
Leaderboard


Popular Content
Showing content with the highest reputation on 06/05/22 in Posts
-
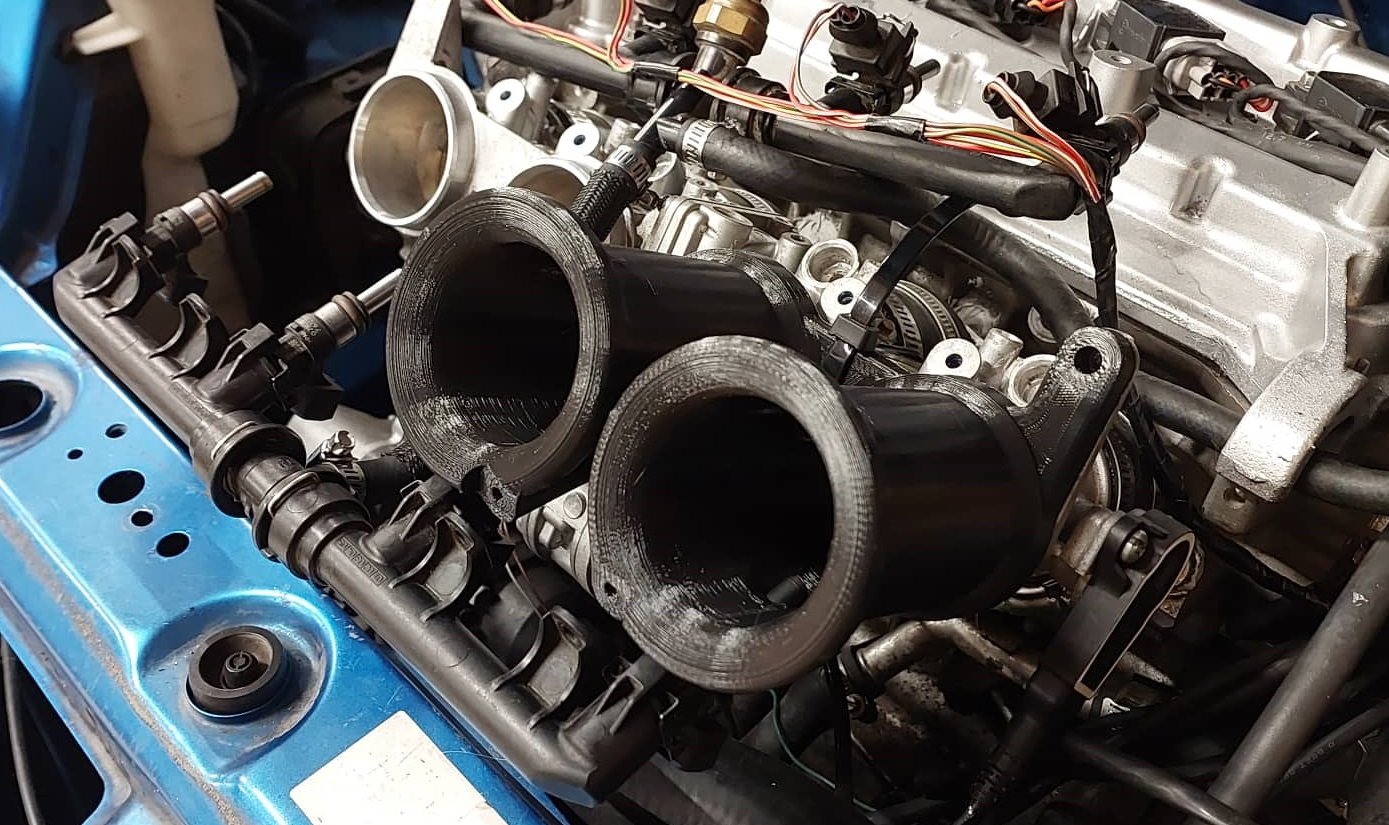
Toyota Echo Intake version 6 million As per previous waffling I think it will be beneficial from a reflected wave perspective to keep the intake runners more parallel most of the way up... Then also make them a bit longer. So I modelled this up. So this then had the flow on effect of making the fuel rail situation a little tidier as well, as it pokes in from the other side. So just use the regular tabs on the fuel rail for holding it in place. Also keeps more of the perimeter unobstructed, which might be important now tha the cross sectional area at the entrance is greatly reduced. Also now the fuel line and the injector plugs are flipping upside down too, so it will look a lot less messy. First iteration needs some dimensional changes to fit properly but so far so good. It's got about 10mm clearance the the bonnet which is perhaps a little marginal. (because of longer runners) But see how it goes. I still havent figured out how to print the nylon stuff properly yet, might need to wait until I've got some $$ to buy a dehydrator box. But I'll try get the design sorted in PLA for the moment anyway.
 12 points
 -
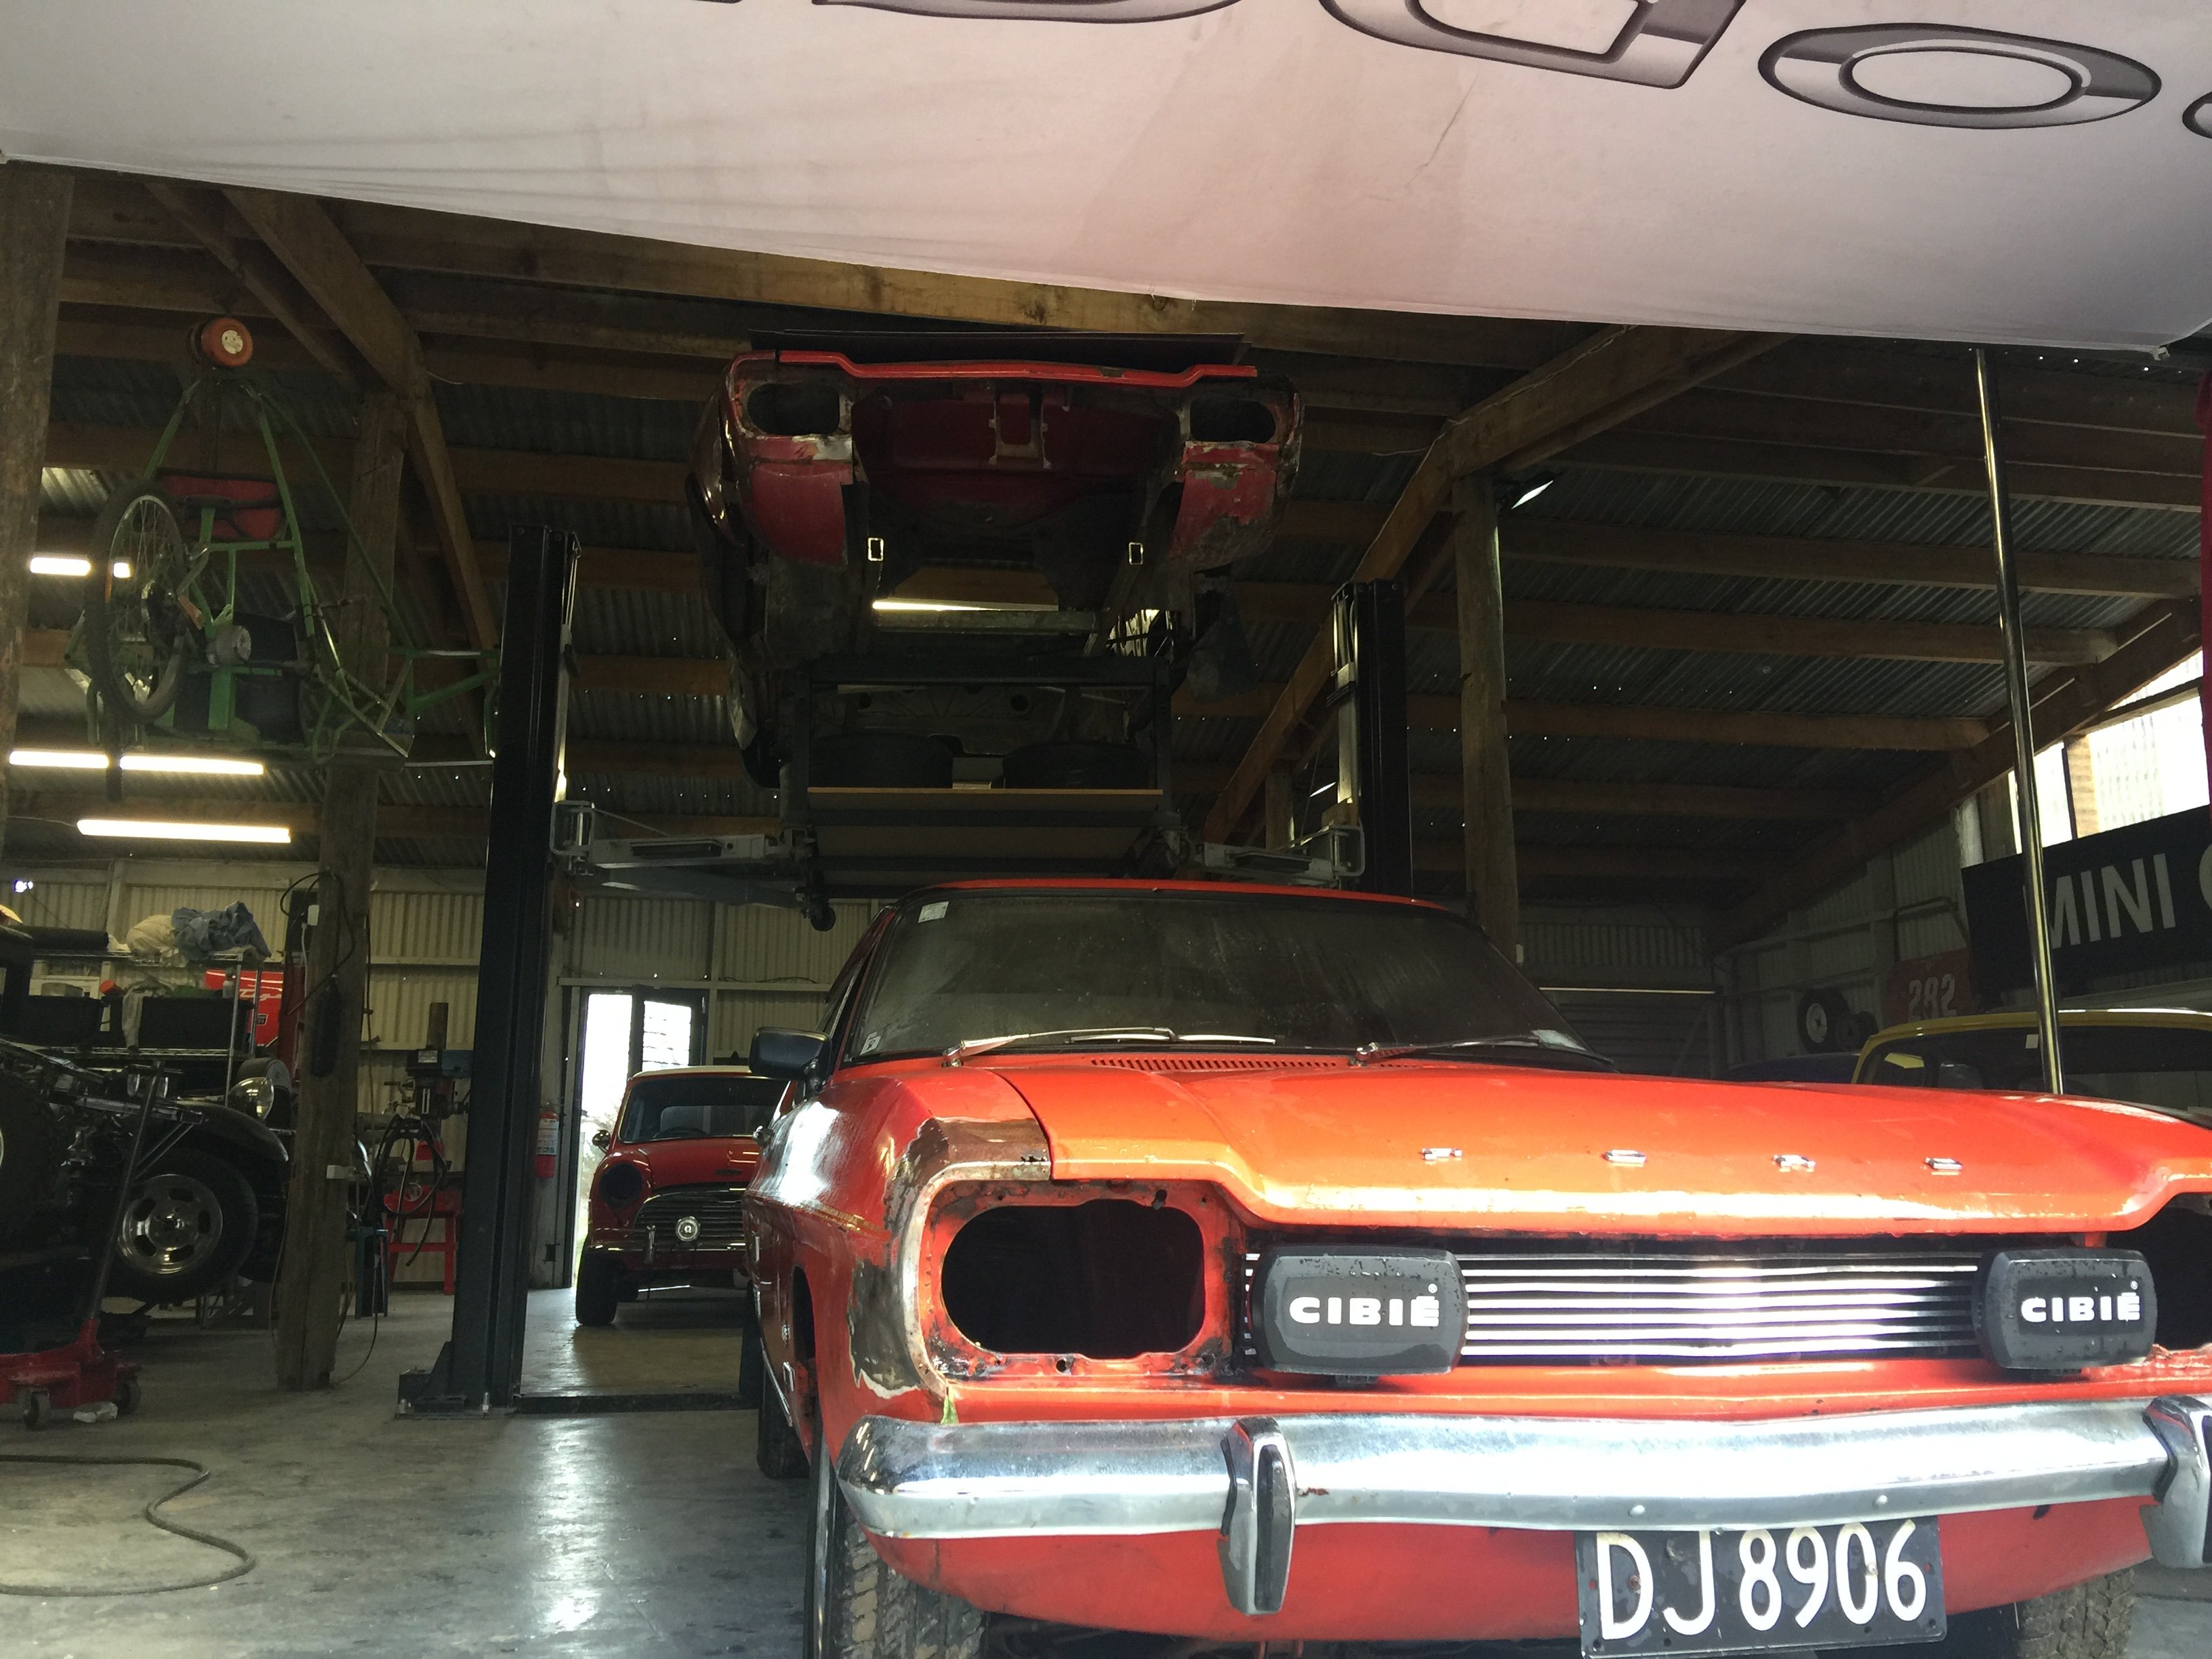
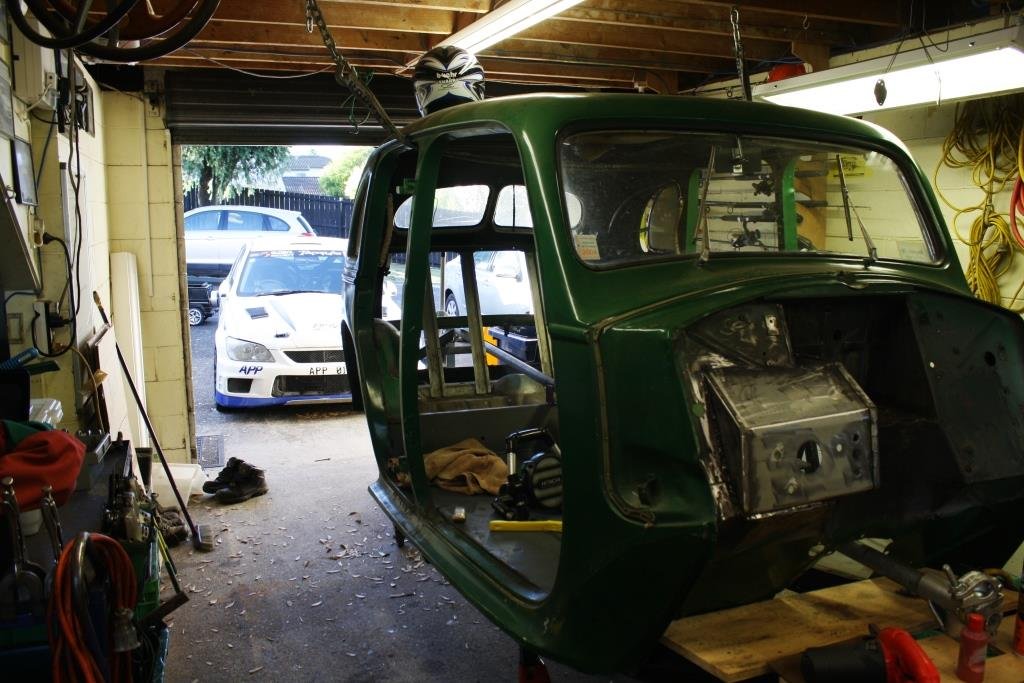
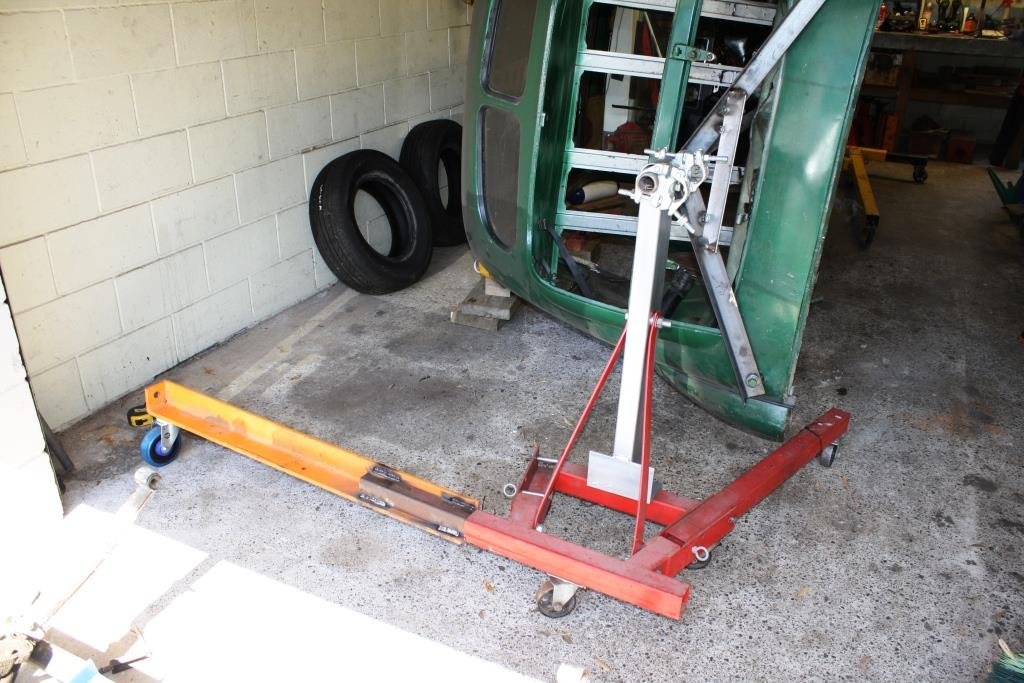
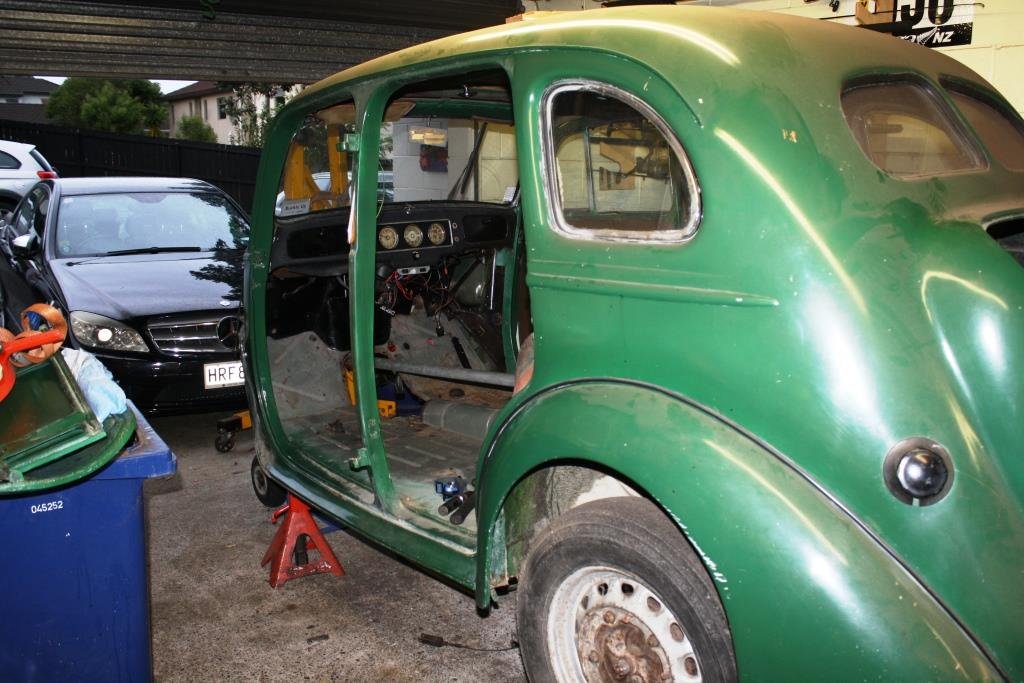
Things are happening ... capri is getting some love. look at what’s above it on the hoist. met someone who is building a mad Capri, going to help me get it back on the road. In good hands for now.
4 points
-
This may not surprise you, but I have been bit by the Rover SD1 bug. I sold NP70/Nigel when petrol hit $2/litre for the first time ever. I was a young’un at the time and that was my only car, which I had to daily to my minimum-wage job. A 3.5L V8 probably wasn't the smartest choice. Look at it though, *swoon* I reluctantly parted with Effie when our landlord faced financial struggles and evicted us at short notice to sell up. We had nowhere to live, let alone somewhere with secure parking for two SD1s. My wife called on a friend to store Tess until we found our feet. On paper, Tess was the holy grail of SD1s. Black, manual, Vitesse. But after investing $3,000 and countless hours in her, she was back on the road (after several years being parked up with a mystery issue) and driving solidly and reliably. I didn’t bond with Tess as I had with Effie and, with no more work to do on her it was time to find her an owner that would drive and enjoy her. For my 65th car, I knew it had to be something special. I wanted another one. Ideally, a Series 2 EFI, of which according to my records, there are ten of in the country. There were none for sale, so I reached out to NP70’s current owner. I know the car has been off the road since 2018 and the owner has a large fleet so hadn’t gotten around to fixing it, but he’s not intending to sell. I tried Effie’s owner too, as we’ve kept in touch, but he’s got plans for her and knows he would regret selling. Then I recalled someone last year had posted something on Facebook about planning to export their SD1 to the UK. It would be a shame to drop another car from NZ’s limited numbers, so I reached out to see if he still had the car and was soon fizzing with the excitement of adding Lucas to the TastesLikePetrol fleet. Alas, some of you may have picked up on social media that very quickly I ascertained that there was something seriously wrong with Lucas. I’ve been conned. At this point - I could skip forward to the moral of the story. But of all 65 cars I have purchased, this is one that’s going down in infamy, so I’m going to lay the facts down. This is Lucas’ story. First impressions After several exchanges with the previous owner, I needed that car. He played hardball - he knew what he ‘had’ and that Series 2 EFI cars were rare. It was now or never. There are so few of these cars and too many of them are rotting into the ground, if I could save a fourth one and get it back on the road after over a year languishing under a ‘best intentions’ owner, I would. In addition to needing a new indicator stalk for a WOF, the one caveat he stressed was that it “wasn’t show quality”. That’s fine, he had already specified no rust, and the body and engine were otherwise solid, just in need of a good service and some "TLC". I’d seen the car under its previous ownership, circa 2016, and recalled it was a tidy example. British Car Day 2016 He sent me some potato quality photos taken from a distance, and a video of the engine starting and running when cold, also potato quality and not quite showing some bits. It seemed solid enough though, and although there was minor lifter clatter on initial start, it sounded fairly normal. We made a deal (or more like, I agreed to his price and sent the money). This is the point where he said he would “hold the money in a separate account” in case I wasn’t satisfied and wanted to return the car. Perhaps that should have been a red flag, but I took it as a positive sign. A few days later Brent’s truck pulled up (cut to ad break for Classic Towing NZ, for all your personal door-to-door automotive delivery needs *no affiliation, he's just a good guy that does a great job*) and first impressions were mixed. He said it wasn’t show quality, but I didn’t realise that he struggled so much with carparks. Both front and rear bumpers were cracked with chunks out of them. From this vantage point, something also seemed off with the fuel tank. Perhaps he had a habit of doing sweet jumps over speed bumps. The paint job is also a bit questionable - overspray everywhere and it’s lifting in places showing little prep may have gone underneath. But I guess that’s covered by not being show quality, and while a niggle, it wouldn’t affect the enjoyability of being behind the wheel again. Speaking of, the steering wheel was at its lowest height, floppy and with the positioning screw MIA. The stalks and surrounds were sitting in a plastic container on the back seat. As I was pulling the car into the garage, I was surprised that the car with “no rust” had clear rust at eye level, including a large area of bubbling on the sunroof and rust around the windscreen that will hopefully hold for a bit, but will eventually require the windscreen to come out. Can of worms You know me, I tend to dive straight into projects and this was no different. I’d only had the car a few hours and already fixed the “one issue” for a WOF - being the replacement indicator stalk (and reassembly of the steering wheel), which I’ve already posted about. In testing the indicator, I discovered I had no headlights and spent a couple of days tracing wiring diagrams and finding that part of the loom had been submerged in water at some point (also covered in the above post). I’m yet to work out where the water was getting in - but the owners manual in the glove box has been destroyed by moisture and overtaken by black mould so there’s a leak on that side somewhere. Snooping around the car and building my shopping list for the inevitable Rimmers order, I found: Three fuel leaks (fire hazard) A dented/weeping fuel tank (fire hazard & WOF issue) Washer jets don’t work (WOF issue) Doors sticking and/or not catching properly (WOF issue - at this point, I’ve been too scared to try the windows other than the drivers once, which is stuffed) Everything was finger-loose. Why does no one like doing up bolts? And this is where it gets really good/bad Following the initial work, I took the car for a gentle lap of the block - just to validate the steering column etc was all good for a Warrant. I had non-existent oil pressure. Rovers are known for low pressure (high flow, low pressure system) and the floppy gauges aren’t decimal-point accurate, but at best it was getting about 1/2 what I should be and you could tell. Less than 15PSI at idle, but hey, the lights not on, so that's something. Then I got the car up to temperature and the knocking started. Turns out it’s made the noise before (of course - cars don’t go from fine to full on metal-spoon in a saucepan by themselves) but “didn’t make the noise when loaded on to the truck”. That doesn’t mean it’s magically better, it just meant the car hadn’t come up to temperature?? But wait, that’s not all I’ve saved the best for last. Last week I noted something not right and I discovered what it was. The tired, worn-out engine was not original to the car. It wasn’t even an EFI engine (31A engine code, 9.75:1CR). It was a lower-spec (11A 9.35:1CR) engine rated at significantly less power. Now, some people legitimately don’t know what’s in their engine bay. These people typically aren’t “enthusiasts” or active club members who explicitly “know what they’ve got” and the value of a Series 2 EFI. But while I knew he knew, I had no way of proving that he knew it was not the original engine. Let's recap Exact quote: Surely it’s reasonable to assume? What he sent me Series 2 EFI A Series 2 EFI with a high compression "Vitesse" EFI engine in the car A Series 2 shell with a lower spec engine, with the EFI gear bolted onto it Just needs an indicator stalk for a WOF Just needs an indicator stalk for a WOF, and maybe a good service Needs an indicator stalk, headlights fixed, the fuel tank repaired, fuel leaks fixed, the doors to function, and maybe some rust work depending how picky the inspector is. “Any rust?” “No rust.” Light surface rust, but no bubbling Visible rust at eye-line - bubbling through the paint on the sunroof and around the windscreen. Have also found rust in the floor pan so far “Got some spares” A box of miscellaneous spares - usually includes an airbox, maybe a spare taillight, radio surround, that set of spark plugs you hadn’t got around to fitting. That sorta thing. A pile of scrap, including the original engine - as yet, not provided. Return to sender After hours of diagnosing and googling and pricing, it was clear that the car was miles away from what was described and sold to me. I don’t have space to do an engine swap at home (noting our steep driveway making manoeuvring limited when a car’s missing running gear, and remembering the Marina has dibs on half the garage). I have no money left to pour into a significant project like this. Effie had an engine rebuild before I got her - receipts for $6,000 NZD. I have a long list of jobs still to get through to get the Marina to British Car Day in February 2023. Earlier in the week, I had signalled to the seller that the car wasn’t happy and I was going to run some further diagnostics just in case it wasn’t serious but it wasn’t looking good and we might need to revisit. Remembering his original offer to hold back the money in case I wasn’t satisfied and needed to return the car. At minimum, I’d need to be compensated at least half of what I paid for the car to keep him but a) I’d still have issues with space and time, and b) let’s face it, the seller was never going to go for that. I drove the Swift up the Coast to clear my head the next day and made a call. A hard call. Lucas had to be returned. I first sent a video of the clattering engine. Then I sent a note outlining the disappointment and that I would have to return the car. I proposed that he covered return costs as the car was so drastically misrepresented - and in the meantime, I’d fixed the indicator stalk he’d spent a year "fixing", and the headlights, given it an oil change, and replaced the AWOL exhaust gaskets for him. He said if I wanted my money back, it was my problem to send it back to the Bay of Plenty. That would put me out $1,400 in transporter fees and I would have nothing to show for it. But better than being out of pocket for the full cost of the car, I suppose. I agreed and provided him with my bank details so I could start arranging return transport. “No no. Send me the car first. I’ll refund after I’ve inspected it.” Well, how about half now - as a sign of good faith, considering everything? “No. Return the car first" Okay, I’ll just get a short agreement written up for us to sign, to cover us both - you get the car, I get a full refund. “No.” You won’t sign? “Send the car first - I'm suspicious you have done something to the car" "Return the car or get lost" So apparently I found one of the dodgiest guys in the Rover community, and his behaviour was getting slipperier by the minute. Even if I returned the car to him at my cost, I had zero confidence I’d see my money back. After the total of the interactions I’ve had with him in the last month, there was no good will there. He declined, on several occasions, to sign a simple agreement to provide a full refund because, I believe, he never had any intention of providing that refund and actively dodged answering the question. I half expected him to come back with things like “Hey, this isn’t the original engine! And it makes noises when up to temperature! Oh well, thanks for the car back. I’ll just have to keep your money as compensation.” So I told him as much. He doesn’t deserve Lucas. He had a plan to export it to the UK (likely as-is. He has no time nor intention to fix it) saying he had a buyer for £12-15,000 GBP. So, you’re welcome unsuspecting British Rover-lover. You would have bought a lemon without an EFI spec engine and who knows how many more to-be-discovered issues. Karma’s a bitch. Final chapter I had no proof that he knew it didn’t have the original engine (except in hindsight I seem to recall it being mentioned in the listing when he bought it in 2018). Or, that is, until two full weeks after money had changed hands. I get this message from the seller: “By the way I still have the spares that came with the car when I bought it. They are the original 31A engine block, cylinder heads power steering pump etc that was replaced with the different engine.” Check and mate. This was the first time he had acknowledged it did not have the original engine - despite commanding such a fixed, high price. Apparently a “nut or screw went through” the original engine, so there is a reason it was taken out, and he knew all about it. For the record - this is grounds for compensation under the Contract and Commercial Law Act 2017 (which does apply to private sales, unlike the CGA). Yes, I’ve had someone look into this. The compensation entitlement would likely be greater than I had asked for. The question is whether having the car in limbo, in order to go through the motions and see him in Court is worth it is another thing. Now, I wasn’t in the market for a project - the Marina is deserving of my time and money first. But had I been told there was an SD1 with a temporary (albeit knocking) engine, so it was rolling, that would come with the original engine needing a full rebuild, maybe I would have reassessed the value and potential of the car. Maybe I wouldn’t have been able to resist. Maybe I still would have taken it on. But that’s not what he sold me, and not at the hefty price I paid for it. And they lived happily ever after When you get sold a lemon, make lemonade. It may Taste Like Petrol, but that’s kinda our signature here. Lucas is staying and he’s going to be back, better than ever. I don’t know how we’re going to get there. I still don’t have time, money, or space. I’m enquiring about offsite storage to keep him dry over winter while I sort a plan and order what I need.4 points
-
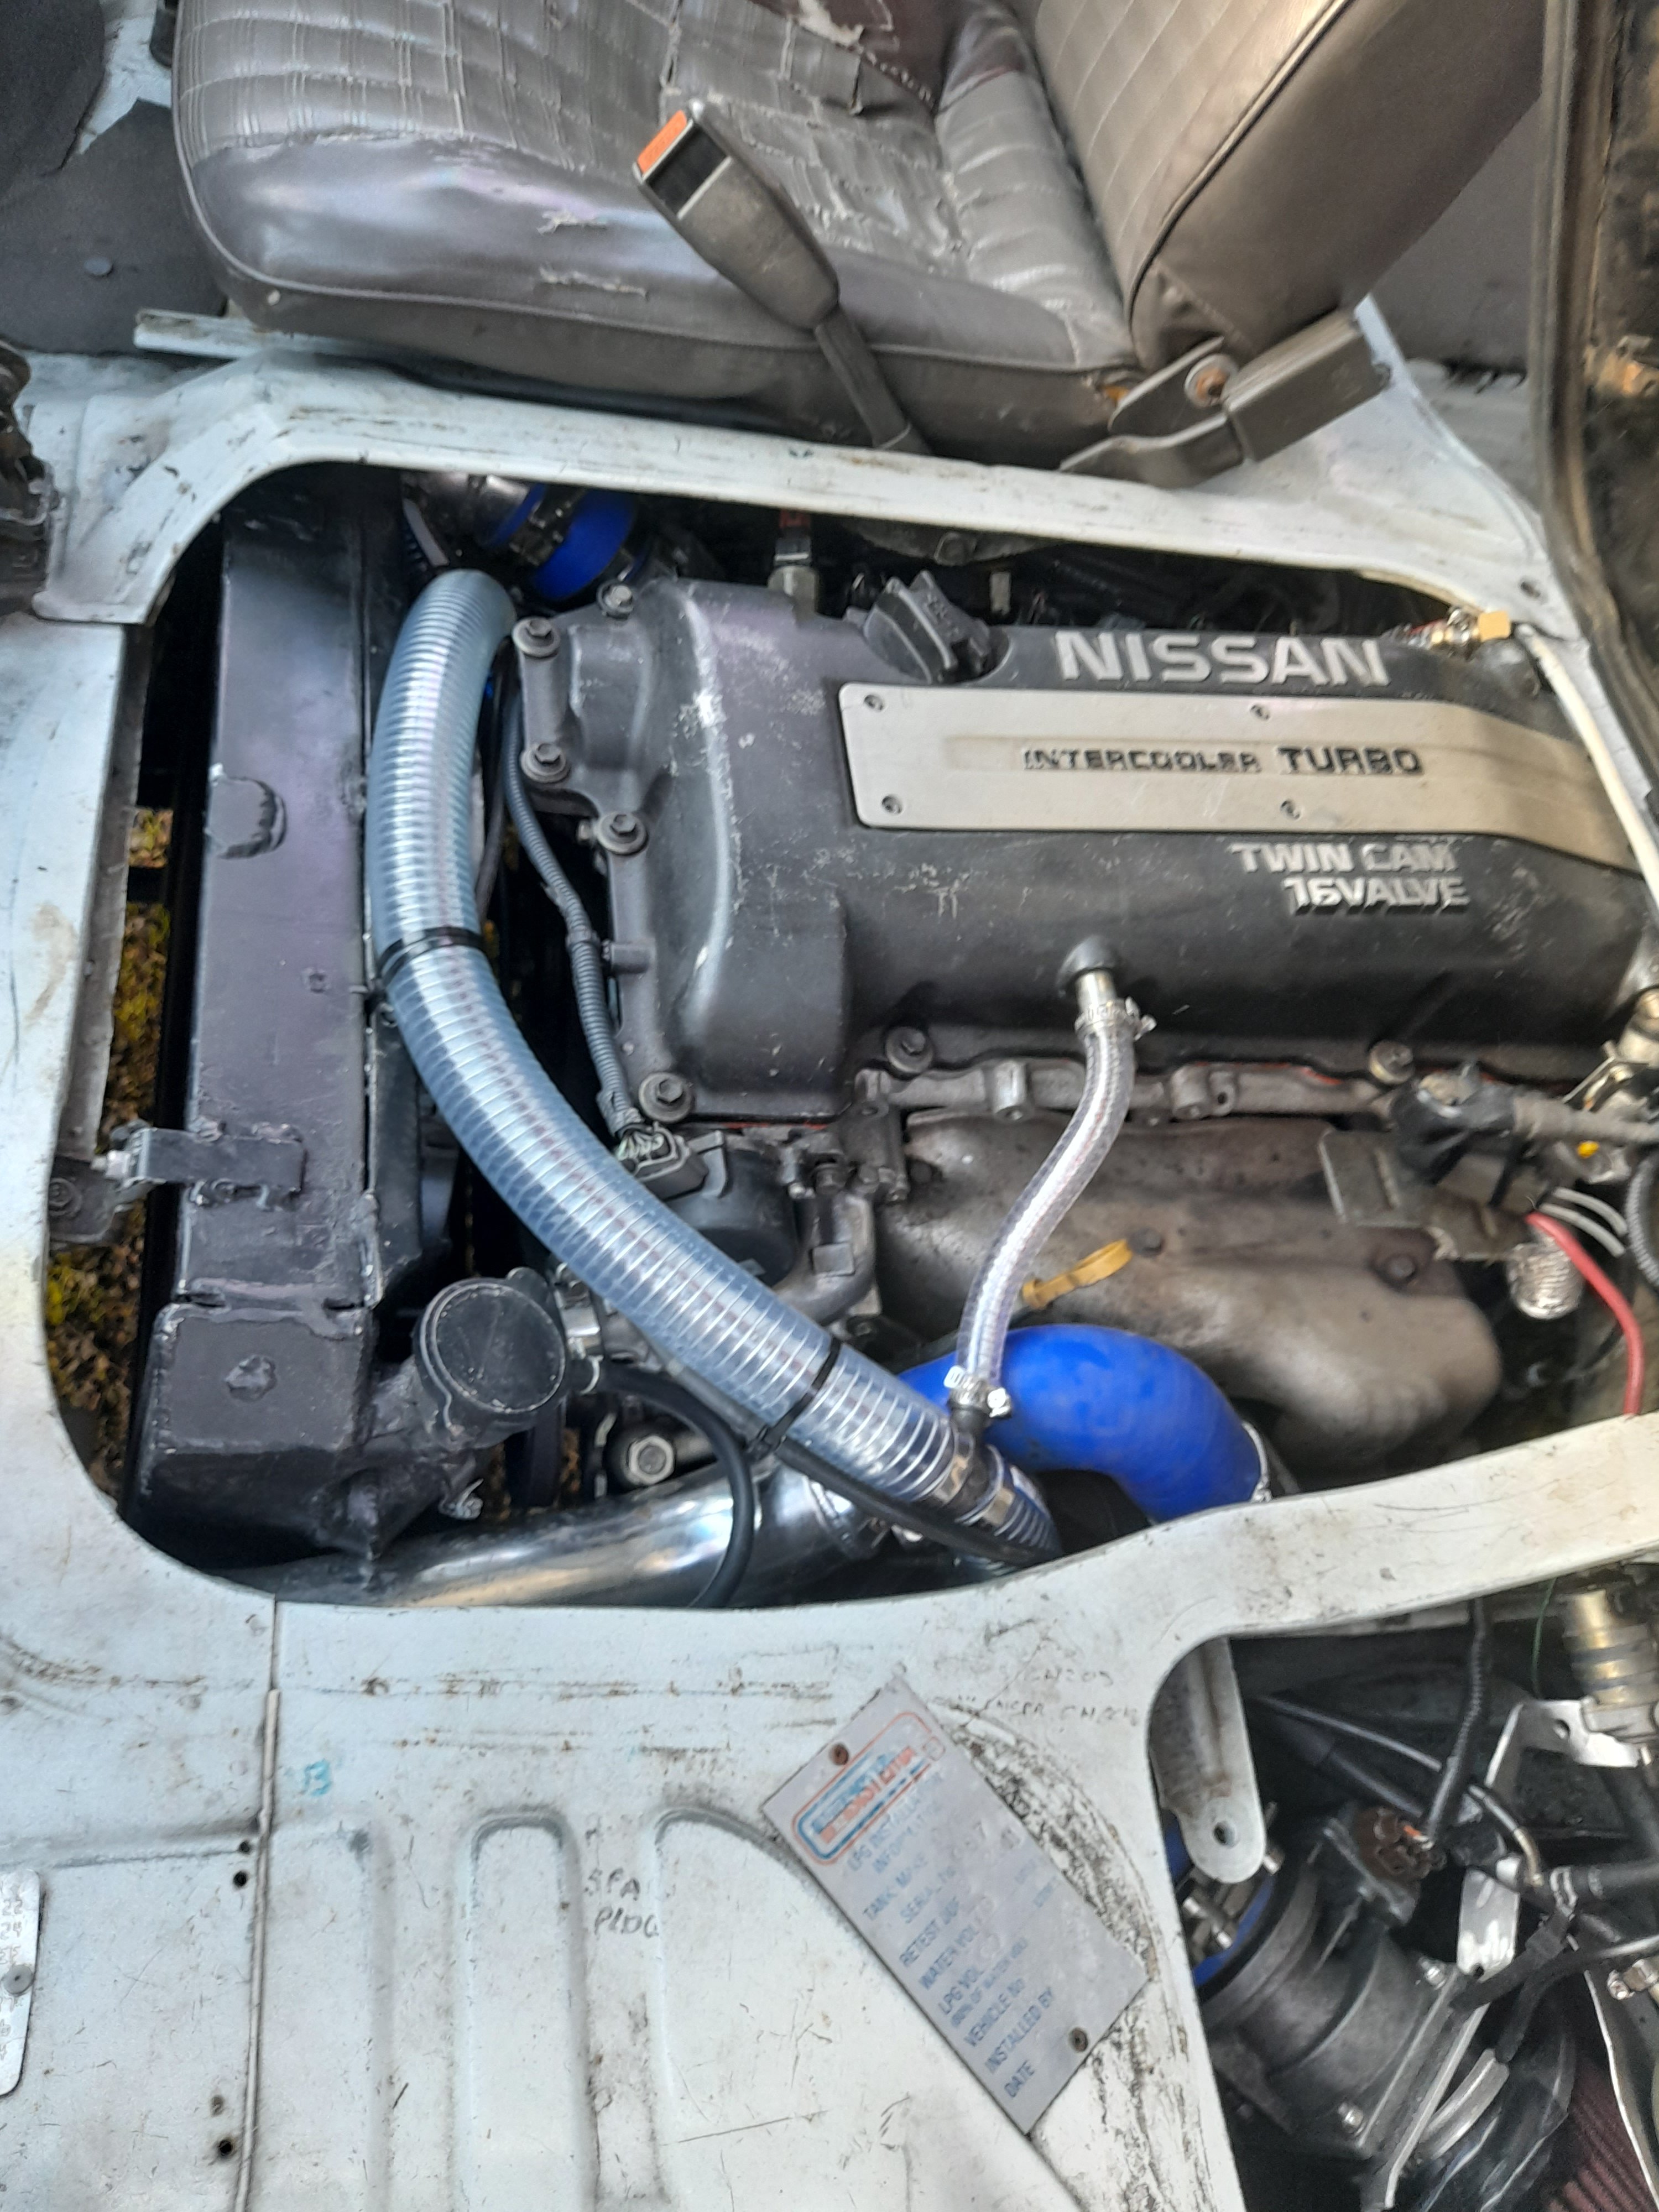
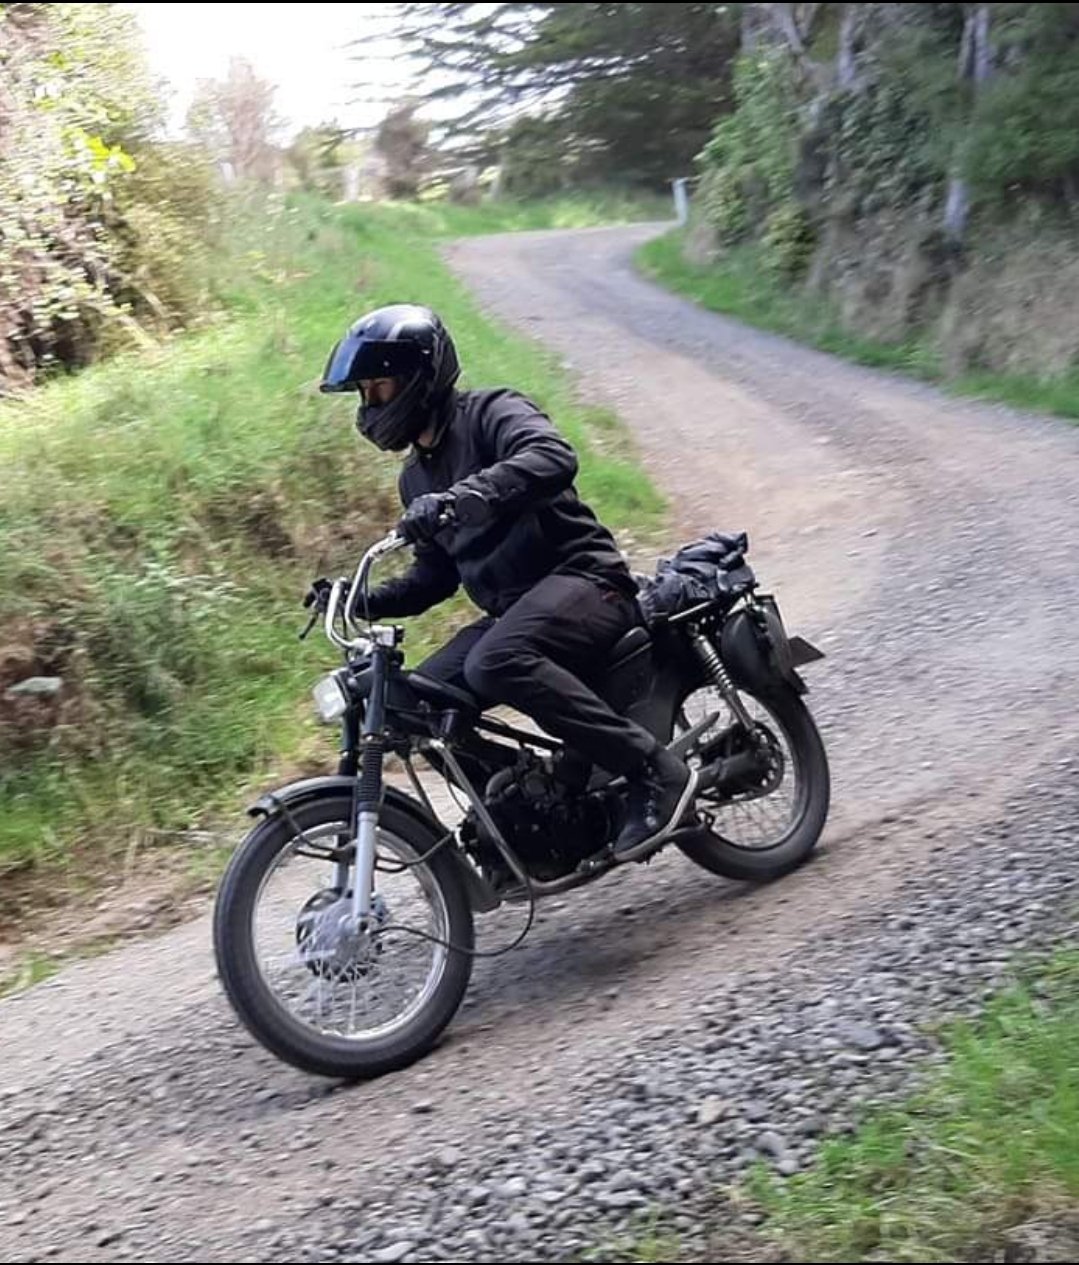
Some hoses that are oil resistant for oil breather and blow off valve return, from safety blackwoods, and its driving good now, noticed steering wheels on the piss a little and speedos out by 20ks... maybe needs a better radiator cap, other than that it's ready for some extended driving ...
4 points
-
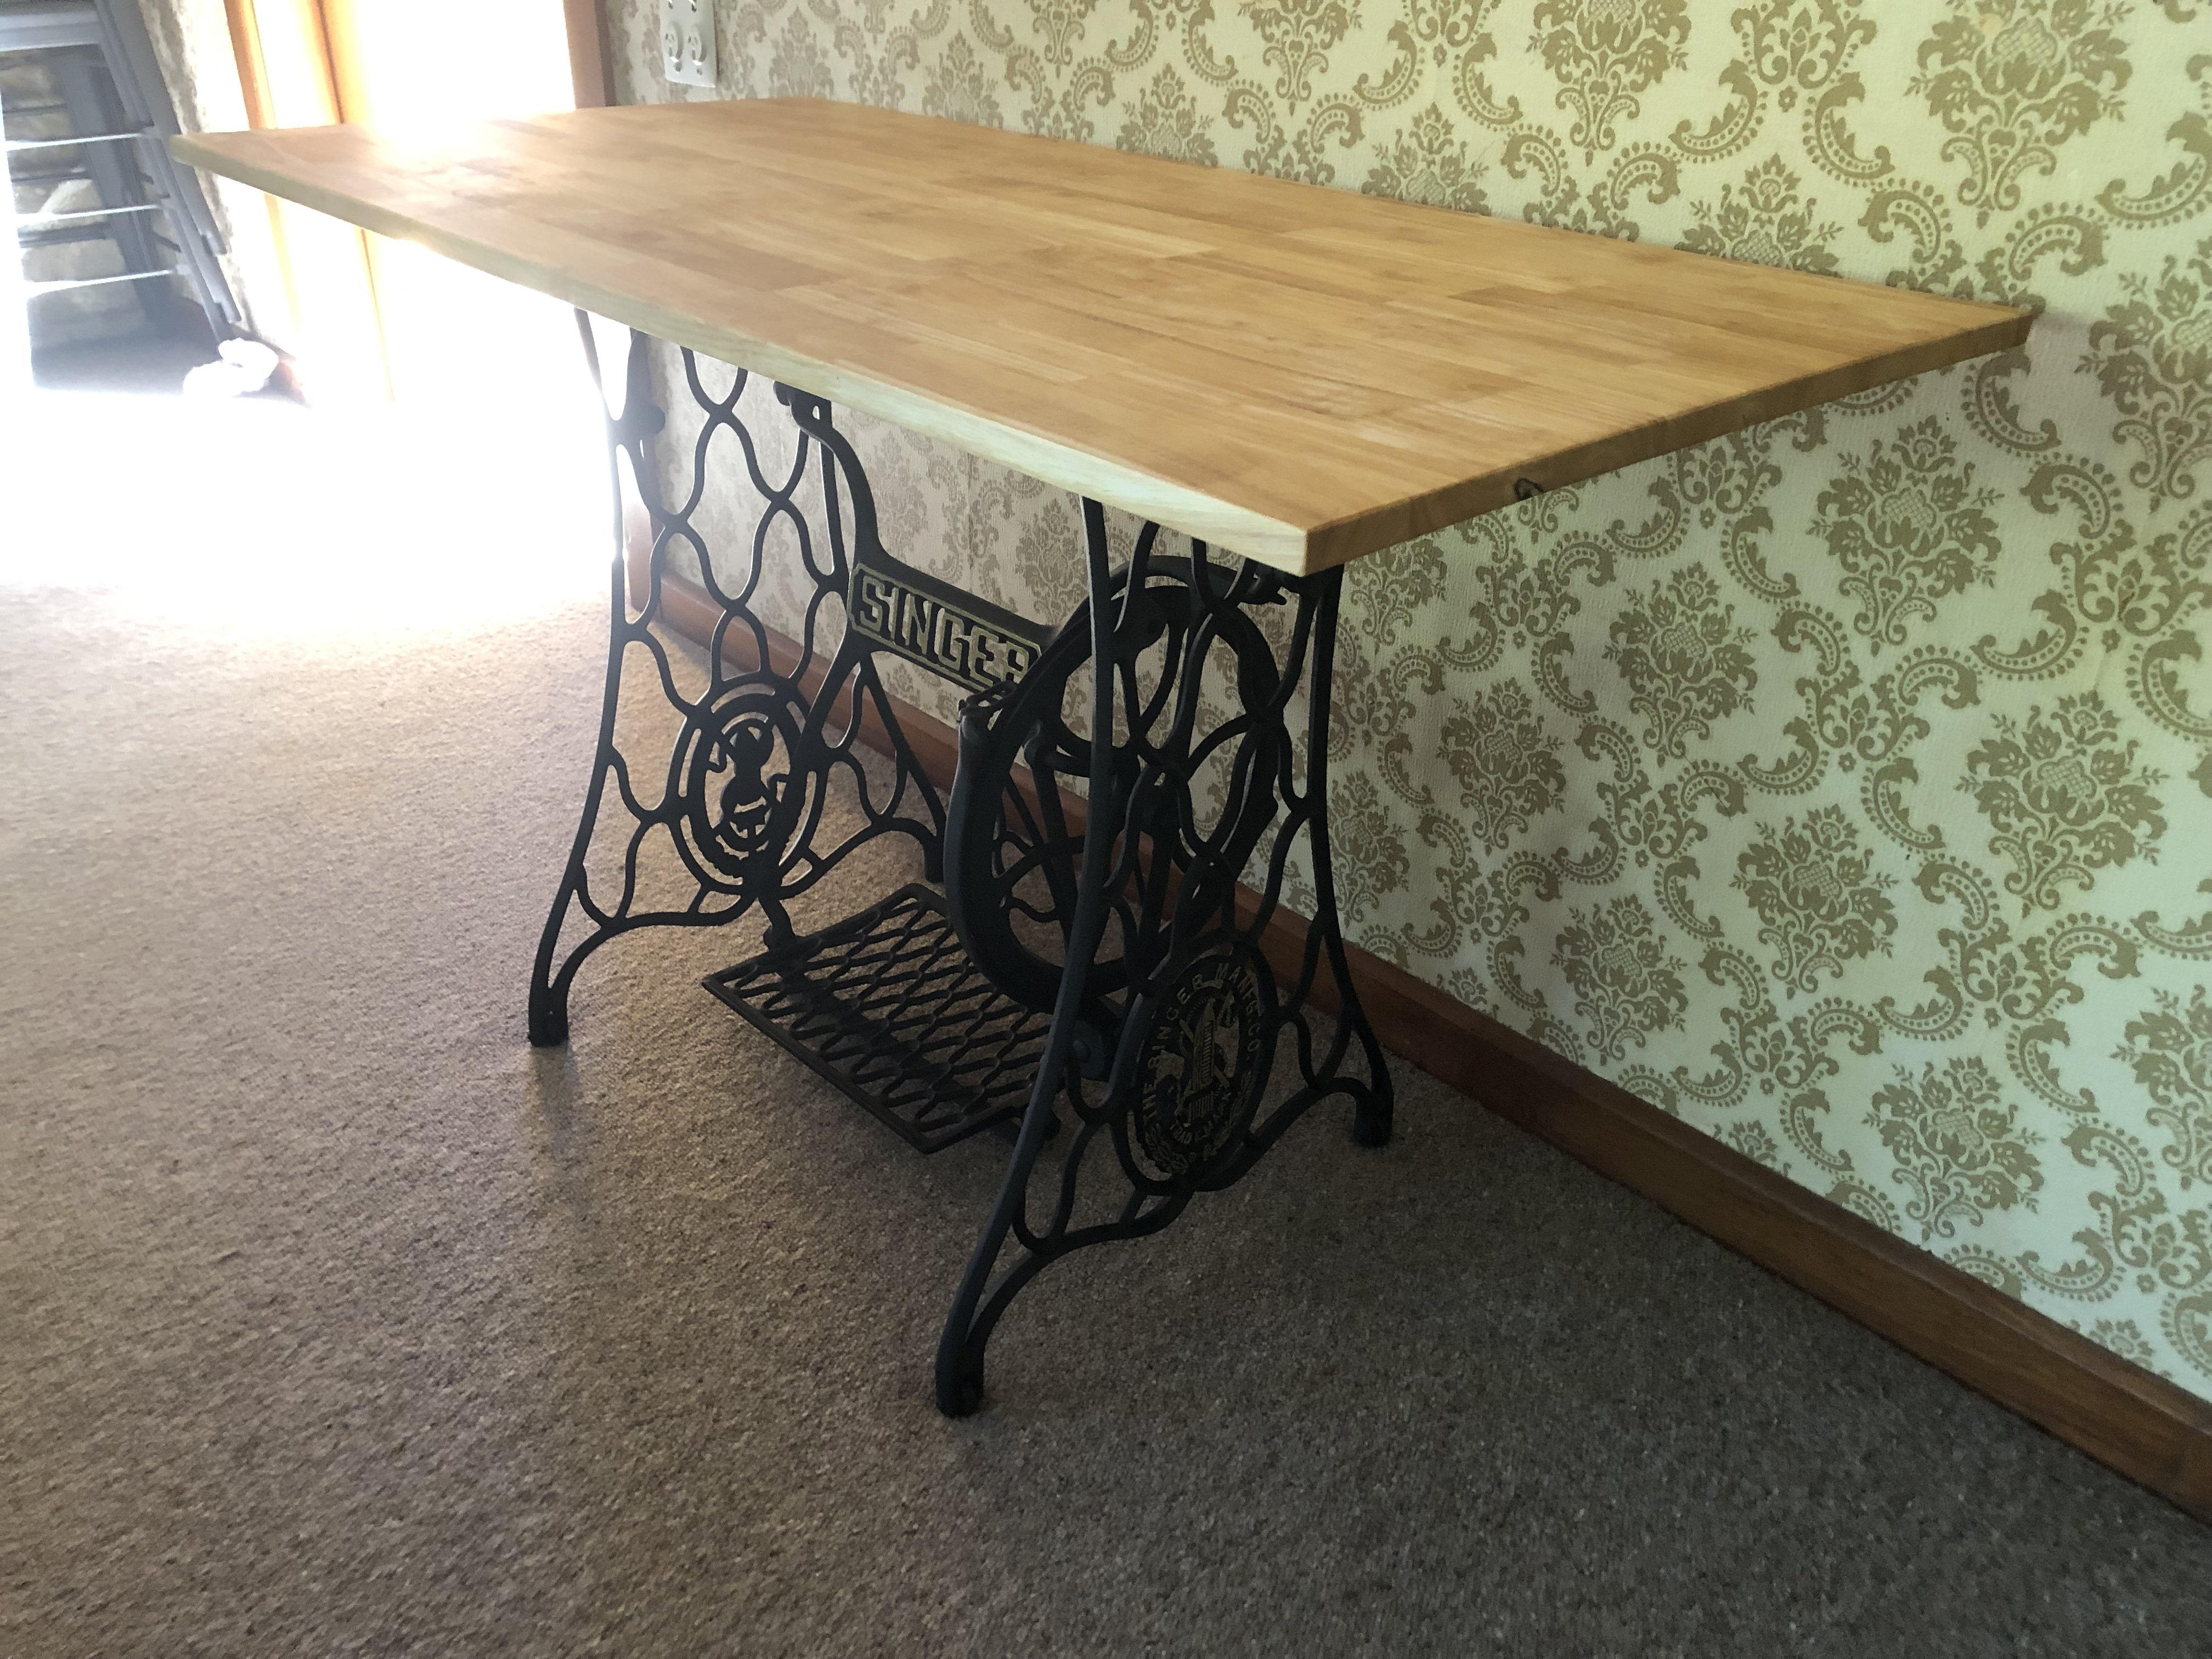
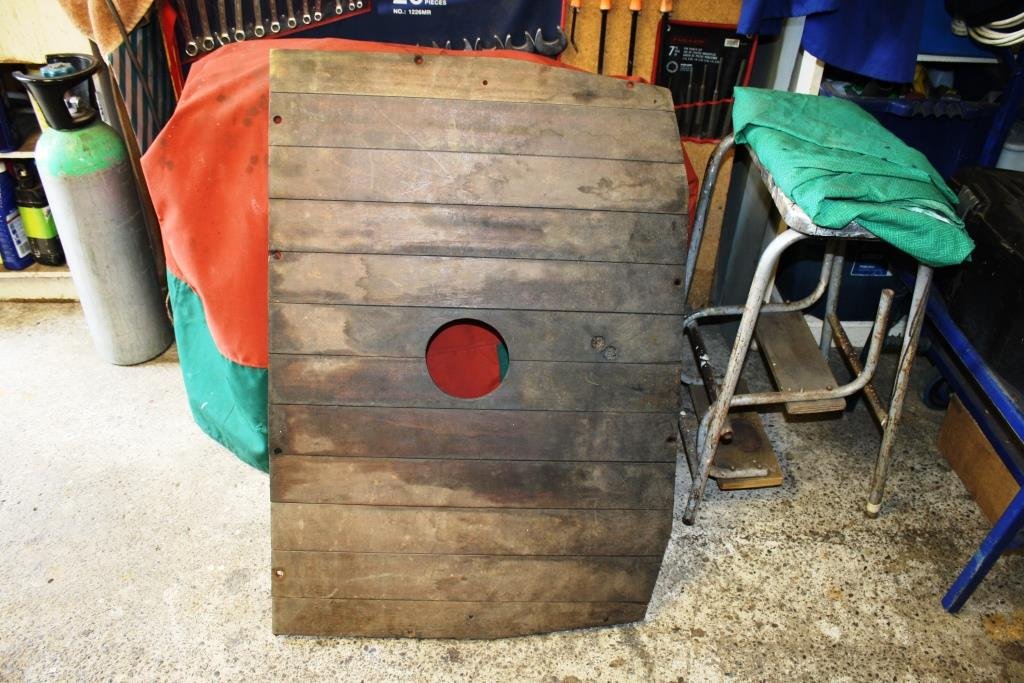
Tided up this rusty piece of junk that had been sitting in the woodshed for years
4 points
-
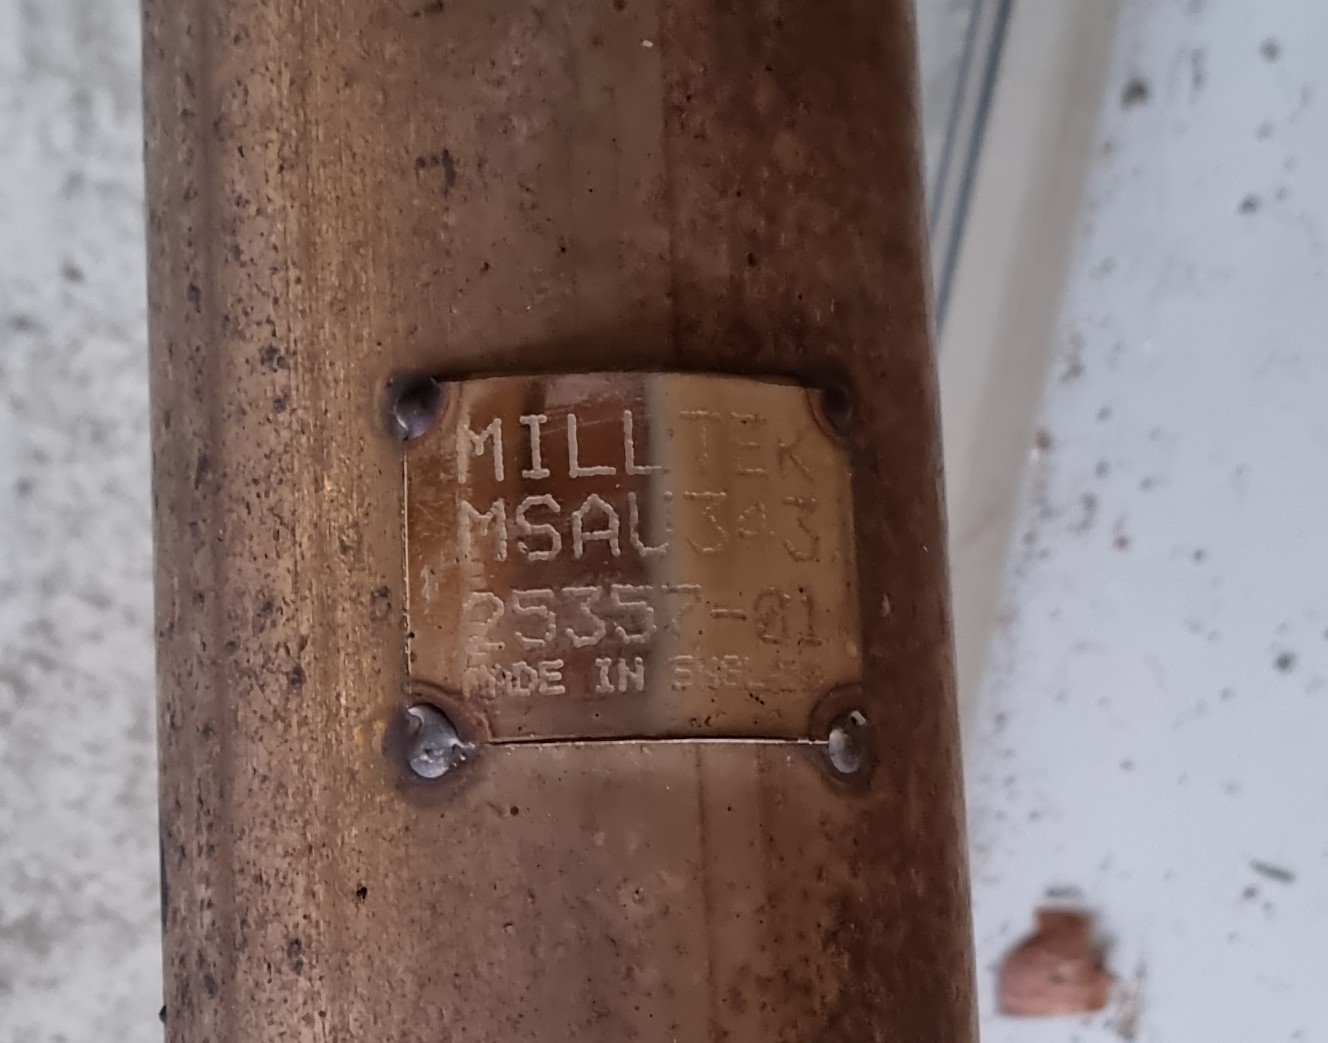
My tow bar delete didn't work out ended up being a jdm rear bumper But I found a miltek turbo back stainless exhaust for it for not alot of moolaa
3 points
-
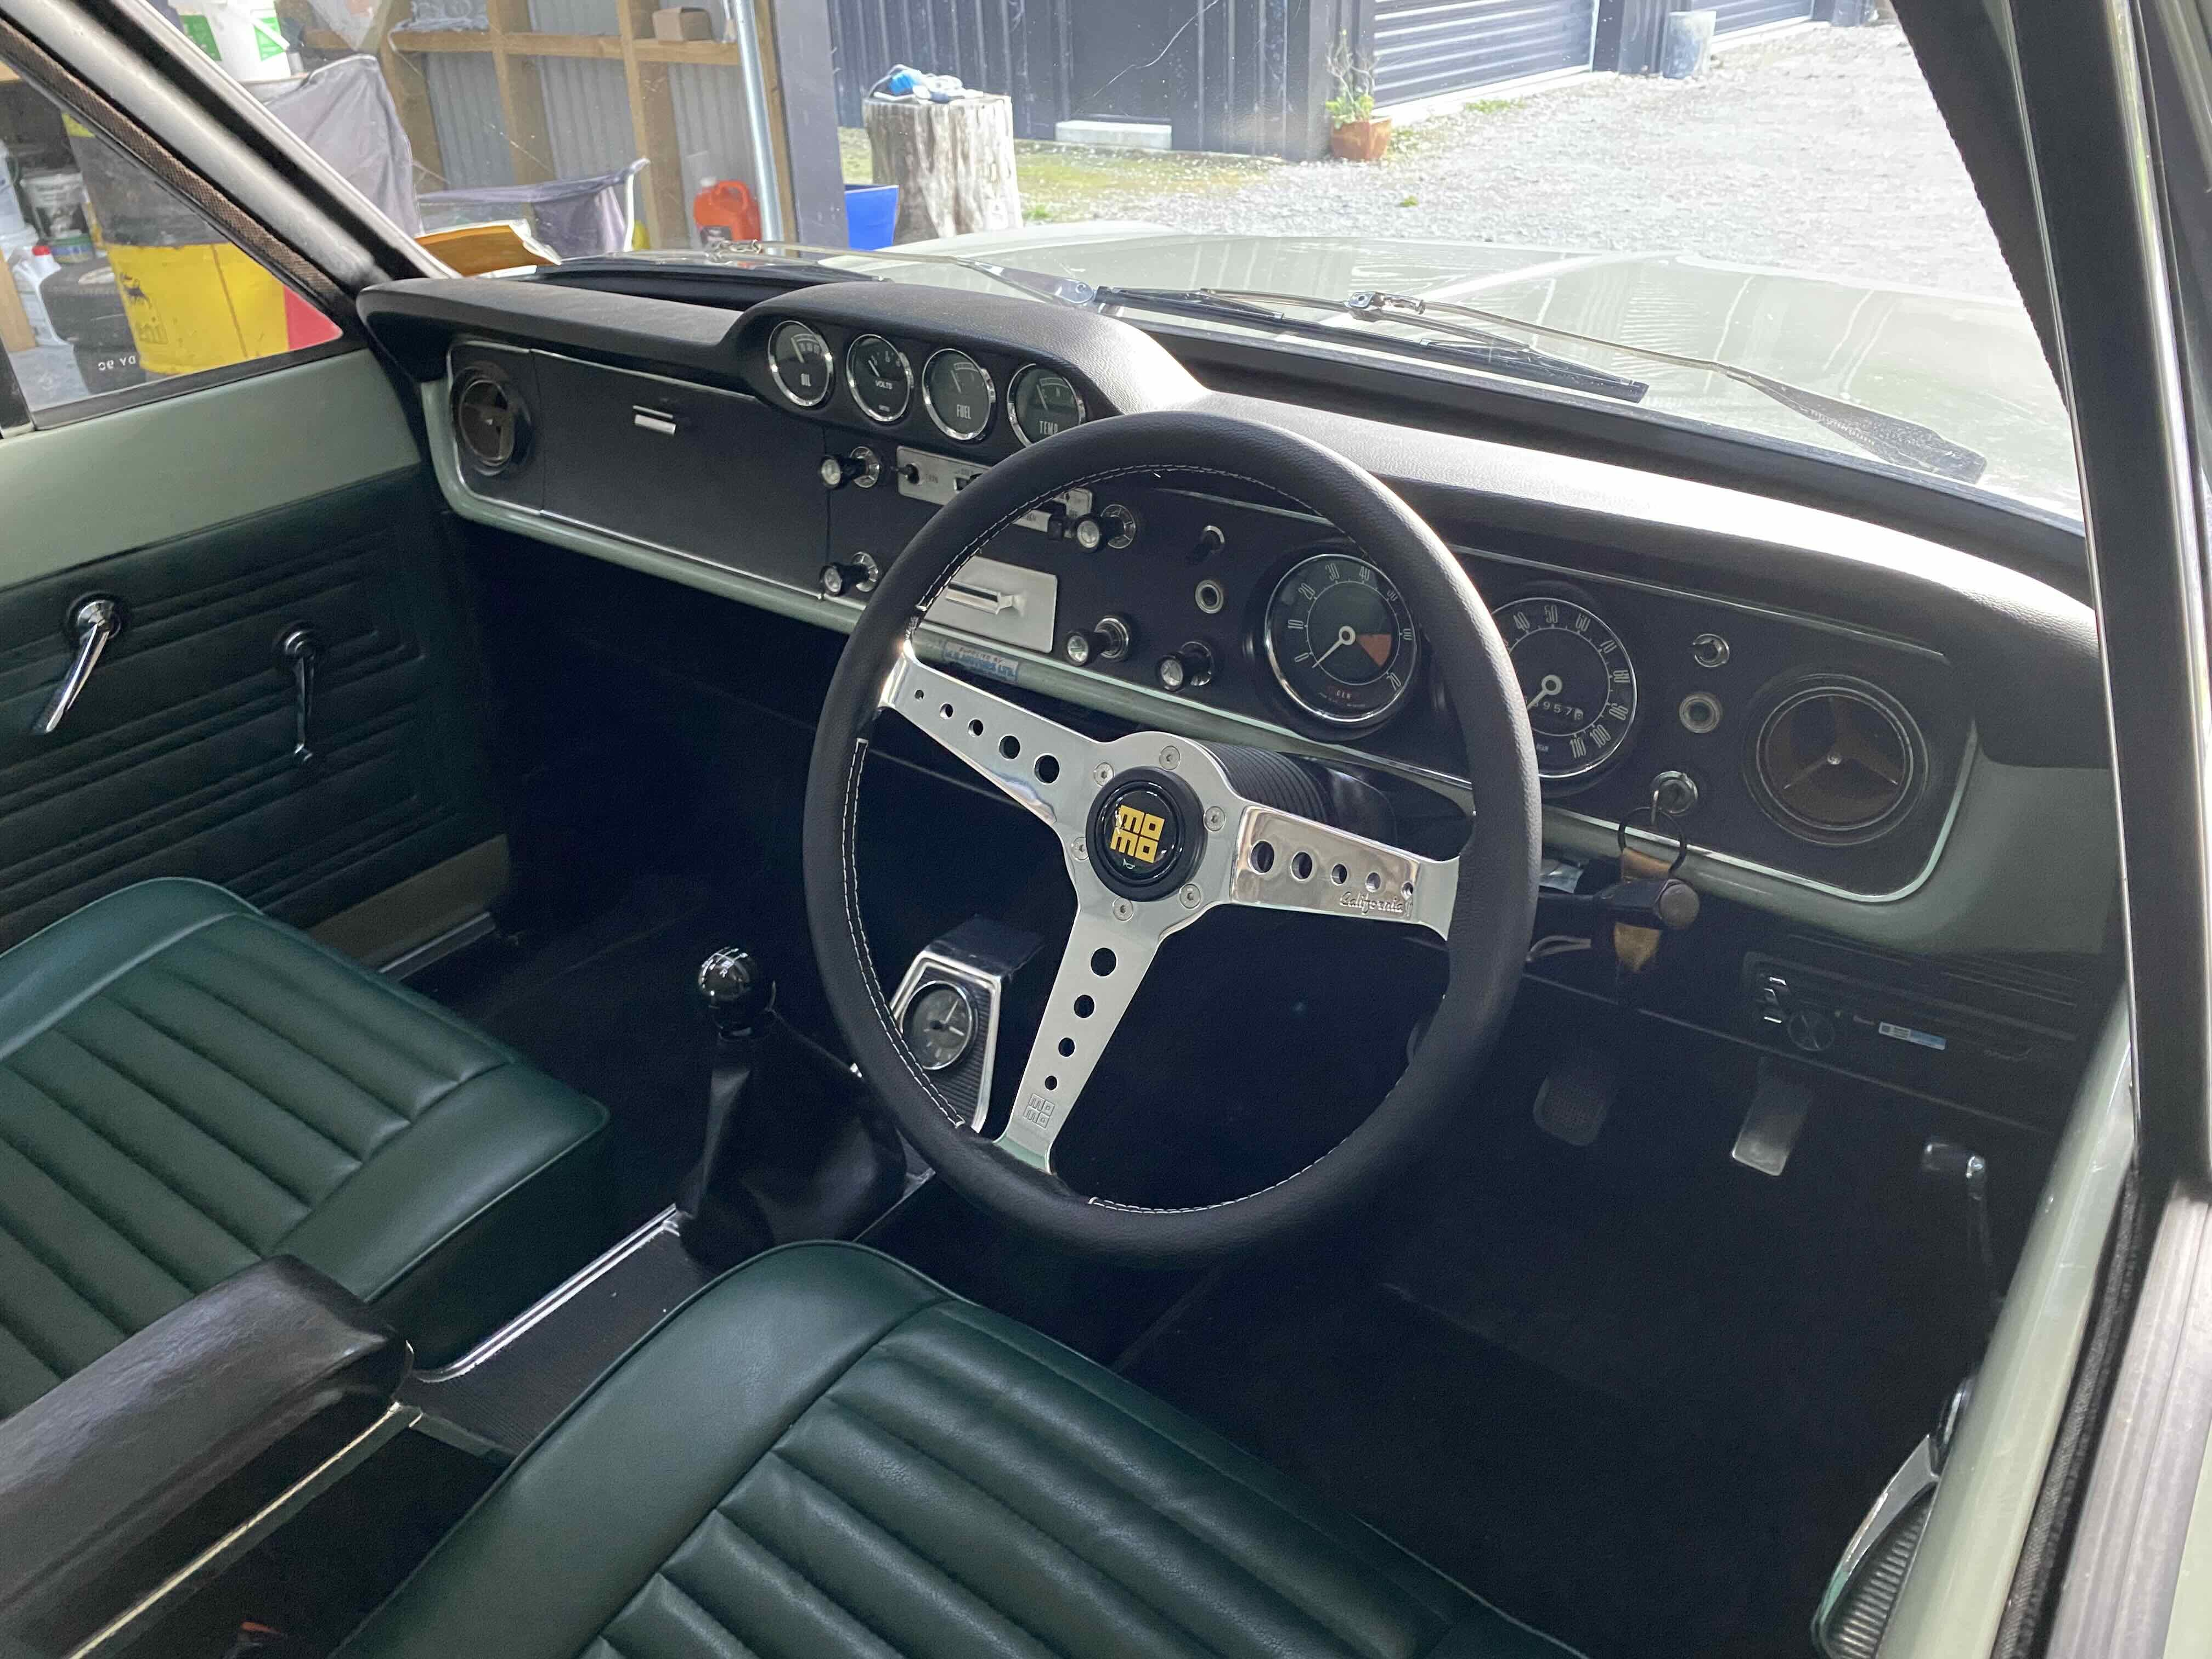
Busy week, buttoned up enough to go off for a tune yesterday. Slight issue with the cam sensor being wired the wrong way round but that was quickly sorted. She made 158hp at the wheels which is about what I was expecting- much more dialed in now and nicer to drive. Have been working away on eliminating all the bumps and rattles- as much as I can anyway. Spent today tidying up the interior, gauge surrounds on, parcel shelf installed and the ECU mounted in behind the centre section of the parcel shelf. Coming together nicely. Will look to book her in for a cert shortly.
3 points
-
Testing the wiring out, looking good so far. I split the bike wiring so now everything "key on" comes through the car ignition switch via a fused relay whilst everything else is still direct from the battery. The FI light goes out which is a good sign, still have a CHEC message but I'm guessing that is caused by either the clutch switch still being disconnected, the kill switch being off (to stop the pump trying to prime with no fuel) or the low fuel alert (due to there being no fuel). Next I'll wire up the lift pump, its relay will take a signal from the main pump relay and I might add a momentary button to help with priming the surge tank. It's all still in the testing phase so no tidy wiring pics yet3 points
-
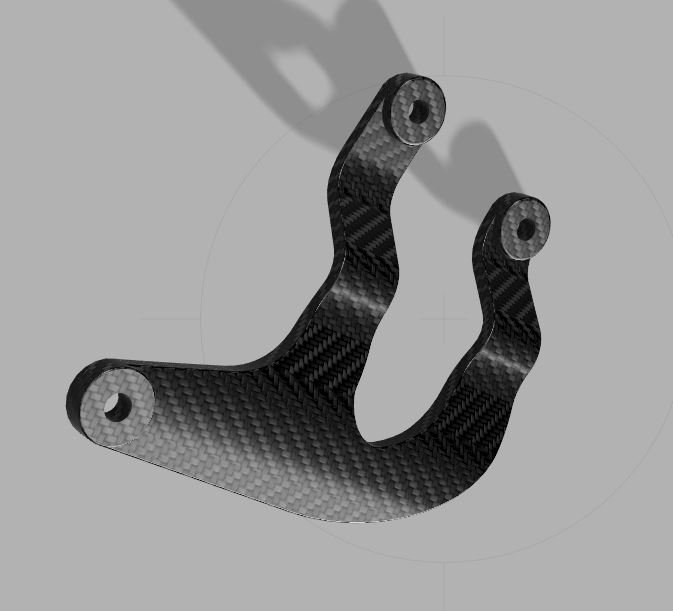
In typical fashion I'm working on everything at once so I'm also deep in spaghetti I thought I would chop out all the unneeded stuff like lights etc, was disappointed that it didn't thin it down much I'm working from right to left so one side is tidy at least, gonna have to shorten a whole lot of stuff soon. At this point I realised I'm gonna have to attend to the list of brackets I have to make in order to establish the final positions of various things. I hate making brackets so onto something else. The shift lever (buttplug for reference) Looks good with the 10" steering wheel Look at all them snazzy gauges Now I need to make a bracket for it...fuck3 points
-
Looking forward to this in 2025 judging by the current rate of 1NZ development.2 points
-
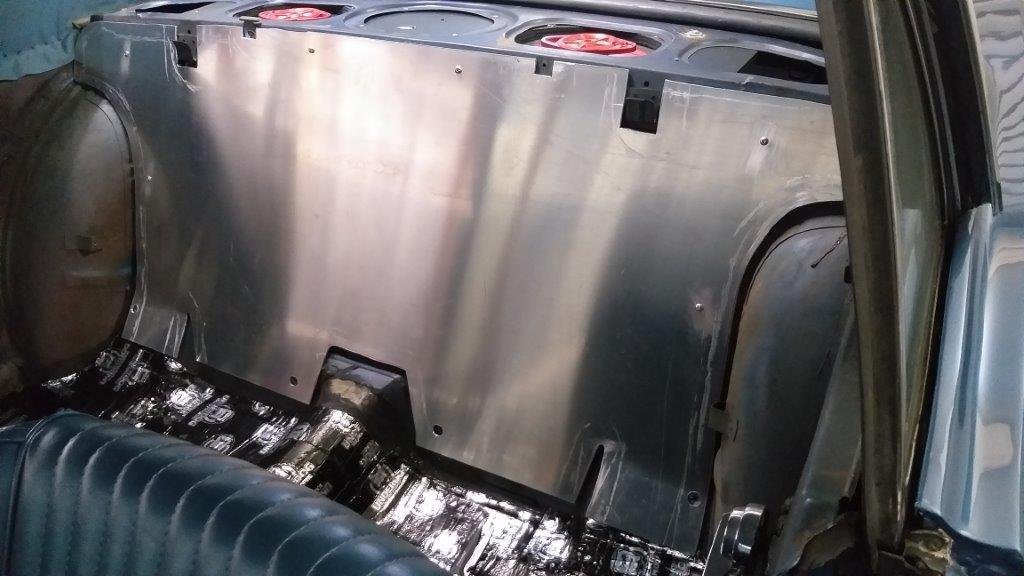
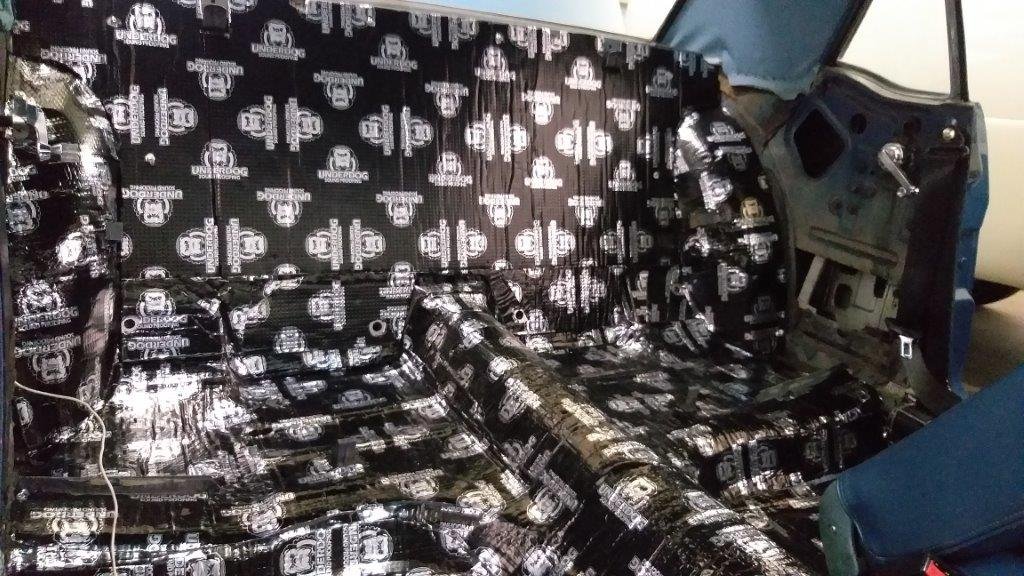
Yesterday arvo the courier pitched up with another roll of sound deadening, so this morning I pulled out my recently fabricated seat back panel to cover it. While I had the panel out I covered the rear wheel arch inners and the last portion of the transmission tunnel. Feels nice and solid. I've just got the rear quarters to do, but my plan there is to cover the backs of the shaped metal side panels rather than covering the body panels as that would entail leaving big openings to access the rear quarter window mechanisms for maintenance purposes. Thanks for looking.
2 points
-
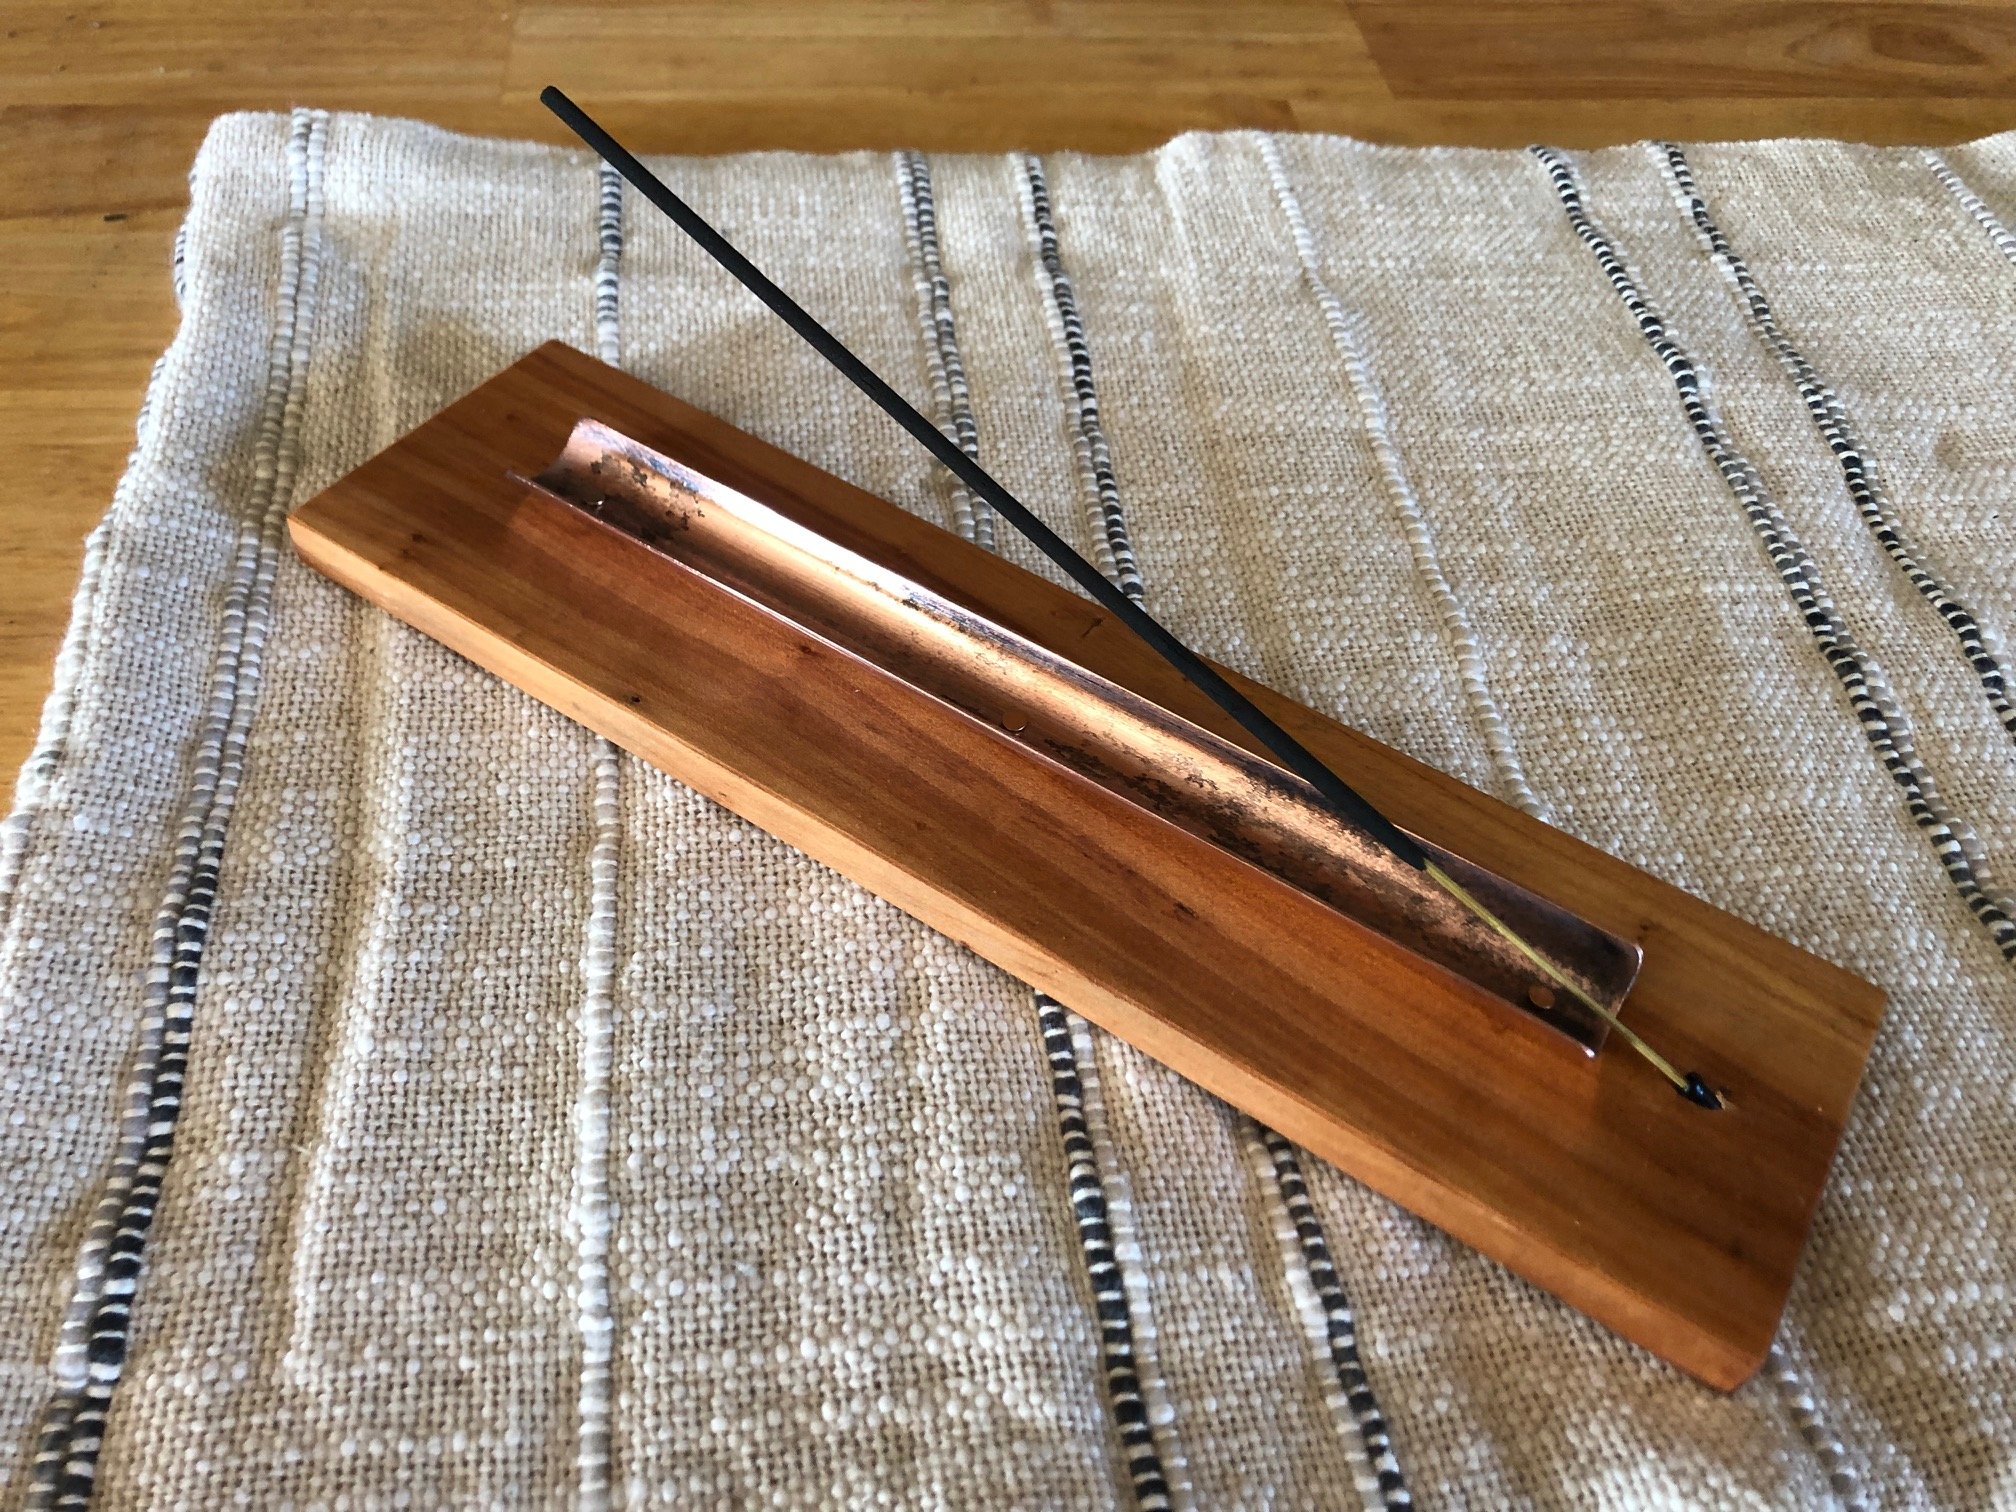
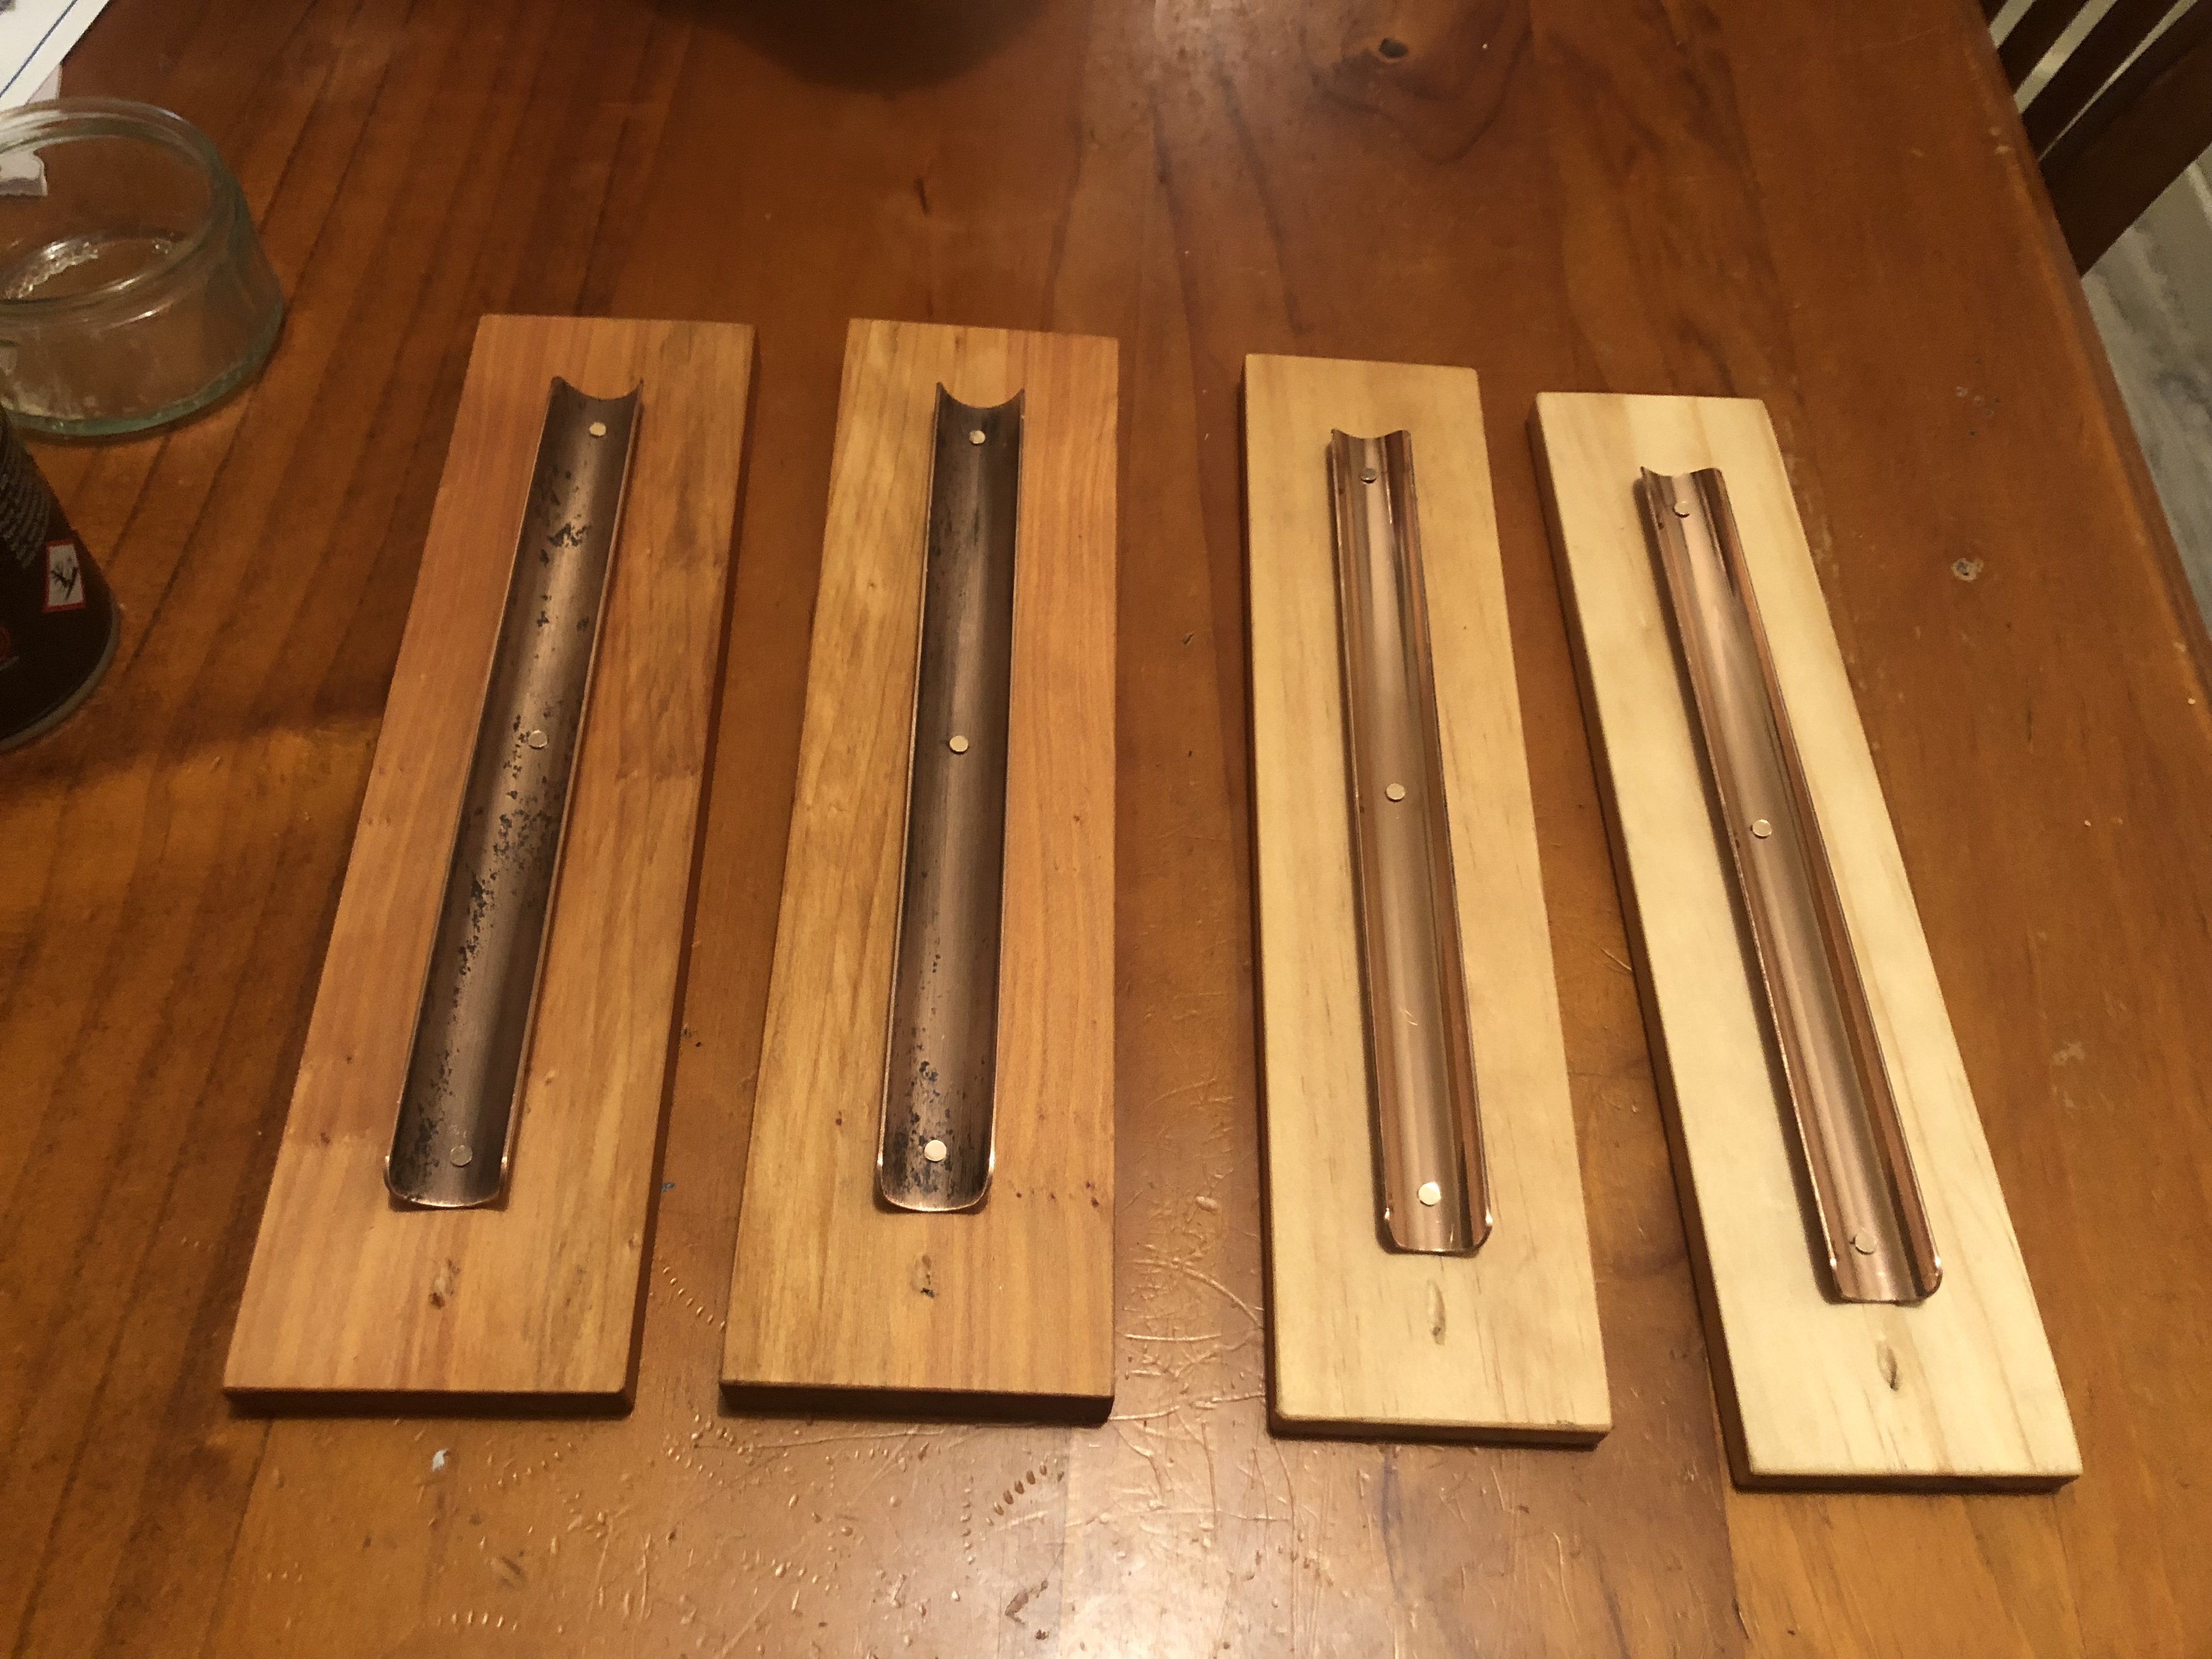
Been making and selling and giving away a few of these things lately
2 points
-
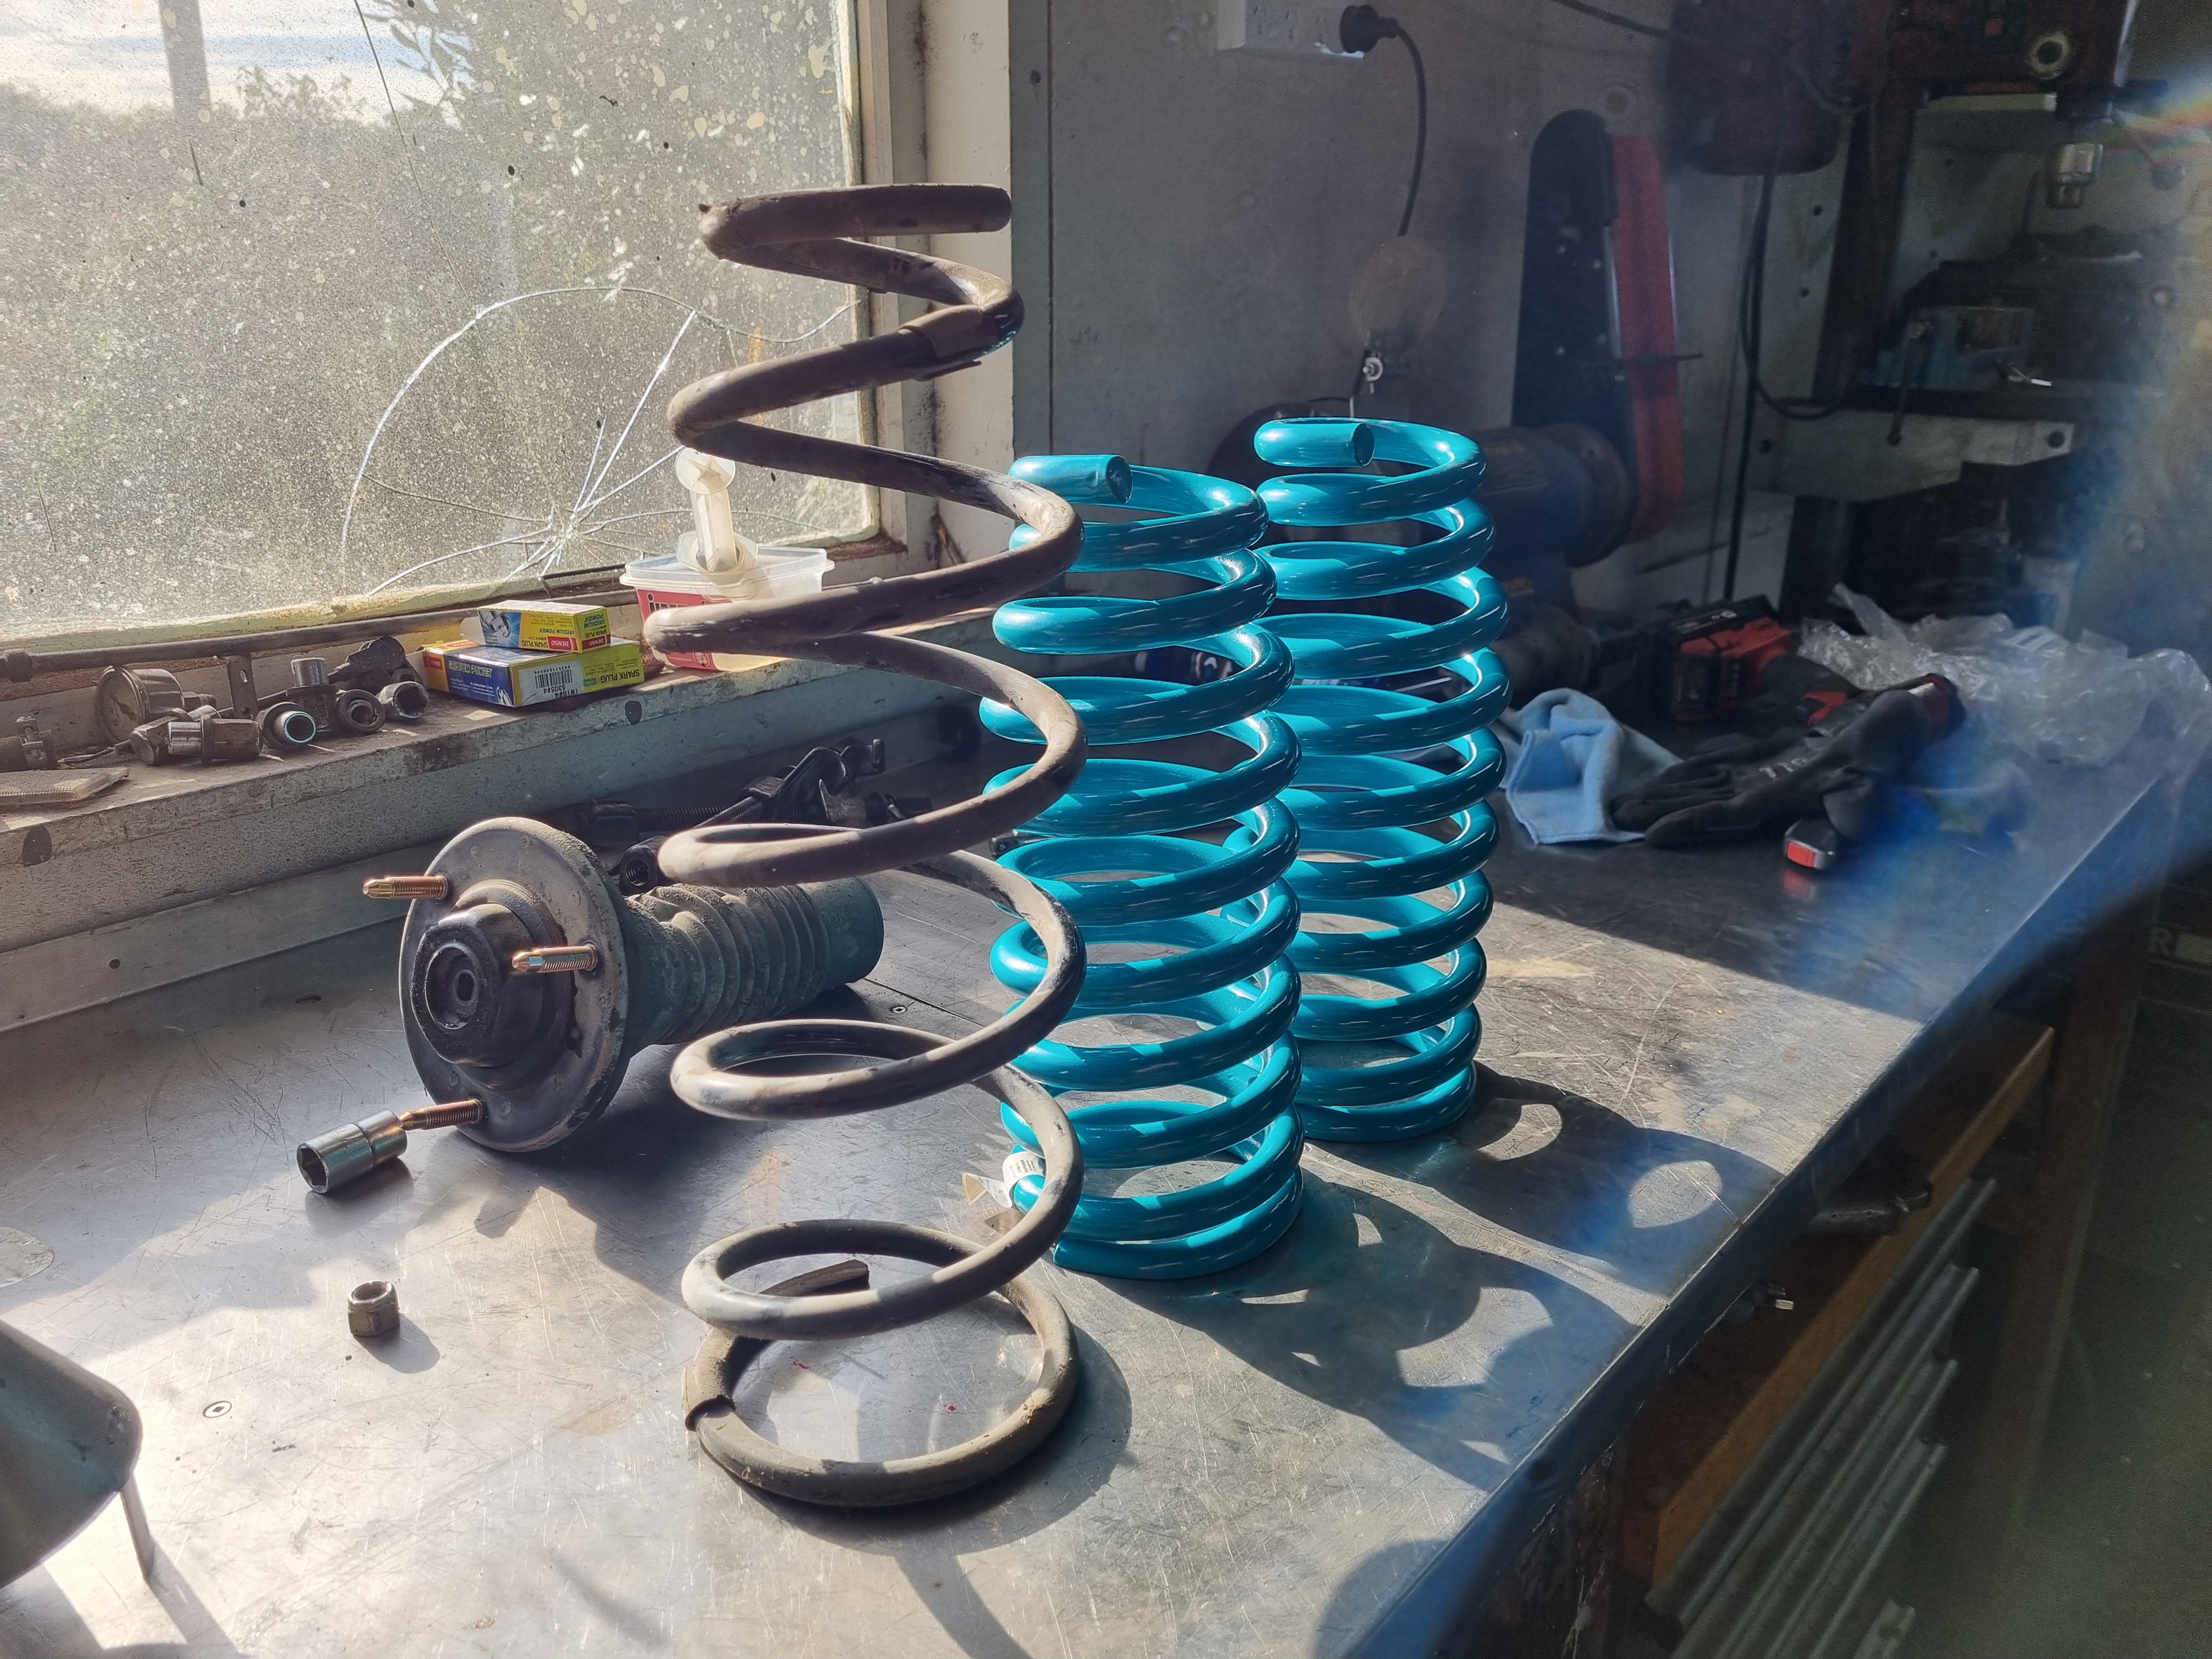
So I bight a set of lowering springs for this thing and went about installing them. Started with the back because why not. The replacement springs were quite a bit shorter but a much heavier wire diameter. I stuck them in and put it back on the ground. The new springs dropped the car appropriately zero mm but they made up for that by being not captive. Cool, so out they came and I returned them. Now I'm on the hunt for some coilovers for it.
2 points
-
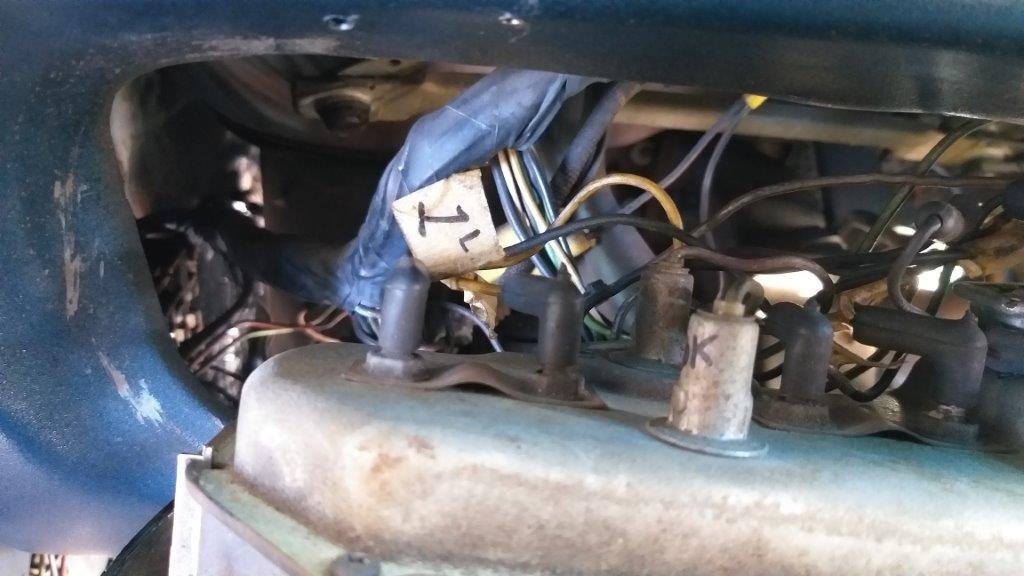
First step was to mark the instrument cluster wires before removing the cluster itself. I made a rough sketch of the setup and then added the cable numbers as I marked each cable. Initial observations: 1. Someone has been at the instrument wiring before as there are little hand written labels. Hopefully they just removed the cluster to replace the surround. 2. Instrument surround has been replaced at some stage with a reproduction part out of Taiwan. 3. As previously mentioned most of the globes have been replaced with LED items apart from the turn signal ones so I'll sort those while I am here. 4. Instrument cluster voltage regulator is relatively new. Bonus as bad ones usually result in erratic gauge behavior, so I'll take that as a win. 5. The main wiring harness appears pretty solid and relatively unmolested. Will need a clean and a bit of a tidy up, but apart from that just the previously mentioned items to sort. Photos of the spaghetti for your viewing pleasure:
2 points
-
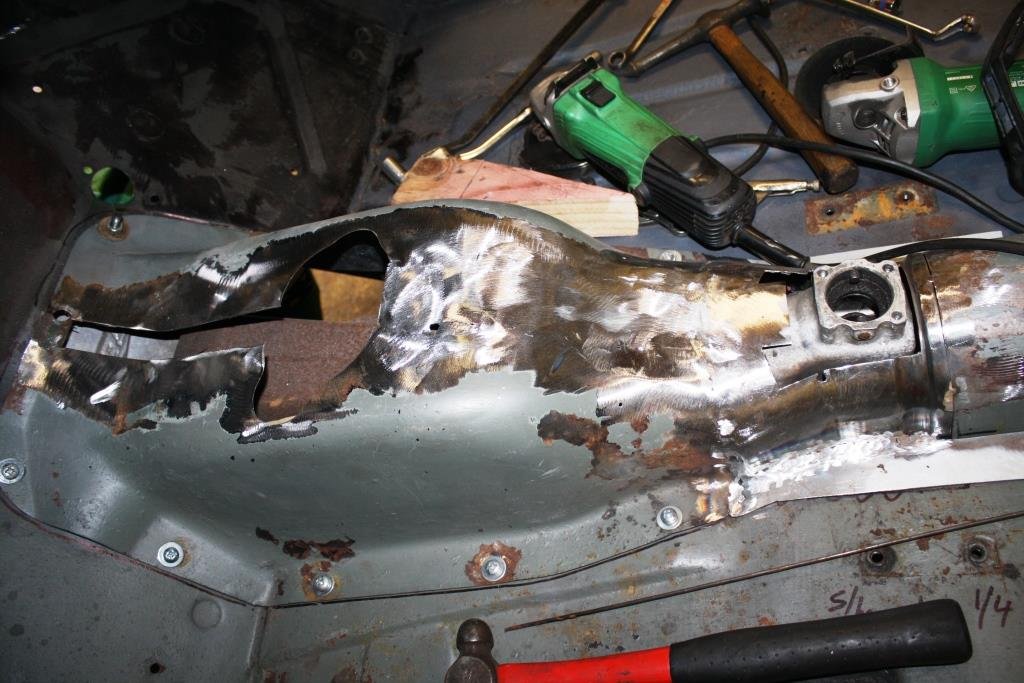
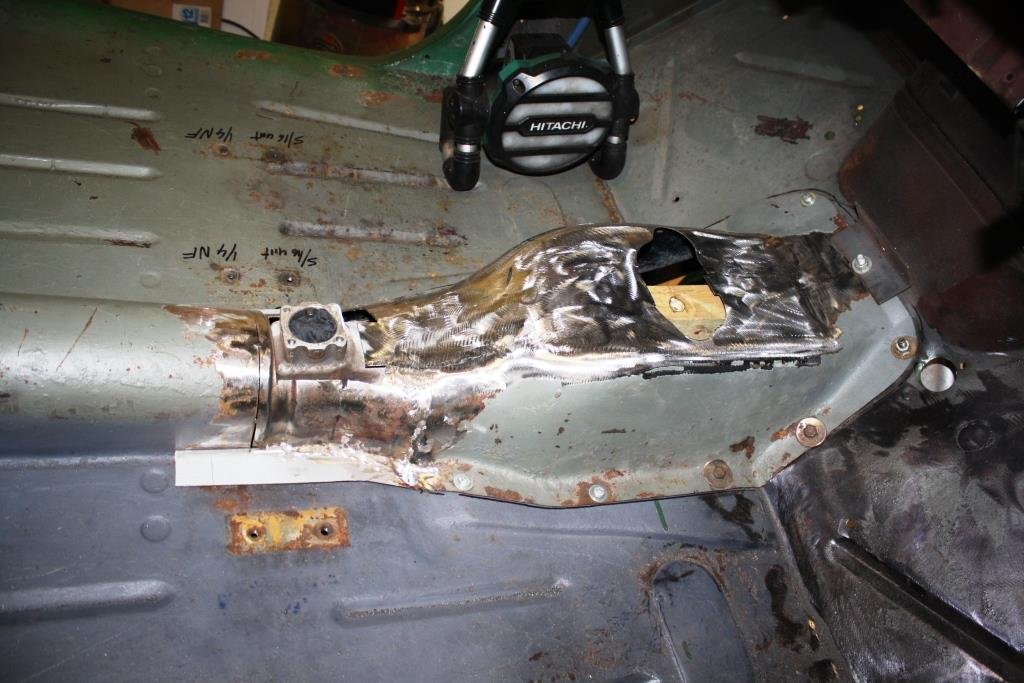
More mucking about, this time connecting the stripped down bike loom into the car, it'll be powered through a fused relay off the car ignition switch. I ended up writing three pages of notes on what each circuit needs to do to run the engine, some more simple than others and a few sneaky ones. For example the side stand switch is just a simple join the wires whereas bypassing the bike ign switch needs a resistor on a particular wire as the ecu uses it as a rudimentary antitheft device. A sneaky one which doesn't seem to be very well known is the clutch switch, most people seem to just join this one too but apparently there is an ecu feed on it and if you just join them the ecu will only detect the circuit activating once when starting so will think the bike is in neutral and run a fuel map for it. I just happened to have an appropriate switch so I'm just going to hook it up to the pedal and keep it as is. Having the big rust hole that I am yet to patch has been a godsend for accessing the wiring behind the dash but I still found myself upside down in the tiny footwell. I had to make a platform next to the car to lie on, then ended up lifting my legs up onto the seat so I wasn't banana-ing my back on the sill, 6/10 would trade again2 points
-
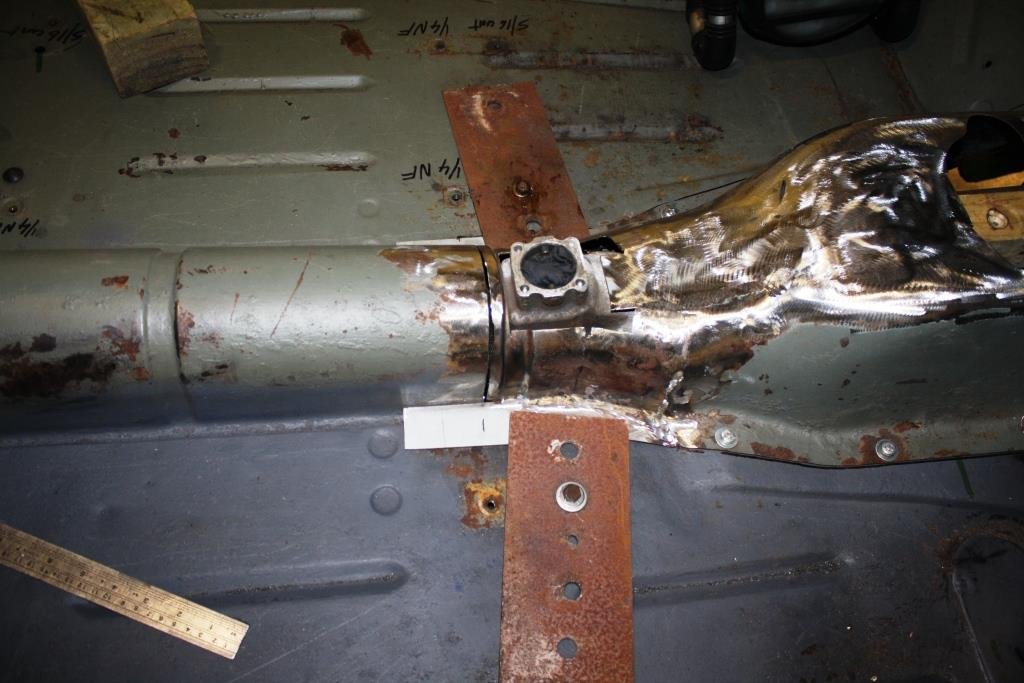
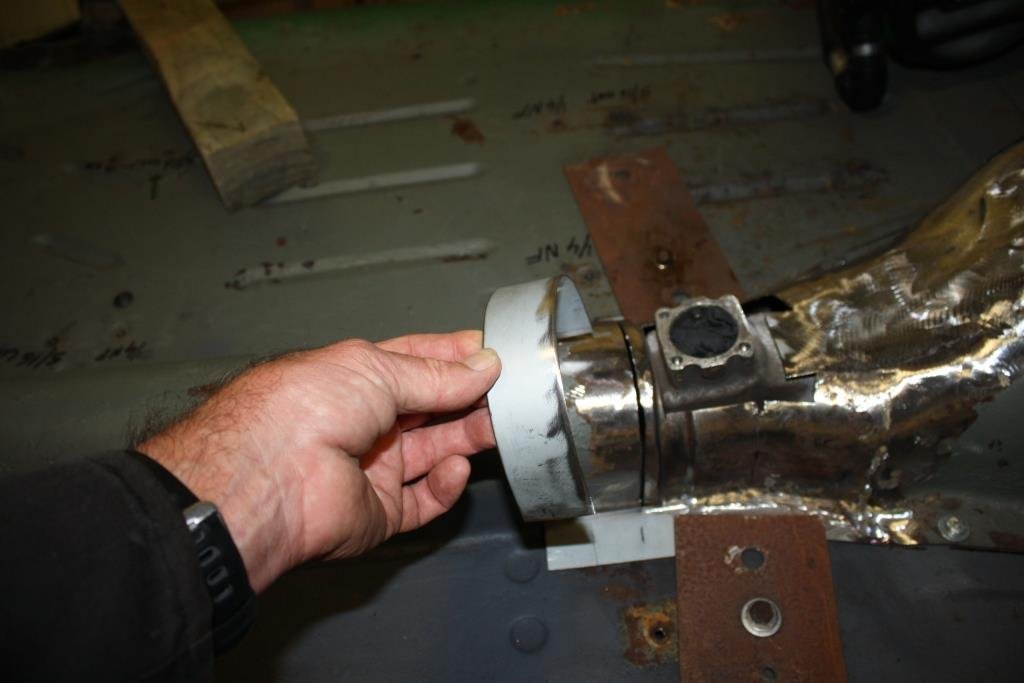
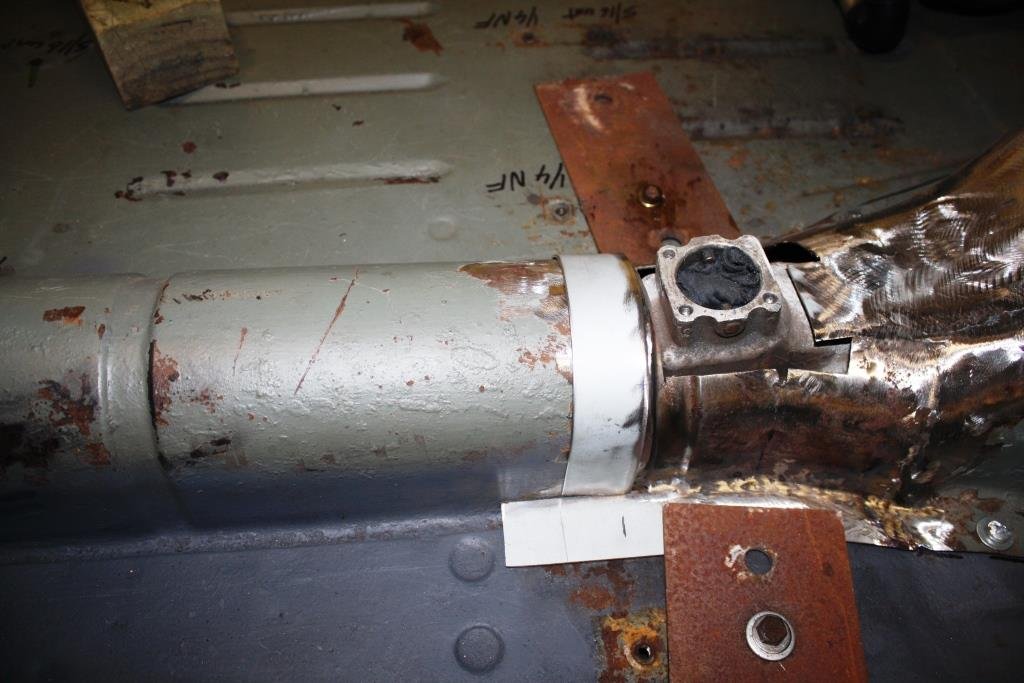
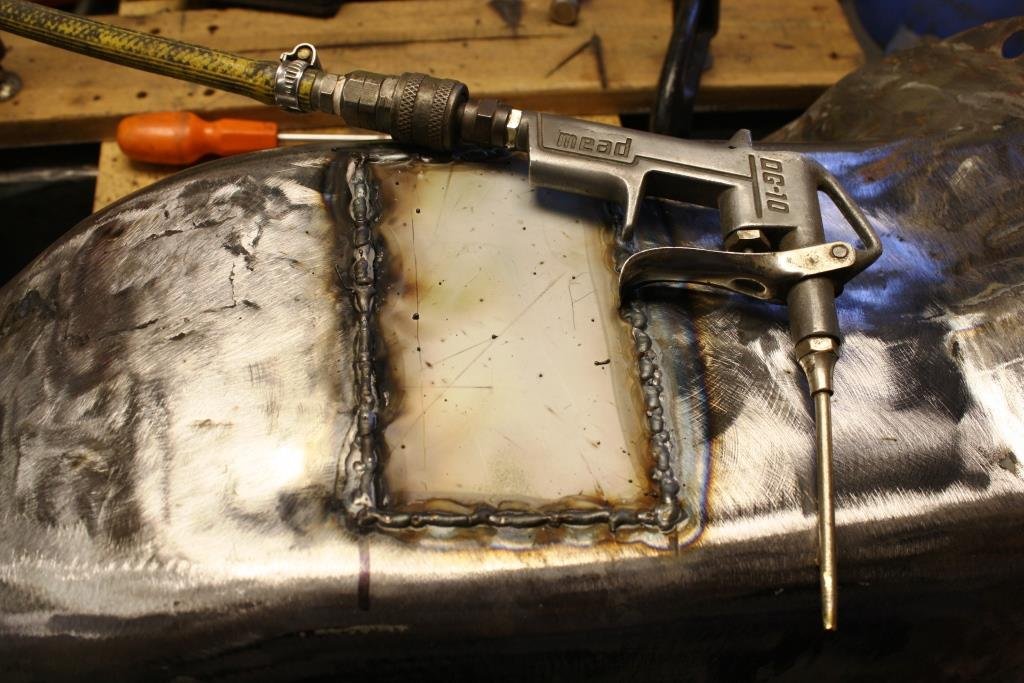
More little bits of progress. I needed to block off a few ports in the cooling system, drill, tap, plug, repeat. Gave em a quick clean in the blasting cabinet too. I cut a couple hose barbs off and had some larger ones welded on. Next job was replacing the roof air bleed hose. Attached it to the old one and it pulled through easily. Normally it would run to a header tank that lived on the left but now it will run to the radiator. I'll have a look to see if it can go under the frunk and into the heater compartment somewhere.2 points
-
The cooling system is gonna take a few revisions to get spot on I expect, I'll put it together with what i've got and see what it needs before spending money on new bits. Things I don't know, will it need a bigger rad?, will the bike waterpump cope?, will I be able to get all the air out? etc etc The stock setup has two hoses running through a tunnel in the floor to the radiator up front, the hot side goes through the heater matrix first then a bypass thermostat before the rad, there is also a header tank in the frunk which takes an air bleed from the thermostat on the engine, this runs up the c-pillar through the roof channel, down the a-pillar then into the header tank. Interestingly it has no fan on the radiator, the heater fan performs this duty as all the hot water runs through it anyway. I'm mostly replicating the stock setup, due to the height of the engine the header tank and overflow will be in the back now so they can still be the highest point in the system. I'll also be adding a radiator fan and after speaking to the radiator shop I'm gonna ditch the heater for now to help with flow and will also cool the oil with air instead of coolant. So starting in the front. I had to buy 7m of 25mm ID hose to replace the 50 year old originals. Chopped up the heater box as the bottom was rusted out anyway The hose now goes straight to the bypass thermostat housing. The benefit of keeping this setup, as I read on an MGF forum discussing headgasket failures, is that it helps stop temperature fluctuations in the engine by warming the system up in stages instead of repeatedly flooding the engine with litres of cold coolant whenever the thermostat opened. I need to make a trip to supercheap sometime and rummage through hoses for a better upper rad one, one join would be ok but two with different colour hose looks a bit michael mouse.2 points
-
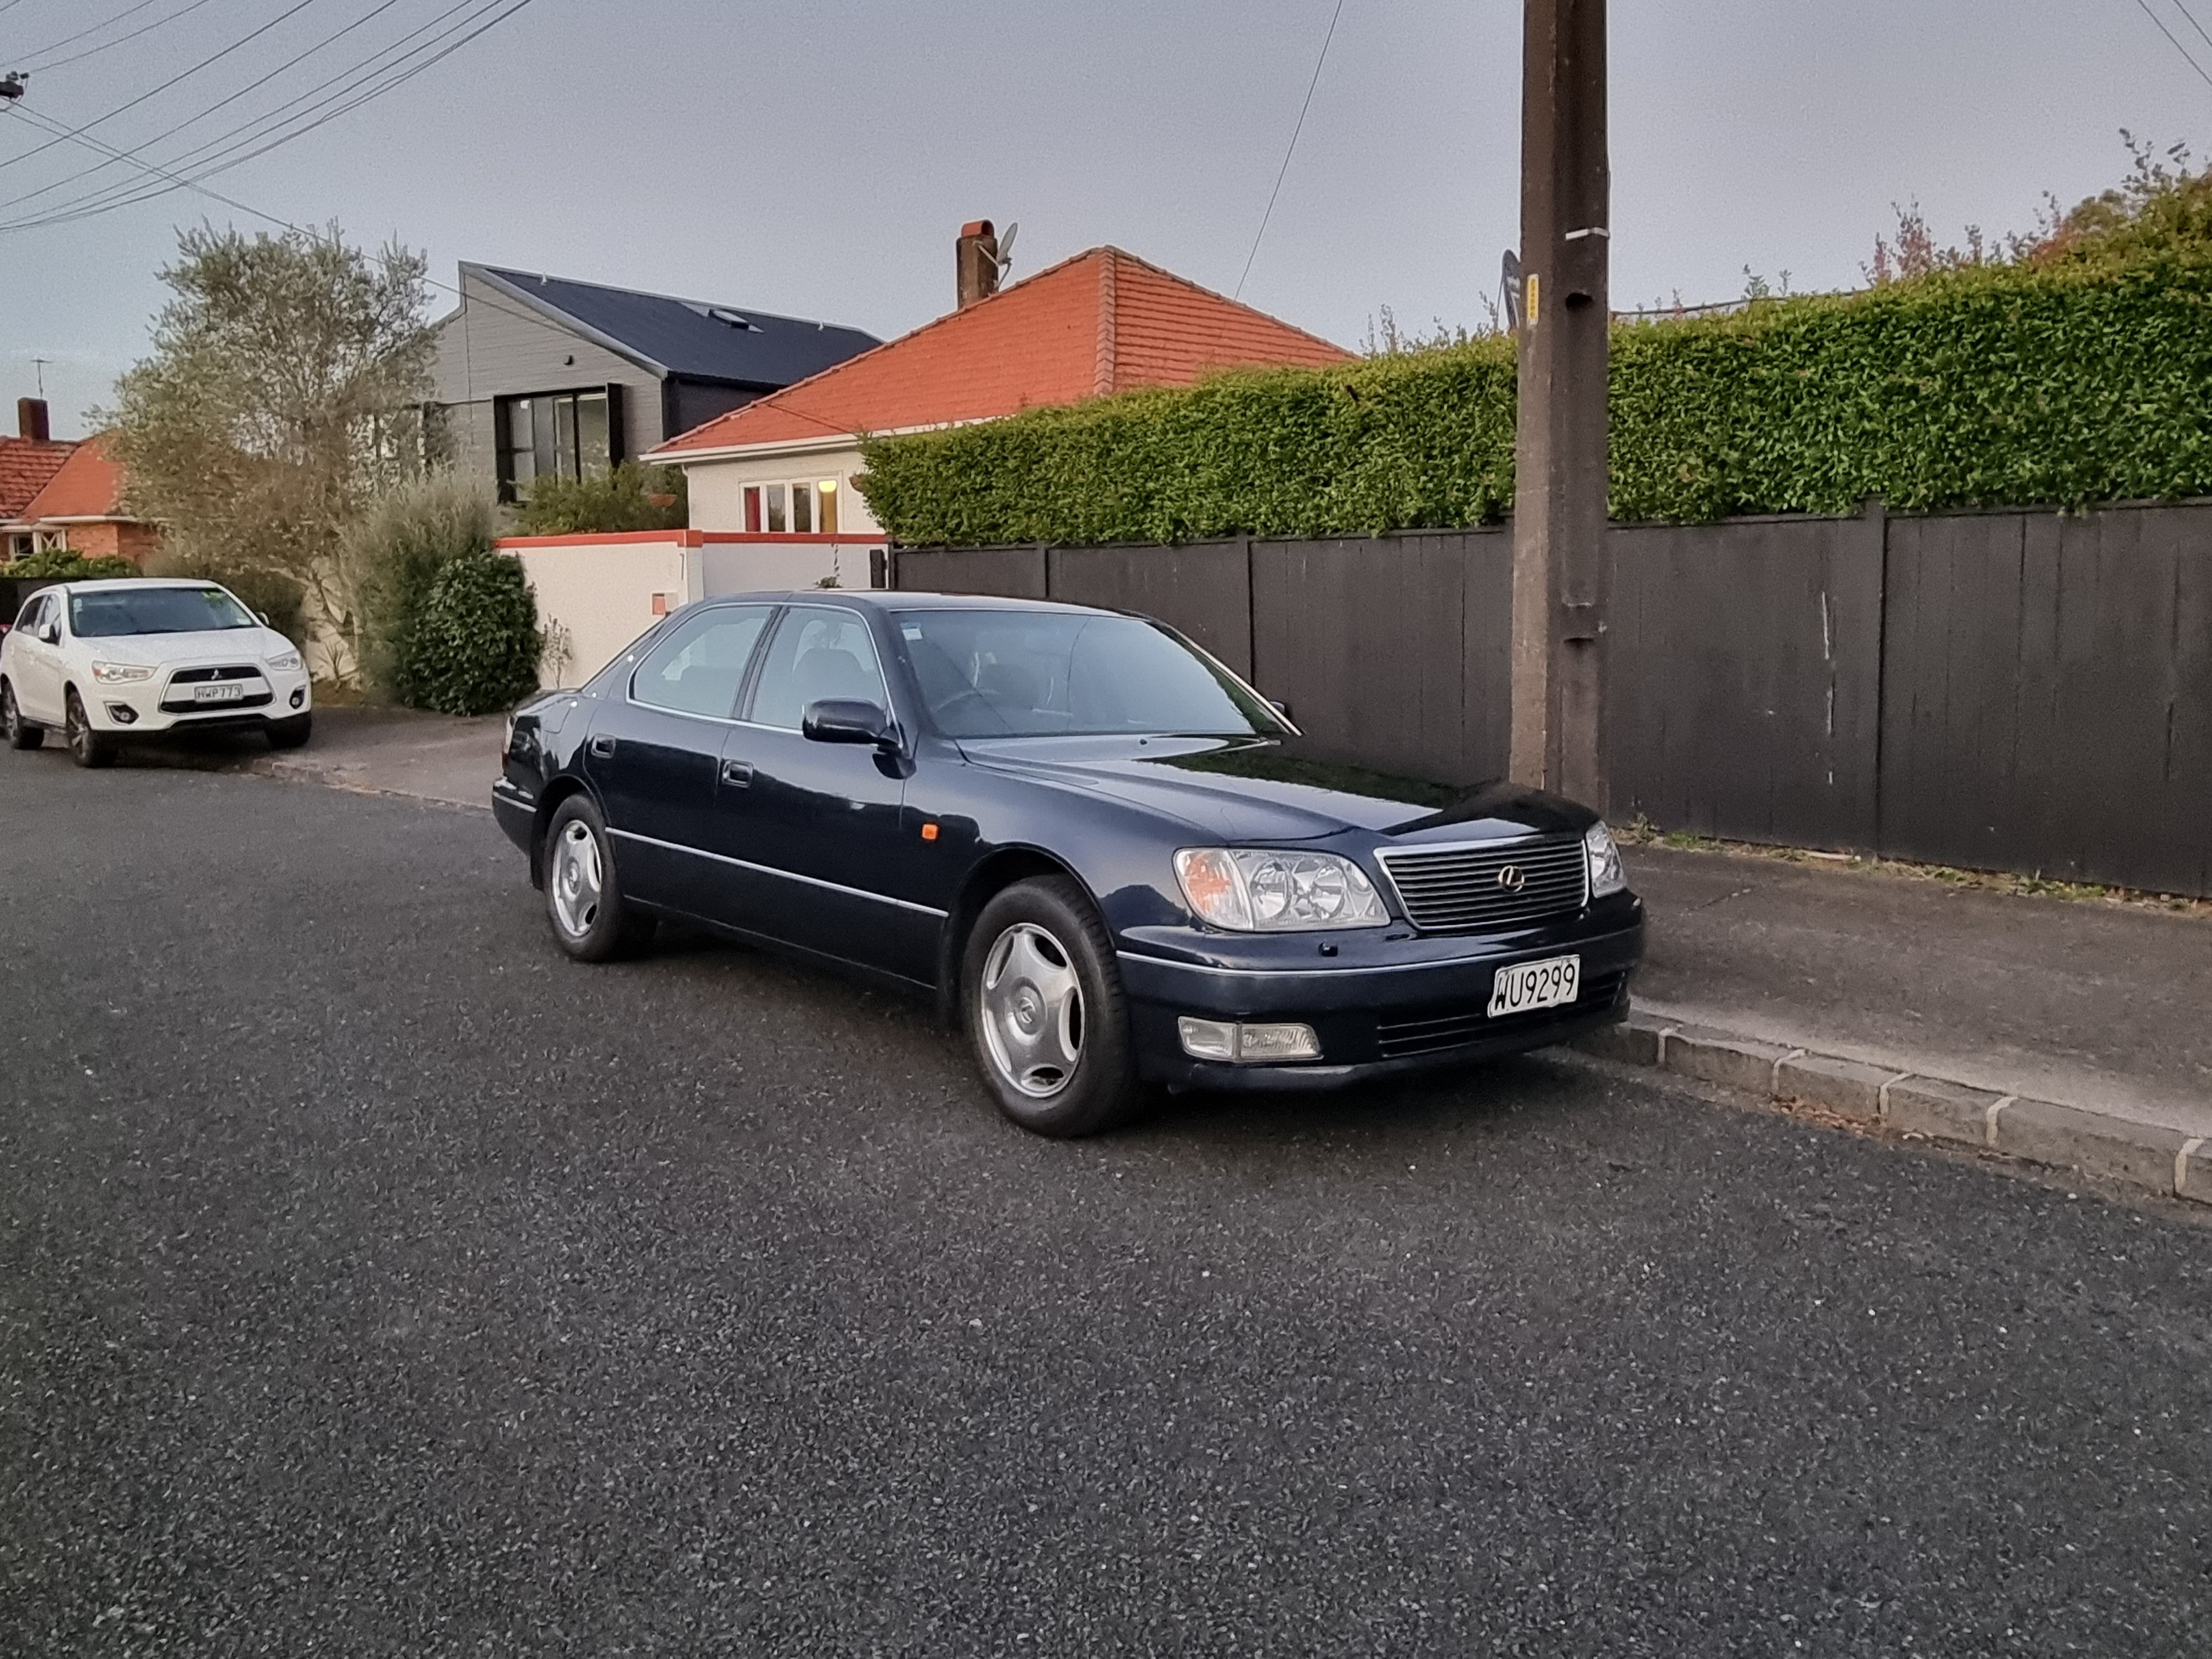
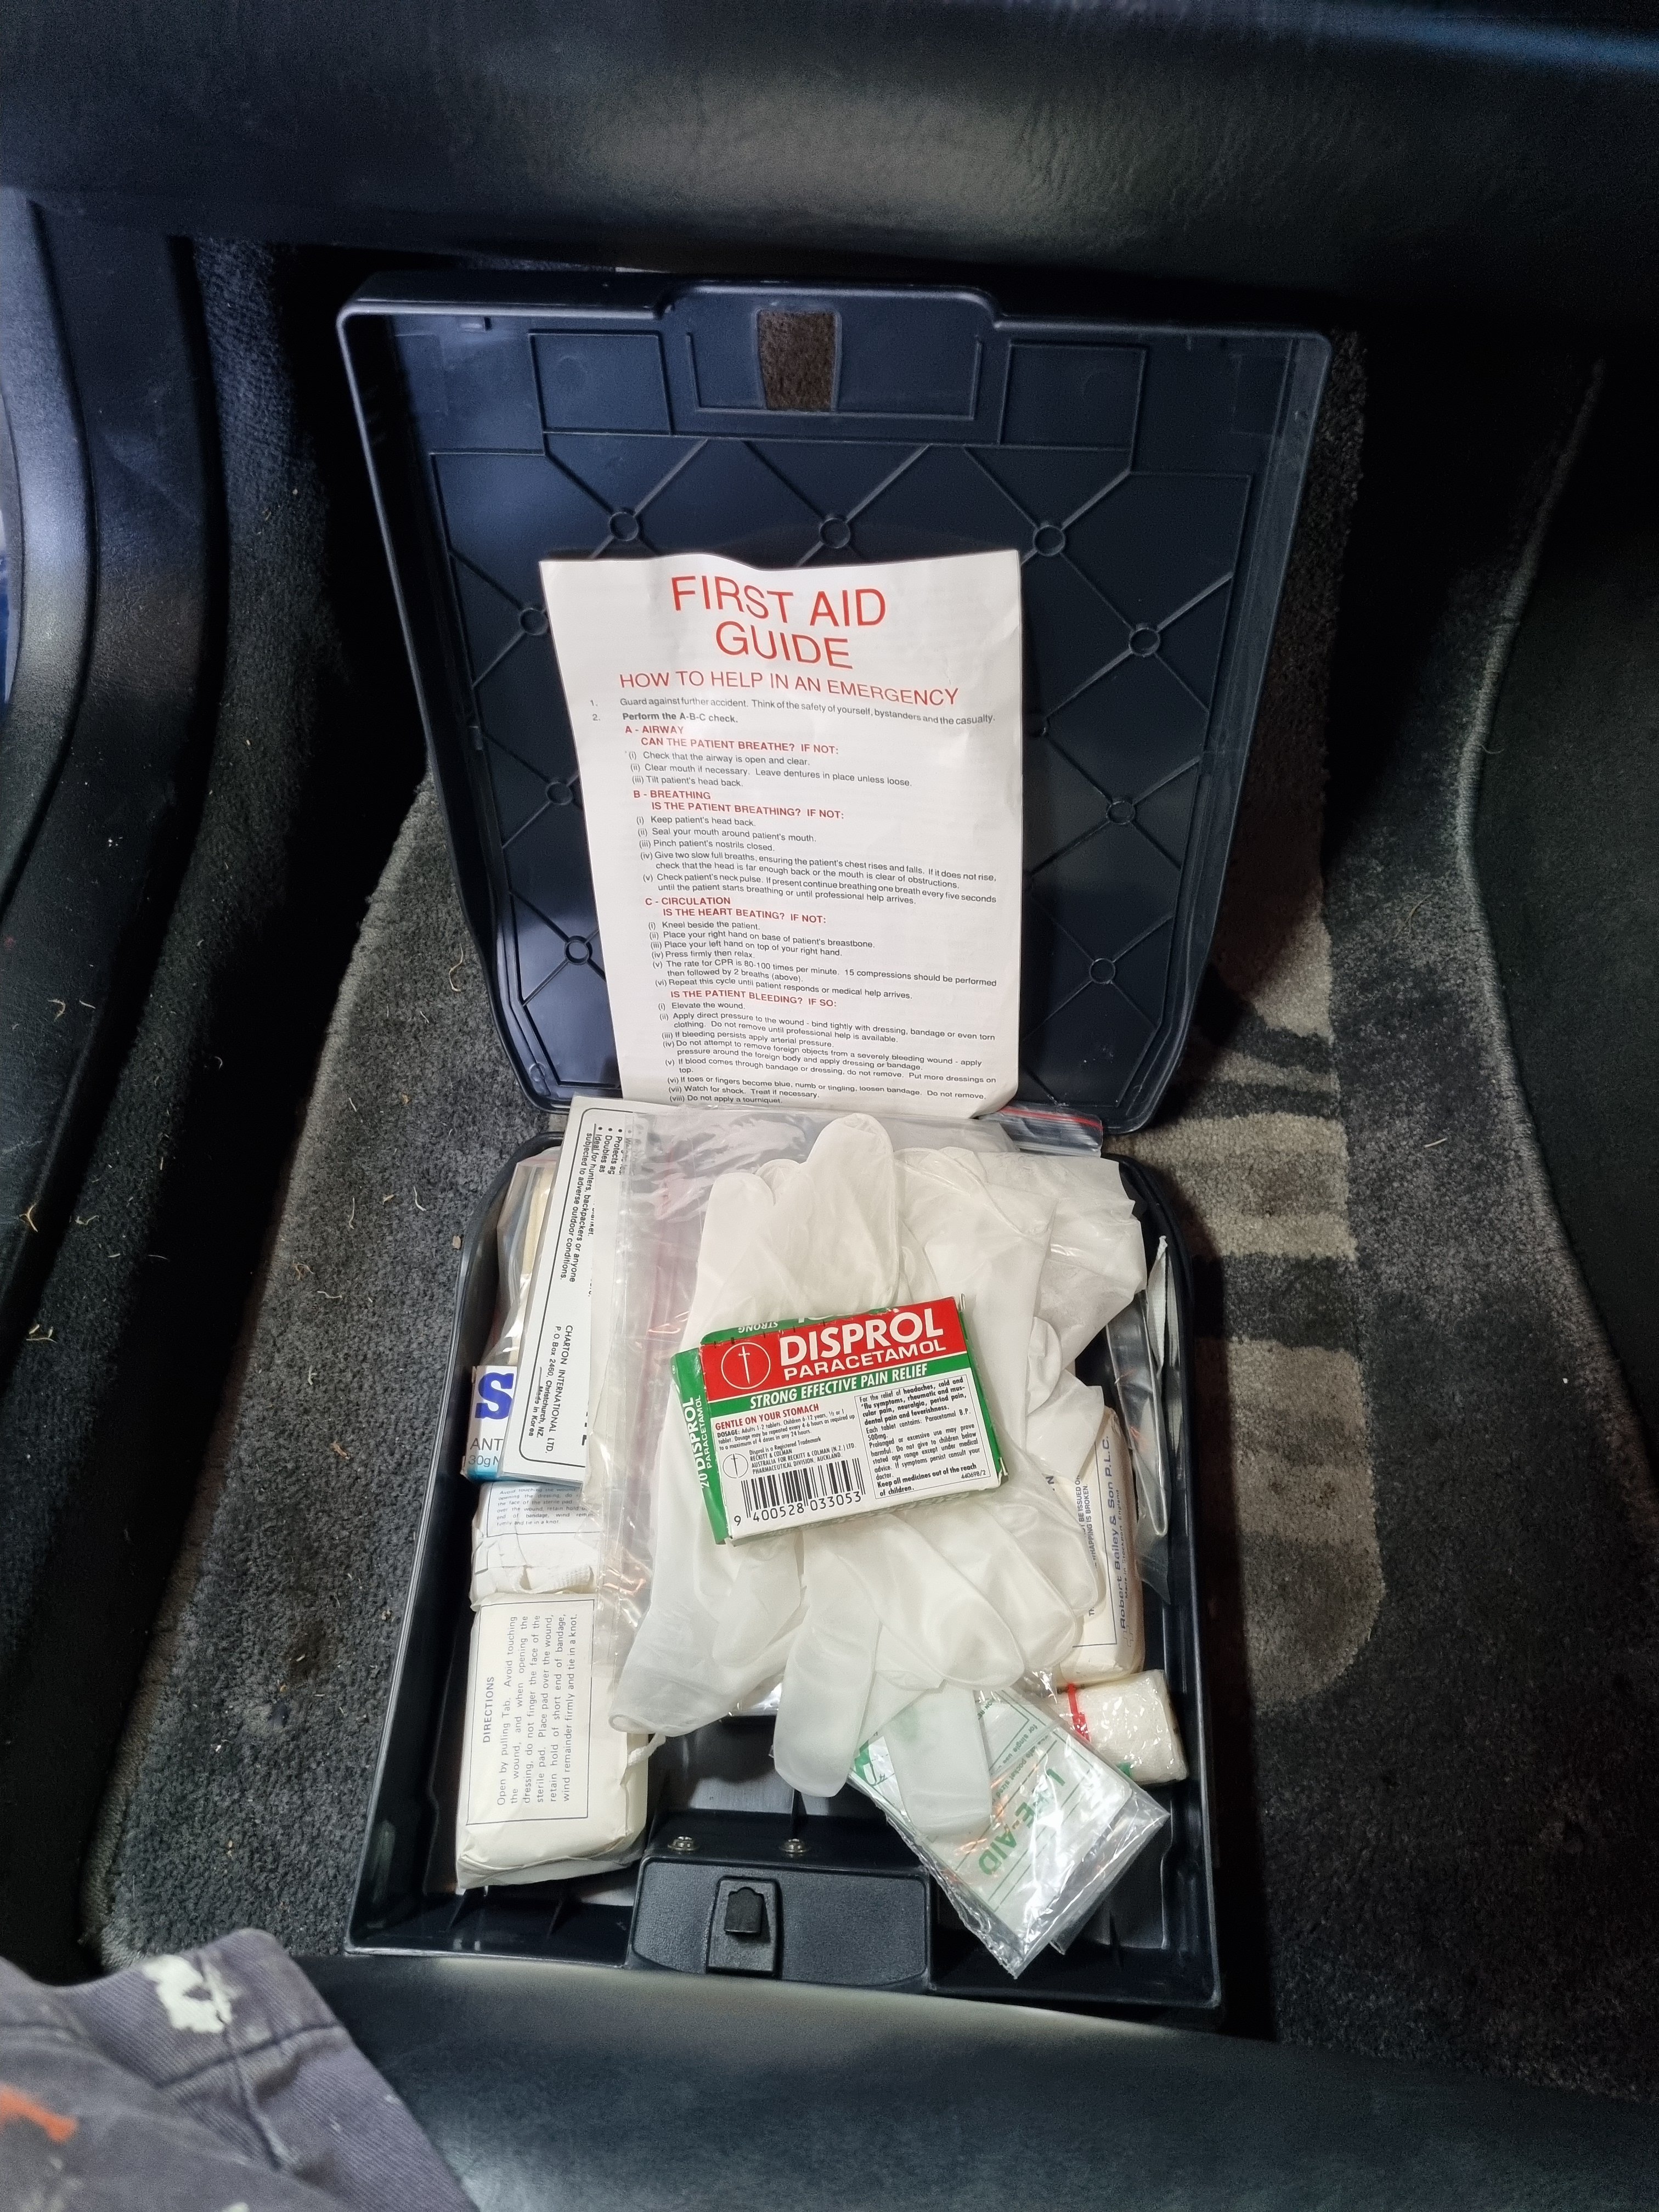
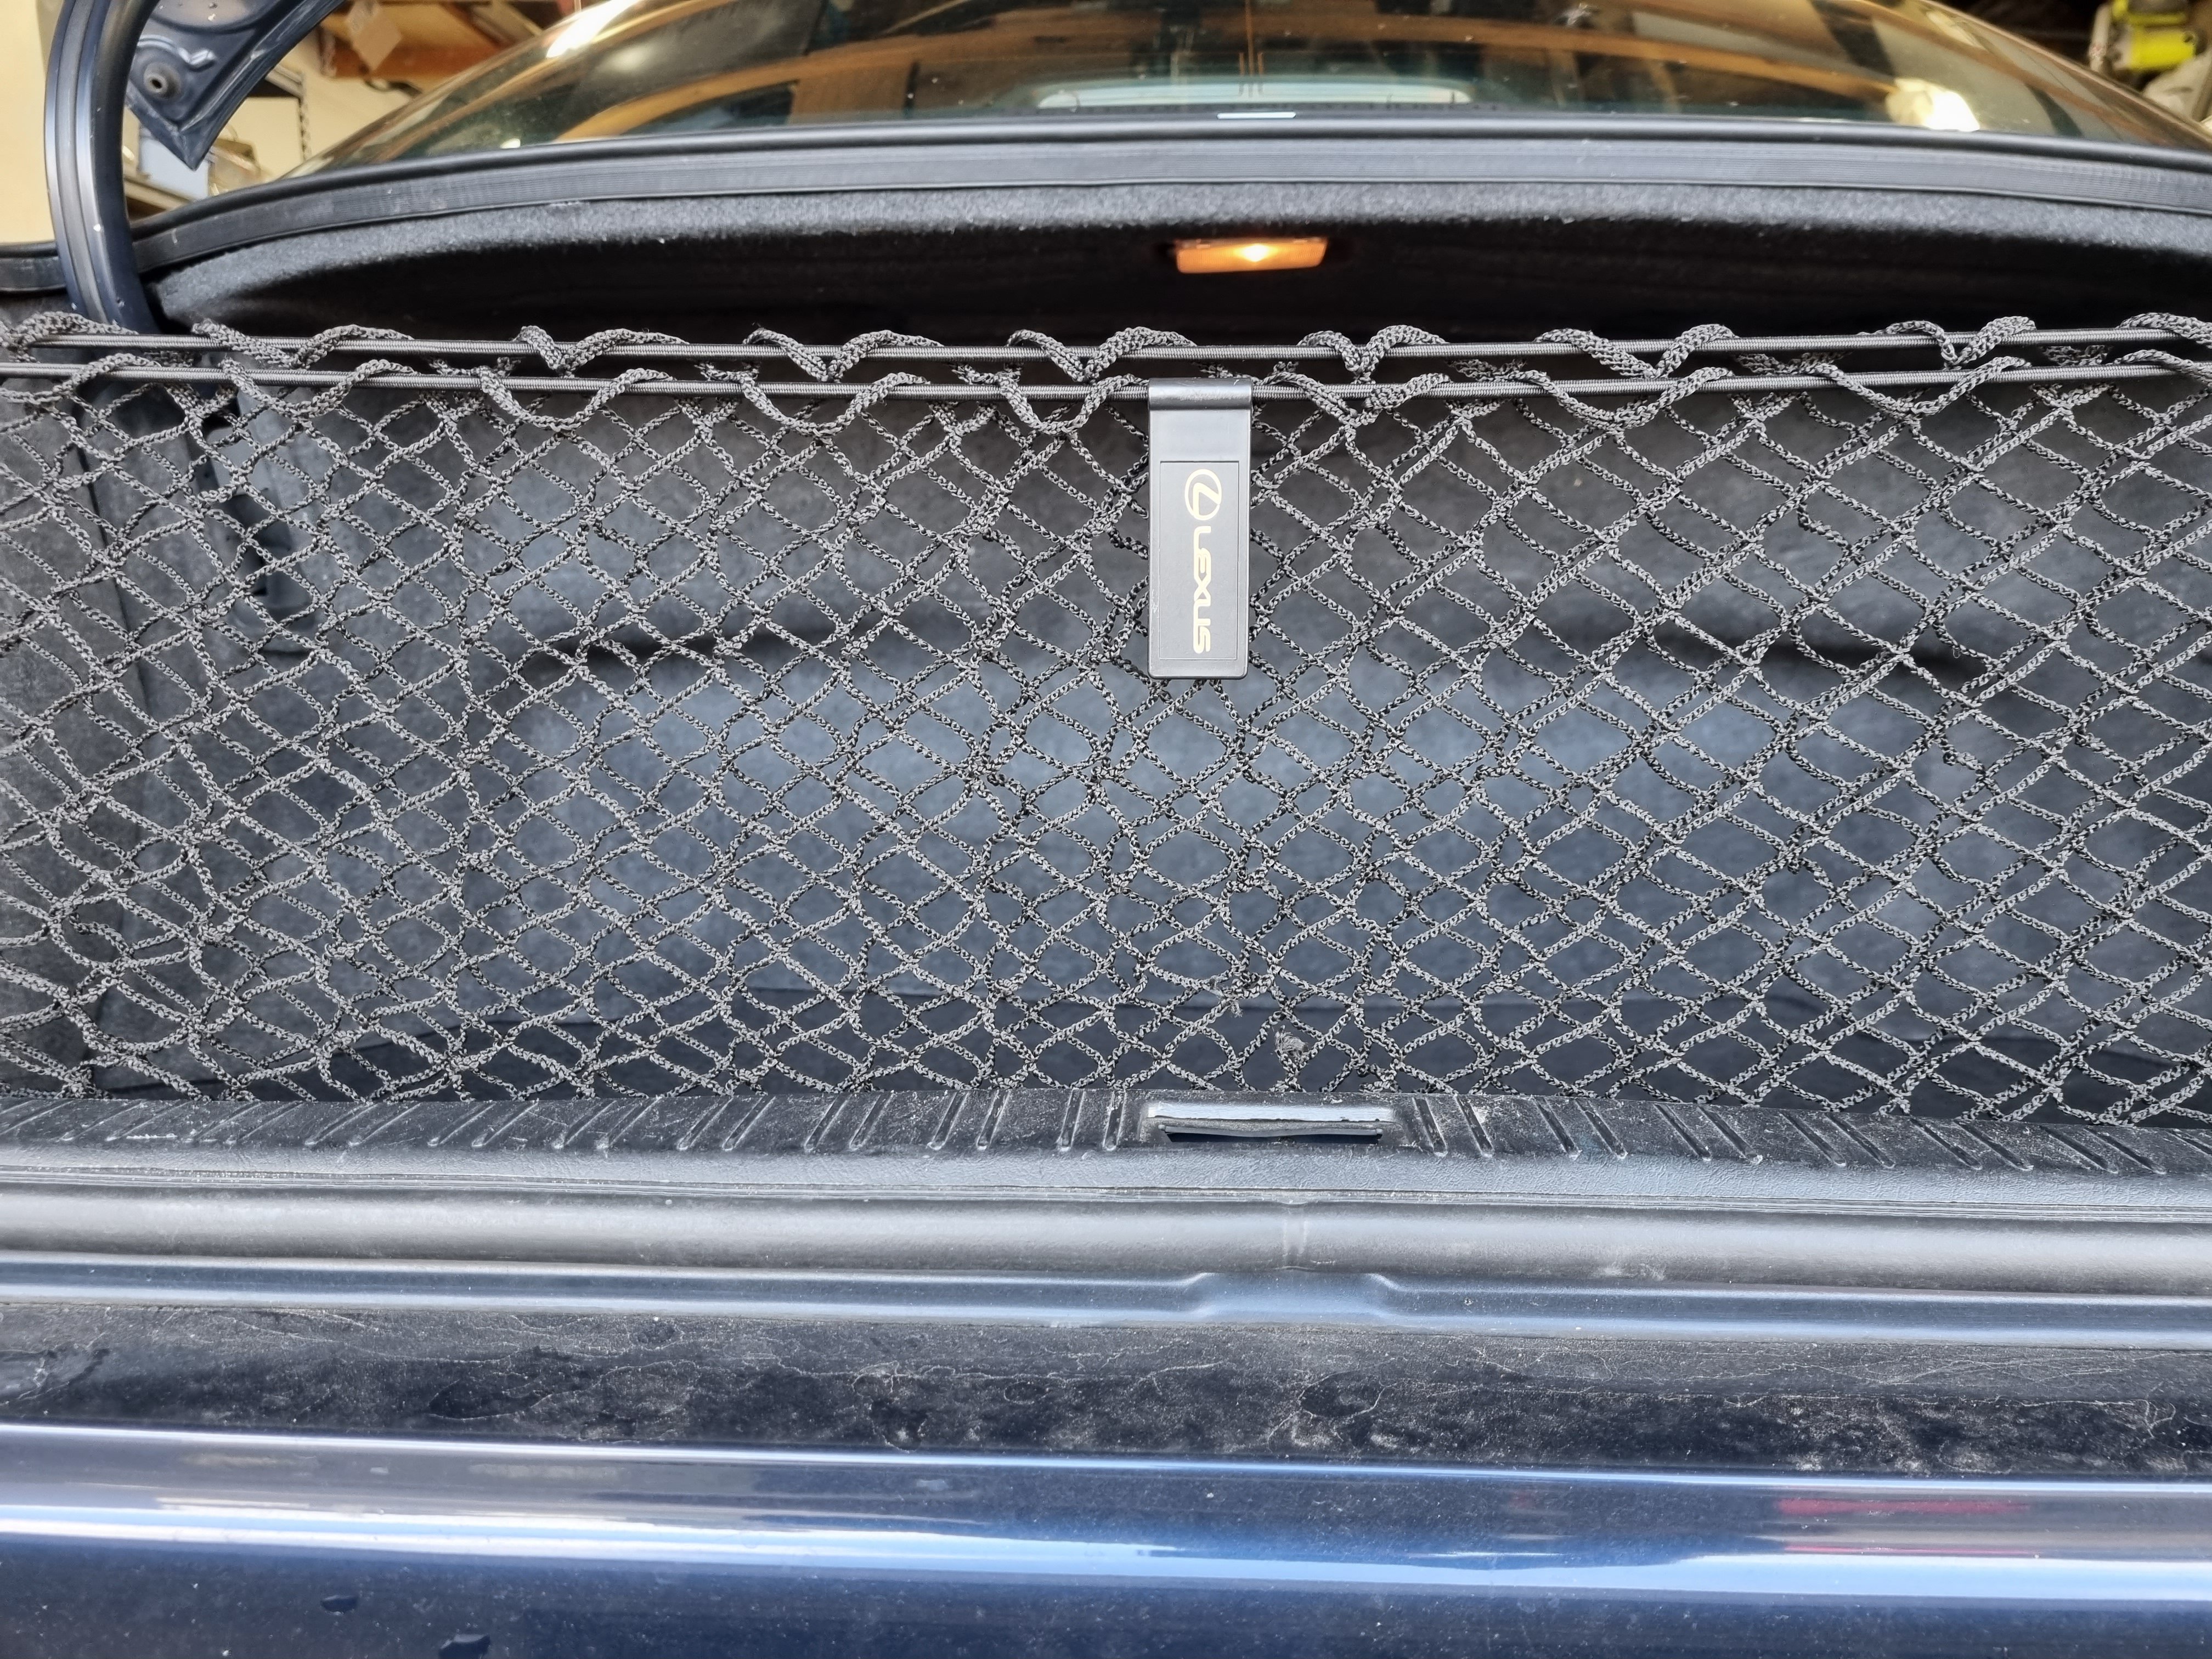
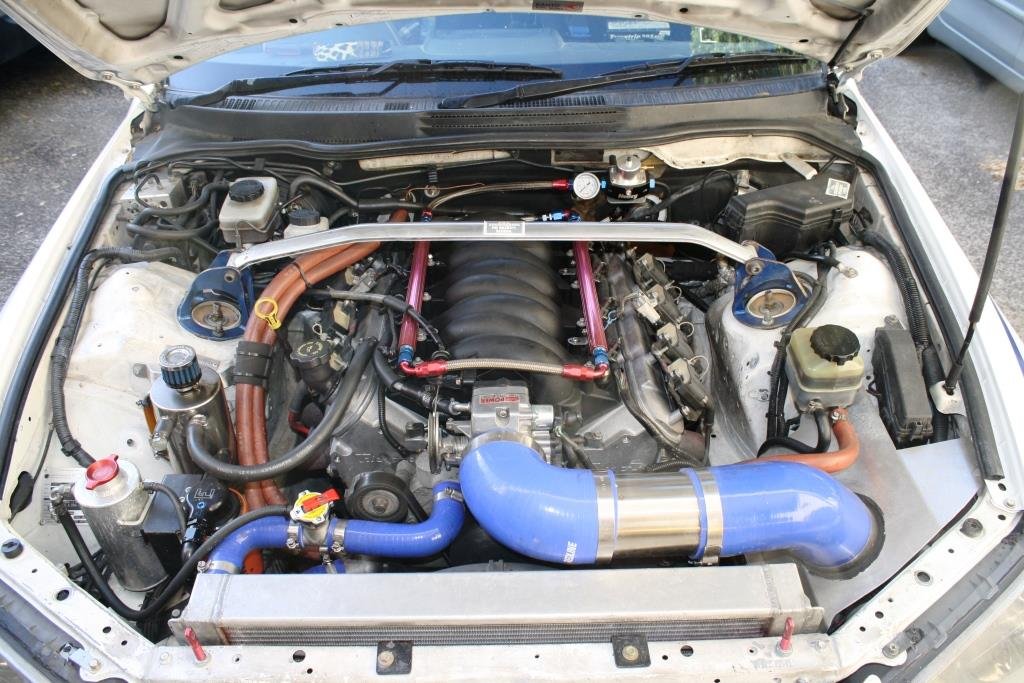
I had one of these a few years ago and it ruled. It was the wife's daily so I never did anything to it except maintenance. Now I've bought another one that is going to be my daily. I've done over a hundred thousand Ks in each of my celicas and quite frankly, it's fucked them. So now imma daily this. NZ new 98 LS400. Has the vvti engine. No sunroof, totally stock, fastidiously maintained 140 000ks. Dark blue with black interior. Every factory accessory is still there including the factory gloves, factory leather conditioner, luggage net and factory first aid kit. Plan is low, wheels, exhaust and an apexi neo fuel computer.
1 point
-
They still have it here in taranaki but yeah they should get that network going again.1 point
-
I'm a fan of the Italian tune up tbh. Hondas love it1 point
-
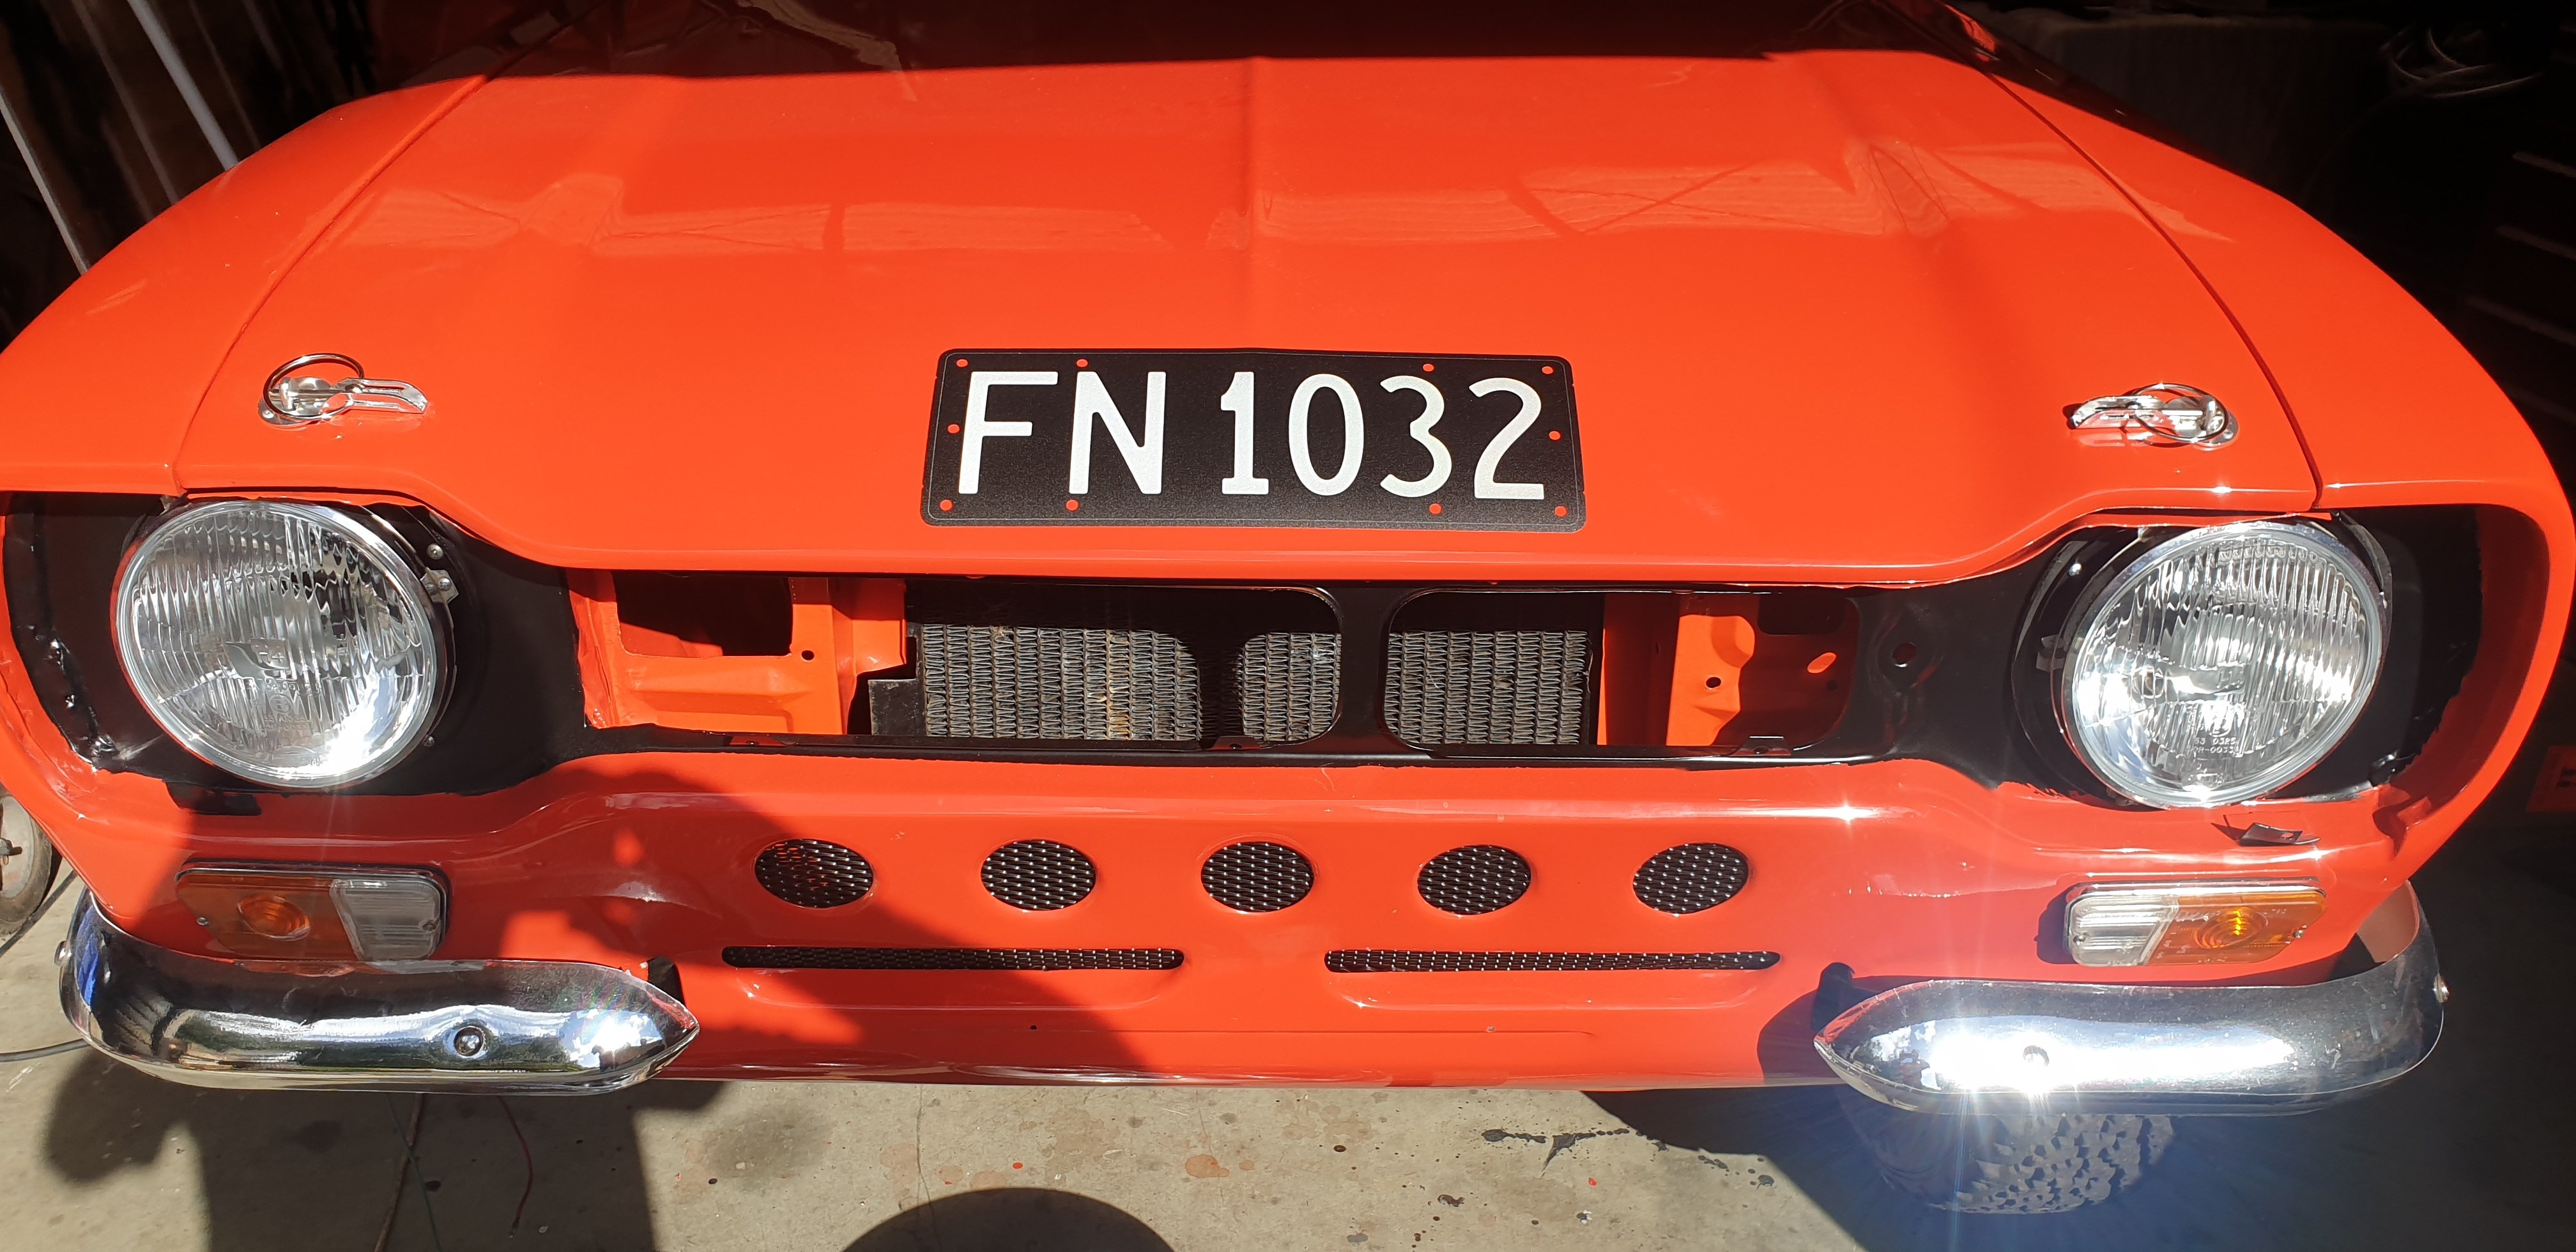
In daylight you can hardly tell... Should keep Mr policeman happy.
1 point
-
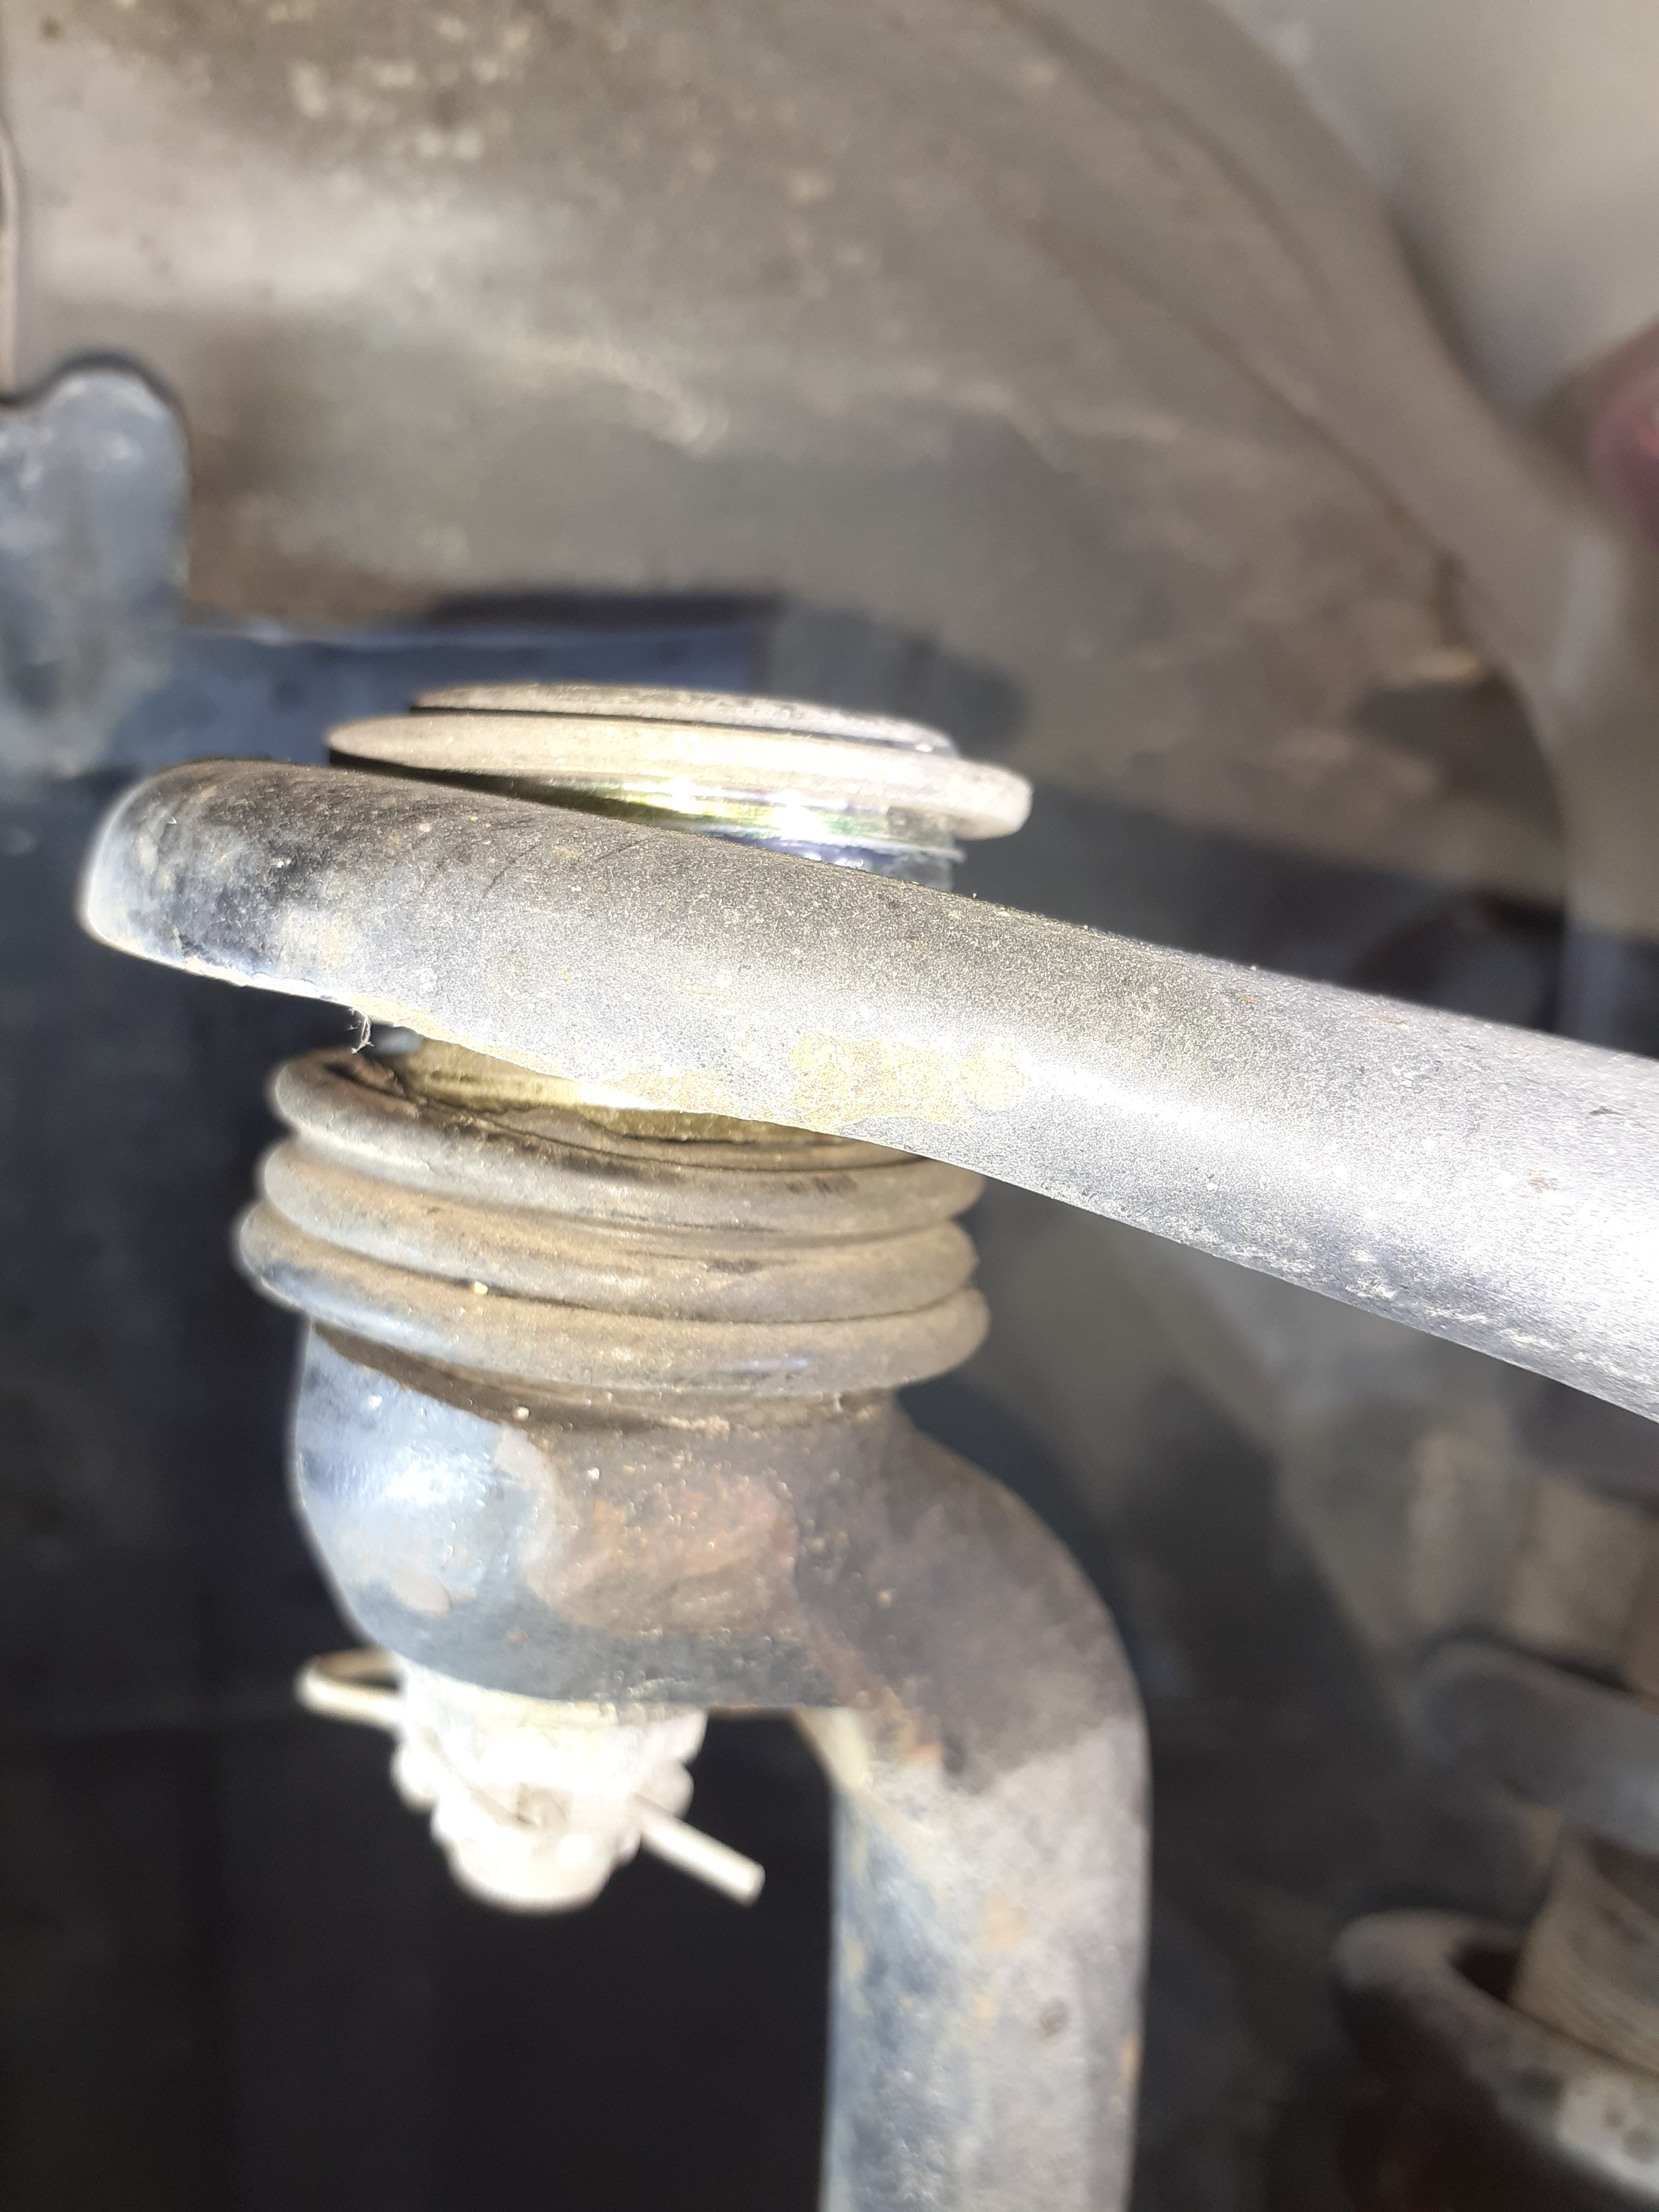
If you do coilovers, there's a bit of mucking around with the front otherwise the balljoint becomes one with the body on bumps, and various damaging things occur. Or it ends up stock height and looks silly
1 point
-
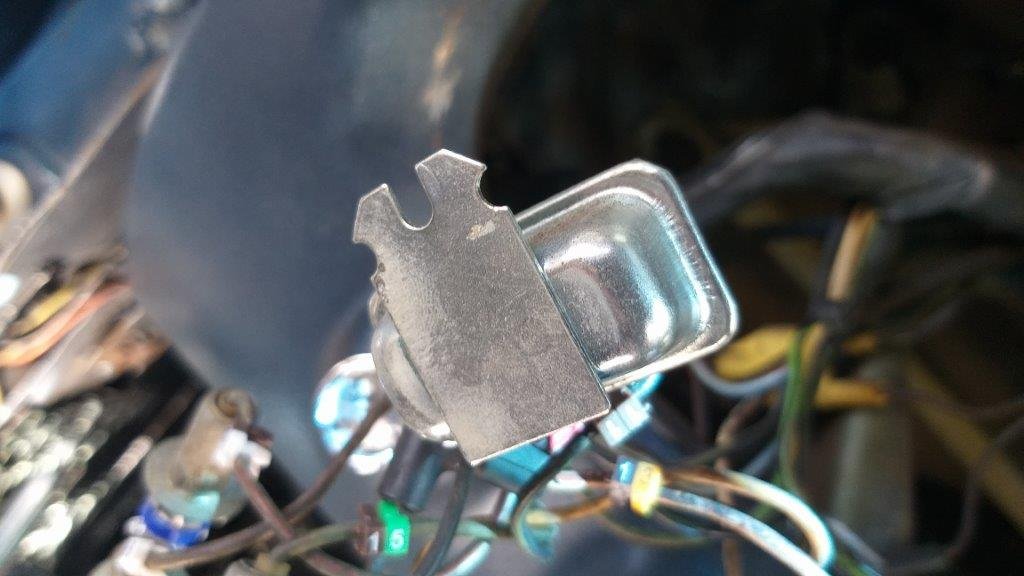
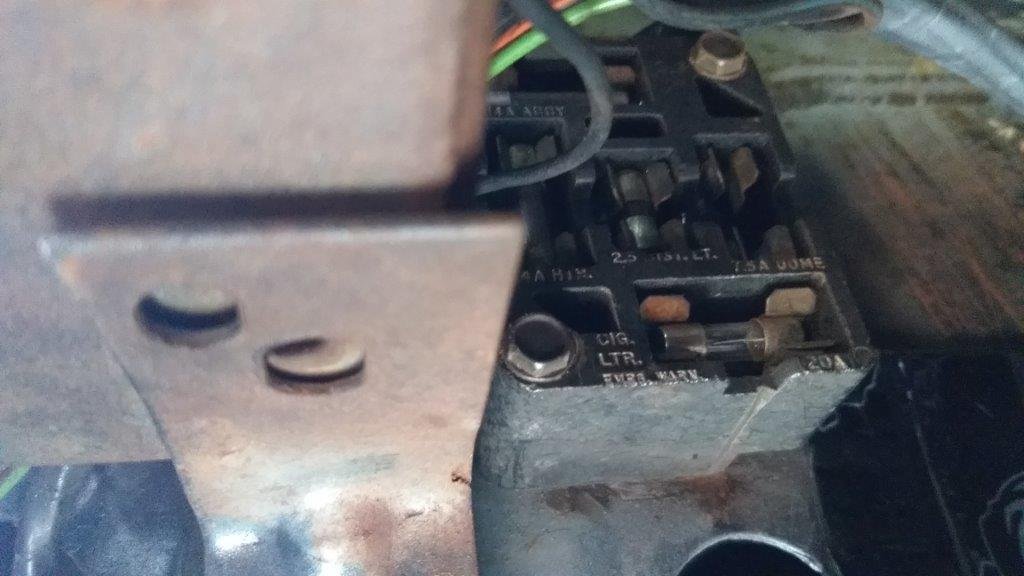
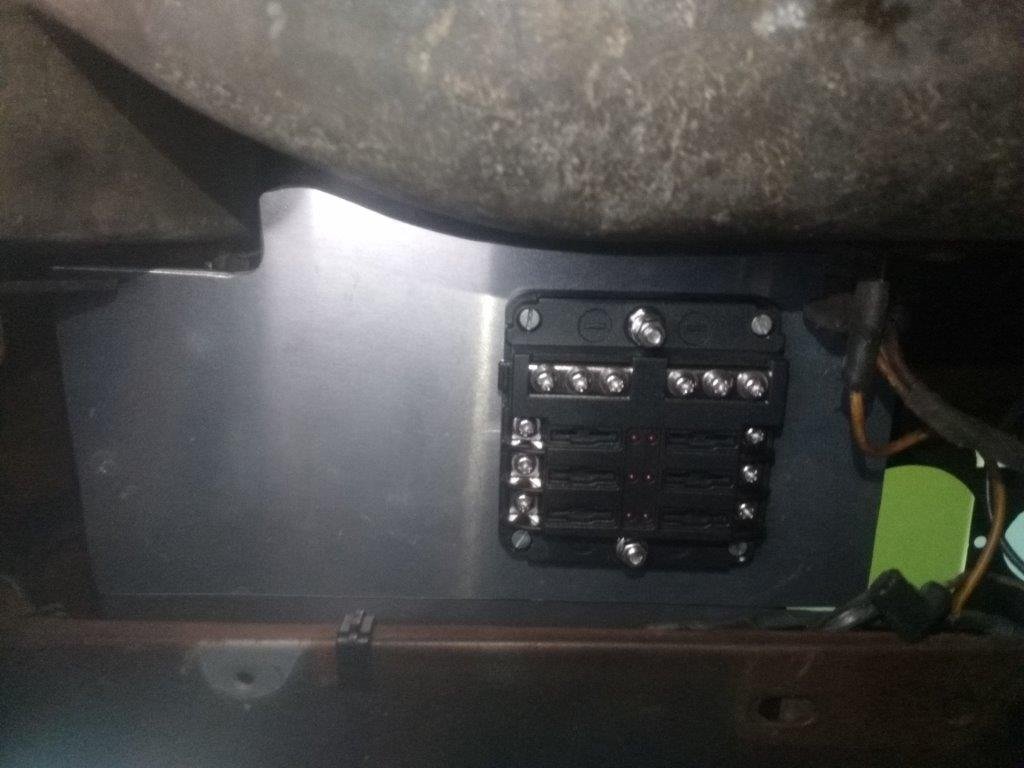
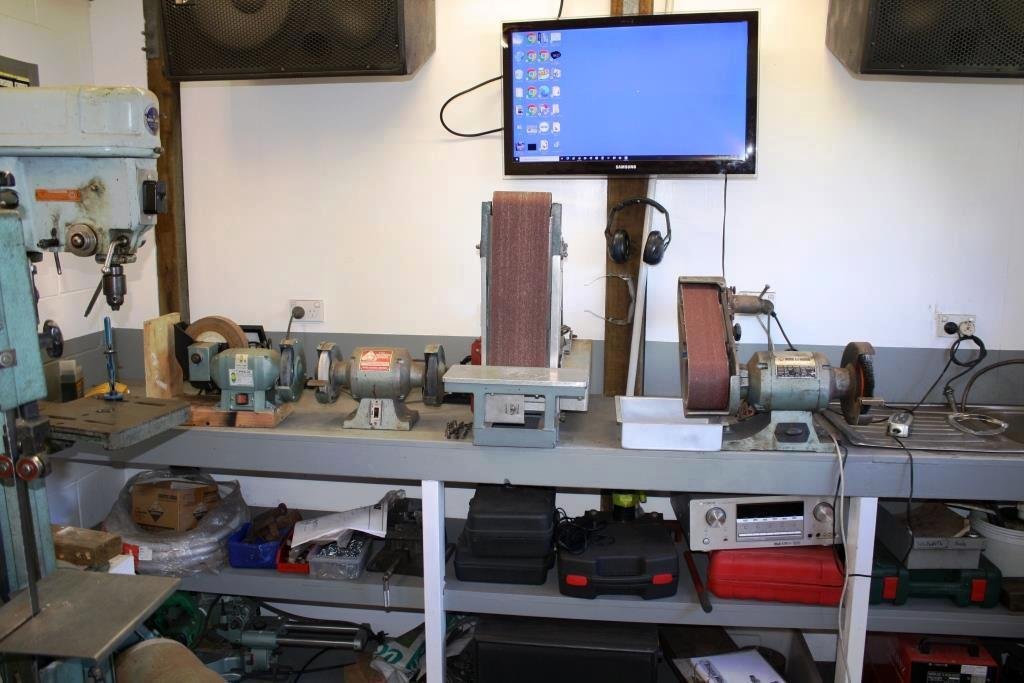
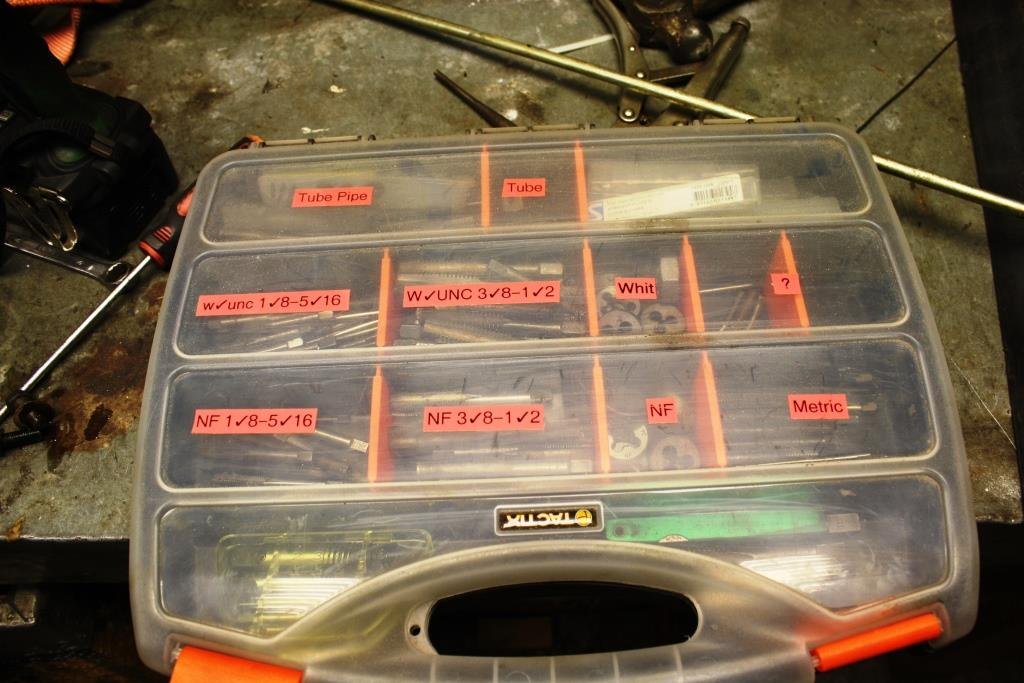
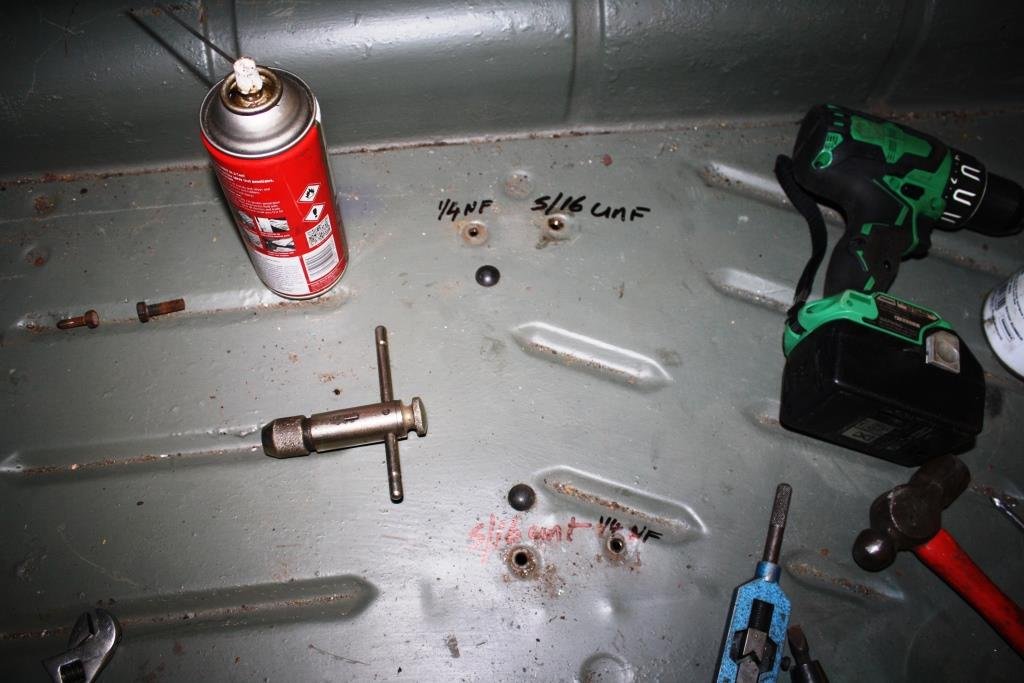
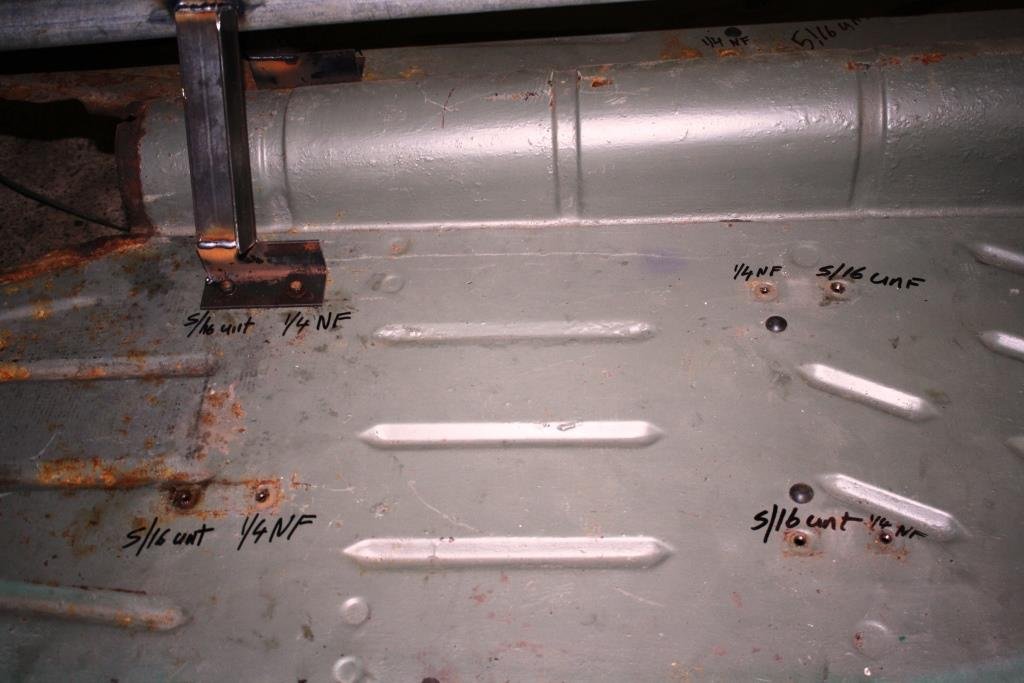
Some of you may be wondering why I am so hung up on augmenting the current fuse related setup, so here is a bit more detail. The factory fuse box is pretty poor by modern standards. In addition to being hard to access it only consists of 5 fuses which vary in physical size. I suppose the size differences make it easier to figure out what amperage fuse goes where, so that's a plus. But it still doesn't really cater for the addition of any modern creature comforts. I've included images of the fuse box schematic and a photo of the replacement fuses, just to show you what I am talking about. The last two photos are of my factory fuse box as it currently stands. The missing fuse labelled "dome" probably explains why my interior lights aren't working.
1 point
-
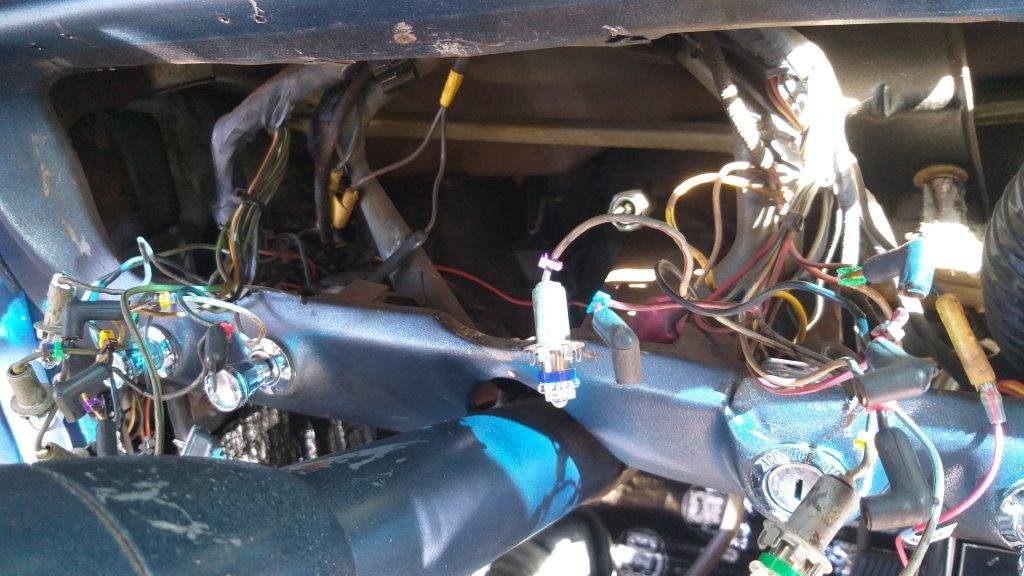
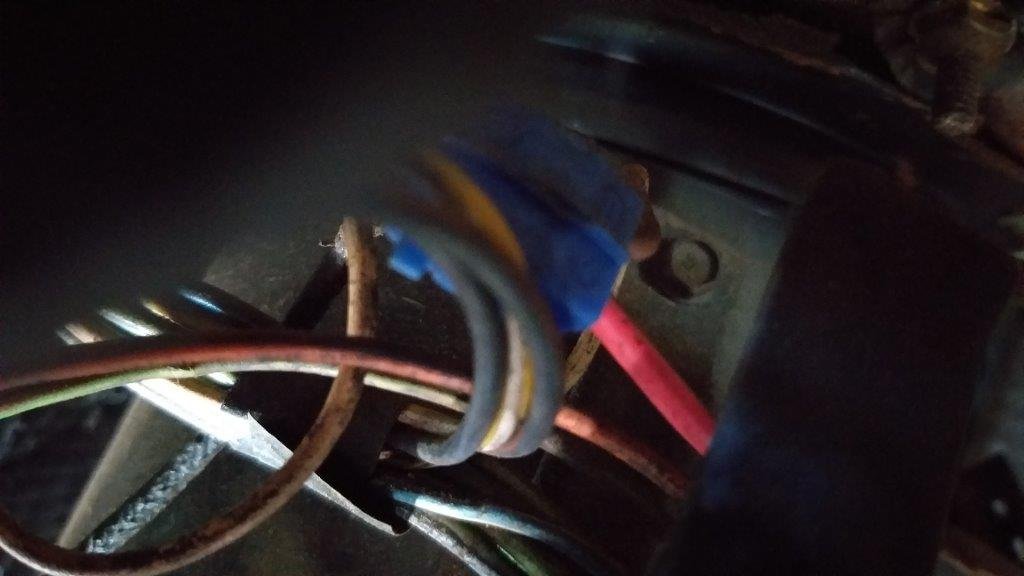
Yesterday my cable numbering rings pitched up, so this morning I thought I'd tackle a bit of under dash archaeology in order to assess the overall condition of the wiring harness and associated electrical components. As previously mentioned my fuel gauge and ammeter aren't currently working so they need some investigation. I've also spotted a few inline fuse holders that I'd like to remove as well as one of those blue plastic cable splicer thingies that usually indicate bodged wiring modifications. There is also an aftermarket toggle switch that thus far has some unknown purpose. The basic plan is to remove all of the wiring related bodges and reconnect all of the "non factory" items to the new fuse boxes.
1 point
-
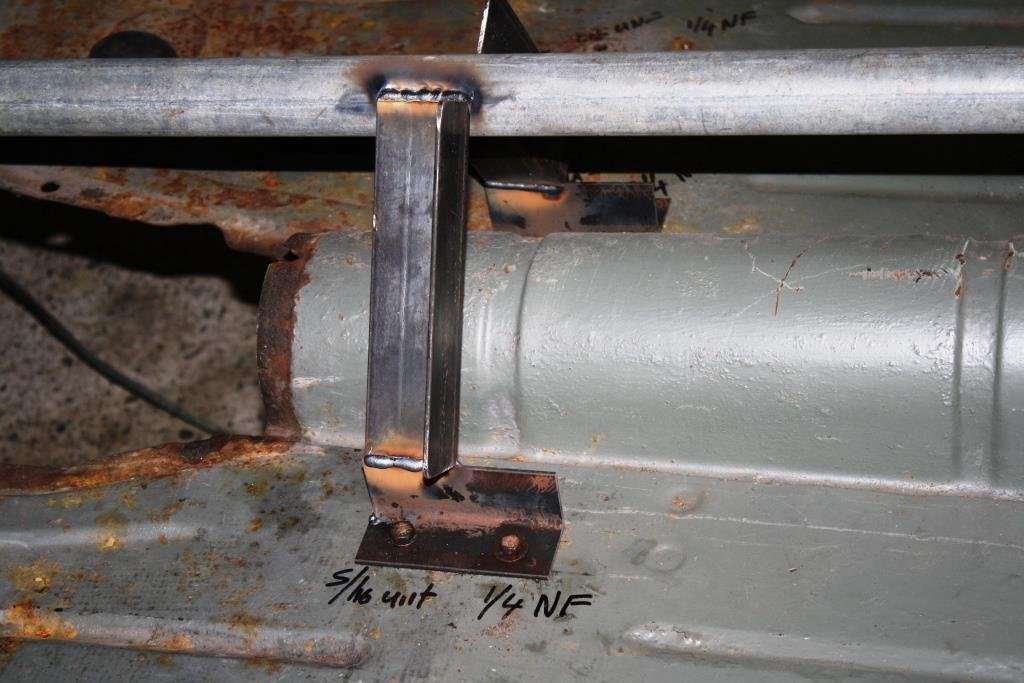
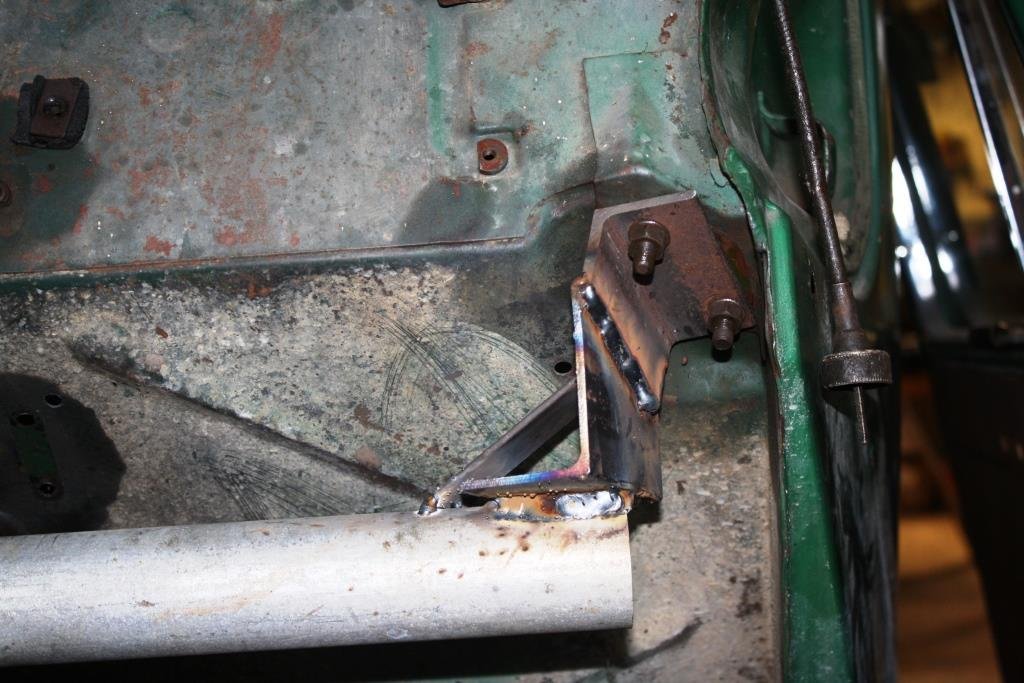
This morning I cracked into part two of the new fuse box panel. Two portions are required as there just isn't enough space to get a single piece panel in without removing the heater core housing and I didn't feel up for that right now. Yesterdays panel is the part that is fixed to the car and today's panel is the portion that the actual fuse boxes bolt on to. The two fuse box back mounting bolts perform double duty holding the fuse box in position and also fixing the two aluminium plates together. Sounds a bit complicated I know, but hopefully the photos make things a bit clearer. I've only installed the ignition fed fuse box for now as I'm still waiting for the battery fed fuse box to arrive. Fuse box two is a similar style, but because the mounting space narrows I've had to order a slightly smaller box without the earthing terminals. A small compromise as I should have more than enough earthing points on the first fuse box. Apologies for the quality of the under dash photo. It's pretty dark under there and the flash reflecting off the aluminium doesn't exactly help matters. Thanks for looking.
1 point
-
Version 2.
1 point
-
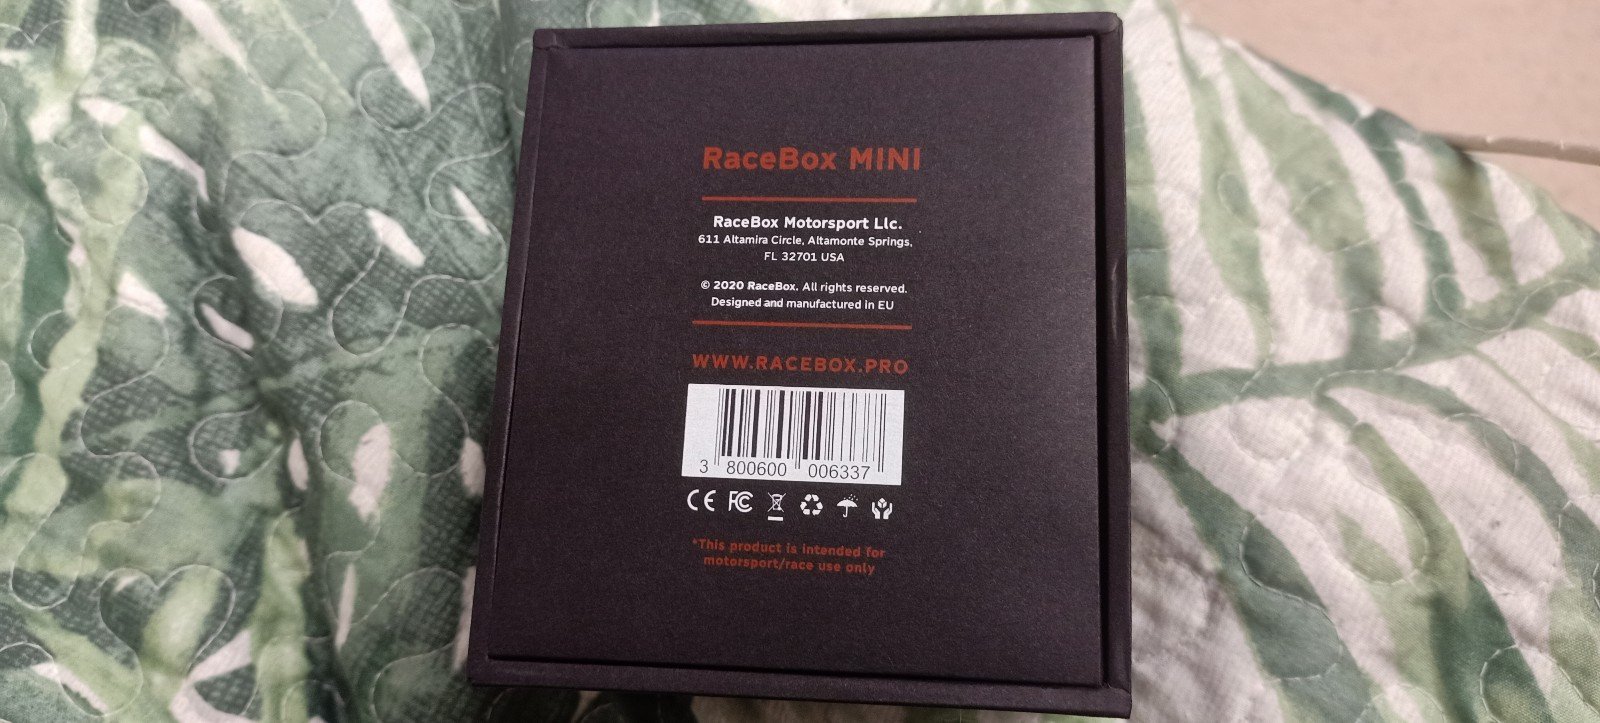
When I was very young I had a Gtech timing device for my cars. No idea what happened to it but practicing 0-100 times was a hoot. I'd love to take the busa to the strip one day (The solid clutch center contributes to this) and so when I stumbled across an indegogo project for the RaceBox Mini, I was pretty excited. Its basically a compact GPS/G sensor unit which mounts on the bike (or car) and then provides a huge amount of data on acceleration, timing, lean angles and G forces via your smart phone. I'd never signed up for any kickstarter type thing before so I was anxious, but the result couldn't have been better. But yeah unfortunately the bikes now in bits and the rain had set in prior to disassembly so its not even been used .... But unboxing pics below. Its a quality bit of kit! https://www.racebox.pro/products/racebox-mini
1 point
-
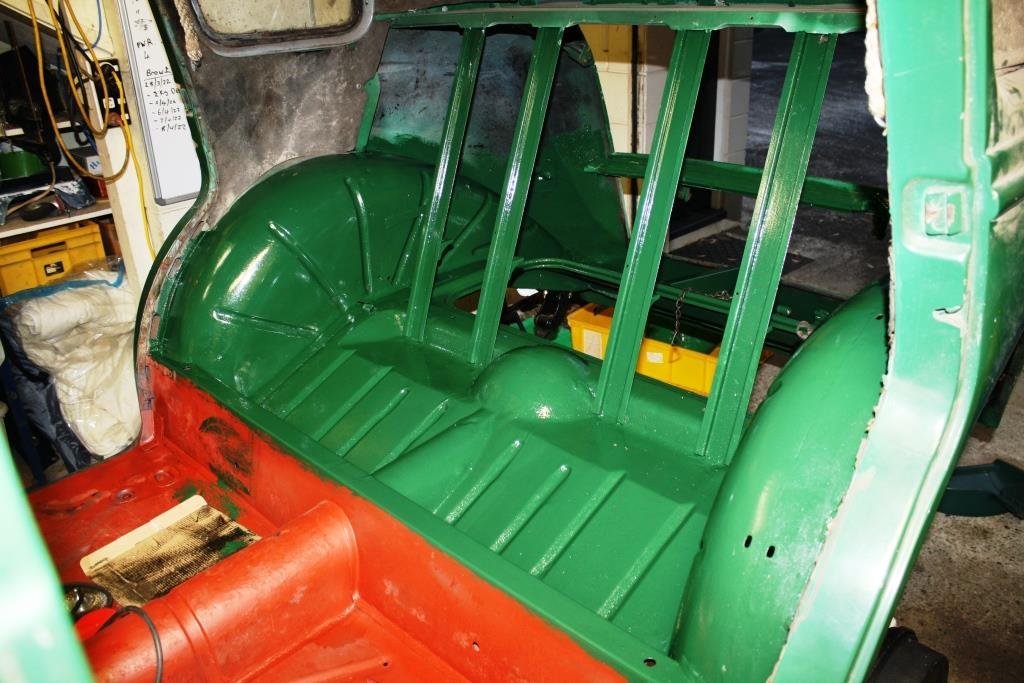
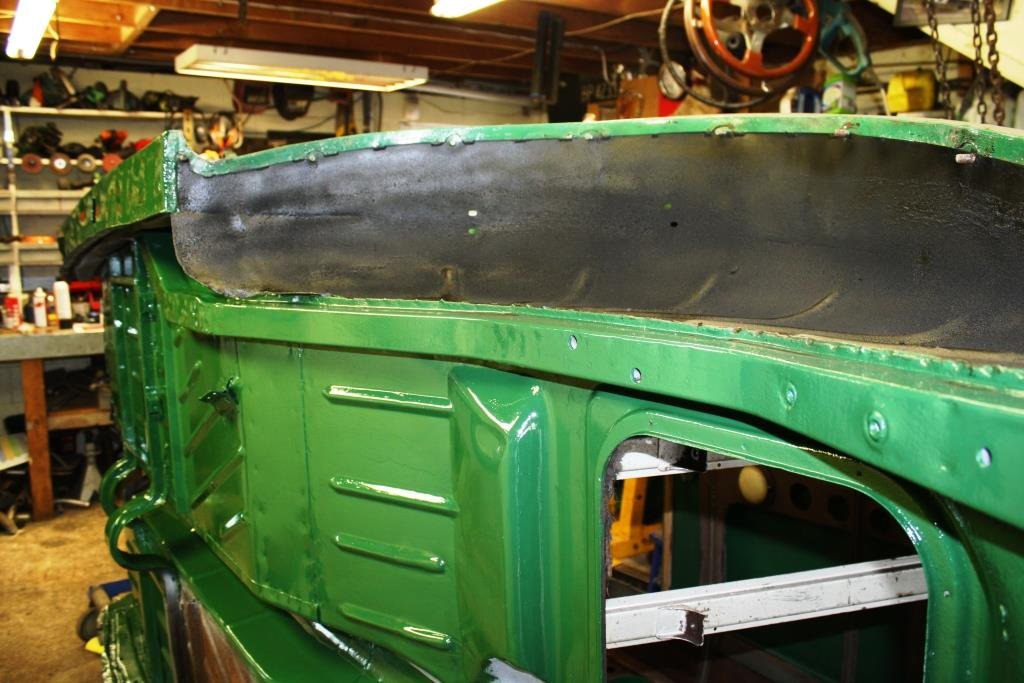
More bloody endless scraping and wire brushing, this time the top of the rear floor pan. Lots of surface rust to deal to…. But thankfully nothing that needs cutting and welding (‘cause I’m over it). In my eyes the result is nothing short of sexy; in Rigamortice’s eyes I apparently need to get a life!
1 point
-
Fuel system completed SS brake and clutch hoses Steering coupler Pedal assembly installed New connectors for turn signal switch and ignition switch. Signal switch was brittle and crumbling and ignition was non existent. Wheel and tire installed1 point
-
After many celebratory/therapy beers Saturday night we set off 8.30 Sunday morning to beat our 12 hour time for a 6 hour trip we had set on Friday. This was a lot more successful, only had to put petrol and air in the back right tyre twice. And made it home for 3pm. I did develop an exhaust manifold leak from turangi onwards that has me down on power quite a bit, I wasn't stopping to bother with that.
1 point
-
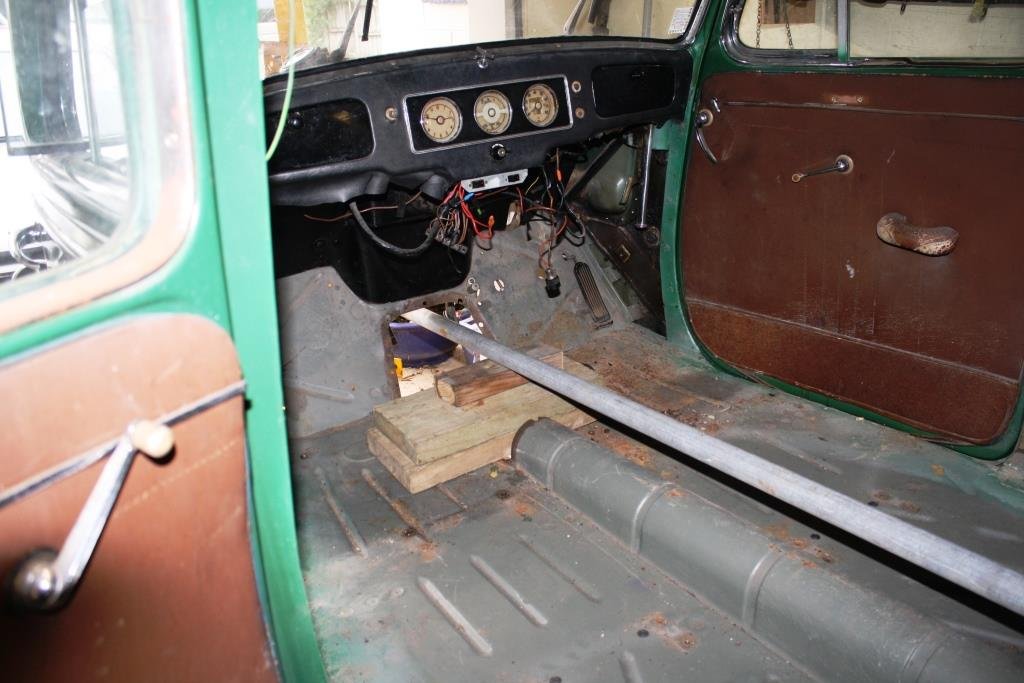
back again and at work doing bugger all so lets get to the updating this thread. looks like a few days later i decided the engine needed to come out. Pretty sure i removed it this time as i was having issues with the clutch shuttering and i wanted to remove the flywheel to get it skimmed. looks like i got bored that night and got into rebuilding my steering box while i waited for tools and the fact it it was midnight after removing the engine going off the time on the photos. must have been night shifts or going into night shift. yup so must had come off or gone onto night shift. following image is from 2pm. steering box apart and the peg out ready to be replaced. usually the peg wears out from been in the center all the time and gets a flat spot which creates steering wheel wobble when you are driving along in a straight line, mine wasnt bad but i wanted it better. the peg sit on the worm drive in the box, has a bunch of little roller bearings. the peg itself is on the other side of the nut in the image itself. i was trying to find a blown up diagram on the net on how it works but shit out of luck sorry. this here it self is the peg. i struggled to find any information or videos on youtube how to do this so i thought id make a quick how to. this also might make sense of what i'm replacing here. old mate from vdubshoppe recommends grease in the box itself when you rebuild it, so packed it in there. smashed that back together and done a bunch of fine tune adjustments and i feel its definitely better but not 100% so i think ill replace the rubber steering coupler next time i remember to buy the peace. back to where i was with removing the engine. fly wheel skimmed and back, replaced the rear main seal while it was apart and slapped it all back together. turns out i am better at upholstery than a vw mechanic which is good and not good..... engine back out and replace the rear main seal as i pinch it on instillation and probably didn't use enough lube. never had to use heaps of lube before....... back in again and we are driving, had to shoot to Bunnings grab something so took Tayla for a hoon, we got 4.7kms away from home and she stopped, completely, no power at all nothing happening. had a look around done some digging and checked a few things. wasn't really having much luck but i found one of my wires going to the coil had snapped off. killing all spark. some how dodgied that together and made it to a better position and had a mate come with some new terminals and some plyers to crimp it on. so back to Bunnings we go. next up was to visit my local wheel alignment shop and annoy him cause the bus is low and he cant get the things on the wheel so have to jack up the rear. got it steering a bit better but i think im to much of a race car driver so so might need to find someone whos keen to take some time and fine tune it, wearing the out side of the tire a bit to much for my liking. wanting to change to a 15 inch rim so maybe wait till this are worn out and go to a 15" and a smaller tire and then get a better wheel alignment for race car driving. so you remember how i replaced my screen not long ago in my previous post. turns out this one didn't like been in my car and i got sprayed in stones heading over the kai mais. went for a walk the following day and come back to this. shit a brick. thankfully we got insurance. ahh well off home we go. stopped at the top of the kai mais got a photo and continued my trip home. about 7 days later it started making some horrid noises after going to get some sushi for lunch. bad enough i didnt drive it into the garage. thought it might have been my thrust bearing been i didnt replace it while the engine was out. so lets get into this. engine out time and i give you 18 mins later ermmm spinning release bearing and nothing sounds abnormal? what on earth could it be. spin it a few more times, feels a little off but not enough off to make that type of noise. ahh fuck seems like my flywheel nut has come loose. well clutch off and flywheel nut was finger loose so we undone that and lets see what kind of damage i have done. looks like the dowel pins were the only thing holding it there and they have elongated the holes in the flywheel and the crank. so looks like he's going to need some love and be off the road for a while. lets pull the gearbox out while we are here since its going to be off the road for a while. ' you may ask why am i pulling the gearbox out? well. i have a taller ring and pinion i've been wanting to get installed. you may ask why? well the factory ring and pinion is a 5.375. with the tire size i run i sit at 82kph at 3200rpm i used a website blocklayer. enterd my tire size and gear ratios and diff ratio and it does some cool calculations. we worked out what was going to be the best way about changing the ratio, be final gear or the ratio via this website and diff was the best option. so i ended up going with a 4.13 ratio ring and pinion. this will inscrease my speed from 82kph at 3200 to 107kph and at 3000rpm ill be doing 101kph which is going to be a far better cruising speed. with the old ratio id have to be doing 3900rpm and id be doing 100kph. so that's that really. kind have caught up a bit more with the thread. i think ill have a couple more quite shifts coming up where i can smash some keys and update this thread a bit more.1 point
-
Major 2 are When were the injectors serviced last and has the IP had a rebuild. how difficult and rattelly it is on startup stone cold is a good test to see what itsb fuel system is like. then theres the usual of general servicing (oil, filters, coolant, etc). Those Era transits also use bolts to hold the manifold on which snap off in the head so an exhaust leak is a bit of a major to fix. There is a company here in christchurch called All Transit Parts which would be a useful contact for spares. Rear brakes trake a hammering for some reason too. I refuse to work on them now as most are neglected pieces of shit. Especially if theyre a camper van.1 point
-
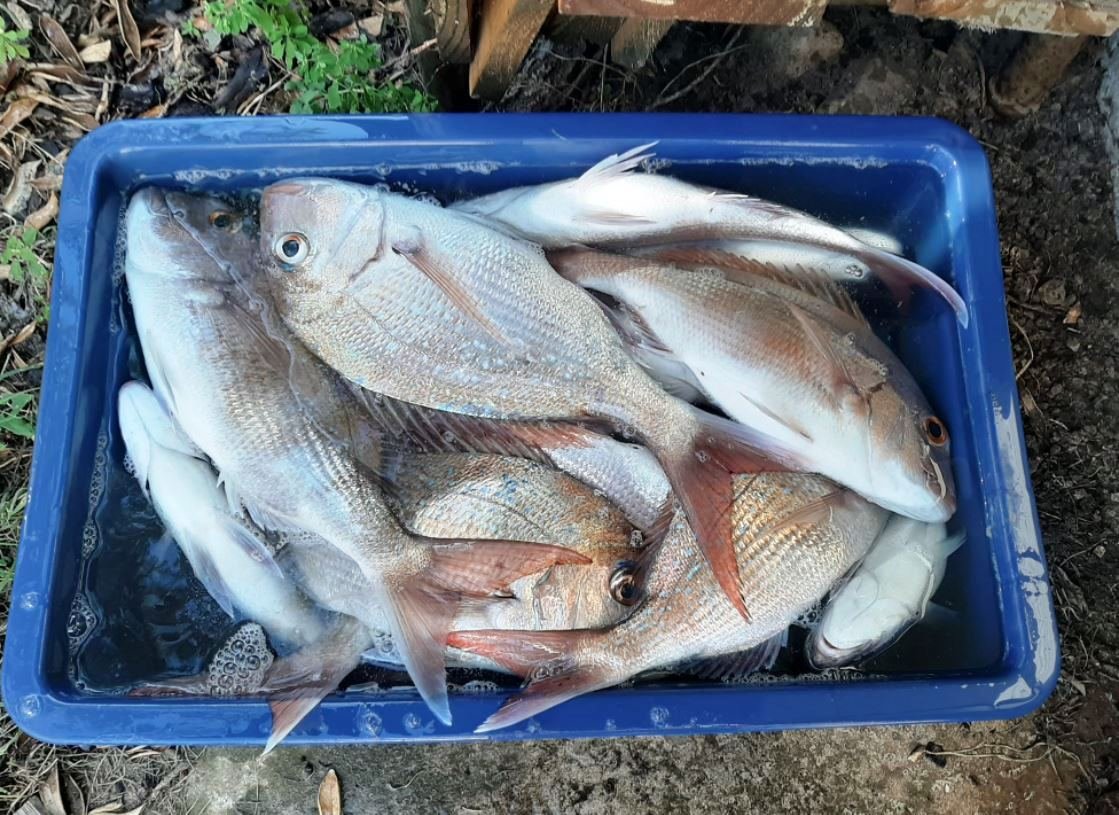
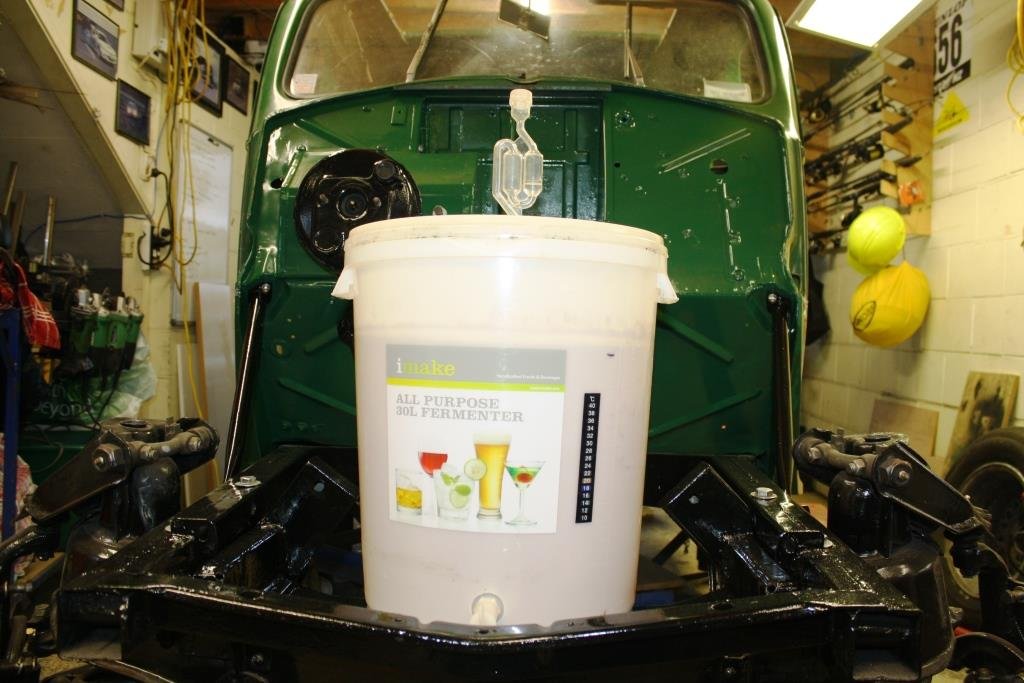
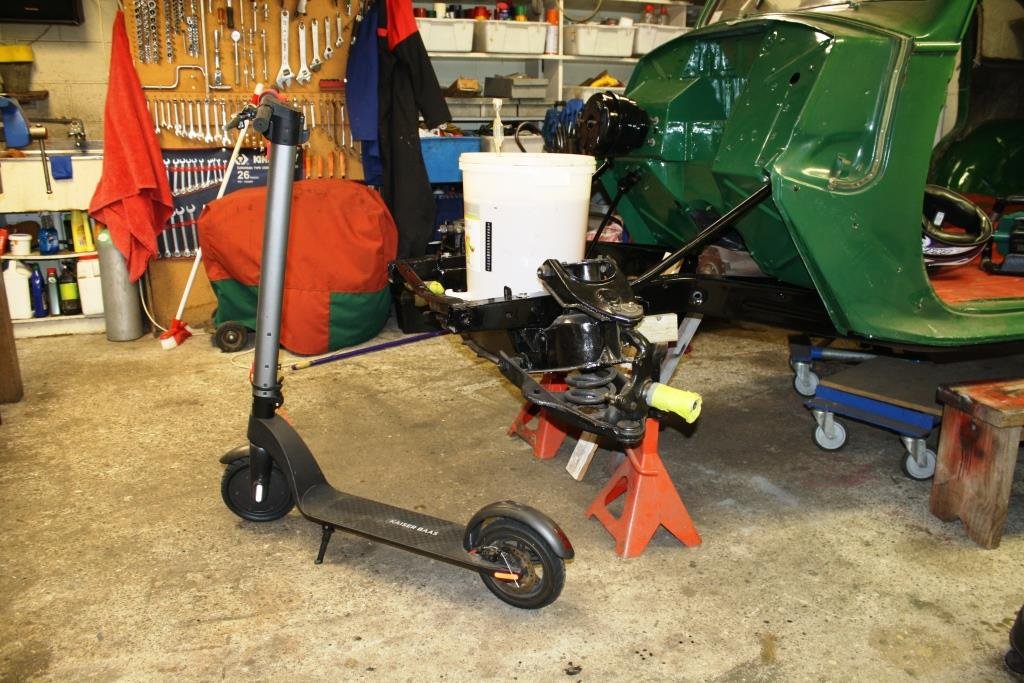
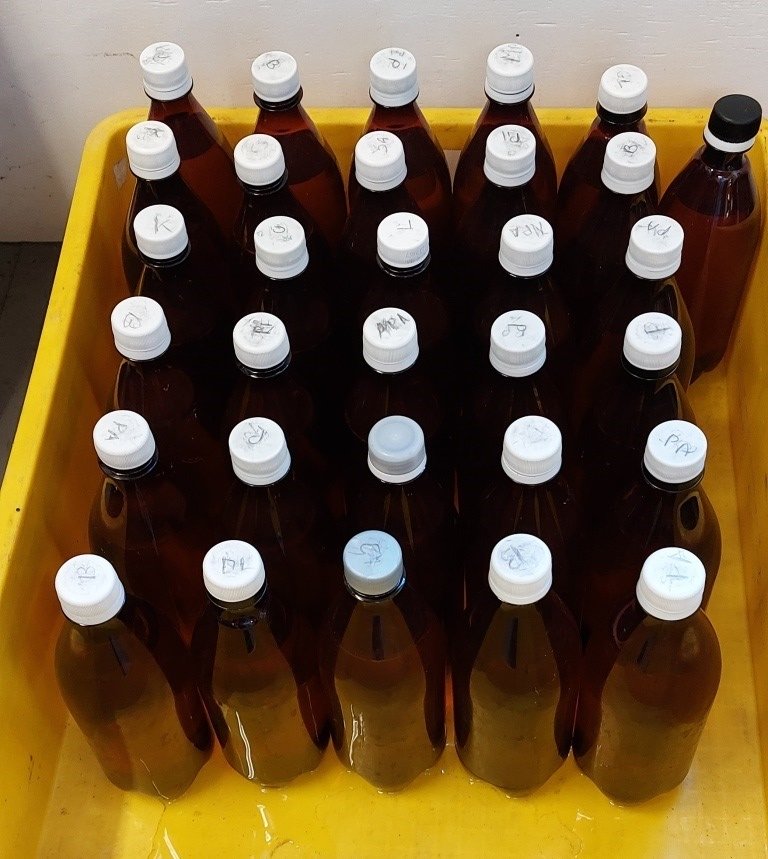
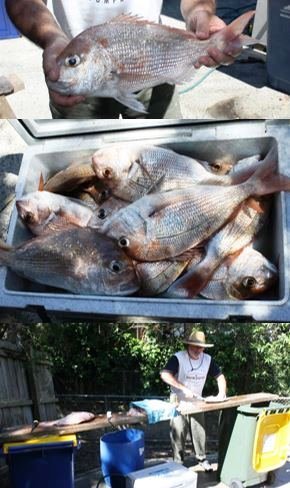
The “ever lovely Mrs sr2” and I headed up North to the batch for the recent long weekend, the fishing was an improvement on the New Year. (It would be bloody hard to be worse; see the Jan 18, 22 post). On my return I was shocked to see that in my absence Rigamortice had been blatantly and deliberately emitting the nasty horrible dangerous carbon laden CO2 gas, (that our dear leader the "PC goddess of fertility and cultural sensitivity" has been repetitively warning us about).......... to the atmosphere! Still showing total faith in our “transparent” government (in these turbulent times) I was overwhelmed and riddled with guilt as to the long term effect Rigamortice’s senseless selfish act would have on climate change, (it used to be called global warming – but it didn’t get hot!). In desperation to restore our lost carbon credits and head off an imminent climate emergency I decided to “give it the Greta” and acquired an E-Vehicle. Being Oldschool (i.e. 75 oldschool years old) Rigamortice insisted that I hand in my man-card immediately………..begin the public humiliation….! Thankfully after a few medicinal Wild Turkeys, Rigamortice and I devised a cunning and fiendishly clever way of containing the evil fermenting concoction, preventing any further release of the nasty horrible climate changing CO2 gas…..What could possibly go wrong!
1 point
-
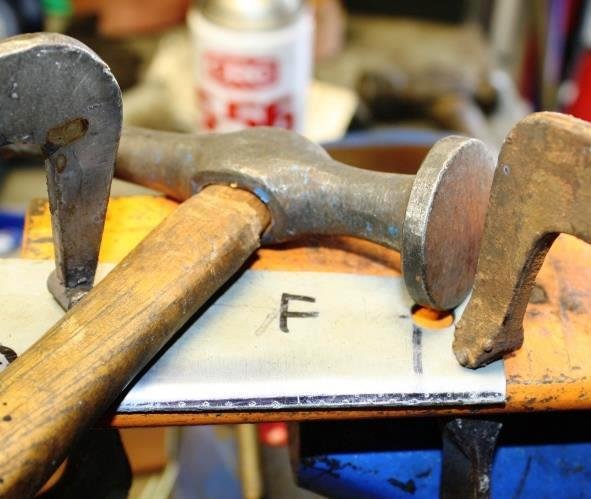
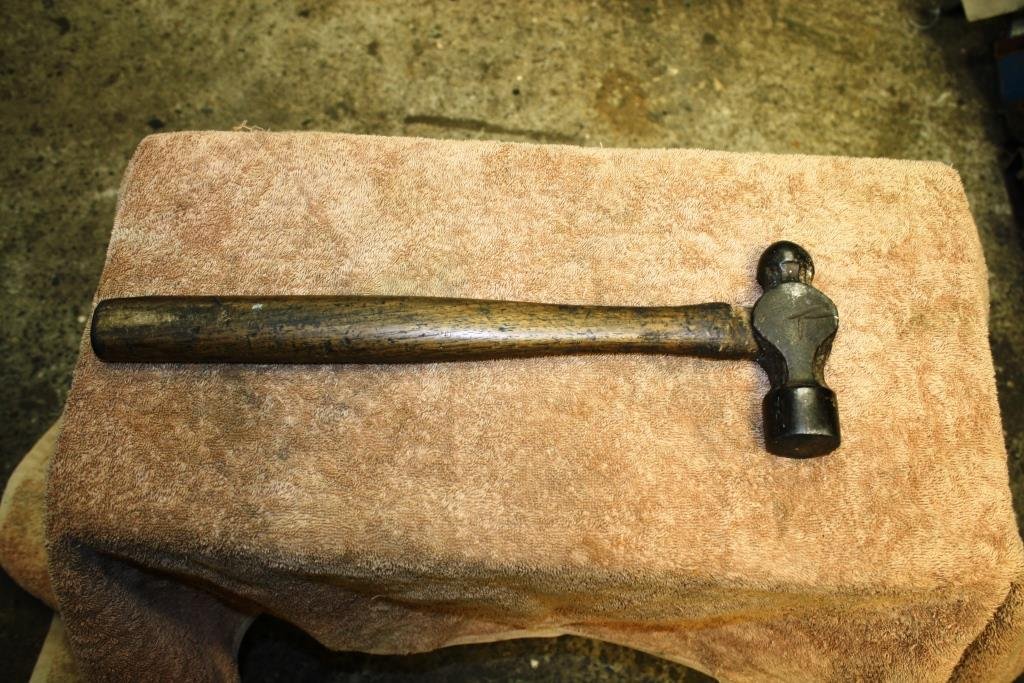
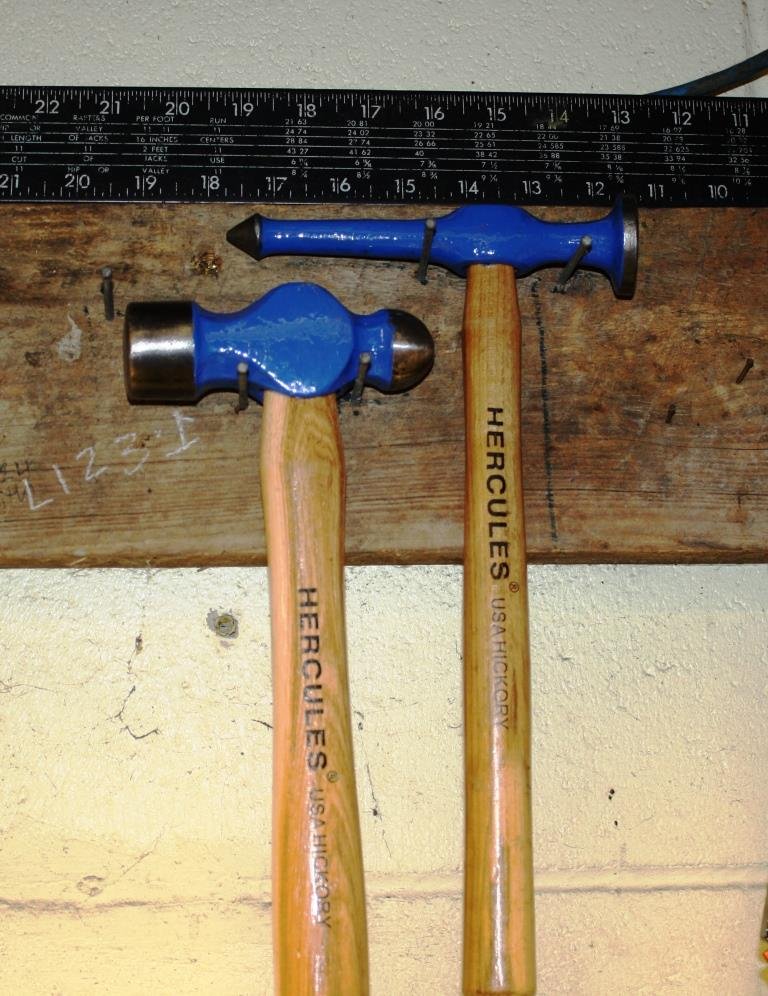
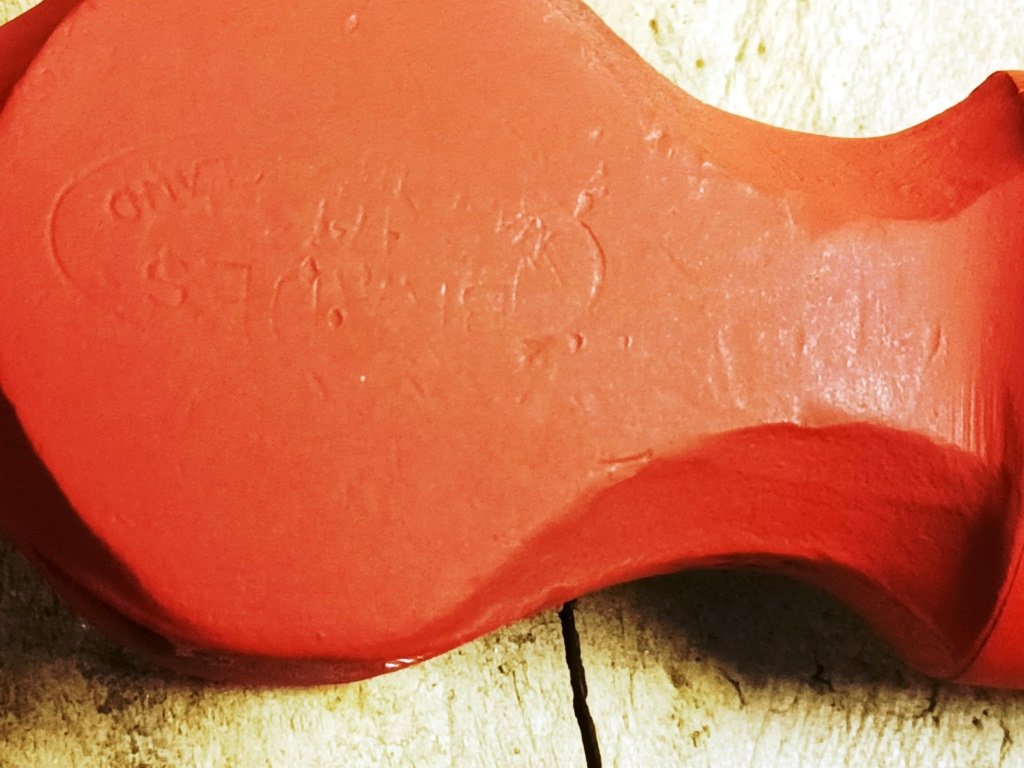
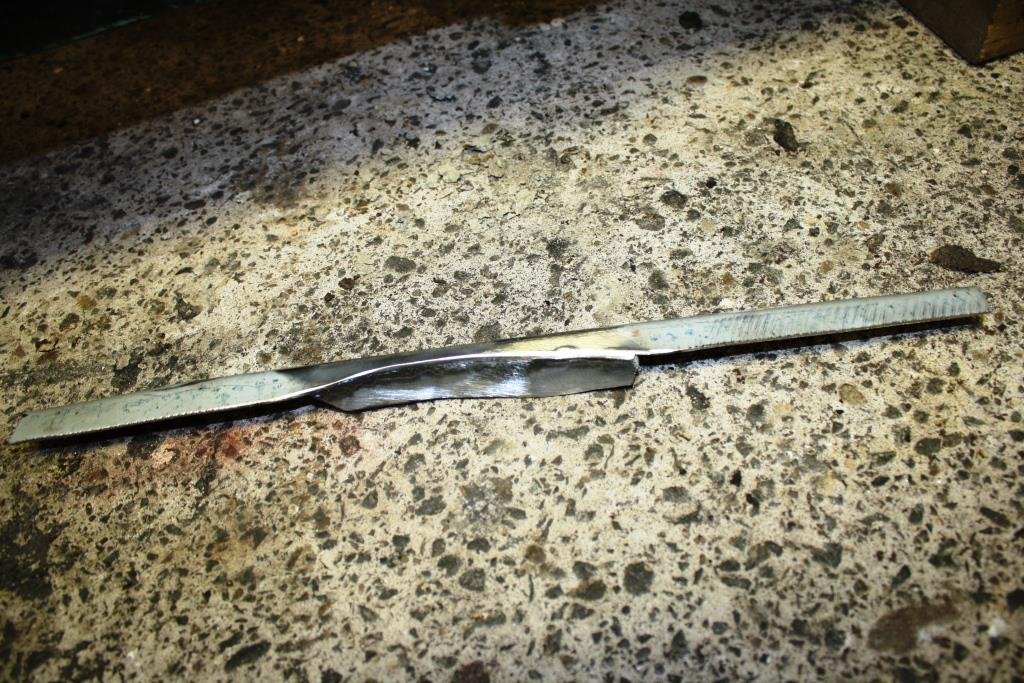
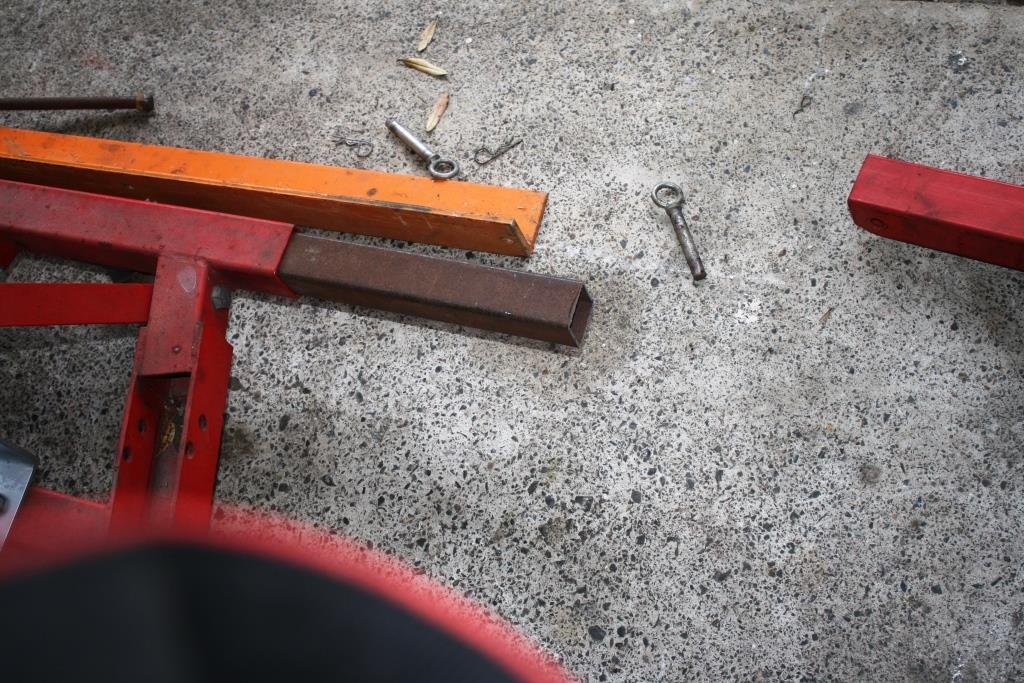
For some years now both Rigamortice and I have always shared a propensity for saving old tools and painting them blue (don’t ask!). The handle was falling off my favourite planishing hammer (bought in a junk shop years ago when we were buying our first house, ms sr2 had a baby on the way and were broke). This ball-pen was my grandfathers and we think was probably pre WWII. It’s got a name on the head with Sheffield England below it? Found a guy on Trademe selling American Hickory handles and ordered a couple. Spent a pleasant evening with Rigamortice in the “much esteemed & universally applauded” (in NZ) sr2 man cave drinking ½ a bottle of Barossa Valley Pinot Noir while linishing and painting the two hammer heads. Following day I shaped the handle ends and wedged them in tight. These hammers should outlive me and the people reading this thread – It’s easy to discard history but it is just as easy and far more rewarding to keep it alive.
1 point
-
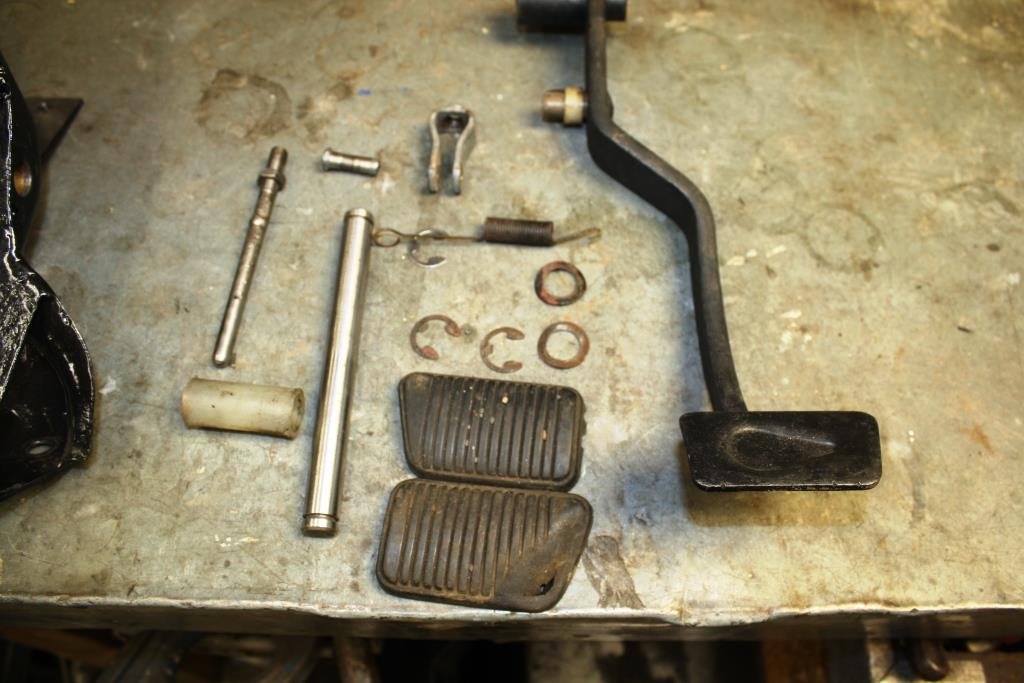
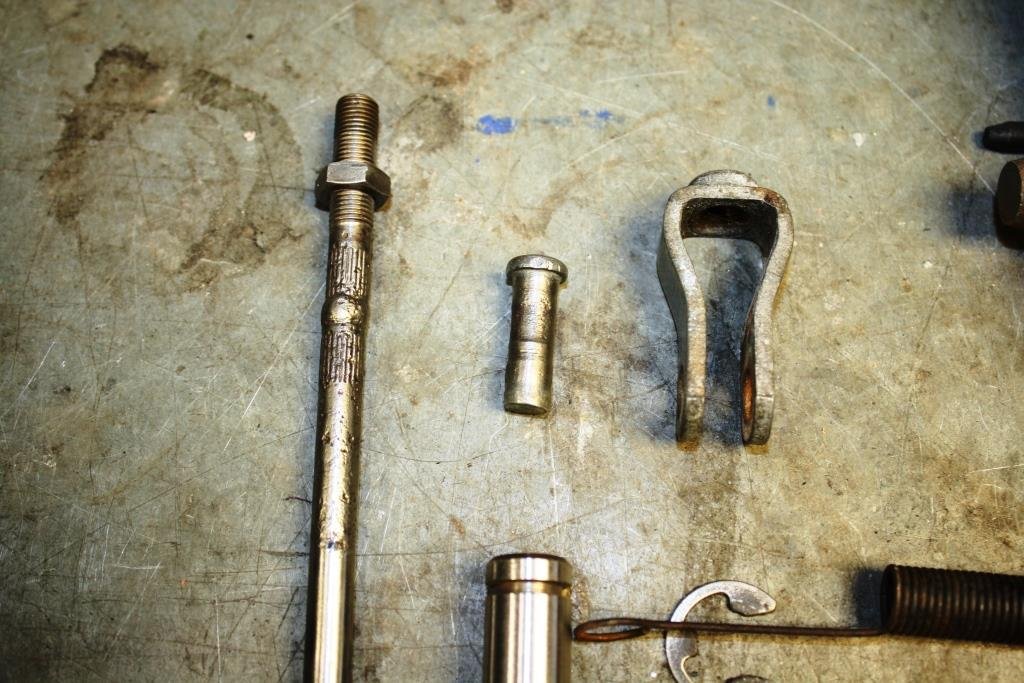
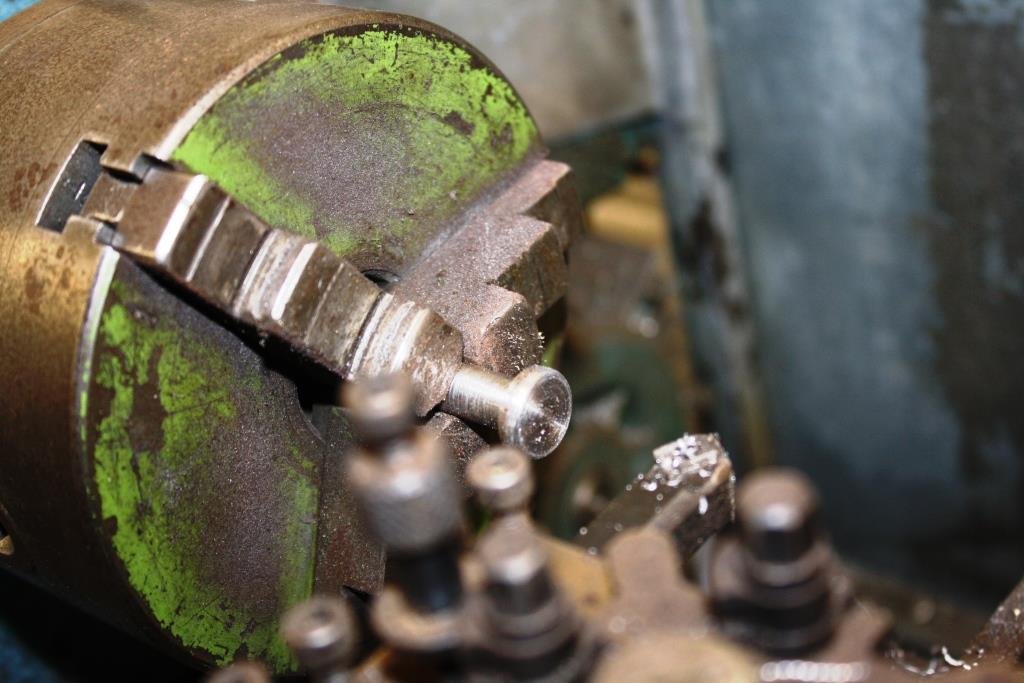
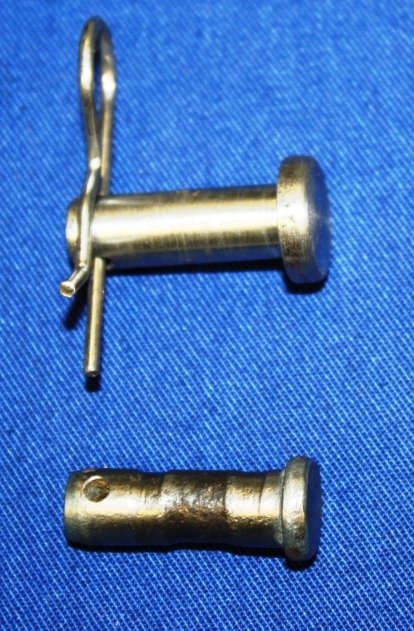
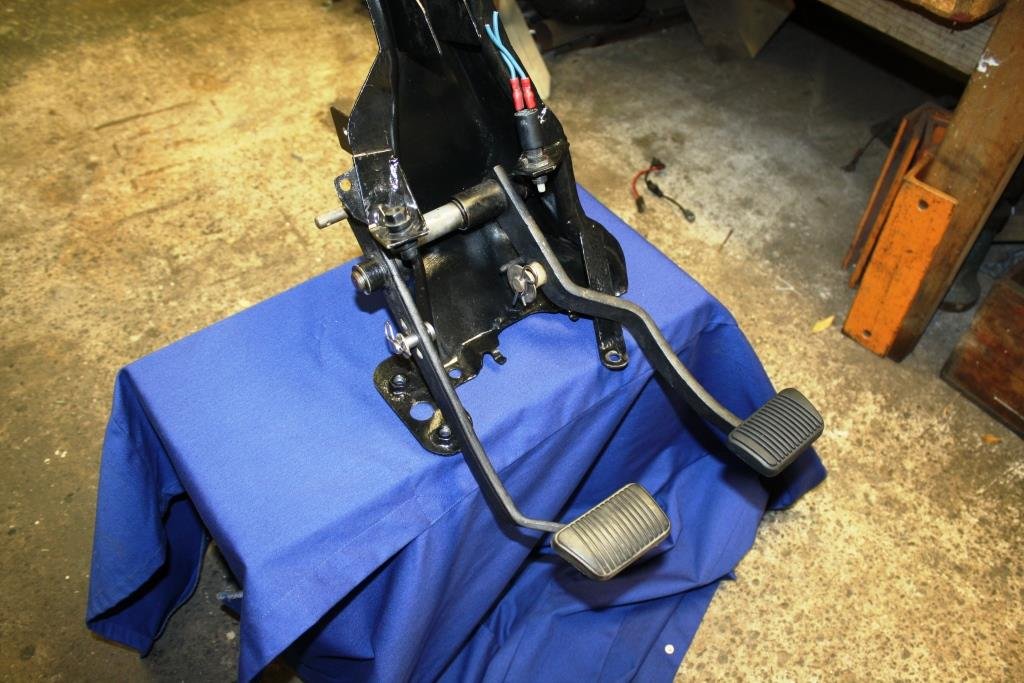
Time to look at the XA Falcon pedal assembly. The clevis pin on the brake pedal has seen better days. I’m picking it had already done some 300 odd thousand Km’s in a clapped out XA Falcon before I bought the assembly on “Trade And Exchange” in the early 80’s, (no internet in those days). The welded push rod is for the hydraulic clutch - came from an HD Holden. Spun up a replacement clevis pin. Old vs new…… Pedal assembly ready for installation.
1 point
-
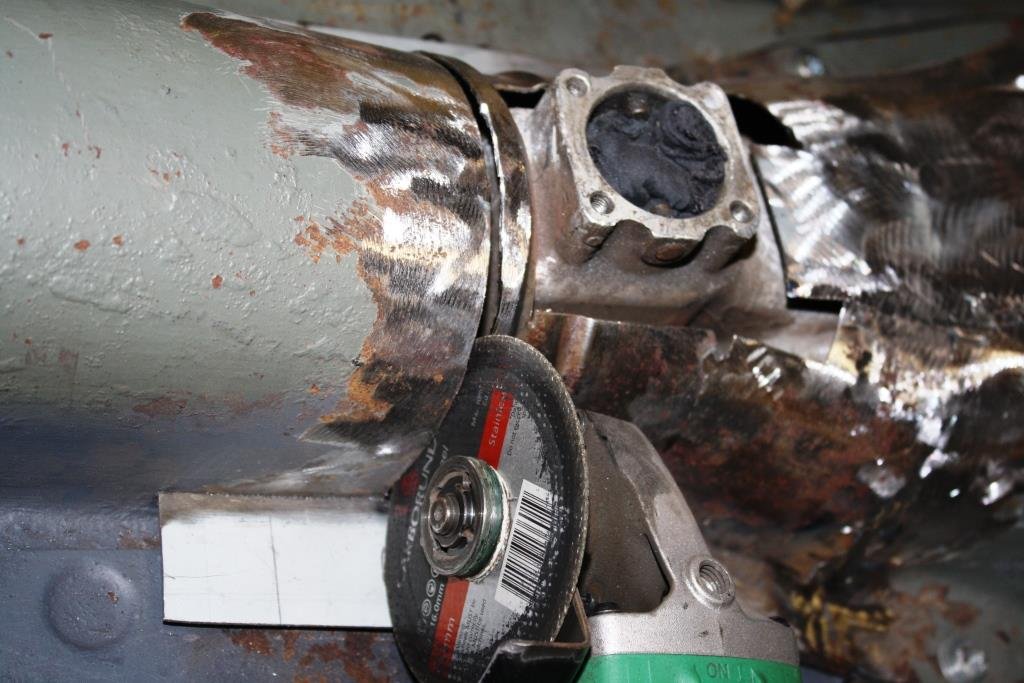
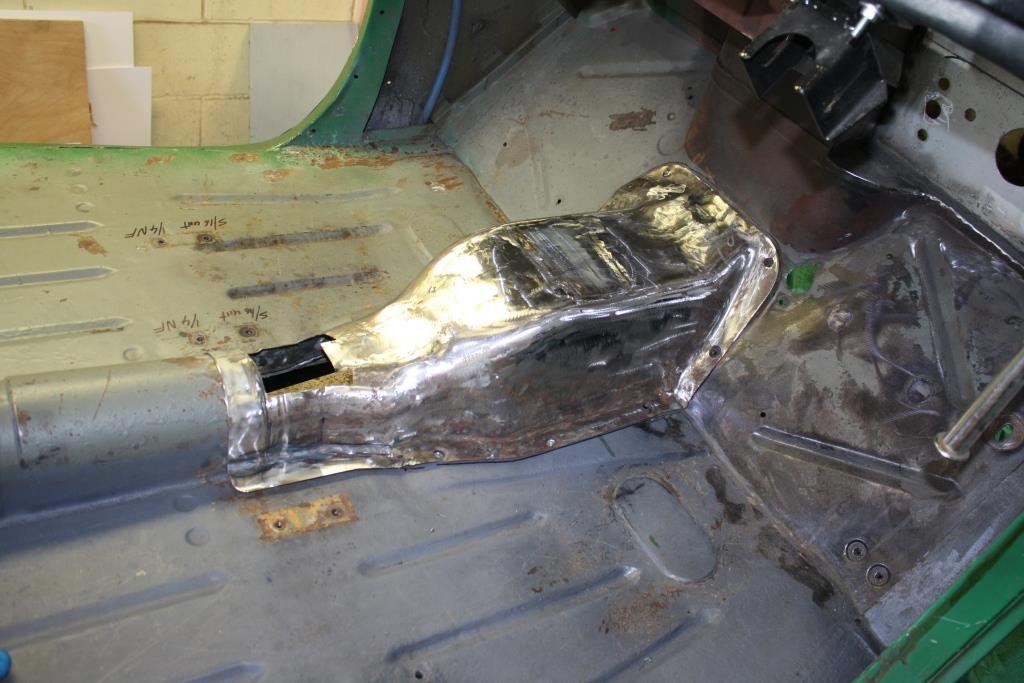
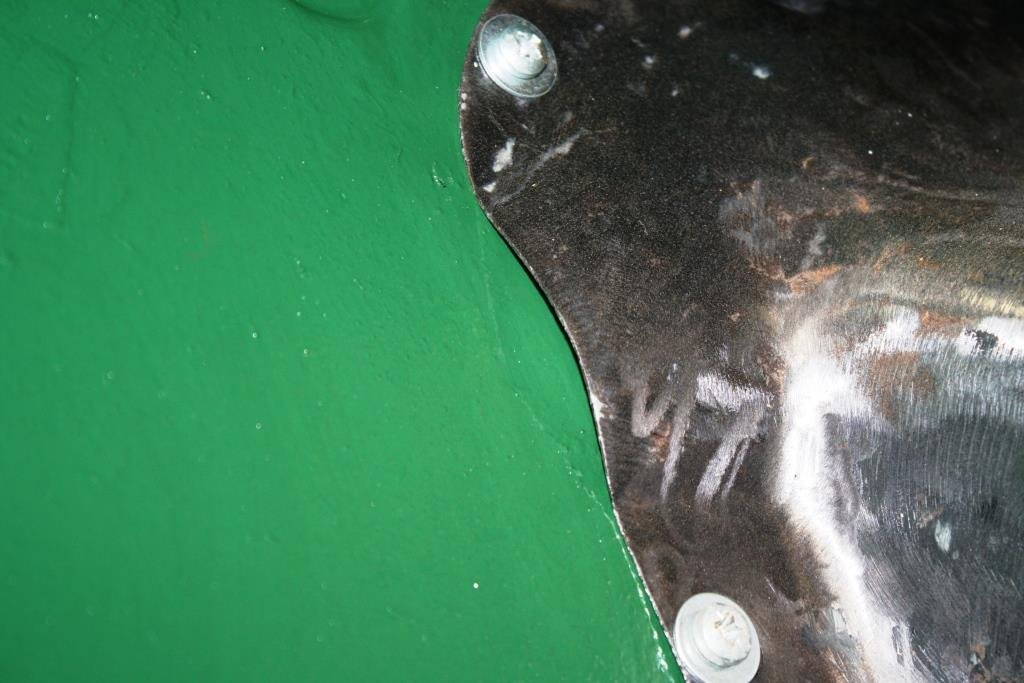
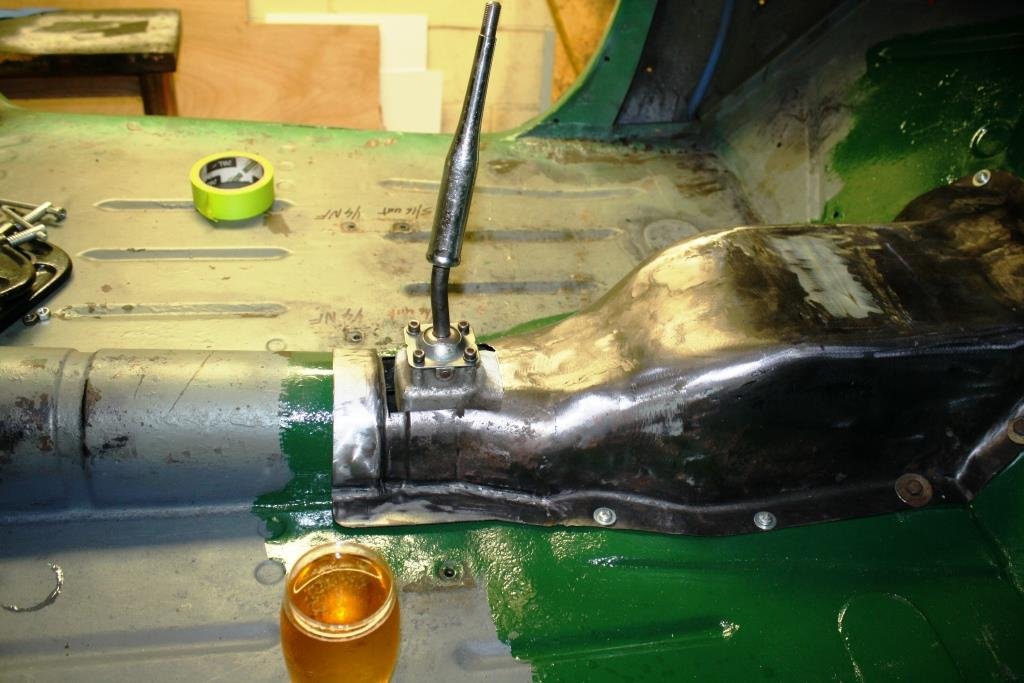
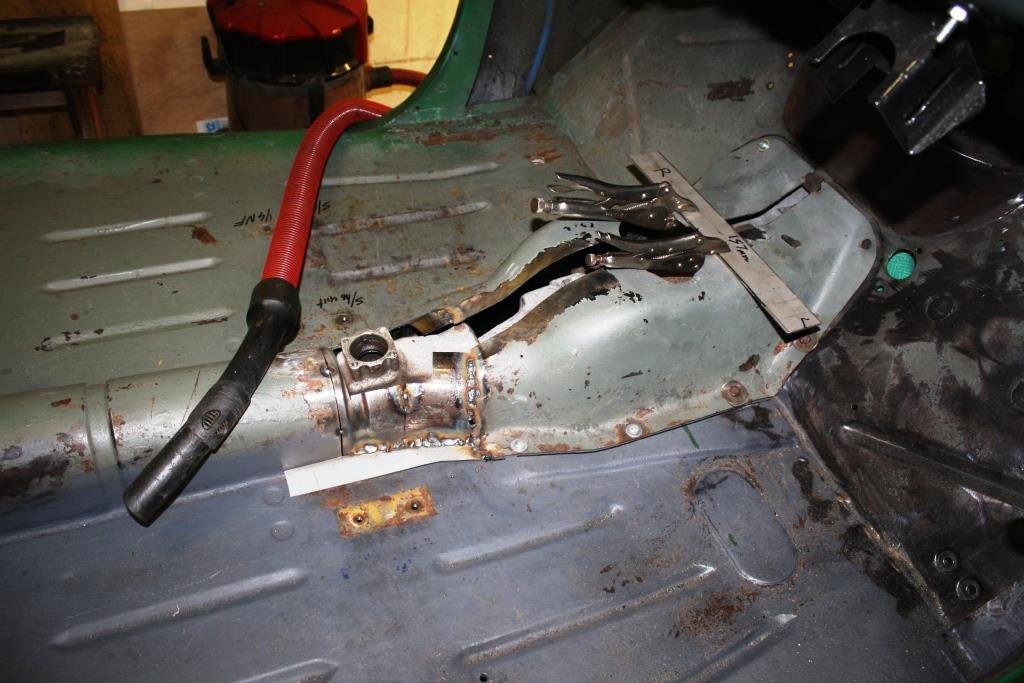
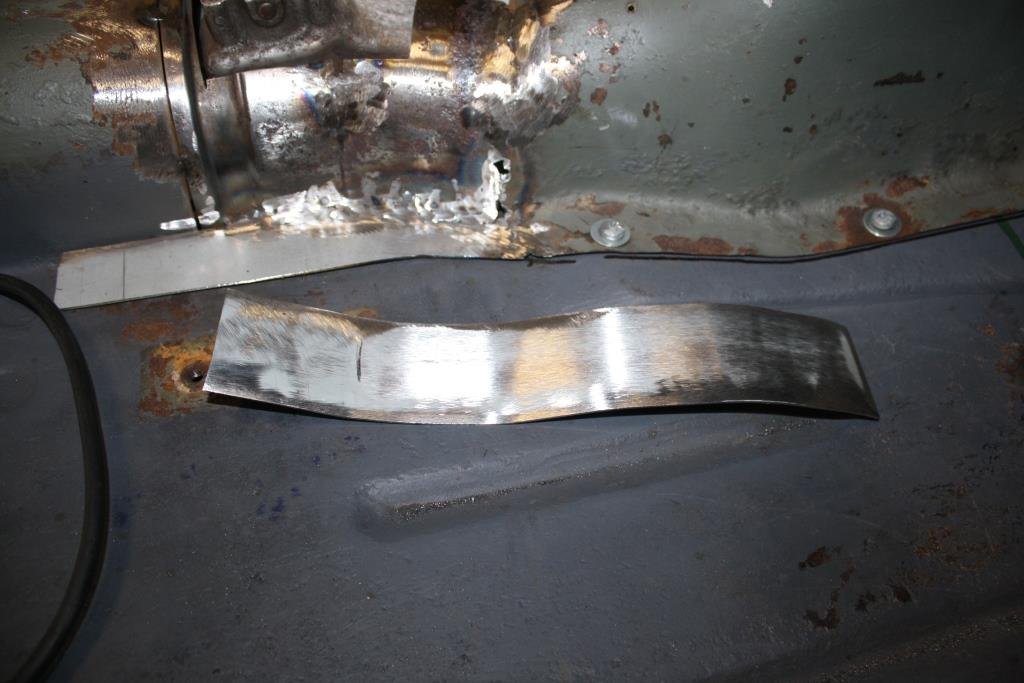
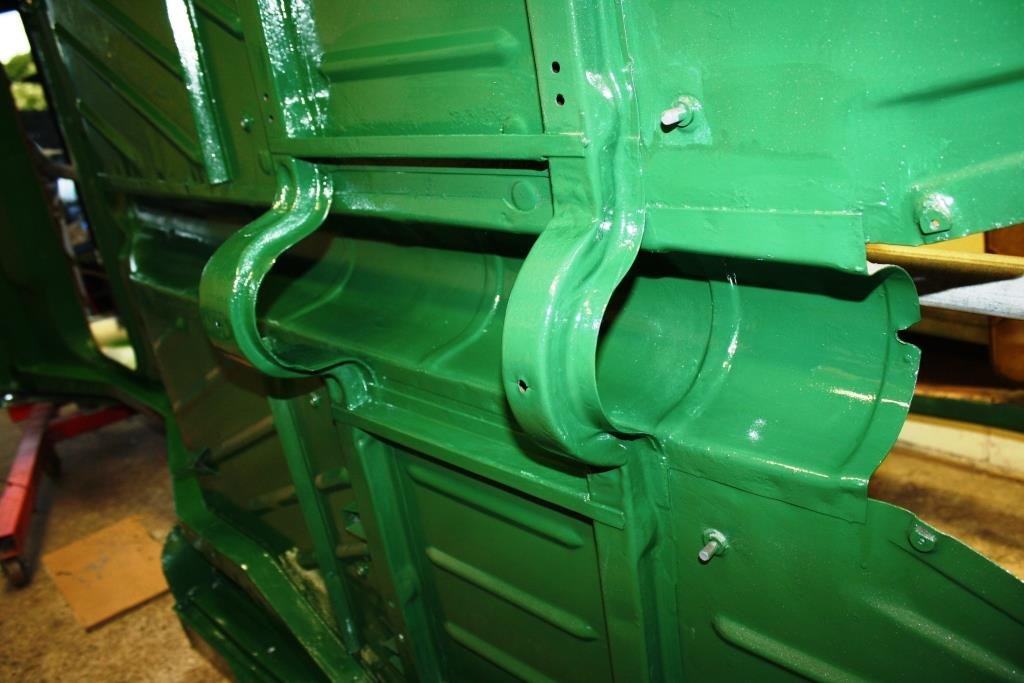
Proceeded to cut the tack welds out so I could fabricate a lip to go over the trans (don’t ask) tunnel. I’m keeping the original bench seat so things will get tight with the shifter further back. It sprung slightly when released so I held things in position with some scrap and the mismatched seat mounting bolts. Bent up a piece of 16 gauge zintec for the lip…… A bit of massaging to make it fit…… And tacked it in place….. Out of the car to finish the welding and trim. A quick test fit – still holding its shape. Time to fill the big hole; endless, painstakingly small tacks cooled off with the compressed air trying not to have it distort on me. Cleaned up and it still fits! Did some floor painting and installed some 8mm riv-nuts. Beer o'clock! - Happy with the results, I’ll finish the rear part of the cover when I find a suitable old-school gearshift boot.
1 point
-
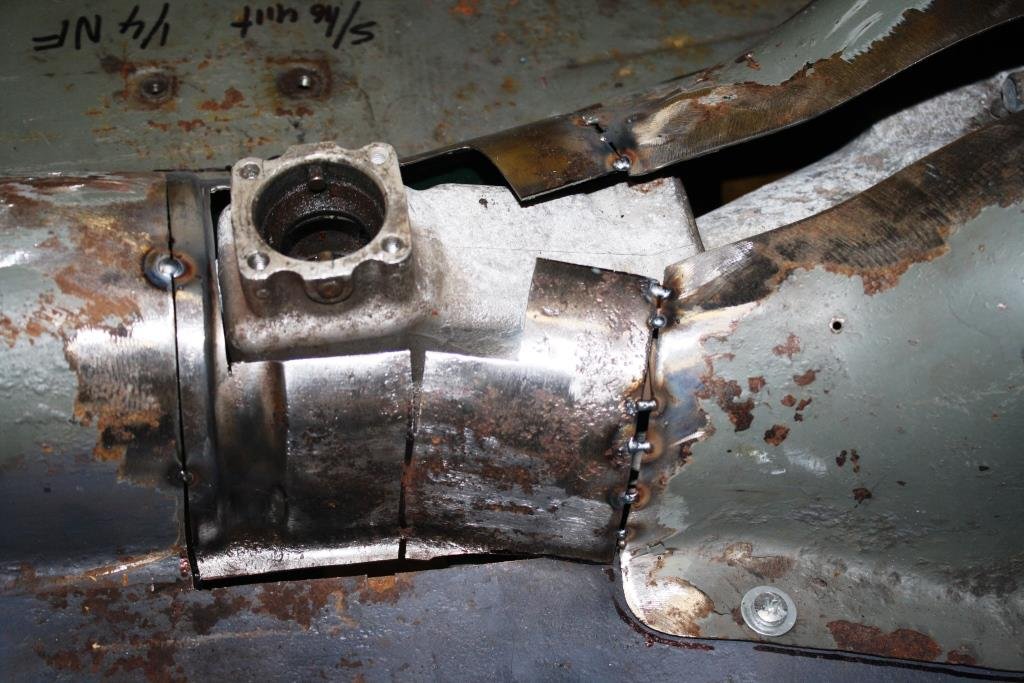
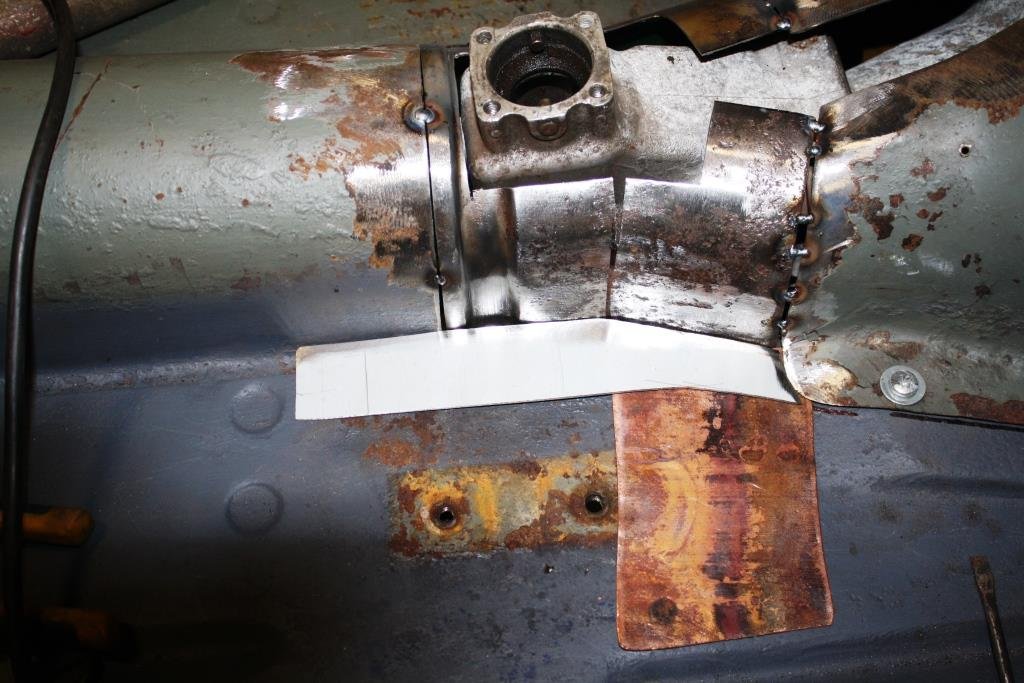
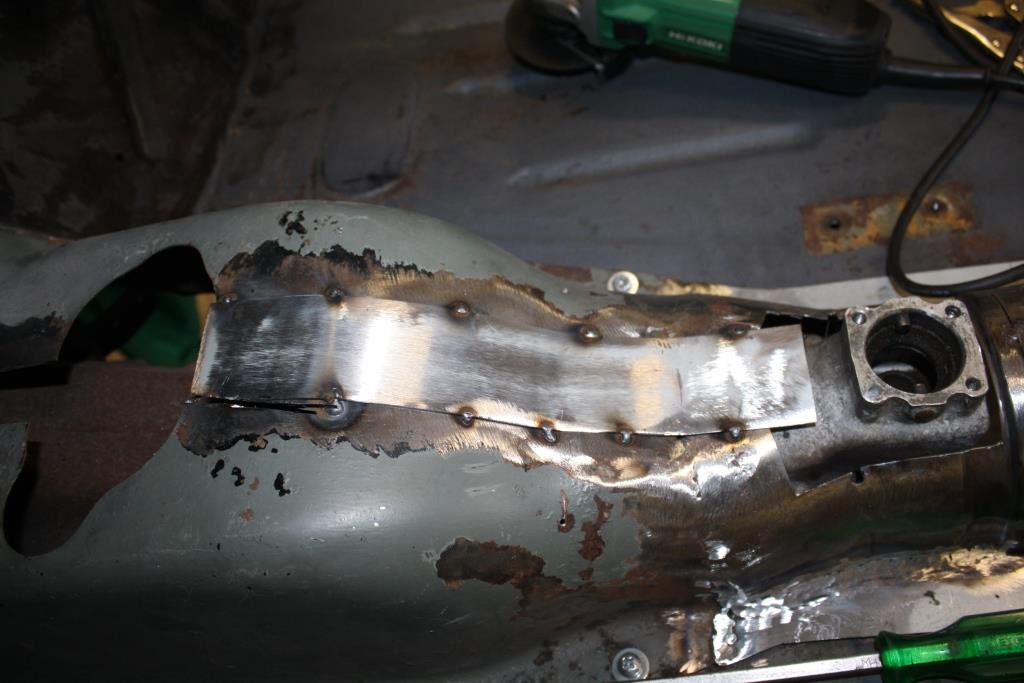
Started tacking in pieces I’d cut from the trans (i.e. “gender fluid”) tunnel. Once again a piece of thin copper sheet gives you something to weld against that wont stick. A bit messy but I think we’re heading in the right direction. Cut out a strip to join the two halves. Starting to look like the shape I’m after. It needs to be removable but has to fit well, I’ll fill the big hole where the original gearshift was when it’s out of the car and then see how good (or bad) my hammer and dolly technique is!
1 point
-
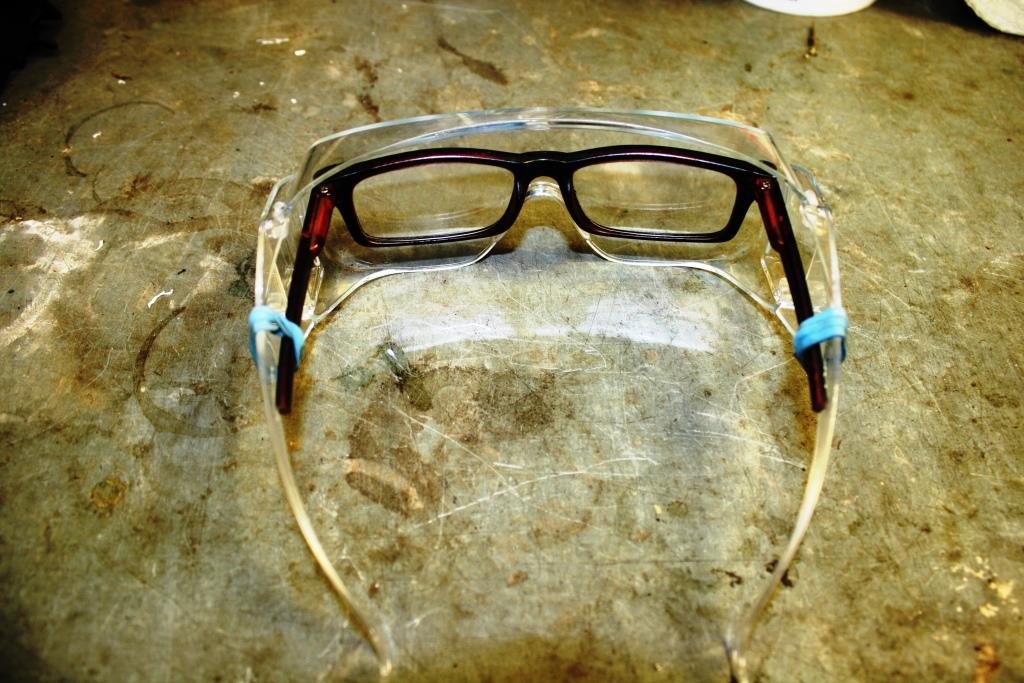
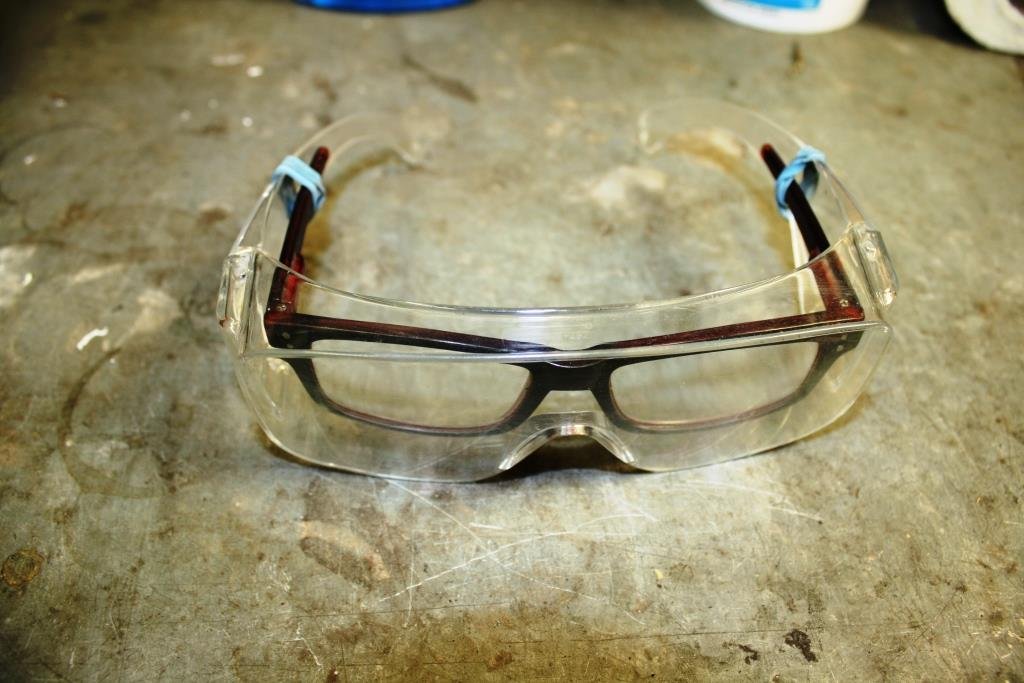
GRINDING 101 FOR OLD BLIND BASTARDS! Ouch! - While waiting at the local Shorecare A&E (don’t ask!) to have yet another chunk of metal dug out of my eye I came up with a solution for the “reading or safety glasses” dilemma. Spend ten Bucks at the local Warehouse on a pair of plastic reading glasses, cut the arms down and attach them inside a pair of safety glasses. As an added bonus you can comfortably wear ear muffs over them without developing front row forward cauliflower ears! Lastly hang them somewhere handy, in this case the grinding bench in the universally renowned and revered (in NZ) “sr2 man cave”.
1 point
-
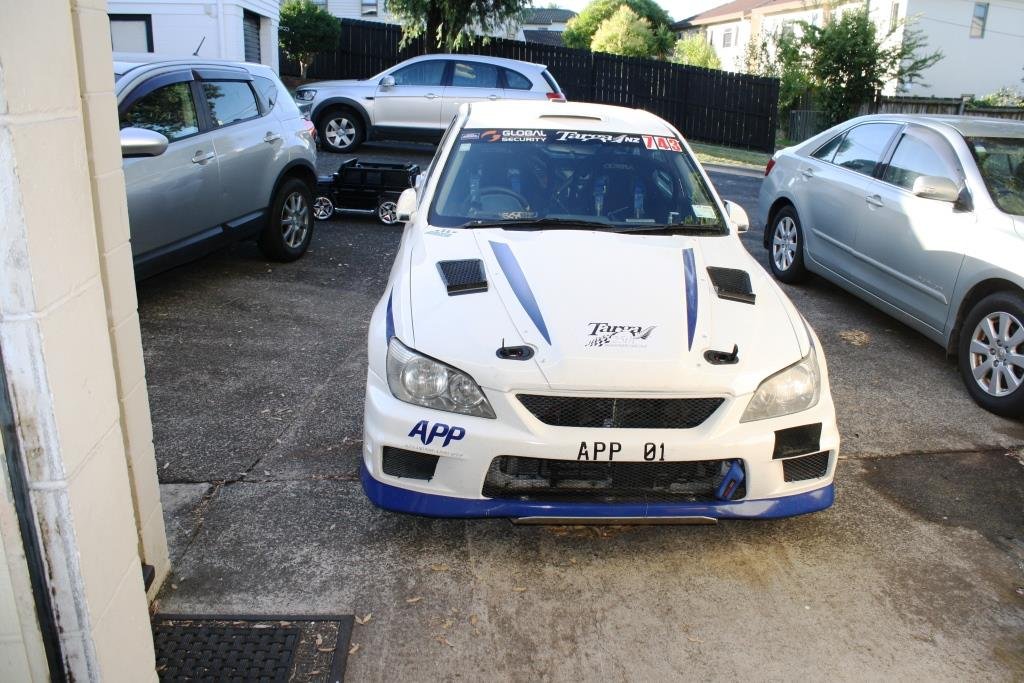
Meanwhile lurking in the driveway…… Time to go Targa racing for the weekend……
1 point
-
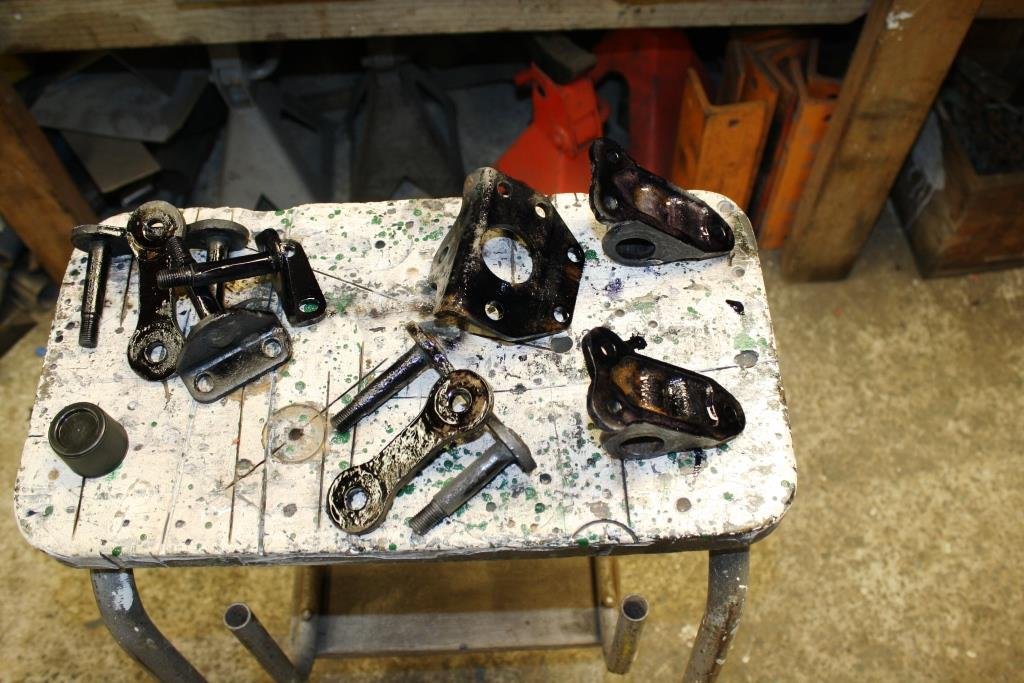
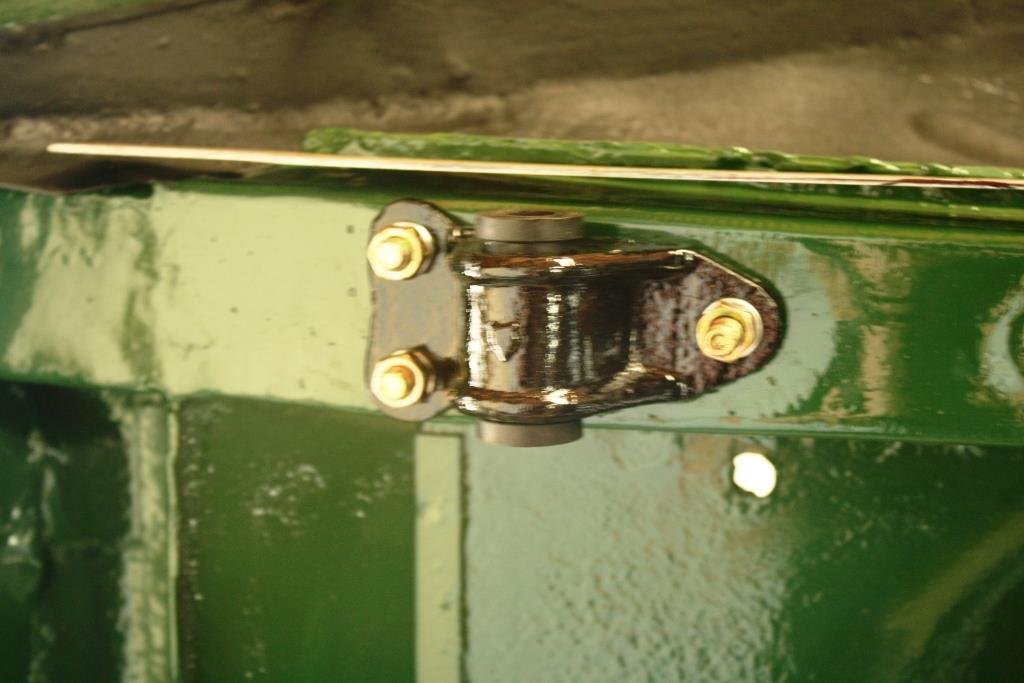
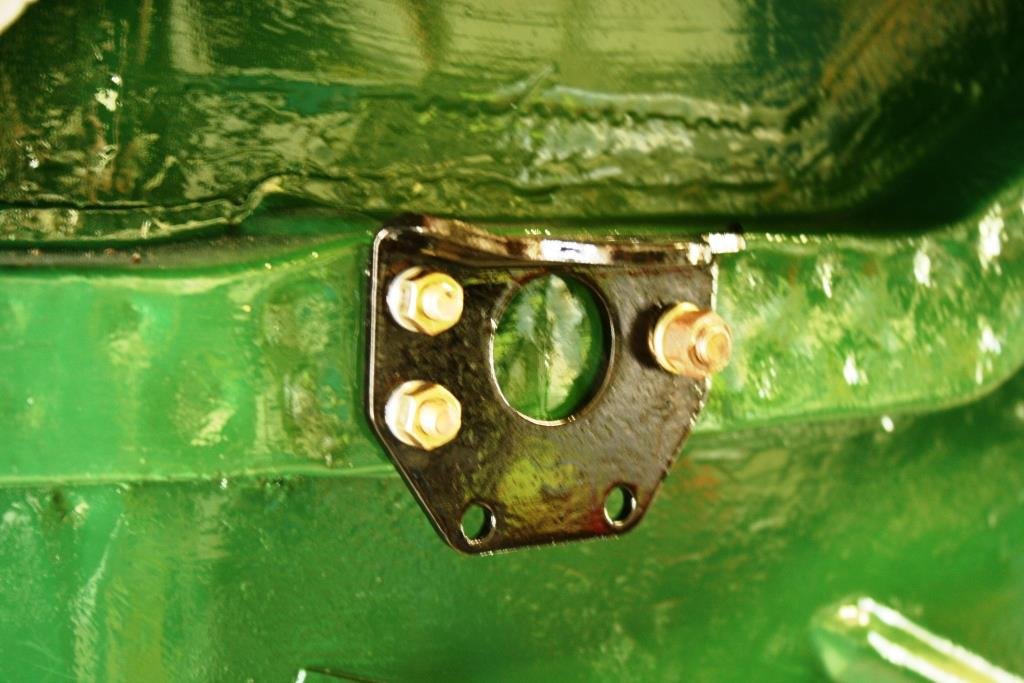
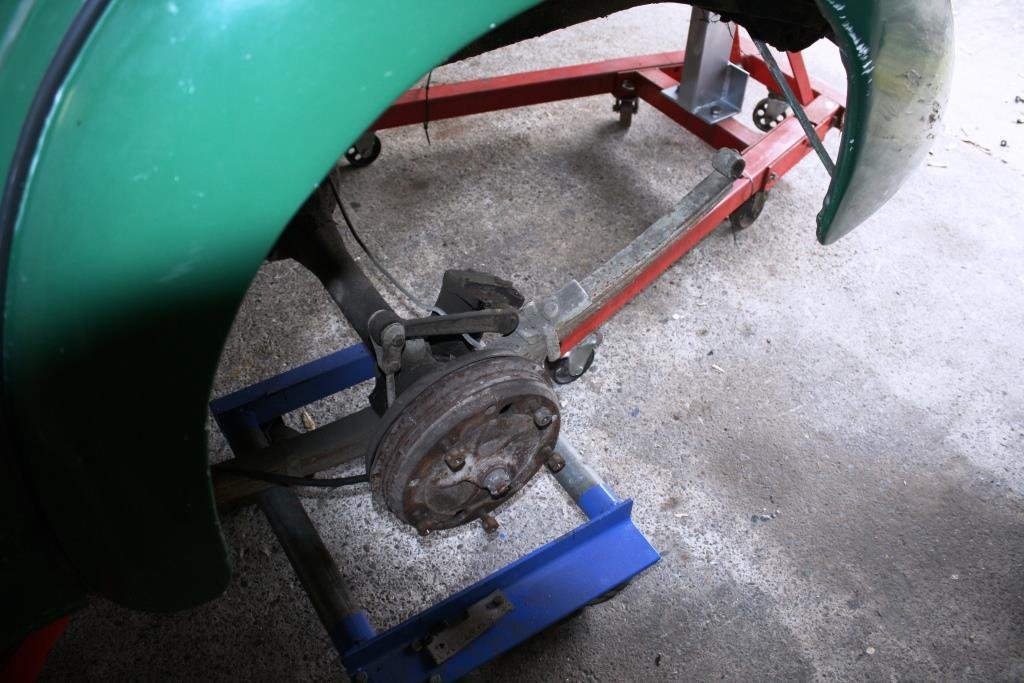
A little time spent cleaning up jacking points & rear suspension bracketry…. Etch Primer…. Epoxy Enamel hung out to dry…. Touched up the front cross member and rear springs when I had the black paint out. Can’t believe I’ve been storing them for 6 years since I rebuilt them! Rear suspension mounts in place with all new bolts and bushes.
1 point
-
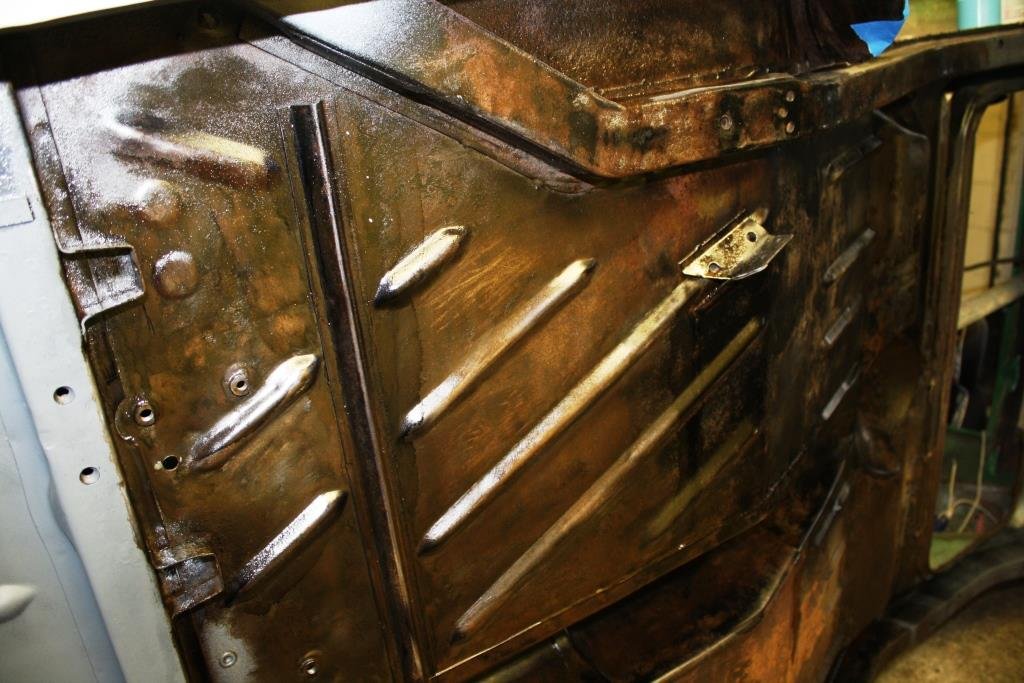
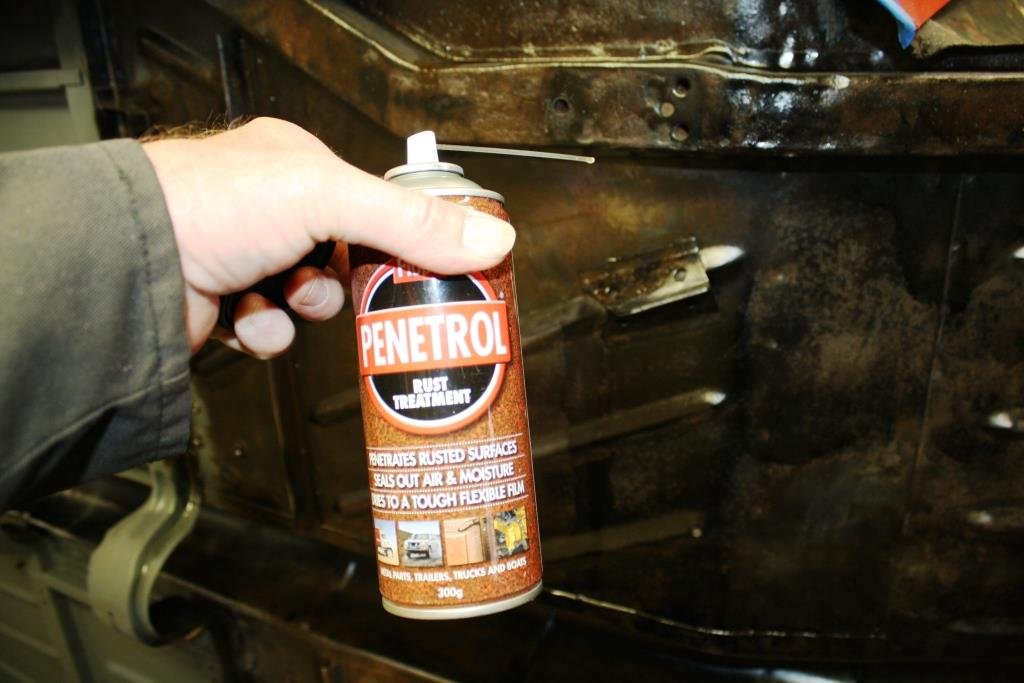
I’ve been putting this bit off for too long. Time to start scraping and wire brushing…….. And more scraping… More CRC Rust Convertor… And more…… Can’t beat Penetrol for getting into the seams. Great product with unbelievable capillary action. Etch priming and then painting with Wattyl Killrust Epoxy Enamel. Undersealing the wheel arches. More painting…. Not too shoddy for a brushed finish.
1 point
-
Started making up more repair pieces. Check the fit one more time… Tacked them in place…. And started stitching… The sun was shining so I dragged the old tart outside for a good waterblast, still couldn’t get a lot of the crud off – looks like I’ll have some scraping to do!
1 point
-
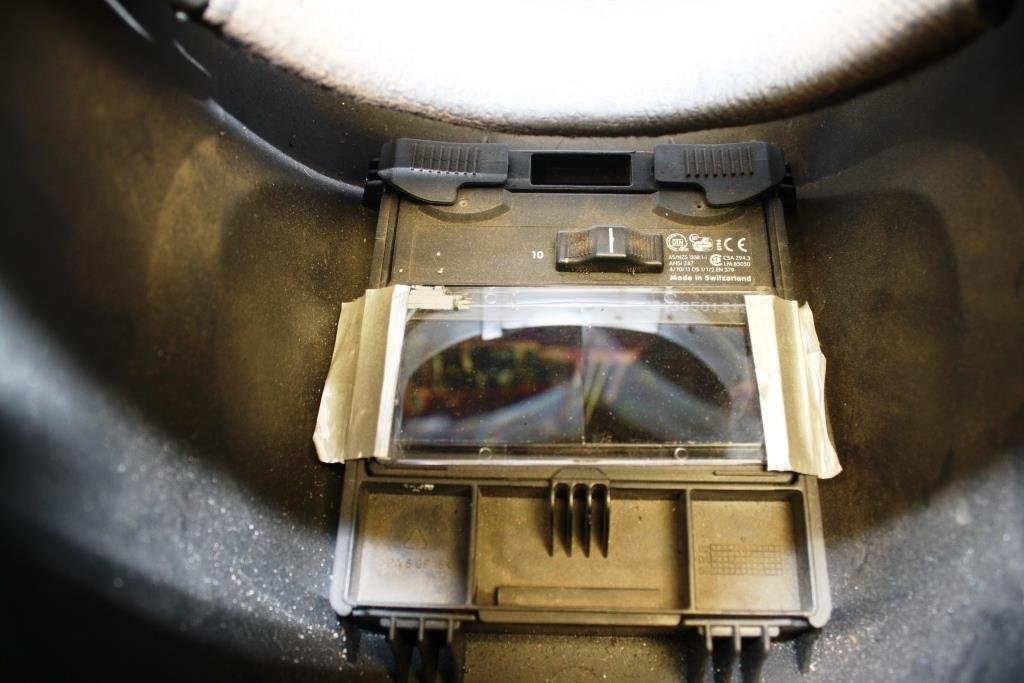
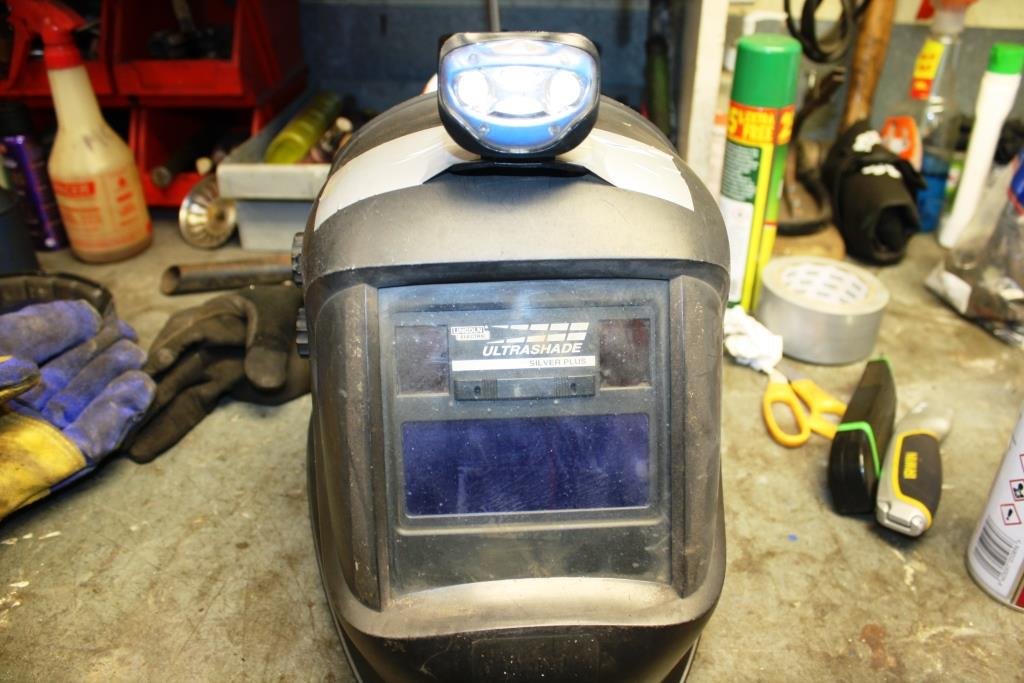
And now for some handy tips from the world famous sr2 man cave; que the cheezy music……..!. What could possibly go wrong! “WELDING 101 FOR OLD BLIND BASTARDS” Step 1: Spend 20 bucks one of these bad boys from your local safety shop or welding supplier. ( An “Omnimag” welding magnifying lens) Step 2: Barry it up inside your helmet. Step 3: If like me you still struggle to see where to start the weld with your self-darkening helmet down, fit LED lights. Step 4: Most importantly a steady, steadfast hand is required for welding at all times. This is best achieved through a simple process of self-medication. Yes you do look a little stupid and yes it does scare horses and small children but it works for me!
1 point
-
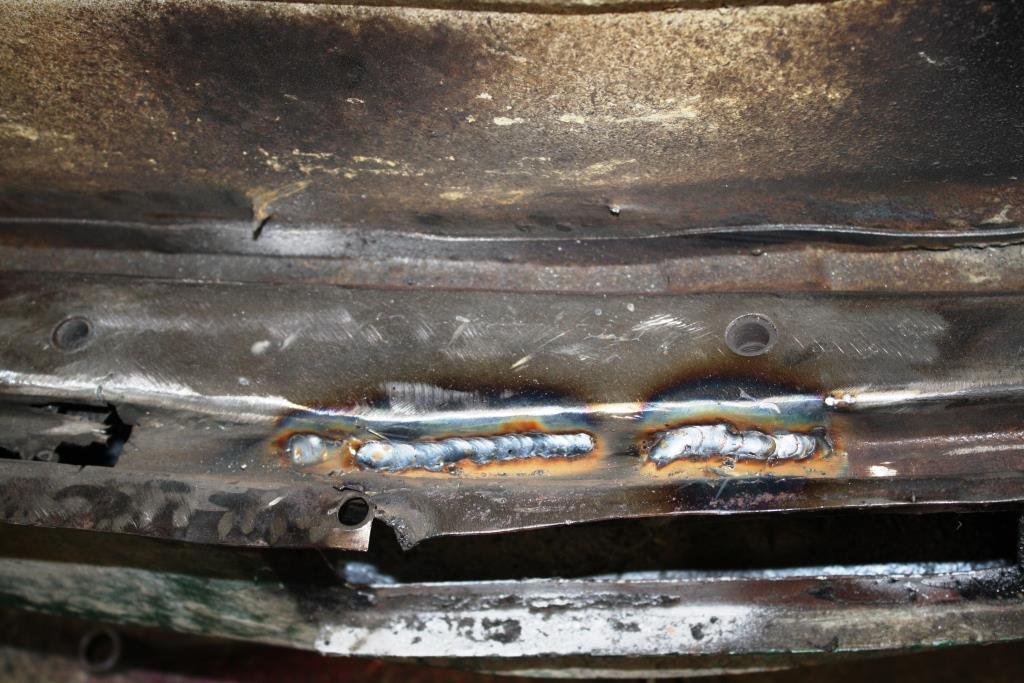
Welded a bent strip to the capping piece….. And trimmed it to fit. Happy with the result. A quick easy patch…. And we’re making slow but steady progress.
1 point
-
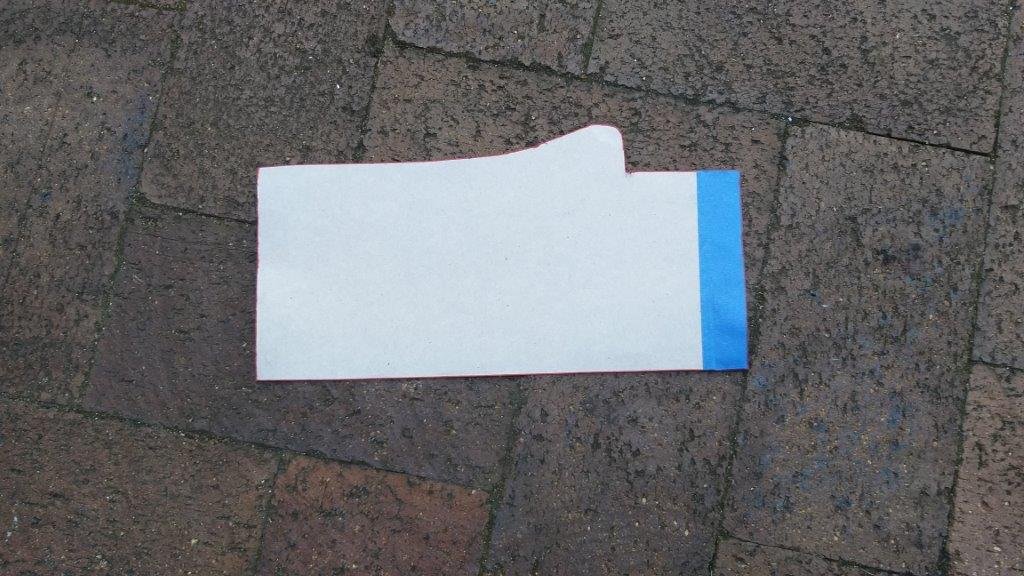
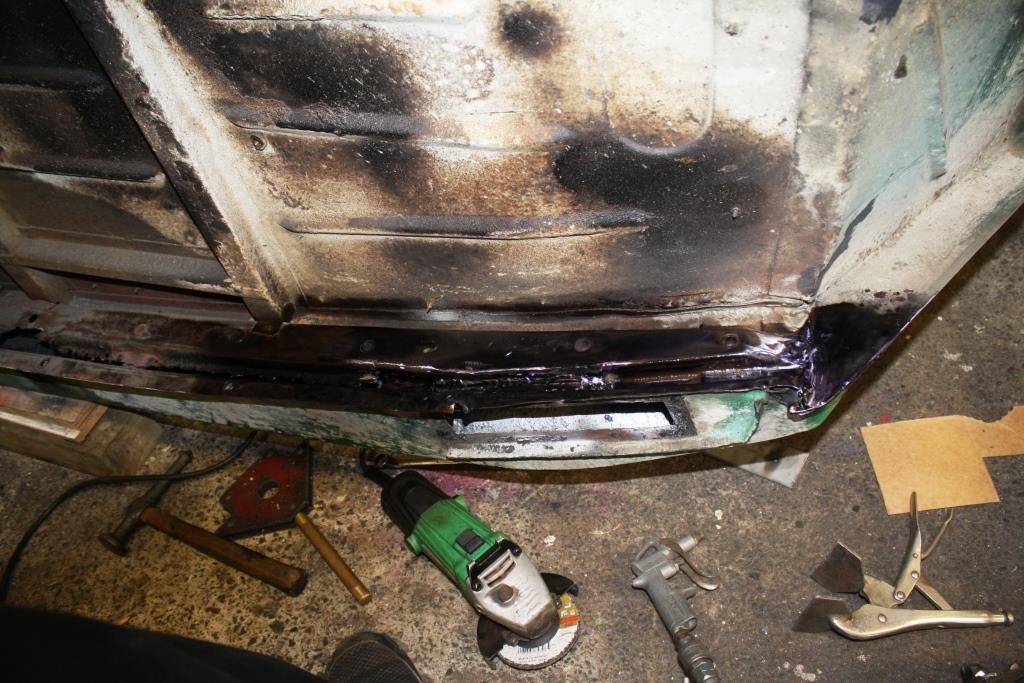
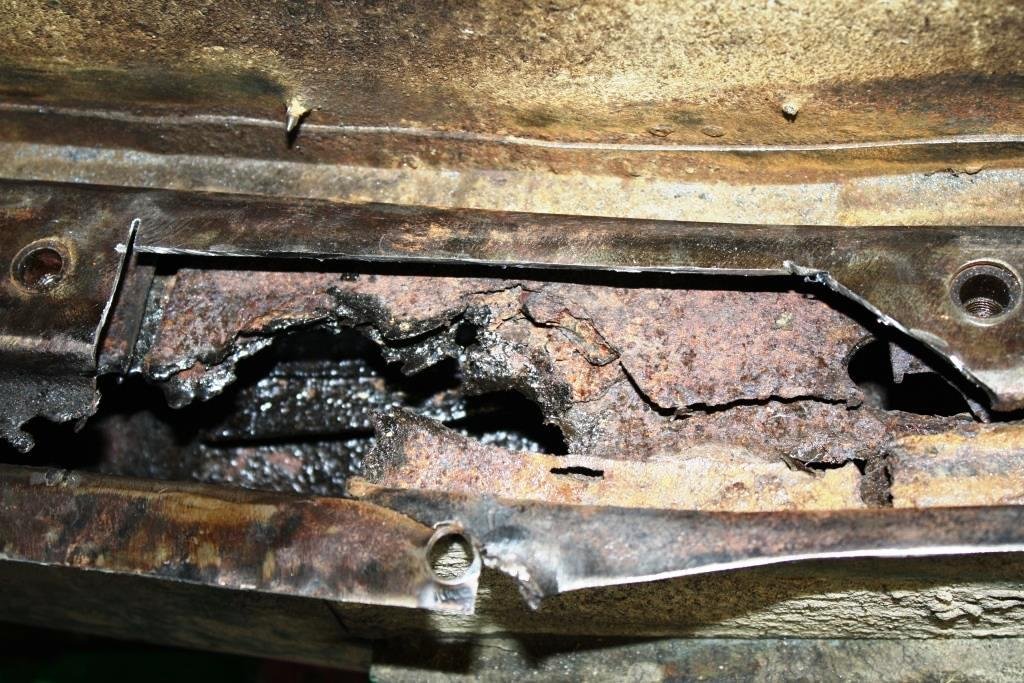
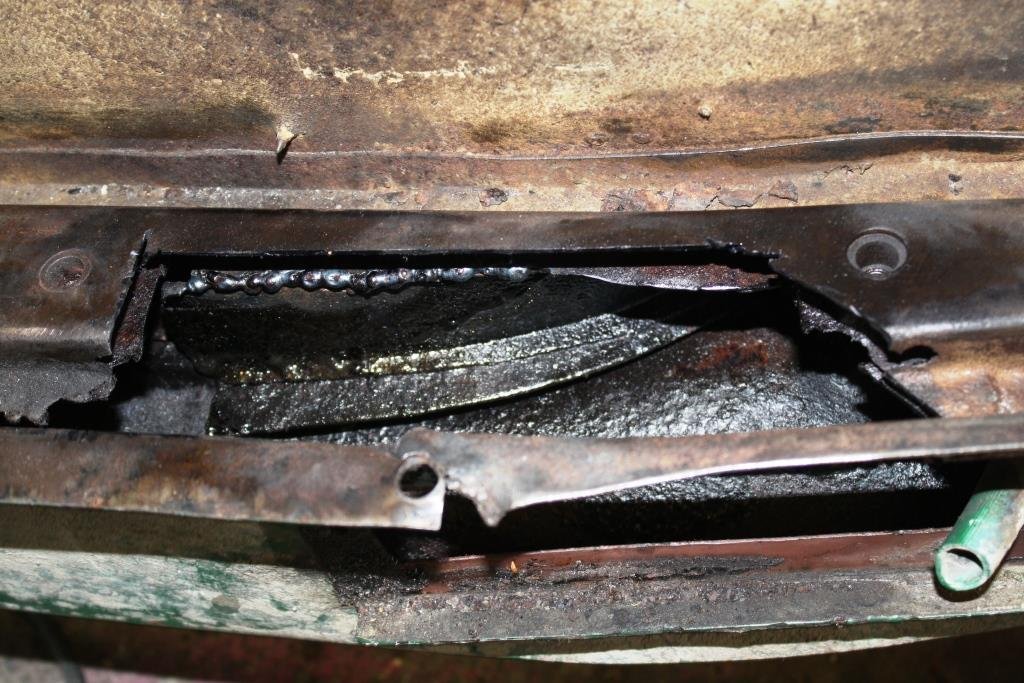
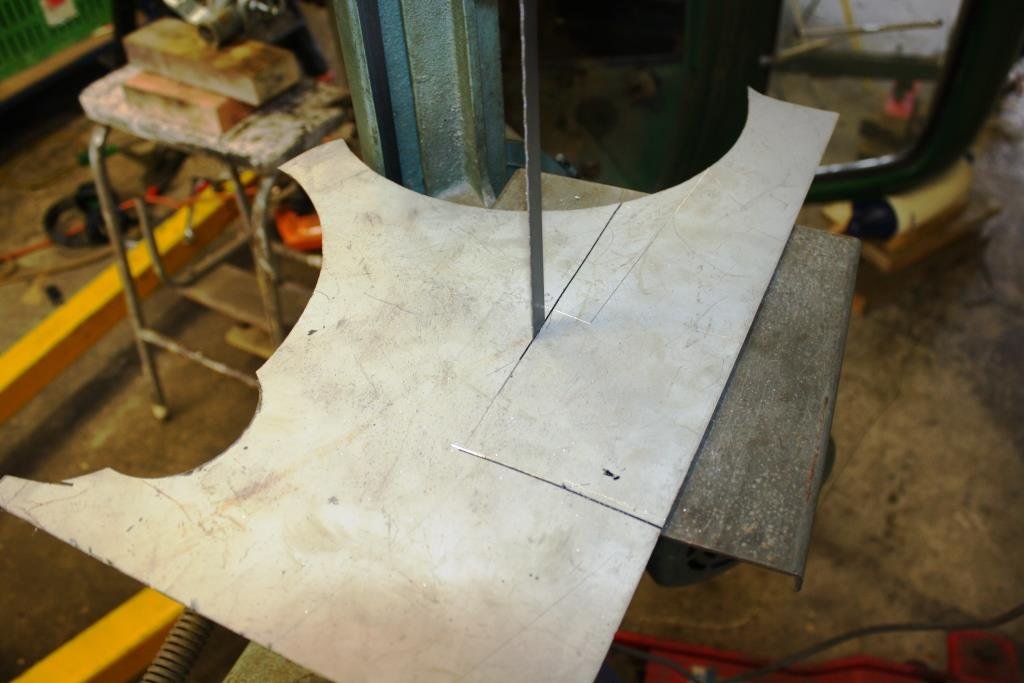
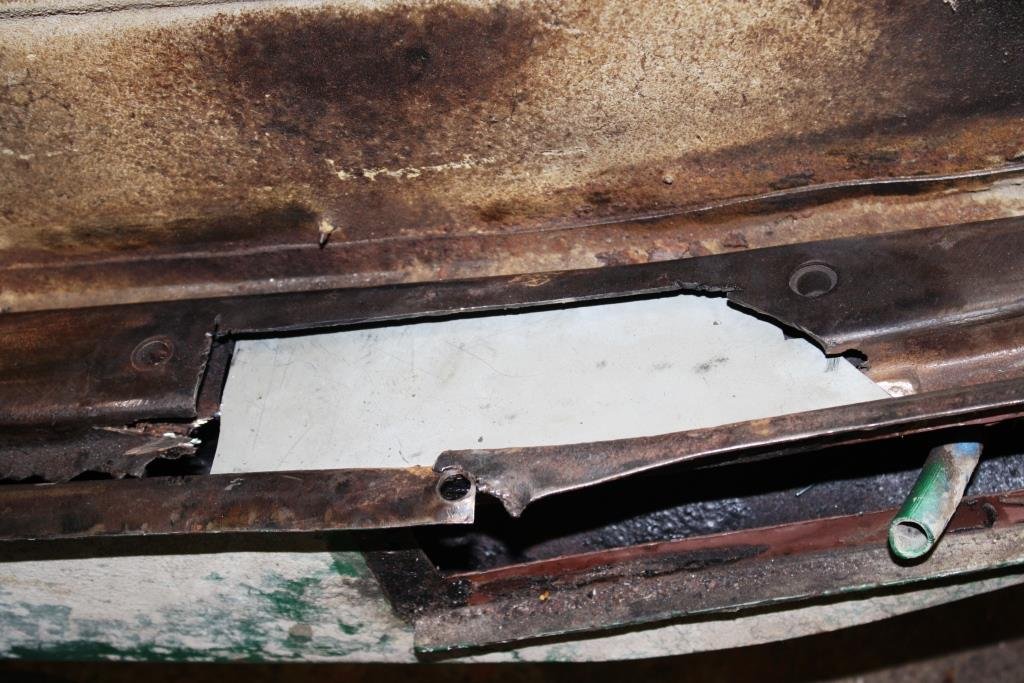
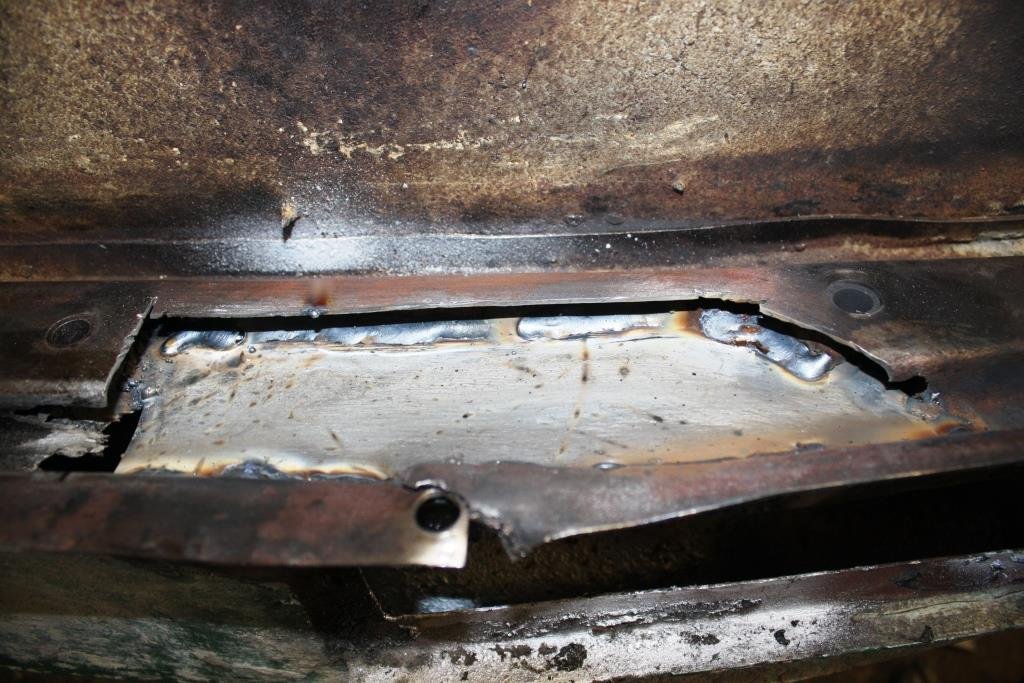
The inside looked somewhat daunting… Started cutting until I found good metal and then gave it a good coat of CRC Rustkill followed by galv primer.…. With the aid of more high-tech CAD (cardboard aided design) I started cutting out the replacement panel. I have to say a metal cutting band saw is my choice for freehand cutting of sheet metal; you get none of the distortion you get when using shears. The panel fitted well so we stitched it in.
1 point
-
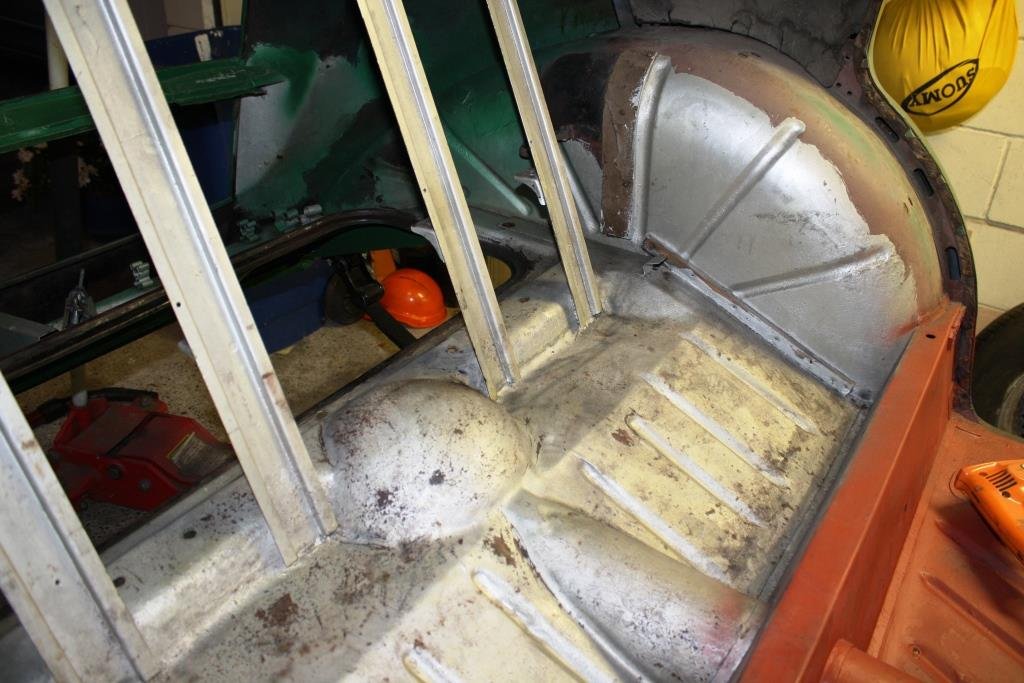
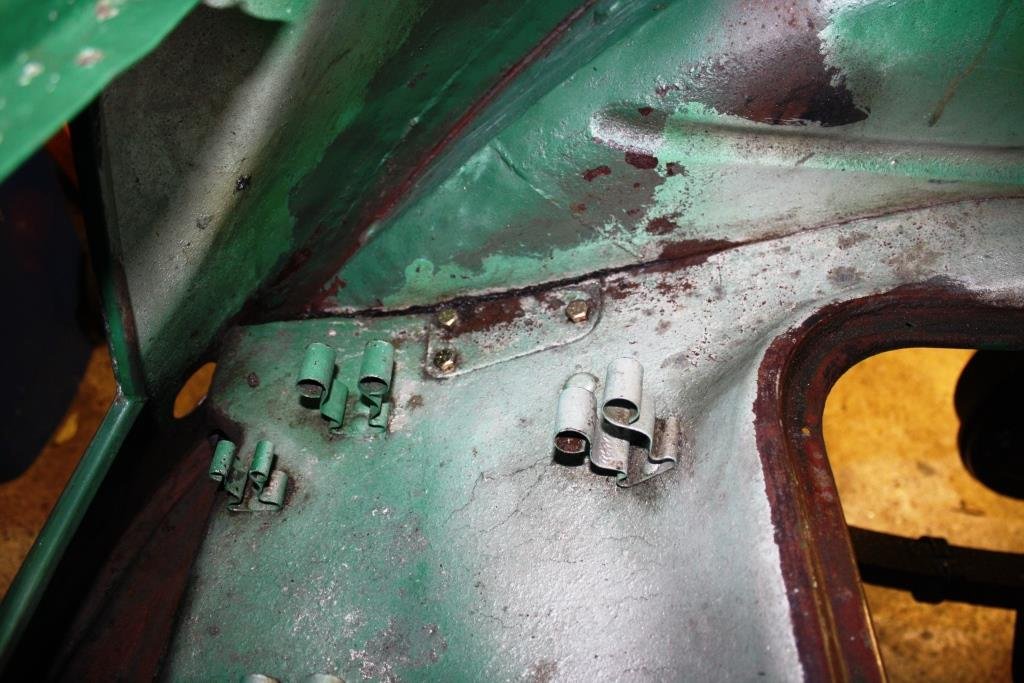
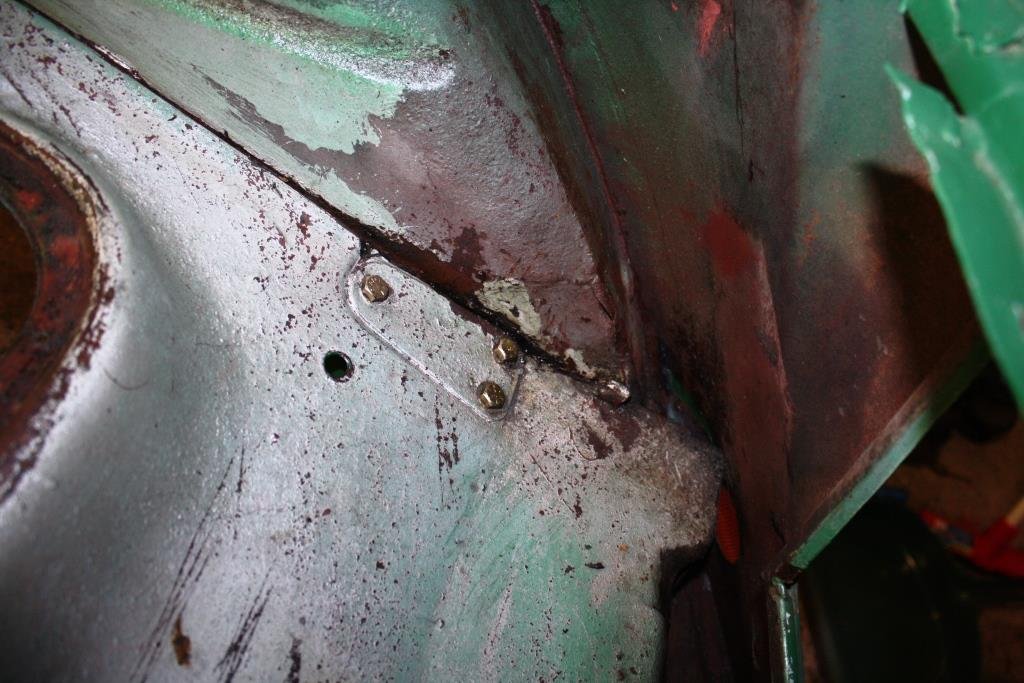
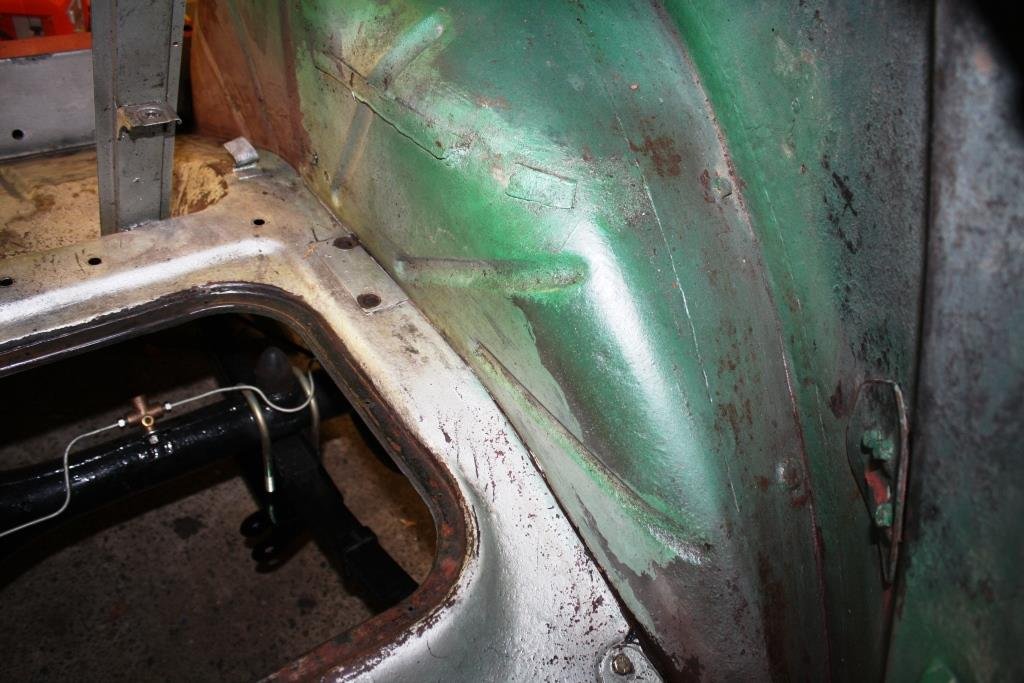
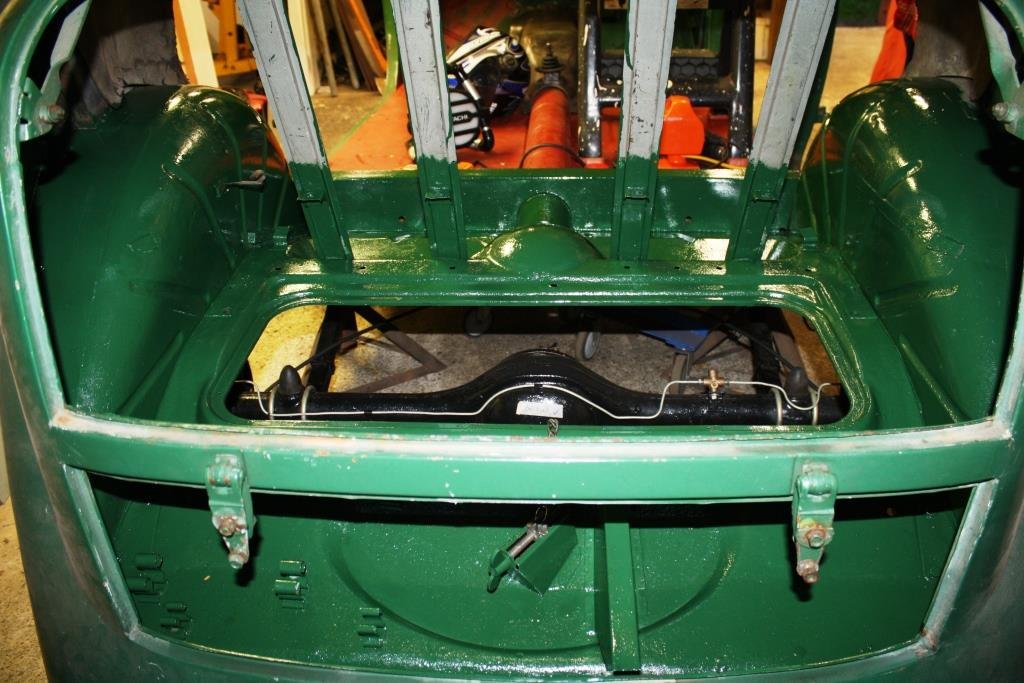
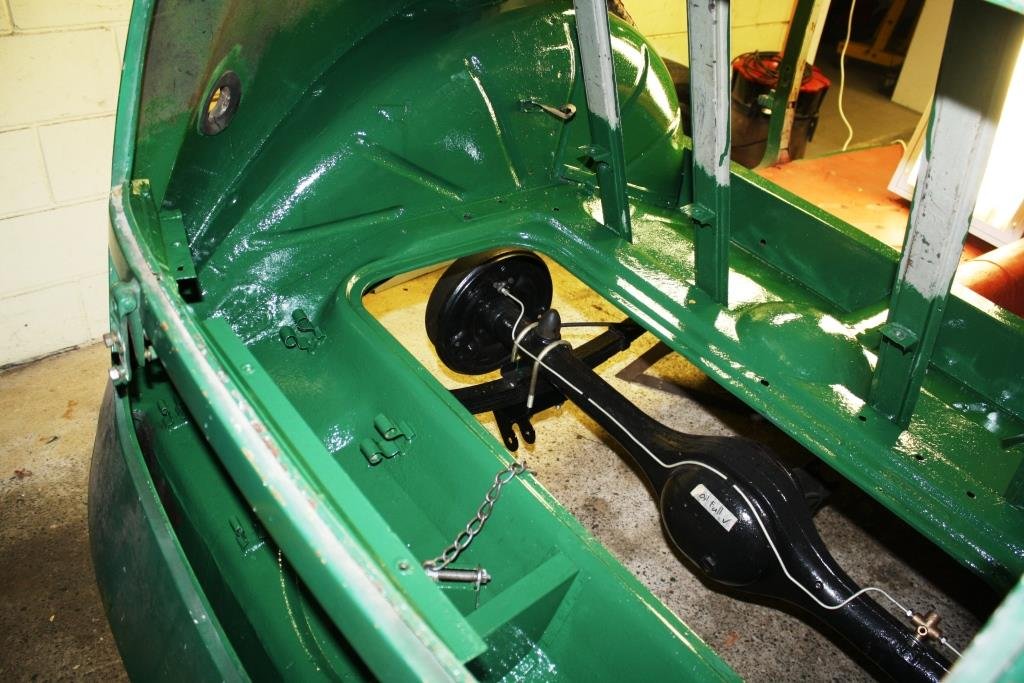
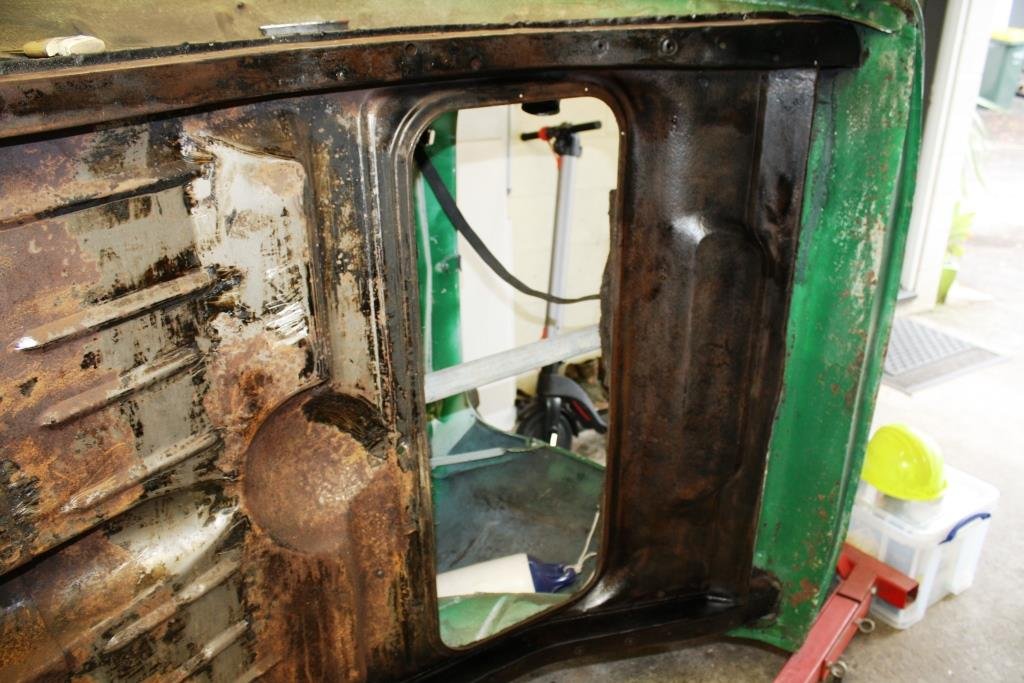
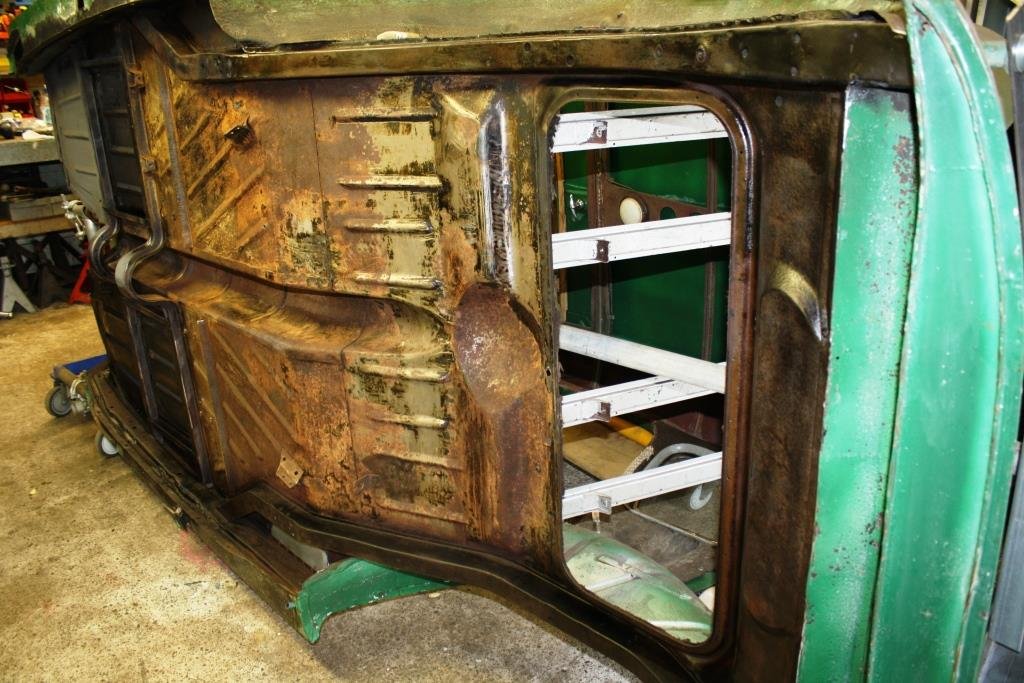
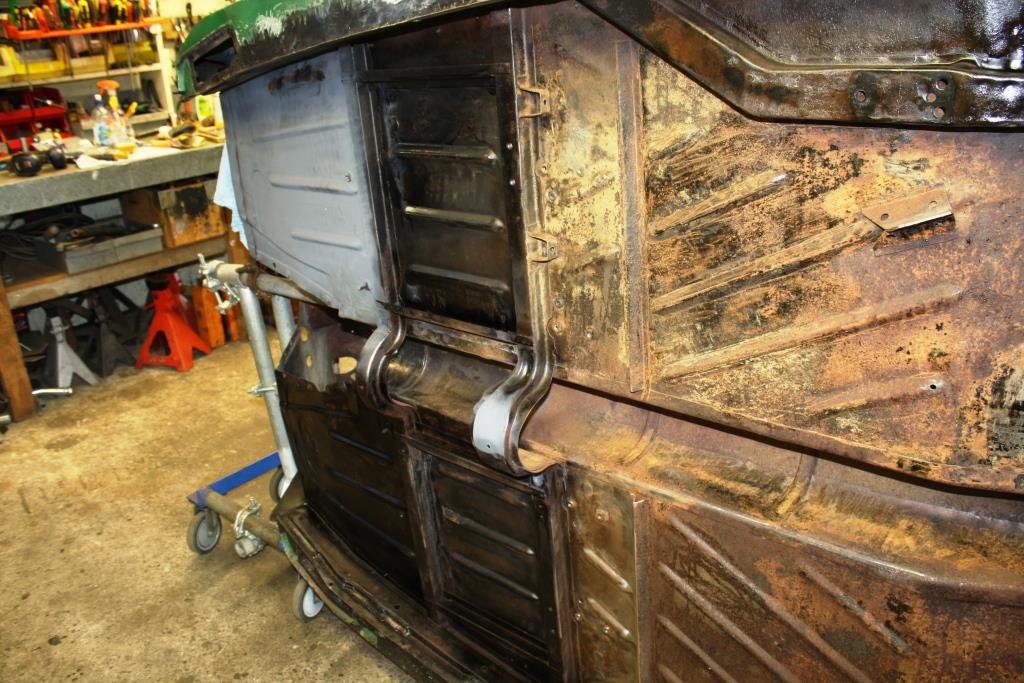
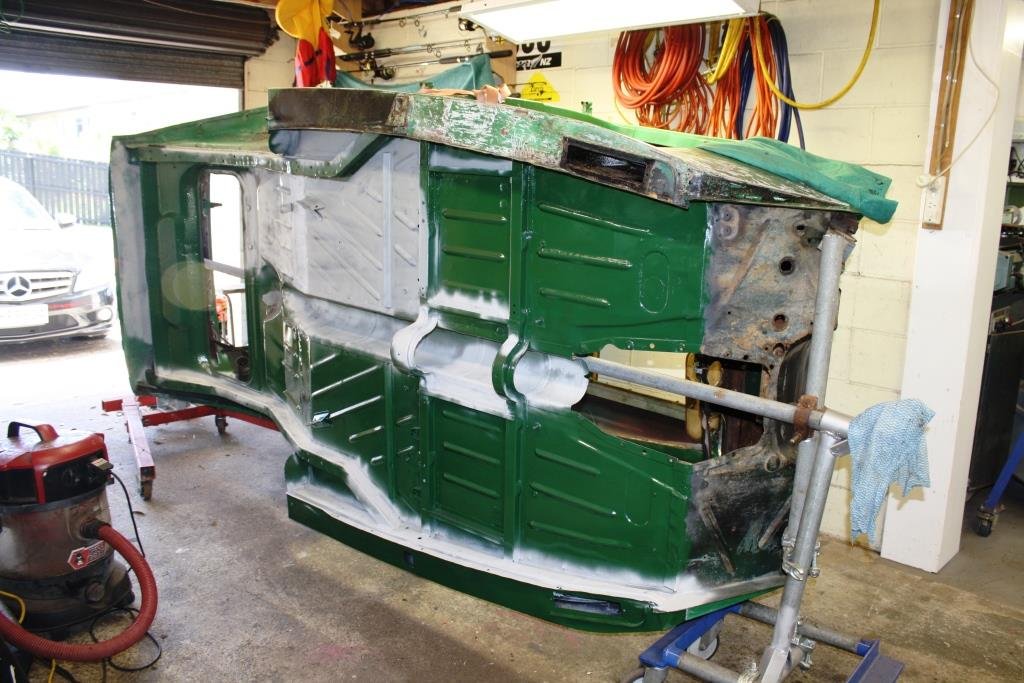
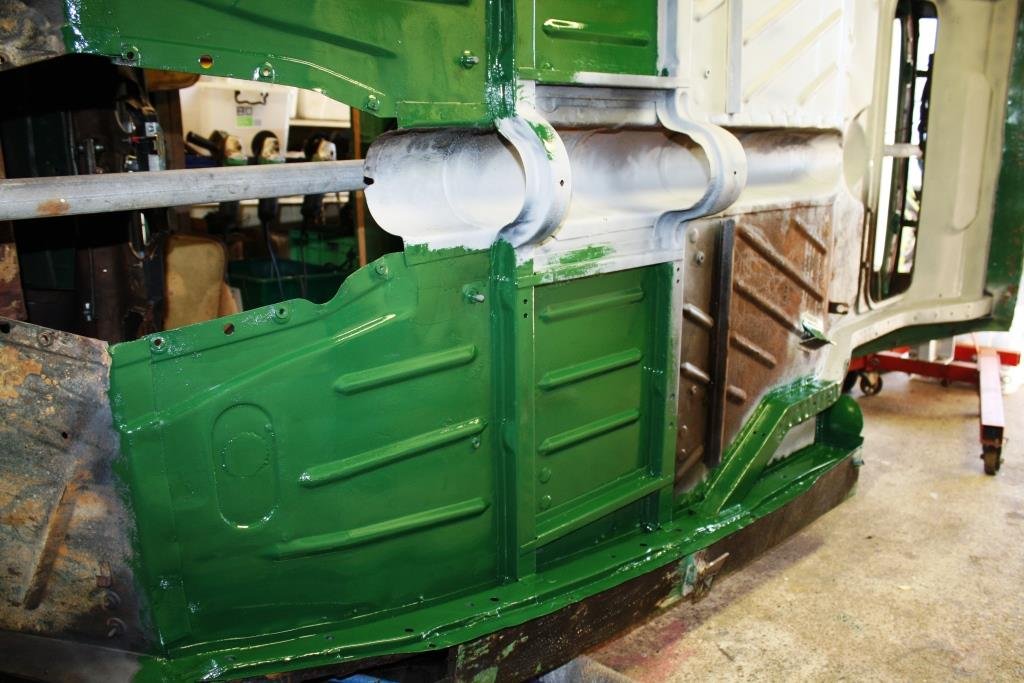
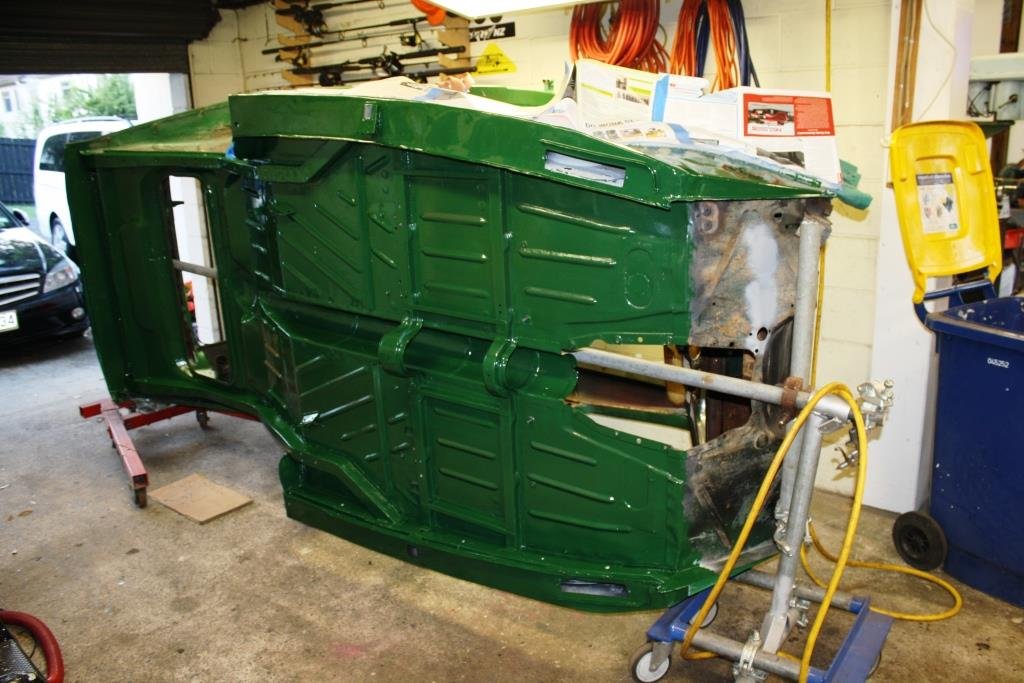
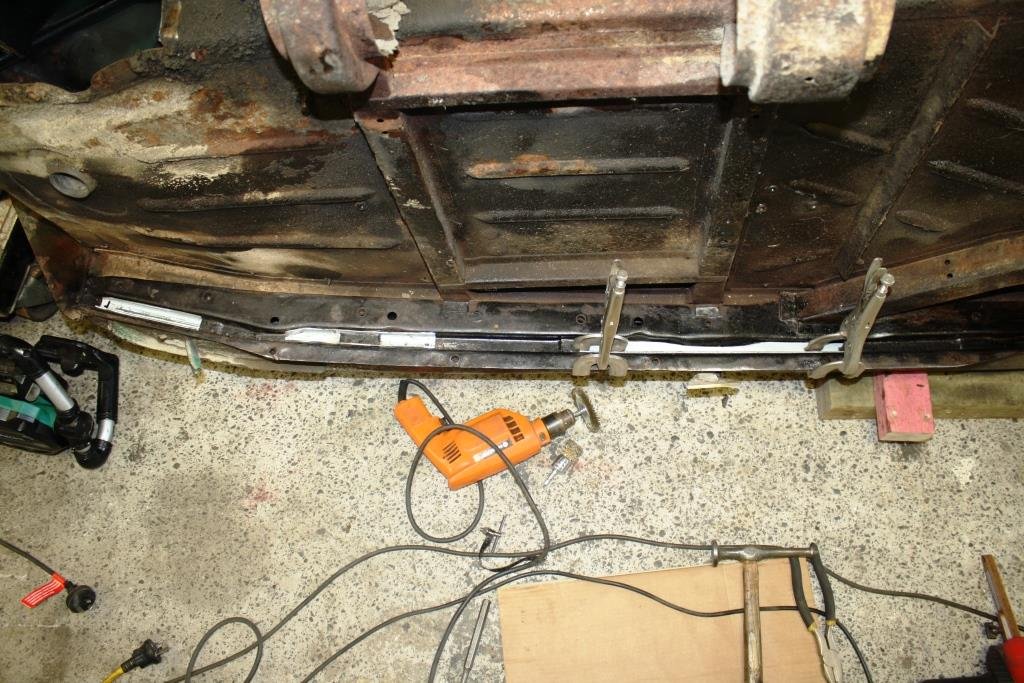
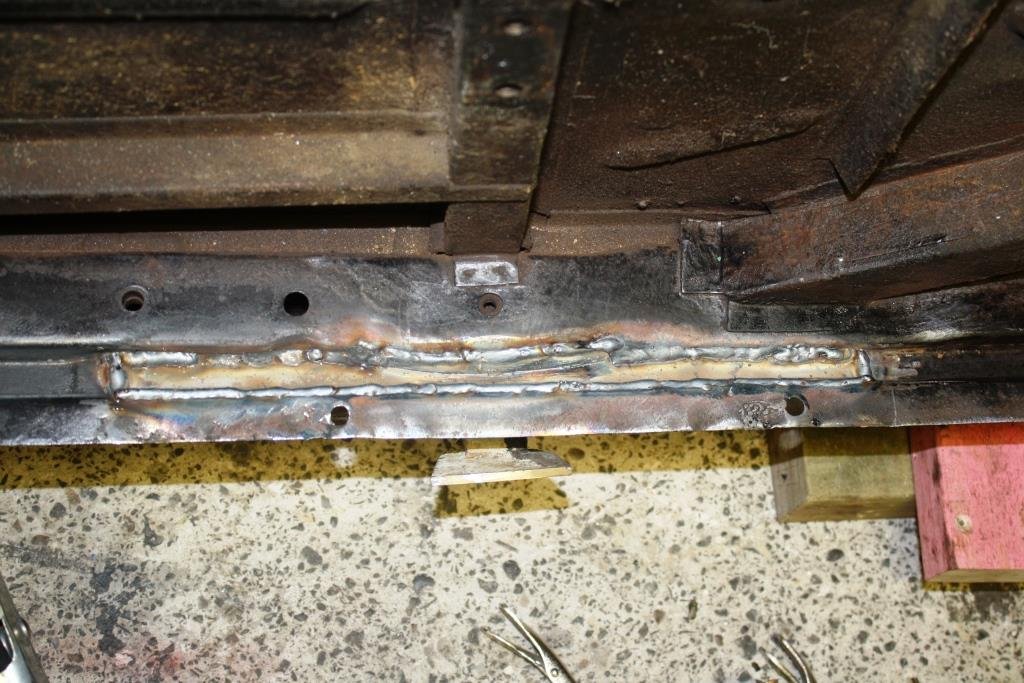
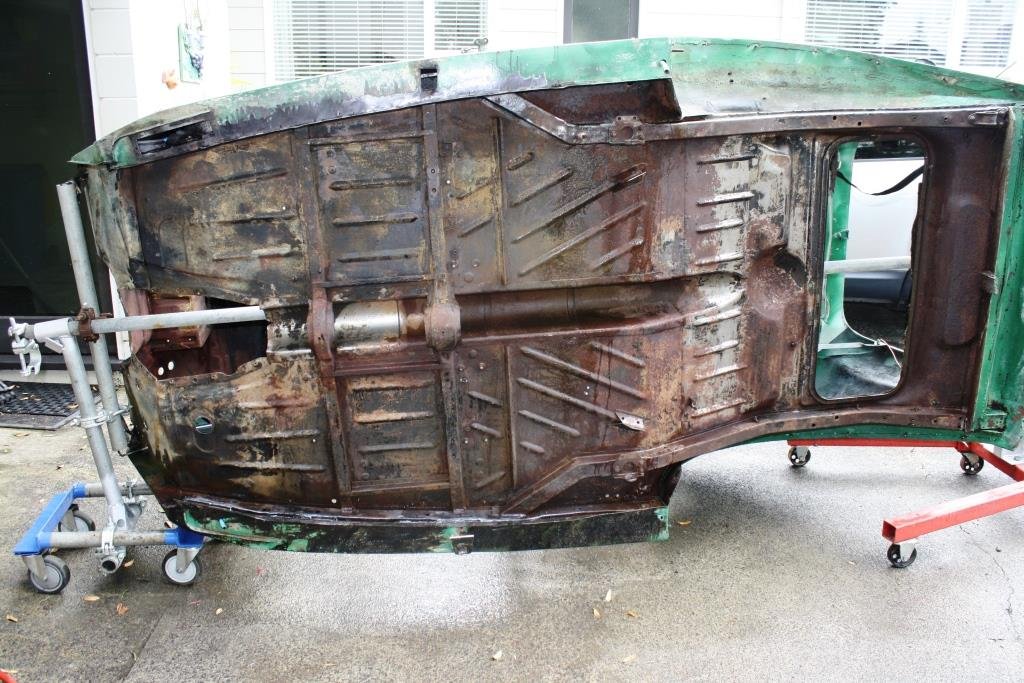
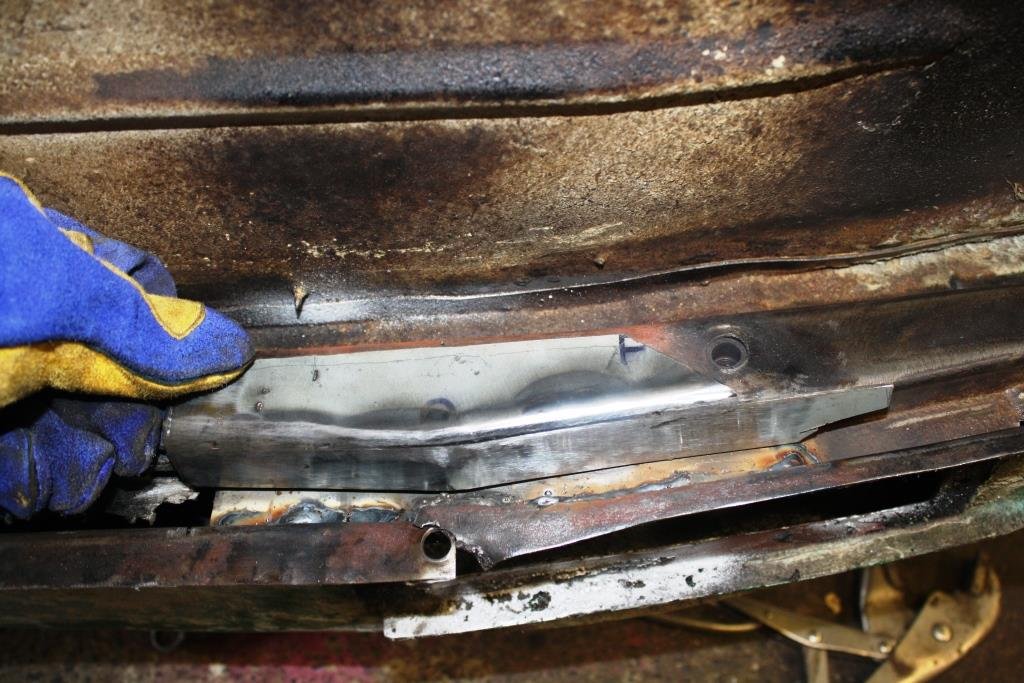
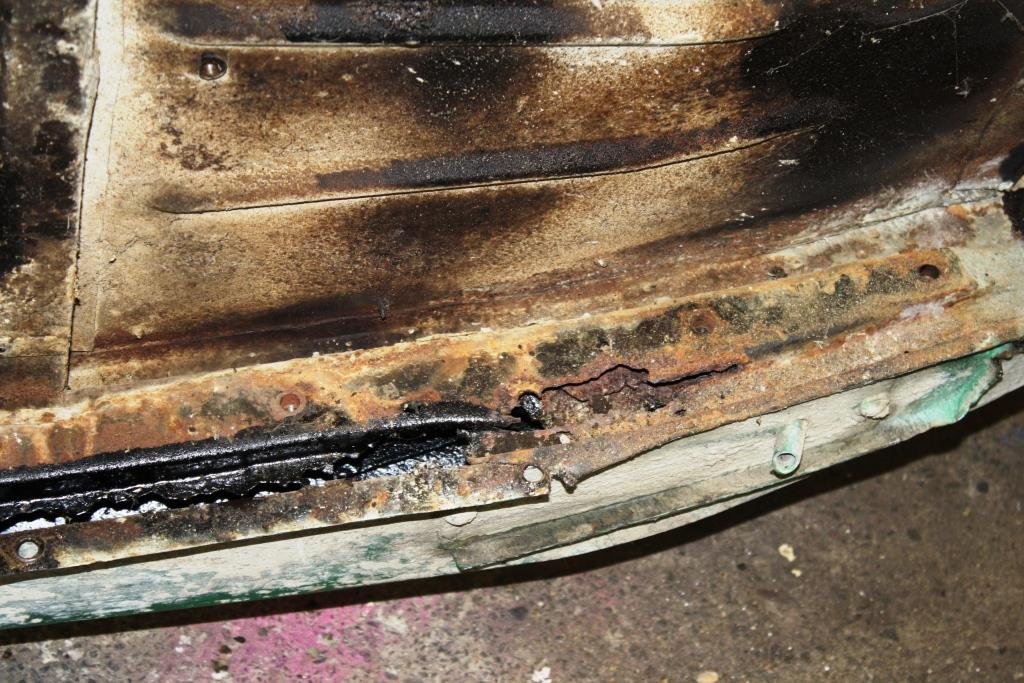
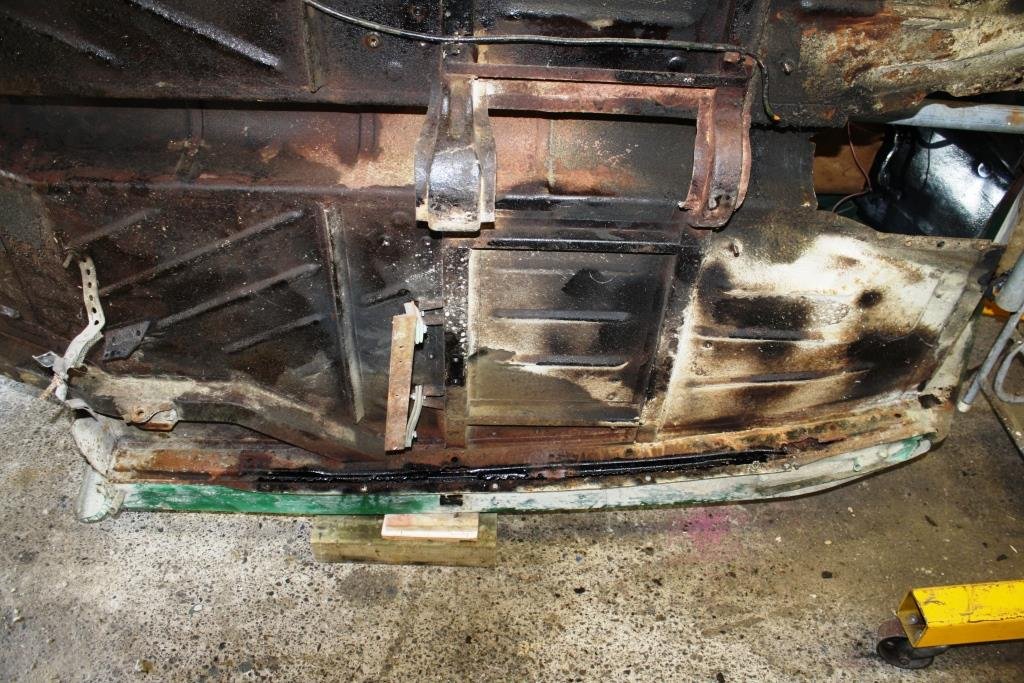
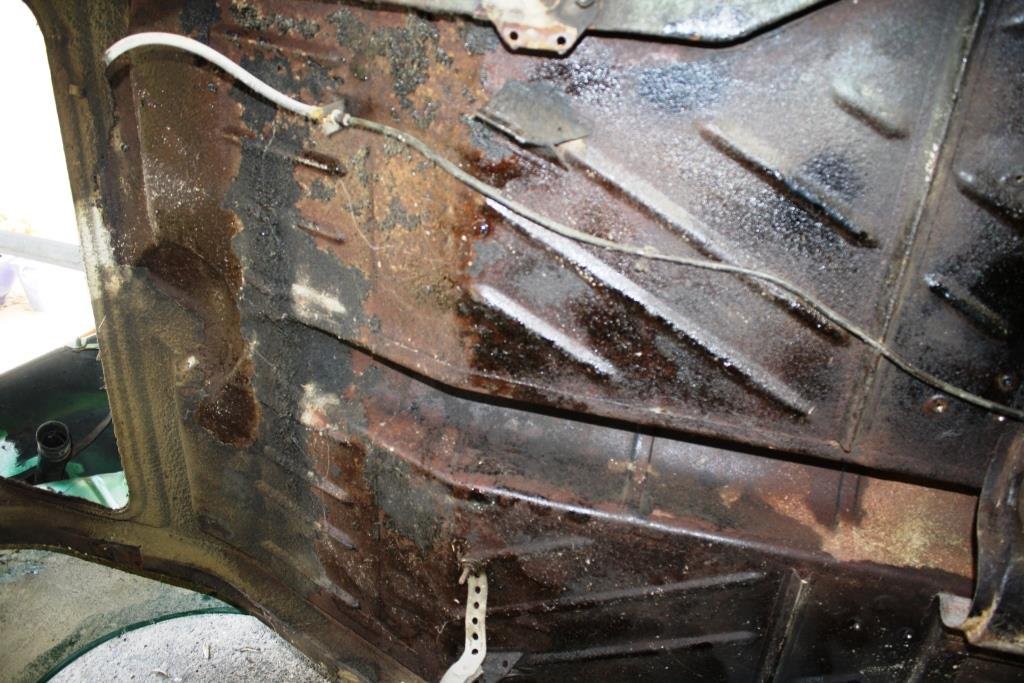
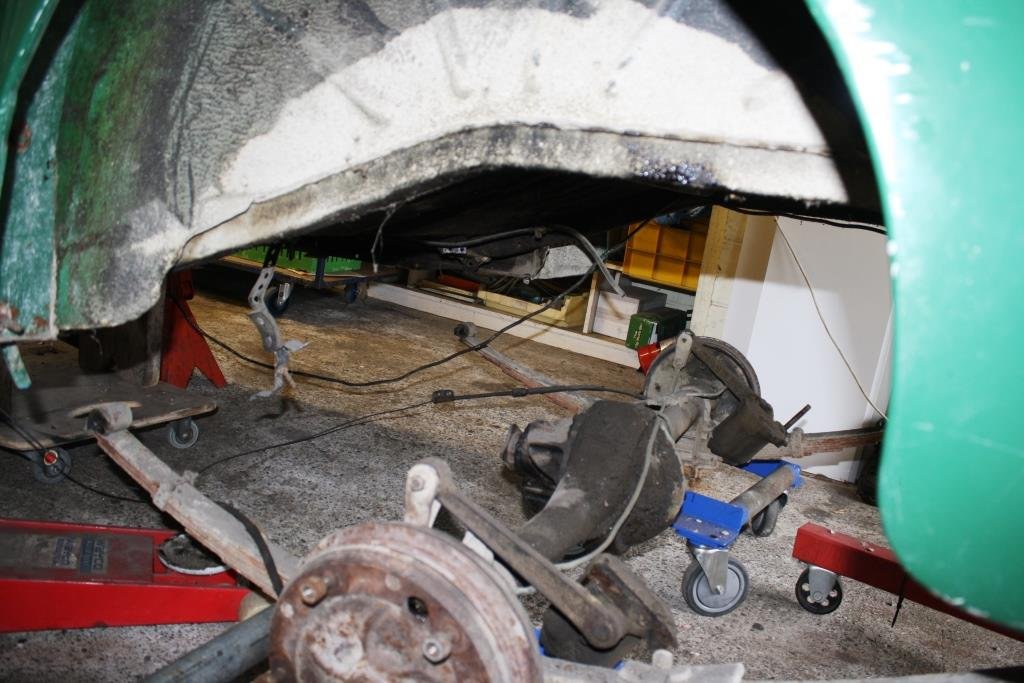
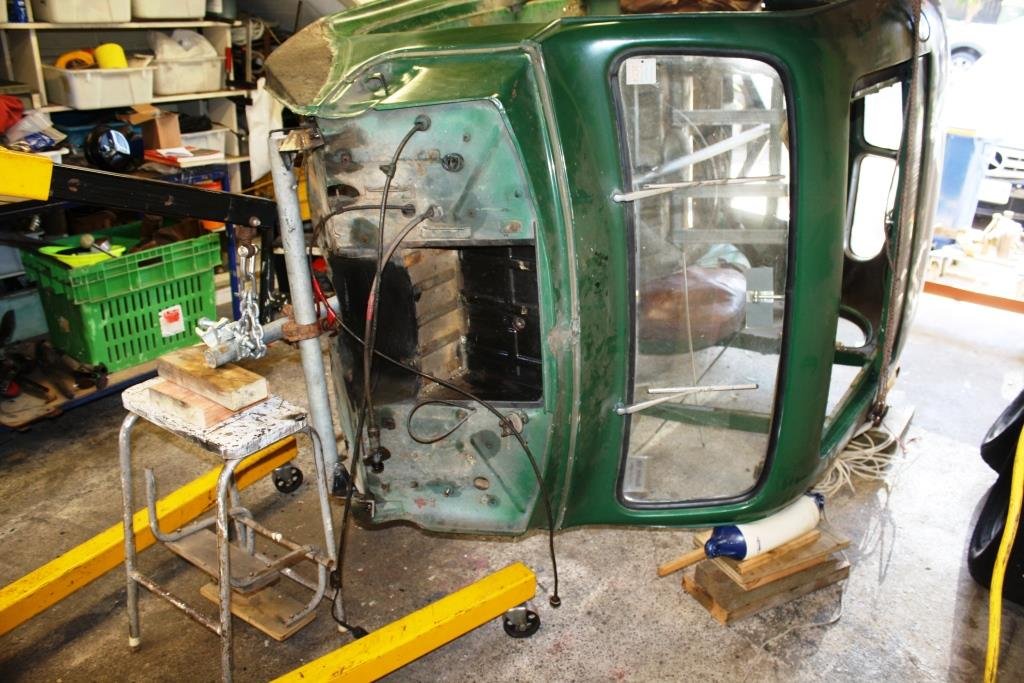
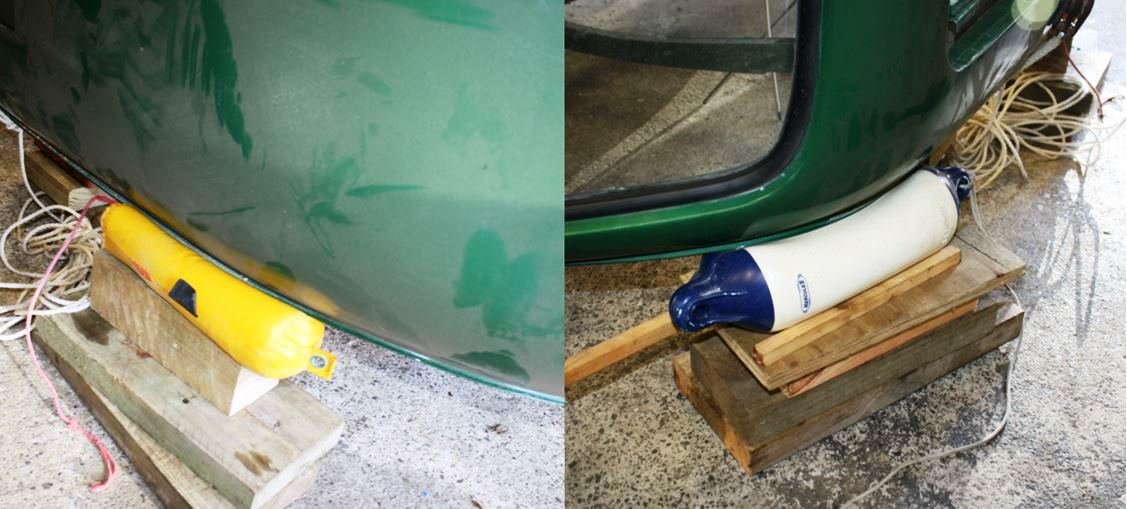
Closer inspection confirmed that getting the car on its side was well worth the effort. 70 plus years of being covered with a chassis rail has left me with a few rust repairs to do. Strangely enough similar to the chassis the starboard side is far more corroded than port, is there a dark chapter in Rigamortice’s chequered history that I’m unaware of? At least the years of “splash lubrication” from the diff has kept the rear underneath relatively rust free!
1 point
-
Sounds like a top bloke.1 point
-
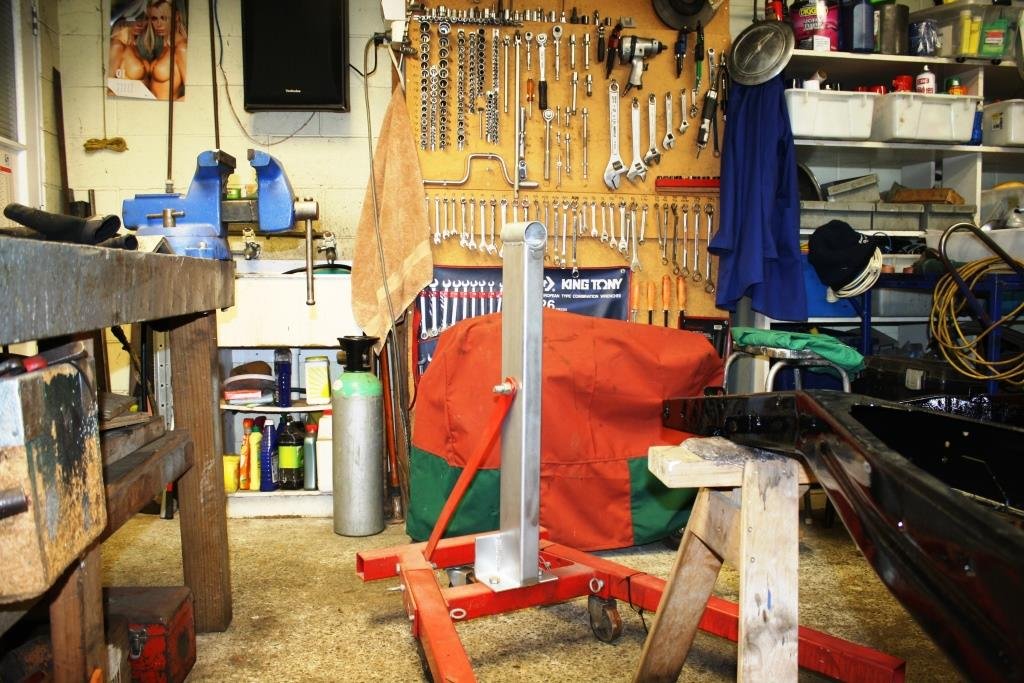
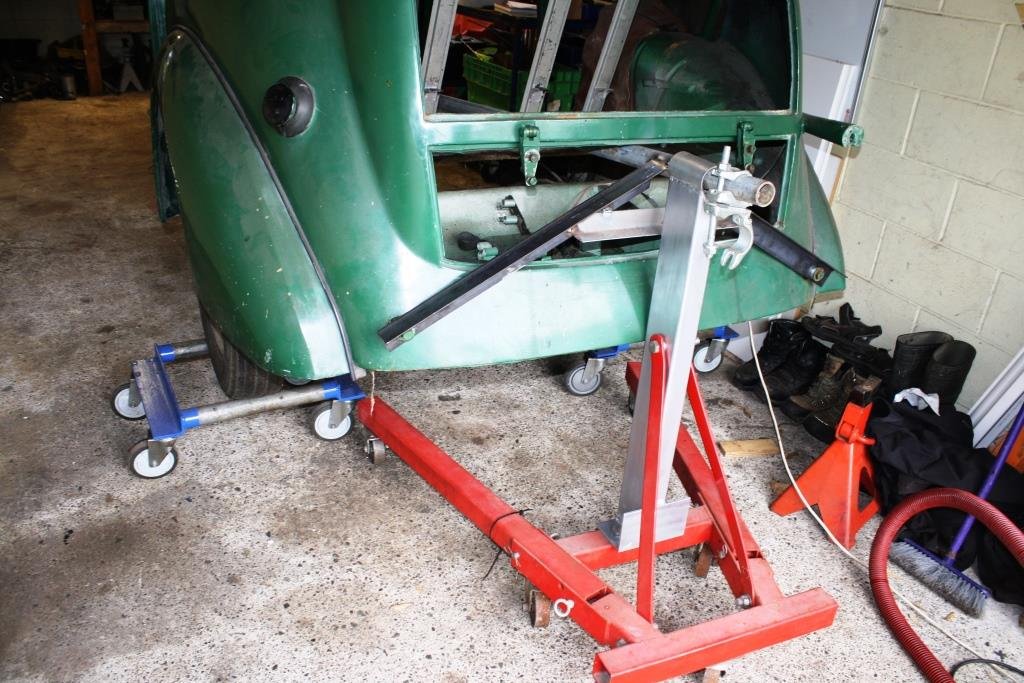
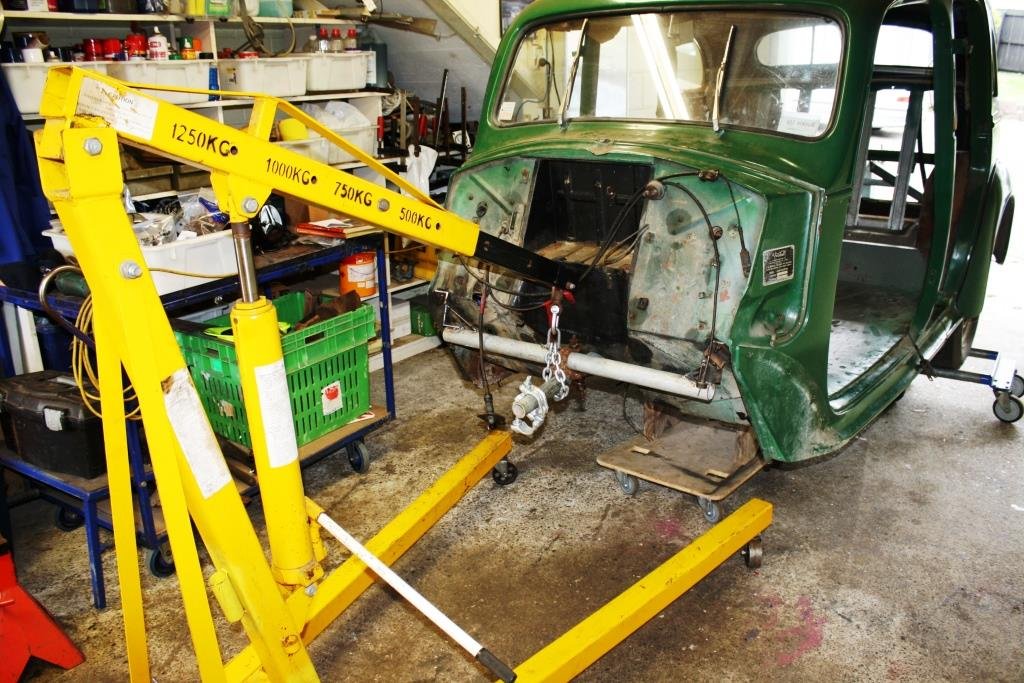
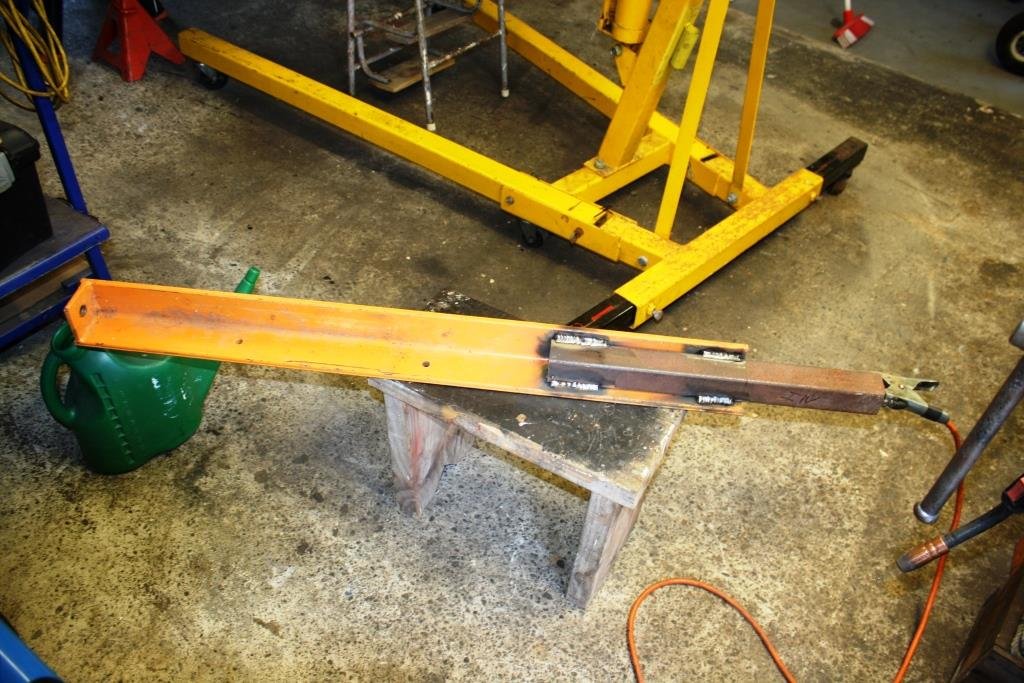
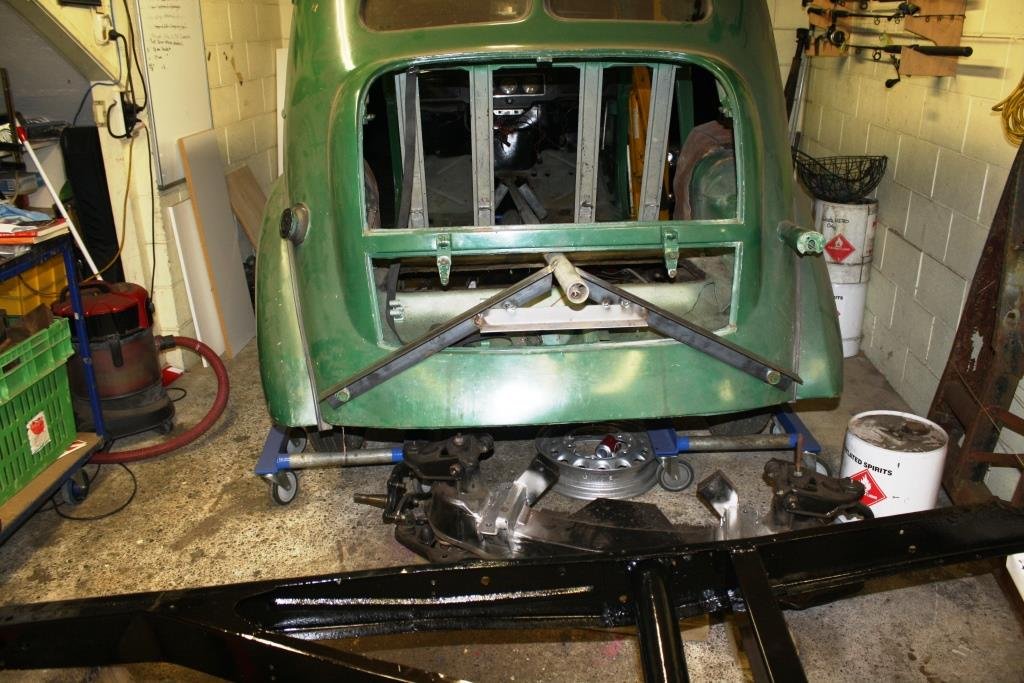
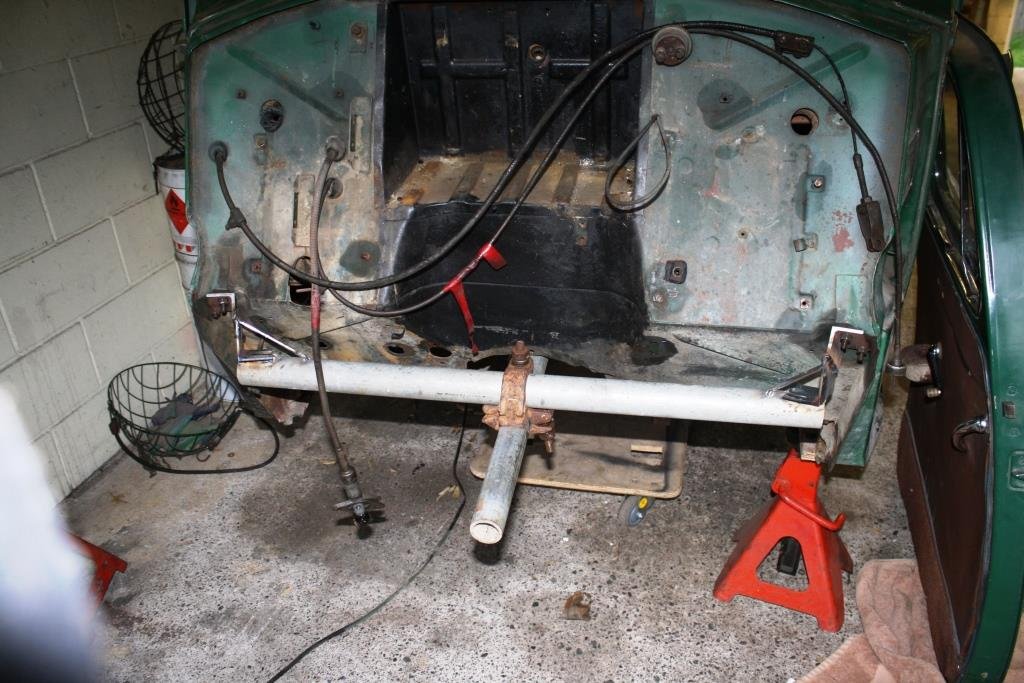
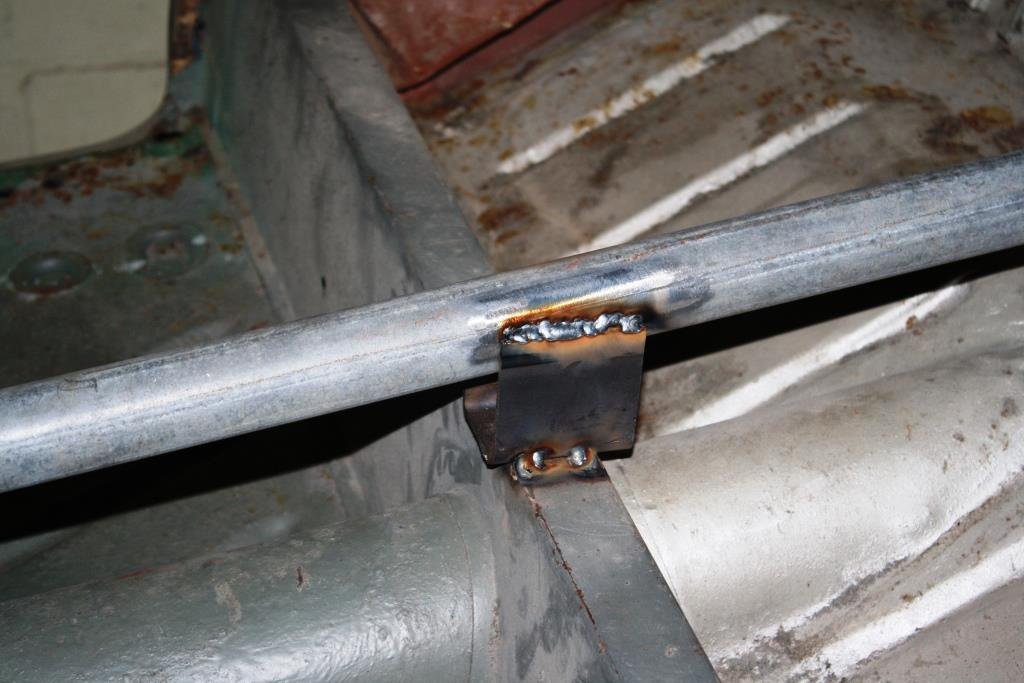
Next problem was how to support each end? It was then I started eying up my engine stand with evil intent….. Raided the scrap pile to make a new vertical upright. And the old girls big arse end was suddenly sitting pretty. I settled for using my engine crane to hold up the front of the body – a little sketchy but hey it was all I had. Time to get the old diff out, love those lever action shocks. With the rear end out everything felt a little top heavy and I was a little worried that the engine stand at the rear could tip over. Found a piece of RHS that slid into the frame… Welded it to a piece of heavy angle from the now rapidly depleting scrap heap…. Found a castor to attach to the end and … Voilà…. The old girl’s safely on her side. I knew there was a reason I’d kept those old fenders… Time to go fishing……..
1 point
-
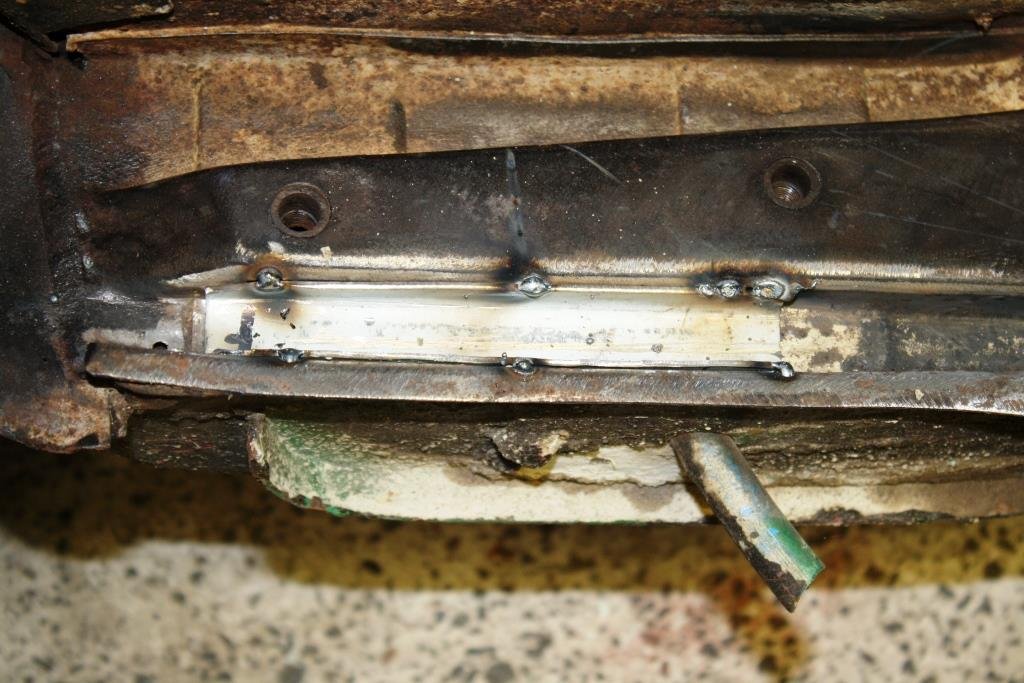
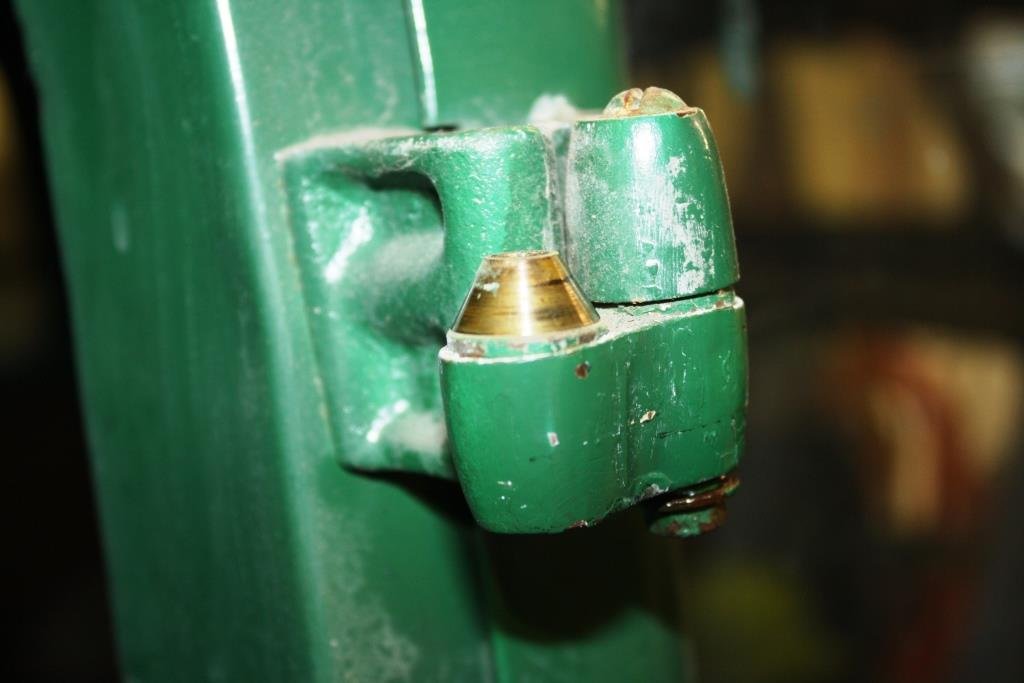
Time to start pulling doors and boot lids off the old girl to lighten the shell for flipping her over. Love the way the doors use egg shaped brass balls for hinges. The boot floor made out or tongue and groove, can’t I.D. the timber but I’ll be using it again. Next problem was how to get the old tart over on her side. I didn’t have access to a rotisserie but I did have a pile of scrap that included some old, heavy scaffolding. Had a piece of pipe longer than the body & “guesstimated” the centre of gravity. Managed to hang the rear off the bumper mounts (they were real bumpers in those days). Tacked some tabs to the rear floor. (God I hate trying to weld galv!). Decided I could mount some temporary brackets to the front seat mounts so pulled out my much treasured collection of old imperial taps to clear out the threads. Have to point out how crazy it must have been with the shortage of fasteners after WW2. Look at the random collection of threads that holds the front seat down! Inside mounts finished. For the front of the body I used the bolt holes from where the chassis braces attached to the body and held things together with a scaffolding clamp.
1 point
-
1 point


This leaderboard is set to Auckland/GMT+12:00