
Leaderboard


Popular Content
Showing content with the highest reputation on 04/26/21 in Posts
-
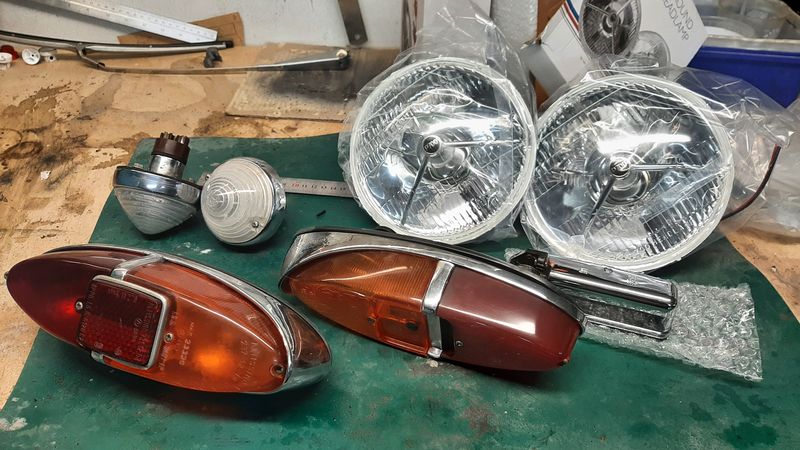
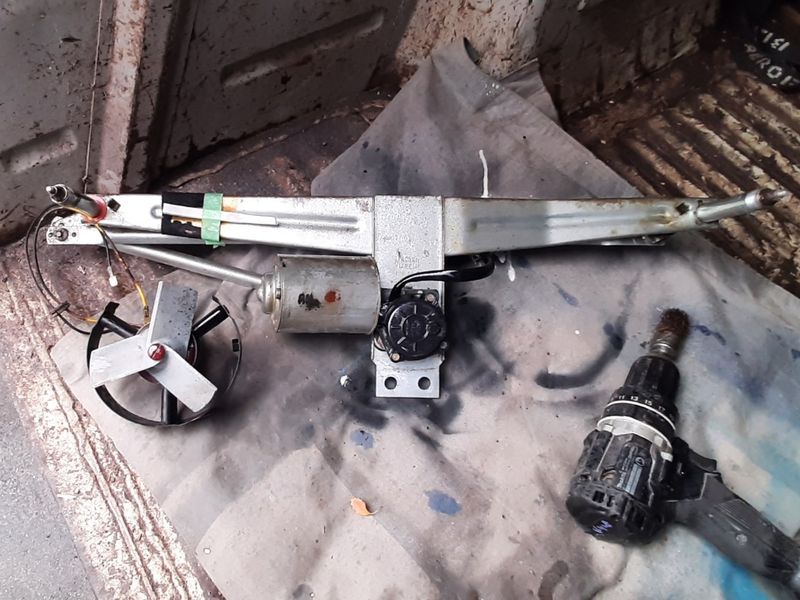
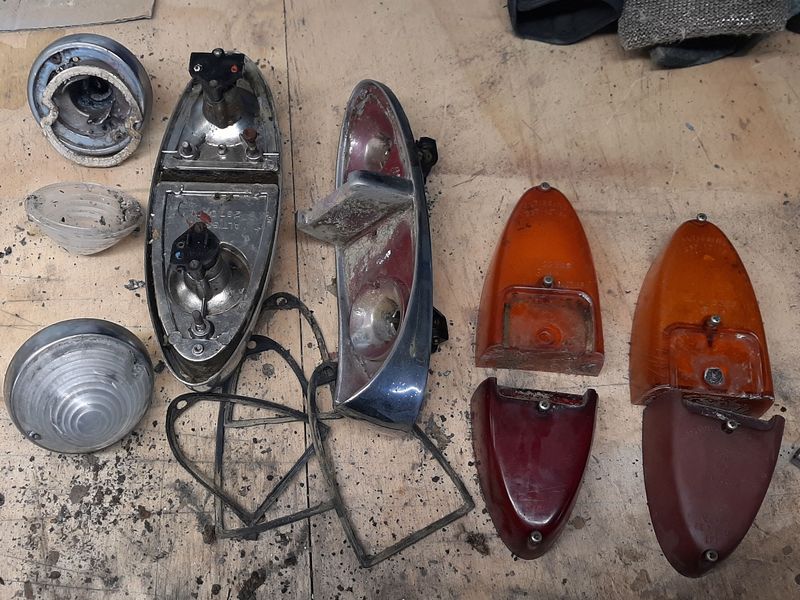
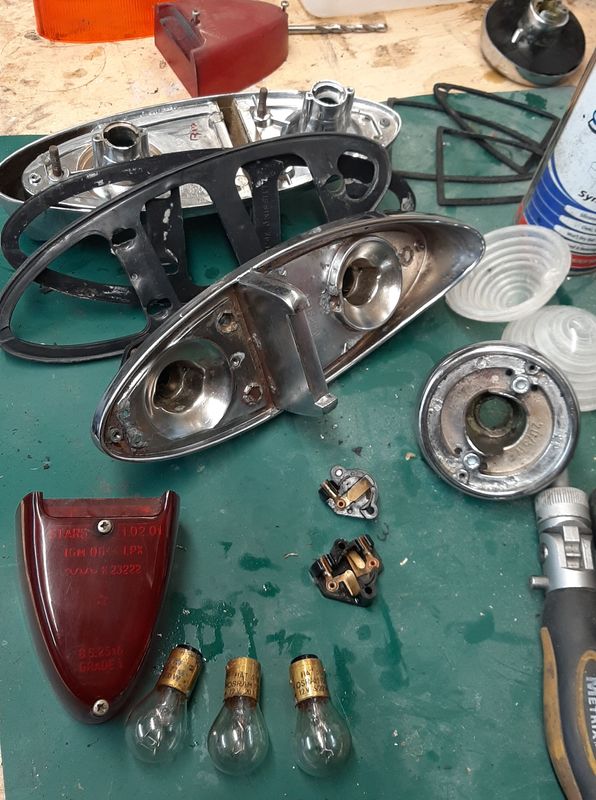
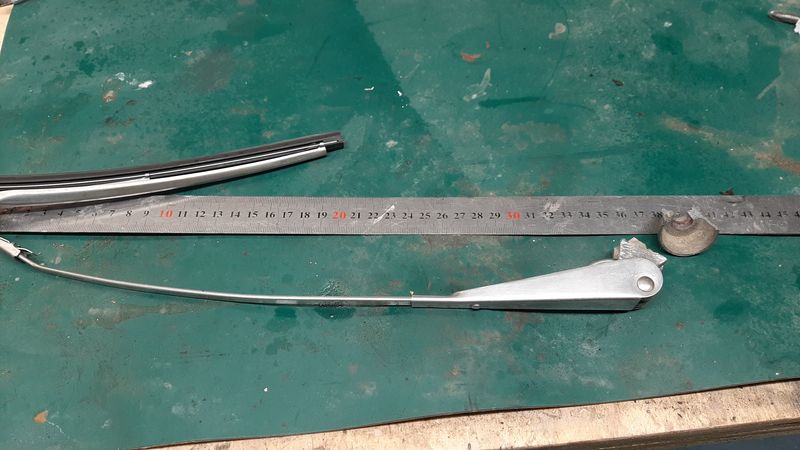
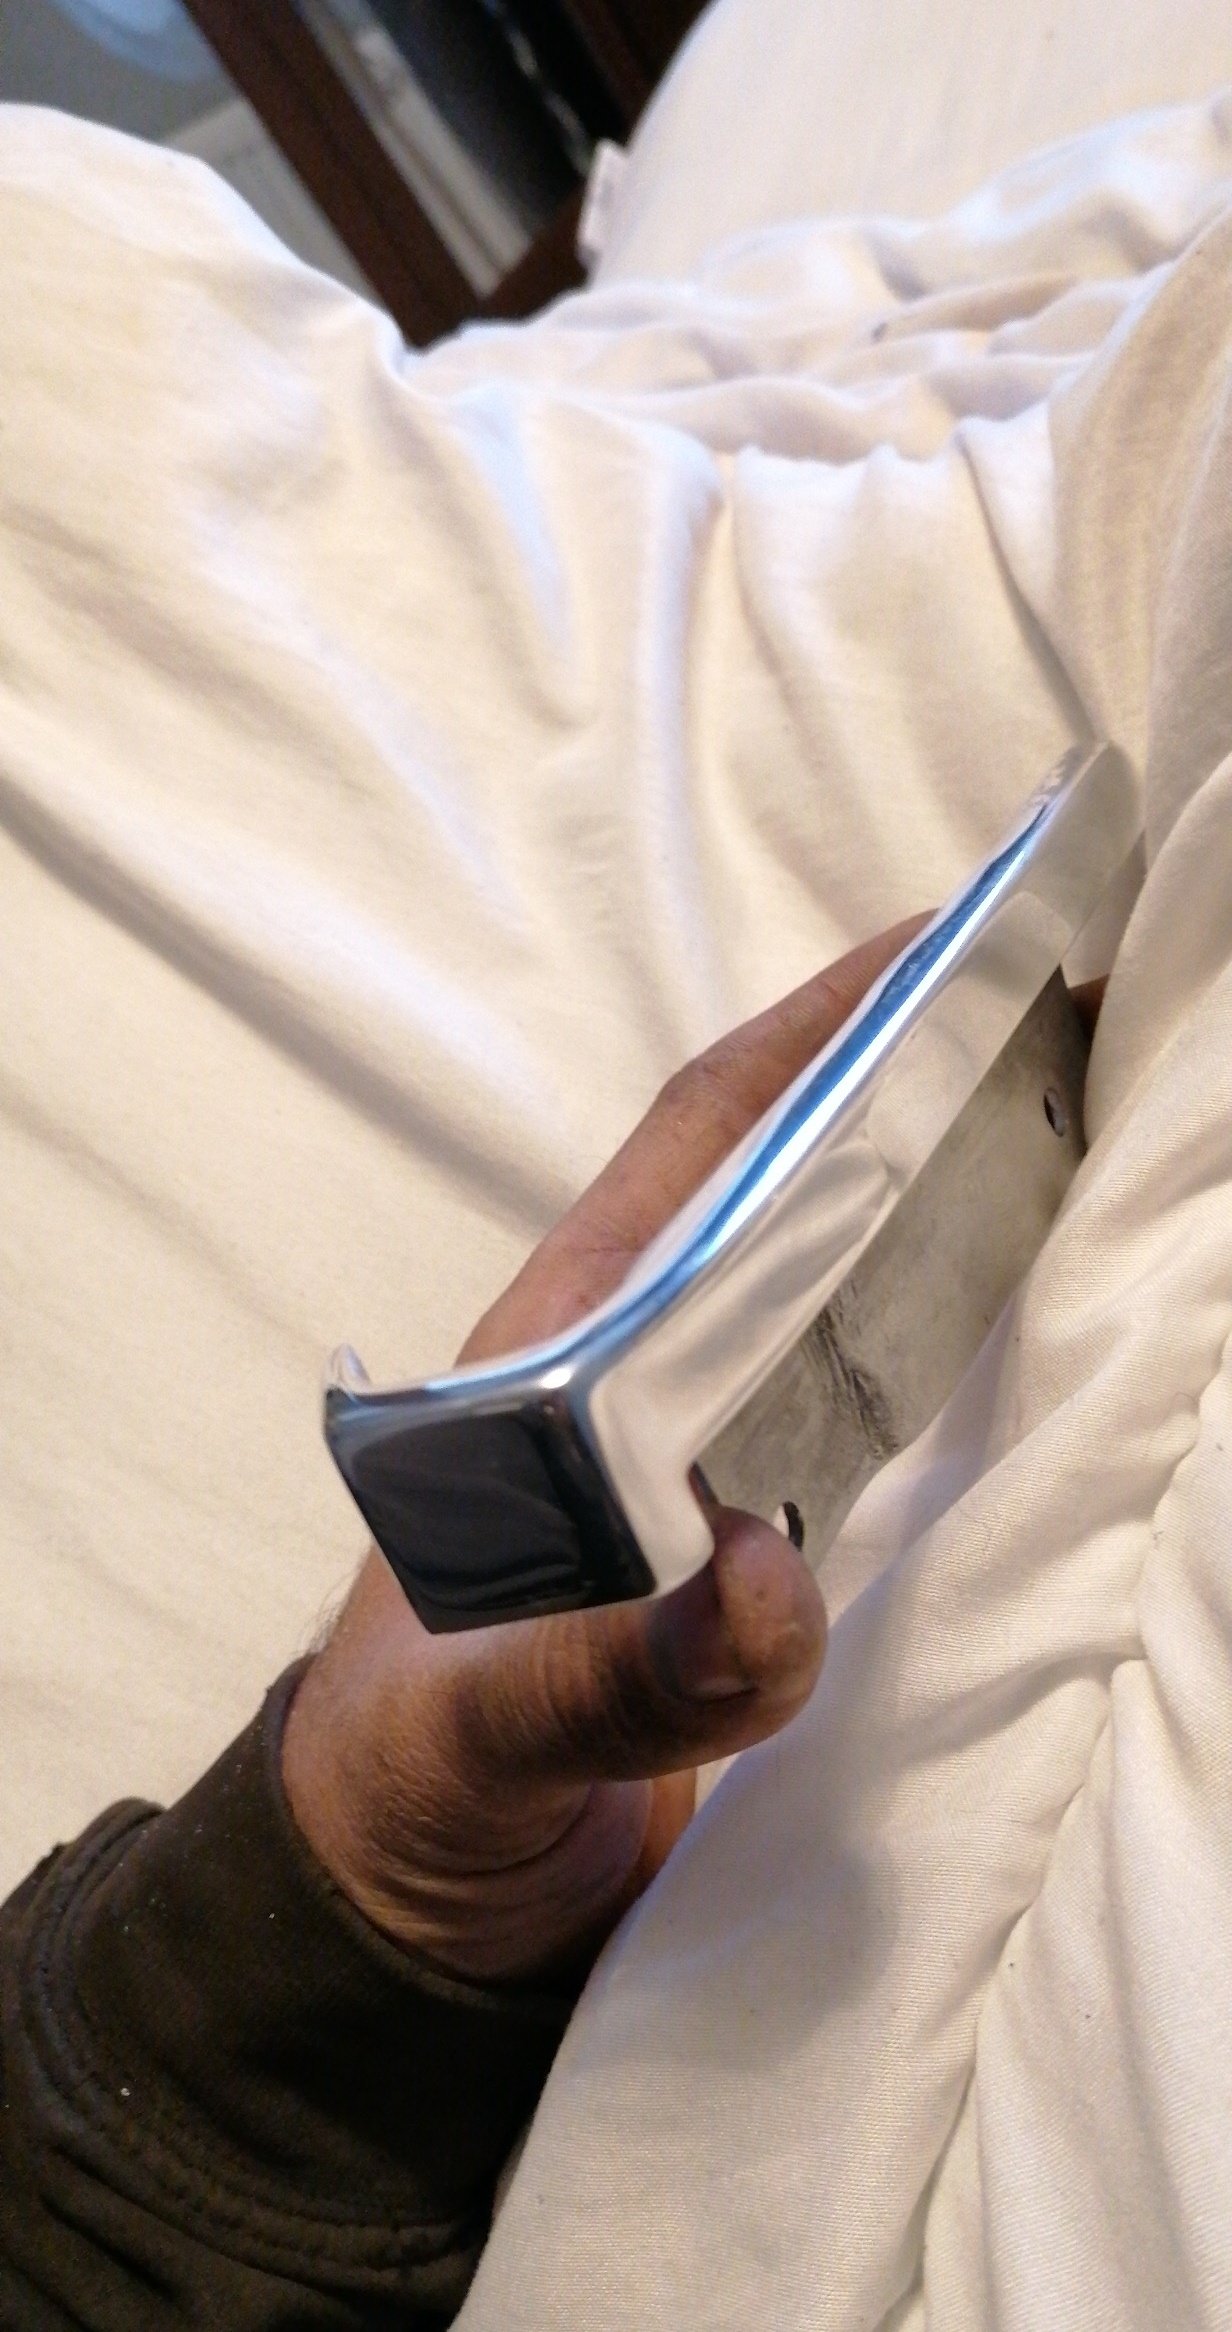
Also removed and tidied/greased and checked the operation of the ventilation fan and wiper mechanism. Putting the wipers back on this happened the pot metal just split as i was tightening the nut. They are the same style as my 2300 (and so also several other Fiats of the era) so should be fairly easy to find. Tidied up the horn button to match the dash And cleaned up all the existing lights Some modifications needed to replace M4 and M5 fine threaded steel machine screws embedded on cast aluminium on end end and wheel well muck on the other that either snapped off or got the dremel. Components are all quality material and servicable and have some up well - 2 of the Original FIAT branded bulbs went back in Some headlights came in as well, along with some generic mounting rings so i will see if i can get them to stay in. Lamps all tested and ready to install.
 24 points
 -
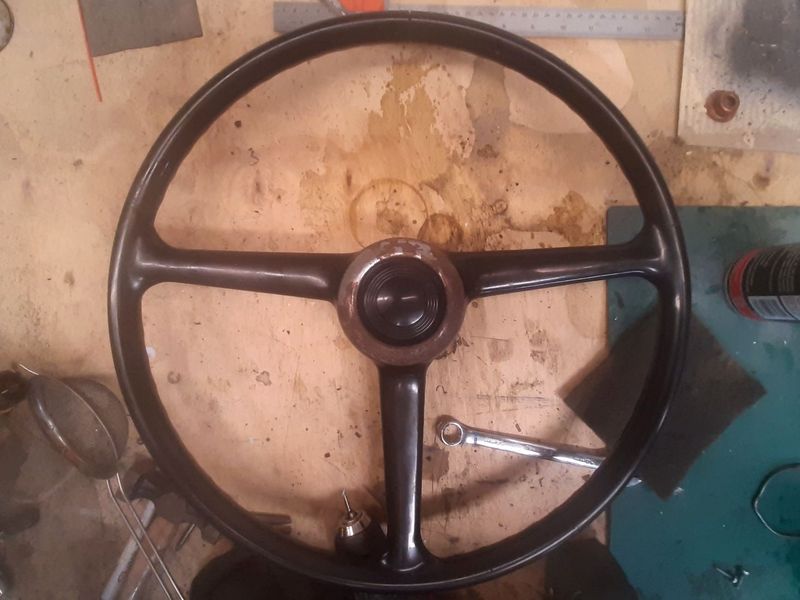
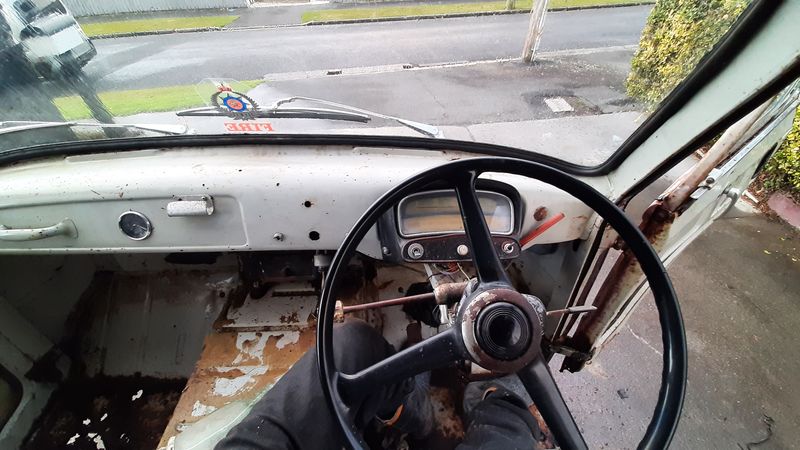
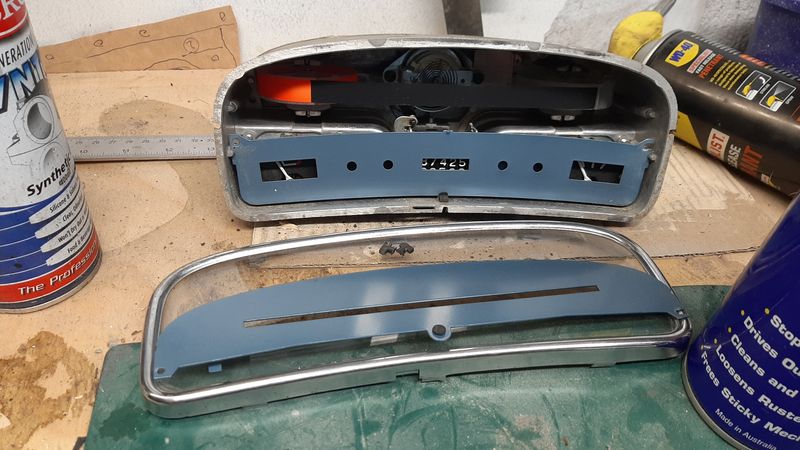
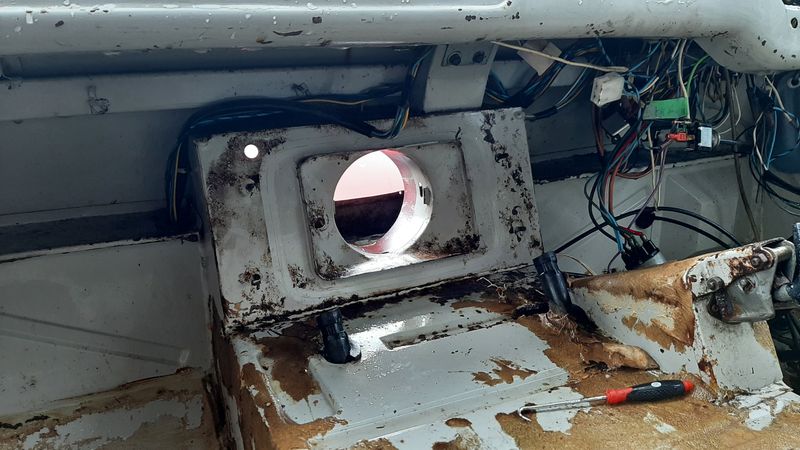
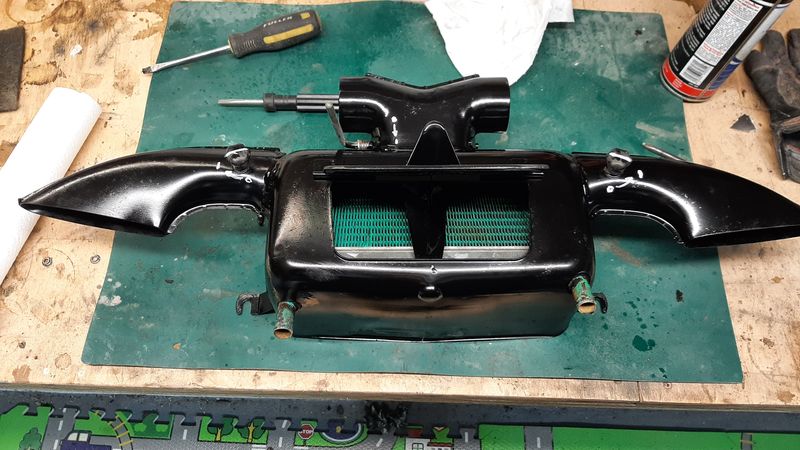
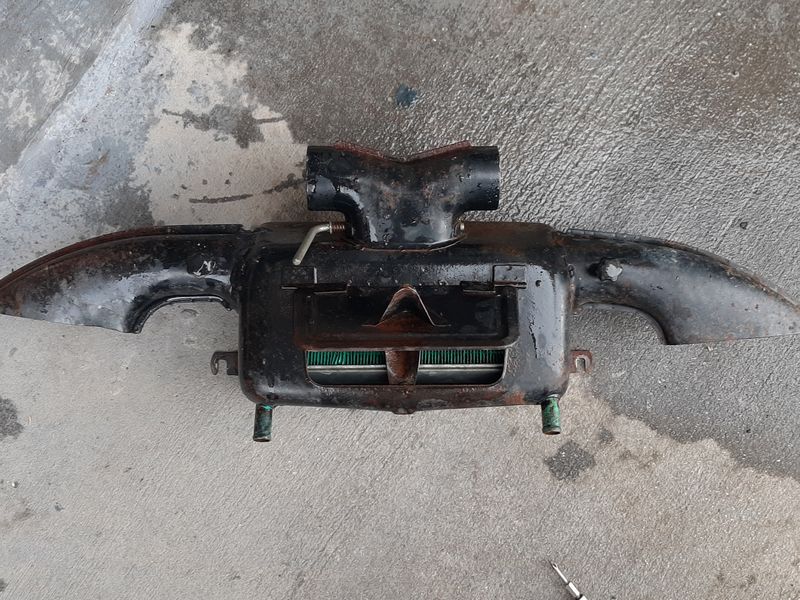
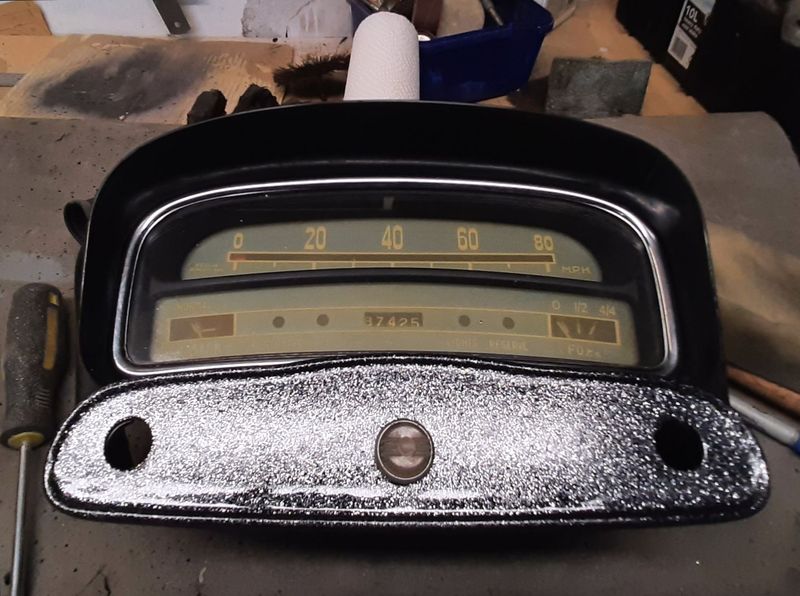
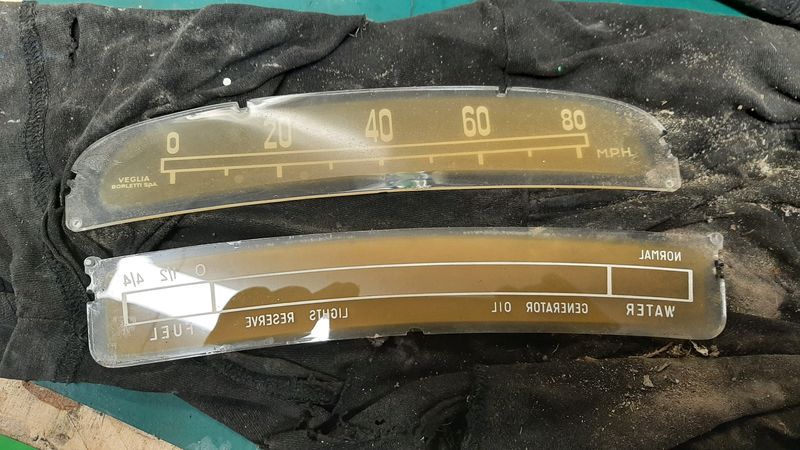
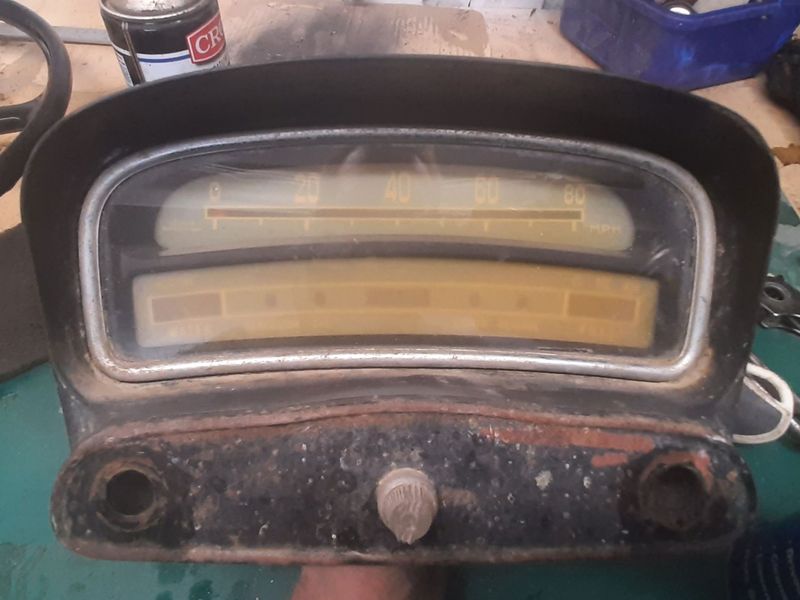
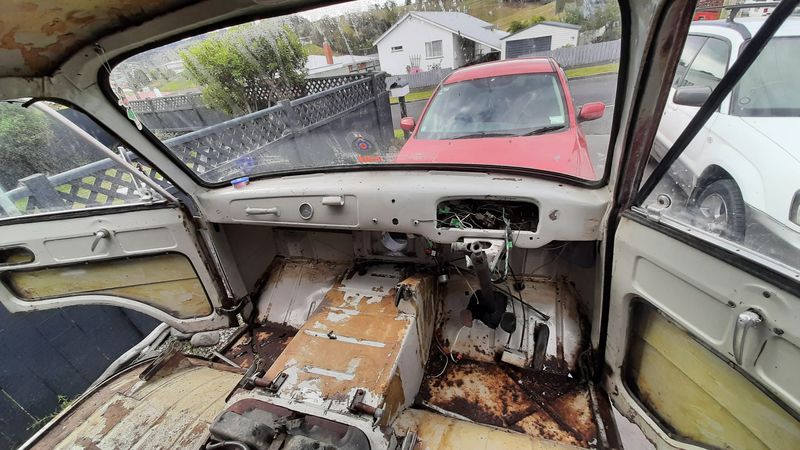
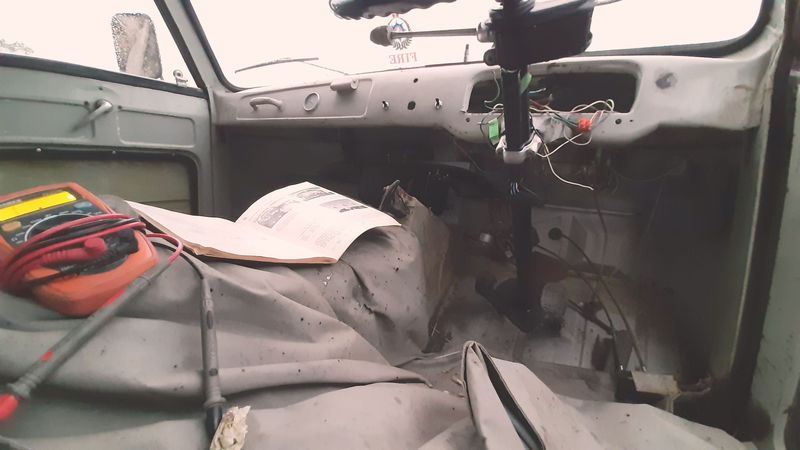
So, now armed with a diagram i could confidently* identify all the cut wires, odd switches and vampire taps in the dash to hack around the busted high/low beam column switch. Time to pull the dash apart to clean the mouse/rat poo off, and see whats what. The interior is pretty spartan, not even a glove box (there is a metal pocket on the cabin divider) and some bourgeois wanker has added a few features like a bag hook, a clock, some random holes and that decadent bit of hose screwed to the dash. Beyond that the instruments are a speedo, fuel and temp guage, some idiot lights but very hard to see, gear knob is a piece of bone, 2 of the 4 dash switches are not original and there is a hi/lo beam type foot switch hose-clamped onto the column in place of the broken factory column switch Bleugh, dirty rats. Simple Green, hot water and another hose out before lying down on it. Pulled the heater out too, this hole houses the ventilation fan which is behind the small upper grill on the front That blasts air through this cool thing, the lever is for the window vents, knobs for the feet, and flap at the front for the cab. In winter you turn on the water tap on the block, in summer you turn the tap off. Heater matrix is a nice teal colour and everything is in great shape apart from the rust from damp and mouse poop Sandblasted and came up really nice. Dash looking pretty sorry for itself The perspex? itself has been affected by the sun Can see the milage now too, 87,425km, i would believe either first or second time around. But otherwise very clean and vibrant colours on the inside, and giving me ideas for next time. Wet sanded the clear plastic and clear coated them, everything else got tidied up too, checked all the bulbs and fixed a stuck speedo drive. My drill has a max speed of 40mph. Bit of bling on the switch panel
23 points
-
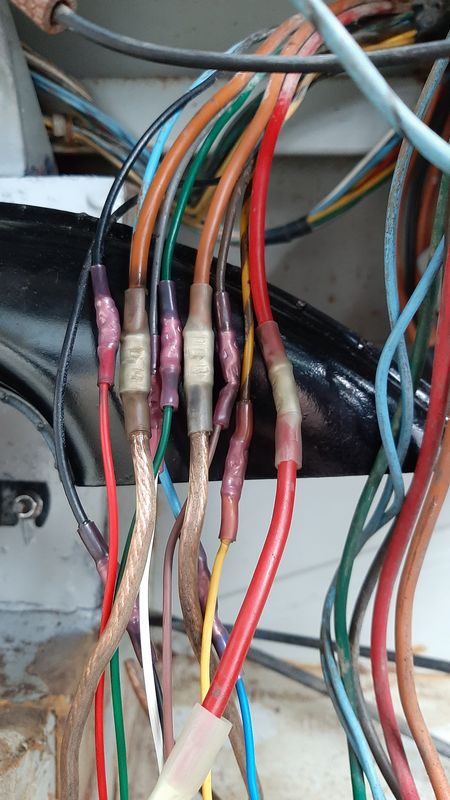
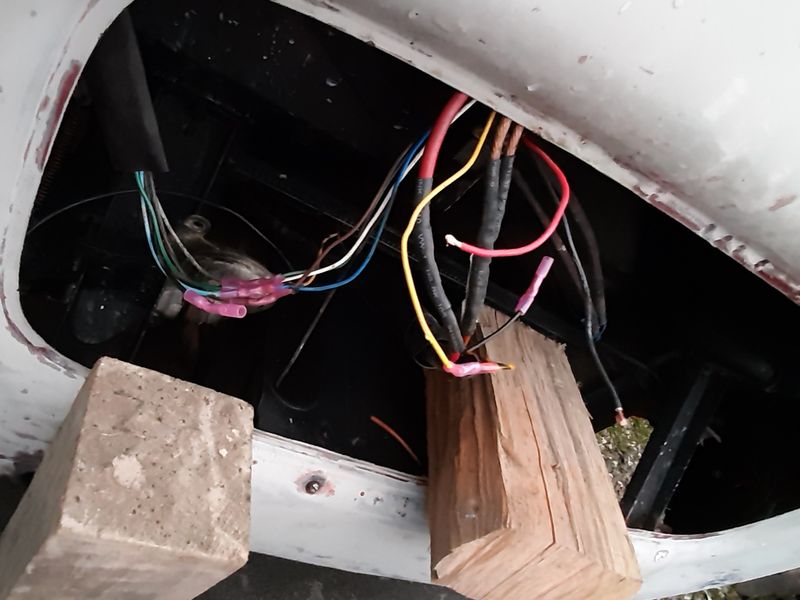
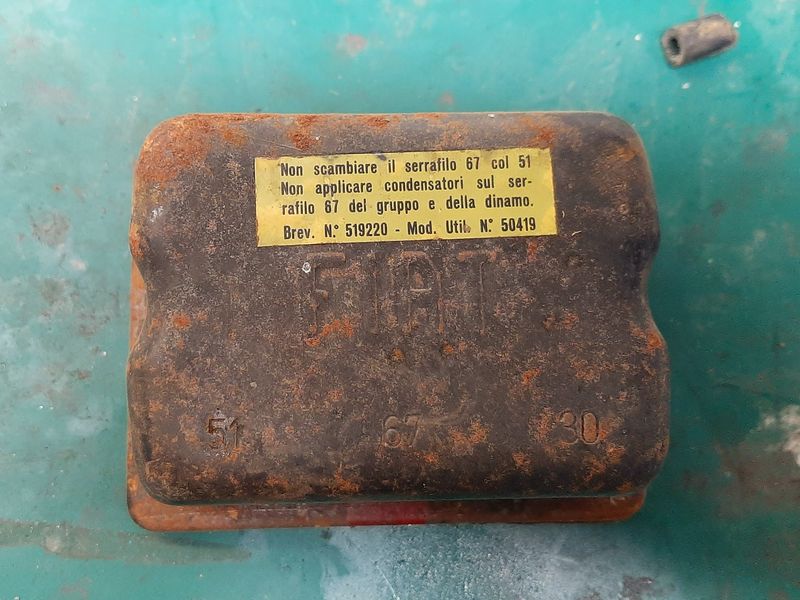
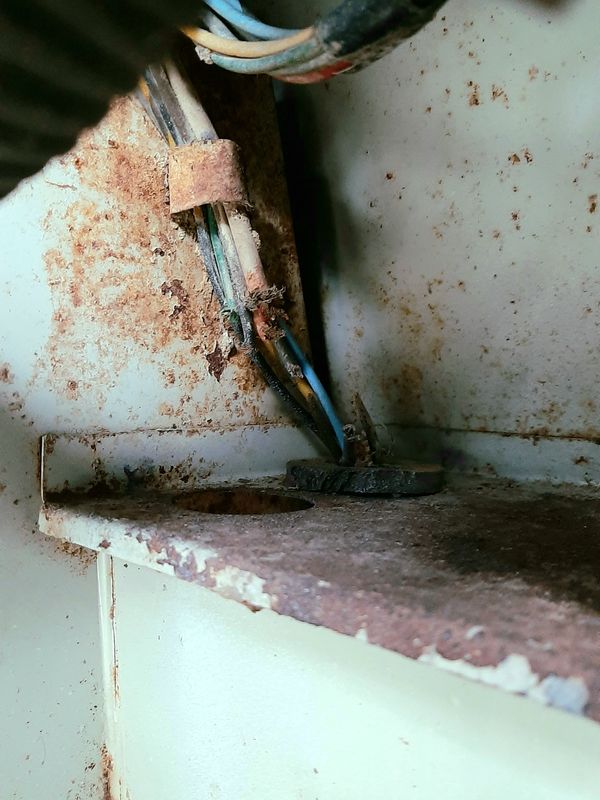
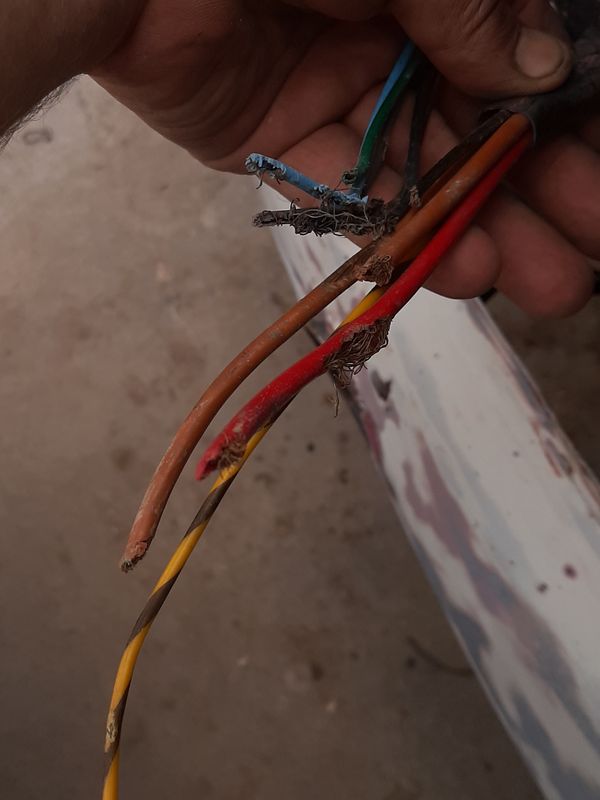
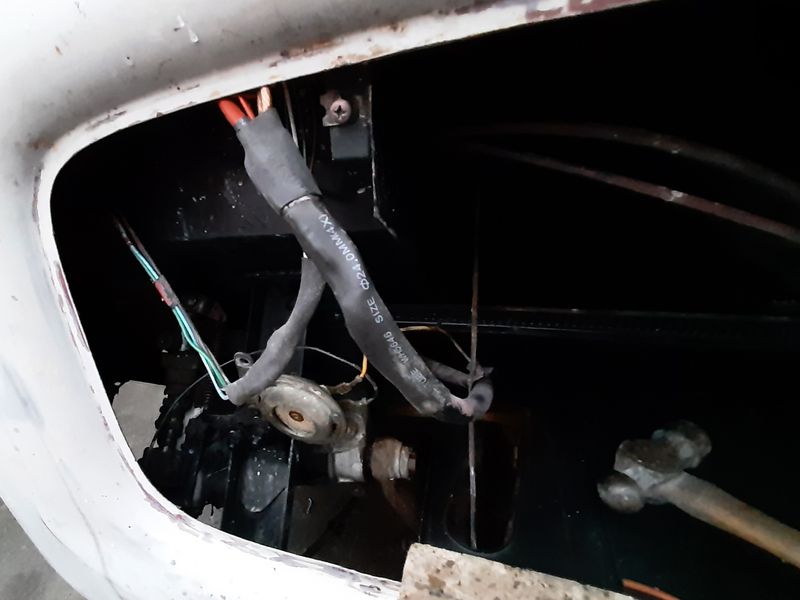
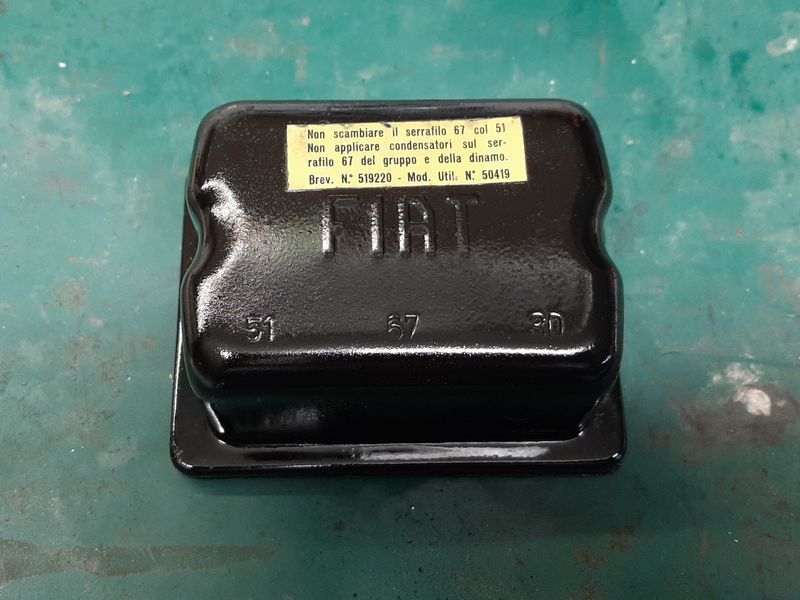
Before i put any electrical things back in i gotta take care of some shit. Fucking rats man. This is the main engine loom (alternator and starter control plus main power feed) as well as the drivers front lights loom. Only wire not chewed to the point of separation was the horn power supply. Interesting horn wiring sidesharn, the other horn wire (from the button, that earths out the circuit) actually travels the length of the hollow! steering column and exits the bottom of the steering box!?! Because of where the break was,right in a really tight shitty spot, under the dash, I extended the loom from the dash side first. Love these shrinky connectors and my box of wires came up with almost a match for most of the wires. For future reference the black to red wire is the alternator signal for the voltage controller. Then poked that though the hole after a quick derust on the shelf while it was all ot the way. Then finish off underneath with lots of heat shrink. The wooden block for really getting those small crimps crimped up good with a blunt cold chisel, my crimpers dont quite go small enough on the small ones And some cable ties then more heats for good measure. If you cant fix it with a hammer you got yourself a software problem... Voltage regulator lives under the dash too. "Do not mistake the clamp 67 with the 51 Do not apply capacitors on the wire clamp 67 of the unit and of the dynamo" Cleaned out the cobwebs and gave the 'points' a quick file while the paint dried after a quick sandblast. Important electrical safety messages maintained. I forsee a bit of this before i finally wire everything back in. My back got pretty sore from even thinking about doing that, so I did some more sanding, shes coming around. Got a good light for finally seeing the chassis number properly. I also wanted to be able to get a good photo of it before cleaning up the area. FIAT 217D * 107627 * Tipo 217D = Type 217, revision D, that makes it a 'late' 1962 to 1968 model, and this was the 107627th, Tipo 217
16 points
-
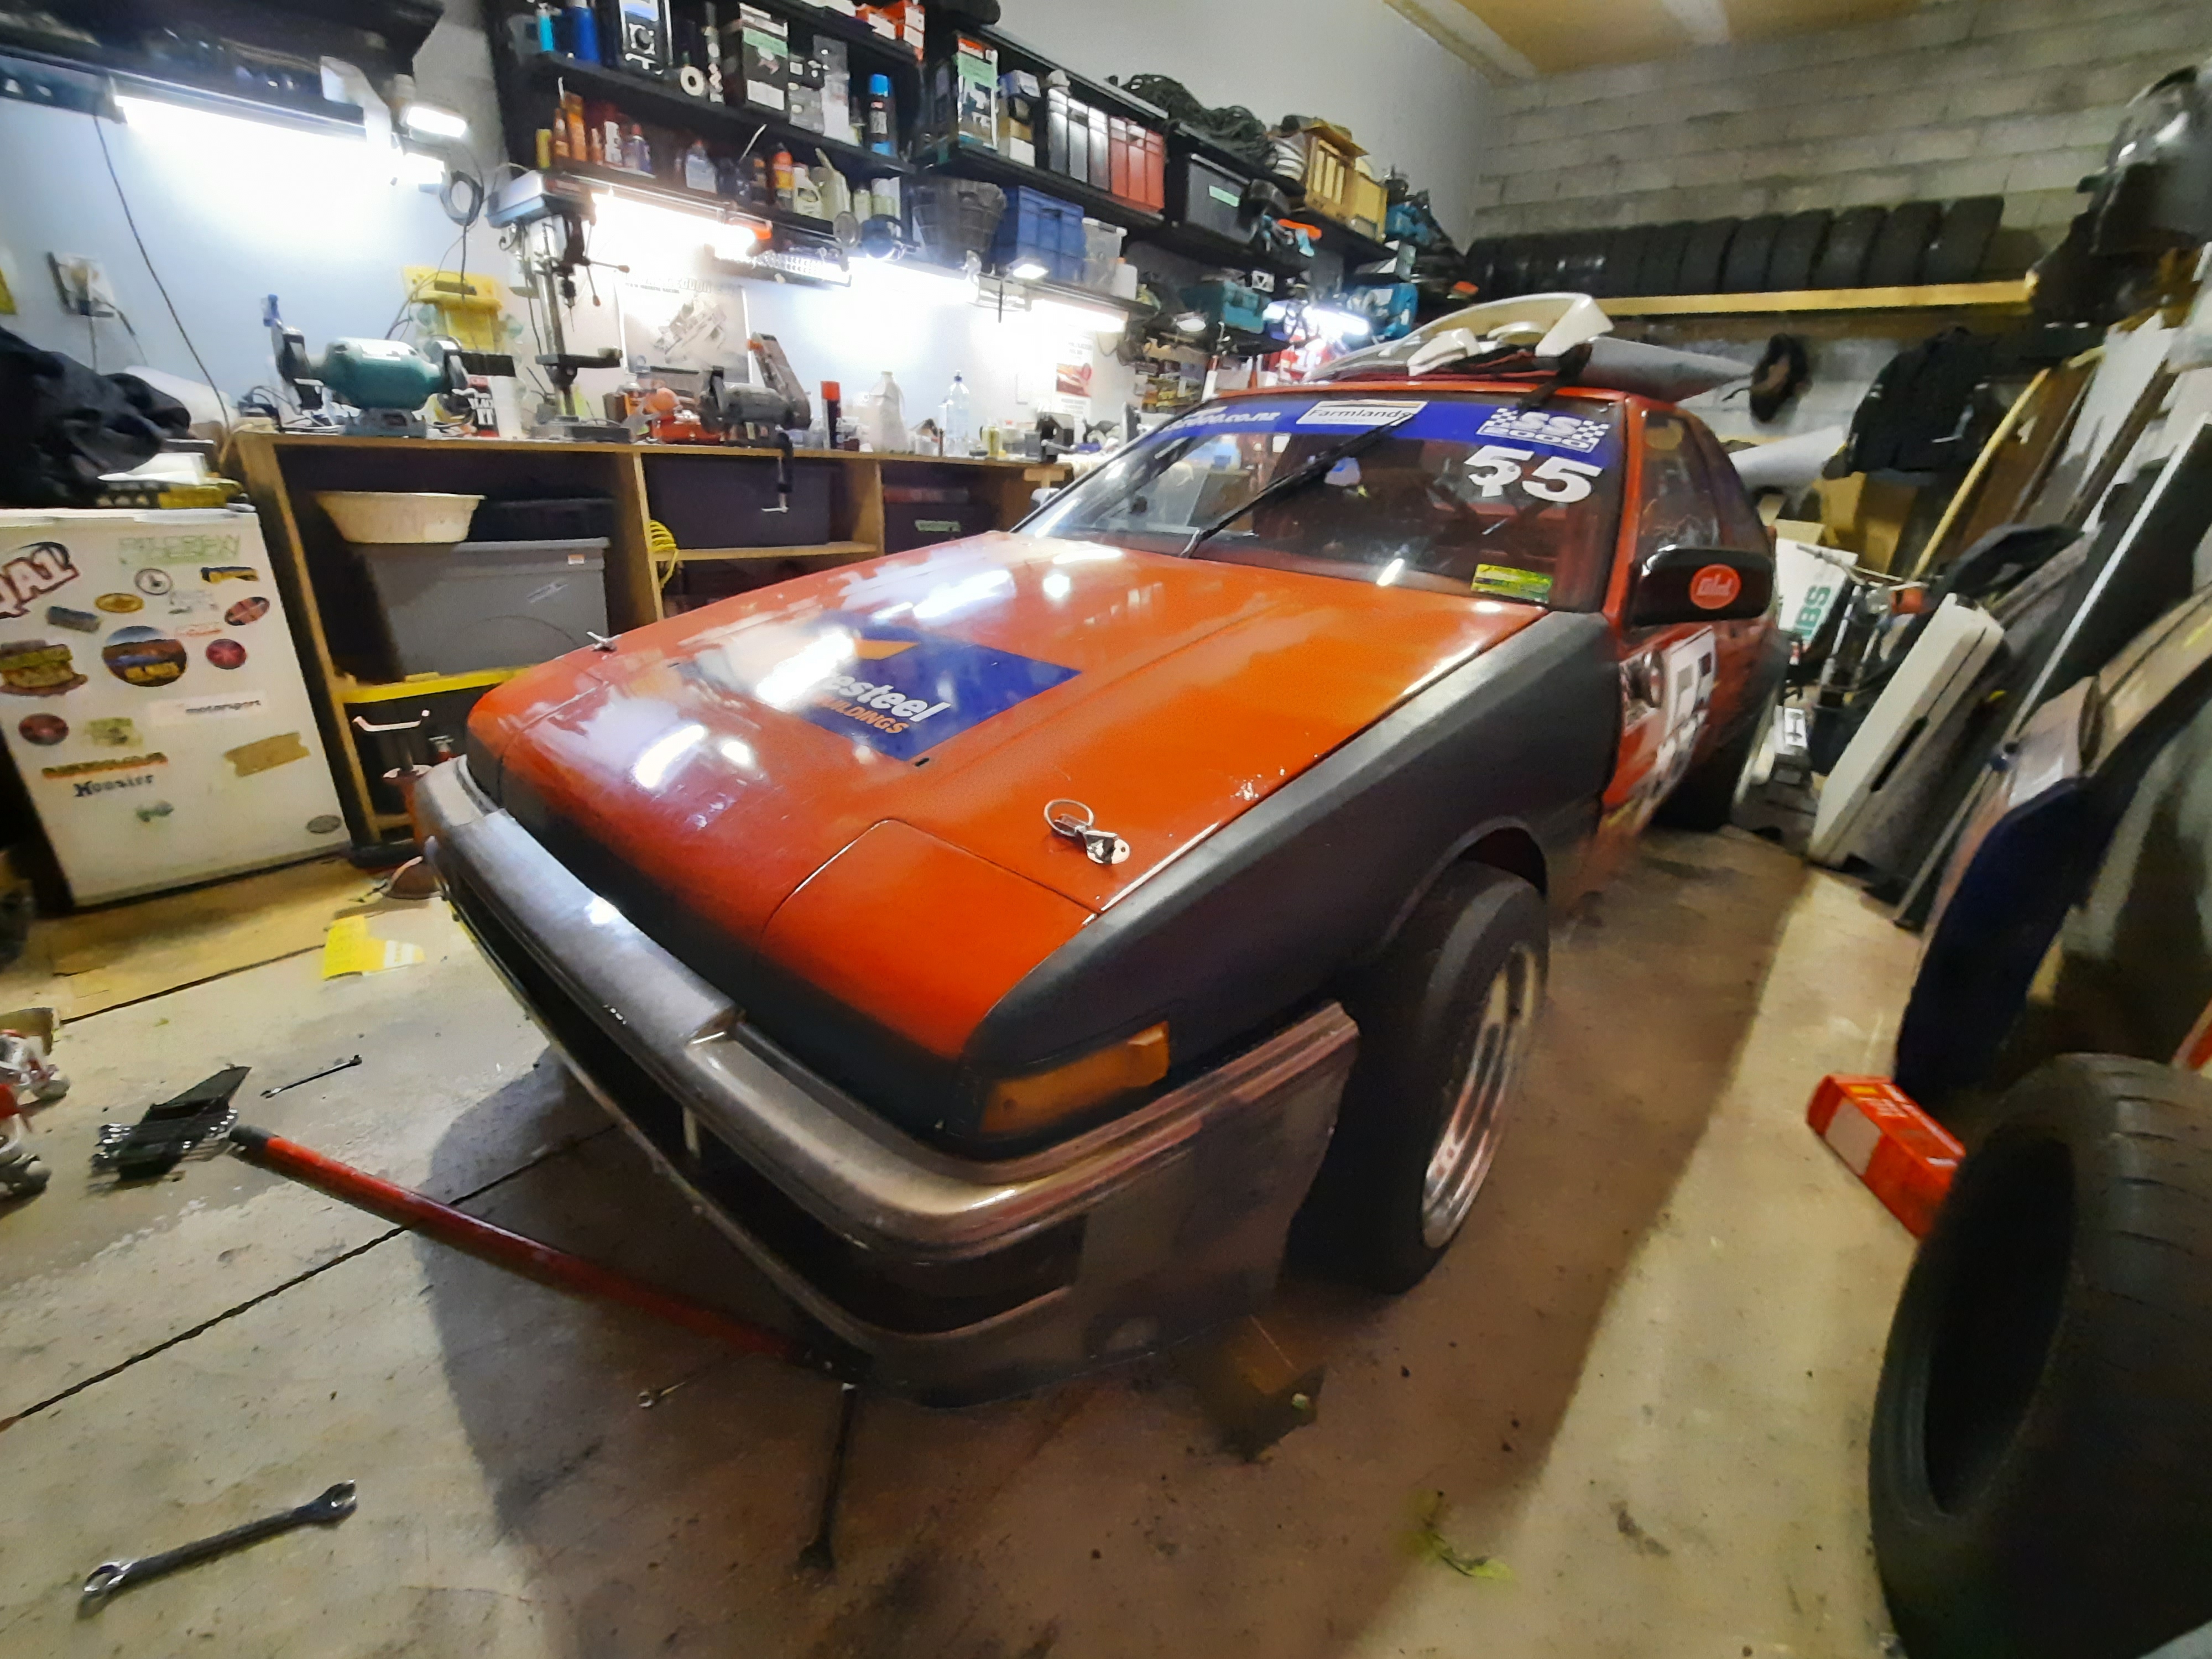
Right o, the latest round of fuckery. As discussed, I decided that a second rad was going in, regardless of you fuckers who said not to worry. Basically the thing bouncing off the electric fan just by hitting 100kmh for 2 mins or after a hard pull was not giving me the lovelies. After a measure up I scoured the internet radiator catalogs for a suitable donor. Unsurprisingly a Hiace van rad was pretty much bang on if maybe a little tall. I ordered one from my rad man and when it arrived presented it up. A minor forward tilt had it sitting in a good place. The top inlet pipe was a stupid angled thing so I took it back to rad man to change it for a straight inlet. I made some bottom mounts that hooked in to existing chassis holes, then fudged up a top mount. I had to grind off some unnecessary brackets and such but that was no drama. Then I spent quite a while rejigging the stainless pipework to point in the general direction of the rad pipes. I dragged the old fan and viscous clutch setup out of the container, however the 450mm safari fan was going to be pretty tight in there and probably going to hit the engine cover. Some google-fu resulted in the purchase of a TD27 fan, as it had the same mounting but only 420mm diameter, perfect. I then somehow spent nearly a week of evenings fucking around creating a shroud that would miss everything but still do ducty good things.. I have no idea what it took so long, but it did get remade 3 or 4 times. It's a bit dodgy, ie made out of some old flashings that were the only really thin steel I had lying around, but it appears to duct adequately. So today I finally filled and bled the cooling system and took it for a spin, and holy shit what a huge difference! It basically gets to 1/3 of the way up the gauge and stays there absolutely rock solid. This is where it sat when doodling around town previously. I did a long run at 100kmh, then went up a steep hill that had always made the big fan come on and it didn't move the gauge at all. Super happy with that.... It also appears the thermostat now has a temperature range it can work with, as the wee fan and aux pump cycle on and off which tells me the thermostat is choosing to open and close rather than stay open all the time in an attempt not to blow the engine up. So all in all that was a worthwhile exercise.14 points
-
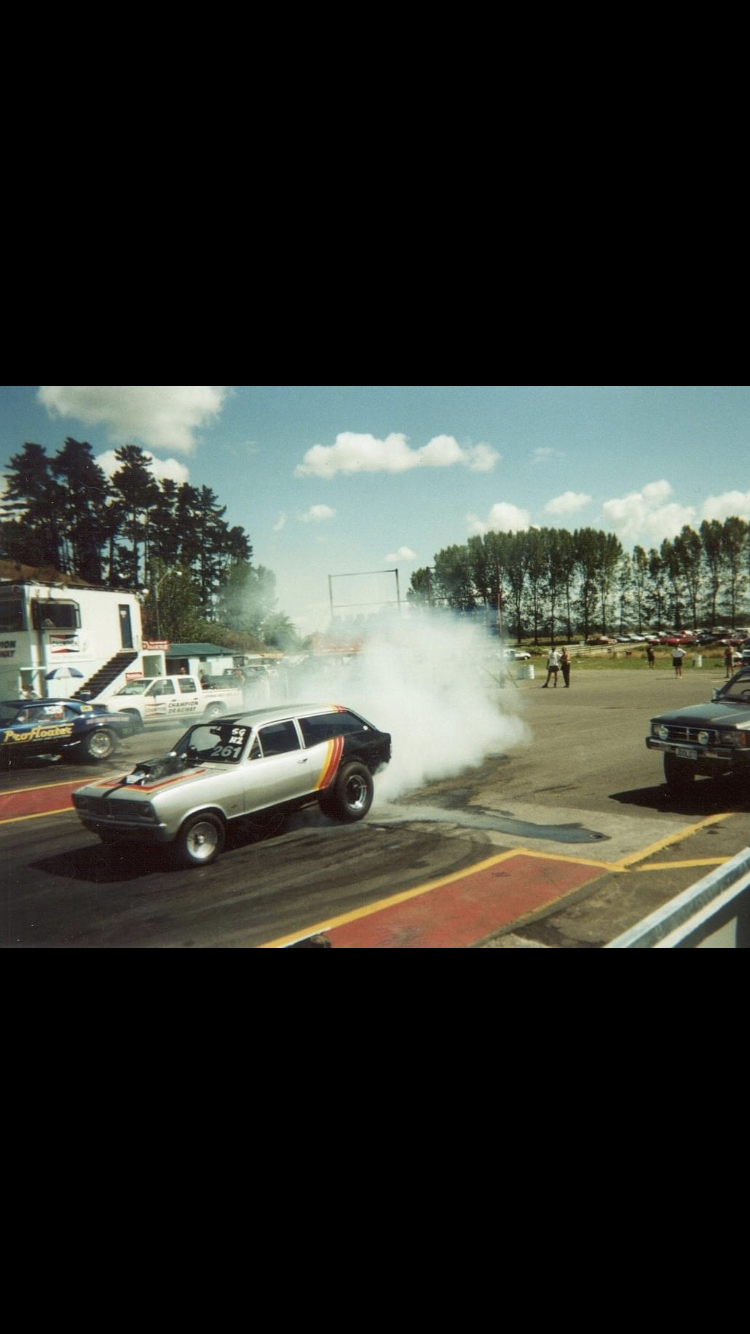
car went to the paint shop to get the runs out of it and get the final cut and polish. i went and picked it up last night and it looks amazing. anywho, today i wanted to fix the exhaust where the flex joint had worn through because its the lowest point and its had a fucking over judder bars and whatnot and subsequently has a hole it in. step 1 - jack up your car. this is where things went wrong. 2021-04-25_02-55-42 by sheepers, on Flickr car slid off the jack on the way up. given what could have happened i got off extremely lightly. it bent the radiator support up and bent the bottom of the radiator real bad. it also bent the bottom of the front bumper. however, the radiator isn't leaking and the crank pulley is unscathed which is a fucking miracle given what happened. i was able to bash the rad support back down and i got most of the bend out of the bumper so it looks fairly normal again. fuck it could have been WAY worse.................. so yea, after dealing with that i moved on to fixing the zorst. cut out the fucked bit, made a new bit, tacked it in place, remove zorst from car and fully weld, add 4mm thick bash plate and put zorst back in car. 2021-04-25_02-55-49 by sheepers, on Flickr 2021-04-25_02-55-55 by sheepers, on Flickr 2021-04-25_02-56-02 by sheepers, on Flickr 2021-04-25_02-56-09 by sheepers, on Flickr 2021-04-25_02-56-21 by sheepers, on Flickr then it was time to wax the newly polished paint. that went well. it looks pretty ace tbh and yea, i cant take a photo that justifies how good it looks. but it looks good. take my word for it. 2021-04-25_05-34-27 by sheepers, on Flickr 2021-04-25_06-18-48 by sheepers, on Flickr 2021-04-25_06-19-23 by sheepers, on Flickr 2021-04-25_06-32-09 by sheepers, on Flickr12 points
-
And this as well, which I filmed halfway through the process. This was cos i am now under serious pressure to provide content to my now 189 youtube subscribers, fuck you for suggesting I enter that competition.9 points
-
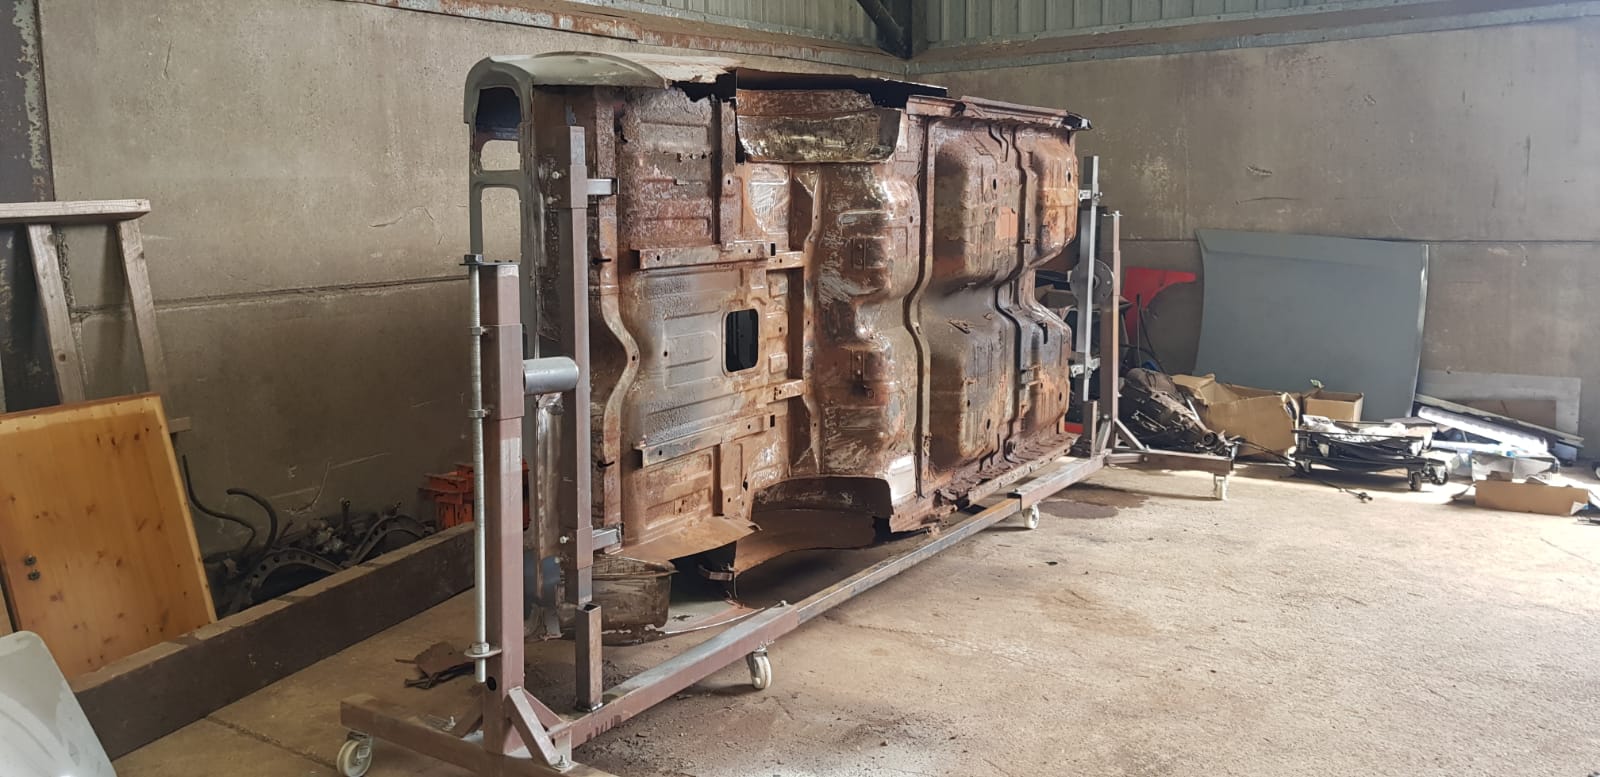
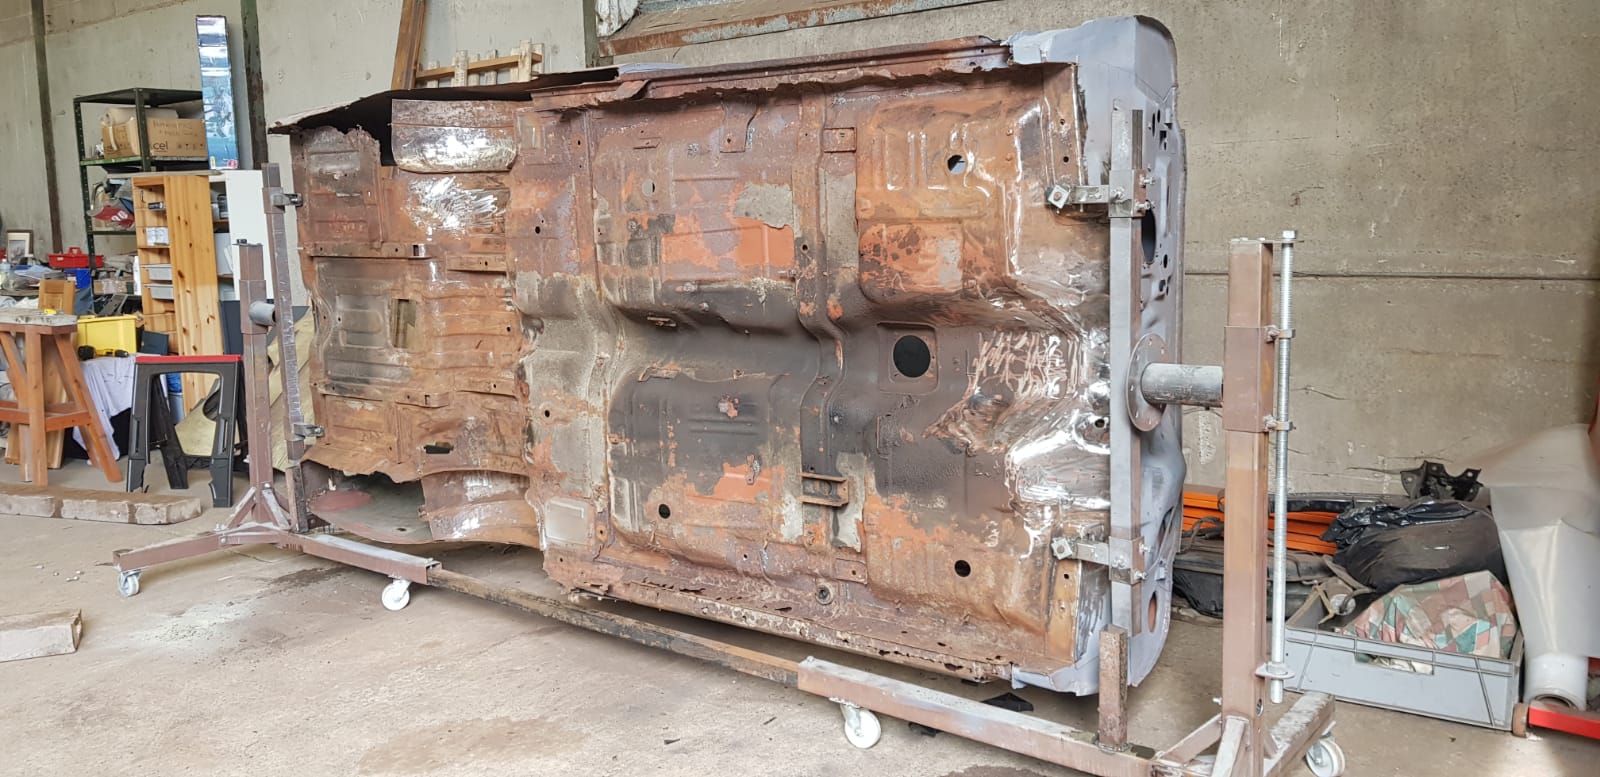
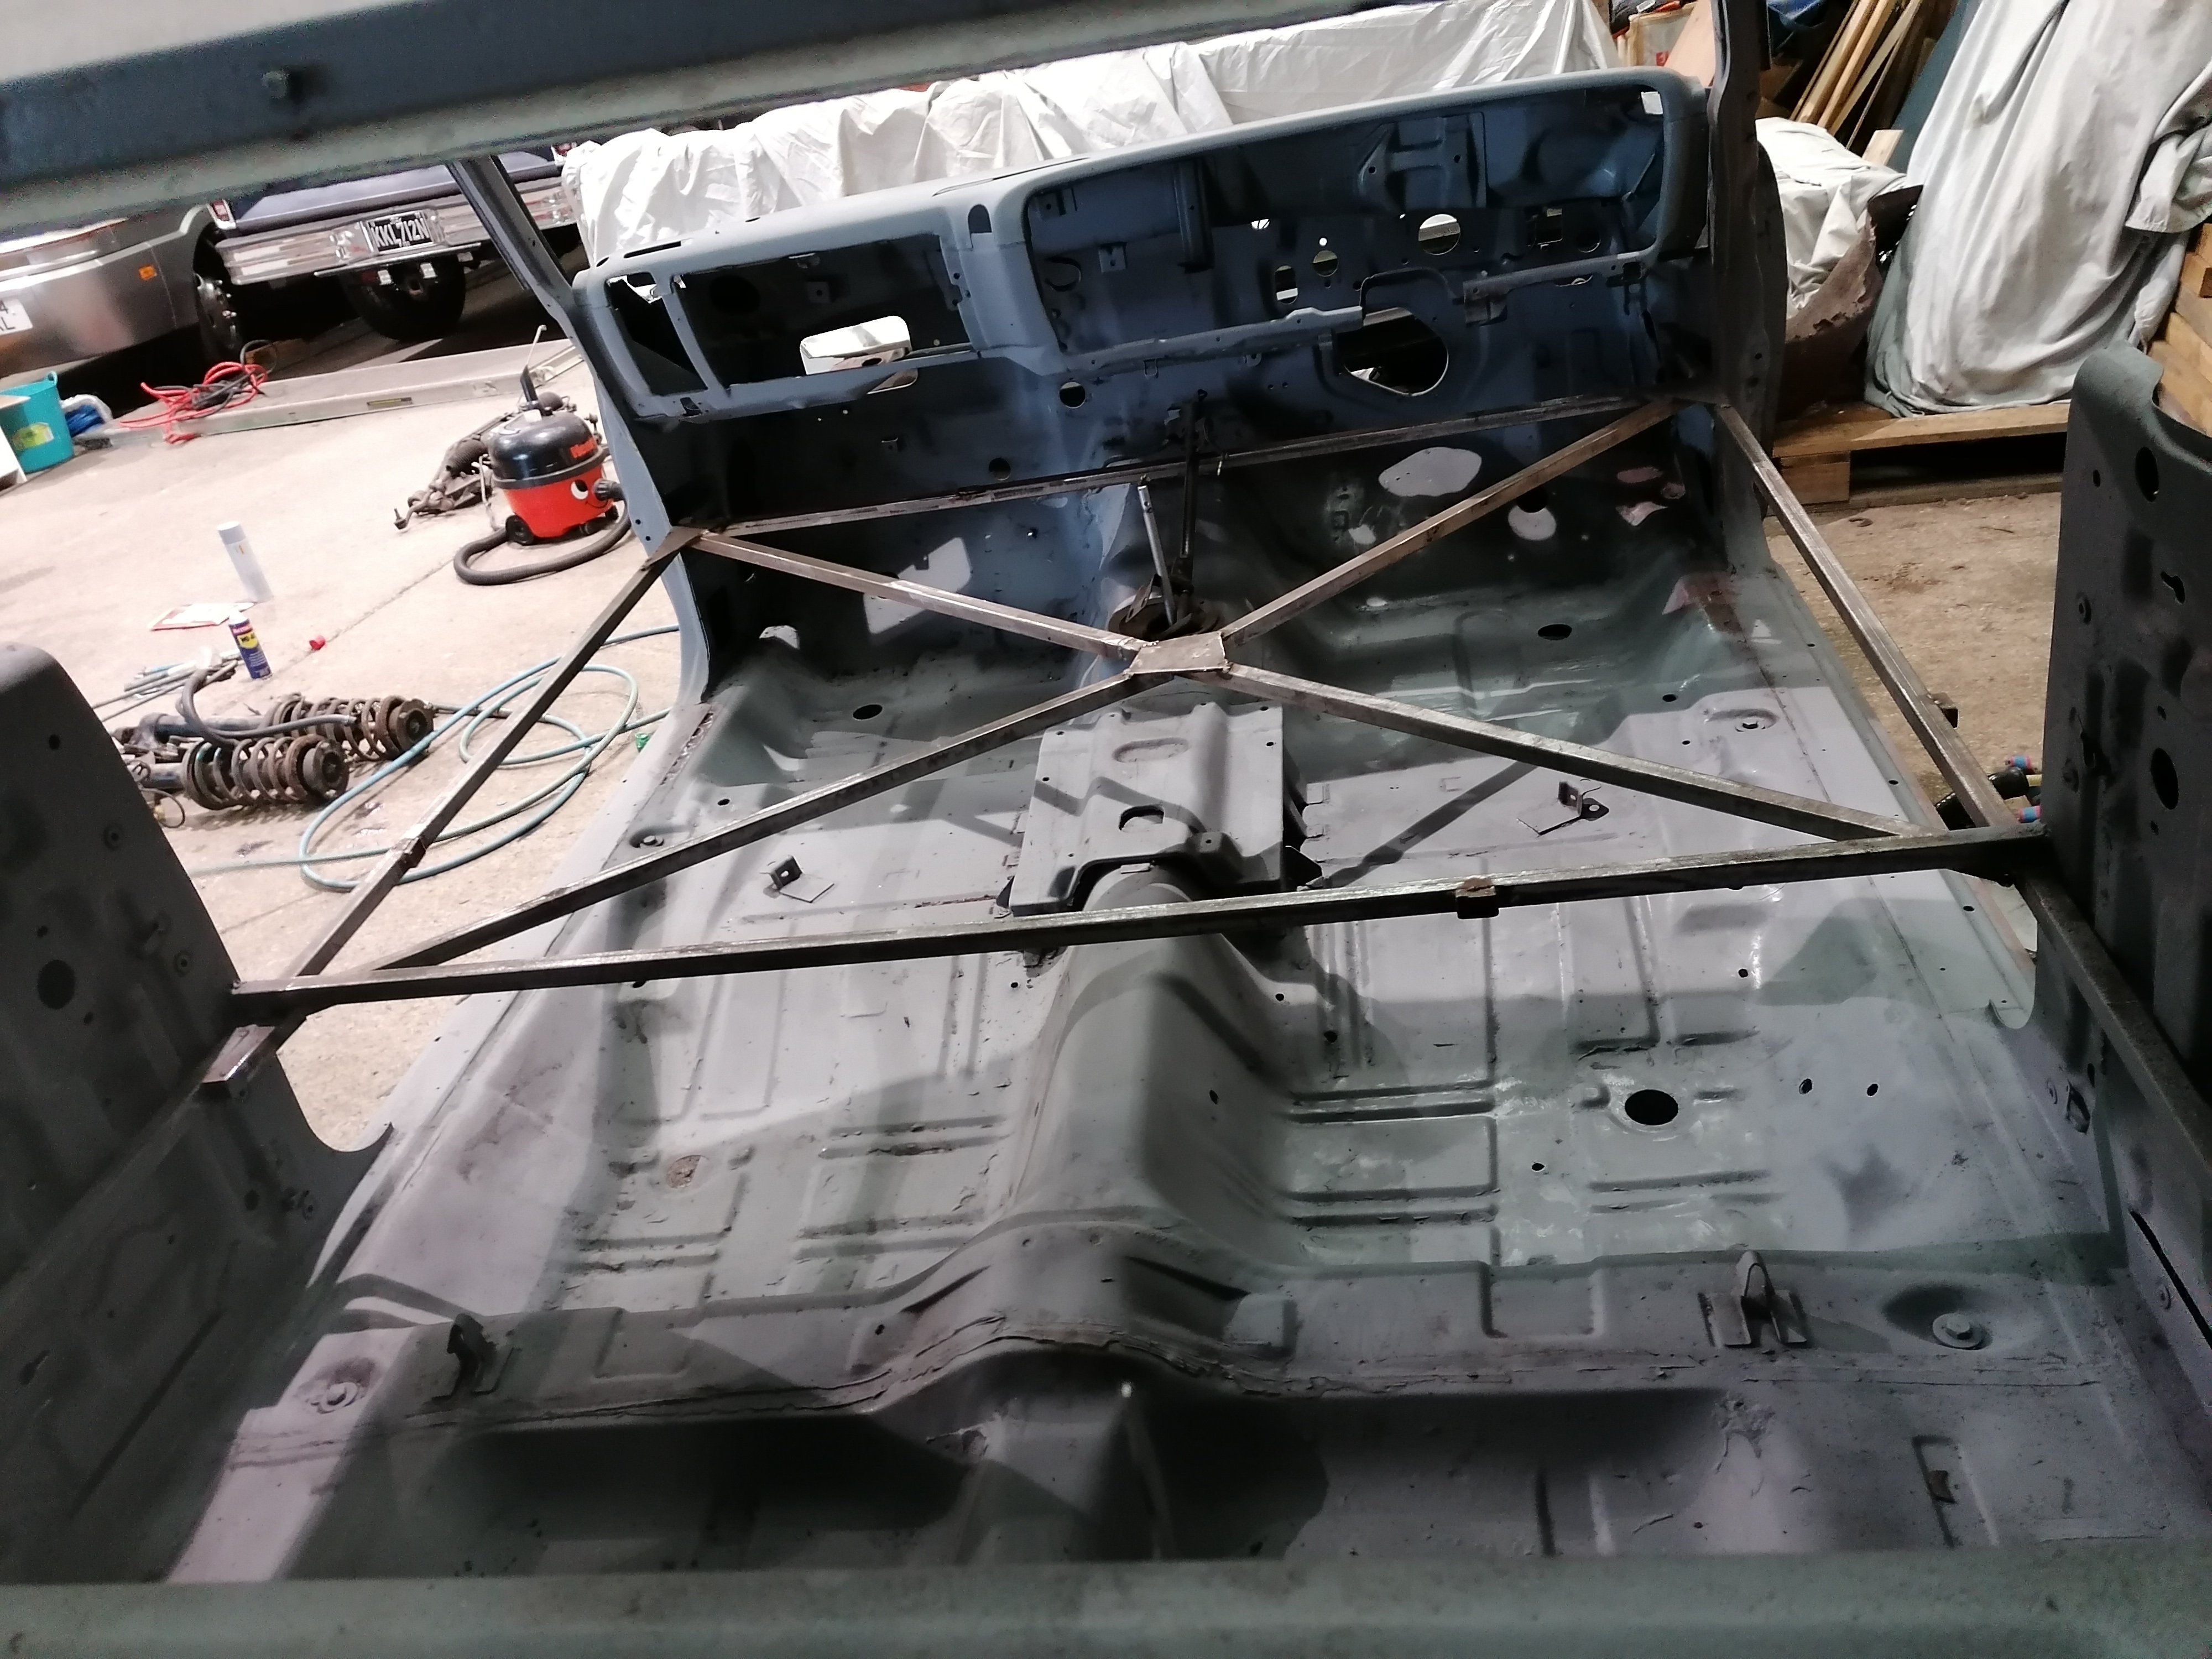
Got a jig set up & the car mounted, ready to bare metal underneath & make a start on the sills etc.
9 points
-
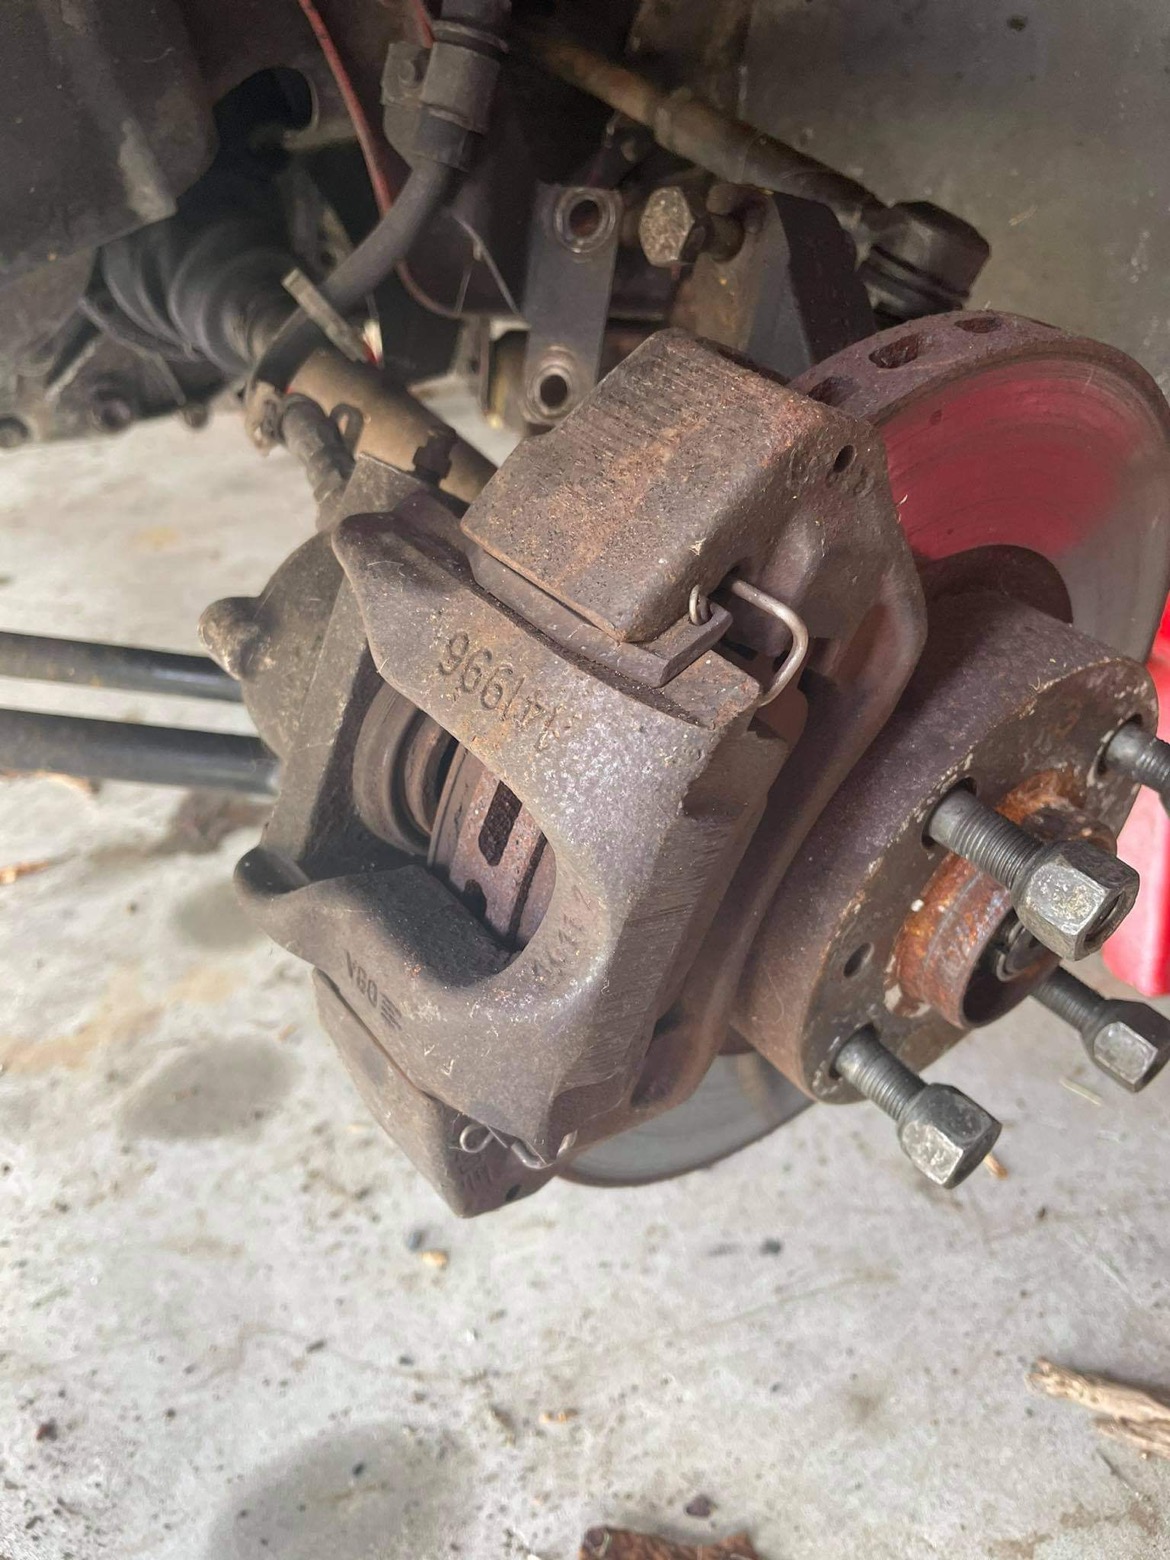
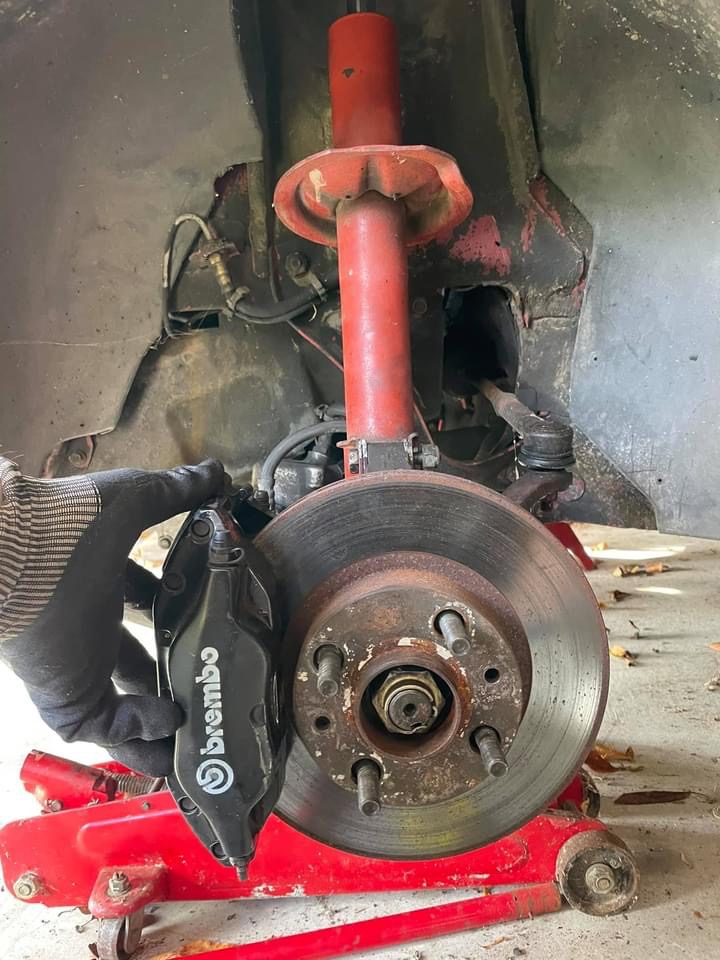
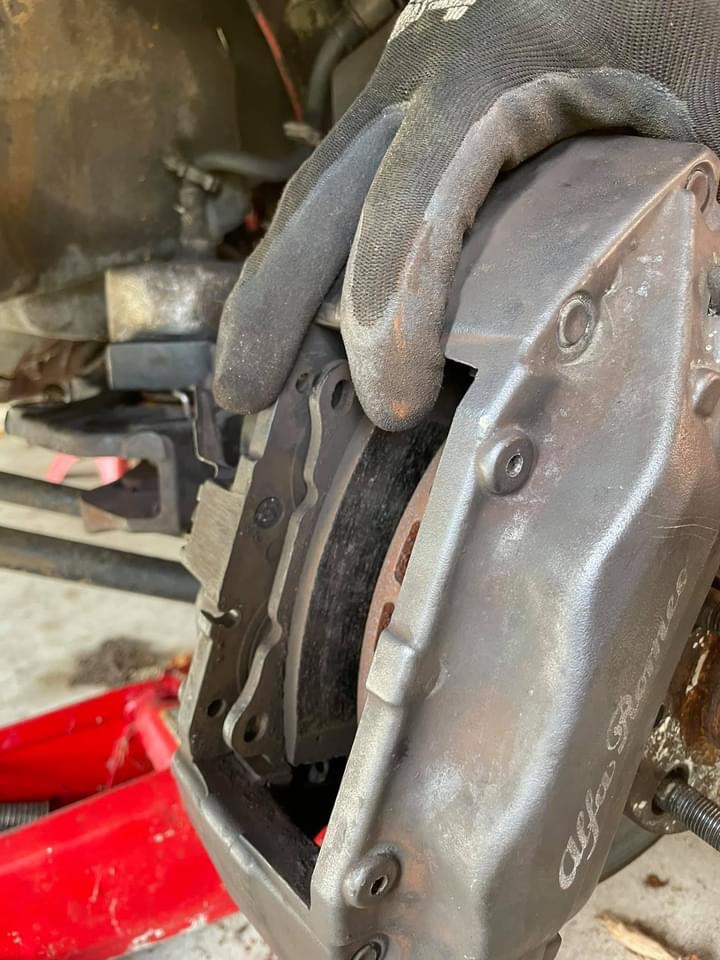
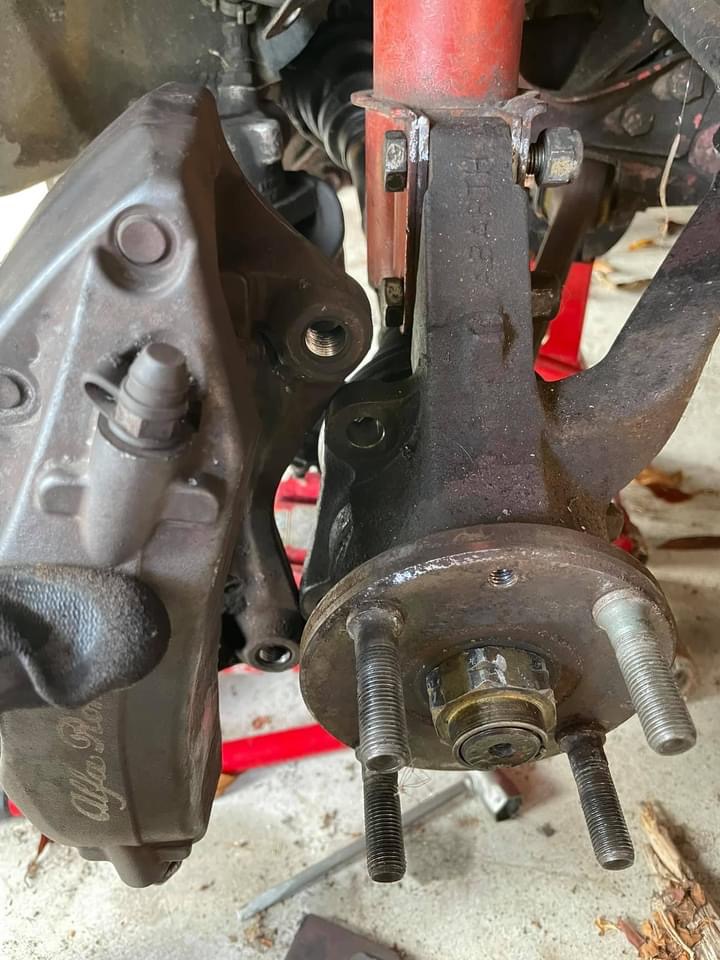
Got stuck into the brake situation this weekend. The front brakes have always been a bit scary, being single piston and not even really fully pressing on the surface of the brake pad. Whipped them off to trial fit some Brembos. Got two sets, Peugeot 406 ones and @zep Alfa 166 ones we snagged from pick a part a couple of weeks ago. 406 ones are slightly smaller but are still 4 pots and were the original preference. However on fitting them they are too much of a close fit to work with an adaptor. The Alfa ones however sat perfect with enough room for the adaptor plate to manage any offset issues. Factory Strada disc is 242mm and there is 25mm extra pad space to fill so 242mm + 25mm +25mm = 292mm. So upgrading to 305mm Fiat Turbo Coupe discs seem like the perfect fit. Next I’ll get the discs and start work on a wooden adaptor plate to see how it’ll all come together.
8 points
-
7 points
-
Also did some building, turned this... into this... Has different levels to help with sparging, siphoning etc. Bit of a gamble design-wise before I've actually done anything, but should work out ok. Cleared out a corner of the garage to put it in... And put down a brew last week. Simple all-grain APA, with NZ hops... And malt pipe lifted for sparging... Into the fermenting bucket. Hygiene is everything so fastidious cleaning and sterilisation as you go... Original gravity came out around 1.058, pretty good sugar levels... And into the brew fridge. No airlock fitted here yet, was just lifted into place after pitching yeast once it had cooled to 21 deg C, almost exactly 20 litres of wort... And ticking away doing its thing. My lovely little yeast cells are making things bubble away... So will hold at 20 degs for 10-14 days. Will take gravity readings later on then siphon into bottling bucket, add conditioning sugar and bottle. Then another couple of weeks... Took about 6hrs as it was my first time and I had initial equipment cleaning to do etc, I'll get better as I have learned how the temps go now and I'll be able to multitask once things are under way. Been interesting...7 points
-
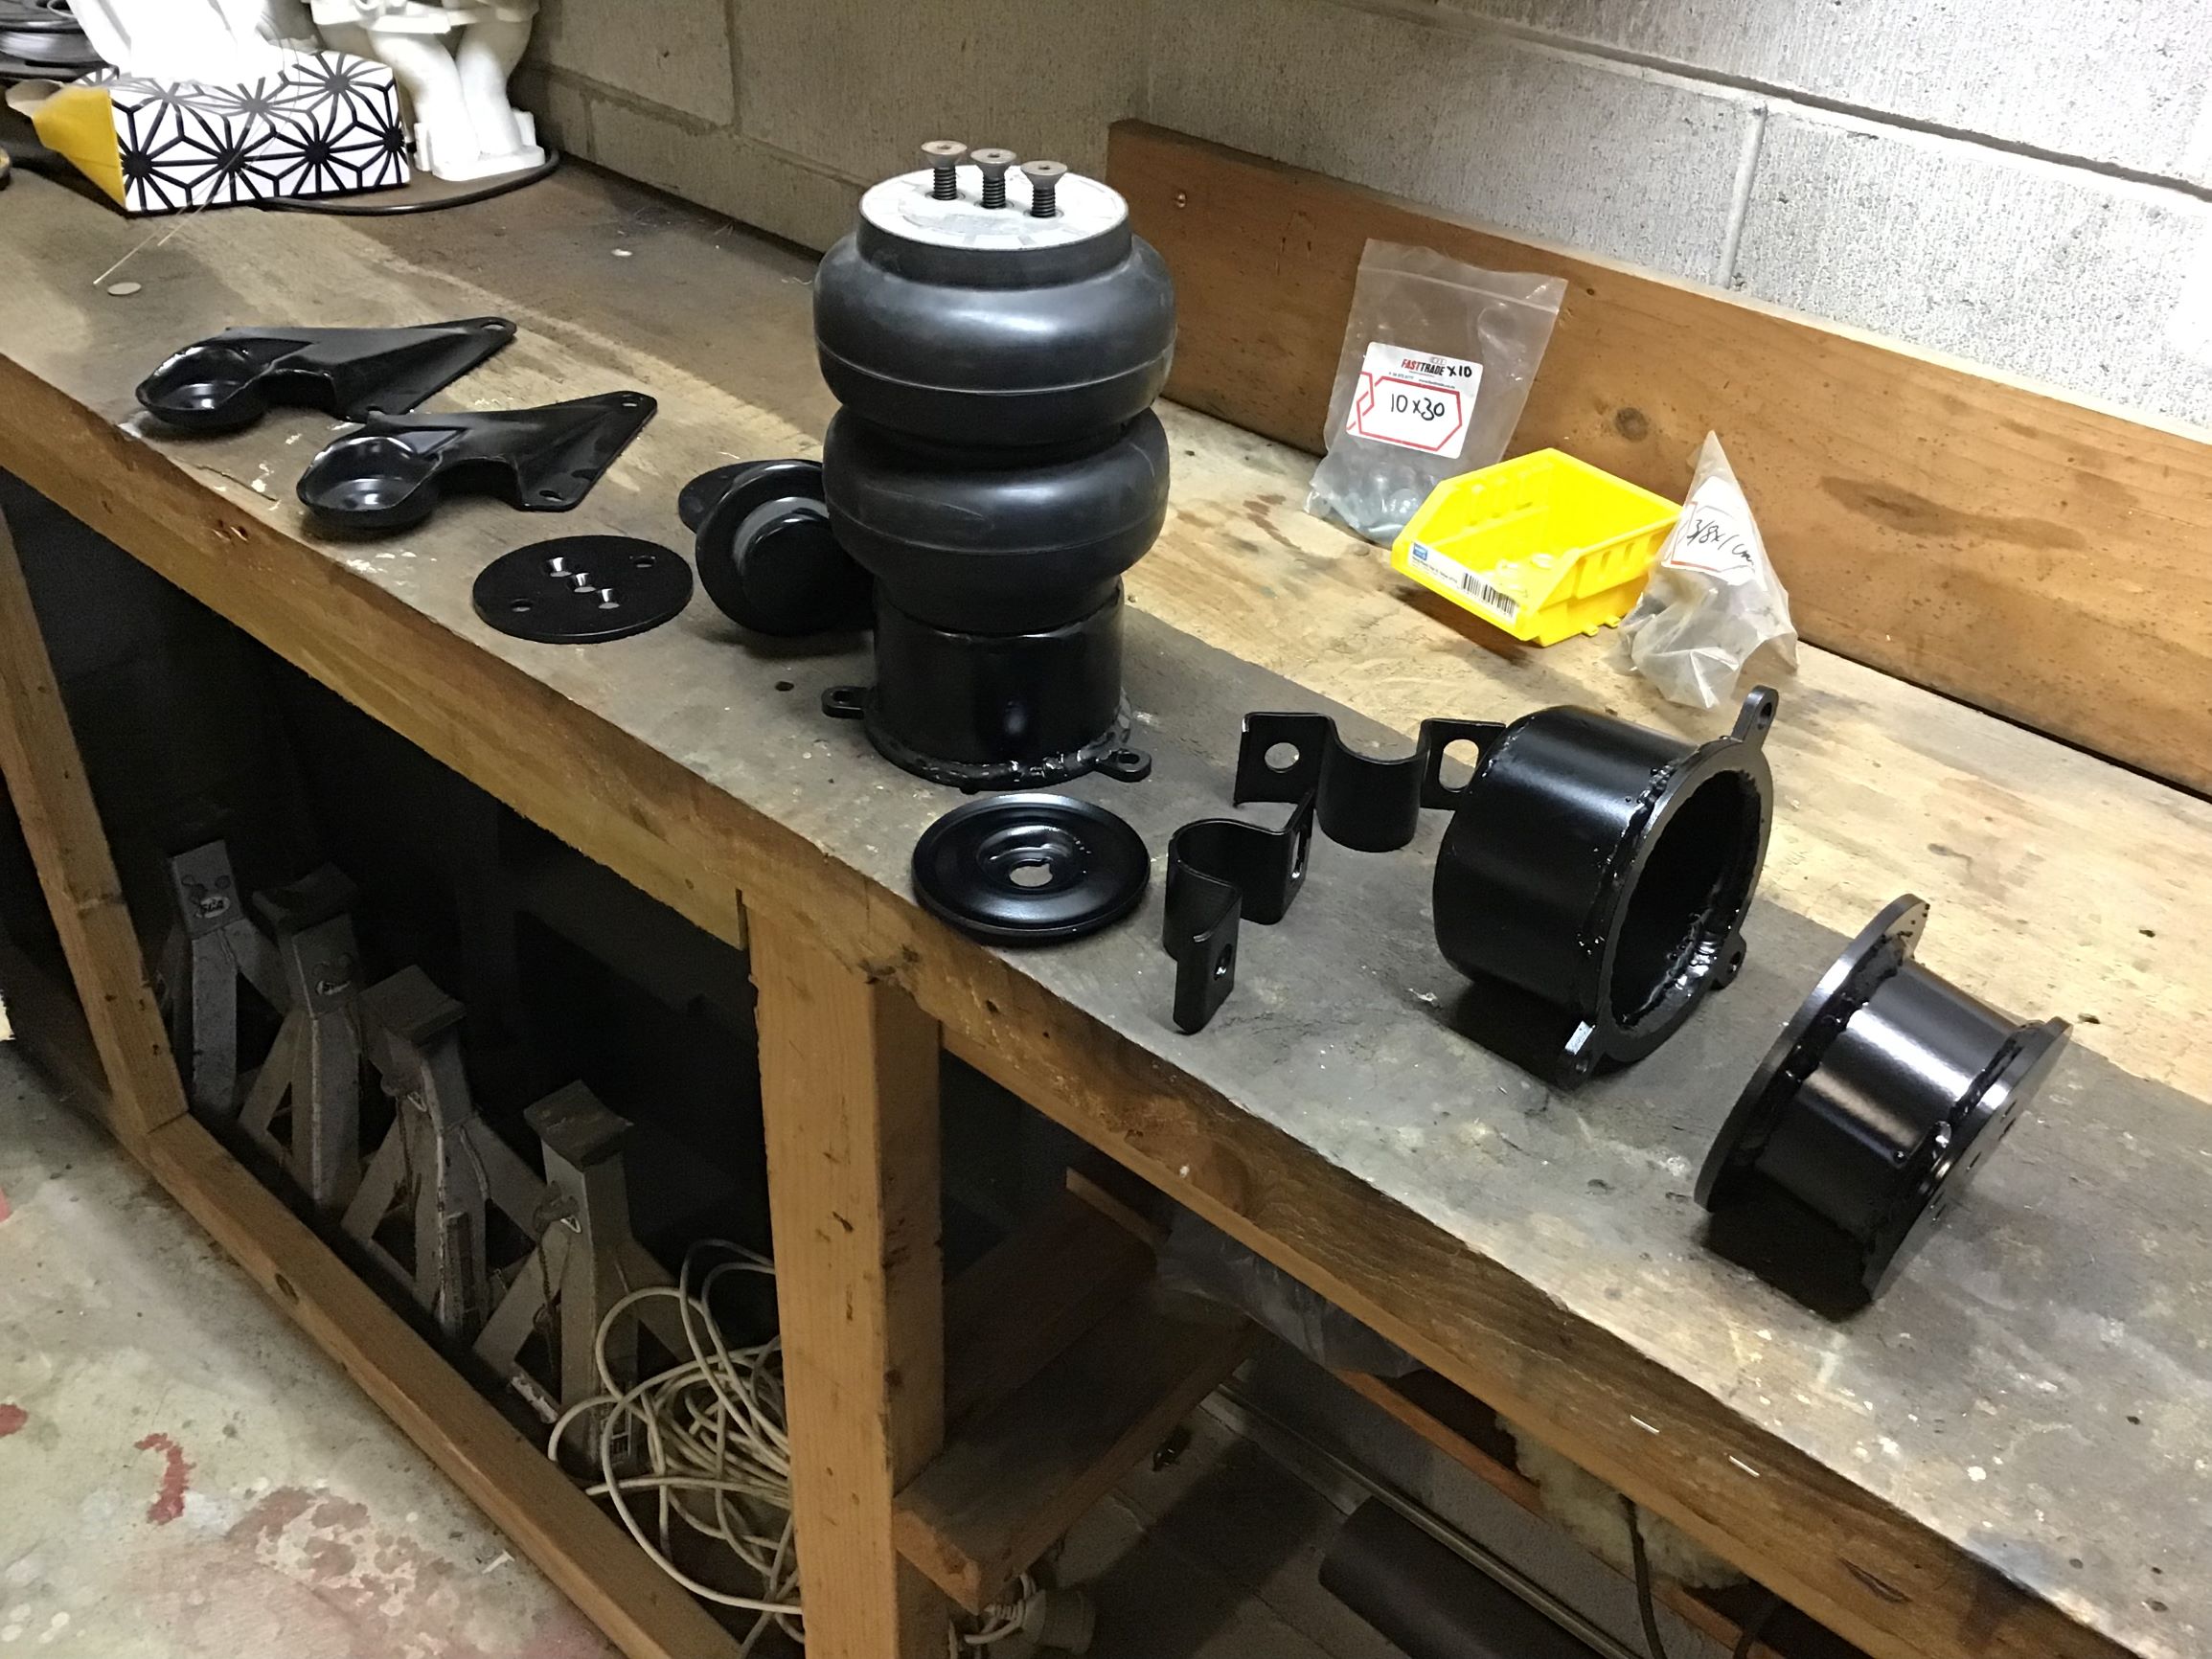
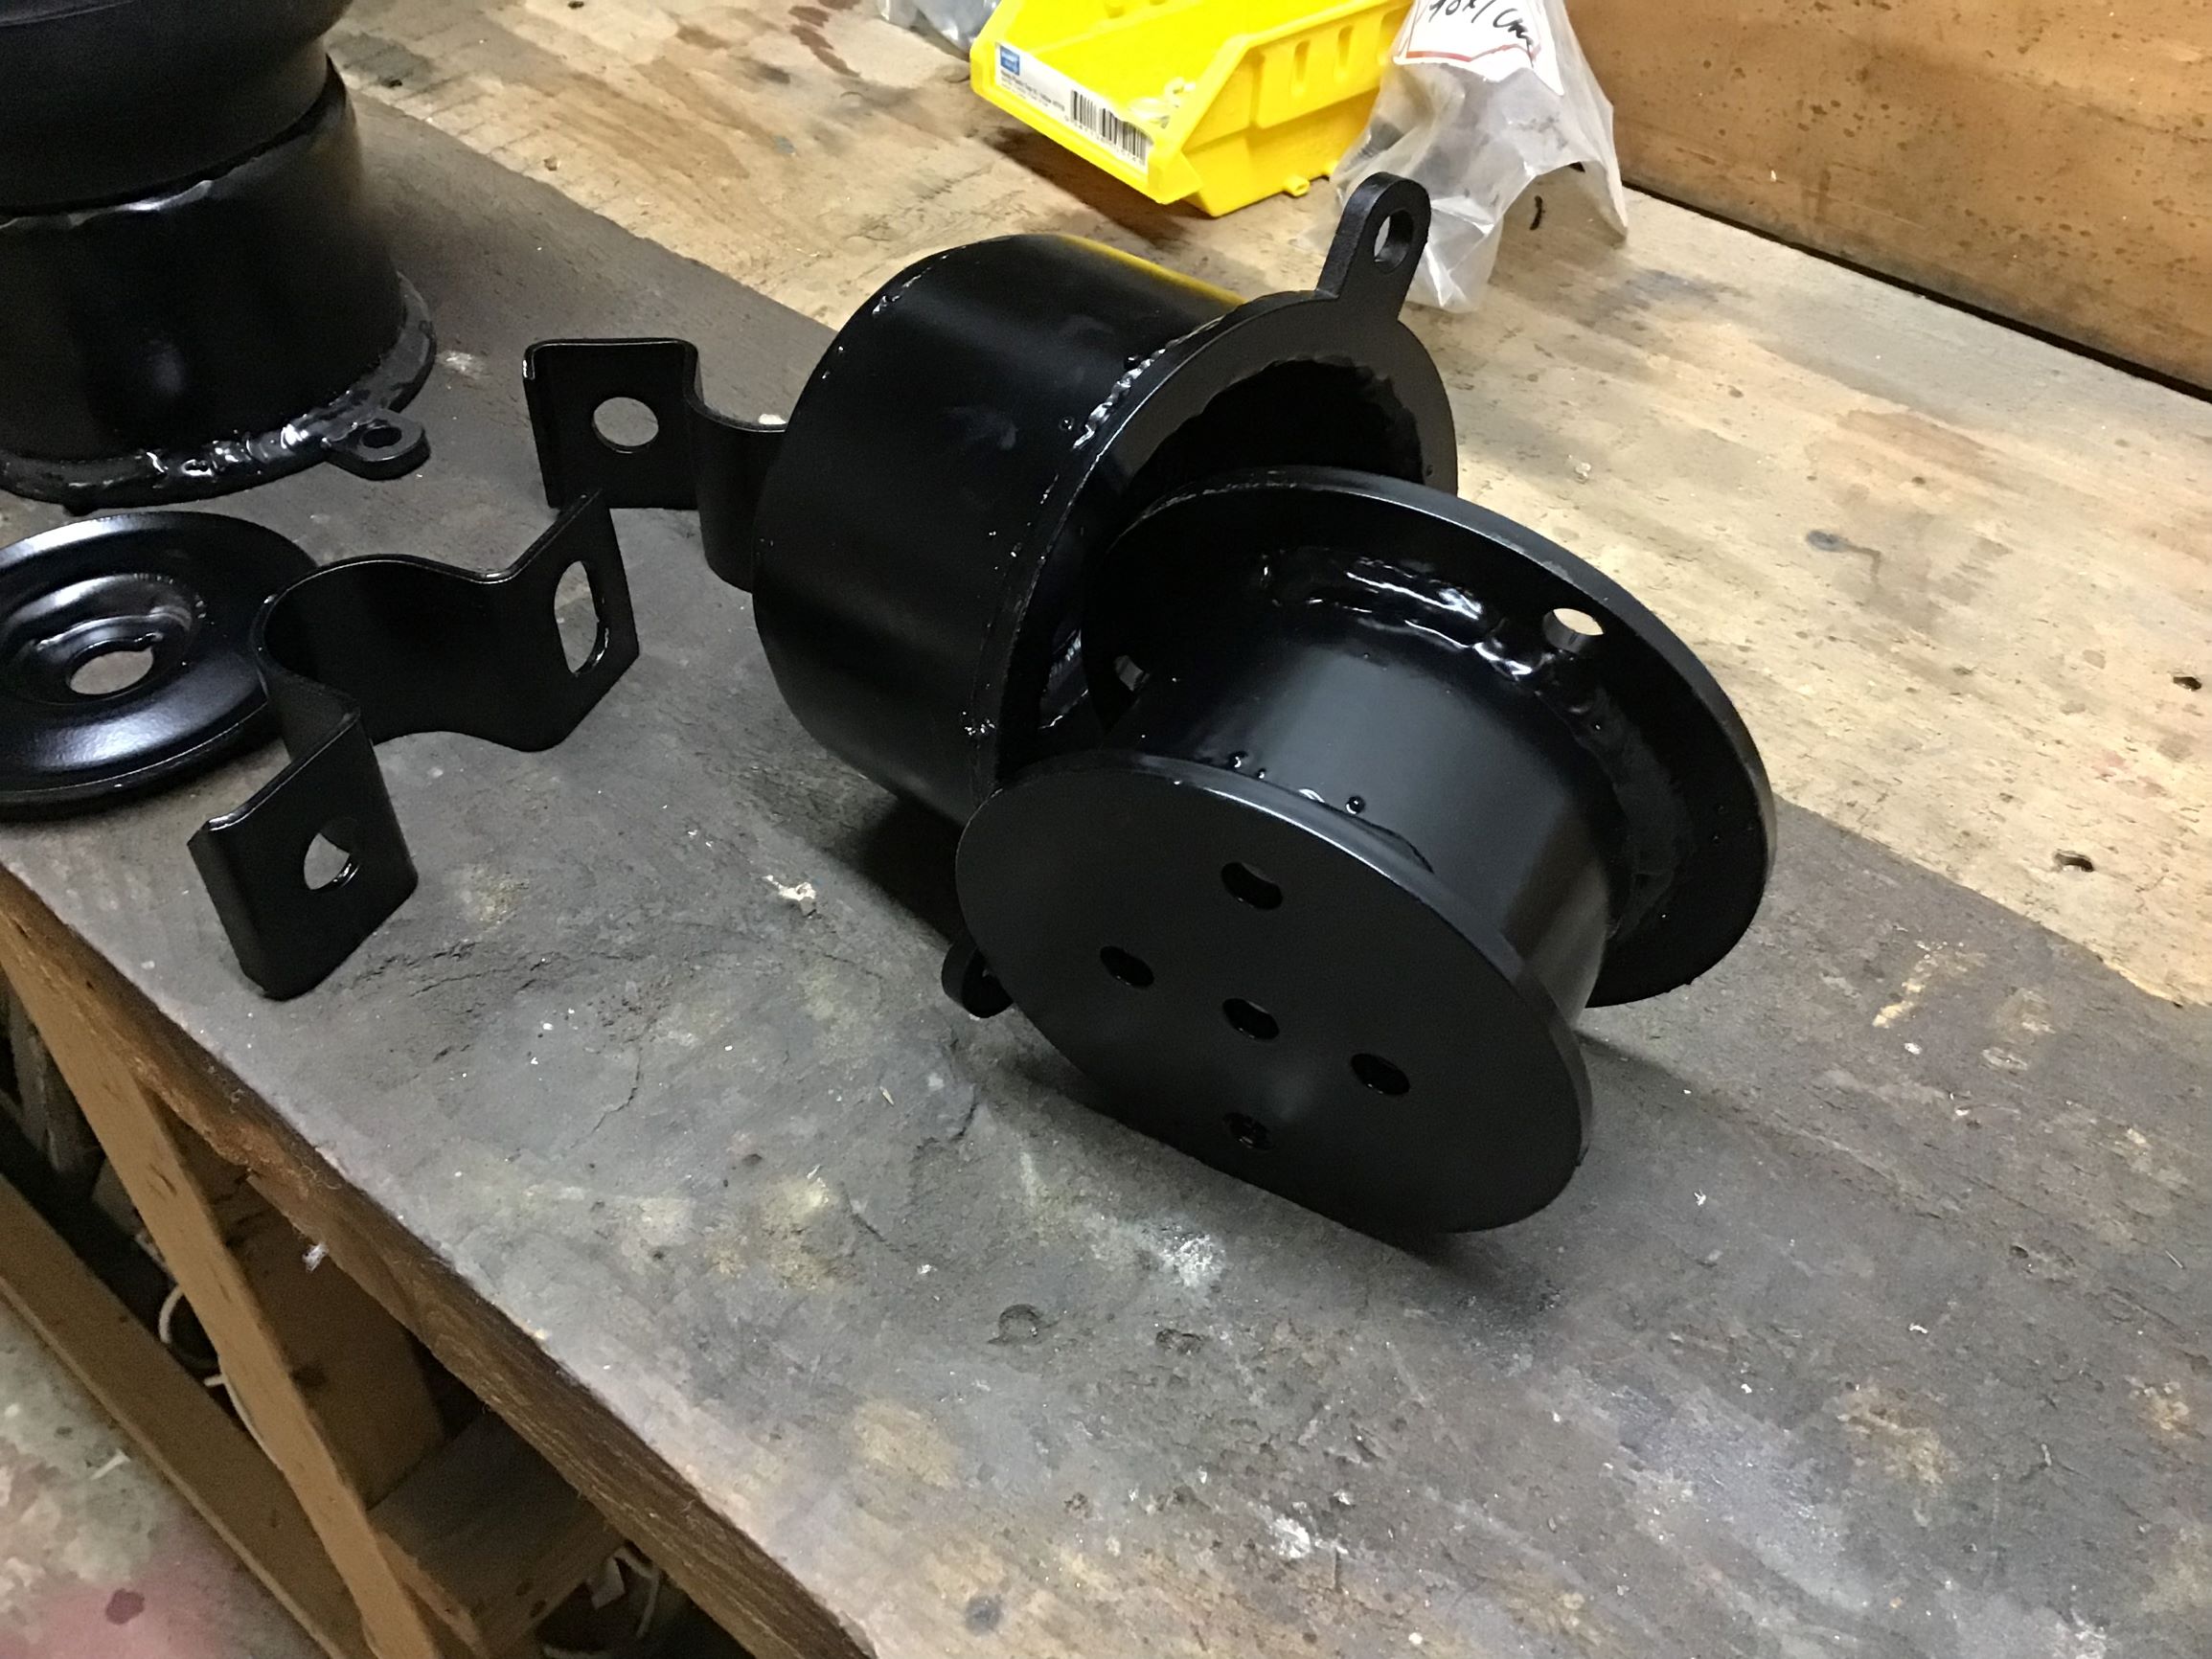
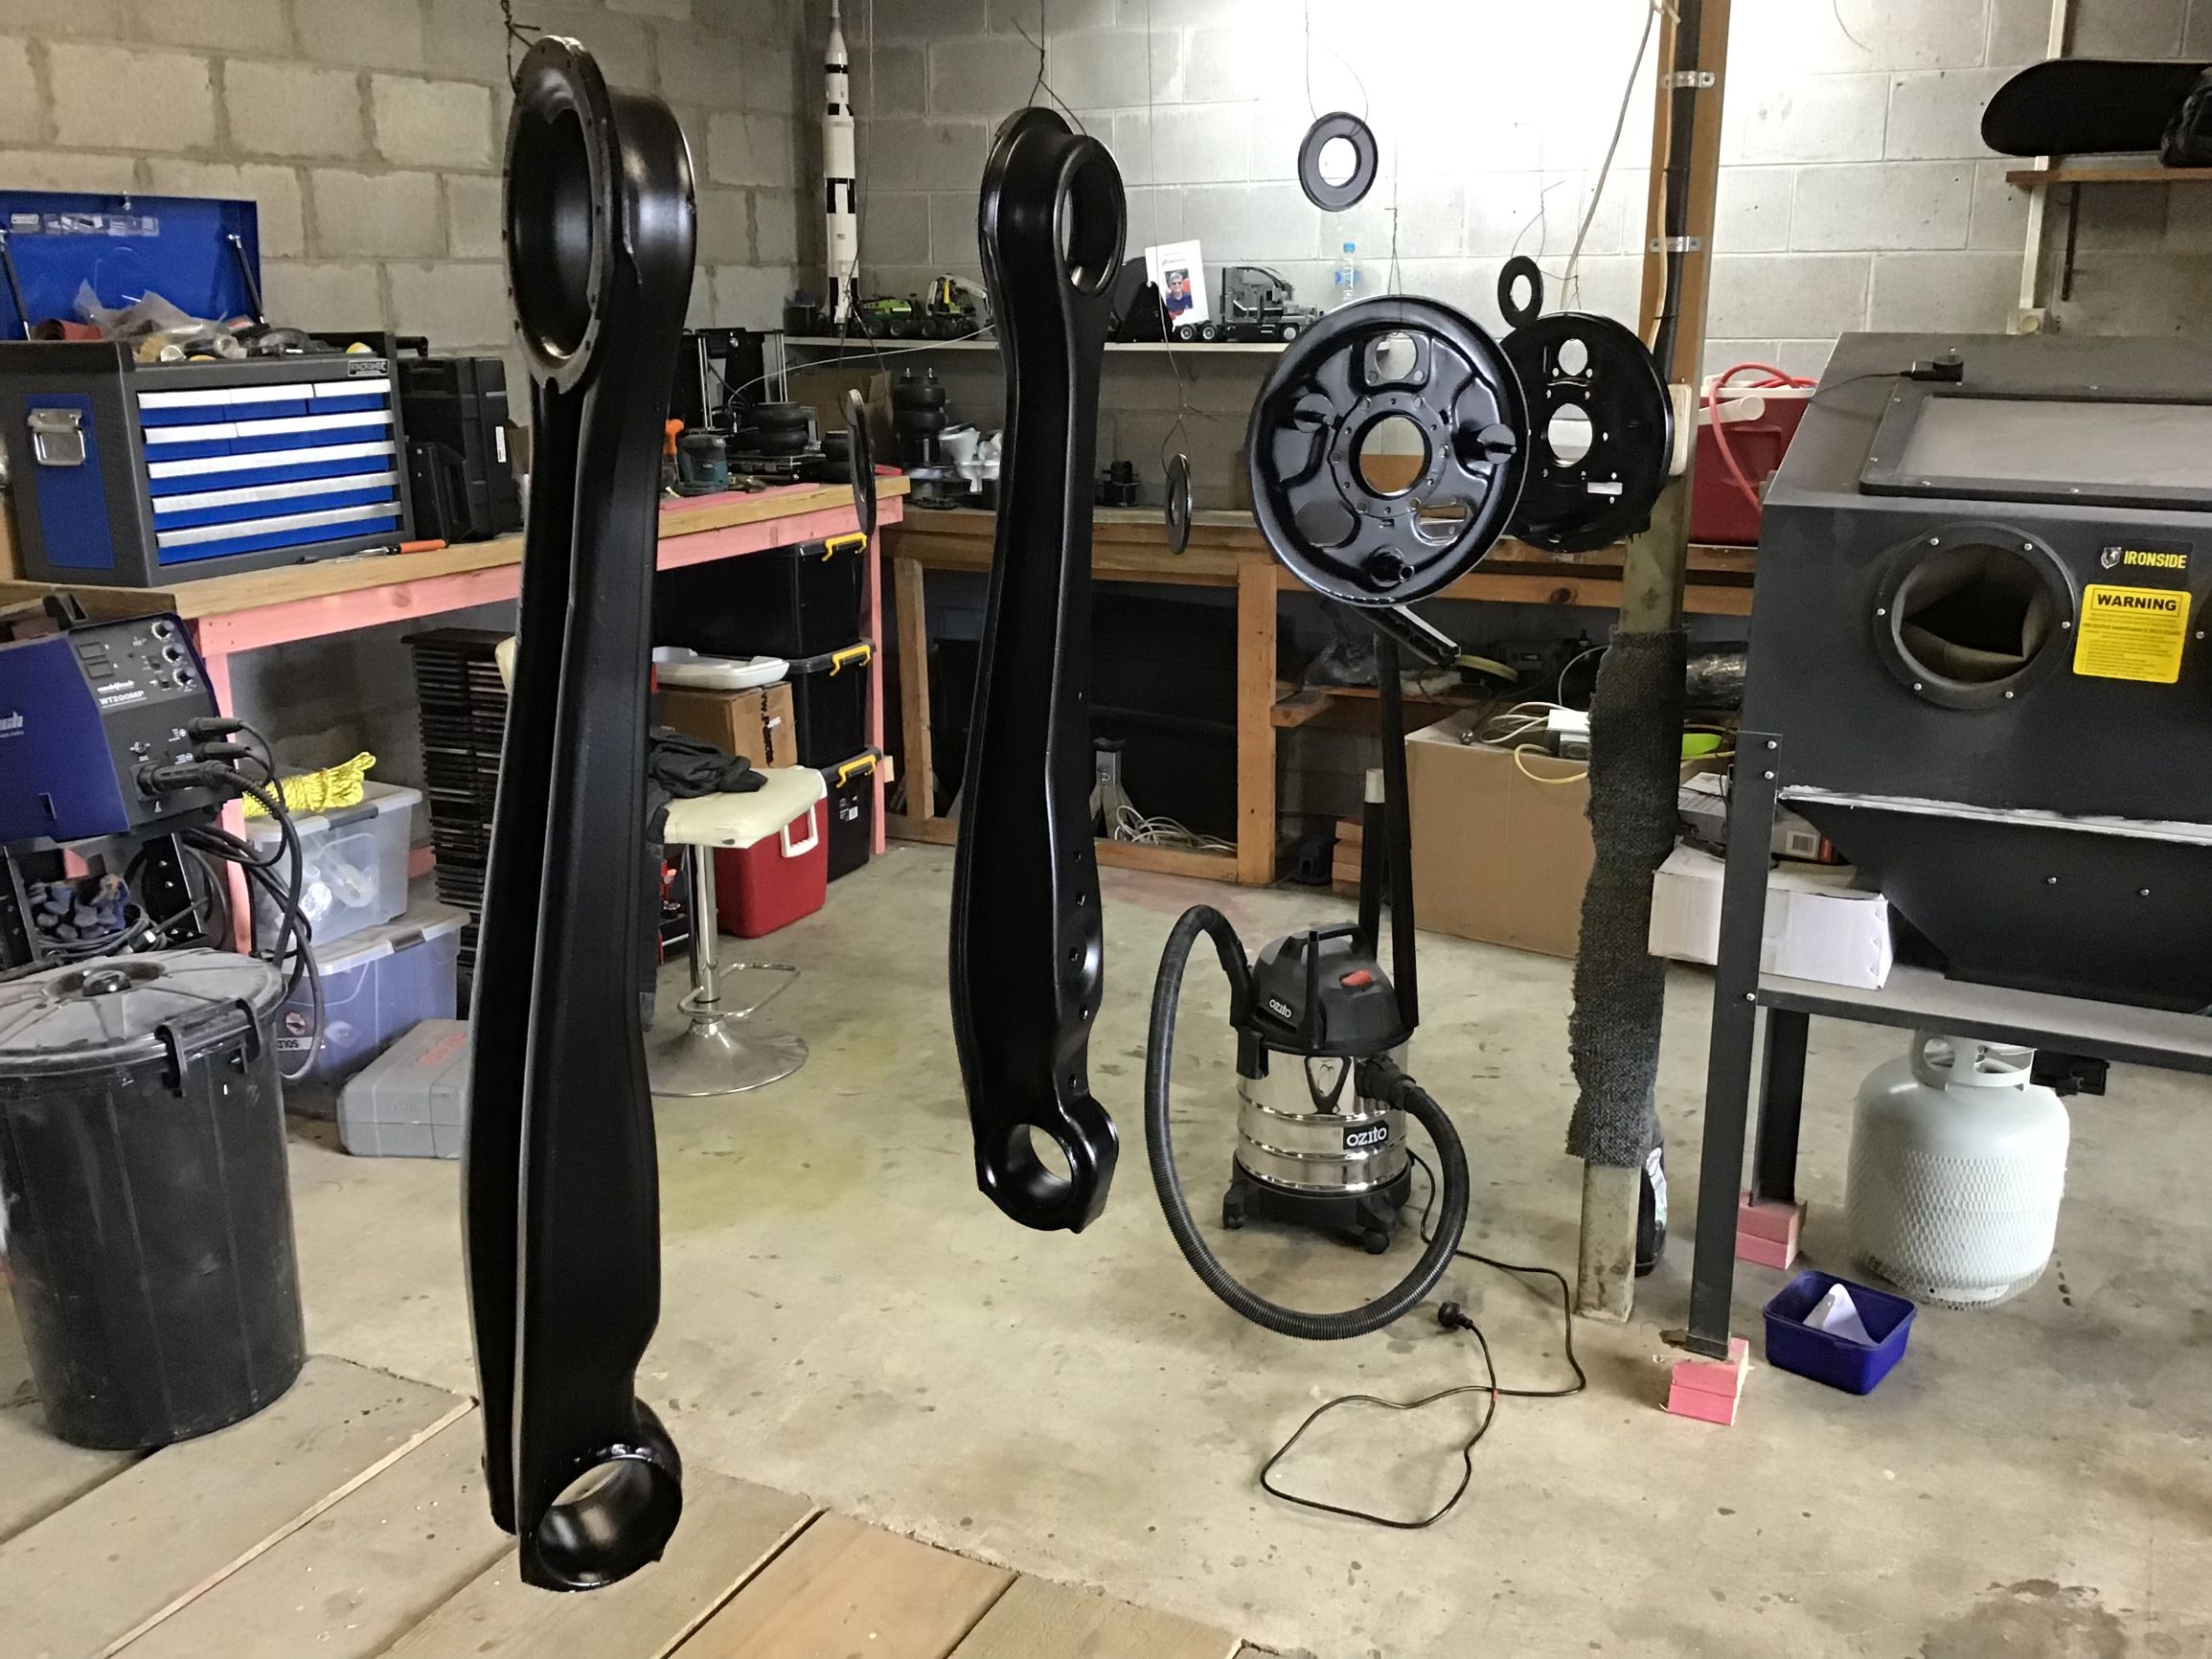
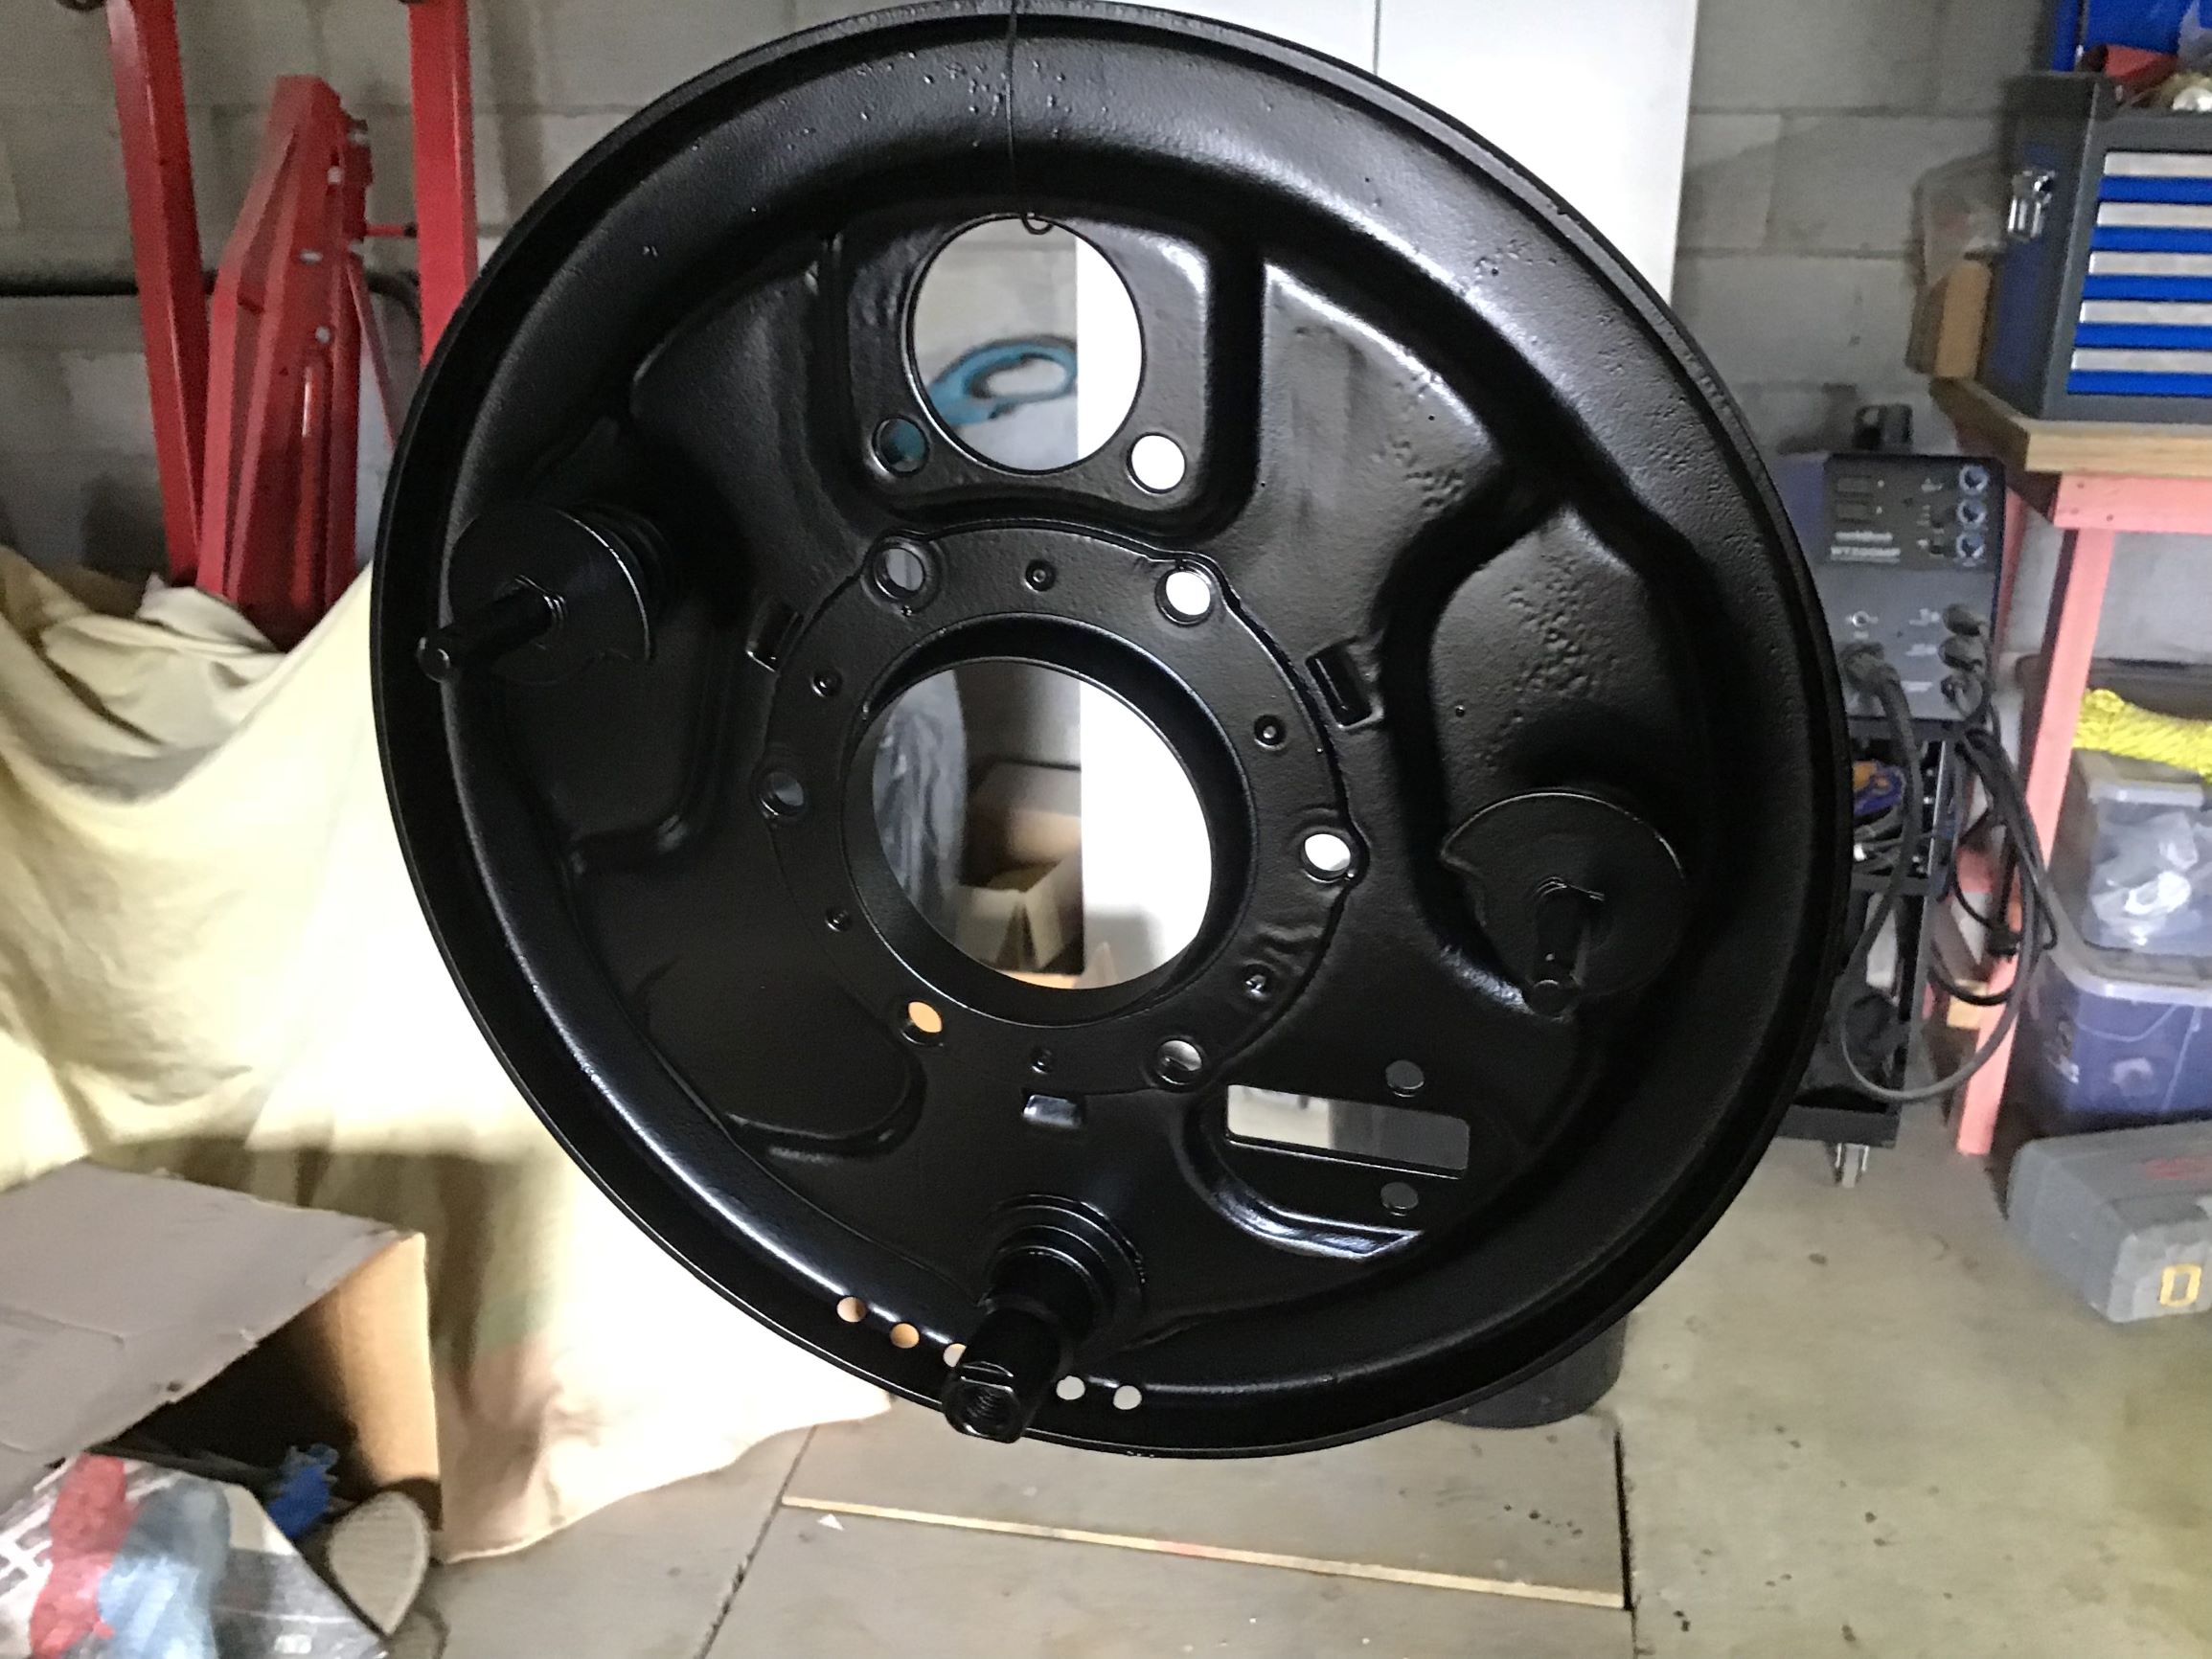
Recently picked up one of those generic 220l freestanding blasting cabinets, so I could set to work blasting/primering/painting the rear suspension/bag mounts etc in several batches. Such a time consuming task but super satisfying seeing once scummy parts come out looking new. Need to replace the window and do an LED light upgrade to the blasting cabinet before I can do anymore (the front suspension bits). Can't see shit in it anymore. Ended up cutting the wheel bearings off the half shalfs so I could paint the drum brake backing plate. Don't have a press so might try the axle in freezer, bearing in oven trick for fitting the new bearings I have before I go door knocking around the neighbourhood trying to find someone with a press I can borrow. Then I can finally get the diff back together in one piece. The whole diff hangs from a rubber bush that sits in the boot floor, I've got a new one of these bushes on its way from Germany as the original is suitably flogged but it seems the replacement one is on the slow boat so who knows when that will get here, but I need it to refit the diff so bit of a stalemate there. Also picked up a 722.6 trans out of an early 2000s W203 that suffered a timing chain failure (like most of them do). these don't bolt up to the M180/M130 family of engines so I need to make up an adapter plate, which is my next job will also need a controller for it but that can wait. I've gone the complicated route of gaining a lock up torque convertor and a 5th gear, but a man wants what a man wants. Until next time.
6 points
-
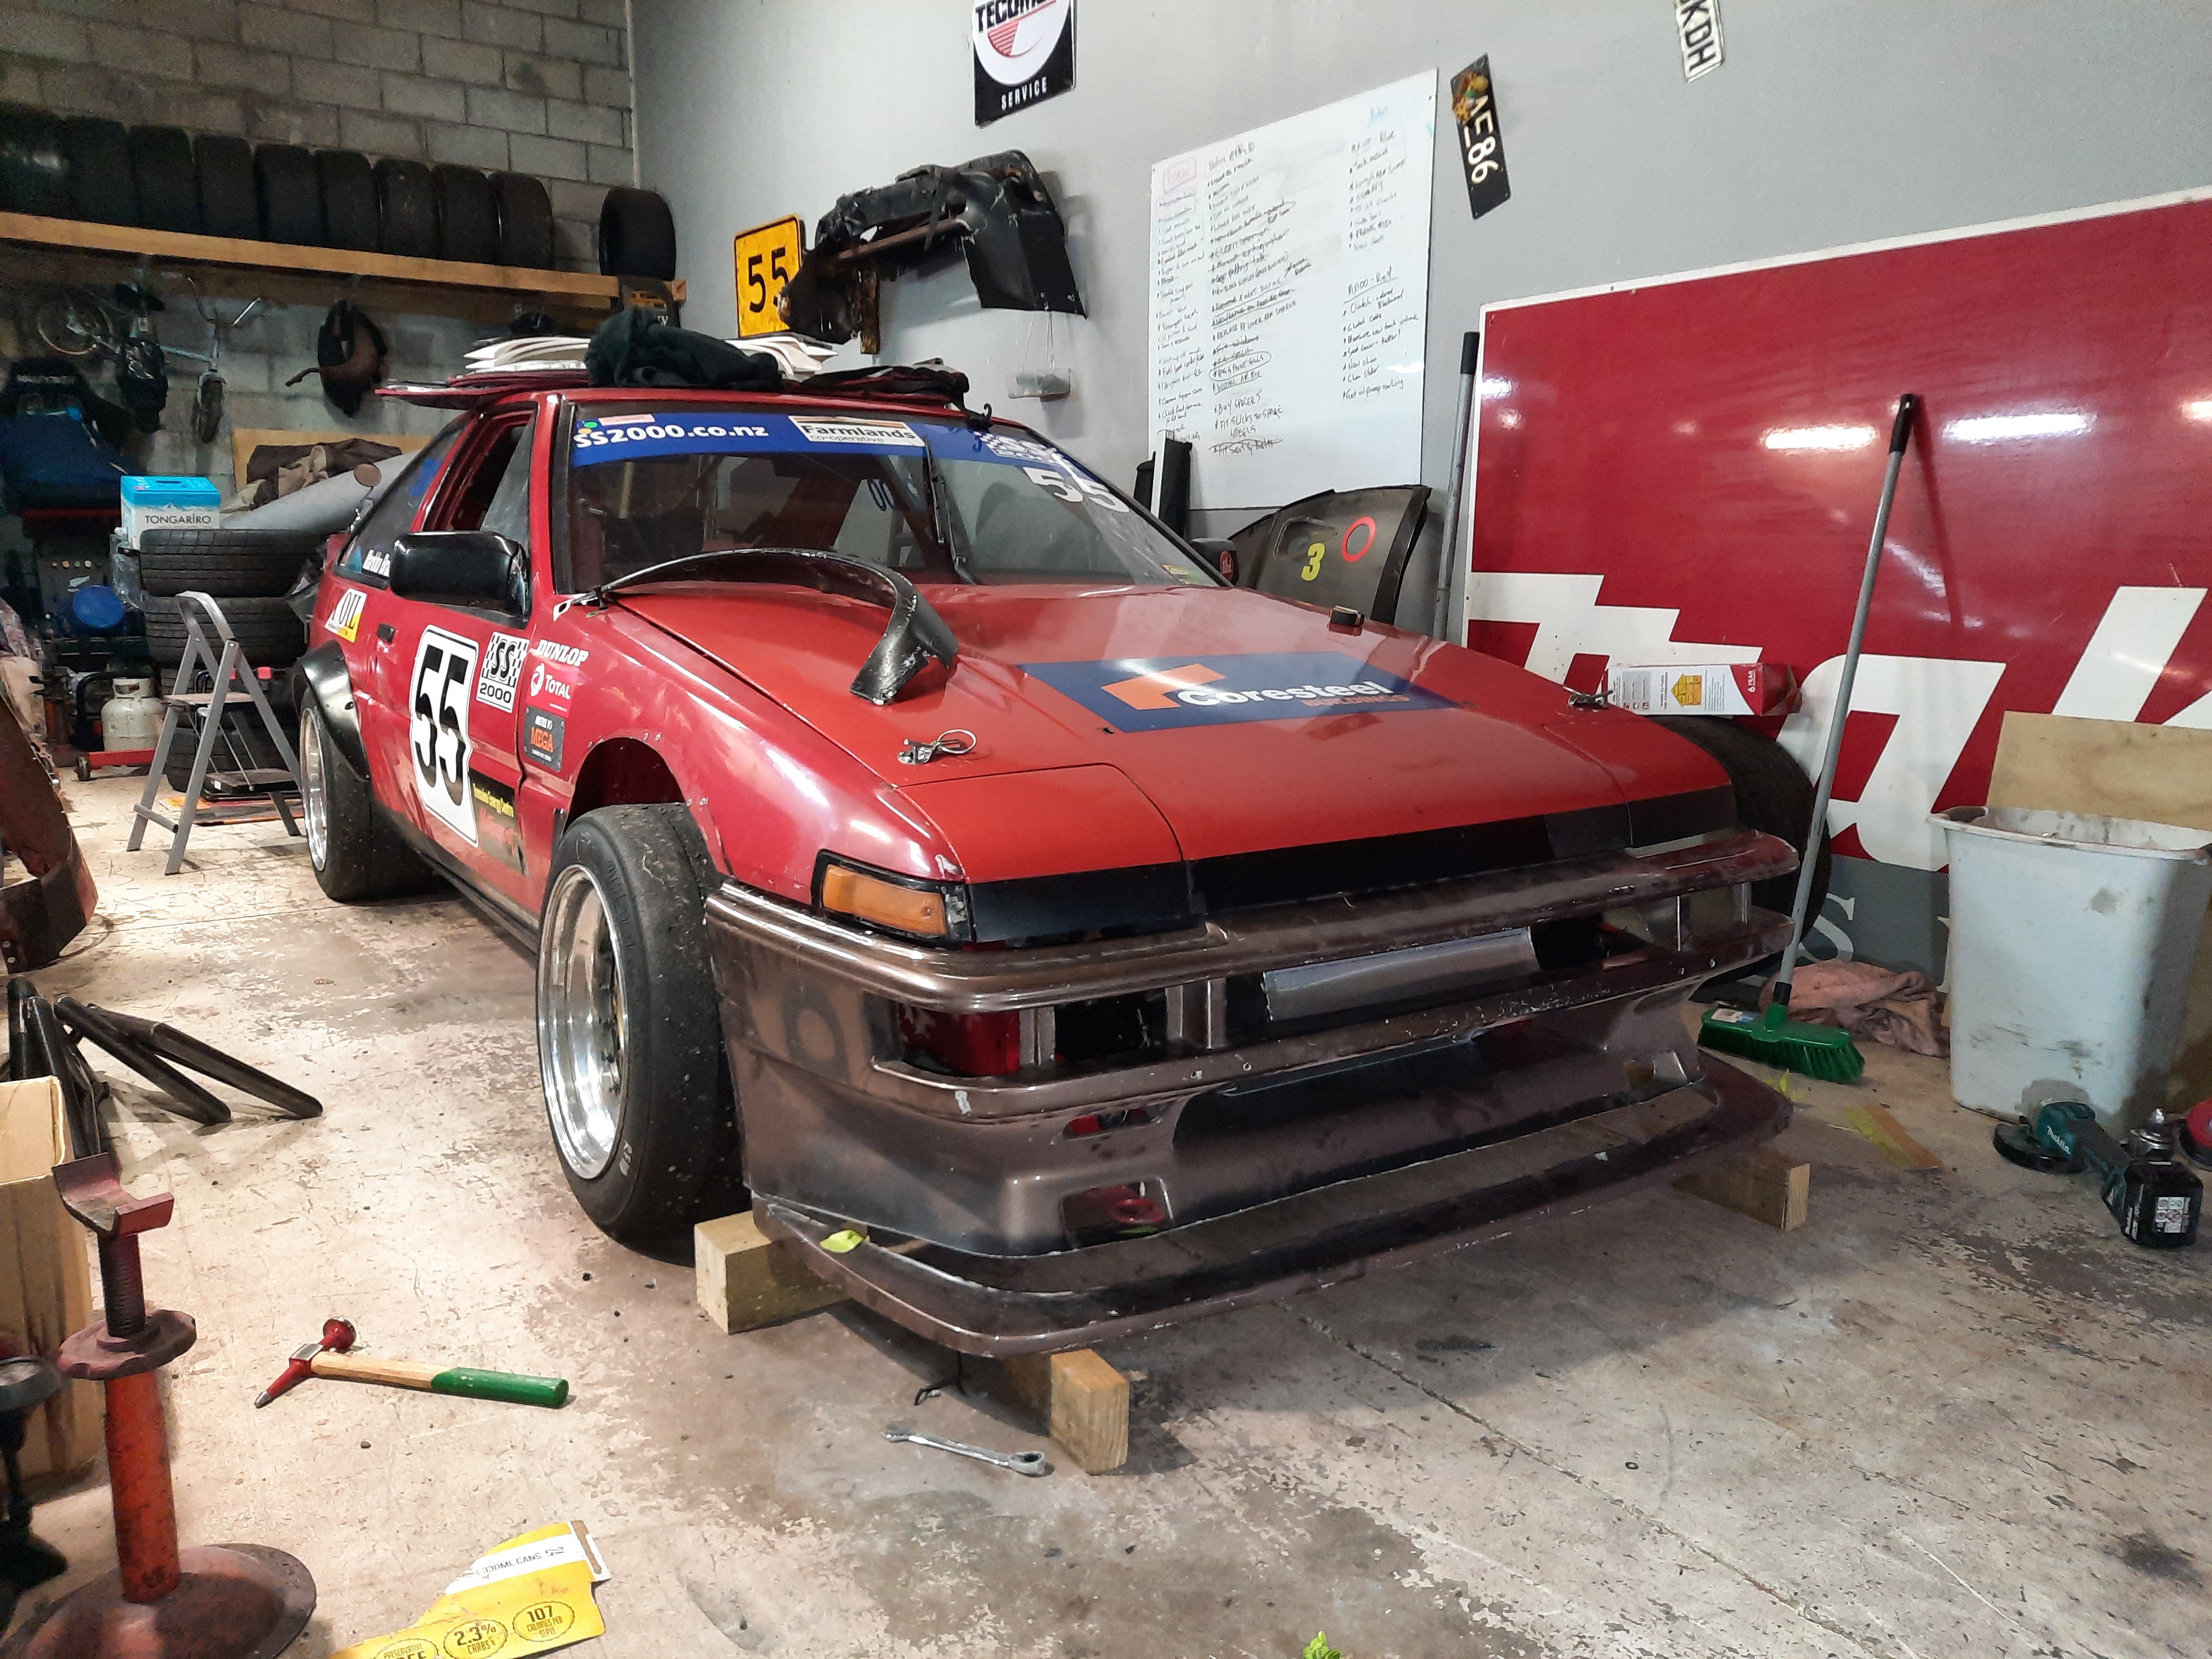
I've been busy doing a bit of fibreglass work. The front is coming back together now. Sanding and bogging is up next, then it'll be ready for paint. My replacement guards arrived too. Thanks to @TimShadboltfan27 for being a GC and collecting them for me! It'll need a wheel alignment (possibly a new tie rod end or rack end if they're bent) and then it's basically ready to hit the track again.
5 points
-
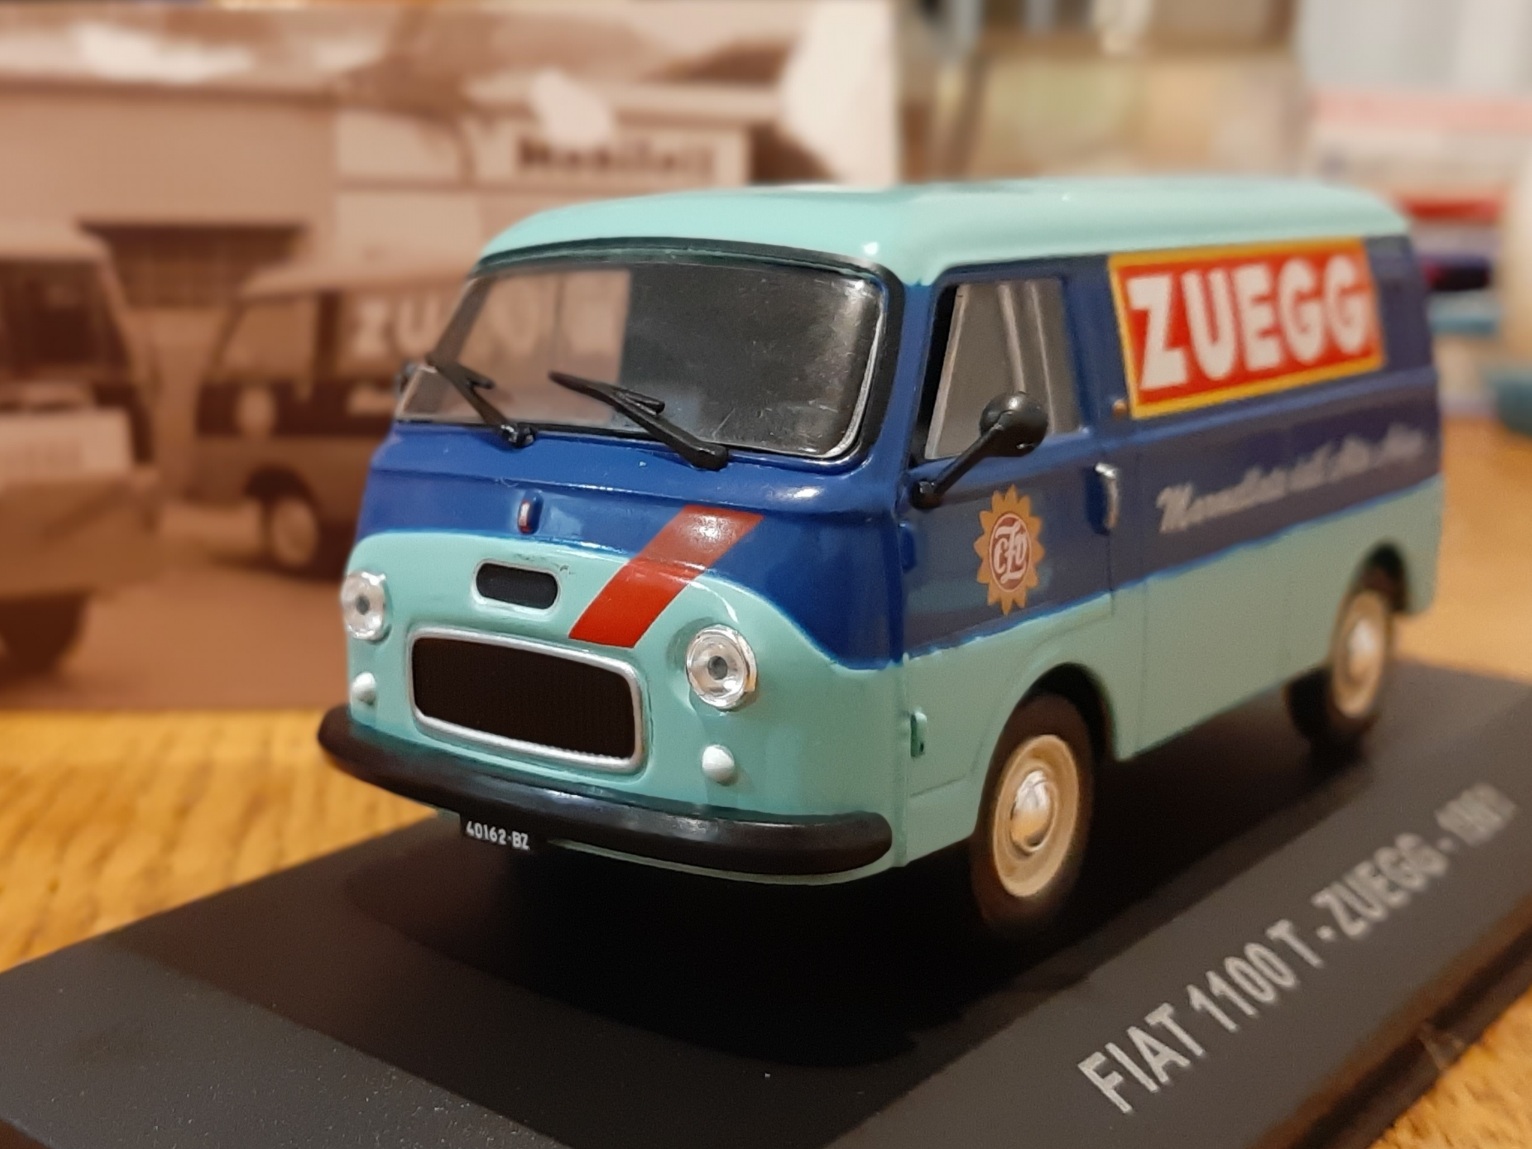
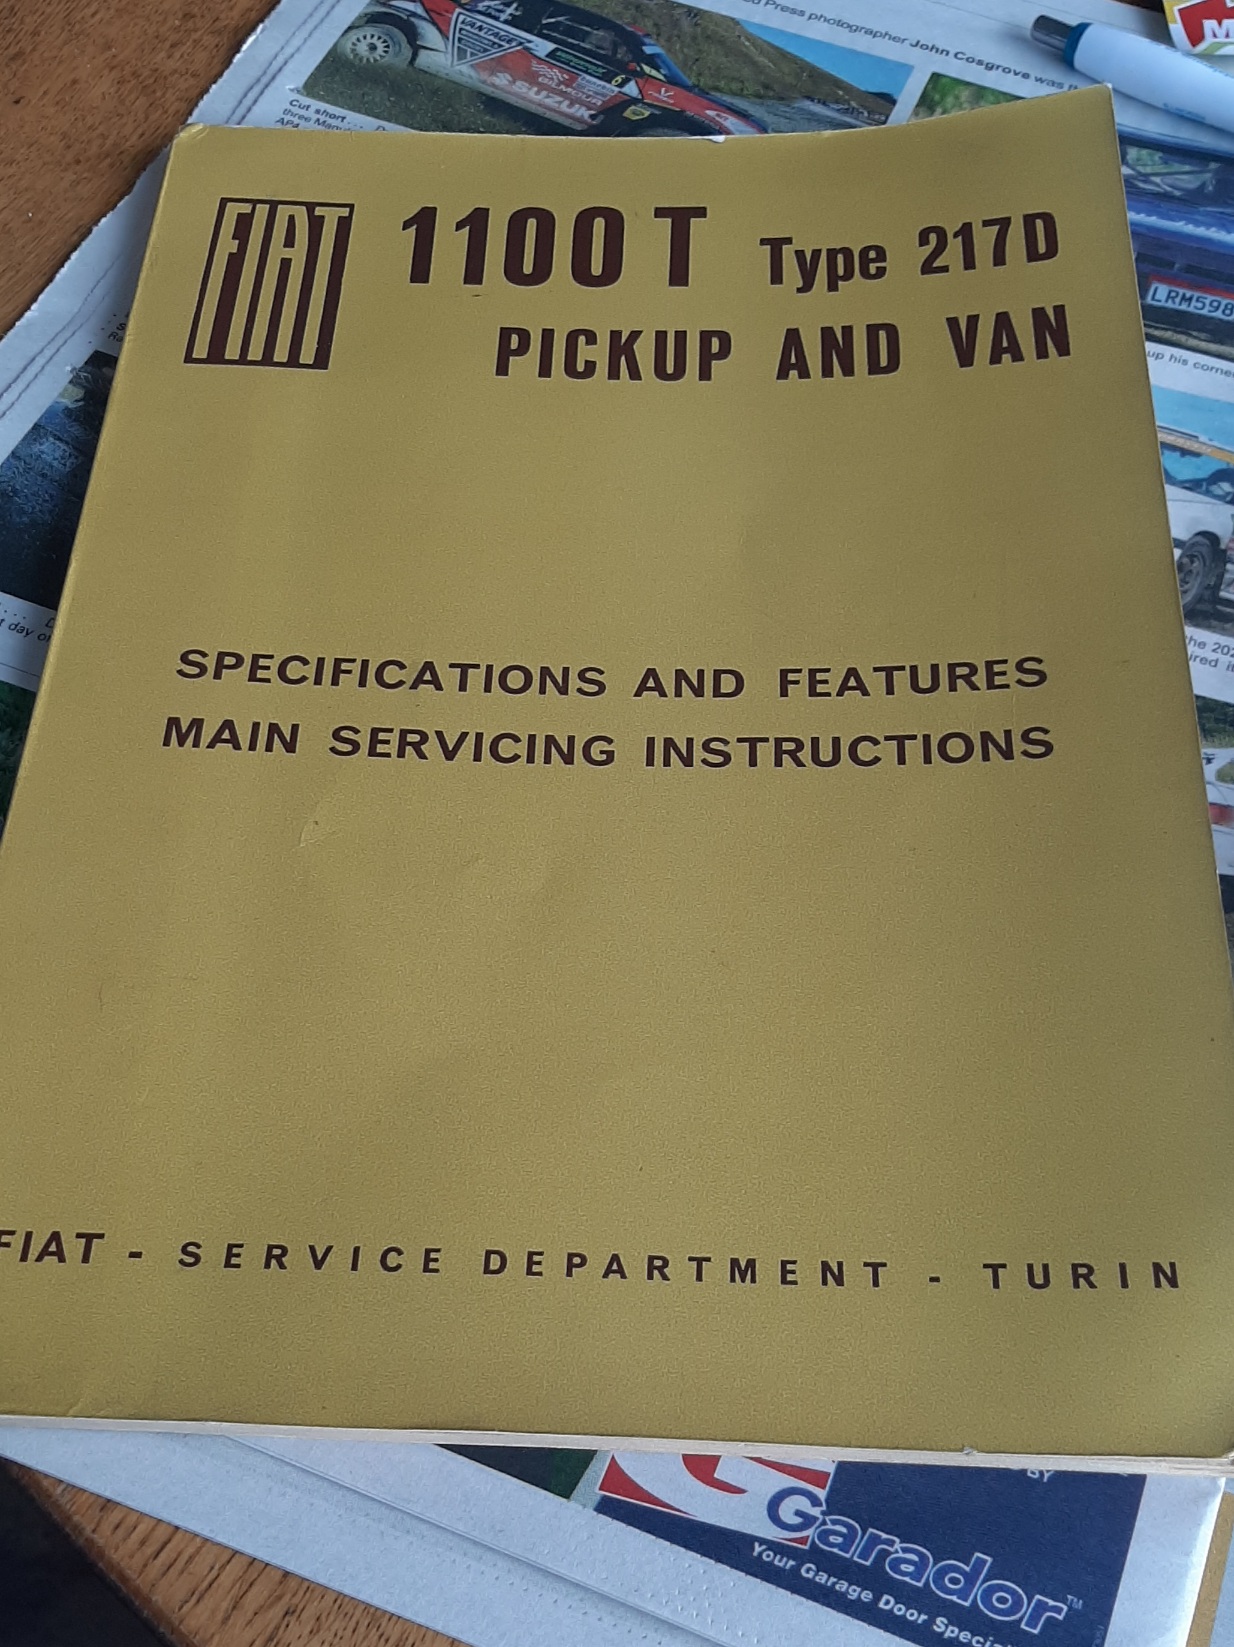
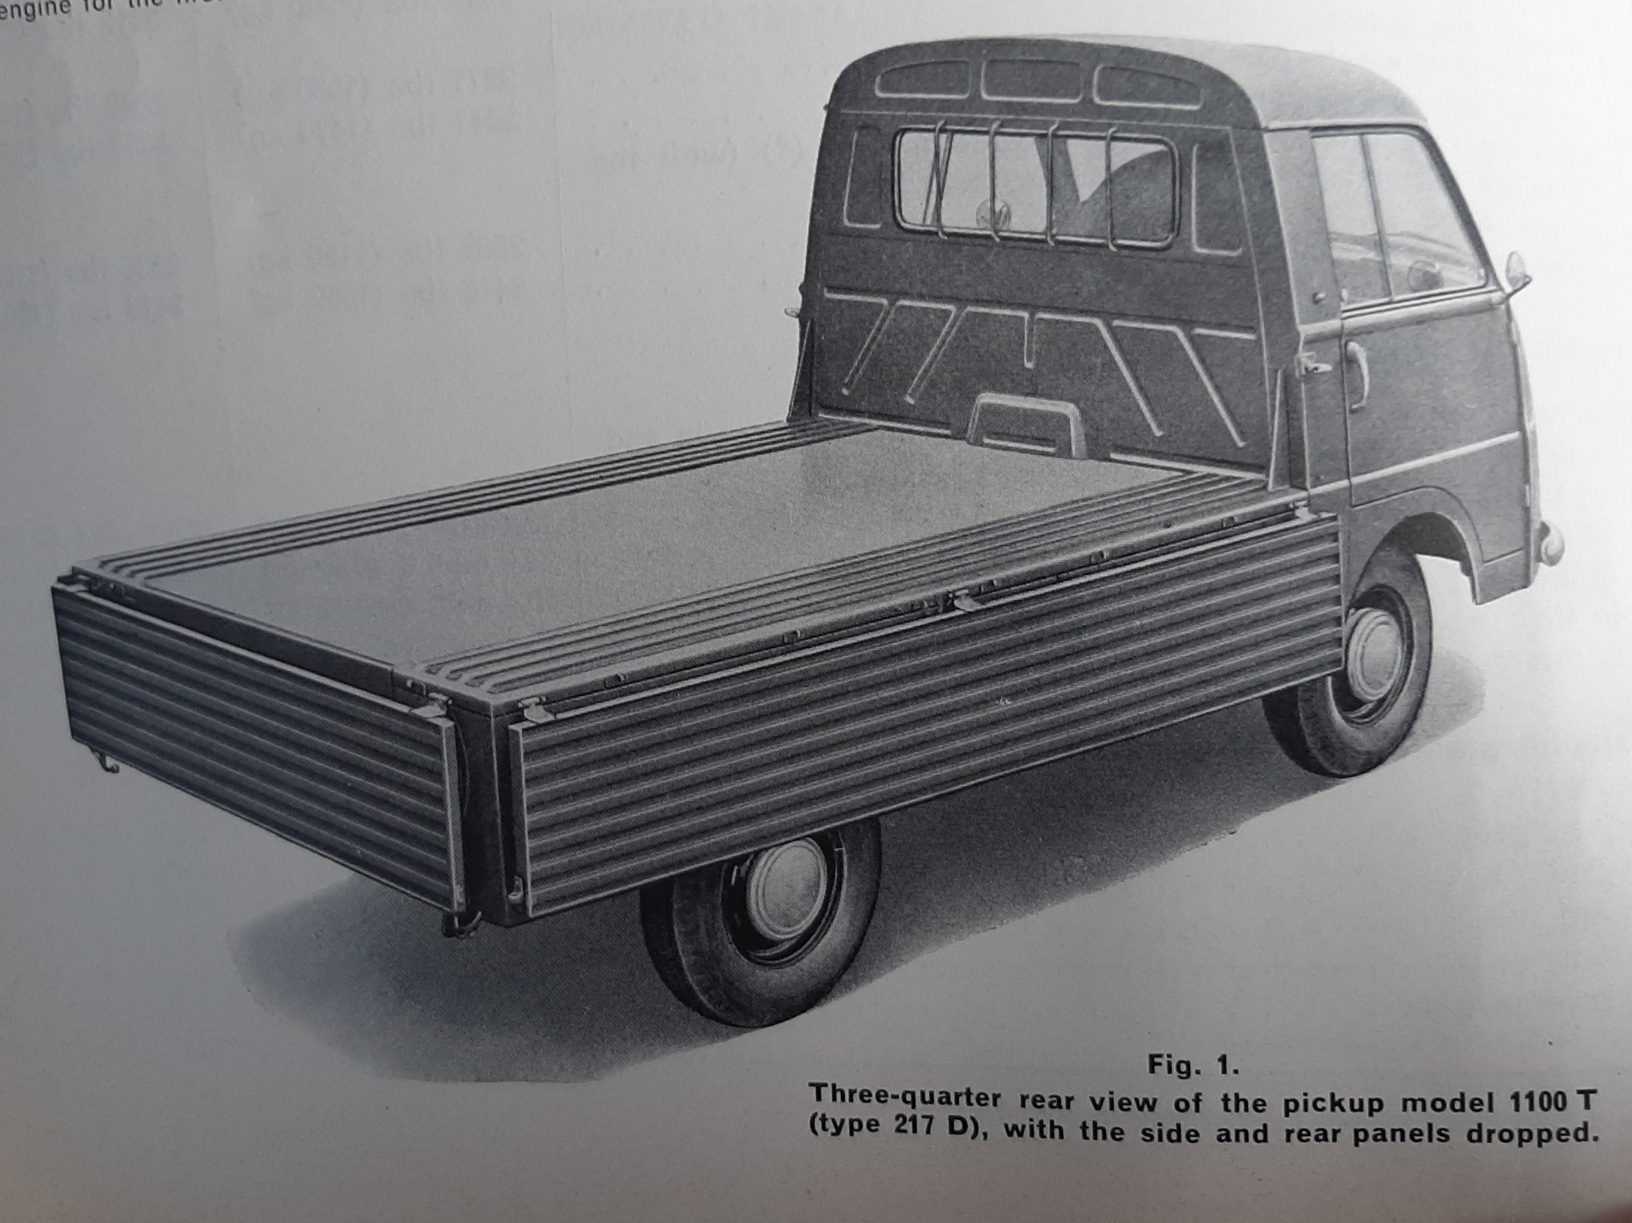
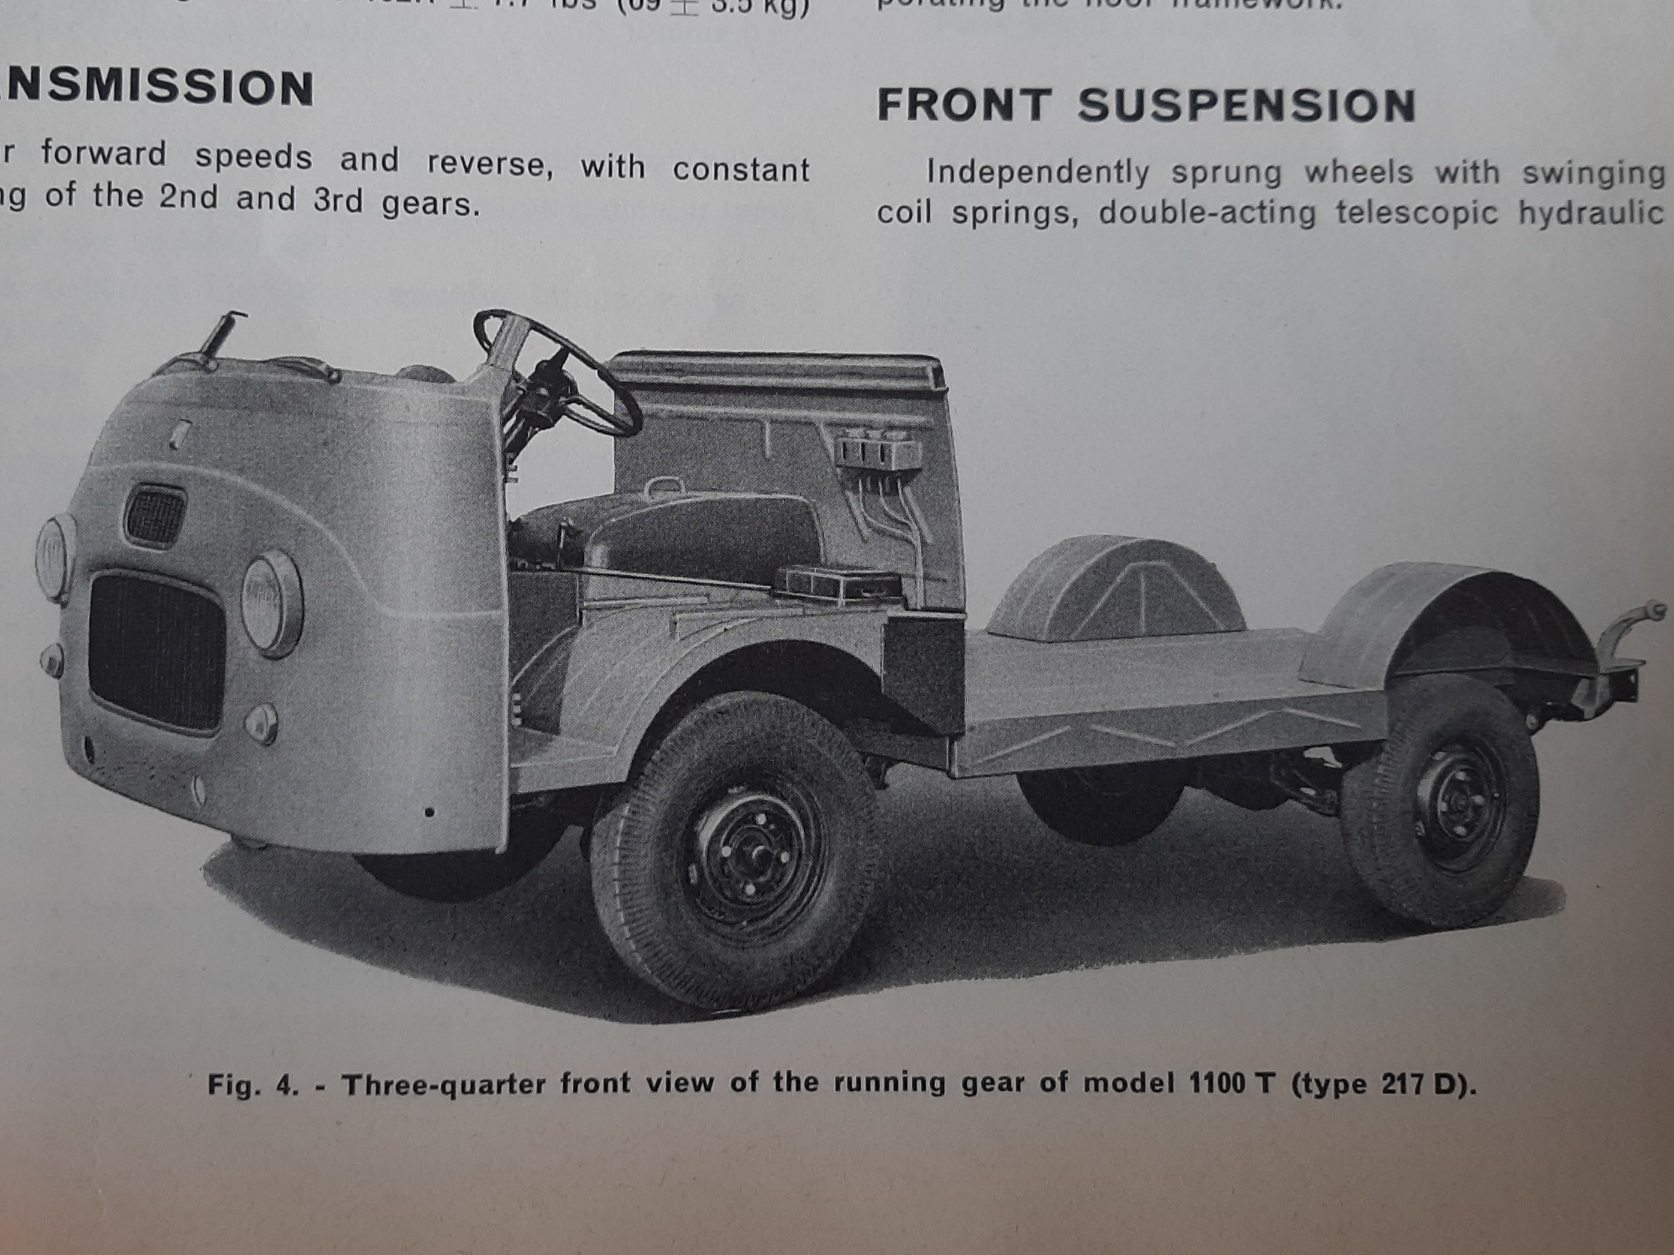
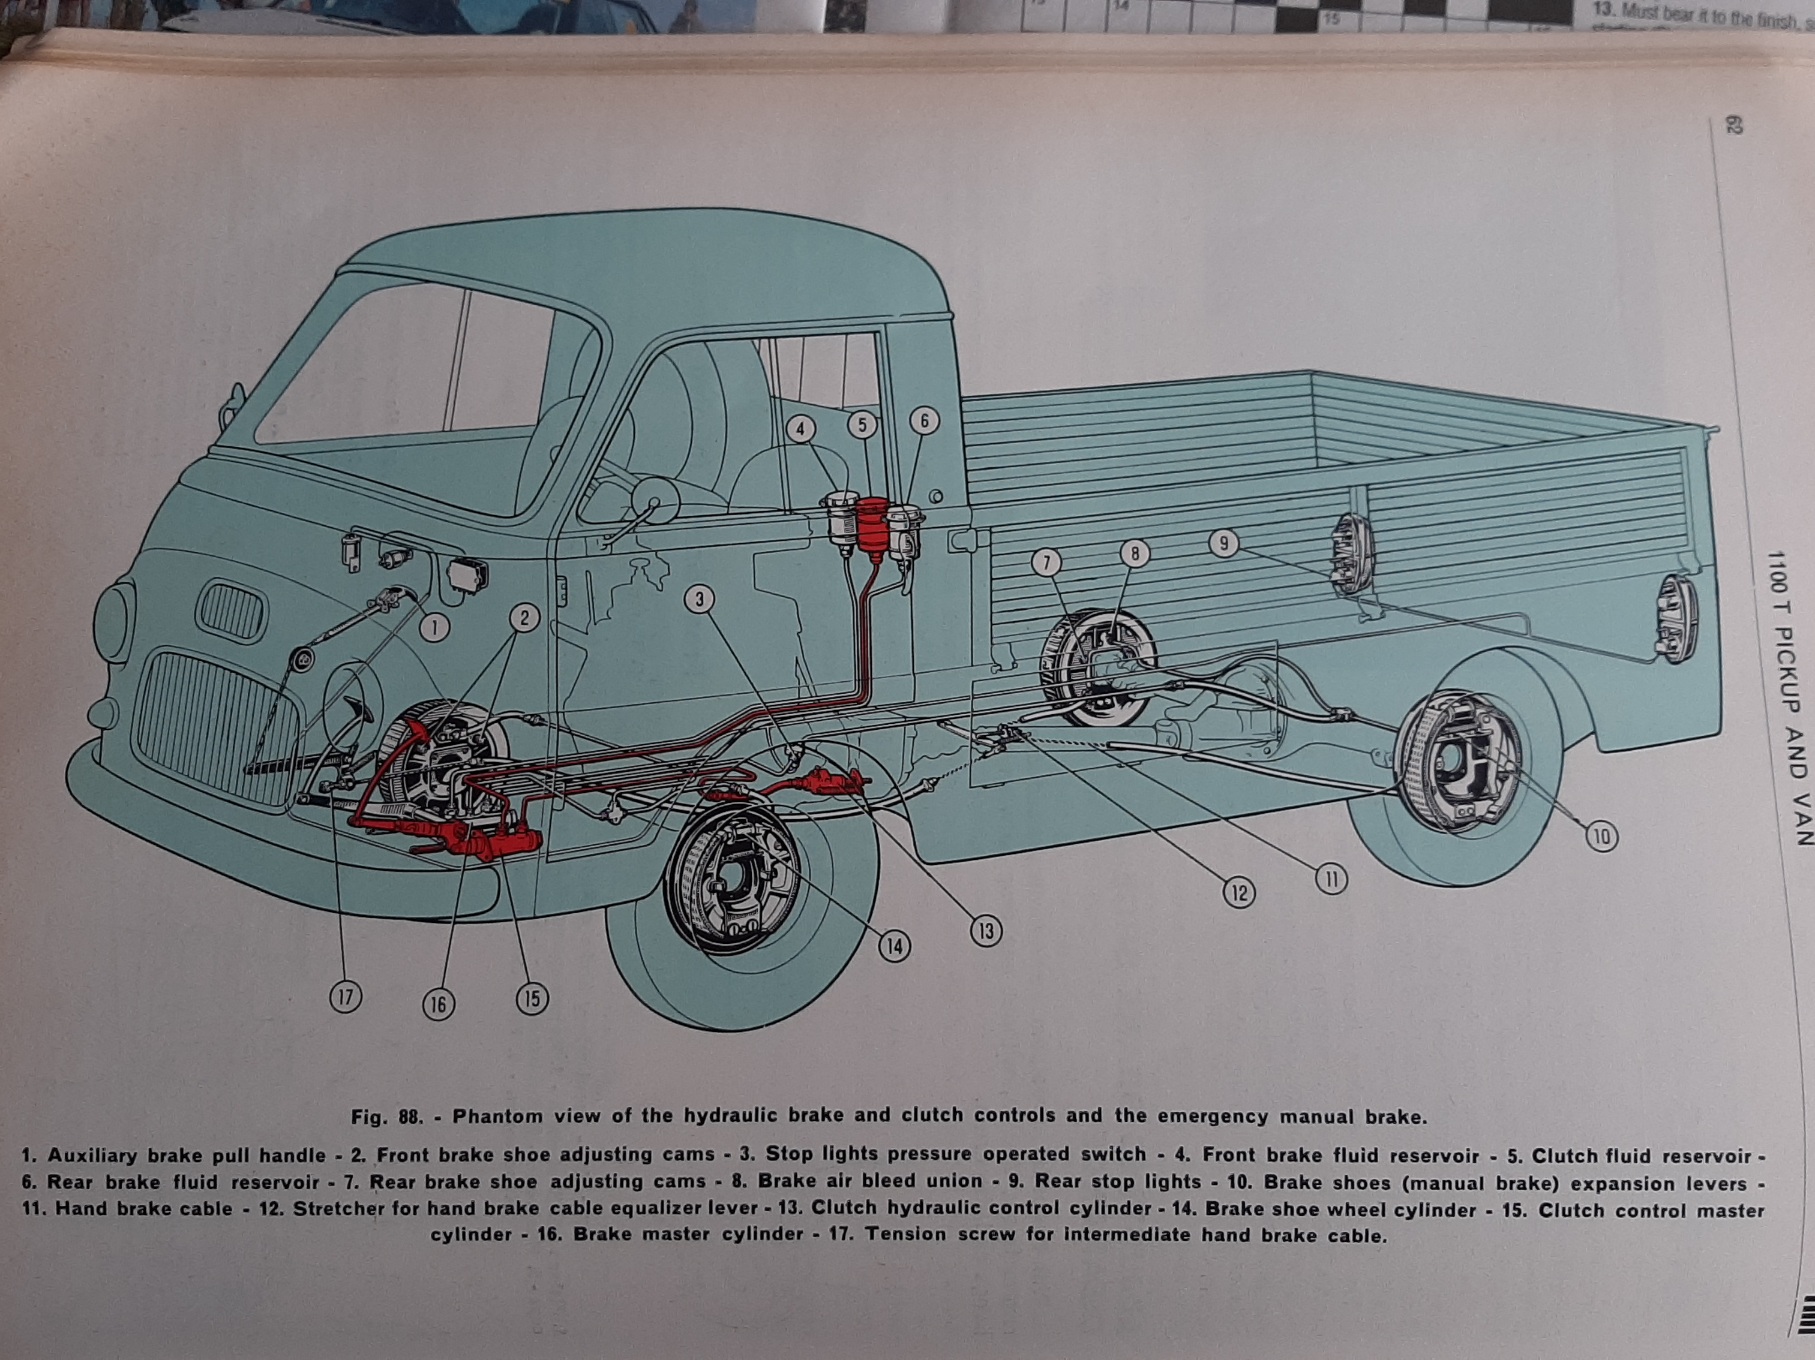
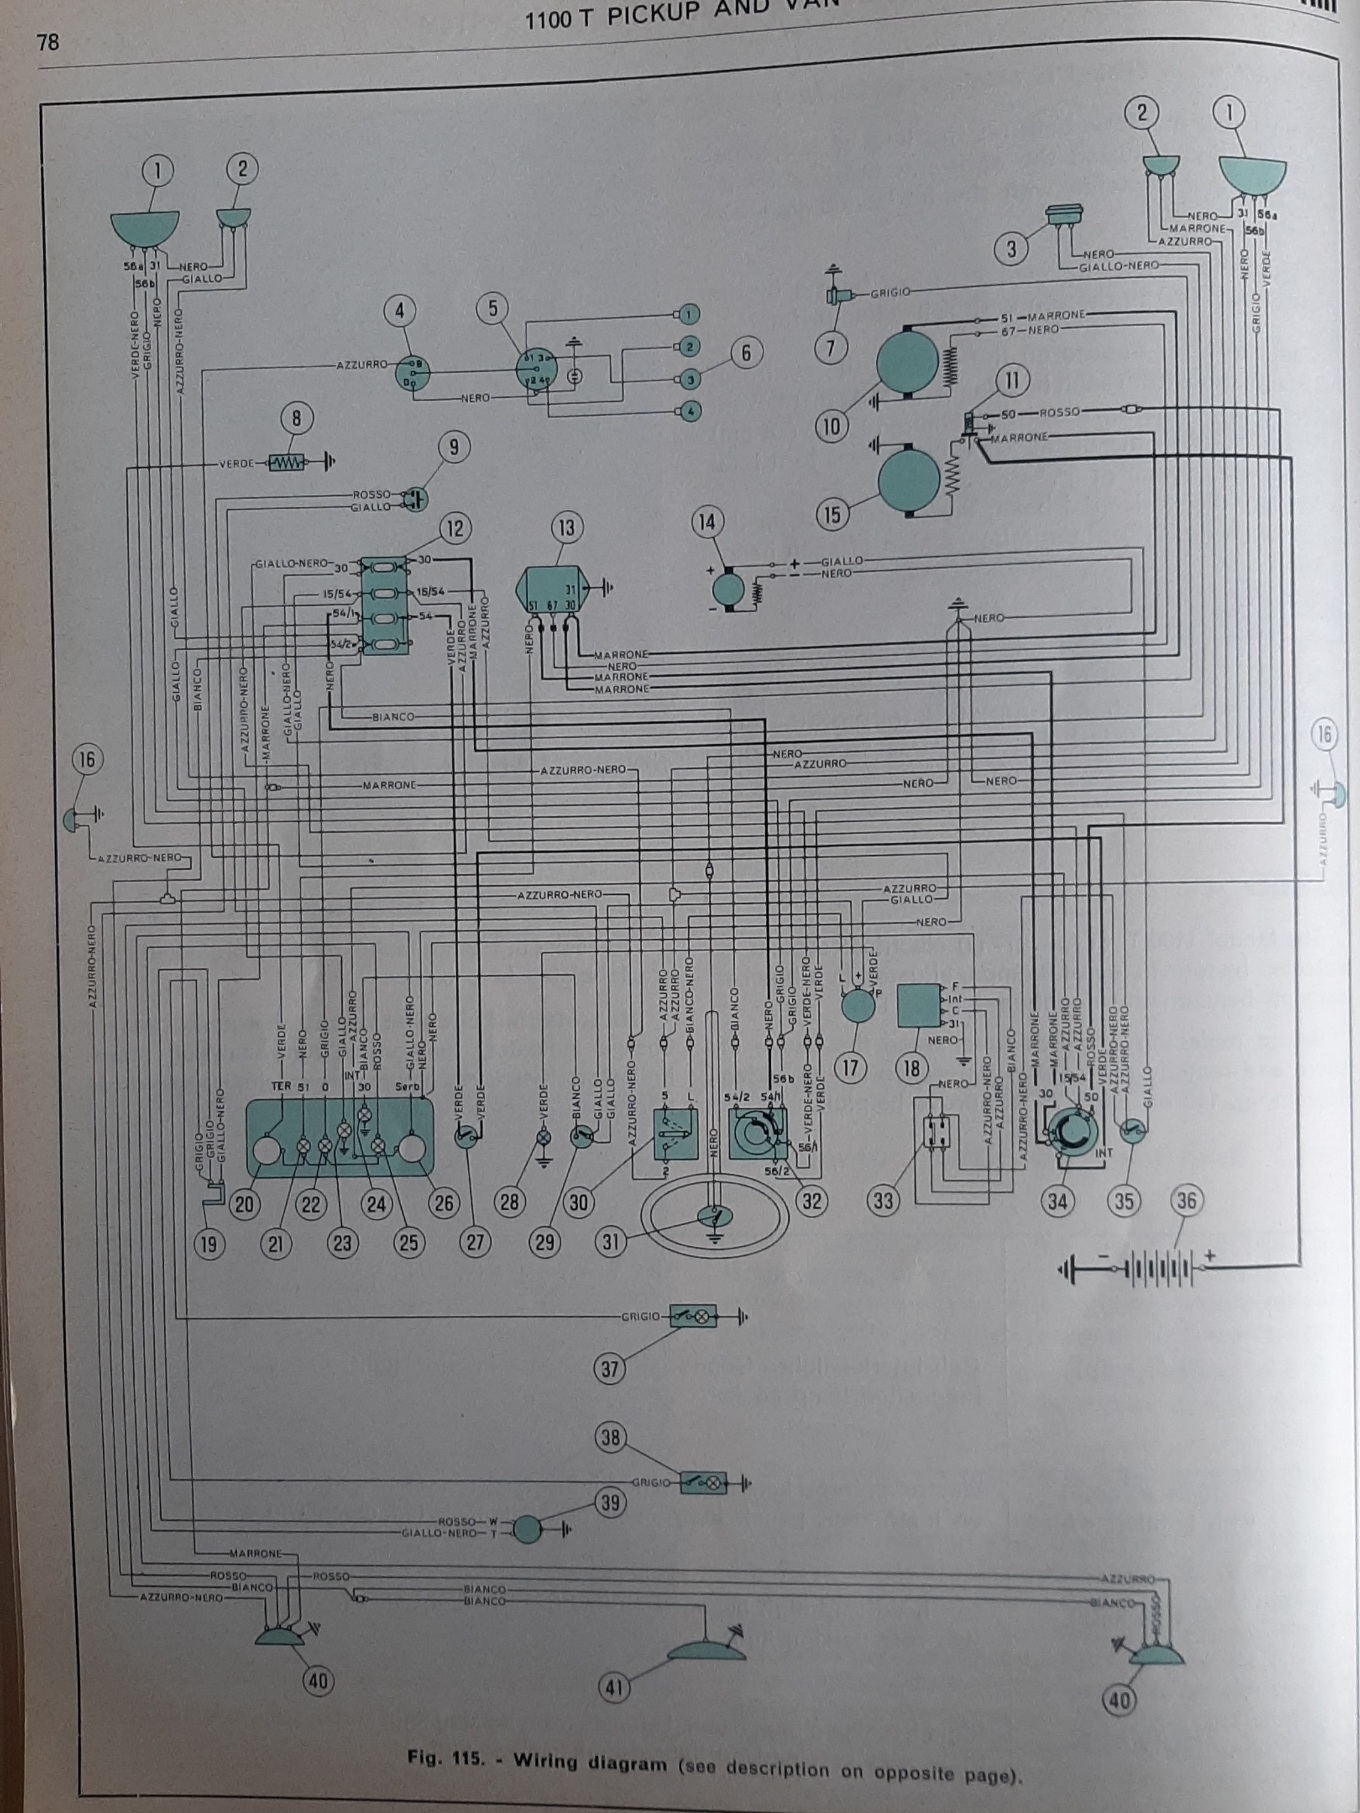
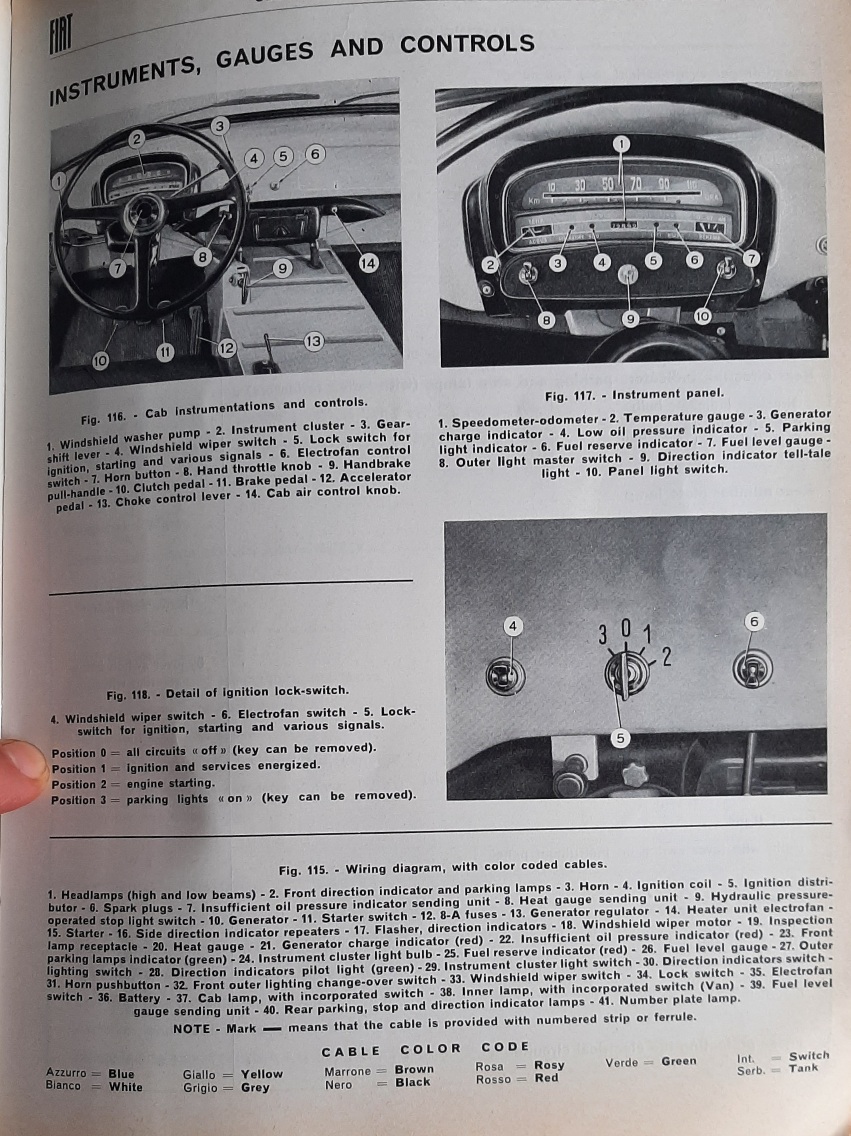
Trinkets are starting to arrive. This will be painted to suit, once i decide on the full size version A factory service manual. These 'yellow books' are great, beautiful hand drawn 'photos', pics of the special tools in use and all sorts of specs and info. Such power! (The 116.000 is the 1300, the 1500 is closer to 52hp with slightly more torque). Such utility! What i really wanted was this page. Fiat 1100T wiring diagram. Not too many systems, with only 4 fuses, but classically FIAT in its implementation And this. Dash contols, none of the switches are labelled from the factory anyway, and there has been some hackery, like a foot switch for hi/lo beam retrofitted to the steering column, aftermarket switches replacing the factory ones and vampire taps galore, as well as some rodent damage.
4 points
-
Can you use sharper scissors? The edges might be a bit fluffy. When I post my cad designs to the cutting service I also pay lots of attention to where I fold the design. Like don't fold the cardboard up through holes etc - they hate that.3 points
-
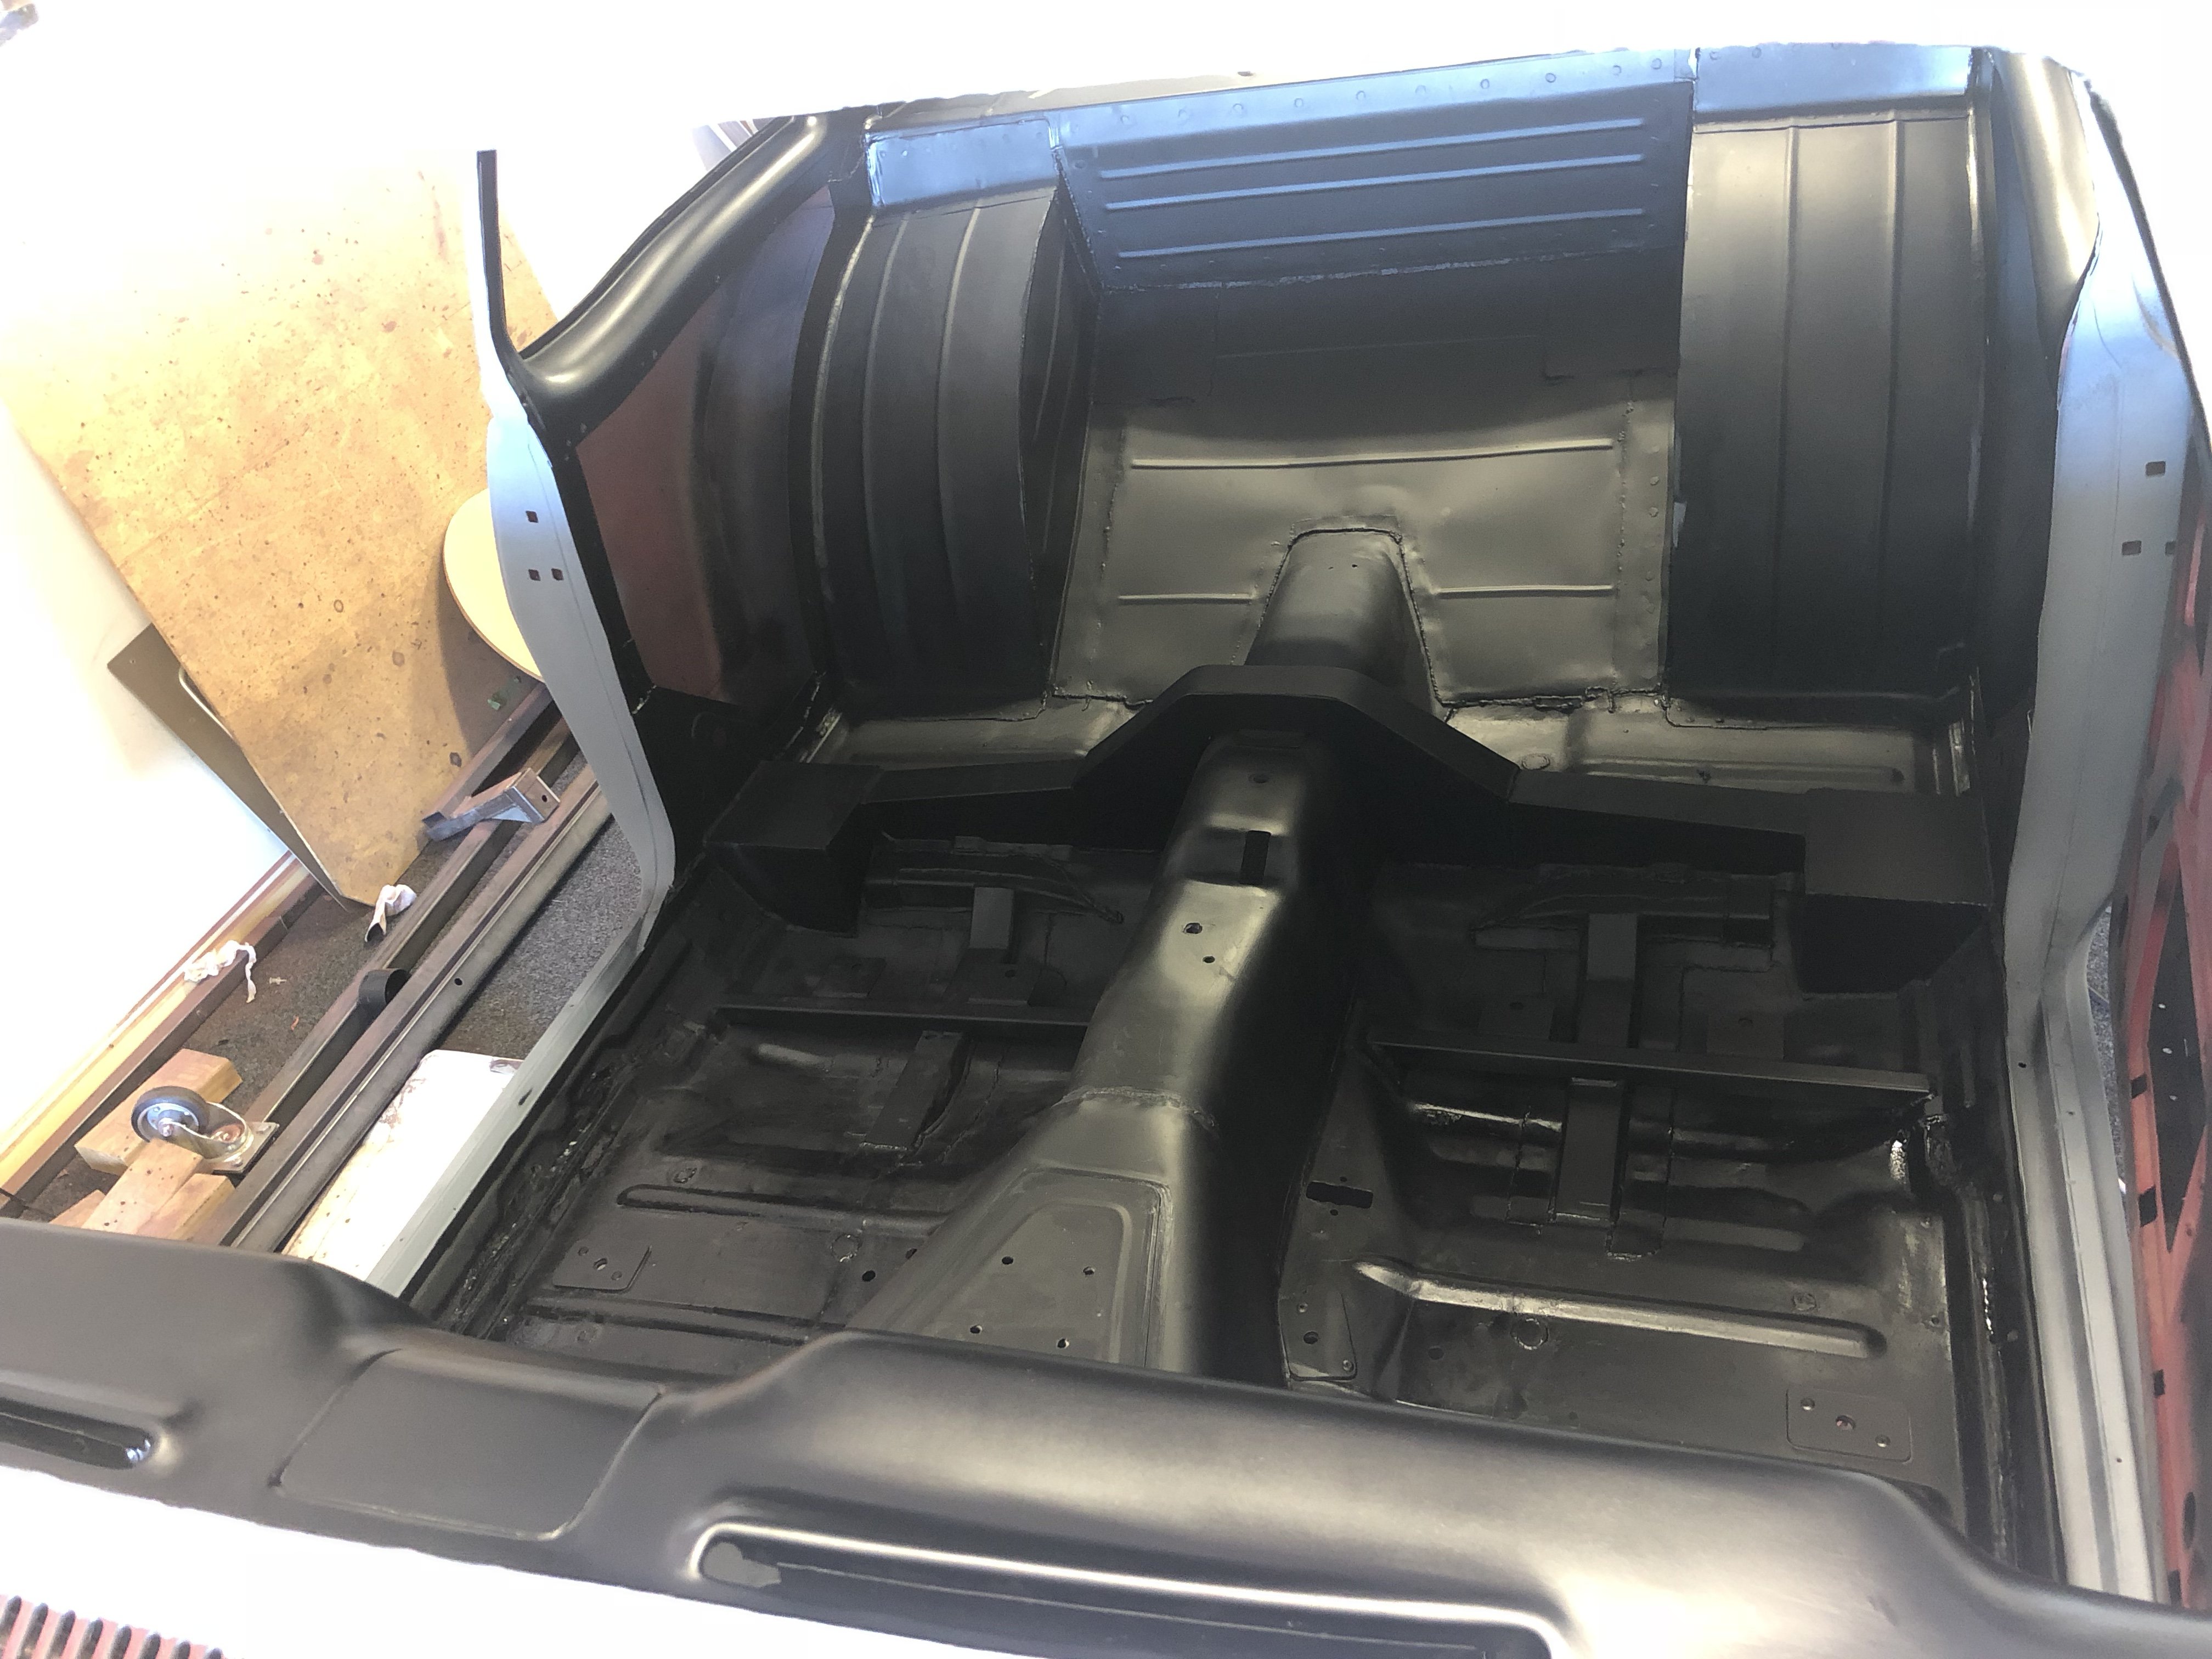
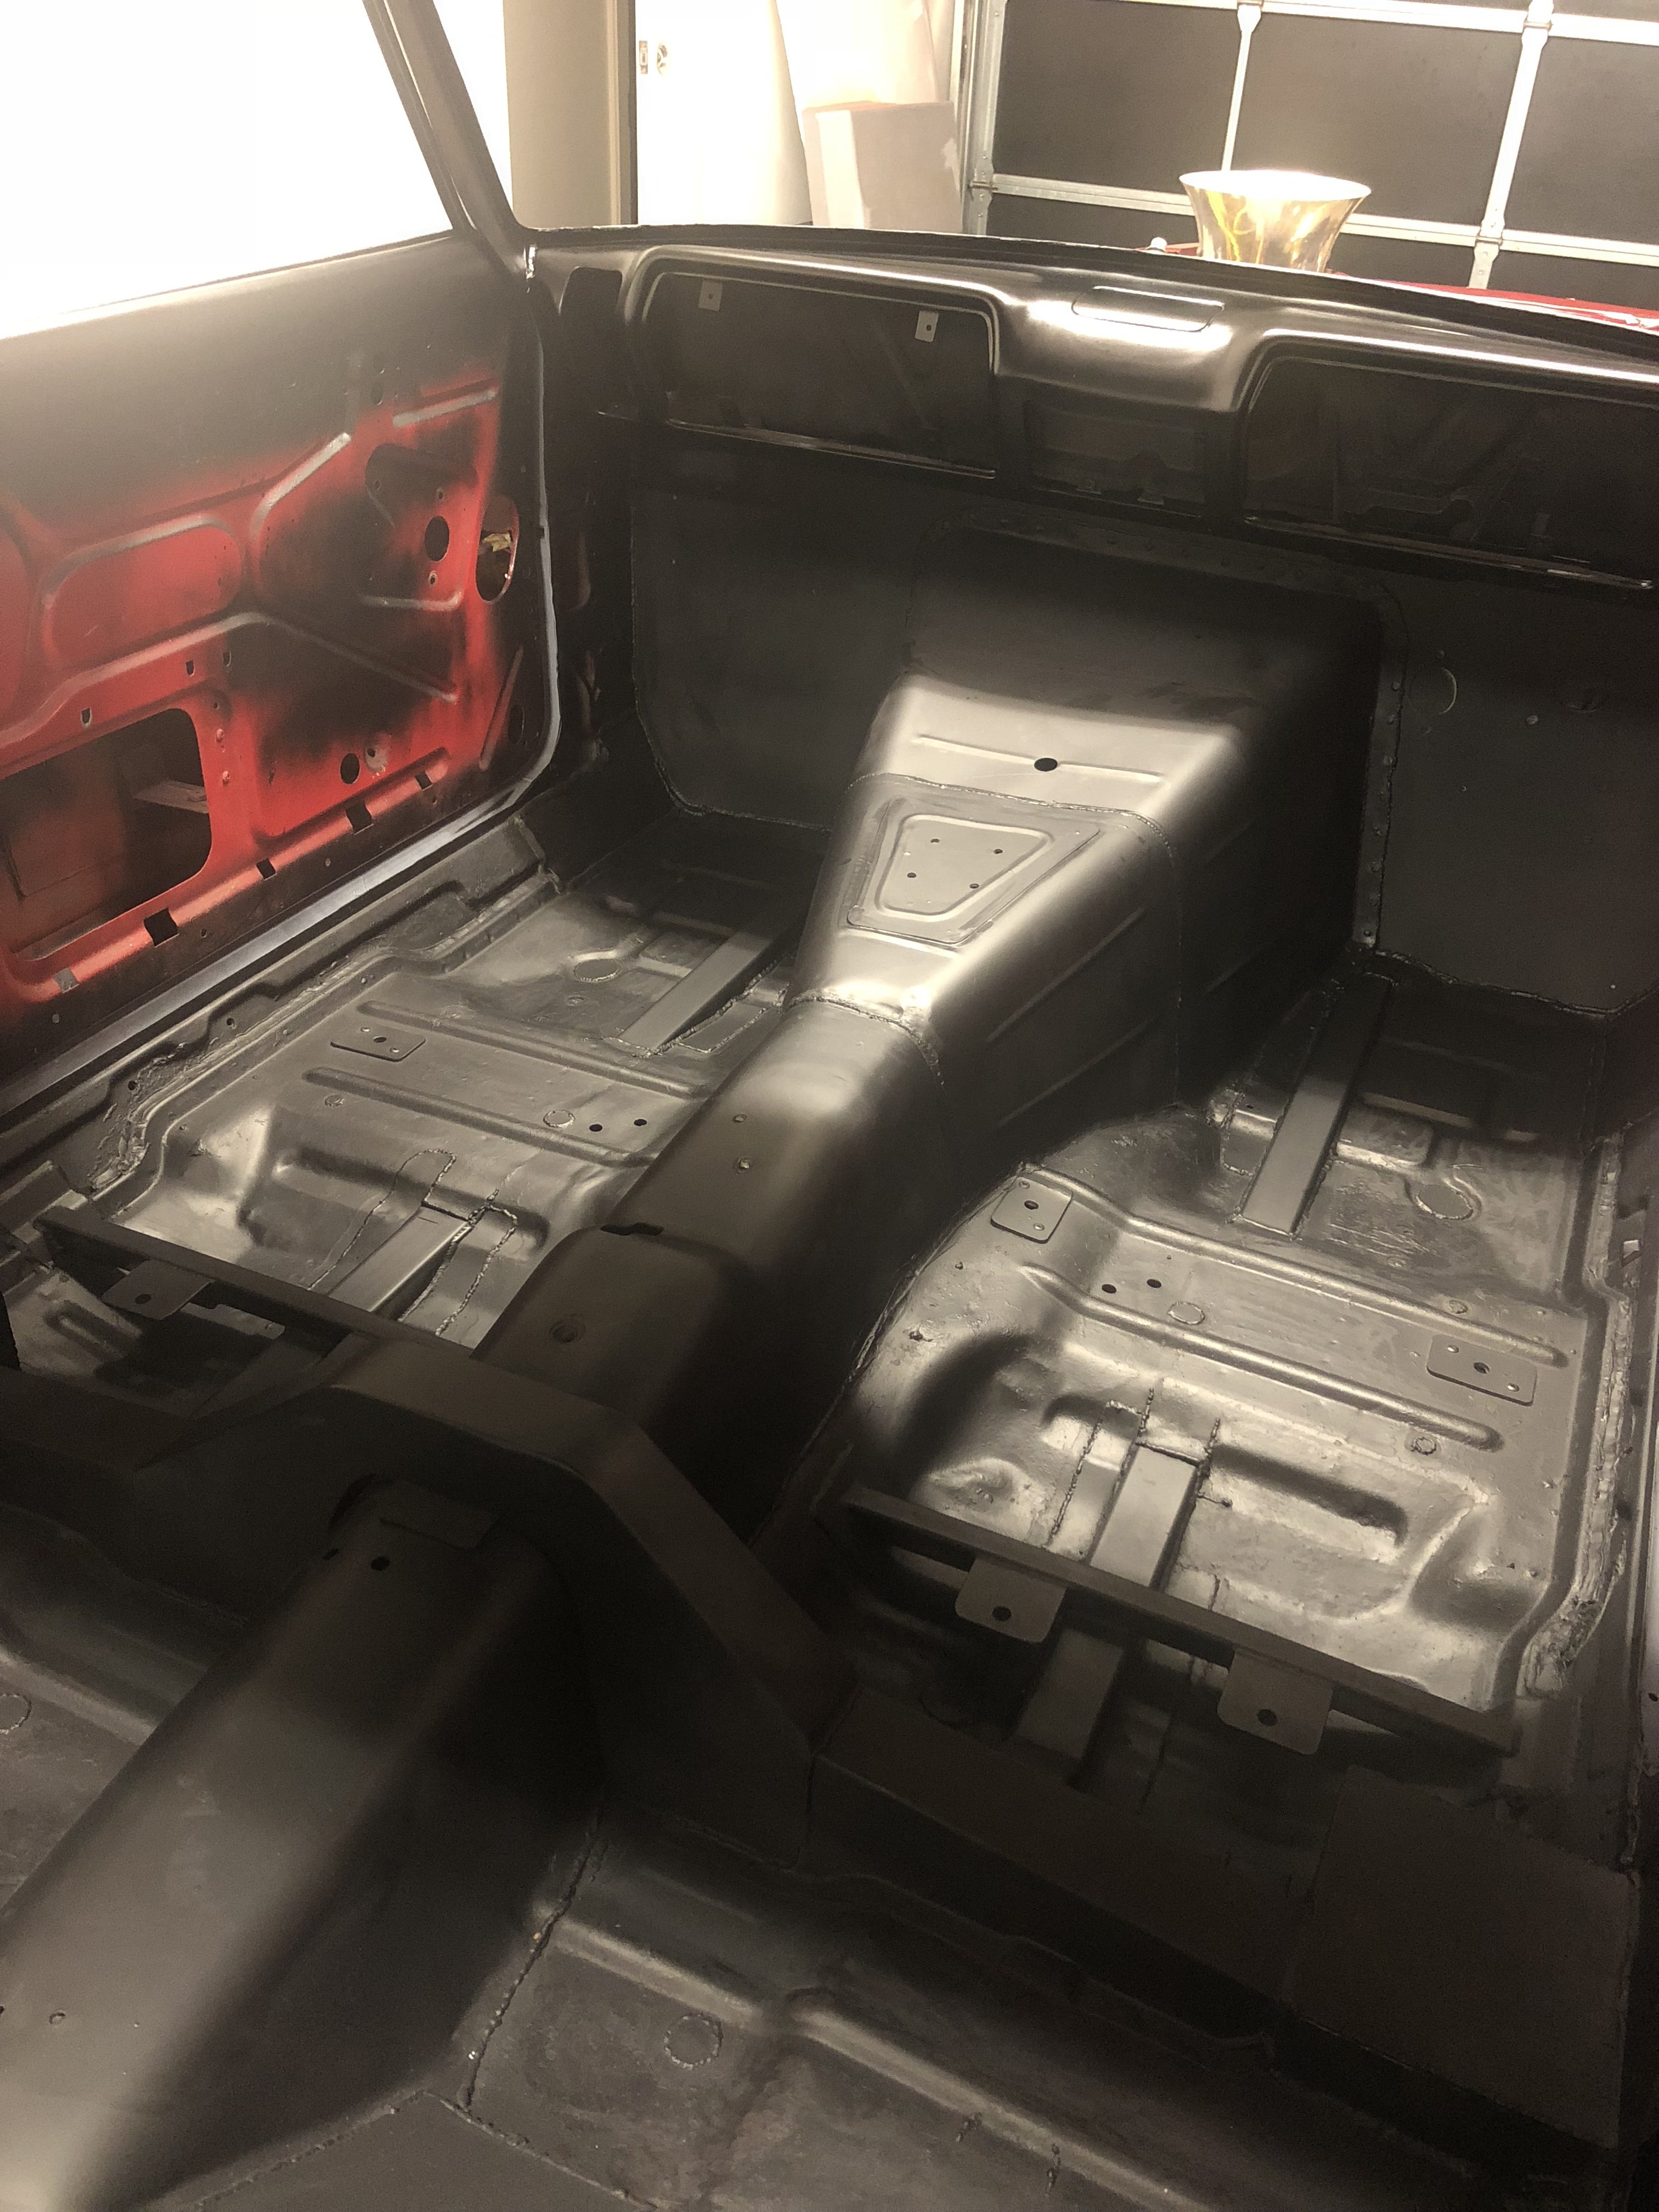
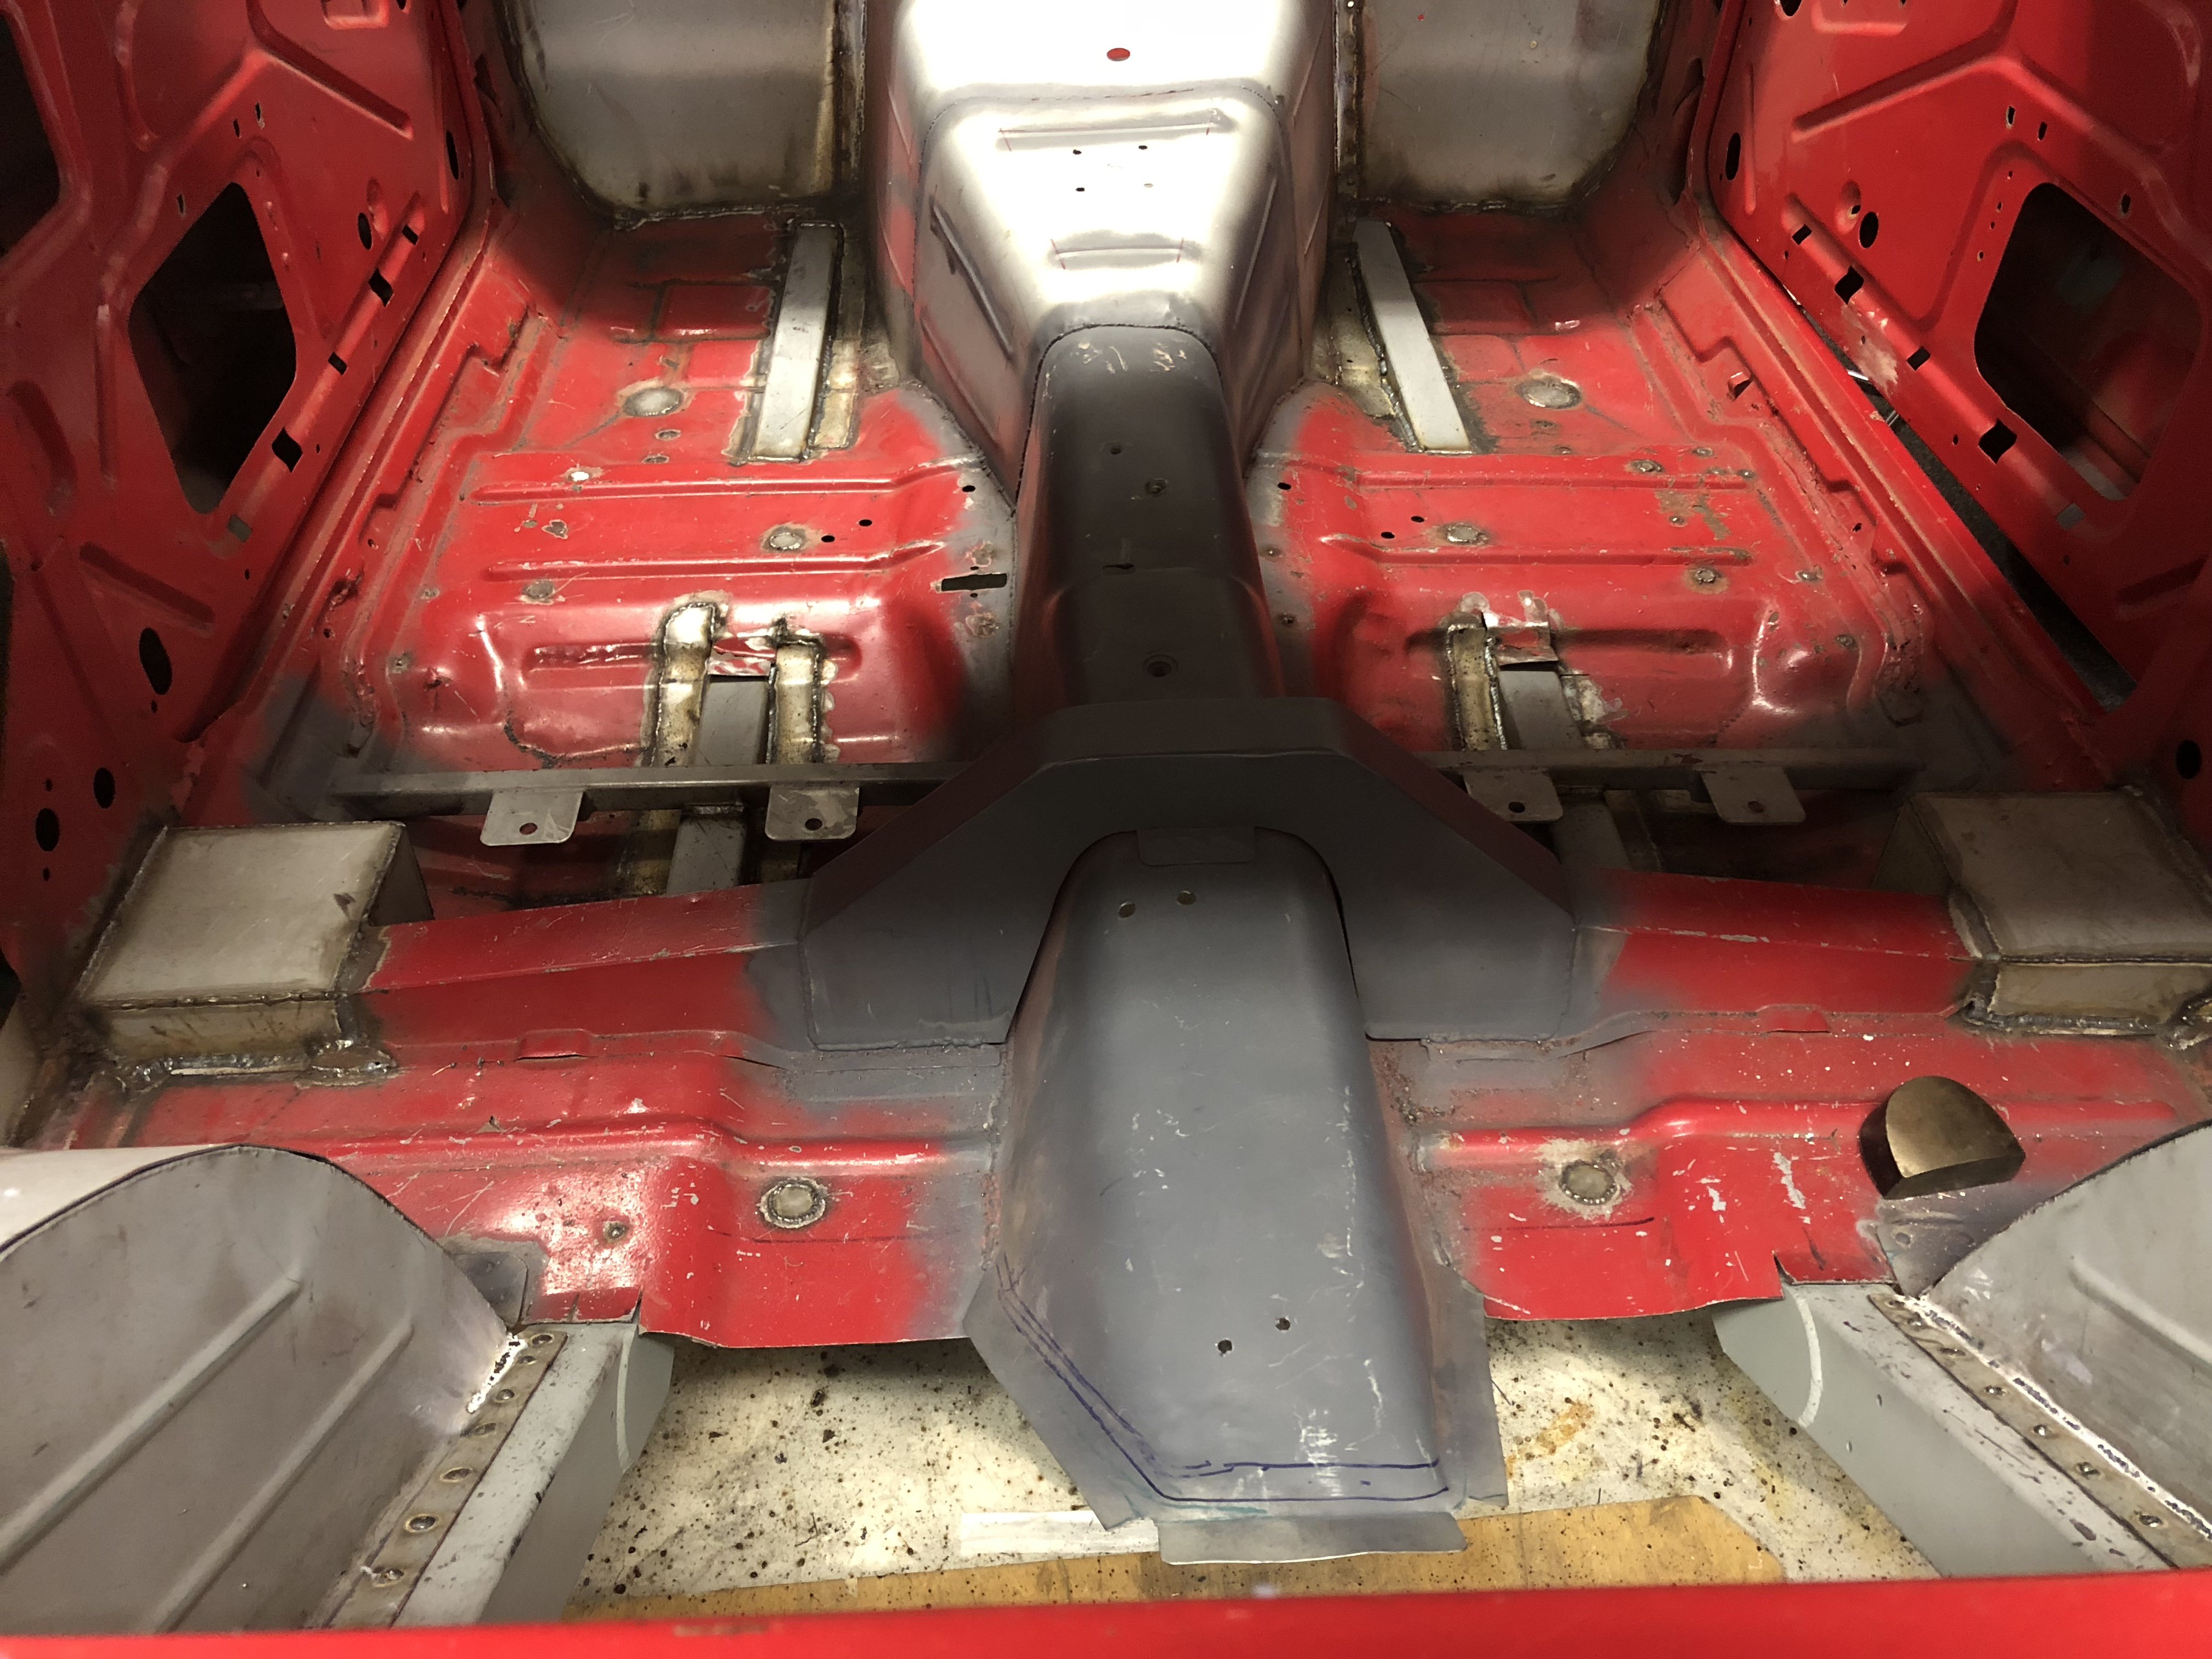
Finally rid of that shit red colour on the floor. two coats of stone chip to go and 2k clear and she’s done.
3 points
-
Some updates. Waikumete upholsteres made a carpet for me. 2 pieces, like original, and we found a loop pile in maroon! Which was brilliant, as I really wanted a loop pile for that more premium appearance. 20210321_161234 by Richard Opie, on Flickr 20210321_165710 by Richard Opie, on Flickr I think it turned out pretty well! Did the boot also, but I haven't got a pic of that for some reason. 20210408_210246 by Richard Opie, on Flickr Engine and gearbox came out again. This is minutes before it all lifted out. Very easy. 20210417_114901 by Richard Opie, on Flickr Pulled apart the gearbox with great guidance from Earle McFarlane. 20210417_121227 by Richard Opie, on Flickr Measured all the clearances, then pulled it apart. Selector hubs are a bit pwnt, there is excessive wear in the shift forks, bearings seem all right but they're all being replaced anyway with all those parts in the post above. So now the mainshaft has been assembled (in my absence) and we are just waiting on the forks to come in from Japanland so we can reassemble. 20210330_125040 by Richard Opie, on Flickr Since the motor was coming out anyway I thought it'd be a good time to get the top end sorted, as it's only ever been a stock head and cams, despite the bottom end being built/hi comp. This is a spare smallport head that I spent a while scrubbing in the shed to get clean. 20210330_125016 by Richard Opie, on Flickr I then thought I'd try cold jet/dry ice blasting as a bit of a test case on the cam boxes to remove the baked on sludge and scum. This is the result. Pretty awesome! I'm going to be using this process to clean some of the undercarriage parts in situ on the Honda. 20210331_084622 by Richard Opie, on Flickr I stripped the head myself, once I learned how to remove the collets from the retainers it was all pretty simple. Here's the head, with all the bits catalogued and in containers, with the Kelford 193B cams and Supertech retainers/springs I bought ages ago for it. It's in with Alan Harris at Harris Performance Engineering (previous Lynn Rogers) for porting, some tickles on the combustion chamber and a port match of the ITB manifold. I then got to thinking about what audio this car is going to have, even if you can't hear anything inside it really. Initially, I was going to run a modern Bluetooth head unit in the glovebox, and got as far as buying this pretty rad Sony unit that has 50wrms per channel - from a head deck!!! Enough to power anything, speaker wise. But then Ed sent me a link to a Yahoo auction that changed things. 20210422_172330-01 by Richard Opie, on Flickr 20210422_172308-01 by Richard Opie, on Flickr This is an AD-189T fitting kit/adapter produced by Pioneer in the early 80s. It fits a 'B' type head unit, which is conveniently what the 'component' systems of the early/mid 1980s are. Before the standard DIN size we all know and love today. It replaces an entire middle panel on the dash, replicating the OEM fit where normally there would be a spindle mount head unit (as is the case on my factory dash). I had never, ever seen even a picture of one of these kits before, let alone a NOS one on Yahoo. So I bid on it, because who doesn't love period accessories. And I won it. So then I thought I'd probably better find a head unit to fit. 20210422_172407-01 by Richard Opie, on Flickr I ended up with this Pioneer KP-717G tape deck. Note - it's a tape deck only, there is no AM/FM radio or anything with this, as was the style of the component systems of the time. This one was listed with a clean bill of health, and some remedial work done to ensure it was operational. The auction was backed up with a video to prove it. It's one of the higher end units in this range, with Dolby NR, adjustable tone controls, all the fruit. It doesn't have an amp on board - luckily Ed has one of the Pioneer GM-4 amps for this to plug into, that will find it's way into my car. 20210422_172454-01 by Richard Opie, on Flickr This is how it should look when installed in the car, using the AD-189T kit. Fuckin. Awesome. I reckon. 20210422_172612-01 by Richard Opie, on Flickr 20210422_172638-01 by Richard Opie, on Flickr And this is essentially what the initial system I run will be. Later on I may add some fronts - I have some NOS Pioneer TS167 coaxials, and also dual cones whose code escapes me right now. These TS-X9 are incredible though - I had them wired up to my amp in the house and they produce enough bass you can actually feel it through the floor. How they achieve it, I do not know. Sure it's not sub levels, but it's a beautifully balanced sound that I hope will be loud enough to listen to while pootling along at slow speeds or stuck in traffic. Thank you for coming to my TED talk. Hopefully, next updates will include a rowdy cylinder head, a slick shifting T50 and some Phil Collins tapes in the KP-717G.3 points
-
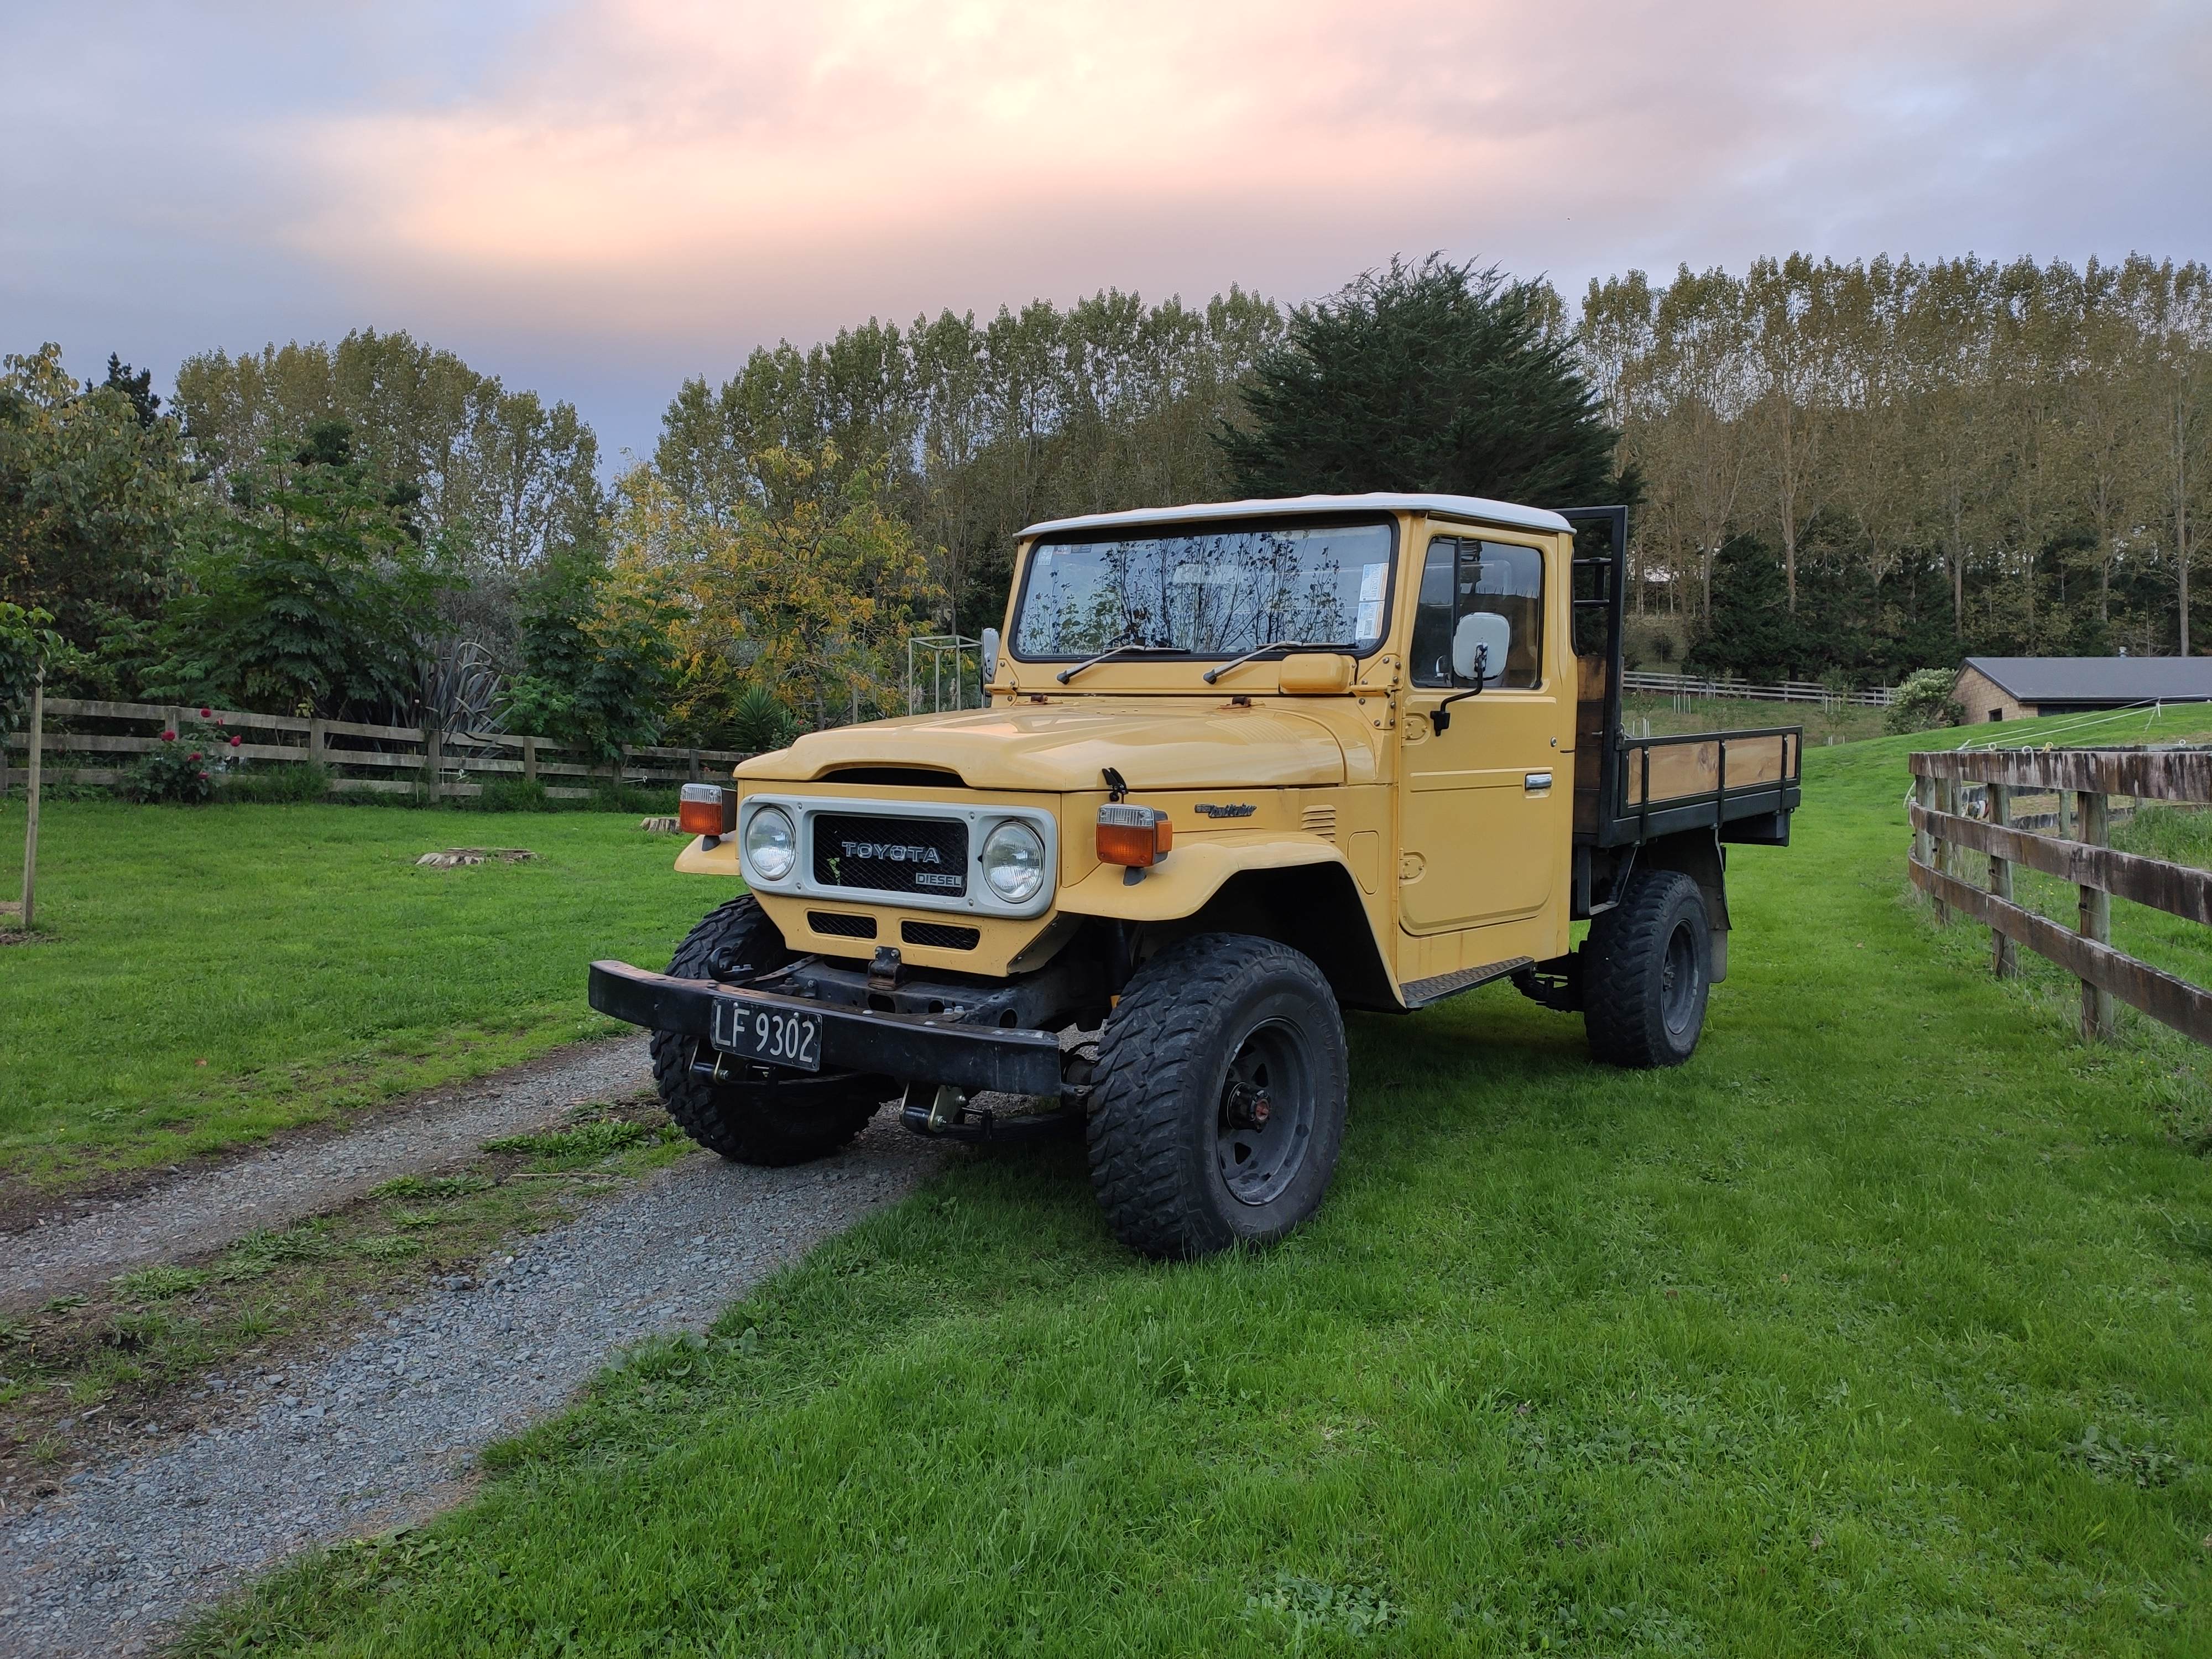
Still room! Factory quoted 95kph top speed. With a 6.17 diff, it would be screaming.2 points
-
Consider it done.2 points
-
Brought a BBK Alcon crb343 calipers Forza rotors 295mm x 32mm Hawk dtc70 brake pads2 points
-
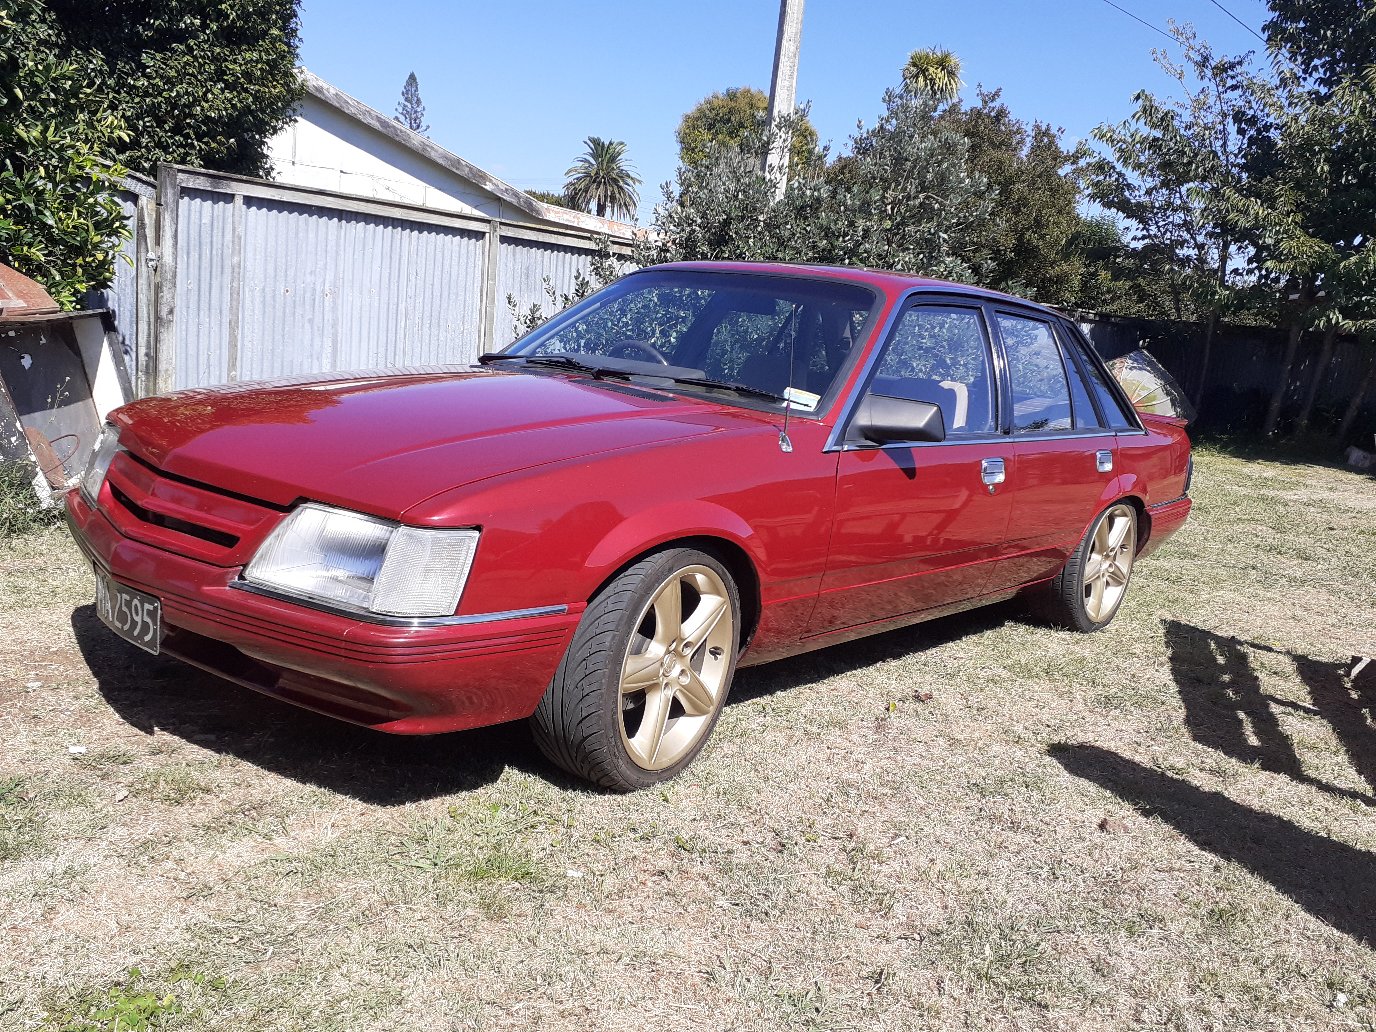
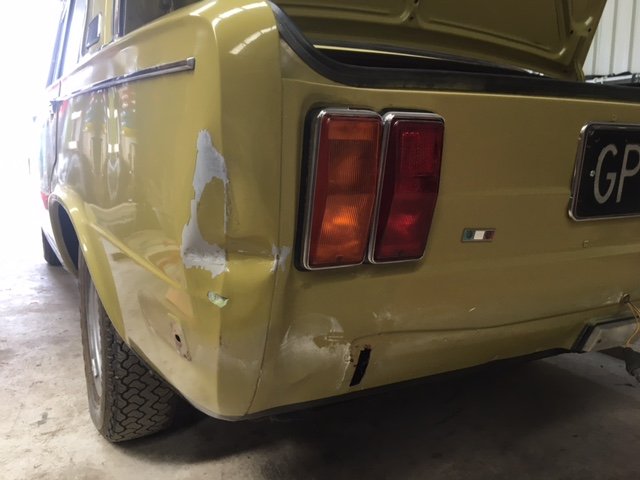
New stance: Super happy with how it drives, rides and steers so much better. Unfortunately though my cunning plan that the new suspension would distract the WOF man away from the rust around the windscreen and A pillars didn't quite work, and she failed her wof last week. Prolly $1k to fix, but there's niggly bits starting elsewhere so teetering on going all in and do the full effort blast/fix/total respray. Soooo, anyone able to recommend someone in the kato that will do a damn nice job for a very decent price? Got a couple of ballpark quotes already, but keen for some oldschool recommendations... Cheers
2 points
-
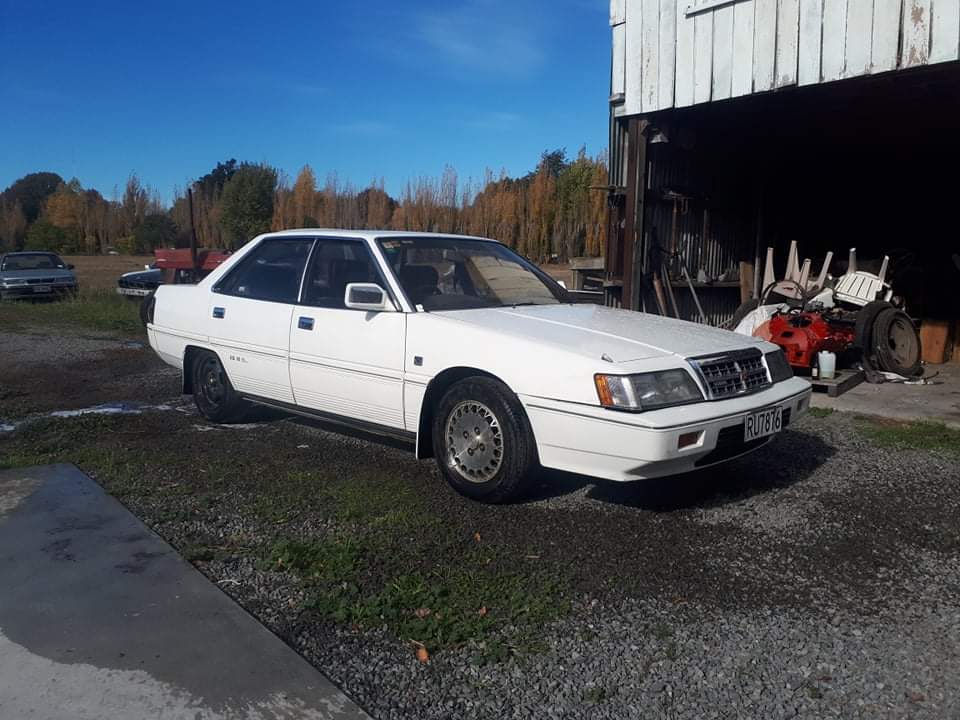
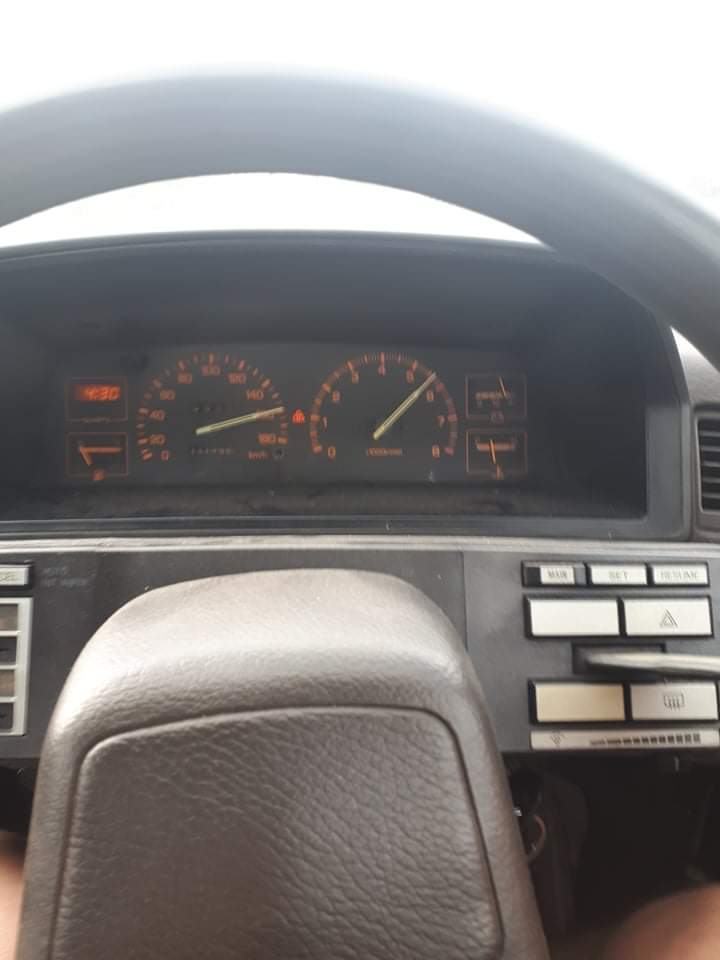
Get back on the main page. Got a set or soft lines for the rear brakes made up today and some seals for the calipers got them back on an bled up njce and easy Got a new brass frost plug in the block. Was a prick to get in Got it all dialed in and took it outside to wash the dust off it. Took it for a run up the motorway to test out all the work ive done to it Which turned into this haha Transmission is working ok in 2nd 3rd and overdrive. But pulling away in 1st gear in drive it slips pretty hard. But if i select low it is ok.....dunno. old autos beinh old autos. Might put a few more kms on it and see if it improves.. Cruises at 100k pretty good for a little 2 litre v6
2 points
-
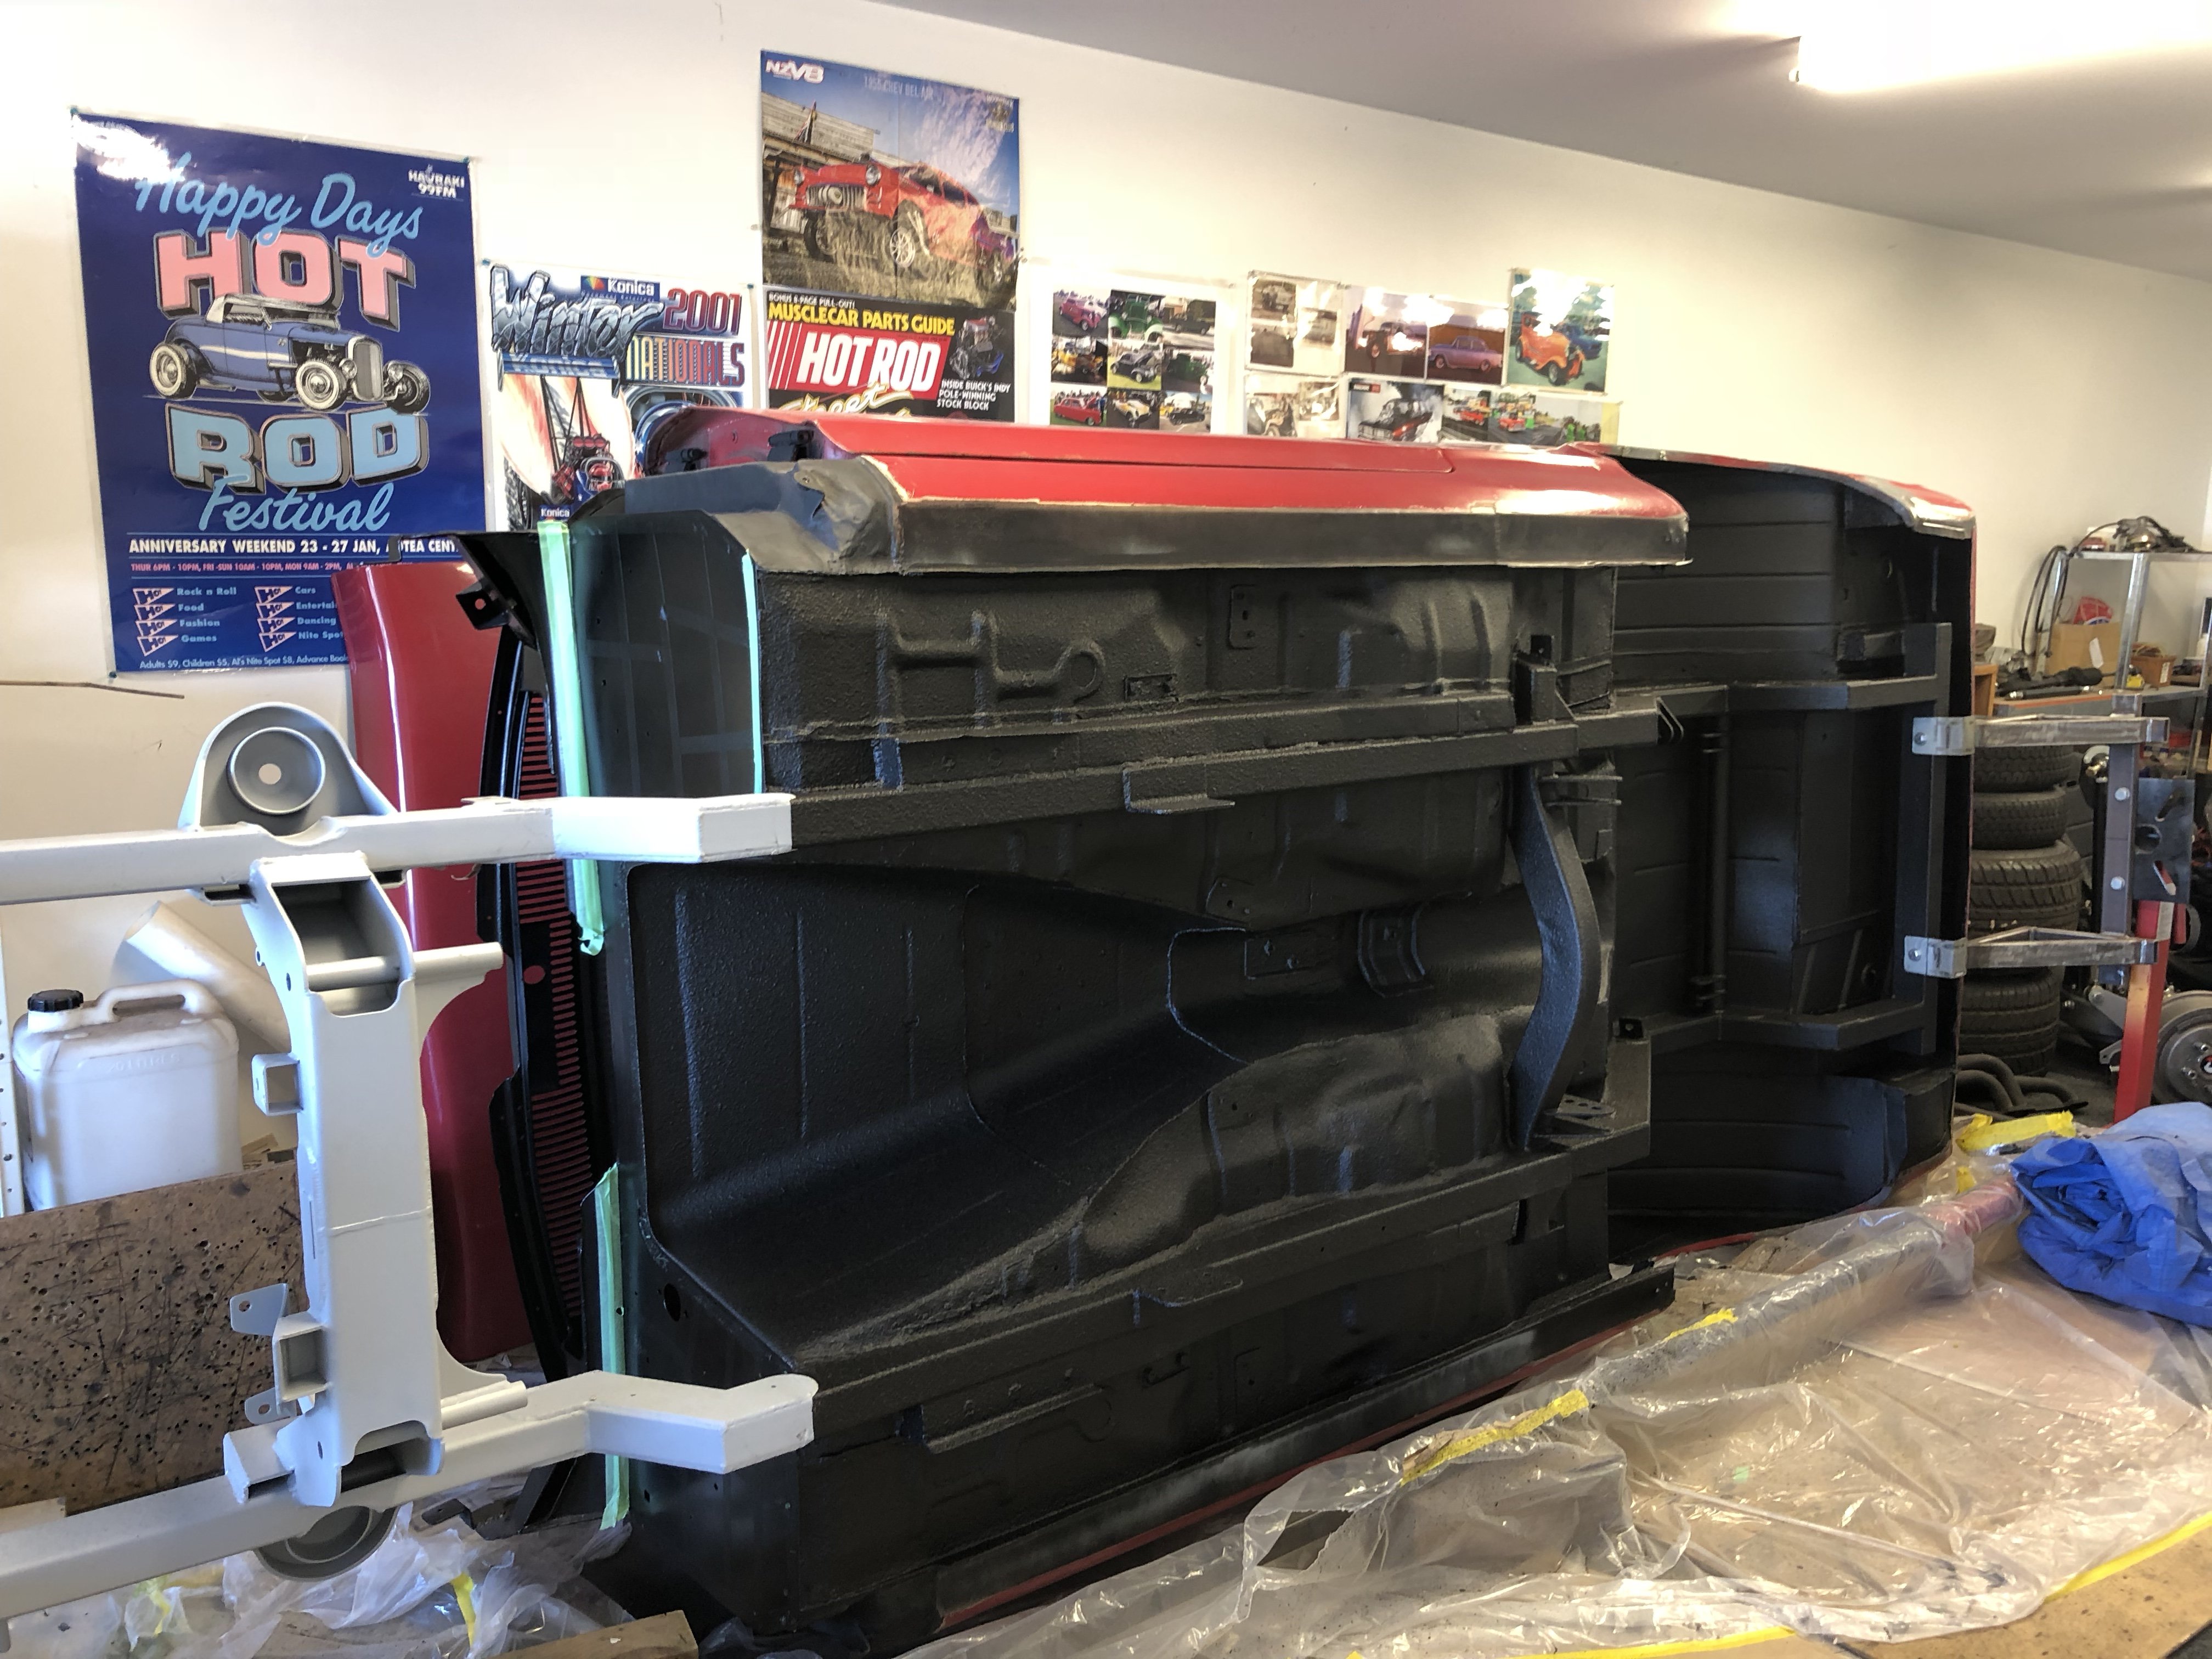
Ideally we’ll be blasting the underside and enginebay next week! stripped the heater A/C and junk out because it will never be more accessible/ save some weight baring down on my stupid little wheels and I can clean the mouse shit off. Some time in the past the furry sound deadener has got moist and that’s why there’s crusty bits on the firewall. I had to remove it or it would catch fire anyway. Back out with the face mask and wire wheeled this big kahuna after whipping off the fuzzy shit. Quick black-zinc to seal and savour. That shite I mentioned a few weeks back that I was blowing out of the plenum, there was more in the ducts. Glad that didn’t fire out first time I used the heater! LOL at the gasket never being square since assembly. Classic industries hadn’t provided an invoice or MAF declaration, just an address.. so the crate was just chilling at the depot in California. Took the mrs a couple of weeks to get that squared away.2 points
-
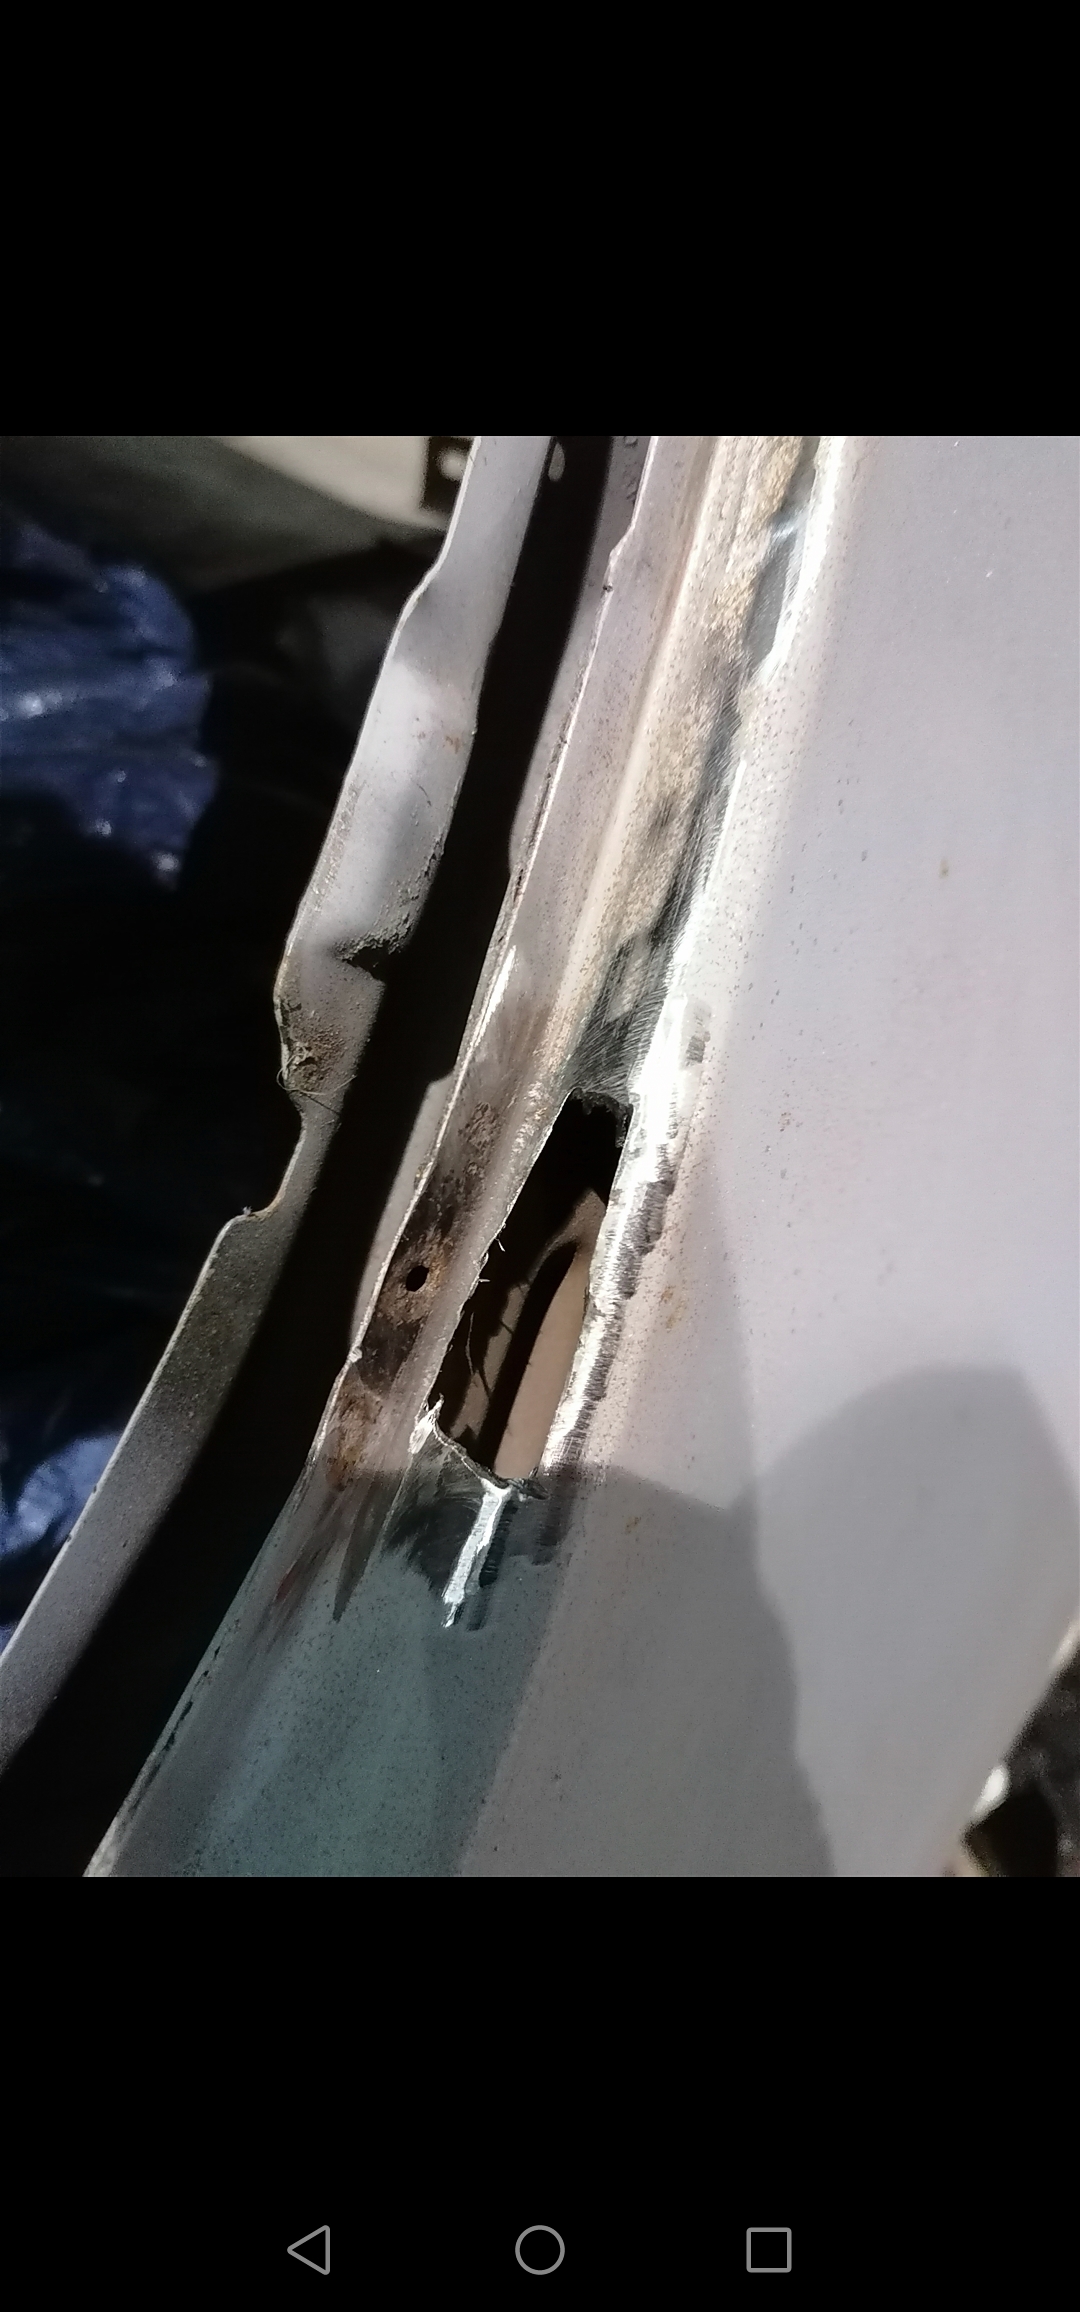
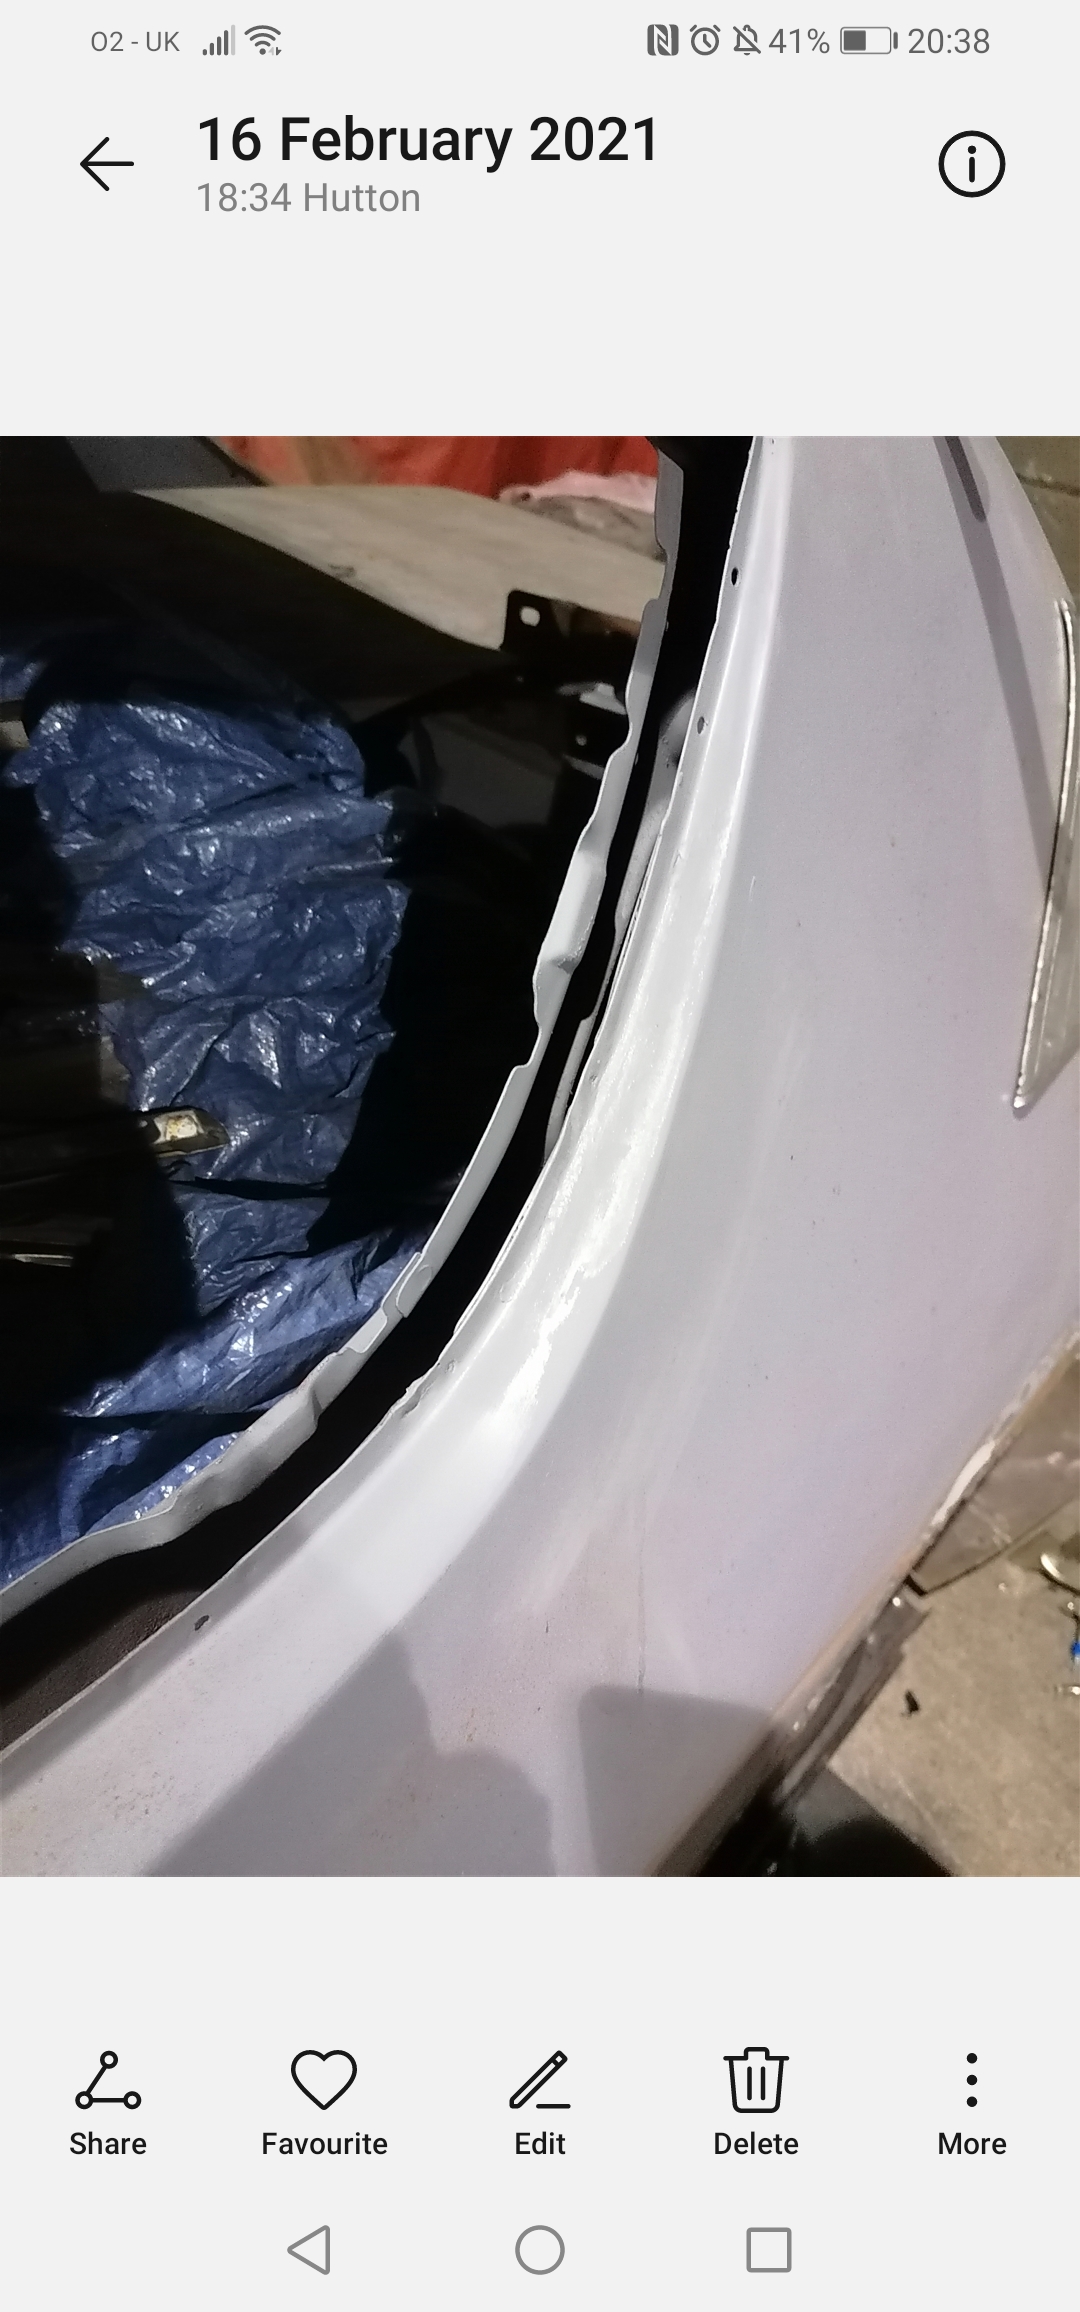
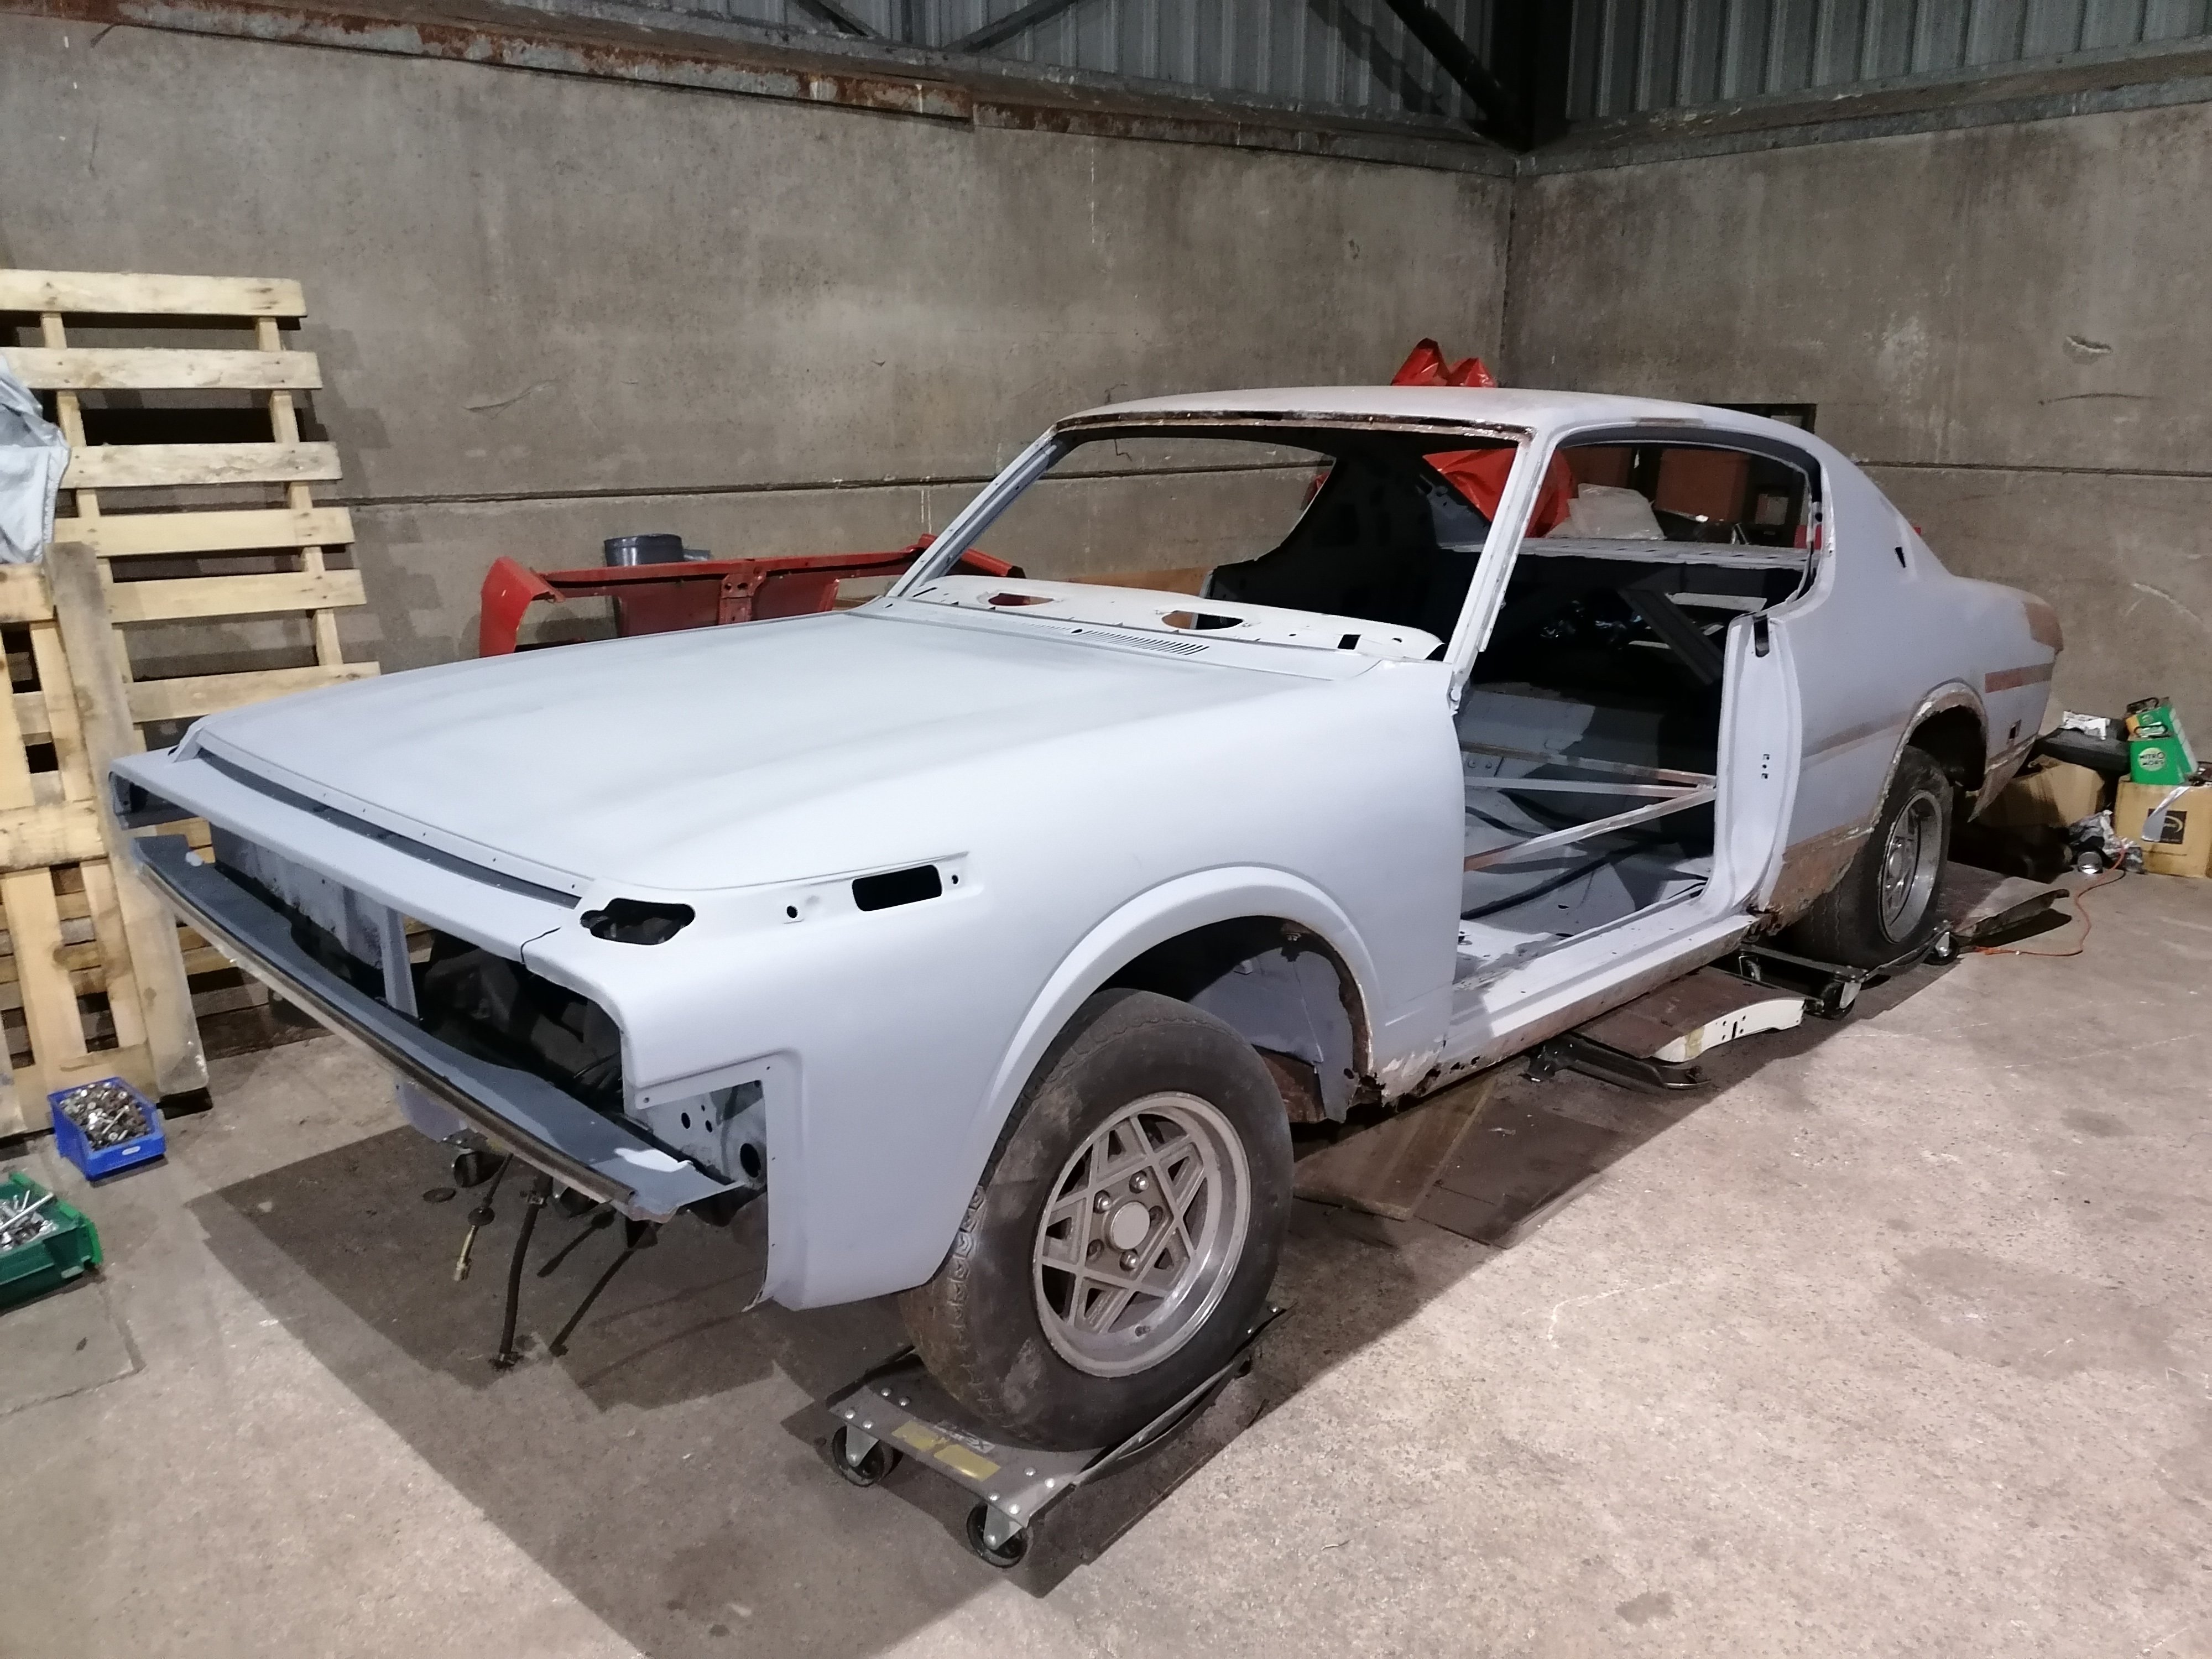
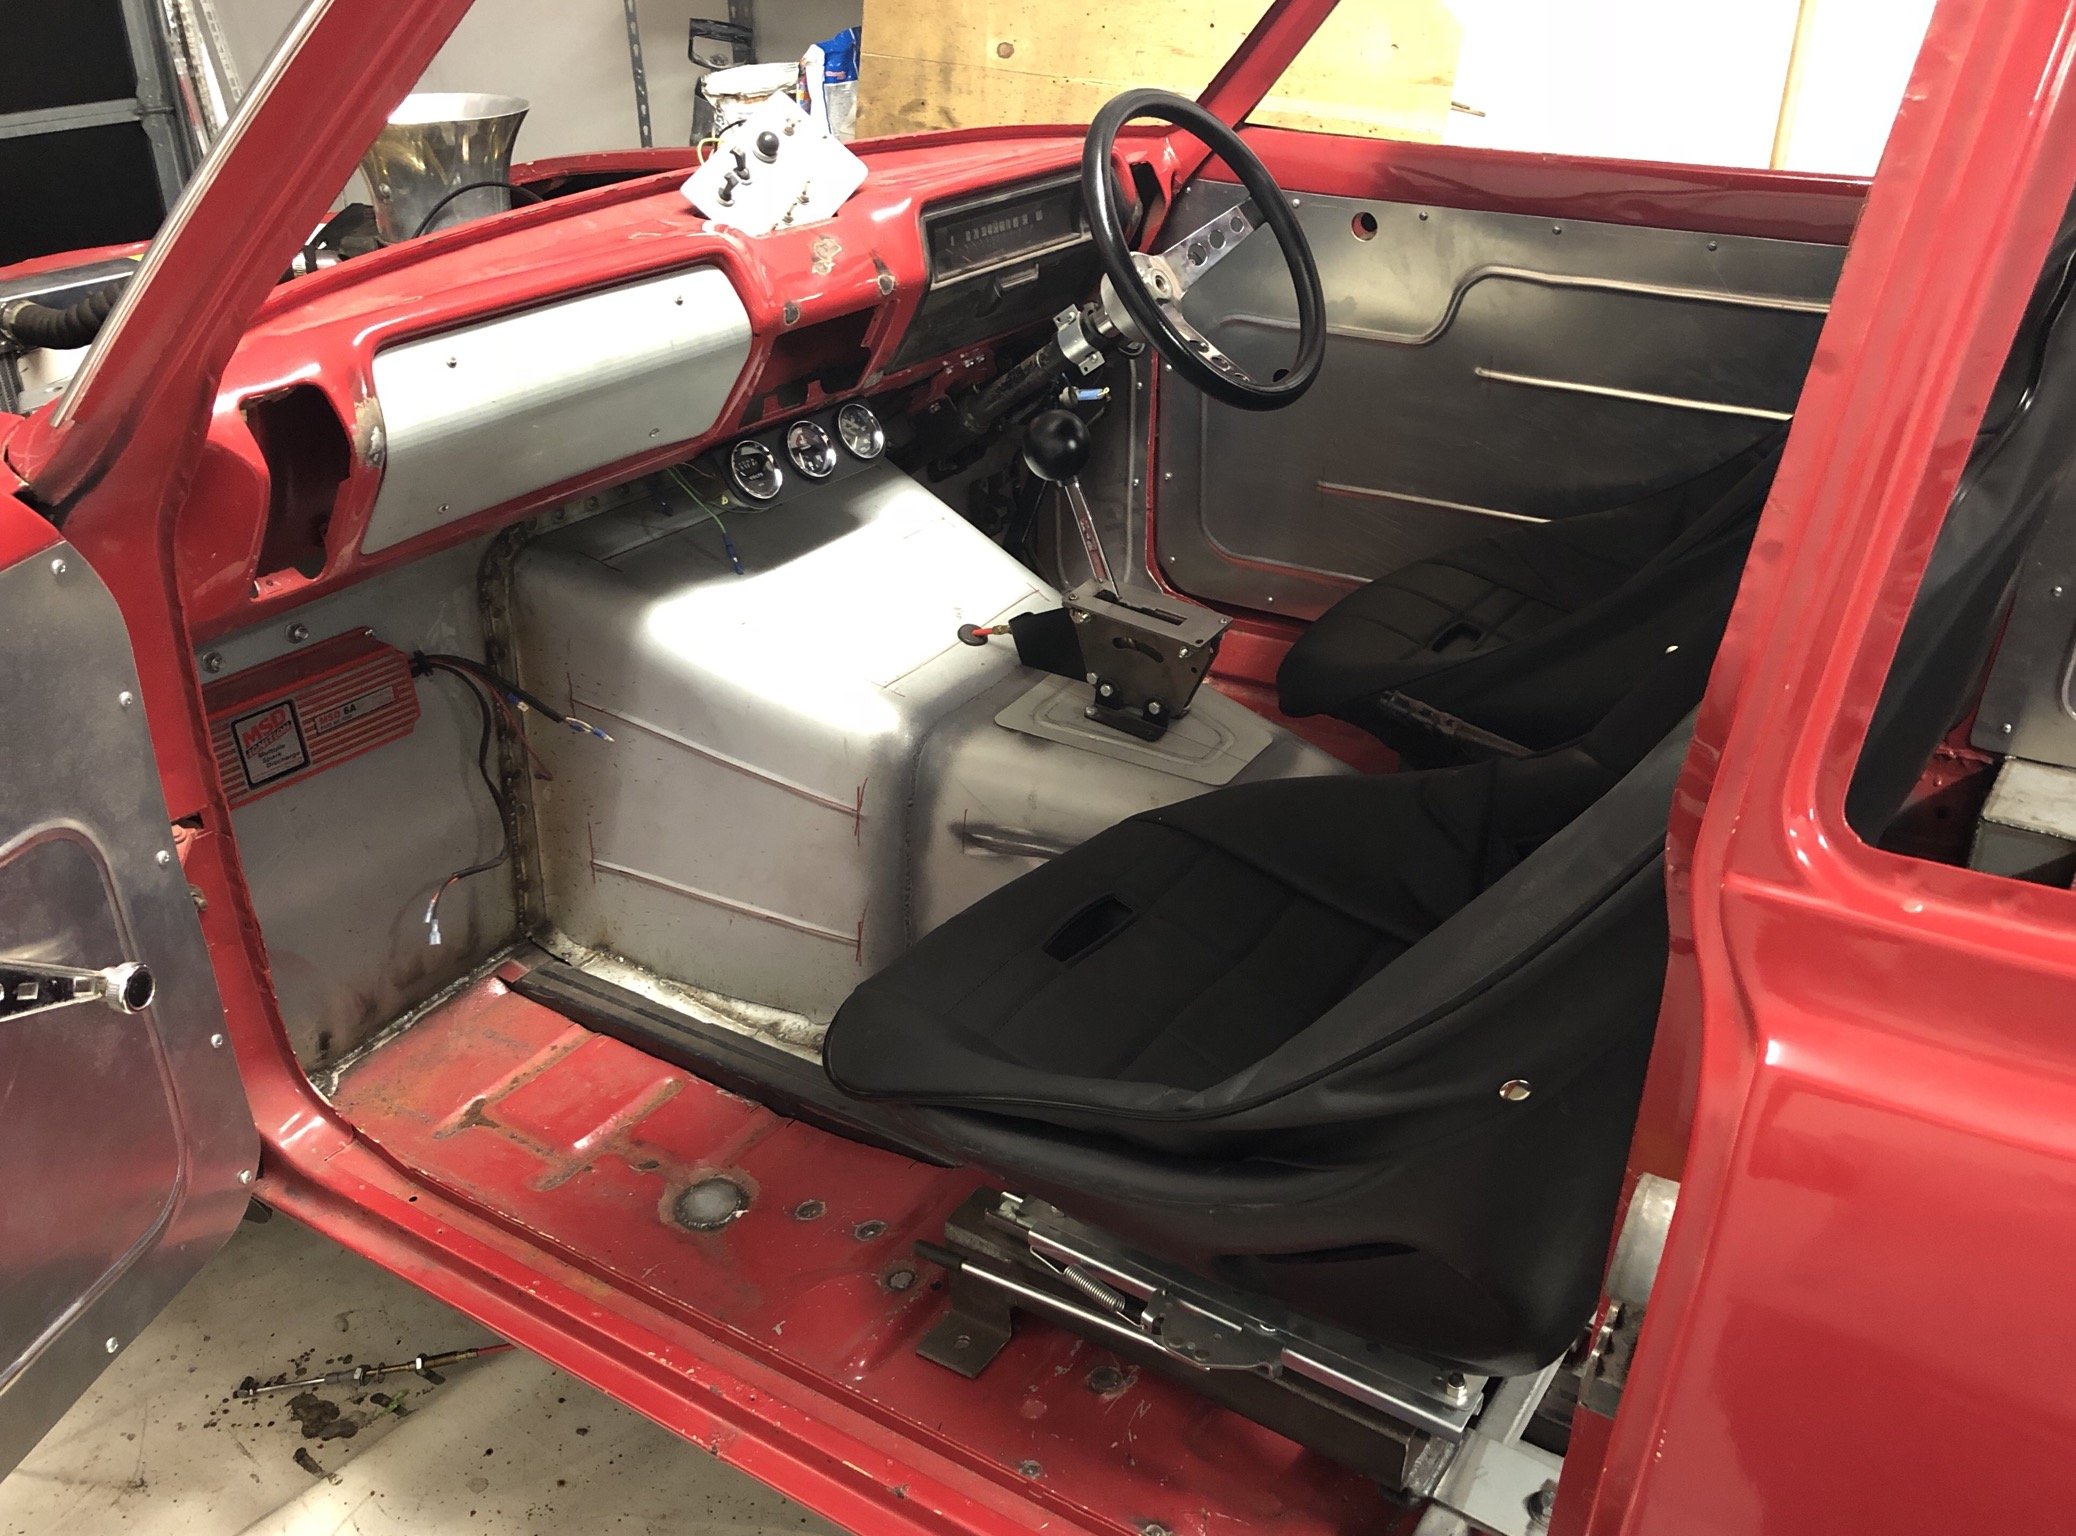
I've spent the last few weeks trying to strip the shell down as much as possible to find any hidden rust and to have the car sent off to the panel beaters. It will be good having all the rust cut out and being painted professionally, Even though i would have liked to do it myself. For the most part, It's just a rolling shell now. There is still the glass in, although I have to get the windscreen removed as it's damaged now unfortunately. There is a massive crack on the passenger side of the window. I picked up these Recaro fishnet seats awhile back and have been considering getting them re-upholstered with the rest of the interior. Still on the fence about it. I'll do an update on the interior at a later date as currently it's all inside the car in boxes.2 points
-
Now that I can work on this again, I thought I'd start with the engine, considering it was already out. I'm planning to stick with the L20ET that came with the car, From my understand it has some good old mystery cam in it, and a flogged turbo. I picked up a new wastegate for the steel wheel 25det turbo i picked up awhile back. But here's a photo of before i started to clean up the engine, and below was afterwards. I'm planning to go with a Speeduino engine management system, So I'll be able to get rid of that massive AFM box in front of the turbo. I'm still waiting on getting a new fuel rail as the OEM one is a mess. Looks like the 25det manifold may need some slight adjusting aswell as it looks like it'll hit the transmission. I've also got an SR20 throttle body i haven't put on yet as well. I'm pretty happy with how the engine is looking now. It's far from done though. I need to replace a handful more gaskets, Paint the valve cover, Get the new fuel rail and injectors, and some more manifold studs for the turbo, attach the throttle body and finish running the lines for the turbo.2 points
-
Now that you’ve sorted the cooling thing can you now fit a PTO so you can run a mower/log splitter/saw mill/wood chipper.1 point
-
The bottom ones are on soft mounts, and the top one is slightly more rigid but still rubber isolated....1 point
-
Any mechanic worth paying should be able to sort it out in less than an hour.1 point
-
Did the mechanic do a compression test?1 point
-
some possible causes of low compression: incorrect valve clearances, stuck valve, bent valve, burnt valve, worn piston rings1 point
-
When funds permit I'll get some v5 simmons or similar
1 point
-
I figured i'd just throw this in for comparison, This is a picture of the new turbo. This is a picture of the old turbo, next to the new one.1 point
-
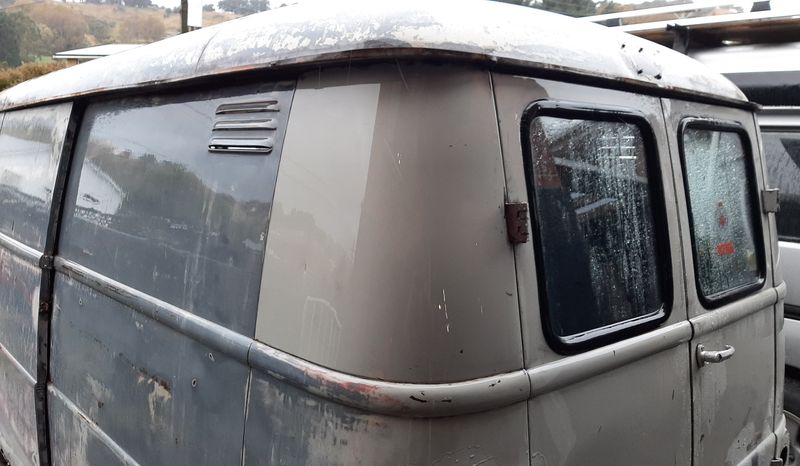
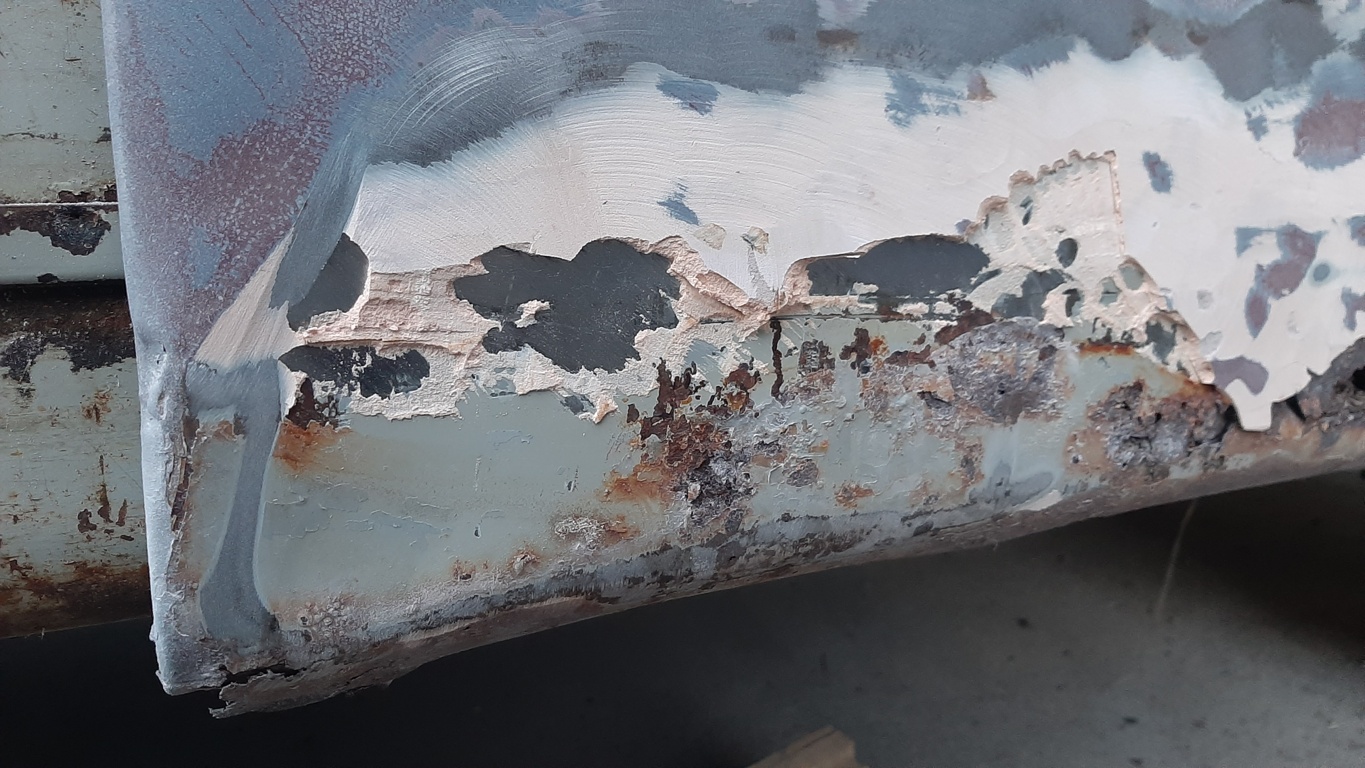
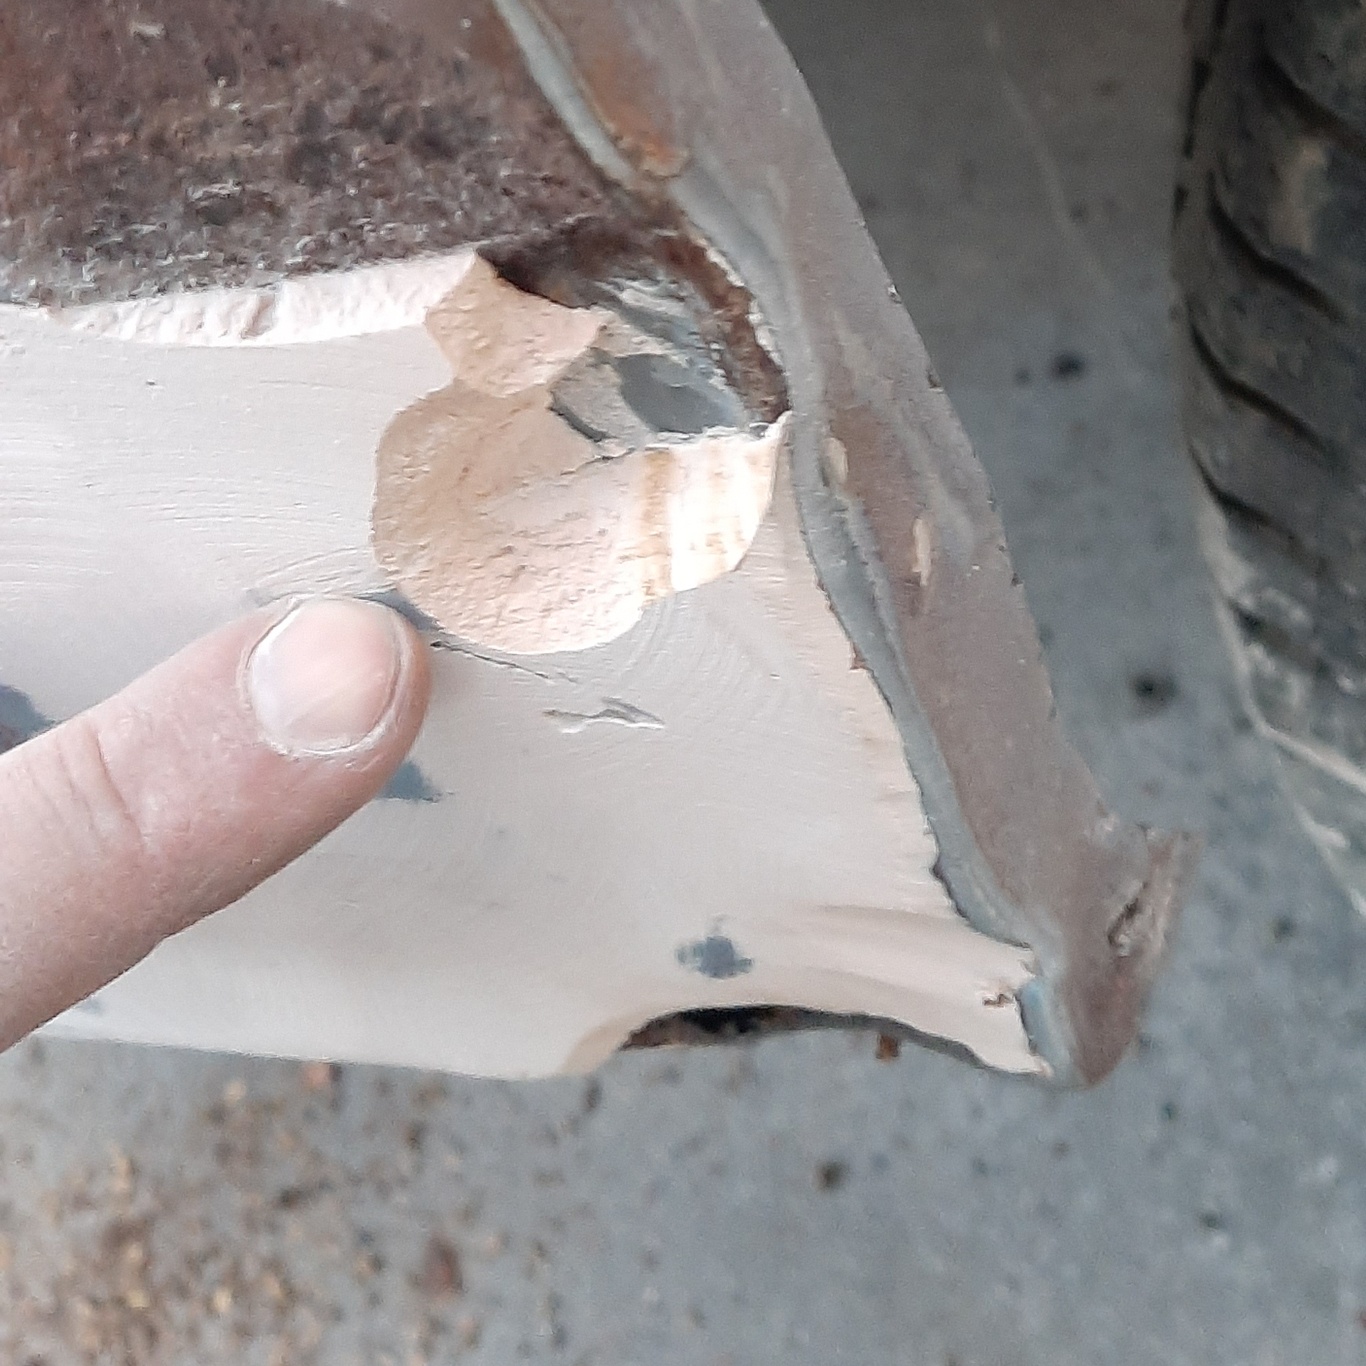
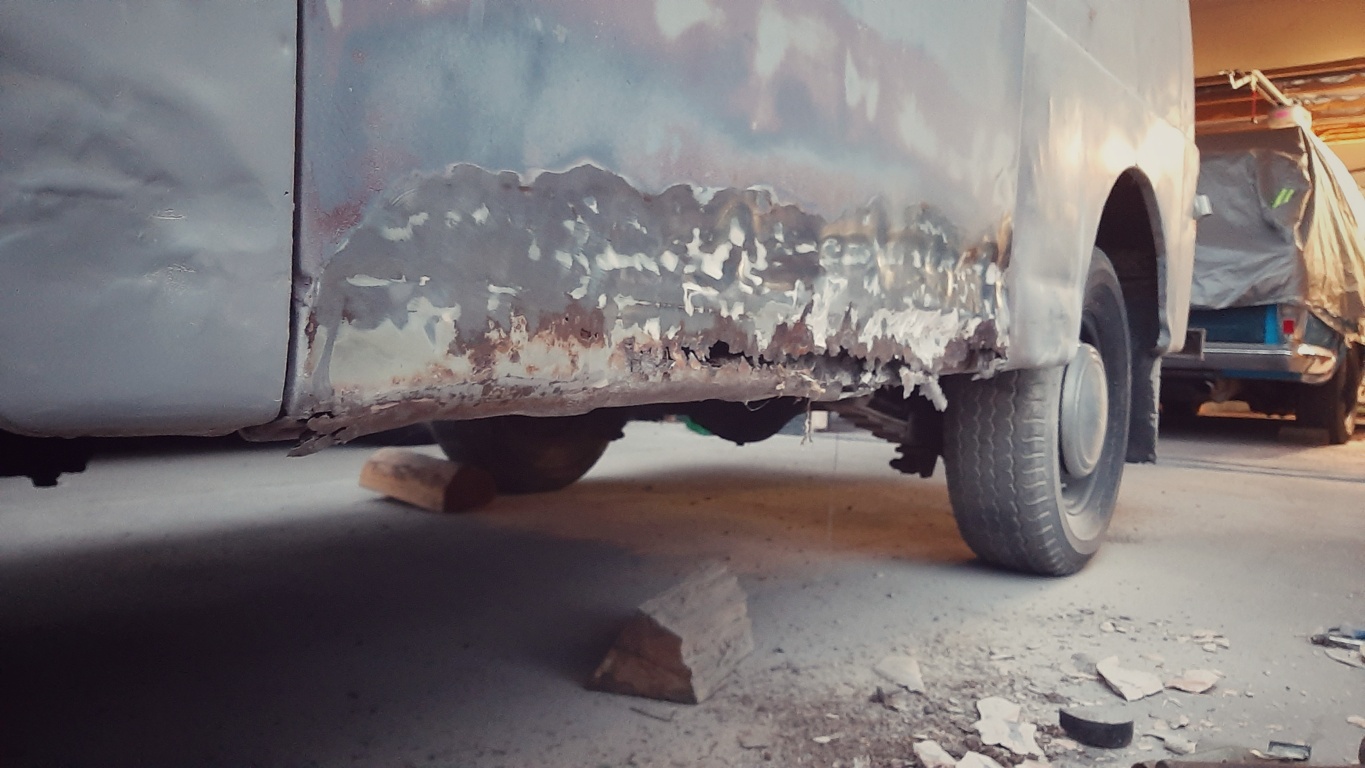
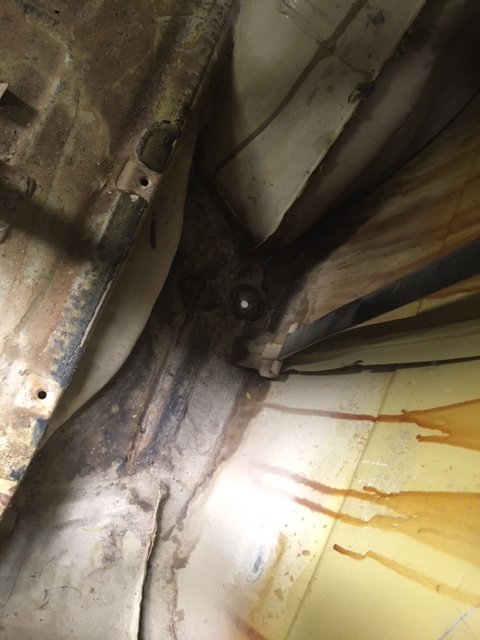
Been doing some excavation, attacking the bog patches with a stripping wheel to free what lurks behind them. First the ugly forehead lump above the windscreen. Looks like it was driven into something, and very roughly but also hardly tapped out. Pretty easy access from the back too so some tappy tap should tidy up a lot. Stoked there are no rusty holes tho! Then the area between the wheels on the passenger side. Jeepers! Front of the sliding door looks good under the protective 10mm layer of wob Back half not so much, and reveals the deep dingle down the side. The panels either side of the sliding door are pretty beat up but not rusty. Again pretty good access from behind so not sure why they used heaps of time layering on so, so much bog, rather than spend a few minutes with a hammer and dolly.
1 point
-
1 point
-
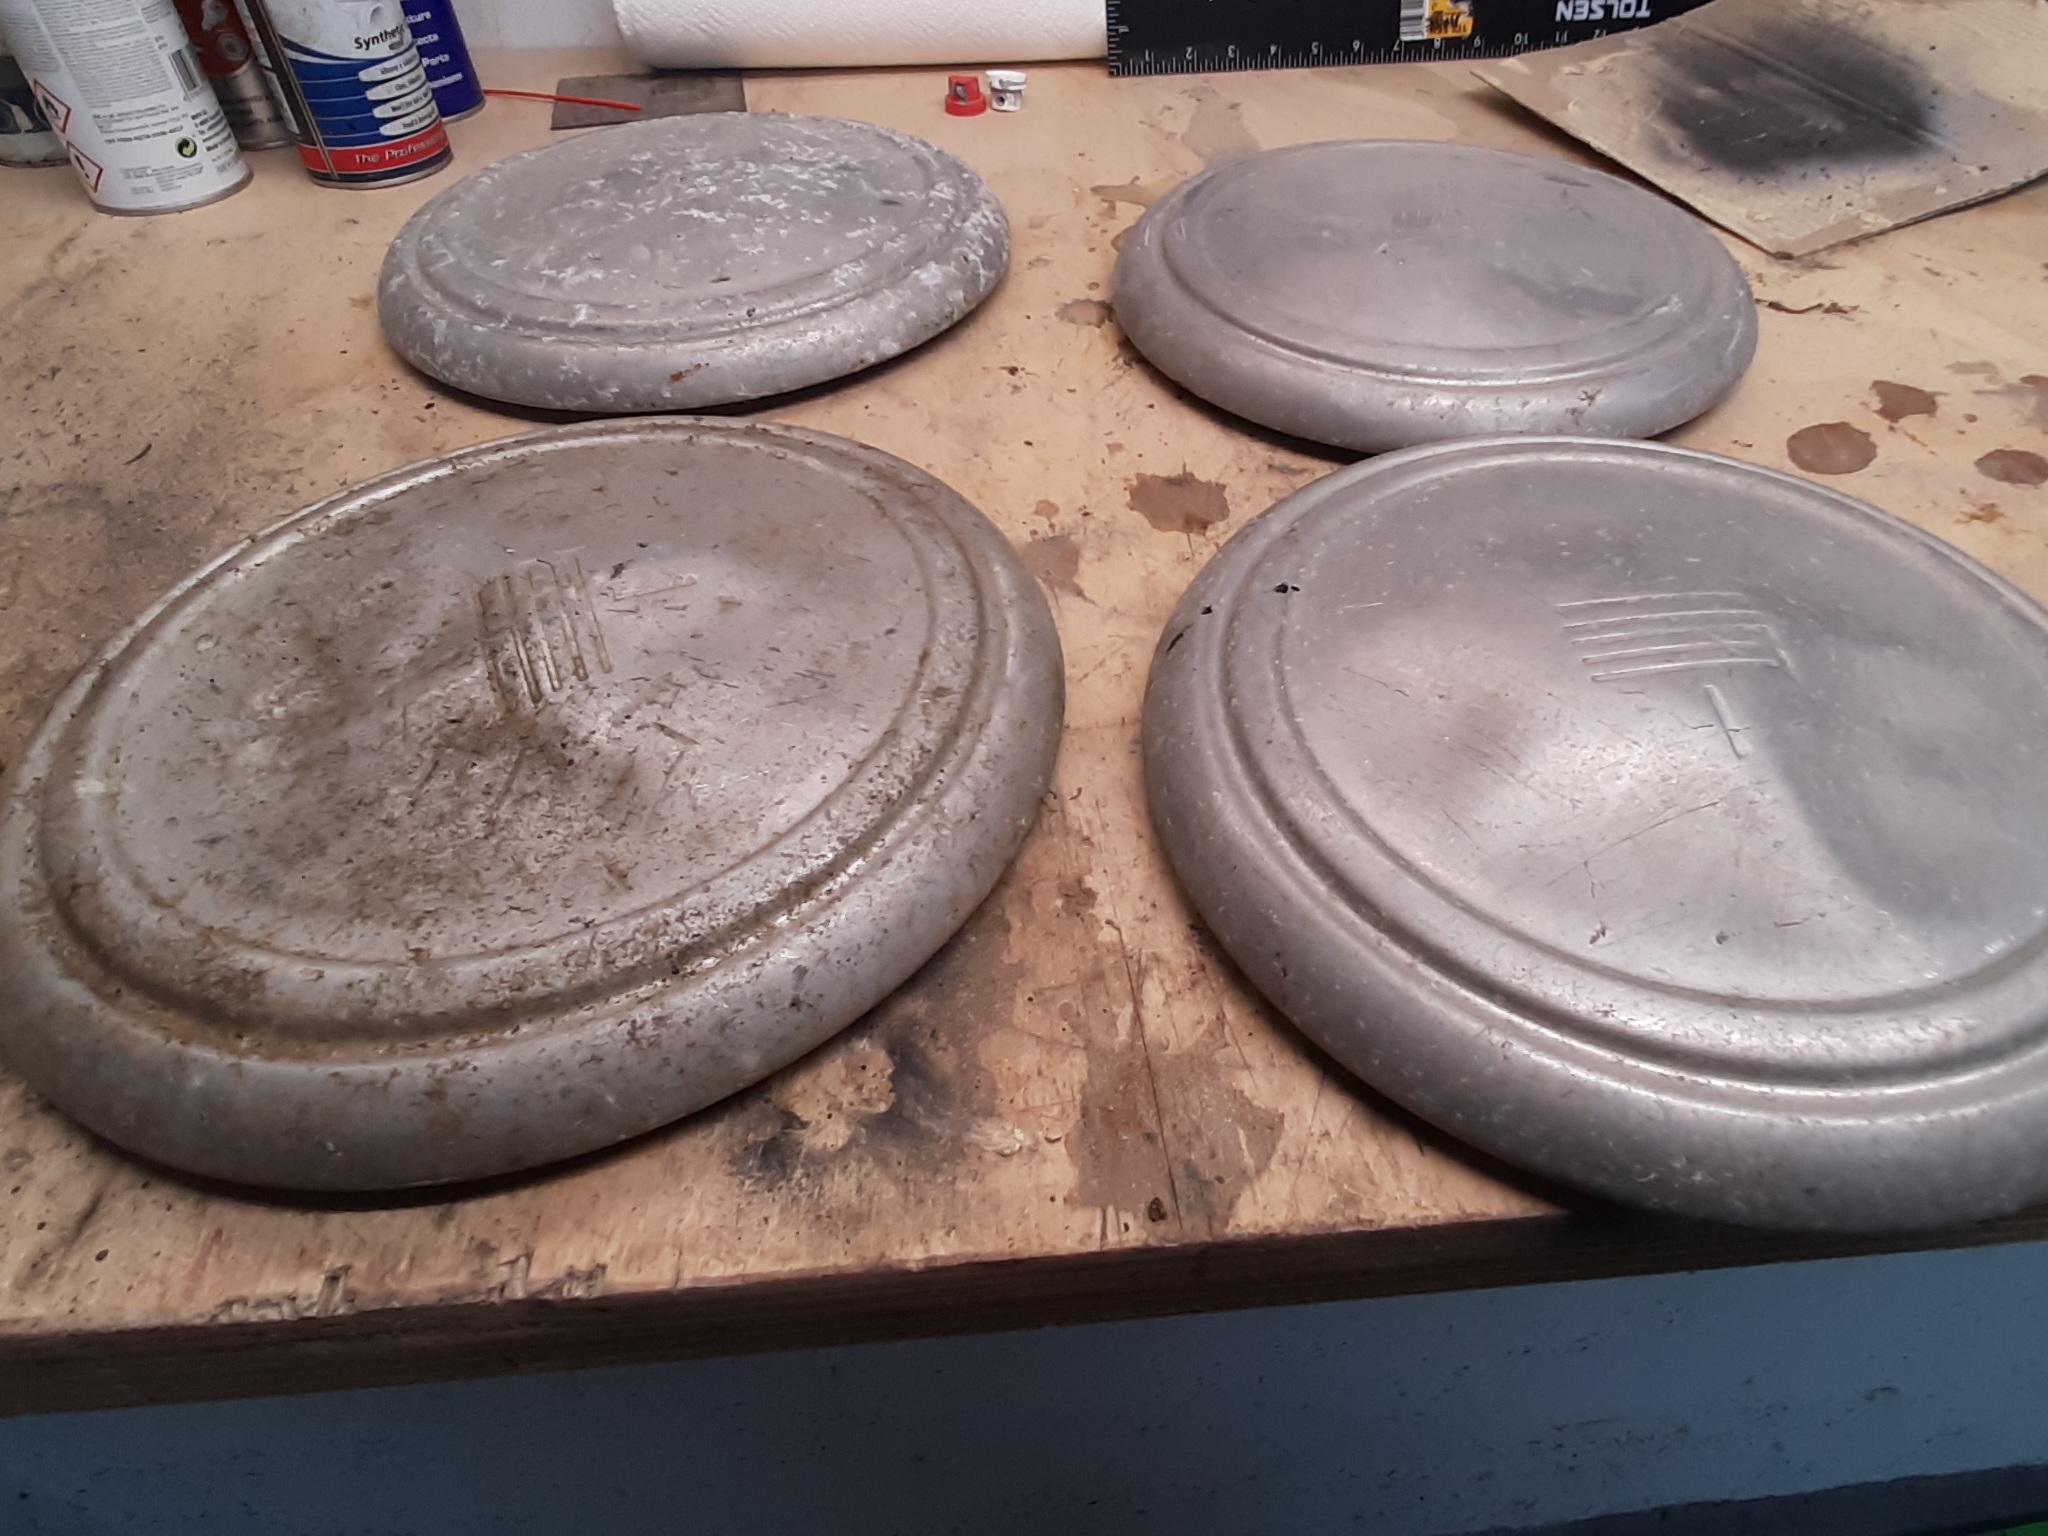
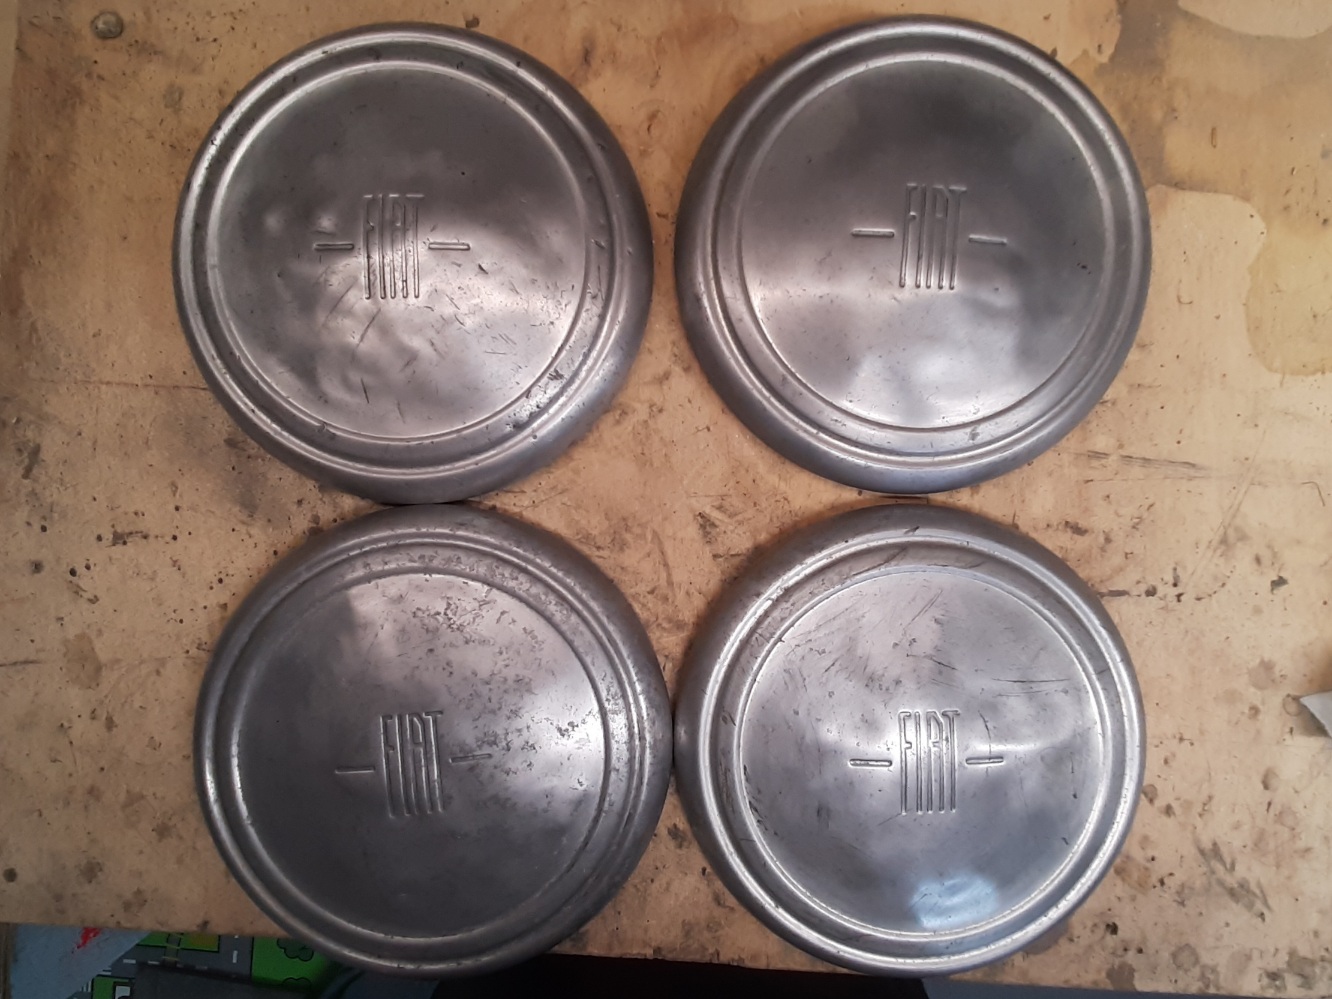
I also tidied the hub caps. Came with all 4, which i happy about as they are van specific too, but they had all been given a good kicking. Underside to show the ring that clips into another ring on the rim, and, A former owners address? D. S. Clark Kelso 5 RD Gore Again alloy, so came up much better, certainly good enough, after tapping the dents out and a whiz with the scotchbrite and wore wool. Ill give the rims a fresh waft of black and pop these on tomorrow.
1 point
-
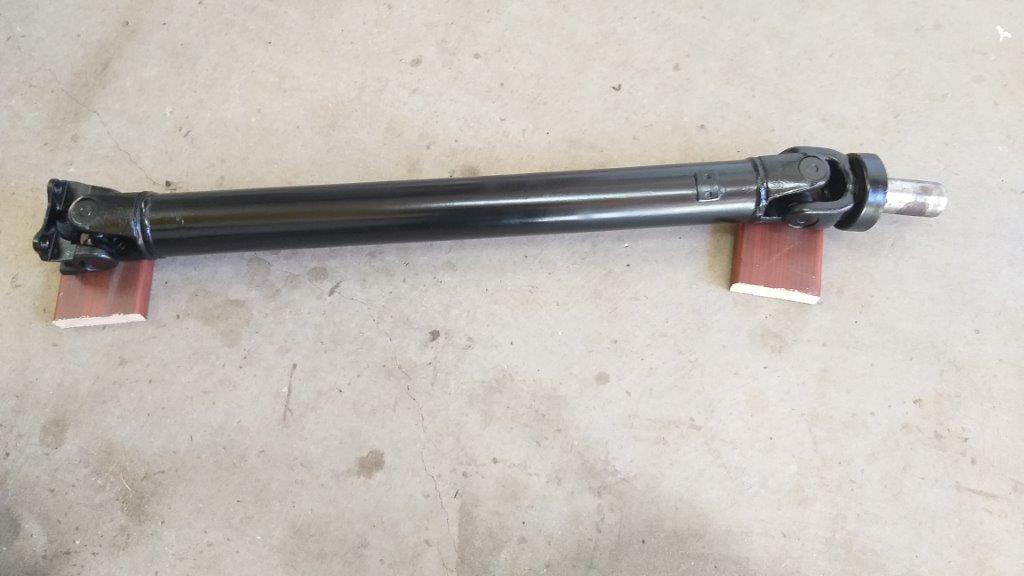
Got a call first thing this morning to say that my driveshaft was ready to be picked up from the hospital after its nip and tuck operation, so took a drive through to town to grab it. After a quick test fit I gave it a quick spank with a flapper disk and chucked a bit of satin black about the place and its looking a lot better. I'll let the paint dry overnight and will fit it up in the morning.
1 point
-
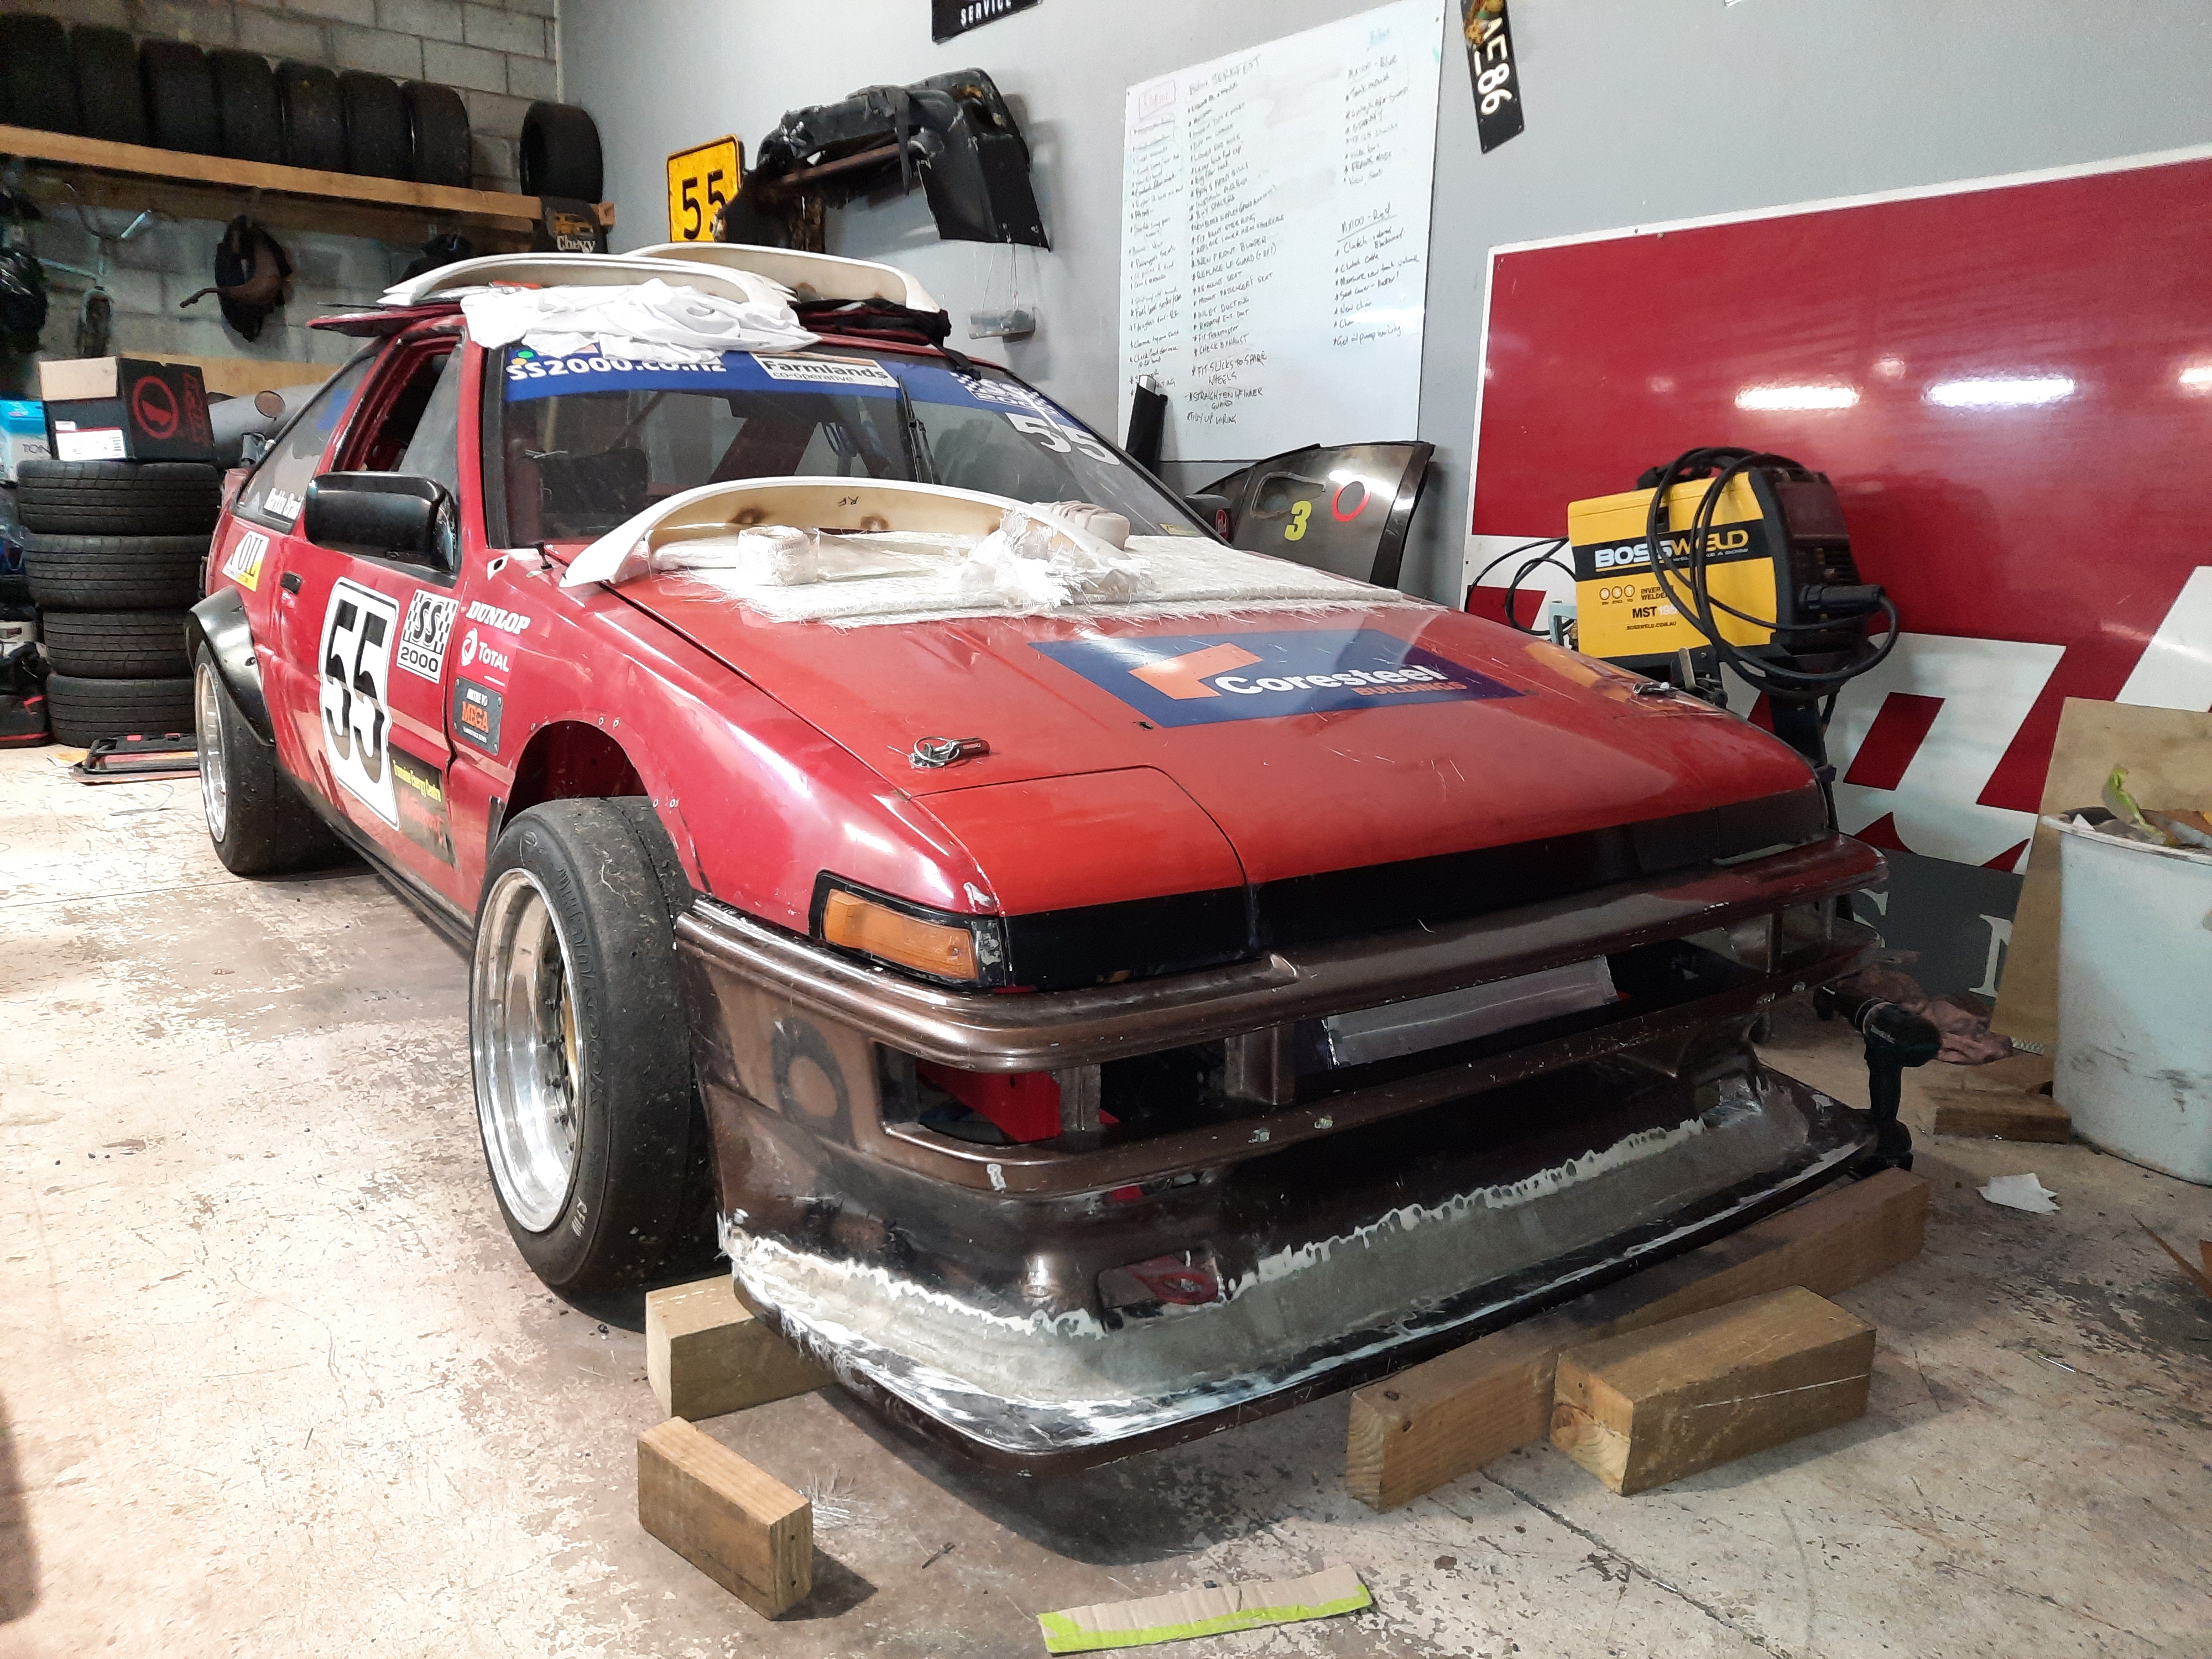
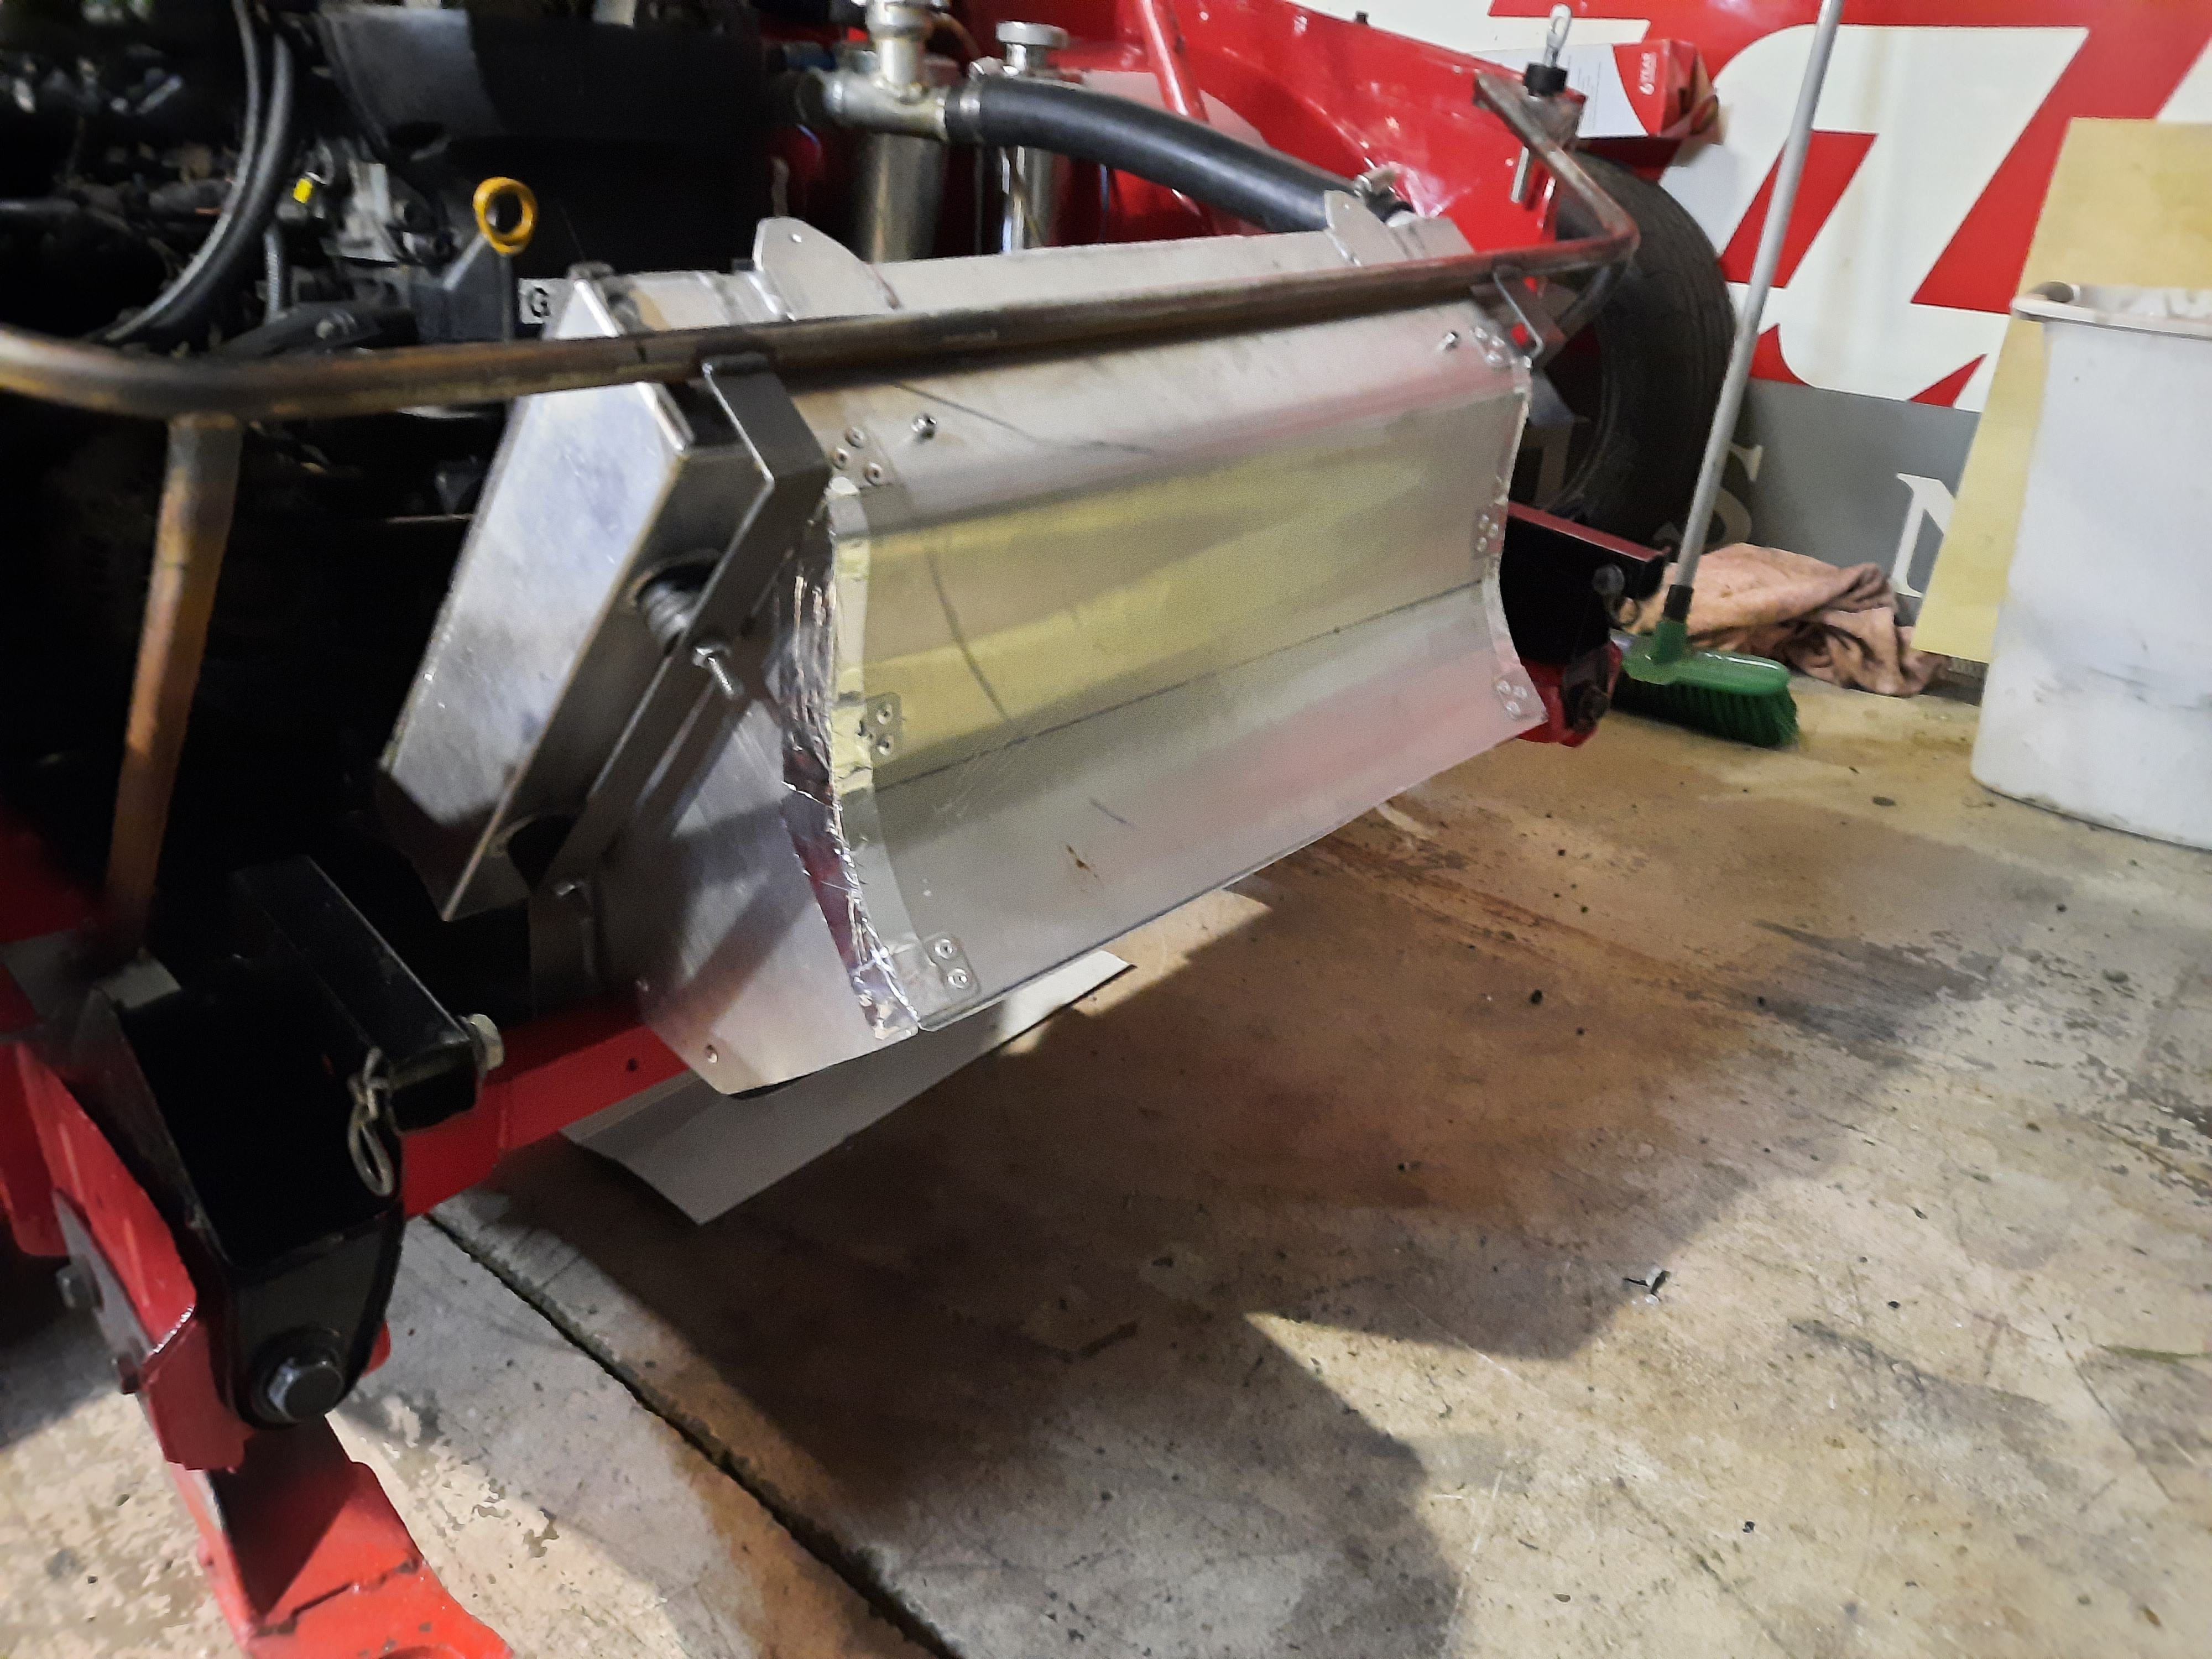
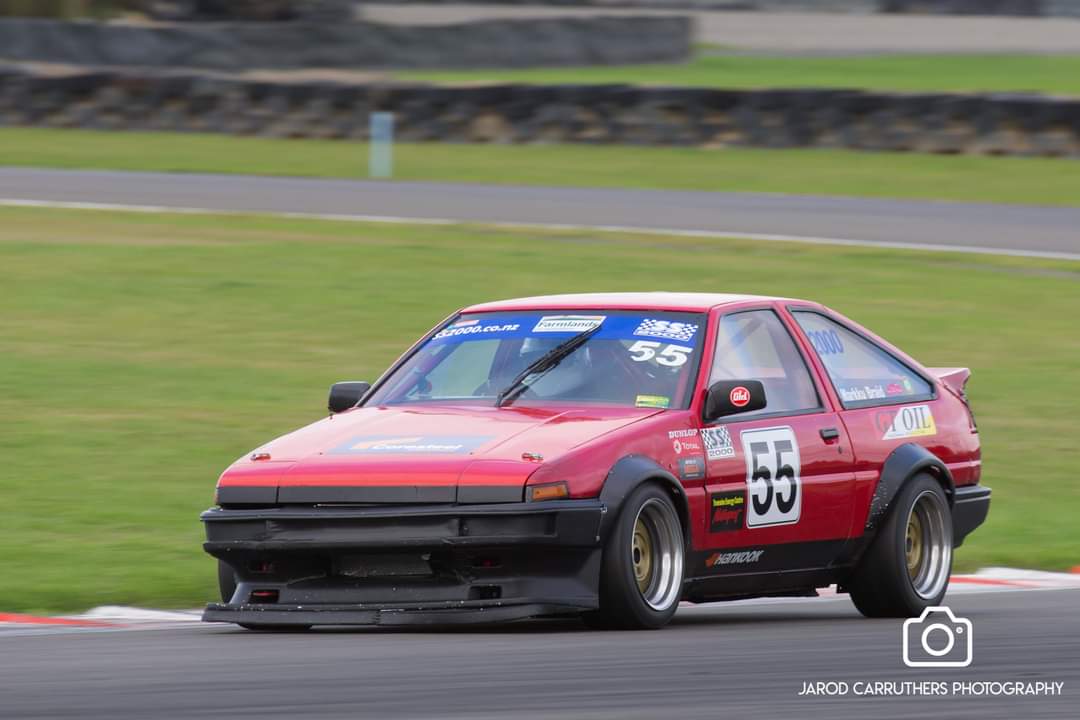
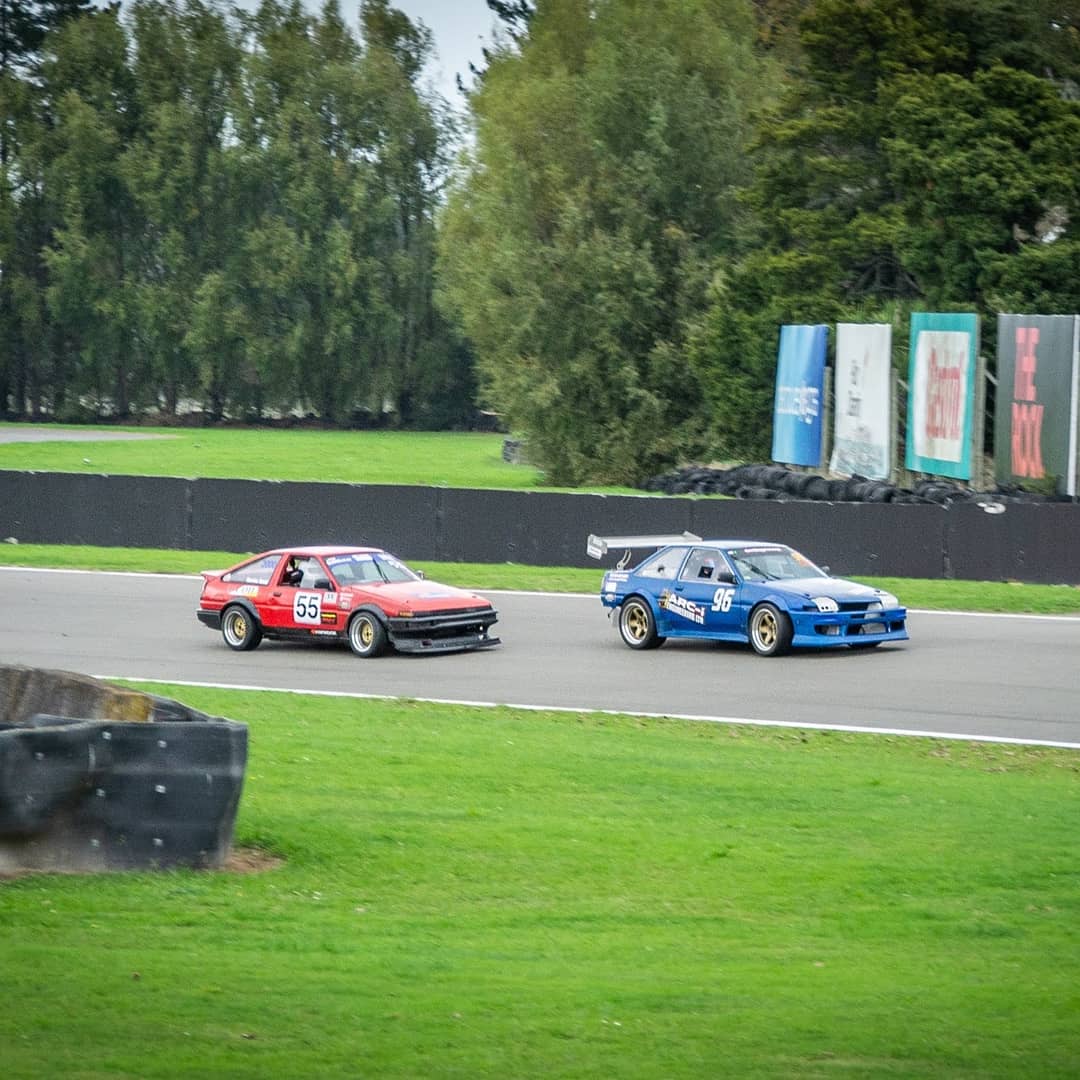
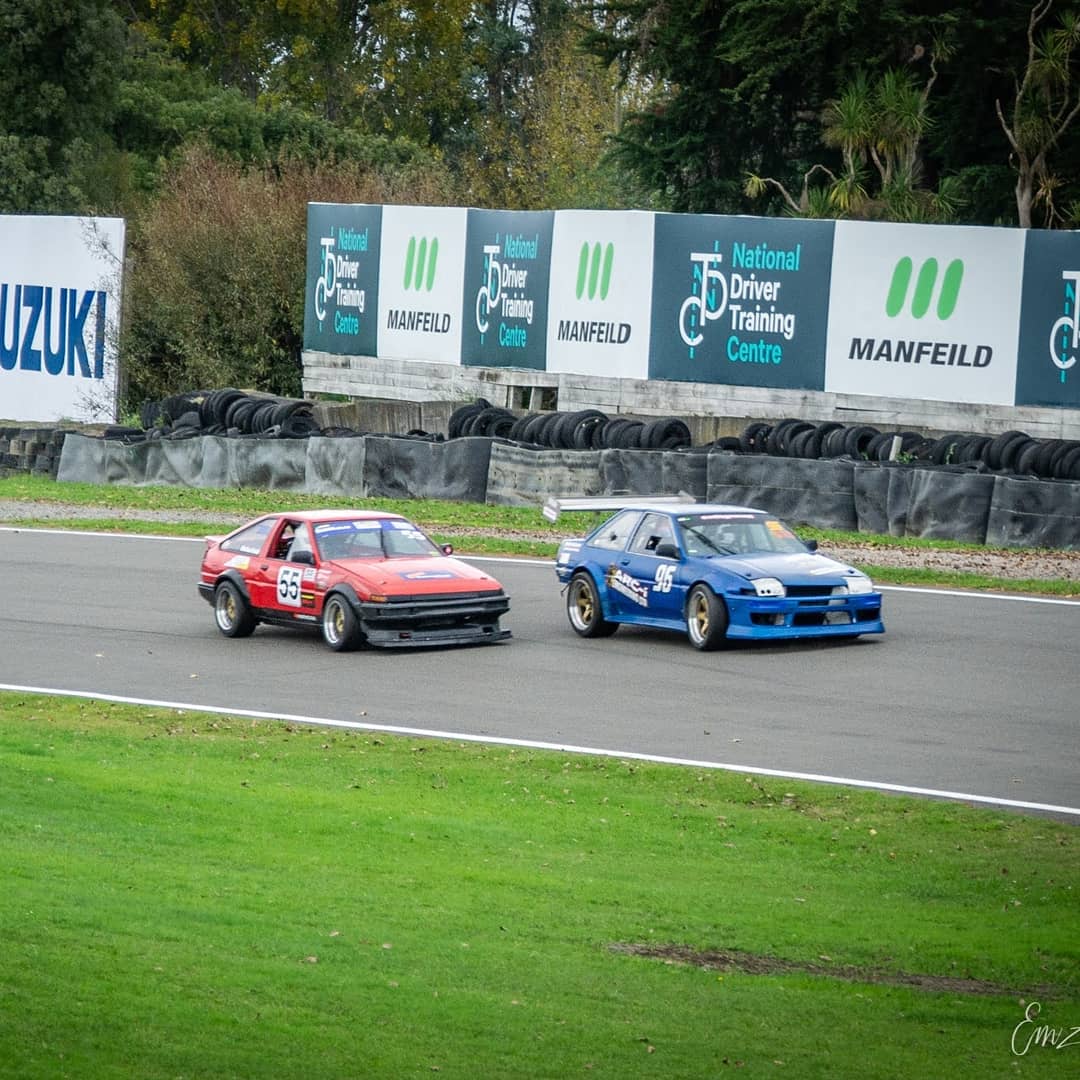
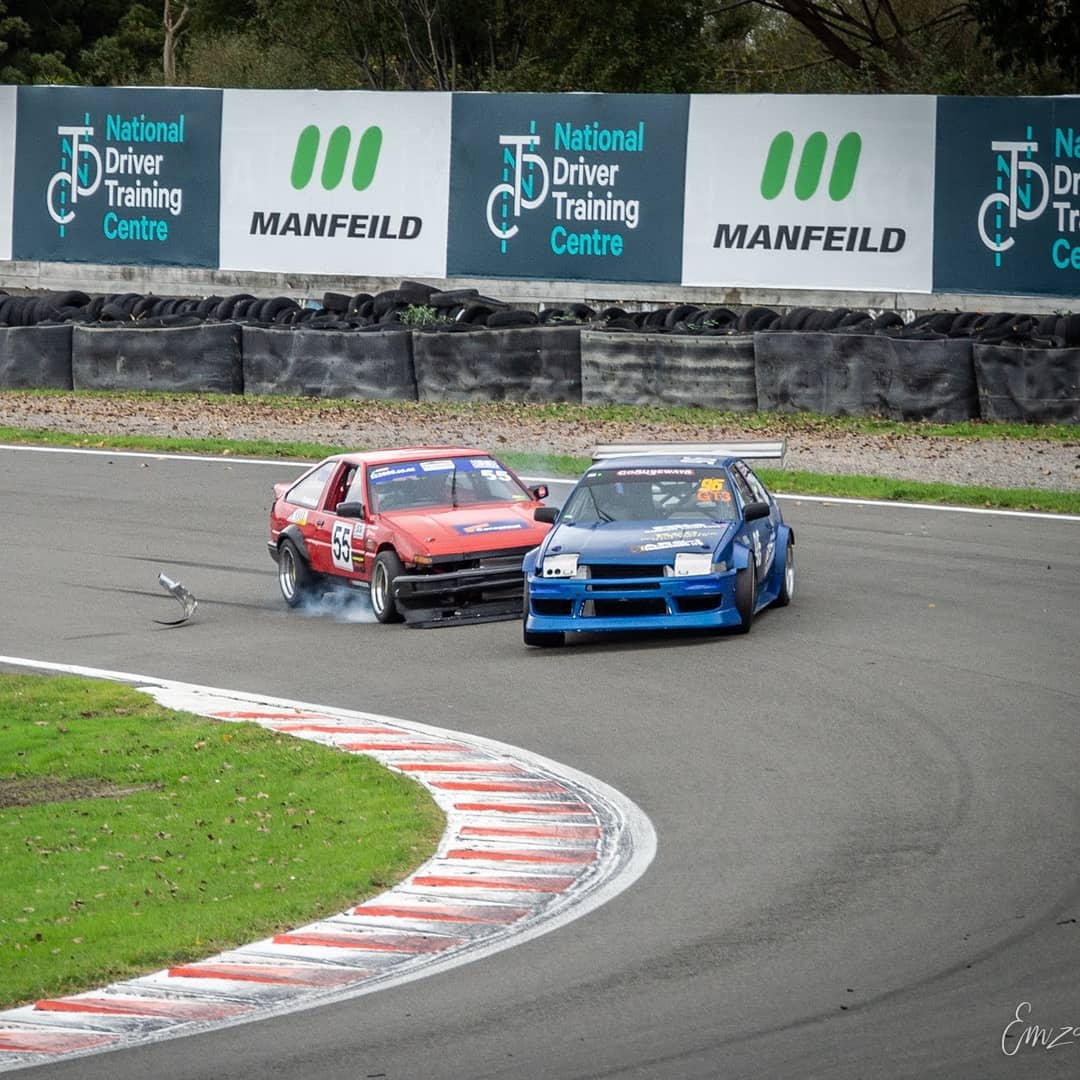
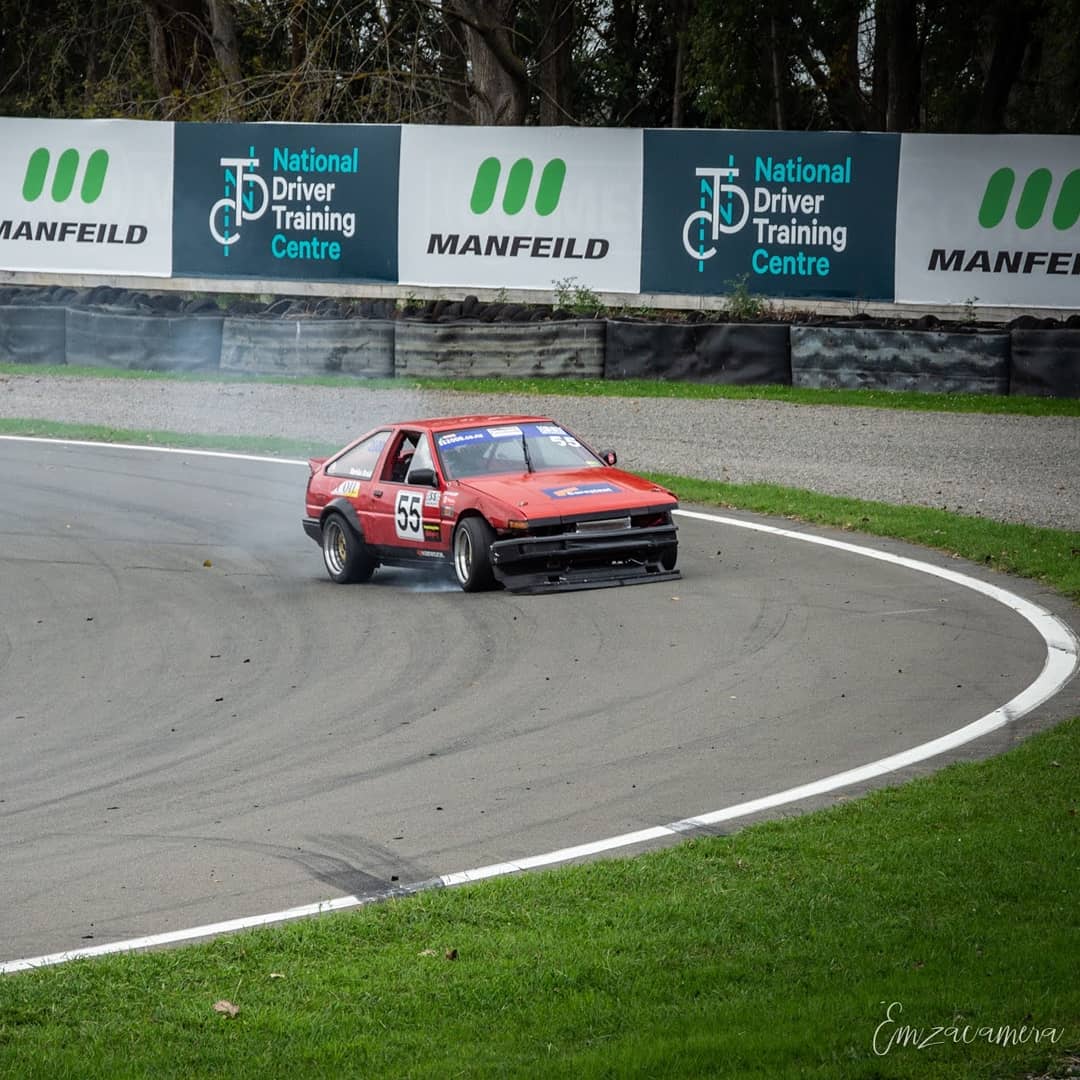
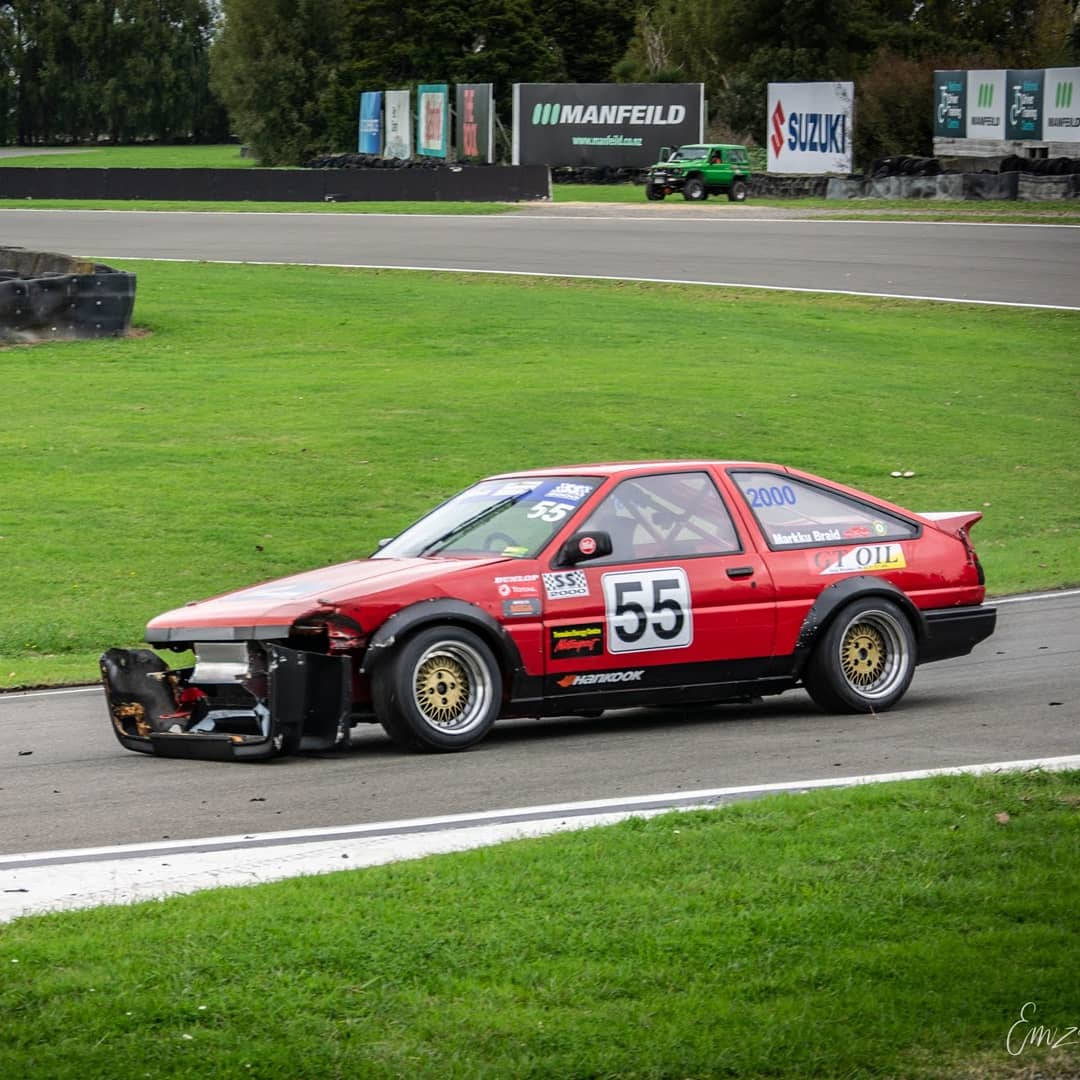
I decided duct tape wasn't good enough, so fixed the corners with aluminium straps and rivets. It's turned out nice and strong. I used foil tape to seal the edges and duct taped it to the bumper. The results were good. It stays at 90° or less out on track. I'm aiming for 82° and it looks like I'm on target once the exit duct is in place. Got out to Manfeild for the final round of the Mitre10 Mega Summer Series and had a decent day. We had a pretty slim turnout in our class, but still managed to have some great racing. I made a mistake in the final race on the last corner and had contact with Jamie in the LS86. This swiped my front bumper off and damaged the LF guard pretty badly. Still finished the race and managed to bring the class and over all series wins home for the GT Cup. Here's the sequence showing my whoopsie: Now I've got to finish the front bumper project that I started years ago... I'll buy some fibreglass supplies and get this done before Gripfest on May 8th. I'd like to pick up a LF Trueno guard if anyone knows of one. Steel is preferred over fibreglass, but I'll take what I can get.
1 point
-
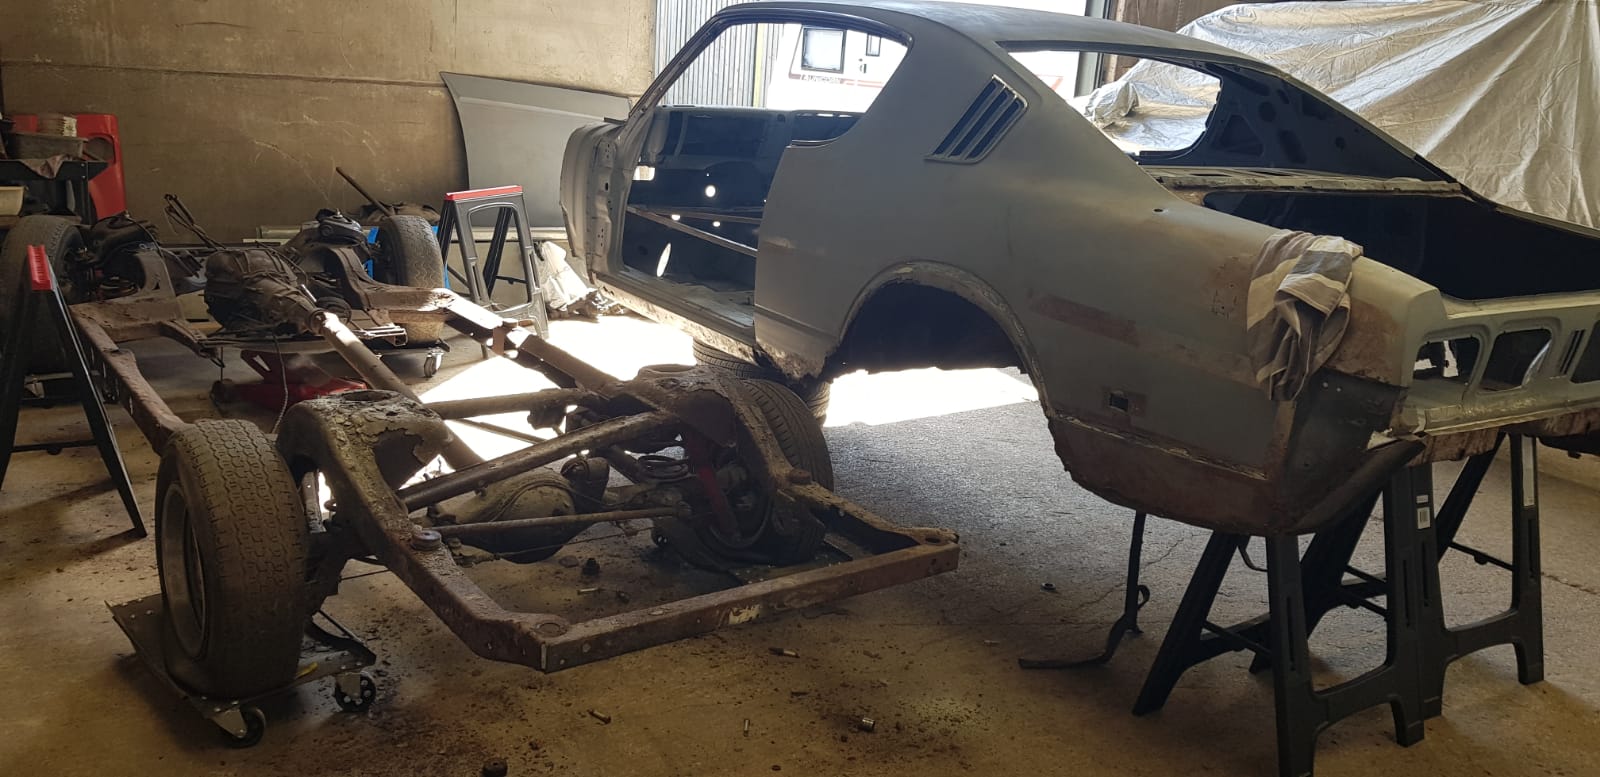
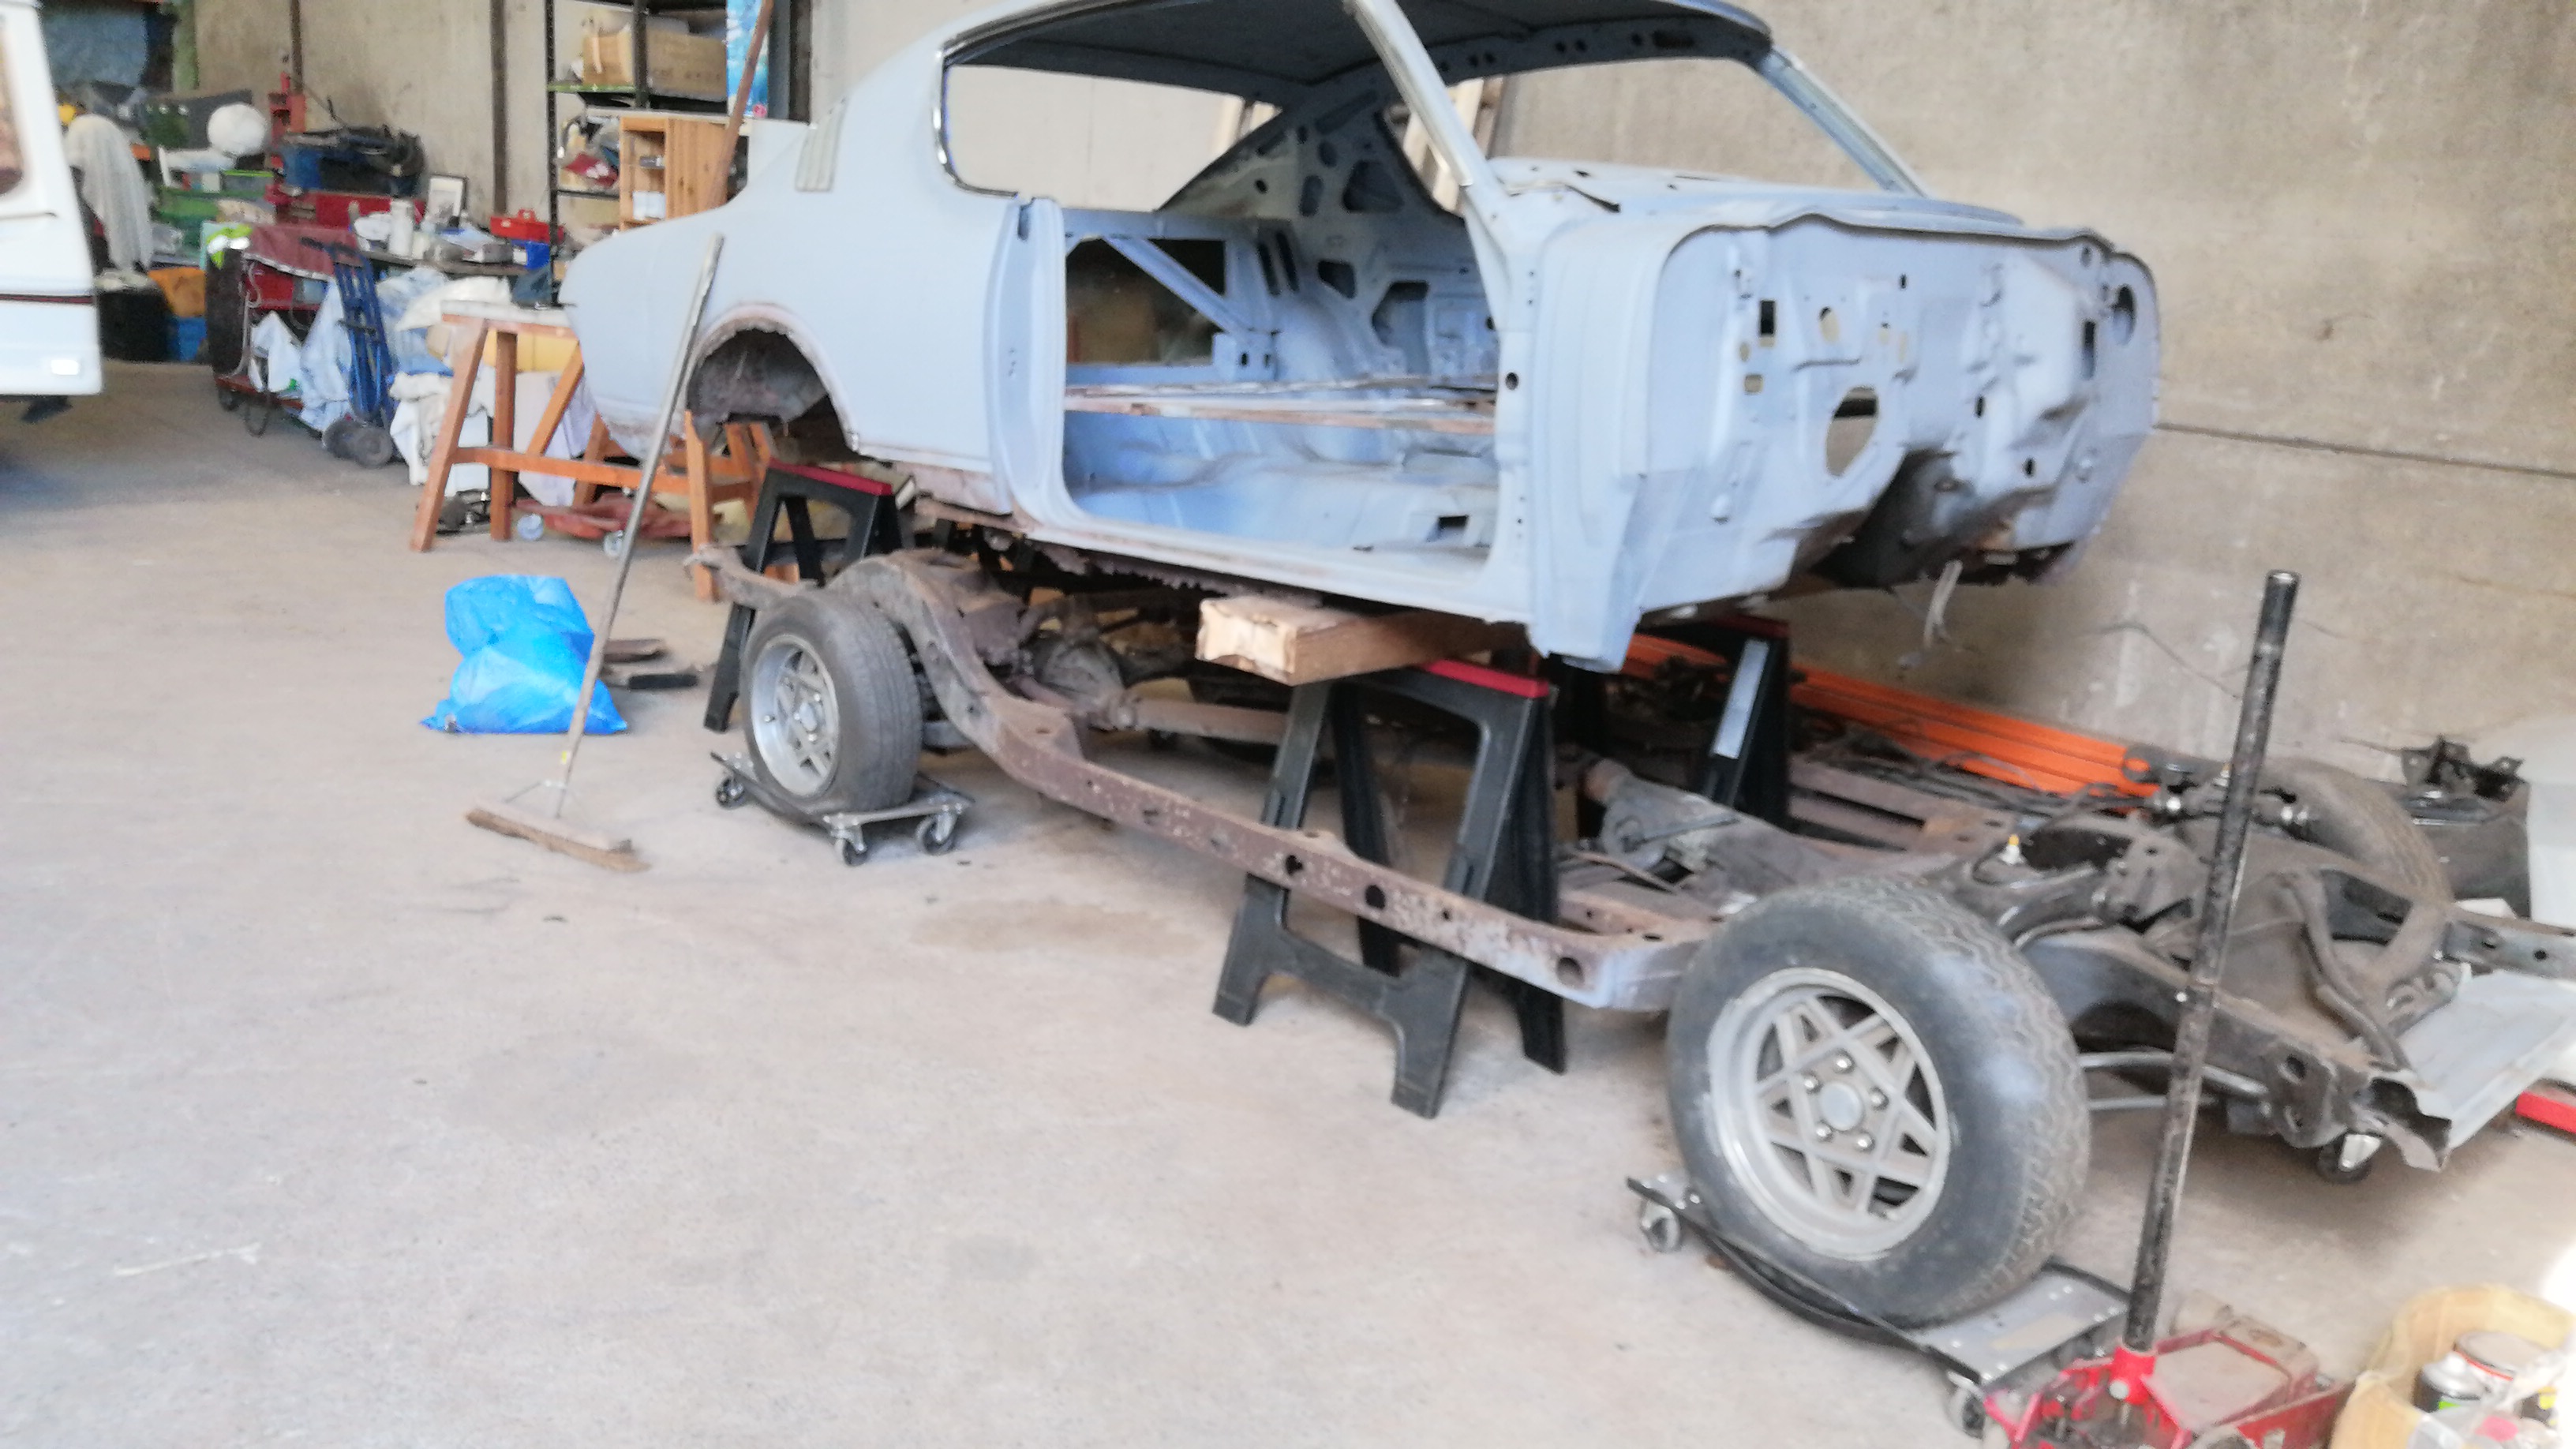
Big job done today getting the body off, no evidence of chassis rot just some surface rust to wire wheel.
1 point
-
1 point
-
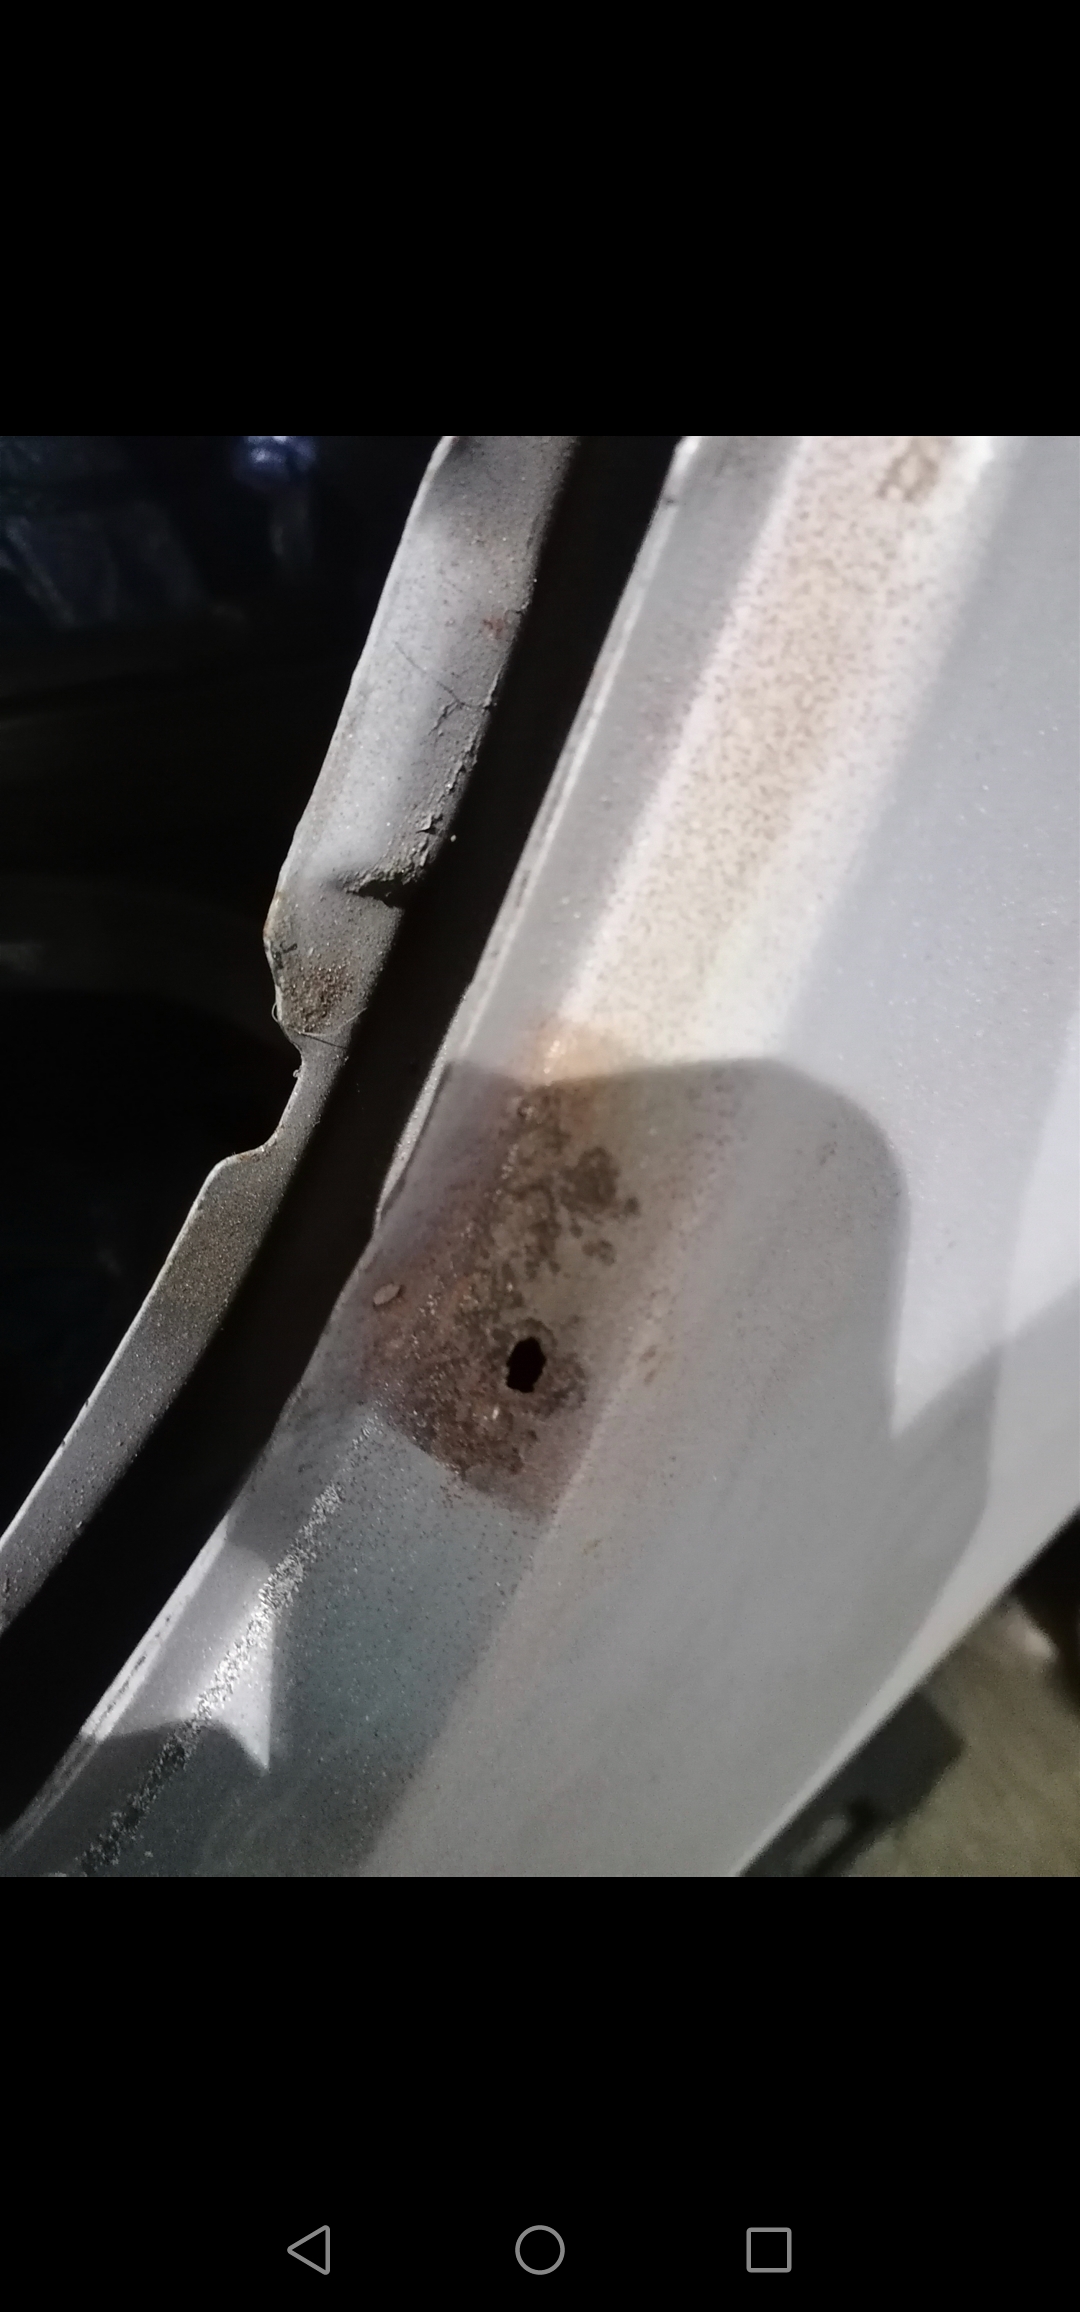
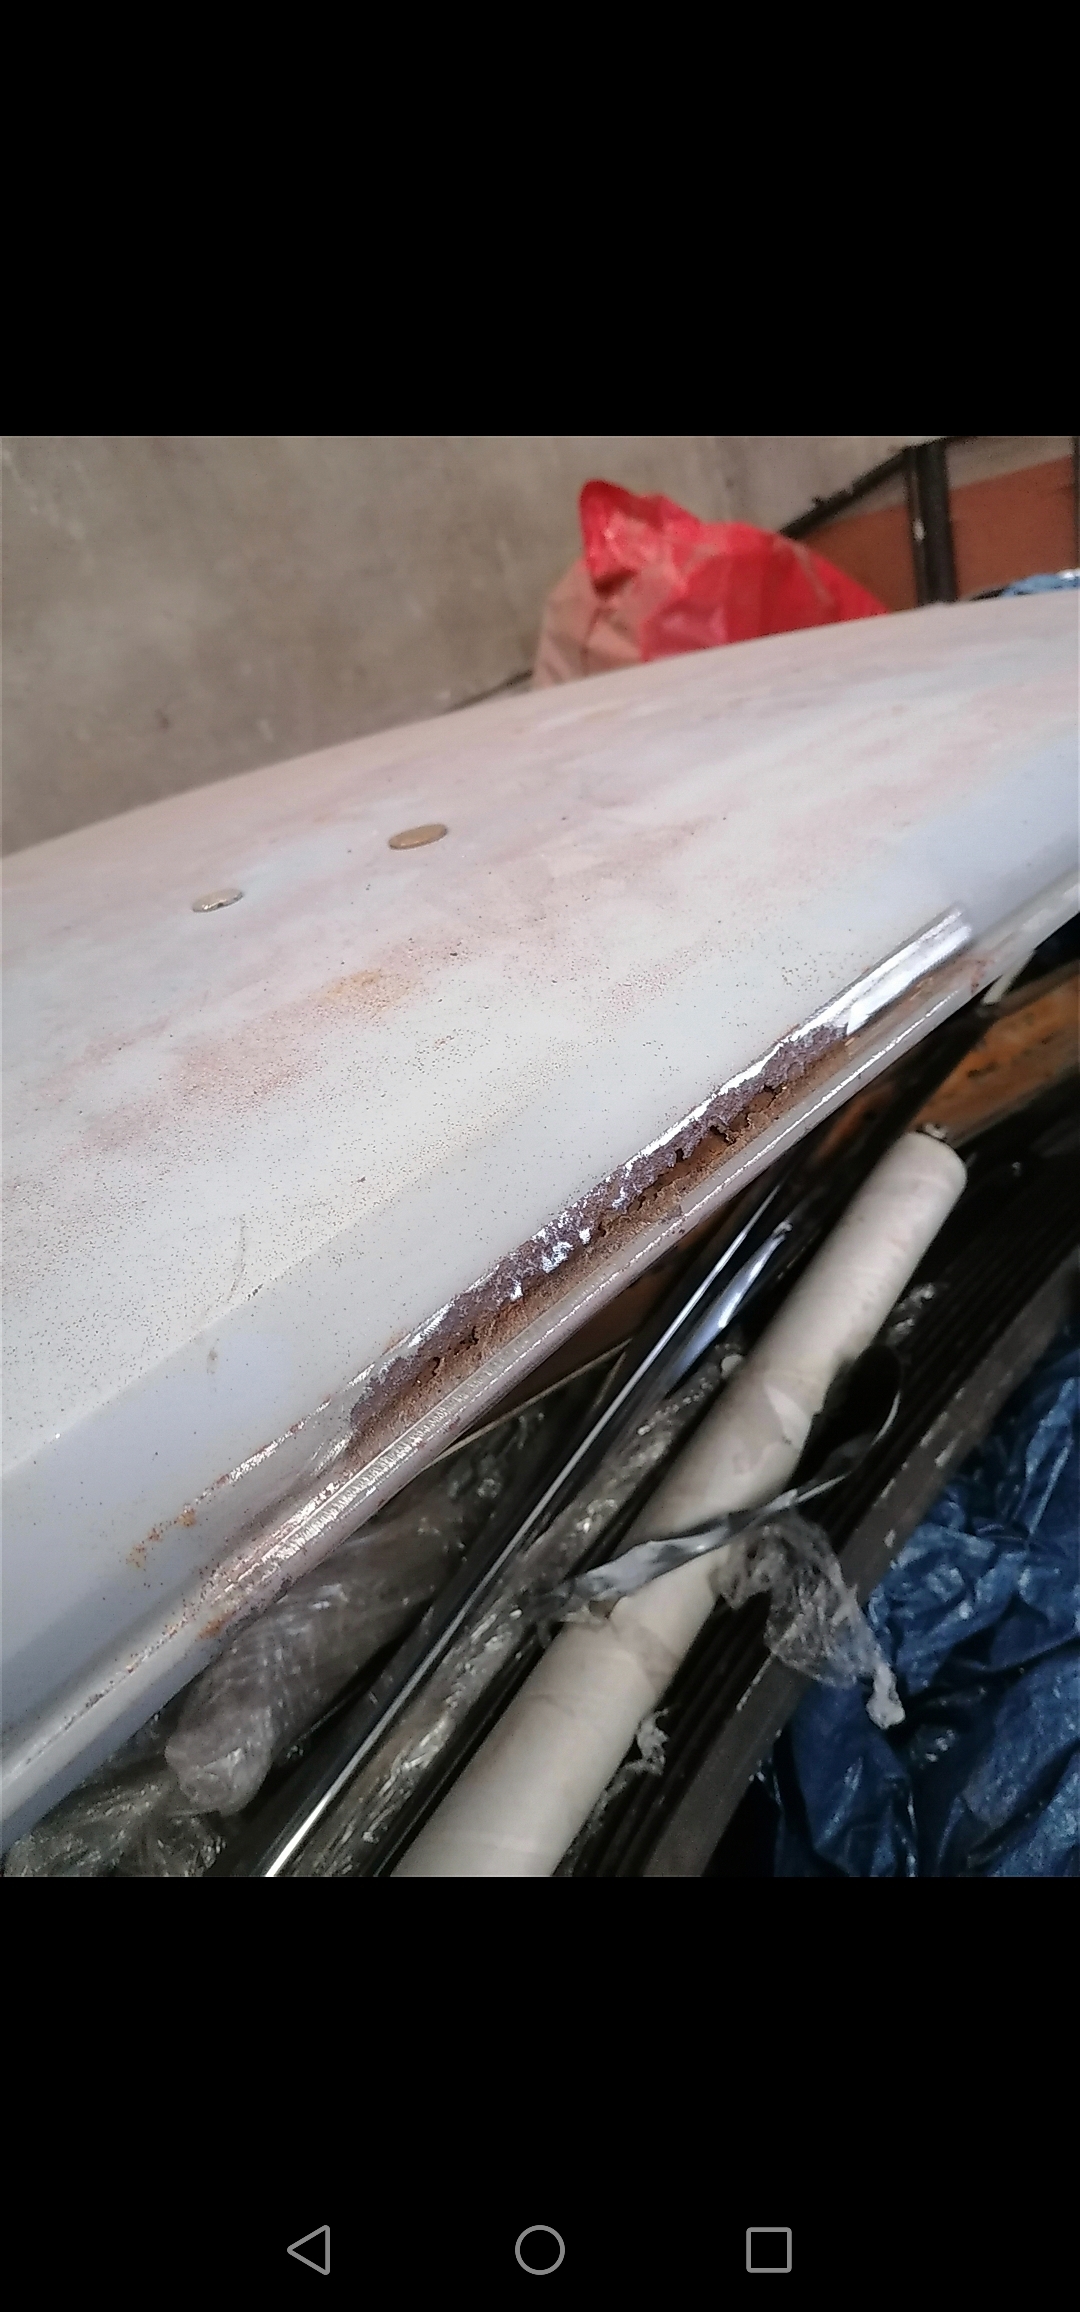
First of the rear pillars done - the other side is much worse sadly.
1 point
-
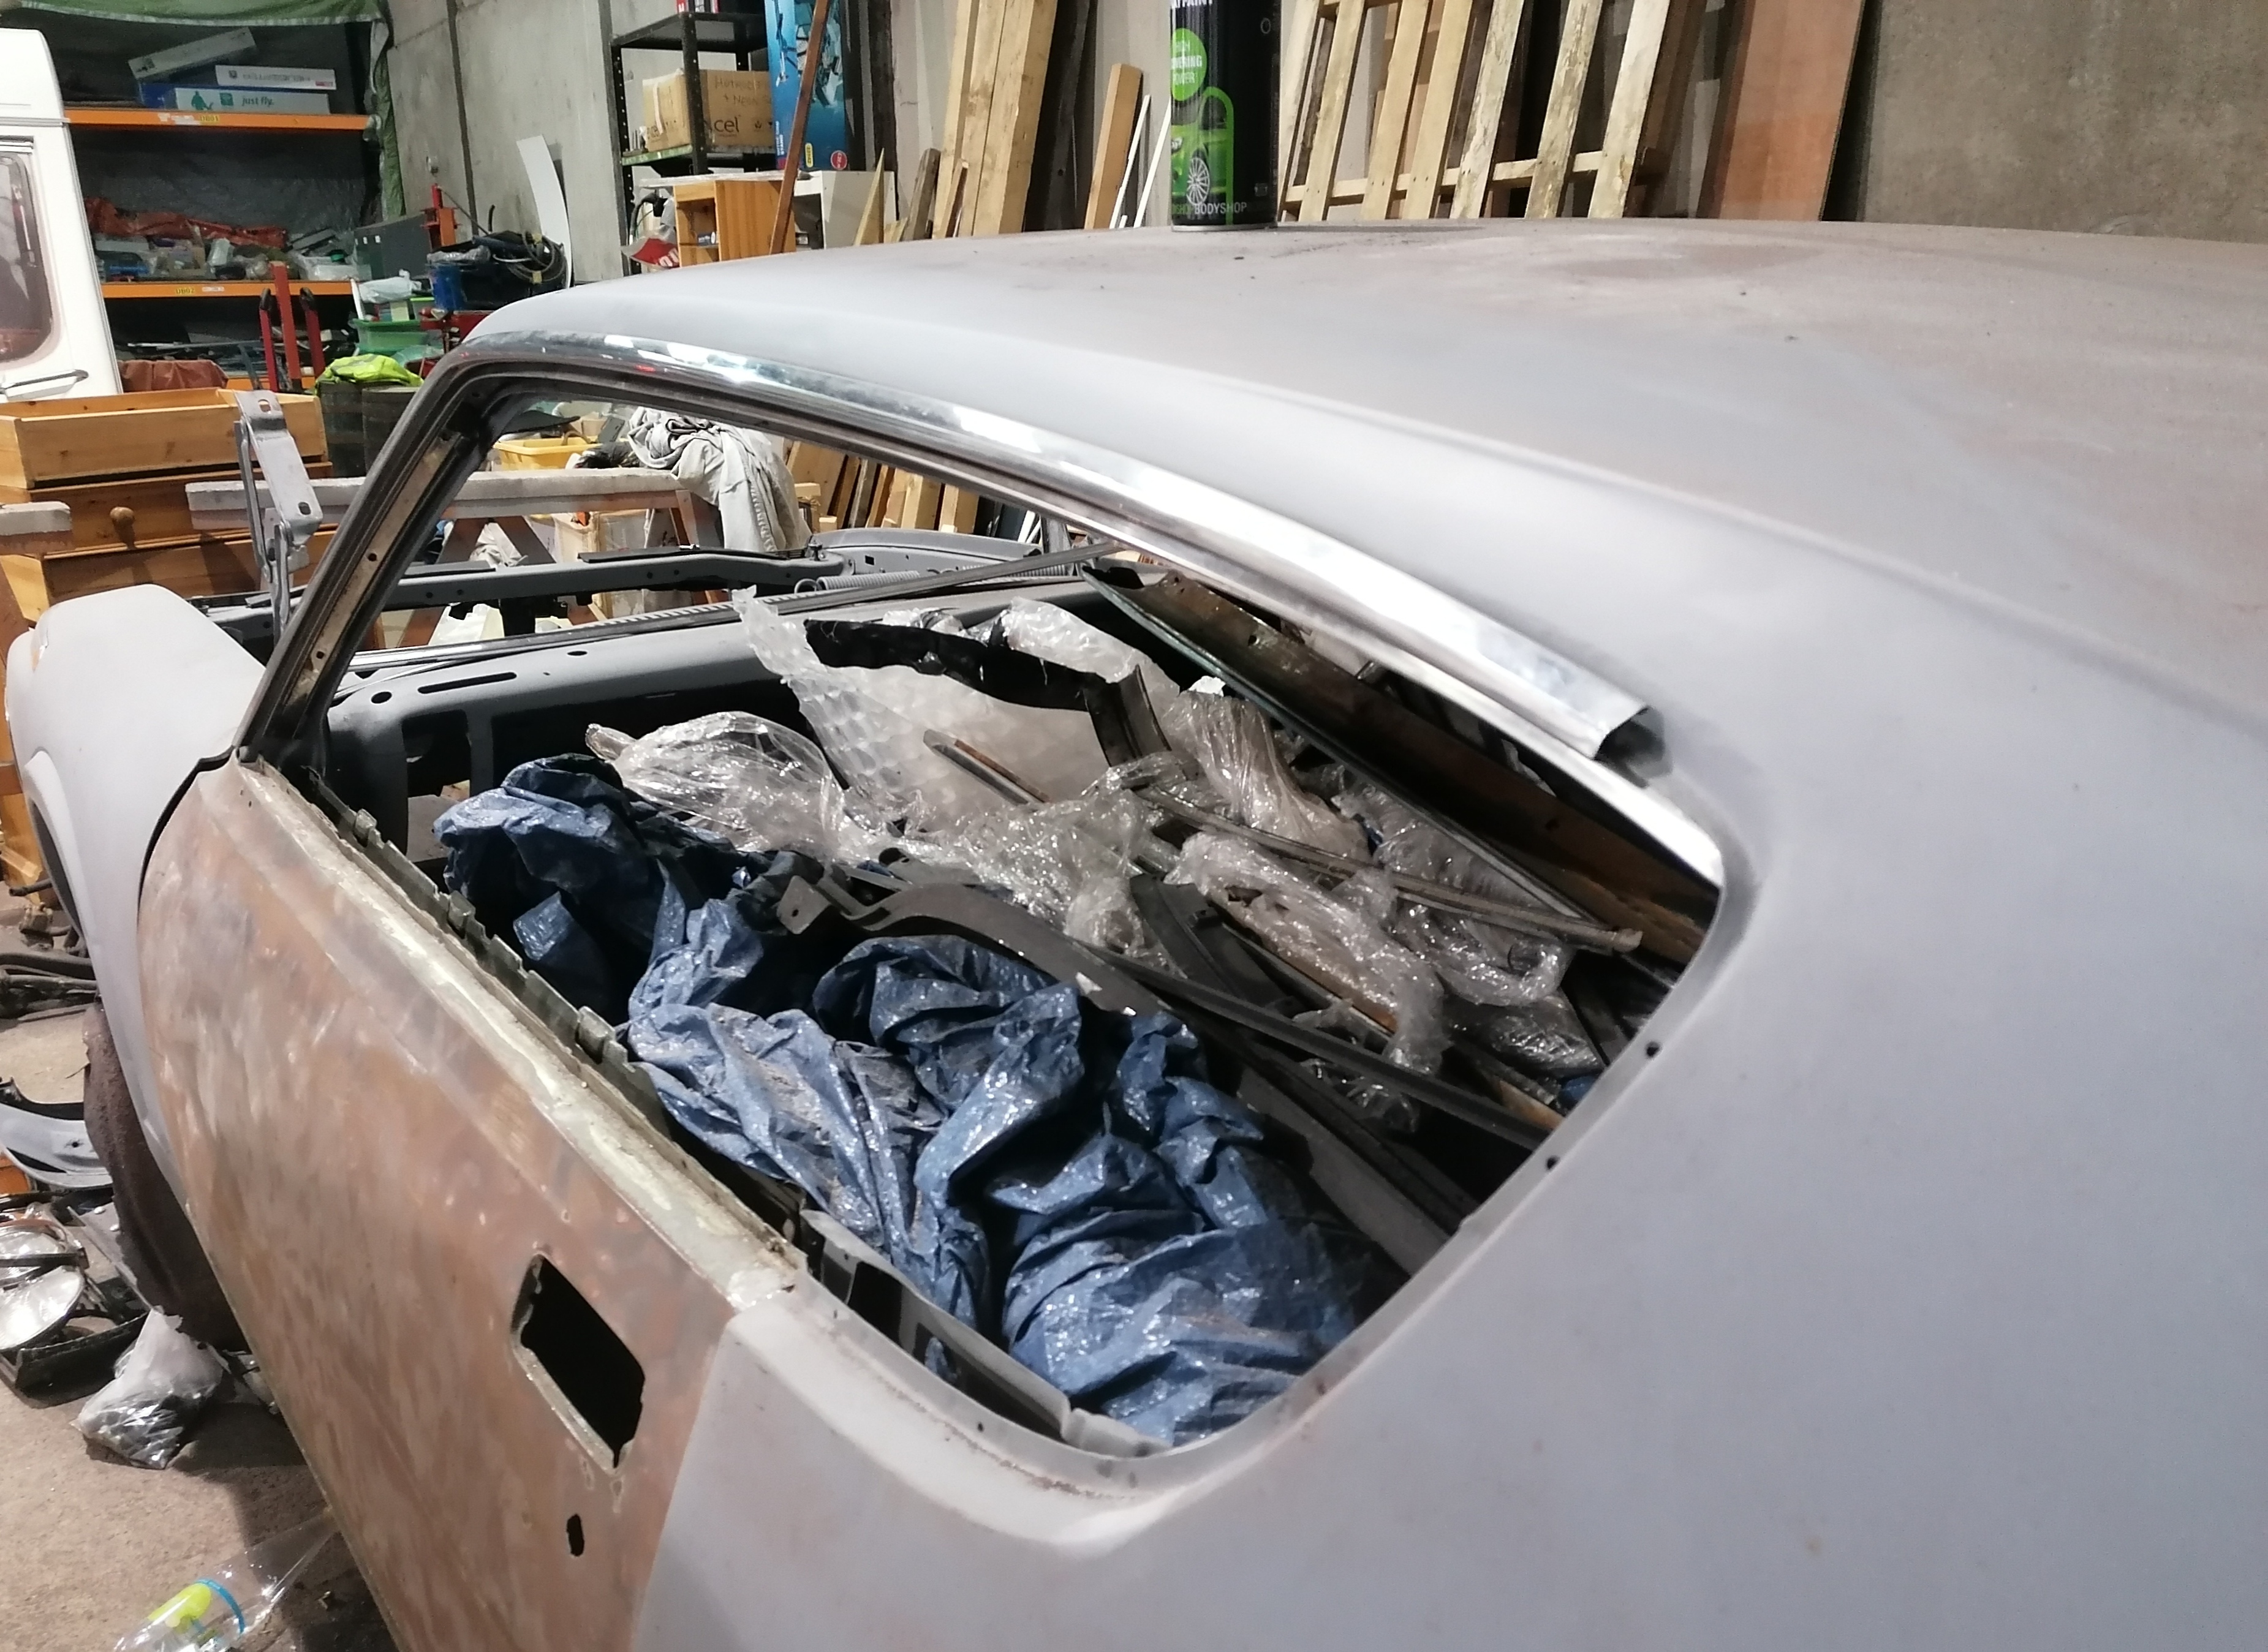
Took a break from the front end to tackle the roof. Rear pillars next.
1 point
-
Finally got two coats of stone chipping on it. man it’s so good to have it one colour under there.
1 point
-
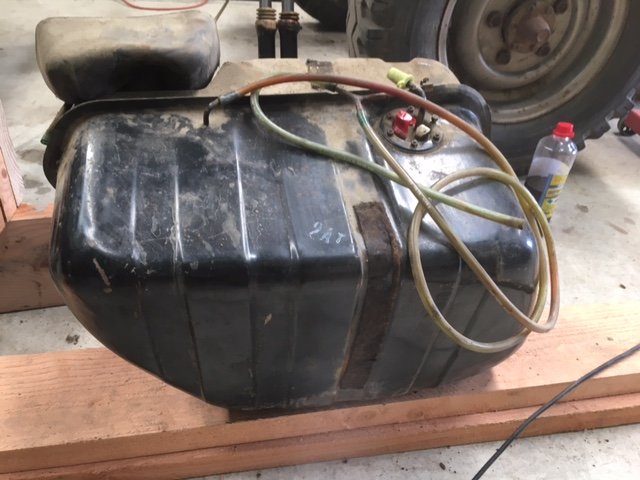
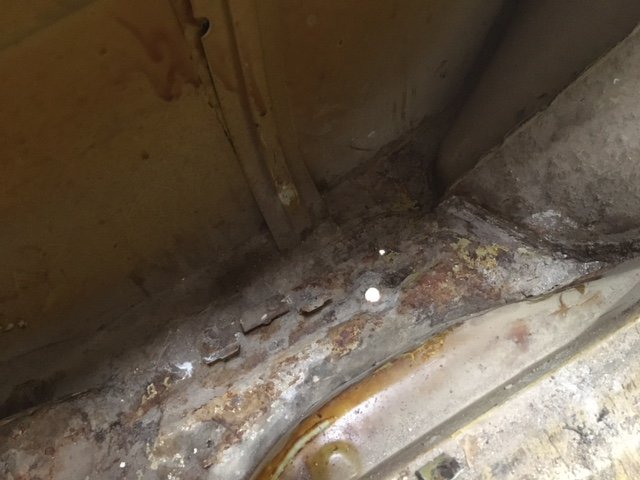
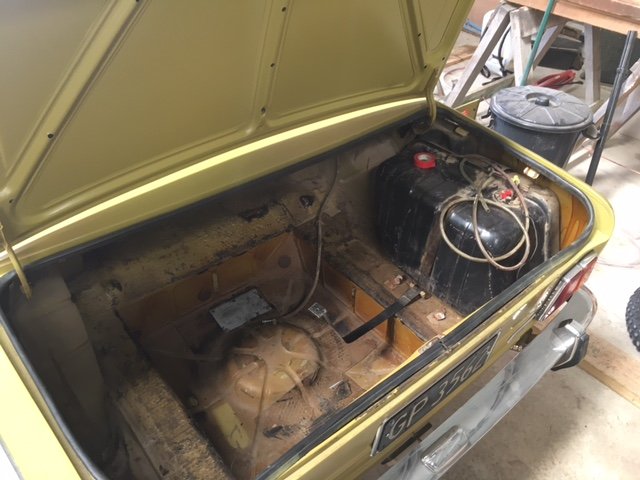
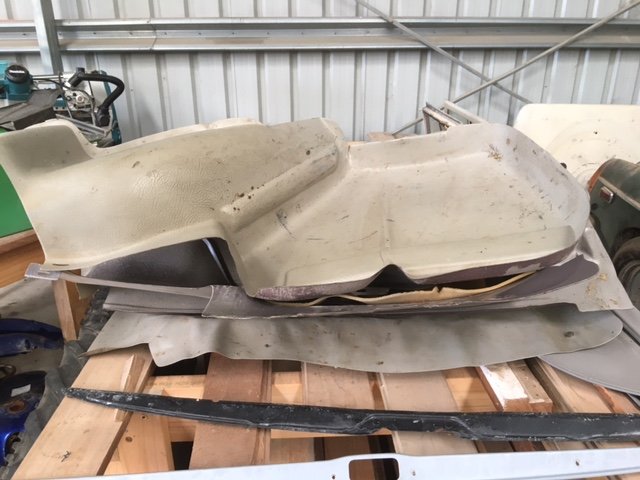
Happy new year. 2021 shall be the year of the Fiat. A strategy has been mapped out with the ministry of finance to get this thing back on the road. I have lined up a semi retired panel beater who happens to actually like cars to fix this thing for me. No, I do not feel like a failure... In preparation I needed to remove the rear bumper which necessitates removal of the boot lining and fuel tank. The boot lining is not too bad except for the left side panel which is wedged in quite tight. I can see why it’s cracked, somebody has had it out before me to graft in a high stop light, daisy chained from the left brake light. If I ever feel inclined, the cracks should be an easy enough fix with some fibreglass. Inside the boot isn’t bad. I vacuumed out all the crud and there is just a small rust hole in the left side, bottom of the rear guard. Wheel well is all good. There is a lot of cavity wax inside it, which I’m not sure is factory, but certainly beneficial. Tank out is easy, then the bumper is even easier, and there we have it, bare bum. Bonus, tank looks pretty mint too, although starting to smell a bit stale with the bulk of the remaining petrol in there being upwards of 5 years old.. Bring it on! Can’t wait.
1 point
-
Defiinity a motivation boost seeing it like this
1 point
-
1 point
-
1 point
-
Todays delivery from @sheepers The crowns been neglected while I've built an R34 Stagea, but I should be back on the crown soon.
1 point
-
Interiors all finished also and starting to look like a proper car.
1 point
-
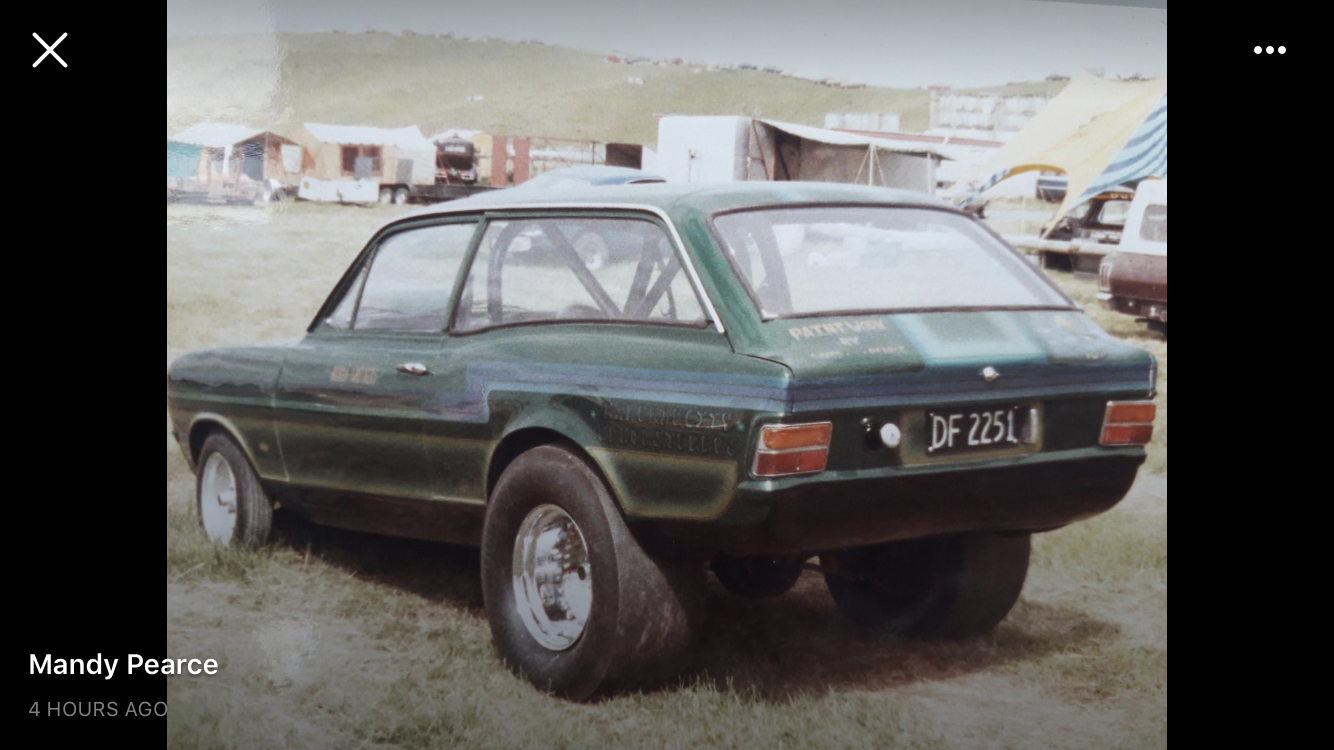
This was our old wagon before it got written off
1 point
-
1 point
-
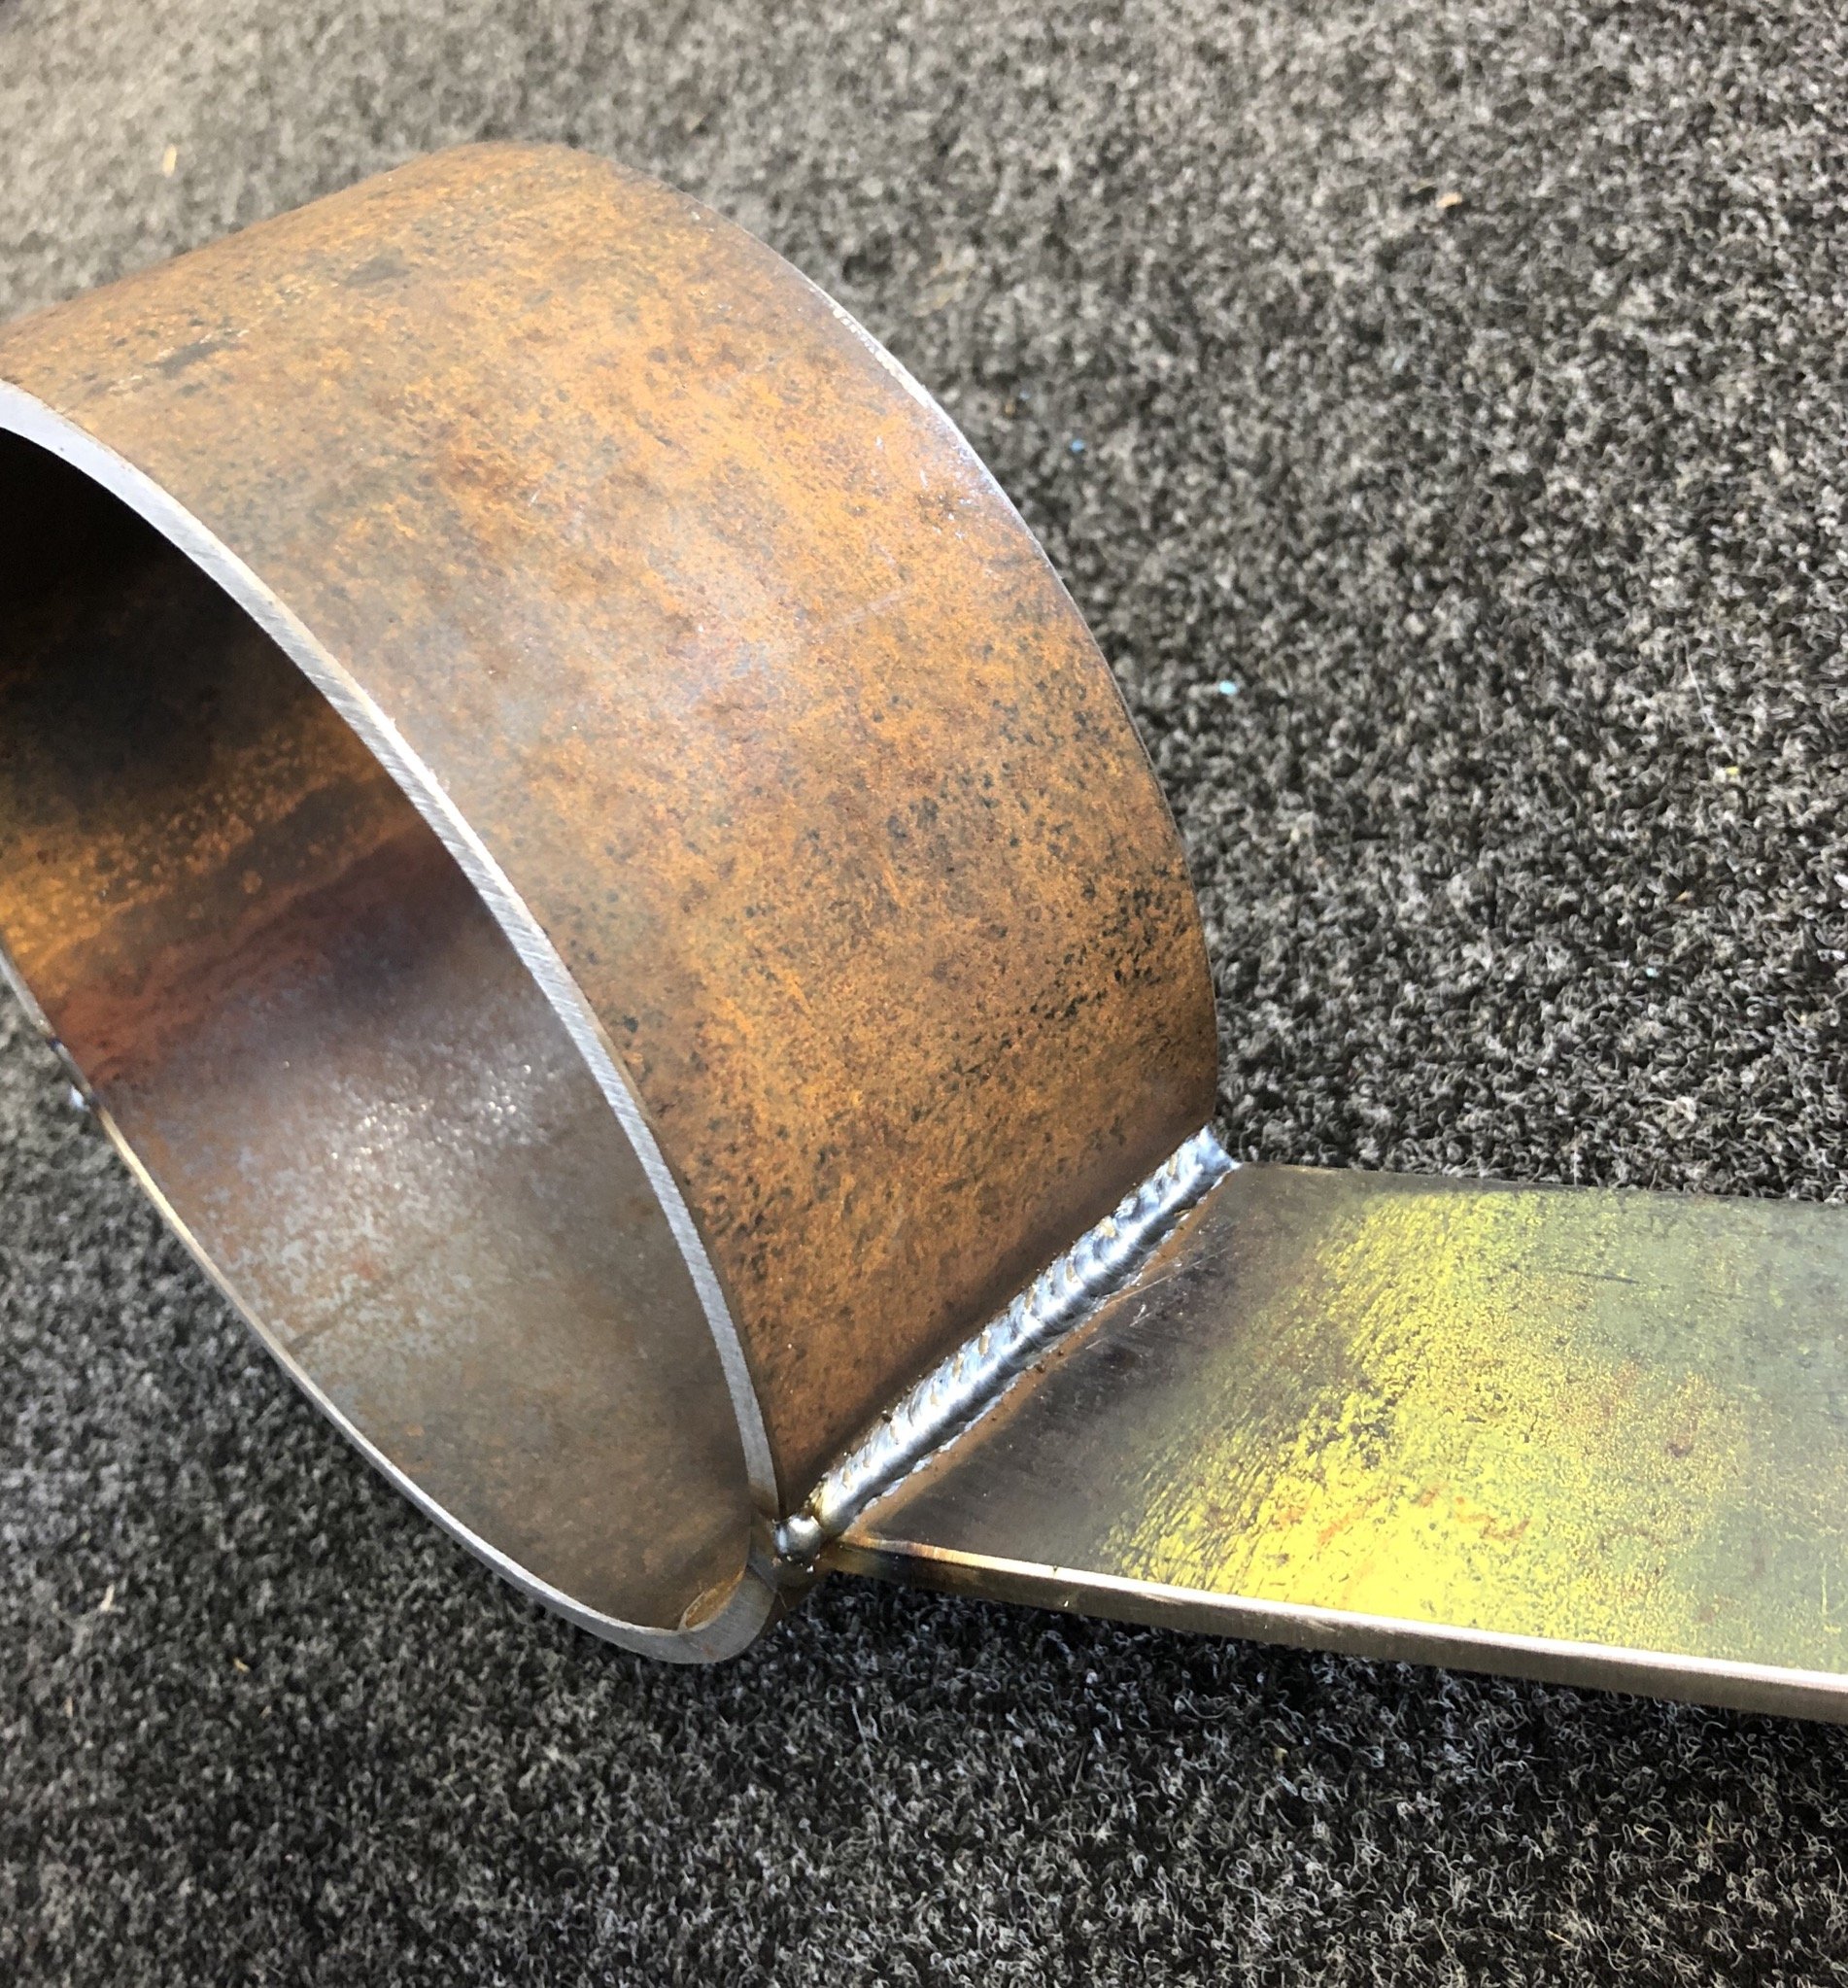
Jeeezzz, its been a while for this car!! Finally got time to work on this after 5 years of sitting in a garage. Did all the basics today, changed fluids, new hoses, new filters and got her running. Chucked some new rims on, thoughts? I think I'll like them more when I convert the bumpers and trim to black. Took it for a quick drive and fk me there a lot to fix on this car!!! Motor pulls strong however the car feels like its on skates, darting all over the road. A quick look at the suspension and literally the rubber bushings have dry rotted away. Pulled the rear arms and shocks out so I can get them rebuilt. Anyways heres a pic of its current guise
1 point


.thumb.jpeg.e0a4bff61111e0c8c7396950fcc94da1.jpeg)


This leaderboard is set to Auckland/GMT+12:00