
Leaderboard


Popular Content
Showing content with the highest reputation on 08/06/19 in all areas
-
The better half and my self have been honing our skills of late. Thats right boss. Hours of hard yards have been put in out in the garage. You all know it and have no doubt also spent many hours doing it. .... Standing there with a beverage staring at an old jalopy, talkn shit and do'in sweet fek all. But seriously what have we been up to other than throwing back jars and chin wagging you say whilst dressed in trendy garage attire. Well ladies and gentlemen wait no longer for here is yet another riveting update to cover the little bit of work we actually did. Radiator all plumbed up. the finned metal hoses bend and hold shape well. like how its kinda central in the engine bay. Replaced the hose clamps that came with it with stronger jobbies as I couldn't be feked with hoses blowing off and coolant going everywhere. Moved on to hooking up the column shift to the trans. Using an IDIDIT GM/700R4 universal shift kit. Thinking being since im using an IDIDIT column it would all just be bolt on. Well that was the theory anyway. Basically it would work fine if I was LHD. the instructions are nice and simple and kit straight forward and well made. Would just bolt in. Being RHD its all opposite though and naturally the American brand dosnt included any instructions and when I contacted support I got no help and basically told me to fek off. LHD shifting would pull the cable out as it moves from park through the gears. RHD we push it in as we move through the gears from Park - 1st. Rejigging at the column is an easy fix. just throw the car in park pull out the cable and hook it up (As pictured). Basically doing opposite as instructed. The bracket that fits to the trans had to be bent so the tab that holds the cable pointed upwards not downwards. Then an extension made up for it. Reason being that the shift arm on the trans is made to point downwards and pull through the gears. Since im pushing through the gears it had to be mounted up top. So the bracket that holds the cable in place had to also point up. Simple enough I know but thought since IDIDIT support and engineers where about as useless as tits on a bull I would flick it up encase any other Kiwis or RHD owners needed a bit of help. Shifts easy though the gears. Clicks from Park to 1st. Ordered a heap of fittings for the fuel system. But before I start hooking all that guff up it was deemed time to finally finish up the gas tank thats mentioned in a previous post. Its made to nestle up nice and happy in this rather large hole that was cut in the boot/trunks floor. Its hard to tell but the hole has been braced up fro the underside so when its all together the floor will be sandwiched and nice and sturdy. Since the lid was still off it seemed a good time to put together the in tank fuel pump. Overkill to be sure since its only driving a few carbs and not fuel injection. But it has good reviews and is supposed to be pretty quiet so I was like mehhh seems easy enough and should be "hook it up and forget about it". Its an Aeromotive Phantom in-tank carb setup. Basically meaning it has a regulator (pictured there front center) that drops the 320psi pump down to 15psi. Also has its return blocked with a removable cap. Comes with pre-filter pictured along with that sponge tube that you cut a tad higher than your tank and acts as a filter and a baffle. Also put together the Dakota Digital universal sender. As with all there stuff its a nice bit of kit with simple instructions. Has the ability to fit in a huge range of depth tanks and works with many gauges. Anyway lid all TIGed up. Thanks lads at Kirk Irrigation for that by the way. Also got them to attach the filler neck and drain. Holes added before assembly to make life easier. Then the sender and pump just all dropped on in to place. Under the car it sits up nice. tucked just above the lowest part of the chassis. Should be no scrub line issues. Also still has a nice amount of clearance from exhaust - its why its an odd T shape. Up top it is about level with the lip of the opening. Will have a floor mounted above it latter down the track. The rest of the other bits of the fuel filler neck still to attach pictured above. Also pictured is the cradle to hold the battery box that we wiped up to hold it all nice and secure on the right side. Just using a standard marine battery box. Fits up nice in the back fender as shown. Can vent it through the floor. Will have a panel to hide it from view down the track. The battery only just fits in whats good i guess - no slipping about. The big bugger should power everything I need and flick over the engine no worries. Looking at either welding cable or 1guage wire to carry the current up the front. earths all over the place of course. So picture the above with panels. sides to hide the battery and tool kit along with fuel neck that will live on the other side. floor to protect the tank then front panel to hide the airtank and amp whilst also adding sound deadening to the shut up those two pumps. Now getting back to my original comments in this post. That being the standing staring at the car. Maybe moving something a fraction taking a drink and repeating the process. Side pipes seemed like a good excuse to practice this. We had to go through the process of draining a few cans to use to hold the pipes in place first of course. Sacrifices we make aye. Note the said cans are crimpled in the middle otherwise they are much to high to suit the air out stance with the pipes. Front grill also seemed like a good excuse. Pondering a 1950 Buick grill. Middle section should fit in well once pushed back but its overall width is wider than the car. Dont really want to cut the chrome as it is so nice so I guess if we use it we may need to flair the guards a bit. Already planned to do this a bit to get better wheel travel for steering when air out but hmm I think this is something a few more brews and staring might require. All this is much down the track of course. Tiki - such a great helper. You got a wire he will attack it. Drop a nut and he will soon have it flying across the garage floor ending up down the side of some thing out of reach or under some other heavy obstacle. Told him I would stuff him is such a pose if he keeps annoying me. Guess he is happy with that idea as the little shit hasn't stopped.17 points
-
Kids wanted to do better skids on their pedal kart so a quick hunt thru the offcuts and random stuff at work got me a short length of mains water pipe at almost a perfect id to go over the wheels. A bit of pre heating of the sleeves to soften then then worked them on with a hammer. A quick test run tonight proves it has enough traction to get speed up and can drift with enough entry speed I need to fold up some flat bar to lock the diff so to speak then it should slide alot better.6 points
-
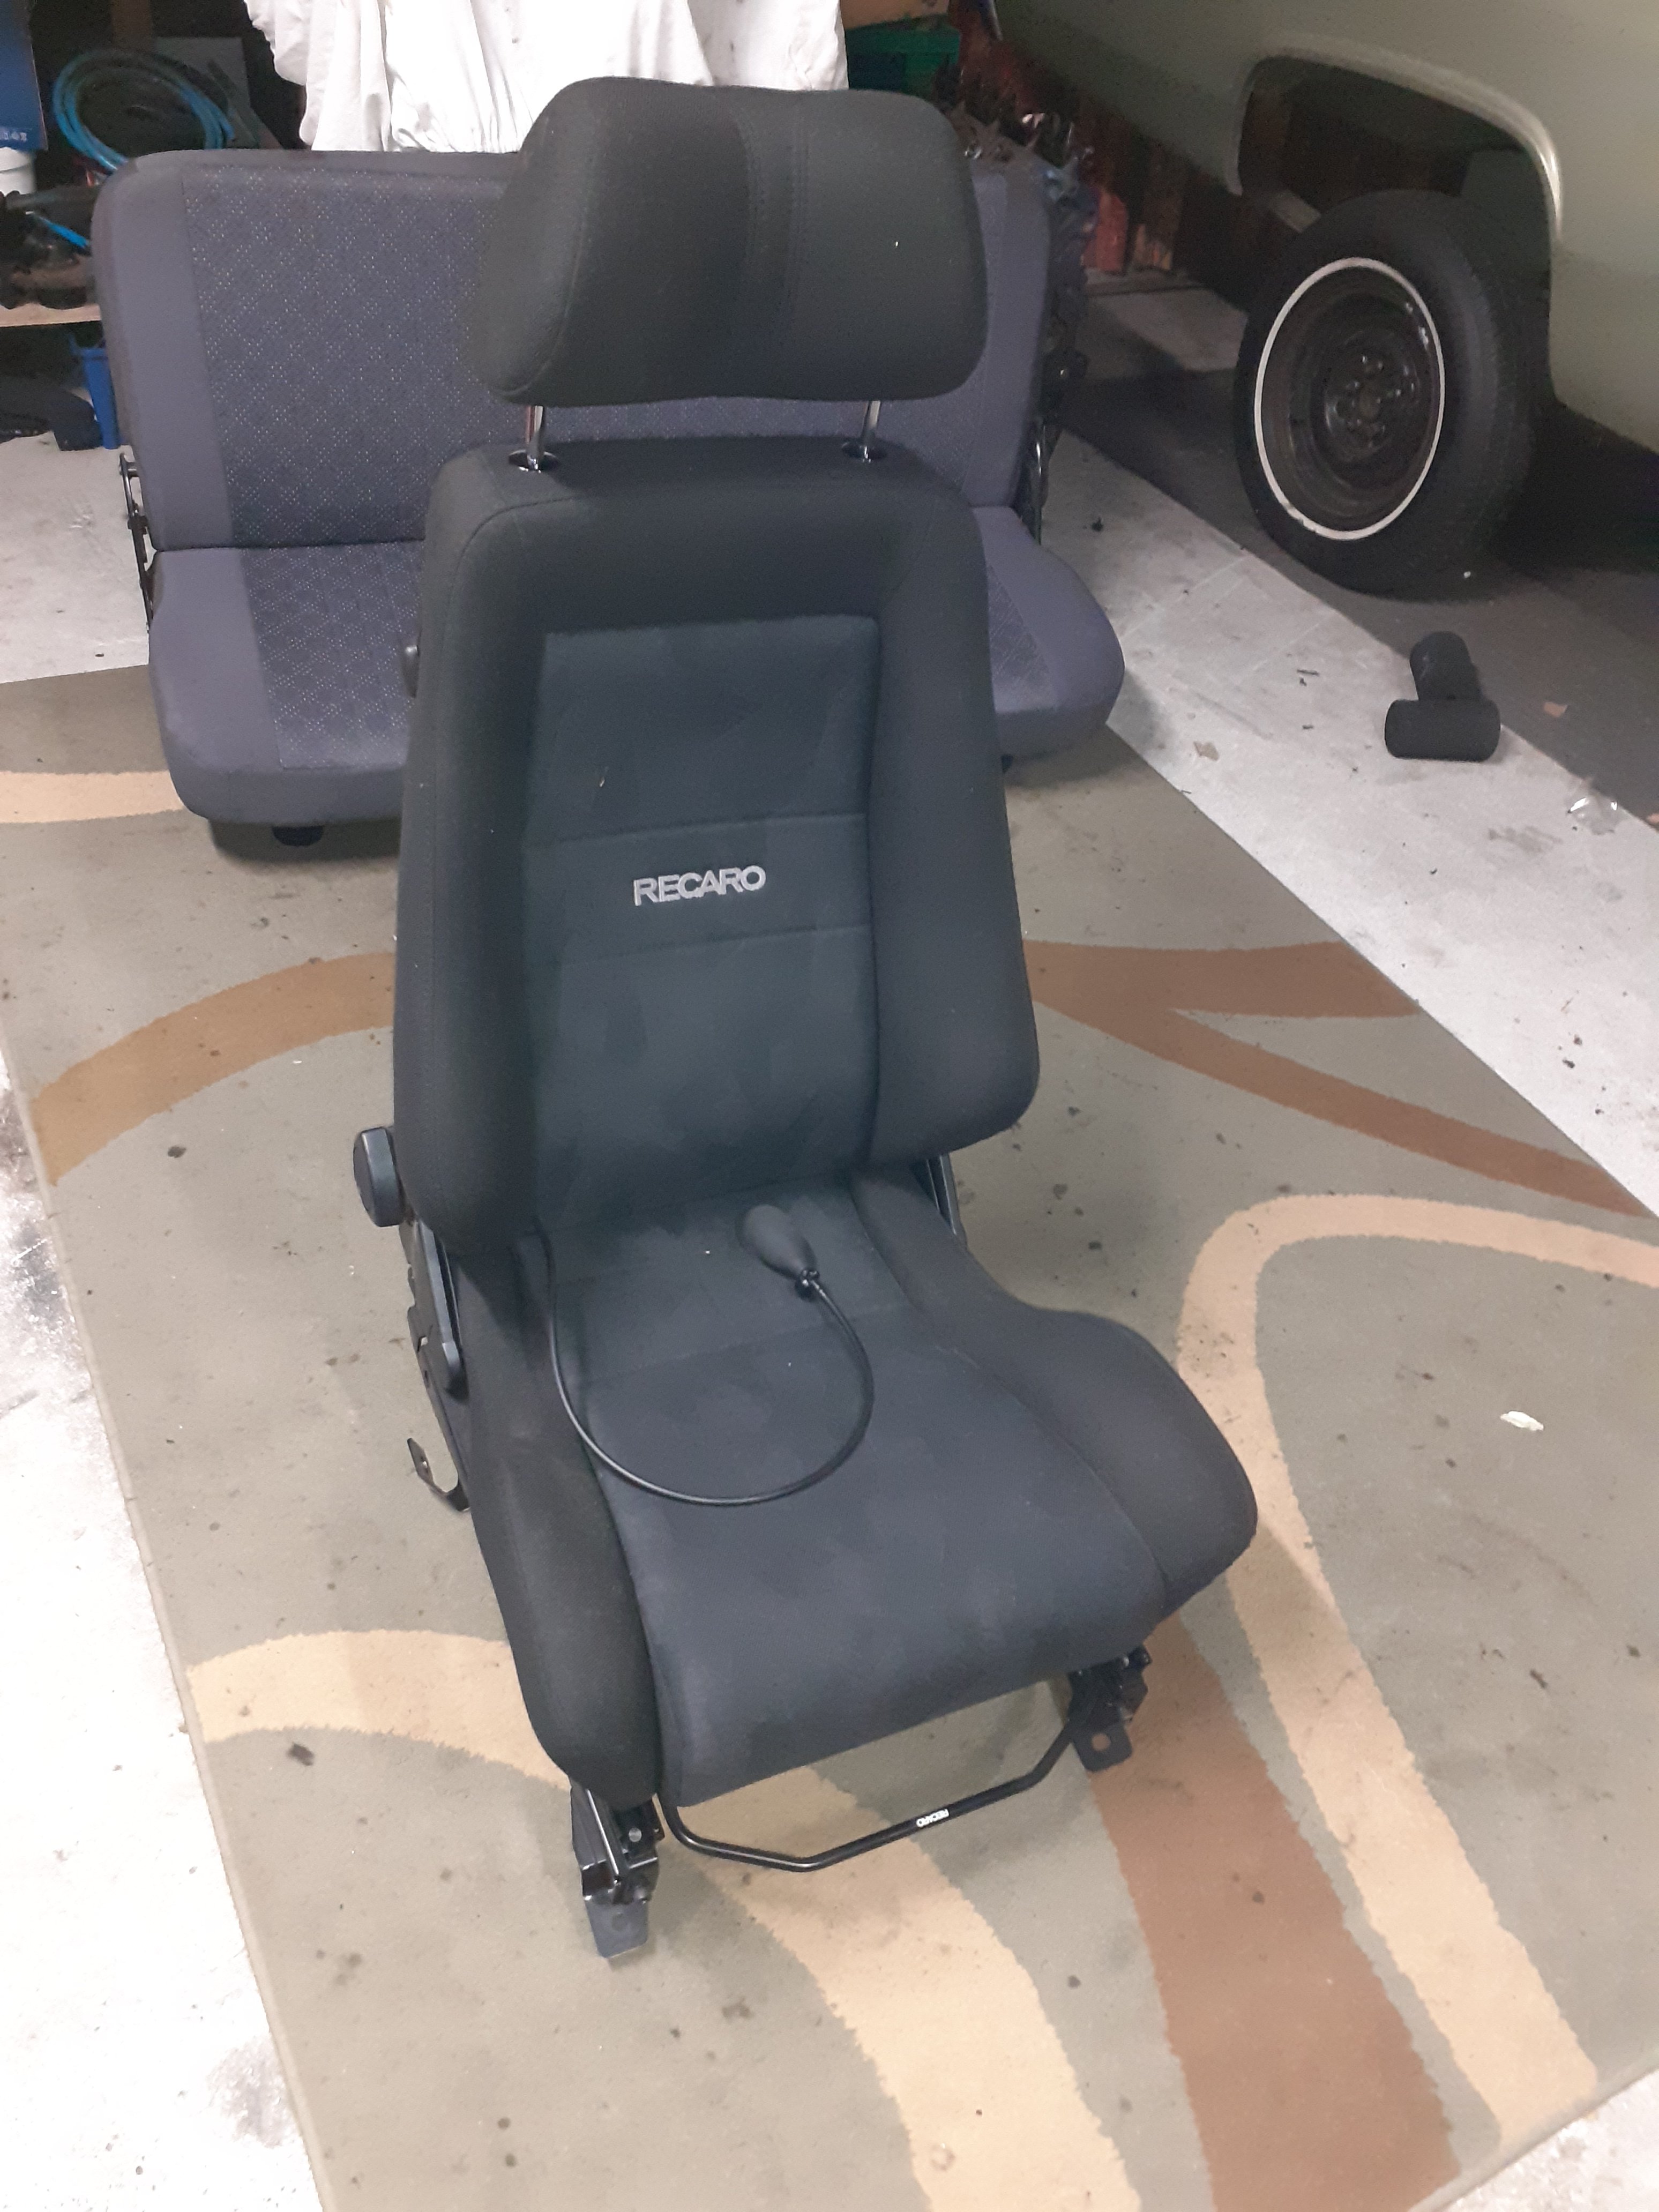
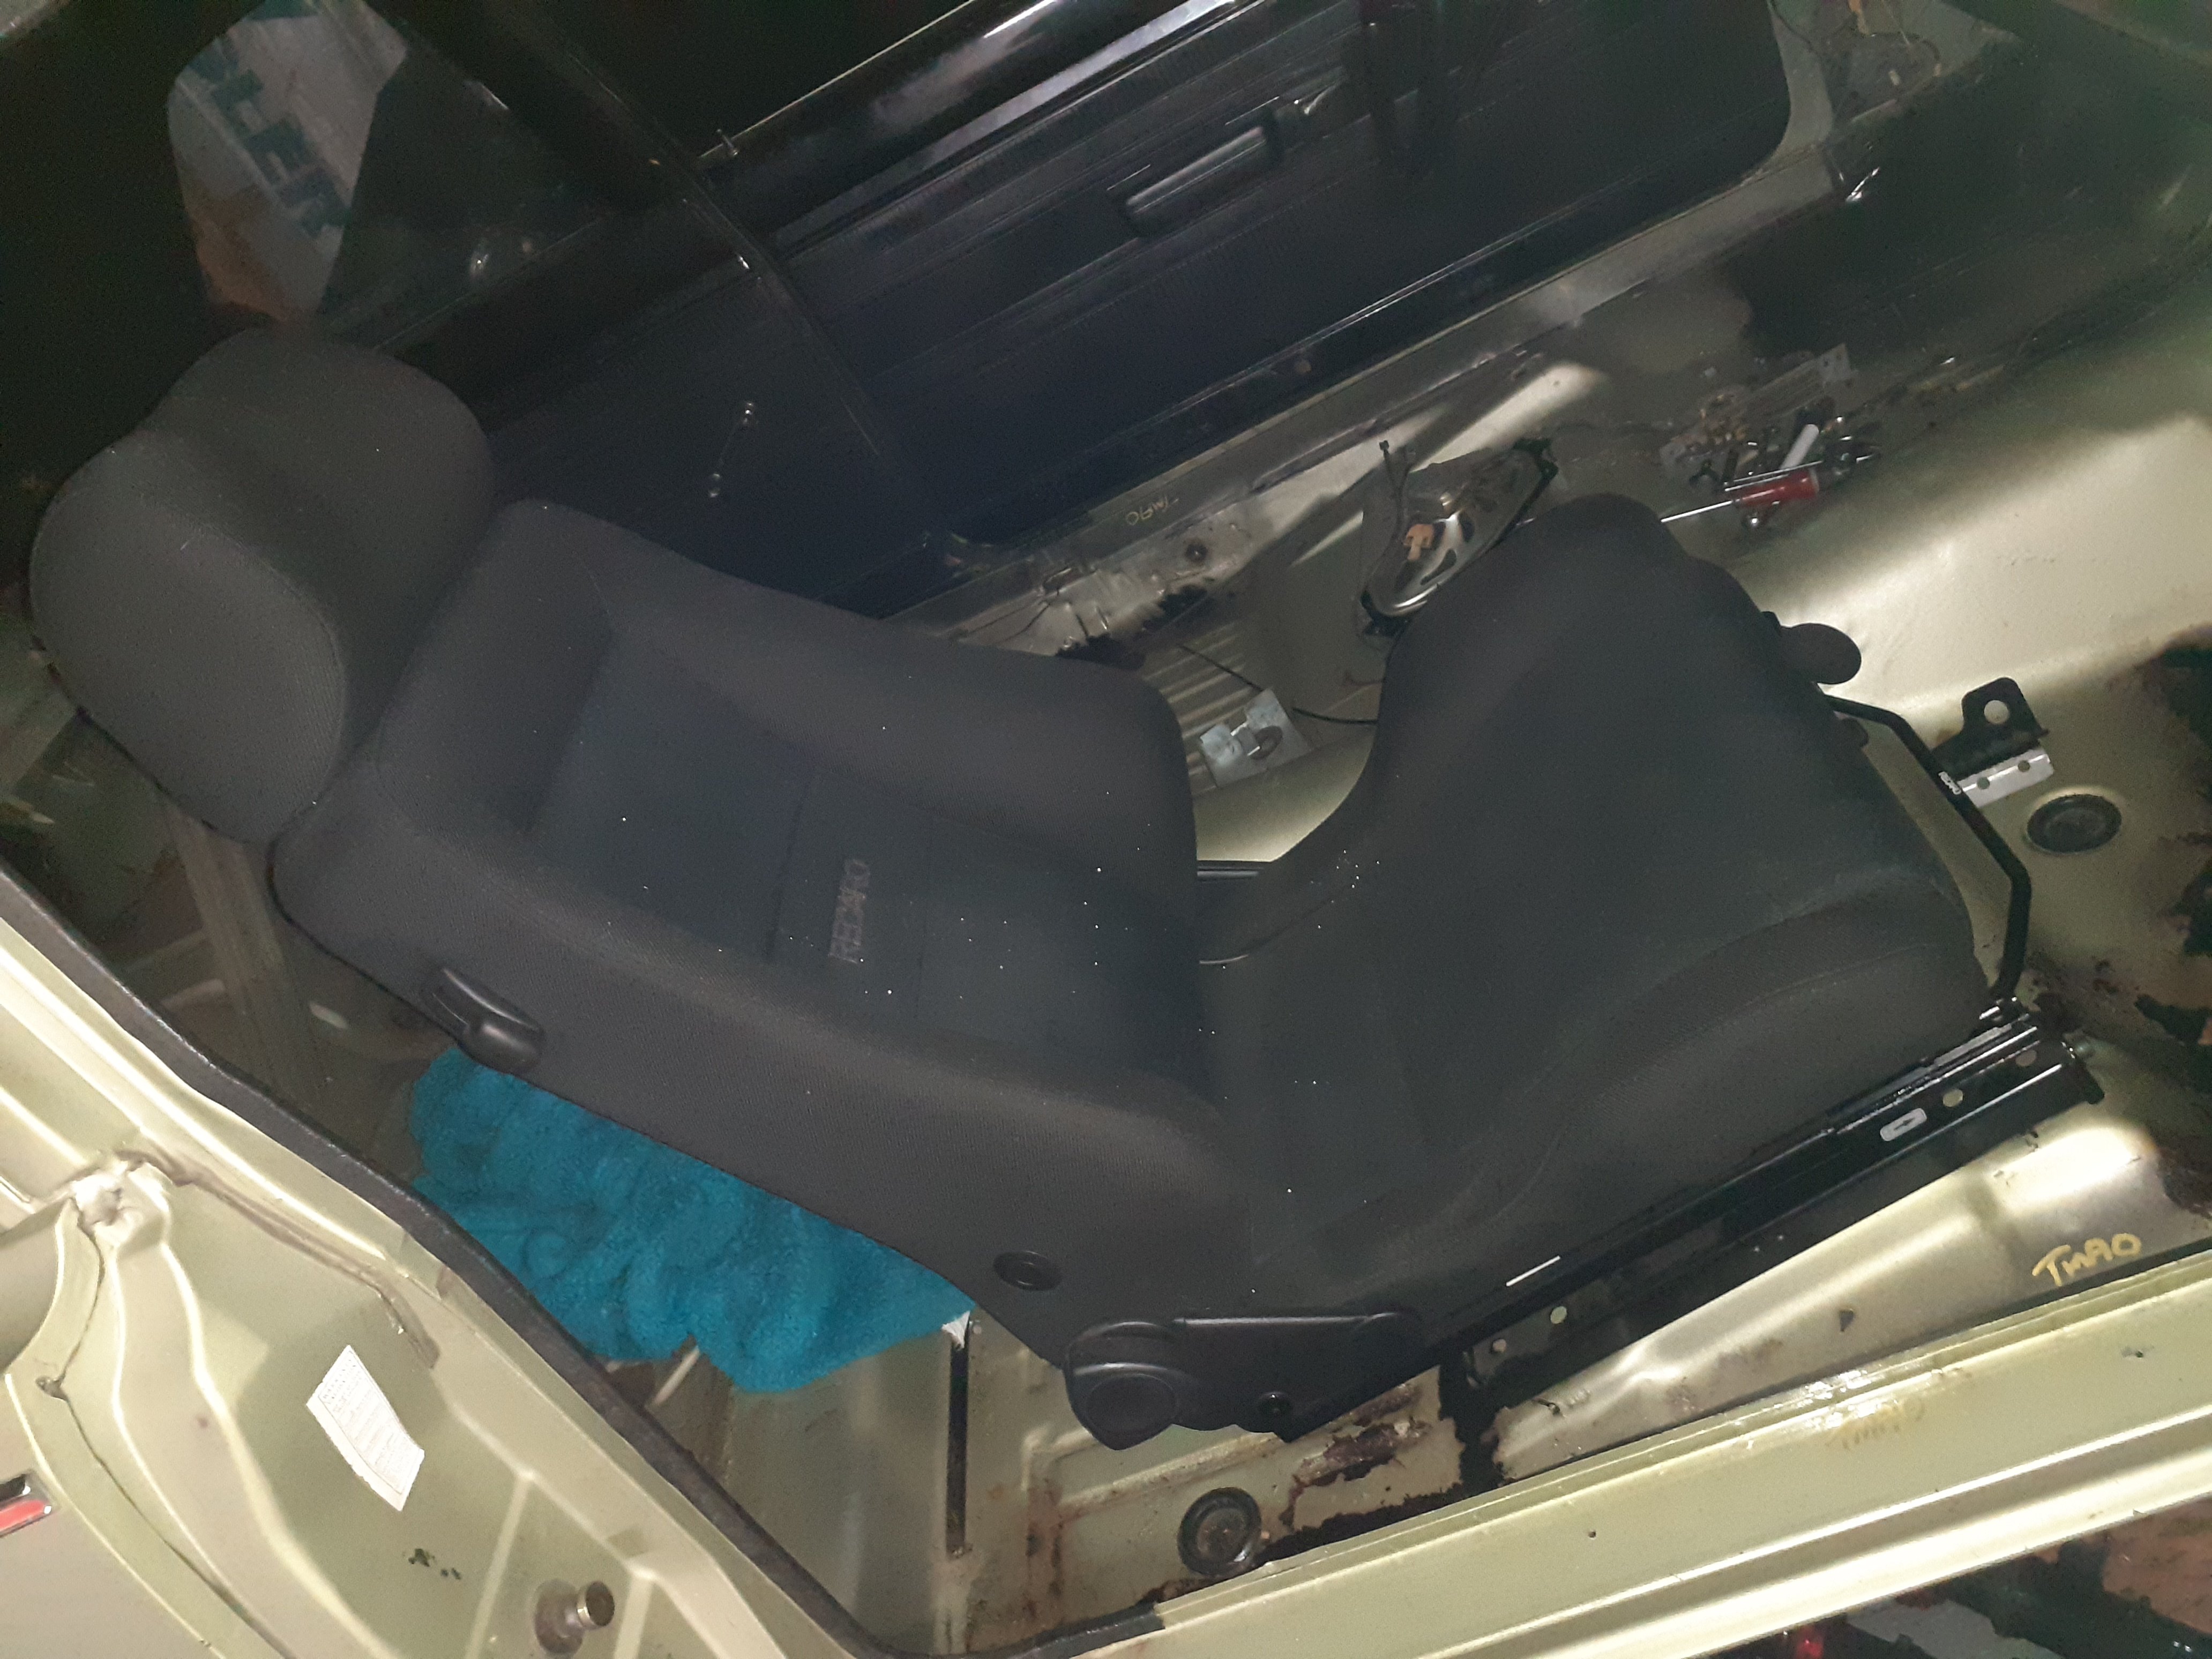
Was at a compliance center today and they had a pair of seats they had taken out of a Prius of all things... anyway I asked if they were for sale and now I own them. Head rests are a bit big, but they are very tidy with no rips and the foams in the base are good. I put one in the car and it looks like they are going to be very easy to fit, if I swap a couple of brackets side to side, the inside will bolt in with some doubler plates, and the outer will bolt on to the bench seat mounts. They even have a pump up lumbar thing so I can take old man @sheepers for a ride and his vertebrae will be suitably supported
 5 points
 -
Sunny again so cleaned plastics up. I'd water blasted them earlier and they were pretty yellow and scuffed so didn't have high hopes. Just a bucket of hot water and a scotchbrite sponge with some Jif cleaned them up pretty well... Bbefore and after side panels (top and botom)... And hosed off they look surprisingly ok... Rear guard was the worst one - stained with rust and exhaust fumes, so left it in a hot water and bleach solution, will see if we have a tide mark after work... Tank to go, plus some repair work on the cracked plastics, will try epoxy resin and glass tape probably... [Edit] No miracle bleach solution, but at least it didn't melt into a puddle. Looks like sanding the only option on this piece...4 points
-
I bought the ones on Trademe in the end, they seem to work well but wont have time to give them a real test until tomorrow.
3 points
-
You guys should organize another. I'm sure we can do more than 13 points
-
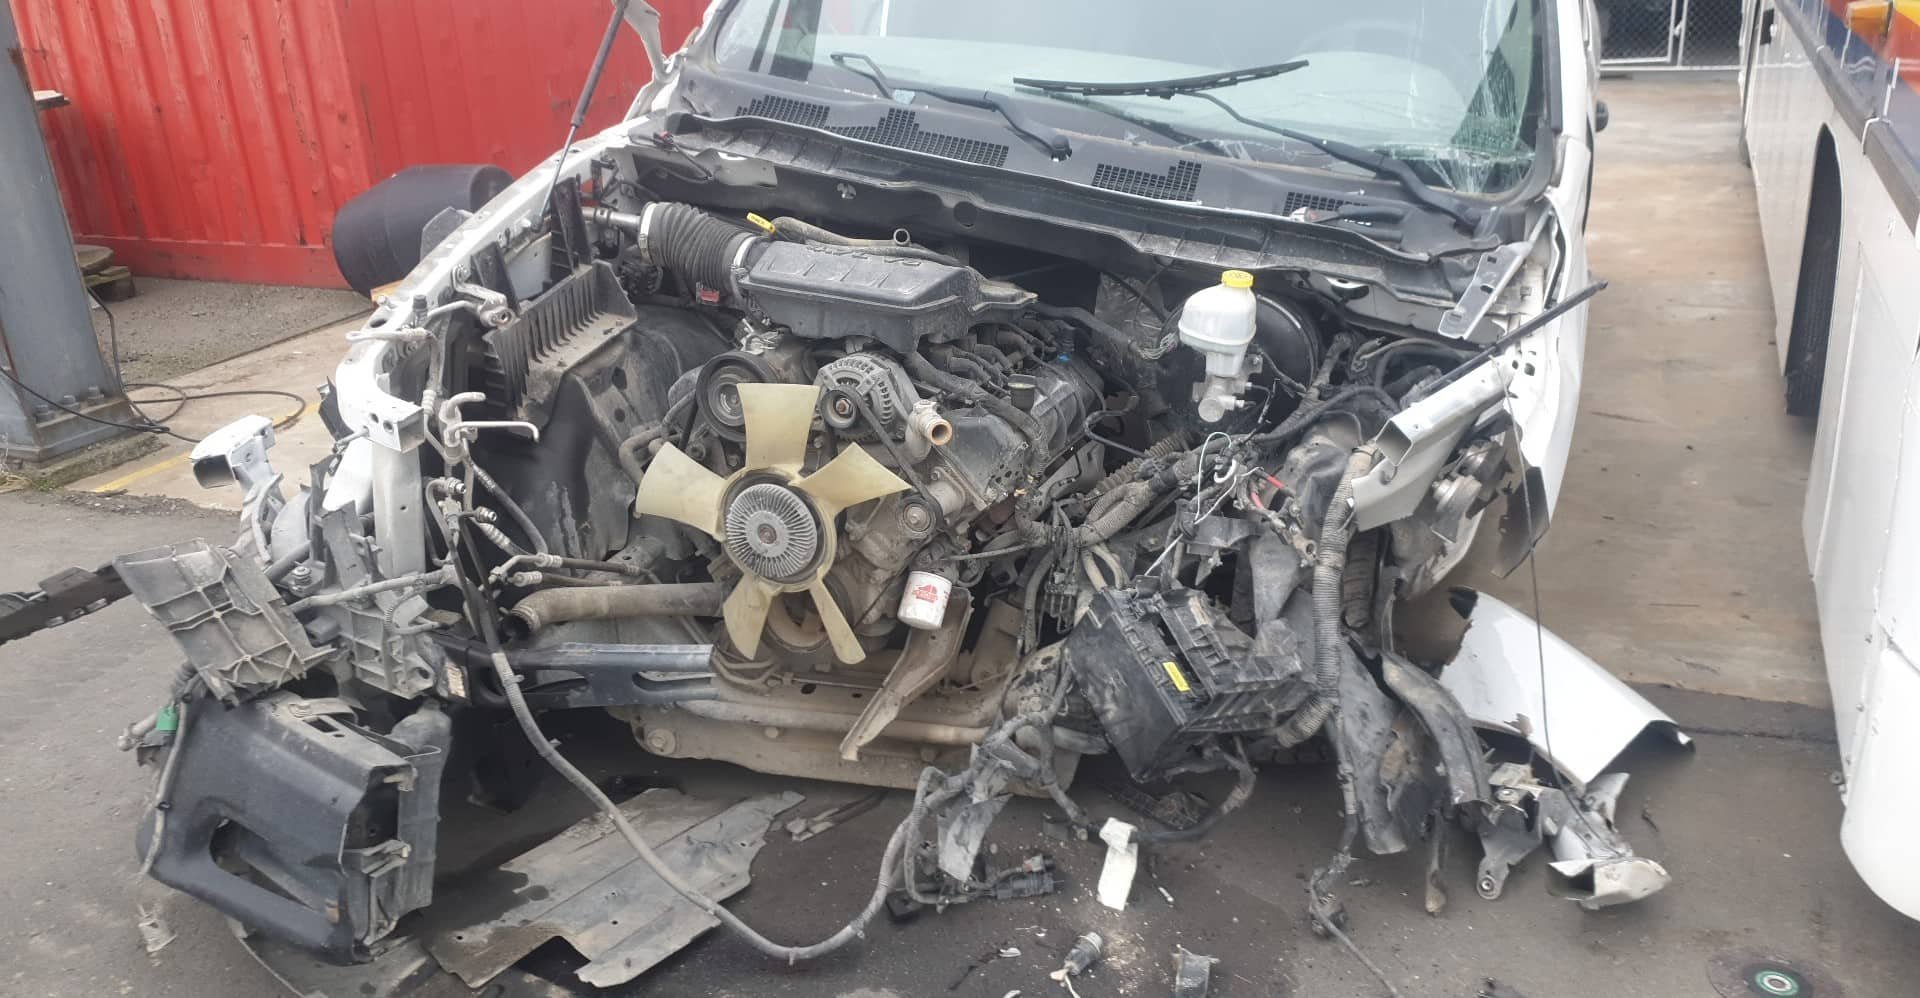
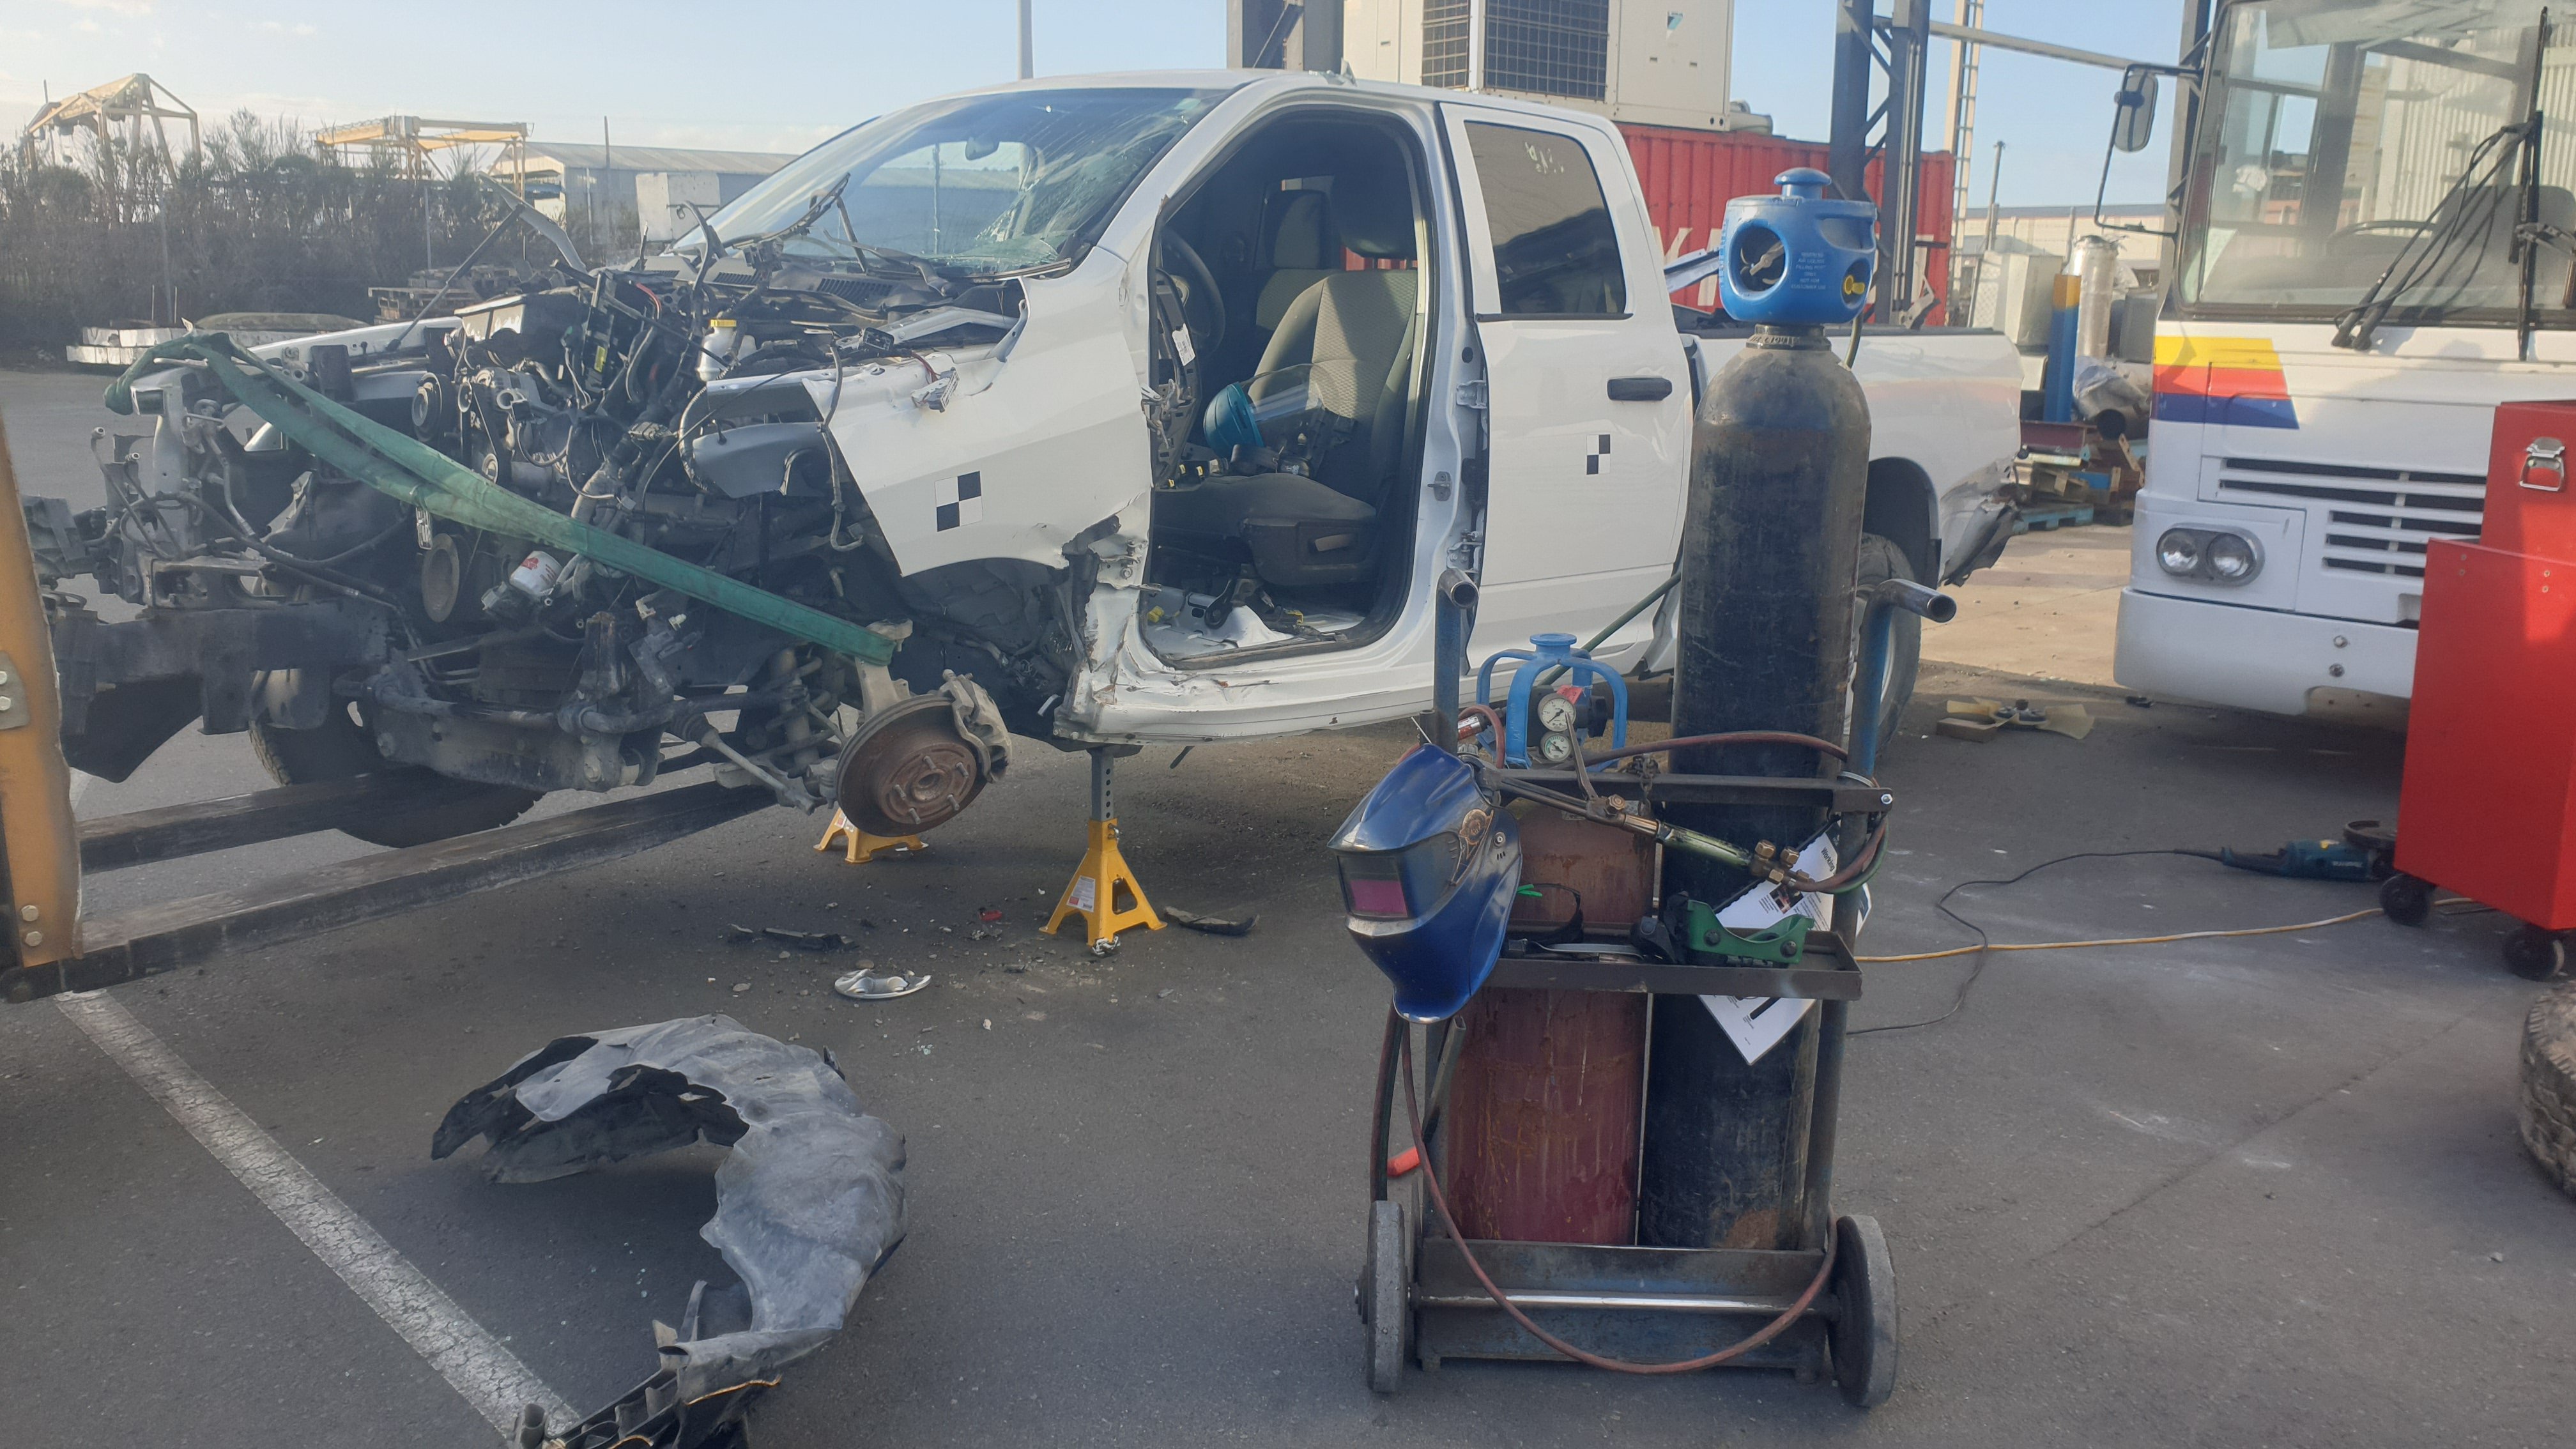
Where do i start. A while ago my brother started building an mx5 for his girlfriend and ended up with a fairly straight, but de registered rolling body, offered it to me for free and i was keen for a future track car project. I also happen to have a job which involved crashing cars, and thanks to a certain american standard roadside barriers must meet, we crash a lot of Dodge Rams. with plenty of v8 engines kicking around i hatched a plan and proceeded to talk about it for at least a year without actually doing anything about it. then the engine blew up on the corona, so while i wait to save up money to build that engine properly, i thought id make a start on this one, which by all accounts should be nearly free, with the only big ticket items needed being a roll cage, a diff swap and a driveshaft. So last weekend i dragged the mx5 into work, where i have all the tools i need to build a race car. and over the week started the efforts to remove the engine. Now that sounds easy, but boy was this truck fucked up. while the engine faired very well with the only damage being an engine mount ripped out (block still fine) and the starter motor wanged in (i have alot of spares). the chassis was bent at near 90 degrees around the engine, i also didn't really want to remove the trans. i started with a 9" angle grinder and removed as much fucked body and frame as possible. i then undid the remaining mounts and then promptly discovered this engine doesn't have lifting points? strapped it around some dubious strong points and tried to lift it out with the forklift. it rapidly became clear that the turbo fucked chassis was going to make it impossible to get out. so packed up, went back to work and had a think over the next few days. that brings us to today, what i had decided to do was cut the chassis in half just behind the trans and lift the truck off. so out came the 9" grinder again and i began by cutting access to the rails around the fucked body, and then trying to cut the rails with the grinder. sketchy at best. so thought fuck it, step it up a notch eh? though this was actually much safer. Gas axed the rails and out she came!
2 points
-
Supposedly it doesnt close until 31 October so there could be more opportunity but @V8Pete is in town so gunna hit Mercs for some nostalgia THURSDAY 1230pm @UTERUS @Testament @Poo @sentra @sheepers @Corbie1 point
-
Thanks guys.1 point
-
Just take the lens off the car and use a soldering iron from the inside to fix the crack.1 point
-
IMHO repair is ok as long as water can’t get in and the wrong colour light can’t come out (like white out a tail light.1 point
-
If I have a cracked lens of say, parking light (or any other lights except head light), is it acceptable to glue or sealant repair it? Virm states the following for rejection: A lens is missing, or has a hole, crack or other damage that allows moisture or dirt to enter. The light is not diffuse and/or is altered, eg due to damage or modification I take the intent of the rule is to prevent non-diffused light output and nil foreign object ingress (which would degrade the light output). Therefore, if the repair of the crack with glue (or similar) does not significantly affect the light diffusion or foreign object ingress, it should be ok, IMO. What are the opinions of the learned inspectors (or anyone else) amongst us? Cheers.1 point
-
I'm keen but I just can't swing the day off.1 point
-
I thought that bulb was for inserting in your anus and it blew up when you got on boost. Just so you knew how hard to push it.1 point
-
on the suggestion of runamuck, i posted in this forum looking for wiring info, and user on there was very kind and gave me a bunch of info which should hopfully sort me out, i was gonna dump all the info in here but sort of cant be bothers, plus give those guys the traffic eh? https://www.forabodiesonly.com/mopar/threads/4-7l-corsair-wiring-diagrams.440431/ also had my weld in 'project car' engine mounts turn up from speedway motors in america, grunty looking things! they are actually for the new gen Hemi, but for the price, i couldnt have bought the materials and if they don't fit the block then worst case is a redrill or a new engine plate. easy as! hope to have the engine "fitted" soon.
1 point
-
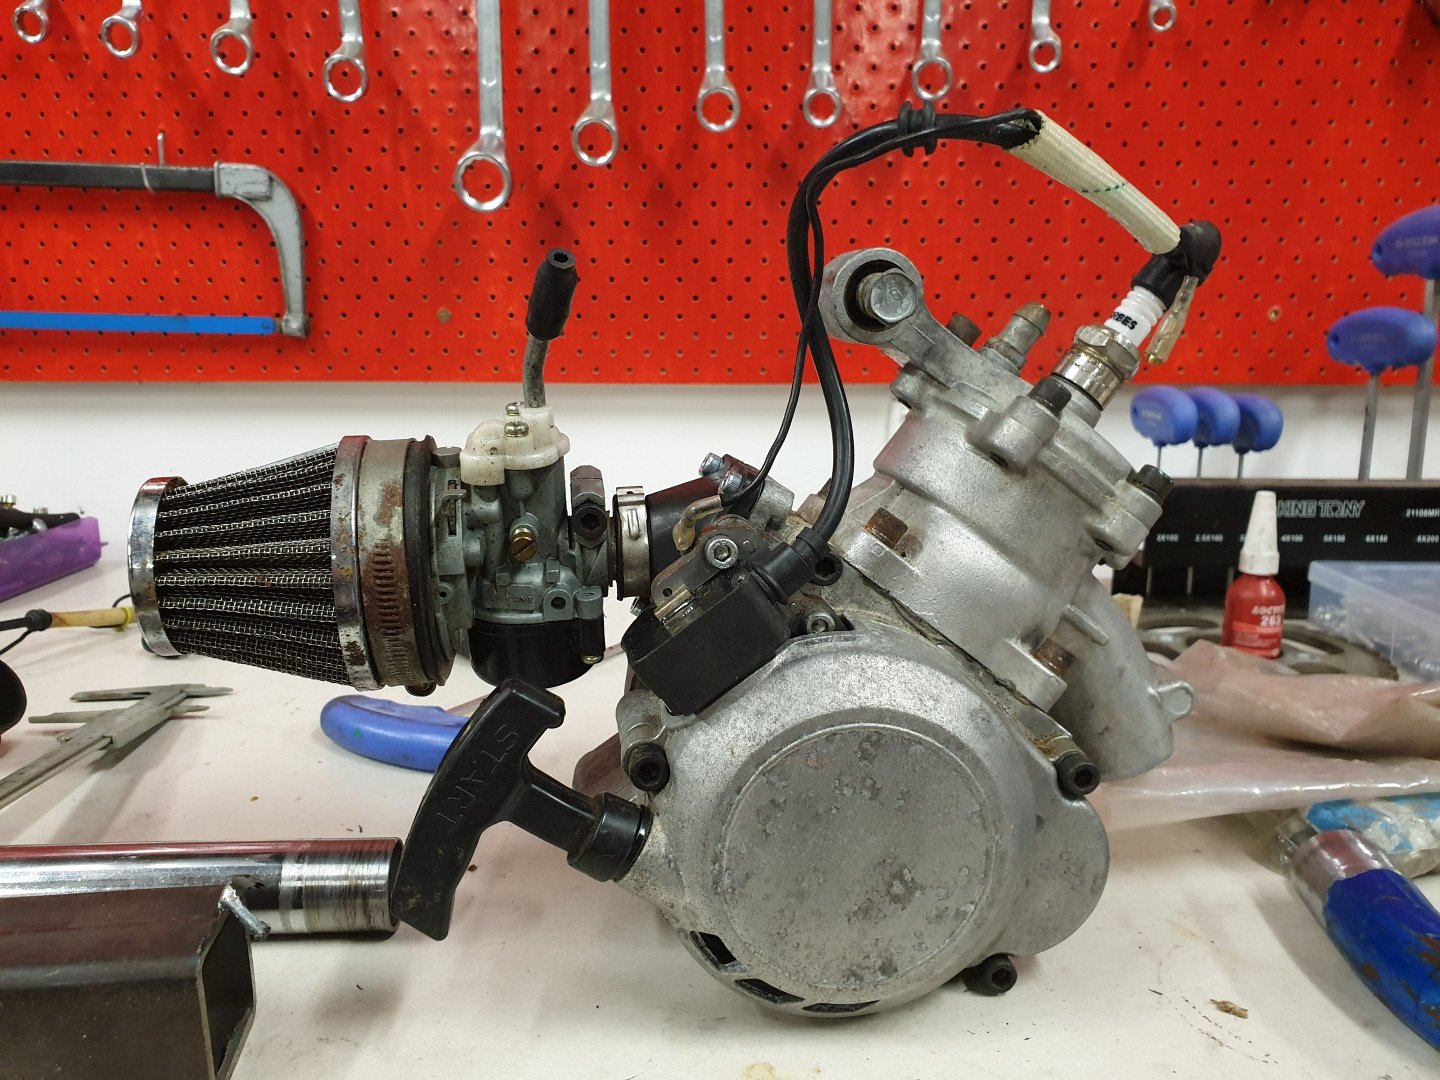
Out of the parts I got, I made the best out of what I had and put this together today. I squirted some engine start into it and it fired straight up... so I know it'll work. This is likely the direction I'll go.
1 point
-
Some things arrived. The rad is just mocked up for now, I will add some mounts and change the lower outlet angle.. The driveshaft is sorted, I had some adaptors machined out of 7075 ally at Topliss (I am sure I have a pic somewhere), then dumped it all at marine and turbochargers to get shortened and balanced. The shortened extension (you wot mate???) Is a 2wd Hilux shaft. I bought a new hangar bearing for it as well, so that shit represents over a grand of accumulated investment. Gulp. After having a quick check to see that it basically fit (and damaging the fins and spending 20mins with a tiny screwdriver pushing them all into place again and taping some cardboard over the tiny little fucks so I didn have to do it again), I made a fake one out of rod to get the position roughly right. Cable tied in place. Tacked in place I removed the cab to make this bit easier, I have quite a few cab off jobs to get through anyway. I did some other shit but forgot pics so that's all you get for now.1 point
-
Cold out, cbf going to get paint, so polish it is. Plus it's a toasty 5 deg in the garage so paint would struggle to go off. Began with a 180 grit cross hatch sand to remove worst scratches, it's a dirt bike so has lots of dings and I'm not after a show finish... Then went over with 400 grit, again varying the pattern to show up areas that need attention... Then the buffer wheel, so satisfying... Told you it was cold, got diesel heater going though so cosy indoors.. And a before and after... Leg # 2 just before polishing, few more tabs on this one so a bit trickier. Worst bit was getting old sticker residue off... And done, came out bloody well, glad I didn't faff about with paint now... And just a close-up to finish, Waxy polish should last ok, easy enough to re-apply if it gets a bit scody... Never tried this before, was a good job to get out of the way, been putting it off but can rebuild forks now...1 point
-
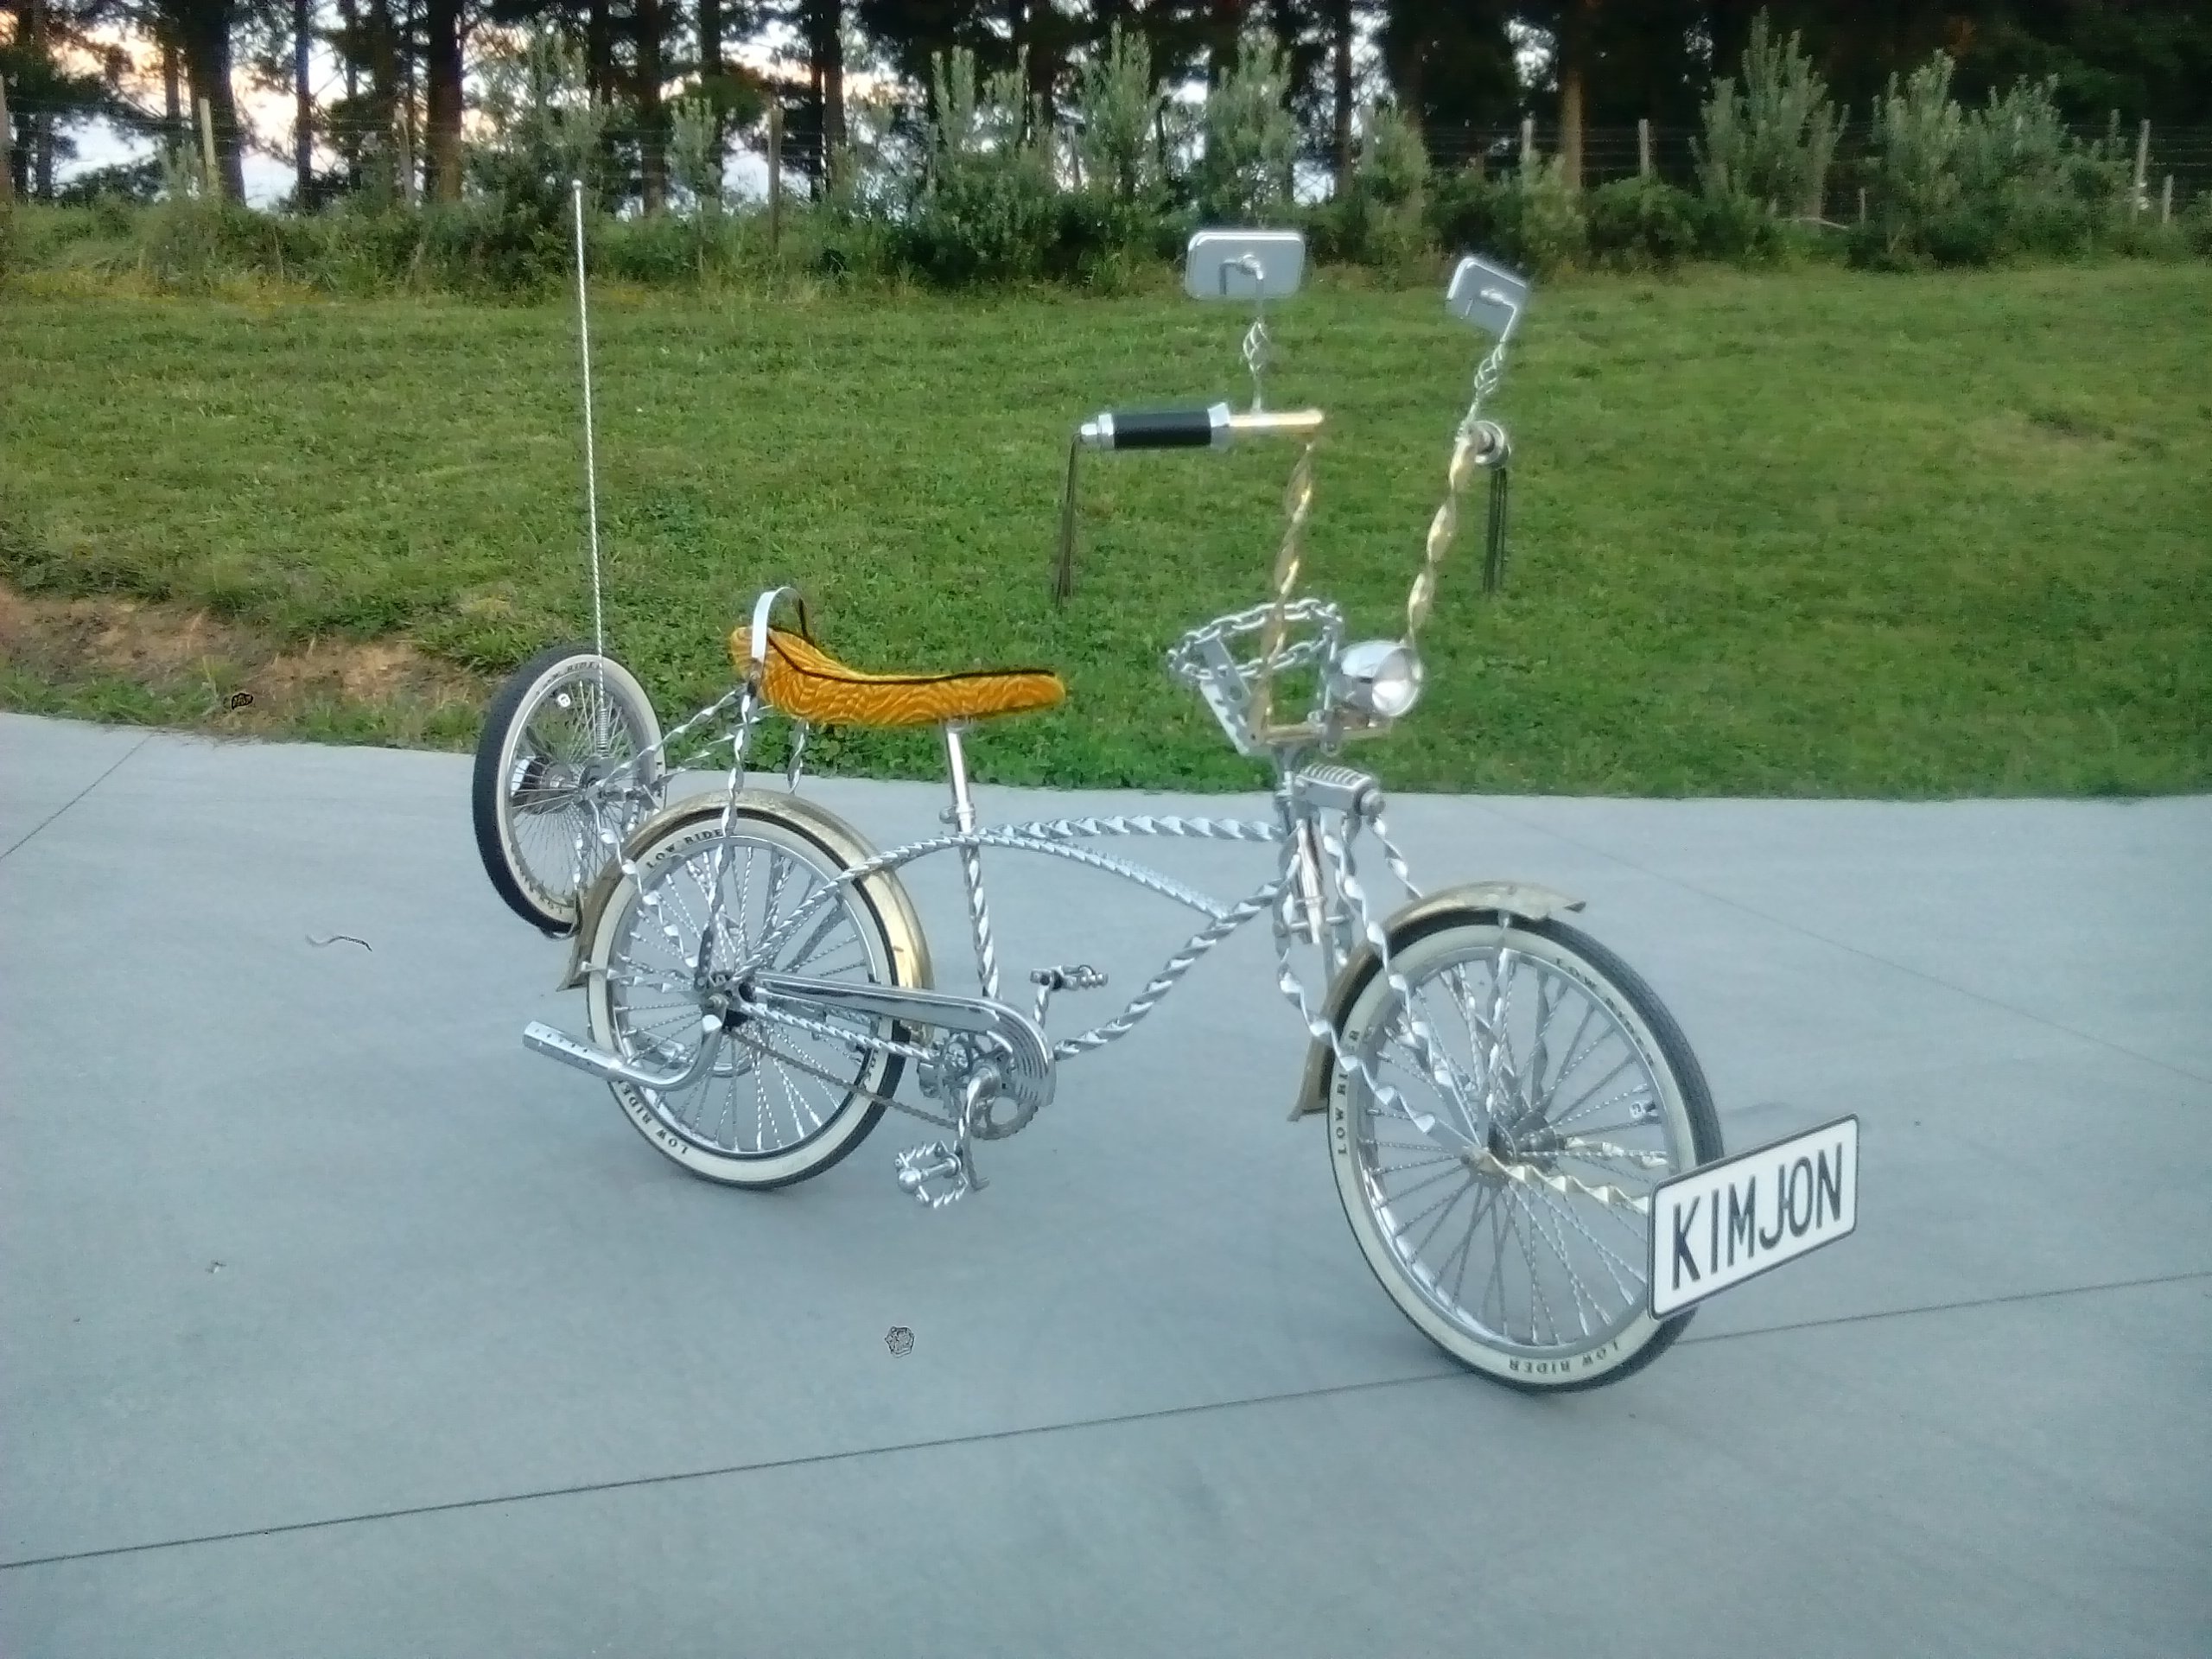
Chuck a model plane motor on it....... @Kimjon egg him on.
1 point
-
This was my ride for dropping kids off duties. The kids were young enough not to be embarrassed. The pretentious soccer mum's however were another story, as they looked down at me from their Audi 4x4's... I'm sure they felt compelled to report me to chyfs...
1 point
-
Here's a clip of us fucking around warming the trikes up. For some it's the first time they've ridden one. We then went on to a structured knockout system of elimination. Though towards the end the system went out the window and we just made shit up.1 point
-
1 point
-
I need a bigger garage.1 point
-
i have, that shit crazy fast. there is also a Mercedes M120 v12 going into one, that one fits like a glove too, an XXS glove over an XXL foot. fits none the less. and it will sound like a zonda if hes done it right, funnily enough we also have one of those engines at work, in an sl600 race car we built, its a gigantic engine, truly a monster. sadly the motor is fucked, so its getting similar treatment to my car, except we'll use one of the Hemi 5.7 beasts we sometimes get. i figured i didn't need an additional 25% power over the 4.7 in an mx5, with the added bonus of way more spare parts for the 4.7. cheap cheap1 point
-
Seen the Hellcat Miata in the States? This puppy will fit like a glove* *when you have XL hands and XS gloves .1 point
-
Stock cams back in for now since it idles on 2 cylinders at 2000rpm. At least until i get motivated to make a new inlet manifold. finally cracked 2 hundy on stock cams with few more tweaks. still only 13psi boost1 point
-
im keen but thursday seems a little soon/hard i mean, theoretically, i COULD do it @UTERUS if you were keen.... day trip and disguise it as a work trip but seems hard0 points
-
Quick update just for the record. So I sold this about a year ago. Kinda regret it now. It was cooler than I give it credit for. It now lives on in what I assume is ke70 heaven, as it met its demise a while back now, when the new owner snapped and bent the front suspension in an accident near Auckland. Rip ke70 gone but not forgotten. I mean who am I kidding it's probably living on as a franKE70stein somewhere with probably the third time it's had dodgy front end repairs done on it. I don't think there's one fully straight ke70 left in the country. Final picture I've got of it before it disappeared for good, so long good friend:
0 points


.jpeg.2ad74eeb3757f4d97ba48c17cdcabbb6.jpeg)


This leaderboard is set to Auckland/GMT+12:00