
Leaderboard


Popular Content
Showing content with the highest reputation on 07/12/19 in all areas
-
wow. Been a while! this car still goes, and is actually the only car i own these days... Since the last updates, it has run 2 or 3 OS Drag Days, where it would just do run after run after run! like 30 runs in a day, and is just sooo much fun! slow... but fun! It has also been on a number of fun trips that im going to share with you now, and has proven to be a capable trow beast! BUT It also has done a lot of not-driving. 2 diffs and 2 gearboxes in 12 months? so we're pretty good friends with AA (plus) and theres been a fair bit of this But, it's all worth it! because days like this are hard to beat! We have some plans though... Great plans! And the 'final' piece fell into place today.... I have in my garage a shortened Hilux LSD with disk brakes, buying, today, a K-T bell housing, and in slackercams shed is a T50 with my name on it... Plan is to install all of that before drag day, and hopefully i wont smash all my driveline gear again which is great, because then i have no excuse to do other things to this car maybe one day... as i never wanted to do more mods as i was breaking diffs and gearbags already, so didnt wanna put any more power into it... Plus, i kinda like how fast/slow it is... its the right amount of fast you can beat on it on a daily drive around the block, and not get into too much trouble! but at the same time, triple digit HP numbers would be nice... Anyway, thats what we're up to. This car is my ONLY car, so that makes mods more fun... but i live in Taupo now, so cars are optional... plus partner has a car and i have a scooter, so she'll be right.17 points
-
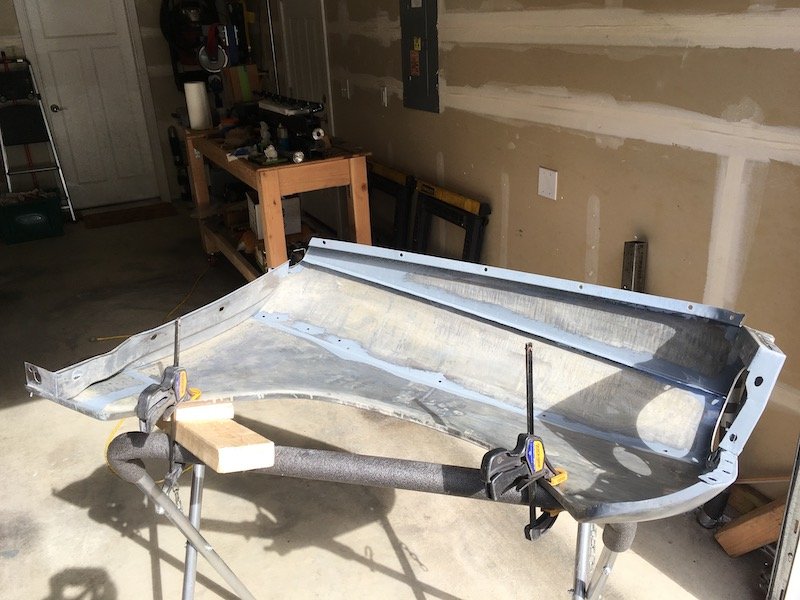
Seems im overdue for another update. Best remedy that I guess and spew forth more pics.To keep all the electricals ticking im using a Powermaster 150amp 1 or 3 wire alternator. As i stated above I wanted all the brackets as low as possible. unfortunitly cooling hoses got in the way in the middle positions and the powerstearing rack when it was really low. So its had to go up higher but is still low as we could get it. Still its not to bad I guess.Also mounted up the radiators overflow seen above.On the other side of the rad we mounted up the PS/hydroboost reservoir. Three port jobbie.Under the car a fly wheel cover was fabbed up. Stock would not work due to the trans adapter. Bit of split pipe was used for the notches to clear the torque converters covers ridges.Car is off the jack stands and front panels are bolted on. not all the bots etc are in but enough to keep it together until I get new bolts for it all and get it done right. Old Nailhead sits in there nicely.Steering wheel thrown on just so we can roll it about easier. GT Performance 9 bolt hub, 15.5" wheel and horn. Really wanted a wheel with a horn ring cus I love those things but ones that suit smaller wheels are bleeping expensive so it can wait.Car is sitting pretty darn low. Like the lowest part is the brace that joins/strengthens the front sub side to side much like the original Hudson setup. I haven't measured it but I guess we have 30-40mm clearance to the road. As you can see with the good old beer bottle next to the car... it low.keep in mind we still have to add side pipes - its that big ol hole you may of spotted in the above pic. You will see also that we will have a heap of room for them under the rockers. They also have a bit of a curve whats a bonus as it will (with luck) keep them out of ankle range whilst keeping them nicely tucked up so we dont rip em off.and moving right along... side shot just cus I like it. yes I know the car is dirty but so is my mind and I like it that way.Now talking about burning ankles on side pipes a subject by gal has mentioned most times I bring up lake pipes. My answer generally goes along the lines of "wear heels" below pic proves it. Ankle out of burn range.. toes on the other hand she has never mentioned.But seriously - like the back tire viewed air out side on.Enough farting around talking about air out this and that. Throw a battery in and test that shiz. Yip yours truly testing it out. We left it air up for a few days and I was pleasantly surprised to find it stayed there with only a few psi drop from what I left it at uniformly across each wheel. I will mark that to atmosphere and not any slow leak due to it being across all four wheels not just one.yeah i know the front could be bolted on a bit better but ahh stuff it it will be off again anyway.And just cus im feeling all gangsta...i know it aint hydraulics but it will do me. When air up we must be around 150mm at that one low point in the middle just behind the wheels. Ass end that has larger bags naturally goes much higher.14 points
-
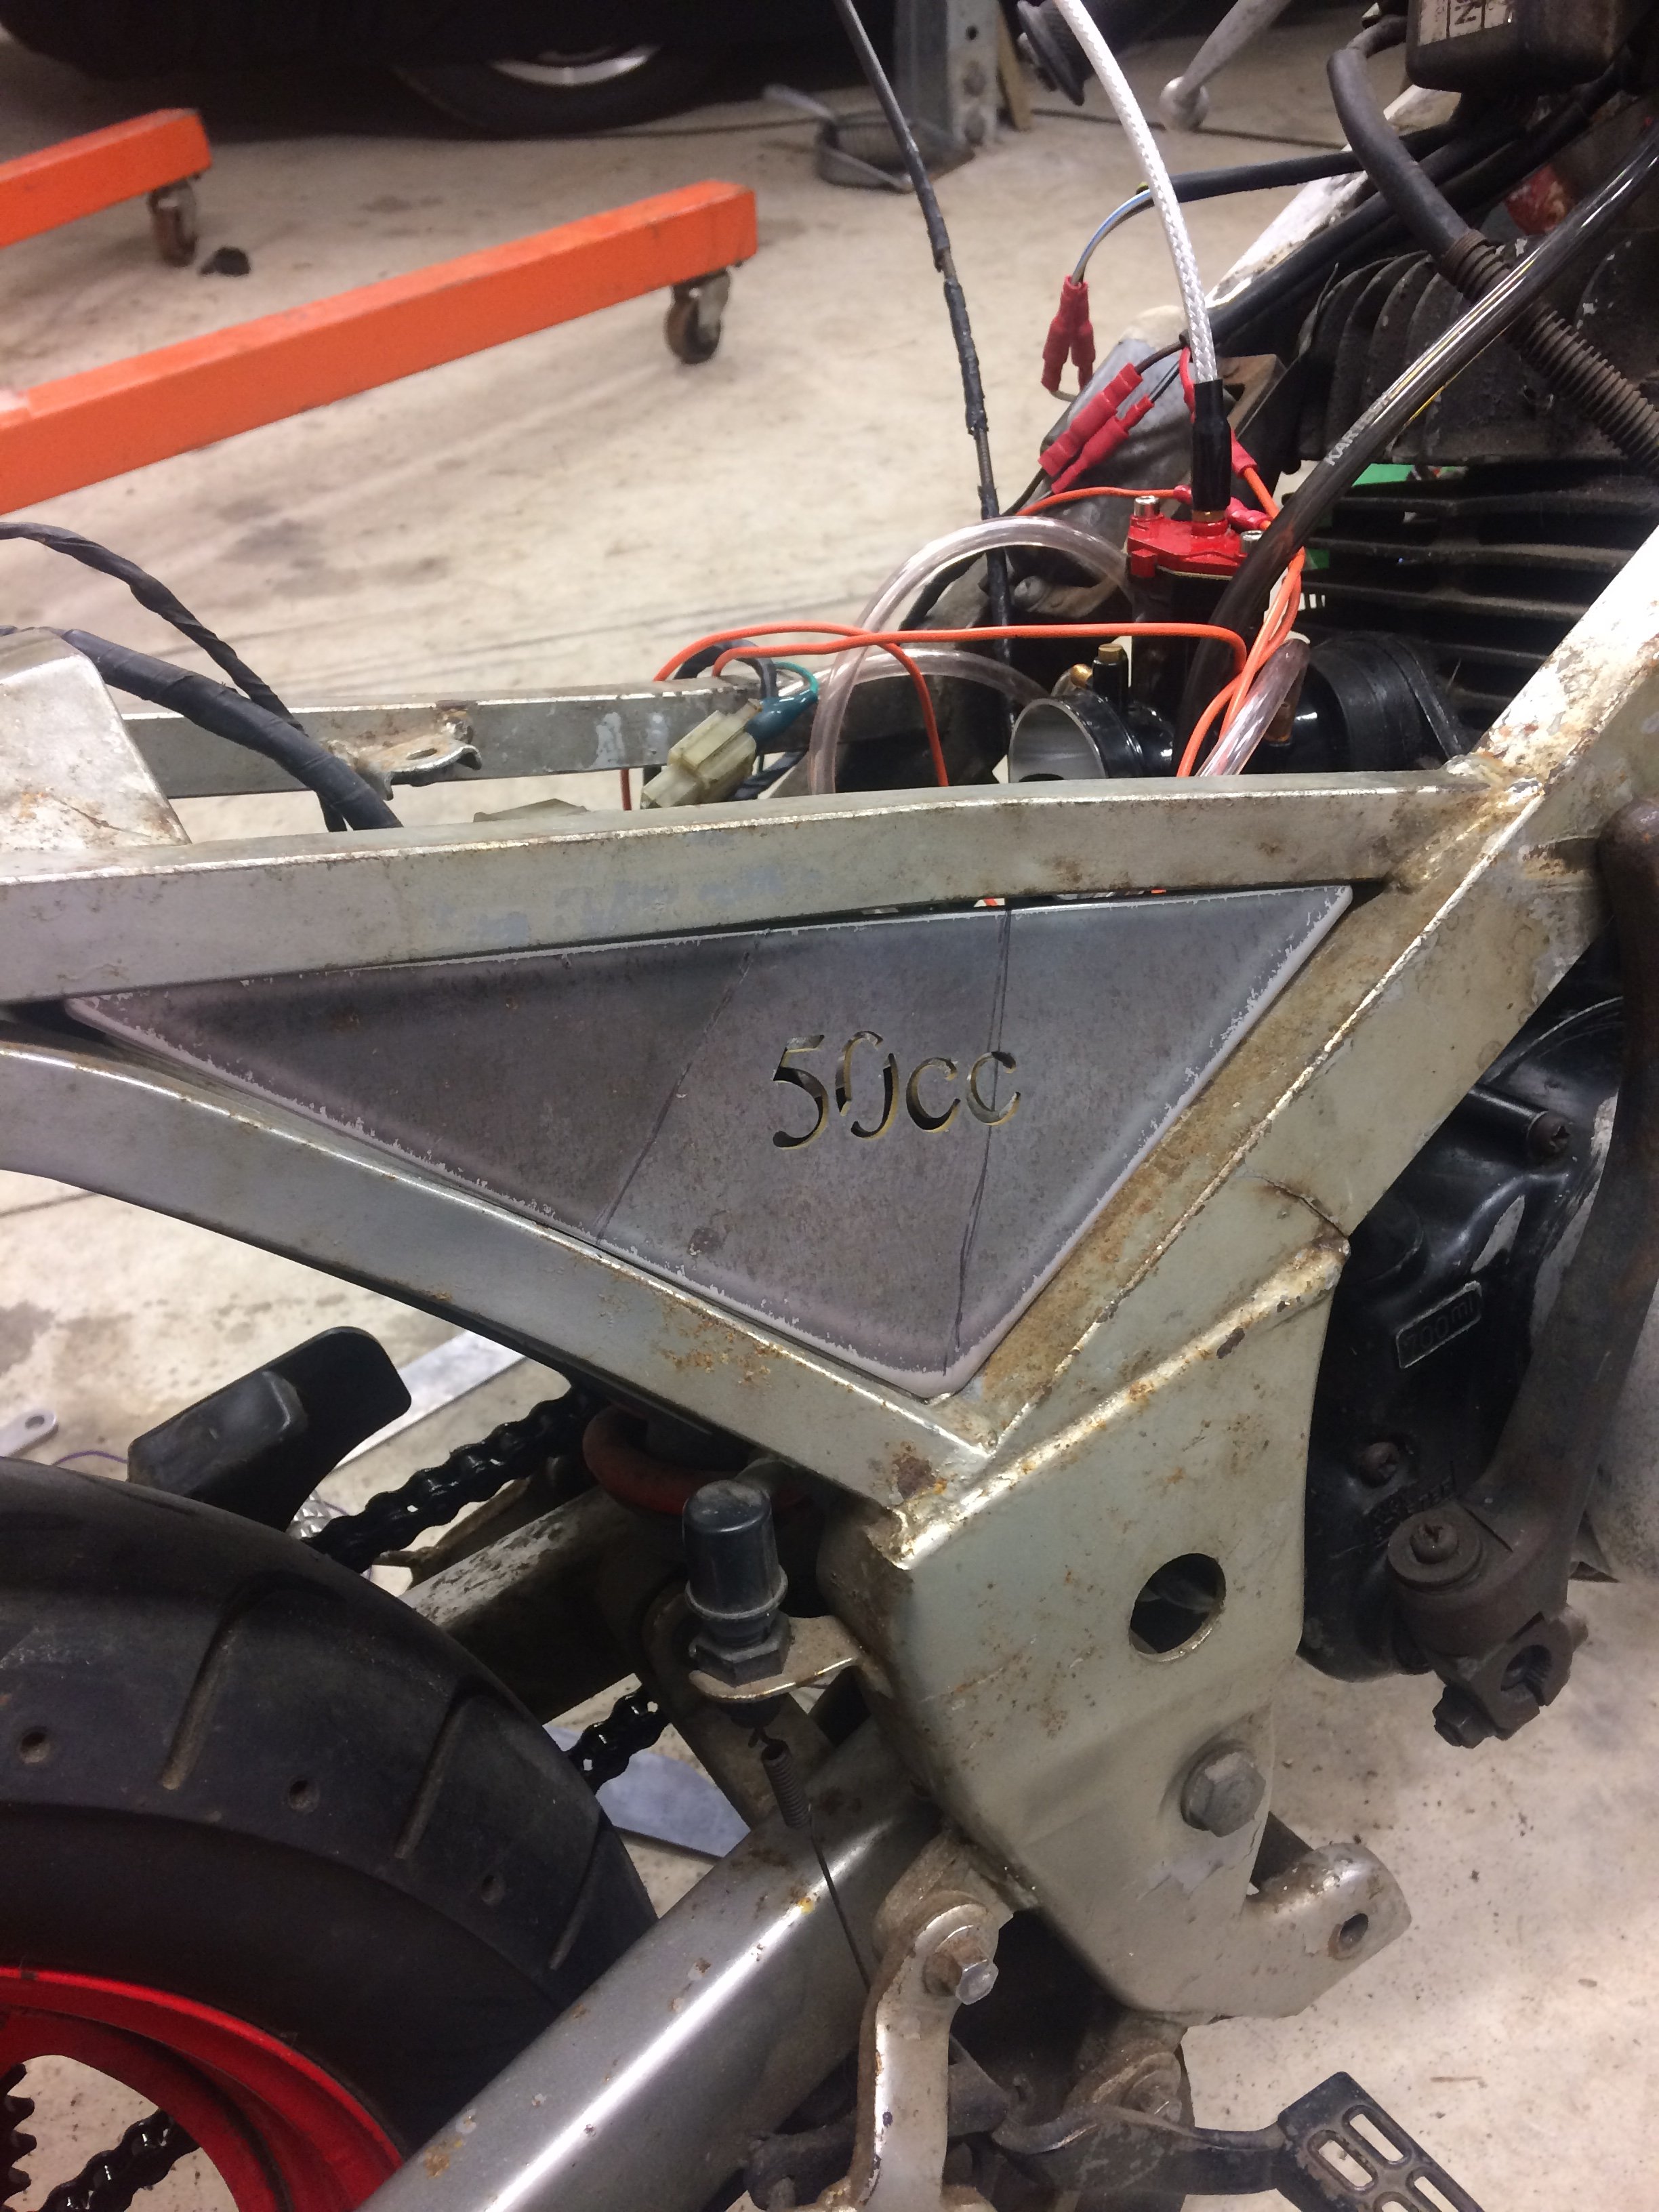
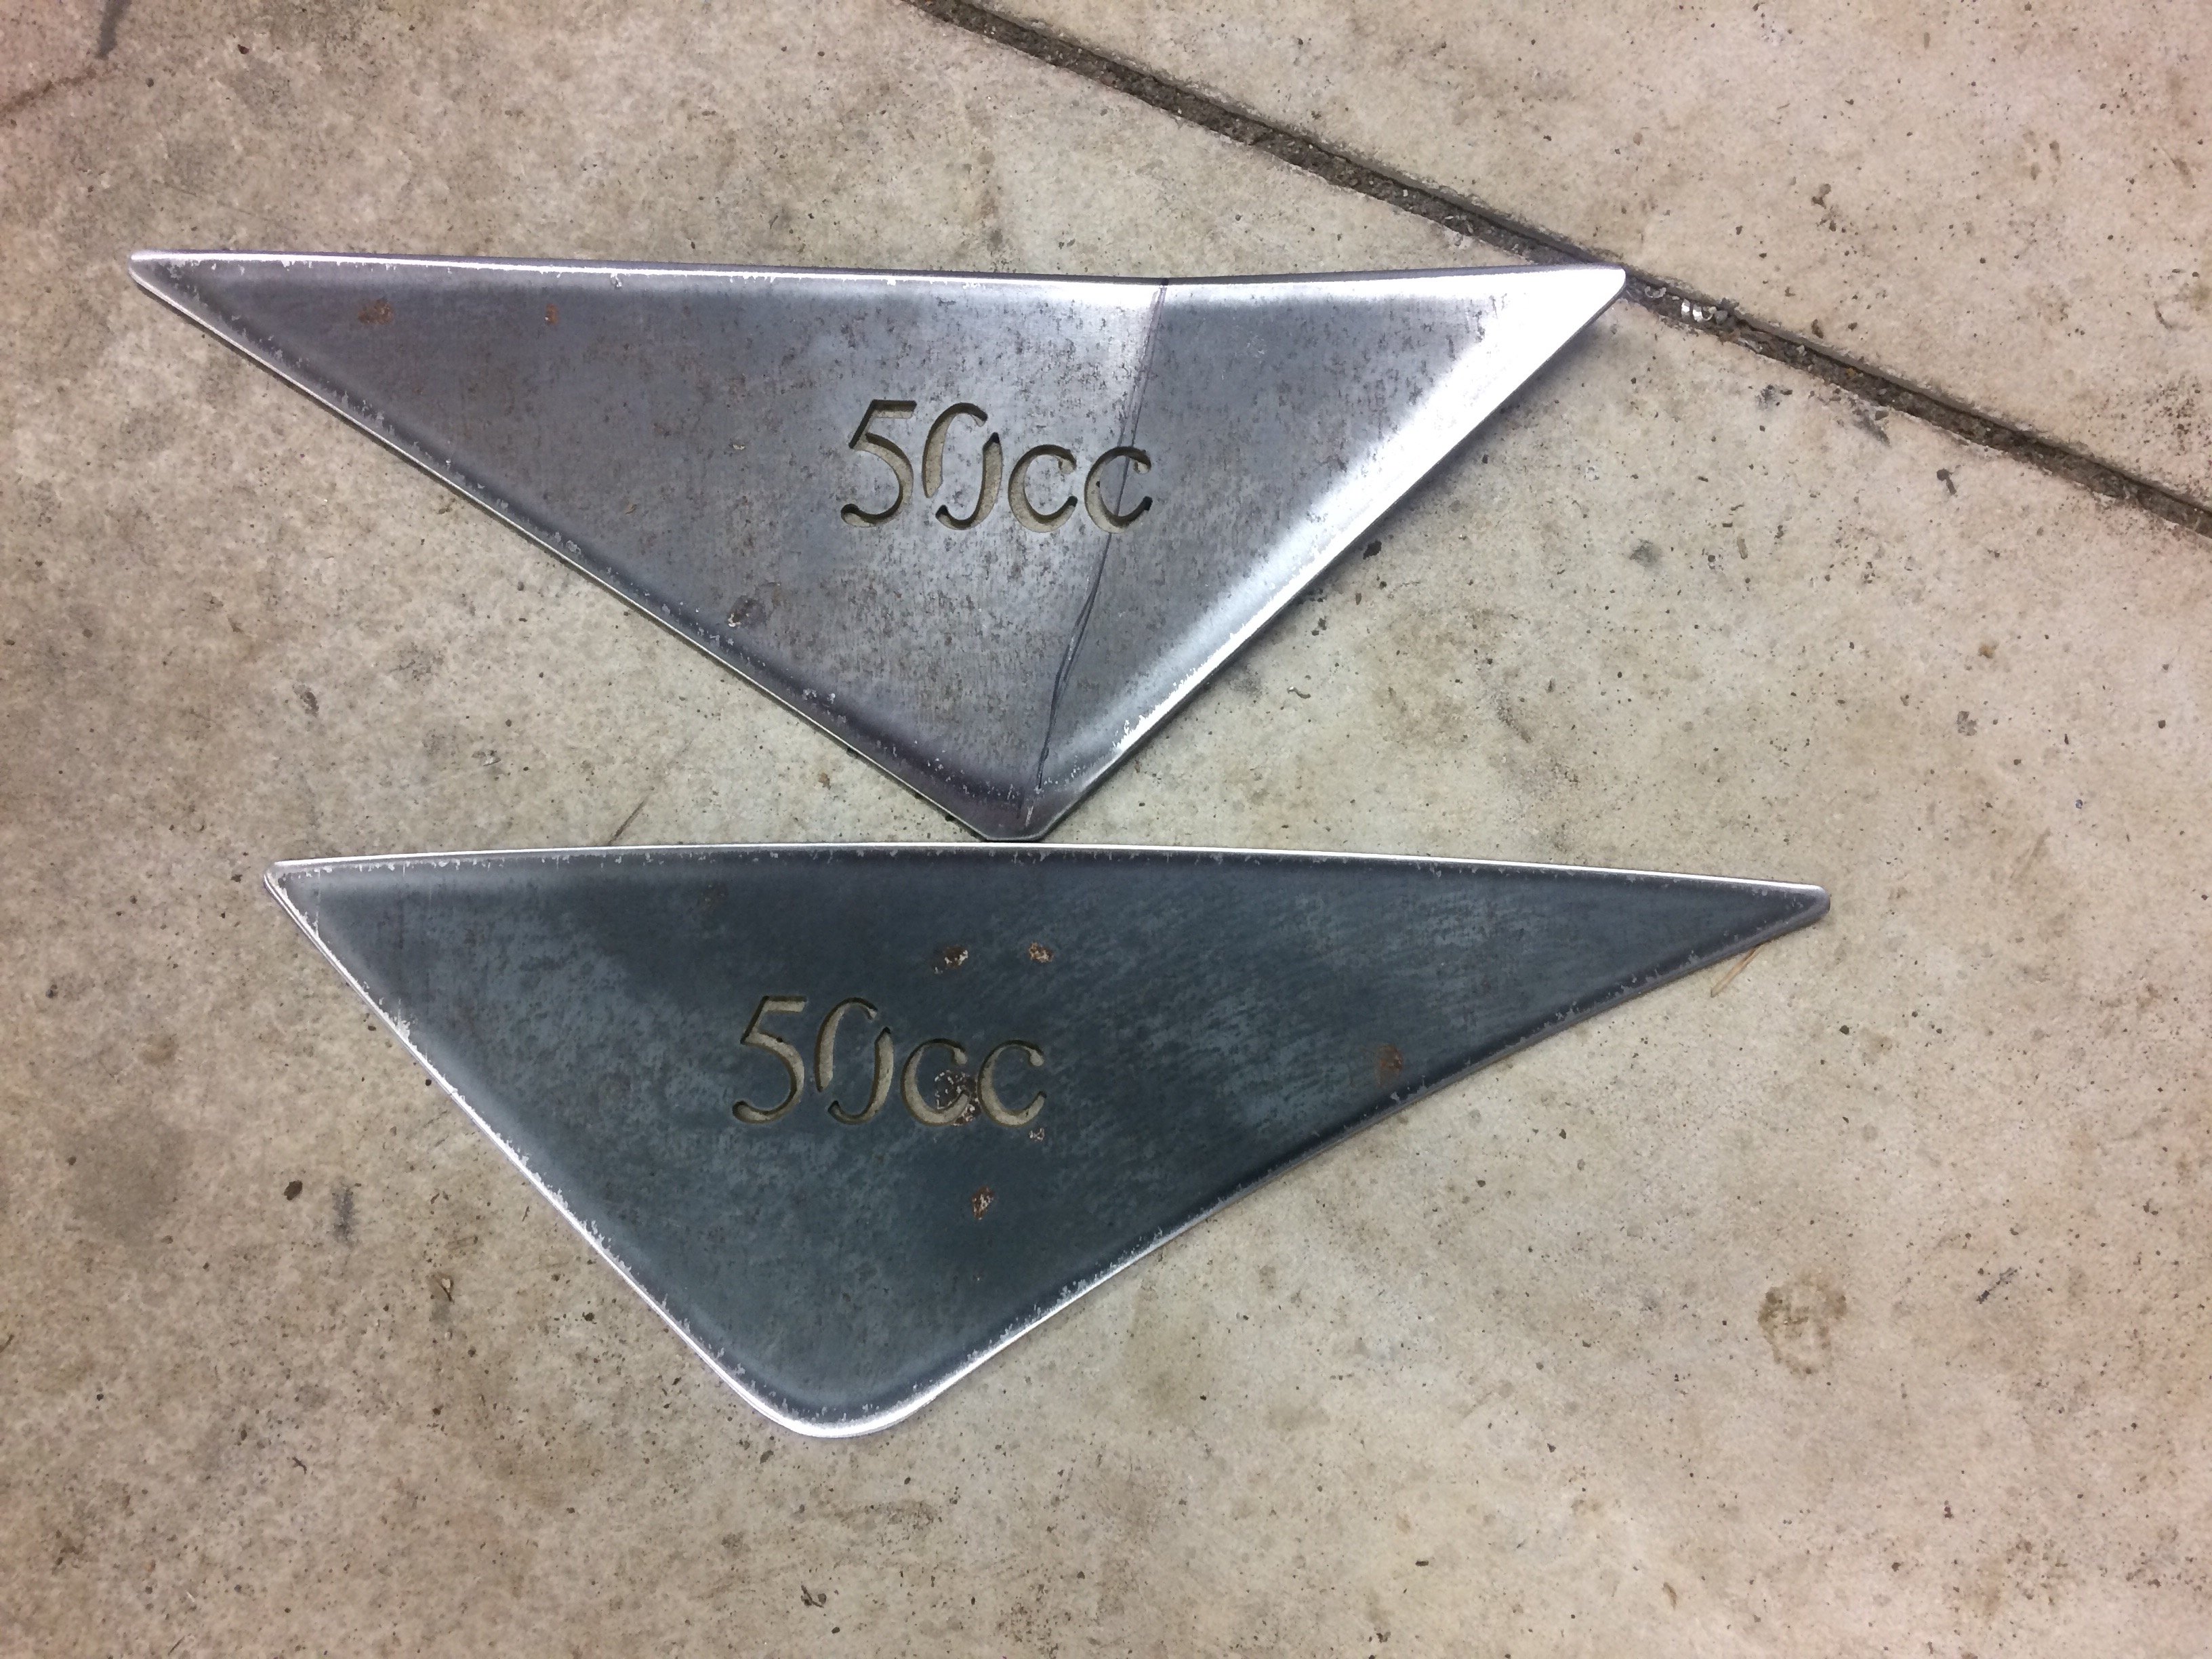
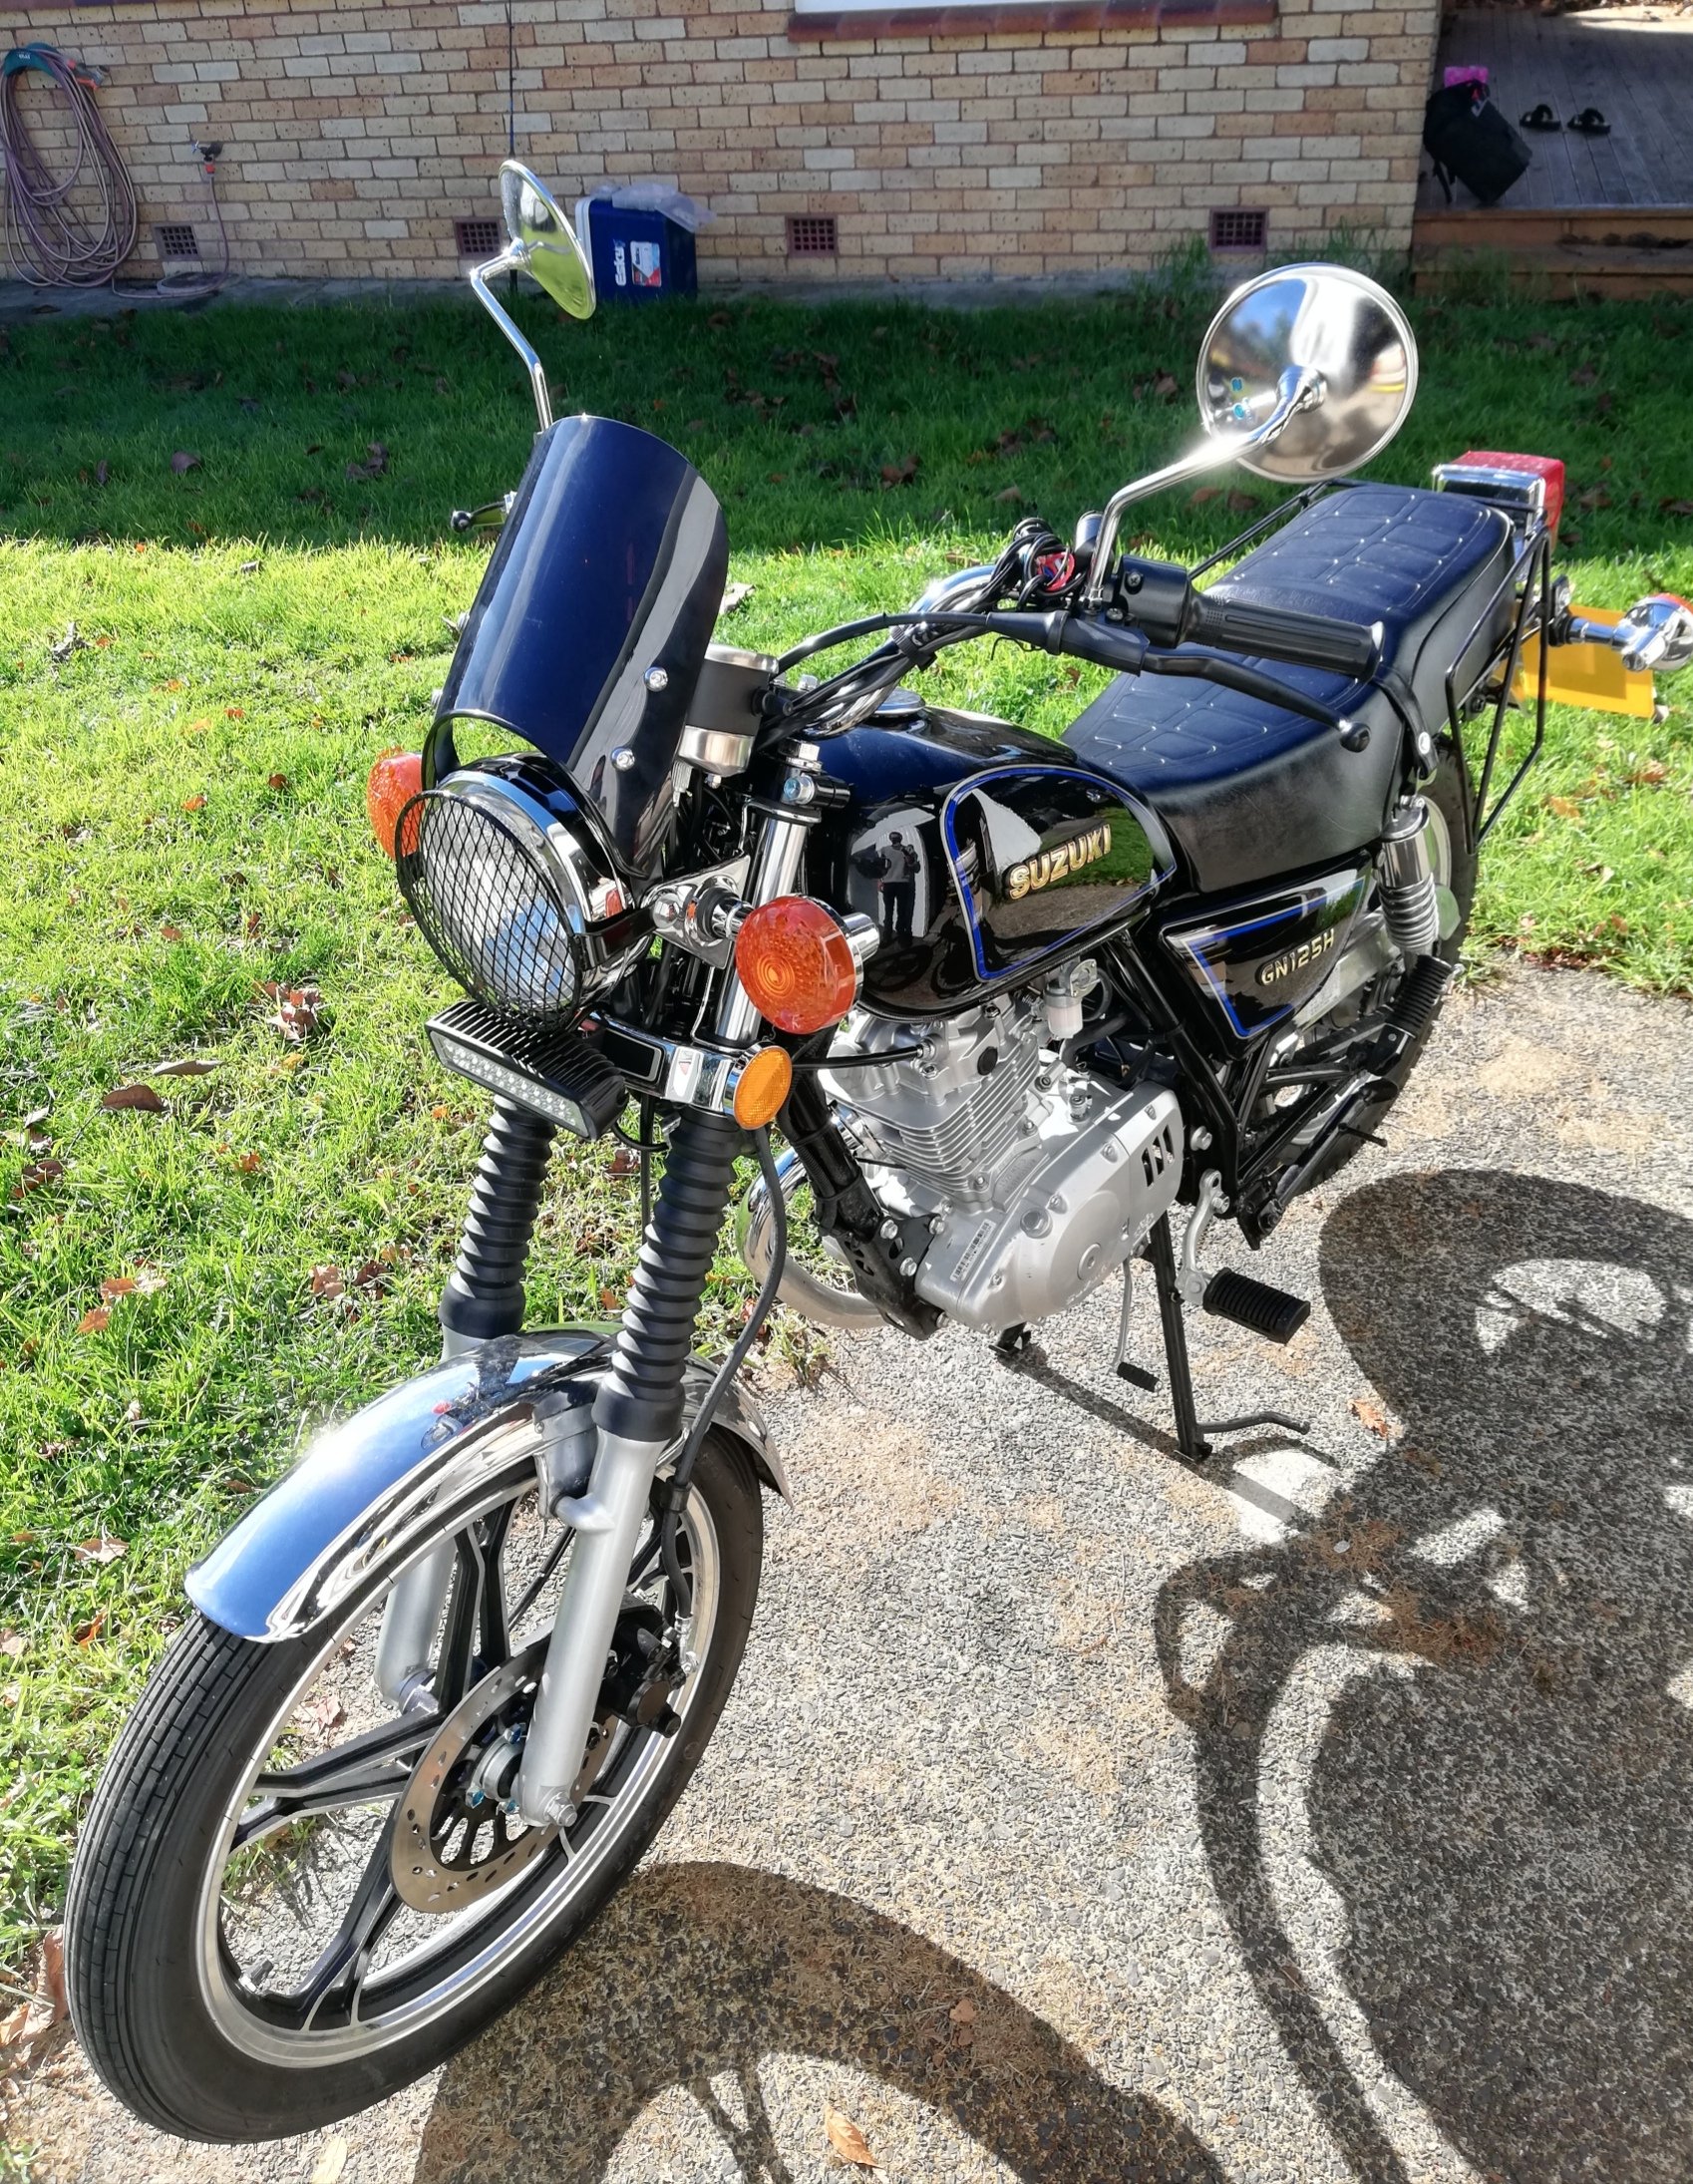
Sorry officer, you must be mistaken, I can't have been doing a 70kmh rolling burnout.... it's only 50cc? Look at the frame....
 9 points
 -
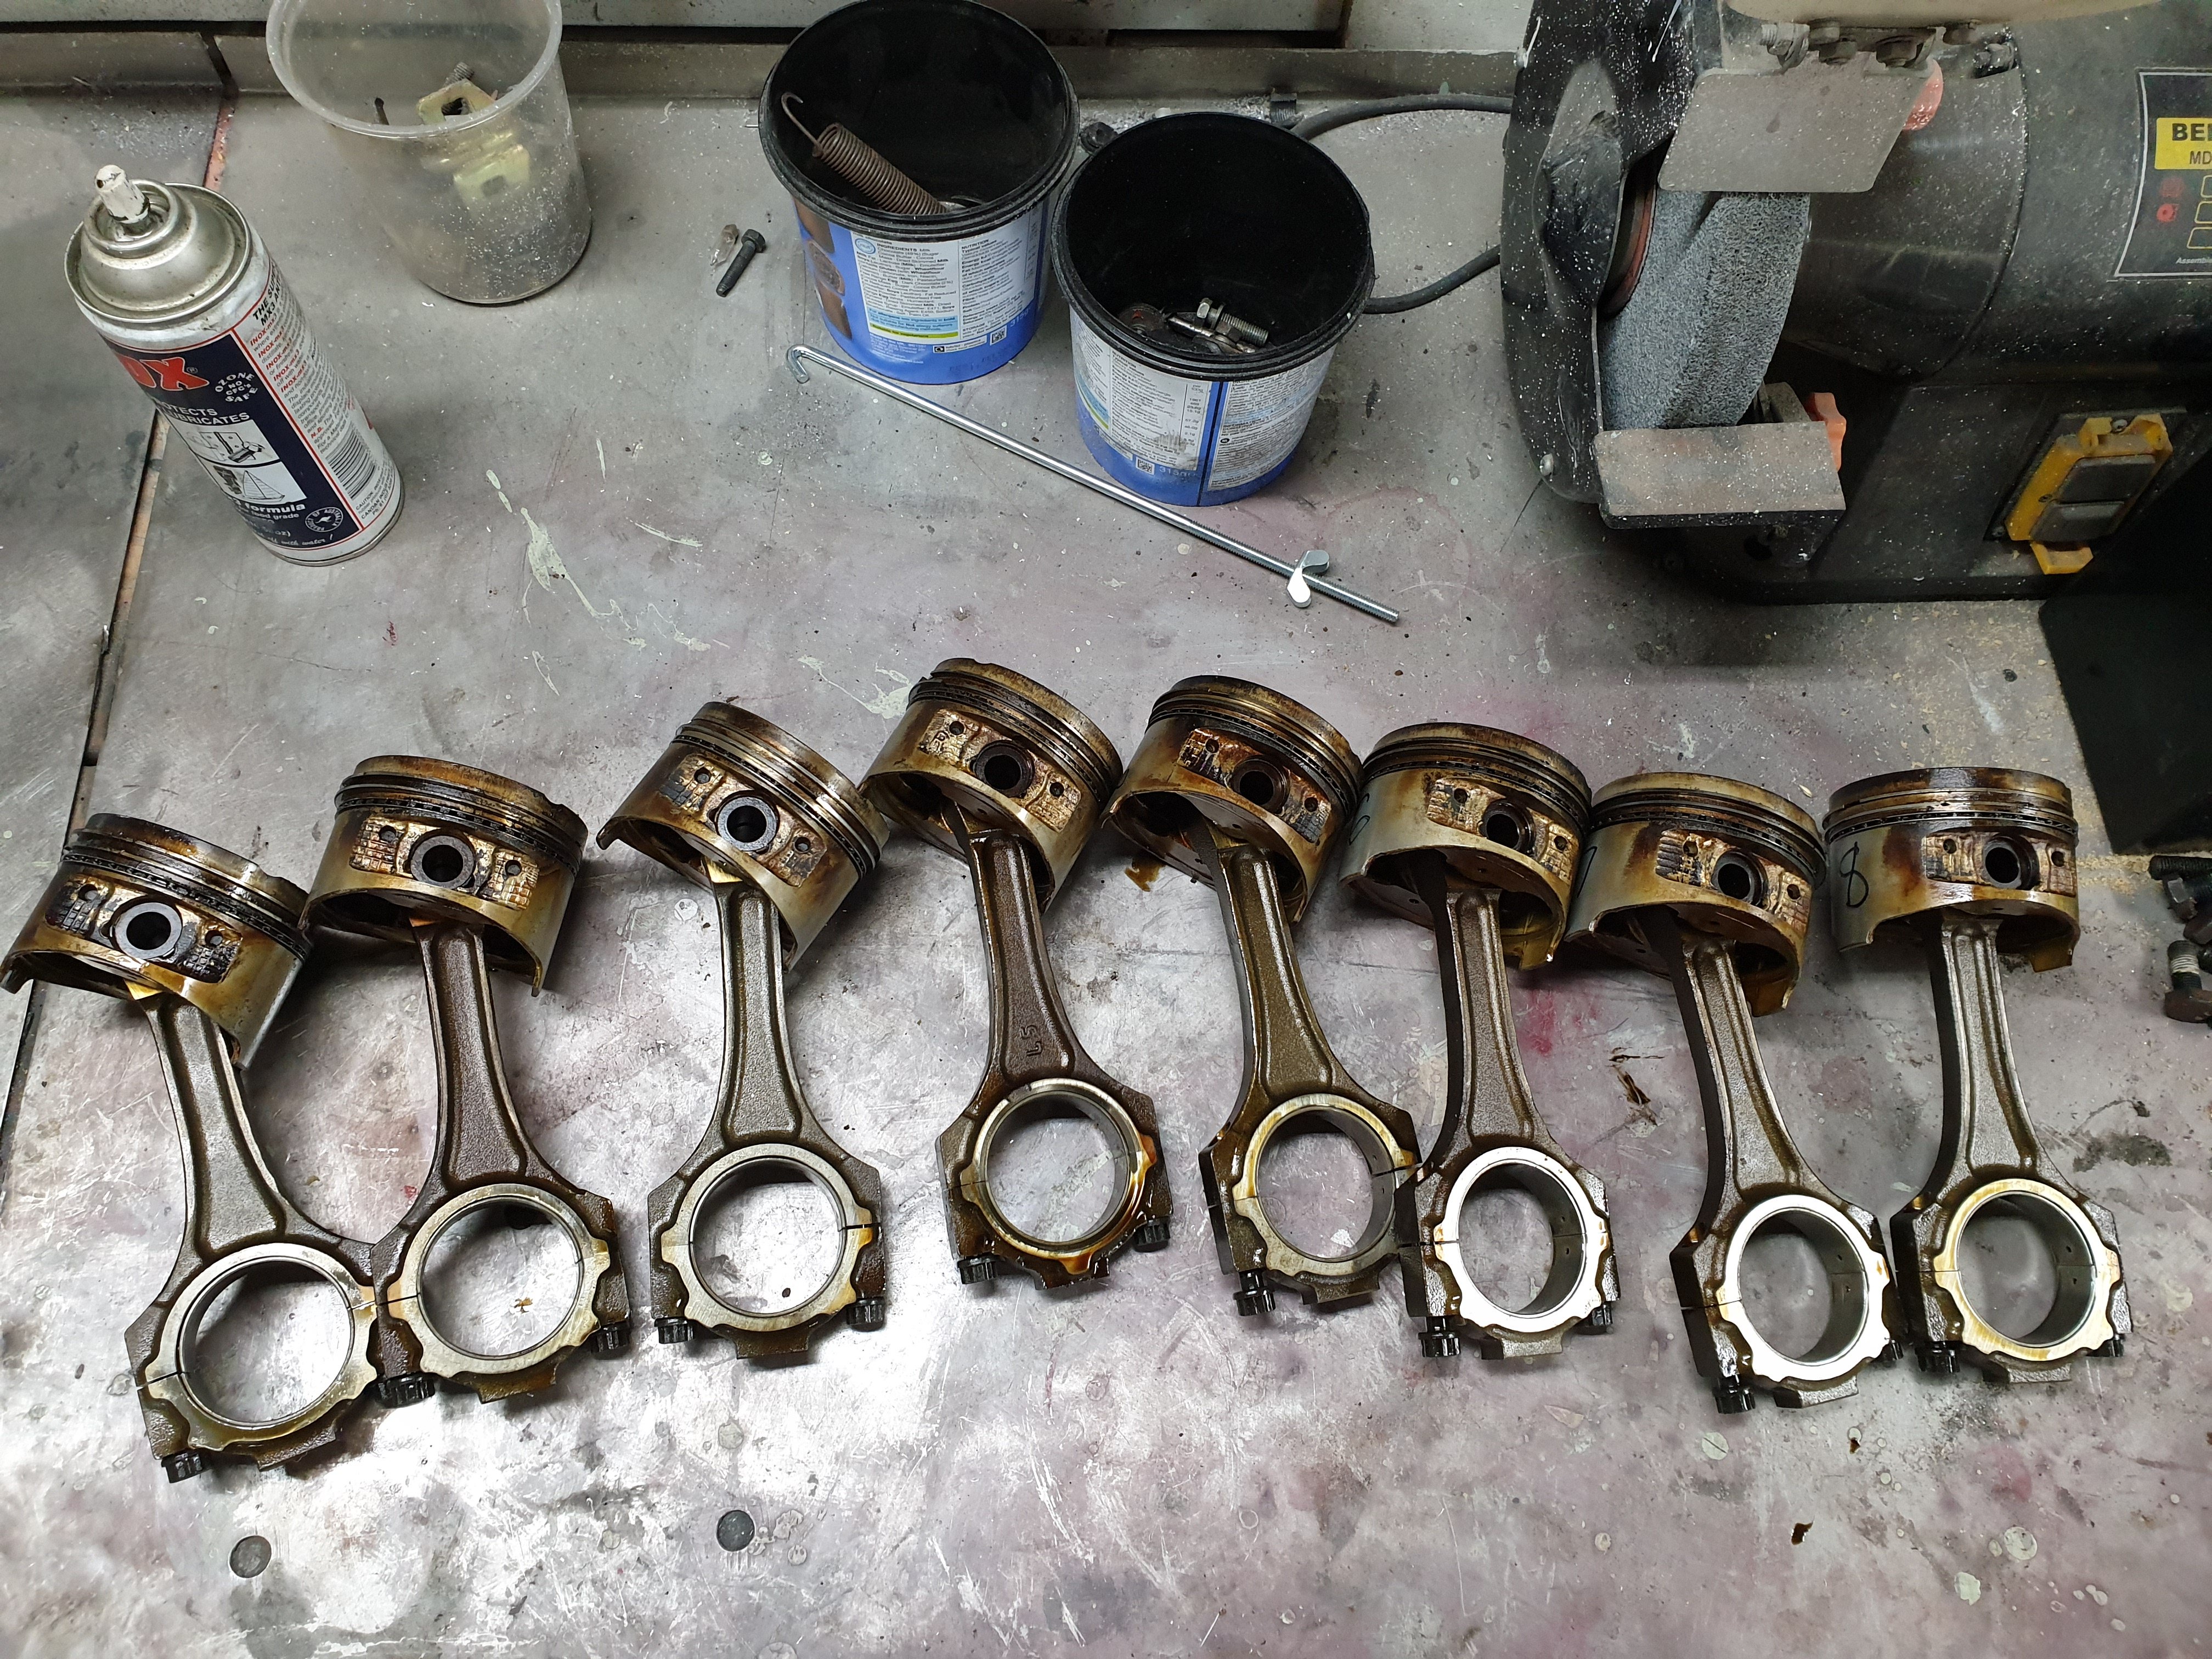
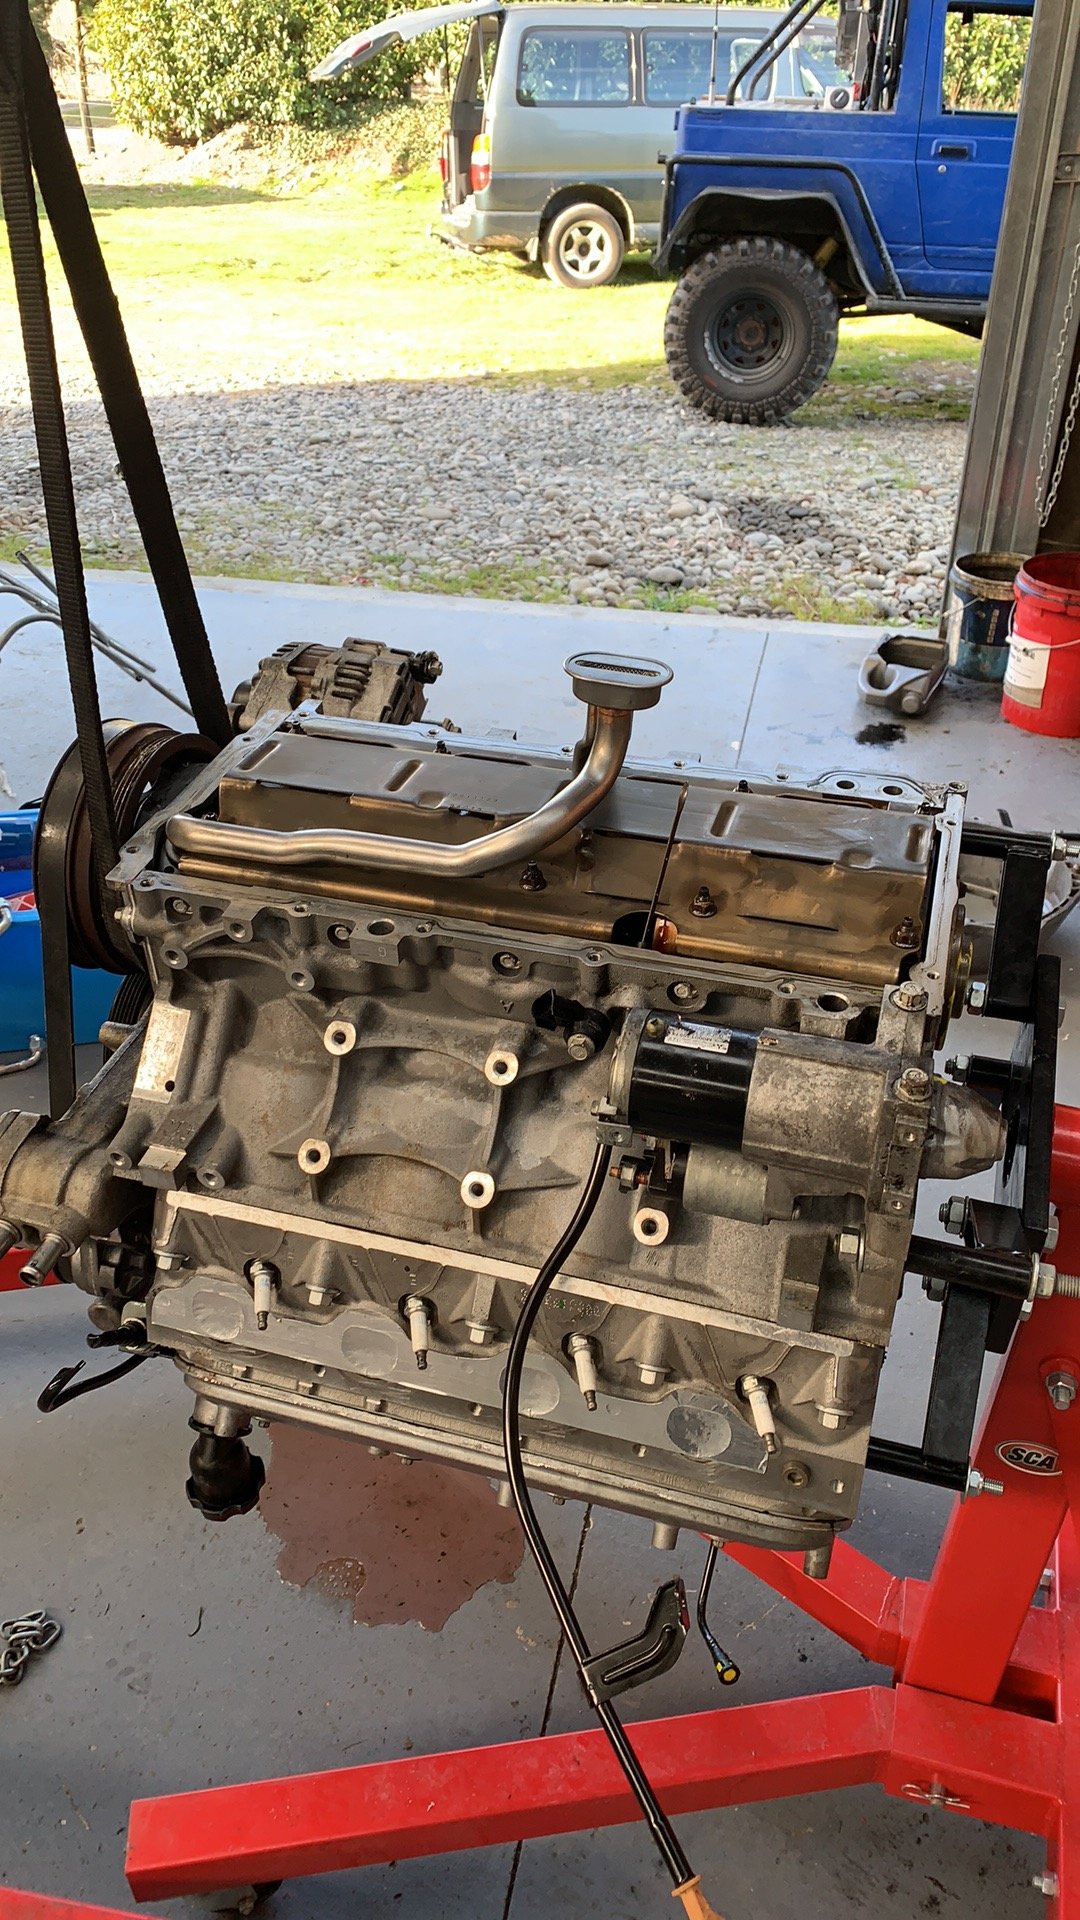
Pistons out of the block. Bores should clean up with a hone but we'll see and the crank looks like it just needs a polish. New eagle rods and Ross pistons to go back in.
8 points
-
this is one of OS's greatest threads. the four-wheeled equivalent would be to mod a Nissan Tiida with a 3" lift kit, muddys, lightbar and the latest Ranger running boards5 points
-
5 points
-
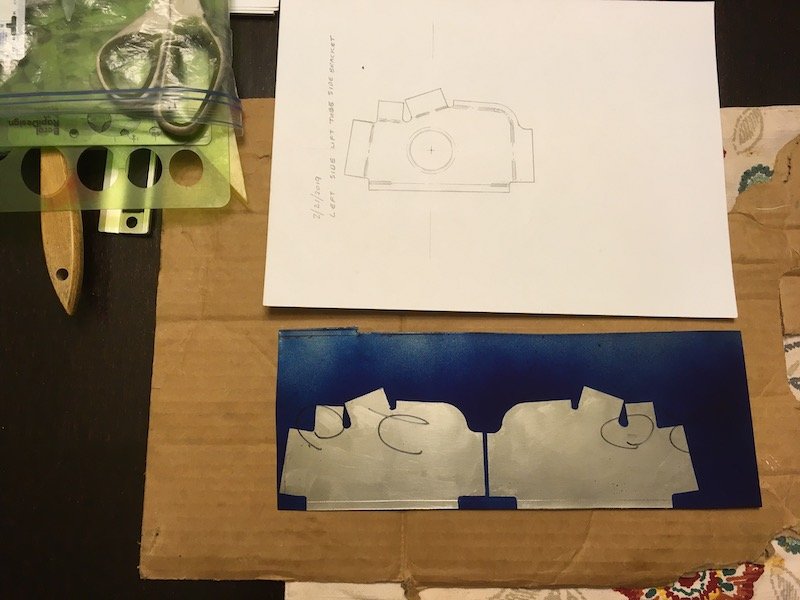
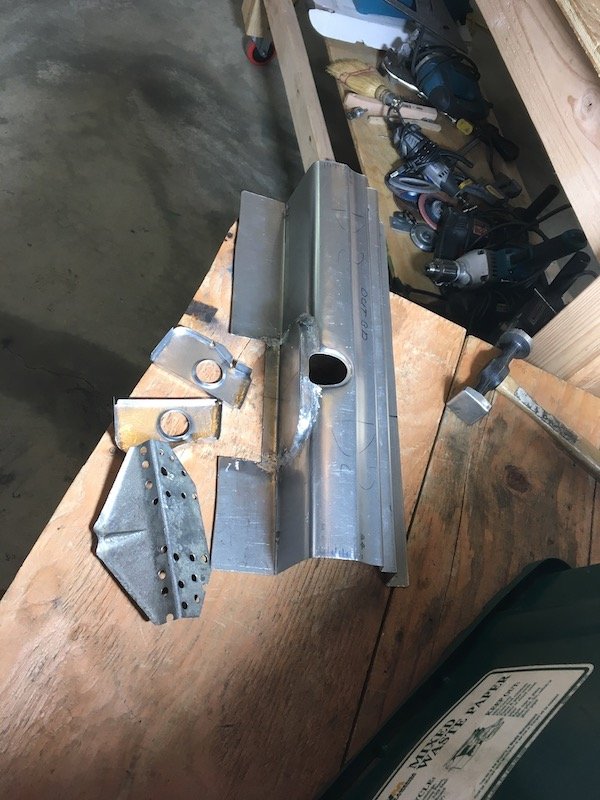
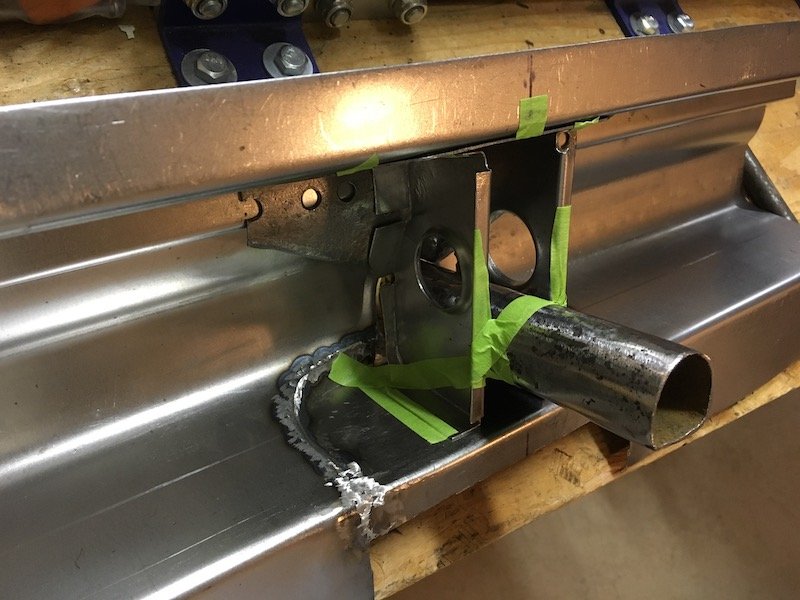
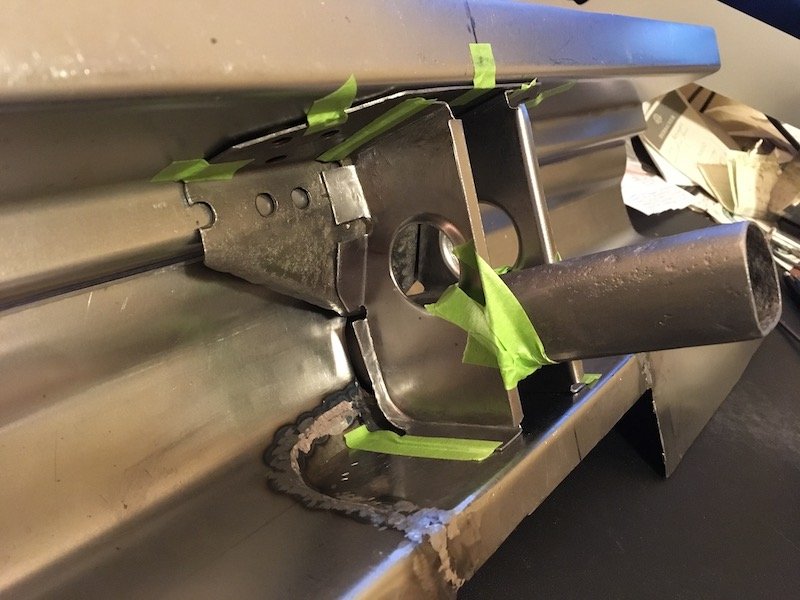
Continuation of the previous post with several more pics. The left middle/side patching of the rusted trans tunnel. As it started out with the fore and aft sections already tacked in. Made a patch to try and duplicate the existing contours and set an upper tape trim line. The black sharpie line was only a guide for torch heating the metal and asphalt undersealant on the other side to get it soft and scraped off. I didn't want my cutting tools getting gummed up. Cut the rotten metal out. Rubbish now. It would have been difficult to get a good weld against it. Cleaned up the surrounding metal. Did some test fitting to determine the trim of excess material on both ends. Final fit and ready for tack welds. Initial tack welds completed. With all the surrounding metalwork taken care of, I proceeded to cut the left hand side floor out. The seat mounting bracket will be salvaged. Same for the reveal or surround for the hand brake penetration. The underside. Planned underside salvage items include the long fore and aft 'Hat" section and body mount bracket. Other brackets are too badly bent, battered or rusted to be salvaged. There are four other simple flat or nearly flat parts that will be duplicated. I'll double up on whatever details are made to be ready for building the right hand side of the car. Never made a scratch built floor before, only patches and brackets. It's going to be challenge with the wide stiffening beads, elevation changes and 3D shape near the mid-body mount and rear footwell. No guarantee of success. Some random extra pics. Sleeping Bluebird with dreams of many road trips past and to come. I've now completely used up a four foot by eight foot piece of 0.9 mil thick sheet metal and need to buy more. Still got a long ways to go just to get the left side of the car finished. I'll post again later with more progress when I get the left side finished. It could be three, maybe four months or more. Discussion: https://oldschool.co.nz/index.php?/topic/60267-marts-pl310-61-datsun-bluebird-sedan/
4 points
-
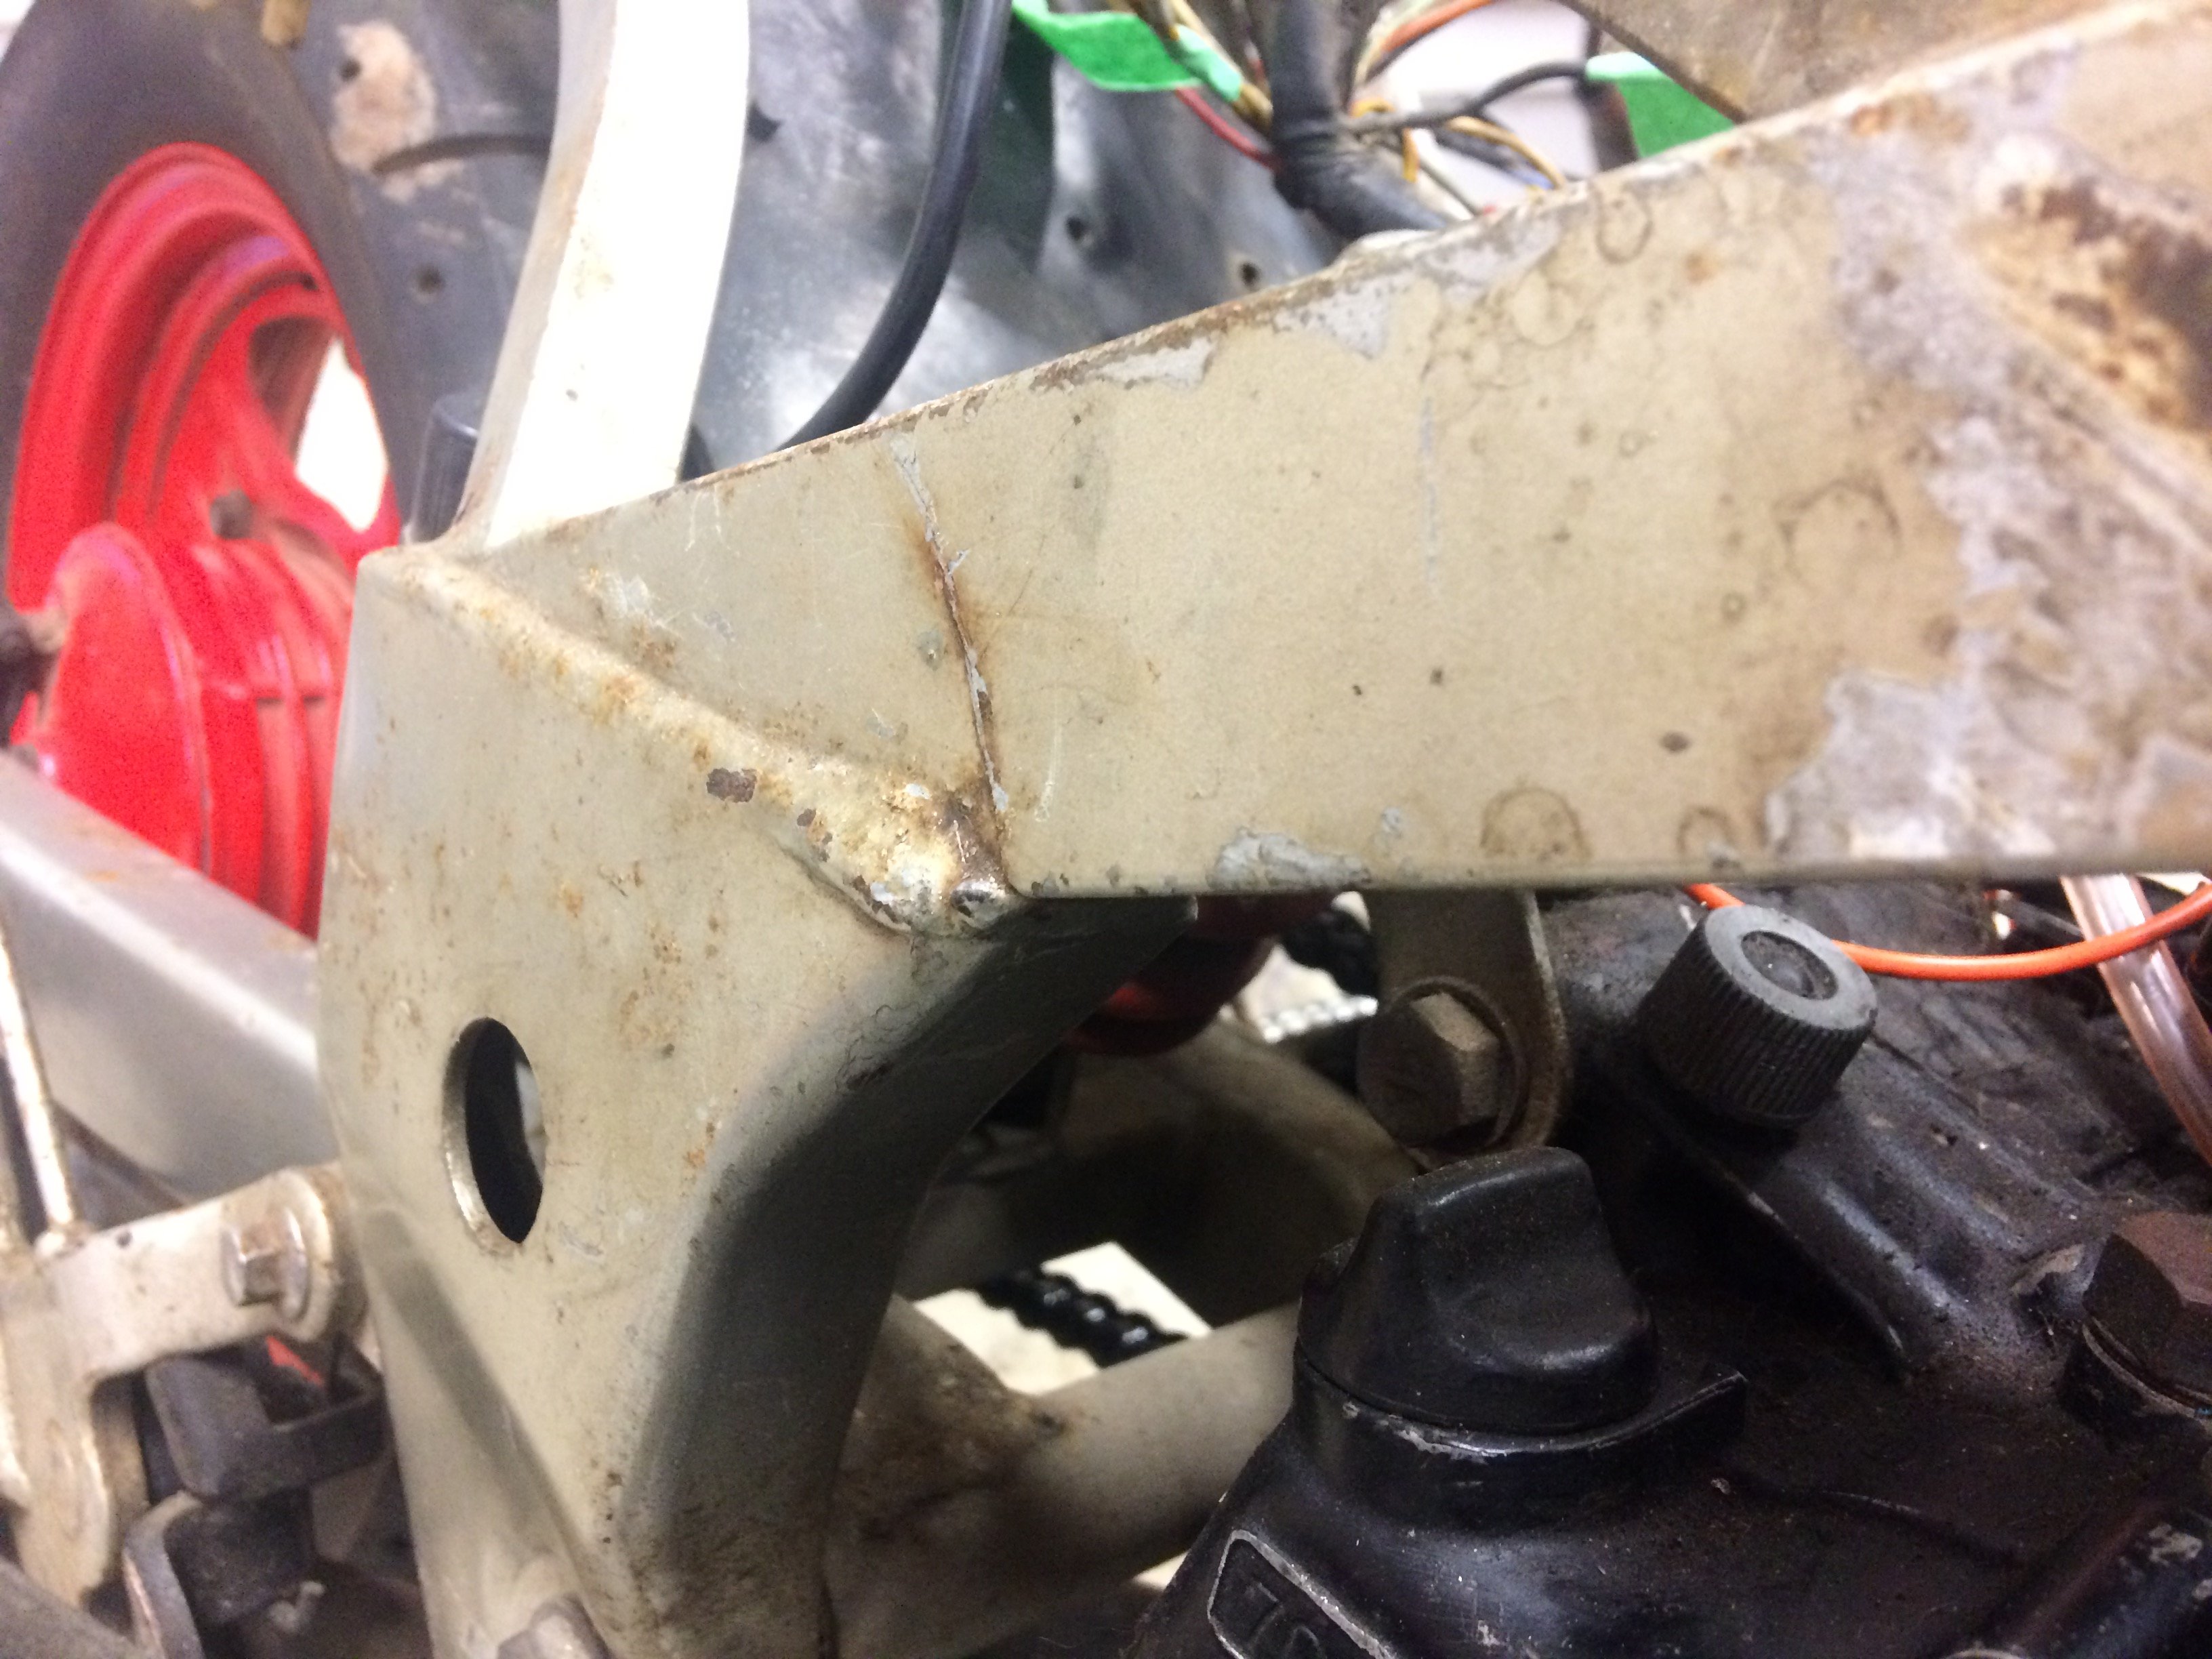
To avoid this, I've made up some frame gussets and doubler plates. She has also had a test idle and a stable voltage has been achieved.3 points
-
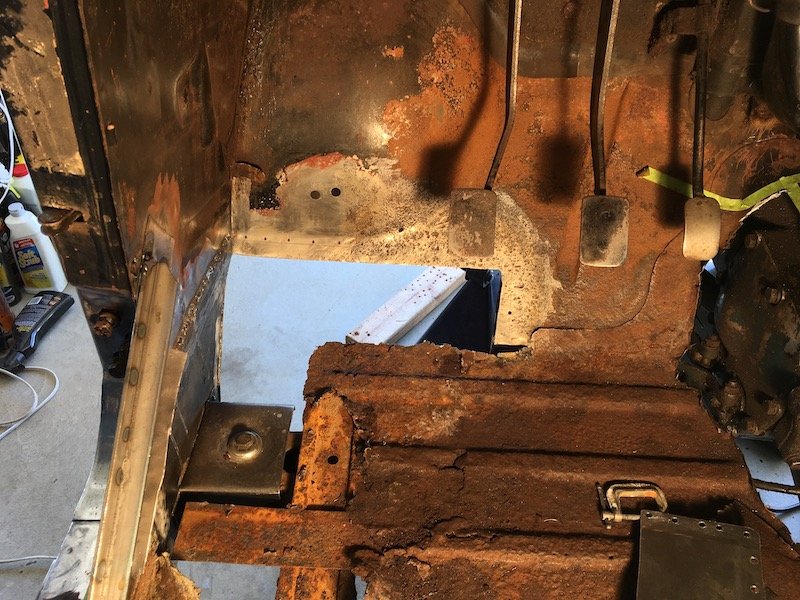
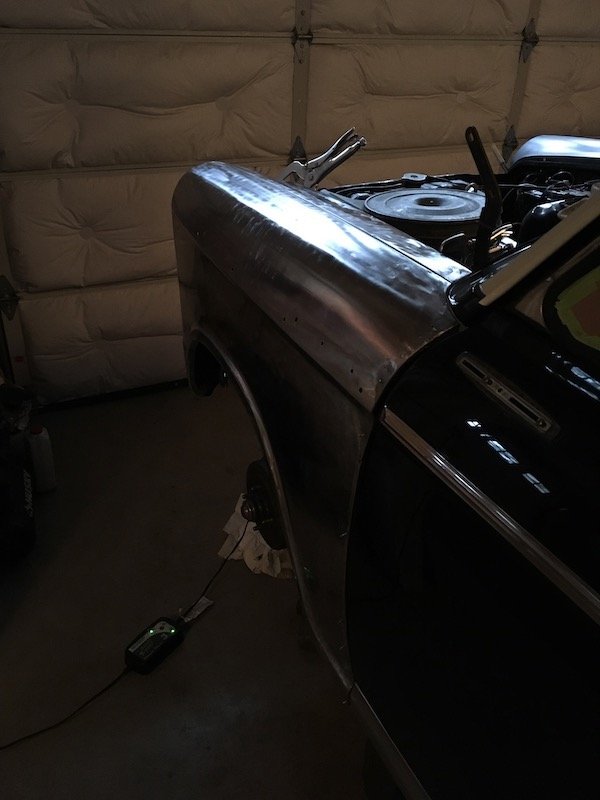
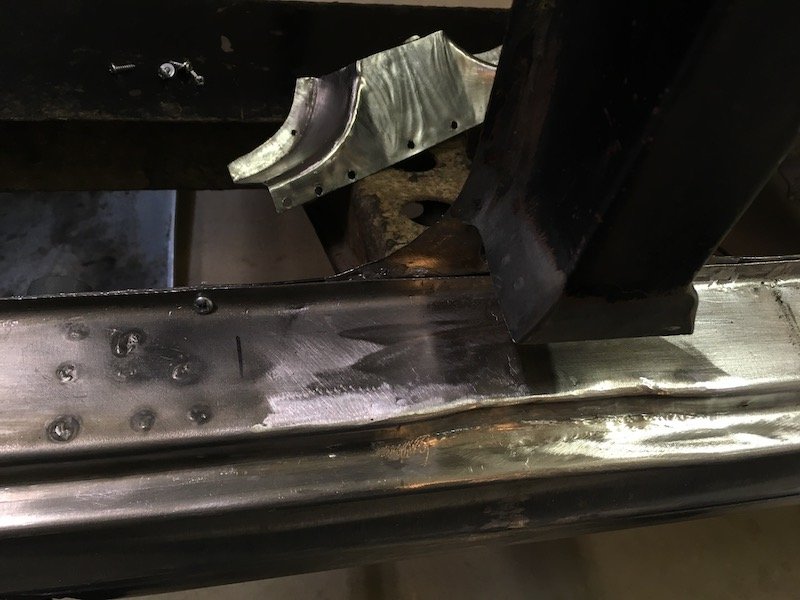
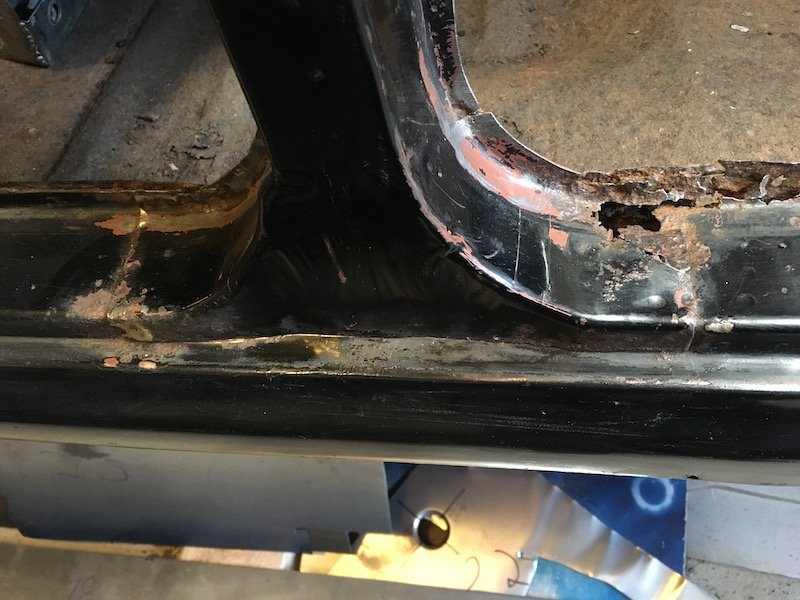
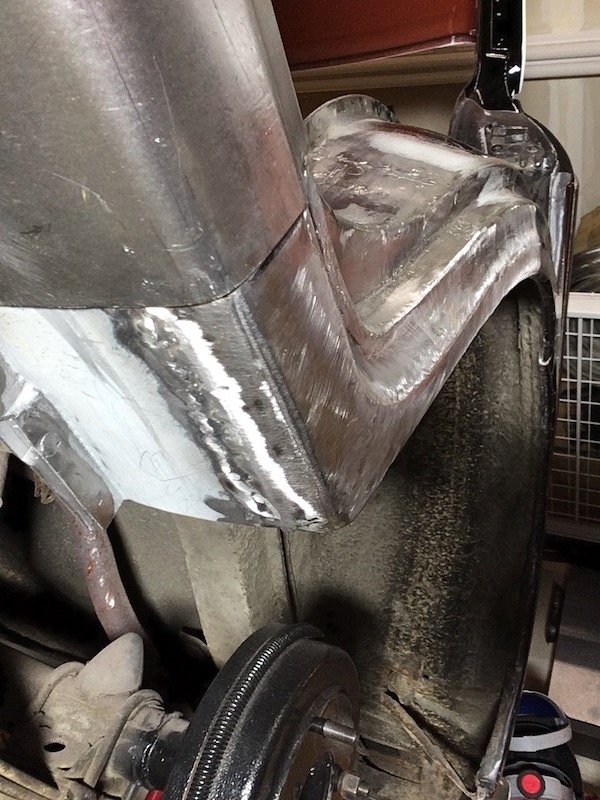
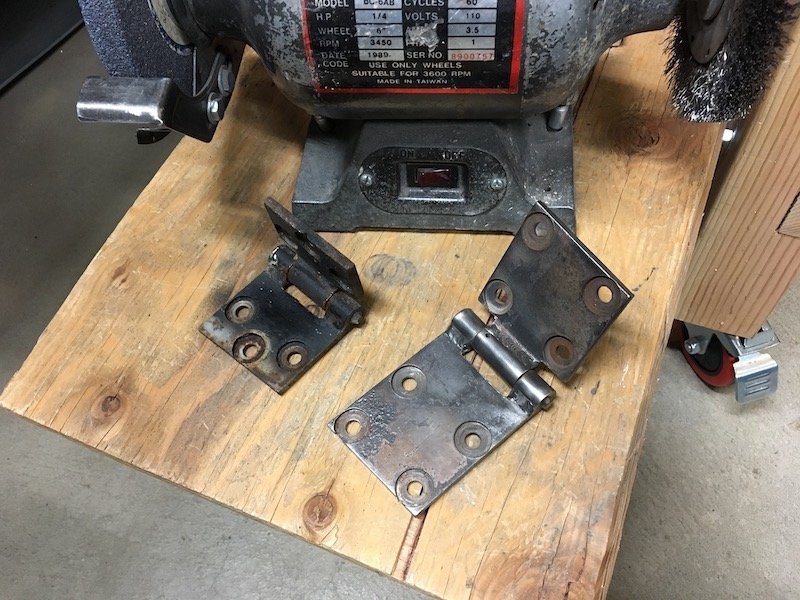
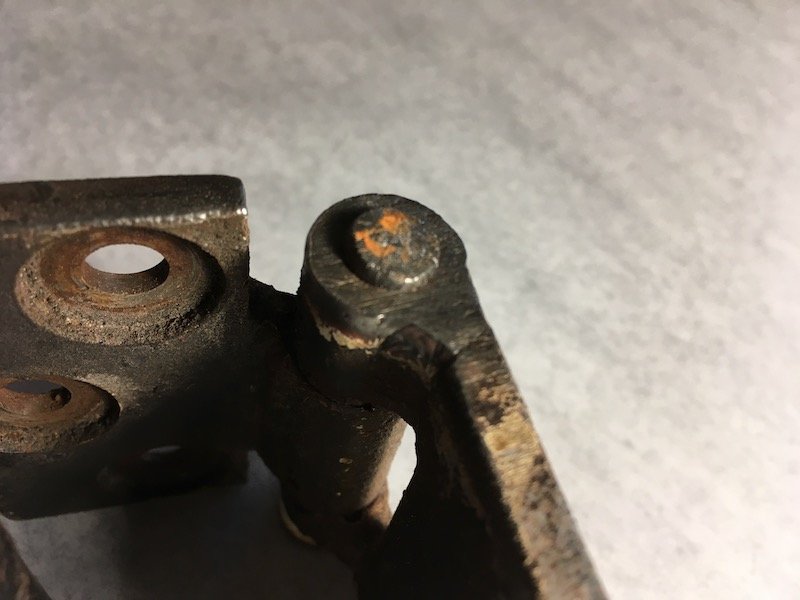
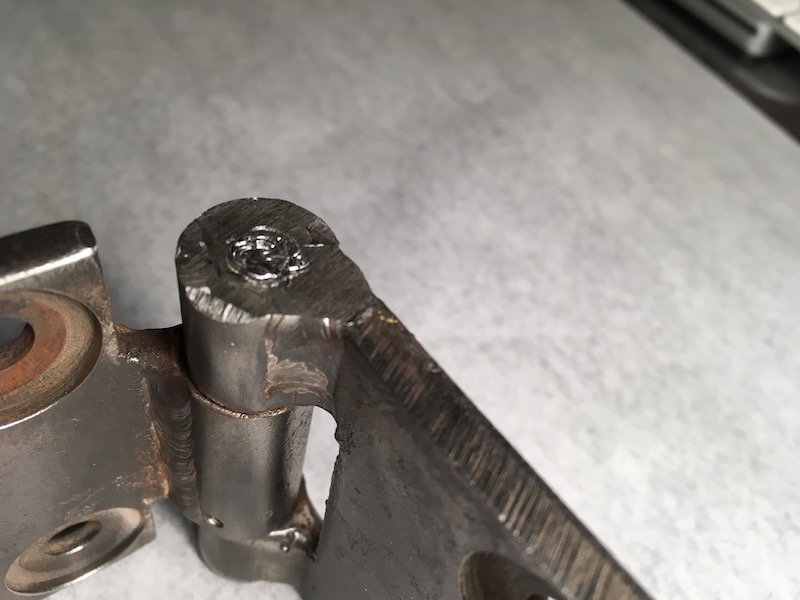
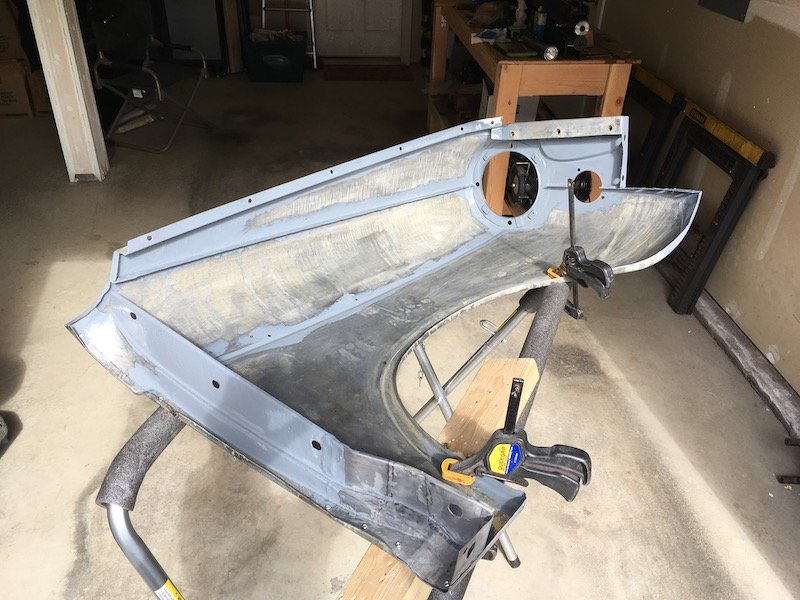
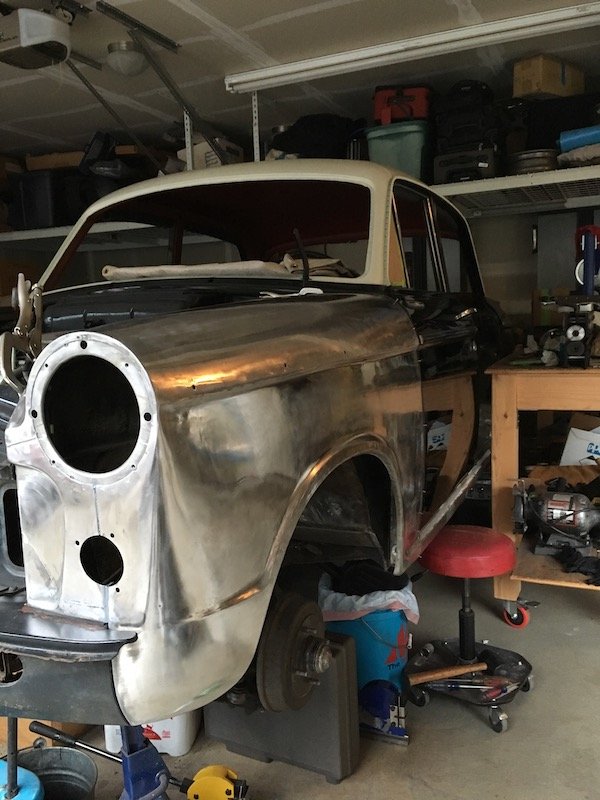
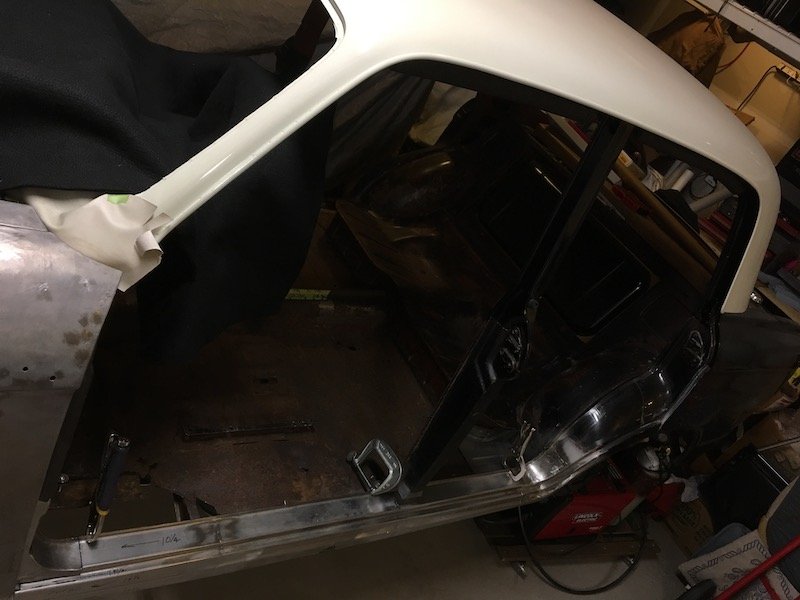
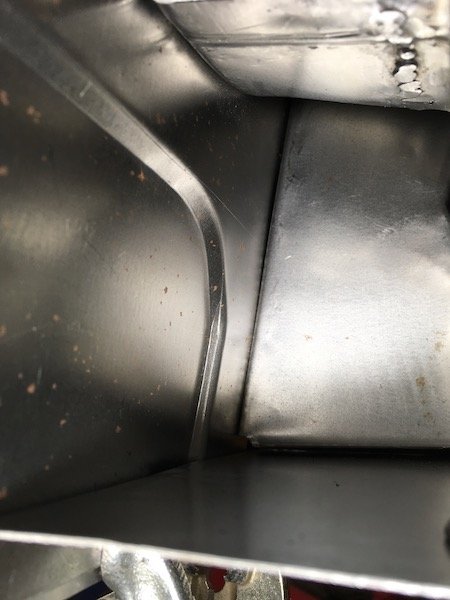
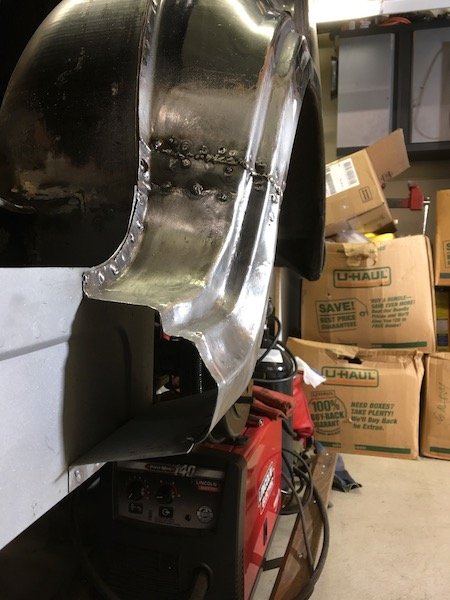
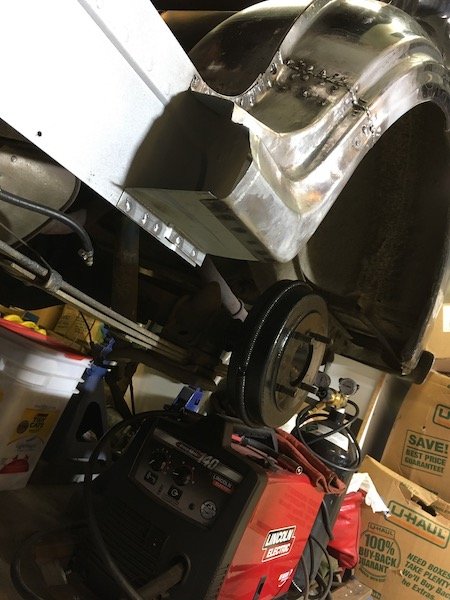
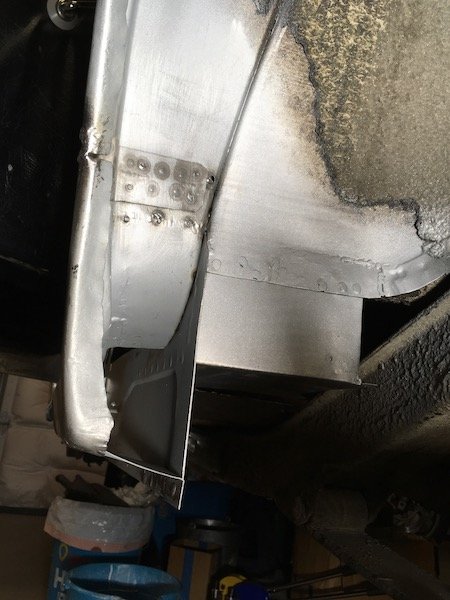
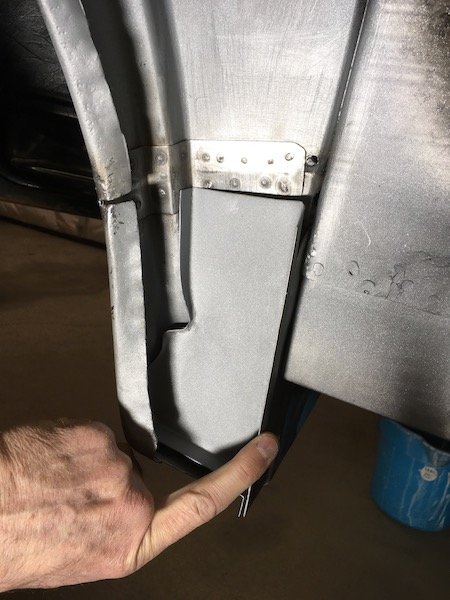
Catching up with progress today. Beware of this, my favorite tool over the last 26 years, the good old knotted wire wheel and angle grinder. Very handy but dangerous. Took a nip out of my flesh the other day. Ripped right through the glove. I should reinstall the guard of course. So I went to work by finessing the fit of the forward end on the outer sill by forming a lip on the end, making pie cuts and welding up the gaps. The objective to set it up for a flush contact with the A-pillar stub. Btw, the outer sill assembly will not be welded to the body until the floor is fabricated and installed so I can get a coat of epoxy primer over the resulting welds on the inside of the sill box. I've got it fastened with screws temporarily. Next, I had to make adjustments at the base of the B-pillar by joggling the upper surface of the sill inboard. Did this with some cuts, pushed metal in and welded shut. The top flange of the sill was originally joggled as shown in these left and right B-pillar base pics. Next I adjusted the C-pillar or dogleg. The bottom of which was tucked in way too far inboard. This resulted in an unacceptable mismatch with the outer sill profile. So I cut a slot in the bottom plate and welded in a 1/4 inch strip. Then had some fun time buffing out and polishing the now 42 year old repaint job on the doors. Don't ask why, I just did it on impulse. The doors do need repainting but it does not show that in the pics. I wanted to rebuild the hinges to make sure thing are fitting correctly. I grabbed the hinges off the right front door to experiment with. It did not go well with my attempted pin removal methods. First I tried pressing the pins out with a hydraulic press but it just began mushrooming the pin. Same for the big hammer and drift pin technique. And yes, I was pushing on the correct (not splined) end and supported the hinge properly on the other side. It looks like the pins will have to be drilled out. I'm not going to do that with a hand drill and not without sourcing new pins and bushings first. It appears I'll have to send them in for rebuild at a shop somewhere. Before I pushed against this end of pin Fail Fail Then worked on the left front fender some more. Welded the two halves of the aft inner vertical structure together with a lap joint for a rigidity. Cleaned, acid etched and painted rust scarred and pitted areas on the inside with POR-15 gray. Polished the outer surface with 3M scuff pads on the angle grinder to help see the waves and indentations better and work it smooth with hammer, dolly, rubber hammer, etc. I'll weld the inner structure to the fender once everything is coated with epoxy primer. And finally I set about repairing a bunch of damage on the trans/driveshaft tunnel. This 310 Bluebird has had the wrong transmission swapped into it back in the early 80s. The original trans wore out the 2-3 shift fork and this spare unit was installed but would not fit. So the side of the tunnel got torched out and it was made to fit. There is a huge difference in size between the two trans. The all synchro trans is a side loader, which is not only much wider but also longer. The original 310 trans is a top loader. Anyways I had to fix the gapping hole and make it adaptable to either trans since I still have the original and it is repairable. Then I went on to replace the aft section the covers the driveshaft. Then patched the rusty area midway between the other patches. All is just tack welded for the moment. Pics below tell the rest of the story. Below pic is looking up at side loader. The original 310 top loader trans. Above pic. It was no fun trying to do those three plug welds upside down. Notice the parallel hat section reinforcement structure or beams running fore and aft, I don't think these were installed on later 312 Bluebirds? Looks like I hit my maximum upload limit here for this post, and it is a late work night. Plan to catch up on the remainder tomorrow. Discussion: https://oldschool.co.nz/index.php?/topic/60267-marts-pl310-61-datsun-bluebird-sedan/
3 points
-
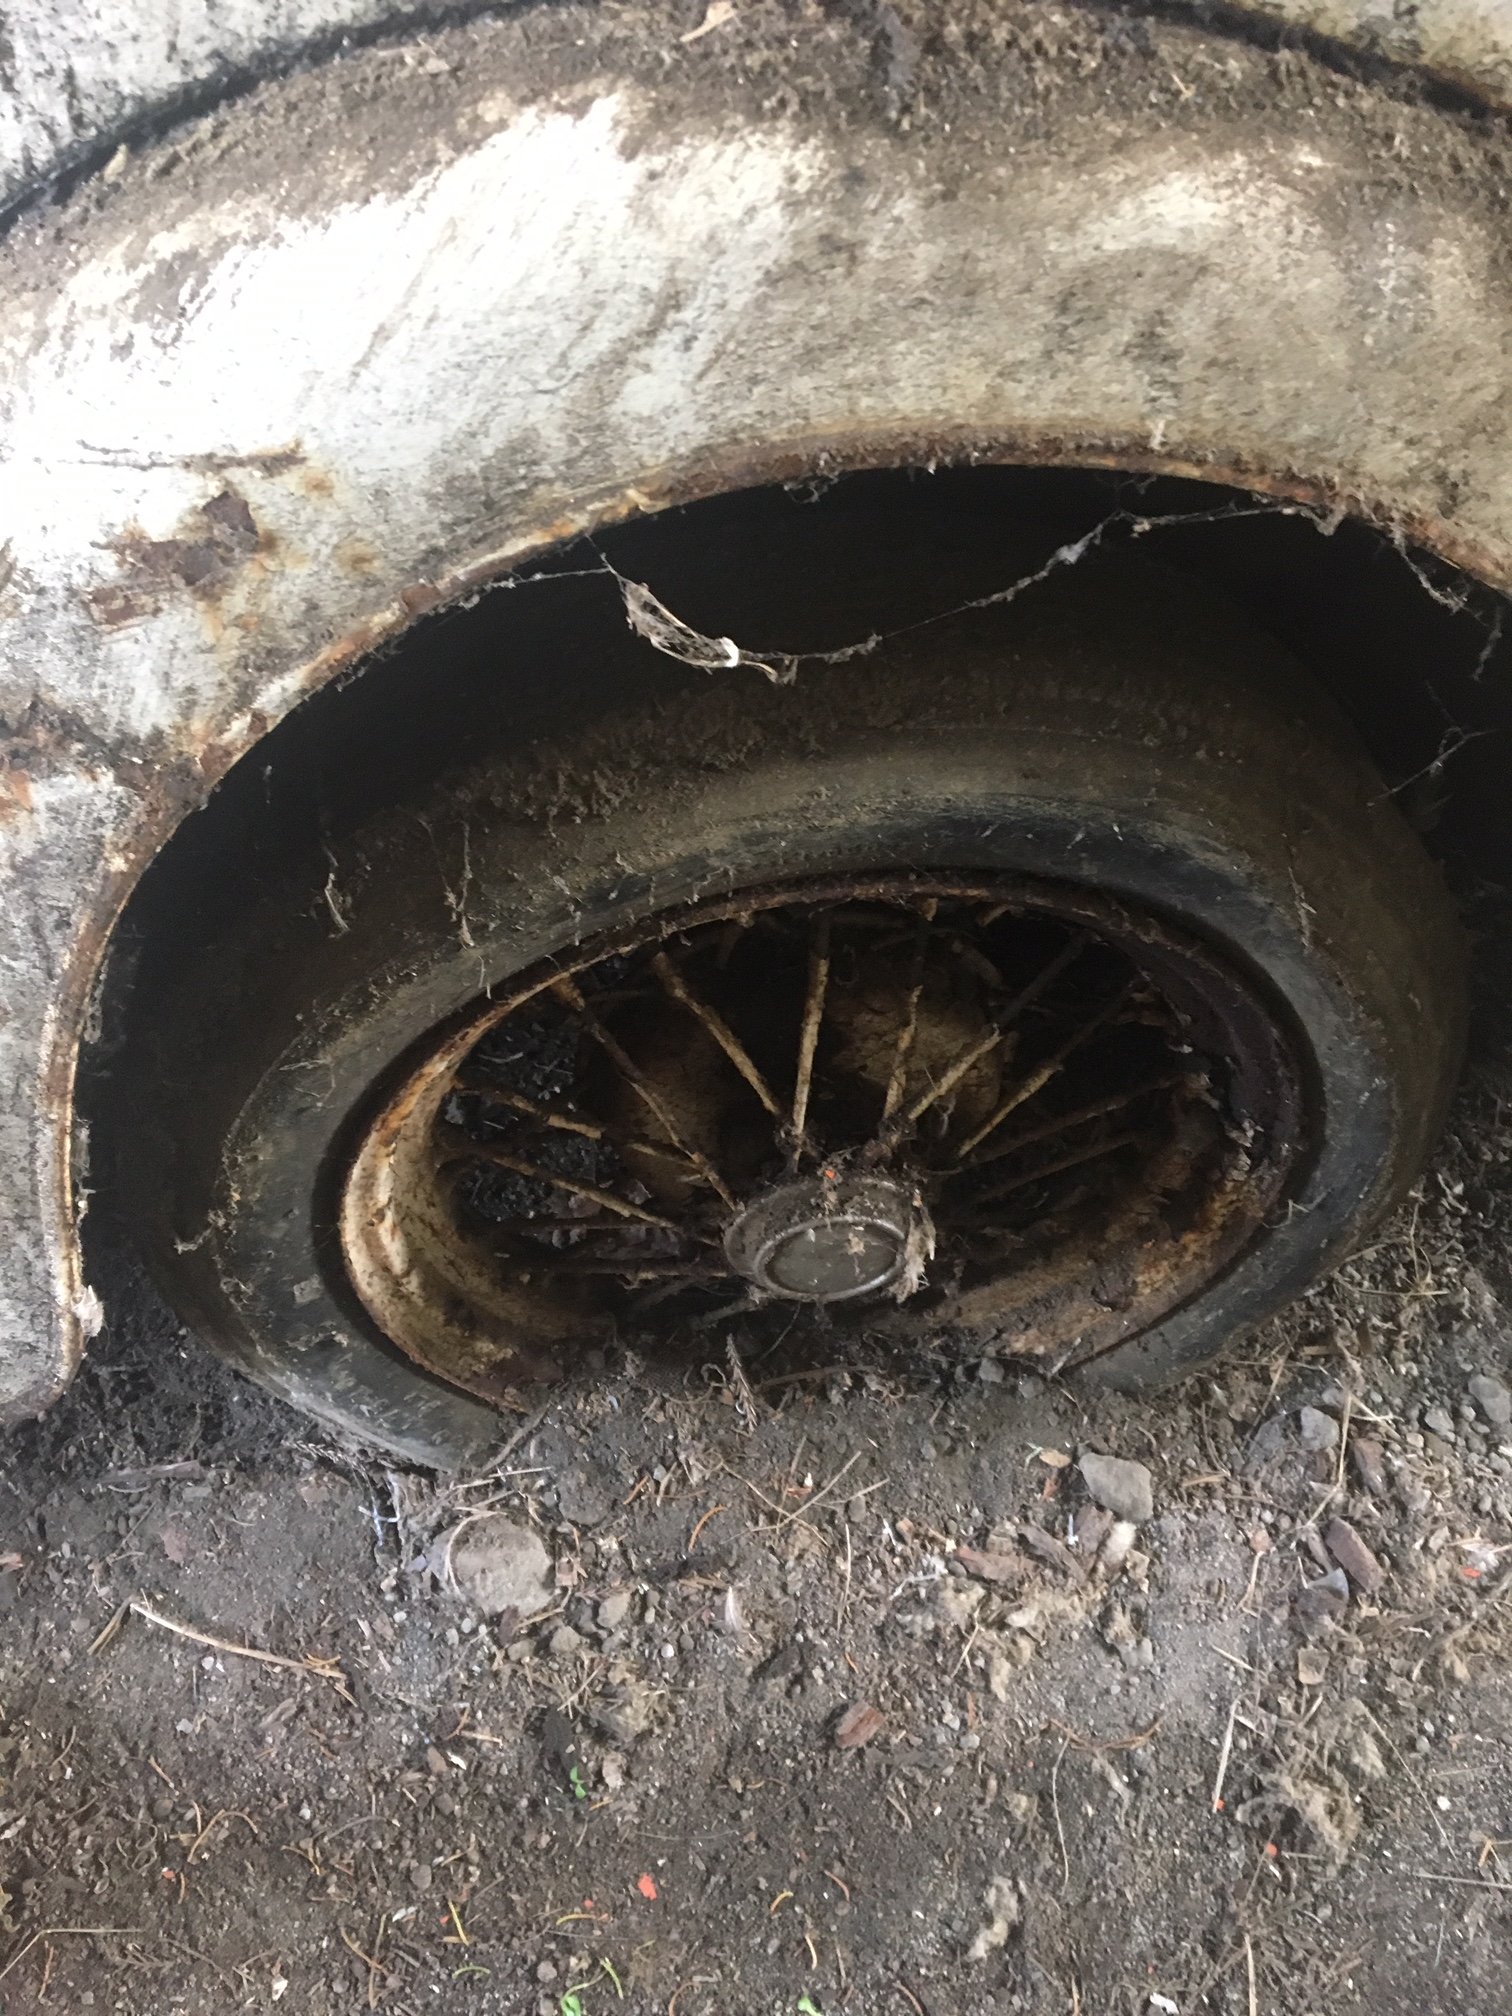
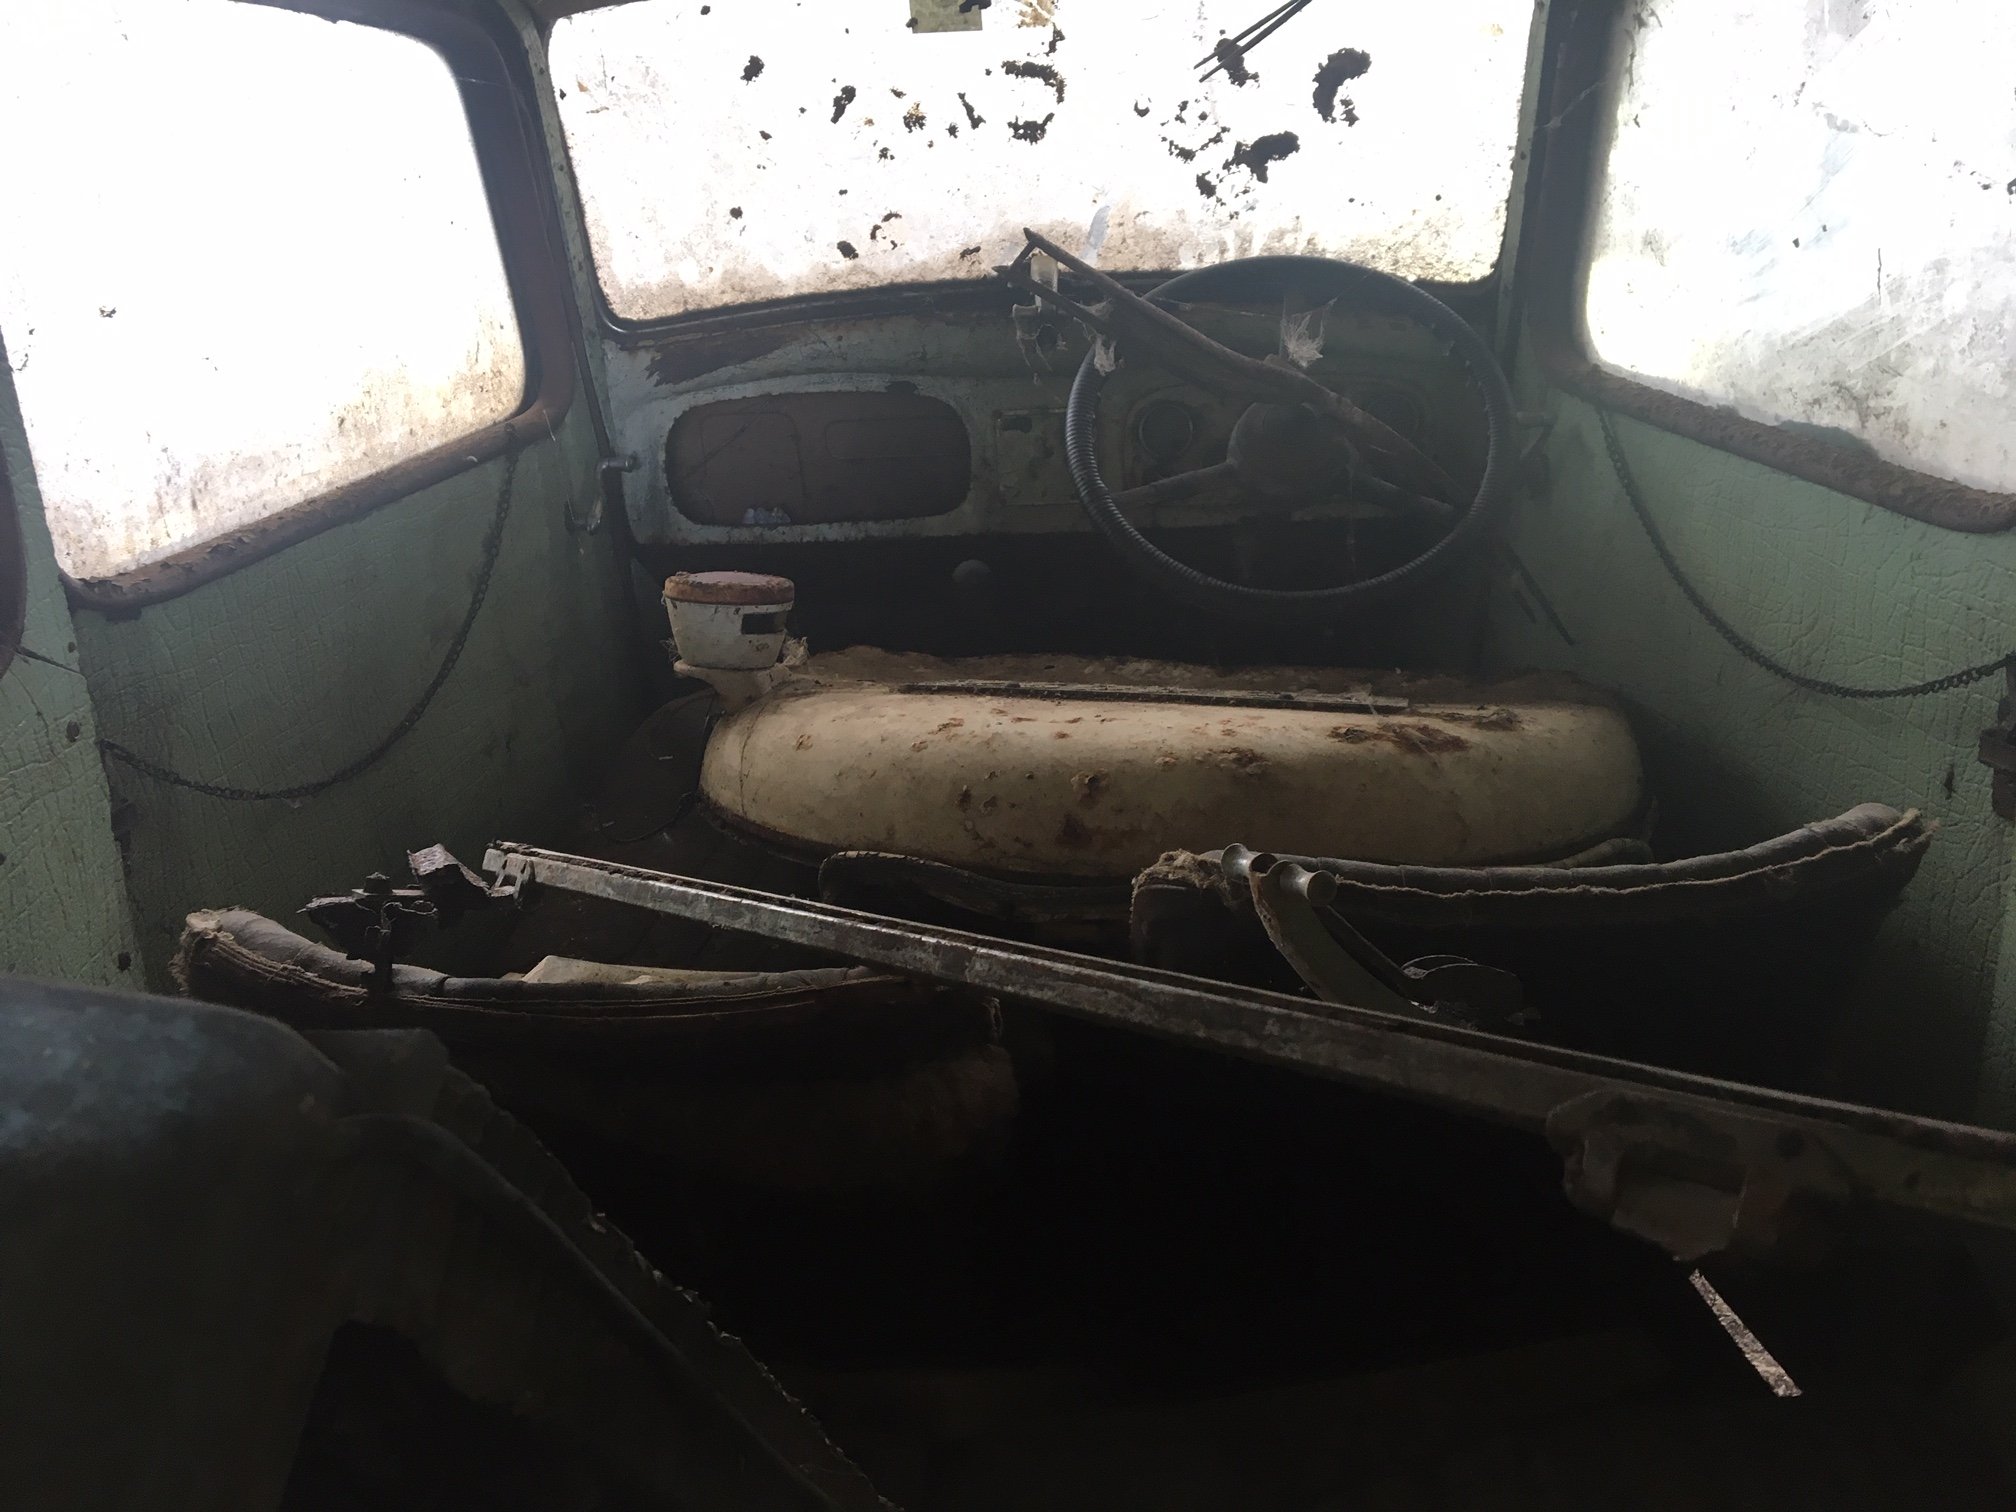
So I started to hatch a bit of a plan. Retrieving it was going to need a decent plan, the poor thing has been parked there for nearly 50 years and had literally started to become one with the earth. I started a tradme saved search for "Austin 7" just to see what kind of stuff came up. I scored a good set of wheels, and then some tires that were just round the corner from home. So armed with knowing that I had decent rolling stock, it was time to start seriously thinking about uplifting it. From the limited access we could get, the underneath of it was looking pretty rusty, so we wanted to be very careful about what we lifted off/pulled on to get it out of the shed. The plan was to put some box section through underneath it from one side to the other, and jack up the box section lifting the car on that. I was going to get it high enough using that method to then wheel the trailer underneath and lower it back down onto the trailer. Lets face it, its been 50 years, those wheels aren't going to turn...
3 points
-
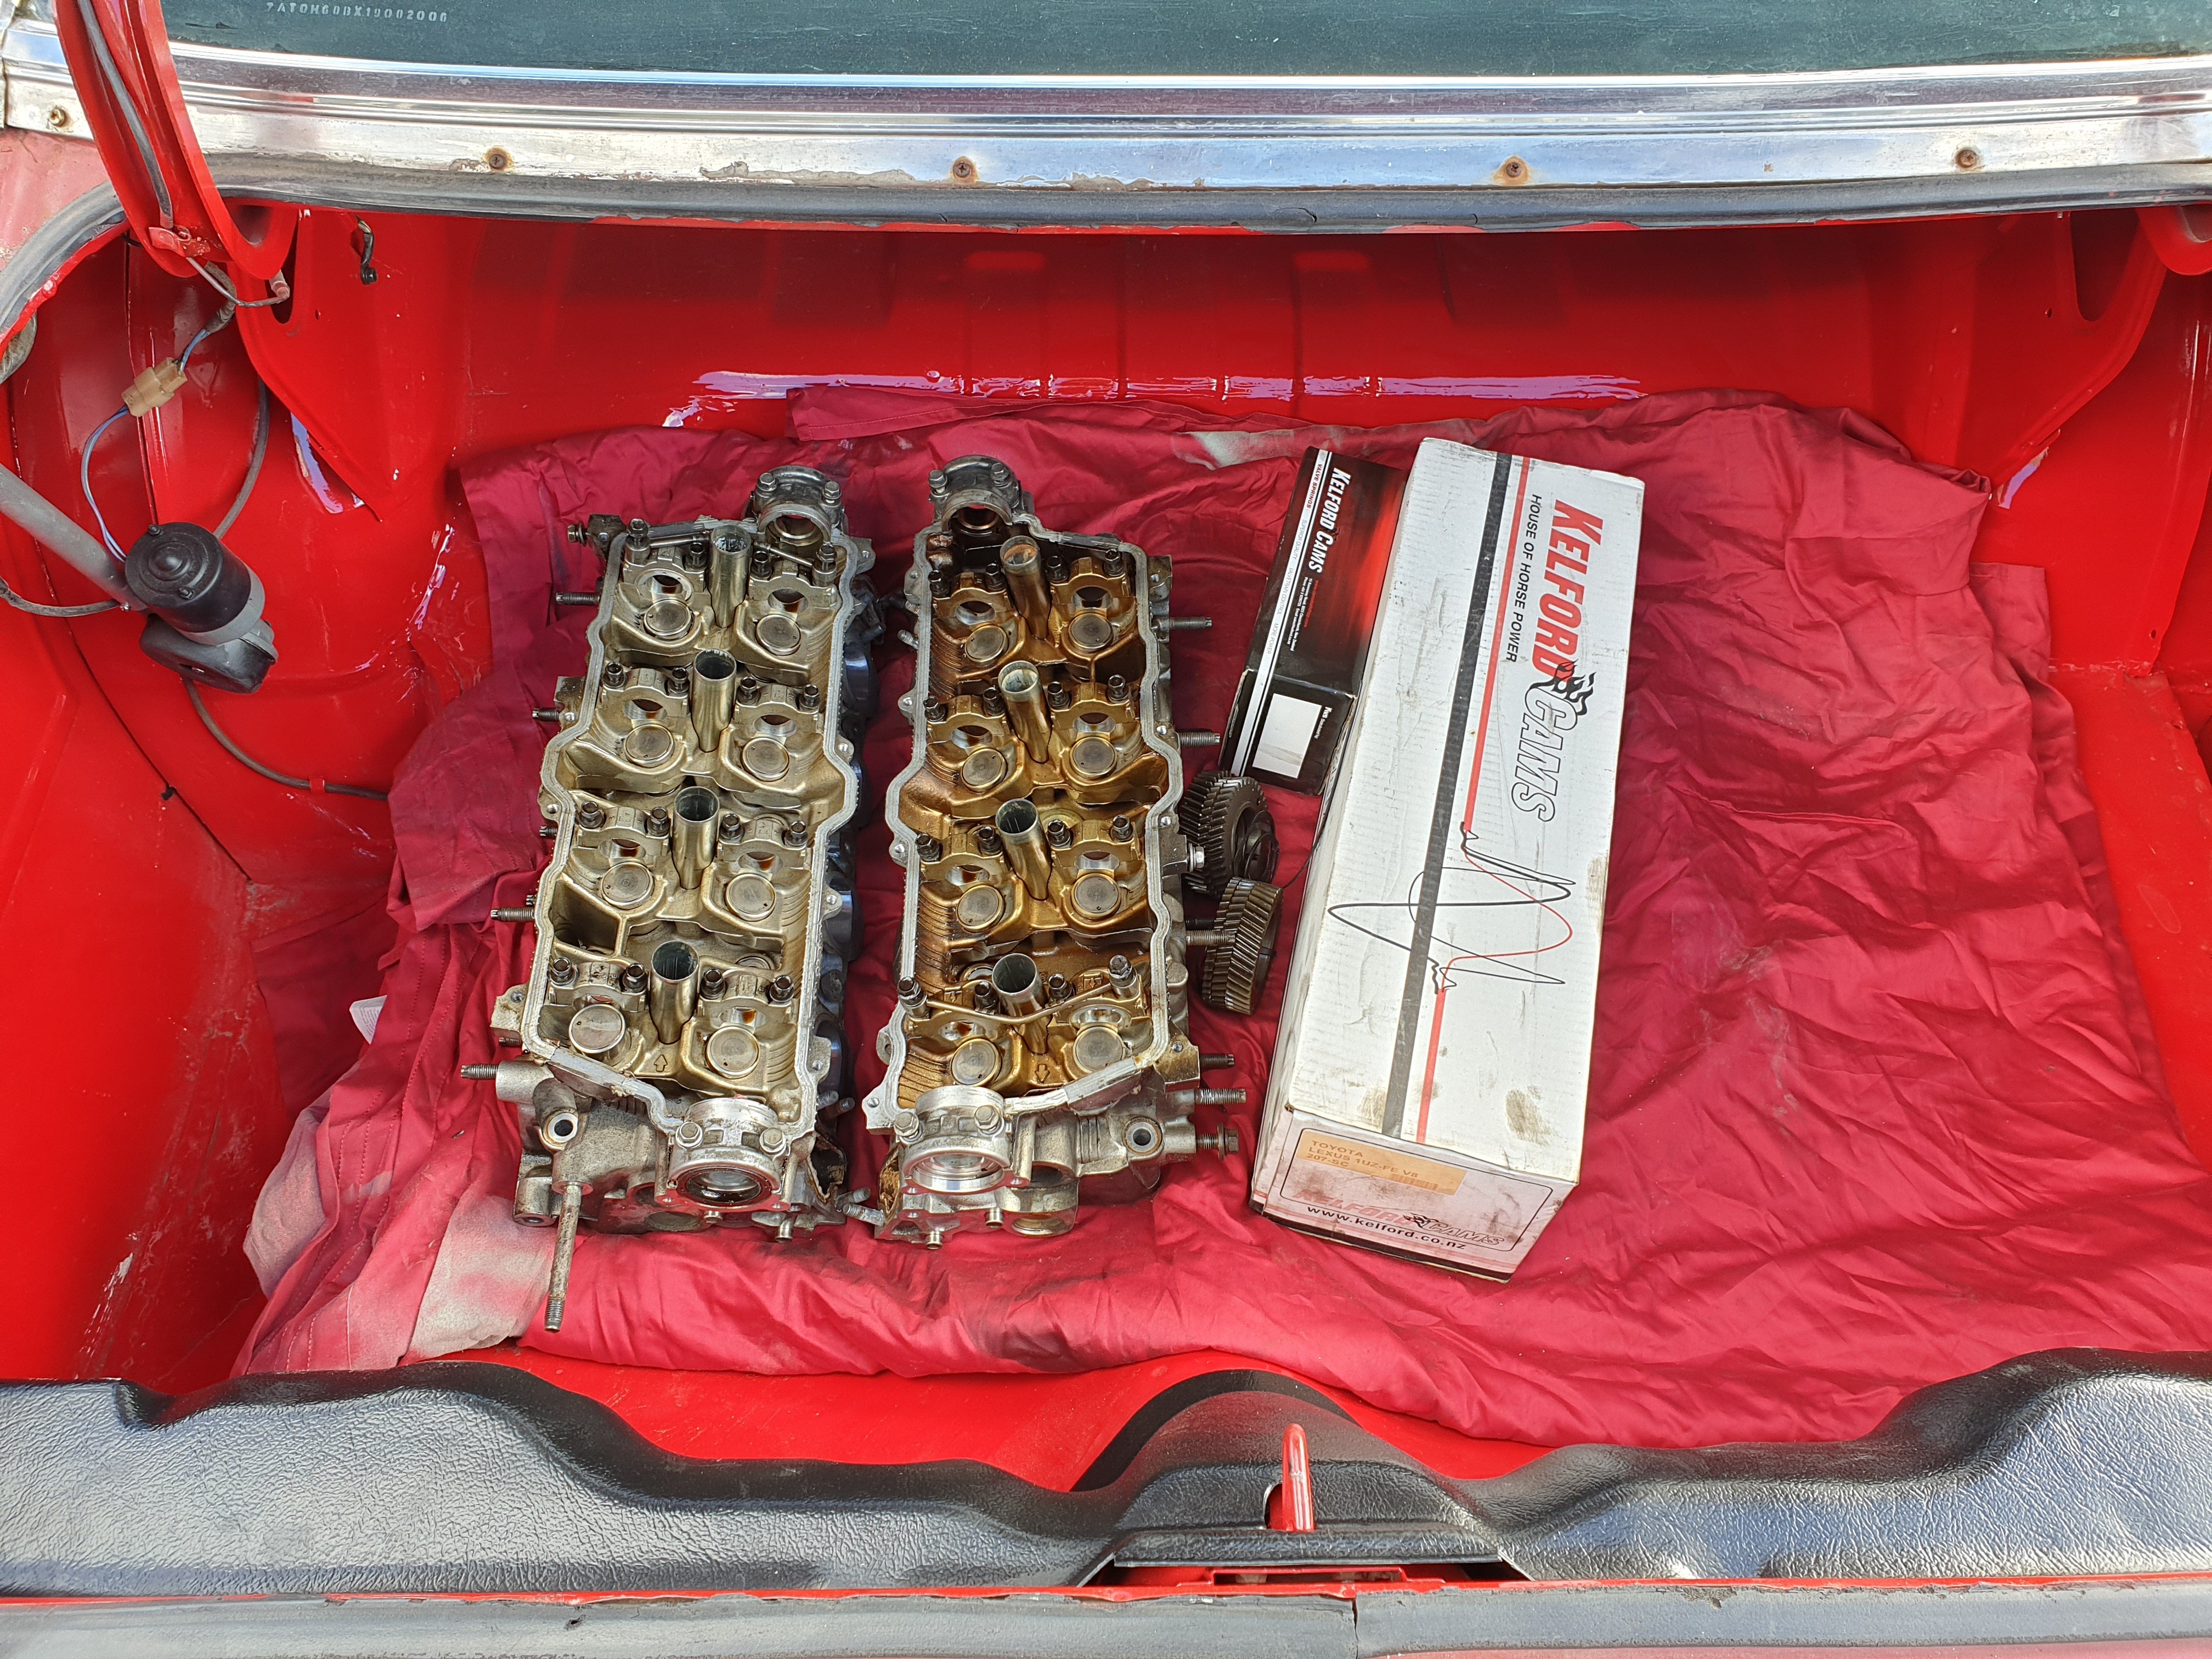
Since my last update I have re-kitted the P/S pump I’ve also shimmed the relief valve to lower the assistance given as the steering was too light at higher road speeds, I’ve replaced all the inner and out tie rod ends and the drag link, I dropped the block, crank and heads off to my machinist, block had been acid tanked, honed and had the cam bearings replaced. The heads have been checked over, machined, machined to take the valve springs, couple of worn valve guides replaced. The valve springs turned into a bit of a headache, the double springs supplied with my cam kit ended up having 140lbs of swat pressure which is was too high for a hydraulic flat tappet cam, We ended up ditching the inner spring and shimming the outer to end up with 100lbs seat pressure. A bit annoying but at least it didn’t turn into a major. Dont have any photos yet as it’s all plastic wrapped as it will be a couple of weeks before I start assembling slowly coming together, made another couple of orders from rock auto got a cam thrust plate with a tensioner (from a Dodge V6) as the factory 318 doesn’t have one, got some rubber lower arm inner bushes as apparently the complete polyurethane bush kit I got for the car doesn’t come with them (and no one lists a poly bush for it) ordered new rad hoses, bypass hose, rear spring shackles (as mine were too rusty) also ordered a starter motor from a 1992 dodge Dakota as with the headers I can’t use my factory starter due to the size. You can buy A/M mini starters but they are around $400, or as most of the guys in the states do you can get a Dakota starter and it’s basically a factory mini starter and at $71usd plus shipping it’s still way cheaper than an A/M unit. For now I need to let the bank account recover so ill be working on tidying up the rear suspension mounts and springs.3 points
-
2 points
-
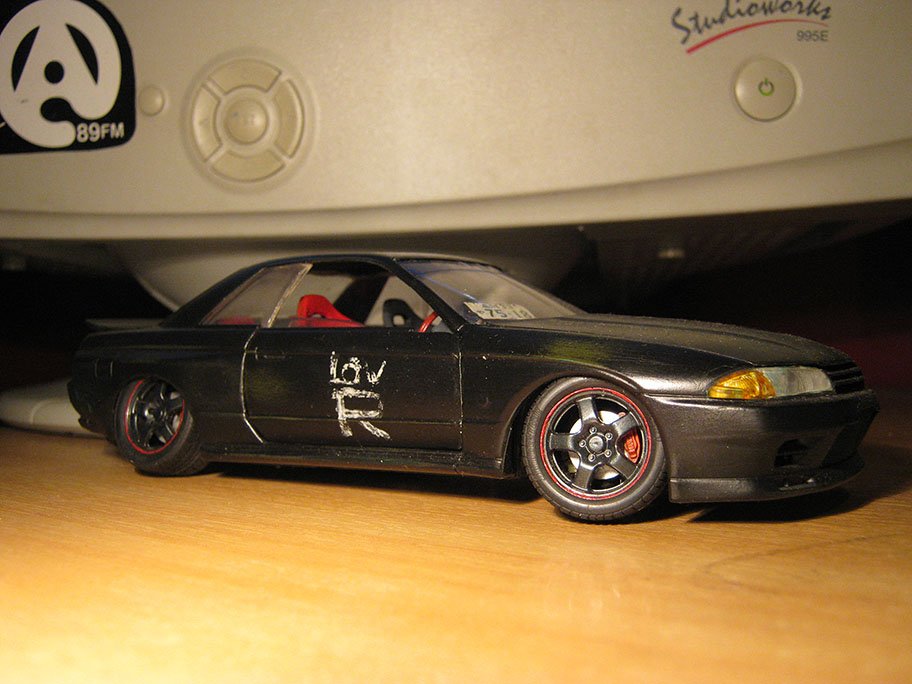
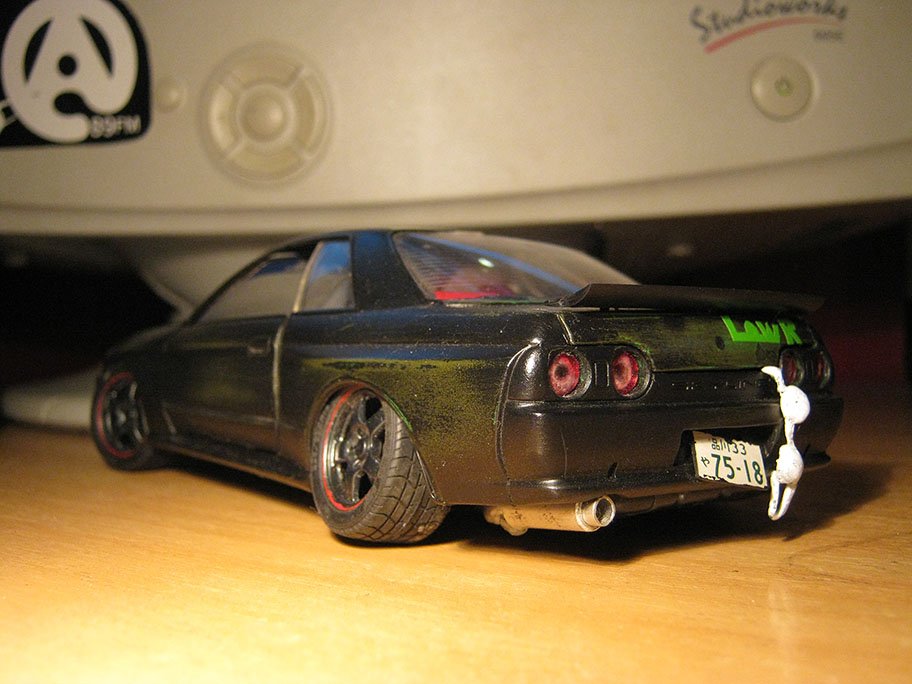
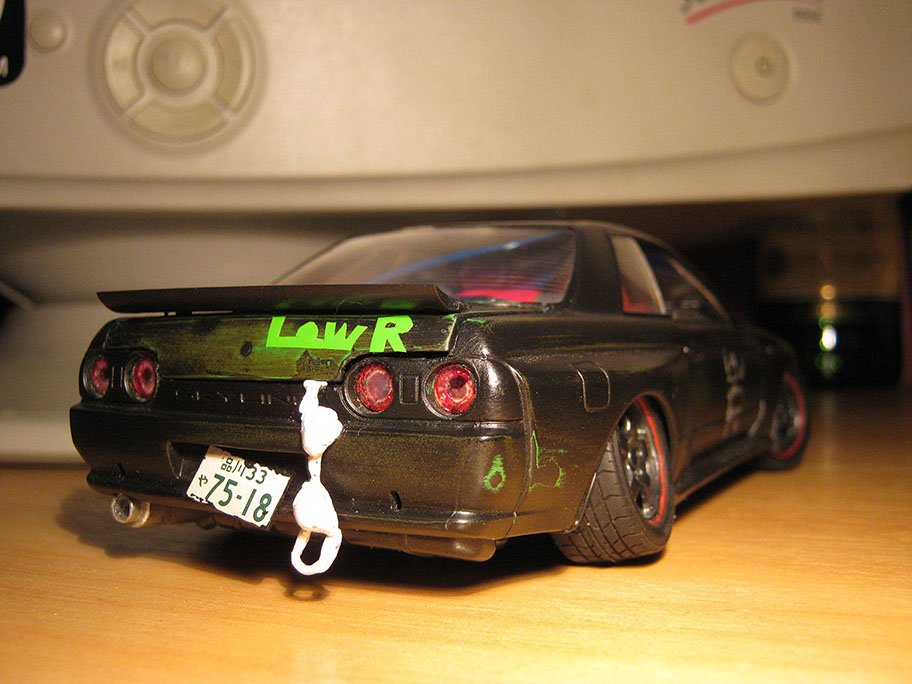
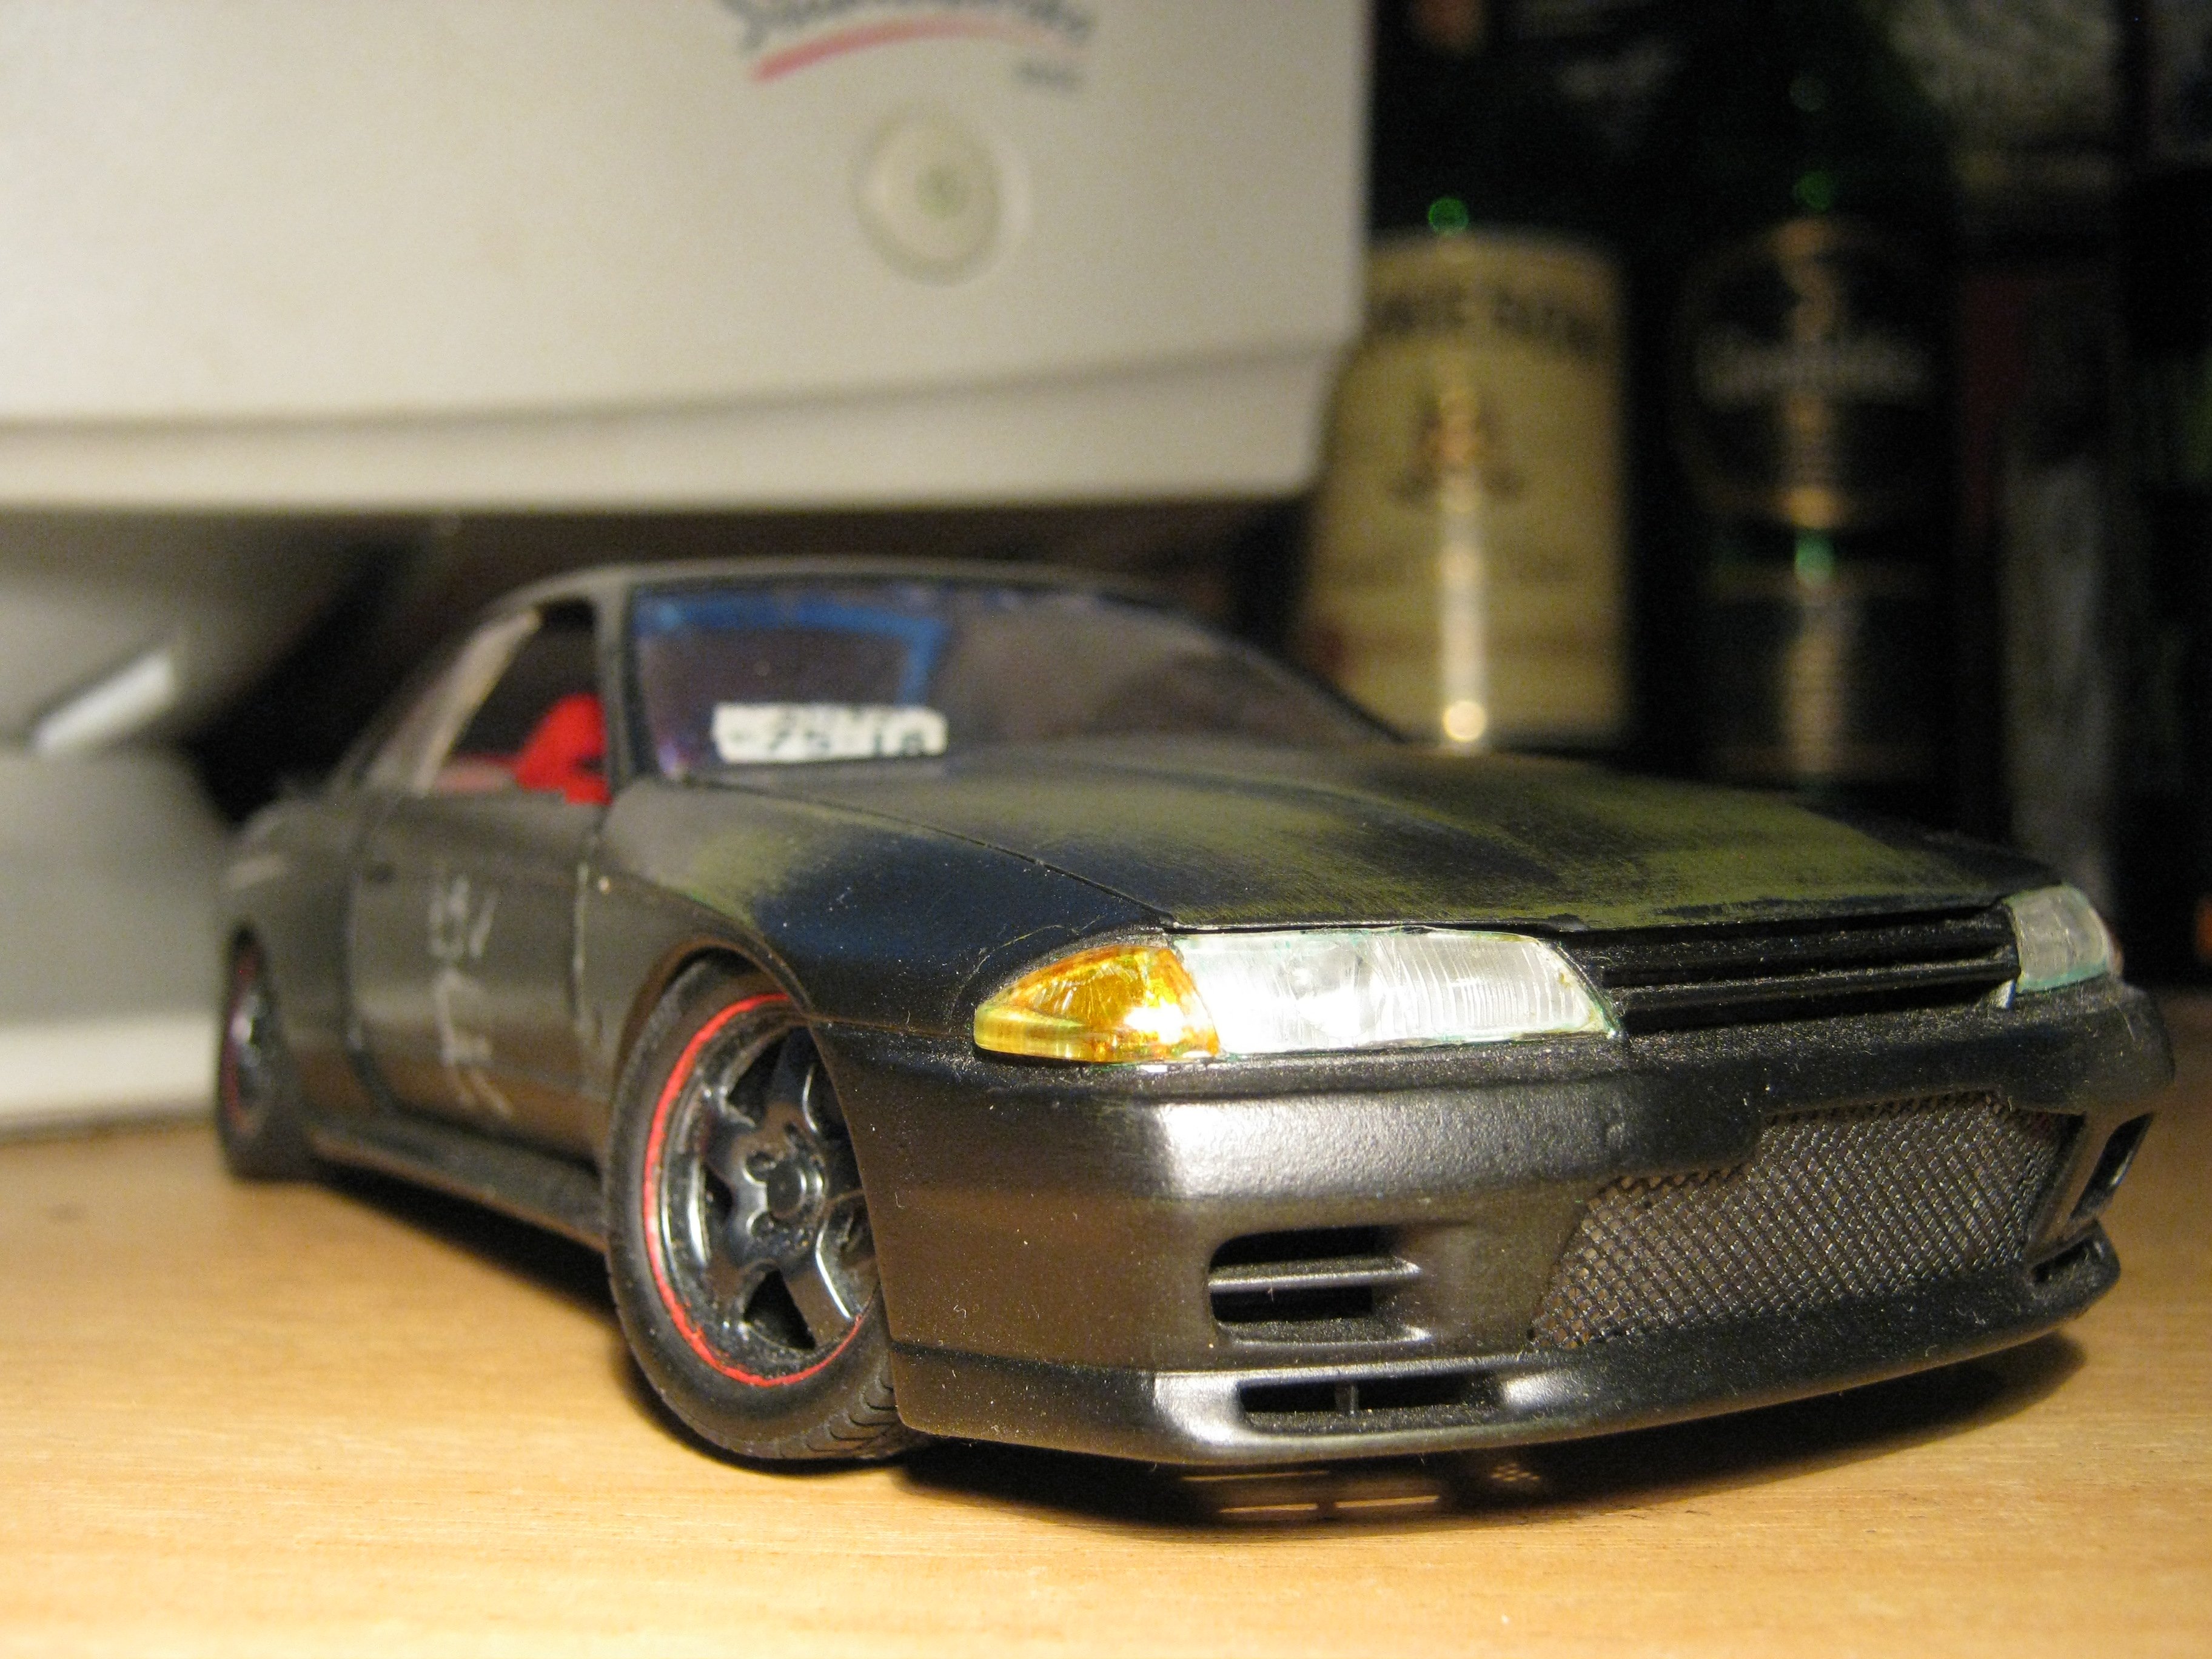
Tamiya R32 with engine detail. did some hack and chop mods including frontmount and piping, lowering. I also chopped the doors out of the body, and the doorcards out of the interior tub, then using modelling putty i created the skin to give it the correct thickness and also cut the windows out of the glass section, so that they could independently slide up and down inside the doors. had little tabs so they would click in at the right position to make them stay up... still cant believe i managed that, was about 10 years ago now. oh and bought some modelling alloy tubing in different diameters to create an actual dump pipe back exhaust with bigbore muffler... left it at a friends years ago and never went and got it back oh the boot opens too.. made a little scale bra to hang out the back like the cool kids used to do back then
2 points
-
As it sits, behind anglia4's Austin
2 points
-
Congrats on reaching this milestone. Looking so good. You look pretty stoked at the end of the vid.2 points
-
Alarmingly the bike is already showing evidence that it intends to reject its new engine; by breaking in half and letting it fall out
2 points
-
I think I am starting to get my head around the cert process a little. I have bought and read and re read the CCM and read a bunch of the regulations online. One question that is not specifically answered in the book.... I have a convertible MX5 from 1990. I have turned it into a Speedster, fully open car with body mods and an Alfa Romeo 3.0 V6. I am looking at cutting the screen off the car at the bottom of the A pillars. Then cutting a screen frame from an identical donor car including a lot of the body with it so I have overlap of parts where the screen bottom of the donor parts meets the body. Then refitting the full screen and screen frame at more of an angle.... by cutting away material until it all fits and welding it back together with extra bracing to the welded area. Same screen. Other than doing the work in a workman like fashion and documenting the work and maybe even getting the cert chap to pop to the shed to take a look when needed to see how it's going to go back together.... what else do I need to consider?? The seat will be lowered so head to screen distance will be safe.... Thanks. Gavin2 points
-
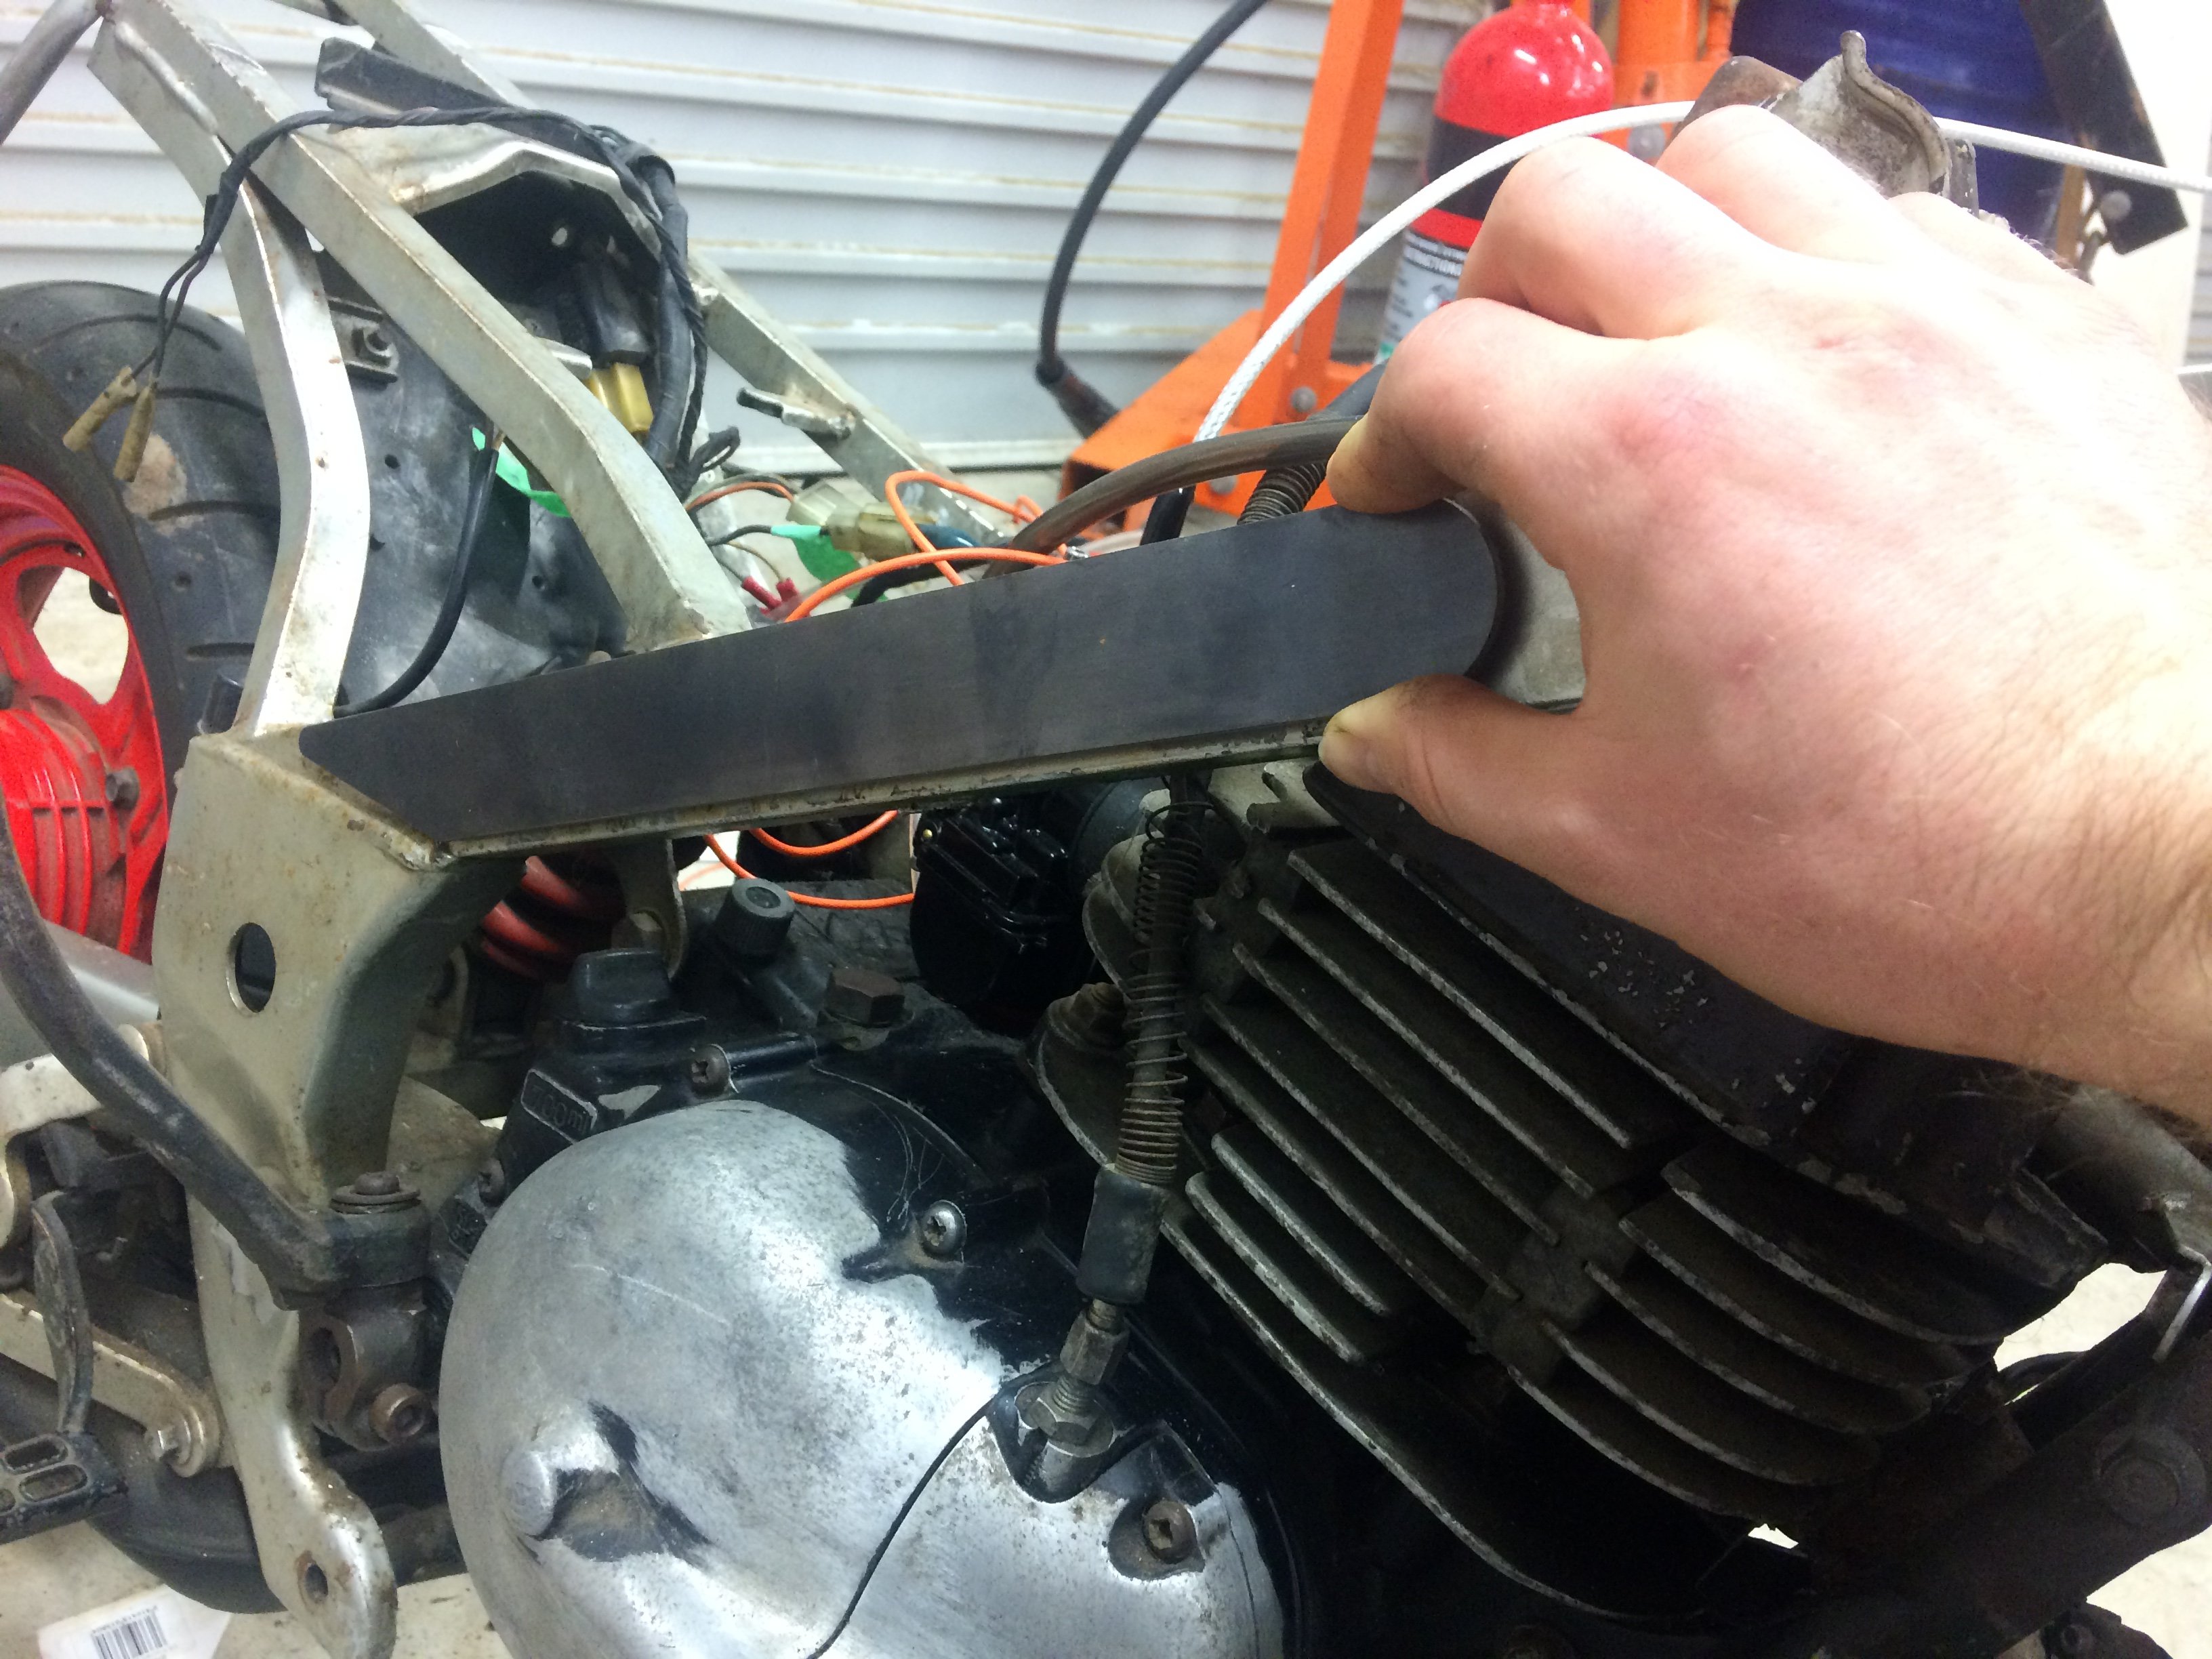
just using short silicone hose on my na setup, works fine. will do the same on this missing the hose clamps in this pic2 points
-
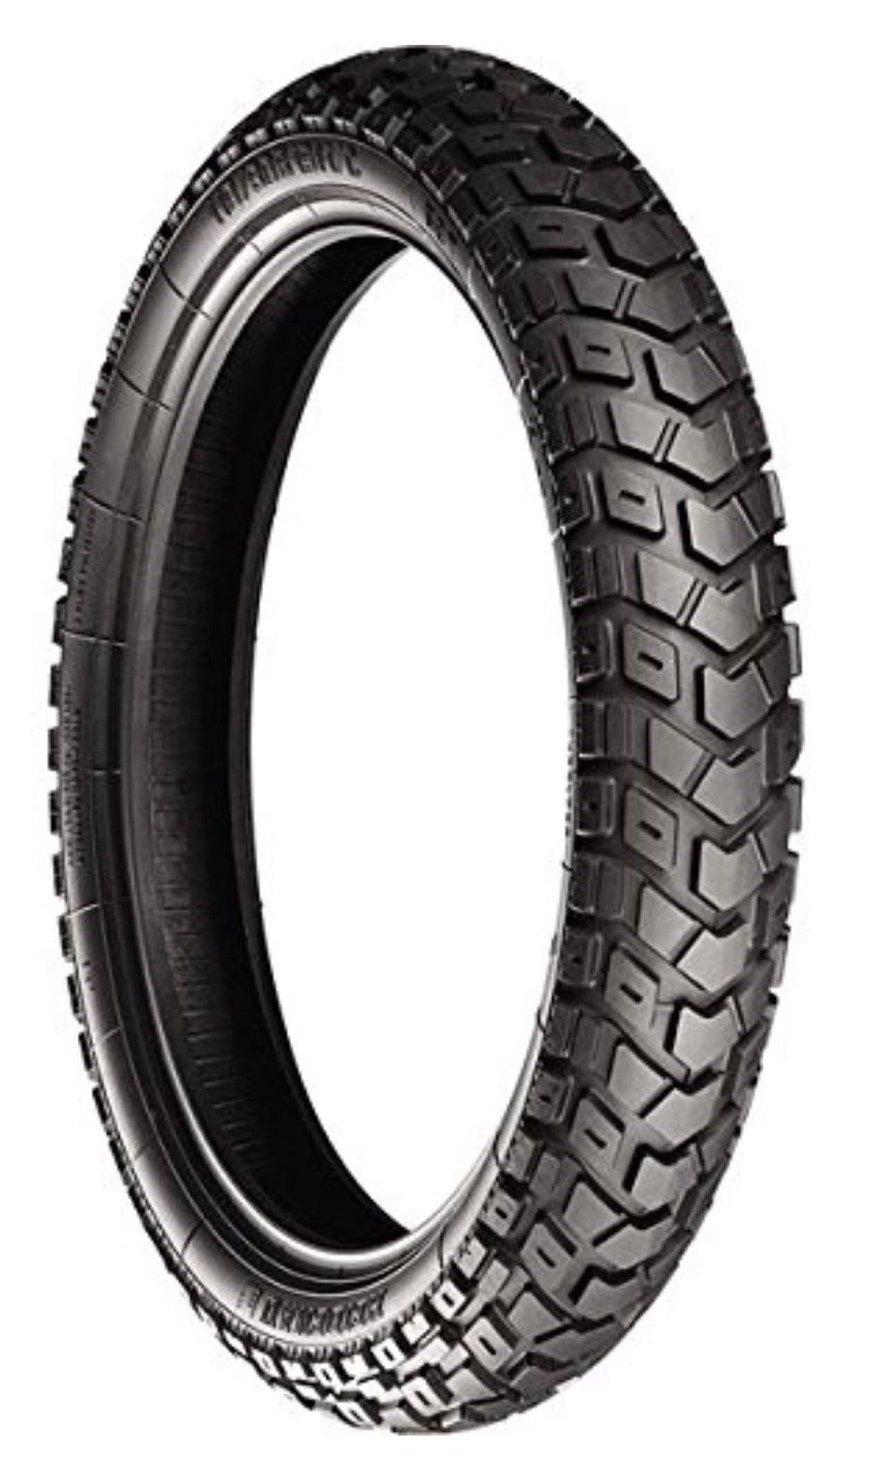
Standard Bort repellent A Heidenau K60 Scout, same size as original front tyre, but a 50/50 adventure tread. That's going on the front. Didn't see any 16's I want for the rear, but it has a kinda chunky tread anyways and I'm more concerned about the front washing out than losing the rear end
2 points
-
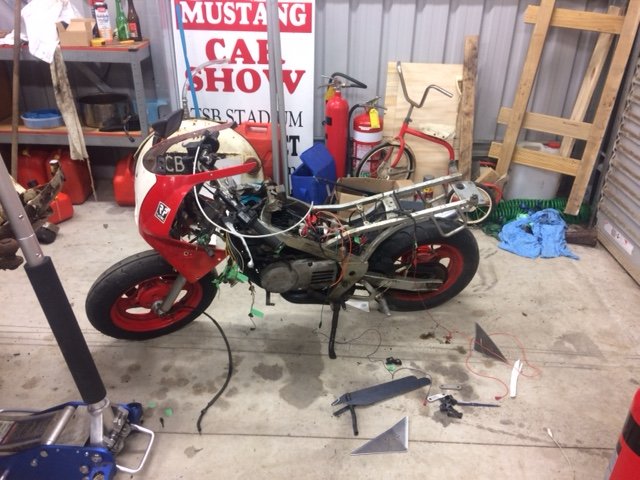
A couple of years back I bought a YSR50 with a TS185 engine transplant, half complete, from an estate garage sale; it may be the best value purchase of my life. I haven't touched it, never got it running. After reading about the upcoming Urewera Undertaking, I knew it was time. The factory YSR frame is only rated for 65kgs and I weigh more than that... I'm also looking at a horsepower increase of something like 240%... and I should probably make some kind of concession for the gravel. So there's a bit to be done. Step one, amalgamate the looms and achieve stable idle voltage. Step B, celebratory burnout. Watch this space.
2 points
-
WOW I DIDN'T NOTICE2 points
-
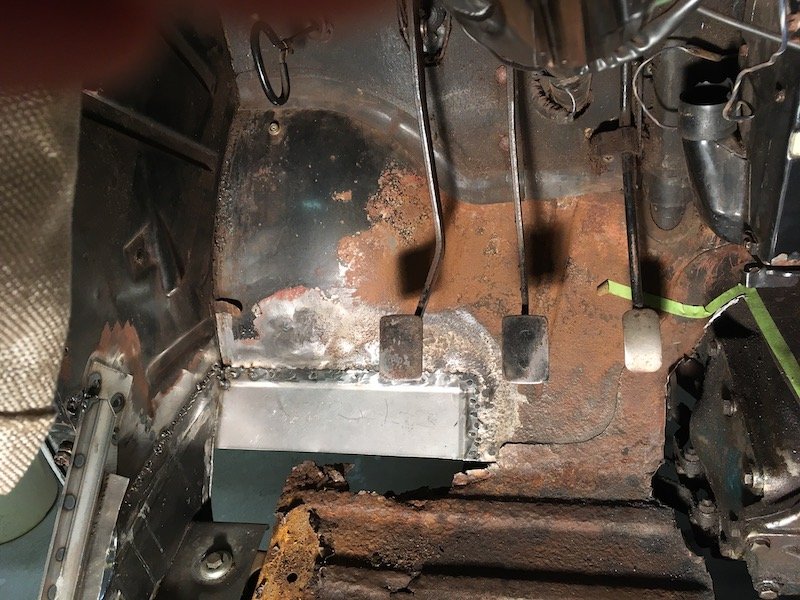
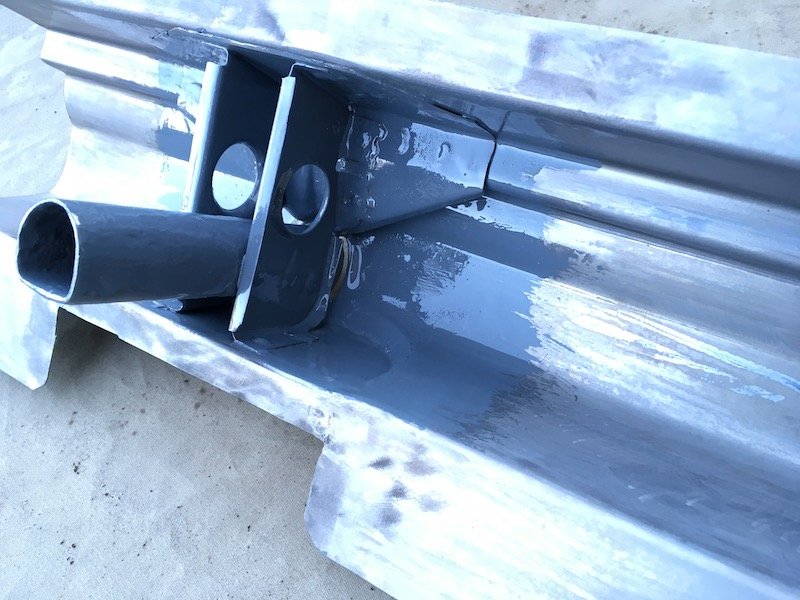
Welcome back viewers to yet another ever so thrilling update on the old Huddyson. Sitting here and looking back over the last few years I must scratch my head and ask where has all that time gone. I really did believe it would of been driveable by now - road legal or not legal. Life has its way of derailing such grand time frames as im sure you all are aware and the fact that even though the parts im using may not be the most expensive out there they sure dont come cheap. To paraphrase Oedipus, Hamlet, Lear, and all those guys, "I wish I had known this some time ago." Everything was such a damned nice idea when it was an idea yet as with everything How you look at it is pretty much how you'll see it I guess. And looking at it I can see the old gal ride low n slow down the street fast n loud on the highways everytime im out working on the old beast. God i got a tad philosophical there for a moment... what are they adding to the water around these parts. /twitch Enough of that nonsense. let start the normal barrage of images and brief explanations. Back floor all patched up over four link brackets. Holes added for access & removal of the top bars bolts. Sparks and smoke flying up front as the Trans cover was all made up like a big jigsaw. To help pull the drivers side floor up the brake boosters cover has been incorporated onto the trans cover to add rigidity. Since the brakes are all tucked away under the floor and me being a bit of a lazy sod im using a remote reservoir. The brake pedal was a bit of a sod that took up a heap of time. Due to the floors sloping angle and other factors we couldn't do a normal pivoting bar as the inside push rod where you stand would be pointing towards the floor. So a duel/tandem lever was made up. its somewhere between 4:1 and 5:1 ratio. Still got to get the adjustable top links. but tested with a bit of bar and have heaps of travel for the booster. Grease nipples all over the place. Machined up brass bushes and ya its solid as. Have to get the actual pedal and the other lever bar it connects to tested still. Moving on to smaller jobs now. Power steering. As i have mentioned I think some time ago im using a PSC setup made for rock-crawlers. So if its powerful enough to drive and survive the crazy setups they have it should be fine for my setup. Now I didnt want to take away from the finned engine dress-up stuff when you open the hood. So a low mount bracket was fabbed up. The little pump has a heap of adjustment, lines up nicely with the other pulleys and is tucked nice and low that will not only keep it out of eye sight but since the pump is gravity feed from the reservoir that will be mounted up by the radiator it will have ample full as well. Mounted up the trans cooler up front of the radiator after I drilled a few holes and added grommets for the hoses. Should be hidden away enough not to be noticed. Got the cad skills out again to design up the gas tank. Its about 19Gallons/72litres. The tail pipes are rather close together so the plan is cut a hole in the trunks floor and have half the tank through this and then the other half taking up much of the trunks floor space. Baffles will also add bracing for those times I may throw heavy loads like tires ontop of it. The bottom should be flush or just tucked up with the bottom of the chassis whilst the top will come nearly up to the trunks lip/bottom of the door. So it shouldn't be a hindrance or noticeable. One end is slightly deeper for the pump and sender. Josh and the guys at Apex in Oamaru cut n folded it up. Top guys with some great kit that I highly recommend. They also made up that Hudson logo for a bit of fun what was nice of them and chucked it in. Until I figure out what to do with it I plan to use it as a stencil to tag a few things around the garage. \,,/(-.-)\m/ On a bit of a separate note the missus has taken up slinging a bit of one shot paint of late. Hell yeah I say. Im more than happy to buy the brushes, paints and what ever if it means I can get some lines laid down on pretty much what ever I want. I think she is busting it out but naturally I may be a tad one eyed, biased and not the best judge in the matter. Take a look any way. Some panels up near the top of below pic in my garage. Cooler to go with her Morrie Door she made up for Flockie on an old 40s Ford pickup door. And of course hand bags... she has a thing for handbags.2 points
-
Discussion: Lurking in the back shed at my grandads farm for all of eternity has been an old Austin 7. There was a bunch of old cars there that as kids we used to play in, but the Austin had been there for so long that it was completely buried under hoarded shit and was far too scary to play in, but was always interesting to see if you peered past the old L300, Fergie 19 & piles of old timber. As a 10 year old kid, I was smart enough to know that this one was well beyond rescue... Fast forward 20 years: Grandad has passed on and the sheds have been mostly cleaned out for the next generation of hoarding, revealing this little Austin. Now 30 year old Jeff is not half as smart as his 10 year old self... So now I look at it and think "I reckon I can save that... maybe..."
1 point
-
Have at me guys. Tell me all the things I'm doing wrong. Laugh when I cock it up. And share a beer with me when I get her going!1 point
-
Dunno if this has been covered before but check that the injectors aren't stuck. It's a common problem. Power them straight of 12v and make sure you can get then ticking open and closed. If they've been sitting for a while they will stick1 point
-
Ordered an arduino due off of ali today. Not sure what I will use it for, but the extra speed may outweigh the lack of 5V capability for some applications (32 bit, 84 MHz ARM cpu)1 point
-
Just bought some STM32H7 dual core processors. Now all that's left to figure out is... Everything1 point
-
video please1 point
-
I have some headlights for one of those. Or the donor, i can't remember.1 point
-
fuck yeah A+ work, also getting it to air out so evenly looks meaaan1 point
-
1 point
-
Doing it to prove i can. And i've driven the coils from mosfets many times & burnt up every one of them.1 point
-
Check ya mailboxes too to save on fries and drink haha.1 point
-
why are you still dicking around with this? just buy a speeduino board, and start writing code... those ignition drivers all work etc as well as give you lots of other inputs you're going to need... or you doing it purely as an exercise on how to drive coils/learn something? I dont understand why you are using a fet to drive an IGBT to drive a coil, when you can just use a fet to drive the coil1 point
-
Parts haulin....
1 point
-
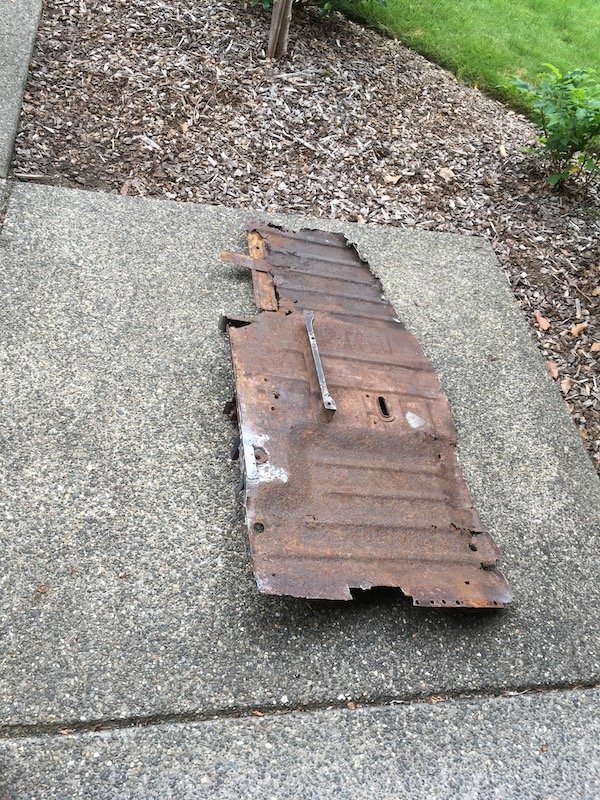
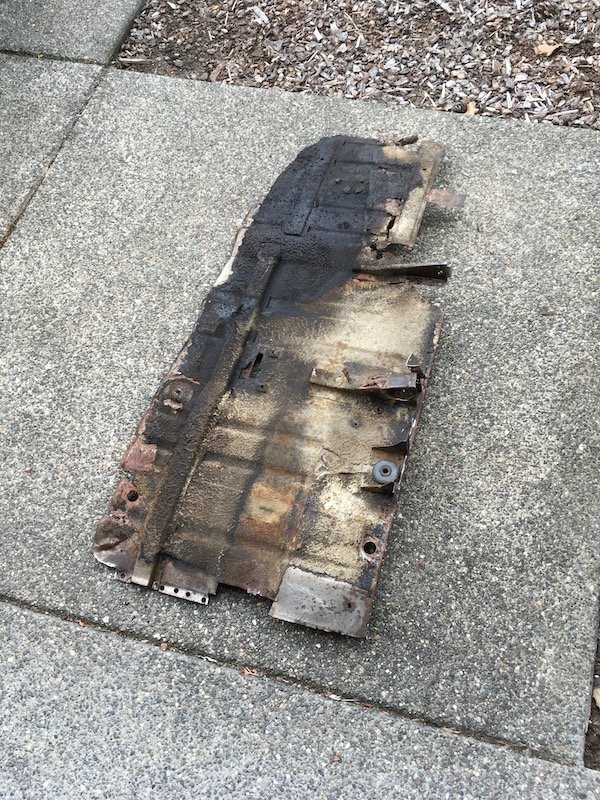
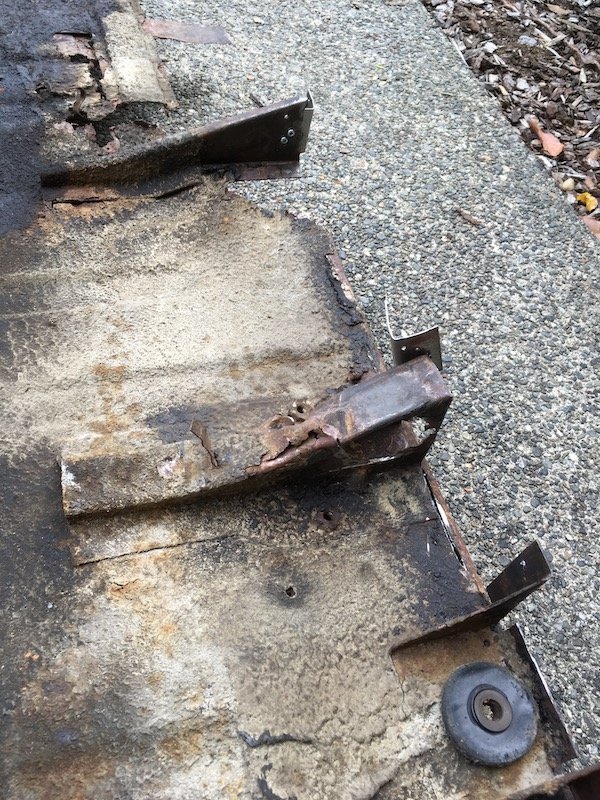
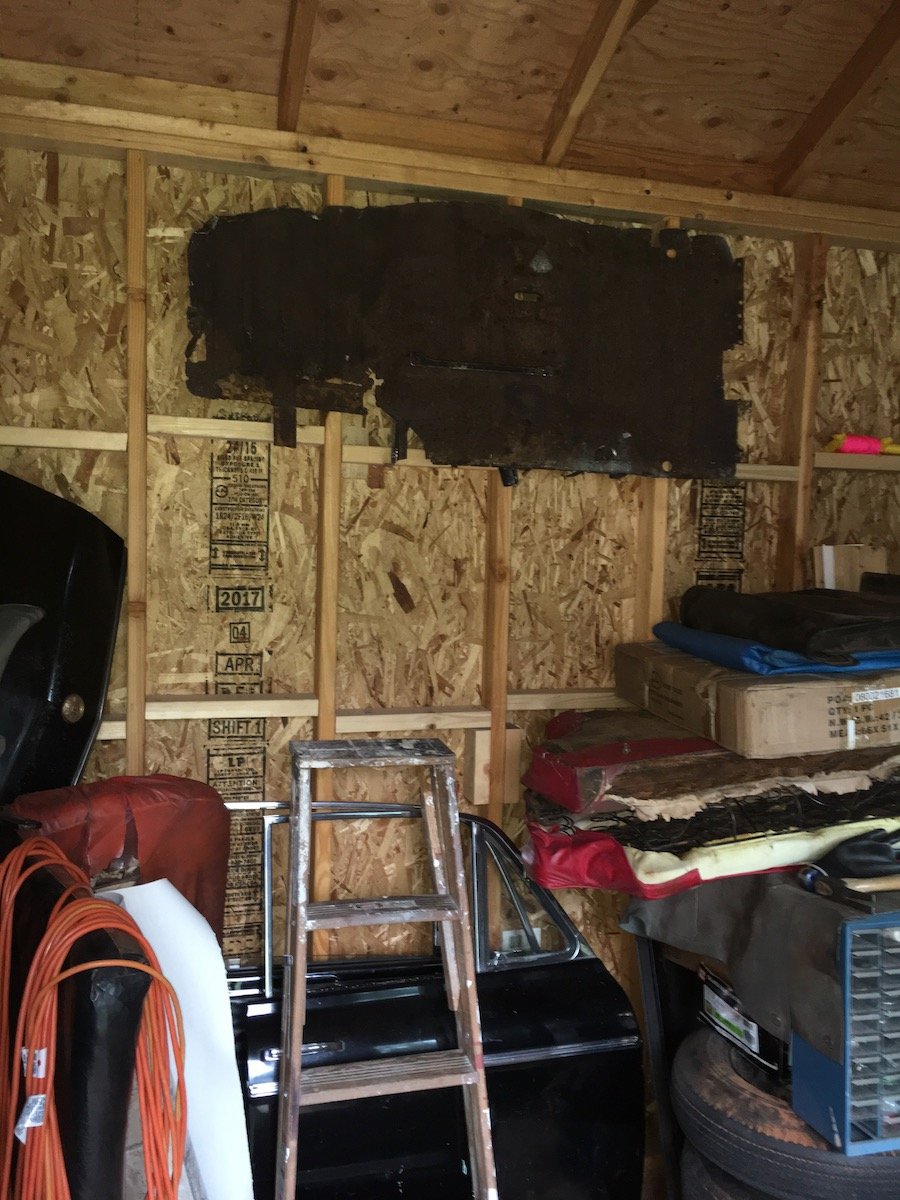
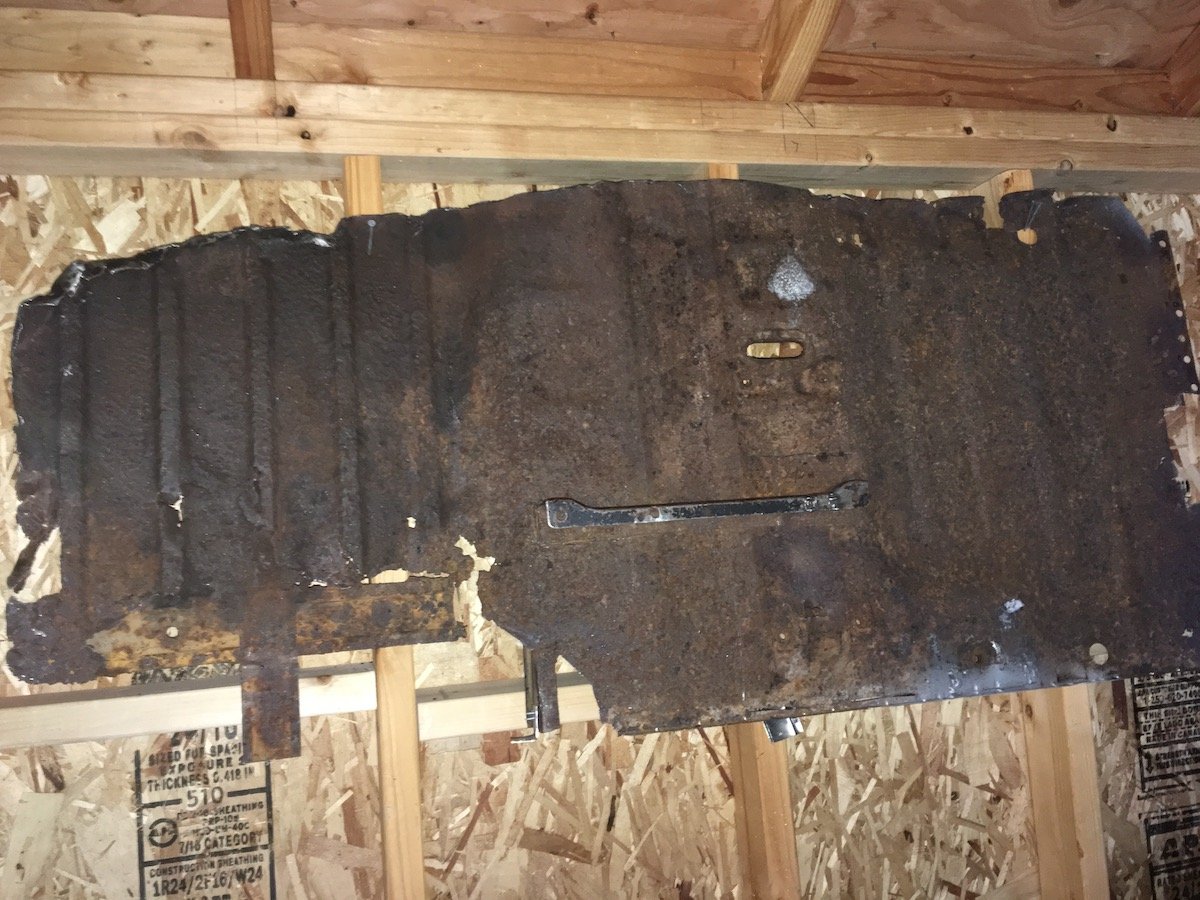
Hung some new wall art in my storage shed today. It's the remains of a '61 Bluebird left floorpan. There is a practical reason for temporary wall hanging it. I was just going set it on edge in storage so I could salvage a few items off it later but it began folding over from its own weight. Plus, it was generating all kinds of crud such as; dirt clods, large rust flakes, under sealant, and greasy blobs anytime it got touched. Just had to get it out of my garage and isolate it. My "wall art" came from here. I'm hoping to make a few more posts soon to cover the last couple of months other work activities that led up to this "epic" event. Making the trans/driveshaft tunnel solid, investigating door hinges, finessing various fitments and preparing the fender and other bare steel sheet metal for epoxy primer. Discussion: https://oldschool.co.nz/index.php?/topic/60267-marts-pl310-61-datsun-bluebird-sedan/
1 point
-
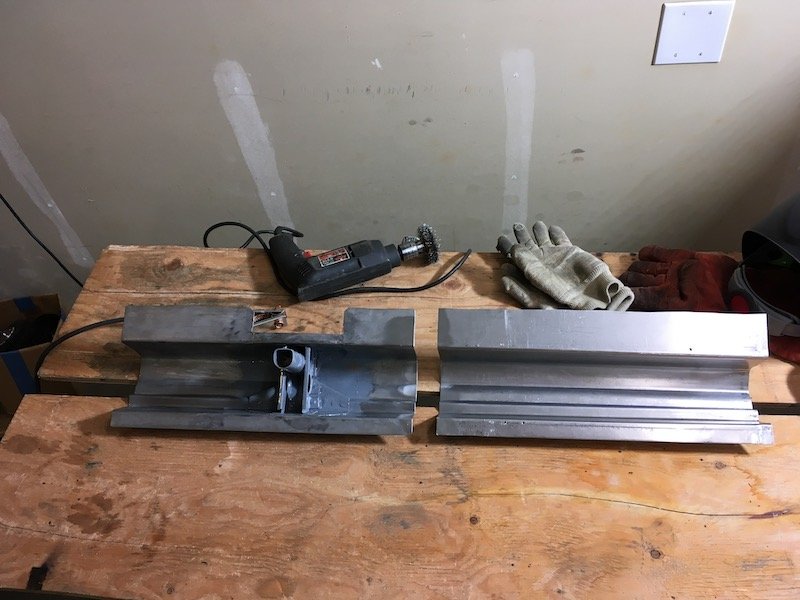
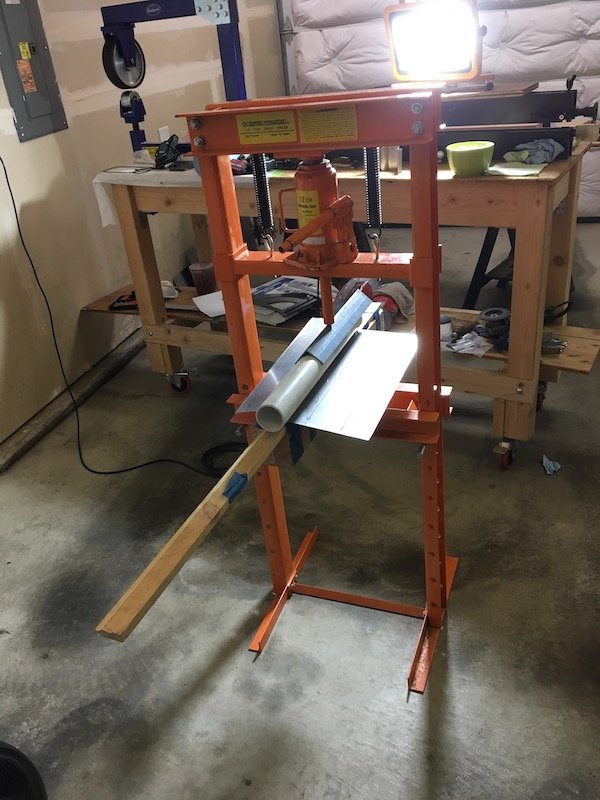
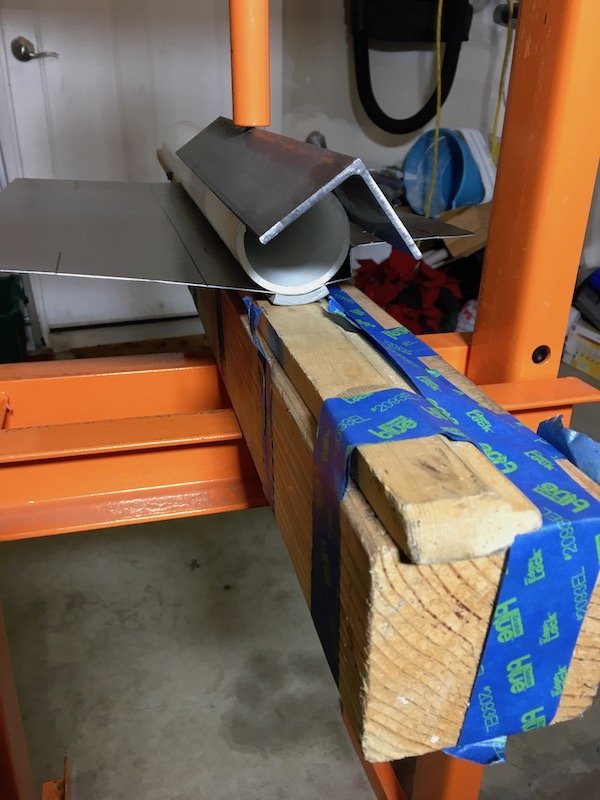
So plan is - twin 45mm (or 1 3/4") for most of the length, which matches the existing twin pipe from the manifold to the Y that is a muffler shop replacement that i will keep a very small part of, - into a single 57mm (or 2 1/4") pipe to match the existing rear muffler, that i cribbed from bits from the Croma Turbo i wrecked This was way more expensive than i thought, especially as a bought a nice new welder to do it with. Even my man-math was struggling. After watching some youtube and doing some actual math i started with making the new Y section from which everything else will be built from. and went forwards from there. The Y is right at the back of the floor pan and actually has a kick up towards the diff. Shiny stuff to the ex croma over the diff section And painted with some BBQ paint Pretty flash for a driveway job! Ended up using only the first 50cm or so of the old secondaries but turned out nice in the end. Shit is tight getting in and out. This is the new front section against the old part, the new Y joint ends adjacent to the white bit on old pipe so ive extended the primaries by like 2 meters. Unfortunately didnt take any photos of the whole thing as the rear half was installed so i could ensure the front half lined up Buttoned it all up just before dark and its surprisingly quiet, probably because i was used to the old blowing exhaust, but has a proper FIat rasp at around 2000 rpm or stabbing the throttle and seems to free rev a wee bit better. Tightening it all up properly means it now has no leaks, but it rattles on the cross member, i want to put a support off the gear box and I remembered that i forgot to weld in a O2 sensor bug so another couple evenings tweaking and upside down welding before a road test and butt dyno.1 point
-
Make a few bucks on the ride home1 point
-
Do it anyway! Bring the ragtop.1 point
-
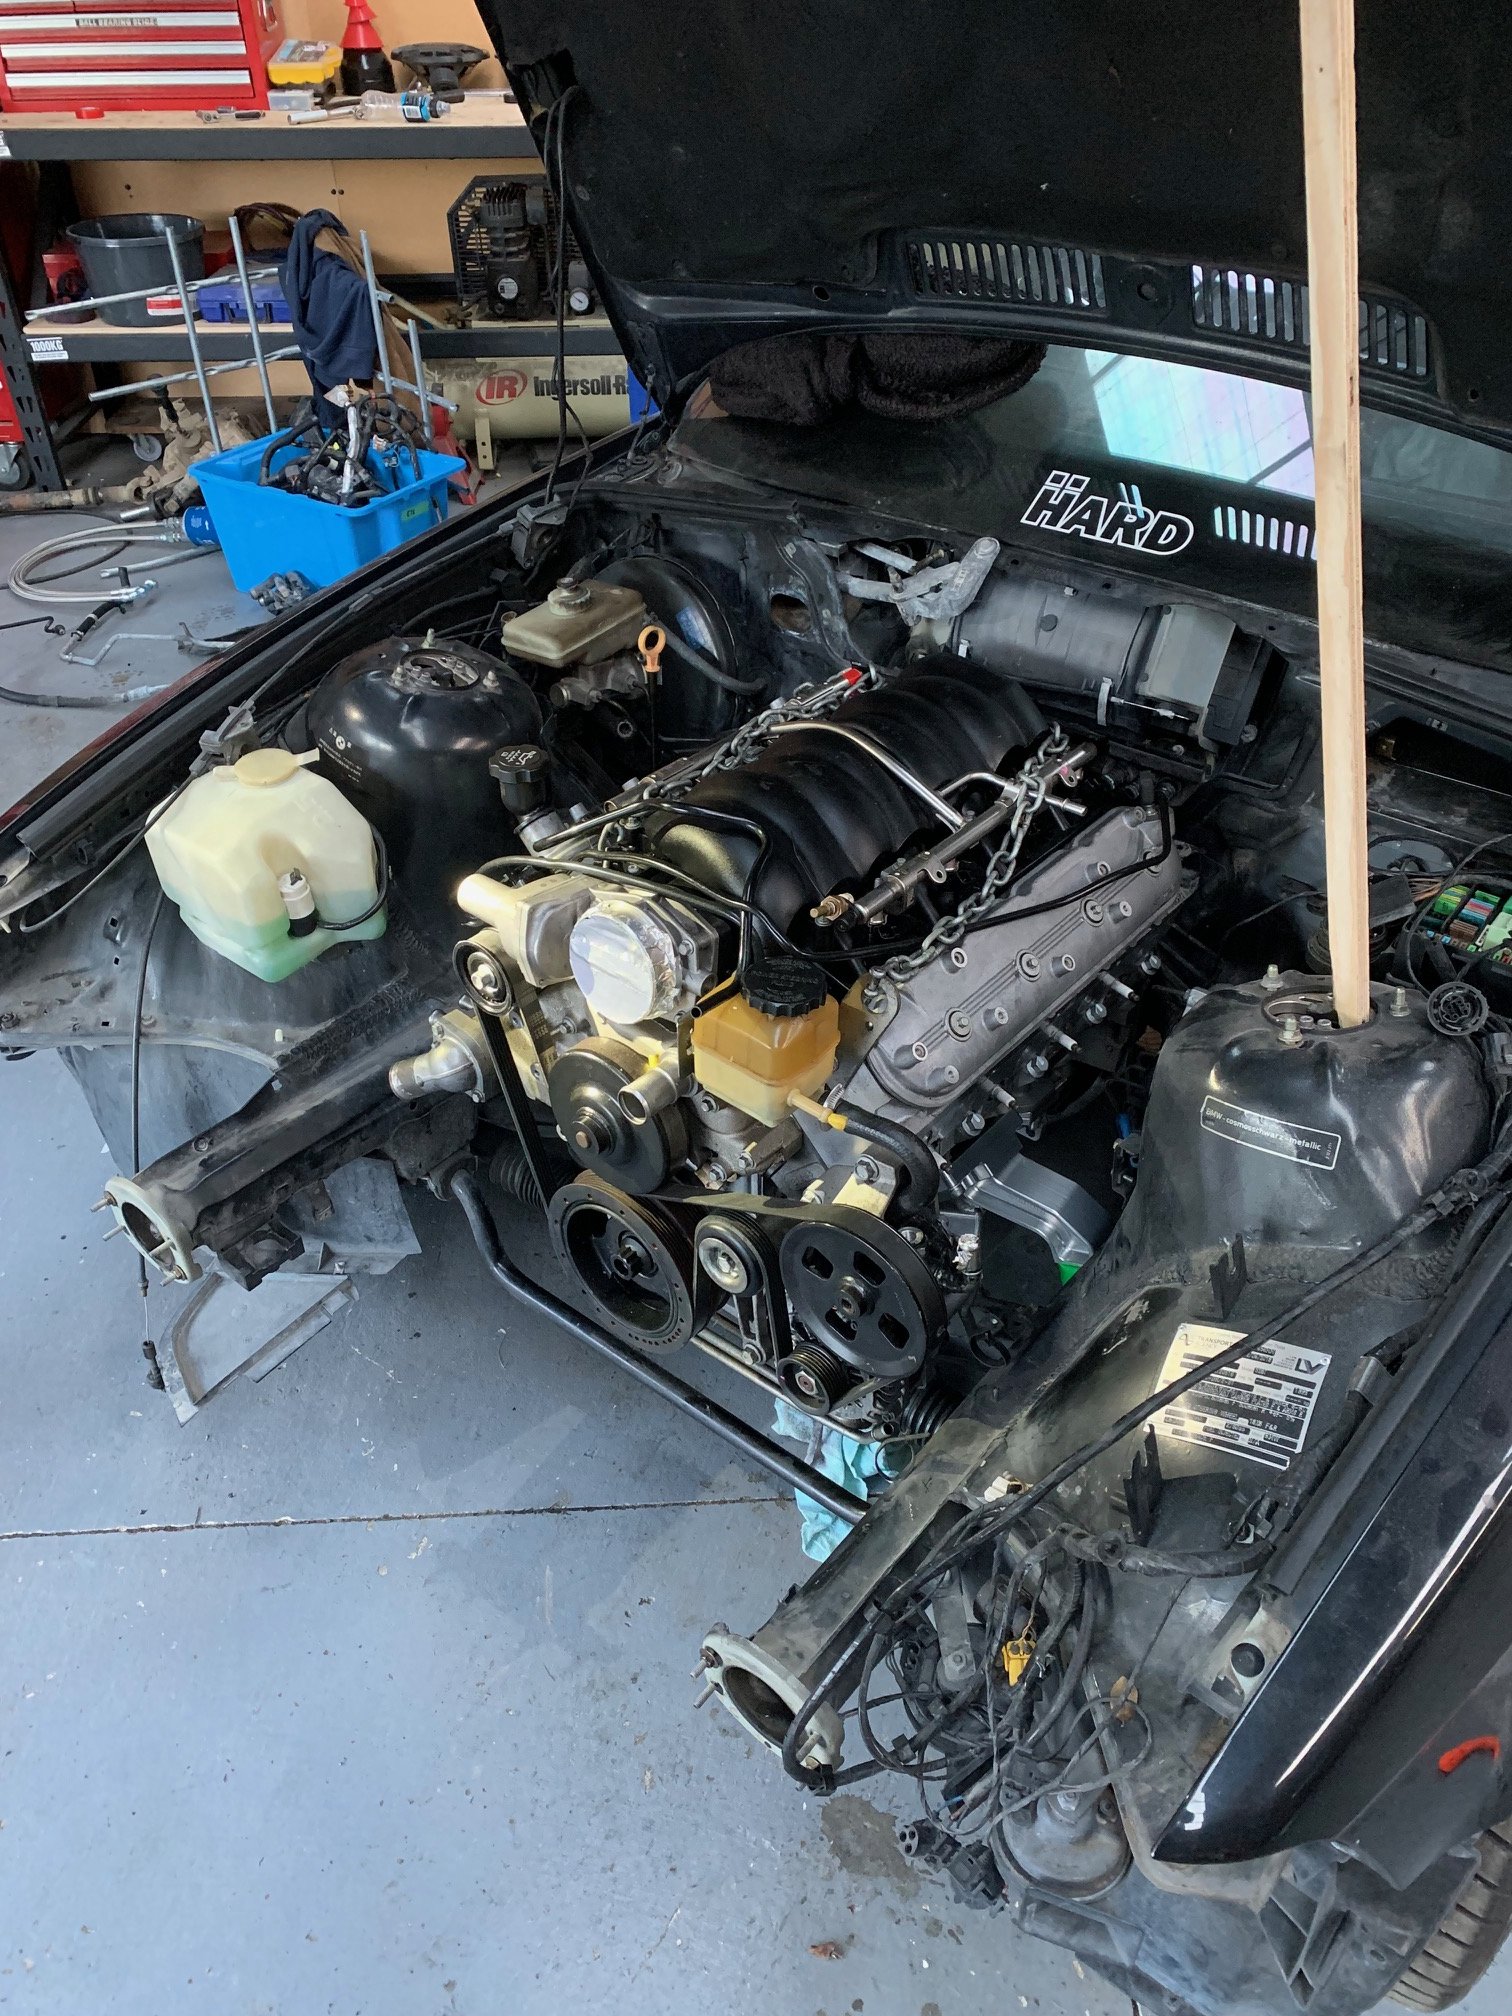
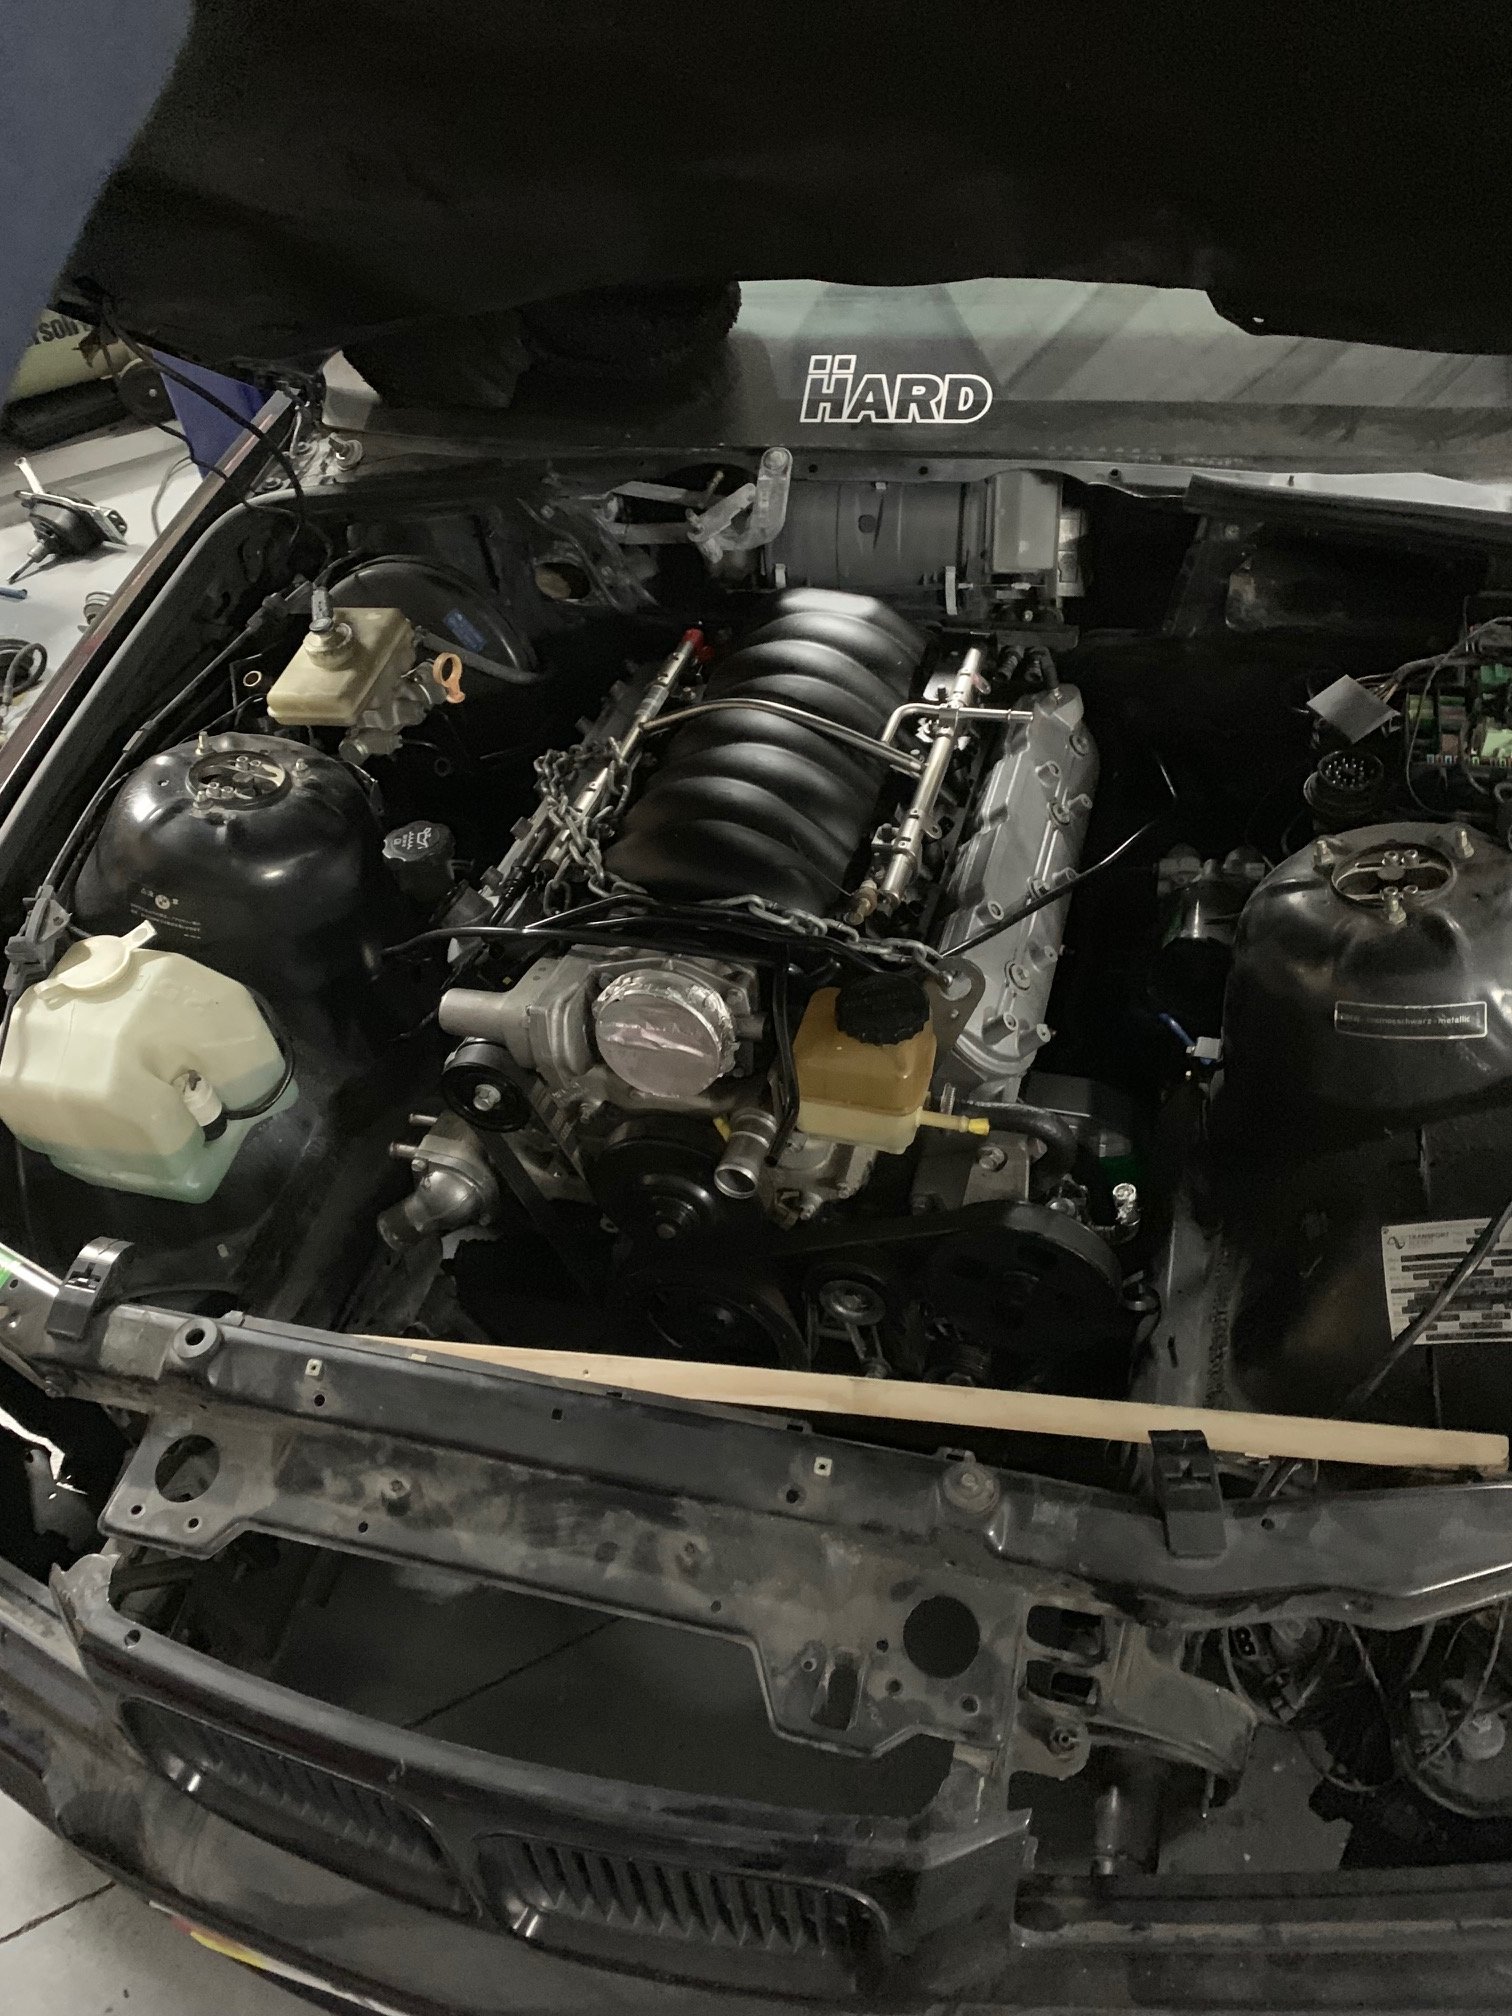
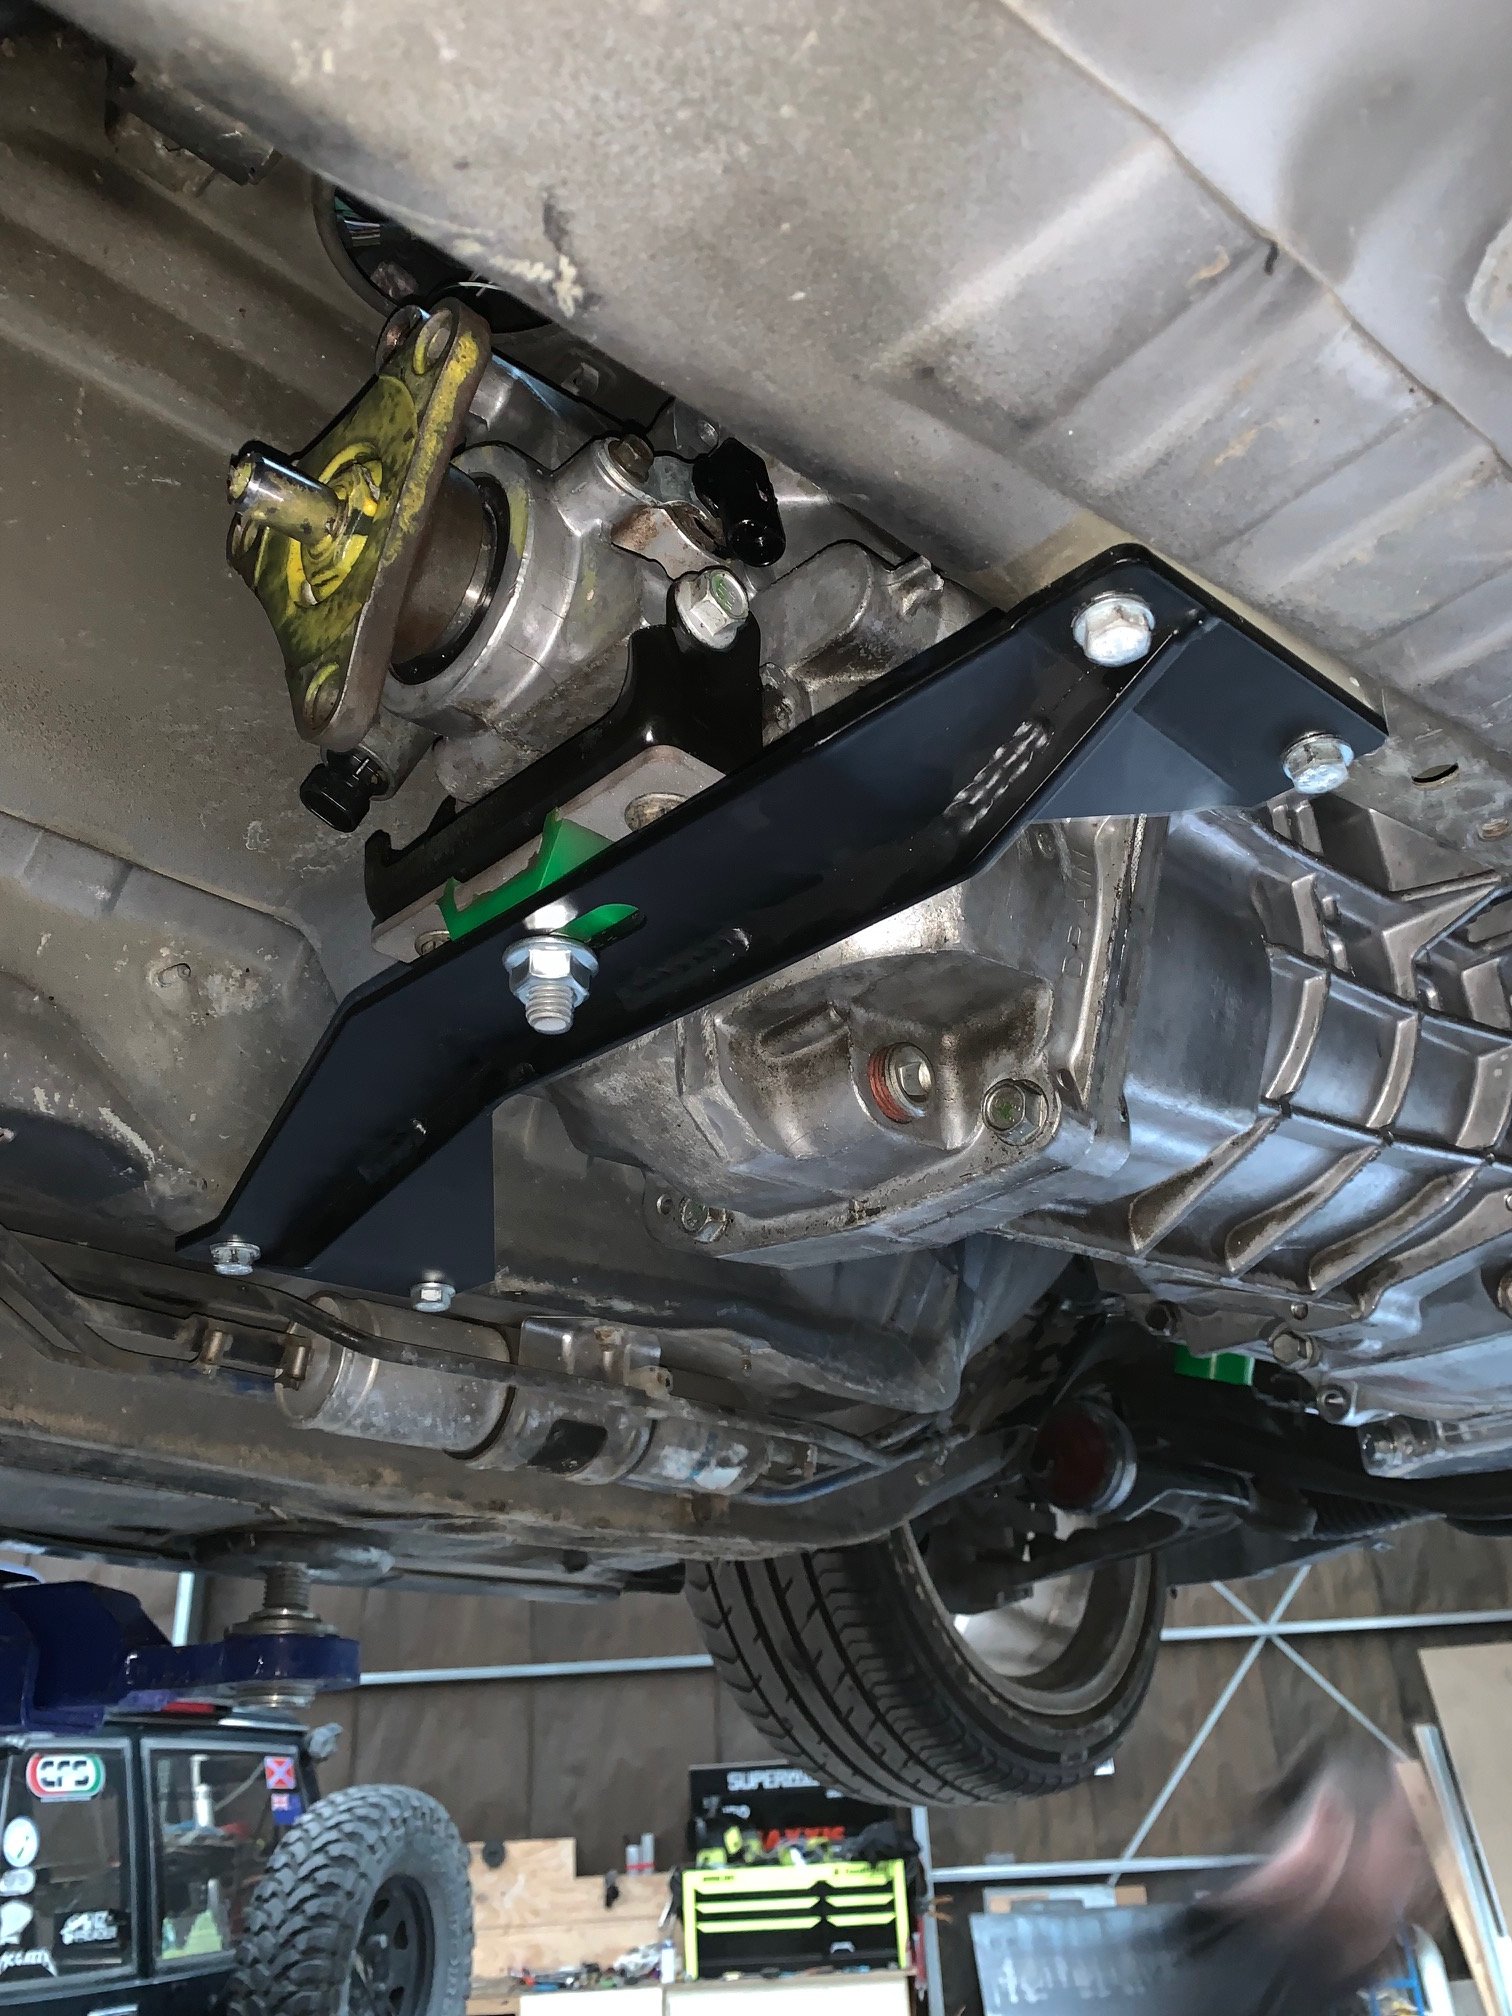
Yeah it’s mental. At the top of fourth it finally gets its legs and snaps your head back in the seat! It’s a weird sensation when something pulls harder and harder through the gears. Especially considering it’s got fuck all lag. Anyway today was a good day! Engine and box are sitting in the car and fit well. Gearbox mount is for a T56 but fits close enough. Will space it up so gbox sits a lot higher. Shifter will be a bit of a dick so I’m going to have to fagricate up a shorter mount and linkage. I think standard position sits about 5” back from the current hole. I was tempted to move the hole but then have to ruin trim and move my hydro and handbrake back and I want the interior to look pretty standard. best thing is the huge amount of room available at the front! I have a Fenix M3 radiator coming for the gap, straight bolt in... and that should provide heaps of cooling. It’s what all the USA people are using (M3, not Fenix) with no trouble. I’m not keeping AC and theres a big daddy oil cooler to compliment it. Still weighing up an oil thermostat but almost think the added complexity isn’t worth it. Headers on drivers side are going to be a real cuntflap. Writing this in the bath, hoping I don’t drop the phone. Too many diesels! Nek steps are to make new steering shaft, move ABS pump or delete it, get driveshaft made, and send loom off to the pros. I’d really like to sneak this up to Raglan but it’s not old and won’t be finished! Wish I still had an E30
1 point
-
Image size limit reached Bolt ons for days Also one of these. Fits a N2O canister for uhhh nitrogen filled tyres
1 point
-
Why have you got 2 engines you greedy ho.1 point
-
What were you driving? Cheers for the pic! Sorry for driving like a 15yo. Me and a mate swapped cars for a bit and I broke his 500+hp evo! Crank pulley exploded and let the belts go. Overheated it. Considering it’s a 2.4 stroker that’s quite new I really hope I didn’t kill it. Slapping engine together at the moment for the TYRBBQ. So far it’s been a bit of a cluster but nothing too major. The oil pickup tube fouled the plate that sits under the crank, so the die grinder sorted that out. Frustrated that the fucking pickup tube hits the sump though so will need to be modified. I bought them all off the shelf from Sikky and I would expect it to just work! Also the engine guy wrecked the water jacket bung by cross threading it. What a munter, I’m gonna have to go and find an m28x1 tap to clean it up. Got really hammered last night so progress is slow.
1 point
-
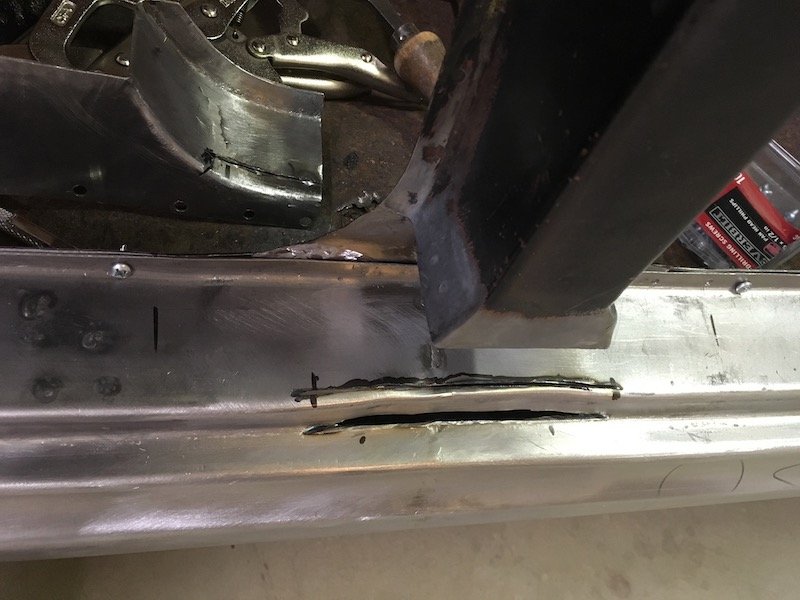
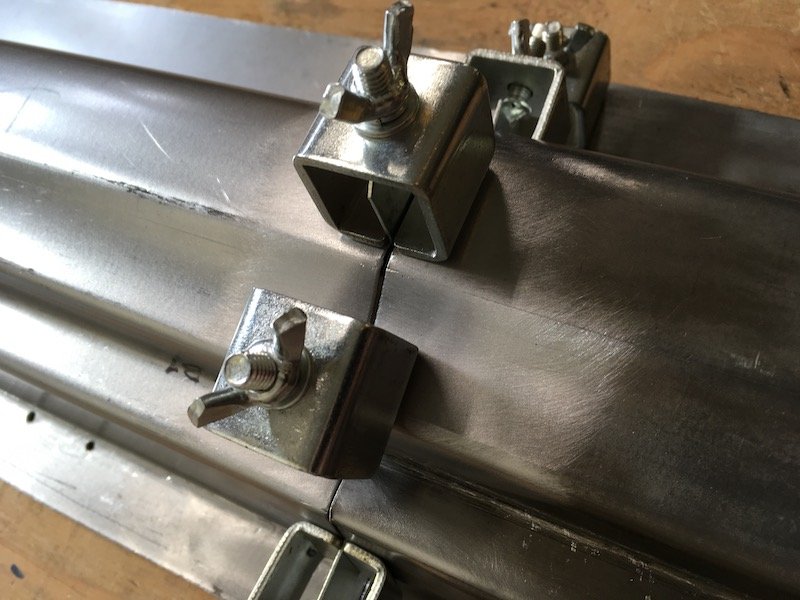
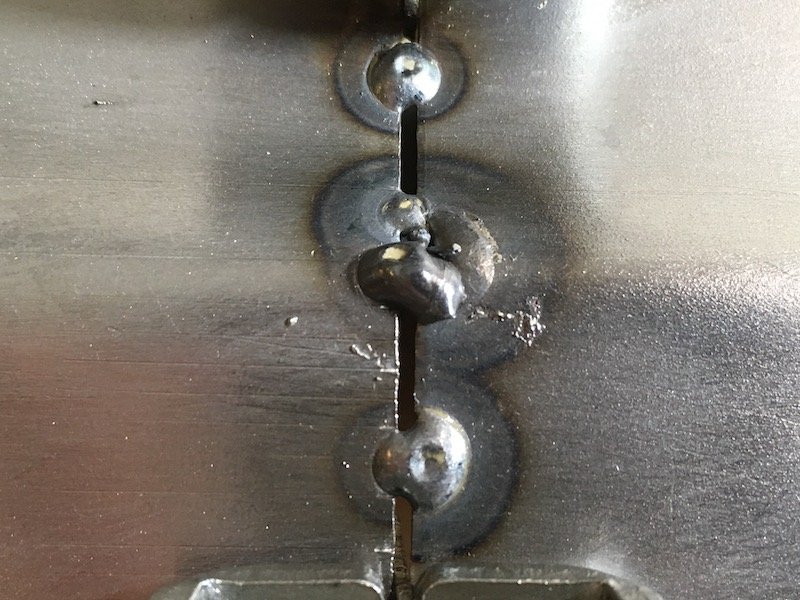
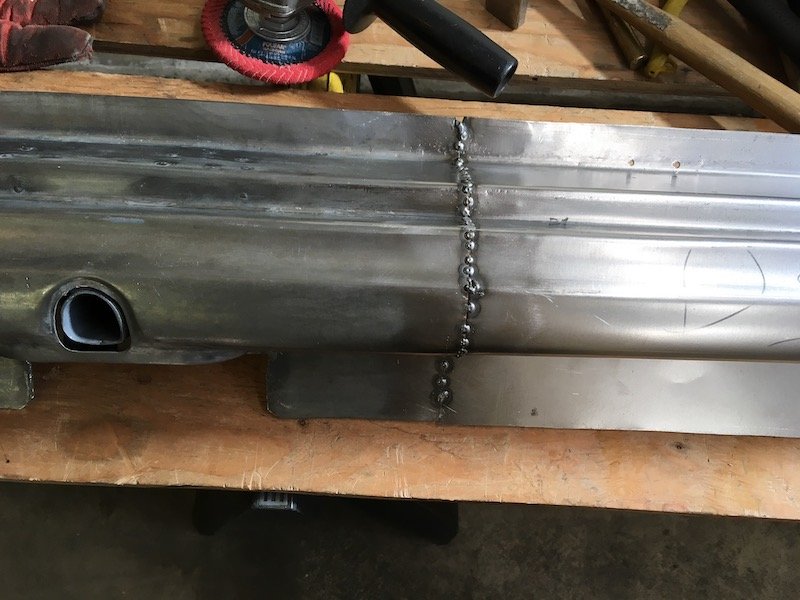
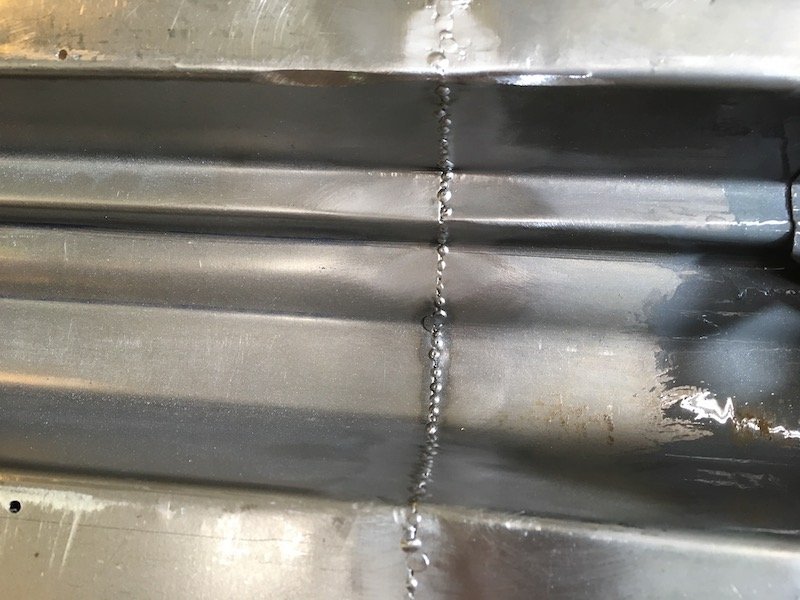
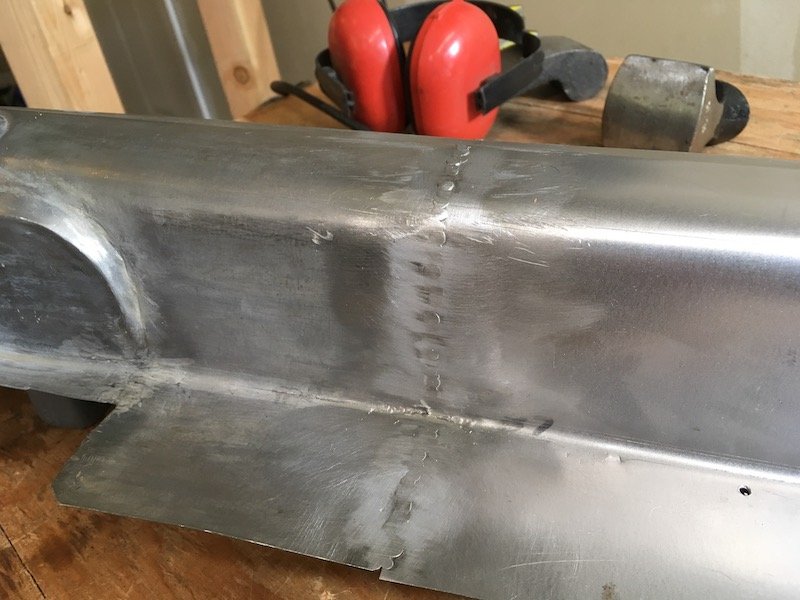
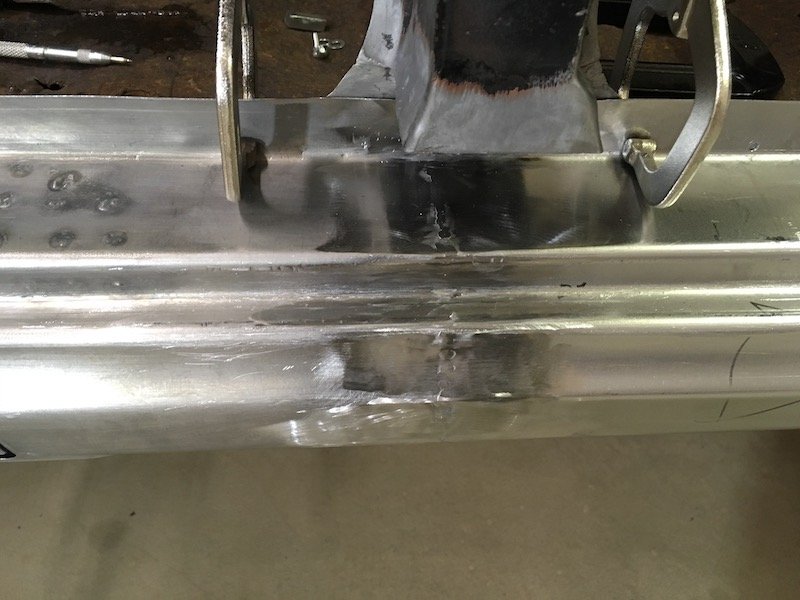
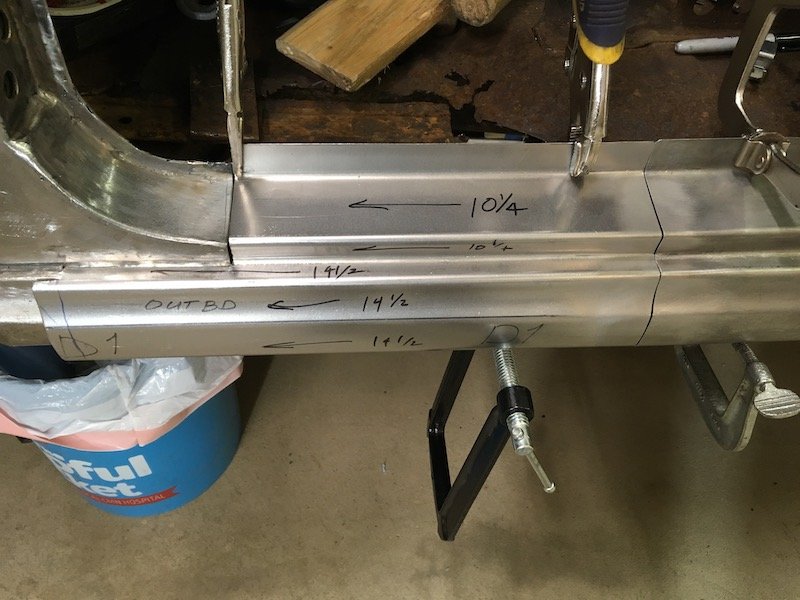
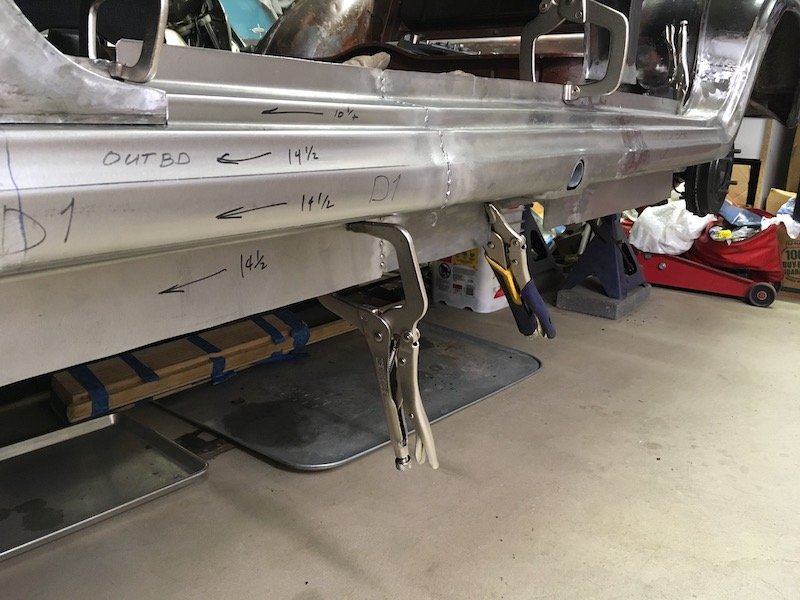
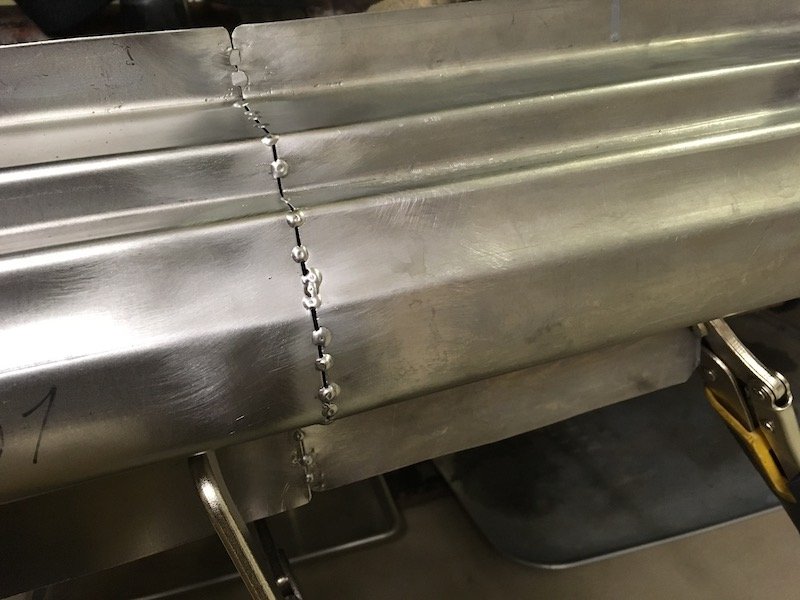
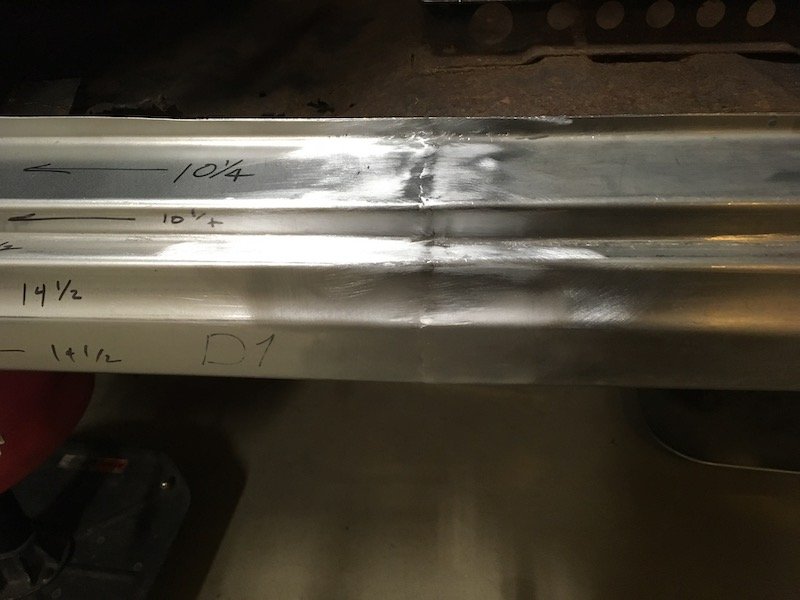
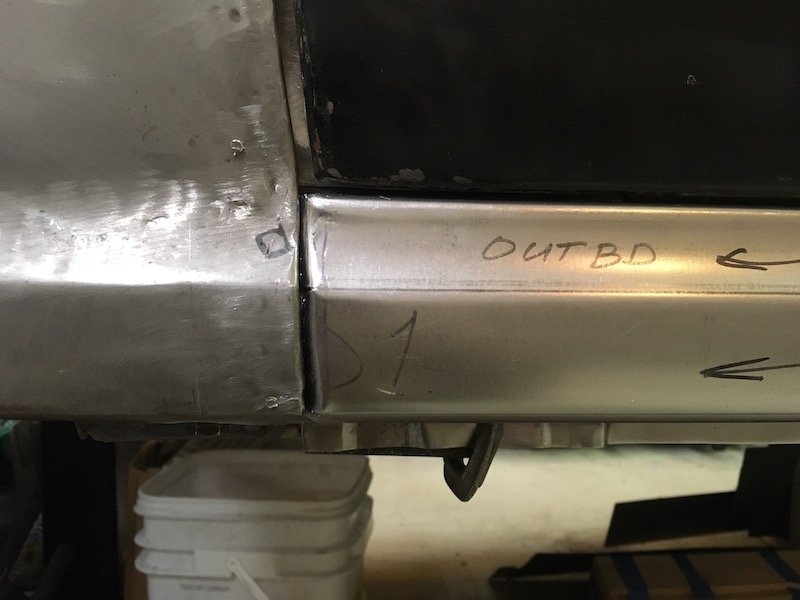
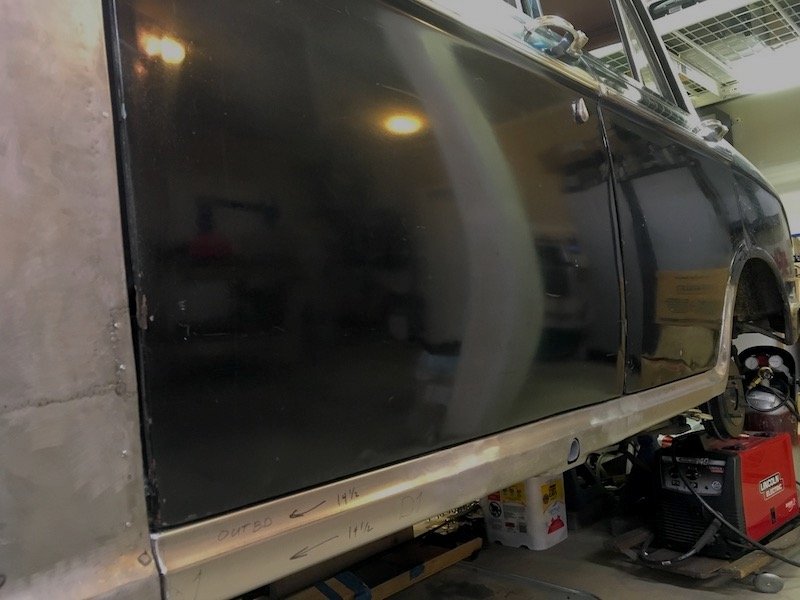
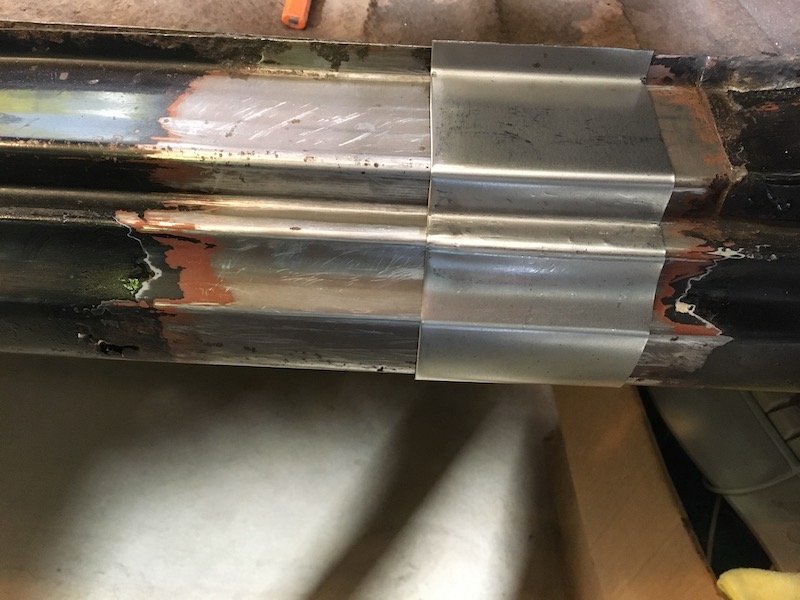
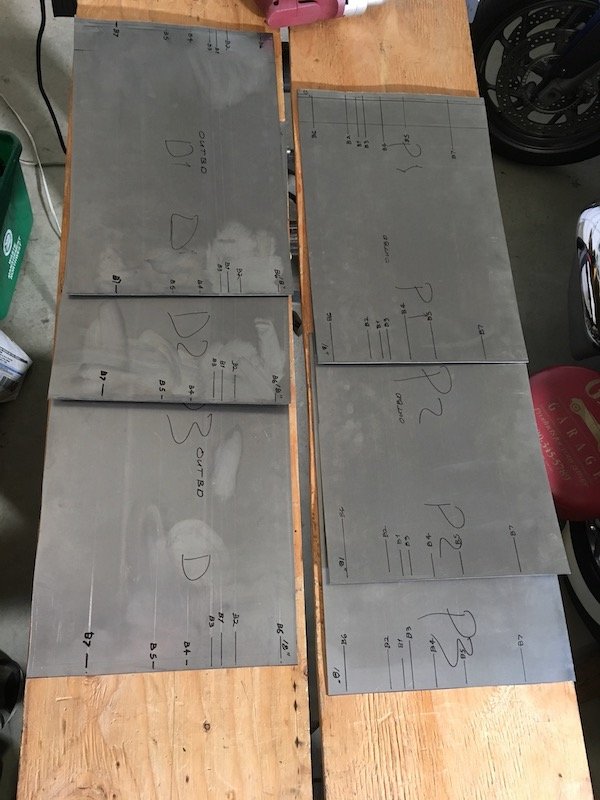
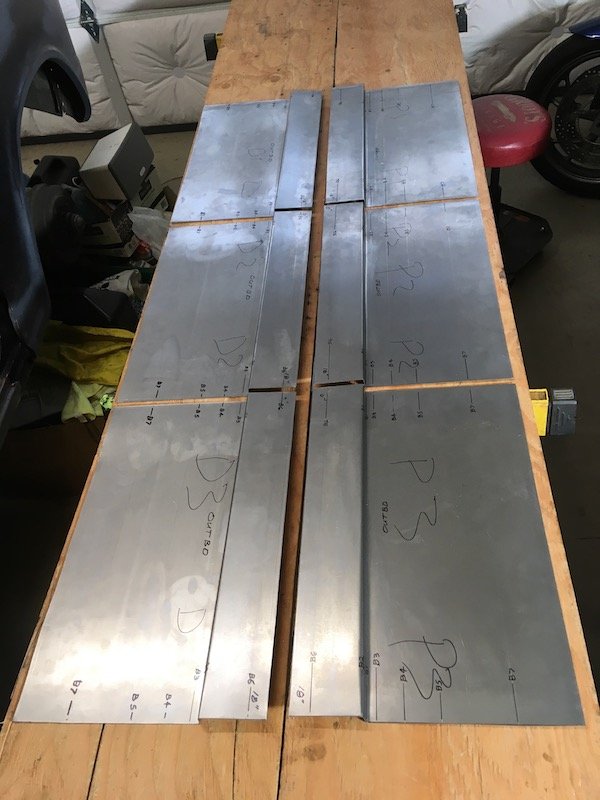
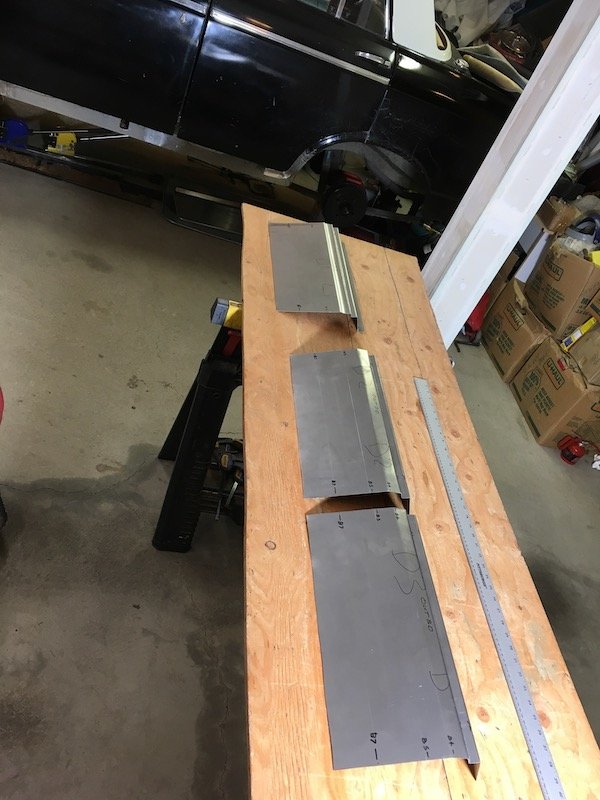
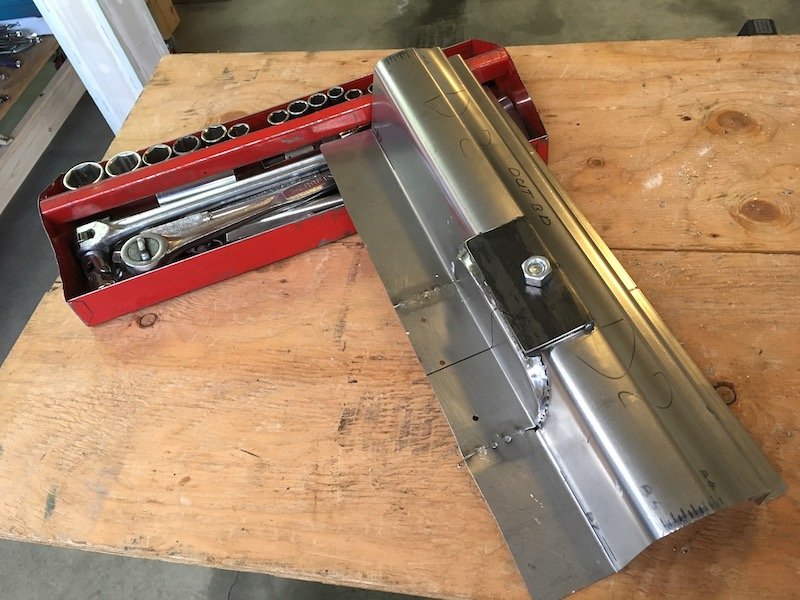
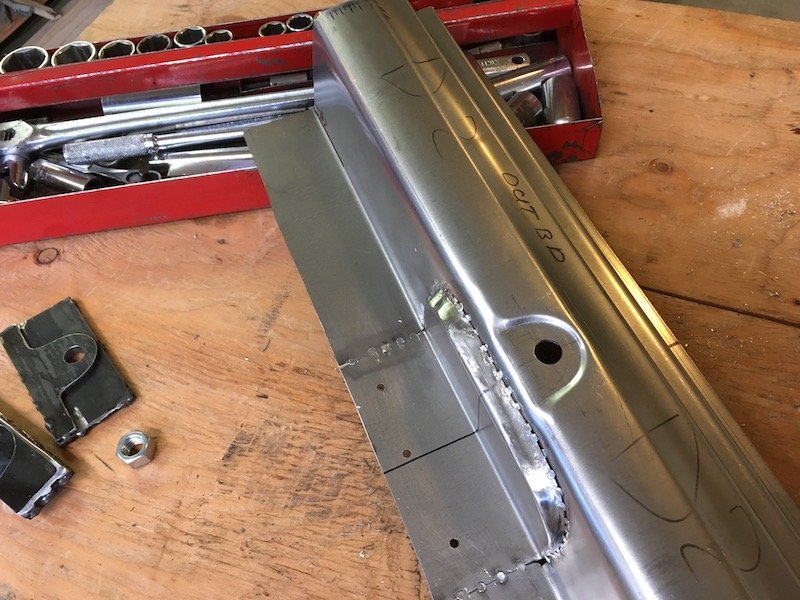
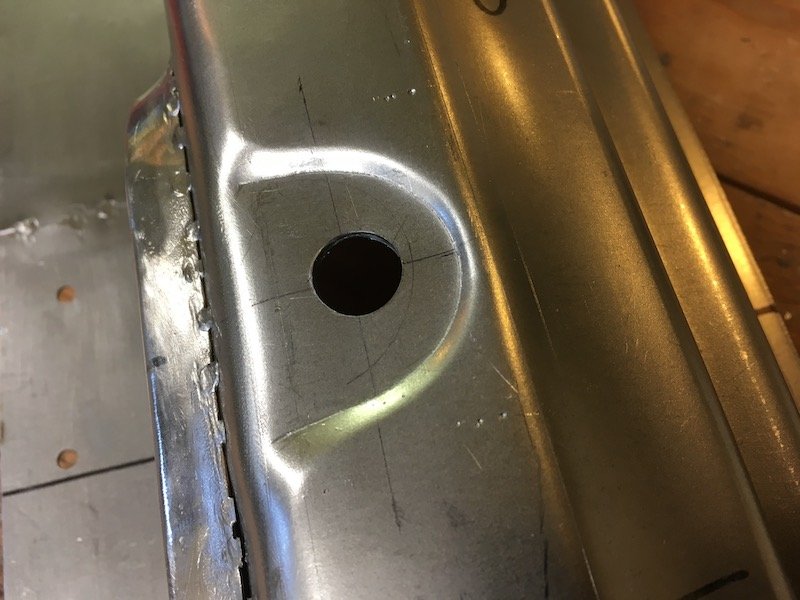
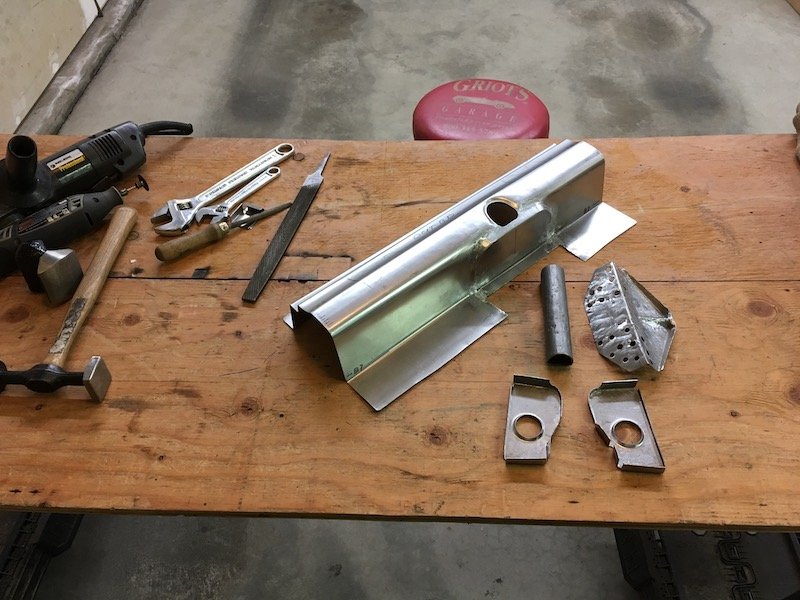
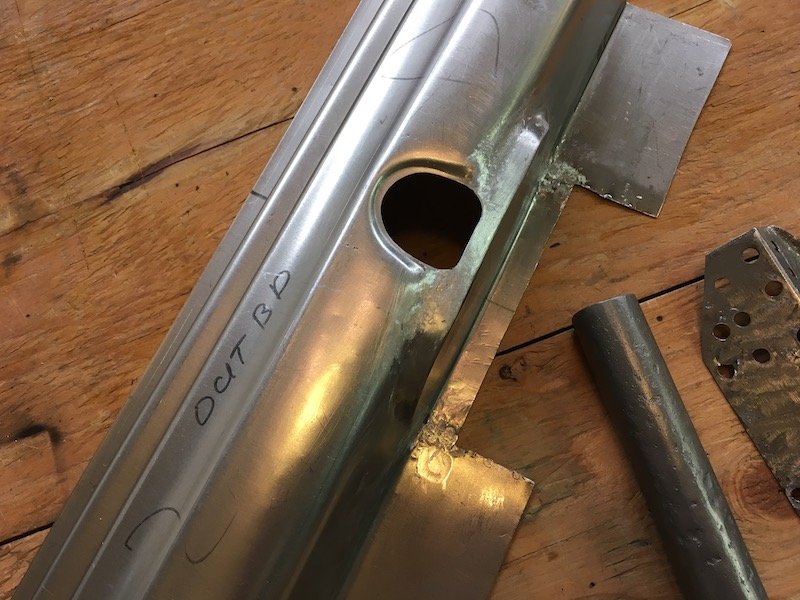
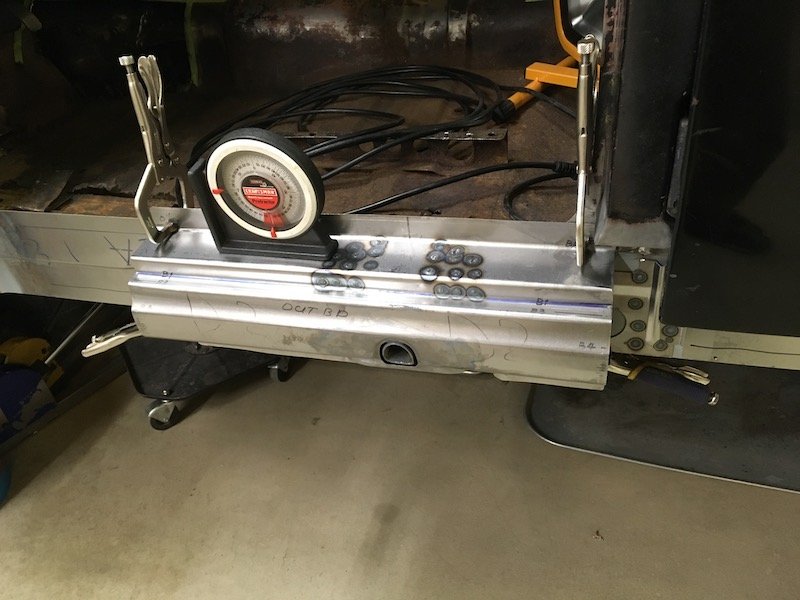
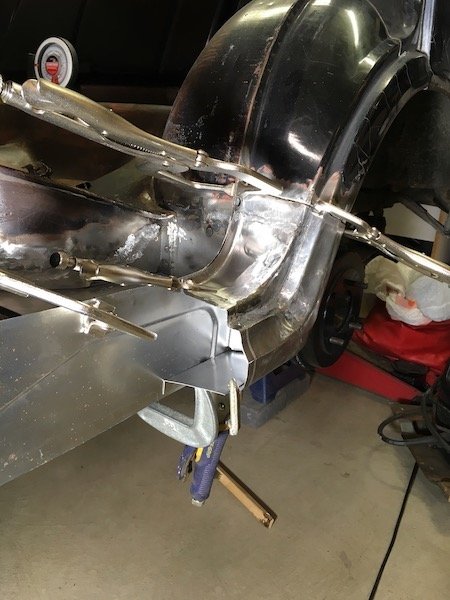
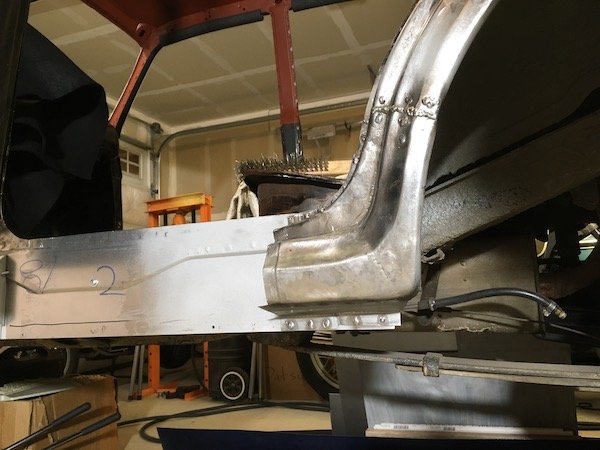
More progress with the Bluebird left side outer sill. Welded the three outer sill segments together. Started with these two shown previously Then I fixed the sill segments together with these little clamp things. These set up a nice gap to make good weld penetration to the back side. Then starting making tack welds. The first strikes in the center of pic were really bad and missed. Remainder of tack welds were usually on target. About 70 percent complete in these pics. Front and back side shown with good penetration. Front side will eventually get ground and sanded flush. Back side gets left as is. Initial grinding and sanding. After that I held the assembly against a bright light and check for pin holes, fill with weld and complete. It looked pretty good in a fit check against the car body. No weird wrapping or anything. Then on to the joining of the third sill segment to the assembly, same as the first. Except I was checking against the fit to the inner sill on the body before tacking, and after initial series of tacks, because there is a slight bow or curvature on the body fore and aft and I wanted to make sure of no issue. Did a little more rough trimming of the forward end as well so as to permit tailoring a nice fit up against the A pillar and lower stub later on. Finished weld of the last segment. Overview of the situation Then I decided to play with this. No, I did not actually try and jack the car up, just having fun with it. Later on I bolted the doors on again, probably for the fifth or sixth time, and did a final check for gap along the lower edges. Plus I formed the forward edges of the sill assembly to mate up with the A pillar stub with just the right gap next to the fender (or wing, right?) As seen underneath in above pic, there are several joggles along the lower flange to accommodate fit against several parts that are layered on the vertical inner sill plate. Below, the gaps look decent and body lines of door to sill are flush. Installed some trim to show off for the camera. Discussion: https://oldschool.co.nz/index.php?/topic/60267-marts-pl310-61-datsun-bluebird-sedan/
1 point
-
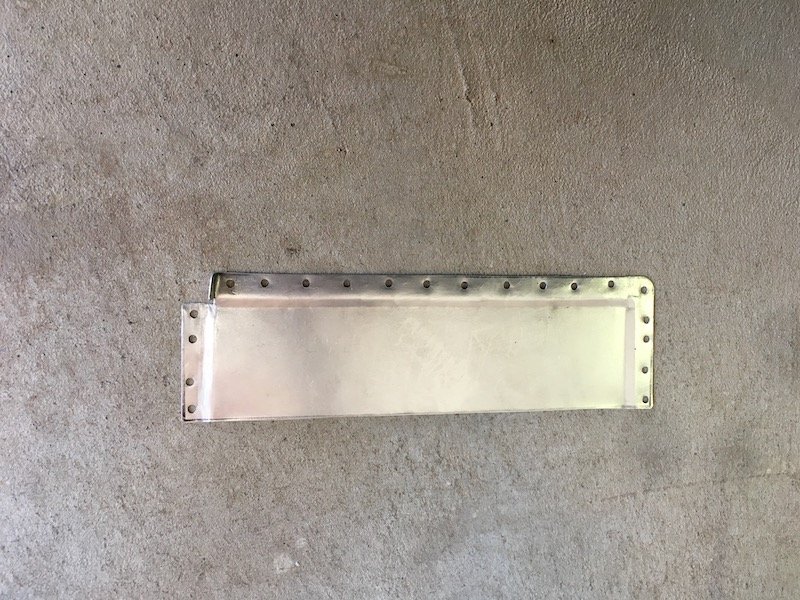
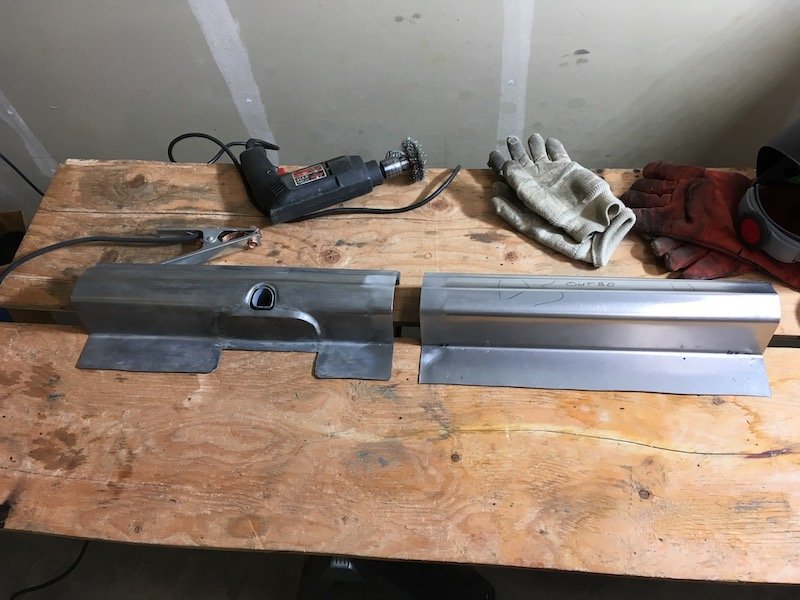
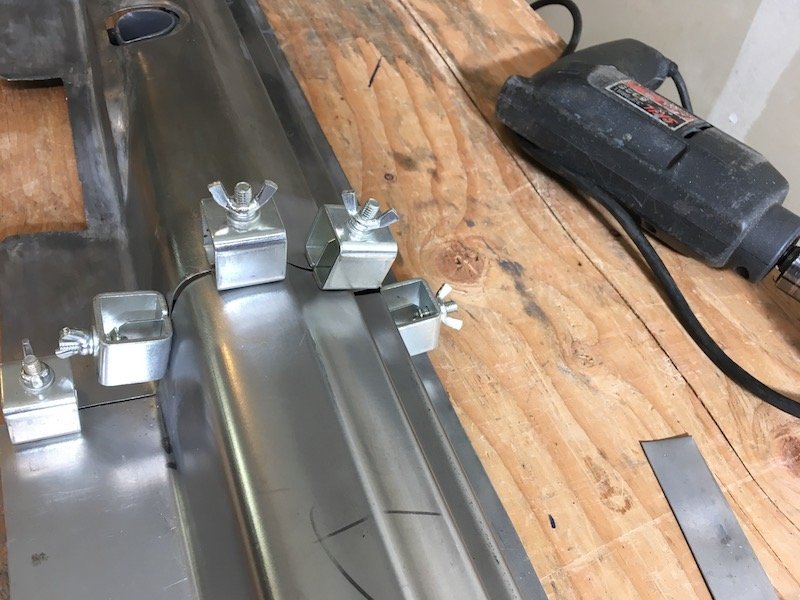
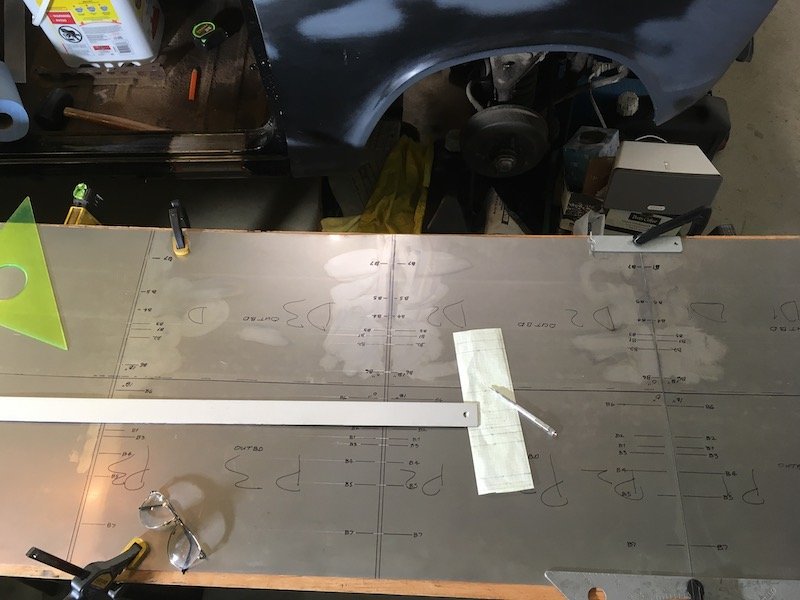
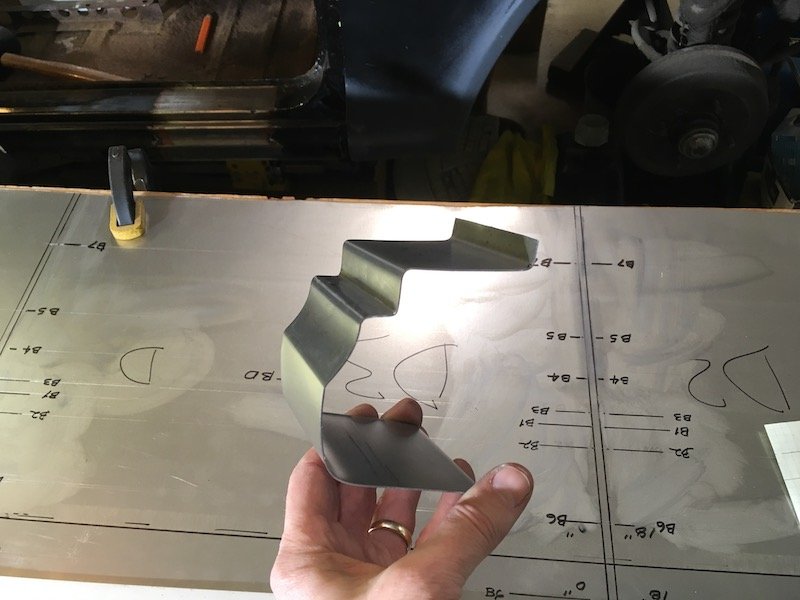
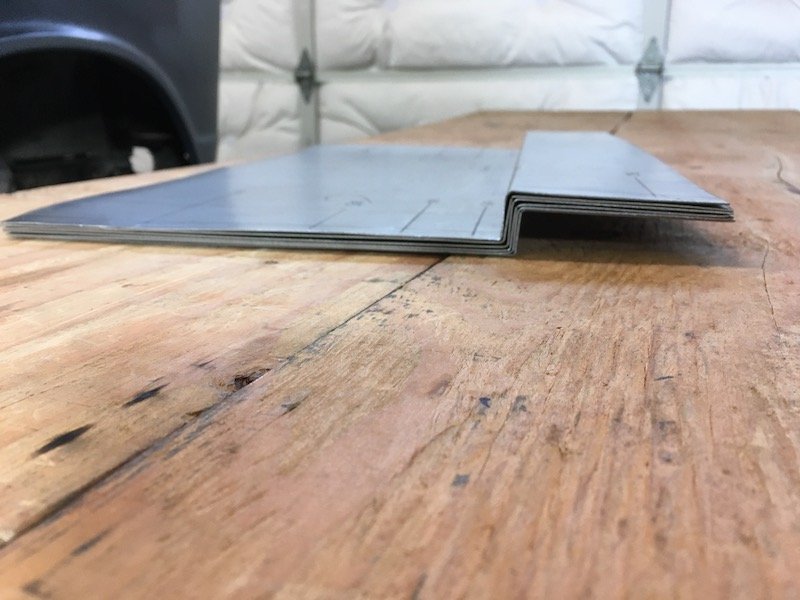
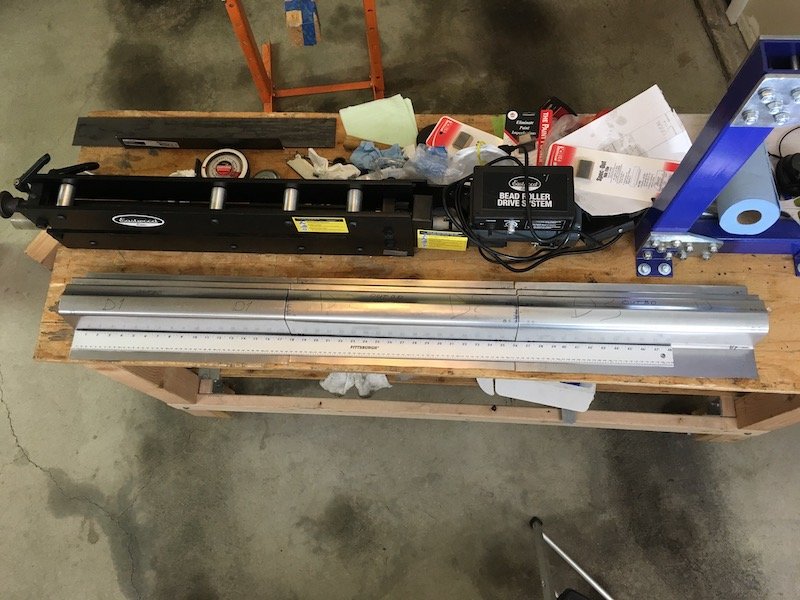
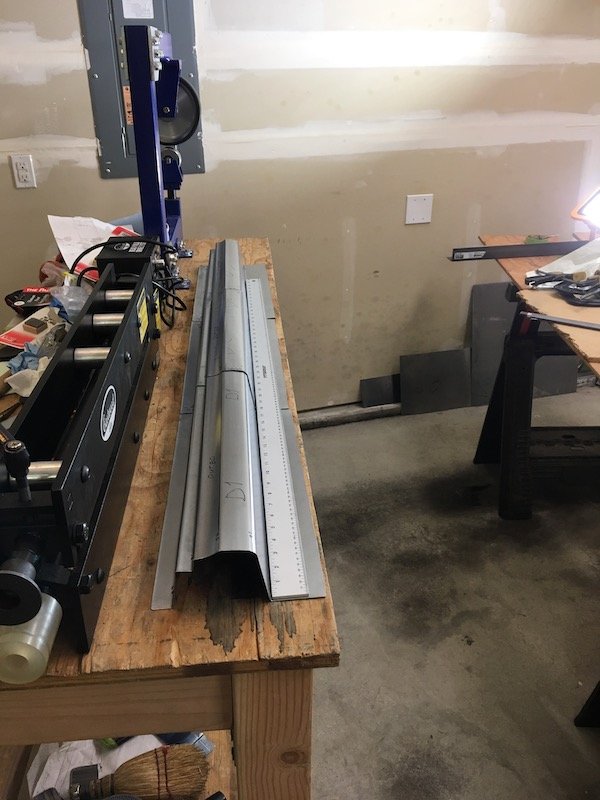
I got a little out of sequence. I should back up a little and show the making of the three outer sill segments that began about six months ago. Three segments because the metal folder tool only can do a 20 inch length maximum whereas I need about 54 inches total length. I also need to make offset bends. So there are a lot of challenges to make the sill. Makes it all the more interesting to have a go at it. Anyway, I have run into difficulties in duplicating the exact profile but it's good enough for usable parts on the left side. Maybe the technique can be improved upon for the right side. On the righthand side of the car I carefully measured and made a card template of the least rust damaged profile. Then began experimenting with and adjusting the seven bend line locations to figure out a way to make a sill. This is unlike a usual and simple sill that just wraps under the door more or less. The Bluebird has several visible body lines and a concave shape in-between. Plus there is the side of sill penetration for the jack lifting structure shown previously. This Bluebird outer sill is made of 20g sheet. Layout of bend lines The prototype profile Fits like a glove on sanitized right hand side Cut out six 18 inch long panels of 20g for left and right (D for driver's side or left, P for passenger side or right). Bend lines are marked more sharply by scribe marks so I can get good alignment when it comes to joining the segments together. B1 and B3 bends are offset bends and very close. This proves to be a problem Made the offset 3/4 inch bends for all panels (B1 and B2). Not perfectly uniform but close enough So far so good! As mentioned above, now I start having a problem at bend 3. This needed to be a tight offset bend from B1 at just over 1/2 width. The folder will only do 5/8 minimum (yet it was advertised as capable of 1/2 inch offset). Not good. I have to start compensating by moving the other bend lines to keep the visible body lines on target. The plan is to adjust the pillar bottoms to fit the adjusted sill profile, at least on the left side. I'd like a better plan for right side to get the true profile so I can leave the pillars unaltered. I'm considering having the folder plate milled down to get a true 1/2 inch offset bend, but that still leaves me with three separate segments to weld together. Either that or start over and make the whole thing as one hand formed piece by hammer forming each bend over a solid 90 degree edge of some sort. That might be wishful thinking. My crude setup for making the concave curvature between bends 3 and 4 Sandwich the sheet between plastic pipe, angle iron and squash it Checked out the fit of a couple of segments relative to the doors and the lower edge. Checked out as good. Three completed sill left side segments lined up on the rollaway workbench. Decent alignment of three segments. Looks like I can make it work when it comes time to join them End profile view of three outer sill segments all in line, just for kicks Discussion: https://oldschool.co.nz/index.php?/topic/60267-marts-pl310-61-datsun-bluebird-sedan/
1 point
-
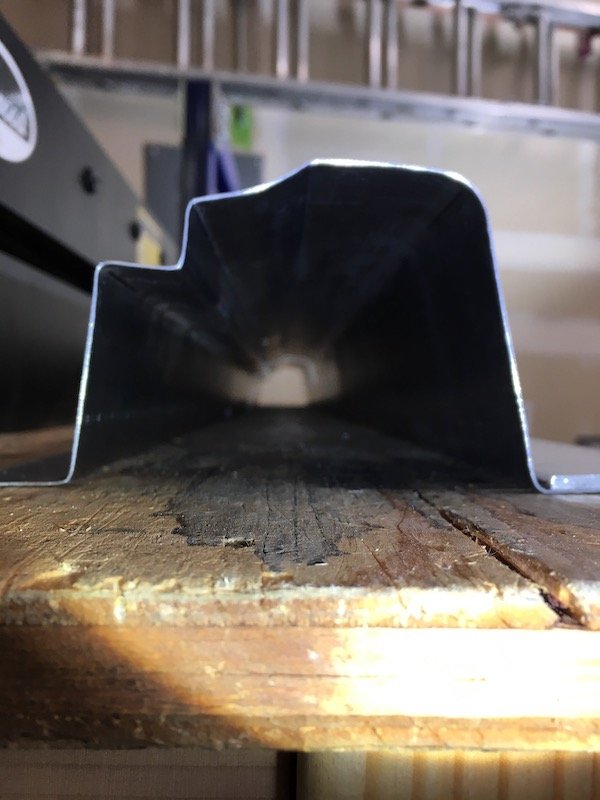
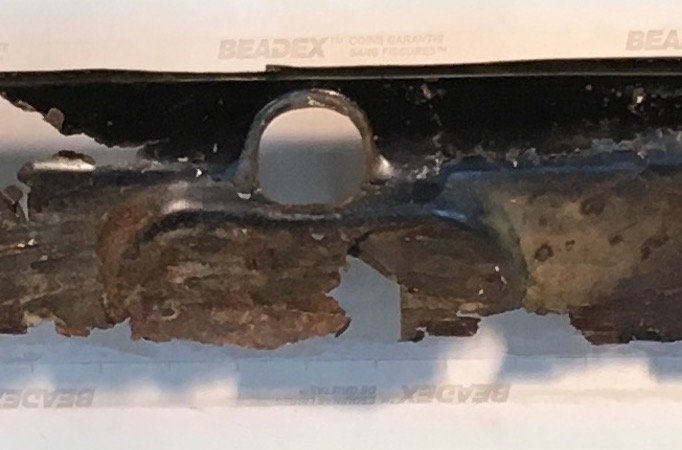
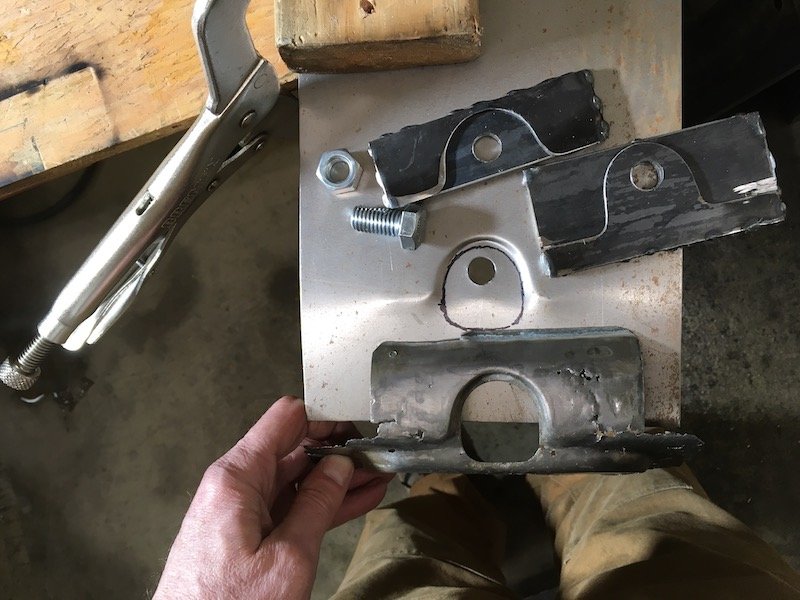
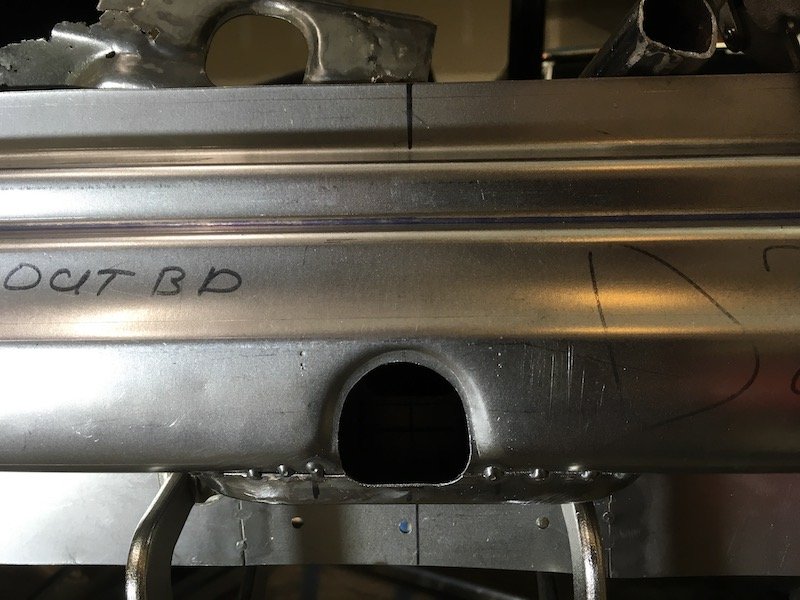
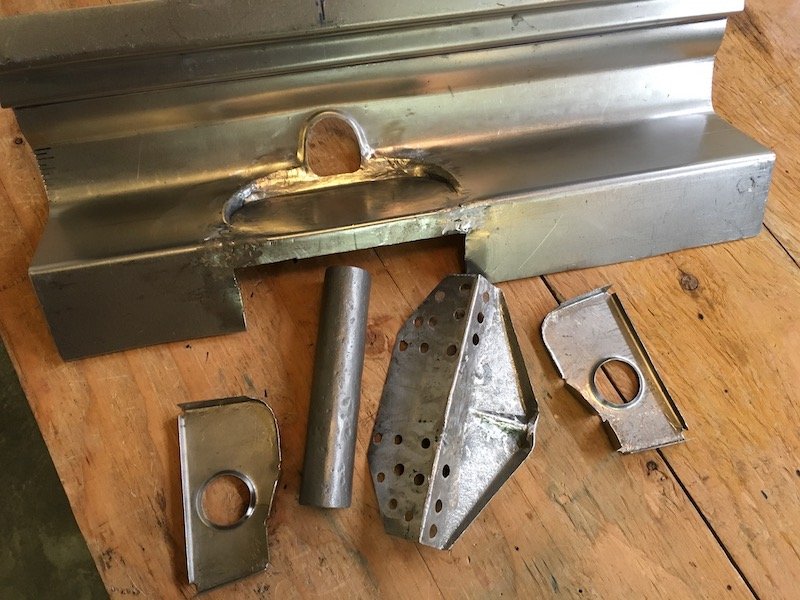
Build of the lifting jack structure Original outer sill panel where the lifting jack pipe was Inside the sill are the remnants of the jack bits Made a forming die to recreate the indented outer shape, test looked good on scrap piece so went ahead Simple as sandwich the panel and tighten the bolt Looks not too bad! Closer examination. The extra metal around the bolt hole gets trimmed out to match original. The lower pop out section (to left) is welded on and then cut off. Wrong position darn it ;( Straight on view after trimming Moving on to recreate the inner vertical stiffening brackets. Takes a bit of imagination since only about half of the originals remained Bits getting ready for weld Checking bits out for fit Sand blasted the original pipe free of rust Now really ready for weld Welded and checking results for fit against inner sill Coated with POR 15 for future rust protection. Turns out this coating can catch fire real easy and sustain flames. Next are the three outer sill segments to be welded together. I've kept a lot of extra flange widths, top and bottom, to resist warping. These flanges gets trimmed back to about 1/2 inch. Discussion: https://oldschool.co.nz/index.php?/topic/60267-marts-pl310-61-datsun-bluebird-sedan/
1 point
-
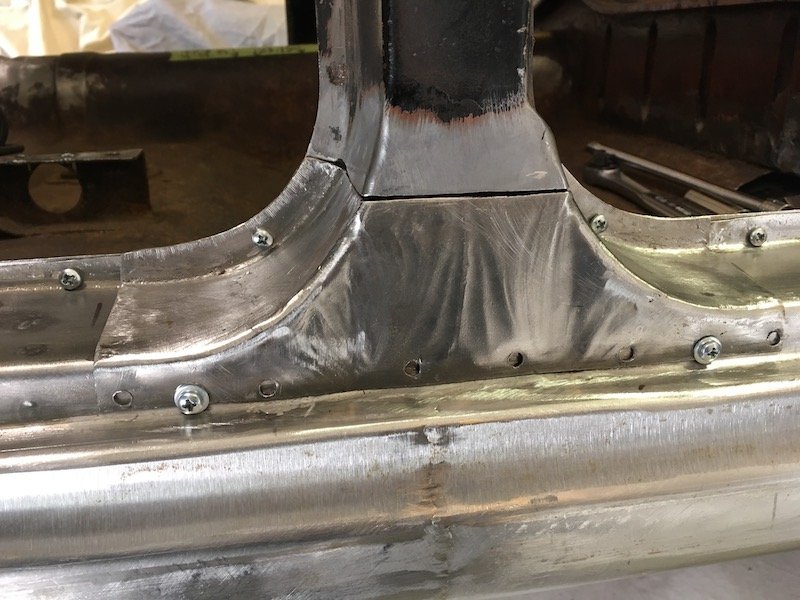
And then the repaired dogleg and base was welded back on. Still not happy with the quality results. Some tweaking of the lower outside body line is needed, finish welding and small holes to fill. First early trial fit checks, outside and inside views: Then flange adjustments, to fit more flush with the not so perfect outer sill panels I had made, and weld. I also decided to add a splice plate behind the butt weld. Then I find my end cap plate is now just a bit too wide. It can be adjusted and cap welding will wait for last anyway to close out the sill box. Got some more work to do on this
1 point
-
1 point
-
I've just mounted the aliexpress brake caliper. This wee guy was only 9 months old when I started this... I promise I'll pick up the pace. I need one more sprocket for the jack shaft. I'll have to have a good think about how fast I want it to be before I order it. After that it will be drivable, just lots of tidying up to do, paint it, make a chain cover and make the interior look nice.1 point
-
Finally on the ground. image below for an idea on air up height. And air out. Note it will have side pipes that will make it a tad lower still. A+B=Fun.1 point


This leaderboard is set to Auckland/GMT+12:00