
Leaderboard


Popular Content
Showing content with the highest reputation on 07/05/19 in all areas
-
so last year in 4 weeks i stripped the front and resprayed the engine bay. gave the engine some new parts and a spray can rebuild. chucked it back together as i wanted to take it to an event. got it mostly done the night before the event worked till 2am that night. did some more in the morning as had carb issues. then took it to the event and hoped for no breakdowns. i had pushed myself to finish it in time as a woman wanted to go to the event together and was keen to go in my car. plus would've been extra brownie points right? but it turned to shit before the event. but ended up taking a male mate instead. was good but still overheated... been super slack and haven't been updating this thread will try and update it in the next few weeks yeeah
 10 points
 -
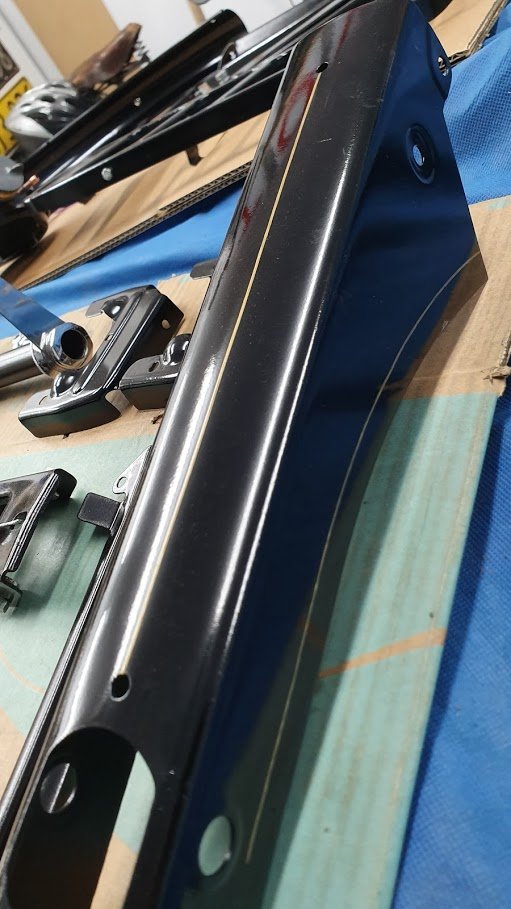
Tried my hand at painting some pin striping - not a bad 1st effort. I replicated all the factory stripes it originally had
8 points
-
been productive day so far. happy with the first coat. just a quick scrub with the grinder and wire brush. so don't get close. need to flip the cab and prep that ready for a coat of primer. but will do that once this is finished. now to go clean the mess in the shed.
7 points
-
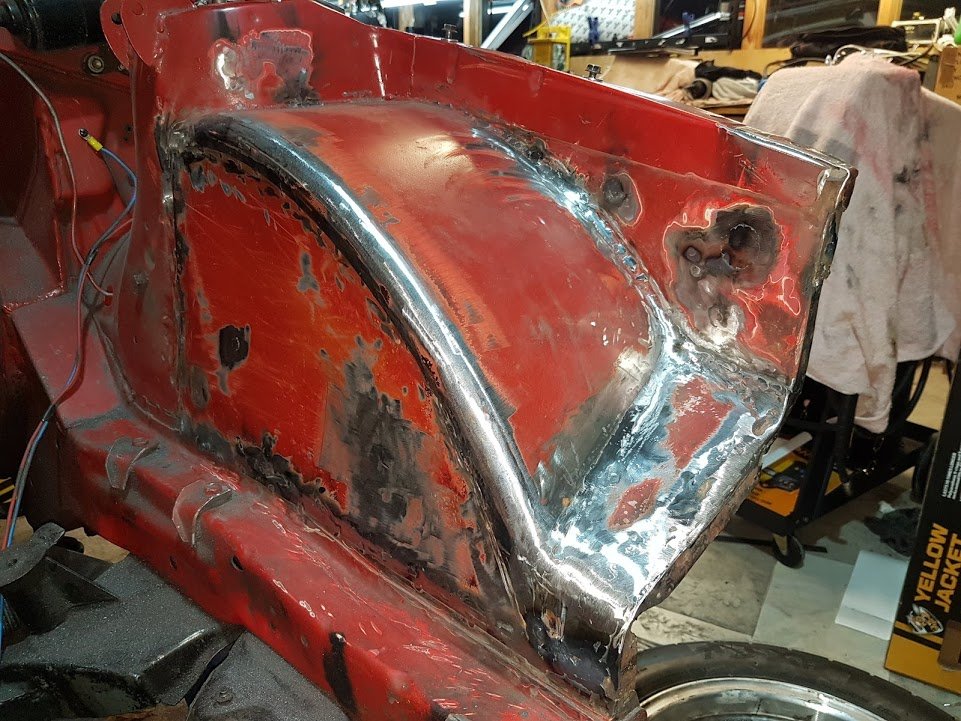
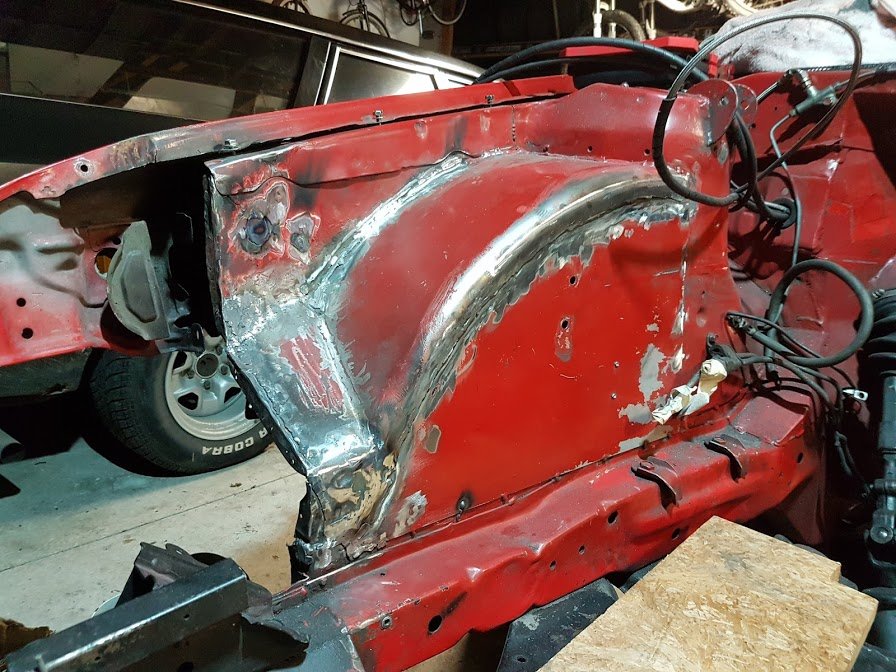
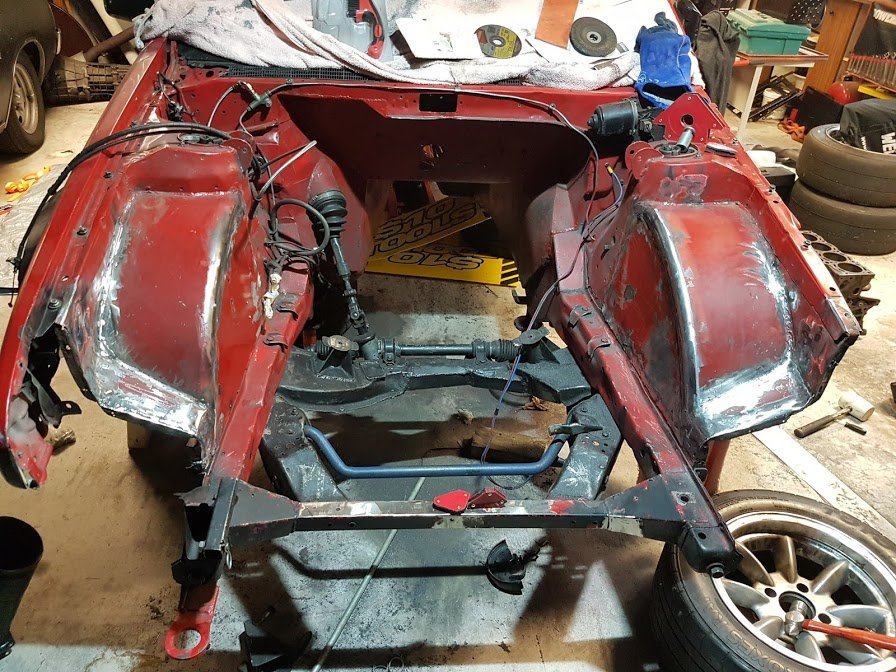
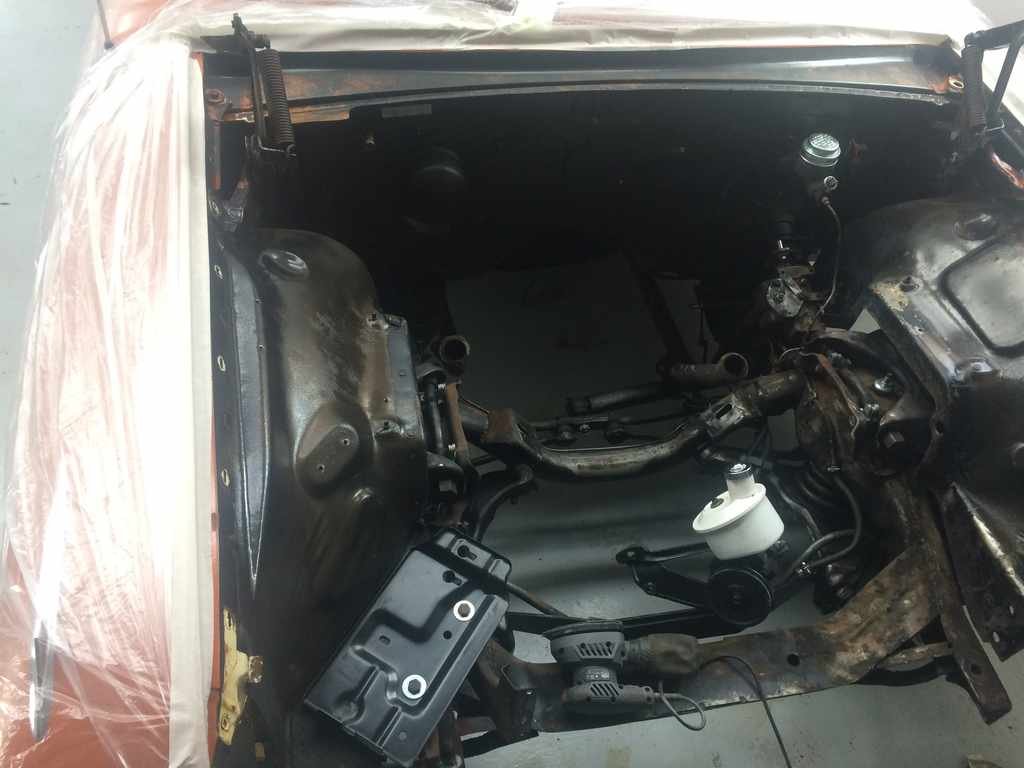
Haha, cheers man. I’ve never been much good at bogging, so half the fun was learning how to mix and lay it again... The stuff I’m using doesn’t change colour when you add hardener, so I doubled down on hardener the first time and ended up with a streaky mess to deal with. Recent applications have been much nicer! Plus the sanding is basically cardio . Its getting there now - bit of filler primer and seam sealer done. Now it’s time to start applying filler to the other side and get the rest of the bay cleaned, sanded and primed for paint.
6 points
-
I went down that road and bought a couple of different styles as I figured some would be shit. The ones that are "square cut" like, they are drilled from one side and drilled from the other. Avoid. Most of them had a small piece of swarf still stuck to it internally! Went straight in the bin. These ones were good (I've used them with fuel and oil for several years, including a lot of do ups and undos with no issues at all) https://www.aliexpress.com/item/32741180690.html?spm=a2g0s.9042311.0.0.27424c4d670JXq https://www.aliexpress.com/item/32718466578.html?spm=a2g0s.9042311.0.0.27424c4d670JXq This style, avoid: https://www.aliexpress.com/item/32743291389.html?spm=a2g0s.9042311.0.0.27424c4d4HvP3k I reckon the biggest cause of fuckups with AN lines though is putting them together improperly. I found putting masking tape around the outside then using a cut off wheel gave the best results. But need to clean a bunch of crap out of the line afterwards (But need to whichever method you use)3 points
-
Outer mould patterns finished and ready for printing. 3D printing is good but it also means to have to design the under side! Twice as much work!3 points
-
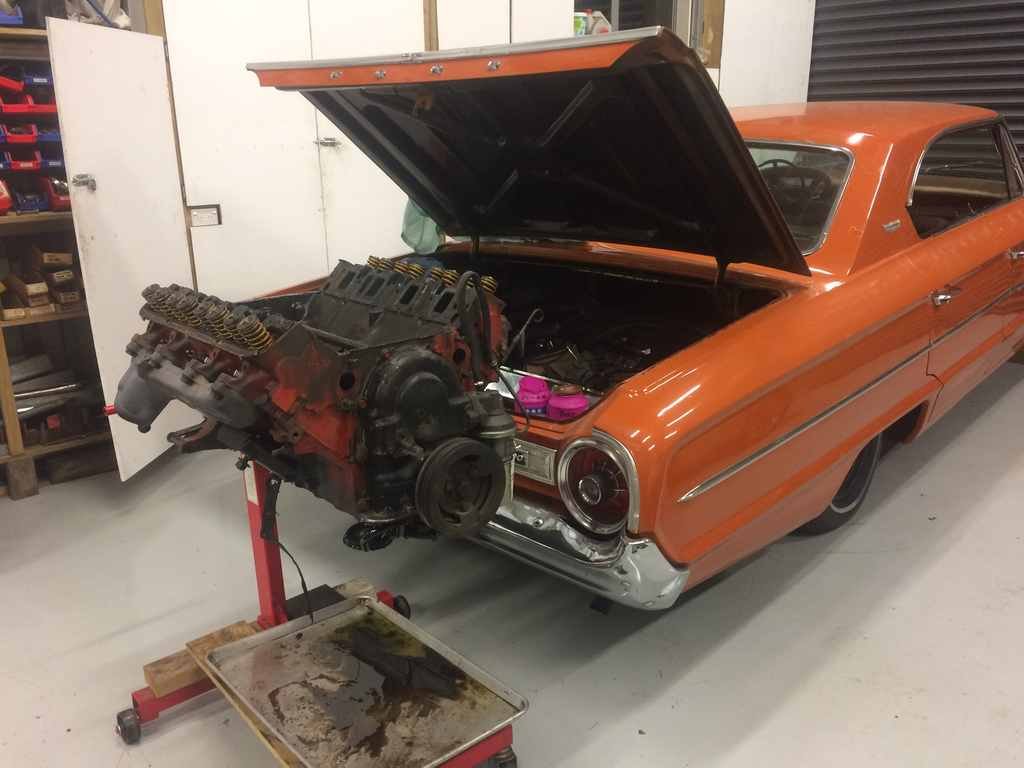
So with now having the engine black ready to bolt on everything I looked at it and was unimpressed how well it looked being that the engine bay also being black as then there would of been too much black. so ended up sanding all that off and painting it this colour. so these galaxie's ran black engine blocks from 1959 till 1965 then in 1966 they went to this blue colour which looks alot better than black. then after letting the paint dry i put the rest of the bolt on items back on the motor. then did some more painting on bolts And nuts And cleaned up the throttle linkage bit and turned it black No more Orange And cleaned up and painted other bits like the engine and trans dipsticks. then joined the two together to go back in then in the hole Also polished up the rocker covers and bolted them back on too. now its just piece everything back on while tidying bits up like the wiring and painting and cleaning bolts.
3 points
-
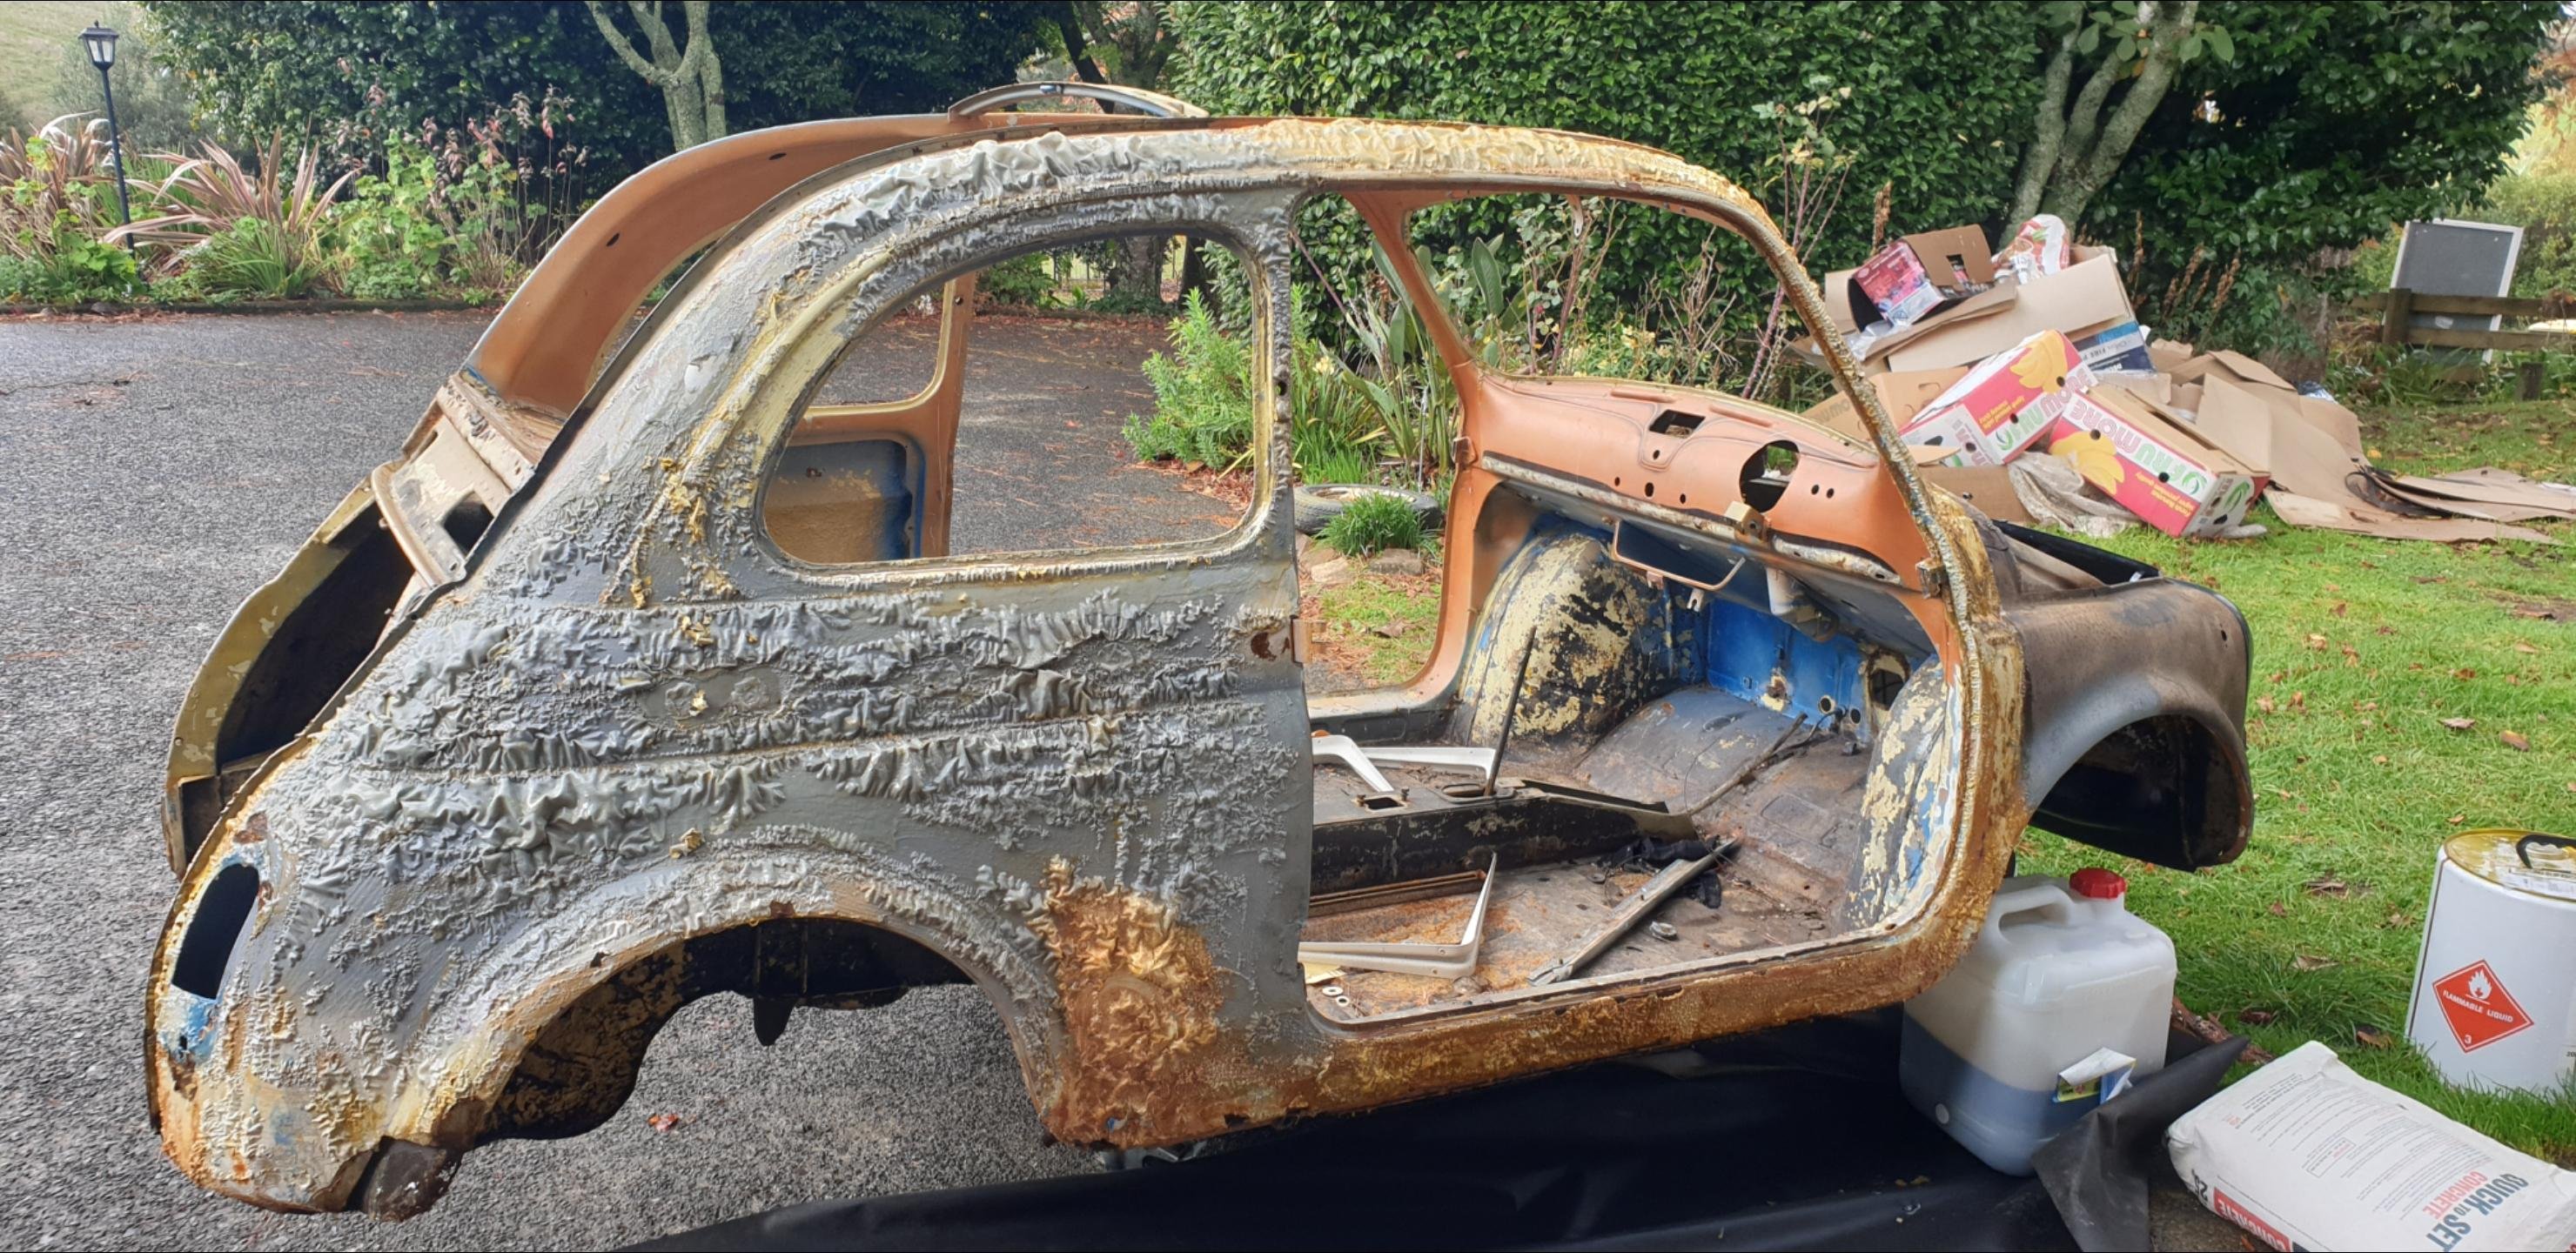
Time for a smol update on the fiat. Have been chipping away with making patches and buying parts/paint stripping etc. Gave the mrs a wind up about getting motivated to finish it and she pushed me in to actually buying parts. Parts are in the country but the a holes at customs forgot to process the gst invoice so I'm back to bodywork.
2 points
-
second coat on. a couple of runs but over all it look mint.
2 points
-
Oooh paint it like my old one. Had lime green front fading to yellow then white flames, as was the fashion in the time...2 points
-
The French race them and you can get a big bore cylinder/piston and hi comp head - good for a lot more torque and top speed. The pedal gear ratio is a bit crap and takes a lot of work to pedal without the engine so i fully understand the sweaty mess situation. With the engine running it is fantastic for 30+Km/hr and still being able to pedal (albeit rapidly)2 points
-
Those aren't turbos!2 points
-
Workmate just brought a stack of chinesium AN fittings for an efi conversion, macaroni elbows would have been a superior material choice.....2 points
-
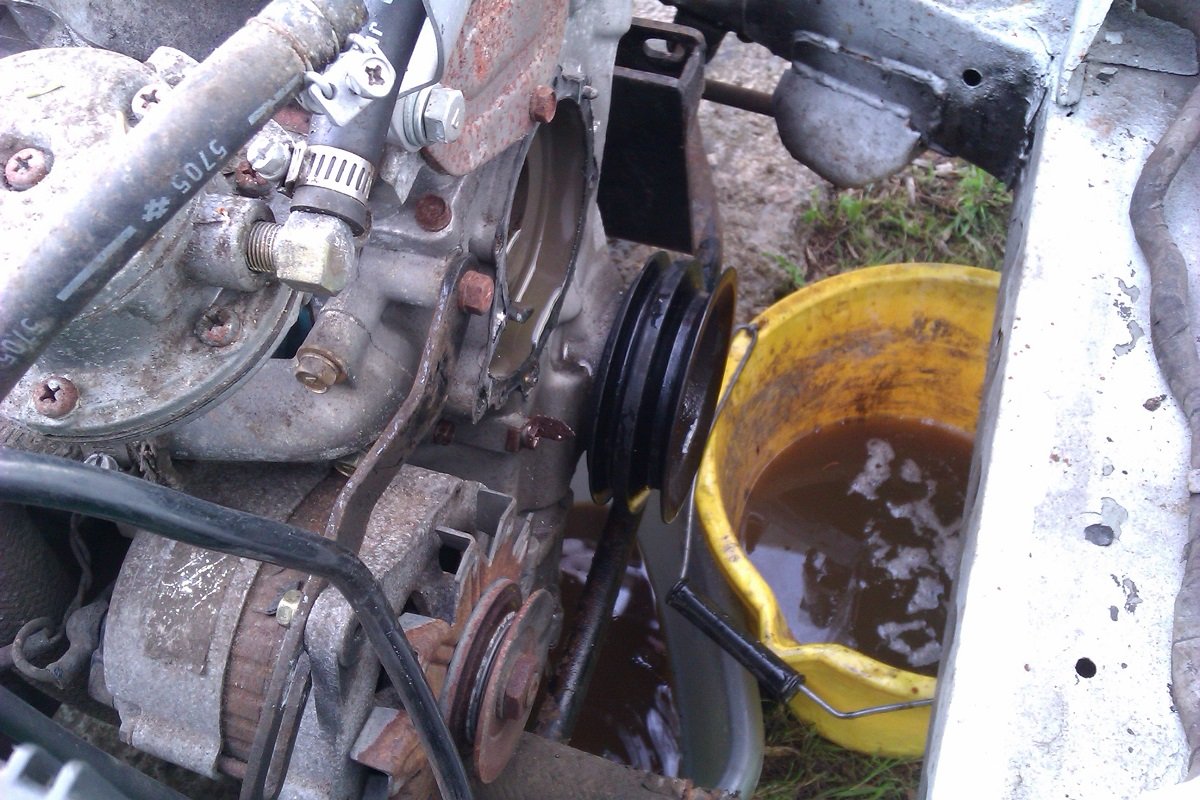
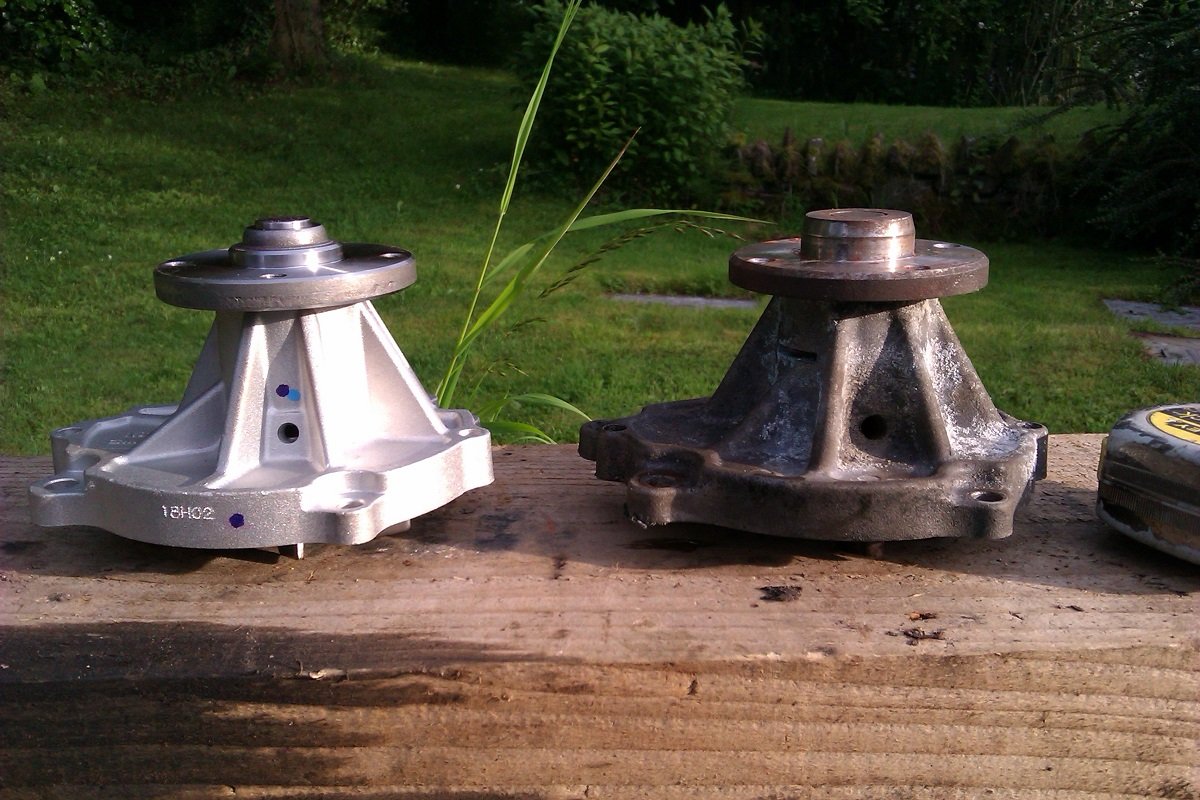
Sunday of productivity. Water pump back on, filled & warmed up. No leaky, no squeaky. Messed about with the front brakes but couldn't work out a way of fitting the new calipers without it turning into a fearsome bodge. I'll take the calipers & current flexies into the workshop tomorrow & make up some hard lines and brackets. Rear brakes went well though. Offered the shoes up and they looked good enough for a country job Everything fitted perfectly so I can confirm that 1971 Datsun 510 rear brakes are the the same as Hakos. Do with that information what you will.... Also done a vid. Really to demostrate the tappet rattle for comparison after I've adjusted them but it sounds like the cam's not bolted in. It's really not that bad. So that's about it, hopefully full braking will be restored by the end of tomorrow and then I might even give it a clean. Once I've adjusted the valves I'll give it the beans, I've been staying below 4 grand (mostly) because of the water pump but it really feels like it wants to pick up between 4 and 4,500. Thank you for your continuing interest.2 points
-
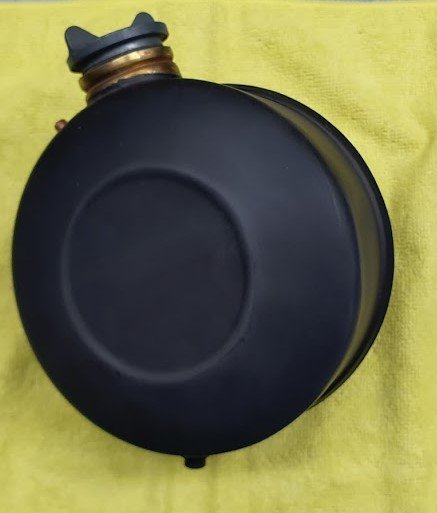
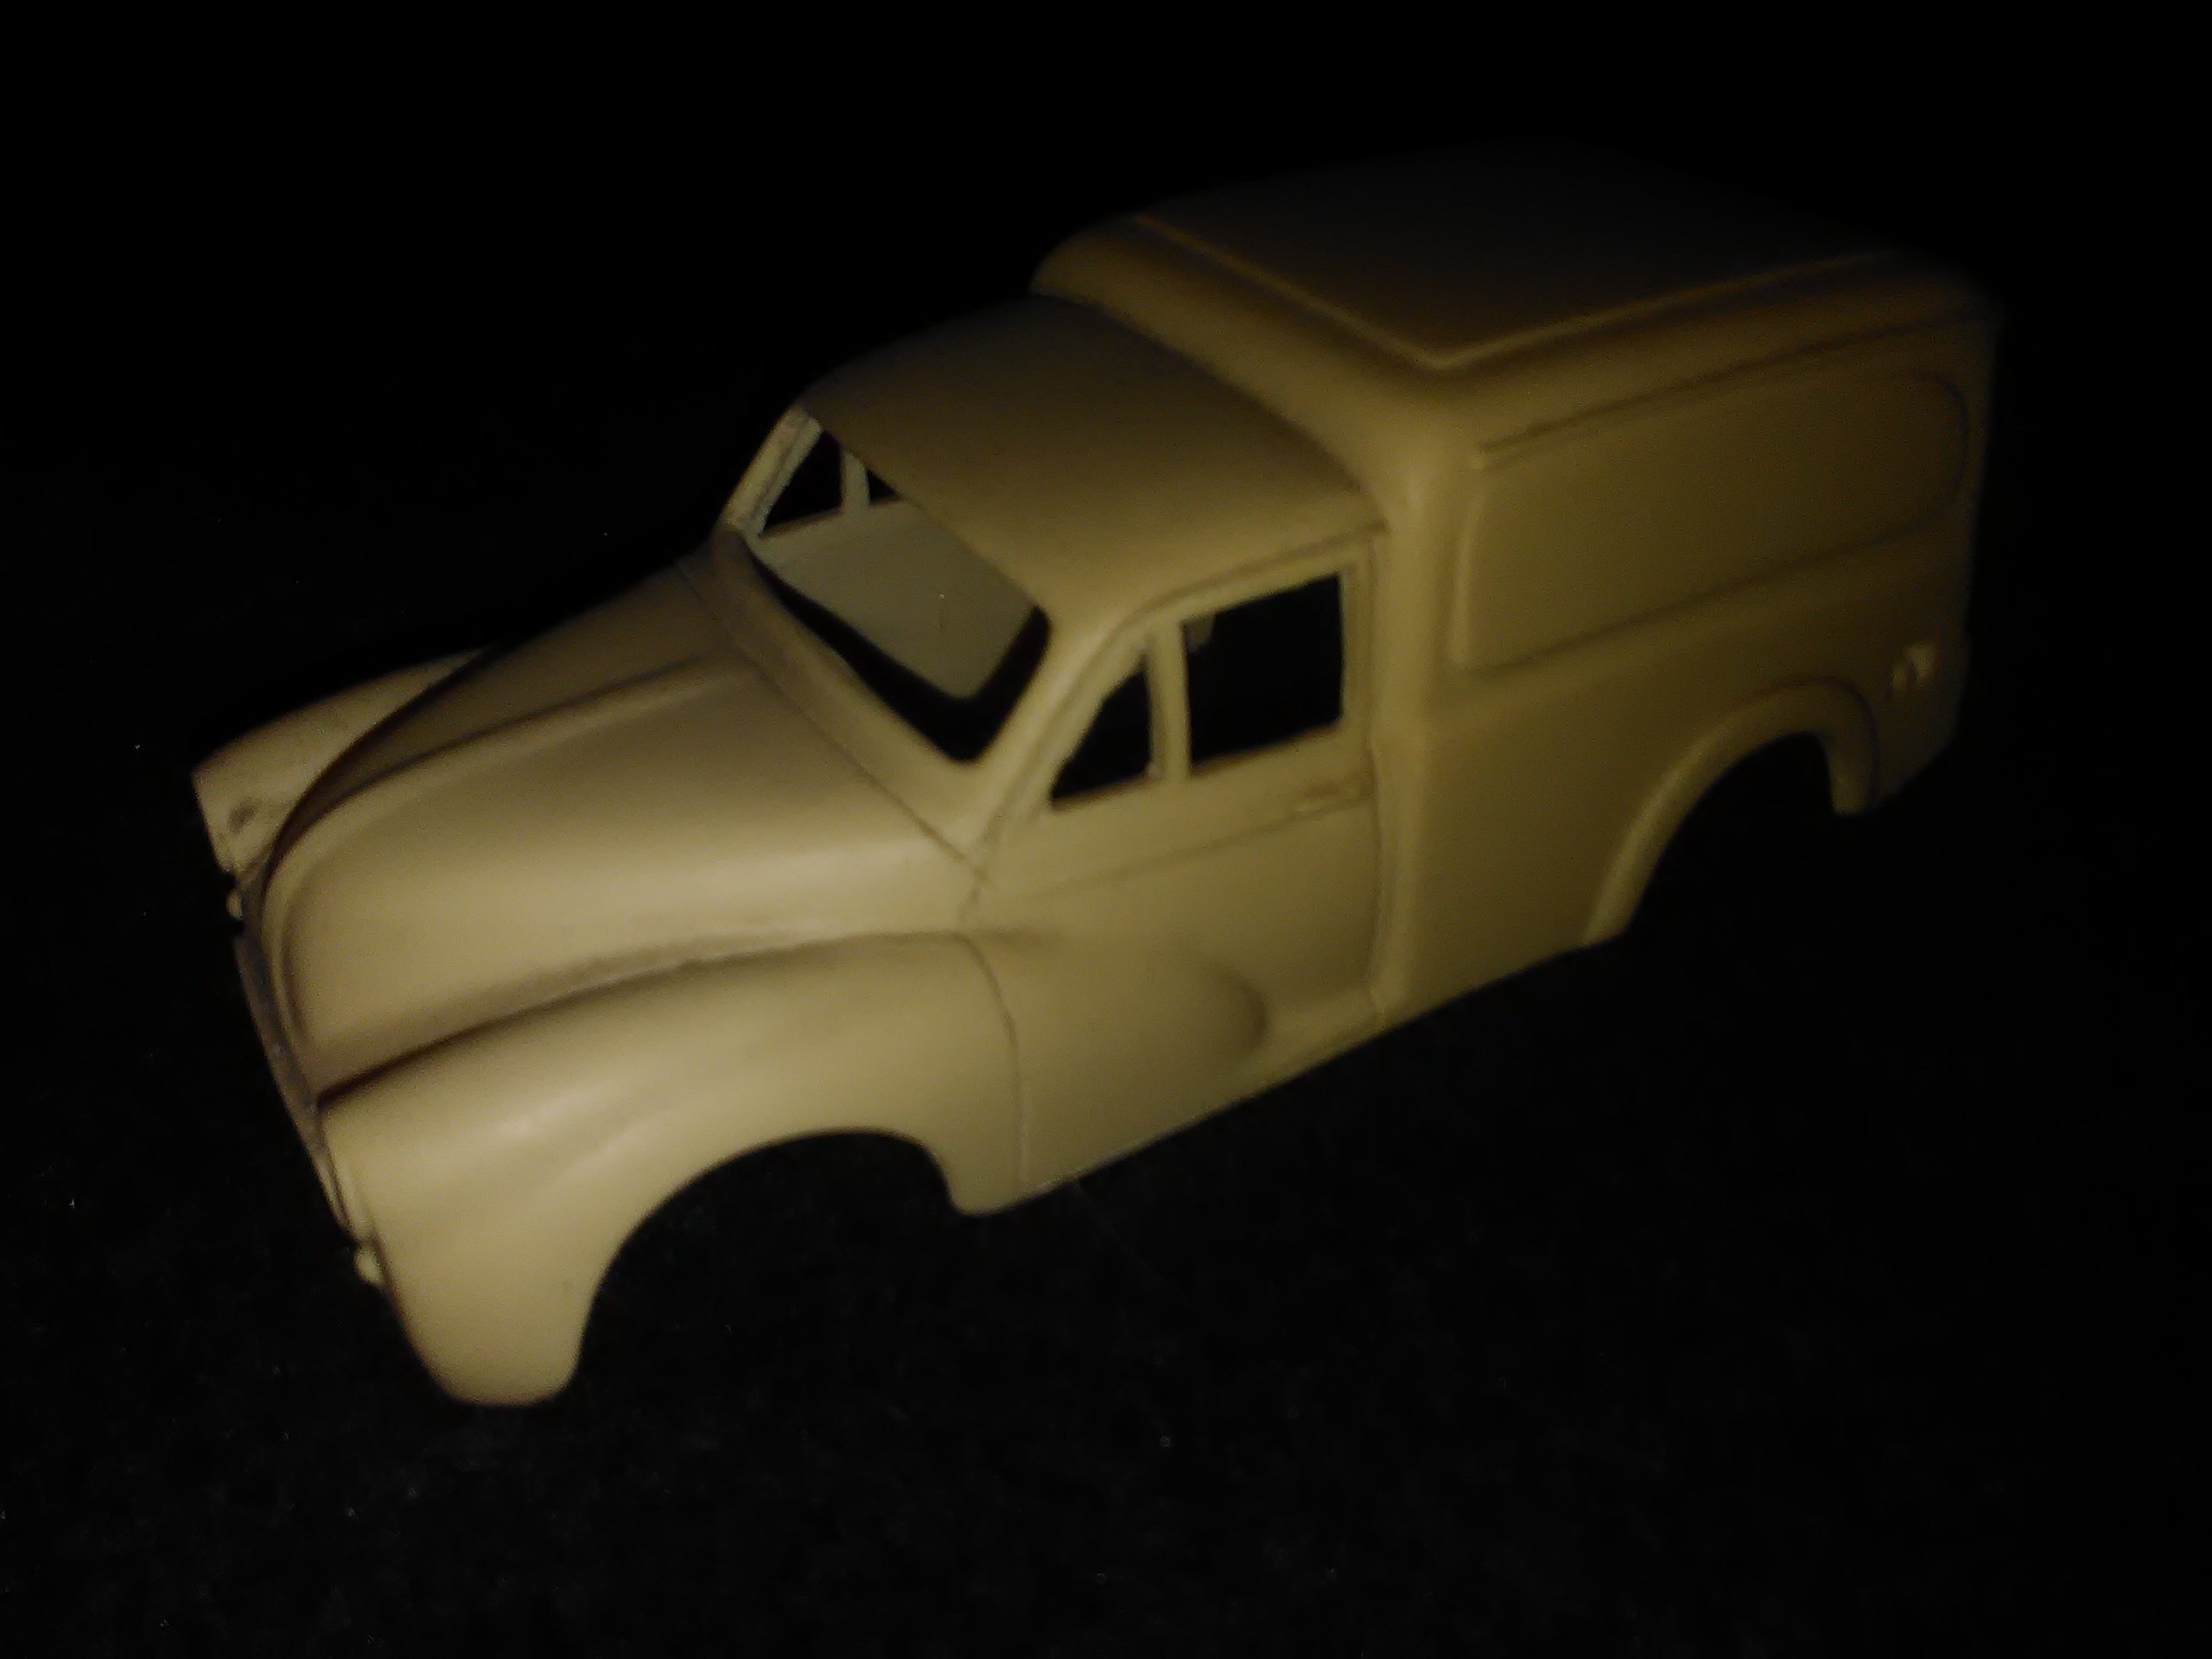
I'm stoked at how good the tank turned out. I painted it last week and finished it over the weekend.
2 points
-
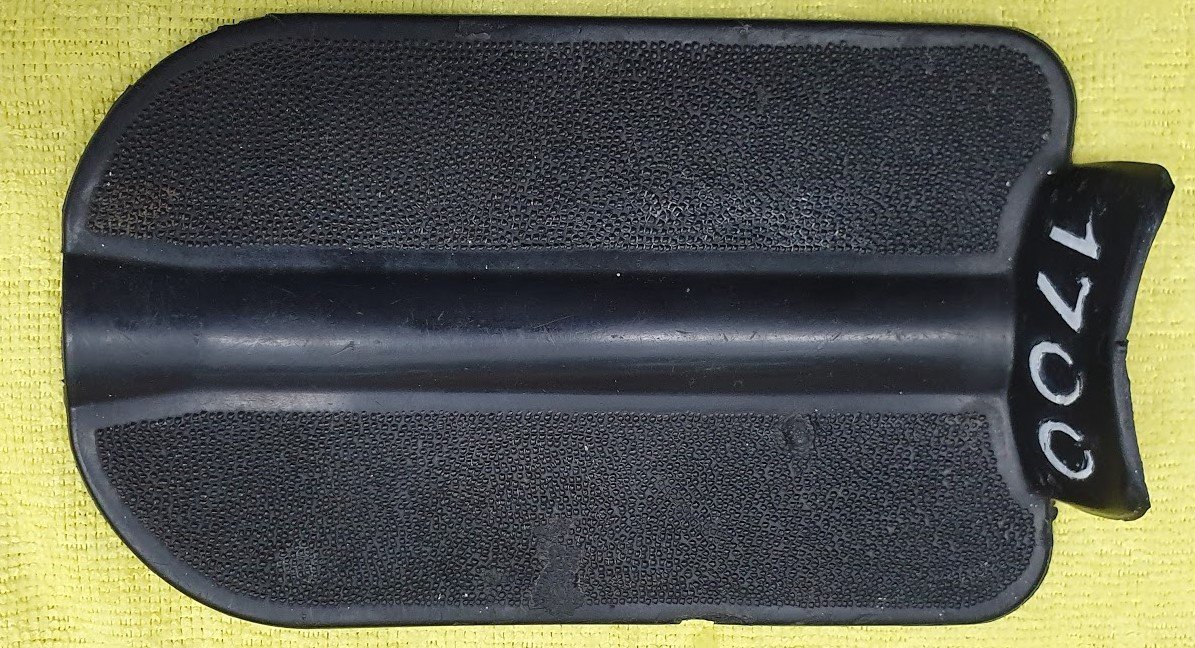
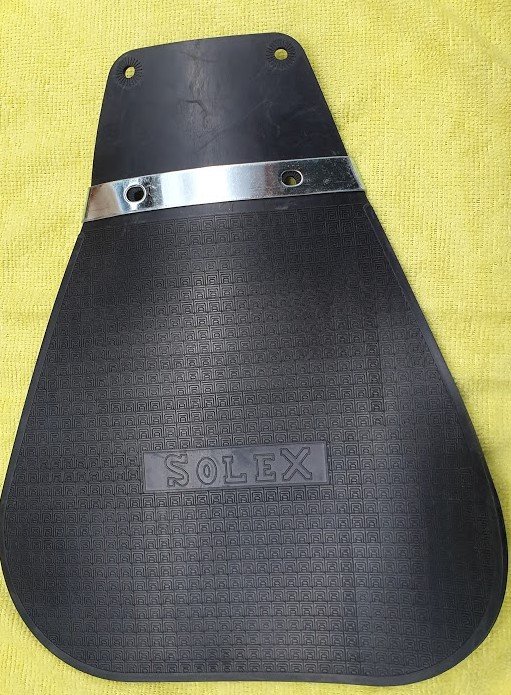
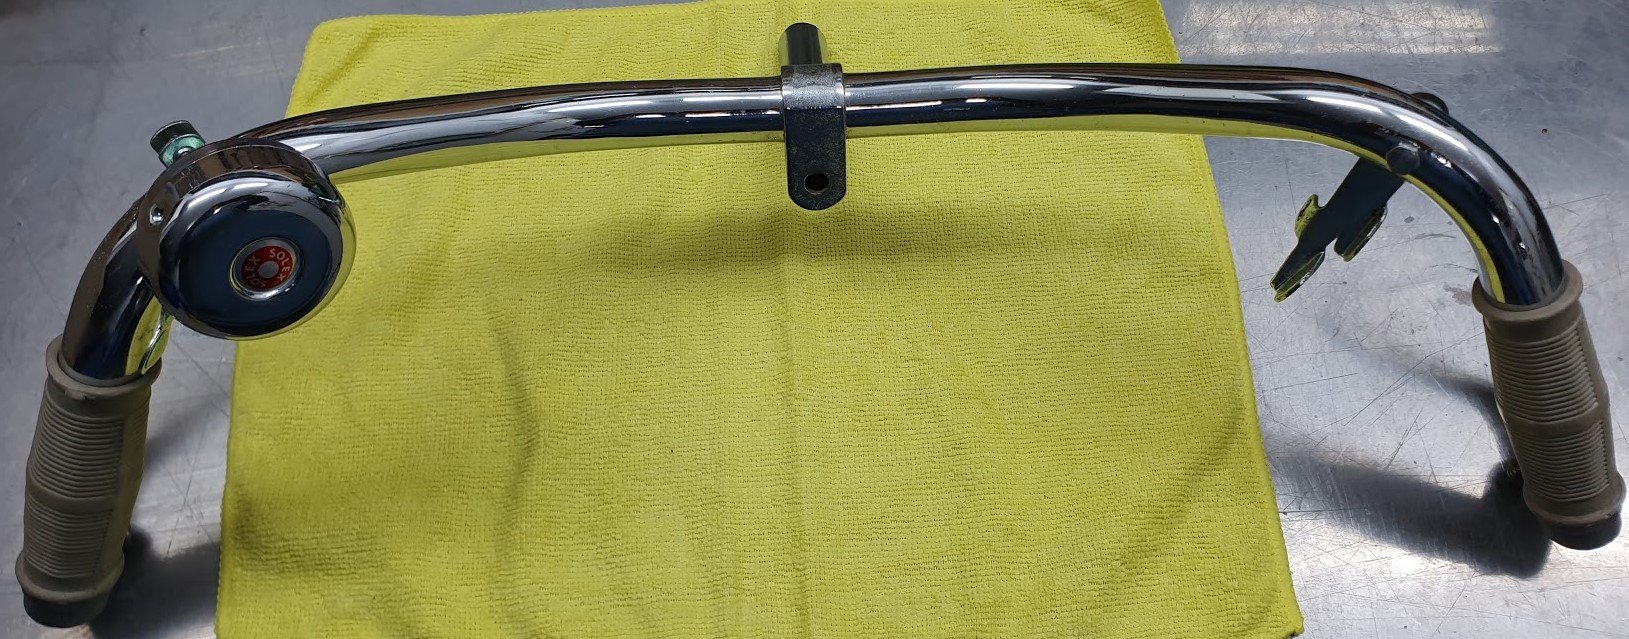
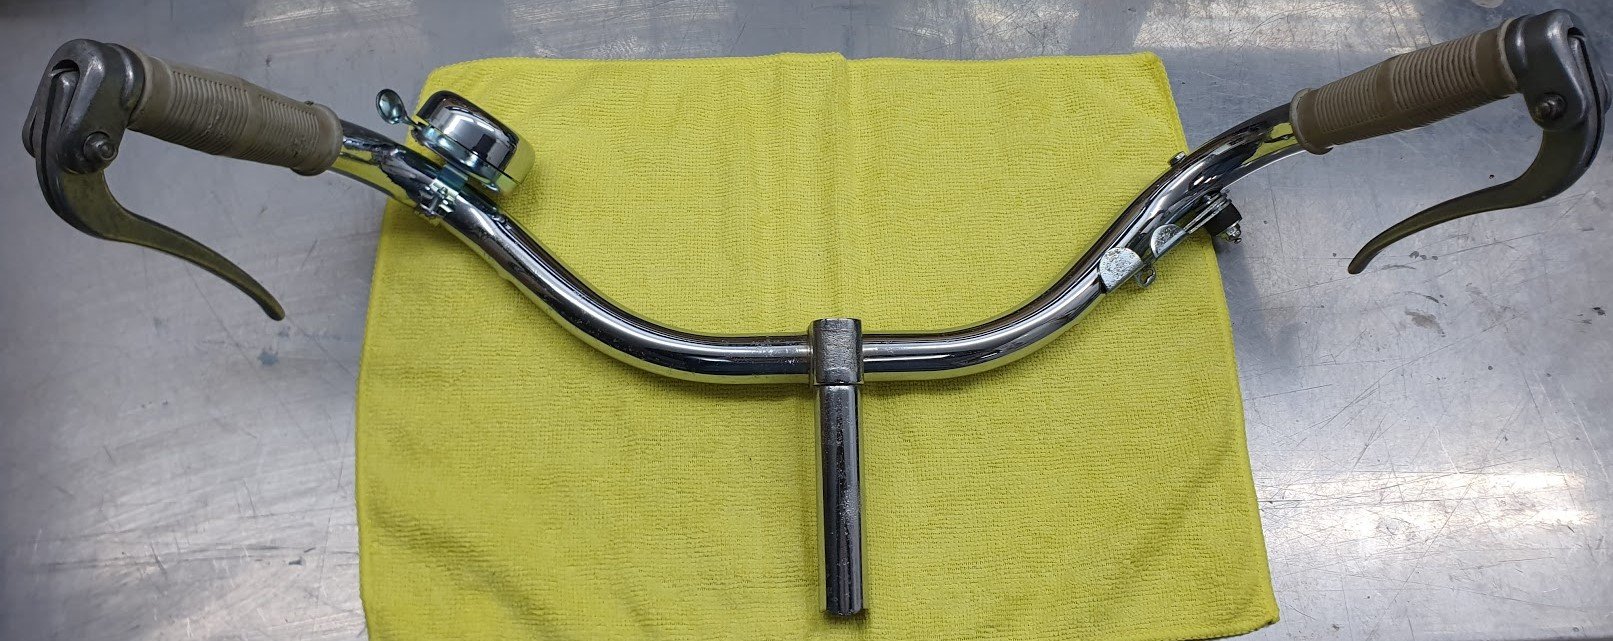
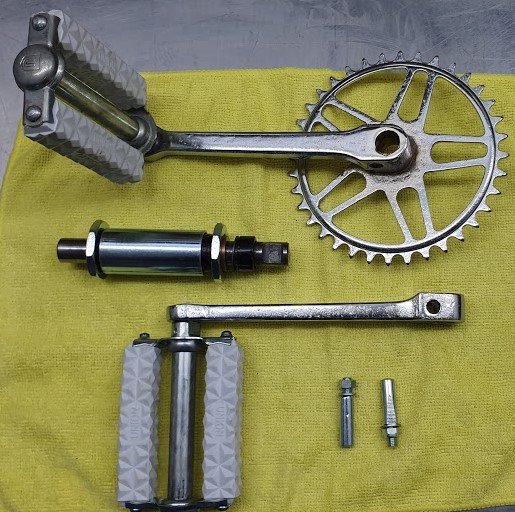
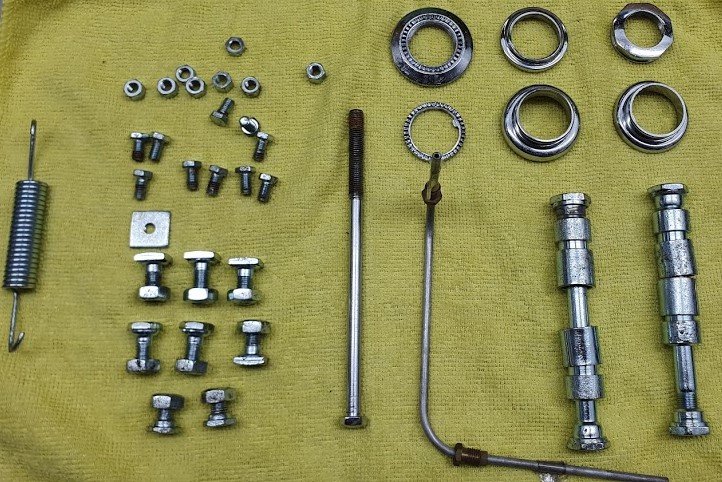
I had also reconditioned a whole pile of other bits. i unearthed all those today too.. Moteur all done - big-bore 50cc piston, honed barrel, new headlight and plastic side cover. Front mudguard and engine mount plates painted and everything plated. Including fuel tank that took way too many hours splitting it apart, panel-beating it, sealing it back up. still to be painted. before.. after.. Exhaust - gutted out and tidied up Brake calipers zinc plated and reassembled. New tail light and re-plated/refurbished bulb holder Tread plate cleaned up new mudflap + re-plated support handle bars re-chromed and everything cleaned + re-assembled. also new bell The auxiliary power units were re-chromed, nos pedals, and rebuilt main bearing and lastly - re-plated bolts throughout
2 points
-
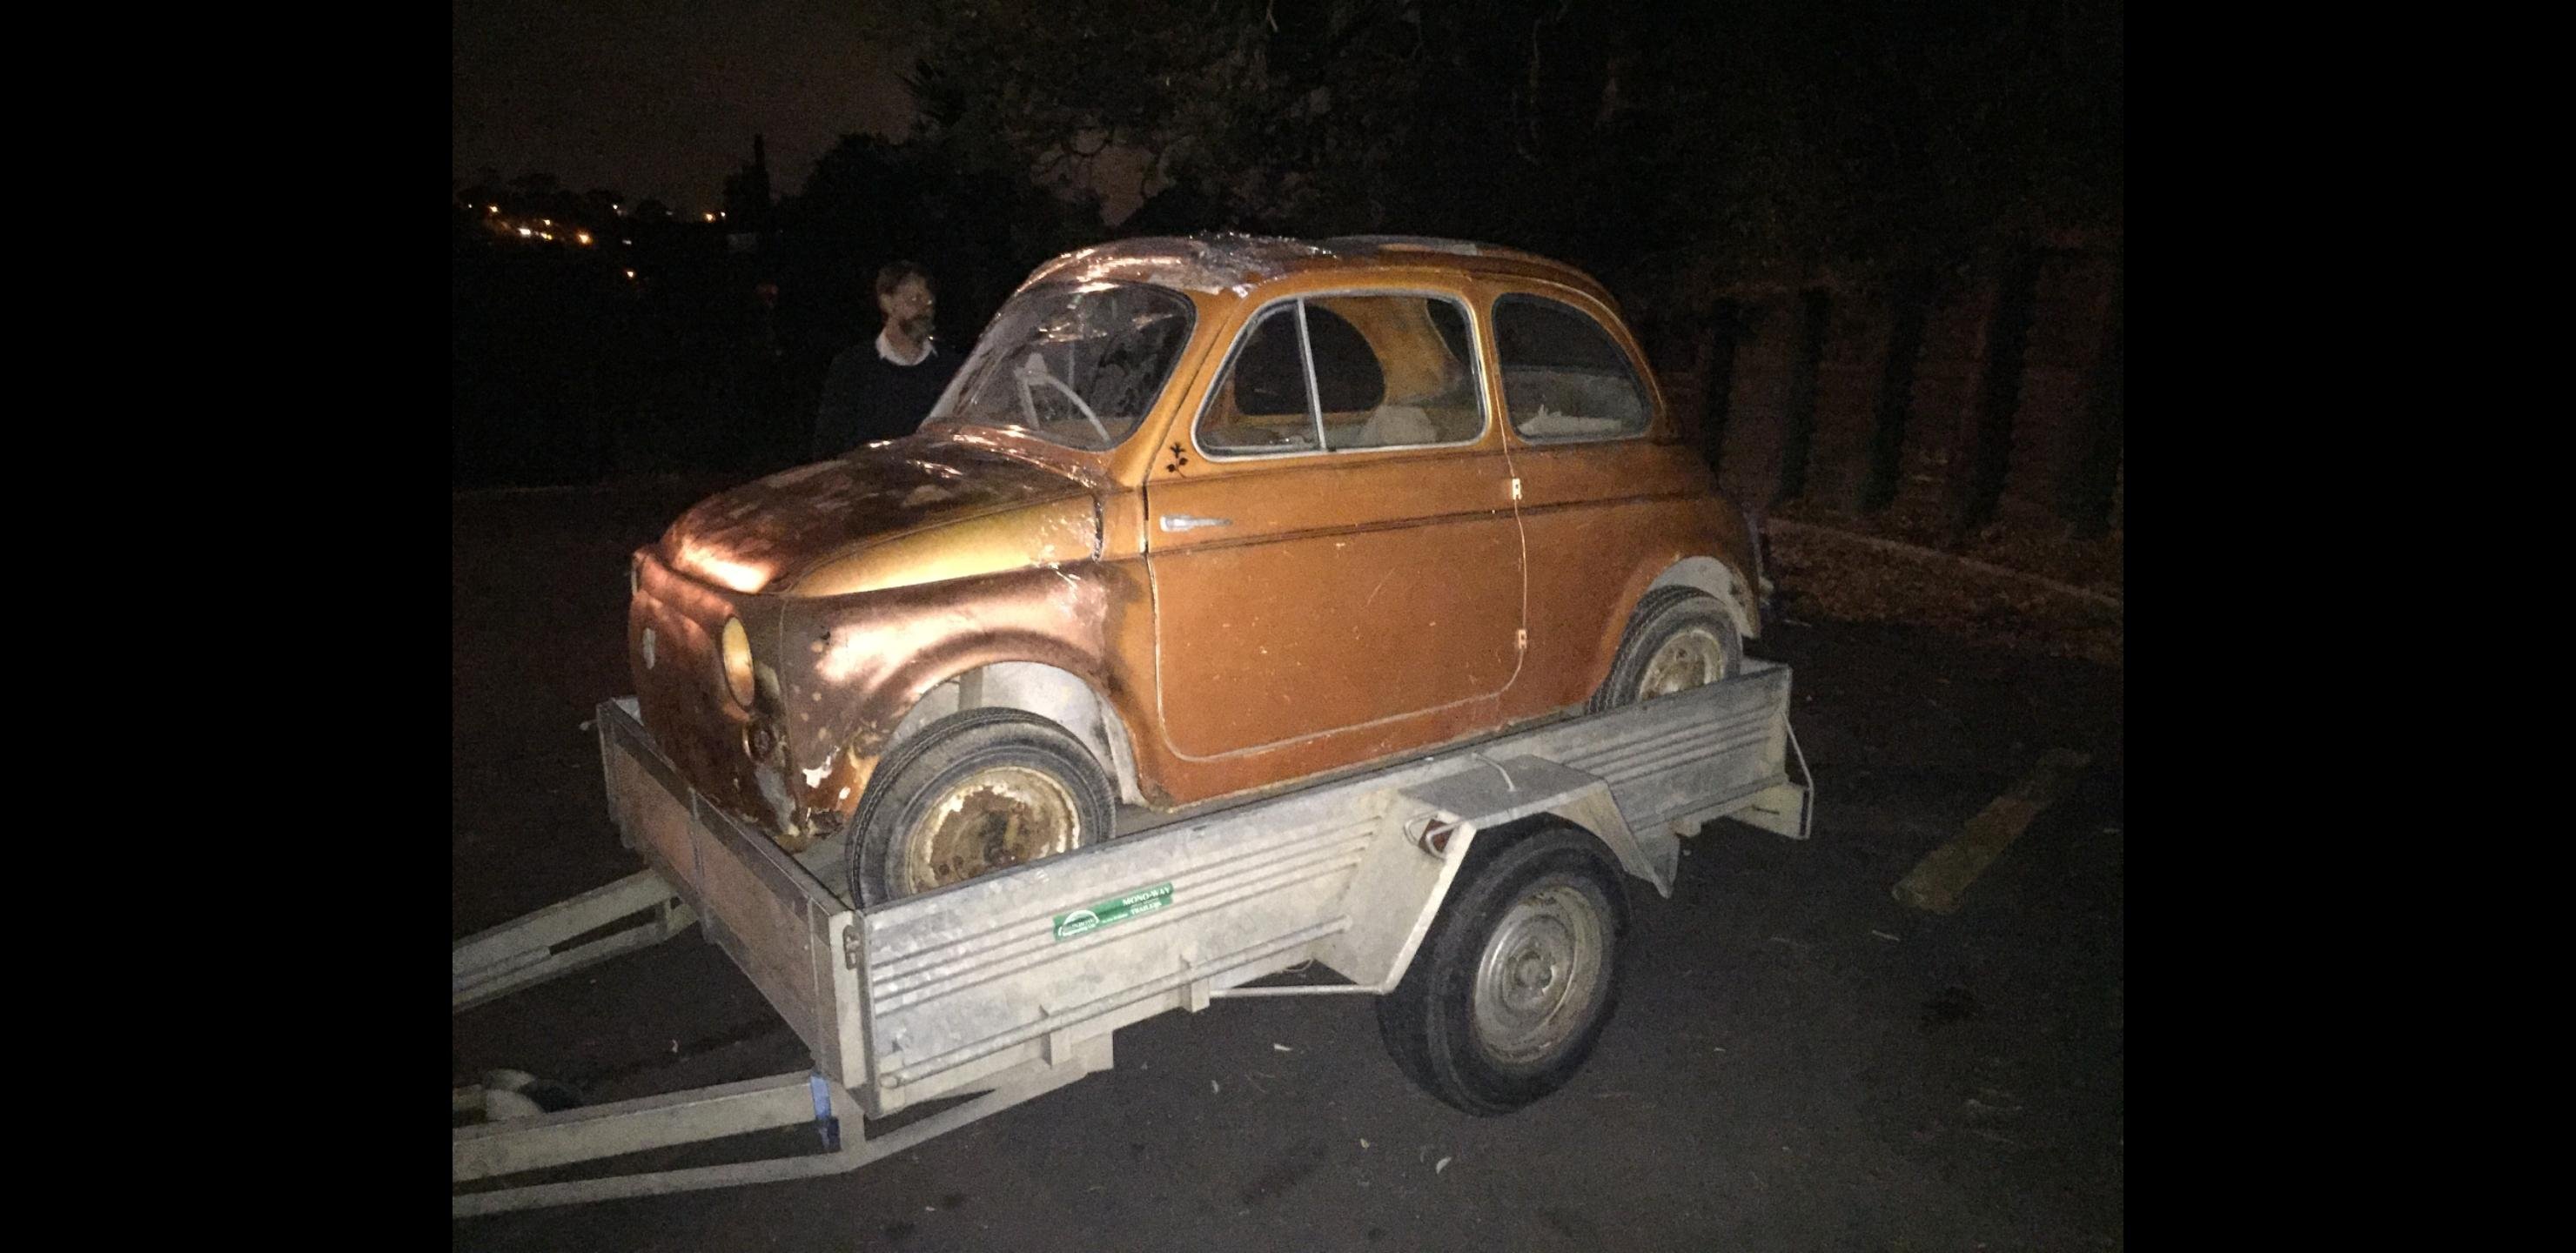
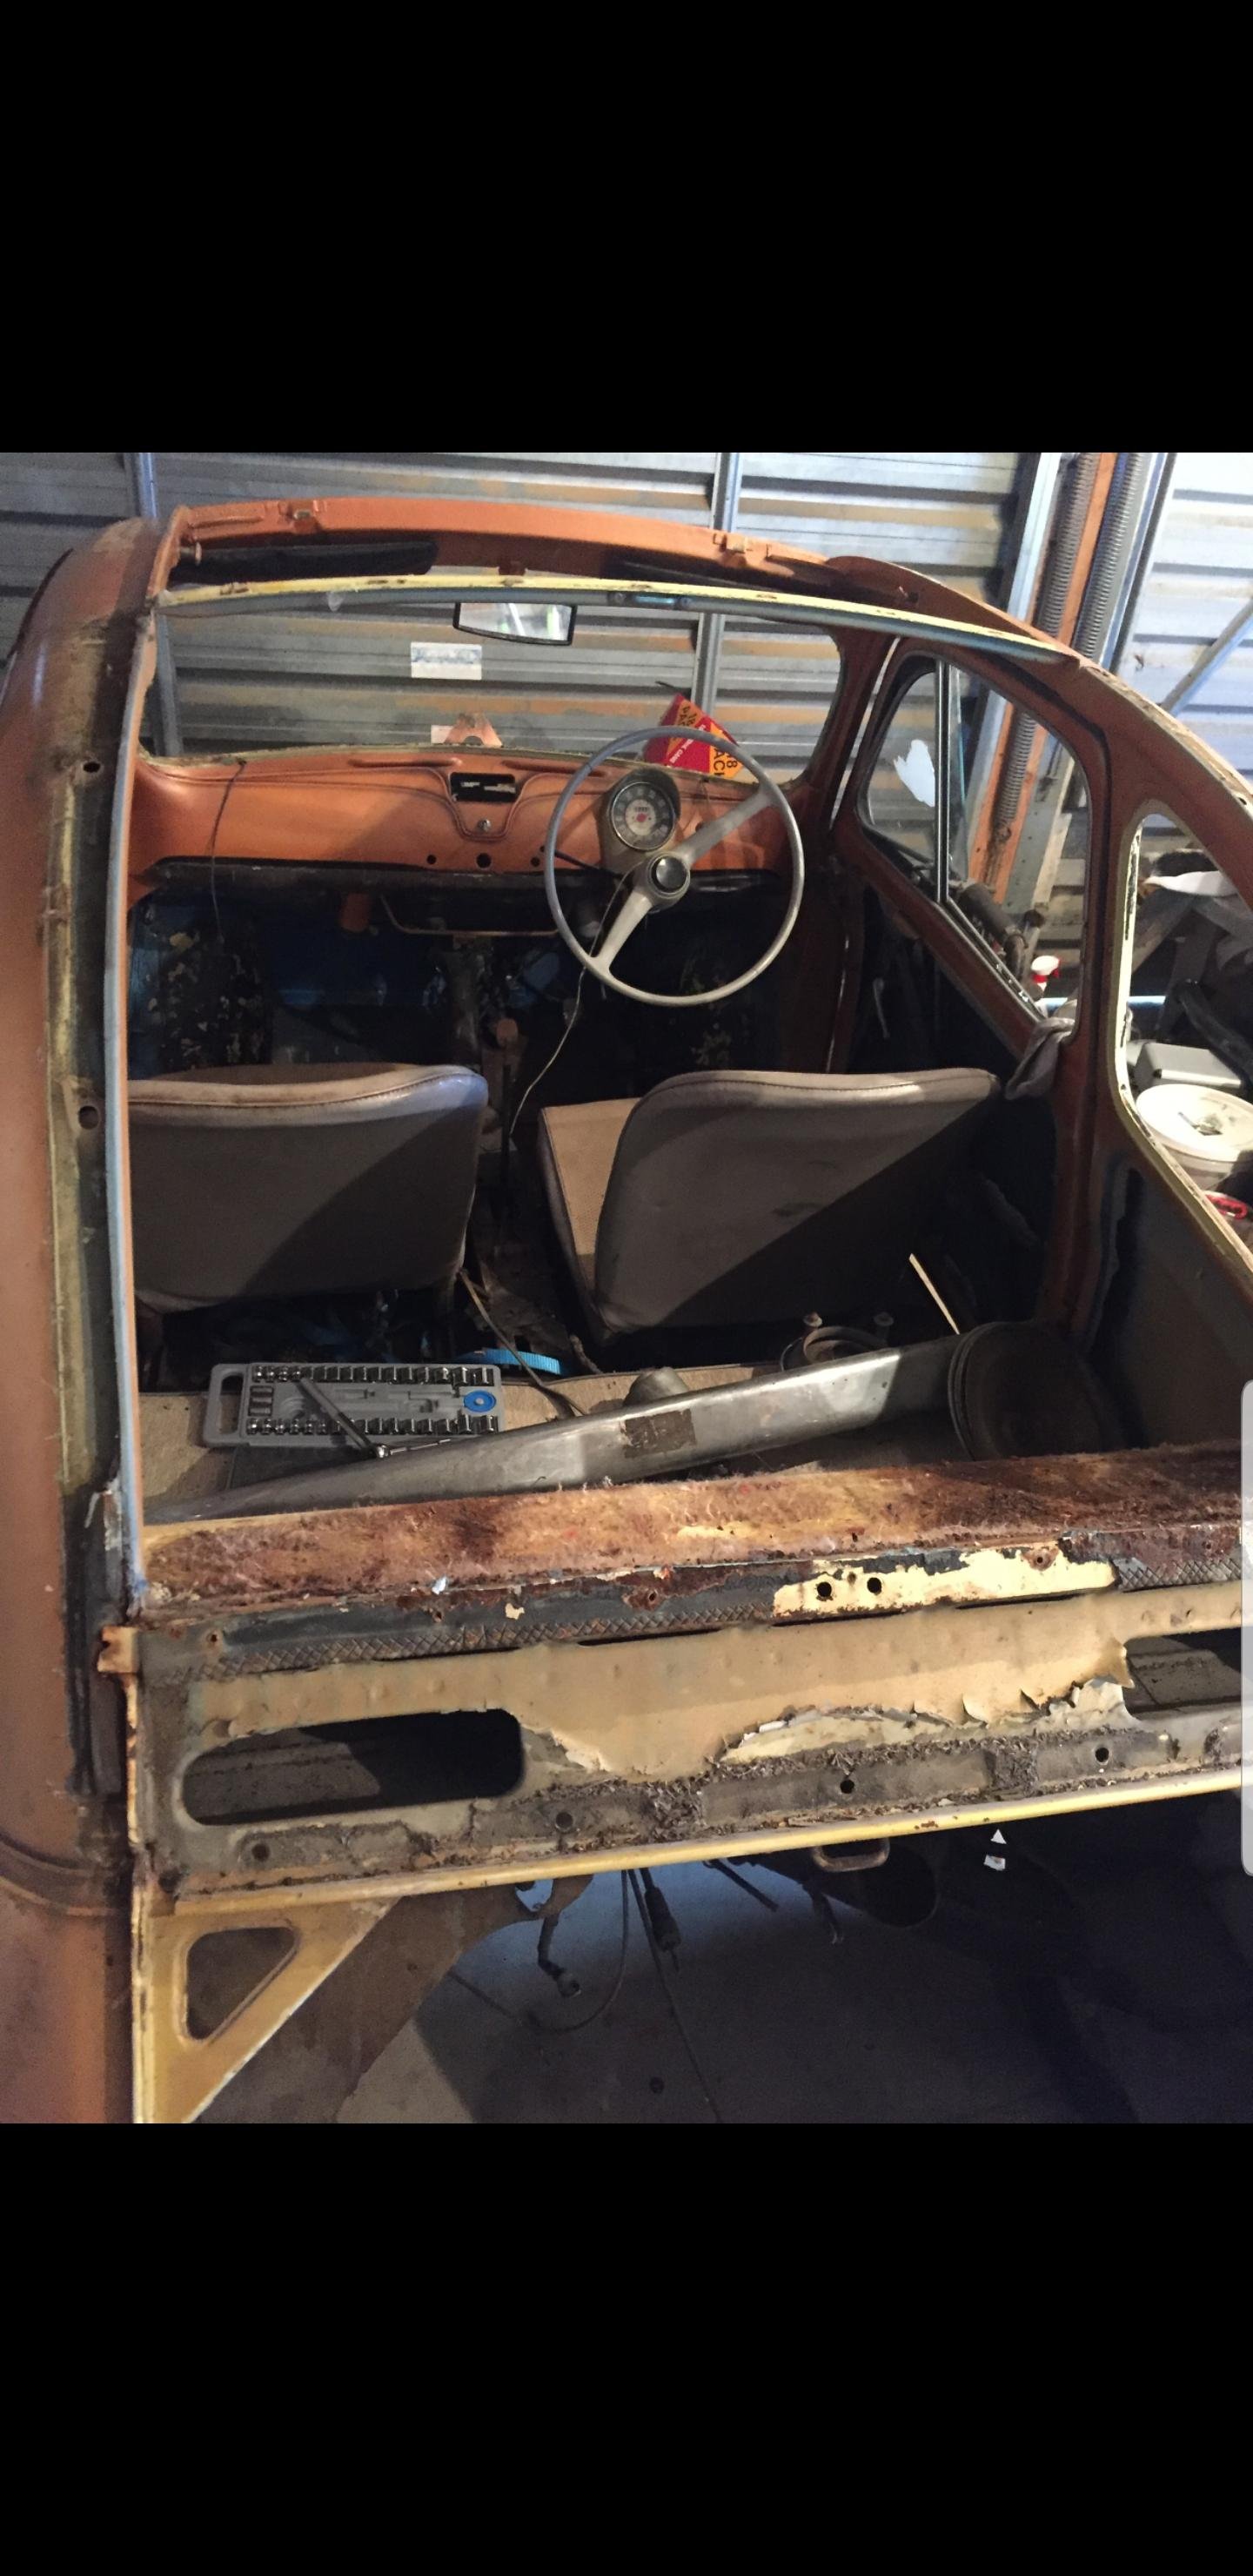
Bought a Fiat 500D a couple years ago for the Mrs. Was supposed to be a quick panel and paint, re reg and enjoy. Had beers with angle grinder out. Discovered many cancers. Got depressed. Moved overseas and forgot about it. Moved back to NZ and it hasn't turned itself in to dust so I decided to get it done. Hopefully making a thread will motivate me to finish it.
1 point
-
Looking awesome. Mate had one and got it going ok, but cos he was a 130kg unit he still had to pedal with the motor going, so arrived a sweaty mess everywhere...1 point
-
1 point
-
Can someone from the 3D printing thread please whip up a few sets of hotwire's, turbo's and tridon's? Cheers.1 point
-
@kyteler they even do the worlds best rim! https://www.ebay.com.au/itm/1-24-wheels-17-inch-Ronal-Teddy-Bears-w-stance-tires-for-Tamiya-Aoshima-Hasegawa/254180426791?_trkparms=aid%3D111001%26algo%3DREC.SEED%26ao%3D1%26asc%3D20160908105057%26meid%3D05bc413e65114e999ec5342e5ee5649d%26pid%3D100675%26rk%3D1%26rkt%3D15%26sd%3D254180426791%26itm%3D254180426791&_trksid=p2481888.c100675.m4236&_trkparms=pageci%3A7538d8eb-9e2c-11e9-9316-74dbd180afaf|parentrq%3Abbdcd11116b0a4e8e08c7bfbff92e09a|iid%3A11 point
-
Yep, when it's carrying pressurized fuel or oil, I'd rather pay more for quality.1 point
-
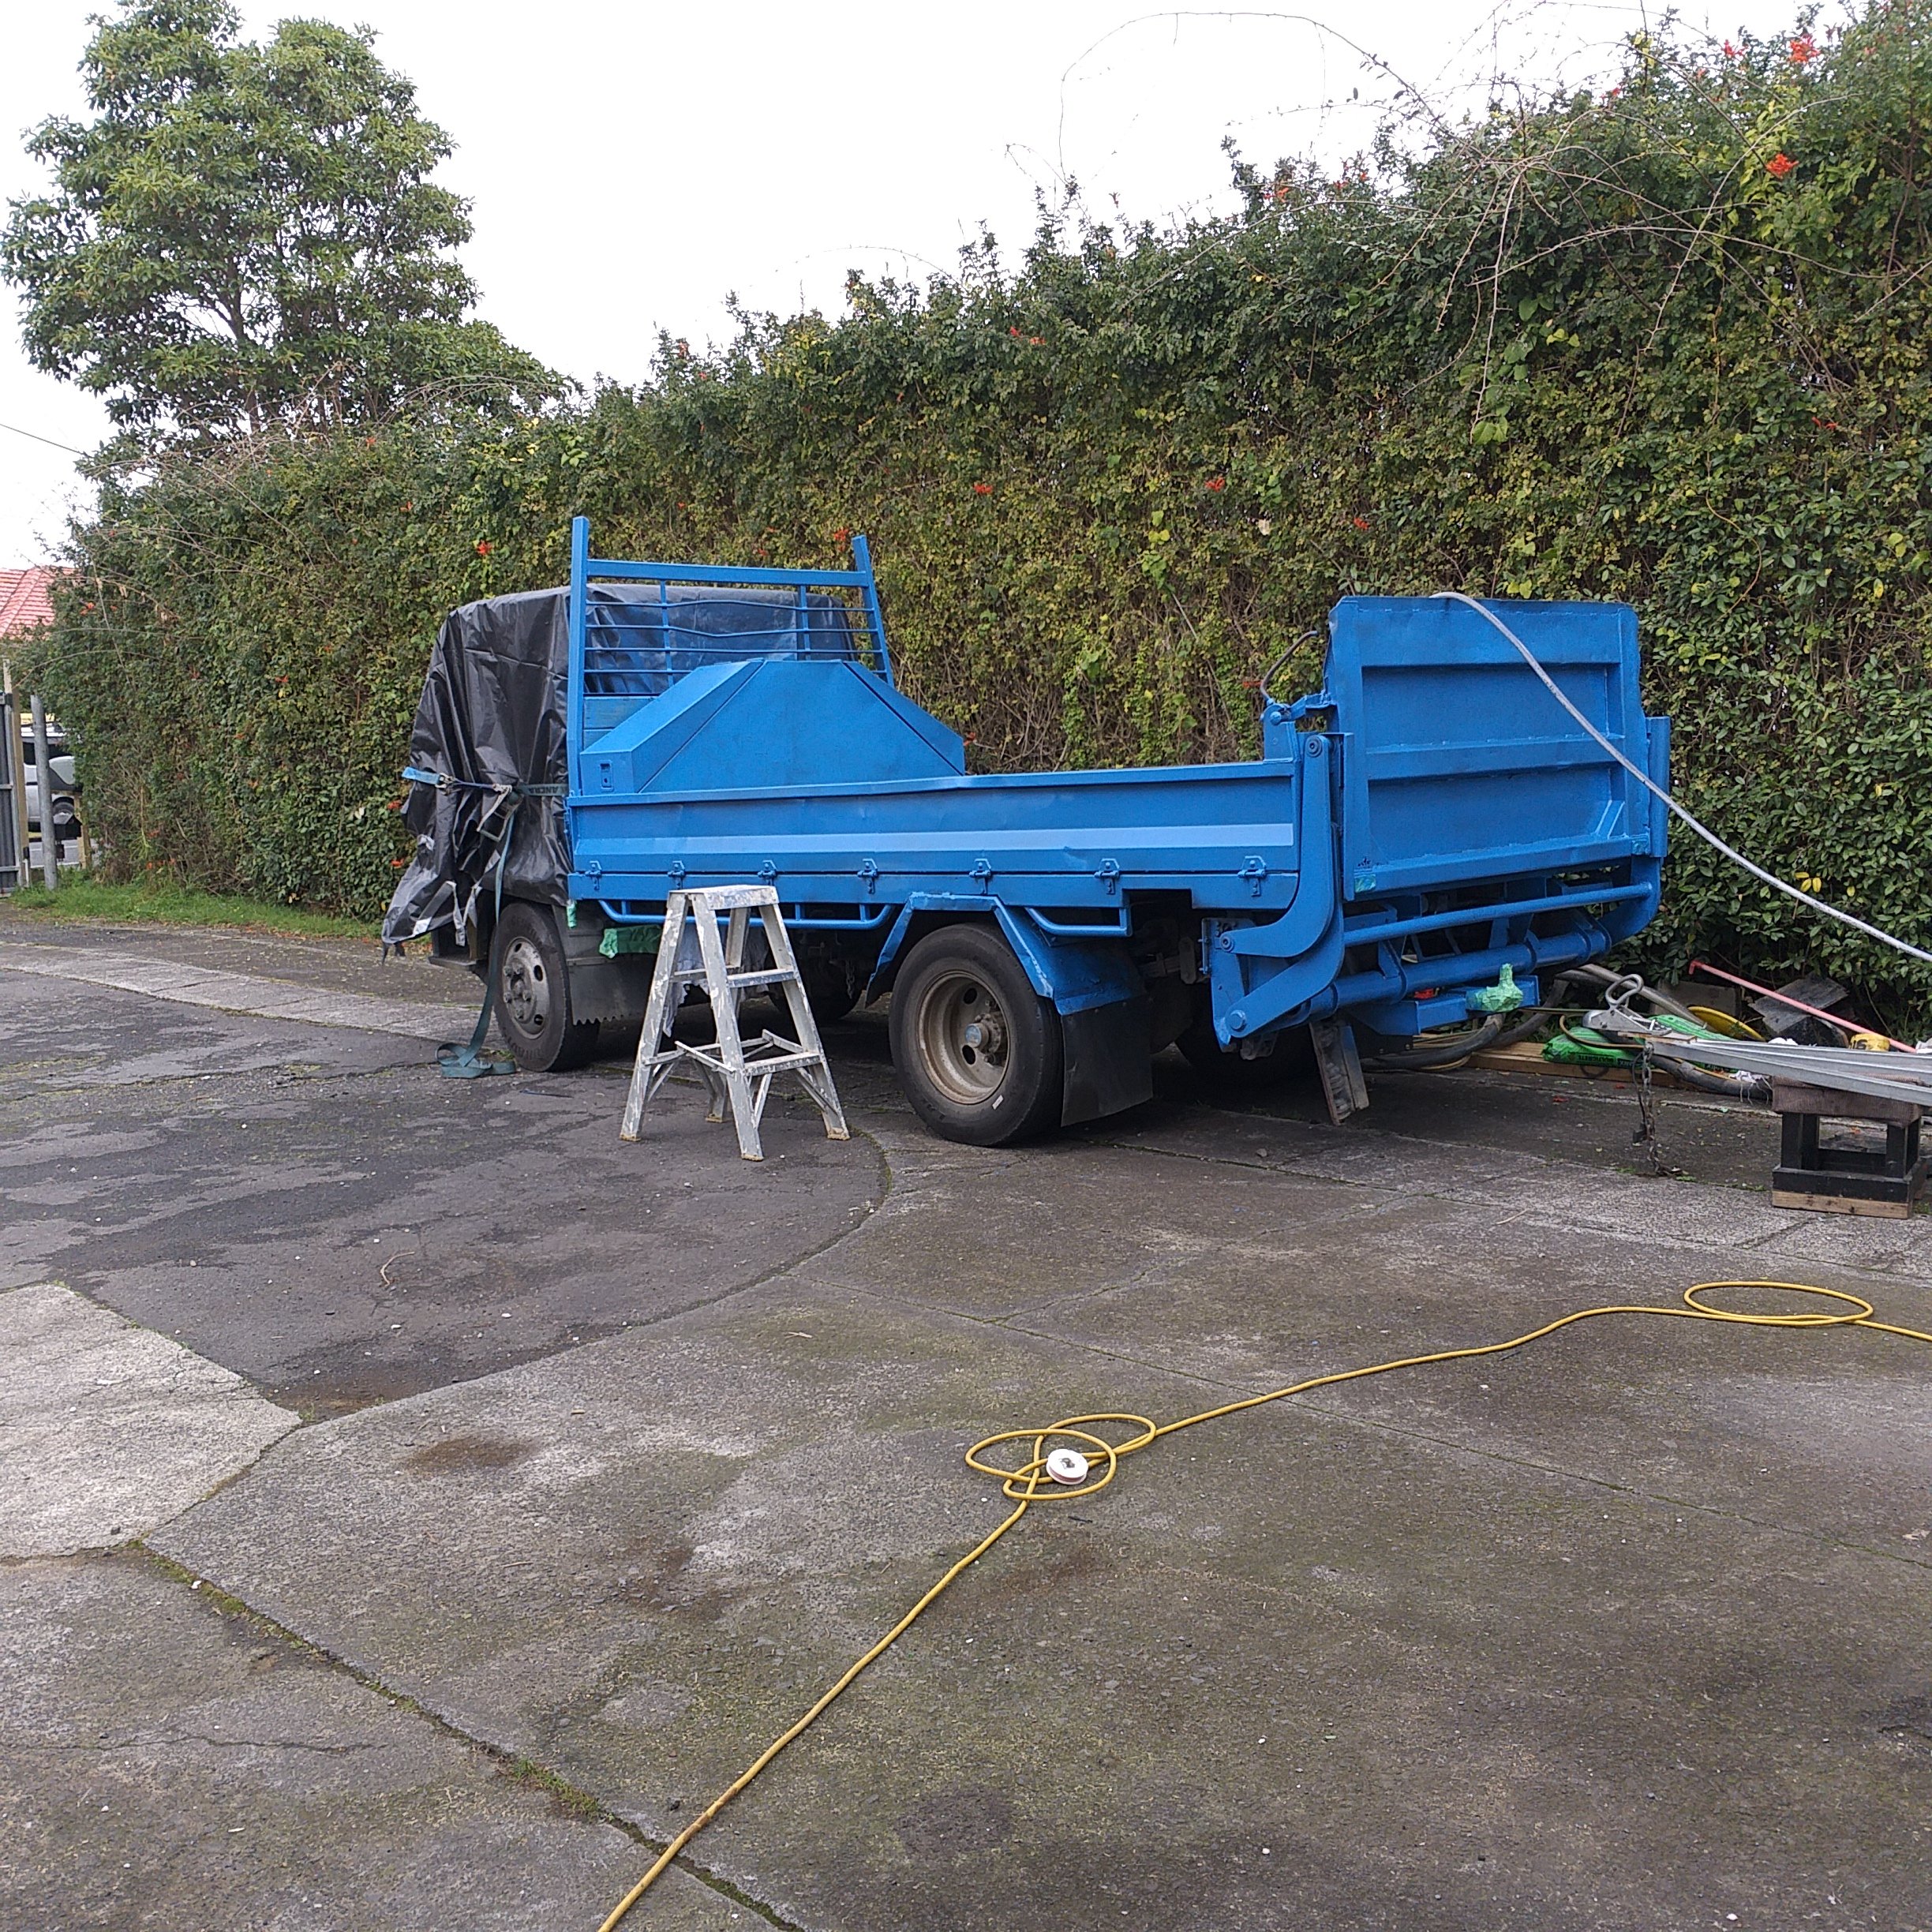
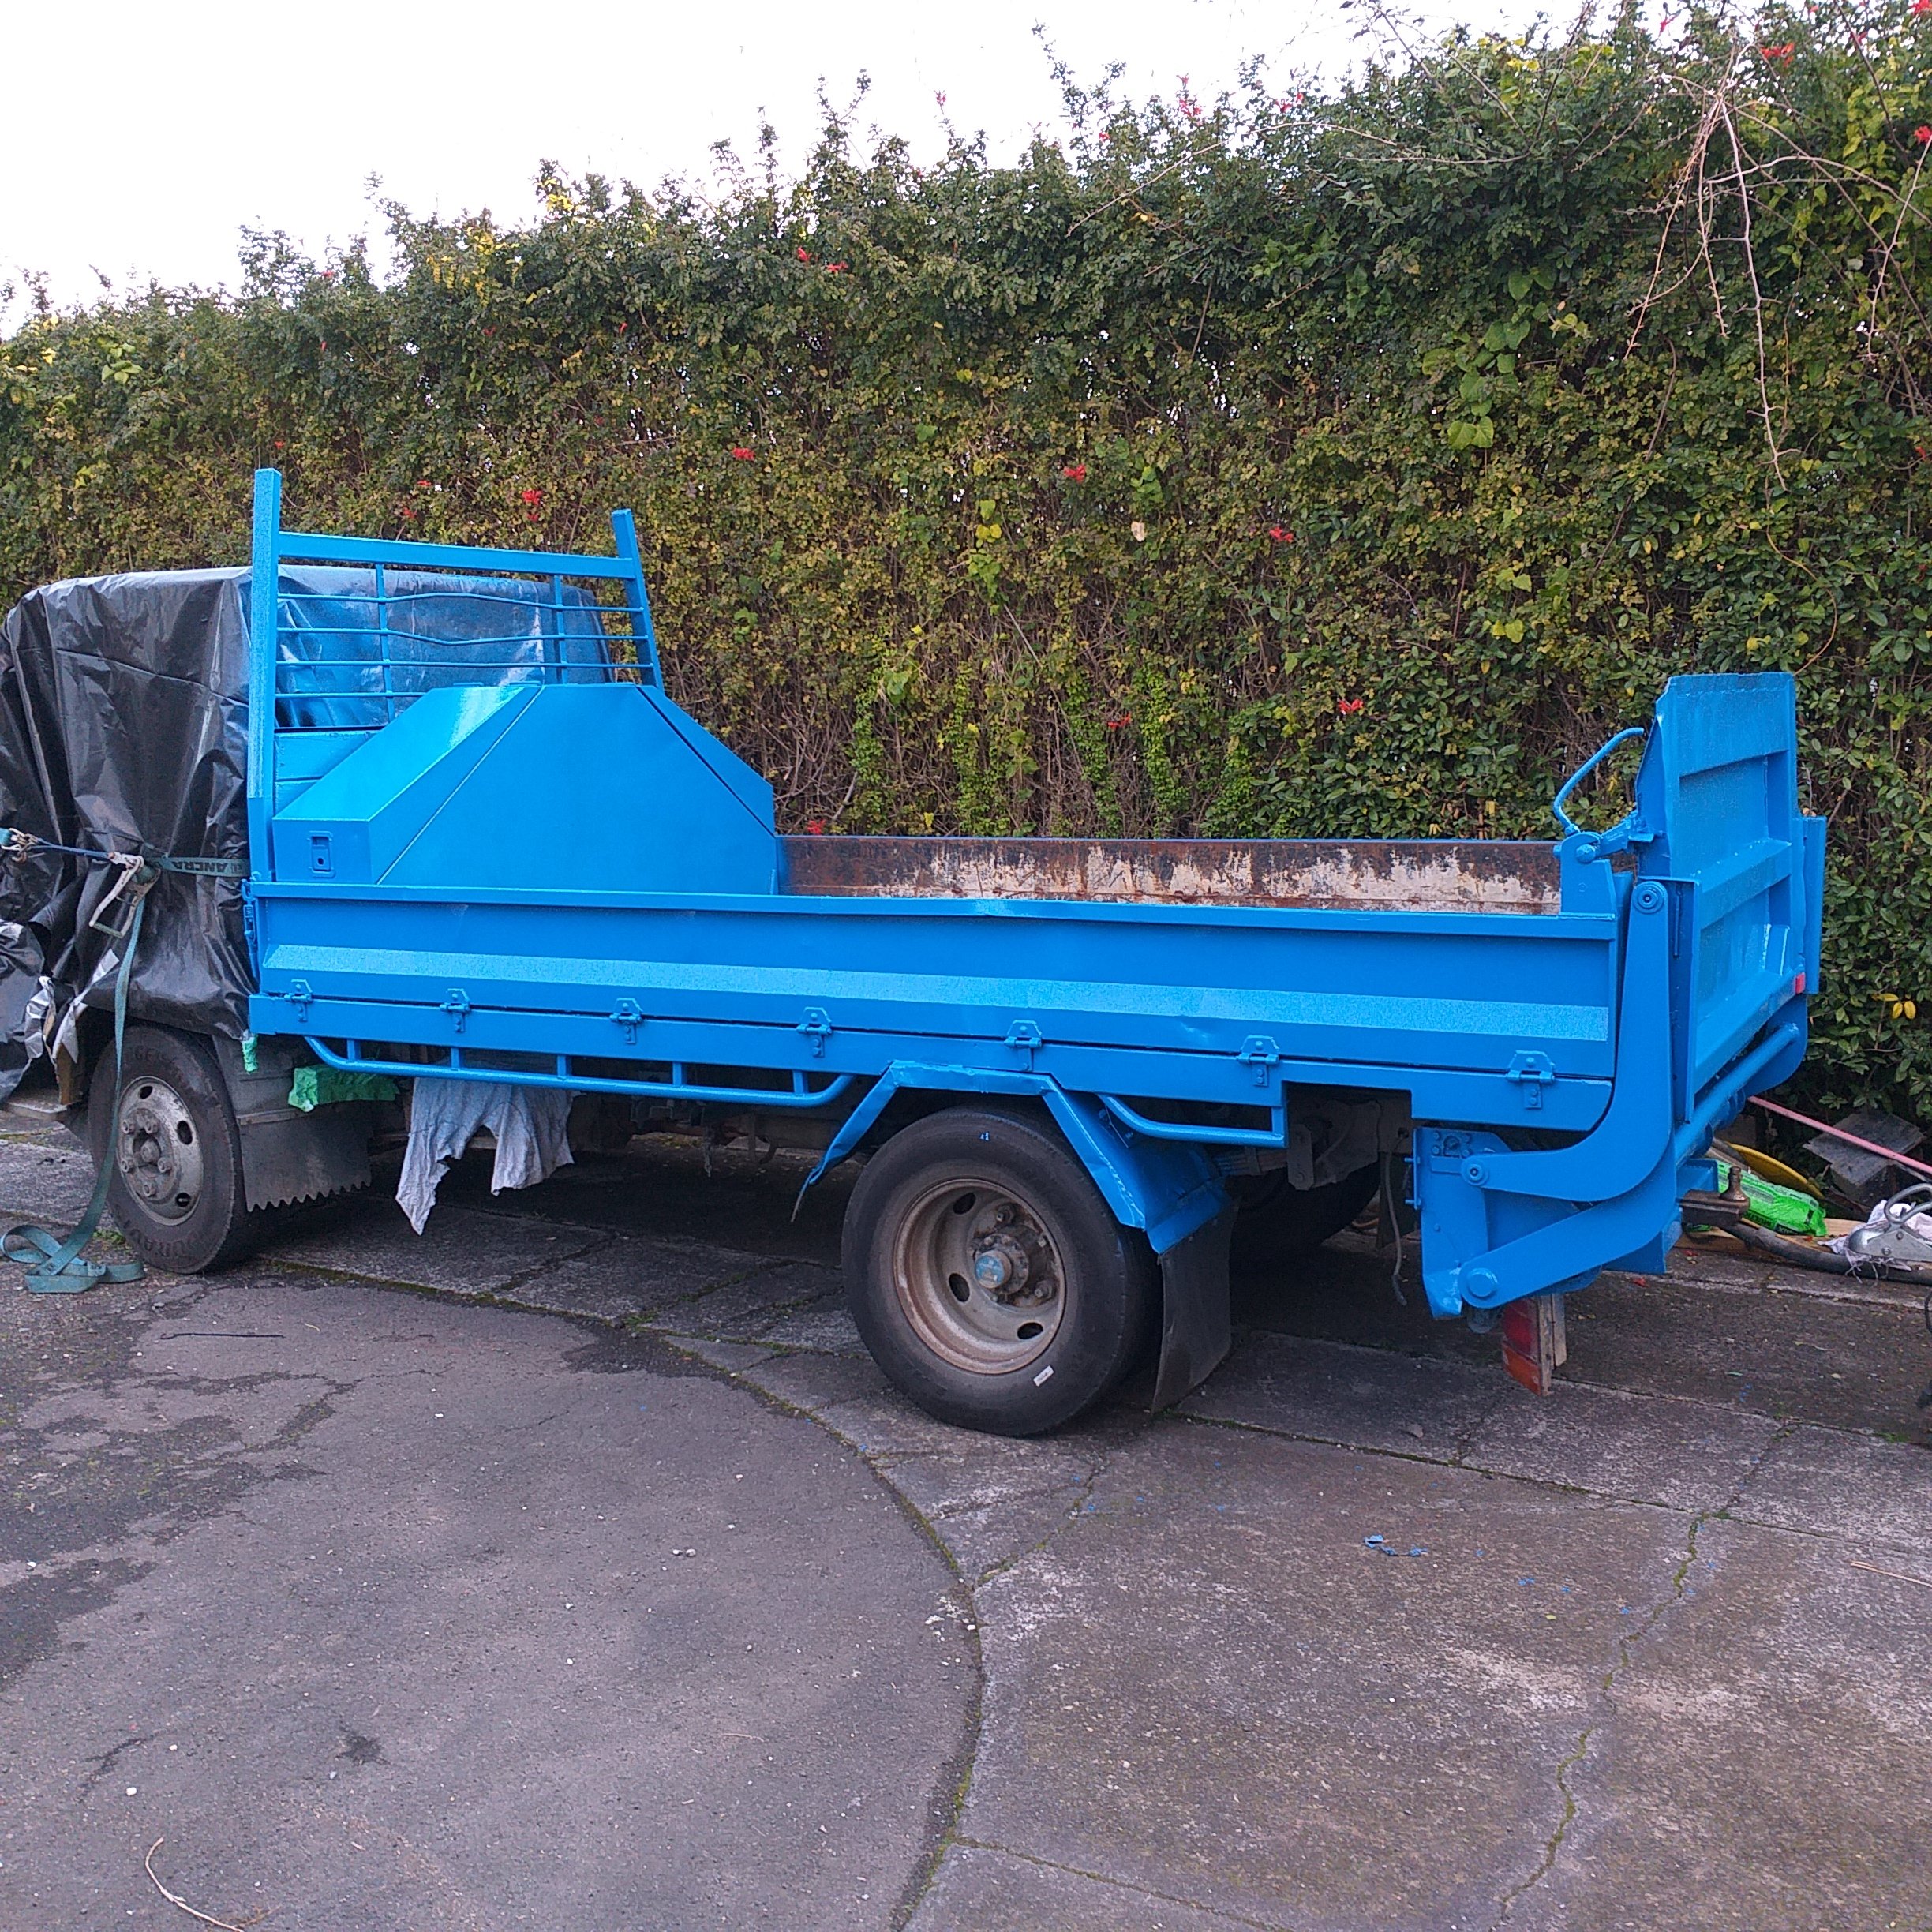
I yep all blew. and no that would just make it look like a smurf. black or silver wheels. plan is for blew tray. blast the back end and smash some blue on. but its winter so may just wire brush the base parts and squirt some black on till summer1 point
-
Is $90 affordable? https://www.trademe.co.nz/Browse/Listing.aspx?id=21819015041 point
-
All blue? nioce. However, Turk would look even better with a white roof and wheels, and maybe white below the crease in the body? Or will that just shift it from 'ex-Downer yellow truck' to 'ex-Mainfreight blue and white truck'?1 point
-
Yup. I am all that is man.1 point
-
got some primer on the doors and small panels colour will be in before dinner
1 point
-
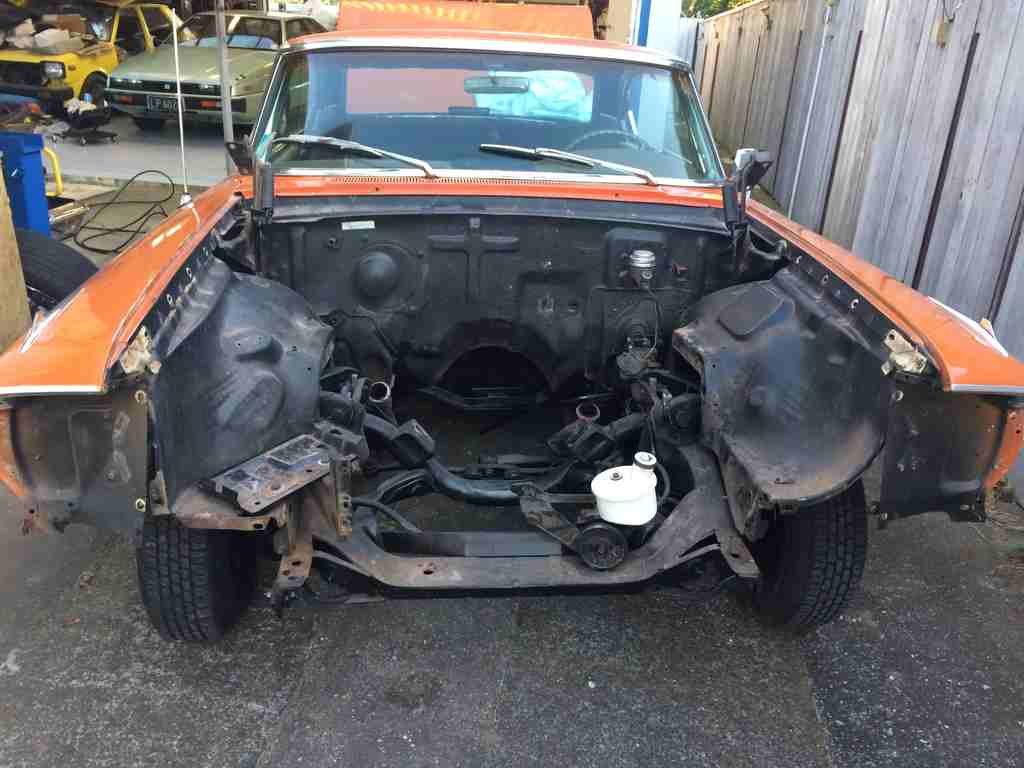
September will be two years since I've driven this car... So I've decided that I should get it going and try to race it at the final round of the Manfeild winter series. I've not done a whole lot since 2017 due to general slackness, but have cleaned up a bunch of welds around the tubs. This was about a year ago: Fast forward to this week and I've started doing things again. More weld removal, a few holes welded up, paint removal etc. A bit of filler and the first coat of etch this evening to see how it looks: The underside is still a bit wrinkly, but it's good enough for an inner arch. Now to get the other side. to this level.. I always forget how long it takes to sand filler! It's a pretty painful job . Once both sides are in primer I can give the rest of the bay a good clean up, sand and start thinking about paint.
1 point
-
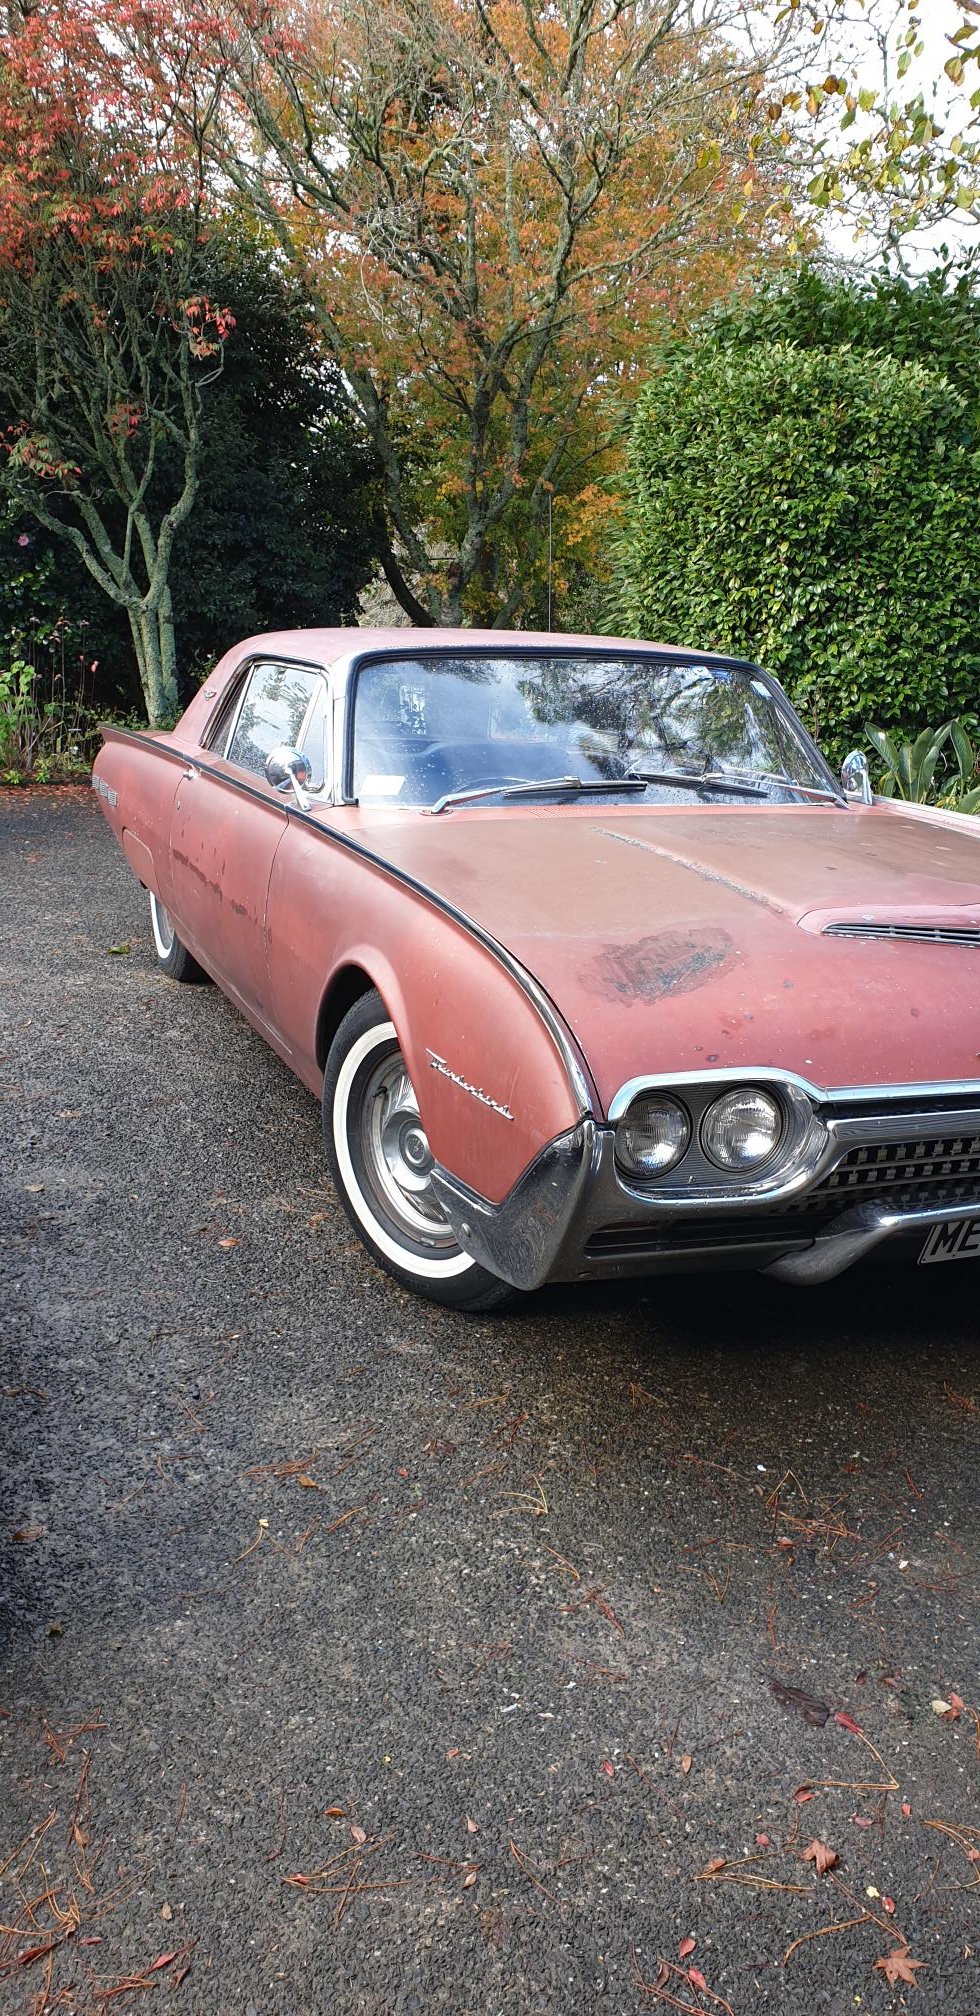
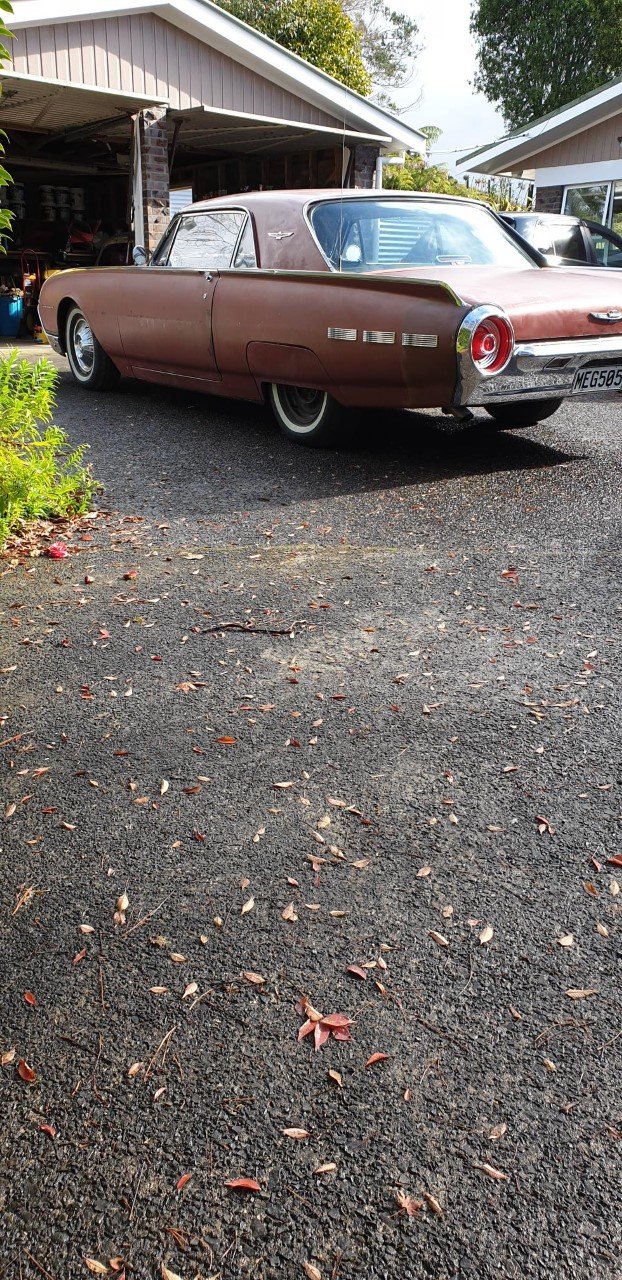
Used to have a 64, sold it to buy a house. Sold the house bought another house bought another Thunderbird because had more space. Has been chopped about 3 inches which makes some annoying but also some cool. Needs quite a bit of a tidy up but its had a disc brake conversion and a bunch of other coin spent by someone else which is cool. for yarns
1 point
-
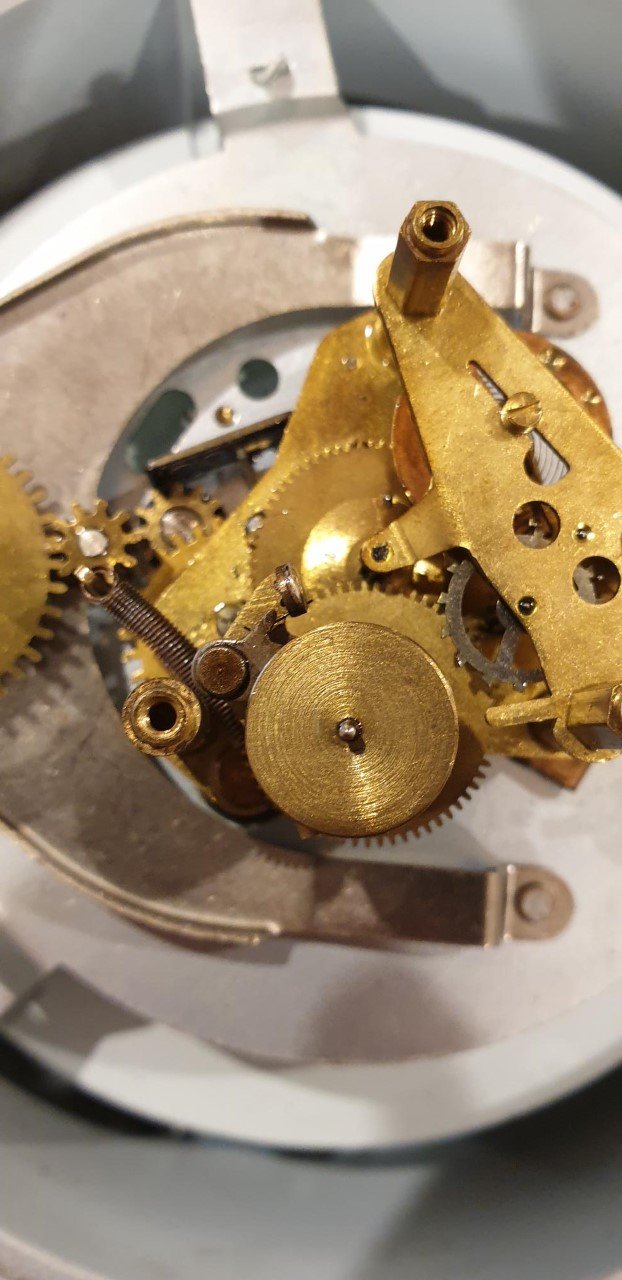
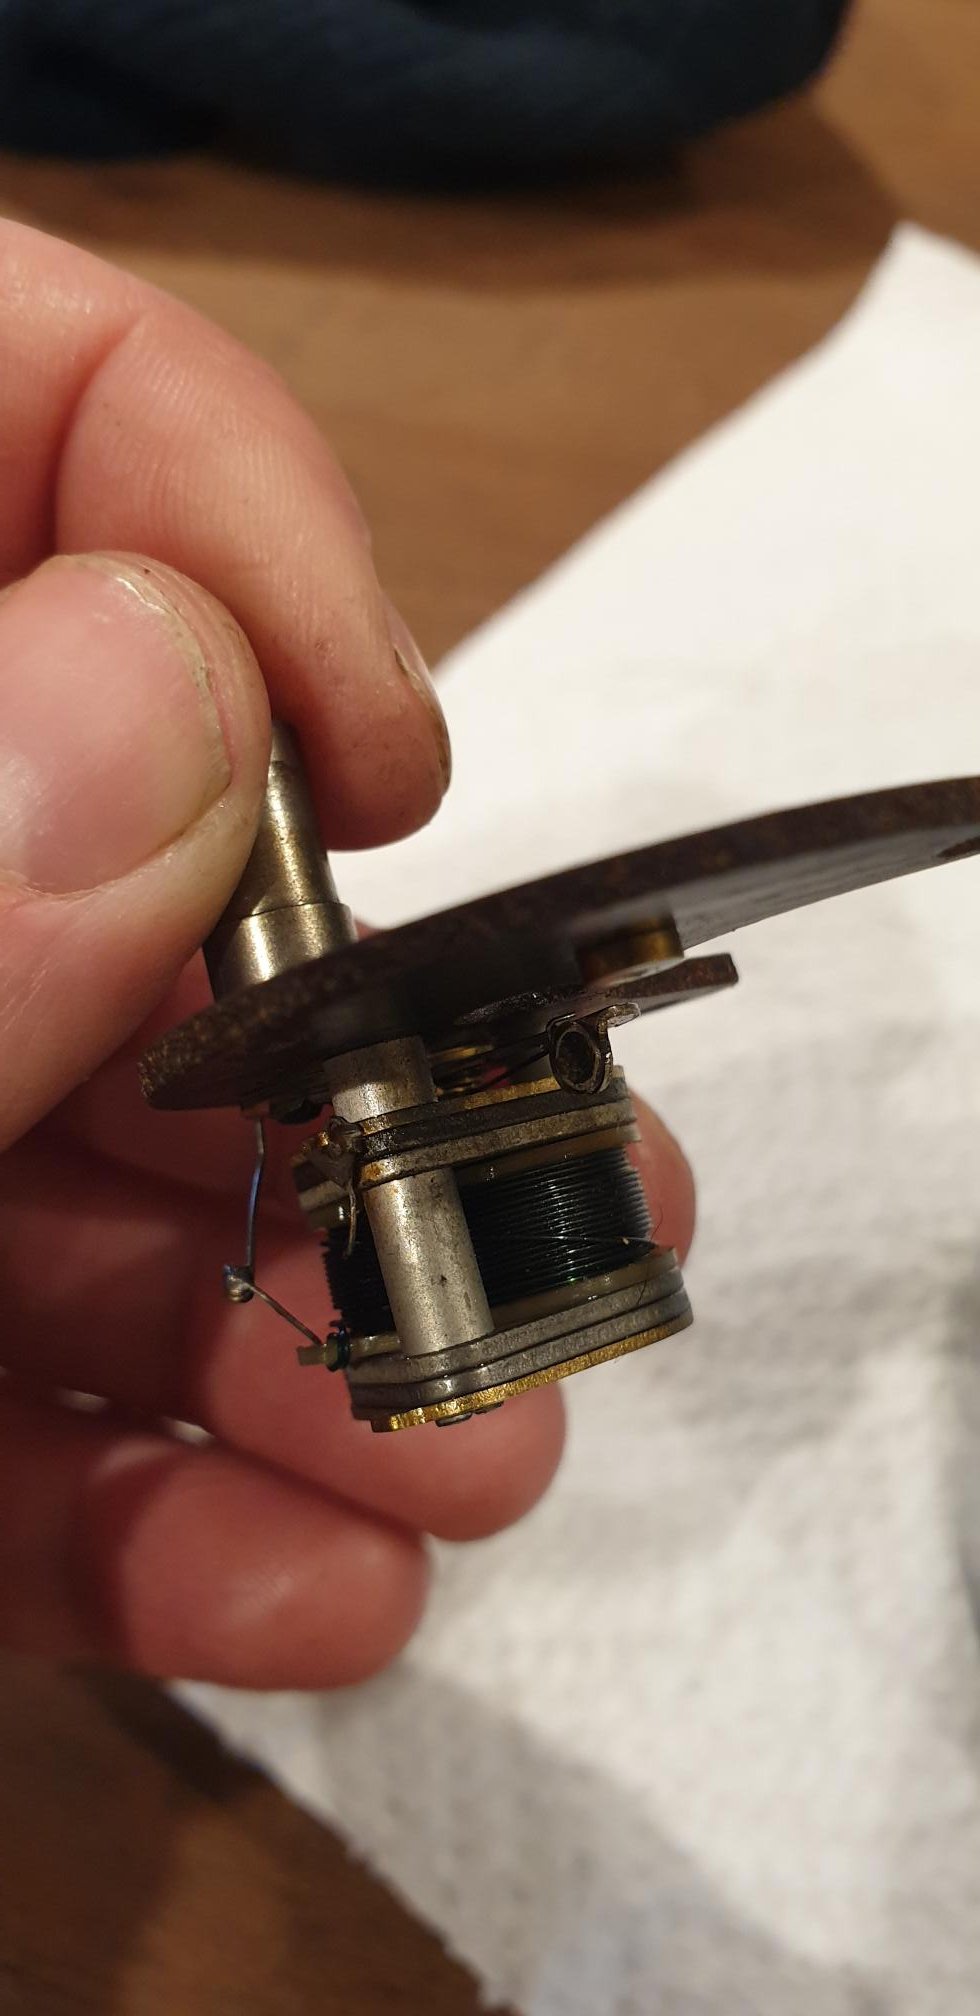
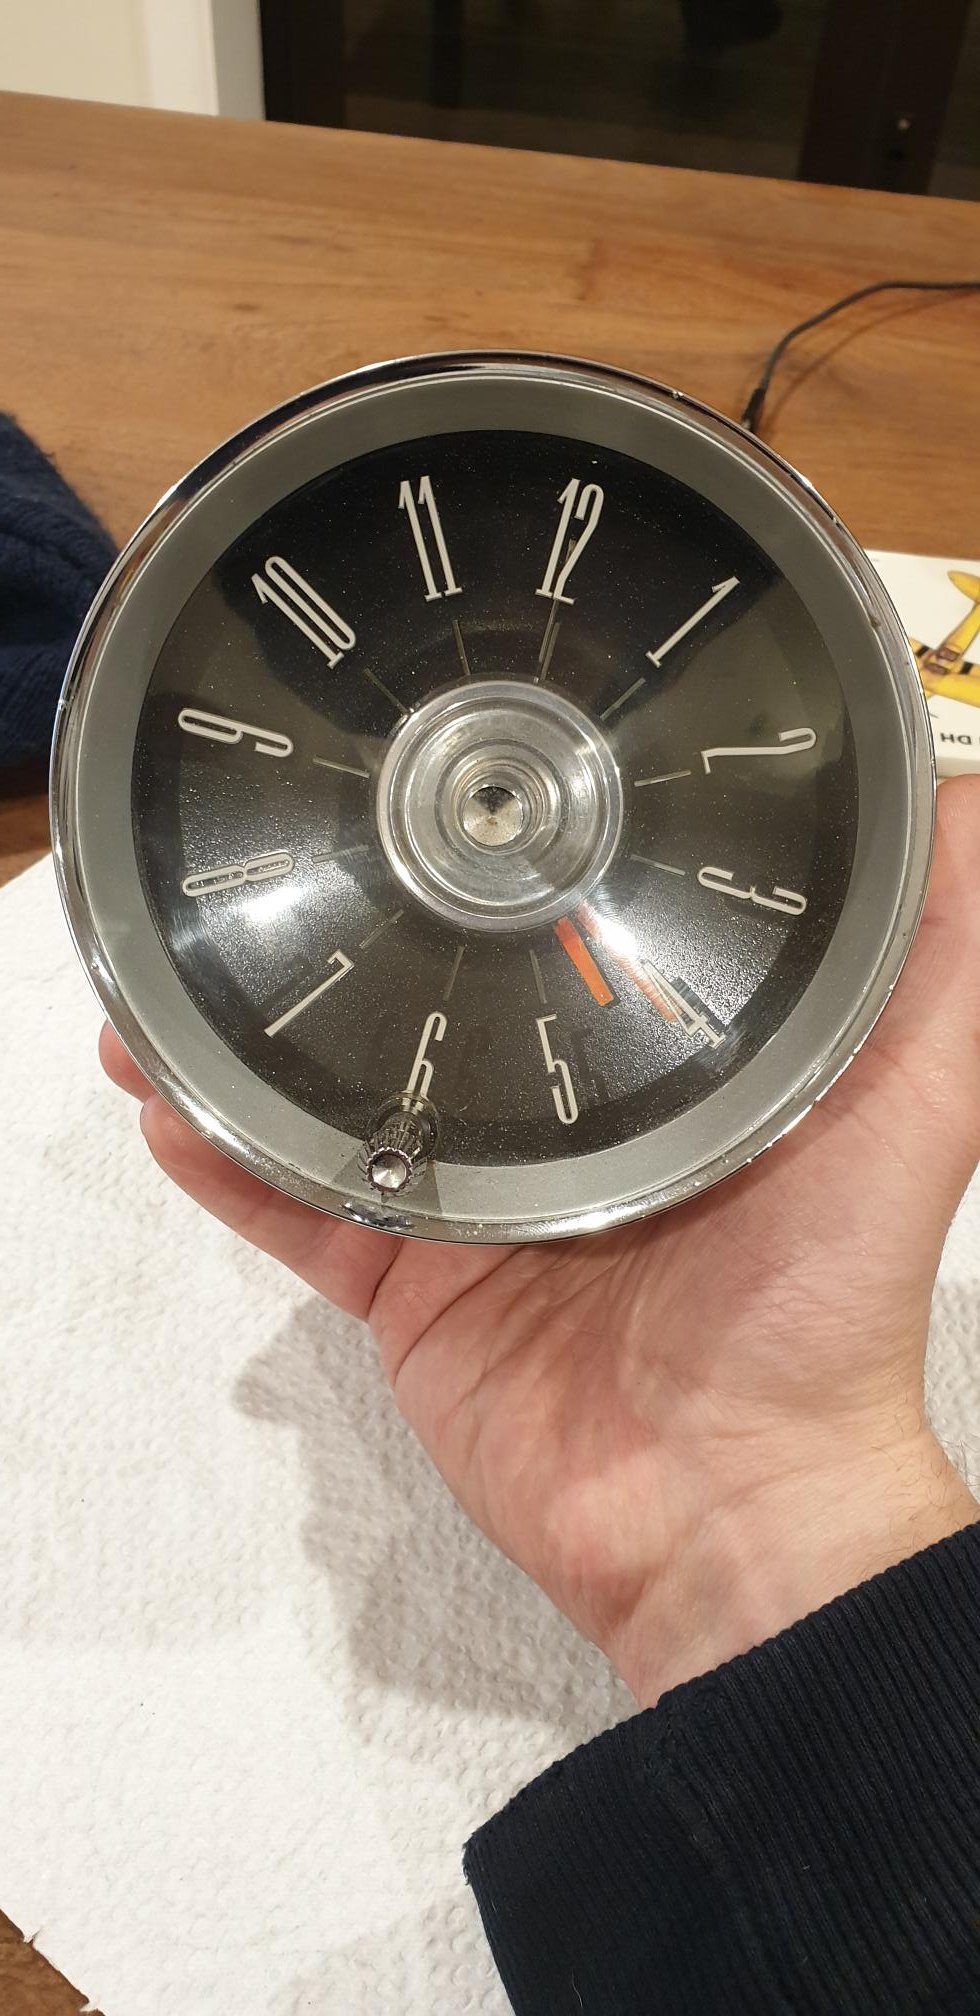
Got the clock going tonight, strange place to start but the clock comes out and the shed is cold... Some pics of inner workings,the solenoid winder and the front of the clock which still needs a polish up.
1 point
-
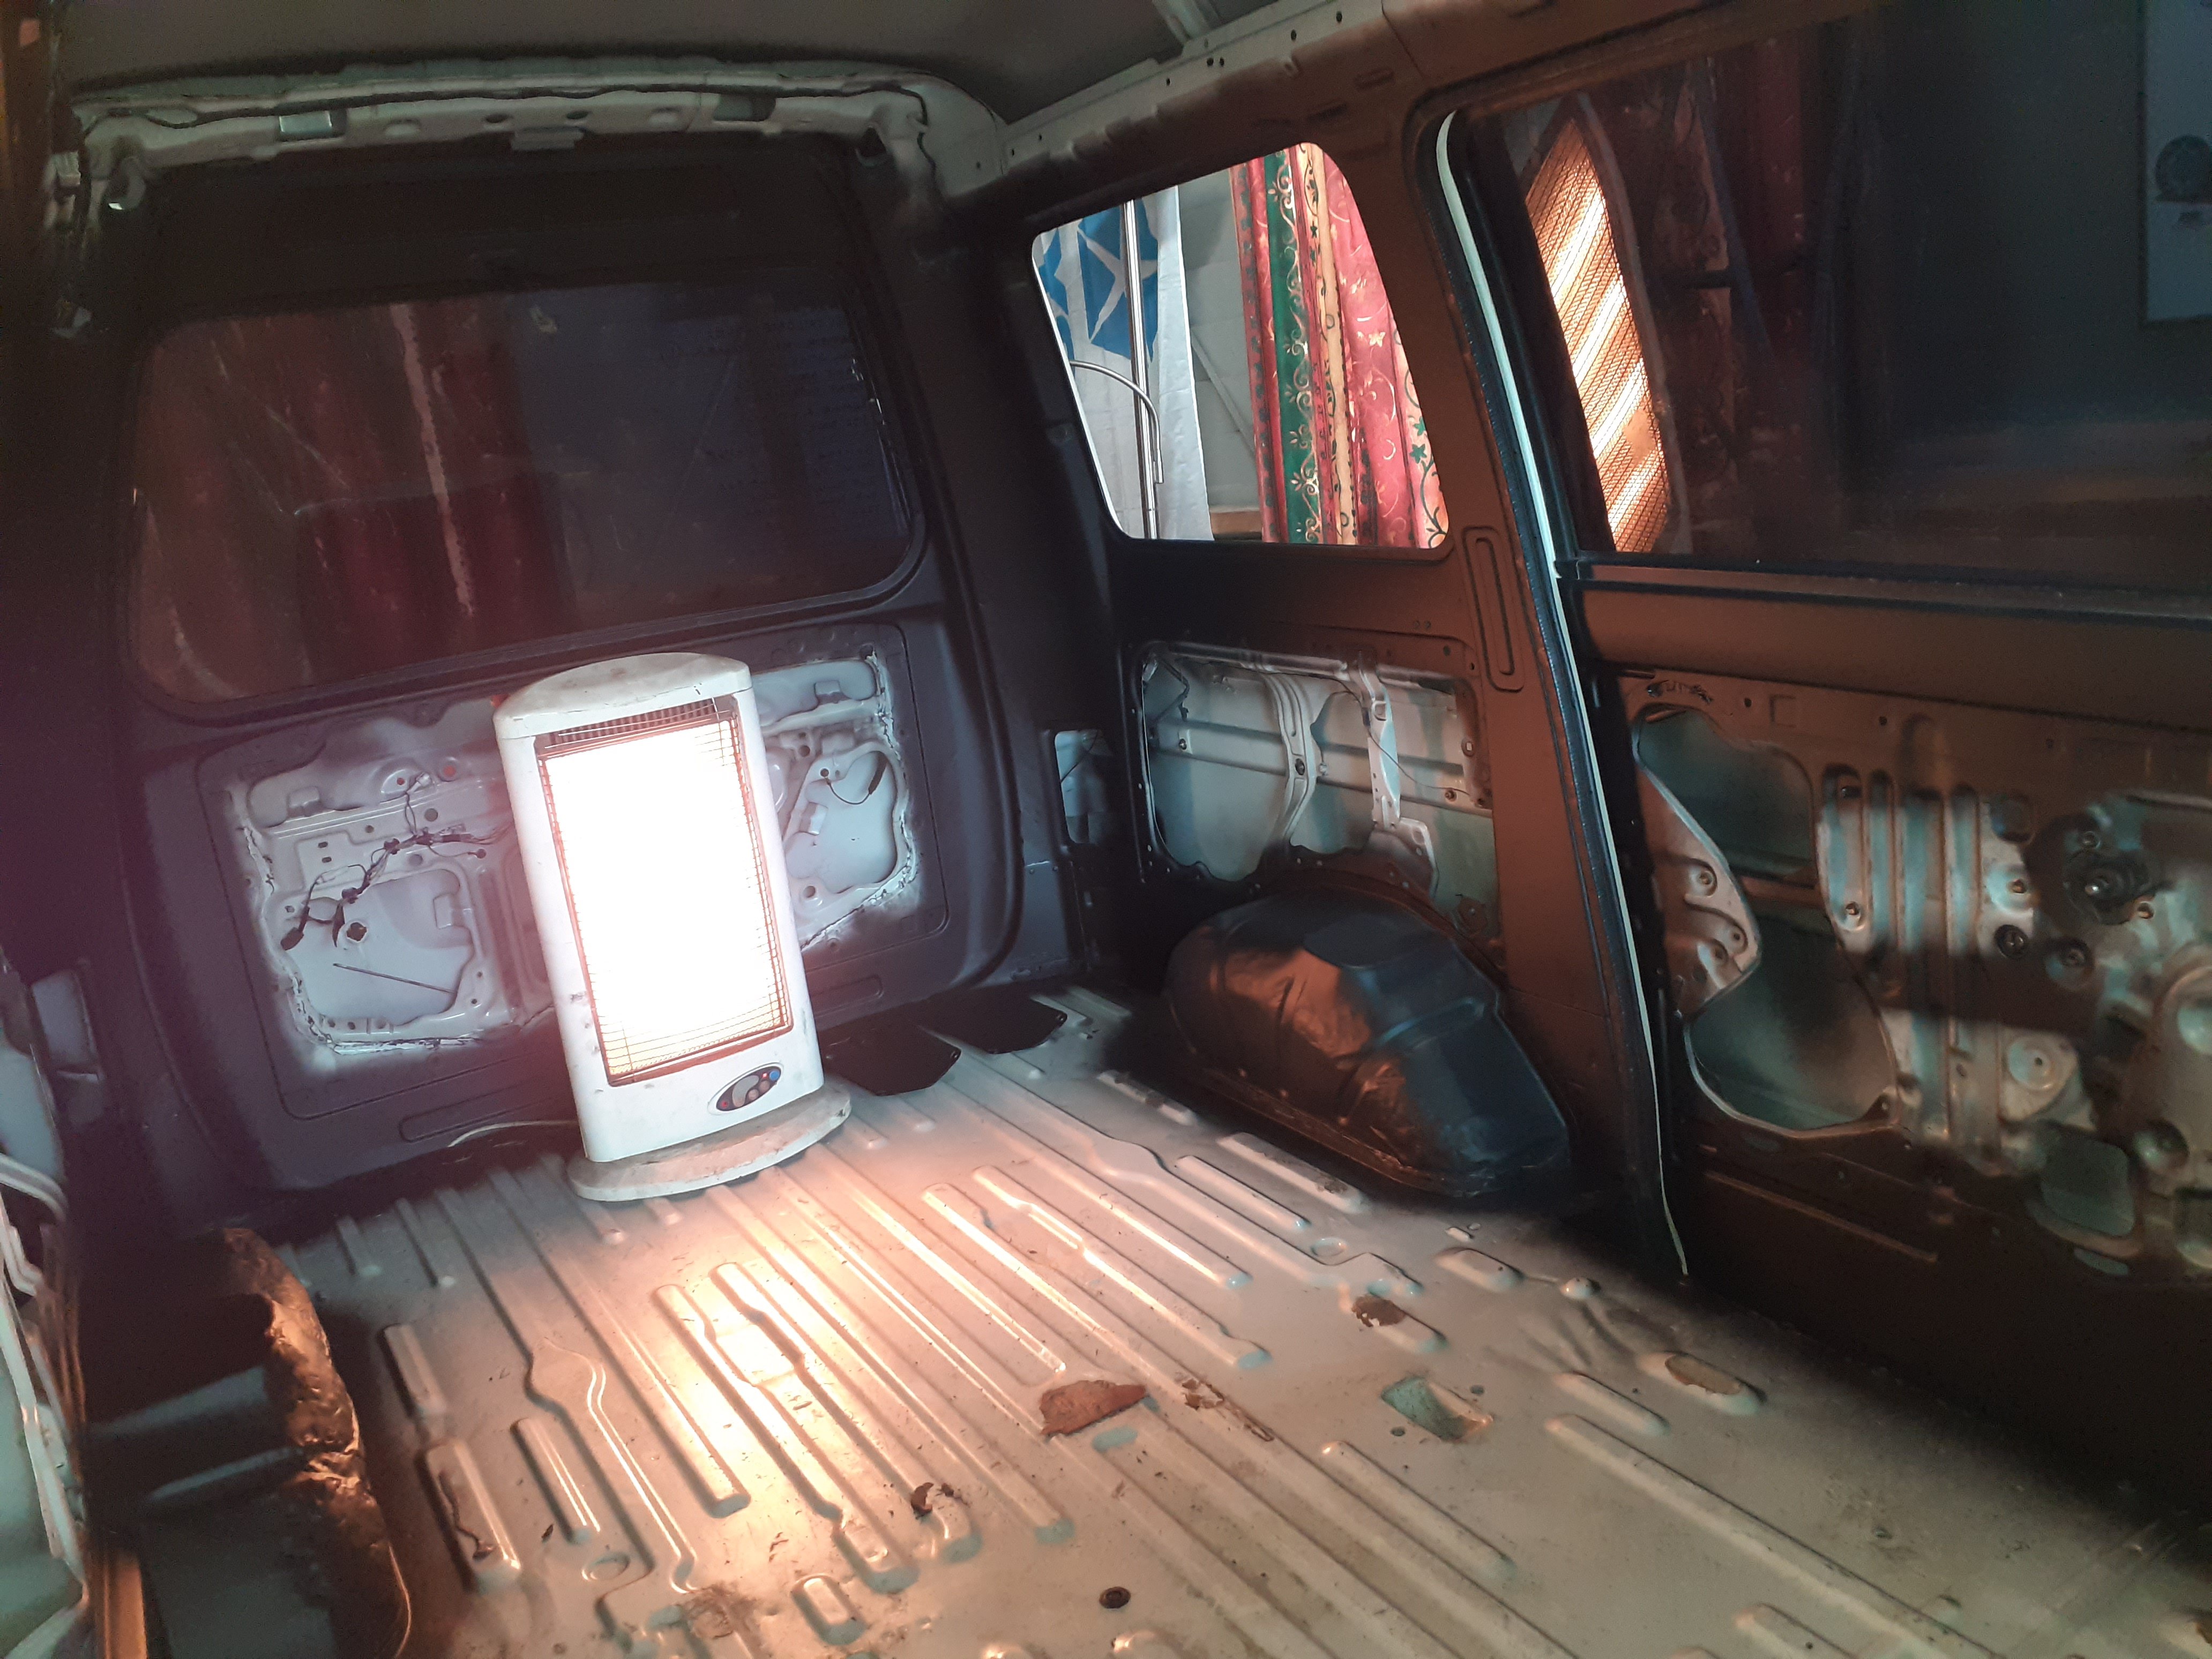
Yuck to not so yuck, sugar soap and a water blast . And dungeon spec interior
1 point
-
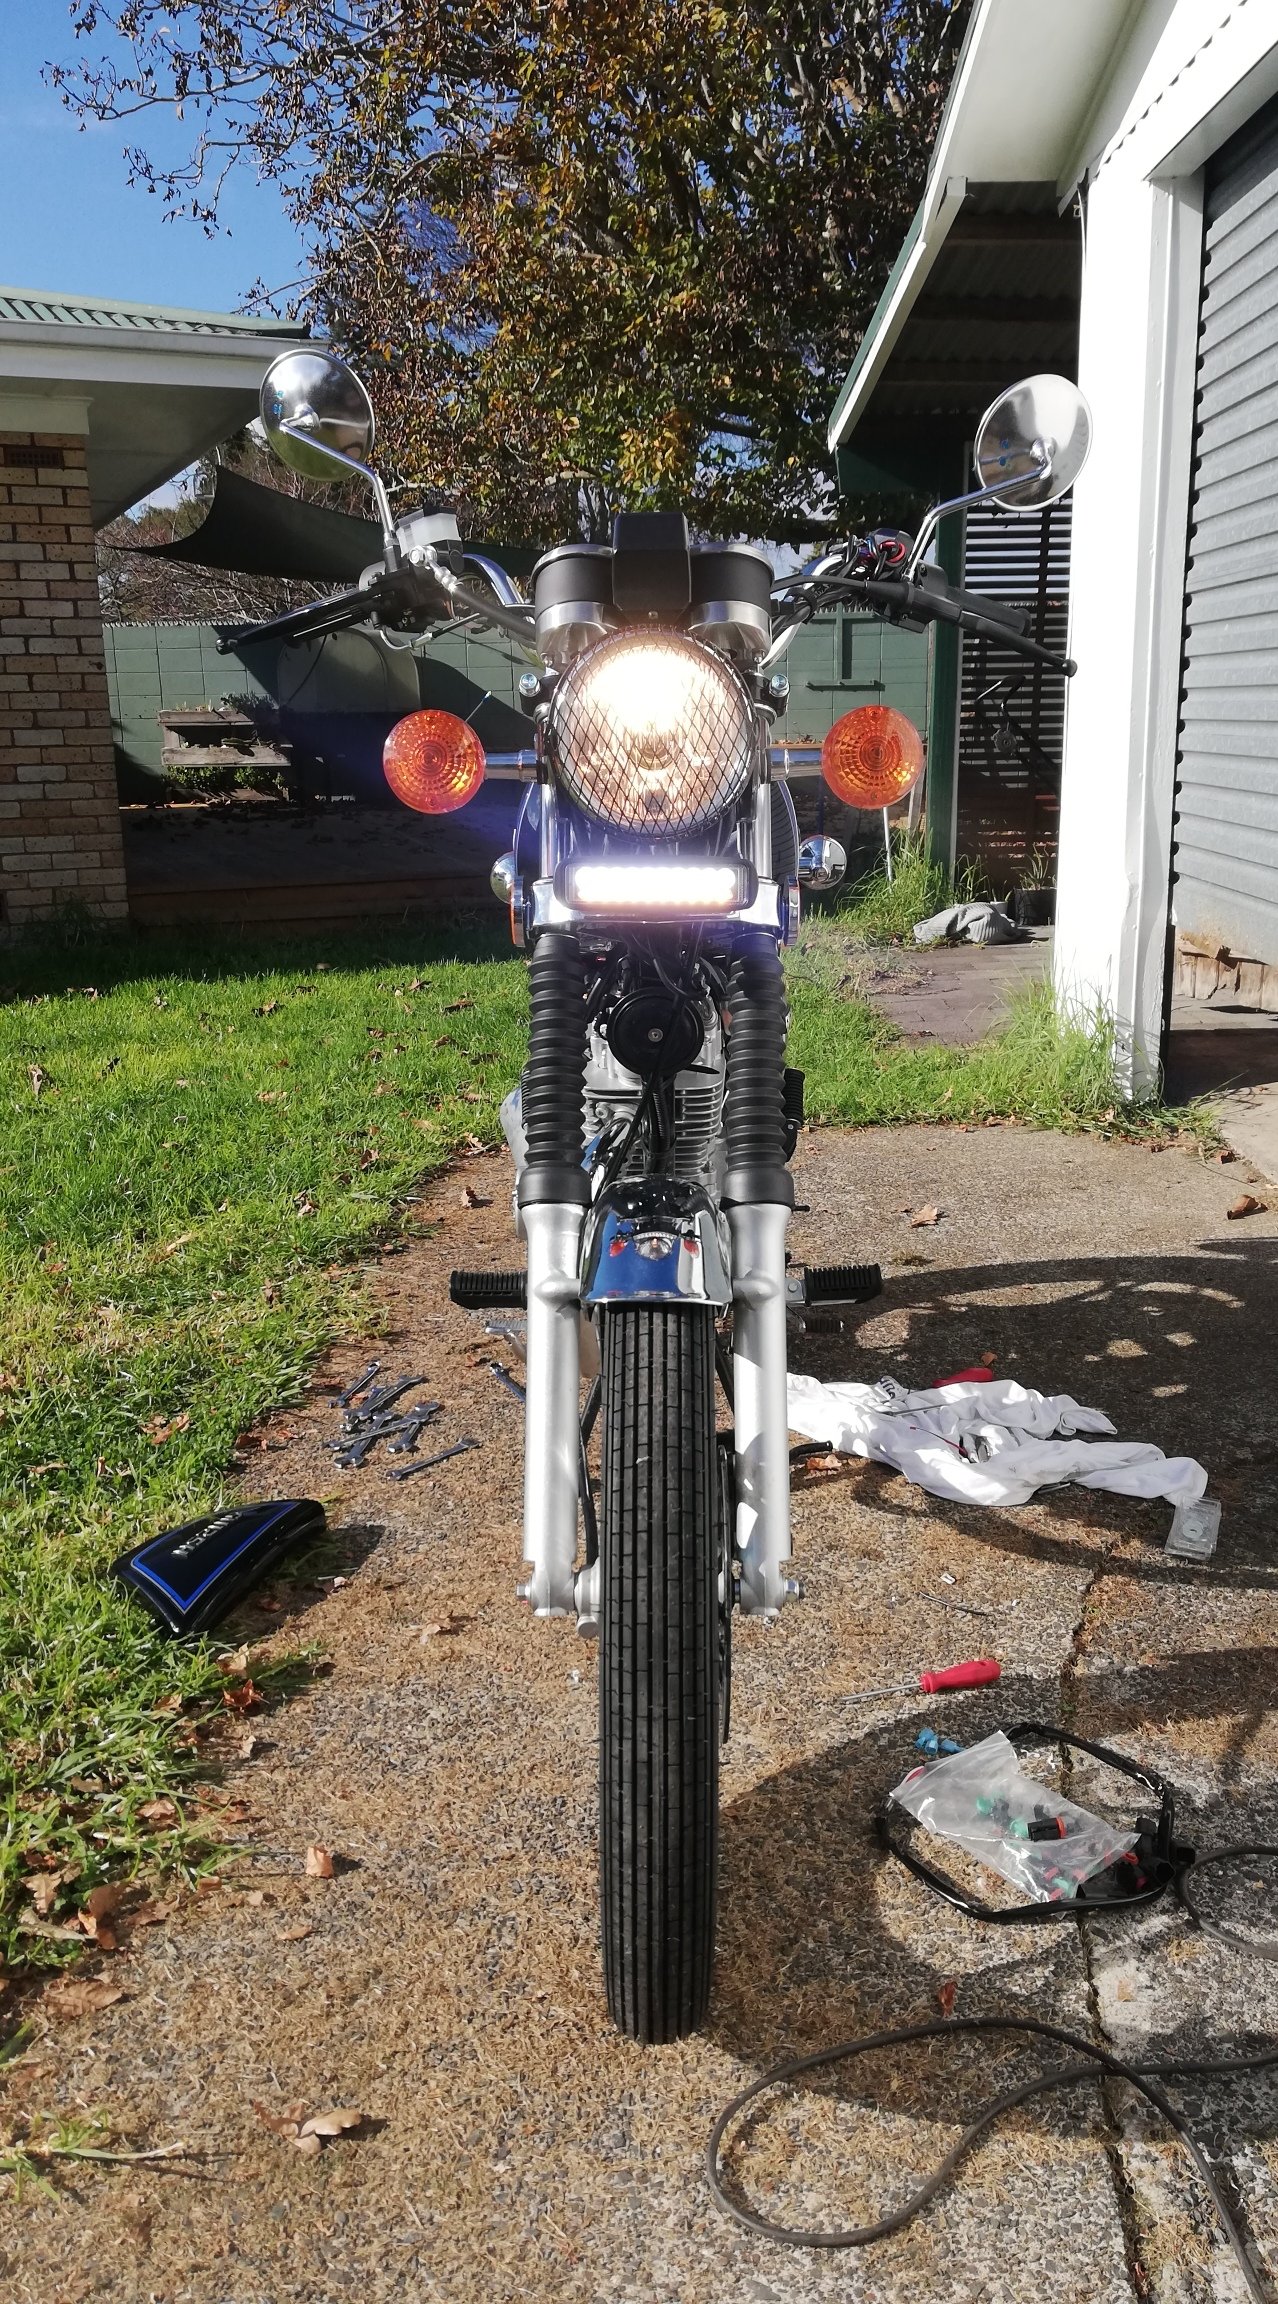
Ordered an off-on switch instead of an on-off-on. So that's on its way now. Installed the rest anyways two toggles ziptied to the handle bar should be alright for now. Run off a relay from the battery rather than the key, but I don't think il forget to turn it off. White flood and amber fog led light bar. Ready for some #adventureGN
1 point
-
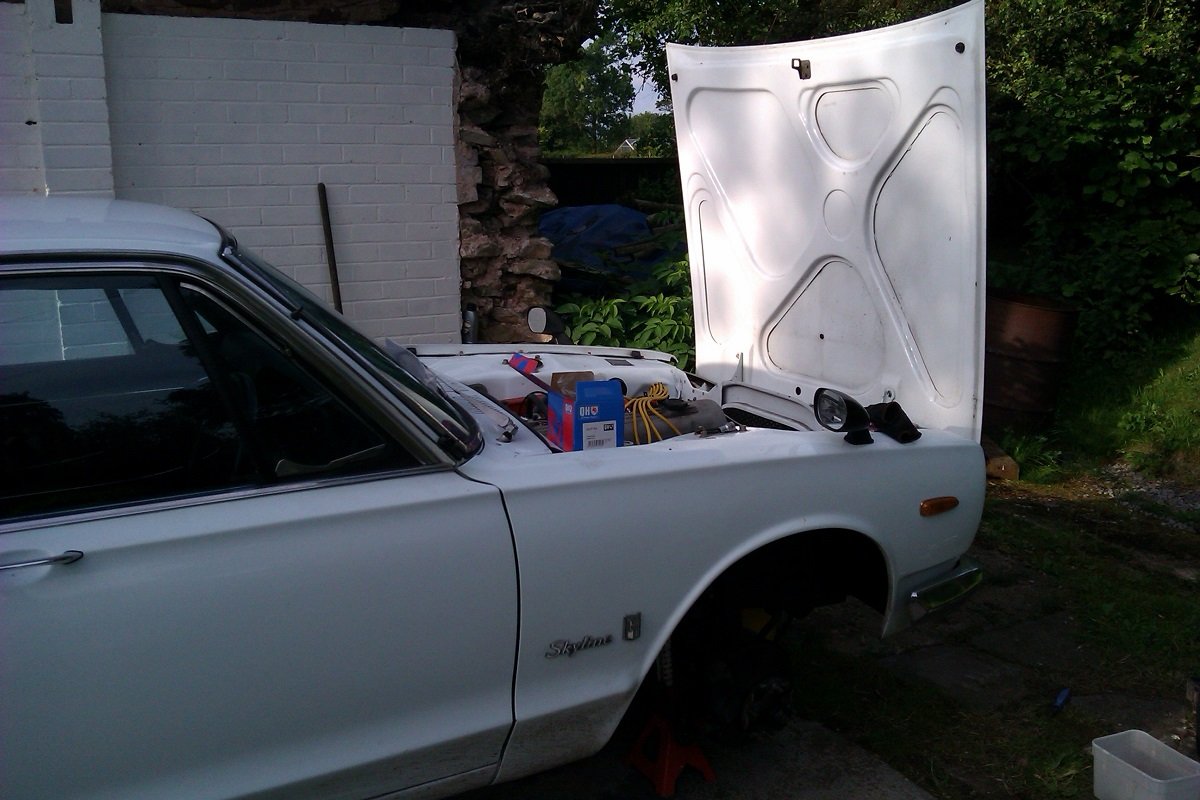
I was going to spend all day on the old crate today but didn't get on it till 6. Stupid Saturdays. Having decided not to go the Pro Stock/ Street Freak route, (see random picture thread, page 4283) I thought I'd better mend the thing. Calipers fit but the originals had the fitting in the middle of the body so the the flexies aren't long enough. By chance, Hilux chassis to rear axle hoses are 60mm longer so I may get away with that. Anyway, bailed on the brakes and pulled the water pump off. In true Japanese style, all the bolts came out fine and everything seems the same on the new pump. Came in at 7.30 in time for chips and beer. No Skylining tomorrow, taking the daggs to the beach. Want to do more Skylining TBH. PS.... Any of you GC's know what the valve gaps are for a '72 L20 ? Gonna go with 240Z specs unless I get told otherwise. /pics
1 point
-
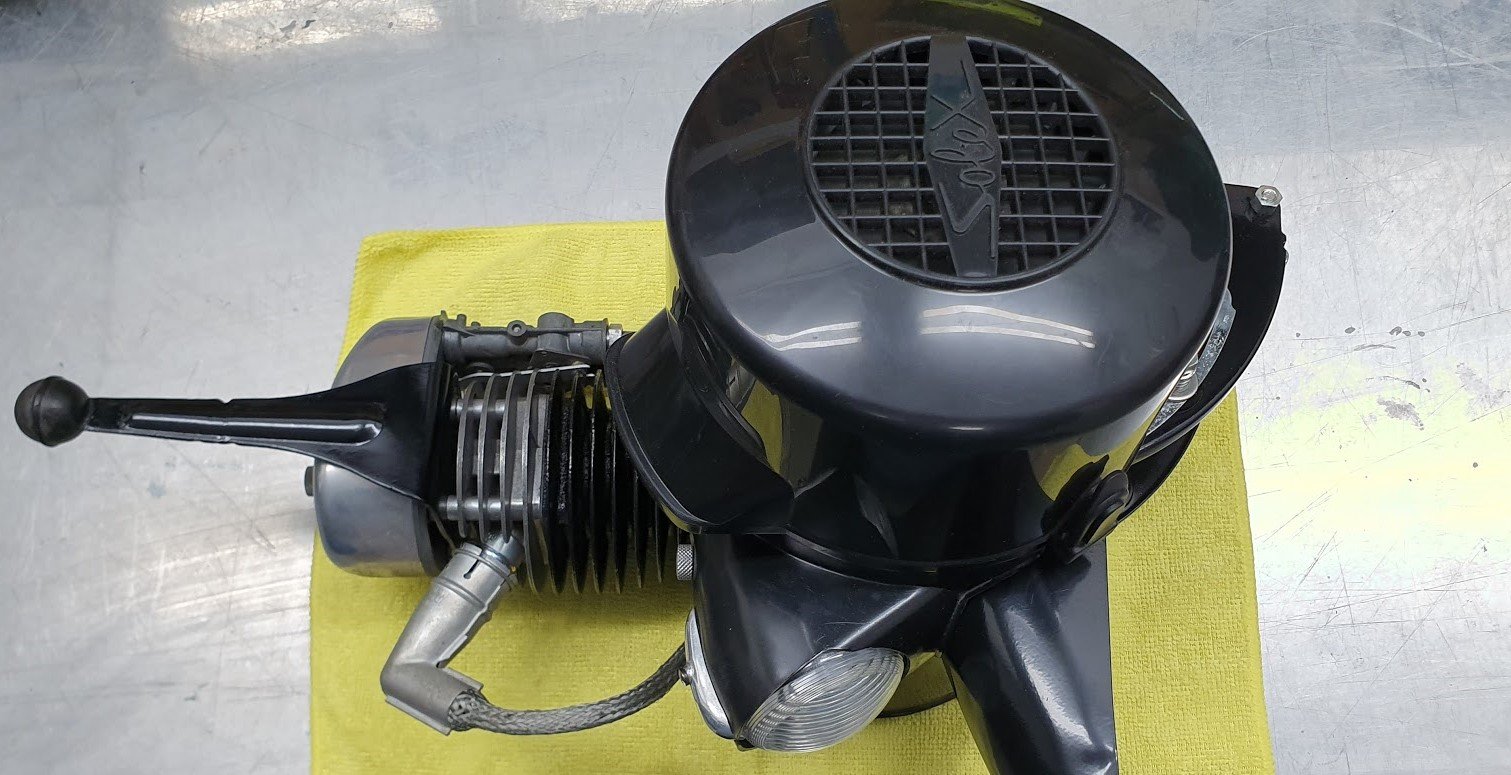
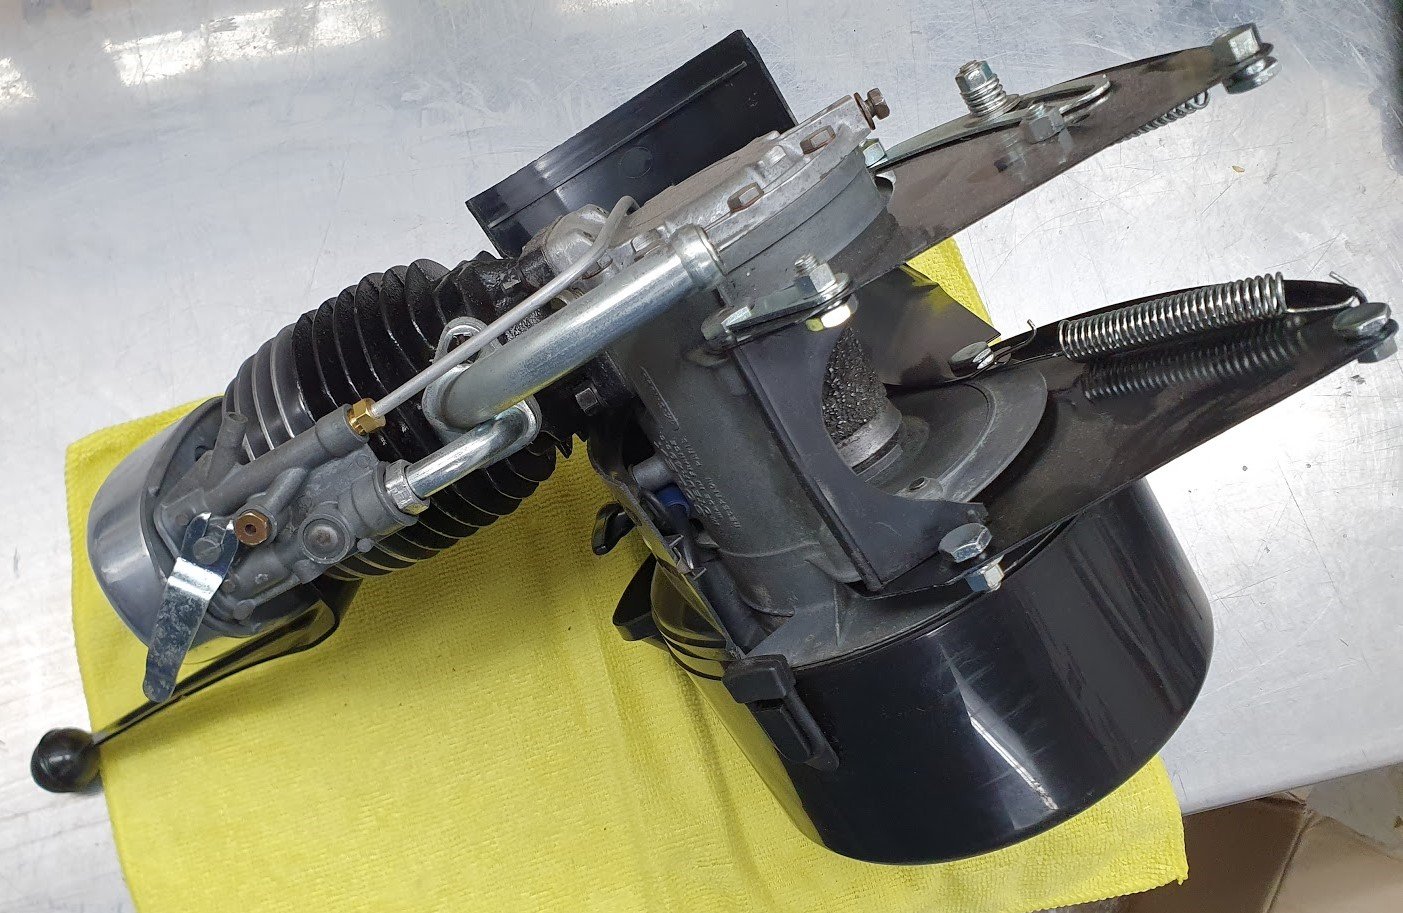
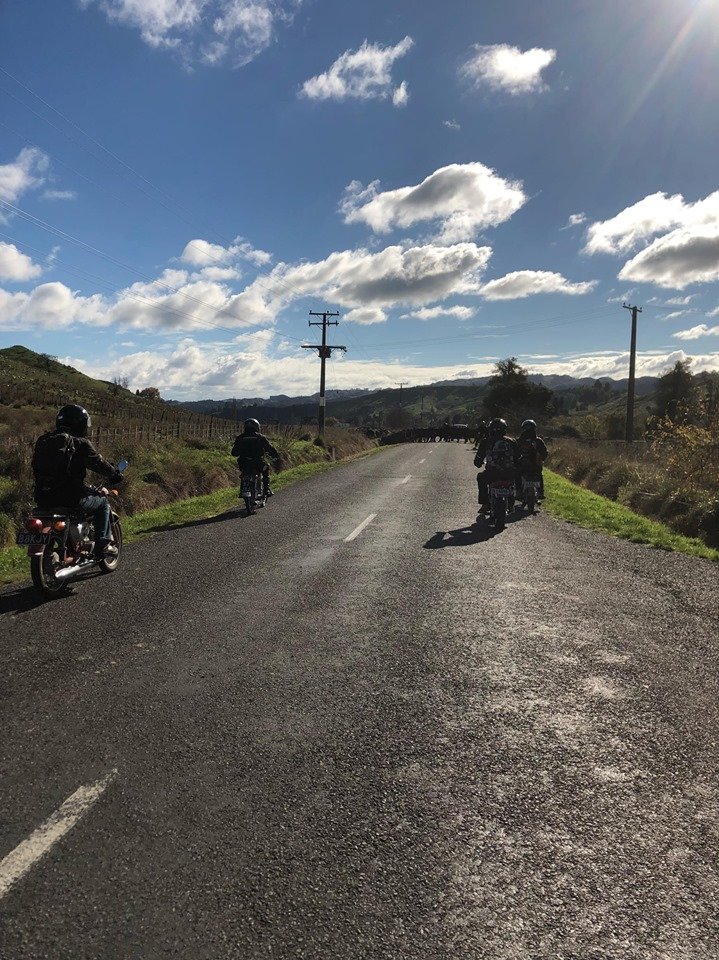
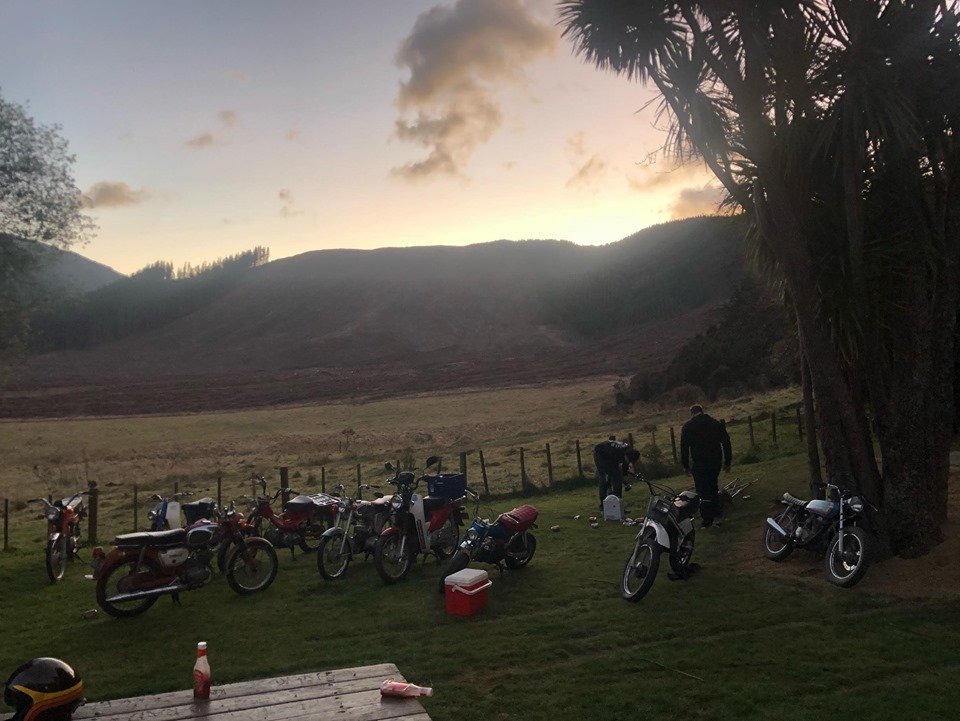
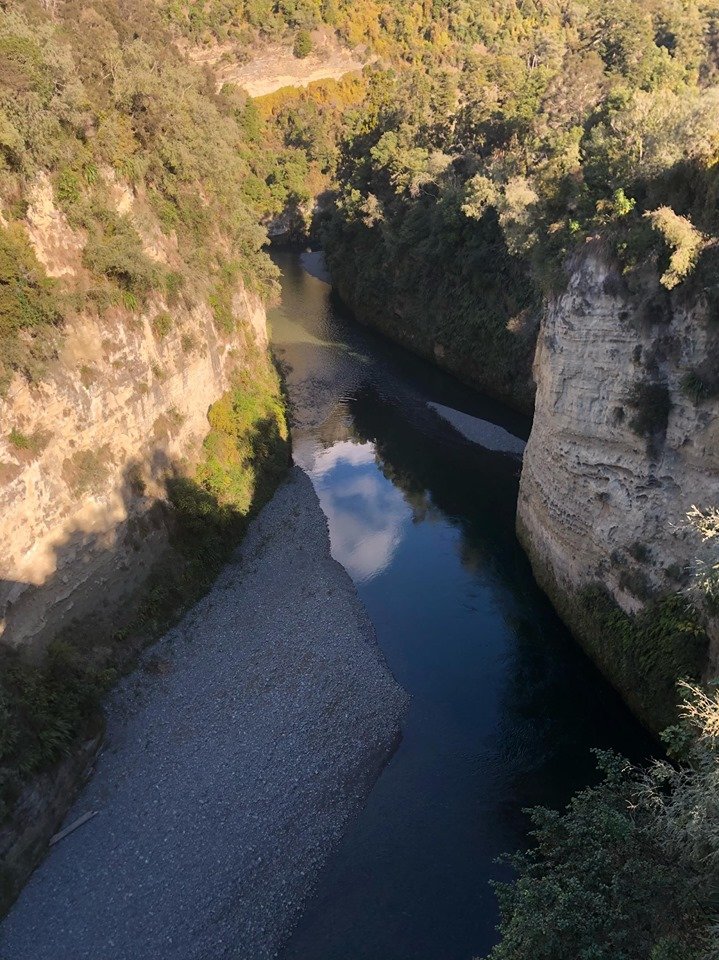
well i was planning on taking the trombone to this years east cape ride (te uruwera) but this wee gem of a GP125 popping up on trademe for a bloody good price, with reg on hold, and after hearing @TimShadboltfan27 harp on like a barry at a sandal convention about how hard the go for that they iz i thought id grab it. first trap for young players was this hilariously added throttle governing screw that has been added and was wound right in. dude never told me about it and i couldn't figure out why it was slow, turns out it was a riding school bike and they had to limit them to stop dweebs hurting themselfs, not a problem that they have with GN125s anymore id think. so this was the slide height at full throttle with the governing screw in also note that dimple on the slide, as it turns out when that circle touches the top of the carb opening as it is in this position, is where you set the CCI oil pump to meter is max amount of oil using the lines on the pump arm and pump body. so once i had that sorted it still didnt run to good, so i whipped the air filter out which fell to bits and had all solidified so that wasnt helping, i order a sheet to make a new one. i also whipped the baffle out of the exhaust which was like 90% blocked, and with the baffle out you can see here that the muffler is almost half full with scum and oil from 30 odd years of putt putting between cones so hopefully this weekend it will be back together and close to its original claimed HP of 15 wild wild smokey horses. should be nice and comfortable for east cape, the tank itself being 10l should be enough for any fuel distance we will require so wont need to carry extra, and will run this tank back and just a small 20l dry bag strapped to the back. looks like i might be taking a bivvy to sleep in too as the cabins at waikaremoana are all booked. then its just sorting tyres, stock tyre size is a bit better than most small bikes with 300-18 on the rear and 275-18 on the from. i grabbed one 300-18 shinko 244 and will see if it clears the guard on the front, if it does ill order another and run 300-18 all round and if it doesn't ill just smack it on the rear and whack a 275-18 shinko 241 (PPSC control tyre) on the front, but would be nice to have matching styles i think. bit bloody excited to have a 2 stroke in the shed, hopefully it doesn't cause me headaches which is the predominant reason i don't usually have 2 stokes in the shed.1 point
-
Completed the 57sc Sump Model. Moving onto the pattern making designs now. These should be a lot easier than the crankcase! Casting version with machine allowance and shrinkage compensation First cut of roughly what the sand cores would look like.1 point
-
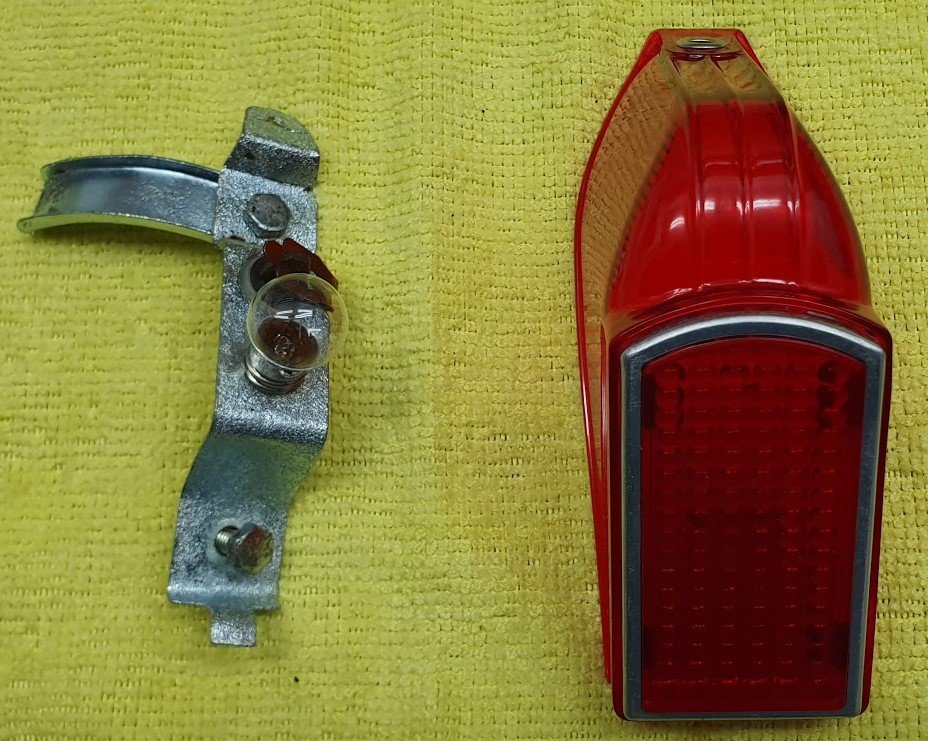
I've been hooning this thing a bit. ran into my first issue which was the lights stopped working and we couldn't find where in the original loom the break was so ended up just wiring the headlight and tail lights straight to the stator through the trail tech which worked a treat and that also ment i could ditch all the original handlebar controls and ignition switch and rip out the entire old loom which tidied the bike up a whole heap. bike ended up dieing on me on my way home from work and had to push it home, it had lost spark so i pulled the side cover off and turns out one of the screws out of the stator had made its wat out and had a bit of fun behind the flywheel and knocked the points and one of the windings. so i chucked my spare stator in and after mucking around with the weird timing advance setup these use managed to get it going just in time for the penny pincher's first big ride. We managed to travel around 550km's over two days all on back road and gravel which was super fun my bike ended up making it to the lodge where we stayed the night then when i when i was full cut and tried to start it to do a drunken skid as ya do there was no one home and we couldn't get it to fire up at all the next day which was lame, have a feeling something to do with the points is fucked again so it may be time for a xr100 motor with a cdi setup for reliability. i ended up riding one of the other boys a50's on the way home and that was a great time, really have to work hard to keep those things humming up hills and just in general. Note: the Irvine's mince and cheese pipe sitting on the engine casing, i recommend 50km @9000rpm to warm i through throughly Next plans for the bike are to get it going reliably, ride it more, i am wanting to play with a fibreglass mould for a new seat pan and recover it in some brown leather, also i managed to destroy the speedo drive in the original speedo on this ride so may end up getting some nice small desecrate rev and speedo gauge, also get a good quality tail light as the aliexpress ones seem to rattle apart easily this being the second one i have killed.
1 point
-
"Test Drive" turned into blasting around in it for large parts of the afternoon, reckon I've done about 45 miles or so. Brakes are fine and it goes pretty hard (for what it is). Handles really nice and is no way stock in the springs & shocks department. Tweaked the timing a bit and it's just rattling a little under heavy load, I'll try some octane booster tomorrow that will sort it out hopefully. It was blowing oil smoke for the first 5 miles but a couple of hot & cold cycles seems to have freed the rings up a treat. Haven't revved it beyond 4 grand yet but it feels pretty strong. Over all I'm pretty bloody chuffed with it, it's a really nice car. Bit of a clonk in the drivetrain but it only sounds like a UJ. Water pump bearing's a bit wobbly and it needs a new rad cap but it held temperature & oil pressure despite some enthusiastic driving. Vids for your entertainment... What ? Skid you say ? So, it's all good. Gonna do the wheels bronze and paint the rear panel black between the lights but apart from that, roll on summer.... * Also, side-sharn.... About 5 years ago I was chatting to the in-laws neighbour about cars. Started telling him about the Hako and he said " Fucking Japanese shit, I'm not interested in those useless bits of crap". We popped round to Carols folks earlier and the neighbour drove by as we were leaving. He fucking loved the Skyline, was all over it and asked if I wanted to sell it. I ignored him. Silly bugger.1 point
-
Today's events went really well. Had @Geophy and @flyingbrick over today help out. Pretty excited about the following weeks. Ah yes we have an Instagram page for Greg's ice-creams now as well. this is for the people who cant view Instagram or also don't have it.1 point
-
Runner system prints completed.1 point
-
This gives you an idea of how the moulds/cores from these patterns will go together.1 point
-
Havnt updated for a while. Been in the US living up the Freedoms. Ive been working on a lot of CAD over the last 1-2years and have just recently bought a massive 3D printer to make casting patterns. The plan is to stock pile patterns and then hit it hard when Im back in NZ Currently doing patterns for the crankcase. I'll update more on Instagram. @Barlow.Jobs1 point
-
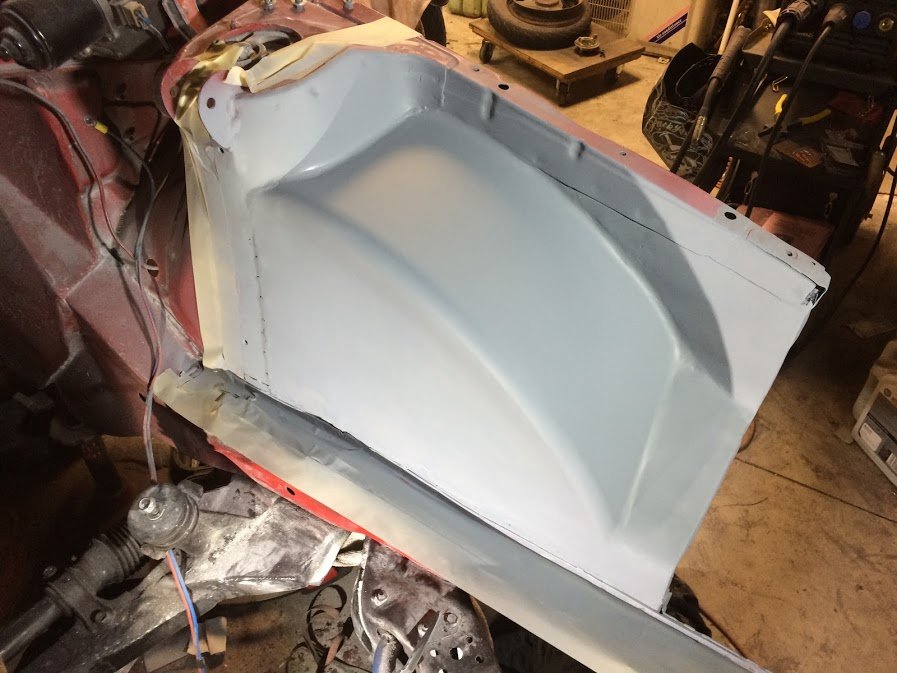
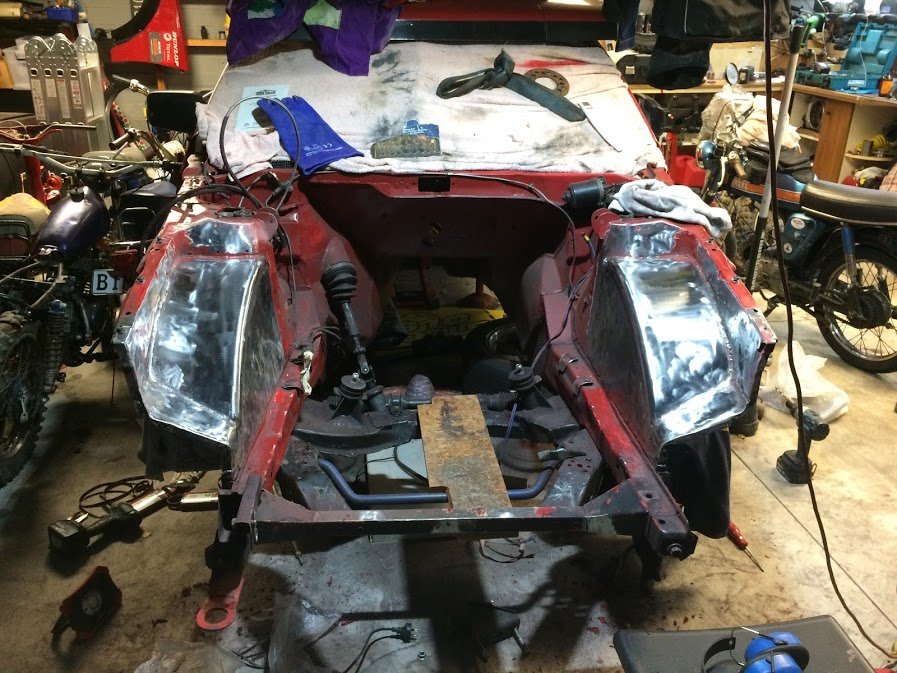
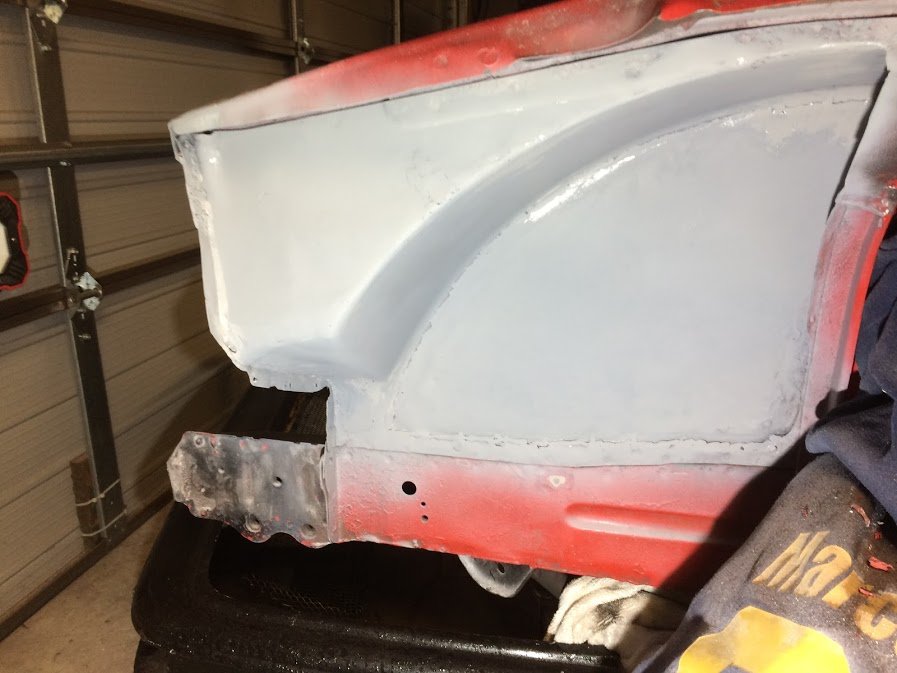
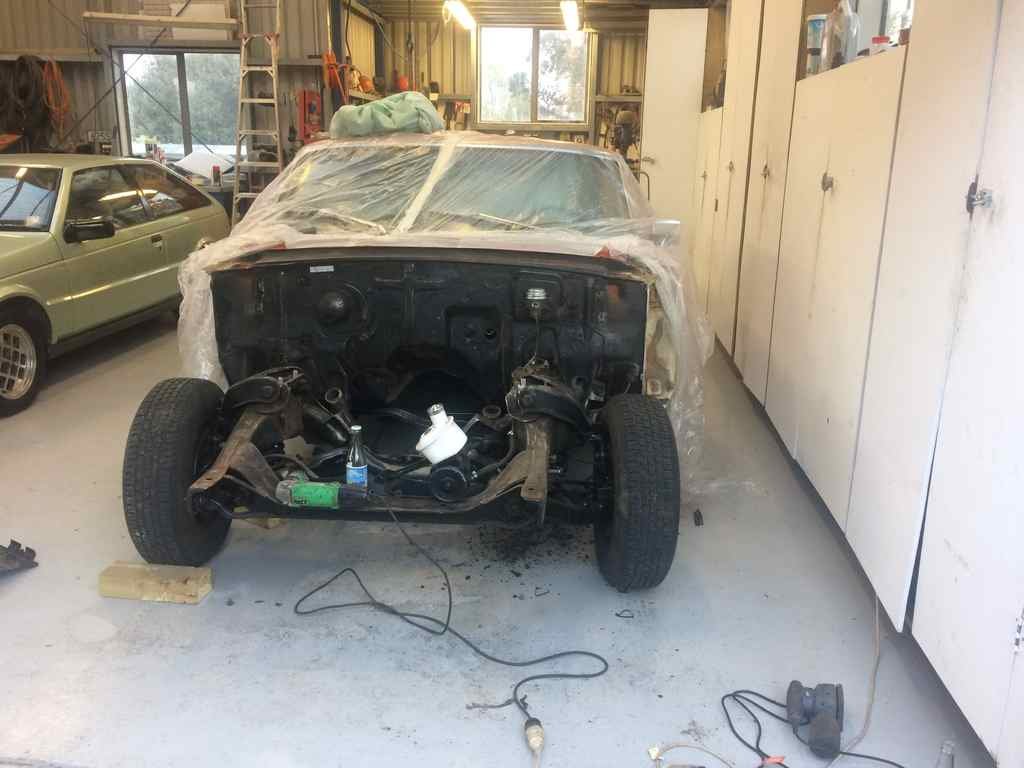
so this thing has turned into a big job... went and pulled the galaxie outside and give the engine bay a full degrease and waterblast. then i wasn't happy with the finish paintwork on the firewall wheel tubs and pretty much everything. was coated was looks to be underbody sealer so looks super rough. so began sanding it off then i pulled it apart some more to help with the sanding process Then when i got sick of doing some sanding i stripped some stuff of the engine so now im at the point where ive fully stripped it and wanting the car ready for an event which is 4 weeks away. so heres to hoping not too much goes wrong right.... with plenty on the to do list
1 point
-
So 2 weeks before moving to the US this happens! Guy in OZ is rebuilding a T57 and needed a new block. So got to and cast one up! Didnt go 100% but still really well. On a plane to LA in 3days!1 point

.jpg.ccf2c0bb547abf49652fff66cfa21c29.jpg)
.jpg.f2e6efd2be423739811faff63c00d9b3.jpg)
.jpg.bb24c9a3bae281073e7ba15f56105e82.jpg)


.jpg.d802b97116a03d7ced5580ee79037a0b.jpg)


.jpg.00c96a2281d6a0ee437e9927de20cc98.jpg)


This leaderboard is set to Auckland/GMT+12:00