
Leaderboard


Popular Content
Showing content with the highest reputation on 07/01/19 in all areas
-
Sunday of productivity. Water pump back on, filled & warmed up. No leaky, no squeaky. Messed about with the front brakes but couldn't work out a way of fitting the new calipers without it turning into a fearsome bodge. I'll take the calipers & current flexies into the workshop tomorrow & make up some hard lines and brackets. Rear brakes went well though. Offered the shoes up and they looked good enough for a country job Everything fitted perfectly so I can confirm that 1971 Datsun 510 rear brakes are the the same as Hakos. Do with that information what you will.... Also done a vid. Really to demostrate the tappet rattle for comparison after I've adjusted them but it sounds like the cam's not bolted in. It's really not that bad. So that's about it, hopefully full braking will be restored by the end of tomorrow and then I might even give it a clean. Once I've adjusted the valves I'll give it the beans, I've been staying below 4 grand (mostly) because of the water pump but it really feels like it wants to pick up between 4 and 4,500. Thank you for your continuing interest.8 points
-
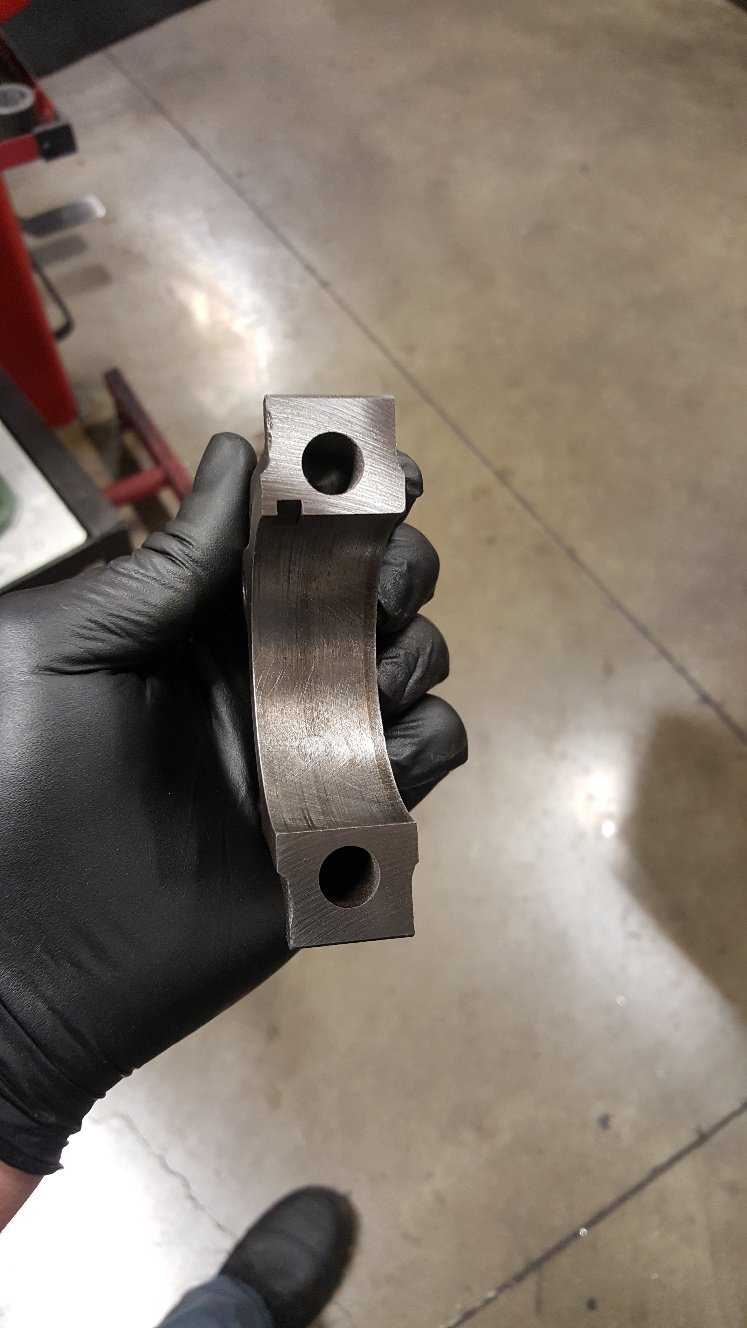
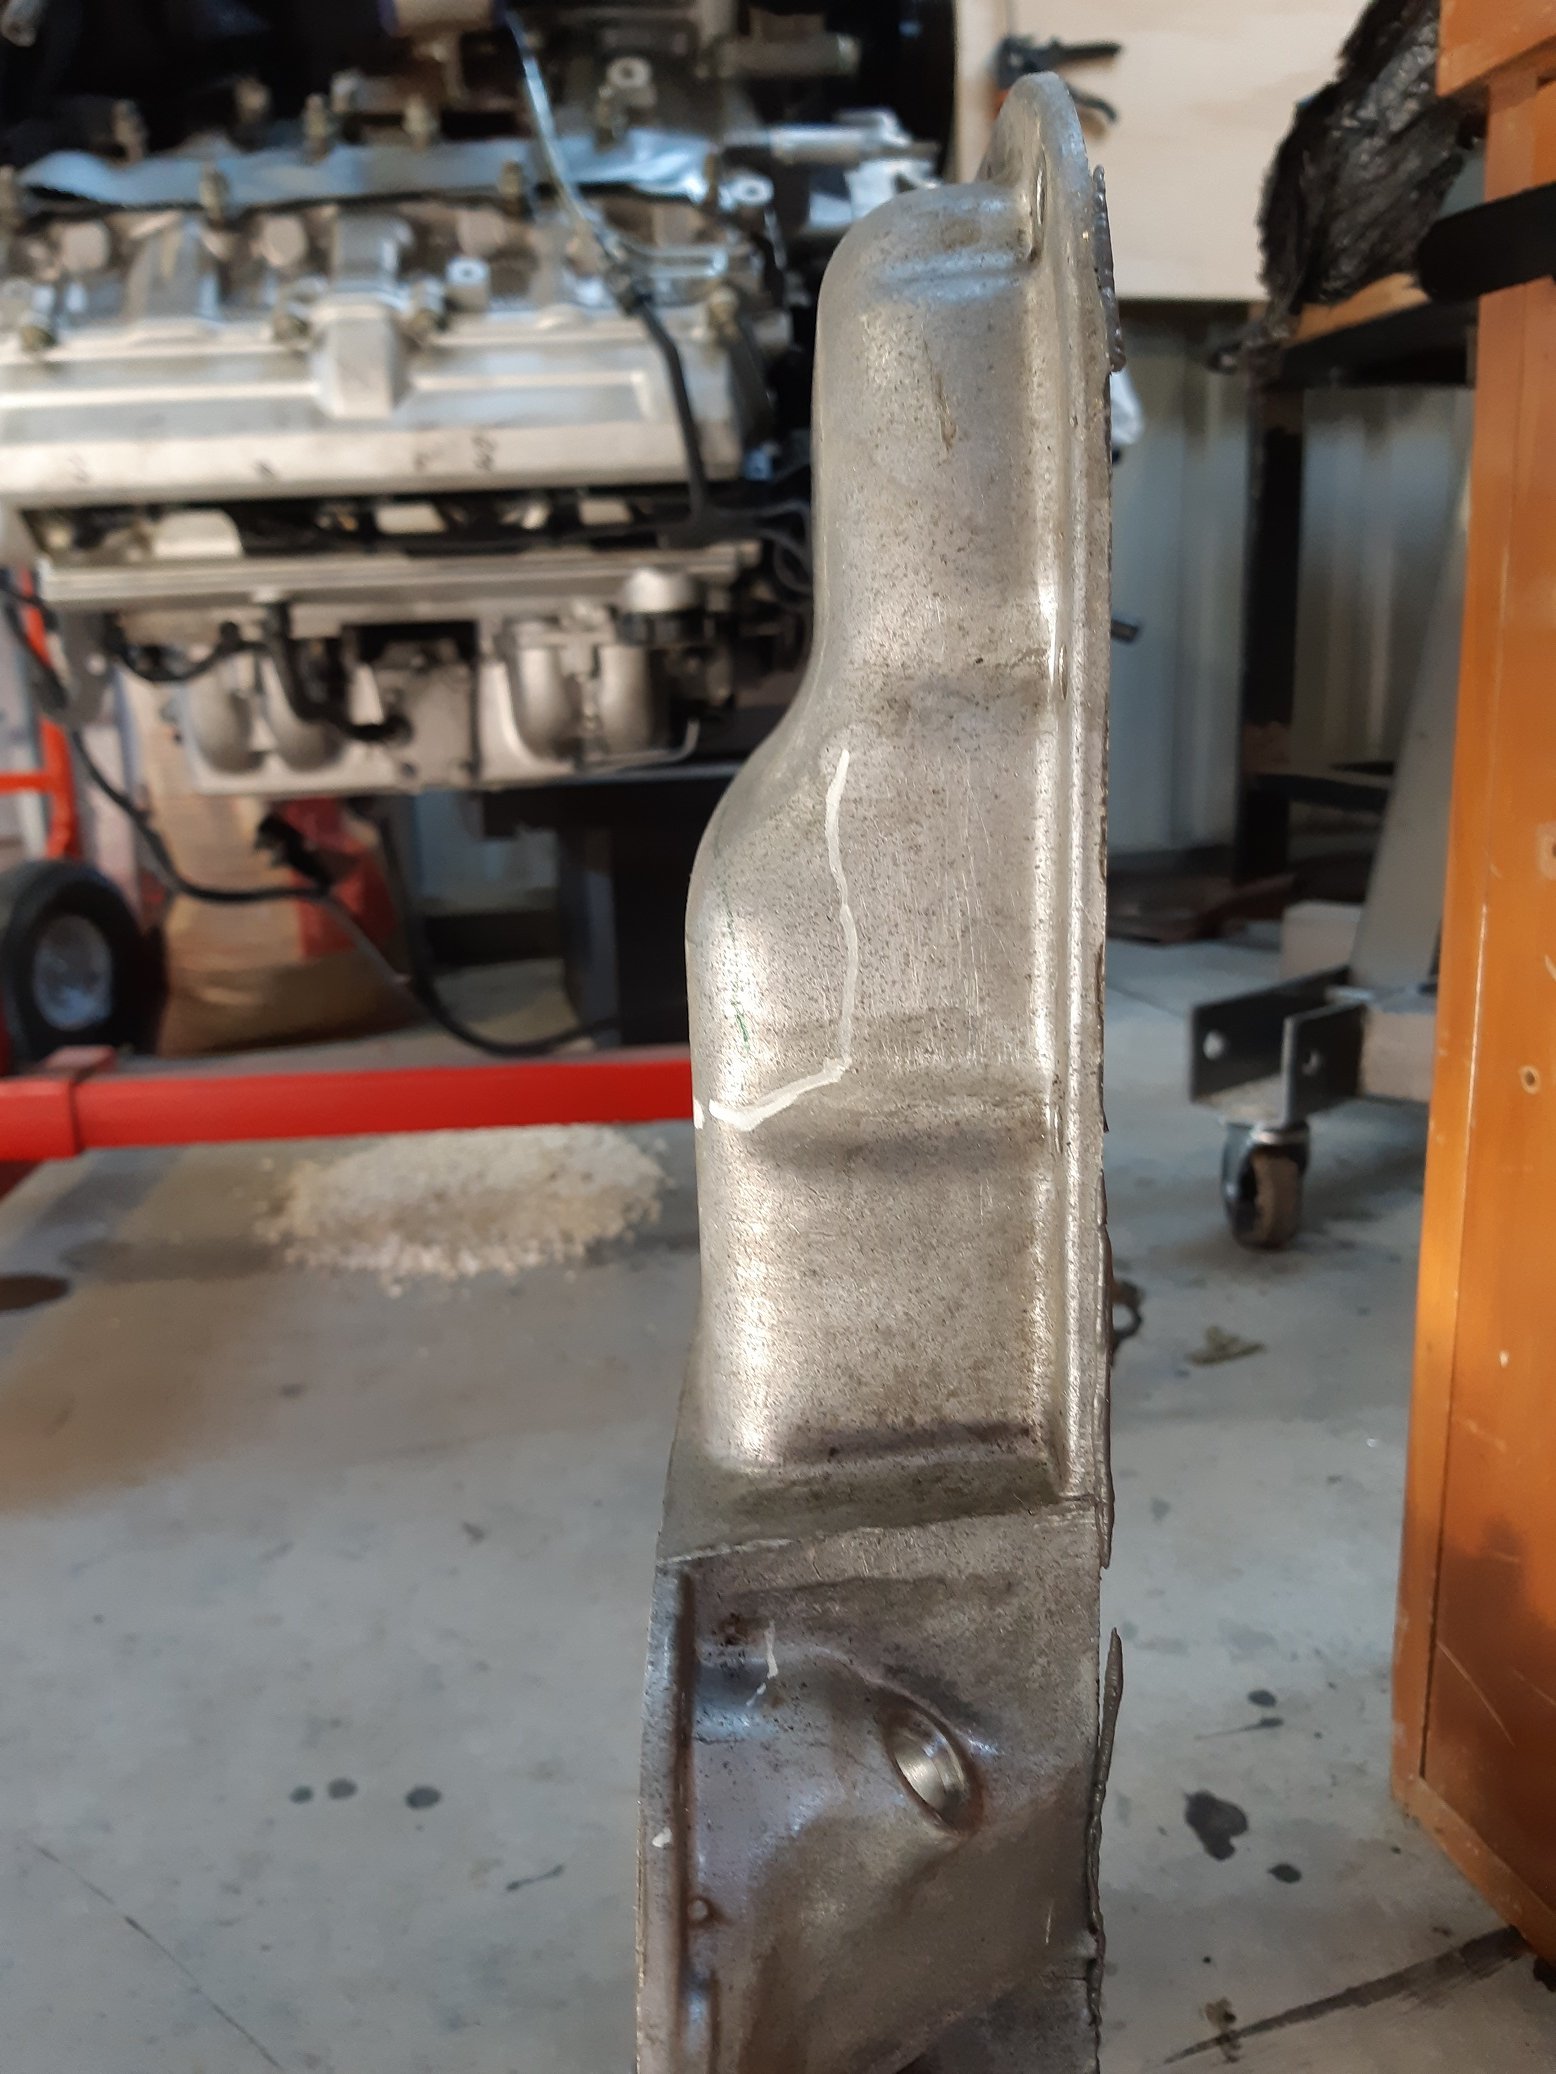
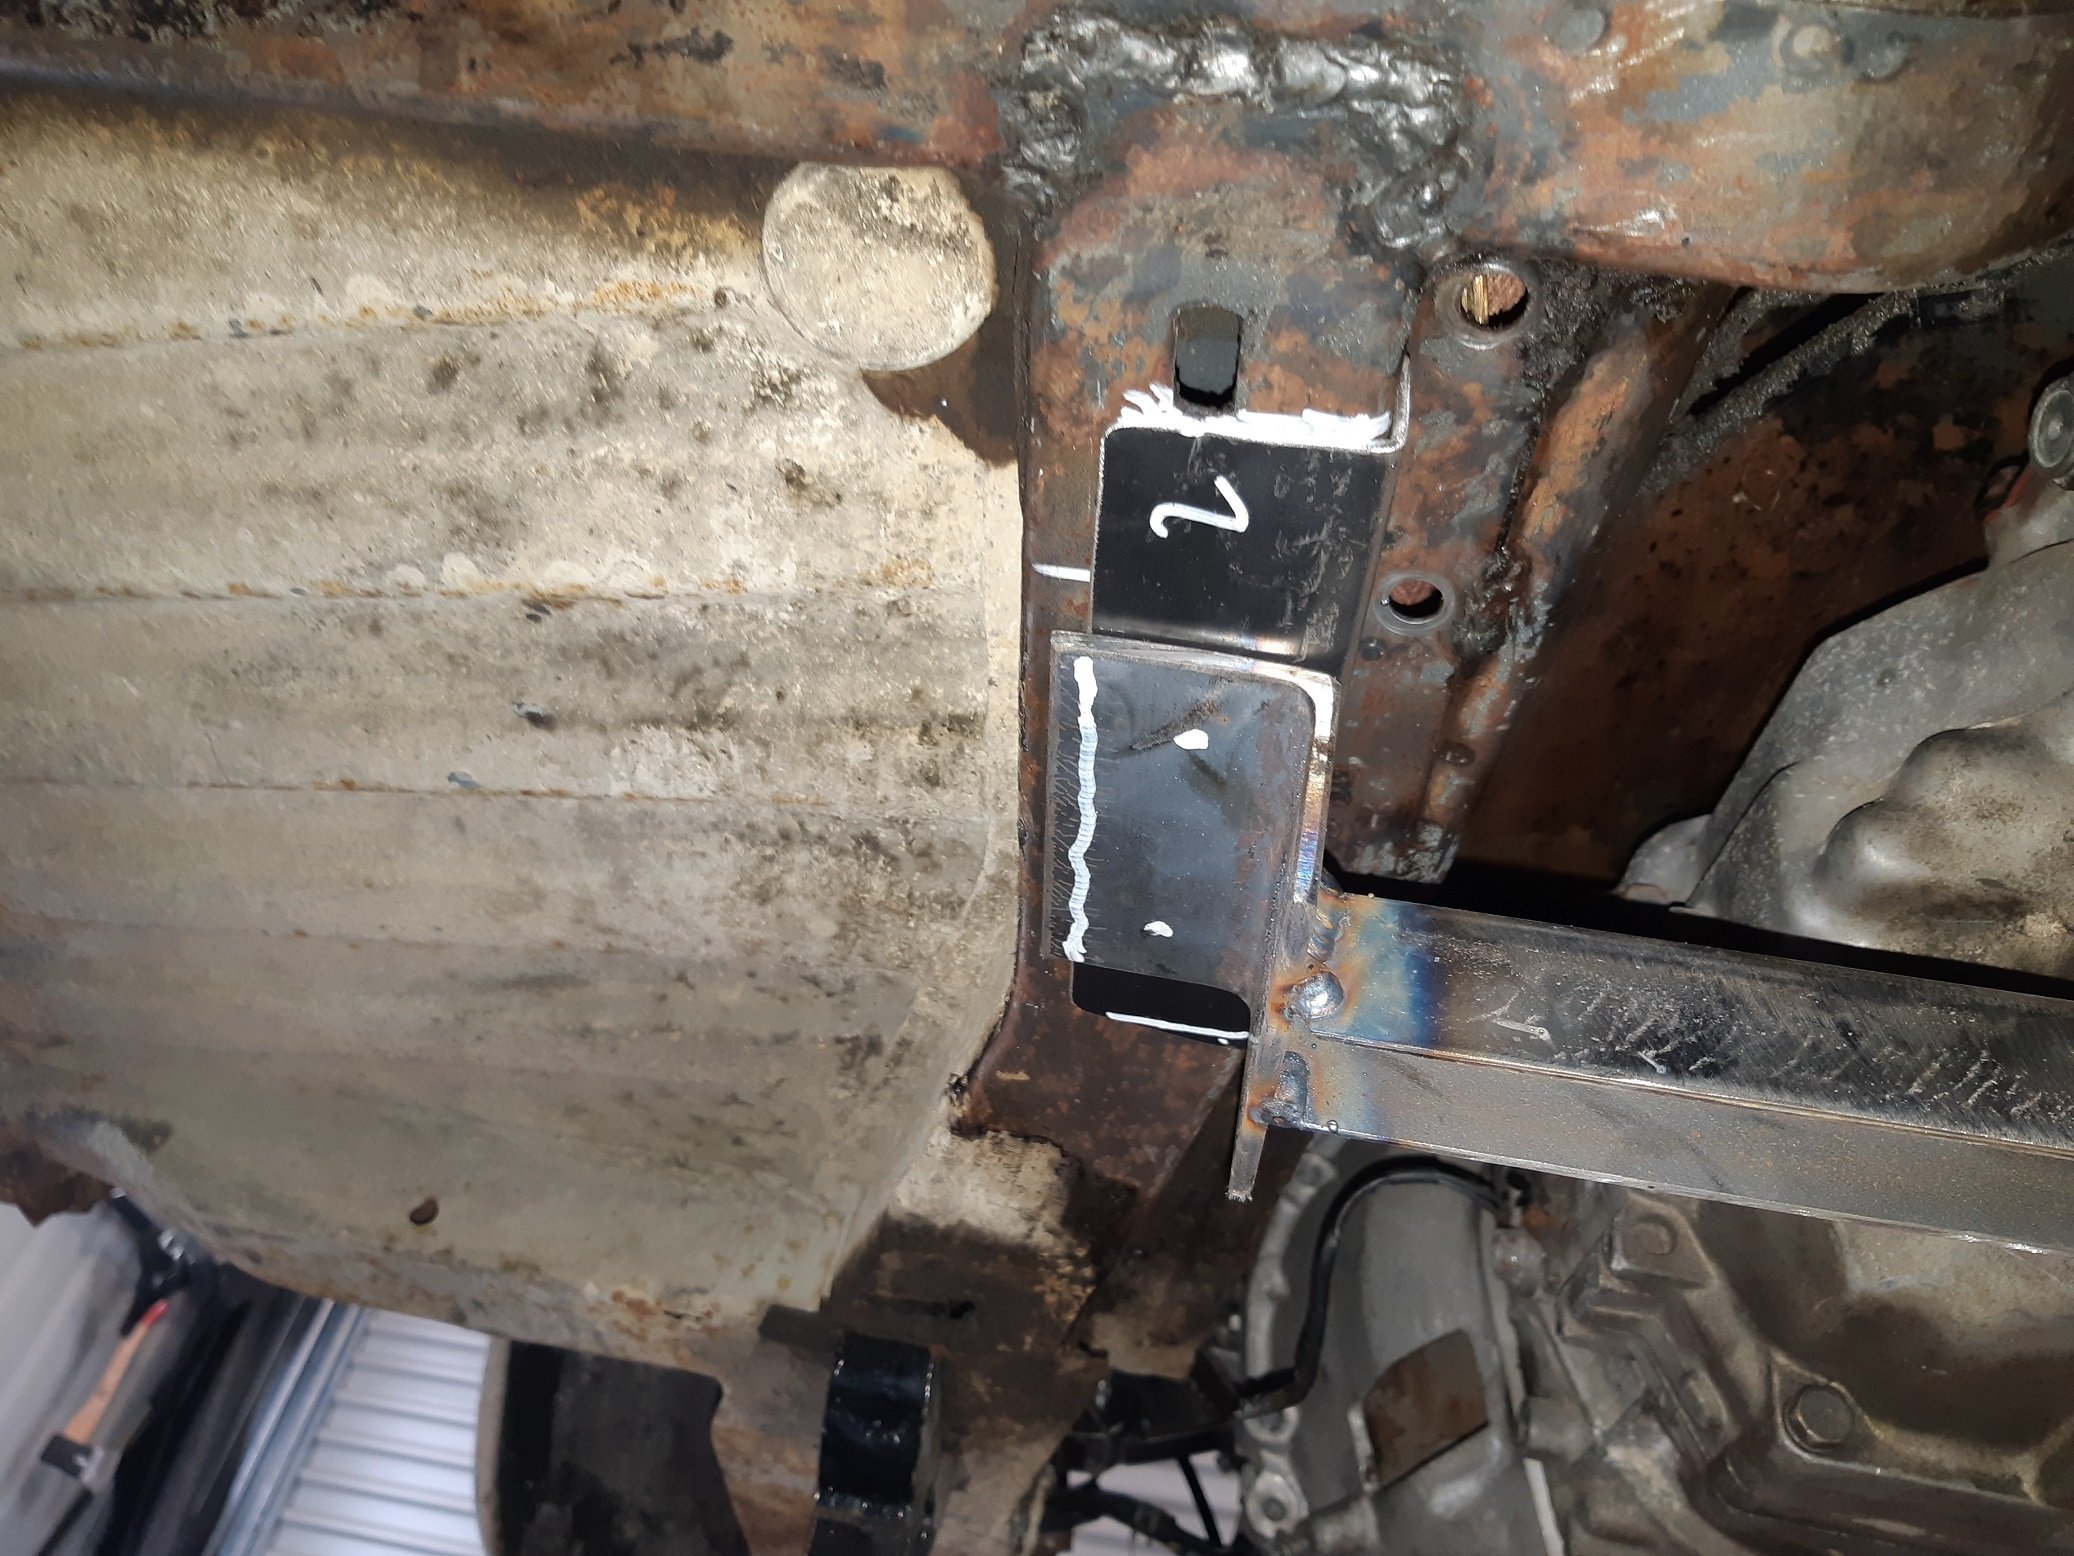
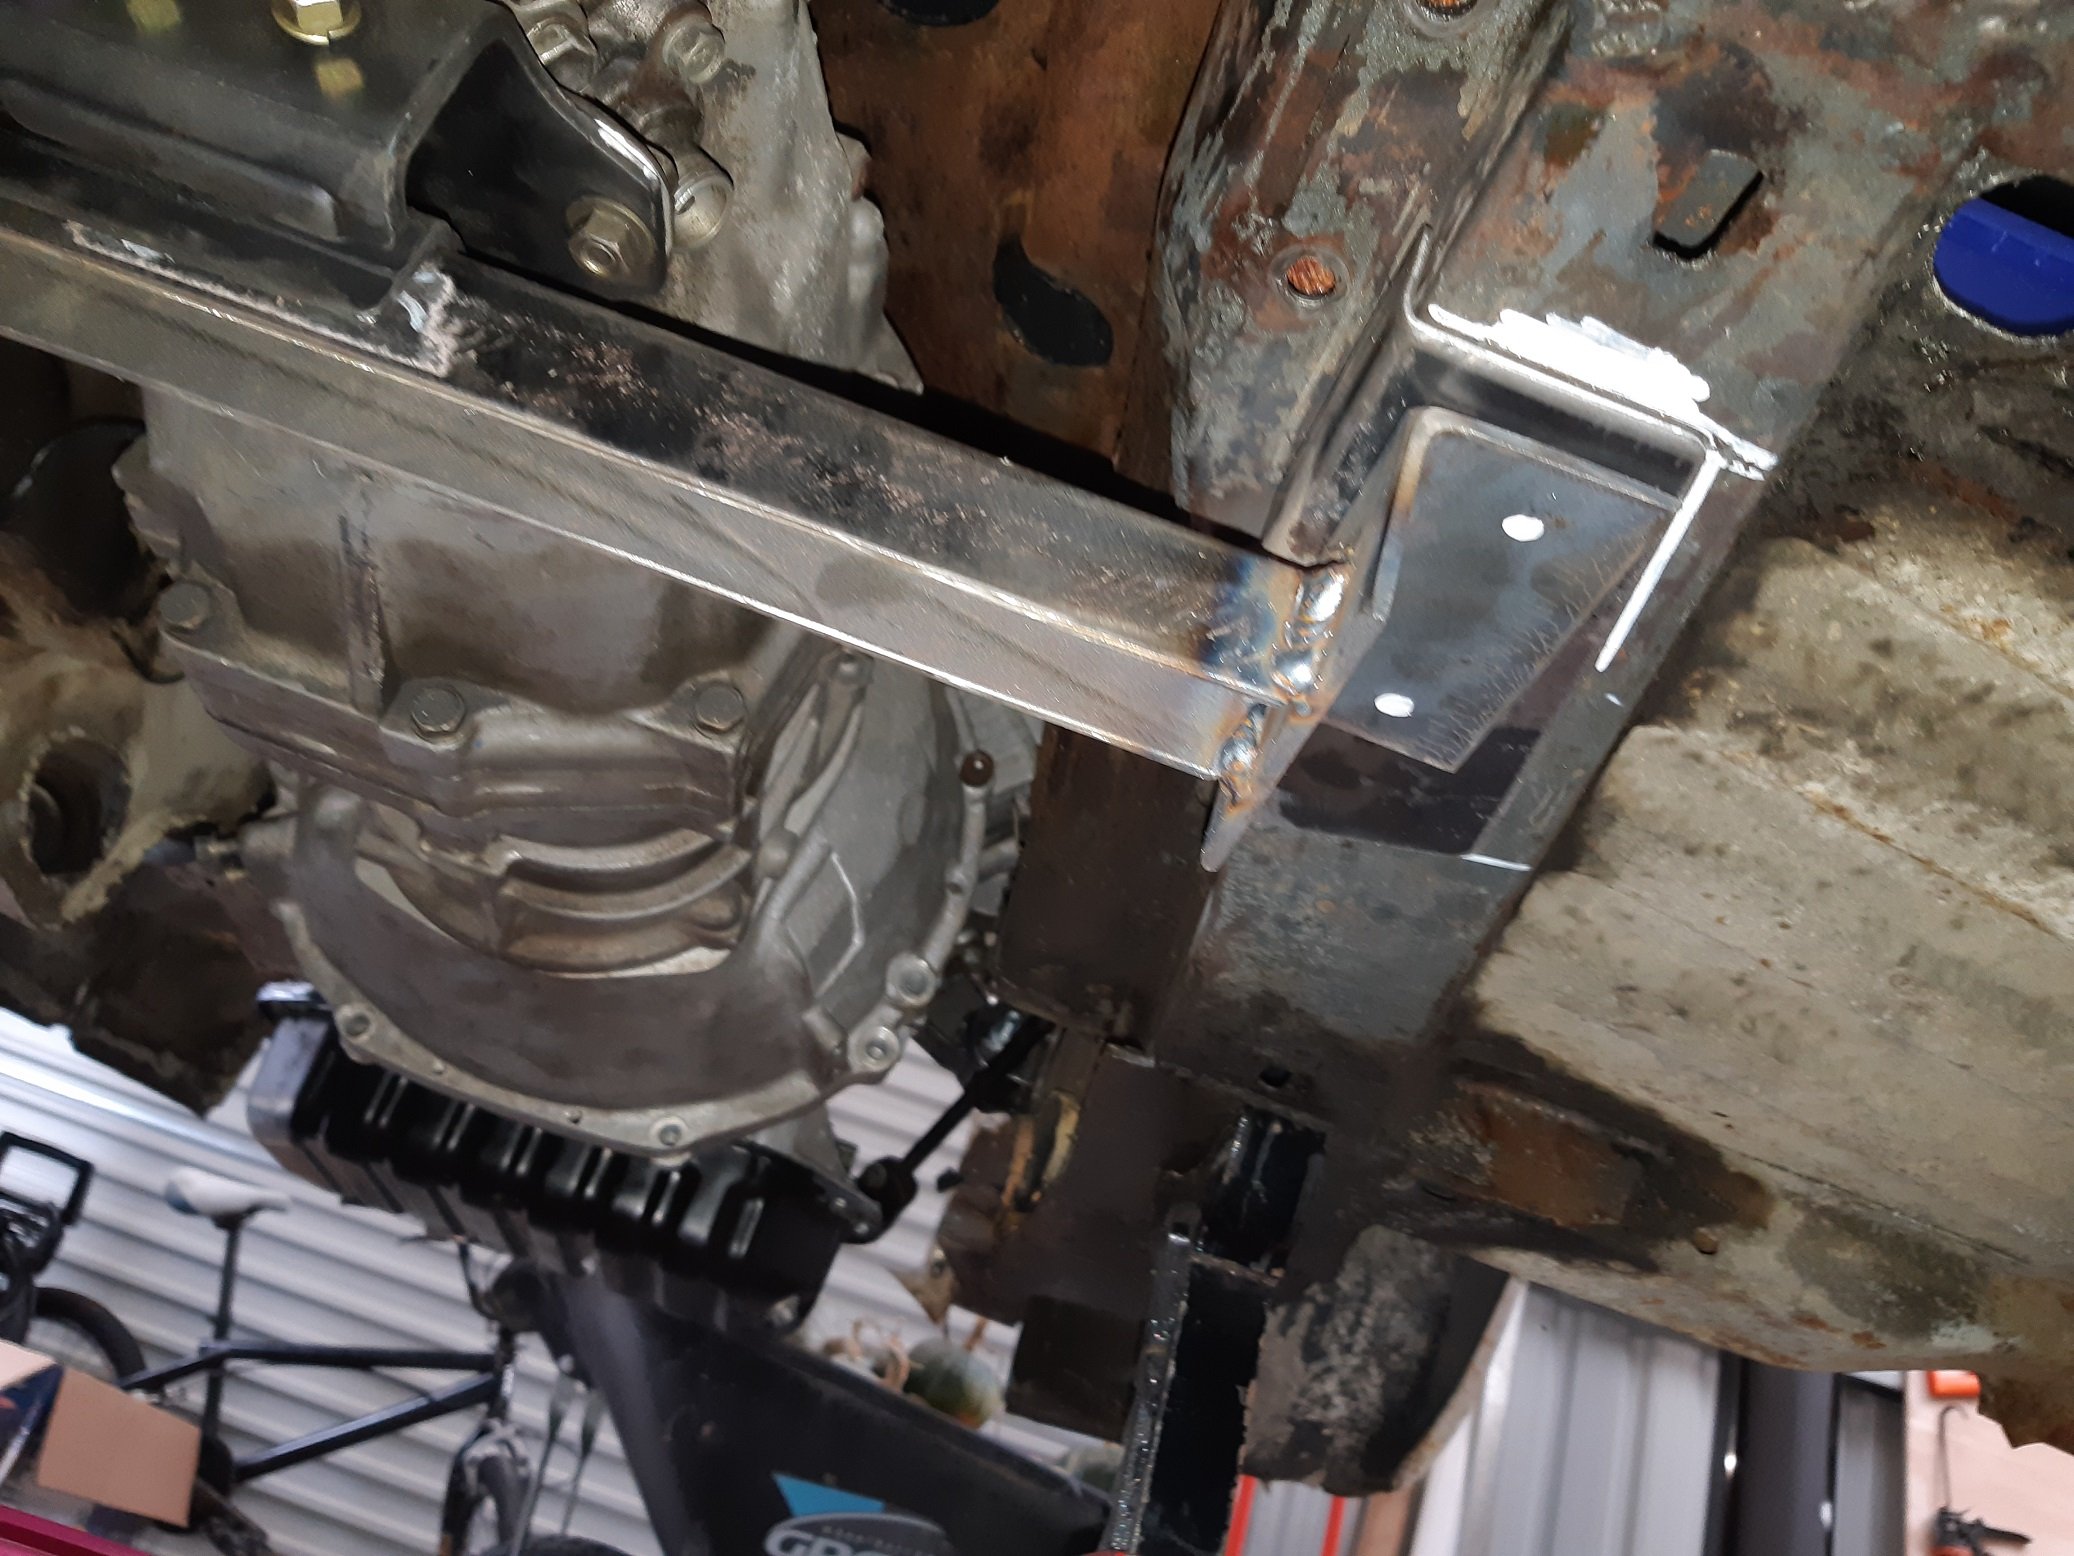
I cut a hole in this sump I paid lots of money for. I need to get some 4-5mm sheet to fill the hole. I want to make up a jig/brace/plate I can bolt it to so there is no warping when it gets welded.
 7 points
 -
Had issue after issue with getting this in the water. Life got in the way Had an afternoon free yesterday so decided to roll this out of the shed and give it a go Took a while to start but finally fired up with a smooth steady idle. Bundled up wife and three kids, launched the boat, found the first major issue - the gear selection was reversed. Put it in reverse to got forward spec. Motored out of napier harbour, put it in forward and disconnected the shift cable (throttle is limited in reverse), gave it some beans and found the second major issue It wont rev over 3000 rpm, not quite enough to get the boat on the plane. My gut feeling is that its way overpropped. I need to check that the throttles are opening fully, but i might just go and get another prop before i look into it much more. The prop on it looks very grabby, but has no pitch numbers to compare. The gear reversal can be easily fixed i think, instead of putting the cable onto the push lug i need to put it on the pull lug inside the control box. I was looking for an excuse to open up the control box anyway and attach a temp guage and warning LED's to the various sensor output wires in there. The good news is that the outboard is charging, starts and stops first pop, and is smooth and quiet We still motored out to spot x, and had a hour of good fishing, came home with 10 gurnard and some kahawai for smoking. The cats will be happy!
6 points
-
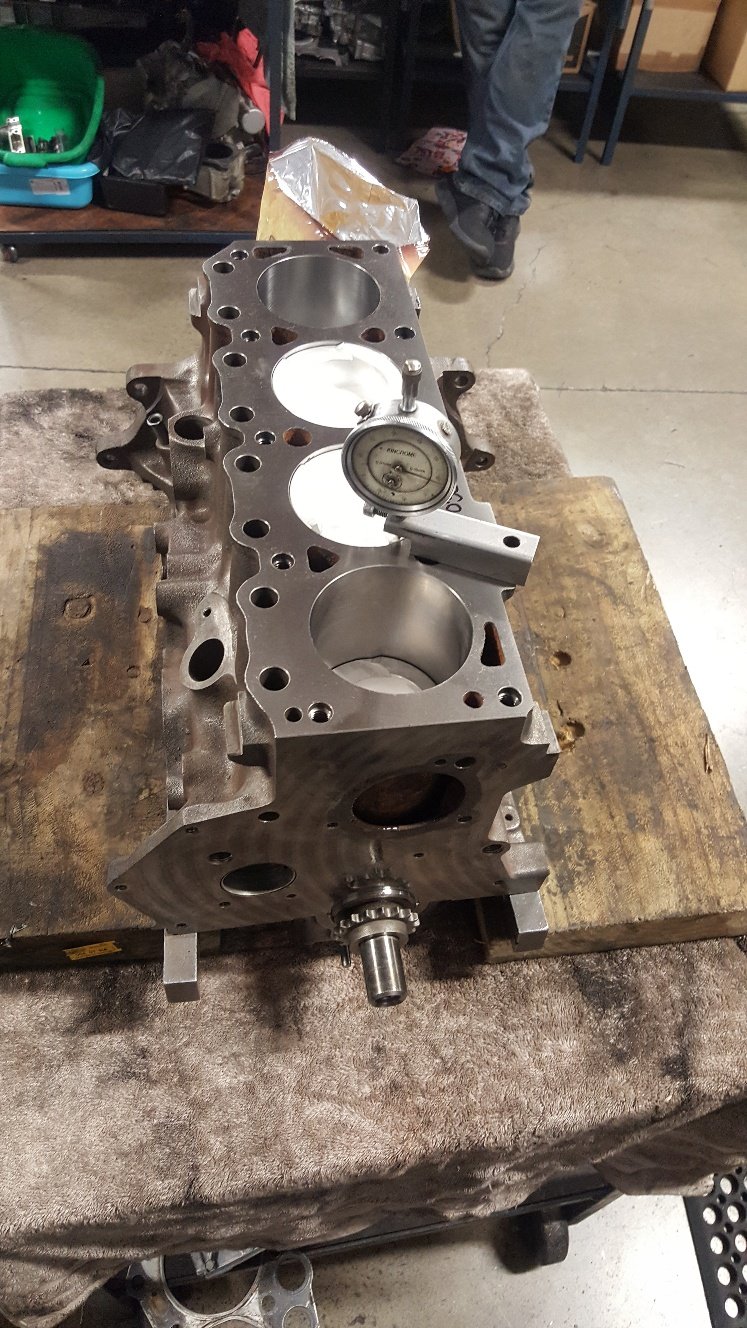
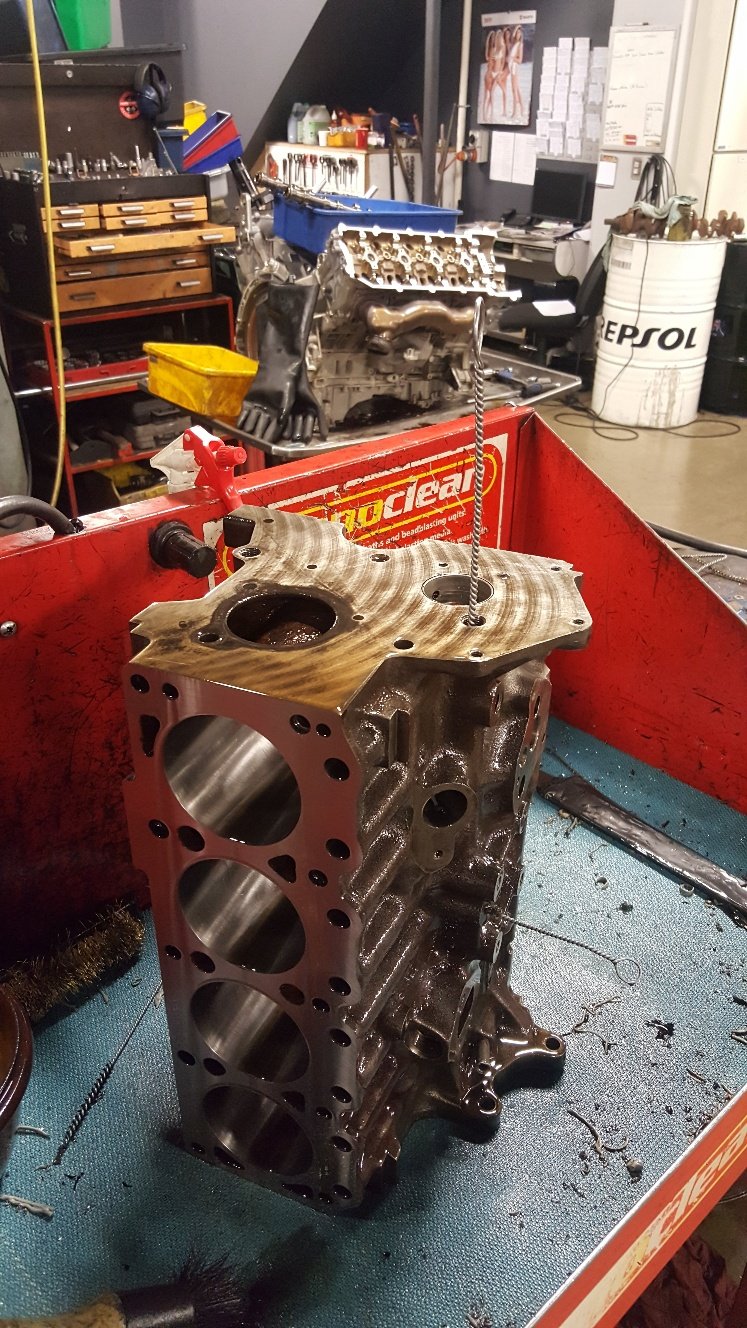
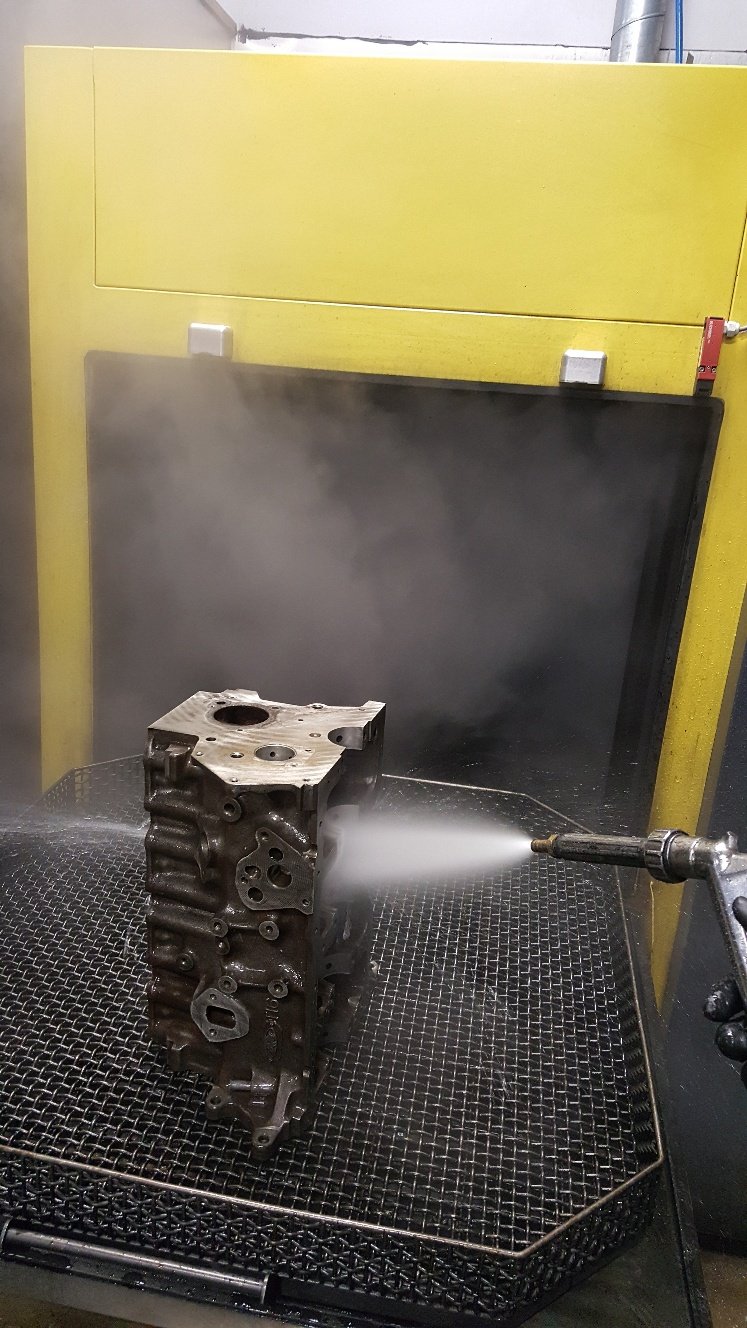
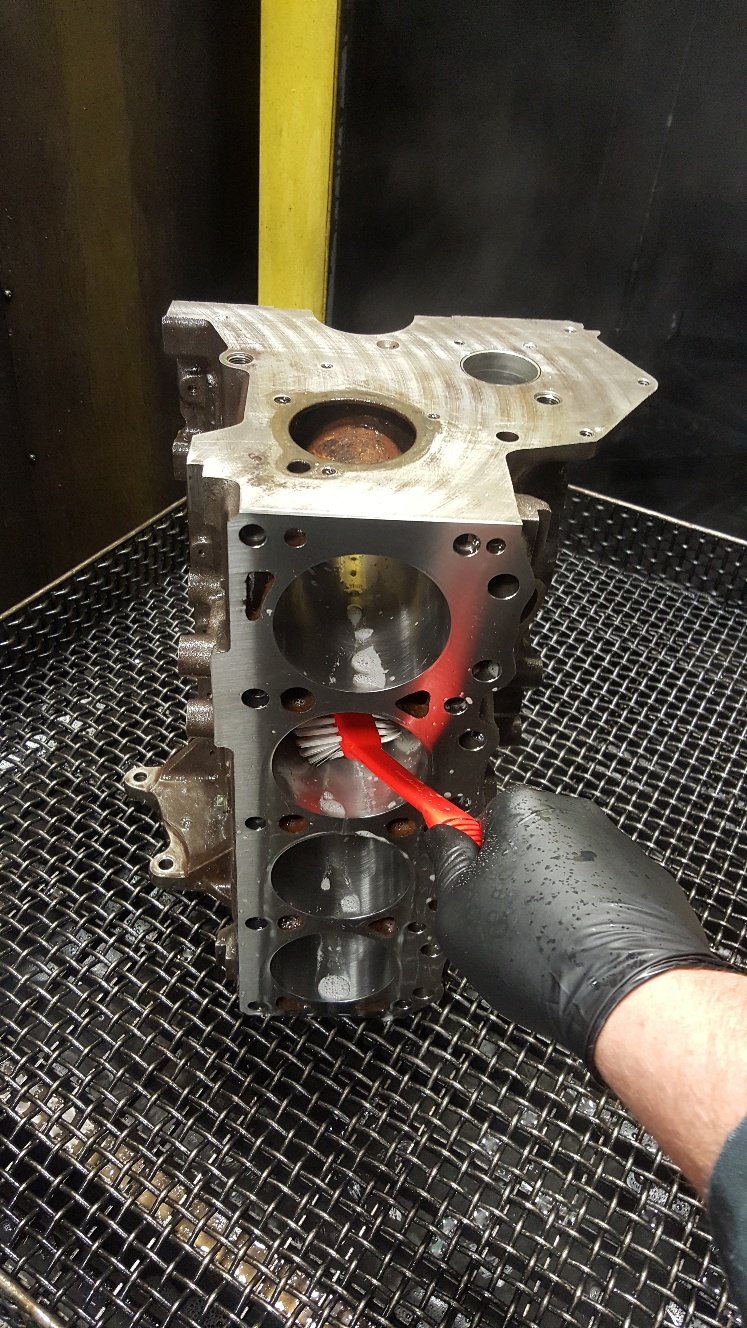
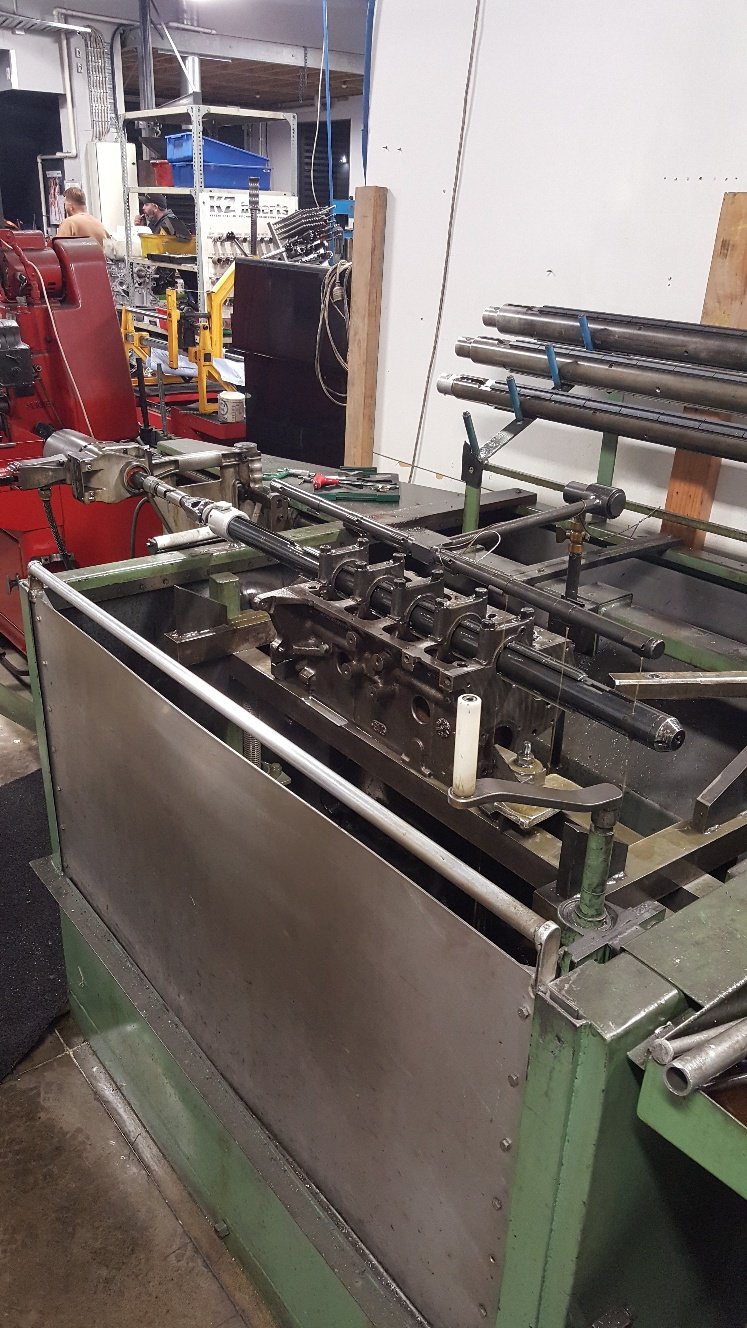
So assembled the short block to check piston heights. Normally old engines have heaps of piston to head clearance. I found the pistons are below the deck surface 20 thou or half a mm. My head gasket 52 thou thick. So ideally i won't the piston above the deck 10 thou to get my 40 thou piston to head clearance for good squish. So it was back to the surface grinder to remove 30 thou. While i was there i sat the block in the surface grinder on it's deck surface and run a dti through the main tunnel to check how true the tunnel is to the deck and i was surprised to find it was within 1.5 thou. I haven't put a pic of it being surfaced as there's already one earlier on. So I gave it a wash. I went through all the galleries with gallery brushes. Then put it in our Bupi wash. This is pretty much just a big dish washer. Made in Germany and it's one of the more handy things in the workshop. Then we just give them a good going over with soapy water. Normally just dish washing liquid and hot water to brake down any left over honing oil. And really get all the machining swarf out of the oil galleries and other spots in the block.
5 points
-
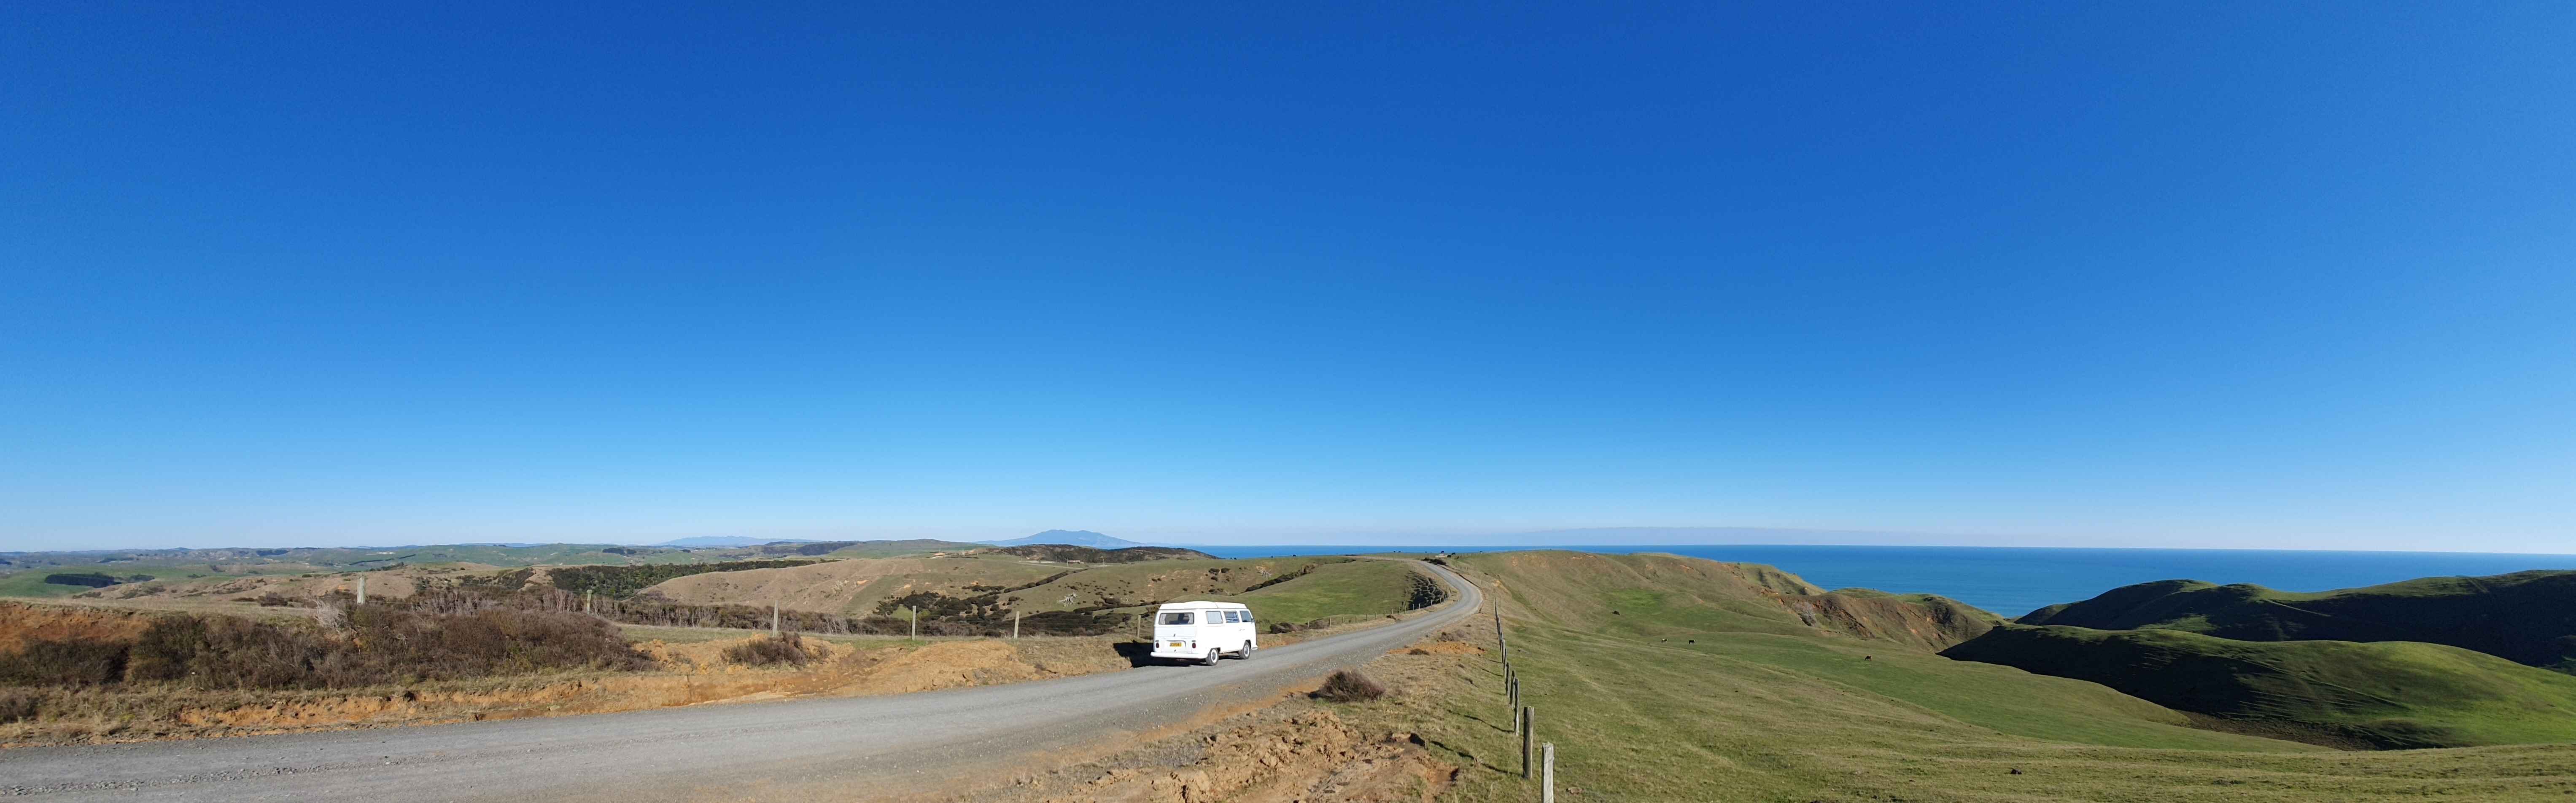
We went for a drive today. Started with heading to caffeine and gasoline. Had a look around at a few cars. Then headed to pukekohe to visit a few mates while we were up that way. No one was home so we heading to port waikato and then continued our way down the coast. Clocked up just over 120miles. I visited this spot while on the vespa and pretty much done the same trip just in reverse. Such a stella day and kombi went really well. 10/10 nice roads and great scenery, much wow. Also done a oil change on Saturday. Will post those photos tomorrow.
3 points
-
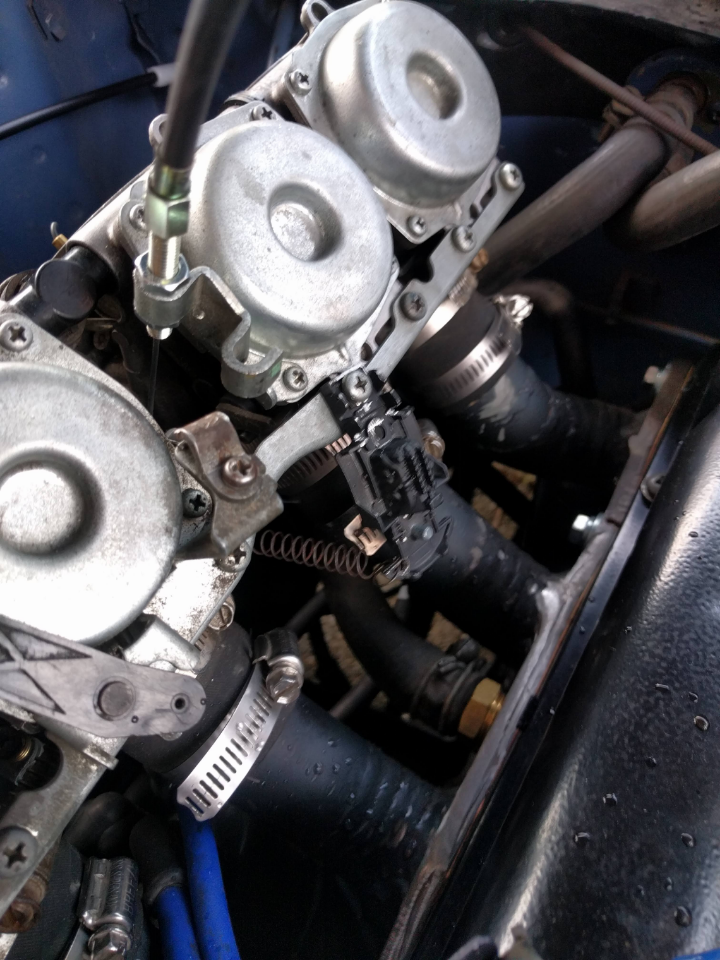
Wired in an electric bike fuel pump which fixed the over fueling issues. Tuned them with a vaccum gauge but had trouble so resorted to a hose to my ear. Threw a colortune at it and it was running rich all through the range. Wound in the pilot jet all the way and it was still rich at idle. Have ordered some jets from aliexpress and will play with them. Have driven it around the block a few times and it certainly comes on song. I had to horey up a return spring, ended up using an old matchbox chassis. Have yet to rectify this.
3 points
-
sounds like he needs a ld28 manual .....2 points
-
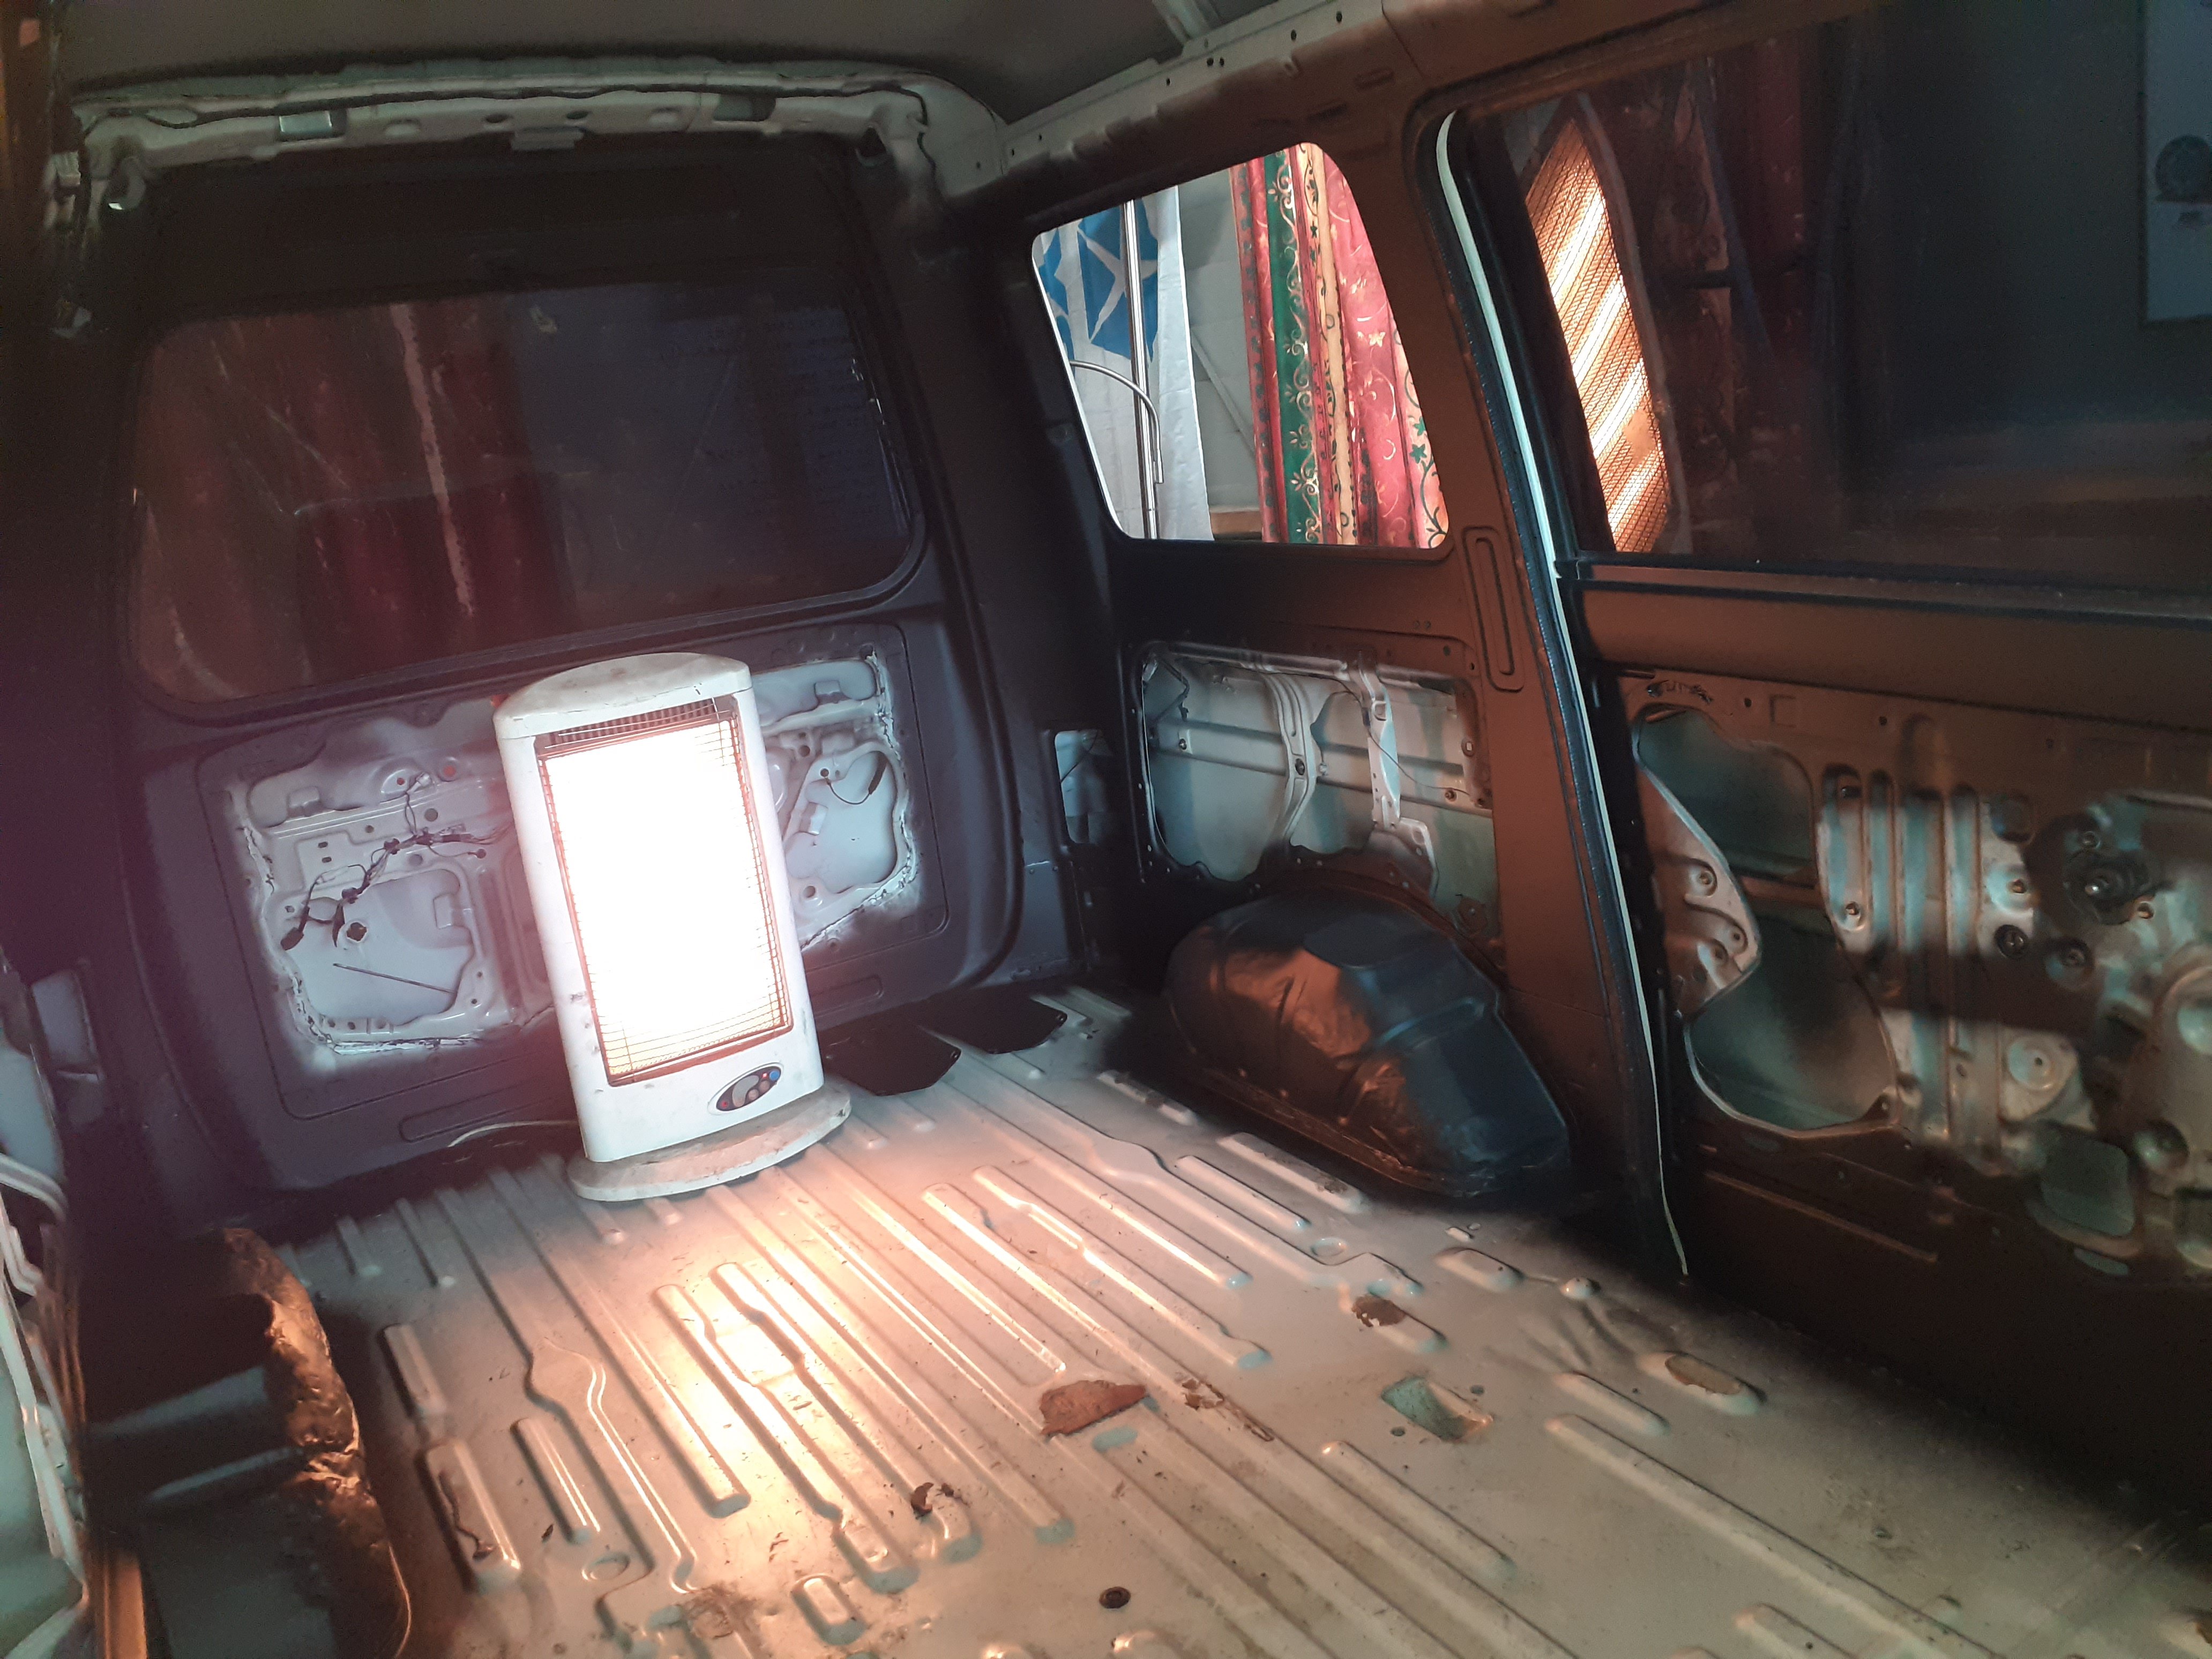
Yuck to not so yuck, sugar soap and a water blast . And dungeon spec interior
2 points
-
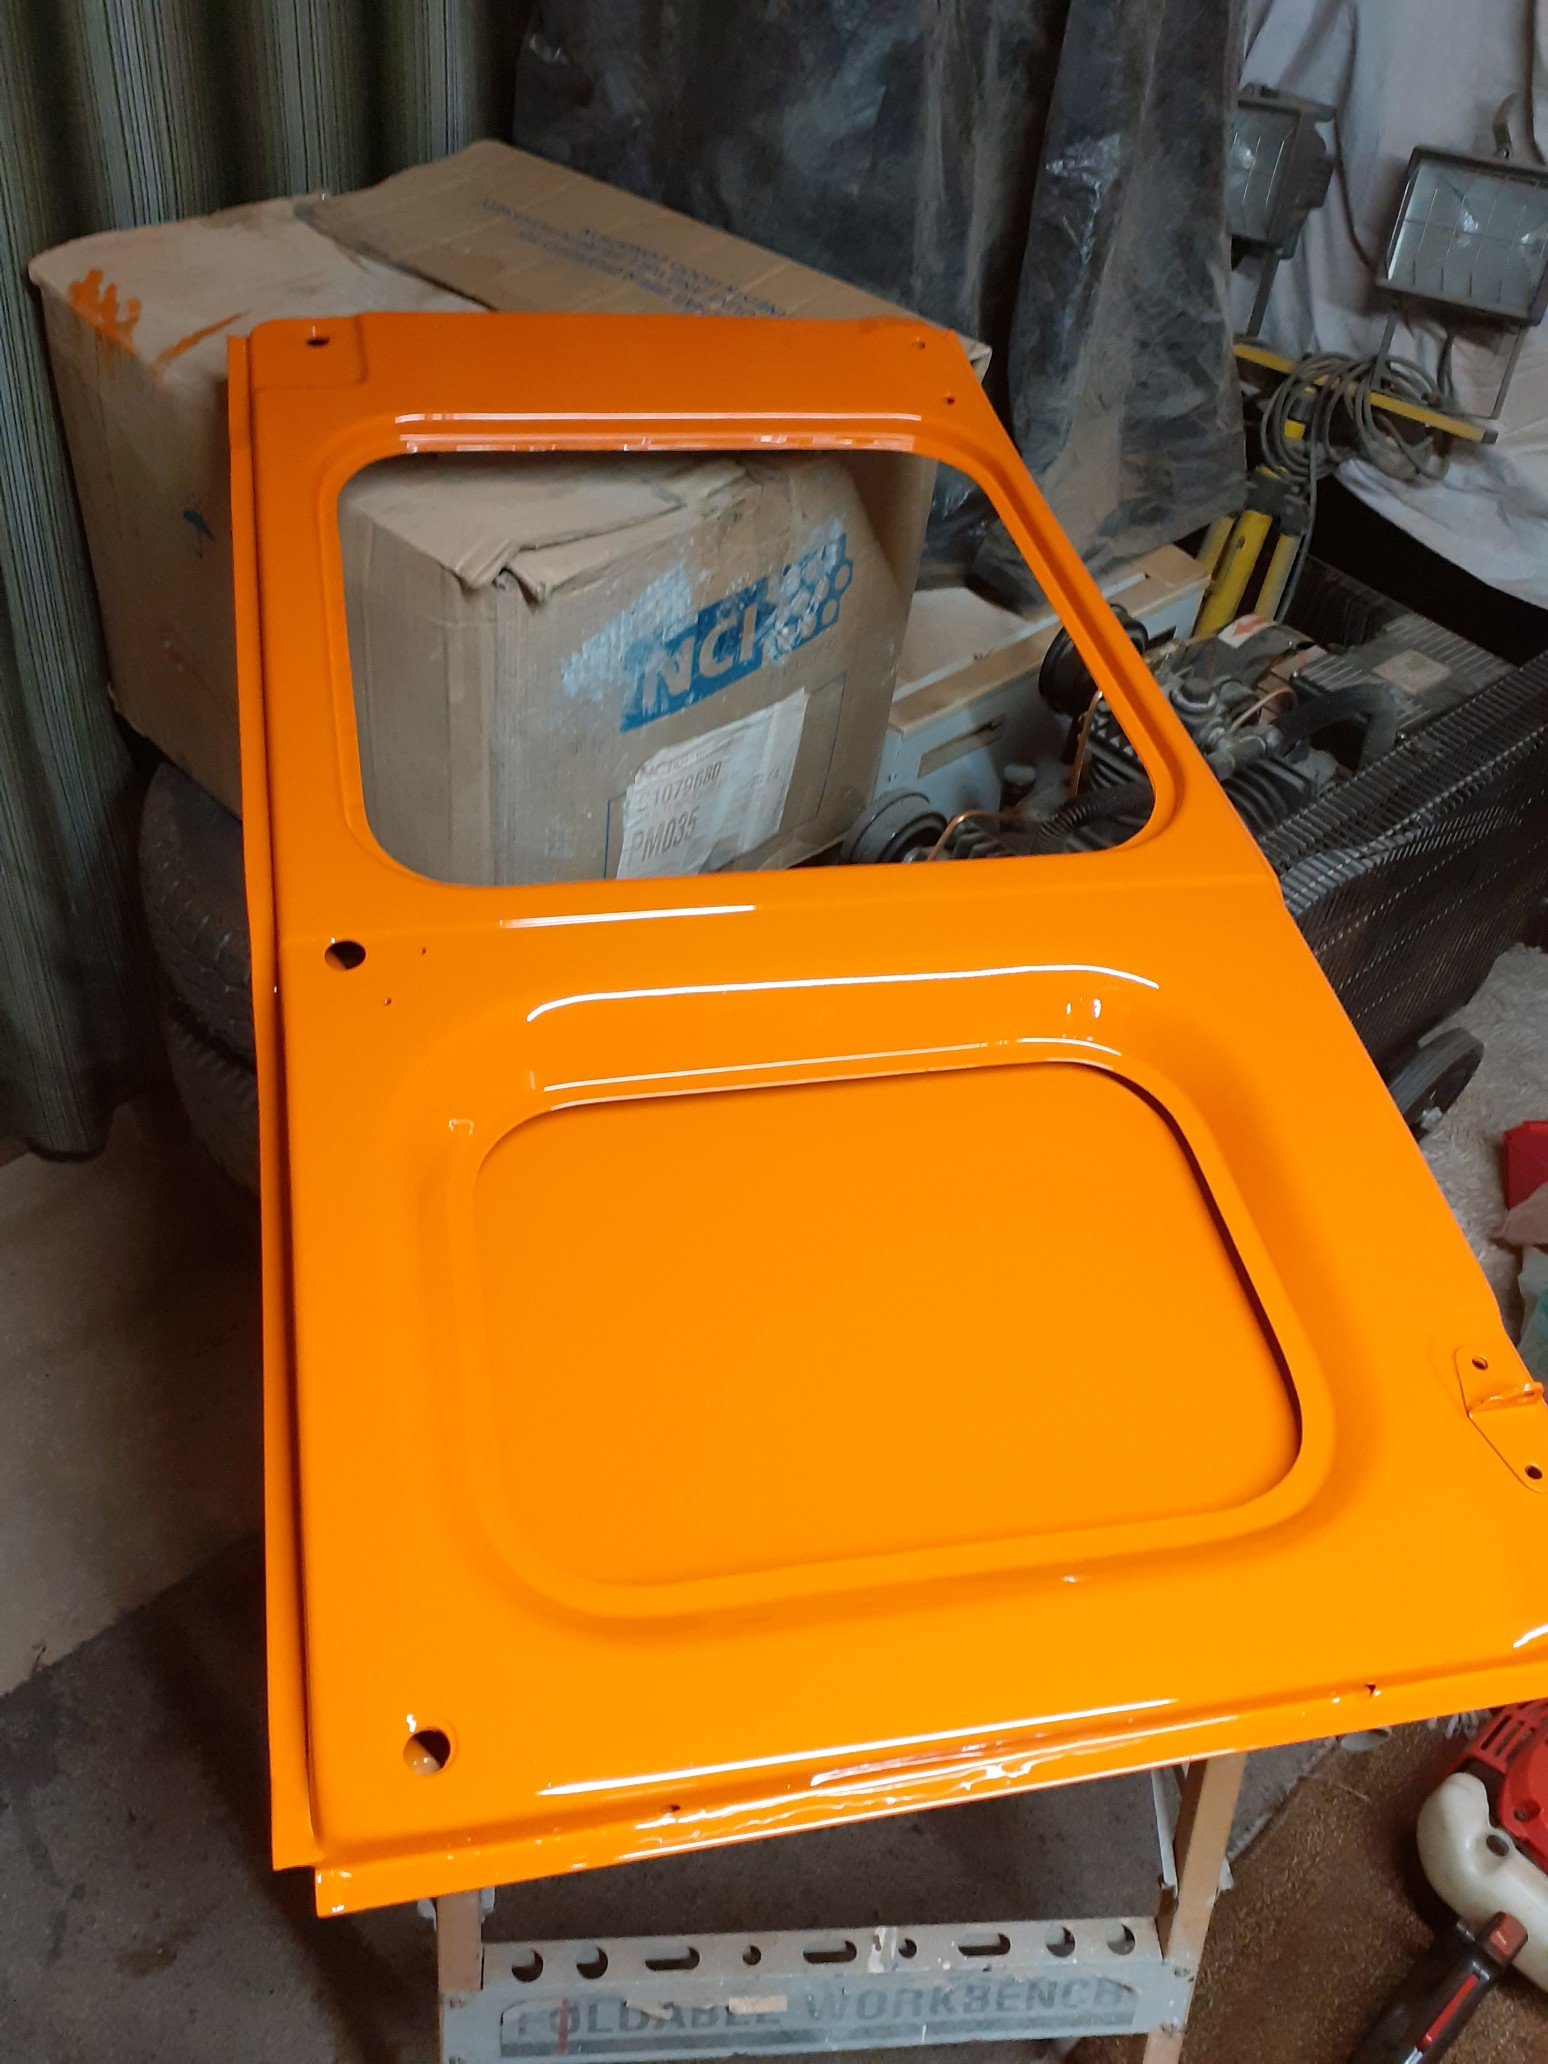
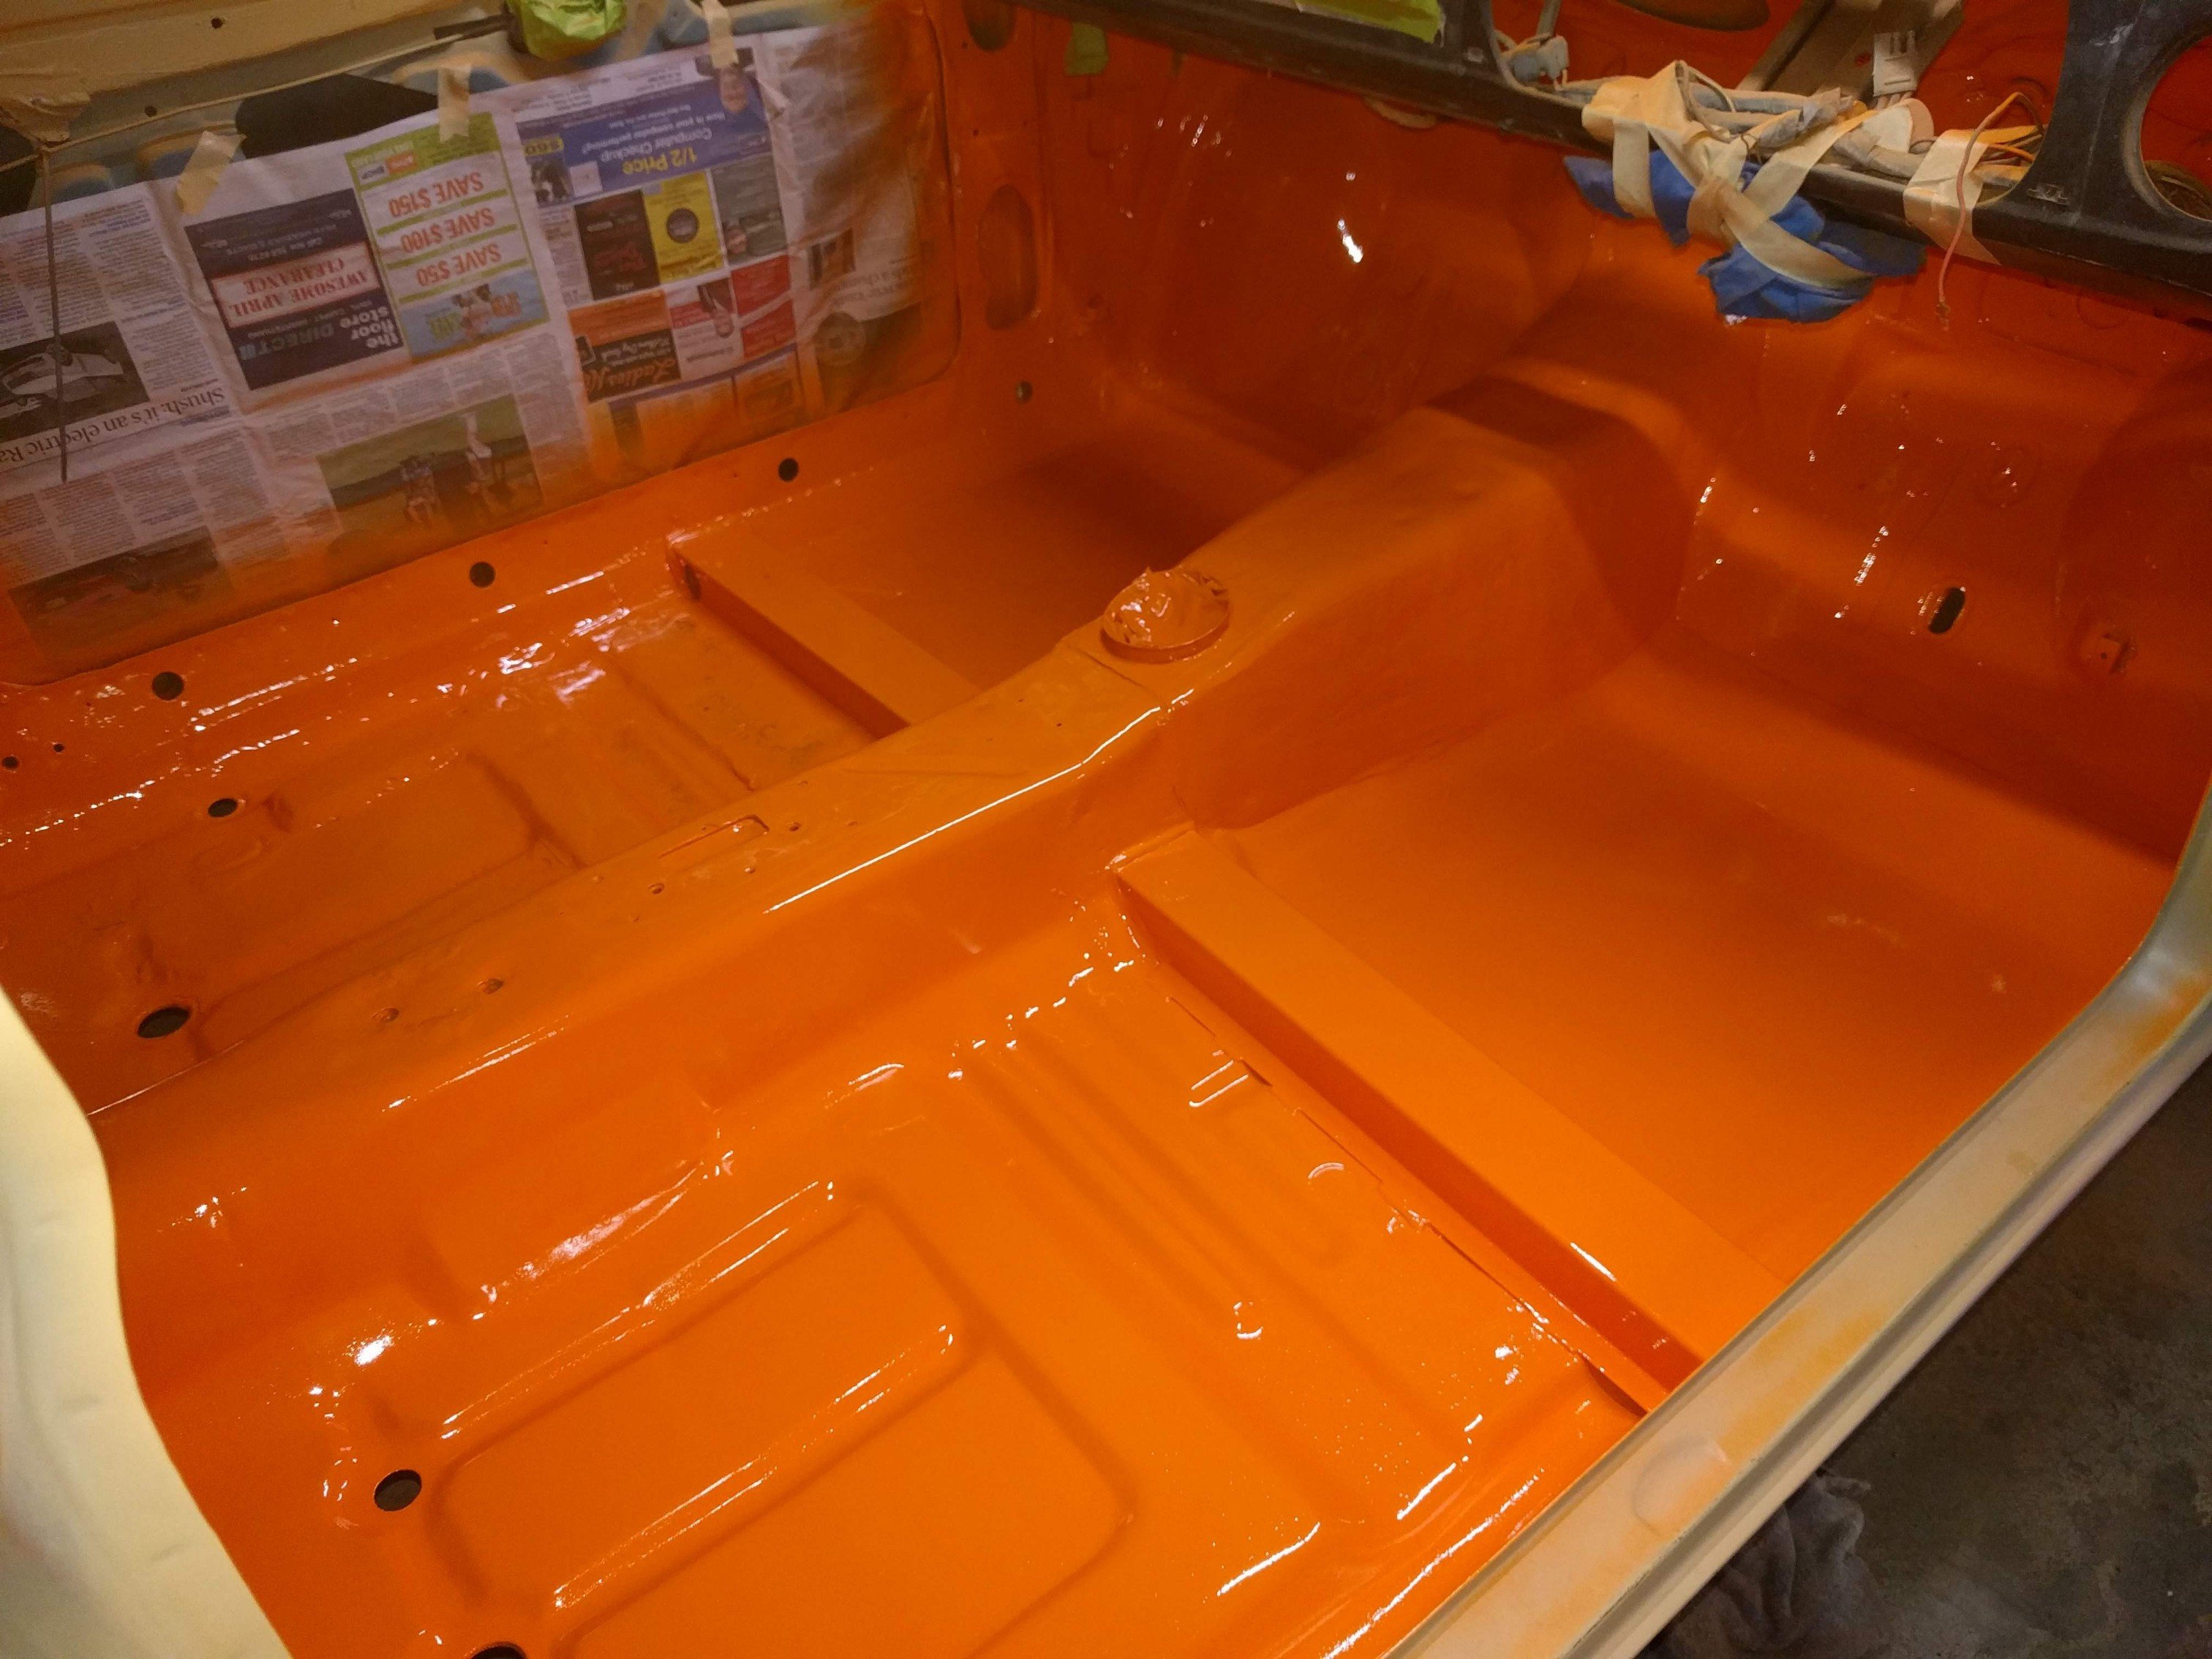
Ended up going with signal orange 79. It's an original color for an escort, but not this van. Sampled a blue and a different signal 77 orange but settled on this. Have been spraying it in sections. Engine bay, interior and inside of the doors. Still a while to go before I can spray the outside but its certainly progress!
2 points
-
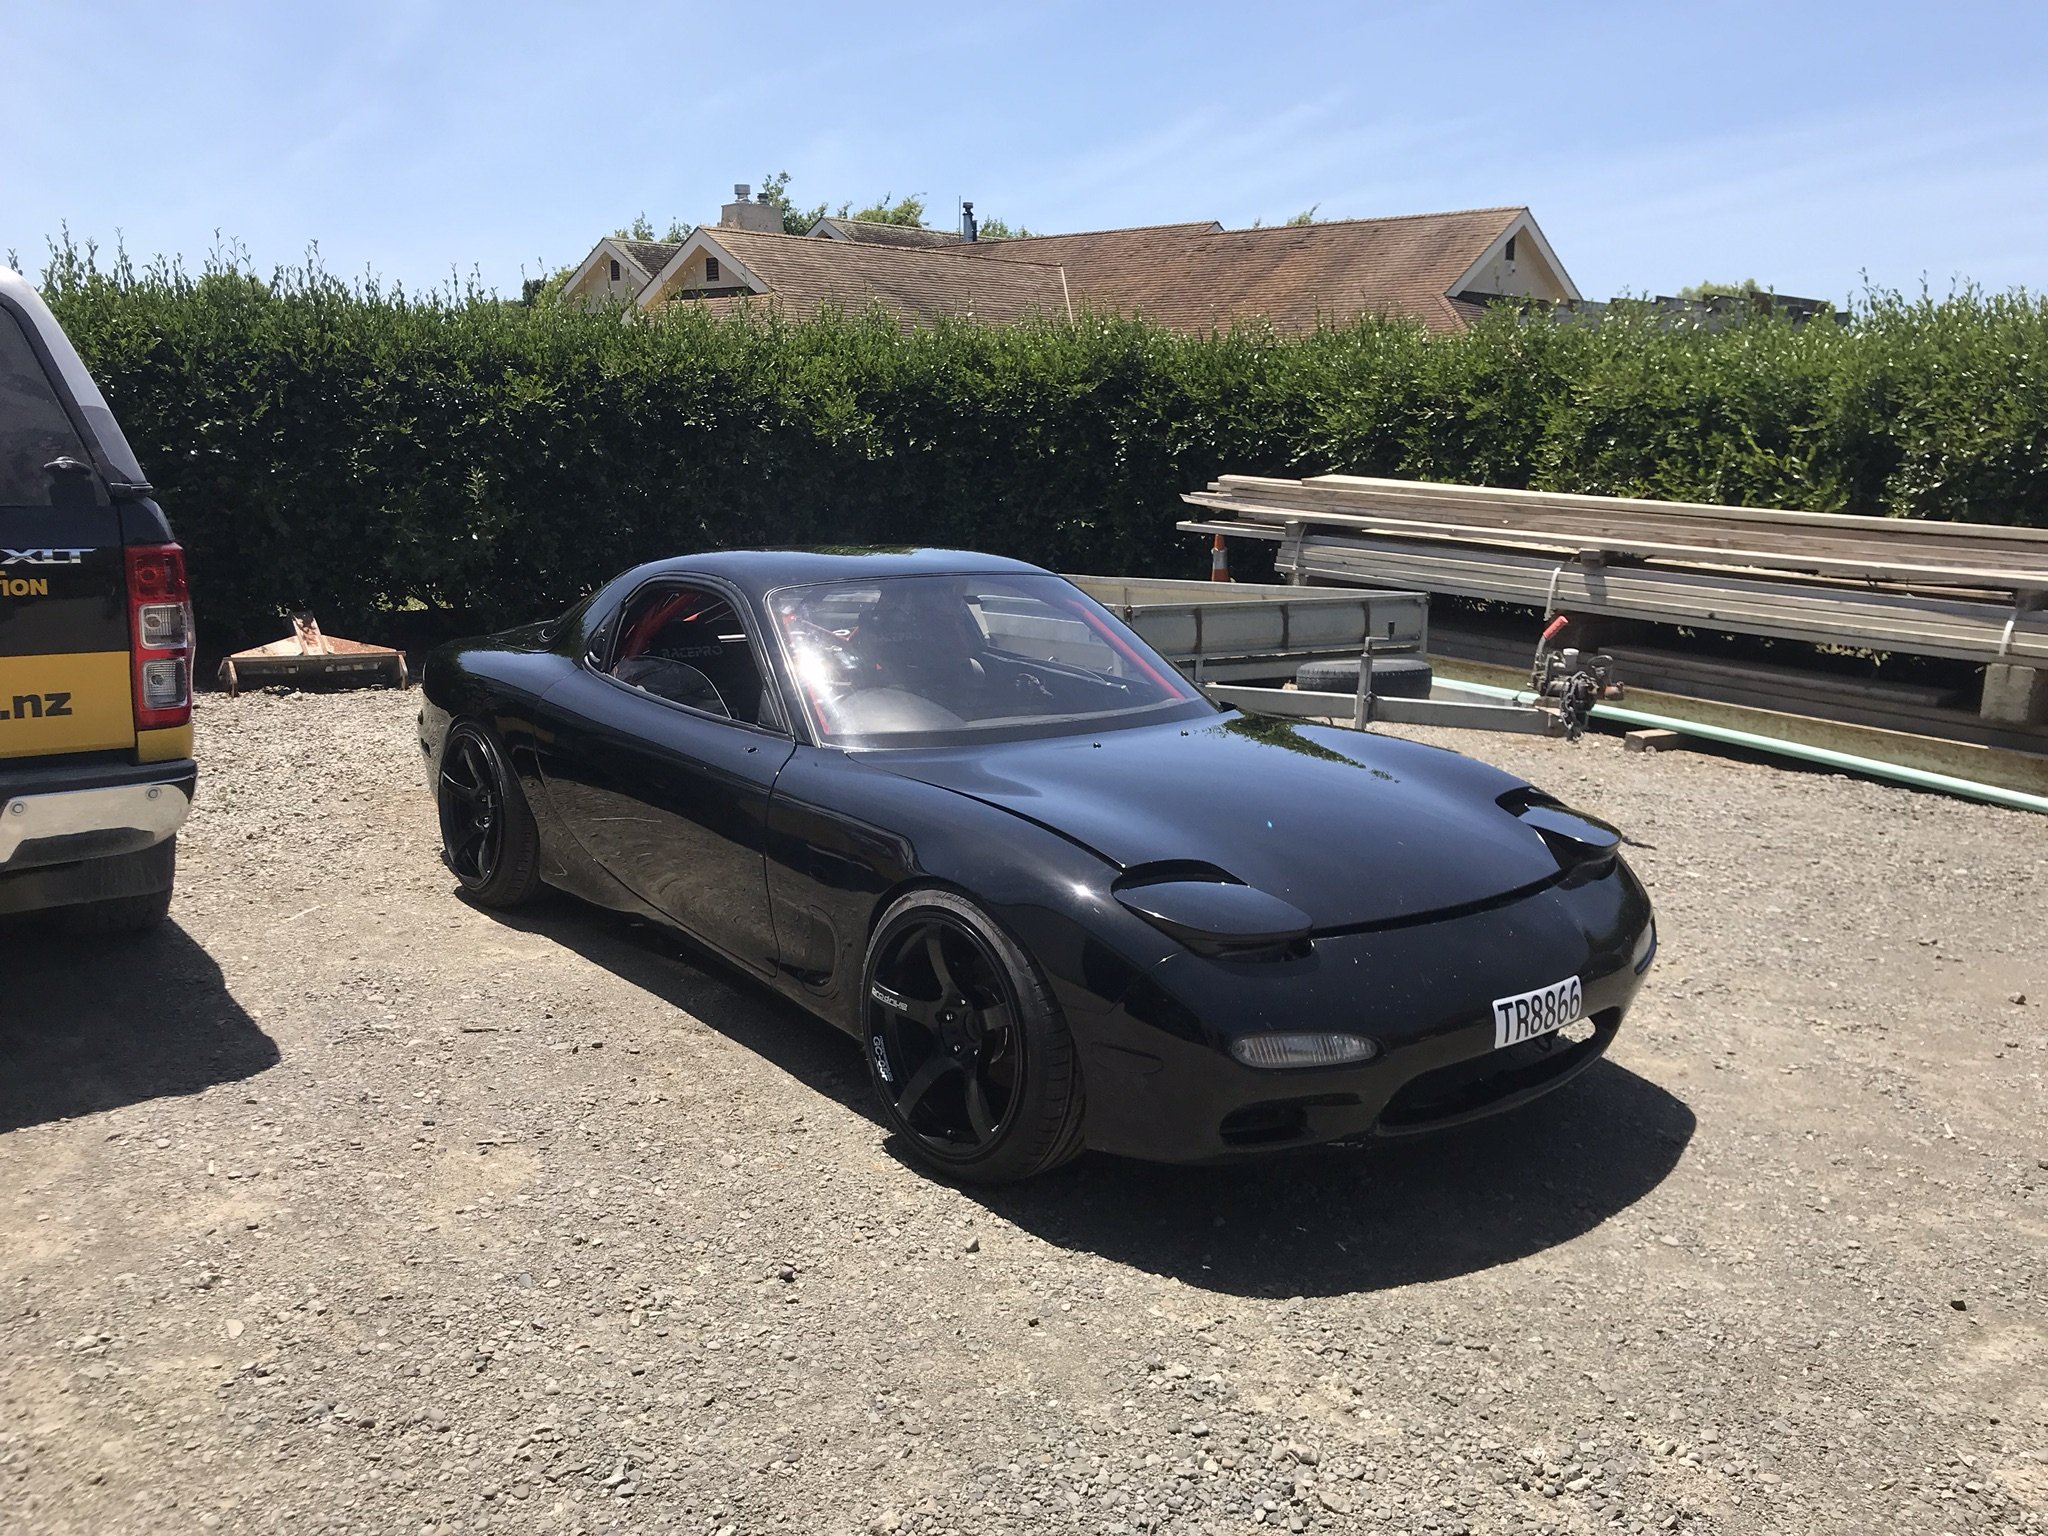
Ones for the brothers FD. We are going exactly the same spec so that we can have a fair race at some point!
2 points
-
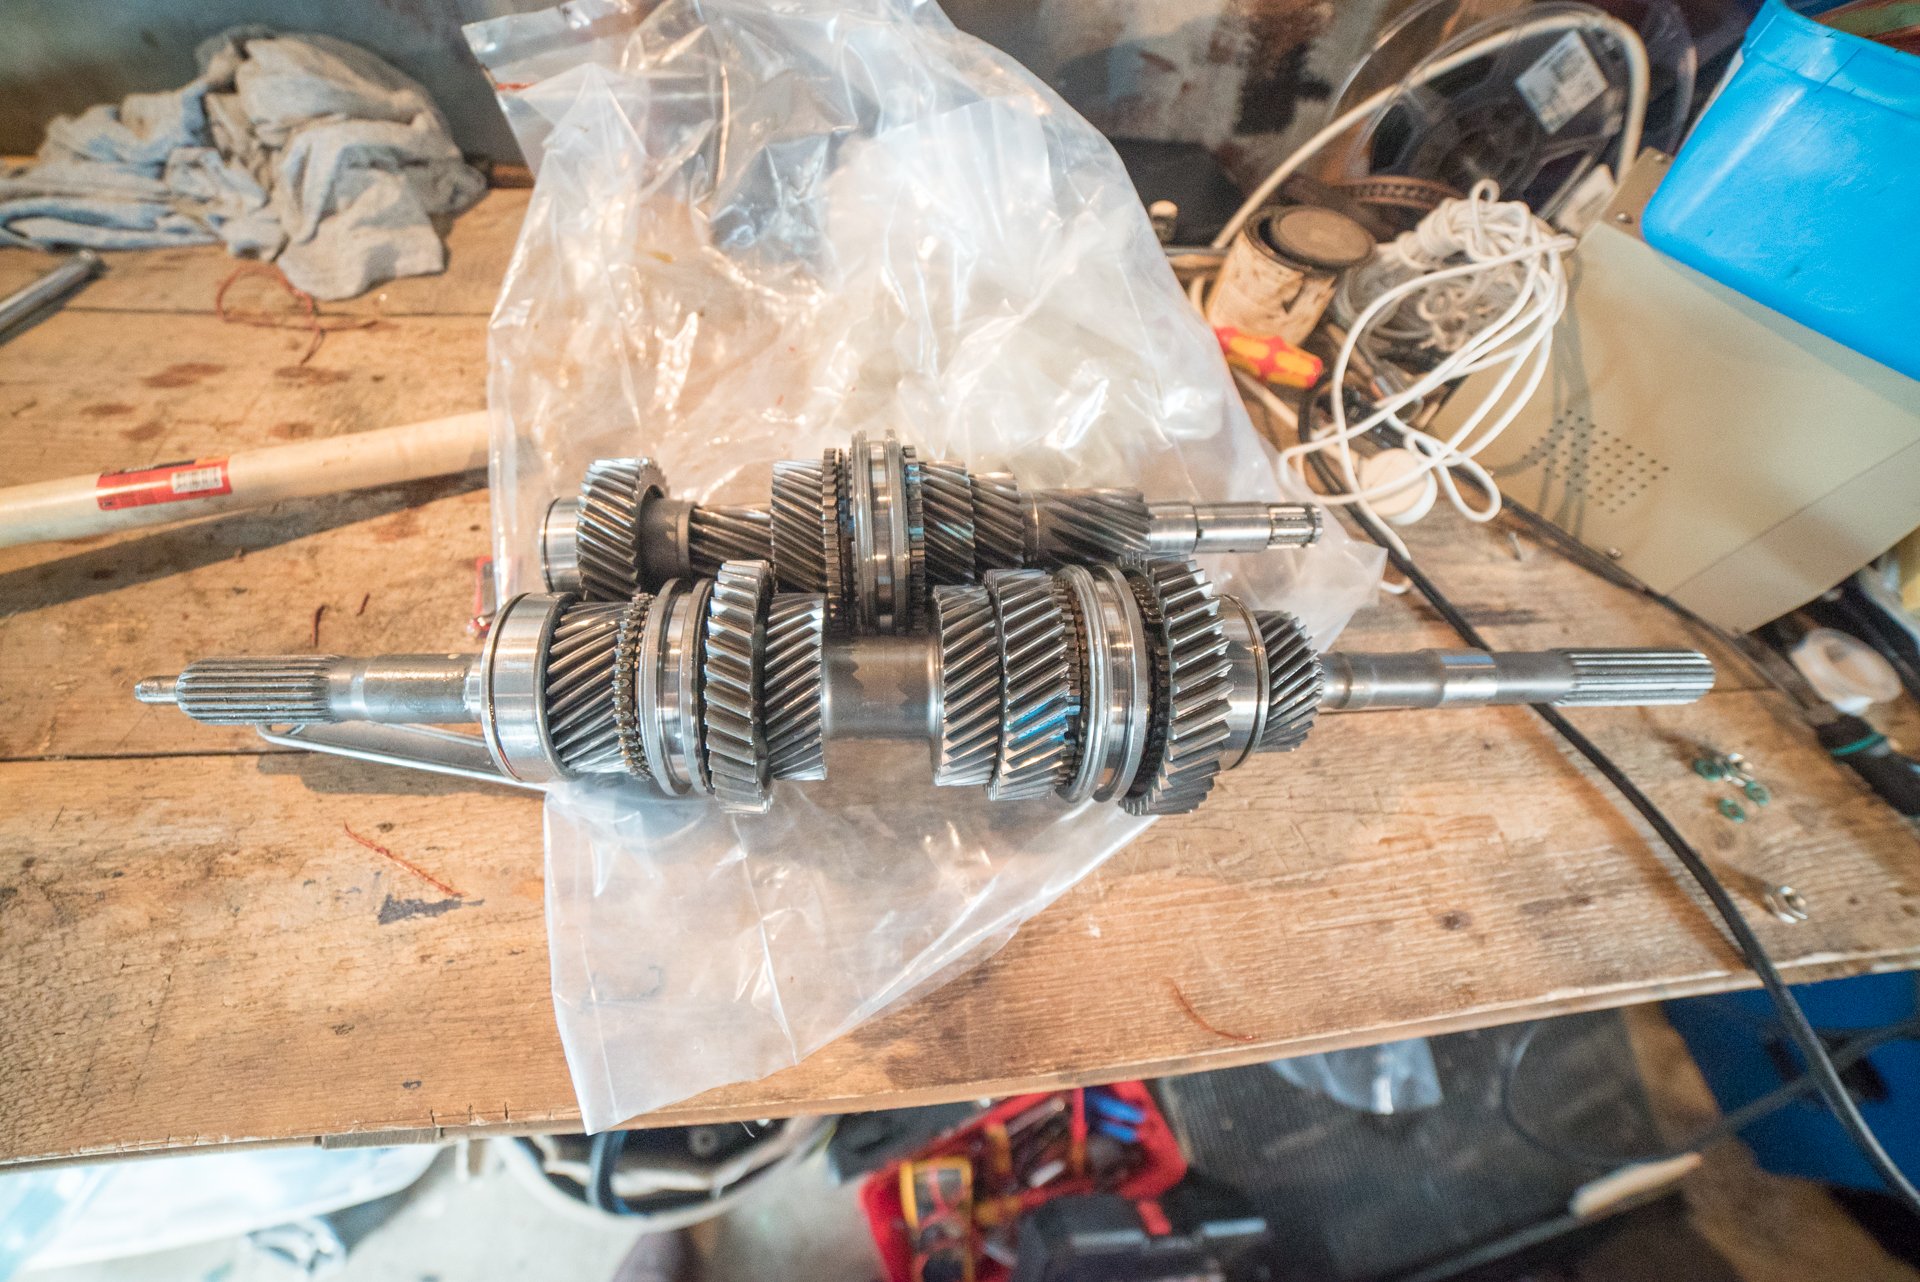
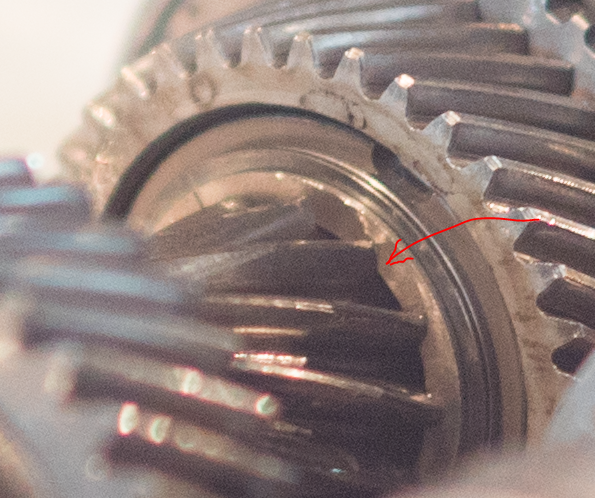
A few different yarns here, start with the gearbox. 12 or 13 years ago, I bought, attempted to repair, a virtually brand new Altezza gearbox. It was pulled out of a car under warranty when supposedly it had only done 30(!) kilometers. Or something to that effect. The only catch - reverse didnt work, and I could never get it working. So after a bunch of frustration and dissapointment, I sold it on. Roll on to a few weeks ago where I'm moaning about how most 6 speed boxes are high kms junk now, and I remember back to this gearbox. I track down the gent I sold it to, he's still got it... it's just been in dry storage all this time, and I can buy it back! awesome. So I've stripped it all down, no faults found but I've got the service manual and more patience so I can check every single thing for the right amount of clearance, play, etc. The difference is that now I've got a full service manual with instructions for reassembly, and a lot more patience that's come with age. So I'm confident I'll get it working. Even if it takes a few attempts and part swaps to isolate the issue, it'll be worth it for sake of having essentially brand new synchros and bearings, and awesome gear shifts. It's also going to get some treats in the form of a Silvia 6th gear, and I might fix the "fourth gear circlip issue" as pictured below: What happens is imagine that the gear in the background, when the helical gears get loaded up with lots of torque, it pushes the thrust washer onto the side of that smaller gear in front of it - Which is only resting up against the outer half of the teeth on that gear. So give it enough torque, and the teeth break off that front gear and it blows itself to high hell. So some people weld that clip in place, or cut the groove deeper and make a new one, or, whatever. Apparently fixing this more than doubles the torque holding capacity of the gearbox. So I might do something about it while it's apart, maybe. Also, I bought another low km gearbox that he's had sitting in storage for 10+ years too. So that'll go back into the car in the meantime while I fix up this one. End of gearbox yarn. (for now)
2 points
-
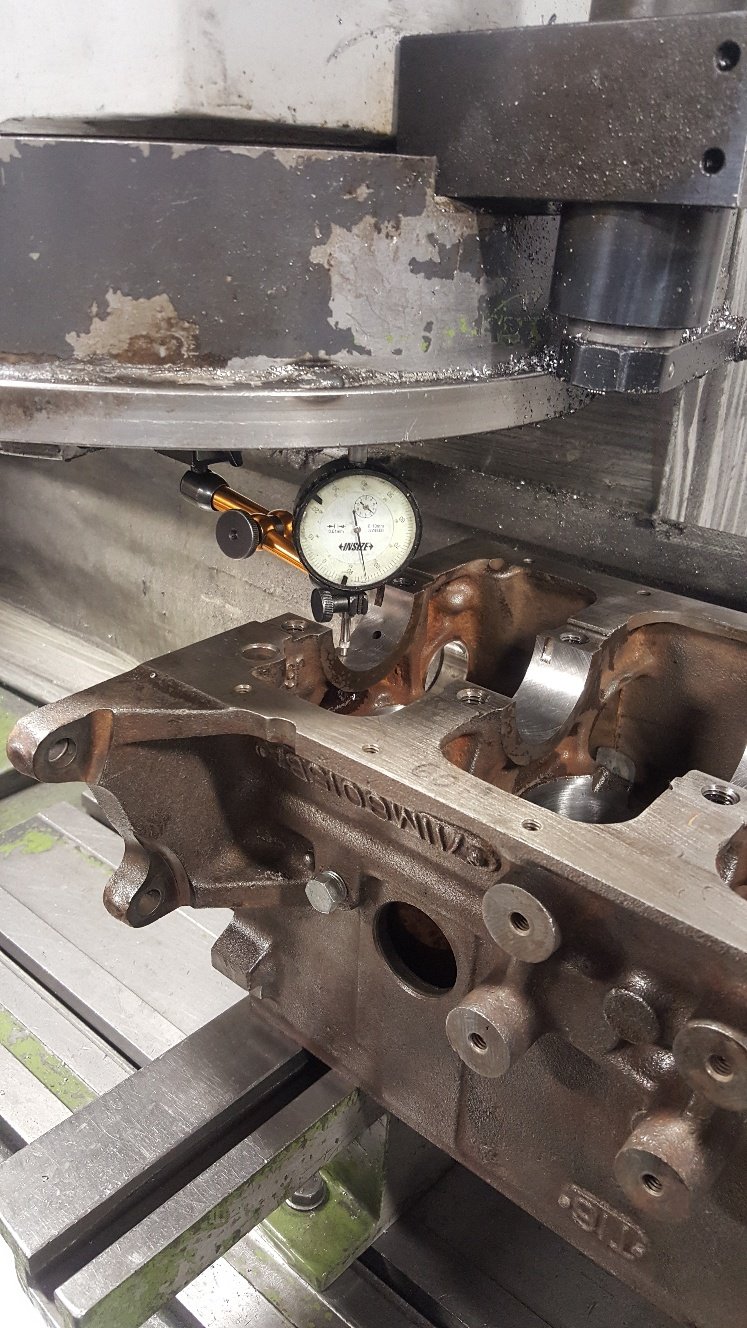
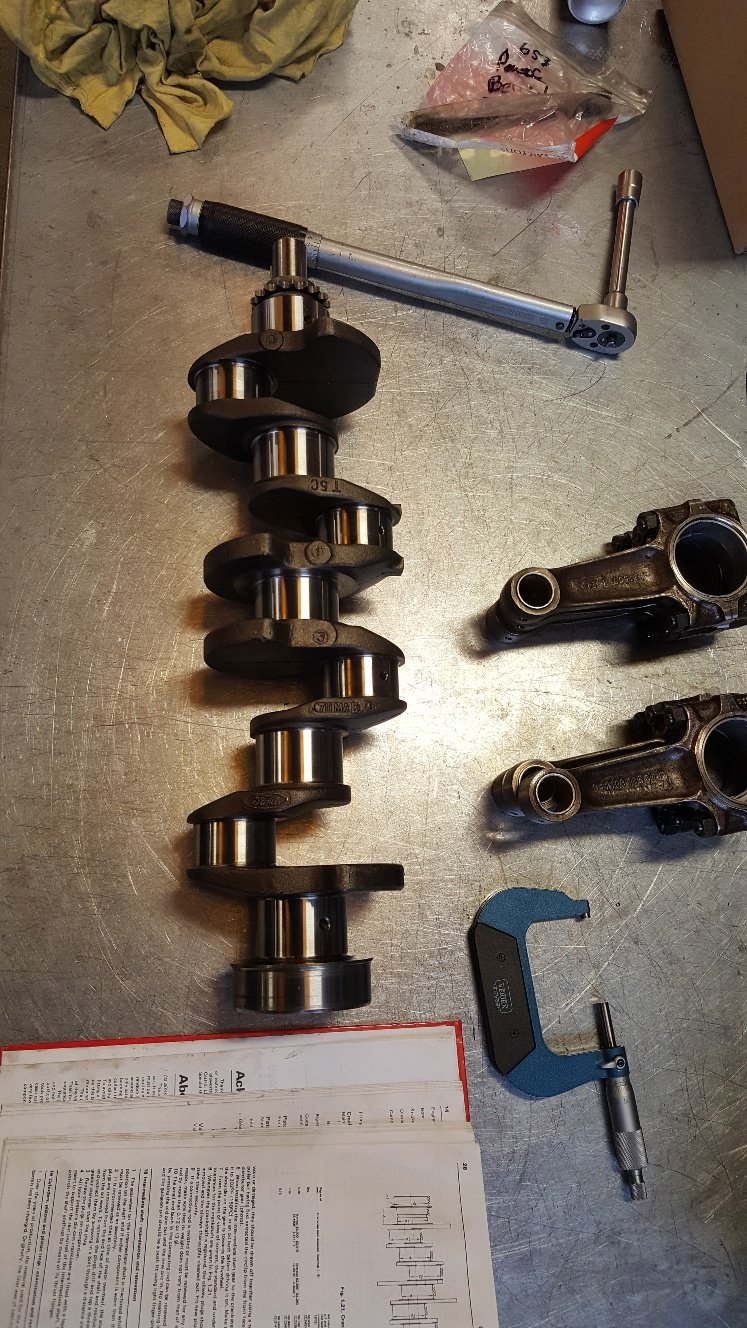
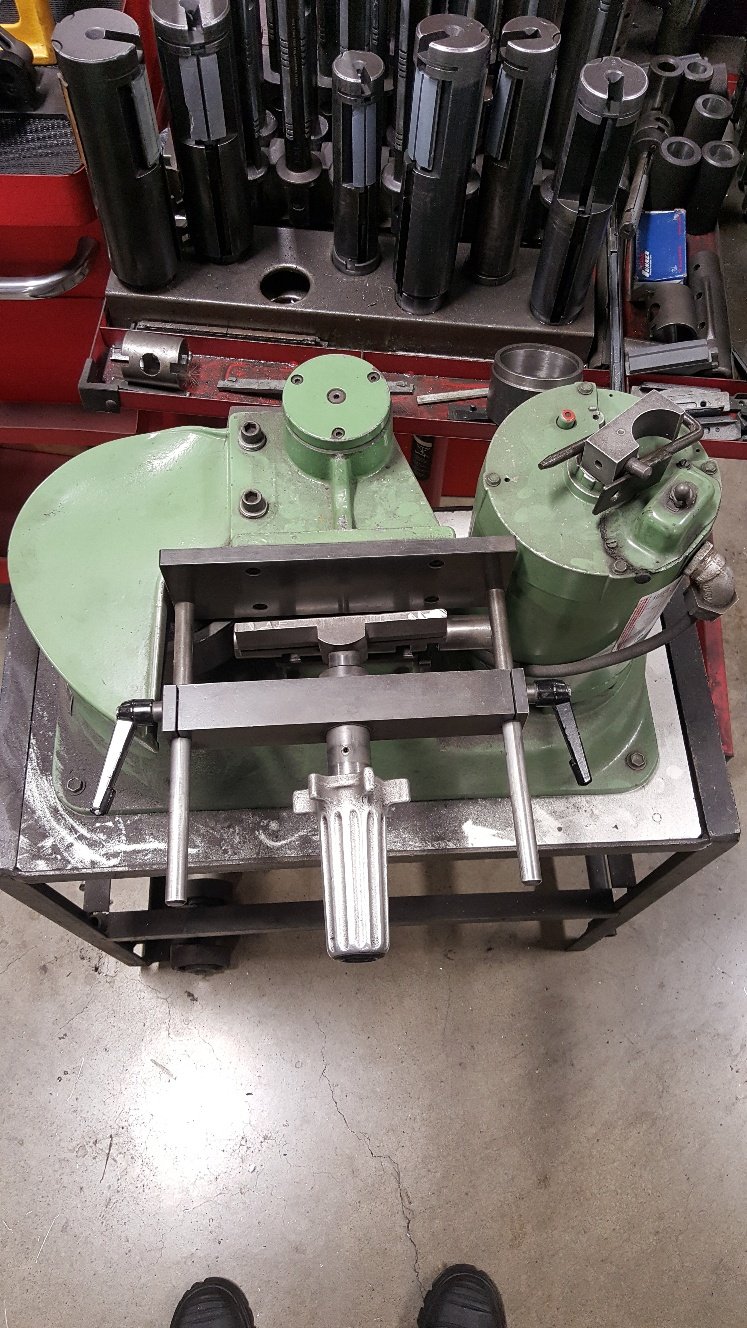
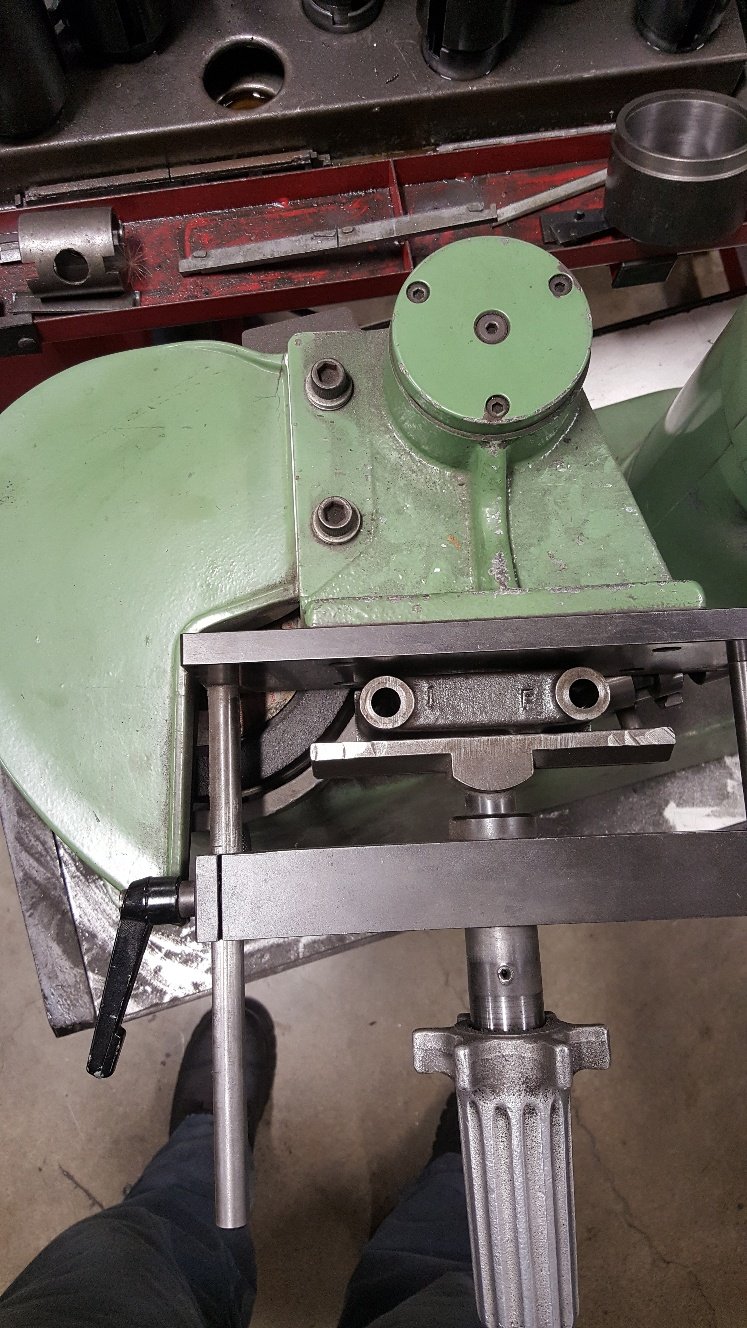
So I have the crank ground and ready to go. So I got started on the Align hone. This block didn't necessary need align honing It was within book spec in the mains. I haven't fitted aftermarket studs which is another reason for a tunnel hone, the studs normally tighten the tunnel up due to the extra torque you can apply to the stud giving better clamping load. Another reason is if you have run the main bearings this can also put the tunnel out of round and or put a bend through the tunnel. Here's a picture of the cap dresser. I used this to resize the rods earlier on. This is the main cap in it. It ground about 3 thou off each cap. First picture is the cap ground and ready to be torque up back onto the block. The next picture is with the block in the Sunnen Align hone. Sunnen is one of the industry leaders in honing. Our block hone is also a Sunnen Cv 616. So I just refitted the main bearings to check clearance. I've got 2 thou vertical oil clearance in the tunnel. Its nice and straight now. This isn't something we do to every block as some don't need any attention. But most old blocks either weren't that great from the start or have had a hard life.
2 points
-
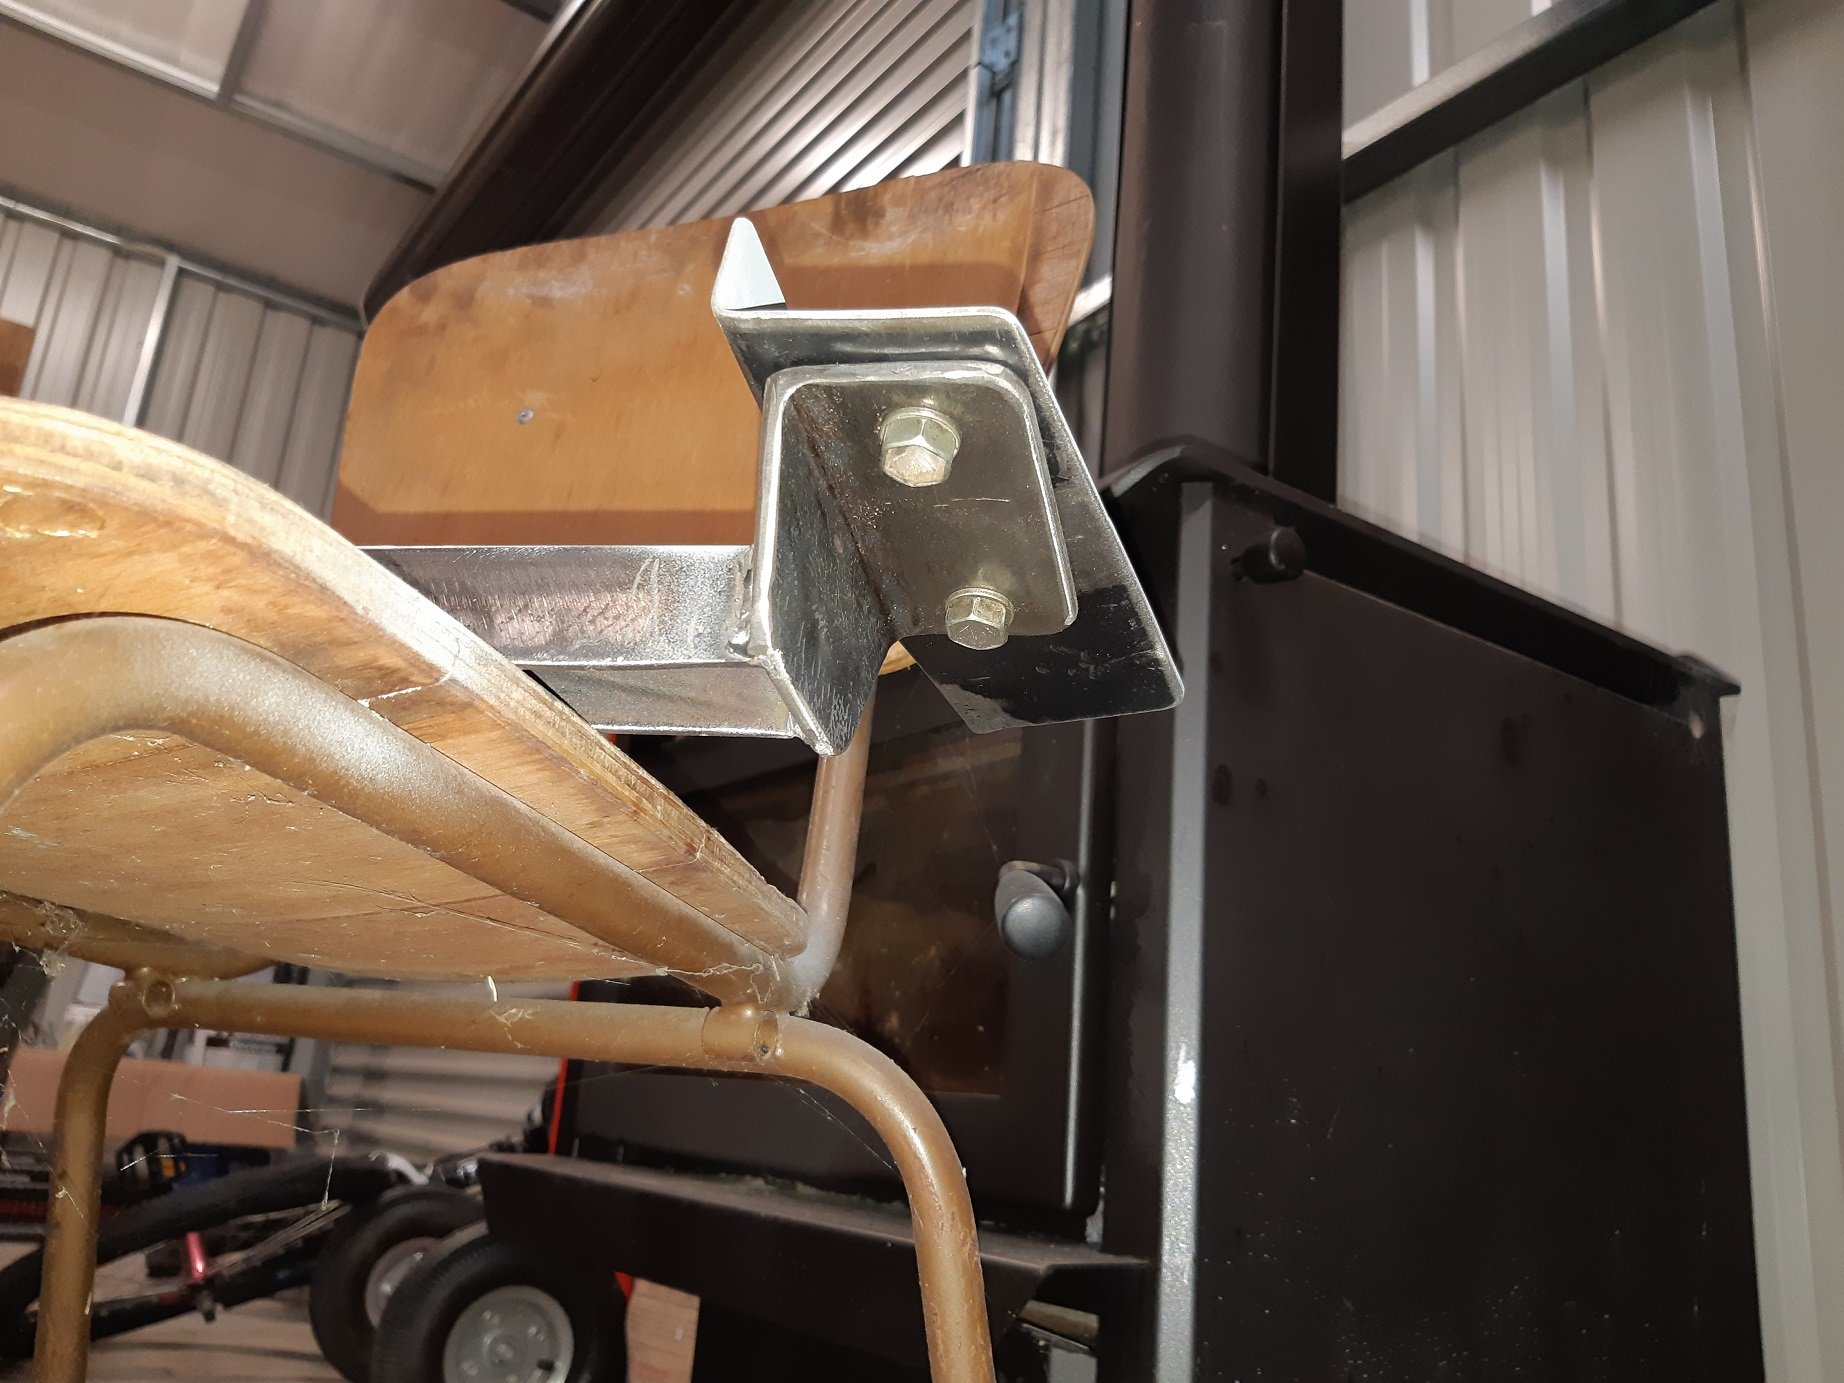
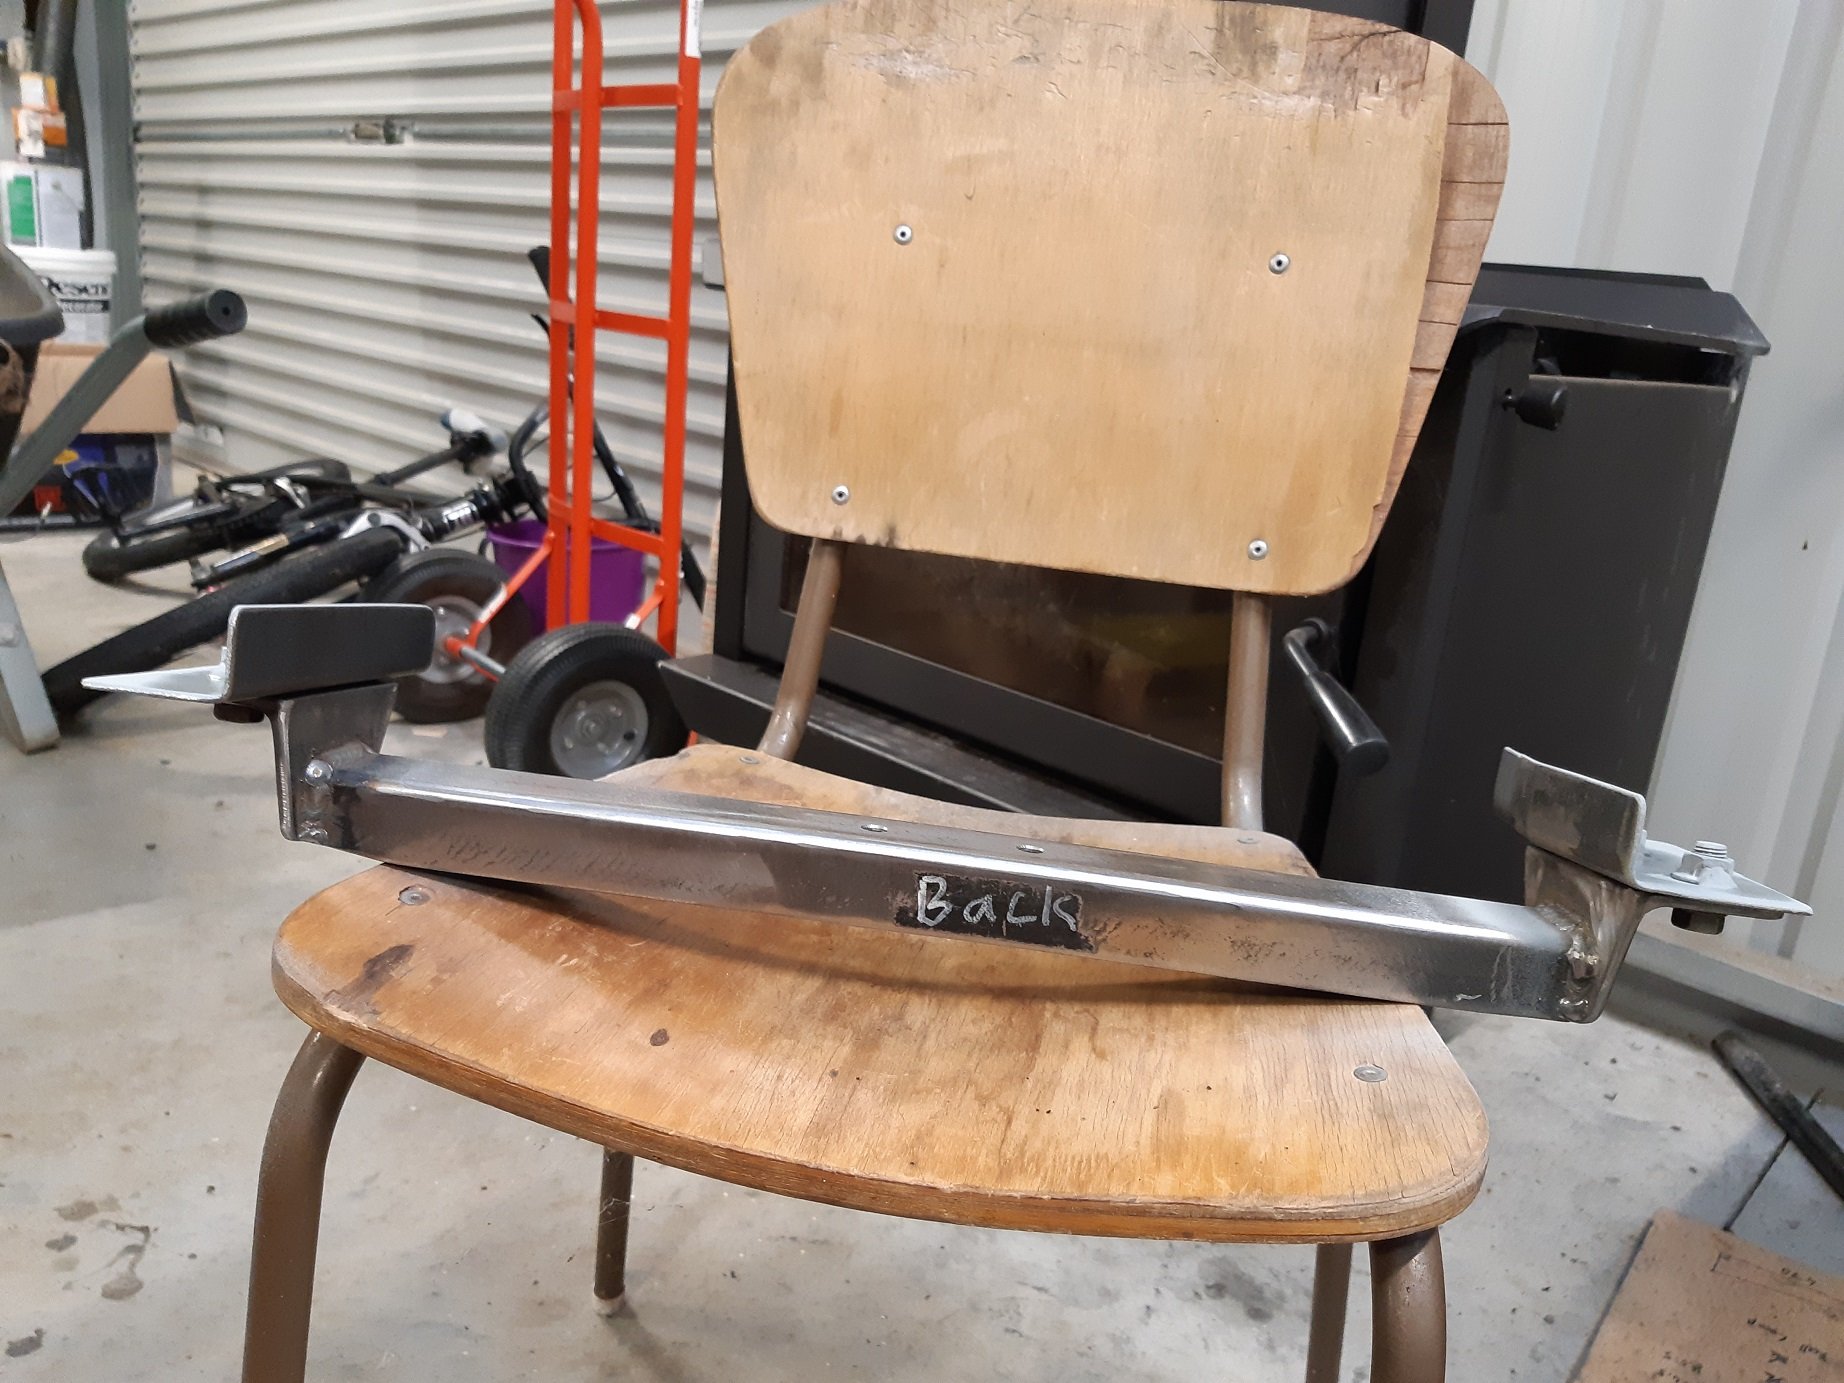
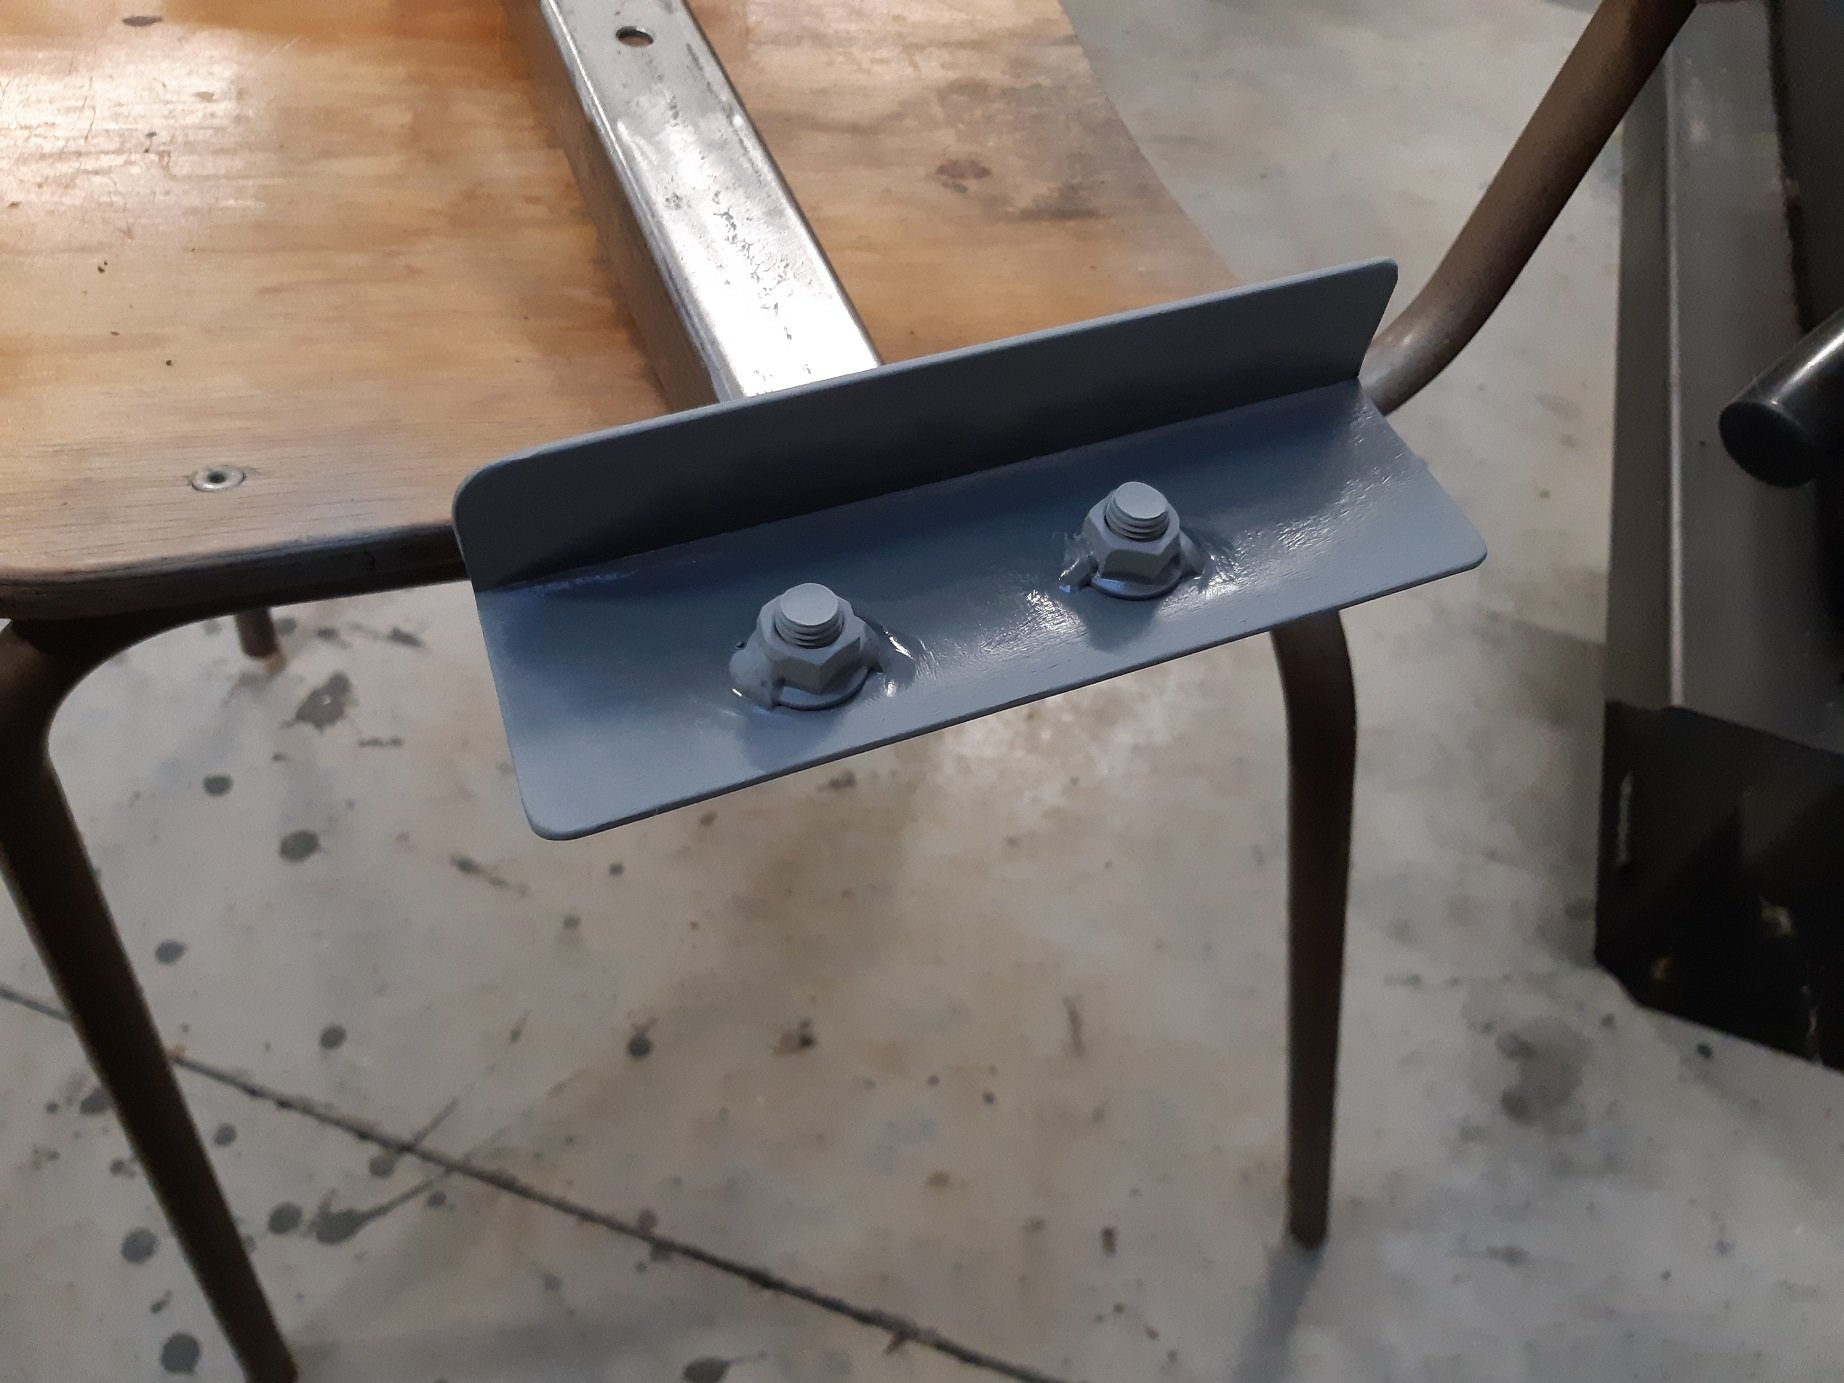
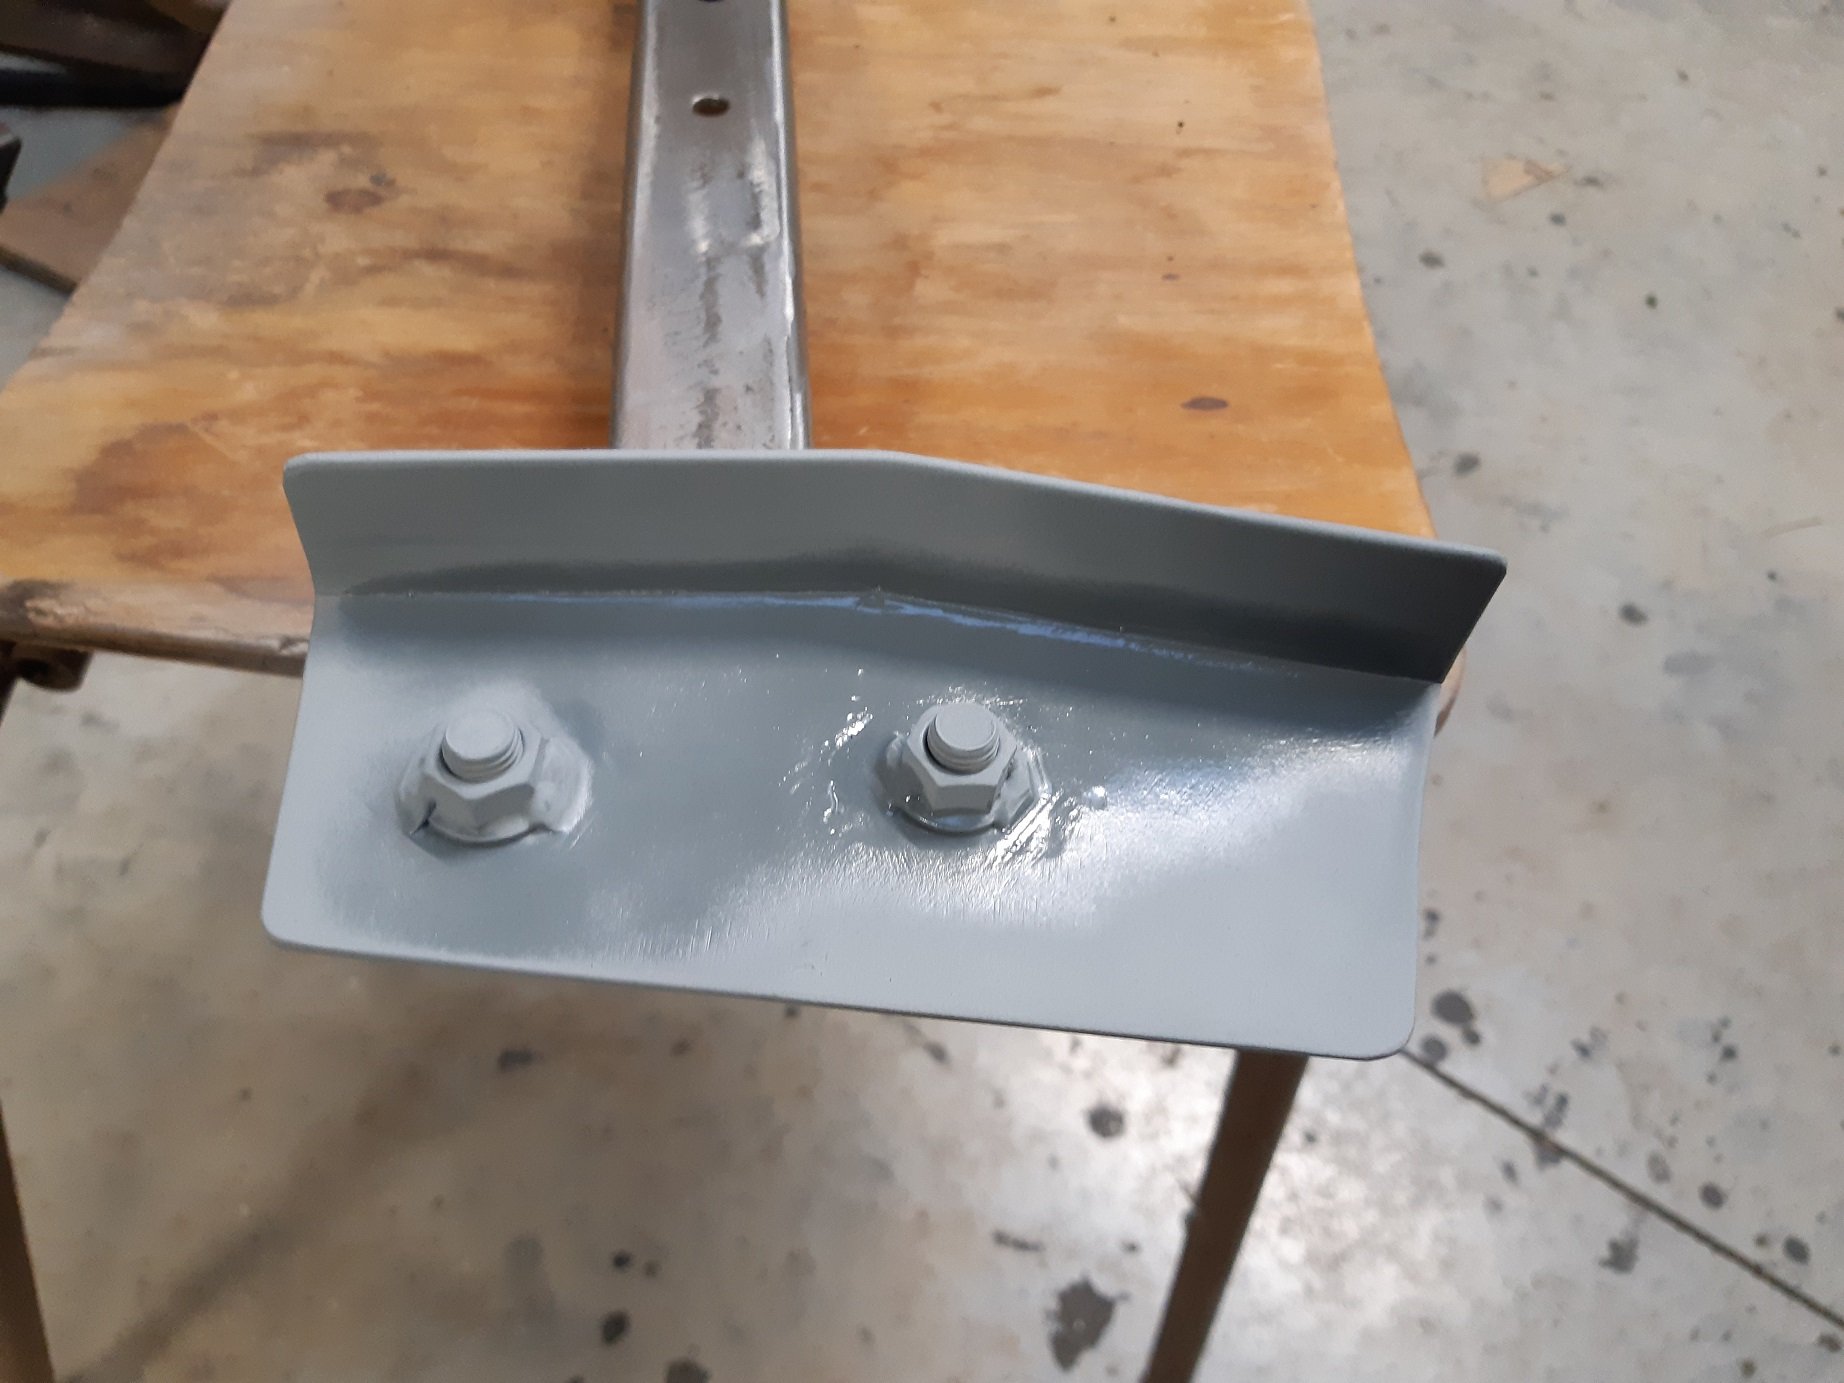
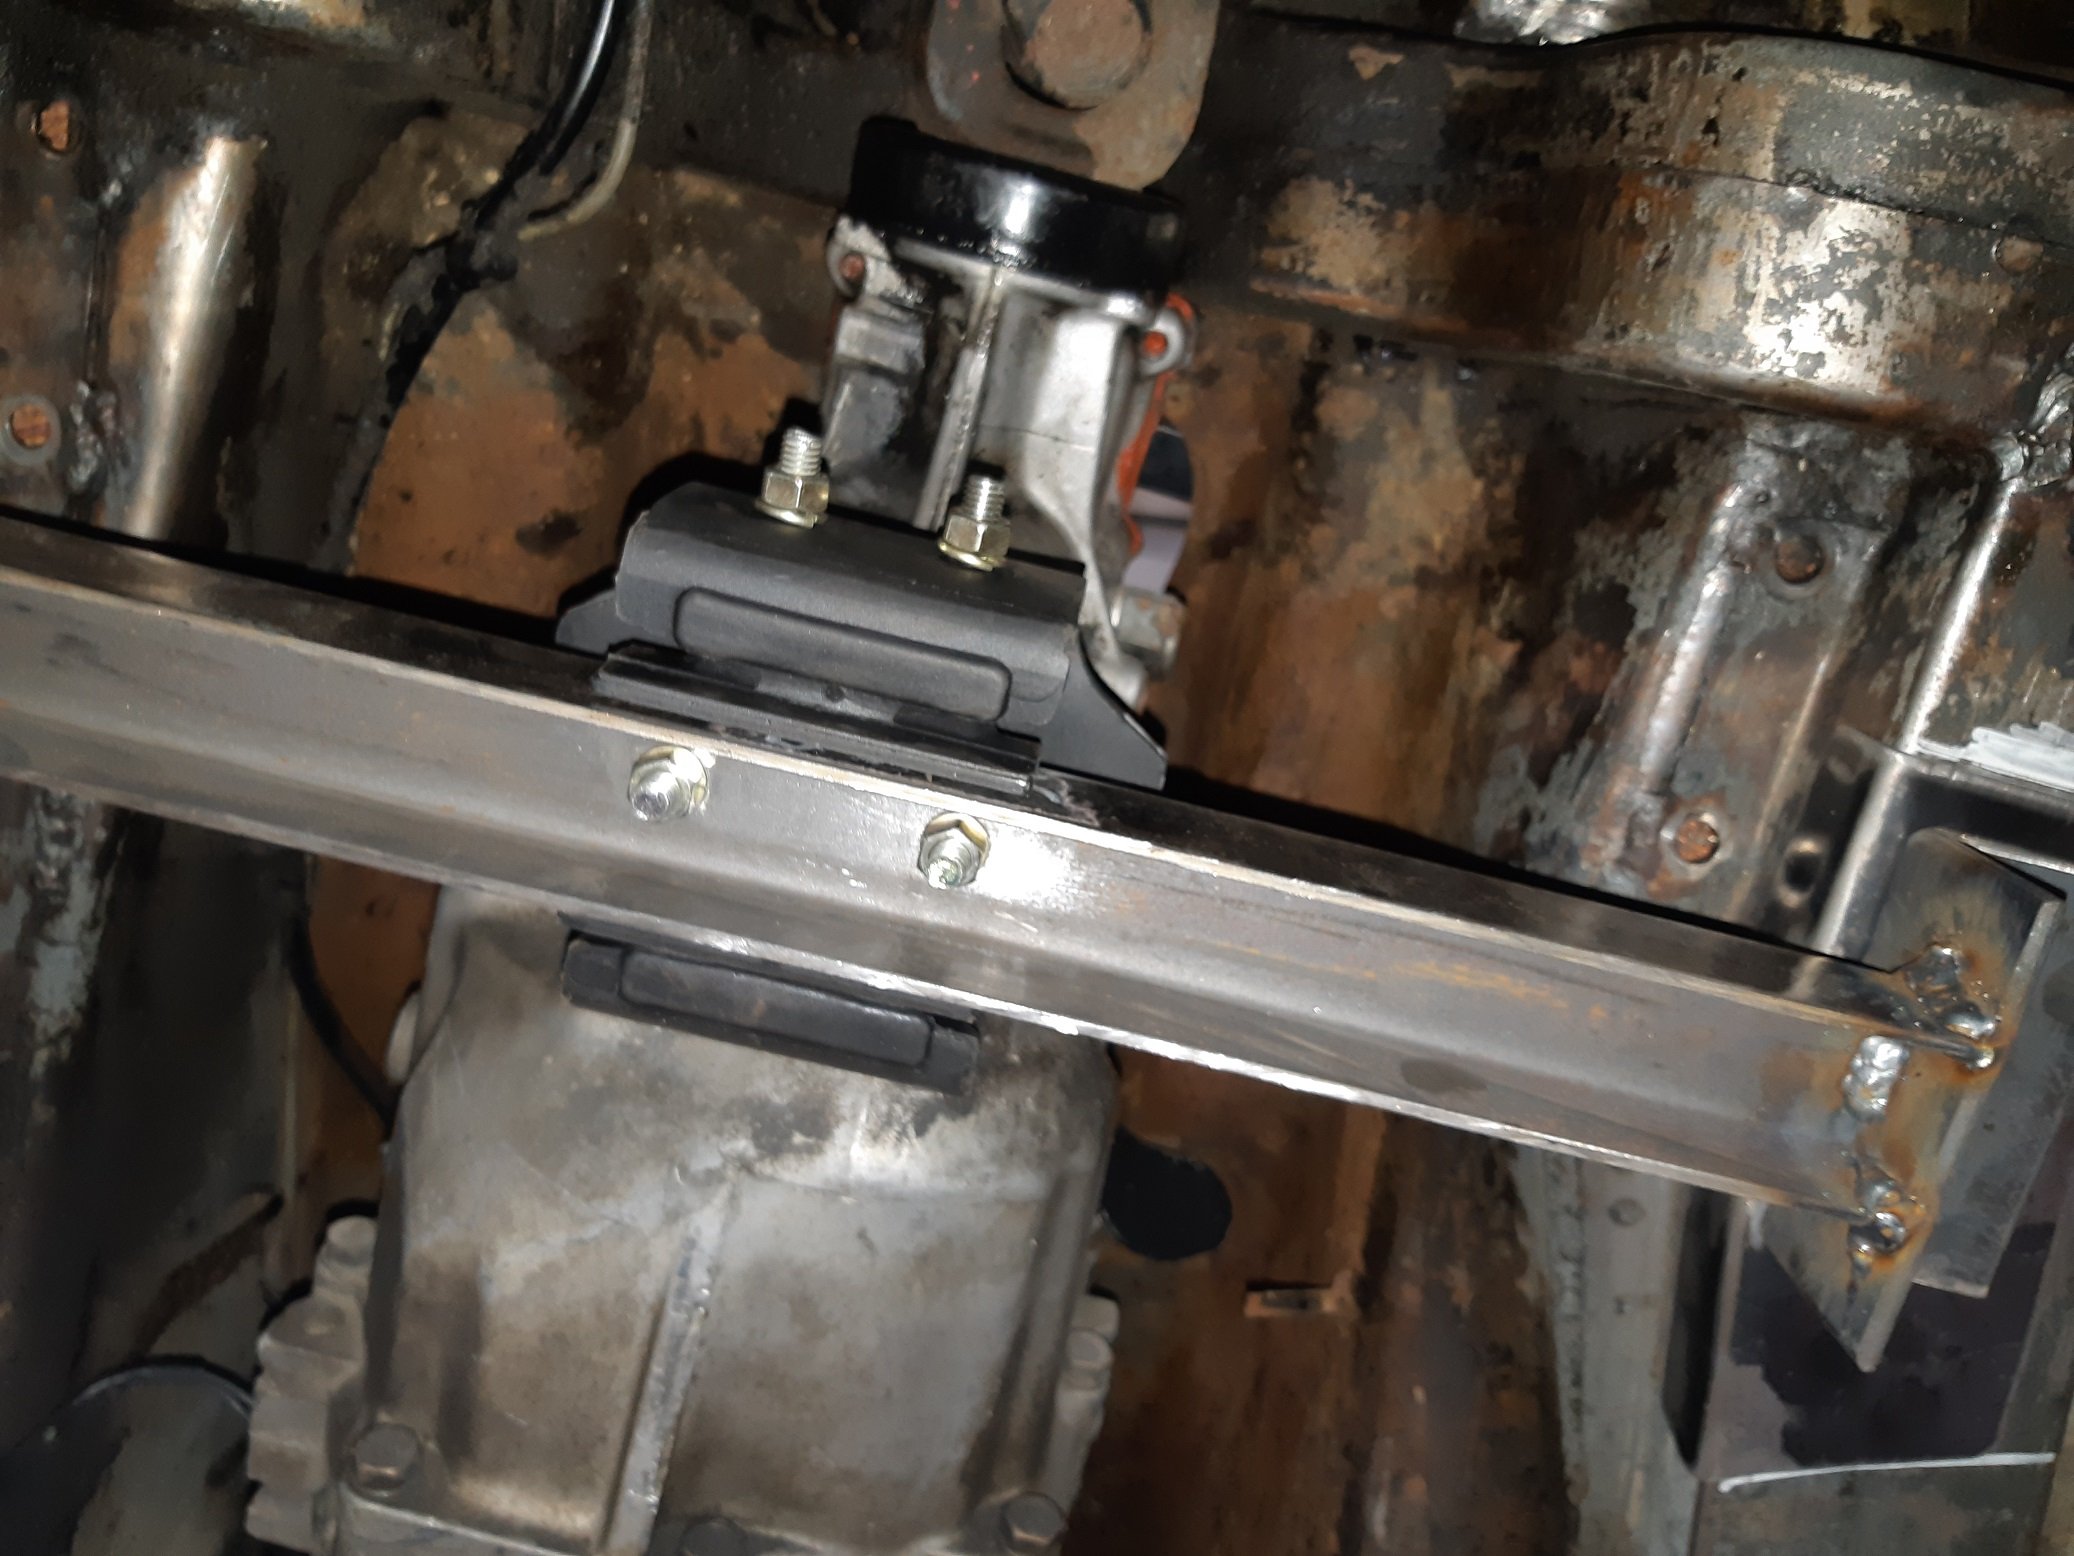
I had worked on this last weekend but didn't take any photos. Captive nuts welded to strengthening plates. Straightened welding warpage in strengthening plates. Embiggened holes in chassis rail to clear captive nuts. Cleaned, sanded then acetoned chassis rails before spraying with some zinc 'weld through' primer, that I'm totally going to wire brush off where the welds will go. Sanded the strengthening plates and zinc primered them too.
2 points
-
Saturday morning update.... Got my chores done & picked up my new tyres, got back home and the postie had brought me prezzies. Time for an early lunch and then an afternoon of Skyline shenanigans. /pics
2 points
-
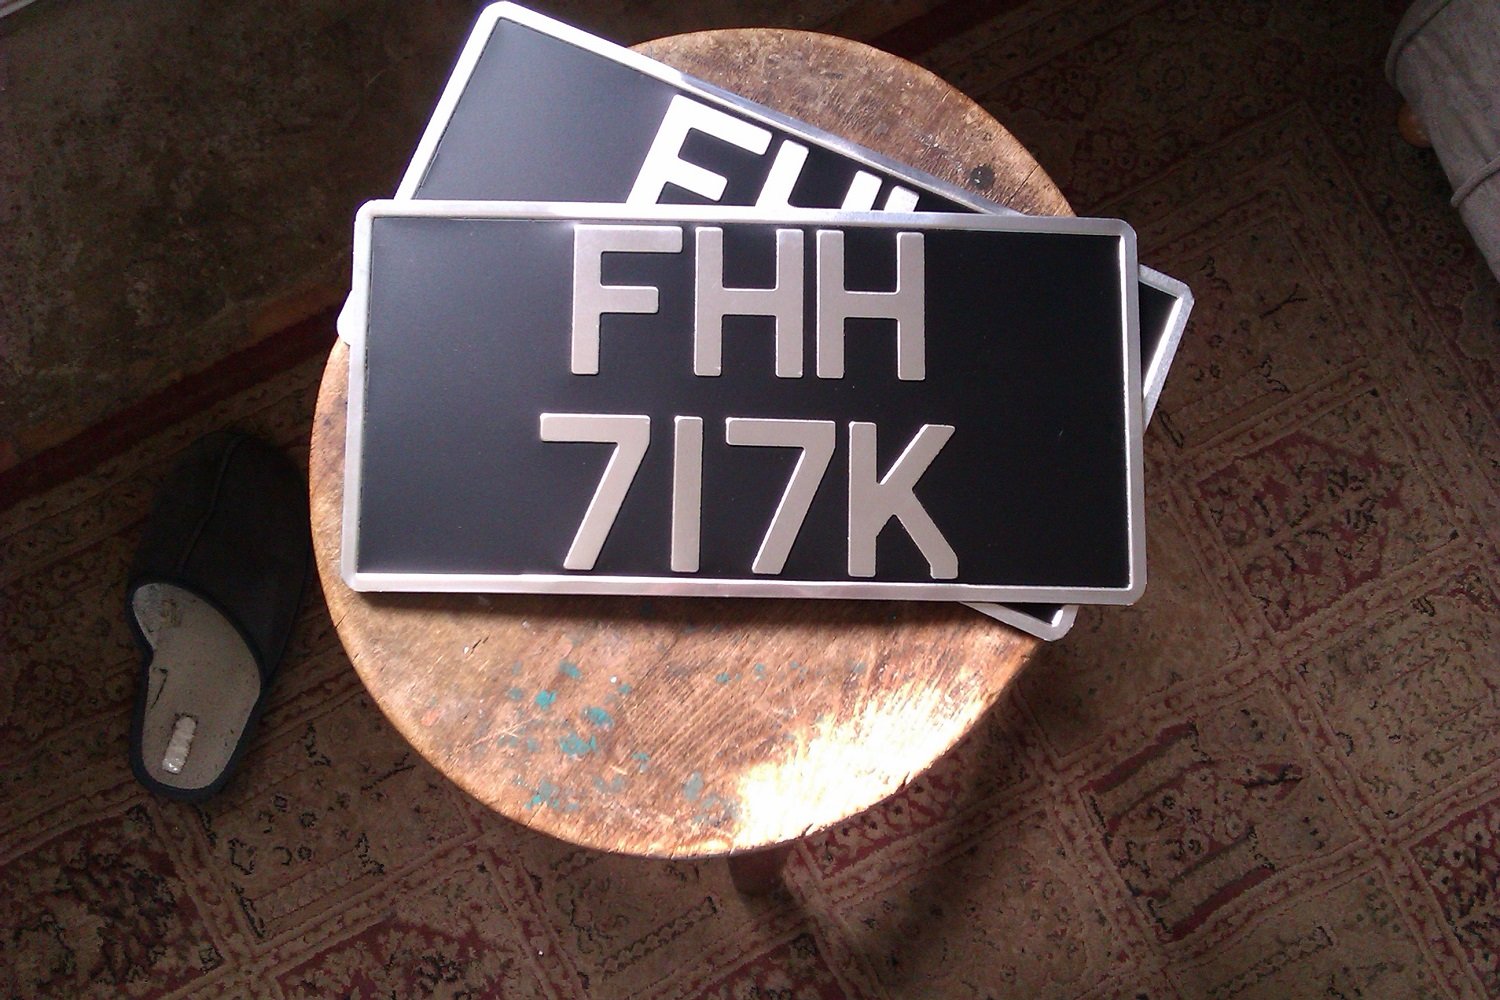
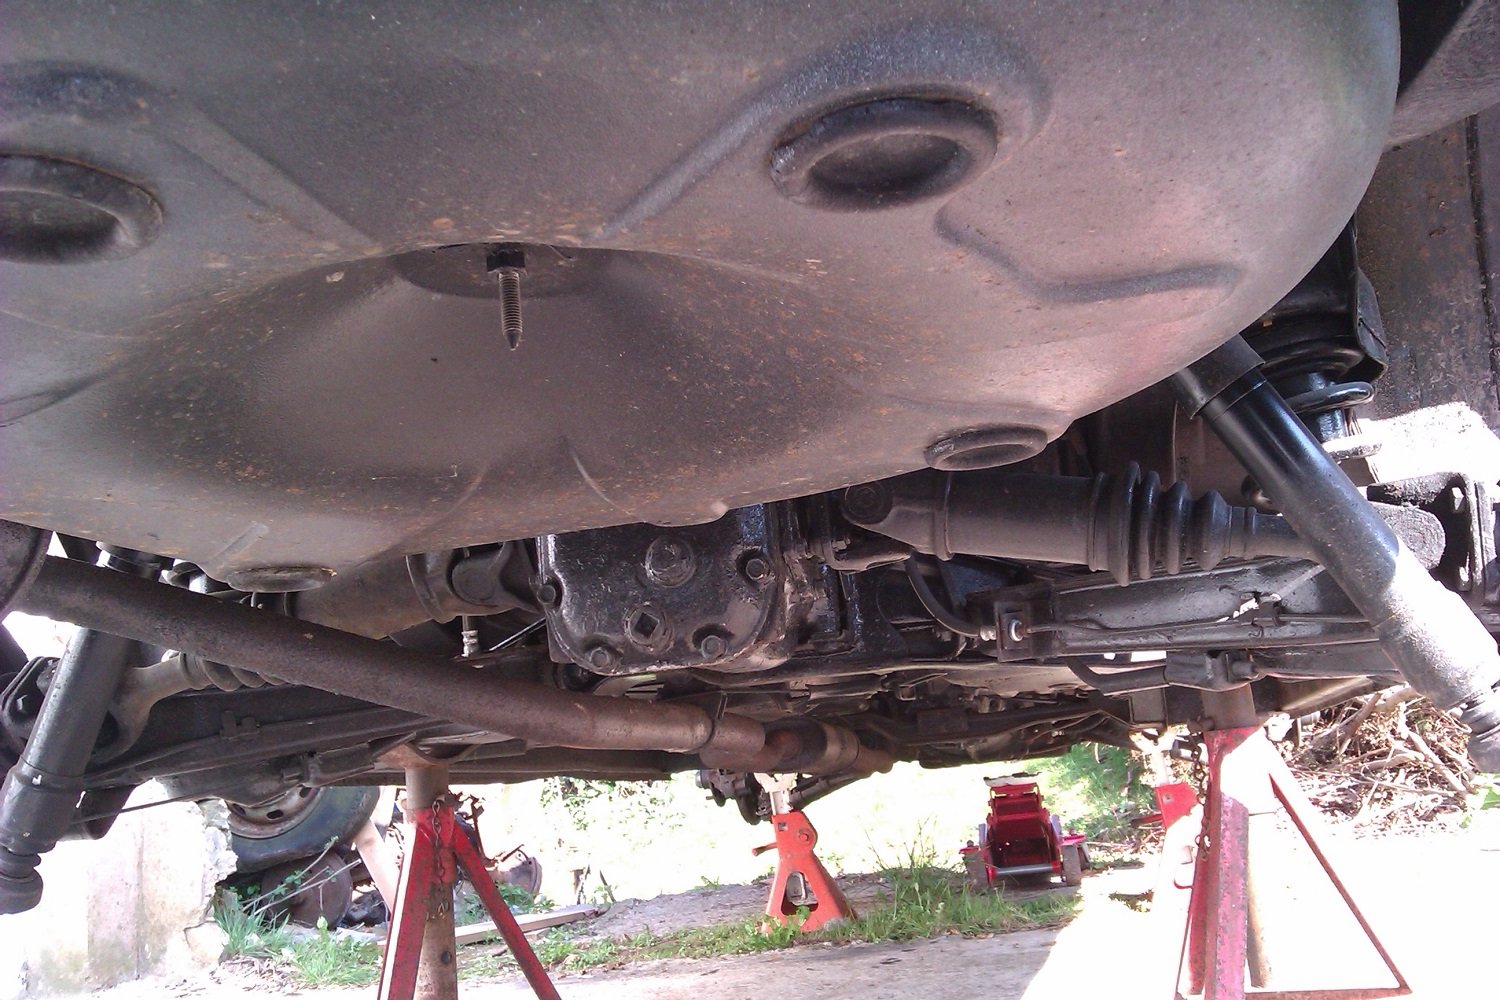
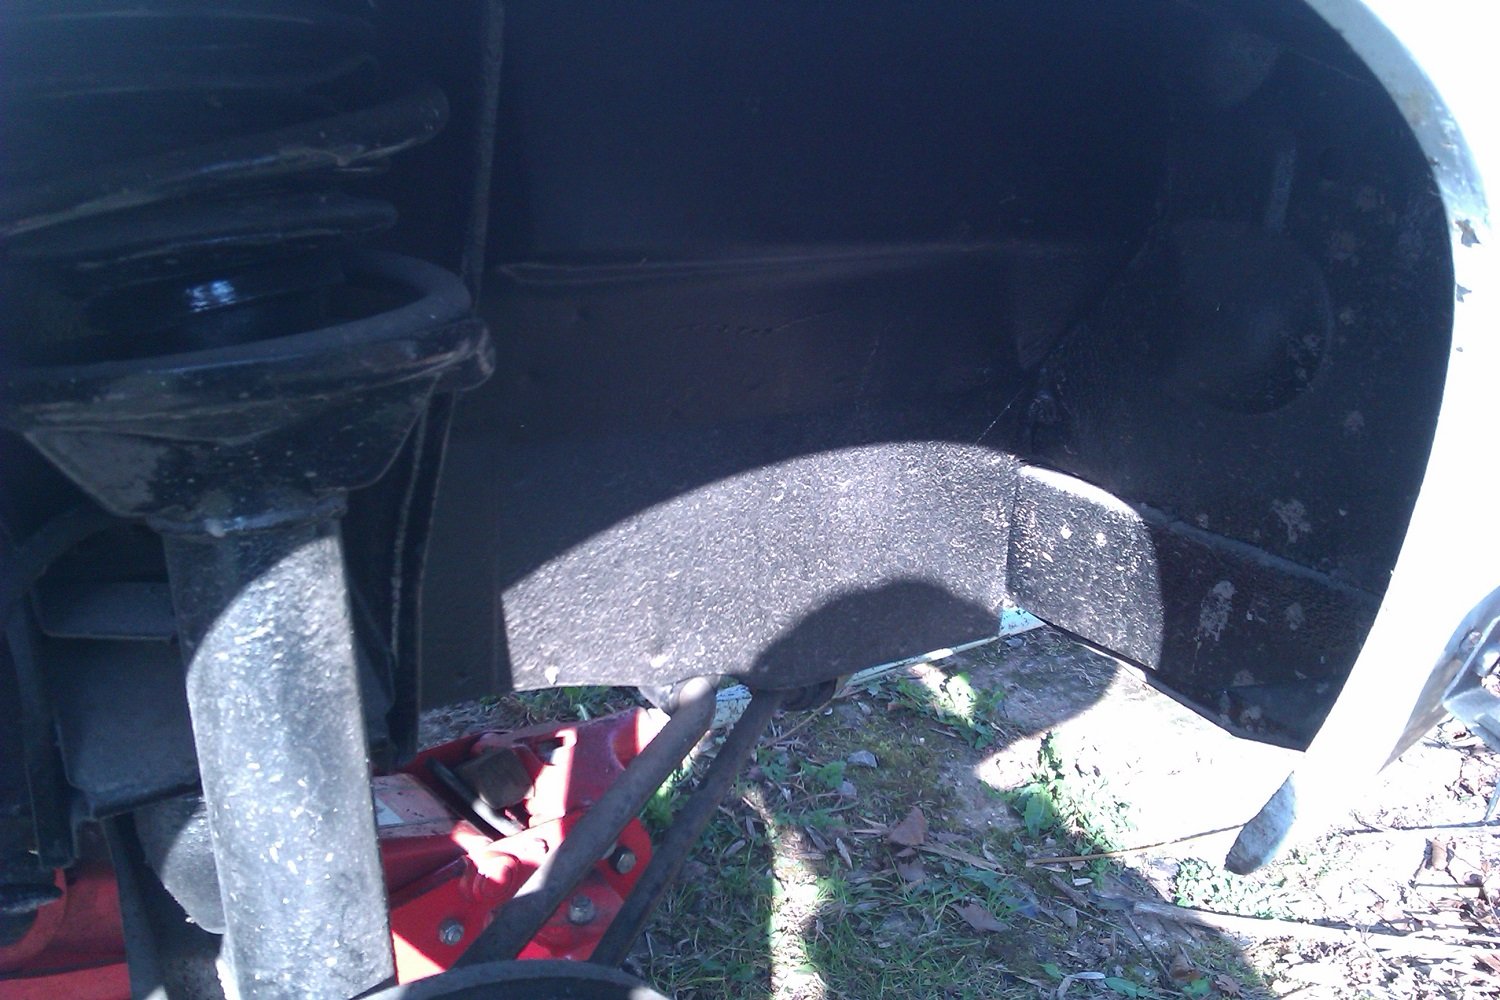
You lucky bastard. Got my documents & registration number back in a record 12 days. I've ordered some plates, Black & silver, Japanese dimensions with motorcycle size digits. Should look OK. Tyres are all fucked. Dry rotted on the inside. Little bit suss as they were fitted just before it was shipped. Date stamped 2005 so not a massive surprise, cheapy new ones on the way. Not sure which way I'm going to go with the wheel tyre combo yet. Can't really drop it any lower for our roads so no mad camber & stretch on the way. It's up on stands and that's where we get to the lucky bastard bit. It is still totally solid underneath and seems to be as original as I thought. A few little scabs on a couple of the doors but over all it's mint. Gonna need some brake parts & maybe a new clutch master and/or slave cylinder, anybody got any recommendations for parts suppliers, either in Japan or over your way ? Been asking around a bit over here but I'm not feeling the love.... Anyway, a couple of rust-free pics just for fun. Hopefully some decent, on-the-road pics in the next few weeks.
2 points
-
Not been on here much at all for a few months, mostly cos an unnamed mod changed one of my posts to make me look like even more of a cunt than I actually am without indicating that they had done so, this gave me a complete sense of humour failure so I lost quite a lot of interest. I guess I am over it now but we will see how things go.... Anyway I have been up to a bit of stuff in the absent months, I will let the pics mostly do the talking. Cost 3x boxes of beer White dust is from fingerprinting, was stolen and recovered.. Fitted pretty nice with minimal sheetmetal cutting Engine is seized, need to find another, but will use this to set up the mounts. Made a removable subframe for the rear and mid body mounts Later model safari steering box, this might be a sticking point but i have a plan that has been agreed with the cert man in principle. The box is rotated forward from the original position, the tie rod position is exactly the same though Front body mounts and steering box mount are all tied in. I have a design for this in CAD which looks pretty good. Fitted the Safari clutch booster in there with relative ease Engine is just propped there, I have moved it back 570mm to help with weight distribution/radiator clearance/etc. It also means I can use a SWB rear driveshaft. Gear linkage might be fun, although apparently the gearbox in a Condor/Atlas with the FD42 has the same box housing, the top plate and gearshift mech should respectively bolt on/be able to be modded to fit. Took it to a weighbridge to check axle loadings, 1755kg all up, 1130kg on the front. Axle ratings are 1500kg front and 1800 rear so should be good to go. The weighbridge was reading 65kg heavier by the time we were done so this is probably worst case. GVM of the Safari was 2505kg, so will be racecar. There is a lot to do yet, as I said the engine is seized so need to find another + turbo to put on it. Build the front cab mount and steering mount, engine and gearbox mounts Need to think how to build the front driveshaft, probably a shorty shaft to a frame mounted carrier, then use the standard front axle. Need to find FD42 gearbox linkage Probably needs new tyres and at least one more rim for a spare Need adjustable panhards and adjustable rear lower trailing arms to get the axles in a better position. It had a 2" lift that translates to about a 3.5" lift with the current weight, so axles are a bit off to one side and the rear will need rotating so the driveshaft flanges are parallel. Need to airbag the rear for load leveling. Need to convert the AC pump to continuous air for the airbags and whatever else Will need to build a deck with big ass drawers underneath for my tools. Will probably will have a budget hoist of some variety, maybe just an arm with a chain block. Electrical will be a nightmare as the cab is 12v and the chassis is 24v, need to talk to an auto sparky to discuss my ideas. Still need to 100% make sure that my cert guy will be able to take it on, there is no one in Nelson with 1D unfortunately. Piece of piss really.1 point
-
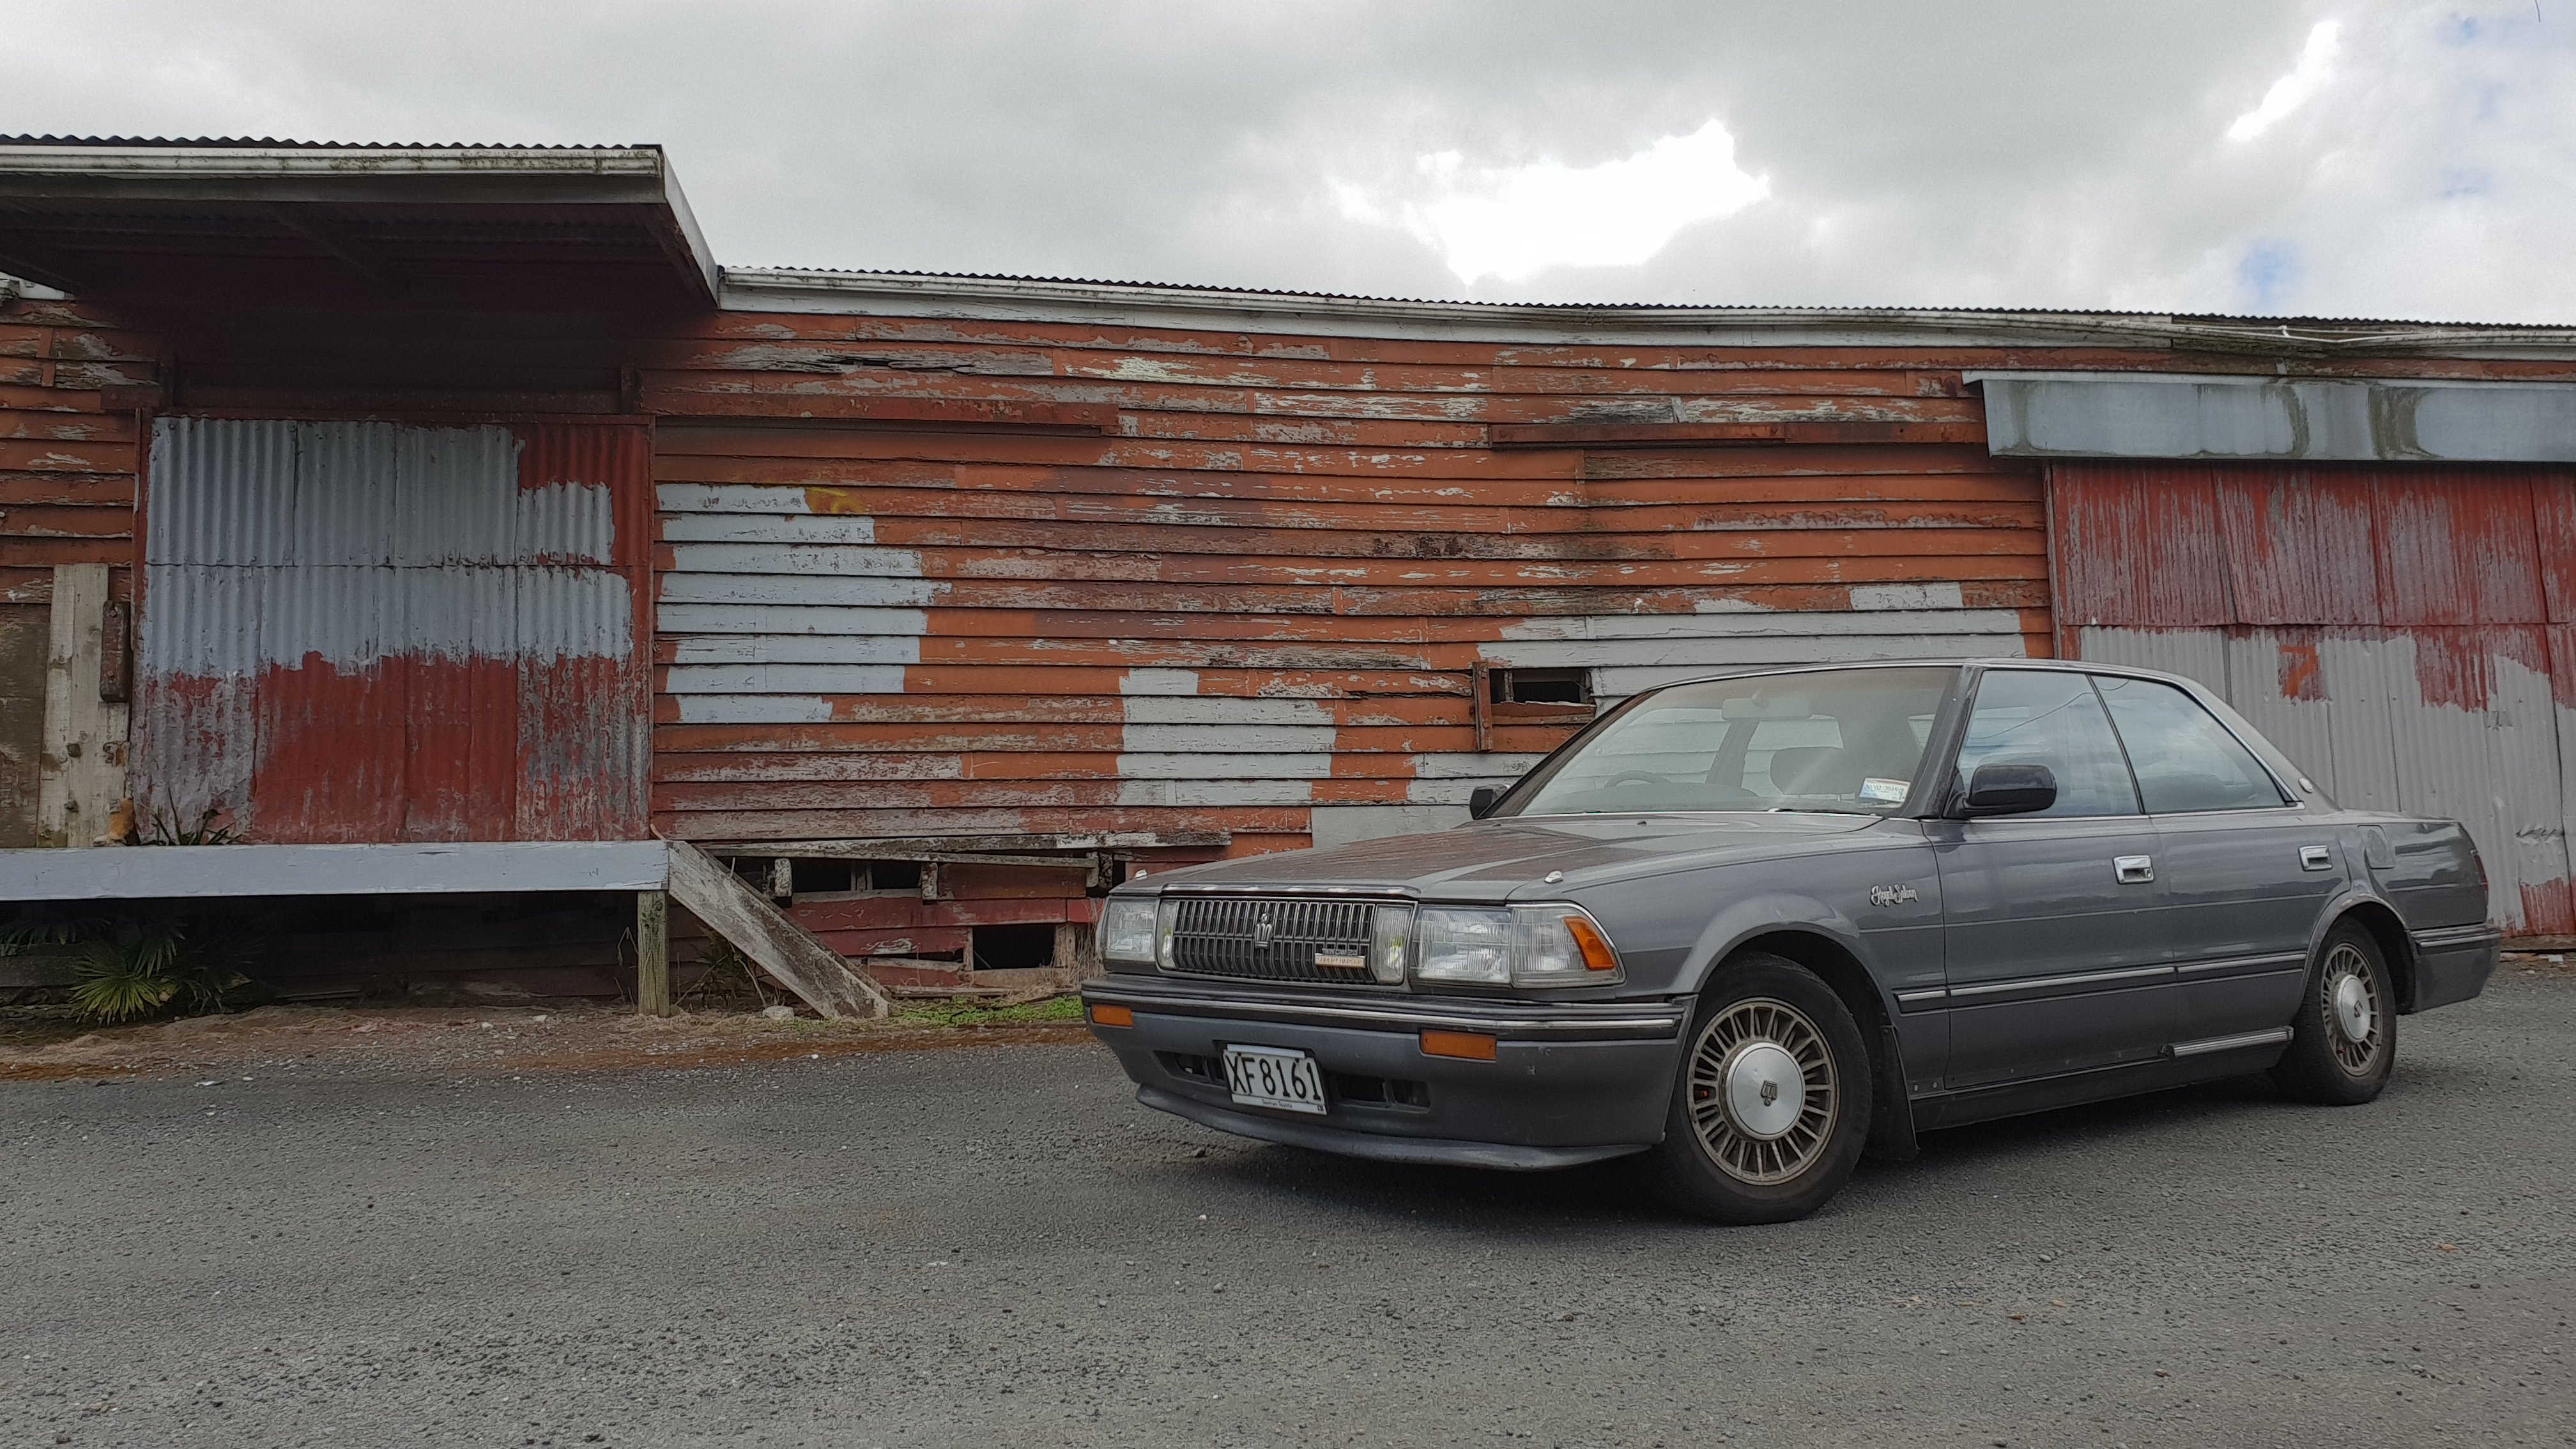
Currently enjoying a beer in kapiti, half way home with my new small project/daily. 1988 Toyota Crown TC24 Supercharger.
1 point
-
This thread is worth looking through too.1 point
-
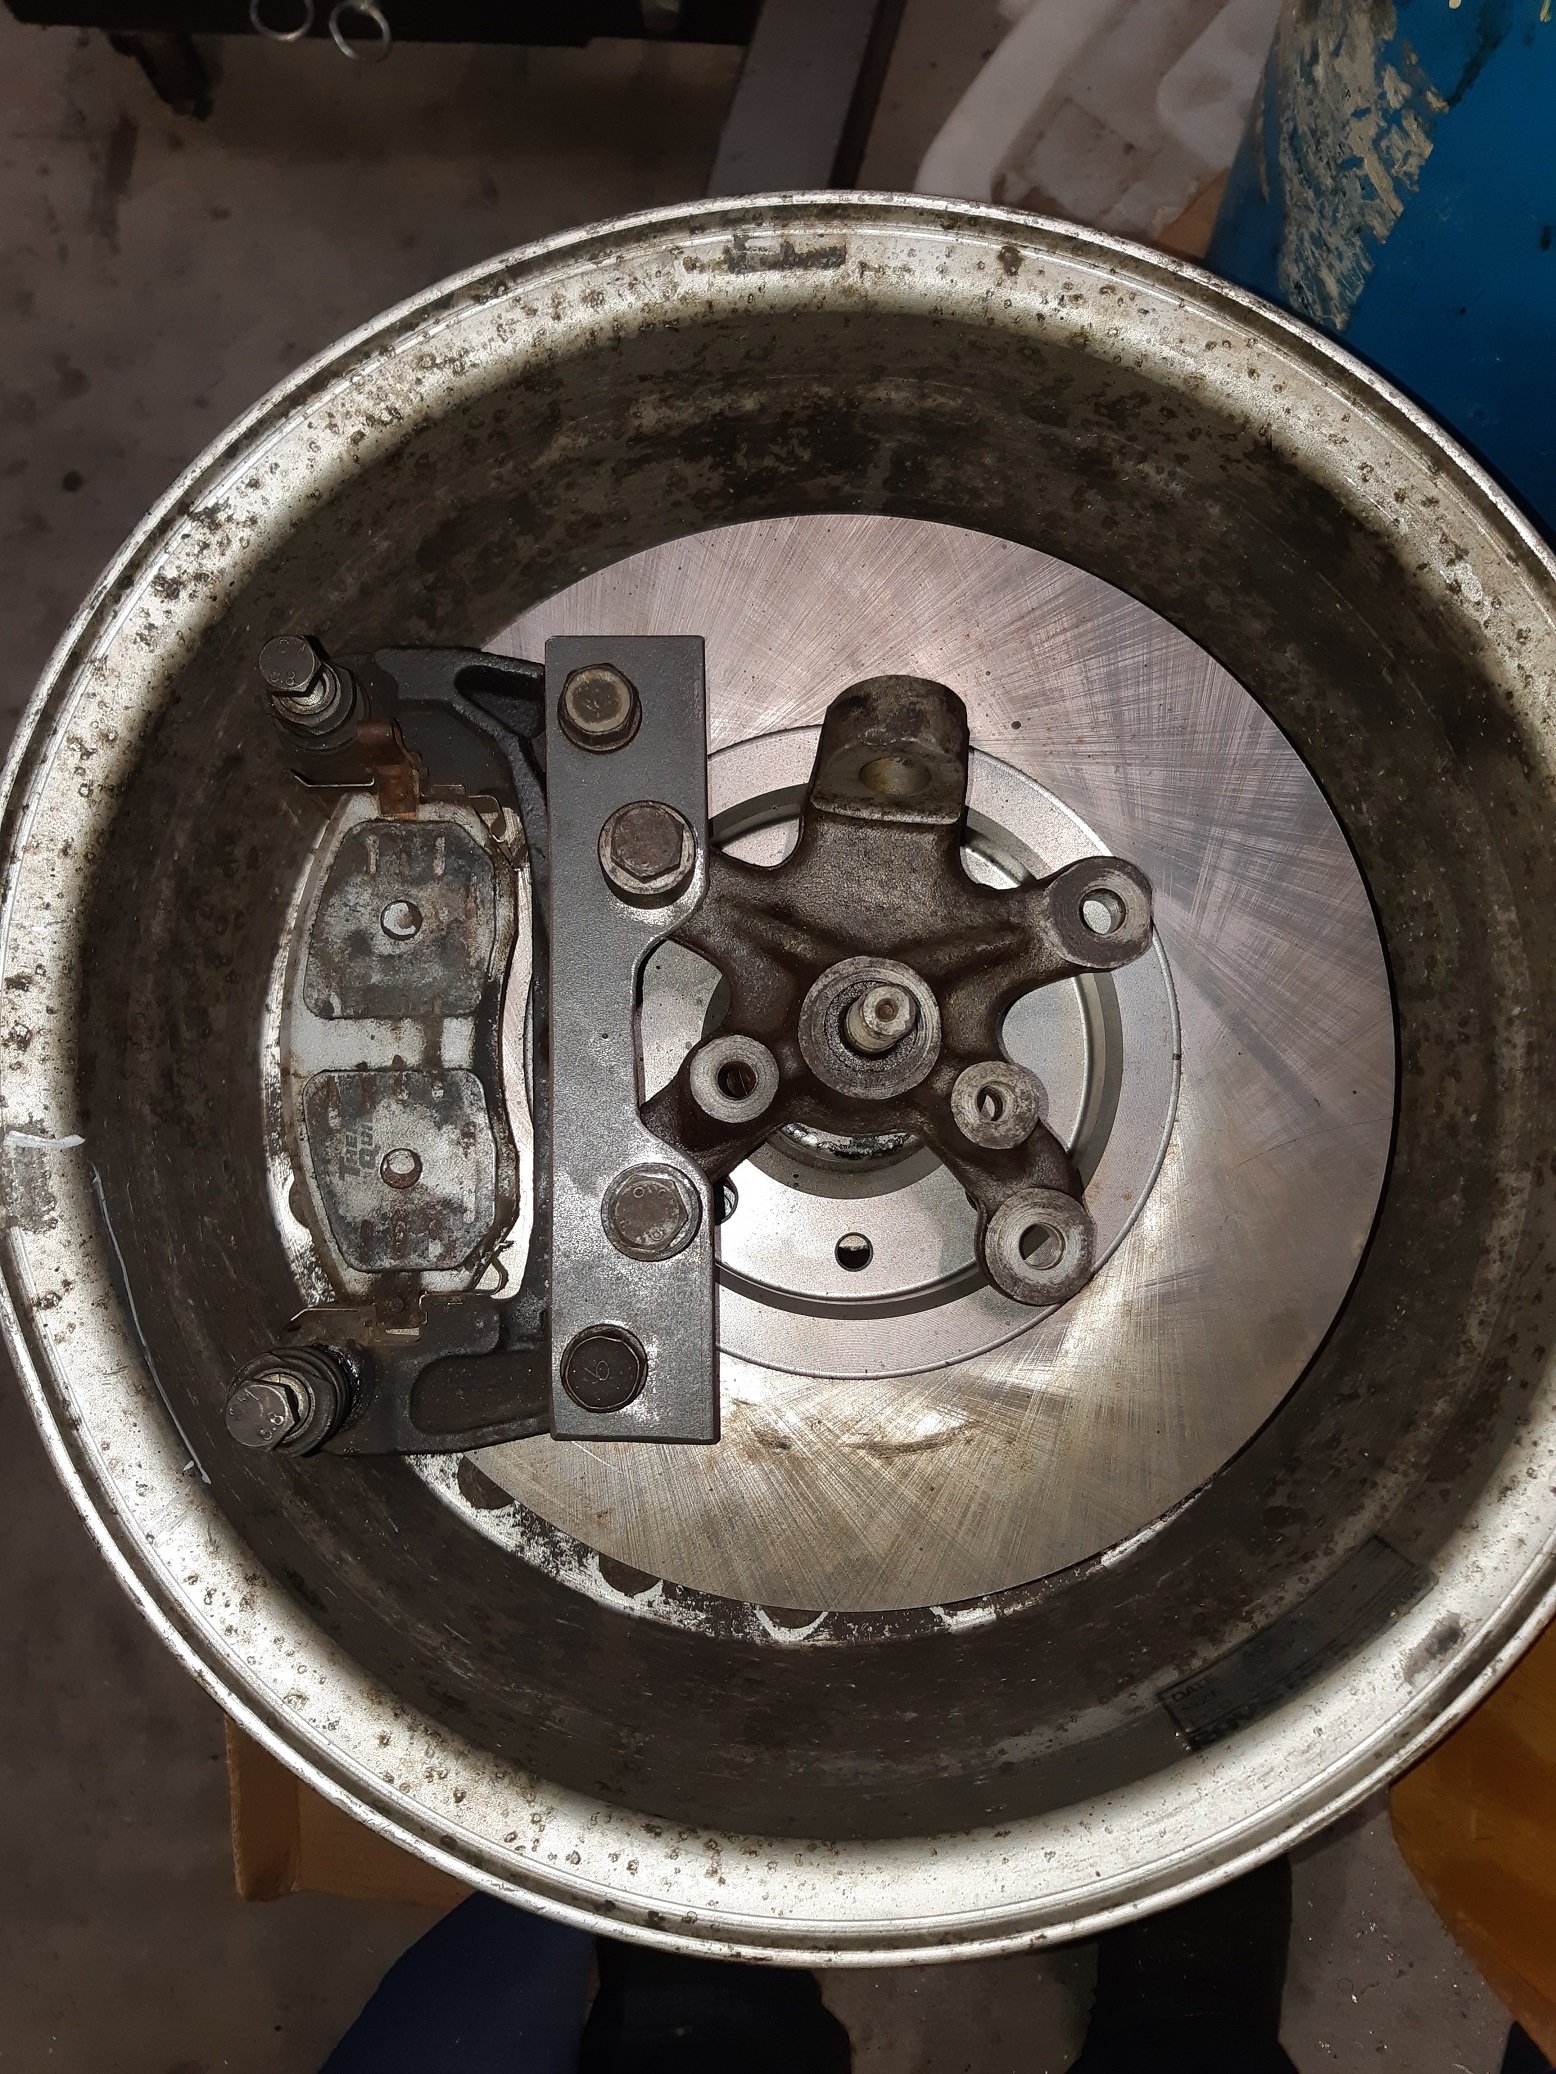
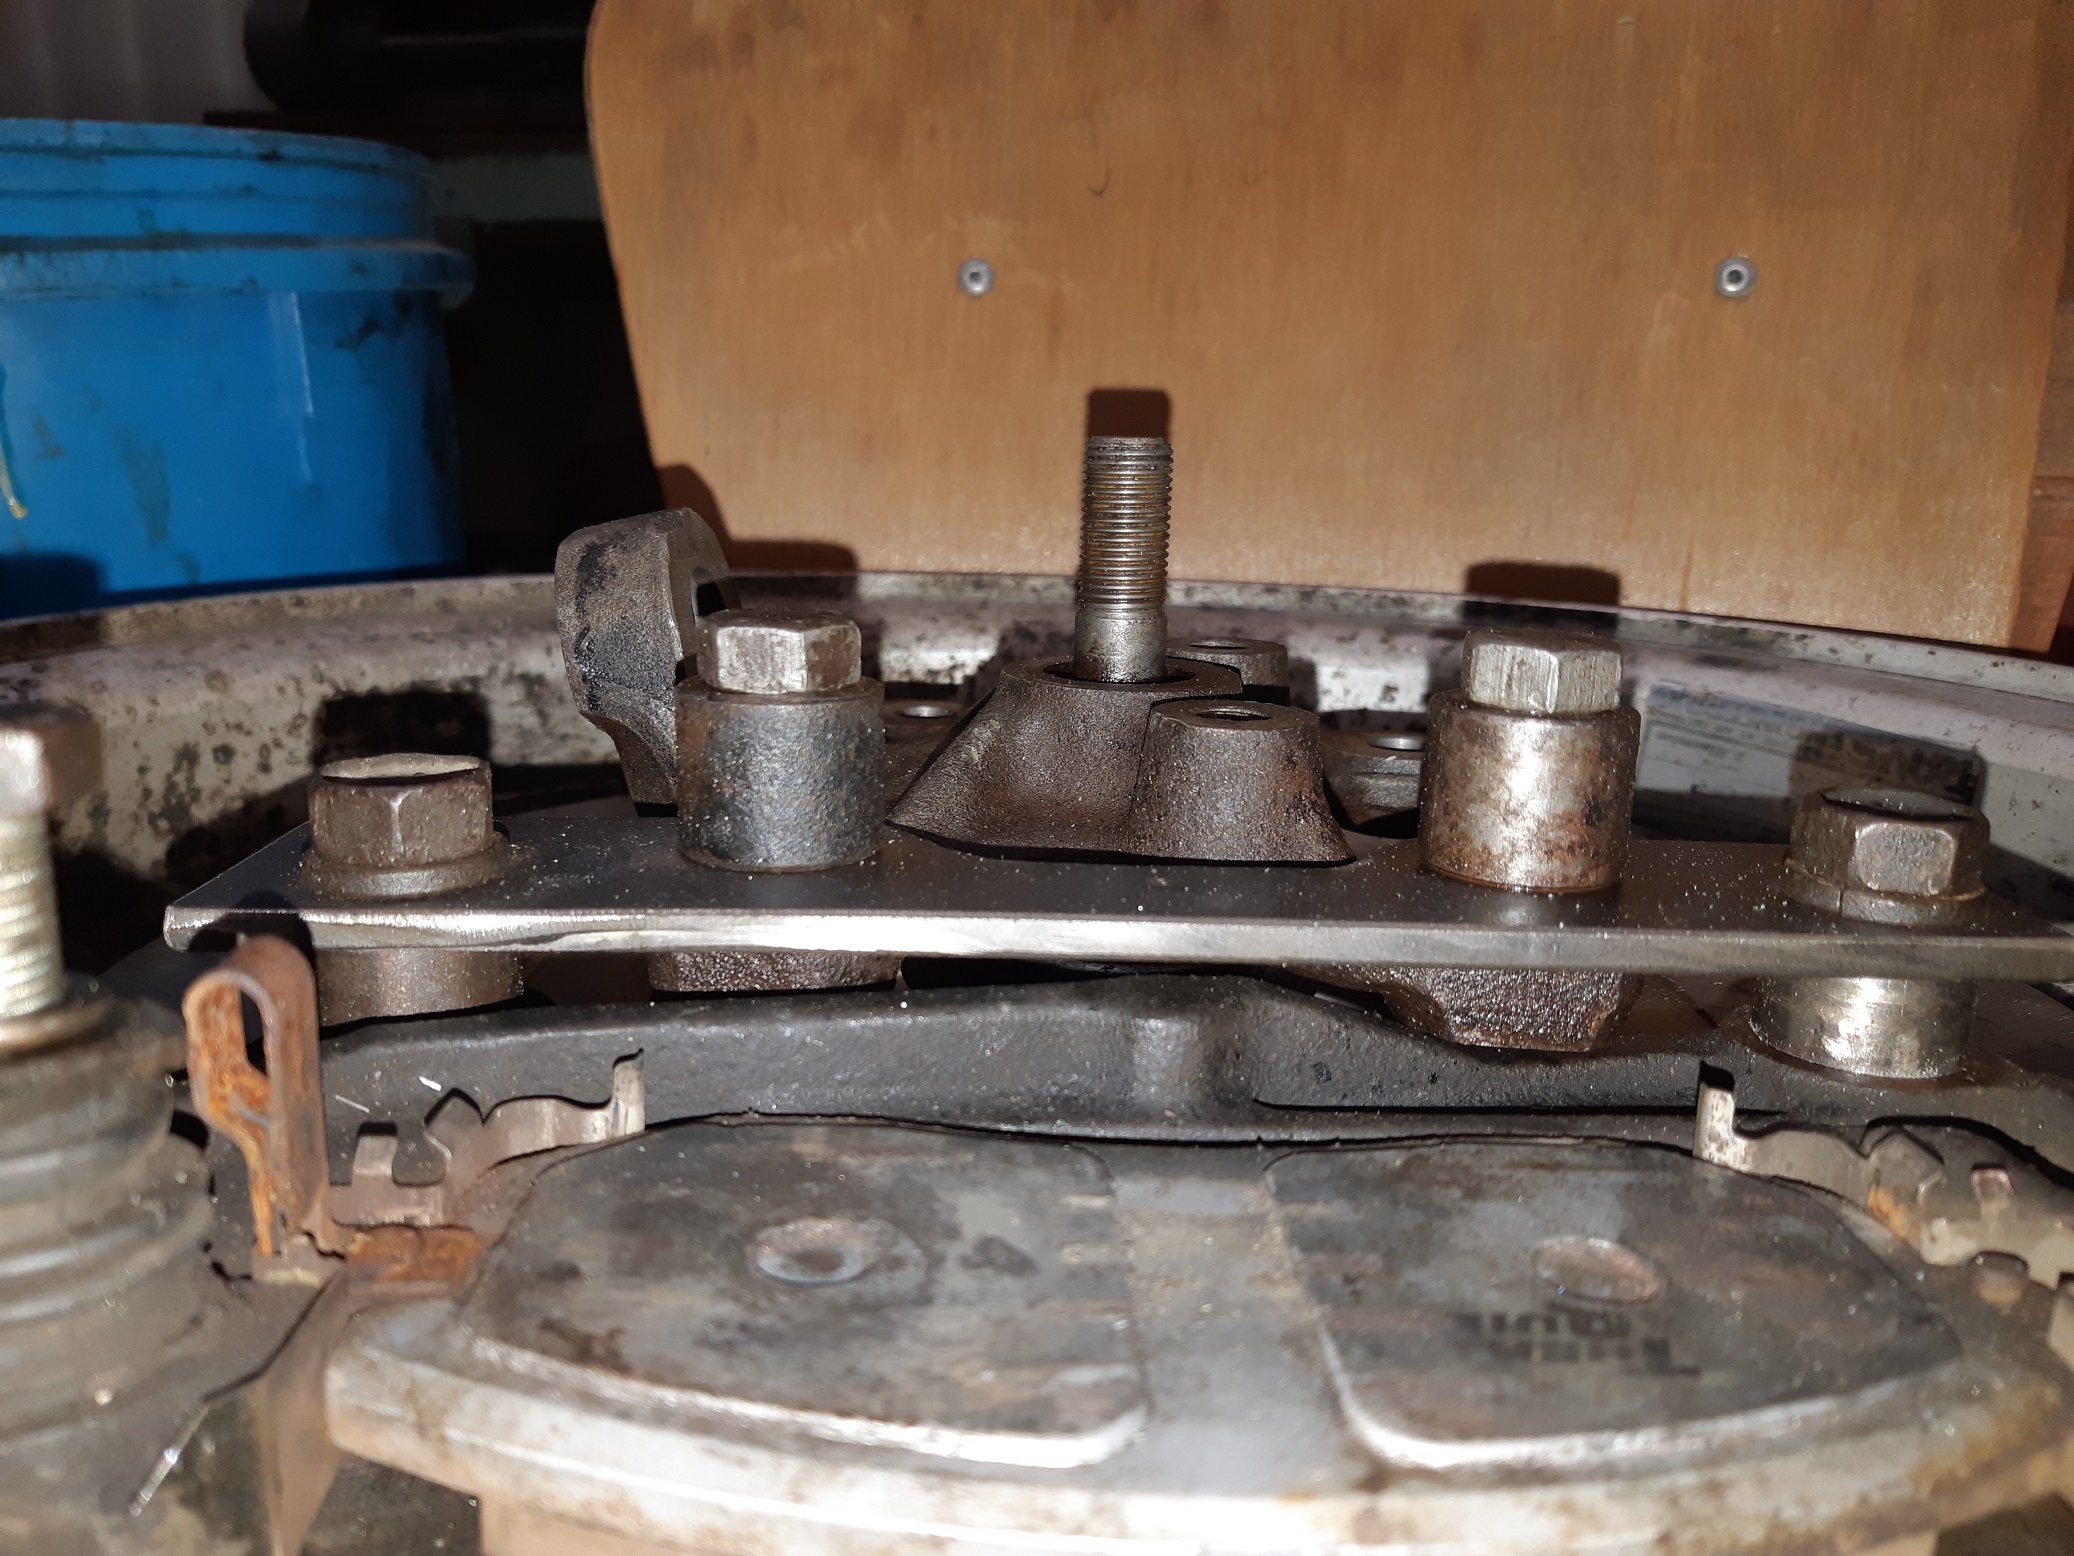
Used some 6mm flat bar to work out the dimensions and hole spacing of the caliper brackets. The caliper mount is not sitting perfectly parallel to the disc, there is a ~1mm difference between the leading and trailing end. I hope this is not because of triumph manufacturing tolerances, but by a bit of wiggle in the spacers and will be resolved with the final 18mm thick brackets. The caliper fits with heaps of room to spare. I took them off so I can use the pads for alignment.
1 point
-
Definitely a sickness, I'm on the lookout for more, preferably with live plates and not rooted, nice pooch btw, and that 4x4 one looks hard case.1 point
-
The wiring is pretty much there now bar the speedo cluster, a bit more tidying in the cab and adding some Deutsch connectors in the rear. And a licence plate light. Now I am a difficult bastard at the best of times, and part of this is that I hate car stereos with all their bullshit inputs, eq settings and animated screens, another part is that I have not willingly listened to the radio or watched television for more than two decades, a small and ineffectual rebellion against capitalism. I only listen to talking books over Bluetooth when driving and fucking hate it when I get into a car after someone has been used it (Shane you dick) and has fucked about with the stereo and turned on the radio. So to prevent this occurrence I have bought a top quality Bluetooth mini amp off Ali express for $54, this has two tone knobs and a volume knob, and no display. Perfect. It is a nobsound brand lol, right up my street https://s.click.aliexpress.com/e/u5tcaeM In other news I have had some front driveshaft adaptors made so I will be sorting that out shortly. I will hopefully have enough cash for a radiator in the next few days as well. In the realm of actual work I have mounted the rear seats. Not masses of legroom but they work well and pack away nice and tidy; It will be tight for the engine cover but do able.1 point
-
On today's adventure Greg discovered the best feature of the kombi. Chip/snack holder for the driver.
1 point
-
I bought some genuine BC racing ones so I knew they would fit, the idea being I wouldn't have to spend time finding options. Then I got a fckn chest infection for a week and didn't have the energy to work on the car. But anyway, they are in now and I'm pretty sure its solved the play. Now I just need to fit some resistors to slow down the indicators and take it back for a recheck. Then I can FINALLY drive it!1 point
-
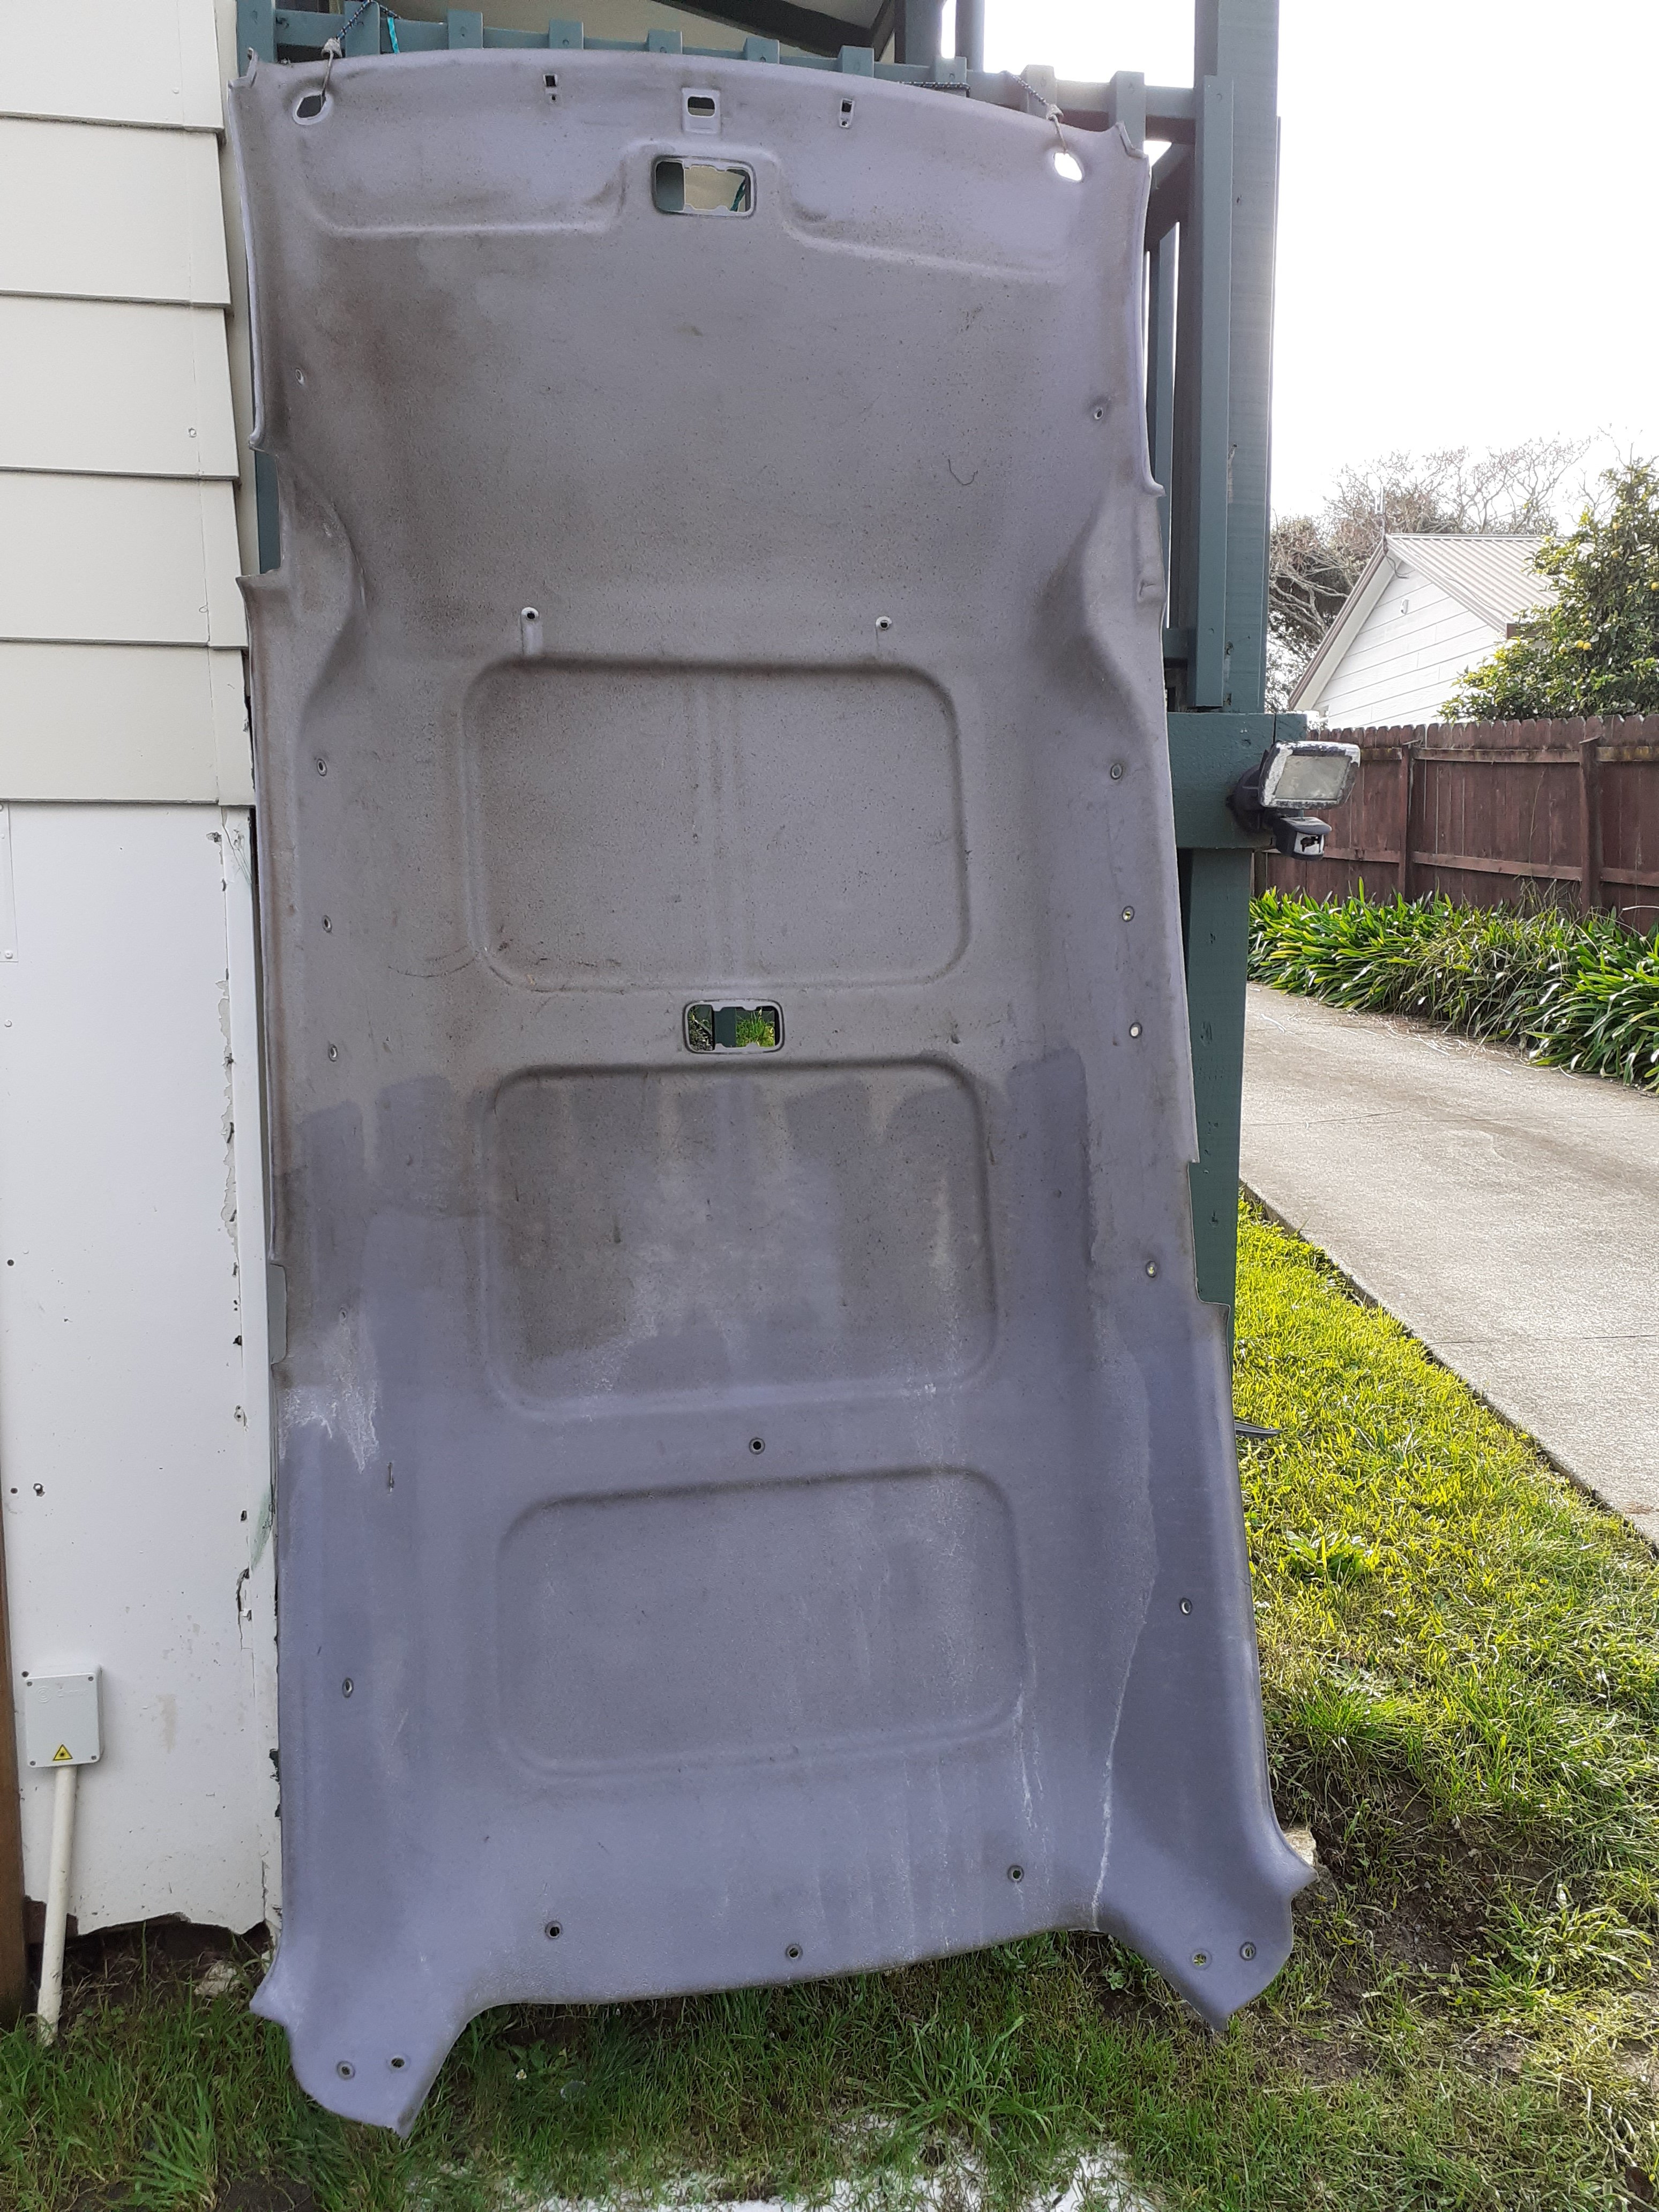
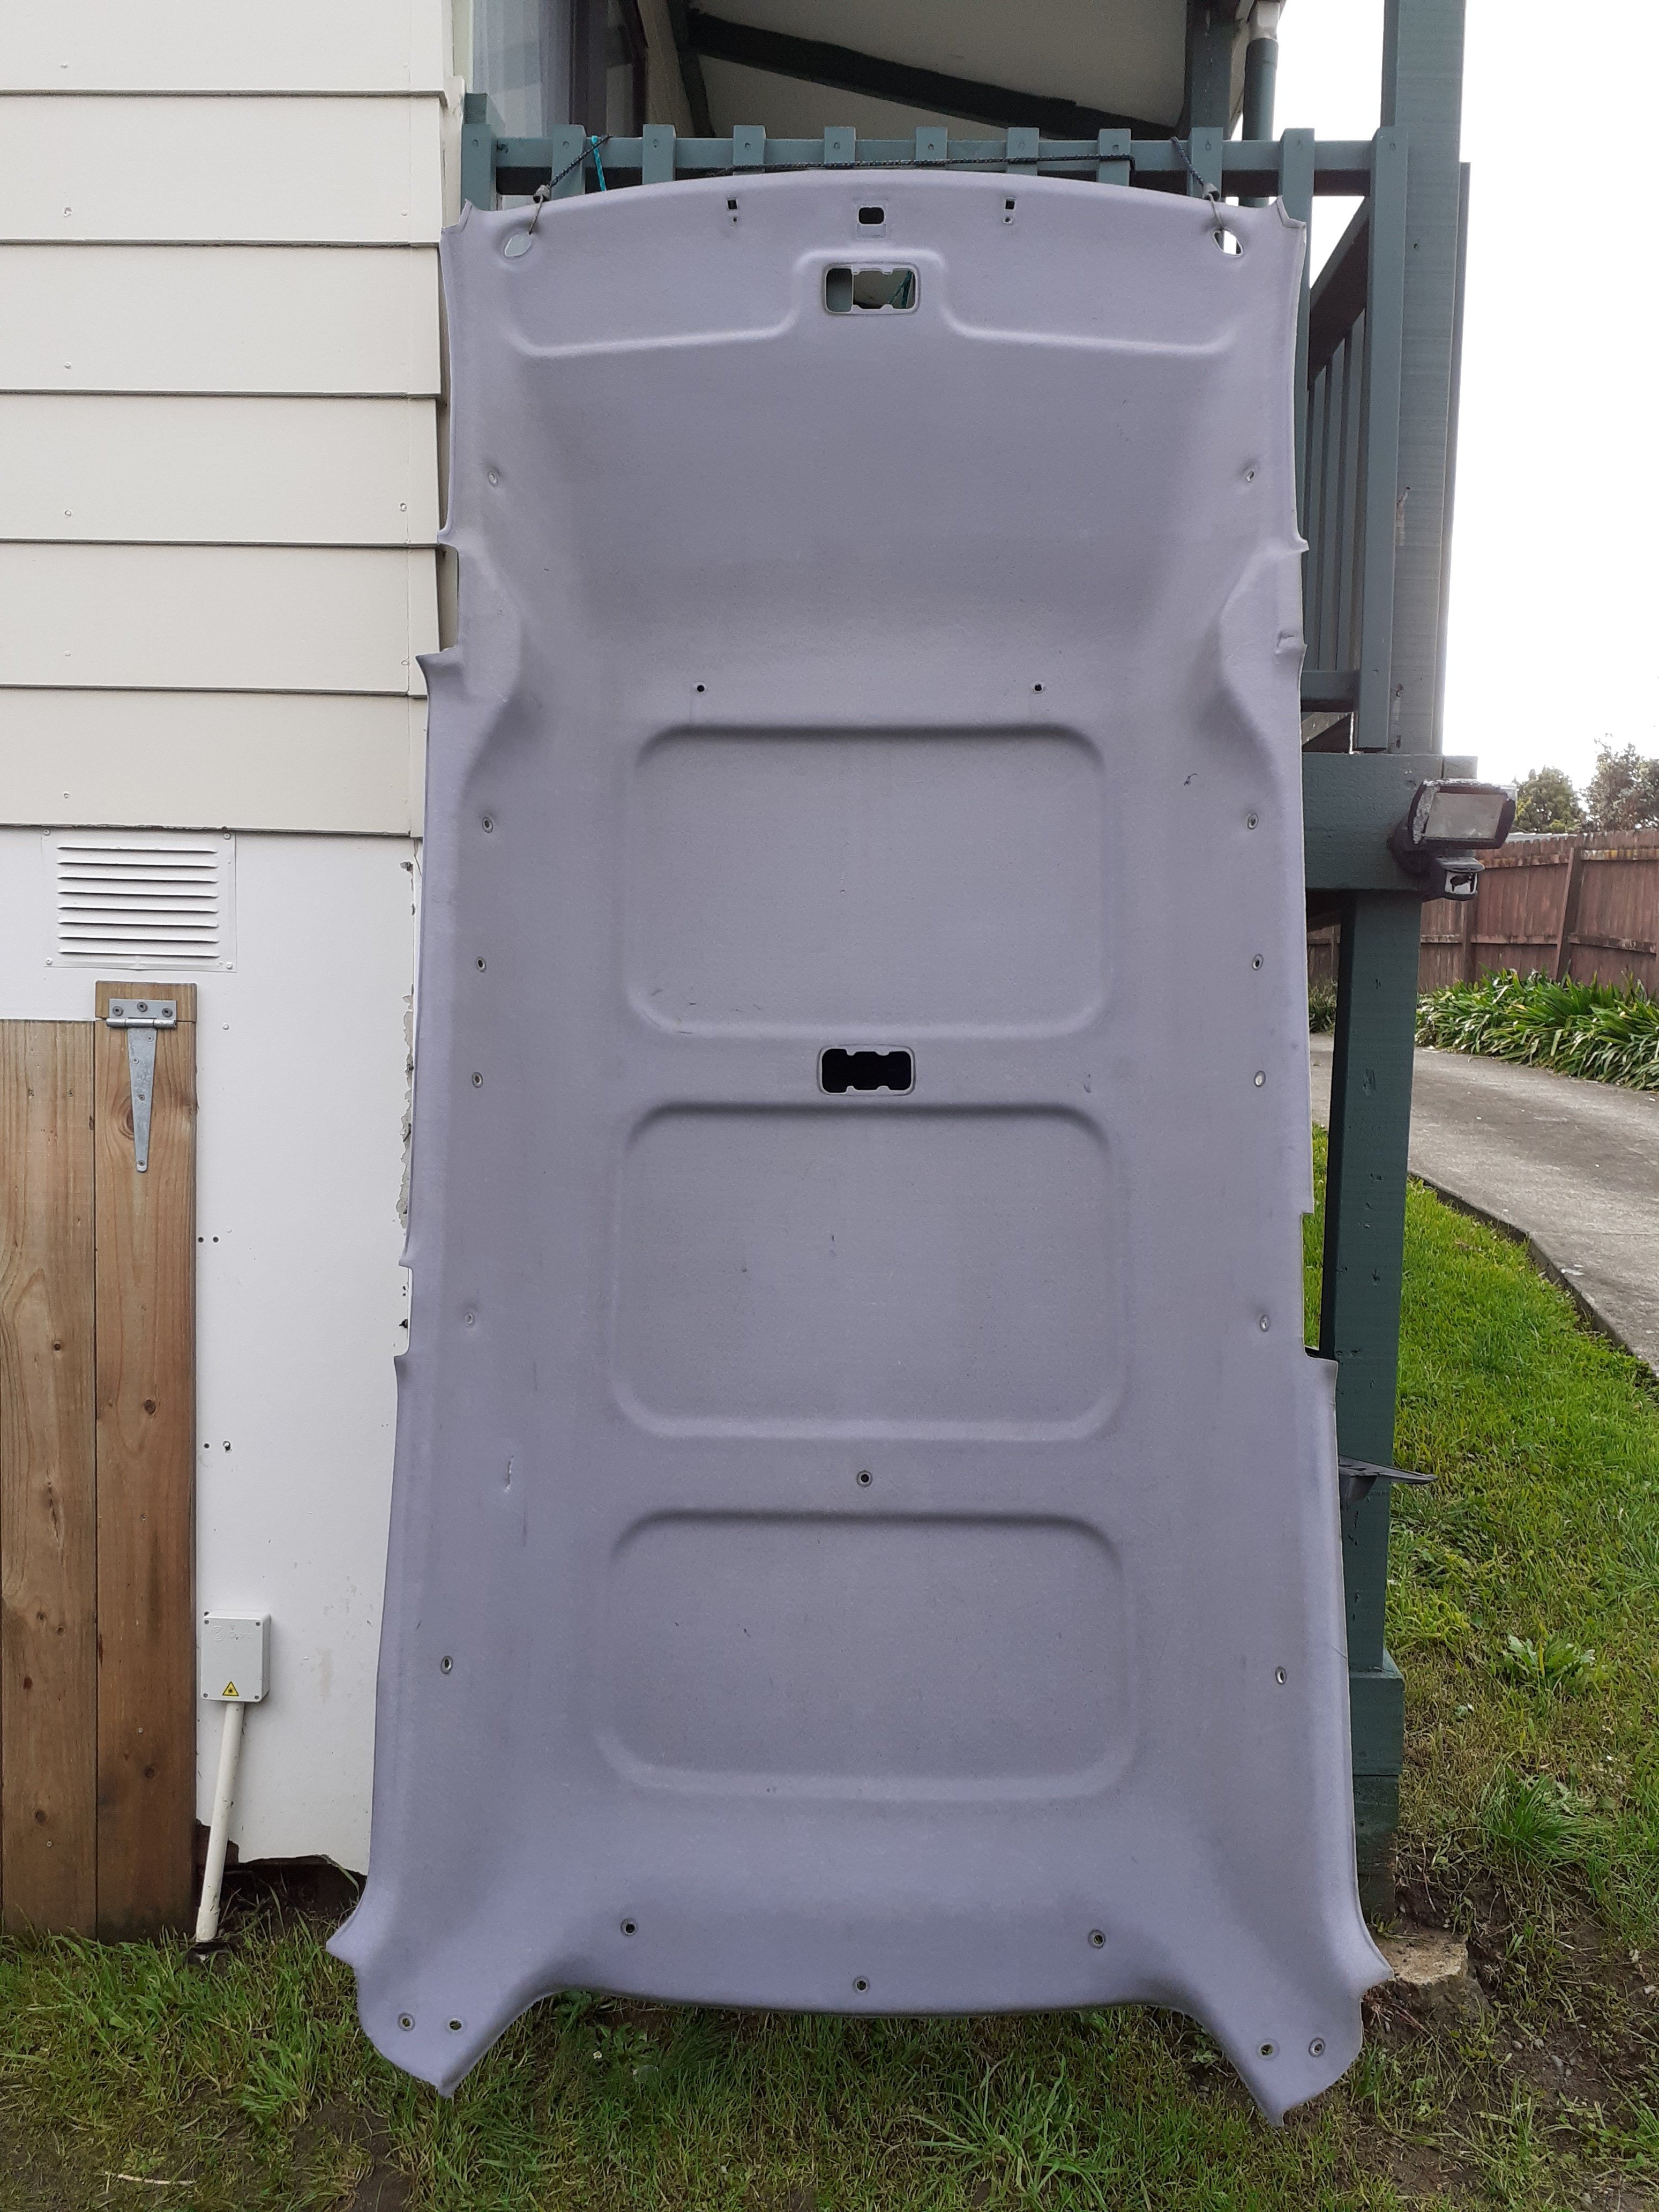
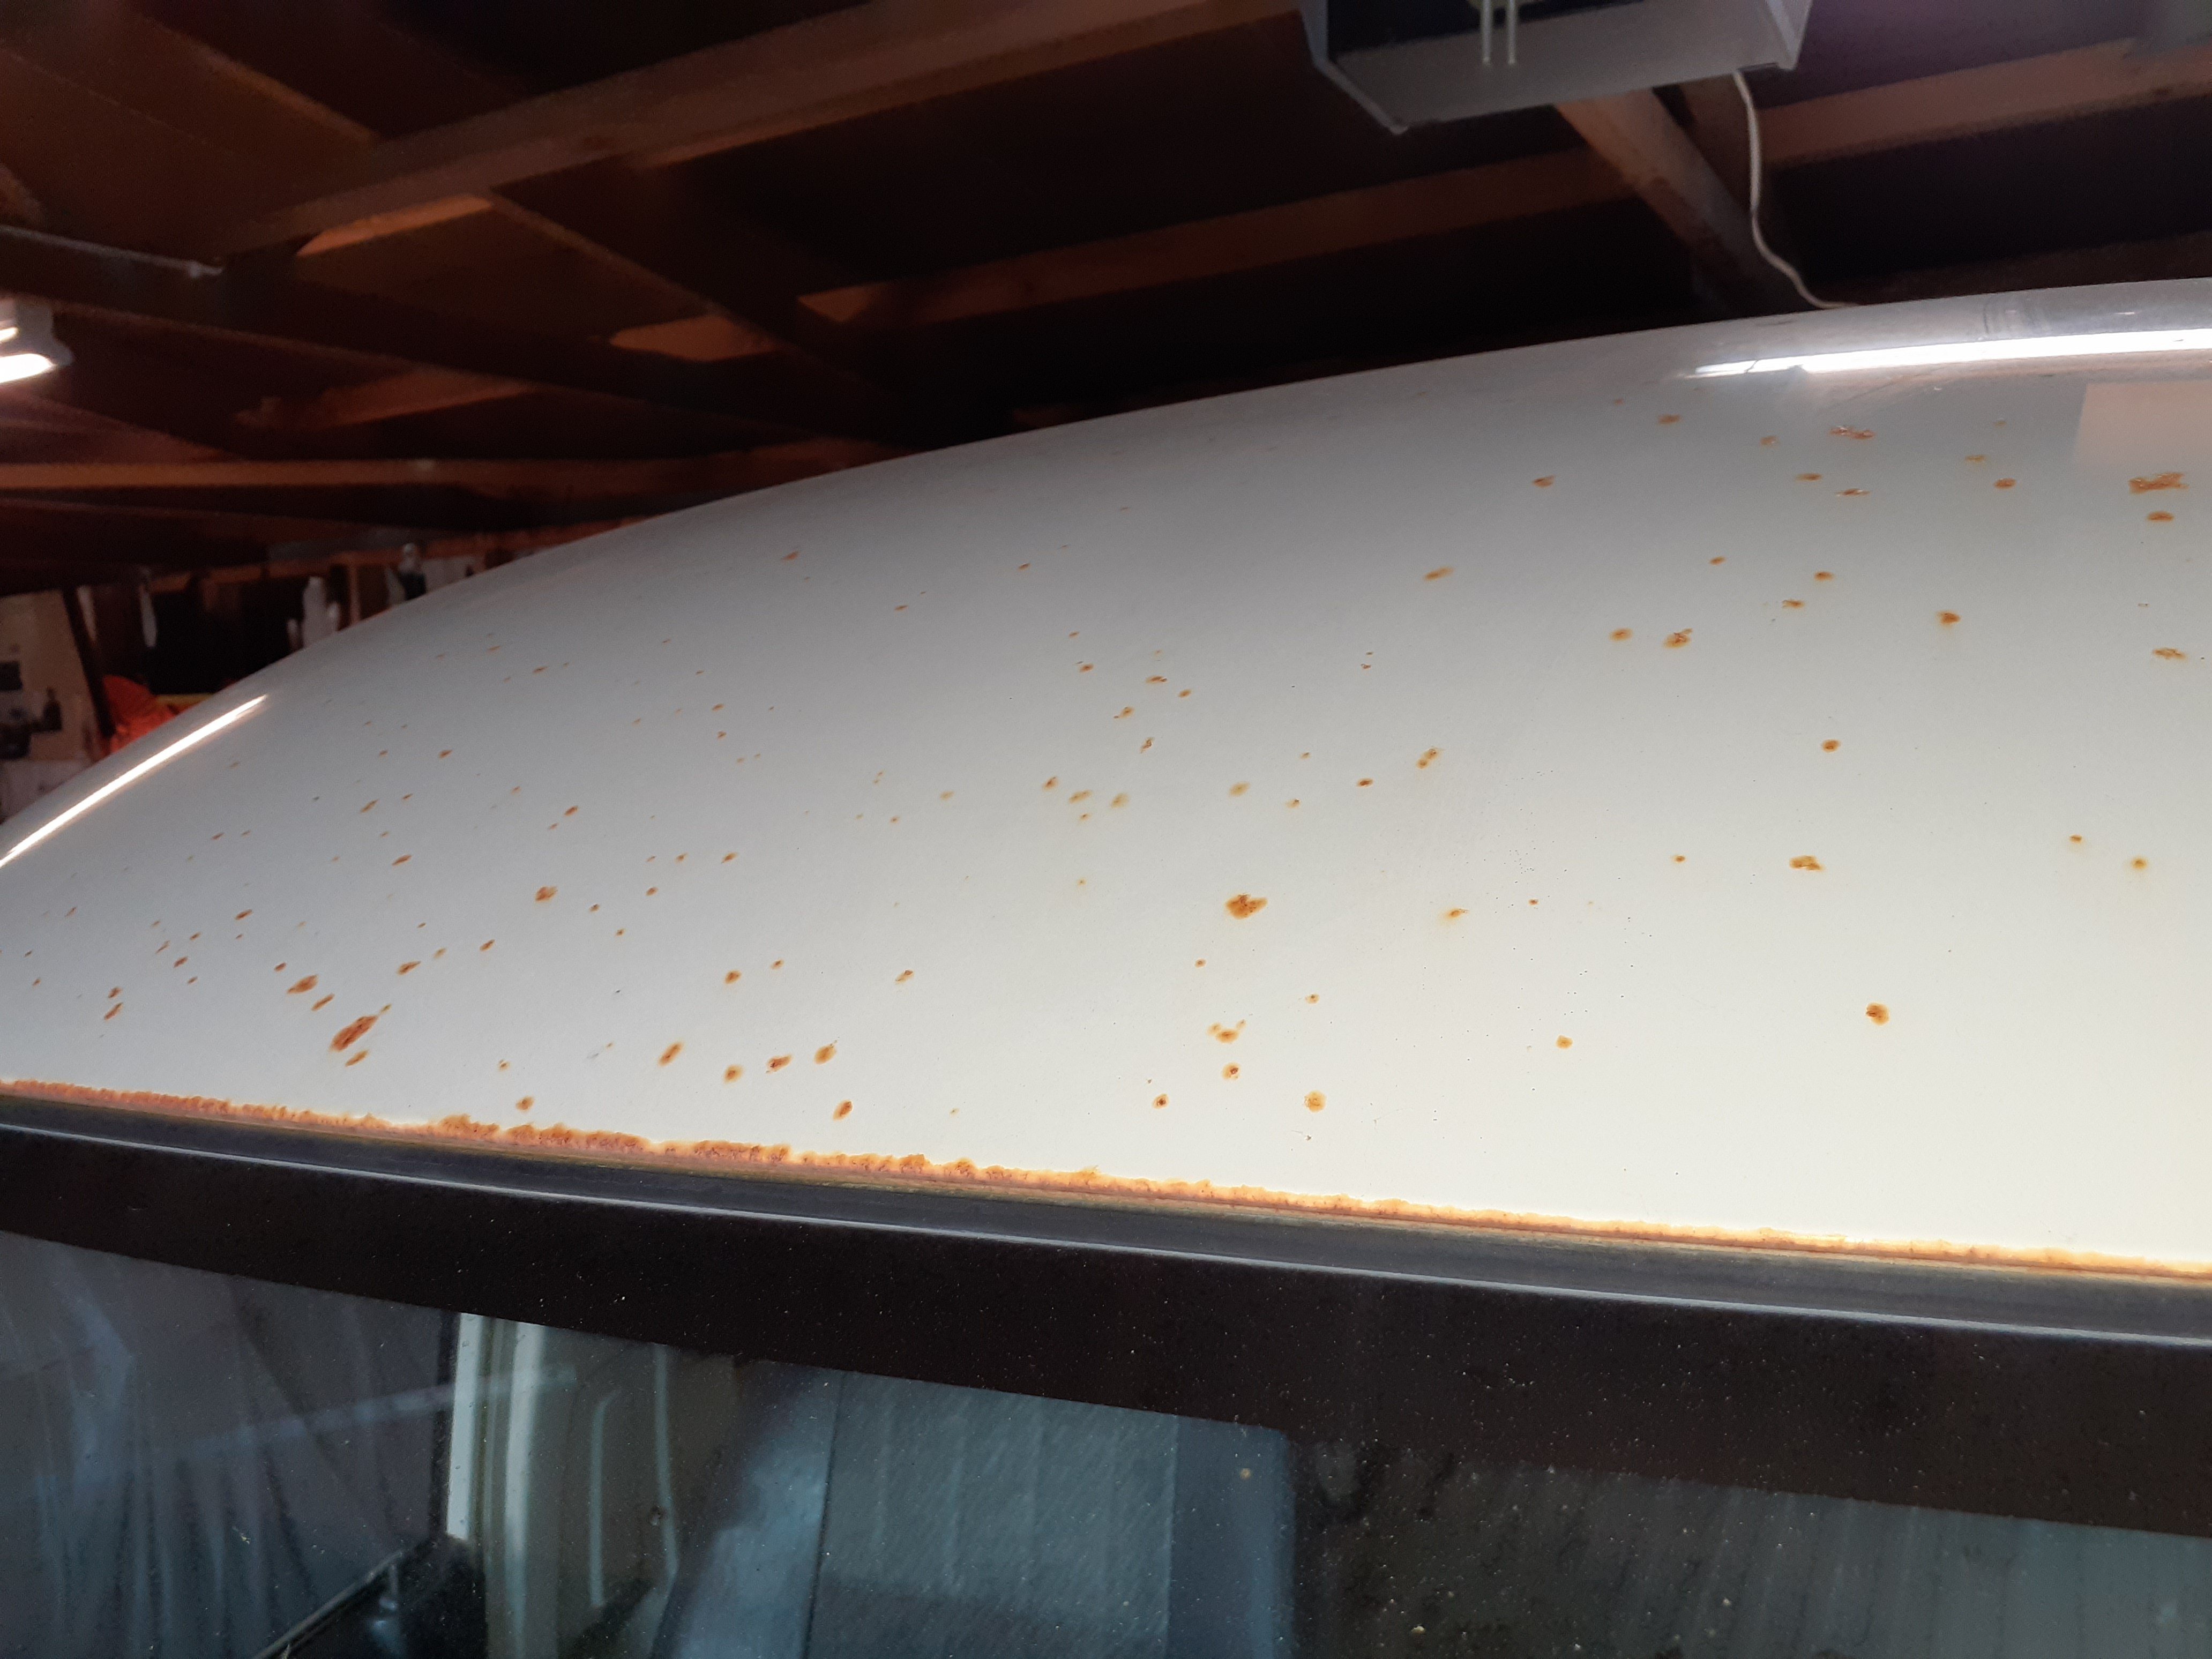
It has some shitty surface rust along the front edge of the roof and a lot of rusty stone chips on the roof, that was the main reason for painting it to stop all that getting bad The rest is not too bad but every panel has some small issue so want to tidy it all up
1 point
-
This is how people start fires at govt agencies1 point
-
Why have you got 2 engines you greedy ho.1 point
-
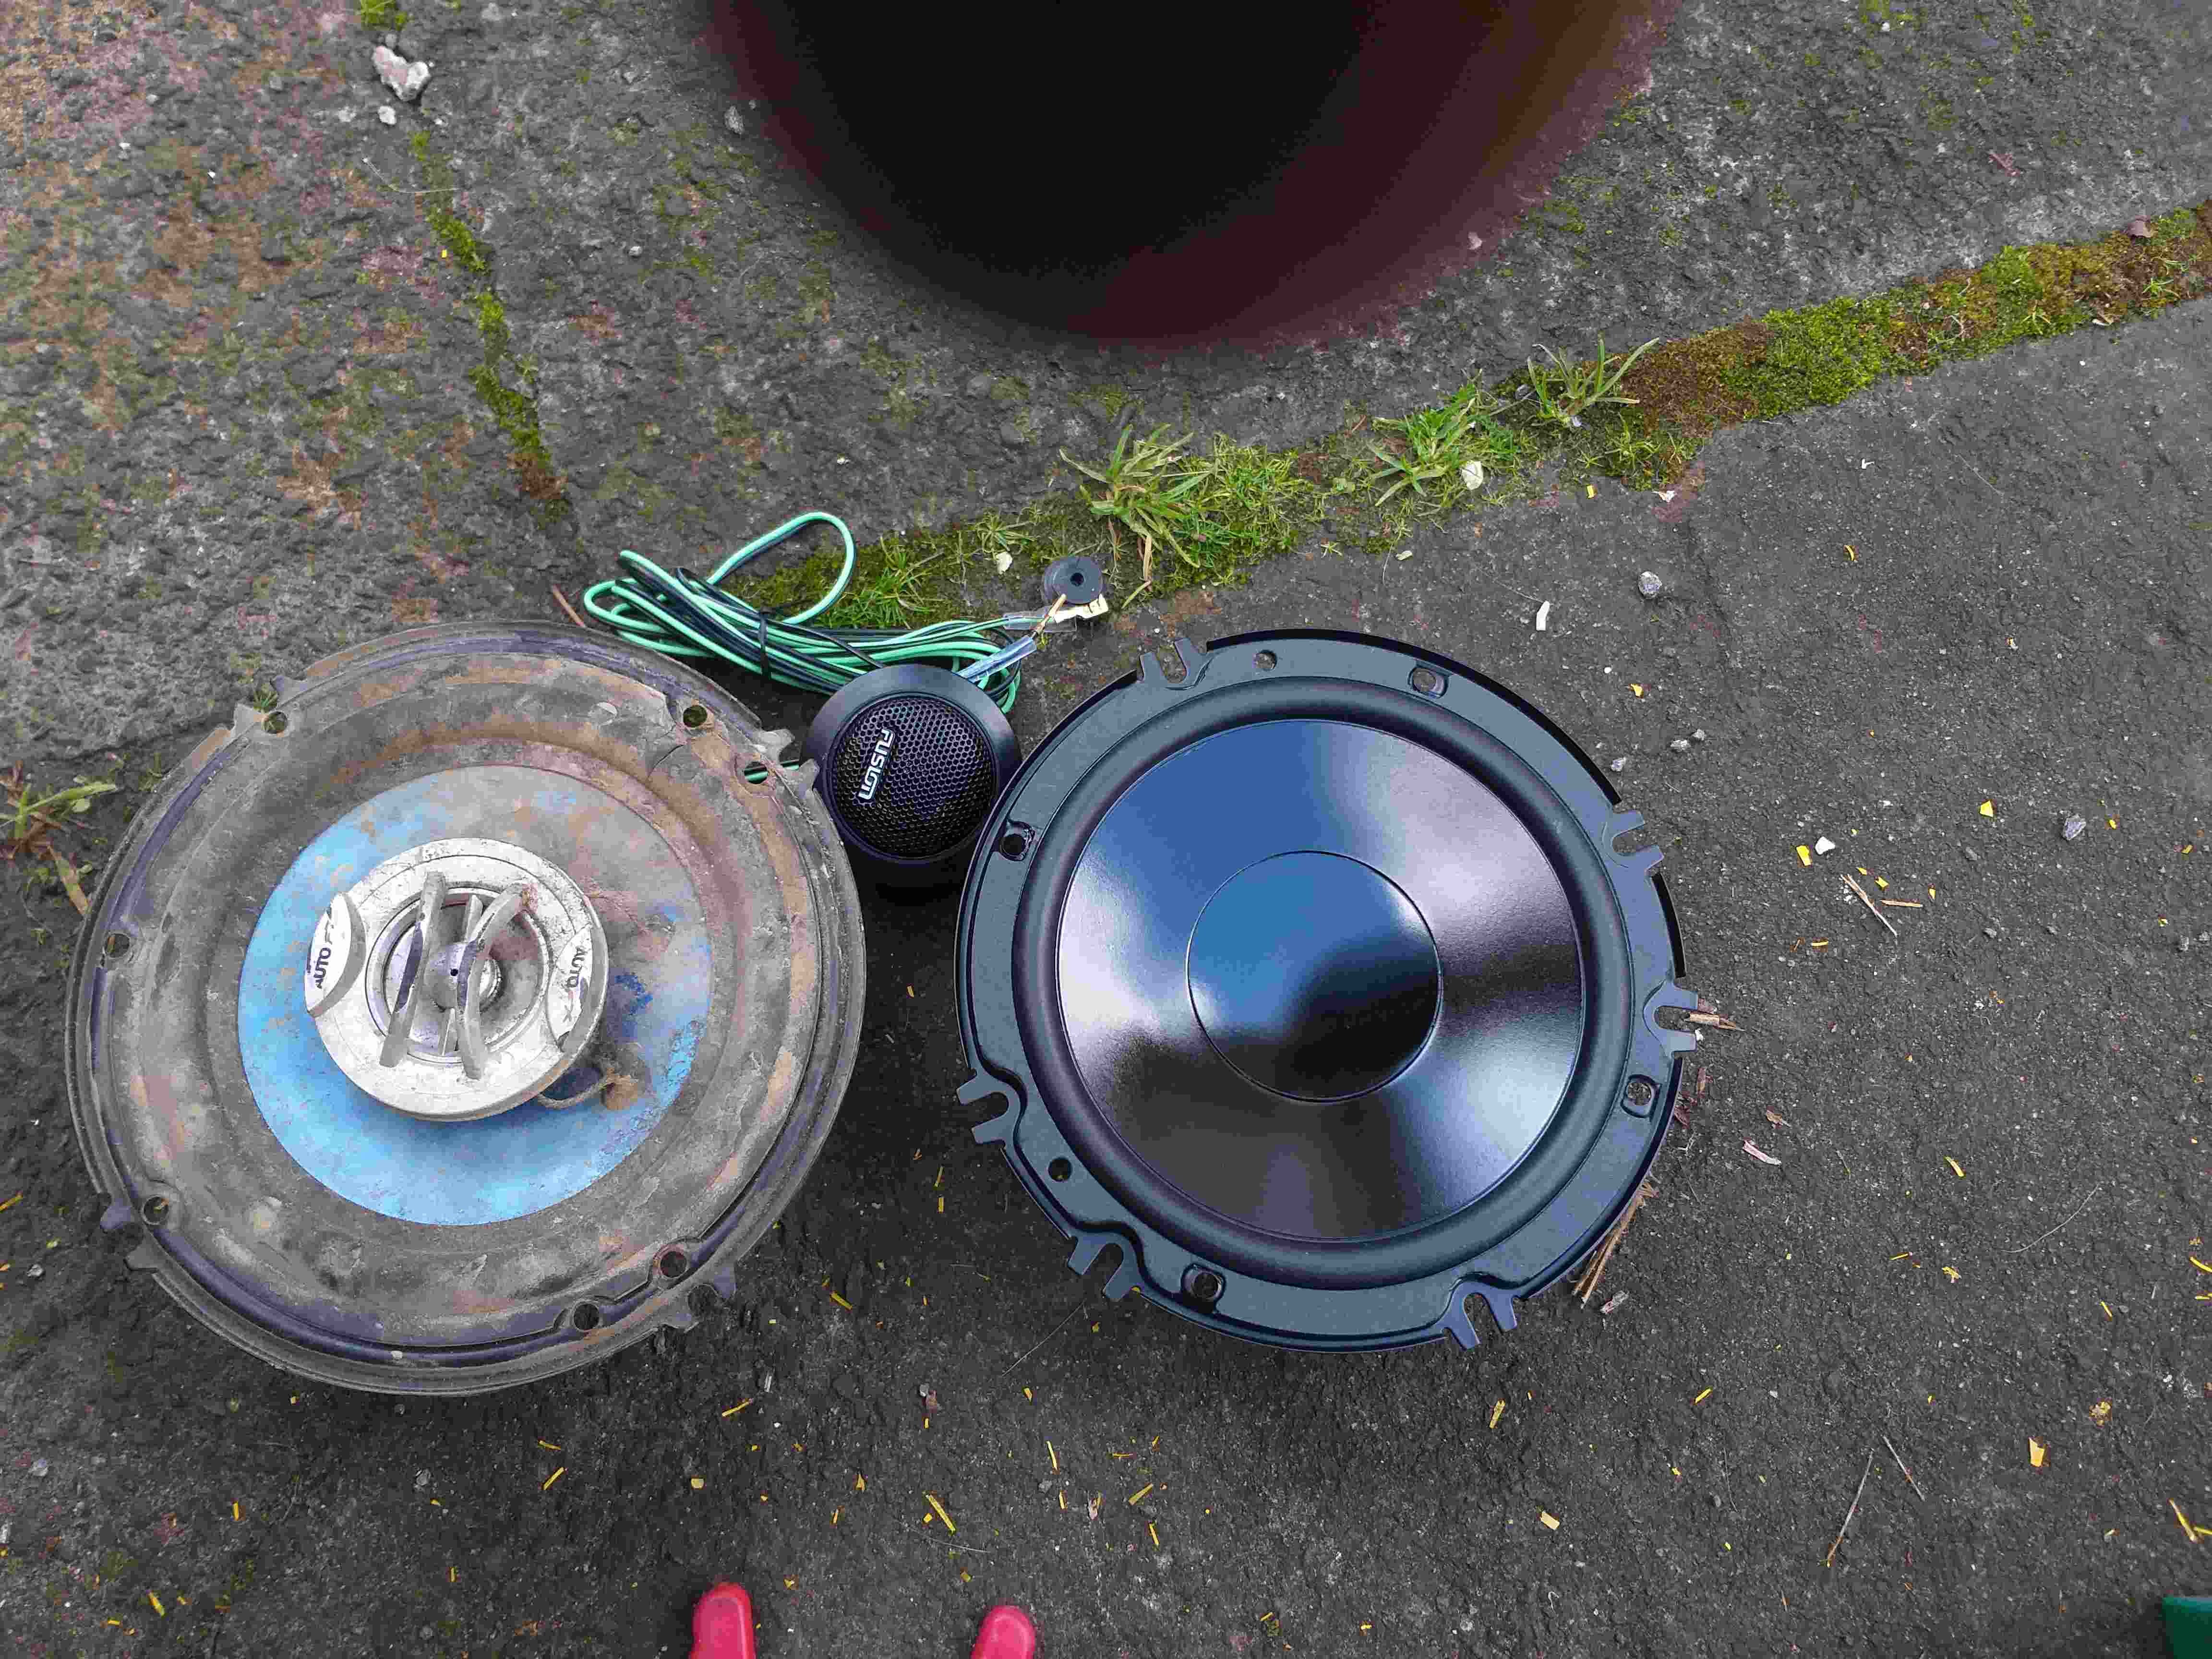
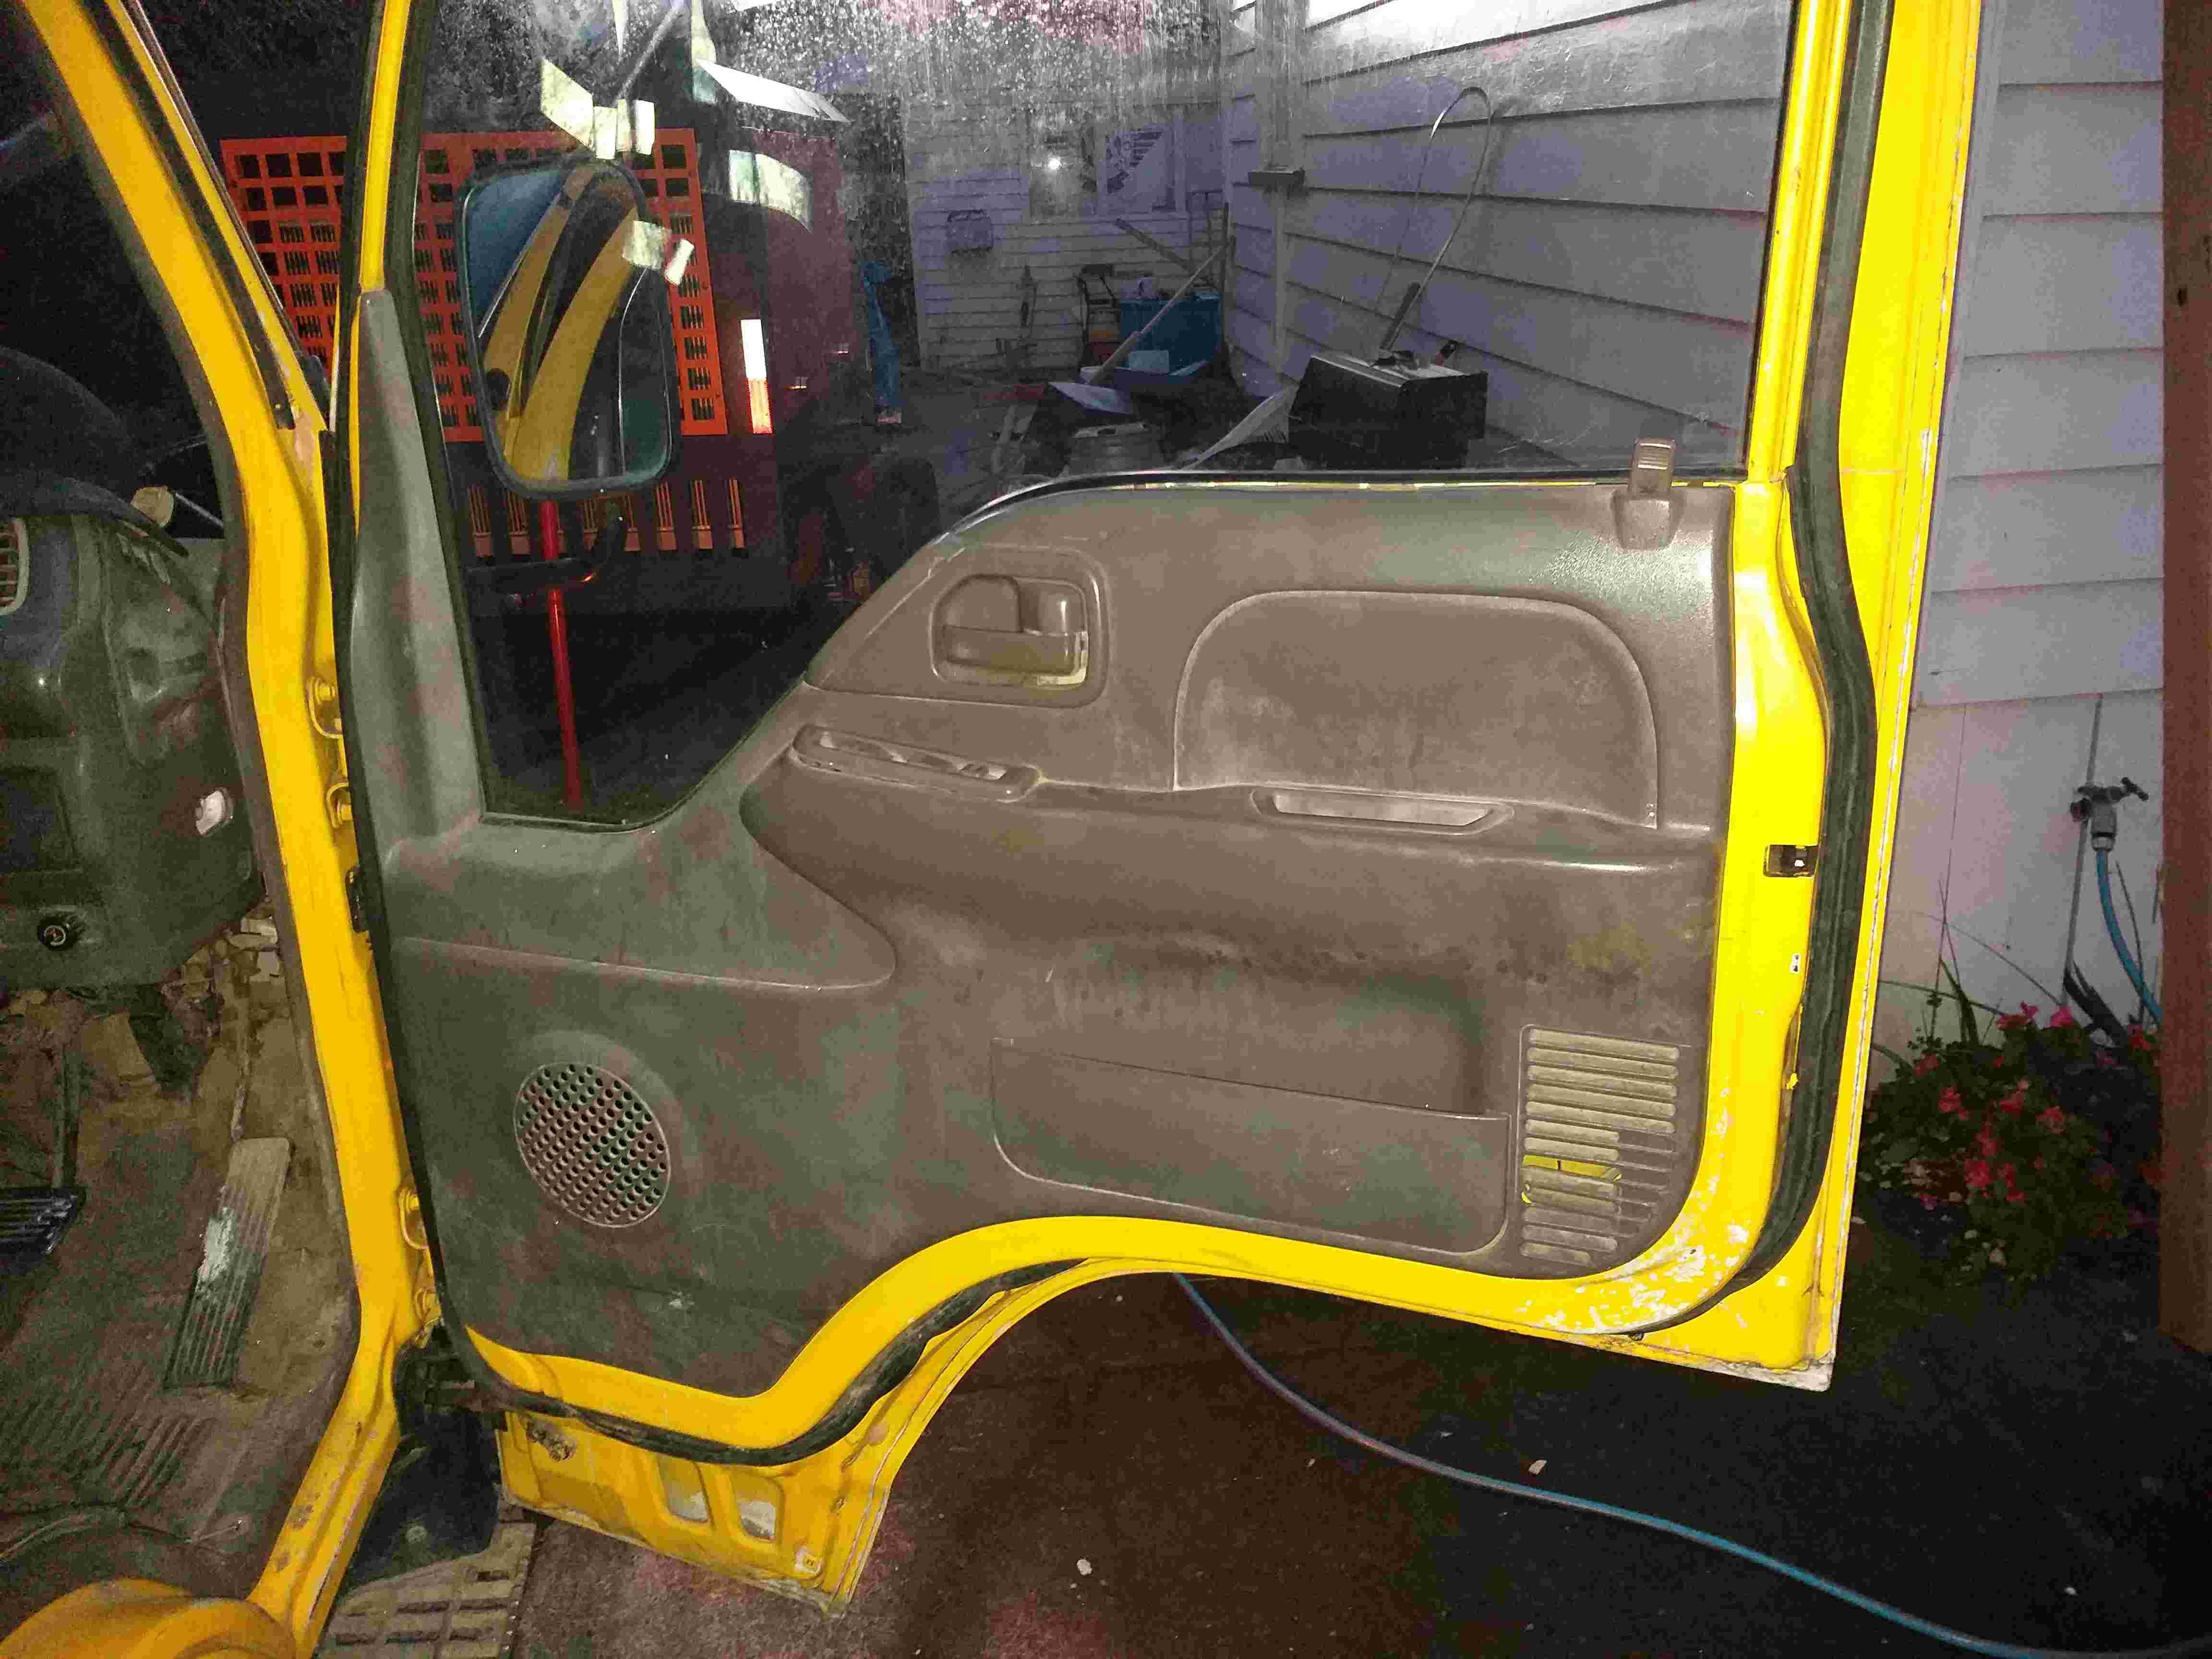
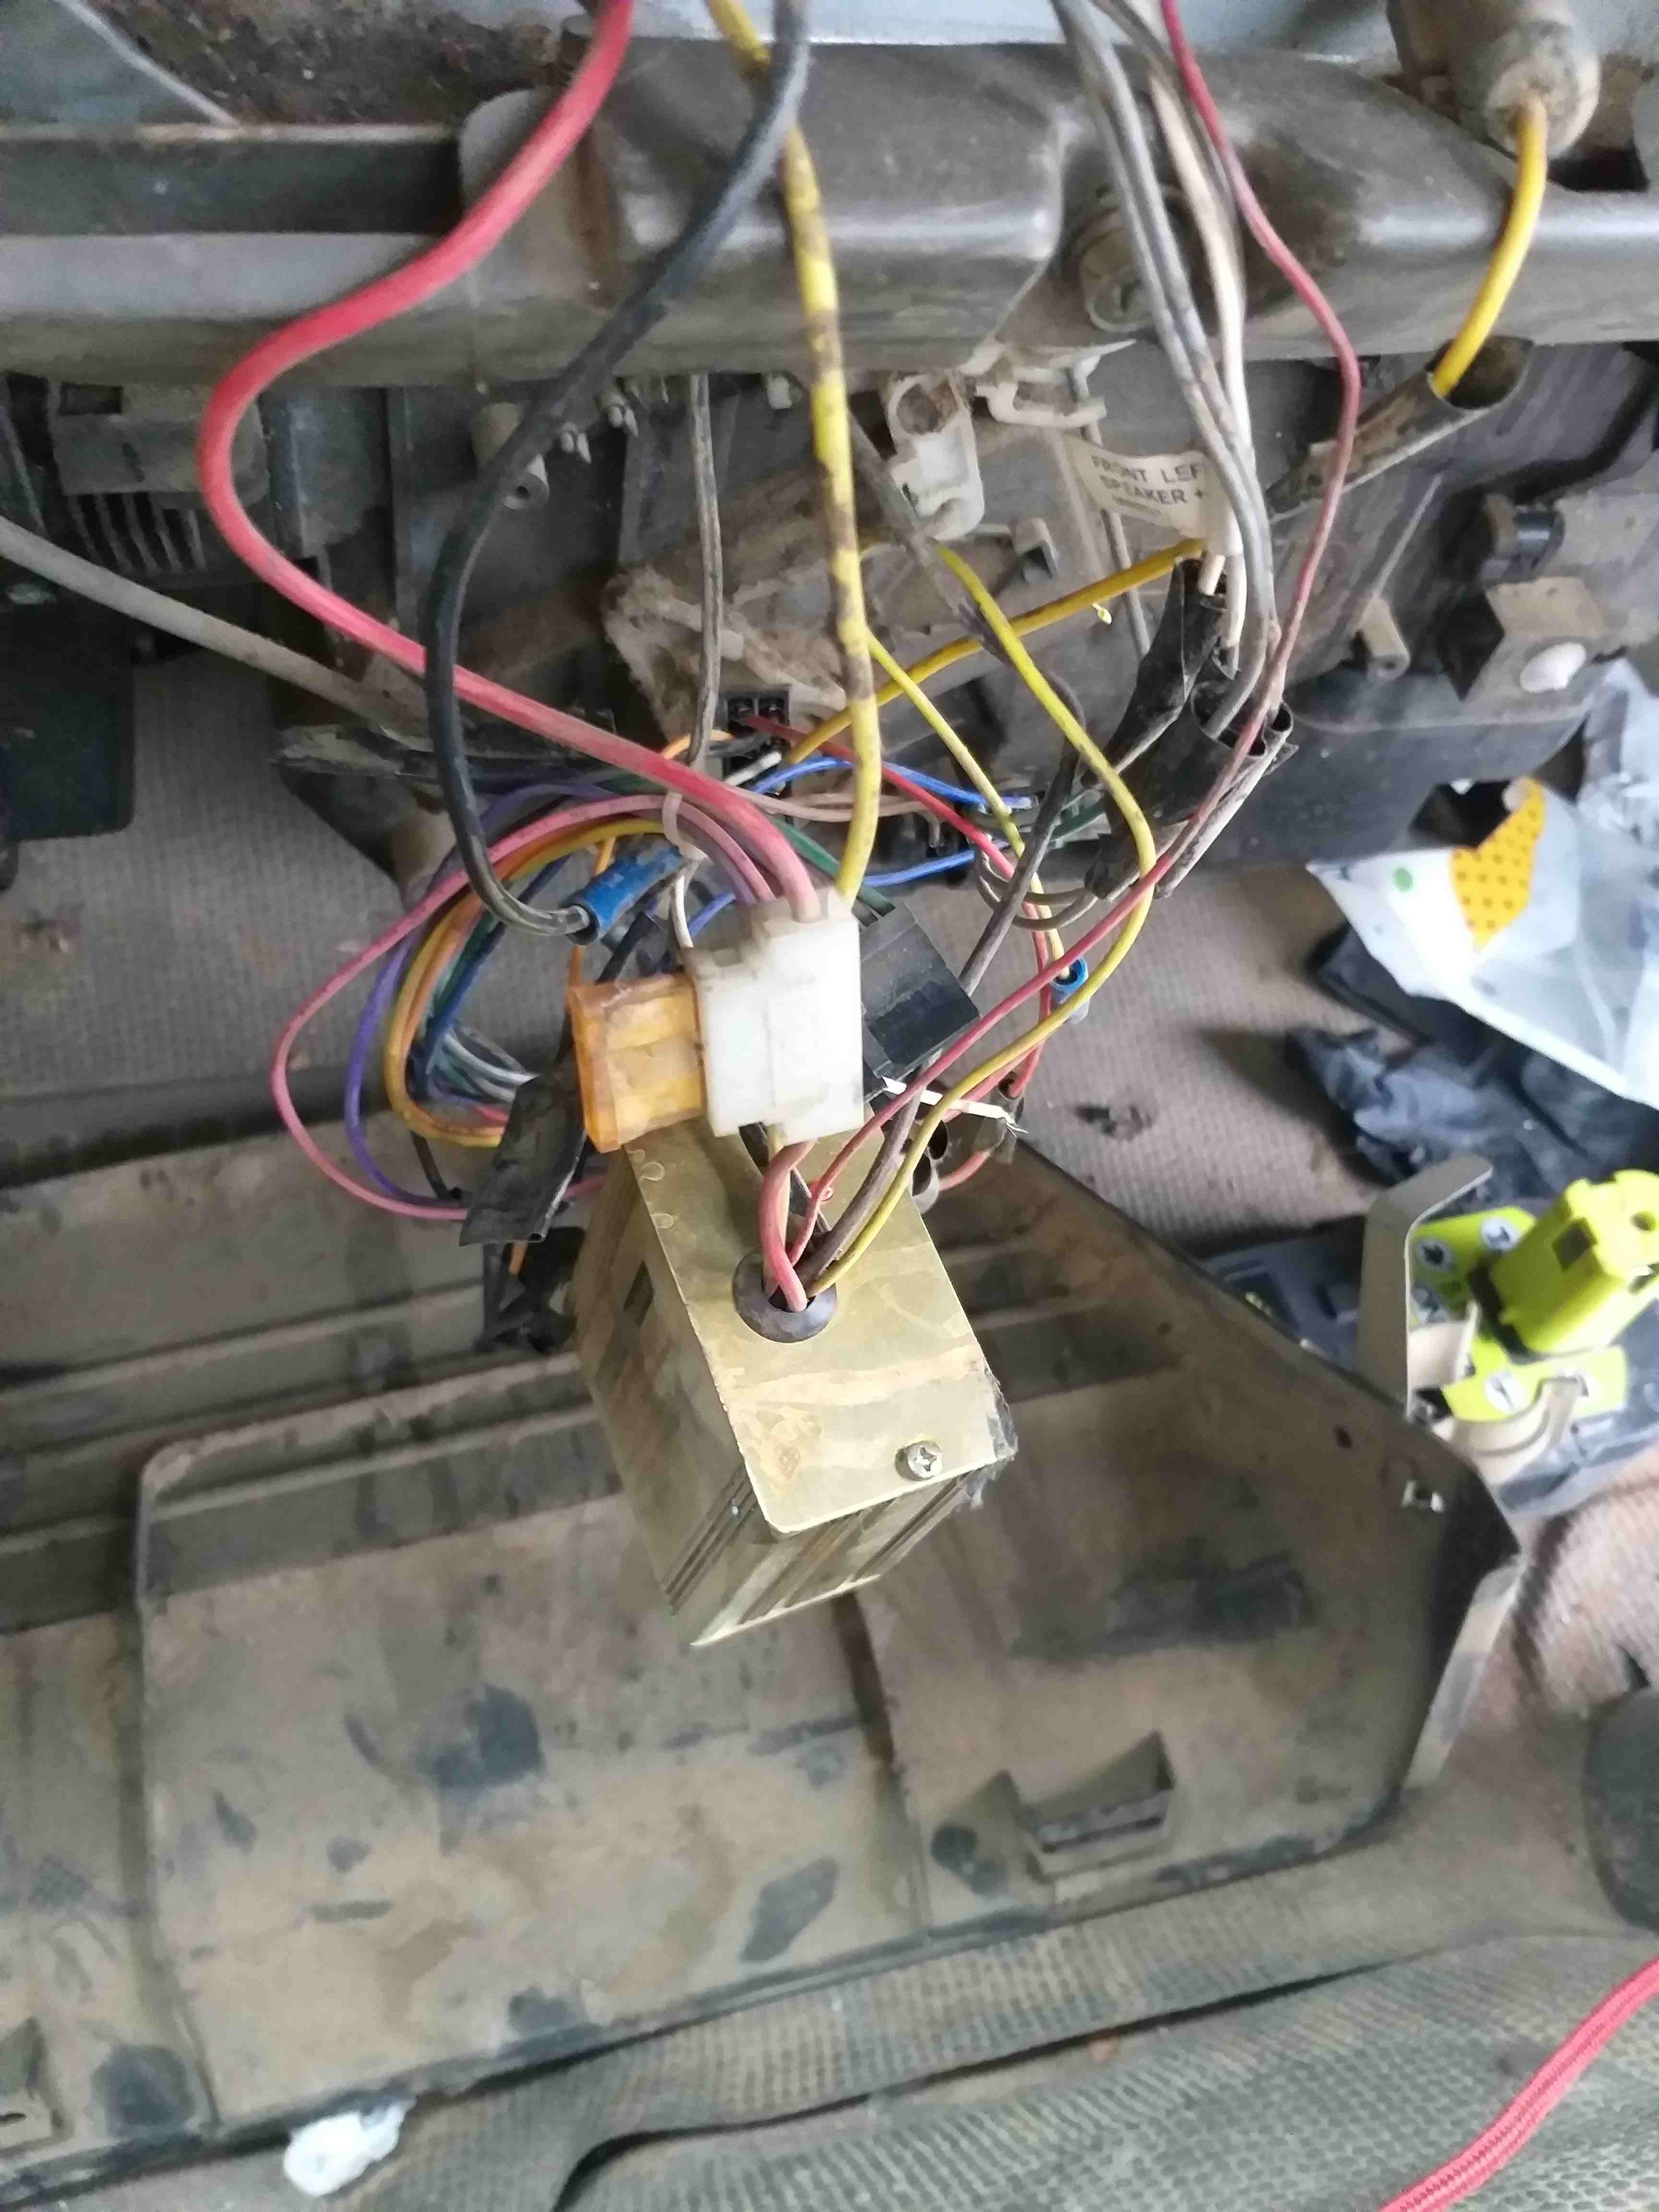
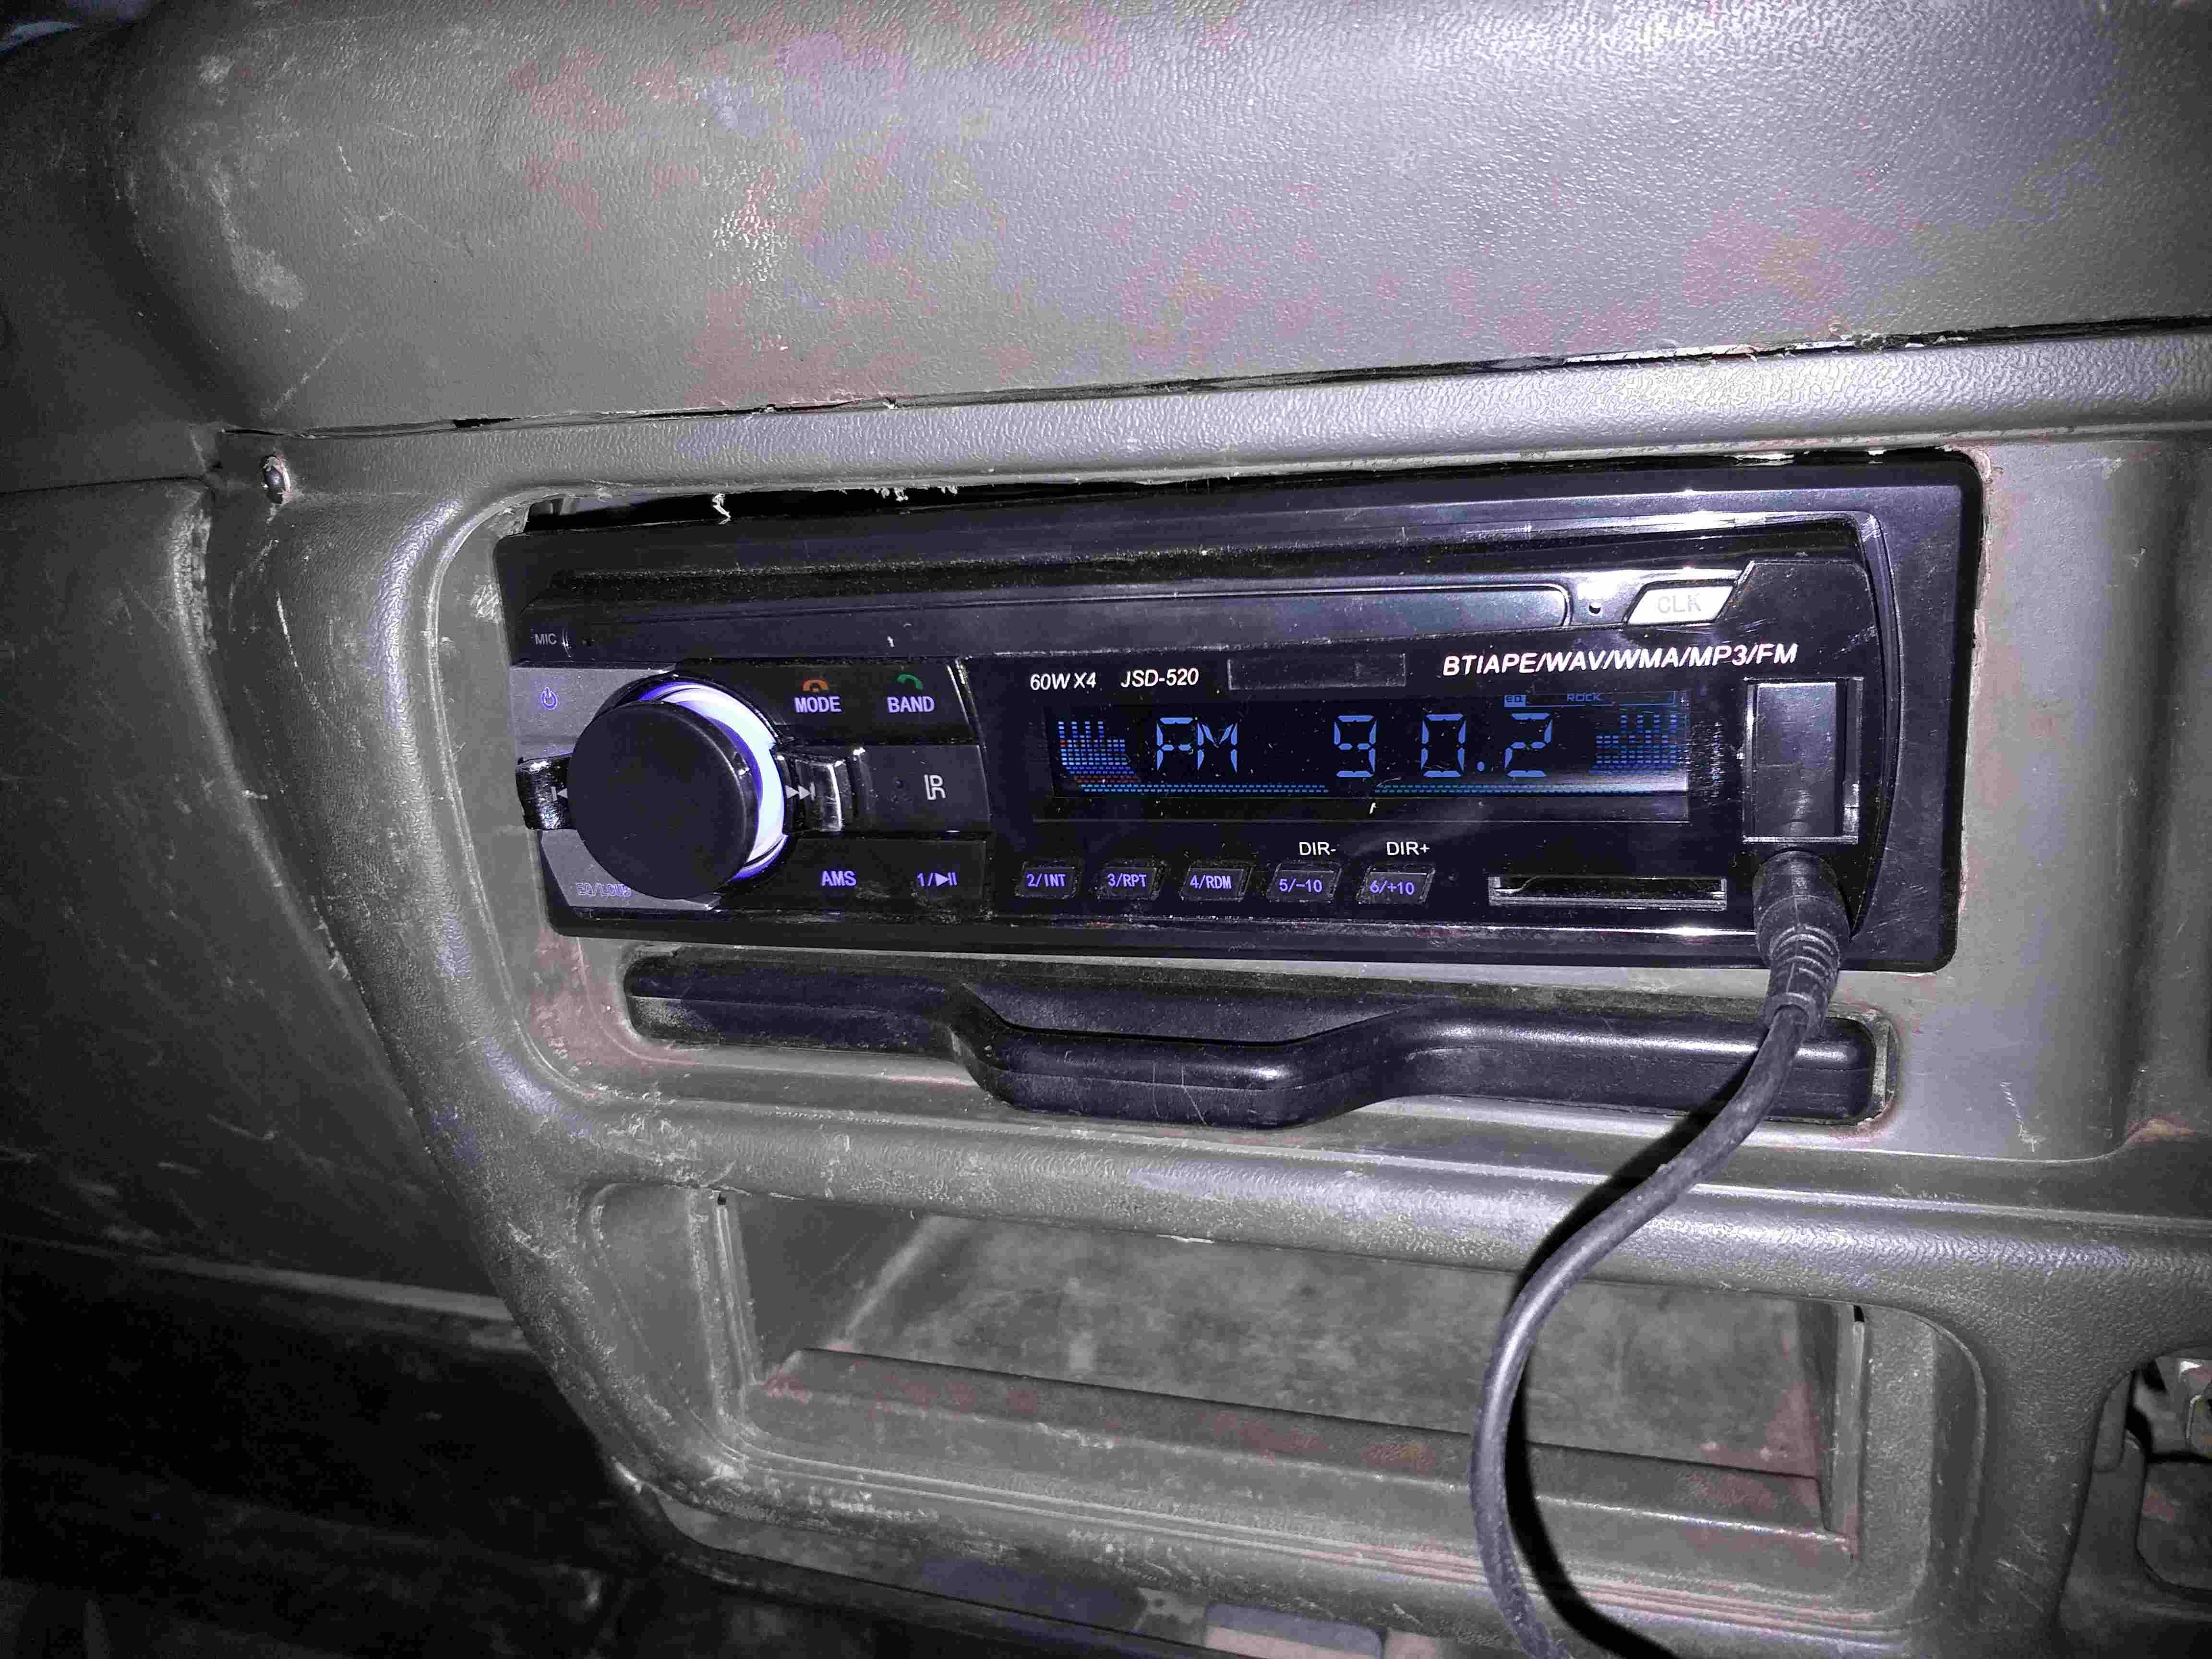
So today I got cracked in the head buy a rampaging concrete drill as I was making a big hole is a wall. Got sent to the Doctor and he said go home an rest, but don't go to sleep. My standard mode set so if I stop and simply lounge around 8/10 times I will have a nap. So I decided to make a start on the truck. a set of fusion component speakers arrived this week. just 58 delivered of the tard. out with the old and in with the new. when j pulled the door panels off I found all but 2 clips wer missing or broken. luckily I brought a a bag random clips off ali. will be very handy. boring pic but I'm stoked the door is back togeather and the rattles are gone Got a cheap $30 radio offAli. Found a 24_12v reducer under the dash. good to have but the radio I got is 24v so pulled the reducer hoping it may stop my battery drain issues.
1 point
-
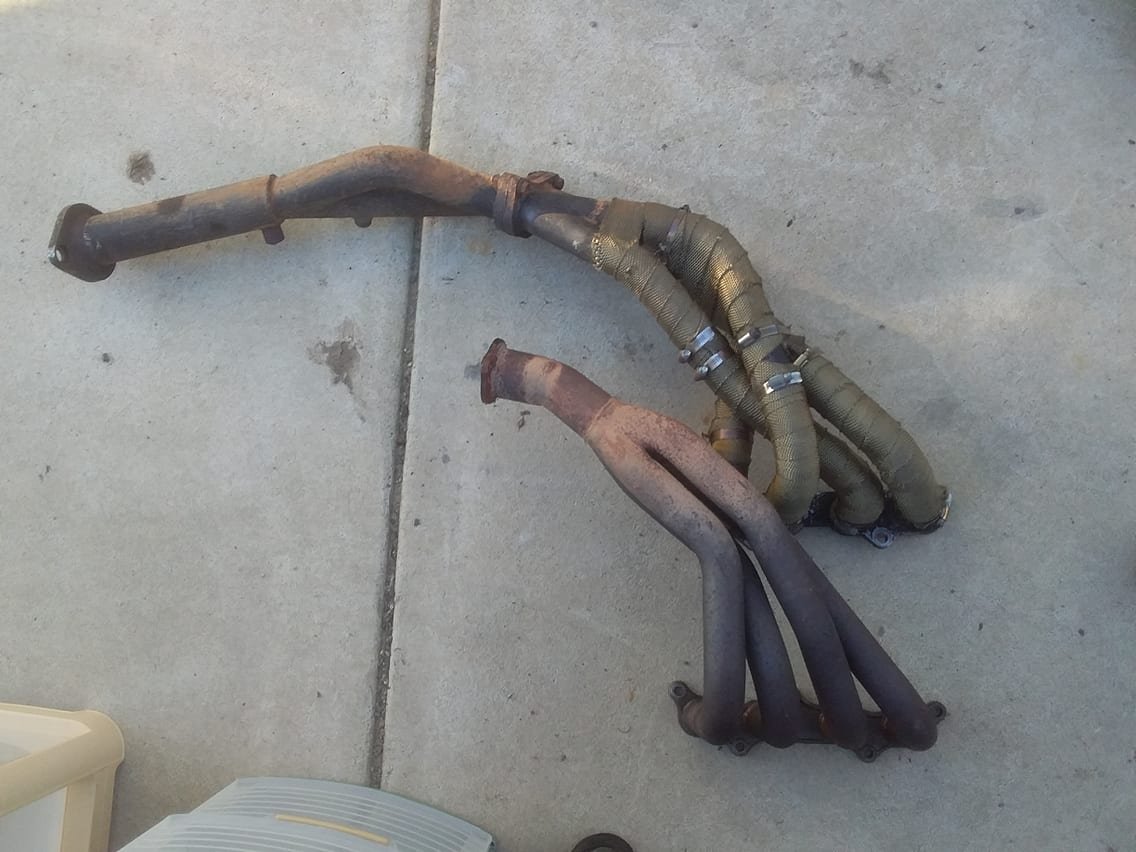
Ramble #3: Since forever, I've always had this exhaust manifold on which is a copy of the HKS 4-2-1. Altezza manifolds sit super bloody low when swapped into different cars, so fitting the likes of the beautiful TRD pipes is problematic. With the HKS pipes, the 4-2 section finishes right down by the firewall, which meant I (by which I mean someone competent, Denham) could cut the 2-1 pipes and reangle them to suit. I've always wanted to see how a 4-1 manifold would respond in comparison but I've always thought there's no chance of making them fit, and it would be difficult to modify. But since I'm currently redoing the engine mounts, I could tip the engine over to suit fitting factory Altezza options, and then I'd have more things to play with. So had a look around and I found a shitty looking second hand FGK 4-1 manifold. The FGK site says that over the factory manifold, dyno back to back swap to standard. It gains 7hp and more torque at a lower rpm. When I went and picked it up, I chortled at how bloody tiny it is! It's only 7kg and has really neat cast flanges which dont have any material where it doenst need to be. Ideal. The HKS 4-2-1 vs the FGK 4-1: The 4-1 isnt even as long as the 4-2 section on the HKS one haha. So I can have a nice transitioning bend to the under the car part, rather than my 2-1 section which has been chopped and angled about 10 degrees maybe, right by the flange. probably not ideal. The weight difference is massive though! I'm going to design my mounts etc so that I can fit both. So I can do some comparative nerding and see whats best. I'm thinking that perhaps with exhaust side VVTI now, some of the downsides of a 4-1 design (narrow high powerband) can be mitigated a little by moving the cam around. It will be interesting to see if any improvements to the powerband from the exhaust, happens because of better cylinder clearing of exhaust gas, or other mechanisms... If it's better clearing residual gas, and allowing more fresh air in, then I'll be able to quantify the differences in powerband from each simply by looking at which gives higher airflow numbers at full throttle, via the MAF sensor. I've never had any changes to the exhaust side while I've had this ECU so it'll be interesting to look at what changes. (or not)
1 point
-
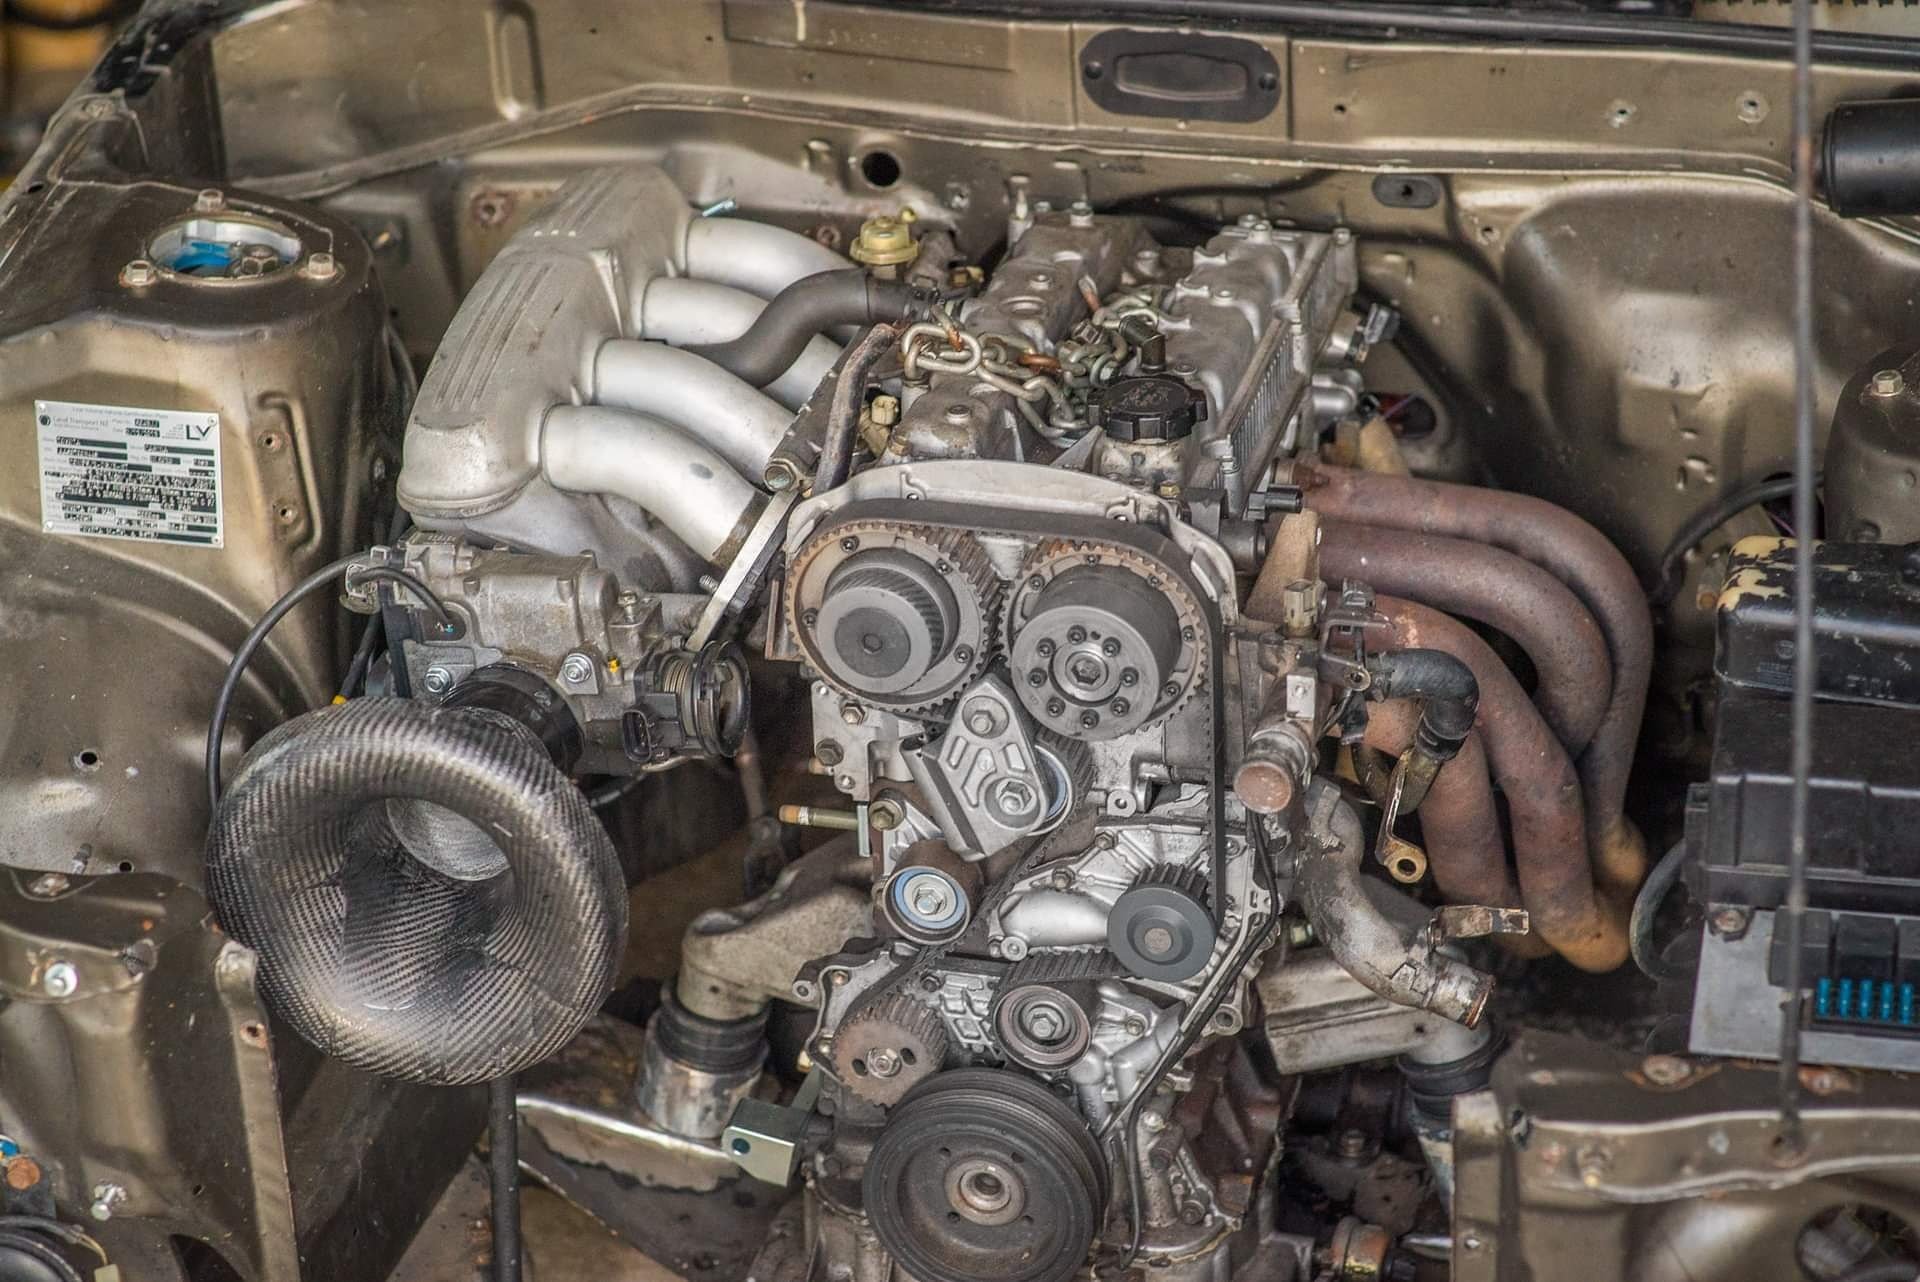
Next thing - My redtop engine has finally started to make an engine rattle that I cant diagnose without taking the head off - and I cant take the head off without taking the cambelt off. I cant take the camblet off, because I've ugga dugga'd the front pulley onto the crank because I stripped the threads on it doing something stupid. So this is all a big enough clusterfuck to warrant switching over to the dual vvti engine that I've had sitting in the corner for a while. Putting this in has a few advantages, that I think I've already blathered on about. It's lighter, more powerful, tidier, and less complicated. win. Redtop engine had sentimental value as it's taken a hammering for a long time but it's earned its retirement! Rather than just doing a basic engine swap and getting the car running with minimal effort, (pfffttt) I've scope creeped this into oblivion by deciding to push the engine back as far as I can in the bay and will remake new engine mounts, gearbox mount, exhaust, driveshaft to suit. This has a bunch of benefits, mostly to do with weight savings: -I can ditch my gigantic heavy swaybar for a normal one, so no big loop around front of the engine. -Oil filter will finally fit properly! This has annoyed me for at least a decade. -Switch to alloy Altezza mounts which save a fair few kg over the utterly shit spec factory 1S mounts. -Switch to a pedal box so I've got space for the intake scheming, and get some better brake balance at trackdays. -Tip the engine slightly to one side, so intake is lower and exhaust is higher. so both fit better. -Engine as far back as is practical without cutting firewall etc. -Less engine rocking with some much better mounts, so clearances can be a little tighter. (Better road clearance to exhaust) -considering using a FWD sump with the motor tipped slightly (say 10-15deg) as this would allow the motor to sit a little lower, and the front part of the pan is much further back. -I could now make a strut brace that's dead flat across the top rather than having to bend up over the engine. -Much better alternator location, and a few kg lighter with the SQ engineering kit to use the Vitz alternator. I'm copying Truenotch by using the Landrover mount rubbers, and for now I've 3d printed some upstands while I fiddle with the engine position to see what I can get away with. Hopefully this weekend get some metal mounts made up, and since I live in the Waikato now (morrinsville) hopefully find someone local-ish who can weld the steel ones in place for me. (Should really learn this for myself one day...) Then work on the gearbox crossmember, then I can finalize dimensions for the driveshaft so I can go get a brand new one made up without having to worry about shitty old UJs breaking. The basics of the car will be largely the same, but just pretty much fixing up shitty things I did 10+ years ago when I had much less patience.
1 point
-
Had a company track day today, took the crown for a couple of laps, 100% just for a Photo Op. holy shit its terrible on track! cant corner at speed to save itself, might need a wheel alignment, but im pretty sure its just the chinese tires and nearly 2 ton weight! it did pull a (GPS indicated) touch under 170 km/h down the main straight which i thought was pretty epic for a 2ton brick with a soggy automatic. that little supercharged 1g can really pull! if it didnt over heat the brakes after two laps and wore a better set of tires, there would be more in it, but its unlikely to ever see track work again. especially once the mopar miata is running.1 point
-
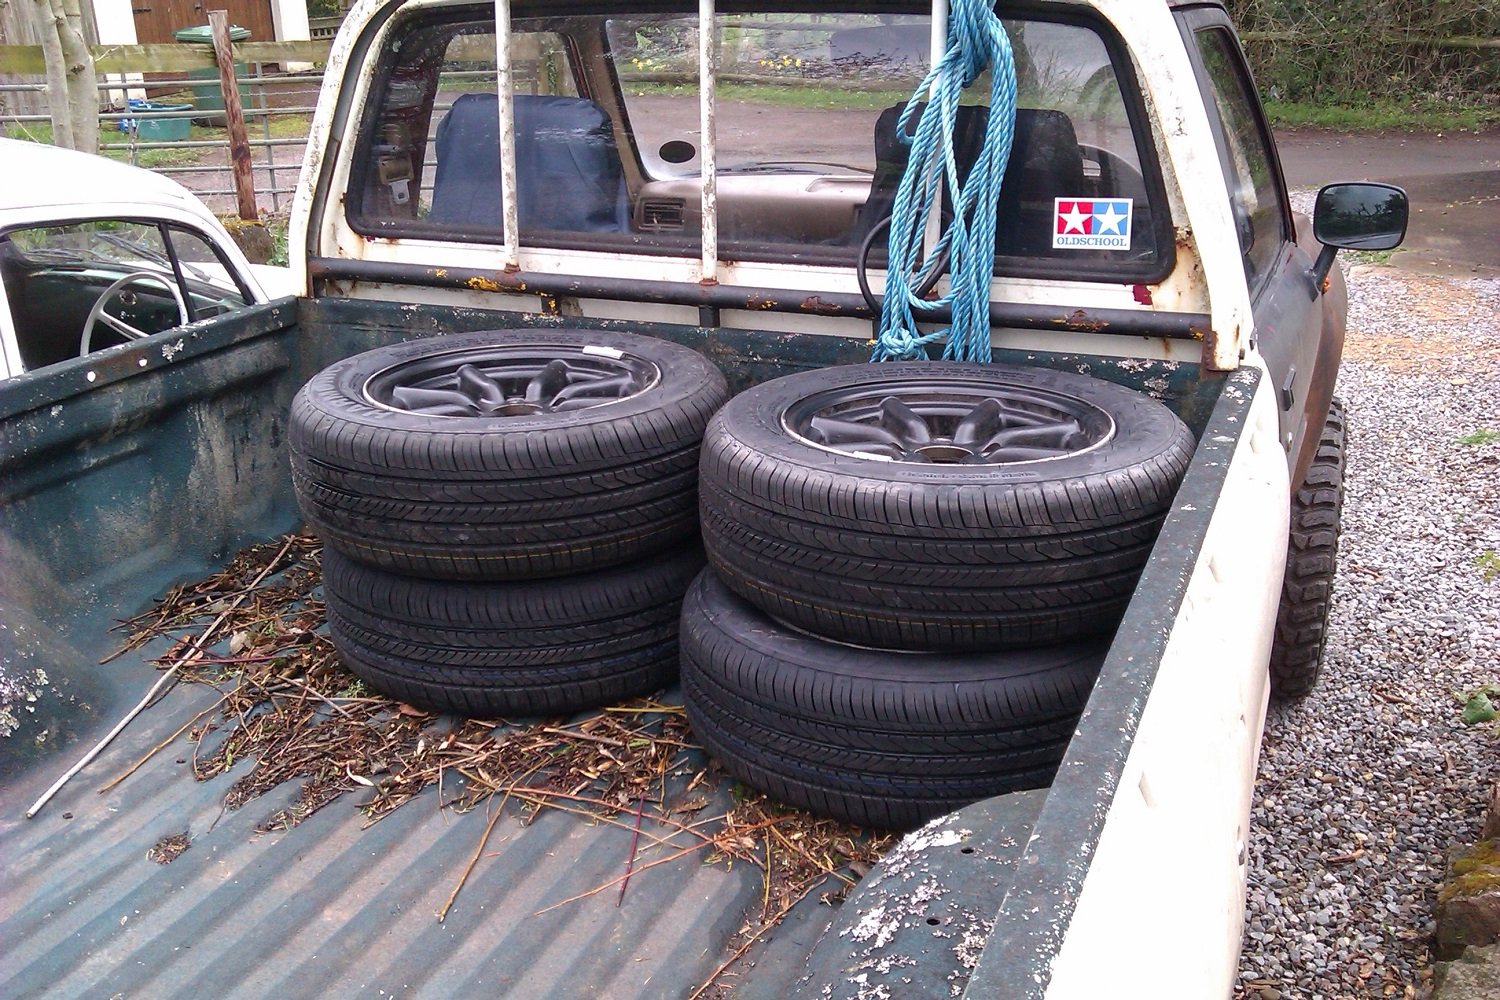
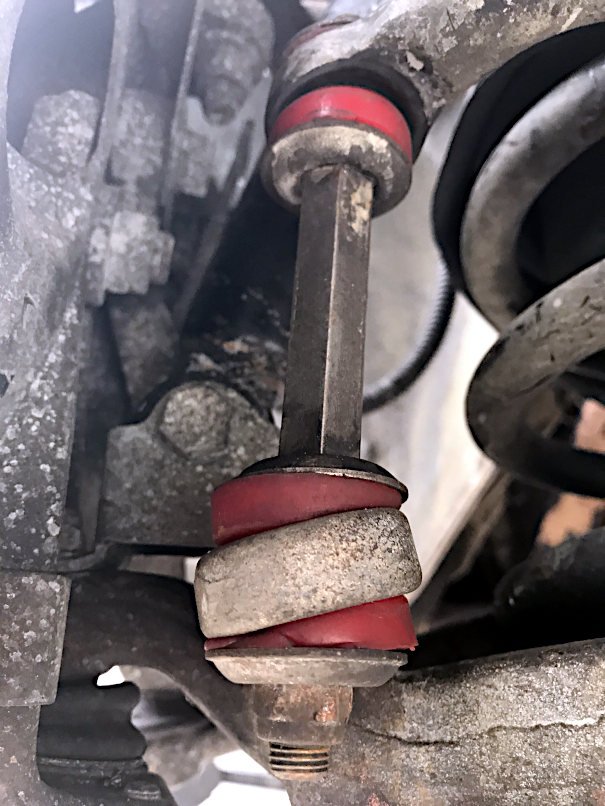
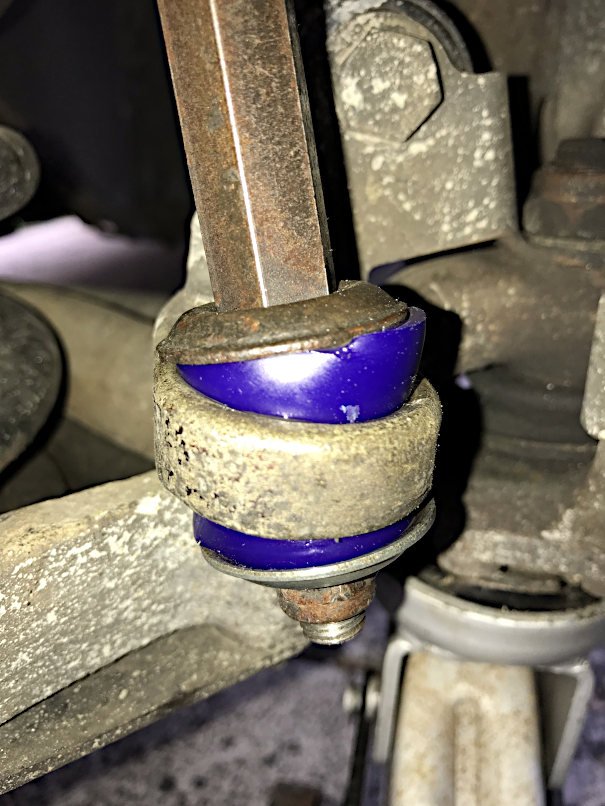
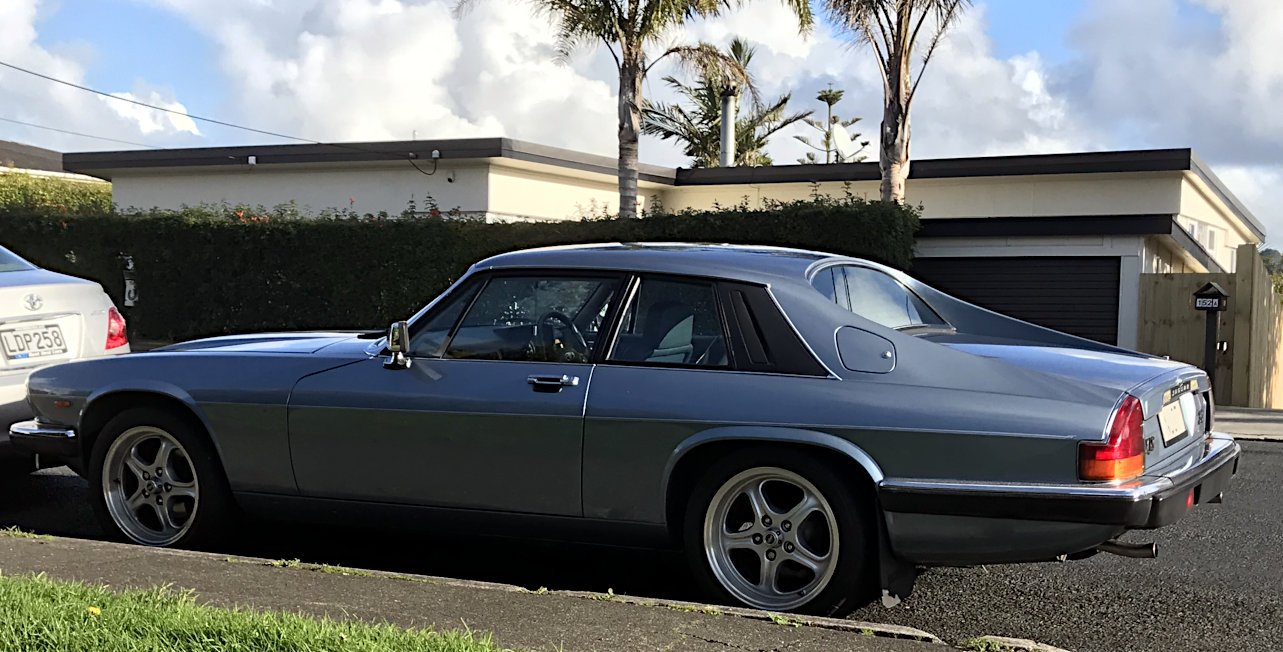
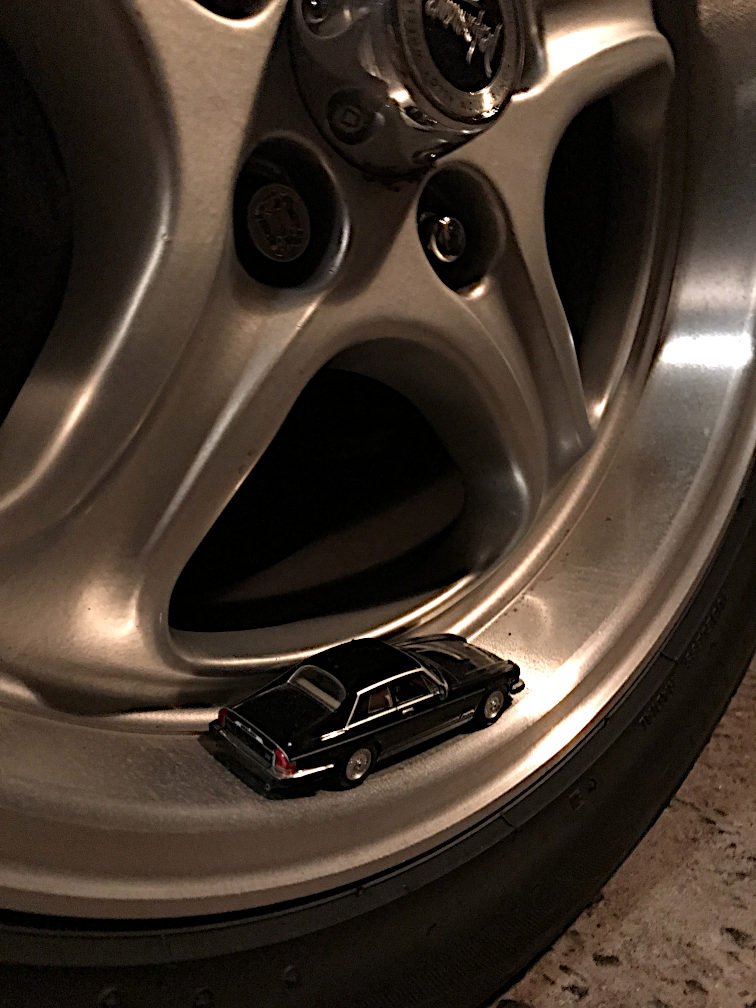
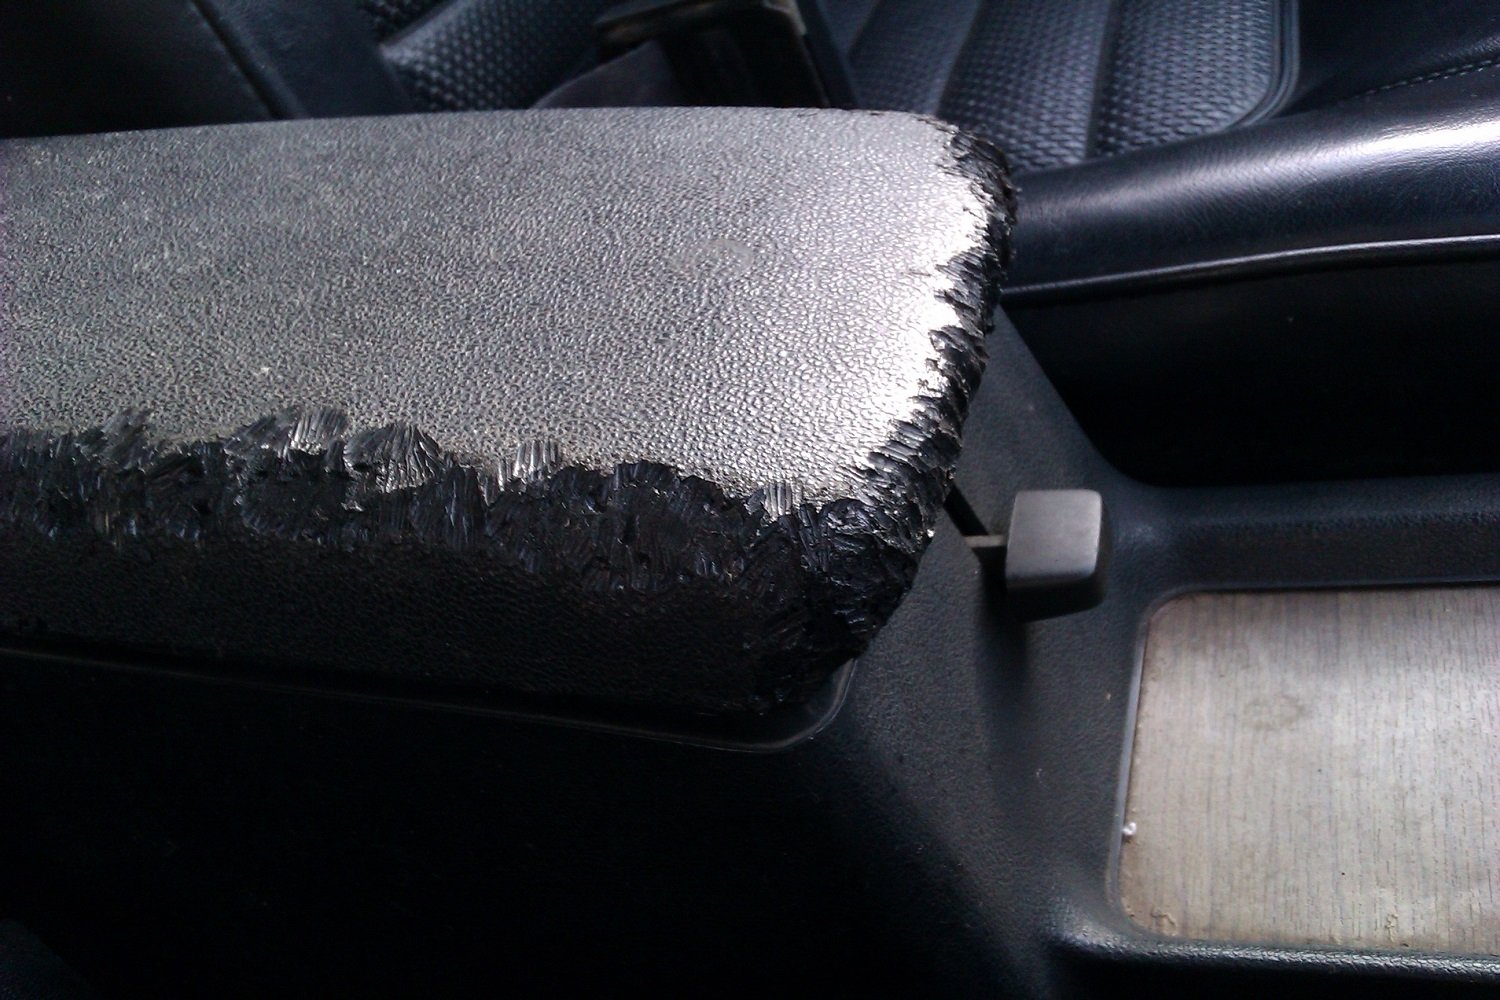
I took the car to the specialists where they rebuilt the power steering pump and rack (which was also leaking). This was not very cheap, but now the pump leak will not damage any more suspension bushes and the rack leak won't risk me failing WOFs. The specialist told me that some of my whines and clunks were the auto transmission (ZF 4HP22), which had good fluid so wouldn't improve without money being thrown at it. One of my rattles was the clips on the airbox - some idiot had taken the front cover of the airbox off for extra induction noise and hadn't figured that the resulting loose cover clips would rattle at certain engine rpm. Another rattle is either the engine fan clutch or the water pump, so I'll look into that myself at some point. I got new bushes for the front sway bar drop links. Here are the old bodged ones which are too thin and too large in diameter: And here are the new ones which don't really look any better! Oh well. Apparently you can get spherical bearings to replace these bushes if you're hardcore, but I think I'll pass. Anyway, the Jag specialists got someone to do my wheel alignment after they'd rebuilt the steering rack. This resulted in improved steering self centring, but the feeling of square wheels at 40kph and the vibration at 80kph did not go away. So I started looking at replacements for the Linglong directional tyres which were on my car when I got it. Other than more Linglongs, the only other tyres available in the right size are reproduction retro hotrod stuff - BF Goodrich Radial T/A, Cooper Cobra Radial G/T, Hercules H/P 4000, Galaxy Radial G/T... all tyres that OS report as being a bit average ("harder than a whore's heart"). I looked at going to wrong-sized tyres on the stock 15-inch mags, but this doesn't expand the tyre selection much. Jags of this era have a bolt pattern of 5x4.75" / 5x120.65, which is what a lot of old GM cars used. This means most aftermarket wheel choices are stuff like Cragar SS / Torq Thrusts which look wrong and/or only come in small diameters. But then some 17-inch "Performance" brand wheels came up on TradeMe, so I grabbed them. The seller had taken them off his old Jag to upgrade to 18s, so I knew they were gonna fit my car. Surprisingly, I could buy wheel nuts off the shelf at Repco with the right imperial 1/2" UNF thread pitch and tapered seats. I just threw the wheels straight on with no issues. I didn't have to take the dust caps off the front hubs to allow the wheels to fit as the seller said I might. I haven't even noticed the wheels rubbing so far. The fronts will be easier to clean than the original lattice design, even if the rears look a bit weird with no brake discs visible between the spokes. Dish photo! The improvements and compromises are all as you'd expect. The Potenza RE002 tyres on the new mags are obviously an improvement. Their lower profile doesn't magically give the XJ-S any steering feel though. I can't benchmark the lateral grip against other cars I've owned - when going around my 180-degree test curve, the Jag's speedometer reading decreases significantly for some British reason, only to increase once I straighten up again. Also, the vibration at 40kph may be gone but the one at 80 remains. Back to the drawing board.
1 point
-
noisy version of above1 point
-
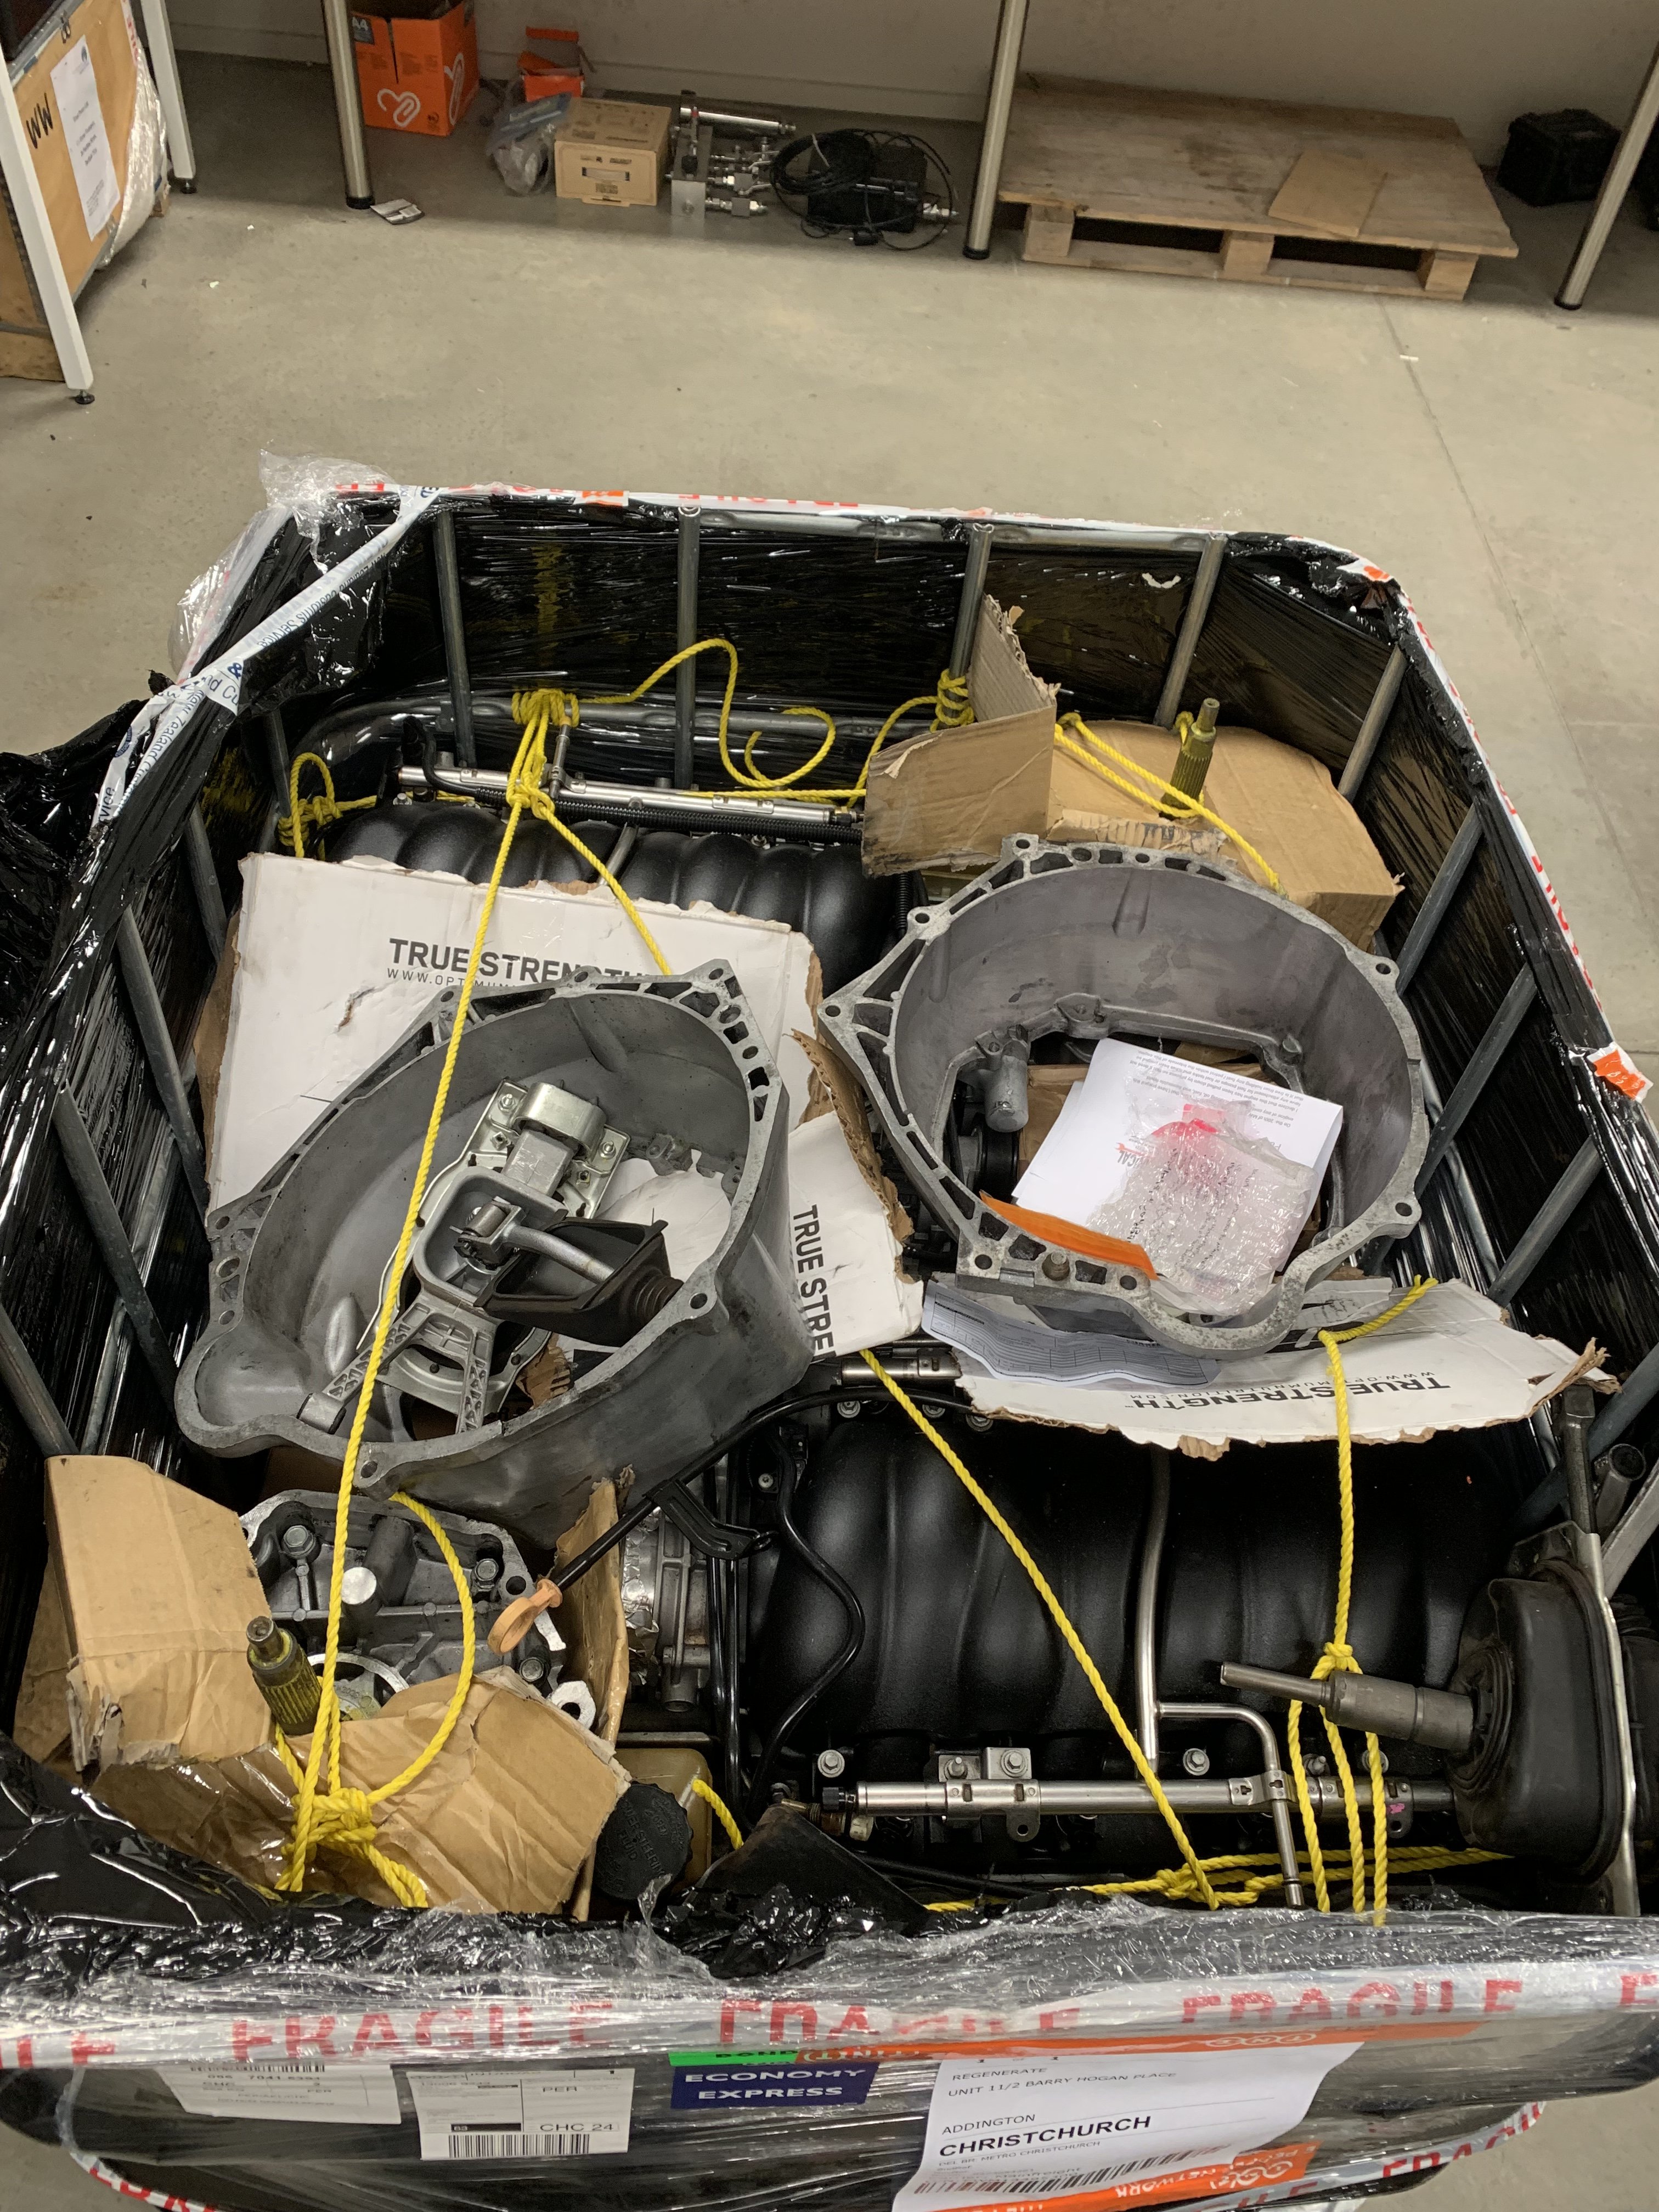
Finally, engines have arrived!
1 point
-
It will sort of have the same style tray, but not the roll bars as this will make it way harder to get stuff actually on to the deck. Mostly cos I have a fucking great crane now;1 point
-
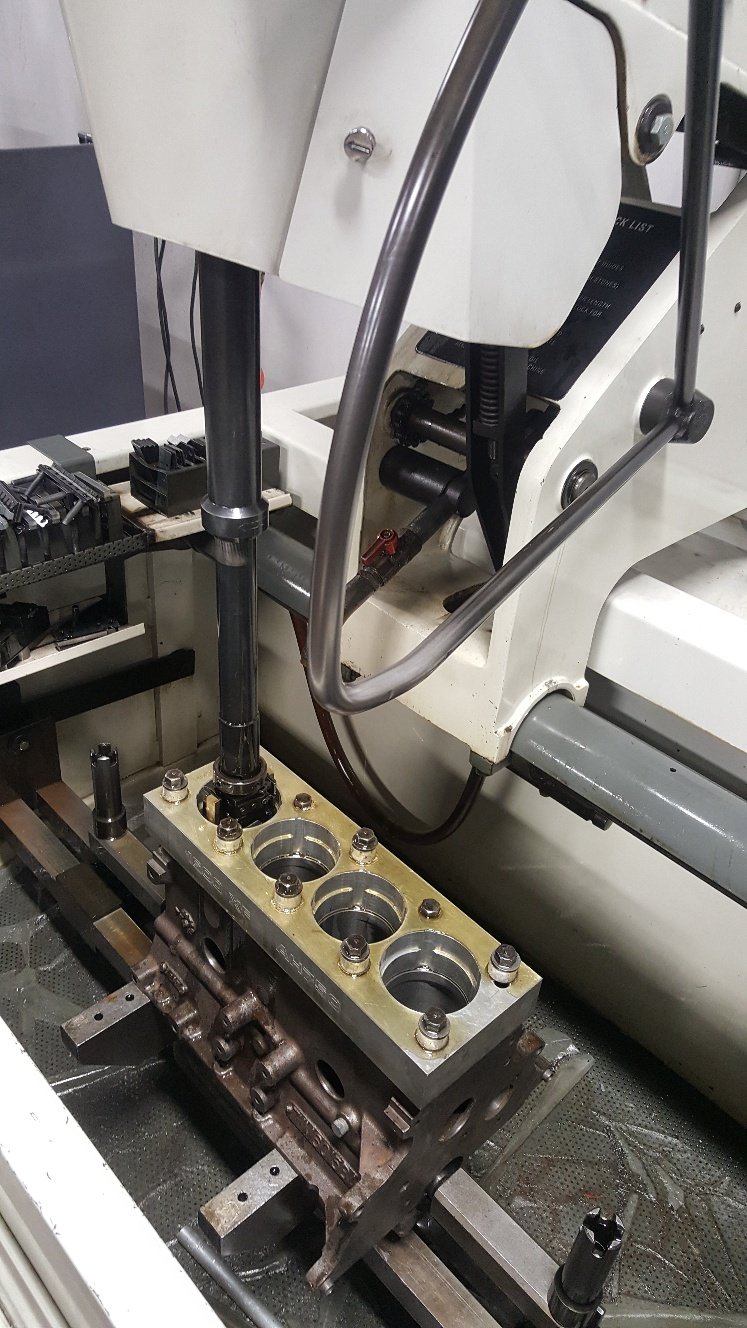
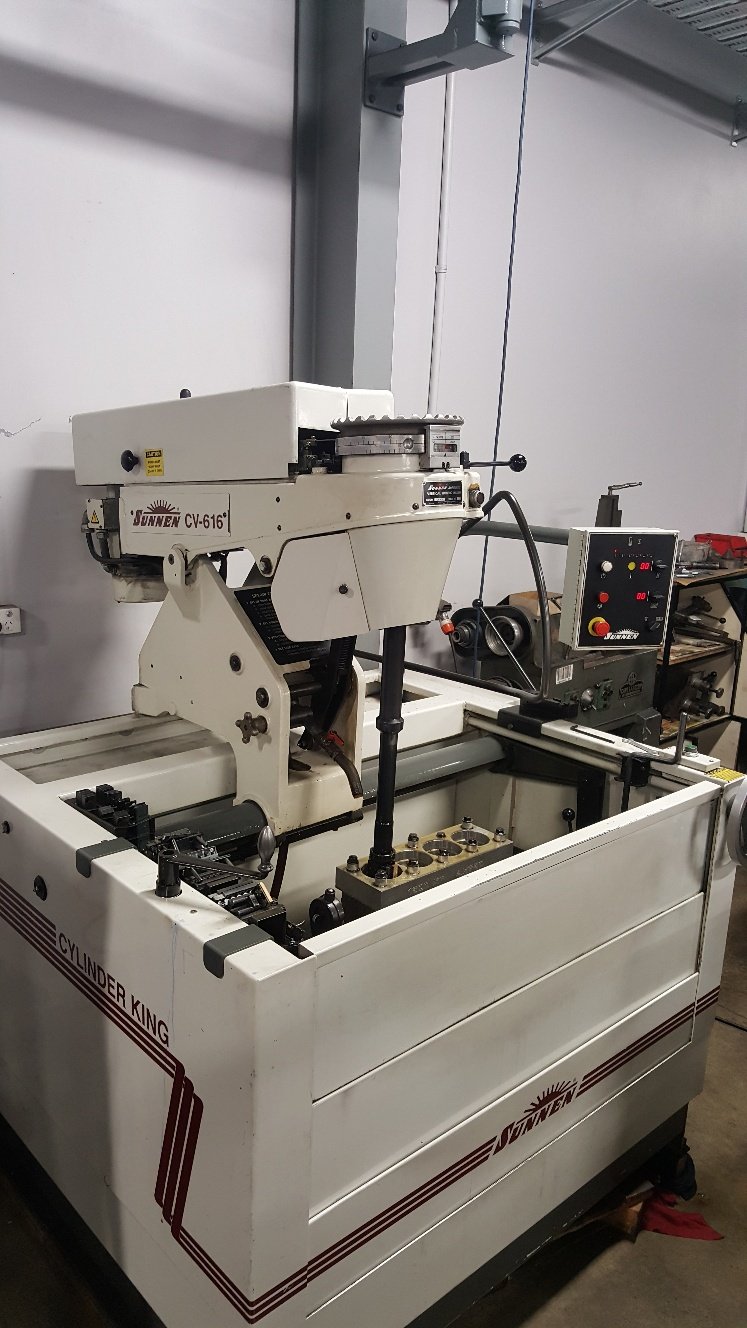
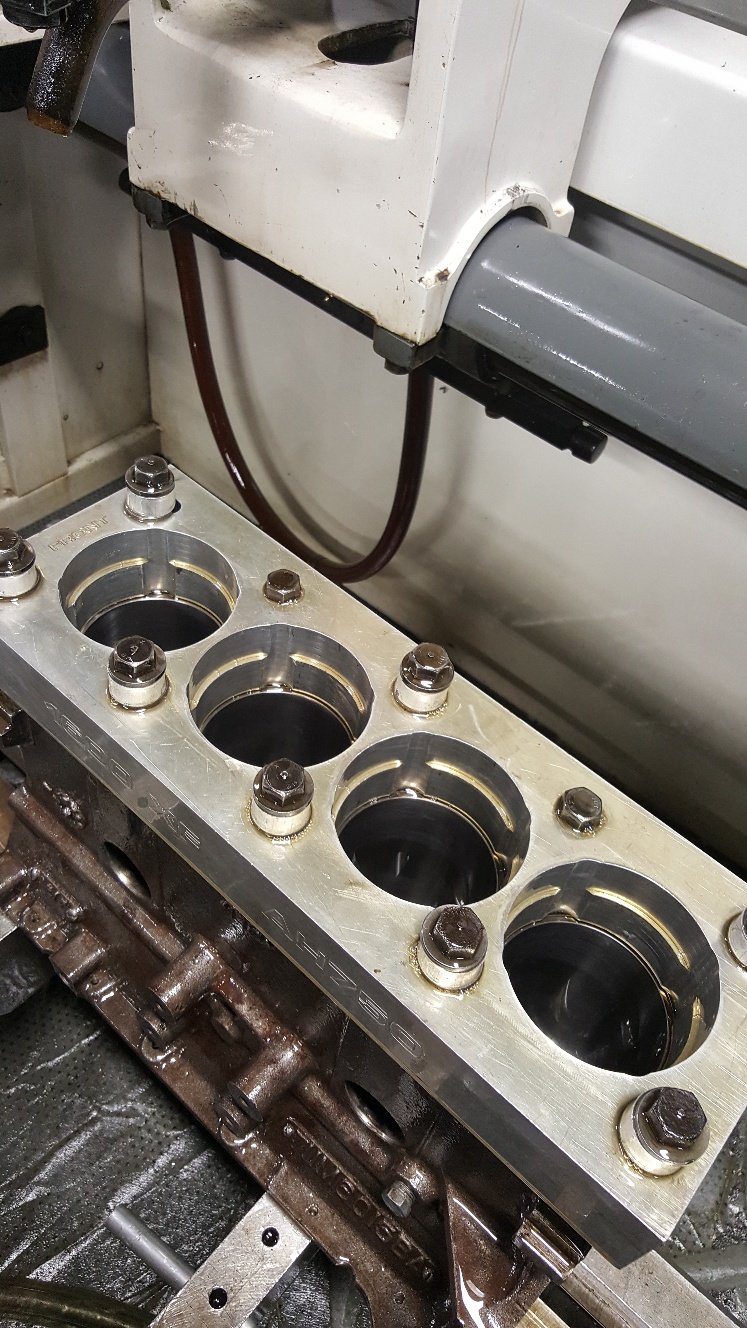
So i fitted the torque plate for the honing process. We only have torque plates for certain engine's. But lucky Ford xflow's are in formula Ford's so the boss saw the need to get one made. The torque plate allows you to simulate the tension of the cylinder being fitted to the block while honing. Some blocks move considerably from the head bolts being torqued up. This can distort the bore, sometimes up to 2 thou on various blocks. So it's like honing them in there assembled running state. I have heard stories of shops honing with hot coolant running through the water jackets to simulate total running conditions. All in the name of perfect ring seal you need a perfectly round and straight cylinder. We leave 4 thou of material to hone out as this gives us a good base to start achieving good rk rvk and there's another value aswell but I can't think of it right now. But we start off honing with a course stone which gives us a deep groves and removes material quickly. Once we've removed 3 thou we change stones to a smoother grit this removes the tops from the course stones while taking more material out. I'm also happy say I have removed all the bore wear marks after removing 2 thou of material. Now we move to a finer stone again same thing applies. Each different grade of stone removes material in different ways. Some stones will take more out of the bottom middle or top of the bore, so you have to measure the bore to make sure you're keeping it straight. The stones also react to load. Theres a round handle onto of the machine that applies load to the stones in the bore. If you wind to much load up it normally takes more material from the middle of the bore as there's no real strength there. Extra load can also create heat which will give you a false reading of size from the material expanding. Once we are at finish size we have what we call plateau stones. These are 800grit they don't really take much material out but smooth the tops off from the previous set of stones. Then we move to our cork stones. Which look nothing like cork. These are really good a removing left over honing material out of the cross hatch. We only give the bore a couple of strokes with these. Once a year we clean the machine out. It normally has about two 20 liter buckets fill of cast iron sludge sitting in the bottom of it. This machine runs 200 liters of honing fluid. Which is great as one of the jobs of the fluid is to keep the block cool as well as wash the honed material away from the honing head while honing. A drum of honing fluid isn't cheap at $2500 Then there's all the stones we burn through. So the honing process has one the highest consumables cost in the workshop per year. From start to finish it can take a hour to two hours to hone a block after a rebore. A deglaze or what we call a rering hone is normally about three quaters to a hour.
1 point
-
LS Engine Supplies in Perth. He’s a nice guy and the price was about 3500-4000 cheaper than what I could find here, but I can’t help but think he doesn’t understand his duty/gst requirements. Not really my problem and I’ll hold my judgement and cross my fingers that it all works out ok. I bought 2 engines and boxes from him so he better be a GC lol. L98 with aftermarket camshaft and pushrods etc installed + TR6060 box was $12500. A good chunk of that (maybe 2500) was cam and install which is something I’d normally do myself but atm I have waaay too much on so figured I’d be better off paying for it and just getting an engine I can slap straight into the car.1 point
-
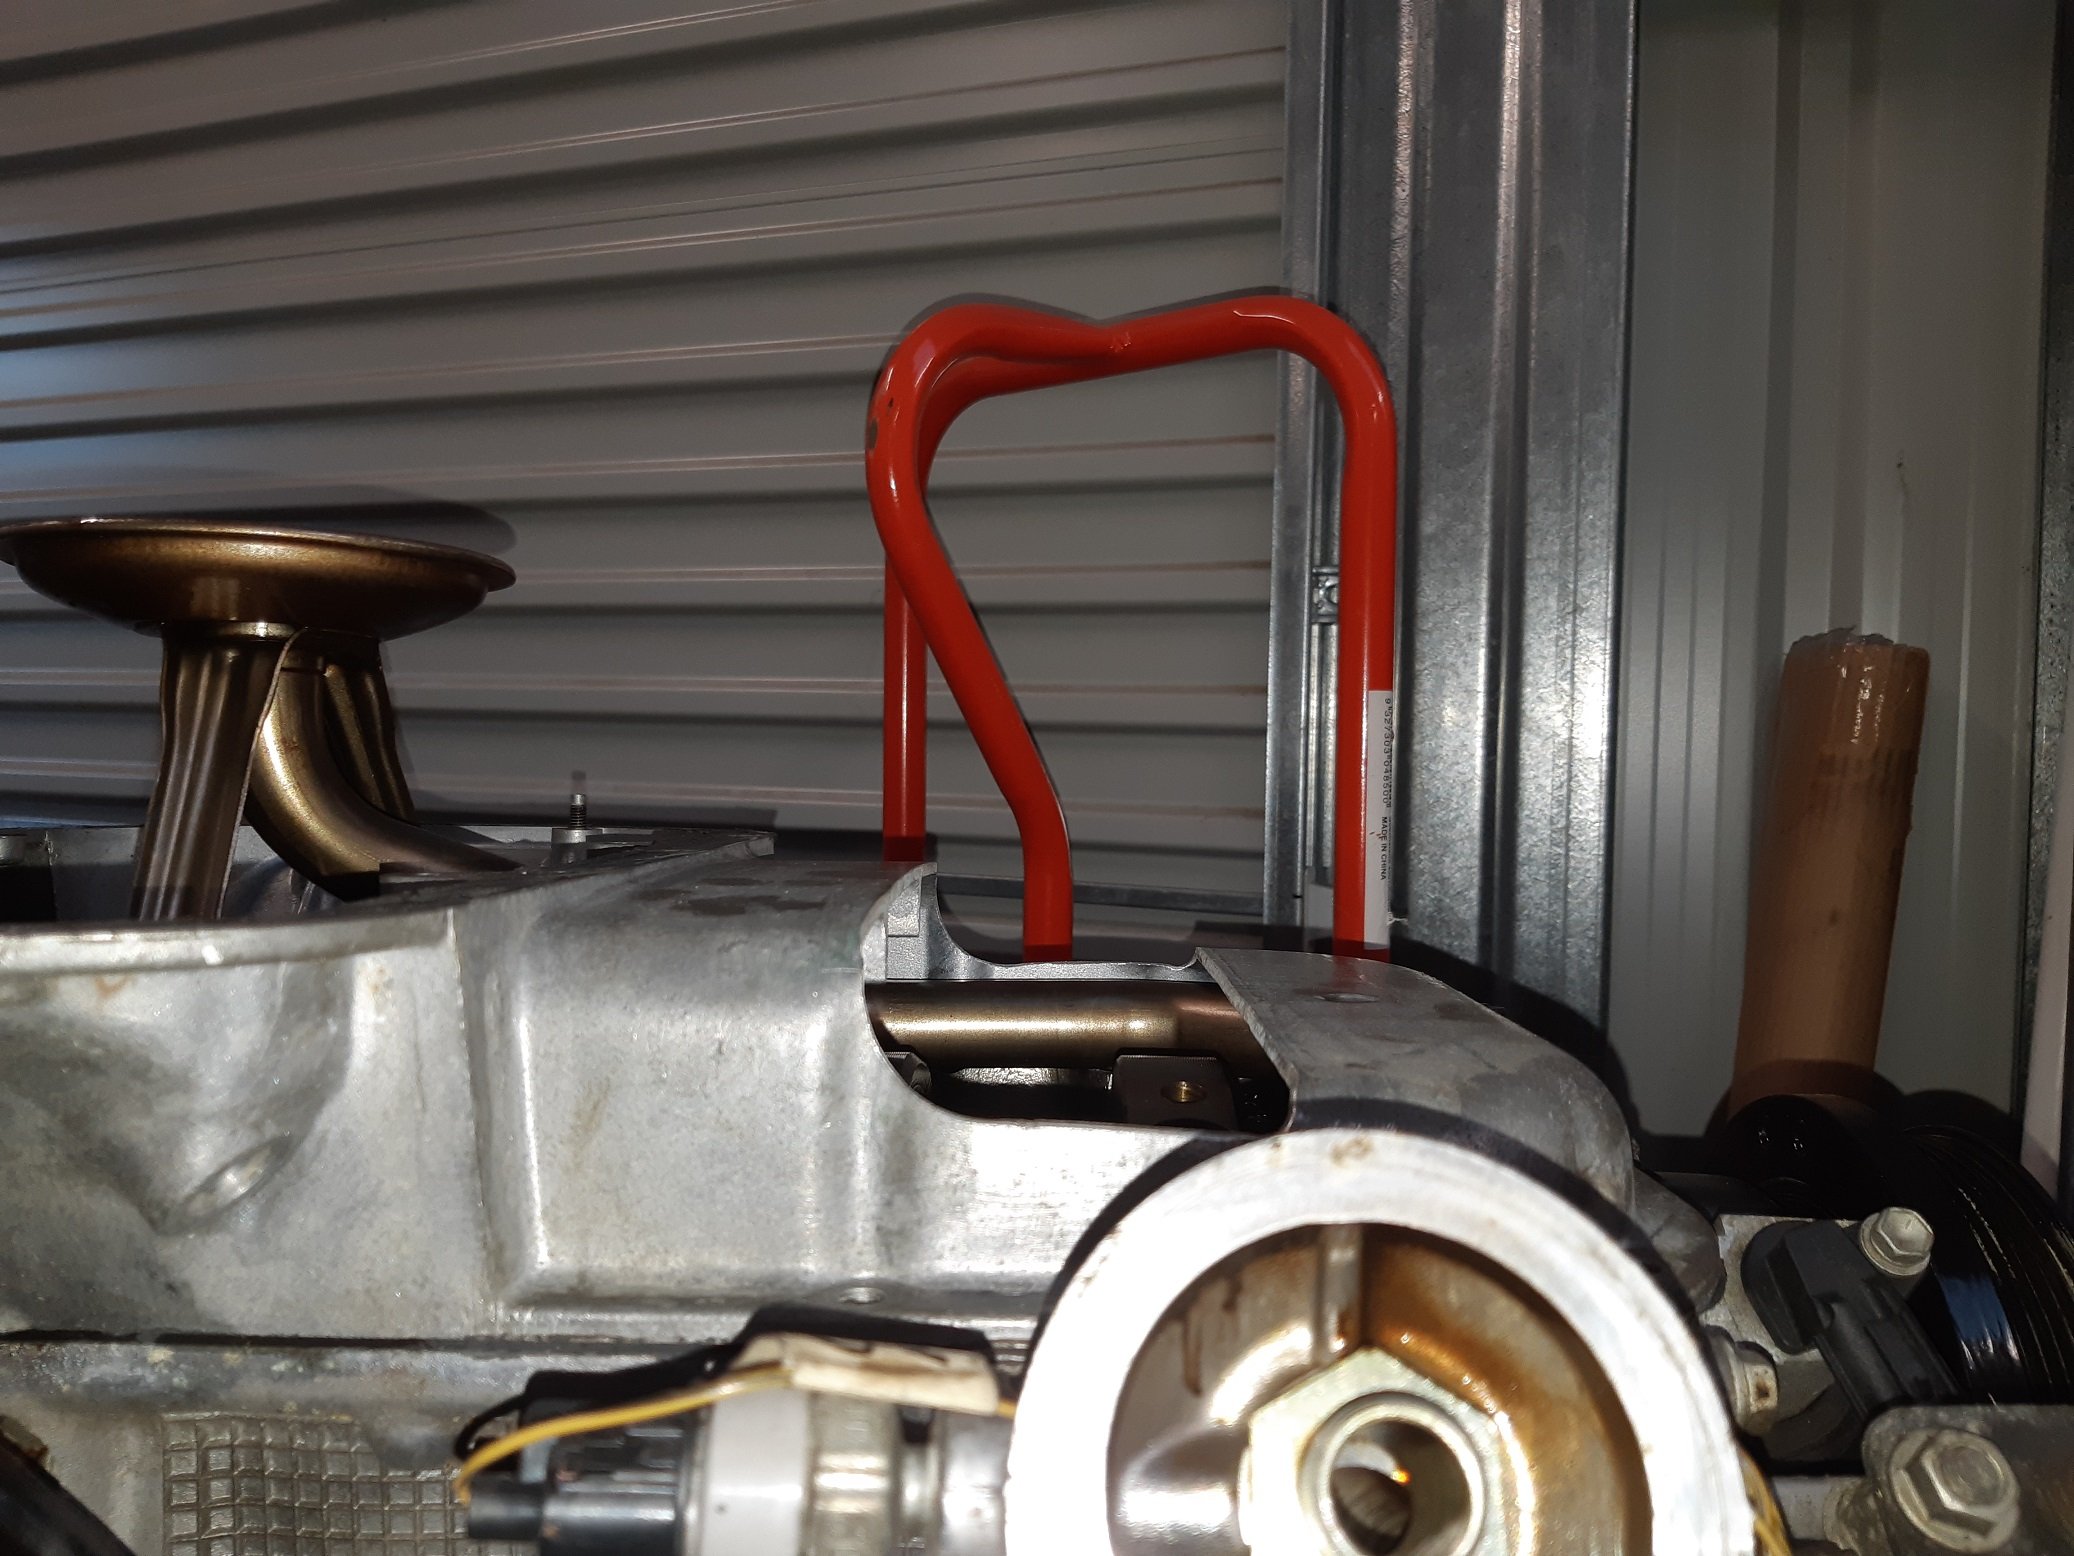
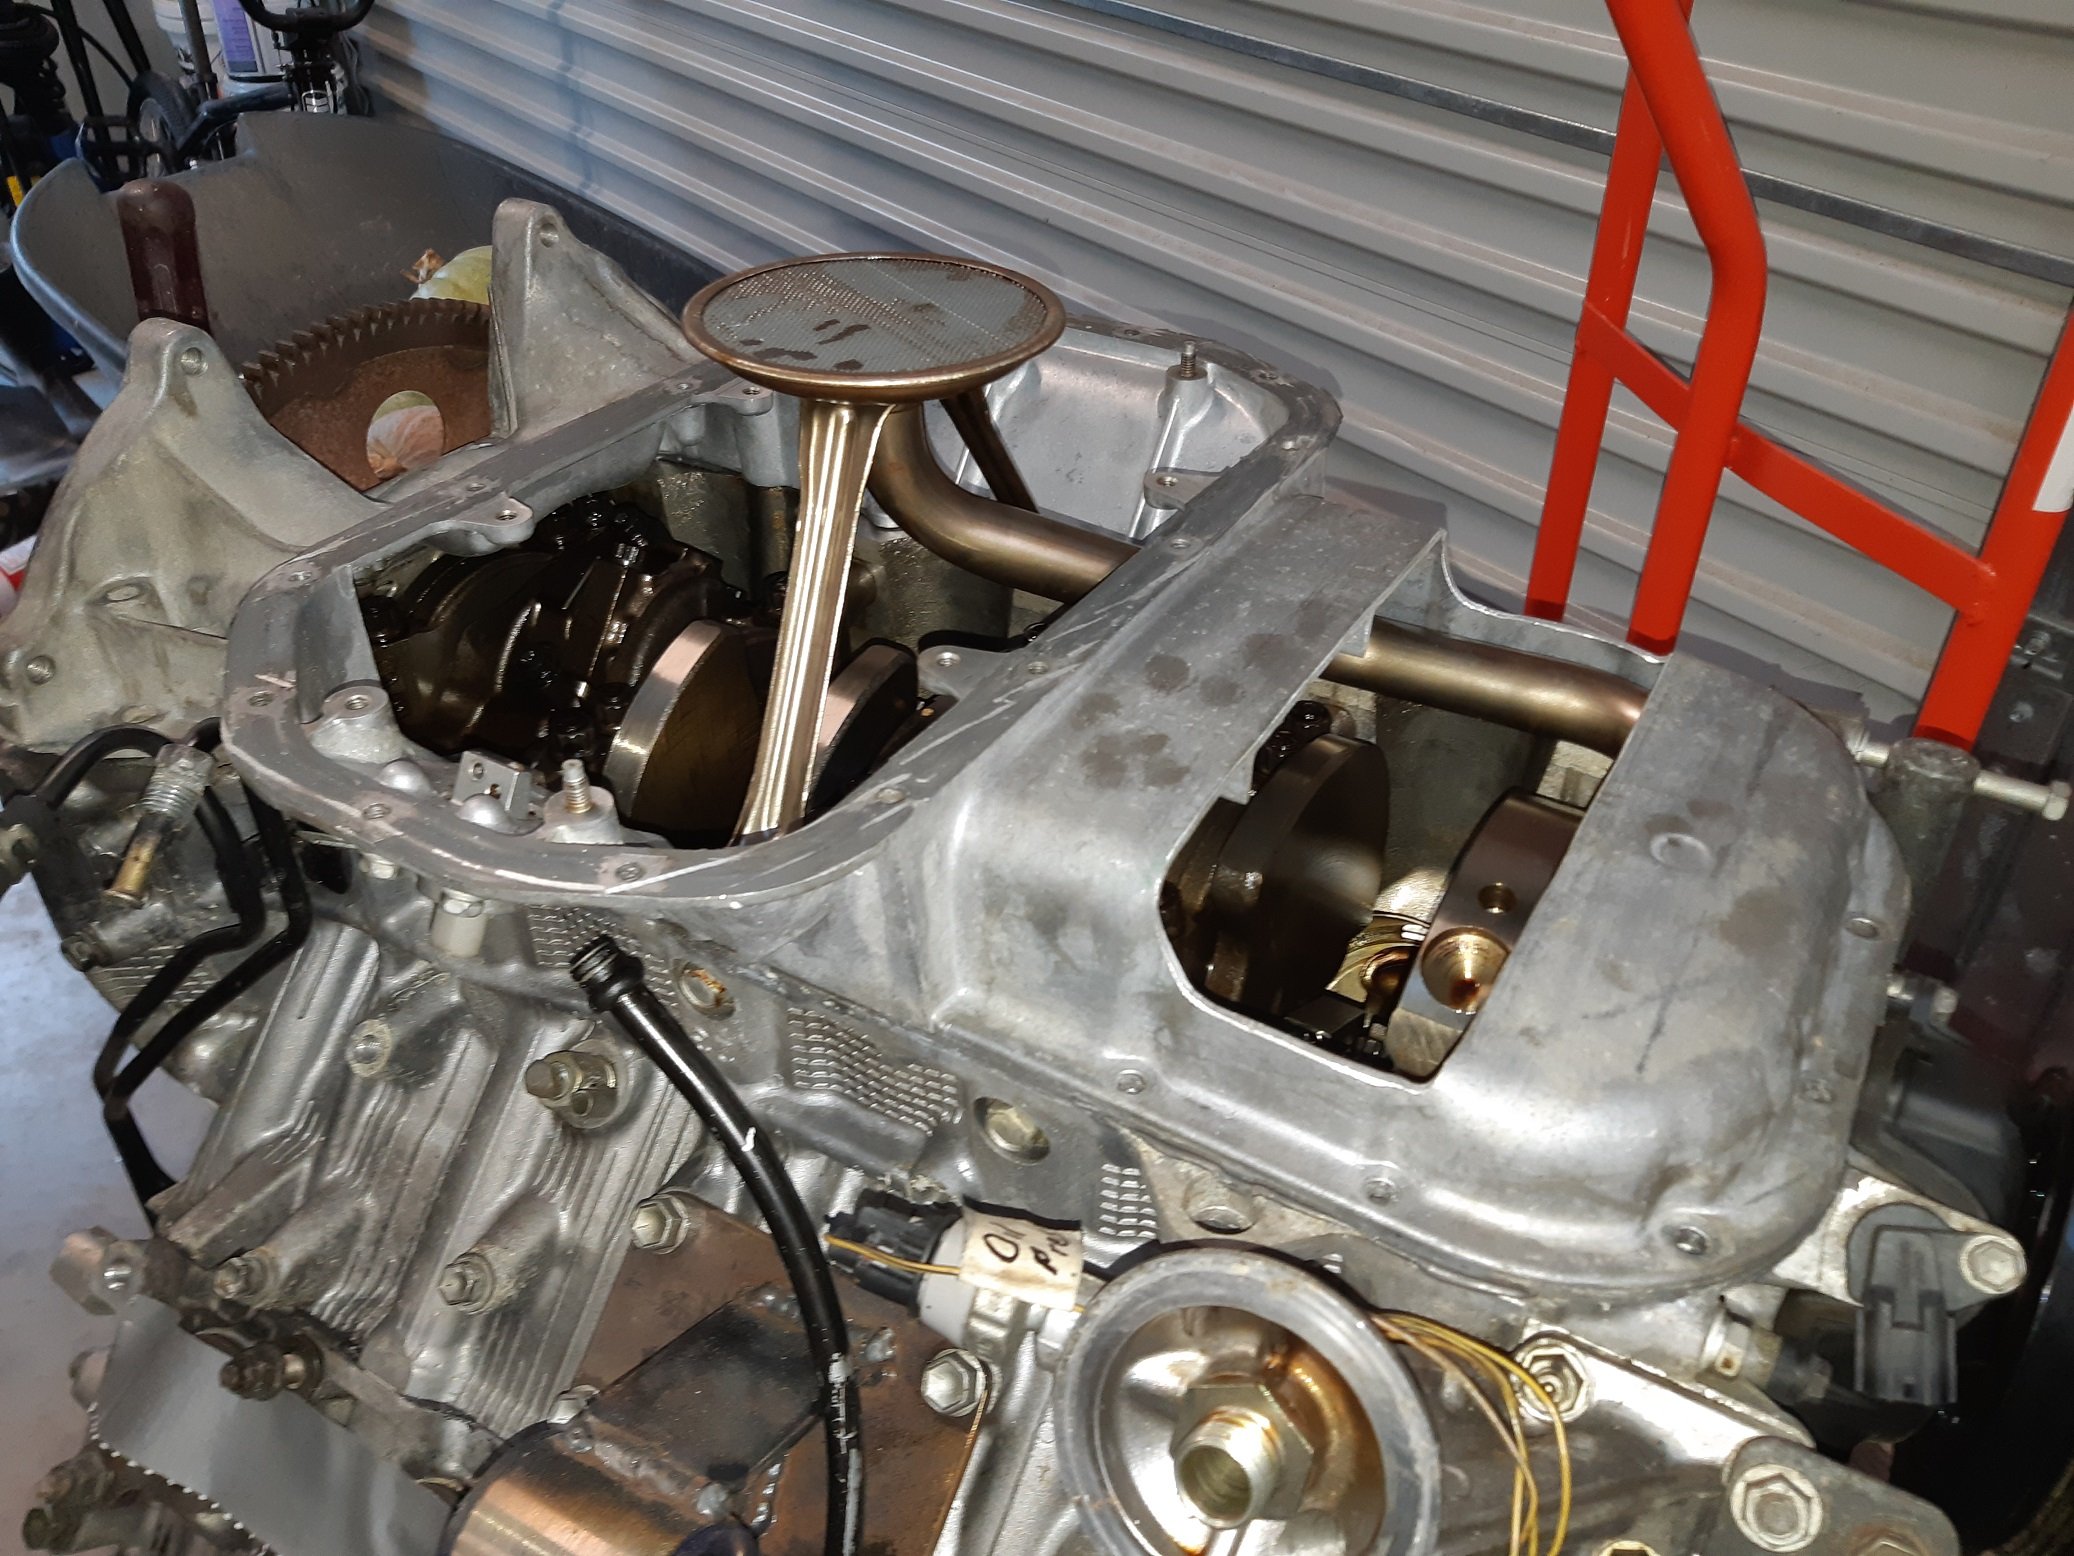
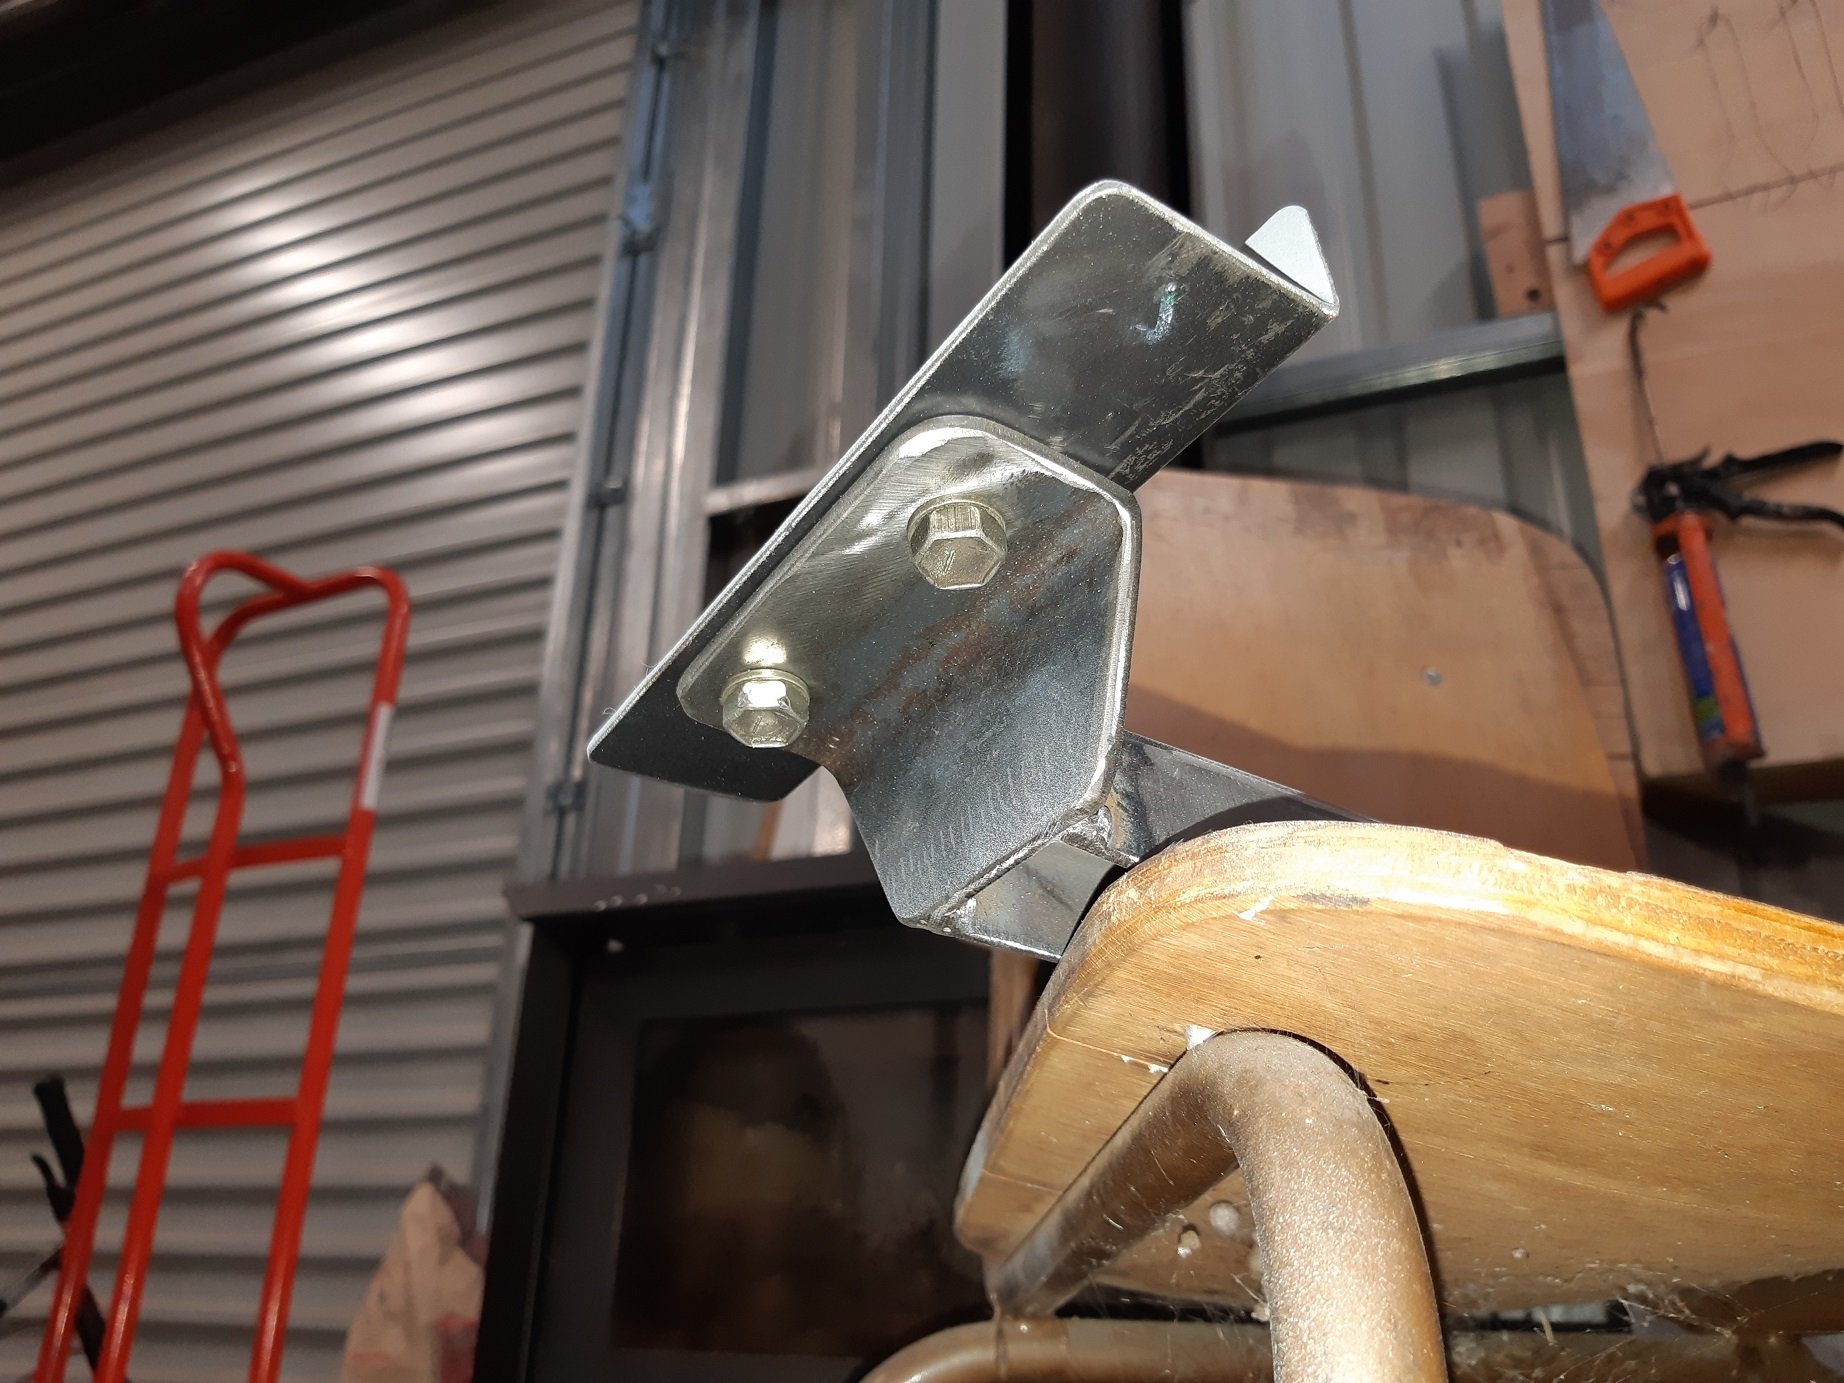
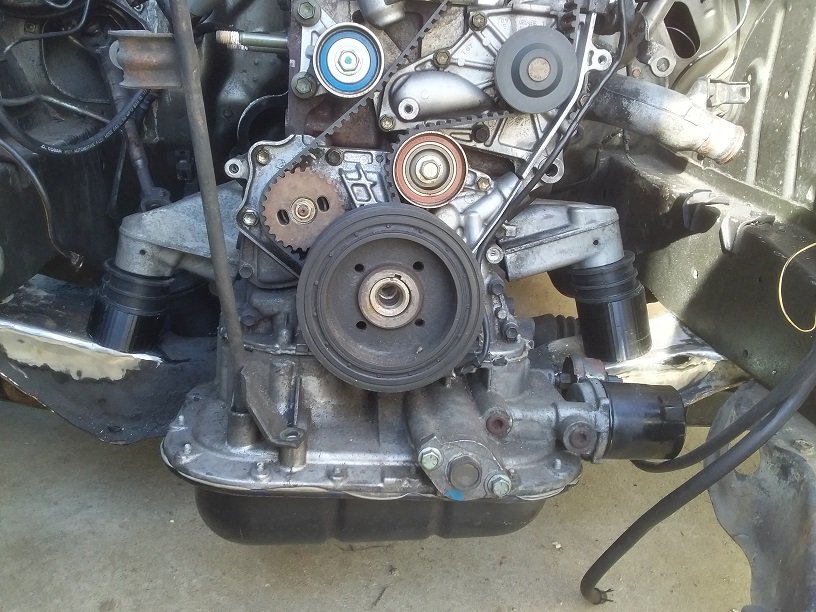
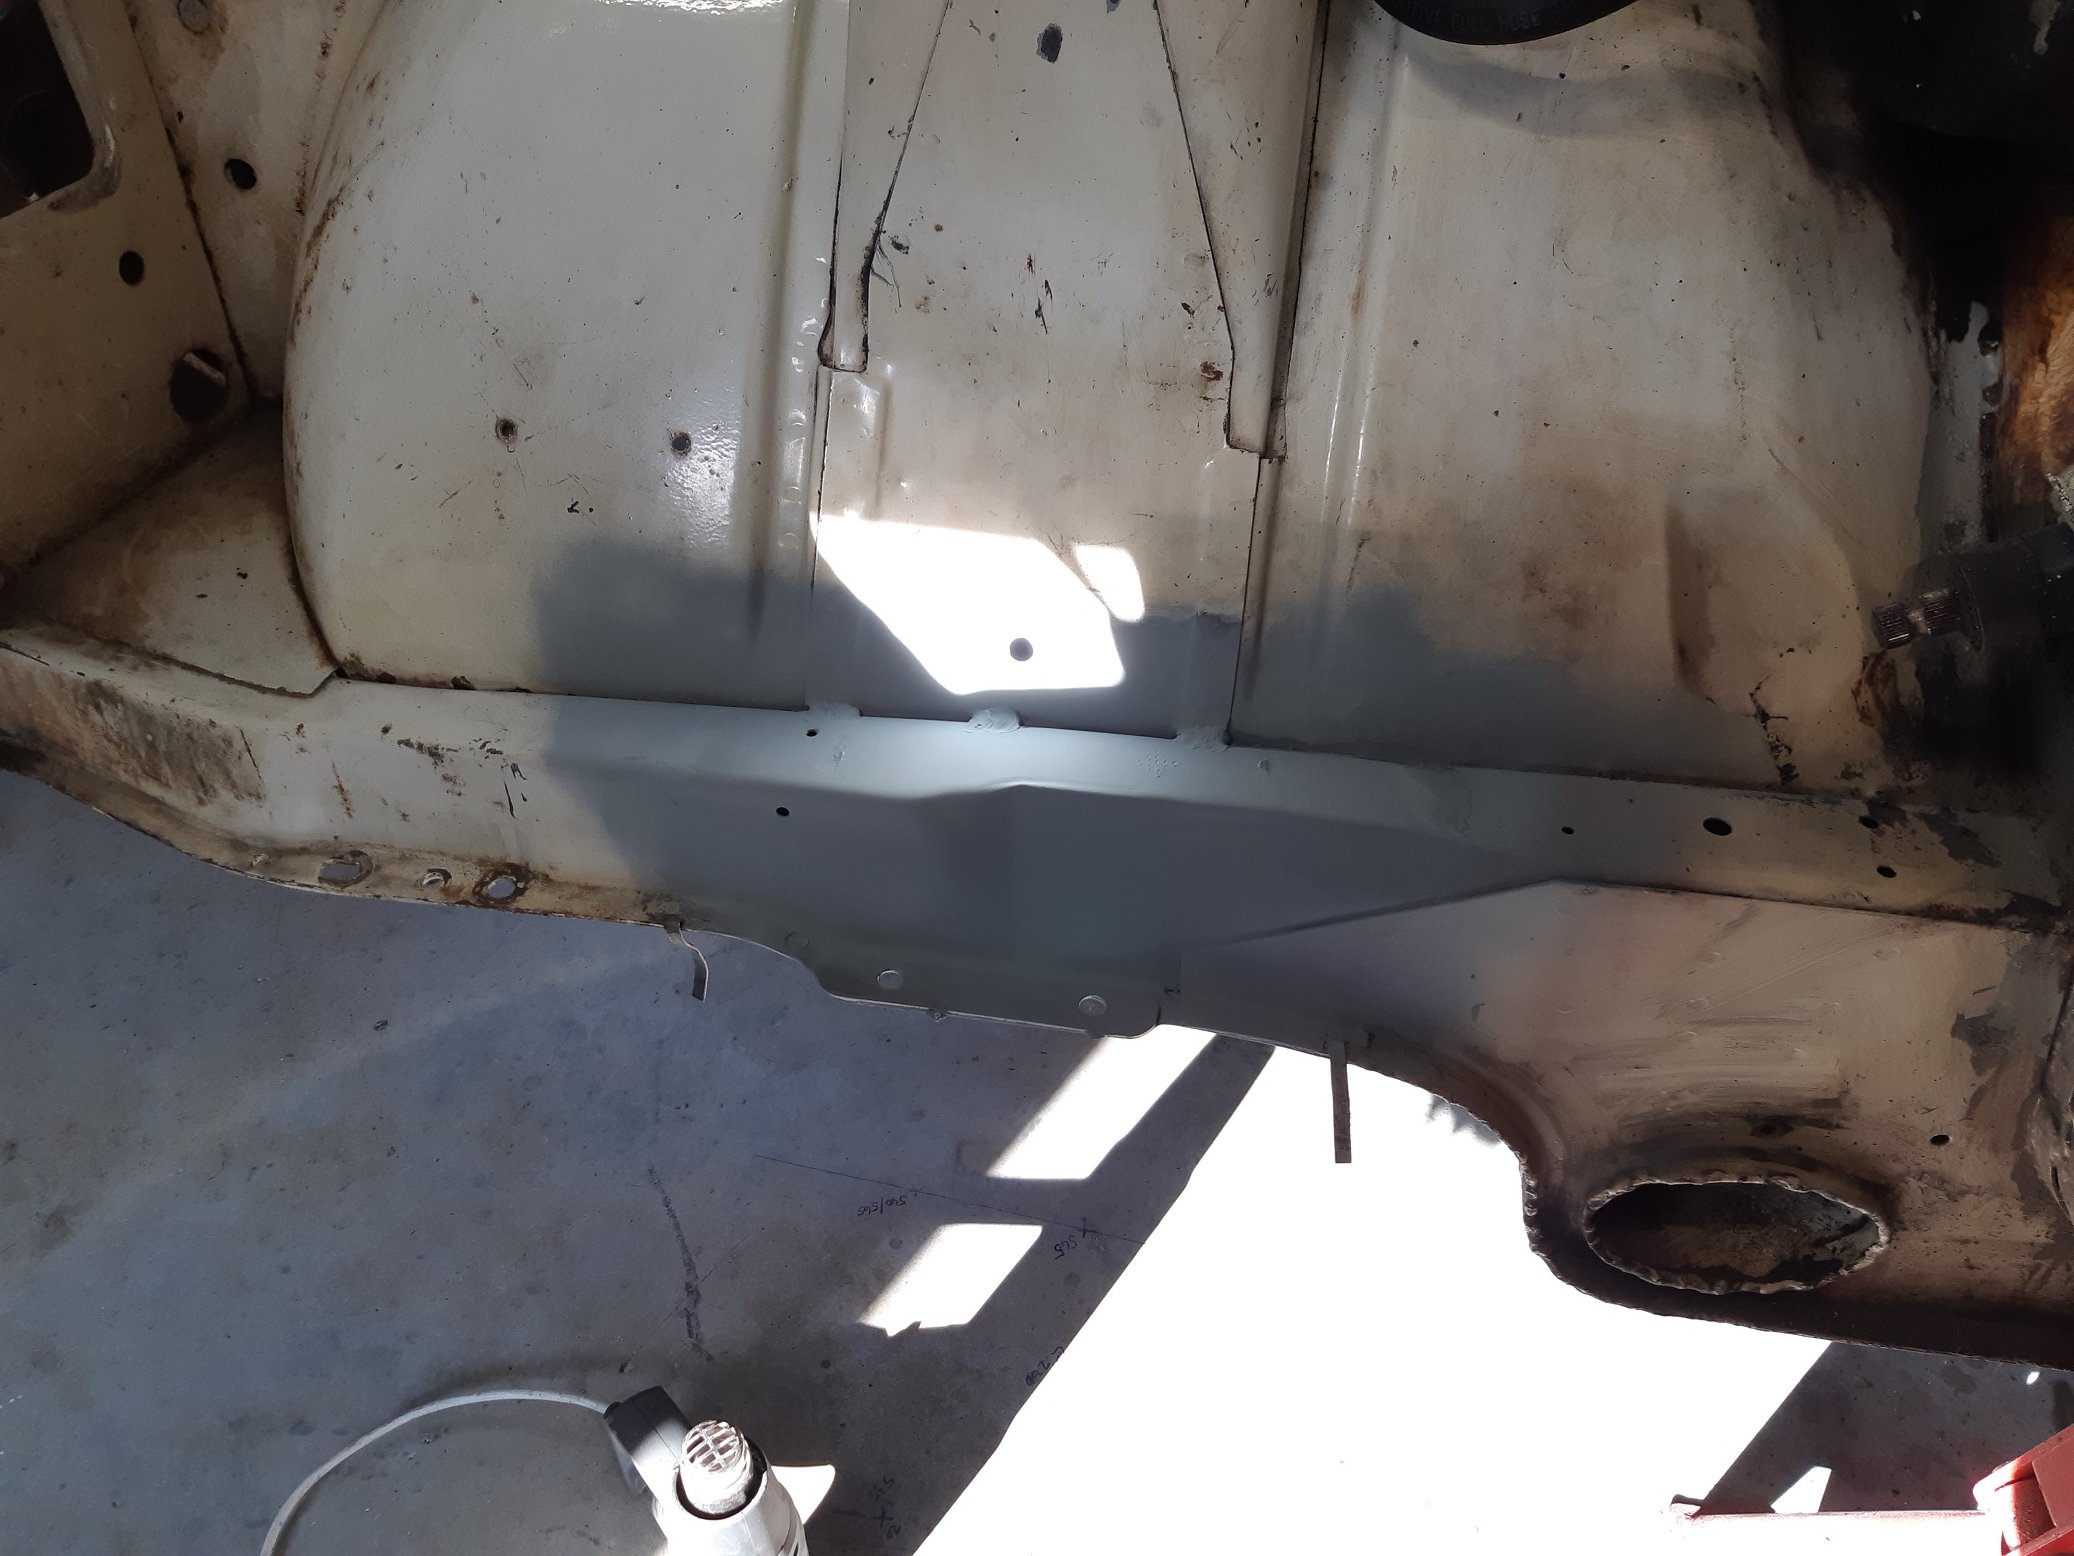
Since the engine and box has mounts now, I suppose I should take the engine back out to look at modifying the sump and properly welding the engine mounts. Bonus, the oil pickup pipe doesn't start bending at that step so I can cut this much out with no problem. This means I can lift the rack about 10-15mm, which means I can also shorten my spacers on the steering arms/tie rod ends. I do have an AC tig welder, but I haven't attempted any aluminium welding. I will need to find something to practice on. I plan on bolting the sump to to something flat and stiff to try keep it from warping. I also cleaned, prepped and zinc primed to weld the engine mounts on. I didn't grind down the original tack welds so I can use them to align the mounts.
1 point
-
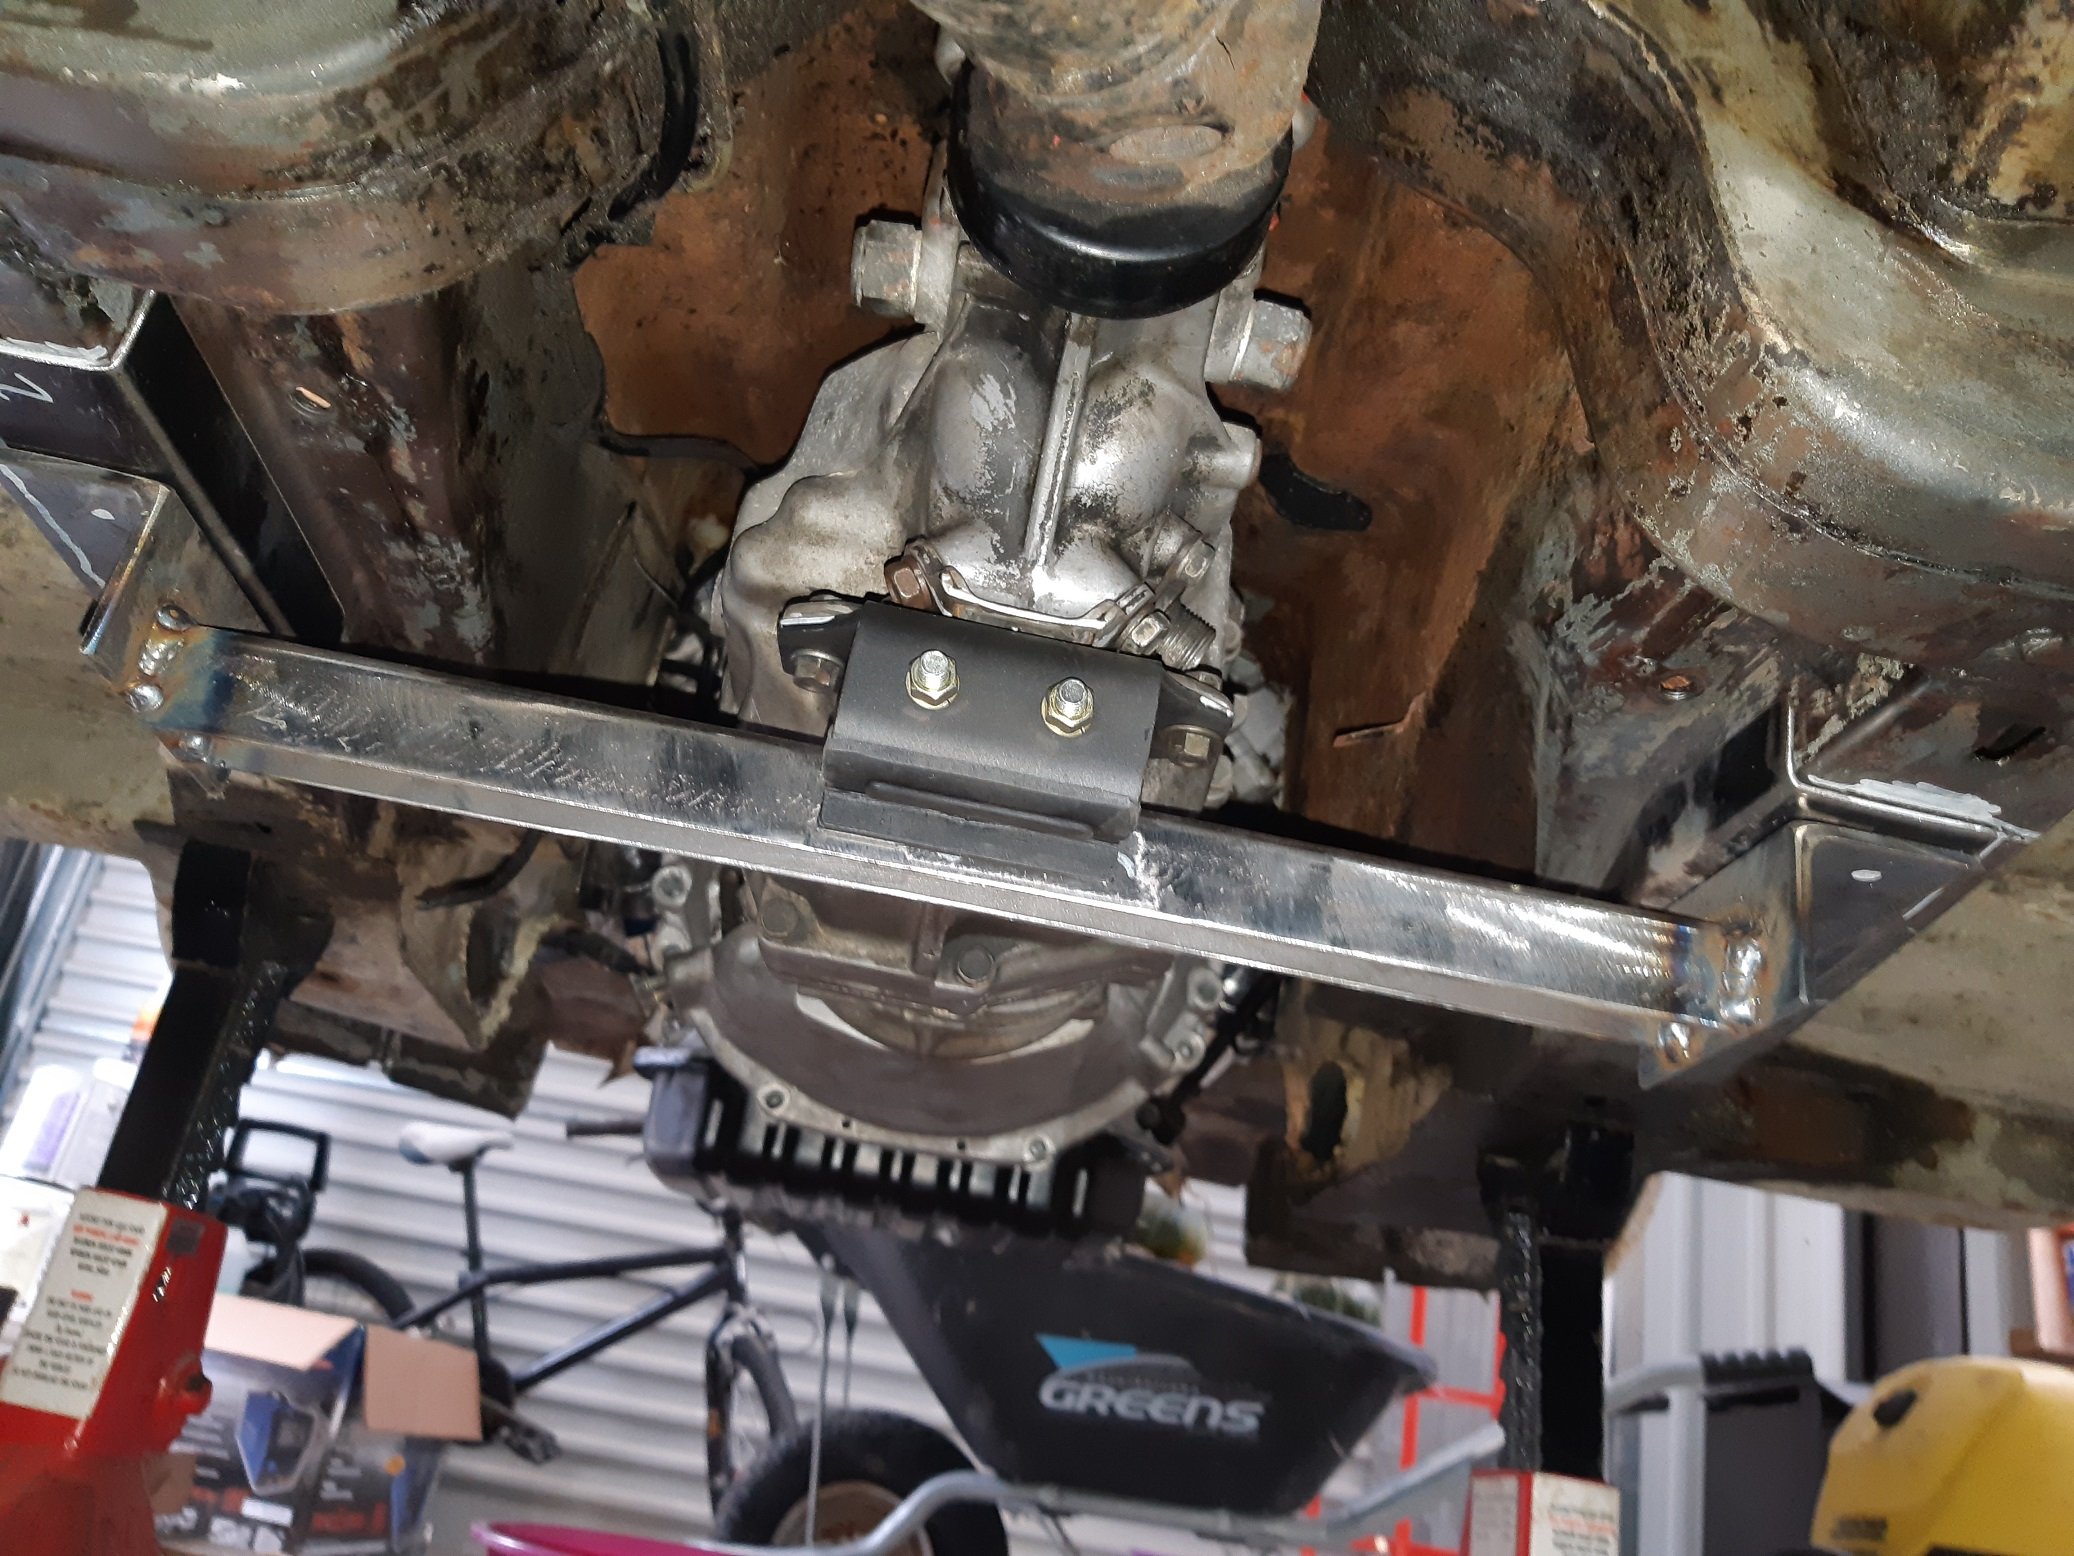
Been working on the gearbox cross member. Made up some 2.5mm strengthening plates to weld to the chassis rails. I will weld the captive nuts to these. I'll just tack the plates on for now and fully weld them when I make a rotisserie later.
1 point
-
Firstly thanks for removing the rogue @dave from my thread. ban that guy Couldn't be bothered getting off the couch the other day so made a video. Kinda looks like a 12 year olds school project and if you've been following this thread, would have seen most of it before. should be slightly amusing none the less1 point
-
Do a wheelie bro
1 point
-
a care package from japan arrived. the no working on this quickly went out the window when i saw my new wheels yesterday. scored some 16x7.5 et4 Epsilon Ragunas out of japan, for not the cheapest in the world, but probably half their value in NZ. was also a set of 5. haven't decided if the 5th will get a tire mounted and act as a spare or if i mount it to the wall and hang my airline off it. also bought a cruise control spec HKB boss kit. i expected this to just include a wire pigtail for cruise buttons, but it actually has buttons built in. super clean. the lables are wrong, but it looks like i can just swap the buttons around. finally an uncracked stereo surround. i still need a bunch more plastics, but this parcel was getting worryingly big, as it was it got seperated into two parcels. which also meant it slipped in customs under the tax threshold. score. i also swapped back to the stock clutched supercharger pulley, very small performance drop, clearly the party pulley on there was only making heat and not power. plus fuel economy has improved, and thats more important on this car being my daily and much more of a cruiser than a performance car. cant wait for this to be panel and painted.1 point
-
"Test Drive" turned into blasting around in it for large parts of the afternoon, reckon I've done about 45 miles or so. Brakes are fine and it goes pretty hard (for what it is). Handles really nice and is no way stock in the springs & shocks department. Tweaked the timing a bit and it's just rattling a little under heavy load, I'll try some octane booster tomorrow that will sort it out hopefully. It was blowing oil smoke for the first 5 miles but a couple of hot & cold cycles seems to have freed the rings up a treat. Haven't revved it beyond 4 grand yet but it feels pretty strong. Over all I'm pretty bloody chuffed with it, it's a really nice car. Bit of a clonk in the drivetrain but it only sounds like a UJ. Water pump bearing's a bit wobbly and it needs a new rad cap but it held temperature & oil pressure despite some enthusiastic driving. Vids for your entertainment... What ? Skid you say ? So, it's all good. Gonna do the wheels bronze and paint the rear panel black between the lights but apart from that, roll on summer.... * Also, side-sharn.... About 5 years ago I was chatting to the in-laws neighbour about cars. Started telling him about the Hako and he said " Fucking Japanese shit, I'm not interested in those useless bits of crap". We popped round to Carols folks earlier and the neighbour drove by as we were leaving. He fucking loved the Skyline, was all over it and asked if I wanted to sell it. I ignored him. Silly bugger.1 point
-
What happened was..... Had a big fuck off pizza for lunch & then got stuck into the car around midday. First job was the clutch, thought the master &/or slave might have been fucked but a bleed & adjust sorted it Brakes next. Calipers were a bit sticky but freed them up to a usable state. For the moment, at any rate. One rear was perfect, if dusty. Nice use of thumb... Other side fucked. Or so I thought. Cleaned it all up, took the cylinder apart and it all seems fine. Once I'd refitted & bled the system there was no sign of a leak, even with repeated pedal stamping/ continual pressure. Go figure... We''ll see how it goes. I wonder if the reason it was all damp and shitty was because on top of the drum was the fave spot for rats to have a wee. Put new plates on. Think I'm going to join the rear lights with a black panel edged with chrome trim. Mrs Shuzz said " Oh, FFH....Fucking Hot Hako ?" Good girl. Finished off as the sun went down touching up the paint on the rims & taking a blurry pic. Messed about with plug leads, etc and came in And that was a bloody good use 7 hours of my Saturday. Test drive tomorrow. Sweeeeet.....1 point
-
3 years and 5 days later ? Fucken hell. I've finally pulled my finger out and got on with getting the Hako road legal. It's been seven years since it arrived. There were various reasons why it's basically sat in the shed for all that time but one of the main problems changed last year. The indicators on the Skyline are illegal in this country. After 1965 cars must have orange indicators front and rear, there was no easy way to rig it up using the original system and I wasn't prepared to butcher the loom and add extra orange lighting etc. To register an import it had to pass an MOT test which also served as an vehicle identification process. No orange indicators mean't no certificate & no registration papers. In their wisdom the powers that be decided that from May 2018 all cars 40 plus years old didn't need to have the annual MOT test. This is obviously bonkers but there really aren't that many pre '78 cars left on the road here and I'd say that almost all of them are in the hands of people with at least half a clue what they're doing. What this mean't for my Skyline was that it didn't need to be tested to be registered. It has to be "roadworthy" but doesn't have to be tested. The indicators are still illegal but you have to get pulled over by a copper who knows his stuff. The upshot is that I sent all my paper work off, had a random inspection to determine that it's not 2 cars welded together, etc & I'm now awaiting my documents and registration number. It needs a few things sorting and I've arranged with the local MOT tester to have the car "tested" on training mode so I'll get all the print outs but it won't be legally binding. 10/10, GC, etc. Biggest problem has been a mouse that moved in at some point over the winter, it may have been the one I evicted from the Hilux. Little bastard ate my centre console, plug leads and steering column stalks. Fucker. Update soon /pic 4 fred
1 point
-
I wasn't too happy on the finish on the first underseal. It came out a bit smooth. Admittedly I thinned the product down to put through the gun. The product was normally used to brush on. I tried a different product and left it a bit thicker to give it that true rough underseal look. Chassis rails and inner gaurds got a thick coating, then I gave the previous areas a quick flick. Came out heaps better this time. Was probably laying it on a bit heavy because I went through 6L's. Ha. I learned my lesson of not wearing a face mask the first time round. That shit sprayed everywhere. Last night I was looking around for something to cover my face. Glasses? not enough coverage. Full saftey shield? Bit tricker in small areas. Stockings and masking tape? Bingo.
1 point


This leaderboard is set to Auckland/GMT+12:00