
Leaderboard


Popular Content
Showing content with the highest reputation on 10/20/17 in all areas
-
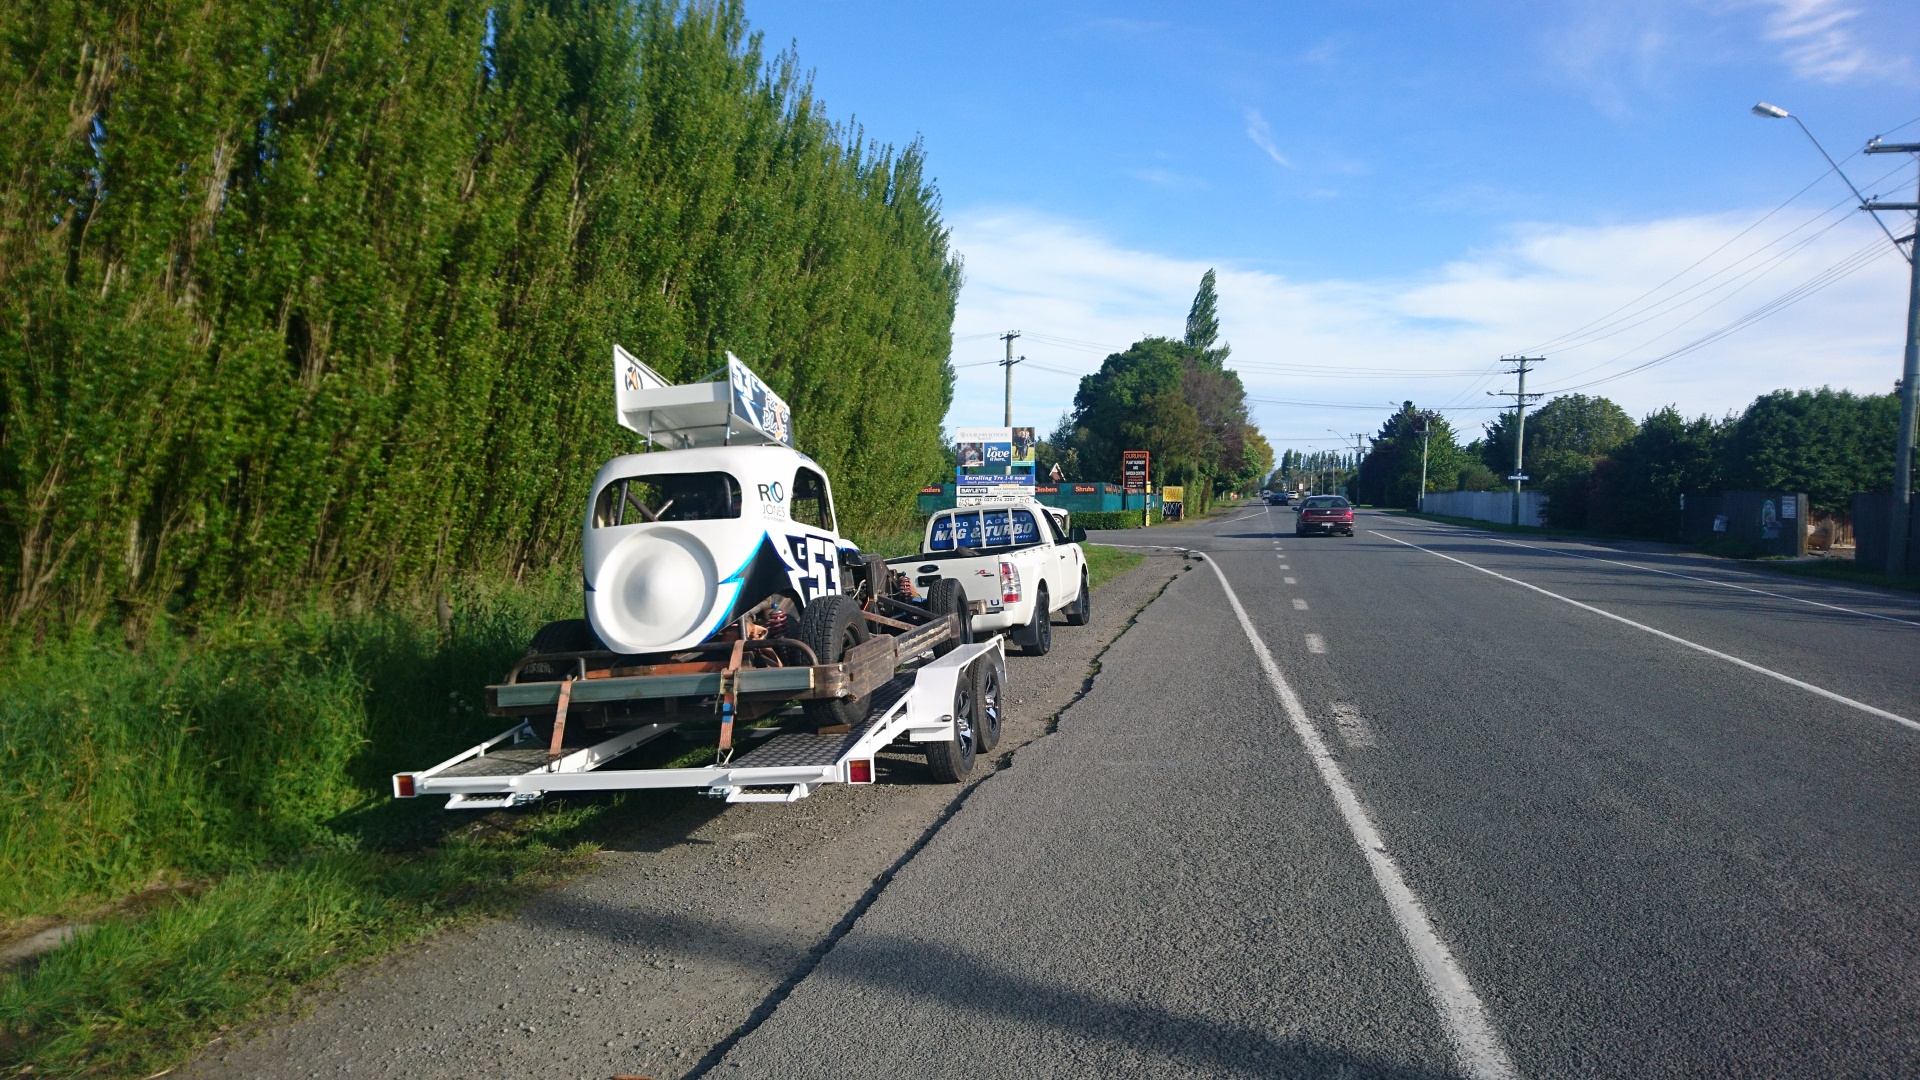
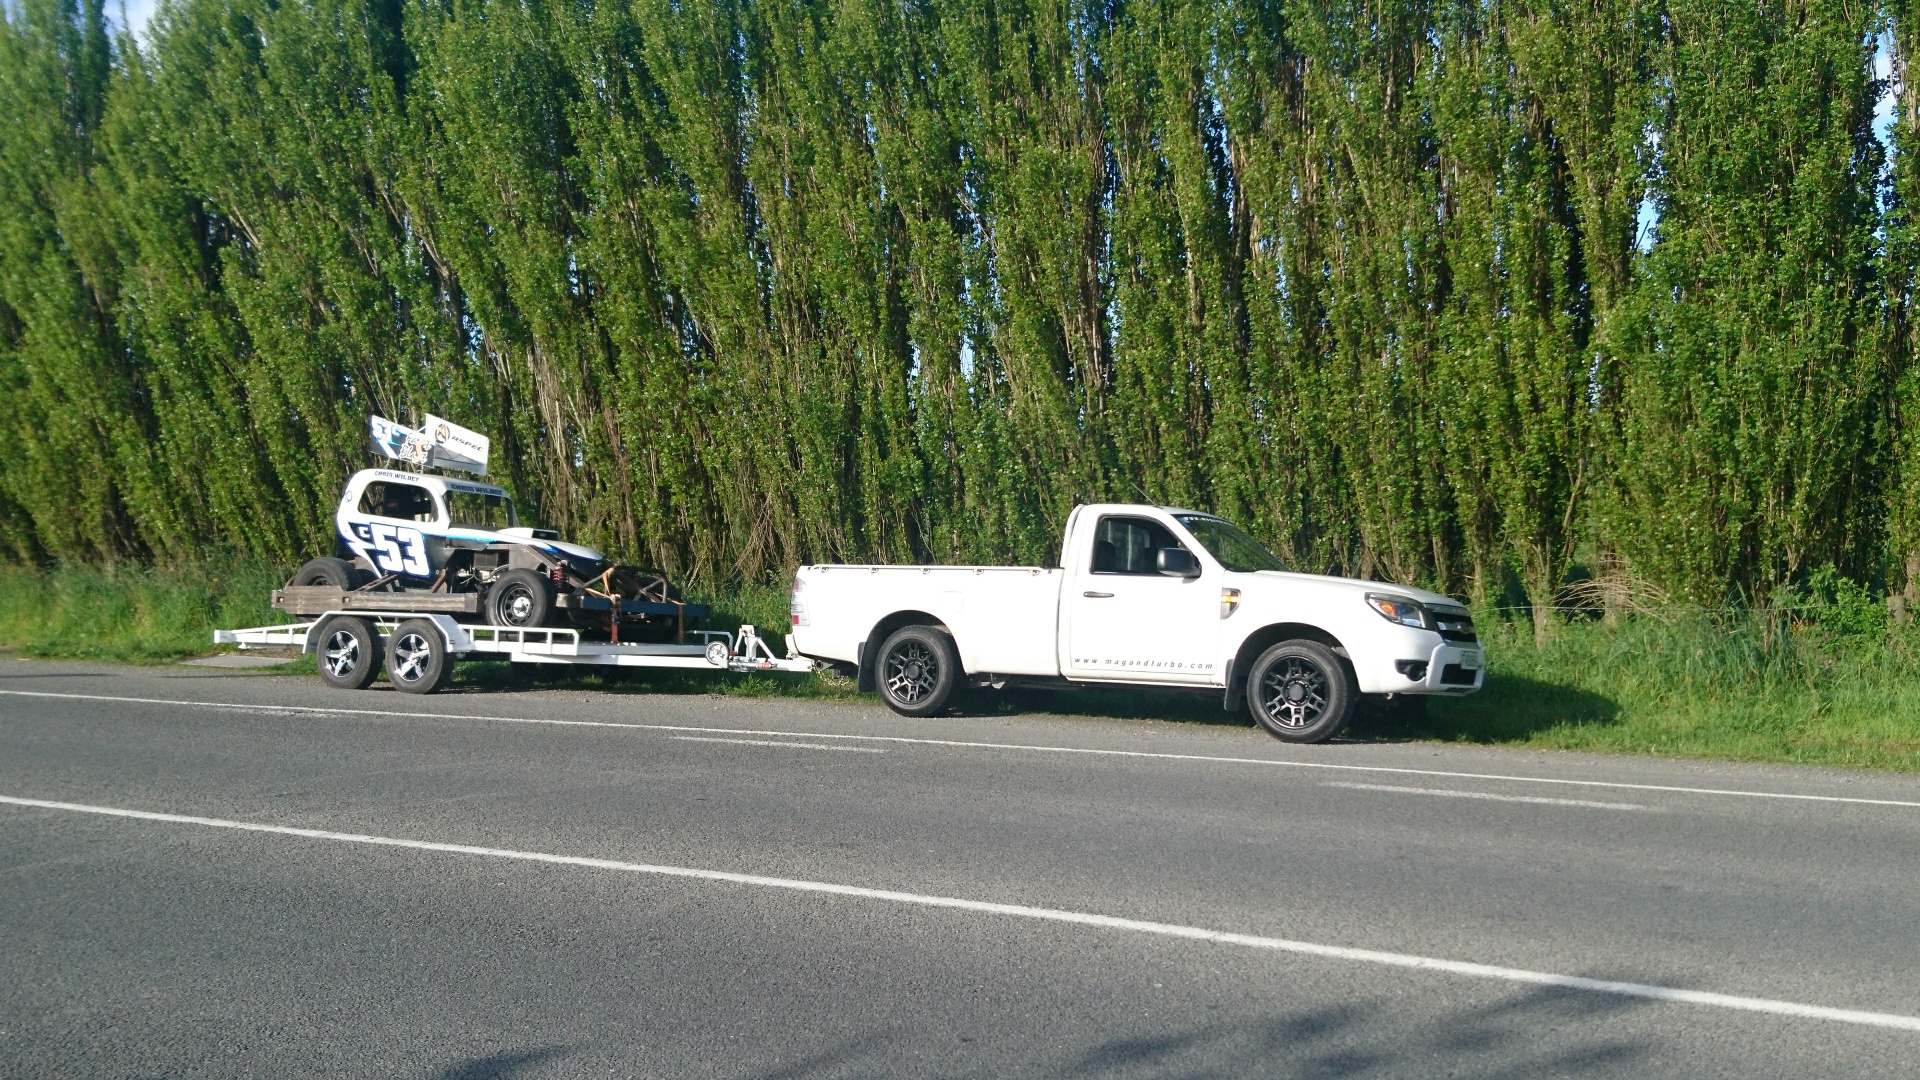
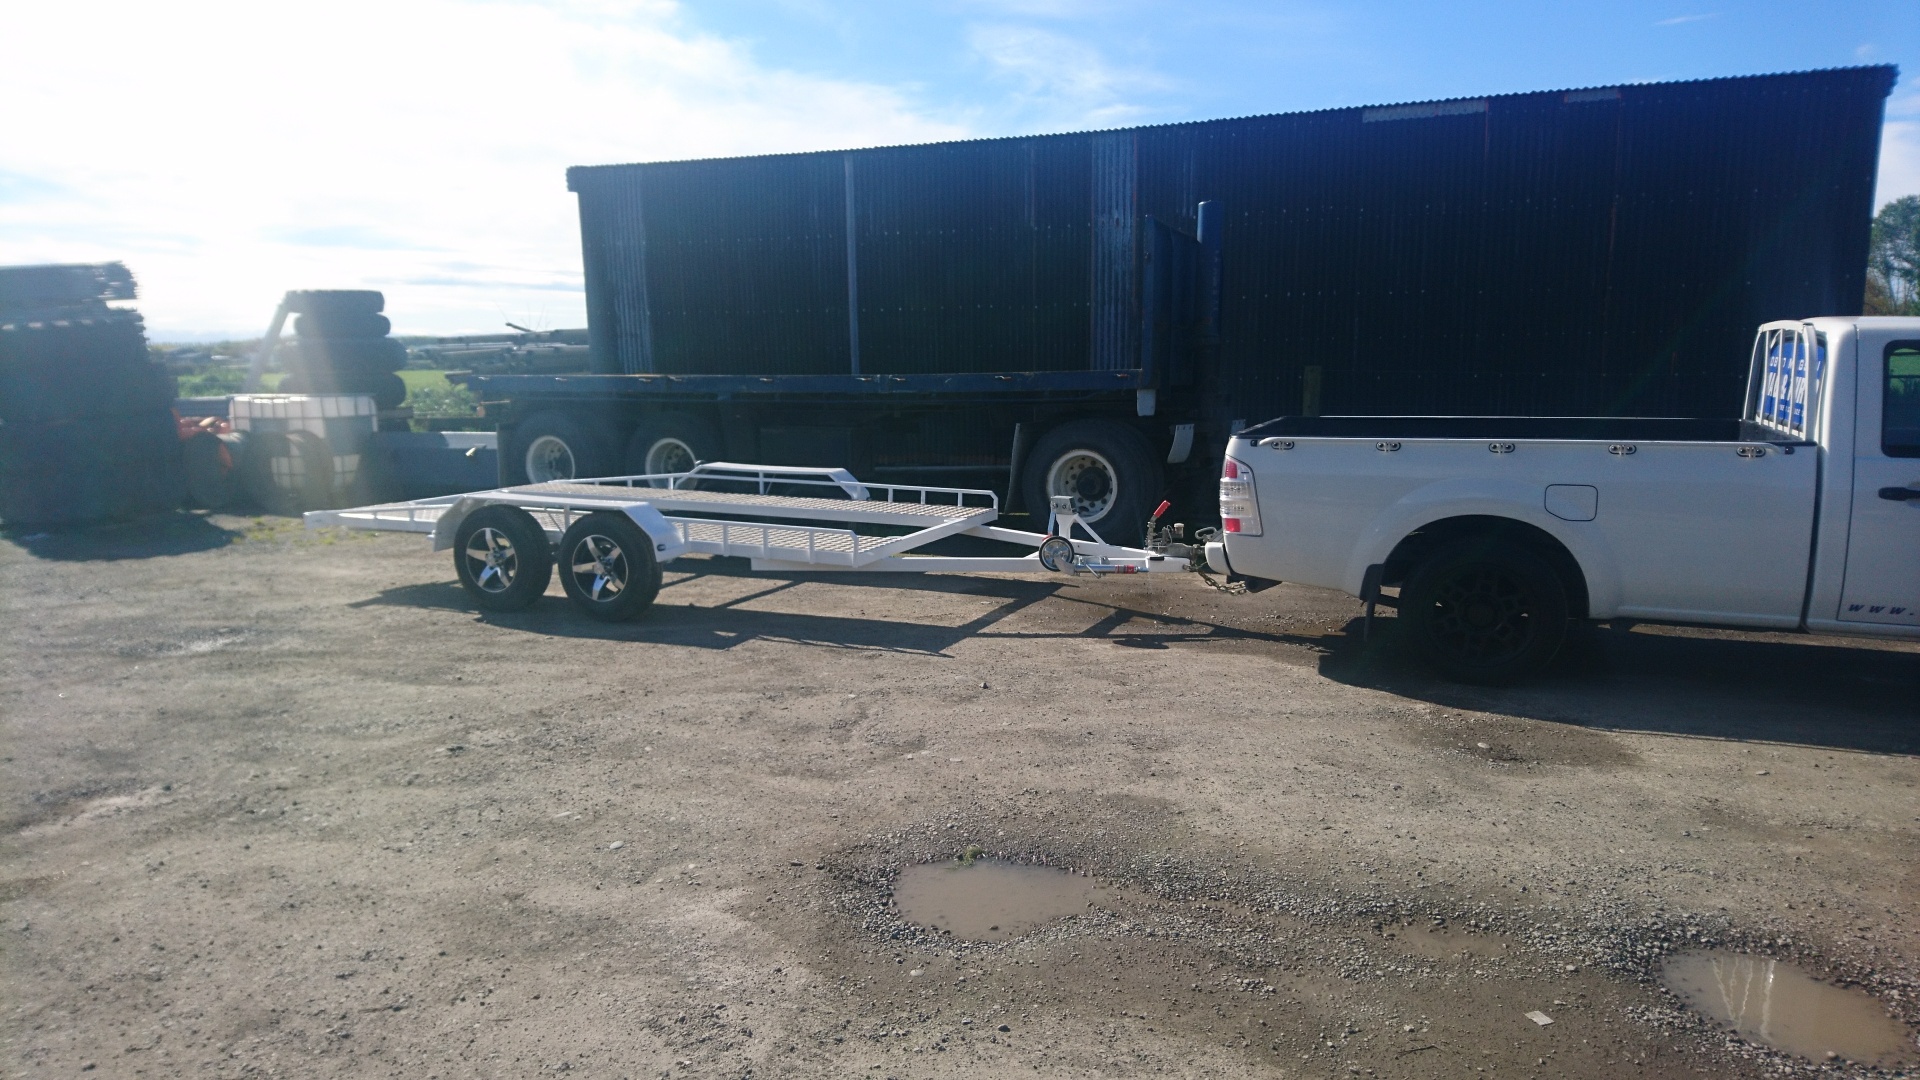
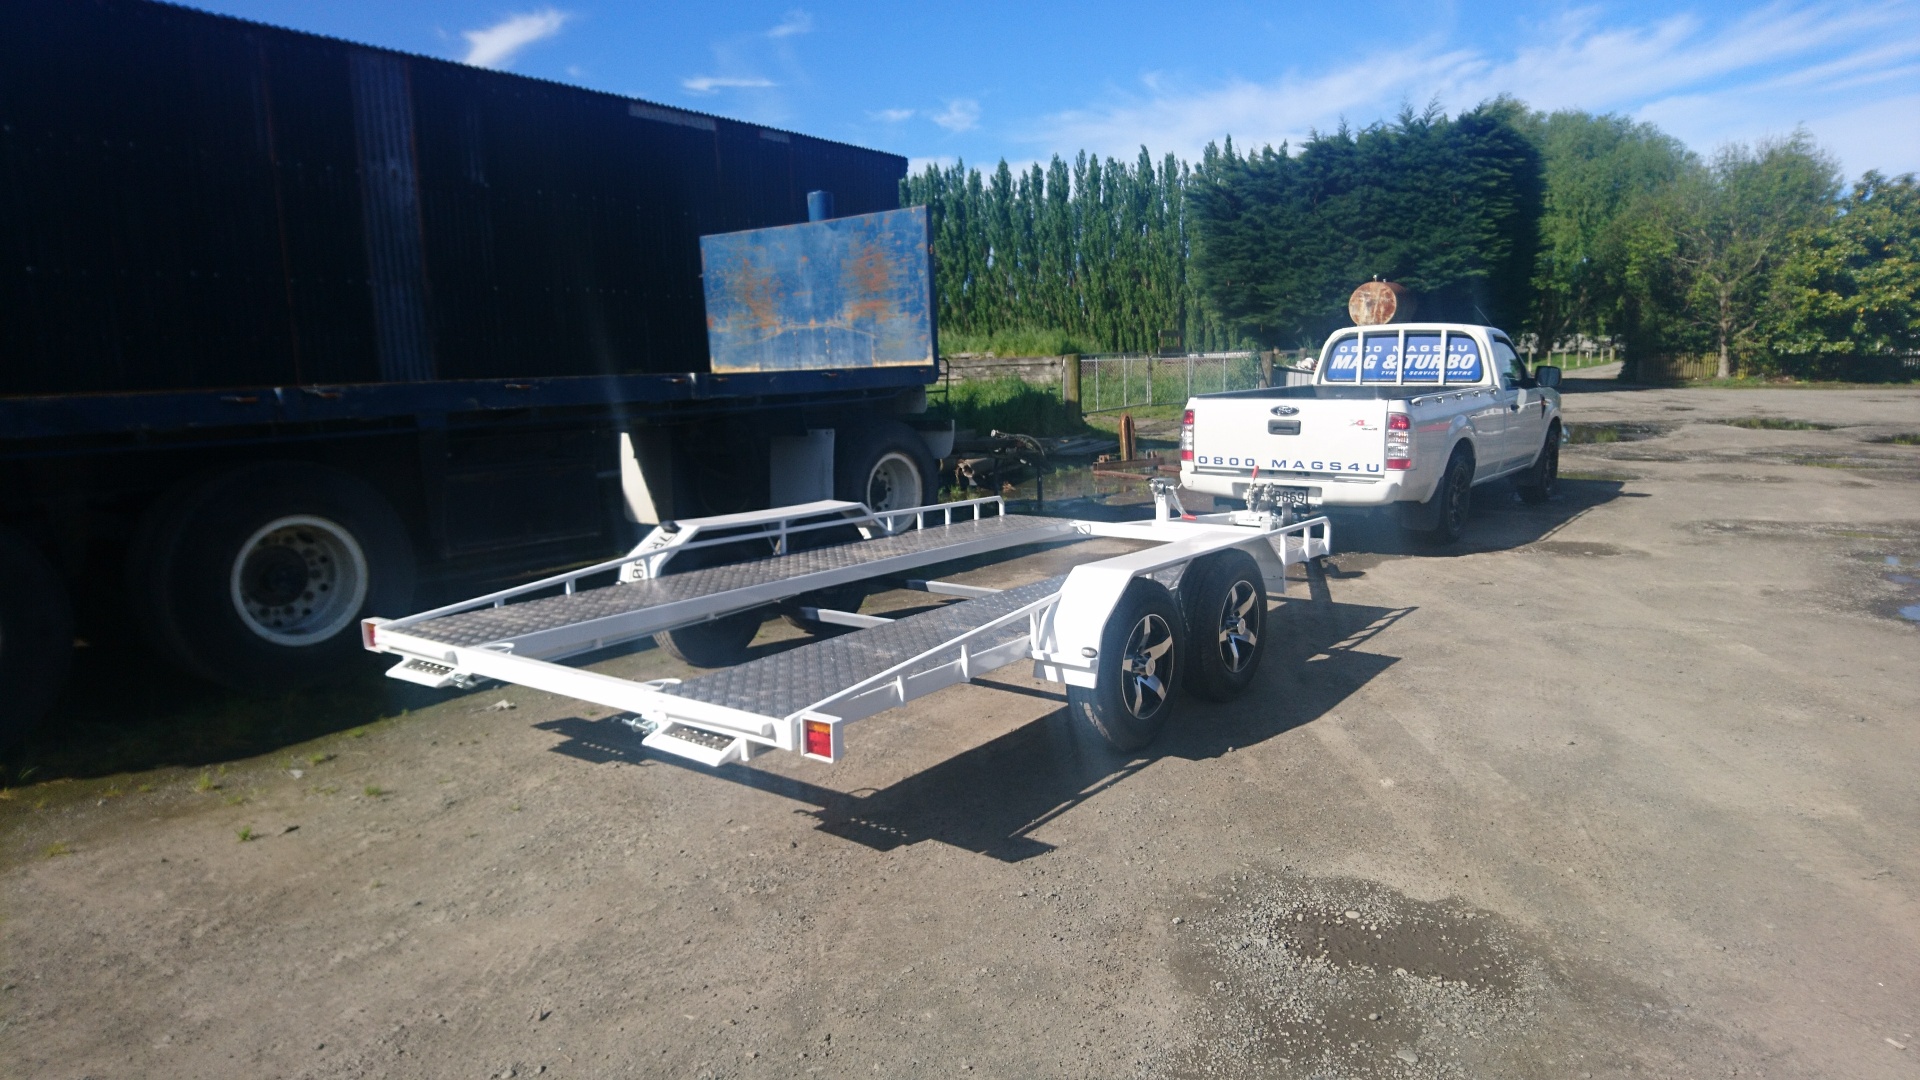
Headed back, loaded up the car. Raring to go for opening night tomorrow night!
 7 points
 -
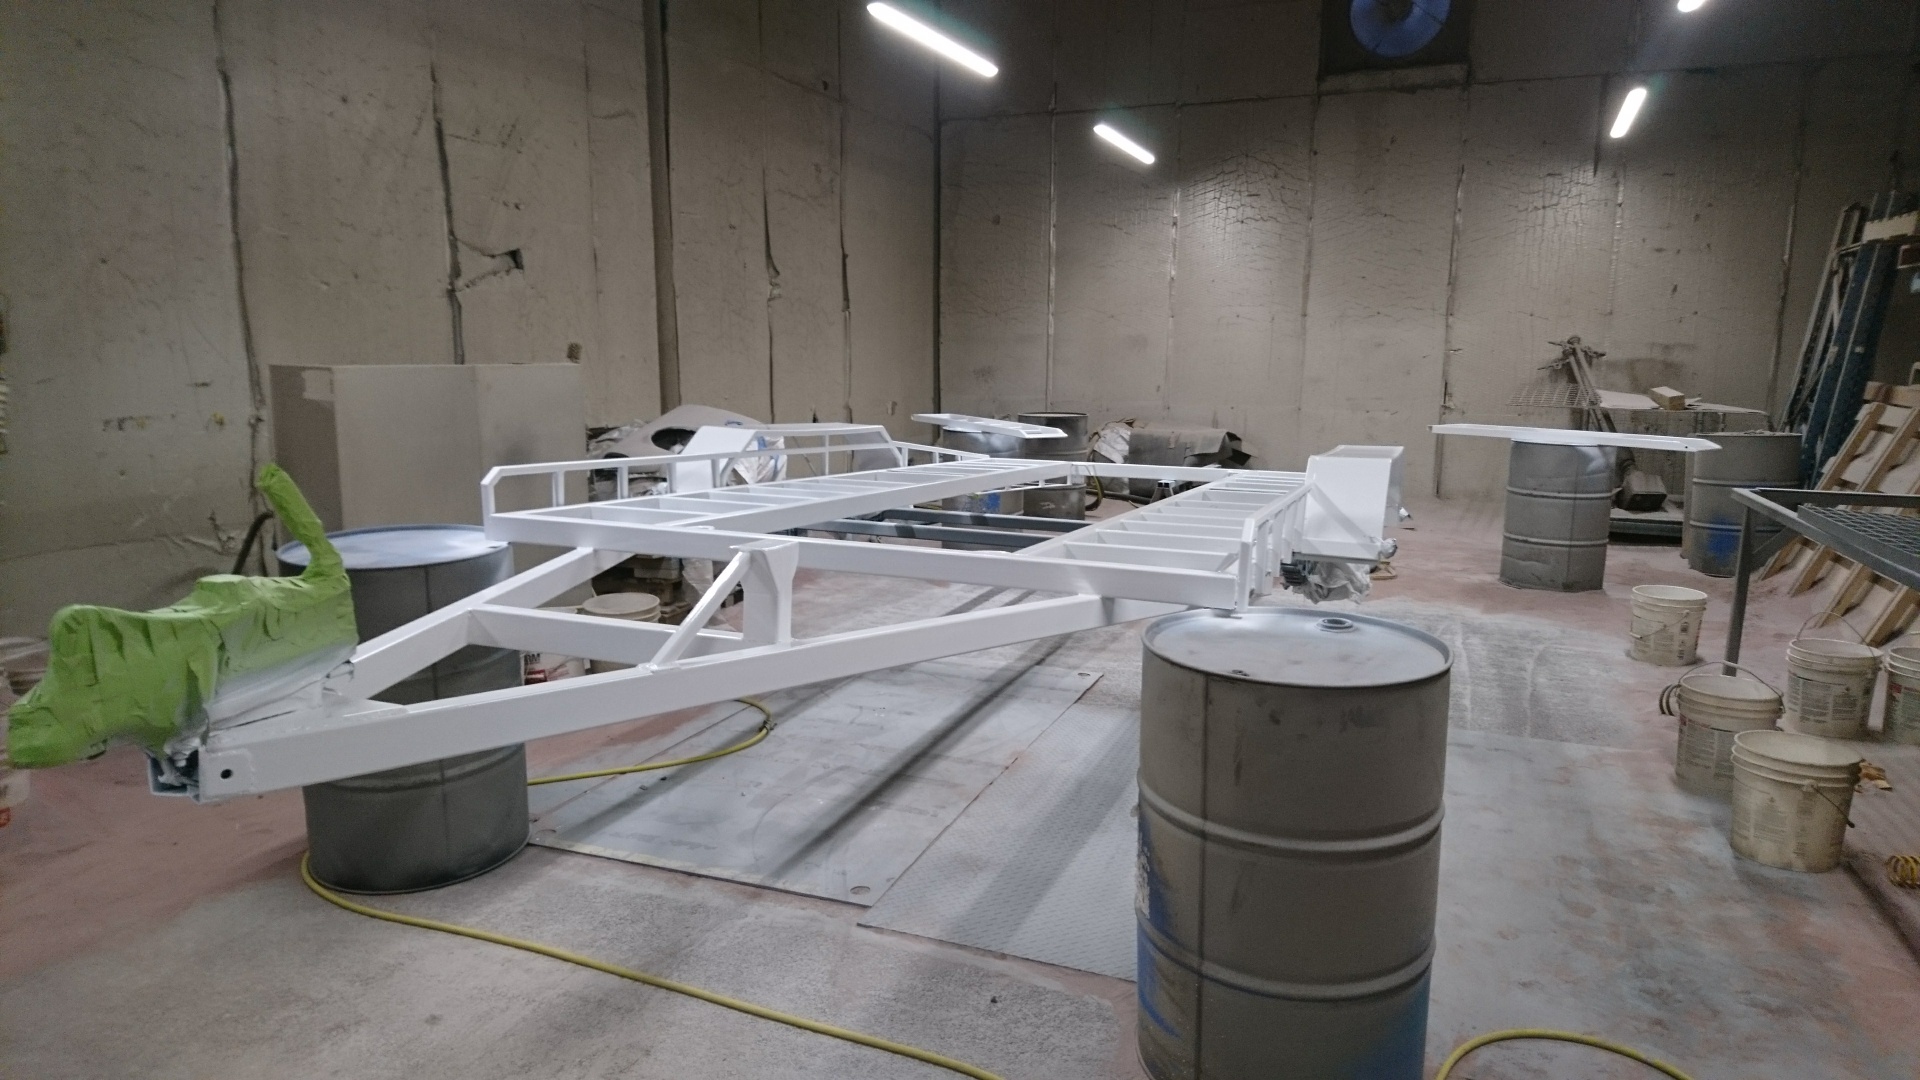
3 coats later it looked like this; After a full day piecing it back together, and prior James/Horndog kindly lent the services of his works guillotine. I then seam sealed the deck, along with blind stainless rivets both the ramps and deck... (Blaine kindly helped after a day of blasting for him)
6 points
-
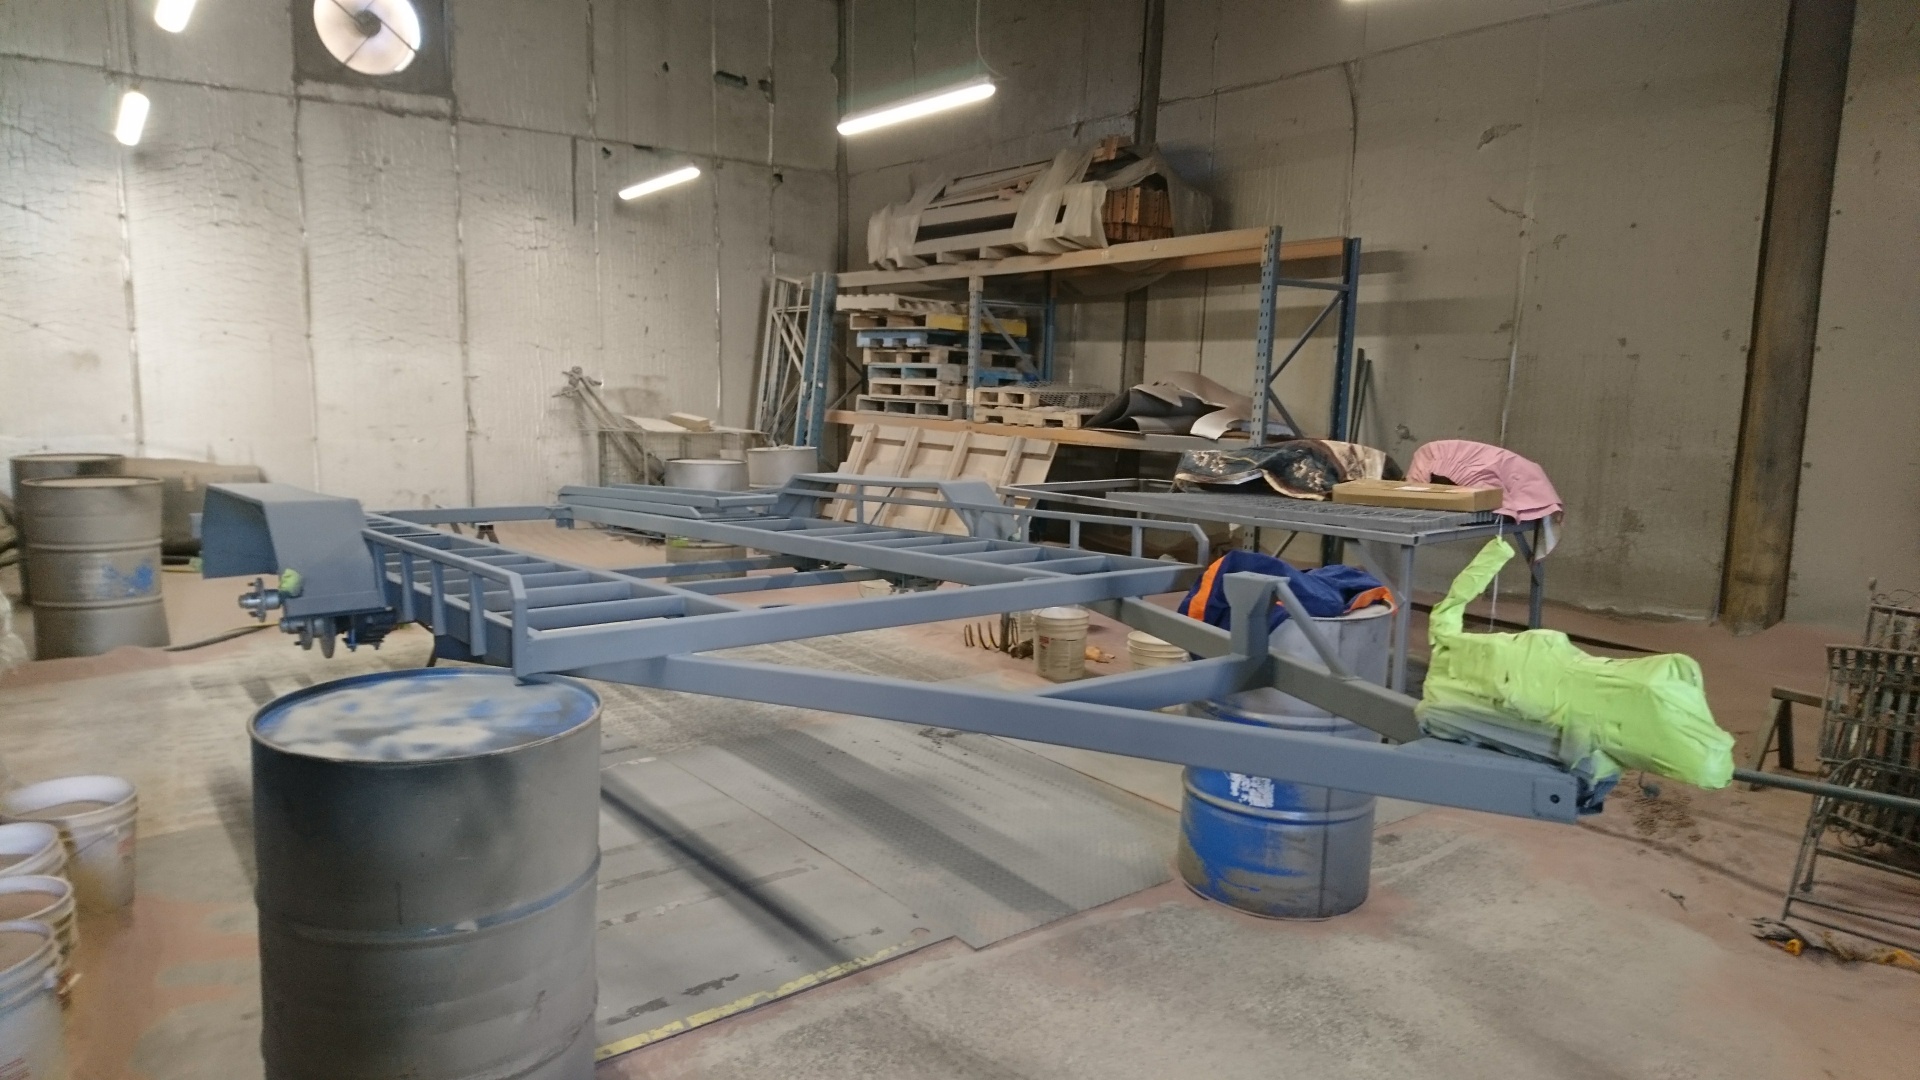
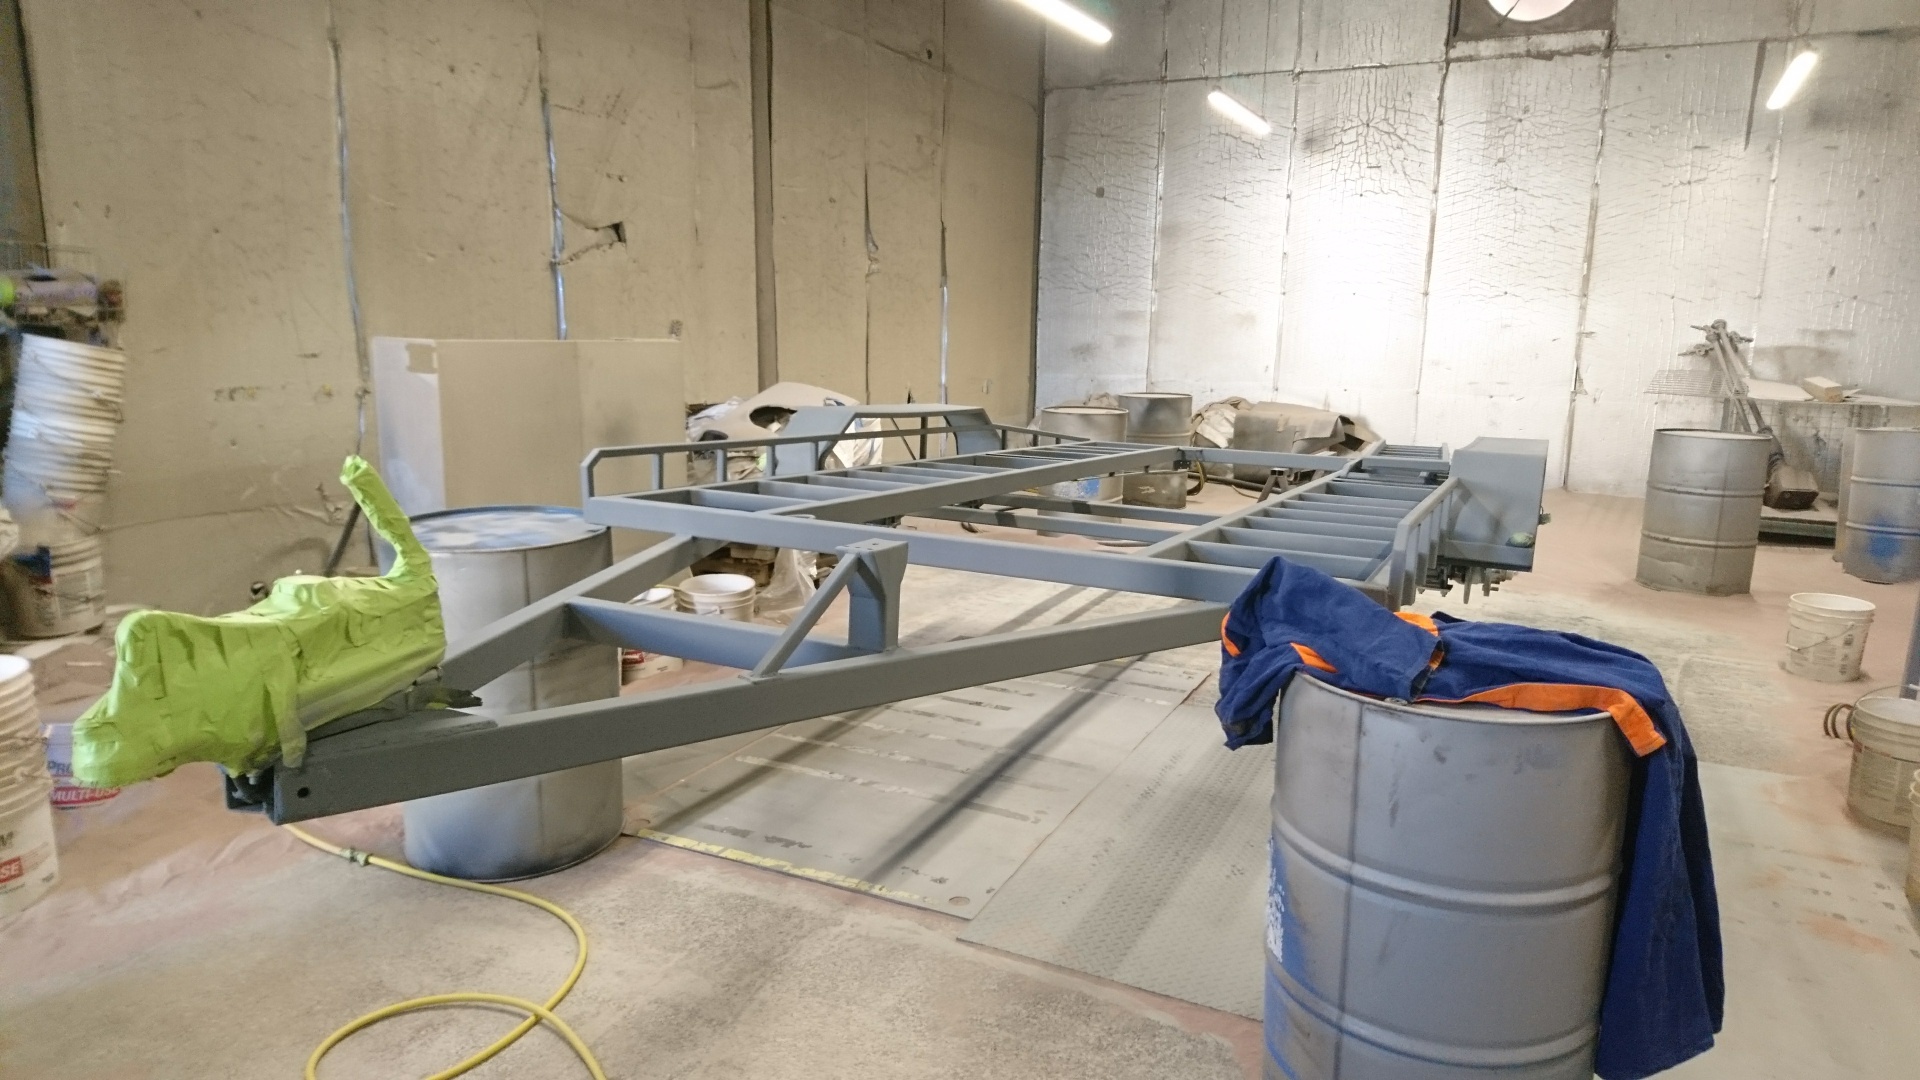
Got a wof, made sure everything was up to scratch before blasting it.. Blaine from Fast Blast kindly Sandblasted the chassis for me, and then together we Primed the chassis, then called it a night
5 points
-
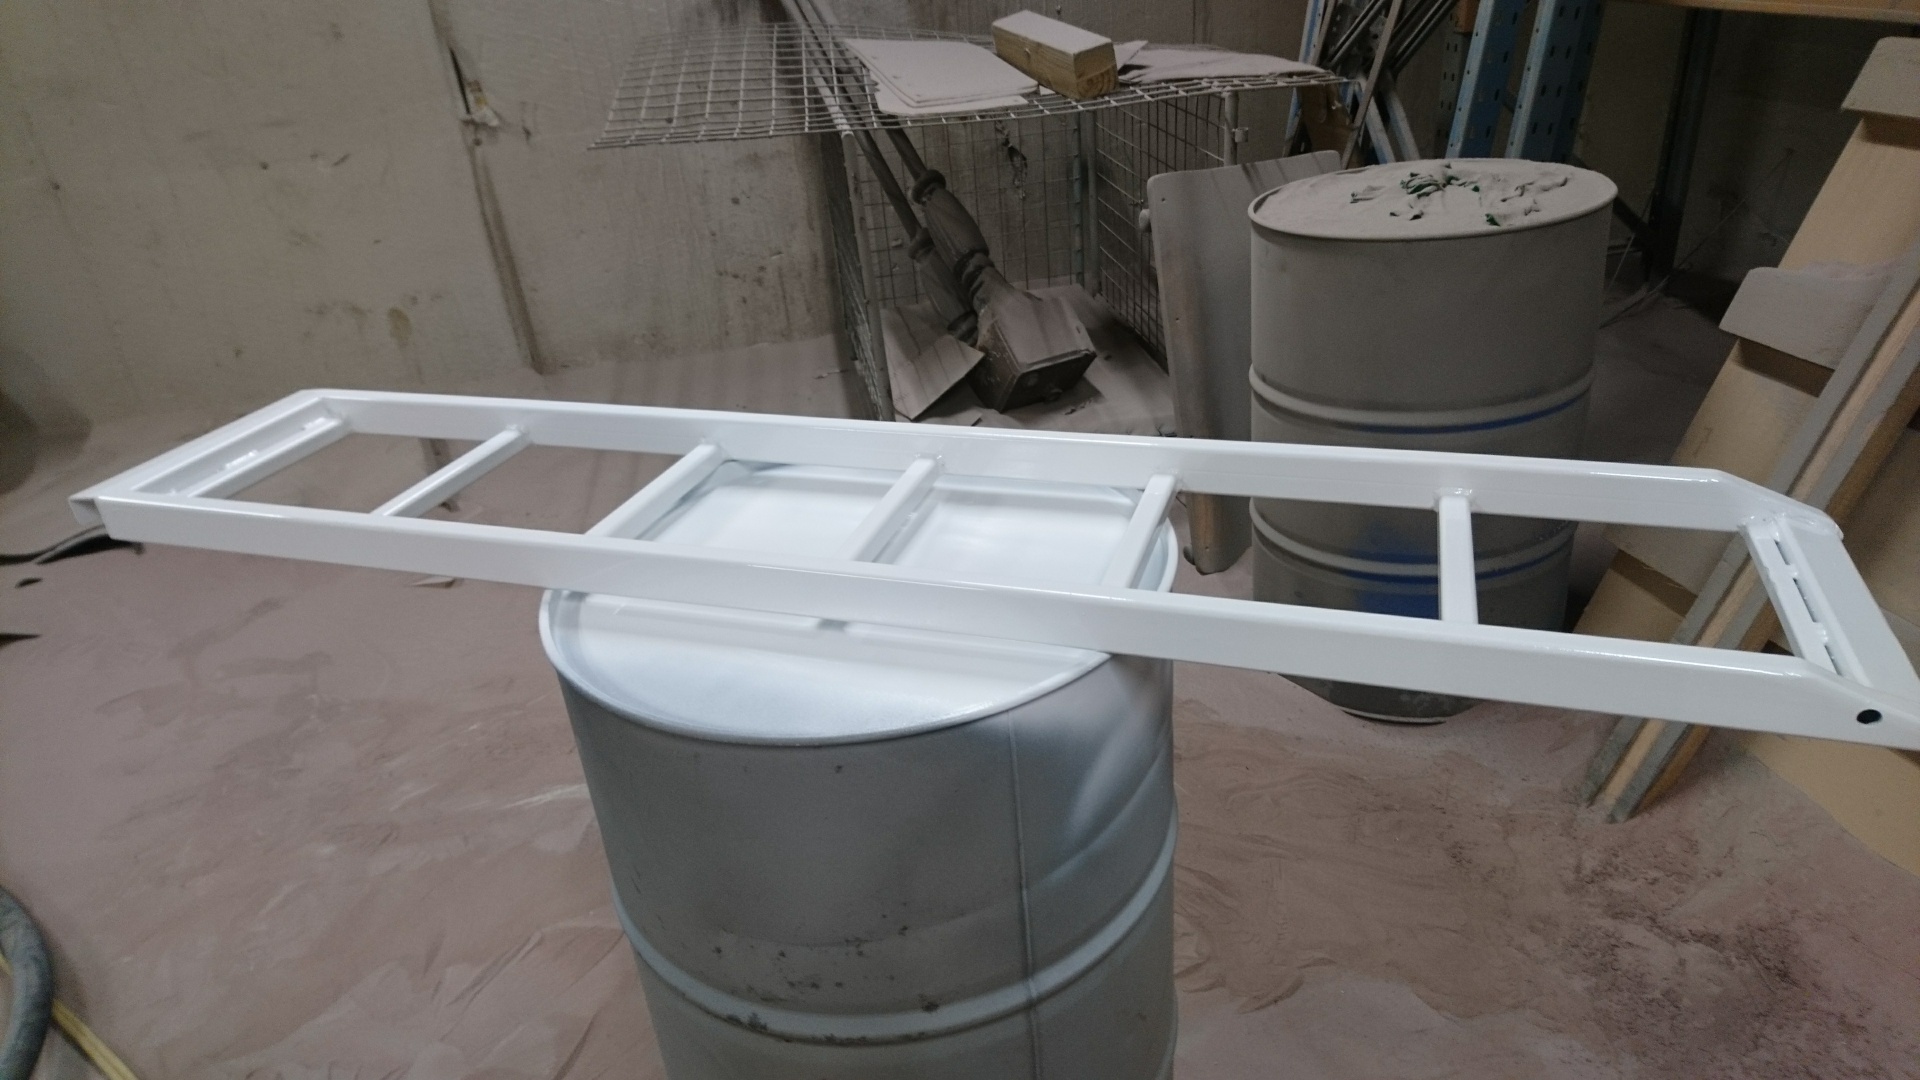
Lay the first coat of 2k acrylic white on Friday night..
4 points
-
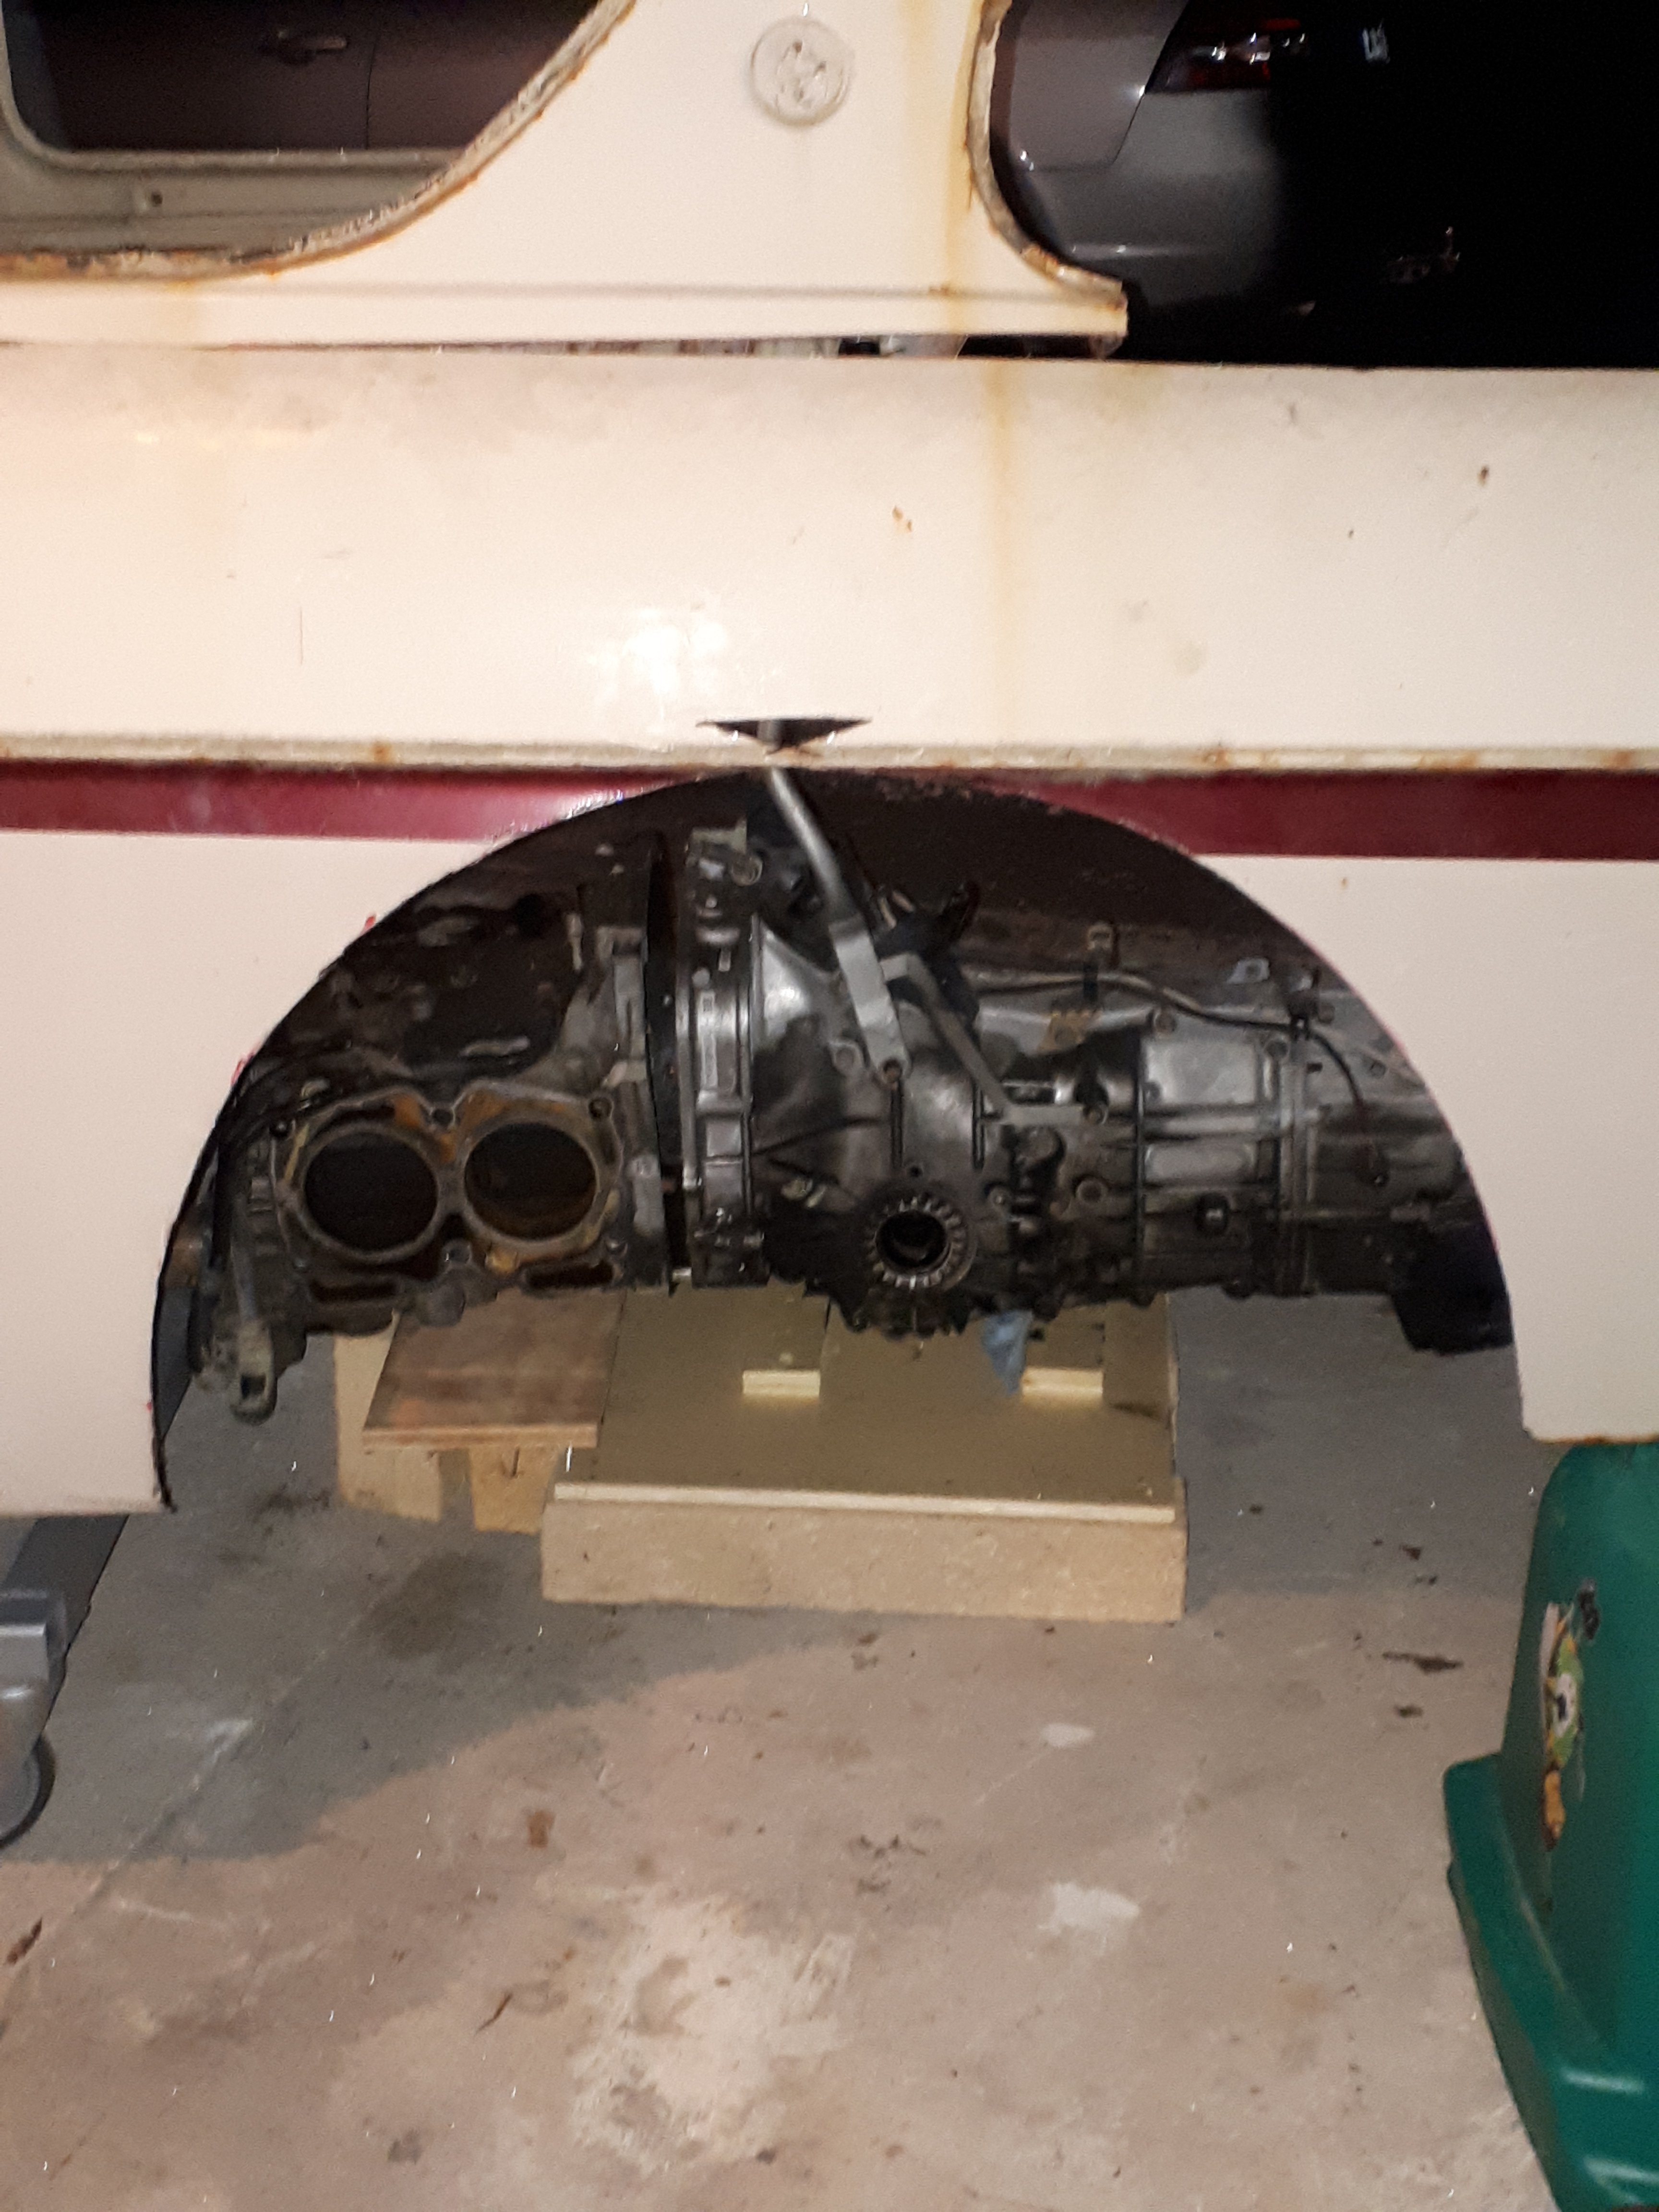
Got motivated tonight and went out to garage, Sat engine and trans in rough position and placed guard back on to see where shit will end up and if it is a feasable(spelling?)concept. My biggest worry was where the axles would be in relation to the centre of the wheel arch, as you can see it's only slightly offset from the centre line. I also wanted to see how long the trans was going to stick out the back, which it doesn't, will be well forward of the rear panel. Next will be to bring the rear subframe and suspension in and sit in the engine/boxes place and work out how far the hubs will hang out, and this will allow me to work out how far to box/flare guard. *** insert cheesy grin here ***
4 points
-
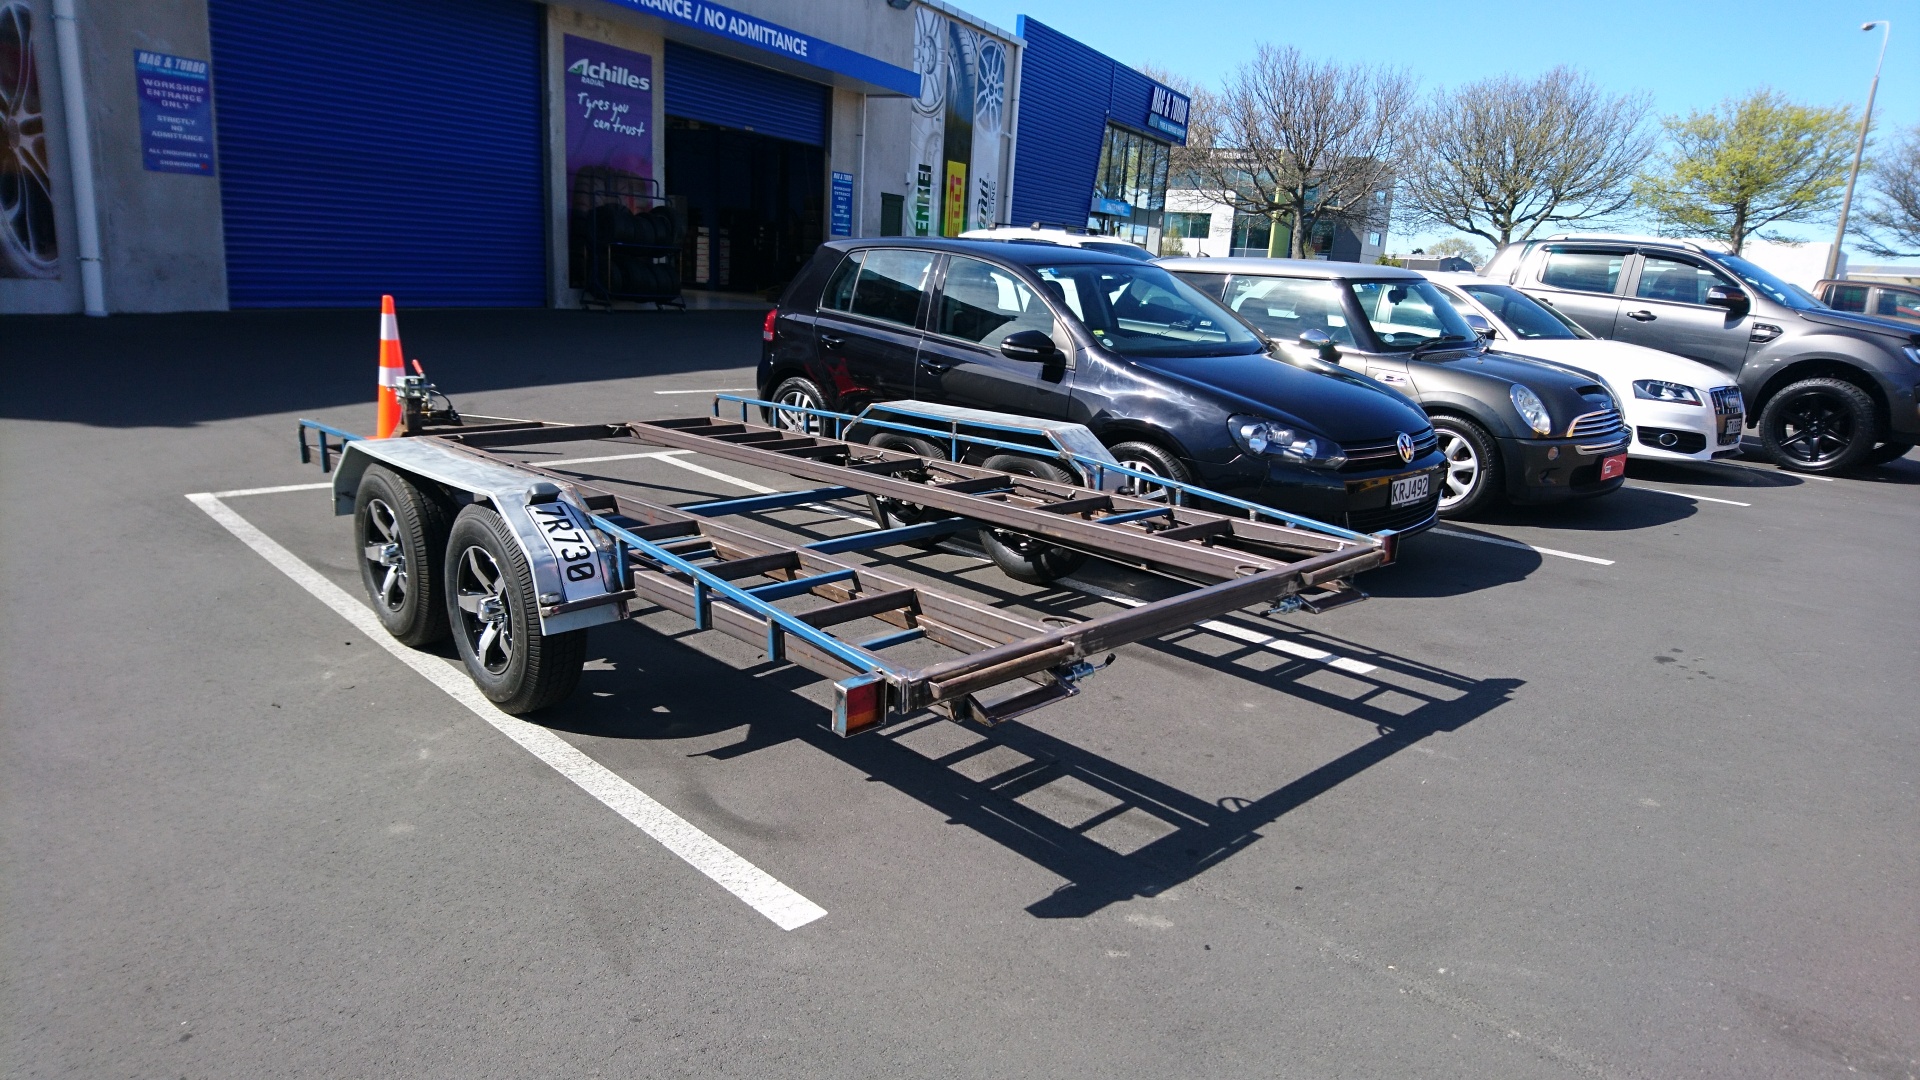
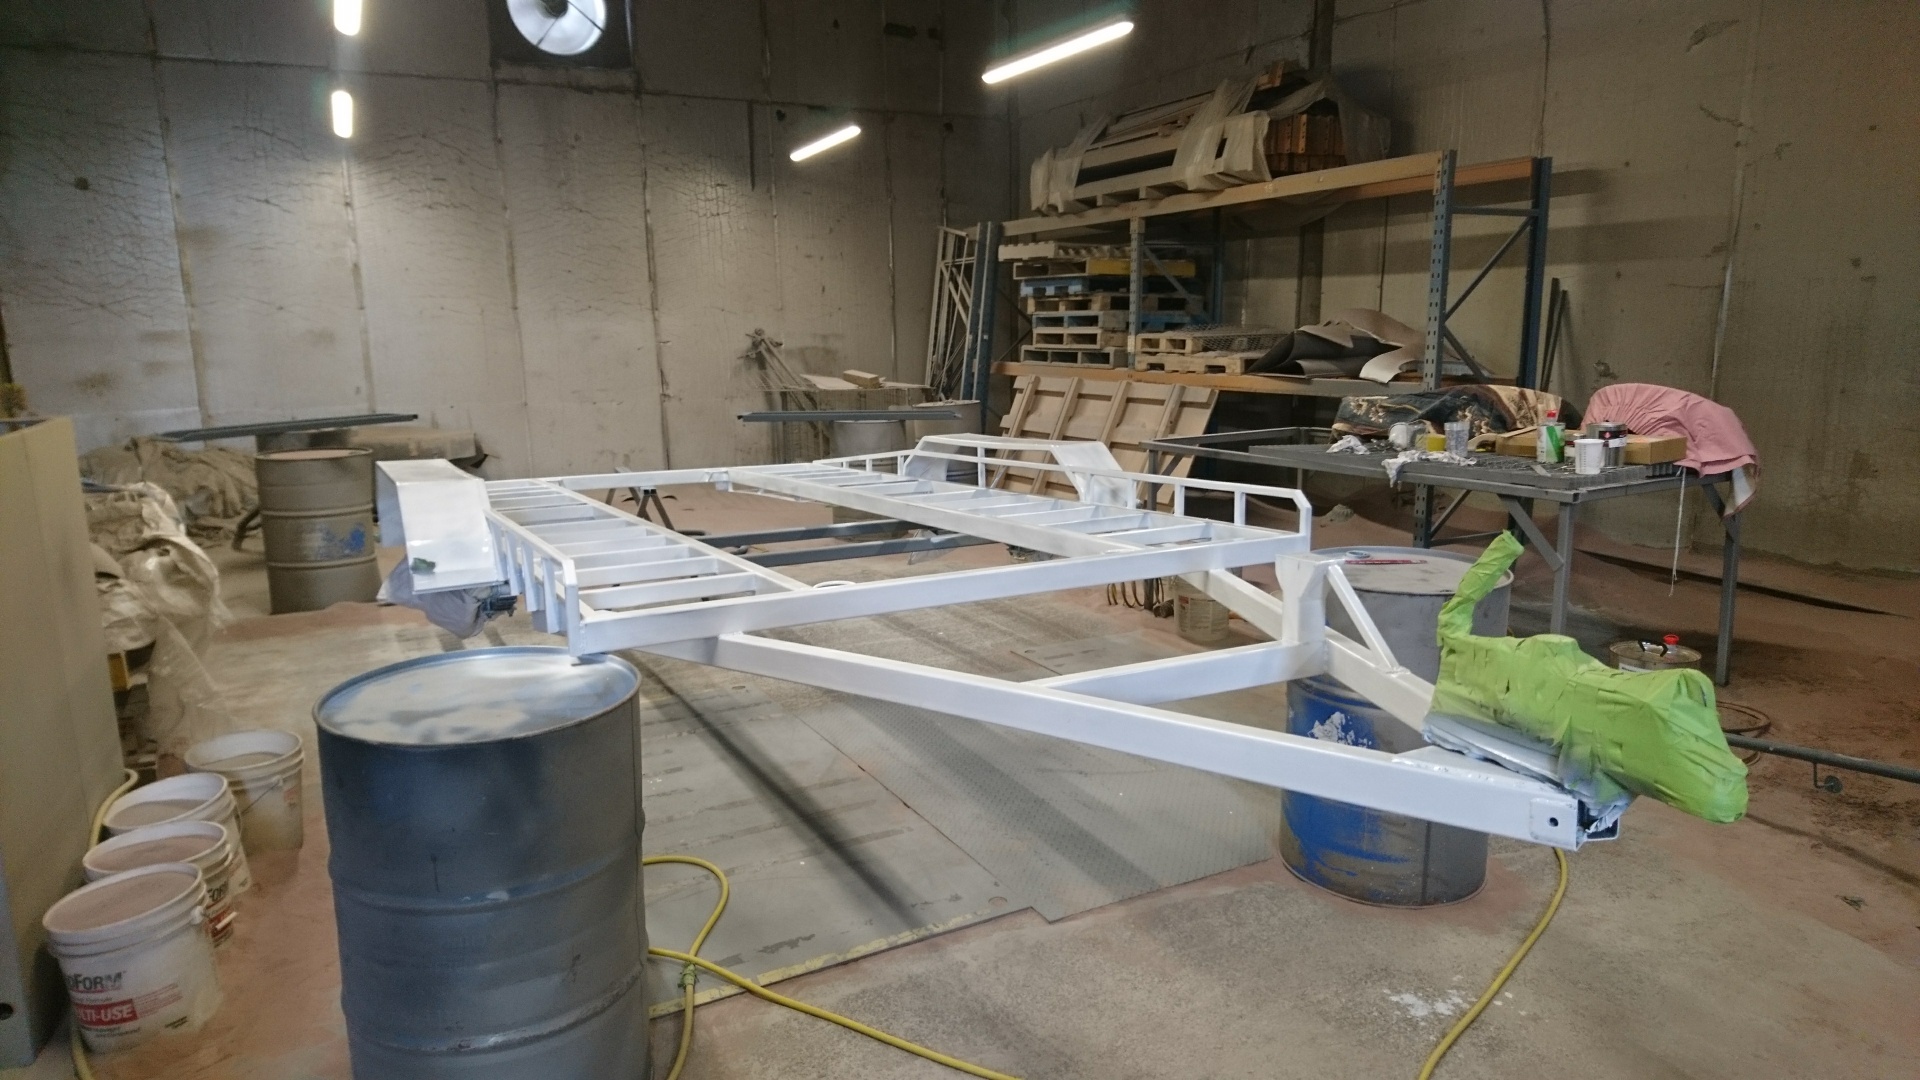
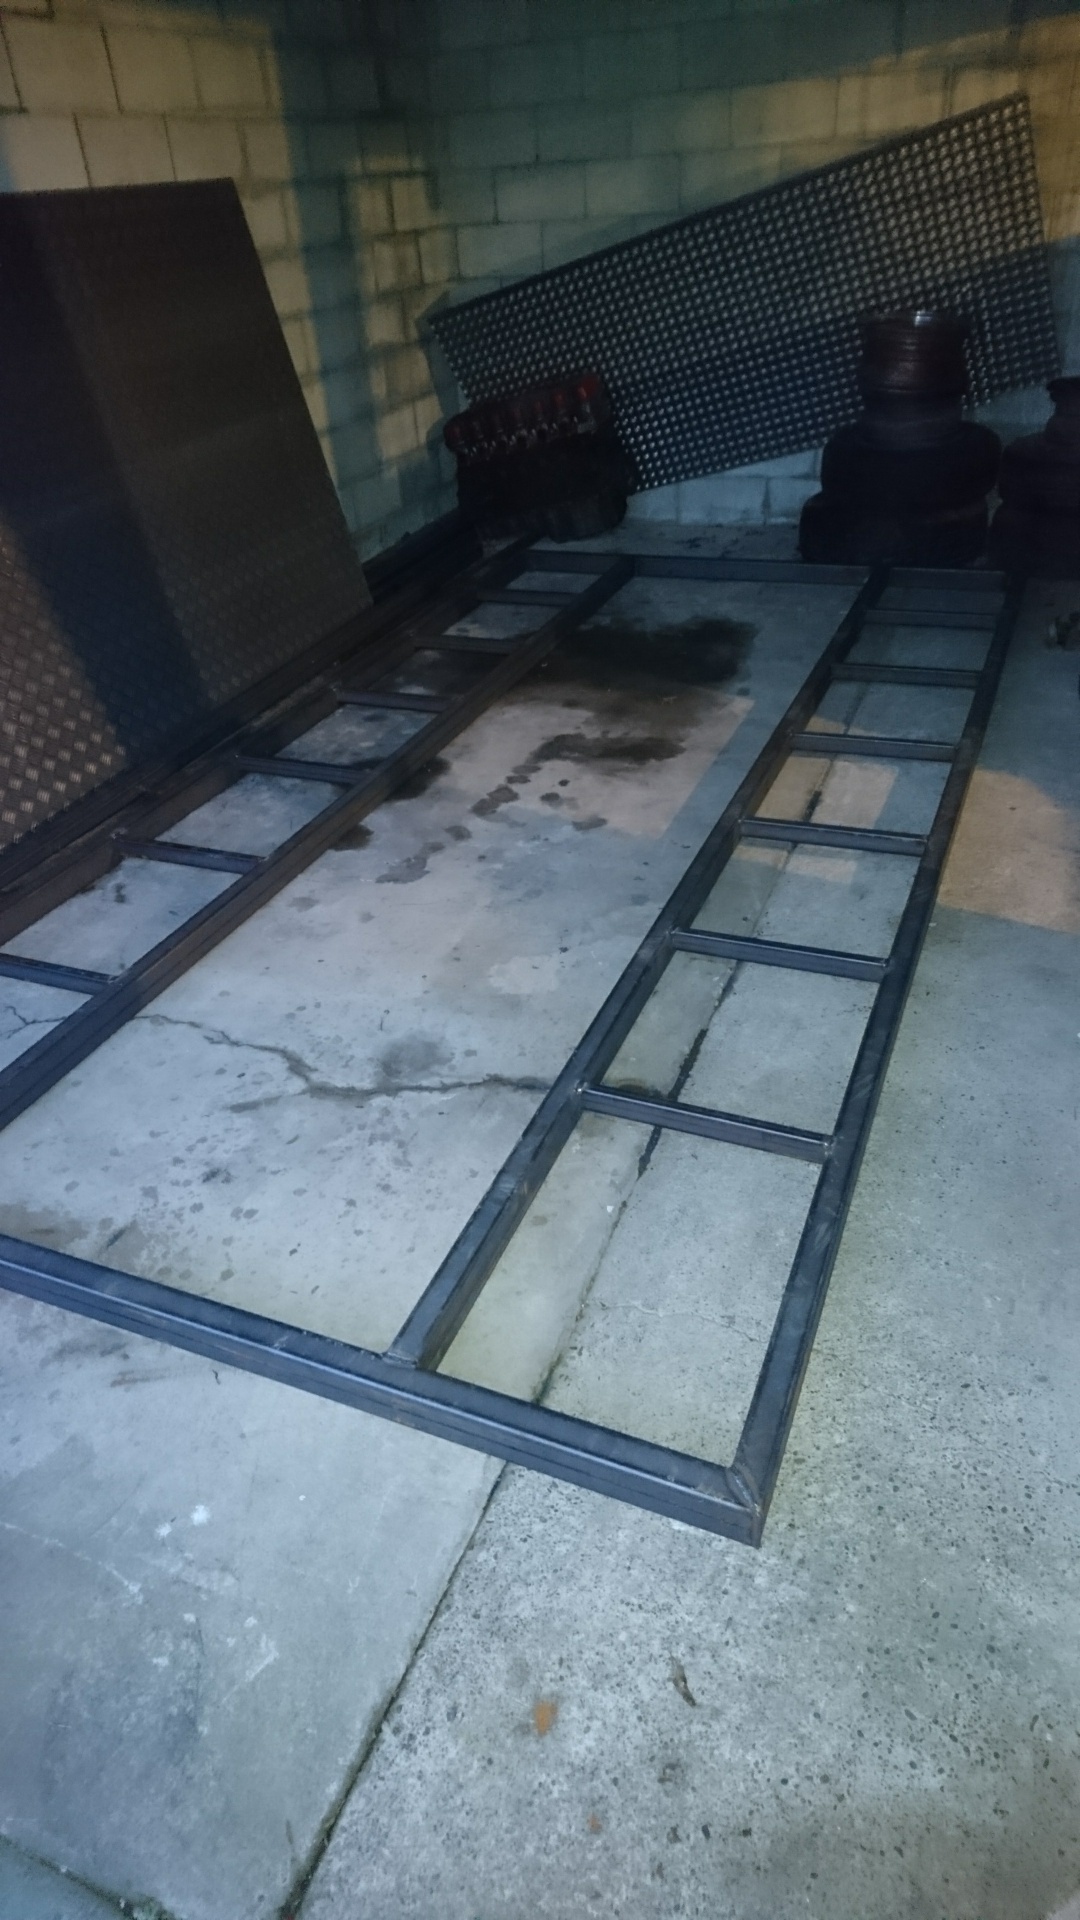
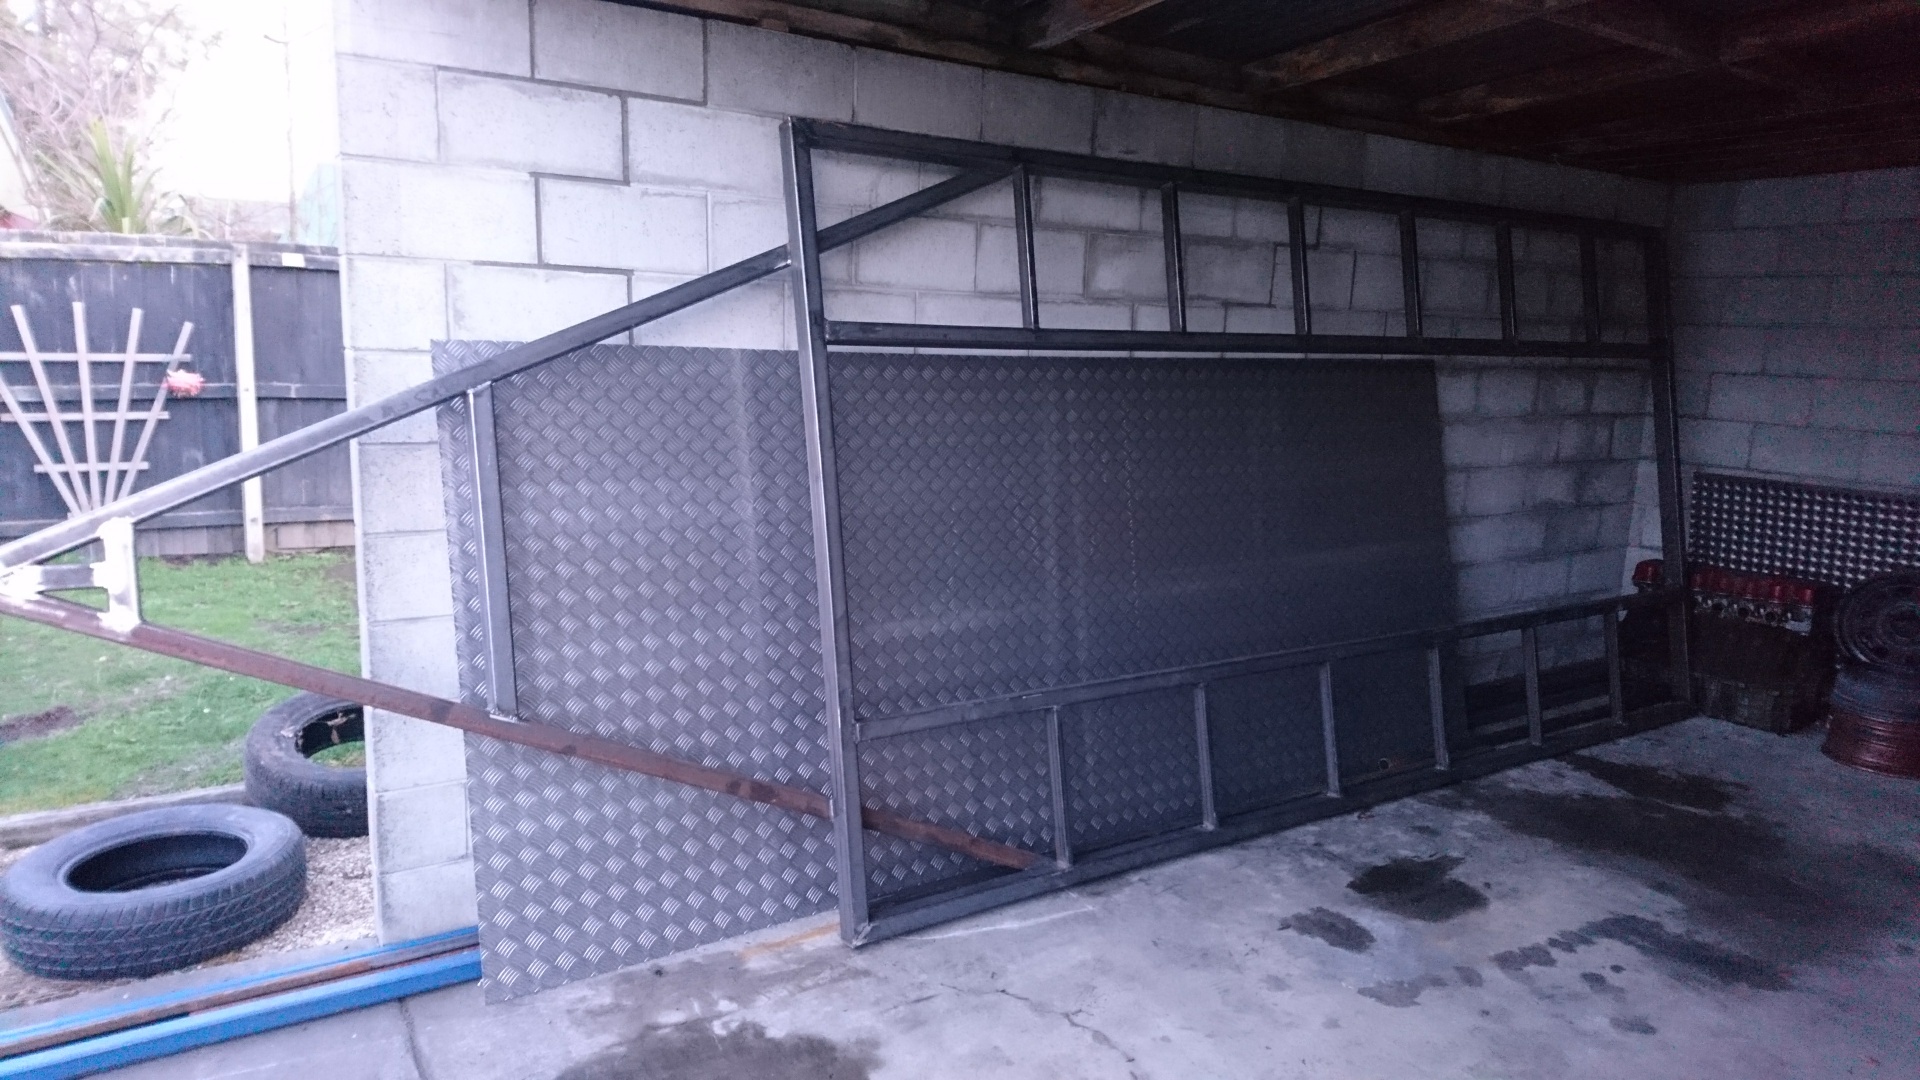
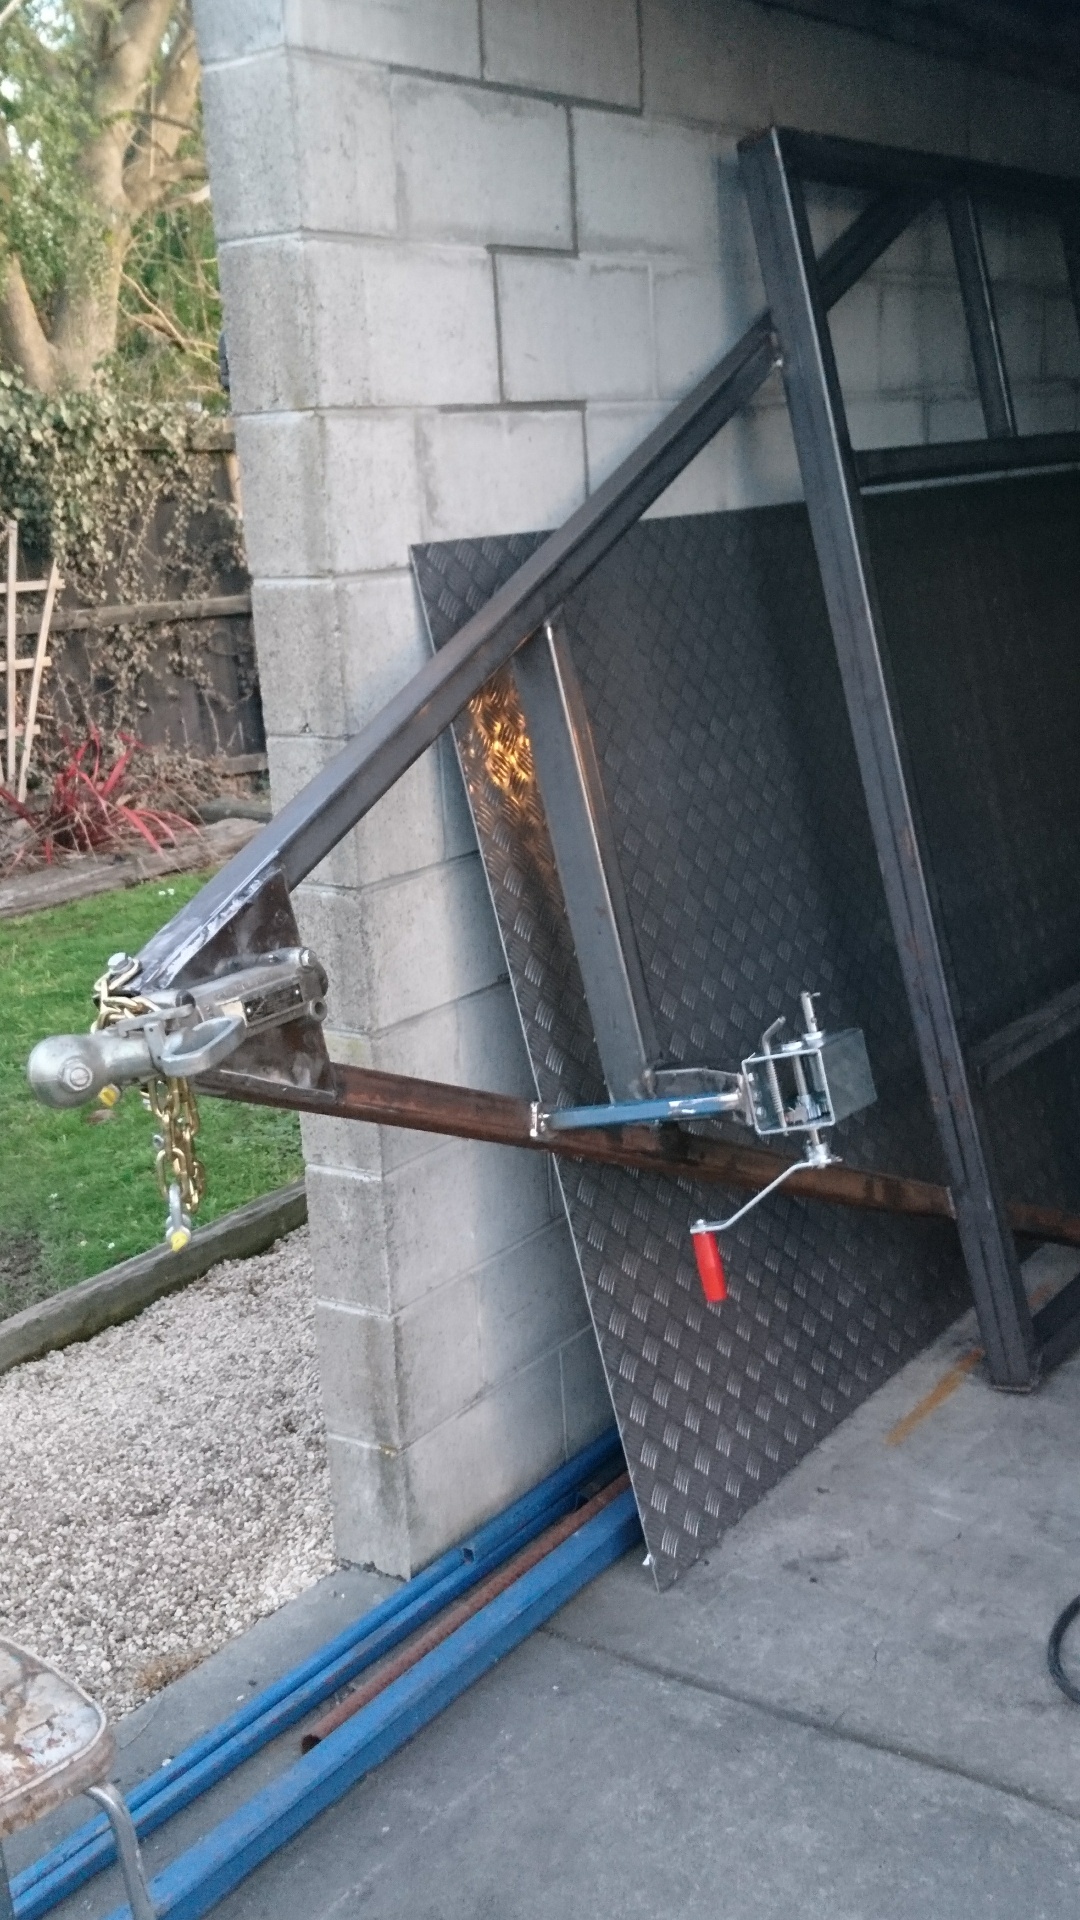
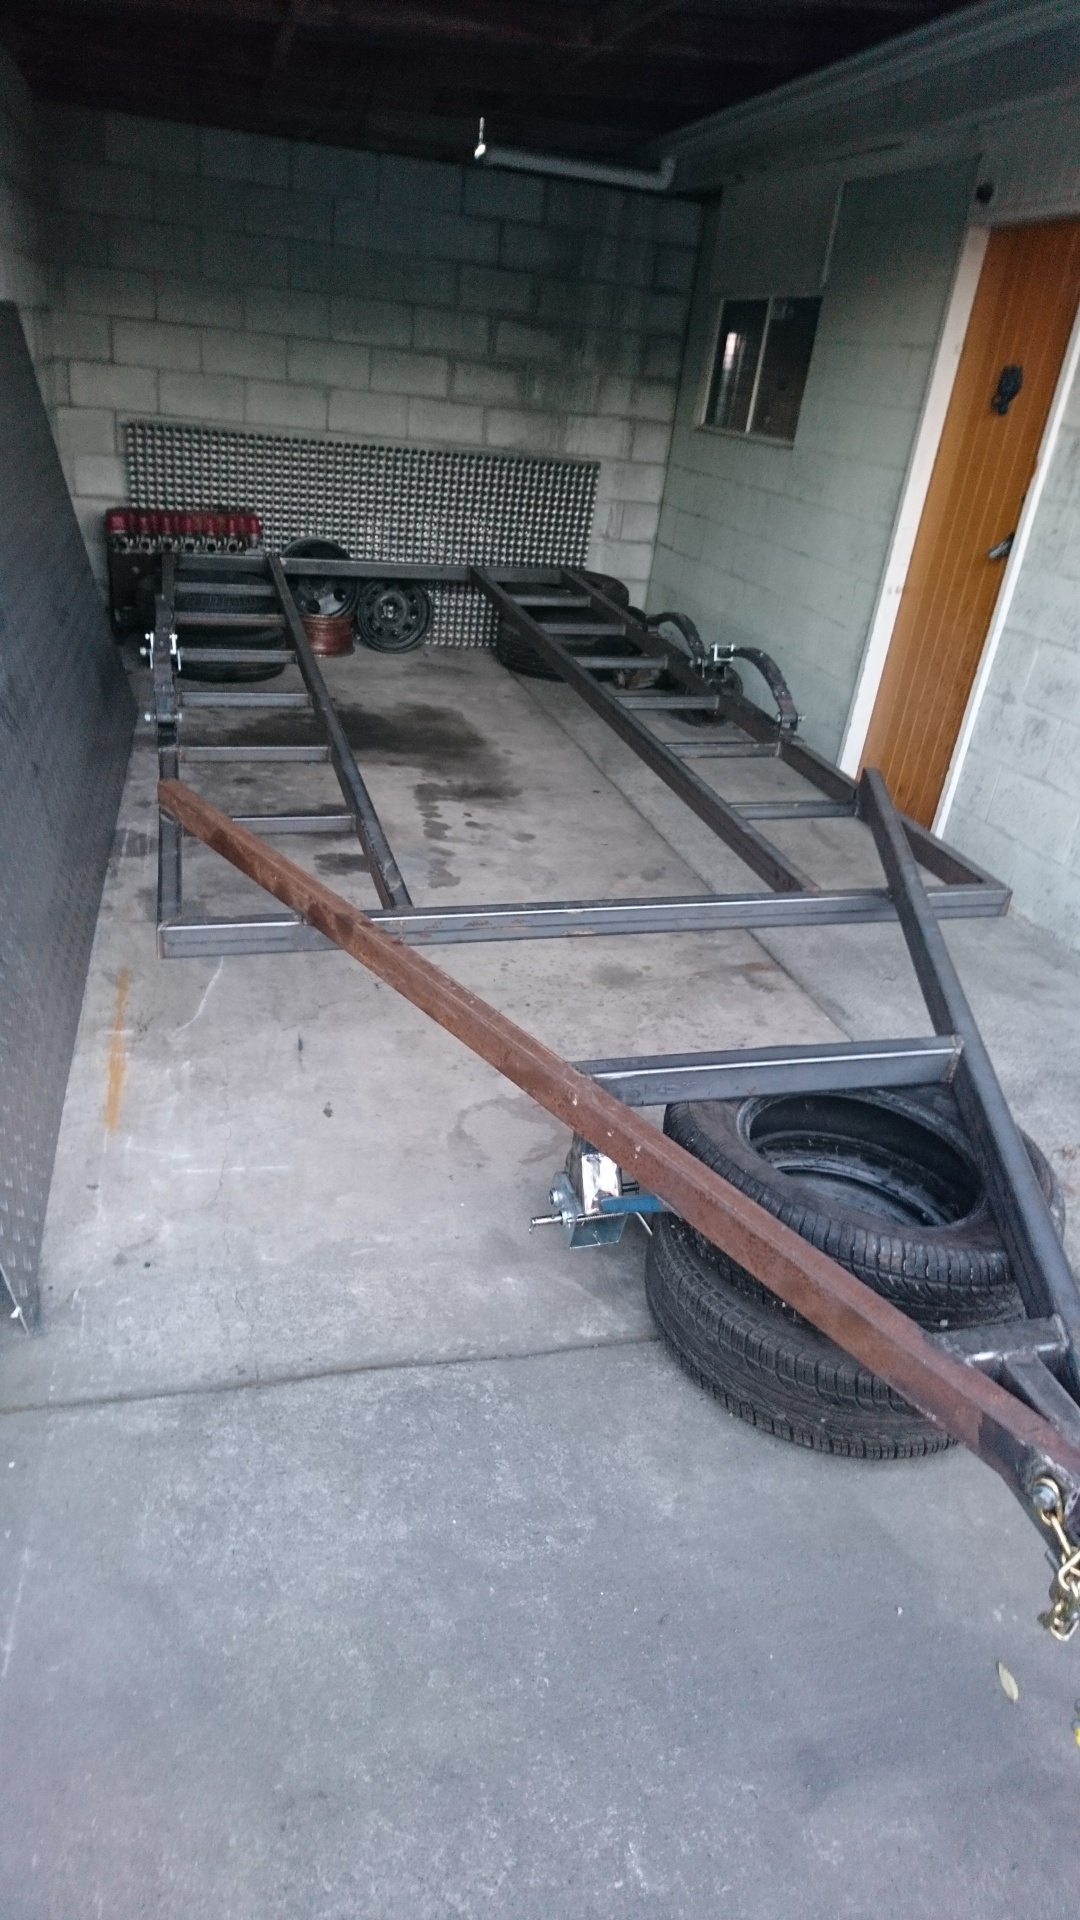
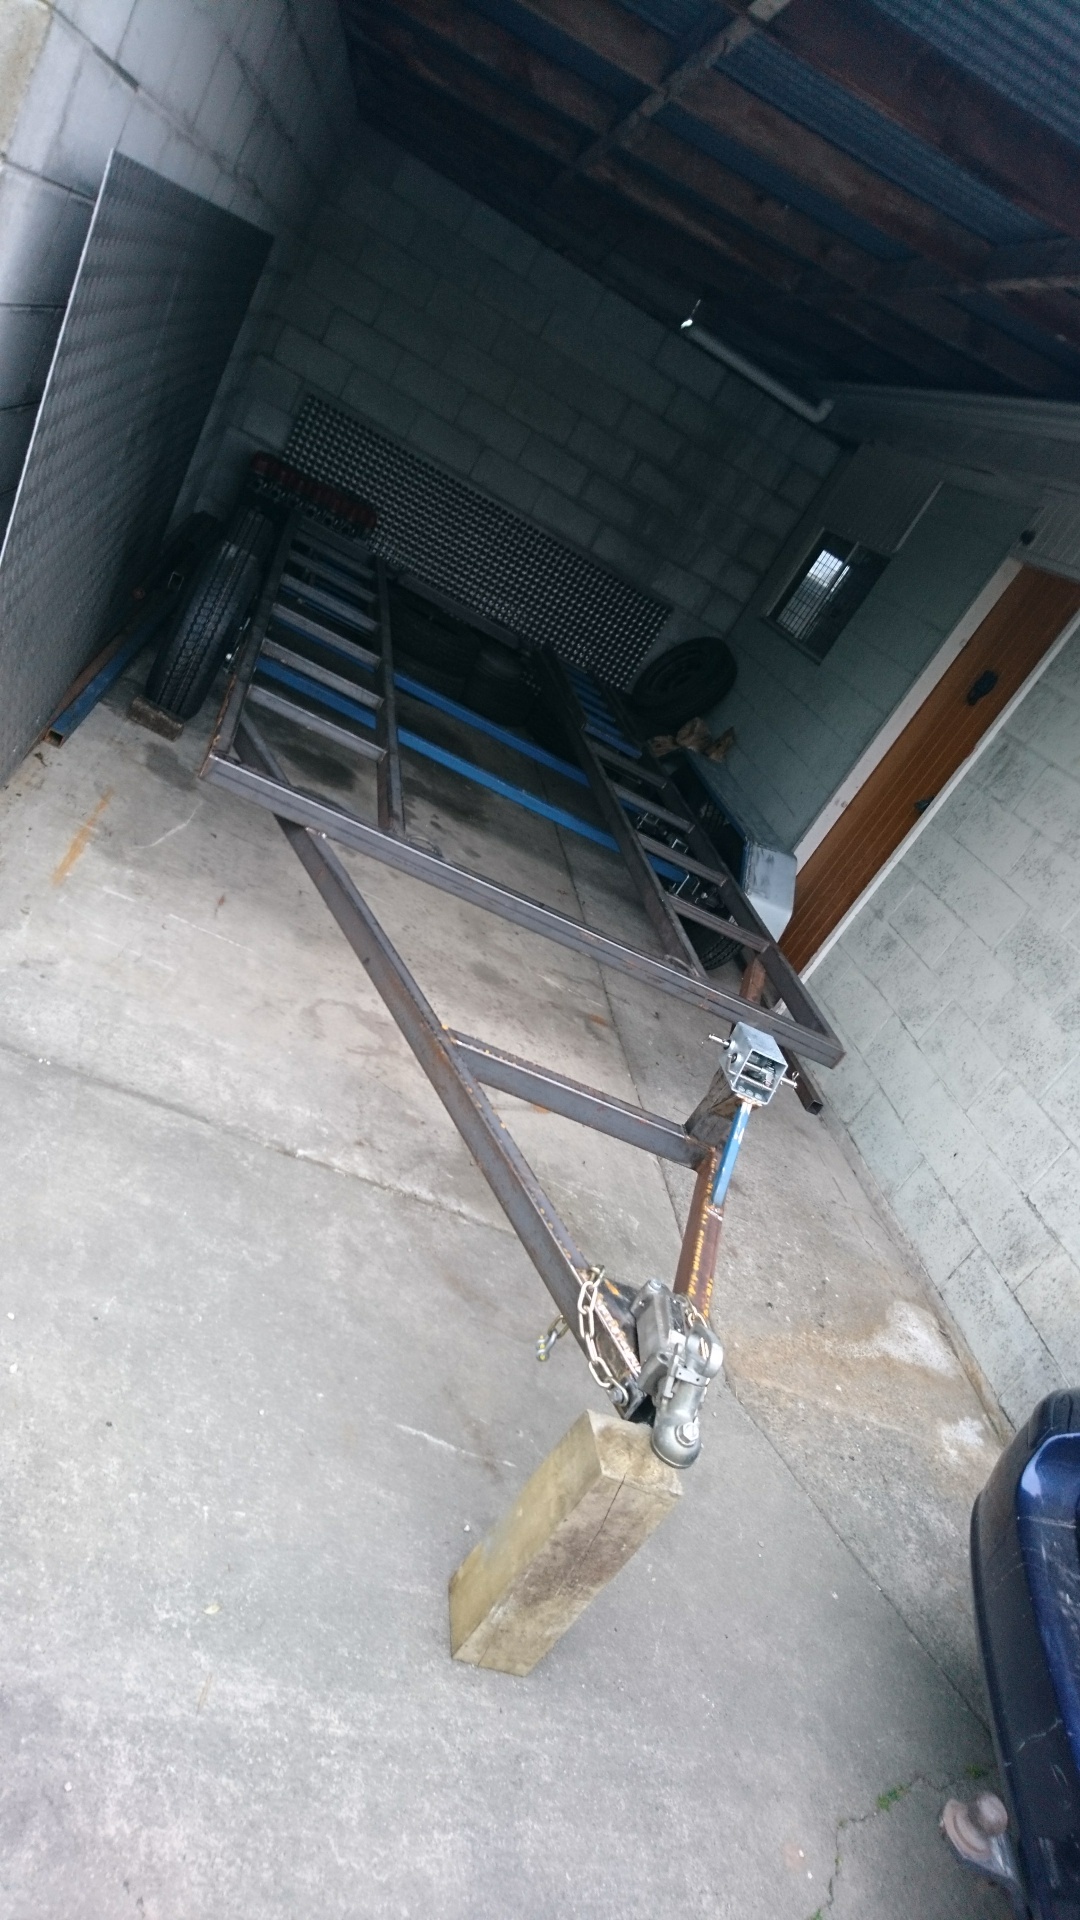
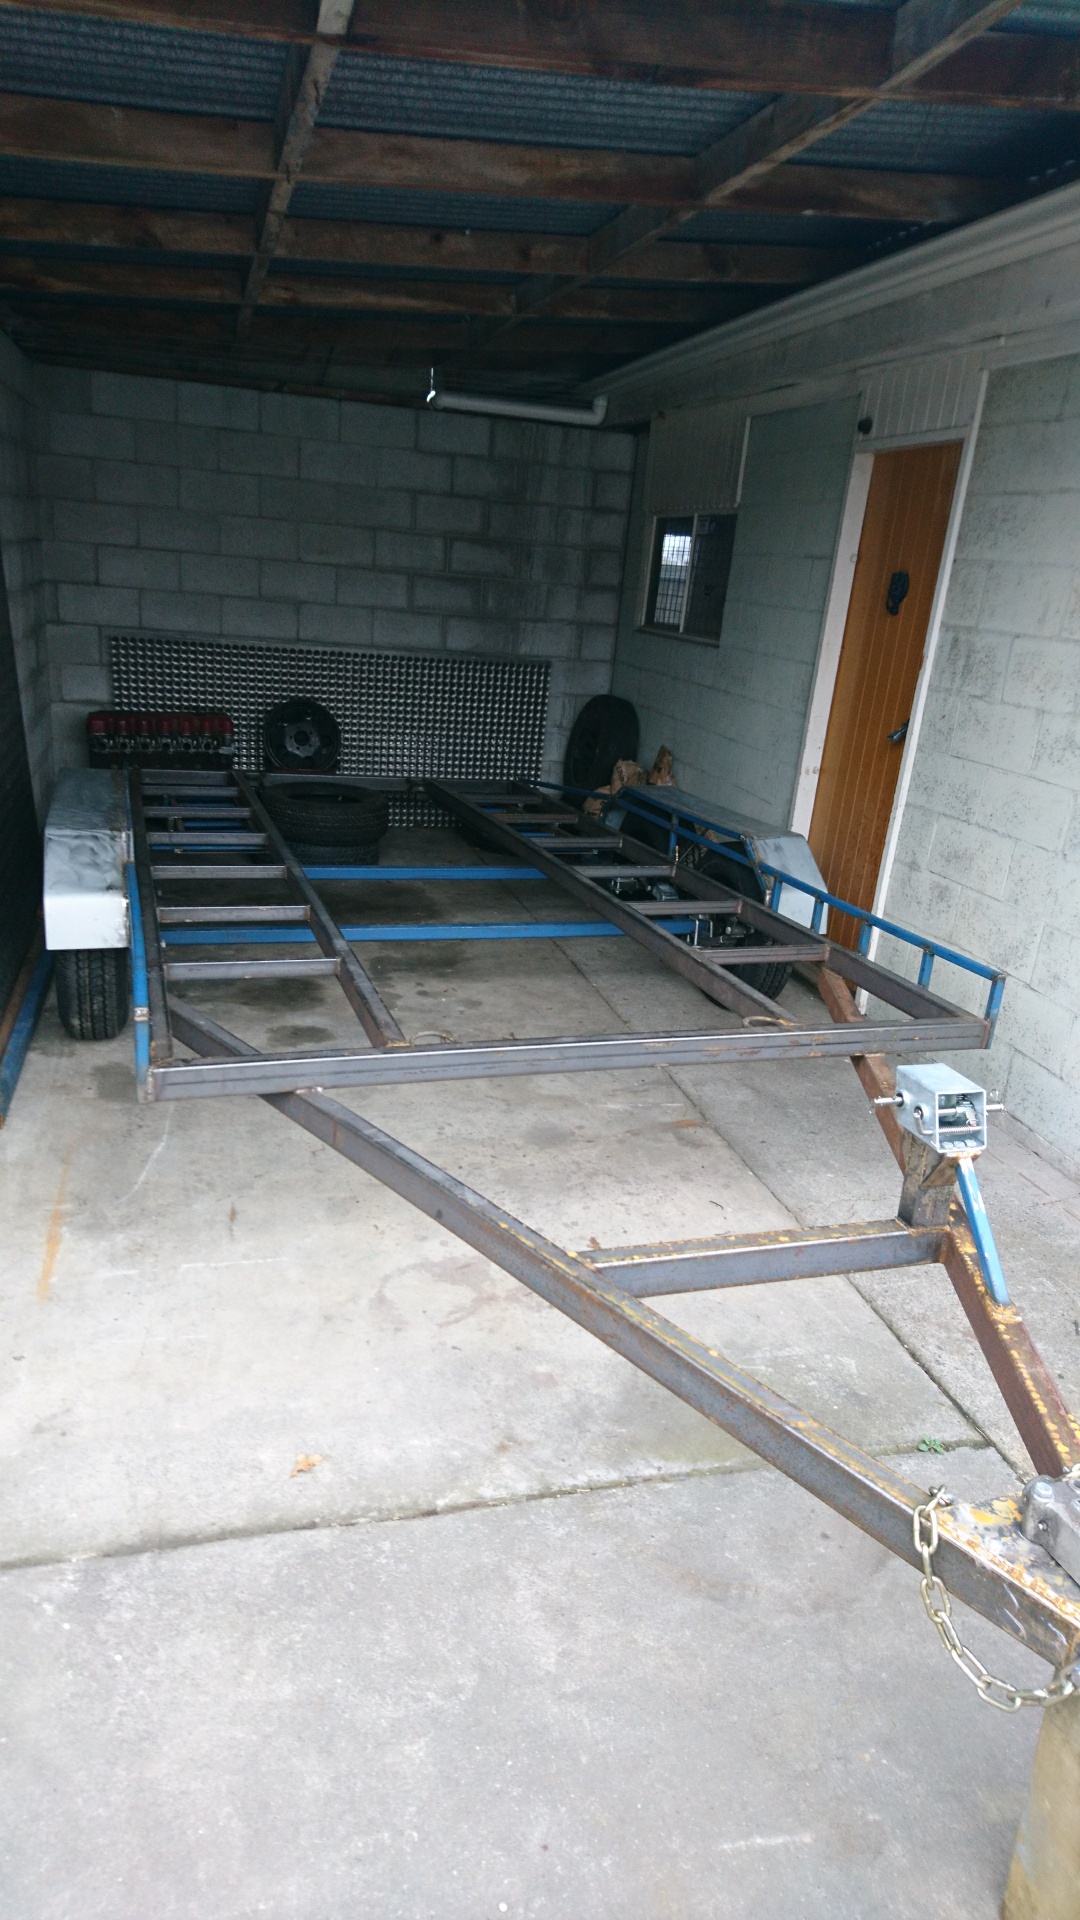
So, after a couple of years of borrowing mum's trailer for my racing, having to ask to borrow it or retrieve and fix/maintain it after being lent to randoms, I'd decided to build my own, quite similar in design to what I've used, but with a few lessons learnt. Originally was going to Hot dip Galv the trailer, but strong CBF factor for drilling holes and warping the guards, tipping it over soon put me off. Have decided it will be Sandblasted, epoxy primed then painted in 2k. This took me roughly 2 hours to have tacked together; Added Draw bar, flipped it over for storage, couple of braces for drawbar & hydraulic couping mount Offset the winch, rather than have it pull from the centre where its a pain to stand and winch - and no cars ever have the tow point dead in the centre really.. Doubler plates for the safety chains - pain in the ass welding outside with the slightest breeze 3 Ton springs installed Made the axles - braked on the front - such a ball ache calculating them with offset, clearance, dowels for the springs.
3 points
-
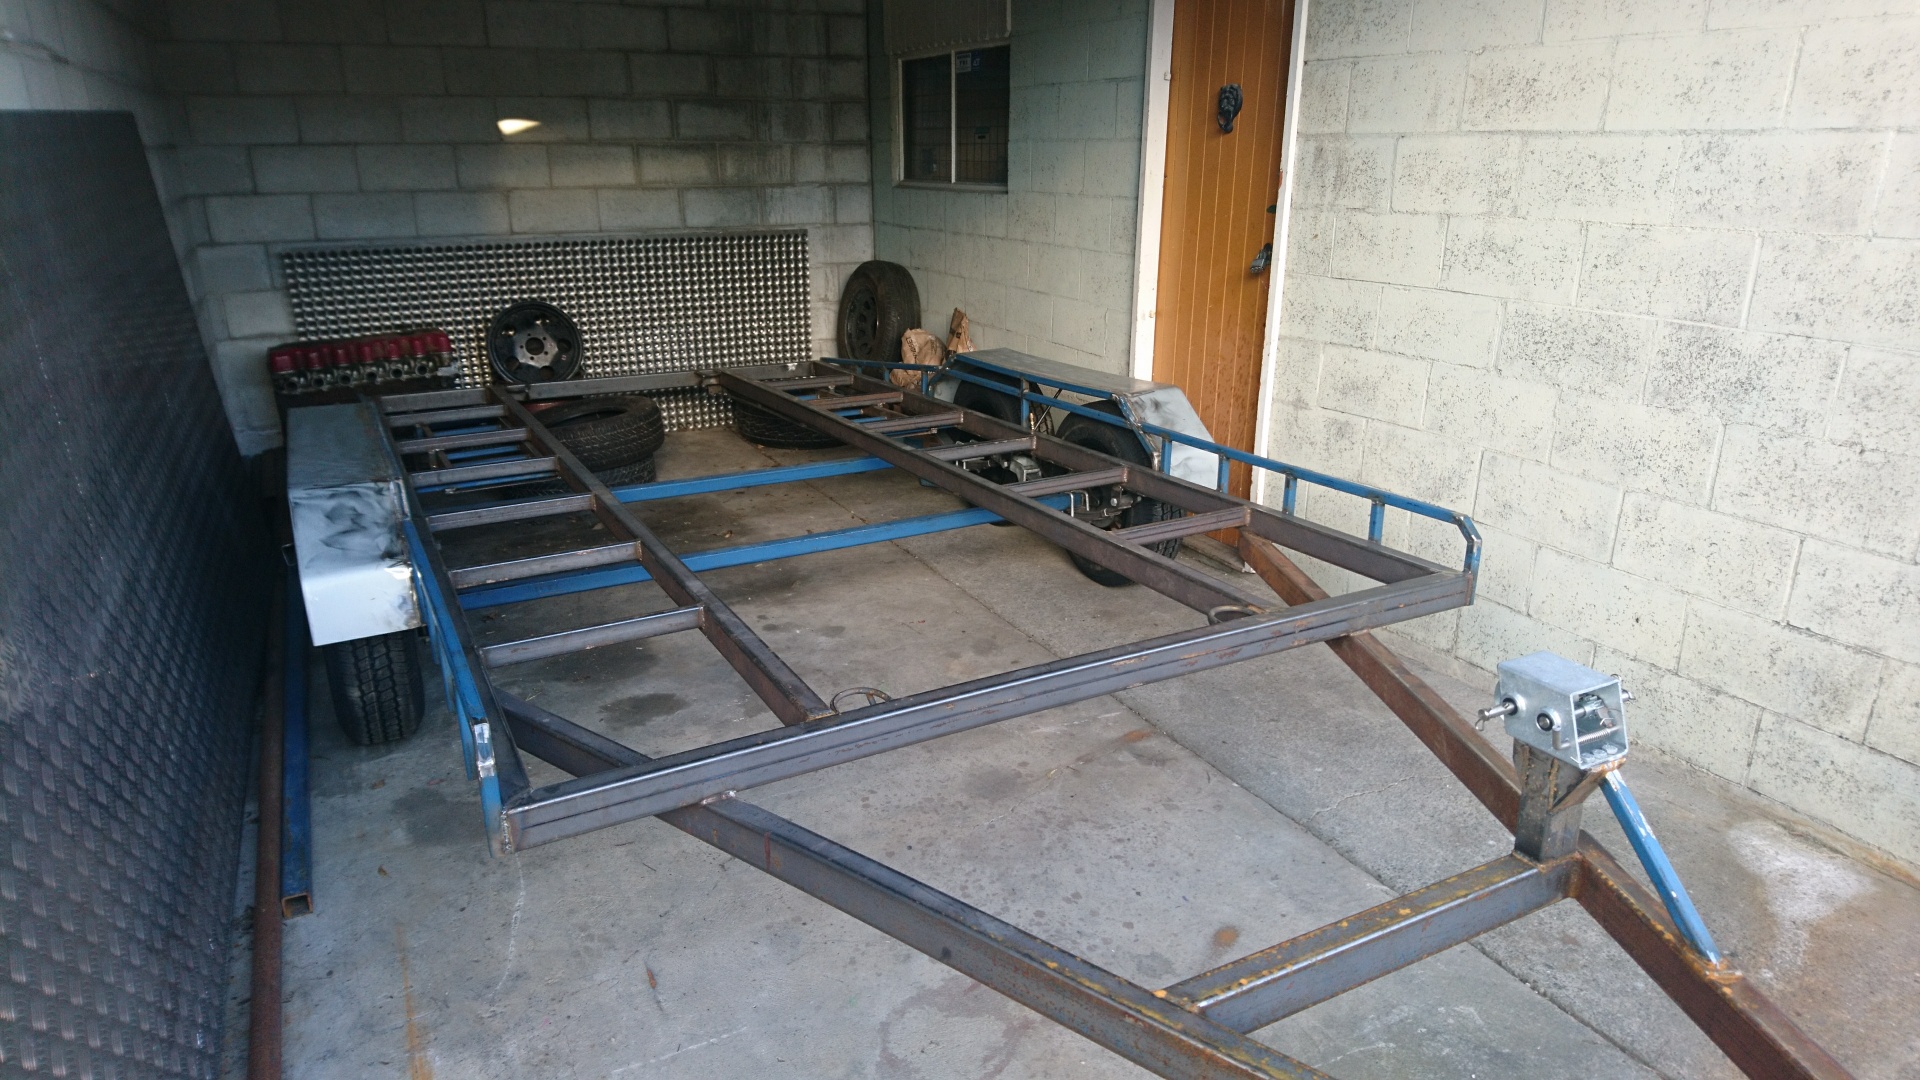
Didn't like the straight 90 deg at the end of the tie downs, support braces, so 45'd them. Flapped back the welds for a tidy finish. Sloped back the rear braces As you can see by the photo's, the guards have inch box section welded along them - two reasons strength for the guards for when people inevitably stand/sit on them, and when loading cars so the guards cannot be directly smacked. I also weld a stay underneath in the middle of them for more strength What you cant see here, is the ramps are welded up, and mounted underneath, slide in/out (forgot to take photos) - although they may not seem like it, there is almost as much work in the ramps themselves as there is the plain chassis itself
3 points
-
Omg its coming around again. West aucklands wild weekend Il be in the van this year. Which means not sleeping with tailgate open!!!2 points
-
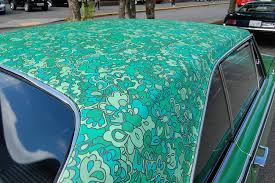
Useless two monthly update..... Been using it most days, dunno how many miles I've put on it coz the speedo's broken. That also makes passing speed cameras and police cars a bit of a laugh. No tickets yet. It's been fine though. A bit noisy and slow but it always puts a smile on my face and hasn't let me down.. Chicks dig it, most blokes hate it and give me filthy looks. Probably because their chicks dig it.... Adjusted brakes and pedal as the travel was starting to make my foot shade the throttle pedal and so made life exciting in slowing traffic. My mate is still promising to pull the 1641 motor out of storage. I'm doing some work for him so will hold him to ransom in a minute.Not going to put the big rims on until the new motor is in, not sure it'll move with only 40 hp. I've started flatting the paint. Ether going to go full on 70's lace work panels or just blow it over in white and get some mod top vinyl for the roof and interior. Gonna get the rims chromed and paint the drums red because I can. Pics mod top aye Before I took the stickers off I drove to Sicily I may have made that last bit up...
2 points
-
If they are really 2mm discs, I'd recommend getting some 1mm ones.2 points
-
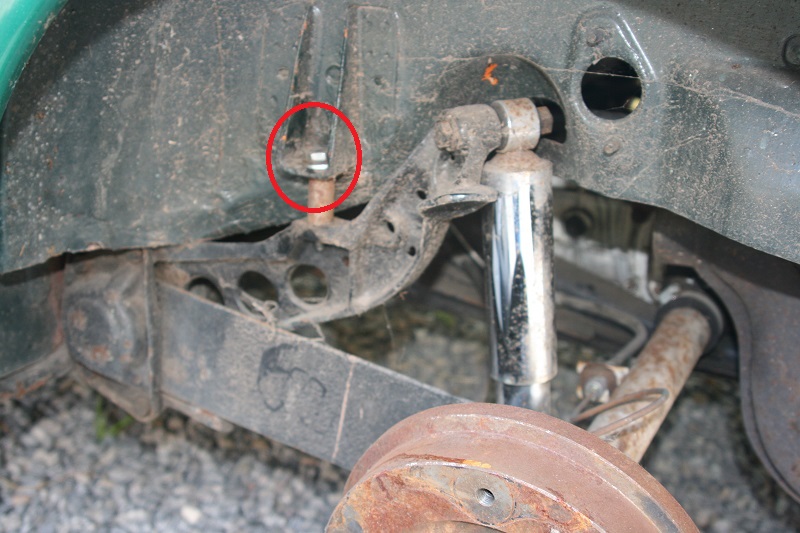
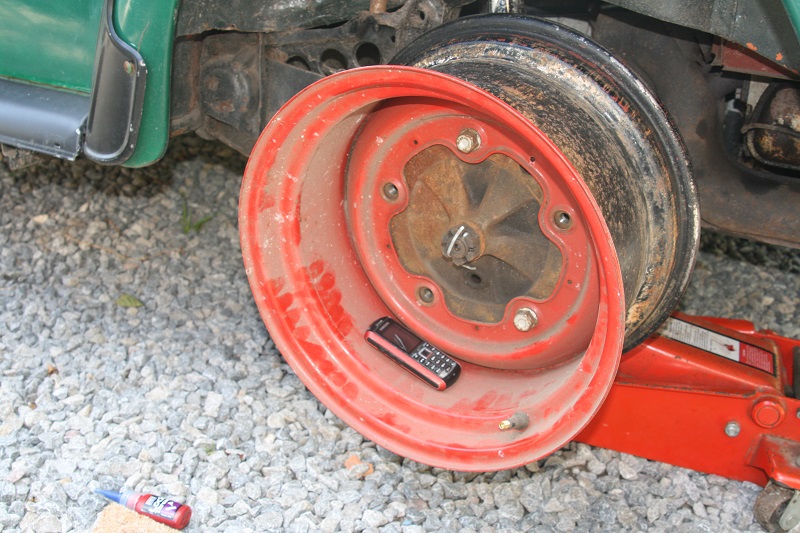
Got a few things sorted. Gear lever lock-out was all spiffed to fuck so you could hit reverse instead of second, not much fun on the way down the gears. Adjusted with hammer/drift. Fine now. It's been a bit crashy over holes in the road, I thought it was just a Beetle thing.Turns out the rear body mount bolts were loose. One needed a bit of a nip, the other had backed off about 1/2 an inch. These 2 things sorted have made the car totally different to drive. Also tried the rims on for size, they're 8" and they are going to look mint. Going to have to do 2 & 1/2 inch flares which is fine. Anyway, pics. Loose bolts/chrome shocks aye Phone shot Nice.....
2 points
-
I'll just leave these here...
2 points
-
Would be nice if the dude showed up before 11 pm lol last years statment when he arrived was "you said you wanted to drink so lets drink" we were all well toasted and liqoured by then looking forward to seeing crownwags again. How long has it been brother? A year maybe?/exactly lolz1 point
-
Mmmm... wonder if i could get my shitheap there again this year? Could be alright. Could buy more rusty crap to sink money into too. Keen.1 point
-
How could a Kumeu be possible without a drunken me there.1 point
-
A crane with 10 propellers1 point
-
Another crane..1 point
-
Gave it a blow today, could very clearly hear air escaping from the left hand side of the engine behind the starter gear. Once I make a little puller to get the gear off I'll be able to see whats up with the seal, must be proper fucked though as I can blow a lot of air through it. Stay tuned, or not1 point
-
It's alive!!! The motor was built out of left over parts from other such projects...very pleased that it goes so well. It has very high compression so should be good to go!1 point
-
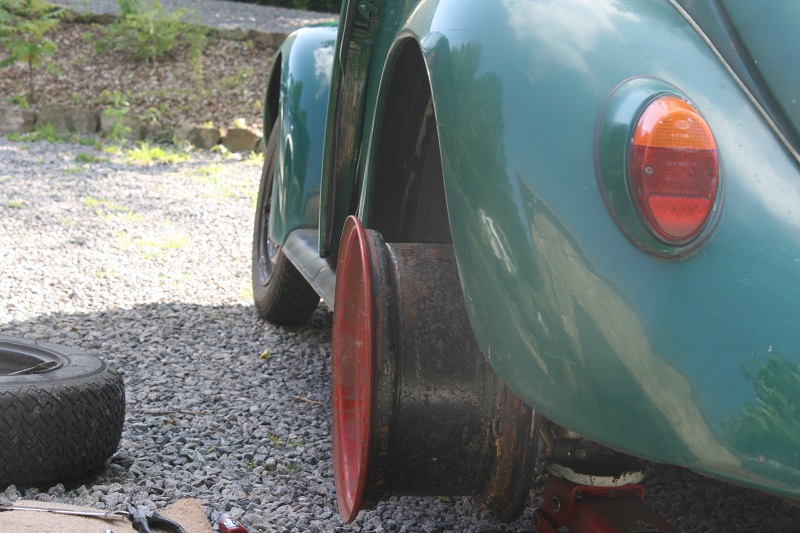
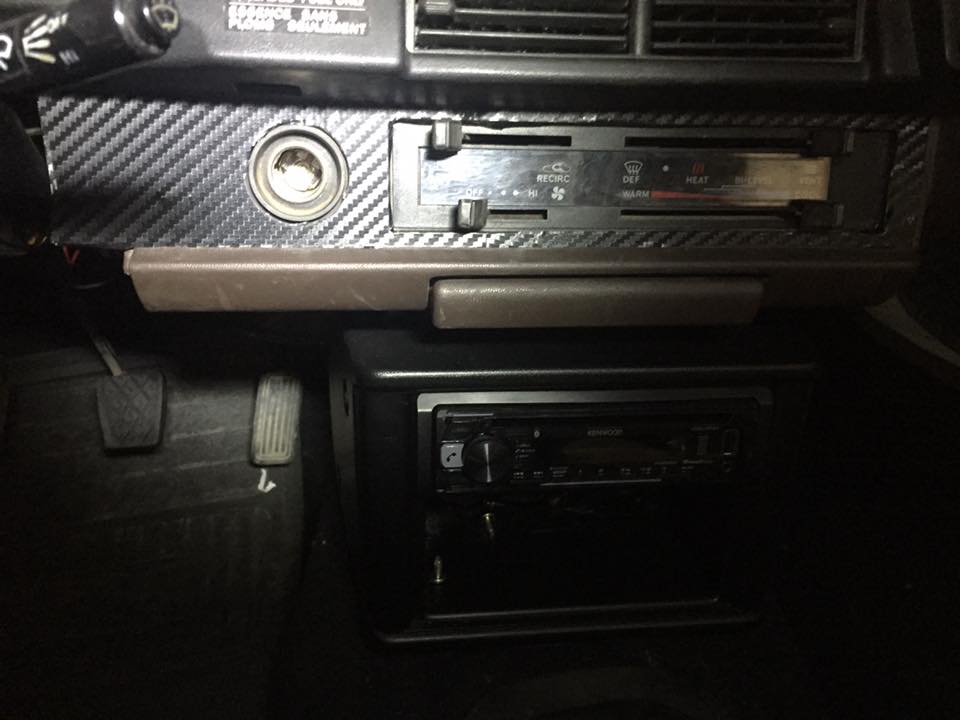
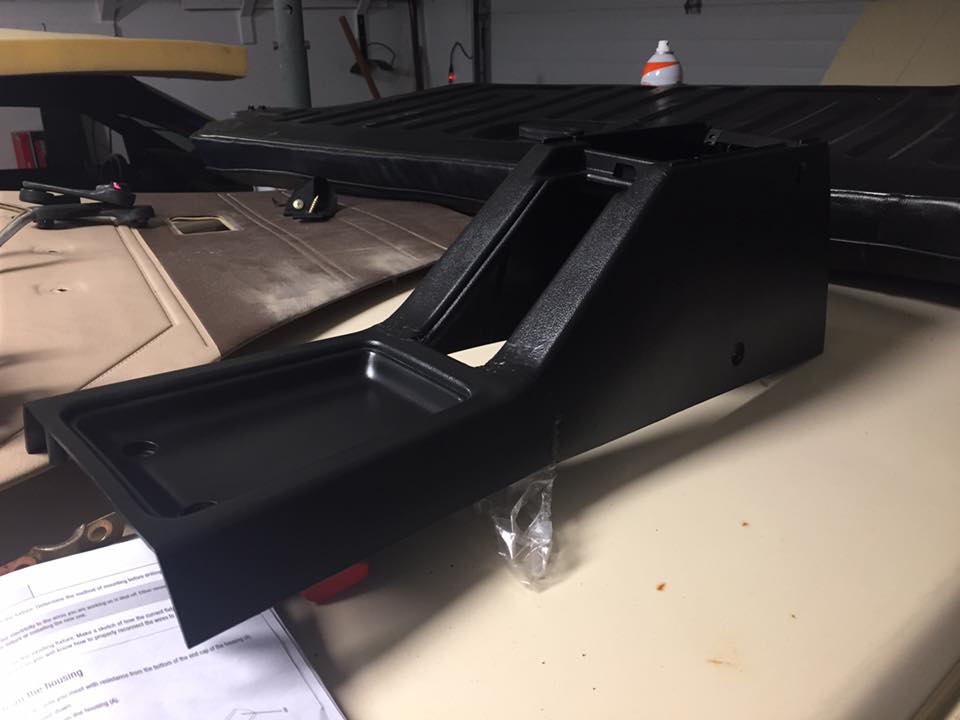
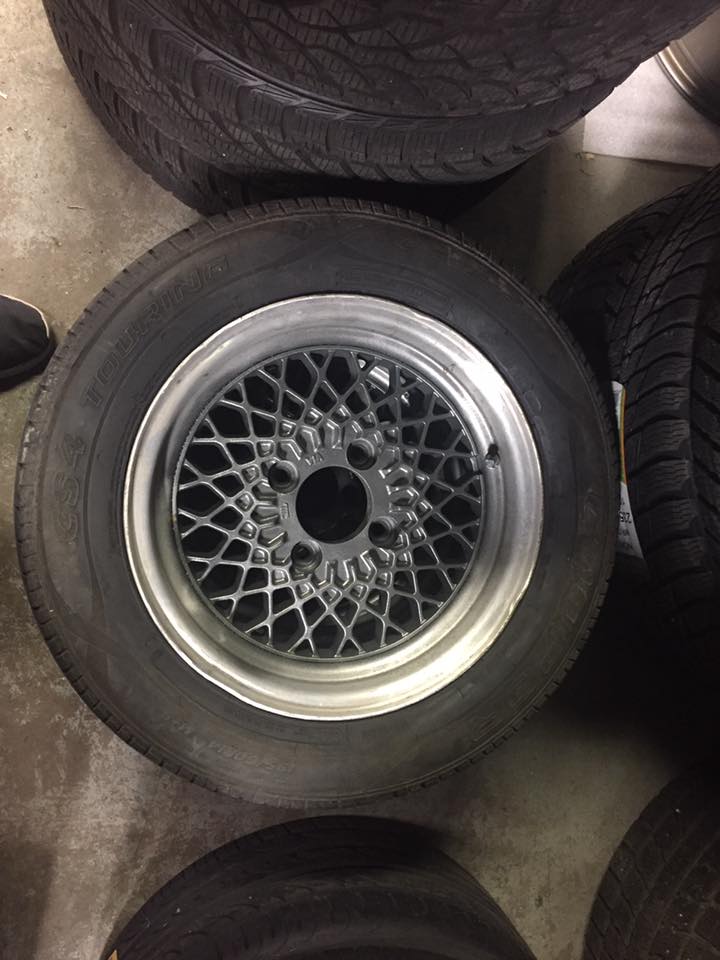
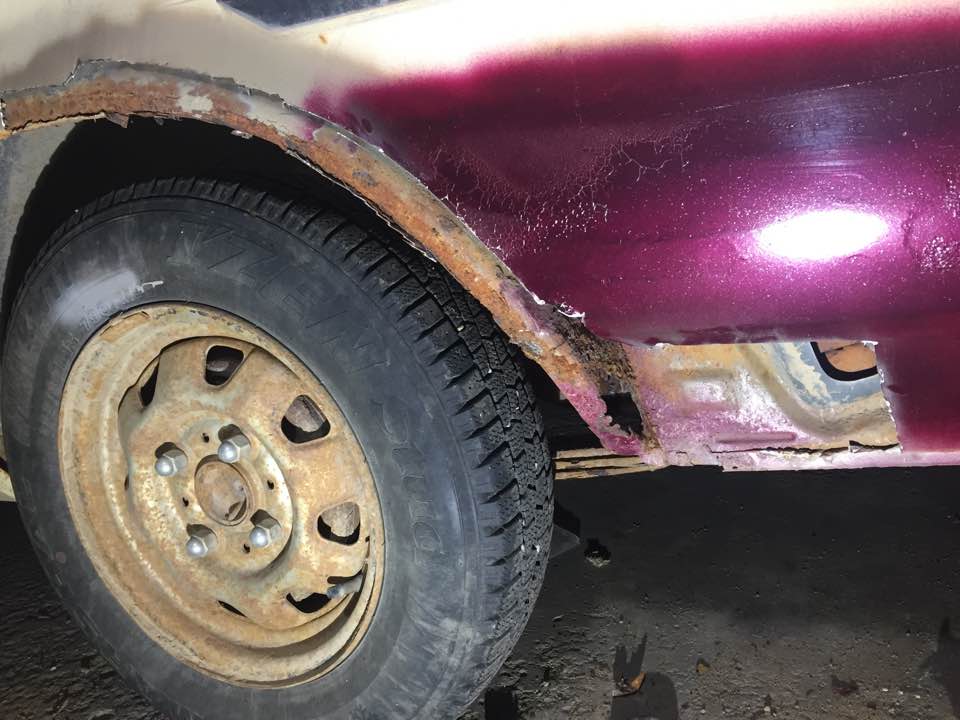
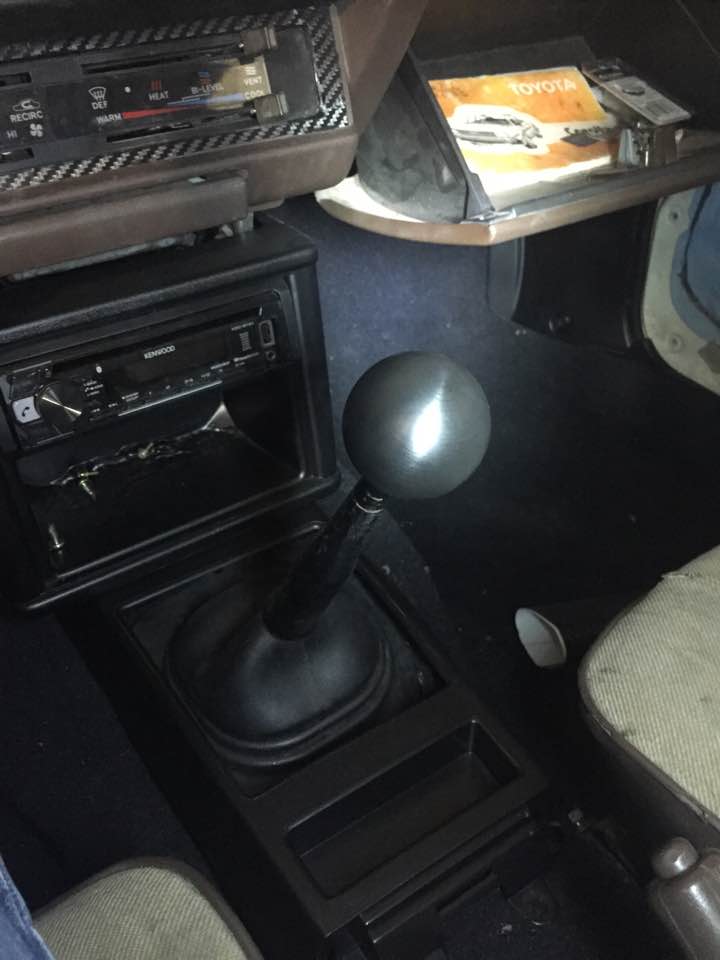
It's been a super busy month, but I actually did some work! First off, I refinished my Riken's and Enkeis. I painted the mesh centers in gunmetal and started to polish the lips. So far I only have tires for the rear Rikens (free tires from work). The problem now is the stock 13" steel wheel is pretty much rust welded to the drum on the car, so I've been soaking the hub in penetrating lube for the last week and I'm going to break out the sledge hammer on the weekend to get it off. I also started working on the interior. I fixed the broken center console. Got a new shiftknob (its from Killer-B motorsports, so it's actually meant for a Subaru) Also wrapped my heater controls with some DiNoc carbon overlay. I also took the dashpad off and started working on filling the cracks and missing vinyl on it. It's coming along pretty good, but I'll save that for another post. The biggest progress is that I started cutting out the rust work to start building patches for it. Don't mind the miss-matched paint, my wife wanted to see how a colour looked on the car. It's suprisingly not that bad in behind, just need to make a small patch in the rear fender liner section, then just basic sheet metal on the outside. That'll be a job for over the winter. And last but not least, I got my front suspension sorted. I found a guy about 400km from here who had a set of AE86 front strut housings with newer inserts, Tein lowering springs and a set of Silver Project (?? never heard of them) Camber plates listed for sale for $200. Since I have an account with a couple of courier companies at work, I got them shipped in for cheap. They are in pretty decent shape as is, but I'll probably disassemble them and clean up the spring perches and camber plates. Thats all for now, I have a week and a half where my wife and daughter are on the other side of the country, so I should be making some progress in the next few days.
1 point
-
I completely forgot to post this sorry, there is a Cortina display for anyone interested at the Palms arena car park this saturday between 9 and 2.30 I will have a couple of cars down there
1 point
-
Mixed the paint a bit thicker this time. 13 seconds through the Din 4 cup. Easier to spray I guess. So did that last night and clear tonight.
1 point
-
Yeah sounds like dry joints on the voltage regulator I wouldn't bother Changing the resistors as they are unlikely to be a point of failure You can very carefully clean up the pivot point as they can get gunk in there or grinding dust if it's a magnetic type, and check that the gauge face is sitting nicely as that can also catch1 point
-
Not a bad idea, maybe I could vape into it then sniff out the source of butterscotch and hipster1 point
-
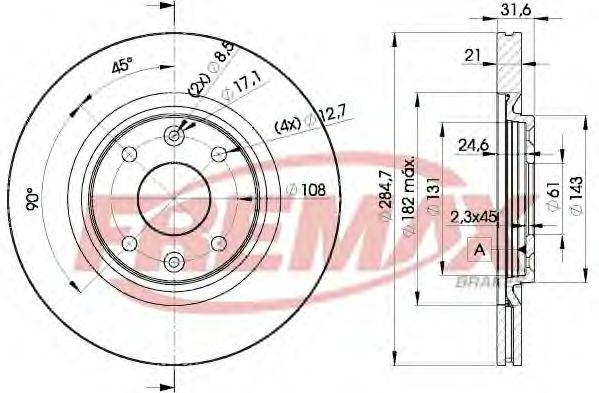
I'm investigating front brake upgrade options for my Triumph 2500... It uses a disc bolted to the rear of the hub using 4 bolts with a pcd of approximately 85mm. If I wanted to replicate this mounting arrangement by drilling new holes in some appropriate larger diameter vented discs, what would be the minimum acceptable distance for the holes to be to the center location hole? If that makes sense. As an example, I found some renault discs that look like a possibility. If I drilled 4 new ~13mm holes at a 85mm pcd, that would leave about 5mm of metal between the edge of the 61mm hole and my new 13mm holes. Would that be okay, or too close?
1 point
-
Shit finally. last page was getting a little slow on my laptop. Anyway after that 80s banger we have some pics Turns out the TEA is a little light to pick the front of the Cedric up so we had to do it with a jack like normal people Any way I gave Red a hose off with the waterblaster And then found somewhere to park it so I could leave the window down to let the inside air out. Doesn't it look smart on those wheels Plus look at this awesome tune player parading around its transistors So nothing really stunning has gone on I more felt like uploading some more pics of the car to the interwebs. I crawled under the car and it looks pretty good underneath. Ill probably drop the front subframe and rear suspension out to give them a lick of paint and tidy up the engine bay. I think i need to make a todo list. Ok I'm done, you can go back to your life now.1 point
-
Swapped the 175/50/13 yokohamas onto the starsharks. It's so slammed now haha. It's also nicer to drive in most ways because it sits at slightly higher revs, apart from high speed cruising which still isn't too bad. Speedo is waaaay out now though!1 point
-
Got it filled and primed 'good enough'. Painting the inside of car is even worse than the outside! I need some of the correct thinner before I can make it yellow/get runs everywhere.1 point
-
more rust. I always think it wont take very long but it does. I tend to work in sections and batch things to the tools needed - saves trying to find that tool while your lying around on the ground, as its always in your hand. . Eg mark sections, drill all the spot welds, cut all the holes with the slit disc, tidy with the other grinder ends and powerfile etc. Then make all the CAD templates, cut all the steel, then fine work to get teh patch to suit the hole, weld, grind, weld pinholes, grind, sand, primer. Also means i can do a bunch of quieter stuff after work etc and do all the welding and especially grinding in a single annoying spurt on the weekend instead of a little all the time Section A Wheel Arches. Figured id get this done so i can loosely fit the tins and start pile crap back in there. Pretty much 3 matching areas both sides, plus a couple of random blebs out of shot Section B: Rear Valance etc Took the tow bar off to get into this area, this section is 'closed' (lol) from road debris form the wheels and tray areas and does not have very big drain holes (there are some humps in the inner section that his plugs to that face forwards...) so trapped wet grime sitting on the flat sections has made its own way out. First batch of patches. I should have replaced the whole bottom section right across TBH, i added a couple drain holes in the big patch which should help let dirt and stuff out (and cavity wax in). I will also seam seal before i underspreay as there isnt much on this car, and some of the gaps are pretty bad! Moving around to the passenger side, thought id get away with filling a few pinholes, but ive since done what i should have done the first time, and cut the corner off like onm the drivers side, as well as extended the big patch in the middle both ways. You can also see the strengthener on the flank where trapped muck and holed the side, below the bumper, from the inside out, and it was just the same on the other side. Got all the remaining patches for this area ready to weld in during the week some time. Remaining rust (i know about!) to be cut out, which isnt that much if you say it fast is: - 1 tricky to fold section if the rear lower corner of rear passenger wheel arch (just in front of the mudflap) - 2 & 3 holes/bands in rust trap factory positioning things that look like jacking points but are not... of outer floor section behind front wheels, both sides - 4 rear cab/floor area (will probably use rust cuts here) pass and drivers - 5 lower rear tray to tailgate seal lip, but can leave it till after summer/WoF , and will get a section bent up so i can spot it in easy, like the 2300 section in the same place1 point
-
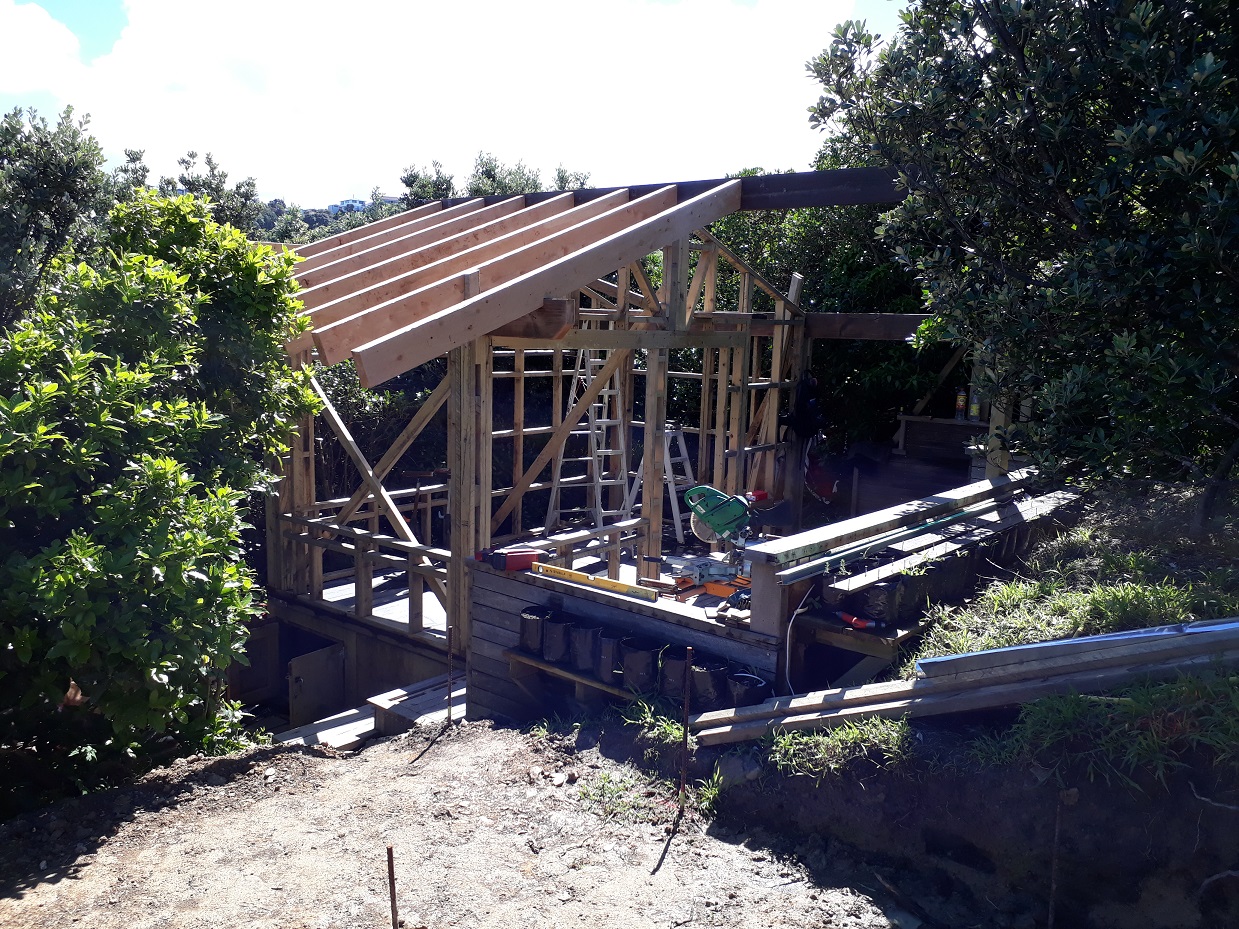
Getting the rafters up by myself has been a mission, but it's about a third done.
1 point
-
they have started stopping. 2017-10-10_06-02-39 by sheepers, on Flickr 2017-10-10_06-02-12 by sheepers, on Flickr and i forgot to take pix but they've finished the deck as well. 2017-10-10_06-01-40 by sheepers, on Flickr 2017-10-10_06-01-20 by sheepers, on Flickr1 point
-
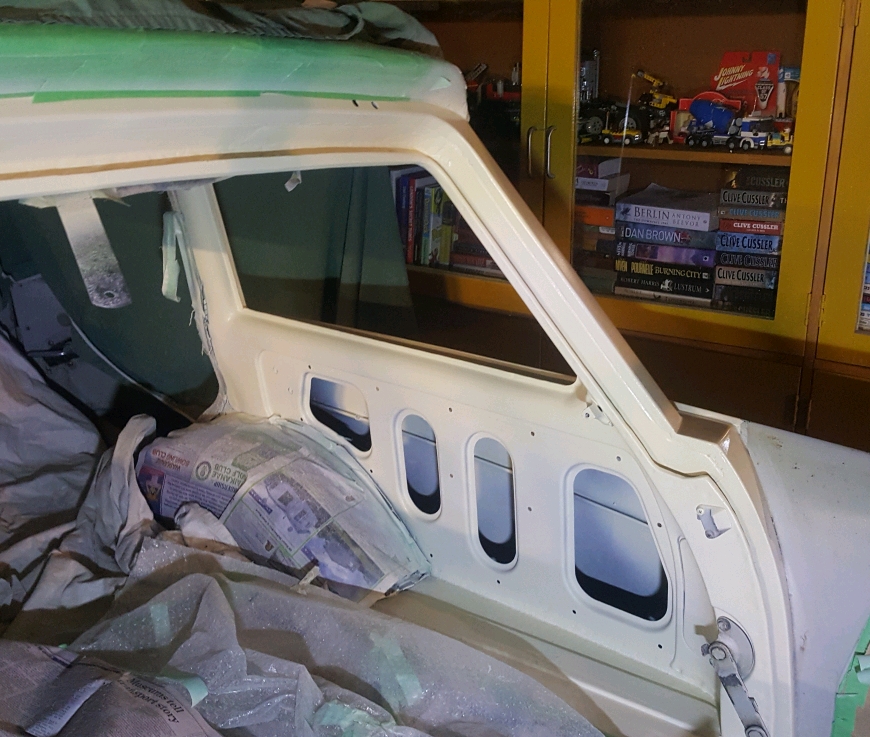
Have repaired the last of the body rust now (not counting doors here). Last weekend I cut out the flat area that was holy (holey) along the rear window. Bent up some replacement parts (I did it in two pieces to make the folding/fitting easier) Also filled the holes in the C-pillar on the passenger side where a seatbelt had been bolted through. The inside wasn't as neat as the pillar was a bit crushed. Both rear sides now ready for prep and paint. Then I can get the glass back in and hopefully back on the road.1 point
-
Filled one hole Also zapped some small holes in the horizontal part. Just need to fix a bit of the pinch weld on this side and it will be done. Took the glass out of the other side. I can see why it was a bit leaky there.1 point
-
I got the van back together yesterday, and drove it around today dropping off some parts for work. A few minor issues to sort, but it runs really well! Anything more than half throttle from a standstill will turn 2 of the 4 rear tyres into tyre smoke! The power steering is fantastic, although a bit "pointy" now, I will fit another castor wedge in there to try and help with this. The new big bore stainless exhaust sounds so sweet, not too noisy when you are cruising, but has a nice deep bark when you put the slipper in! Still need to fit the evaporator into the heater box and connect up the air conditioning, but other than that it is basically finished. Super happy with it! A few pics of the finished product: The pulleys run really close to the radiator fans! I also fitted a smaller pulley to the blower to up the boost to 10 psi Roll on OS drags Mk5! Big thanks to Muncie for the loan of the blower pulley tool Mk3 power steering box, with hybrid Mk2/Mk5 steering column: I needed to make an extra auxiliary wiring loom for the engine, and fitted relays to the headlights, and horn while I was at it. That is 7 micro relays, 4 mini relays and 16 fuses! I tried to make it look as "factory" as possible, so moved the battery tray to the RH side, and fitted the original airbox (which I had to modify a little bit) to the LH side.1 point
-
Tailgate parts both painted and somewhat shiny. They have been rust-proofed inside too, so shouldn't be an issue for a while. Took one rear window out for new seal. Naturally there is a bit of rust in evidence. Odd that it is on the vertical section. I also cleaned up and painted the lower edges of the floor panel that goes in the back over the petrol tank. I'm not going to paint the whole thing right now.1 point
-
So dishwasher packed a sad. Dreading expense I googled the fault code, which indicated a faulty heating plate, which would probably be uneconomic to fix unless I faffed around finding second hand parts. I went through the diagnostics, and sure enough plate not heating (you can trigger it on/off via sequence of operating buttons). Testing for resistance the element tested out ok, so possibly worth fixing. It's an F&P dish drawer (early one, been in the house since we moved in) and I was really surprised how user-friendly it was to pull apart. A couple of pins and everything dropped out/unplugged for inspection. Pulling the main board and removing cover plate revealed obvious burn marks indicating a fault at a 24V/230V relay... And cleaning it with Contact Cleaner revealed the disconnect... As the pin had burnt off I looked at sourcing a replacement relay. Of course it was an obsolete item, but Mr Ebay provided one for $10 US delivered. Bit of a time delay to get it but not a major as other drawer operates ok while the guts are pulled out of the faulty one... I got to use my Aliexpress octopus thing, bit of solder action and wahayy, I am an appliance god. Houswives everewhere will offer me sexual favours in awe of my skills... [Disclaimer] apparently somebody wanted a shiny new one instead of faffing about for a couple of months. Sexual reward withheld despite silly bloke feeling rampant/chuffed with himself...1 point
-
Roof has reached the 'good enough for me for now' stage, so removed the masking. Put the fuel pump in and moved it out of the garage today. I need to sand and buff the clear coat on the tailgatess before they go back on. Also the steel floor panel needs some attention as it has a bit of surface rust on the lower mounting surfaces, and I don't want to mess up the new paint in the back. Metalflake I'd rate as 'OK for a first attempt' I need to 'phone a friend' to help with the windscreen reinstall.1 point
-
Project update non-update /no pics. Went pick up 7" steels and check out hot 1641, big cam, twin down draft carbs motor. Beetle rod type thing that has the rims on was still on top of my mates office, needs fork-lifting off. Motor was under a pile of crap, same pile of crap that the forklift was under. Tomorrow apparently. *sigh* Two part plan. Part one..... Big steels on, rear arches flared to clear. Fit 1641 motor if it's not fucked. Flat back questionable paint so it looks even more shit. Cruise around like it's 1960's California. Part two..... Tall tyres, bugeye Baja kit, body lift, ridiculous paint job involving metalflake, lace curtains and mucho masking tape. Cruise round like it's 1970's California. Win at Beetles.1 point
-
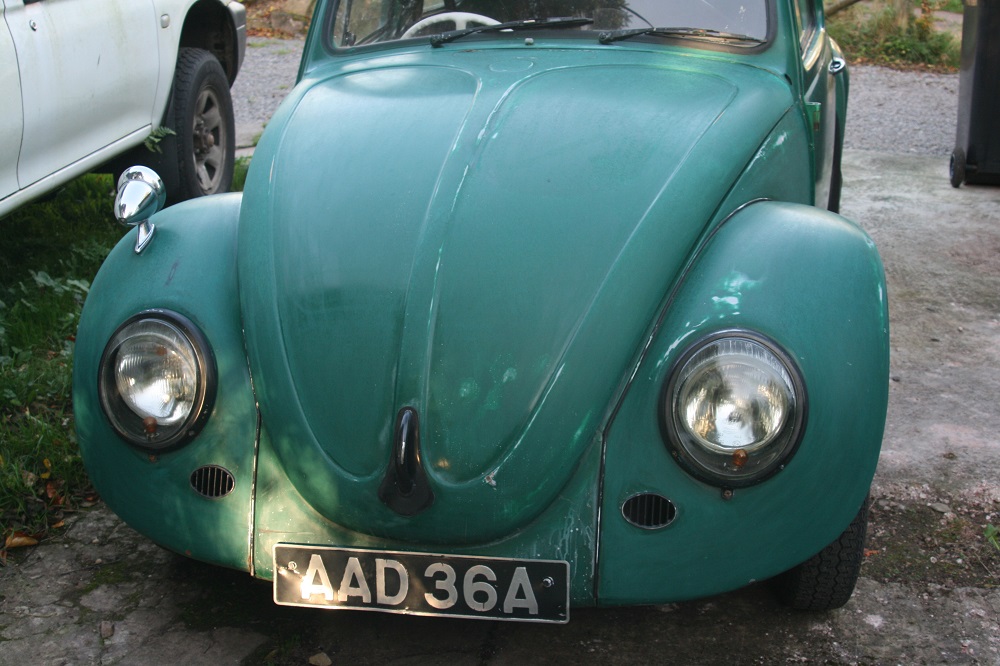
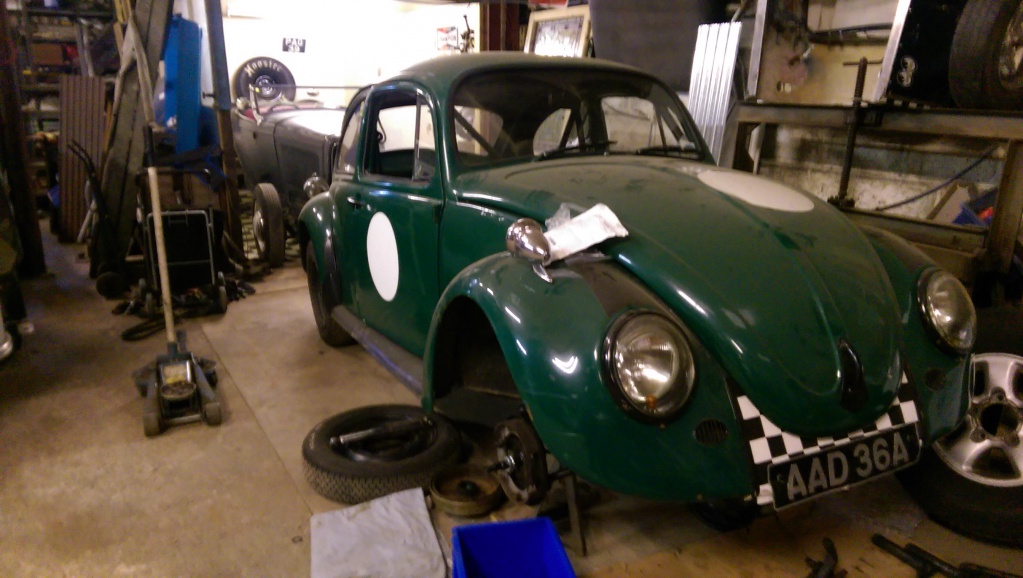
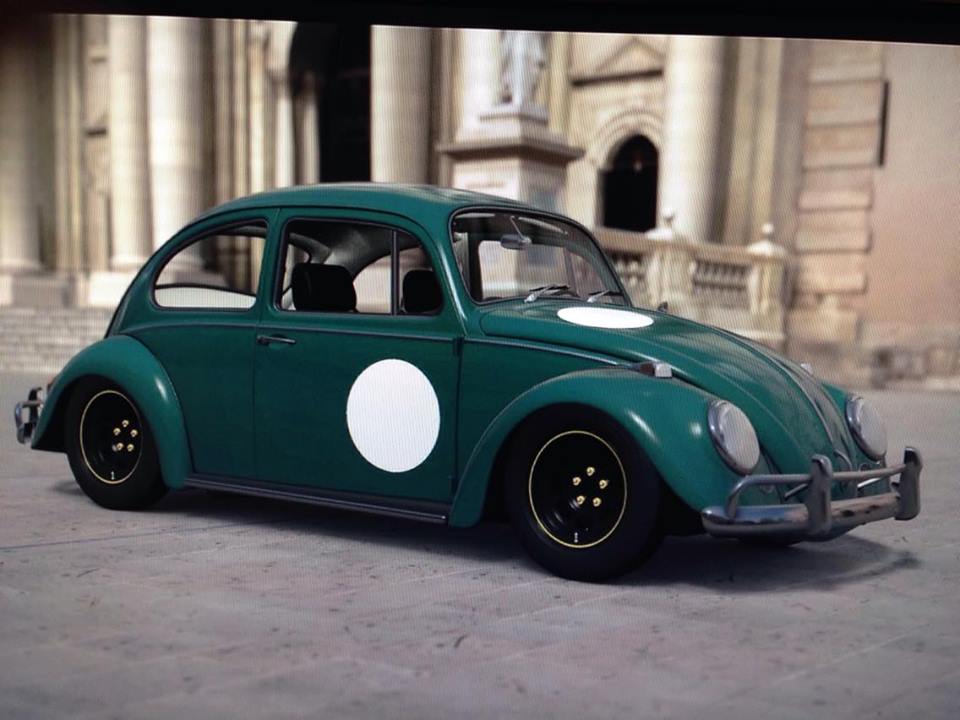
The plan is to chop the ends off it and make a simple Baja Bug. It's something I've always wanted to do but have never found a solid but lashed up car before. I'm not a fan off cutting up good old cars but I'm also not a fan of rusty Beetles. This is what I'll be aiming for, pretty sure it's going to be a bug eye. Aye Before I do that, I'm going to drop it, put a big motor in it, put some paint on and run around like that for a while. I've given it a service, taken the door bars and front half of the cage out coz I'm 50 and falling out of a car at the local Supermarket with your foot stuck under the seat is not big or clever. It's a piece of junk, it rattles crashes over bumps, lets the rain in and is as slow as fuck and doesn't really stop but i'm hooked. Update when my mate finds me the 2" drop spindles and 7" rims for the rear. Hang loose Bro or something.
1 point
-
If you do it anything like me, you might as well just let it run out on the floor as that's where most of it will end up when the house flips out of the container or I knock it over.1 point


This leaderboard is set to Auckland/GMT+12:00