
Leaderboard


Popular Content
Showing content with the highest reputation on 02/14/16 in all areas
-
So Yeah12 points
-
9 points
-
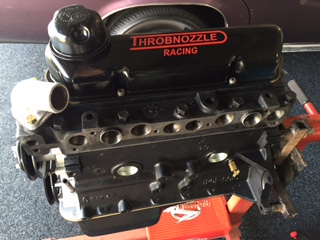
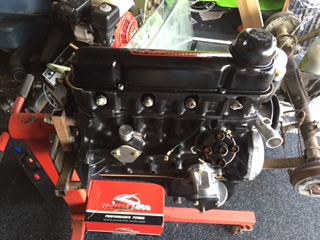
Finally my engine turned up today from Joe at Throbnozzle Racing in the UK. It will produce around 115-120 BHP with the rejetted 28/36. I was going to run twin 40's but want it looking original under the bonnet with the original air cleaner etc. it has an Aldon electronic dizzie mapped to suit the engine and I'm using a Powerlite starter motor which is half the weight of the original and loads more cranking power. I'll get all the bits fitted to the engine over the next couple of weeks and I'm going to assemble the gearbox myself.
 5 points
 -
Well after the hiccup with the head gasket I repaired it and then took it to the Drag racing yesterday. Off the trailer it ran a 14.1 @ 97mph with a 1.97 60ft - I was like sweet that launched and no spinning I then ran a few 14.0's while I tried to work out my shift light and that pushed me into 13.9 and 13.8's. I DYO'd 13.85 and buttoned off at the line until a Skyline beside me pushed me hard to the line and I ran 13.7 but because he red lit I won The last couple of runs I couldn't get traction and the track was going off as others had similar issues, the weather had a lot to do with it. I was so impressed with this little car and so many others3 points
-
More progress. Side (sill) members Made from 25x50 3mm box and just ever-so-slightly bent to echo the original chassis. These will ultimately have the body bolted to them: The seatbelt mounts are more Escort DNA. These were made some months ago. They will need to be modified to do the job, but the funky drilled panels will stay: Diff mount is now in. The underside of the front member is exactly the same angle as the mount plate. You'll notice the cut-throughs on either side of the crossmember for hoses etc again. The top mount will have a logitudinal member at the centre of it for more strength, but also to take the mounts for the brake hoses. 'K' member components are made and just clamped into place to check fit. These need the hose/wire cut outs at the top of them and the 'C' sections welded into place before the members can be fitted. There will be a 50x25x3mm box section welded in flat across the very front of the 'K', and ultimately it will have another prop-hoop as soon as I can mock-up the gearbox (which I haven't got yet....) K member should be in on Monday/Tuesday, then I can flip it over and finish-weld the underneath.3 points
-
Had a better look at the old gaskets and I think I found a leak into the cylinder. This would explain the heating issue, losing coolant without any water showing in the oil (or vice versa). Just a trace of rust between the water passage and cylinder, think I expected to see something more obvious... And a look into the water passages at the rear of the cylinders from the top revealed this. Pretty much a natural trap for any crud circulating the heads that I couldn't get at from the frost plug holes... A $2 Supercheap magnet tool got most of it out, and I vacuumed the rest with a bit of tube stuck into a small car vac. Looks much betterer... So hopefully all is good with the block and I can move on with cleaning surfaces and putting bits back on soon...2 points
-
If there are labels but only in japanese, download the google translate app on your phone. It gives you a translation from a photo.2 points
-
cant see a problem with that2 points
-
"It’s illegal to drive a vehicle… If it doesn't meet WoF requirements. If it doesn't display a valid WoF label. You can drive your vehicle on the road under these circumstances only when taking it somewhere for repair or to get a new WoF – providing it’s safe to do so." You would probably be OK if you aren't picked up for speeding/being a dick on the road. No guarantees when dealing with the Police though.2 points
-
So do we wanna do a pub meet the weekend before nats? Sunday would be neato. (I have a date with five hours of drinking single malt whiskey on the Saturday) somewhere that sells jugs would be ideal too.....2 points
-
I was building a Ford Escort Mk1 gasser and documenting the build on here and on facebook, but a few things made me totally change direction. After spending a huge amount of time on the Escort chassis, I still wasn't happy with the compromise of it. That coupled with the amount of new (read bloody expensive) panels needed to make it as good as I wanted it made me lose a bit of interest. Total interest was lost when I started to build the engine and found a crack through one of the bores. So the shell/chassis and all of the engine parts were sold off (at quite a handsome profit I'd like to add), and I concentrated on my bike for a while. Then this popped up for sale. It's a 1938 Ford model 7Y (which is dimensionally and physically similar to a Ford Pop). It's very straight and solid and was bought complete. The nice stuff from the Escort build will find it's way to the 7Y, so it will still be 'Cheatin' The Reaper' - just a genetically modified version. It didn't take long to strip it down to just the body, leaving the chassis to be sold off along with the engine, gearbox, interior etc I designed a new chassis, made out of 75x40x3 steel box, which is at this stage at the moment: Front suspension is parallel leaf springs. I made the shackles & mounts: Then narrowed the drop-tube axle to suit: I found a nice and perfectly sized fuel tank on TradeMe and made the crossmember to suit. This is 75x40x3 box again, with 3mm gussets: I've bent up the hoops for the rollcage (no pics yet) and am just waiting for a nice full day to get the whole lot jigged up and welded together. Rear axle will hopefully be a Jag IRS. Engine will be Ford V8. Body will be chopped about 2.5" and front end will be fibreglass flip front. Keep checking either here or on facebook: https://www.facebook.com/mk1gasser/1 point
-
Went for a nice long drive out to Takanini and back tonight to see how she's running. All was going great (no overheating, sitting nicely at 90-100kph etc) until we got back to the garage and noticed an unhealthy amount of oil coming from the oil filter housing. Followed the trail back for about a k or so before giving up - luckily there was still a bit in the engine... Looks like its just the oil filter seal thingy so we will fiddle with/re-tighten that and that should be that. Made a right mess of our previously pristine motor though - shit happens.1 point
-
OK, so it is well past time to do some more work on this heap. As it is currently non-op there was some messing around to get it out of its lurking spot on onto the lift. Not helped by very tight LSD clutches, and limited steering lock. I cut off the bumper brackets that were jamming the wheels which helped. Used the V6 buggy to push it up onto the lift. First job is repairing what should be the last bit of rust to be dealt with (I have spent many many many hours on rust work on this thing). This guard isn't too bad I think. Looks like someone has patched an aerial hole before. Inner panel is a bit tatty. I had the other guard dipped at a place in Tawa, will probably get this one done too. I've also pulled the fuel tank out as it had a lot of nasty rust inside from sitting around with fuel in it since 2009 (oops). I made it mostly from zintec coated steel, but some parts were plain panel steel. I've cleaned the inside with strong acid and removed most of the etch primer from the outside. Will get it zinc plated up in Levin soon. Hopefully they can remove the last of the paint.1 point
-
Small update, put the gearbox in so I can work a few bits and pieces out, xmember is going to be a simple job. Got the measurement for the driveshaft so will be able to get that sent off to beattys driveshafts in the next couple of weeks. Just waiting to see what measurements I need to work out which slave cylinder I'll need. The shifter will need a bit of work however, it sits quite far forward so will have to put a couple of bends into it to make it work Also found out that the battery tray will need to be removed to allow clearance for the p/s pump. So looks like I'll have to put that in the boot. Again not something I had planned to do but my hand has been forced.1 point
-
Did a couple of small bits the other day, decided to see why my wiper motor was not really doing a good job and install the rear emblem as well as finally put on the hood latch handle thing. So basically when I got the car it didn't have a proper handle connected to the wire to pull the bonnet latch so what I ended up doing is getting this washed and knob setup there which was ok but still difficult. Most excellently I found a whole wire on Yahoo but as it turned out I could just unscrew the handle bit and screw it onto my current wire which was great because it looked quite difficult to get the other one out. Next up I attached the emblem that I sort of reburbished just using some double sided tape (the kind used to attach wings and such) so that isn't going anywhere. Looks sweet! Also mocked up the black bit there but I still need the trims that go along the top and bottom then I can attach it on there properly. Still debating whether or not to get a badge for it, probably will. Next step rip into the wiper motor.. so what happens is when the wipers are on the windscreen it has one speed, slow. Despite having multiple actual speeds available (slow and slightly less slow). My first port of call, the switch. Sometimes people jump the switch if there's a problem or do some different wiring or wahtever. Definately some.. typical wiring jobs under here.. This one, twist and taped (and a gear boot which is broken that I have another one on the way). This one, casual wire just hanging around. This one, some kind of twist and tape splice method, appears regularly. Old mate twist (no tape even on this one). This is what I mean about the twist and tape splice method.. sans tape. Anyway after all that I did another test with the wipers not on the windscreen and it does change speed so I think the motor is just old and worn out and can't put through the power it needs. So I've got a couple of choices here.. I can take it out and see if it can be revamped somewhere or get a different one. I've been told that S13 ones may be able to work so I'll investigate both options. Also I got rid of a bunch of redundant wiring that I suspect was for the head unit/navi that was probably there before. Also I thought the car may have been red before and repainted to silver.. now I wonder if it's always silver and the floor was just red? No idea really.. probably had some shitty rust repair done on the floor before and maybe it's a coating or something. Yarns: //oldschool.co.nz/index.php?/topic/49704-mlracings-hakosuka/page-7#entry16464121 point
-
I have a Cortina GT which was on a PP and when I purchased it years ago the seller kept the PP,s and just put a standard plate on it. Question is I still have the 2 old black plates that were originally on it. Can I get rid of the current plates and put the original black plates back on?1 point
-
Whats the dealieo with that rule where you can drive your unwarranted vehicle if you are driving it to a place to get work required for the warrant? My Starlet has rego on hold(last rego was 2014) and wof expired. It needs a new cert because I have changed from a sohc to a dohc. My cert guy is in carterton(Julian Cheer), I am in Upper hutt. Technically, getting the cert is "work required for the wof".... If I drive it to carterton, and I am stopped by "the man", would I get away with it? I would probably be stopped because my car has panels that are not all the same colour, rather than for speeding or whatever.1 point
-
Clint oh oracle of knowledge im looking at putting some side flaps on my rally car can i drill and put riv nuts in the underside of my sills like 4 or is this a no no my other option is to make them longer and bolt through the floor like what you see on the side of this car1 point
-
Hey sorry I didn't post up the drawings I managed to find the perfect piece to this puzzle. So I'm buying 12 on Monday and it starts getting tigged up.1 point
-
And I pulled the heads the other night. Disappointingly there was no solid evidence of a gasket leak that may have been the reason for overheating. A couple of cylinders however did have dark exhaust valves, which may indicate a valve seating problem? Could be weak valve springs from sitting maybe? Anyway, will post pics later, it's valentines day so I should be able to get some quality shed-time...1 point
-
Gah, been crook, but did get back into the alternator. Started with the rotor. The non drive-end bearing was stuck. Really stuck. Didn't want to lever against slip rings so had to cut it off with a dremel blade... And turned the slip rings smooth and gave it a clean up and coat of urethane... Then looked at the mangled stator. A winding had snapped off, 2 diode solder joints had come apart and one of the insulating spacers appeared to have melted, perhaps during a previous attempt at soldering on a diode... I unsoldered the windings from the diodes, and reattached the loose ones after testing them. Best way was to use a small lpg torch under the plate to get a nice pool of solder, and place a tinned diode on it. I held the wire with long-nose pliers to act as a heat sink to avoid koozing the internals... Then stripped the insulating coating from the stub of snapped winding... And attached a new lead by crimping on a small sleeve, plus solder. This was a bare bit of copper wire so added some heat shrink tubing, and tied it back in position before another coat of urethane... And machined up another spacer that I araldited in place on the cleaned up diode plates... And fitted the stator back in the non-drive end casing. All diodes test ok, no shorts and the winding resistances look right... And I'm pretty much stuck now until my brushes arrive. Still got to paint the fan and pulley but it's looking ok...1 point
-
Great thing of being the only person in your class, did manage to beat a ke25 Corolla with 4age, a mirage and a beautiful sd1 rover though, chuck up some picks - vids joker, my incar was super shit cos of the sun1 point
-
Shit.. that is a big read in one go. How many cups of tea?1 point
-
Nick "the legend" sparky came over last night with the freshly rebuilt alternator and we chucked that in and finished the engine loom. the engine bay is looking pretty good now. i need to weld up some cracks in the rocker cover and paint it, and the intake, black but its getting there. so with its new found "goingness" i took it for a drive this morning. by far the longest I've ever driven it. maybe 4Ks. it seems to go alright. the front left brake caliper is sticking a bit so that might need attention but for a "first drive" all went well. its pissing oil out the cracks in the rocker cover which is to be expected but apart from that all seems to be well. there is a small issue with the alternator but I'm sure Nick the sparky will sort that out toot sweet. so next to do is everything else. finish polishing/repairing the window chrome and stick that on. millions of things still to do…….1 point
-
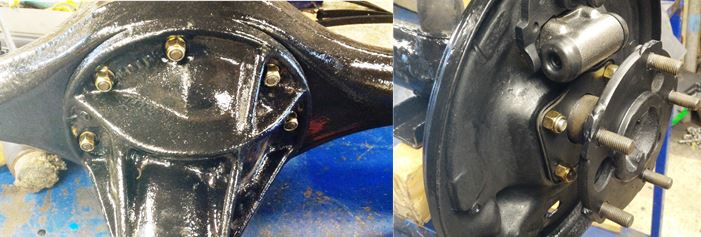
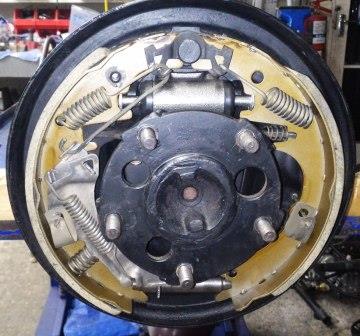
so the brakes had never been fantastic and by that i mean shit so first port of call was to bleed the brakes as the car had been standing for 5 years got a bit of air out and rid of this skanky fluid it actually stops now this morning i did a job id been putting off for a while the main part of the floor and boot floor had a bit of surface rust and it was down to the primer so i took off all the loose stuff and rust killed it then gave it a coat or 2 of truck bed liner came out really well considering the rest of the floor pan is ok and i rust killed any spots i think needed it should hopefully last a while1 point
-
If anyone can get that perfectly straight again I'll give them the firmest of hand shakes. Looks like scrap metal to me.1 point
-
right have had some good progress latley, which was needed as its racing tomorrow. Got stuck in with the vinyl, and good old simon at quickstickers.co.nz made some lush custom decals. had the car on the dyno last night just quickly to make sure its safe. We have run 28mm chokes which is robbing a fair bit of top end but making it really driveable, i will run with these till i get the handling of the car then will go to 30s and hopefully a bigger cam is this one is mild as. it was wayyyy to super rich to start and now a bit rich but at a safe level. Token issues with trumpet clearances, cannot fit the socks at all, when they are on it runs super rich on the middle two cylinders so trying to solve that issue. Yeti at keith stewart dyno ( a couple of quick runs with the carbs still terribly unbalanced and it made 65hp at the wheels, which im happy with for now. He had a newly rebuilt ministock (so standard) 3k in the same day and that made 33hp at the wheels. With the 4.4:1 diff in it now it is peppy as fuck and should go pretty good this weekend hopefully. Only the driver will let it down. Pics cos of coolness dyno- and some glamour shots by sparkle, excuse the primer overspray on the tyres haha1 point
-
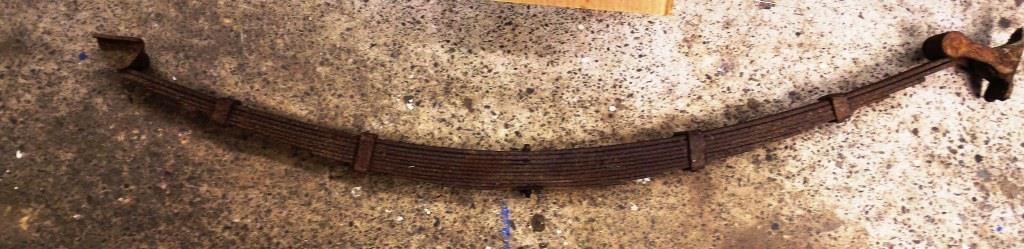
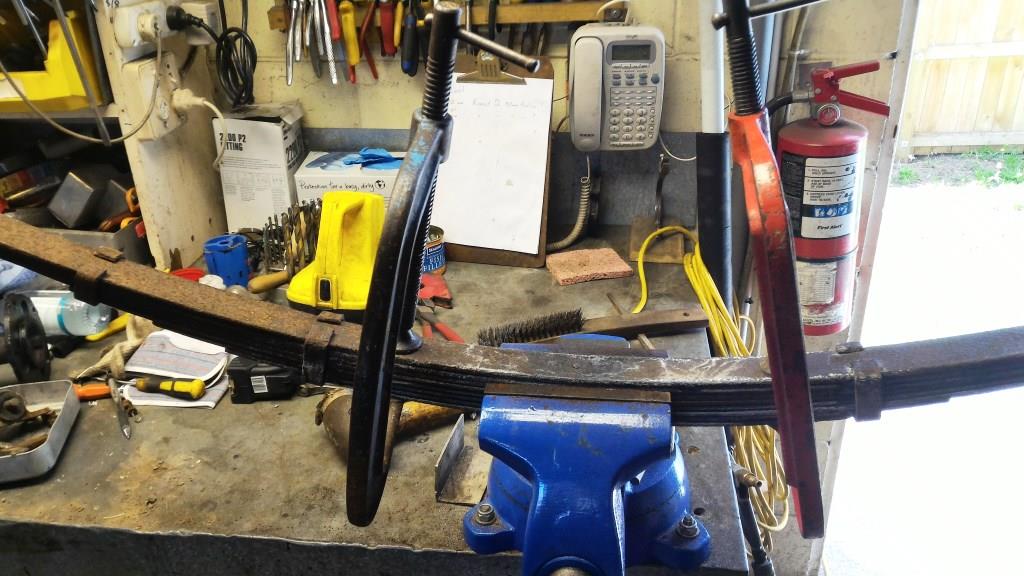
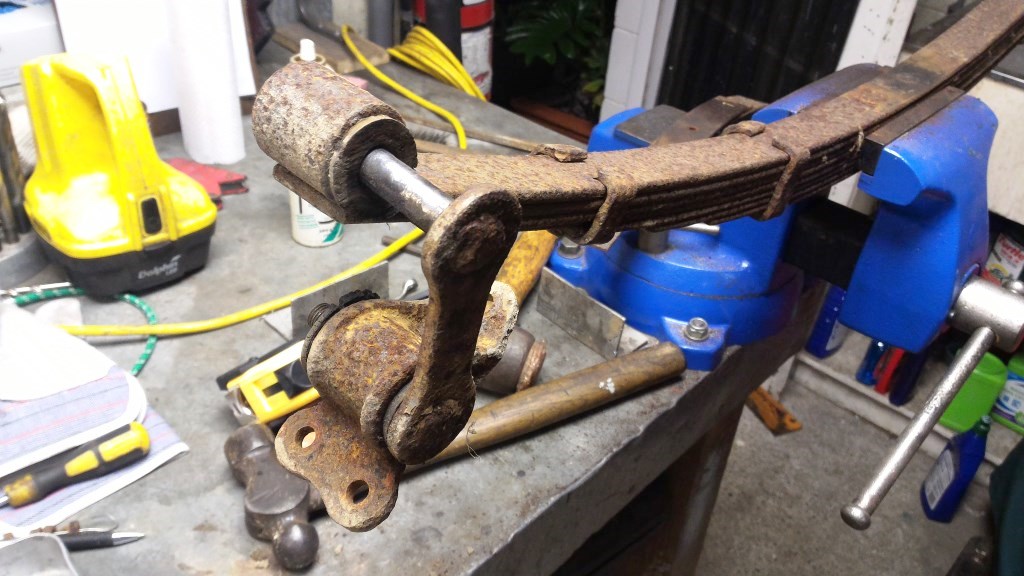
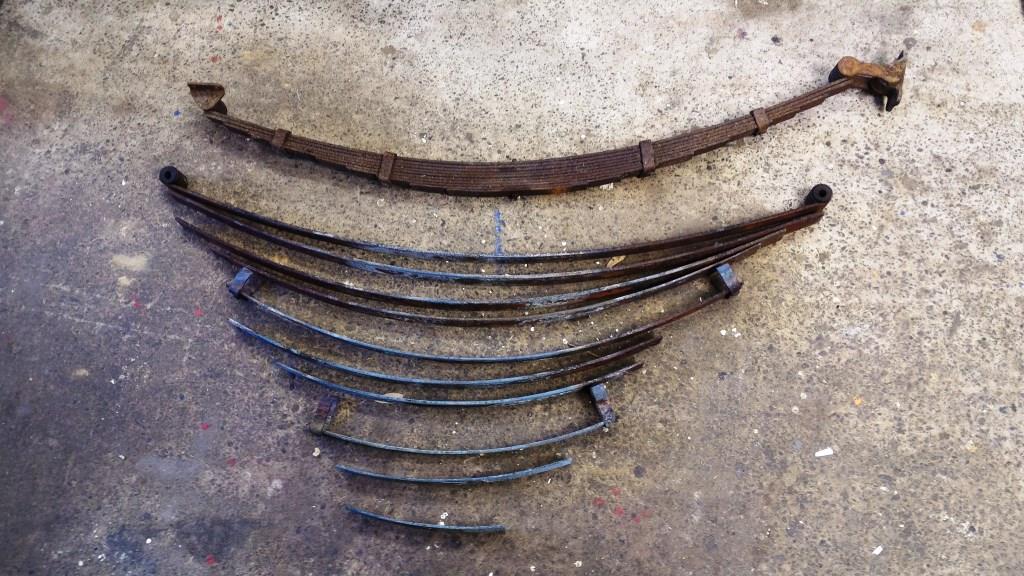
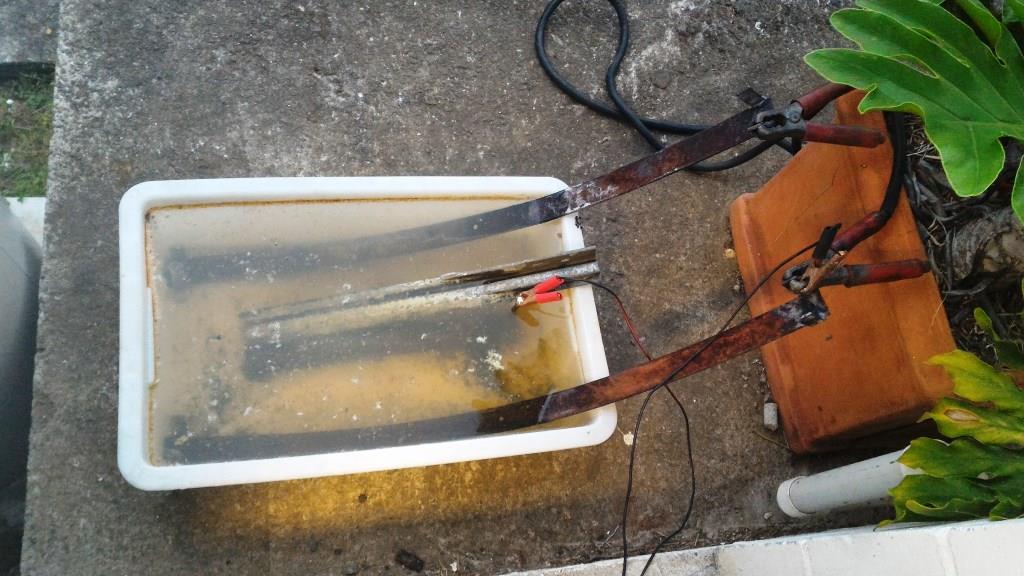
I still remember (although some 50 odd years ago as a child) my father taking me to the famous “Snell Springs” in Newmarket to have a set of springs made up for one of his many projects. As you turned into a now long gone side street off Khyber Pass rd. you saw a decrepit brick building with heat waves pouring from derelict chimney and the sound of big metal hitting big metal with a regular almost hypnotic beat. With my dear old Dad well known in the Industry (maintenance engineer at Chelsea Sugar Works and night time “management and supervision” lecturer at the then new & burgeoning “ATI”) an awe-struck kid got the full tour- in hindsight they laid it on for me thick! The sight, smell and sound of a work-blackened man with huge arms wearing a leather apron dragging strips of dull red hot steel from a forced induction coke powered forge and forming them into leaf and coil springs with a massive flywheel press, rollers, hammer and anvil stays with me still. It was a chance to have a glimpse through the gates of Hell where steel was formed, worked and hardened with heat, sweat, muscle and experience. Problem was I was stuck with a dilapidated pair of these……. …..and Snell’s were long gone. With a little care, an old strong vice and some big G clamps I managed the disassembly with fingers still intact. Next step was a week of the ‘electrolysis pickle bath” running 24/7!
1 point
-
missing the bottom badge if anyone has one sitting around need two
1 point
-
These are sweet! you need a jet engine1 point
-
So I refitted the frost/drain plugs and filled the block with a radiator flush treatment to see if that made any difference. Left it in half an hr then drained it thru the sieve again, then popped plugs and hit it with the water blaster... Blasted every passage in as many directions as possible, and got quite a bit of gunk out. The white bits were stuff that accumulated in the old alloy intake manifold after it sat for years... Looked much better after that... I know they're not perfect and it should be properly cleaned, but I'm trying to just do the top end, and I have see far worse than these, so we'll see how it goes. Dried out passages with air and the crappy prelim stuff is done - should be ready to pull the heads off next... Just needed to order the wife and No 1 daughter to push the old girl away for the night... I did help by mowing the bit of shaggy lawn they had to push it over...1 point
-
I've at last made the rear crossmember and got it into place. The channels welded into the top corners are for fuel, brake and wiring. The hoop is made from 3mm steel plate, seam welded and formed into a 40mm box. This arrived yesterday, and it's f*ck*ng huge! It's certainly going to fill the engine bay nicely....1 point
-
Bought some of these trumpets. Don't worry they aren't staying this colour. Hoping to pic up my throttle body flanges and the engine side tomorrow. Arrange my friend to tig them together with short radius bends. Then start on the linkages.1 point
-
Chassis is coming together nicely: A bit to go, but the main framework should be finished next week. I got the Jag IRS this week And stripped out anything I didn't want, which left the good bits: I just need to narrow it around 450mm. The engine I'll be using is a Falcon XR8 5.4 litre DOHC like this one: Deal done this week! Very happy, I'll be converting it to carb/distributor which should do away with all of the wiring and the need for an ECU.1 point
-
Have been visiting my folks in Nelson, and camping in the Sounds in January. Left in the rain onto the Interislander, hauling the camping gear and kayaks. Our camping setup at Momorangi, on Queen Charlotte Dr between Havelock and Picton At Anakiwa, across the sound from Momorangi. Anyone else been to Outward Bound? I went in the early 90s. Dazzling the tourists at Pelorus on the way back. If you look close you can see bathcollector's wheels on the trailer. Car went mostly OK. I locked my only set of keys in the trunk which was a hassle. A bit of hotwiring got us mobile for a day until the locksmith from Blenheim picked the lock while it was pissing down with rain (thanks AA and Gary Ching Locksmiths). I got some more keys cut after that. Also had some fuel starvation issues which seemed to get worse over the 3 weeks. By the end I was running the electric pump full time otherwise it would lean out and stumble up hills or cruising above 80kmh. Not sure what is going on - perhaps the mechanical pump doesn't like sucking through the Carter pump? I really need to address the fuel leak before using the Carter pump all the time. On fuel leaks, after we filled up at Havelock I notice a lot of gas leaking under the drivers door. There is an old fuel return line that I had cut and 'crimped' under there that is still connected at the tank end. Apparently with a full tank (and maybe the hot weather) there was enough pressure to leak quite a bit. I crimped it up more tightly with some vice grips to stop it leaking, but will fix that better now I'm home. Was quite nice as a camping wagon, but mileage means it's only feasible on trips near home, we will likely go back to the Holden next January.1 point
-
Figured out how I can crank the engine and see the timing marks at the same time.1 point
-
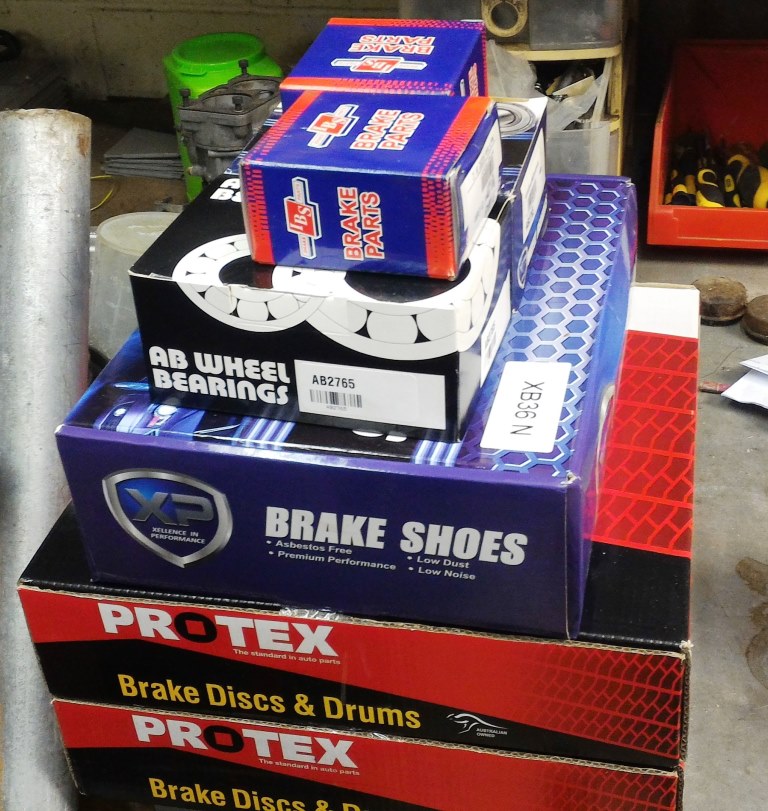
More painting……. And a stack of new parts……. Why does assembly always feel like Christmas…. Some new brake lines…….. And it’s done……
1 point
-
And I got a fibreglass bonnet and bumpers. And I got a better radiator Then I took it to the dyno and said "can we turn up the boost?". And they were like "holy shit why hasn't it exploded before now? It goes really lean and starts detonating. You should LINK ECU it." So I got a link and made a fuel rail to take bigger injectors etc.... Too much torque happened, so better clutch1 point
-
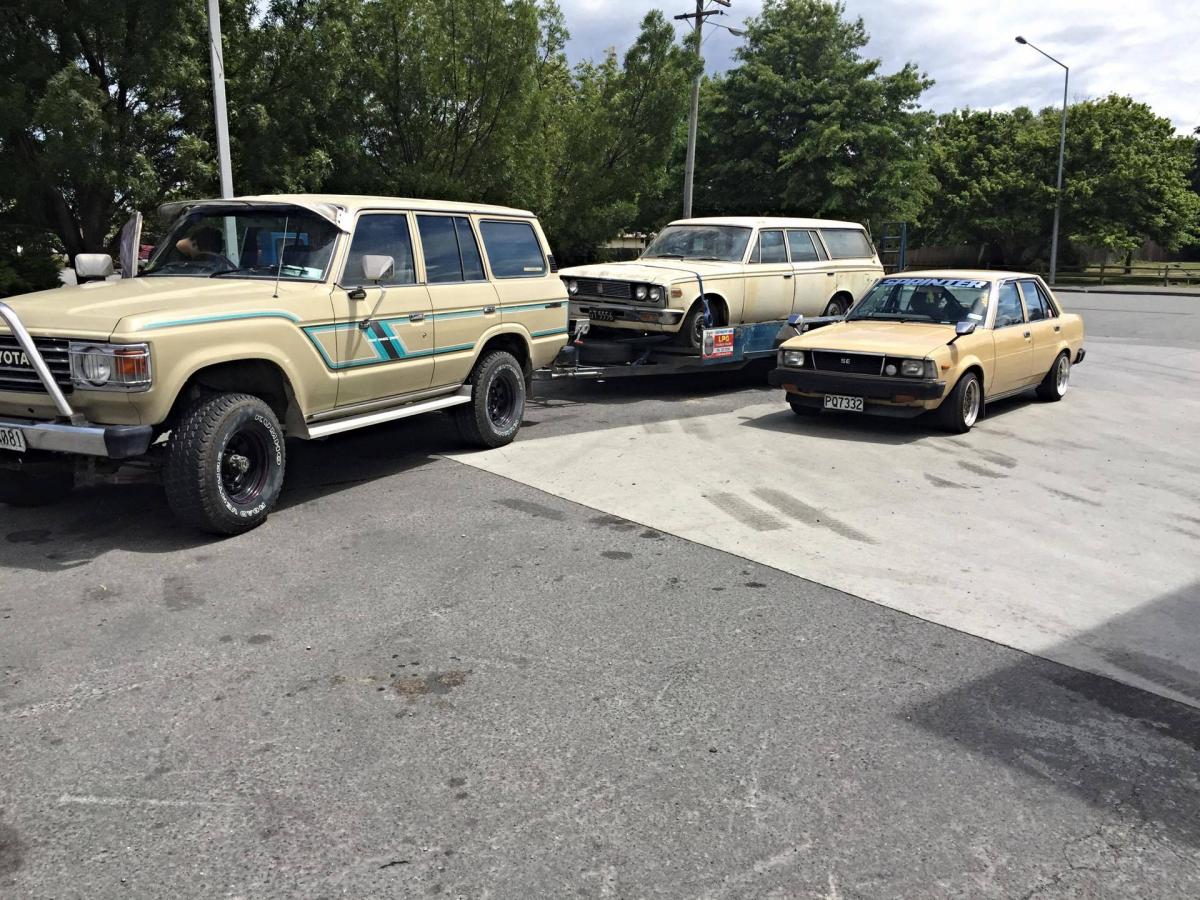
last pic with the tan team, matts 60 series cruiser with his new ms53 crown wagon behide and my 1980 ae70 sprinter sedan next to it
1 point
-
Low vs High.1 point


This leaderboard is set to Auckland/GMT+12:00