
Leaderboard


Popular Content
Showing content with the highest reputation on 10/18/15 in all areas
-
Went for my first hillclimb today, was awesome fun. Had never been out this way or on this road but was great. A few close moments but came away unscathed. https://youtu.be/wolsan9NpN45 points
-
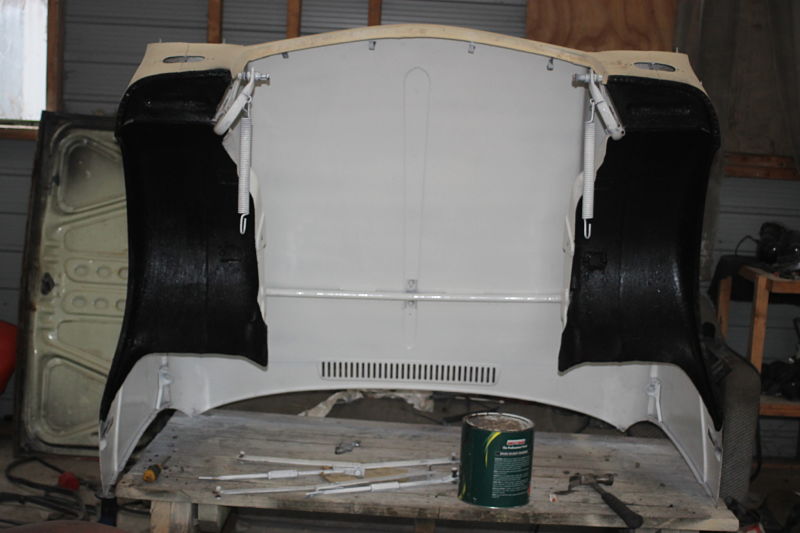
All back inside again, hopefully over the next few days I'll get the engine bay prepped and ready for priming.
 5 points
 -
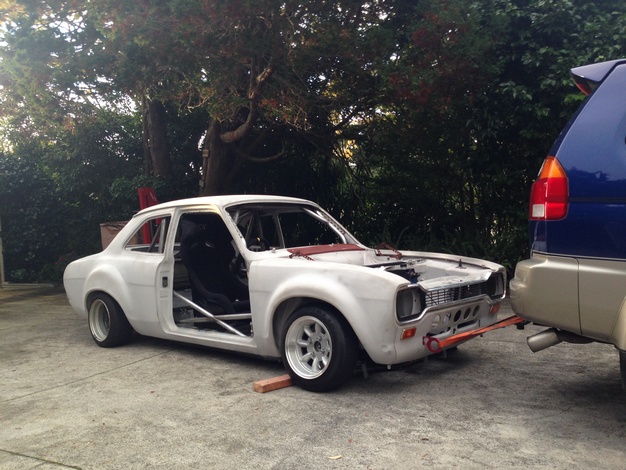
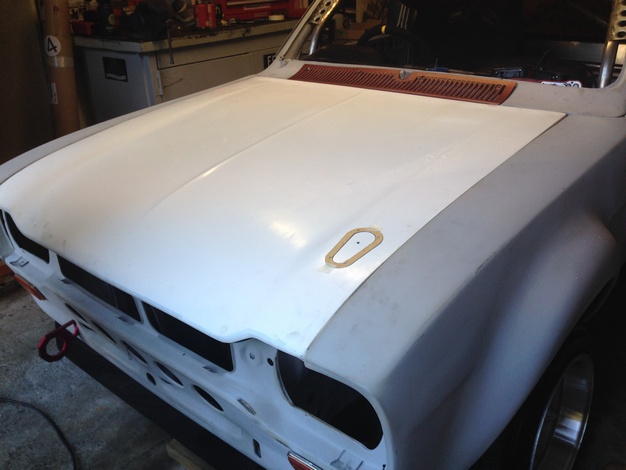
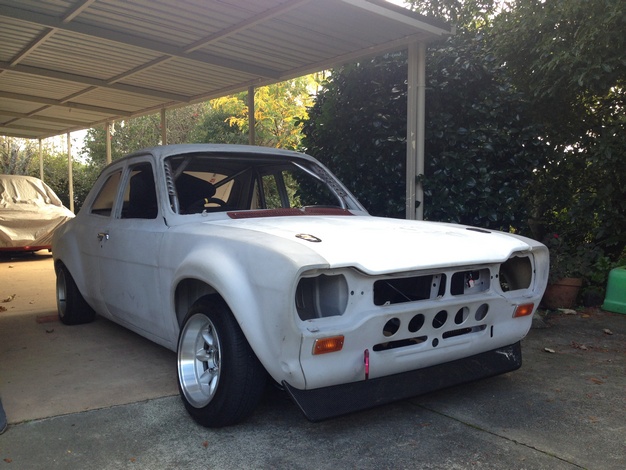
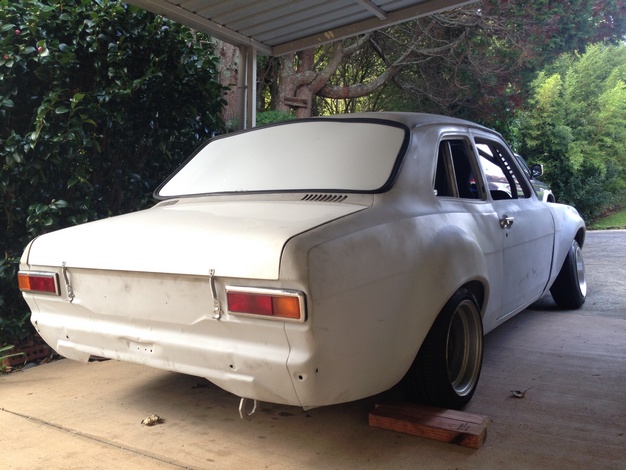
Dragged the Escort out Fitted new Fibreglass Boot and Bonnet Cut holes in bonnet for latches Fit boot springs and trial fitted the rear lexan window
5 points
-
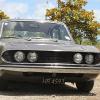
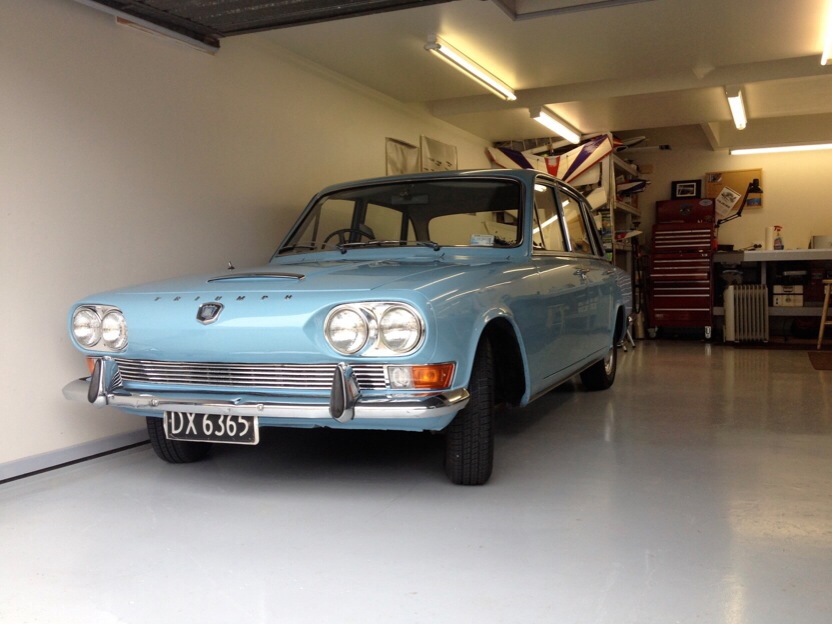
So after a few years of living somewhat of a snowbum lifestyle, I made a decision a few months ago to give I guess 'normal' life a try and made the decision to move back to NZ and look for a 'proper' job. I'd always kept my eye on trademe over the years and once I'd made the decision to move home I thought I'd keep my eye out for an old mazda to buy. And well, I've finally got myself another old car. Was on trademe a month or two ago, I emailed the seller asking about holding the car for me if I paid a deposit, he was happy to do that. And thanks to smokin'joe on here who managed to check out the car for me in before I placed any bids on the auction. ( i still owe you some beers joe!) After he gave me the thumbs up I decided to watch and bid. Paid a bit more than I wanted, but heck, it's something I wanted, and not that its a rare car by any means, and it's not the chrome bumper earlier model, but finding one in original condition isn't too easy anymore. So now I had paid a $1000 deposit on a car in Temuka and I was in Whistler, Canada. Id been planning a holiday home in October, and figured this would be a perfect time to go pick up the car and do a road trip back to Auckland with it! So I booked a flight from Auckland to Christchurch, then a bus ticket to Temuka and met the seller to exchange my money for the car keys! The drive back was quick but awesome, would of liked to take a bit longer, but time was precious, and needed to be back in Auckland asap. The car goes really well for how many kms it's done, and being the 5 speed model made the 100-110km/h driving a lot easier. It's not too bad on gas either and the motor has a lot of pep and torque for an old girl. Met Dave (Horse25) just out of Christchurch on my drive back up and picked up some escort bits n pieces and did a freight run up to Auckland for a nice guy with a mint mk1 escort he's modified for his son. I did notice on the auction photos of the interior that there was only an AM radio, and for a 14 hour plus drive, I knew that it would not do! So I took down my little speaker and used the cigarette lighter to alternate between charging the speaker and charging my phone haha. So here's a couple more pics; Luckily my friend had a spare spot in his garage, so it's gonna sit there for the next couple of months till I'm back in NZ again; Plans so far, either get the steel's widened (i quite like the '4 spoke' design of these) or find some other wheels I like that aren't going to cost a fortune, check out the suspension side of things, new shocks, lower springs, new steering bushes etc. And that will be it for a while, engine will do me fine for now, eventually maybe a rotary, but who knows, I'm just happy to have an old car again, and hoping to get along to a few oldschool meets and events in the future.4 points
-
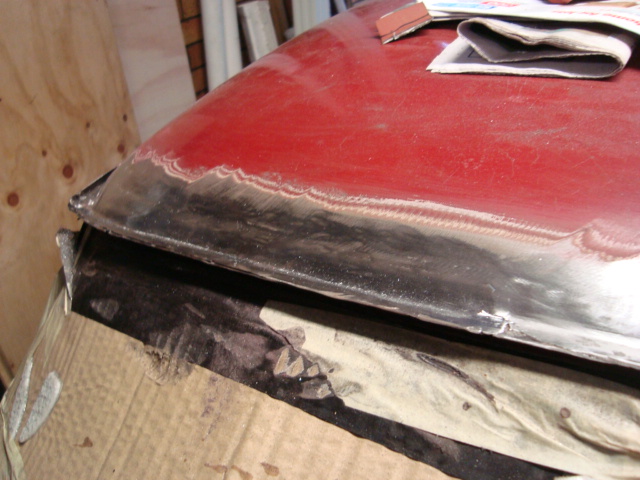
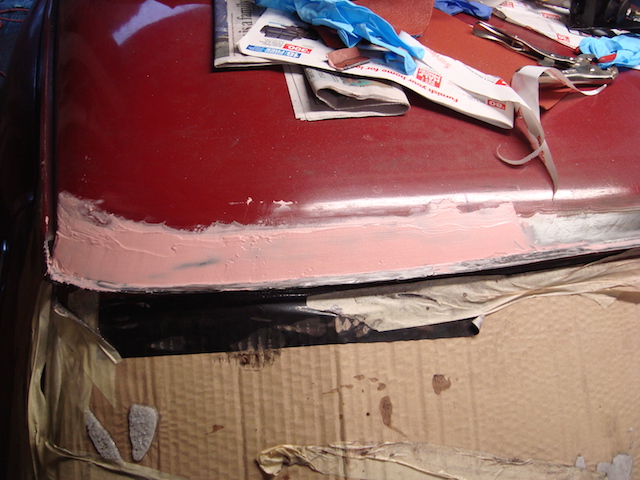
today I found a piece of my very first VW for sale... this is the bonnet off my old Baja Bug, I havent seen it for over 20 years. One day I forgot to clip it down, and while heading along the nor-western, it flipped up into the wind screen and tore one of the hinges out. I replaced it with a spare I had, and can't remember how I disposed of it... The hinge is still broken and you can see remnants of the duct tape I used as a temporary get home repair... I nearly purchased it, but $5 seemed a little steep... (posted in this thread, as it's kind of the genesis of this project)3 points
-
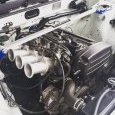
Almost ready to fit flywheel, clutch and then gearbox. Spent some time today adding rear engine hook, modifying the 16v extractors and giving them a paint. Clutch, flywheel and pressure plate with brand new pressure plate bolts. Fitted the SQ engineering blanking plate to the what is now the rear of the engine, this used to be the top outlet that went to radiator. Sealed and attached SQ engineering rear water bypass - also fitted the rear engine hook I pulled from the 3au before I sold it. Gives a bit more clearance, still not sure if the Dash temp sensor will fit. Finally got around to cutting out the shifter hole to make way for the J160. Im still thinking I may need to go back another 10-15mm but will wait till we fit engine and box. Would rather not cut too much out. Modified 16v extractors, Im still in two minds about running washers on the ends like that. I think I may get someone to weld some extensions on to the flange so it bolts on better and looks less dodgy. Oh and Gearbox has been picked up from Brendan so its now all ready to bolt up, he also modified the 3SGE starter for me. Laser cut flange is being picked up tomorrow so all going well (and depending on engine crane availability) we could have an engine and box sitting in the car in the next week or so.3 points
-
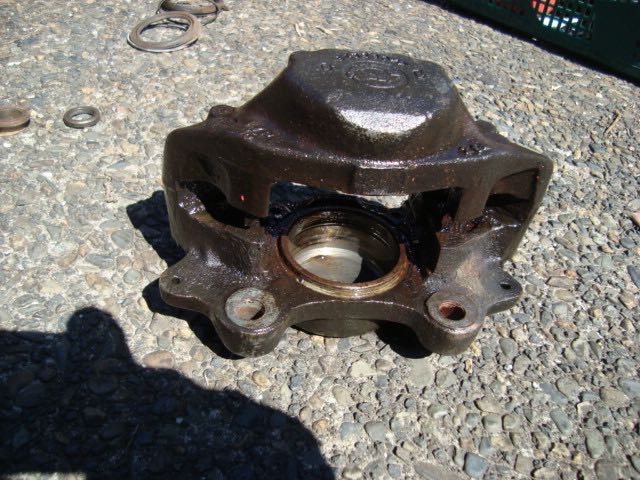
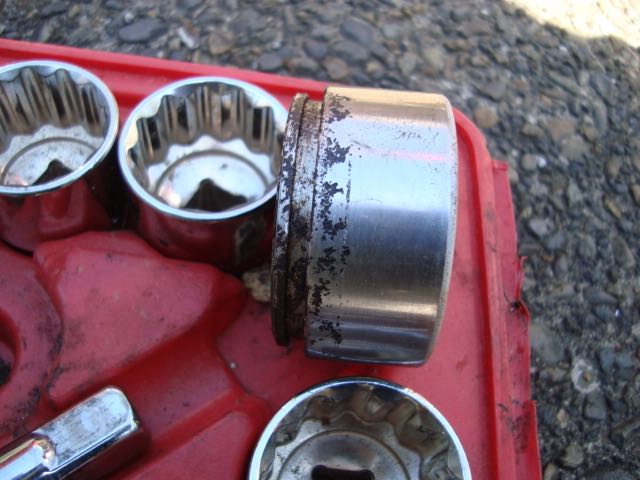
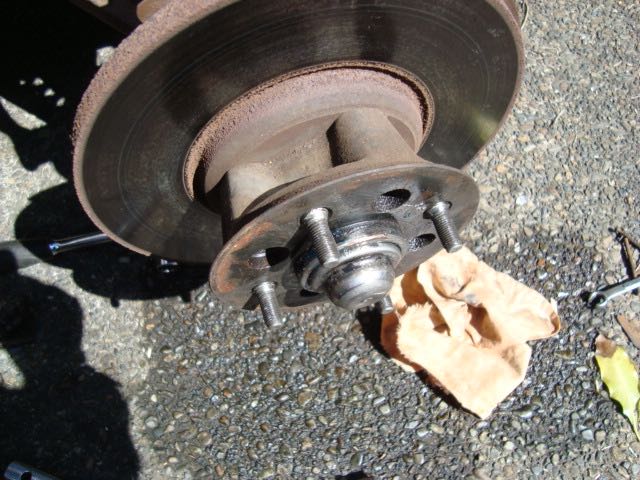
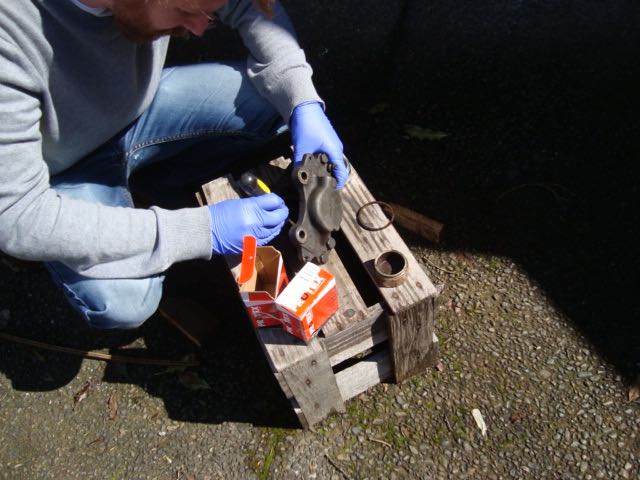
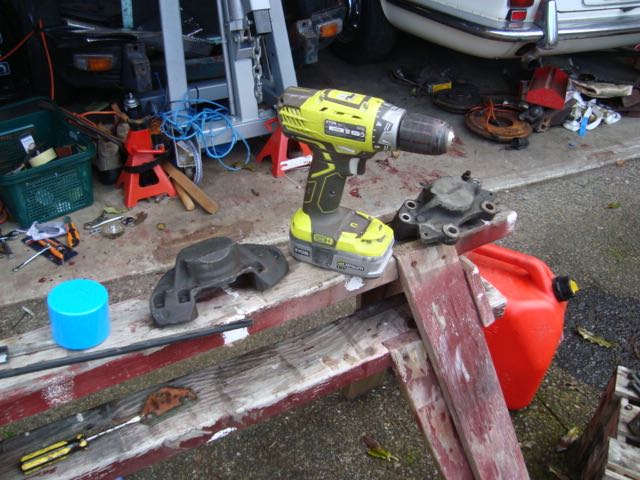
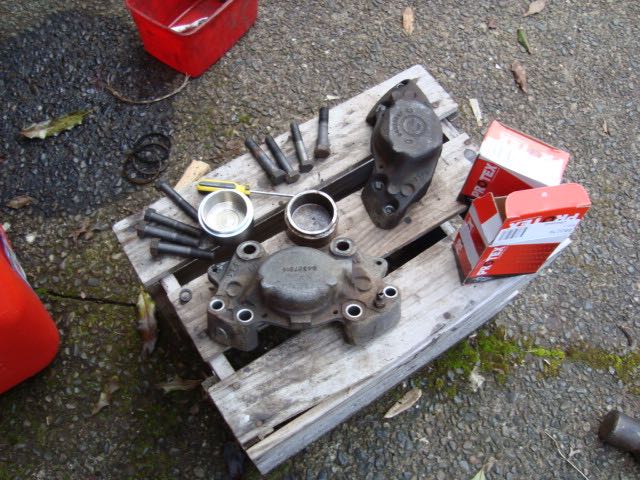
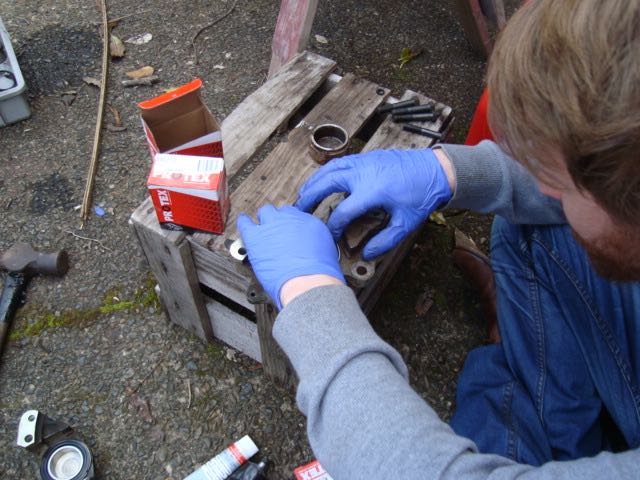
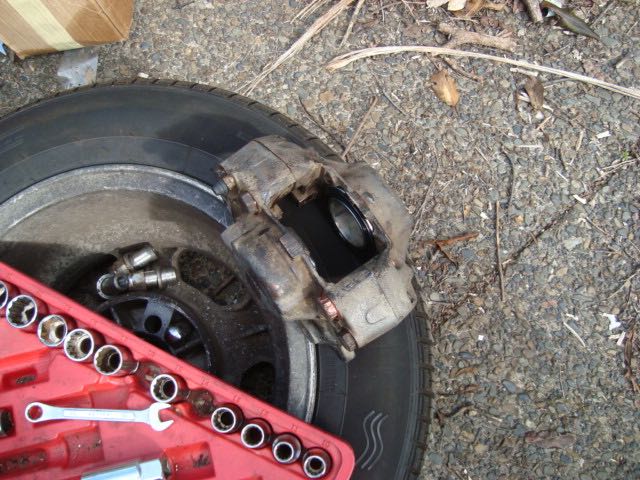
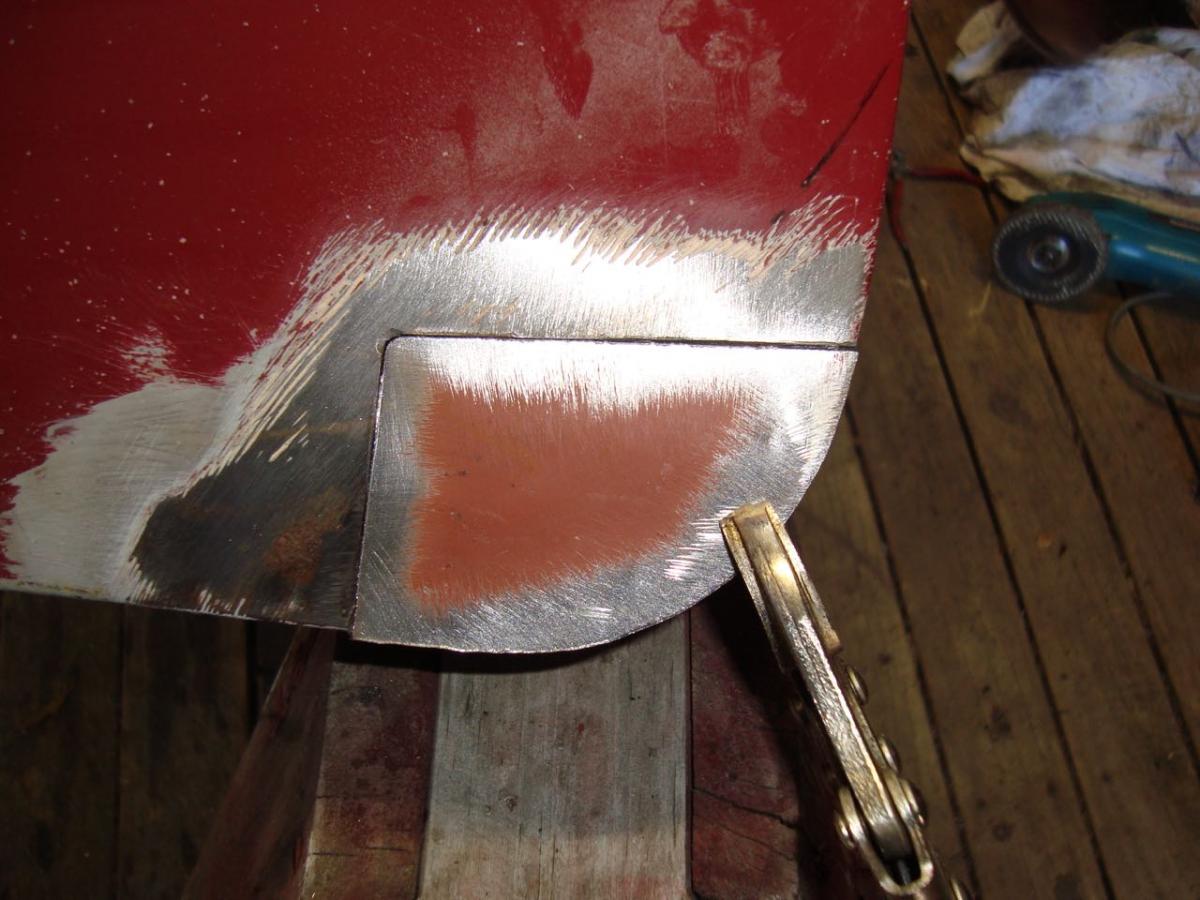
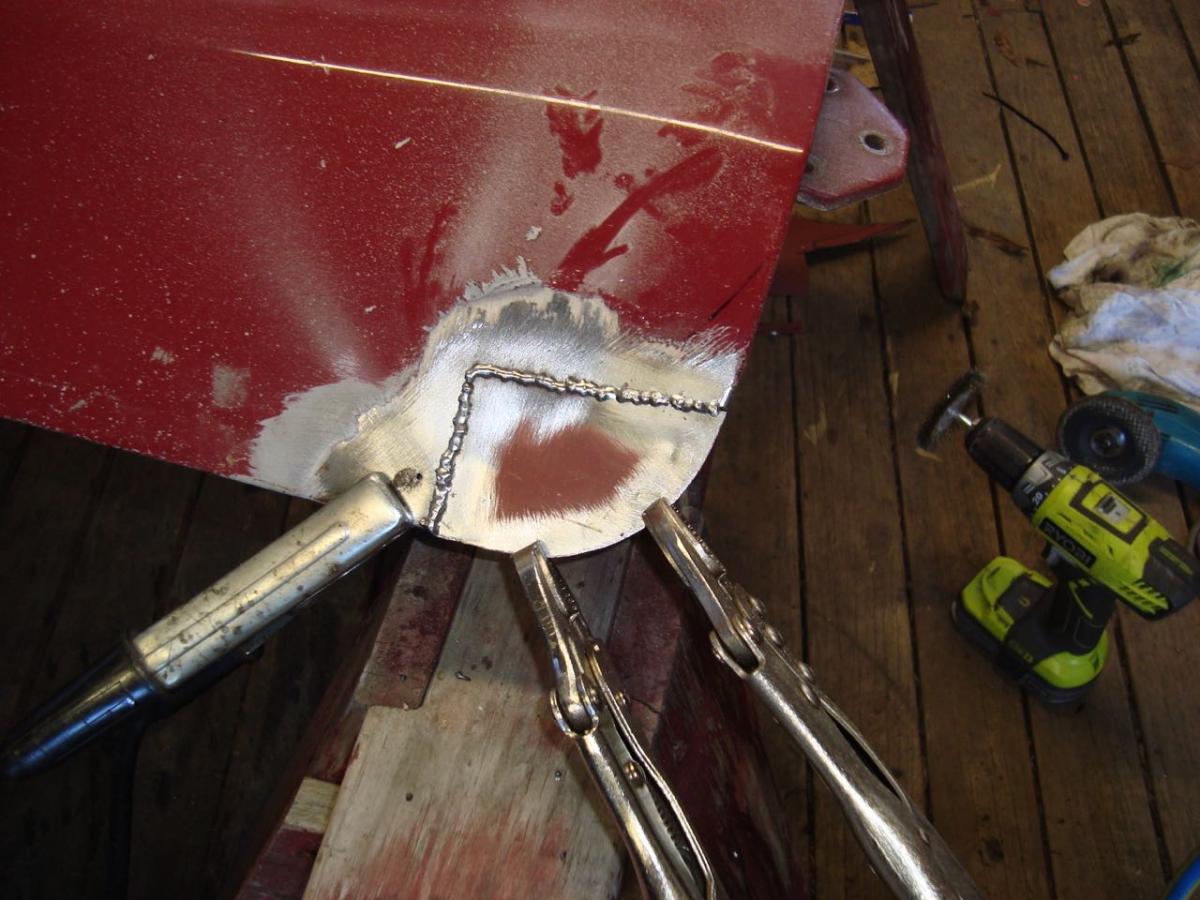
When we jacked up the front and took the wheel off to do the rust I noticed that the wheel didn't turn freely. It was dragging both front brakes. SO we pulled a caliber off and it wasn't in very good condition. IT took a lot of compressed air to get one sides pistons out and it was impossible on the other side. In the end we resorted to connecting them to the brake line again with no pad and used the peddle to get the pistons moving. This is what they looked like. The calliper had to be cleaned but it wasn't too bad. Discs look ok for jammed on brakes. Stripped them down and cleaned them up Got a brake upgrade kit from Sterling Brakes and got started rebuilding them. The look much better with new pistons and seals. Ready to go back on the car. We put them back on and bleed the system and it brakes really well now and goes better without the brakes stuck on
2 points
-
Cut up some plates to fit up to the front crossmember, drilled some holes for the bolts that the front end mounts with. Close-tacked all along the top and down the joins, just need to tack along the bottom. Then I can start the long process of tig welding it all together.2 points
-
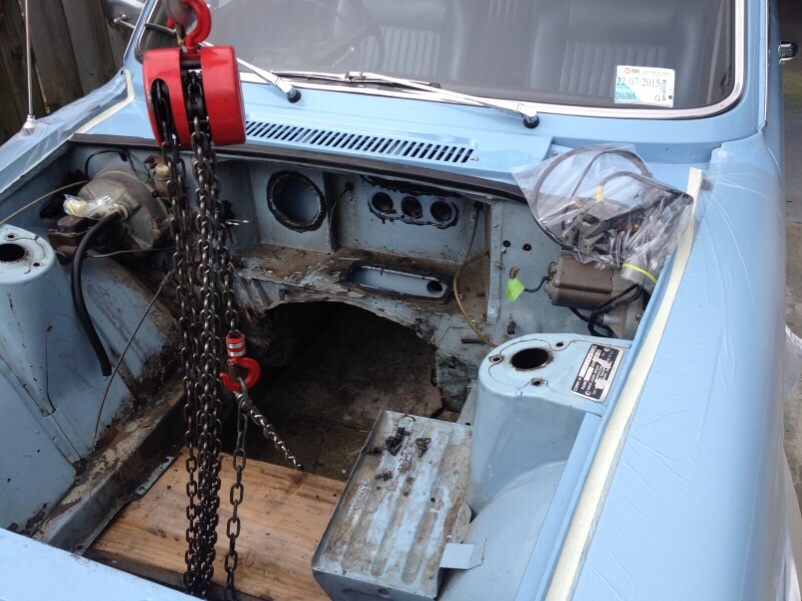
Exciting news! Little Viva wagon runs! It sounds quite sweet too. I had a go at getting it to start ages ago but the points and condensor were shot so I gave up. Today I had to move the car from the hoist to make room for an E21 Bimmer that’s in for rust work. With the wagon down on the ground and parked up near the bench I thought I’d get it going and strip out the engine bay while Im there to make better access for the repairs needed. I had been given another dizzy since the last time so I ripped the points and condenser from that, set it up and got sparks. Set up a fuel can and as soon as the carb had fuel it started. Awesome. It revs nice, idles nice and sounds really good. Time will tell once its running and driving as to how good/knackered/tired/gutless it is. Also today whilst between mucking with the ignition and helping a friend with his Saab I pulled the brake servo off, threw away the single circuit master cylinder, pulled the heater out, bonnet hinges off and some other bits in the search for any more rot. Luckily the usual points behind the hinges were solid as was the heater plenum/channel. I will remove the radiator for a tidy up in front of its mountings. I’ll take off the dynamo and throw that in the bin as planning an alternator upgrade. Pictures from this today.. It was raining to start with so perfect excuse to spend day in shed with Hannah and Rowan and tinker with our respective cars.. This next one.. look at that for some lovely hose locating bracketary.. Engine bay cleared out for a looksie.. Tidy heater/ventilation plenum thingee.. Rust hole.. Another hole.. So over the last few weeks, or since the last update, I have been whittling away at a few bits on it while it was up on the hoist. I finished the chassis rail repairs. As suspected the passenger side rail was solid but for a few little holes and around the jacking point/gearbox mount. Its all strong now. Next time its up I’ll clean up and paint it all. Then some decent cavity wax inside. I’ve swapped the alloys over for some old wheels I had kicking about and had the tyres removed so I can weld up/clean up two of the alloys that the have been curbed. It looks horrible on old skinny steels. I look forward to some new tyres and get them Turbos back where they belong! I am planning on getting 175/70 13 so it retains an element of comfort and that slightly older look rather than the more racy 60 series tyres I have on Viva 1. Next rust repairs will be either the engine bay bits whilst its off the hoist or sort the rotten rear valance out when its back up in the air. Luckily for my wallet I have a few jobs coming in. Unluckily for Viva it waits in the queue as its doesn’t pay me money. Im getting quite excited at the prospect of cruising down to the beach/into town with my ropey looking wagon so I think I see a few evenings spent on it now. Its gonna be perfect for mtb trips too J I will have to get a shopping list together now. Things like brake cylinders, seat belts etc. I will be keen on some Chevette front seats too if anyone can help- I hate driving with out headrests plus Chevette seats are really comfy. Im sure this list will grow. Those with Chevettes... expect some requests soon..... Tim, Chris...1 point
-
The underside of the bonnet also got painted
1 point
-
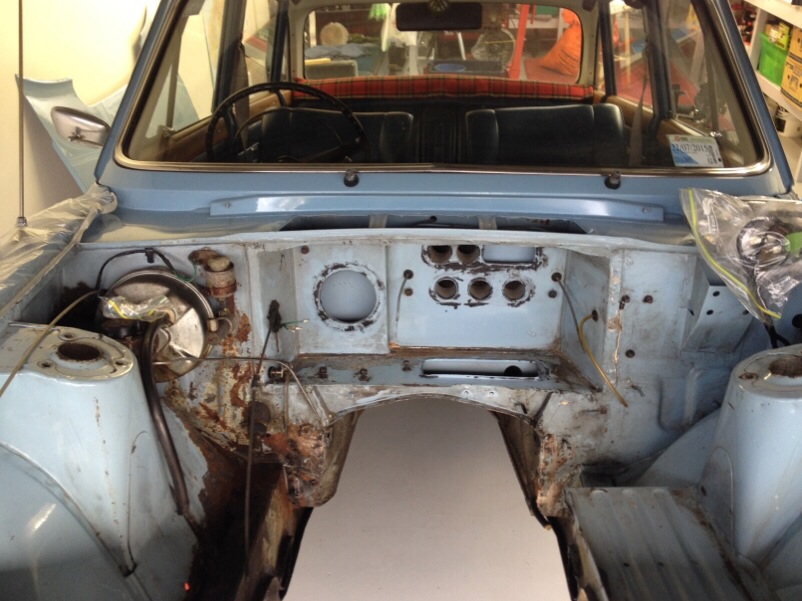
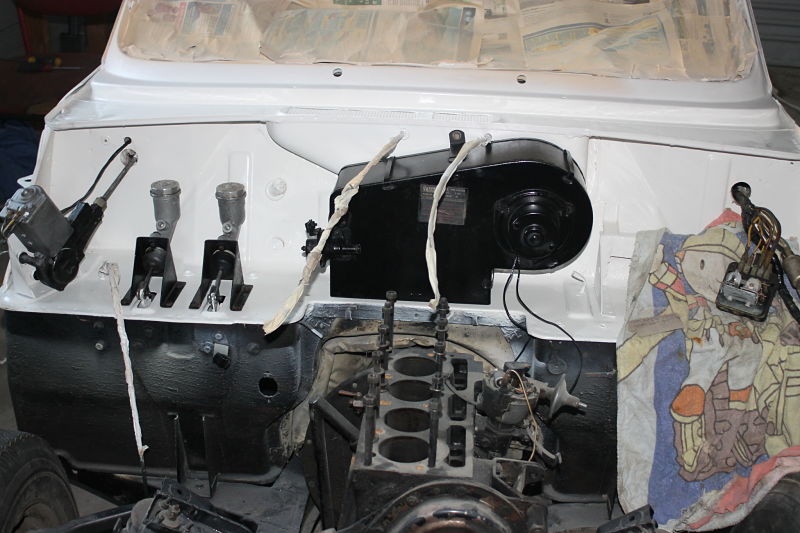
the engine bay had a good tidy up, then it was time to sort the engine.
1 point
-
the floor got cleaned up and painted
1 point
-
Today thanks to help got a little done. Firstly i took the deck off so i don't have to worry about it when i get the wellside So that ended up being easy as F!@#!!! Then looked at the chassis and thought that needs to be cleaned up so a mate headed over and gave me a hand doing that. Got a little done but the wire wheel ran out... While doing that we also prepped and painted some front guards These were acid dipped then neutralised a few weeks ago only got this photo before painting. Sanded back and thanks to acid dipping it didn't require much effort First time really using a proper gun, turned out ok but the last coat went a bit sour.. orange peel looking.1 point
-
Suspect you have killed a gear sack. A mate of mine had a rather worked one and ended up running a standard cluch as it was cheaper to kill a clutch every 6 months than a gearbox every 3 months. though not made of glass if you arent relatively kind to them most the time they will let you down at the weirdest time. Scratched my head once guiding my mate up the ramps to fit a new muffler when he suddenly rolled forward.... dead gearbox pushed it in garage and up on stands it went.1 point
-
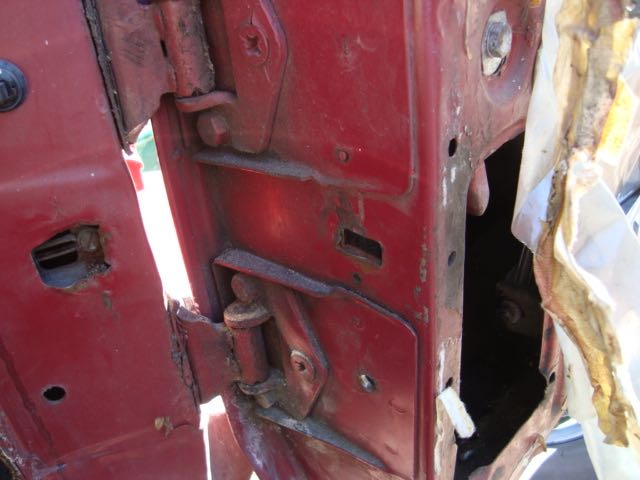
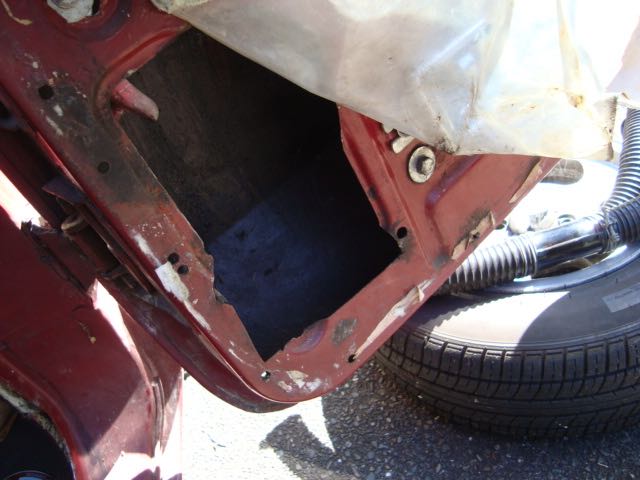
We decided to move on to the drivers door. It was in bad shape with rust and the stop was broken We welded in the bracket of the door stop and then went after the rust in the bottom corner Fresh metal Welded in Primer on the inside Primer on the outside New seal. Will show some pictures of it on the car soon.
1 point
-
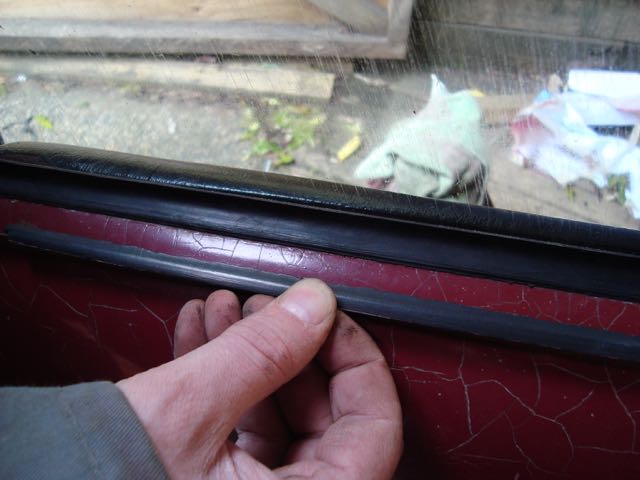
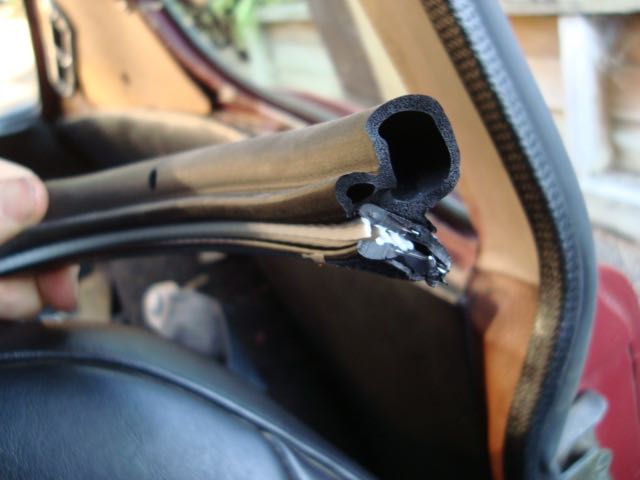
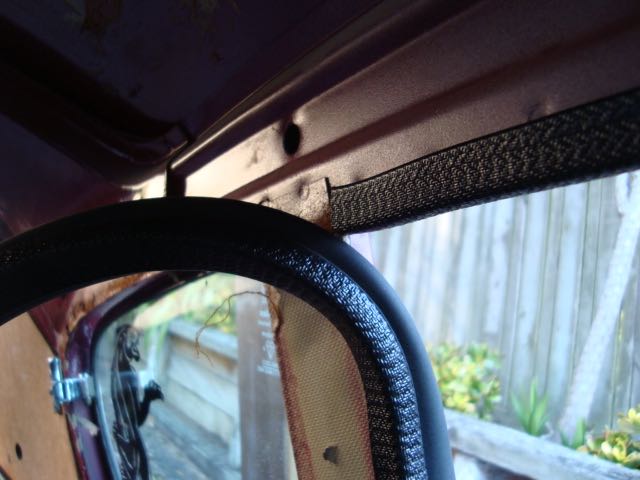
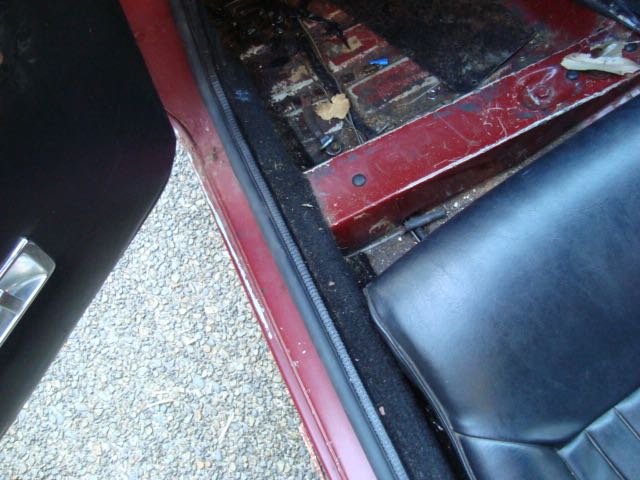
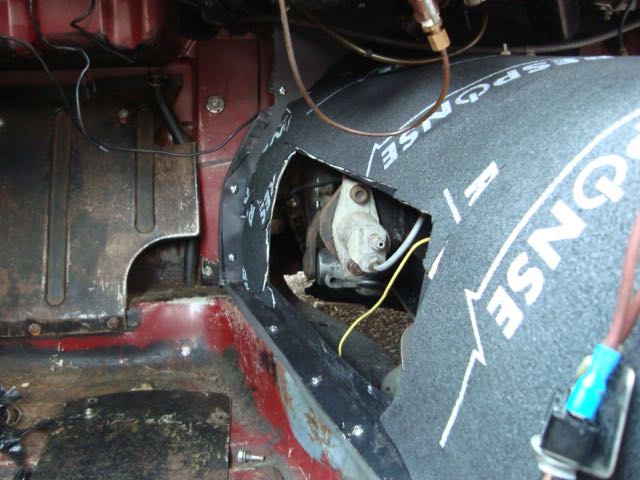
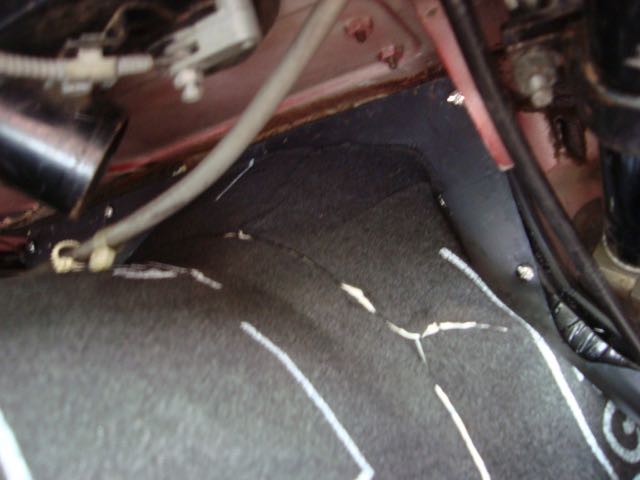
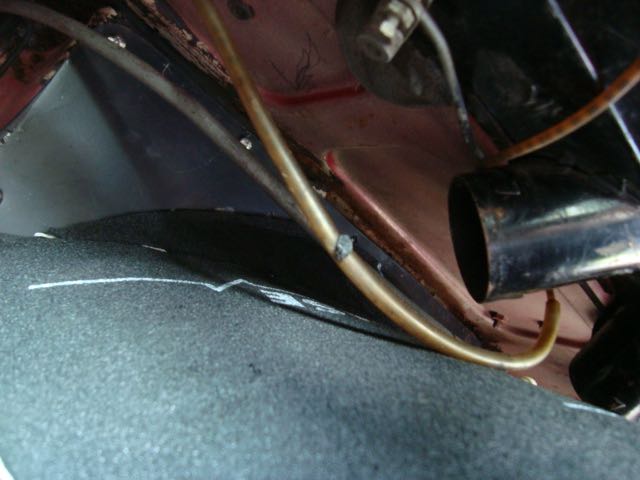
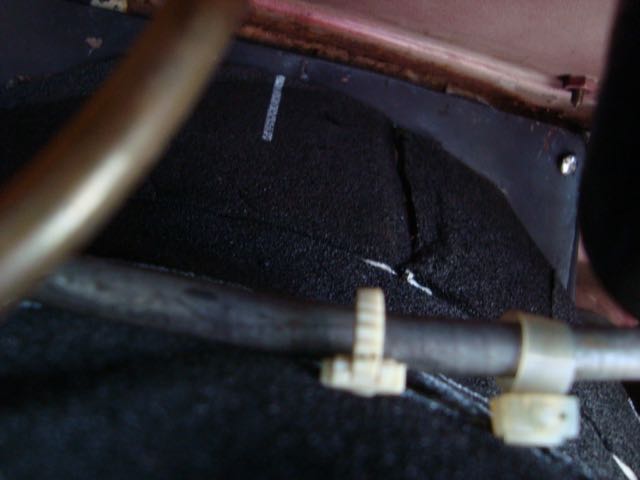
Getting tired of grinding, welding, sanding and painting we decided to do some interior work. We found some cheap door seals from Para Rubber. They are not the prettiest but way better than none. Ethan we put them in the doors and side windows and seem to work OK. I put some sound deadener on the trans tunnel and attempted to secure it in the car. It is hand made and it doesn't actually fit that well. SO with a hammer and two people a drill to locate new screws we did finally get it in place. We decided to run the Speedo cable on the outside as it needs to connect to speedo in the cab and the previous owner had run it through a gab in the firewall that wasn't ideal. Once its covered in carpet it will work way better.
1 point
-
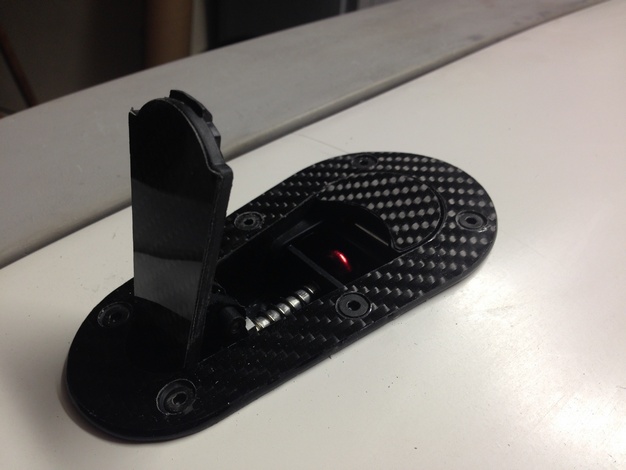
Also, diodes need to be measured both ways. There's normally a diode measuring feature on a multimeter -|>|- , which changes to measuring volts when it puts a trickle of current through. Usual types of diodes should measure ~0.5V to 0.7V in the forward direction. When the diode is conducting (forward biased) it will work just about like a short circuit (no current limiting). Just drops the volts by the volts mentioned above. Your pic looks like the device should flow current from the top terminal to the bottom terminal (if the marking agrees with the terminals). Reverse biased, they're mostly not conducting (~1micro Amp, depending on diode type, not being over blocking voltage, etc) There's an OK description here for more detail. http://www.learnabout-electronics.org/diodes_01.php Also, in a diode bridge (eg rectifier from ac to dc in an alternator) depending on where you measure, you're getting 2 diodes in series, and will see ~1v to 1.4V forward. For extra laughs, LEDs are often ~1.1 to 1.6v forward V (you can see them light up a tiny bit on the meter) if they're red/orange/green, and up to 3.5 - 4V for white / blue etc (edit: clarity, series)1 point
-
Sand castle time at Shane's.1 point
-
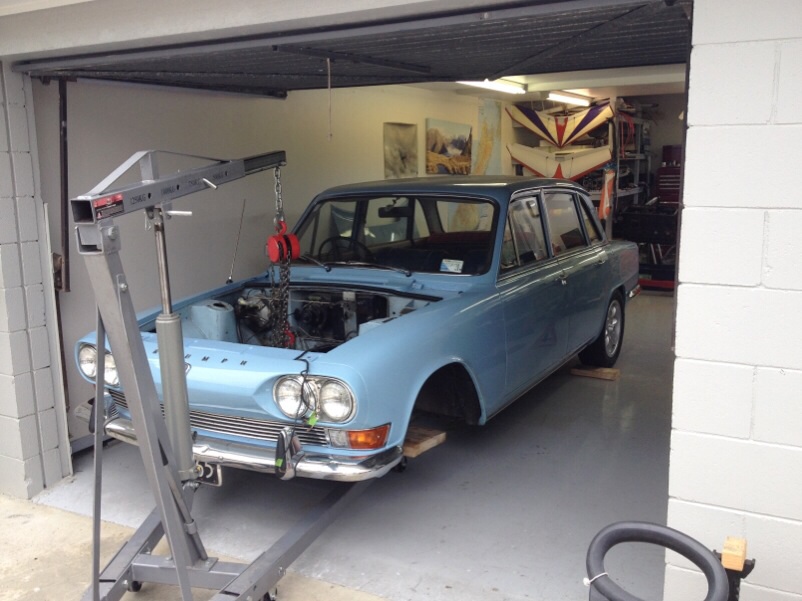
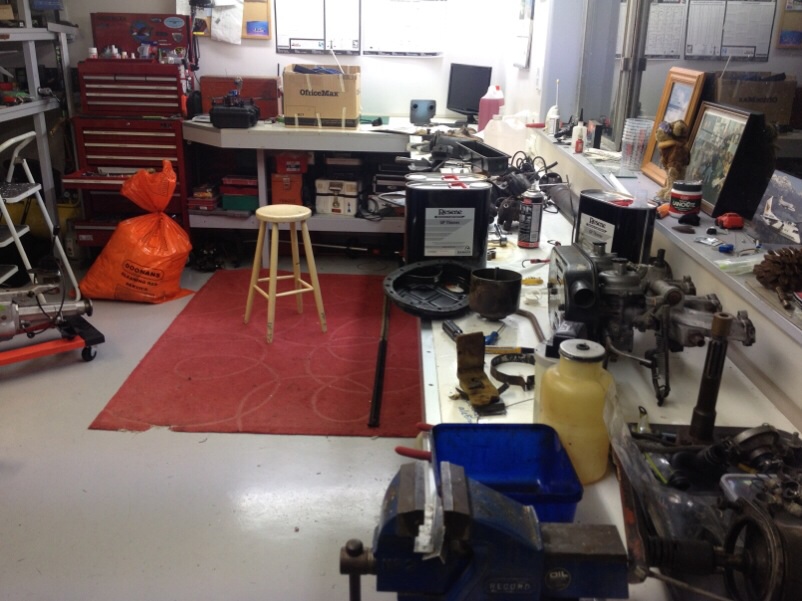
Starting to get a little concerned about all the parts building up on the bench. I hope I can remember where everything goes.. So with the engine out, and a nice big hoist on loan for a few days I dropped the car down off the stands and pulled it outside. Removing everything..
1 point
-
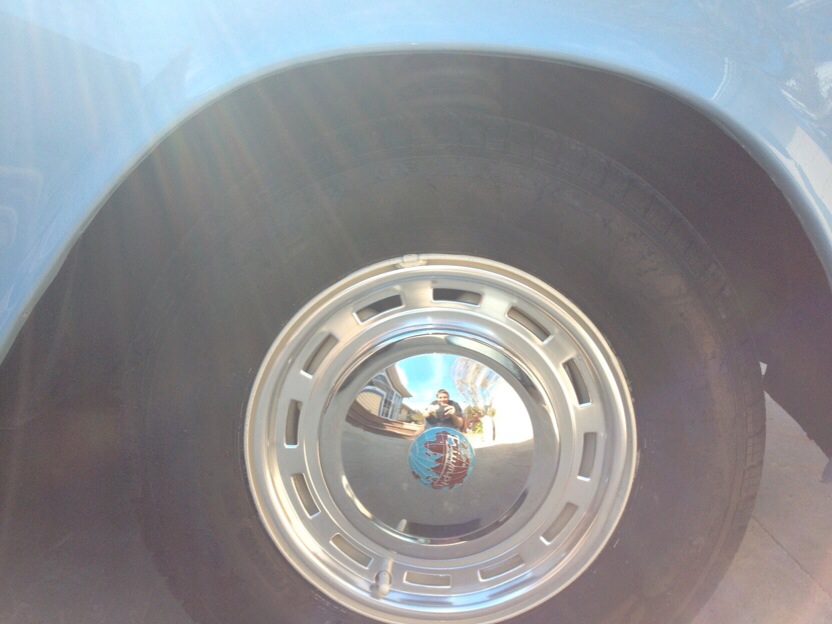
so im in the process of getting the steel wheels widened, does anyone know how wide i can go? wanting it to look like this.
1 point
-
did he give you the faccy wheel centre caps ?? he reckoned he had then aside especially so some hoohrat didn't flog them !! BTW, he'll hate you if you tang it up !!1 point
-
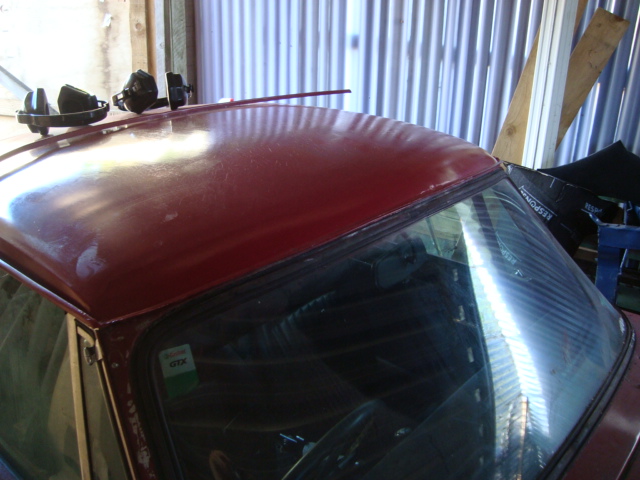
finally got home, AFTER 5 hours in the drivers seat (Dad was available to drive some of the way but i decided to shove him in the passenger seat. aren't i nice? ) anyway, pics of the trip and of the skoda: Woke in Omarama to this, couldn't stop giggling all the way to cromwell: Tow Vehicle (Kia Sportage, also mine) and the Vehicle we swapped for the Skoda (Ford Laser, my first car): Laser Again, she got snarly so we decided to put a muzzle on her Home now, looked under the seat, and found TWO, yes TWO(2) Original Skoda keyslots! (also note the unknown tool, its also a skoda original): Poor wee thing. just needs some TLC (AND A TON OF FLYSPRAY FOR THE SPIDERS!!!) Behold, Original Skoda jack: Dash, Again: Assorted condition Pics: Will put up a basic todo list tomorrow, its too late now EDIT: just found a set of snowchains in it too. SWEET1 point
-
13b jport, thanks.1 point
-
The diode is normally there to stop it back feeding after you switch the ignition off as itll keep the car running. Put a 2w 12v lamp in parallel with it so itll draw enough current to excite the alternator into chsrging.1 point
-
sills and rear panel all shape correct and finish primed. 2015-10-17_01-17-18 by sheepers, on Flickr 2015-10-17_01-17-09 by sheepers, on Flickr 2015-10-17_01-17-02 by sheepers, on Flickr 2015-10-17_01-16-54 by sheepers, on Flickr 2015-10-17_01-16-47 by sheepers, on Flickr 2015-10-17_01-16-40 by sheepers, on Flickr1 point
-
Blown center diff.1 point
-
I don't think having two wives has ever brought any man happiness.1 point
-
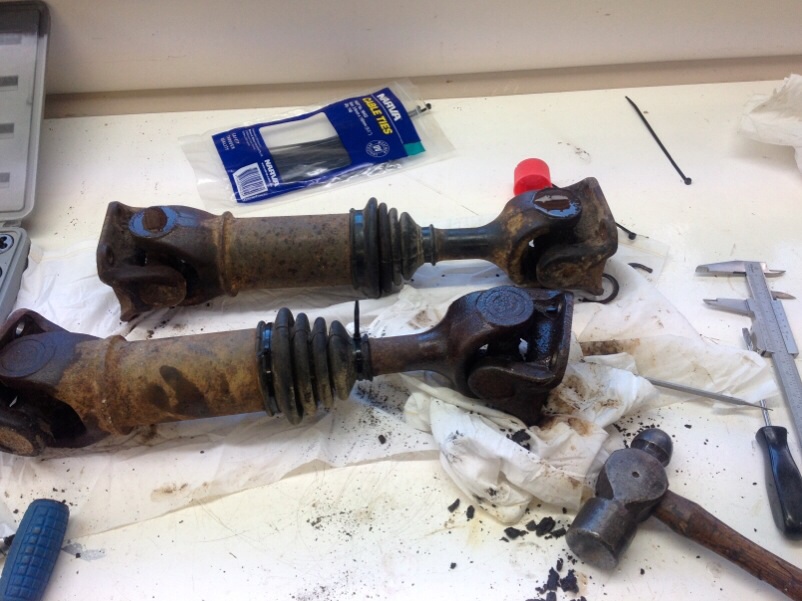
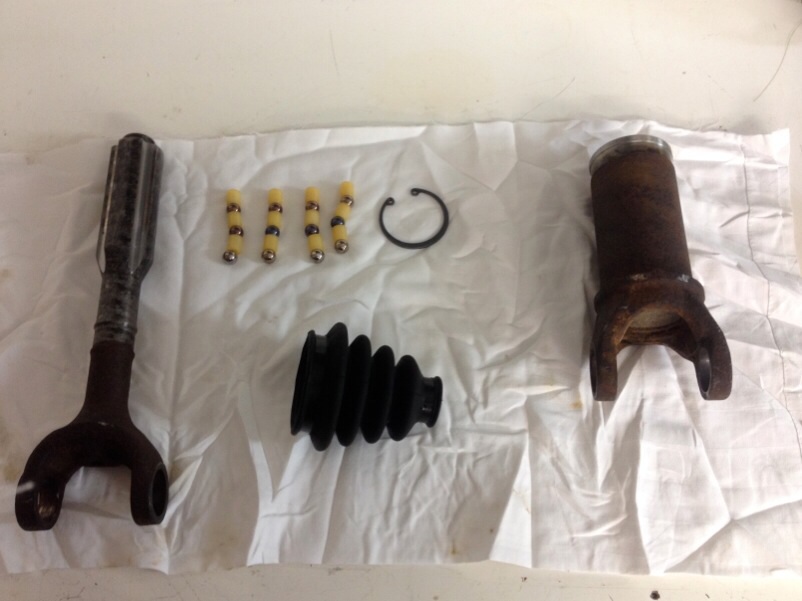
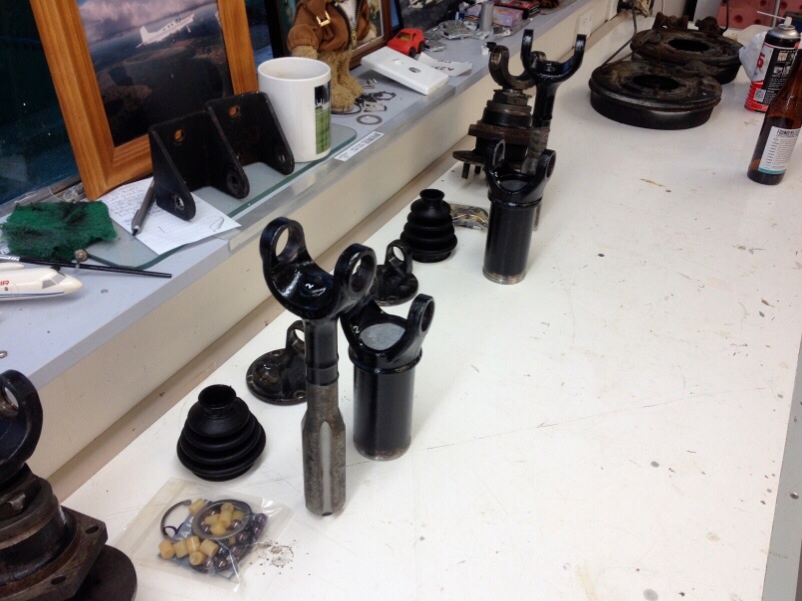
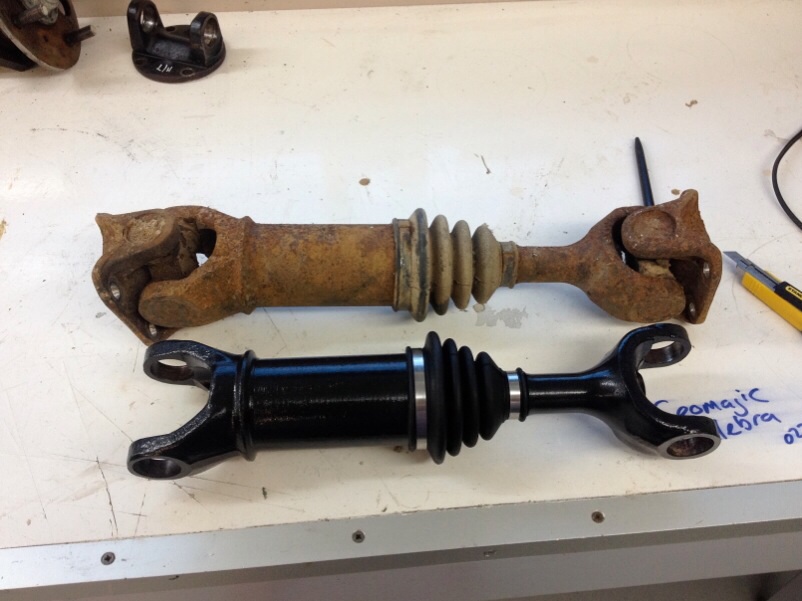
Scored a pair of 180B half shafts to replace the worn out triumph splined shafts that always lock up during cornering. I'd been looking out for these for ages and finally found a pair. They are very slightly different to each other but not in the critical dimensions so will be fine for me. Amazing what a bit of careful acid washing, new paint and a UJ,s do... Got some special UJ's from Greg Tunstall Mechanicaln Aussie, they are a cross between Triumph and Datsun parts and allow you to fit up the metric shafts with the imperial hubs with no modifications. This way the car could be put back to original if someone wanted to...
1 point
-
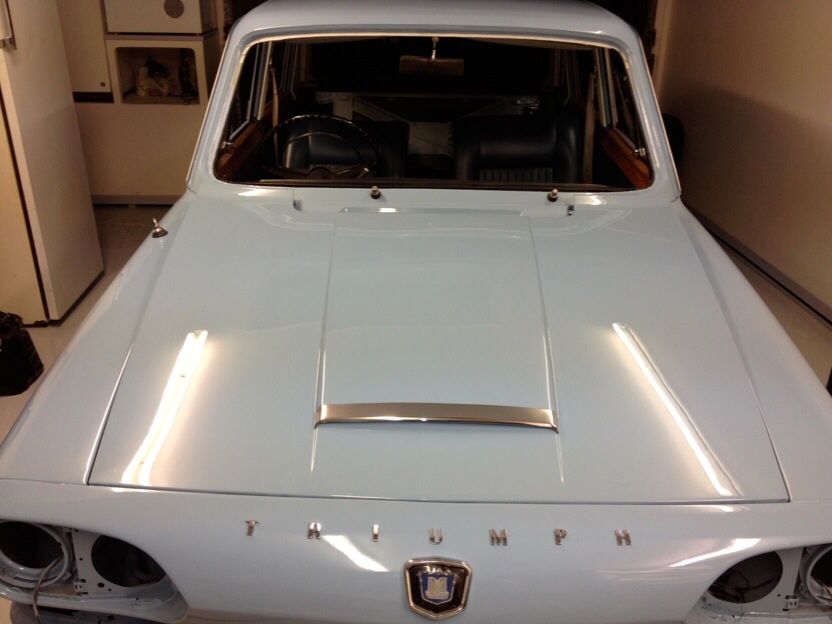
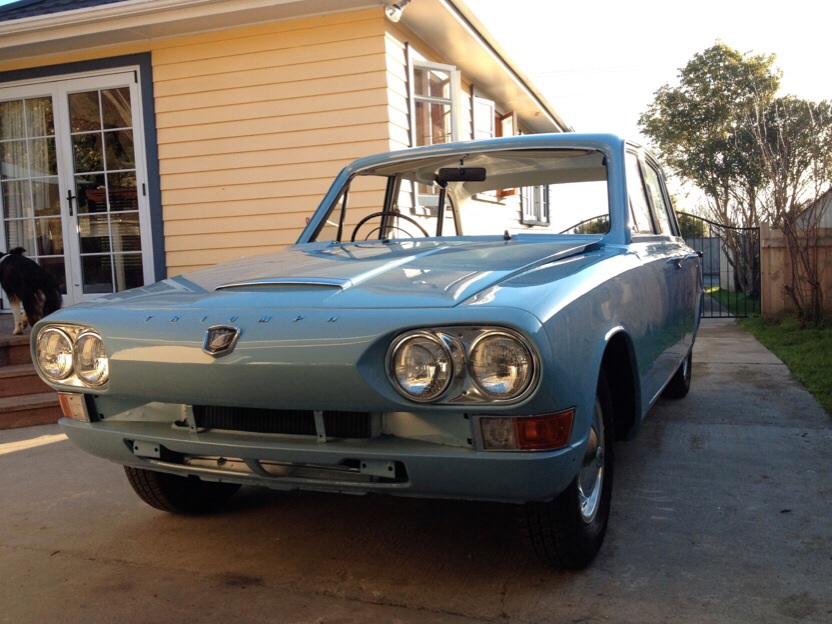
Spent the next few days trying to remember where all the bits went. I'd bought a few bits such as all the little plastic trim clips and gaskets for the tail lights etc off chriswitor.co.uk and even got some new hubcaps with the little emblems off ebay Made the reassembly much easier having all the right bits available. Ended up looking pretty smart
1 point
-
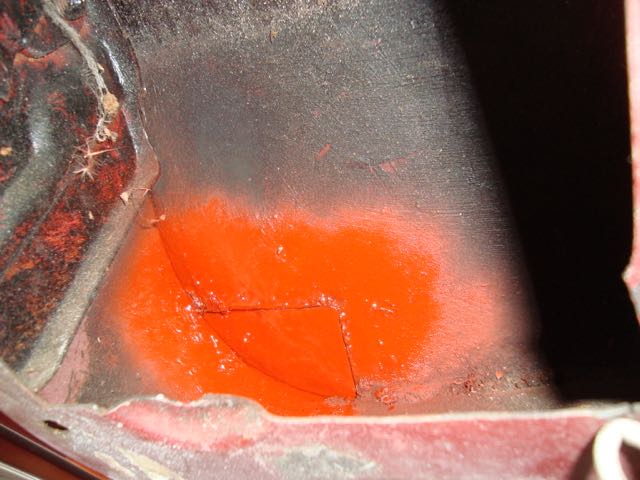
Right, so everything is done on the list apart from the cert for the adjusties and the rust repairs. Got the tints re done to 35% but they didn't put the back screen back in due to this beautiful amount of rust in the back hatch. The car has been stipped out and will be off to the panel beaters next week. I'll make sure that the guy takes lots of photos as it would be good to see everything that gets done with before/after etc Have also got a big list of things coming over from Yahoo! Auctions including original trim (replacing all the carbon dipped stuff), stock front tension rods as the ones are there are rose joints but don't look like they've been done the greatest. Have got a new heater control valve setup, hard to find the auto-air model unit, then a few bits and pieces (i've forgotten all ready).... oh. Black carpet to replace the browny/reddy one that's in there at the moment so should look a lot nicer in there Looking forward to getting it back so I can put the sideskirts on and the chin spoiler, looks so much better!1 point
-
I have decided to call her......
1 point
-
WRCDAT Motorsport shared Dannevirke Car Club Inc's event. 30 mins · Next Sunday Going Prenters Autocross6 September Weber road dannevirke6 people are going1 point
-
Hi Alex.1 point
-
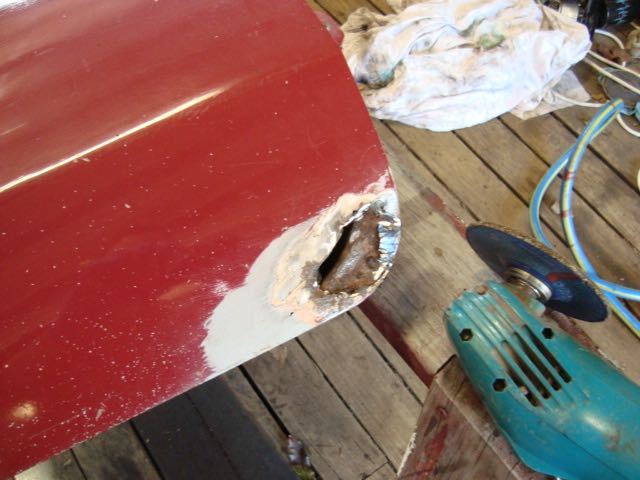
Grind it some more Bog it up Paint it
1 point
-
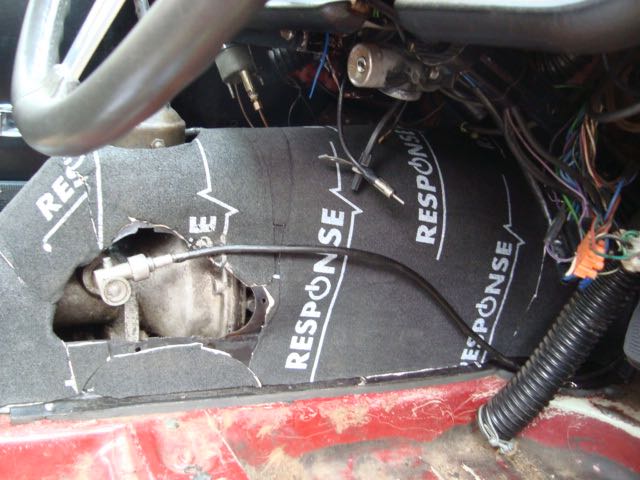
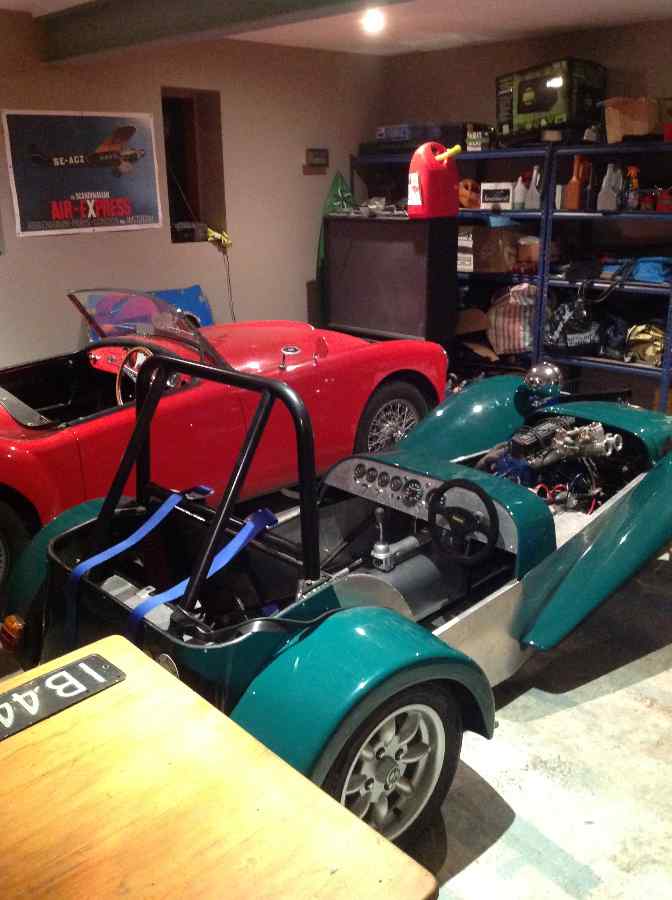
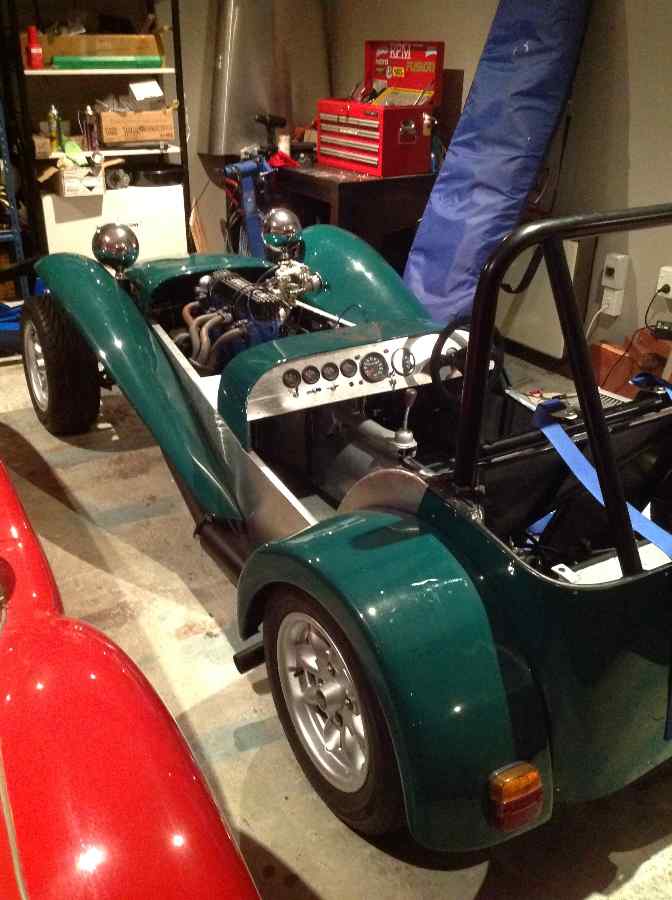
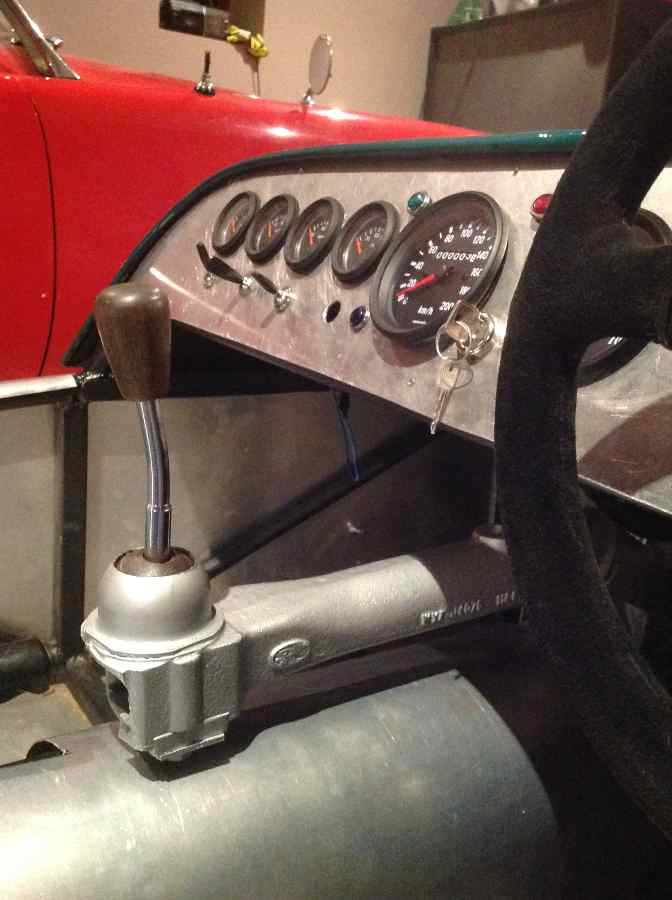
Evening, Had some time this afternoon to bleed up the clutch and indeed there was some air in there, so now the pedal certainly feels better. Also removed the shift remote as it is really tricky to locate the moving parts on the remote into the selector rods... sure enough that was causing the backwards only issue. Did take me about 3 goes to get them in the correct location which involved cursing and some blood. Upshot of all that is... look which way it's facing in the other garage... And no I didn't push it... Photo of offending article And some flamethrower action whilst not in use So now it goes forwards... I feel a trip around the block is in order... Discussion if desired... http://oldschool.co....tus-7-series-3/
1 point
-
so it's all done, bar some tidying up... have taken it for a proper drive this morning, and probably barely used more the 1/8th throttle, it feels fast... pretty pleased1 point
-
1 point


This leaderboard is set to Auckland/GMT+12:00