
Leaderboard

.thumb.png.b2aee08688778d18bdc7b3e3c1852d9c.png)

Popular Content
Showing content with the highest reputation on 10/17/15 in all areas
-
Cut up some plates to fit up to the front crossmember, drilled some holes for the bolts that the front end mounts with. Close-tacked all along the top and down the joins, just need to tack along the bottom. Then I can start the long process of tig welding it all together.8 points
-
sills and rear panel all shape correct and finish primed. 2015-10-17_01-17-18 by sheepers, on Flickr 2015-10-17_01-17-09 by sheepers, on Flickr 2015-10-17_01-17-02 by sheepers, on Flickr 2015-10-17_01-16-54 by sheepers, on Flickr 2015-10-17_01-16-47 by sheepers, on Flickr 2015-10-17_01-16-40 by sheepers, on Flickr8 points
-
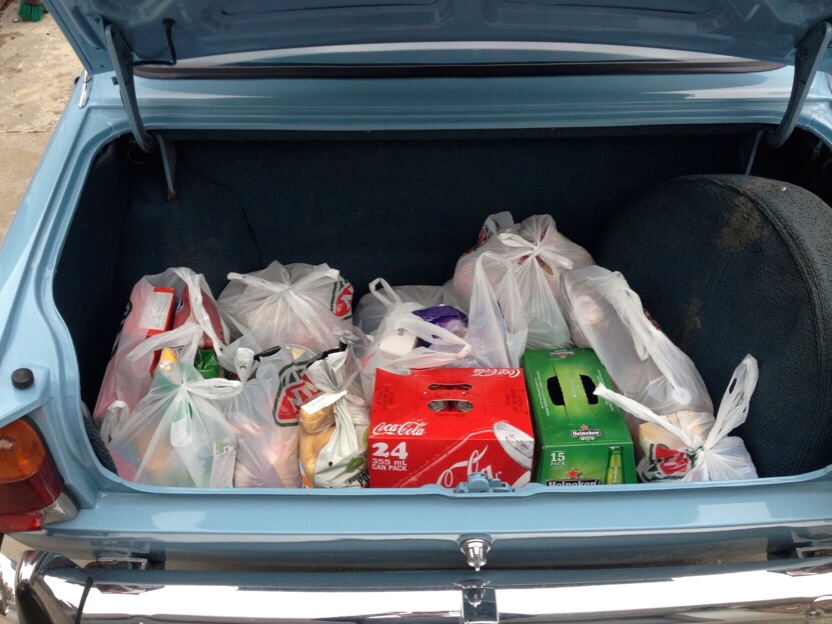
So after a few years of living somewhat of a snowbum lifestyle, I made a decision a few months ago to give I guess 'normal' life a try and made the decision to move back to NZ and look for a 'proper' job. I'd always kept my eye on trademe over the years and once I'd made the decision to move home I thought I'd keep my eye out for an old mazda to buy. And well, I've finally got myself another old car. Was on trademe a month or two ago, I emailed the seller asking about holding the car for me if I paid a deposit, he was happy to do that. And thanks to smokin'joe on here who managed to check out the car for me in before I placed any bids on the auction. ( i still owe you some beers joe!) After he gave me the thumbs up I decided to watch and bid. Paid a bit more than I wanted, but heck, it's something I wanted, and not that its a rare car by any means, and it's not the chrome bumper earlier model, but finding one in original condition isn't too easy anymore. So now I had paid a $1000 deposit on a car in Temuka and I was in Whistler, Canada. Id been planning a holiday home in October, and figured this would be a perfect time to go pick up the car and do a road trip back to Auckland with it! So I booked a flight from Auckland to Christchurch, then a bus ticket to Temuka and met the seller to exchange my money for the car keys! The drive back was quick but awesome, would of liked to take a bit longer, but time was precious, and needed to be back in Auckland asap. The car goes really well for how many kms it's done, and being the 5 speed model made the 100-110km/h driving a lot easier. It's not too bad on gas either and the motor has a lot of pep and torque for an old girl. Met Dave (Horse25) just out of Christchurch on my drive back up and picked up some escort bits n pieces and did a freight run up to Auckland for a nice guy with a mint mk1 escort he's modified for his son. I did notice on the auction photos of the interior that there was only an AM radio, and for a 14 hour plus drive, I knew that it would not do! So I took down my little speaker and used the cigarette lighter to alternate between charging the speaker and charging my phone haha. So here's a couple more pics; Luckily my friend had a spare spot in his garage, so it's gonna sit there for the next couple of months till I'm back in NZ again; Plans so far, either get the steel's widened (i quite like the '4 spoke' design of these) or find some other wheels I like that aren't going to cost a fortune, check out the suspension side of things, new shocks, lower springs, new steering bushes etc. And that will be it for a while, engine will do me fine for now, eventually maybe a rotary, but who knows, I'm just happy to have an old car again, and hoping to get along to a few oldschool meets and events in the future.6 points
-
Being a ricer faggot. Sometimes it's justifiable! Discuss: http://oldschool.co....1-sc-chit-chat/6 points
-
Look what I picked up ^Notice the blatant advertising of my second job...4 points
-
Donations of motivation to- //oldschool.co.nz/index.php?/topic/45620-flyingbricks-198-holden-wb-ute/4 points
-
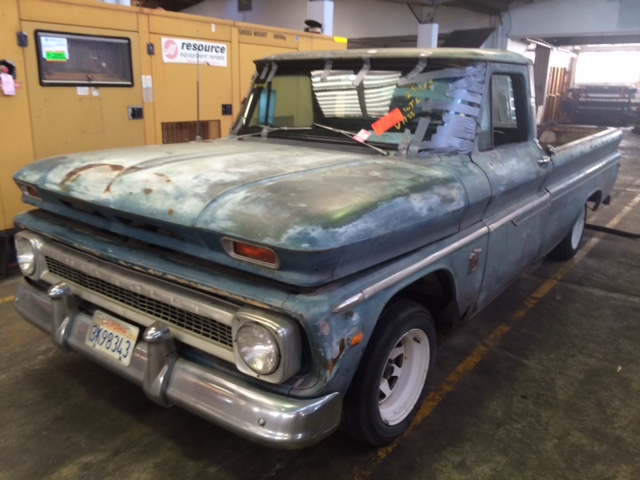
So I had a few mates come over and look at the ute. The further we dug the worse it got.. Multiple layers of bog all cracked through and rusting under. Such a bastard. Most people were like MAN UP....until they saw it in person and were like One of those guys suggested I pop to his uncle's place for a look at his hz oneton. I got all dreamy as I realised this tonner had a FAR more honest body and a deal was done. (I didn't get the wheels) From now on I'll refer to both vehicles by their respective colours. Yellow was stripped completely bare and its body lifted out of the shed (I didn't consider getting it out when I pulled it to bits) then its chassis.4 points
-
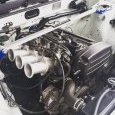
Almost ready to fit flywheel, clutch and then gearbox. Spent some time today adding rear engine hook, modifying the 16v extractors and giving them a paint. Clutch, flywheel and pressure plate with brand new pressure plate bolts. Fitted the SQ engineering blanking plate to the what is now the rear of the engine, this used to be the top outlet that went to radiator. Sealed and attached SQ engineering rear water bypass - also fitted the rear engine hook I pulled from the 3au before I sold it. Gives a bit more clearance, still not sure if the Dash temp sensor will fit. Finally got around to cutting out the shifter hole to make way for the J160. Im still thinking I may need to go back another 10-15mm but will wait till we fit engine and box. Would rather not cut too much out. Modified 16v extractors, Im still in two minds about running washers on the ends like that. I think I may get someone to weld some extensions on to the flange so it bolts on better and looks less dodgy. Oh and Gearbox has been picked up from Brendan so its now all ready to bolt up, he also modified the 3SGE starter for me. Laser cut flange is being picked up tomorrow so all going well (and depending on engine crane availability) we could have an engine and box sitting in the car in the next week or so.3 points
-
Better have been mid burnout...3 points
-
All sensors tested and seems working well, except for the speedo drive so I'll have to recheck that. Buuuuut good enough to go make some doort noises. Felt great taking the car out for a drive again after so long! Finishing the airbox is in the too hard basket currently so I just fitted the bellmouth and coincidentally had a wide entrance pod filter that fits around the perimeter of that. Results so far... First thing is that the intake is frigging LOUD. as in, need earplugs sort of thing haha. This is the difference in pressure drop (scale is in KPA) between old intake and decent bellmouth with pod filter straight on the TB: Only drops 1kpa now, and only starting at 6500rpm+ So should be even better once the proper airbox is on there and getting some cold air! Cant wait to get back to a trackday or to the OS drags!3 points
-
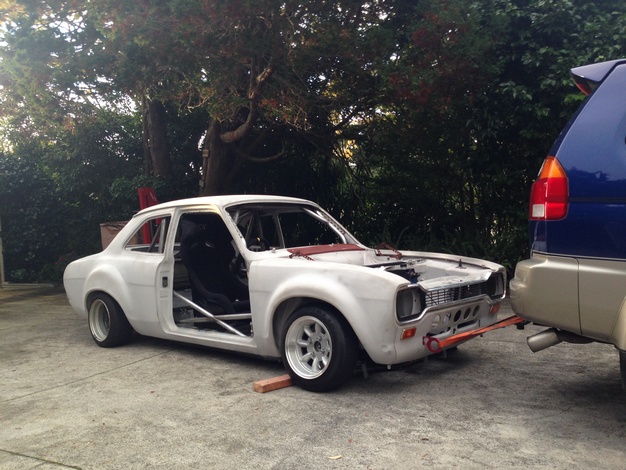
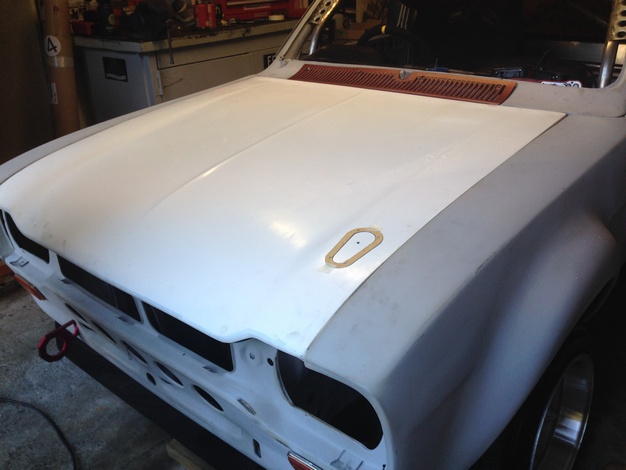
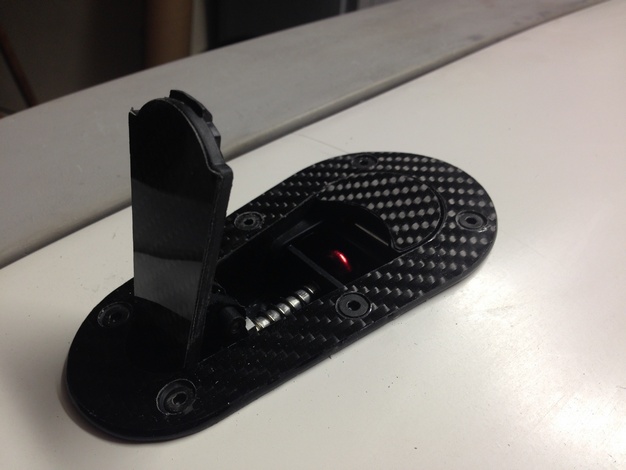
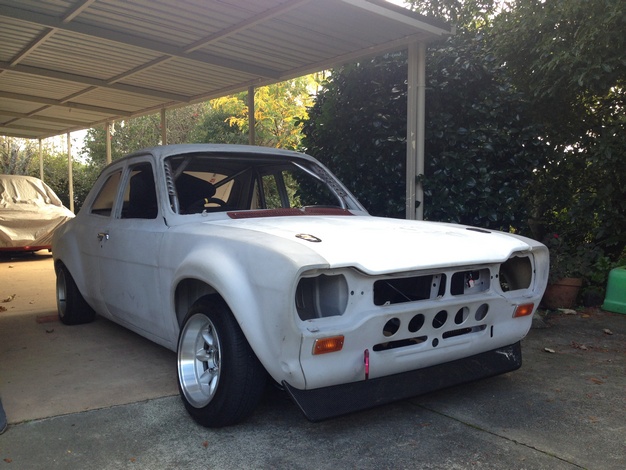
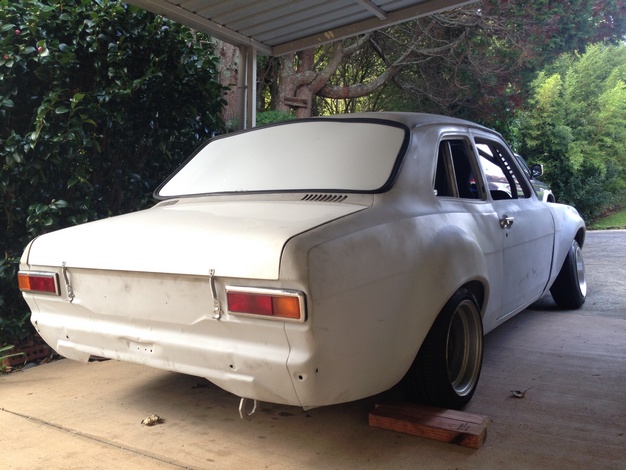
Dragged the Escort out Fitted new Fibreglass Boot and Bonnet Cut holes in bonnet for latches Fit boot springs and trial fitted the rear lexan window
 2 points
 -
Before I forget.. Red even has factory steel under and around the windscreen! Here is a lovely photo of the firewall welded to the plenum bottom. I needed to join the two skins together before welding yellows panel on top. Because the front lip was fucked on red, I decided to remove it and use yellows (with the seam intact). The final weld between firewall and yellows panel will happen UNDER the lip..nice and hidden.2 points
-
Red had two areas of concern. One above the passenger side drip rail. This proved to just be cracked bog over a previous repair (nicely welded in but not prepped nicely before bog) and the second was along the seam where the plenum top, plenum bottom and firewall all joined. Very coincidentally this was virtually the ONLY good panel on yellow so the pieces were cut out of each vehicle. By FAR the largest piece of rust repair I have ever taken on. I did have some question as to why red rusted out in this area. Once again BAD PREP was the culpret. Once I cut the panel out there were previous repairs visible in the plenum bottom (nicely patched!)-they took no time to rust proof the seam when they rejoined the panels so obviously water got in there and rooted things quickly.2 points
-
Got the lower airbag mounts all done. Chucked the airbags in. They sit good, just a little too close to the lower rear arm so might grind a little off. Cool video:2 points
-
I finally managed to get this home today after about 2 months of negotiation with a local "collector". It's an Oliver HG crawler tractor from around 1952 that has been fitted with quite a solid bulldozer blade. It's been partially dismantled at some stage and the original flat head engine has been replaced with a Ford Consul motor which is now stuffed too. The fuel tank is a nice touch Part of the deal is a Oliver flathead engine that is in a header, I'll go and get it next weekend at some stage. I think to get it running though a small car engine will be the go. It will be good to gut all the old crap off, and ditch the old motor and box. I have the old bonnet, grill, leg guards, fuel tank, blade and mounting frame. The kids think it's cool too. So feel free to tell me why it needs a 1UZ Gilmore pulleys and modgies.1 point
-
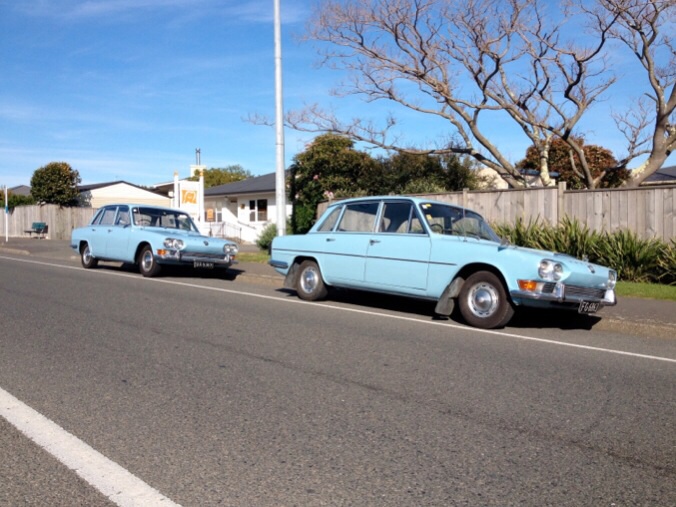
finally got home, AFTER 5 hours in the drivers seat (Dad was available to drive some of the way but i decided to shove him in the passenger seat. aren't i nice? ) anyway, pics of the trip and of the skoda: Woke in Omarama to this, couldn't stop giggling all the way to cromwell: Tow Vehicle (Kia Sportage, also mine) and the Vehicle we swapped for the Skoda (Ford Laser, my first car): Laser Again, she got snarly so we decided to put a muzzle on her Home now, looked under the seat, and found TWO, yes TWO(2) Original Skoda keyslots! (also note the unknown tool, its also a skoda original): Poor wee thing. just needs some TLC (AND A TON OF FLYSPRAY FOR THE SPIDERS!!!) Behold, Original Skoda jack: Dash, Again: Assorted condition Pics: Will put up a basic todo list tomorrow, its too late now EDIT: just found a set of snowchains in it too. SWEET1 point
-
Yay. Okay well hopefully that explains it all. Will pick up repaired alternator later in the week and look forward to a trouble free life. Thanks chaps.1 point
-
13b jport, thanks.1 point
-
My source may not have been reputable, or it could be a combination of Chinese whispers and my 15 year old memories. The car is looking sweet btw.1 point
-
Re dodgy wiring causing random shorts, does the trailer cable happen to pass close to the exhaust? Might be worth checking. One of my EA coons had a similar issue on a family holiday once. It broke the tail pipe off the back of the third muffler somewhere in North Canterbury on the afternoon of Good Friday. We drove on from Cheviot with the windows down for fresh air just in case it was sucking fumes back in. Lost the dashboard lights somewhere in the lower half of the North Island, carried on. Desert road at night unable to see the speedo, still with windows down. Taupo for breakfast, so far so good. Day time again, don't need dashboard lights now. Stopped for juice at Hamilton and no indicators or brake lights working either. Drove on to Northland without indicators or brake lights cos Easter weekend and nothing was open. Described symptoms to ex wife's new husband who'd done his time at the local Ford garage and without even seeing the car he identified the problem having seen it before more than once at his old work. Heat from the broken exhaust had melted the trailer cable and blown multiple fuses. We had just enough functional circuits left for the car to start and run.1 point
-
Wof'd and reg'd the steed today. May have to bring her out for her first meet for the summer. Just got to convince the missus that she can handle the dinner, bath, and bed process for two kids on her own.... Wish me luck!1 point
-
No, you need like 40-100amp depending on what the alt is. You can use a modern fuse holder thing instead of a fuseable link which are easy to check/change. Fuseable links are sweet and easy to use also though. It's just a bit of thin gauge wire that is made to burn out at a certain current, but it from the internet or maybe a local shop and solder or crimp in. The alt wire should be a decent gauge you will need a pretty decent crimper to do the terminals.1 point
-
Here is my effort, cant remember if I posted it here or not. I made a much bigger firebox for it after this version. The copper was pretty spendy but no other decent way to do it...1 point
-
Not very much has happened recently, but now hopefully back into it. Most of that time was spent trying to figure out how to clamp the chassis down so it is all straight before welding on the boxing plates. Decided to make some trestle like things that are bolted to the floor, then put some spacers in between them and the chassis to get it all level. Chassis is then welded to the trestles to hold it in place. Managed to get most of it within 0.1 of a degree. So I'm hoping it comes out quite good. (Probably better than it was from factory anyway) Will bring the boxing right up to the front crossmember, just need to do some cutting to get the plates fitting. Thinking we might need to close-tack it all together, then fully weld the top and at least tack the new crossmembers in, so it can then be flipped to weld underneath of the boxing. That should then hold it all together without twisting too much, I hope.1 point
-
cleaned the car out and took the sunroof out. somehow the sunroof glass got broken and the rest of it got fucking mangled so the cunt of a thing can never ruin another car. 2015-10-11_12-08-19 by sheepers, on Flickr so now its onto the roof. I've got to get a couple of patches fixed before Peter can do the sunroof. this is what it looks like now. 2015-10-11_01-08-37 by sheepers, on Flickr 2015-10-11_01-08-27 by sheepers, on Flickr 2015-10-11_01-08-45 by sheepers, on Flickr this picture gives a good indication of just how ripply the roof is. how the fuck they managed to fuck it that bad i have no idea but Peter sees no problem in fixing it. oh, and he's going to make some new gutters for it too because they've been hacked off. 2015-10-11_01-08-55 by sheepers, on Flickr1 point
-
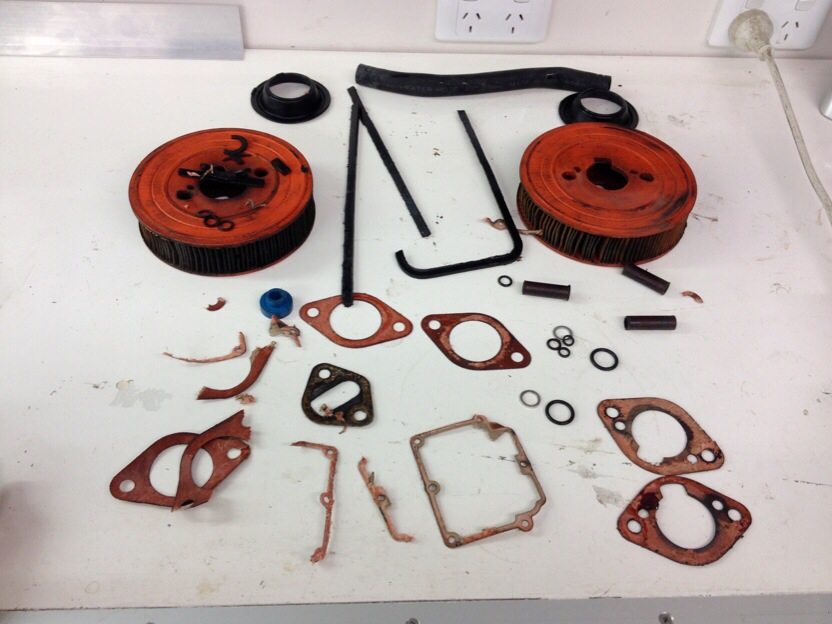
Good news everybody! My pump was field reversible, it was dead easy to do too. It was a matter of swapping the driving gear's location with that of the driven one and putting the front cover back on in the opposite direction. While it was in bits I was able to ditch the flow limiting valve off the back, drill and tap the housing and make it like a conventional pump. I didn't take any photos though. Here's some shit I did take photos of. Some nice shaped hoses for the radiator. A new fuel tank mount. And best of all a MDF Hydraulic pump mount. That I converted into 6mm steel and stuck on the front of my motor. And a tensioner. Looks like it might work, I'm not sure a micro V belt will be able to transfer enough force to make it work. Time will tell. Next to do is to re fit the carb and exhaust.1 point
-
Next up the front end got pulled down, stripped, acid washed and repainted. Really sick and tired of bending over shitty old car parts on the driveway while flicking stripper and acid all over the place but I keep telling myself that each bit I do is one I won't have to do again... Front end out Cleaned of years of crud and rust Nice new paint, been using Industrial 440 etch primer and Acrythane 805 for a topcoat. I don't know what I'm doing and I'm spraying out in the woodshed if it's raining or on the washing line if it's sunny and been getting quite reasonable results so must be good stuff. Going back together now with new nuts and bolts, new balljoints and tie rods etc... Just waiting on the next load of bits from Witors so I can finish this lot up.
1 point
-
Spent the next (previous) few years just enjoying the old girl... Running errands Stopping petrol leaks And seeing double...
1 point
-
Landed in Auckland, looks like my new windscreen stayed in! go Duct. Yay also orange sticker, lucky I got new sills in the states
1 point
-
Pulled off all the extra mounts and brackets that I no longer needed and welded up the bottom of the c-notch. Took it to A1 sandblasting who sandblasted and primered it. Looks so much better! I think the next step is to box it, make some new crossmembers and sort out the rear arms.1 point
-
Pulled the cab off the chassis today. Flipped the chassis upside down so I can finish welding the c-notch. Once that's done it can probably go to get sandblasted. Heaps of room under the bonnet for a supercharger1 point
-
1 point
-
wide steels without flares I hope1 point
-
Ctrl+V:1 point
-
Got my first seat mounting plate welded in. Wish I had a vice at home to help with bending these front plates into shape.1 point
-
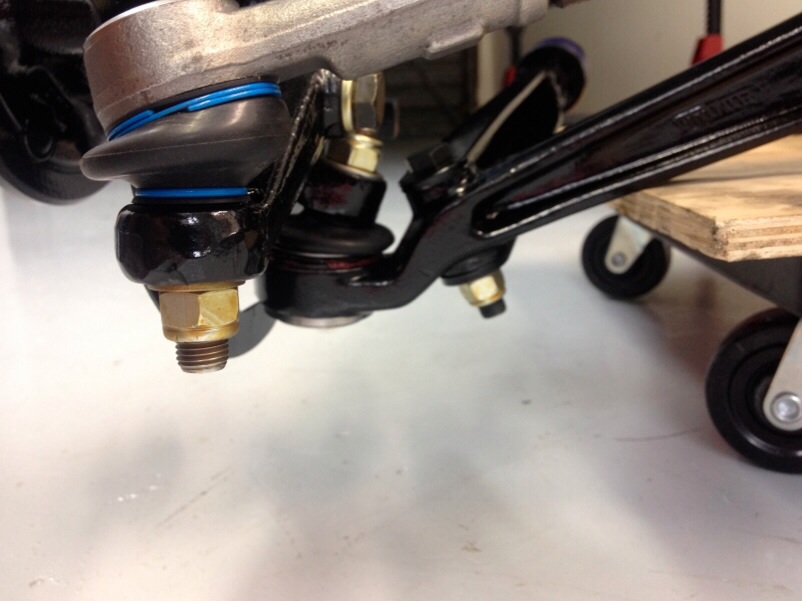
Got some universal seat rails from nzkw and very happy with the quality for $60 a pair. <3 box I have drawn up all my seat mounts in cad and will get laser cut. Balljoints! Today I pressed bushes and balljoints out of front arms and finished my diff. Glued on a place to drain oil, 3 brake line mounts, fixed porosity in a factory weld (was unbelievably bad) and extended the side of my spring perches as the leafs overhung by 10mm. Maybe a bit rude but fit for purpose, strong as hell and 10x faster than removing and reattaching the whole perch. (Plus no banana housing). I took a bunch of images to show any questioning certifiers how it was tig welded in place (huge v, 3 runs, it ain't coming off) Bought these AU2 calipers because cheap and will rekit them for the front end.1 point
-
Not very much progress has happened in the past months; Gave the Jag front end a good clean, cut off a few bits and decided how to mount it. Goes low enough with out cutting chunks out of the chassis or front end, which is good. Bought an engine this week as well. A lot of people won't be too happy with the choice but it was really cheap and already has been rewired to suit a project like this. It's a Nissan VH41. Gave it a steam clean today and come out much better. Was covered in dust. Test fitted it and it seems to fit quite nicely, except the inner guards might need some work. Keen to get rid of that ugly spider looking thing and get some ITB's on there. Tell me how I should have bought a LS and spent ~10x as much to get it going: //oldschool.co.nz/index.php?/topic/47317-matts-1951-chevy-pickup-discussion/1 point
-
I've put the rego on hold for three months, because it'll be a while till I can get the clutch out. In the meantime however, I thought I'd do some work on other bits on the car write a haiku: Registration holds with more confidence than clutch. Fuck you, stupid car In super fricken awesome news though , Link decided to make all of their unlockable ECU upgrades free with the lates bout of firmware for the G4+ So this means I can now setup knock control, extra datalogging, OBD2 junk, and electronic throttle control if I want. I was looking at buying knock control eventually, so pretty happy with that. So I'll wire up the knock sensor to the proper input now instead of laptop and headphones. I'm super keen on launch control and flat shifting! These were existing features but need a clutch switch wired in. I thought this might be a bit tricky to do, but I had a look under the dash... The clutch pedal has a stopper bolt to limit its travel. The brake pedal has a stopper too, but it's threaded switch instead of a bolt. That has the same thread pitch, woot! So I got another brake switch from a Toyota at Zebra today, just need to screw it in and wire it up. Easy! This in conjunction with traction brackets and the higher rpm limit now, i reckon I might scrub a little time off my PB of 14.3 at the drags.1 point
-
run fore and aft lines from the muffler tip for stability/hang your ariel flags from1 point
-
You have to keep it with a crank handle.1 point
-
YEEEEAAAYYYYYYUH I hope you're doing that. ^1 point


This leaderboard is set to Auckland/GMT+12:00