
Leaderboard


Popular Content
Showing content with the highest reputation on 09/26/15 in all areas
-
So close I can almost taste the victory. First order of business: take a photo of the new front bumper support to prove it's on the car (and for future reference if compliance comes knocking). The weird flecks are a combination of rustkill and Brunox. Then reassemble the entire front end in the reverse order of disassembly. Carefully. Wash off a heap of accumulated dust and grime, then make the most of the afternoon sun. Much better! Discuss: http://oldschool.co....1-sc-chit-chat/8 points
-
Aliexpress lights seem all good! There only on loose to have a look at them, but should work nicely! And decided to try get the exhaust sorted finally, so took the pipe and engine down to Pit Stop (not that many places open on a Saturday). The chick there quoted "$100 to $150" for the 2 welds, I put my engine back in the car and bid her good day! Found a place in the subdivision where a guy was welding up a logging truck exhaust in the yard, so I stopped and asked him about it, 15 minutes later it was all tig'd up Asked him how much, "if you've got $10 in you wallet it's $10, otherwise free", as I didn't have any cash on me I went and got him a box of beer which he was rather happy with lol. Showed him my fuel tank when I dropped the beer off, reckons "it's fucked and not worth fucking with" But then said it'd take him 30min to draw up one on the computer and fuck all time to weld it and as he's got a pile of 1mm stainless sheet left over from a job, so I'm getting a computer designed, water jet cut, SS tank for next to nothing!!4 points
-
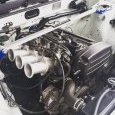
Since the car's been apart for friggen ages, and had a few big expenses that delayed buying a clutch for quite a while. I decided that it would be an awesome idea to rip the wiring loom out and tidy it up, as well as add a few extra bits. So first things first, holy moley after seperating out all of the circuits and straightening all of the wires (instead of bunched up in the way that suits a FWD celica, which my loom is from) the diameter of my loom has reduced dramatically! Decided to split the loom coming into the engine bay into two, so it's a lot easier to take off. So one half for all of the stuff on top of the motor and everything else down the intake side. So the new loom includes provisions for some extra bits: Clutch switch (For launch control) Brake switch (For cruise control) Cruise control switch A panel of switches for the dash to turn things off and on A second map sensor for datalogging/nerdy purposes E-throttle (this is friggen greedy on inputs and outputs! Got it setup running awesomely though) Knock sensor setup properly (woohoo!) Having the Link output a PWM for the speedo (more accurate than current setup) And some other junk I might have forgotten about, but sweet jesus with all of the extra stuff it's a behemoth of a thing! Takes up my whole lounge floor haha. I finally got a clutch, ended up with a full faced disc Exedy Heavy Duty setup. Hopefully lives up to it's namesake. Been doing the hard yards yesterday and today to get the motor back in with the clutch and gearbox fitted, wiring loom back on... Fired up first pop which was awesome! Still lots to do, (like fit a radiator and the whole front half of the car) but its a great milestone to reach. Just about blasted my eardrums out starting this thing up while the oxy sensor was unplugged! Need to calibrate it before plugging it in, but after 2 days of hard slog to get this far I'm happy to have a break for the rest of the night and get stuck in again tomorrow. Can noooooootttttt wait to drive this thing again! OS drags and summer trackdays just cant get here quick enough3 points
-
Small update. Managed to break both the front engine mount and the left one under the clutch. Sourced the front one from Basis Untitled by GuyWithAviators, on Flickr Untitled by GuyWithAviators, on Flickr And the other one from Hawskwood Classics. Was thinner than the original but I just doubled up the broken plate from the old mount and it was fine. Untitled by GuyWithAviators, on Flickr Soon after the accelerator kept jamming on... That would be why. Untitled by GuyWithAviators, on Flickr Quick trip to Zebra and pulled one from a Triumph 2000. Much better. Untitled by GuyWithAviators, on Flickr Also did a temporary repair to the front seat. Hopefully the ones from my Wolseley will be better. Untitled by GuyWithAviators, on Flickr Untitled by GuyWithAviators, on Flickr The clutch also wouldn't disengage but just had to swap the clutch arm with a bent one to make it push further. A day in the life of BMC ownership. And finally a photo from a drive out to Beachlands IMG_0170-HDR by GuyWithAviators, on Flickr3 points
-
You better save me a prime spot in the carpark then.2 points
-
So, this has been sitting in the shed since os trackday. Speaking of which, other than all the good cunts. wasn't up there with the best trackdays ive done, hampton seems to hate me. firstly with some irregular bodily functions that had me gapping to the nearest facilities more than once. Then the old 4age doing the same chucking the oil out the breather due to to many rpm's. tyre choice was some ok t1r's up front and old hard worn out t1r's on the rear, with the previously mentioned oil from the front making it all the way back there too! (sorry motorbike guys) which made for some hectic oversteer and accidental drift runs. i also did a hopeless job of bleeding the rear brakes so they didnt really do anything. fronts were fried. did mange to get some good hooning in there though. ah well maybe next time! Other than that i sold out and got a mate (thanks!) to cnc machine me some longer trumpets, which i've been testing today white ones are the ones i made ages ago. which have been chopped up a bit. as they were for silvertop throttles. about 70mm long new ones are about 110mm They shifted the power around a bit and filled in a few holes. have the before and after map if any techo people are interested. up to 10% difference in fueling in places. Sadly the 4 cylinder harmonics have spoiled the fun again. at high rpm the whole manifold vibrates enough to pop the throttle linkage off.. unsure if its fixable yet, may have to go back to the old setup. unsure if its the extra weight and/or the material thats causing it . plastic ones had no drama.2 points
-
Maybe that's why my rear left door has been resprayed a different shade of white at some point...2 points
-
Now we're talking.. 14x7 -2 Work Equip 03s Picked them up for a pretty reasonable sum, have had a fairly shabby respray at some point so whipped out the thinners and got rid of the overspray then had a go with some Autosol. First time I've polished wheels before but was fairly happy with how they came out with minimal effort. Did a quick test fit on the front, they sit about 5mm outside the gaurd so might need to massage them a little. Good news is they don't foul on anything going to full lock. Bad news is I can fit a bowling pin between the gaurd and the tire. Time to get low I think...2 points
-
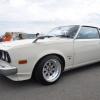
Sup, so it's about time I put up a build thread for this thing and got some stuff done. Discussion here: //oldschool.co.nz/index.php?/topic/47324-robbos-1972-toyota-corona-coupe/ 1972 Toyota Corona 1700 Deluxe Coupe Was searching for an old school Toyota for a while but wanted something a little different to the usual k series so after this thing popped up for sale I nabbed it. Not too many around, I know of about 5 floating around in NZ. Sounds like it's belonged to a couple of old schoolers in the past so some might recognise it. Has a few cool bits, factory tinted windows, pillarless, fuel tanker filler under the number plate, hard wired inspection light in the engine bay, disc brakes up front etc. Failed a wof early last year for some rust and had been sitting in the guy's shed ever since. Pic above from just after I bought it (knocking sound coming from FL wheel on the way home, went to take the wheel off to check it out and the nuts weren't even finger tight!) Anyway the good and the bad: Good -Mostly complete (just missing a few interior bits) -Fairly straight body -Runs well when it starts -Has been resprayed not long ago (not a great job though) Bad -Some rust -Auto -Has some electrical gremlins -Weather strips/seals are mostly perished Failed its wof on rust in both sills and the bottom of a door, previous owner said he'd had his mate fix up the door but he'd forgotten to the do the sills (hmm?). Anywho there was also some paint bubbling in both of the roof gutters and around the radio aerial, decided to get it fixed all at once so took it to a cashie panel beater (cheers Mr Mk1 for the contact). Pics of the rust when it was taken back to bare metal, some fairly thick bog in places and the previous owners mates repair on the door was pretty shoddy (combination of new steel, nutech and bog). Panel beater cut it all out replaced with new steel and primered it up. Got it back home and tidied it up a bit and here's how she sits at the moment. So the plan is to sort out the electrical gremlins (either the battery is buggered or its not being charged, has an almost brand new alternator so ruling that out for now) and take it for a wof. Future plans are: Wheels - 14x7ish Mk2s/Longchamps/whatever comes up Fender mirrors - Current side mirrors are crappy Thai replicas Manual conversion - Need to source W40/pedal box Low - May just chop the fronts and throw some blocks in the rear Paint - Might have a go at painting the primered bits myself That's all for now folks, chur.1 point
-
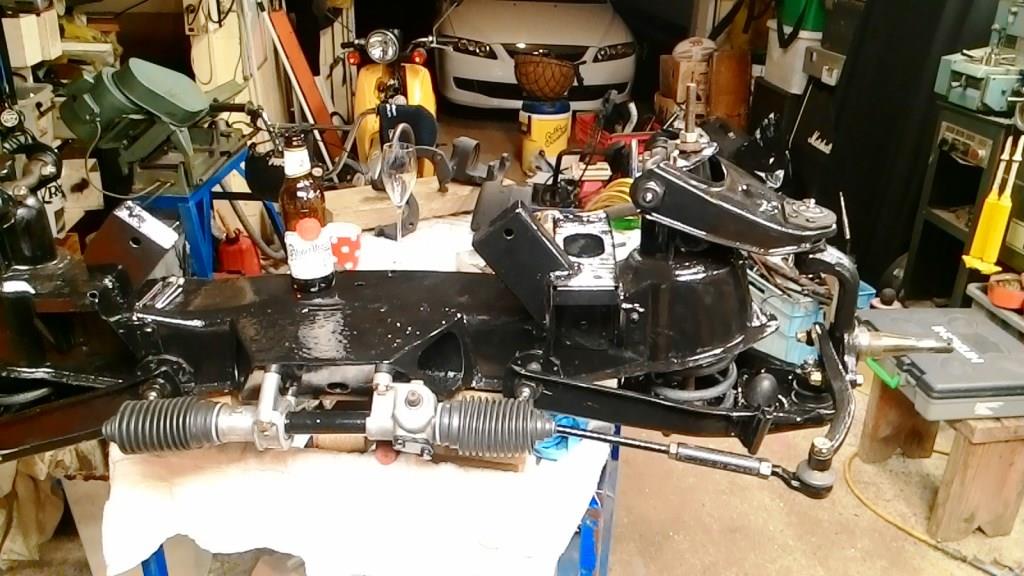
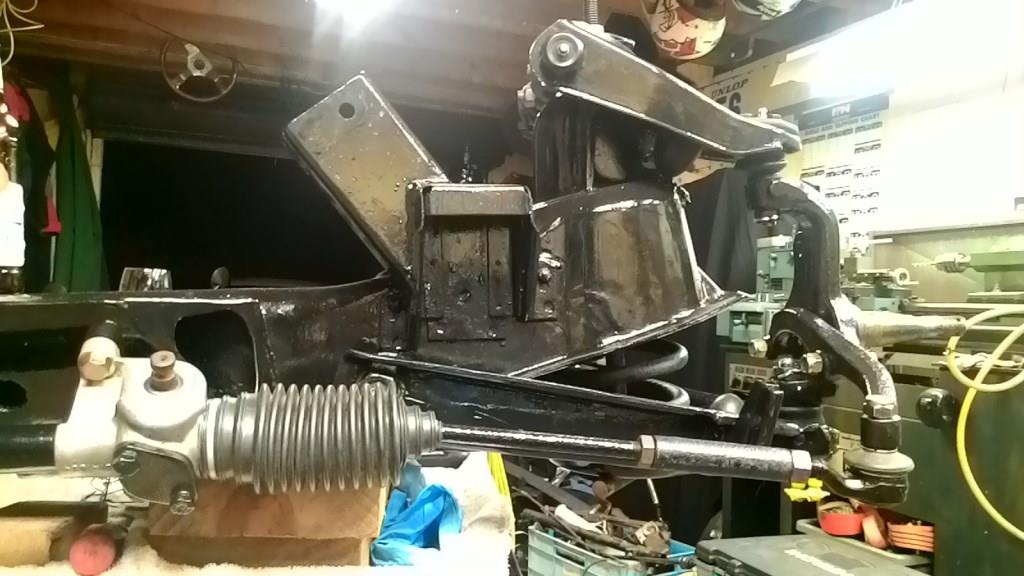
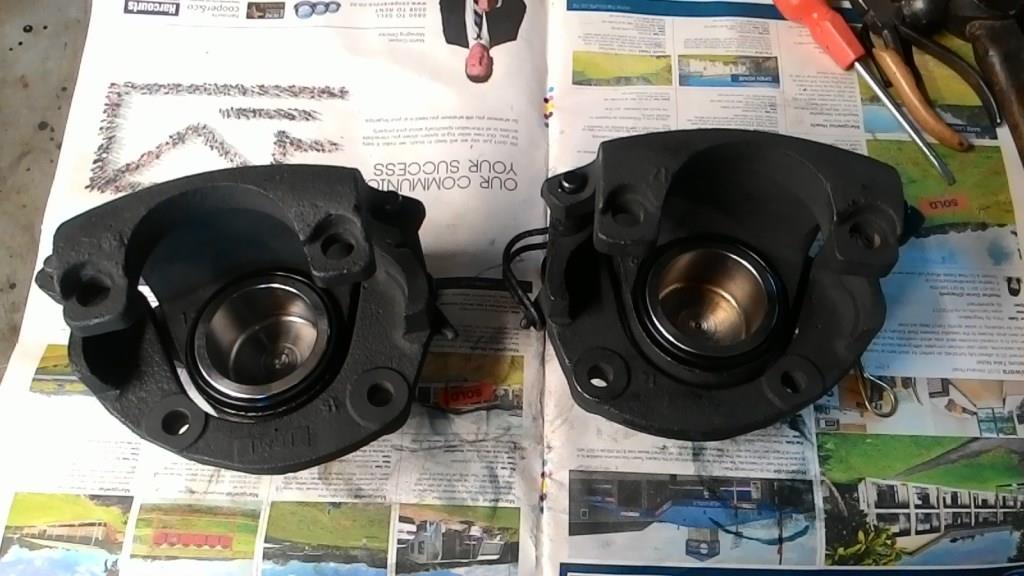
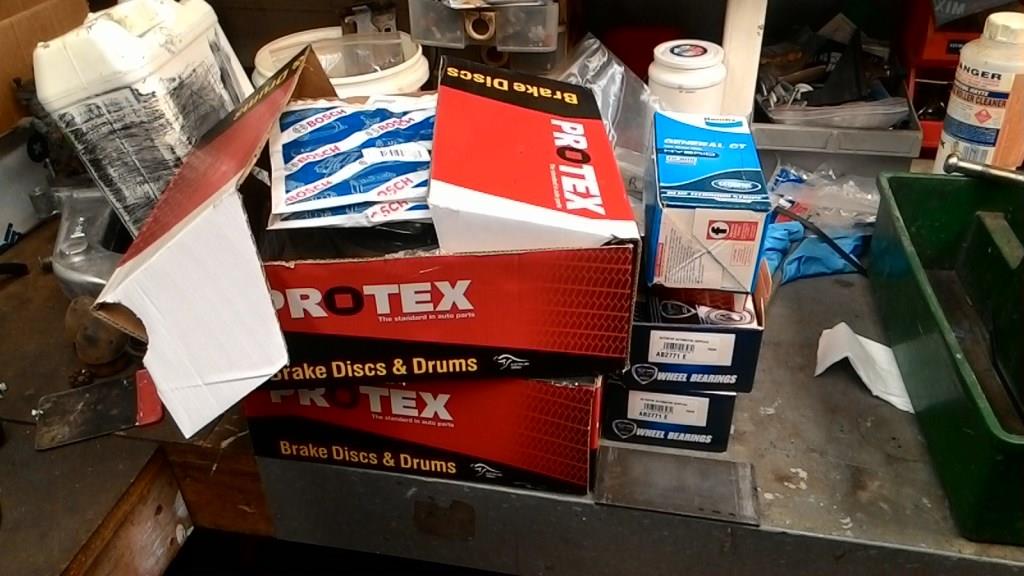
The front end is finally finished. I had some drama identifying a few of the parts; the outer tie rod ends in particular. Thanks to Steve from Autolign for identifying them as AP5, (after none of the opposition could). Have to say all those years ago I really nailed the steering geometry, still looking good! Etch primed and rebuilt the calipers…. Hub/discs, bearing and pads all purchased and waiting for the front end install. Big thanks to my old friend Kevin from ADL; the way you can pull 45 year old part numbers out of your head is a little scary to say the least, mate you might need to find a hobby!
 1 point
 -
Cool. And I know just where to find some........1 point
-
I'm helping set up and shit so no parts master for me.1 point
-
It better not rain, eh. Meeting 9:30am at Arsemaster Wairau? Or just go straight to Smales?1 point
-
No ownership papers for me. But matching numbers on the car for the plates plus good photos. I guess I'll see what happens.1 point
-
So long as you have decent photos of your being used from back in the day showing the plates clearly and any other proof you can probably still apply to reuse your old black plates.1 point
-
So a busy period at work, a holiday and this thing being damn difficult means I haven't done a lot on it in a while... In order of difficulty (top being an absolute keeeenntttt) here's what I have done though: - Removed a front spring - Sourced a clutch slave cylinder - 2inch blocks in the rear - Bought a siiick trolley jack Front spring was fun. Spent about 2 hours smashing the ball joint and separator with various hammers, eventually borrowed the neighbours sledge but it still wouldn't budge. Gave up for a week then borrowed a gear puller from a mates old man and had it apart in about 10 minutes. Classic. Sway bar bushes are absolutely shagged so pulled those off and will do them at the same time as the springs. As with everything on this car nobody has parts listed for it so hopefully they're not too obscure. Decided to get some new front springs rather than cutting the existing ones as the car seems to have a slight lean to the drivers side so they may have sagged a bit over the years. Also if the WoF man gets cranky I can just throw the old ones back in. Did a bit of research and apparently standard Isuzu Gemini springs are almost identical except 1.5" shorter so the plan is to order a set of them tomorrow and 'adjust' them by 0.5" to match the rear. Here's how the rear sits at the moment with the blocks in: Splashed out on the trolley jack and got a Wayco W1001 as recommended on an OS thread and it's the absolute business (Cheers OS gurus!). If anyone in Christchurch is looking for one I found George Stocks to be the best priced and they have them on the shelf. Fingers crossed the next update should contain photos of newly acquired low!1 point
-
Its pretty cool too that the fella selling it on behalf is Dave (avengertiger) whom I was one of the first petrol heads he met after he moved over from Ireland. He had known about this car for ages and no one knew it was my parents old car. Aliens!1 point
-
Sweet find! found out our families old cortina wagon is sitting in a paddock with the rest of Karl's collection haha. Was funny seeing it again!1 point
-
There is 13 weeks till boxing day, Which is 91 days, Which is 2186 hours. Half an hour per day, 7 days a week till Xmas equals 45.5 hours. That's not much... Tick tick tick tick.1 point
-
I got some cool photos. Will post them up soon.1 point
-
Tanks done. Made a stencil of the side panel, then Chris computer wizard straighten/smoothed it all up GN400 2511 by Hayden Rowe, on Flickr cut them up on the plotter, and free hand the pinstripe on GN400 2507 by Hayden Rowe, on Flickr was stoked with that GN400 2508 by Hayden Rowe, on Flickr GN400 2509 by Hayden Rowe, on Flickr We stared at it for abit, Chris made a temporary badge and we played around with location on the tank...... GN400 2510 by Hayden Rowe, on Flickr GN400 2506 by Hayden Rowe, on Flickr GN400 2505 by Hayden Rowe, on Flickr GN400 2504 by Hayden Rowe, on Flickr .....then i thought, what if we cut the suzuki logo out, leaving the green to come through GN400 2502 by Hayden Rowe, on Flickr GN400 2503 by Hayden Rowe, on Flickr GN400 2501 by Hayden Rowe, on Flickr way more simplistic, and since i went to the effort of de-badging/bogging up the sides, seemed crazy putting a badge back on GN400 2516 by Hayden Rowe, on Flickr GN400 2515 by Hayden Rowe, on Flickr GN400 2517 by Hayden Rowe, on Flickr really happy with the end result, Glad its over, huge thanks to Chris, way more skills at sticking then me bahaha next up, Finish forks, and then seat upholstery cheers1 point
-
1 point
-
We talked about this again last night - it's time to get it locked down! So far we have these sheds confirmed: Truenotch Mrjstar Mark105 Matangi (shared garage) Miniman (need to double check) Midnight Upholstery Is anyone else keen to offer up their shed? J.e.d made mention of being keen, which could work if we start the tour at Te Kauwhata and work our way through to hamilton/Matangi/ohaupo and back to midnight for a BBQ at the end.1 point
-
Damn this thing was cool! Awesome paint job.1 point
-
I stuck a vtec in mine. Build thread on here somewhere. It would torque steer all over the road when boost kicked in. Mine was an earlier shape. 1966 from memory. Cletus did the cert on it. Would love to build another one day. Next time with a v8 and full custom chassis and tubbed rear.1 point
-
The BMC cancer is spreading. Awesome _b1 point
-
Suckle upon a picture of the car since I added the filler panel between the bumper and grille and splash guards under the headlights. Dane the good cunt hooked me up these, but only one splash guard and it was rusty. I made another one from scratch and got it fairly close. Dick job but got it together just before the rain fell and daylight ran out. Shows how bent the bumper is and still won't bring the grille into spec because it's pot metal, cracked both sides and never going to be right but fuck it.. Front much more stable and a lot less gappy now. Been too rainy since to paint in anything but black zinc. Mint16 scored me a steering bearing from eBay cause I'm too scared to online purchase. It will eradicate the 360 deg Inch of slop I have with the wheel inside the column. Will be ultra lush. Bridflu has all shifter bushes on order so to make it magical feeling. I've made my own bushes but they fuck out fairly regularly because home made. Hoping to give it a QUICK flick of black before my wedding in a month but require my flatmate (not a mate, he's a scourge) to move out this week to free up space.1 point
-
Did i mention the comb? No I did not. As you can see in the photo I also scored a lovely comb. I am open to offers if anyone needs a nice comb.1 point
-
Sounds like my hog will be making it along under drunkens groin.1 point
-
Awesome- will check out state of car this week. Mum used to smoke like a train (as dis most parents of shits like me in the 70's?) so headlining is probably stained. Plus many a labrador shaking its freshly found fish carcass wet hair stench all over the inside. I bet the roof gutters are rotted out from the inside. Could be a setup to look at for my Viva? I grew up, aged gracefully and turned into a sort of Gerorge Clooney/Brad pitt/Pearce Brosnan mix of man. Maybe a hint of Neanderthal thrown in for good measure. Oh sweet! Im pretty sure Dad sold it to someone in CHch. I heard a few years back that it was often seen in various shows/meets down there. Was a choice old car. Black leather and Essex v6. Yeah man.1 point
-
If you can get the J160 modified cheaper than the Niteparts one though, that's a grand off the bat. Couple of replacement T50's right there KE25's are awesome, looking forward to seeing this progress1 point
-
I too am following this build with anticipation. While I was in Japan I saw many TE27s and thought it would be awesome to own one at some stage. On the topic of 7AGE - I have considered going this way myself and have done some research. Its not the cheapest solution as to get a decent amount of power upgrade from the build you will need cams/cam gears, new pistons, rods, crank balance, some tricky parts from MRP to stitch it together. You will also need an aftermarket ECU and tune. However from what I have seen its well worth it if you want to keep A series engine. Massive torque increase if done right (correct Cams are super important) It would of course be far cheaper to throw a 3SGE beams in and get 200HP standard but depends what you want to achieve really. I would however strongly suggest you consider ditching the T50 and go to J160 6 speed. Will cost you about the same dollars as buying and rebuilding a T50 but will be much stronger! Good luck with the build. Oh and check this if you want to see what a well built 7AGE can do1 point
-
Thats pretty rad to find a vehicle your olds once owned! we have a similar story in my family, the old man saw a chev corvair on TM that brought back memories of the one my grandfather had when they first moved out, he somehow tracked it down and even better managed to buy it! here it is tucked away waiting on hefty rust repairs but the effort for that history will make it worthwhile. I must show him this thread for motivation!1 point
-
Haha that's funny! You could always do your dream build with it too! Rotary Flares Dumpy Zorst And of course... modgies!! Oh and I can't forget the white interior and camouflage paint job1 point
-
refuse to converse unless Mrs. Kicker answers 'operator' with a peg on her nose1 point
-
Hey man if you need pics and dimensions of sr badges I've got a set1 point
-
Finally got around to fitting up the Honda civic alloy radiator. At $140 delivered from STA I am pretty happy with it. Just needed the outlet moved and a strip welded on either side to mount it. So far seems to be awesome, stays cool as and doesn't even need the fan. Will take it for a good drive after I get someone to have a look at the timing - I stuffed round with it and think I set it to 12 degrees, but it now doesn't run as well as it used to so I've probably fucked it. What should I be aiming for for static timing? Unsure about cam specs which makes things tricky. The cores of the radiators are basically the same dimensions, honda civic is just a little taller and less wide. Alloy radiator is multi core too. Fits into the car perfectly, stoked with it. Have ordered one of those alloy drink bottles from Aliexpress to strip and use as a catch can once it arrives1 point


This leaderboard is set to Auckland/GMT+12:00