
Leaderboard


Popular Content
Showing content with the highest reputation on 30/12/24 in all areas
-
Alright alright alright Just been cruising a bit since drags pressure was off, but making progress every day. Radiator fan wired up and ECU triggering it. 2-1 section made. Both widebands connected and working. Engine holds water & oil fine. What I've so far made of the exhaust, doesnt leak. Excellent! Has coloured up a bit. I'm stoked that this has worked out well. Mandatory engine noises: Then I bled the clutch, and was making sure gearbox was good and everything working as expected. It selects all of the gears fine, no weird noises or whatever. Clutch works fine and isnt overextending. So I was giving it some big revs while in 6th so there's a little bit of load on it. Then I noticed zero oil pressure. FFS. Maybe spat a rocker or blew up a pulley again? So I pulled engine covers off. Everything is in place, and everything has a healthy looking saturation of oil. Phew. So I'm suspecting that the pressure sensor shat itself, once it first saw some decently hot oil come past. Will be pretty happy if it's just that. Thankfully I can get both covers off both banks, without having to remove any of the intake stuff or take all of the loom off. I do need to undo the clutch MC to get the cover off on this side, but I can easily reach the bolts since swapping to the slightly smaller TA63 booster. Easy as.23 points
-
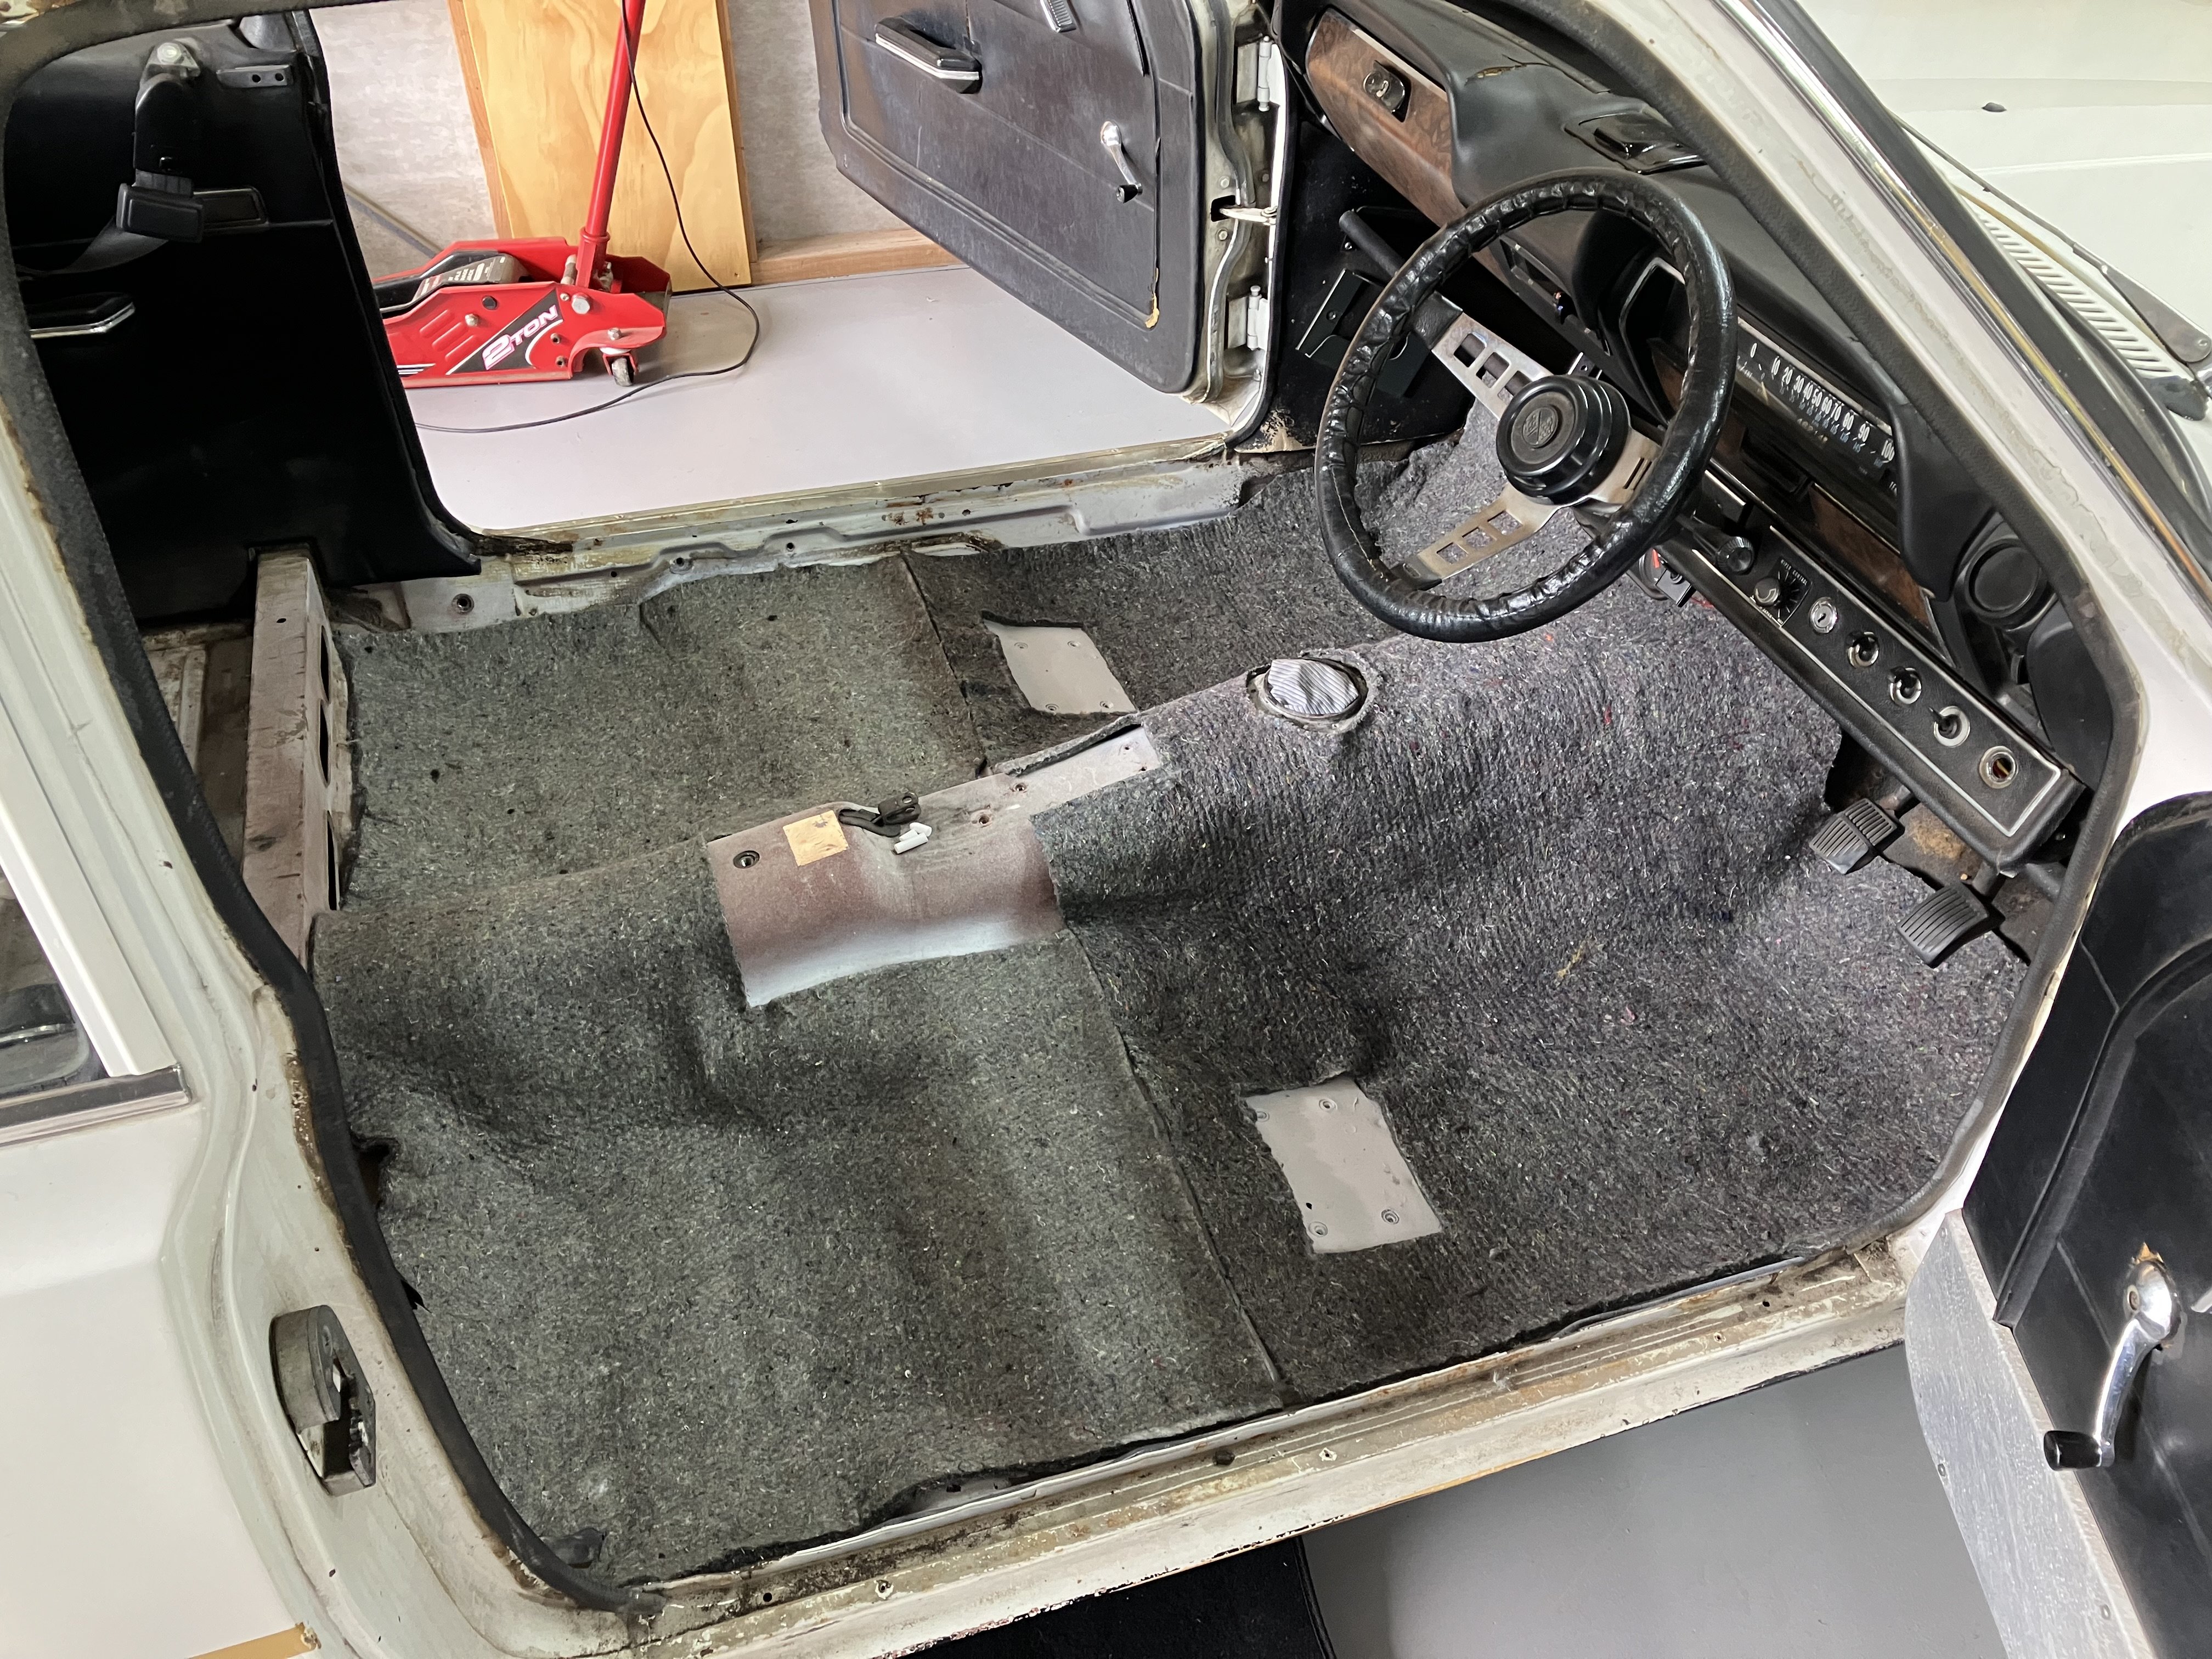
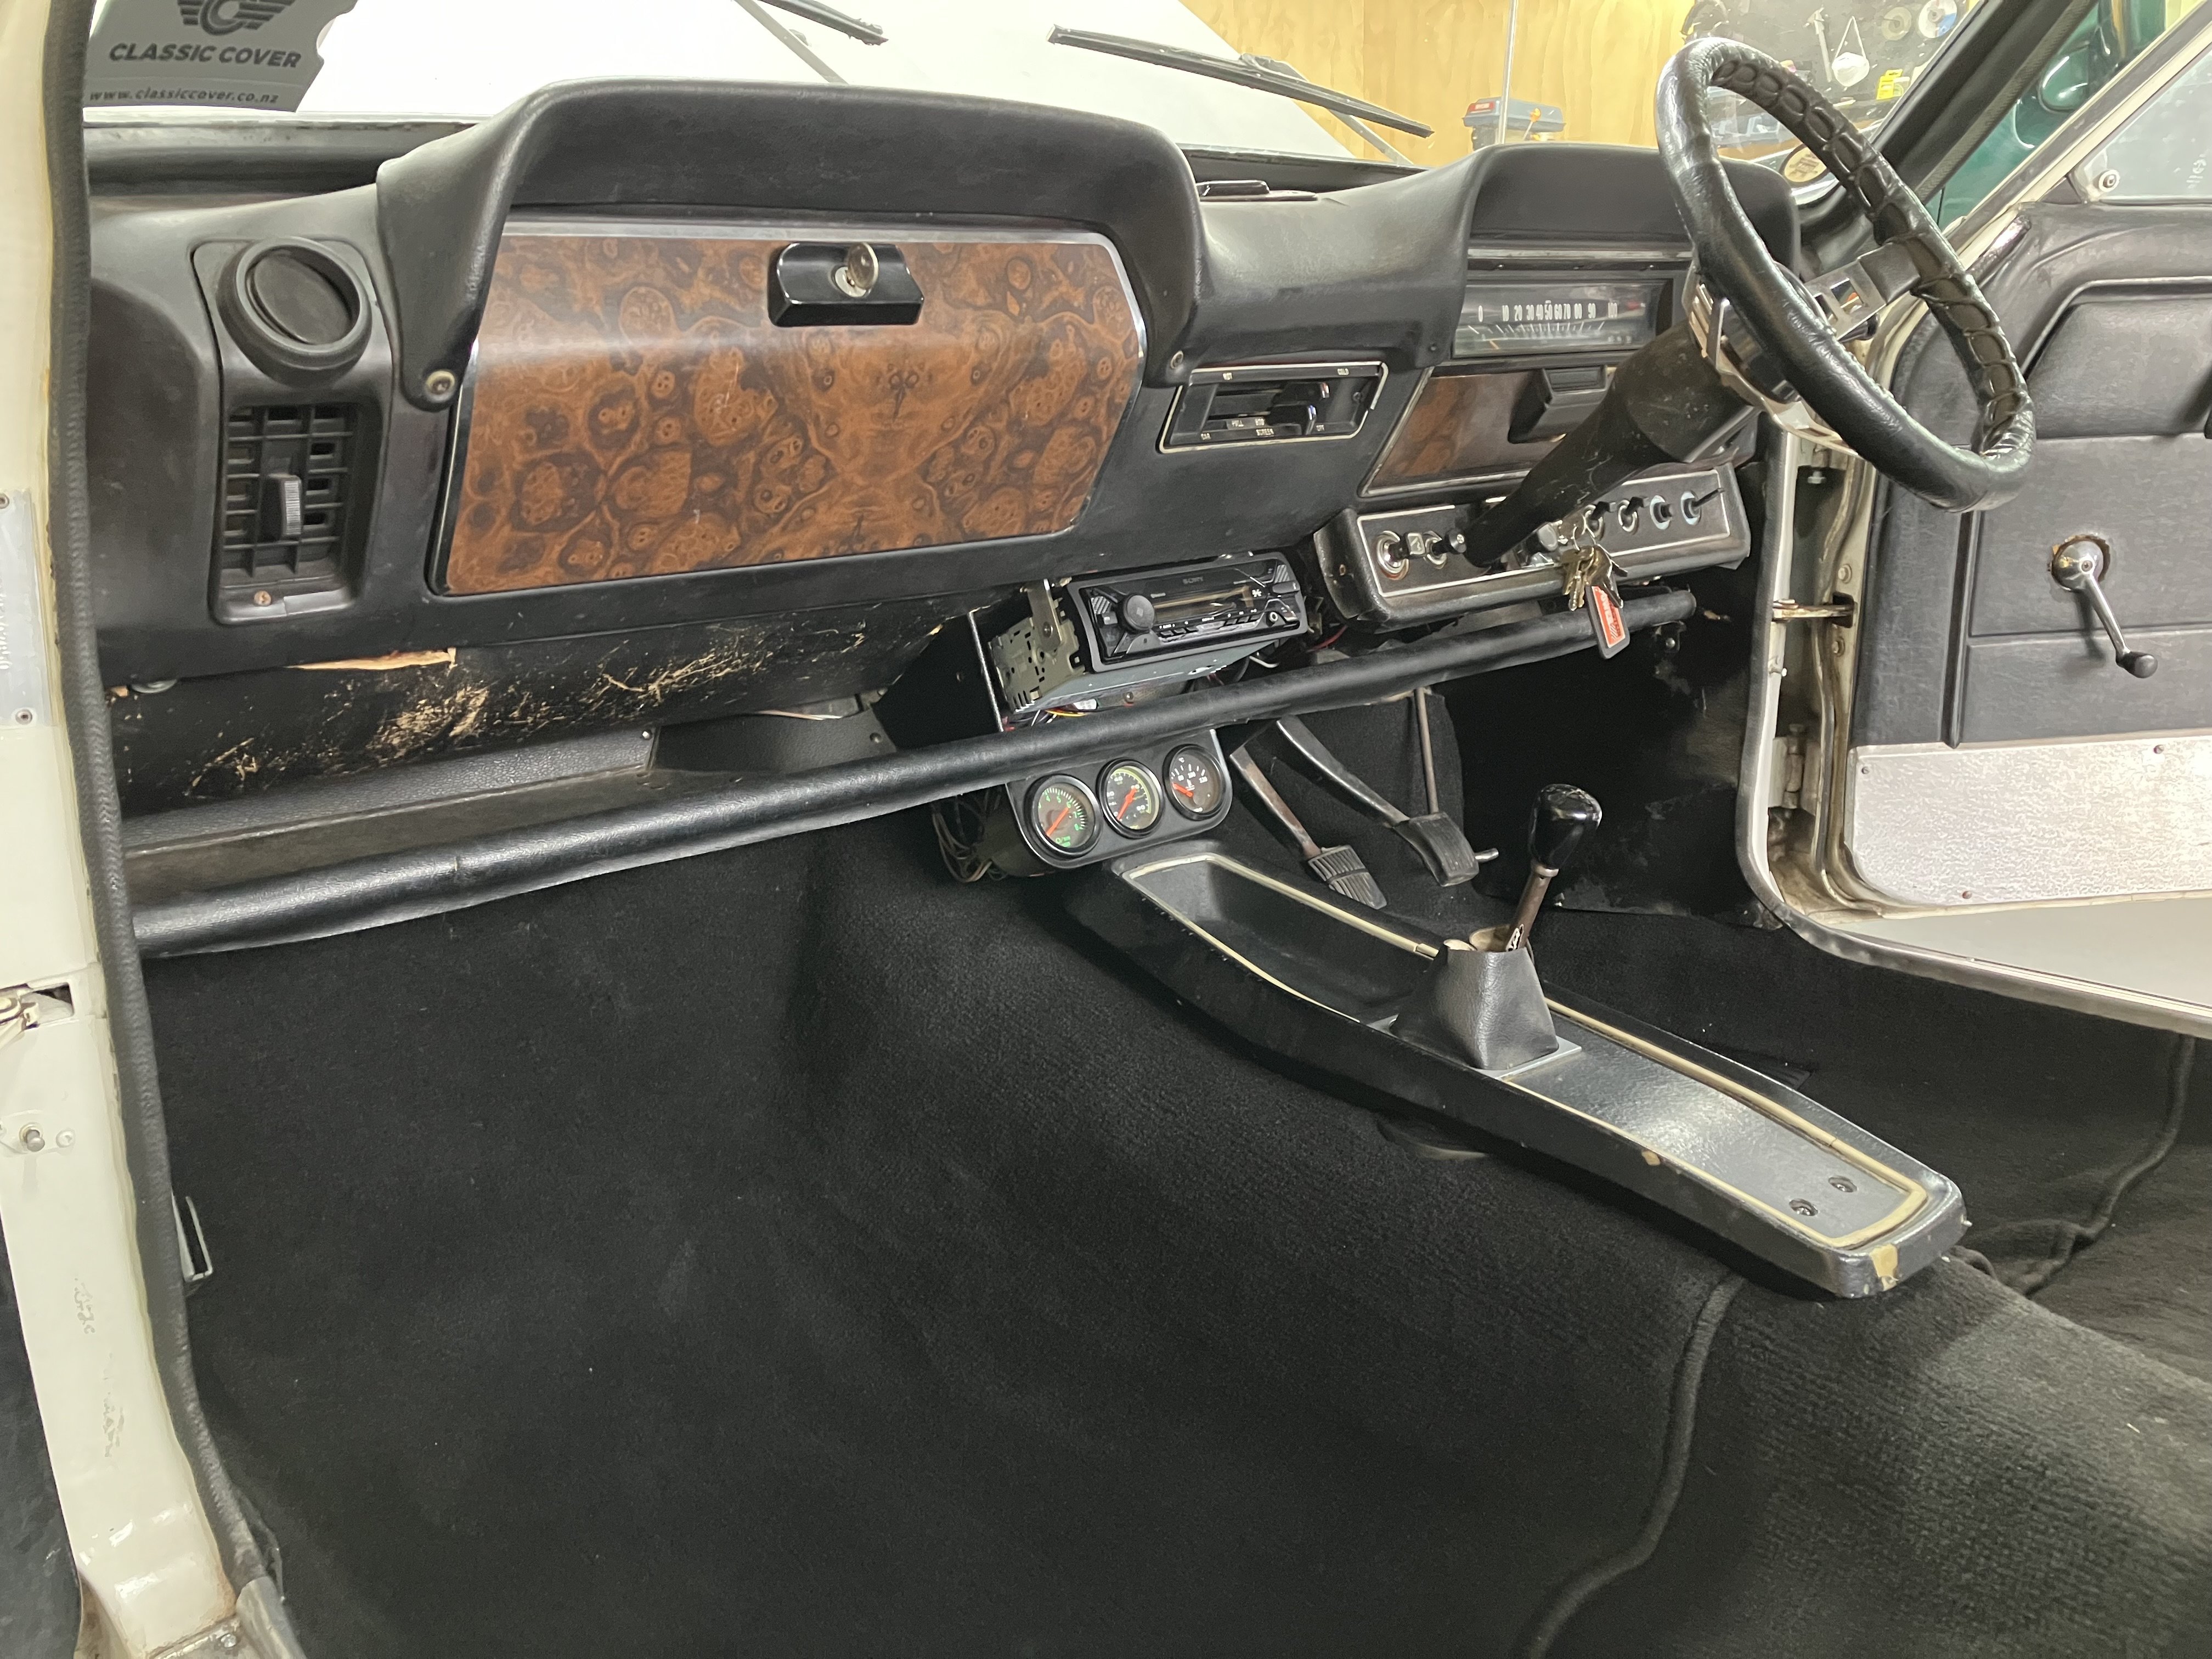
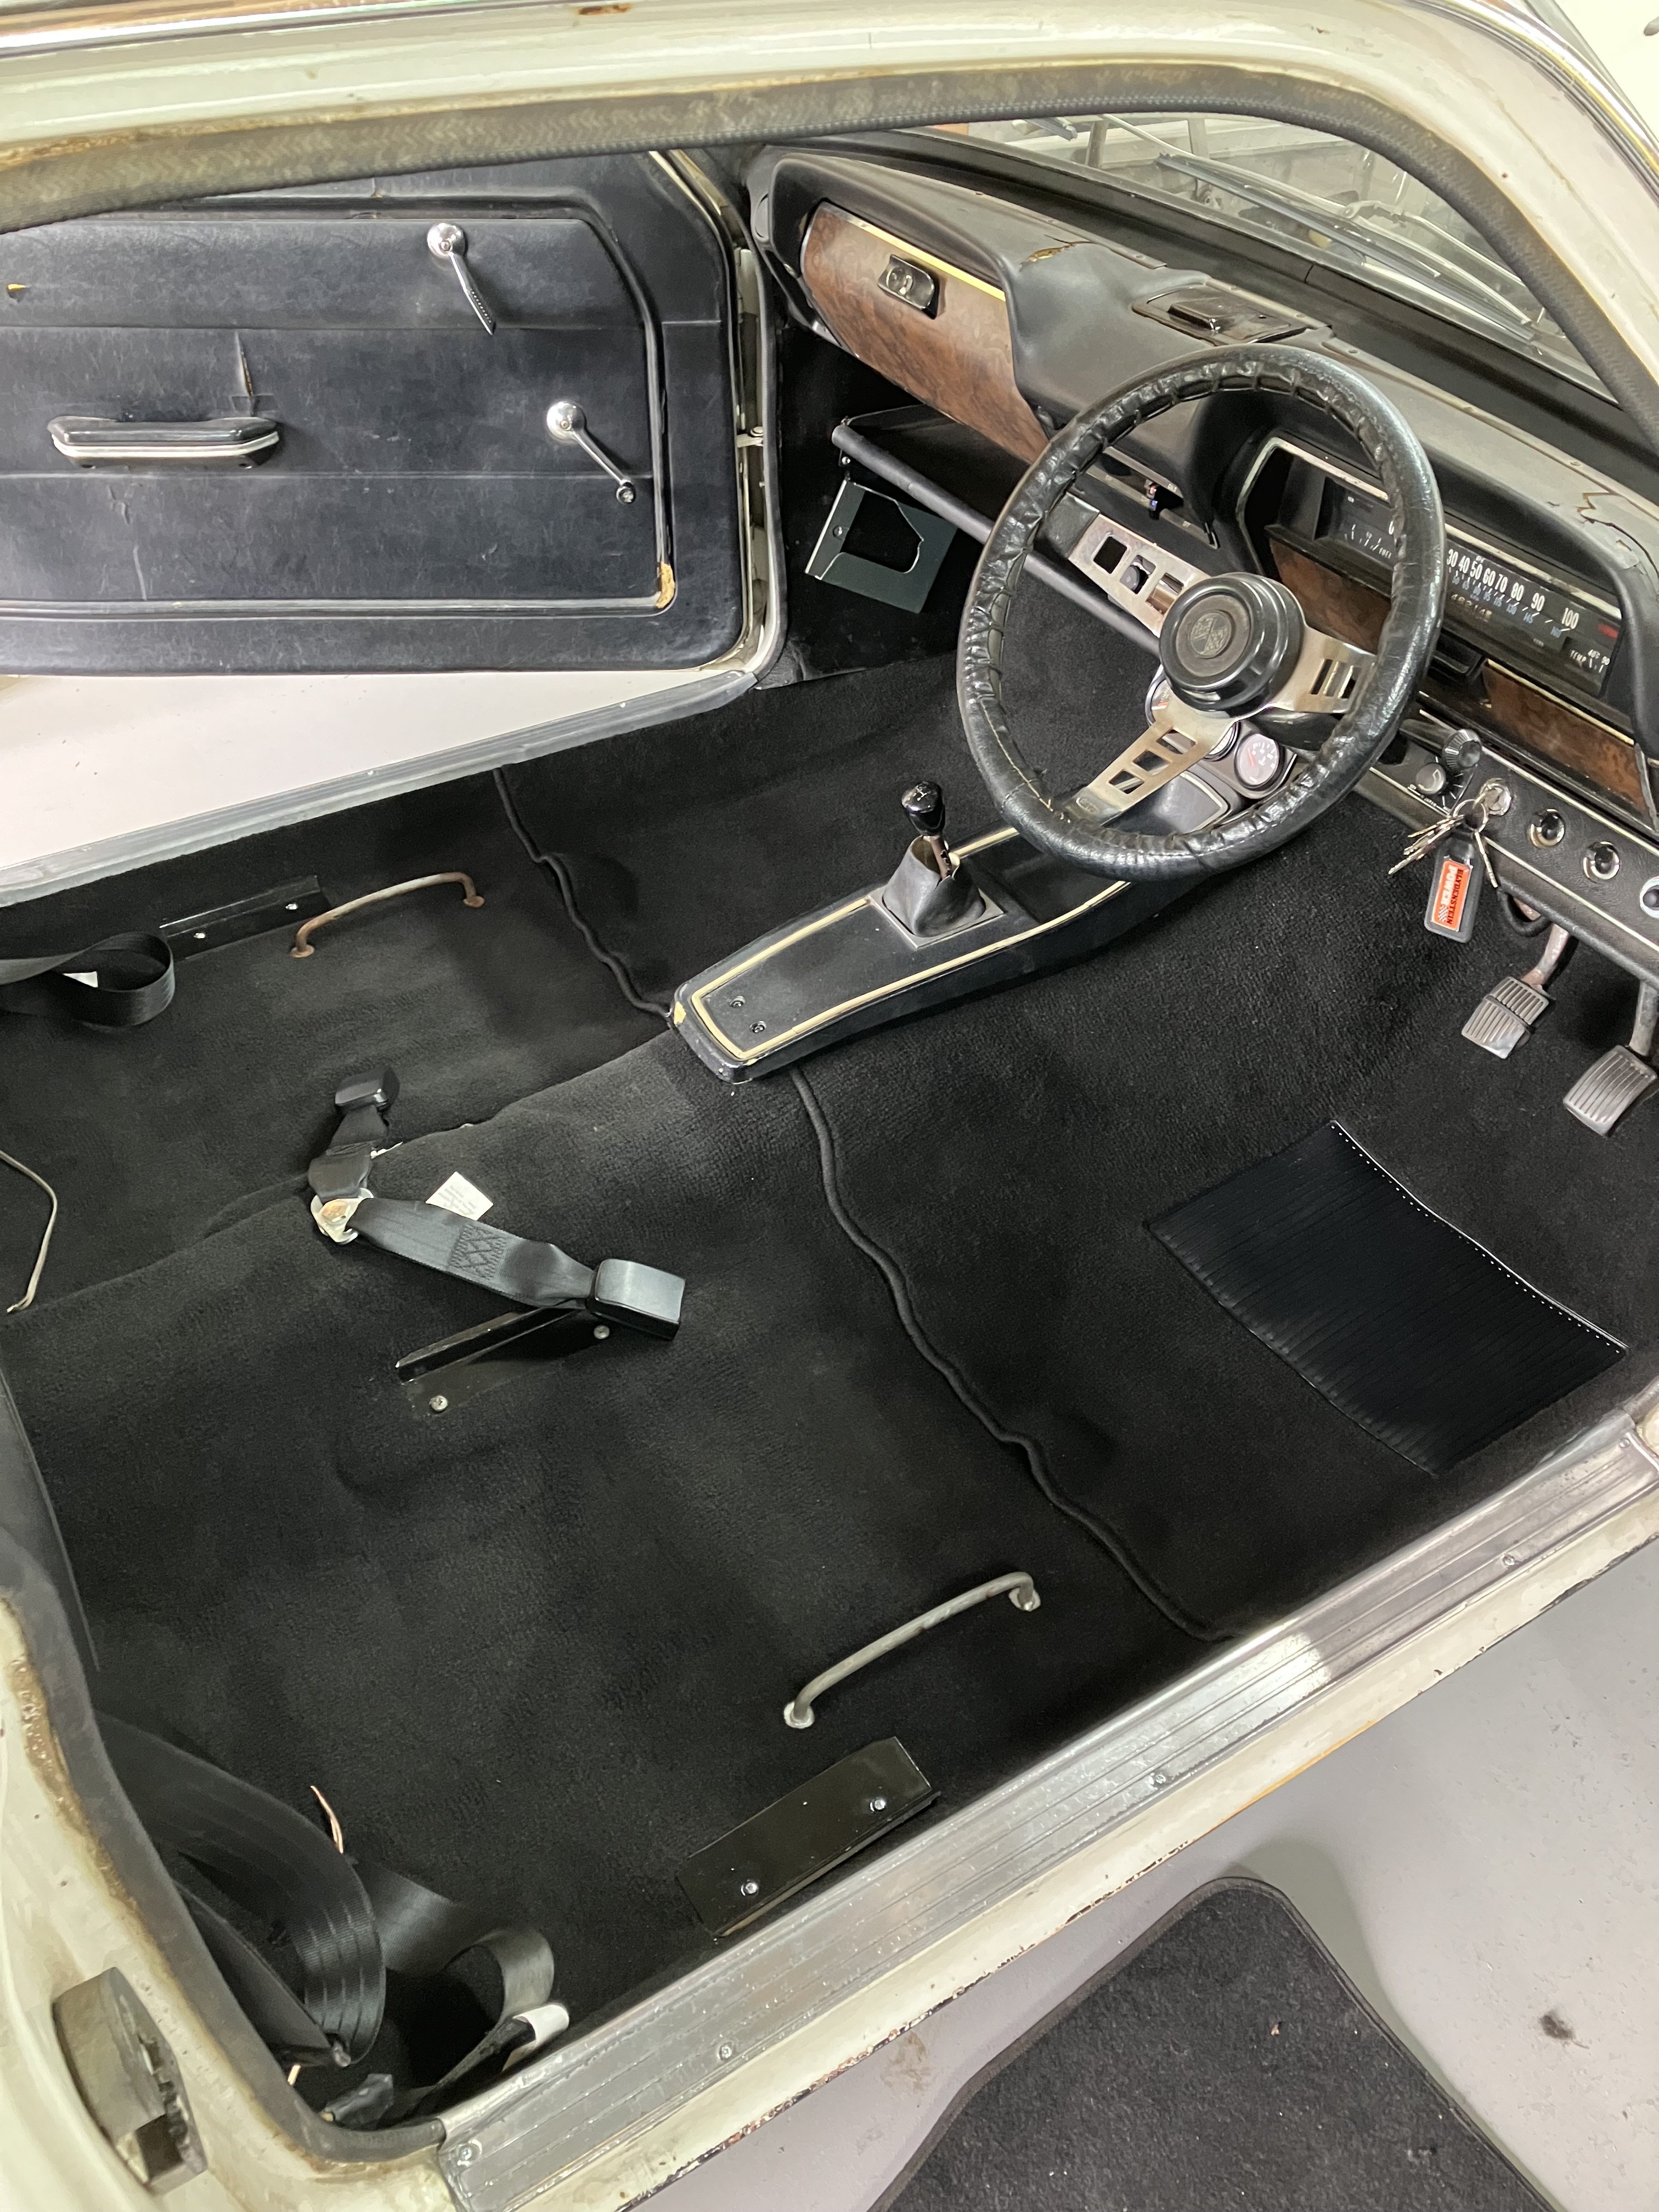
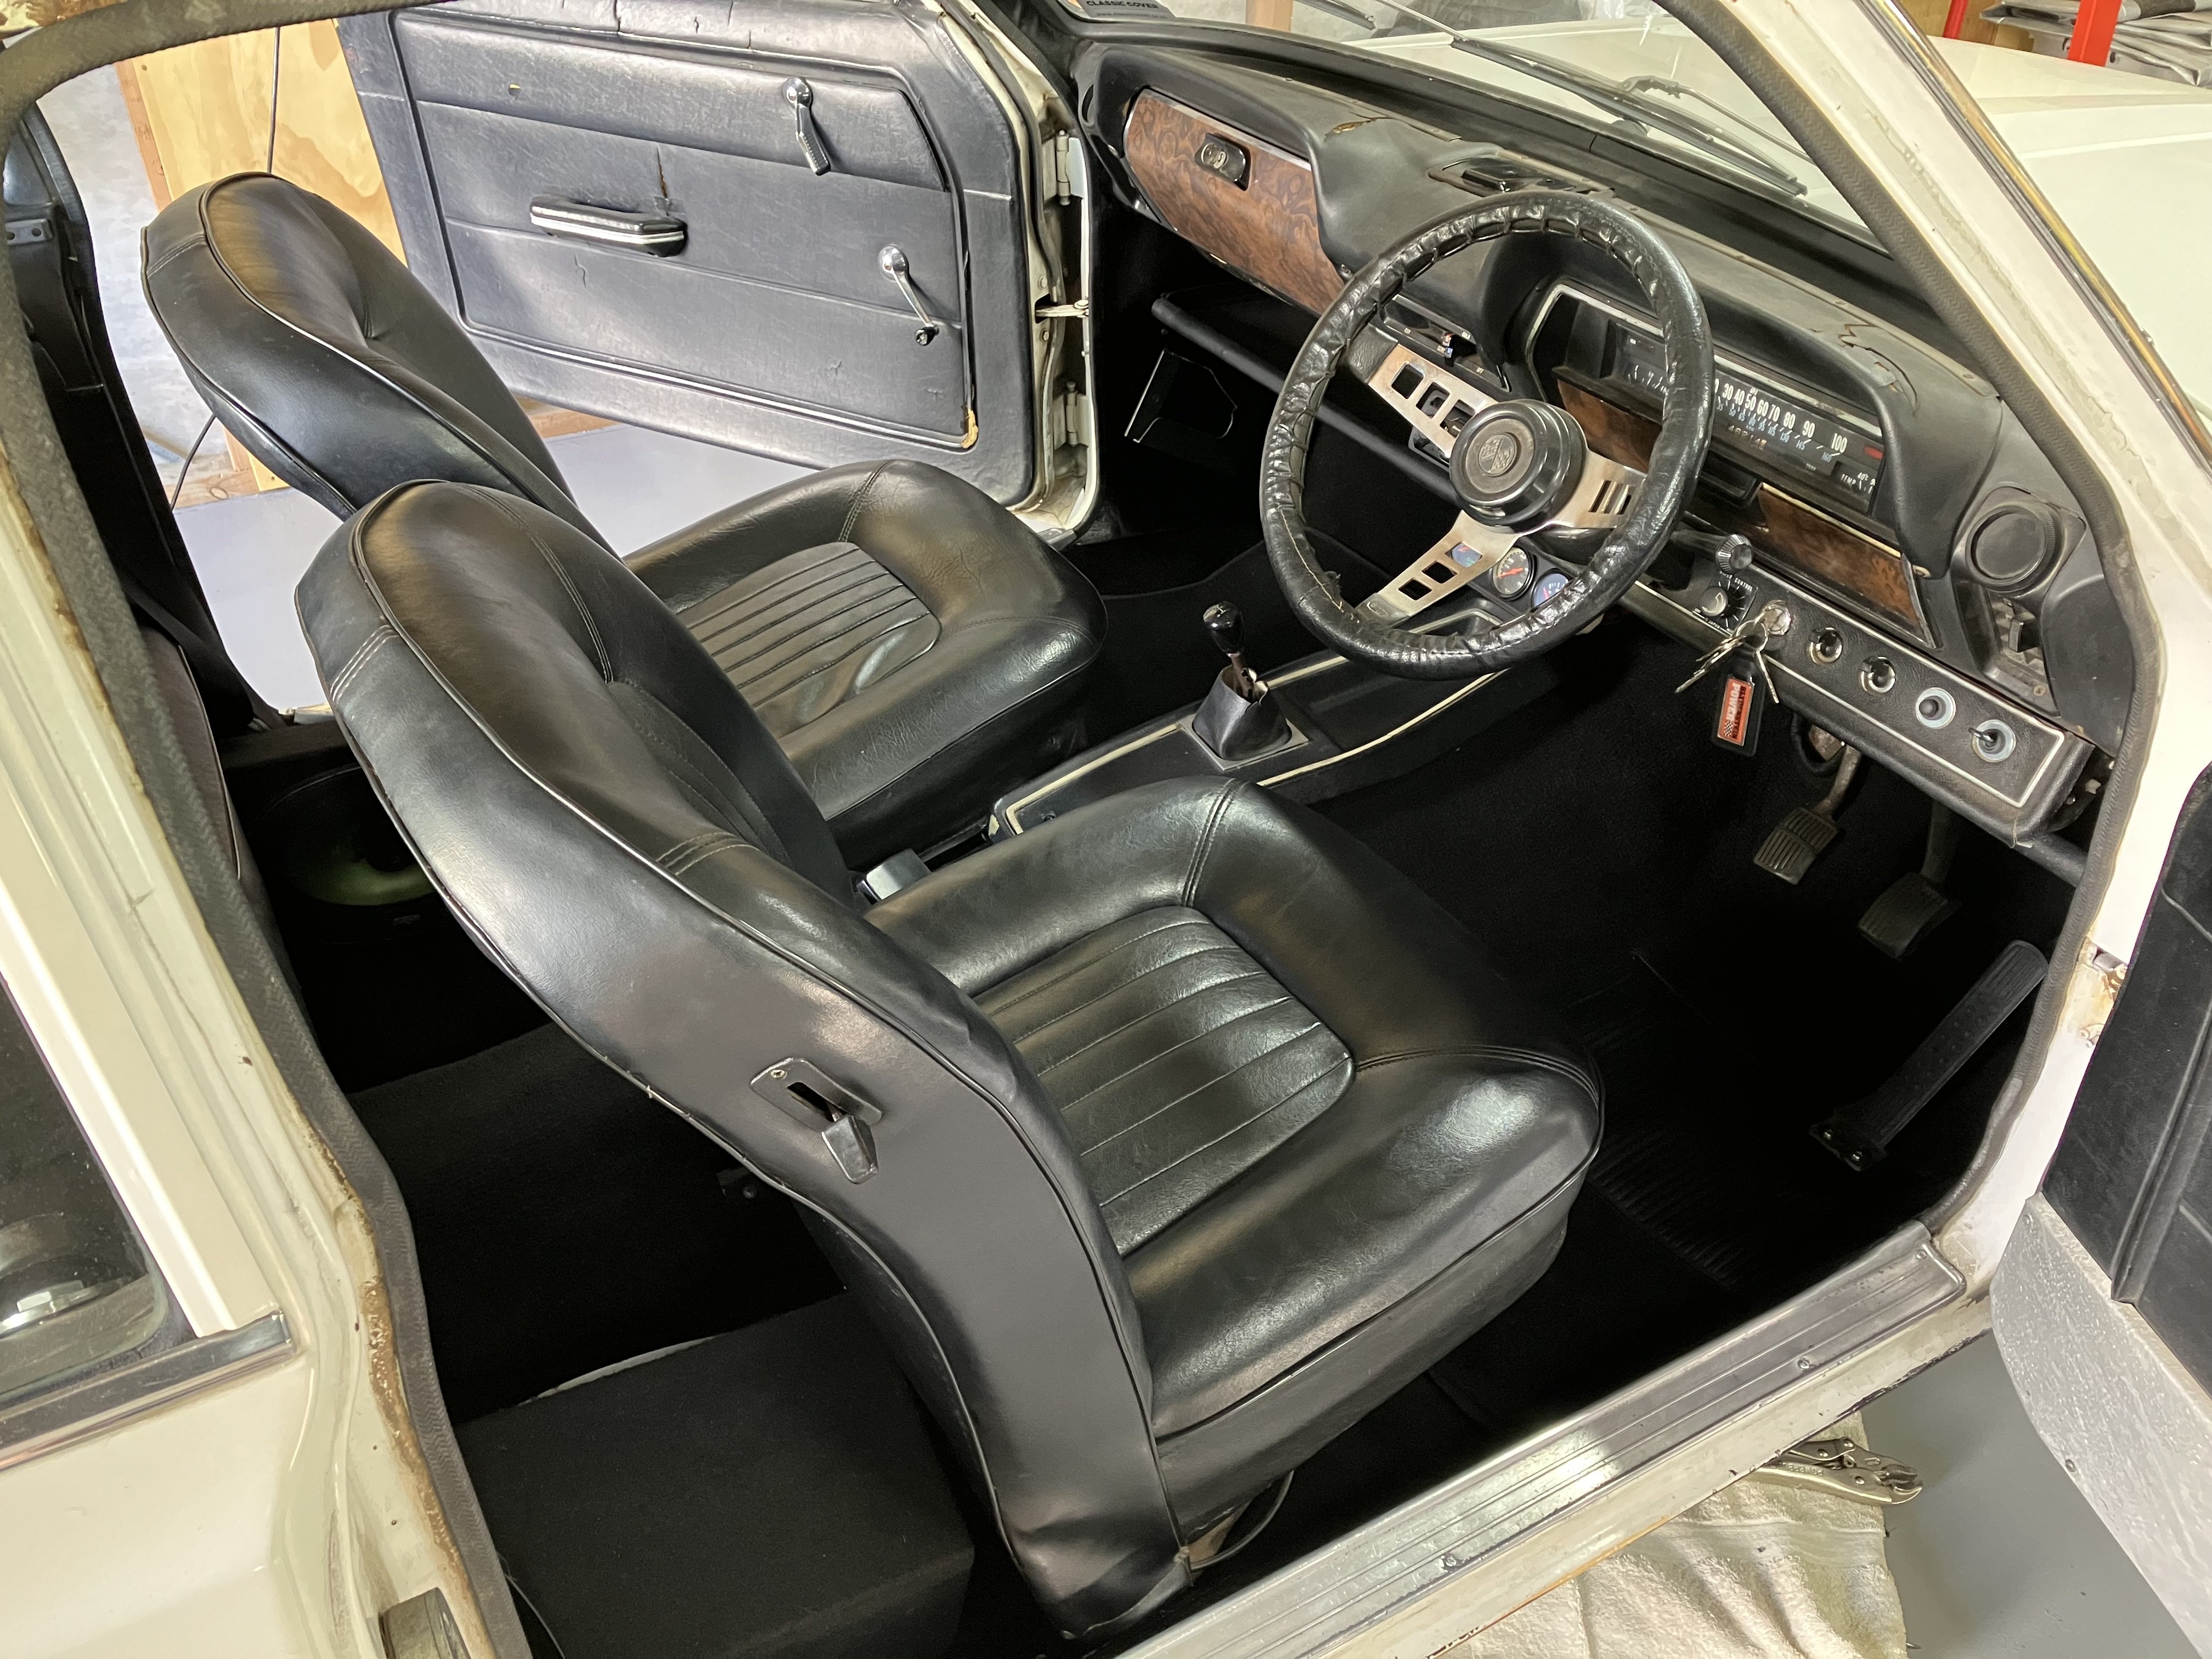
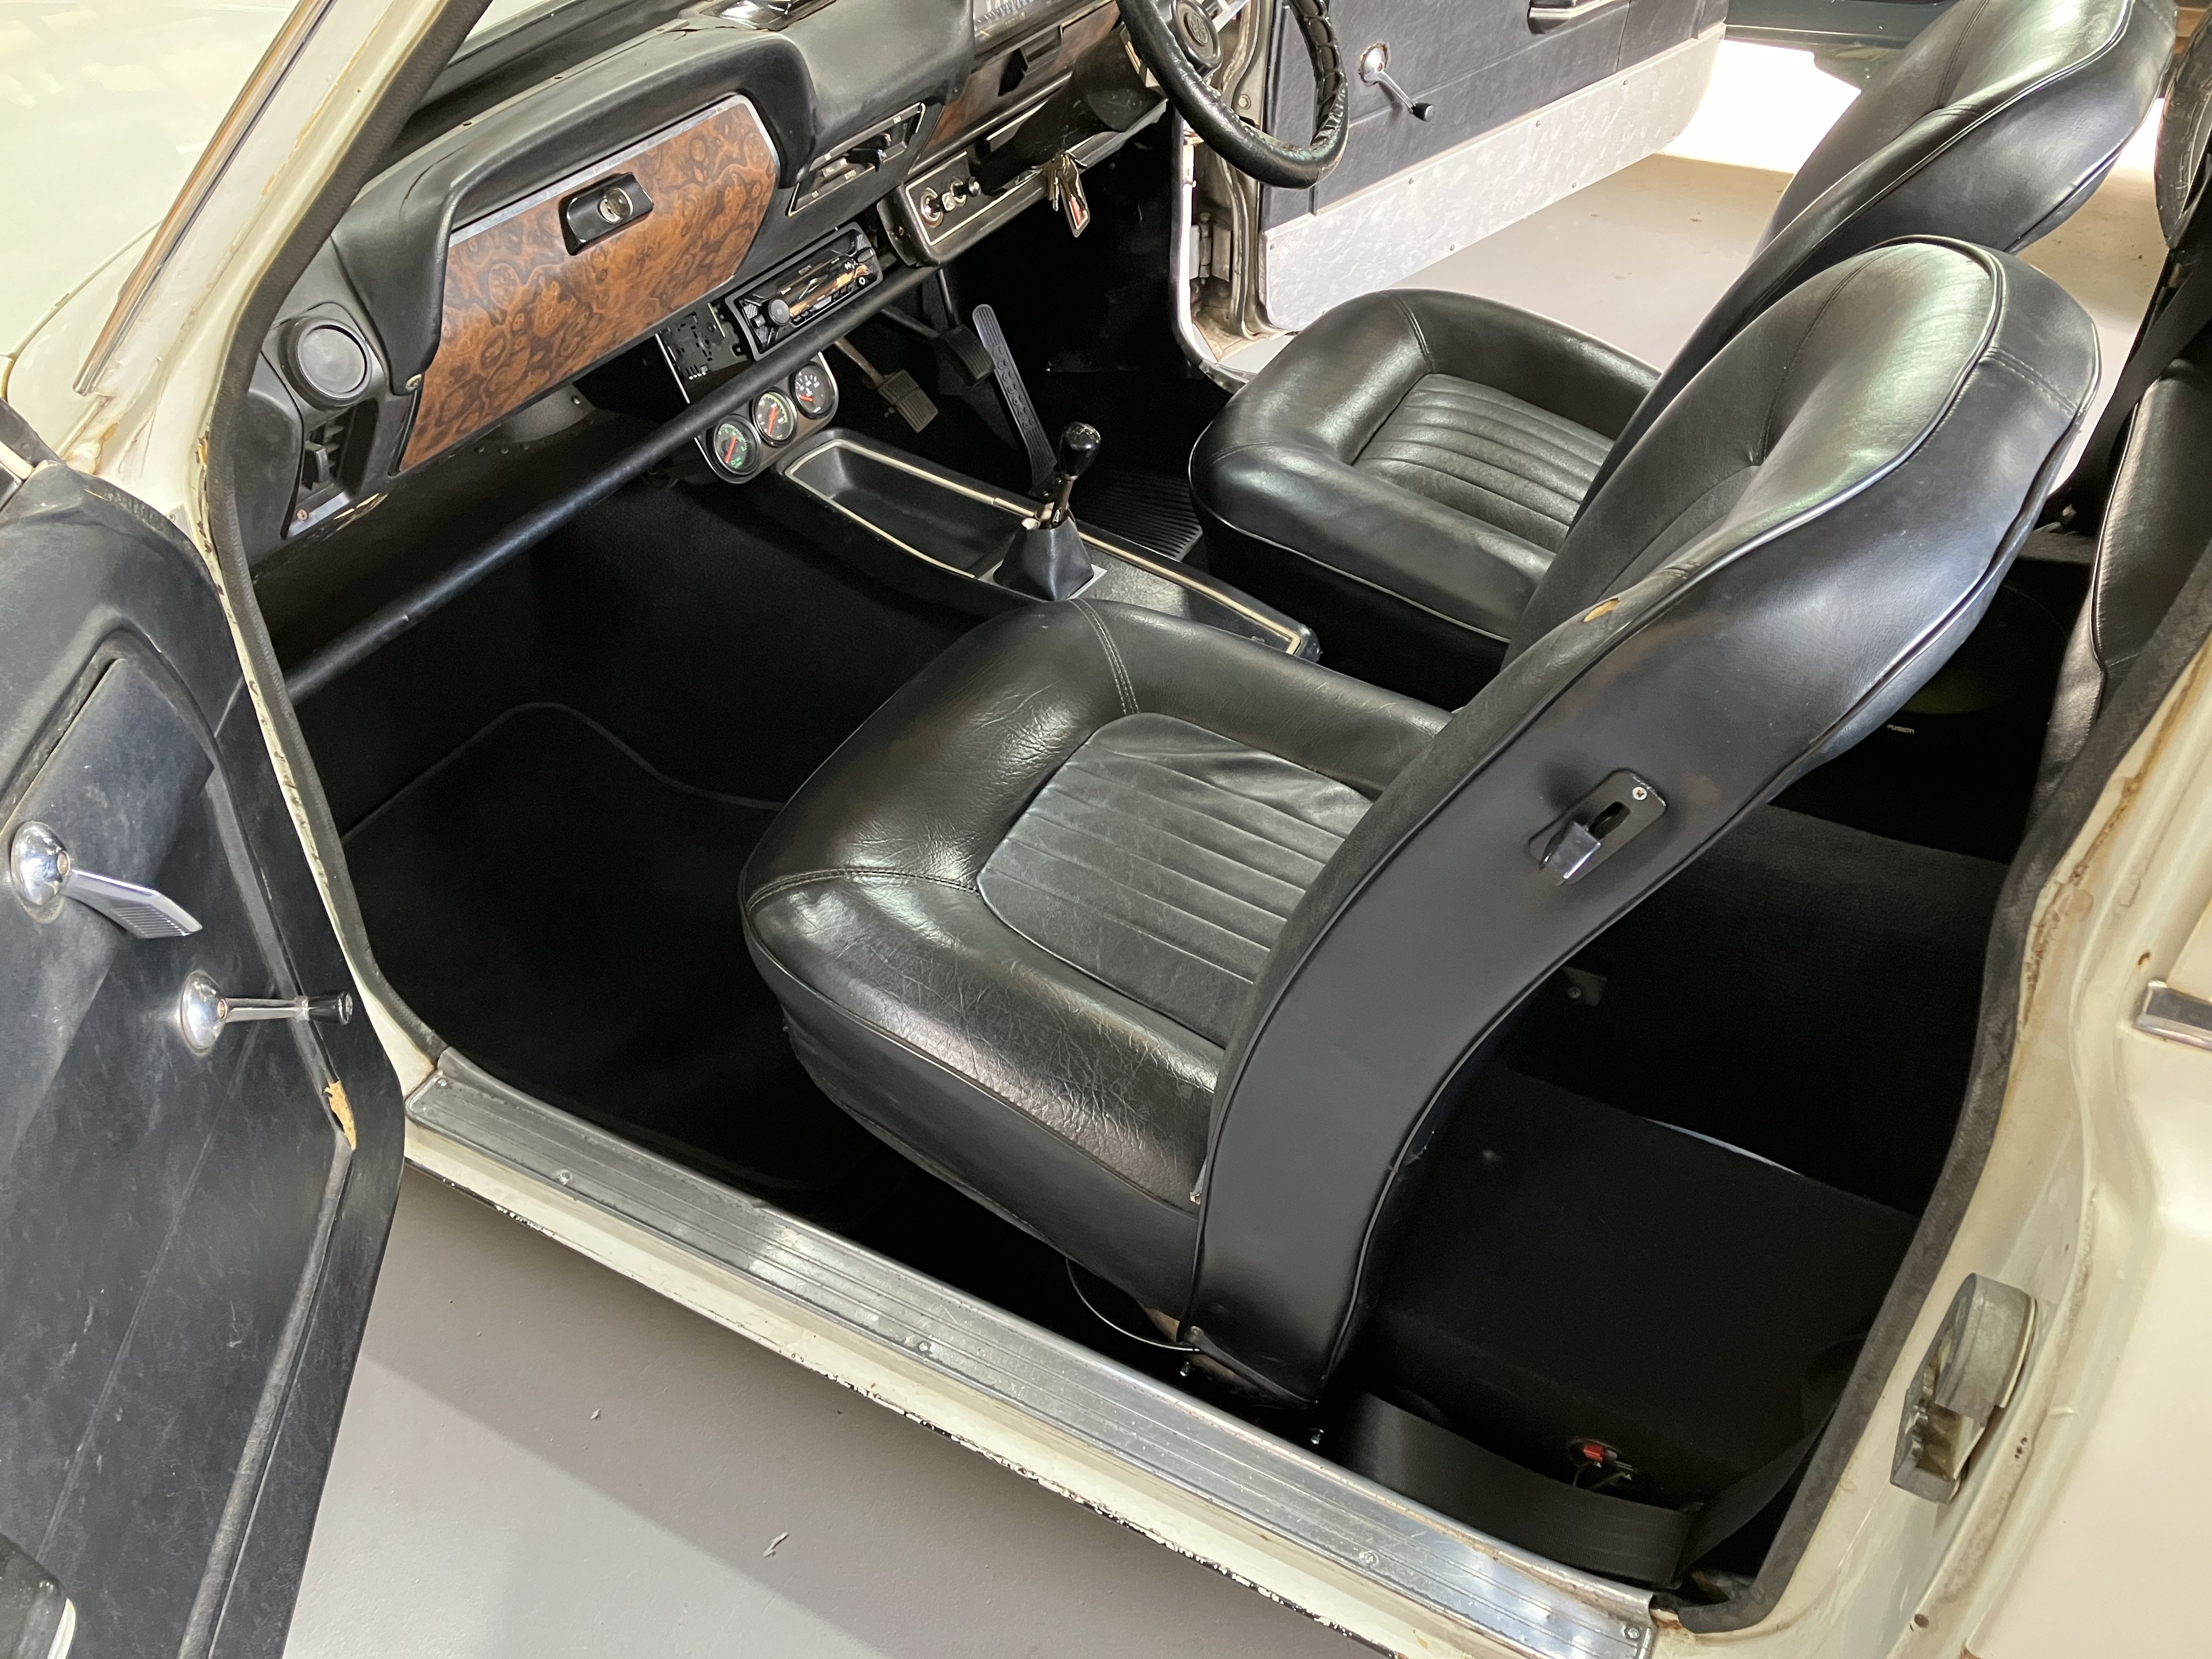
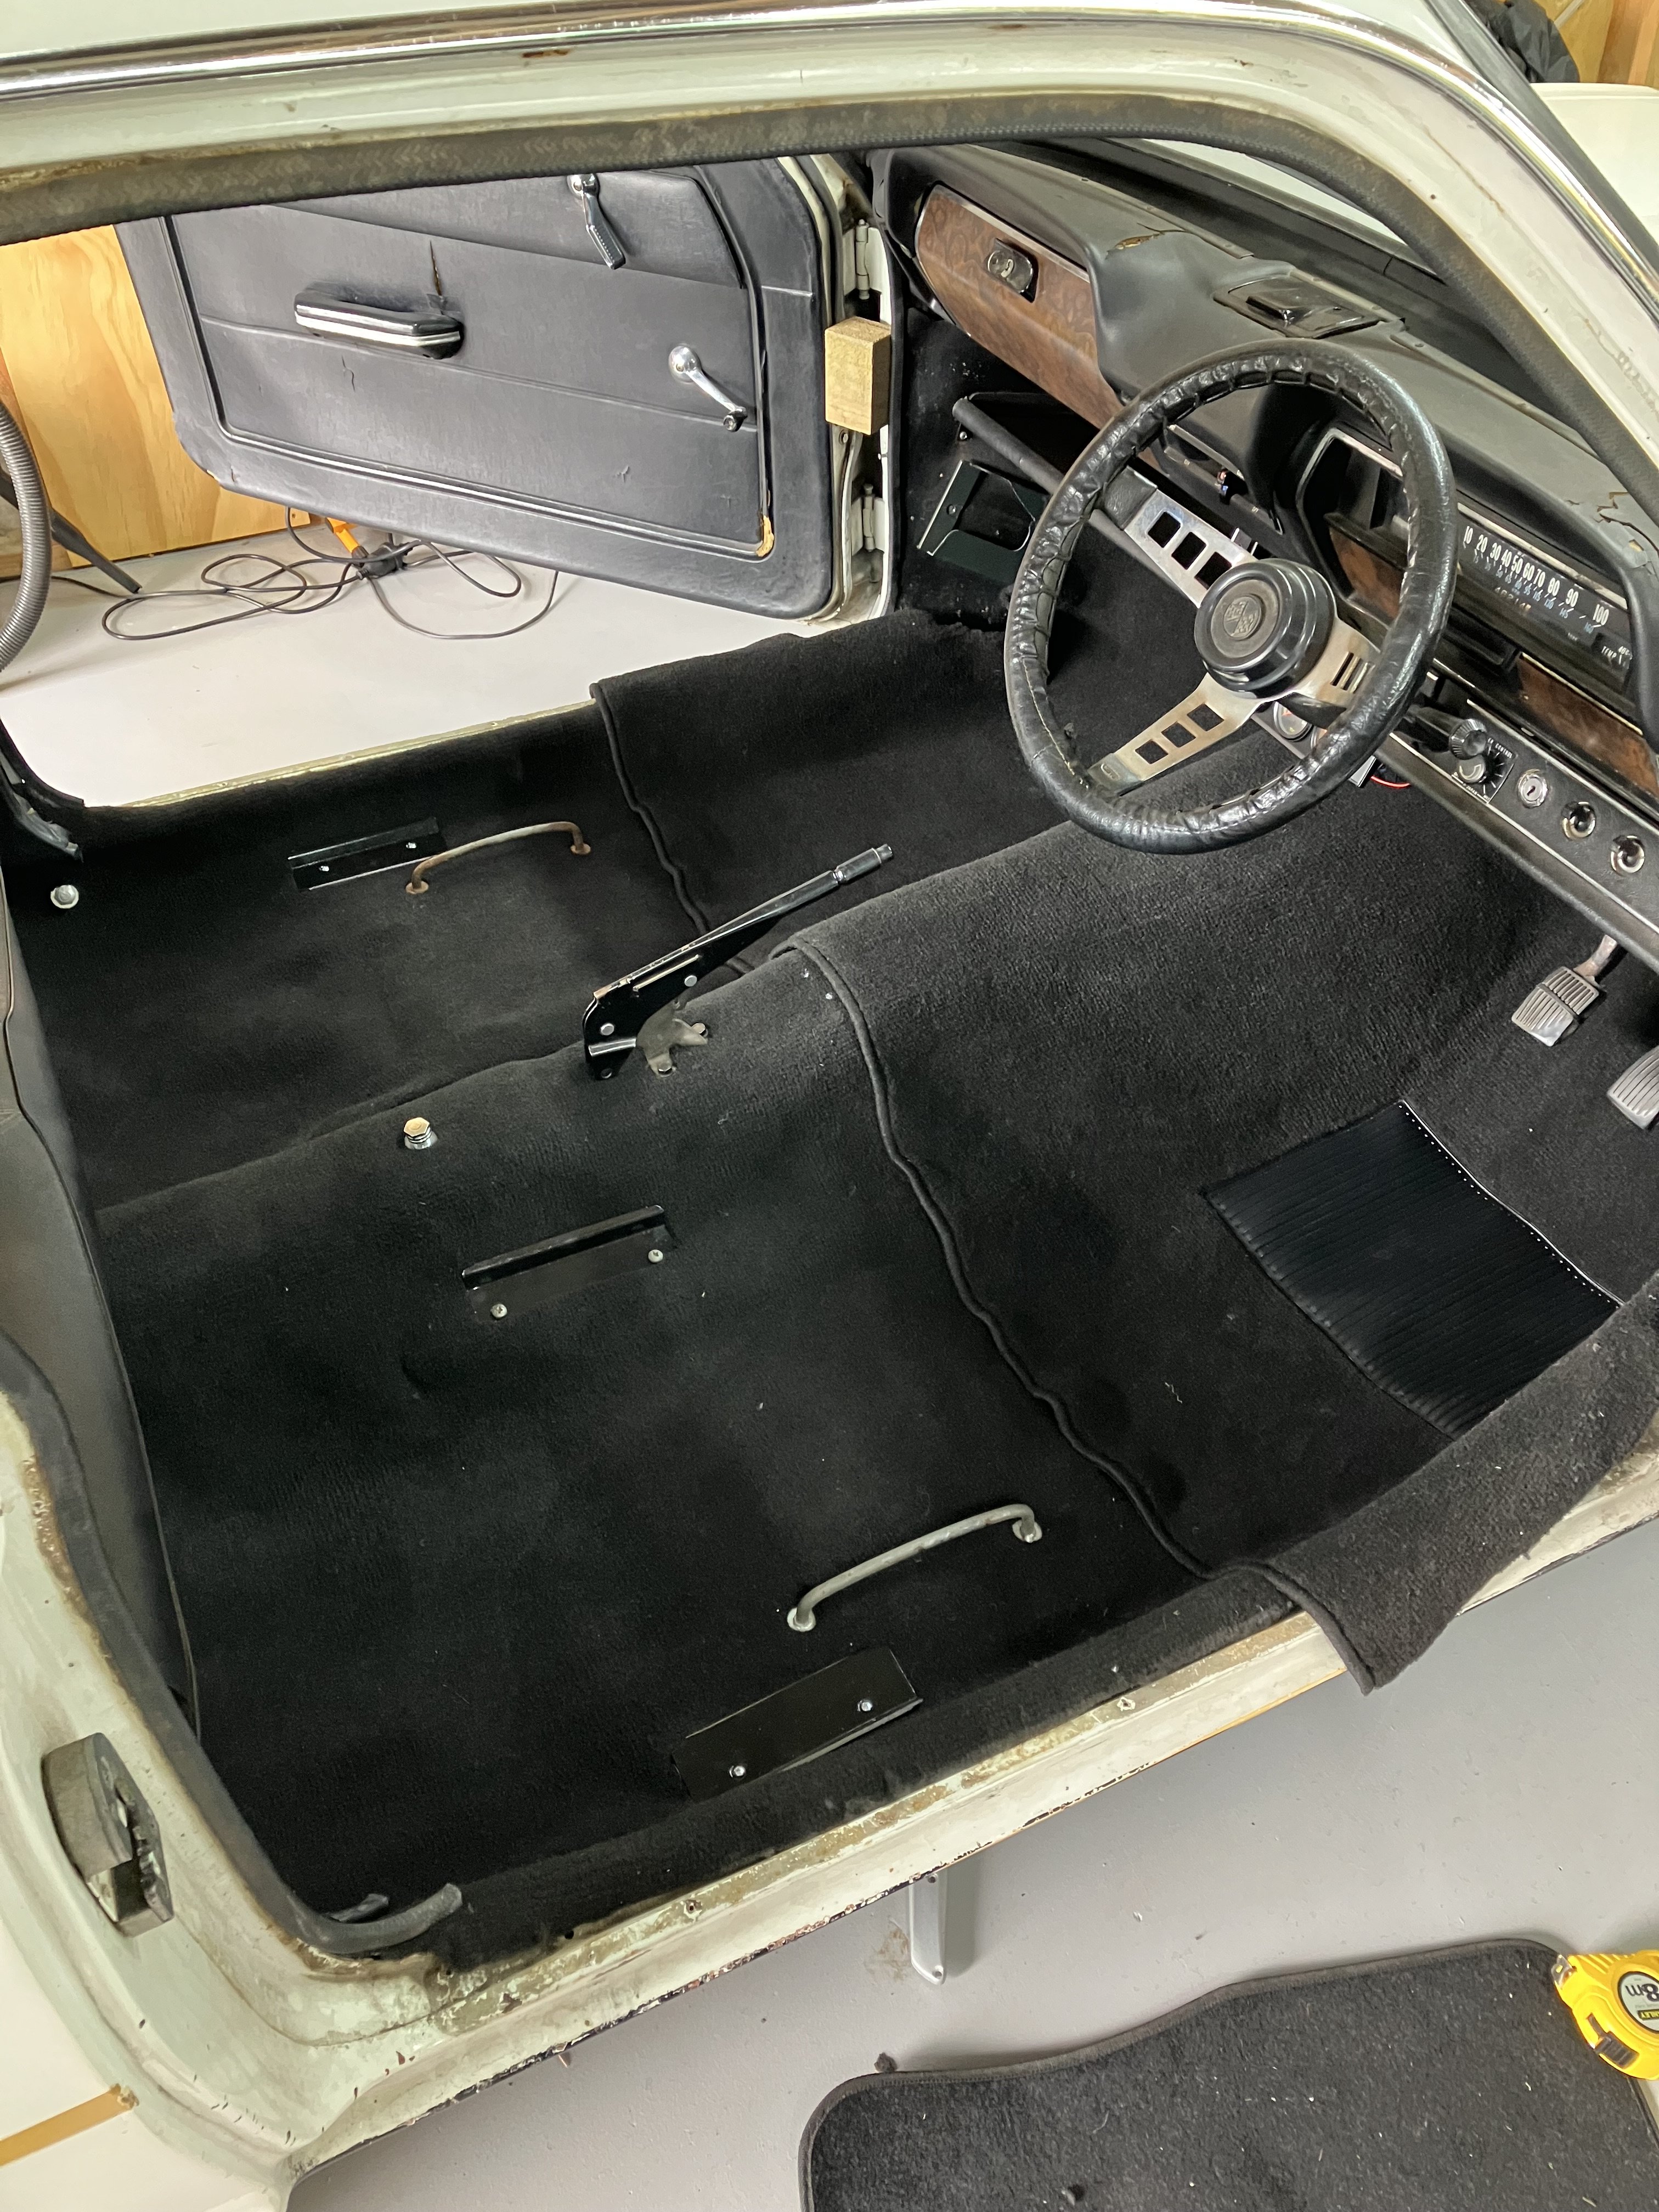
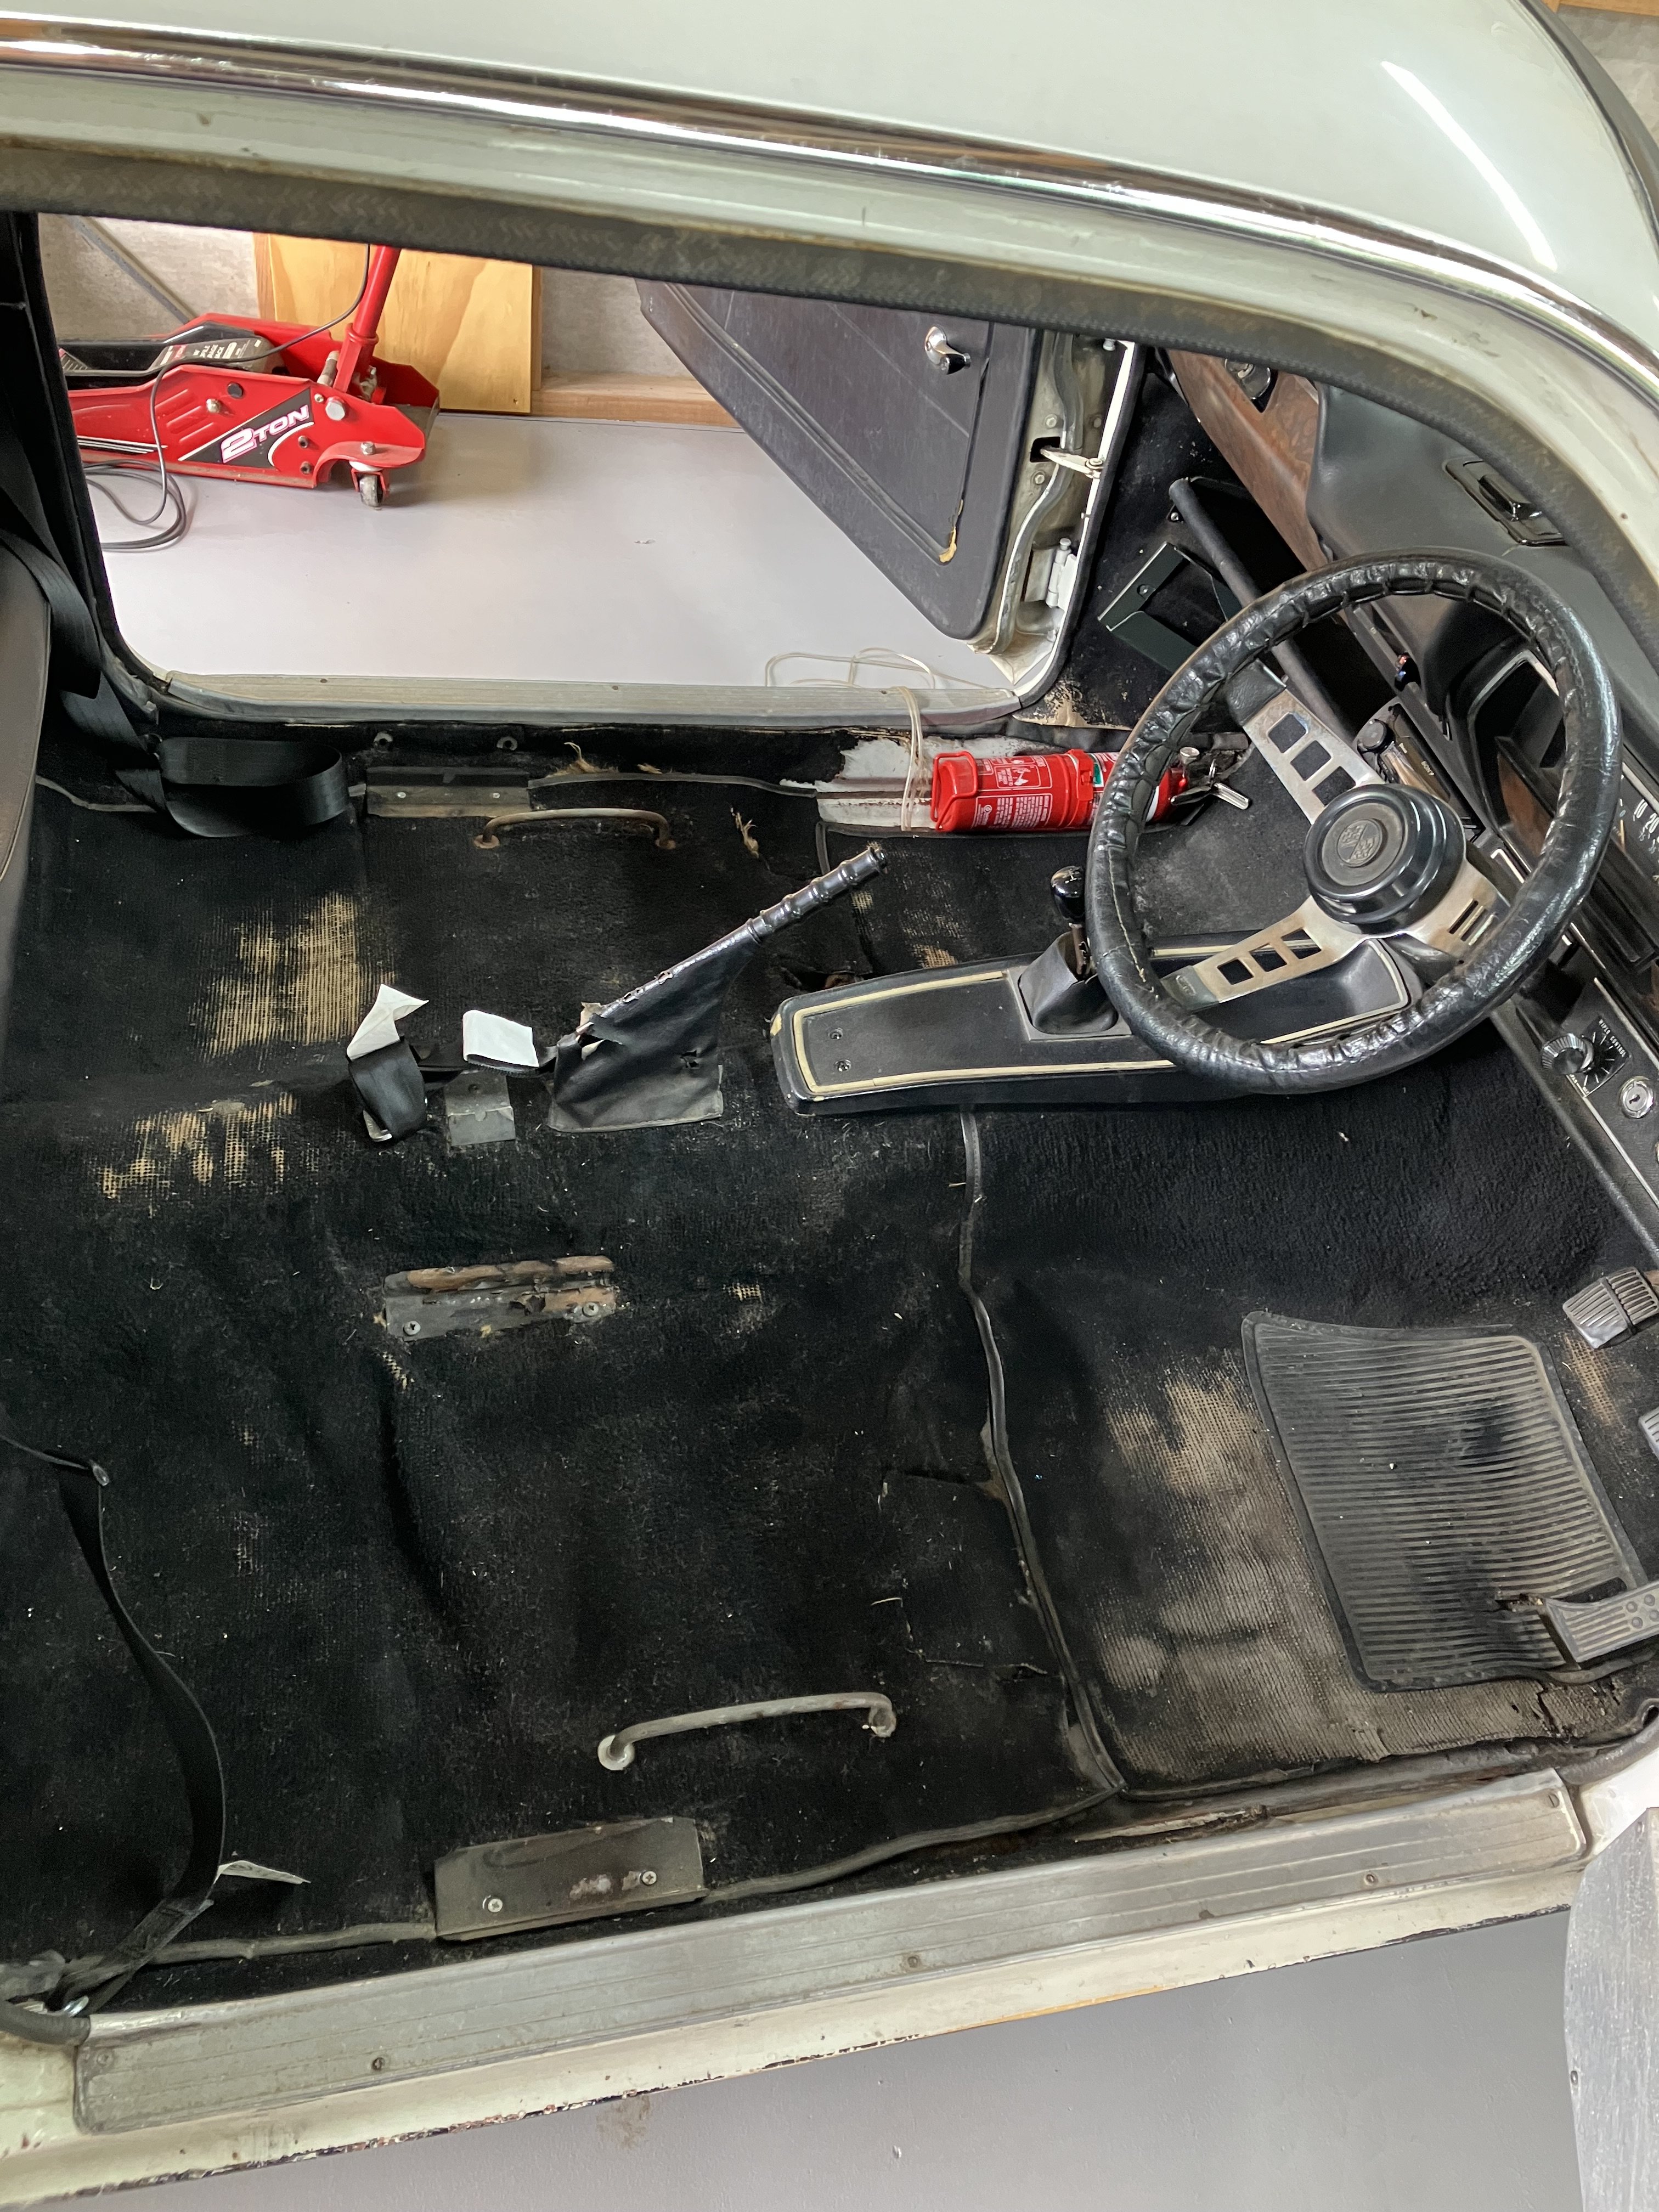
So the Christmas period got in the way of progress on this, but finished up most of it today. Prepped and painted patches of the floor pan which had old surface corrosion and then installed some underlay. Probably should have put down some Dynamat or Kilmat or similar. But didn’t. A bit of fine tuning of the carpet and got the rear section all fitted up nicely. The handbrake boot was attached to the old carpet so I’ll have to get an aftermarket one - can buy online when it’s not a holiday closedown period. I then removed the lower dash and kick panels to get the front fitment sorted. Also took the opportunity to tidy up a whole lot of dodgy and untidy stereo and gauge wiring from various past owners and myself. I also painted the kick panels but they are very worn and really need replacement. They are 2mm board, so not sure where to find that. Also in hindsight should have removed and painted the board under the top portion, it looks crap now. Got it all refitted and fixed up the edges and other fittings. Getting all the holes lined up and bolts/screws is a bit of a muck around… mostly a scriber poked up from below got the location sorted. Seats back in, and pretty much done. It took a bit more effort than originally thought, but came up pretty good and I used the opportunity to fix up other bits as I went. Not a bad way to spend a few days over the holiday break. I will order a handbrake boot and some new windlace to go around the doors. Then it’s fully done. Check back in 4 years for the next update!
 8 points
 -
Righto. Did not go well. After two days I still have nothing really to show. I think I'll have to make the headders in the car because I can't guesstimate where everything is and navigate a path that works. There is just no room to spare and it's not worth making it only to have to make it again. I may even drop down a pipe size too because I'm going to have trouble getting any crush on the gasket, as well as the holes in the head are a good 4-5mm smaller than the pipe I'm currently using. I'll think about it. But yea she ain't gonna happen with the current state of affairs.
8 points
-
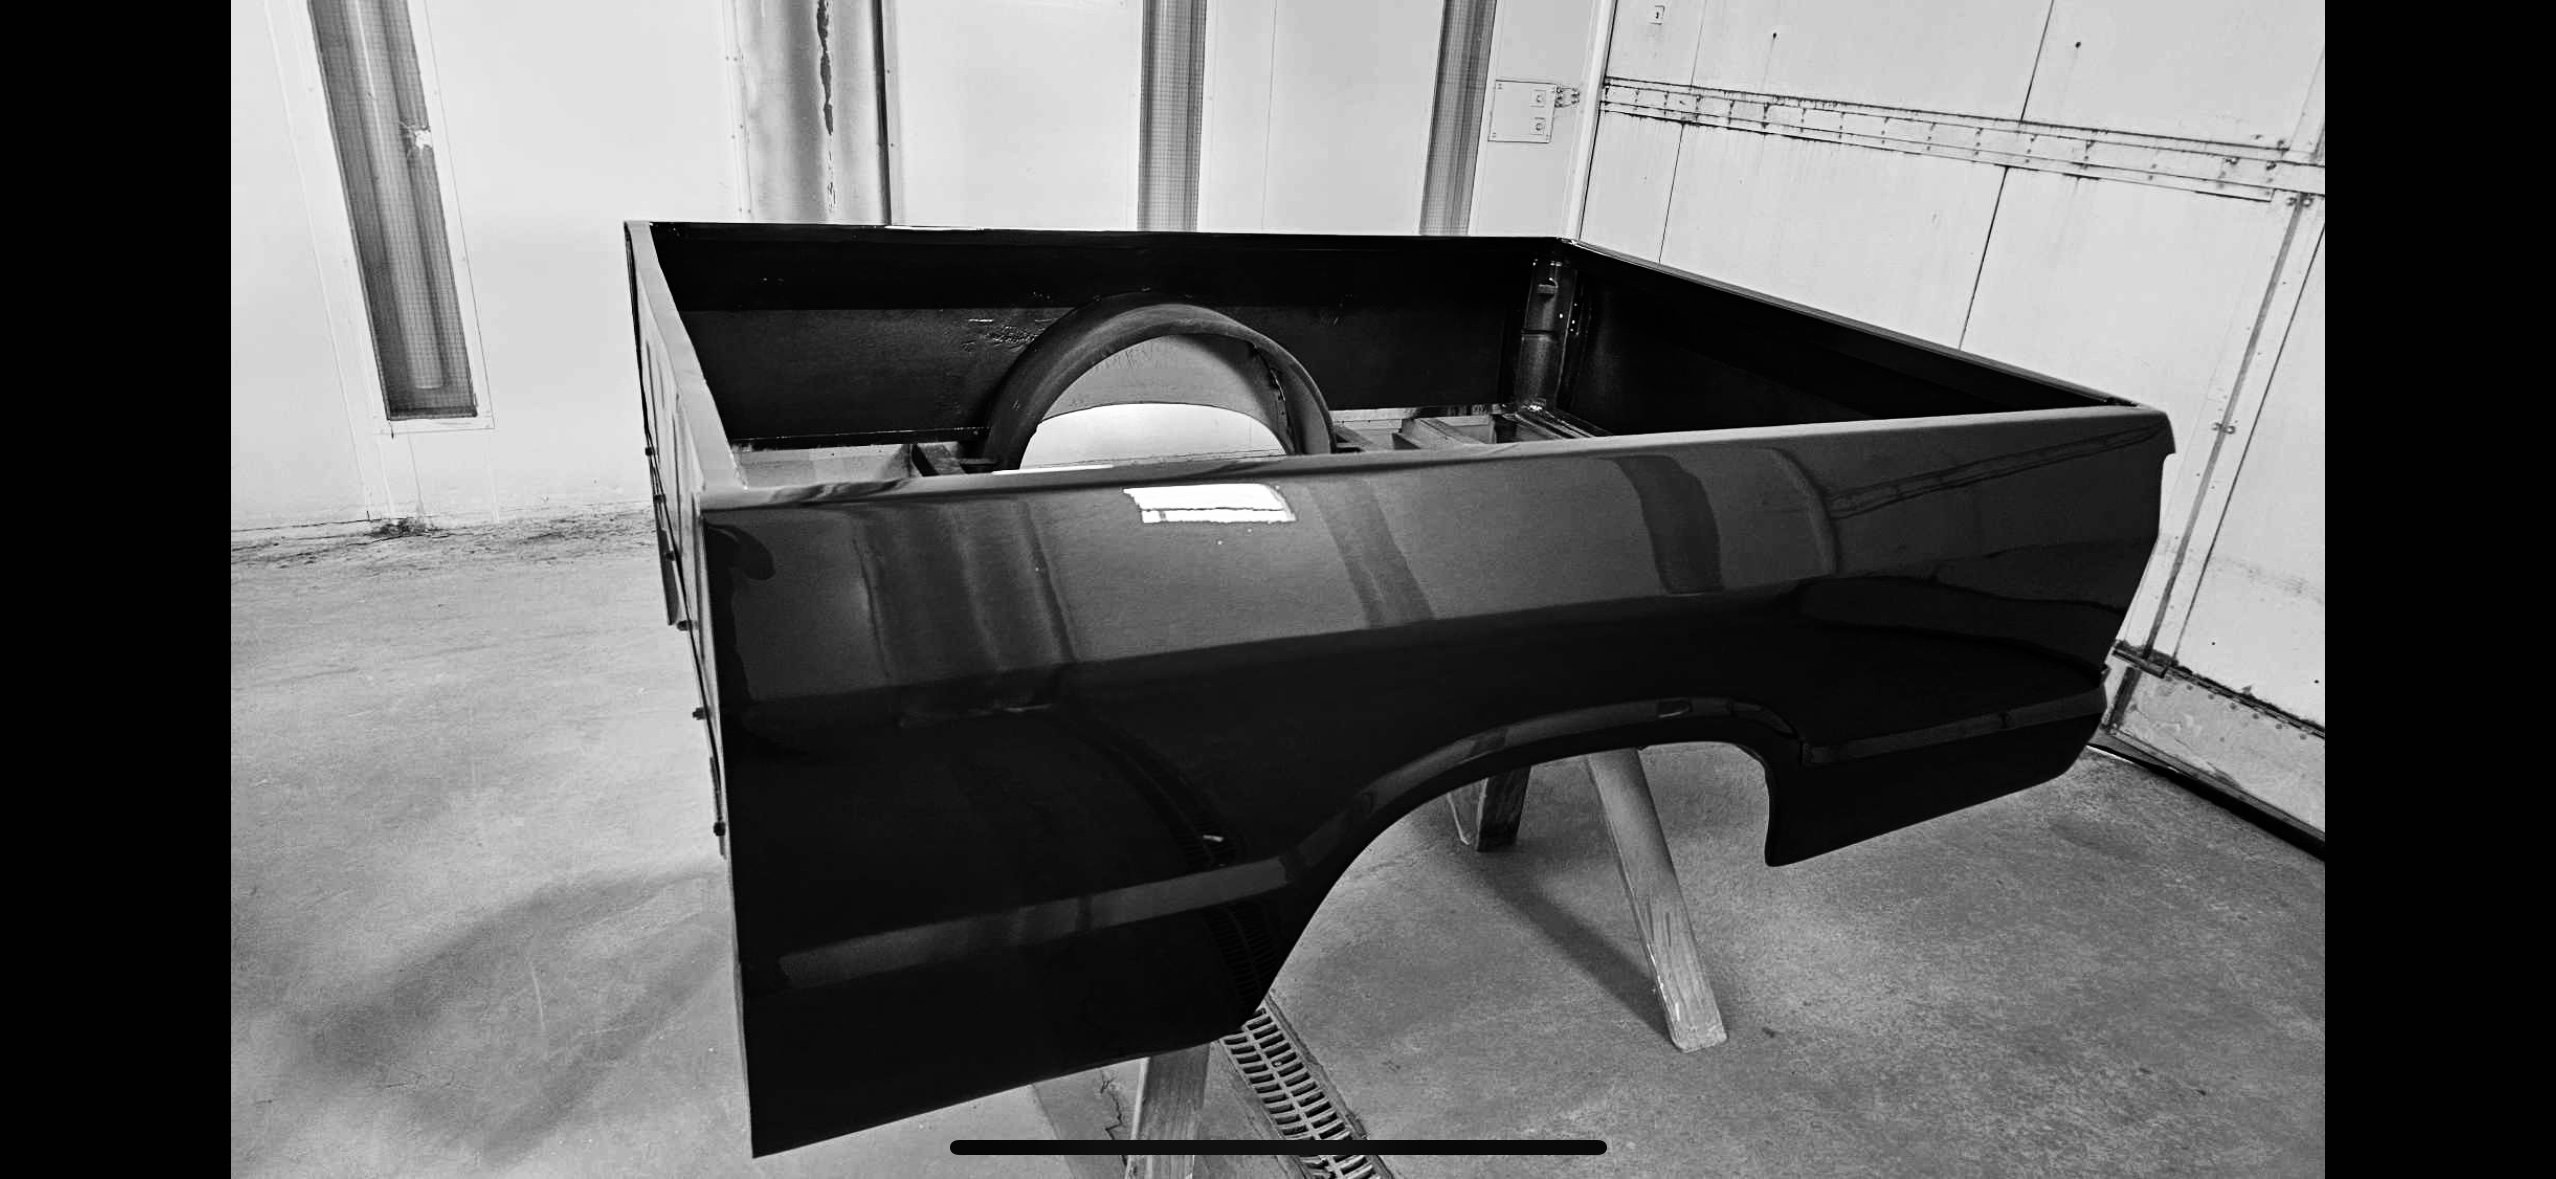
Here’s a quick before and after.
7 points
-
Managed to get into the shop for a couple of hours today. so started throwing the wiring back in it. decided to chop the original headlight crossover loom off the ute loom and reuse that. spliced in at the original splice point. wired up the front lights, fitted the rear lights. Only need to wire up the plate lights, dash and controls and get source wiring into the fuse box. been looking over it, there are a fair few minor imperfections in the paint, but I’m not to fazed, it’ll make me feel better to just drive it more7 points
-
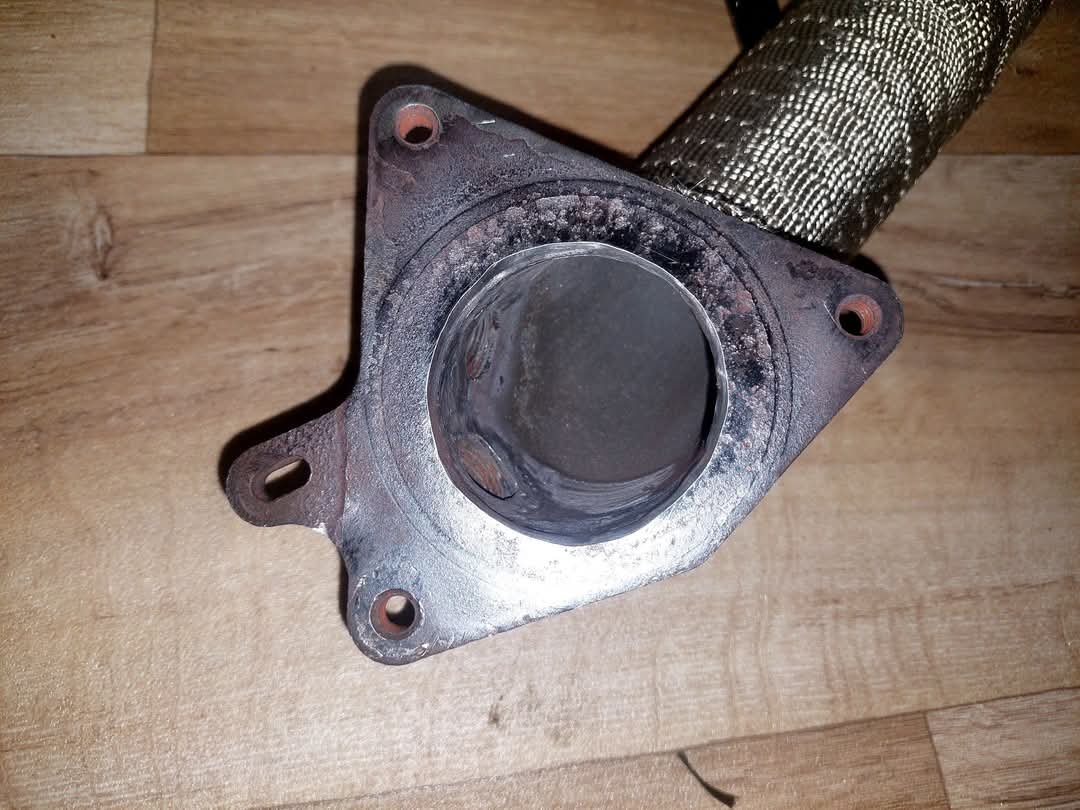
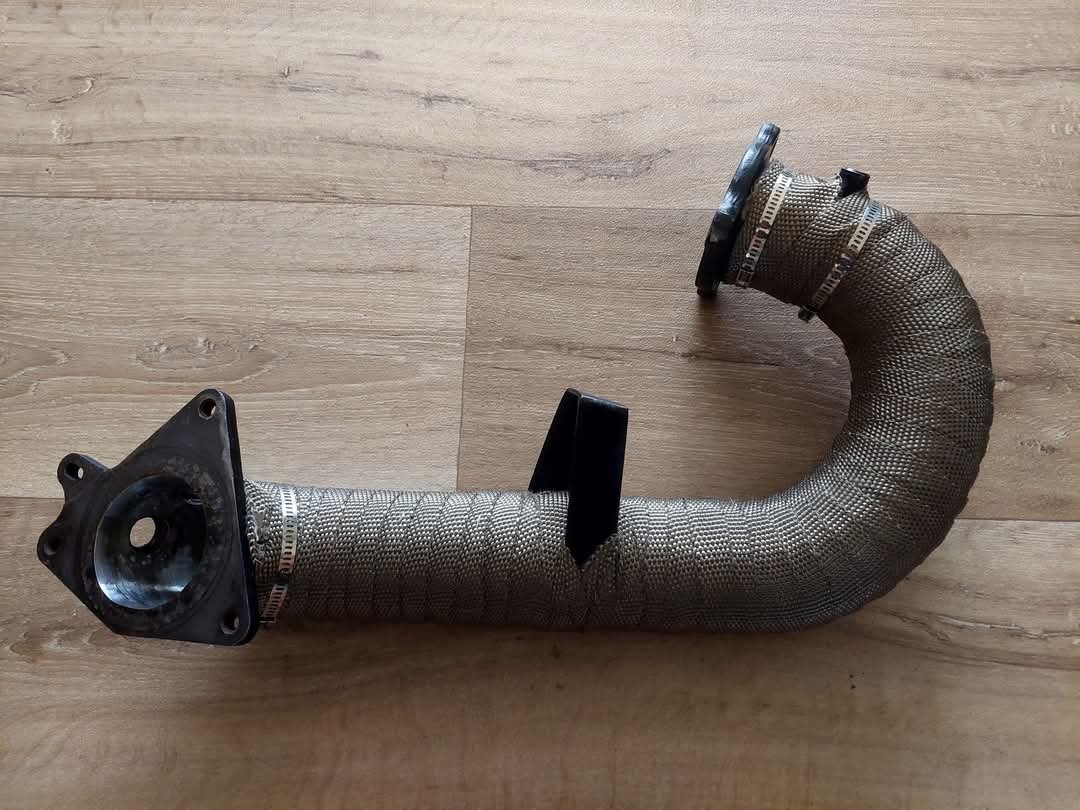
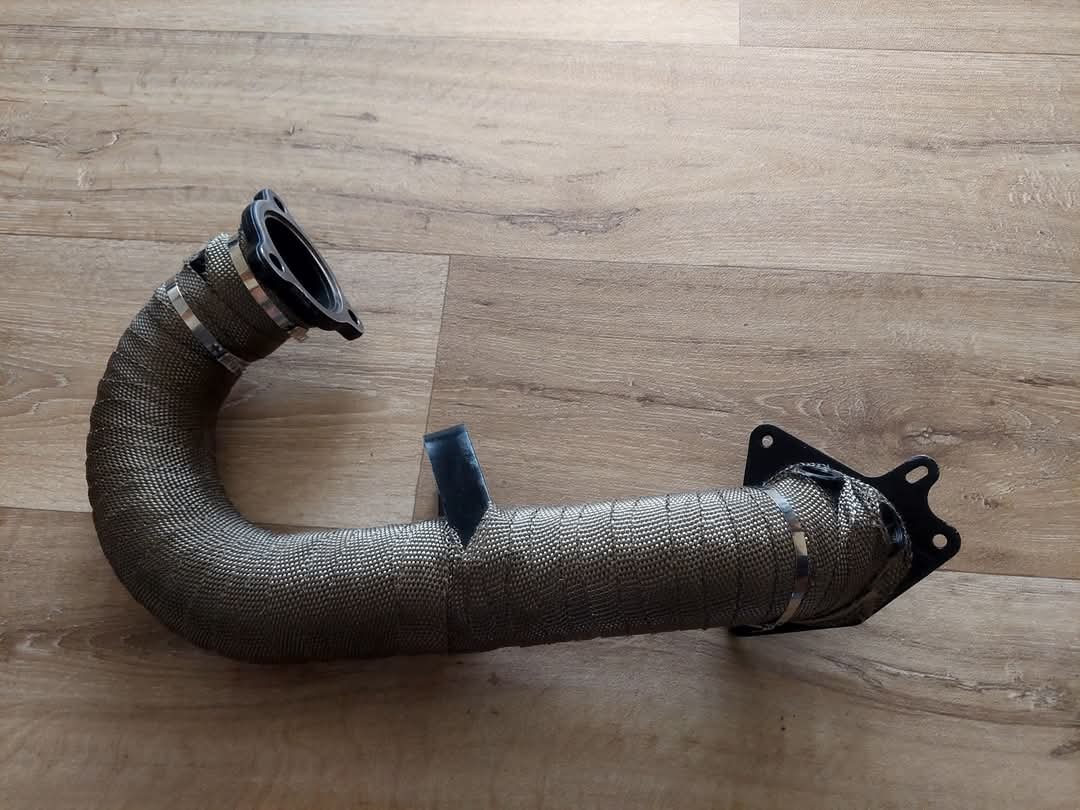
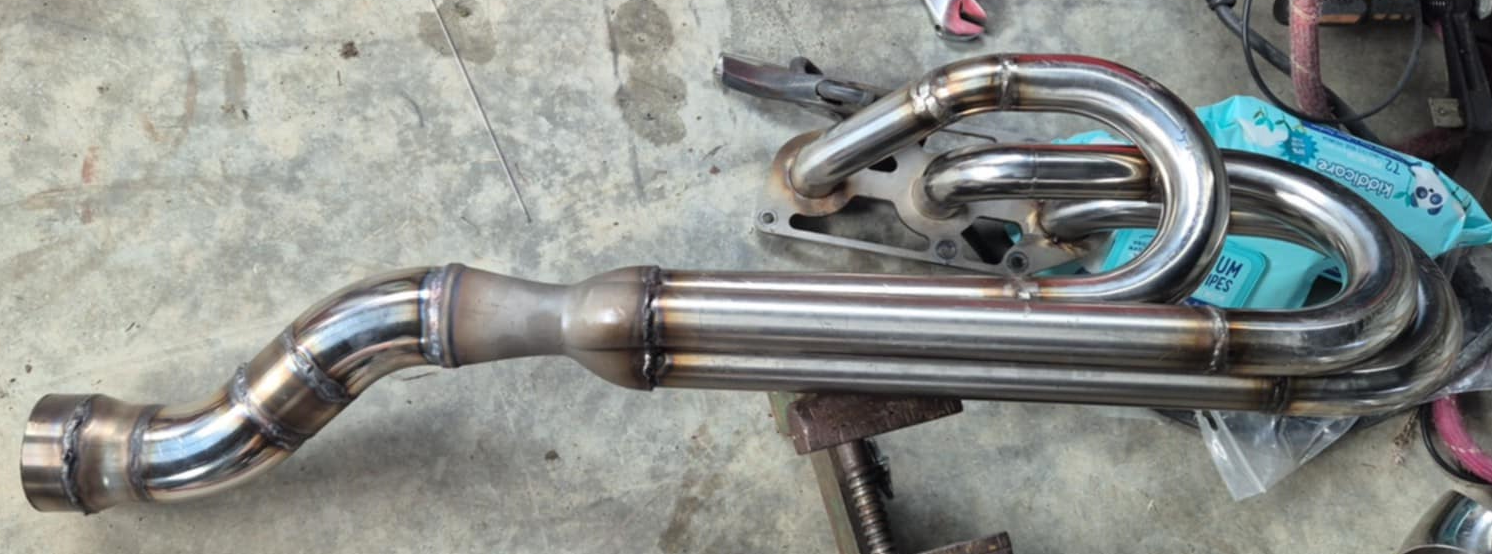
More downpipe spam. Ground out the outlet flange to match the larger pipe, picked up some titanium exhaust wrap and wrapped it up. Pretty stoked at the outcome tbh! Chur
6 points
-
Best practice would be to add relays on high draw items. Headlights etc. Bit nicer on the old switch gear.5 points
-
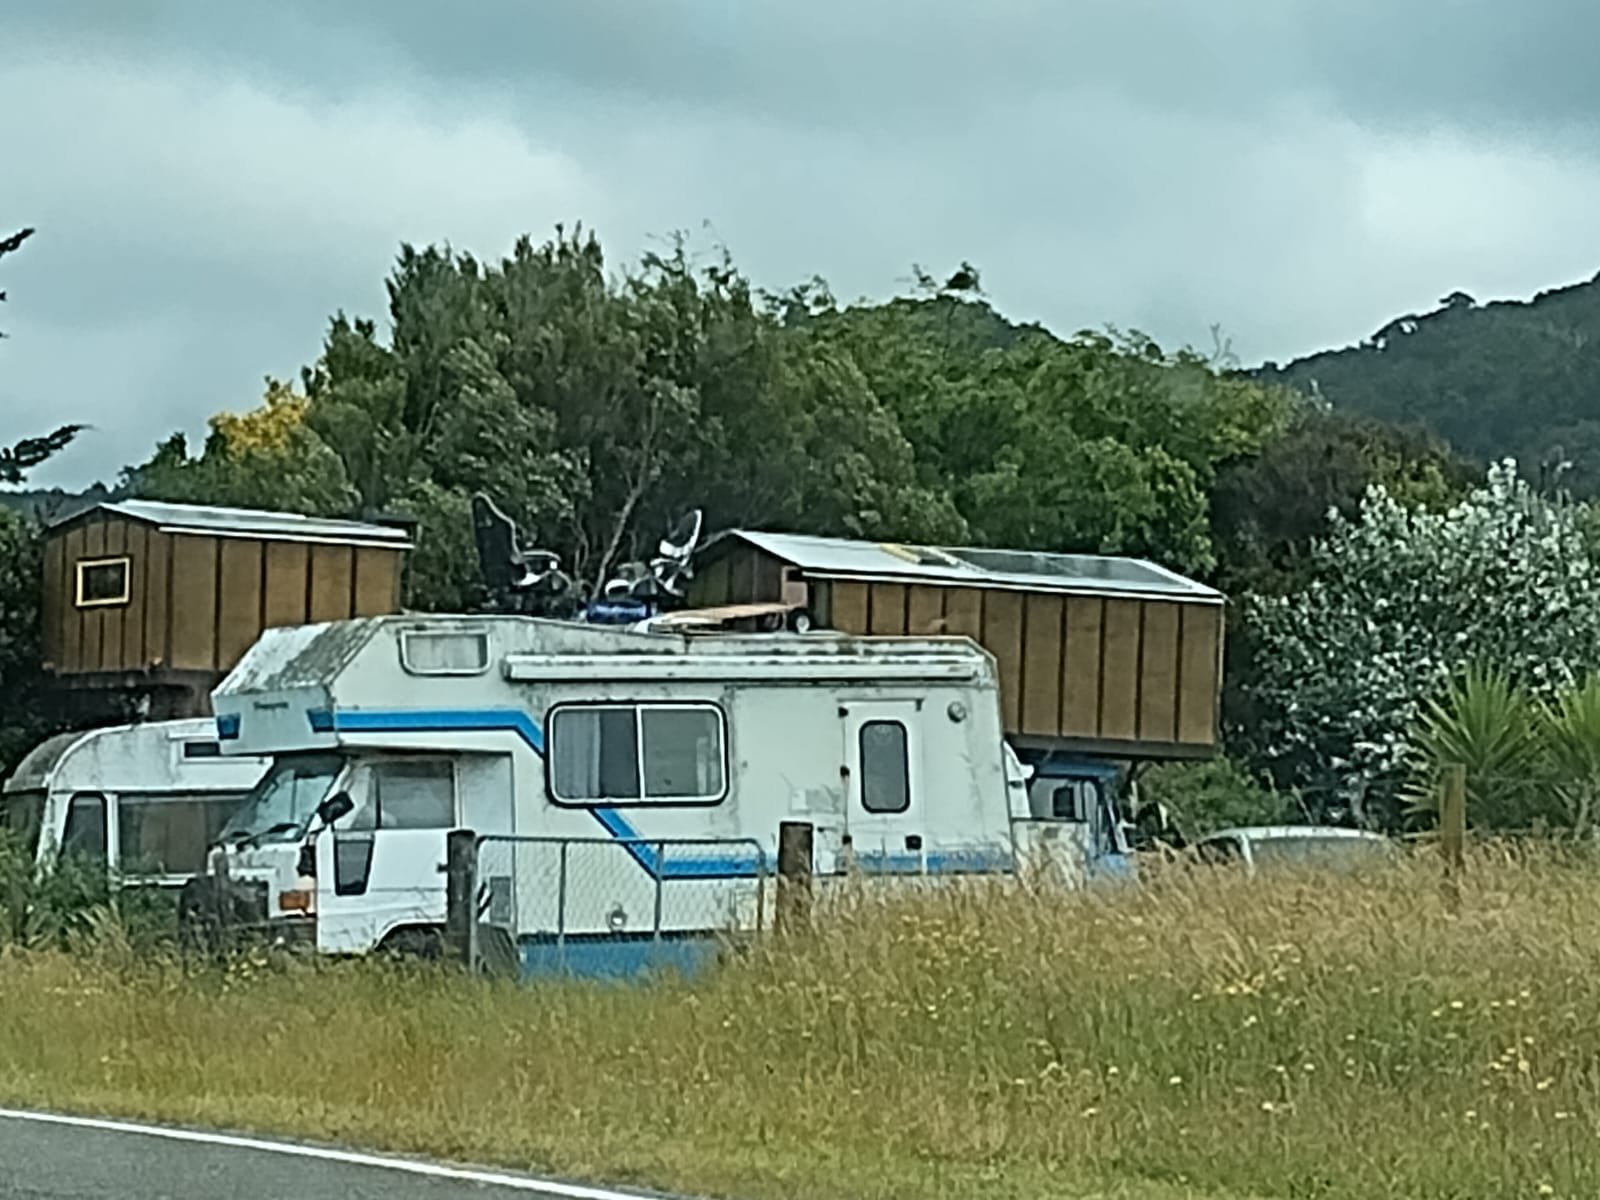
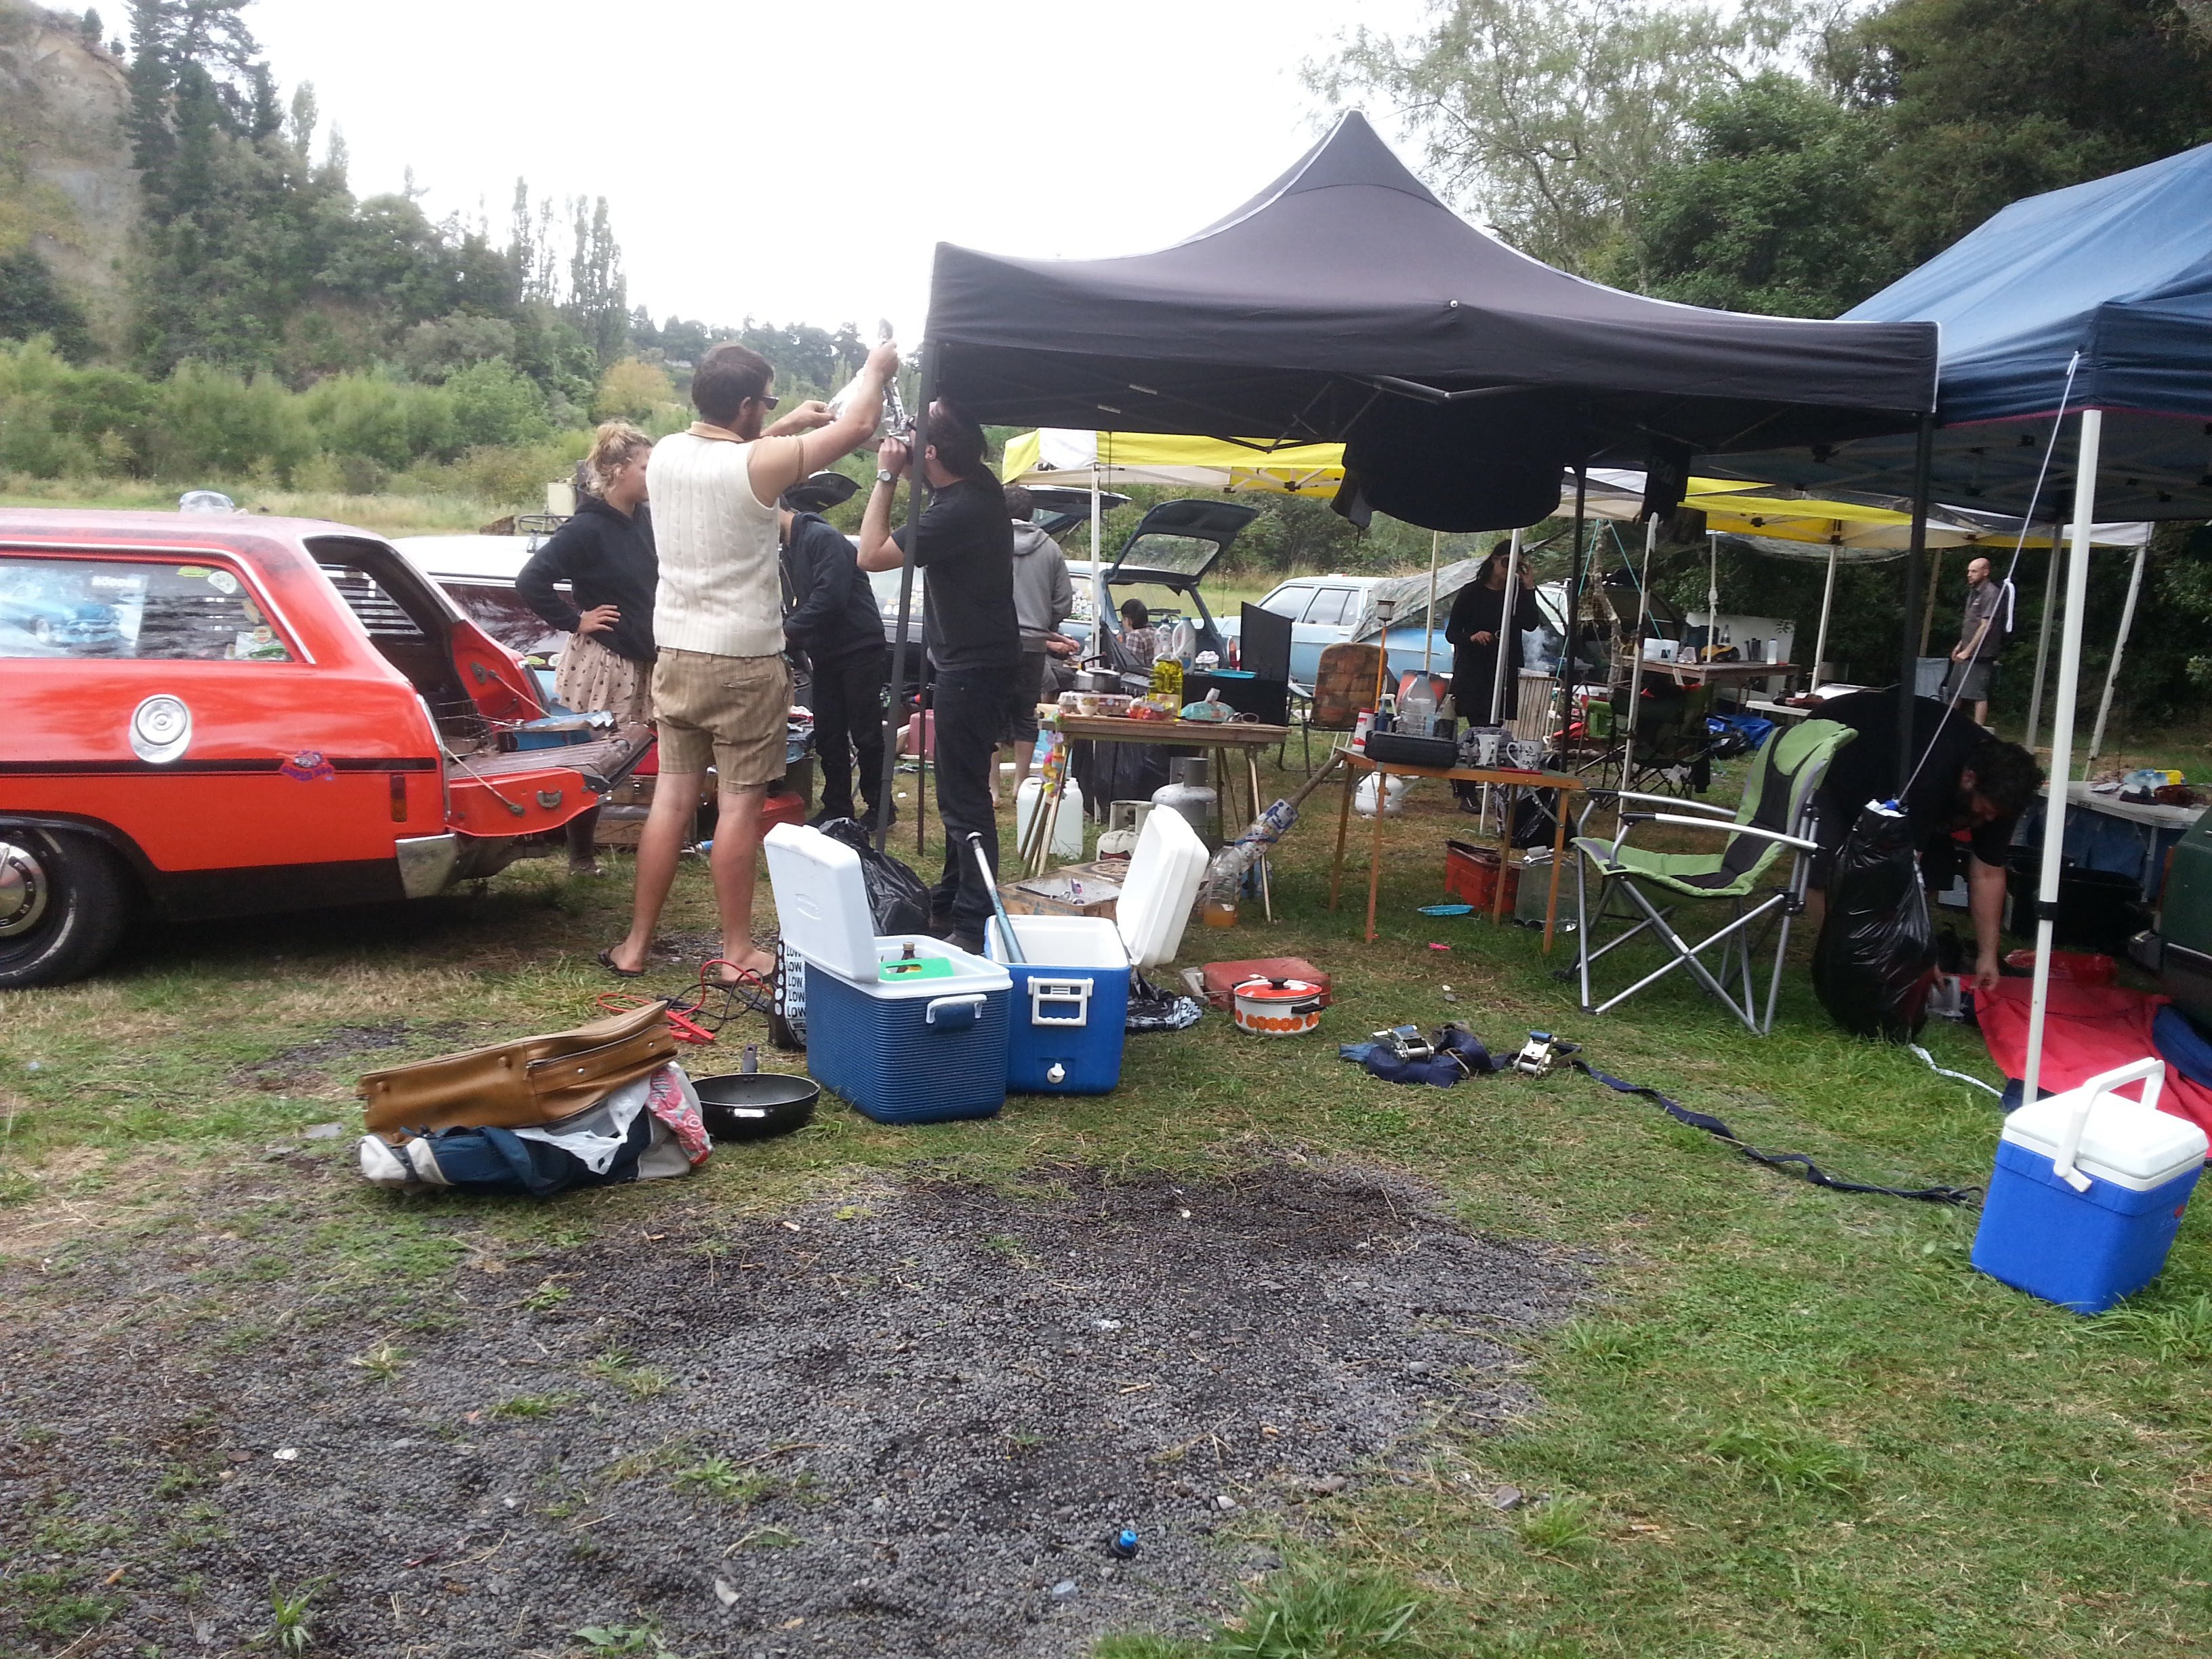
Thread Dredge.. Our old house was spotted yesterday over in Puponga by a friend of hannahs family. Now with added chairs on roof.
4 points
-
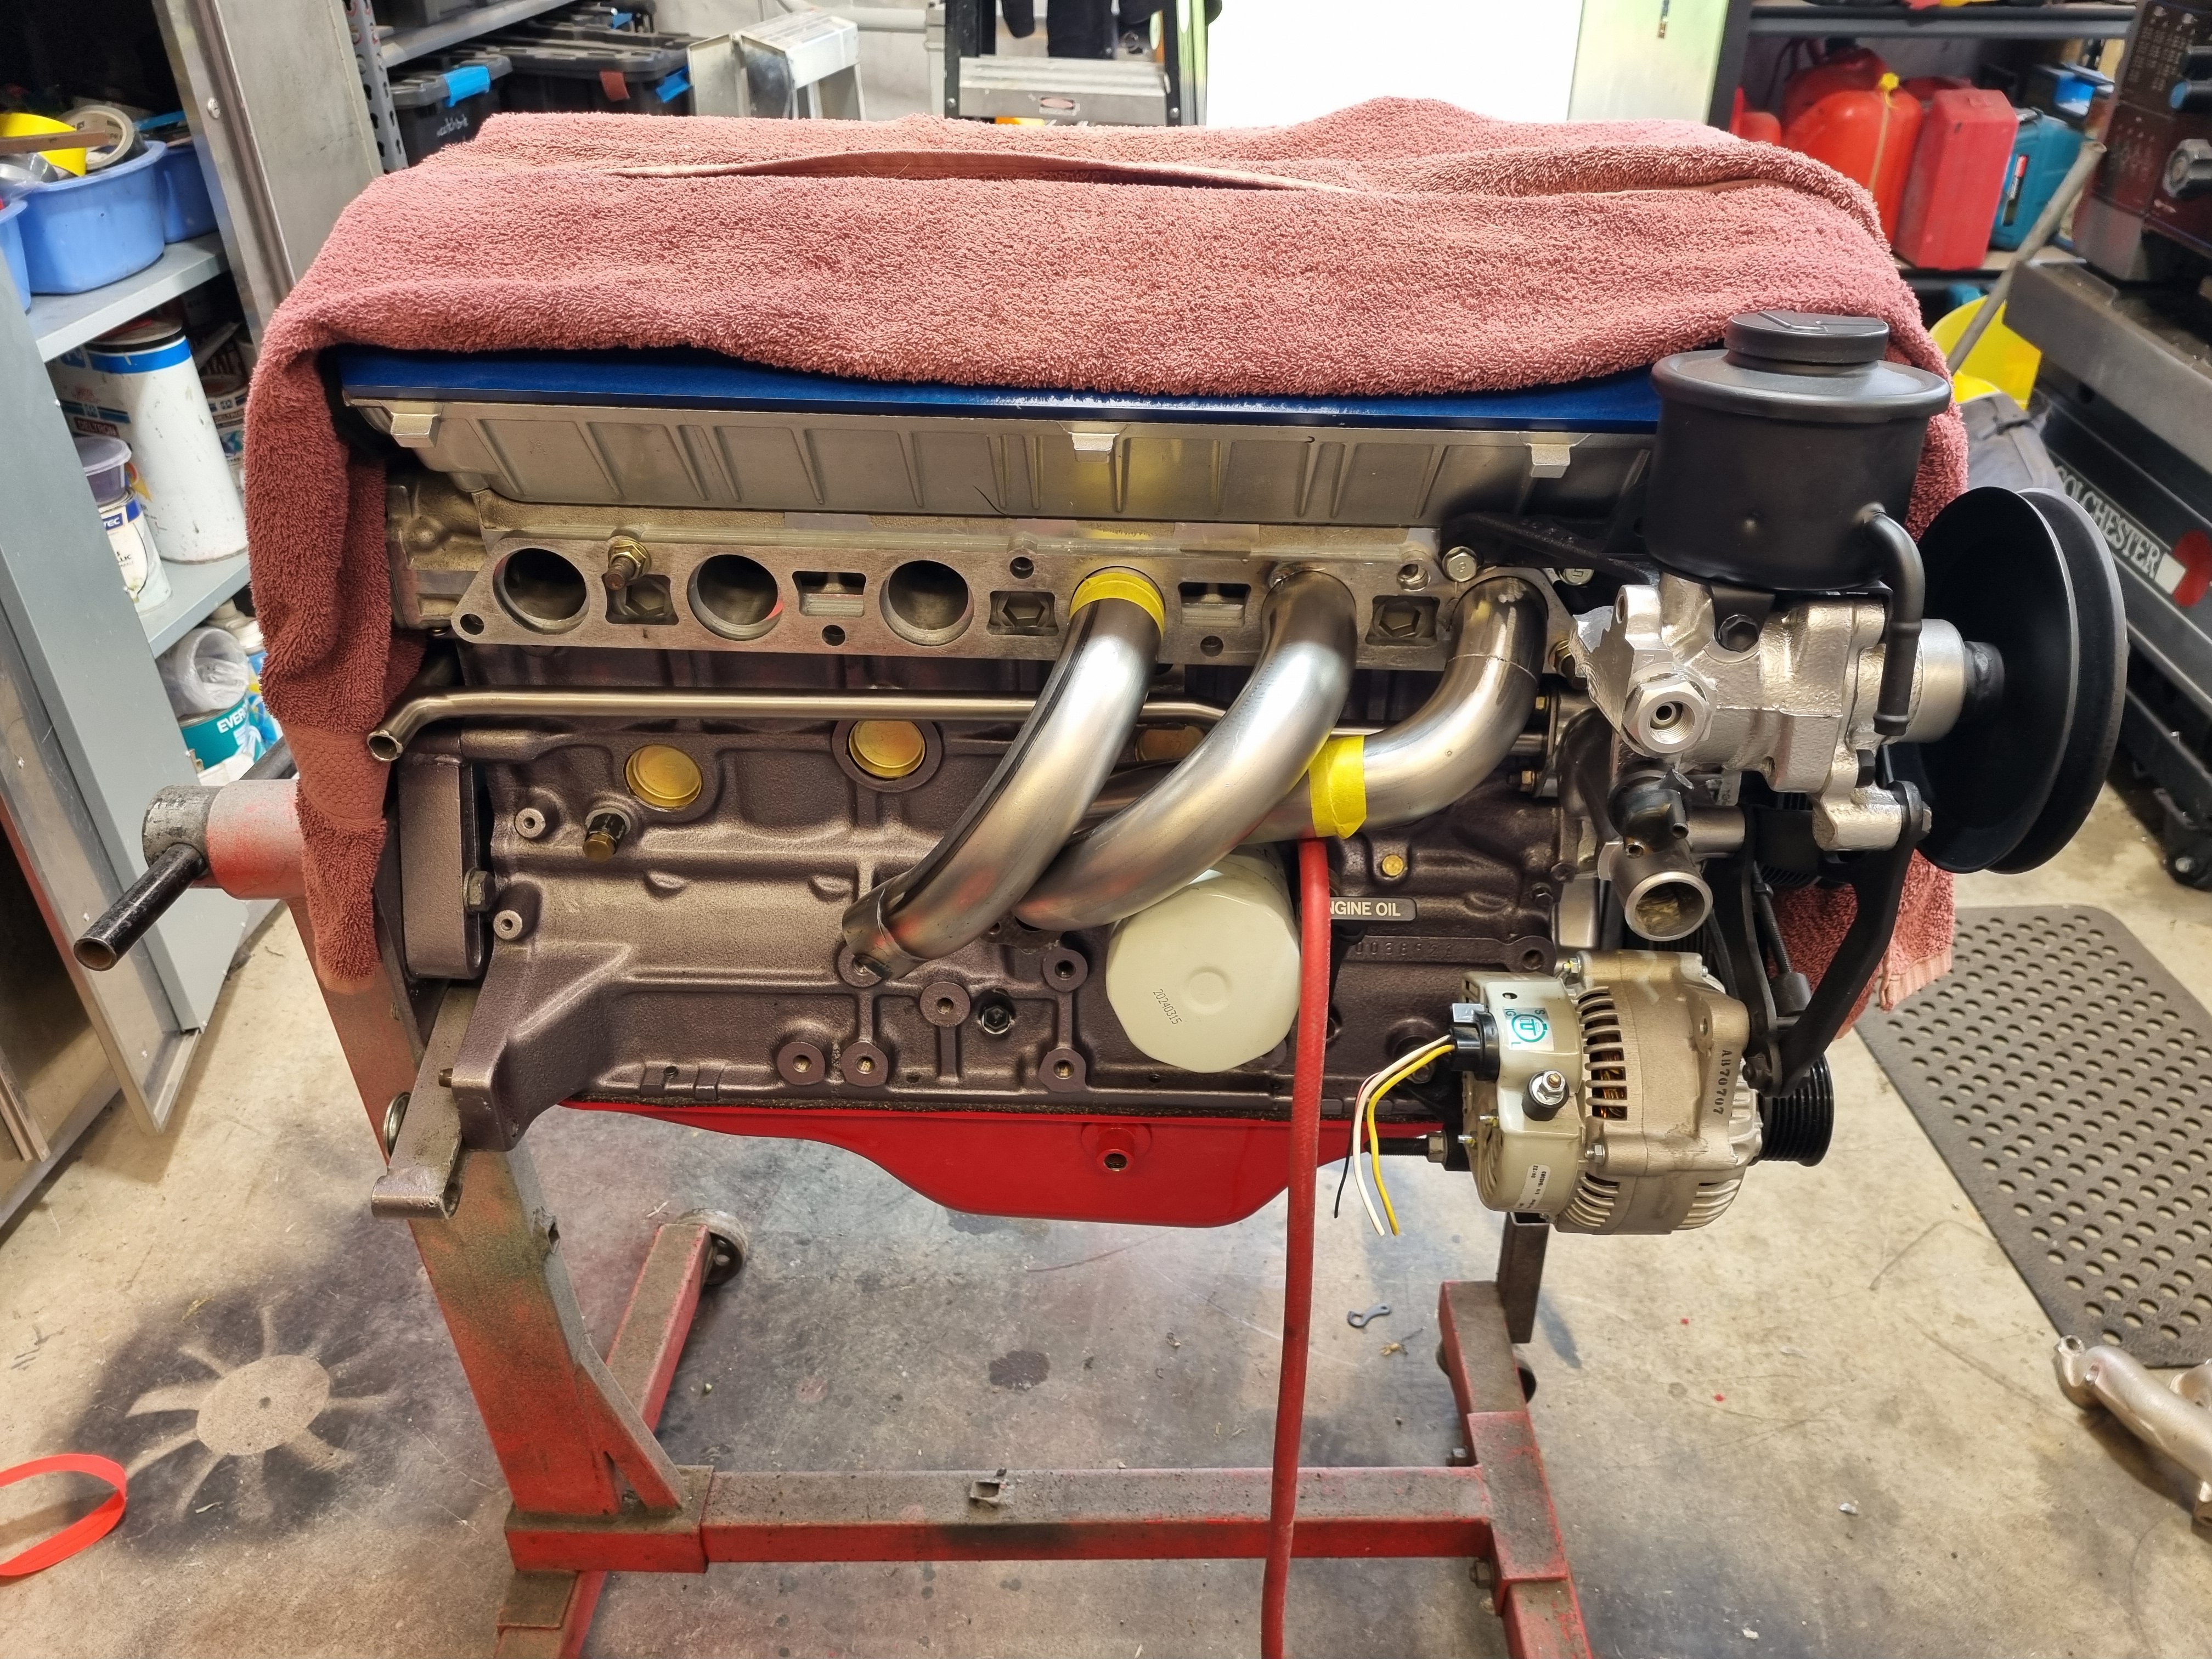
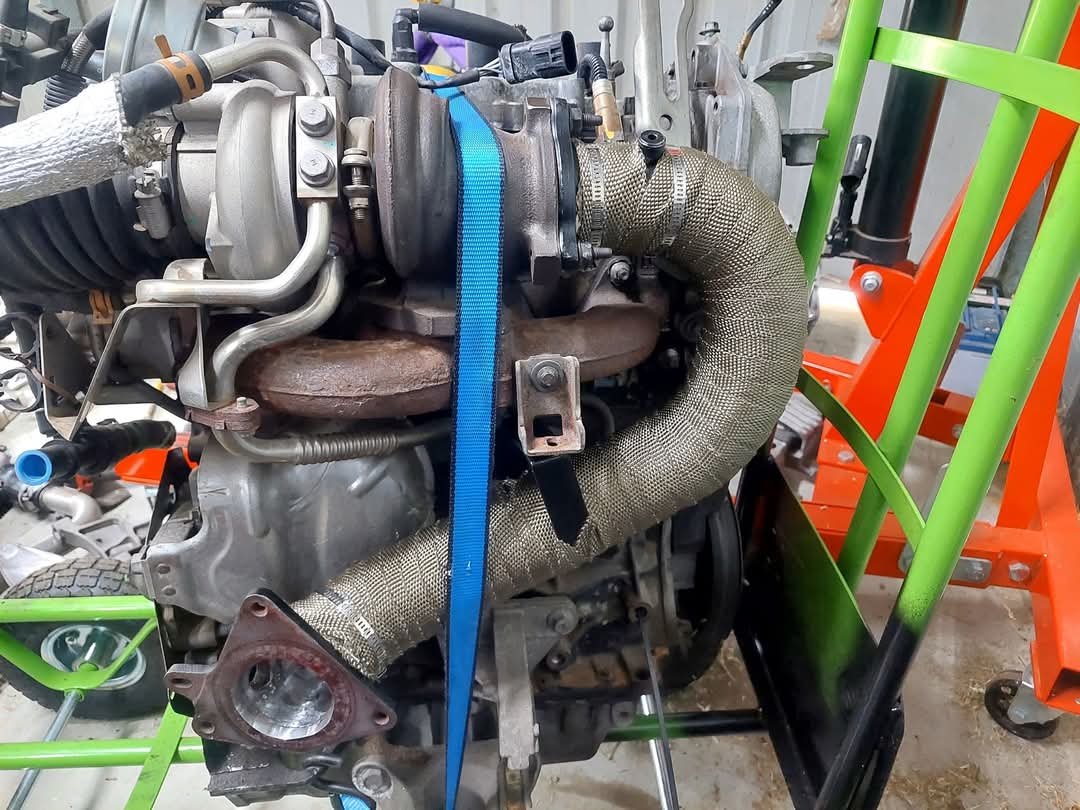
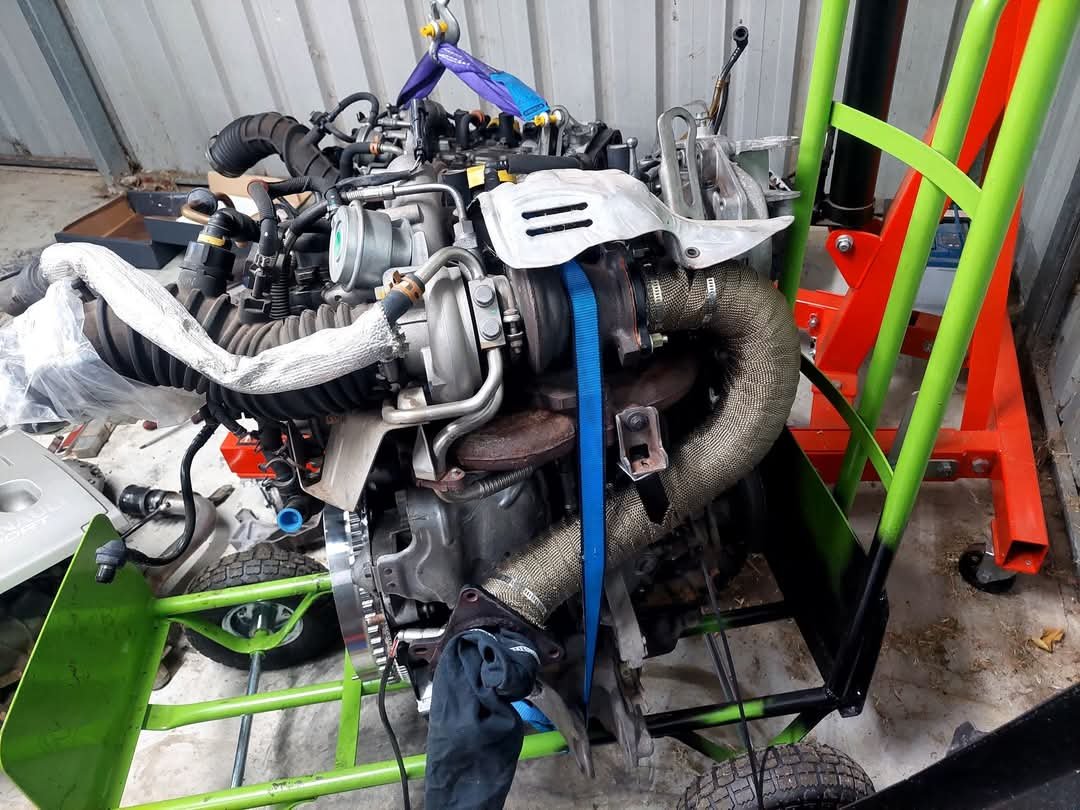
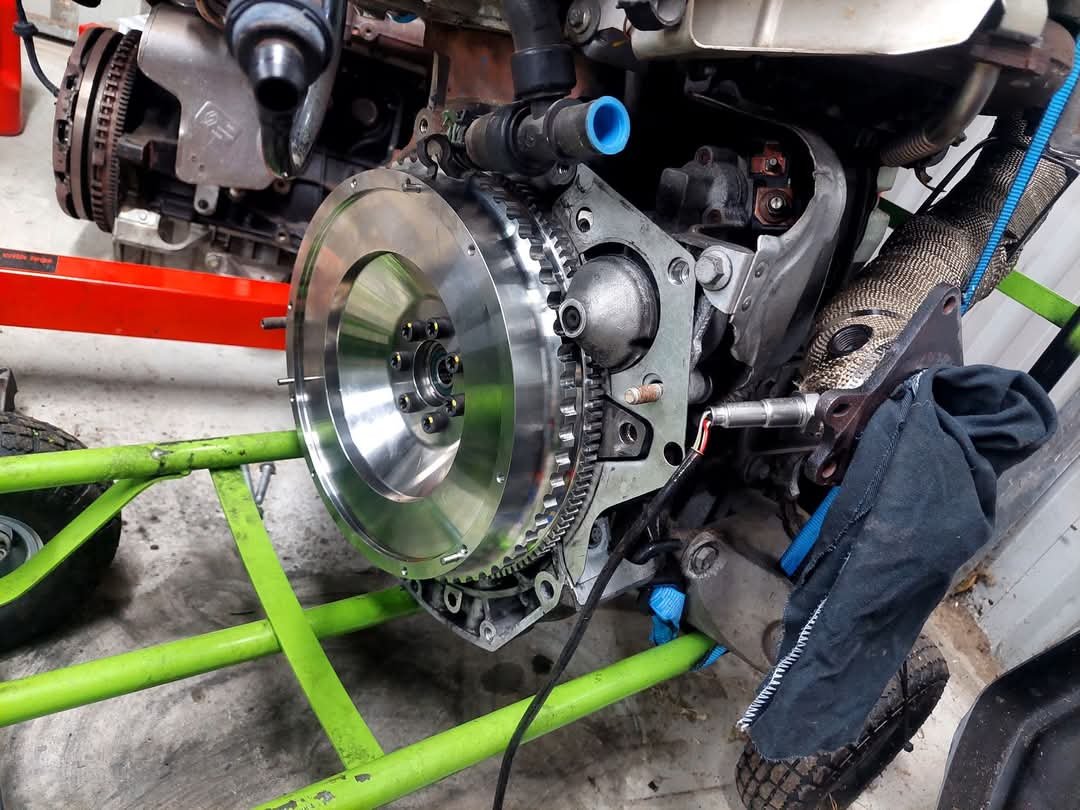
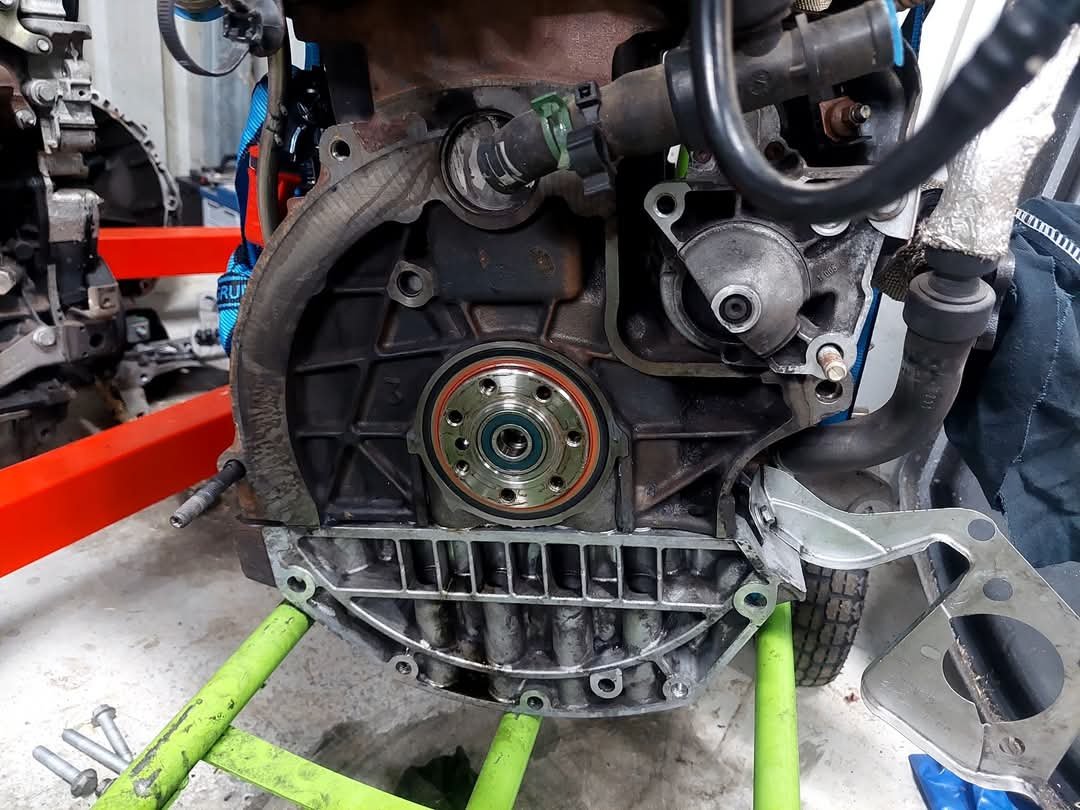
Keep the minimal momentum going. Quick clean up of the back of the engine, remove the rear crank seal and fit the new one. Fit the new single mass flywheel with new bolts. Also cleaned up the rs225 starter motor and corrosion from the terminals, swap it over and mock it up. Because I'm on a bit of tight schedule (to get parts over from the uk) and don't want to spend bank on new exhaust gaskets from renault (plus shipping from sydney), I'm reusing the old exhaust outlet and dump pipe outlet gaskets. I've cleaned them up, doubled up with both the old ones and smeared a tiny bit of copper sealant (probably won't do shit). Should seal up alright I reckon. Fitted new exhaust studs as well ( turbo exhaust shield is only mocked up on top). ill try get a couple hours im each day, juggling around the kids and house painting haha. Chur
4 points
-
Nah no one's been a dick, I've always tried to shift aside to let people past since I'm bit shit and don't want to hold up any other riders like that, but when you roll up to an intersection and there's a group waiting I feel pretty bad about it. I don't have any interest in riding small bikes though, I routinely set off and just do a 4-500km day for shits and giggles and a little bike just ain't ever gonna cut it. Even sitting at 110kmh on the DRZ felt like it wasn't being particularly kind to it. But everyone I have ever ridden with is very experienced and can generally really pedal a bike well! I've never taken a camera though either. Cameras and doing work with them have stripped most of the joy of cars now for me, I'd like to avoid making this feel like work!3 points
-
Give it a soak in atf/acetone mix first.3 points
-
Just gonna leave this here.
3 points
-
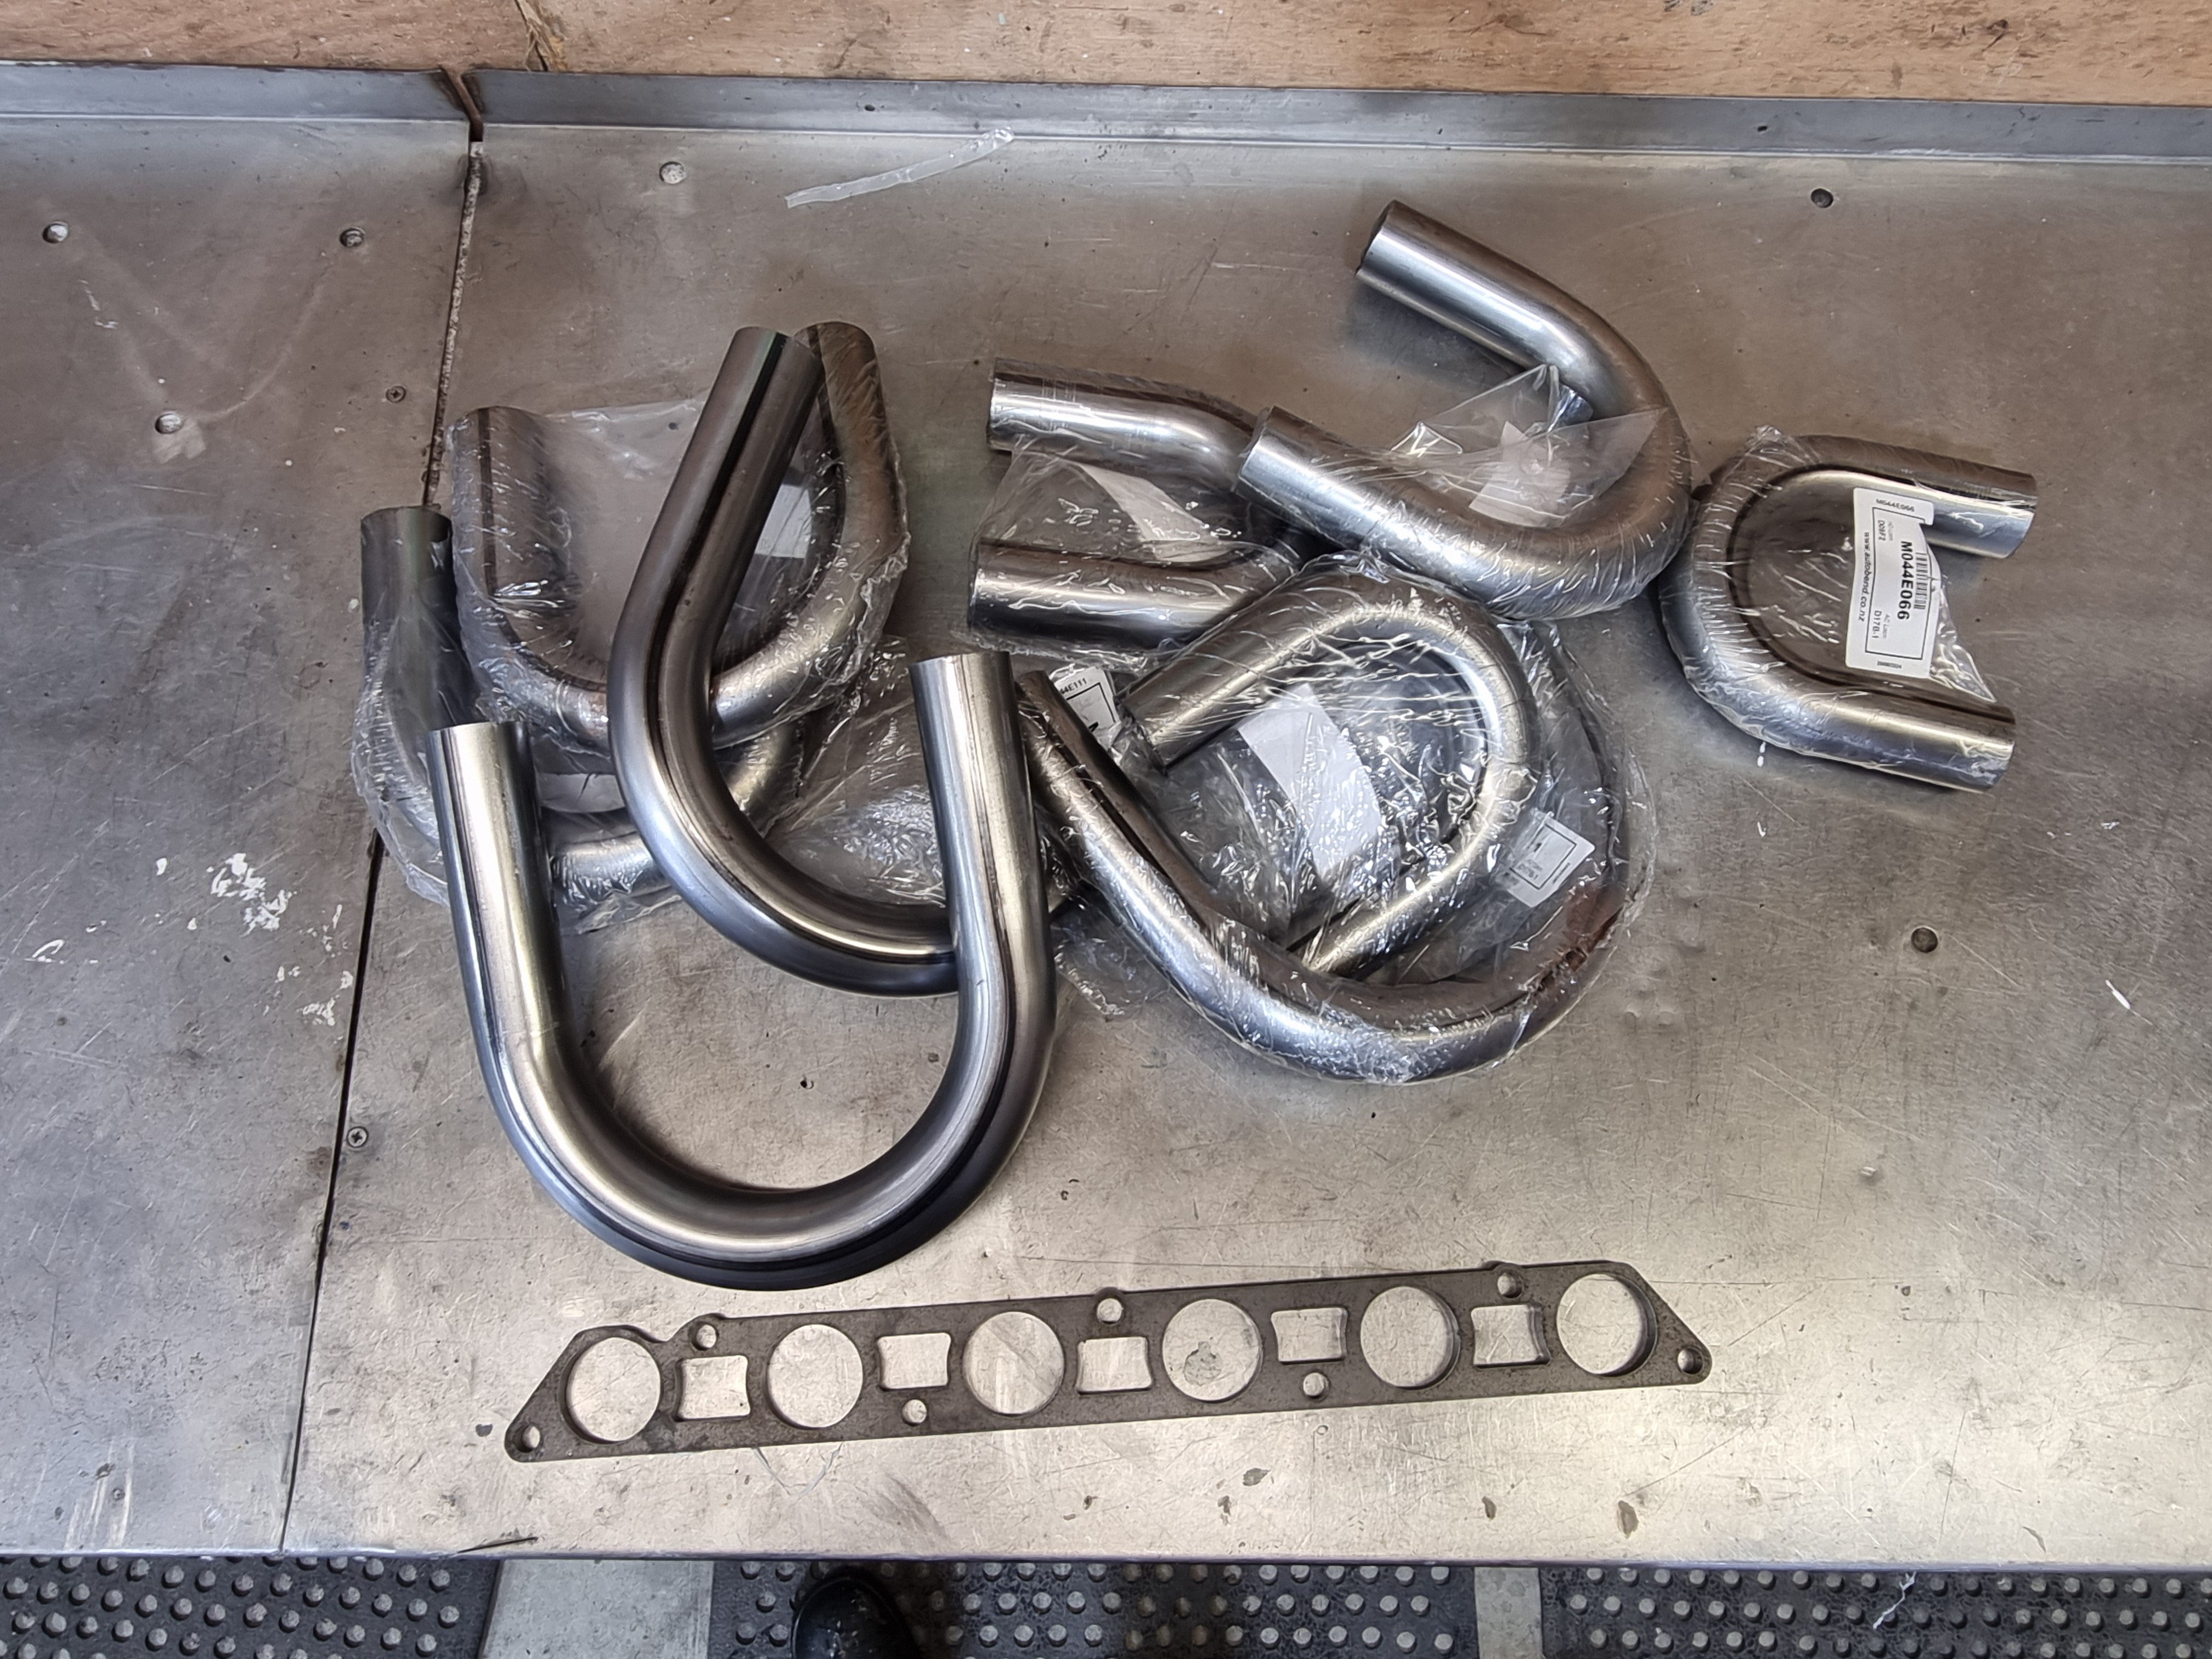
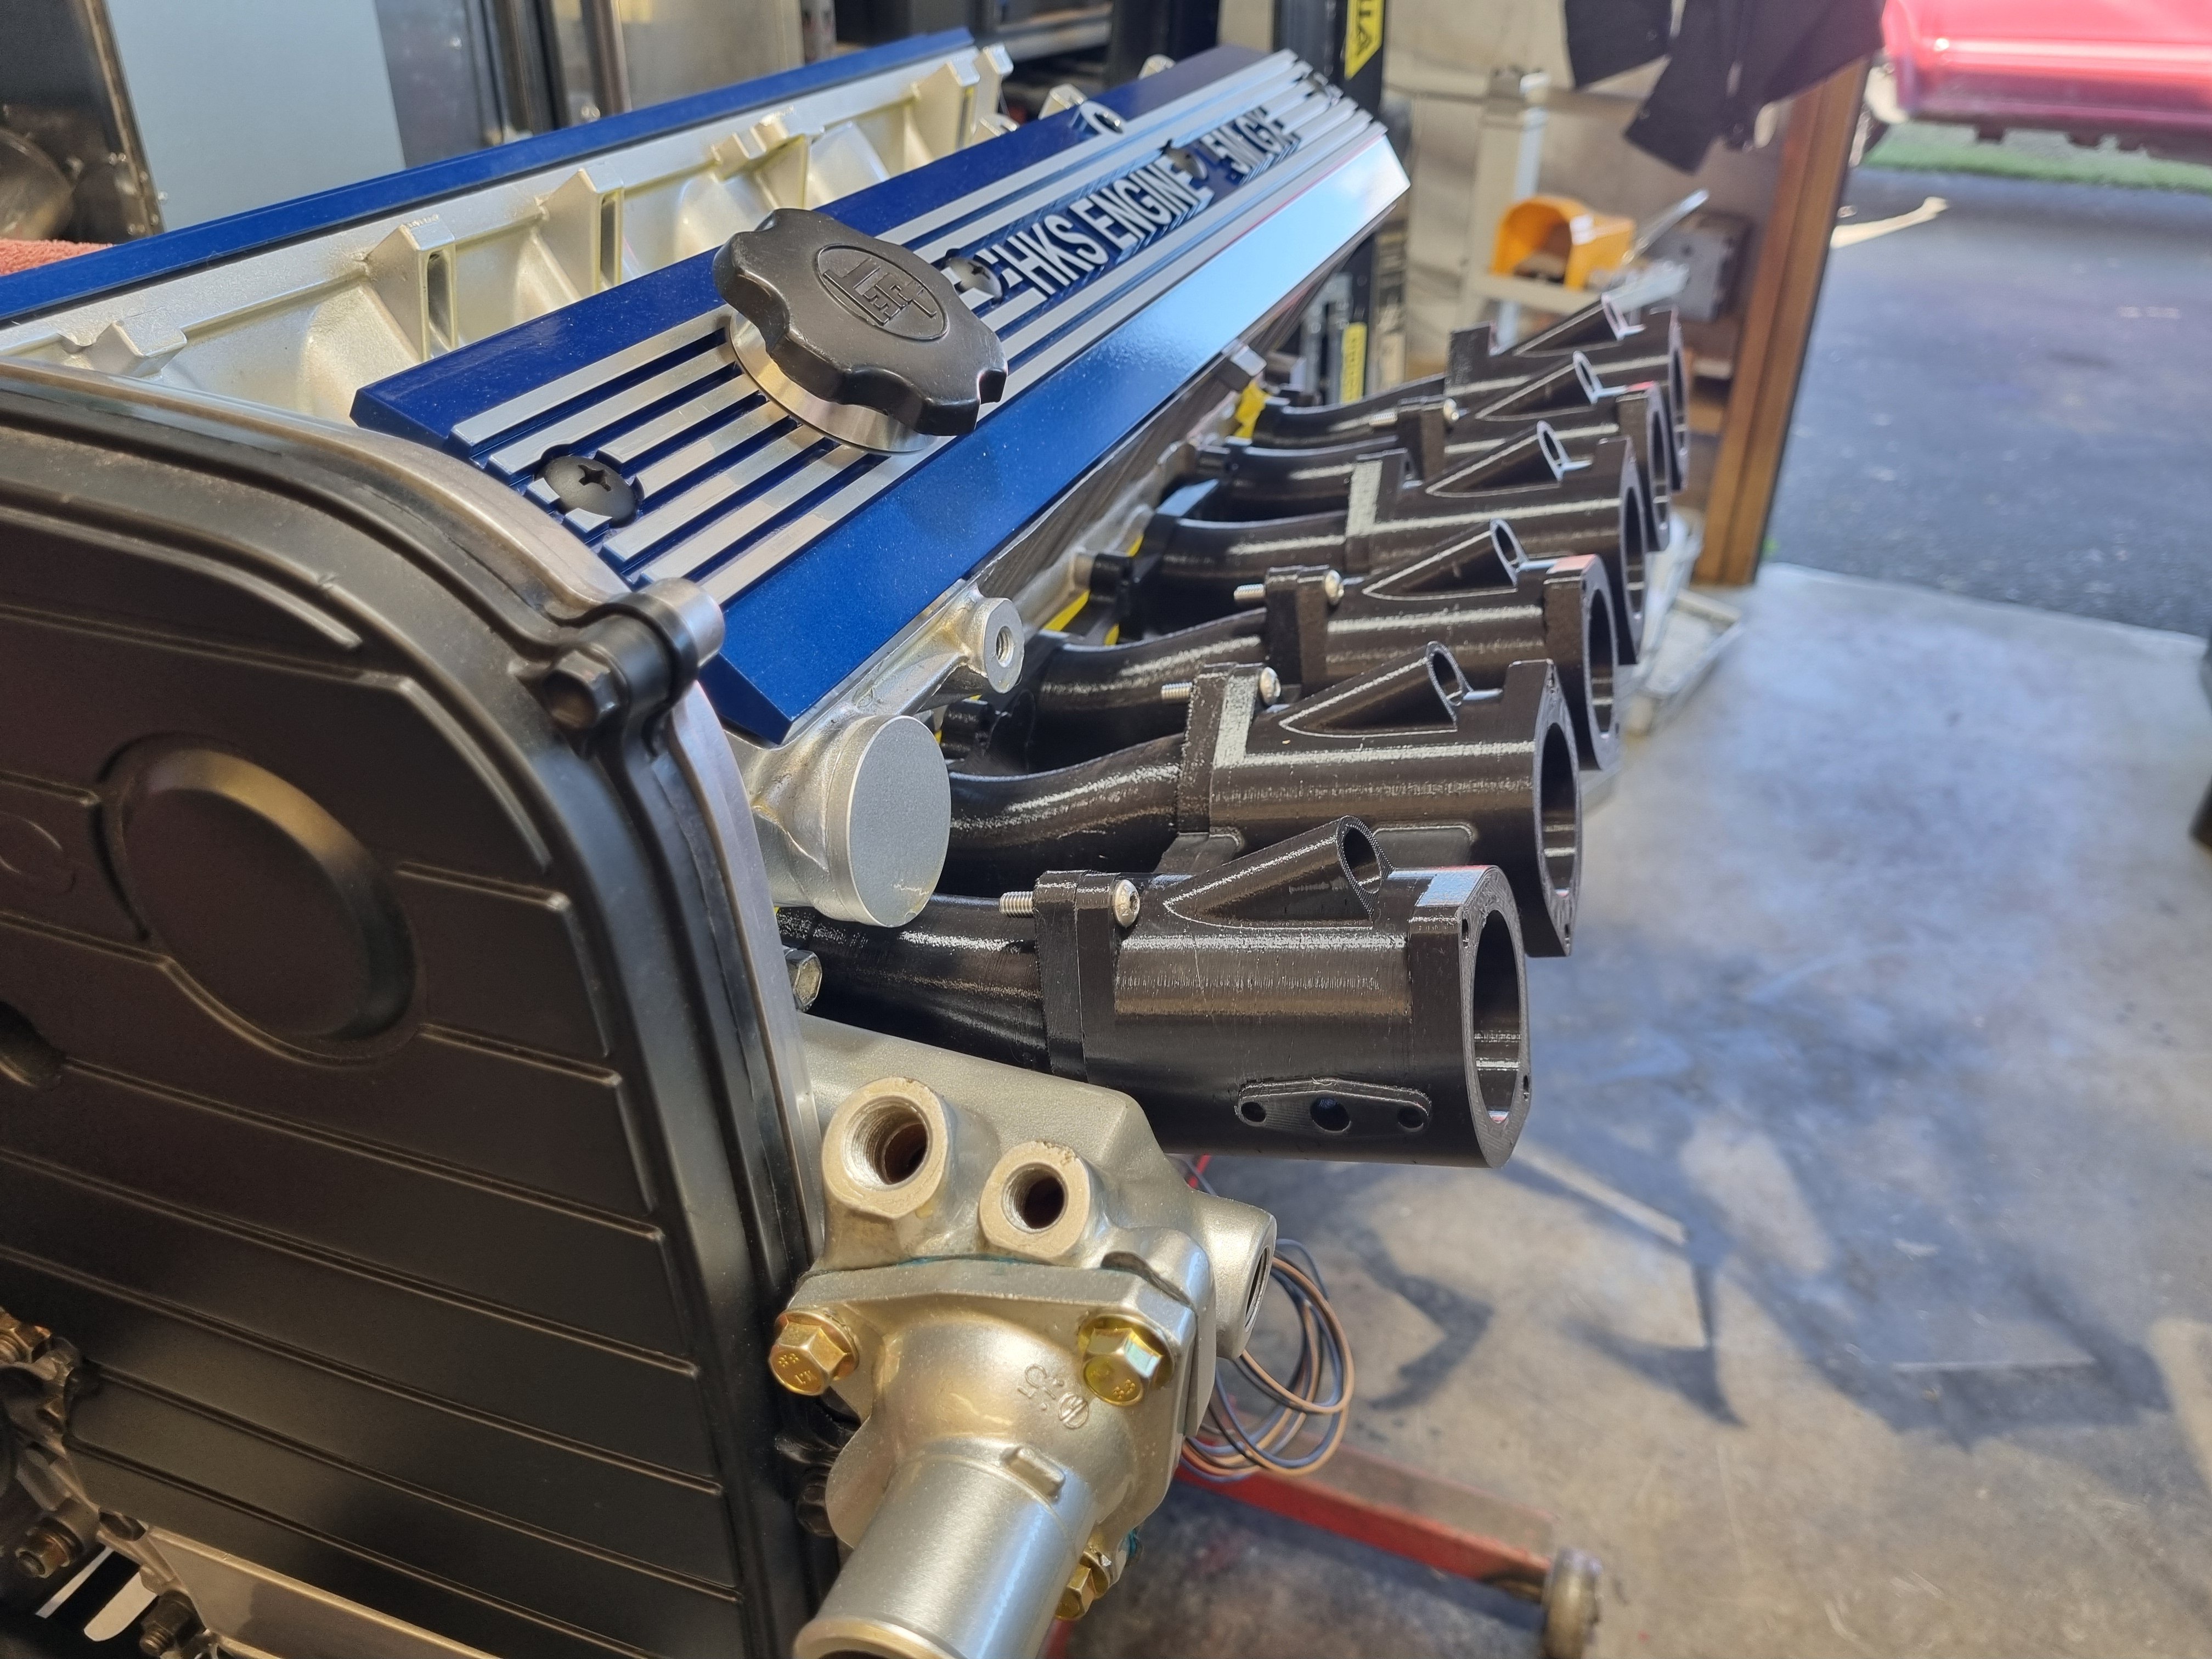
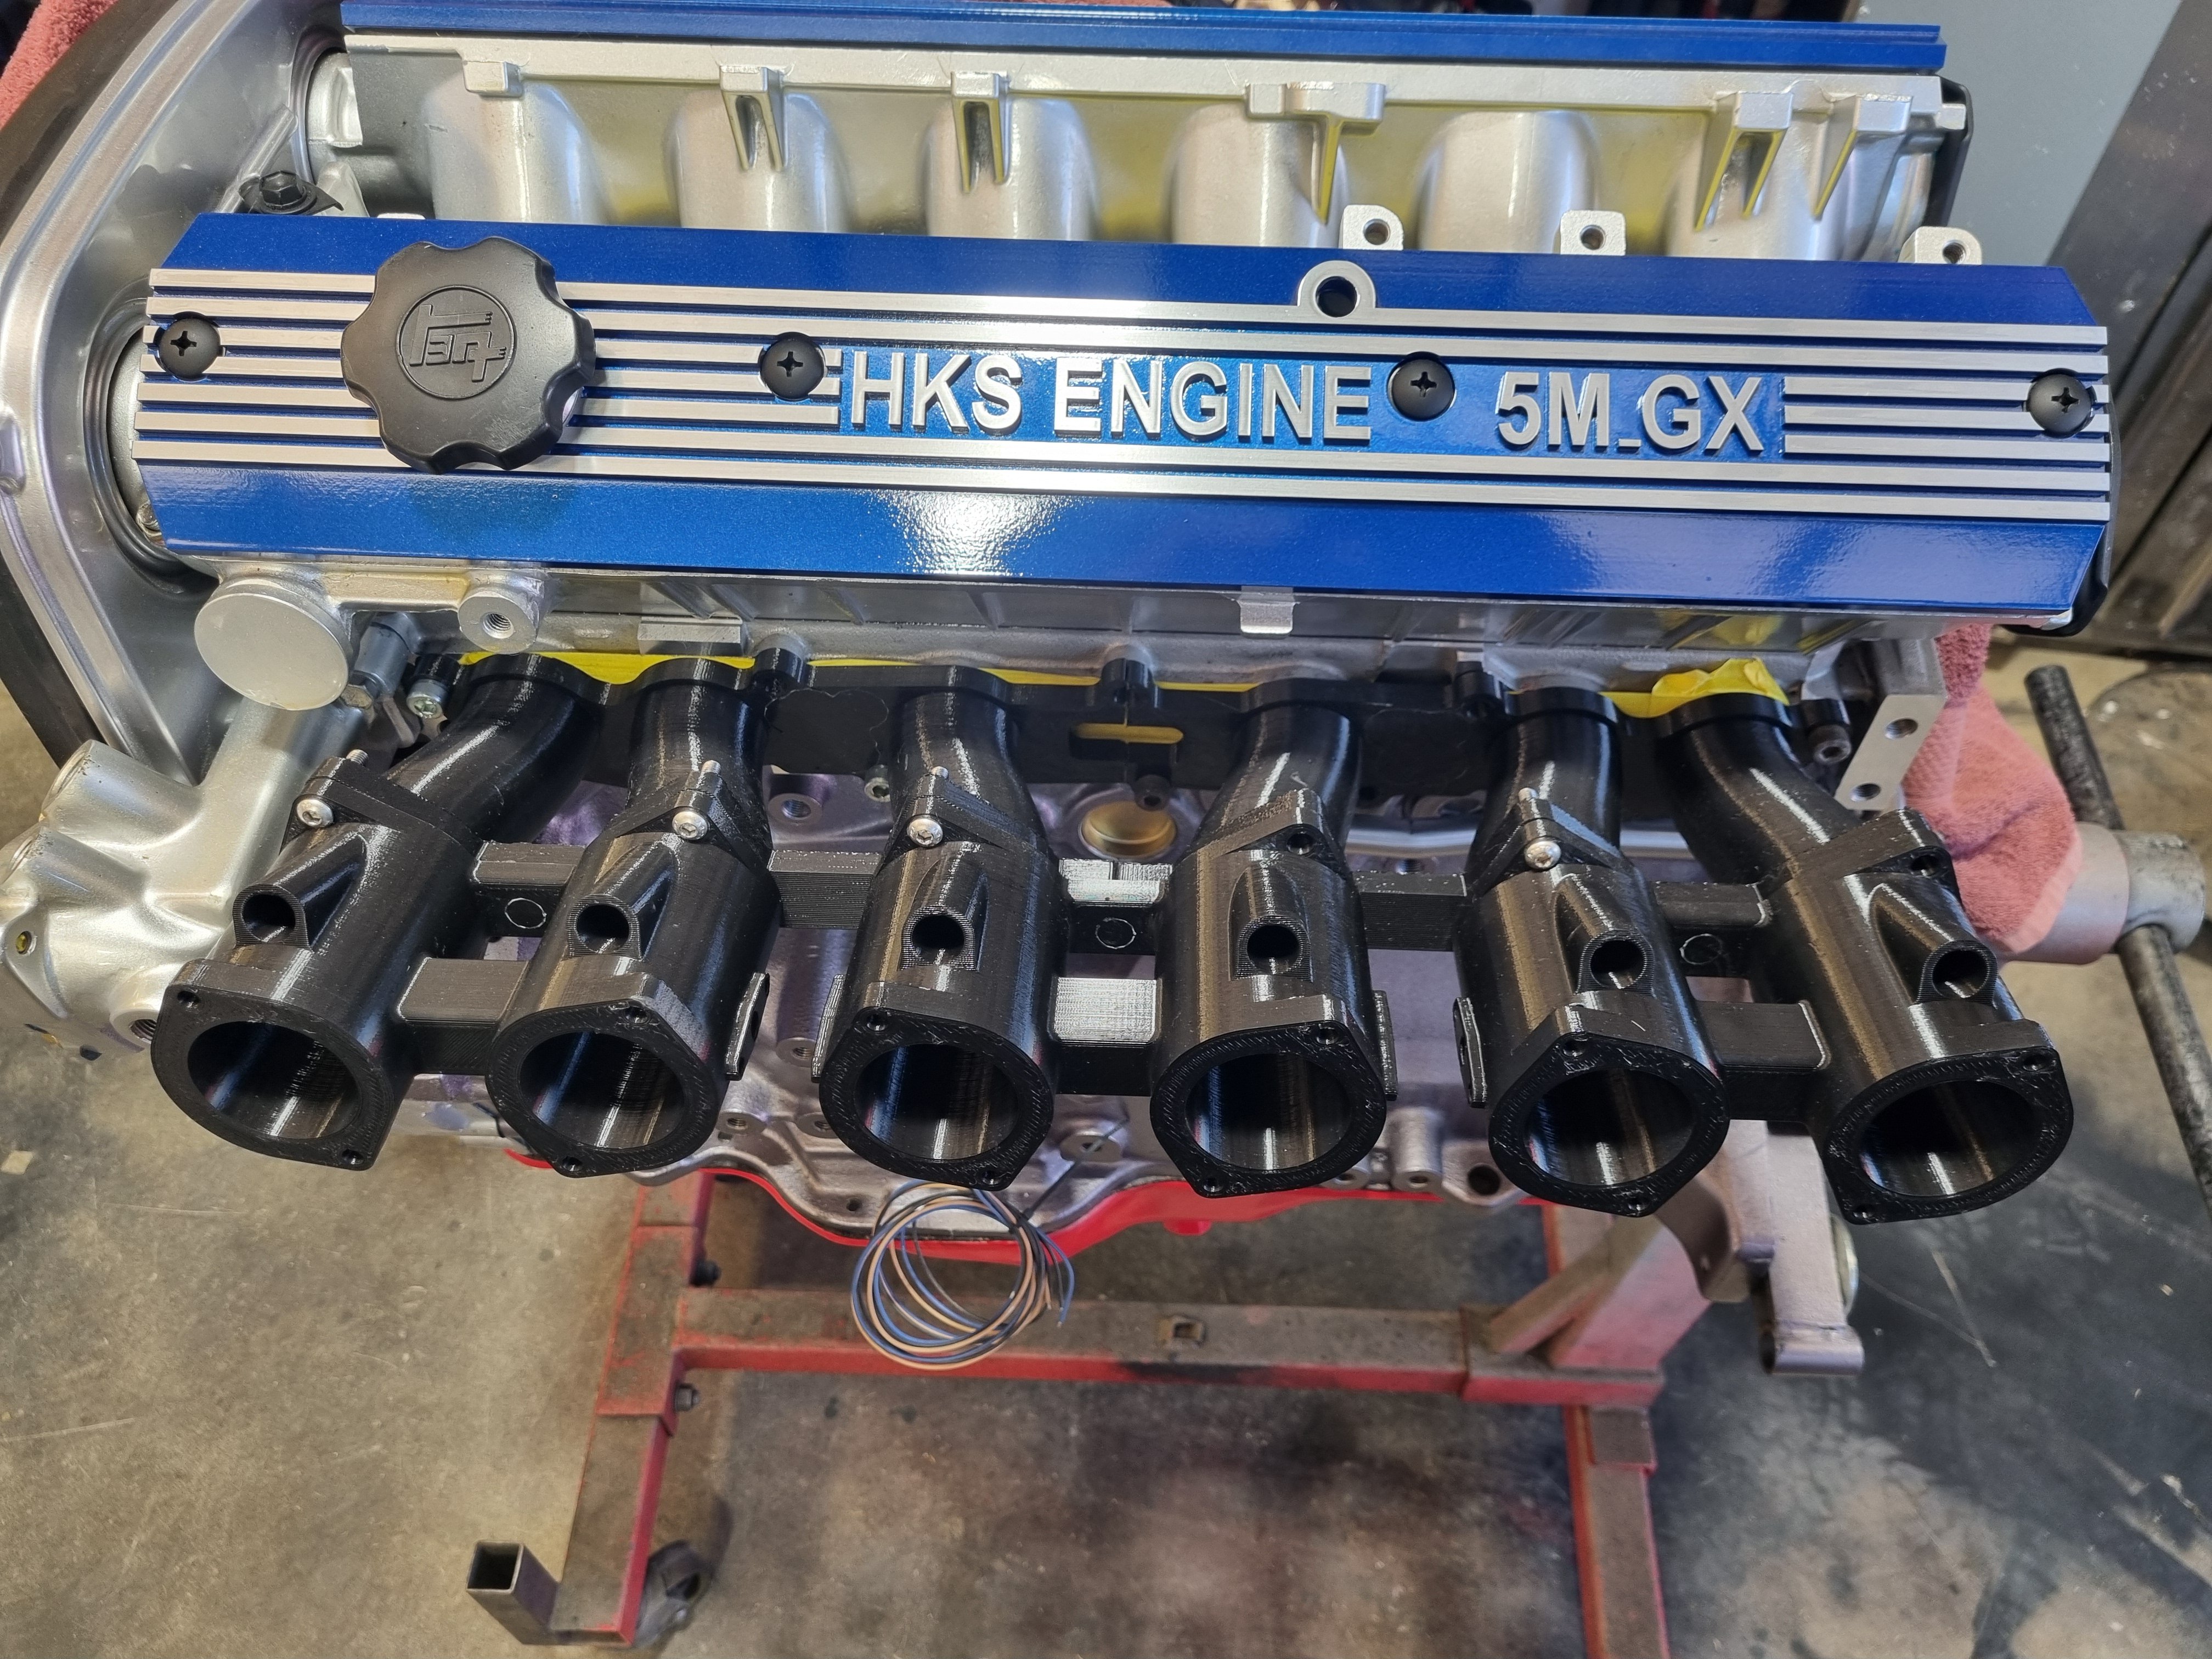
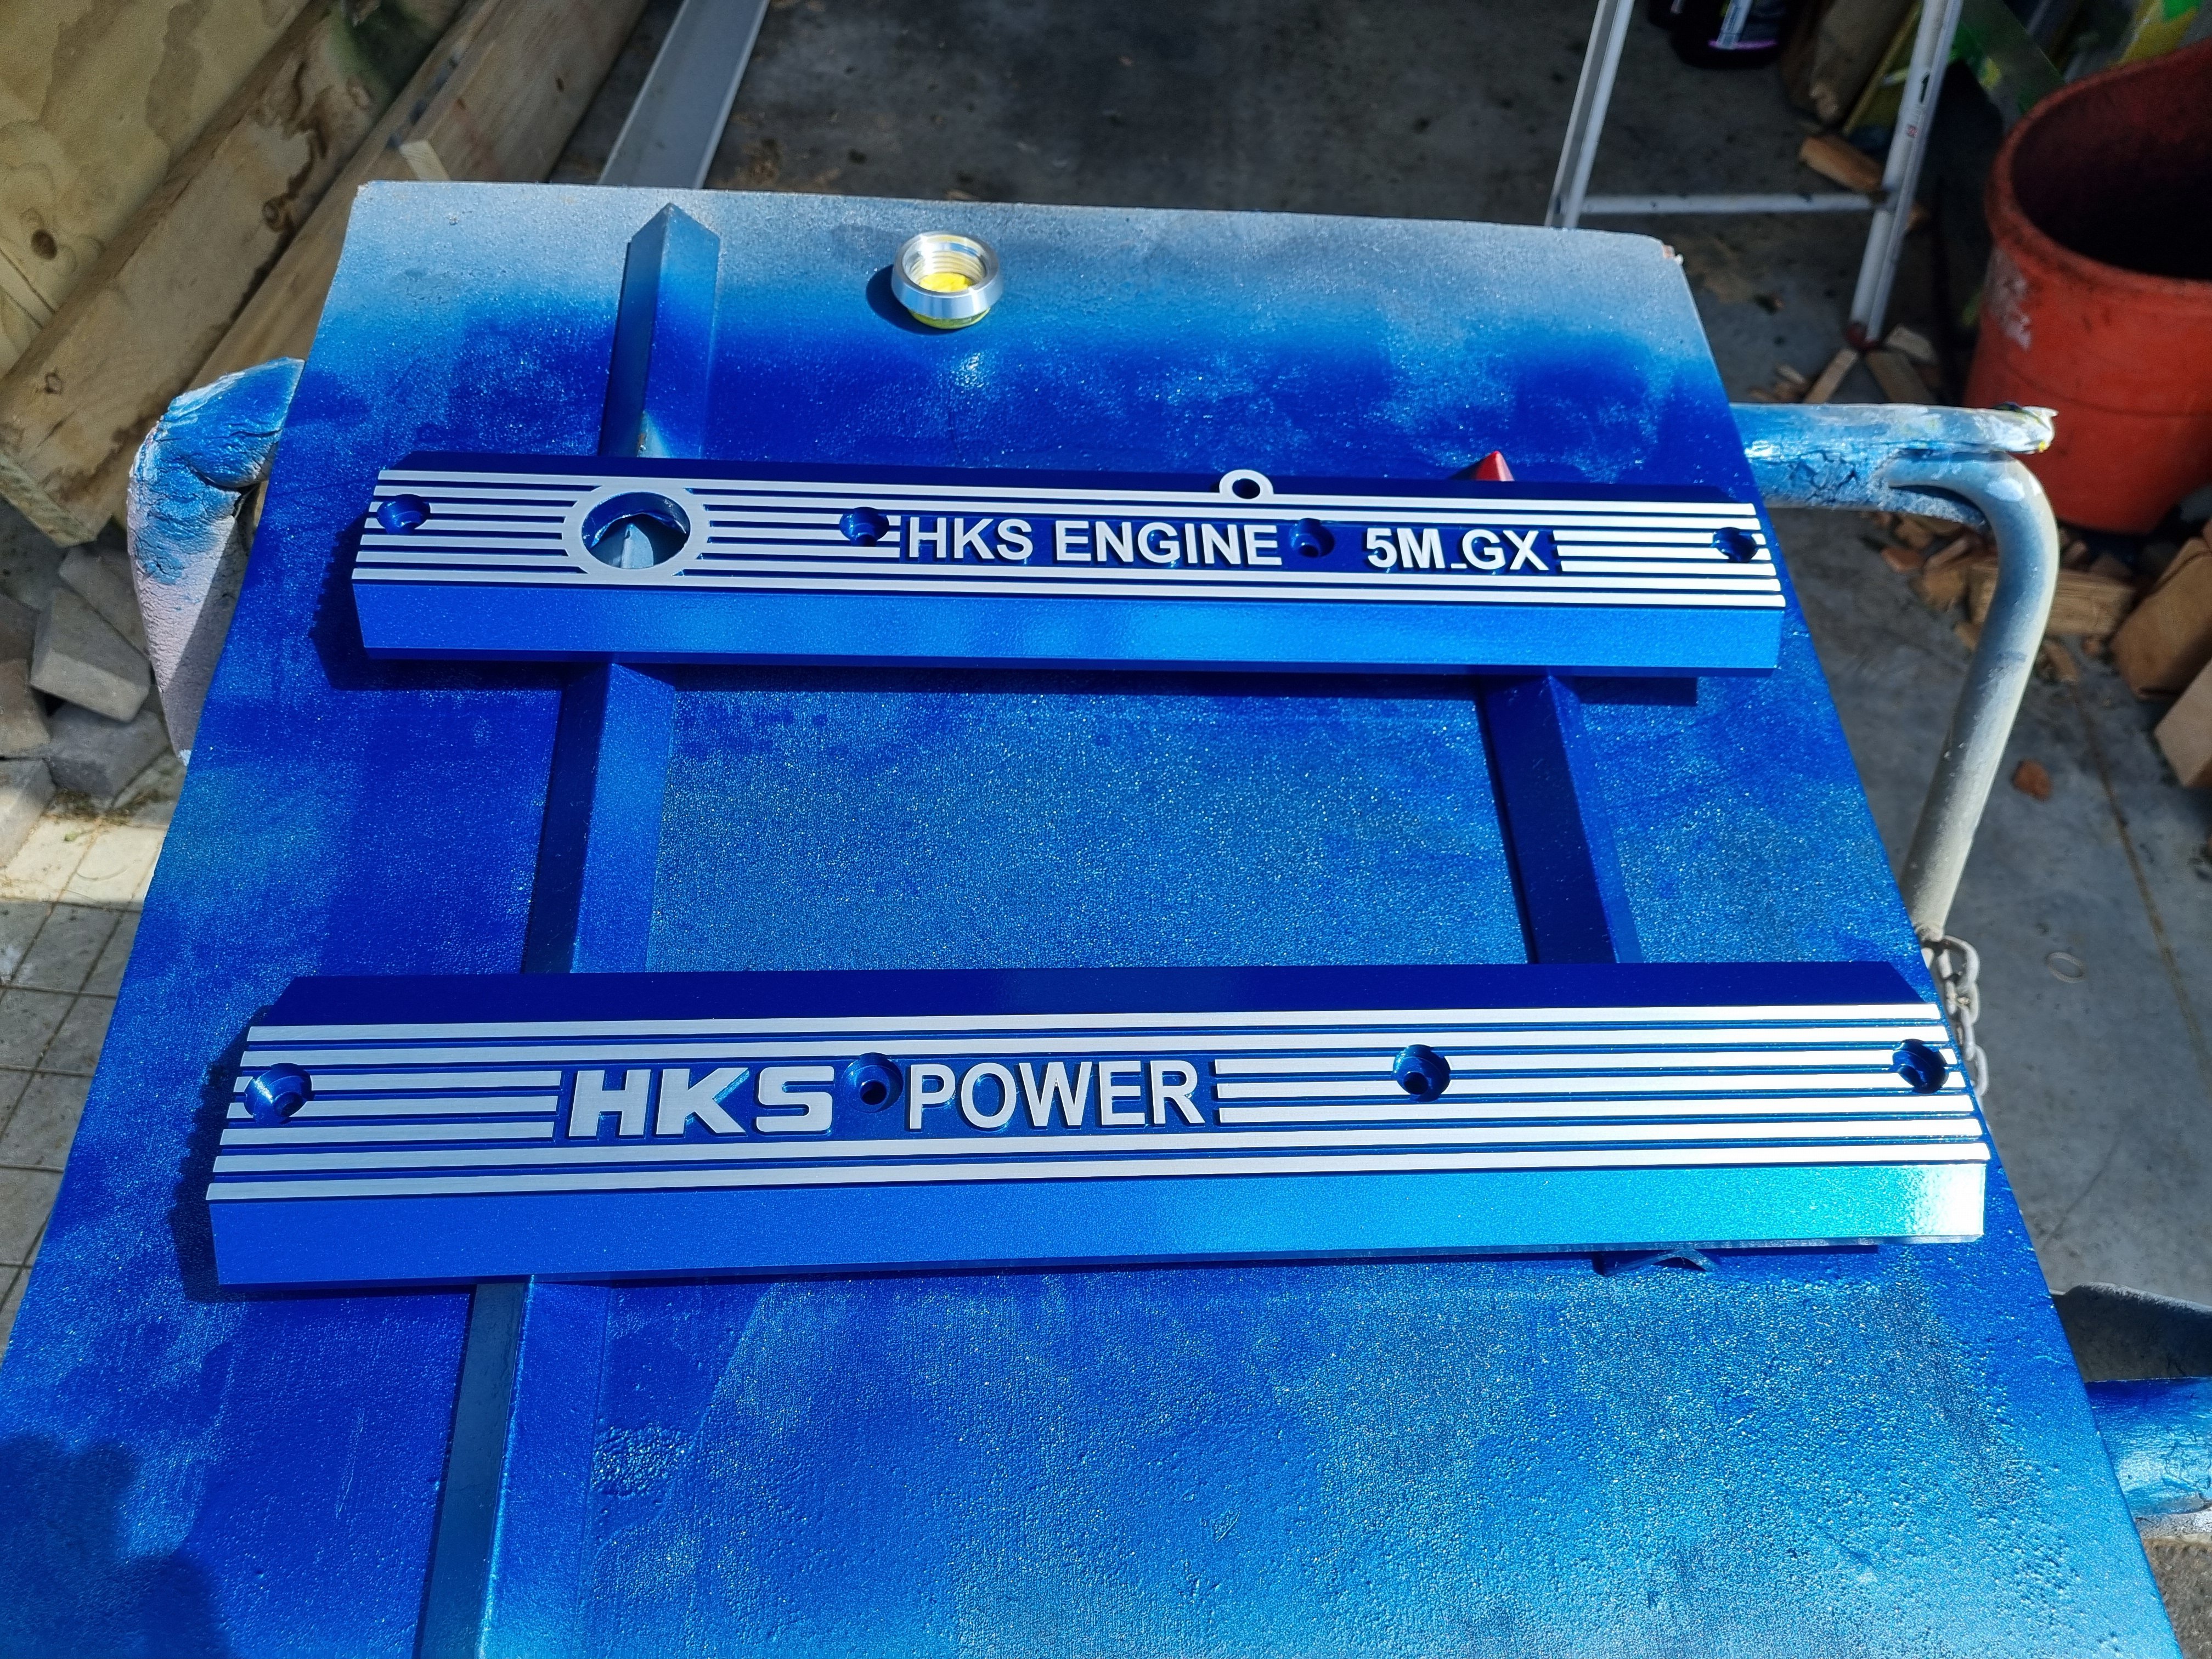
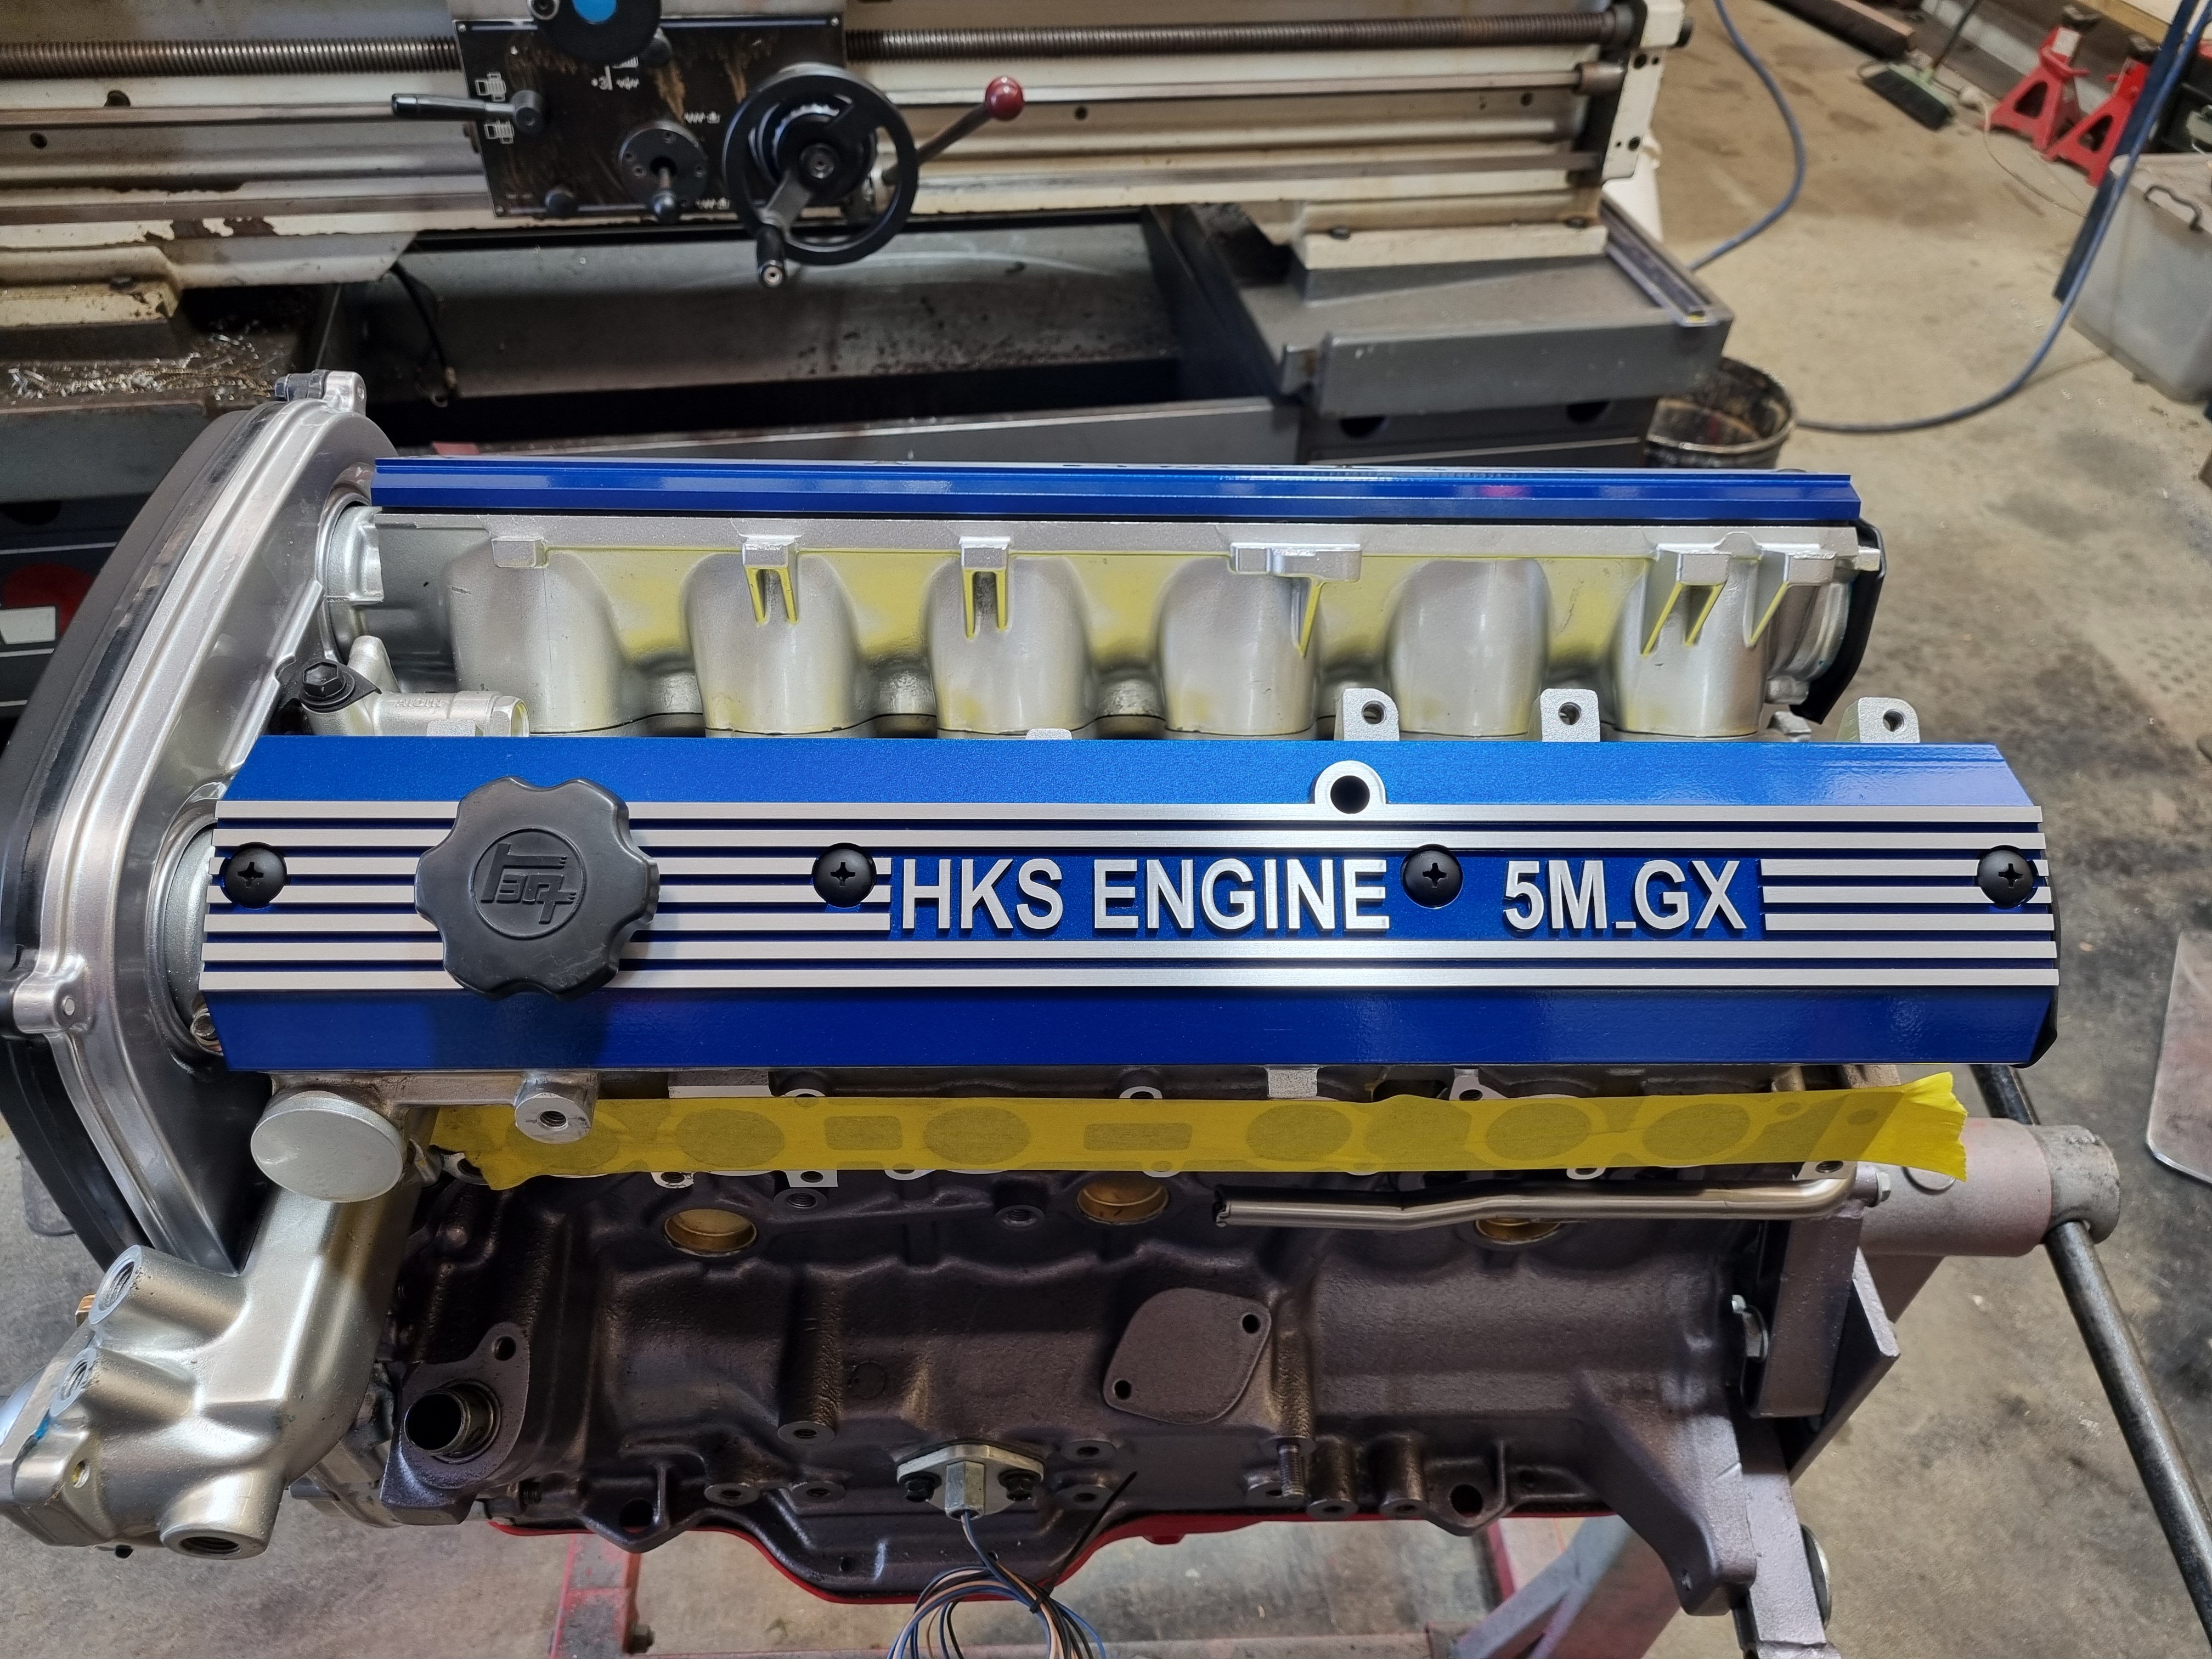
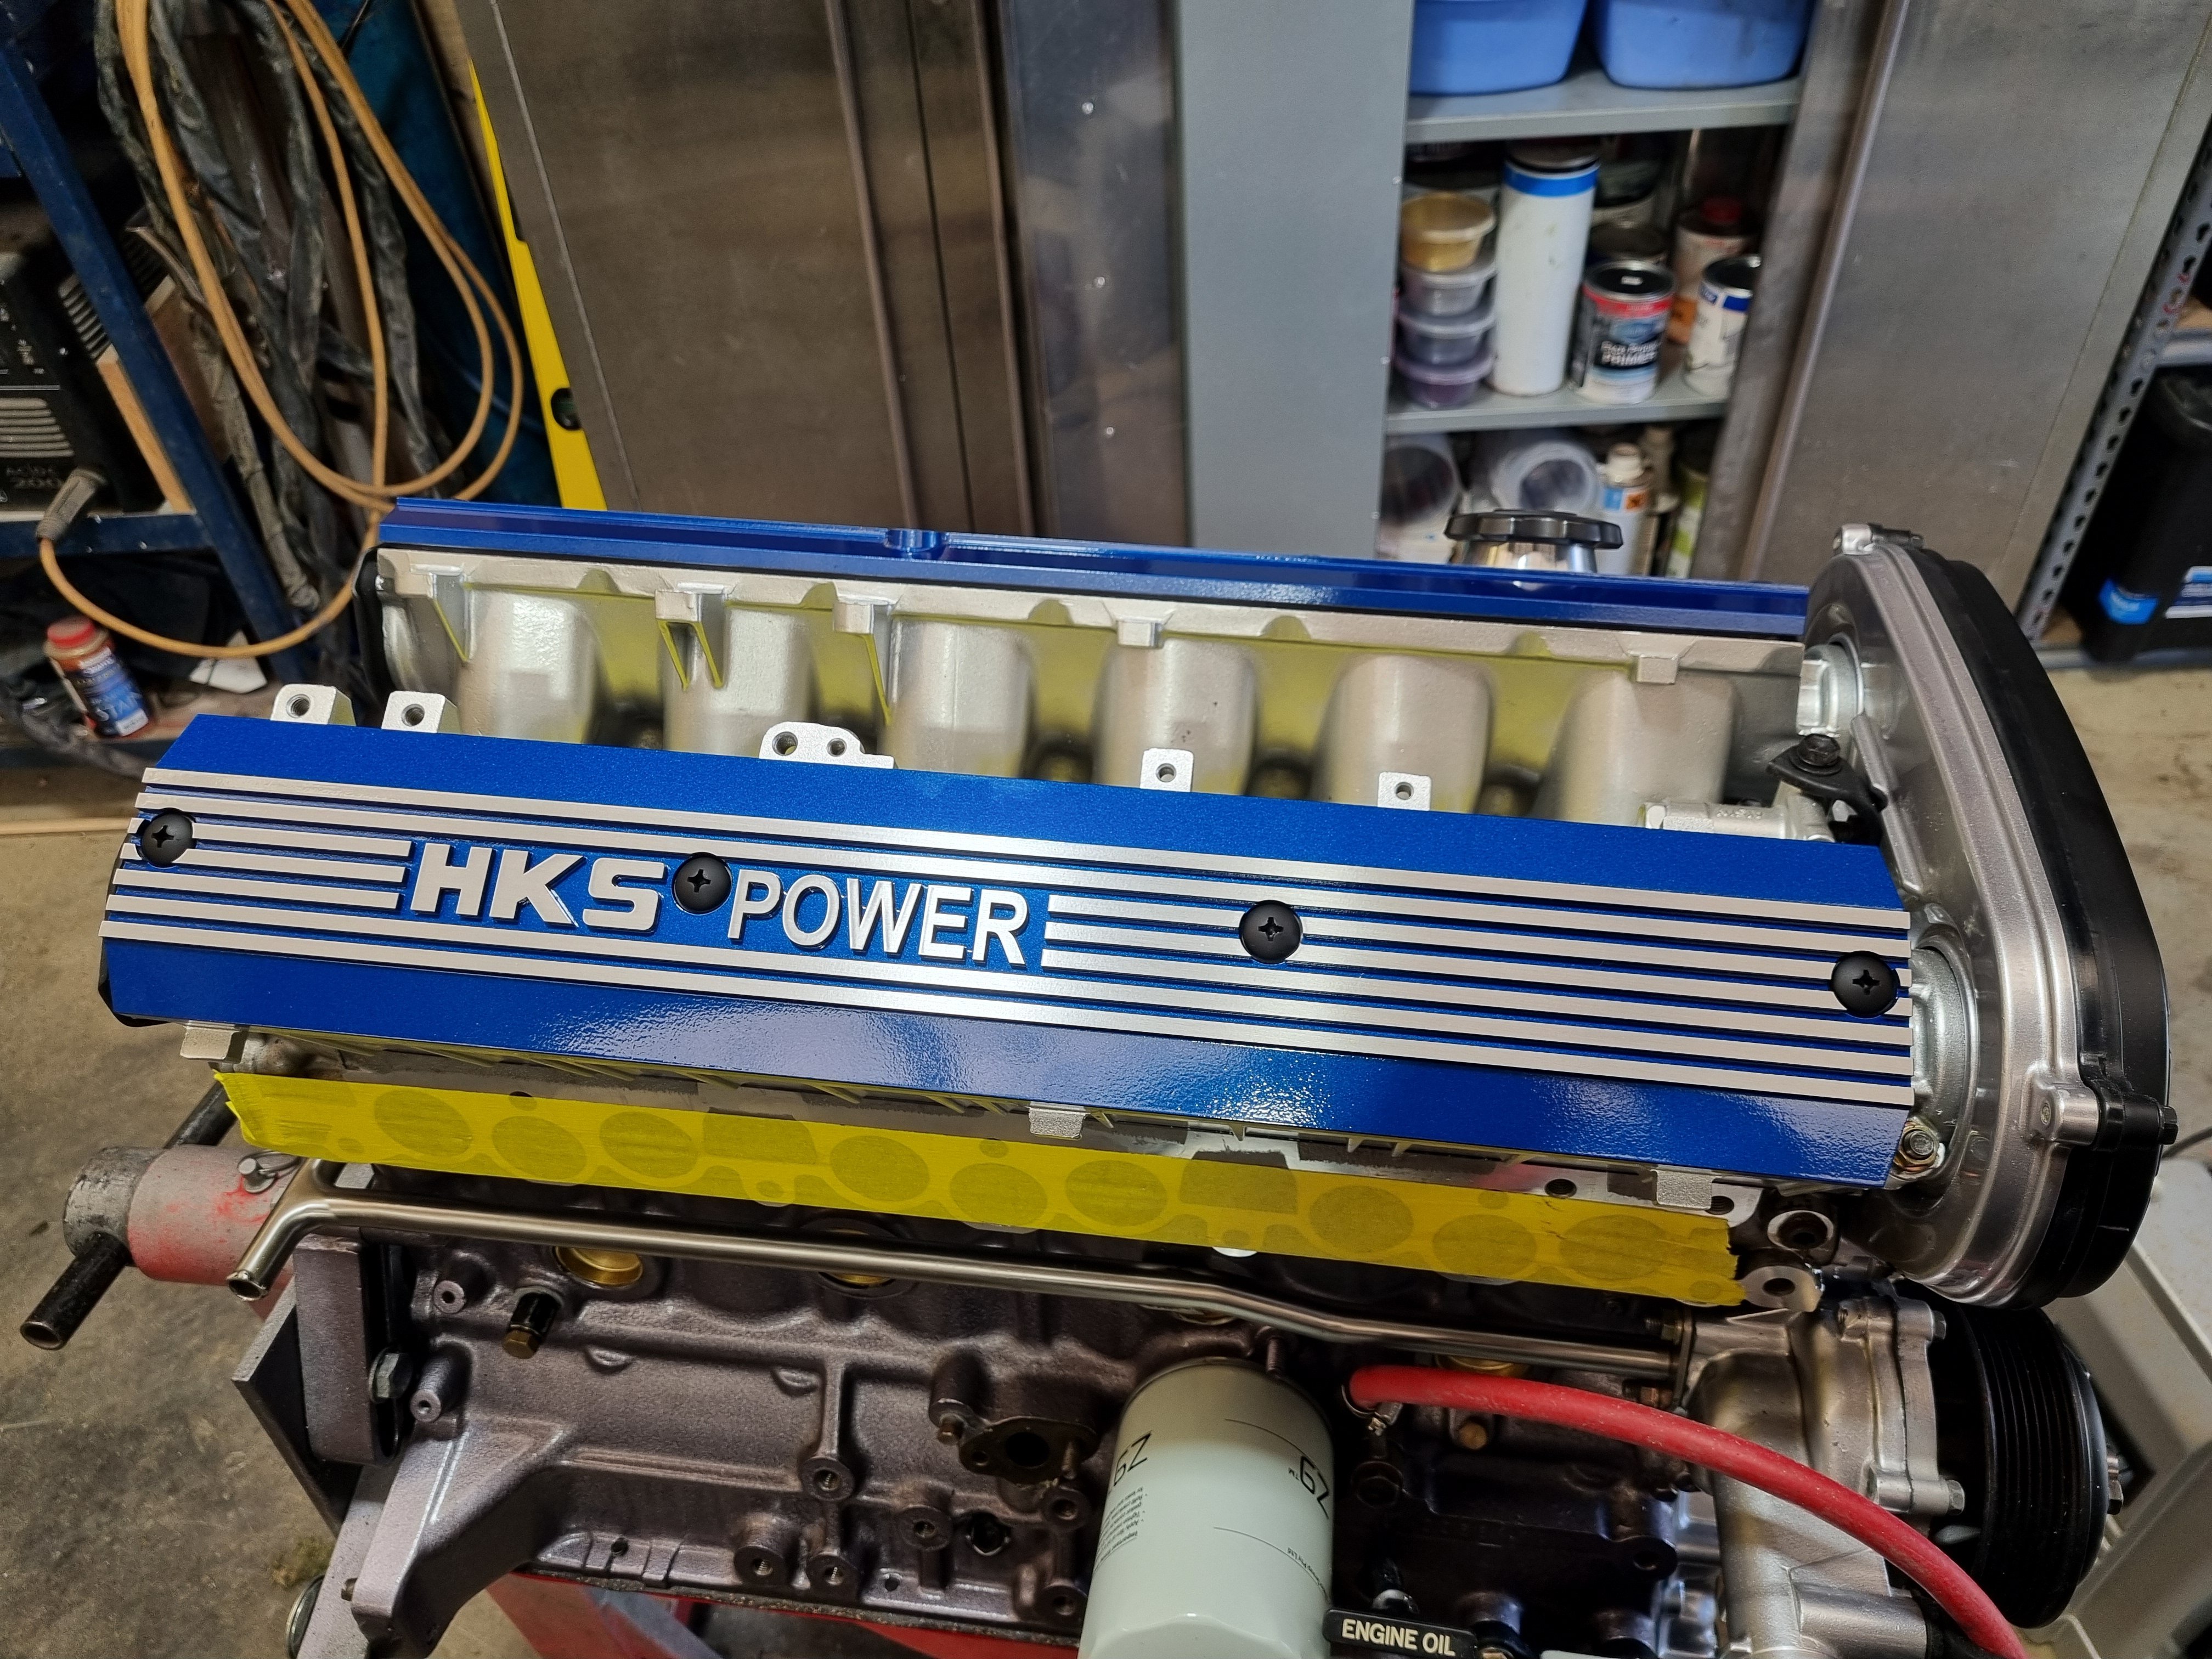
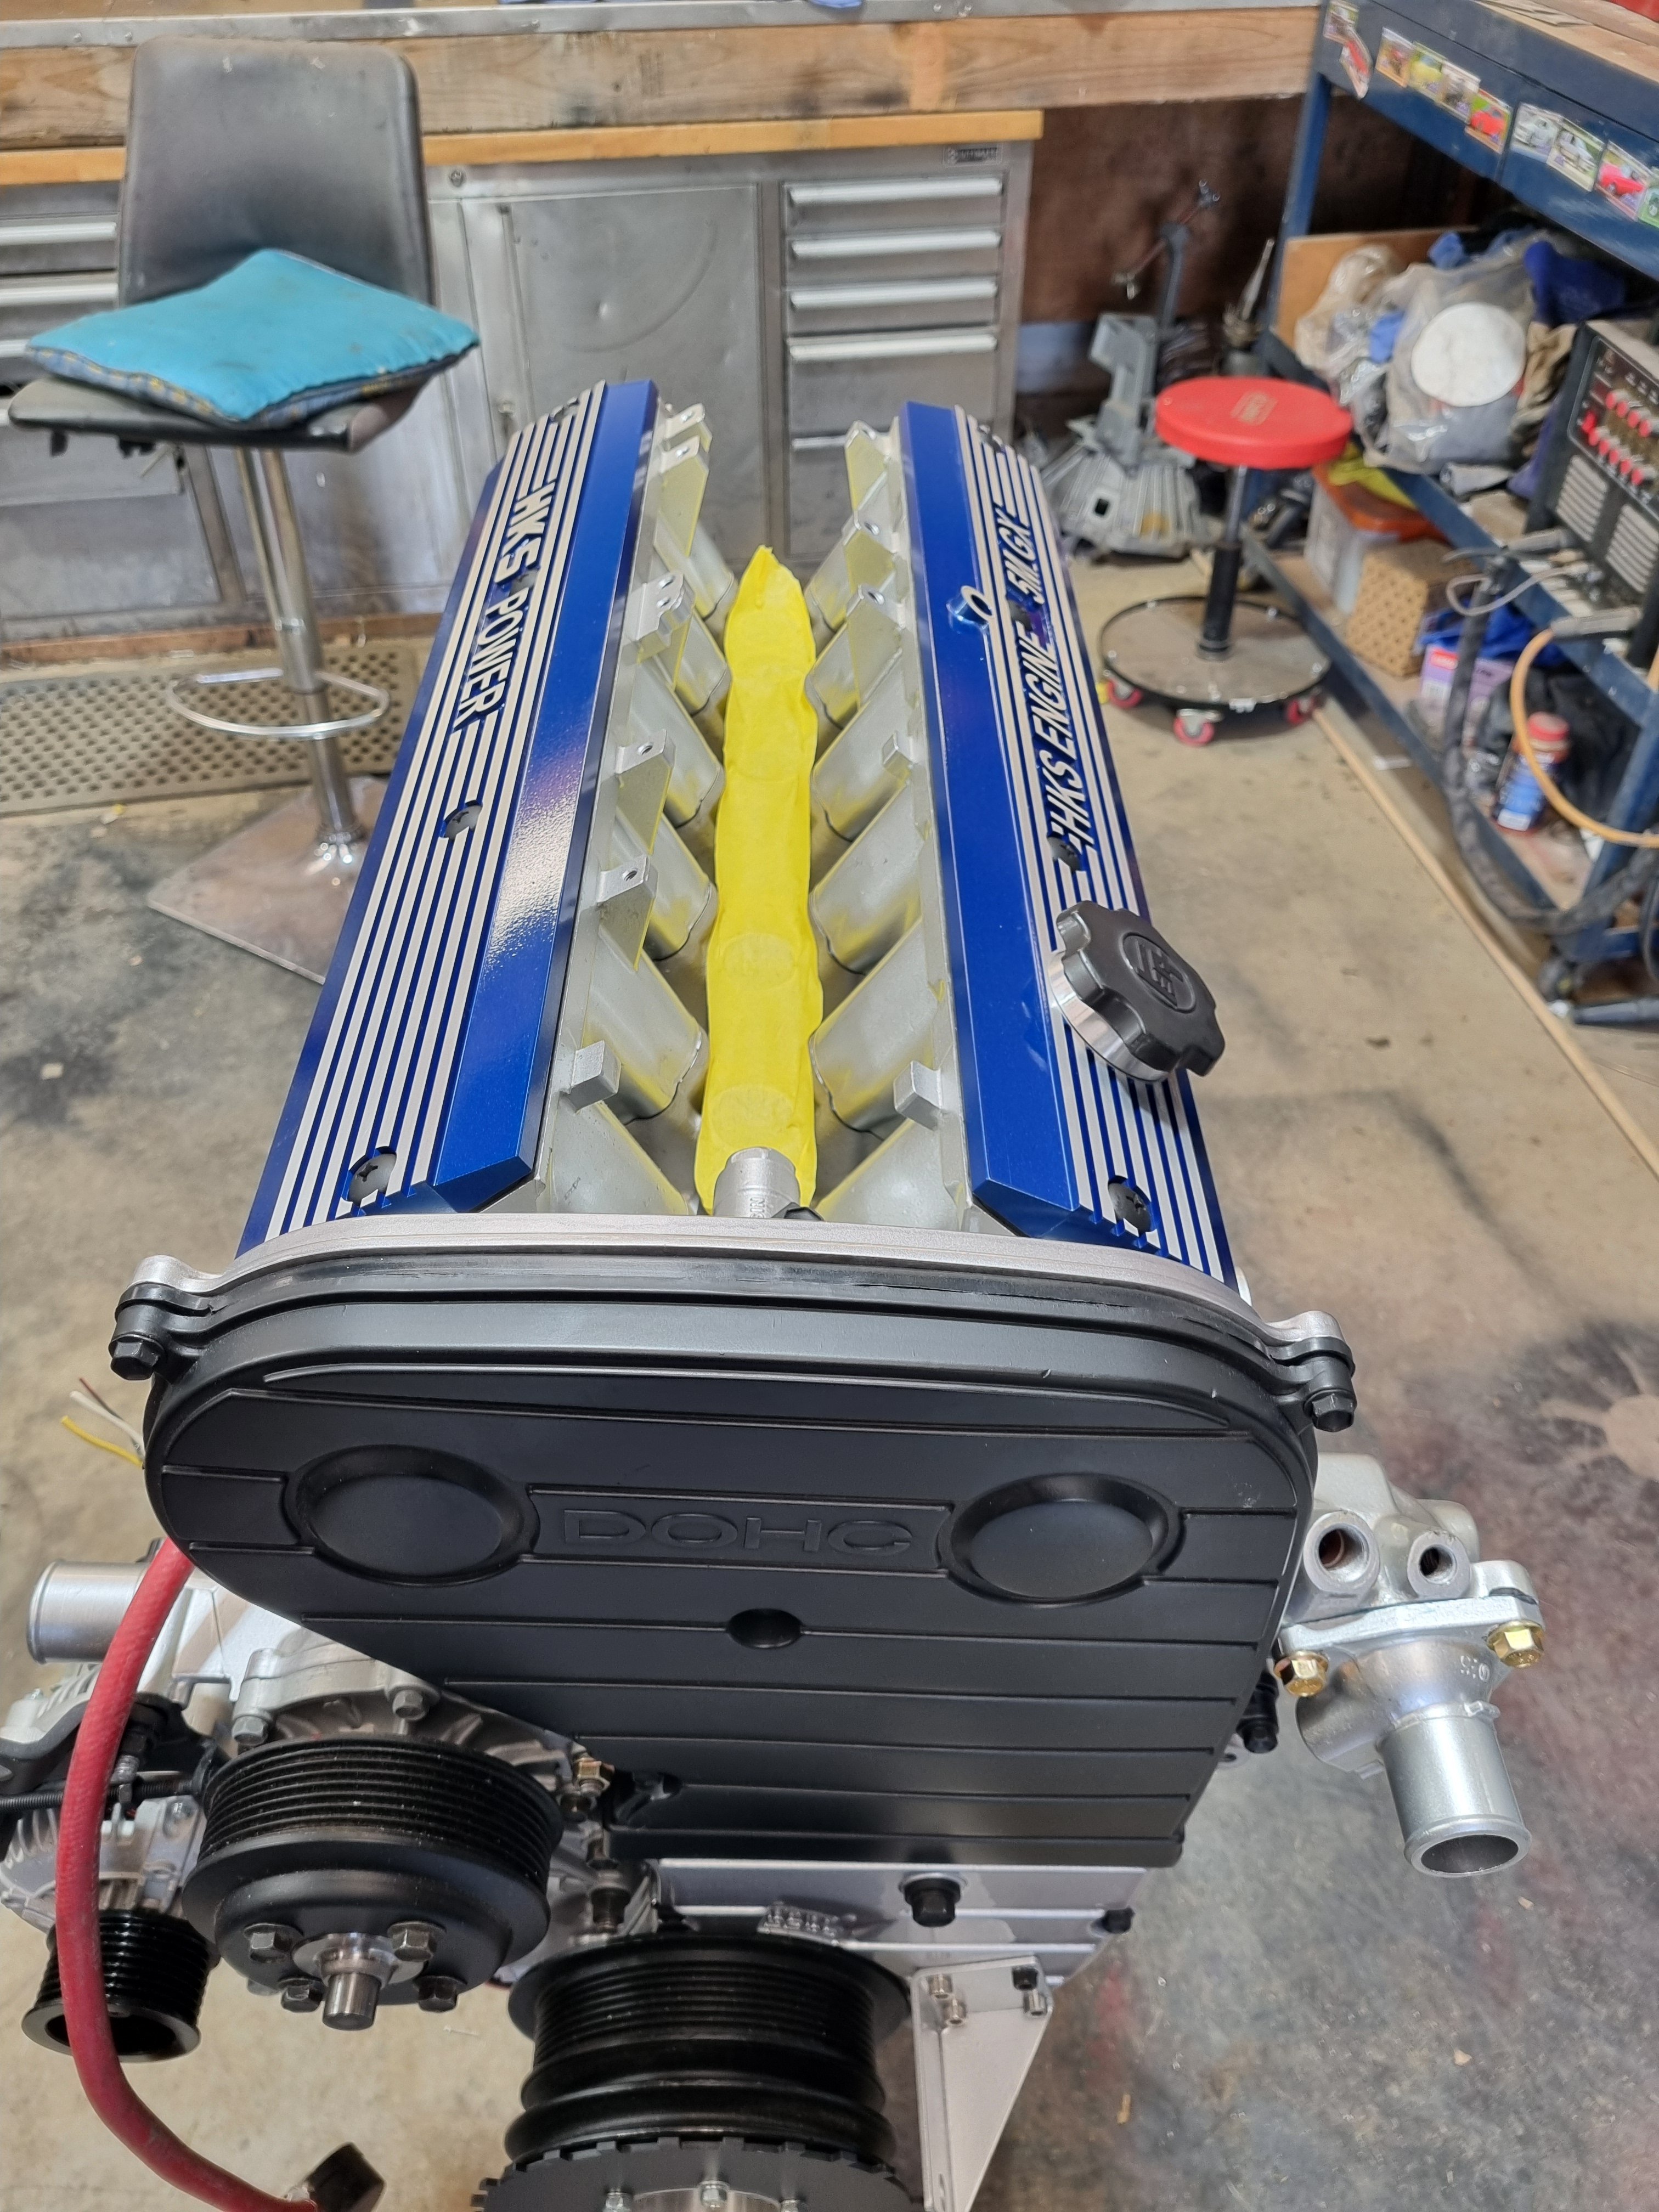
I bought a 5M-GX exhaust header kit. As it the style with this type of kit there is some assembly required.
3 points
-
2 points
-
If I was in your shoes I'd just keep riding how you are comfortable and what feels right to you Maybe have a yarn with the guys you ride with and see what they say? If they are getting annoyed then find some slower riders to ride with or just go by yourself, or tell them not to wait and catch up at the end of the ride, if they are not dicks they should understand the situation and deal with it appropriately It sounds like you have a good sense of self preservation , it would be a shame to get hurt because you're trying to not annoy some other riders2 points
-
The guy who painted it said he’s happy to come up and sort any touch ups etc before Nats. So I’ll get that sorted just before Nats so it’s fresh. Hes keen to give it a polish at set up.2 points
-
I wish. My visa currently does not allow me to re-enter the USA if I leave. So I need to get my visa sorted first. (I've applied, just waiting on their response.)2 points
-
2 points
-
8k rpm, check ...2 points
-
You'll want to get a good bit of heat into it but if it turns into a liquid, that was too much.2 points
-
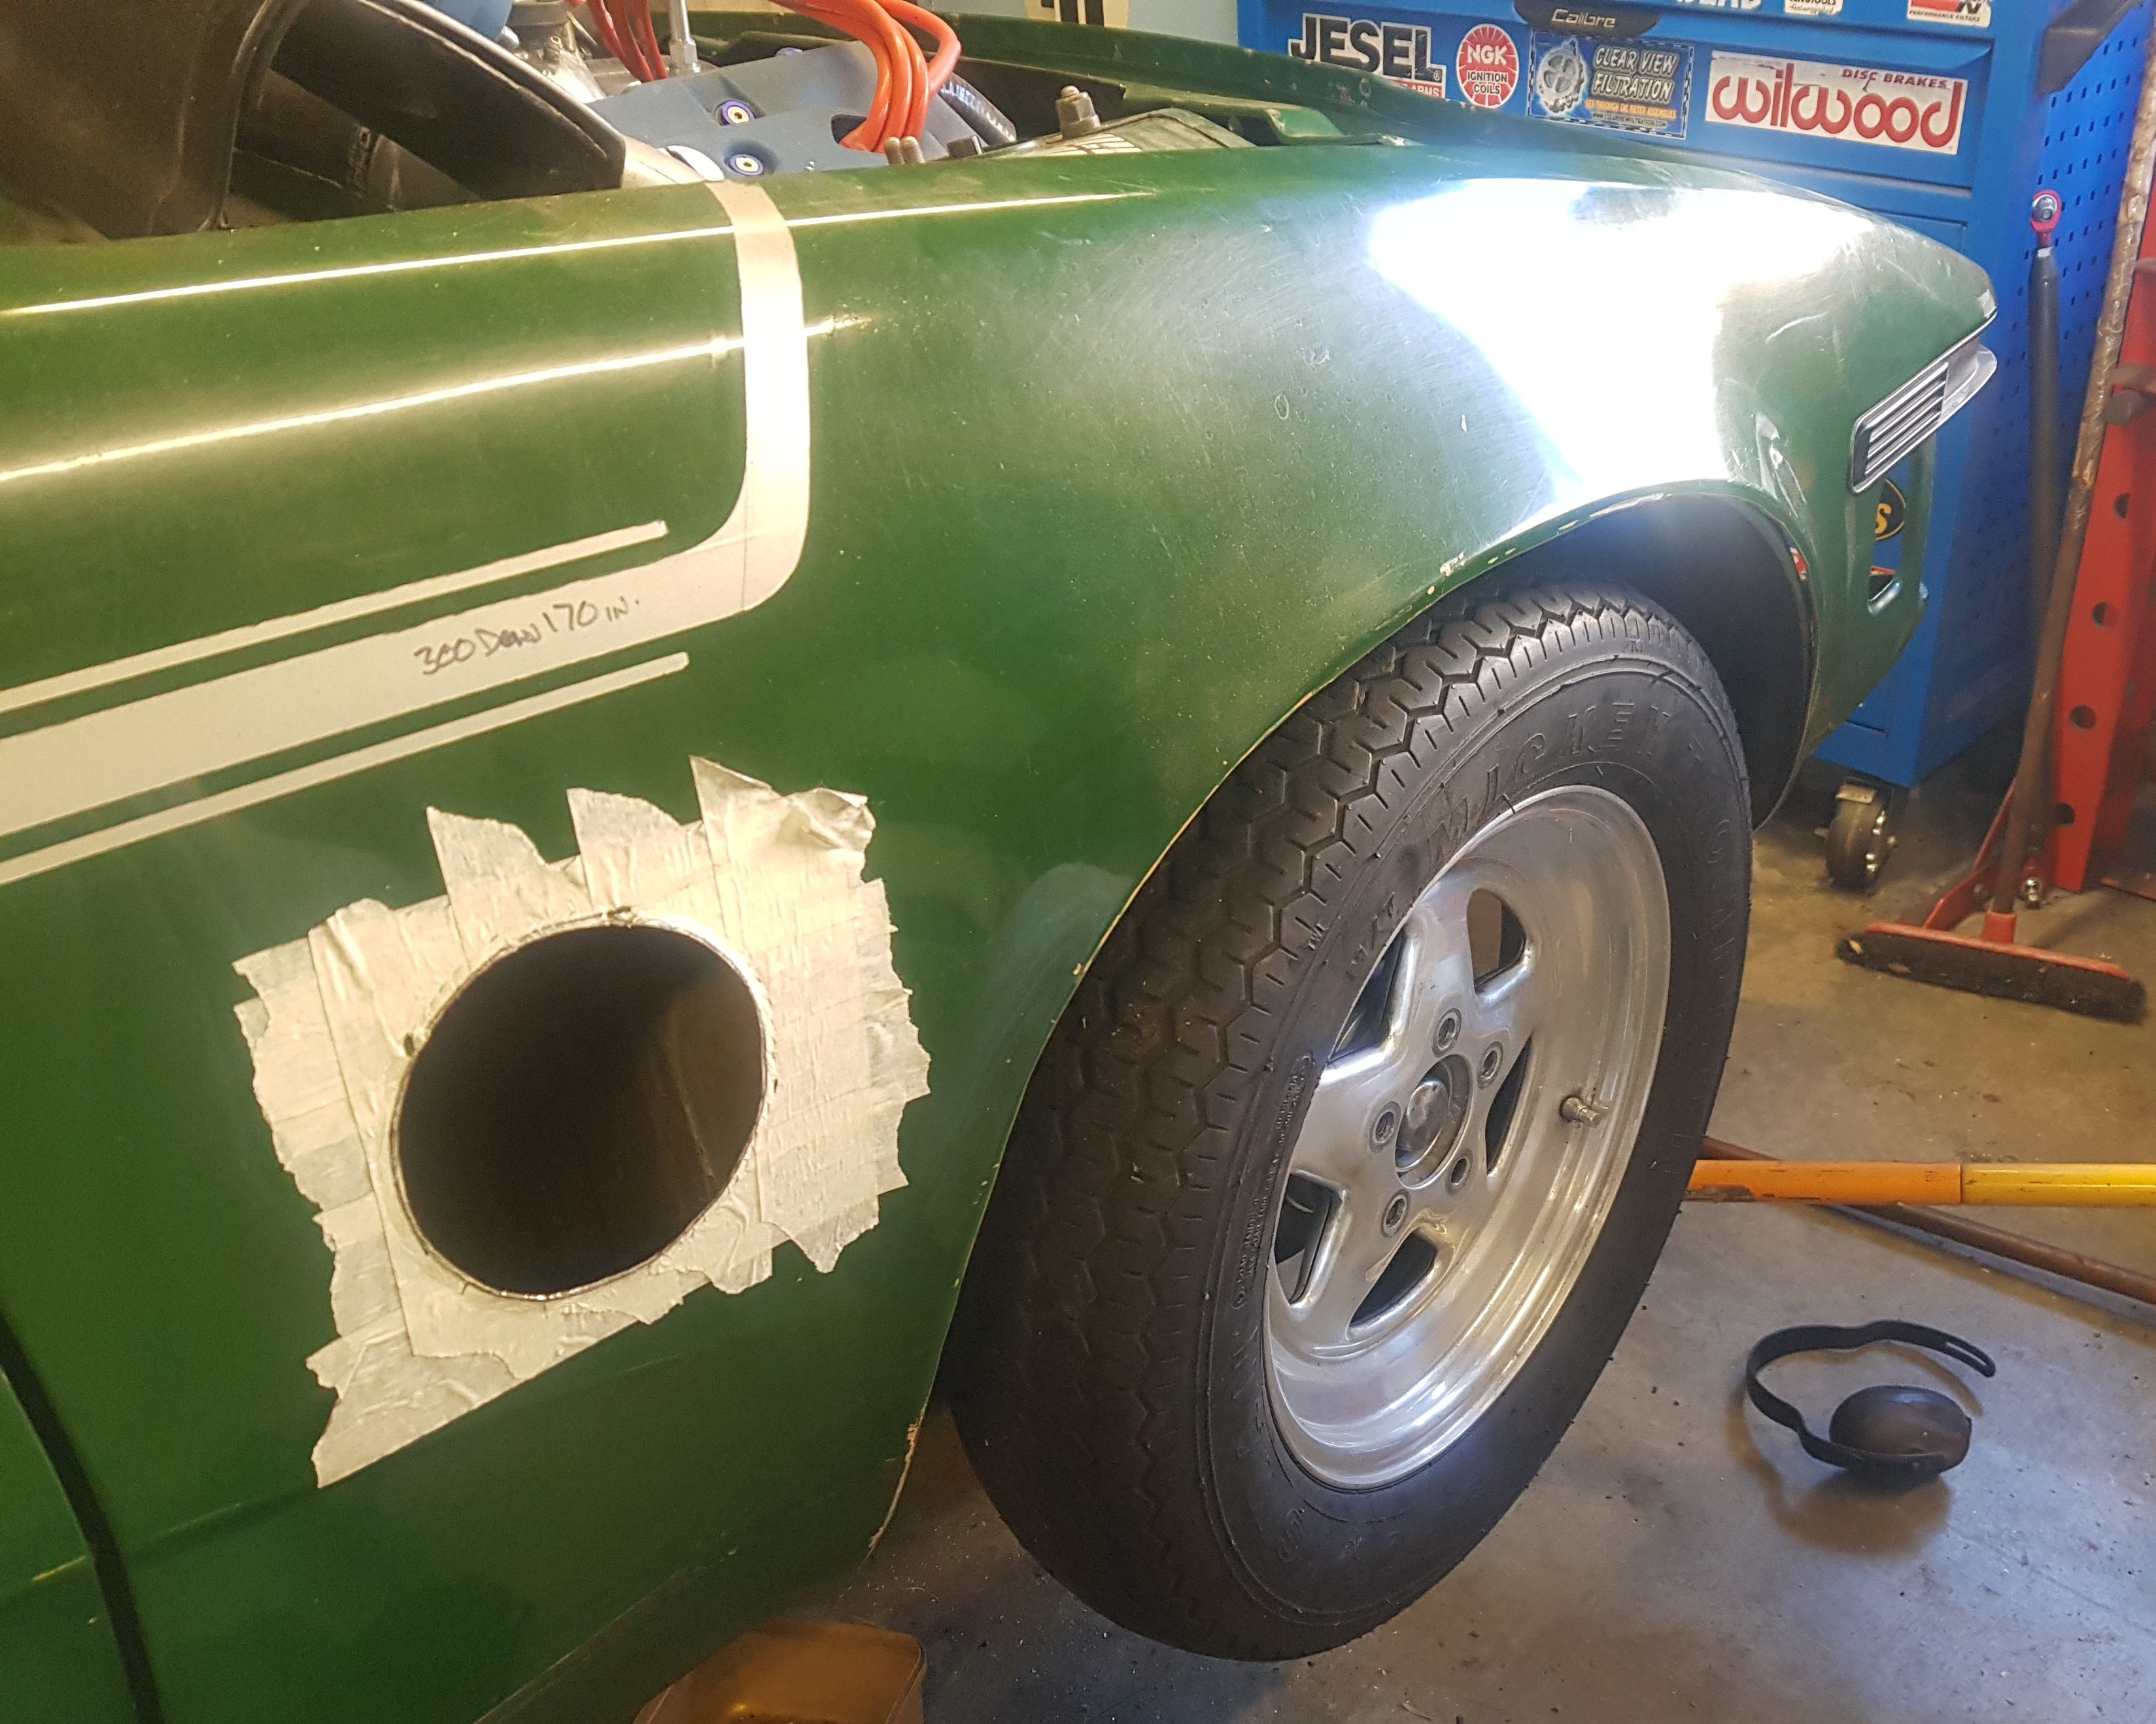
With that done, the top strut mounts needed to be ovalled slightly to accept the hybrid Mazda/TR7 front struts: I probably over-ovalled them(!), but I'll weld on some reinforcing washers. Struts in place and I tentatively fitted the front wheel, but it looks like it's in exactly the right position: Nice, subtle exhaust hole too!
2 points
-
I've not driven the Marina since the last update, and it's been a month now. The reason? My usual "it's on the road now, let's pull it to bits" thing. To be fair, it's not without reason though. In my last outings in the car, I found the engine would cut out under higher RPM, so I wanted to investigate this. Since I got the car, despite having run and driven it a bit, other than cleaning out the fuel bowl and tweaking the mixture, I haven't actually touched the carb. To kick everything off, I thought I would pull out the old carb that came in a box with the car, and strip it down to see what state that was in. The fact it had a big X marked on the top of it didn't bode well. I love SU carbs, they're just so easy to strip and service. Nothing fancy, but does the job. Sadly, there is almost nothing in this carb that was reusable. I pulled the throttle spindle out and it had massive wear The bushing in the body was worn too, as even the "good" bit of the shaft would wobble about when tested With the right tools, some new bushes and some time, I could fix that, but I really don't care for it. Even the needle was stuffed. The holder is cracked and the needle itself is actually bent The jet seems to be welded into the jet bearing, as when trying to remove it the complete plastic end of the jet decided it would rather come off instead So moving on from that development, I popped the bonnet on the Marina. This is what I started with I removed the air filter saucepan and its intake pipe which gave me access to the mighty SU HS6 carb Three tight and one loose nut later, the carb itself was off. The gasket and under the carb were all quite wet with oily fuelly muck The heat shield and spacer came off next With the carb on the bench I removed the fuel bowl lid and was annoyed at the muddy sediment on the bottom of the bowl It didn't really act like rust and wasn't ferrous, it was more like dirt. I have a filter in the system before the fuel pump, and that not shown any signs of rust or dirt (yet), so I'm not sure where this came from. I cleaned the bowl out when I first got the car running. The float looked fine. It moved freely and had no signs of liquid inside it Next I removed the damper, suction chamber and piston. This allowed me to remove the needle, which I confirmed is the correct "BAN" needle for single carb 1750. One of the biggest reasons for servicing the carb was due to this, a sticking jet when the choke was applied. The jet doesn't return and causes the car to run super rich and drop a cylinder Usually it takes just a gentle tap with your finger on the bottom of the jet to pop it back up again, but this requires popping the bonnet when starting cold, which is unacceptable when you have an image to withhold. It should sit all the way up against the adjustment nut The fuel feed hose had been weeping too I removed the jet and feed hose I thought it was weird there appeared to be no seal on the end of the hose in the bowl... turns out it was still in the bowl Careful use of a couple of picks and I managed to chip the "rubber" seal out. It was harder than plastic. The new seal is to the left of the remains I ran some brake cleaner through the jet and found more gunk I cleaned the outside of the jet and inside of the jet bearing up as well as I could, and when testing on the bench it all worked nicely with no sticking I fit the new seal to the fuel feed hose. A new washer came in the gasket kit, but I found the outside diameter too big and I couldn't thread in the fitting, so I ended up refitting the old washer and it works fine. And refitted to the fuel bowl. It turns out this also wasnt tight when I removed it, as the fitting screws much further in than it was The choke linkage was also refitted I refit the needle to the piston and after a thorough cleaning of the inside of the carb body, refitted the piston. As its turns out, the spare carb had a different piston spring. Neither have any obvious paint markings to show which one is "RED" as indicated in the manual. The one from the spare carb is slightly longer and has thicker wire in the coils 0.99mm wire and the one that was in the carb on the car 0.82mm wire I don't know which one is right for the car, and just for curiosity I fit the thicker coil spring from the spare carb to the car to see what it was like. I might need to swap back though as I'm having some weird tuning issues. Next was the fuel needle and seat, and float. The needle and seat are what stops the fuel flow into the bowl, so it doesnt overfill and overflow. As the level in the bowl rises, the float will rise up with it and at a certain height it presses on the back of the needle and pushes it into the seat, blocking the inlet. My needle and seat appears to be original, and replacements these days come with viton rubber tips, to help seal. Mine was a plastic body with brass tip. With these carbs, to remove the needle and seat you need to remove the float. This is held in place with a small hinge pin. I used a smal punch to carefully tap it out enough to grab with some pliers The seat just unscrews from the cap. The spare carb had one washer under the seat whilst the in car one had two. These set the height of the float The new needle and seat. The new needle is all brass with a viton rubber tip After a lot of faffing about with float levels, which I'm still not 100% sure is right, the new needle, seat and float were refitted. It's annoying these floats don't have a metal tab that allows for adjustment. With a new float bowl gasket, the carb was reassembled. I didn't remove the throttle plate or shaft as I didn't have new ones or new screws. There is some play in the shaft, which pretty much dooms this carb, but it'll do for now. Before refitting I decided to bite the bullet and remove the inlet/exhaust manifold. I knew there had been a leak, it wasnt bad, but it was a good time to address it anyway. Plus, this gives me a chance to prep the fittings for easy removal when I go to fit the twin carb manifold. By some miracle, all the nuts and bolts came off without issue. The only little hangup was that the front stud was rusted into the manfold, and needed some persuading to give it up. The inlet port sizing on the manifold is... slightly mismatched. I may check the match on the twin carb manifold and massage it if needed I cleaned the face of the head up with the wire wheel on the drill Add went through with taps and dies cleaning all the threads DIY short spinning tap handle After cleaning up the manifold I found a rather decent crack in the casting between the two center exhaust runners That necessitated some copper exhaust spooge on the gasket, for maximum sealing And with that, I banged it all back together, with new gaskets on everything Because I'm sick of the saucepan handle rattling on my hood prop, I replaced it with a cheap foam "pancake" filter. So much room for activities now. In hindsight it's a bit close to the heater hoses, so I should've got the offset mounting to raise the filter up. Oh well. I've set the carb up, and tuned it as well as it wants to be tuned. It runs well, but I cant help but think the float height or piston spring arent quite right as when lifting the piston the engine revs up slightly and then dies, indicating its lean, but if I add more fuel it starts to run a bit rubbish. At the moment its running at the "audiable sweet spot" where it sounds happiest running. Unfortunately the damn jet is still sticking when the choke is applied, so this carb isnt long for this world. I have a kit to rebuild the twin HIF4s, so they will be going on the car some time soon. It's no real surprise I guess; only a month or so ago the jet was completely jammed solid and didnt move, so I'm lucky I can use it at all. In the mean time, I wanted to investigate the ignition system a bit further to see if it has any affect on the cutting out at high RPM. I have nothing against points, they have their charm, but I wanted to convert to electronic ignition to do away with any risk of the points or condensor being an issue. I bought an Accuspark Stealth "Kit 4" for a Lucas 25D distributor, which I can now confirm works fine on the Lucas 29D4 in the Marina. The old points and condensor accepting their fate I pulled the rotor off and removed the points and condensor I wouldnt be surprised if this had something to do with the issue... The main power feed to the points had been "fixed" at some point, with the worst crimp they could find. I don't even know if any copper was still connected, or if the only thing holding the terminal on the wire was the insulation. I could spin the terminal right around with no issues. This also wouldnt help With some careful poking and prodding I pushed the grommet through the housing and removed the old wire The terminal fell off once out of the car The new Accuspark pickup fits right in, after smearing some of the supplied thermal grease on the underside. The pickup ring slips over the shaft easily. The kit comes with new grommets, only one of which will fit and annoyingly it's not quite right, it should really have a 90 degree outlet to avoid the clip for the cap, but it is pliable enough that you can bend it out of the way without issue. I wanted to also replace the coil, as I suspect it was probably original. I got a nice Powerspark high output coil. Its very understated, with not even so much as a label on it. Perfect. UK spec Marinas mounted the coil on the inner wing, away from all the heat and vibration of the engine Aus cars didnt have that luxury, the coil is mounted on the engine. It'd be quite an easy thing to change, I believe the holes are even already in place. Unless you're me, and have mounted an aux fuse box to that location. Nuts. Oh well, I cleaned the inside of the bracket up And mounted the new coil. Its a little bigger than the old coil, so its a tight squeeze. The Accuspark gets wired straight to the positive and negative terminals. The rotor, cap and sports car racing leads were all refitted again. You'd not even notice the fancy newfangled technology hiding in the distributor The car fired into life straight away, with no issues, which was a relief. Once it was warm I checked the timing, which was a little more advanced than it should be, so I knocked that back a little, tweaked the carb tune and took it for a run around the block. I'll tell you what, it has no trouble revving to the 5500rpm redline on the tacho now! The sound it makes from the little pancake filter too, its excellent. I'm not 100% happy with the carb, so will do a couple more tweaks on that, but otherwise its running and driving very well. I think the biggest surprise for me is that the gearbox syncros can keep up even at over 5000RPM on a 1st to 2nd change. Heaps on the list of things to do, but I'm really trying not to get too stuck into much else that will take it off the road, as if we can get some sunny days for once, I want to be able to drive the car.2 points
-
Hey, regarding your worn kick panels/under tray board, This stuff is great for rejuvenating fucked old hardboard. https://www.aliexpress.com/item/1005006336018980.html1 point
-
Oh yeah and I didn’t refit the fire extinguisher because it was very out of date - like 2010 date of manufacture and they are really only good for 5 years. It is a British car so will refit a new one in due course.1 point
-
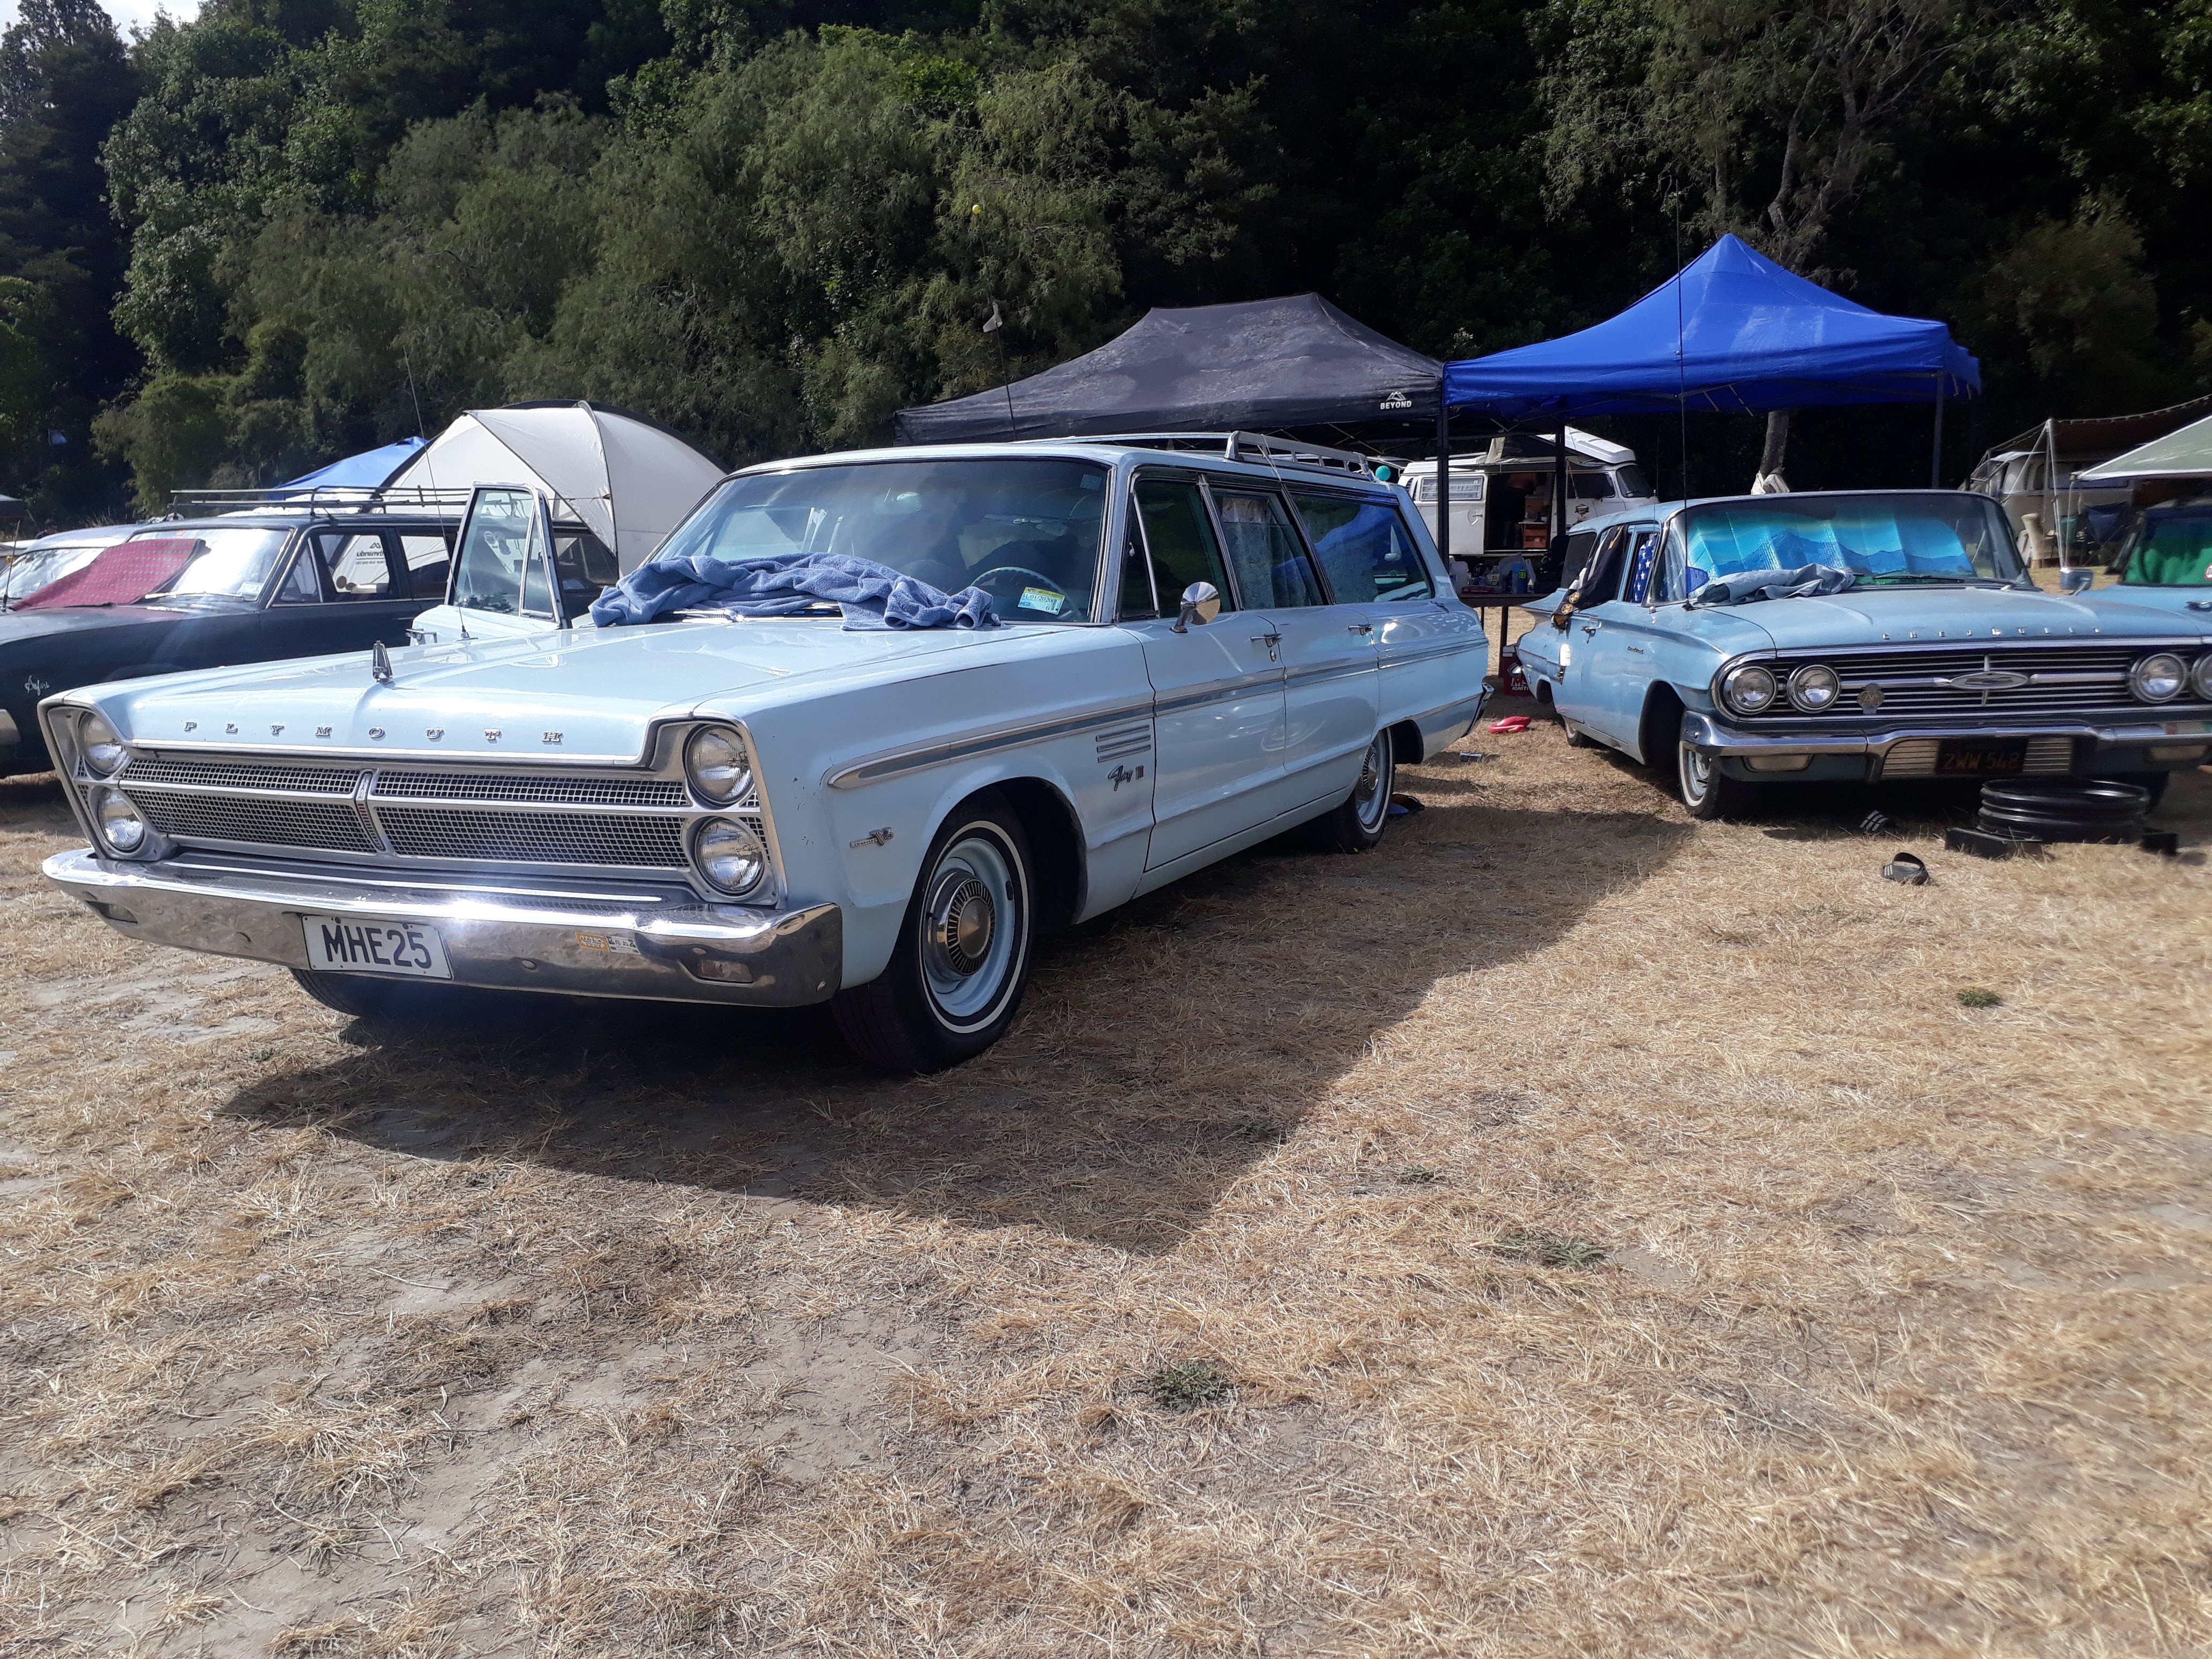
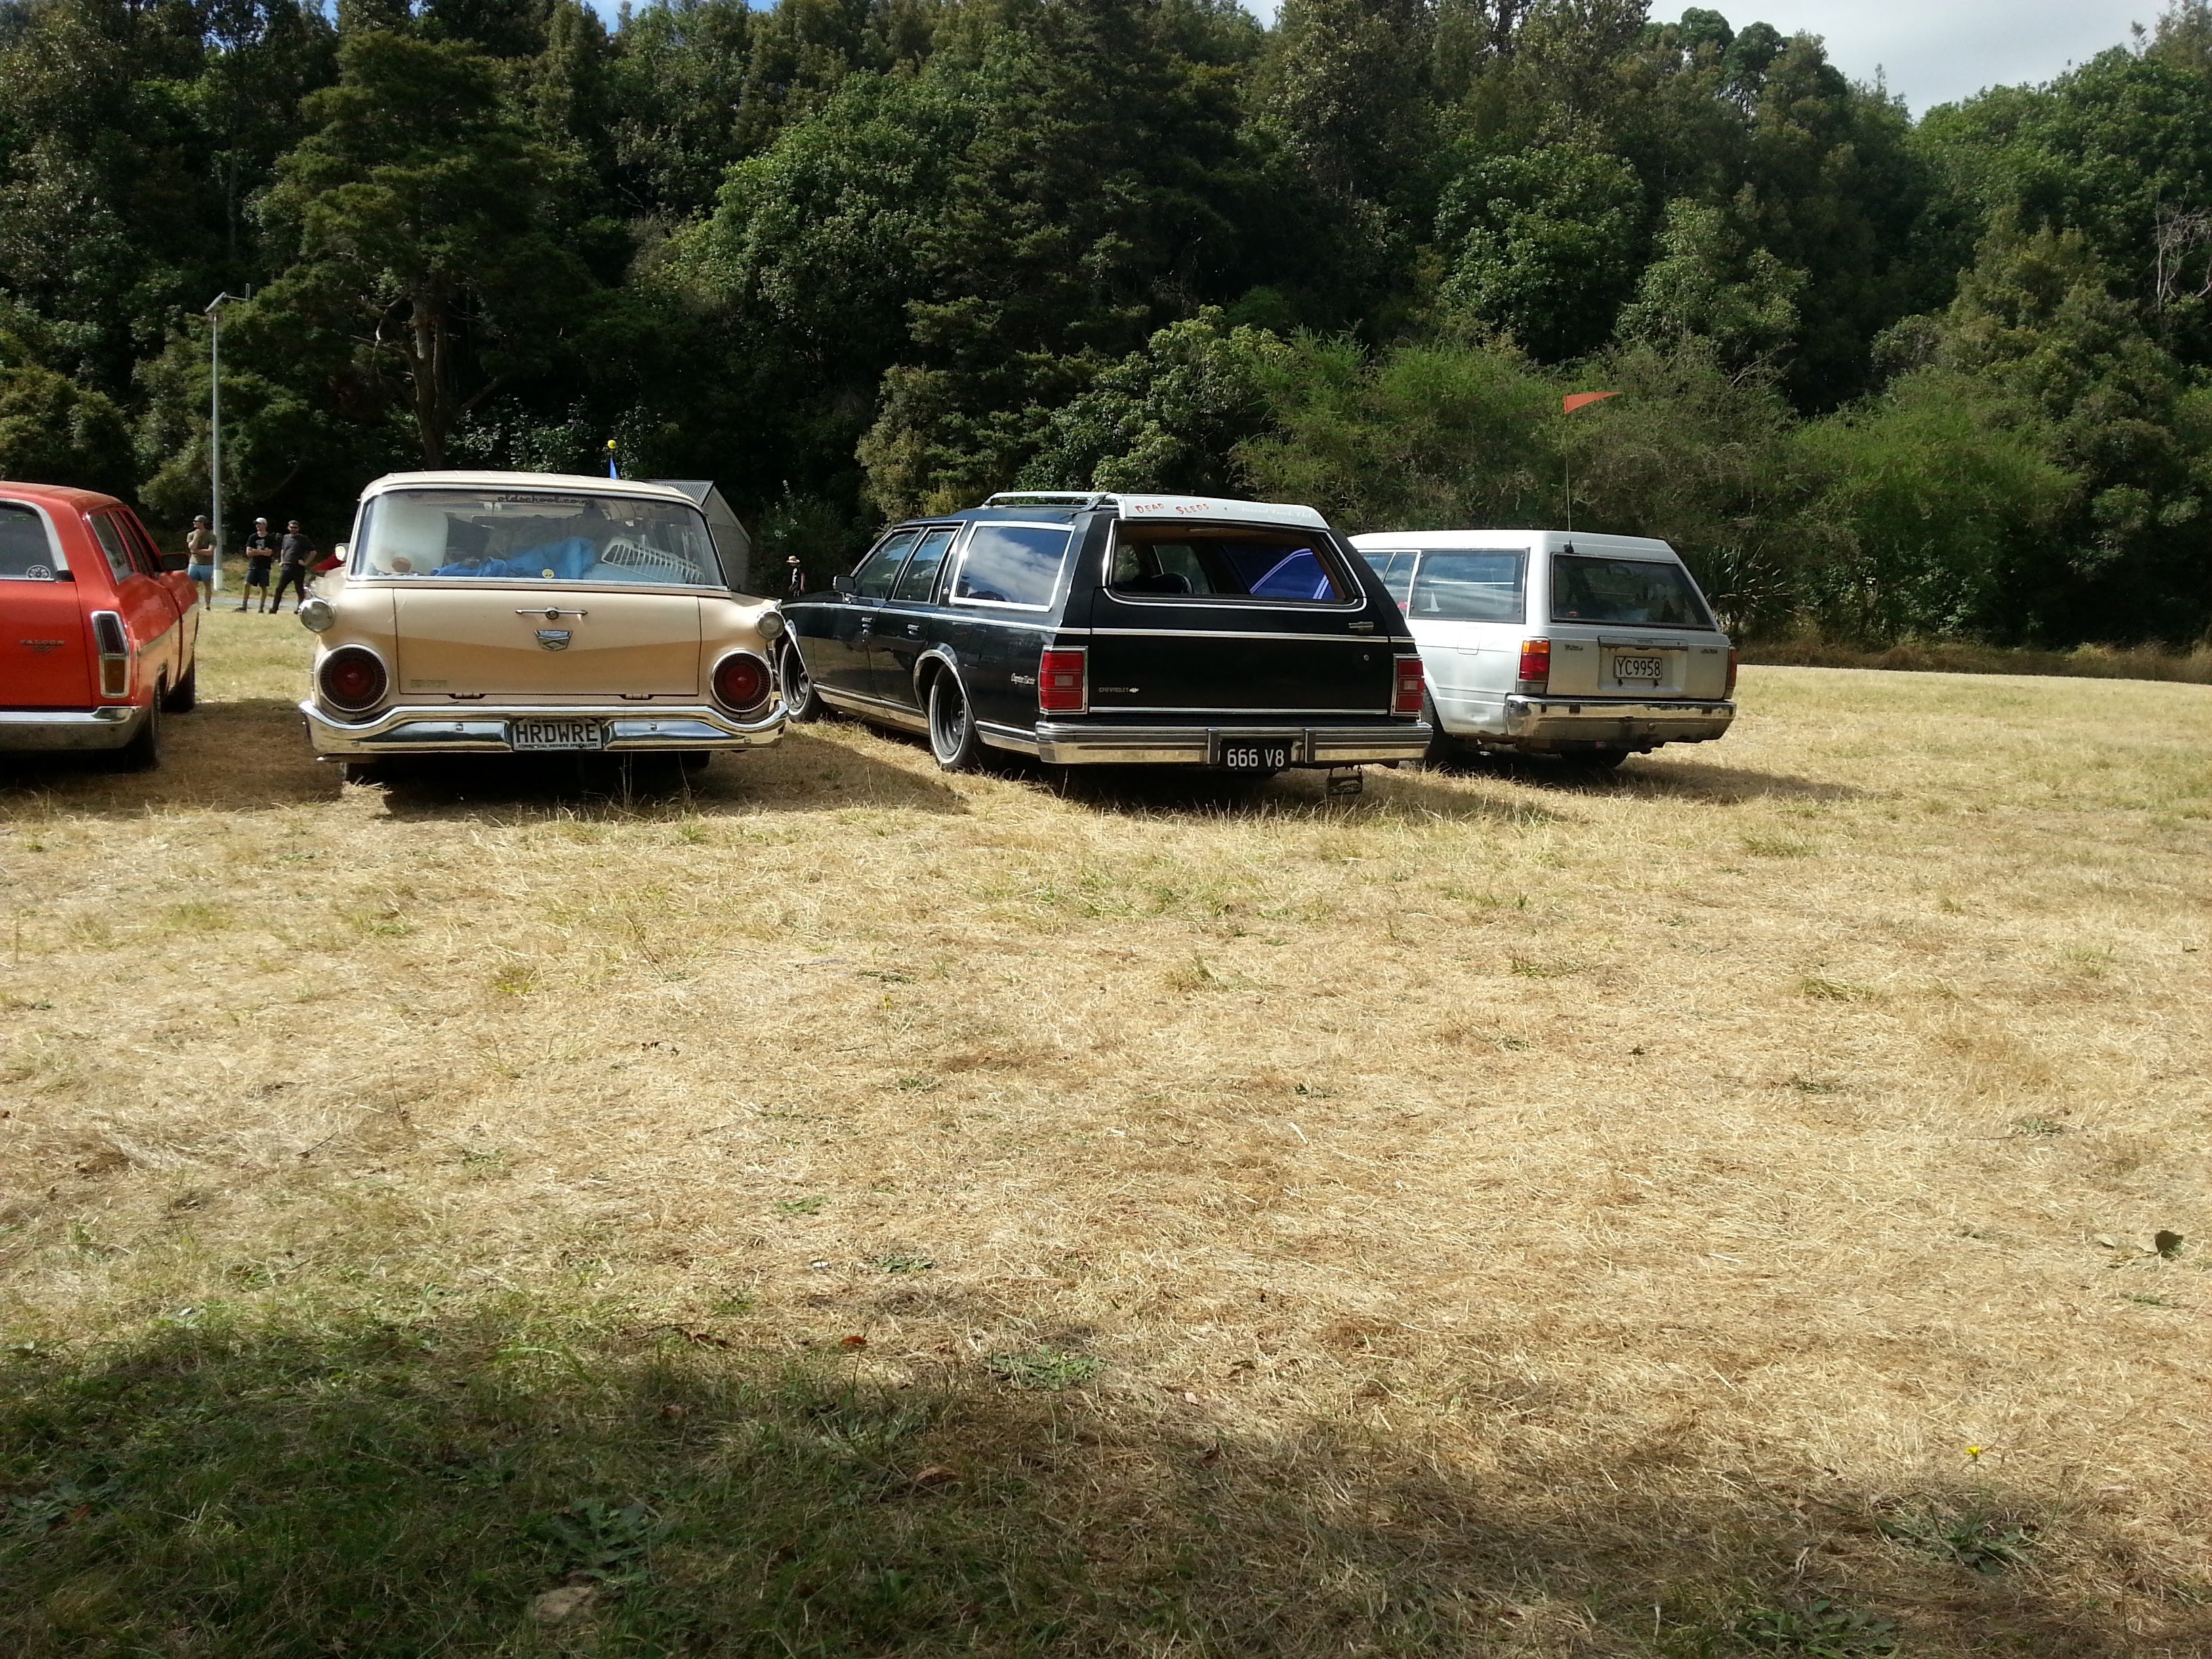
Station wagon rentals are available for next time
1 point
-
1 point
-
1 point
-
Try some wheel bearing grease smeared on the outside of thr throttle shaft to help keep the air out when tuning Also keep.all your worn out carbs in a nail box for me thx1 point
-
I have this very crown and she drives beautifully apart from a blown head gasket1 point
-
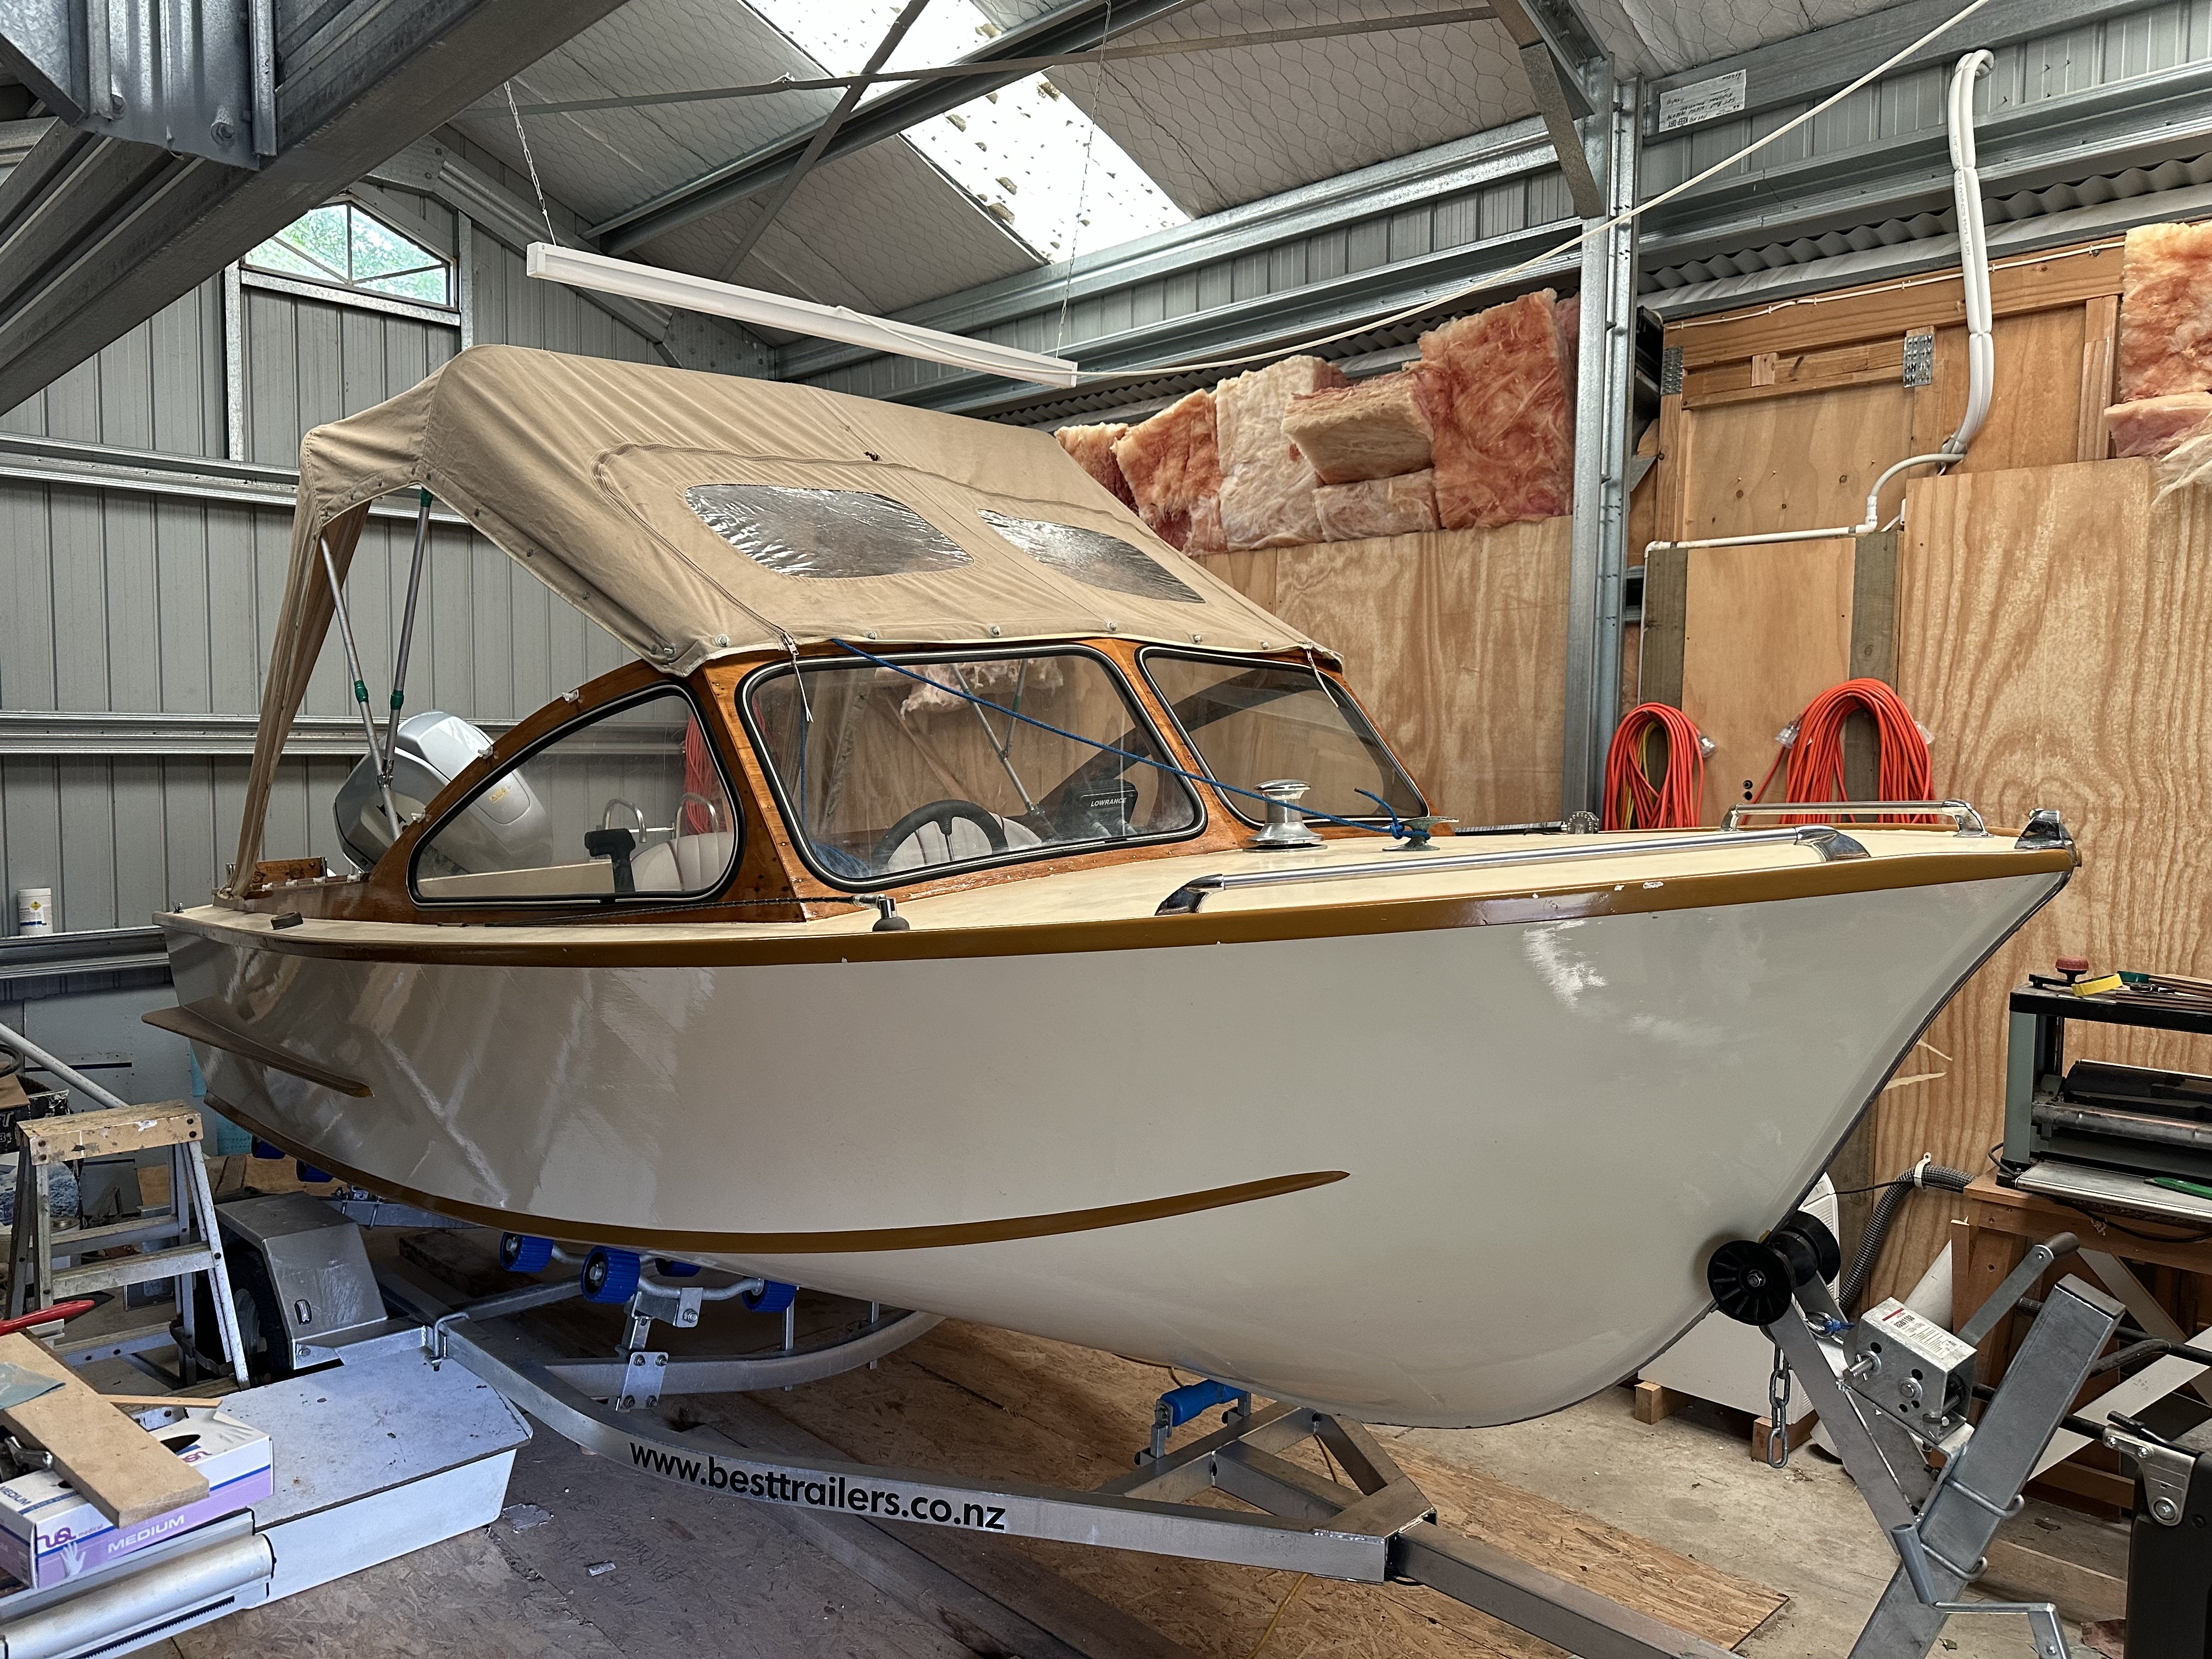
Windows are in and the canopy fitted and it looks like the rats have had a nibble. Little bastards. The canopy has sides and a back that can be fitted. The previous owner must have slept on it as it didn’t have the passenger seat and the bins were a foot longer. Also a lot of other little jobs done. Still a few more to do but we are ready when the weather is obliging.
1 point
-
I've been whittling away on various things I wanted to repair or upgrade on the Honda engine before re-fitting it. First thing was the throttle body pulley. Even thought its an off centre progressive design its not progressive enough. So I made another and offset the centre hole a further 5mm. I had to slot the cable outer barrel adjuster bracket further to align the cable entry. I then popped the engine onto the big wheely table. Easy as because I made the engine stand the same height as the table and work benches.. Remember the nice alloy garnishes Id machined to fit on the cam covers where there used to be plastic badges. They looked lovely. For a while. Because on about the 2nd drive the double sided tape decided it didn't like heat and they both fell off onto the road not far from us. I did manage to locate one of them but it had been driven over a few times and looked a bit sad... So I had to machine up some new ones... This time round I painted them alloy silver and then sanded off the tops. They just looked nicer for it. I then glued them in place using some Sikaflex. I don't think they'll fall off now. In place.. Next job was the one I deemed most important. I discovered upon stripping the engine 4 years ago that they don't have very large crankshaft thrust bearings. They don't really need to because there's no clutch forces exerted upon the crank,with the Goldwing clutch unit being on a separate layshaft. It was something I had never thought about before getting the engine and its played on my mind the whole time. I consider it the weakest link. I may well totally be a non-issue but I'd rather see if there was a way I could help it last. There's about .006" of thrust movement stock - measured as such... I had thought it out and came up with a simple solution involving some expensive, hard, slippery engineering plastic designed for high heat. This was sandwiched between the rear engine plate and the back of the flywheel and had just a few thou clearance so being a backup thrust bearing when the clutch is pressed. Help share the load I thought. The plastic thought different. I knew it had decided to leave the party early because I could see its melted edges through the bellhousing drain hole. But how bad it was I wouldn't know until I removed the flywheel.. lol... Ha. So that didn't work as expected then. Version 2 time I've been thinking about this a while. I looked into very large, thin section thrust bearings. Found an ideal item in the UK but it was 1300 quid. Back to my drawing board. I came up with an idea that uses $10 bearings. I needed a big chunk of alloy to machine up. Local alloy stockist no longer sells 16mm alloy sheet cut to size. They want to sell me a square metre. I went to a Nelson based fabrication outfit that has a water jet and the nice fella gave me a bloody large section of 20mm alloy. I only barely fit into the frunk of my imp (so improving the handling no doubt..) Cut it to size in the trusty table saw that has amazed me.. Into the lathe where I created a massive amount of swarf. Milled out some slots.. Drilled some holes. Very critical this one! They had to be bang on. Machined up some tiny pointy domed sleeves for the bearings.. Assembled it (notice I'd even got out my surface table for marking duties) I shimmed it out, testing and measuring until I had about .005" thrust. Just enough so it'll only touch when the clutch is pressed in. Finally in place... The other main job to do was sort out the reason why I had ended up removing the flat six in the first place. That leaking clutch slave cylinder. Even though I had made an alloy plate to support the mounting face it was not burly enough. This coupled with the fact that I had already burst the slave cylinder previous and its was never squished back together as neatly as it could be. So I reluctantly shook the moths out of my wallet and bought a brand new slave cylinder. I than machined down the mounting points I'd added to the Subaru transmission to allow for a steel clamping plate. I don't expect to have any issues with it now ! I then flipped the engine on its end and gave it a clean around the head gasket seam on the oil return galleries. Its always weeped a tiny amount of oil on both sides at these points... Not enough to drip but enough to slowly make a mess and run down the sides. Not very easy to clean and seal with the engine in the car. Now's my chance. I masked the areas.. Then another Sikaflex product was used.. Sealed up.. I'll see how it goes. Another job that I decided to leave was cleaning up the window on the Mandolorian spaceship. Now that's not something you'll hear many mechanics say But its getting a bit oily inside from general fumes, as I expected it might. I undid the machine screws holding it down but it wasn't going to lift off easily. The foam seal has stuck it in place. I knew if I forced it would crack. Maybe a job for another day. ot important now. At least they are still visible and the leds still light it up nicely. Exhaust box had one baffle that was vibrating at idle. Very annoying. So took it apart and fixed it. Gearbox mounts were knocking the subframe so I gave them a tickle with the cutoff wheel and welded them back up. The gear linkage rod linear plastic bush is something I want to improve in the future with a proper linear bearing and some seals. But for now it got a clean and some grease. I also installed a hotter thermostat. Up from 82c to 88c. So with these jobs done and the weather forecast of two days of rain I set about removing the Datsun engine. I timed myself and it took about an hour because the rear valance has to be removed. swapped the driveshafts across. About 45 minutes because bearings need to be swapped too. I might get some new bearings so both axle sets have their own. Then bolted the Honda in place. This took 15 minutes. Smug faced me then realised I'd forgotten to attach the first part of the gear shift shaft. Whoops. Back out, fit shaft, back in. Plugged everything up and went for a starter turn to build up oil pressure. But starter kept blowing the 10amp solenoid fuse (I'm so glad I actually made a circuit just for the solenoid now!) I'm not sure what was happening but I took the starter out stripped it, cleaned it, pondered it, reassembled it and it then worked fine. Now a engine turn over. Whir whiiiiiir whiiiiir whiiiiir. Something wasn't right. It should turn over quicker than that! Took the engine out again. Removed the box. Engine was hard to turn over. Removed clutch and flywheel to discover that the clutch bolts were just protruding through enough to rub the alloy thrust bearing 2000 plate. Whoops. So I clearanced the plate, flap disked the protruding bolts down. Reassembled and all good. Bolted the lot back in, tested the starter and this time its turned over fine. With the clutch bled, the fuel lines etc attached I started the engine. It started up mint just like it was running yesterday. Tested the clutch. The thrust bearing 2000 rollers made a sound not unlike a noisy clutch release bearing and initially I was thinking 'well that won't do!' but they soon settled in. Still a noise but I know what it is and why its there. Better then potentially wearing away the crank thrust bearing So with the engine all back together and in place... So we went for a drive. Coolant still doesn't get as hot as I'd like to see but it could be that the pump controller had reset to the default so I'll have a play there. Otherwise get an even hotter thermostat. The engine runs fine. The new throttle body pulley makes for much easier driving off from standstill and smoother when crawling through our local village with the many speed humps. But the fumes from the exhaust getting sucked into the cabin when we lower a window is terrible. Its the number one fault now. I have tried blocking off the through flow vents sited just above the rear window but its not fixed it. The gearstick base plate has a gap - could it be possible there's a low pressure zone under the car and the gas can creep forwards along the tunnel and enter there? I'm going to design and make a new exhaust muffler setup. I'm still not happy with the exhaust sound and low rpm, it still drones and only really sounds like a flat six when above 3500rpm. I know these Goldwing engines can sound much better. More Porsche. Less Cifero. Possible benefit will be less fumes if I go side exit exhaust. The Datsun has a side exit and its much better with regards to fumage. I'm also not entirely happy with the look of my current exhaust box either. So I have taken some measurements and will start doing some design sketches along with more research.1 point
-
Got her tucked up inside, with the dregs from an Argon tin I cut down the trolley from the Datsun Rotisserie and rebuilt it to pick up on the Niva jacking points, can now wheel it in and out of a corner of the workshop. Drained all the fluids and spent some time underneath figuring out the needed works, short is not much, but plenty enough. All set now to start stripping the suspension to replace all the rotten rubber bushings and whatever else arises. Worst realisation is that its in much the same condition as the Datsun was 3 years ago........
1 point
-
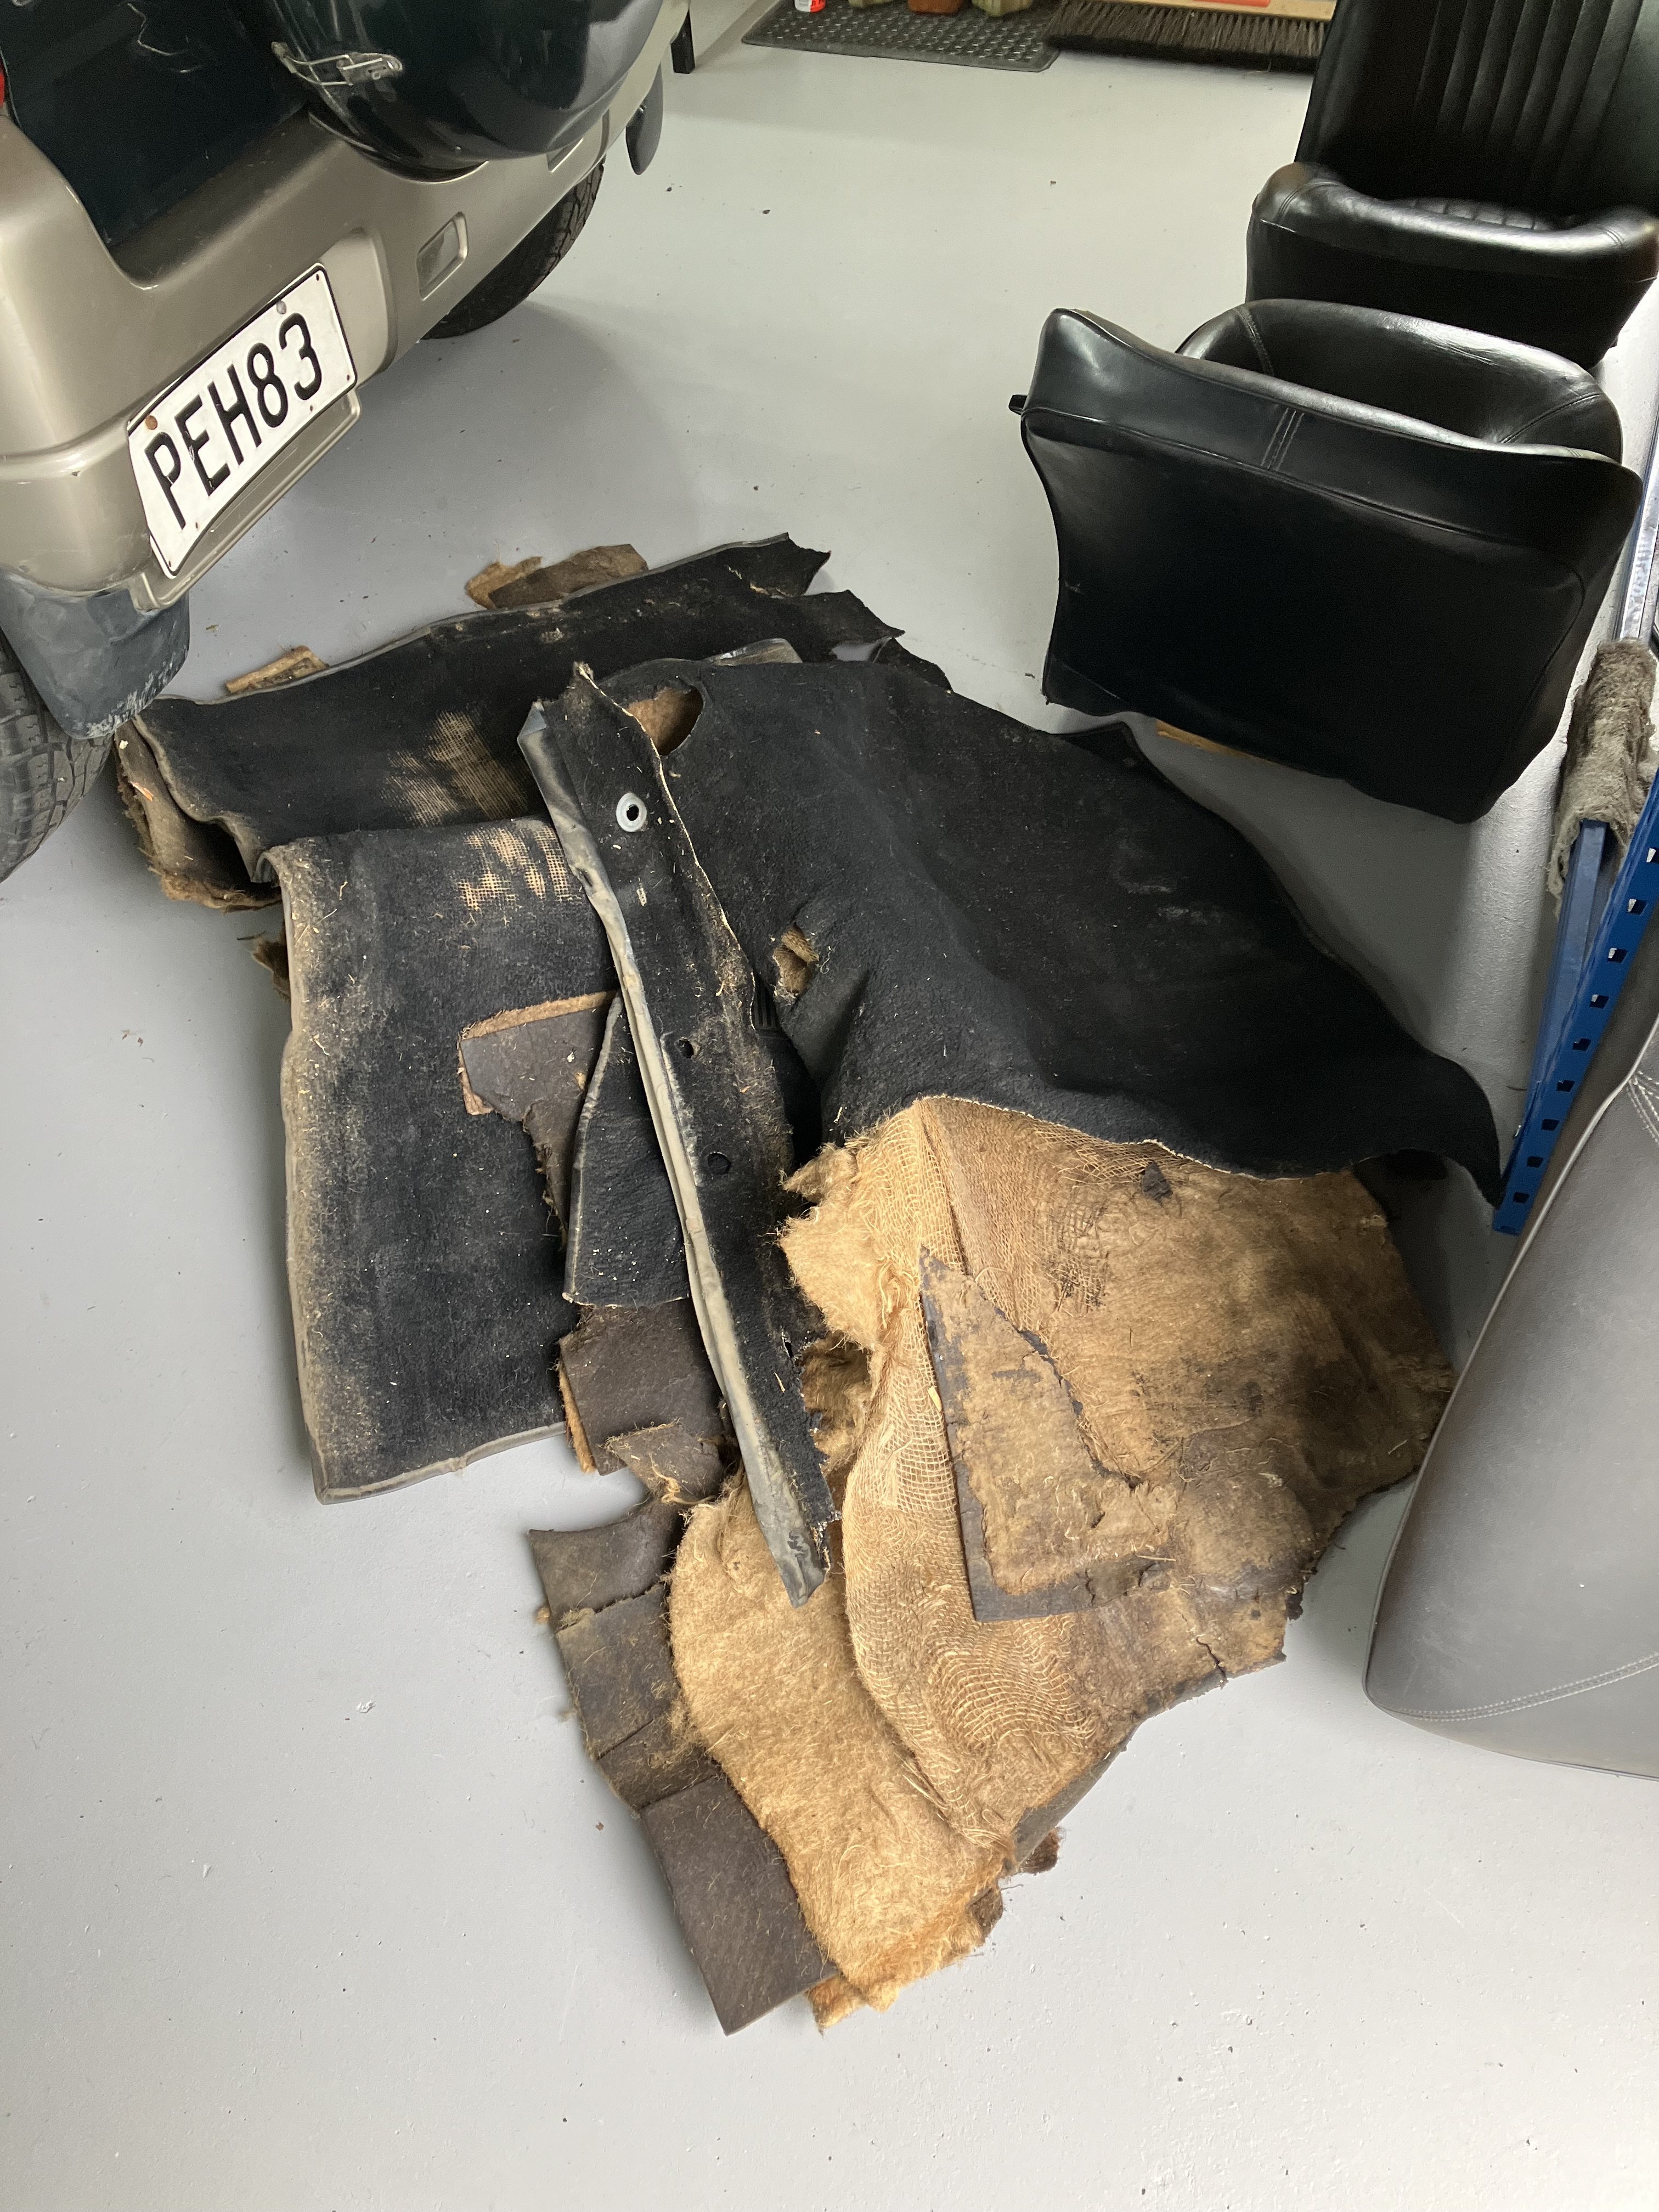
Oh yeah and a big pile of old carpet and lots and lots of underlay. So much dust and fibres, I’ll probably get some lung disease from it.
1 point
-
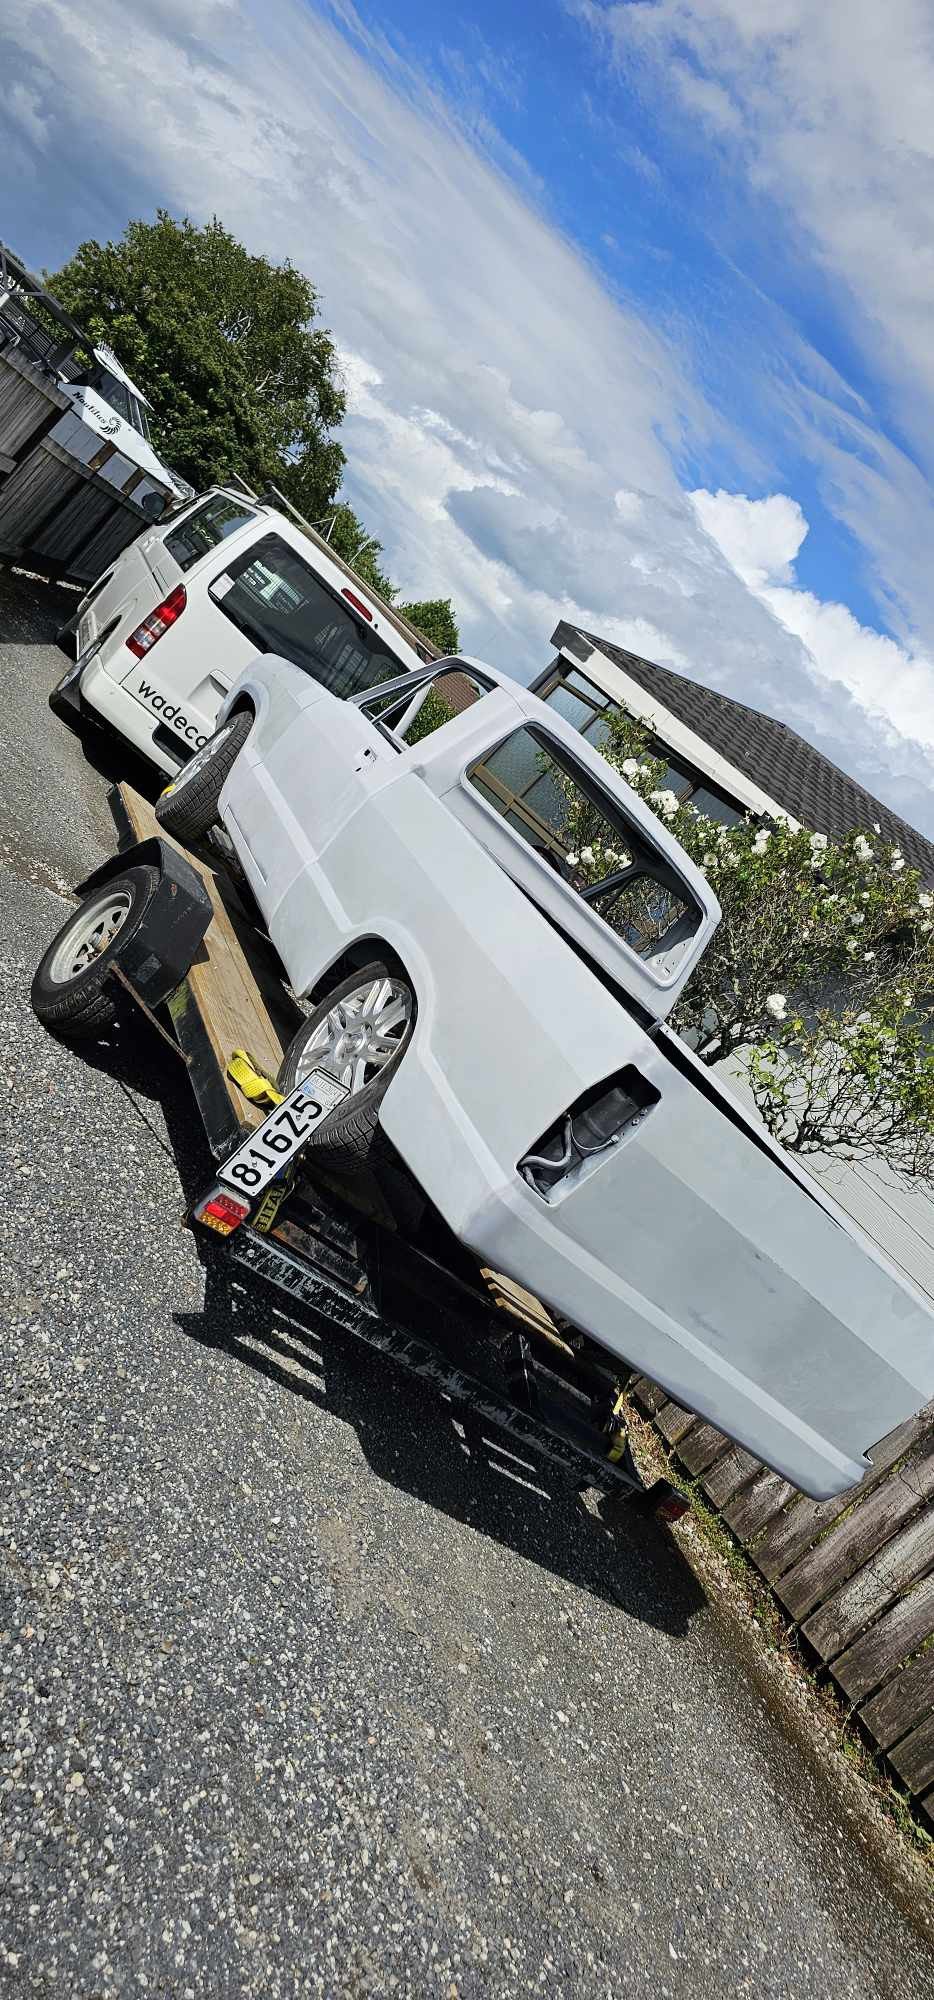
It’s in colour now. And OMG!! the next 4-5 weeks will be stressful putting this back together without scratching it to death1 point
-
To the booth!!!!!!
1 point
-
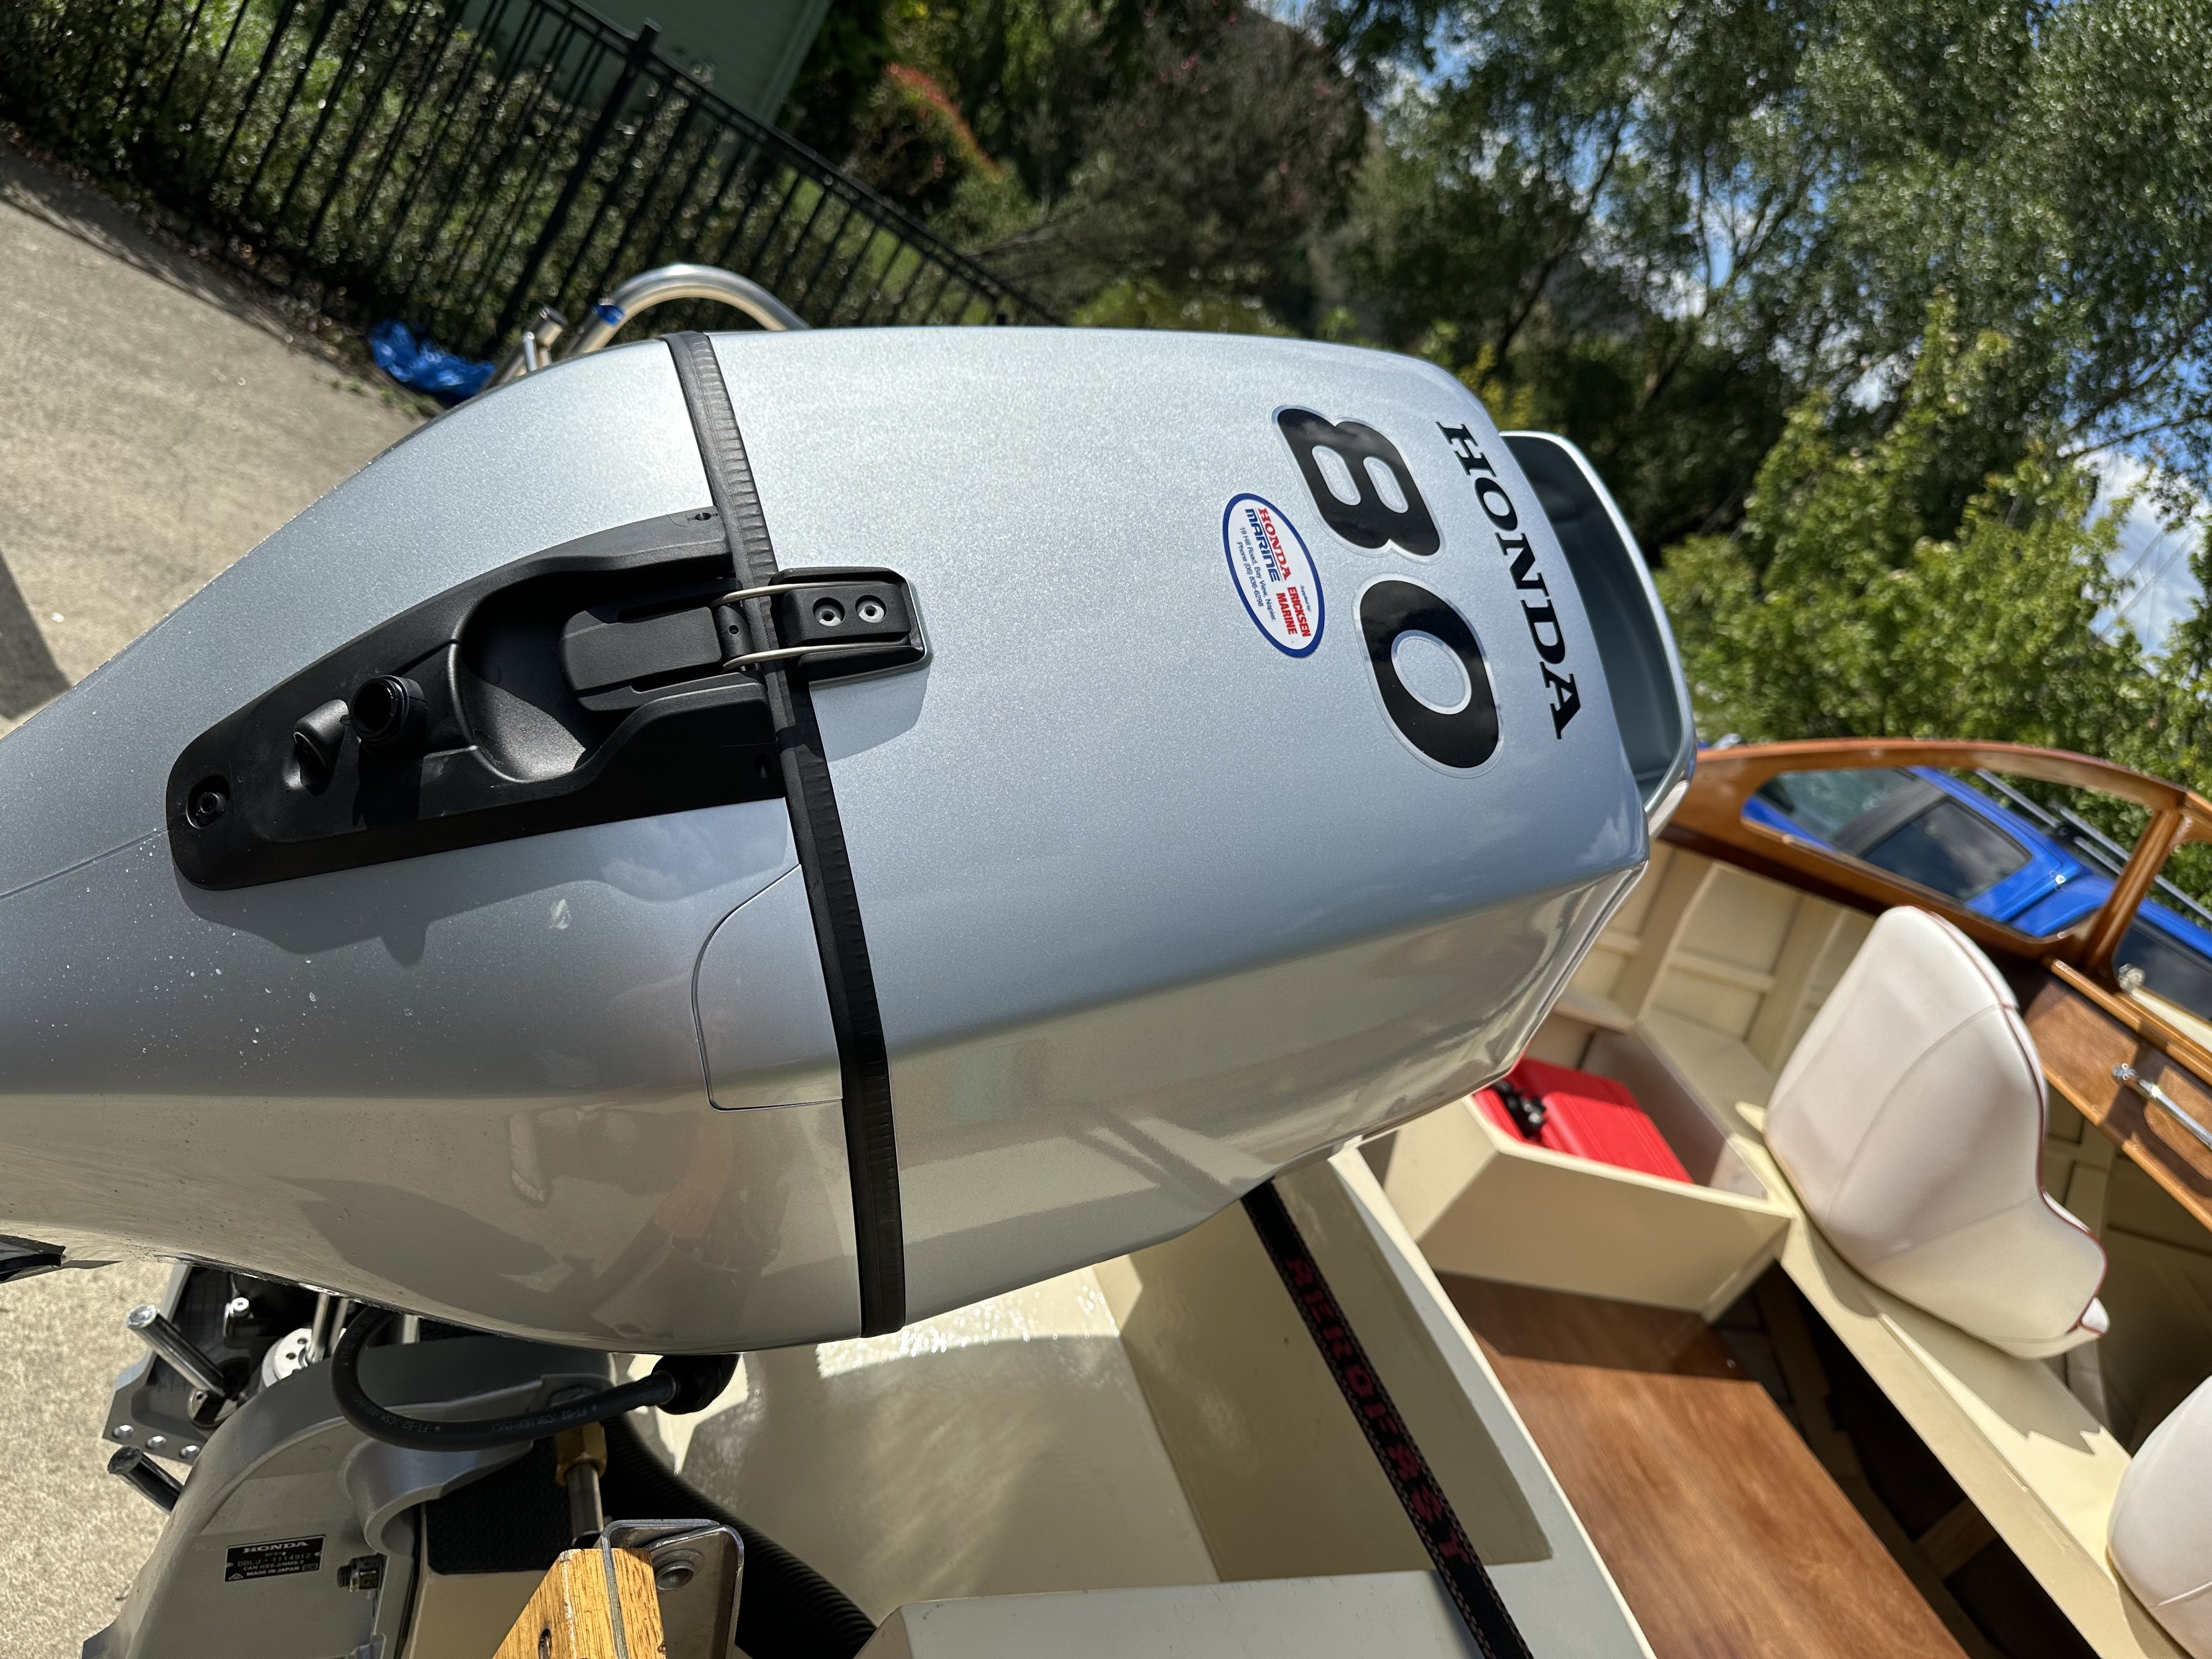
Also Honda NZ had run out of 75hp engines so Erickson Honda got them to supply a 80hp for the same price. So I got another 5hp for free. Yippie
1 point
-
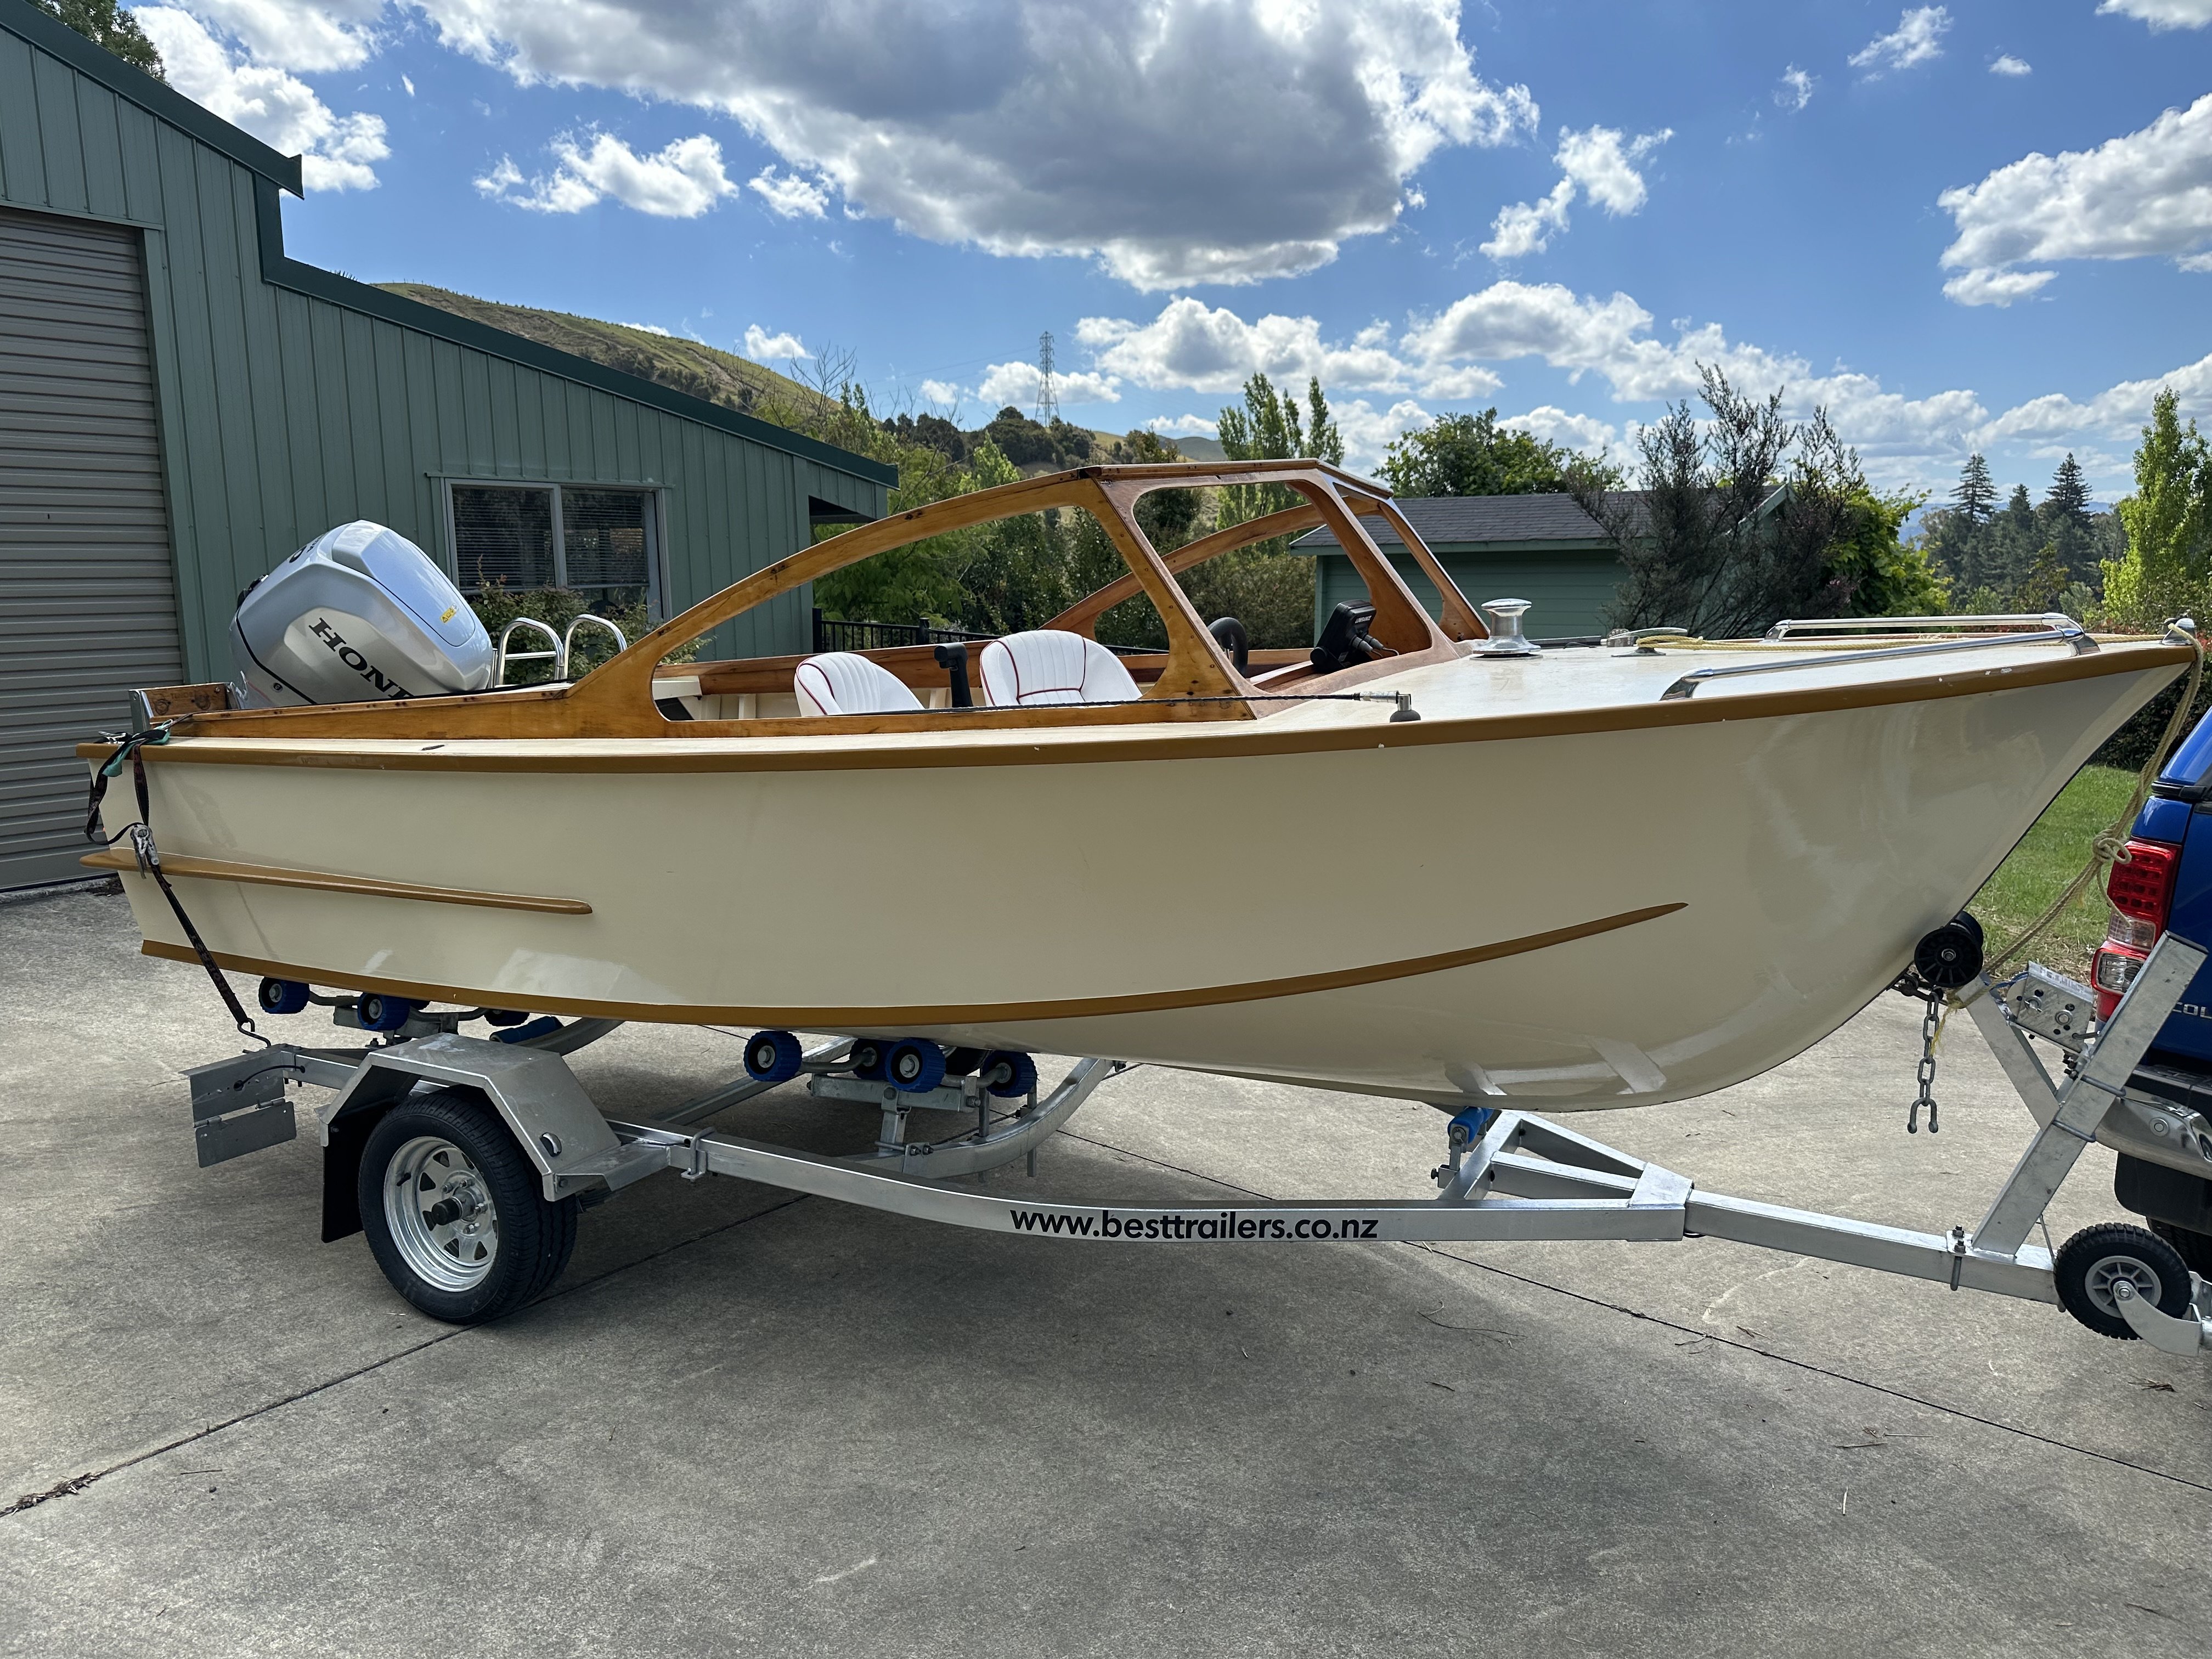
Its back. Ericksen Honda made it happen. Once he found a trailer for it he went to Auckland to get it as it couldn’t be freighted before Xmas. I think he picked up another engine for another boat as well as it wasn’t going to get here before Christmas. He certainly doesn’t muck around. I wouldn’t hesitate to recommend them. Anyway, they took it for a test run in case they need to raise or lower the engine or change the prop. They said with a big grin on their faces that it goes really well and at full power it gets a little bit on the scary side. Now to fit the windows and finish of a few other things before I hit the water. Happy as.
1 point
-
Spare bottom end in a beer crate, Traditional. Going to rebuild the Honda or go Lifan ? If you split the engine(s) i'm happy to come and assess/advise.1 point
-
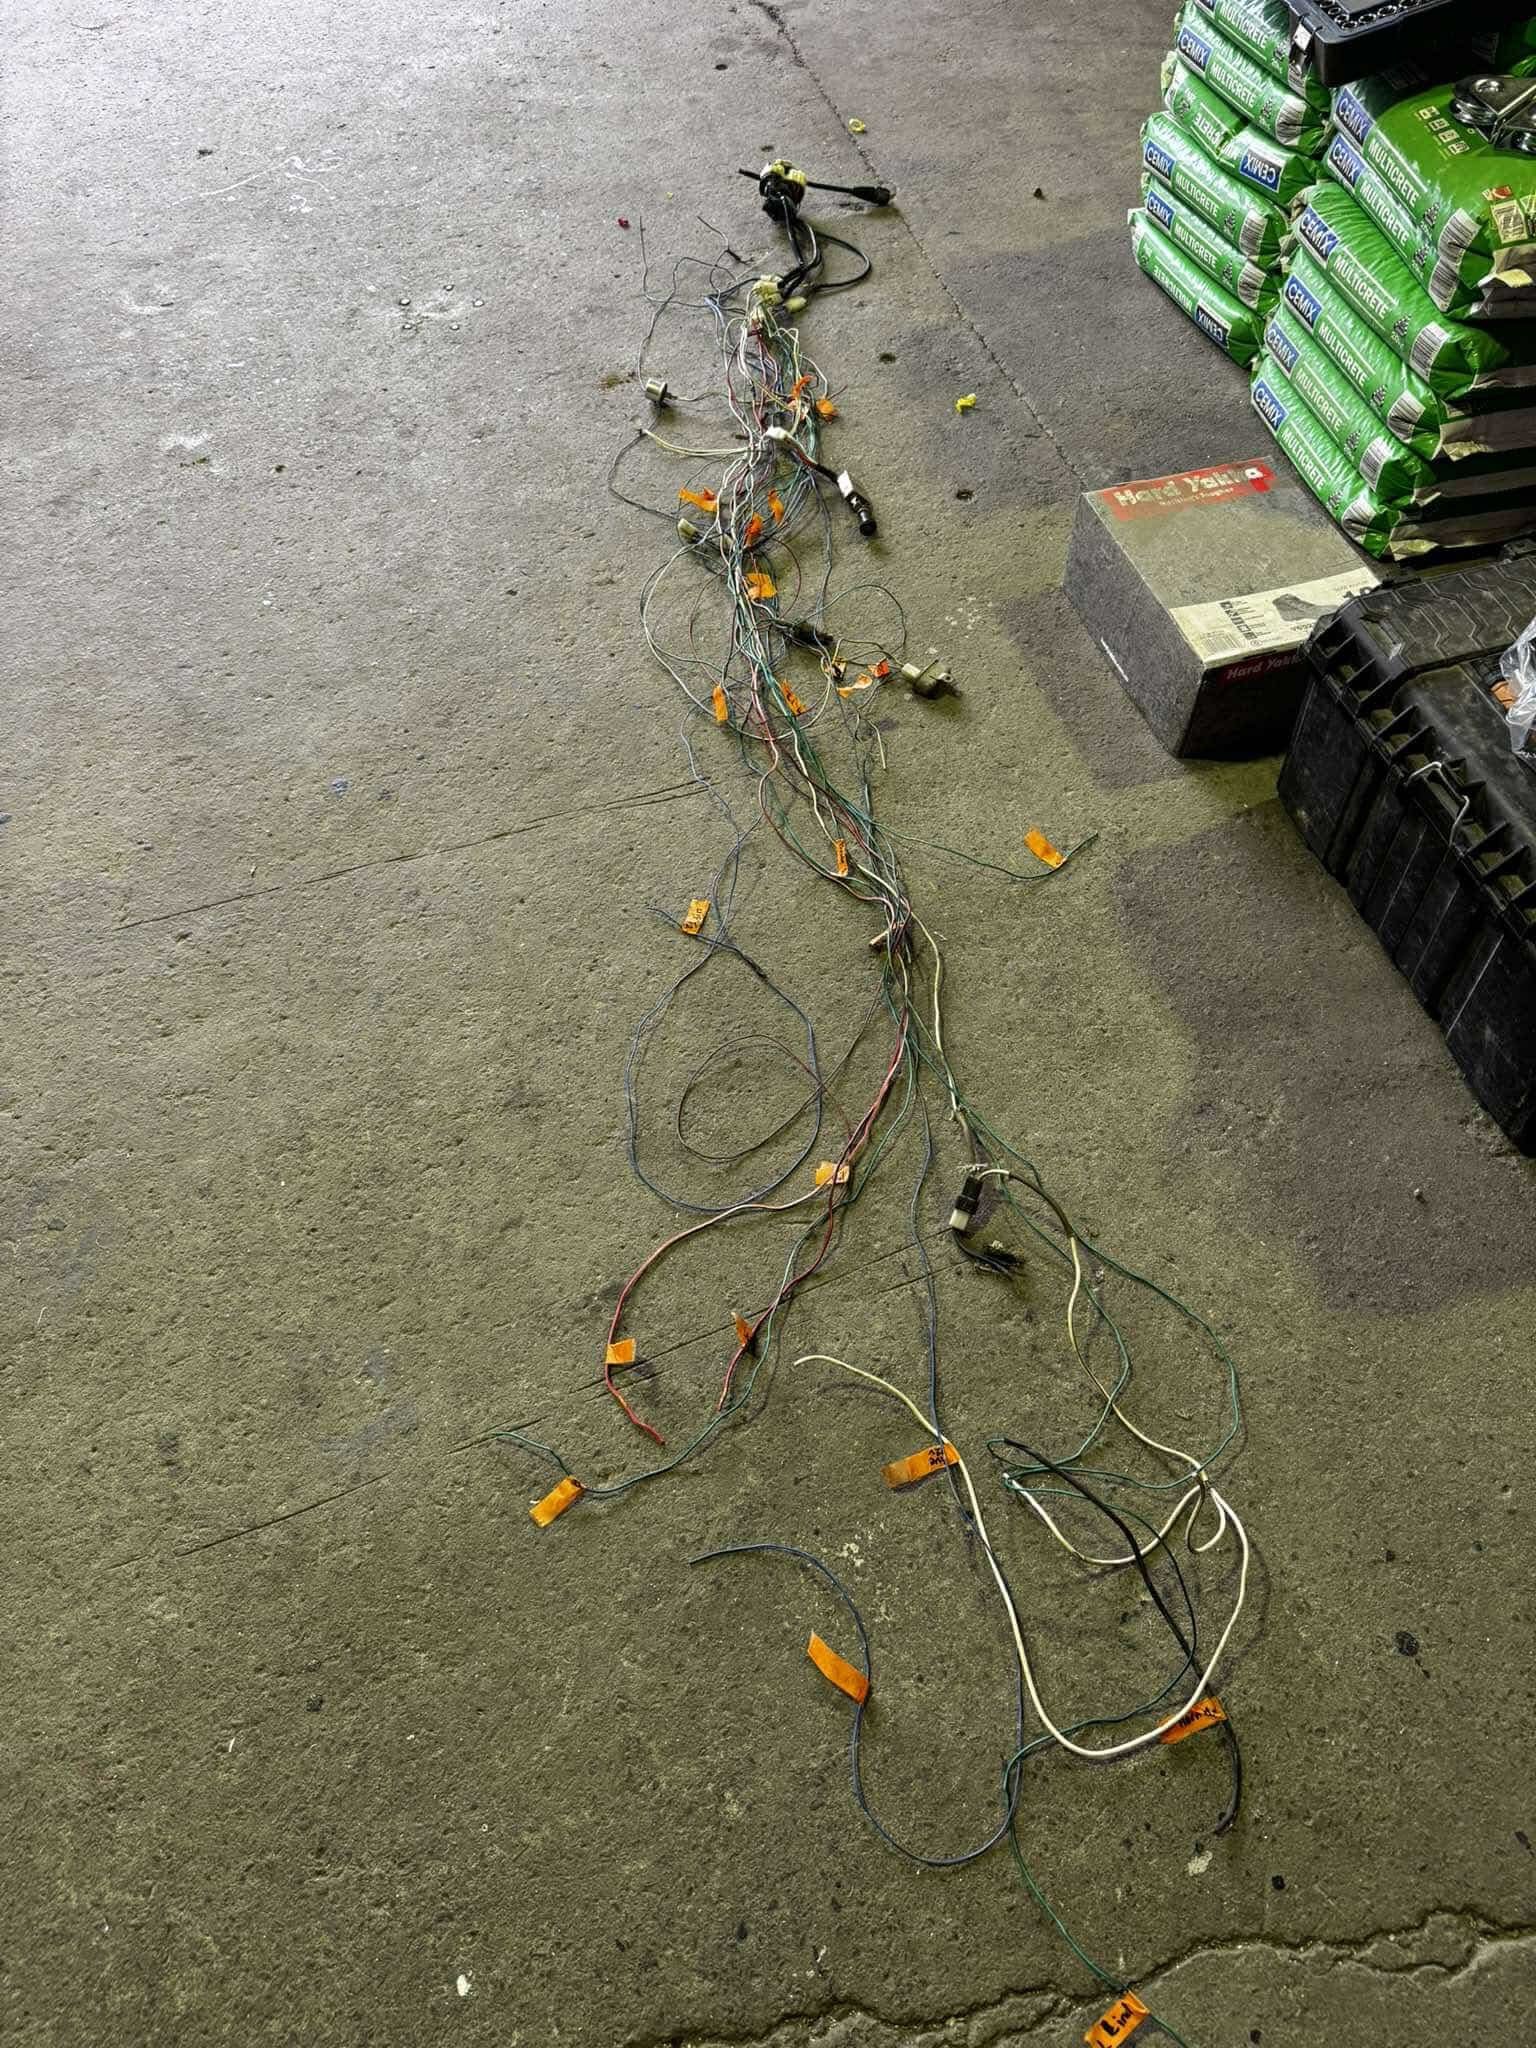
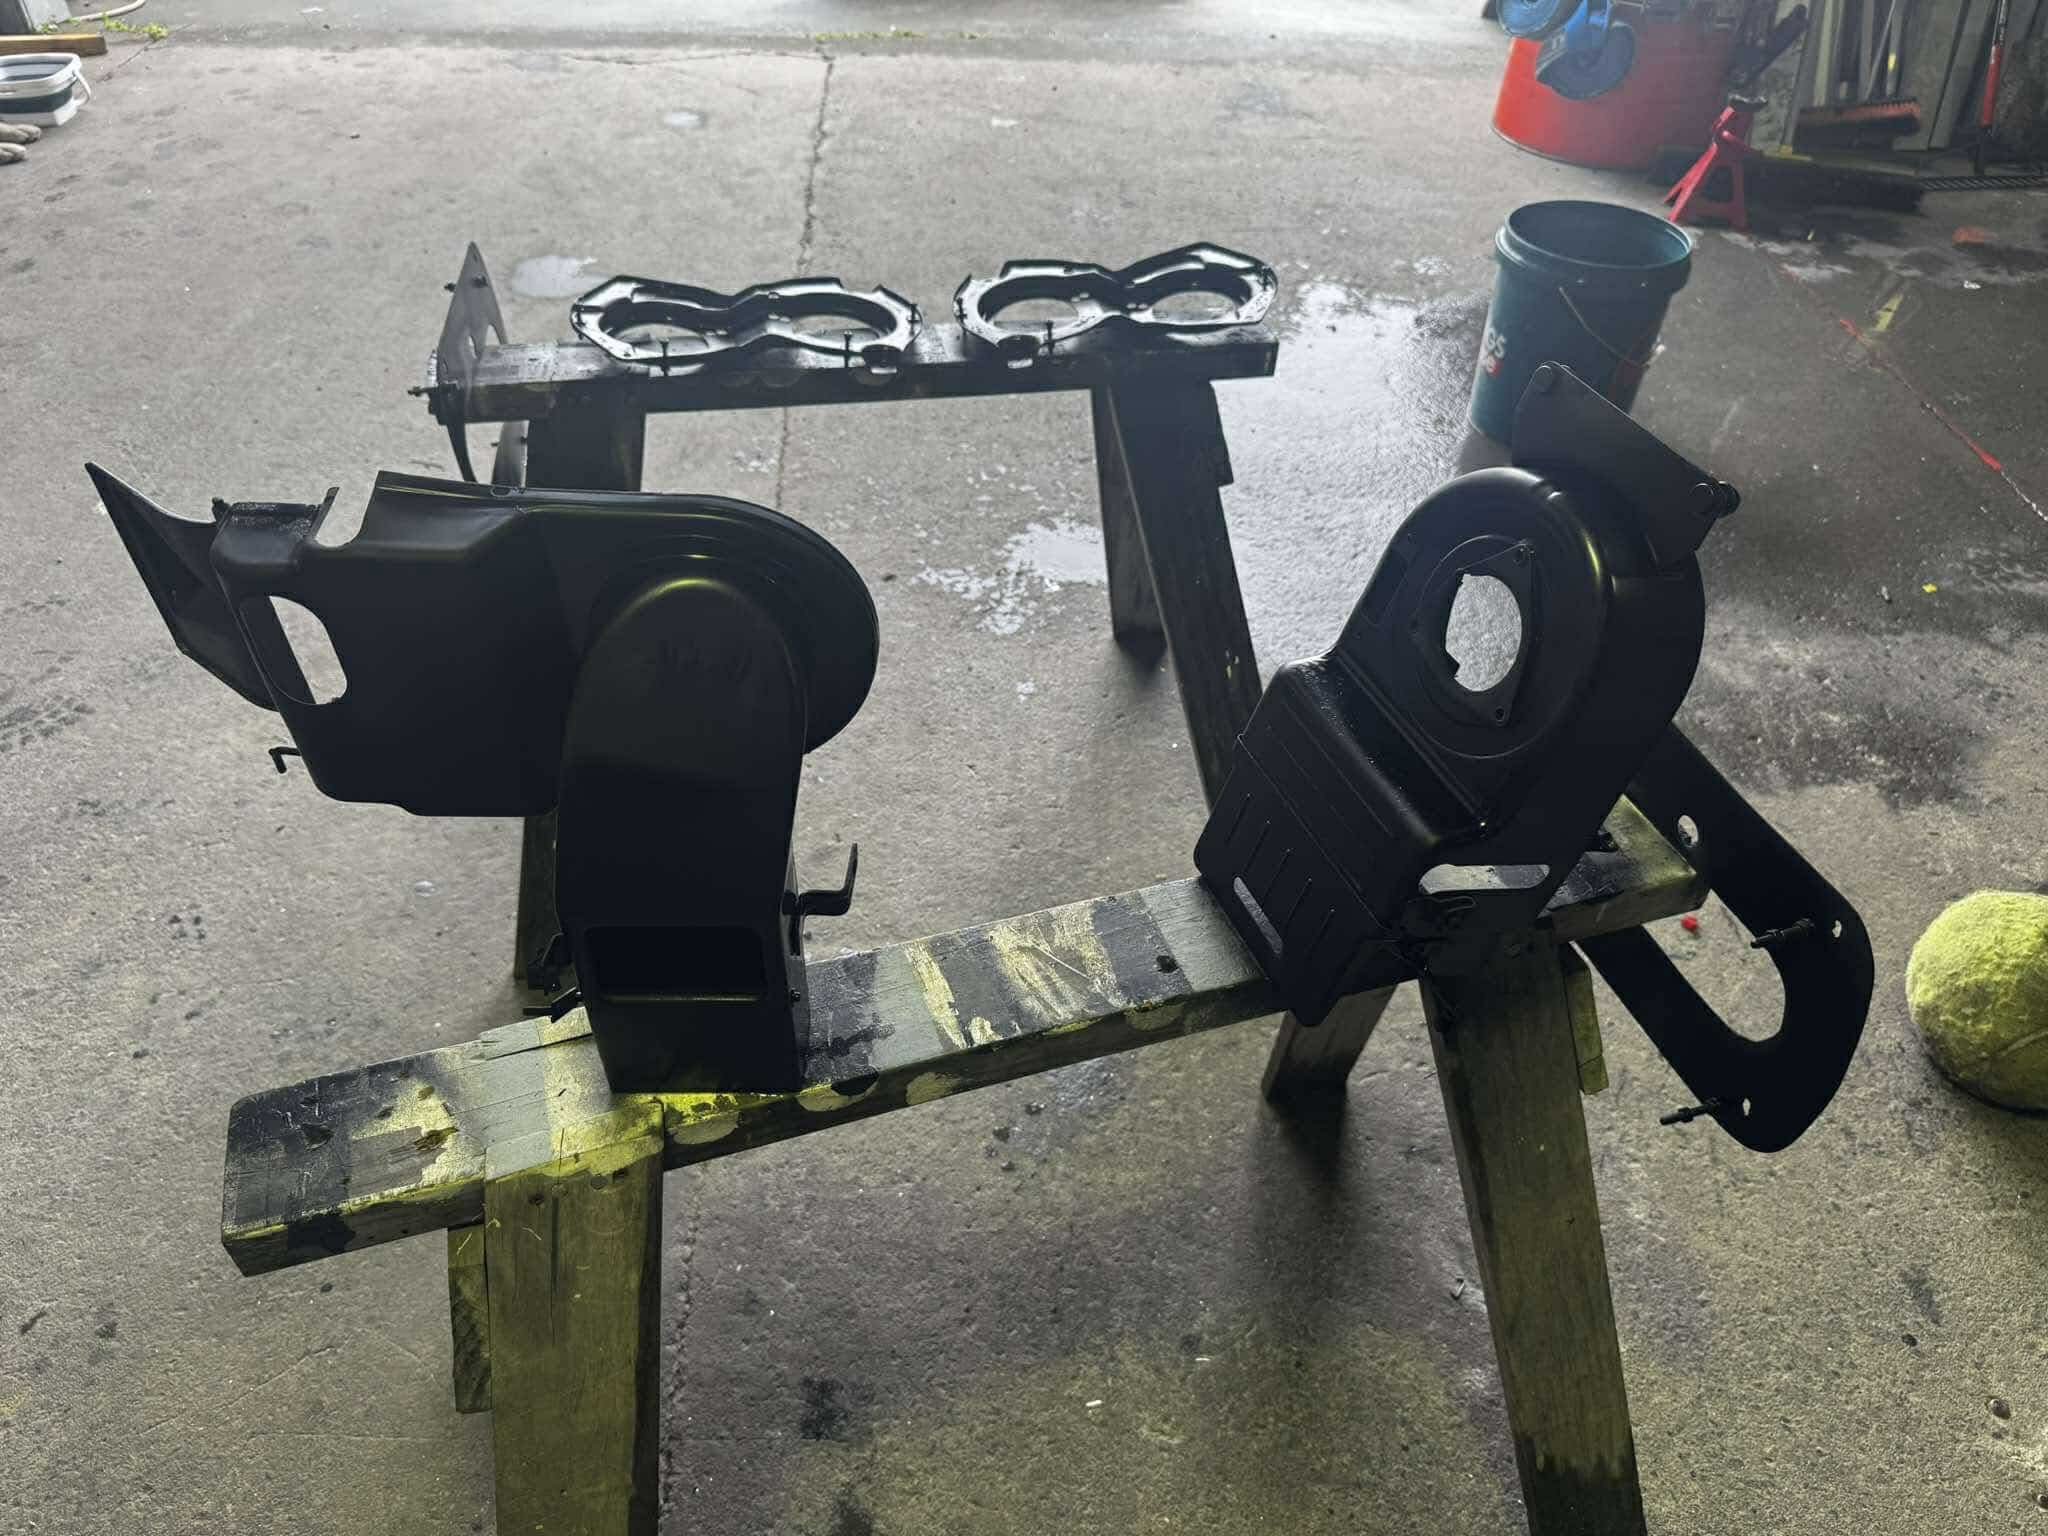
Rainy day stuffs today. stripped back the factory loom to salvage the plugs. Labels everything as it got cut away. seems pretty easy. Just need to figure out the flasher set up cos it was unplugged. then cos it was still pissing down I decided to strip the heater box, remove the heater core, test the fan and scrub and respray the entire housing. came up great. did the same with the headlight buckets and mounts.
1 point
-
Sorry to everyone that I have blue balled with this project! Over the period of god knows how long it's been so far without any cool stuff happening. I have not yet made good on my promise of doing zillions of rpm with a shitbox wrecker engine. In V6 variant at least. I've been putting in some solid hours to get things finished to try get to the drags. But tonight I've come to see I'm not going to make it. If it was just about getting the car finished enough, might be feasible with some long nights. However it turns out I need an MSNZ license as well as a log book in order to race without wof/reg. I've been going down this road over last few days to try organize it. I paid $70 to join a car club, which is a prerequisite to applying for a license. However it was then was going to be another ~140ish bucks for a license that might not arrive in time. So combined with some extra expenses to get car in a drivable state I'm probably looking at $7-800 I need to pull out of my ass in a hurry. My bank balance got fairly well emptied a week or two ago when the neighbors dog tried to eat our cat. Then the cat crunched my finger when I picked it up. So big vet bill for the cats injuries, and a week on antibiotics and a day or 2 with bandages for me. So as exhausting as it has been pushing hard to get this done. For now I just have a rest. But it's really close to being drivable. Since last post: -Firewall finished -Put crossmember and steering rack back in -fixed gearbox leak (loose bolt) -fixed engine oil leak -finished exhaust manifolds on both sides, down to a finished flange. So they can stay in for good while I make rest of the exhaust. -Got motor and box back in -TA63 booster fitted -Interior started going back in -Started on battery tray -ITBs properly fitted and bolted/sealed up -Exhaust manifolds on properly with gaskets etc, all bolted up properly -Some wiring stuff sorted -2nd wideband wired up -radiator back in -front of car back together -Motor fired up again! My collector flares out to 2.25" or 2.5" (cant remember) but then you can see down where the flange ends up, thats where it flares out to 3". So does this mean it's an F1 car now? haha. The last weld I did on this pipe was the one on the rear of the 3d printed part, and turned out quite nice compared to some earlier efforts. Also, although I'm no welding expert by any means. Holy shit, it feels like cheat mode being able to weld indoors. So much easier when you're not battling a mild breeze on the driveway. haha.
1 point
-
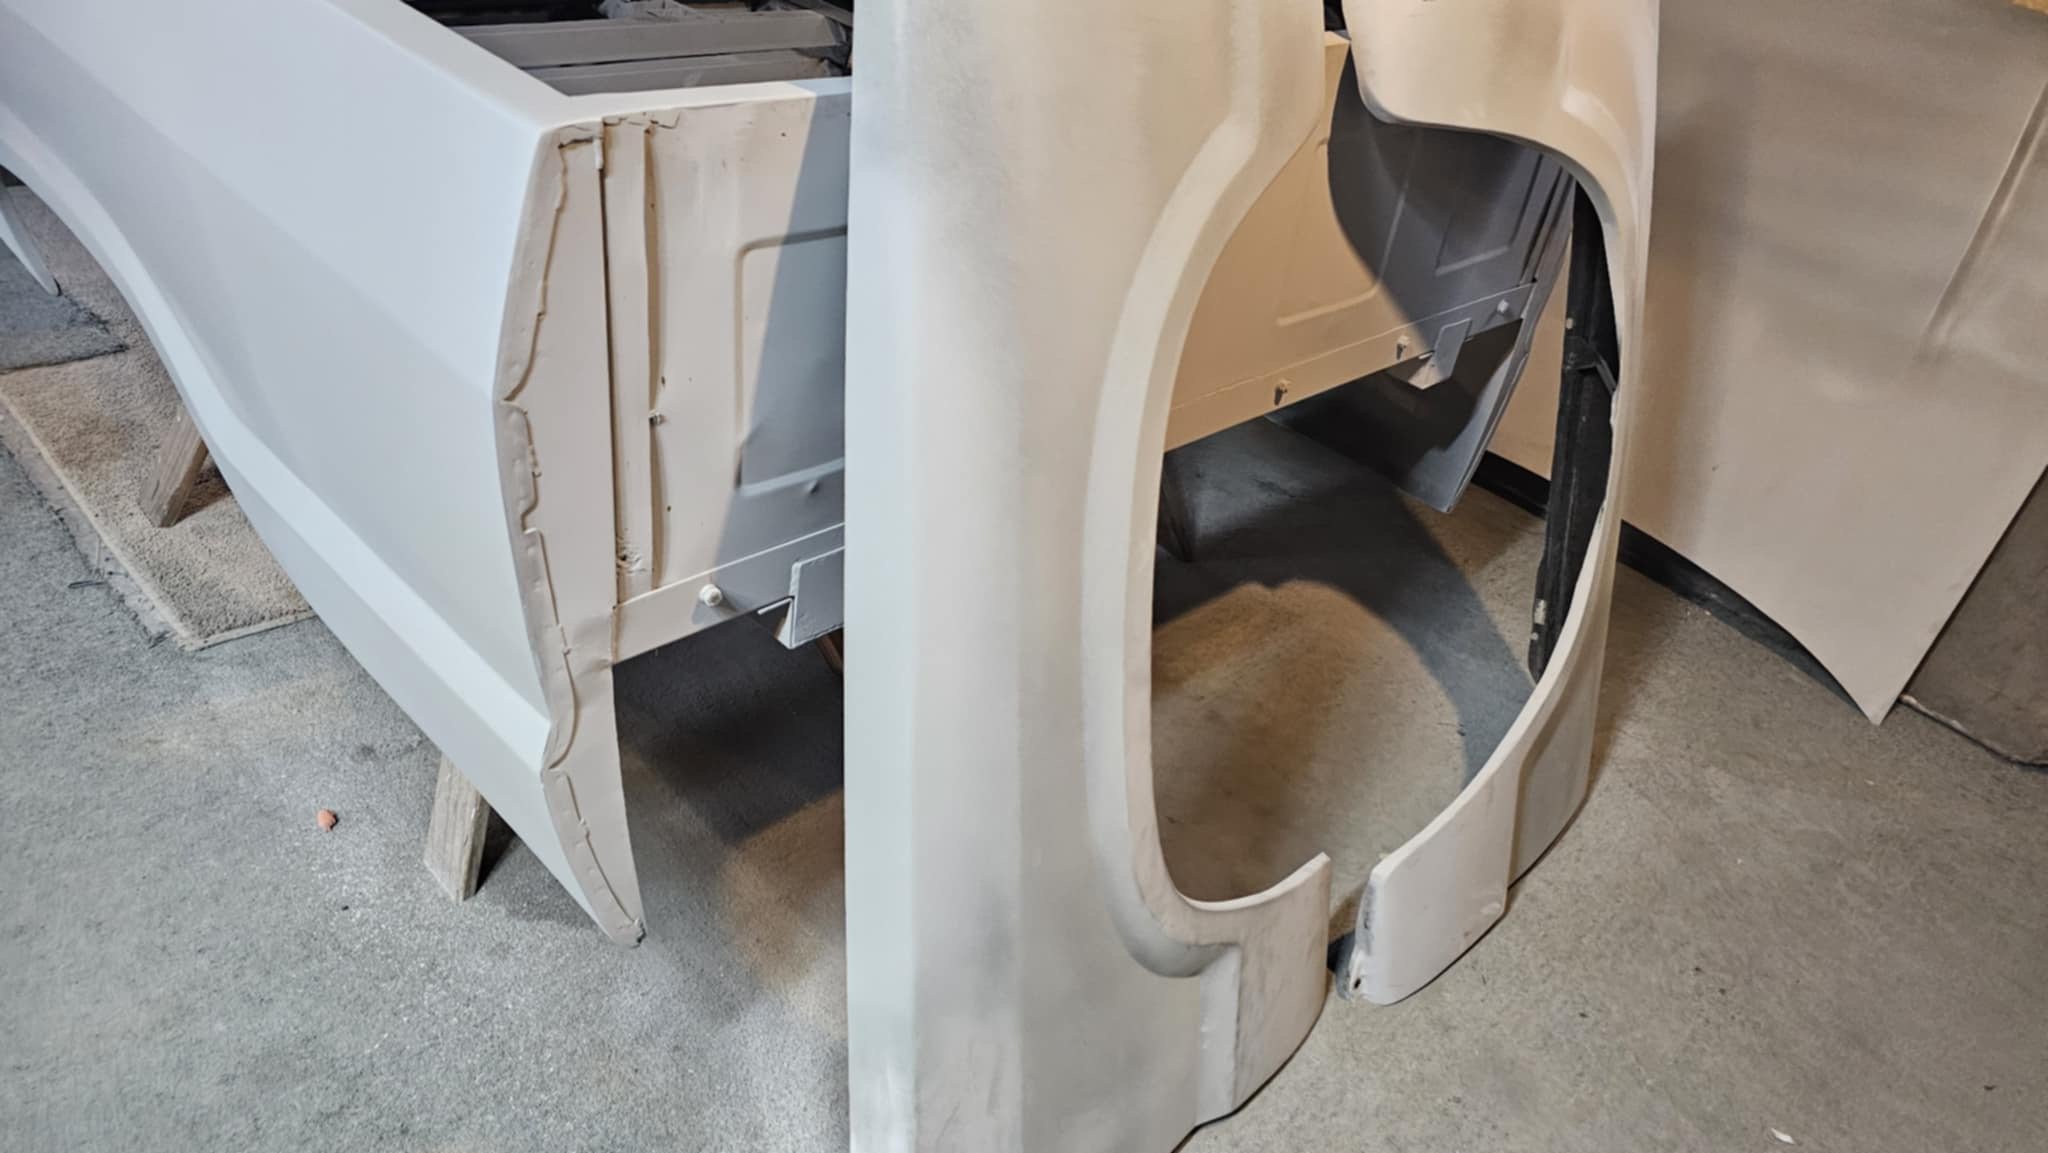
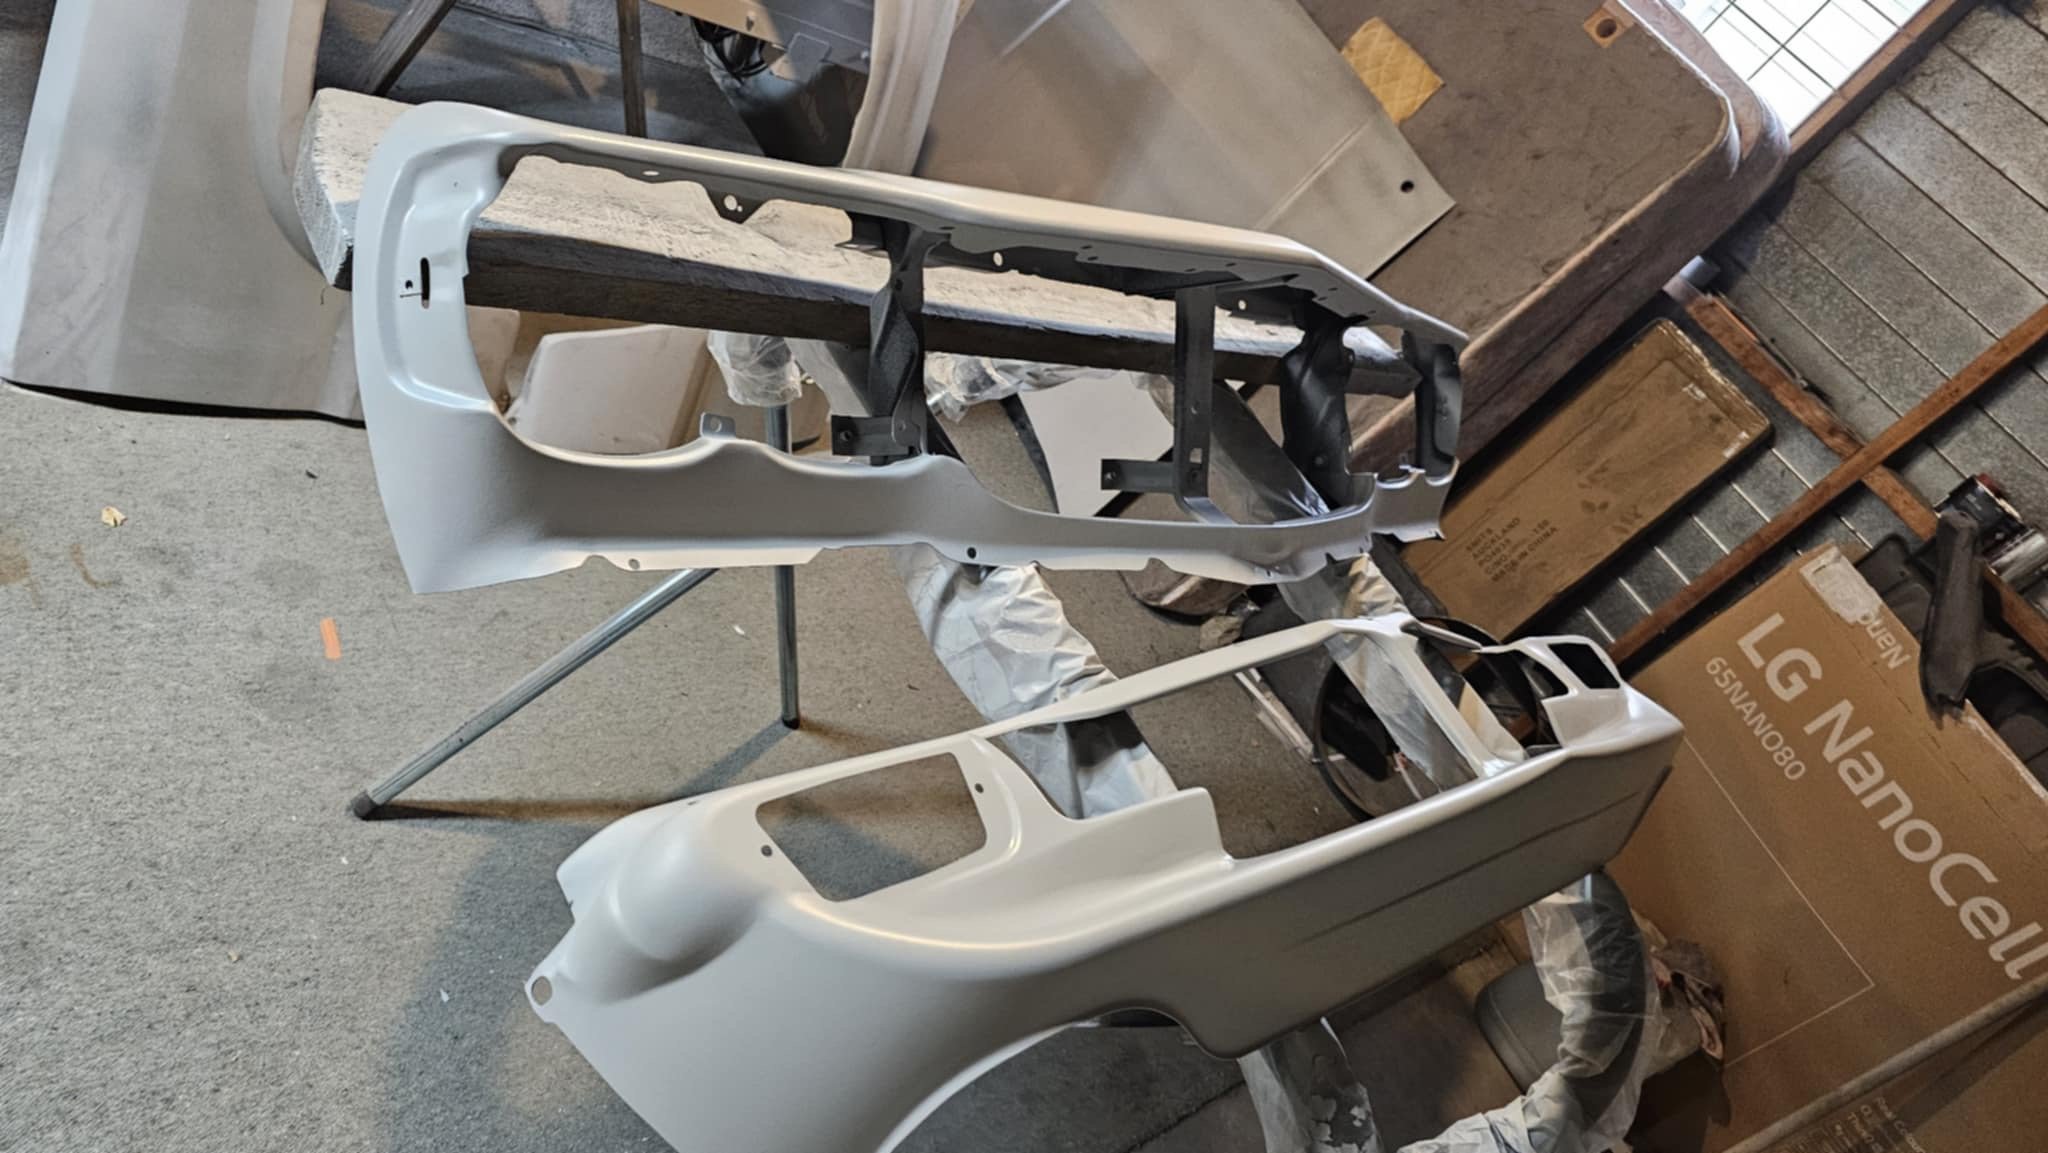
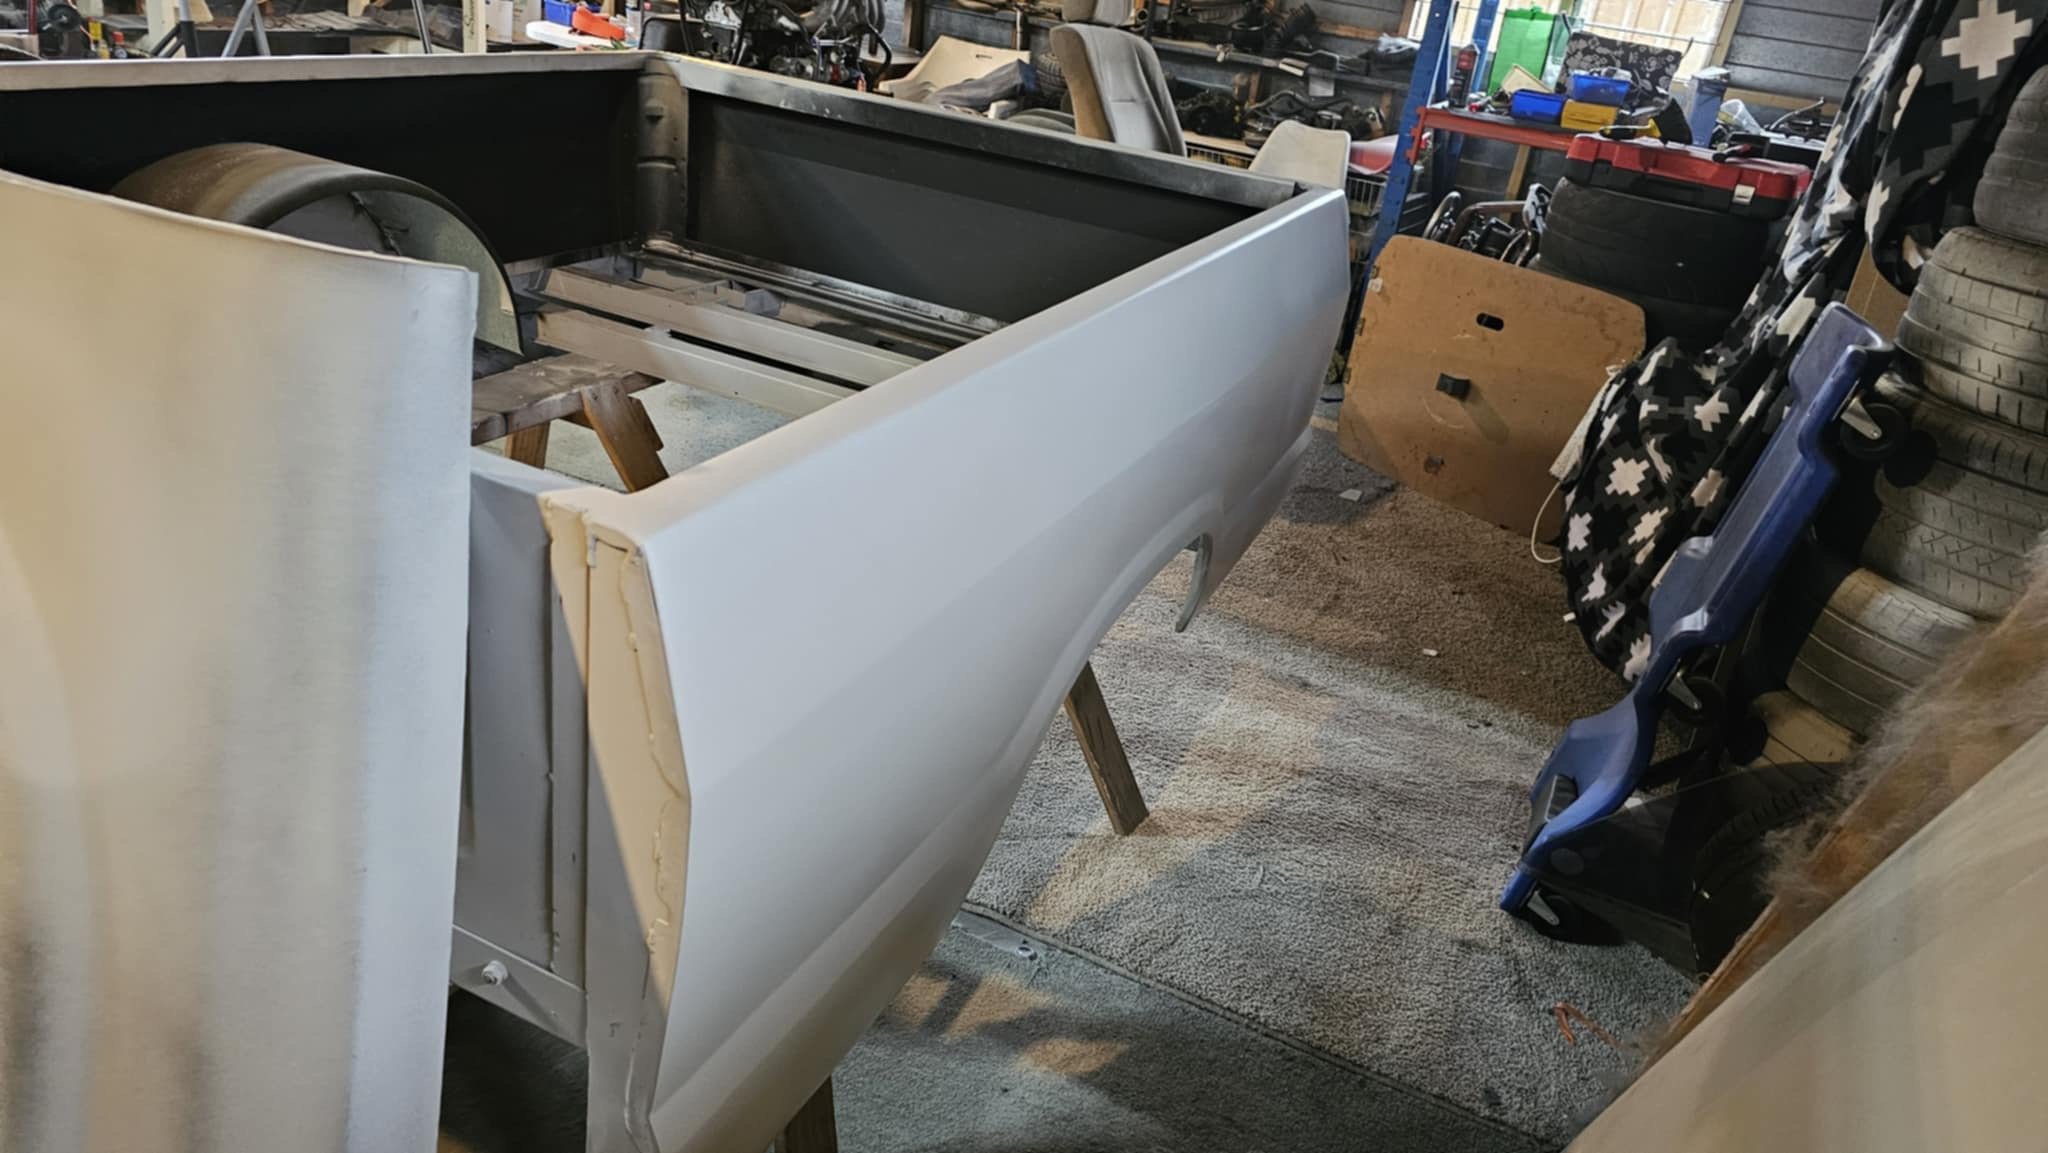
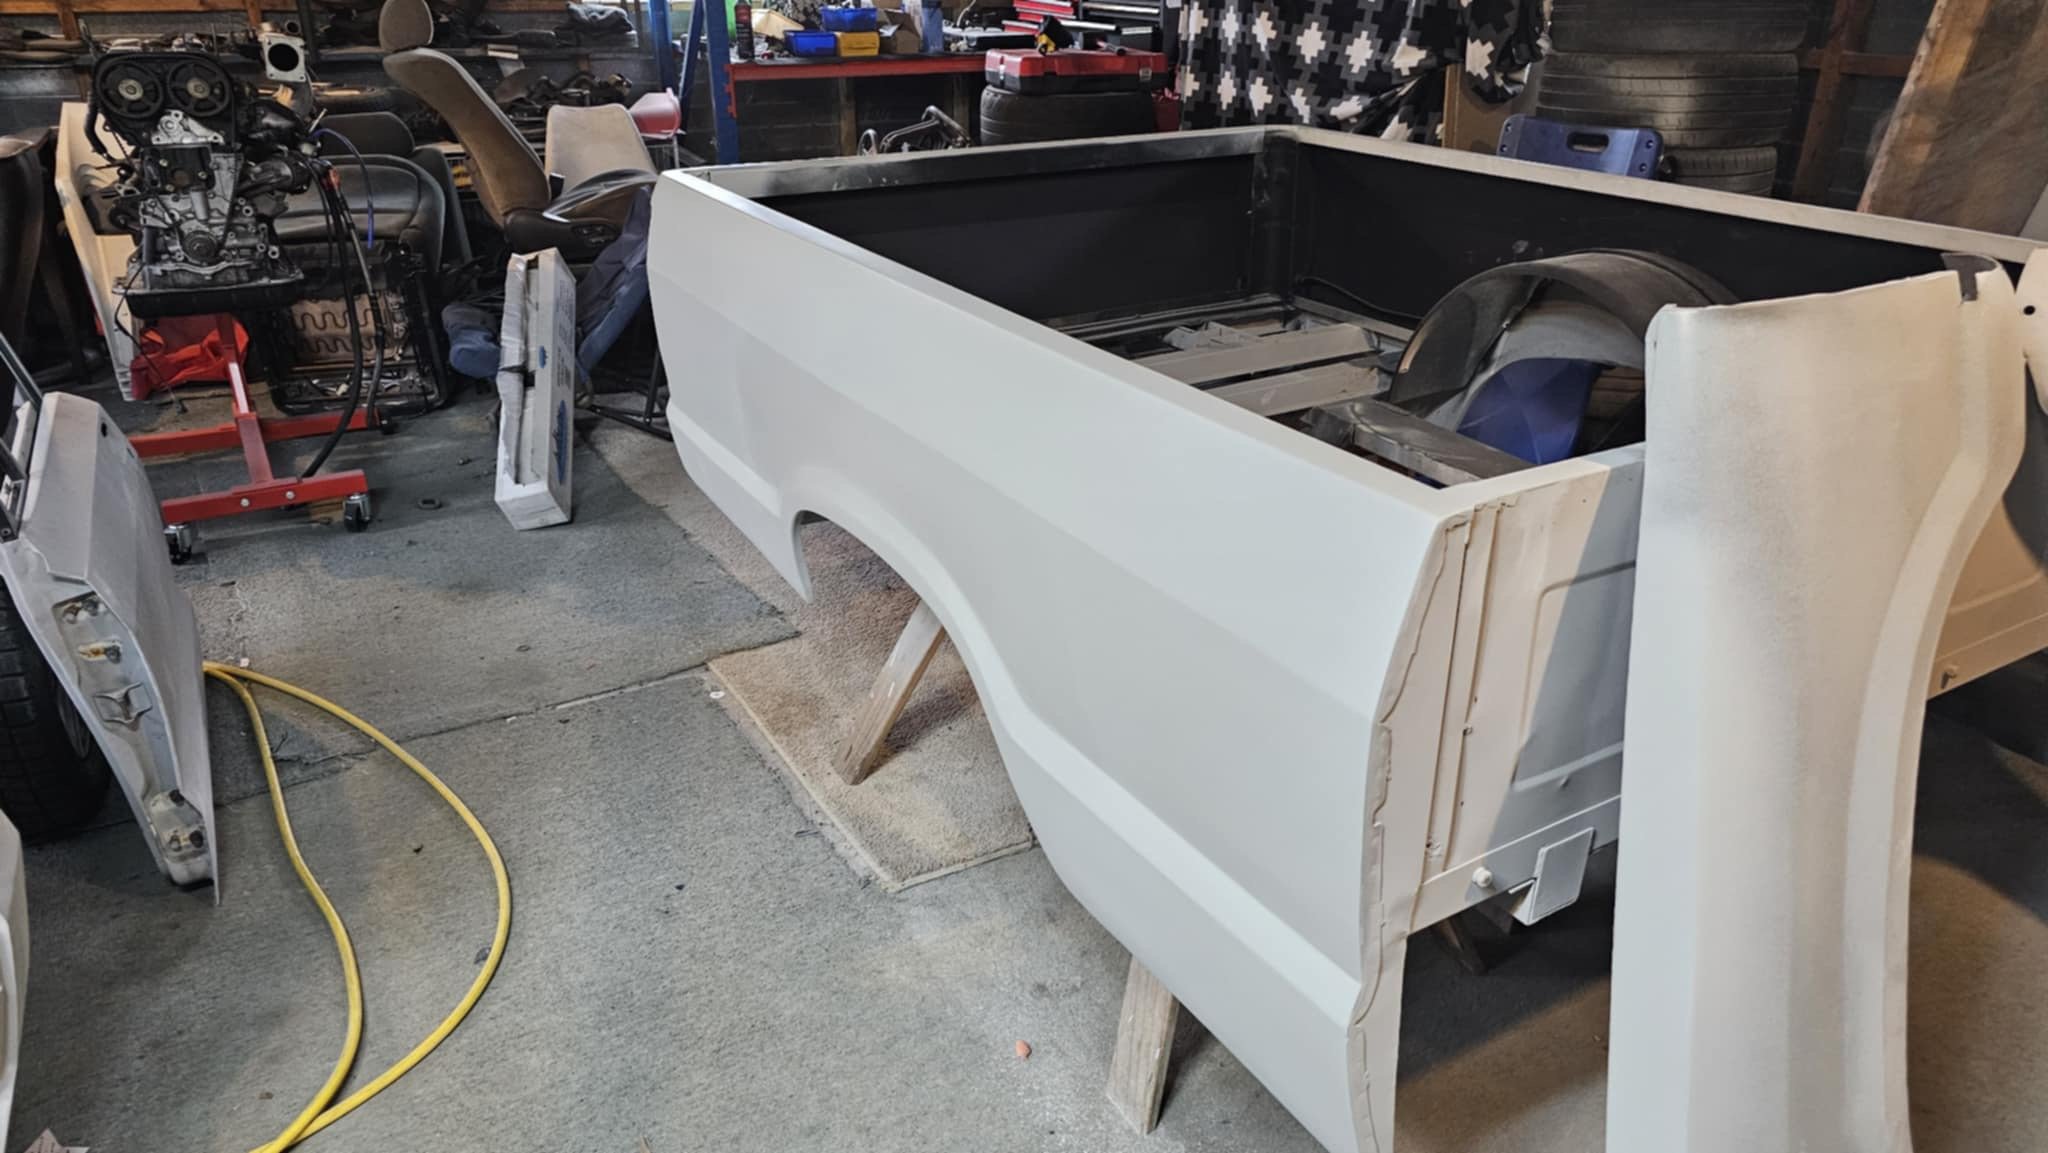
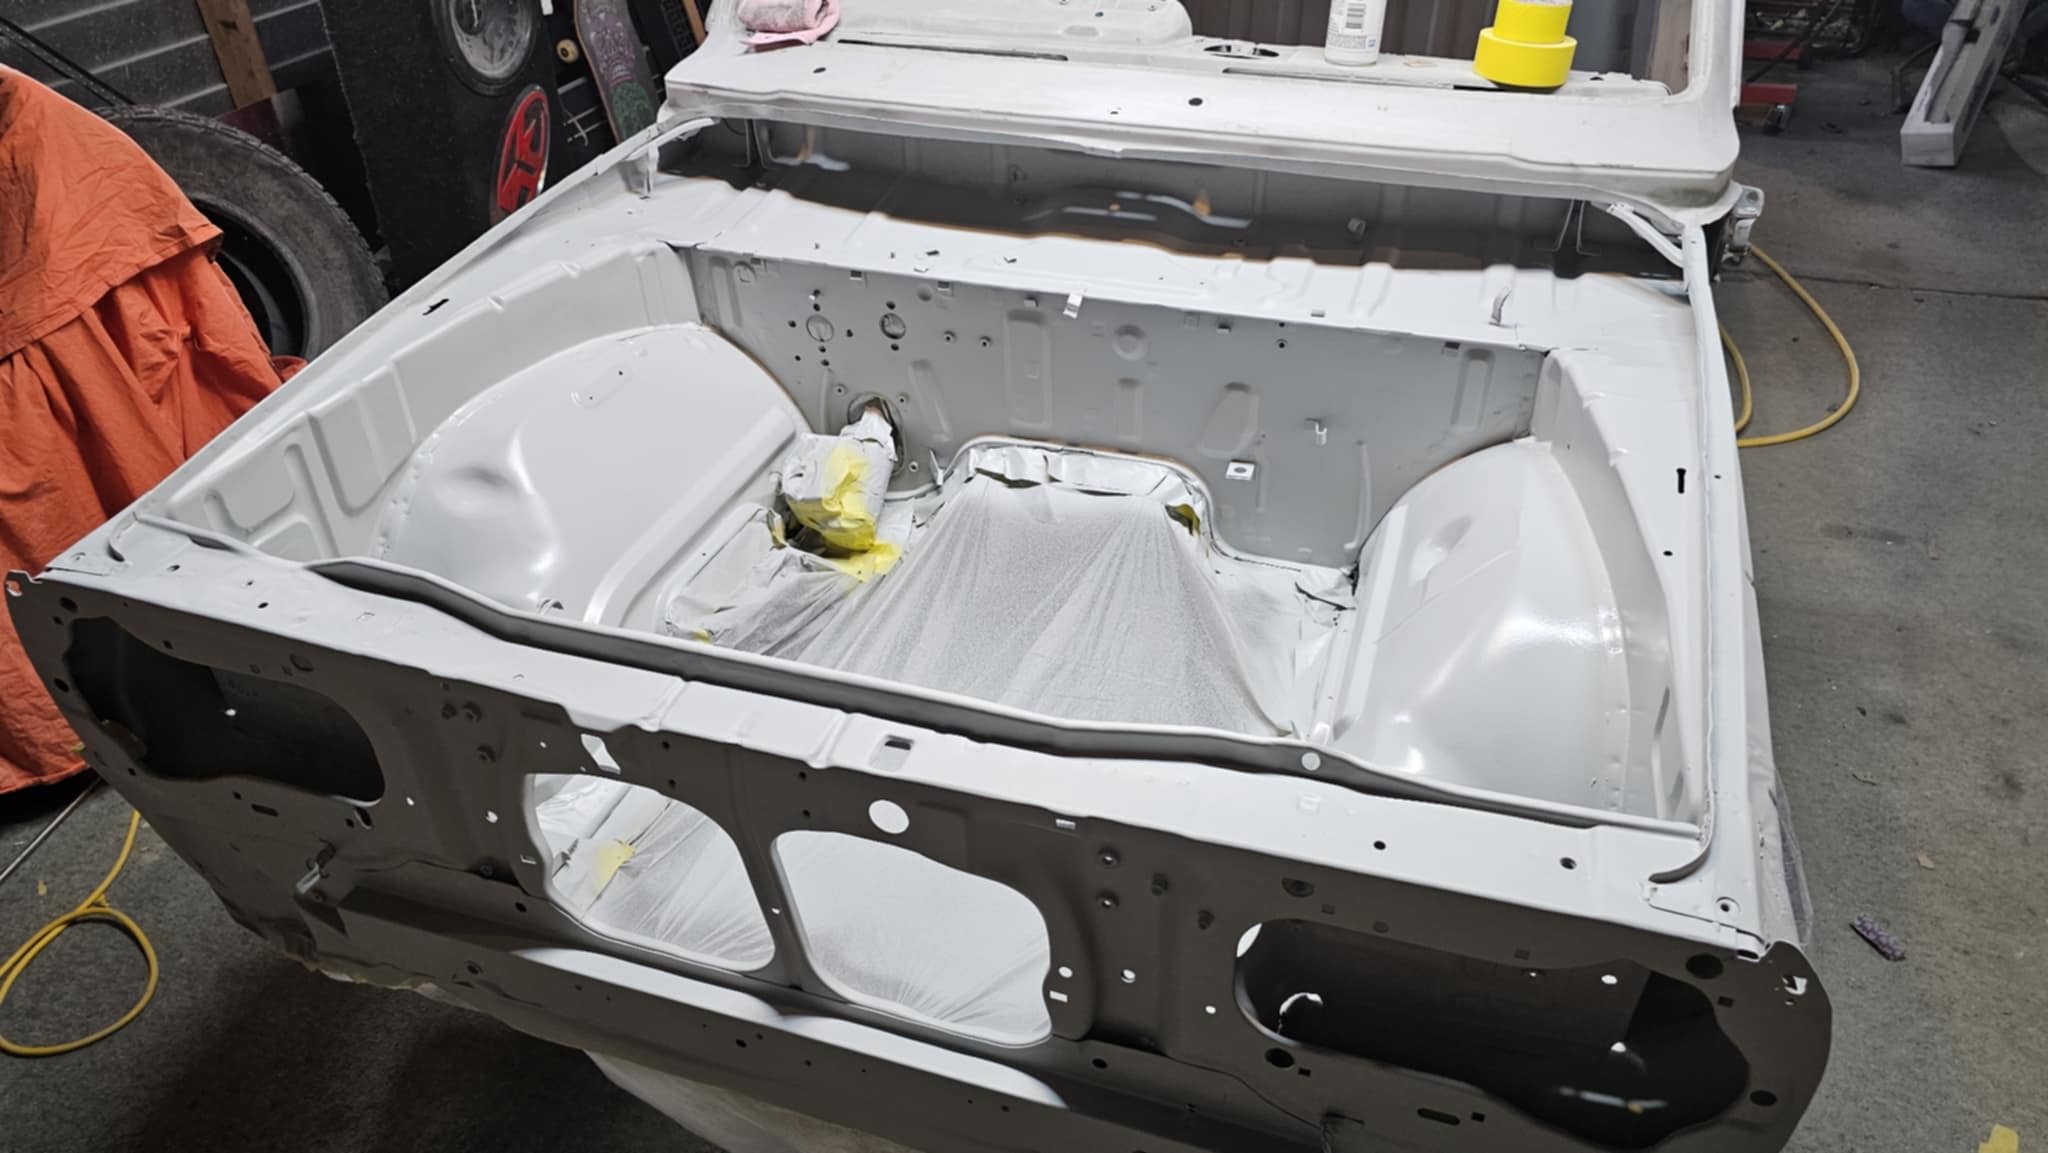
Panel n paint progress… ooosh blocked right back, and into primer.
1 point
-
Printed some throttles to get a better idea. It's pretty good, I'll guesstimate how it might work in the engine bay and take it from there.
1 point
-
Well I'm making progress towards getting things going. Firewall isnt finished, or pretty, but if it stops my face catching fire for now, that's a win. Has got a severe case of myspace photo angles here, looks fairly rubbish in person. Posting here before it ends up on @cletus's wall of shame instagram story for being crappy things brought in for cert. Also welded up the engine mounts properly, and reshaped the front of the mounts so they look a bit nicer. Then a few coats of only the finest rattle can black. I'm out of town for work for most of next week, but I'm hoping to get the engine back in and fired up by next weekend.
1 point
-
Toyota legend Mark Roads has a Spare Celica/Carina GT-T spec brake booster. Which is a little smaller than the Soarer one, and will bolt up. So will go pick that up some time next week. Back to the firewall problem, I borrowed a laser projector tool from @flyingbrick that is a cool piece of gear. It can draw a 360 degree line, all on the same plane. So I'm going to mark where this line lands everywhere, Then I can either cut the metal back to this line so it's all straight. Or, is use it as a reference point for knowing how far a piece needs to bend back or whatever. Makes the problem seem easier in my brain, having some sort of reference point to work to. I'll need to pull the motor back out to do this properly, so will dig out all of my engine crane parts out of storage and make a start on that. Slowly making progress on a few different fronts which is good.
1 point
-
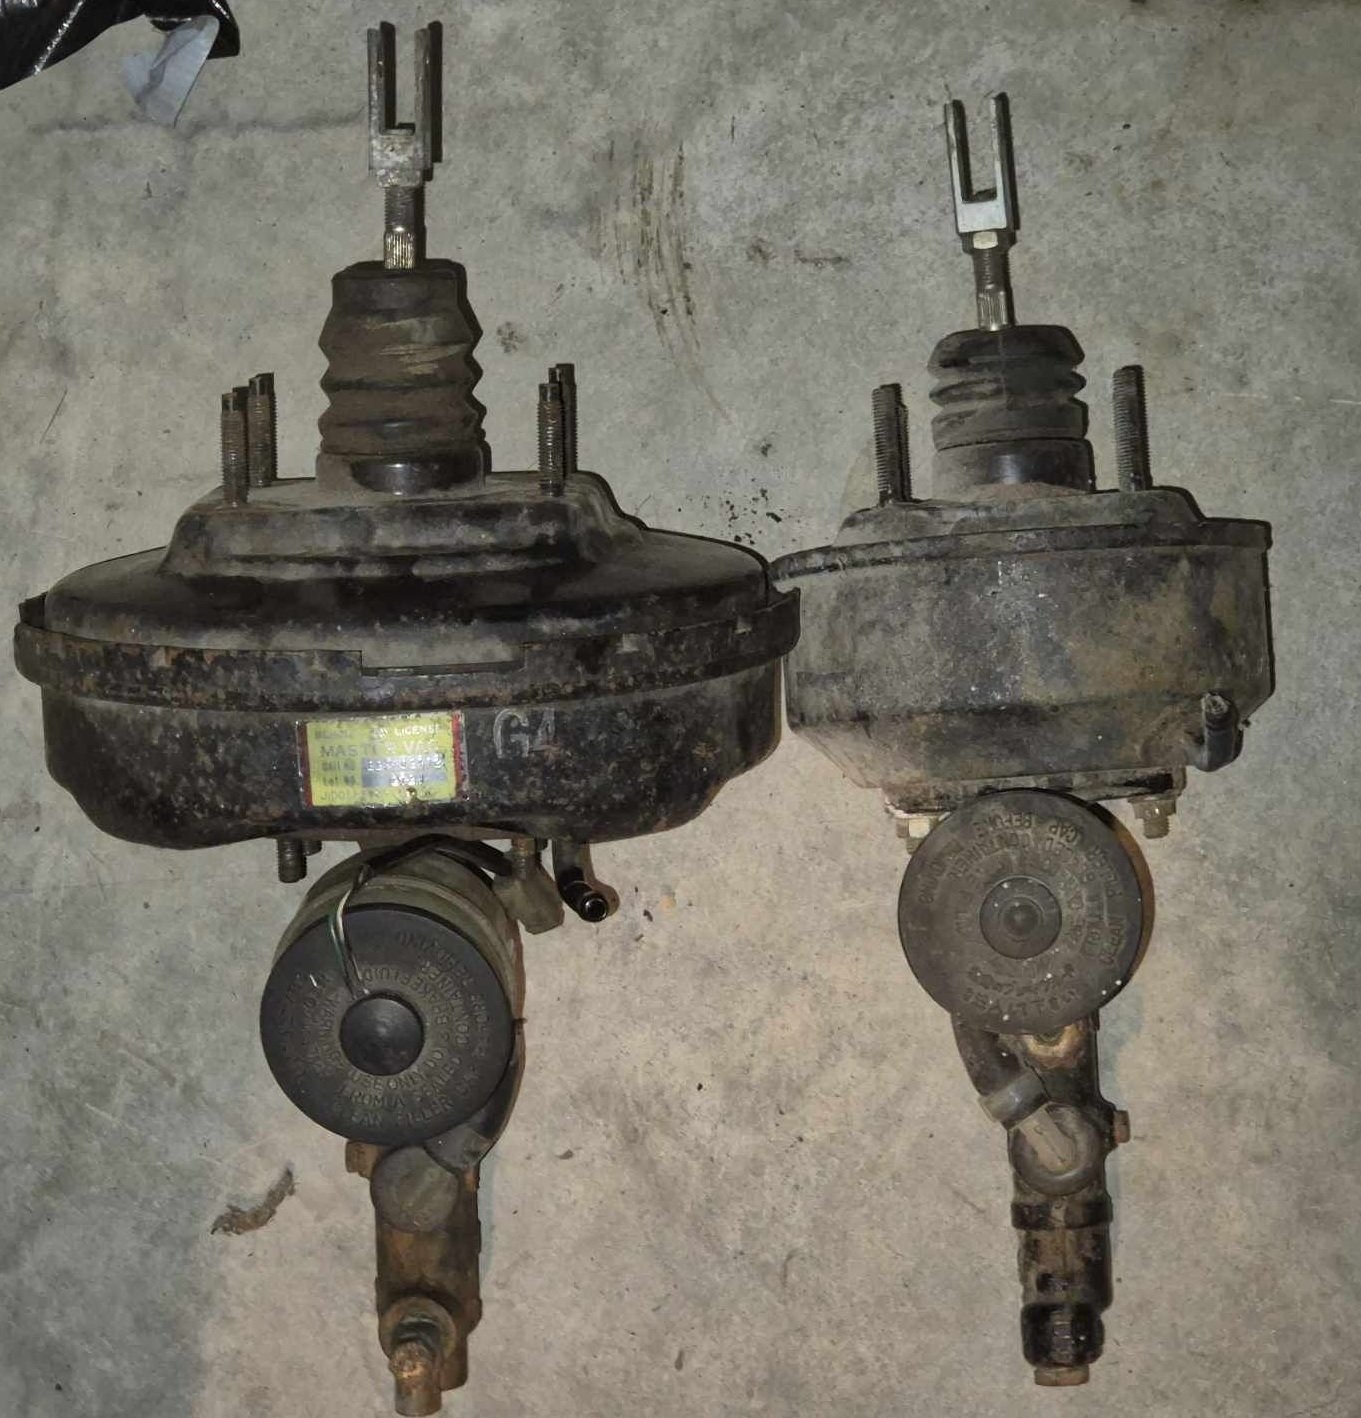
The cable that links the banks of throttles together was made from a motorcycle cable repair kit, so one end had a little screw in type fitting. However problem is that you need to push the cable all of the way through and out the other side to tighten it properly. Which I cant do, because of how it slots in. So I just left some cable hanging out the other side, then buzzed it with the tig and now it's sweet. I could lift up my bench vice using that connection so think it will be fine for pulling some throttles open. Burning the midnight oil some more, now that I can. I drained the brake fluid and got the Soarer booster and master cyl out. I was hoping to fit this KE70 booster, which is much smaller diameter so gives me a bit more room to get bolts in. But unfortunately the bolt pattern through the firewall is different. The Soarer is 100x70mm, the KE70 is 80xsomething I think. It's tempting to redrill the firewall holes but the bracket on the other side has spacers/dowel type things on it, which make it more effort to redo properly. So will keep on the lookout for a slightly smaller booster with a 100x70 pattern. It's looking as though a Hilux Surf has the same pattern, and hopefully a smaller booster. So will try find one of these, unless anyone has something similar lying around they could measure? There's one on Trademe so I've asked the guy if he can measure it up. Otherwise looks like there are some Surfs at pickapart, so will have a look next time I'm in Auckland.
1 point
-
1 point
-
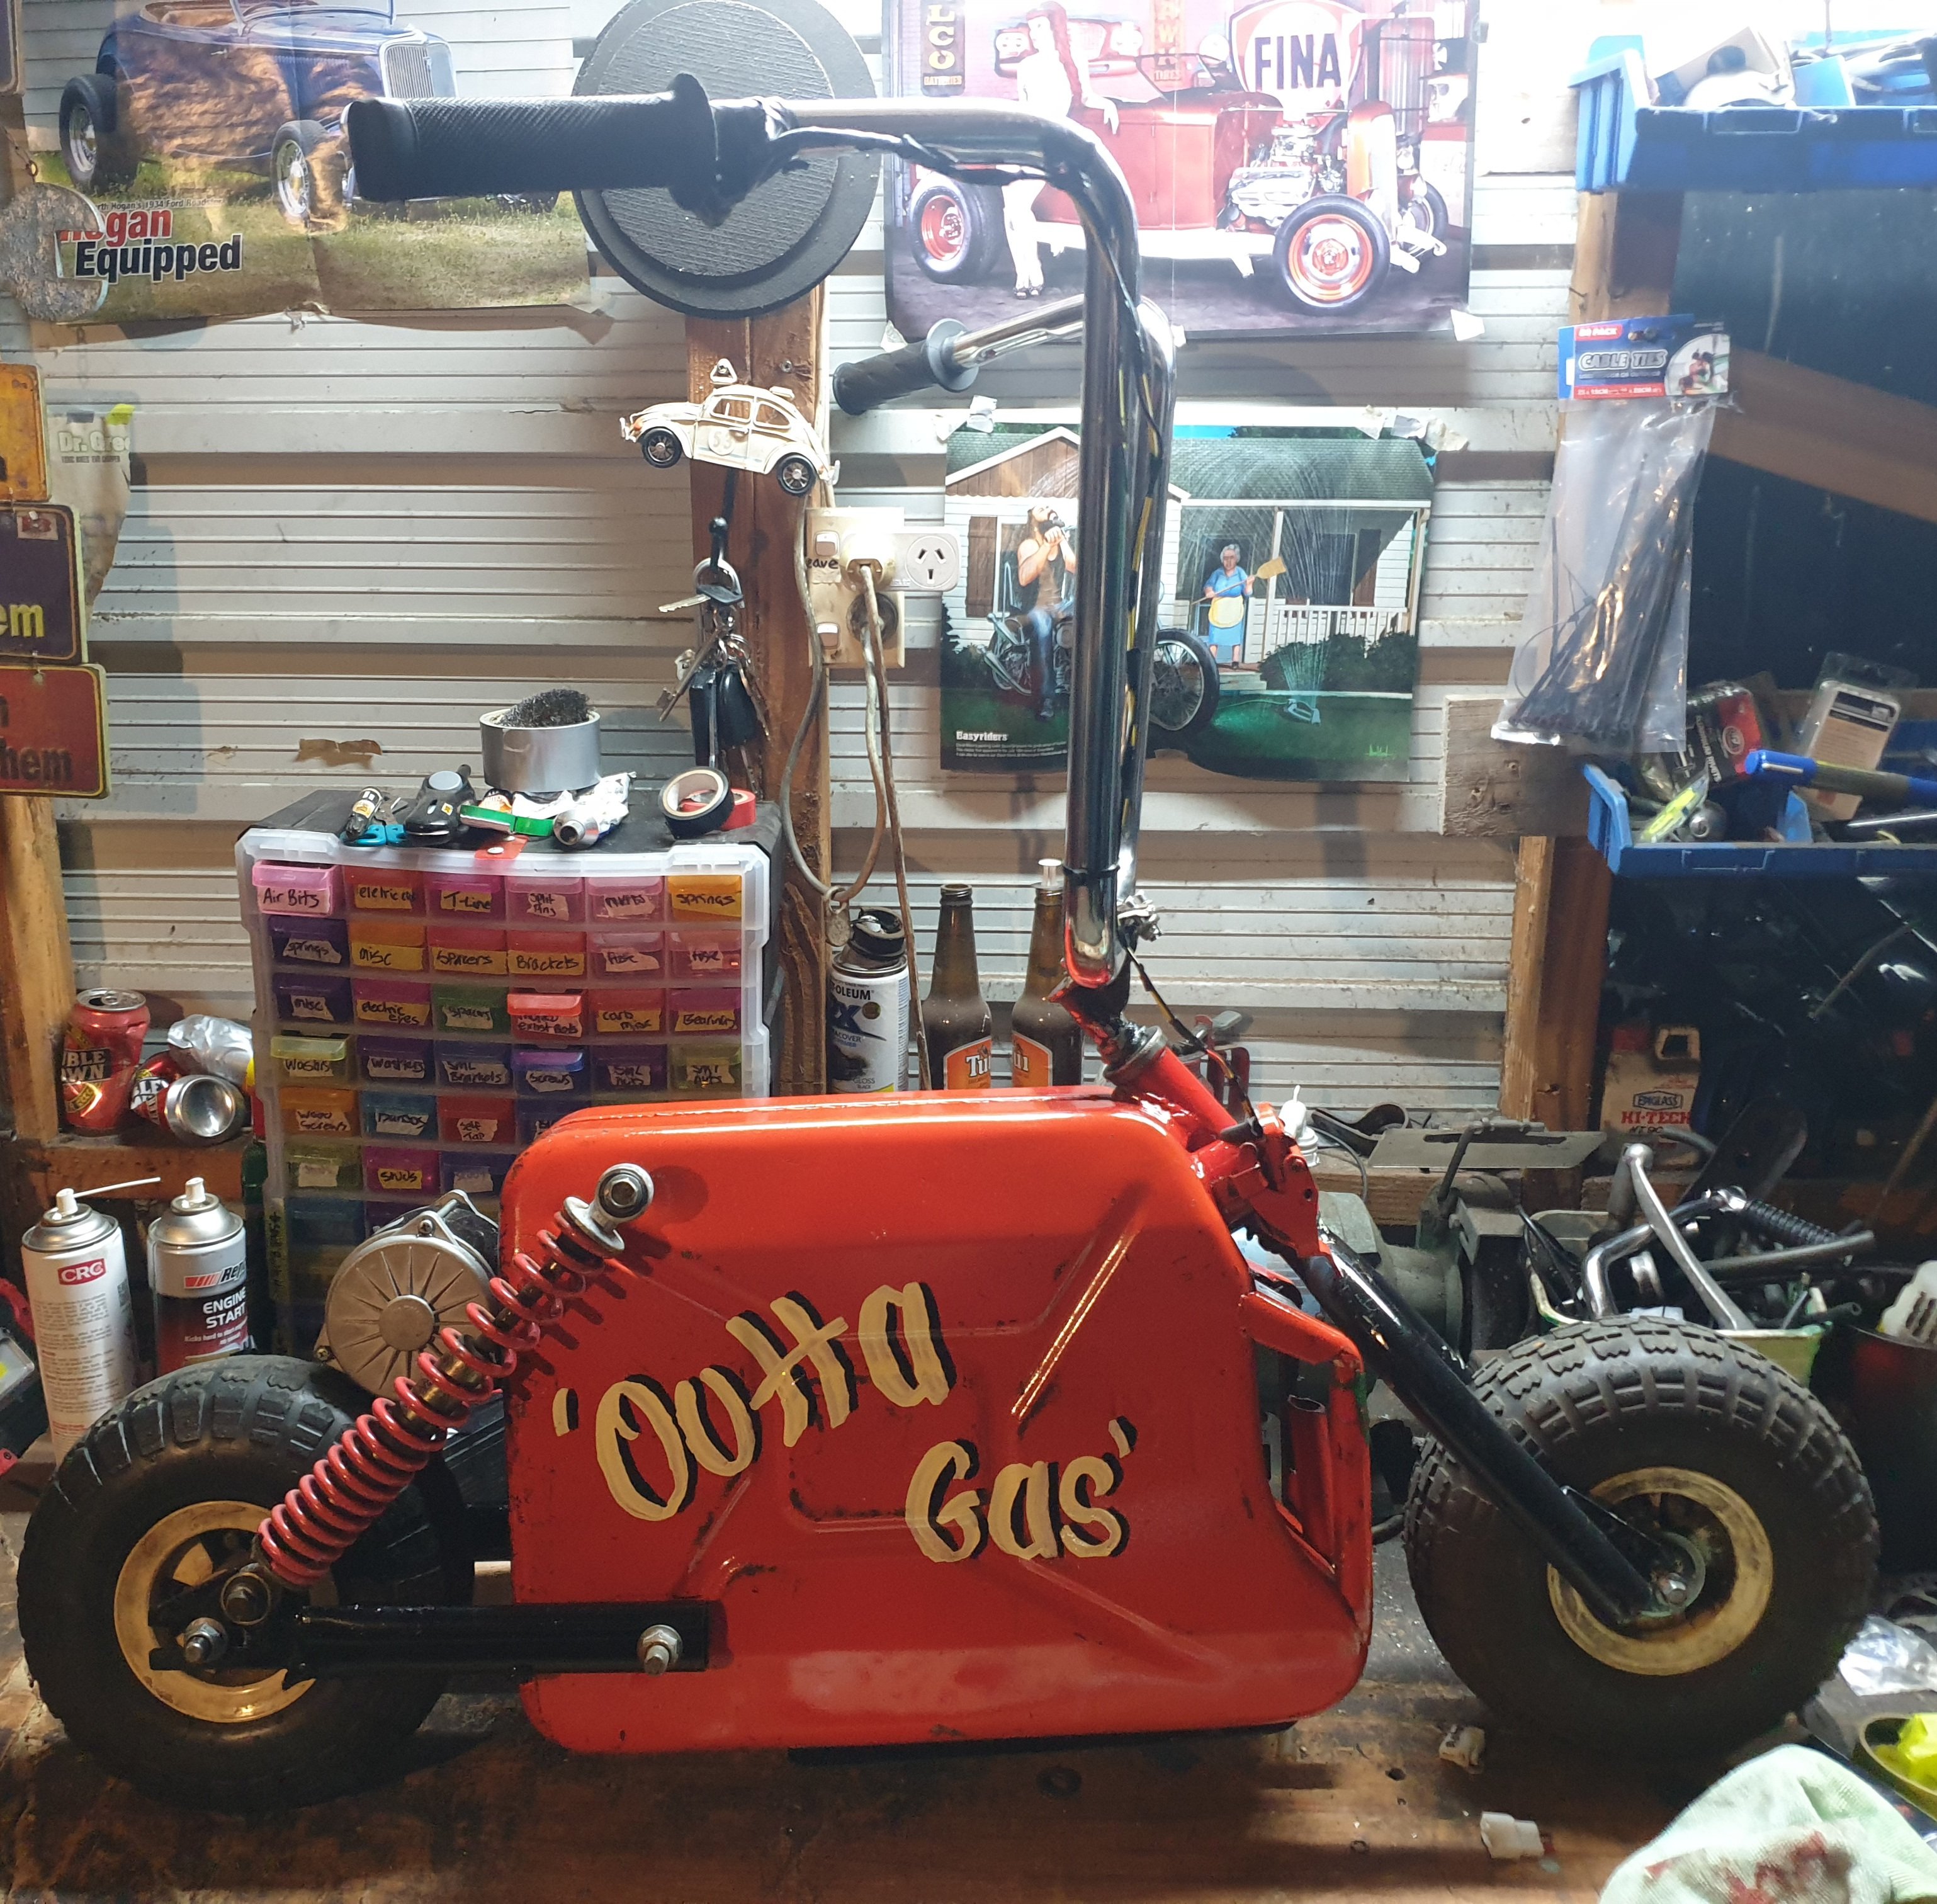
Gave lettering a go other side done aswell
1 point
-
and away it goes. i hope the new owner gets all he wants from the ownership. i learned some things while building this car. mainly that my heart wasn't in it, it had to many doors and i just wasn't in to it. I really struggled for motivation towards the end and thats SO not me. anywho, lessons learned. on to the coupe. 2018-11-02_07-48-39 by sheepers, on Flickr1 point
-
over night parts from china. ordered the carb Tuesday night, delivered Friday arvo. thats pretty legit. it looks way better than i thought it would, it actually looks like its well made. 2018-09-15_06-14-18 by sheepers, on Flickr so i strapped this on and it ran like shit, Nick the good cunt sparky came over and we fucked around with it. turns out the points were fucked and so were the plugs, put some new plugs and points in it and it runs like a dream, its like fucking new. we went for a hoon around the block and its running mint, stoked! so this friday its getting a warrant and then itll be on tardme ASAP. 2018-09-15_06-14-27 by sheepers, on Flickr 2018-09-15_06-15-04 by sheepers, on Flickr 2018-09-15_06-14-40 by sheepers, on Flickr1 point


.jpg.14d3dd416b32de9ada7e7cf23bebb18f.jpg)


.thumb.jpg.570970b401ac8d26ce9af7c1bf2bd8cd.jpg)


.jpg.6788c72cbbf8d8b8d3ef7034010dbfd7.jpg)

This leaderboard is set to Auckland/GMT+12:00