
Leaderboard


Popular Content
Showing content with the highest reputation on 04/07/24 in all areas
-
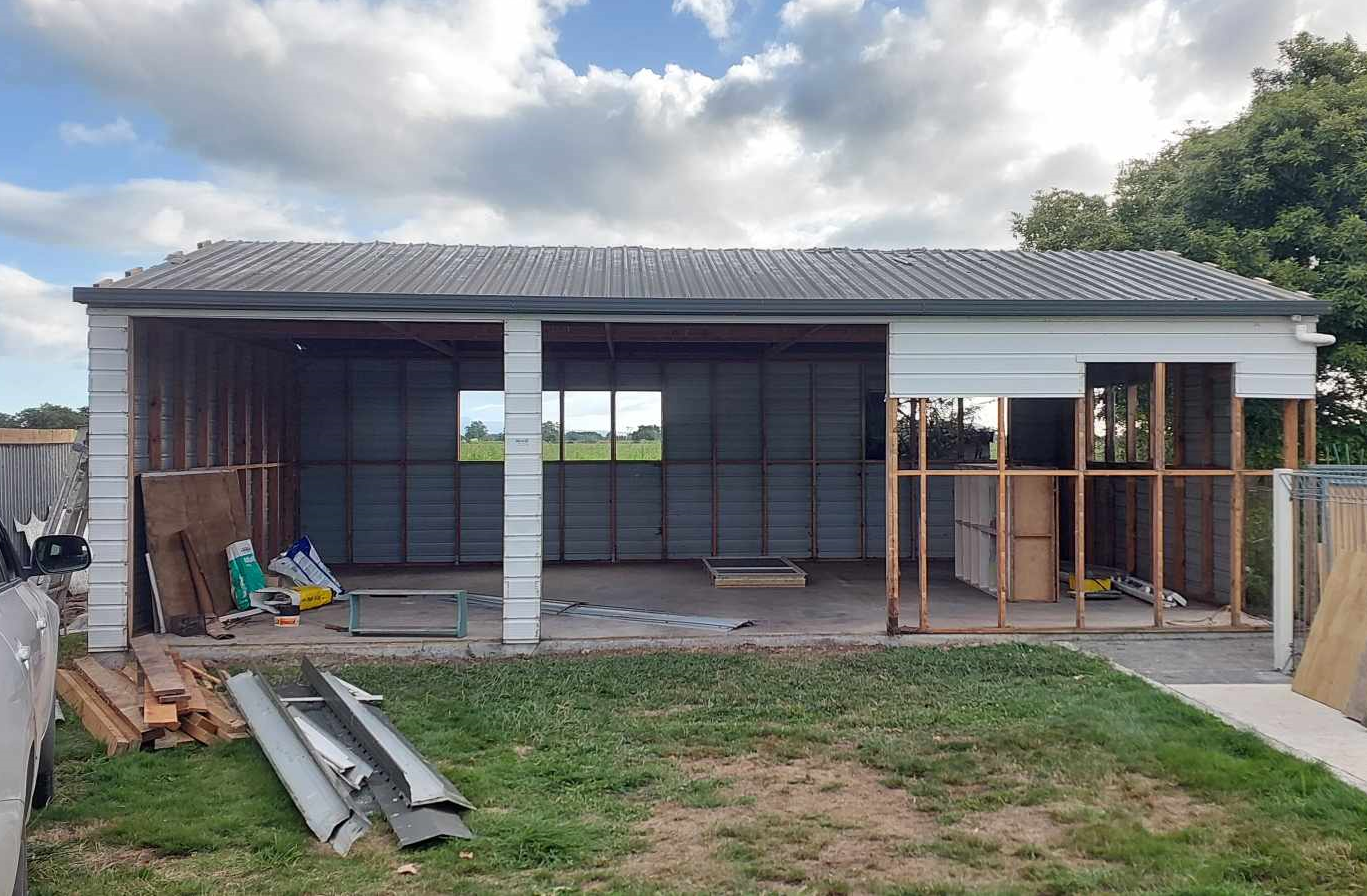
It is tantalizingly close. I probably could have done that a week ago. Except for that I've been in the South Island for work, and we found a second hand garage for removal that is a significant upgrade over the tiny one I've currently got. (New one 9x6m 2.4 stud height) So have had zero free time for car stuff. I'm picking up the last of it tomorrow, then hoping to do some carina stuff in the afternoon. I want that start up damnit!
 14 points
 -
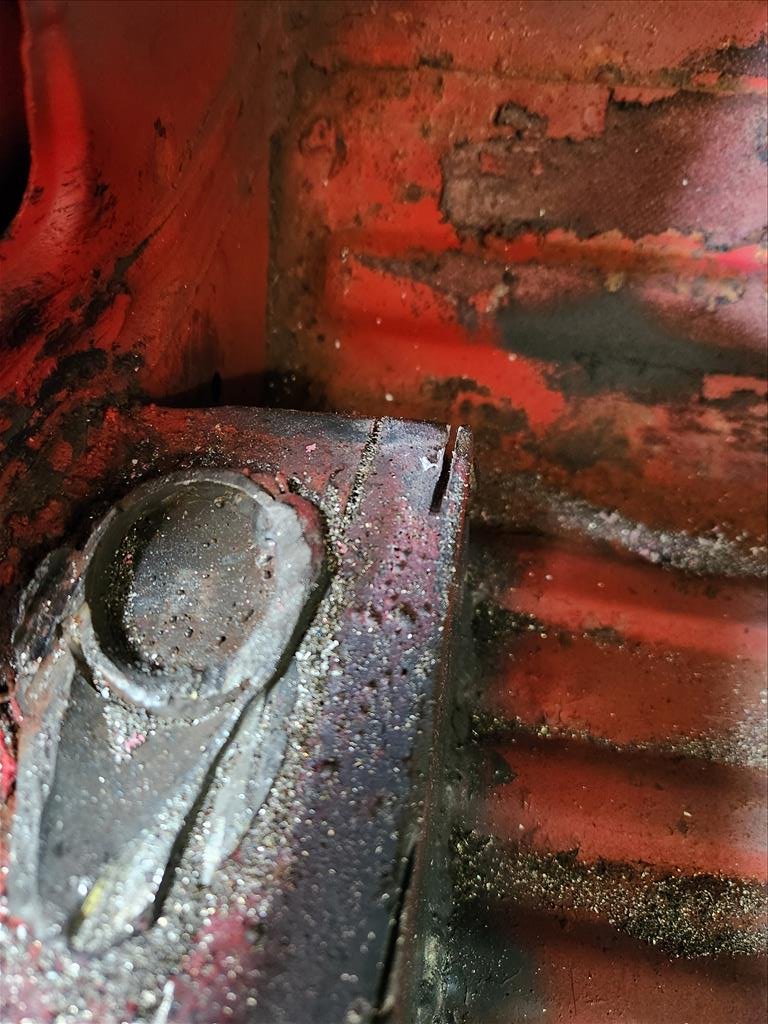
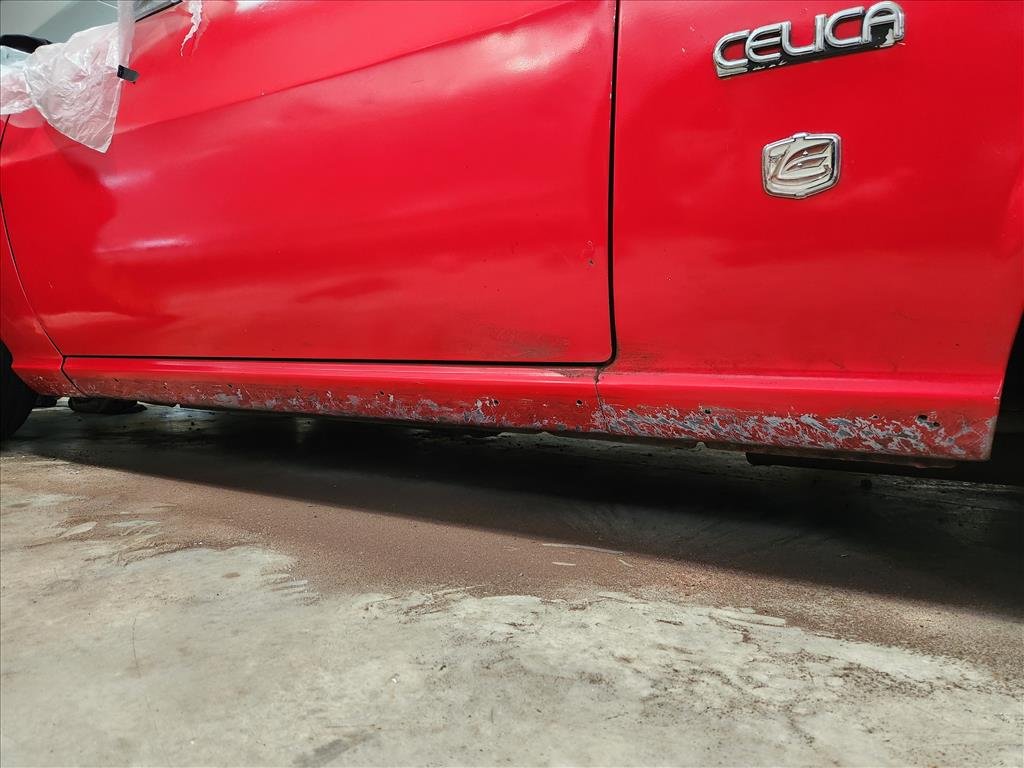
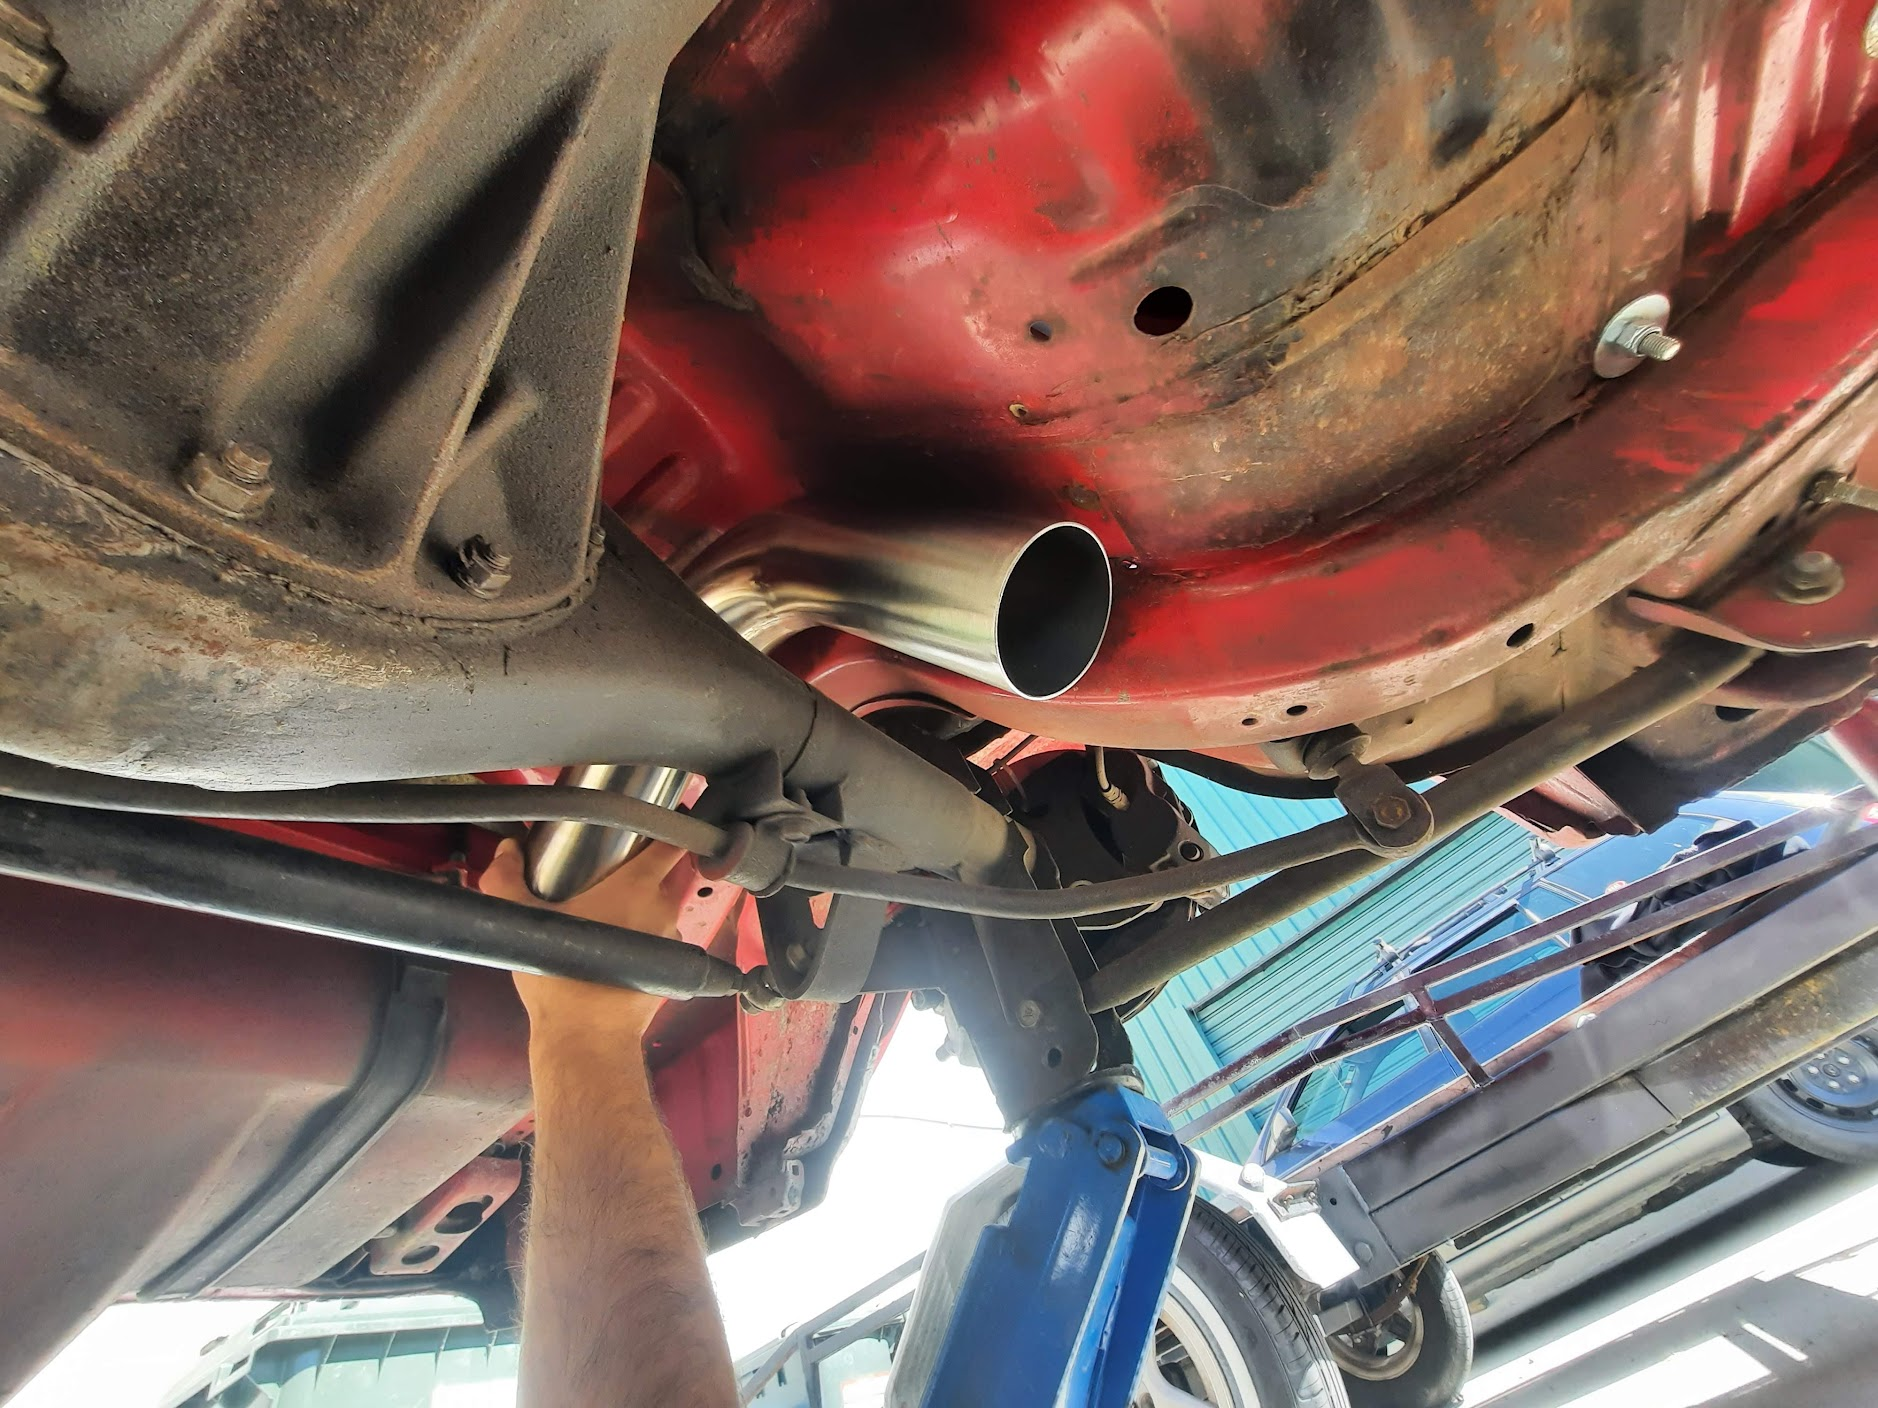
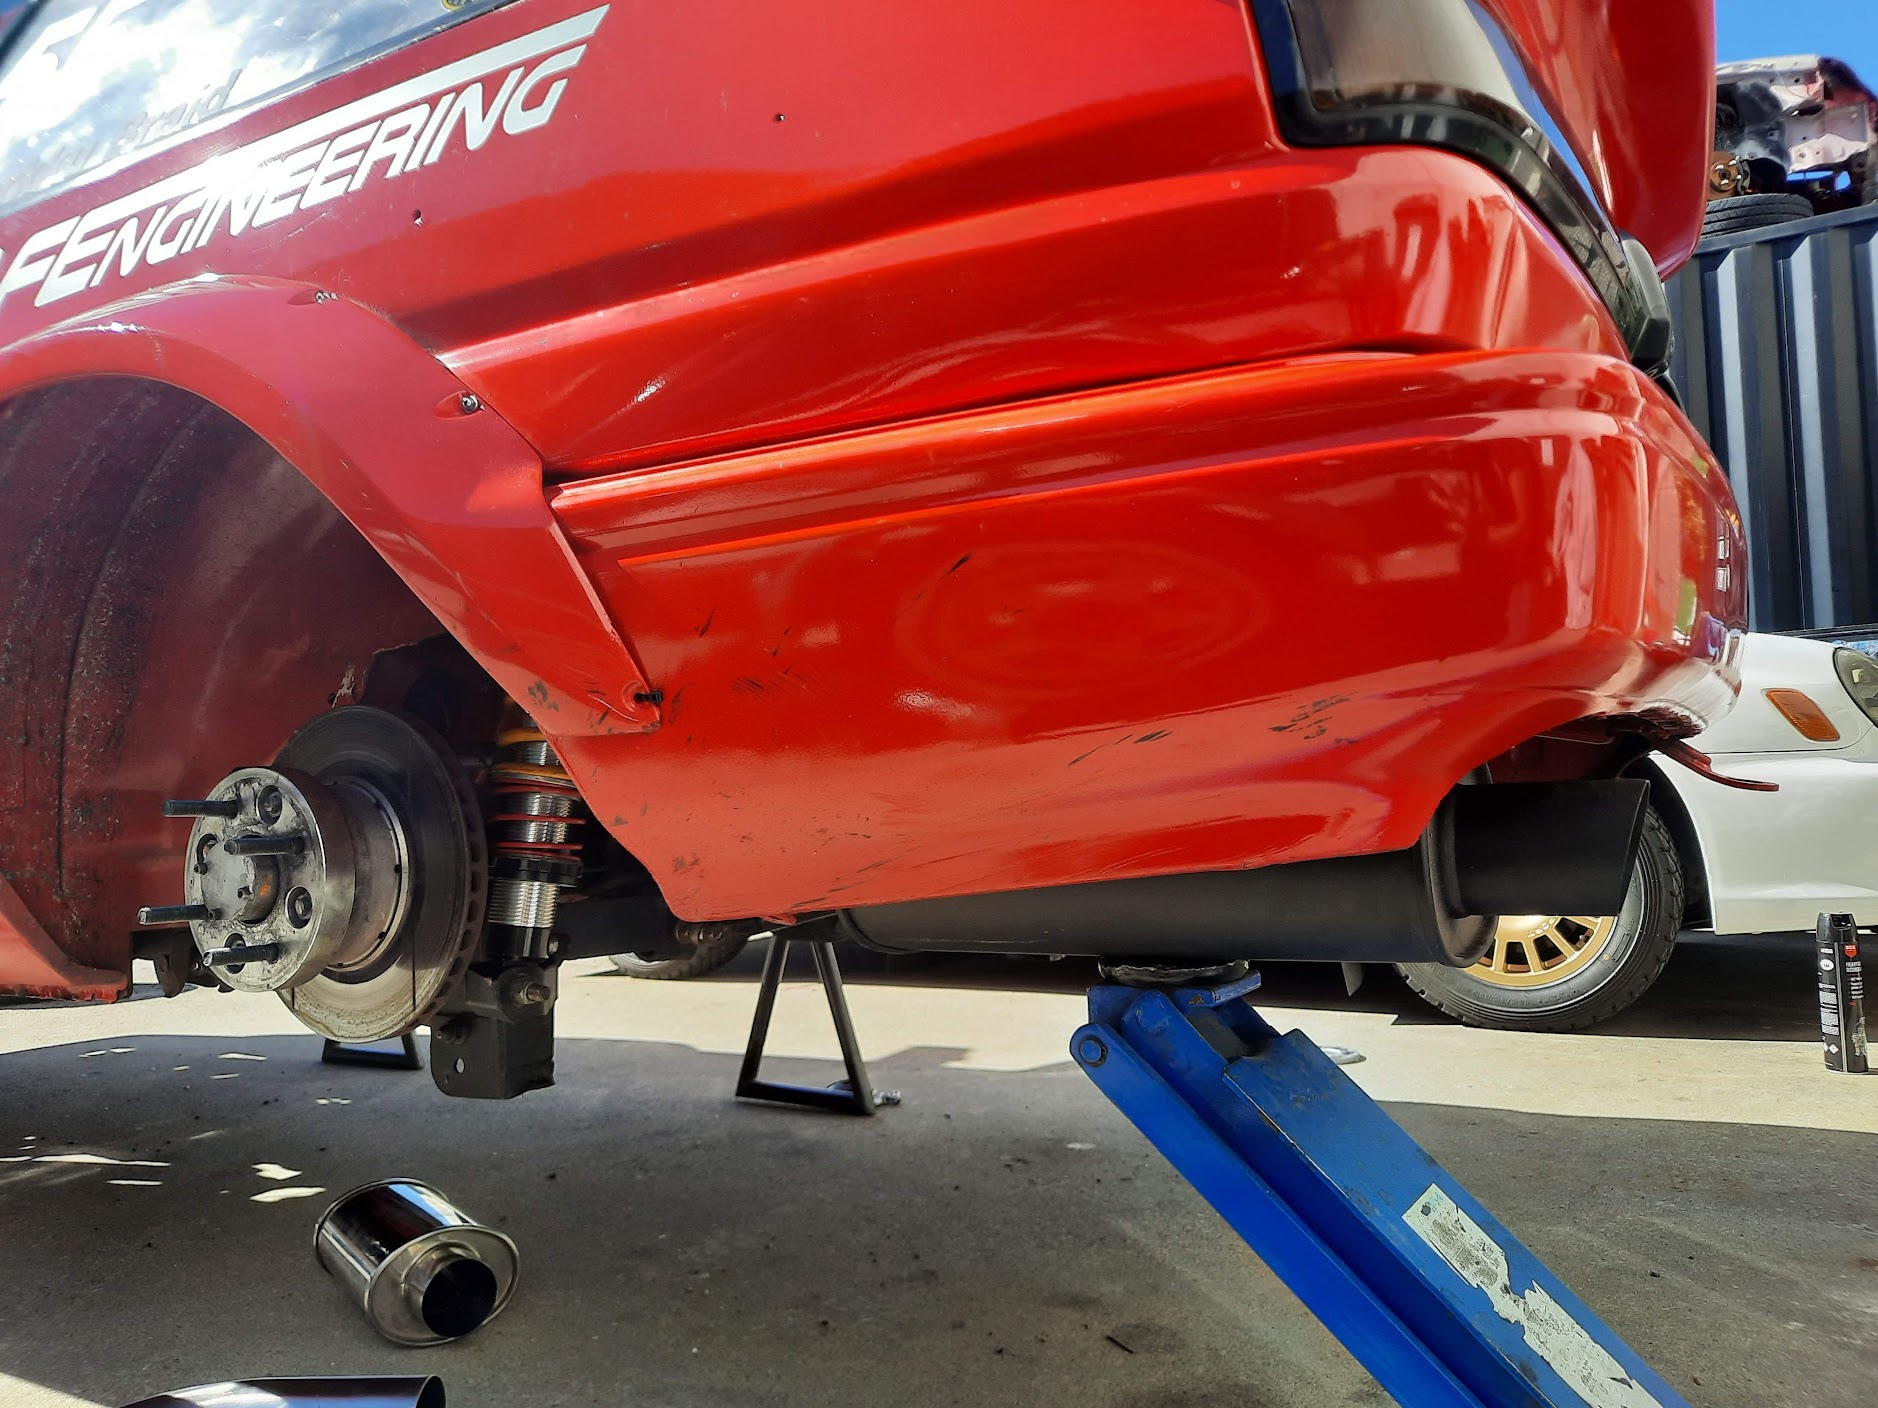
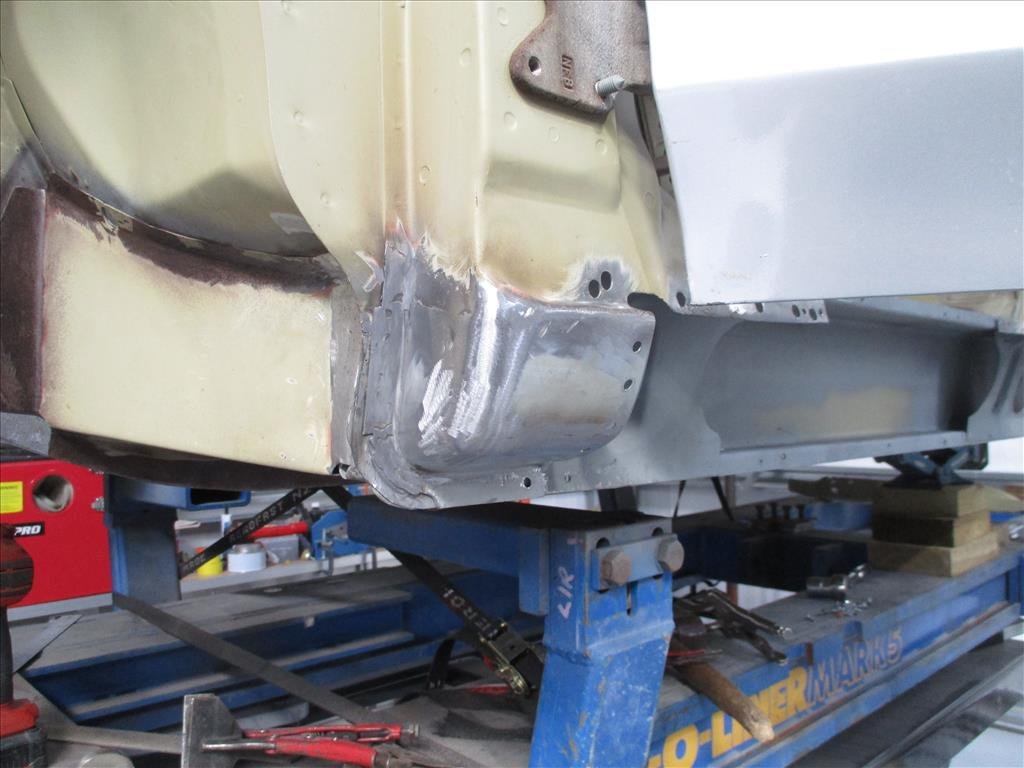
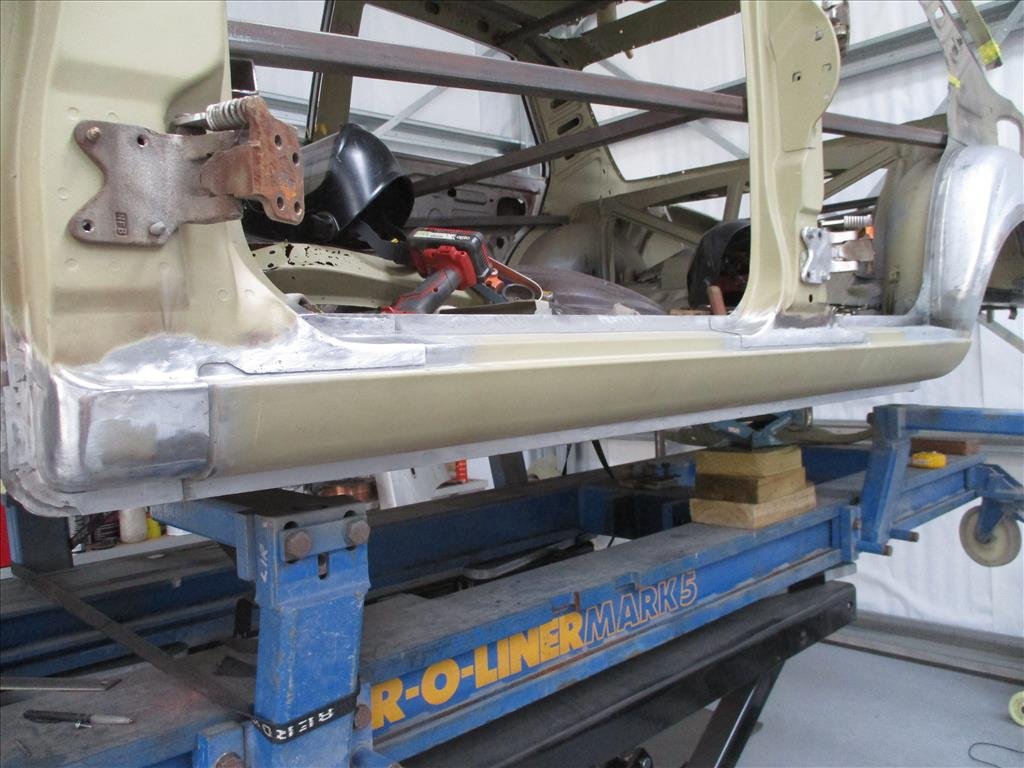
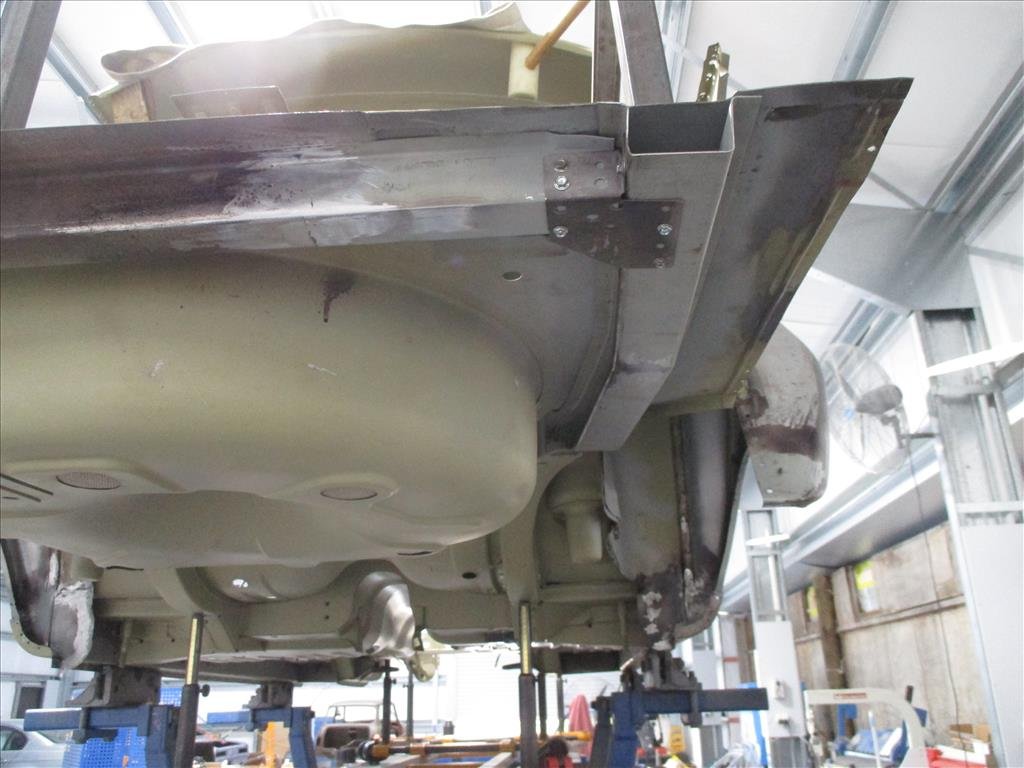
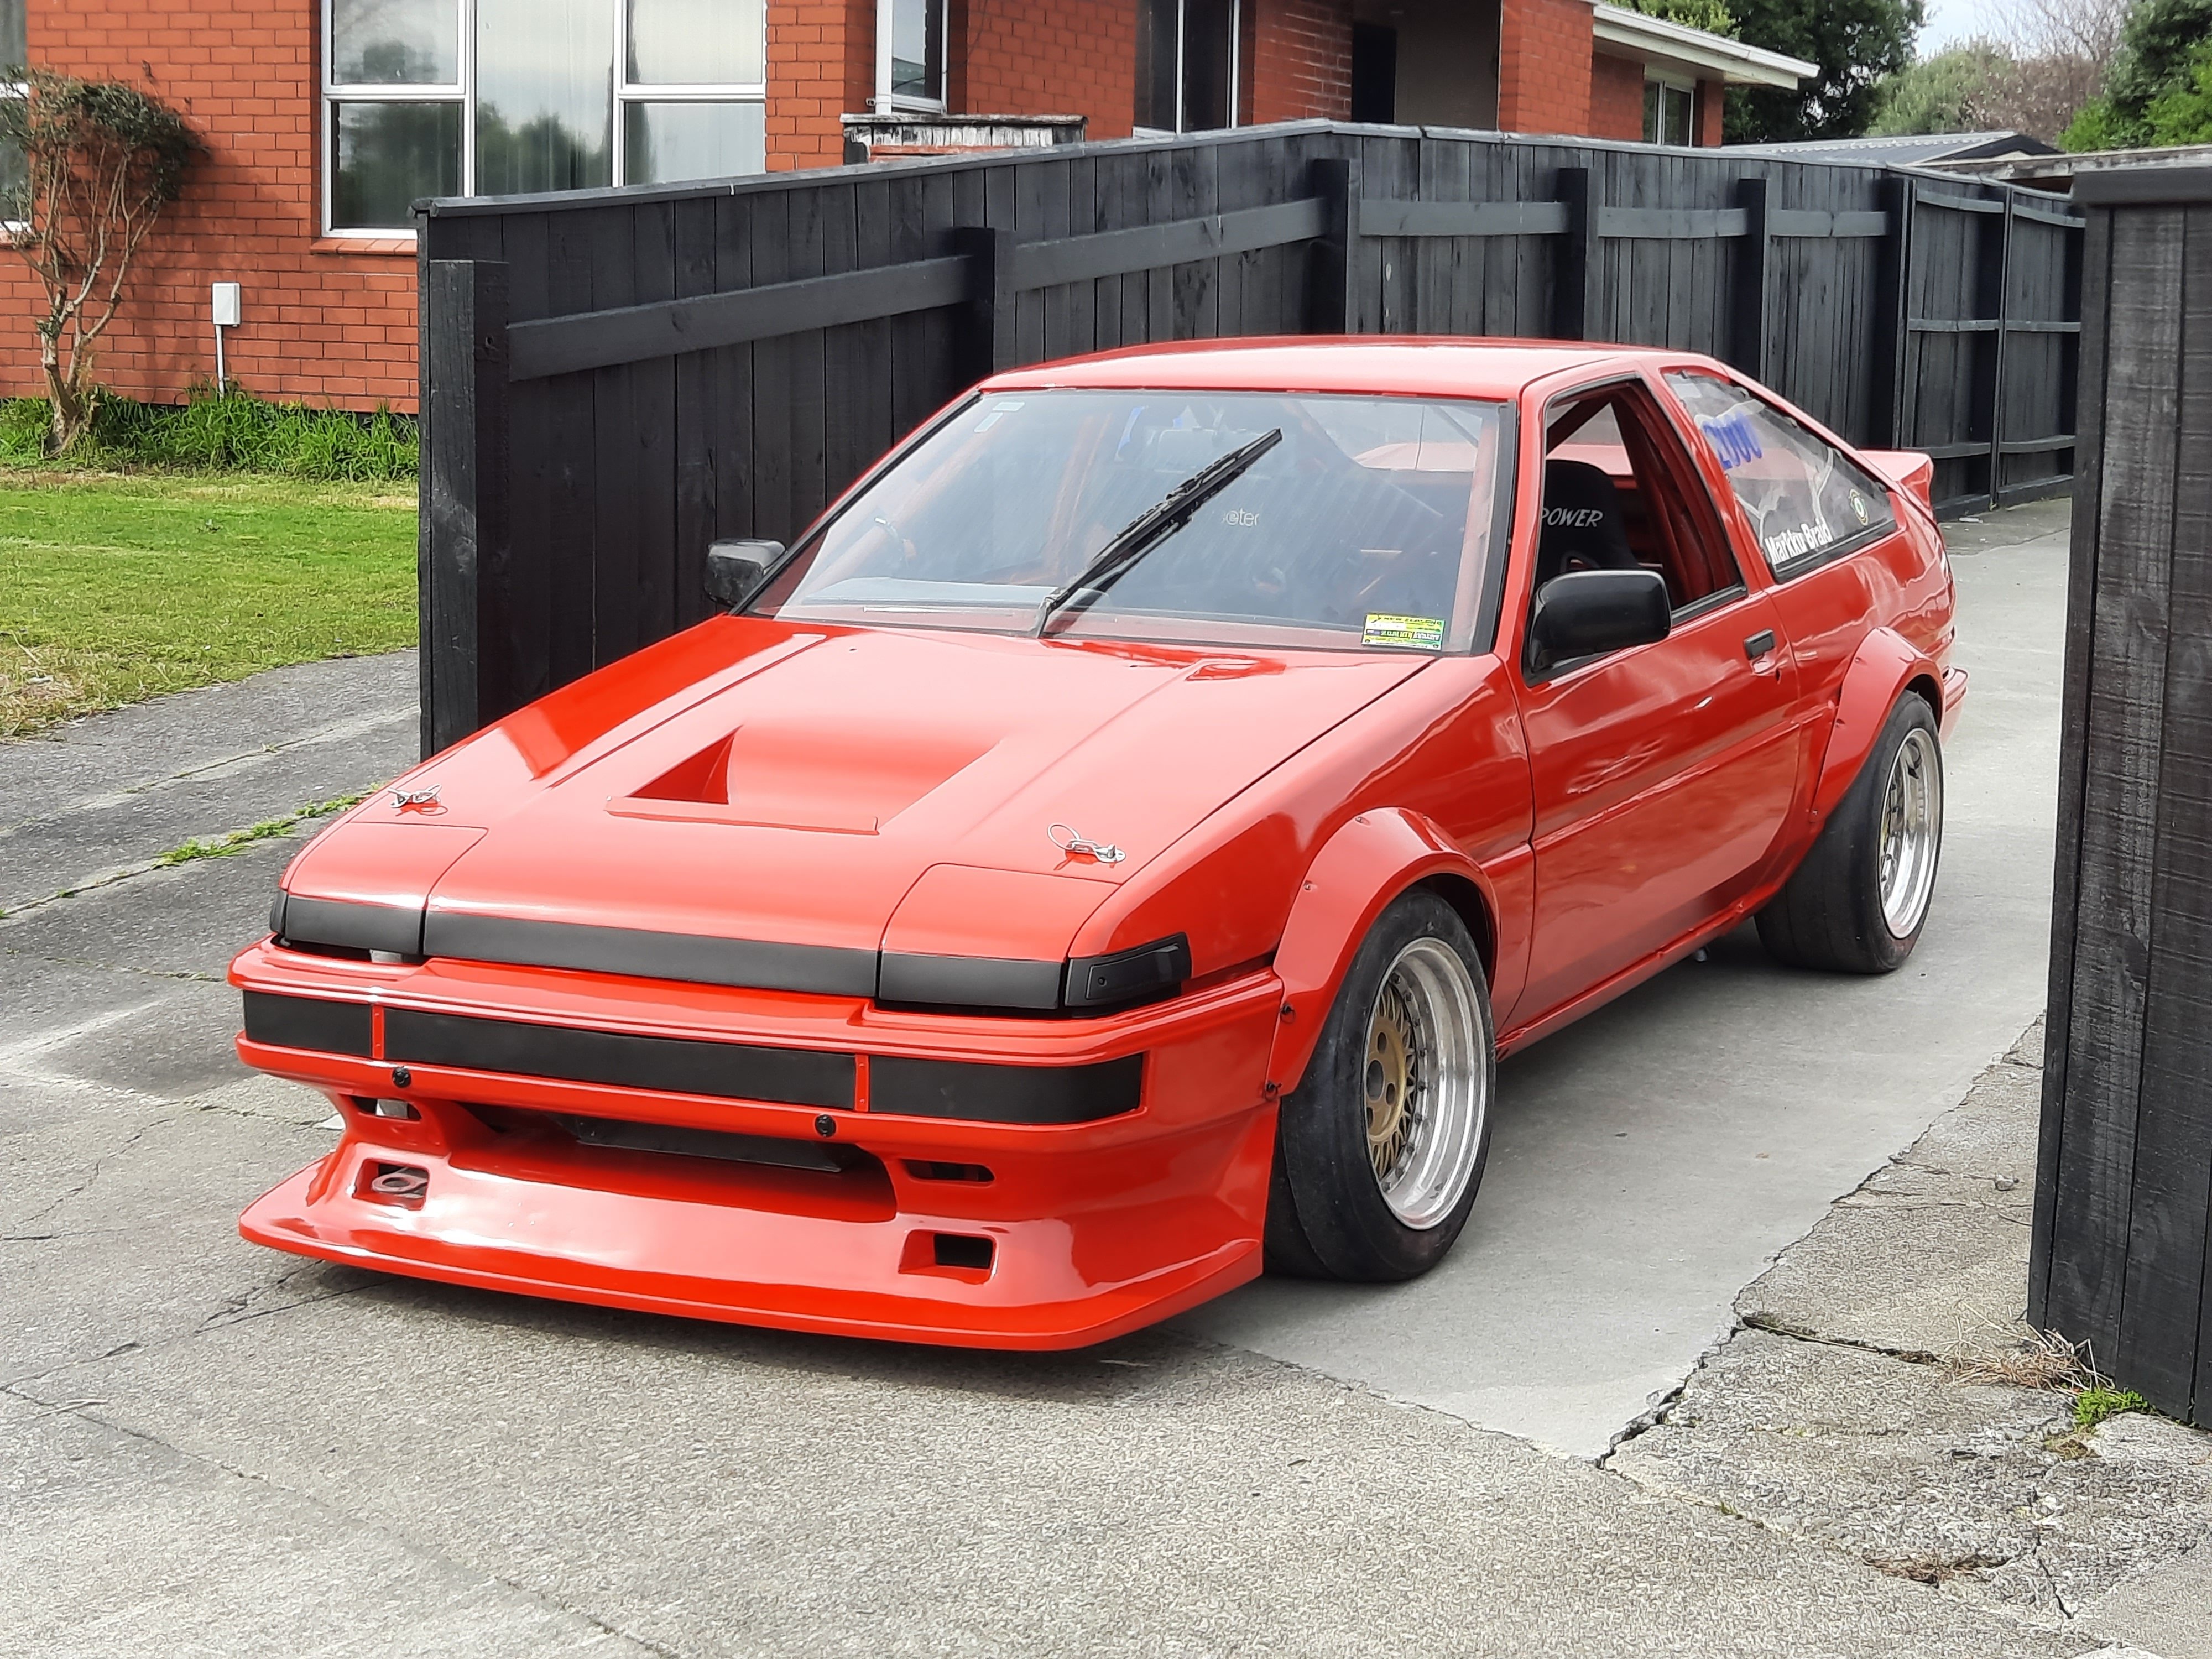
Yea the brakes. I ordered the whole shebang, good old Brian at The Italian Job hasnt invoiced me yet so no idea what the damage is, but fuck it it needed to happen really. I pulled all the calipers and gave them a cursory clean up; The rears had a bit of pitting but not so much that I thought it worth replacing, I may order some pistons anyway for just in case. This is the worst of it; Then the bits didnt arrive til Saturday morning, but it was exciting when they did; I had already decided to spend some time giving the truck some new oil and filters, so I cracked on with that. After I drained the oil I did get distracted by that Honda S800, which ended up being a bad plan as when I got back I missed the quite important service stage where you put the sump plug back in before washing out the engine with 10 liters of pristine Delo 400MGX and dumping it onto the garage floor Fuckety fuck fuck. And fuck. Anyway after I had flagellated myself for a while I cleaned things up then went back to the X, at each corner replacing the seals and discs etc and bolting it all back together; Then today I enlisted the wife to help bleed the brakes, which I had to do many times as a lot of quite ugly fluid kept coming out. After that I took it for a gentle test drive which was pretty meh, then I bled them again and they came up mint. So hopefully a wof this week maybe....13 points
-
Old compressor vs New compressor
13 points
-
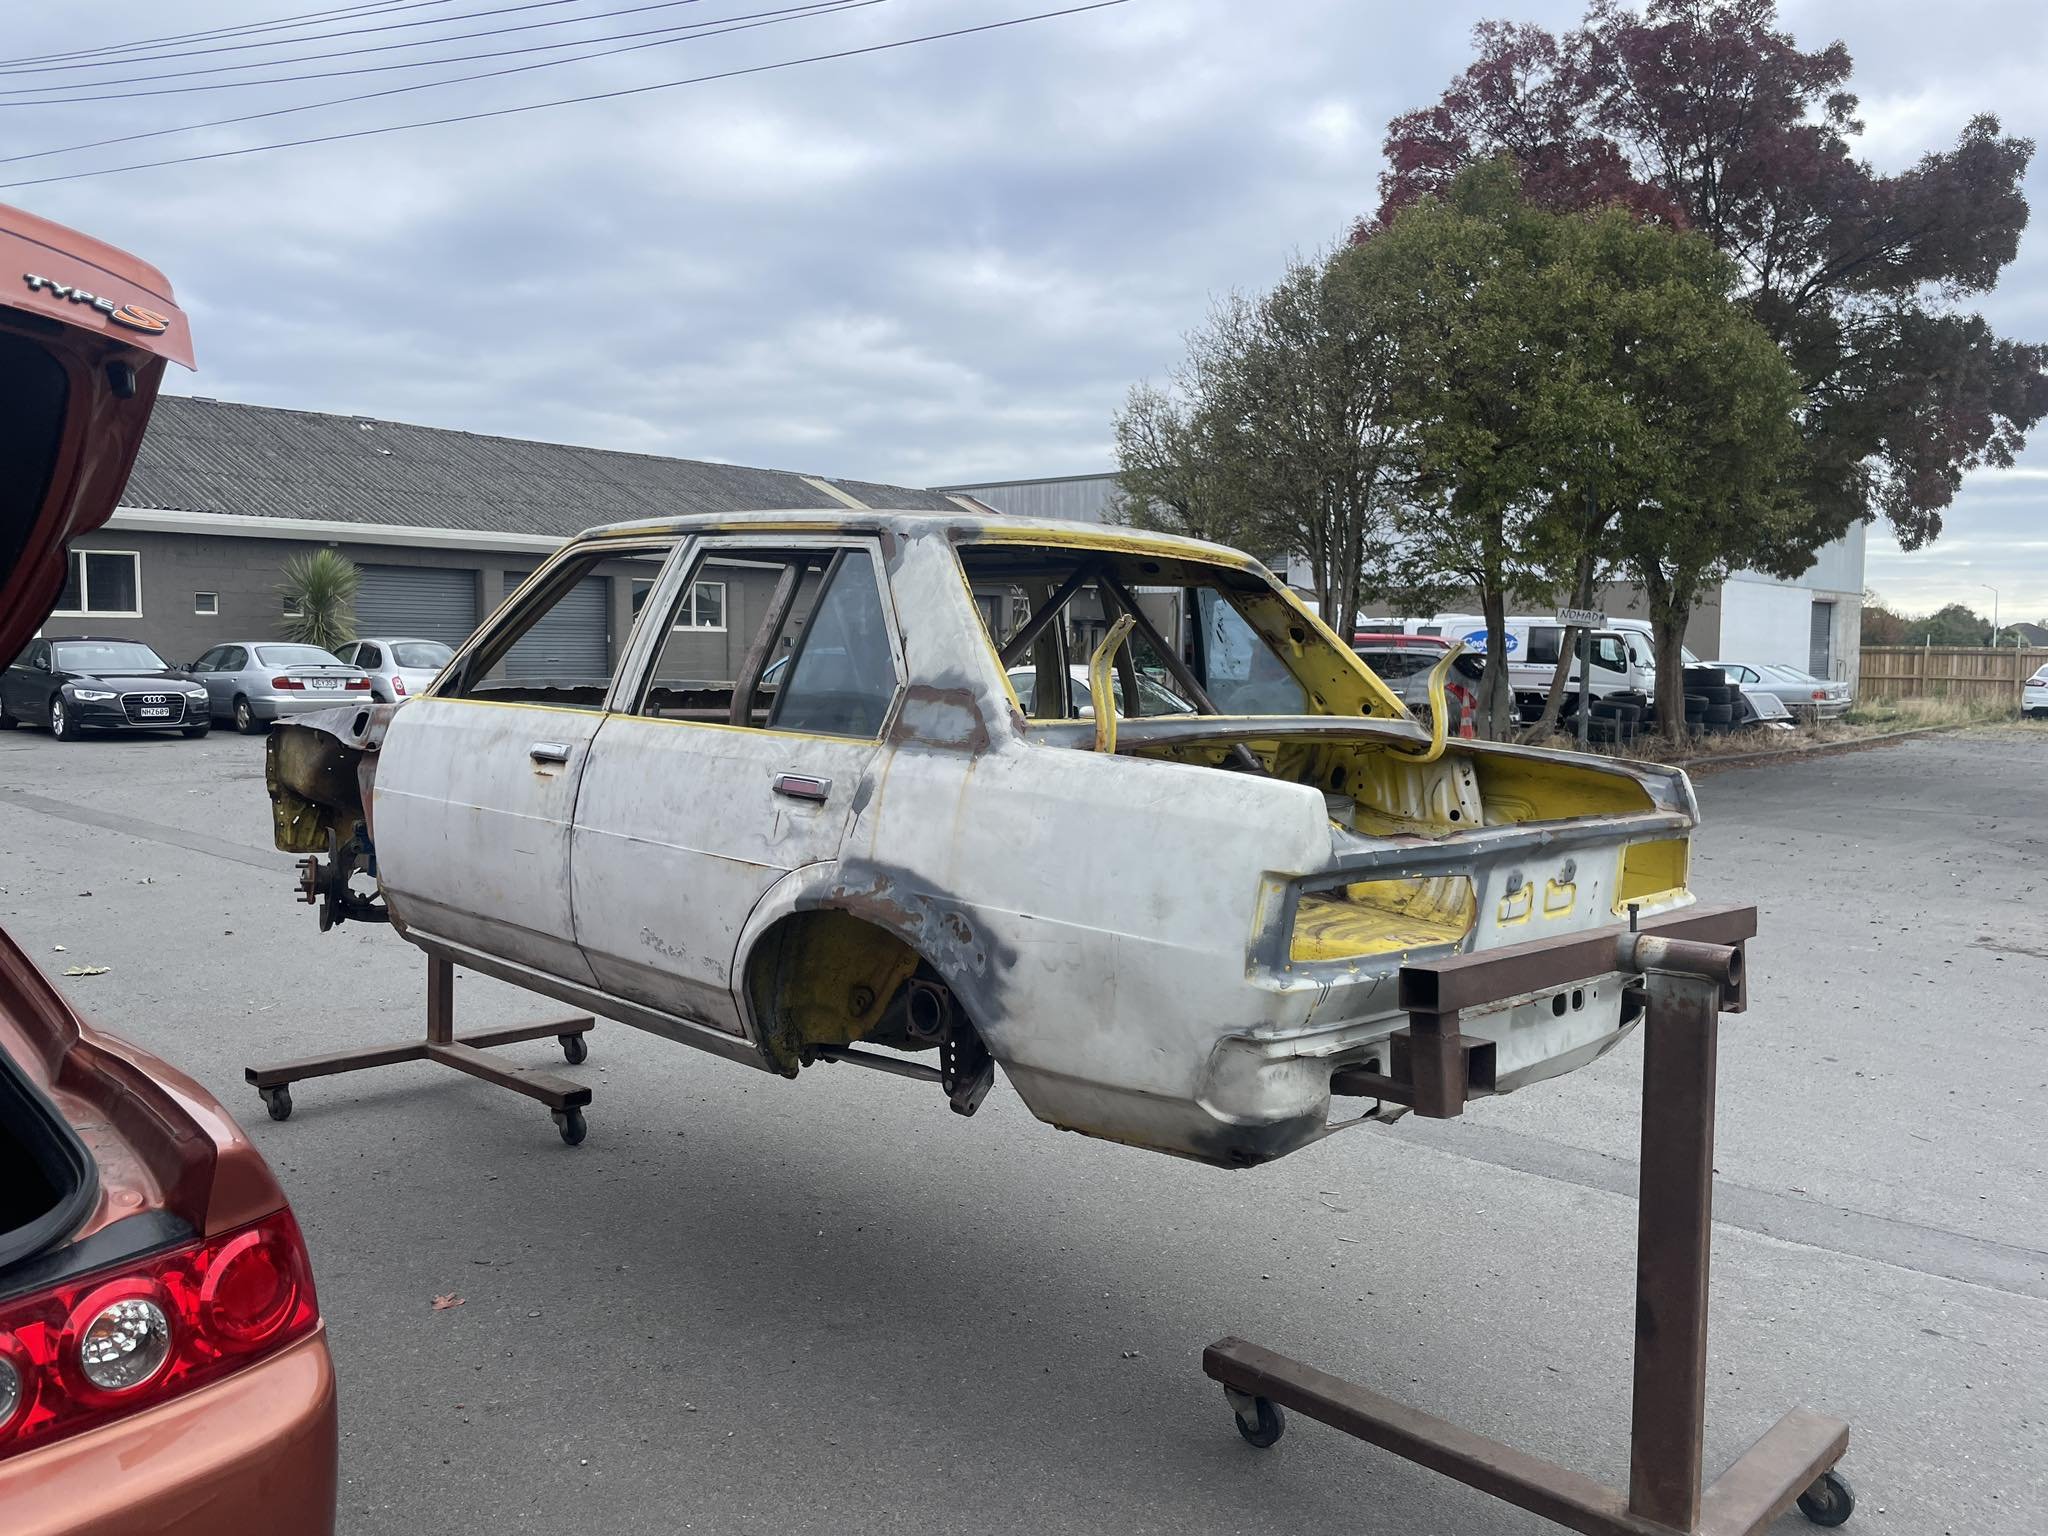
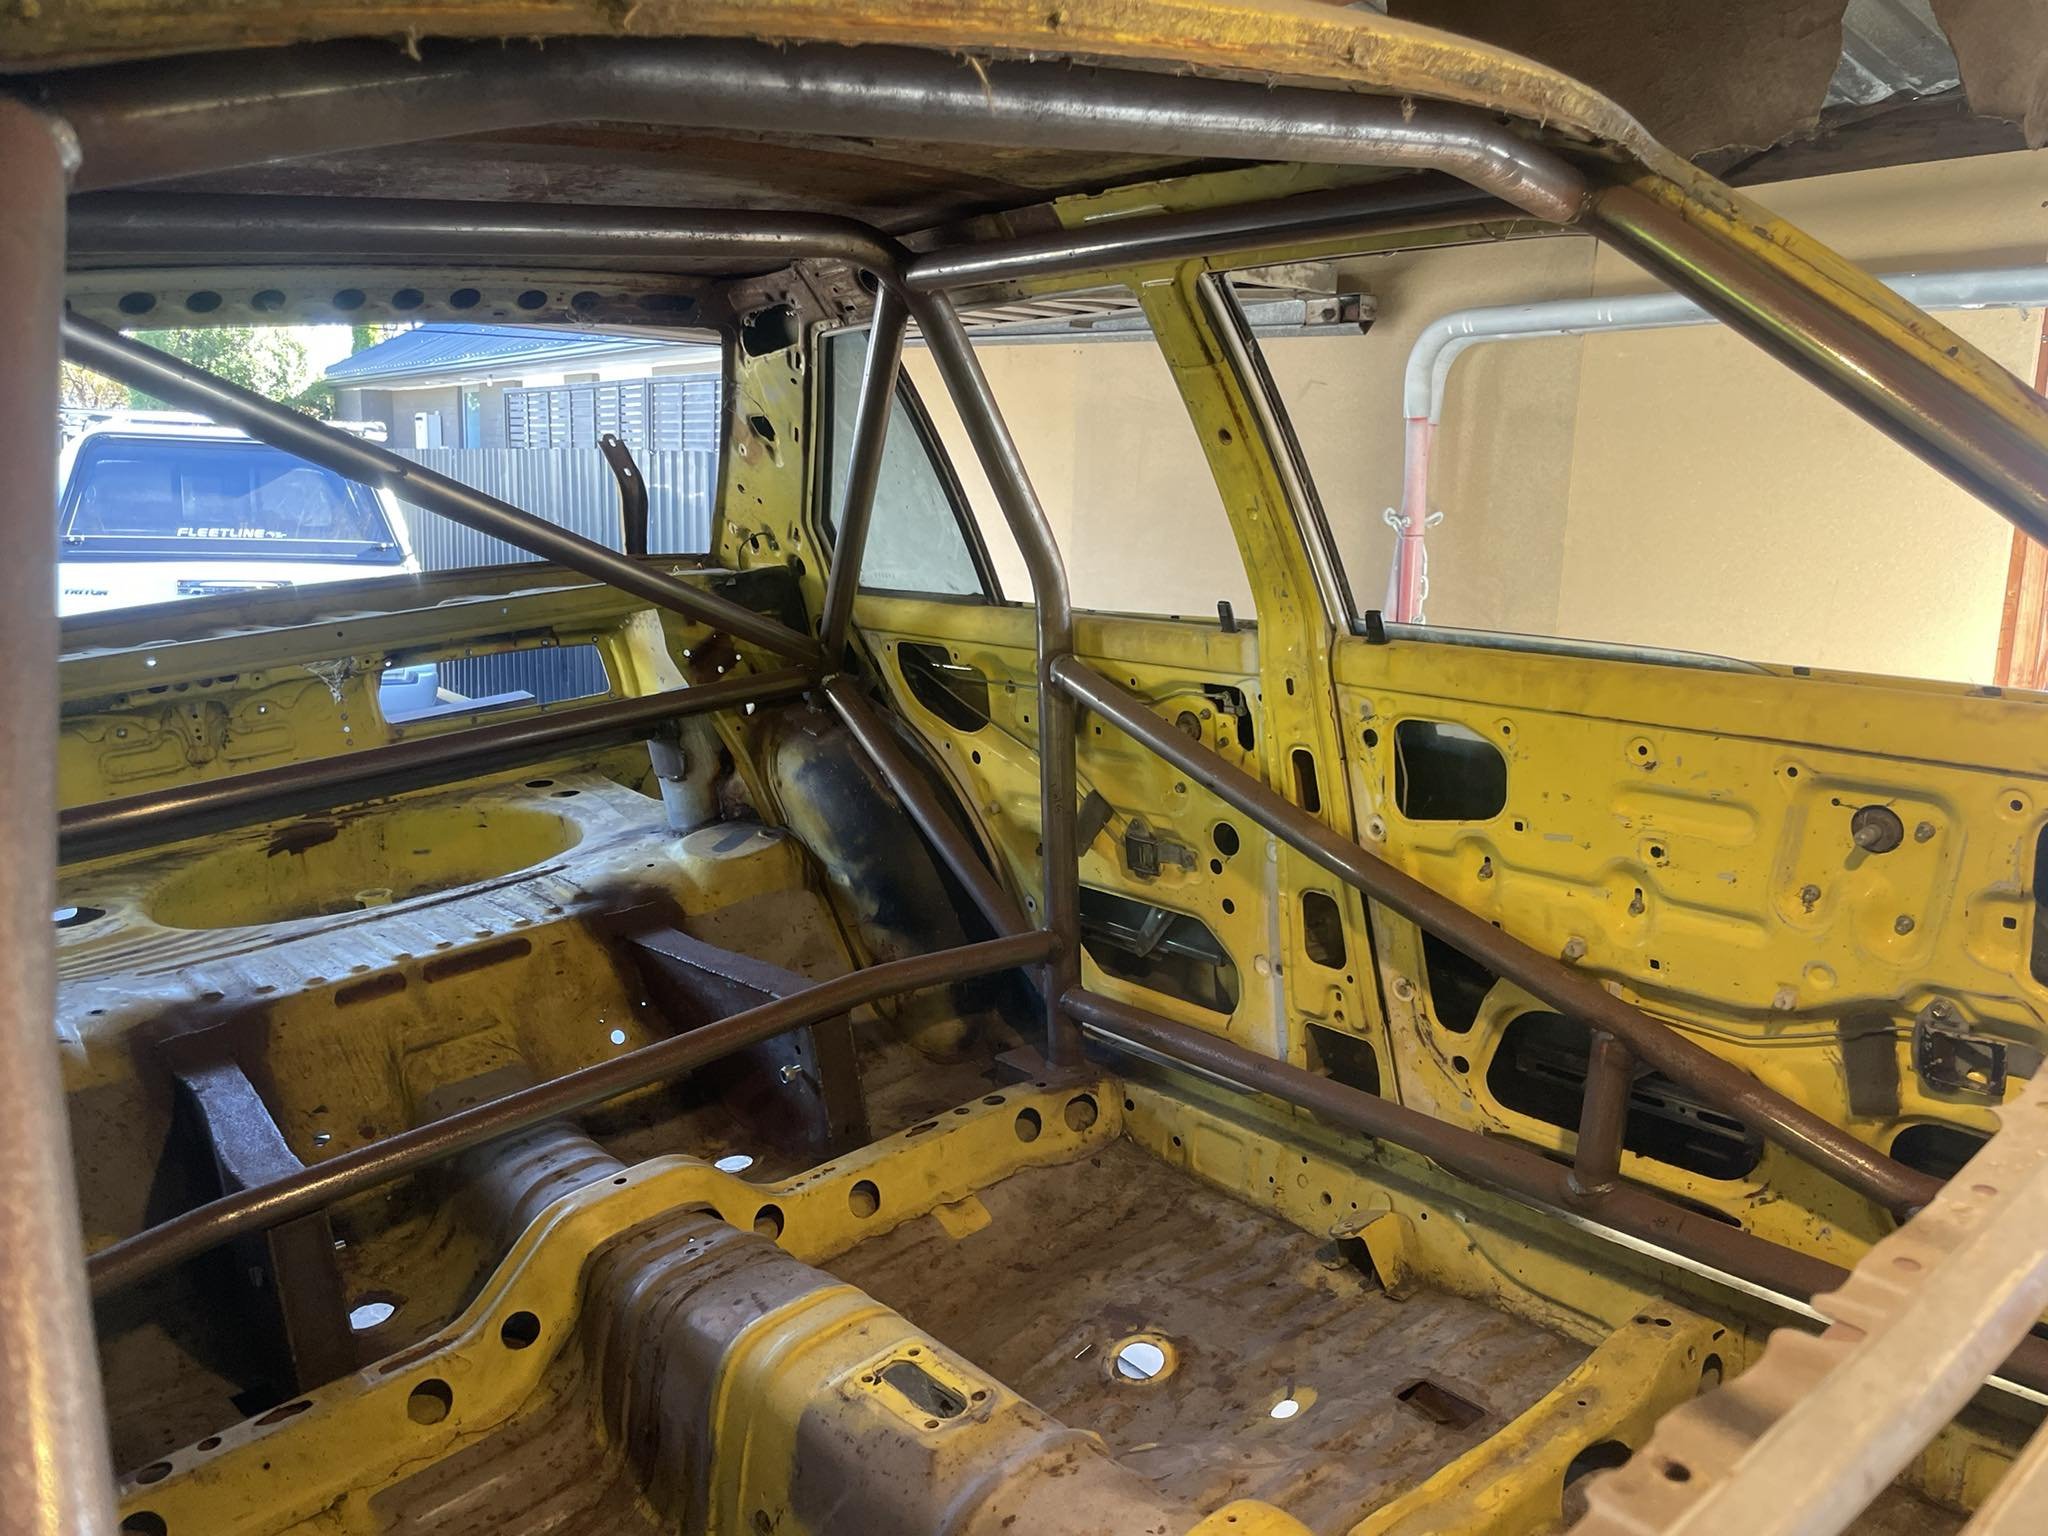
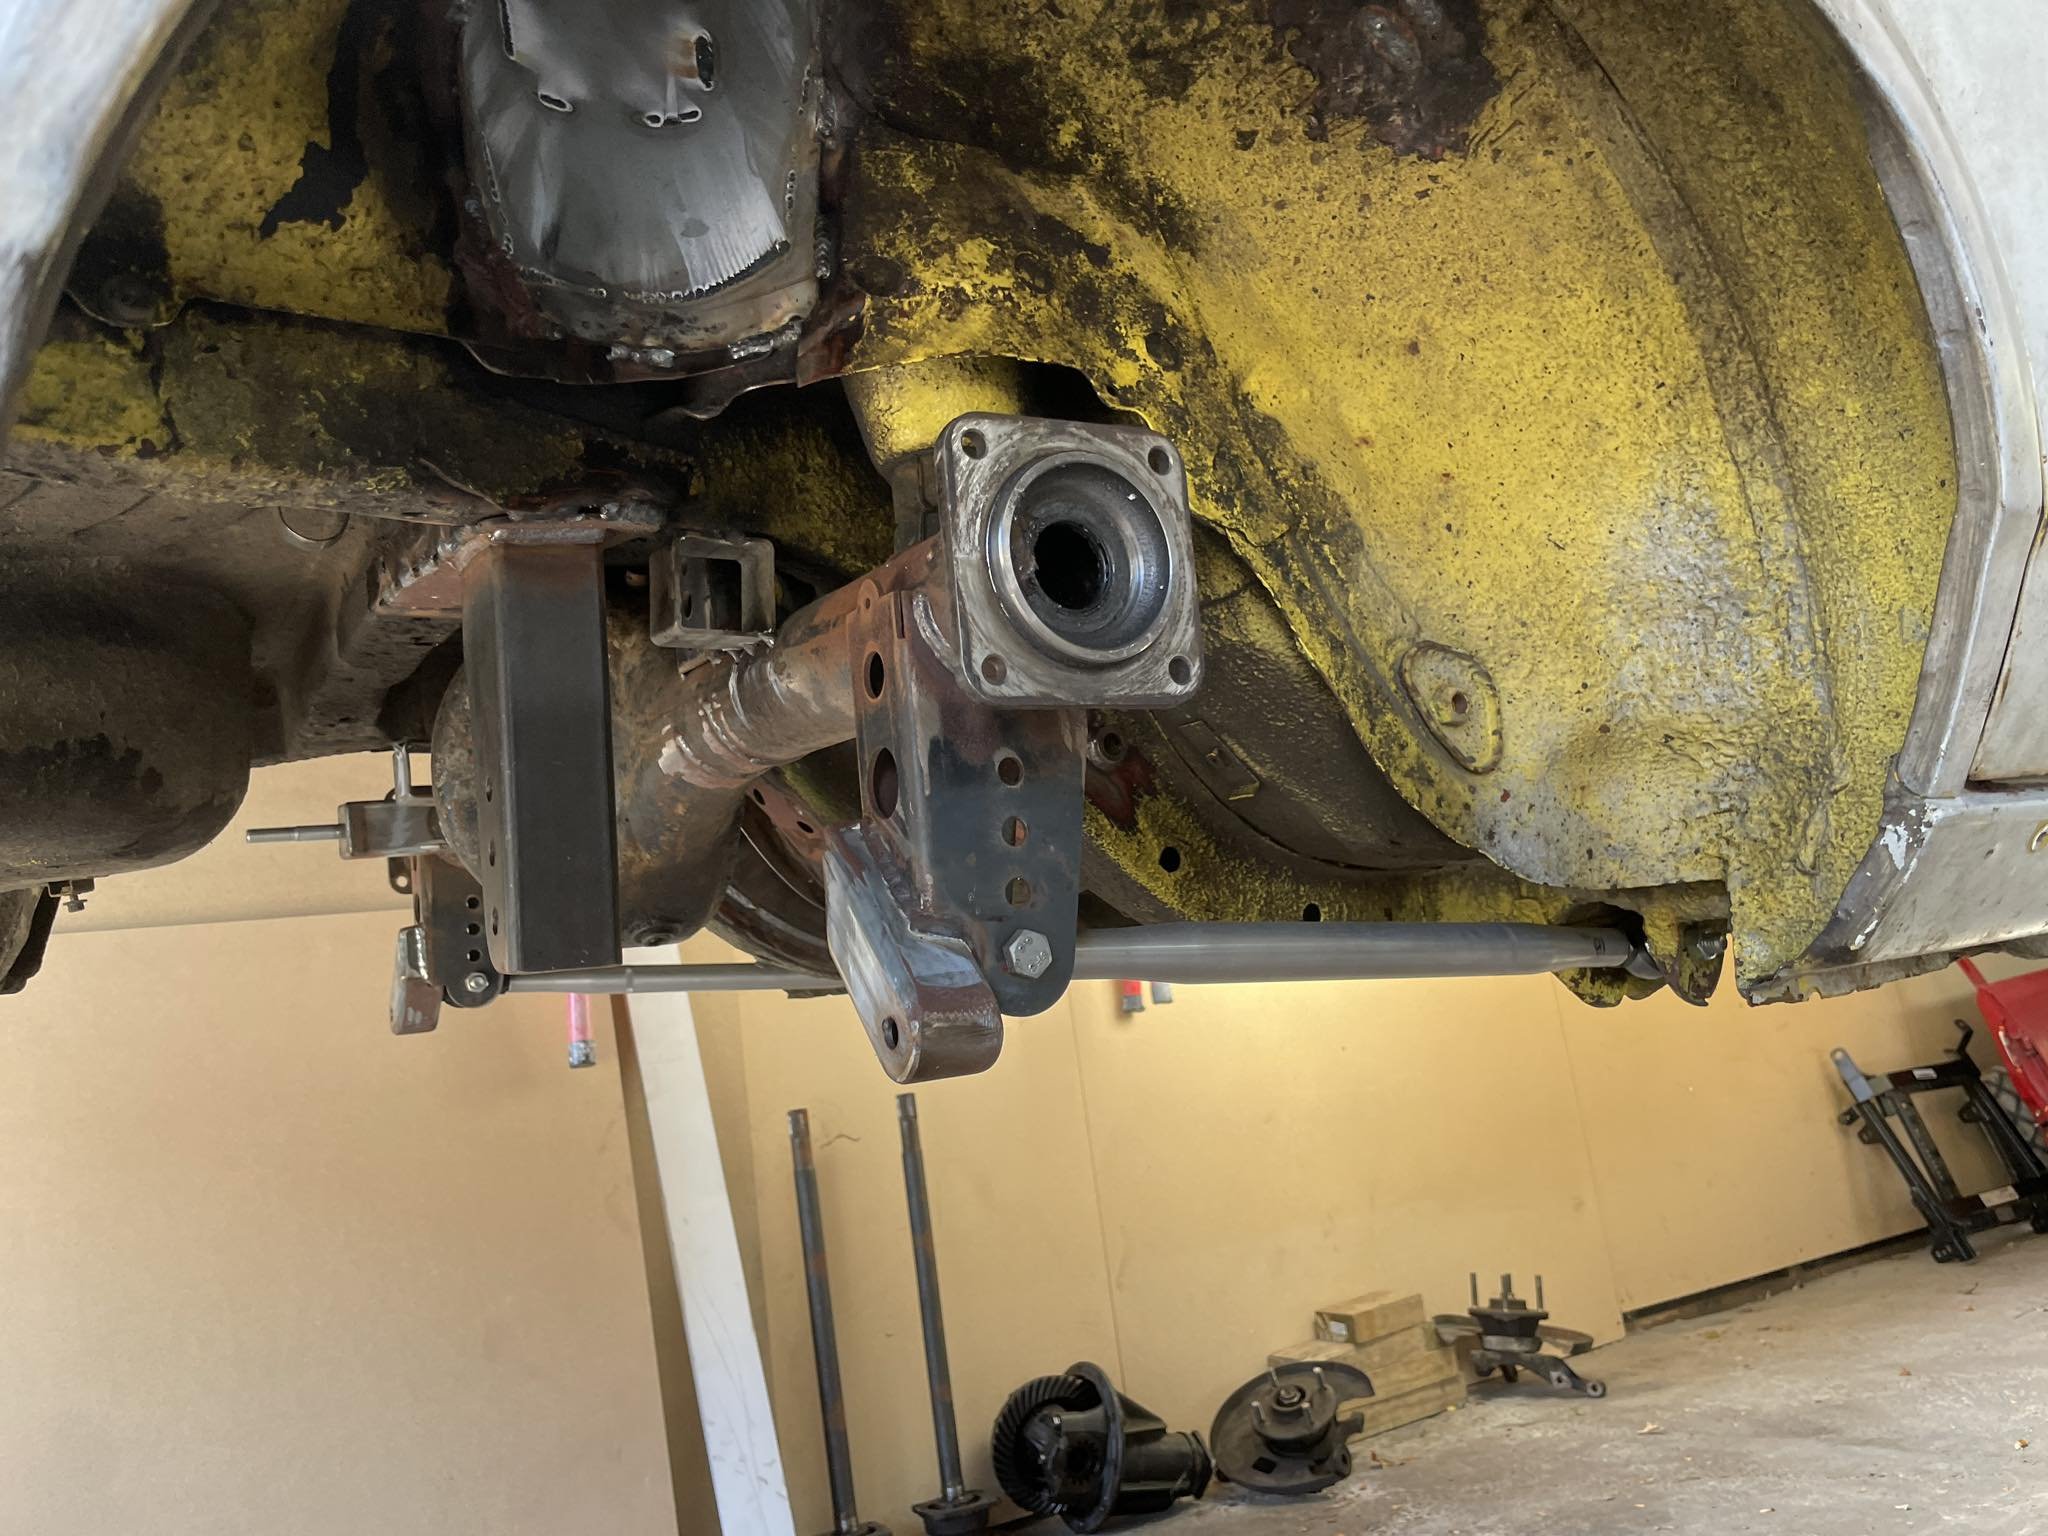
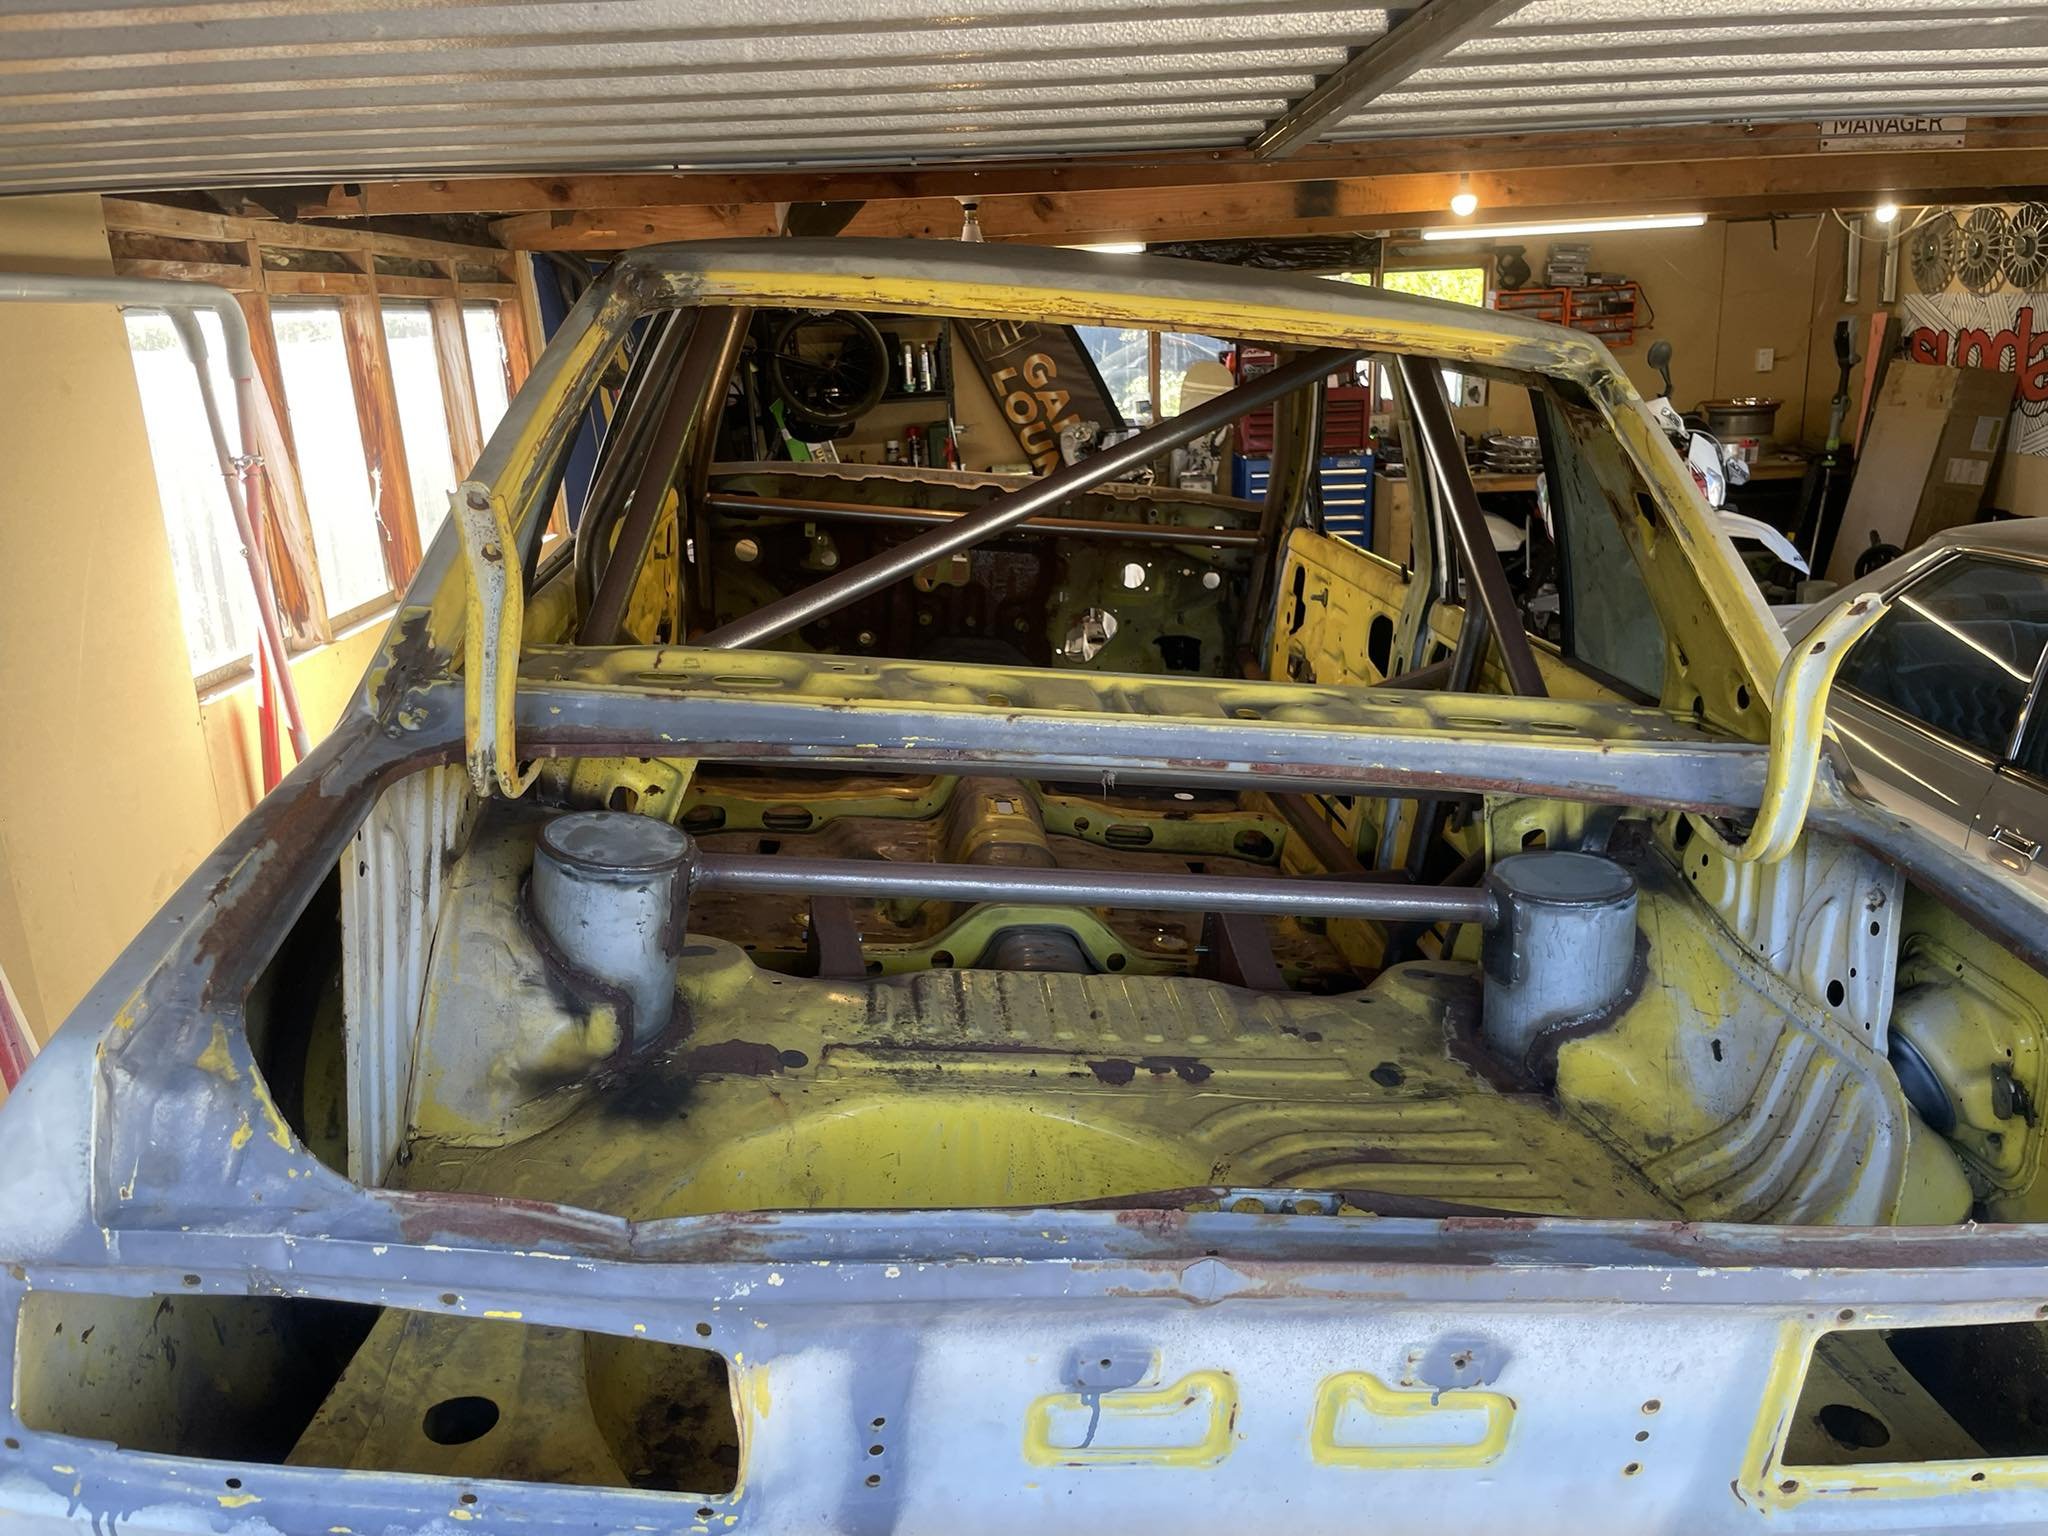
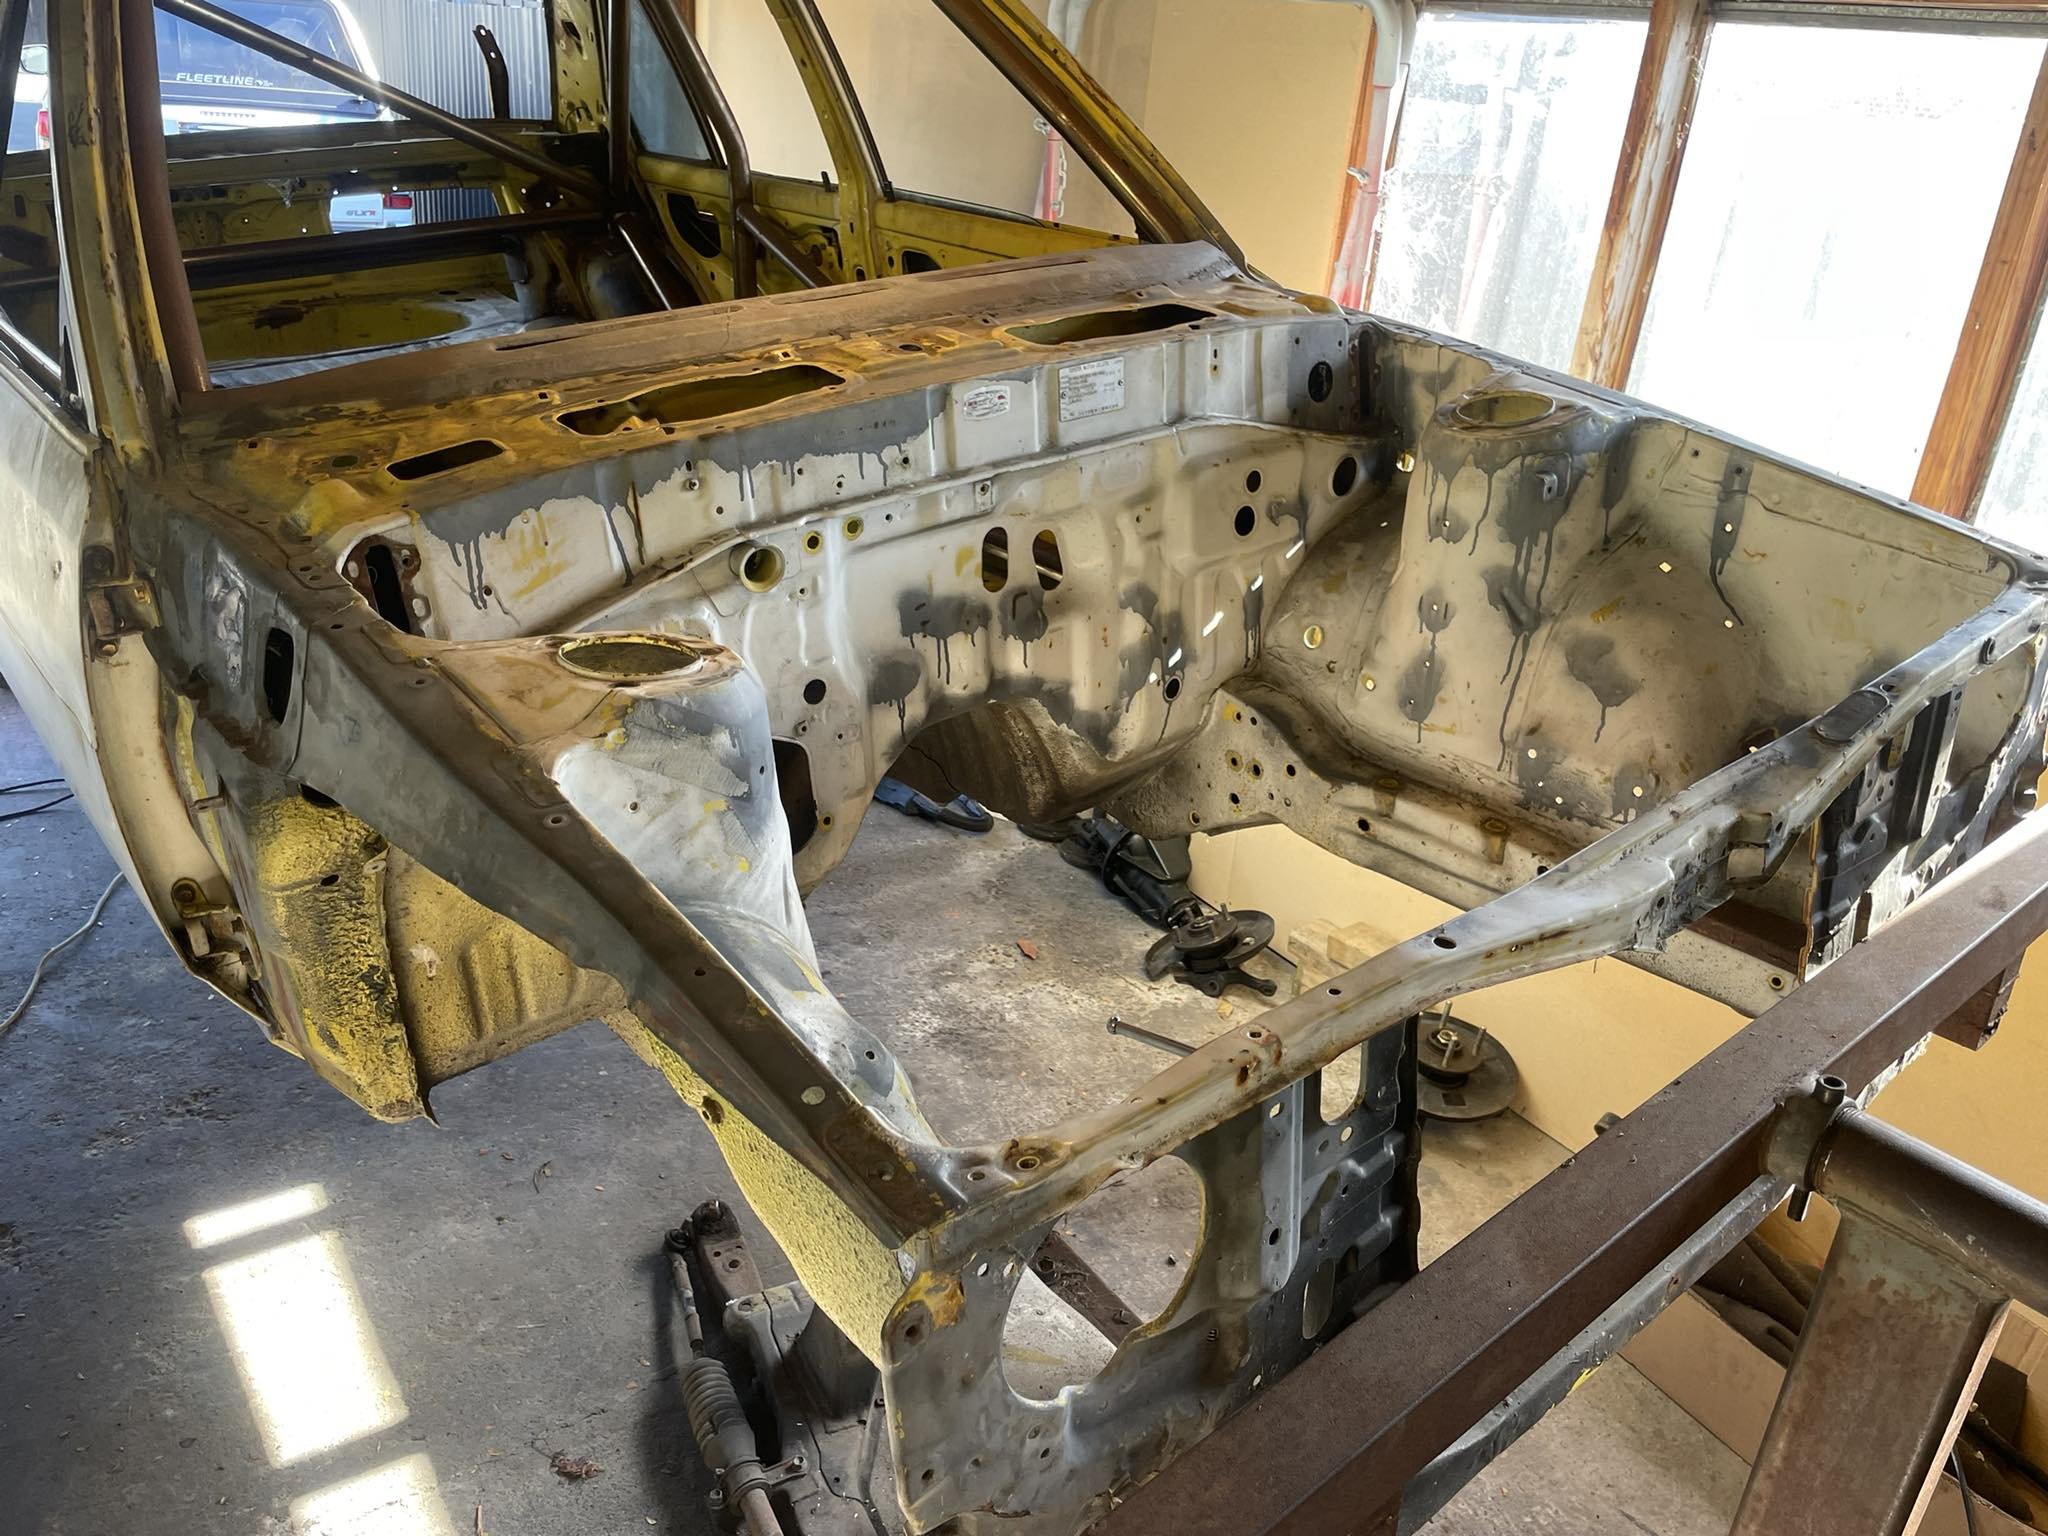
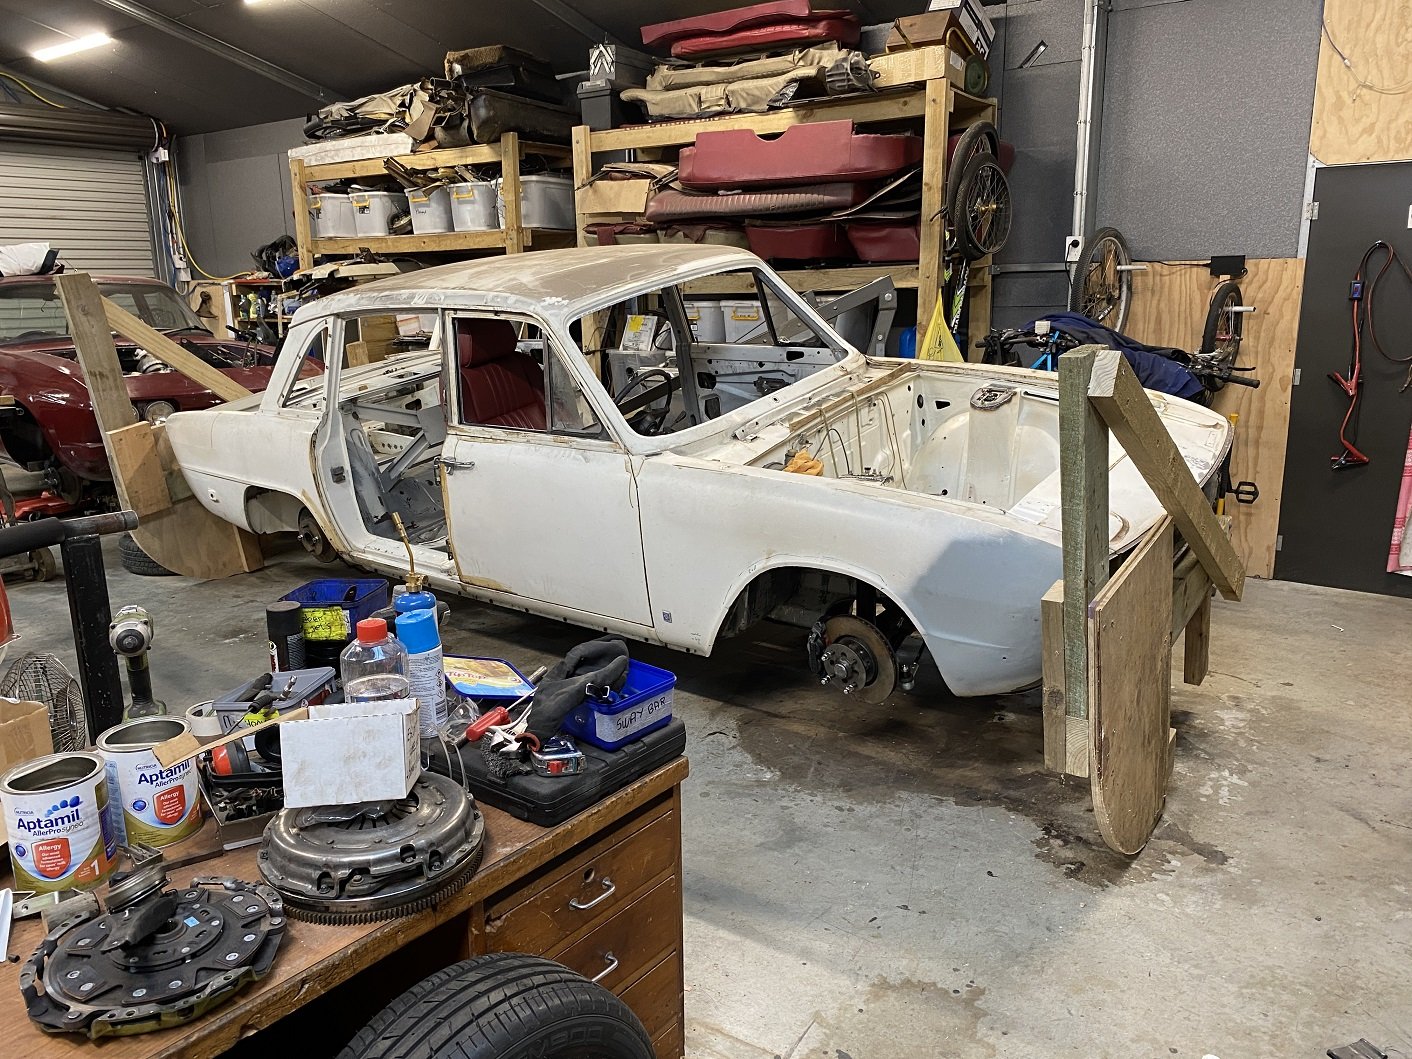
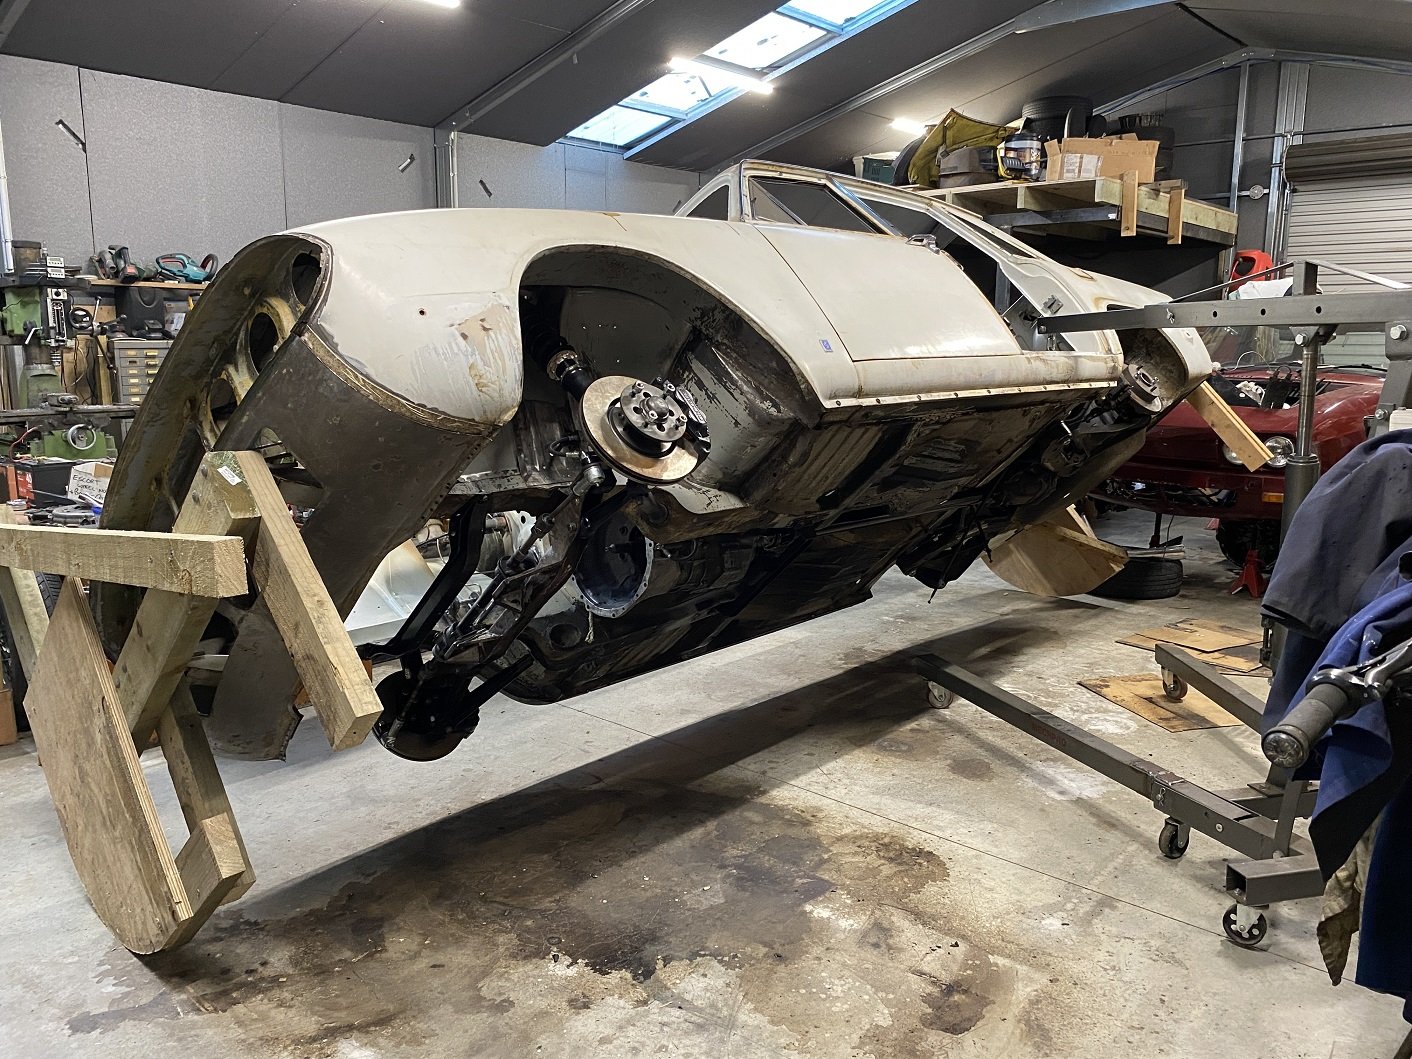
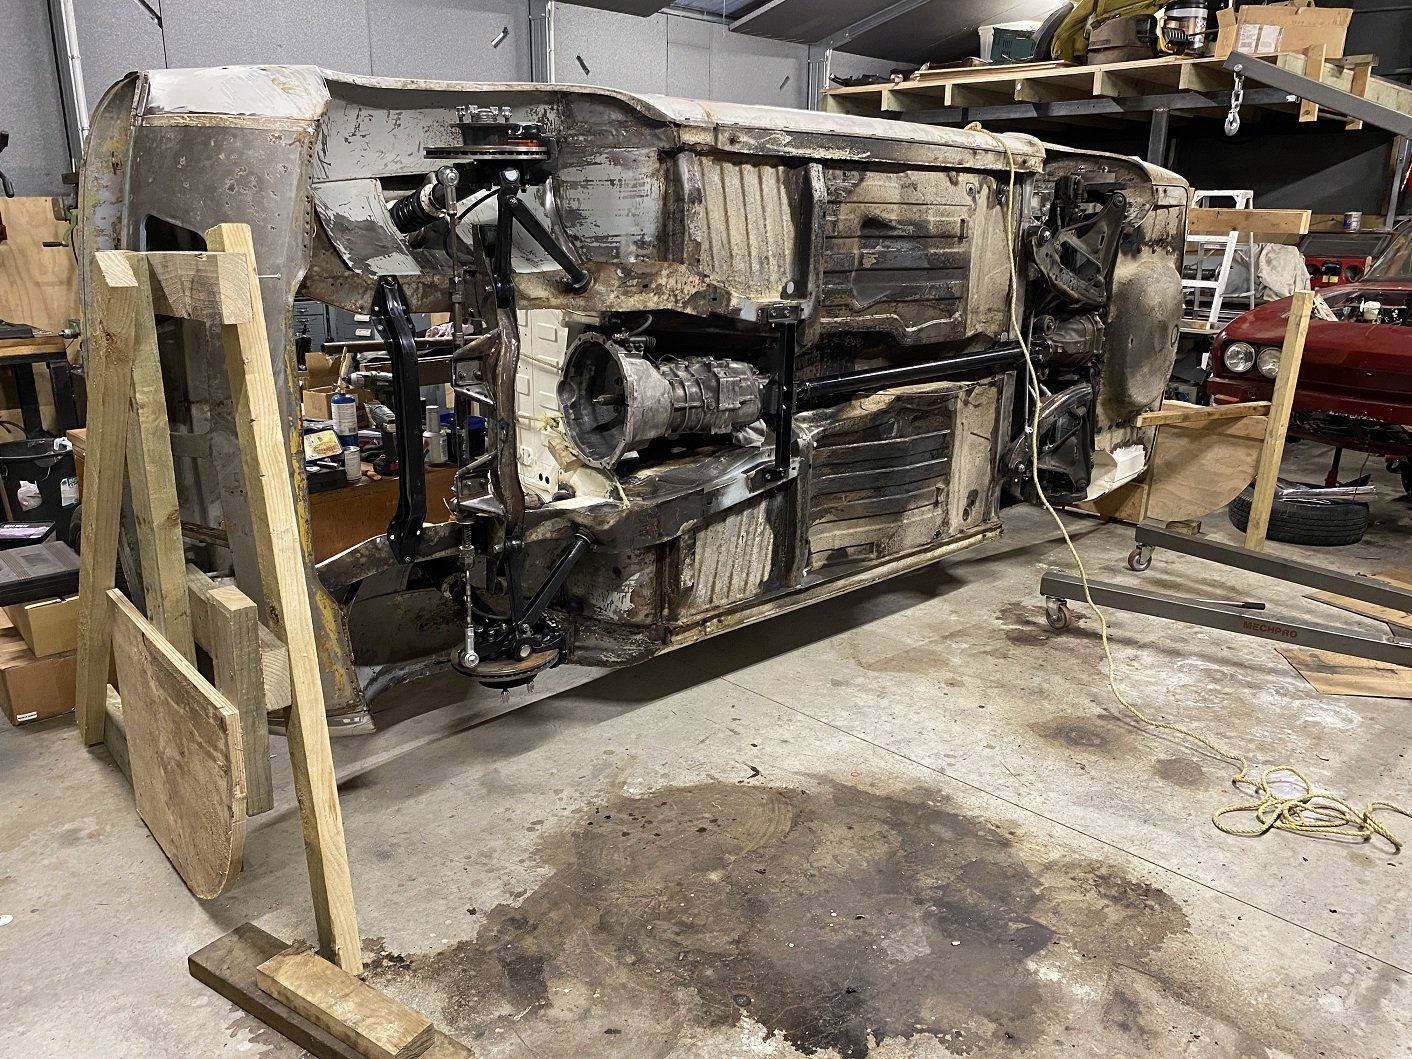
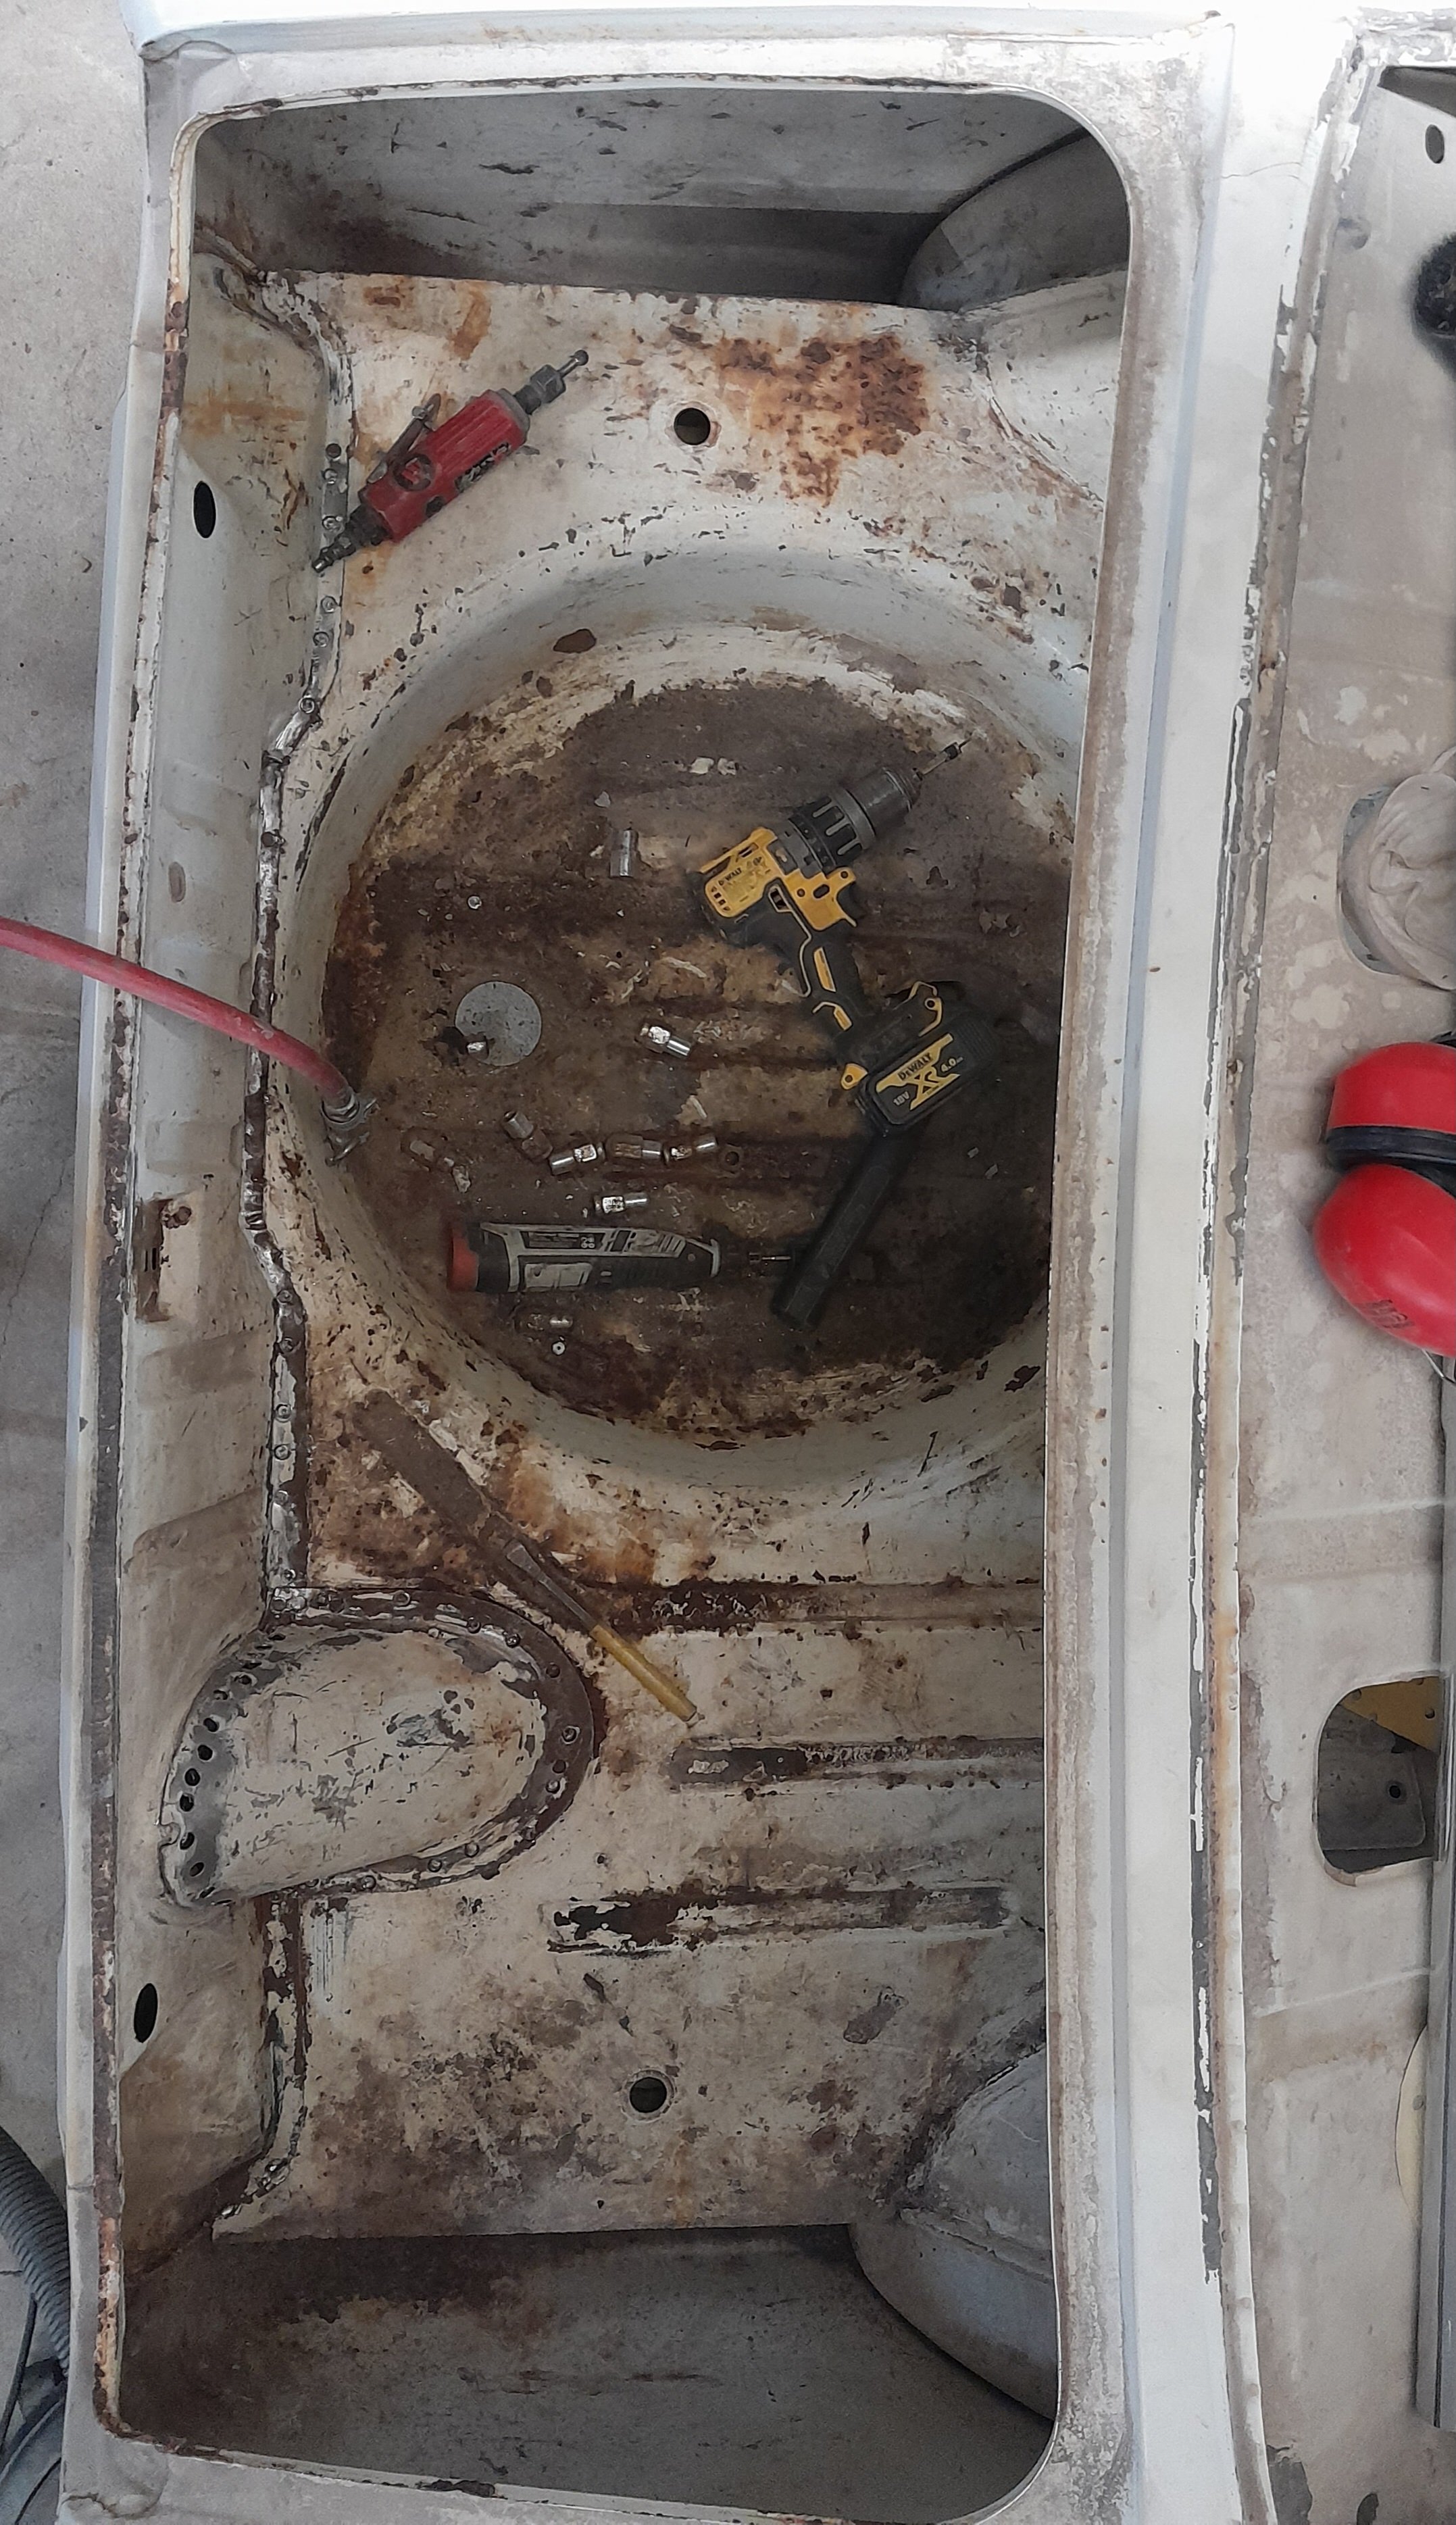
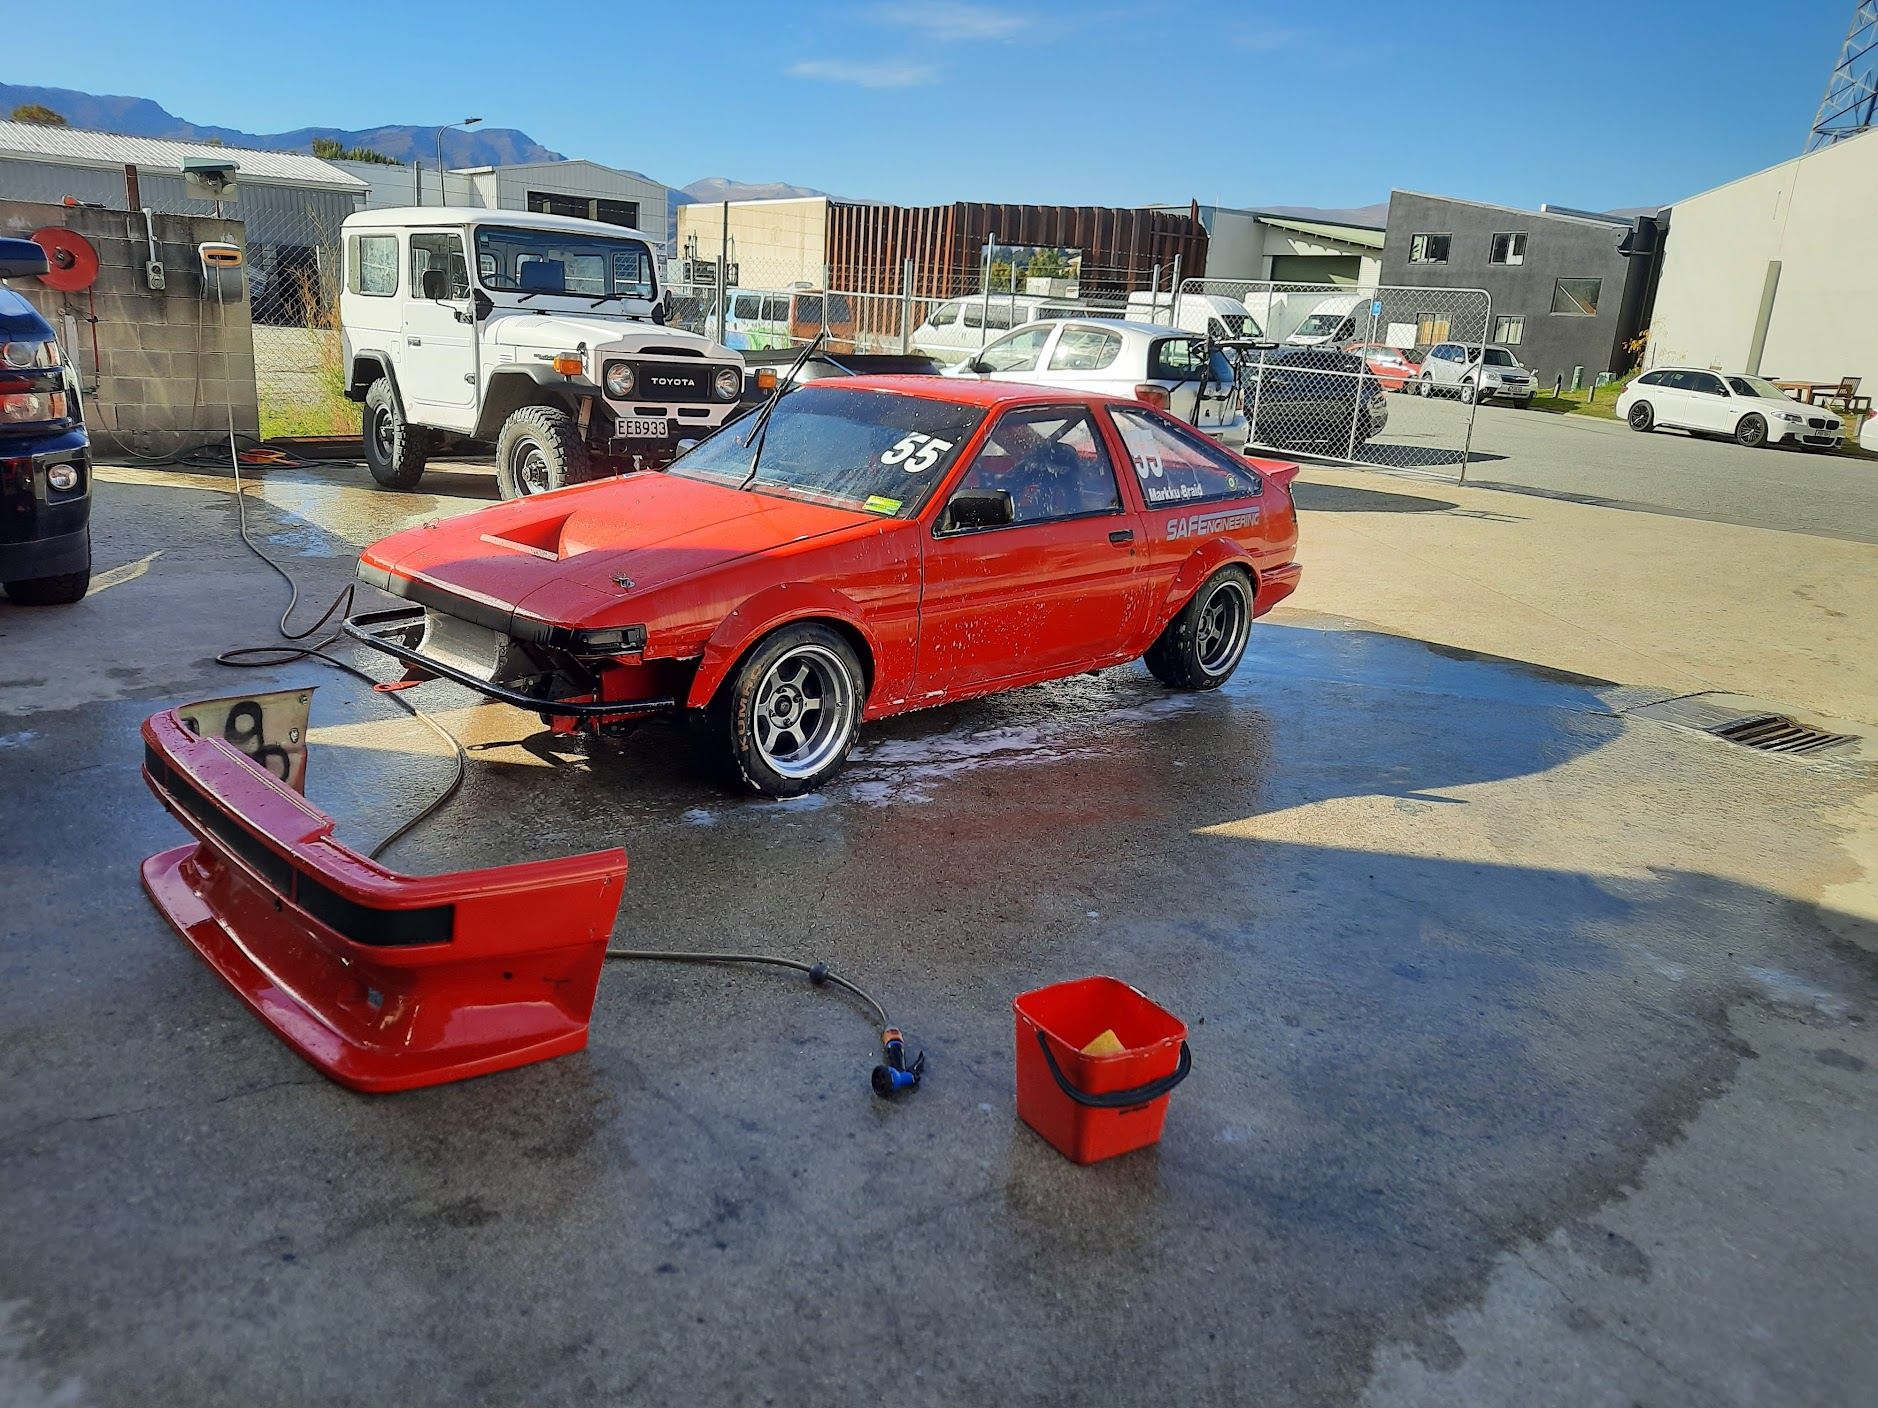
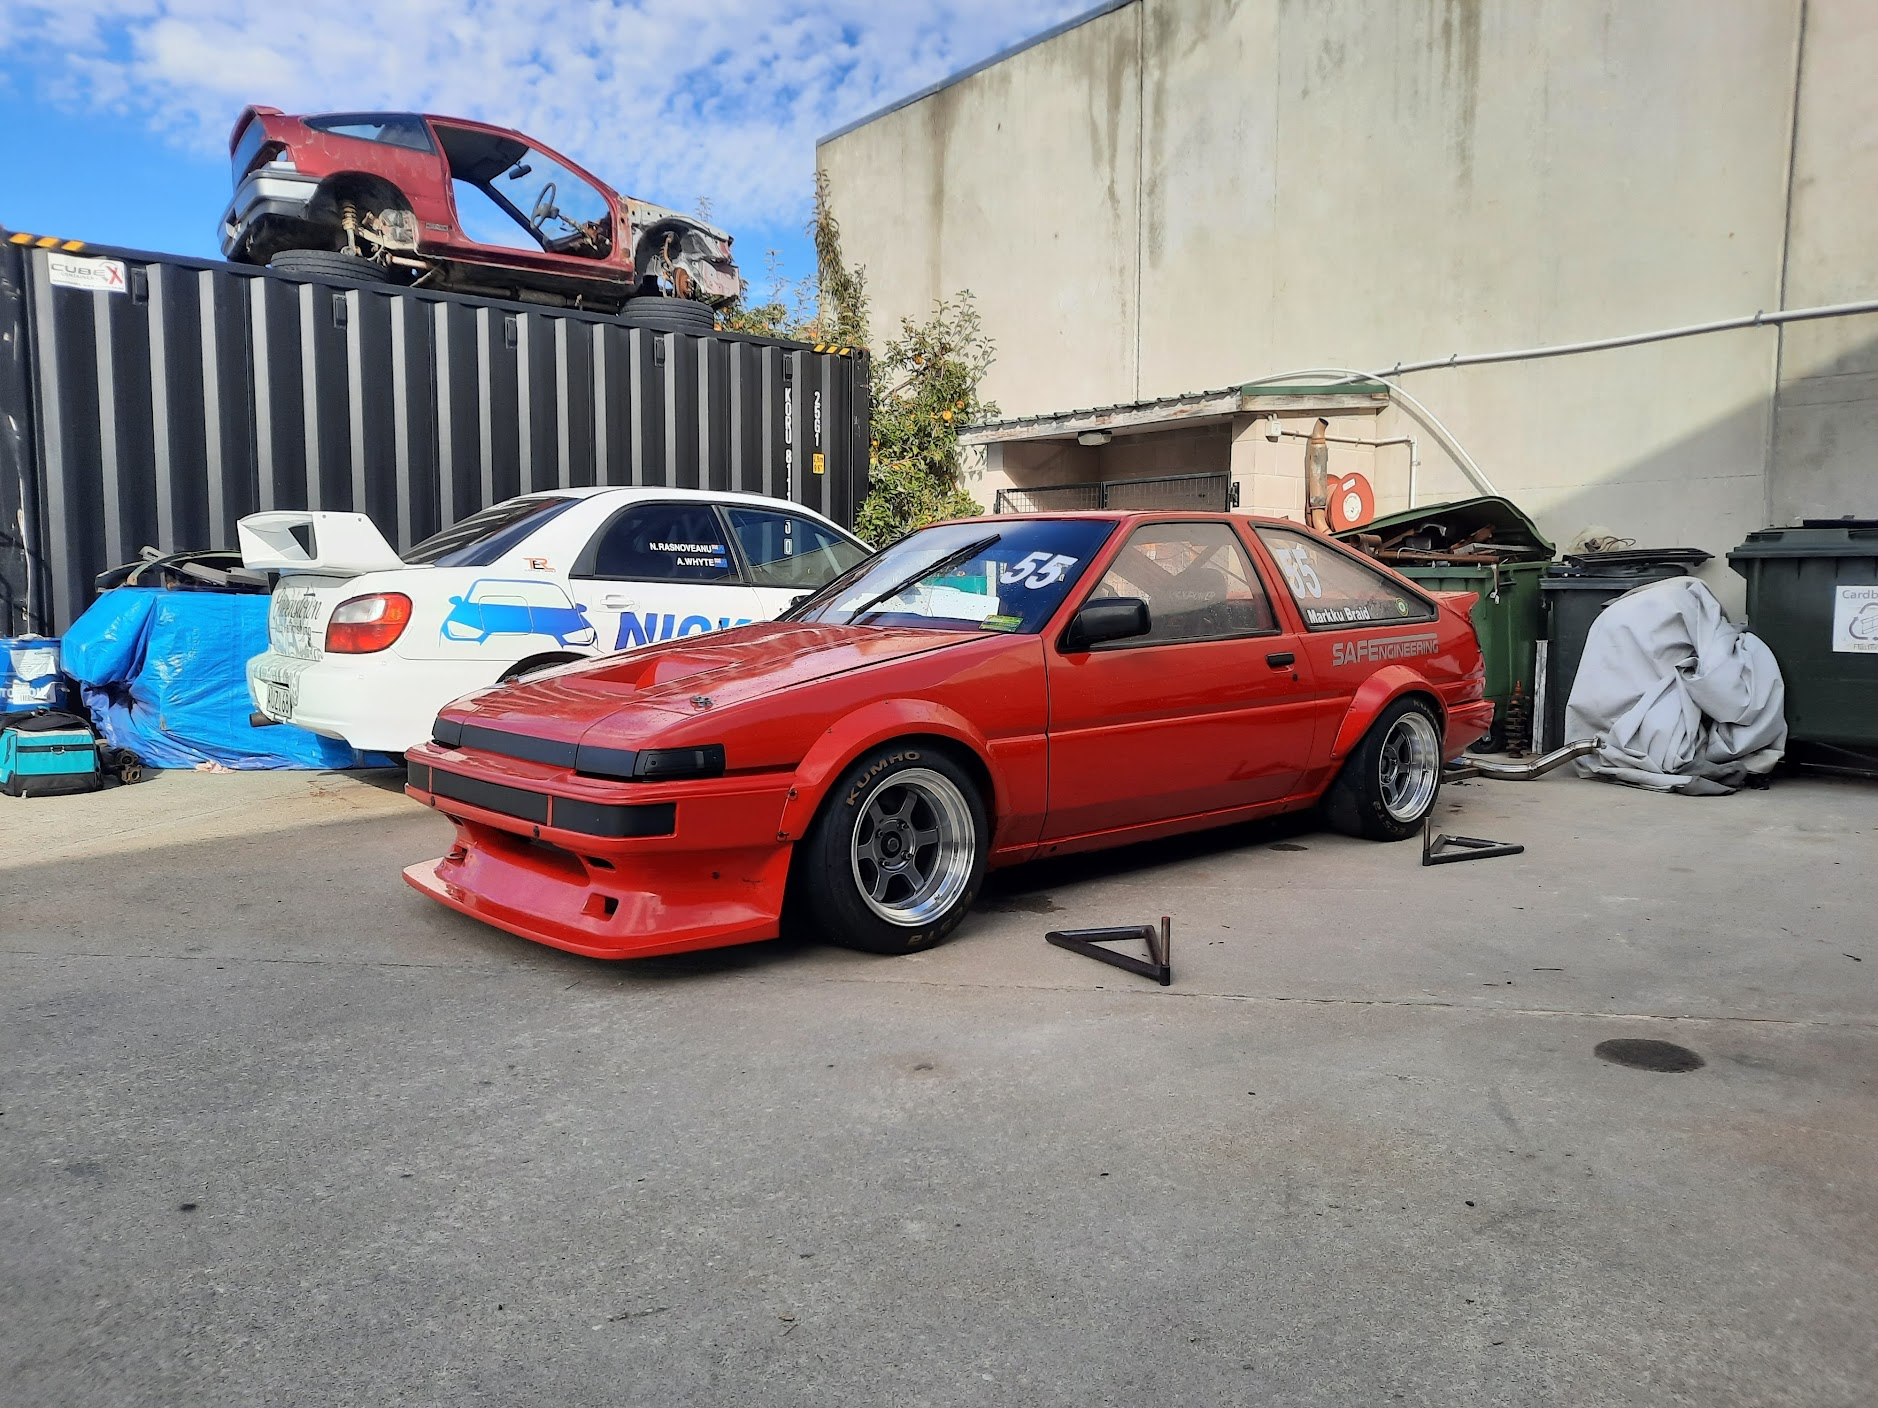
so after getting rid of my ae85 levin because i made it too nice to bash about at the track i was on the lookout for a suitable car to buy/build to have some fun in, bonus of this car is its also rego on hold if i get that way inclined. This popped on on market place for sale, the previous owner had JB Fab here build a 6 point cage and equal length 4 link setup with a b1600 diff, photos below how i got the car. It came with a lot of spares and all the parts needed to put a rolling body together really. i got it home yesterday and started attacking some dodgy spots with a wire wheel to see what i'm dealing with rust wise, didn't find too many surprises only a couple of bad spots that need patches. Removed everything that was bolted on, it had Silvia front suspension which i will be getting rid of and i have ae86 coilovers and knuckles to replace this. before i got this car i had already purchased an engine mount and j160 adaptor kit from Niteparts for 2zz. looking into diff options for the b1600 diff, i've seen a bit online about what heads fit into the b1600 setup. Ideally i would like a nice 2 way diff for this, I saw that potentially fc3s nuggets bolt in? i have a 4.9 Ratio at the moment which is perfect. current plan of attack is: - Rust patches. - wirewheel and re undercoat the underside. - Doors and front end to panel beater for a quick panel and paint. - Weld up all the unnecessary holes in the engine bay. - Mockup j160/2zz combo and start headers and itb setup. - Sort rear brake setup on the diff. - Powedercoat/Zinc everything to make it nice Discussion - Discussion
13 points
-
Steering wheel controls all wired and working. Everything on the left of the wheel works as it should. Right side is for dash and whatnot so there is nothing to connect they to. Fucking stoked.
12 points
-
Hello, Maybe it's just my age, and to do with the cars that I learned about when I grew up. However I seem to be stuck in thinking of all of the motors from the 90s or early 200s as the "golden era"? Where anything before that was a bit primitive, and anything much after that is too modernized and hard to do anything with. So only things from around this time are good. Legendary little rippers such as the 4AGE, 4G63, 2JZ, 1UZ, 13B, LS1... Gotta love em! Cheap, plentiful, great potential, great aftermarket support, and so on. However a lot of these older motors are getting hard to source, expensive, and a bit less fun when it costs 10x what it used to. However I feel like there are some good modern options which are slept on. So, what are some cool modern engines that should have some potential for swapping into shitty old cars? @shrike noted a few cool options in a recent project thread. I figure it's a worthy topic of it's own, going into some more detail on each type of motor. I will write a few posts below that I've seen some success with, with some different engines and pros/cons. In my mind what made those older engines great, was a combination of few factors -Easy to make power in factory form. -Good modding capability. -Good aftermarket support. -Plentiful engines / not too expensive. Now to be fair I am Toyota biased, not because I think these motors are best, it's just what I know about from top of my head. Feel free to spam other alternatives if you know of something cool! First up Toyota 2ARFXE engine This is a 2.5 litre 4 cylinder engine with a 90mm bore and 99mm stroke. This is normally found in a hybrid car like a Camry. There is a non hybrid version too (2ARFE) Think of it as a slightly less good Toyota version of a K24 I guess. Why consider it? It uses all of the Toyota hybrid engine tricks, for good economy - that are good for power too when modified. High compression ratio, huge ports, big standard cams, somewhat bolts to a 3SGE gearbox (Easier for FWD than RWD though) There's currently one on Trademe for under $900. How does it go? These motors have a really big factory intake cam, and this can fit on the exhaust side too. So you buy a 2nd one and fit it on the exhaust side for a cheap and easy upgrade. Then retime the cams away from atkinson cycle, and you make big stacks of power with some basic bolt on mods. This guy was making 270whp with an NA motor with 2x factory intake cams fitted. Pretty awesome! It somewhat bolts up to a 3SGE bellhousing pattern, which works well for transverse engine swaps. Downsides are that it's a fairly tall engine, some people have had to cut their bonnet to fit in smaller RWD cars. Okay so that's cool for a low budget throw together, but does the aftermarket support scale up? How about a full $$$ turbo build? As this motor was common in america, there's heaps of stuff available. Papadakis racing made a 1000hp variant.7 points
-
This make some things easier.... I bolted the don't-fall-on-me props on so they can't accidentally be knocked out. It's a bit bottom heavy with all the suspension still attached so it does want to come back down.
7 points
-
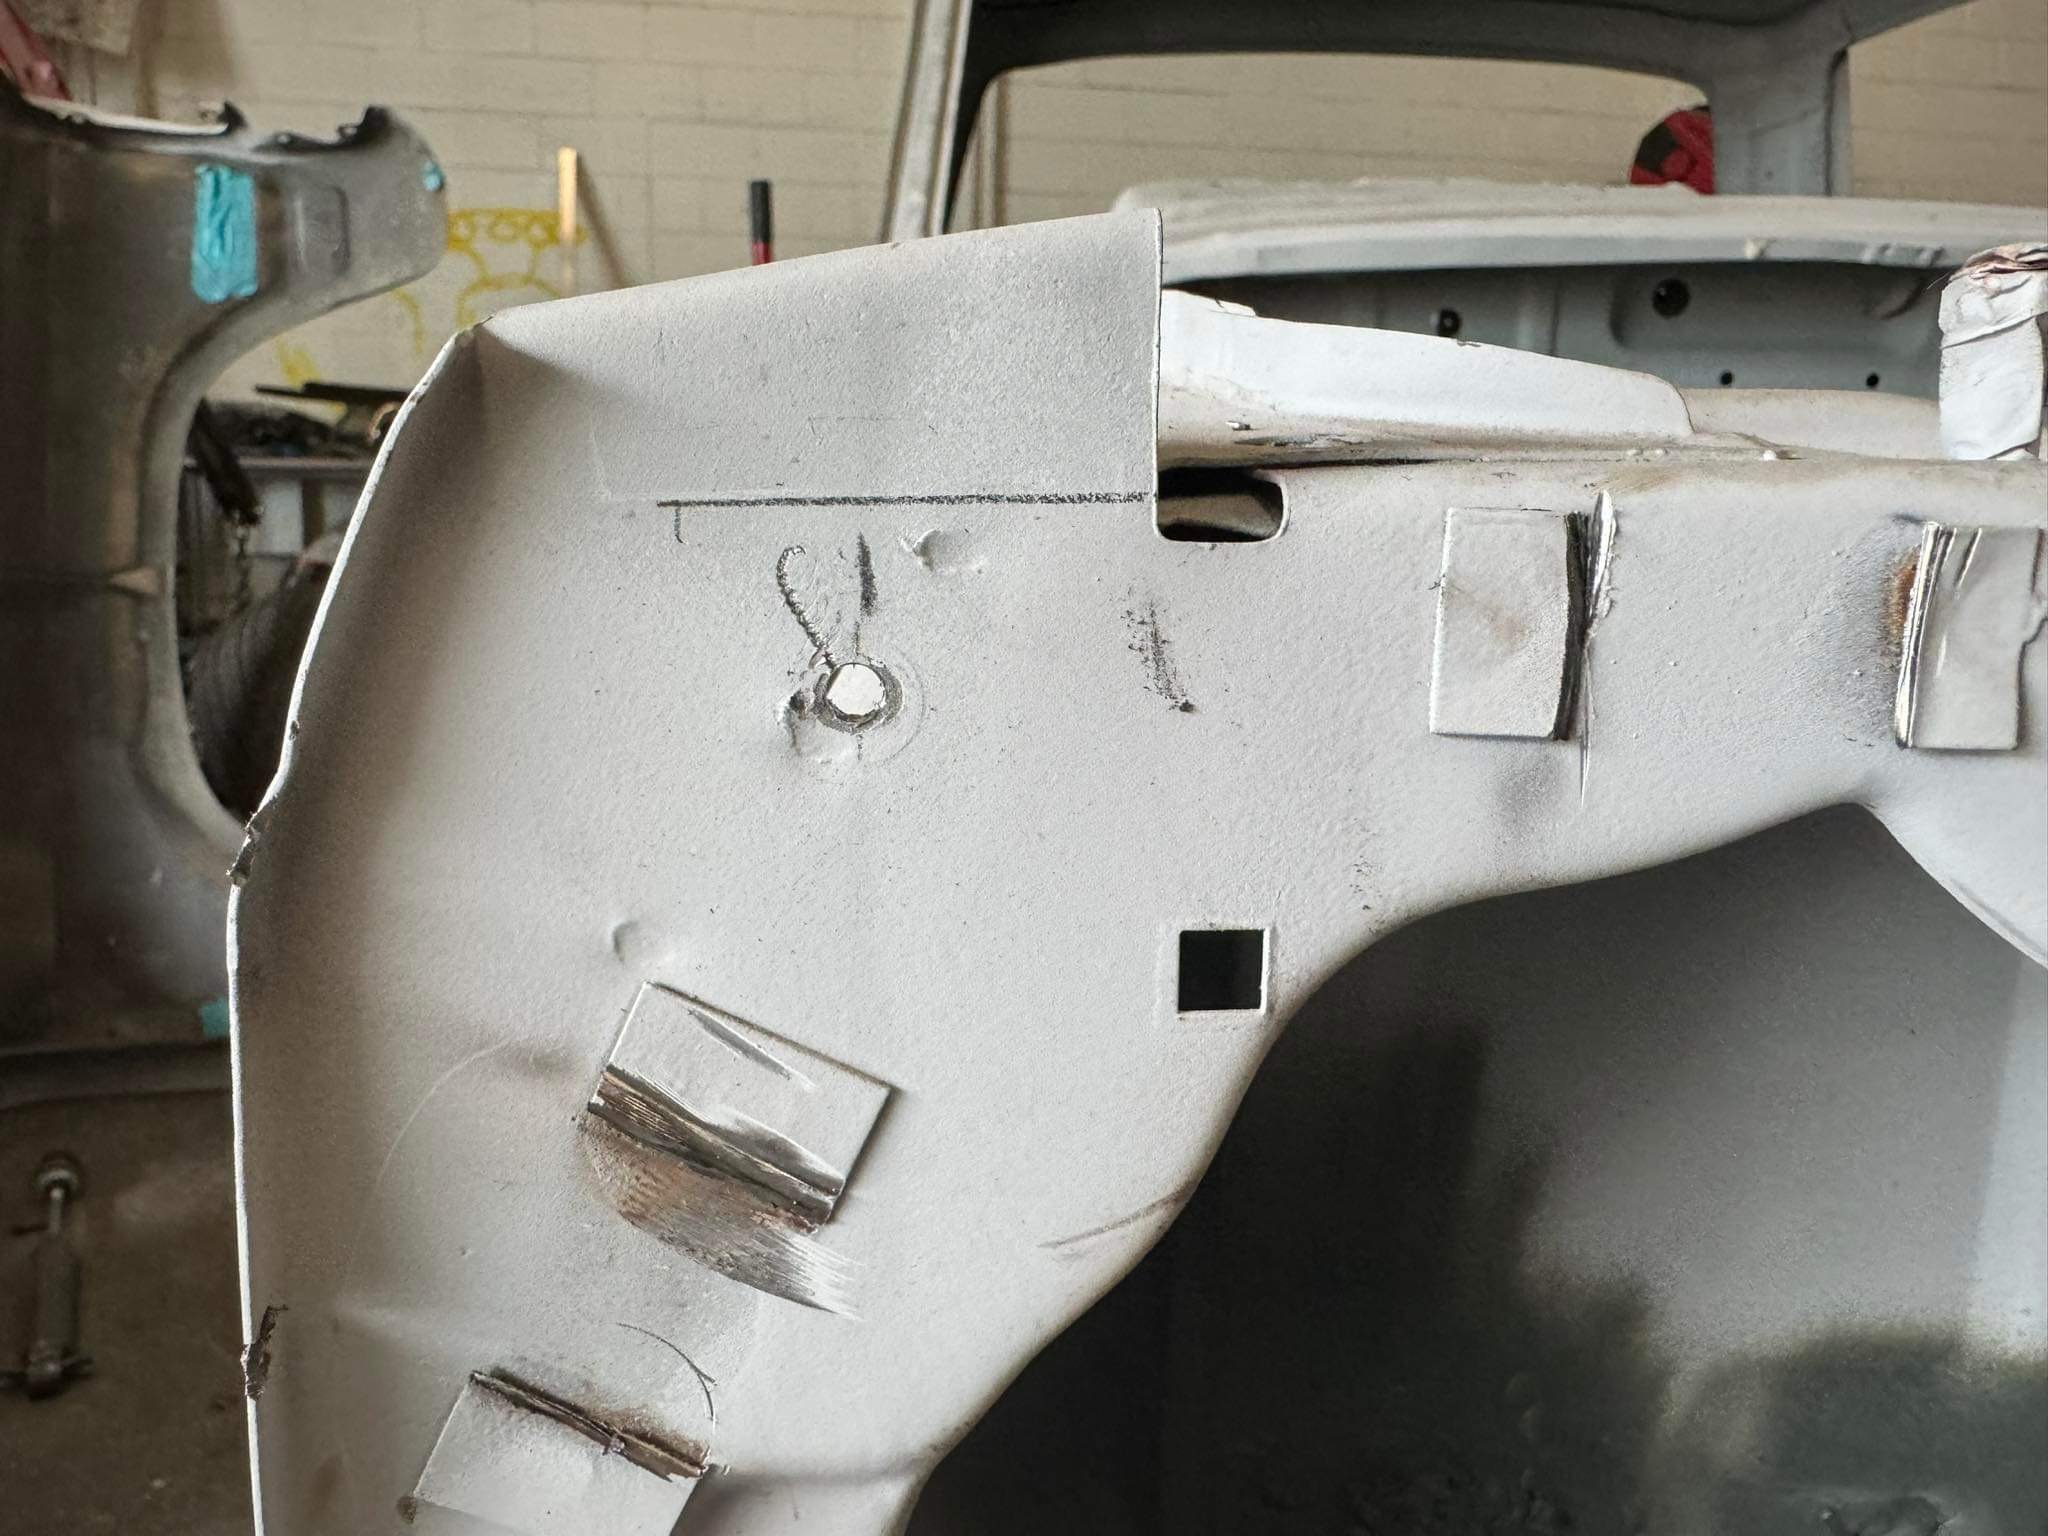
But....... cos I'd hate myself & & I'm a pedantic fucking perfectionist I'm chopping the arse off it. Rust in the seams has to be dealt to, then I guess sand/beadblast the damage
6 points
-
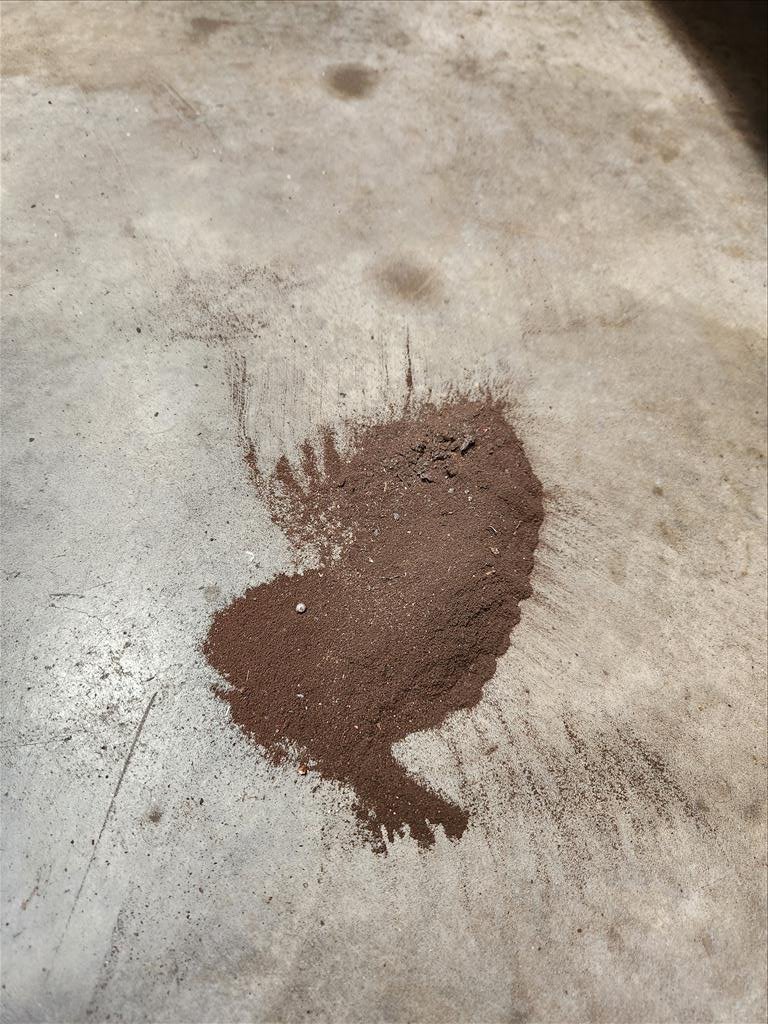
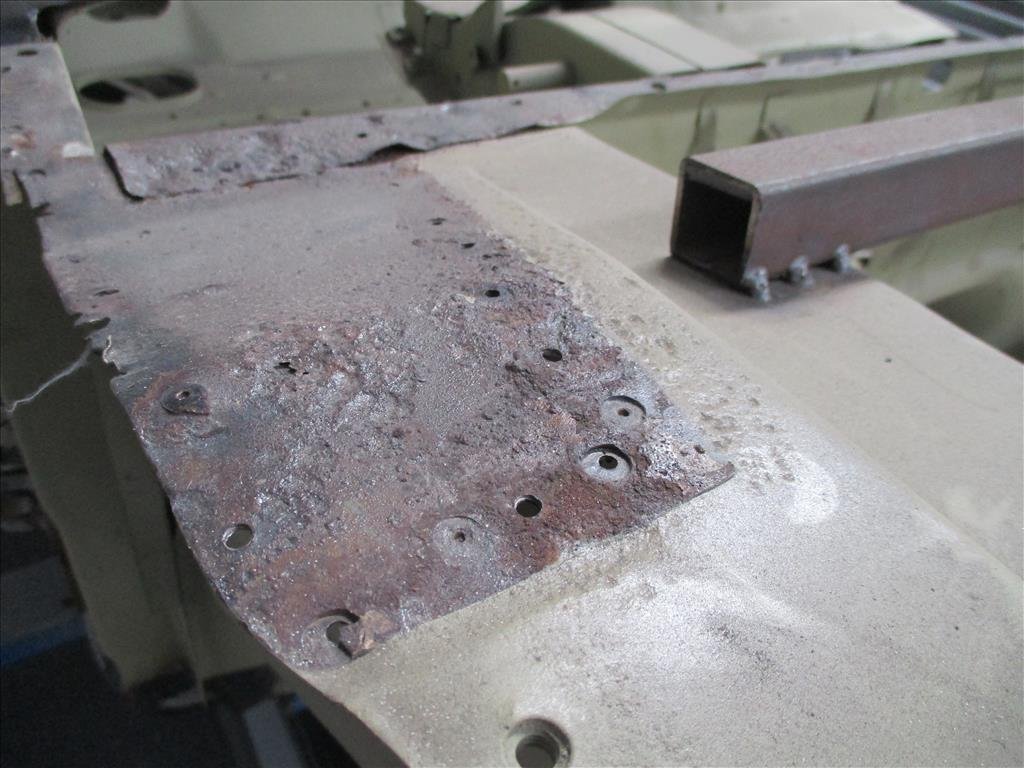
Even after spending like $150 on some beefy blades I still can't cut these damn rollcage boxes out. They must be made of uncutanium or something. Congratulations rollcage boxes, you live forever. I even tried to grind down the top so it was flat but that would have taken 20 years, ain't nobody got time. I'll just get the new carpet and then try to cover them somehow, maybe use the old carpet to make up something; not sure yet. So after that disappointment I found a distraction. I mentioned some time ago about the trims around the windscreens being terrible to look at and it just so happened I had some trim paint laying around. I think they came out great, but now they're a little too shiny compared to the rest of the car.. hopefully over time they'll fade a bit. I'll get some more paint and tape and do the rear to match. I do have the trims to go around the front and rear windscreens however that's a windows out job and I don't really want to find out what's underneath. This is what 20 year old underseal looks like when it's wire wheeled off. While I was in between coats of the windscreen seals I removed the side trim and wired off the remaining crusty old underseal coating that was put on. Unfortunately as you can see lots of the paint also came off so I will spray new undercoating there and re-install the trim after giving it a polish. Originally those trims use plastic clips to hold them on but mine was riveted so not sure if I will rivet again or maybe use screws instead.
5 points
-
I remember reading about them as a kid and being "whoa" at 2l turbo 4wd in a hatch Never had much to do with them apart from fixing one for a tight arse car dealer customer we had, it was a fill in job for when work was slow so it ended up taking 4 or 5 months , it broke a ring land so the car dealer supplied 1x second hand piston. Did it with the engine in place, getting the head/intake manifold off counts as one of the worst jobs I ever did Also due to the fact it took so long just doing bits here and there, when I started it I'd forgotten I'd removed the oil filter. It was on the hoist, fired up, pissed oil everywhere, I reached in the window to turn the key off but it had a turbo timer down by the console so I had to do a panic dive in the window to turn it off, the boss thought that was quite funny seeing me with my legs sticking out the window4 points
-
Shrike thats all great and everything, but... Have you considered a 2ZZ?4 points
-
2.4m stud height, definitely not tall enough to be useful for a hoist. But not worried about that. One thing I've learned is that no matter how fancy and comfortable your garage is. Whenever you go to an event you still end up lying down on the ground trying to look for your 10mm spanner or something. Haha.3 points
-
2ZRFE / 2ZRFXE This is a similar era engine to the above, but a smaller 1.8 litre 4 cyl motor. When the 2ZZGE stopped production, Lotus used a supercharged 2ZR engine instead in the Lotus Elise. So there's some alright aftermarket goodies. This was also the 1.8 litre engine used in the 1.8 litre prius, hybrid and non hybrid versions in corollas. So they're fairly common. There's a prius version on trademe for $700. Perhaps most notably though, this engine was used in "Yaris Hilton" by Mighty Car mods as their cheap and cheerful turbo car. They eventually blew the motor up, it was shitloads of fun and zero fucks were given. It's pretty awesome that this engine spans all the way from being in a $$$ Lotus, to the basis for an absolute shitbox car minimum spend build for max lolz.3 points
-
The golf R32 engine has intrigued me, I haven't done any real research, so it's probably a garbage idea for some reason, and is probably not ideal for high rpm, but from a capacity vs physical size, it could be alright... it seems like a likely candidate for a +t conversion, just check out the head gasket surface area between the bores, and the number of head studs.. (2 things not easily changed on an engine)
3 points
-
incoming old man sharn, in about 1998 a mate of mine was working for urgent couriers in AK and for some fucked up reason that only coke filled courier company execs can answer urgent couriers bought a GTIR and gave it to my mate as his courier car. it was branded and all that but he drove it all day every day. it took me for quite a few rips in it and fuck me was that thing fast. when your bench mark was a 4M powered shitbox the gtir was light years faster. why did they think that was a good idea? fuck knows but it gave a bunch of mid 20s jokers a new understanding of what a turbo car was.3 points
-
A wild @mk2marty sitting in some half mounted fishnets, thankfully not wearing any fishnets. Take it as you will, but we just have another few holes to drill and then we'll make some holes in the seat rails to mount them up properly.
3 points
-
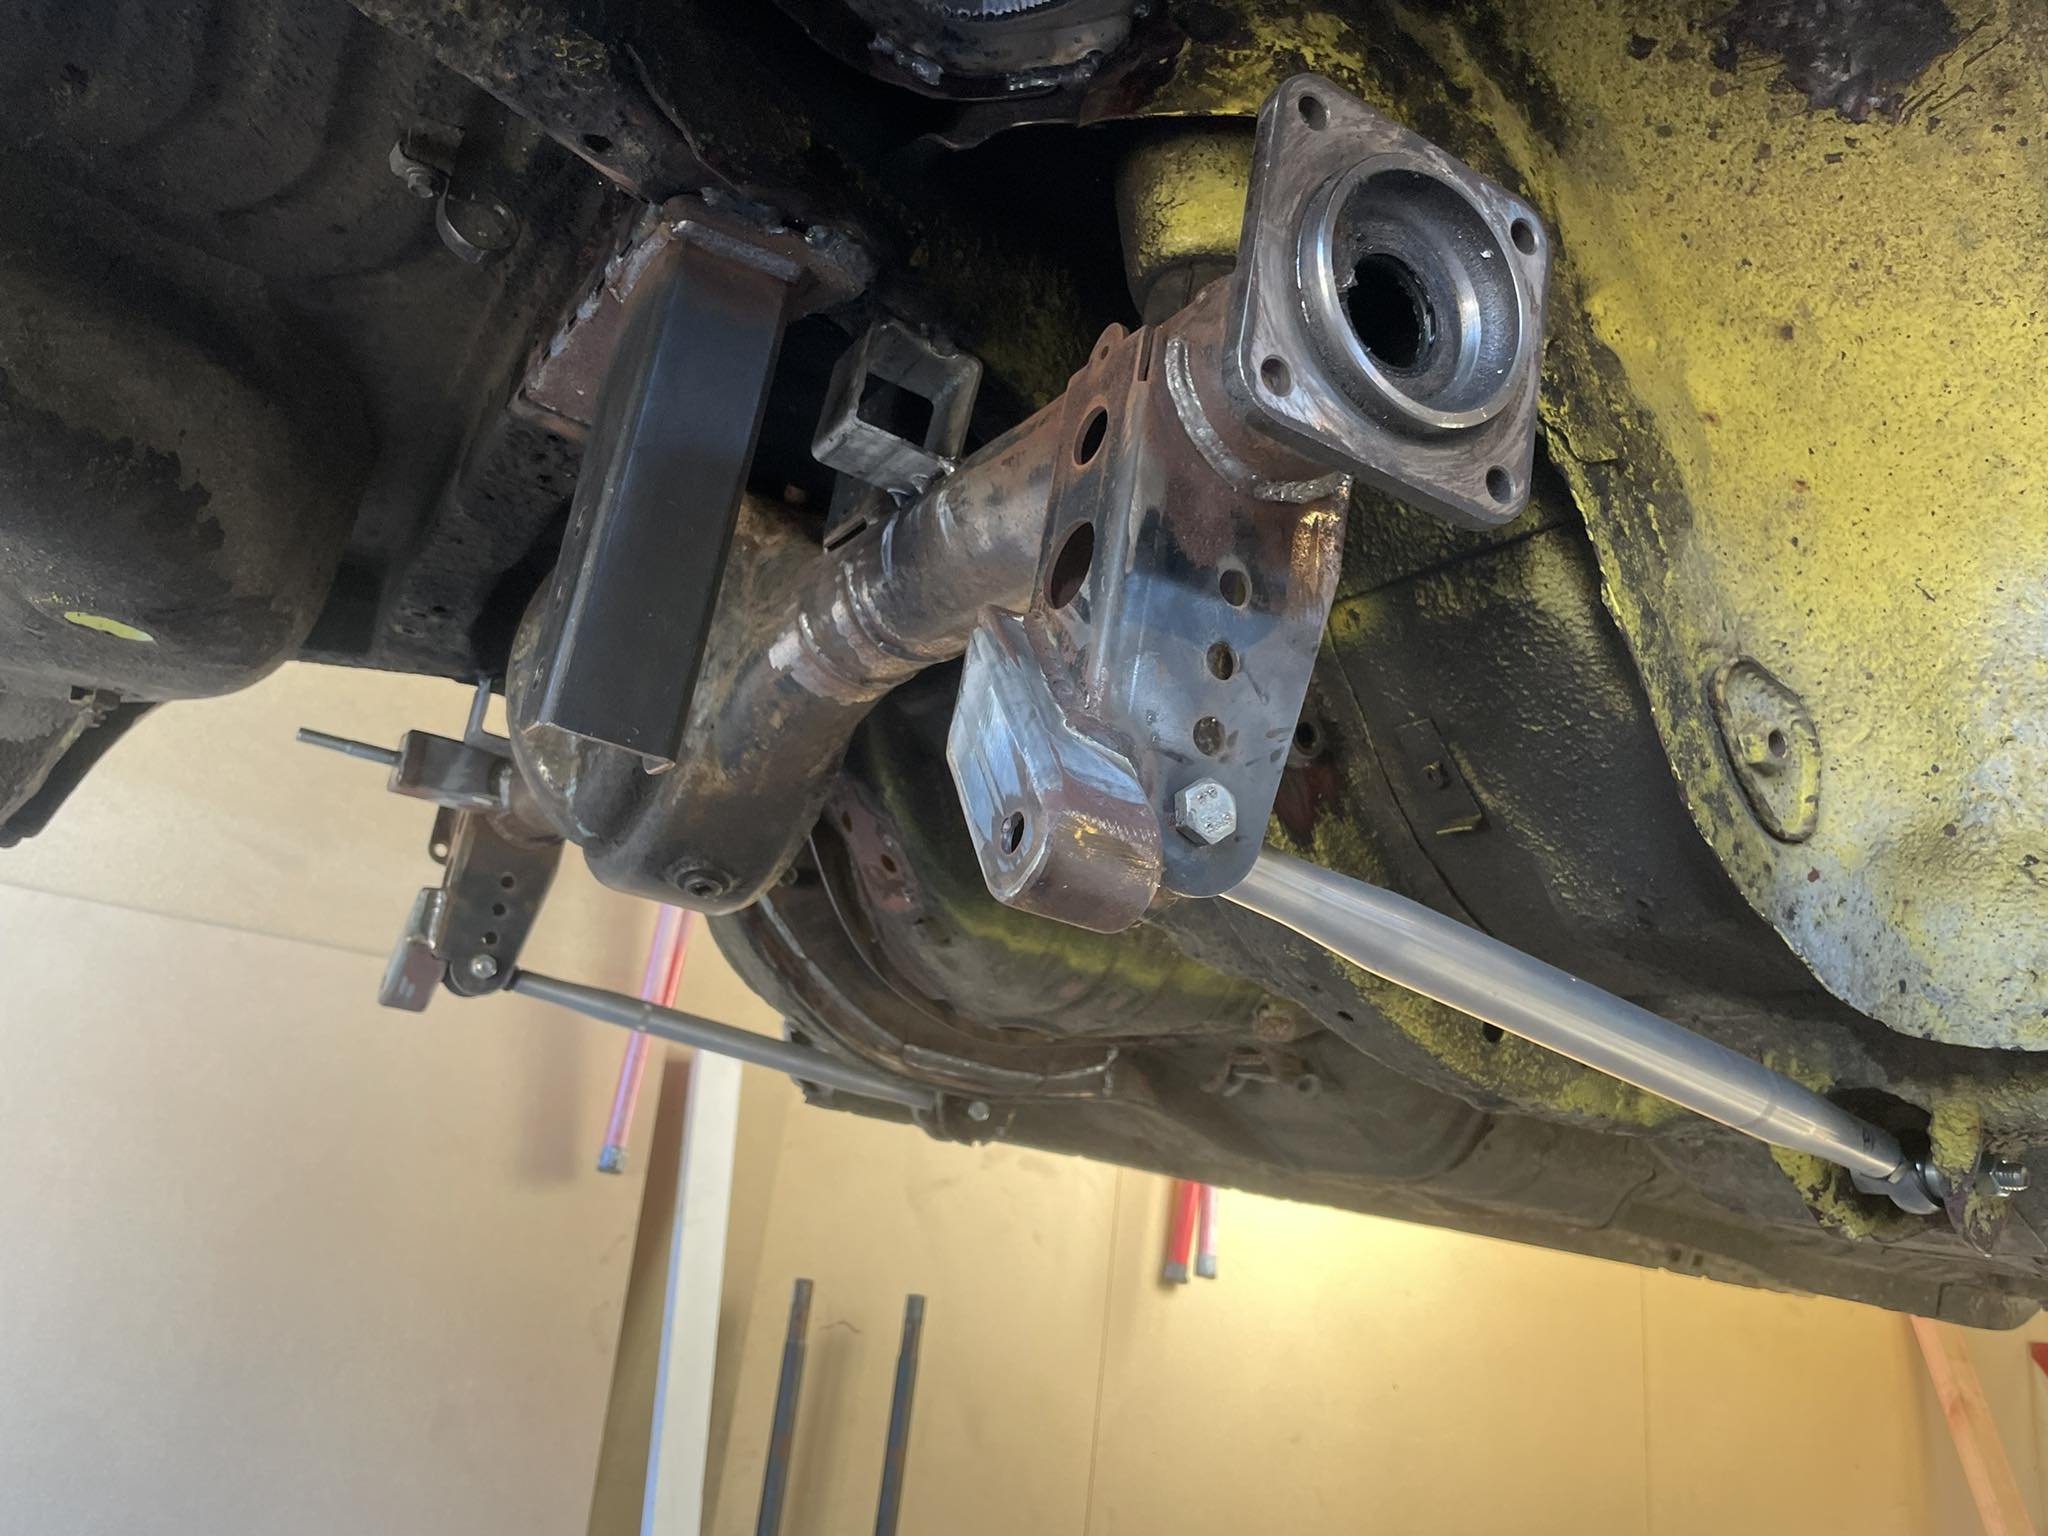
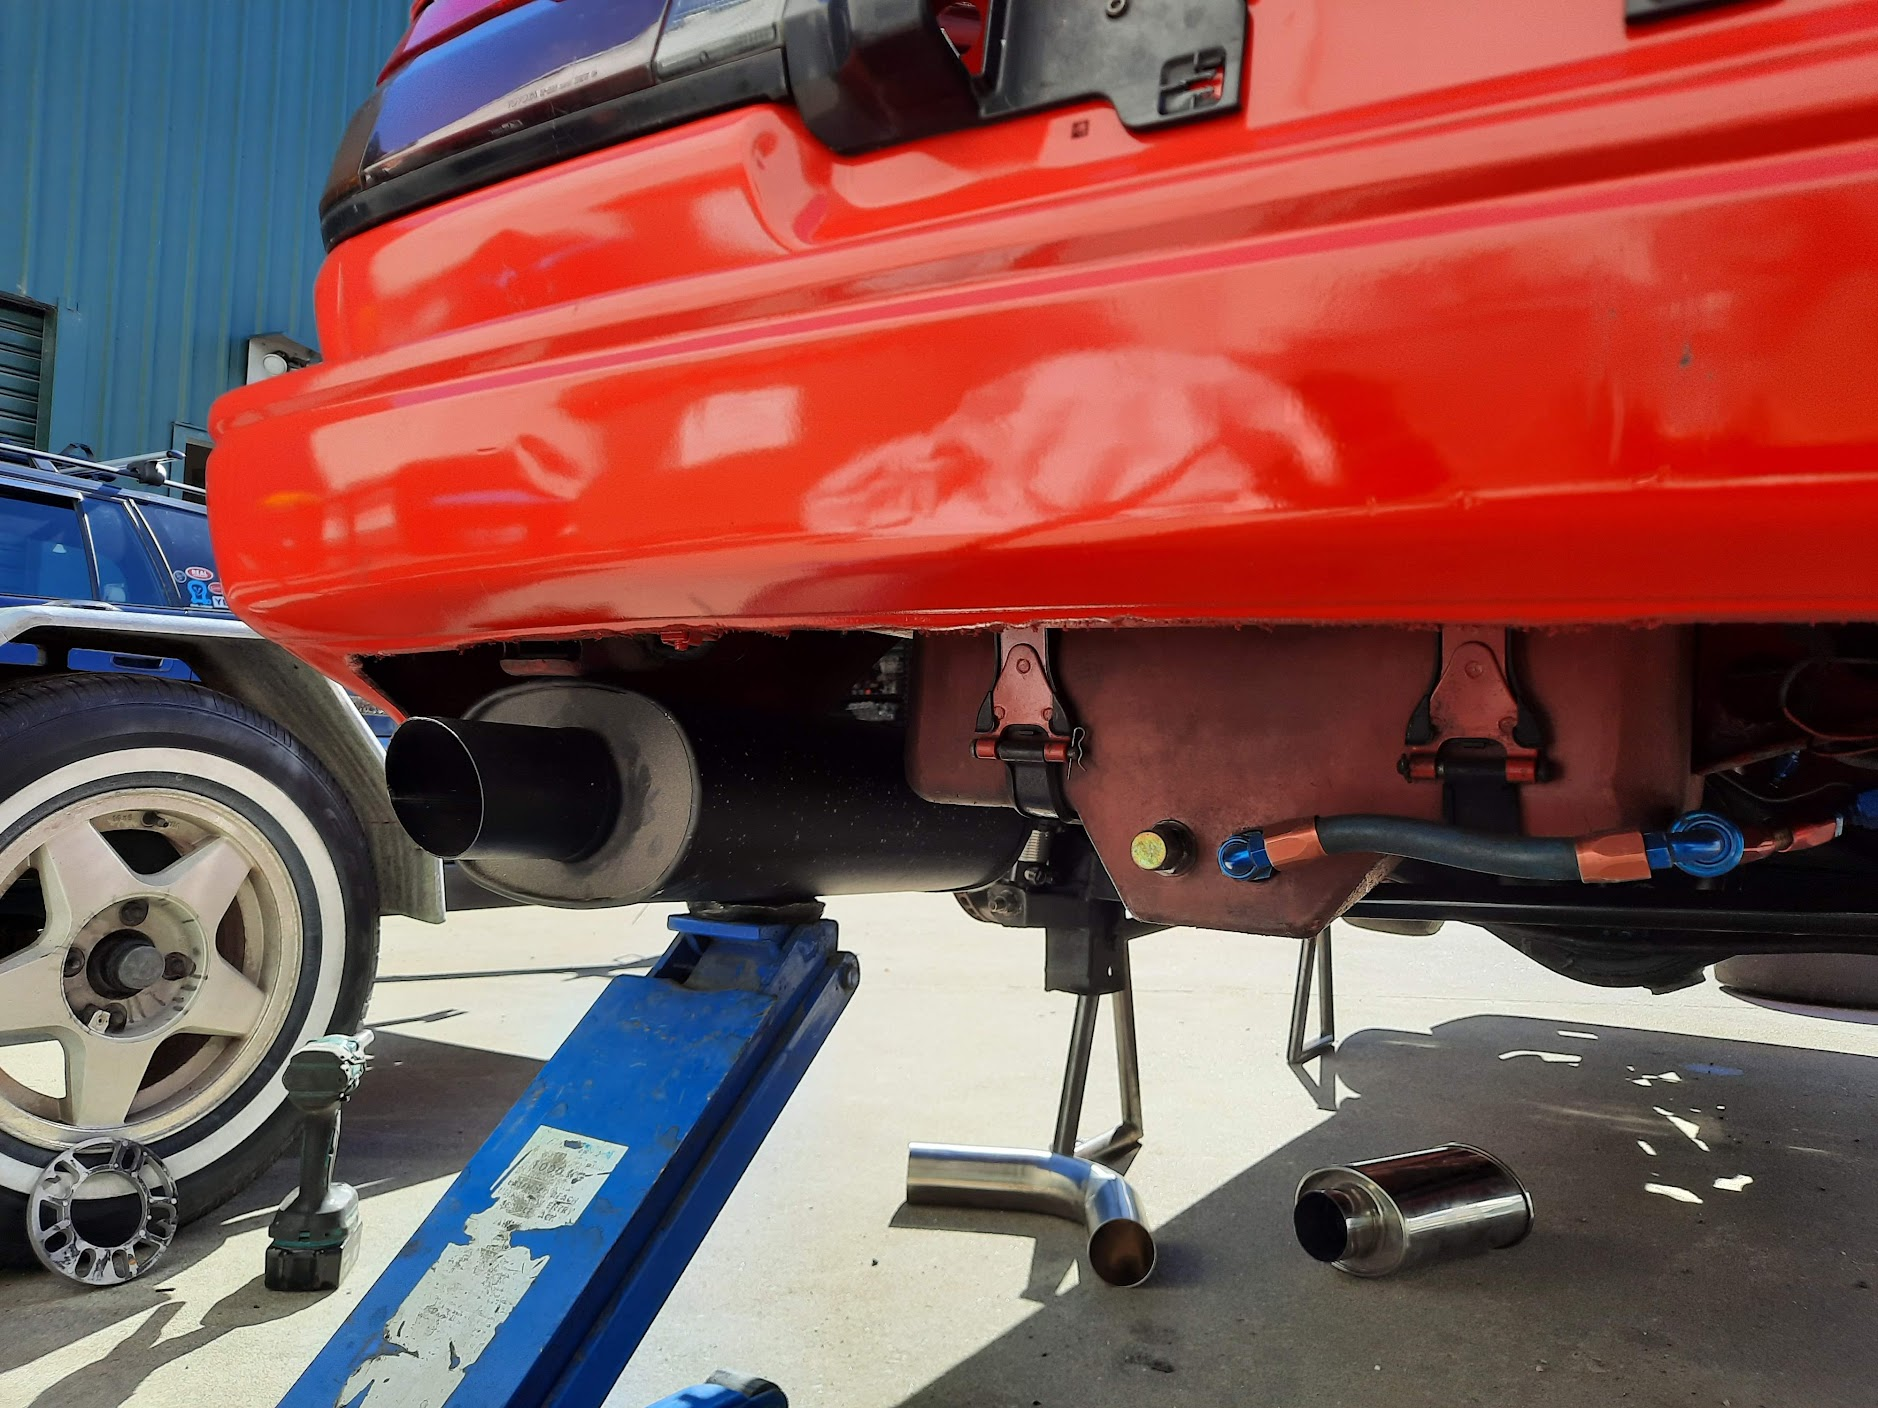
About 2 weeks after I brought the car to Queenstown, I broke my shoulder riding the XR250... So for the last 8 weeks I've been staring at this in my garage without being able to touch it. The sling came off last week. I'm still a one armed bandit for anything heavier than washing dishes, but I still wanted to feel like I was making progress. A couple of mates helped me get the car to work over Easter weekend so I could wash it and start on a few small jobs. Much better. One job I really want to do is update the exhaust. The old side pipe has cracked and it had a bad habit of hitting the ground over ripple strips etc. This time I'd like to go full stainless and exit out the back of the car, with two mufflers. Going under the diff will be tricky because of my droop travel and lowered panhard rod mount, so I'm thinking of heading over the diff instead. It looks like it'll work - this is with the LR shock at close to full compression: Rear muffler location will look something like this: I'll run the smaller reso/muffler just before the diff and might run a V band up the front because the old flanges I've been using are pretty tired now! Taking the exhaust out the back makes me feel old. My ear drums will love me for it though
3 points
-
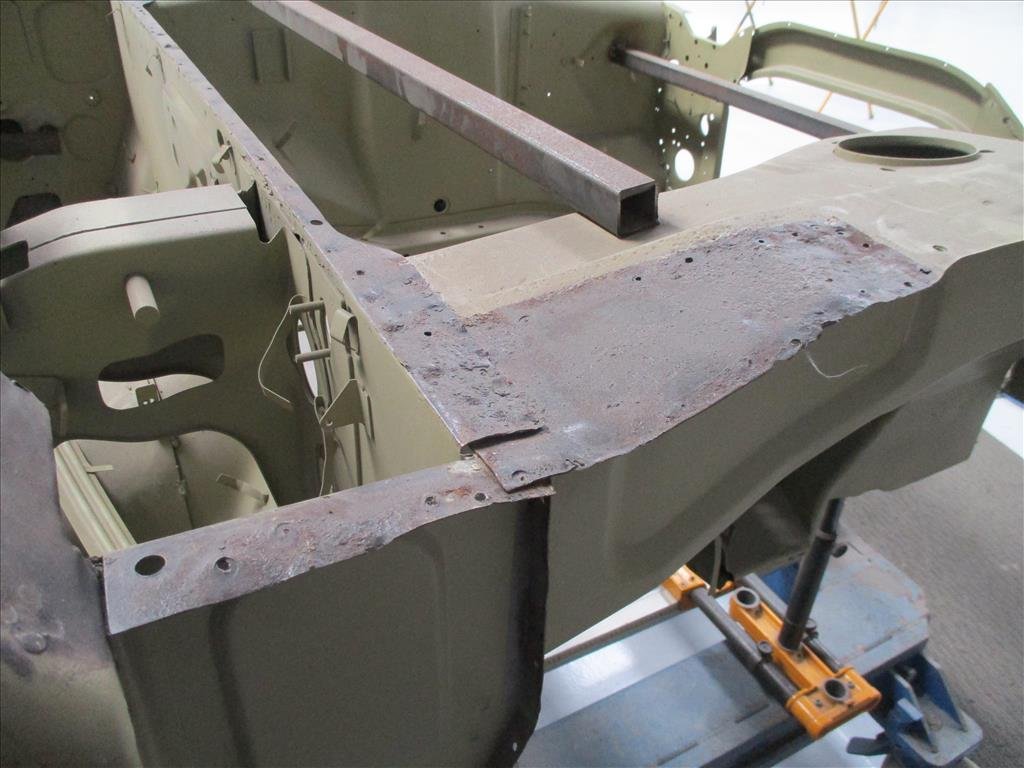
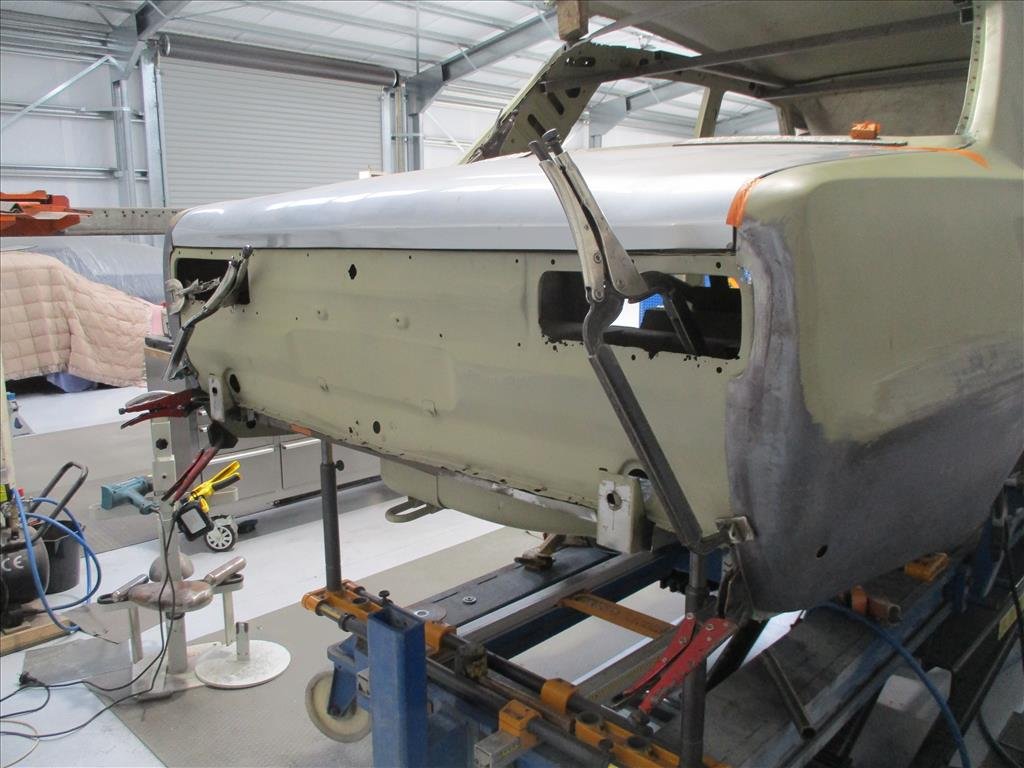
I won't bombard you with 50 more Panel Barry Hakosuka photos but this one is a huge milestone. The majority of the fabrication and rear end structure have been completed and the final weld up is on! The chassis is now razor straight, likely straighter than when it came out of the factory. I can't remember the last time it had a rear end on it? It's been over 5 years for sure. The back panel you see there is the original one which he's using to get the correct holes for welding then will be replaced with a brand new reproduction item that I've provided. Onto the front and to my amateur eyes it doesn't look nearly as bad as the rear but I'll leave it to the professionals on that one. He will have a poke around, clean up what can be cleaned up and replace what needs replacing.
3 points
-
talk me into not finishing this project2 points
-
When I took my 1NZ with cams etc for a WOF with the standard intake manifold on. You could not have believed it was the same engine. Holy crap, it turned into a slug haha. Totally choked out by ~5000ish rpm. If the 2ZR was similarly designed, it would be a night and day difference with some bolt on mods. However yes - I must concede that some motors like 1NZ and 2ZR do in fact totally suck in factory form.2 points
-
2GRFE / 2GRFXE This is a 3.5 litre V6 that I guess replaces the 2JZGE engine. Has good aftermarket support, aftermarket cams etc but the engines cost a lot. Popular for engine swaps into MR2s and similar, because the east-west variants have a bellhousing pattern very close to a 3SGE. So they bolt up to a factory gearbox. Unfortunately ends up being pretty expensive all up, though. This guy made 405whp with an NA setup, using high comp factory pistons, aftermarket cams and valvesprings. and some bolt on mods. Pretty sweet to be banging past 100hp/litre at the wheels with a fairly big engine.2 points
-
Having had the 2ZRFE (factory) in a Yaris RS, its a very uninspiring motor stock. It had a thick wad of torque in the mid range, but other than that it didn't like to rev and felt kind of flat. No doubt boost will fix it. It's getting on a bit now but i think the Mazda L series (2.0L LF-VE and the bigger 2.3L L3-VE) would be a good engine to swap into something RWD. Already comes RWD configured in the NC MX5 (2L) but the 2.3 can be converted to RWD too. I liked my NC a lot, and the engine and gearbox in it were great. Turbo kits are available, albeit expensive.2 points
-
1NZFXE I think we've covered this one well enough - but definitely earns a mention. It's a pity that available aftermarket cams max out at 264 deg / 9.5mm lift. As I think this motor would give a lot of older 1600cc motors a run for it's money if bigger cams were available. Wins the prestigious Goez hard 4 wat it iz award.2 points
-
Just worth mentioning that there is also a slightly older version of the same thing, called 2AZFE / 2AZFXE. Not quite as good but possibly cheaper and more available perhaps. This one is cool.2 points
-
In typical Alex fashion I started a job without having all the bits to complete it. That mess I posted yesterday got covered up today with new underseal but I ran out so only have the one side done so far. I've just sat the trim on there loosely with some incorrectly sized screws but you can get the idea. I think it turned out pretty good. The trims looked pretty nasty after years of sitting around so I hit them with a bit of scotch pad to get rid of the muck and surface rust. That'll do.
2 points
-
Yeah they seem to make around 140kw in stock used form at the wheels which is plenty! I’m use to a stock 16v 4age so it will be heaps. afew things I seems with the 2zz is upgrade oil pump gears as they like to explode and valve springs. you don’t want the s13 stuff. It’s terrible for handling on ke/ae cars2 points
-
It will just be a stock 2zz with equal length headers and either blacktop 20v or s65 itb’s. Would like to get a spare head to do some cams and porting later down the track but main focus is get it running and driving. Yeah the 2zz has some good potential I feel quite popular in Jamaica and some other countries in fwd corollas making good power. there is a lot of cool modern motor with small displacement that make realllly good power that would be cool to do, I friend showed me the Honda L15 the other day which looks super cool. b1600 diff use to be commonly used, I’ve got caliper brackets to run s13 Silvia discs and Nissan pulsar calipers so isn’t too hard to make that work.2 points
-
So went to go to Waiau pa hop this morning, got 3km down the road and it started missing and spluttering. then got progressively worse on the way back. my guess is blocked injectors.2 points
-
Mate had a red one on white OZ rims, about 20 years ago. Had all the go-fast bits, to the point where it was nicknamed "The Paralyser" because at least as a passenger, you couldn't do anything but sit in the passenger's seat with a grin that a belt sander couldn't take off when he'd launch the fuckin thing. Fucked a gearbox trying to do helis like the cool kids in their Evos... I can recall things getting decidedly breezy over 180-ish as the outside air would start to find its way through the door handle cutouts in the door-cards too.2 points
-
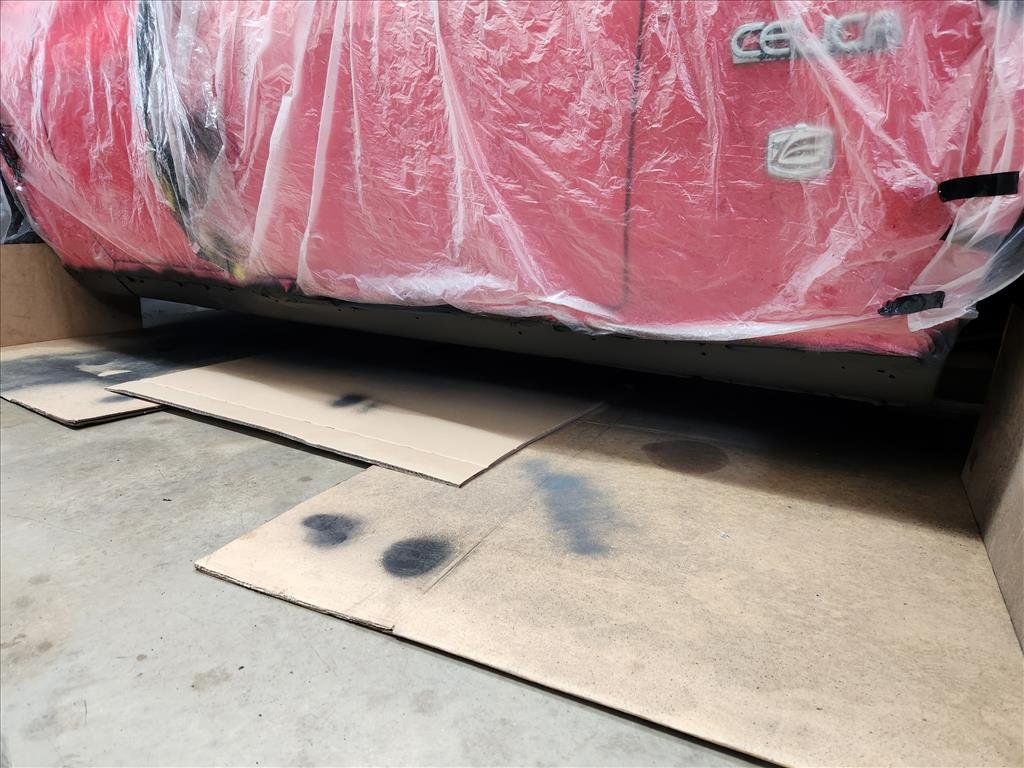
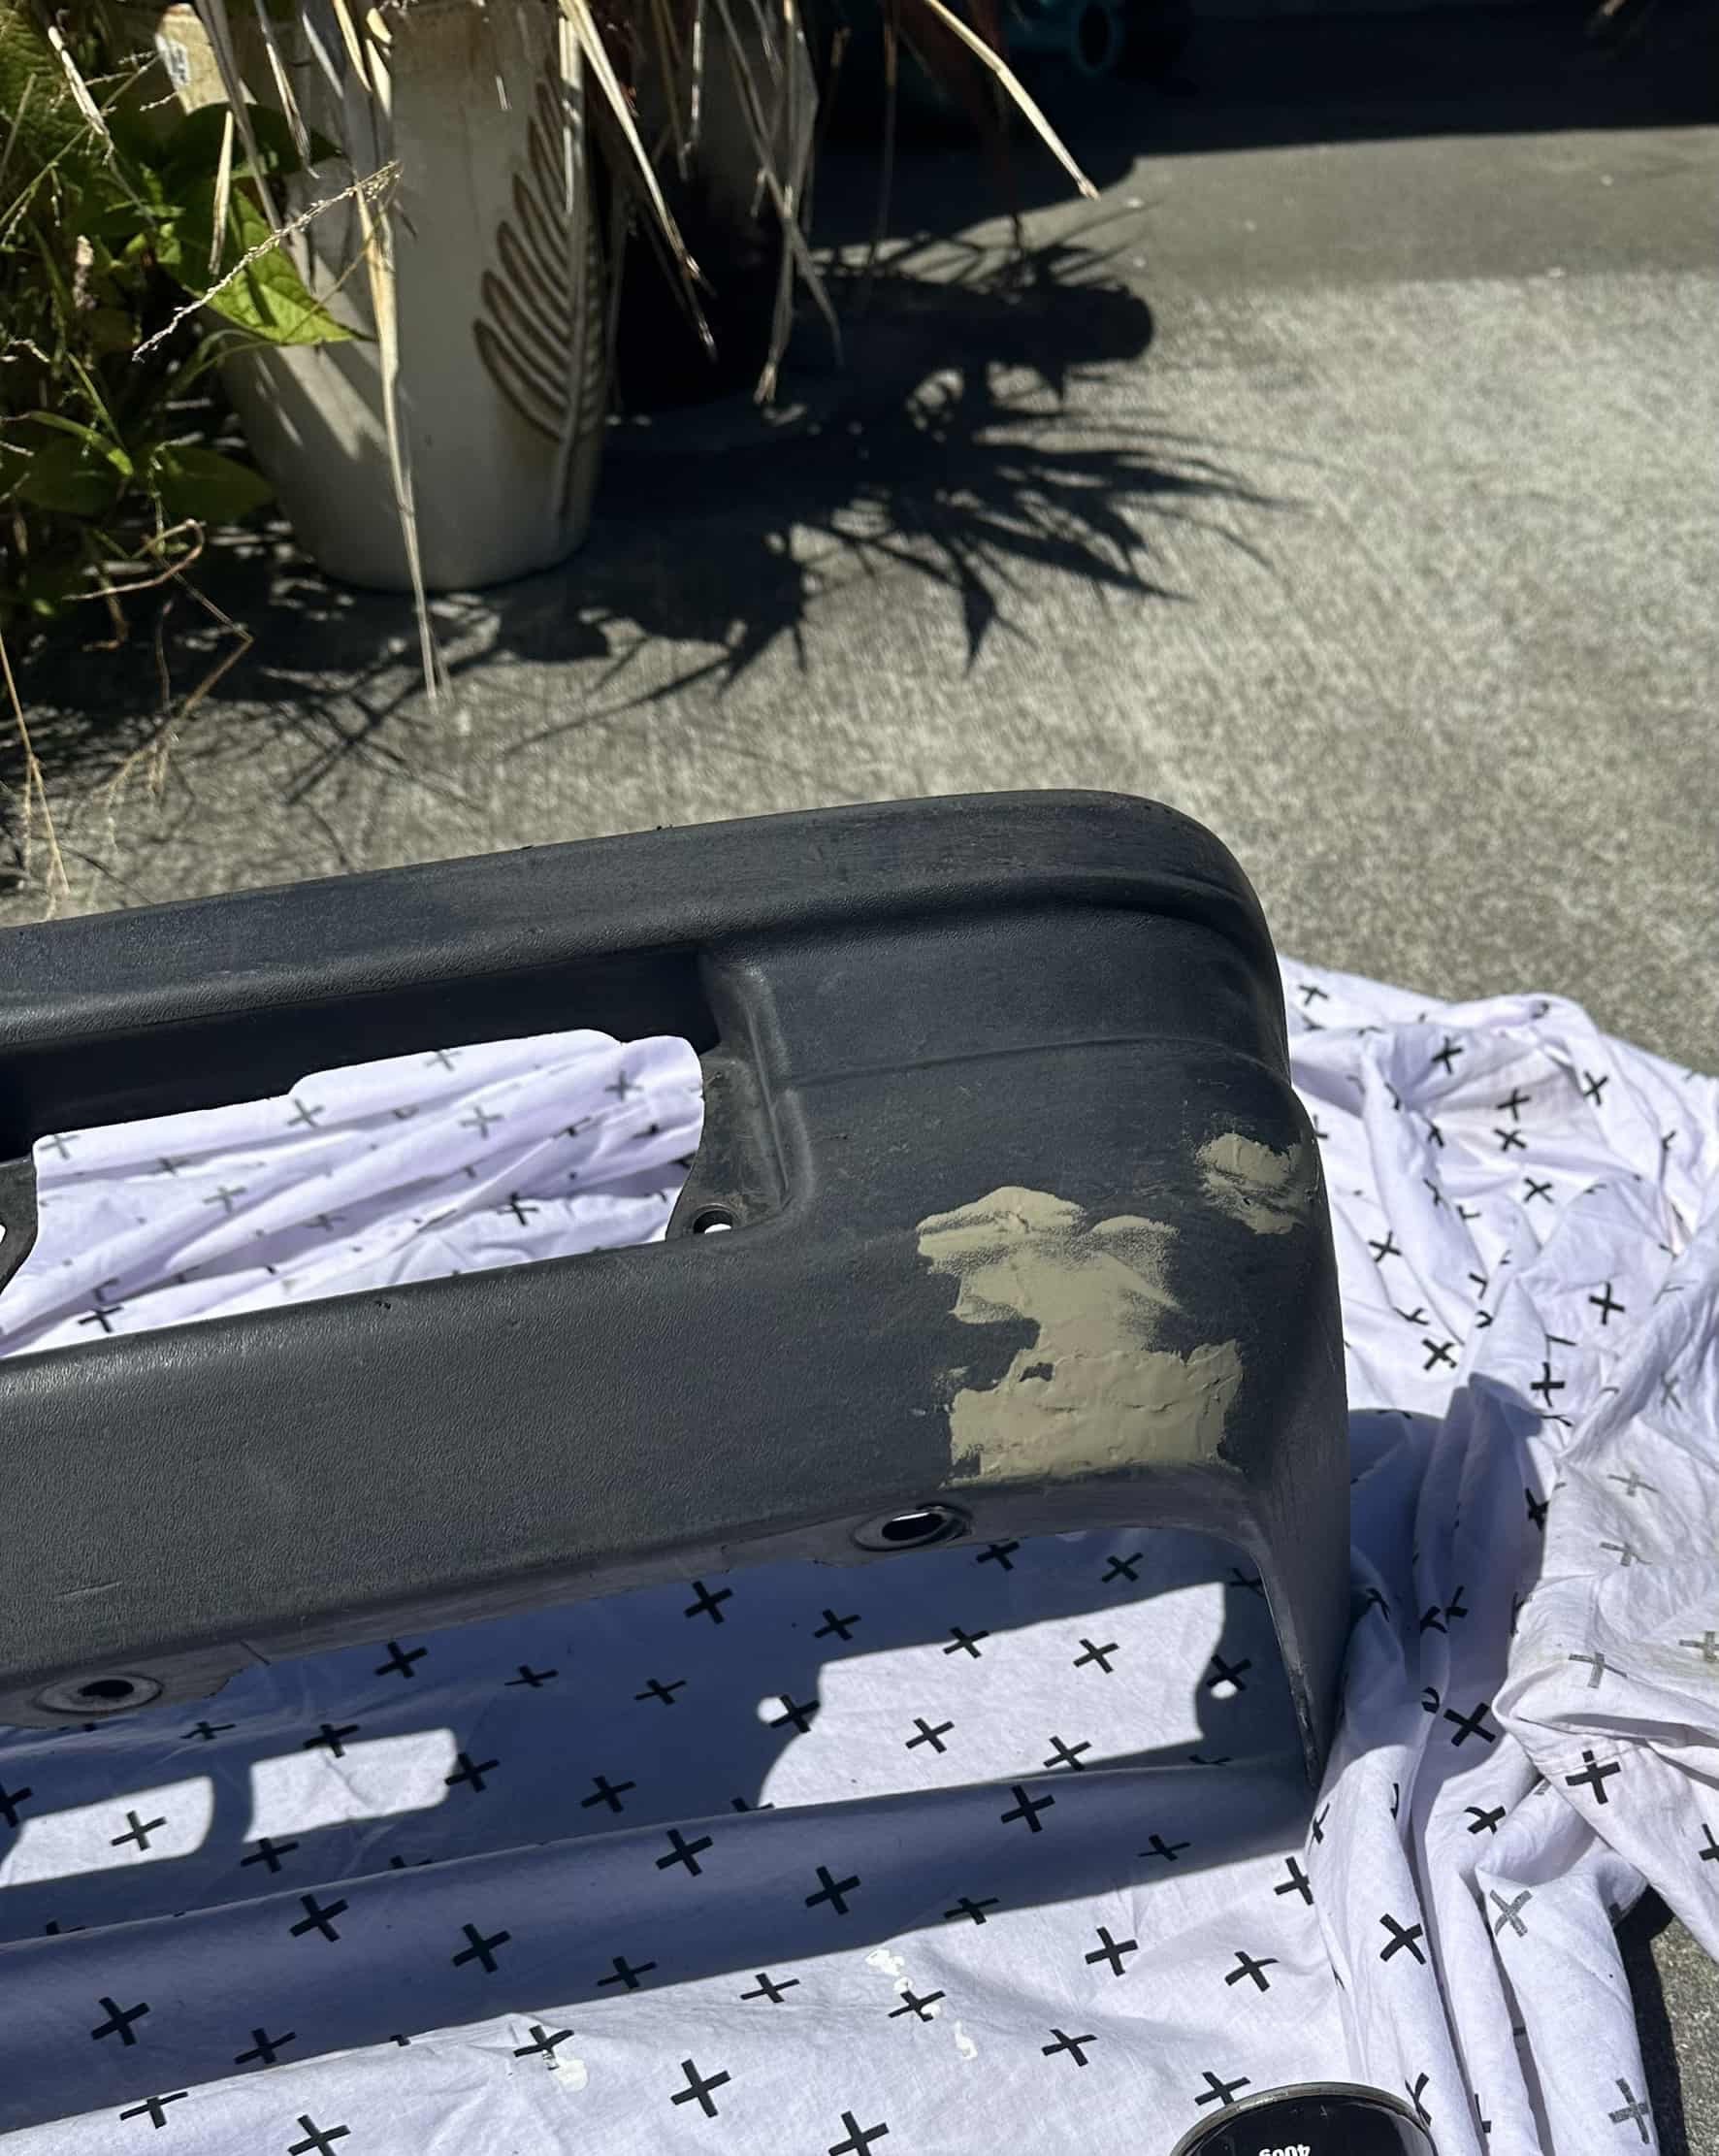
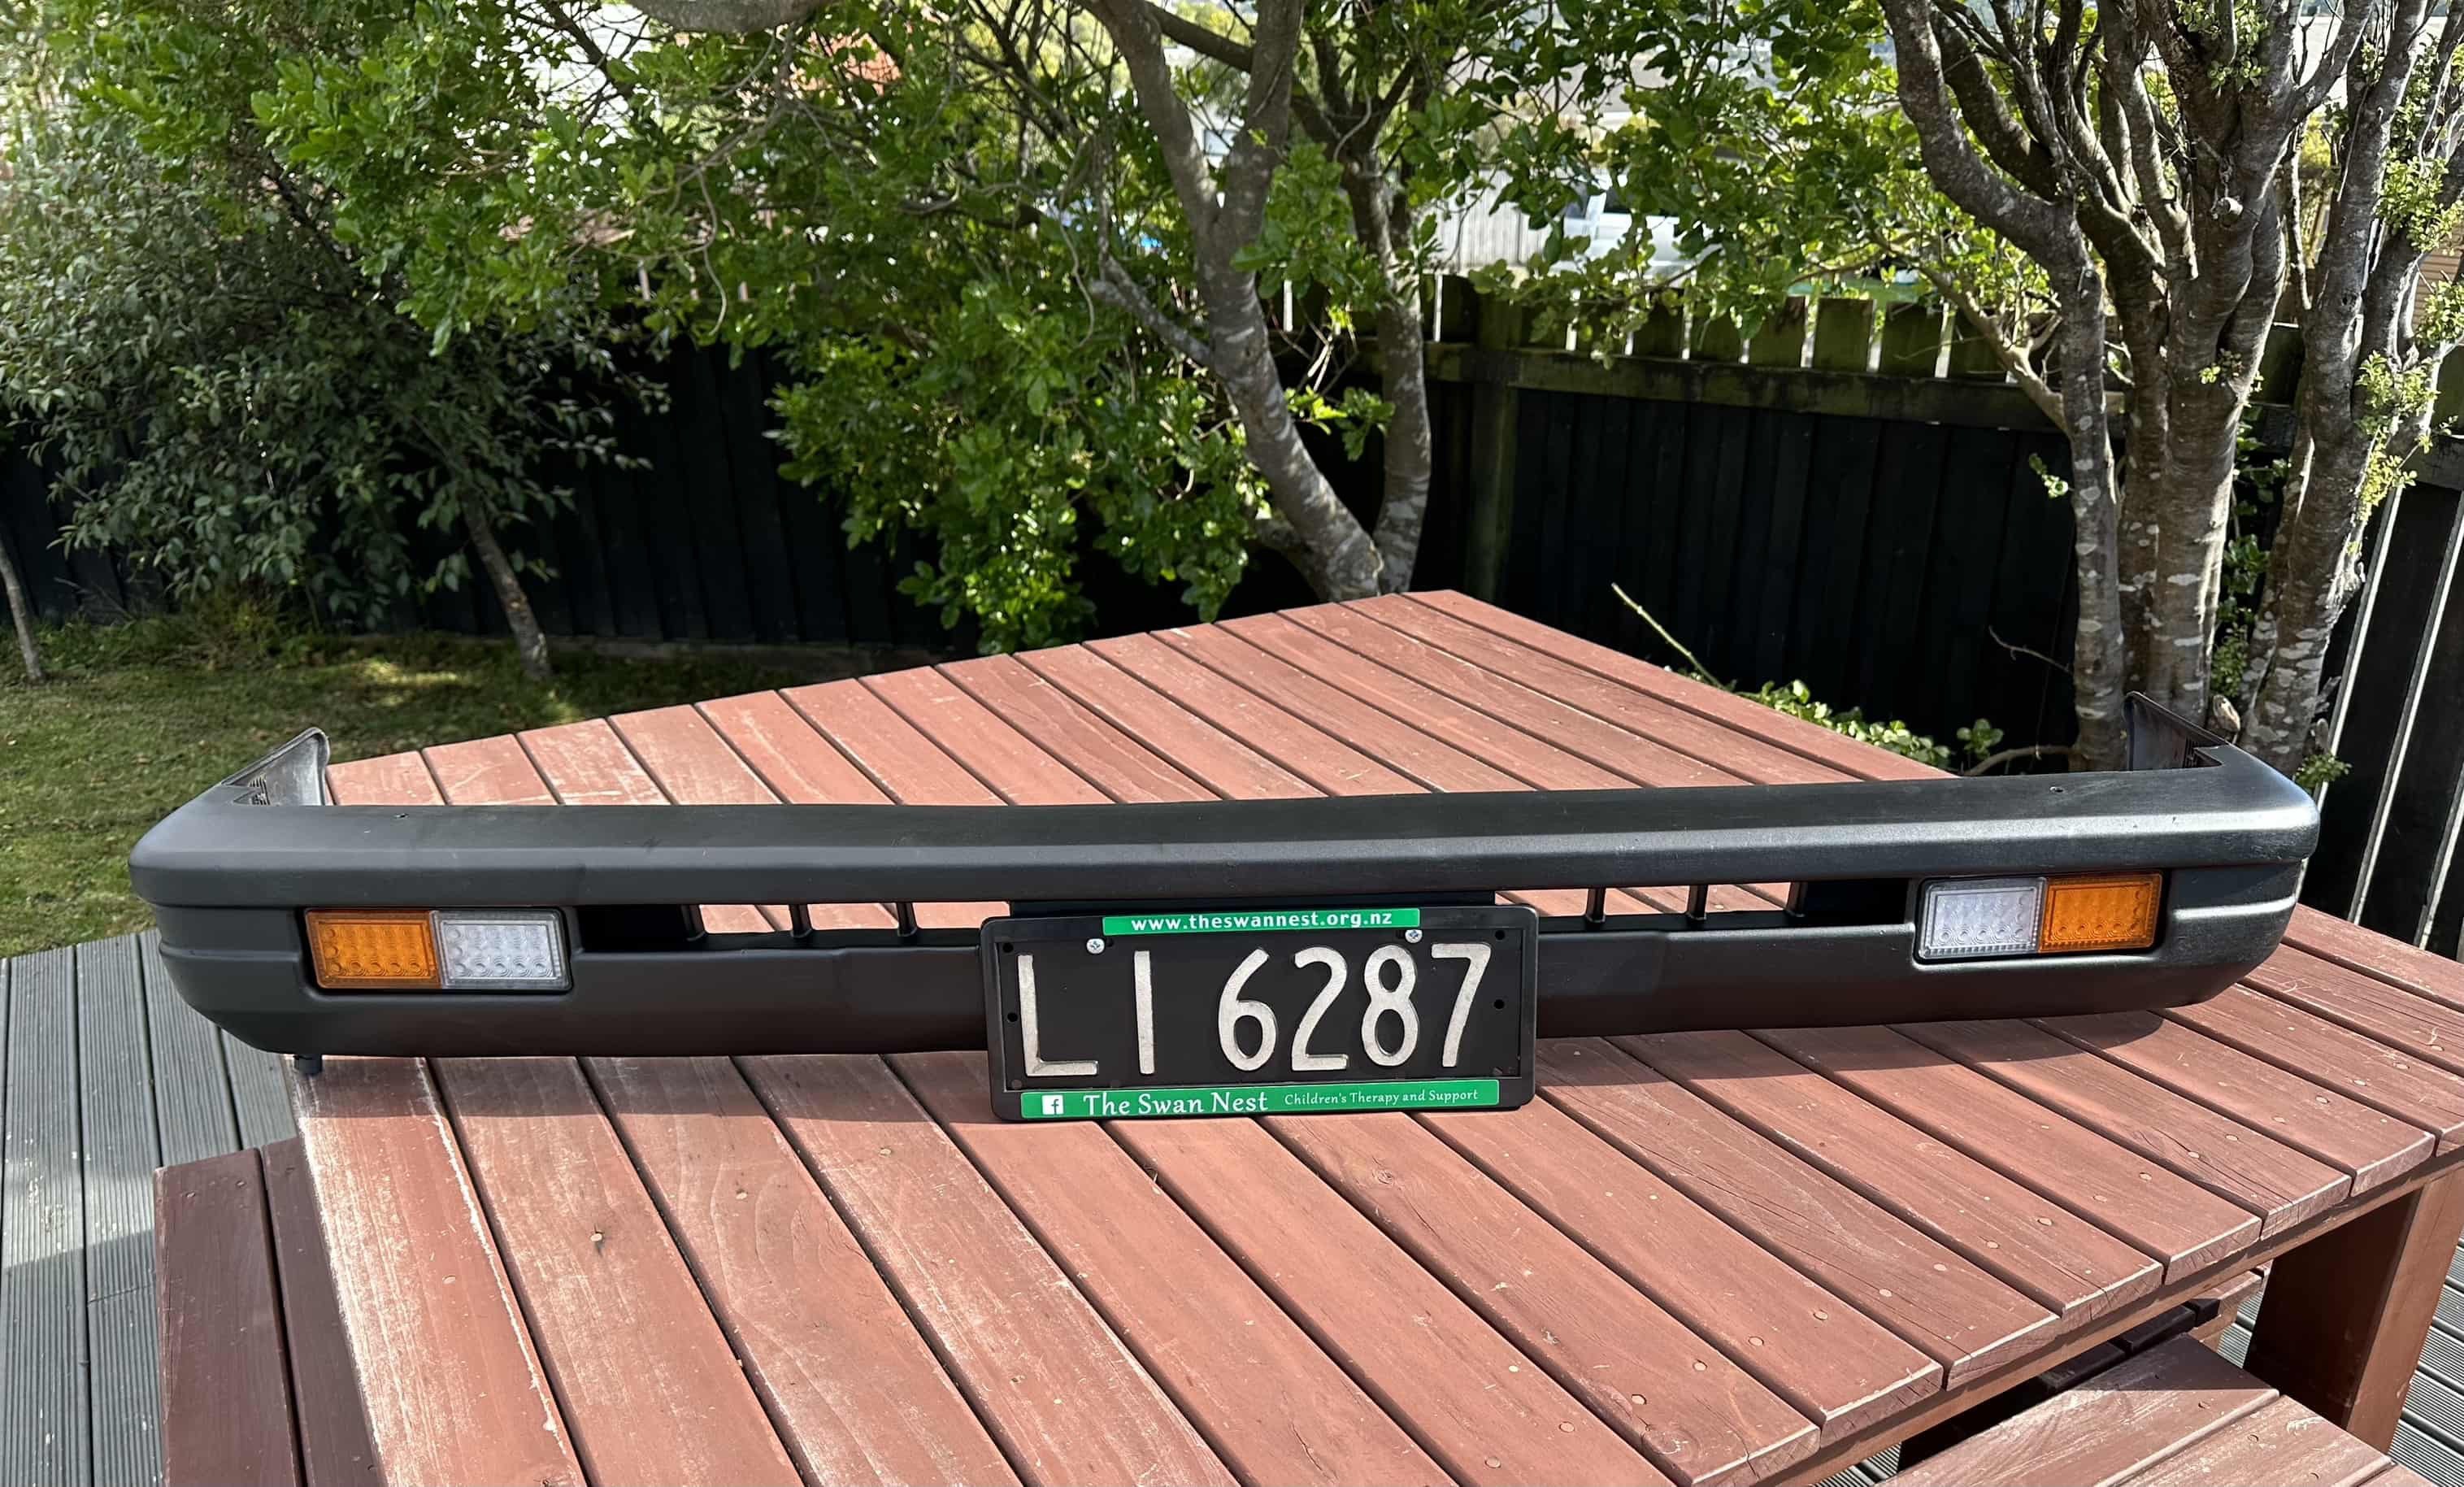
Front bumper restoration complete. After giving the bumper a good clean, firstly with a water blaster then scrubbing with a brush and some warm soapy water, I needed to fill in some of the larger scraps and scratches left by the previous owners touch parking attempts. After some sanding and a quick clean with grease and wax remover it was time for a spray with bumper paint, 4 coats later and it was looking pretty good. I also took the time to paint the headlight surrounds, grill, number plate lights and grill. Now all reassembled with freshly painted number plates and LED indicators and DRLs The finished product
2 points
-
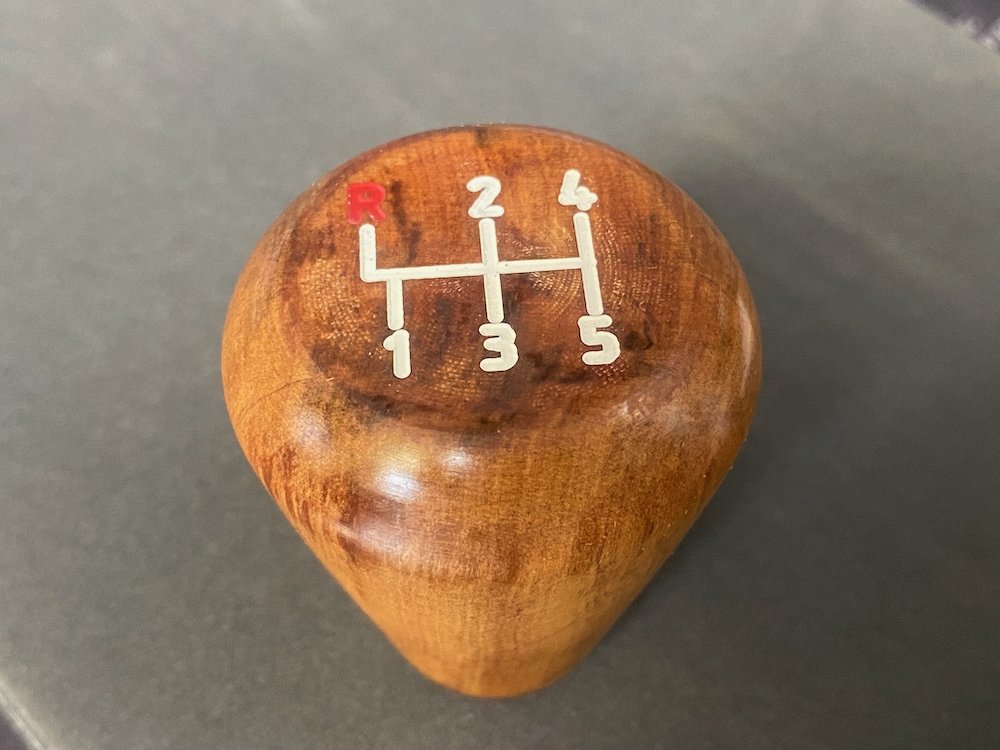
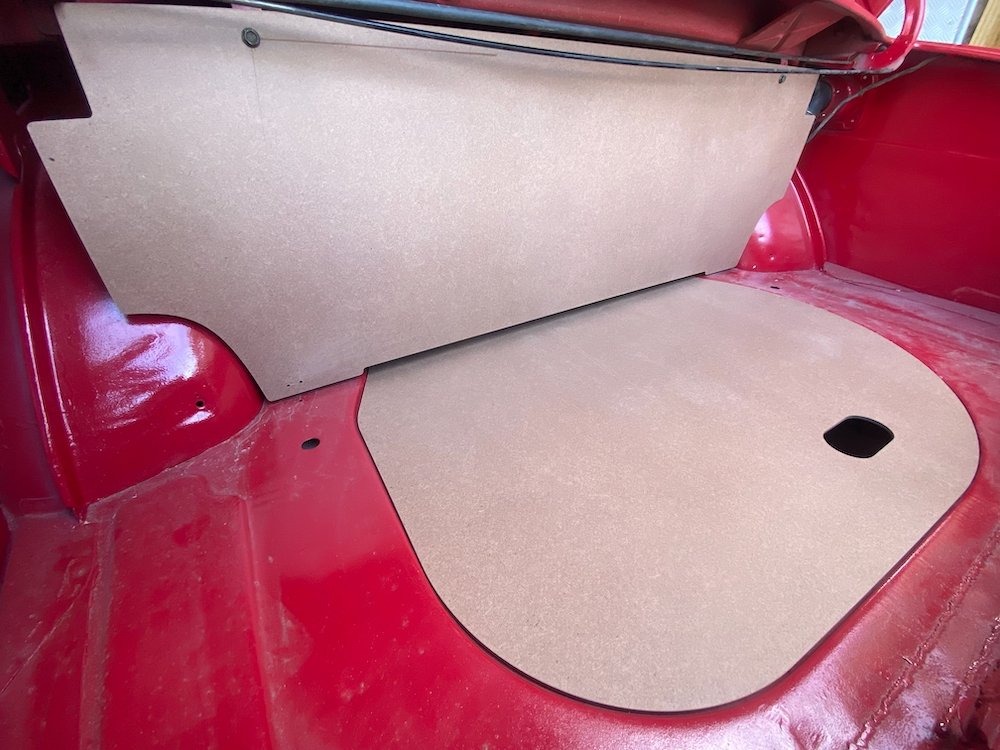
After guessing the shape, dad provided me with dimensions and photos of original boot panels, gave the CAD model an update, grabbed a sheet of 4.75mm hardboard and set about probably the most to factory spec part of the rebuild! Also carved up a gear knob from scrap rimu with the correct shift pattern, scrubbed up real nice with linseed oil too.
2 points
-
Dads finished up a radiator shell. Looking great. The original cores are made from hex flared tube to make a honey comb bundle which is all soldered together. There are about 5000 tubes! The plan is to make a false tube core /front but use a custom aluminium multi pass radiator to work as the real radiator. It will be nickel plated once the core brackets are figured out and any other tweaks.2 points
-
Thought I’d have a go at showing off the shiny cam gears. Added clear plastic cambelt cover. nice, then cover it up with the silly intake pipe. Hmm, must rethink the filter set up
2 points
-
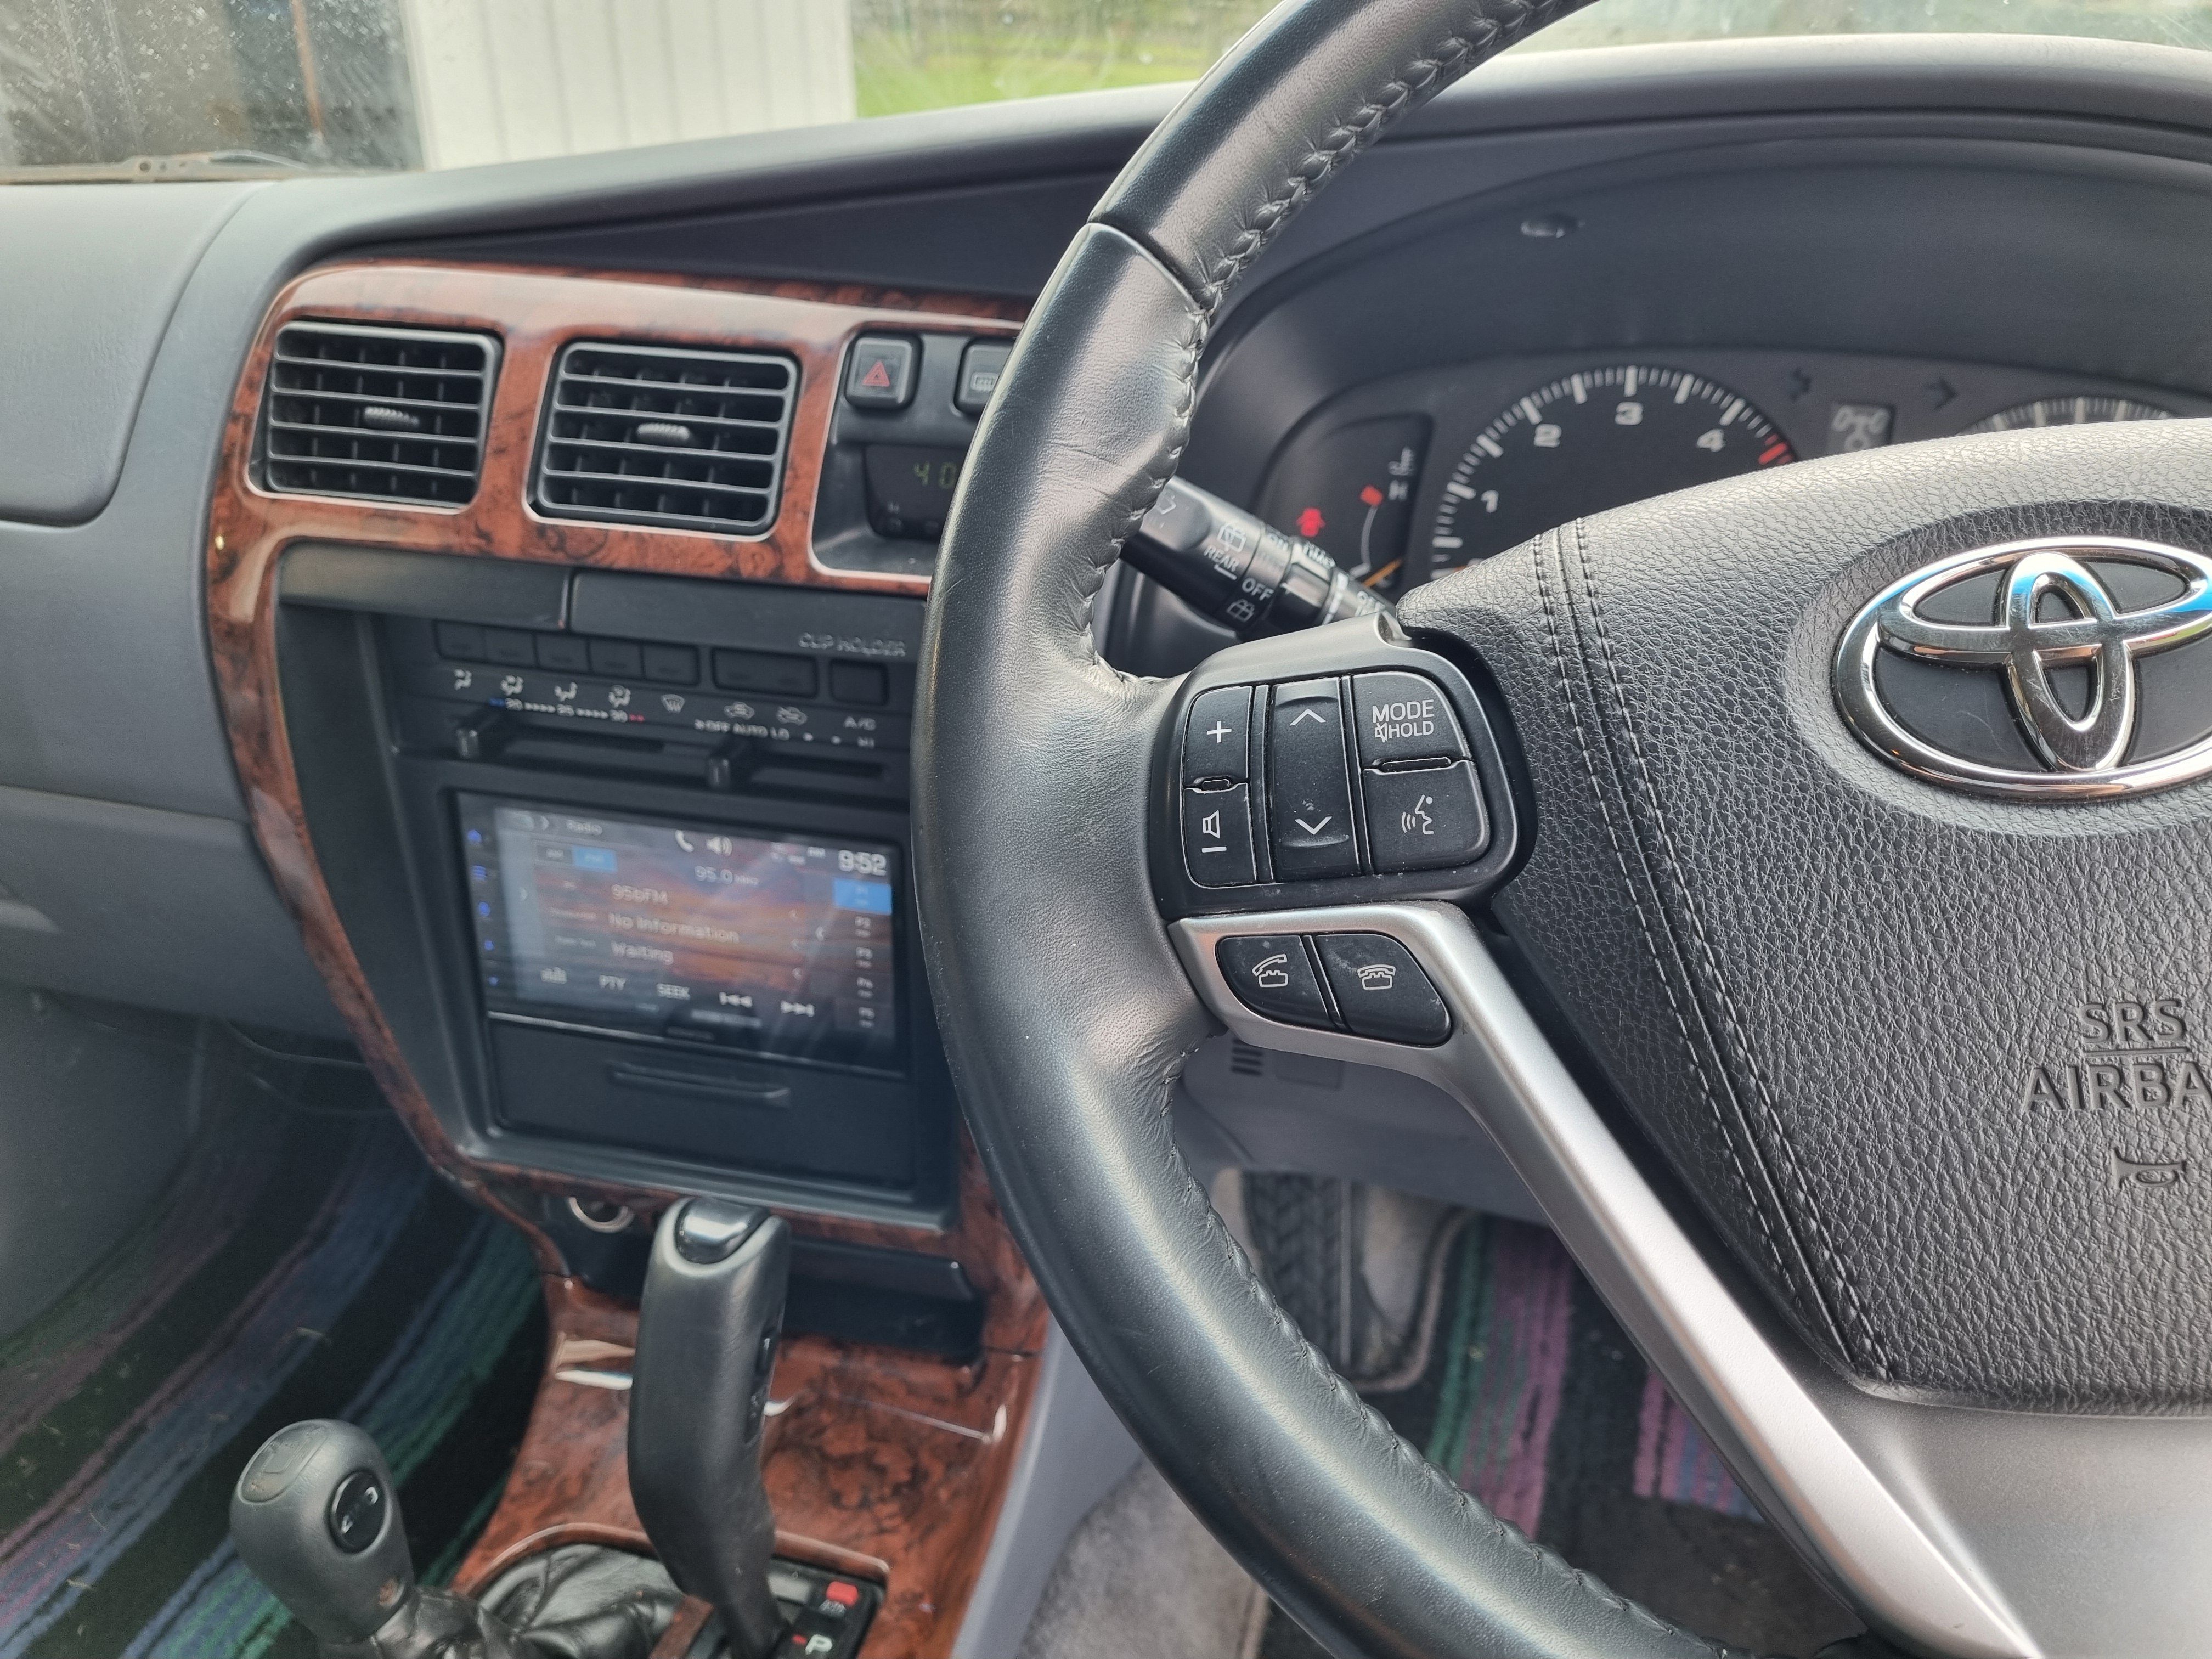
Nick the sparky gave me a hand and we got the right plugs for the air bag and figured out the steering wheel controls for the stereo. I've got to get the right connector to connect the radio to the steering wheel output but that shouldn't be too much of a drama. Once that's done I can program the radio and heypresto! Steering wheel controls that work.
2 points
-
someone should buy my r36 and find out To pollute this thread with nissan, it seems in this note that nismo has gone halfway to a roman 1NZ build on the HR16, trying to resist opening a can of worms i dont have time for. I lold that you ignored rfbs in you first post, twenny debt has to be little ripper certified by lil johnny1 point
-
VR6+T is a very common mod, and there's shitloads of material online about it, plus a wad of aftermarket bits. The engine itself has been around forever in various configurations - 2.8 12V, 2.8/3.2/3.6 24V. Yes, they're heavy but as mentioned, they've got a lot of meat in the block. 15° angle between bore center-lines, so they run a conventional inline-6 crank and firing order... Add to that the asymmetric port length between cylinders (inlets are on one side of the head, exhausts on the other) and they sound absolutely awesome. 1000hp+ is achievable - Just spend 30 seconds on YouTube looking for VR6 Turbo Mk1 and Mk2 Golf conversions...1 point
-
Maybe one of those mobile ones but will be pushing it under those trusses Good job getting garage sorted, gettin shit done1 point
-
The 2zz is what 180-200hp? Thats fucking plenty for such a light car. It will be an absolute pleasure to bash around at that power level. Plus toyota reliability means more time manging, less time fixing stuff that has given up because too much was asked of it. Hypothetically, what are the s13 front stuff worth? I one million percent shouldnt be buying parts for my wagon. But, when things come up......1 point
-
This was my one. Sold it in 2017 for what seemed like bugger all. Then Covid hit in 2020, and the reality set in that I was never going to justify spending the money they were now commanding on another. Gutted I sold it, as I loved the heck out of it. Shouldn't have listened to the now wife. Great to see another still alive and kicking, with a bit of love given to it.
1 point
-
Couple of pics of black car at different stages
1 point
-
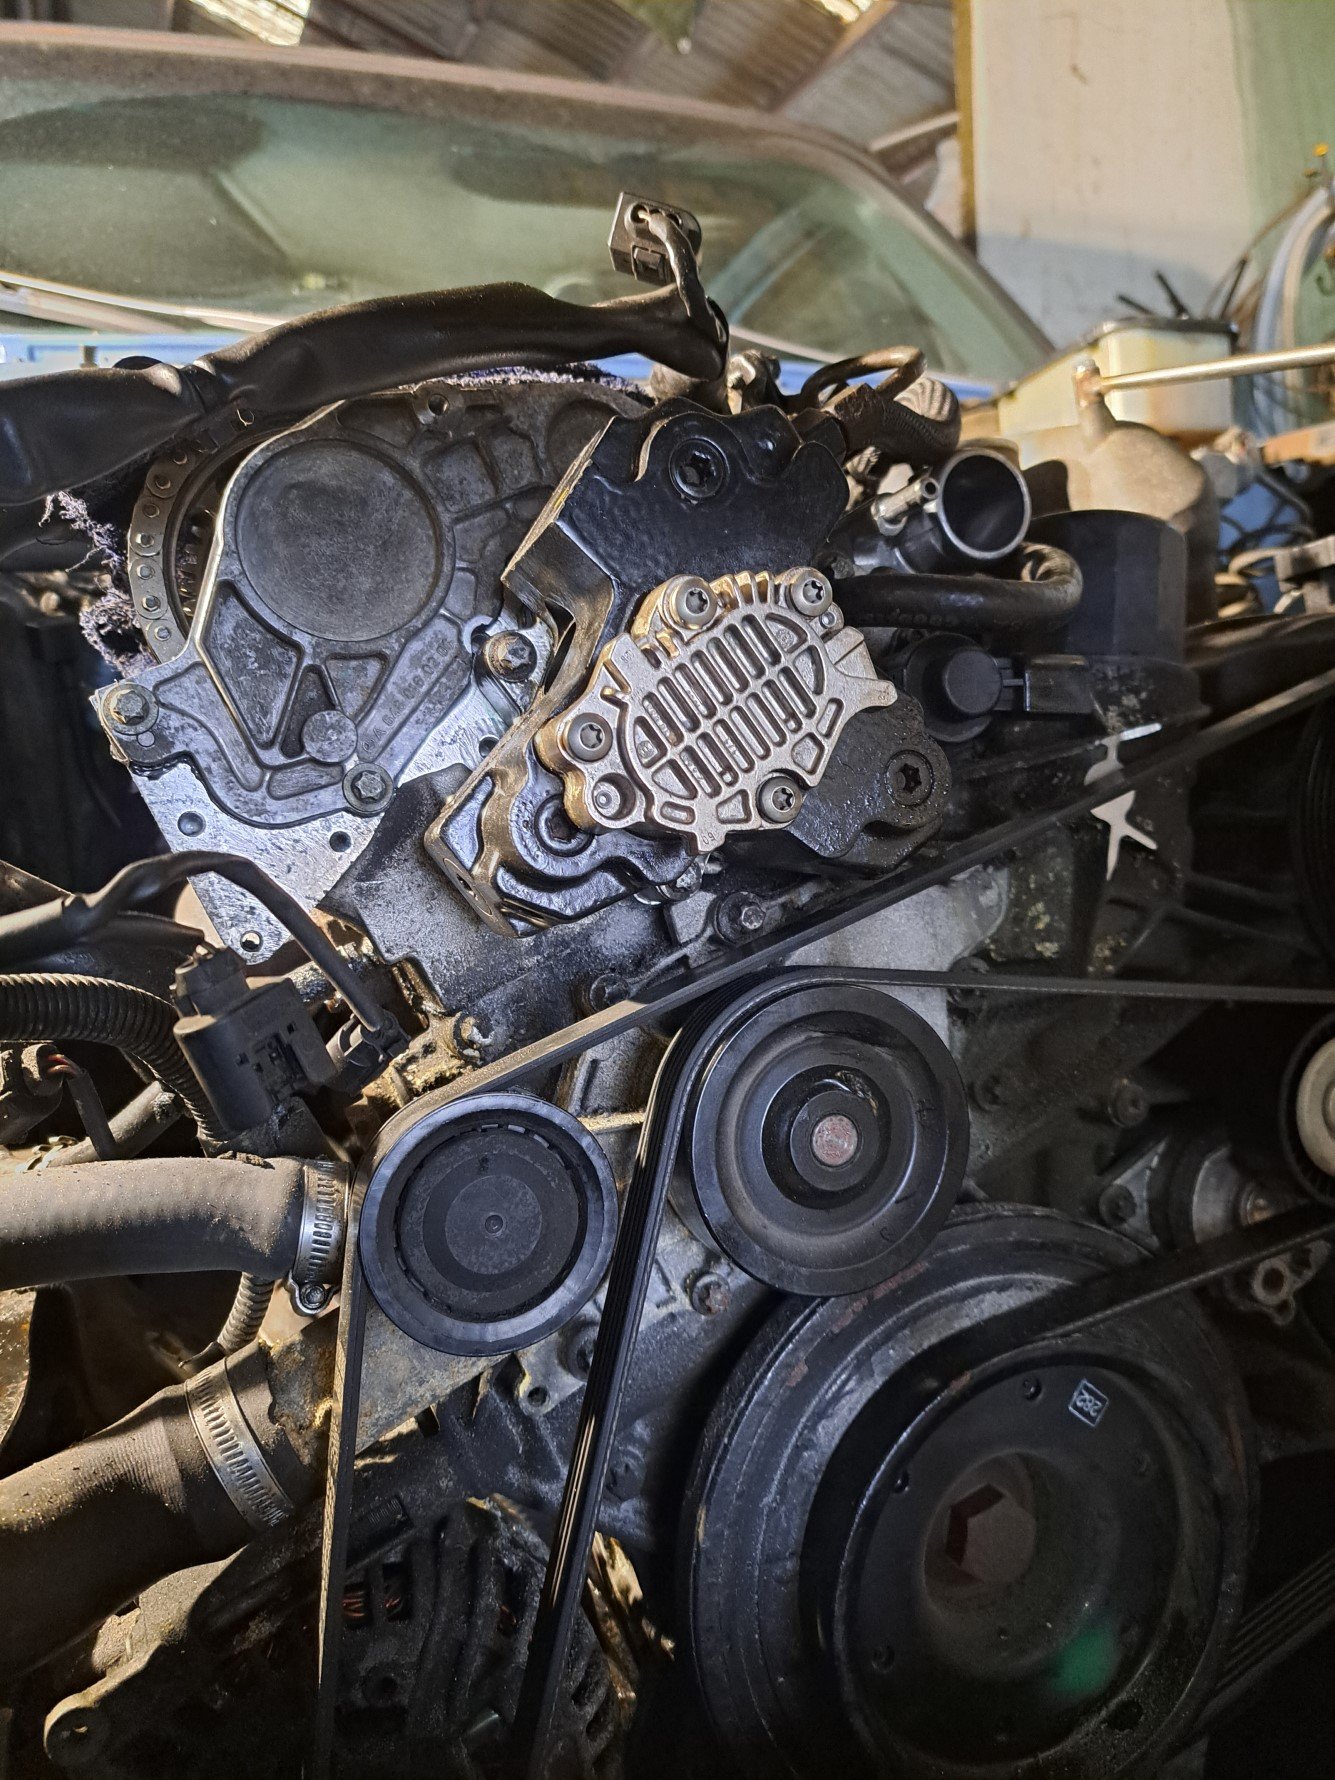
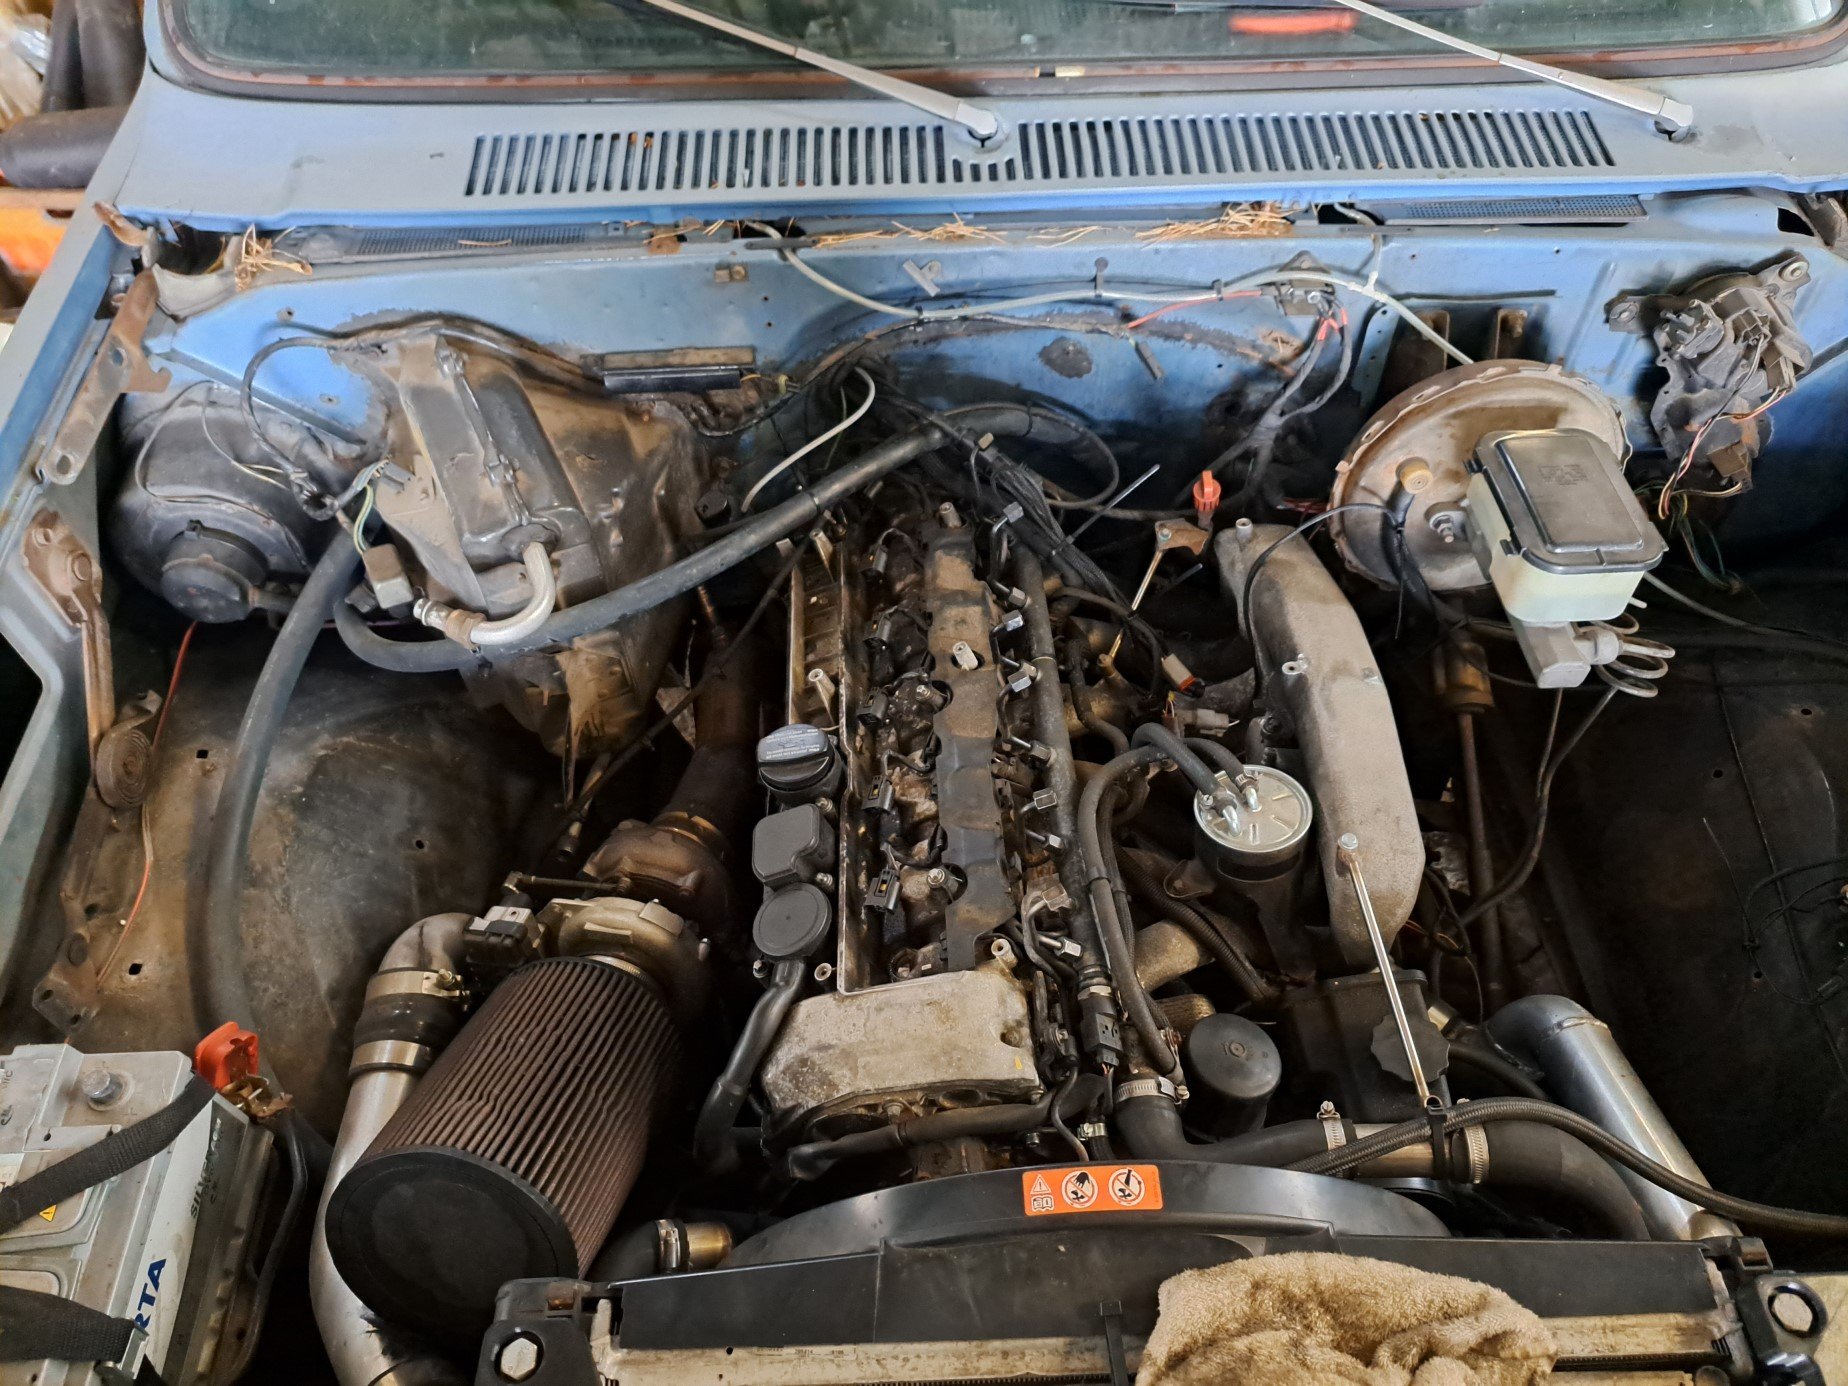
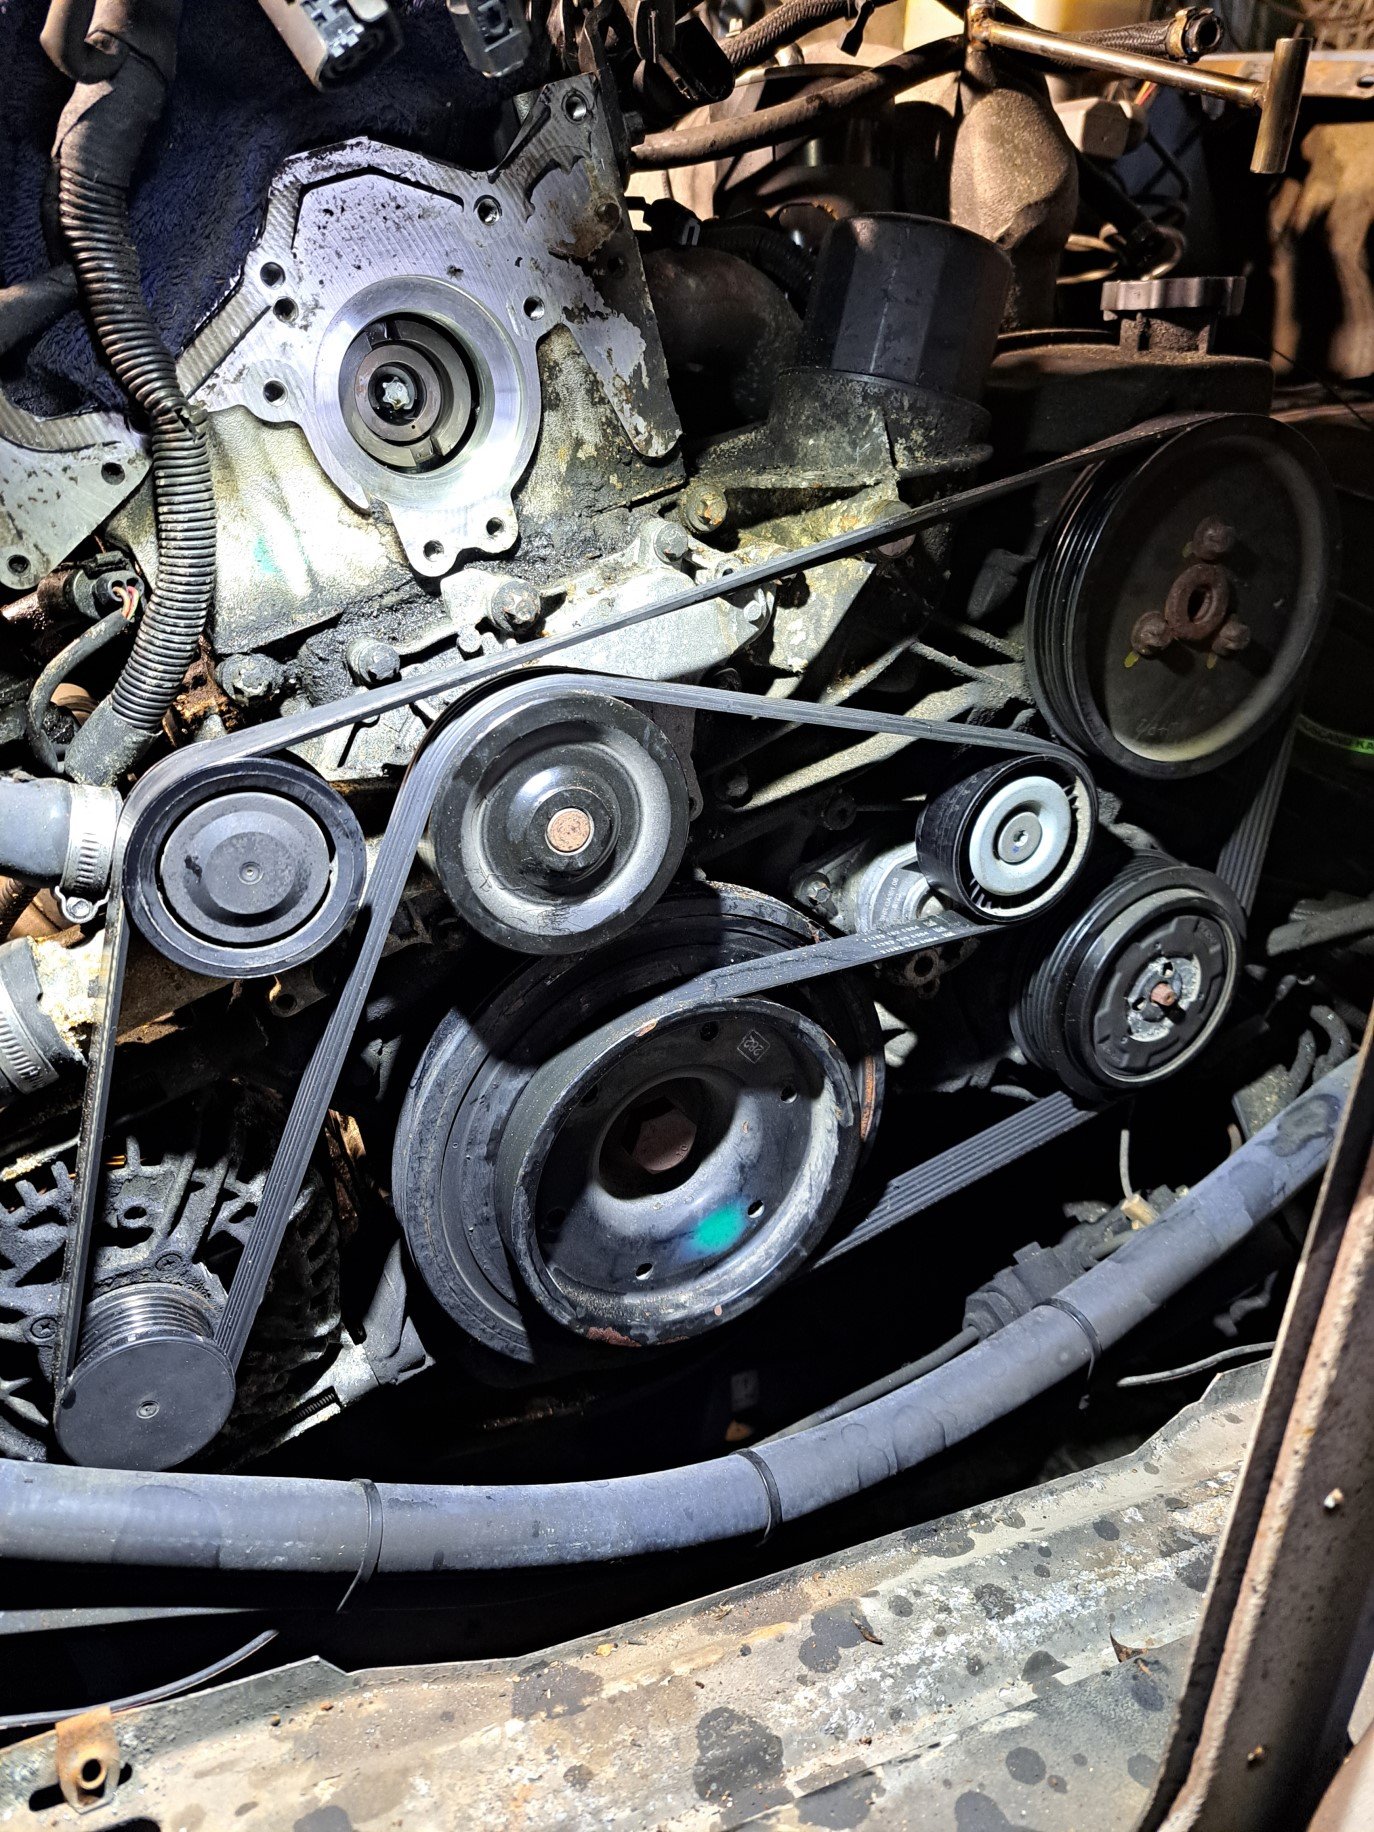
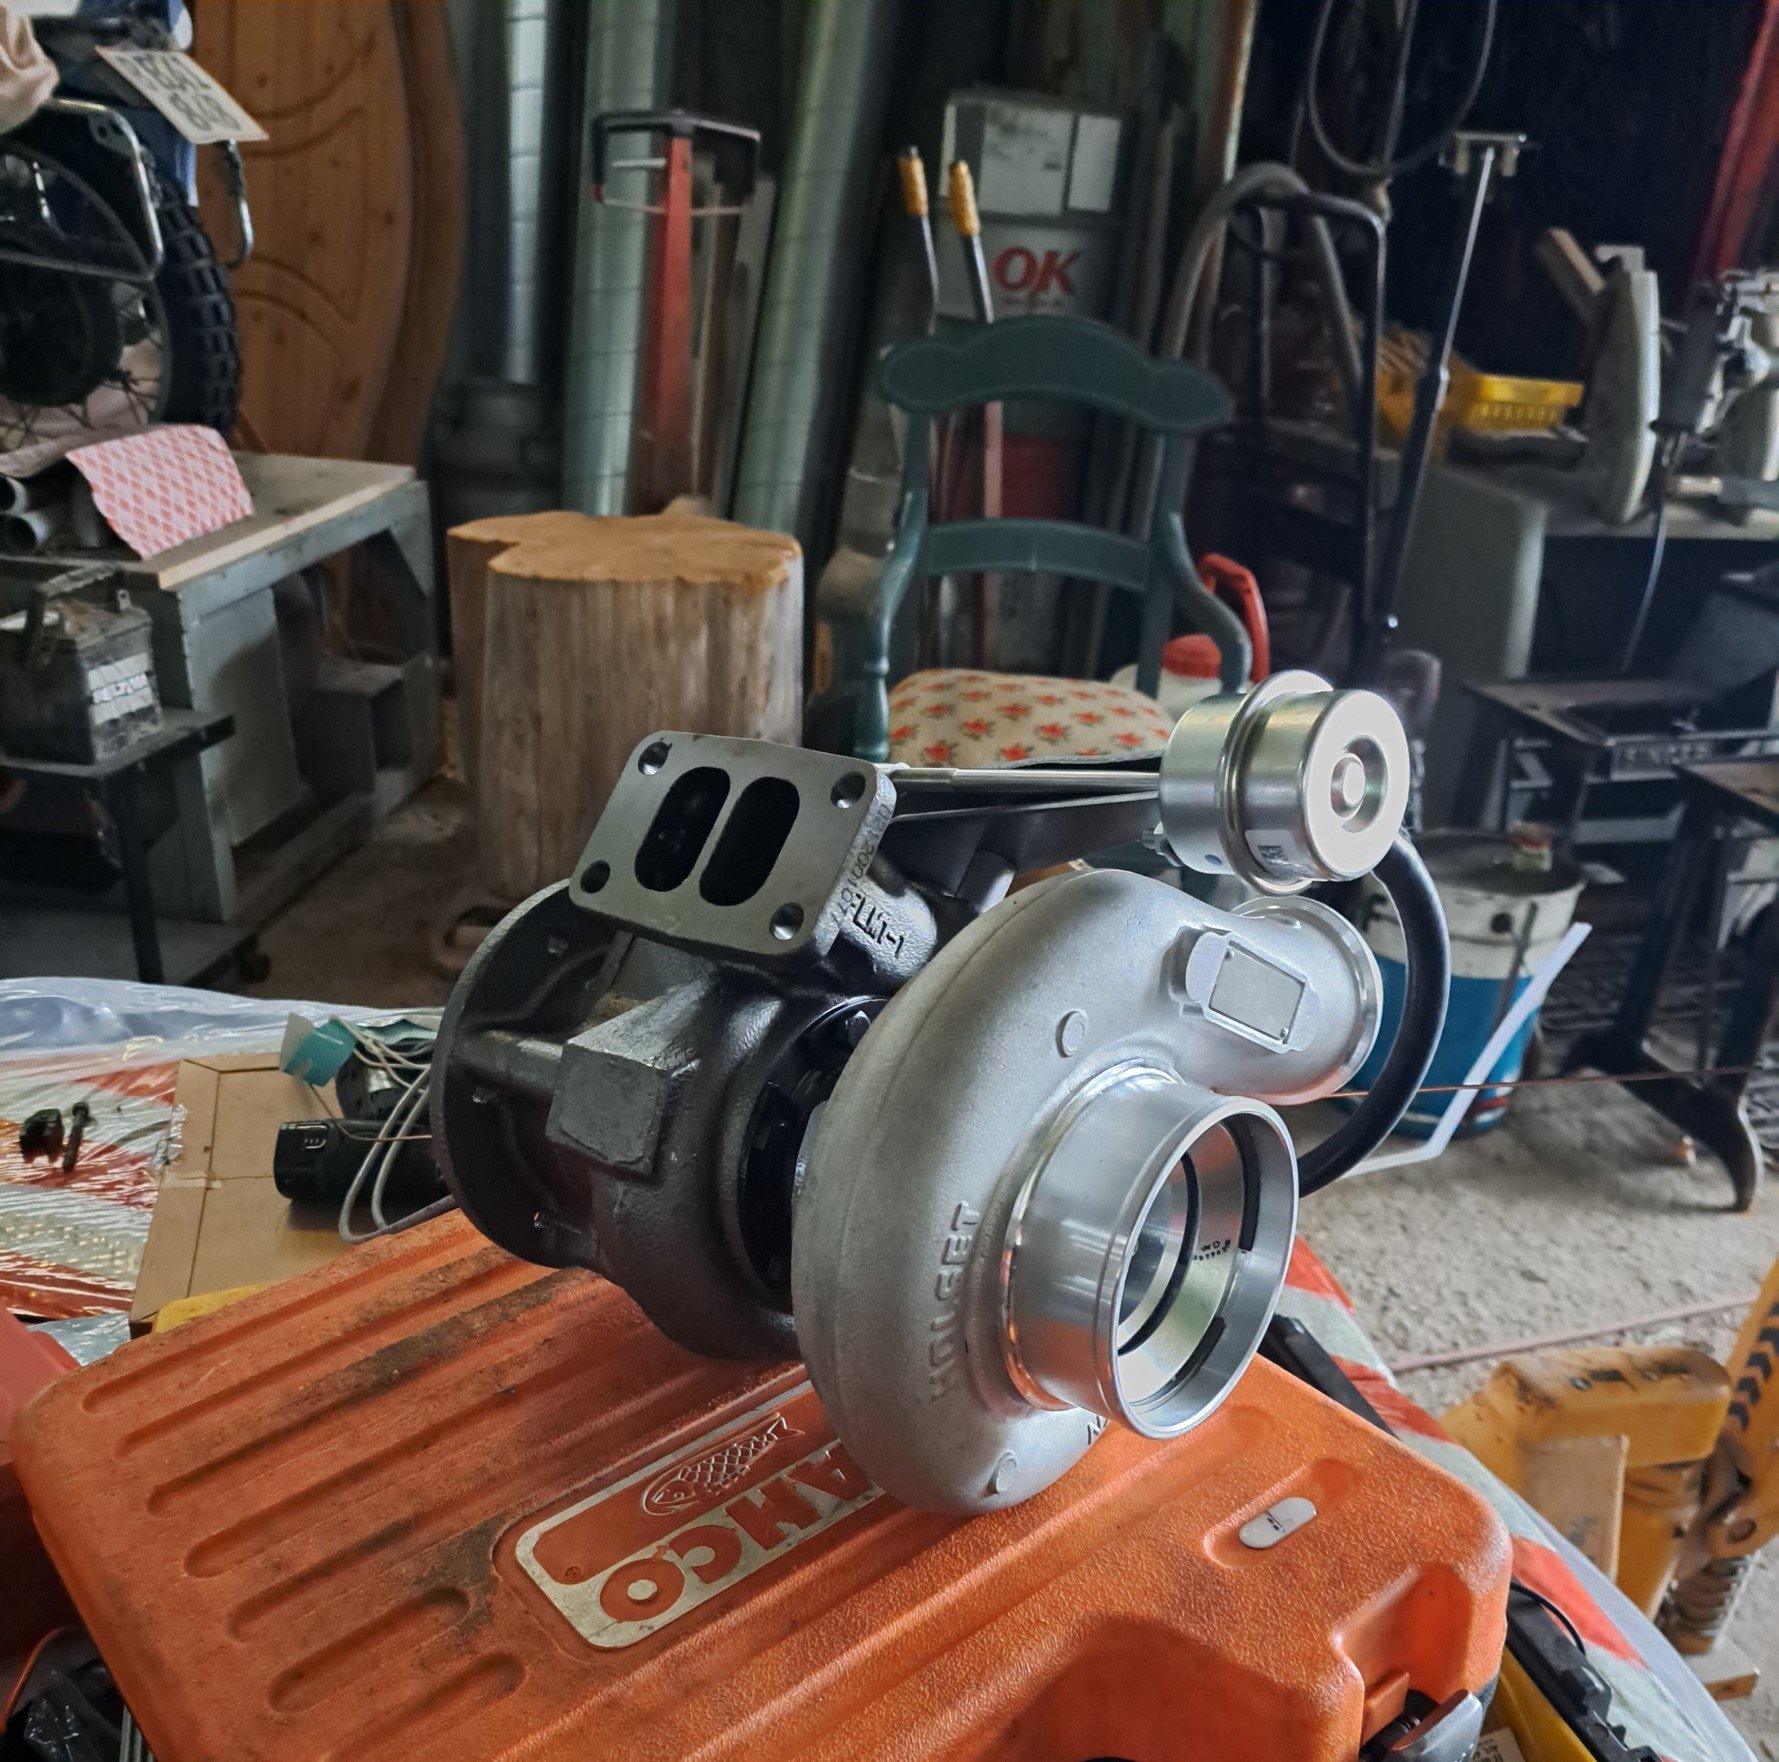
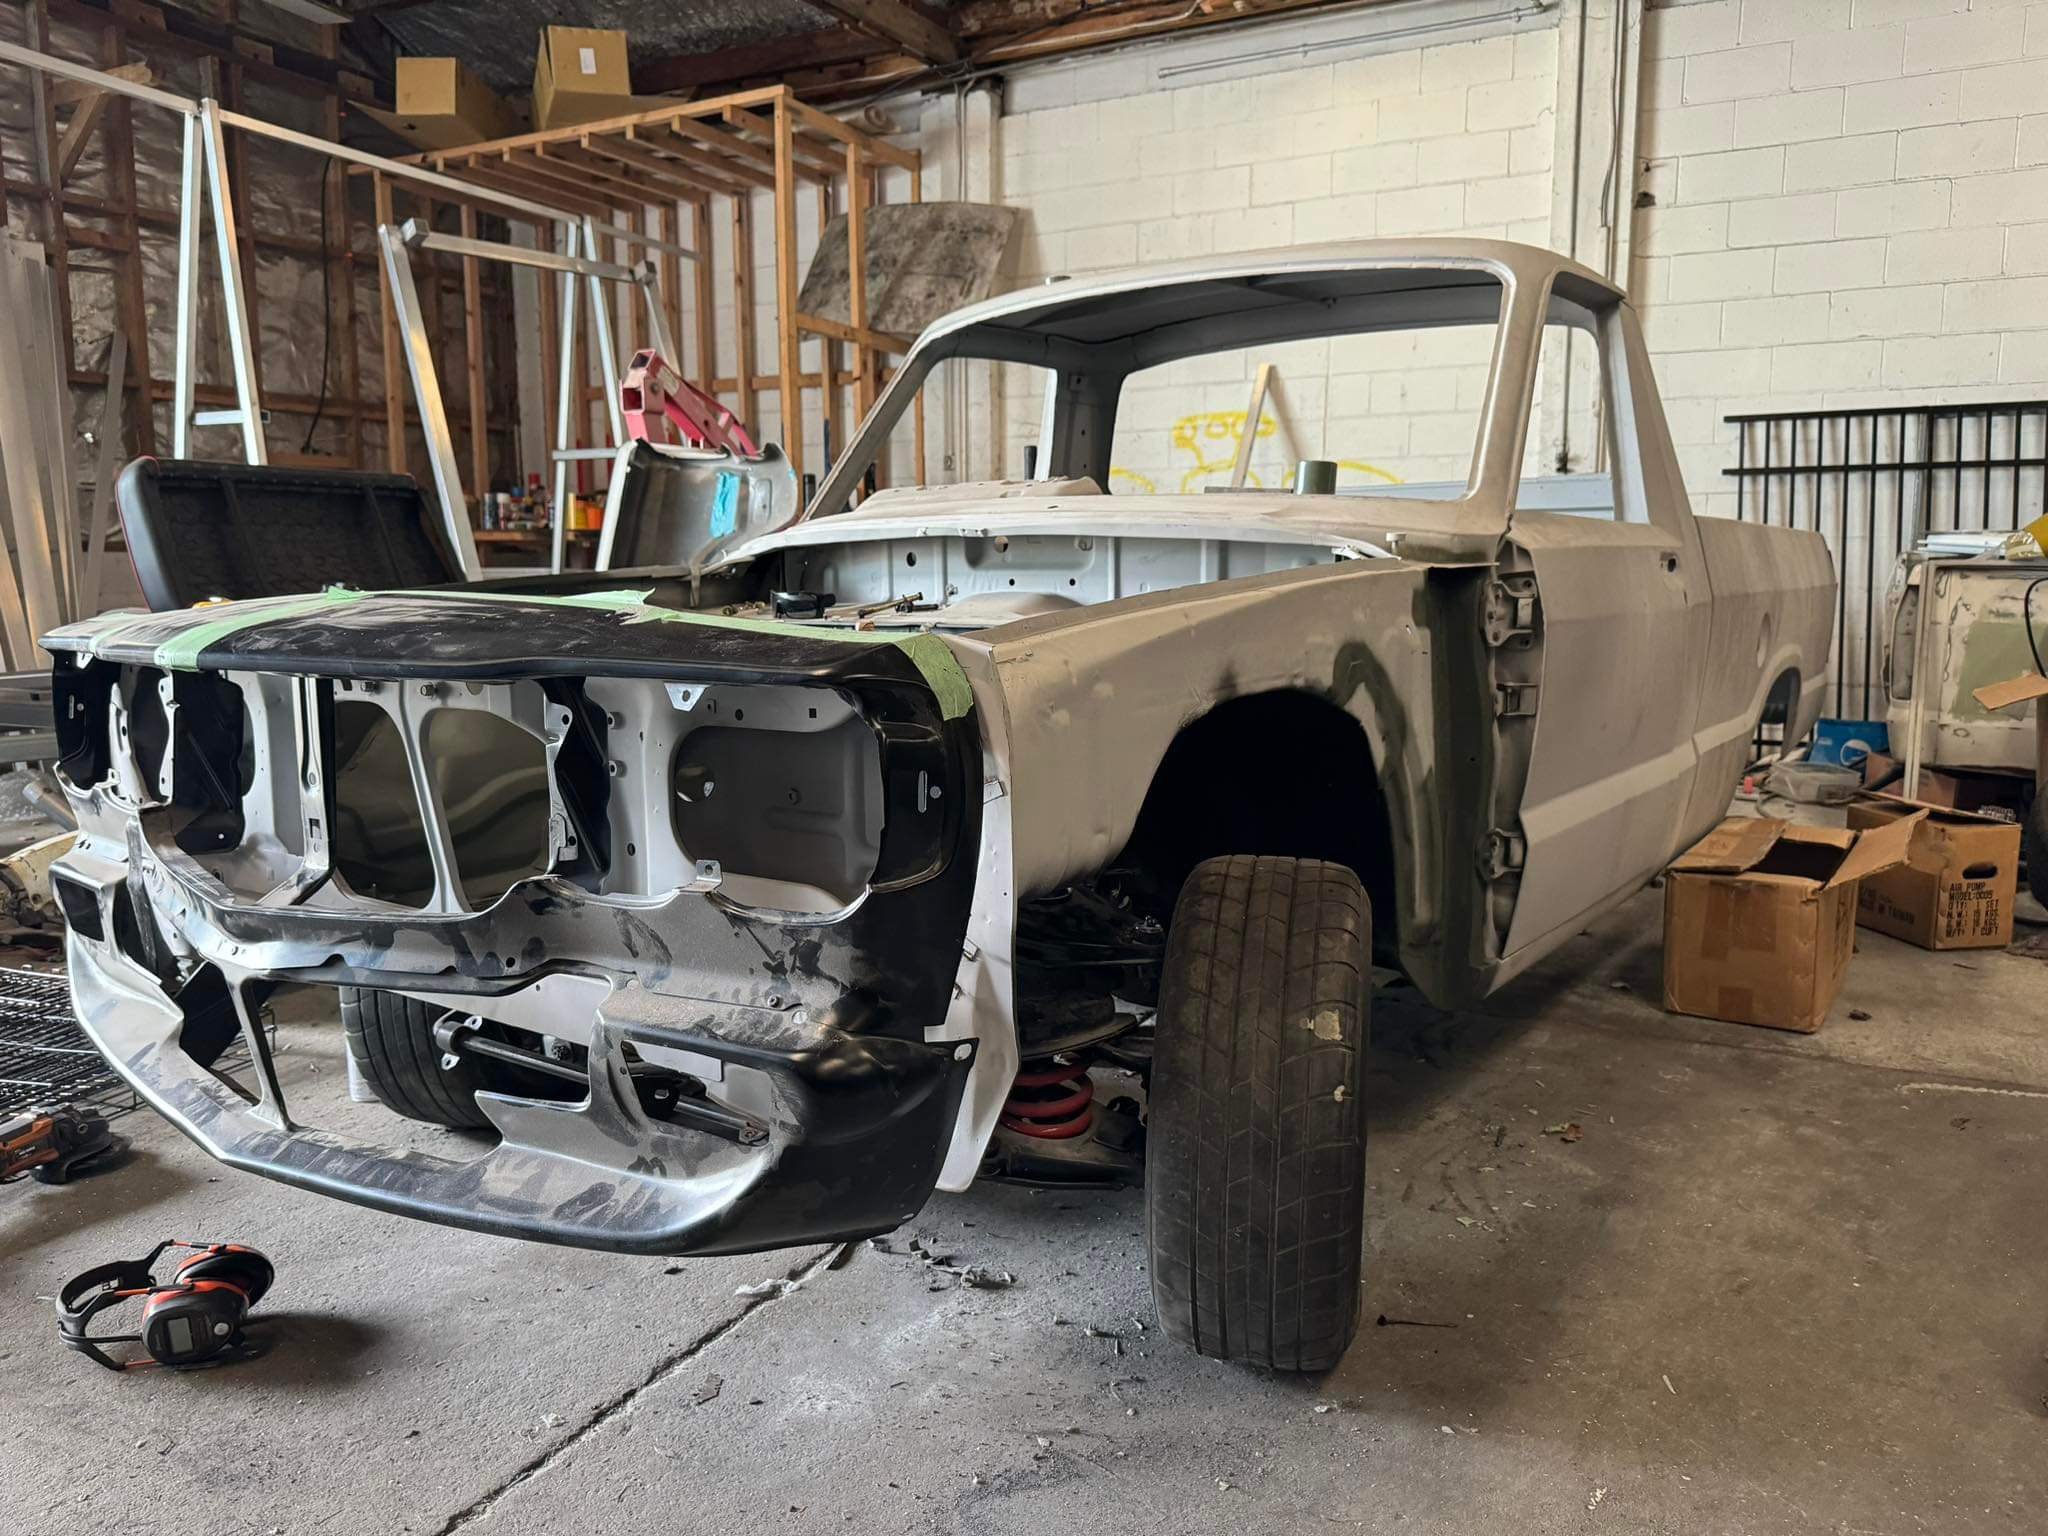
OK, so this is where the story of how my current situation came to be. I was pretty happy with how the truck ran, towed and hauled, but if we rewind to summer last year, I took one of my mates here to see the Malmo race day of the Swedish event StreetWeek, which is a drag and drive event run every year throughout different routes in Sweden. Anyway we floated the idea of participating, I threw it out there that we should use the truck, then I thought a bit more, decided I didnt really want to turn my daily into a drag car, then we ummed and arhhed about buying a 25.5 rolling chassis doing a sloppy LS and going for gold, but the rules to get modified cars street legal (requirement for running StreetWeek) here are dumb so we then put a pause on that idea, at that is bascally where we left it for 6 months. Anyway so I was just randomly doom scrolling Insta on a sunday night and there was a post about getting ready to sign up for StreetWeek on the coming Tuesday.. So I hit up old mate and said, shouldn't we just try and get a spot then figure out the rest after. Tuesday rolls around and I'm sitting at my computer like a Swifty trying to get a ticket, and low and behold we got one. So now this summer we are doing a drag and drive event that will take us some where 5 hours north of Stockholm. One issue though, the truck whilst a great daily does not a drag car make... Enter Phase 2. Basically to get 500 hp out of one of these things isnt too difficult. The formula is pretty tried and true: Big HPFP custom Injectors, and enough air to burn all that diesel effectively. So out came the Injectors to be sent to Diesel Mekken in Sweden, they should flow around 185mm3 @ 1400uS when I get them back. Next on the list was to remove all the things that we wont be using, and seeings as I already had the injectors out removing the rocker cover makes modifying the front cover for the 400cdi pump easier. The gasket was also leaking so it was a no brainer. This is what I found, notbad.jpg for 500,000km It is almost as if Mercedes themselves planned this, because the holes are all there to mount the bigger pump, just a matter of a bit of a trim on the front cover and everything bolts up. After removing one of the idler pulleys and trimming the oil filter and thermostat housings the everything is good to go. So all in all a win. Next on the list is building the new turbo manifold, it is going to be a compound setup with the HX40 over the stock GT2356, so hopefully I dont lose too much drivability.
1 point
-
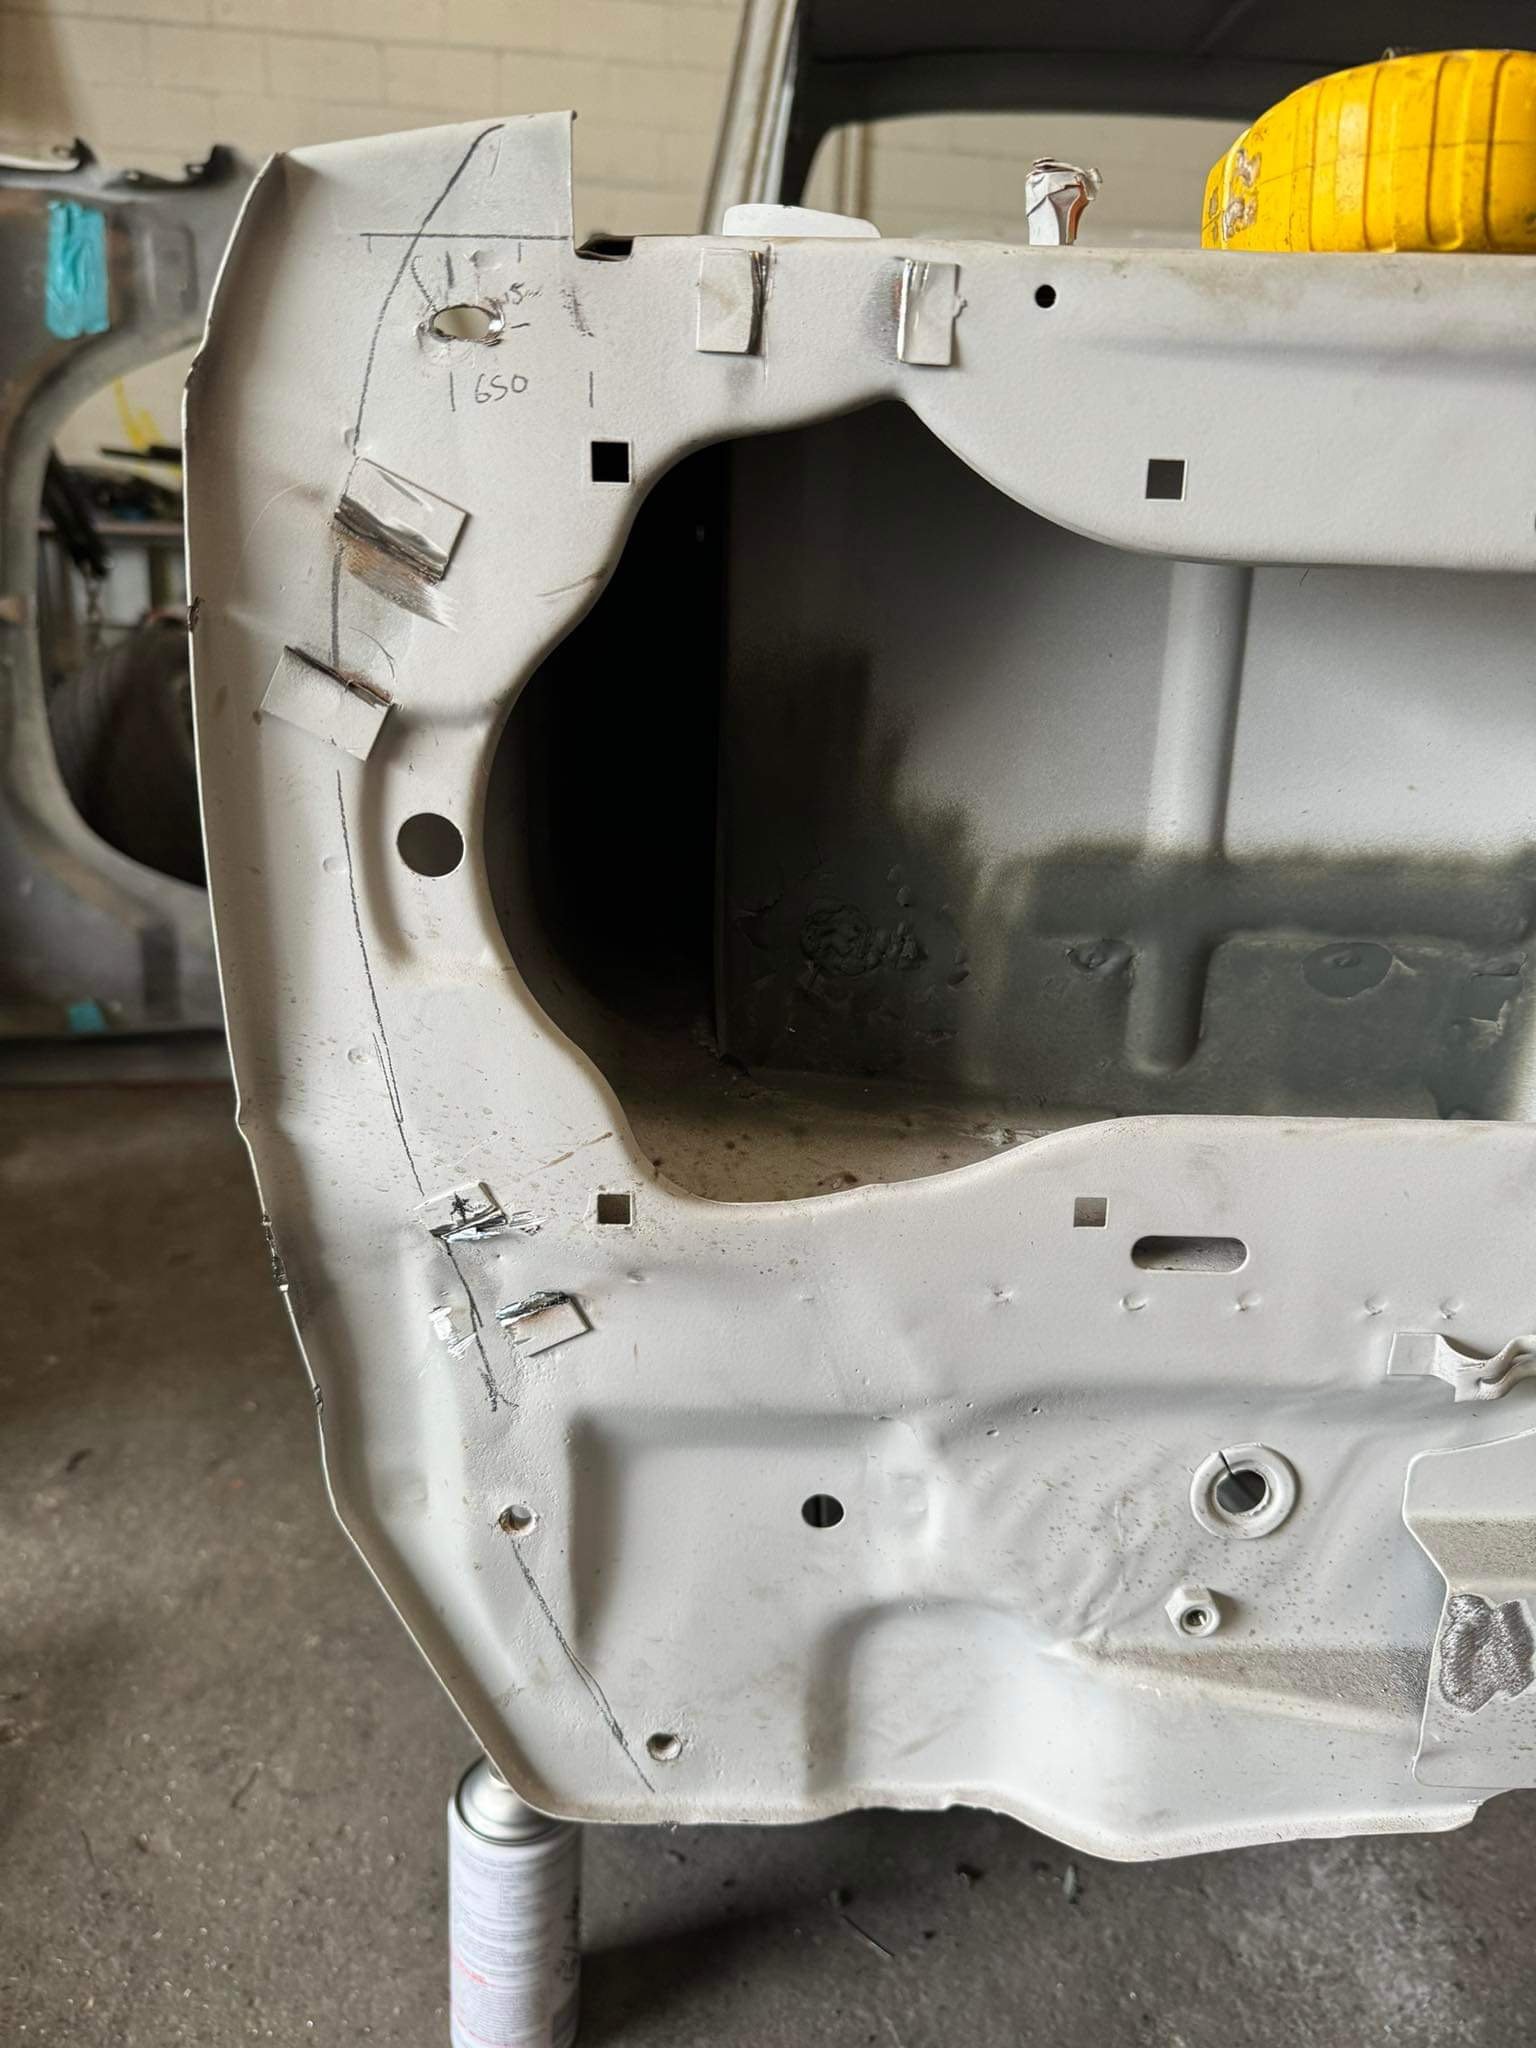
It takes a special kind of idiot to take a perfectly good, freshly panelled car, and chop it to bits. boy I need help Cut all the things!!!!!
1 point
-
Got home from Low Key Nats to find a nice package had arrived.
1 point
-
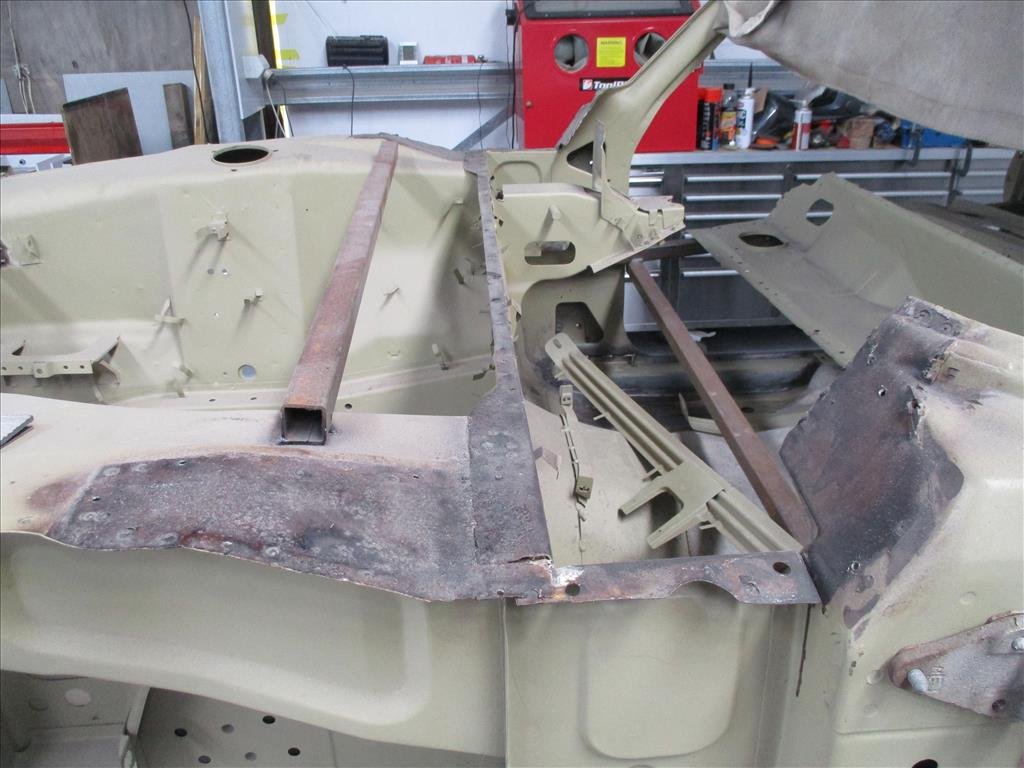
Another email from panel Barry come through recently. He's been spending time cleaning up the sills and preparing for the final weld in as well as getting all the welds in the rear floor/boot area ready to support the rear end going back together.
1 point
-
P.S Wednesday night racing still goes hard The 2023-2024 La Vida crew IF any Tauranga OS boes want to come out and give this a go - flick me a message.1 point
-
Yeah they do have speed holes. Backed with an ali sheet. Can see them here. Original material was a mild steel. Probably low grade (in todays standards and variable. ‘Low background’ pre war stuff so you can’t really buy that. So they’re done from G250 mild steel (I think, maybe it was G300). Either way, in theory significantly more consistent and stiffer than the original.
1 point
-
Snuck home at lunchtime to roll it into the sunlight:
1 point
-
I am a hobby caster, but I have had some success with resin-bound sand, so here is a "If I were trying to cast a valve cover, this is how I would approach it" ideas. These ideas may or may not work, but reflect some of the successful methods I have used. 1. Mix the sand for the entire cope or drag all at the same time in a cement mixing tub using a hoe, or some other method to mix the entire batch all at once. 2. Use Lino-Cure with the slowest set time on the catalyst (possibly no catalyst at all, to lengthen set time), so you have enough time to mix and ram the entire cope or drag. 3. Use a generous amount of either pattern wax or release agent on the pattern (I think you did this). 4. Use a generous amount of knife gates on either side of the mold cavity (you gating looks pretty good to me, but the gates could be longer/thinner, like is often used on thin pieces. 5. My solution for a thin casting such as this valve cover would be to use large runners down each side, perhaps 4 times larger than what you used. I use vents/spin traps at the end of each runner, vented to the top of the cope. The intent is to get a large mass of hot aluminum on either side of the mold cavity, in the runners, before the mold cavity begins to fill. This may require a larger crucible or crucibles. 6. Use one or two very large sprues, and fill the sprue(s) and runners as fast as possible, letting the knife gates control flow into the mold once the runners are full. Don't try to control flow into the mold using the runner or the sprues. The knife gates should be at the top of the runners, and the gates should not start to feed the mold cavity until both runners are completely full. 7. I would use a series of risers across the top of the mold cavity, round, perhaps 2" diameter, 2" tall, necked down into the mold cavity to 1". Perhaps six of these. 8. I would flame the mold cavity lightly with a propane torch, with wide soft flame, after molding it, to drive out any uncured resin. 9. I would spray on one or two coats of ceramic mold coat afer flaming the mold, burning off and lightly flaming each coat of ceramic mold coat. This will give a superb surface finish on the casting, at least that has been my experience. 10. Superheat the aluminum more than normal, and assume that you are going to lose a significant amount of temperature when you fill the runners. Choosing the correct amount of superheat on a thin casting is an art. Too much superheat and you get a rough surface finish, and too little and you get an incomplete mold fill. The ceramic mold coat will help if the aluminum is poured a little on the hot side. I pour small molds in 356 aluminum at 1350F, and so for a large mold, you many have to be well above this. Overheating the aluminum can cause a lot of gas pinholes, so don't get carried away with the superheat. The superheat may be as little as 20 F additional; I am not sure. You could experiment with a long thin rectangular test casting/mold, and see how far the aluminum will run without freezing, measuring and recording the pour temperature accurately. 11. One other thing I have started to do with thin patterns is to make the initial pattern from either a 3D print, or some other material that is not necessarily as strong as a metal pattern, and then cast a permanent aluminum metal pattern. This assumes you have the casting process down, and you use double shrinkage on your initial pattern creation. Any minor imperfections in the permanent aluminum pattern can either be buffed out, or filled with a good autobody filler. If you do things correctly, you should need little or no fillers on a permanent pattern. The beauty of using a metal pattern is that you can use it repeatedly with an automotive body-repair slide hammer, to remove the pattern from the mold, by attaching the slide hammer in various places and tapping lightly with impacts, to break the pattern/sand adhesion, without danger of damaging the pattern. Again, mold release or wax are a must on the pattern. For a one-off casting, the pattern only has to survive one removal from the sand, and so can be made of plastic, wood, etc.; assuming you get the first casting right. 12. If you let the pattern remain in the resin-bound sand beyond the strip time (resin bound sand has a set time, and a strip time), then you basically have glued the pattern permanently into the sand, and regardless of any mold-release agent, generally you will damage the pattern trying to remove it from the sand. You must finish all ramming of the sand prior to the set time, else the sand will begin to set, and ramming will cause fractures. It is essential that the entire cope or drag batch of sand be mixed and rammed at the same time, so the entire pattern can be pulled from the sand at the appropriate strip time. Hope this helps. Just my slant on how I would approach casting this piece, with the understanding that I am not a foundry person, but a backyard casting person, who has used quite a bit of resin-bound sand successfully with aluminum and iron. Good luck. You are oh-so-close to a perfect casting. Edit: I allow my patterns to fill upwards, and I think that is what your mold was designed to do. I have had to vent the high points of the mold with small holes out the top of the cope, else the resin-bound sand will trap air and create large air bubbles at the high points of the mold, like 2" in diameter. .1 point
-
Bugatti chassis-rails were produced by a couple of different manufacturers, and stamped-out by giant presses in the big steel-works operating in France/Germany in the interWar era. Because of the excessive overall length of the un-worked longeron pattern piece, each was arrayed diagonally across the width of the steel sheets that the patterns were stamped from. This had an additional benefit, in that the side-to-side "grain" of the sheet steel was, for each longeron, cut "on the bias" (in dress-maker's terms) which meant that it was much more agreeable to the 90 degree folding along its edges, without cracking and failure. Ettore Bugatti was a bit of tight-arse, and he wasn't so fussed about who made his chassis-rails, or what they were made from, so long as he could get a bunch of them made for a good price. As a result, there are interesting variations in the thicknesses and composition of steel detected in authentic Bugatti chassis-rails arising from different periods and models and suppliers, through the 1920s and 30s. It is useful to note, however, that none of it involved blokes bashing away with big hammers. This was, after all, the era of Krups, and BIG engineering!1 point
-
Here are a few videos of how I make molds, and examples of the iron surface finish I am getting. Hopefully these links will play here. Binder is LINO-CUR, and mold coat is an alcohol-based ceramic material called Velacote (I think that is the name).1 point


This leaderboard is set to Auckland/GMT+12:00