
Leaderboard


Popular Content
Showing content with the highest reputation on 03/31/24 in all areas
-
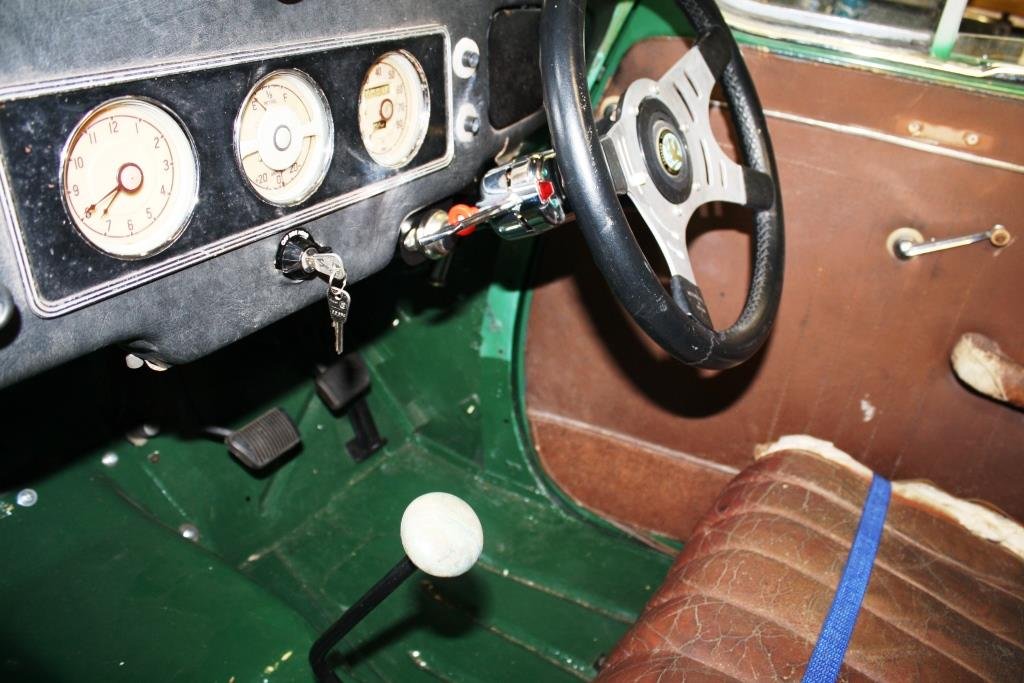
Beem working on this thing pretty flat out. Done a bunch of interior work and just rebuilt all the steering components. Everything feels a lot tighter now . Not too far away being ready for a warrant
 14 points
 -
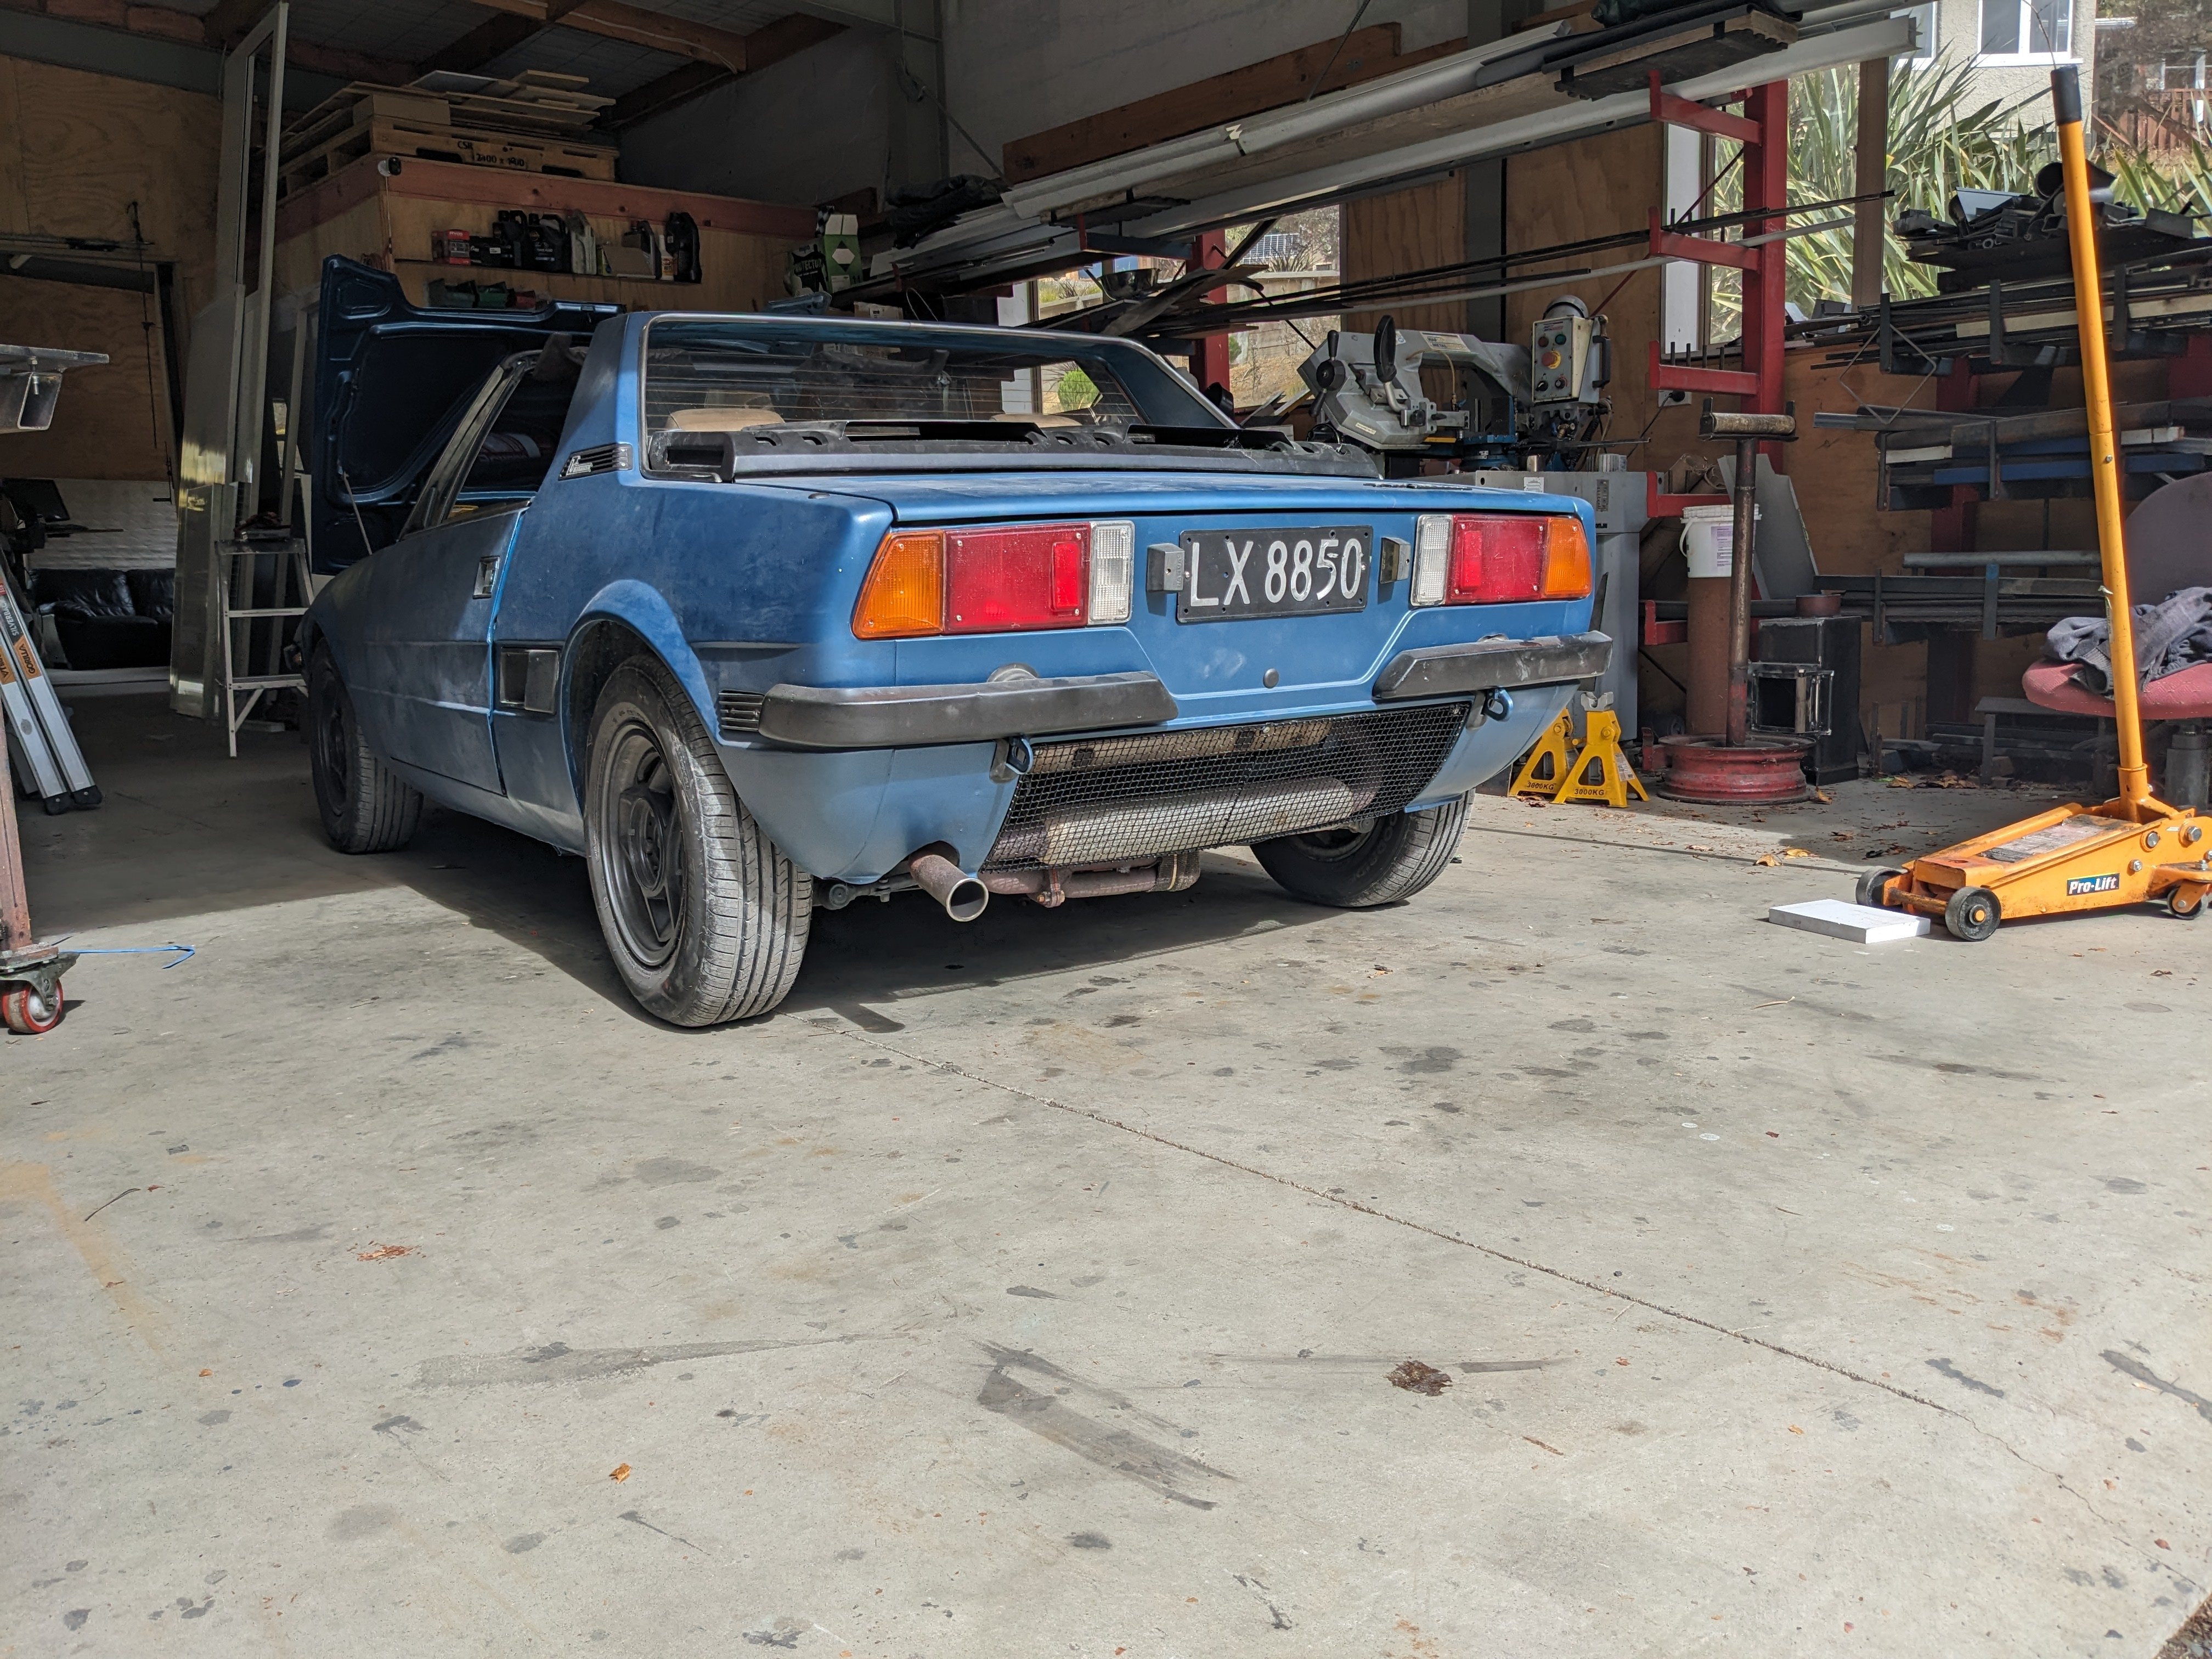
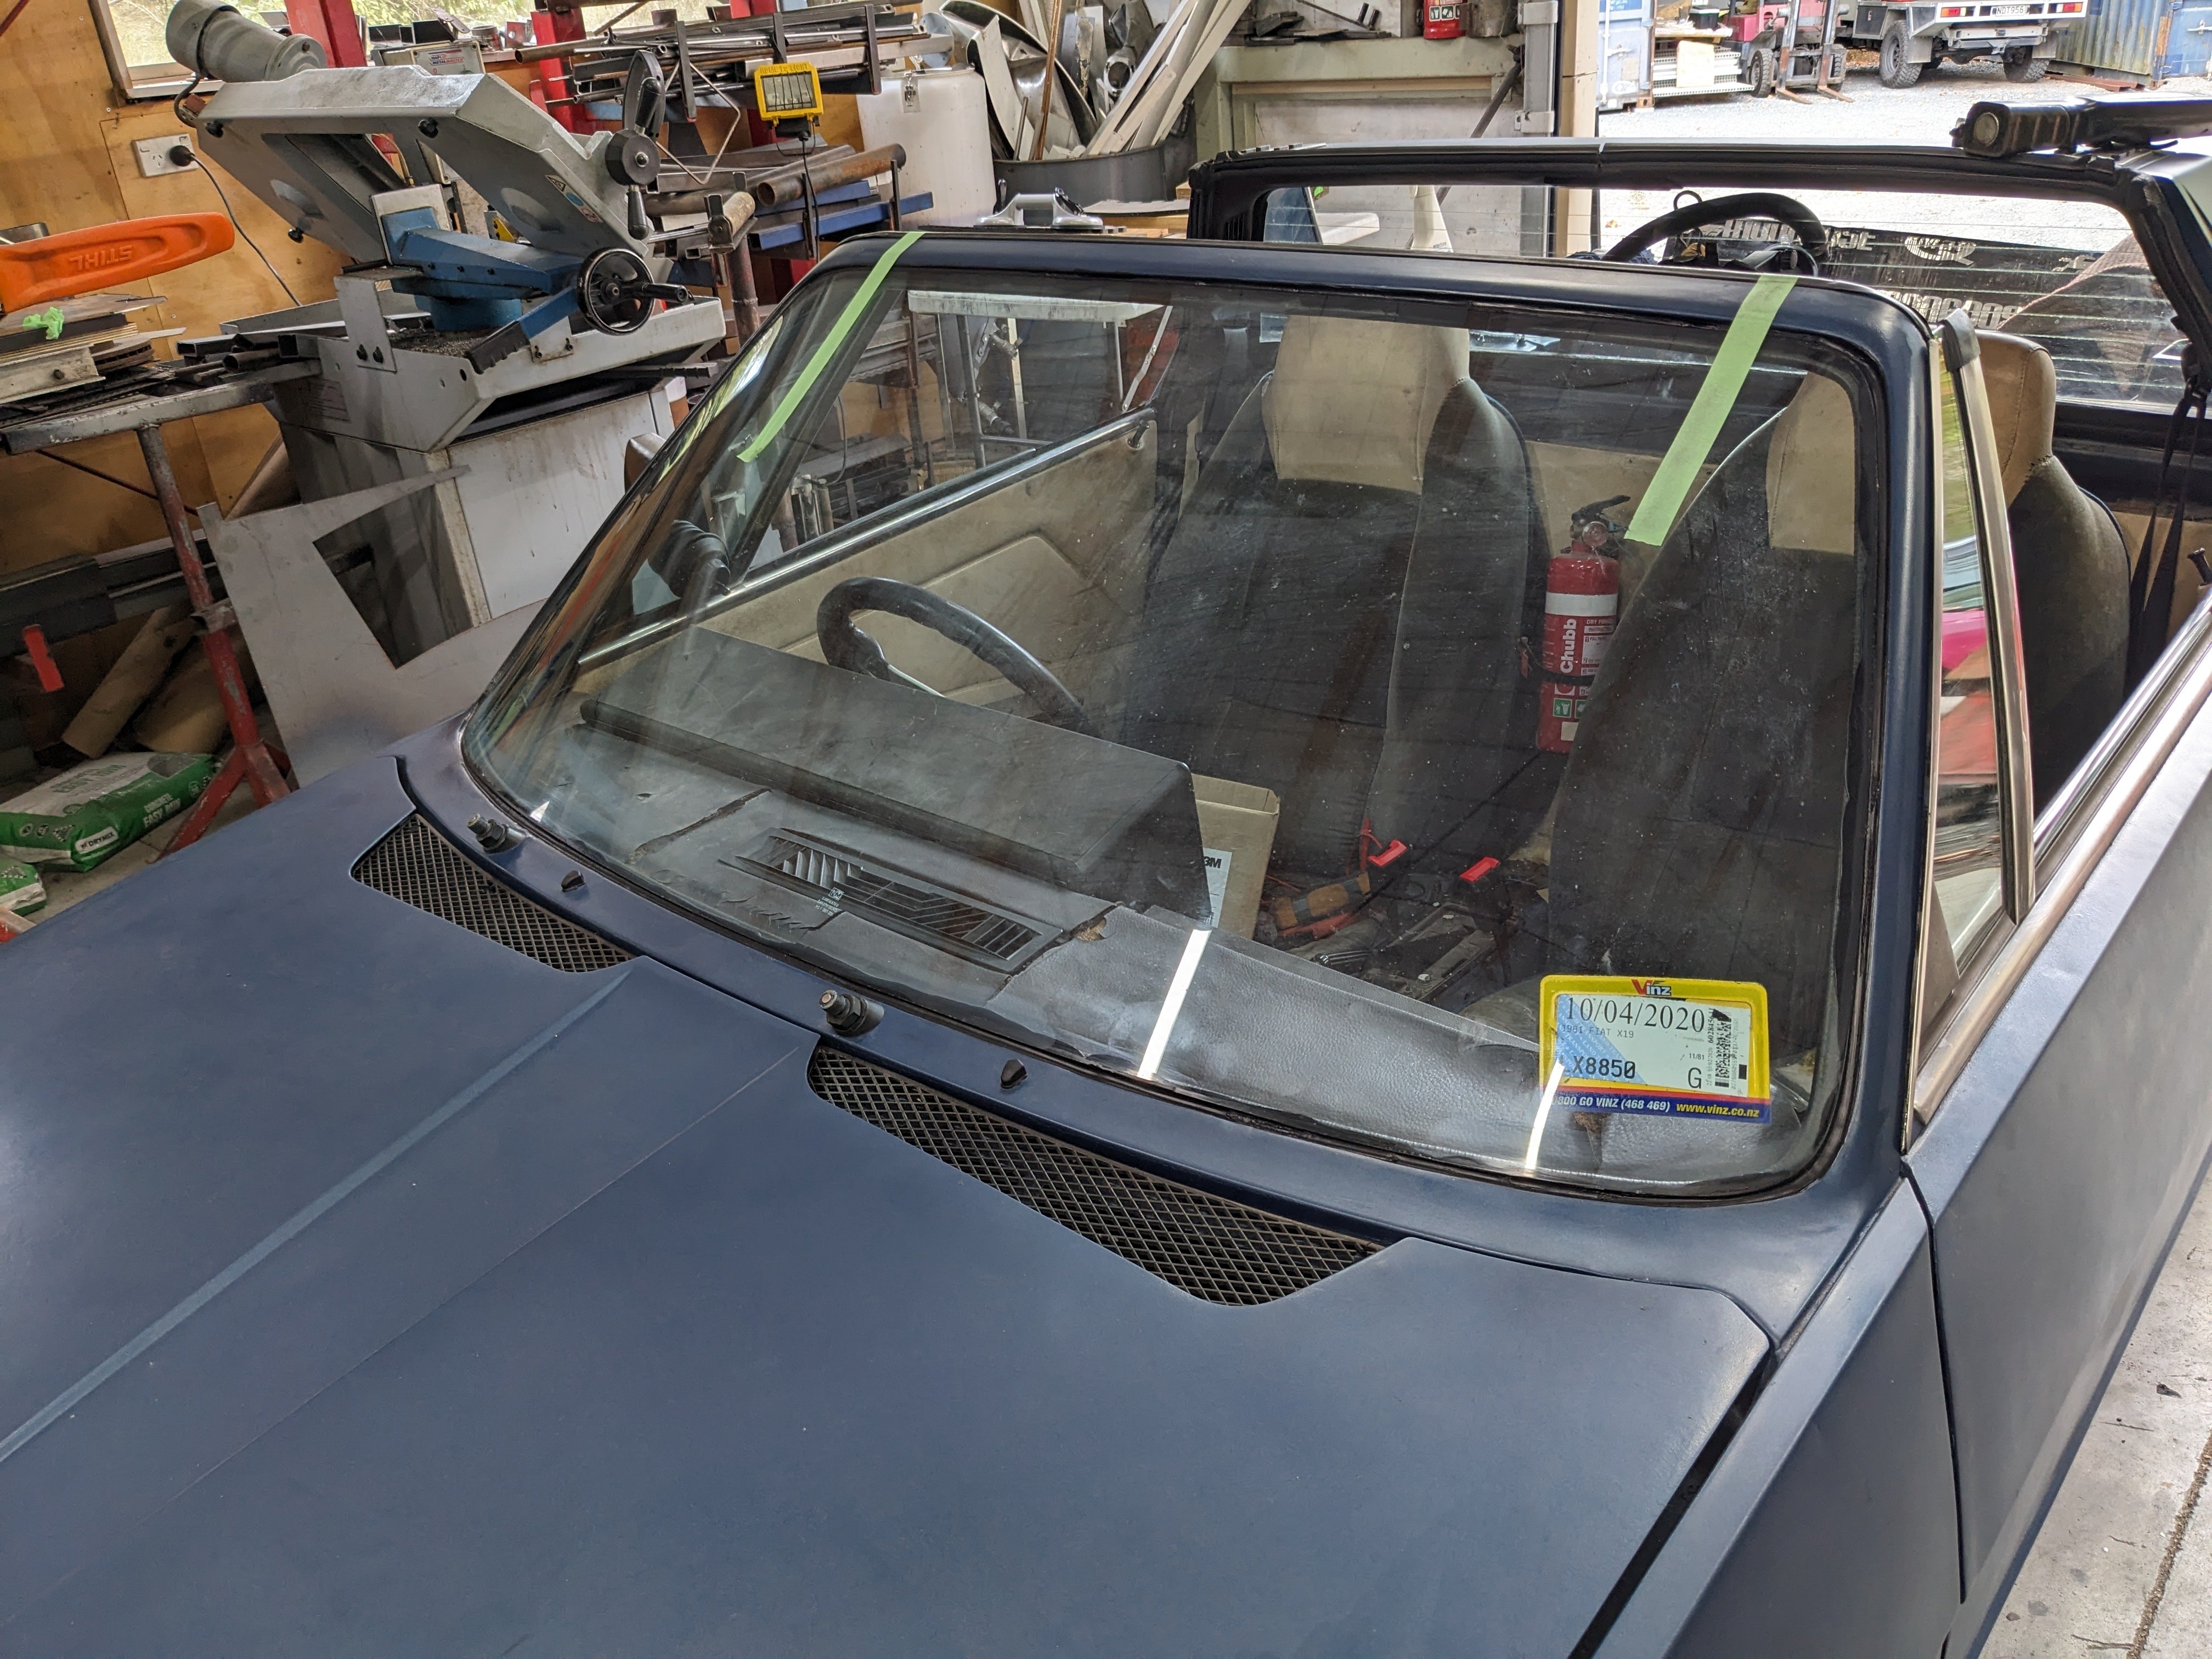
Yea so today I fixed a couple of issues with the windscreen washer, firstly trying to get the aftermarket nozzles to actually fire at the screen, then fixing the washer tank which for some reason is about 8 litres, most of which got dumped into the frunk overnight due to a crack. This I filled up with poo and hoped for the best. Then I addressed the extreme force needed to make the washer run, which meant pulling the stalks off and doing an excellent bodge which you dont need to know about in case my good name as an engineer is ruined, suffice to say they work perfectly now. Then with the few hours still left in the day I made a rear valance thing, although the mesh looks pretty sparse irl so I might smash something slightly denser on there; And I think thats pretty much it, I'll book a wof for next and see how that goes....
10 points
-
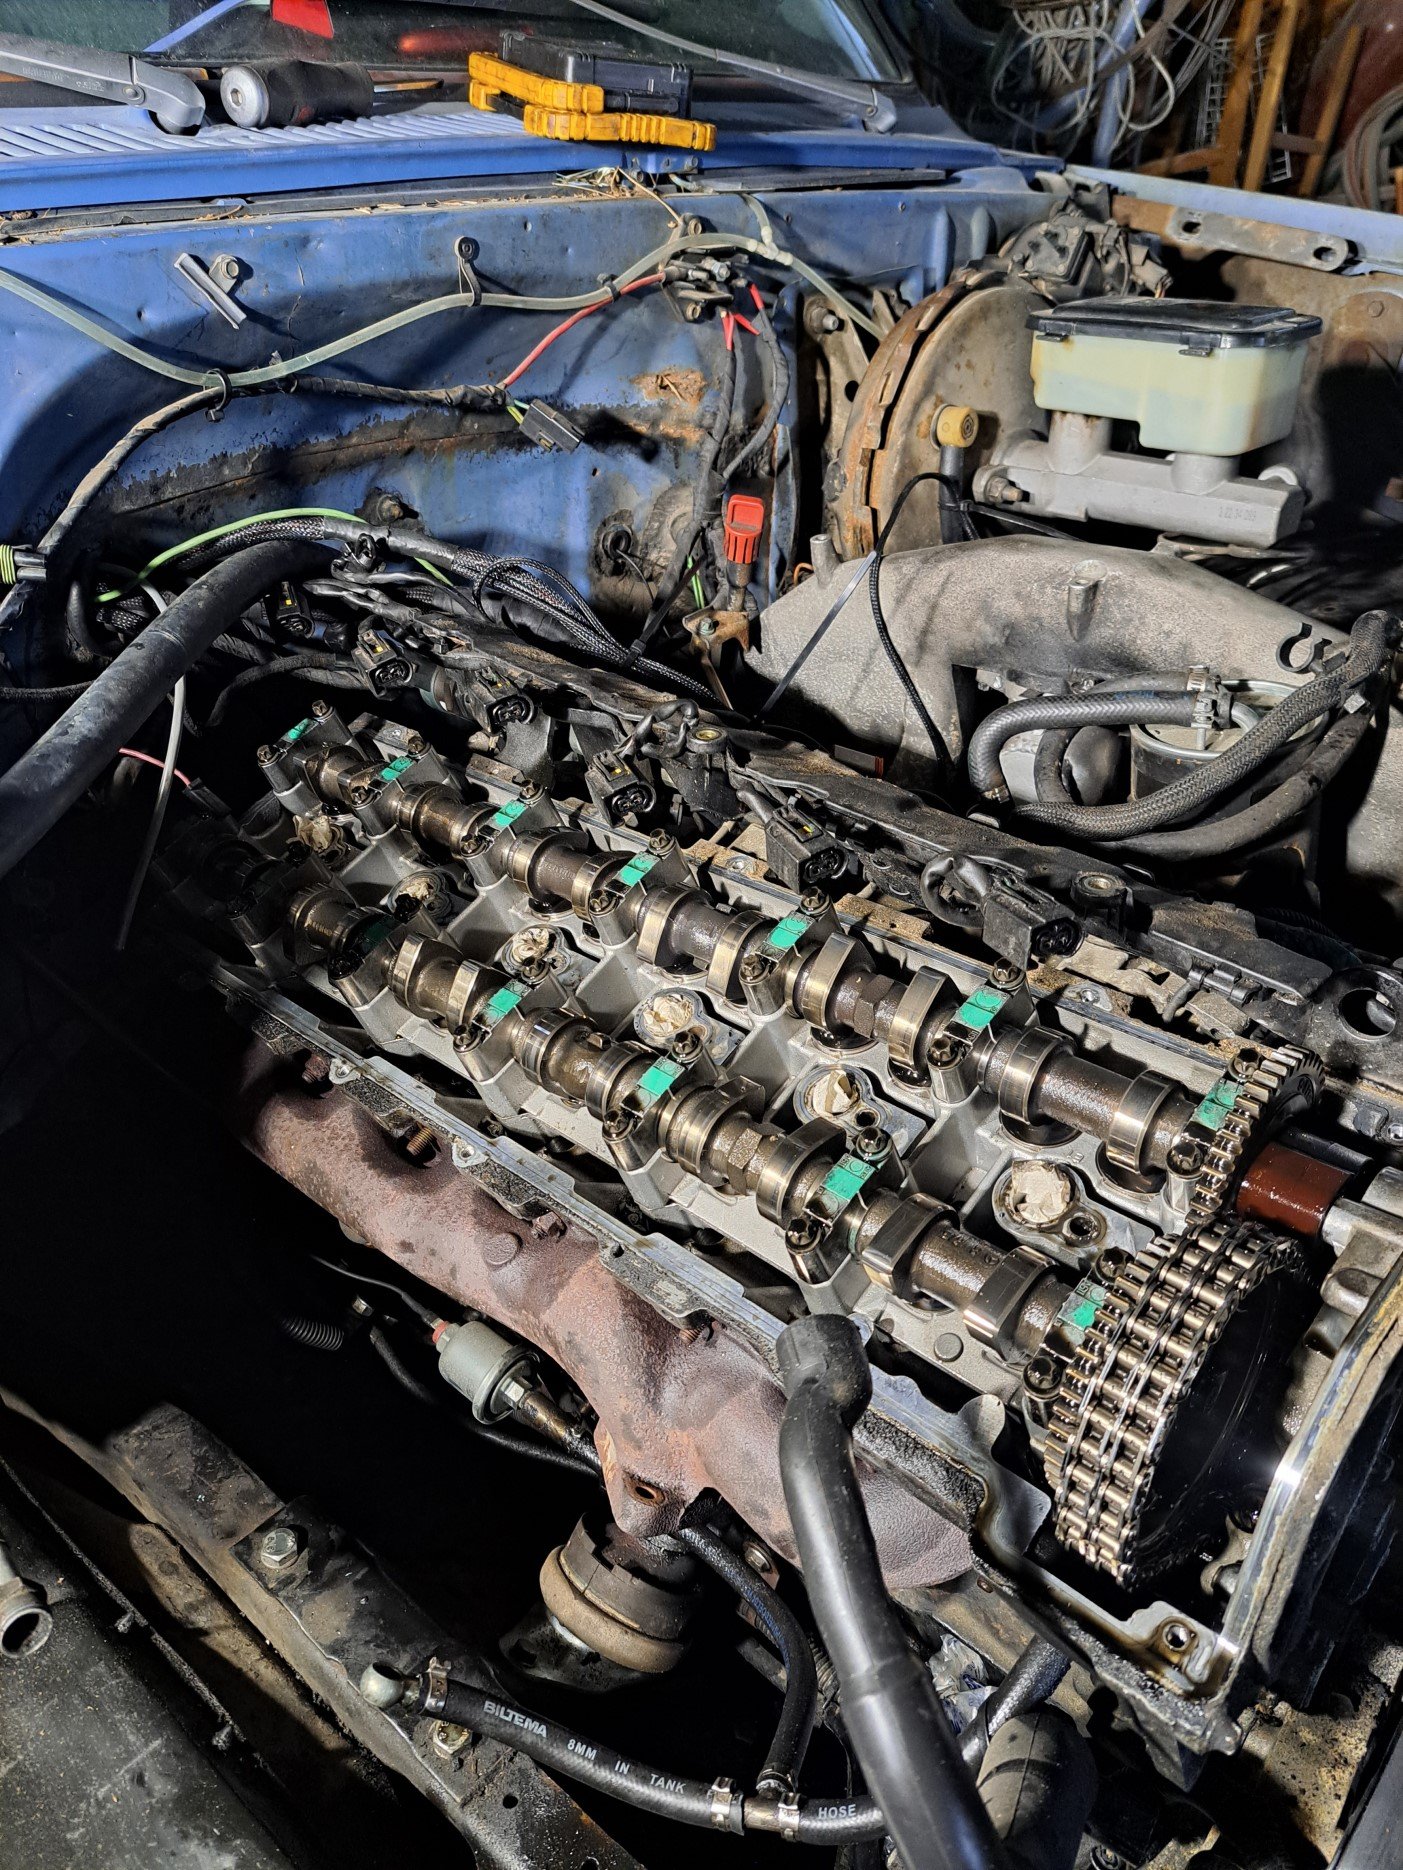
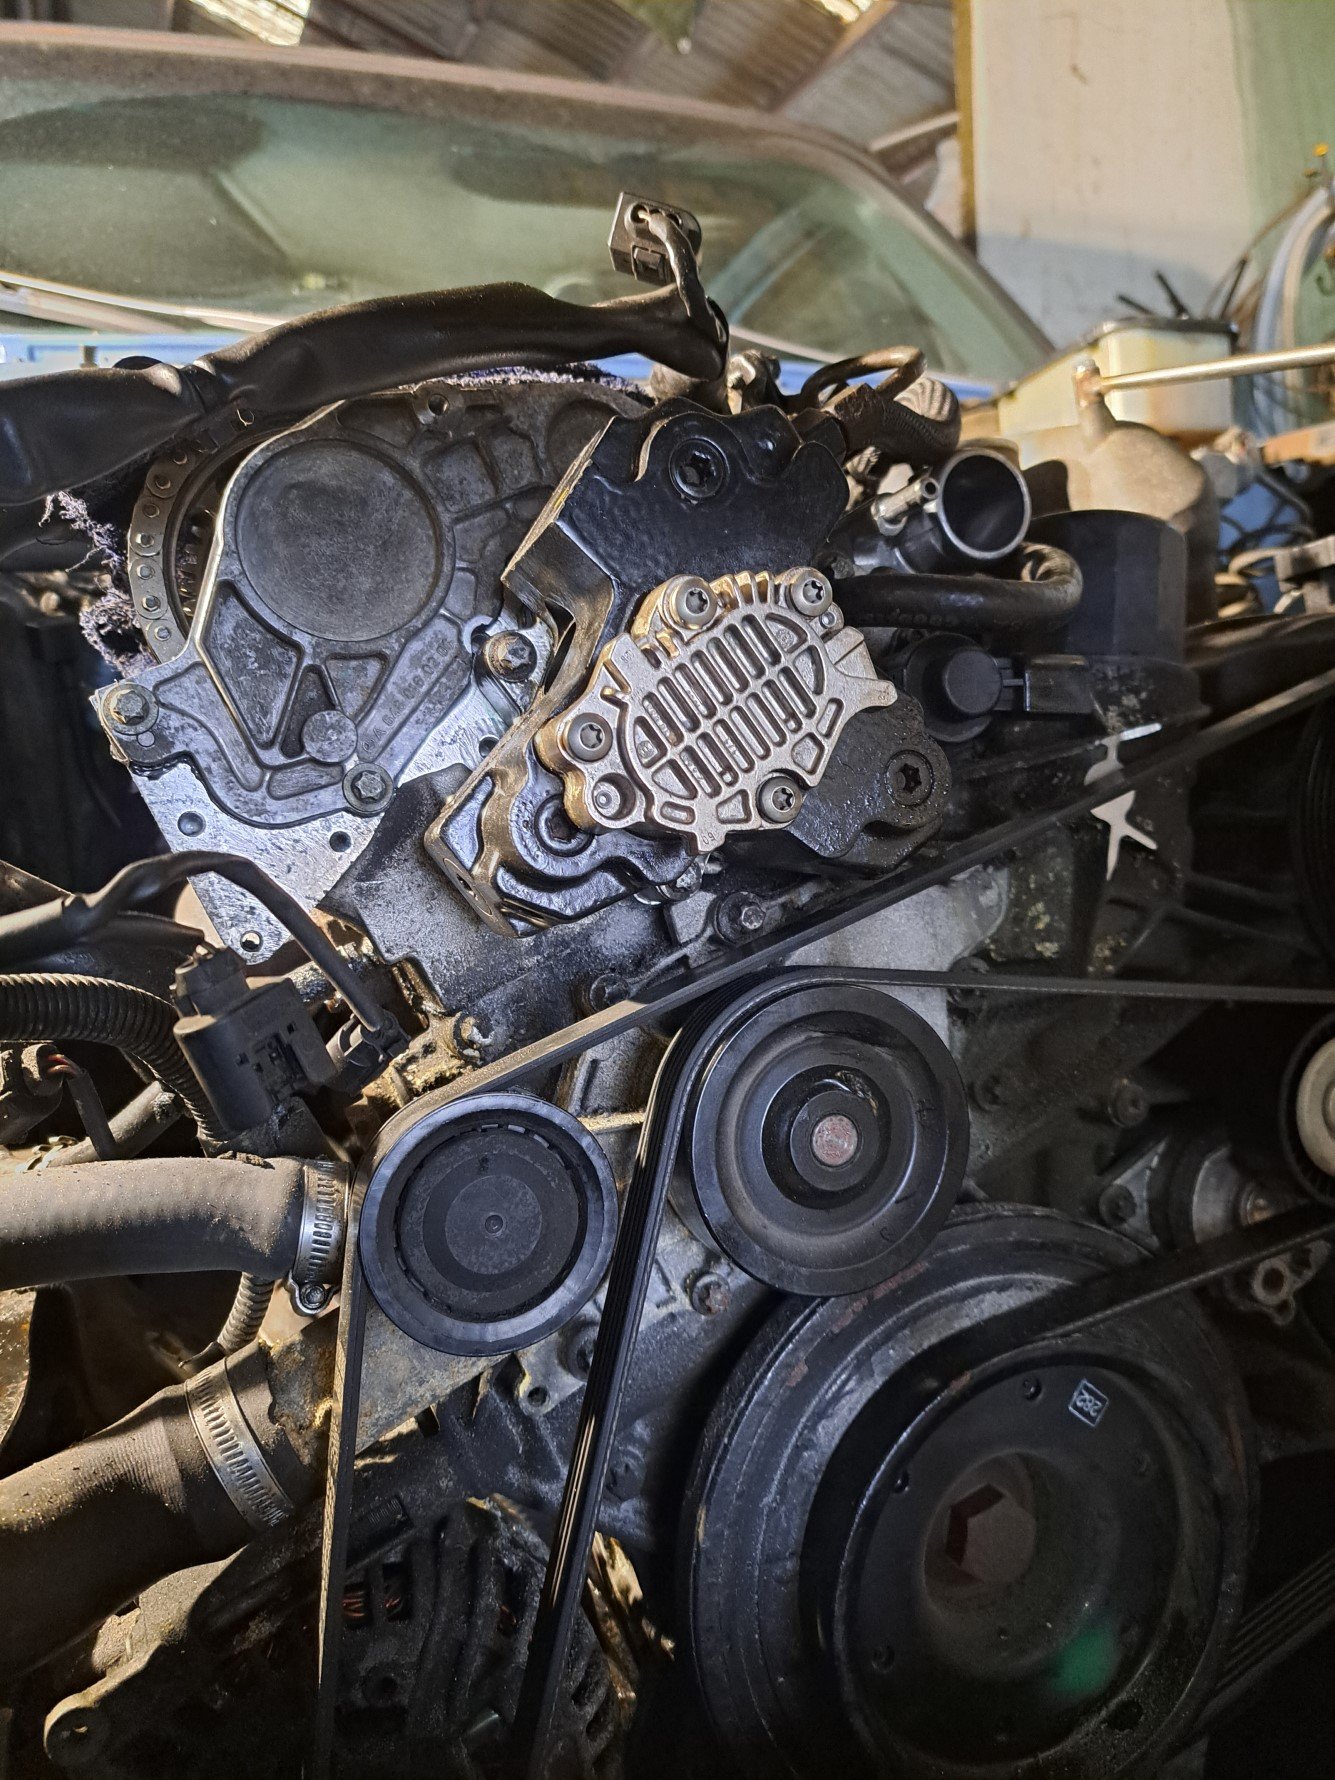
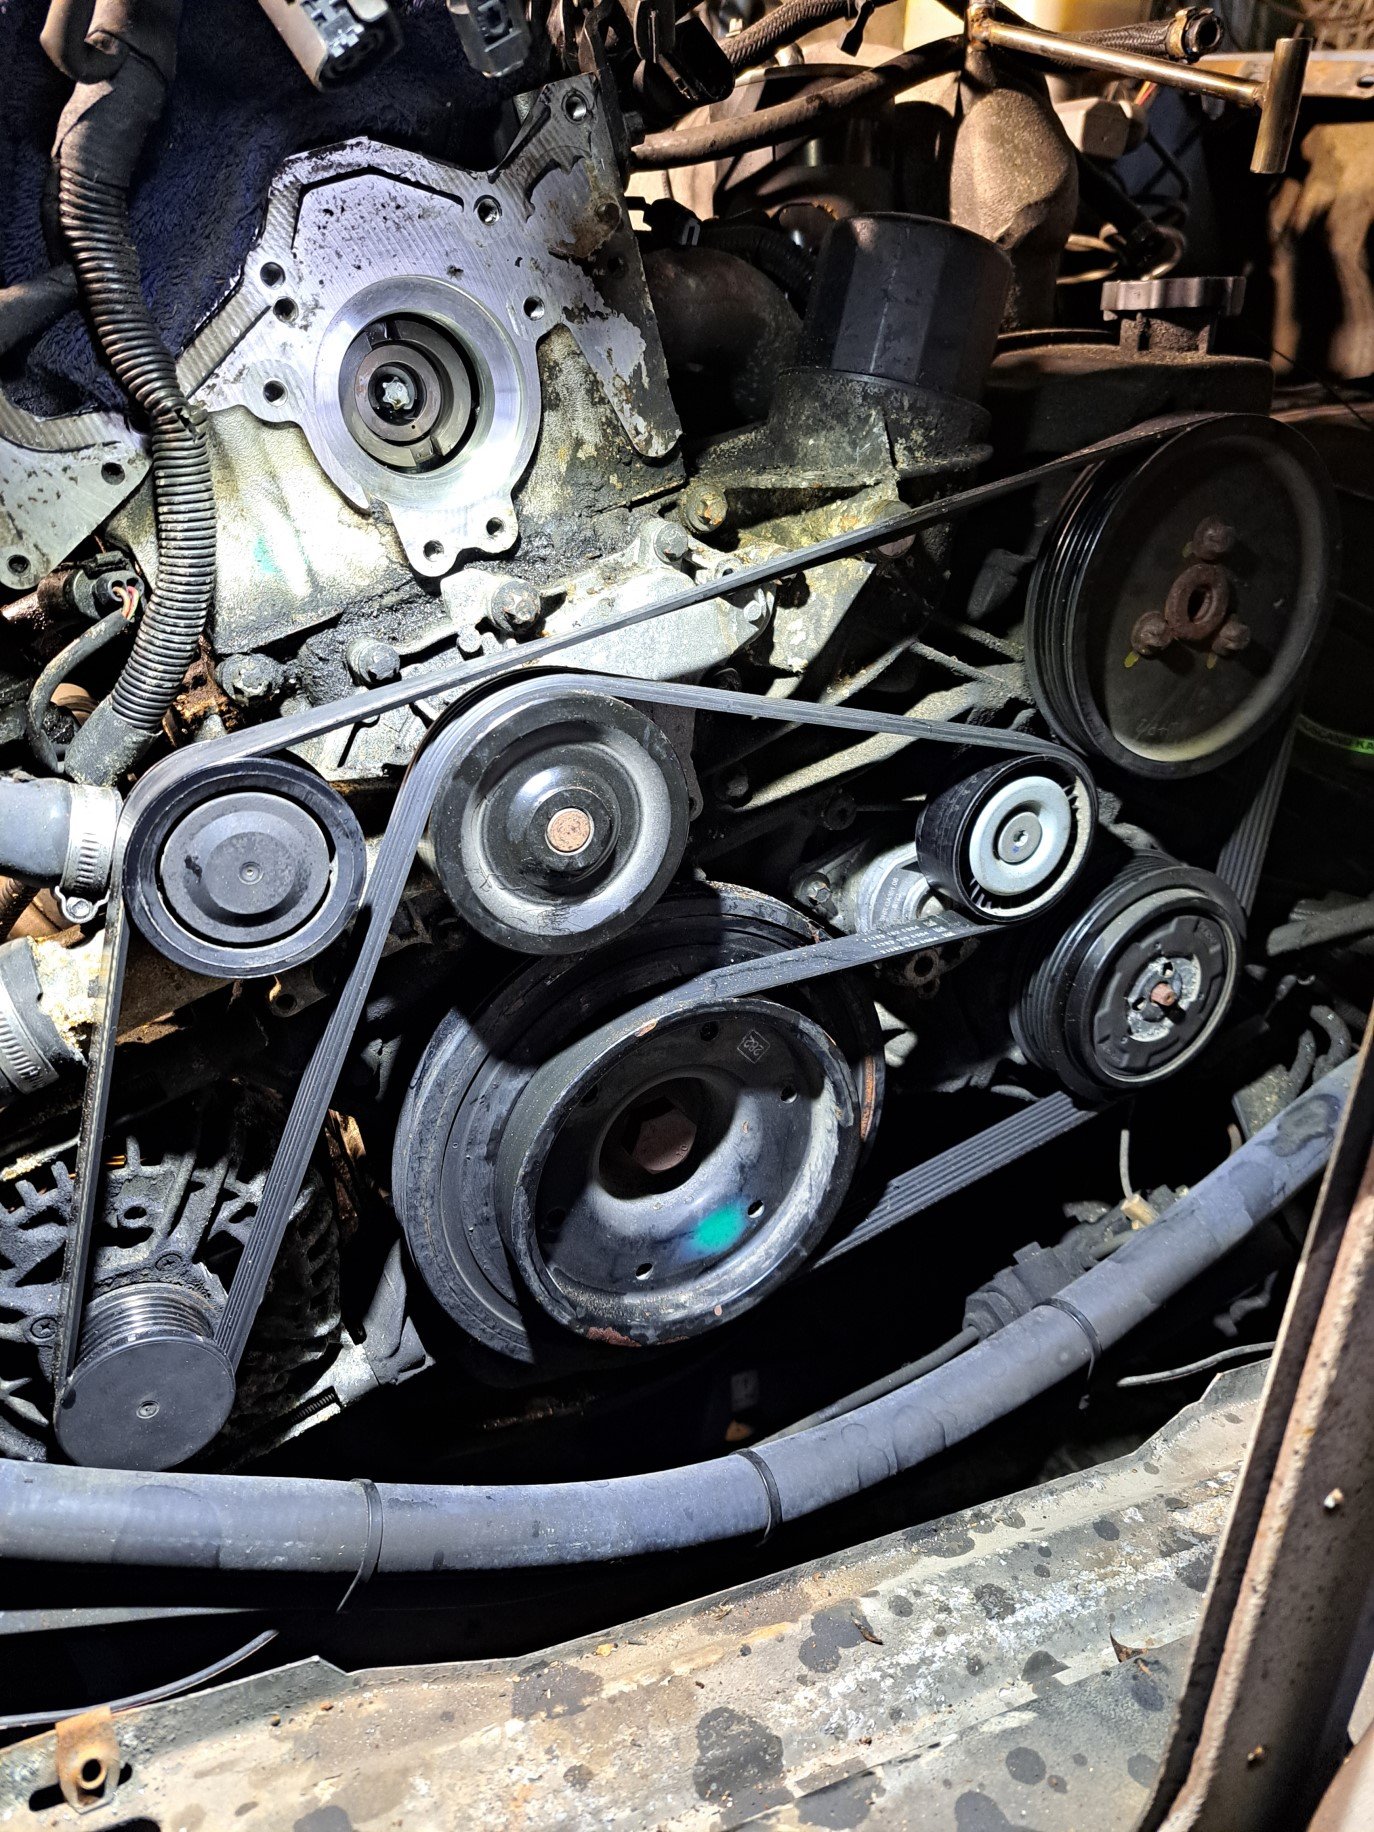
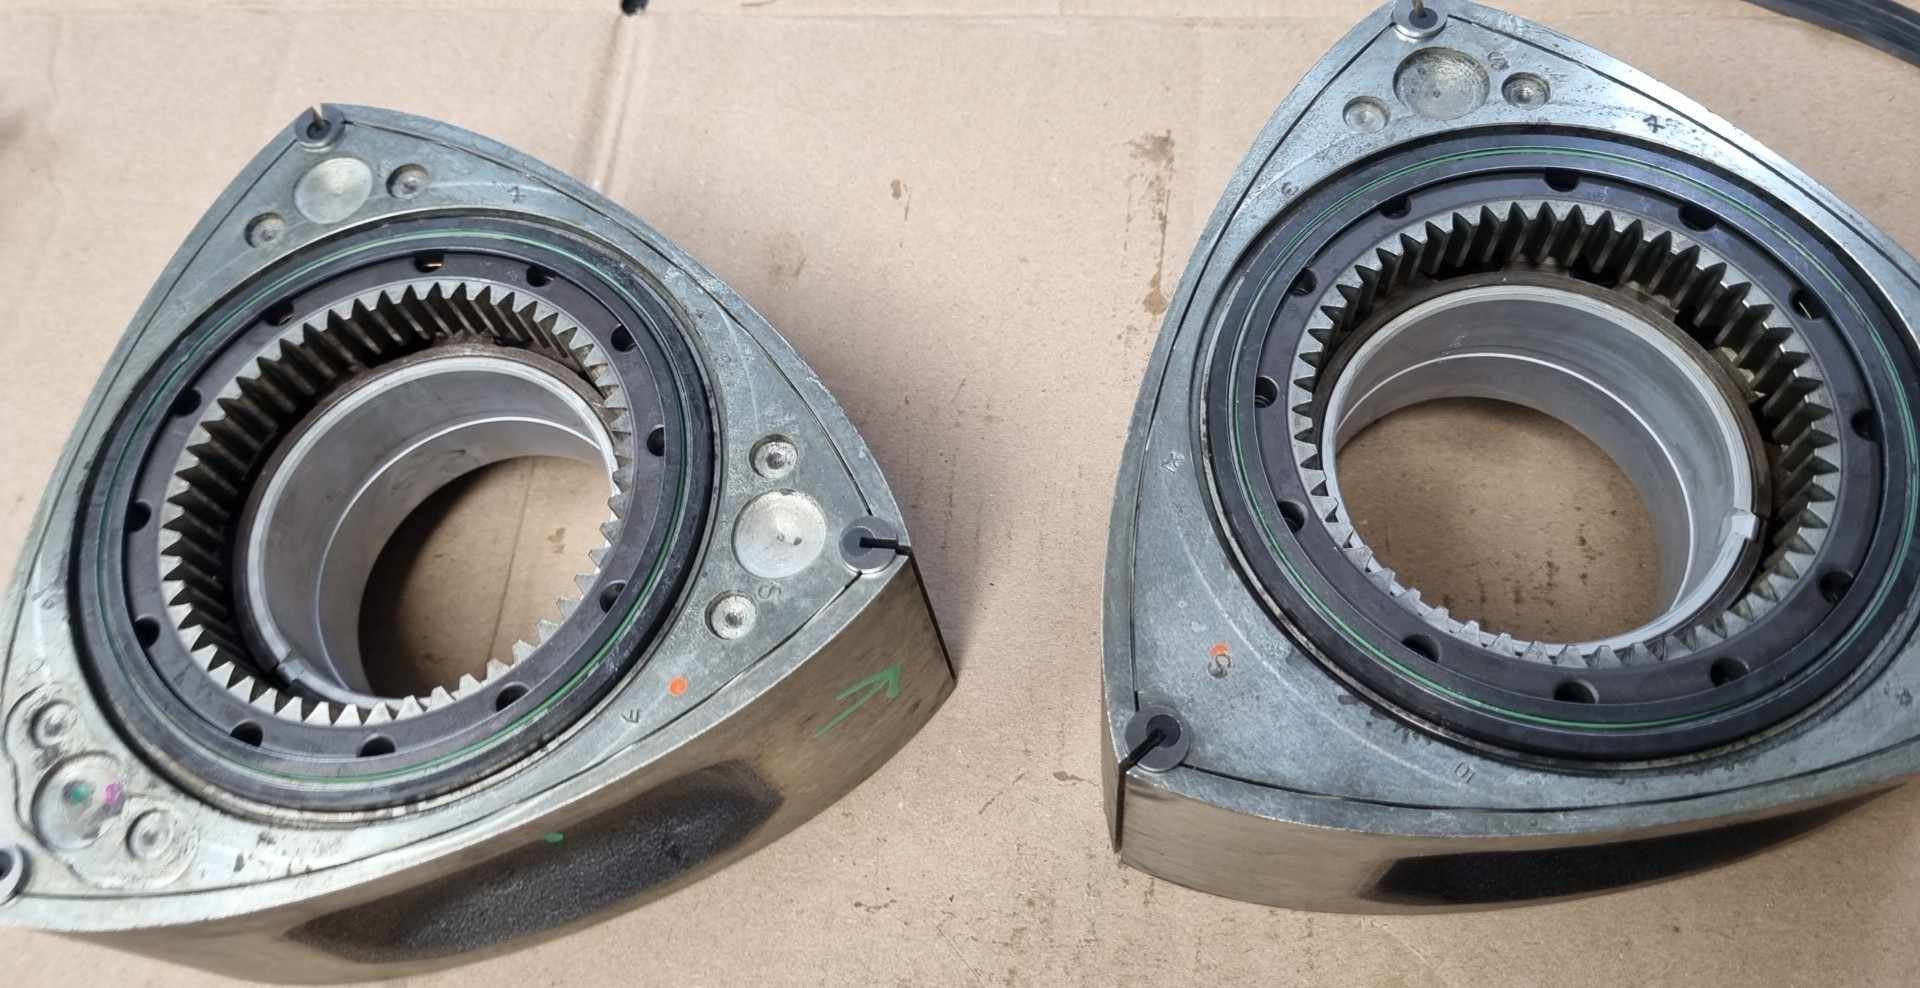
OK, so this is where the story of how my current situation came to be. I was pretty happy with how the truck ran, towed and hauled, but if we rewind to summer last year, I took one of my mates here to see the Malmo race day of the Swedish event StreetWeek, which is a drag and drive event run every year throughout different routes in Sweden. Anyway we floated the idea of participating, I threw it out there that we should use the truck, then I thought a bit more, decided I didnt really want to turn my daily into a drag car, then we ummed and arhhed about buying a 25.5 rolling chassis doing a sloppy LS and going for gold, but the rules to get modified cars street legal (requirement for running StreetWeek) here are dumb so we then put a pause on that idea, at that is bascally where we left it for 6 months. Anyway so I was just randomly doom scrolling Insta on a sunday night and there was a post about getting ready to sign up for StreetWeek on the coming Tuesday.. So I hit up old mate and said, shouldn't we just try and get a spot then figure out the rest after. Tuesday rolls around and I'm sitting at my computer like a Swifty trying to get a ticket, and low and behold we got one. So now this summer we are doing a drag and drive event that will take us some where 5 hours north of Stockholm. One issue though, the truck whilst a great daily does not a drag car make... Enter Phase 2. Basically to get 500 hp out of one of these things isnt too difficult. The formula is pretty tried and true: Big HPFP custom Injectors, and enough air to burn all that diesel effectively. So out came the Injectors to be sent to Diesel Mekken in Sweden, they should flow around 185mm3 @ 1400uS when I get them back. Next on the list was to remove all the things that we wont be using, and seeings as I already had the injectors out removing the rocker cover makes modifying the front cover for the 400cdi pump easier. The gasket was also leaking so it was a no brainer. This is what I found, notbad.jpg for 500,000km It is almost as if Mercedes themselves planned this, because the holes are all there to mount the bigger pump, just a matter of a bit of a trim on the front cover and everything bolts up. After removing one of the idler pulleys and trimming the oil filter and thermostat housings the everything is good to go. So all in all a win. Next on the list is building the new turbo manifold, it is going to be a compound setup with the HX40 over the stock GT2356, so hopefully I dont lose too much drivability.
8 points
-
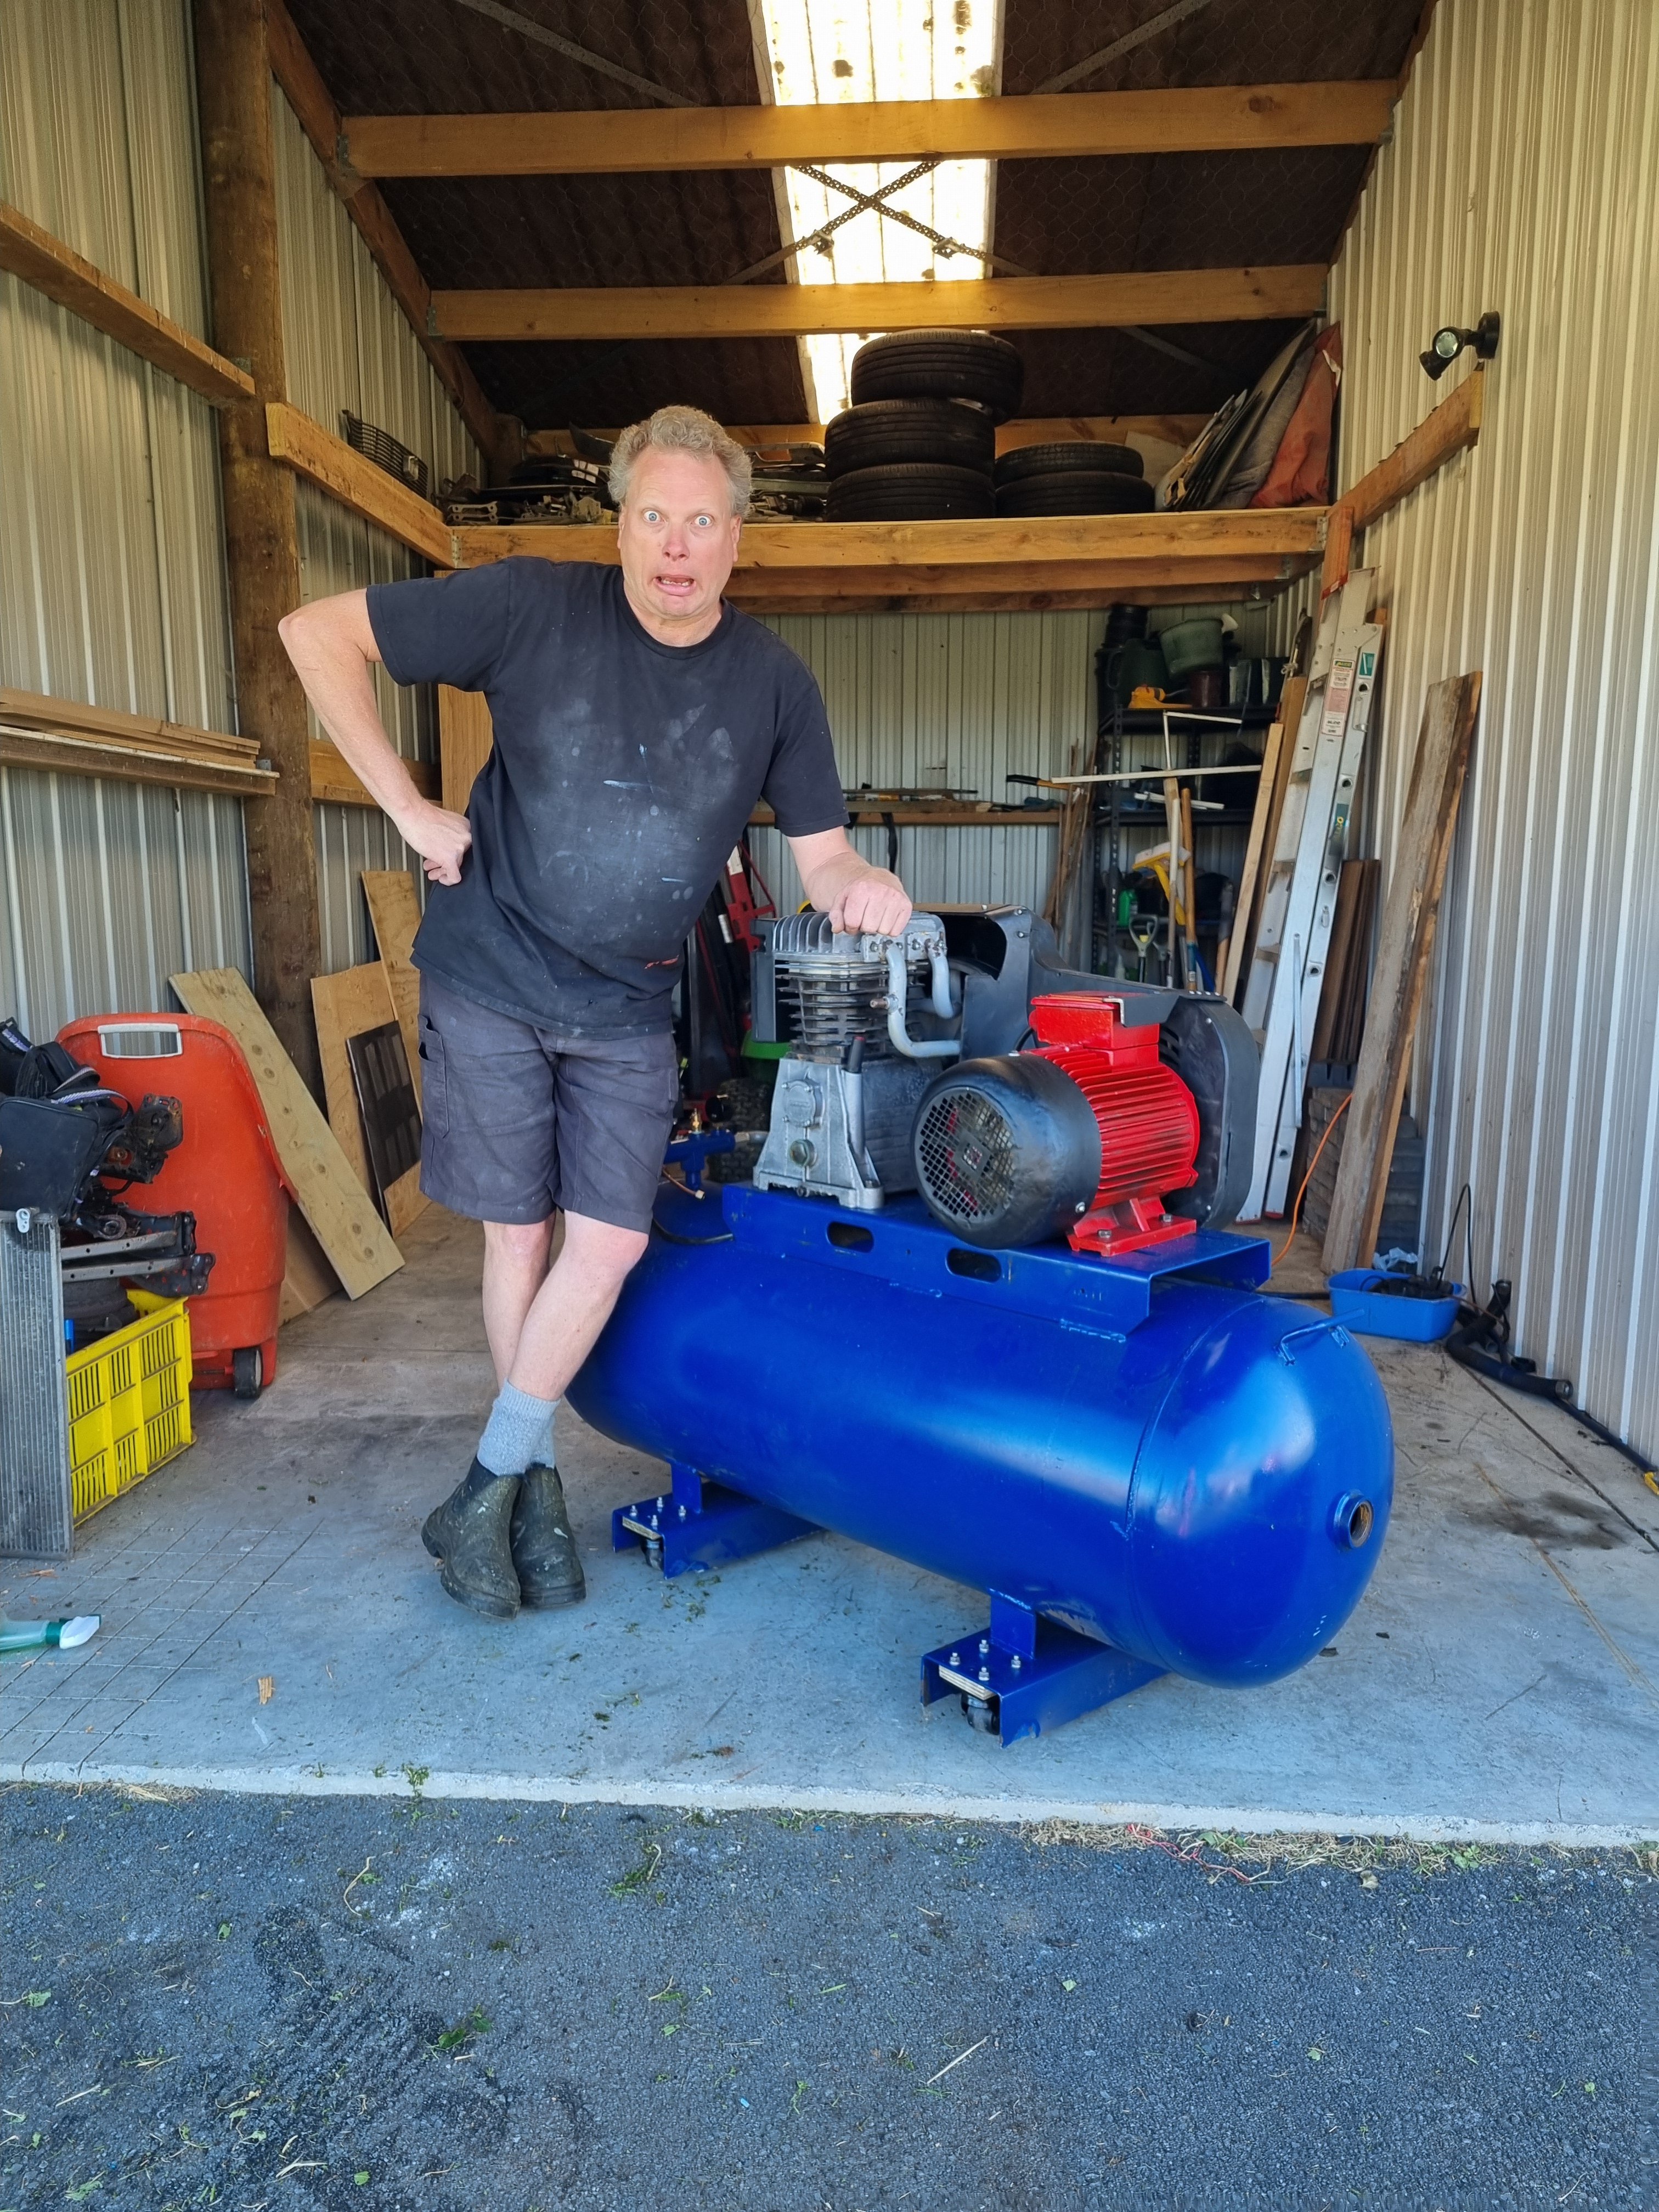
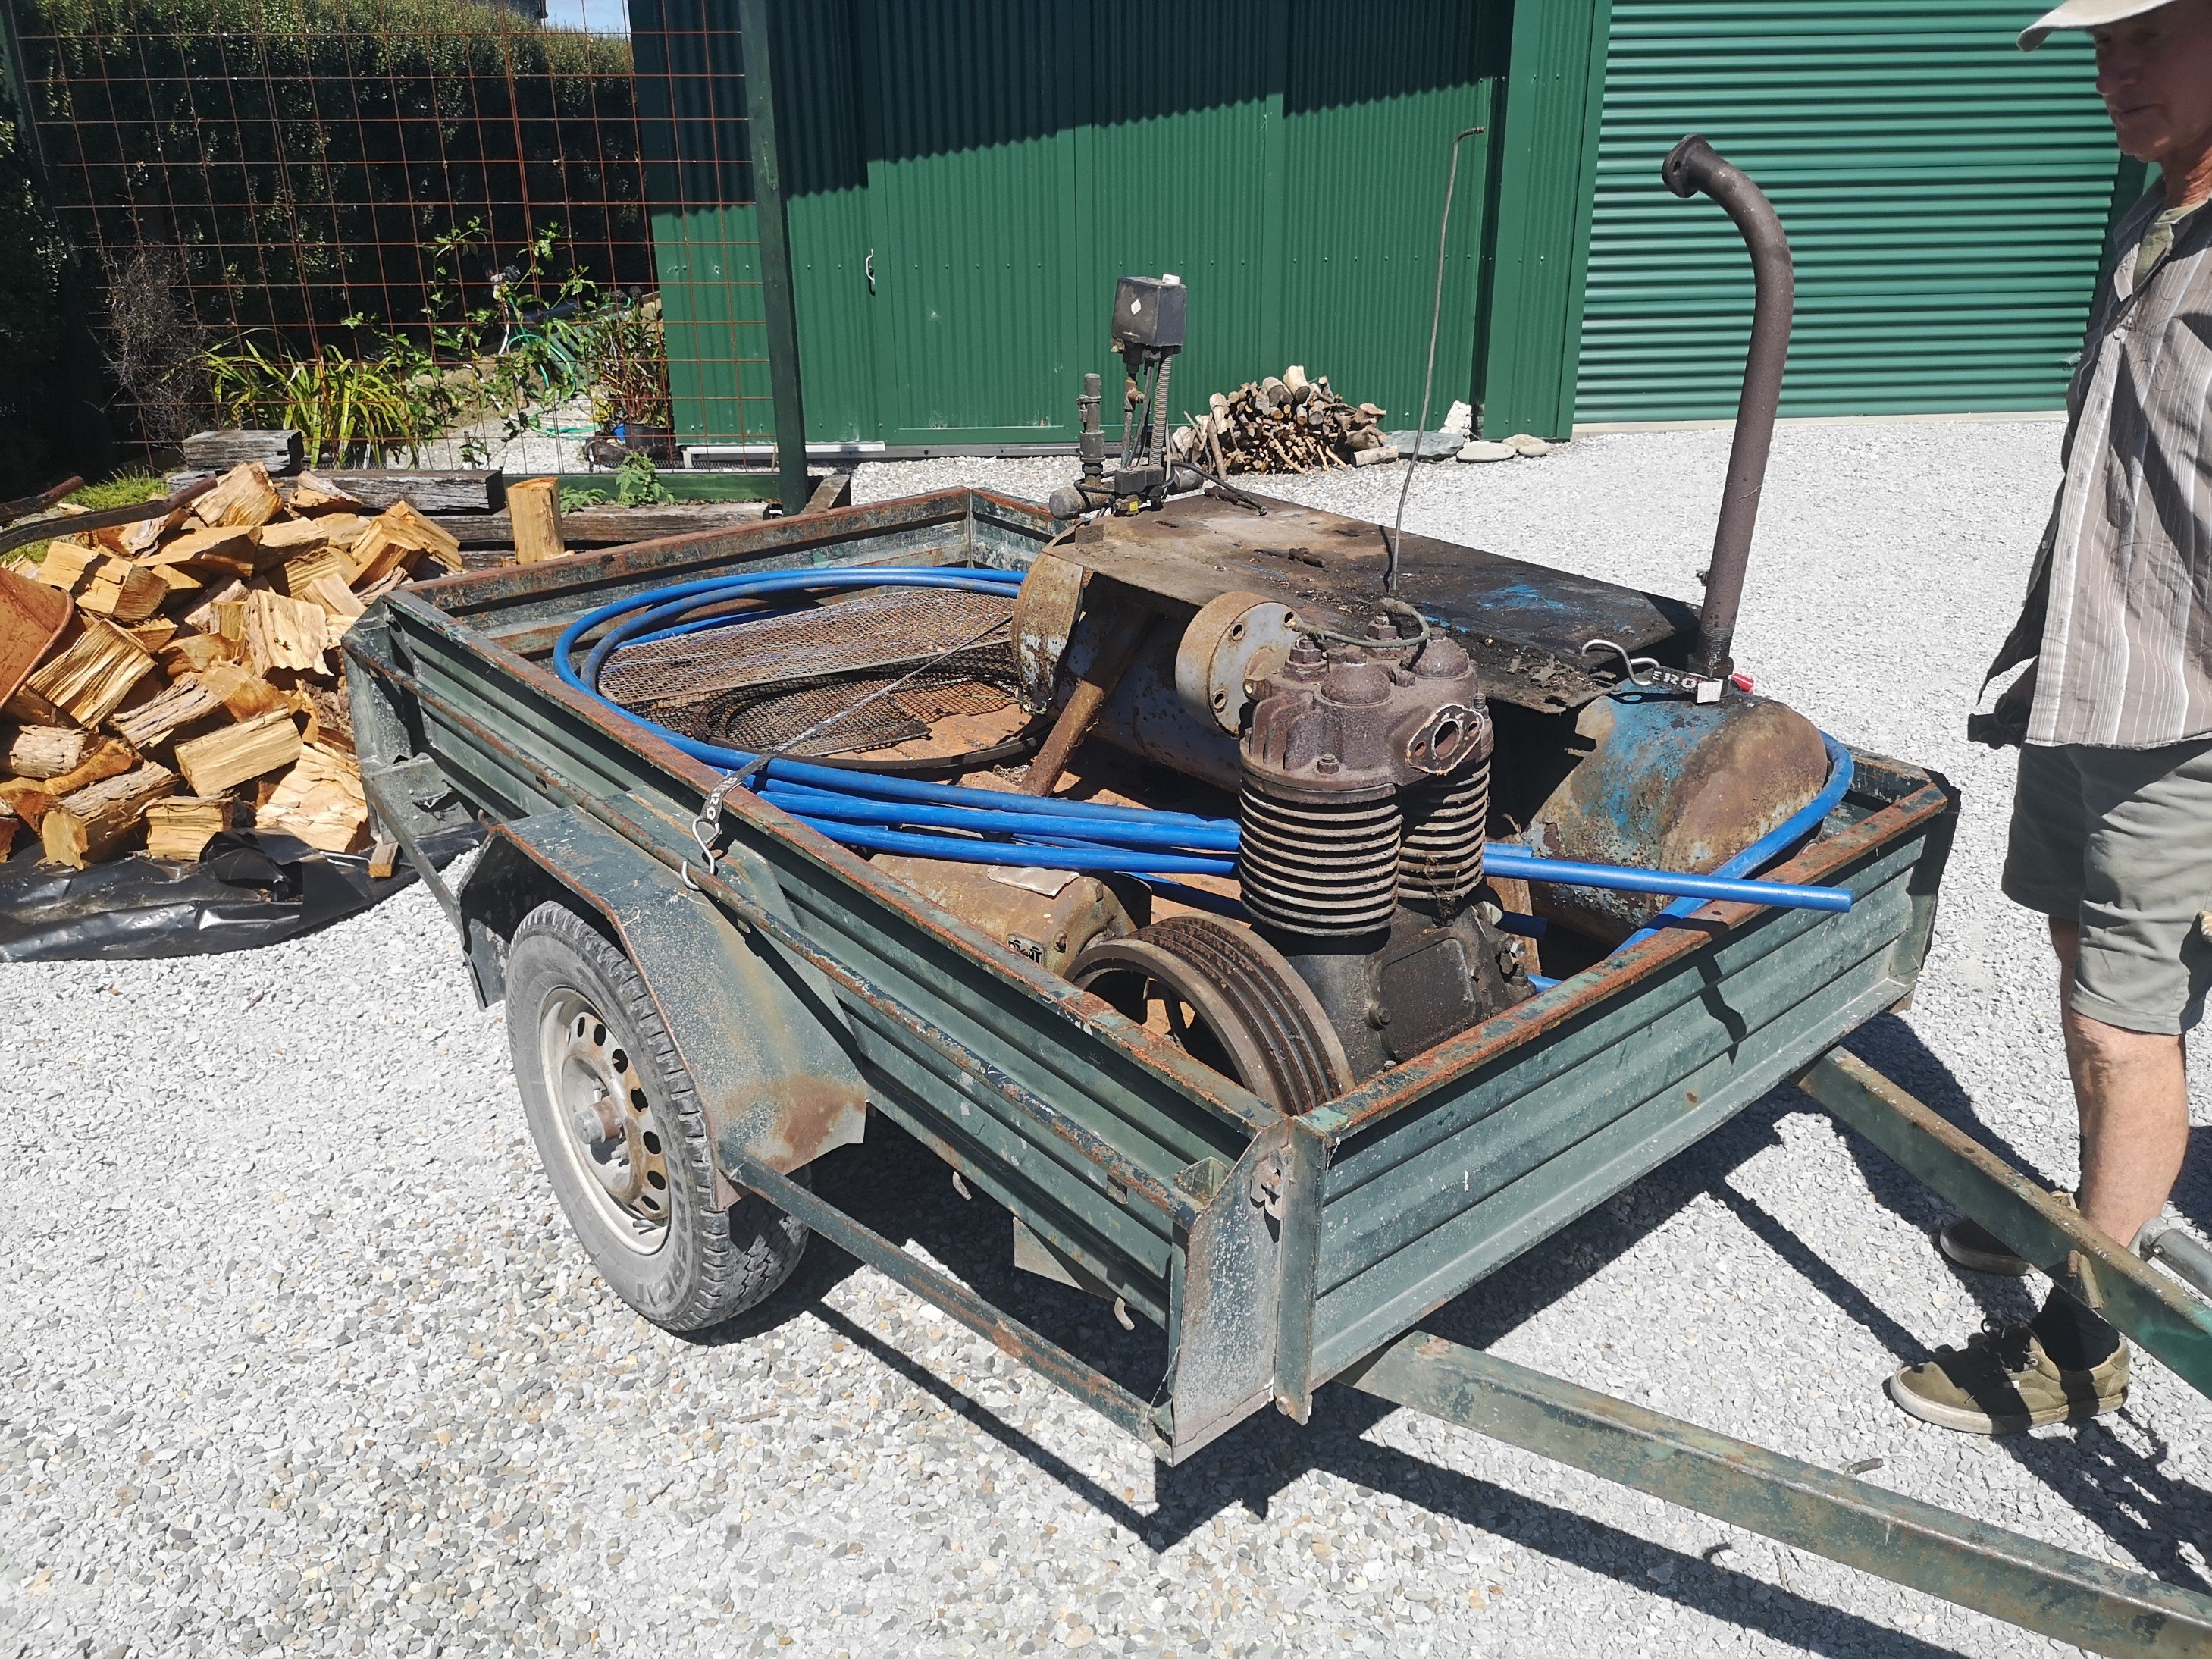
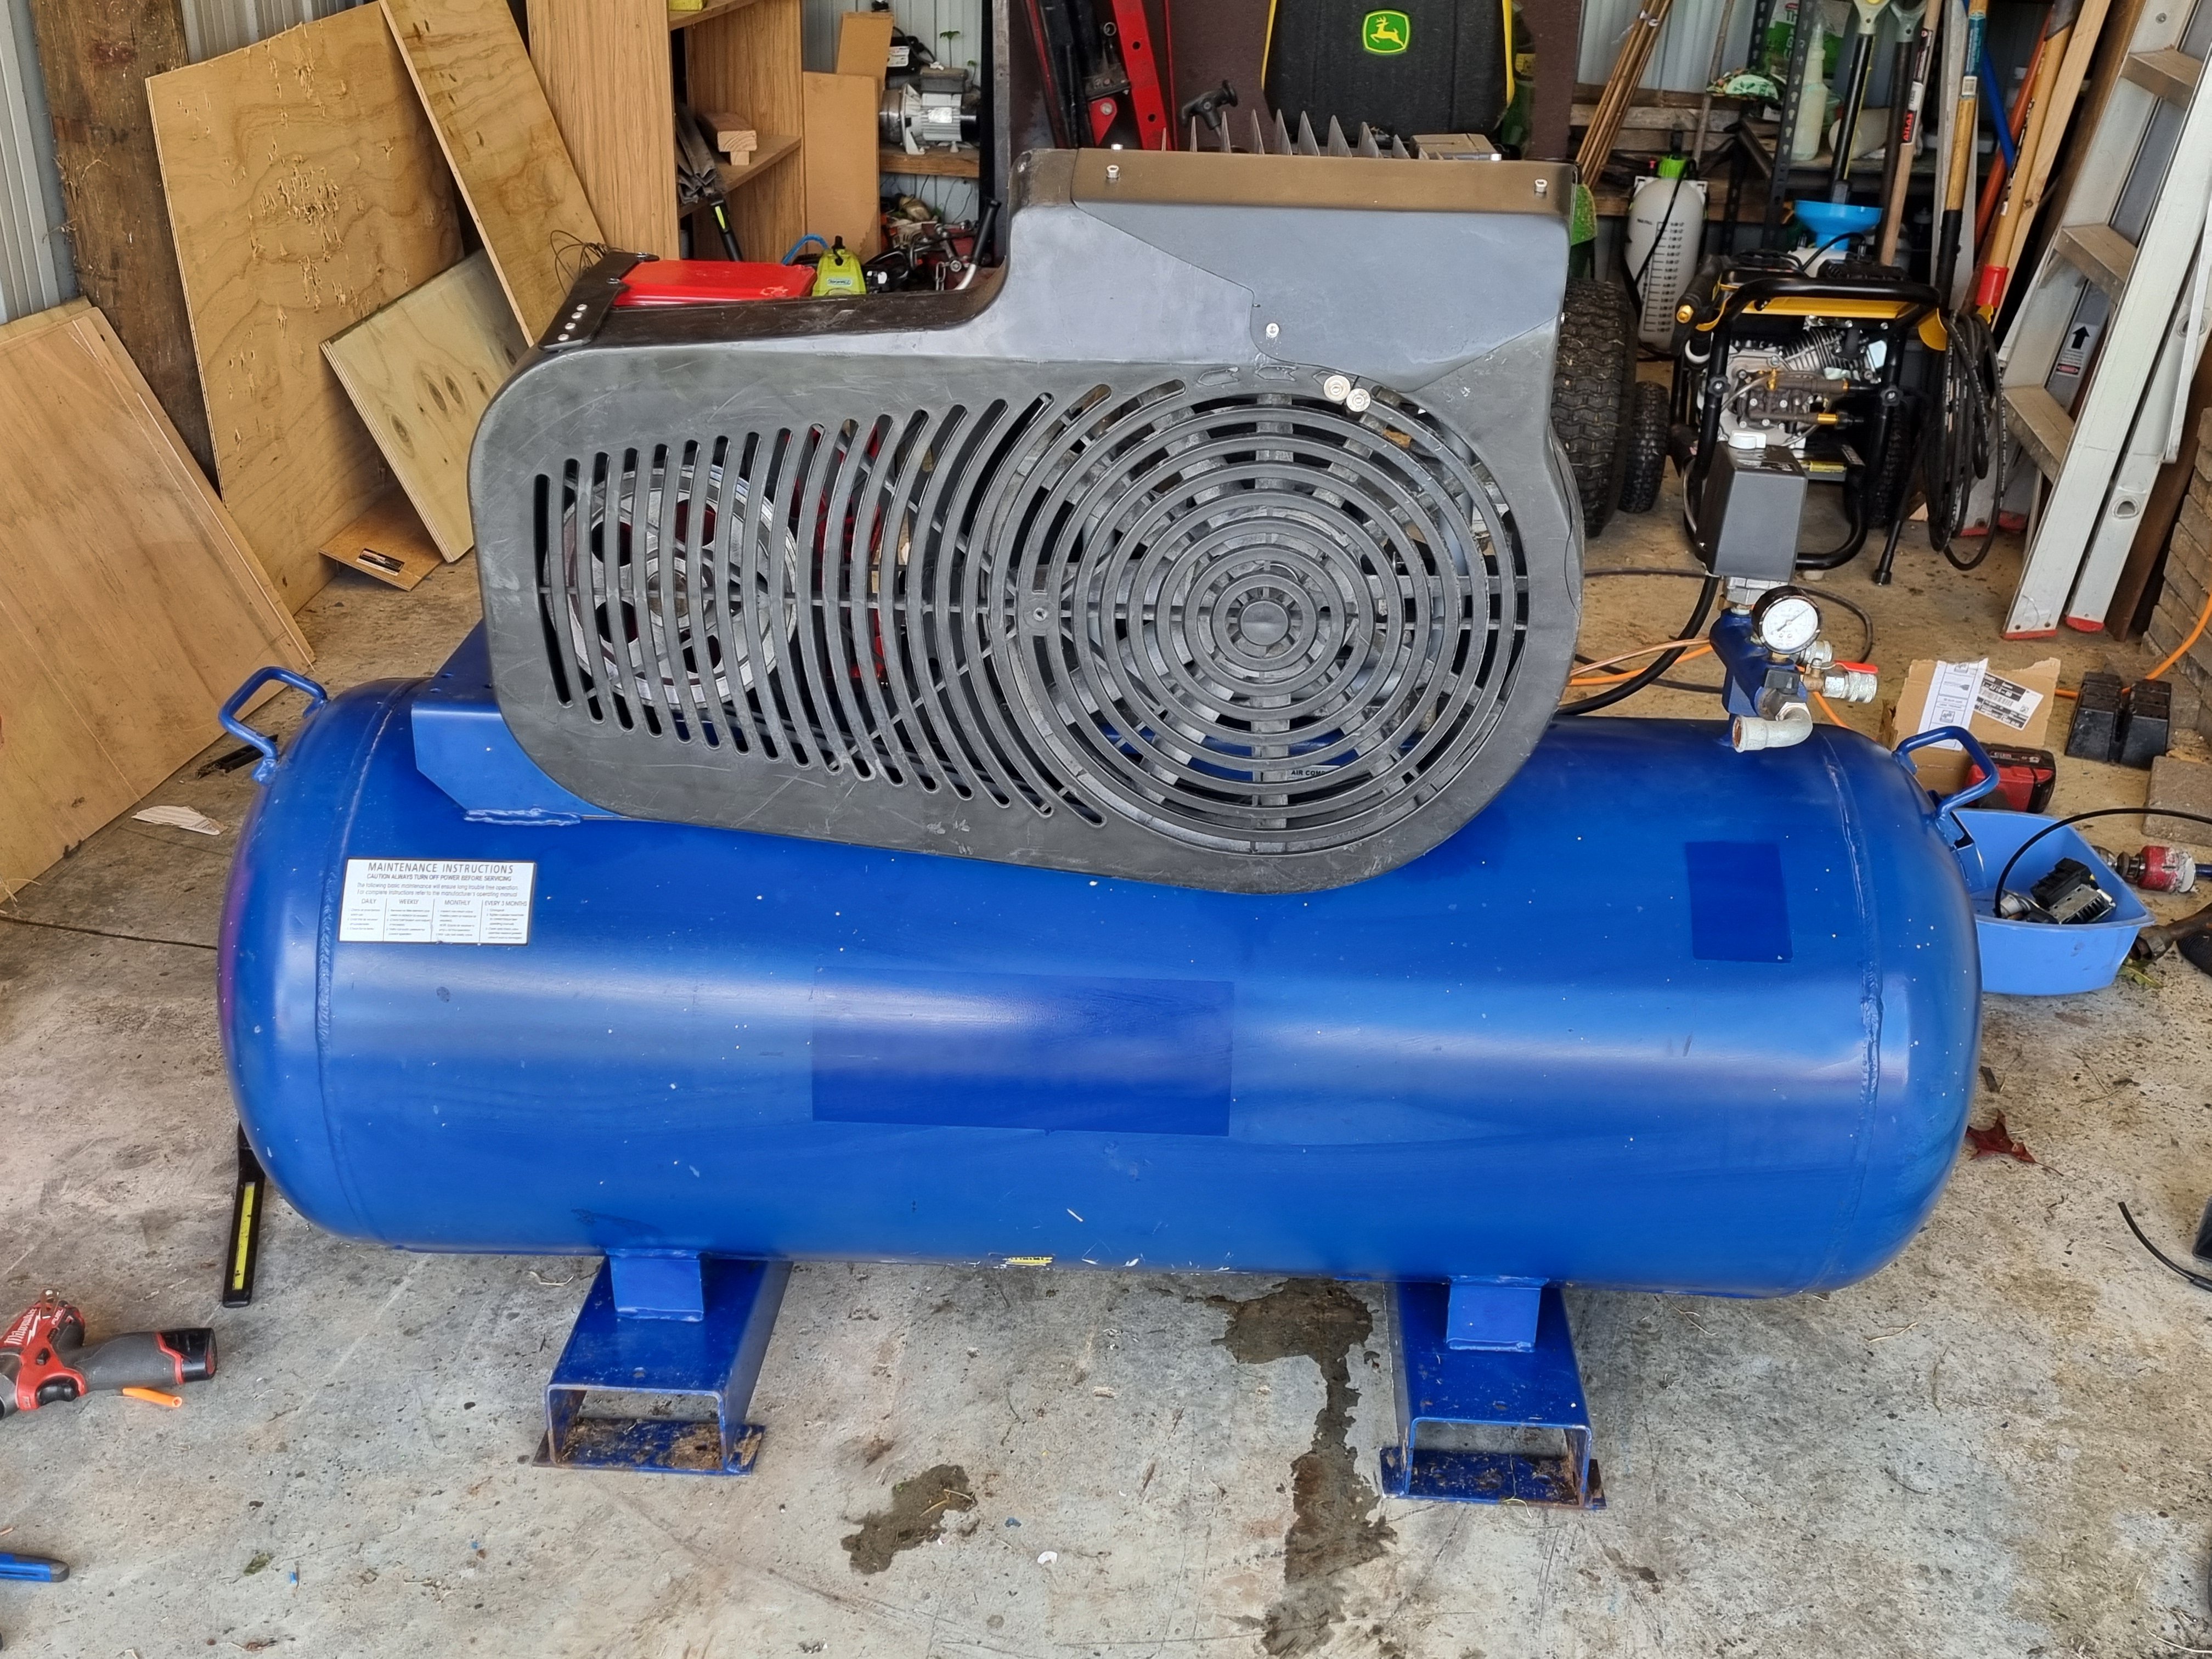
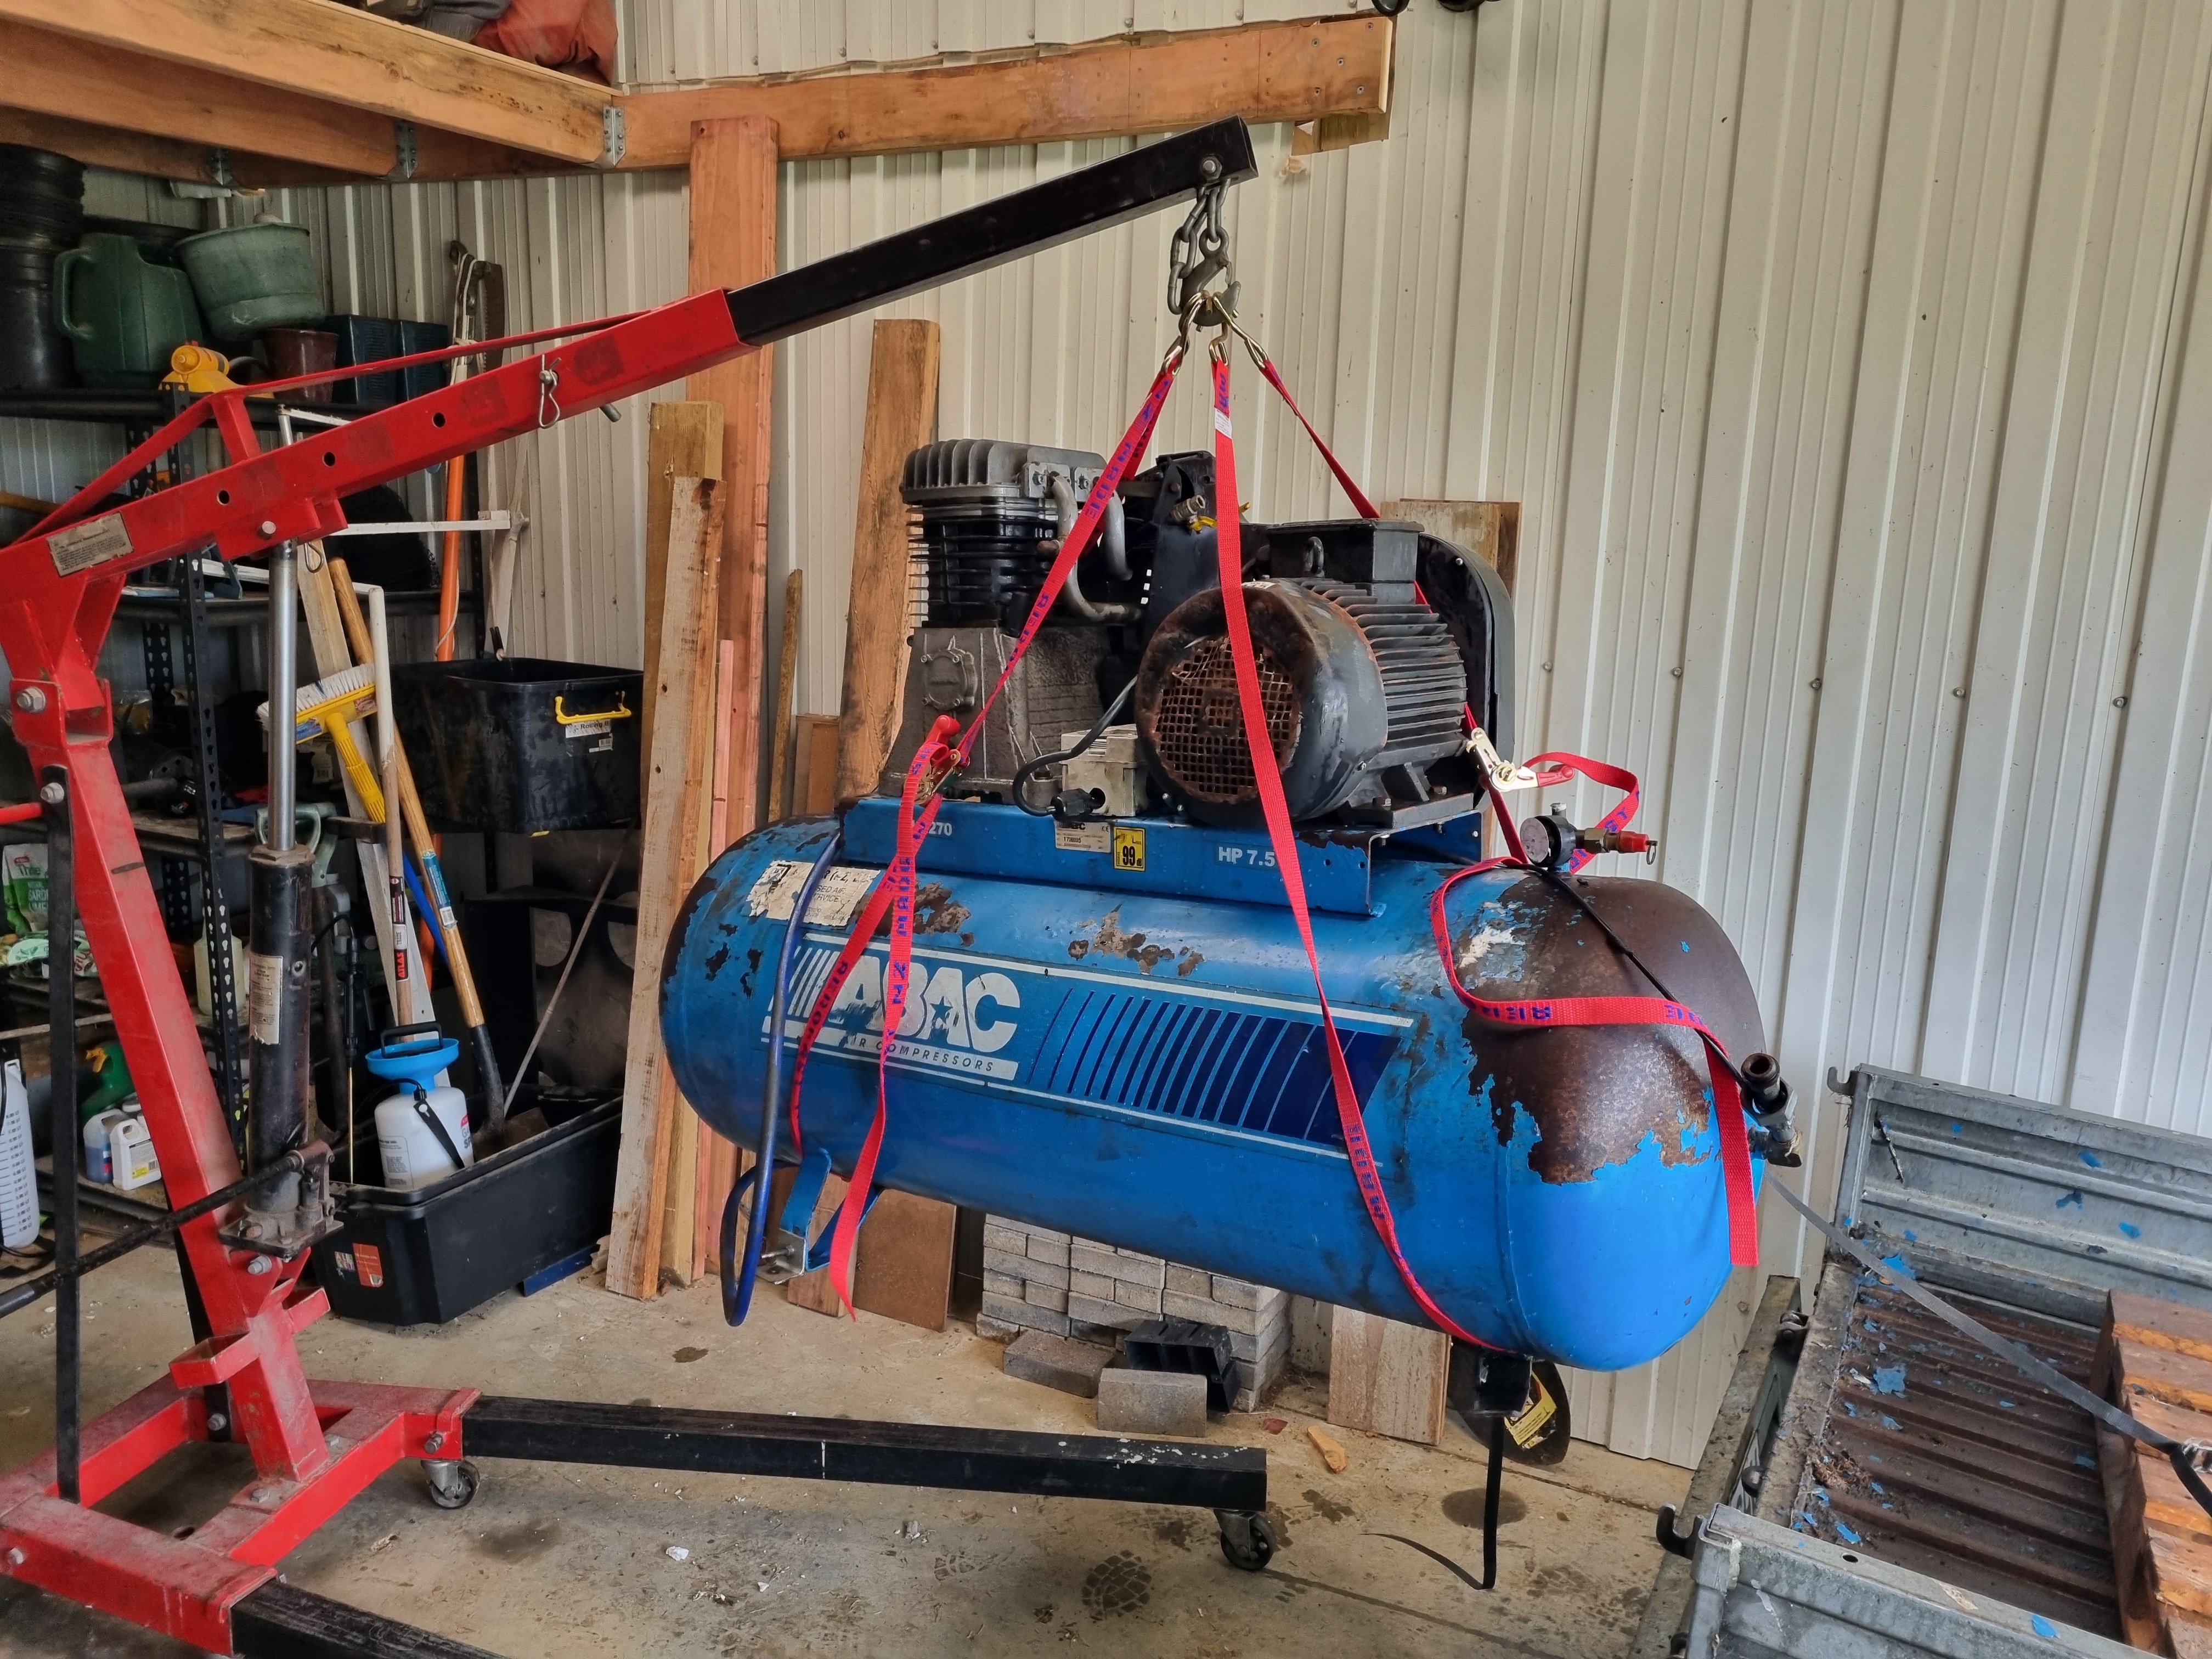
@cletus came over yesterday for a visit and remarked how the compressor looked bigger in real life than on the Internet so I commissioned this portrait with the hope of conveying the size of the compressor accurately.
7 points
-
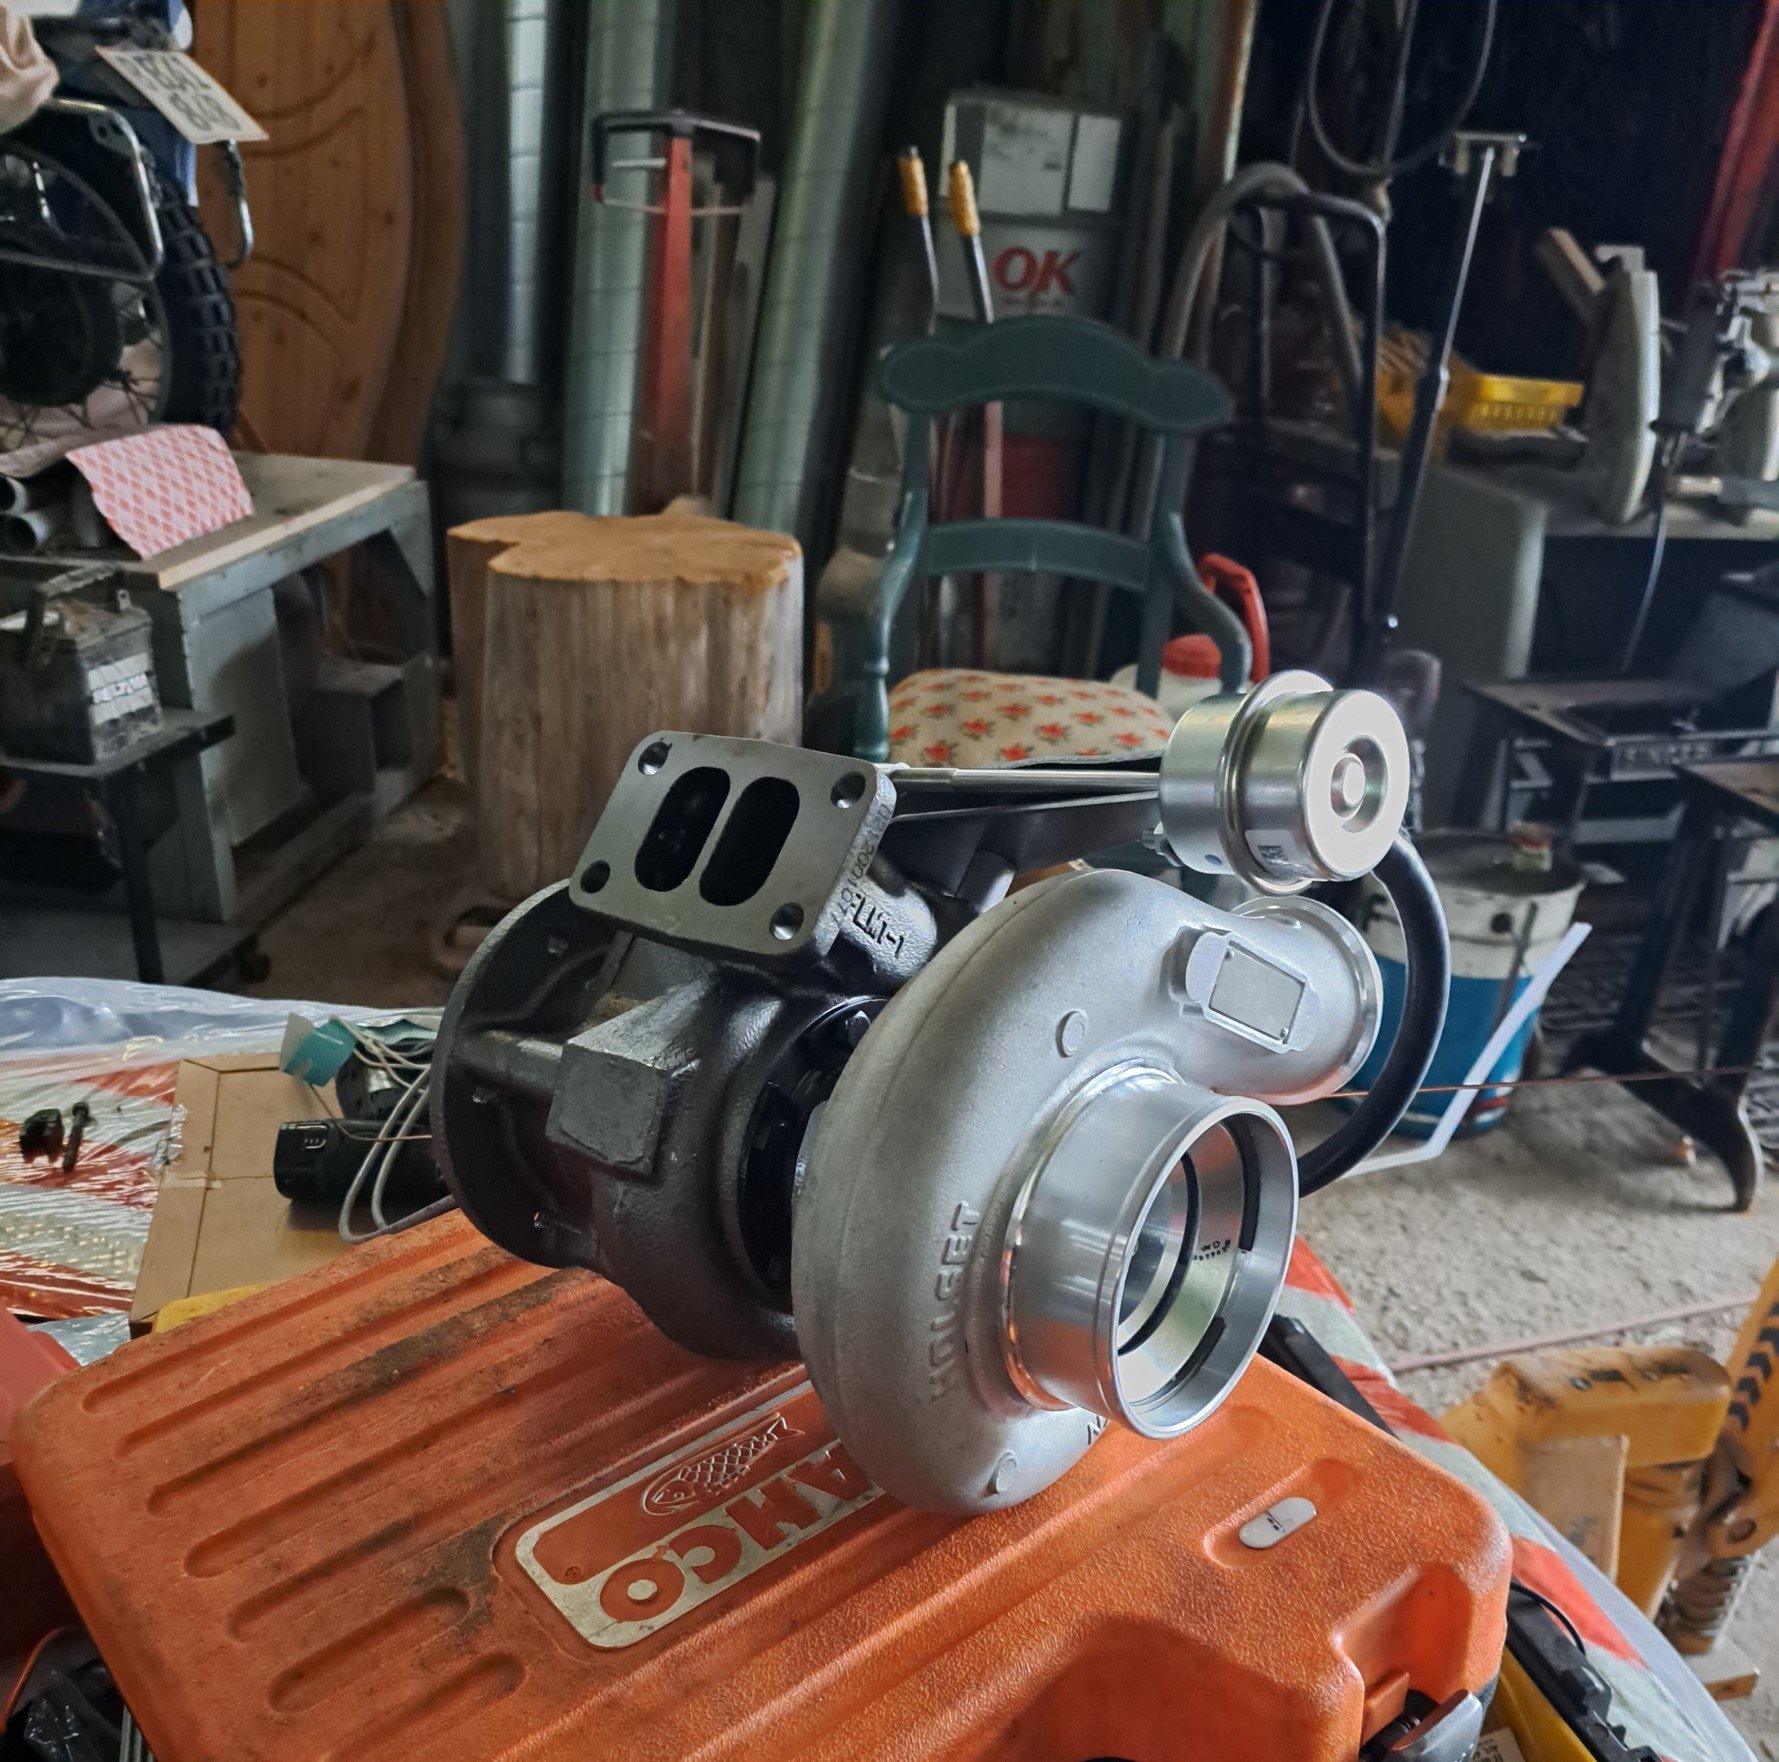
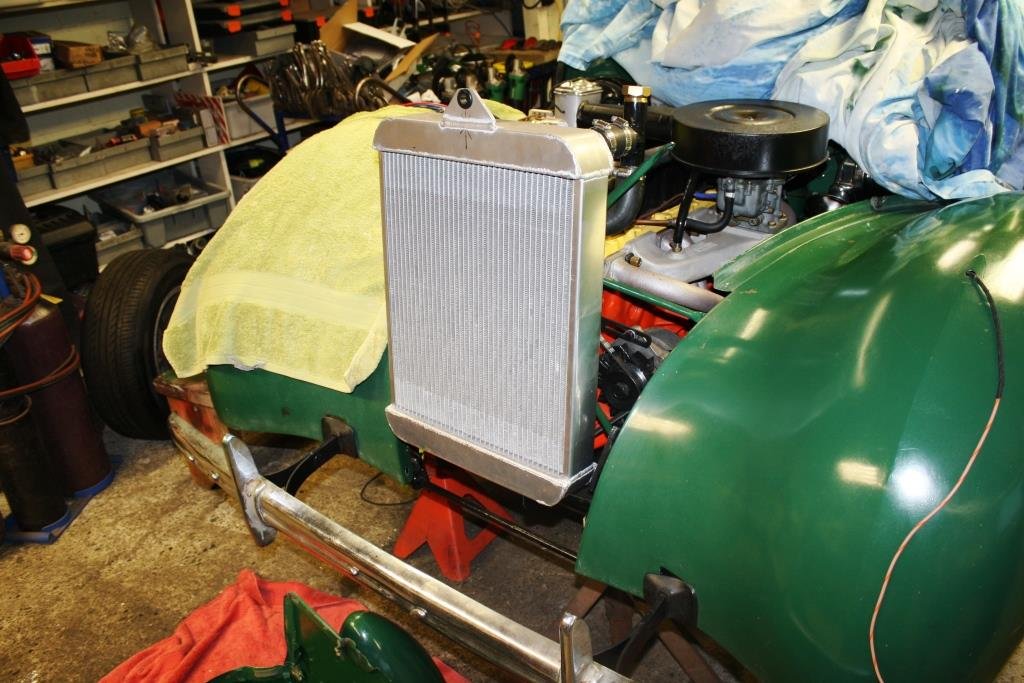
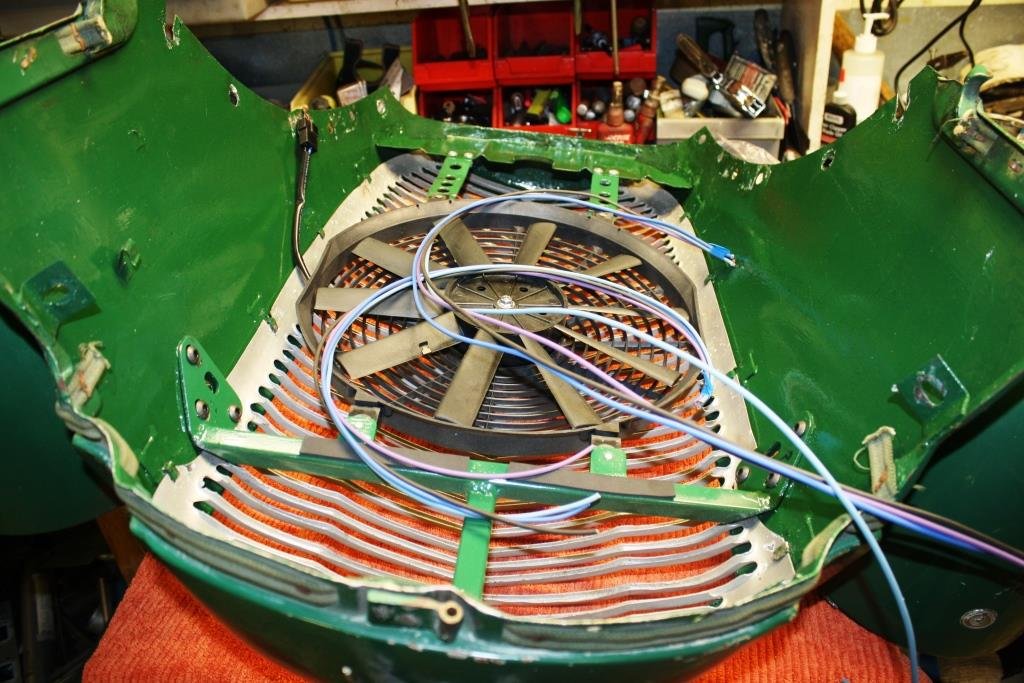
The radiator situation is proving to be a bit of a headache as the available space is minimal thanks to the S/C electroclutch pulley taking up alot of space. where you would ususally plonk a nice thick rad for plenty of cooling. Did a bit of mocking up today with a couple of radiators I had kicking round its looking like a unit from a GA61 Supra will juuuust fit with a pusher fan on the front of the radiator. This one is pretty beat up and manky so will see if I can find an alloy option7 points
-
Fixed the rust hole, no pics cos boring. Made a heatshield for the alternator, first drilling and tapping some brass hex to stand it off, then some CAD, then some shiny so it reflects heat; Then I grabbed the pretty non functional catch can that I made for the truck, modified it so the wire wool was less in quantity and right before the outlet rather than at the inlet, which is why I suspected it didnt work well, then gave it some chode so it would fit in the engine bay; Went and filled it with some 95 as it was pretty low and it definitely needs some time spent on tuning, the low throttle popping and banging sounds good but the afr tells me its not right. Man it feels good to drive tho, the combo of the gogo and the noise is pretty great. If anything it sounds better now the air filter is on, a really purposeful growl.7 points
-
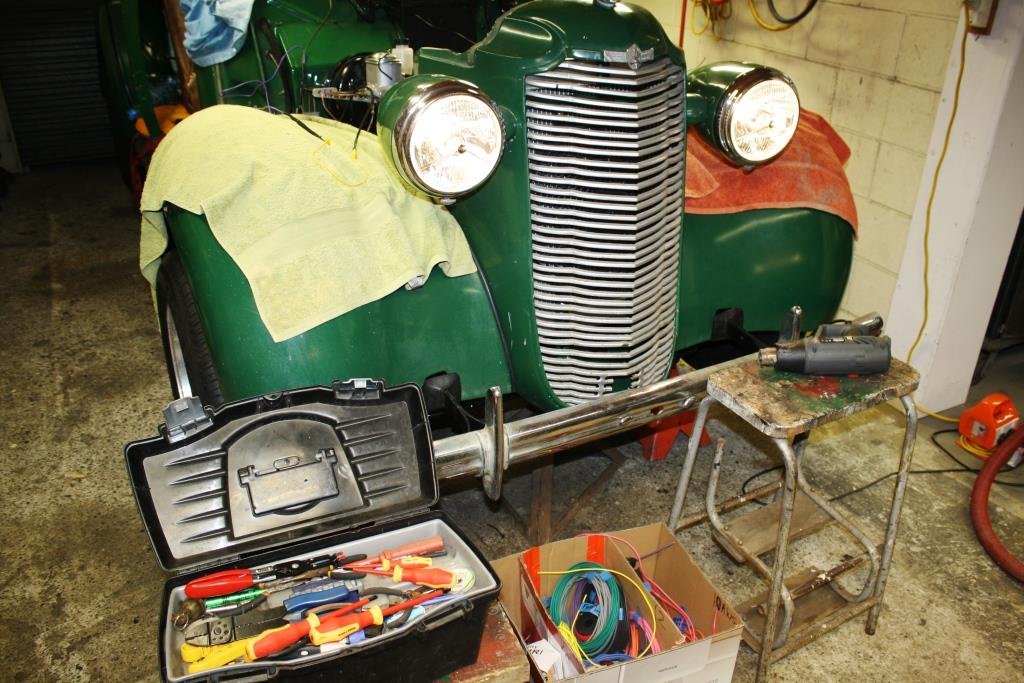
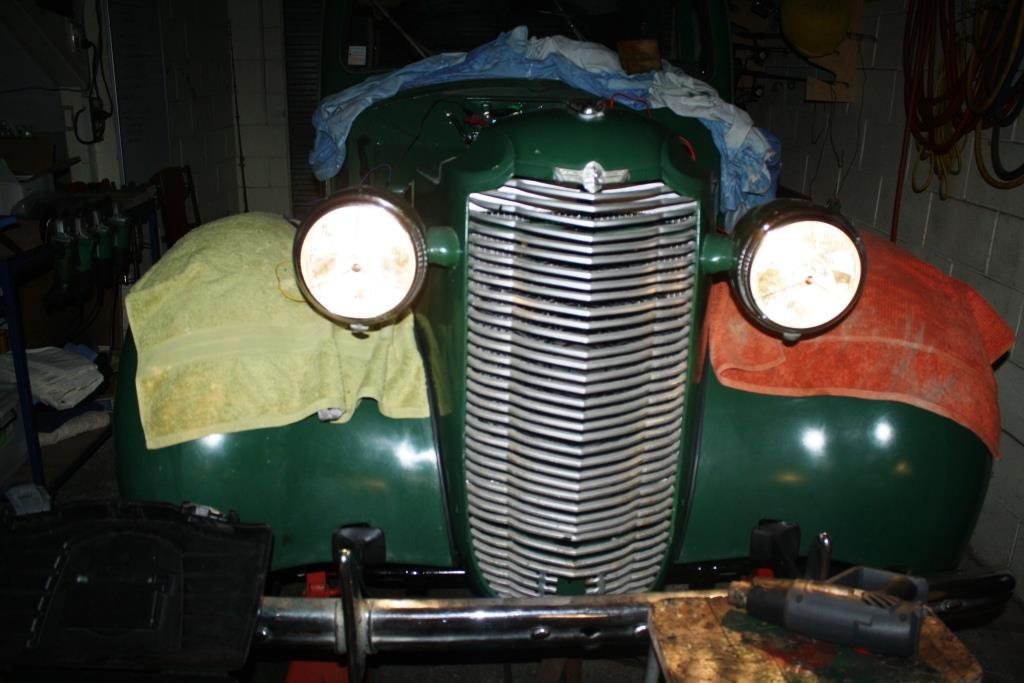
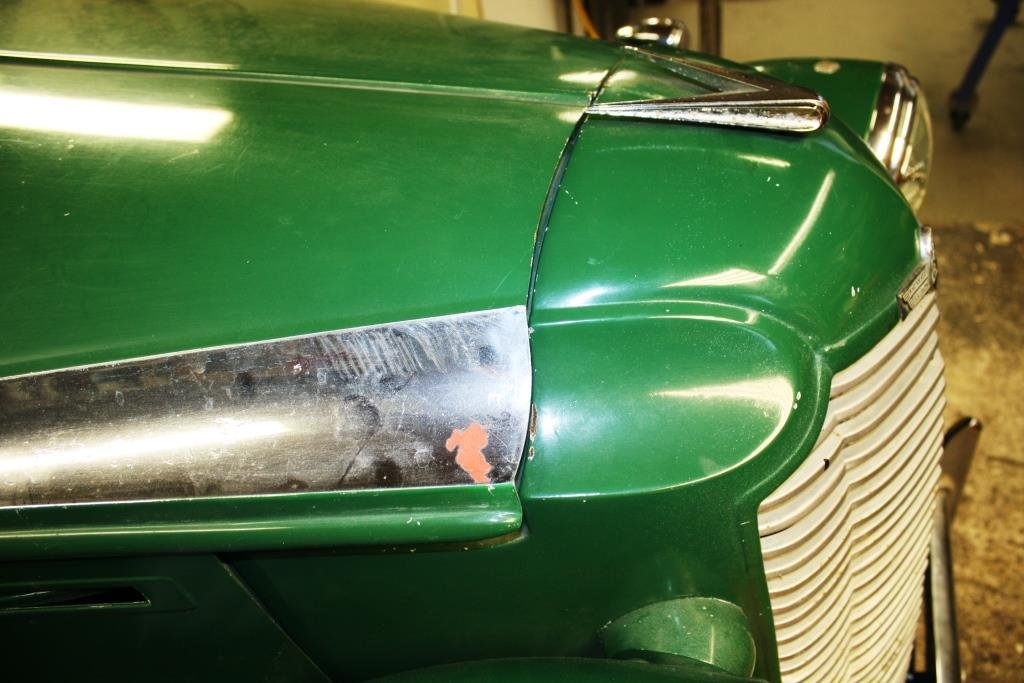
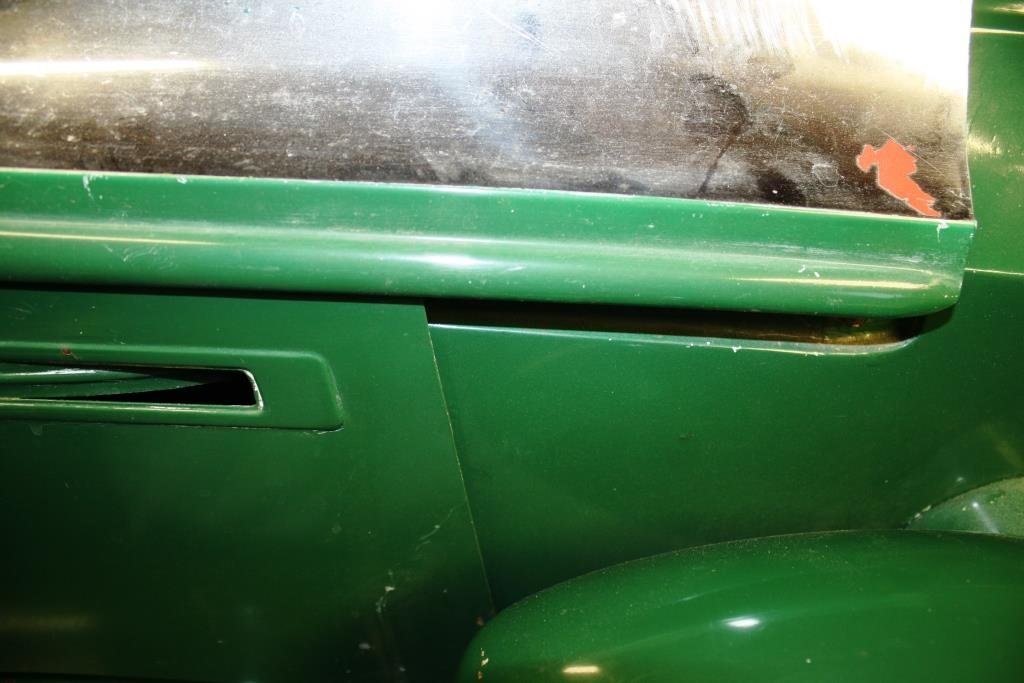
Car has been delivered! Currently organising it to be stripped and off to panel/paint/repair cert so hopefully have some updates in the coming few months.6 points
-
Easter Keg..Bunny might have trouble fitting in his basket.
5 points
-
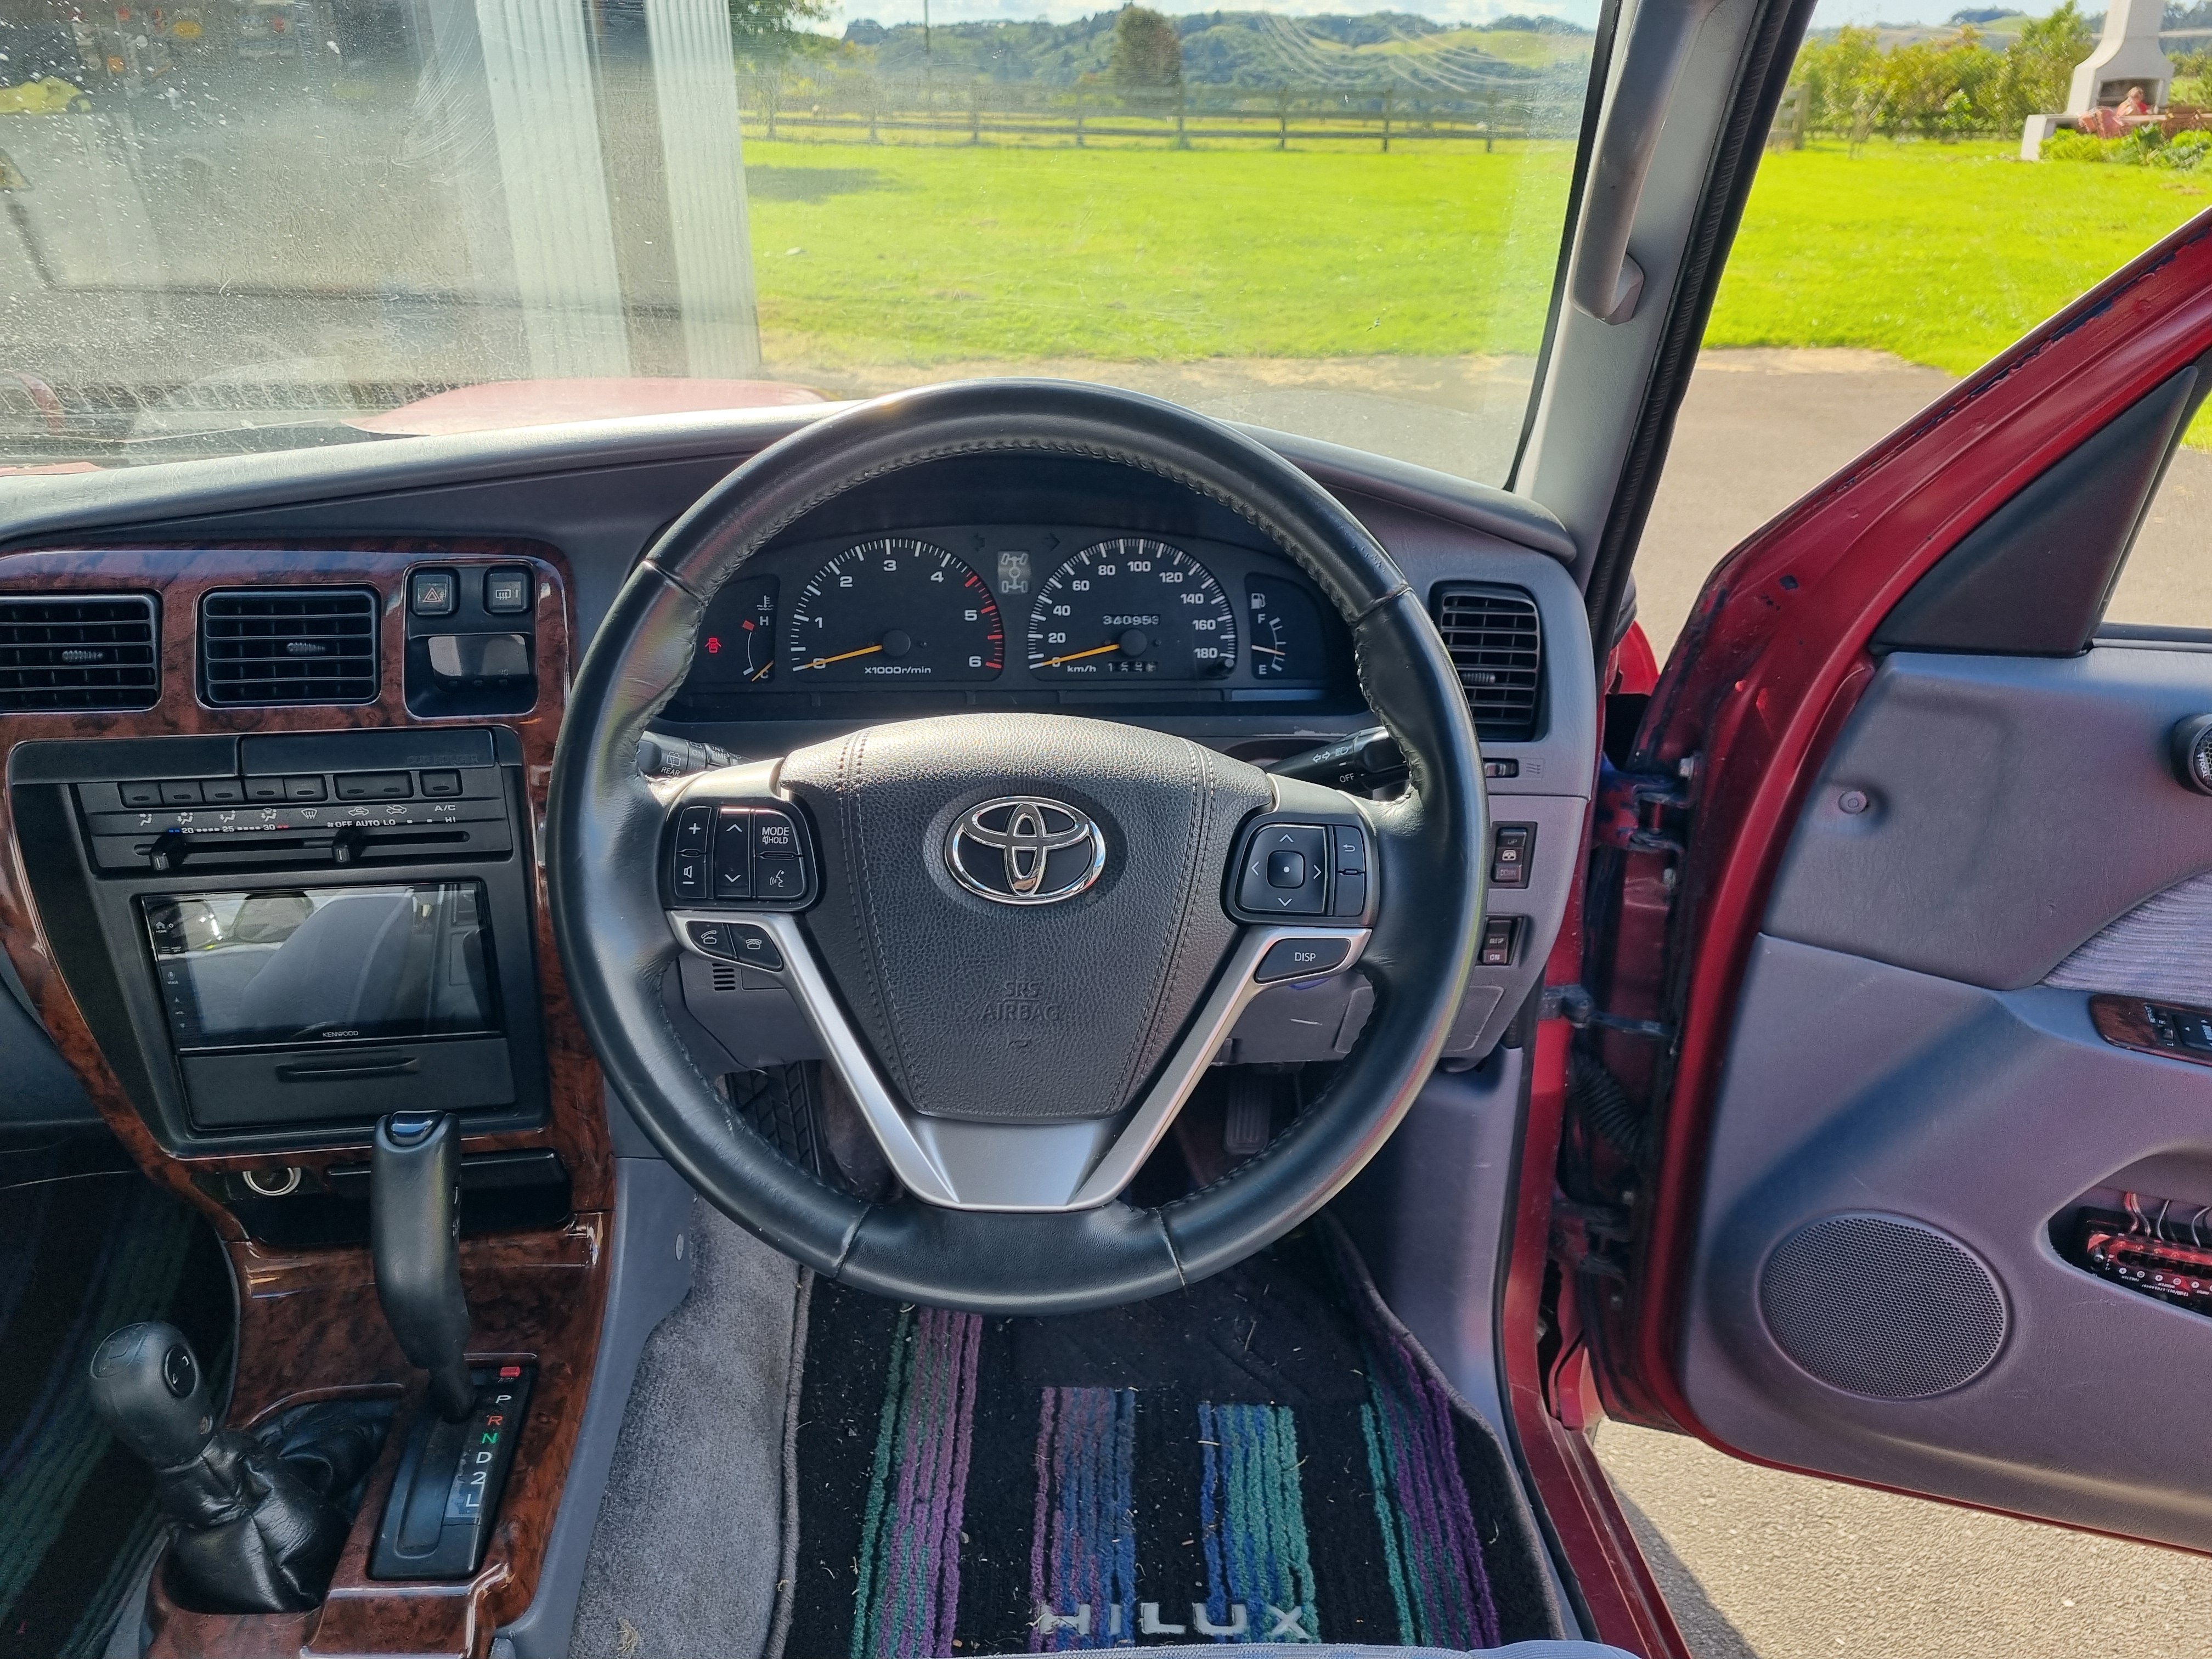
Nick the sparky gave me a hand and we got the right plugs for the air bag and figured out the steering wheel controls for the stereo. I've got to get the right connector to connect the radio to the steering wheel output but that shouldn't be too much of a drama. Once that's done I can program the radio and heypresto! Steering wheel controls that work.
5 points
-
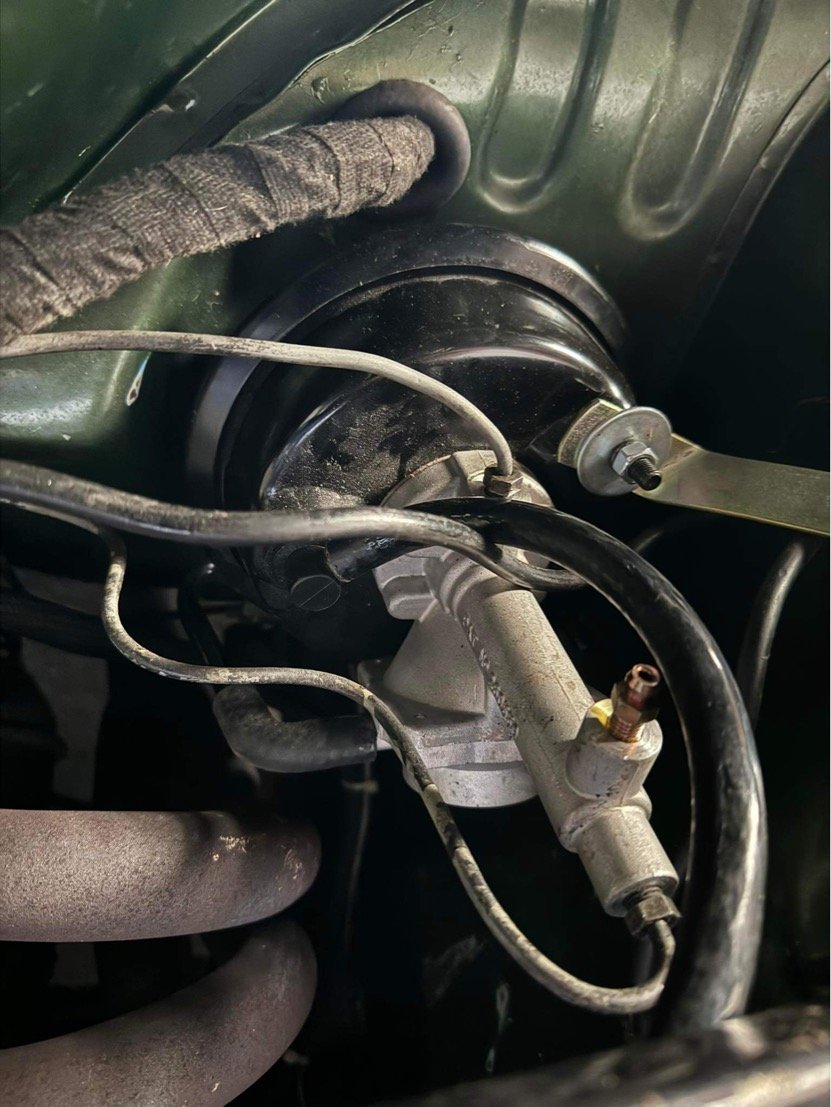
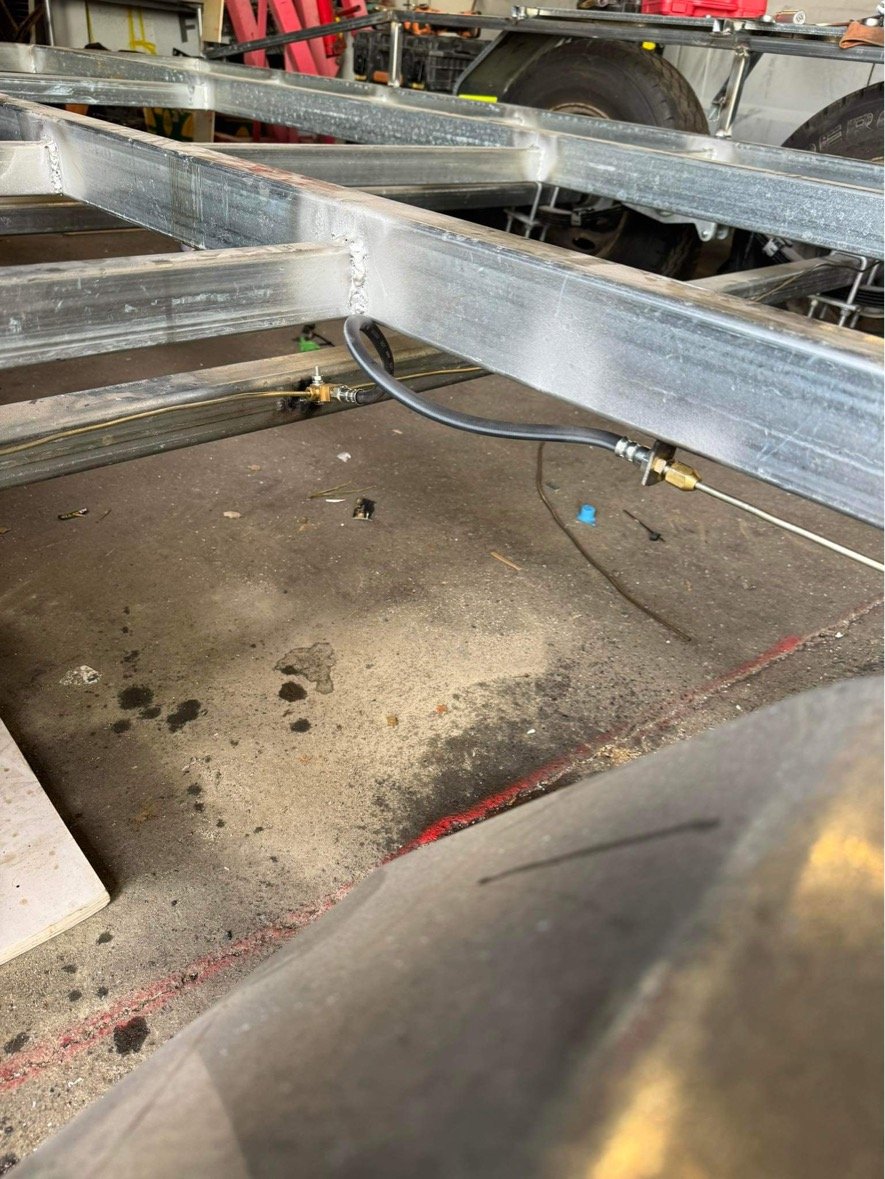
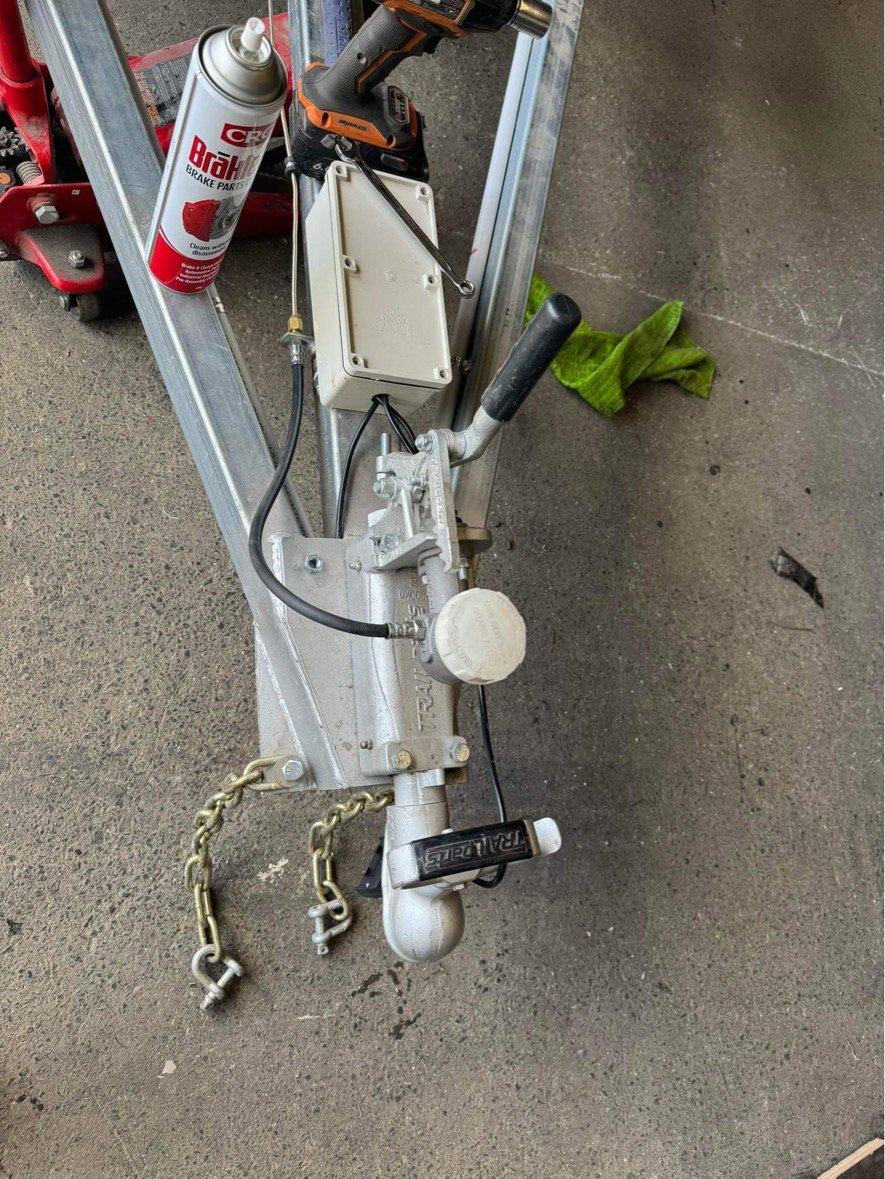
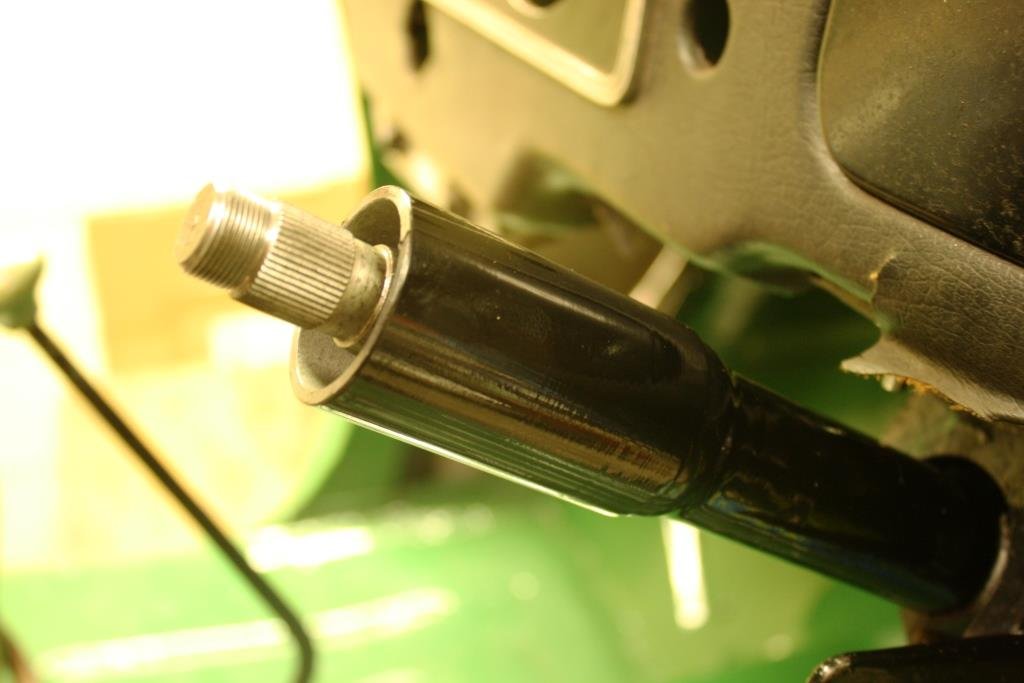
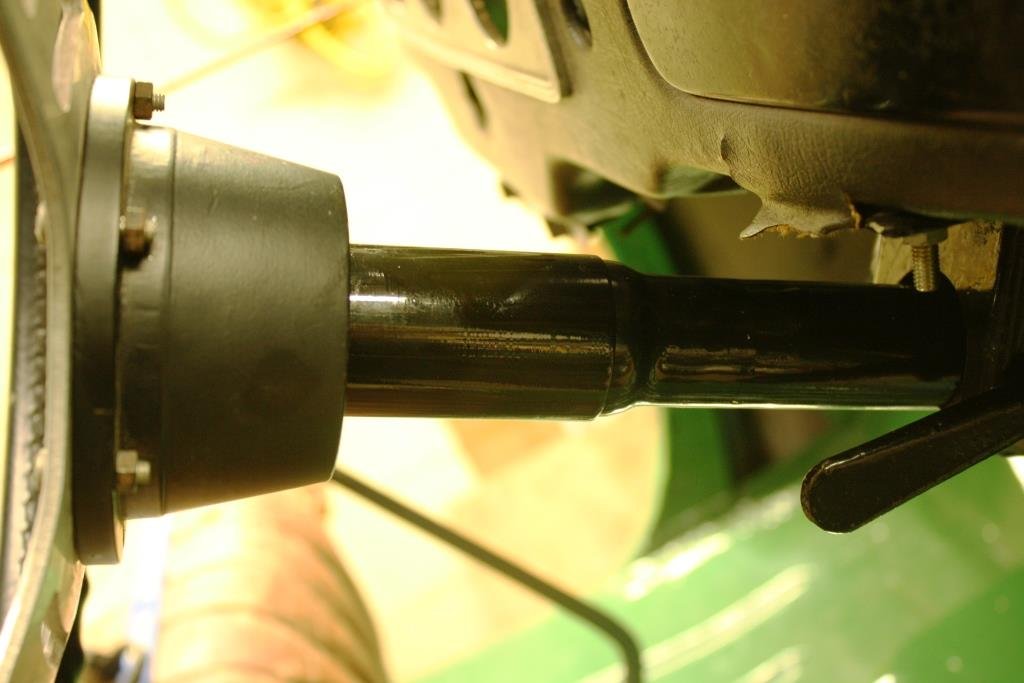
Took the Hunter away for the garlic farm budget Nats .. had brake issues the morning I left, and throughout the weekend, but managed through it cos Slow car.. I knew what it was, the little valley type thing inside the remote booster/slave vh44 deal threw a shit fit and decided to stay put and no longer do brake things. i already had a new unit on the bench, but procrastination took hold and I never did swap it until today. im taking her to Waiau Pa hop next weekend, so keen to have brakes. fairly easy deal to swap it. and it brakes now, and releases.. winning while I had the brake mojo and the flaring tool, I decided to run the brake lines on the trailer. What a Kent, but it’s done and it has brakes and no leaks. ive left the brakes locked on overnight to check for any leakage. Should be good. also clamped the conduit up. so only have the 4 mudguard stays to weld on, then screw the boards on before getting it registered.
3 points
-
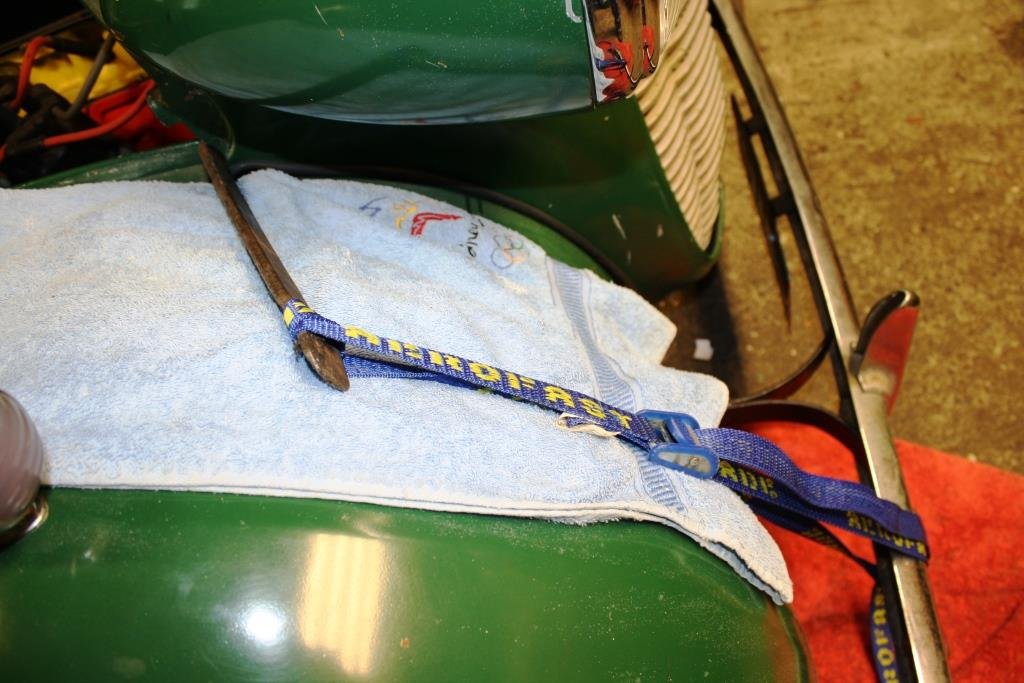
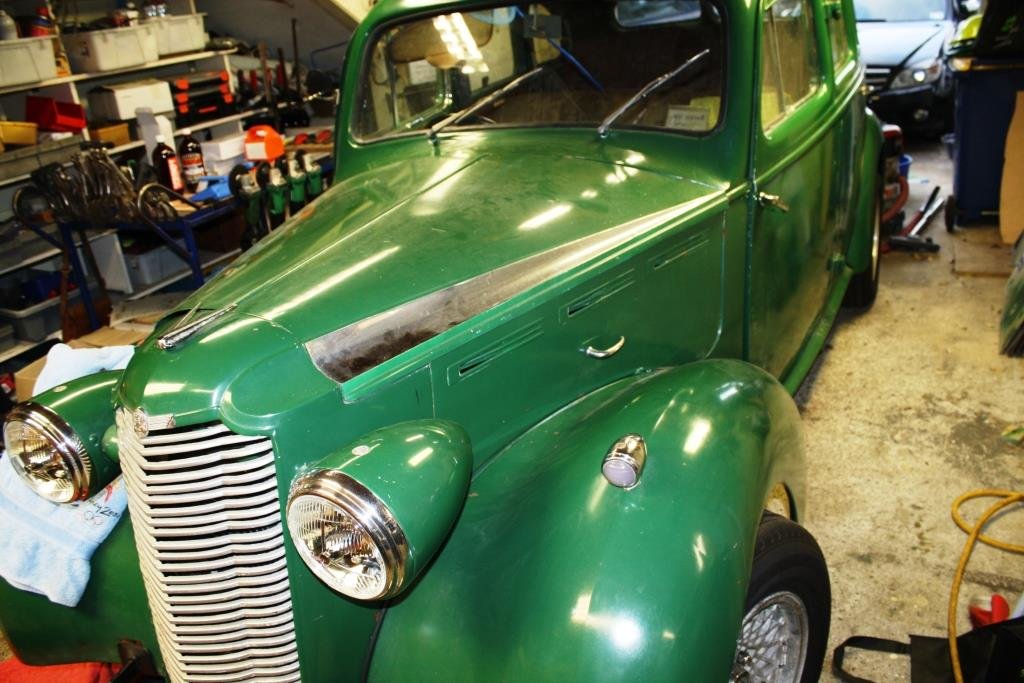
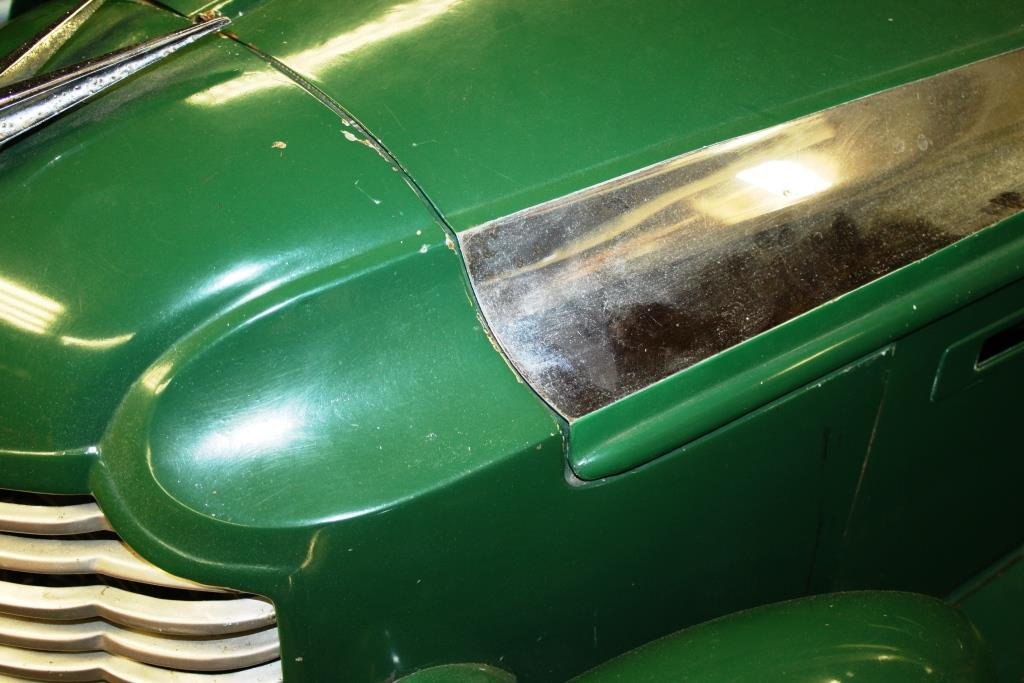
I spent some time dicking round with the airbox as I didn't like the long studs coming up off the carbs, plus the carbs themselves seem to be mounted in a slightly different position and the airbox really didnt like sitting down in place. So I made a new baseplate that fitted nice and put some 16mm tube in there so the screws could clamp it directly through the baseplate. Its a bit cleaner looking too... Then I glued the windshield trim on with some extra and probably non standard fixing methodologies; I am missing the joiner bits but I might just poo the gap up for now once its cured in place. A new and marginally sexier fuel pump arrived and got placed; Ooh and here is my sexy top link what I made in place; So just the rear valance to make, plus probably a heat shield for the alternator as its still close regardless of the wrap. And the alternator light doesnt work for some reason. And I found another sneaky little rust hole in the drivers floor. I should have noticed it as there was a 20mm stalactite of bog hanging down underneath, but obviously I didnt up til now. There is an argument for step drilling it out to 25mm and calling it a drain hole, but I will make a closer investigation. Oh and I bolted most of the rest of the bits back on;3 points
-
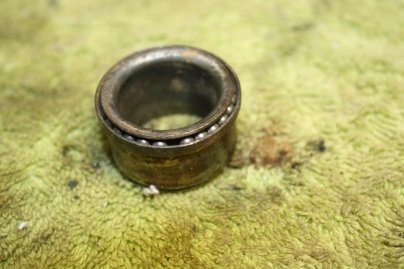
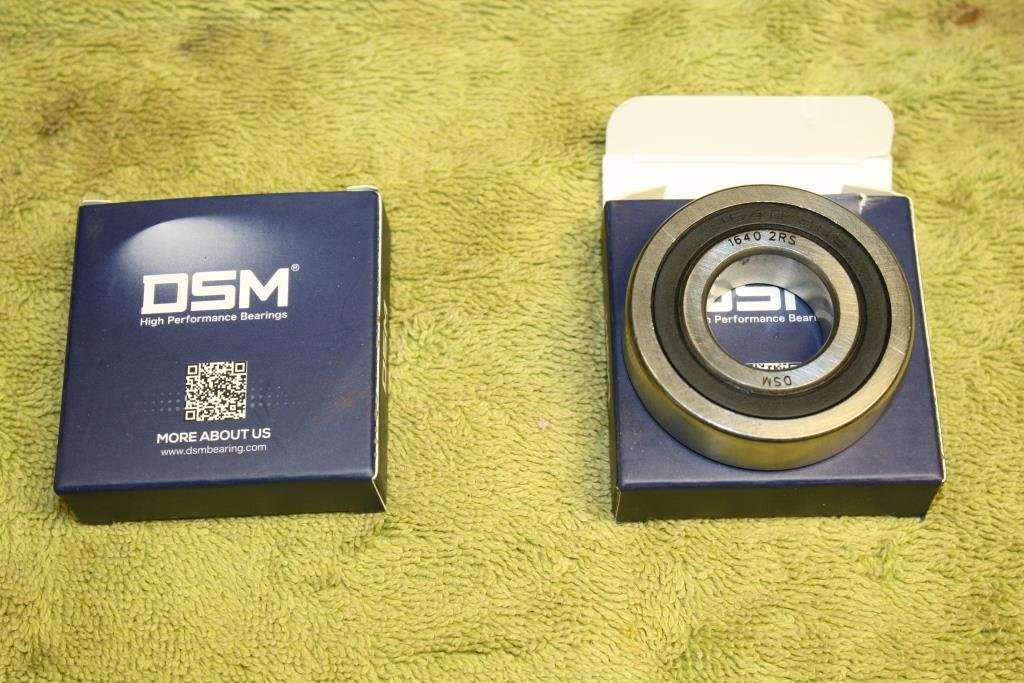
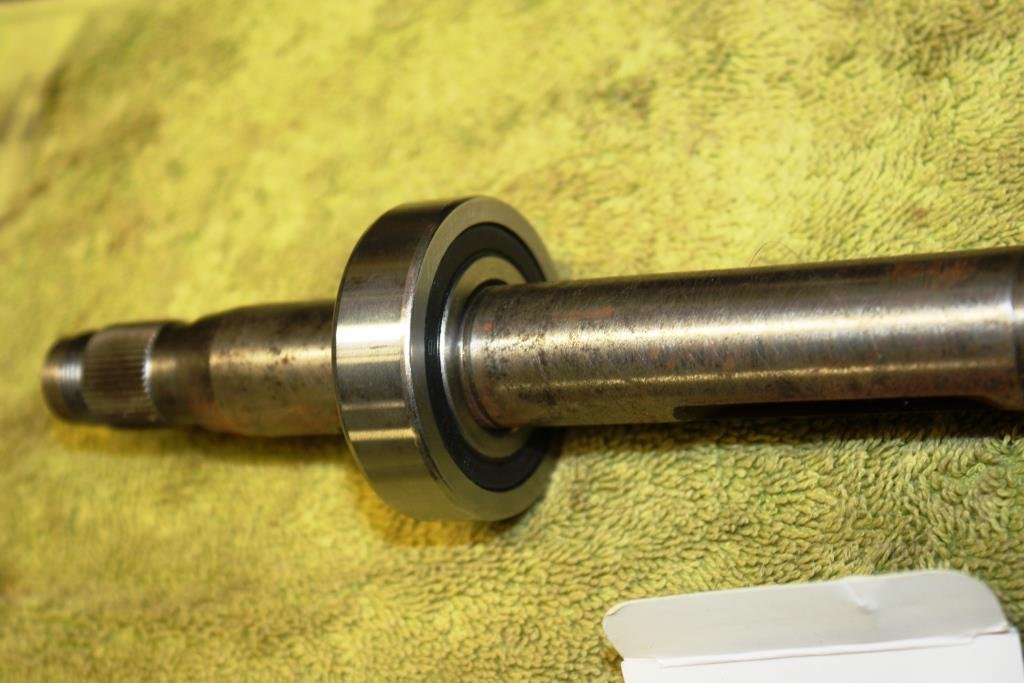
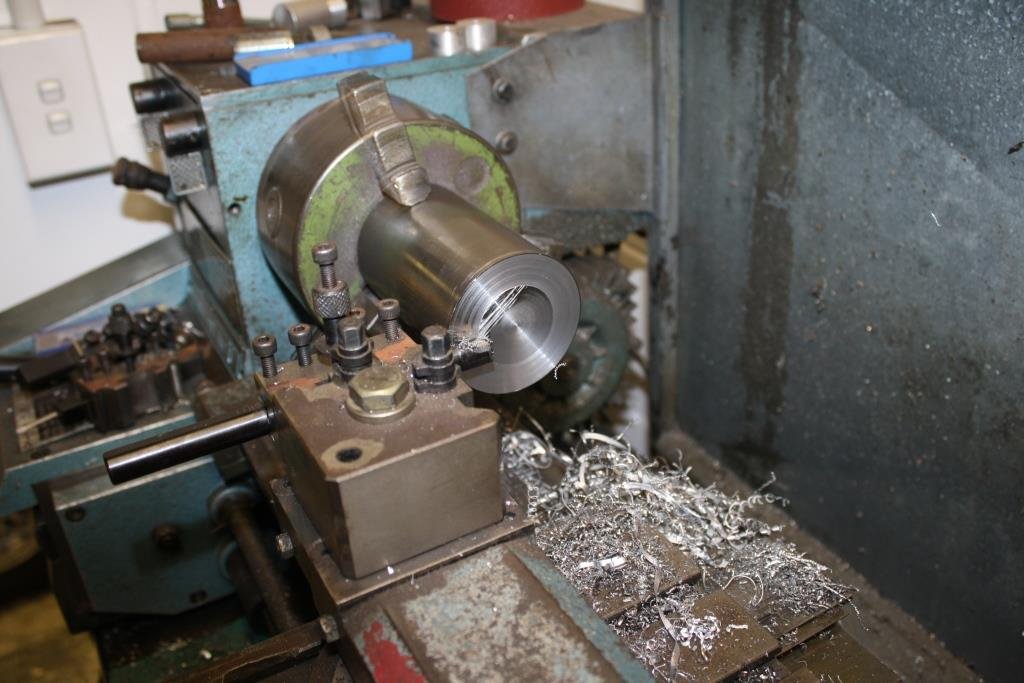
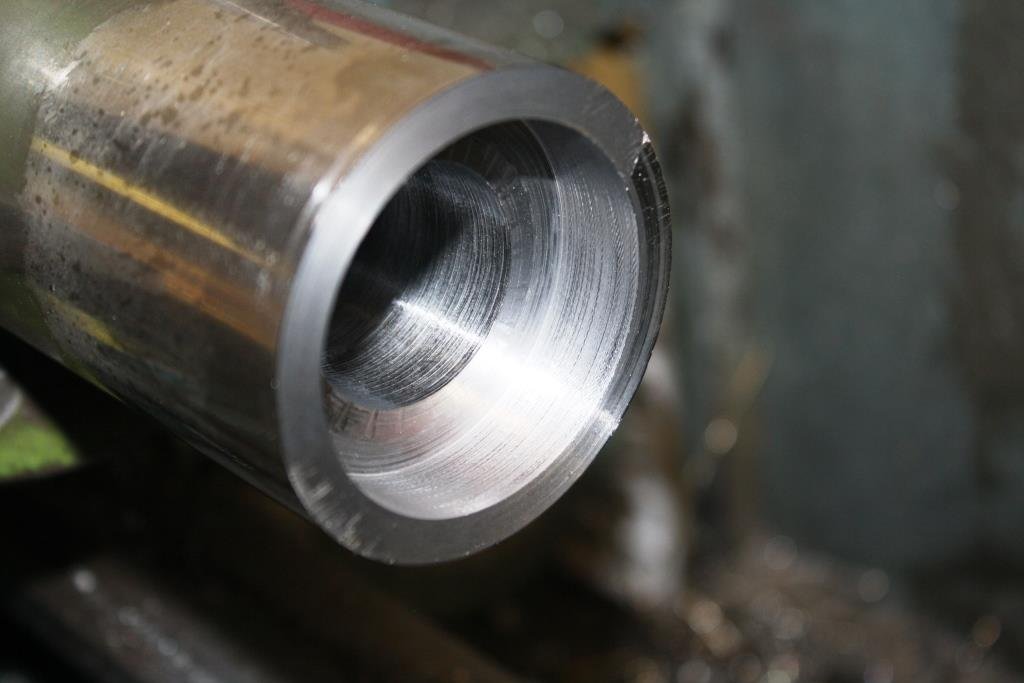
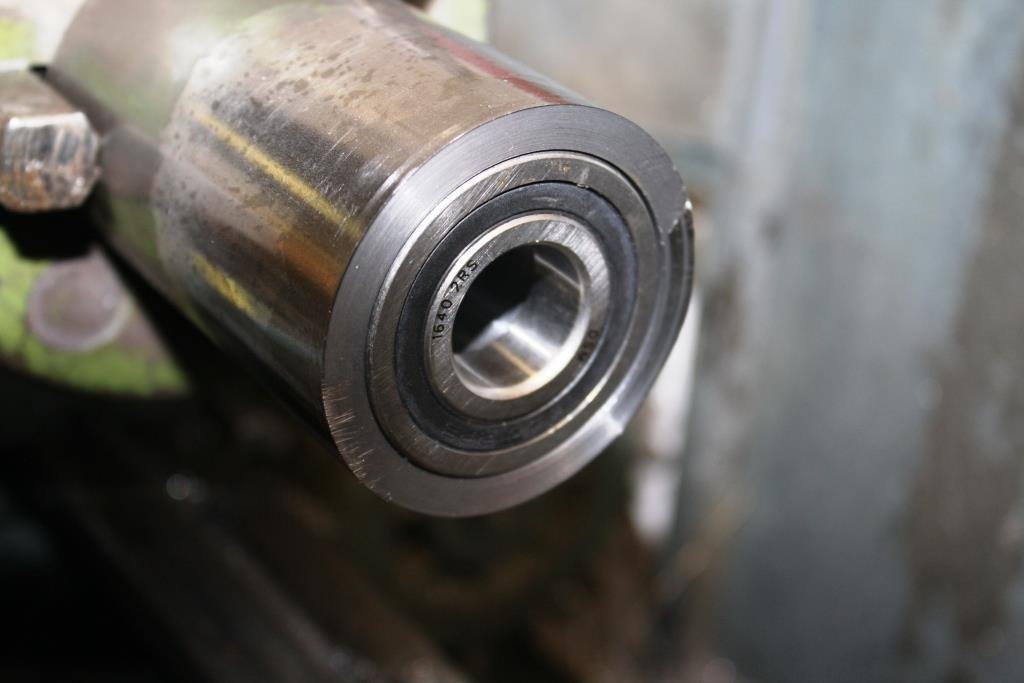
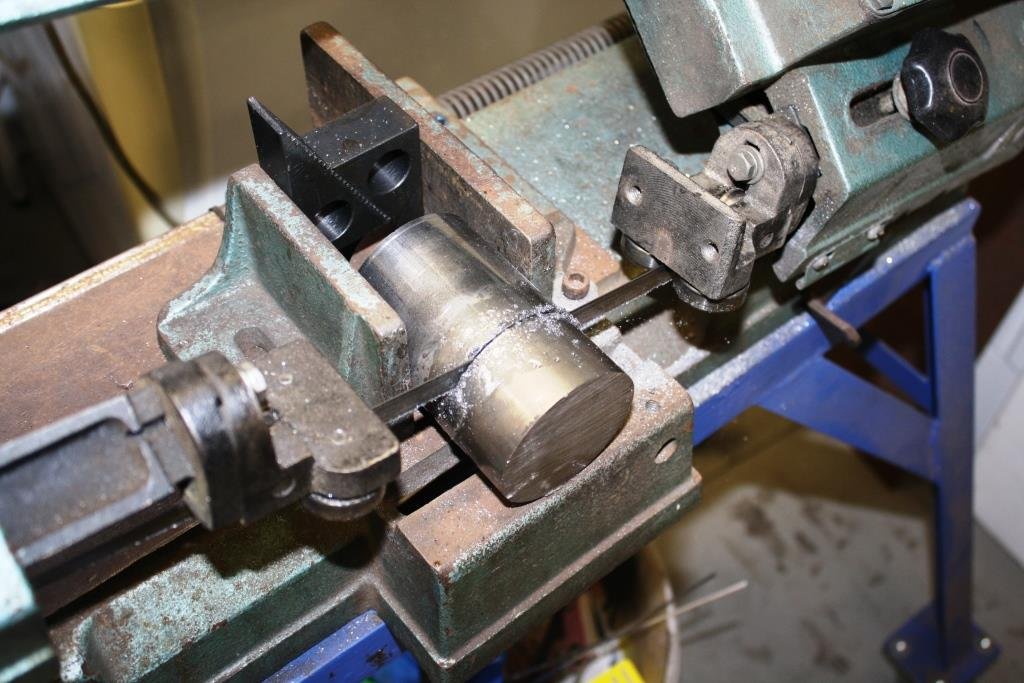
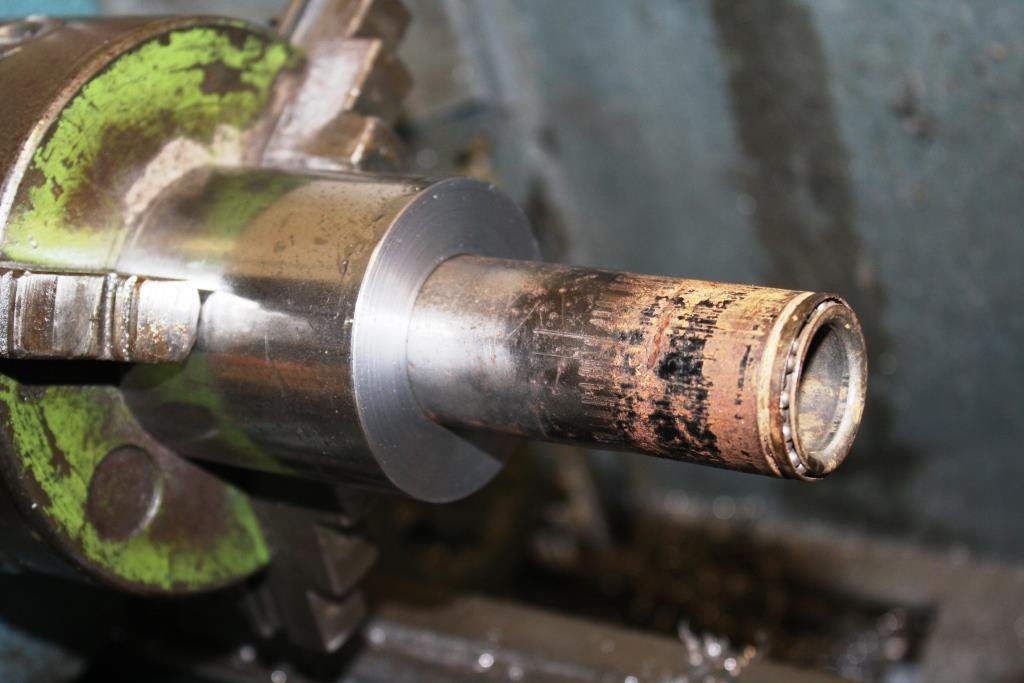
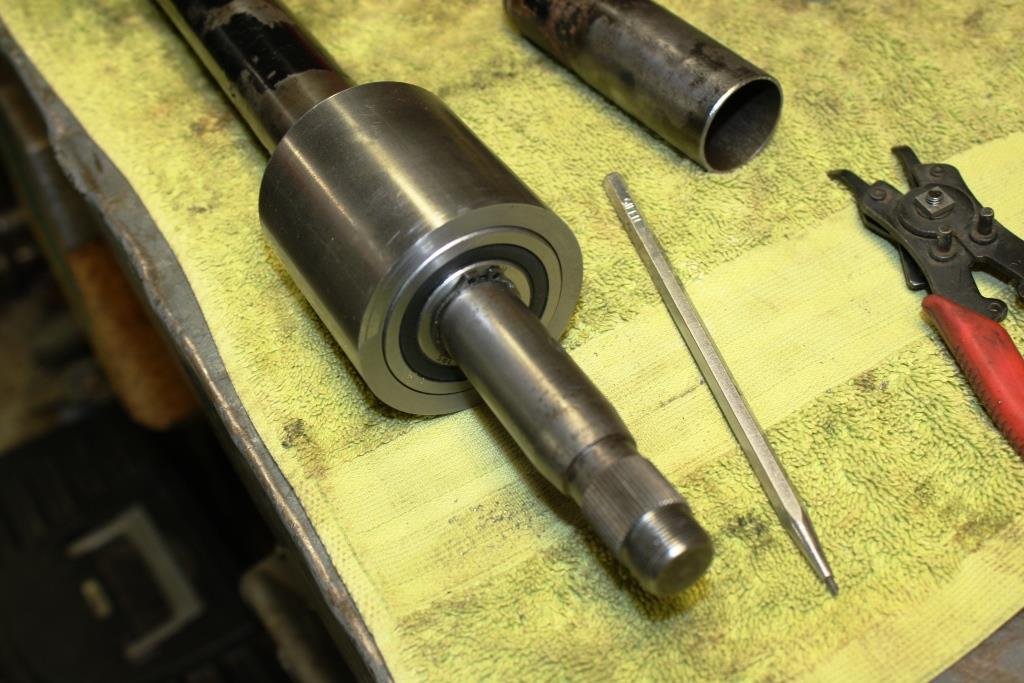
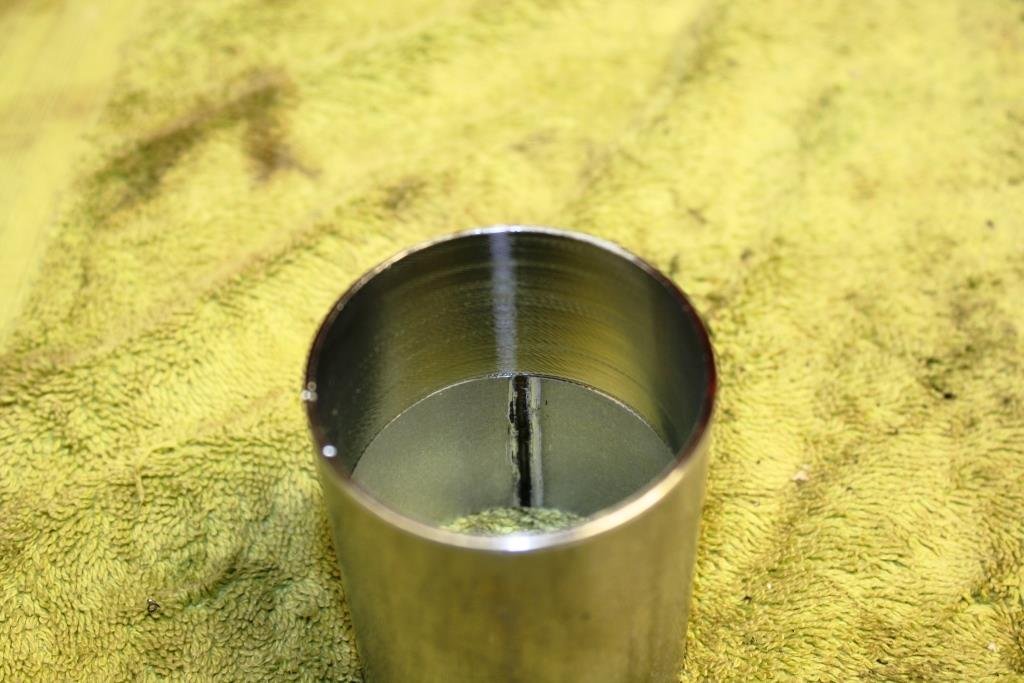
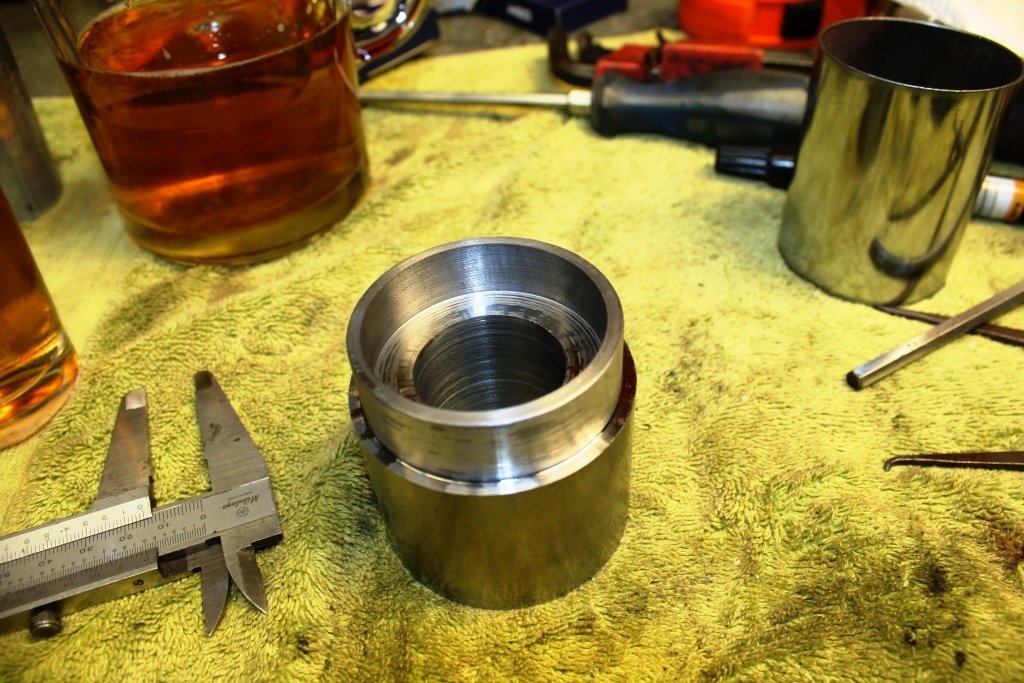
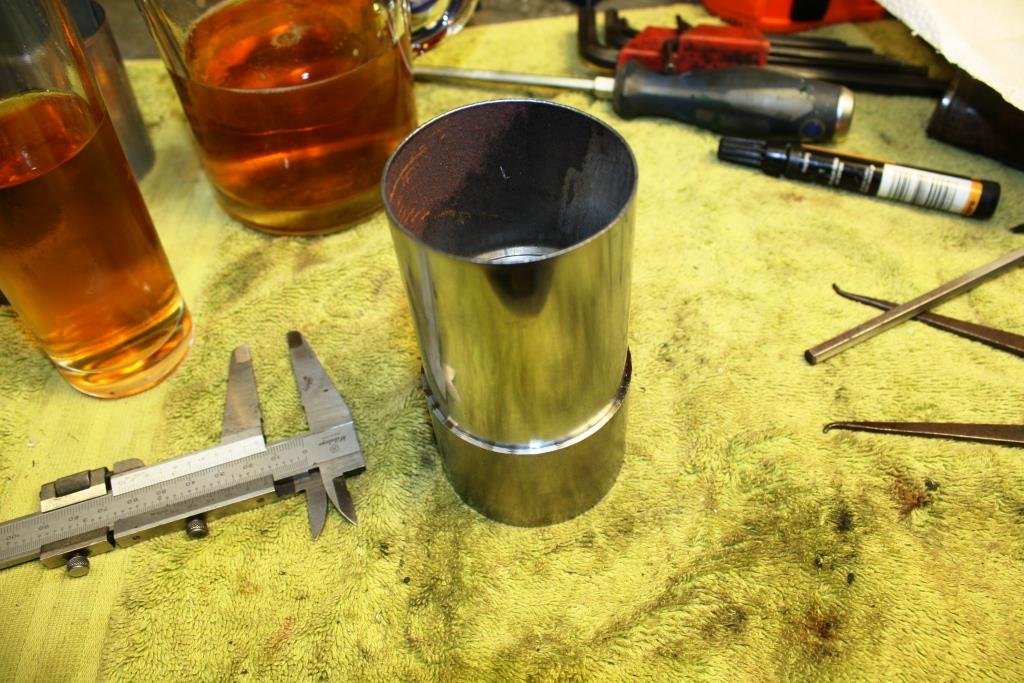
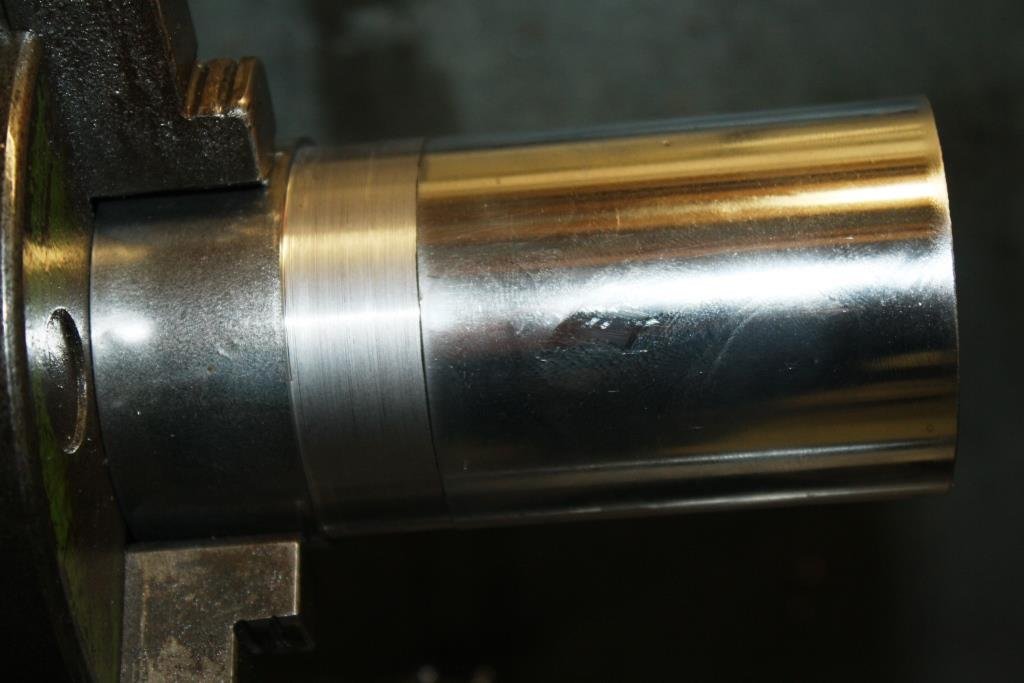
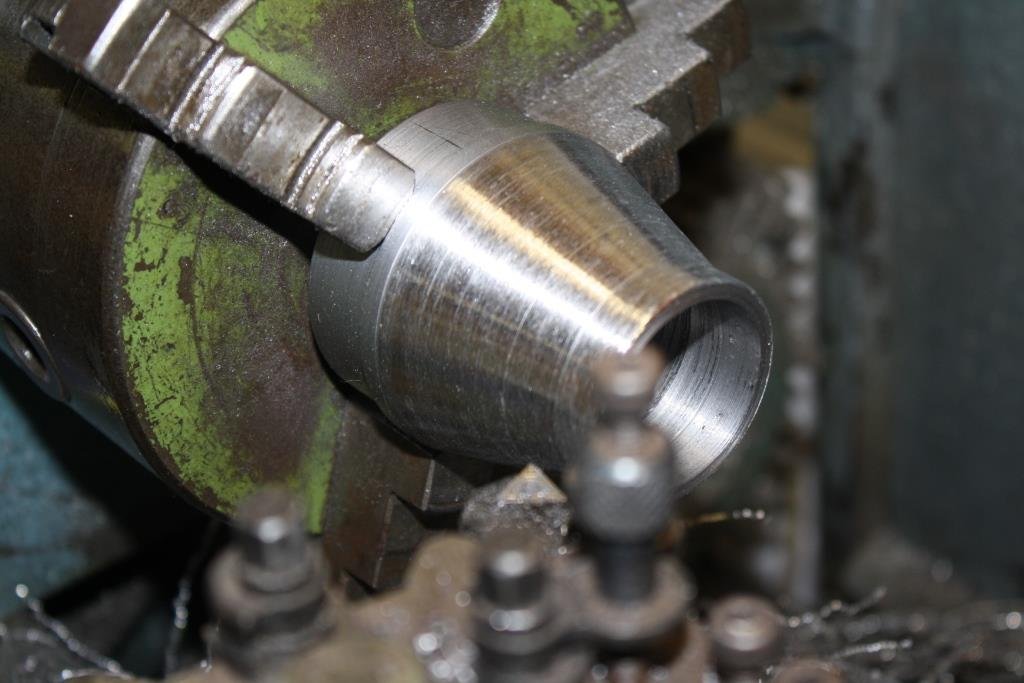
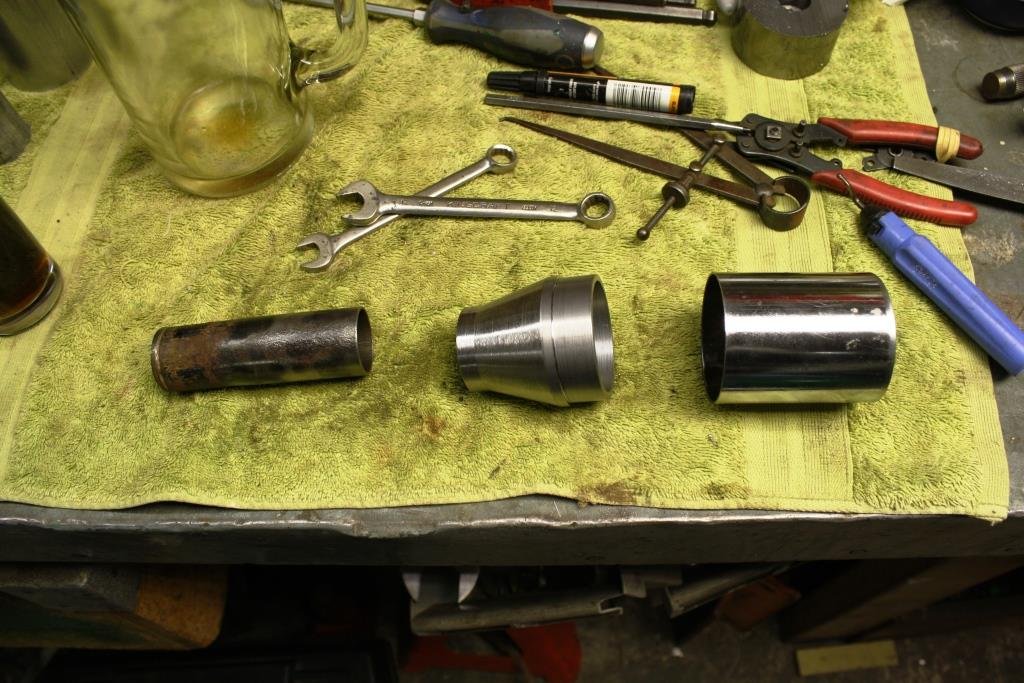
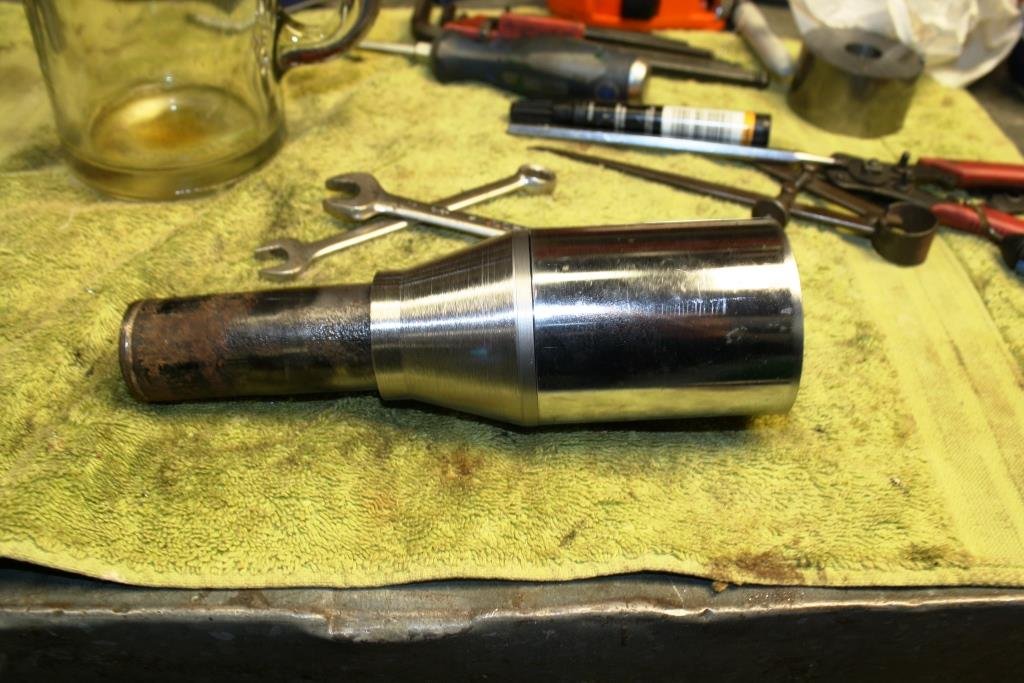
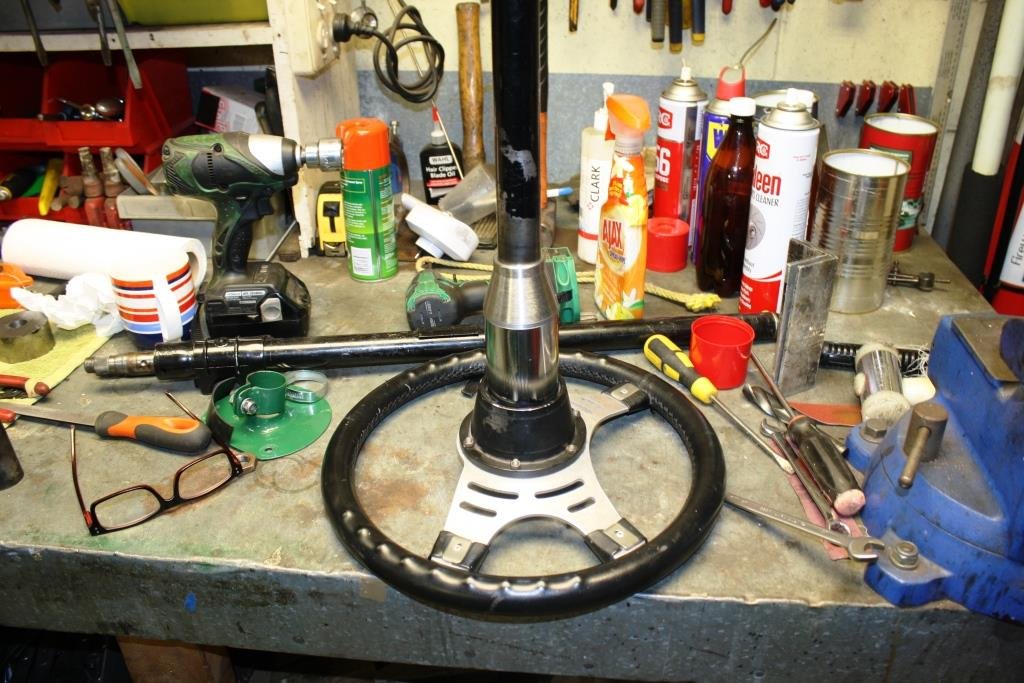
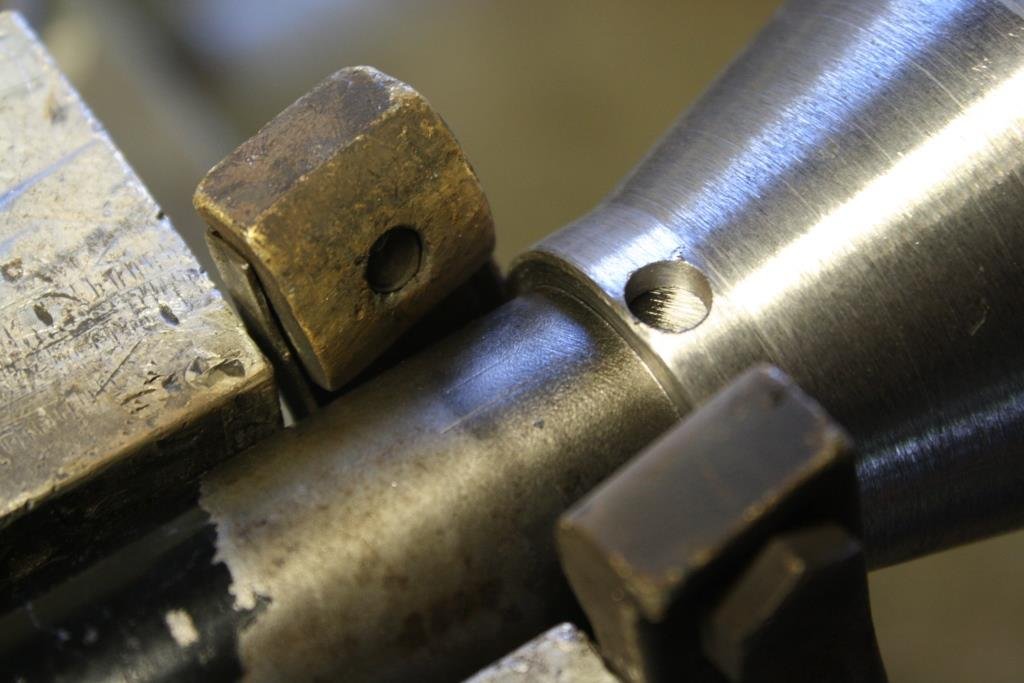
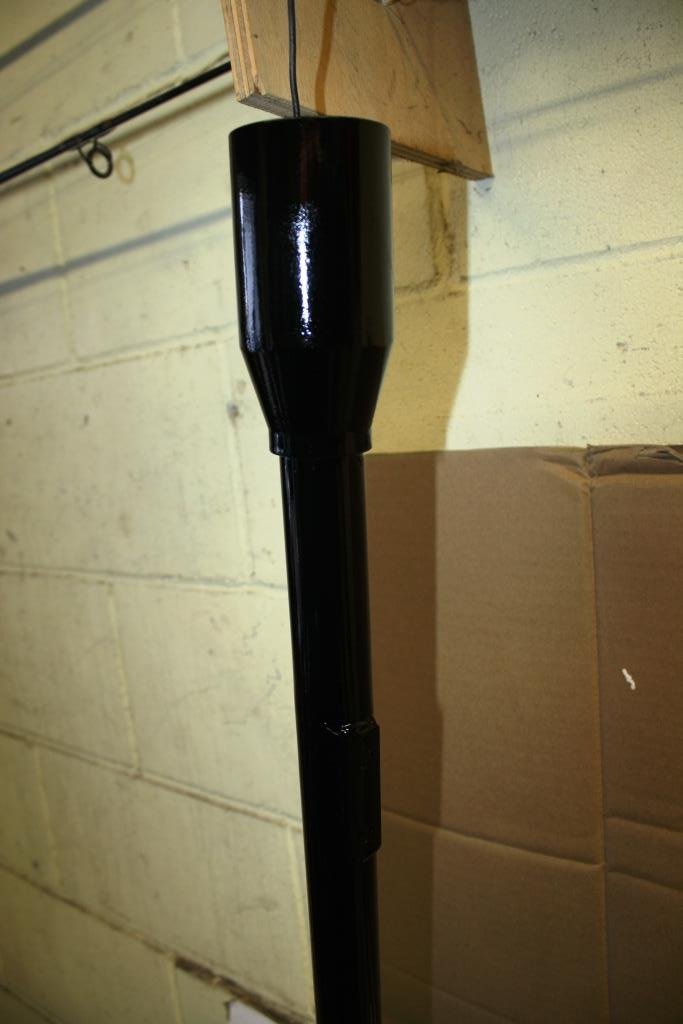
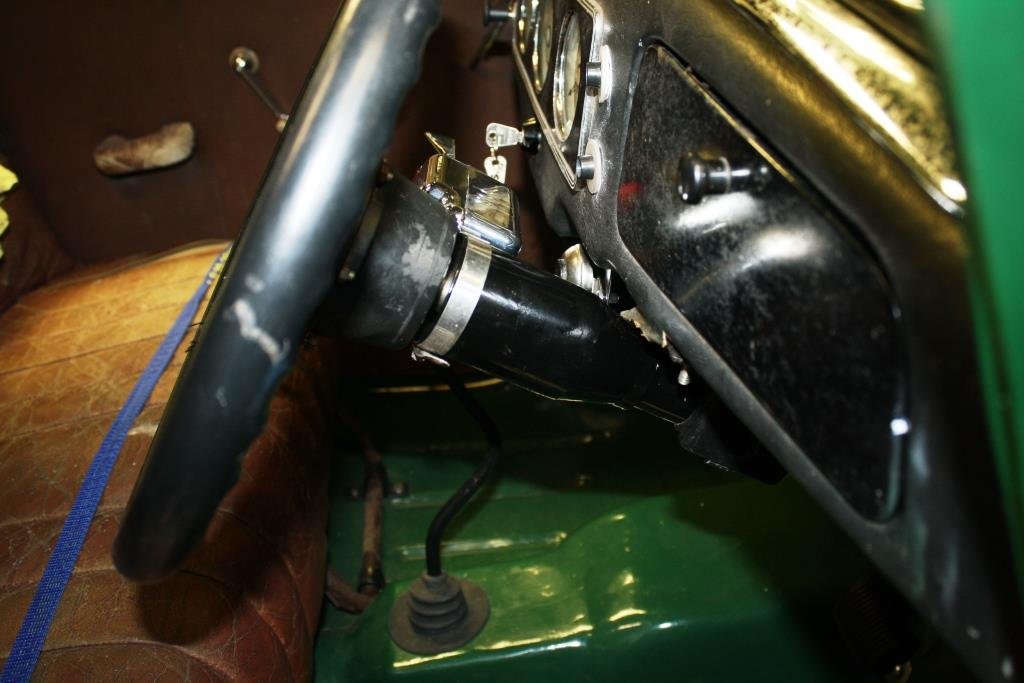
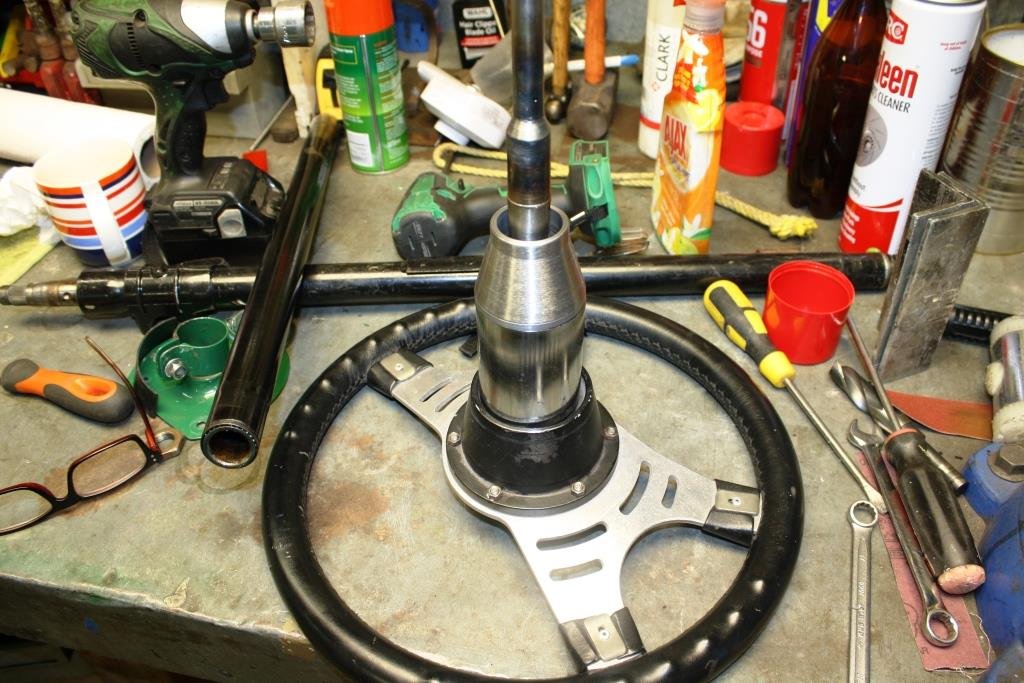
A while back I spent quite some time making a sleeve to tidy up the gap between the steering column and the steering wheel. Problem was the top bearing just had too much play in it for my liking. When I pulled out the bearing I found it was a piece of pressed sheet metal rubbish that was close to impossible to replace. The solution was a trip to the local bearing supplier and the massive investment of $13.50 (and to think the “ever lovely Mrs. sr2” accuses me of being cheap!). I bought a large piece of mild steel round and chucked it in the Emco. I bored it for a firm fit to the OD of the new bearing. I flipped it over and cut it to size in the bandsaw… I then line bored it to fit the steering Column tube. That’s an end I cut off from an old column; you can see how light the original bearing was. I double checked everything still fitted…… …… and then turned down a piece of scrap water pipe to act as a cover between the bearing and the steering wheel. I then turned it down to the same OD……. …. Took the cover off and turned a taper at the other end…… All set to assemble……. (The tube on the left is just for setting it up). Checked it with the Triumph steering assembly…. …….some plug welding…… A bit of paint………… And I’m back to where I started, (story of my life!) but with no play in the steering wheel. The only thing I don’t like is the cheap, shiny, aftermarket “hotrod” indicator switch. To its credit it works well but looks very out of place - far too new and shiny for Rigamortice’s discerning taste. I’ll keep looking for something old and quirky to replace it with. Any suggestions gratefully accepted… https://oldschool.co.nz/index.php?/topic/49843-sr2%E2%80%99s-1947-vauxhall-%E2%80%9Crigamortice%E2%80%9D-discussion-thread/
3 points
-
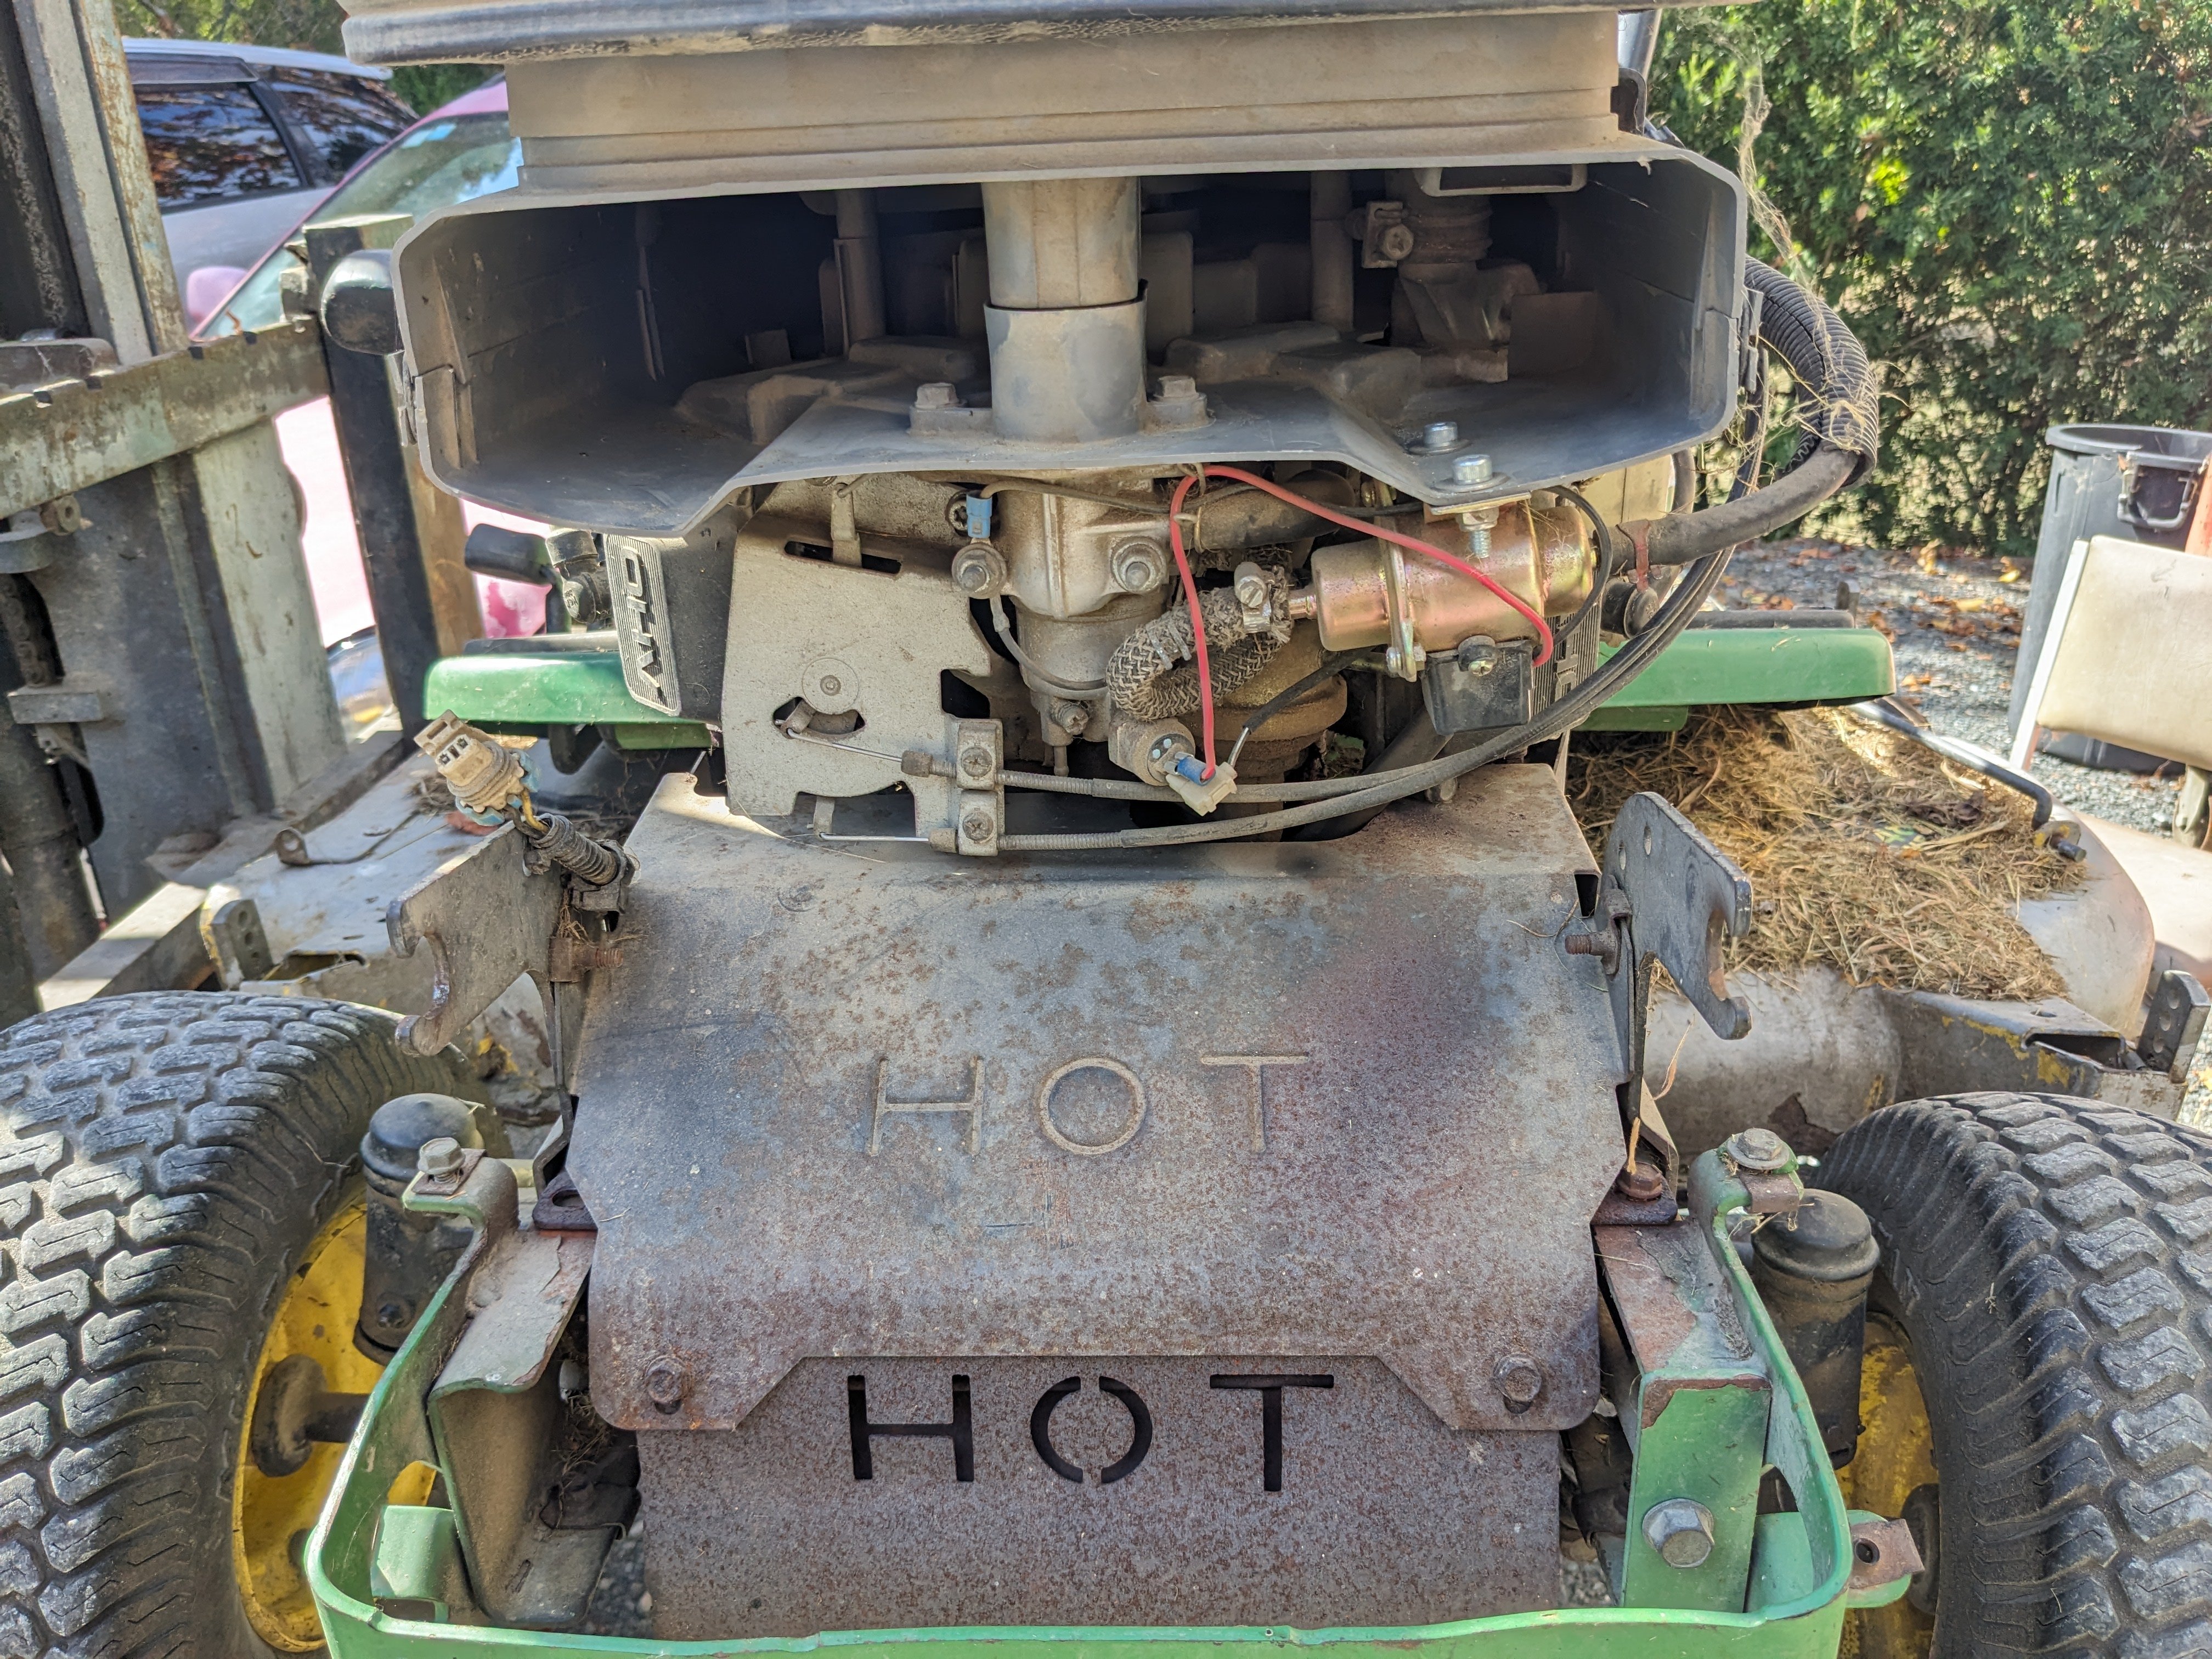
Then I remembered the shitty fuel pump that I hacked into my ride-on a couple of years ago cos it was way too much money to buy OEM; Then naturally this; Dunno what the crackly business is, nevertheless it sounds glorious.
3 points
-
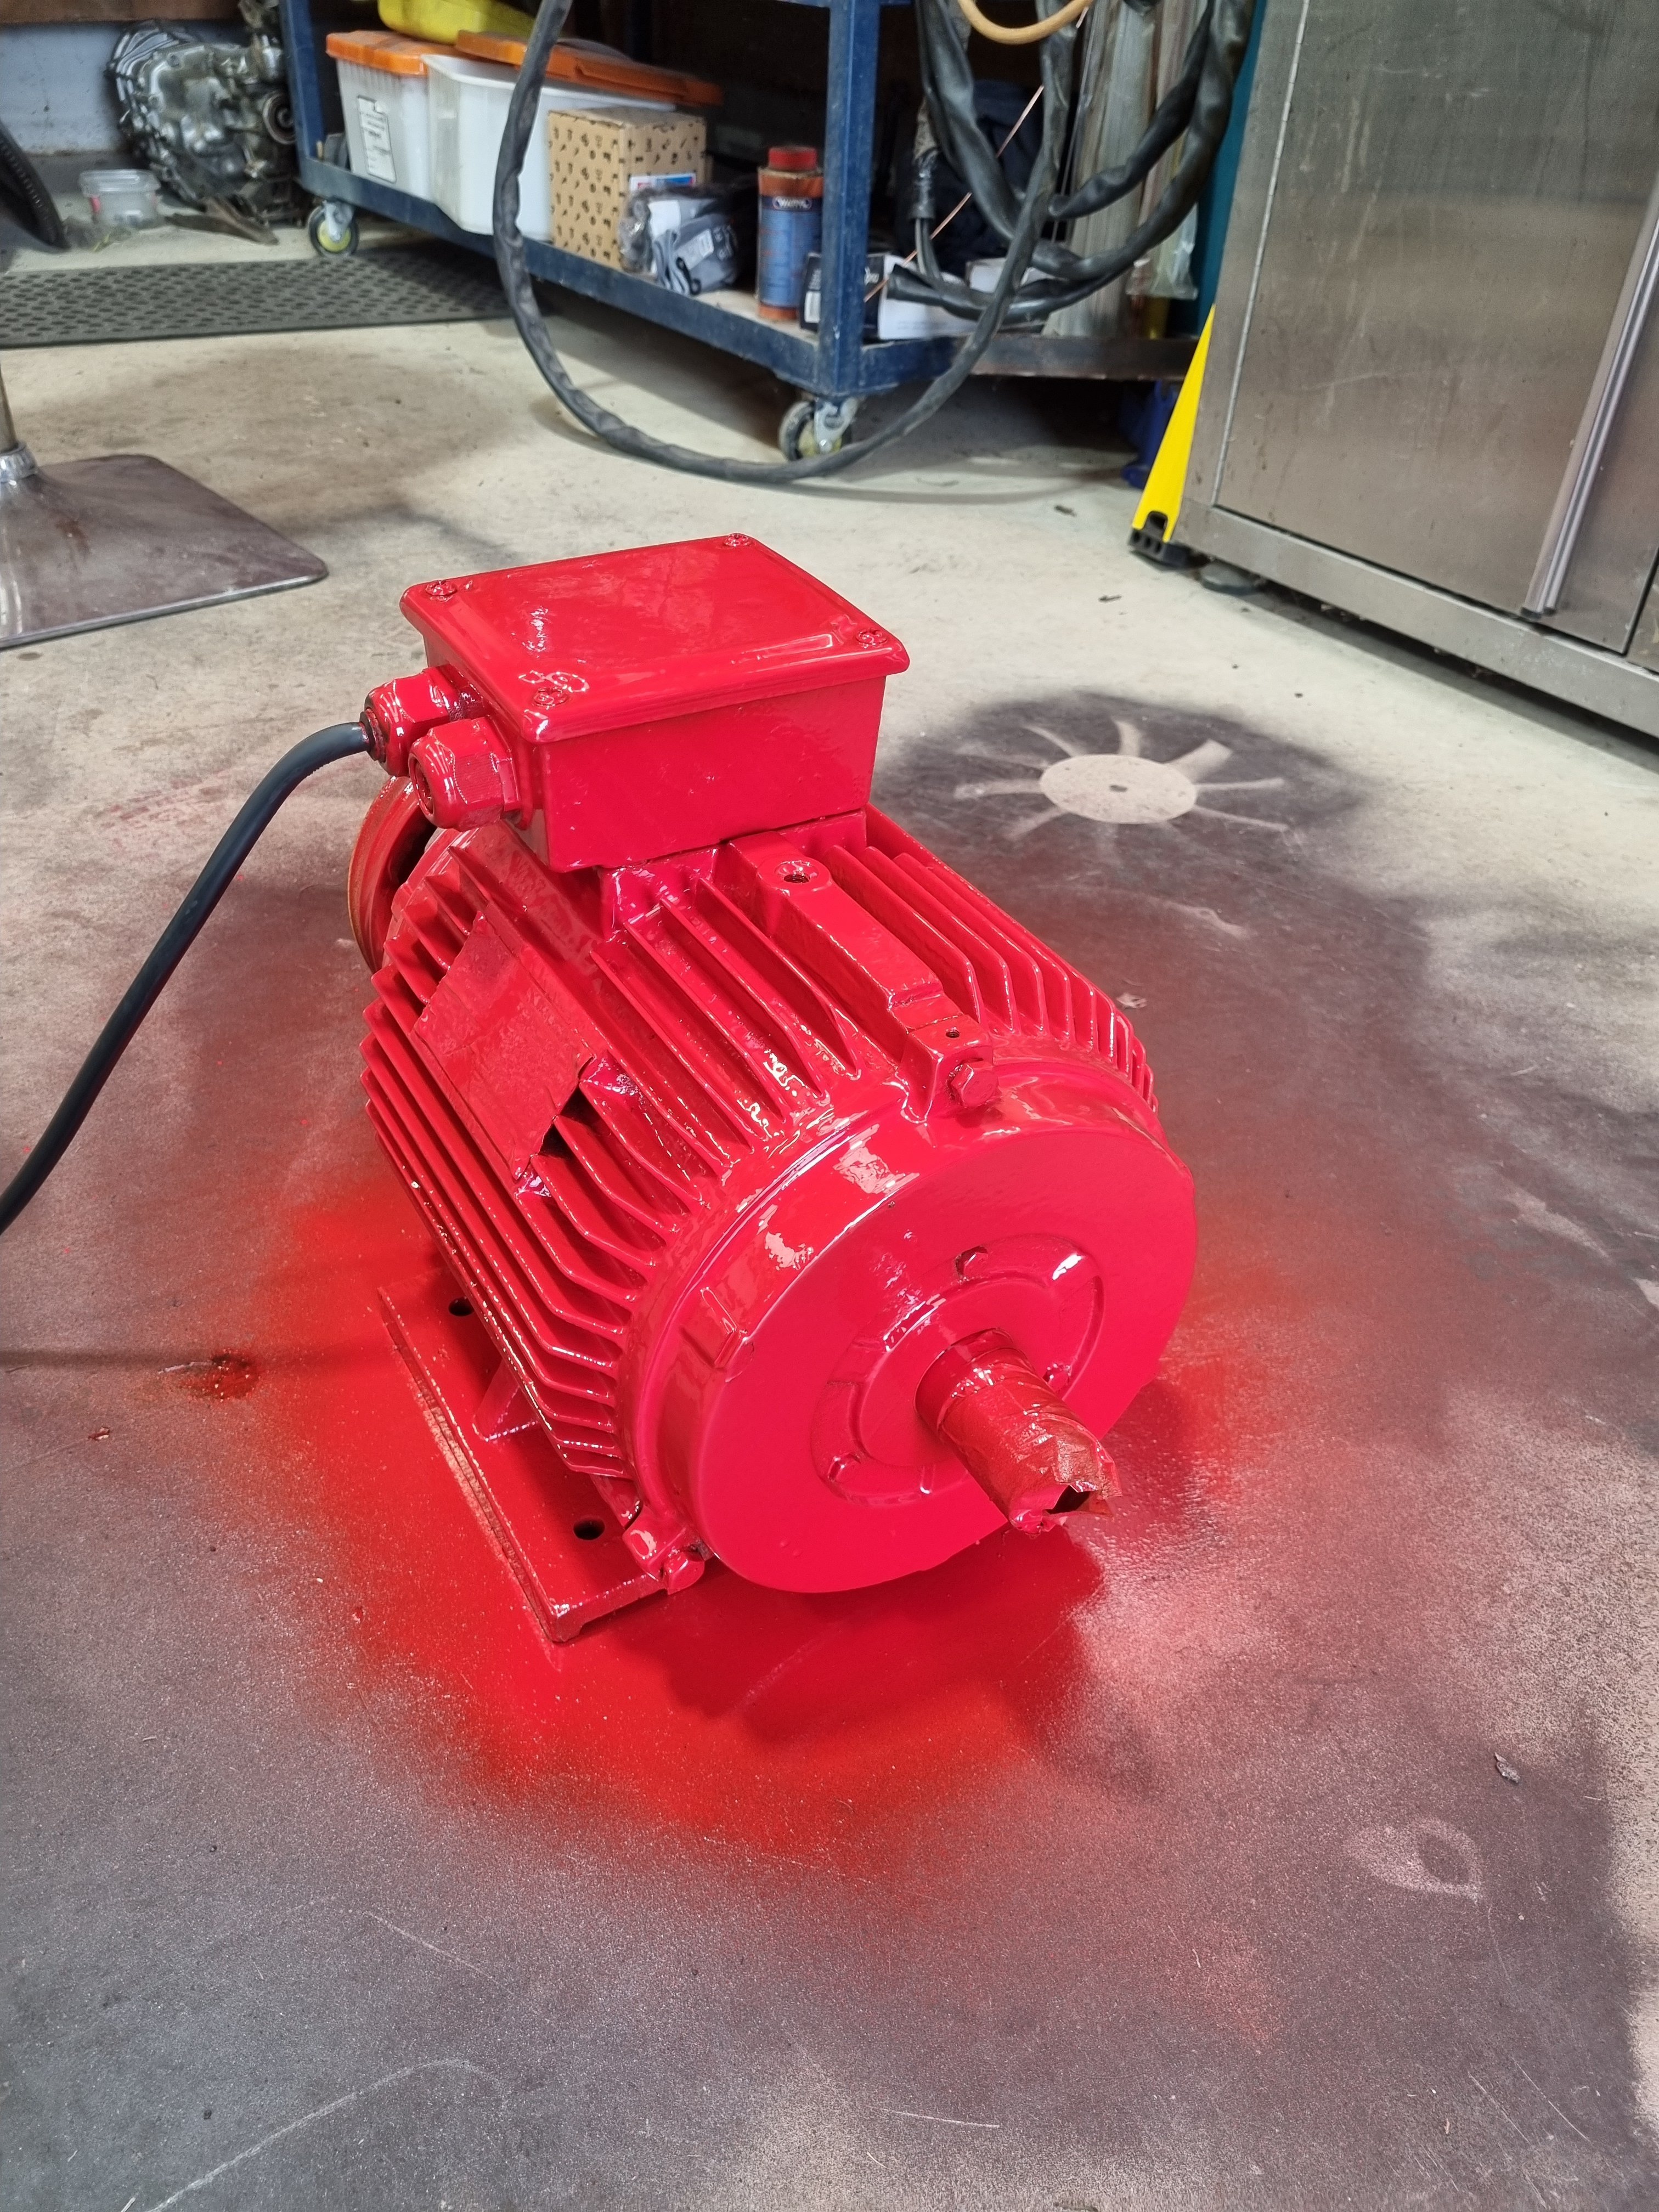
Nice... looks like a red dwarf.. At "some point in the future" I have this 10hp Broomwade to reco.. Think it was out of a mine
3 points
-
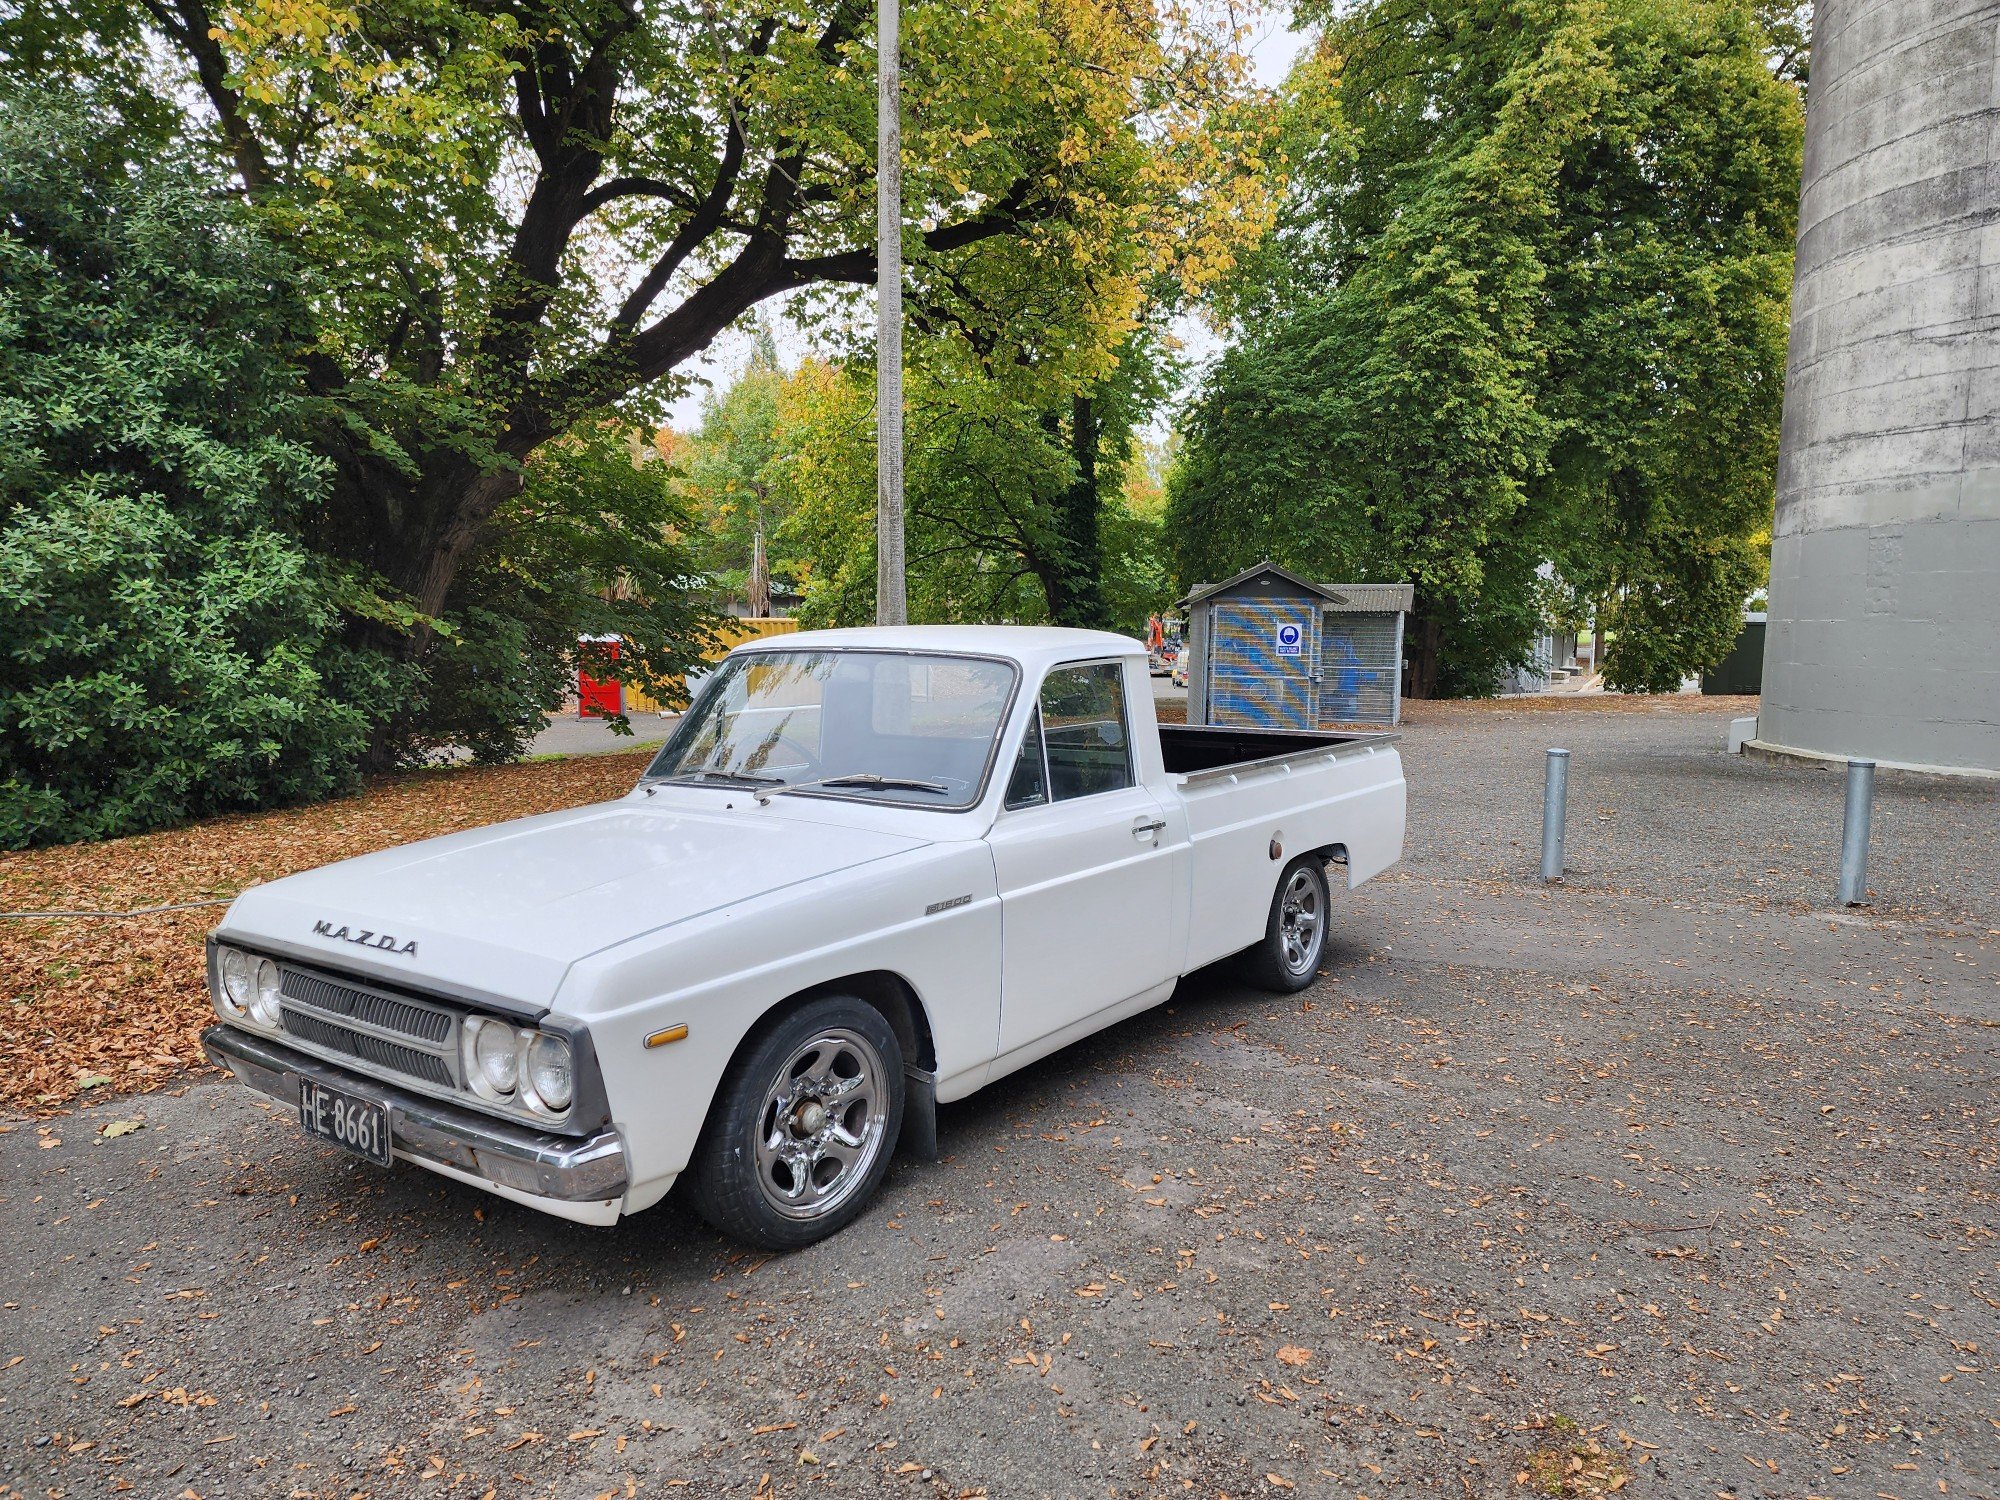
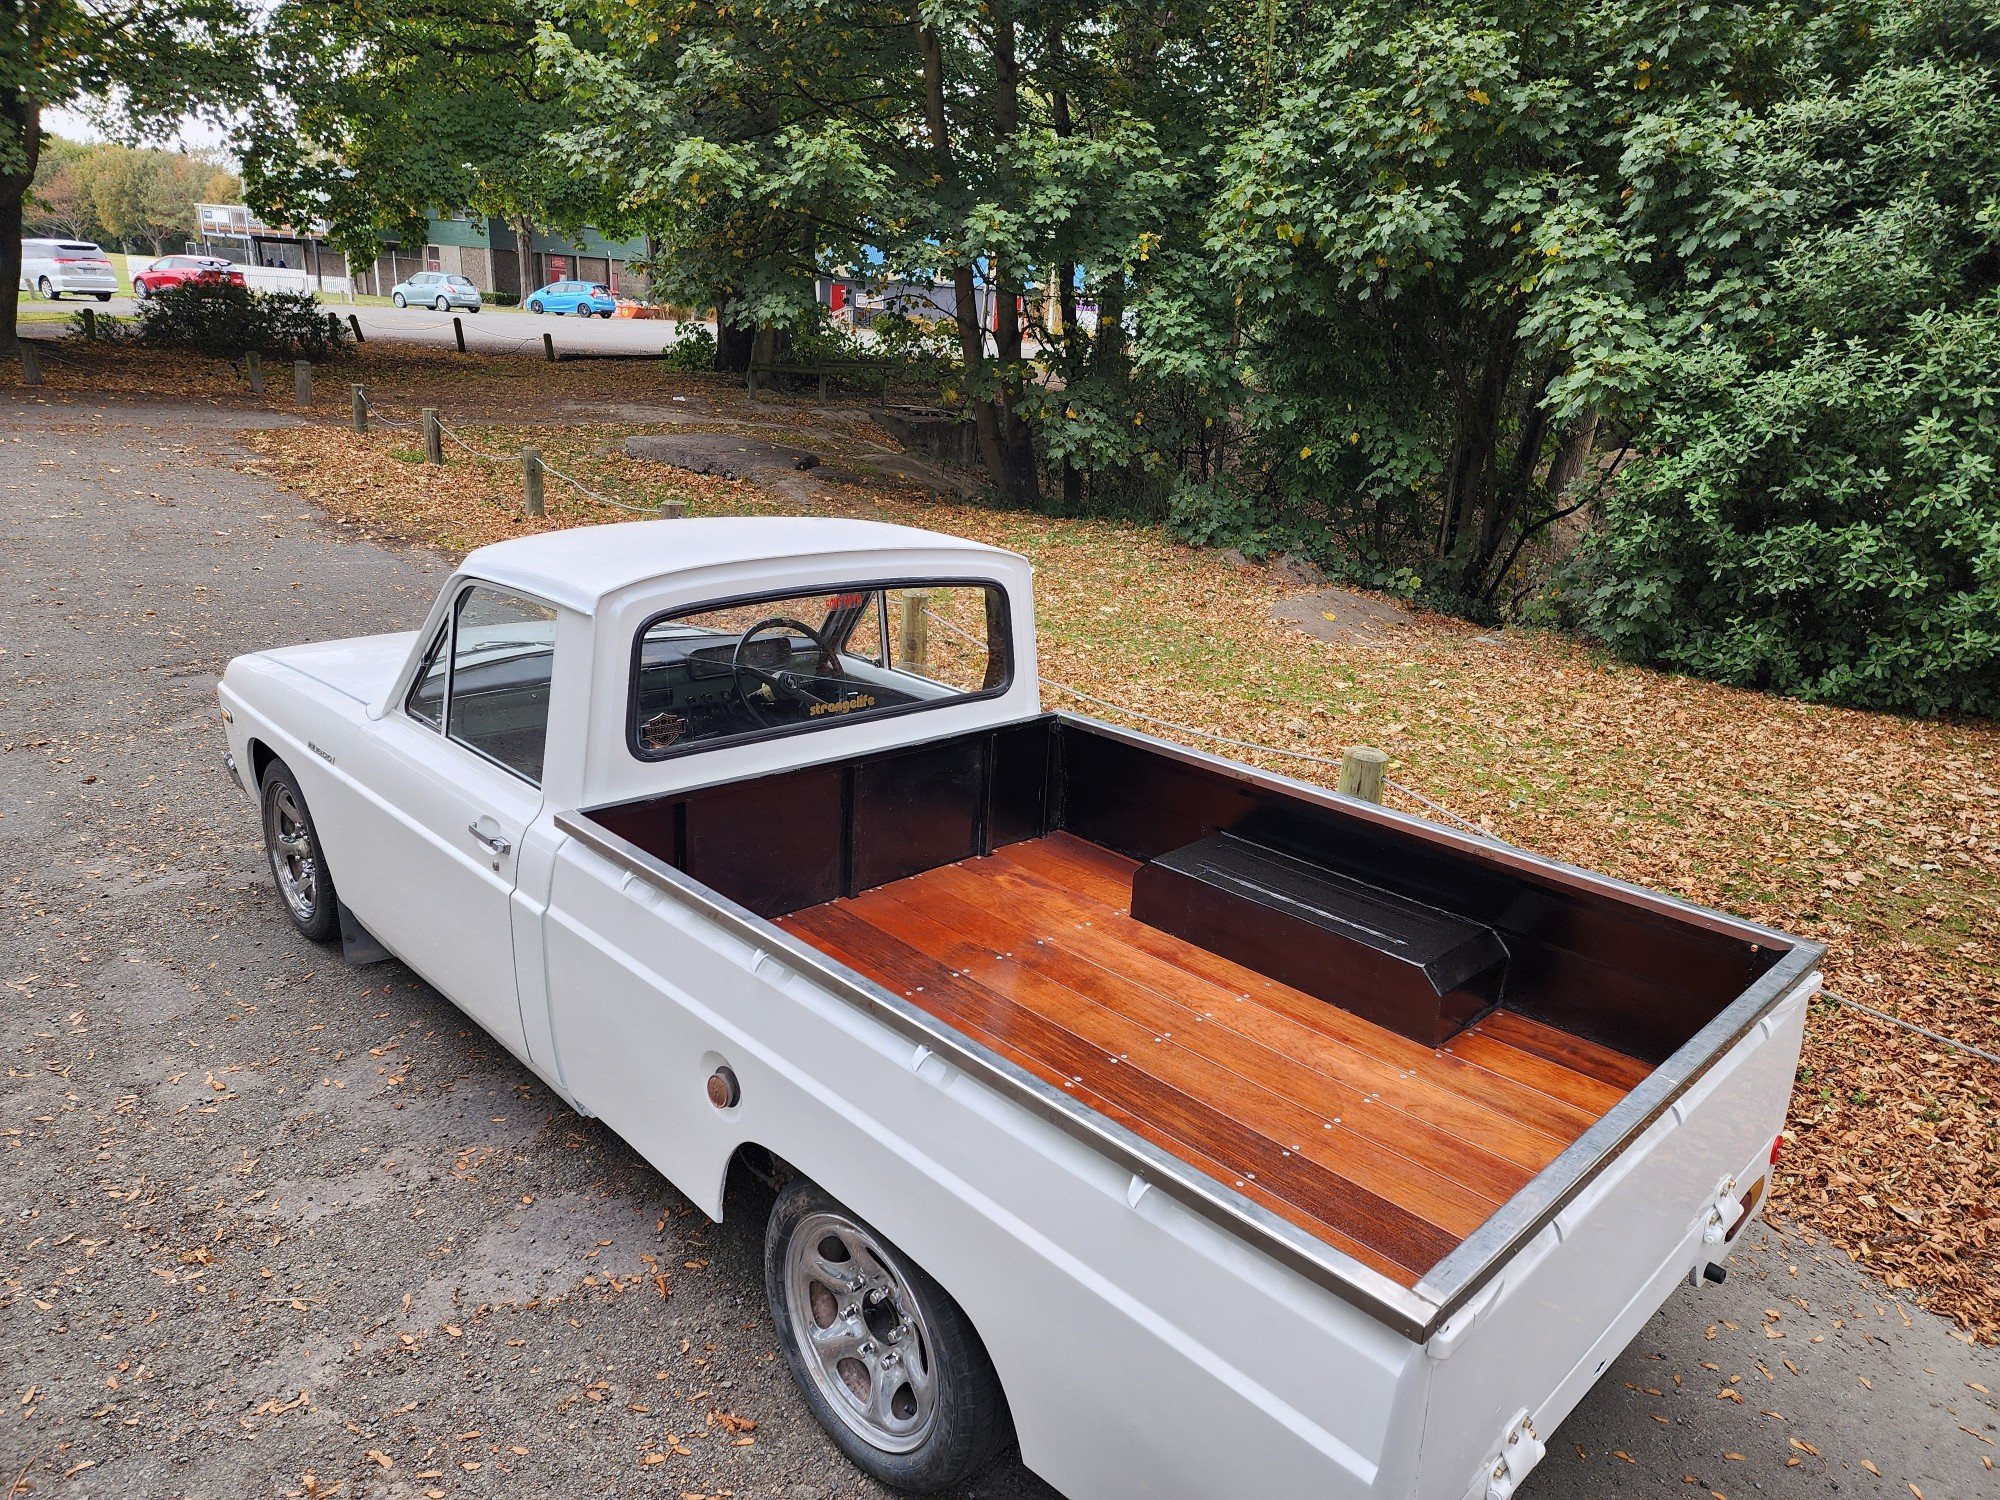
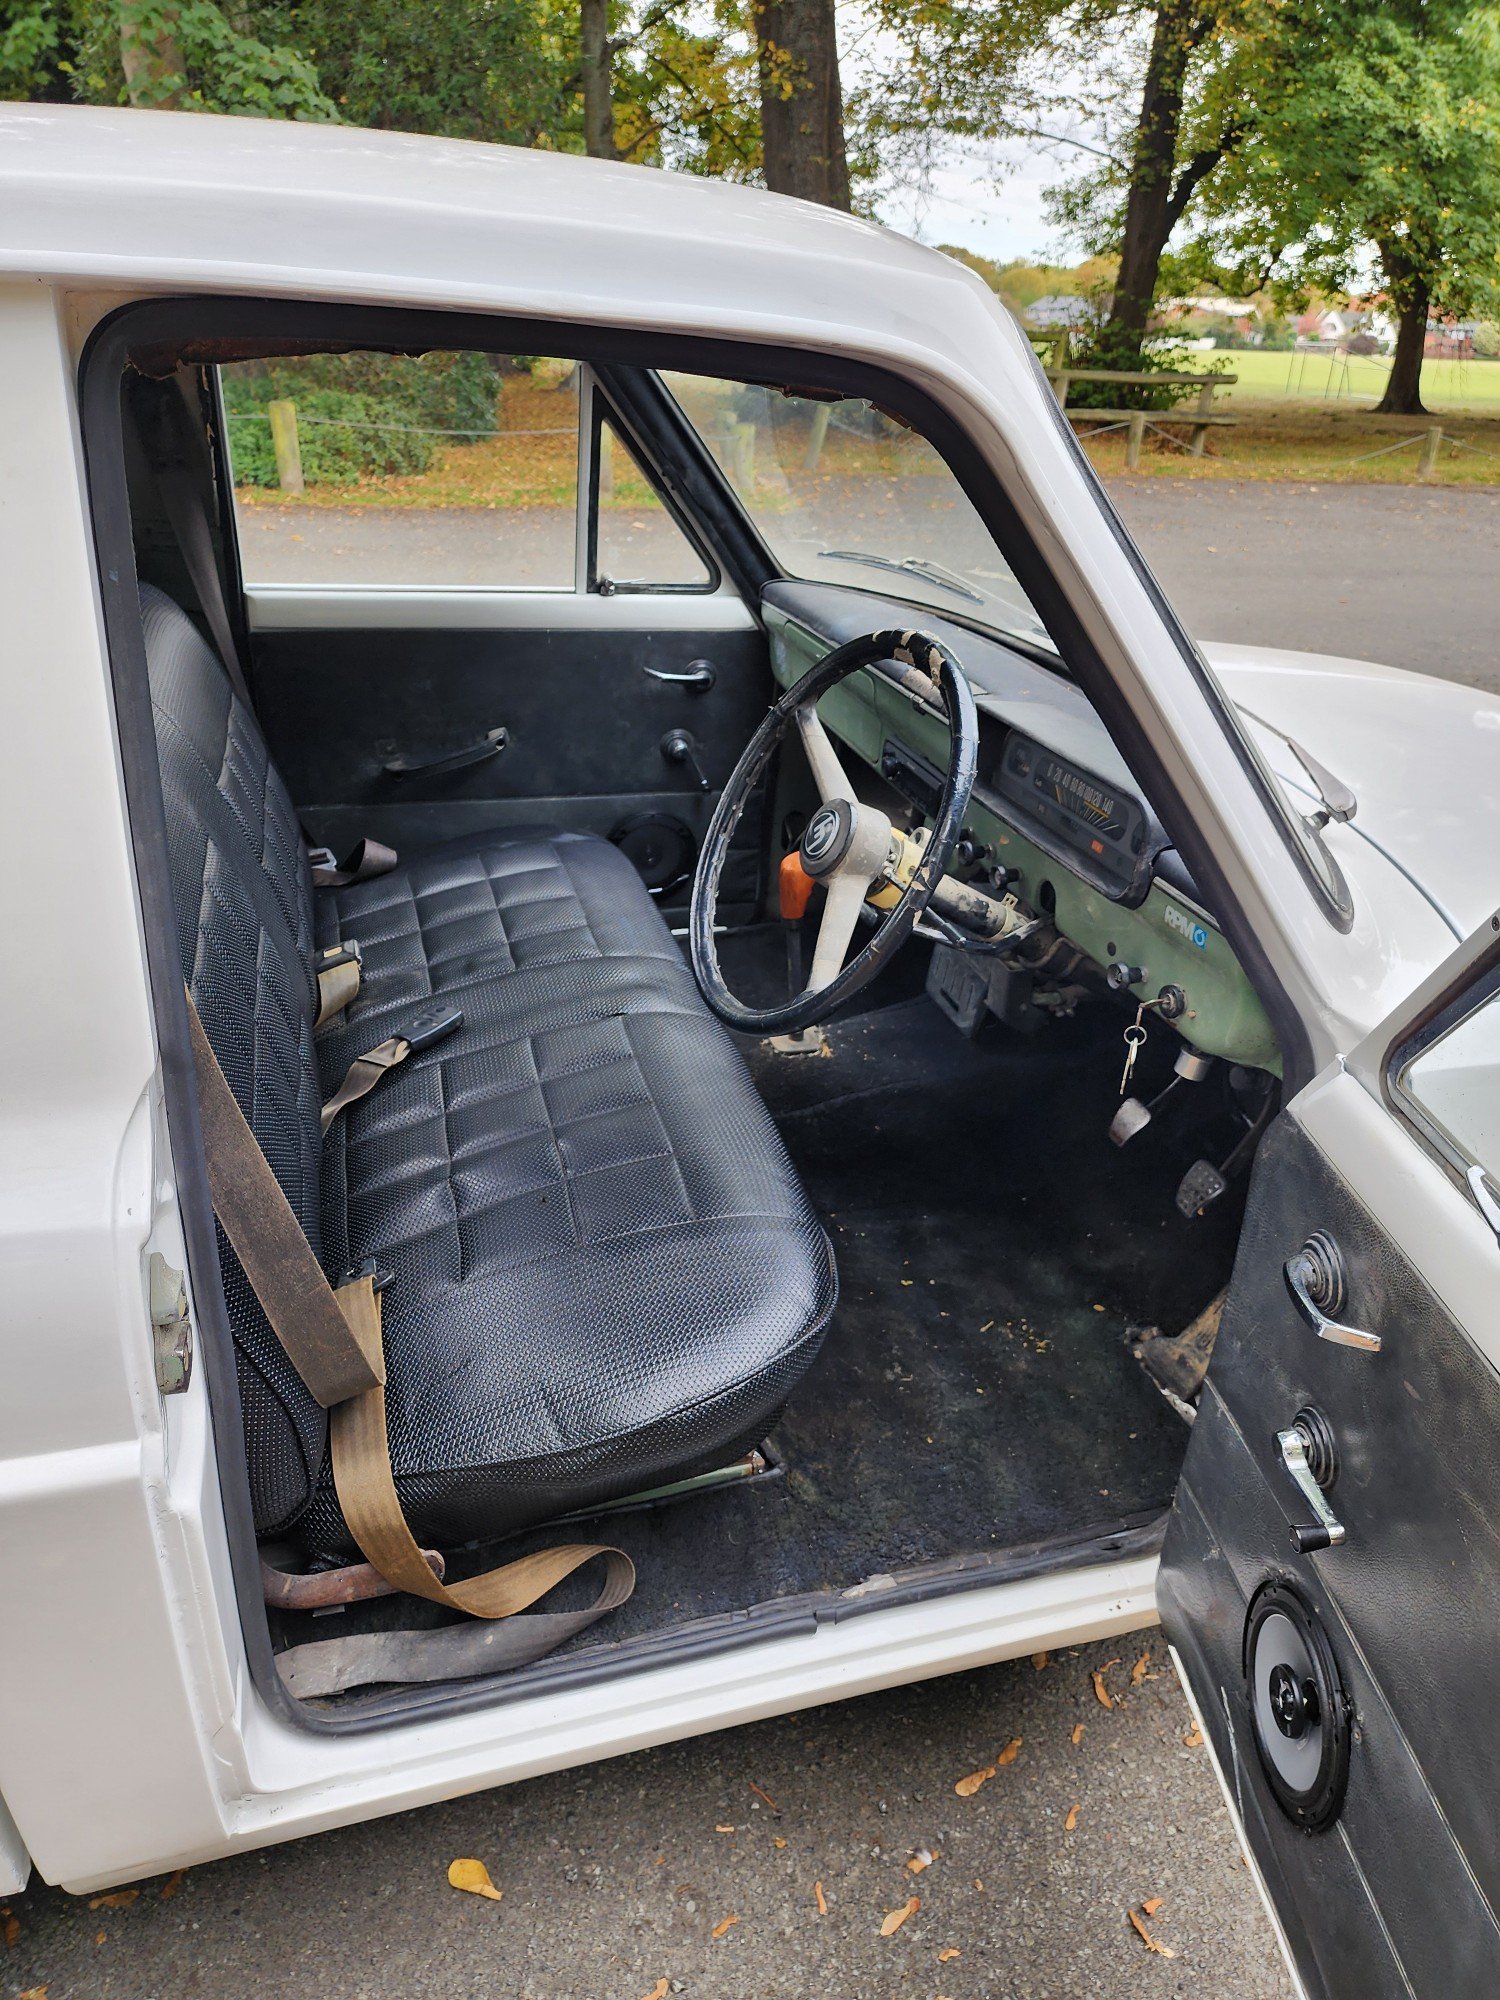
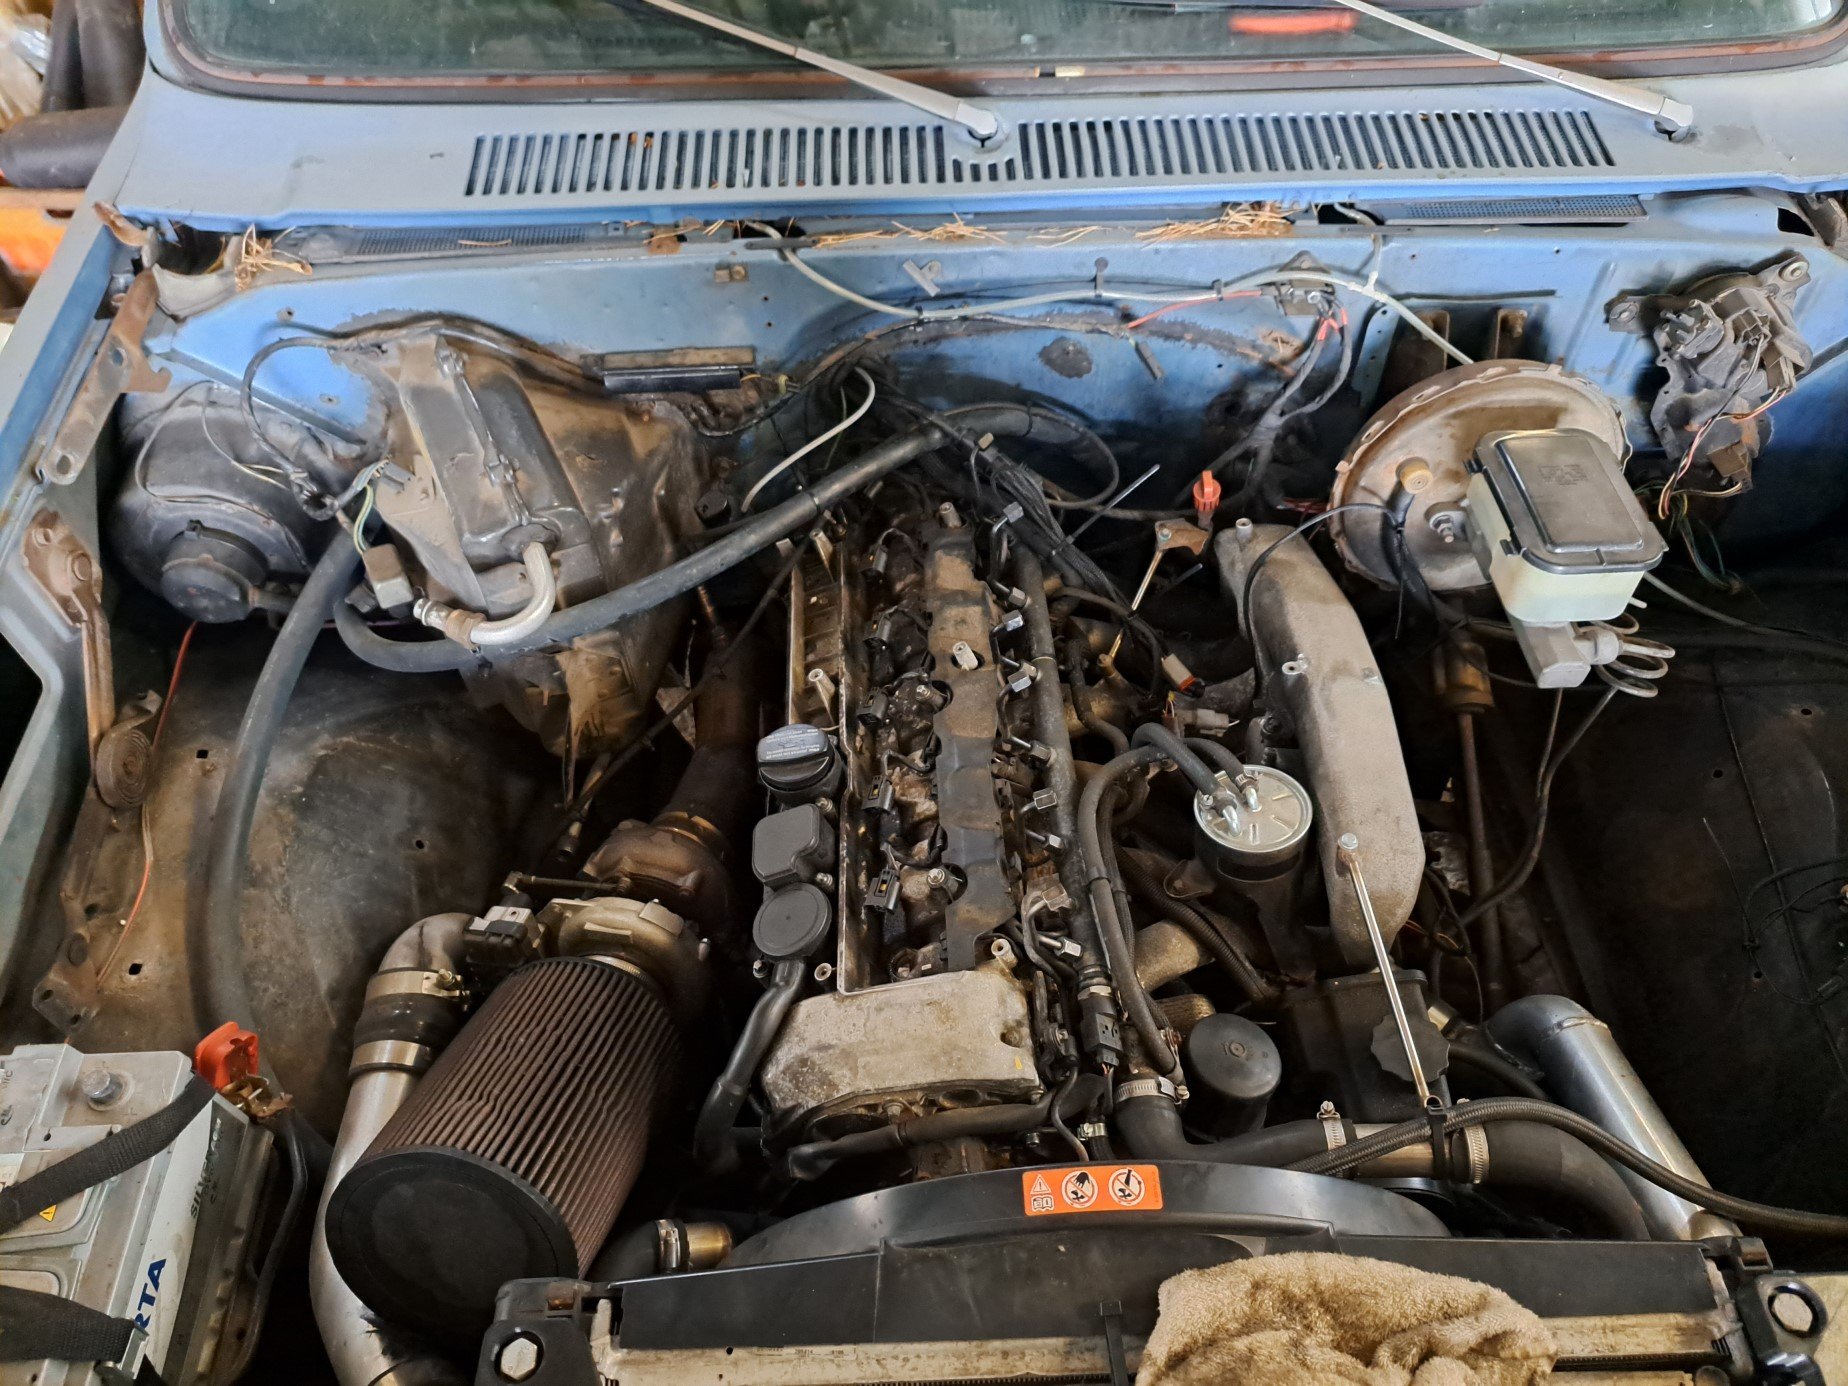
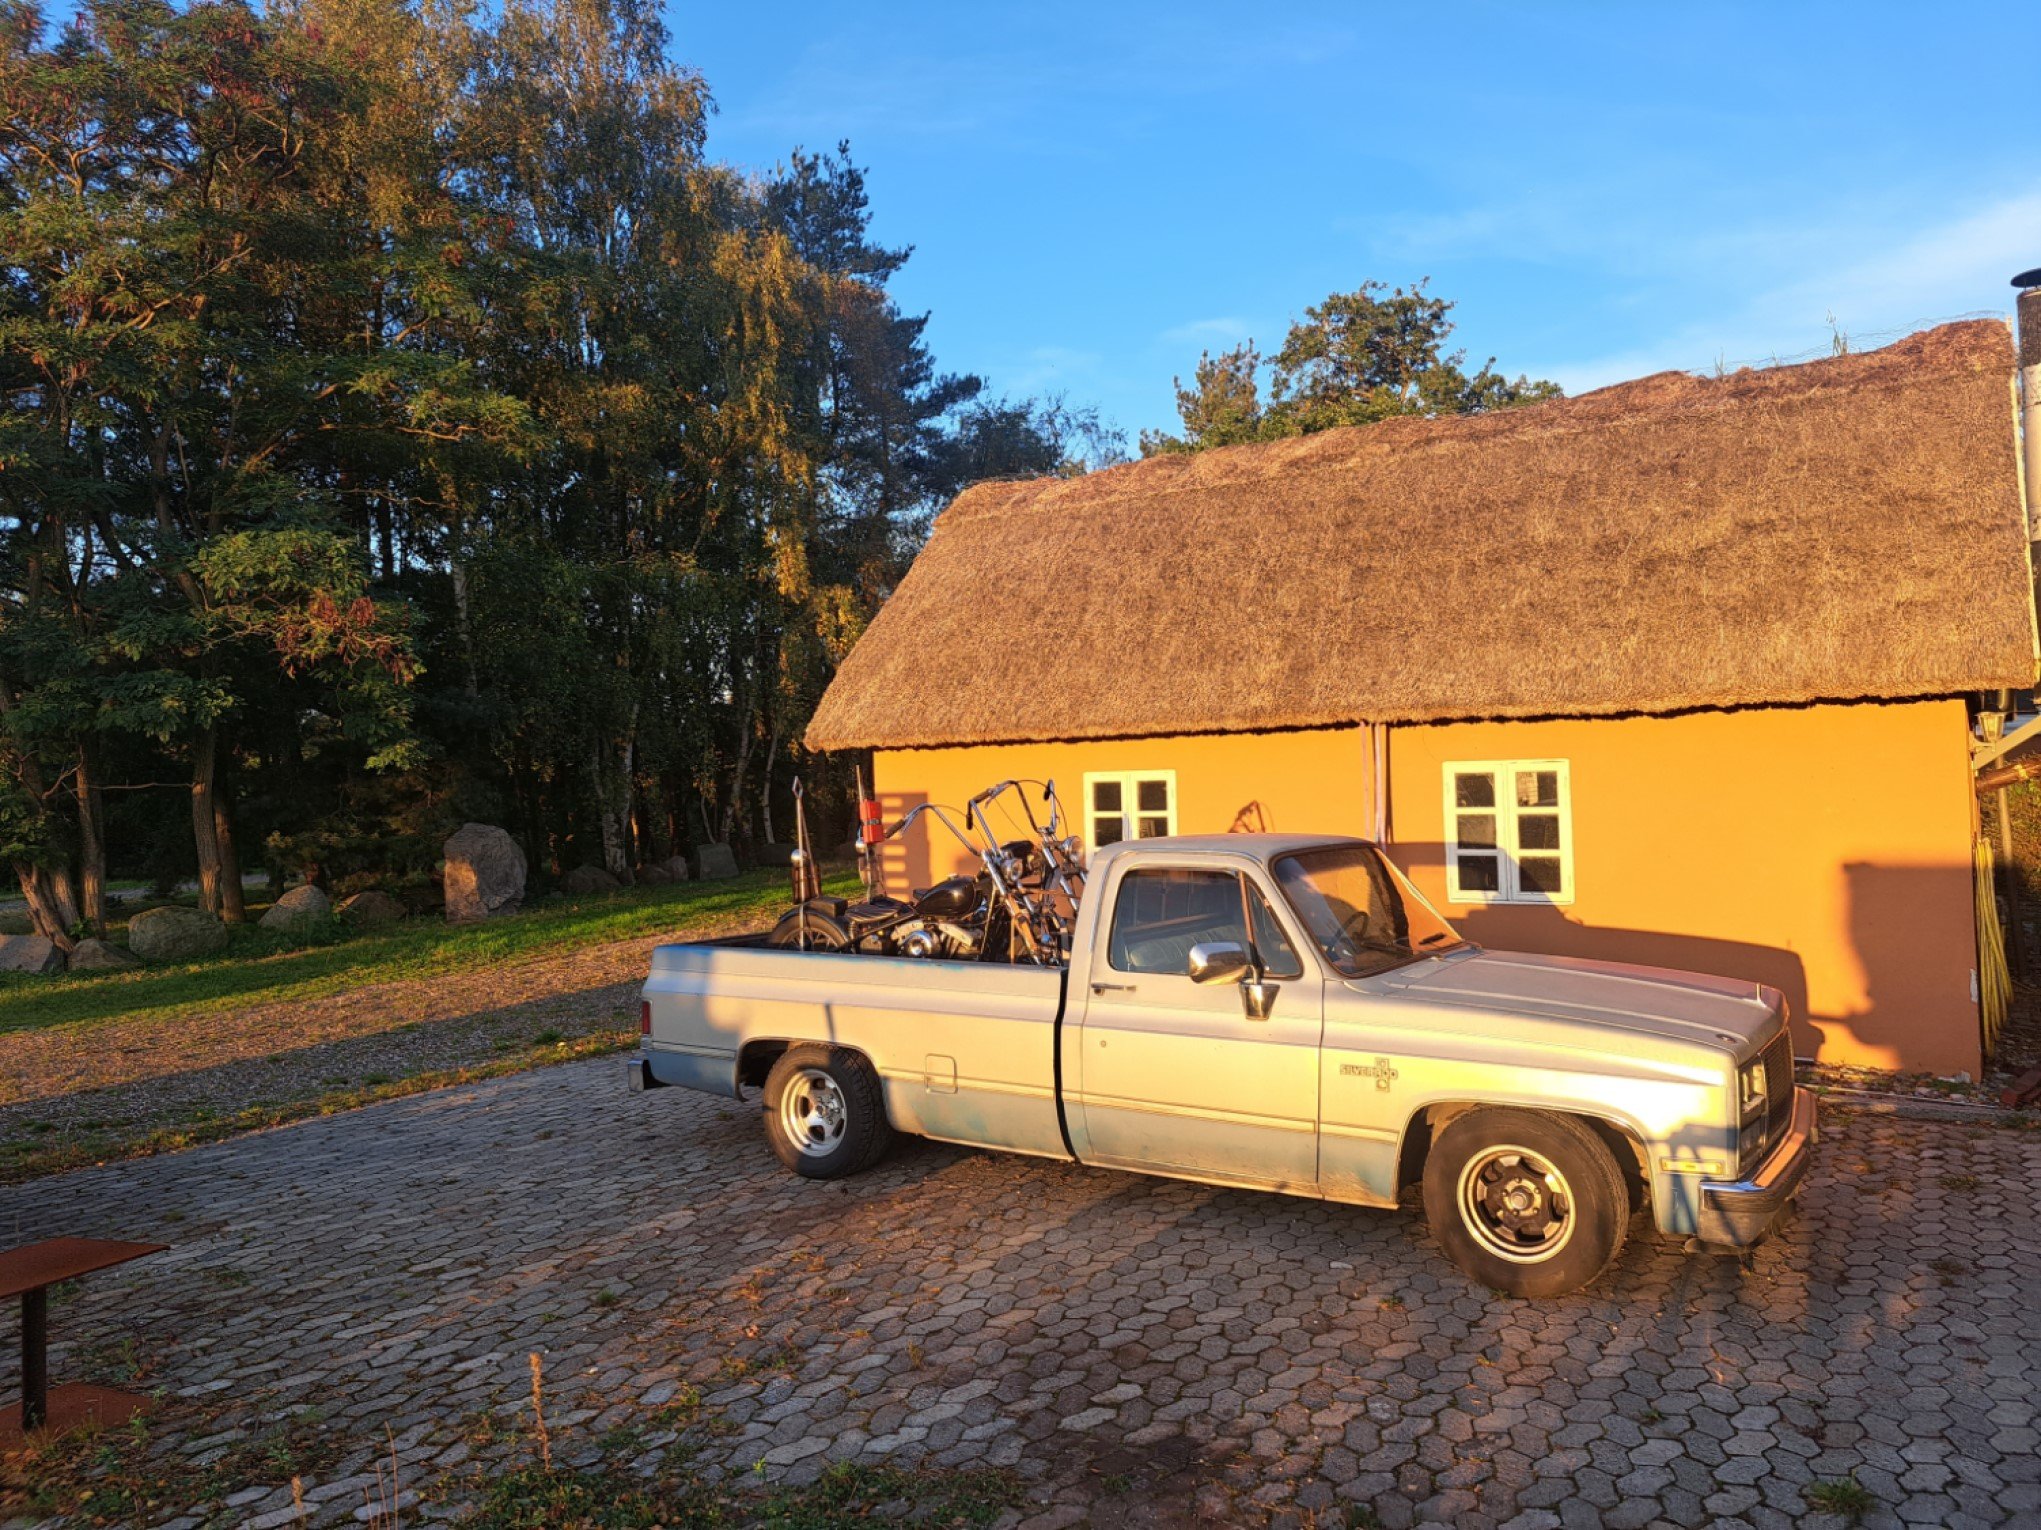
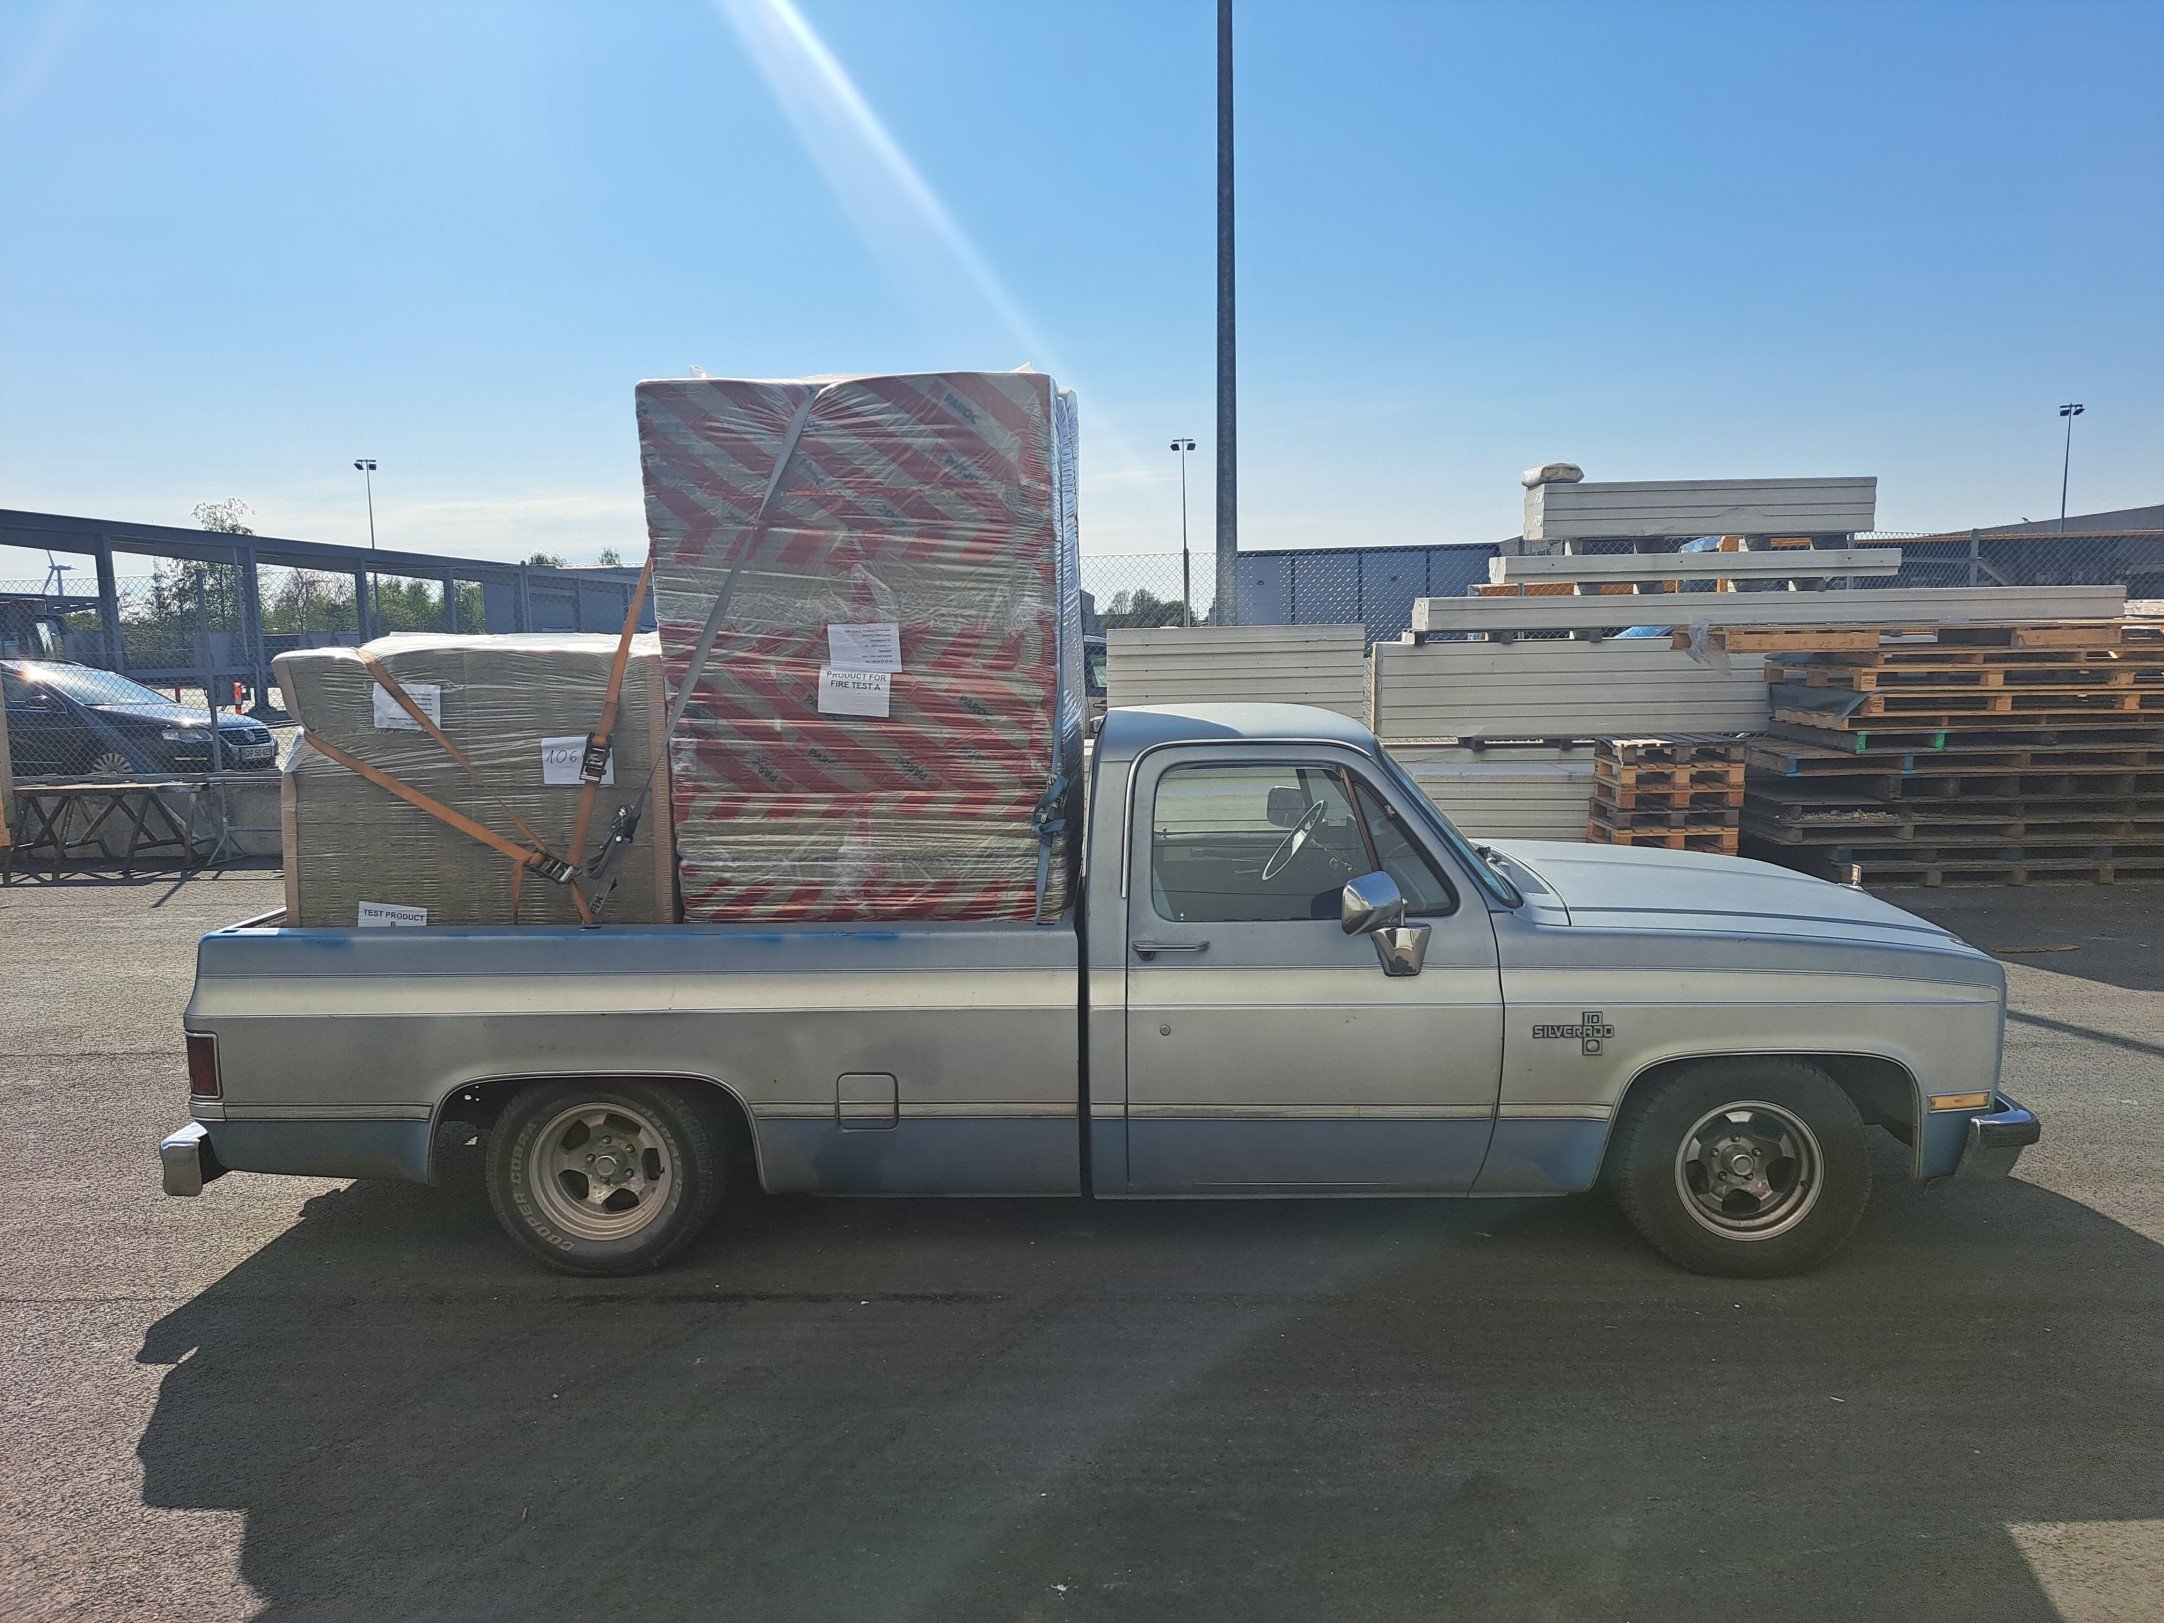
Yo, Long time no see, I figured that because im about to embark on phase 2 of this heap that I should probably make one of these. Anyway, I needed a new daily so I went shopping and found this sweet 82 long bed, I was after a long bed specifically as I needed/wanted it for my shop truck to haul choppers round with. The 350 had a sweet cam and gear drive so it sounded cool and had the requisite chop chop but the 4km/l fuel consumption meant that the daily part of the new car purchase didnt work quite so well. Luckily I had done my due diligence before the purchase and also bought a 2005 Mercedes Benz E320 cdi. Anyway @98cc hit me up and said he wanted to come visit so I put him to work and we pulled the 350 out and swung the OM648 in. Then at some point a @peteretep came and visited so we did some more work, anyway, I had a deadline, I made it, the truck got its maiden voyage with its new motor around Norway chasing a bunch of bikers, good times. Basically the rundown of the swap were: OM648 3.2l inline 6 diesel, the same one the Blacksmoke Racing dudes use. Baldurs Control Systems DID1 stand alone ECU 722.6 Mercedes 5 speed Auto with lockup OF Gear TCU 3 inch intercooler Built 10 Bolt with 30 spline axles, 9 inch housing ends and bearings, Eaton Trutrac and 3.08 gears. At this point it turned into my summertime daily and did truck things Then doing the usual facebook marketplace thing late at night I found a truck camper for sale, so of course I had to have that... At this point I found the limit of the 1/2 ton suspension so with the camper and the 6/8 drop that it has, so I had to do something, I made a bag over leaf setup in the back to help with load carrying capabillity. So about here is up to date, the engine swap is legit, it now gets 14 km/l and will happily cruise at 120 on the highway, because of the 8 foot bed it hauls all manner of things without asking, and does a skid. Discussion
2 points
-
Happily everything ordered so far fits injectors dropped right in, were a snug fit I haven't dare prime pump yet may piss fuel everywhere. Better add that to whiteboard before I go to far.2 points
-
It works.
2 points
-
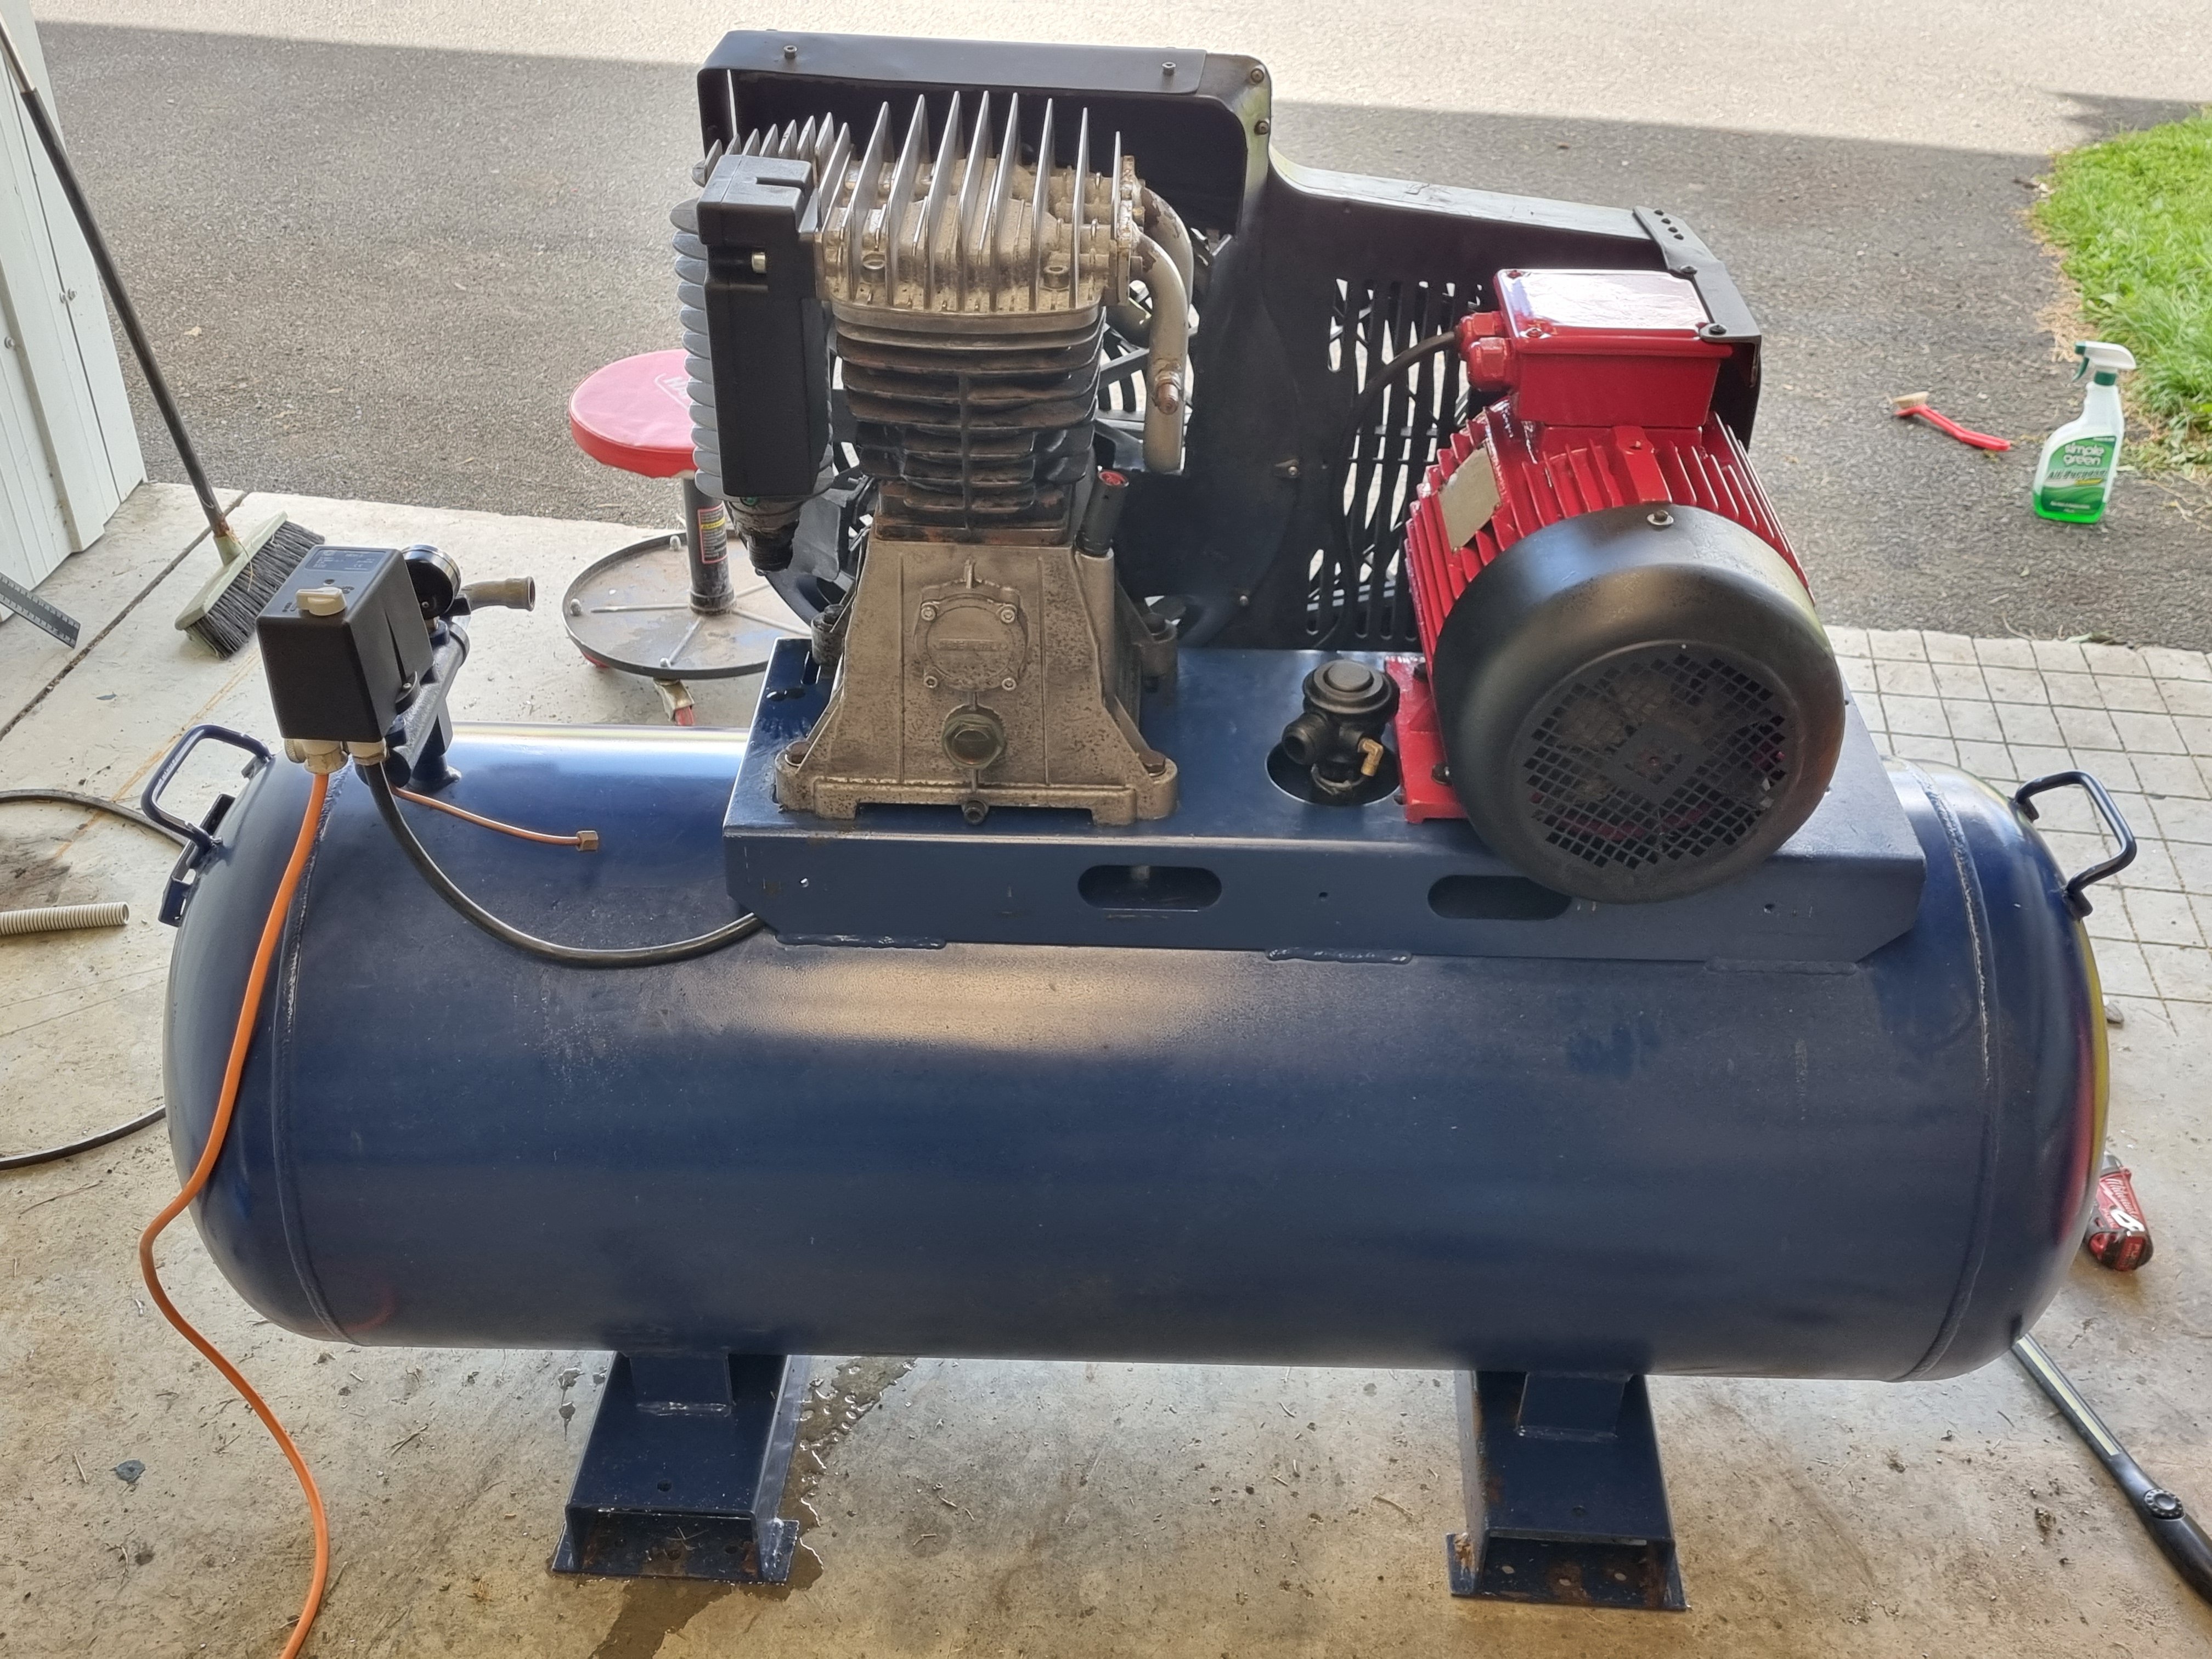
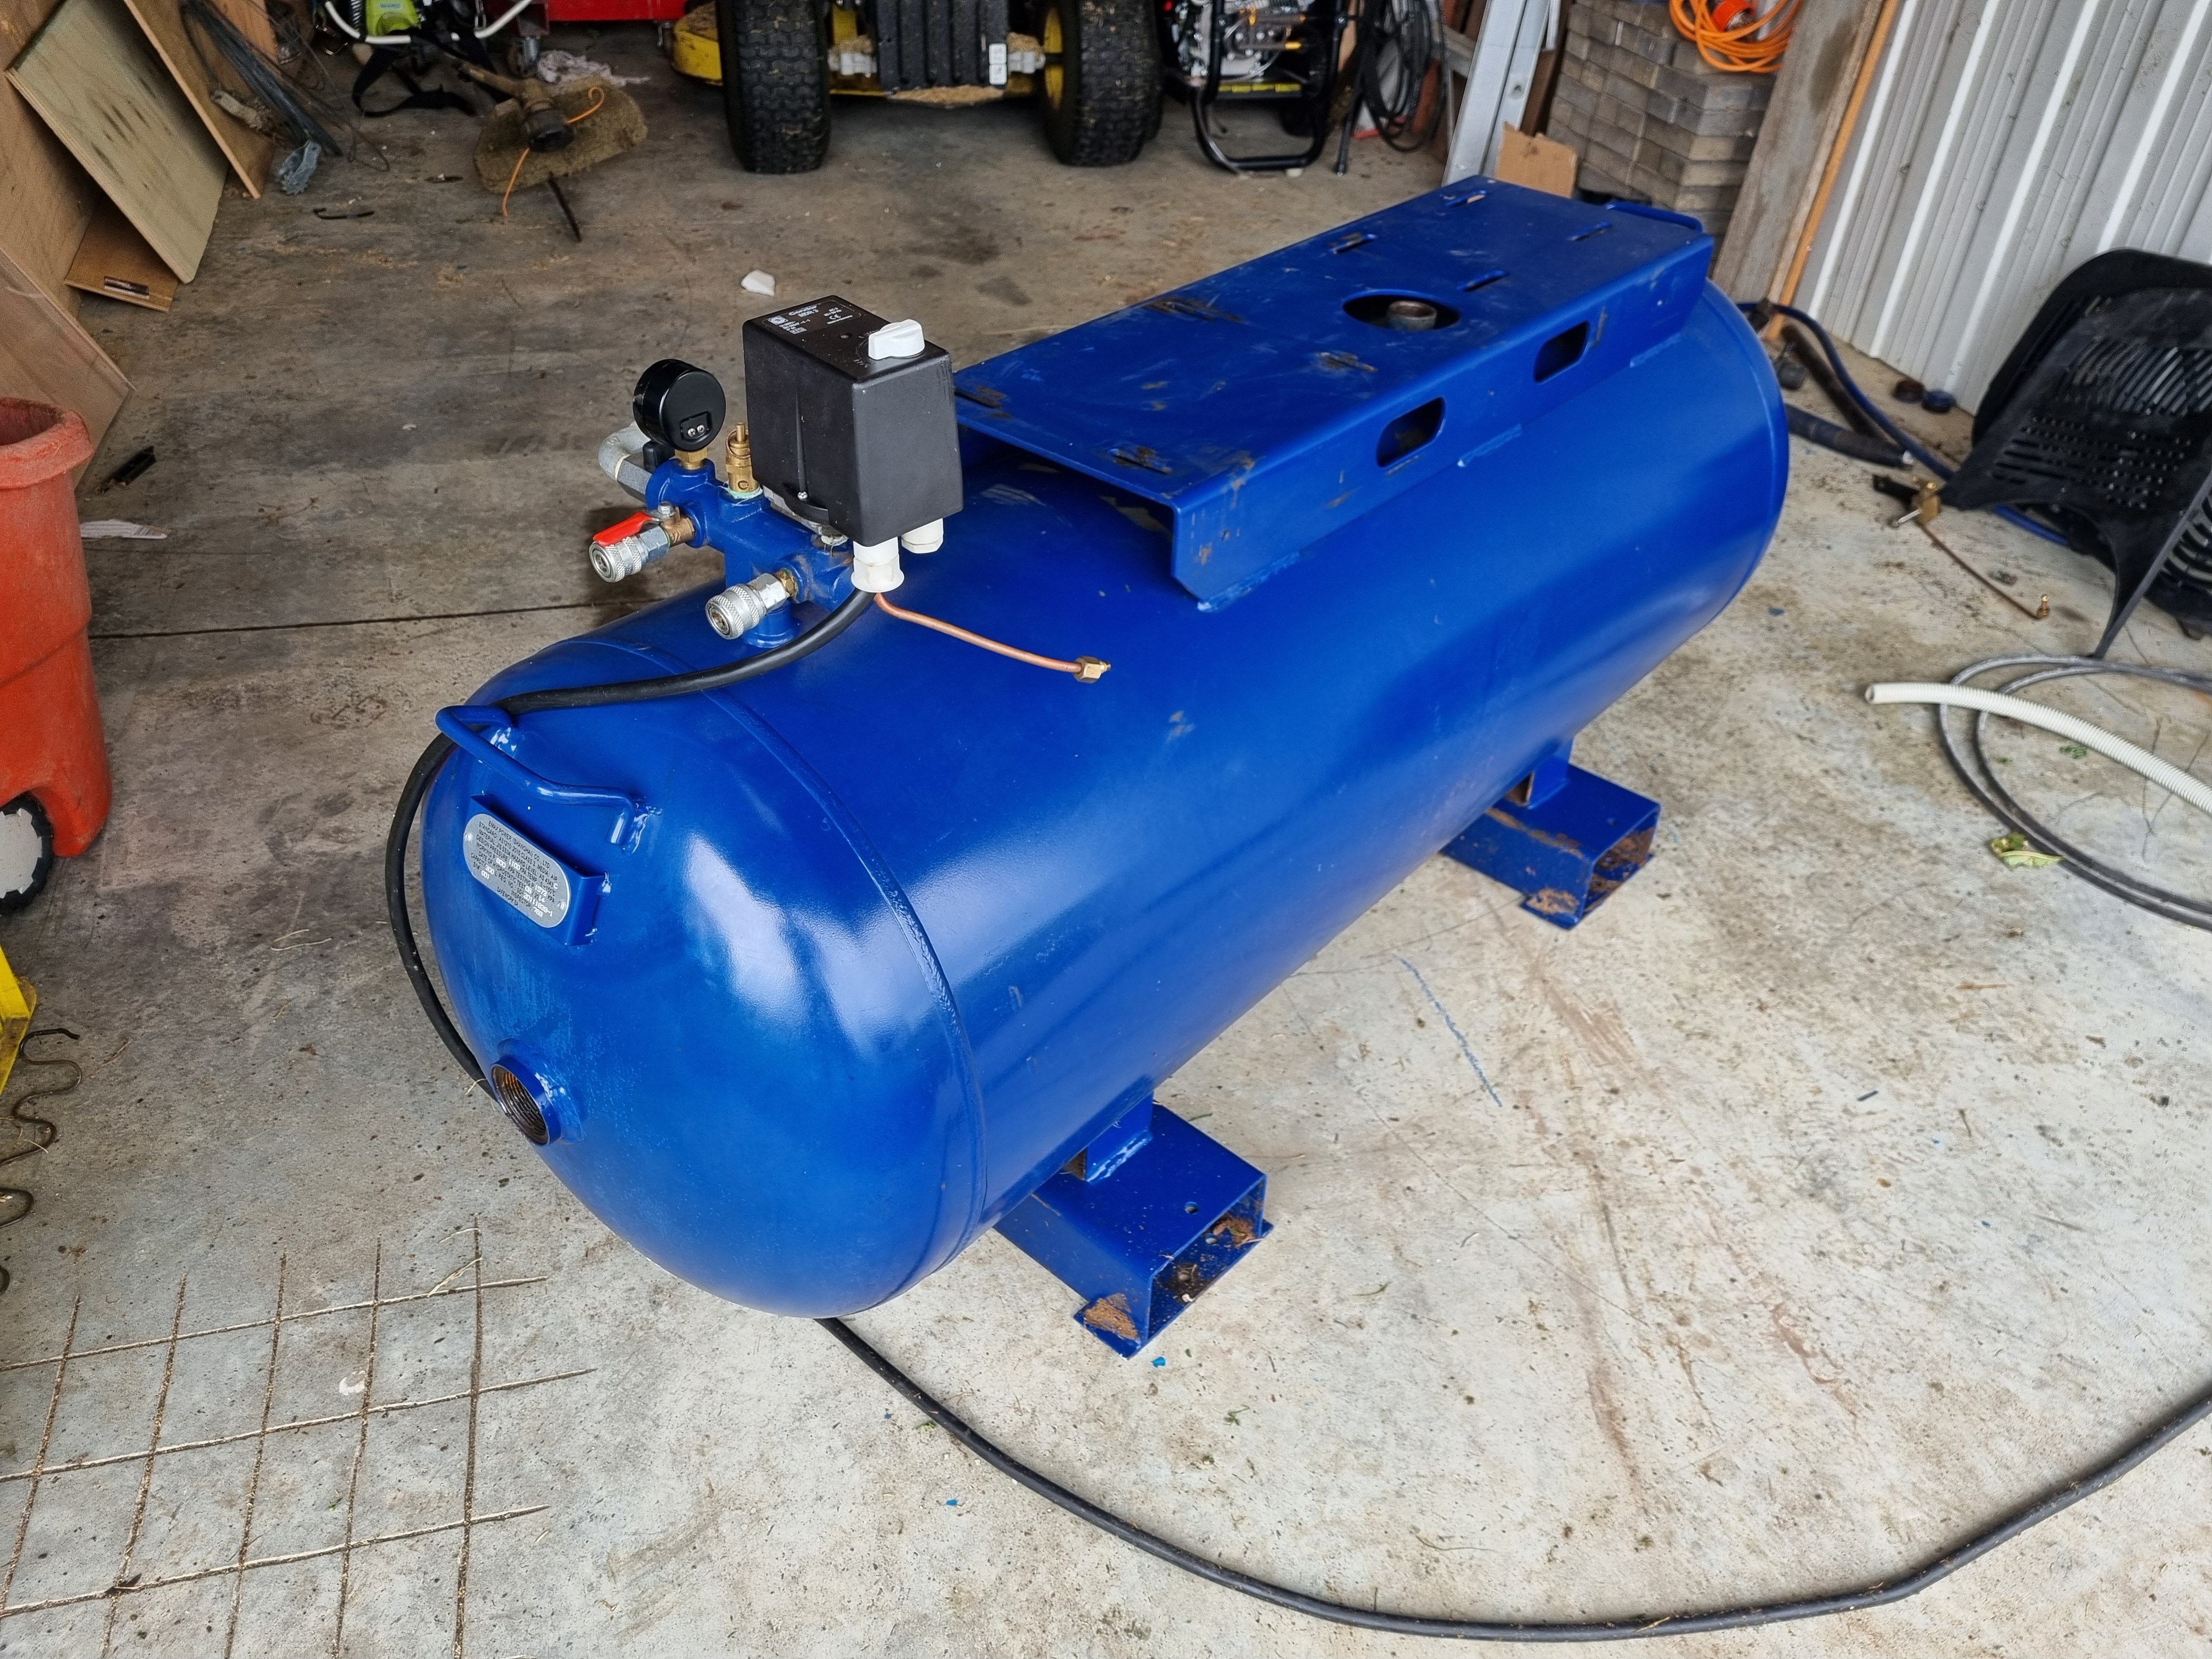
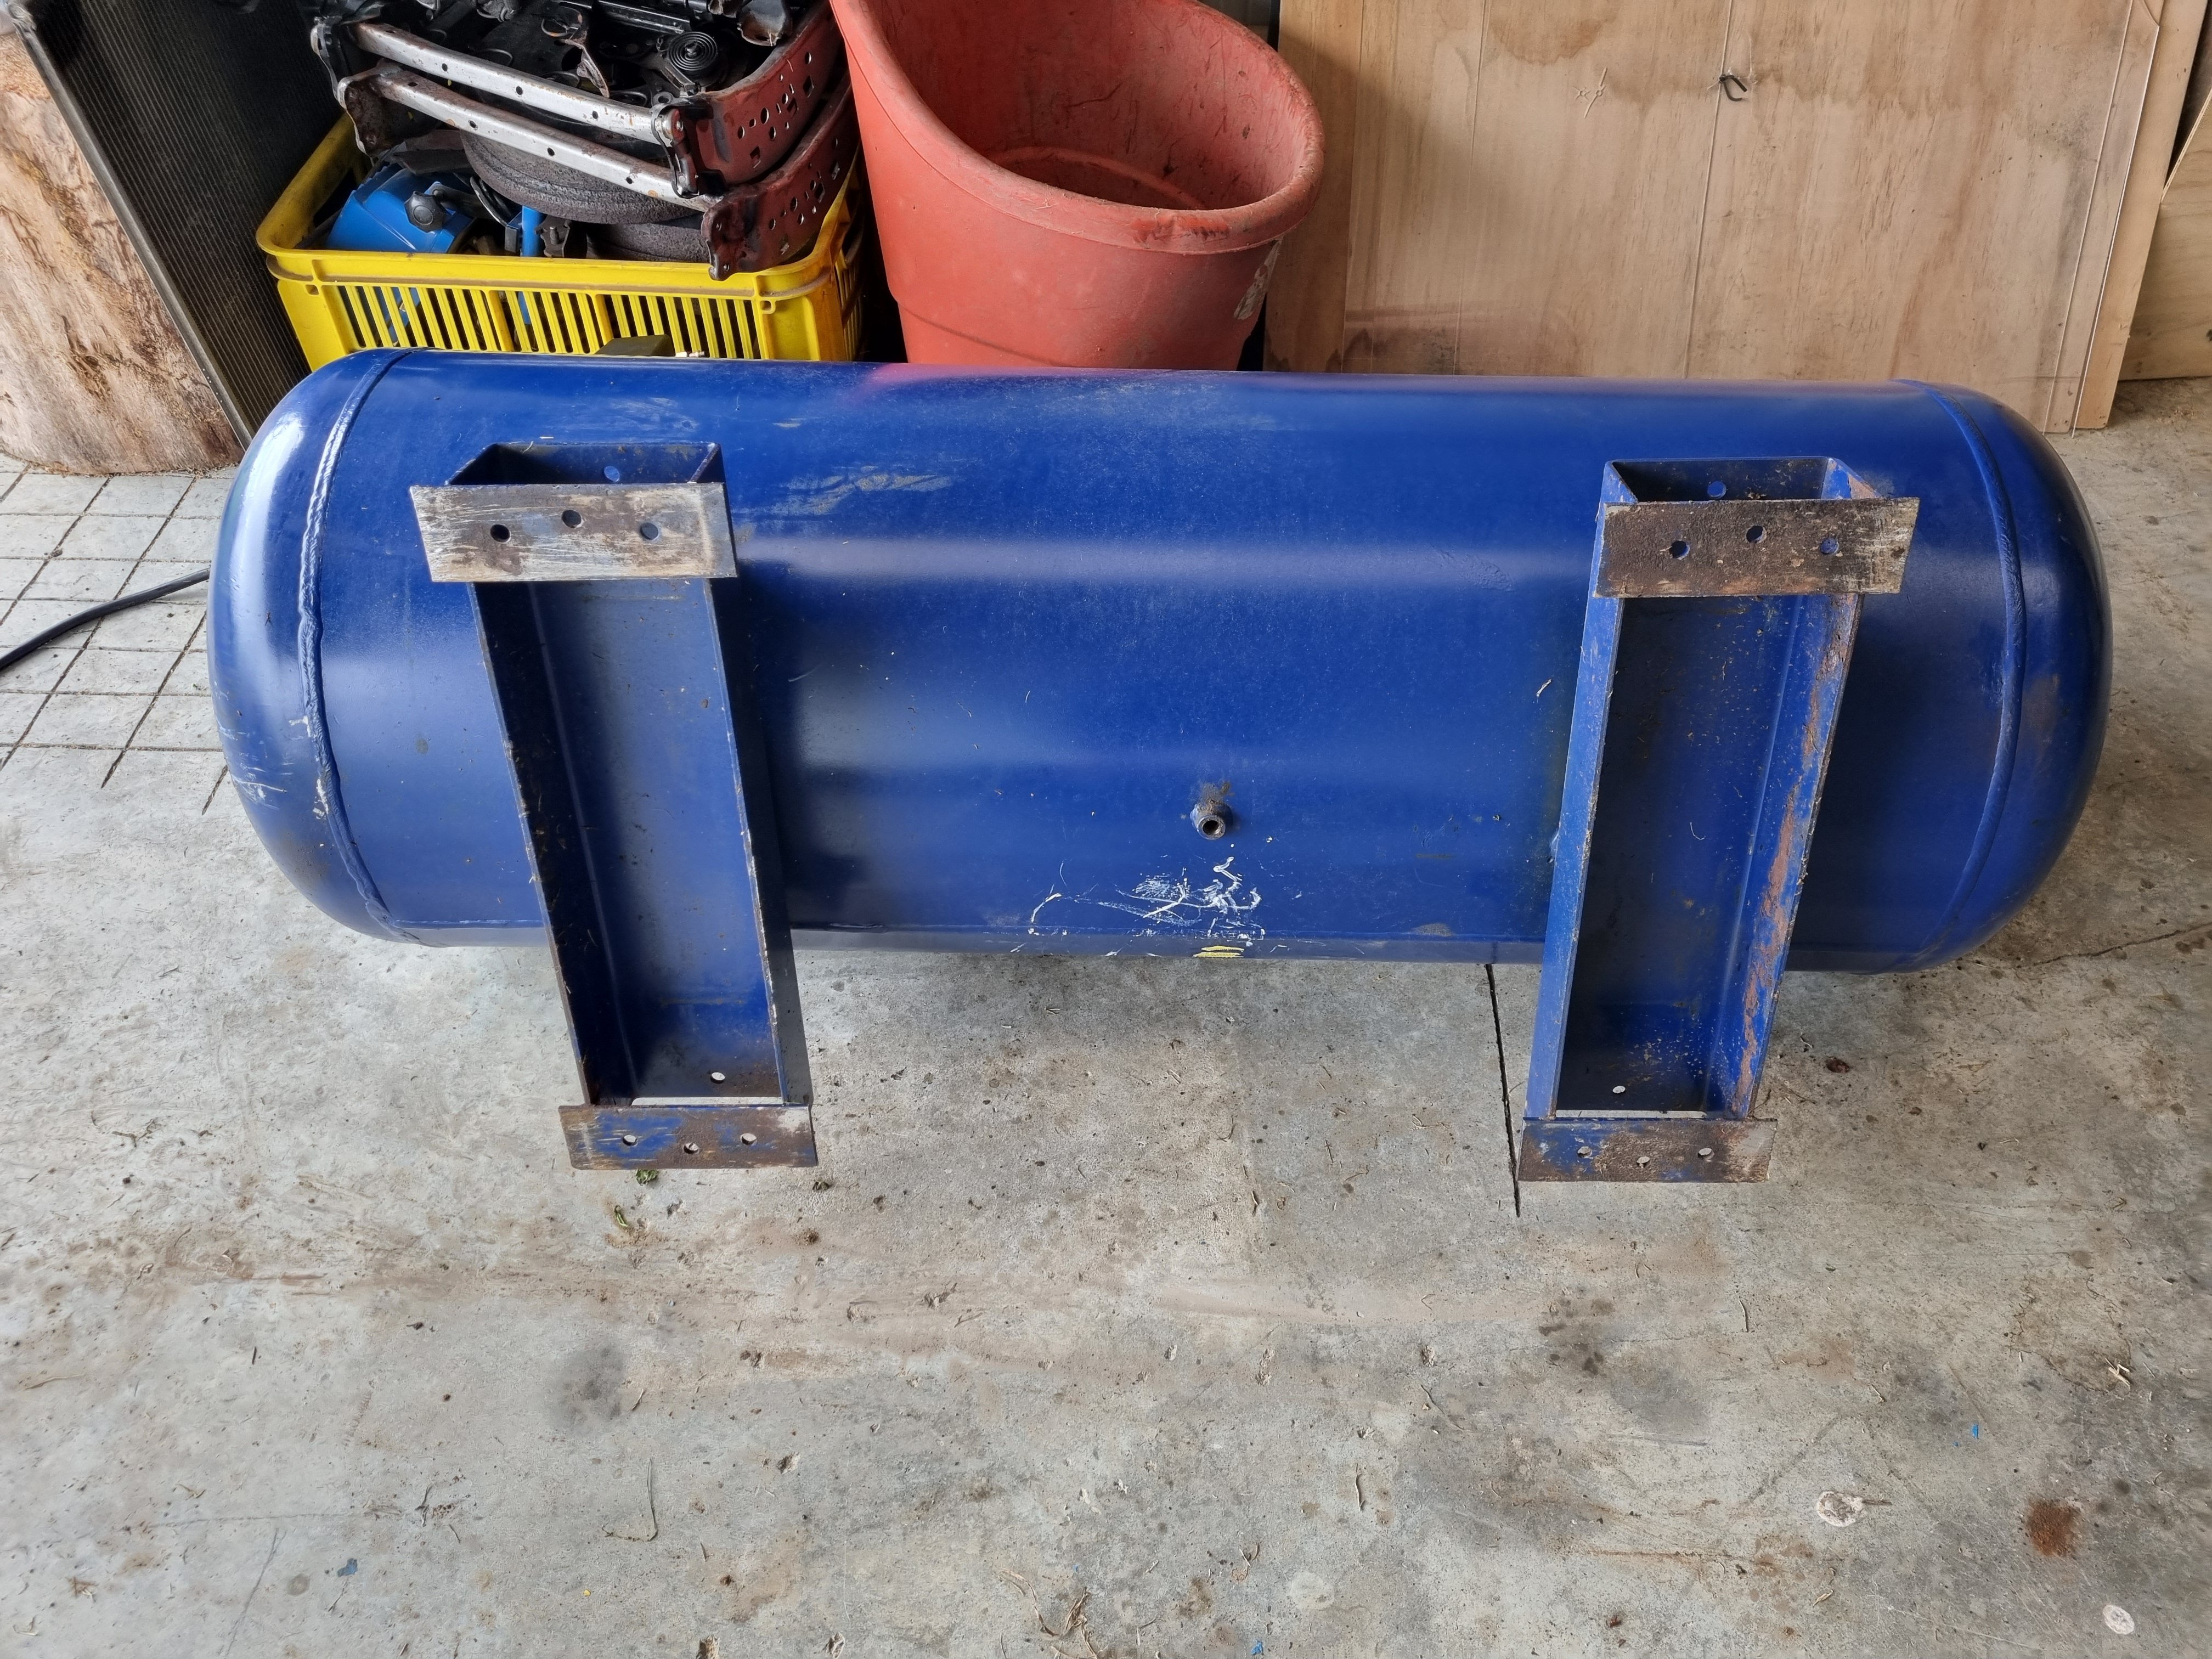
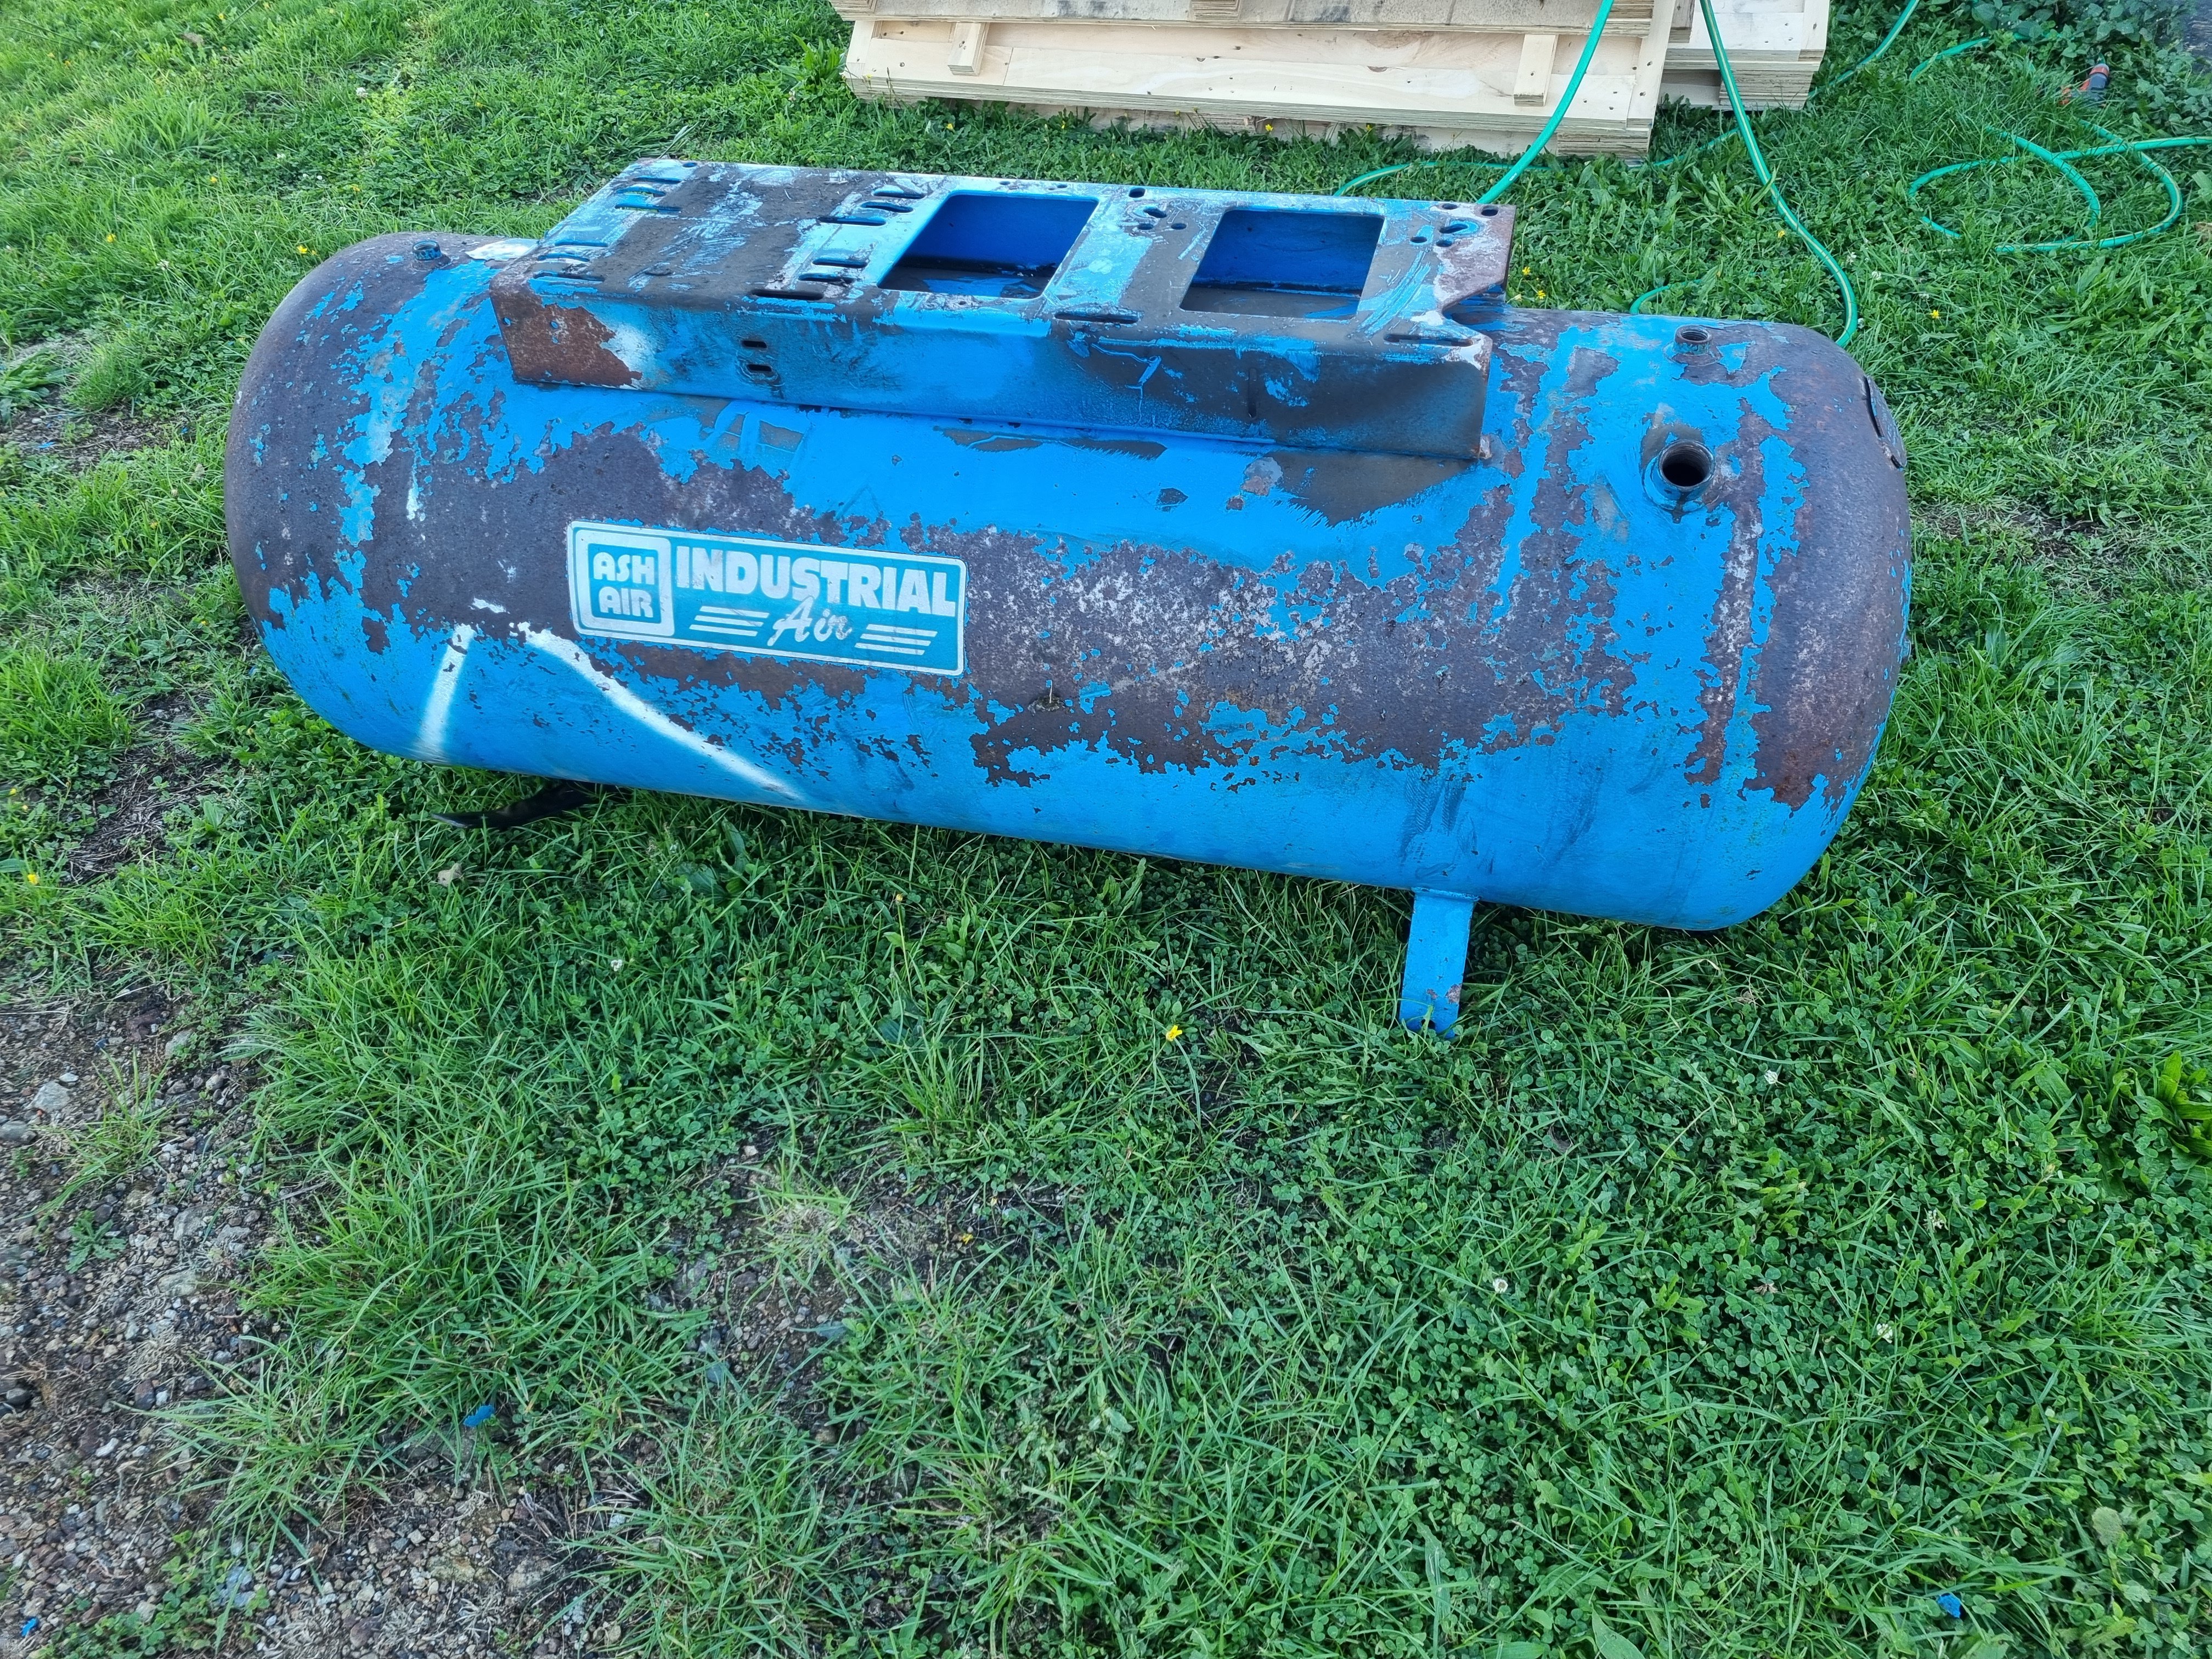
So I took the tank to get pressure tested and it had a crack where the motor plate is welded on. I decided to see what was available on the tard and a perfect (almost) tank was for sale for a price less than another pressure test and paint so I bought it. Is 300L, made in 2014 and comes with a pressure switch and some fittings I don't have. The only problem is the inlet port from the compressor to the tank is in the middle. I don't have a pipe long enough to plumb it. I need a new pipe for that, probably about 900 long. I'll try to mount everything into the tank today and get it running without the pipe. Let's see how far I get.
2 points
-
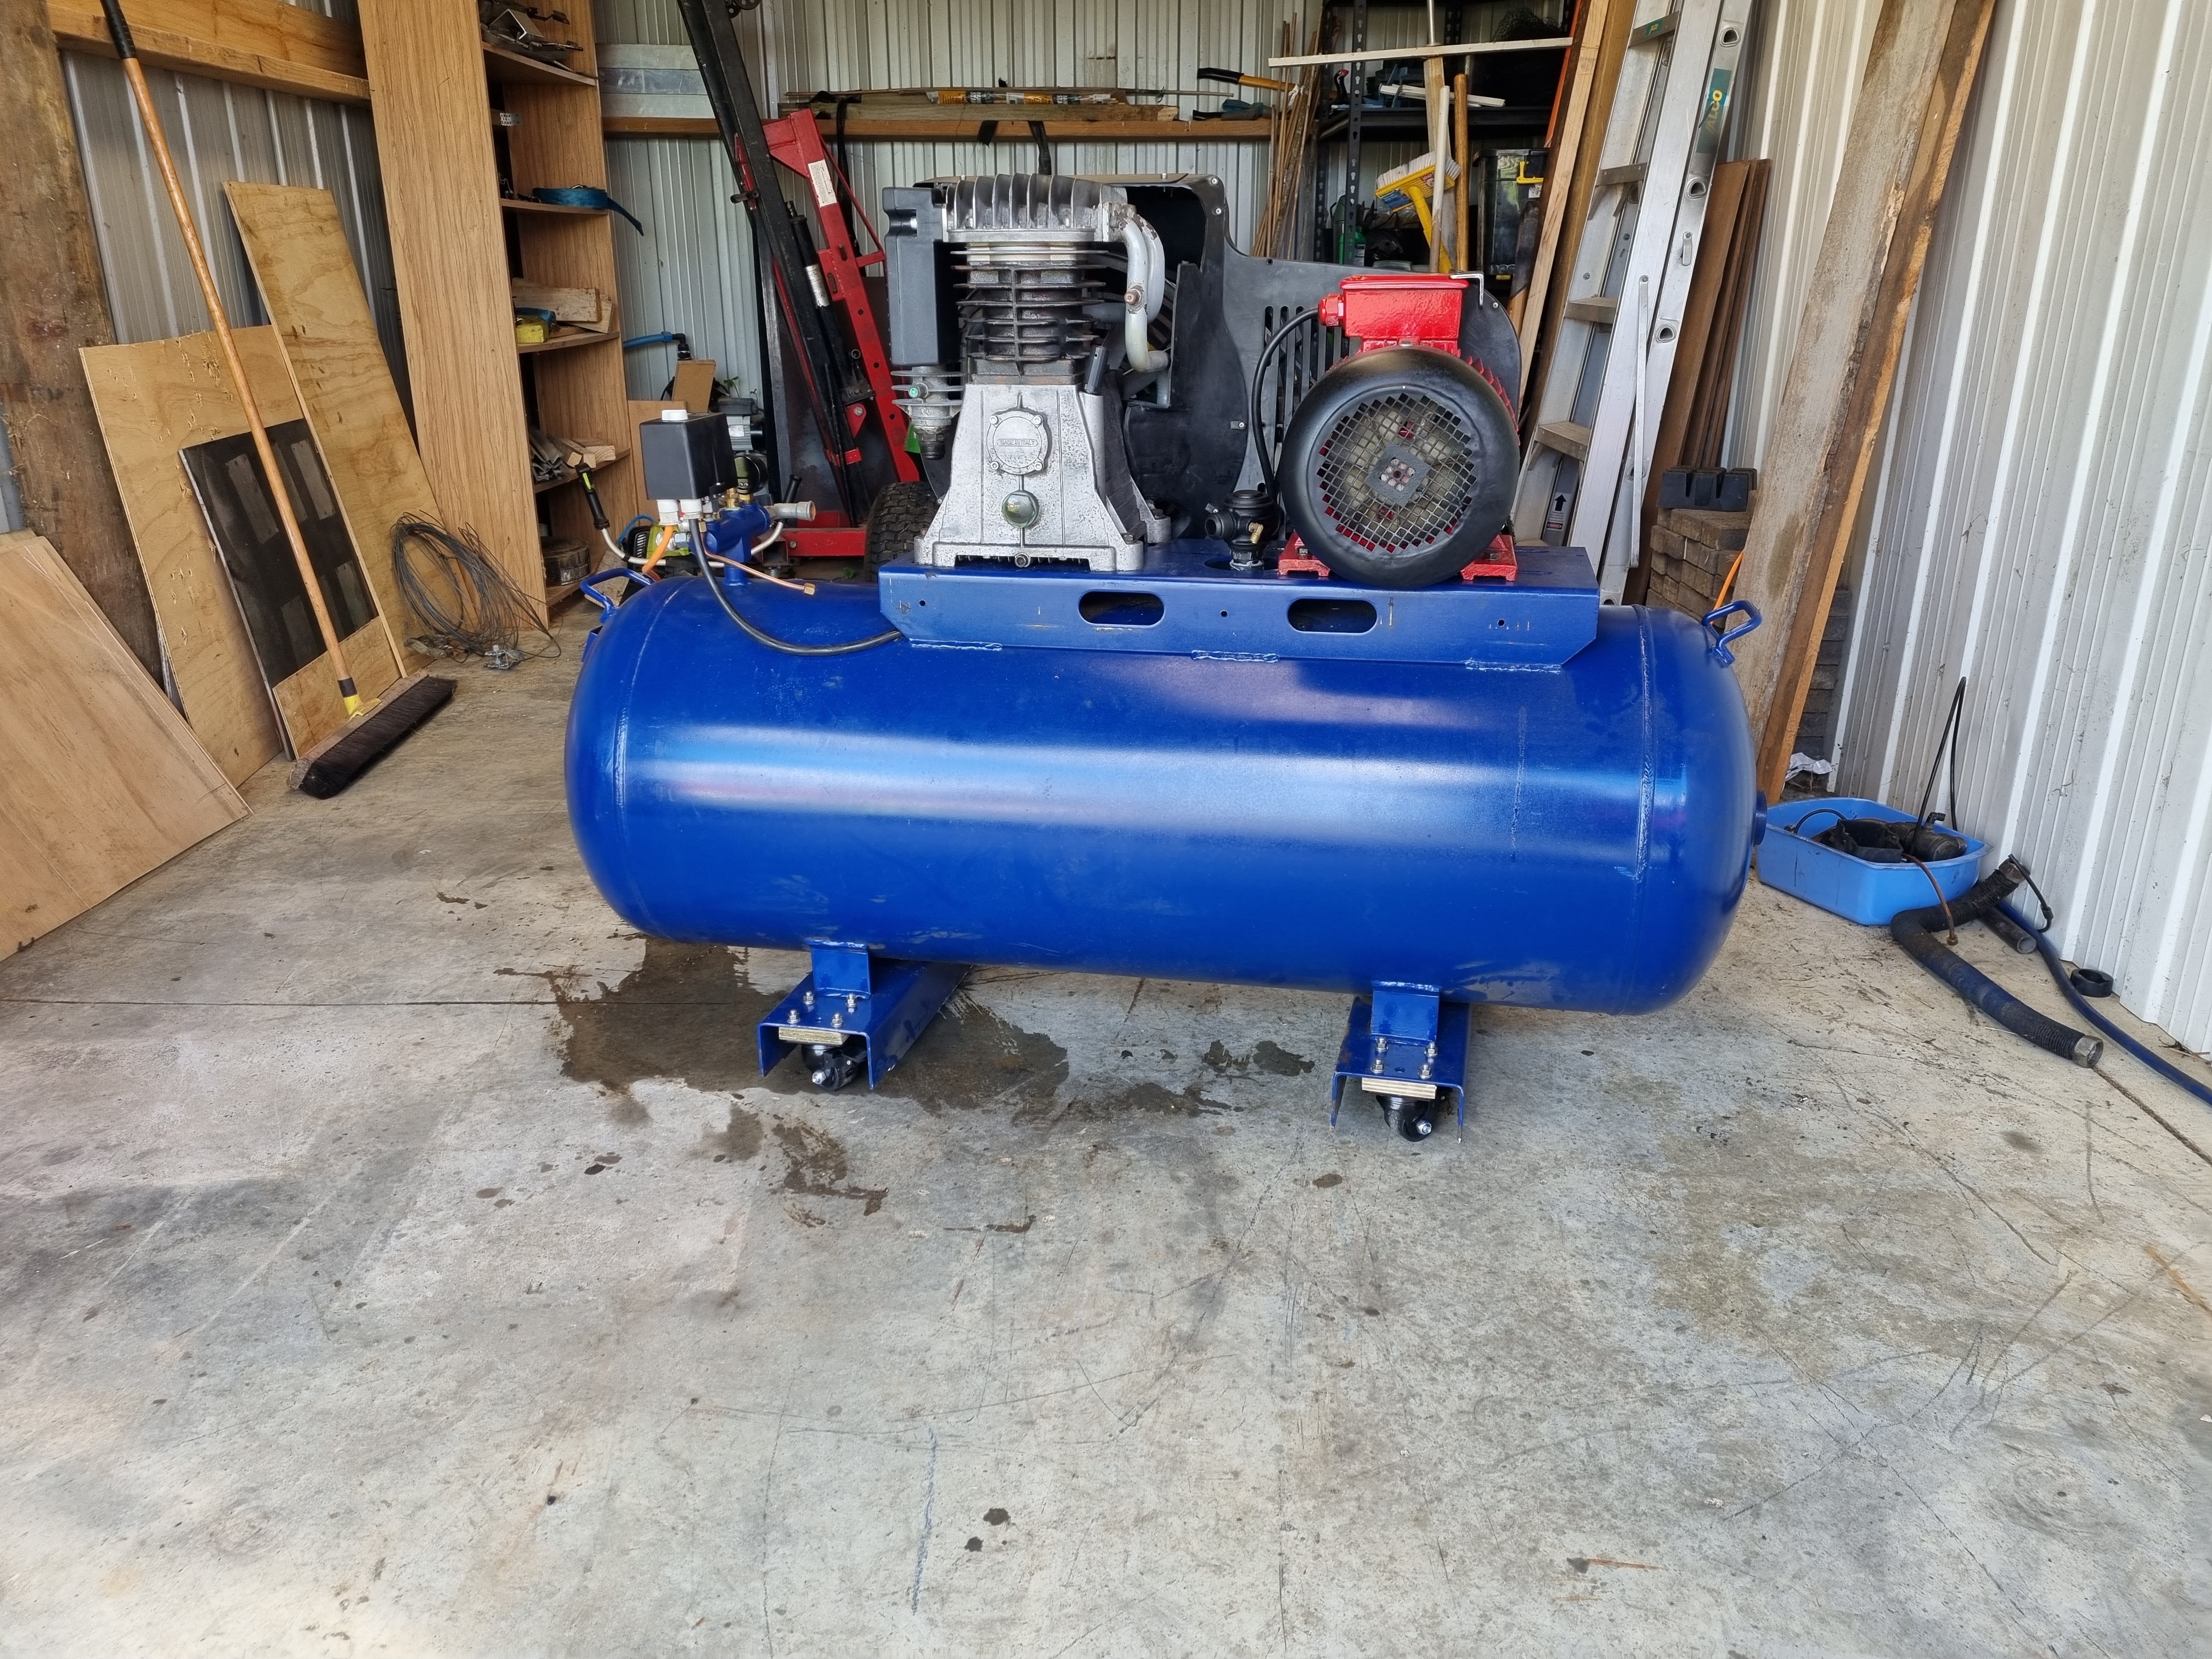
then, to make it go faster, i painted the electric motor red.
2 points
-
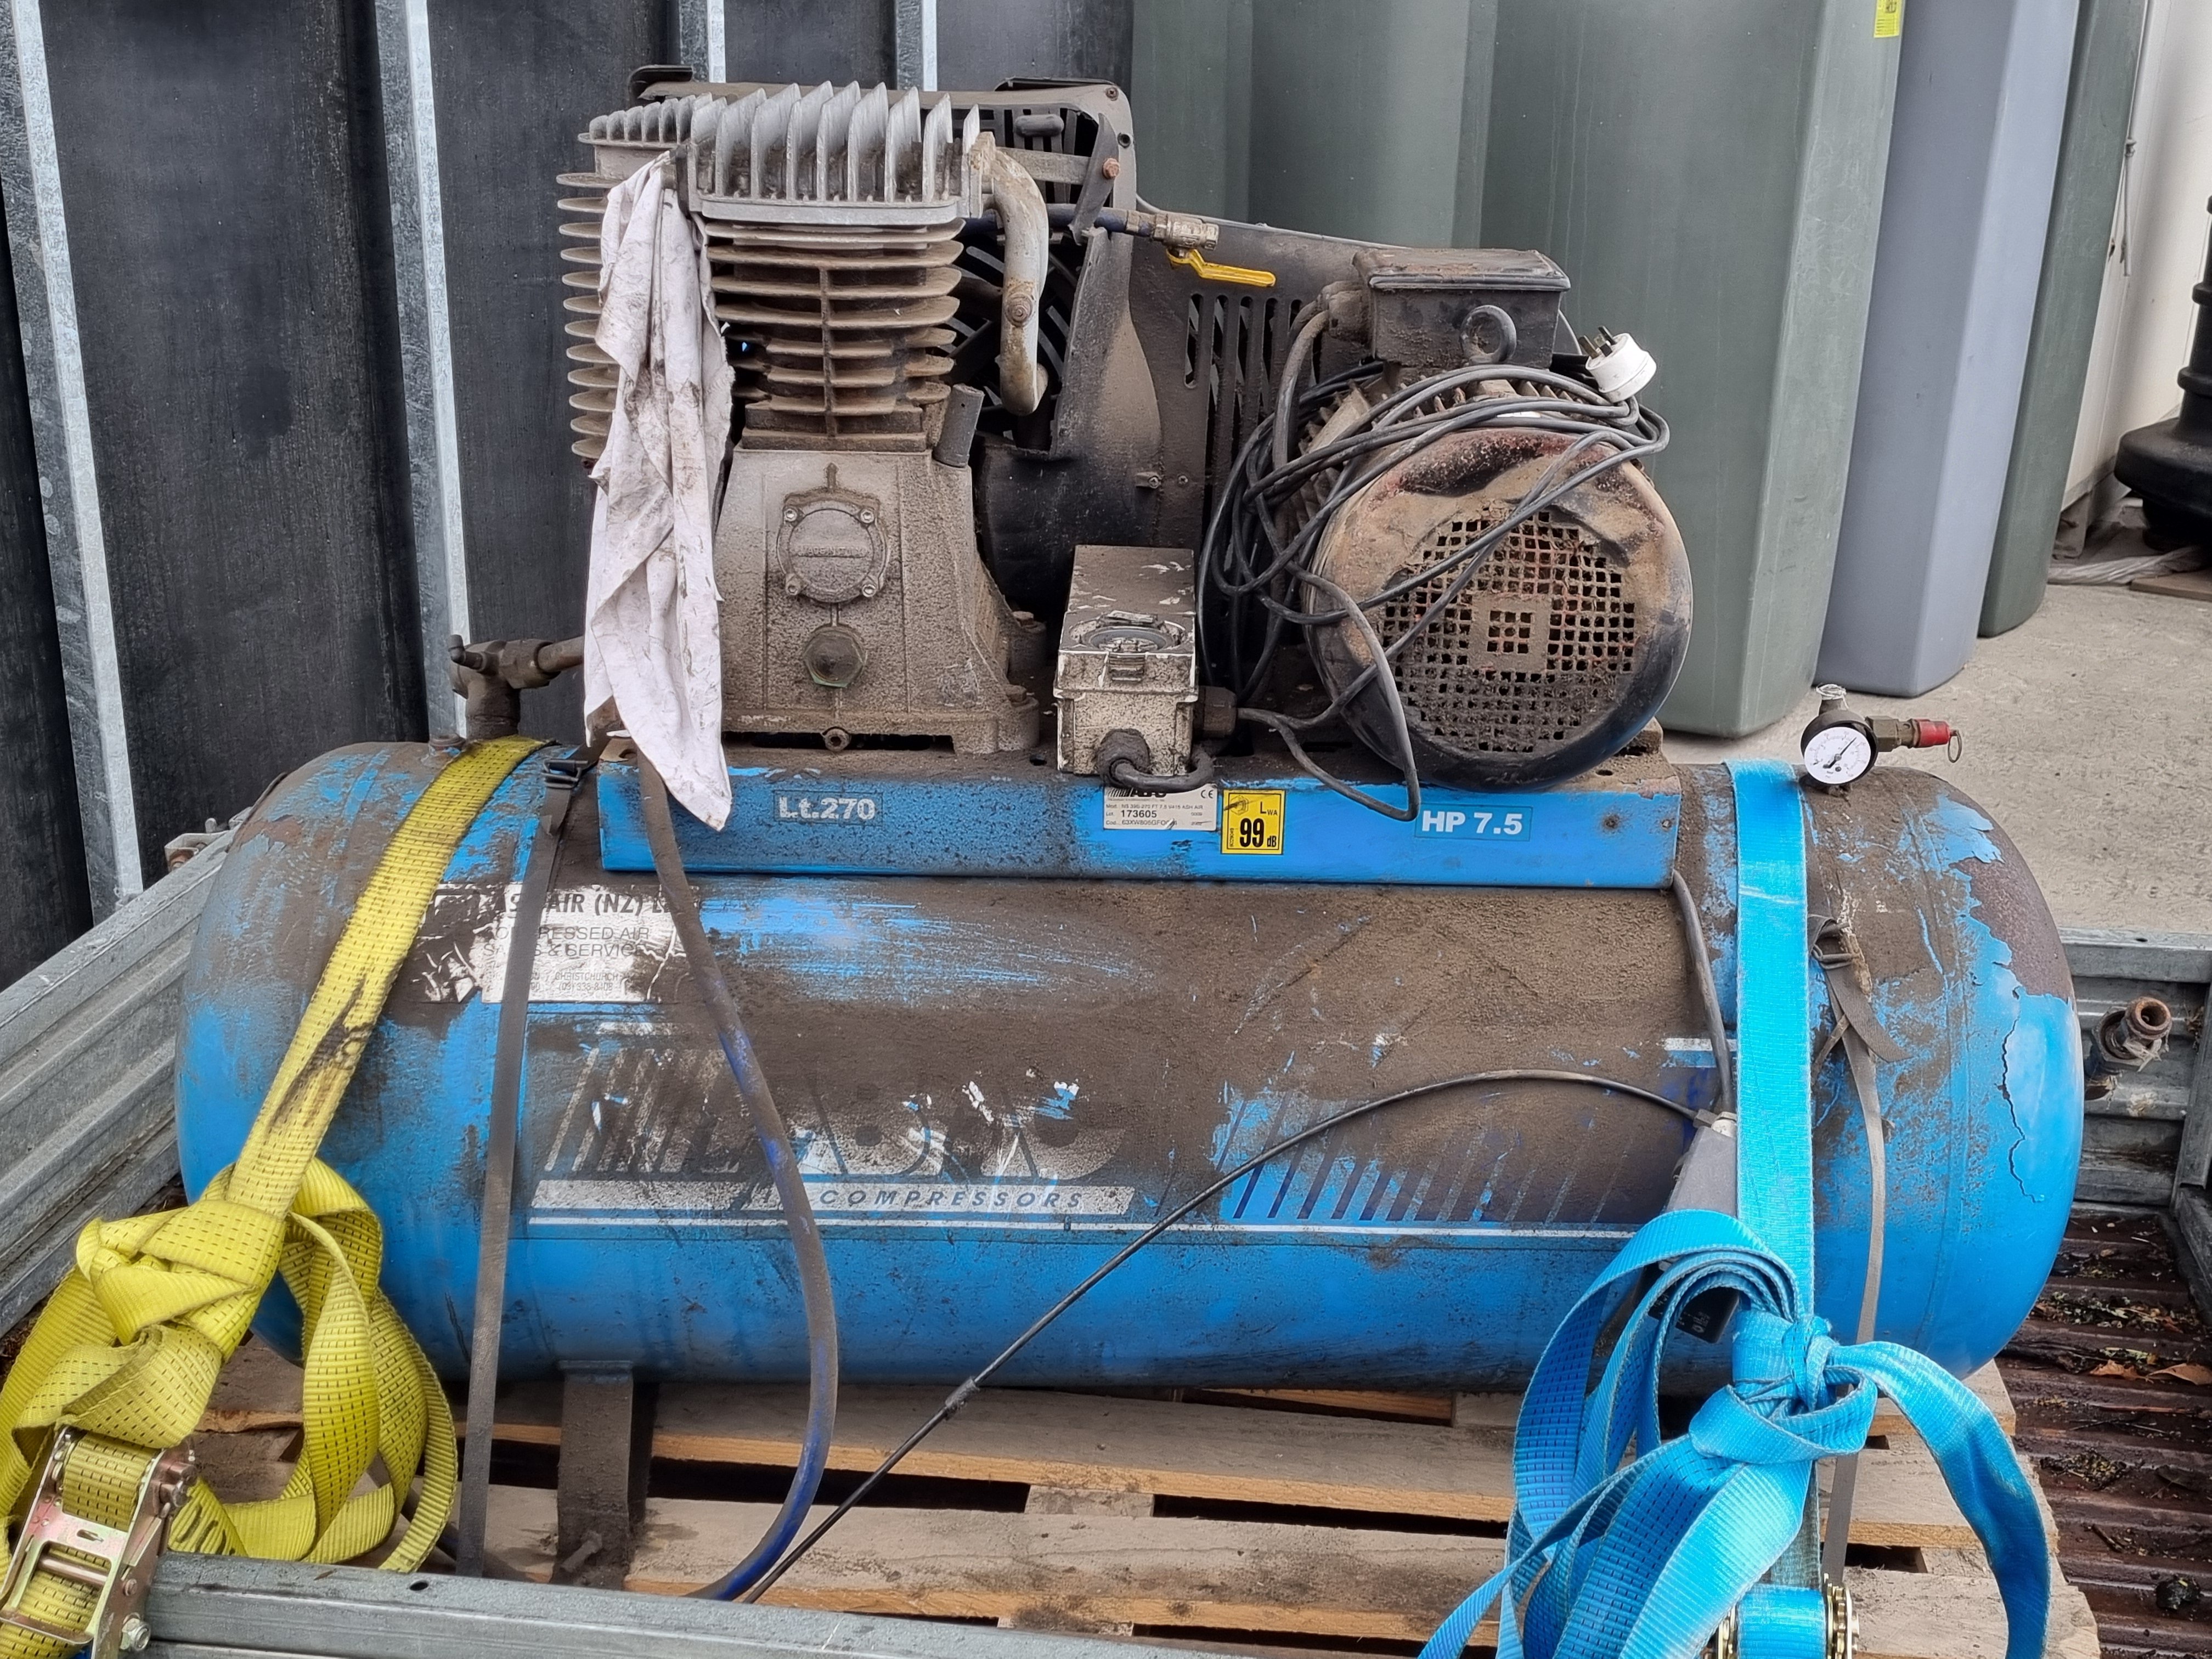
this is the old compressor from work. its been on a pallet kicked around from place to place for the last 10 years or so. its Italian, 44CFM 7HP 3 phase with a 270L tank. and because of that its fucked in many ways. the pressure switch is smashed off, the inlet filter is completely gone, the shroud around the belts is badly broken, the wiring for this thing is all up the shit also the electric motor shroud is all smashed in. it hasn't run in many years and when i picked it up from work it wouldn't even turn. i took it home, waterblasted it and pulled it to bits.
1 point
-
As per title. I'd love to have something to aim for and look forwards to this winter. Hanmer is always good because cold + bbq + hotpools + frostpot of hell = a good combination. Who's keen?1 point
-
And now it has wheels.
1 point
-
Yeah .. I could have held for way more money ..but I got the car back cheap and sold things for what people offered..... I made my money back and enough to get my mk3 all legal.... so happy as with that1 point
-
Other than schooling myself up on making new AN lines (I gonna have a few questions about that) , I been getting bits trickling in like Coils/injectors. Bigger news is I'm getting my very own Easter Keg this weekend.
1 point
-
Rookie Daves diesel mobile doggin unit1 point
-
Cool truck. Agree 11 mpg not conducive to affordable daily driving. Somewhat surprised at half ton load rating, espec given that the many low powered jap utes of that period were rated to carry a ton.1 point
-
Welcome back RookieDave! Sick rig. Do a skid.1 point
-
You're so far away, yet still giving me 3/4 race boners.1 point
-
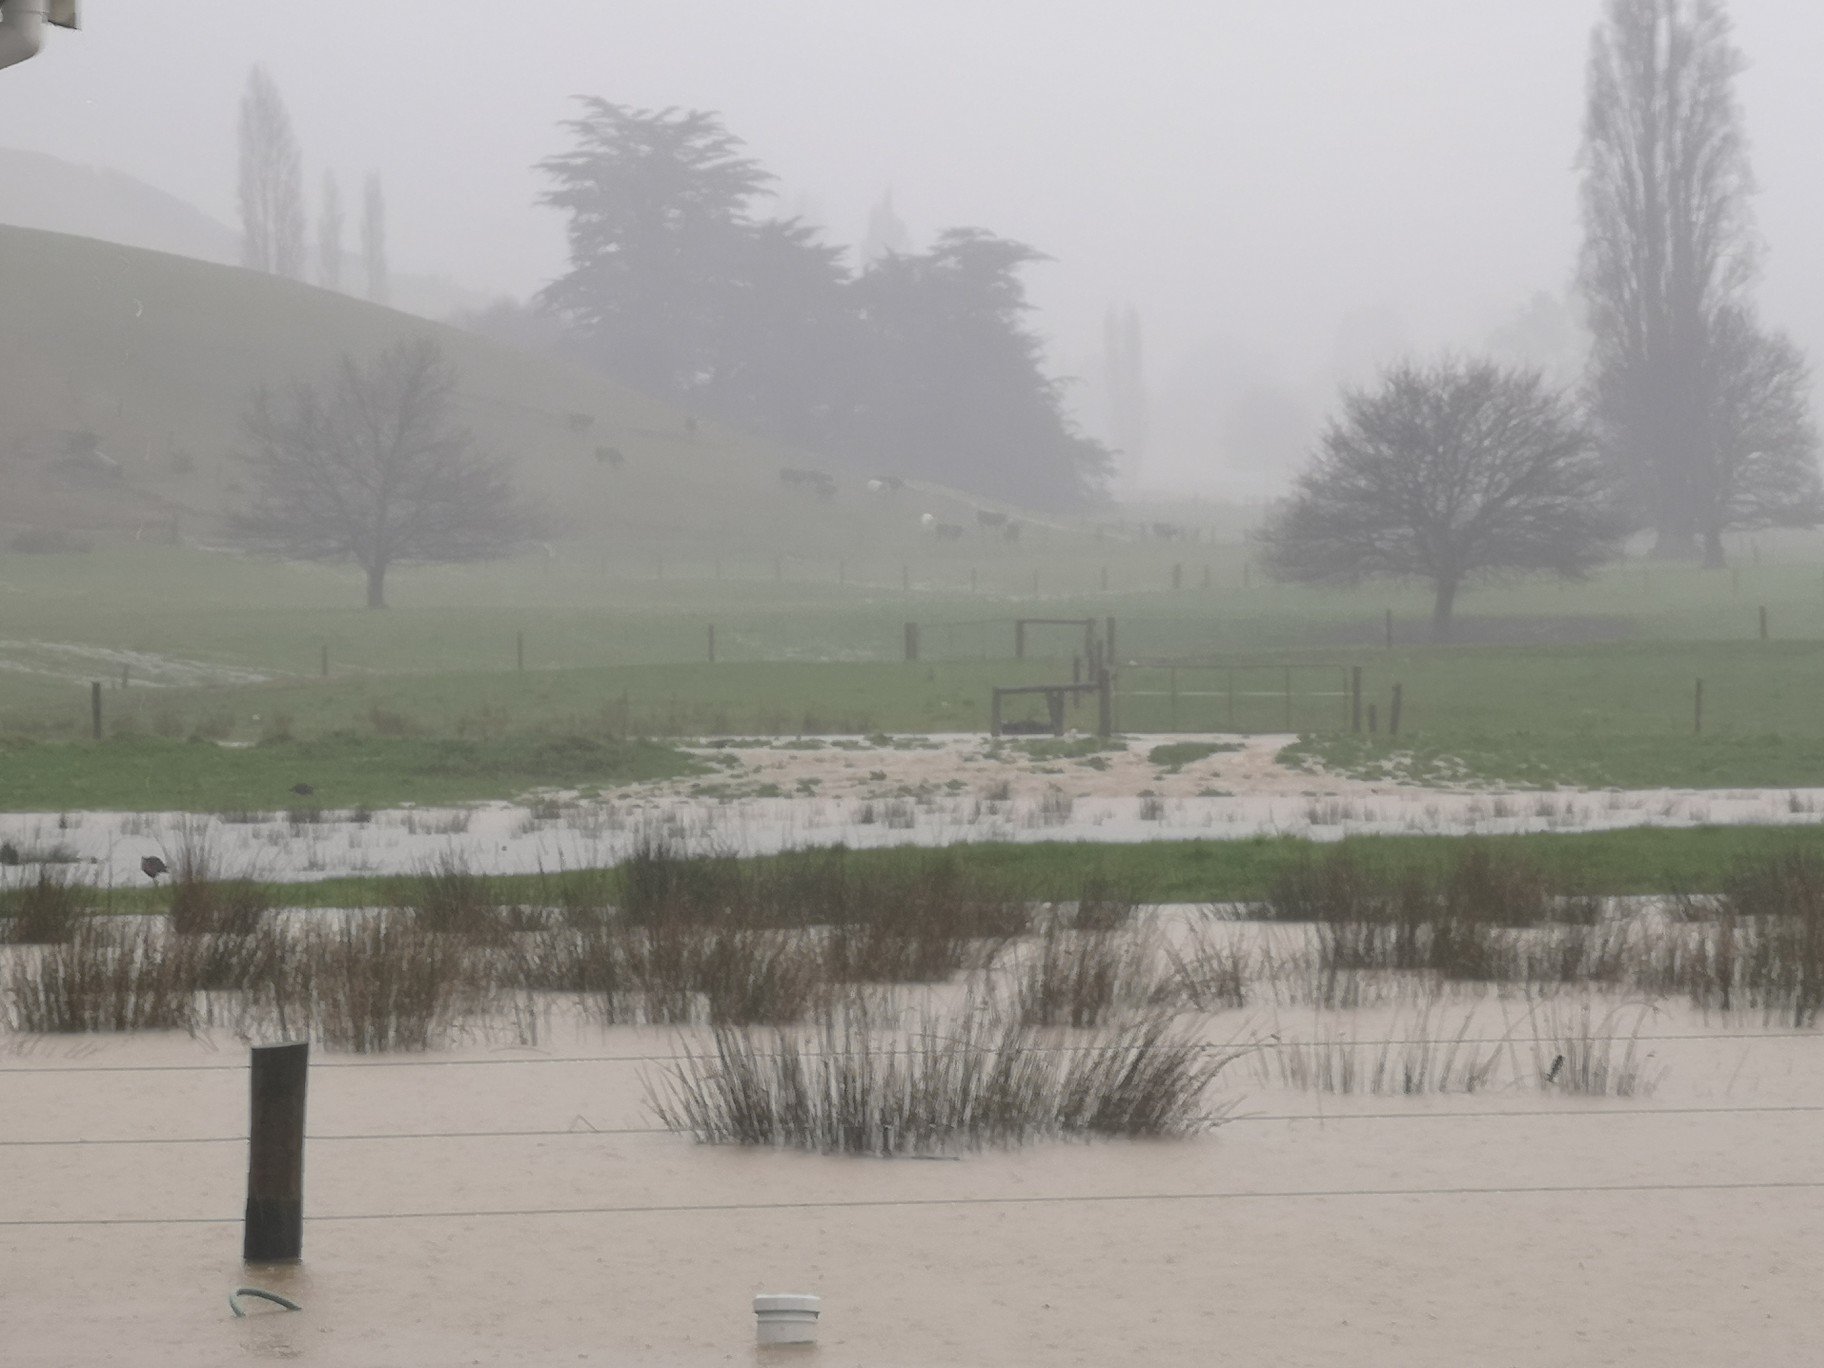
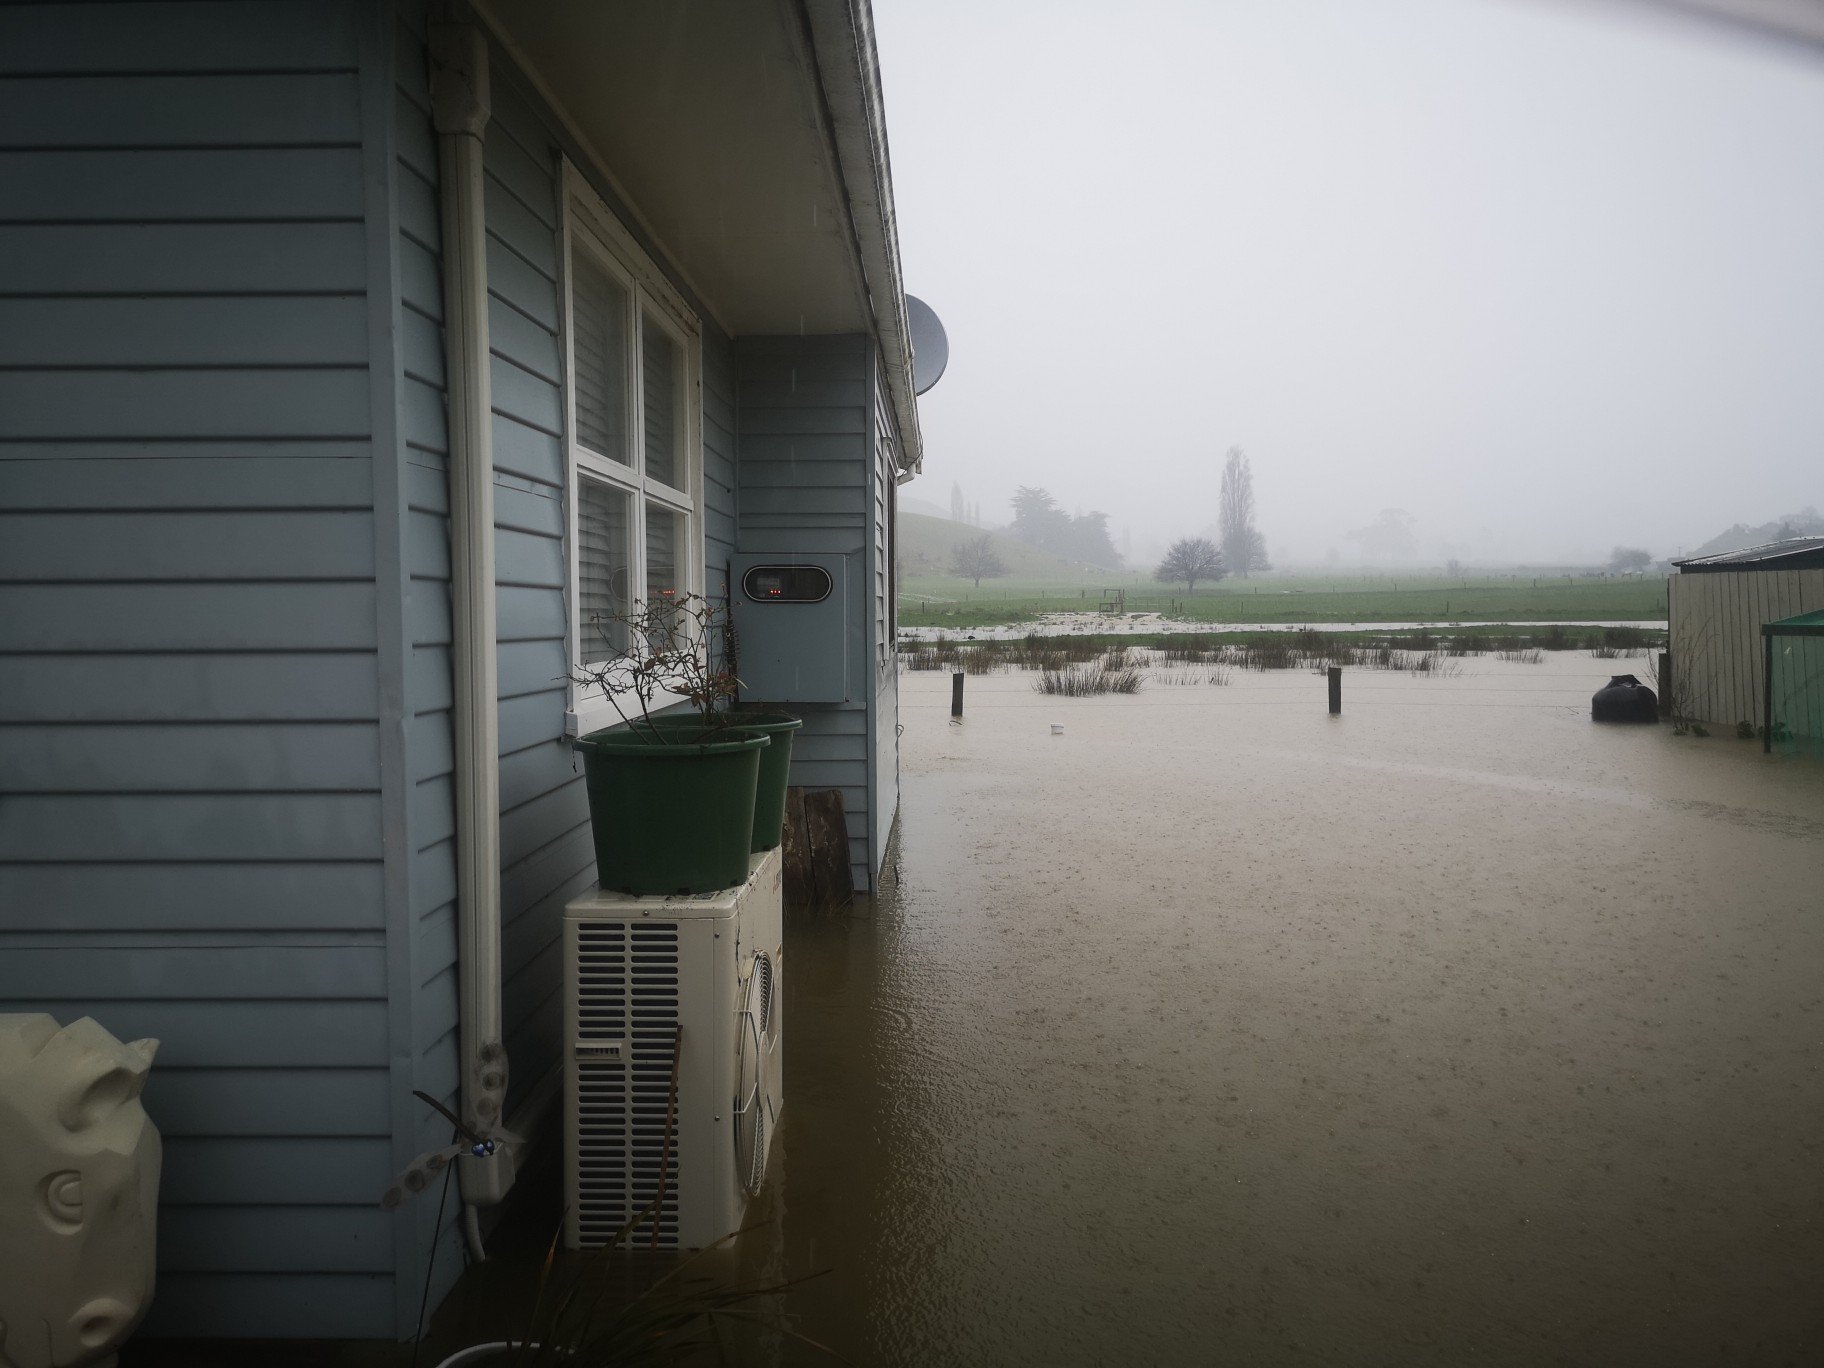
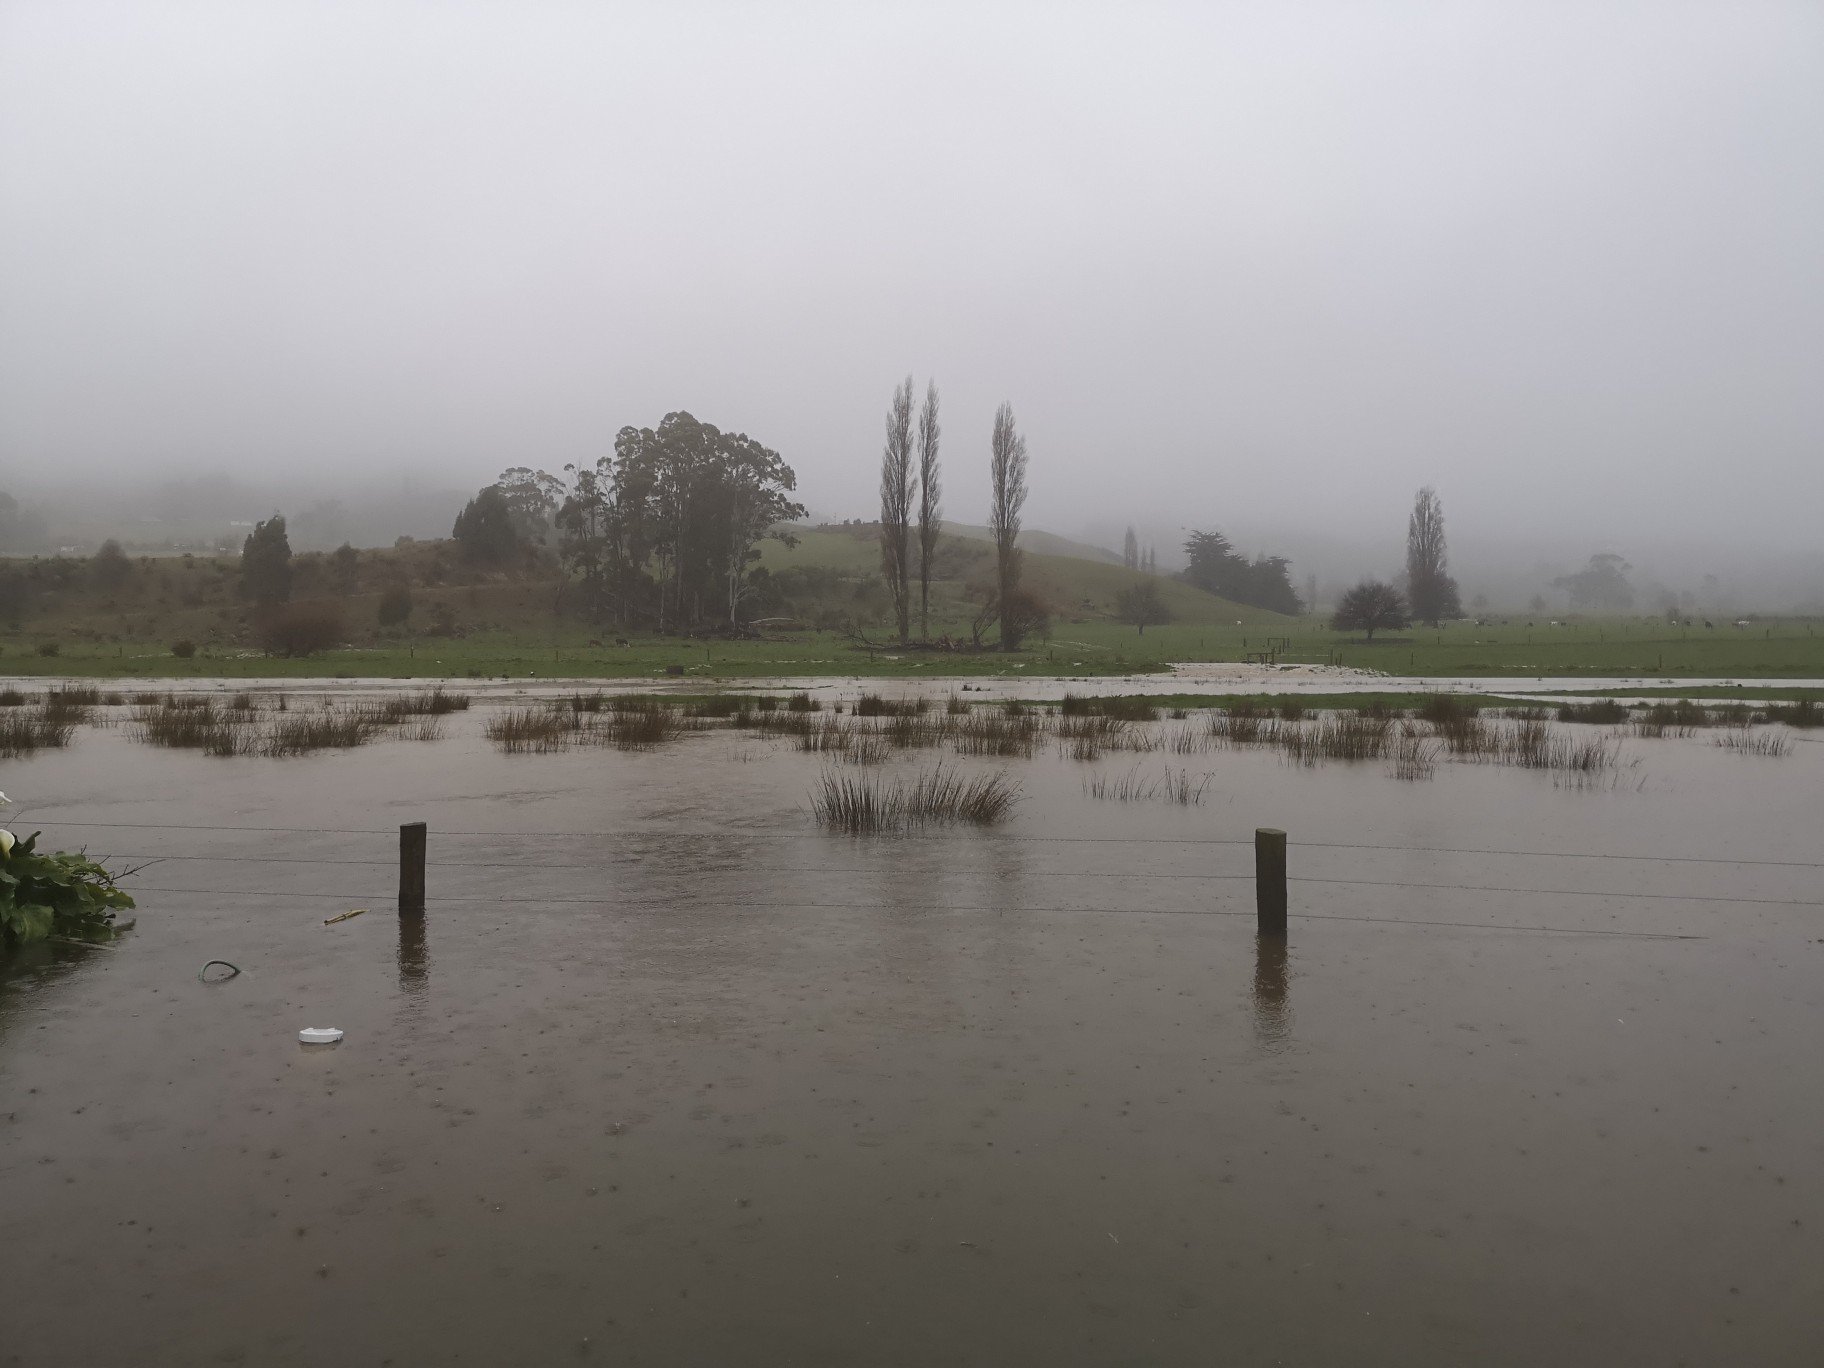
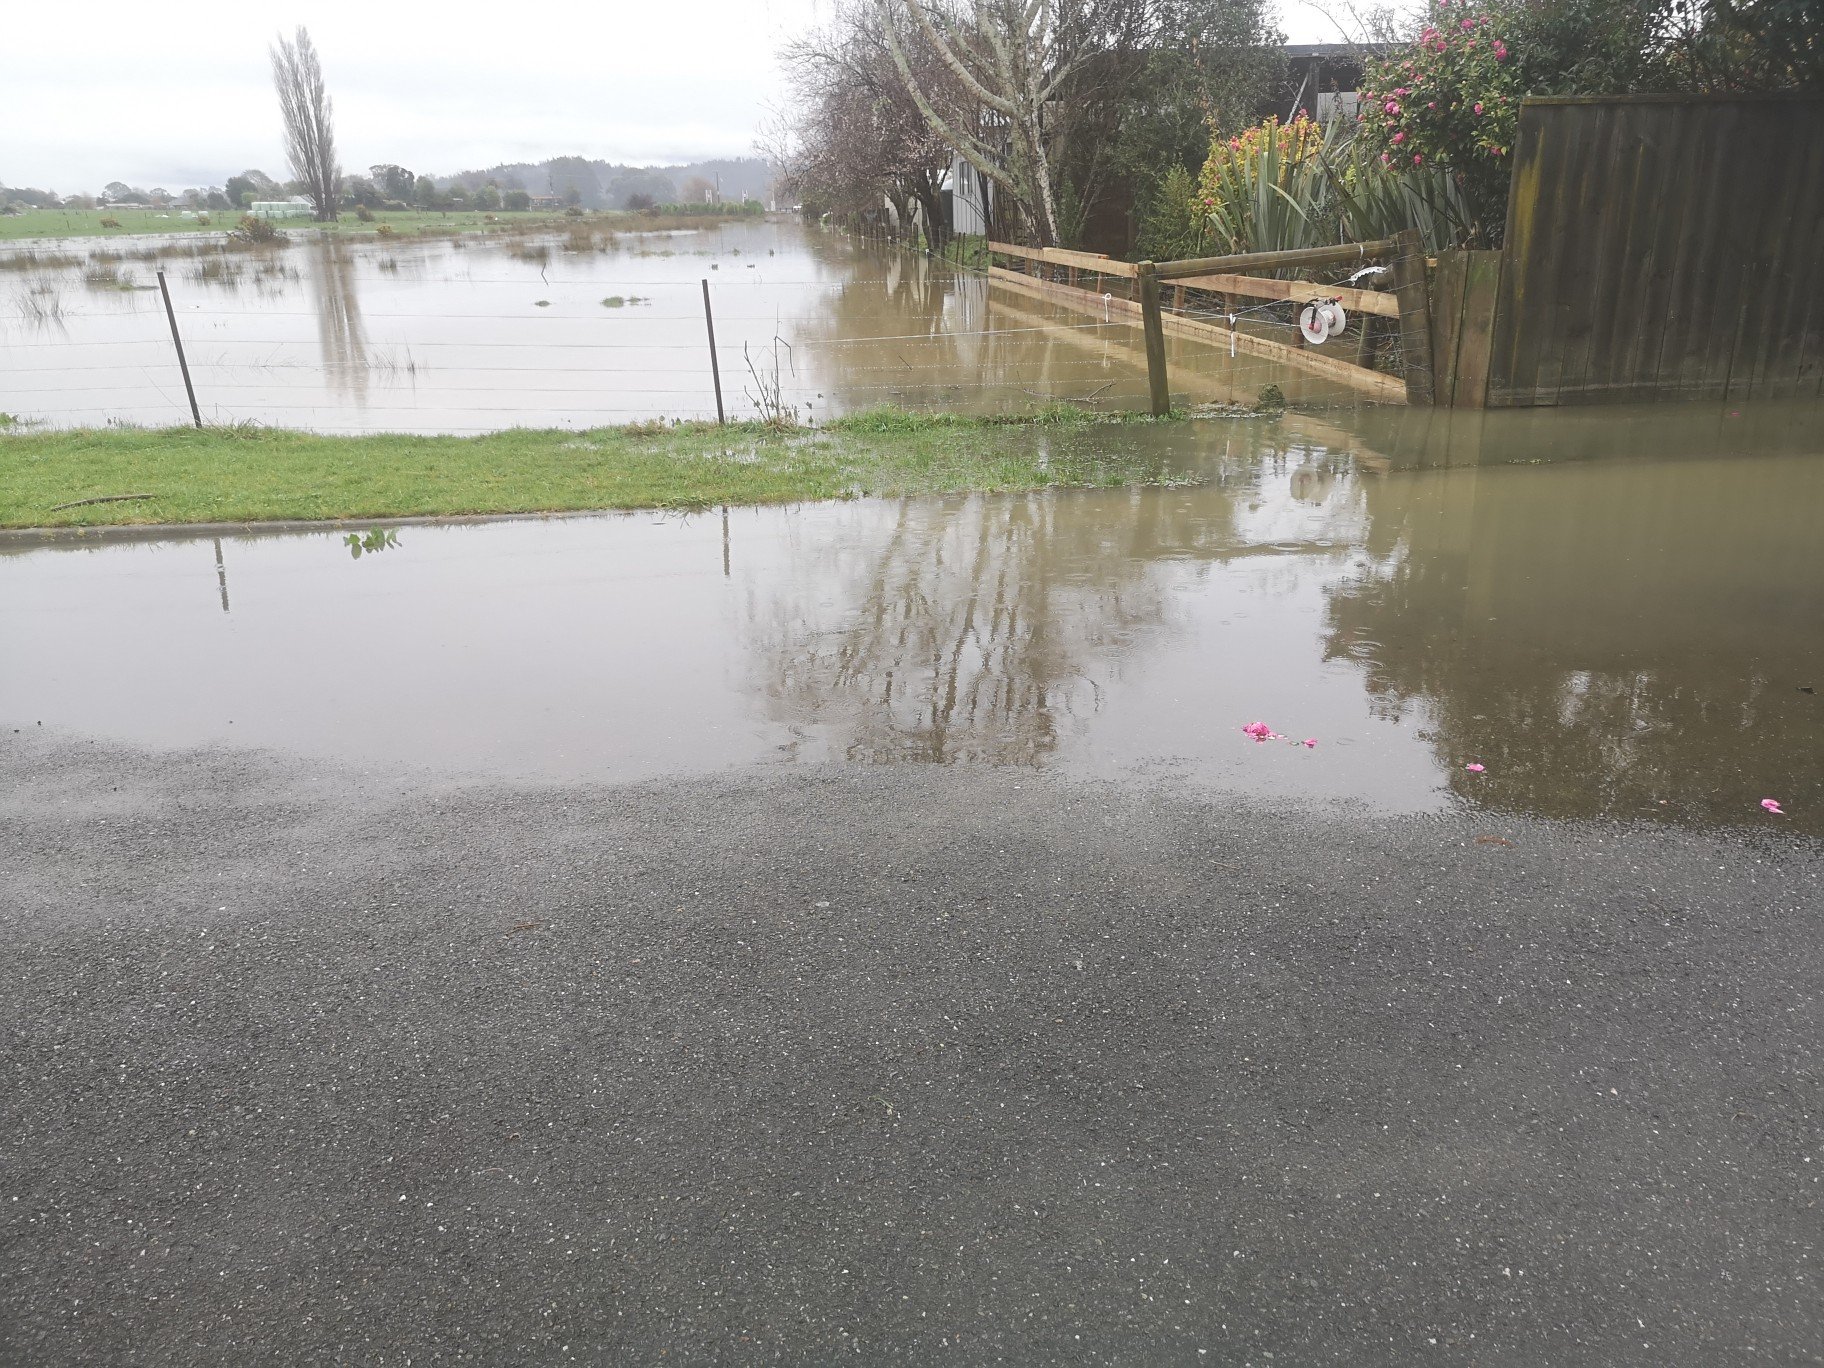
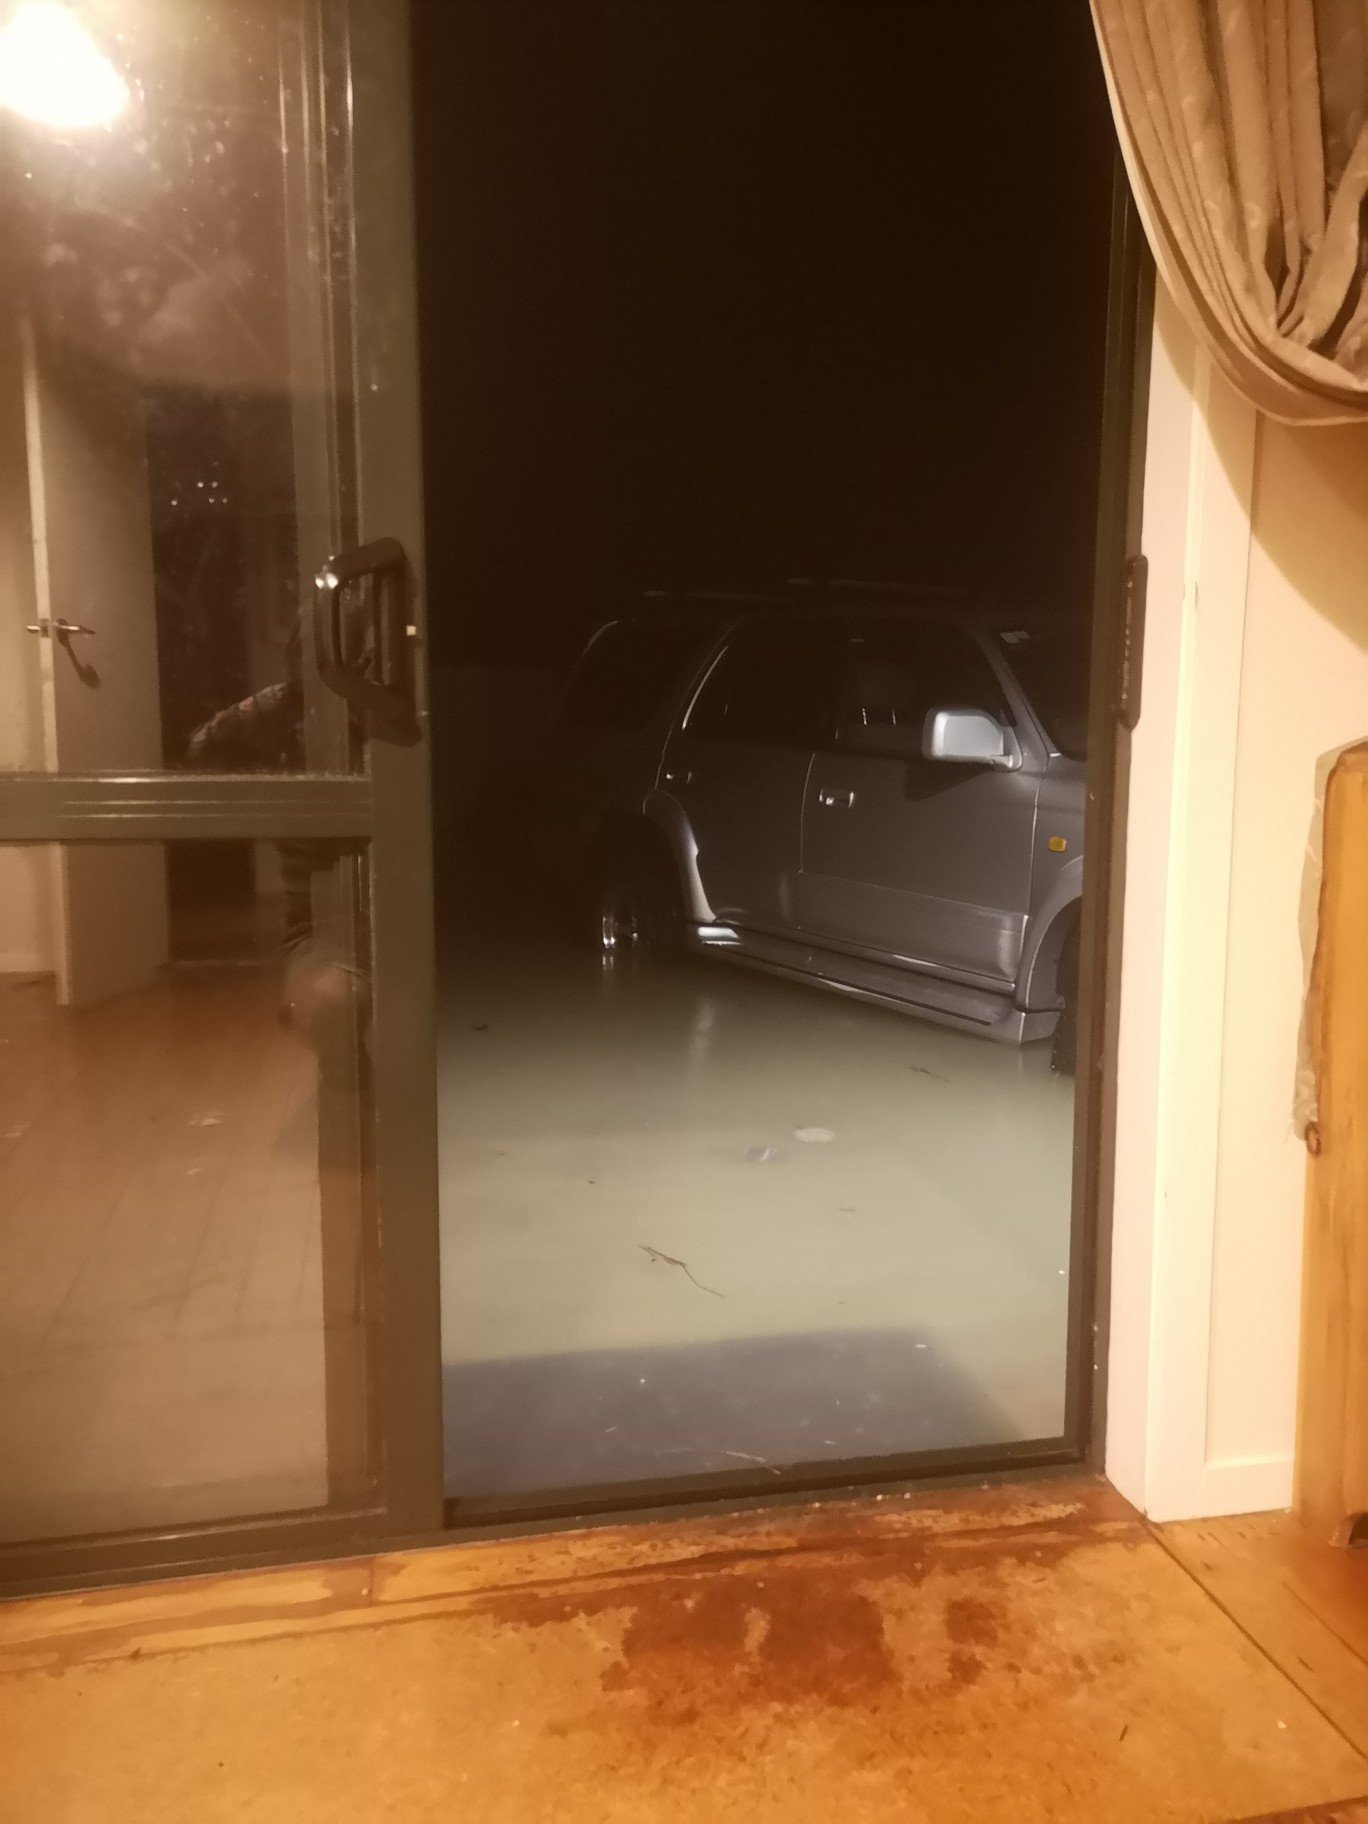
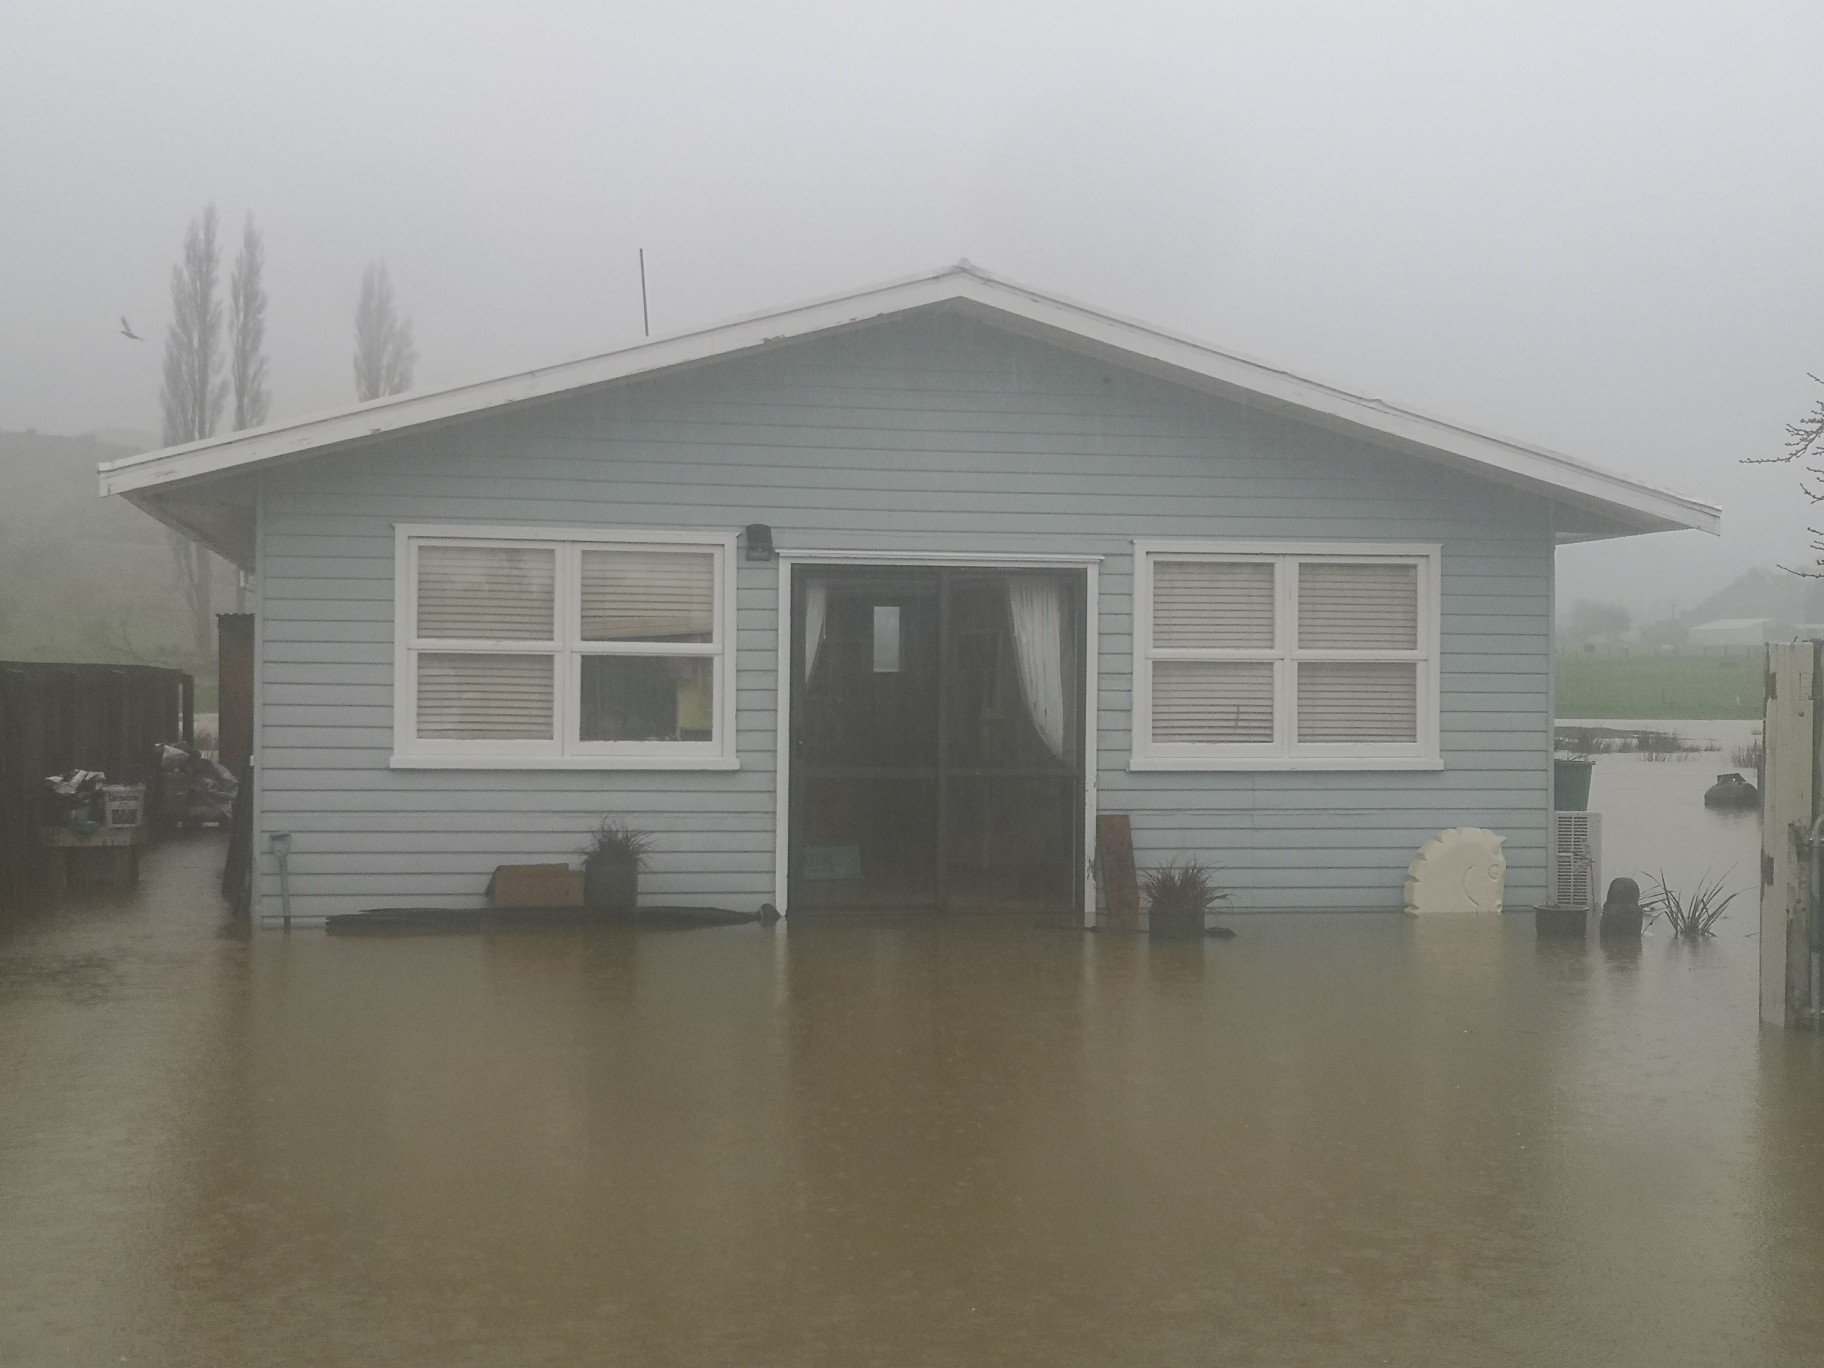
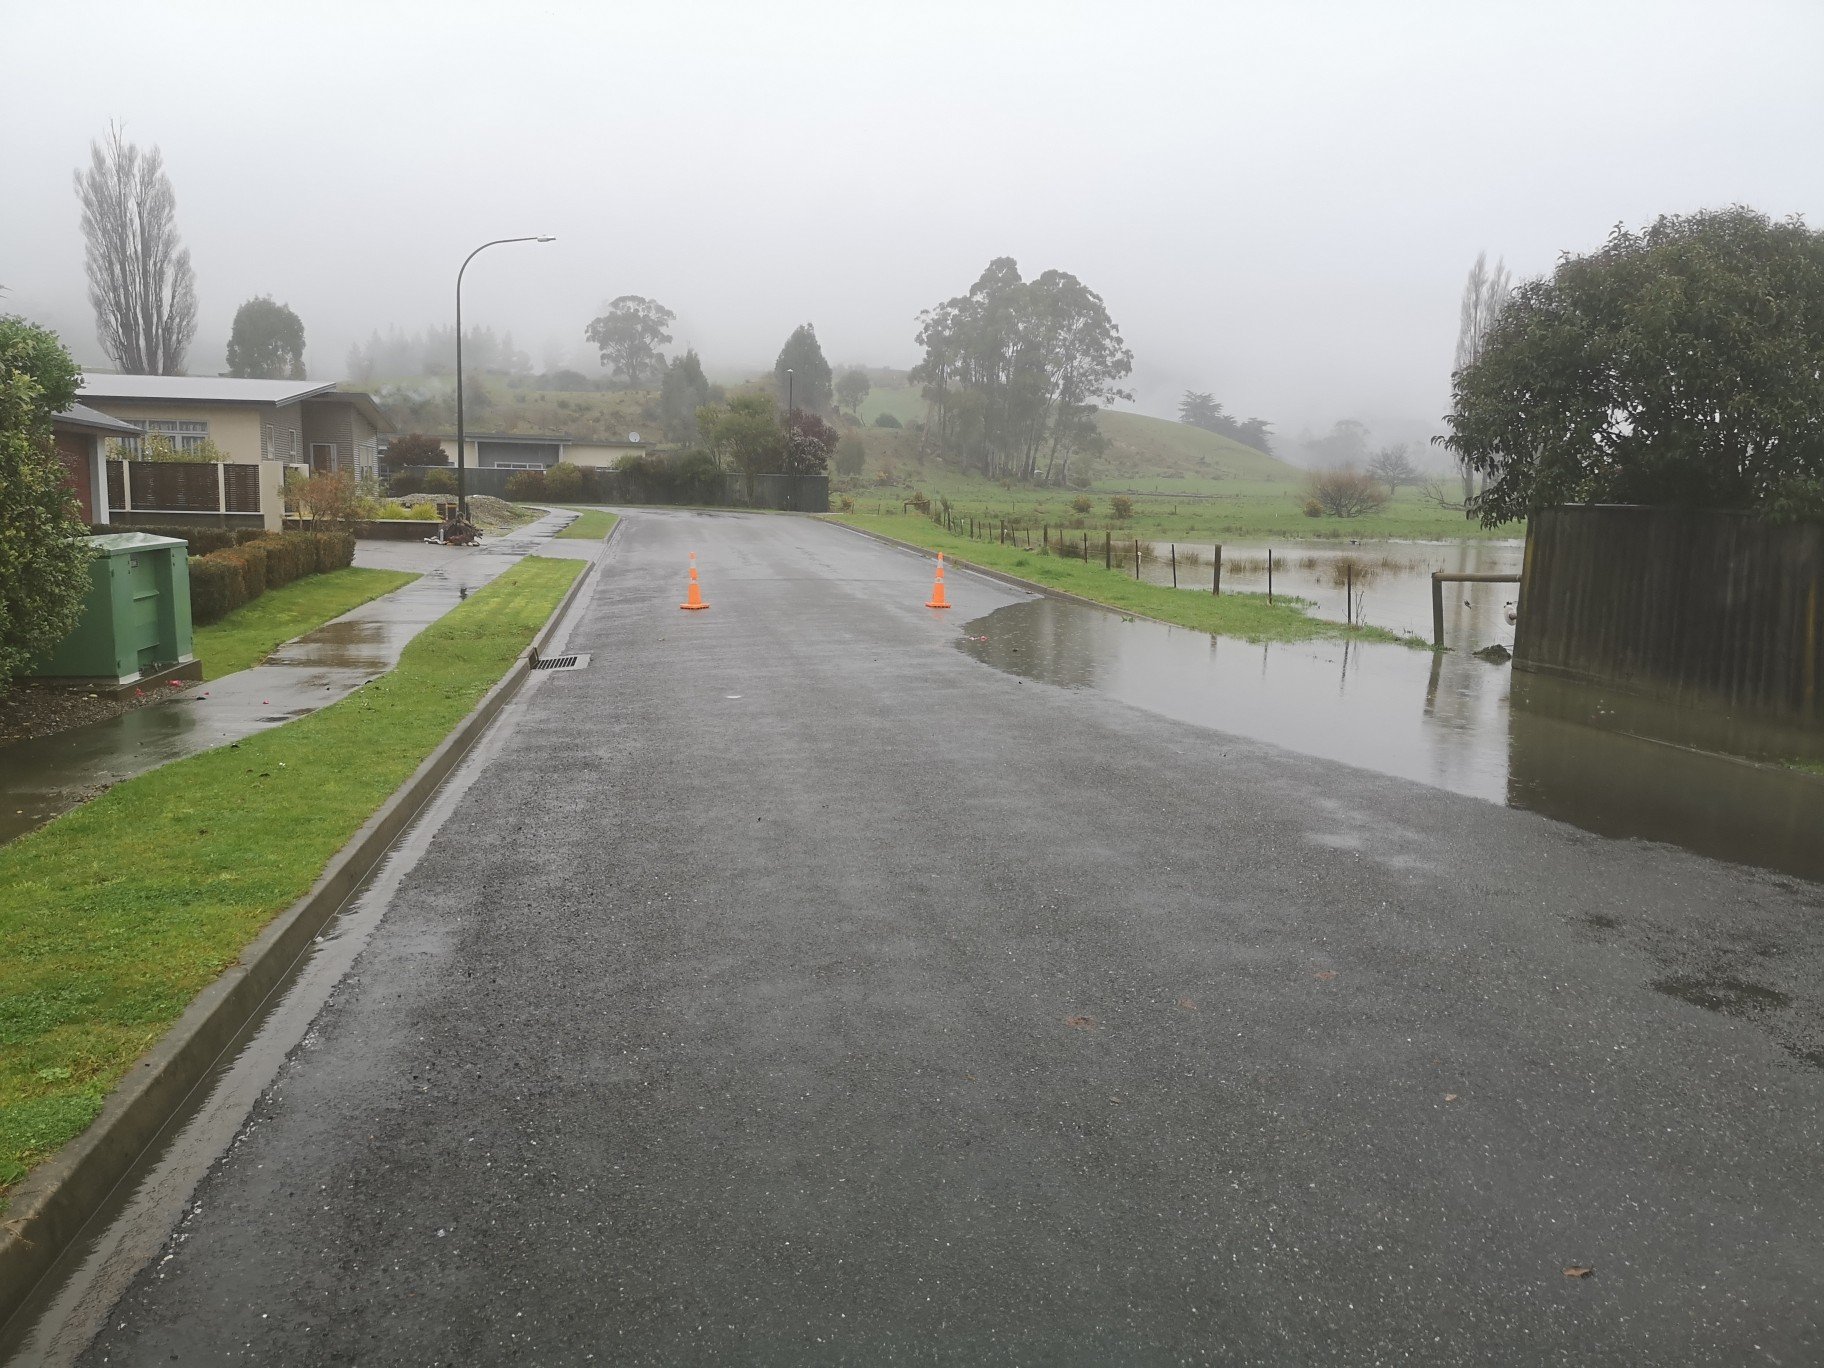
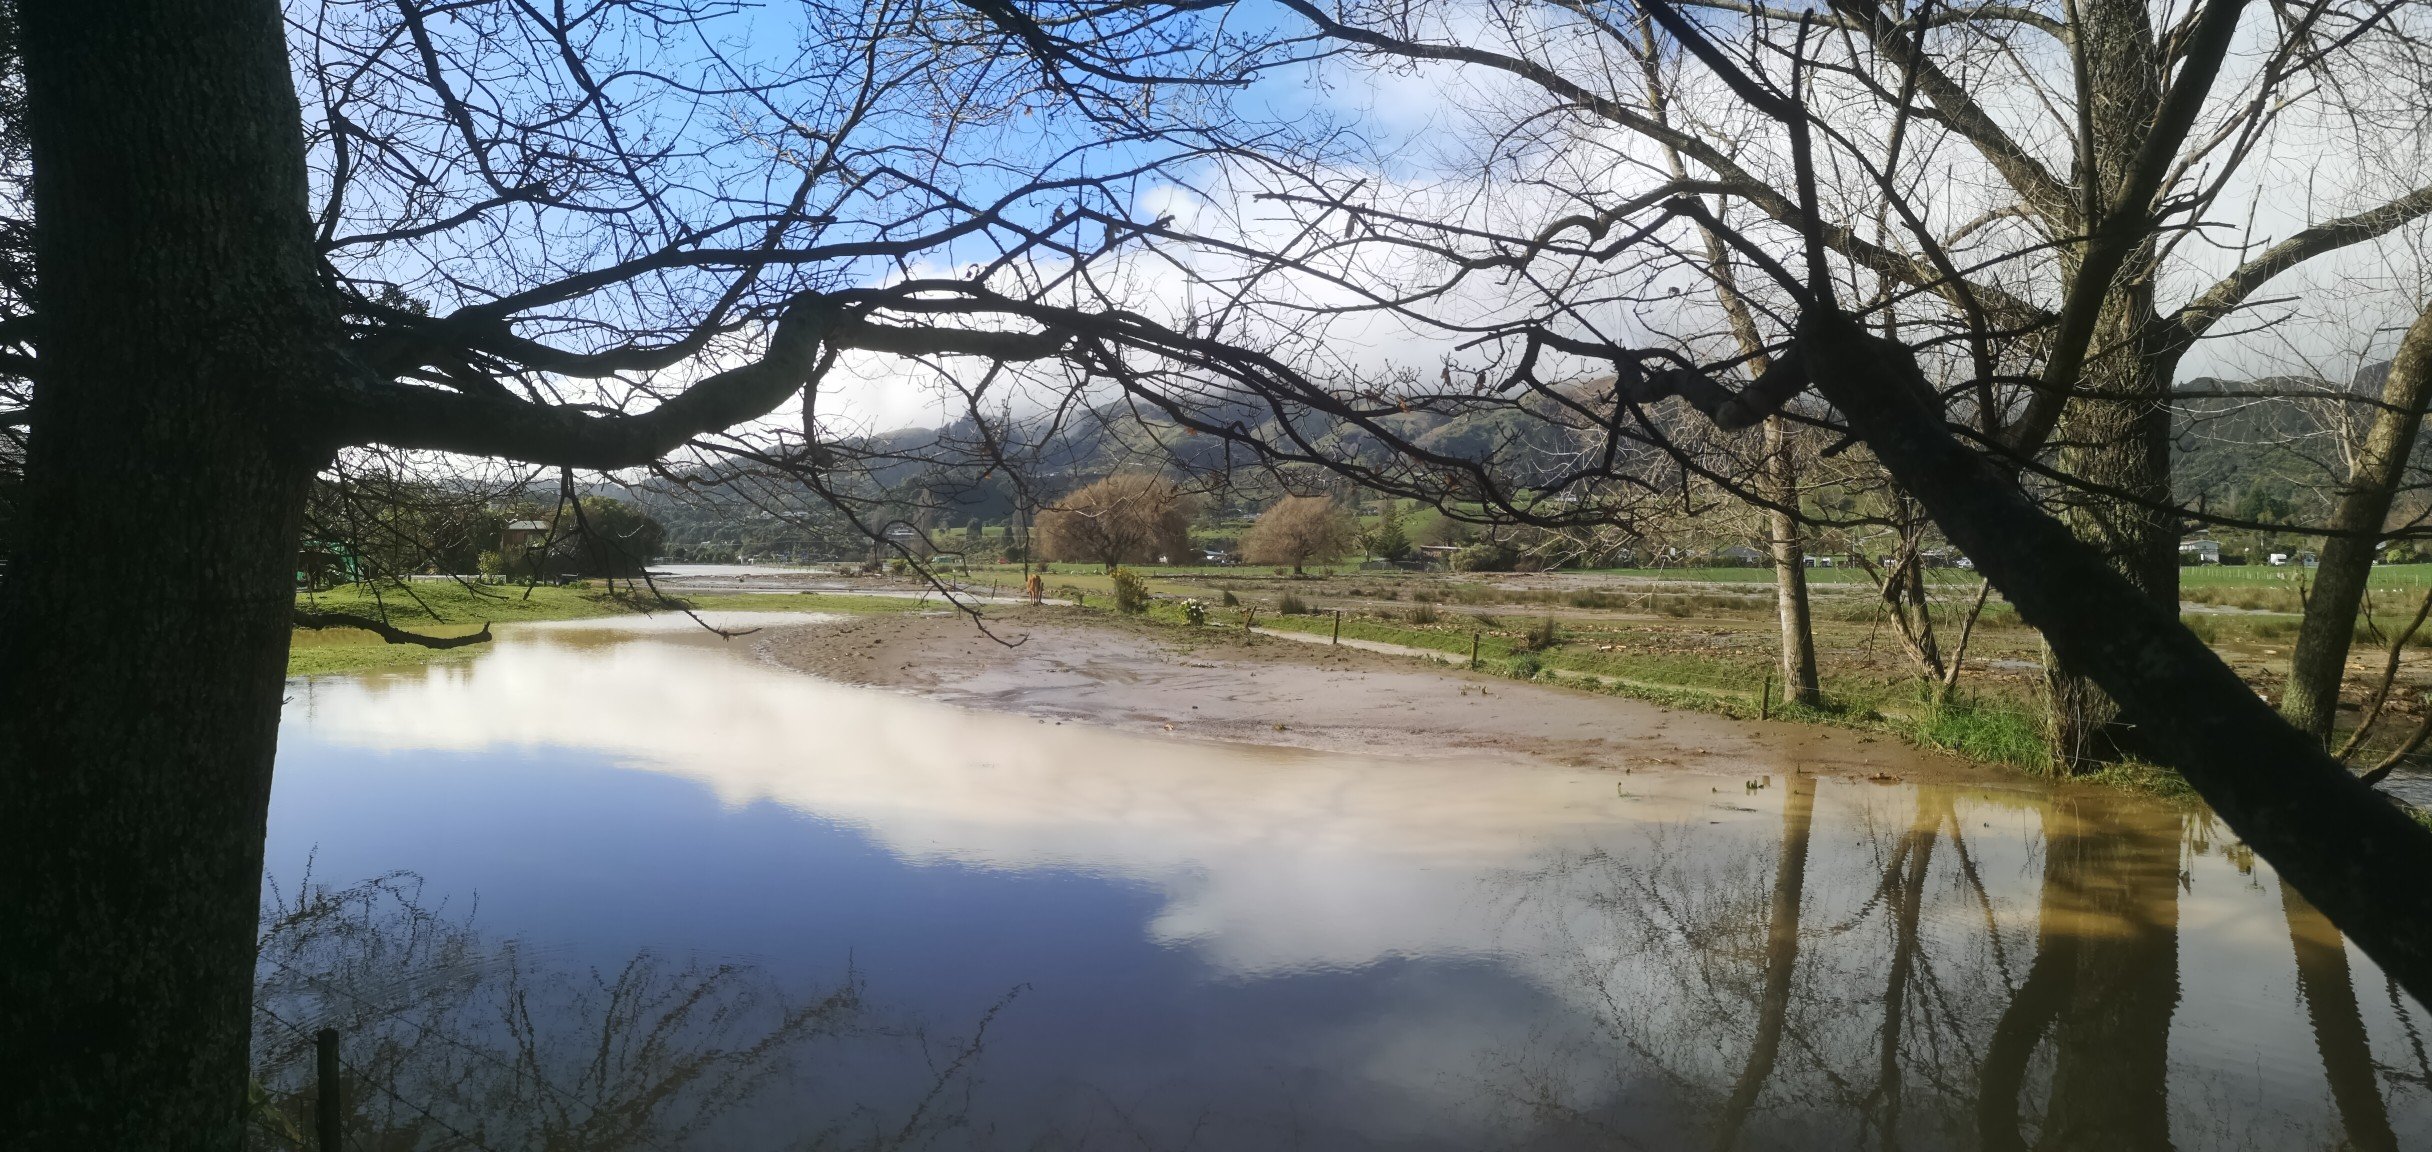
Round two.. August 2022 Action shots of Bartlett creek coming over. In this shot you can see a white disc in the water, that's the top of the sewer inspection port that sticks out of the ground about 600mm (check the pics in the previous post) In full swing Right up to the gunwales Here you can see the water soaking through the joins in the chip board, This is where the water overflowed the road and stopped it getting any higher, this is where the wetland originally drained before they put this subdivision in blocking it with this road and providing a 250mm pipe to drain both the wetland and this end of the subdivision.. Good work TDC Looking back towards where our house pool is. This is another part of the problem on the other side of the main road, water just sits here and until this goes down it won't drain from behind us.
1 point
-
Just glued the windscreen in cos I am too cheap to pay someone to do it. I should have done so. The experience is best described by this convo with @HumberSS
1 point
-
We'd have to go speak to the people who are now running the camp very nicely before getting too excited about a hanmeet. The people running it are all new now. Karl and i have met them when we jacked up leaving vehicles/trailers there for a couple of the moped melee. Theyre good sorts. We told them how we used to book the whole place out back in the day.1 point
-
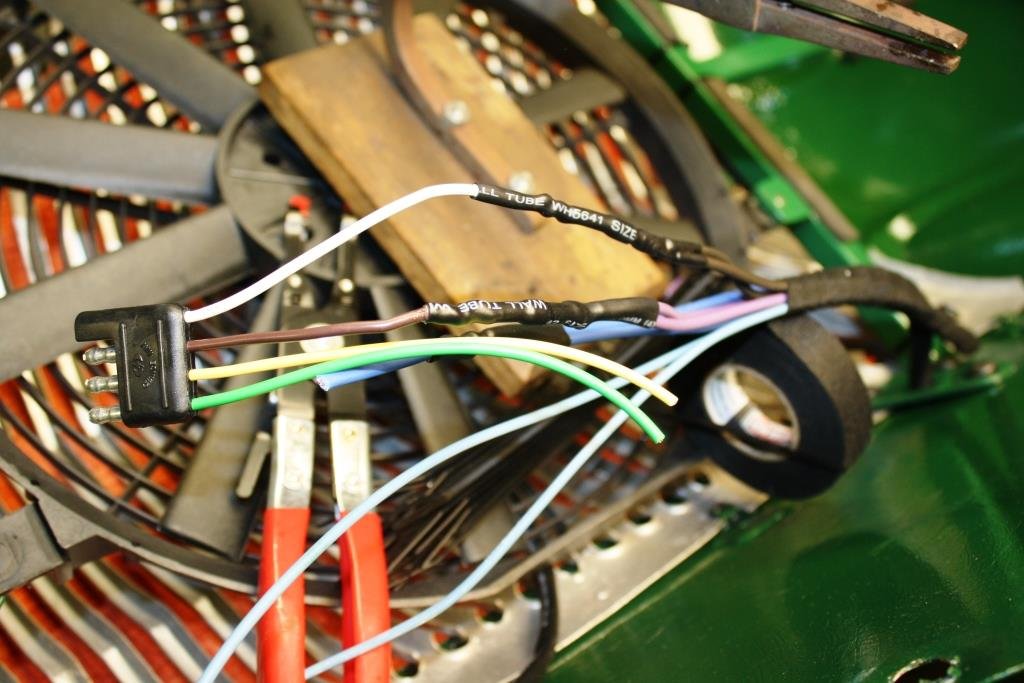
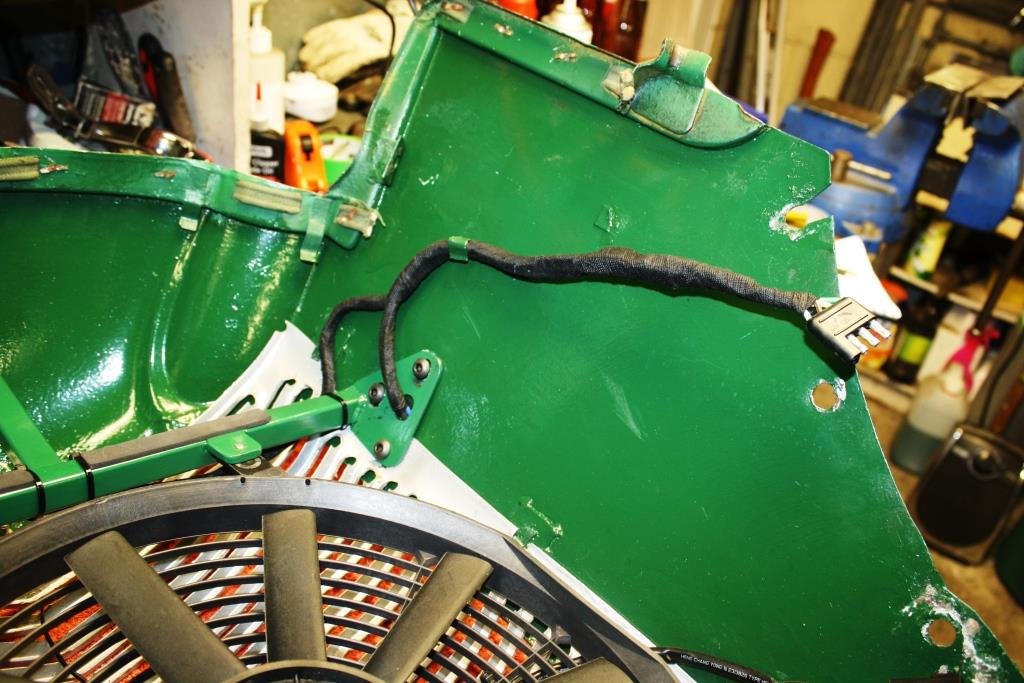
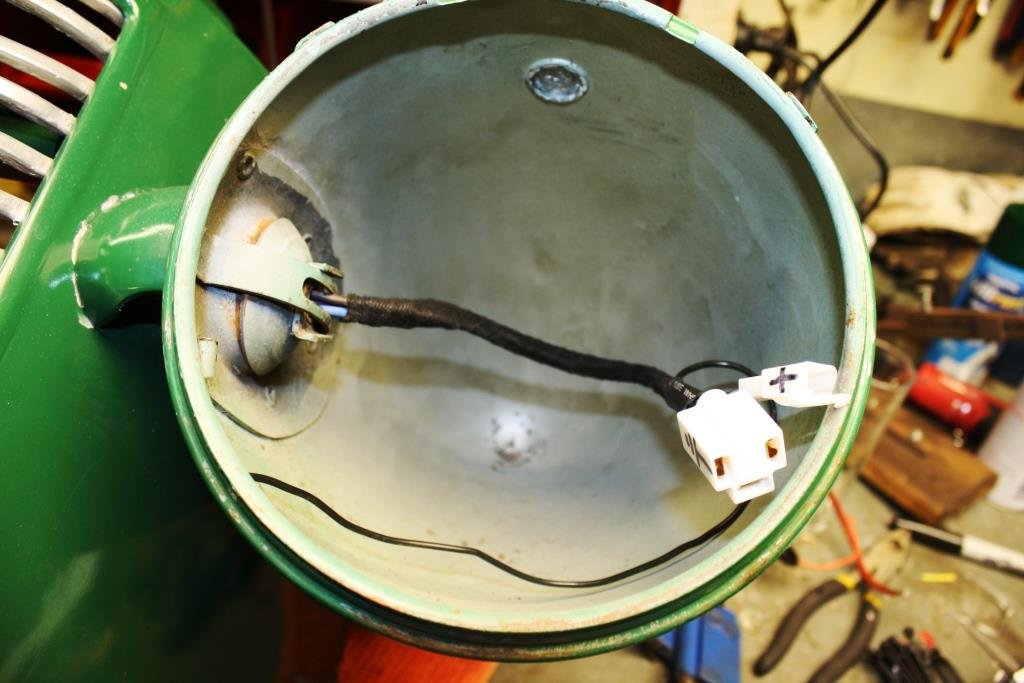
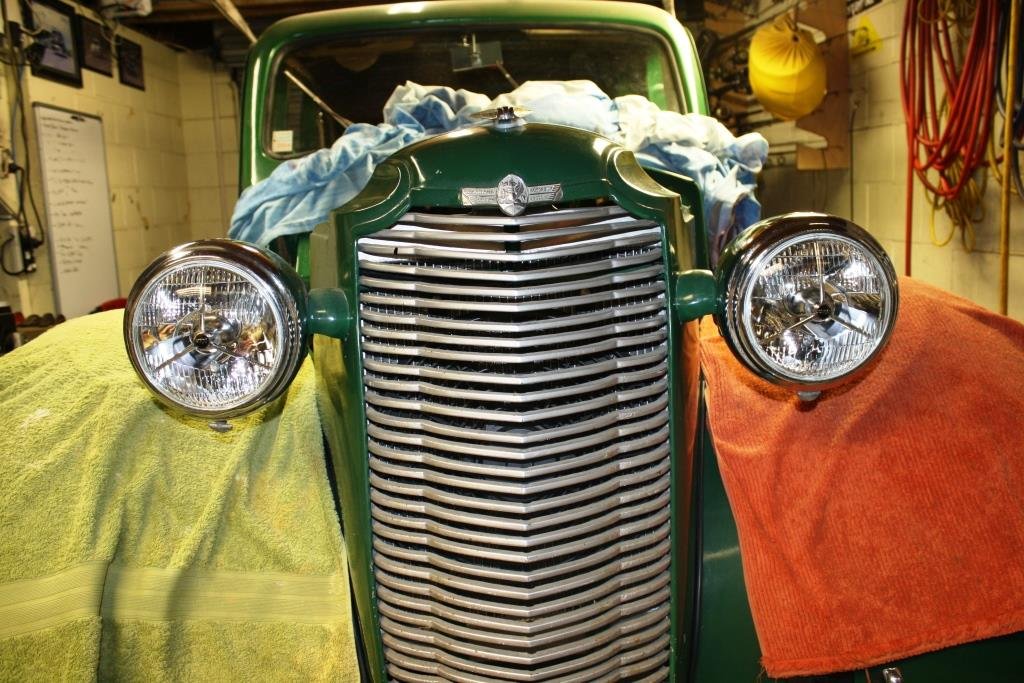
With space in the nose cone so tight the only way to wire the headlights and fan was to take the front off for the umpteenth bloody time….grrr….! So much easier to wire on the bench. Found some heavy connectors to make disassembly easier in the future. Love using the old school fabric wrap. I’d bought a big box of connectors off Banggood for a price that was too good to be true…….. … so I wired up the headlights. I refitted the front………. I installed the gorgeous over-priced P700 headlights…. ……..and started blowing fuses whenever I powered them up! After an evening of uttering nasty horrible words and throwing thinly veiled insults at Rigamortice re the marital status of her parents at her time of inception, while going round and round in circles with a variety of test lights, test probes and multi meters - I discovered the f****** “too good to be true” Bangood connectors were………. You guessed it ‘too good to be F****** true’! After a quick trip to Jaycar the following day, I paid through the nose for the right connectors…and we now have head lights. And as an added bonus they even worked in the dark! So I stuck the bonnet on and discovered it didn’t fit…. I loosened it off and started pulling things into line before re-tightening. Finally, it all fits, (sort of).
1 point
-
Some bits from the UK arrived surprisingly quickly, a sump and tappet cover gasket, a boot for the gearshift, suspension bushes etc; I made a battery bracket to suit the most likely battery I found in my stash of many; All those untidy wires are not part of the car you will be pleased to know. I also printed some things; Cos that link for the lock on the passenger side has gone walkies somewhere. And over the last couple of weeks I have been designing and iterating a set of heater controls that I think actually should work. Cool beans. Also I wired up the clock. It works all nice. The clutch couldnt get uprated cos they couldn't find the parts to do it and additionally the man said it looked like that cover springs had been over extended, this might mean it was slipping due to wrong adjustment, so I will order a new standard clutch and see what happens. Also I found another X1/9, and have spoken to the owner, so there might be a very small Nelson X1/9 owners club.1 point
-
I modelled and printed some door card clips which as always gives me the deepest pleasure. These worked pretty well after some tweaks. These are not exact copies and are designed so they are easier to print, but functionally they are sweet. The drivers side window winder mech was deeply wrong, the wire tension adjustment was maxed out, hacked and the maxed out again, but the wire was still as loose as fuck and while it kindof worked it made horrible grindy noises. This came from the barrel where the wire was straddling grooves cos it was so loose. It was all down in a difficult to reach place, and those mechanisms are notoriously cunty to pull out and put back. Amazing that I got a bollock into that shot as well. The passenger side was sweet and the wire connection looks like this; After a bit of thought and dicking around trying to take slack out of the wire a genius idea came to me; I routed the wire like that through both lift points, which took up enough slack that I could tension the mech properly. Another 1/4 hr of contortion with a torch, phone and screwdriver and I had the wire slipped back into its rightful track. It works perfectly again, yay!1 point
-
Try adding some adblue to your fuel tank And then when insurance writes the car off, get something not french1 point
-
I was given a John Broadwood a long time ago that was badly broken. My wife went to the UK for a month so I sat the action on the dining room table and slowly worked my way along it replacing springs and tape etc. Getting the parts was hilarious as the man at the piano shop had a full on rant at me cos i asked if he also had a tuning key I could buy or borrow, he lost his shit and told me loudly and in the thickest Scottish accent that he had been fixing pianos for 40 years and what made me think I could do it in any way shape or form. I suggested that playing guitar for 20 years might have developed my ear for these things somewhat and he lost it so bad that he had to walk out. His boy was cracking up in the background and sold me all the parts I wanted once the old boy was gone. I didnt get a tuning key so jimmied one out of some square sockets in my socket set. It was never spectacular but played and sounded pretty nice. Unfortunately I had to store it in a shitty shed for a few years and it got ruined again. So when my daughter had her 16th we had a piano smashing party and they laid into it with sledgehammers and axes while drunk. She has one friend who is an unusual girl but holy shit she could wield a sledgehammer.1 point
-
Mostly finished up the tail light wiring tonight, brake lights and everything work, yay! Also I pulled the gearbox to inspect the clutch, it still looks brand new apart from surface rust. I will take it to the clutch man tomorrow to see if it cant be tweaked for a bit more clamping force. If anyone has a suggestion to improve this then let me know1 point
-
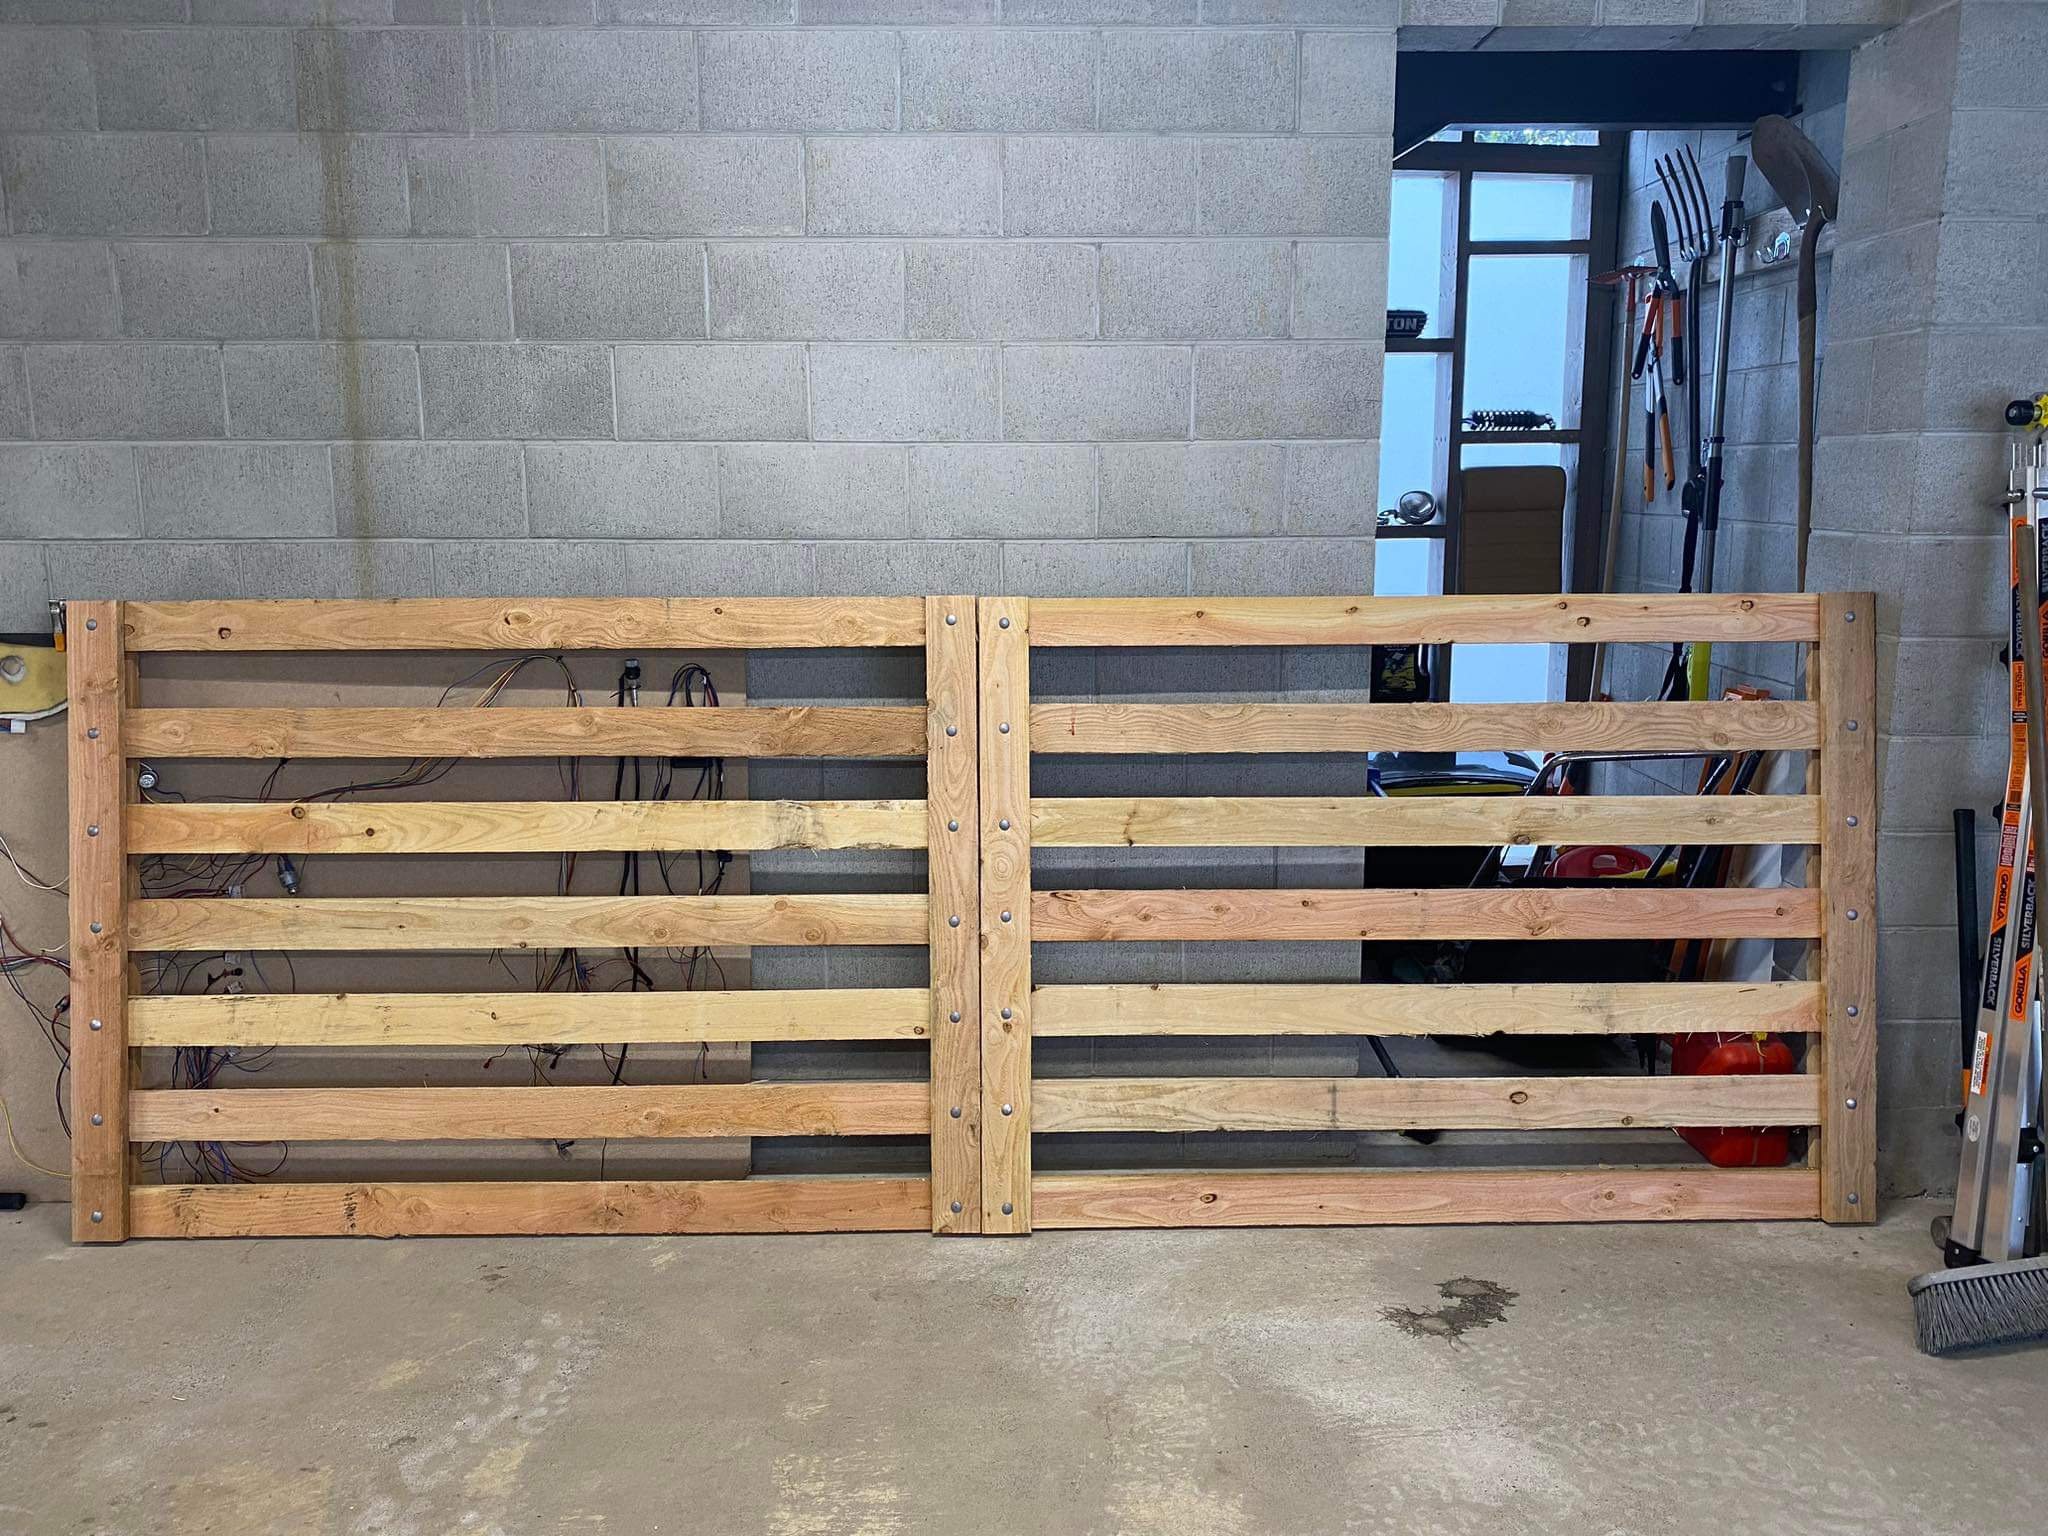
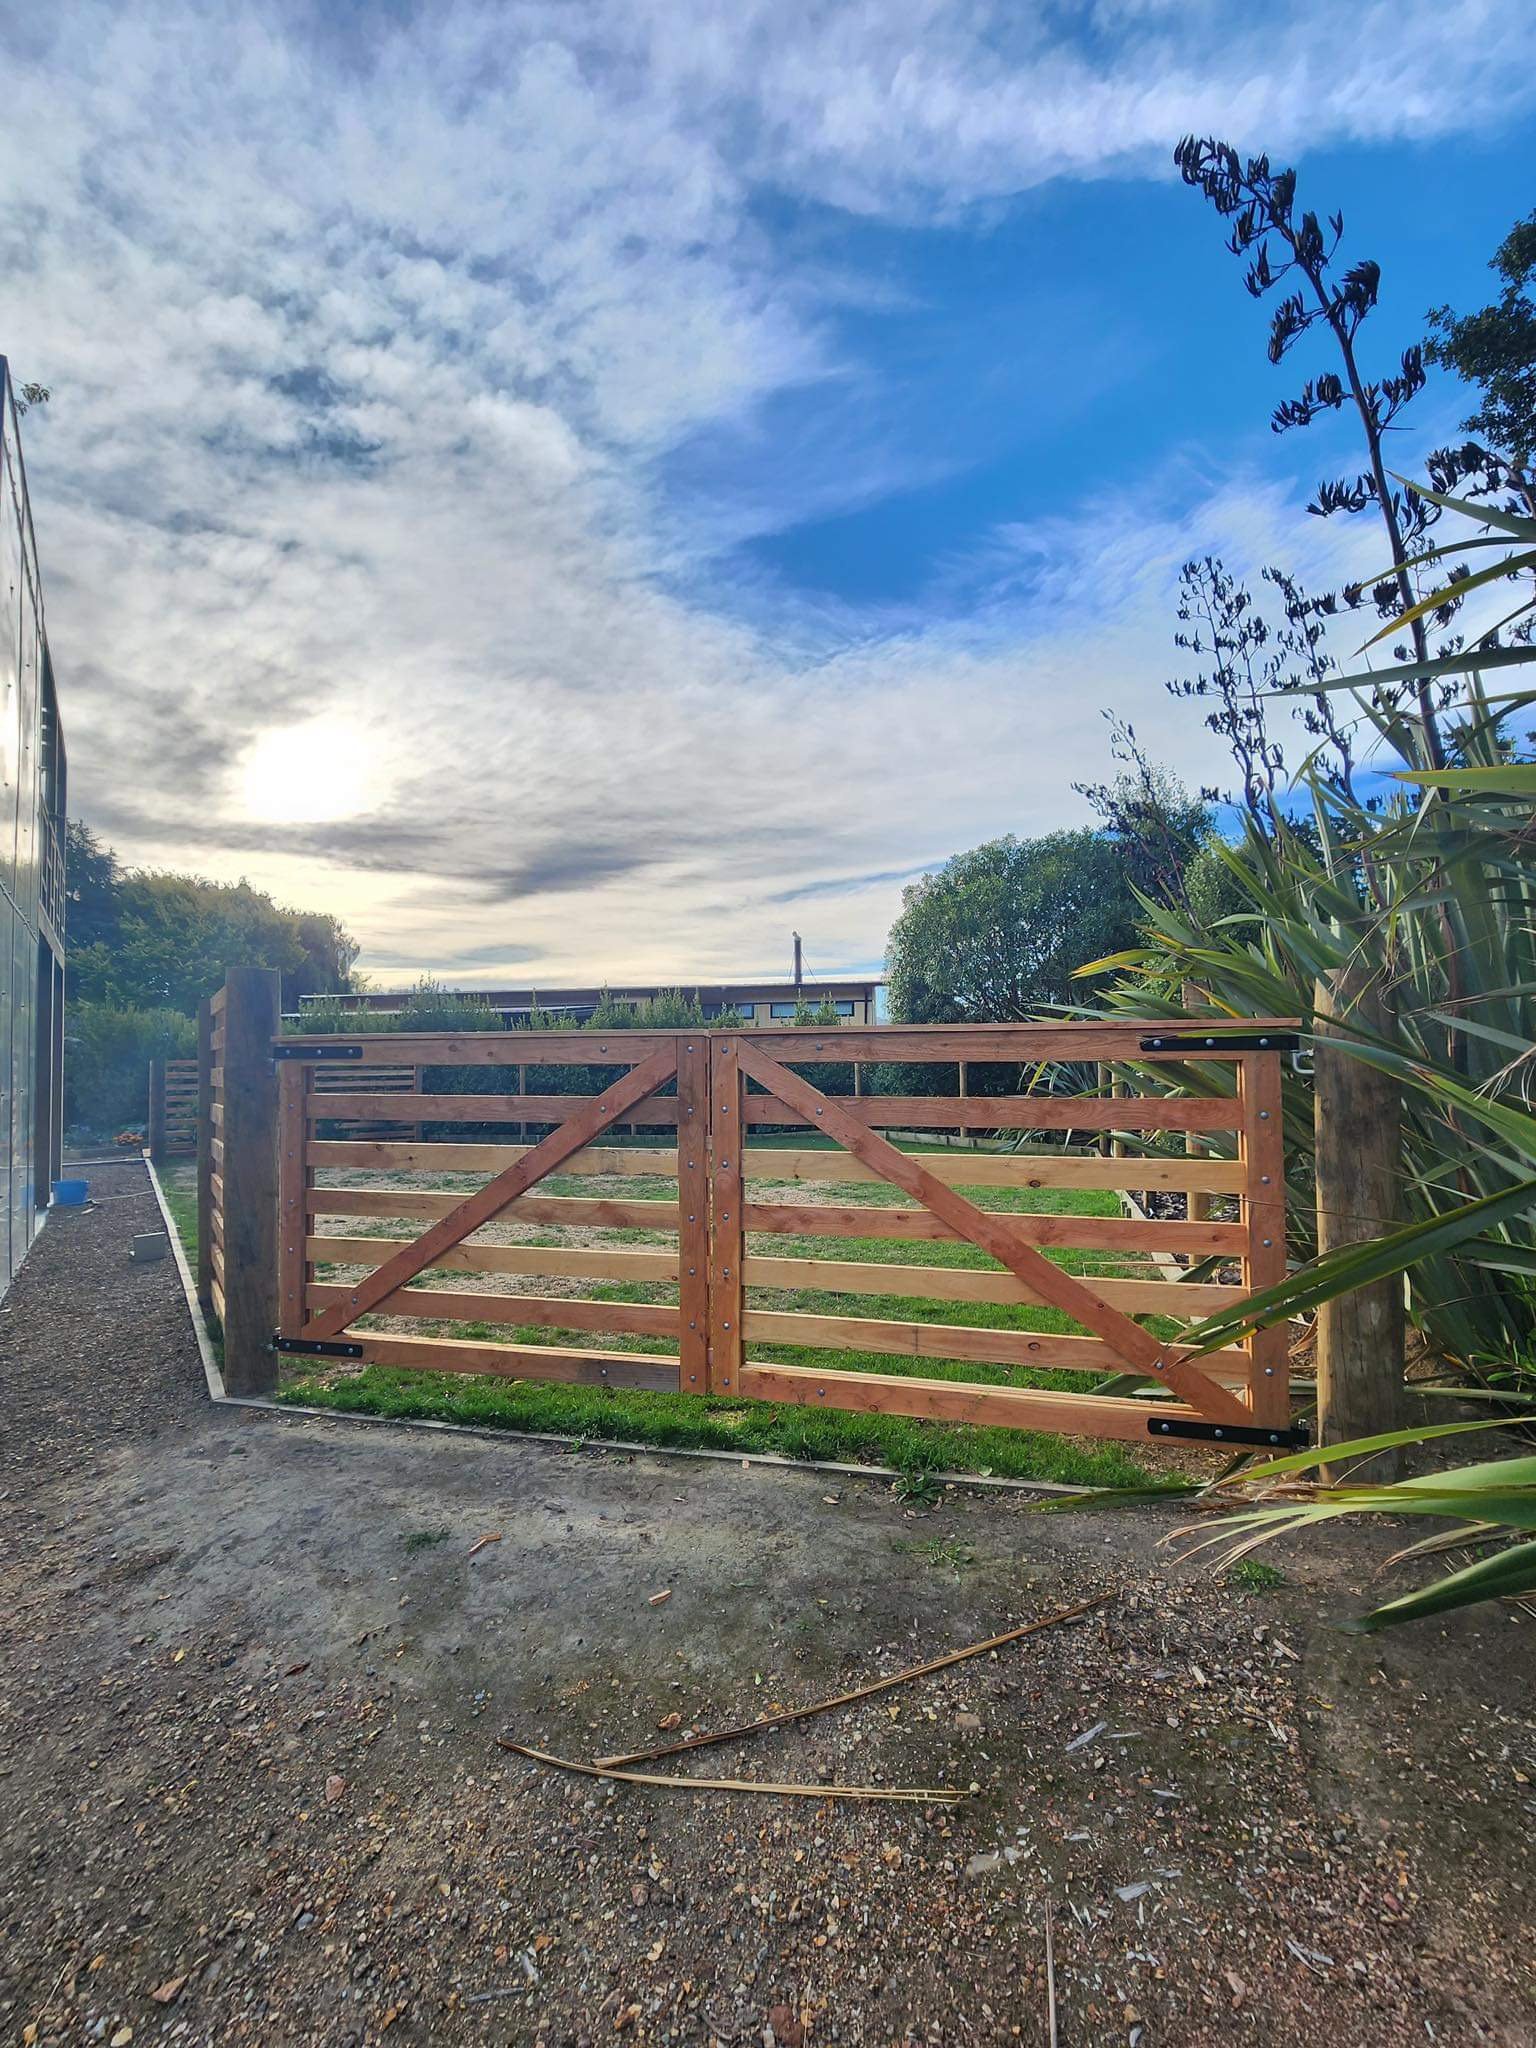
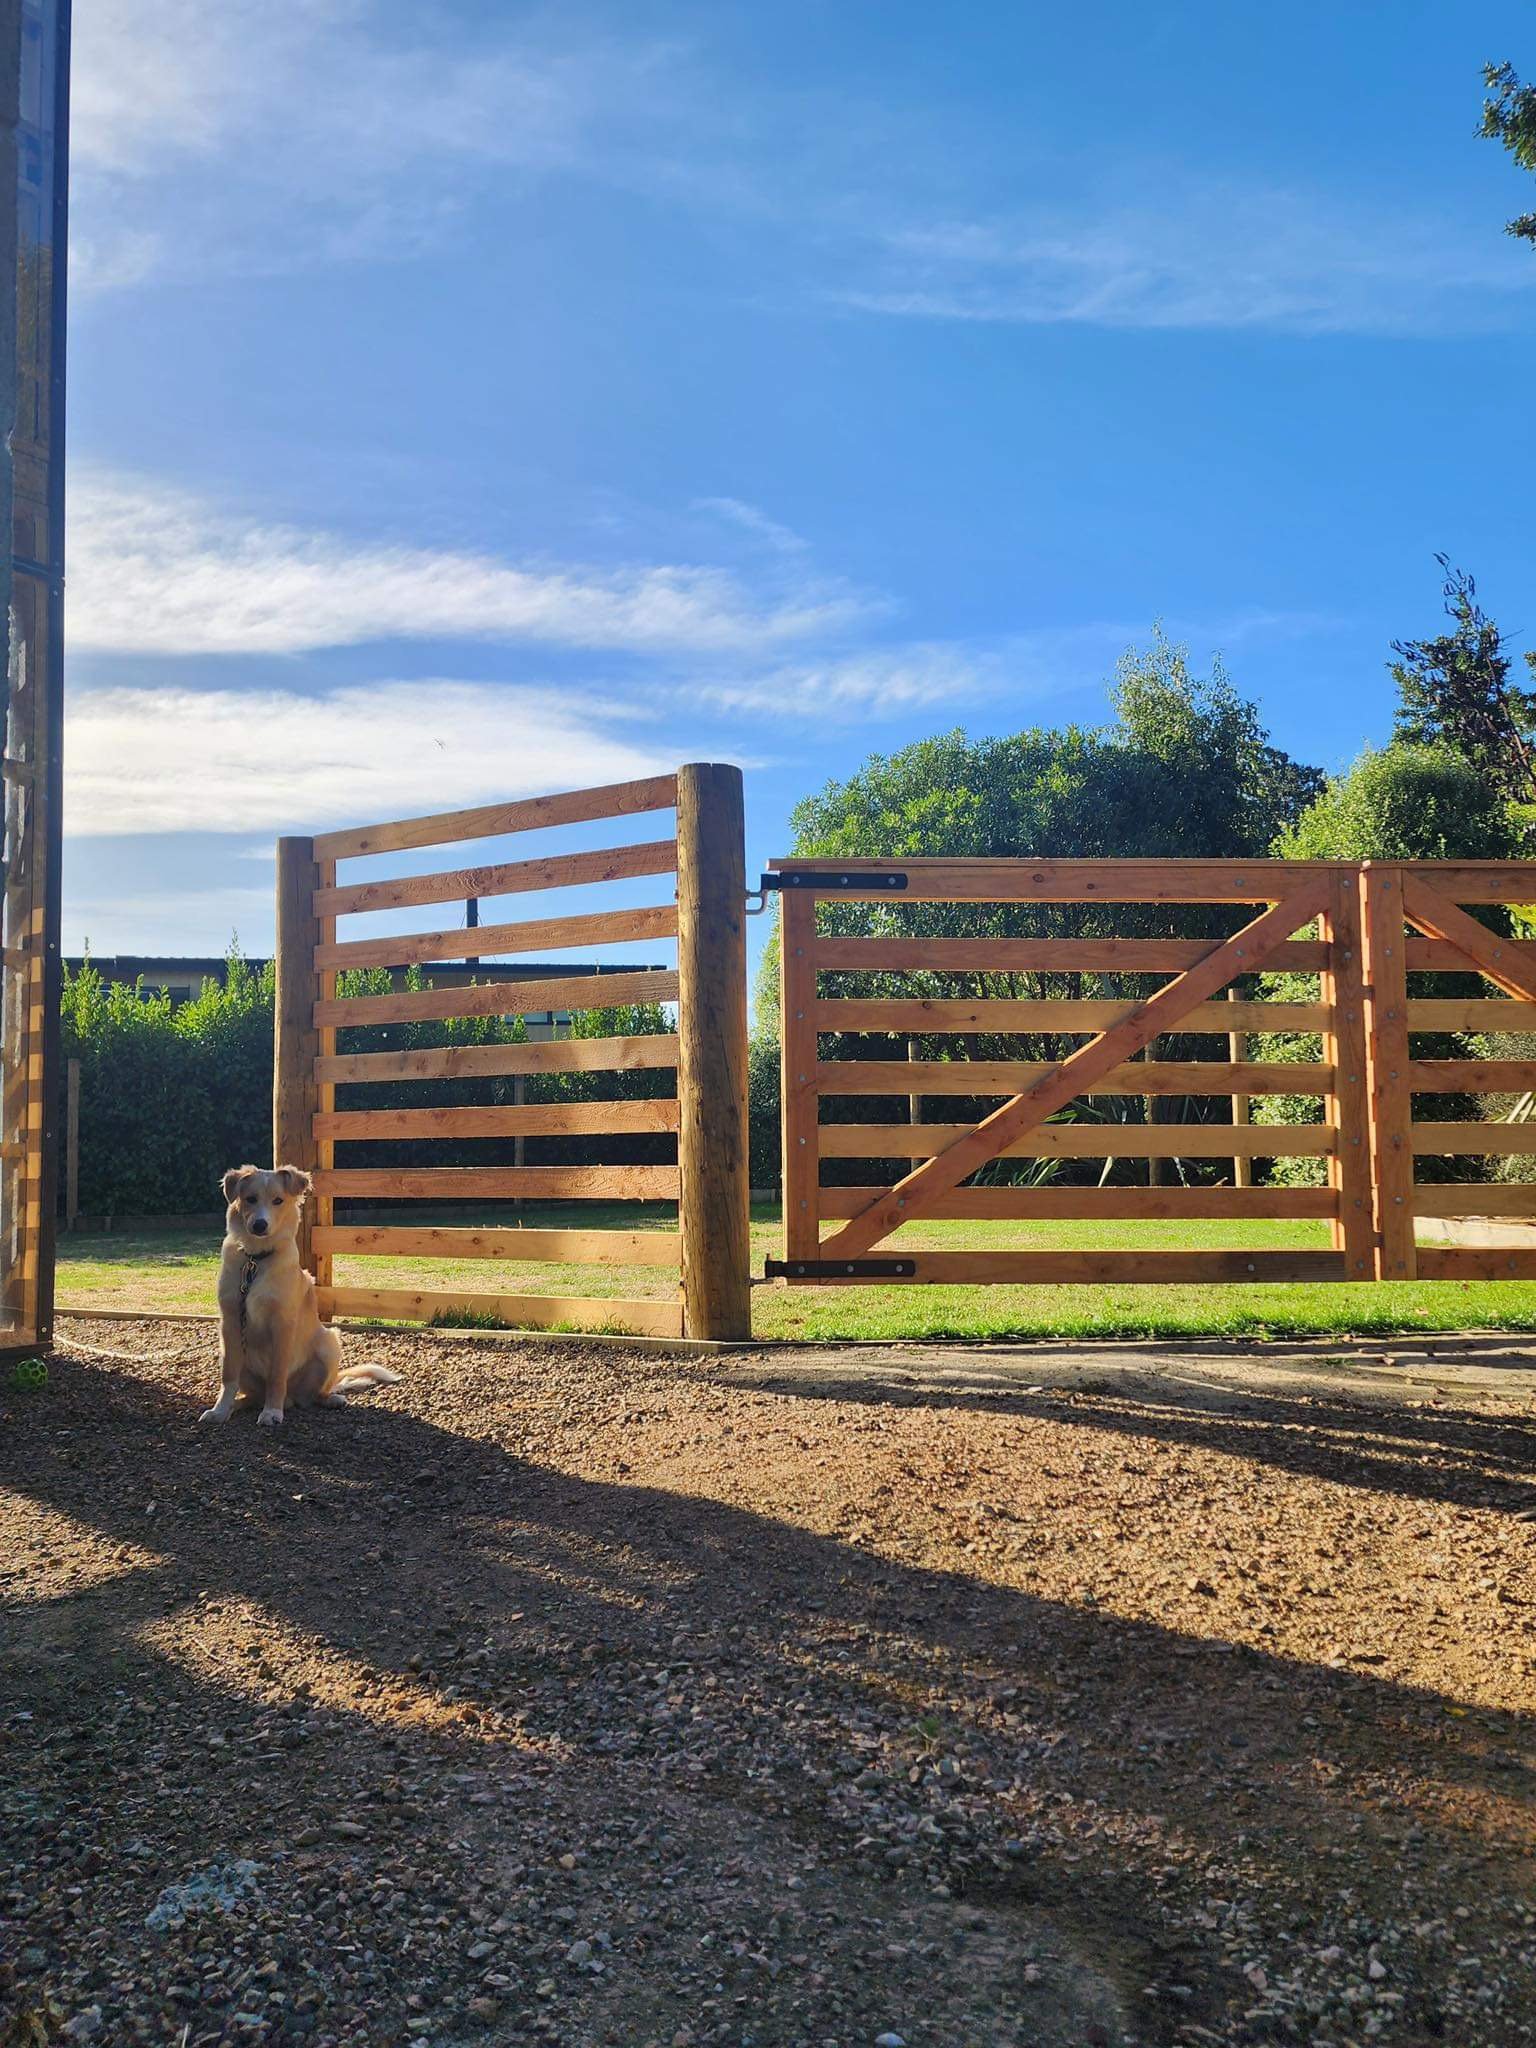
Made some gates so Finn has a nice place to hang out off the lead. Gates are 100x25 Oregon and 200mm round strainers for each gate post buried a meter per side, pretty sturdy: He was keen to show that he could still escape if he wanted to… Alcatraz it is not… yet…
1 point
-
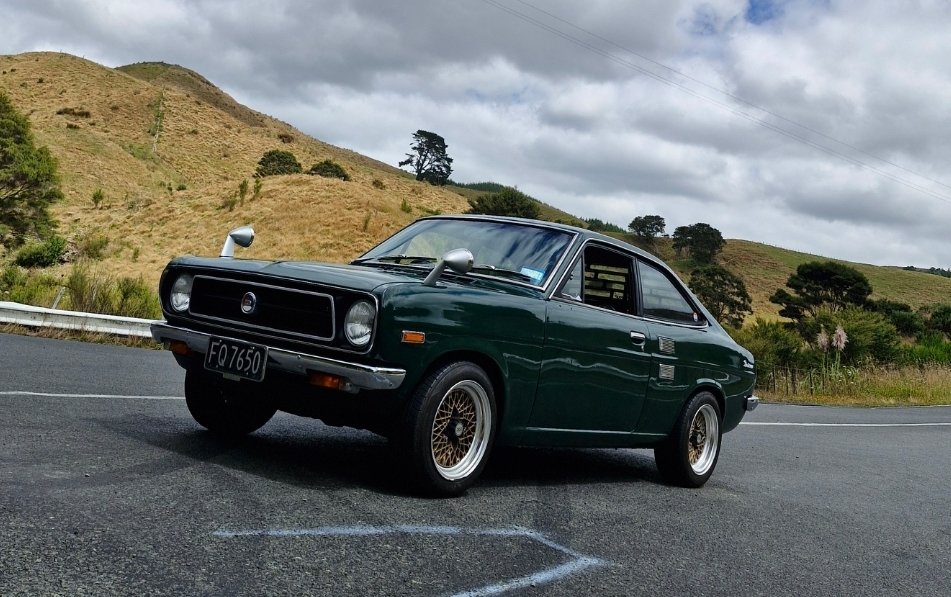
With the Weather being so beautiful lately.. been getting the datto out more and more... All the hard work is paying off and falling in love again. On a side note.. there's two events on this weekend.. Saturday. Hamilton Car culture at Minogue car park. Sunday. Morrinsville Motorama. I'll be attending both.
1 point
-
Pics from the port in Kobe! All looks good, appears that the owner that flipped the car put new tyres on it which is a bonus. Due to leave Japan this week Two gremlins to note: - Car looks to be started up in the images as rev gauge shows 1500 rpm however the charge light is on.. - From photos I've just noticed that the chassis plate is also not in the engine bay. I hope this isn't an issue come VIN time, hopefully the TE27-XXXXX stamp on the firewall is ok on its own?1 point
-
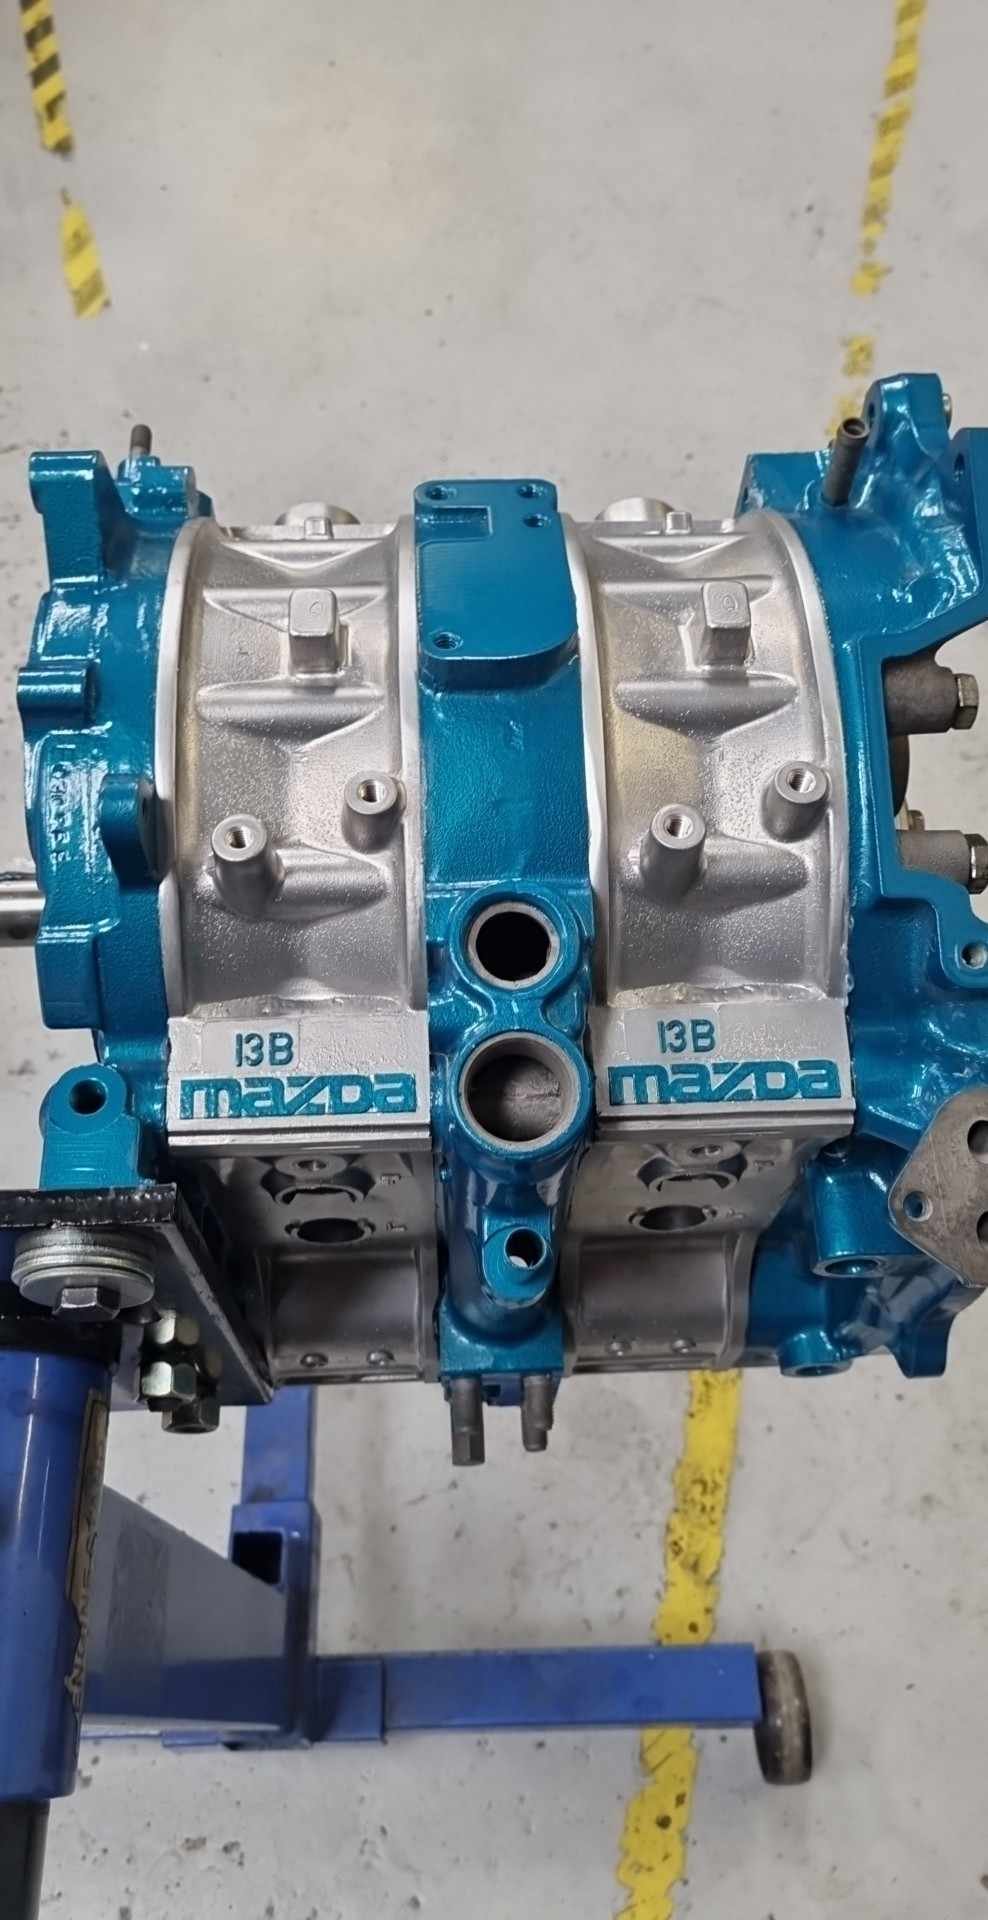
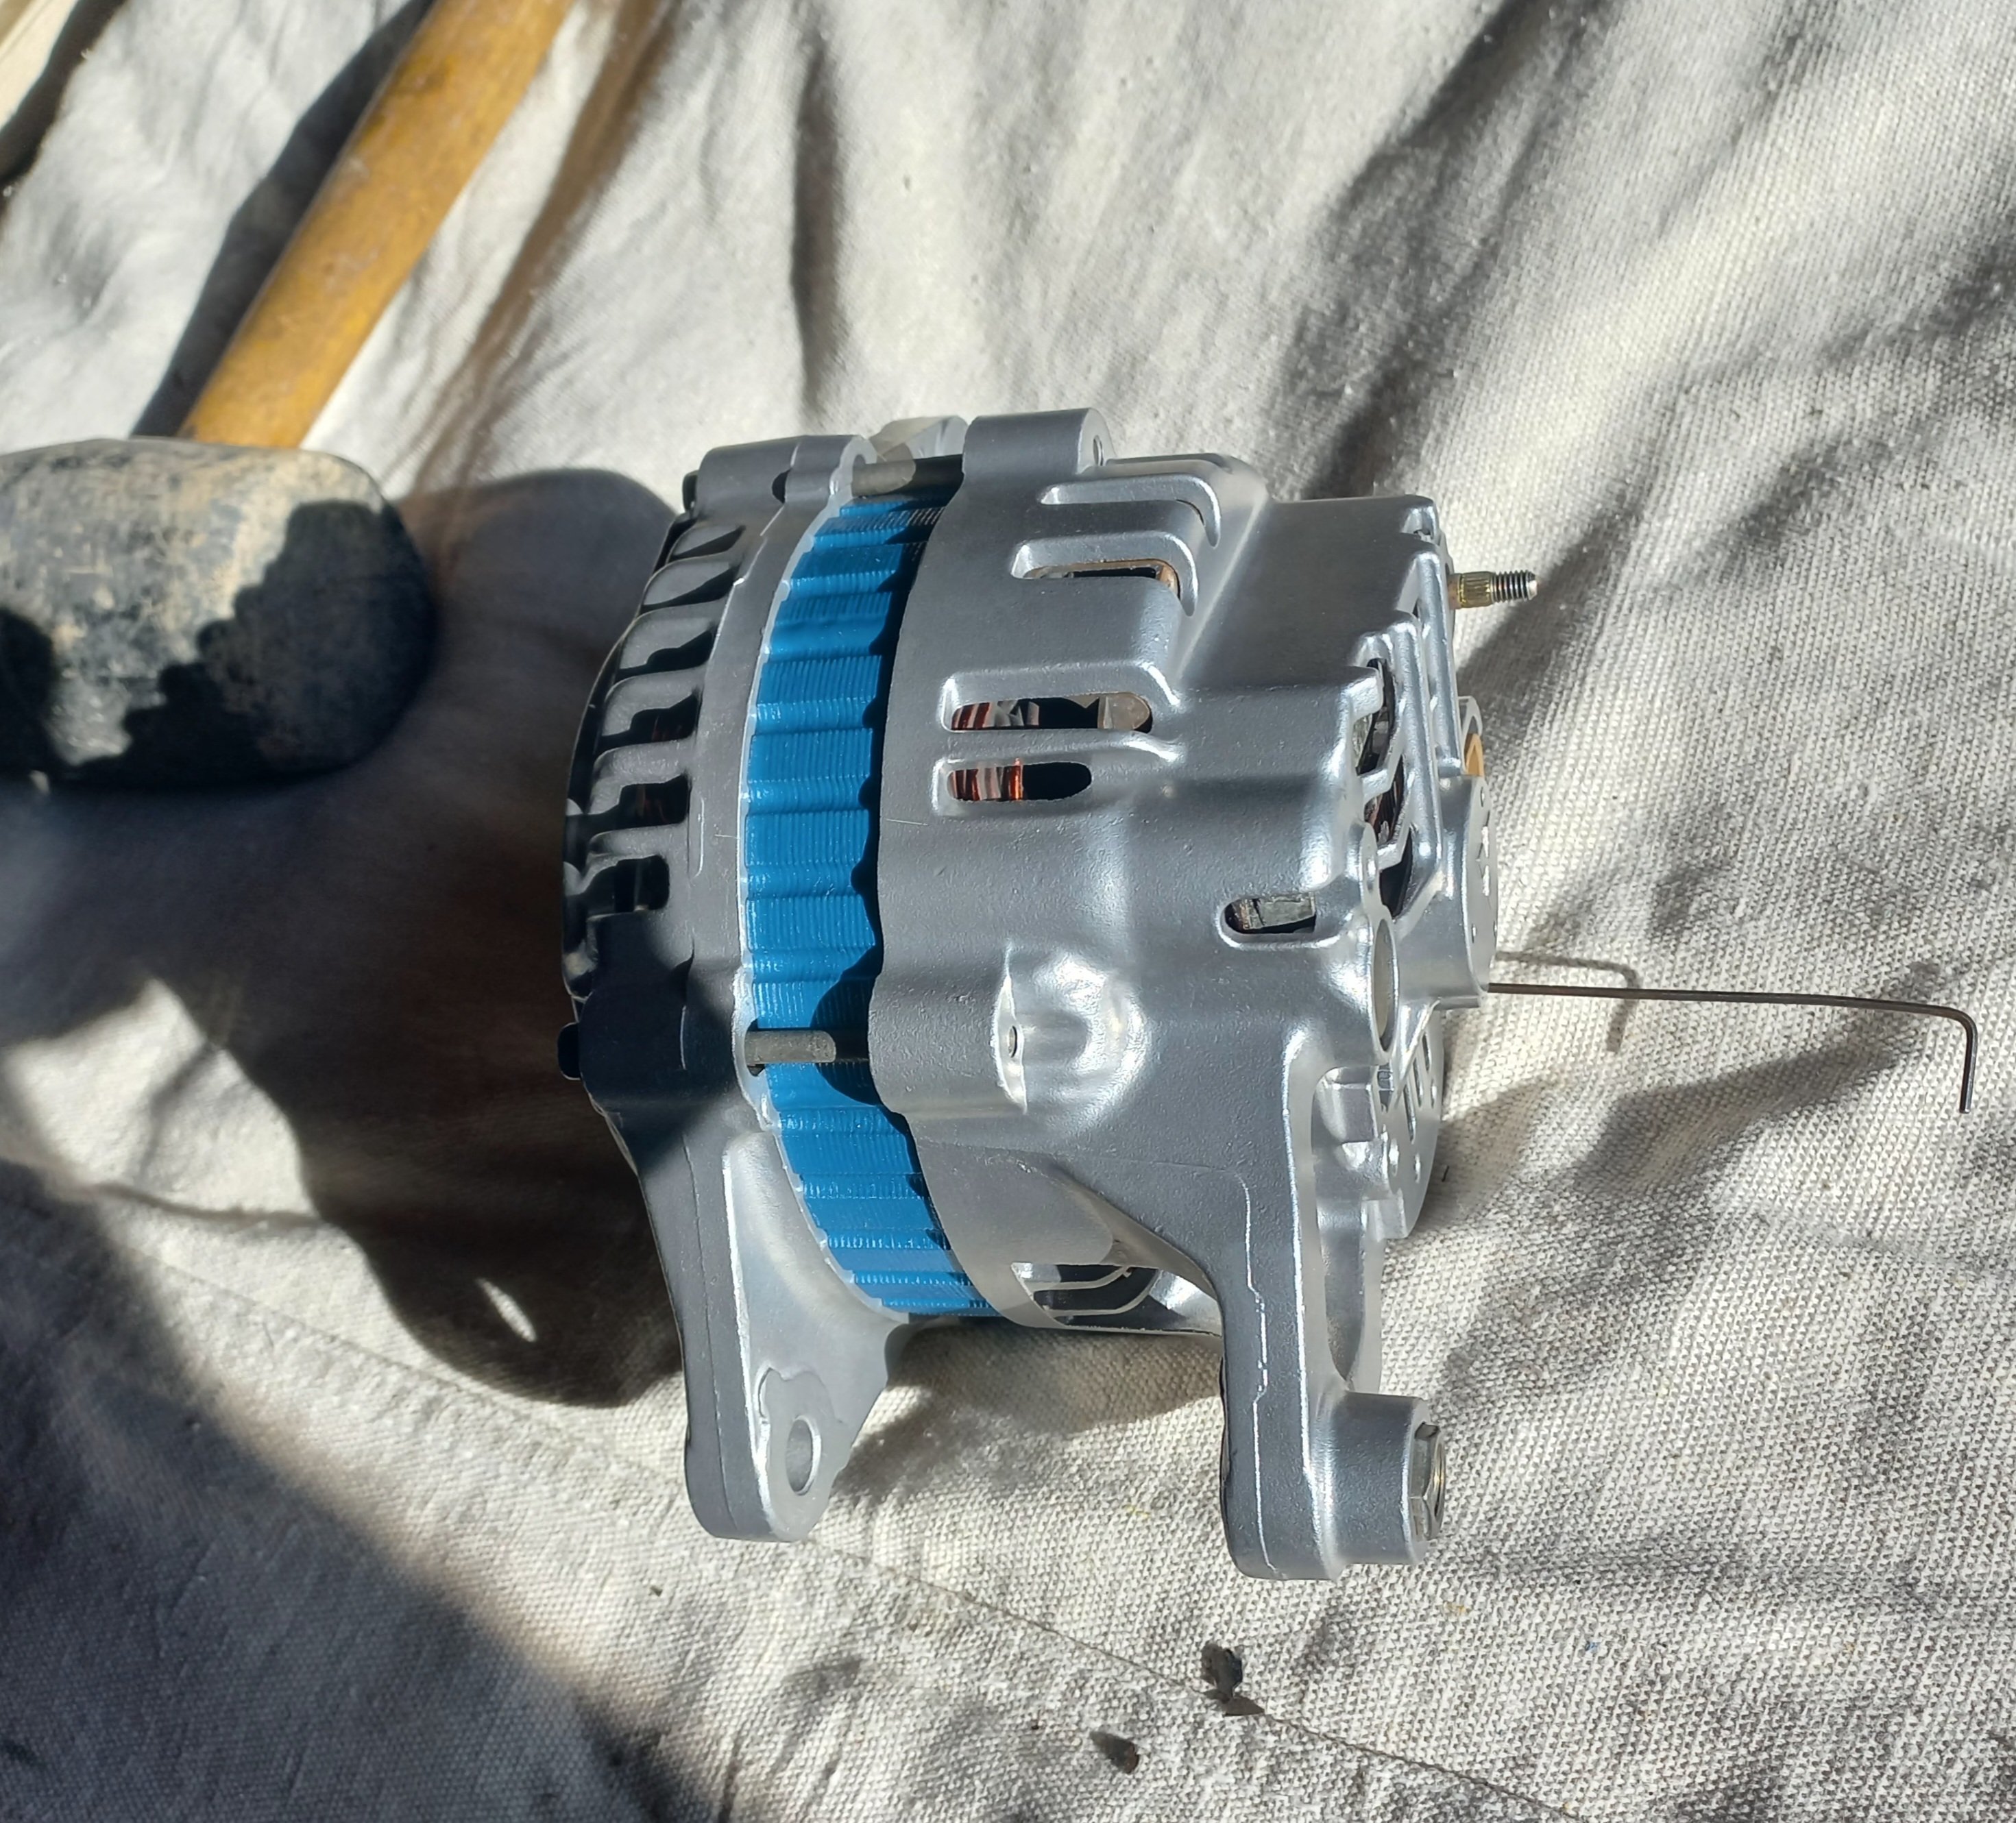
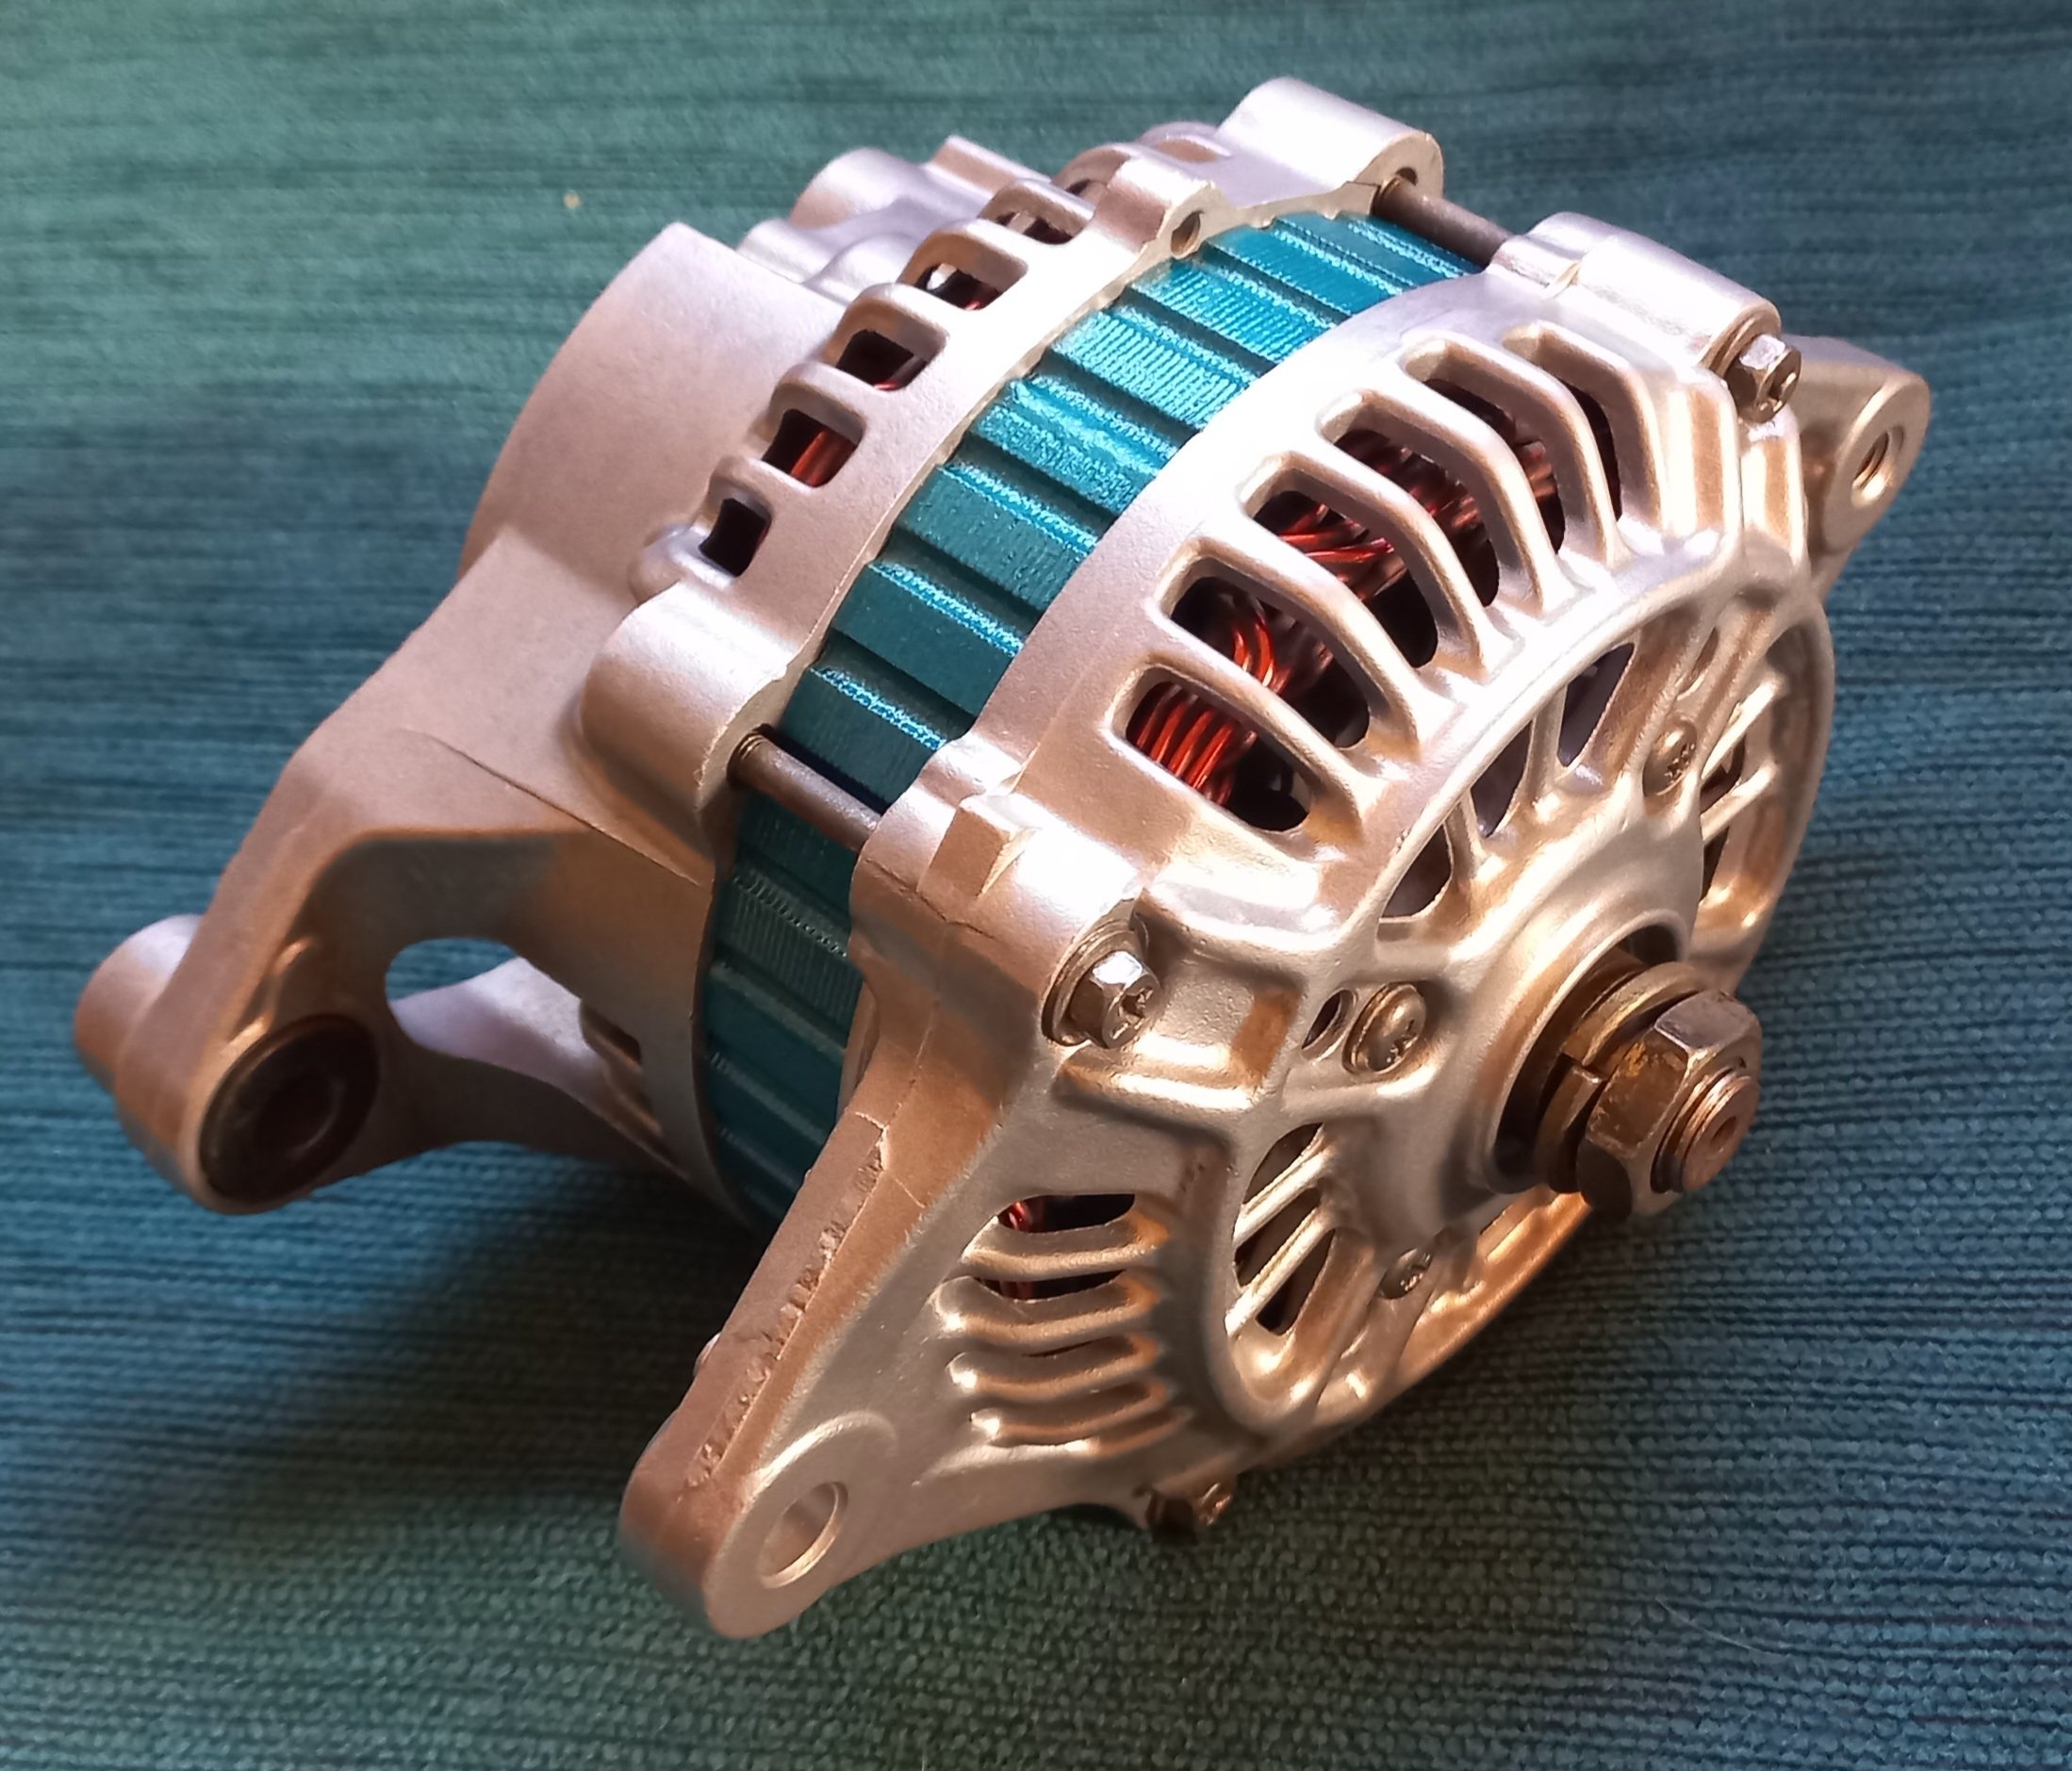
Back in one piece using heatgun to heat the rear casting bearing carrier because bearing was pushed in...heat and rubber mallet done. Allen key to hold in the brushes. Sunlight distorts colour to blue as seen...its actually teal. EDIT: closeup photo seeing the Raggety cast mold dags on the mounting arm is irking me. This bit is pretty much right on top of me motor and visable so I may just dismantle/file/wetsand it smoother and re vapour when i do Diff to settle my OCD.
1 point
-
Lols I finished wiring up the front end except for the final wrap and decided to hook up a battery to see if what i had done actually worked. It all does except for the headlight pod motors, these start continuously popping up and down as soon as the key is on. This is undesirable, troubleshooting commences tomorrow...1 point
-
Daily update. This relentless shit is probably getting boring, but its for me not you so you can just bear with me or not. Today I made a front lip and grille carrier as the original is too rough to even bother fitting up. Its kinda rough in the finish department but frankly I dont give a shit as long as it performs the functions required. I found some stainless mesh, I'll see what I can do with that.1 point
-
I now know exactly what it is like to be mansplained to.
1 point
-
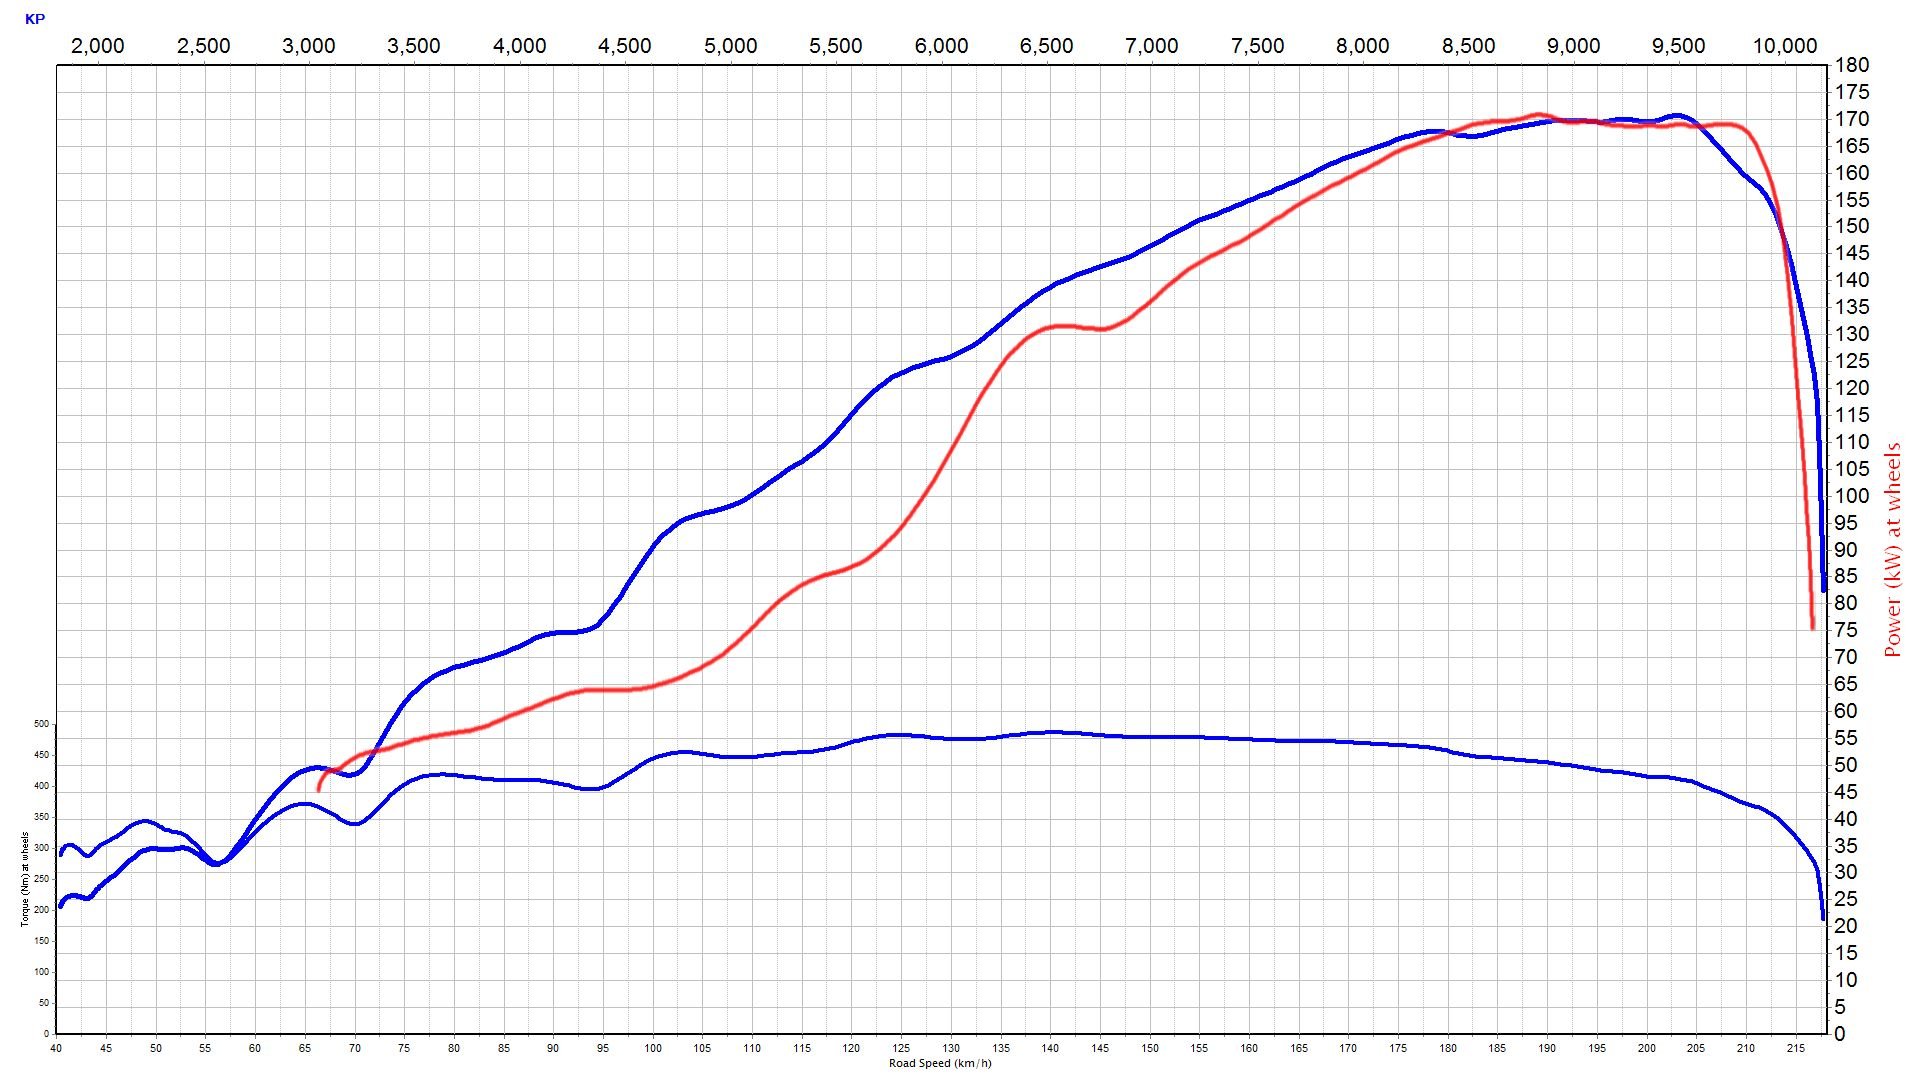
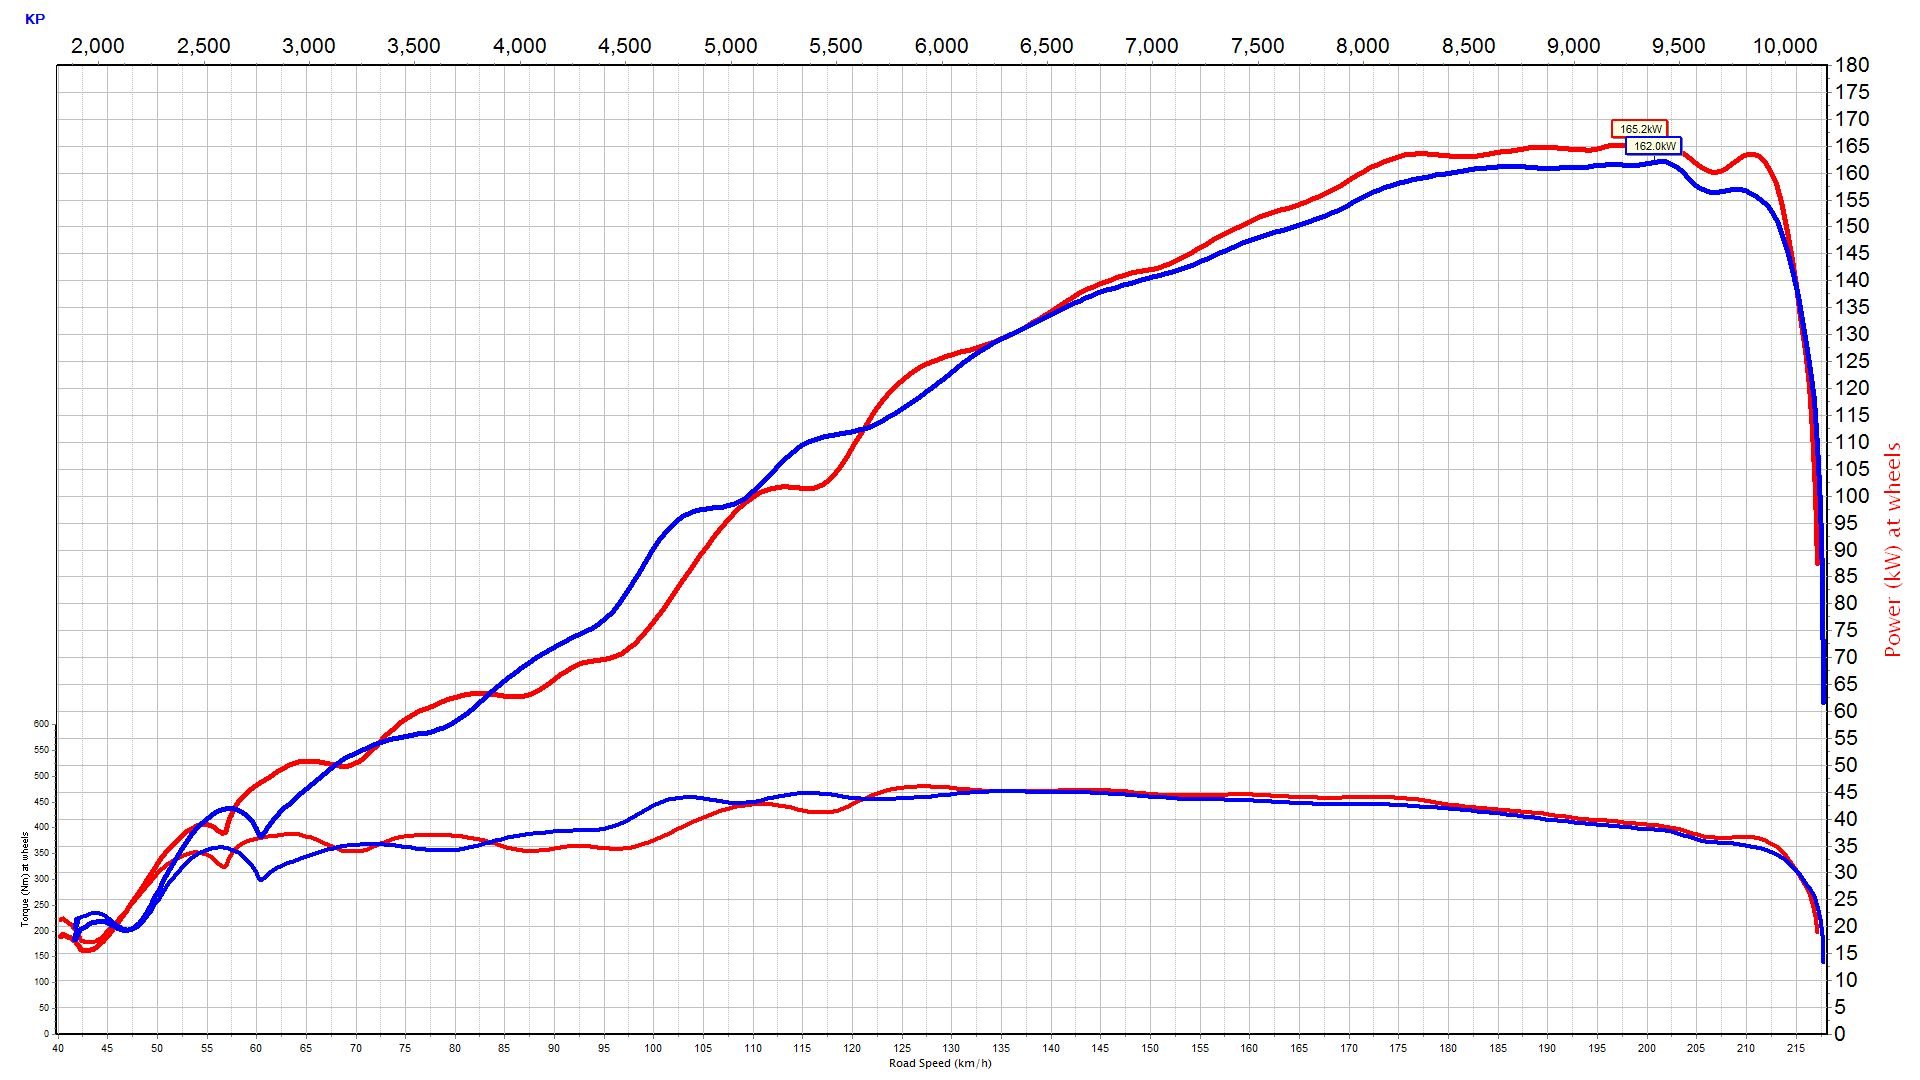
So, i tried a whole bunch of different angle reverse cones, on my test pipe. the part that goes back down smaller to the muffler 18, 23 and 33 degrees included angle basically didnt do anything orange full exhaust. all others test pipe So yeah the orange run with full exhaust. its magically fixed itself and doesn't drop off up top anymore. not sure why, the connection to the big headers is pretty janky atm, so possible exhaust leak. or maybe the way it was on dyno wasnt right. was making 169kw uncorrected, so beat the crap out of it to get oil temps up till it cracked 170kw Atlantic engine = red My junker = blue The vvti is helping out here quite a bit. its amazing/cheating
1 point
-
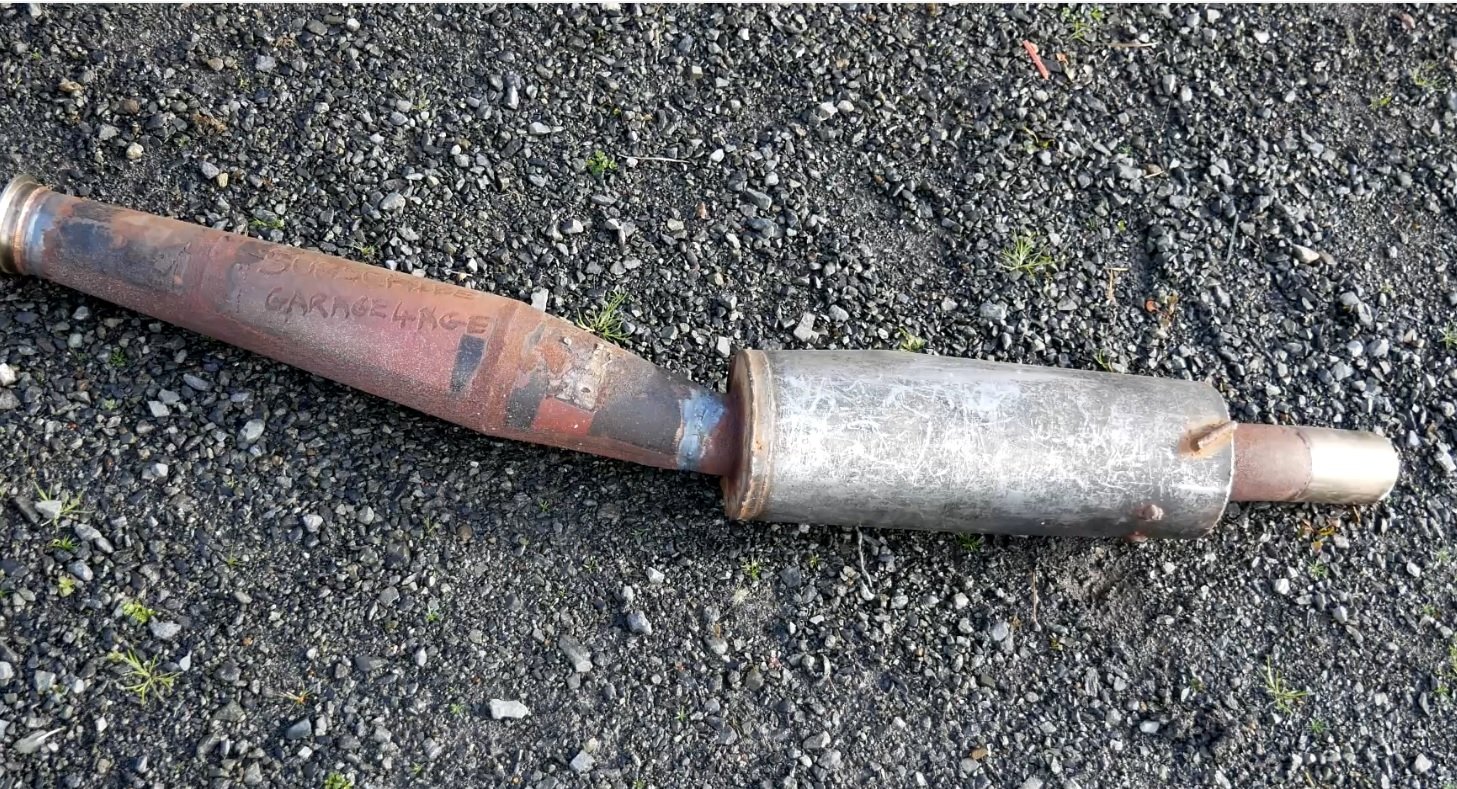
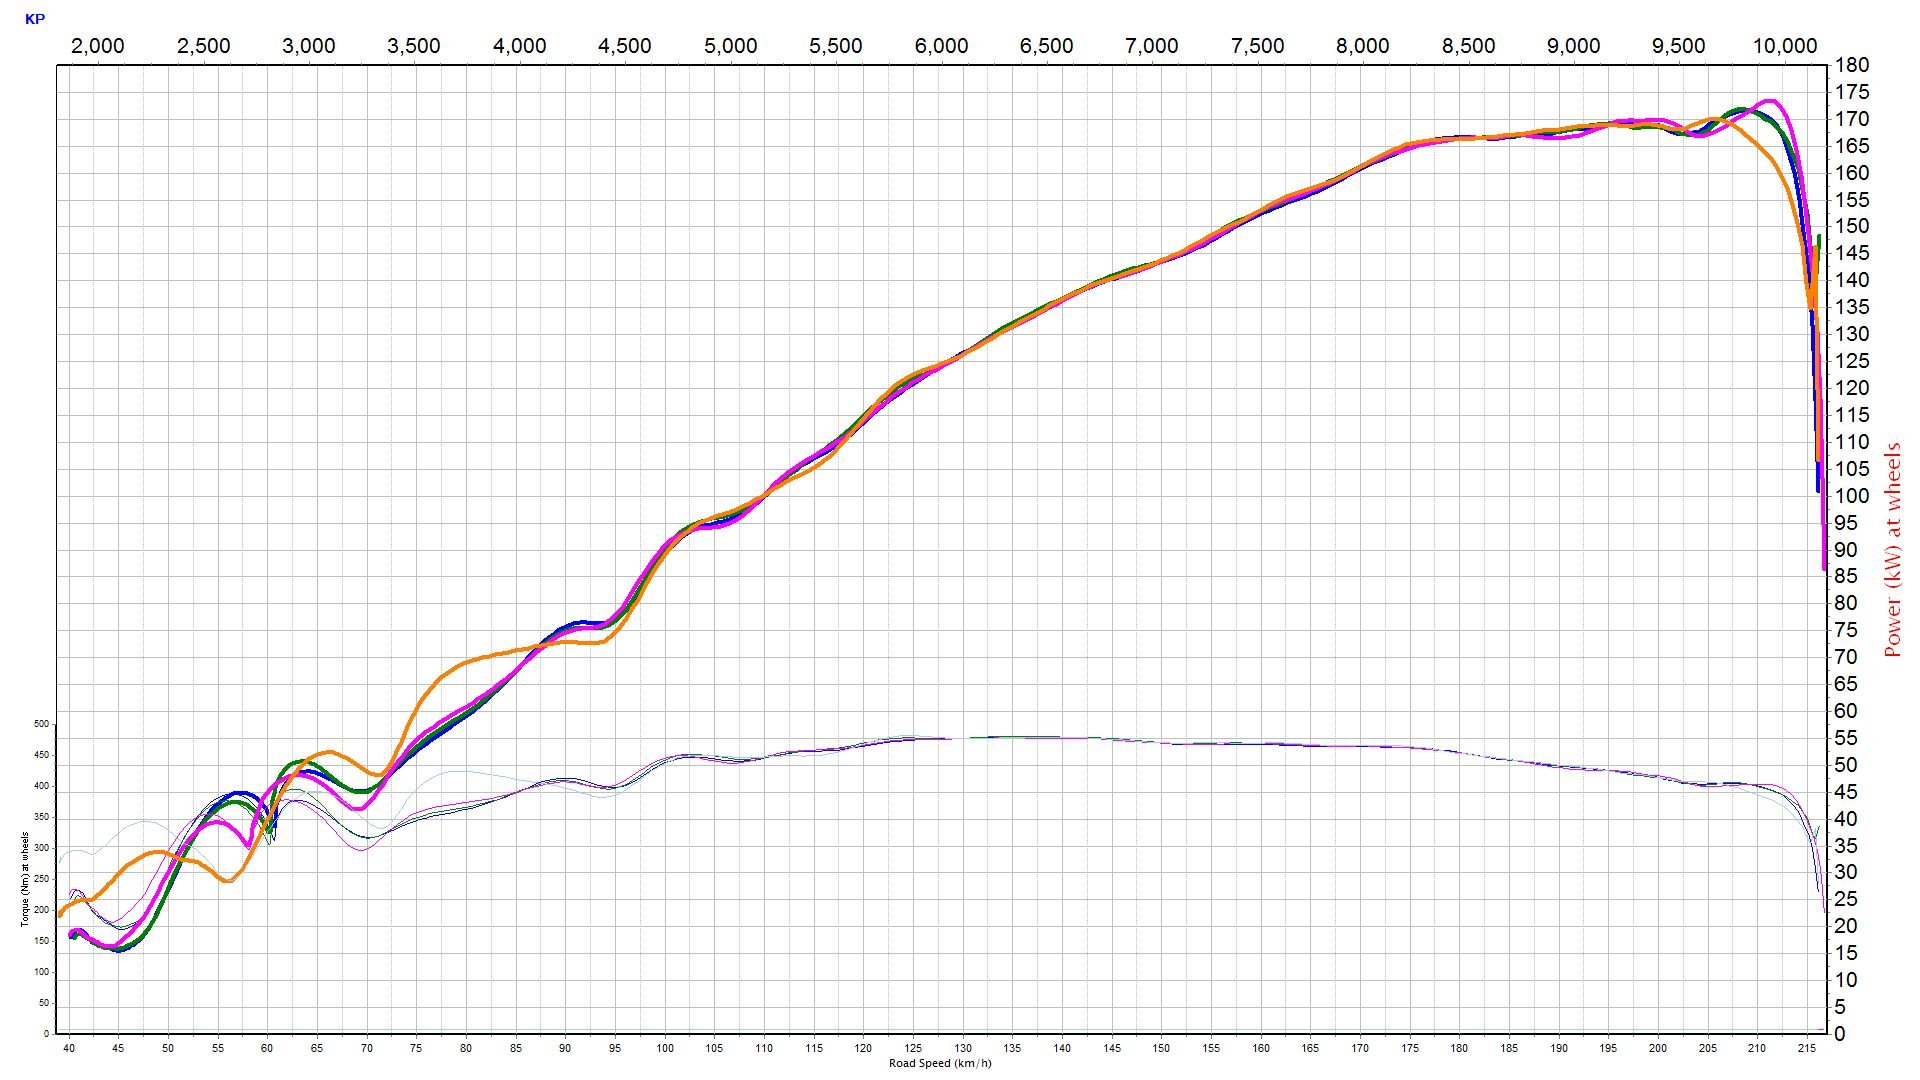
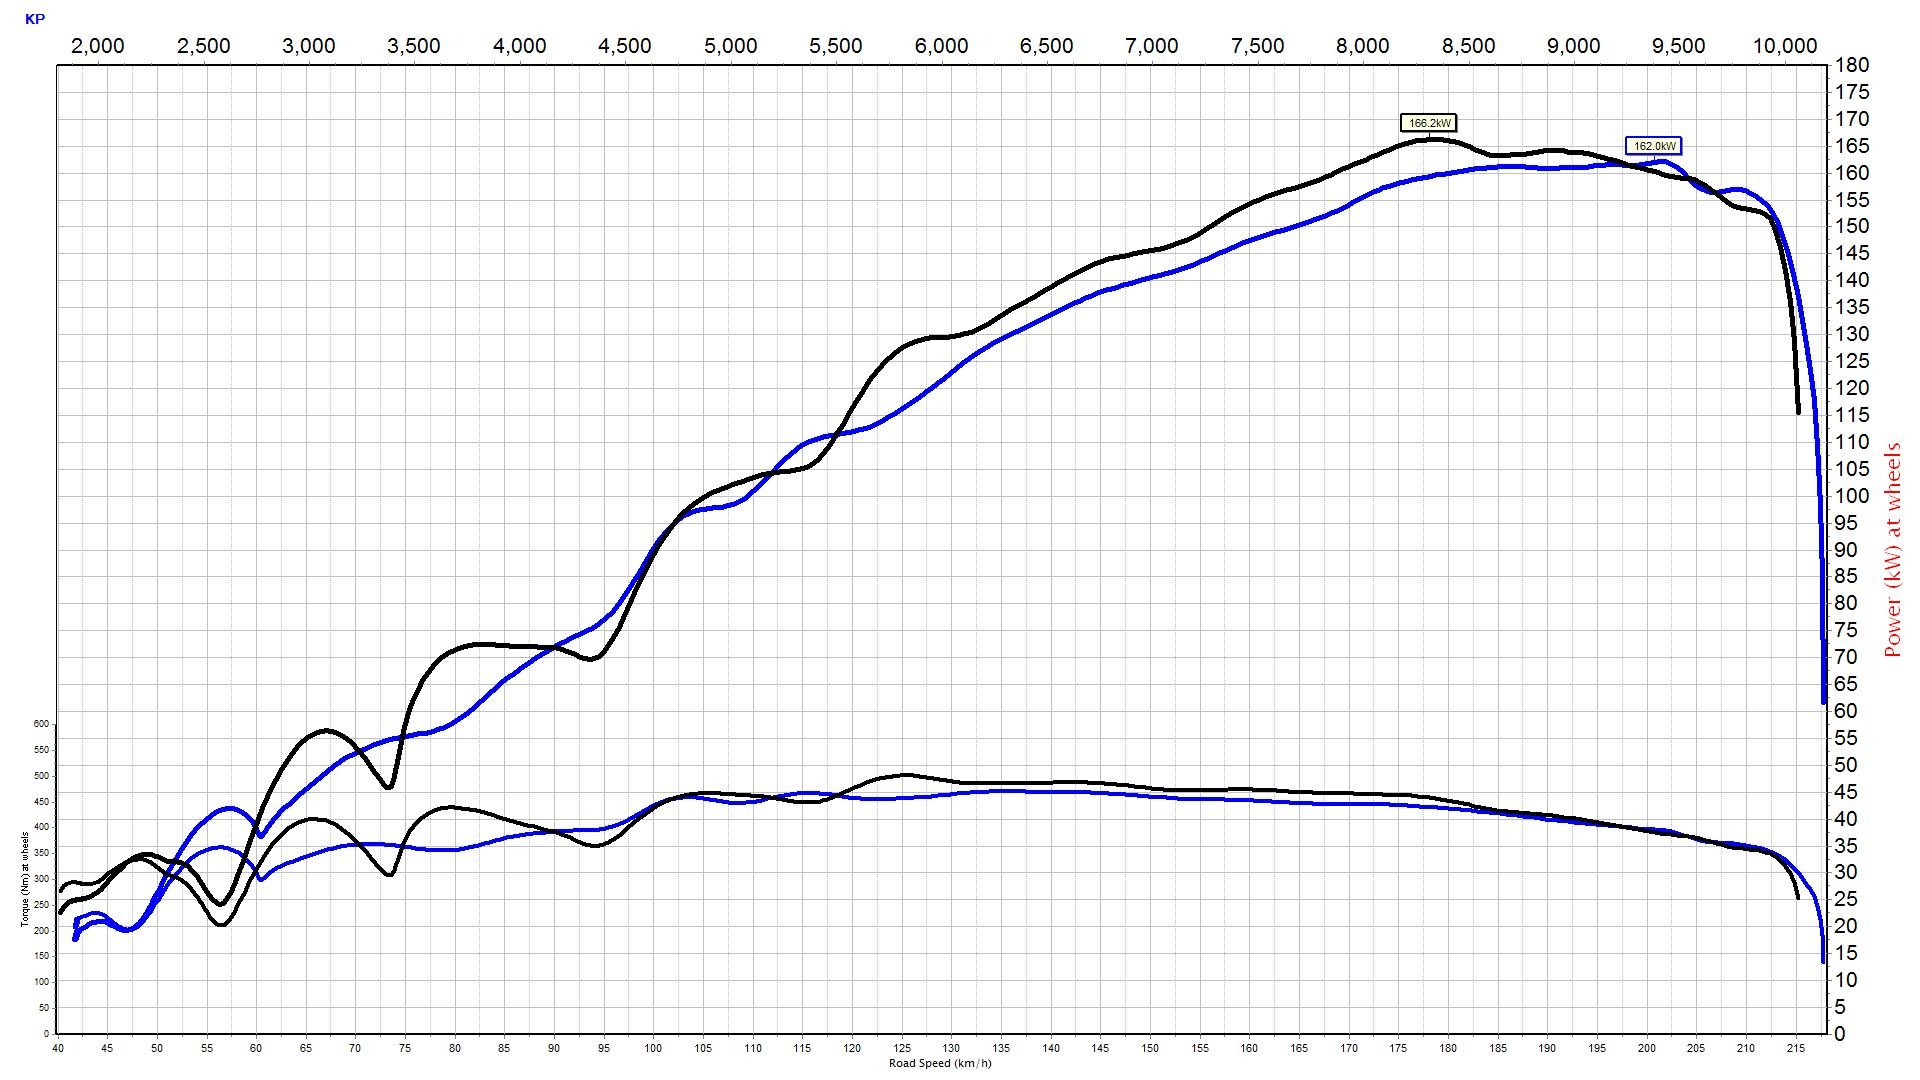
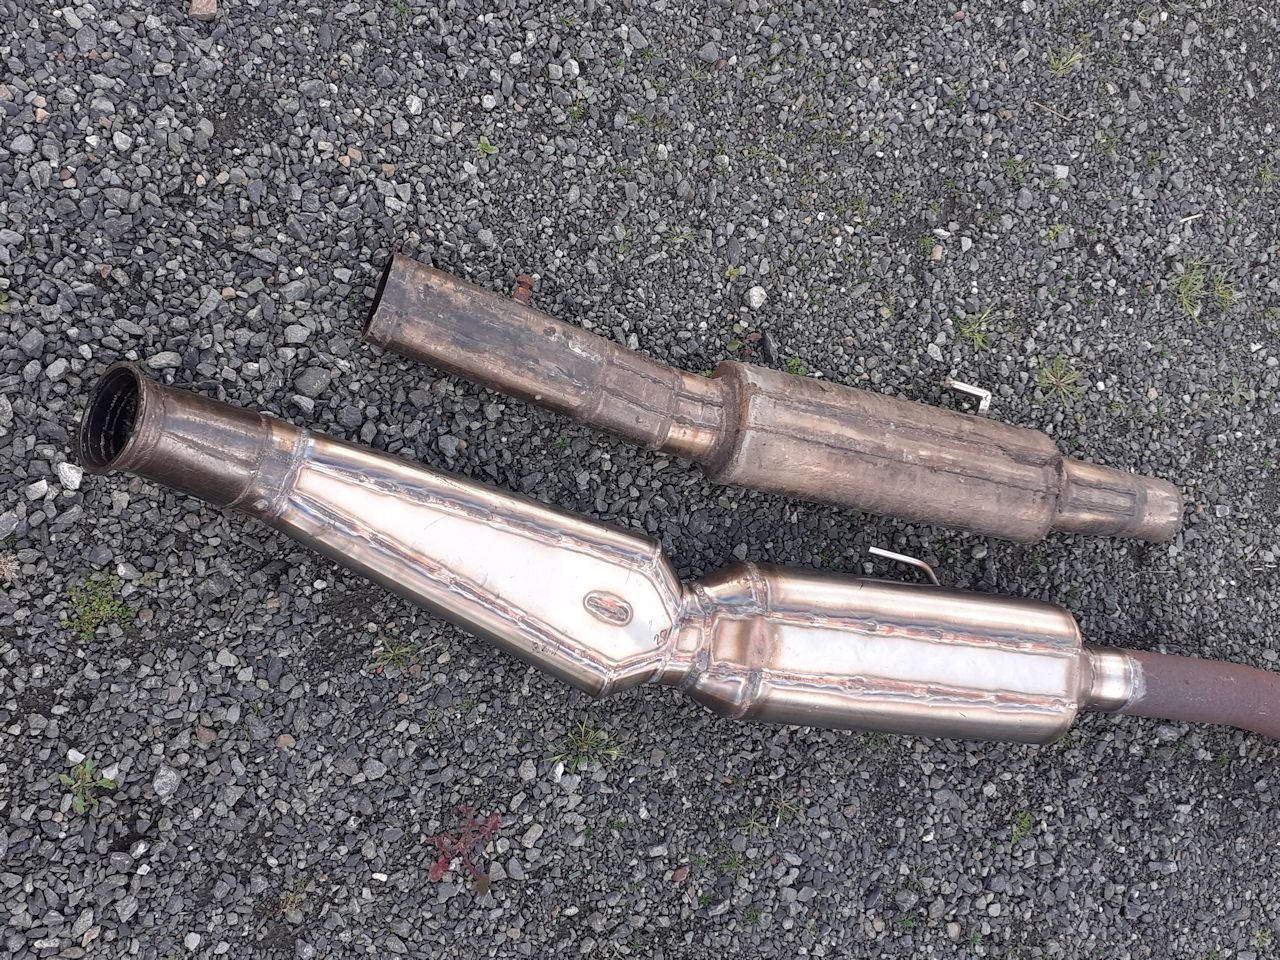
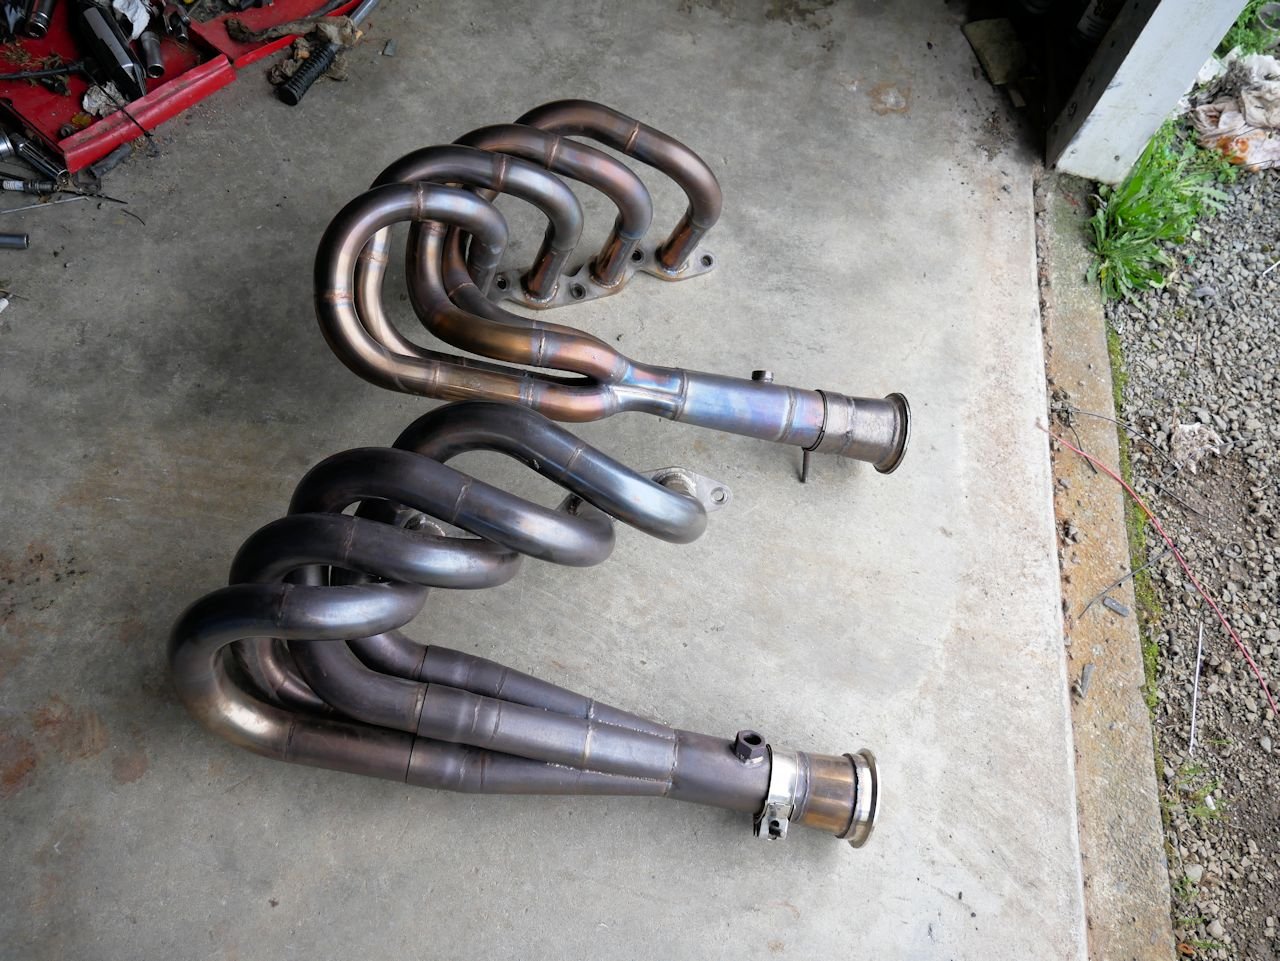
so I tried the big headers i made ages ago, now engine is making more power. kinda same deal as last time. more up top, and a decent hit in bottom end so did some testing with some new exhaust setups after headers. then built something that would actually fit on the car made the below abortion, to replace the existing abortion for reference inlet and the outlet after the reso/muffler is 3" tube. Black is the big headers with the megaphone pipe. blue is small headers with the old pipe as in above graph. bit wiggly under 4k. but aint care about that. pretty good gains through midrange. has picked up the bottom end to match the what the old setup did. the megaphone pipe makes it fall over a bit sooner, but over all better. some fine tuning of the angle would likely help Im running a different collector on the big headers now. but yeh otherwise as below,
1 point
-
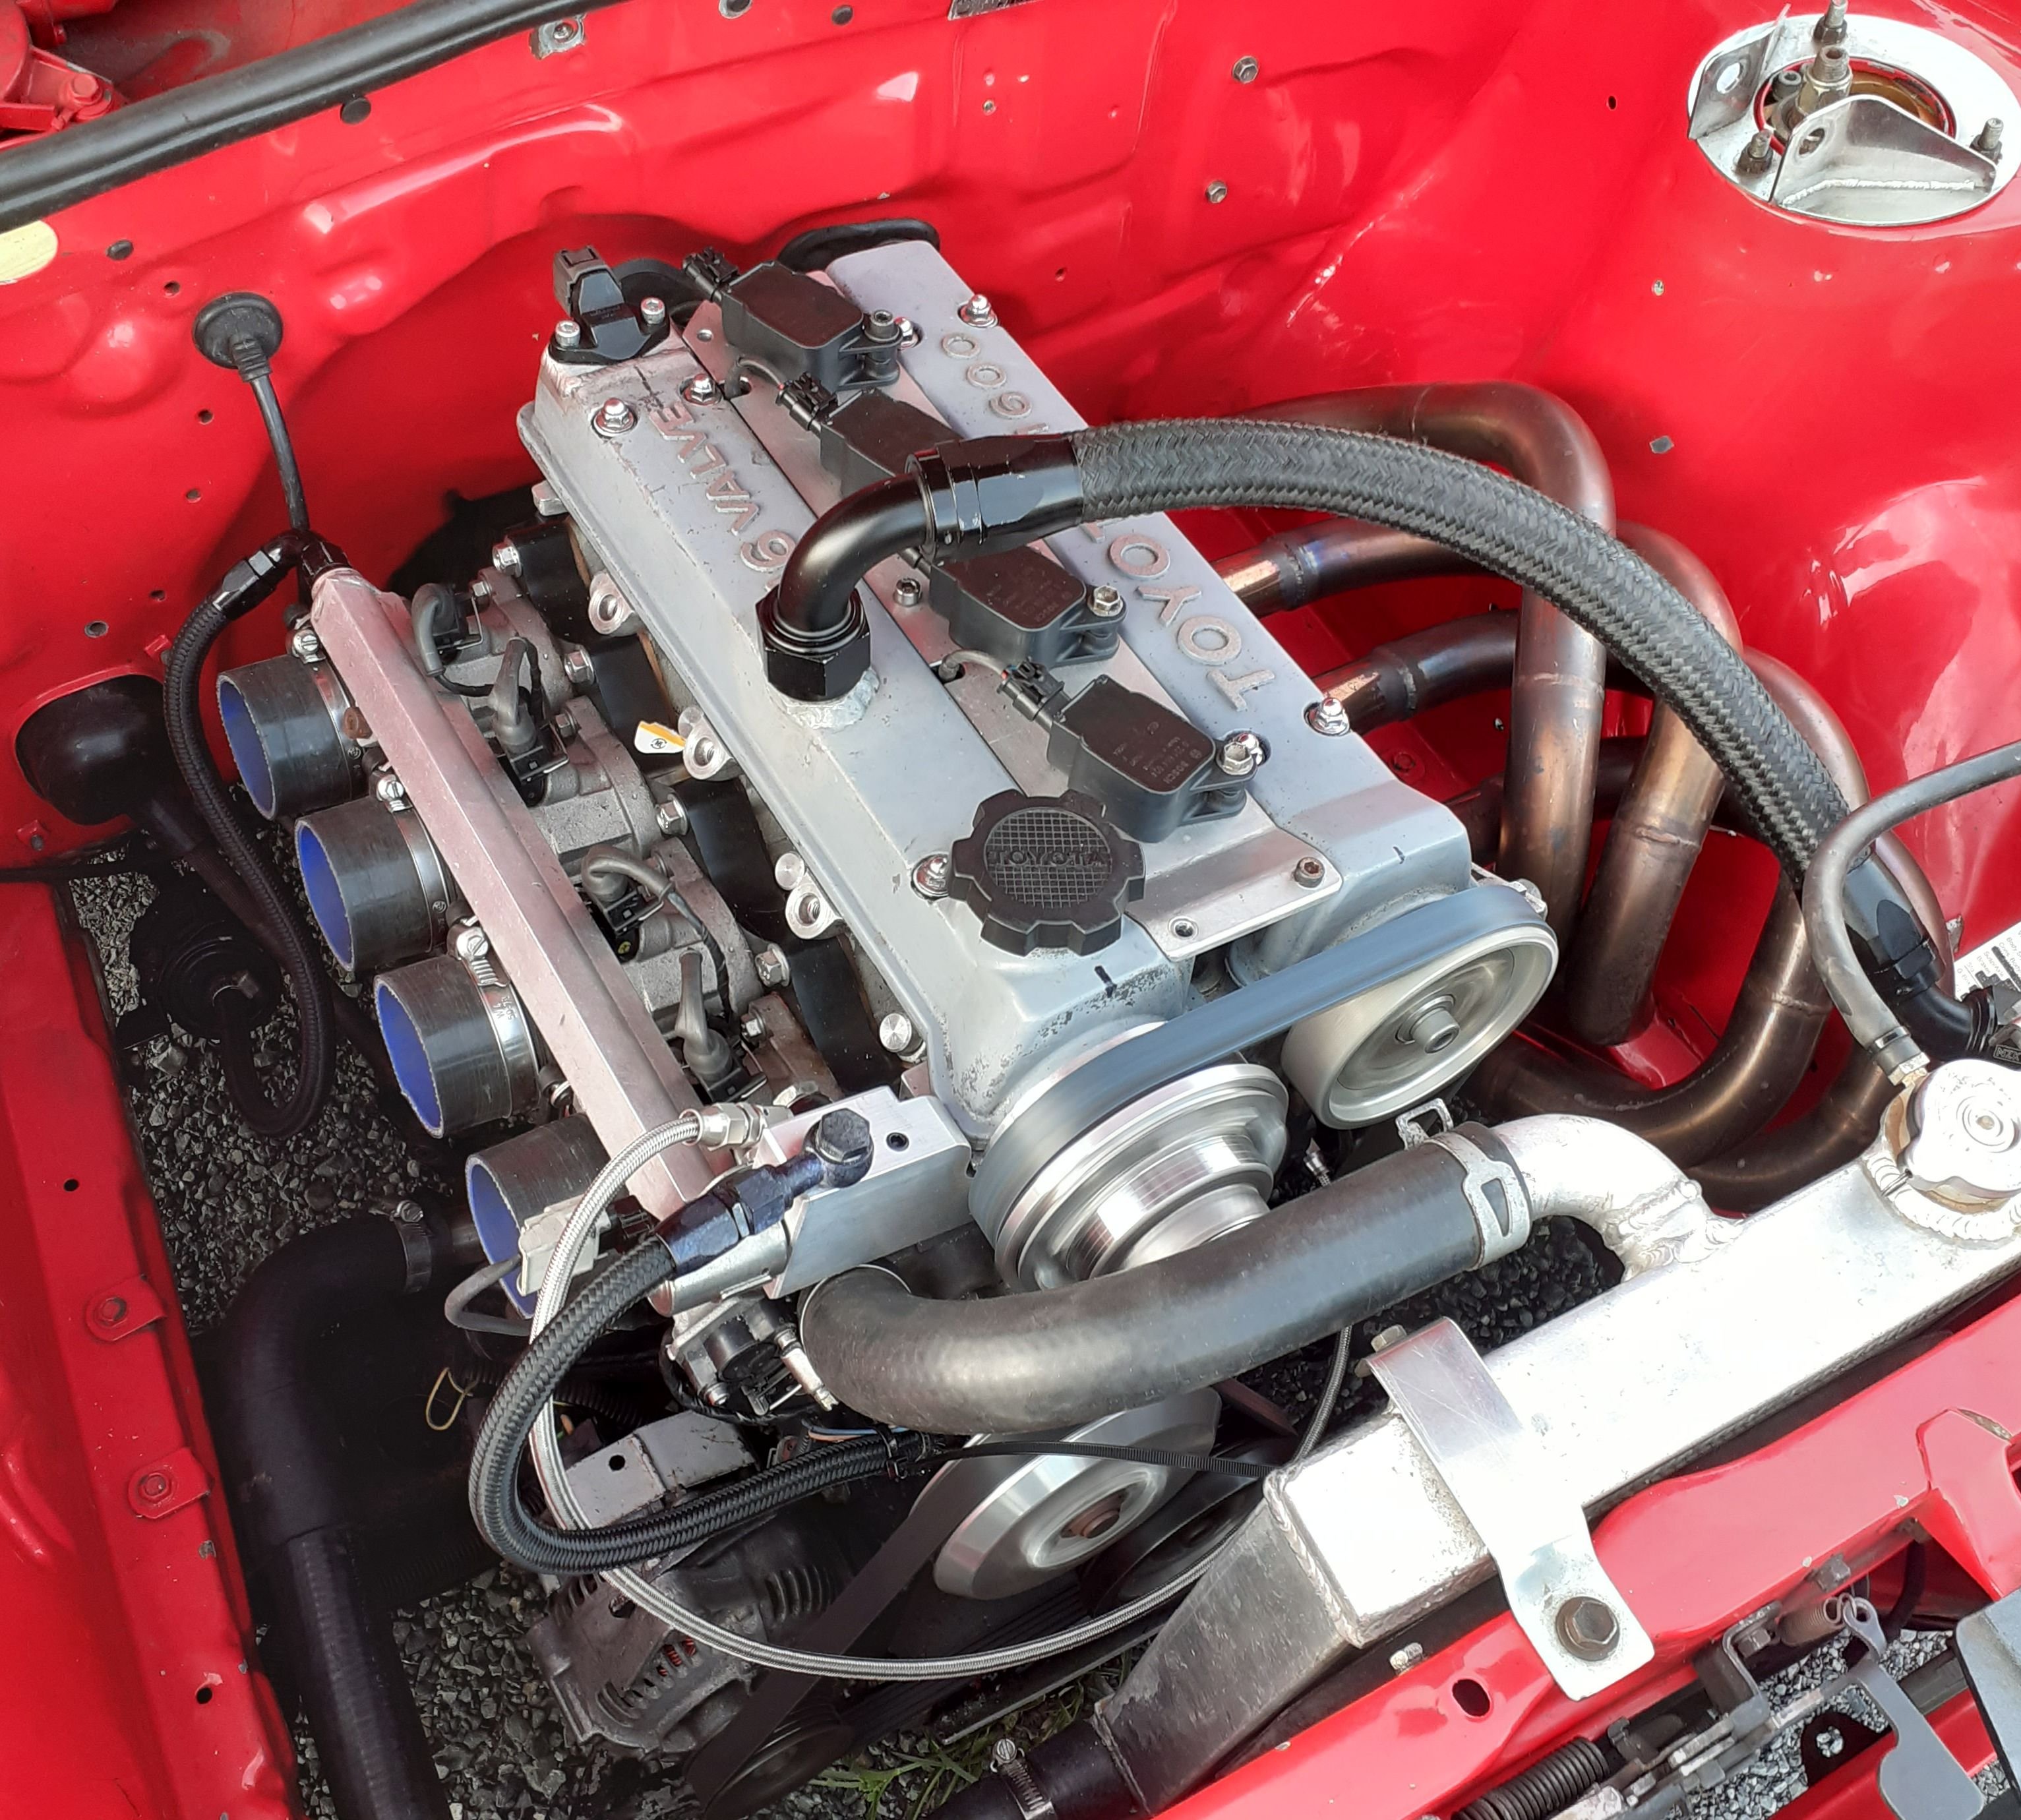
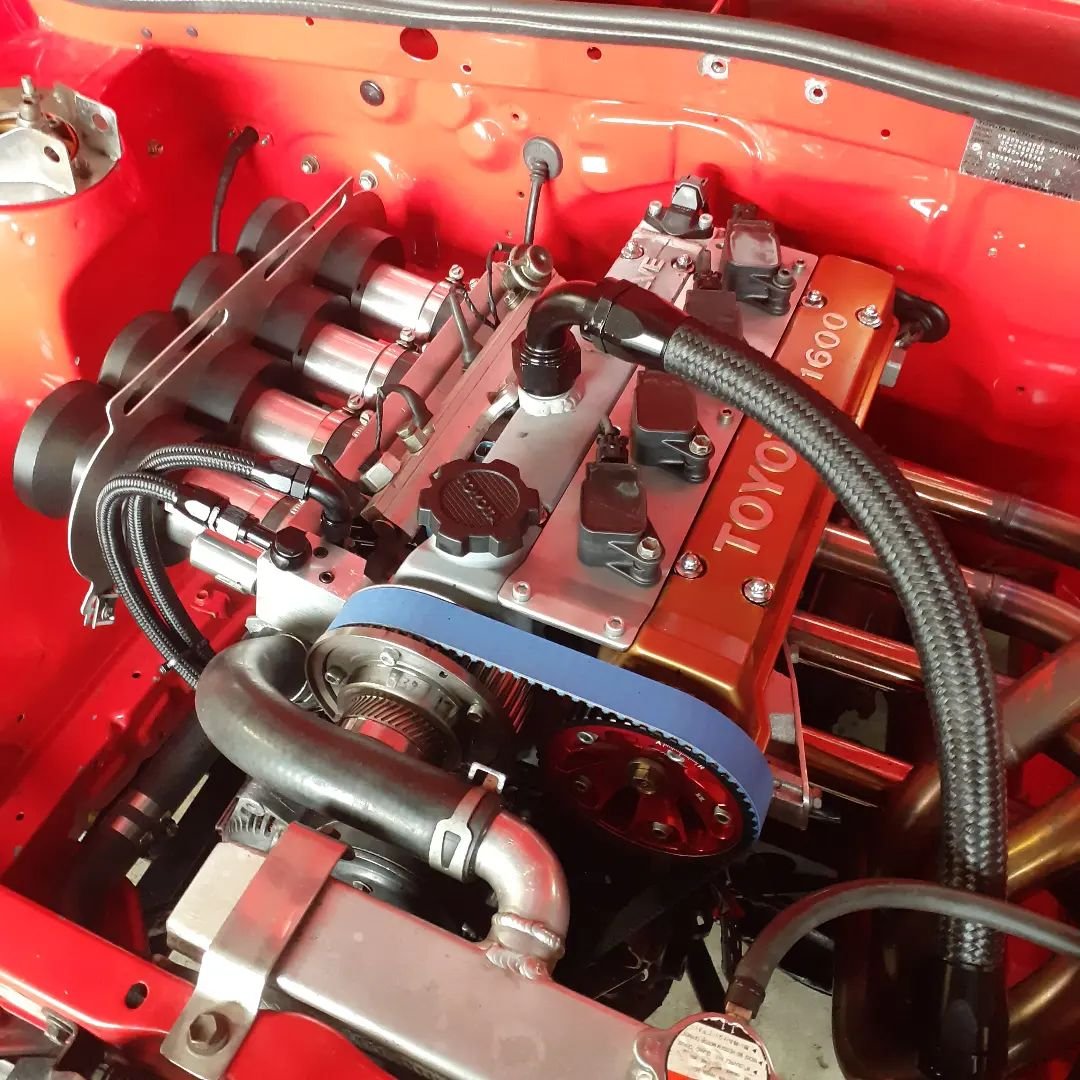
VVTi version 3.0 up and running, on good engine. this time using stock pulley sizes Got issues with way too much travel on the 304deg cam though. its setup so max advance is just before piston to valve contact. Which isn't far off where i normally run this cam fixed. max retard is whatever the pulley travel is back the other way max retard is the pulley in "relaxed" position, so its at max retard when cranking. the ecu is reporting 69degrees travel, which is lots. since the cam is so big, it means the intake valves are open waaay into the compression stroke. No drama once engine is running, as can advance the cam. getting it running is the problem, its like trying start an engine with about 3:1 compression. I'll try a few more things in the tune. But best solution is going to be limiting to the pulley travel. 30-40degrees will be plenty enough, and should hopefully start a whole lot easier. Early days, but otherwise every thing seems good. no leaks and advances and retards like it should.
1 point
-
Man i'd be CGA on that shit. You paid a premium for top of the line, it should be expected to last longer than 3 years.1 point
-
So, I'm onto version 2 of the vvti setup. main difference is the solenoid setup. the original setup I had the solenoid remote mounted. as was easier to do it that way and to confirm would all work. but ocd couldn't handle all the lines. more chances of leaks and stuff breaking. It had 4 lines. Pressure feed from engine, drain back to sump and 2 for advance/retard New setup eliminates the advance/retard lines. So just the 1 pressure line (feed from engine) and drain line to sump. yeah im still using the dipstick tube for the drain, ha. Solenoid now mounts in the block right by pulley and bolts to the other part. so all the advance retard ports and wizardry happens inside the ali blocks. Doesn't look too out of place. have done a small amount of run time with it. All looking good so far. Also moved the cam sensor. before it was hidden in the spark plug valley. but getting the clearance right was a pain, since the covers can move around side to side on the studs Now its on the top at back of cover. I had a little accident with the bran new genuine timing belt, so had to get this blue thing to get me going again.
1 point


.thumb.jpeg.384ff72c8d2b0ee0d34a7bdedb55bdcf.jpeg)


This leaderboard is set to Auckland/GMT+12:00