
Leaderboard


Popular Content
Showing content with the highest reputation on 01/05/24 in all areas
-
Yea so I did a bit of head scratching and asked the internet, this rather unusually resulted in an actually useful answer from a proper barry. It turns out that what I took to be an earth wire on the motor that didnt appear to be connected to anything was a signal return from the switching/diode setup on the back of the pod motor. With some extra direction from Barry and setting up a test rig on the bench I soon got the result I was after. I then had to ransack the old loom for some relay plugs to make up a little sub loom that sits in the headlight pocket, there is heaps of room so should be fine. And with some hours tidying and wrapping the front loom we have this sequence of exciting light based goodness; Next is looking at why the washer isnt pumping. Then maybe tomorrow I'll drop the engine....14 points
-
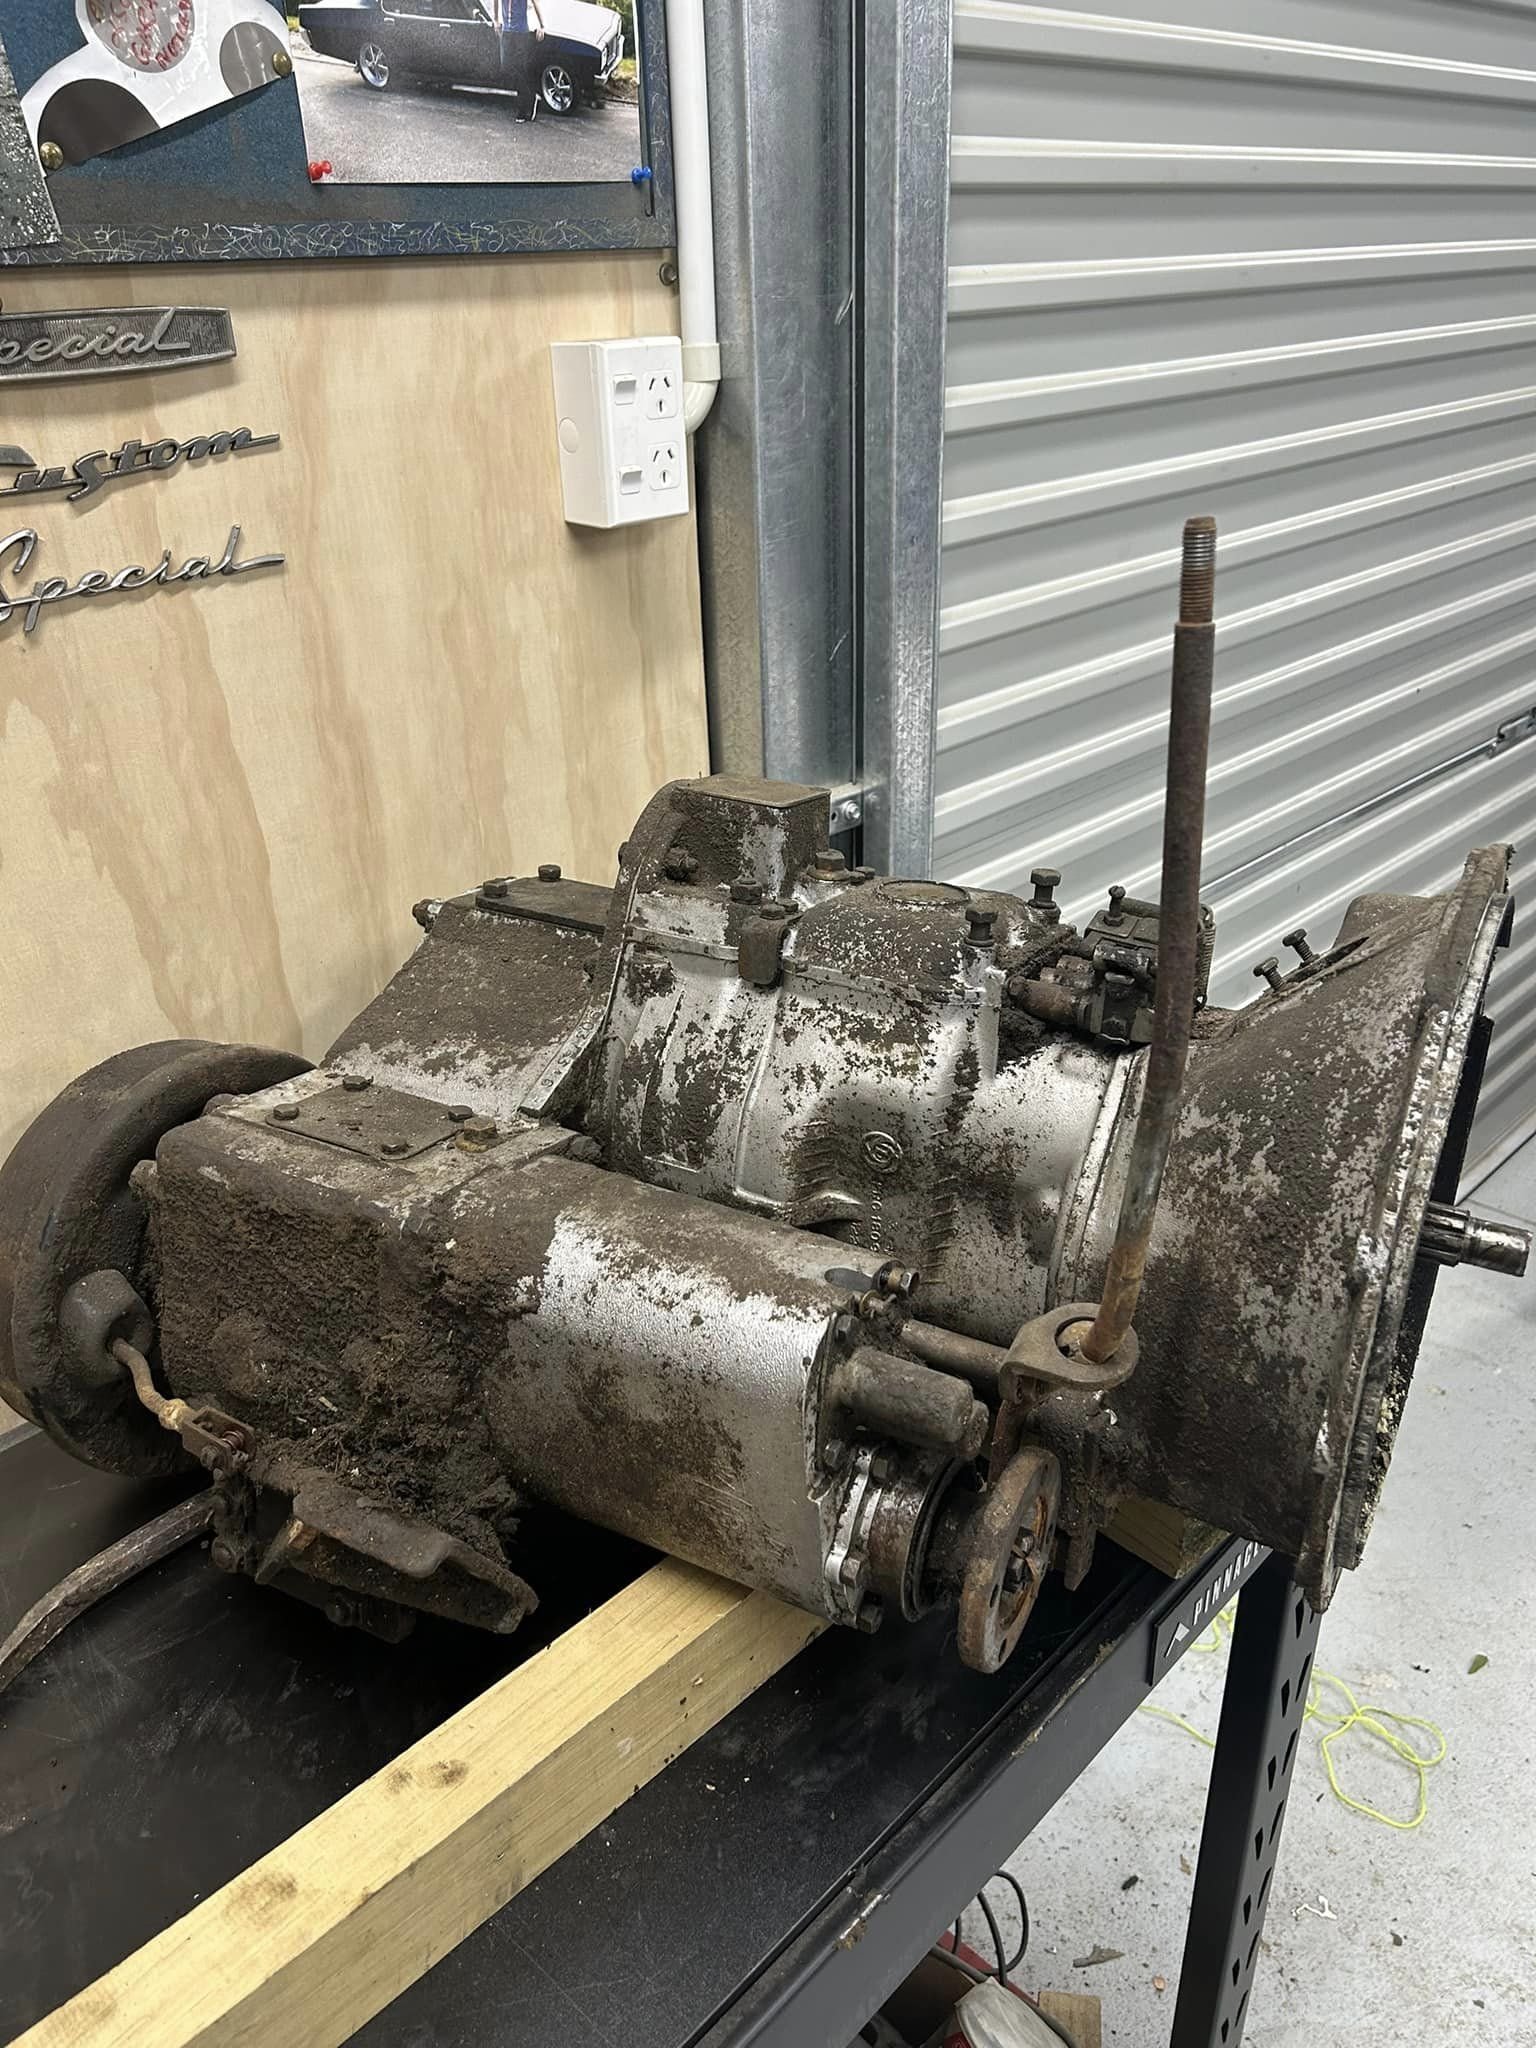
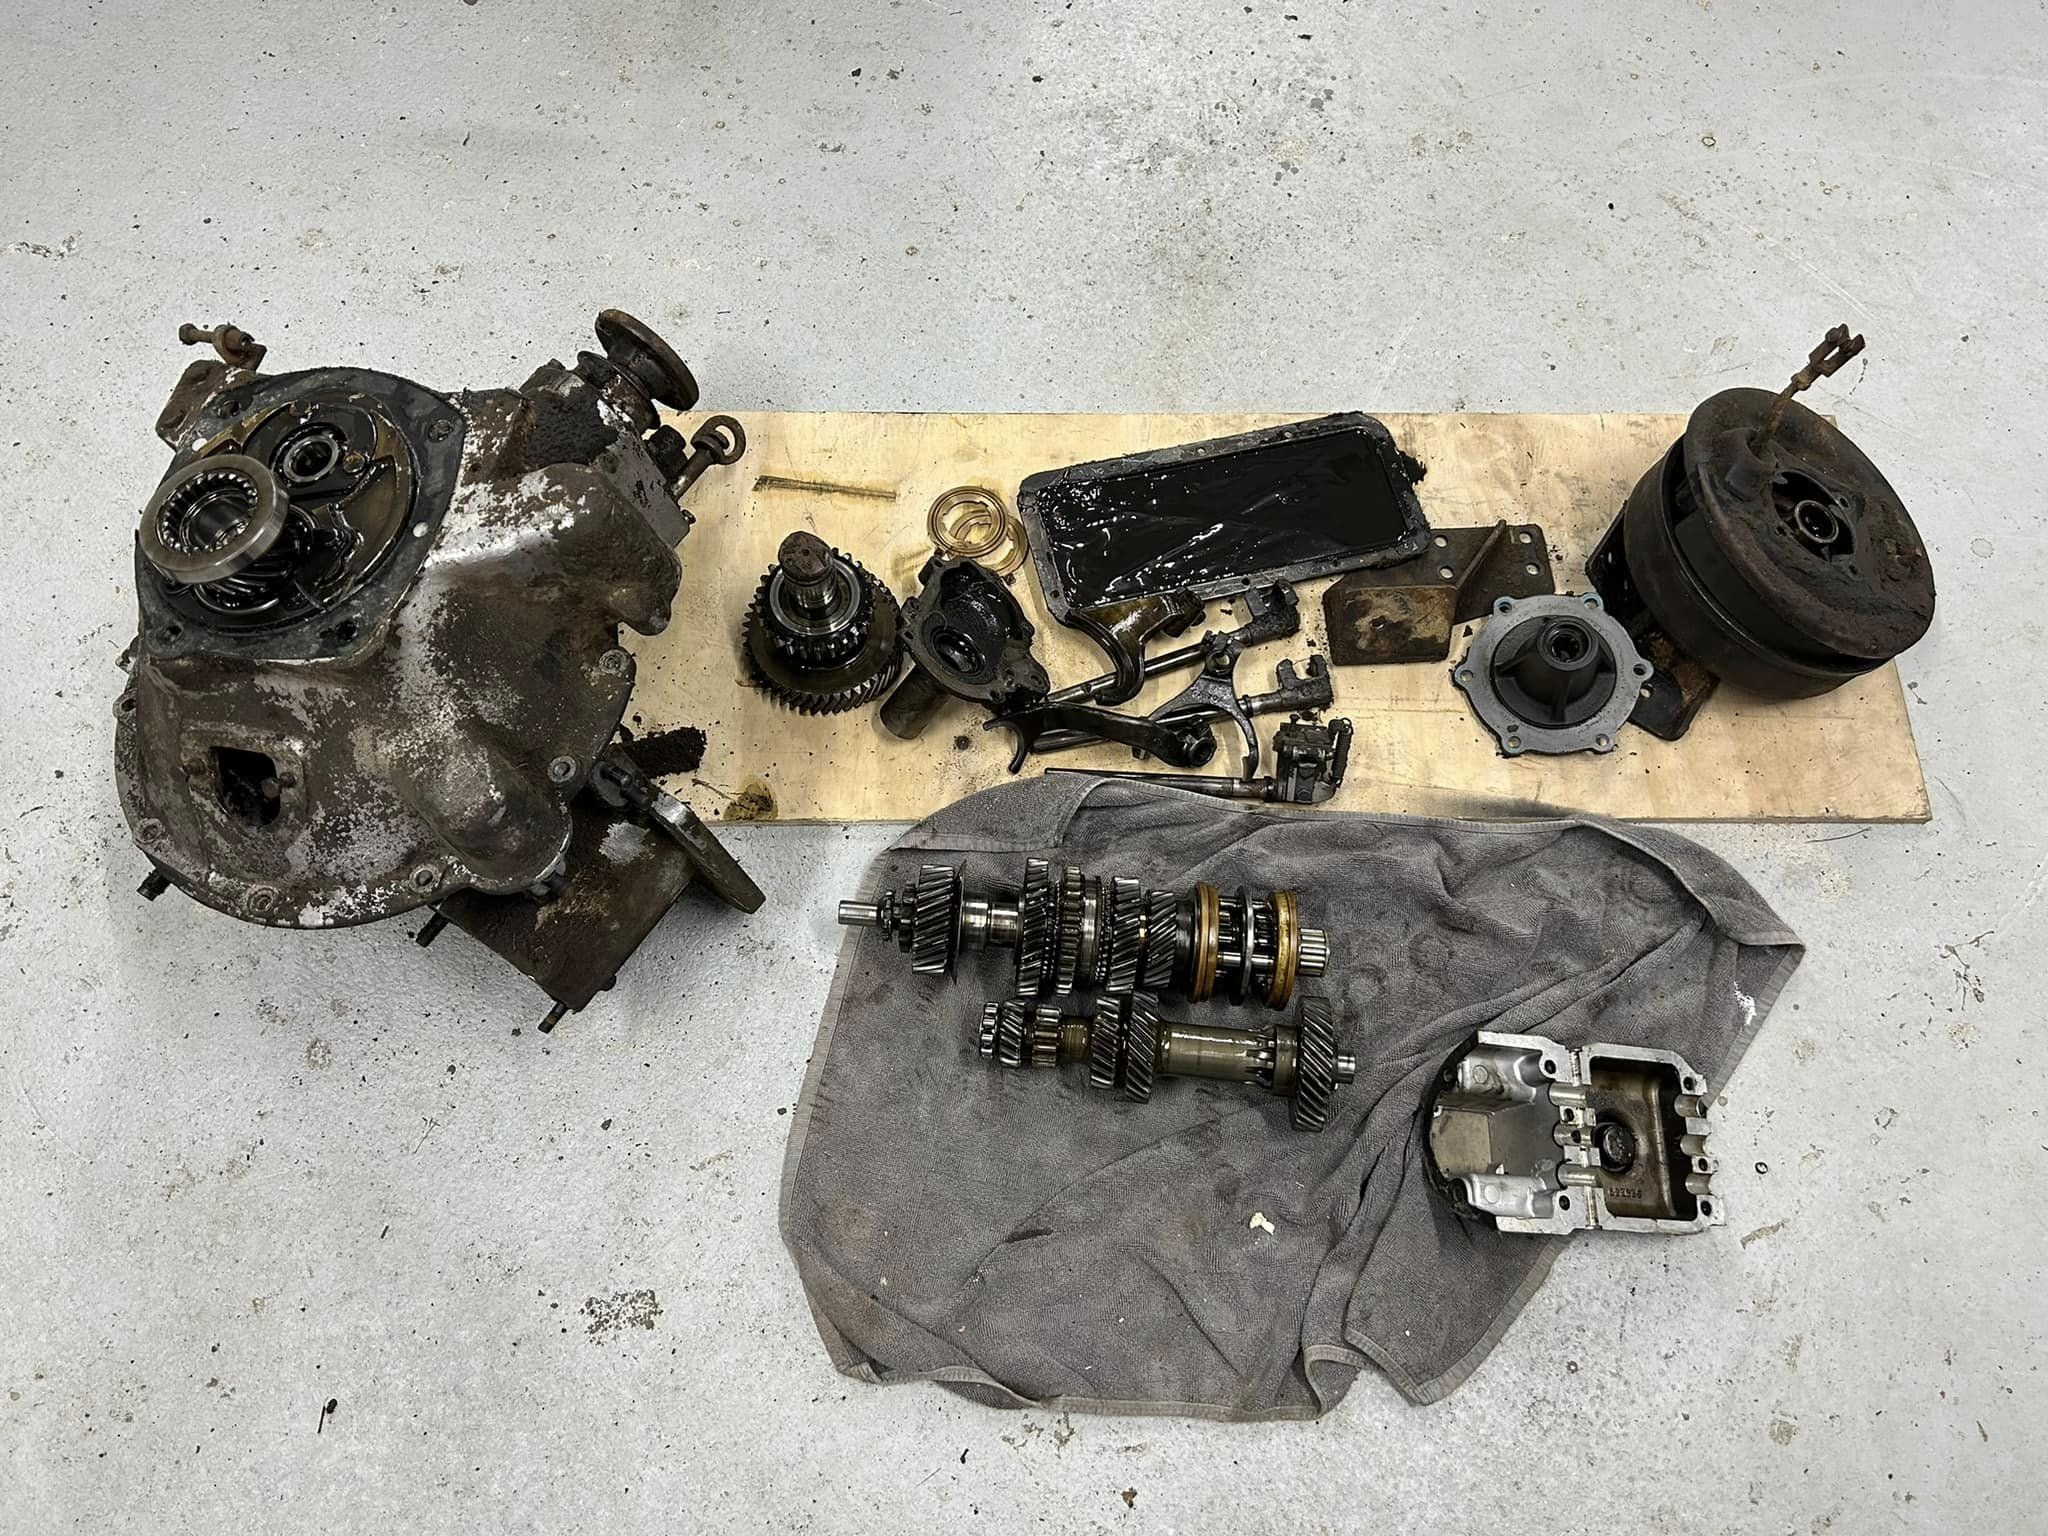
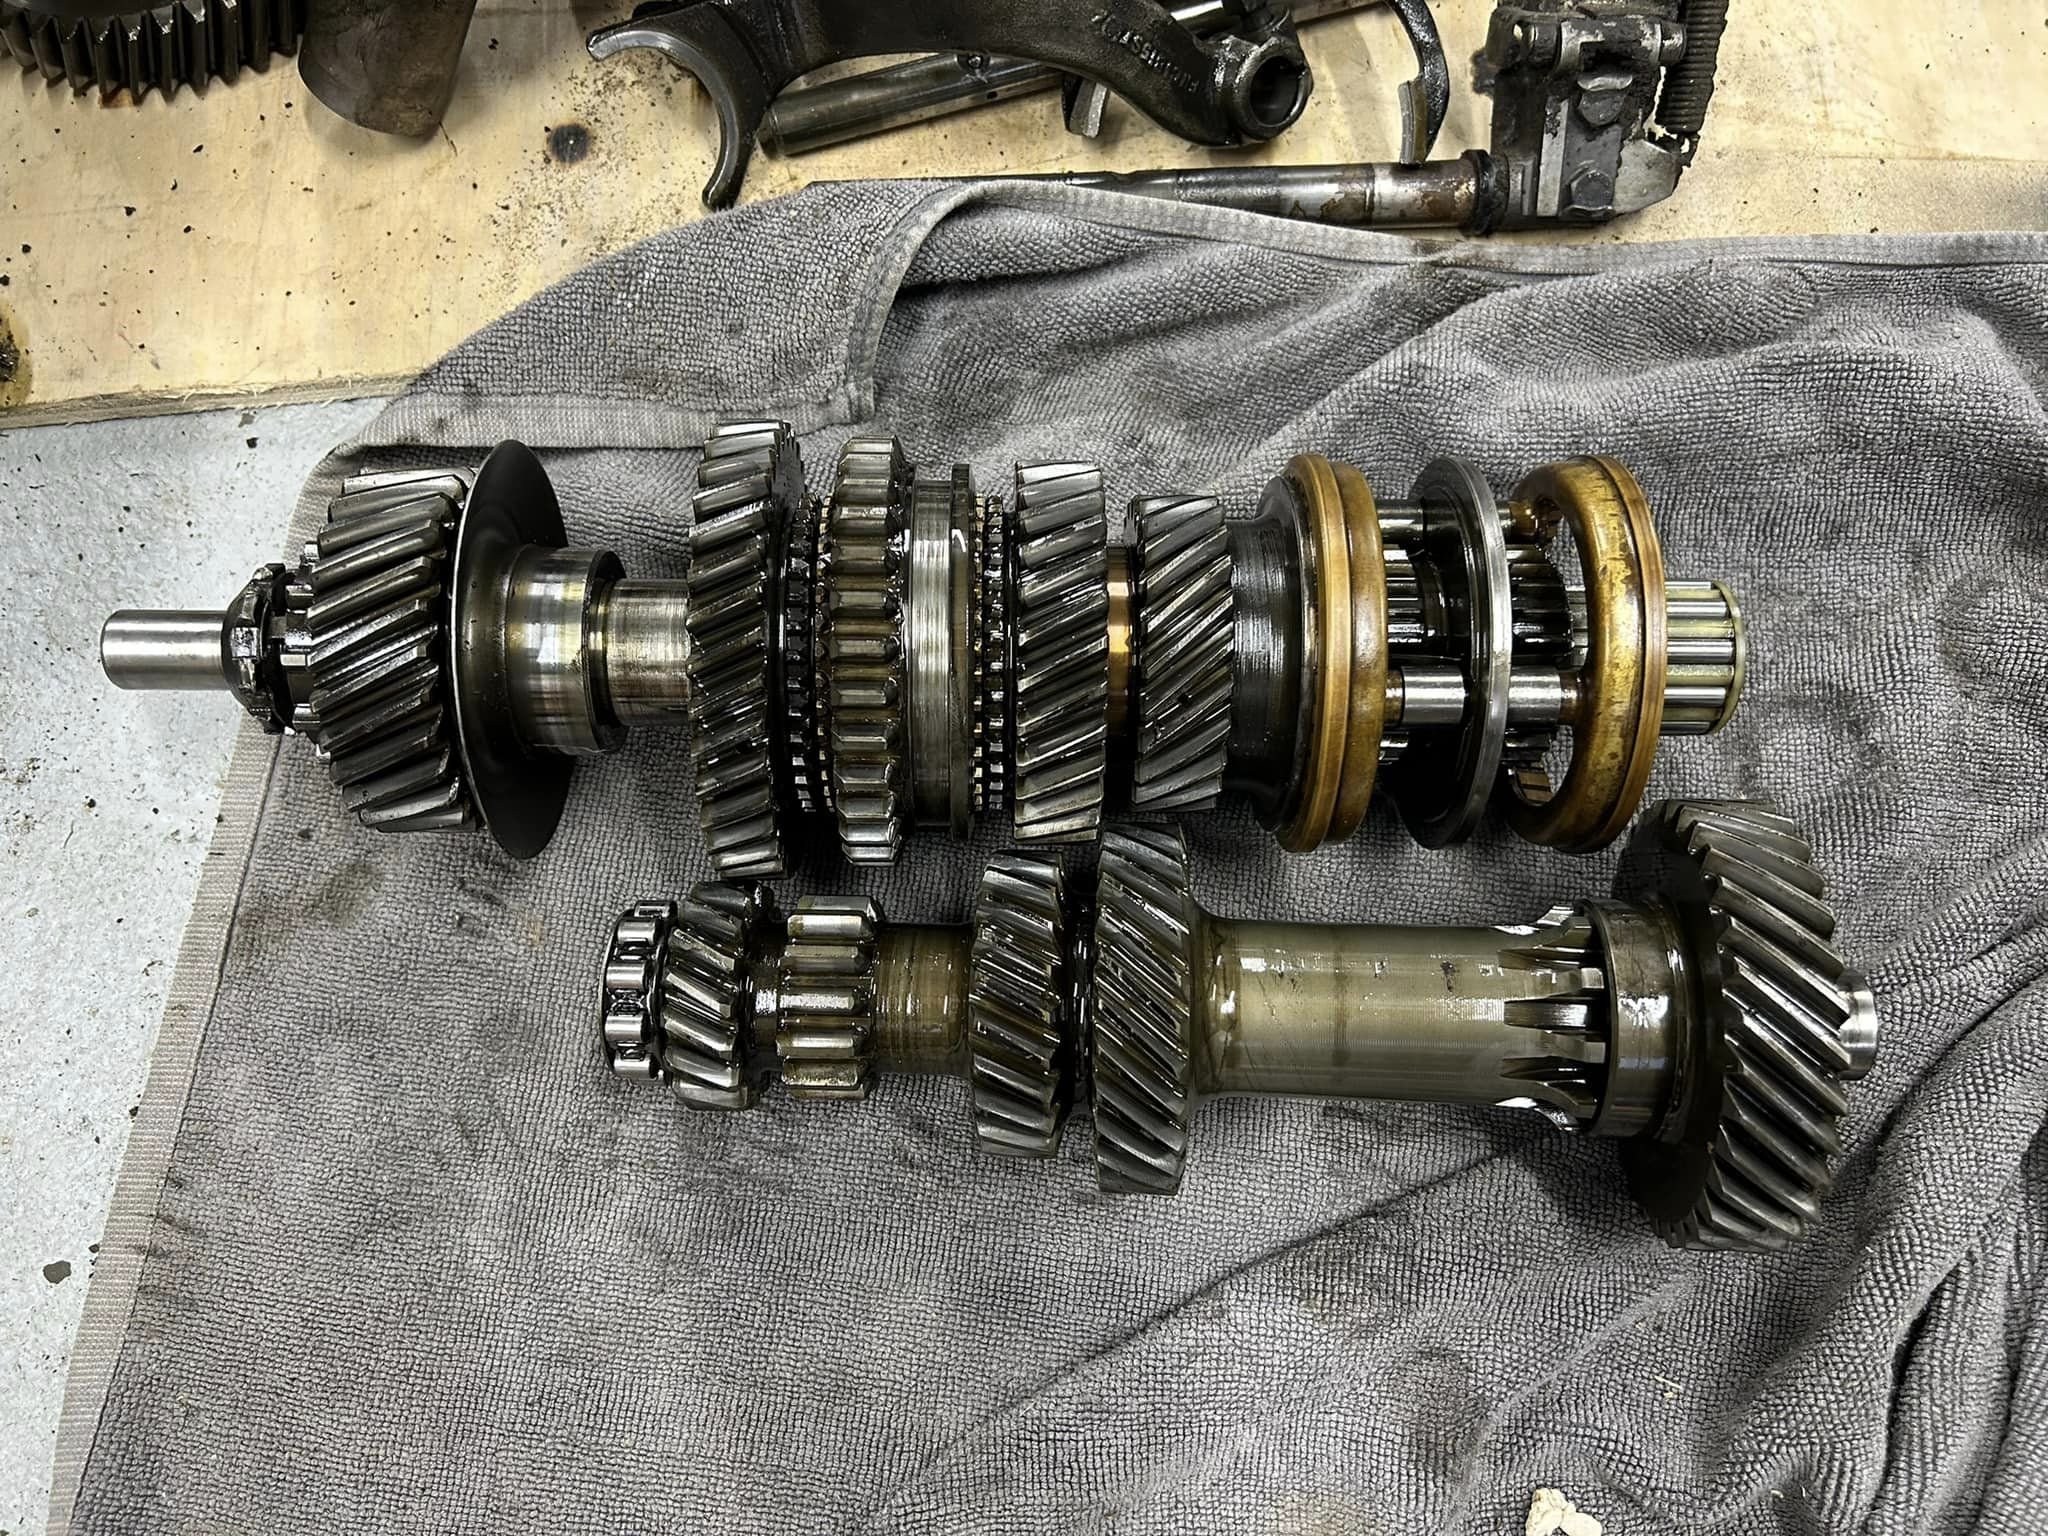
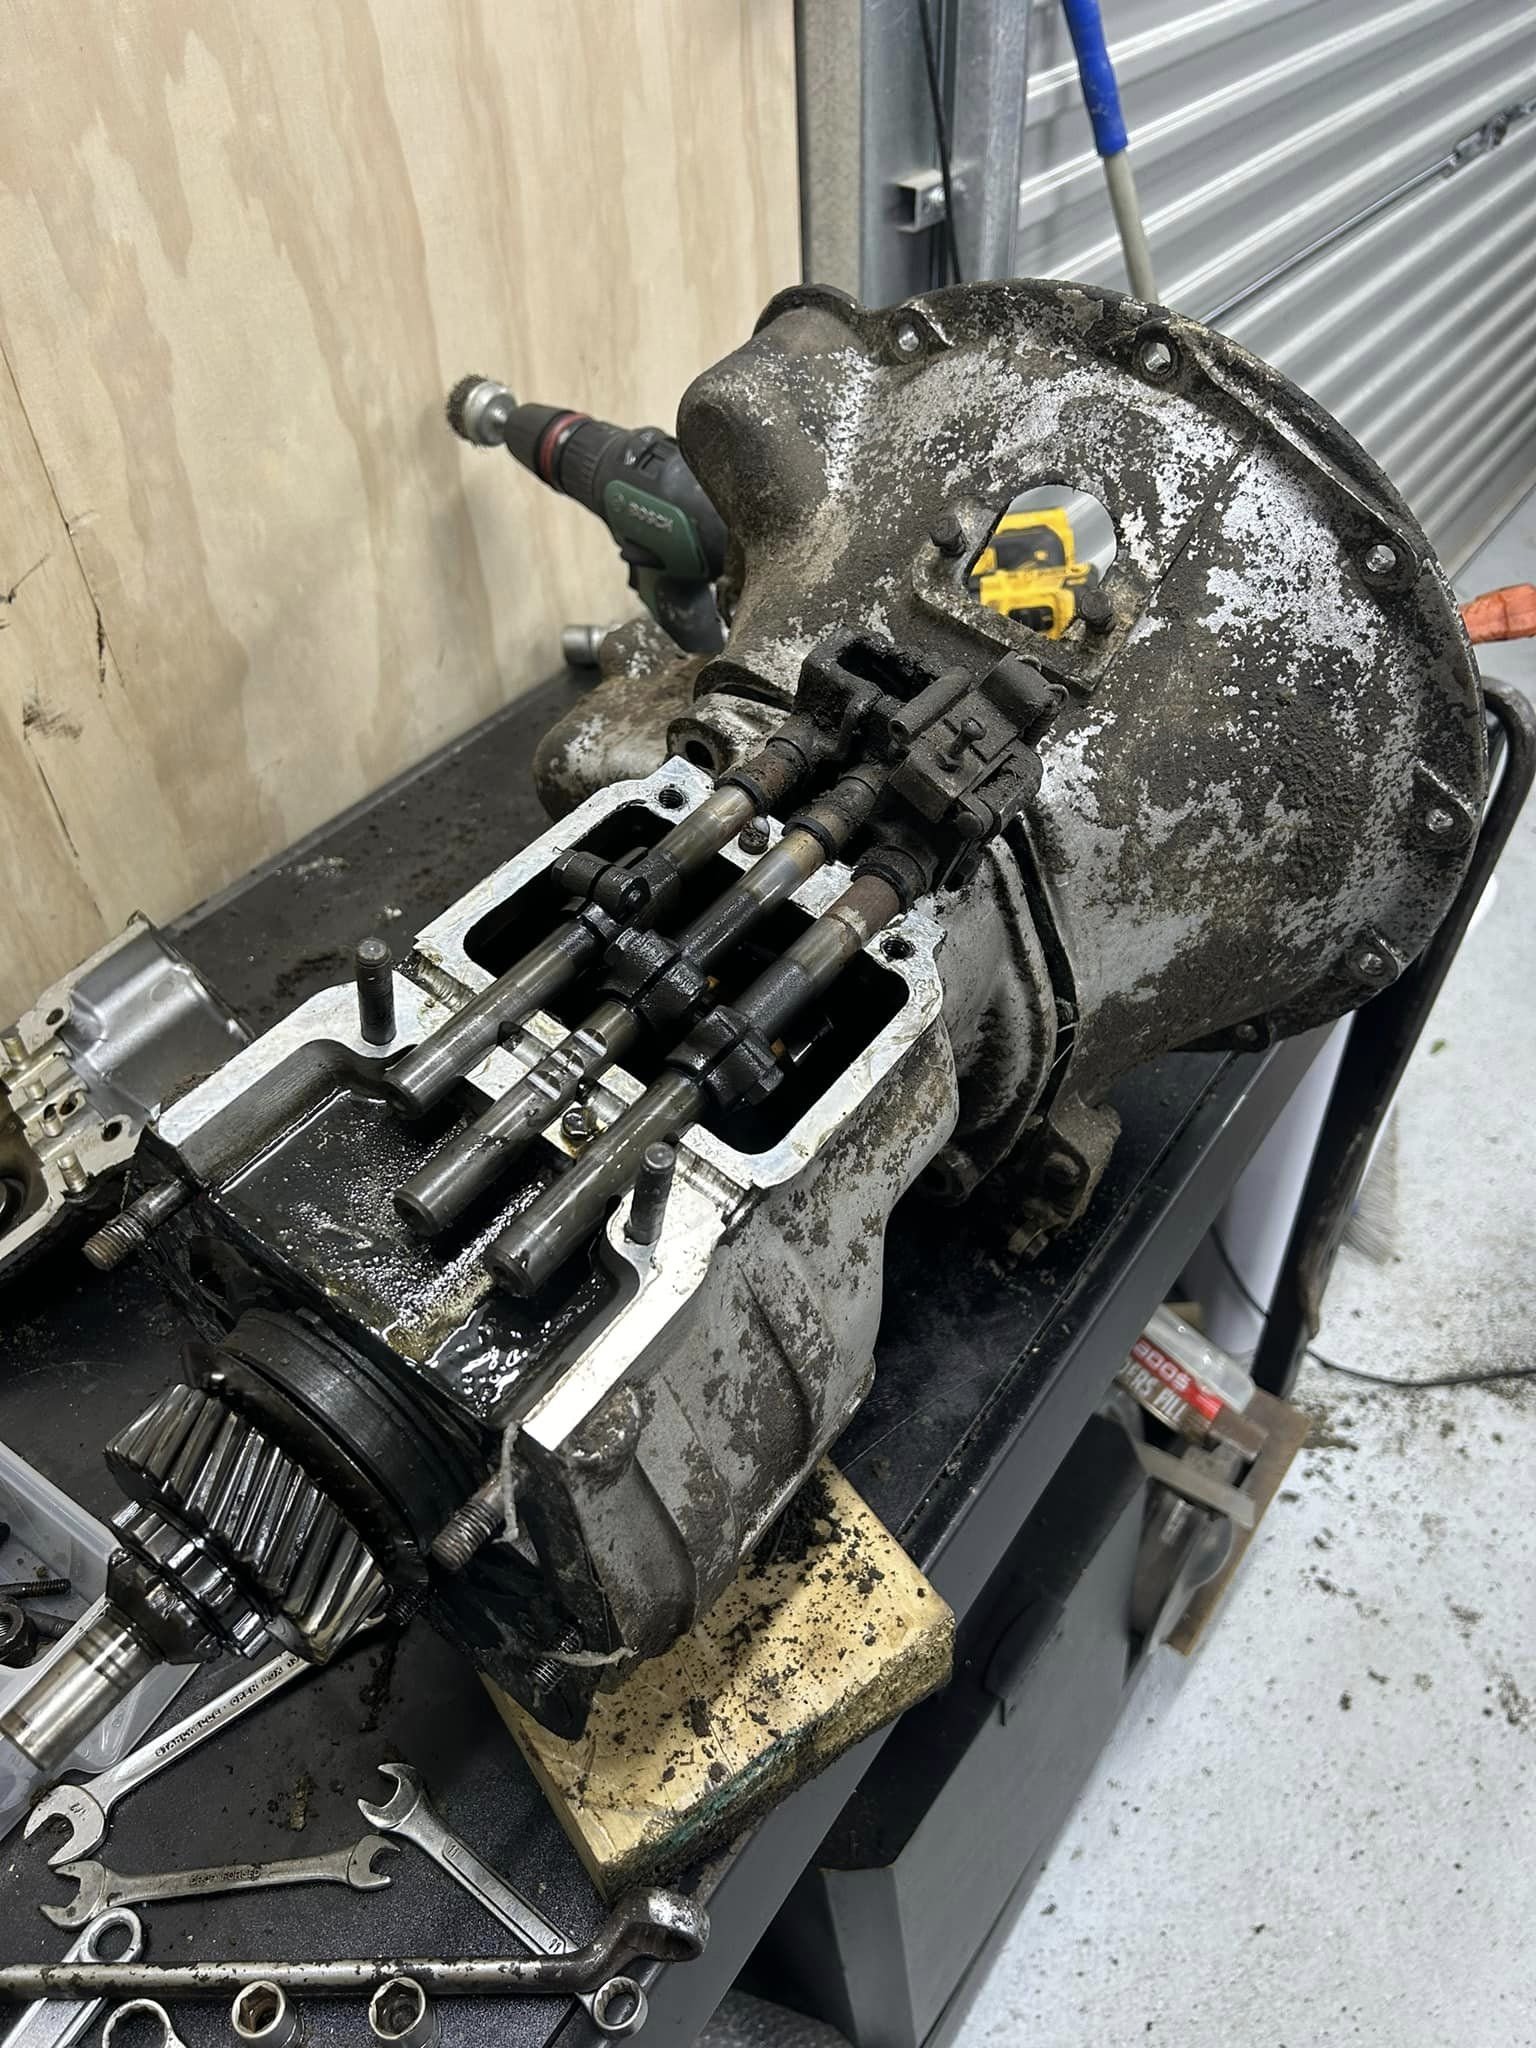
I've been doing alot of panel work for others lately which has definately held up any progress. But this has to be a 2024 goal so I can get onto some other projects.... Pulled down the gear/transfer box. In the grand scheme of landrover things, this one isnt too bad (though not mint), its one of the later boxes with syncro on all 4 gears which is kinda nice. The 3/4 syncro dogs are the most worse for wear, repros are ~$500 so I'm going to go dig through the gearbox bin of the local wrecker to see if I can find a decent original. Based on the condition of the low speed gear of the transfer box, I bet this spent alot of time in low4 with the farmer mashing between 3 and 4 to get across the southland mud. Also, since I'm taking this back to original running gear I've been chatting to NZTA about how to go about it. With this never having a cert plate and that I can prove it was petrol originally from the chassis ID, it seems relatively straight forward.
 9 points
 -
Lols I finished wiring up the front end except for the final wrap and decided to hook up a battery to see if what i had done actually worked. It all does except for the headlight pod motors, these start continuously popping up and down as soon as the key is on. This is undesirable, troubleshooting commences tomorrow...6 points
-
a couple years ago dad was working for a place that did building maintenance and water blasting washdowns for all kinds of usually government or council property. he often went way out to the middle of nowhere with a waterblaster to wash a building and do any any repairs. most of the company had stupid modern pickups, but there was also a hiace supercustom 1kz 4wd (he personally owns a 1kz hiace 2wd and adores it) he wanted that, he then convinced them to install the heavy duty rear springs that he has fitted to his own van and then proceeded to have the most user friendly rig of the fleet. while others were carrying step ladders and rummaging around their dumb high side trays dad had all the space in the world. i kicked him a spare modern stereo head unit that i told the company they can keep if they let him fit it and he had music and comfort while he toured the back country towing probably 1500L of water and all his tools in the back with a clear 2nd row of seating for luggage storage/smoko room. Then people who had been with the company much longer tried to steal it from him but the owners were cool people and told them to jog since he had set it up himself and those people had turned their nose up at the old van in the corner.5 points
-
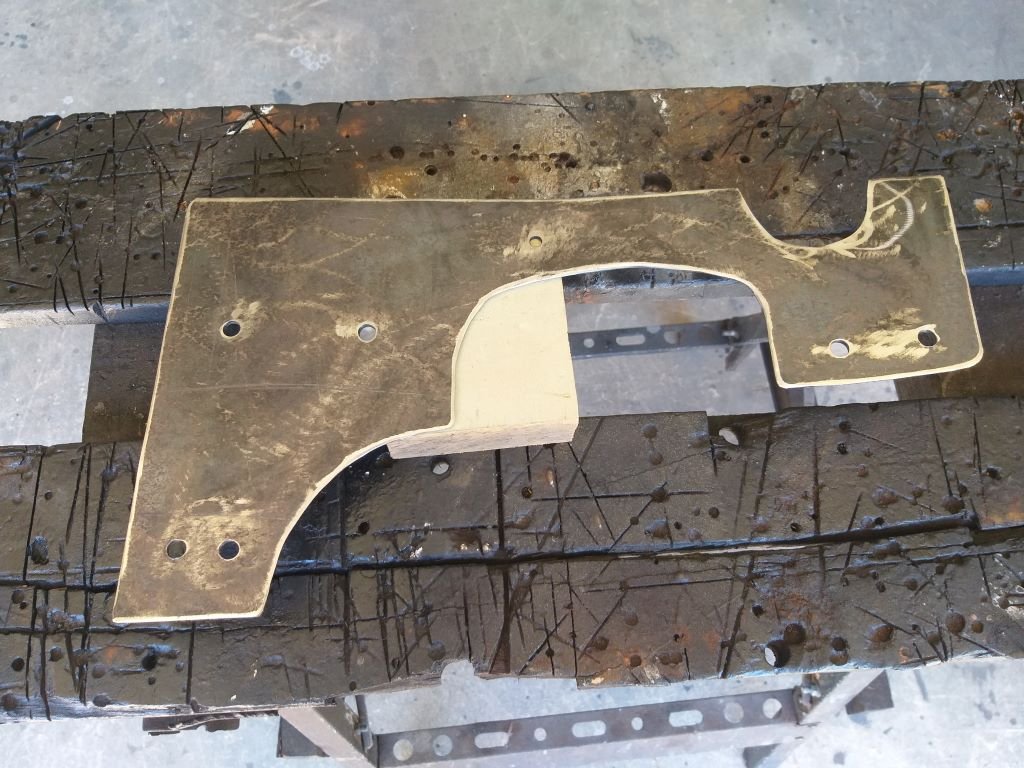
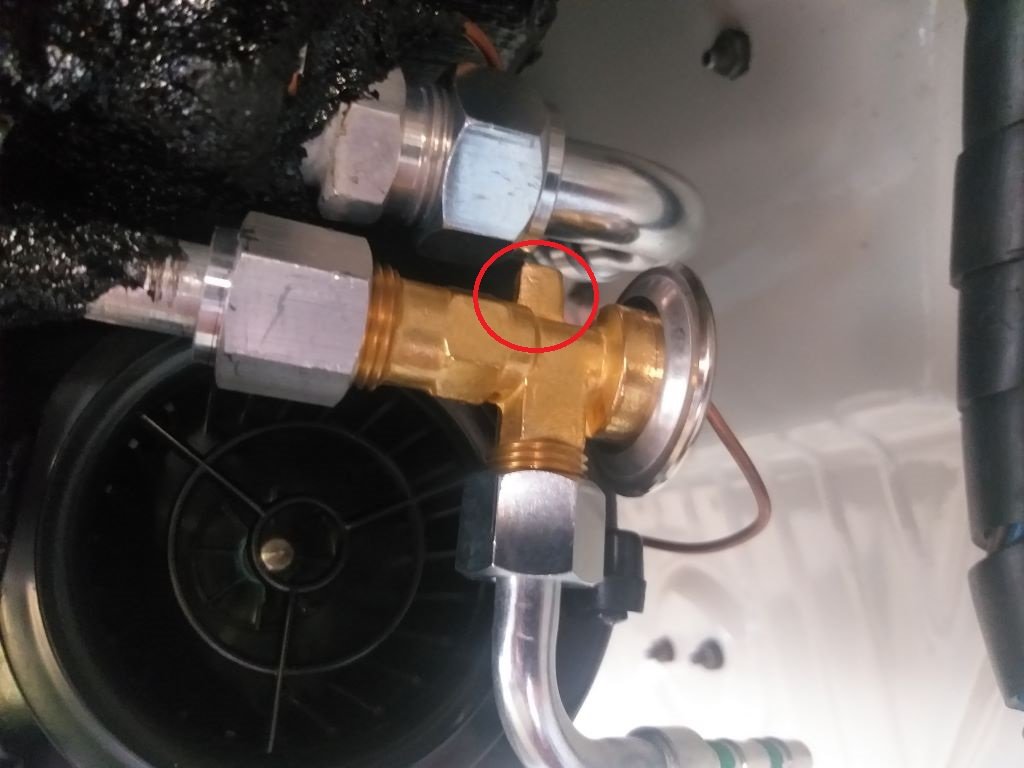
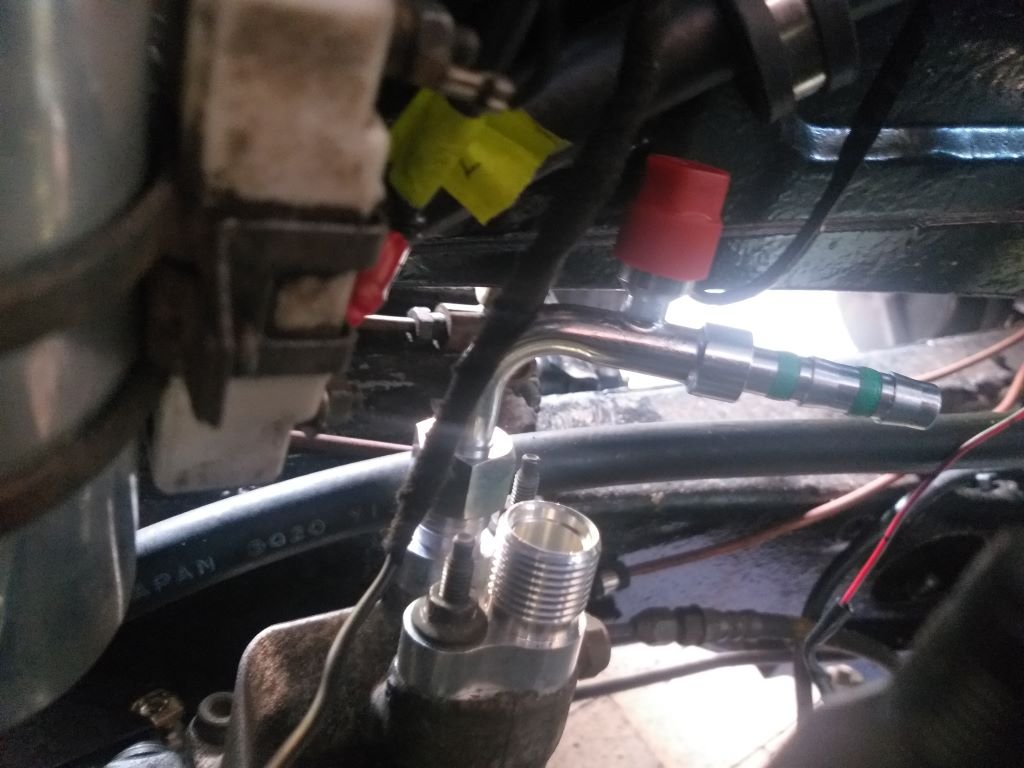
A bit more butchering this morning. The service port on the #8 fitting no longer clashes with the engine box side wall and I reckon there is enough clearance for a/c man to fit his pressure gauges when he gasses up the system. I then created a reinforcing plate to strengthen the side wall back up. Looks like so: Gave it a few coats of the usual satin black and it looks almost passable: I'm letting the paint go off overnight and I'll bolt it in tomorrow. Thanks for looking.
4 points
-
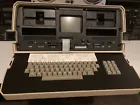
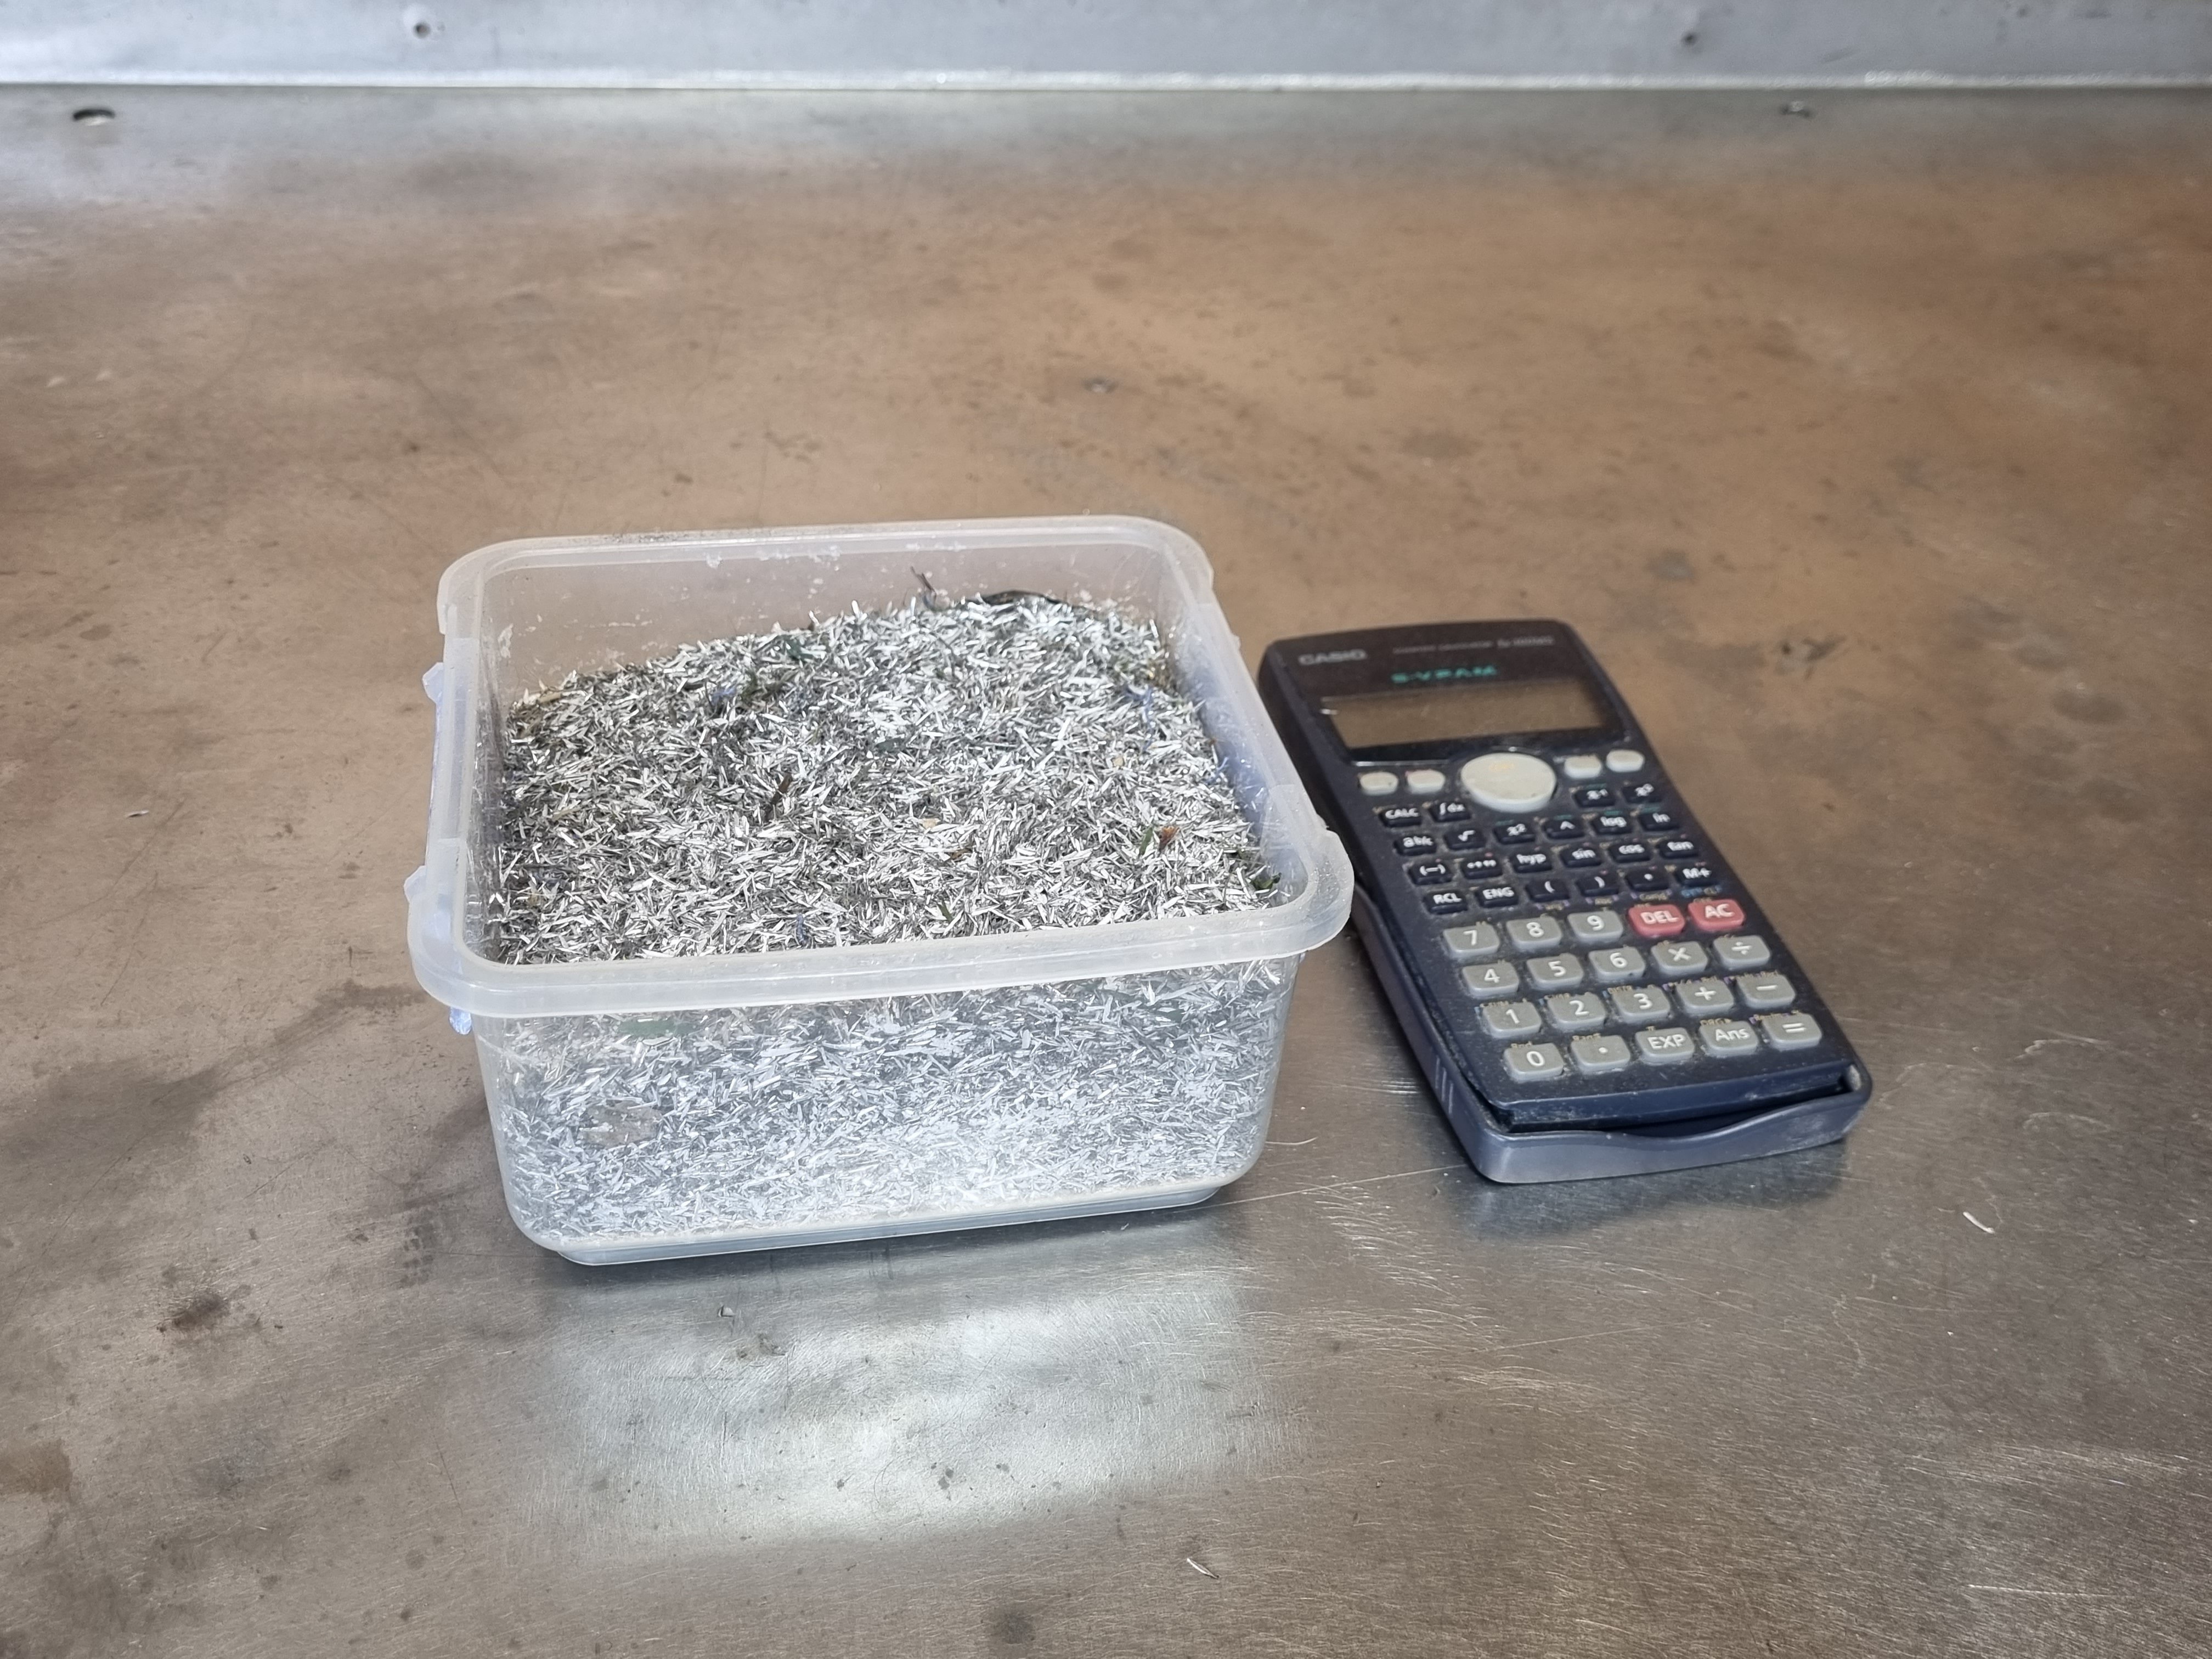
I have been formally gifted the family Osbourne 1
4 points
-
Na i have solved it. I misunderstood that what appeared to be an earth wire was actually a signal return from the diode/switching gubbins. I need an extra relay for each side and a bit of loom jiggery pokery, but its all sorted.4 points
-
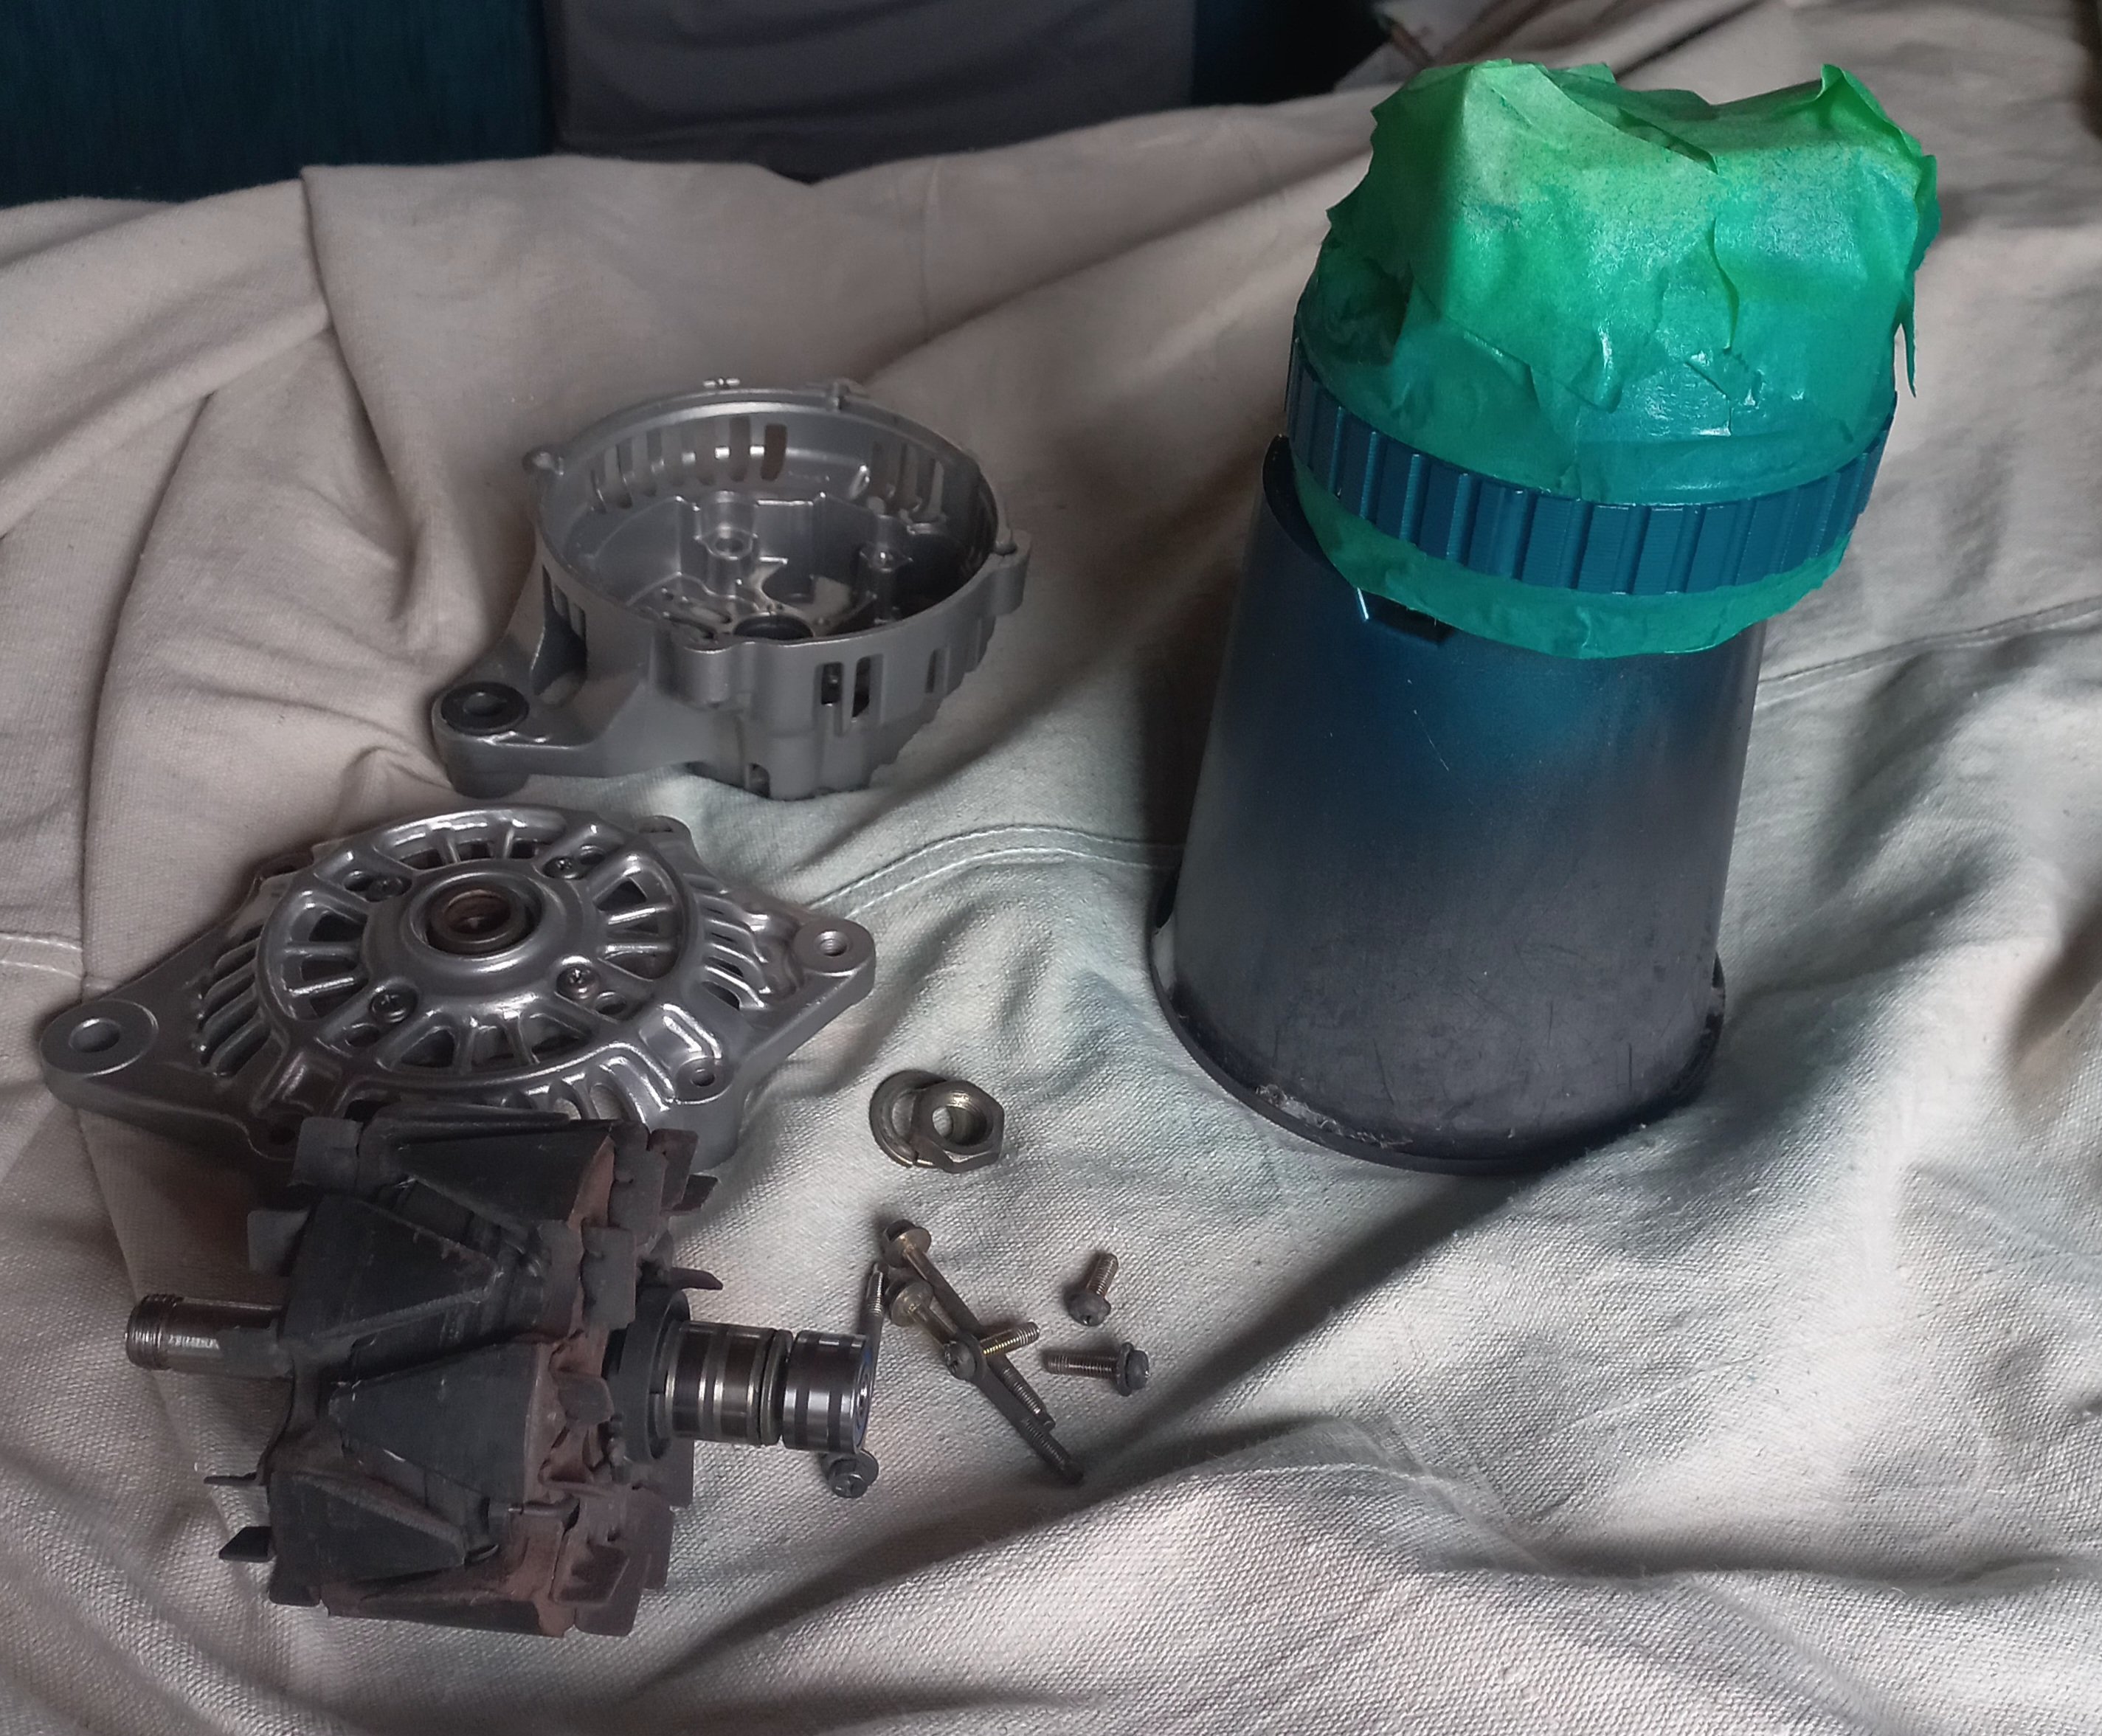
Painting alternator coil cos that what we do with our rotor accessories.
3 points
-
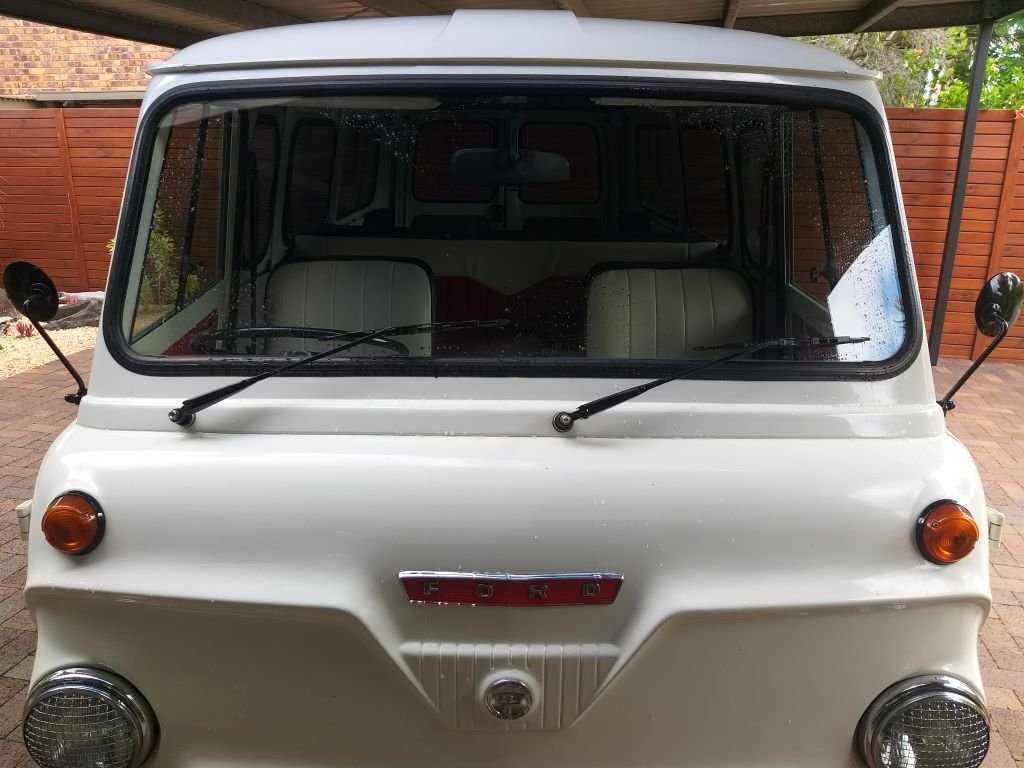
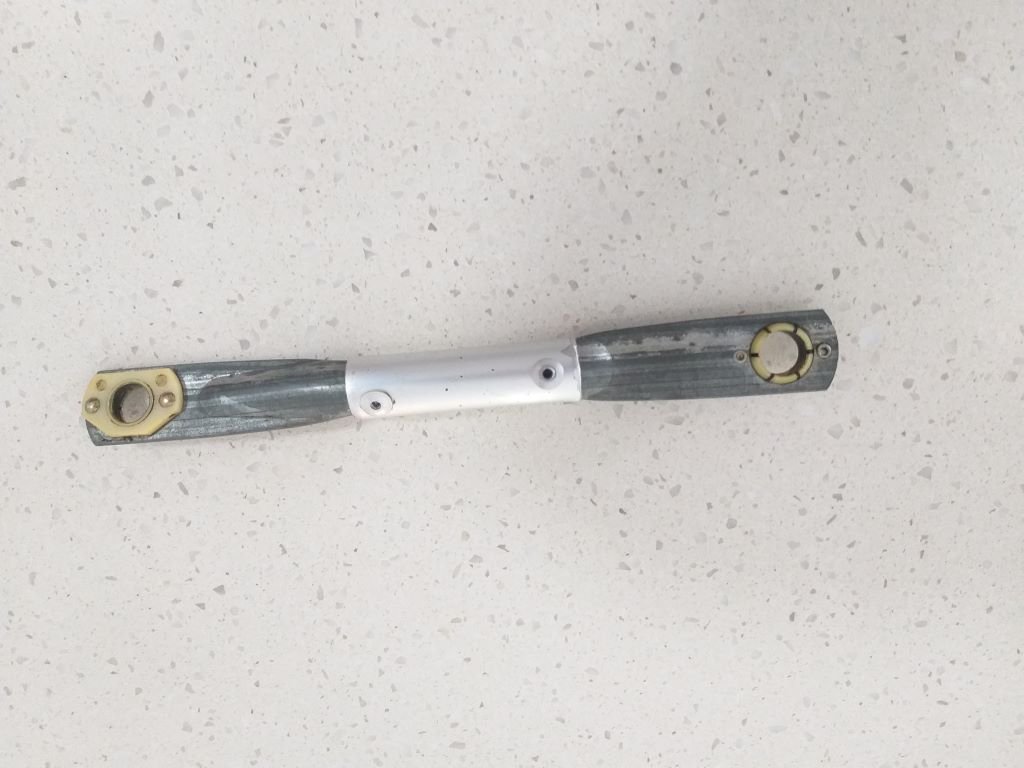
It was nearing the end of the holiday period, and a little Marina waited patiently for some attention. Now that the Alto was up and running again, I could focus some time on the Marina and check off another item on the pre-WOF list. One of the main things I needed to sort, that I had everything for, was to fix the wipers and washers. I removed the whole wiper system a couple of years ago because it was seized and didn't work. The motor didn't function, one of the wiper boxes was jammed solid and the washers didn't respond to the button. I started with the washer system. The Aus spec Marina uses a bespoke washer bottle with an integrated pump. I removed the bottle, removed the pump, and found it full of rust. Trash. There were a couple of options for a replacement pump, but in my eyes the easiest option was to convert the system to the UK spec bottle and remote pump. It's not as tidy, but easier to get parts for. I started by scrounging up a good used bottle and cap, some new hose, a new pump and a used mounting plate for the firewall as the bracket is different. The bracket is spot welded to the mounting plate, so I carefully drilled out the spot welds and removed the bracket. Here I had also prepped it for welding. I considered using rivnuts to mount the bracket, but it's flat on the back so has no space for the bolt heads once the bottle is fitted. The only option was to weld it to the original mounting plate (or paint the replacement one, drill out the rivets and swap the whole plates over). I marked it out and cleaned the paint off the weld points And gave it a quick tickle with the sparky glue. I also welded up the lower hole for the Aus spec bracket as this had been letting water in. A quick prime and a flick of paint and it didn't stick out so much A test fit with the new bottle I pulled out all the old perished washer hose and ran all new 4mm hose. Unfortunately during this one of the washer jets crumbled to bits. With the bottle and hoses in place, I just needed to adapt and install the pump. The connectors are slightly different, so I had to change the wiring to a pair of female spade terminals, but other than that it just plugged straight into the pump and worked. Dark green was positive, and it grounded through the switch. I drilled a couple of small holes and used a pair of new self-tappers to mount the pump. Also note the nice new hoses to and from the pump, including a one-way valve inside the bottle. A quick test with some water in the bottle and we finally had water outside the car, albeit in a stream, not a jet A quick trip to Supercheap resulted in a pair of generic twin jet washers, which I quickly set about fitting They looked ok and didn't stand out too much And they worked a treat. Ignore the spoiler regarding the wipers.... Next on the list was to sort the wipers. When I originally removed everything I had to remove one of the spindles with the rack as it was seized solid and you normally slide the cable through it to remove it. A bit of brute force got the cable out without damage. The wiper system is quite interesting really. Instead of linkages like cars have these days, it was operated by a motor pushing and pulling on a spiral wound cable through some steel tubes. This cable engaged teeth on the wheels in the spindles, which caused them to rotate back and forth, thus moving the wipers. It's quite simple, with not many places to go wrong. Except mine had. The motor was dead and one of the spindles was seized solid. I also discovered that one of the steel tubes had been bent to get around a bracket (which it should have passed though) which was causing huge resistance on the cable. I removed the motor which is done by removing the mounting screw and bracket, removing the wiring and then flipping the motor over. Unless you can/want to remove the whole cable with the motor, you need to disengage it from the motor. This is done by removing the circlip from the arm, remove the small washer and then the arm comes free. The cable is attached to this arm on a pin. A quick bench test showed that although dirty, the motor was working correctly. Even the park function worked. I removed and cleaned the park switch too. It's worn, but still functioning. I have a spare for the future, if needed. Everything got a thorough clean and then regreased. I started by grabbing a pair of good working wiper spindles and fitting them to the cowling panel. This wasn't a job I enjoyed, so there are no photos of it. It involves having to hold the spindle up under the dash with one hand, while pushing on the rubber seal, washer and screw on the nut with your other hand. Next was fitting all the steel tubes (including a replacement one between the spindles to replace the bent one) and attaching the gear covers, mostly with one hand due to space. Good fun. Once all that was in place I greased the cable up, attached it to the motor and threaded it into the tubes, watching as the spindles rotated as it went through. The motor was then refitted to the inner guard, and plugged in. A quick test showed everything worked correctly, so I installed the original wiper arms and blades. Note the correct side parking position, which was reversed on the later Marina for whatever reason. For the first time in a couple of years, the Marina had wipers. To celebrate, I poured some water on the windscreen (since the washers didn't have jets yet) and turned them on Hmm, something wasn't quite right. It wiped well (ignoring the ancient rubbers smearing the glass), the wipers had plenty of speed and parked perfectly, but the sweep was.... tiny. It barely cleared the drivers vision. I tried adjusting the position of the arm up the screen, but by the time I could get enough sweep on the glass, the arm was basically in the middle of my vision. At best I got this much wipe I ruminated on it for a bit and came to realisation that I had cocked up. Ages ago, knowing one of my spindles was seized, I bought a couple of second hand replacements. What I had ended up doing, was fitting UK spec spindles, to the AUS spec motor. This had created a mismatch in the gearing, meaning the wipers didn't move as far as they needed to. I confirmed this by checking my photos taken when I removed the spindles, as to which type were fitted originally The remedy? I needed to swap the drivers side spindle out for my one remaining good Aus spec spindle with the correct gearing. It means the passengers side doesn't wipe as far as it should, but the drivers side is the one that matters. Thankfully the drivers side is the easier one to get to. I removed the wiper arm, dismounted the motor and pulled the cable out enough that it disengaged the spindle. I then removed the back cover so I could remove the tubes from the spindle. It's obvious in this photo, compared to the one above, that the gear on the spindle is bigger and has a different design. Once removed I put them side by side and you can see the difference here. Aus spec on the left with the smaller gear. With the Aus spindle installed, how was it? MUCH better. It now cleared right up to the A pillar, from the arm being horizontal. The Triangle of Doom is horrific though, Hubnut would not be impressed. The ultimate solution would be to source another Aus spec spindle and replace the passengers side one too, but this will do for now. It will get me through a WOF inspection anyway, well, once the new blades arrive to replace these smeary old things. This is a good-weather car anyway. One last thing for the week was to sort out the source of jokes from my wife https://youtu.be/Zzyfcys1aLM?si=lo3PLbRUwQmSkoZ7 I had previously tested the wiring, so knew the issue was the headlight itself and being a sealed beam unit where the whole light is essentially the bulb (not a lens and reflector with the bulb in it) the only option was complete replacement. This one was an ancient GE unit (ignore the upside down photo...) I bought a pair of sweet NOS Hella H4 units a couple of years ago and have been waiting to fit them Date stamped 1996, about a year after this car was last on the road These are a lens and reflector unit with a replaceable H4 bulb They were a direct drop-in replacement. The Hella, on the right of this photo, has a slightly whiter shade My only real issue with them is they don't have the nice pronounced curve in the lens like the old lights (and other new replacements available) Old New I'll use them for now, but will look to replace them again in the future with curved lens units, which is a shame because the Hella ones are really nice quality and really expensive to buy new now. They don't quite look right though with the flat lens. They do light up really well though Since I have changed the ride height of the car and levelled it out some, I had to adjust the lights to bring them back to level. This is done with the adjustment screws on the light bowl. With the grille panel refitted. It somehow changed the face of the car not having curved lenses. It looks surprised. We're one step closer to a WOF and about three more things crossed off the list. The pre-WOF list is getting pretty small now. I need to reinstall the rear quarter glass, install some carpet, reinstall the seats, install the seatbelts, make a door card and have the exhaust rear section replaced and we should be good to give it a try.3 points
-
Righto! I'm registered. There is limited proper acomadation in some stops this year. (There's a festival of some kind in Waikaia on saturday, so I'm staying At the riversdale hotel instead. (Could be improved food options at waikaia with food trucks for the festival? ) riversdale is 18 minutes from Waikaia Tenting is always an option for the hardy souls. Please get registered asap so we have an idea how many riders we're catering for. This is a massive undertaking. And to quote @TimShadboltfan27, I am absolutely pissing cheese for this ride!2 points
-
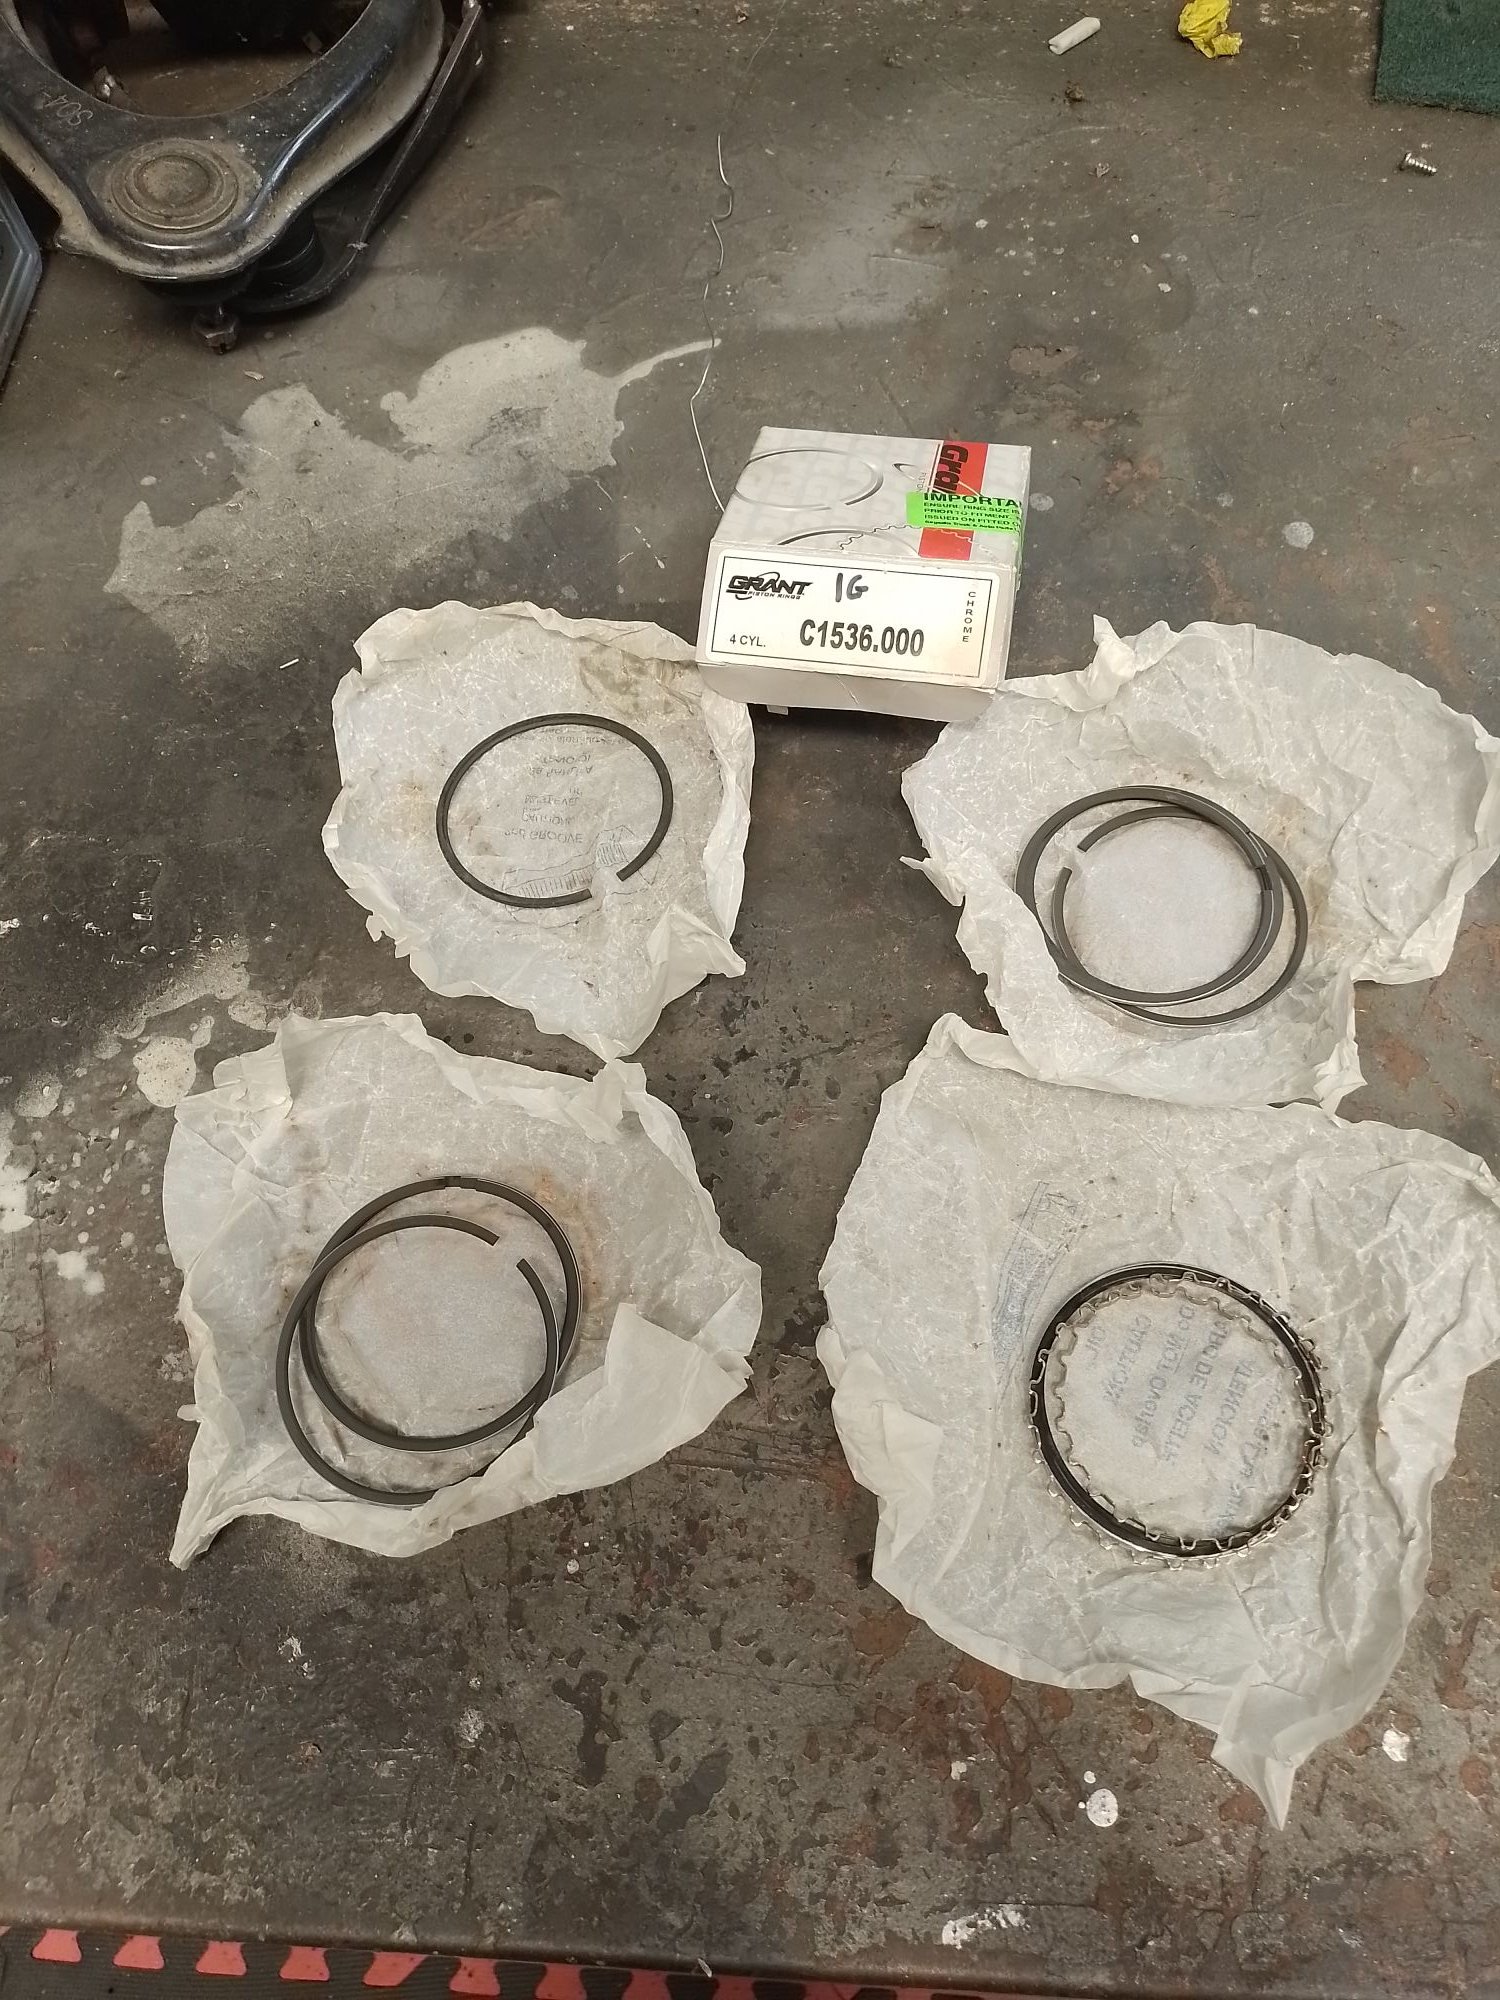
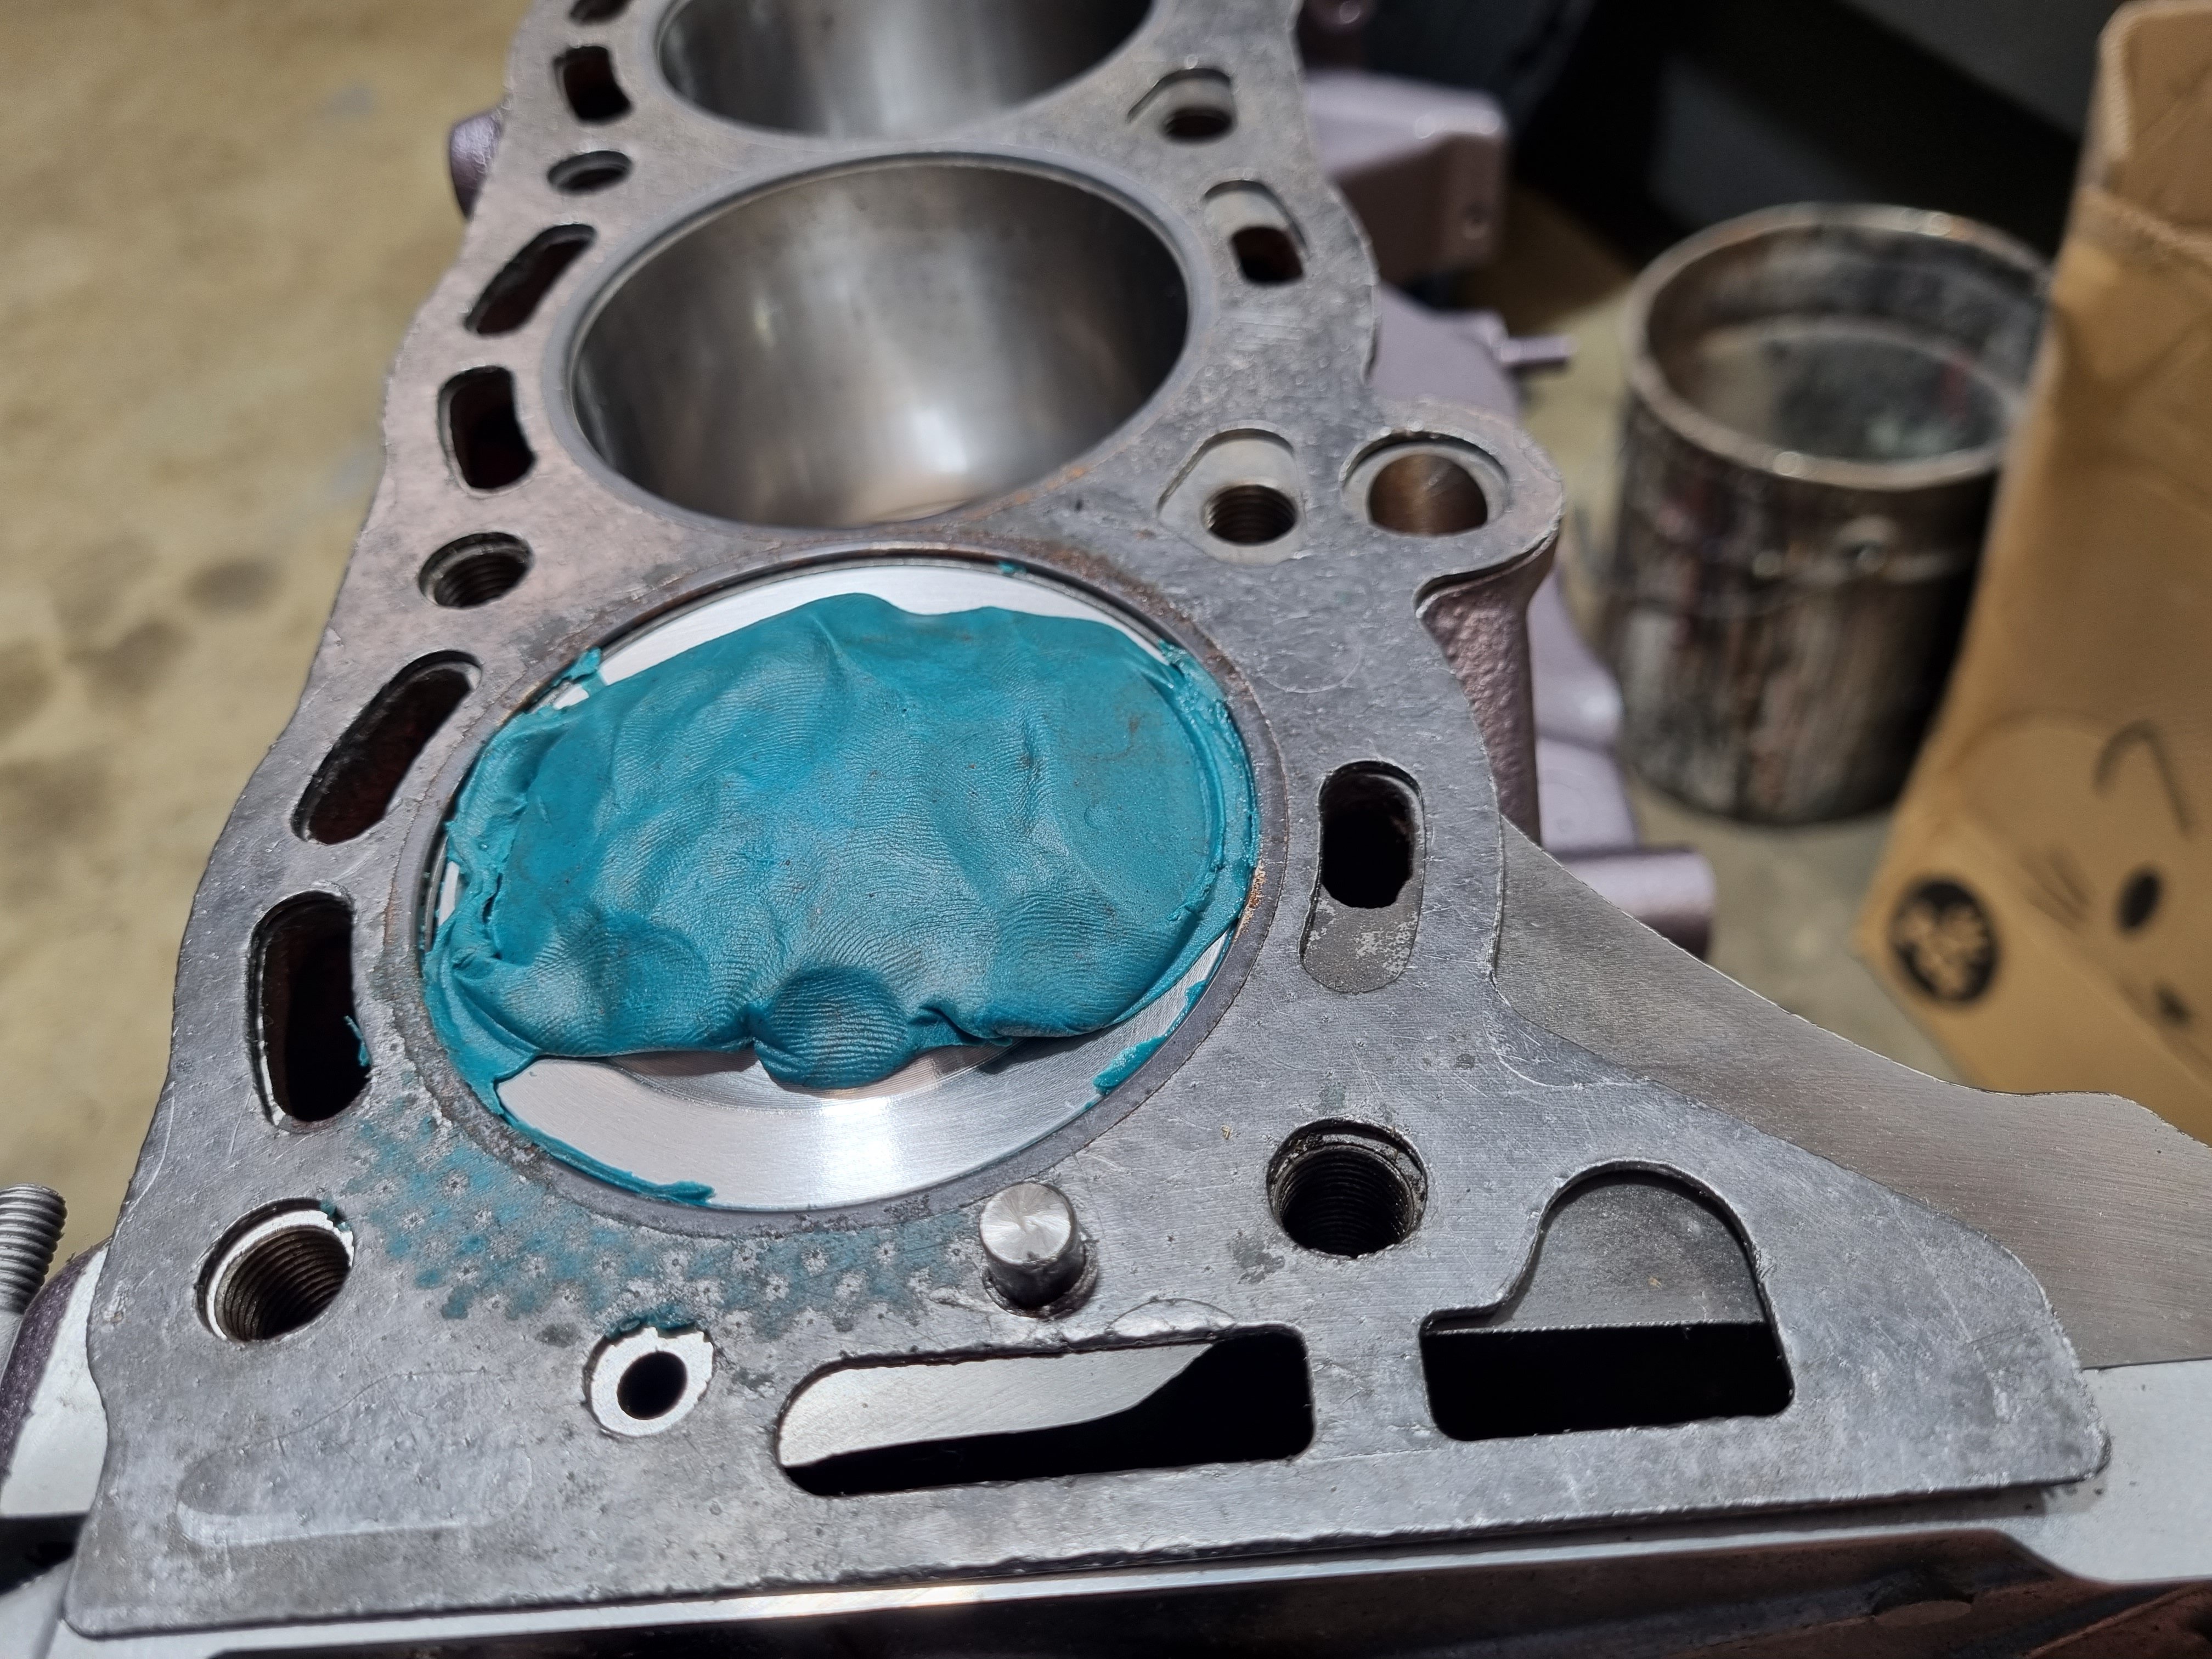
@HighLUX it was something like 3s crank seals, 4k Mains and big ends (there are 2 different sizes), 4k middle and oil rings, with Honda d16 top piston rings. The crank thrust washers were unique, I think I still have a set of two of them.. I might also have a couple of Honda rings because I must have used 1.5 sets to do the rebuild... From memory the head gasket also wasn't all that easy to procure.. valve shims are 16v 4age, as are the valve stem seals maybe from memory.. EDIT: Found this box dated 2003 and I have written 1G on it at some stage.. Can't help with replacement pistons though sorry. Well unless you need a complete runner 1ggte with a KP starlet attached supra 5 speed and shortened Hilux LSD etc..
2 points
-
Made a start on my a/c pipework today. First step was to test fit each of the hose ends on their associated components. This uncovered two minor challenges. The first being the #10 fitting on the evaporator unit. With the TX valve already fitted to the other outlet there isn't enough clearance between the little protrusion at the top of the TX valve to tighten the nut on the neighbouring #10 fitting. The photo above was with the TX valve joint backed off. I was able to rectify this by completely removing the TX valve and then fitting the #10 fitting first before refitting the TX valve. The next challenge was the #8 fitting on the compressor. The 90 degree bend works okay but the incorporated service port is clashing with the side of the engine box which will result in a less than optimum angle once I've crimped on the hose: I've bitten the bullet and started trimming back the offending part of the engine box side. To do this I had to remove my clutch reservoir and hardline, ignition coil and newly mounted a/c receiver drier bottle. I got half of the job done before lunch stopped play, so more butchery planned for tomorrow.
2 points
-
Mocked up - I couldn’t be happier.
2 points
-
https://www.emailmeform.com/builder/form/pJKCz7d8D8O4ZN Get amongst it2 points
-
I decided to take the 1100 on an overnight camping trip up to the massive city of Norsewood on the 2nd. Got all packed up and headed out of town, flying along at 70mph, lining up an overtake on a depressing Qashqai. Aaaaand the fuel pump died. Pulled the old girl over and diagnosed it was the pump, which incidentally was the only spare I wasn't carrying because it was a relatively new looking replacement. Can't fix an non-points pump up a side road sadly. Called a mate out, we fitted a generic Chinese ticker pump and all was well. I continued on my way, the speedo stopped working, oh well. The indicators stopped working, oh well. And a couple km away from my destination, plodding down a shingle road....the brakes failed. Neat! Toddled on gently, got to destination and had a looksie, fluid has boiled over in a huge way. Both front wheels are as hot as heck, right rear was warm, left was cold. Assuming a stuck pressure valve. So, Nannie will take a trailer ride home on Saturday and due to how hot the brakes got ill just replace the lot I moved her a few km up the road on the next morning and brakes had re-appeared. But even I wouldn't trust that! And the speedo came back, she's a good girl really. So, a brake rebuild and I really should throw a cooling system at her. And another SU style fuel pump. Fun times2 points
-
2 points
-
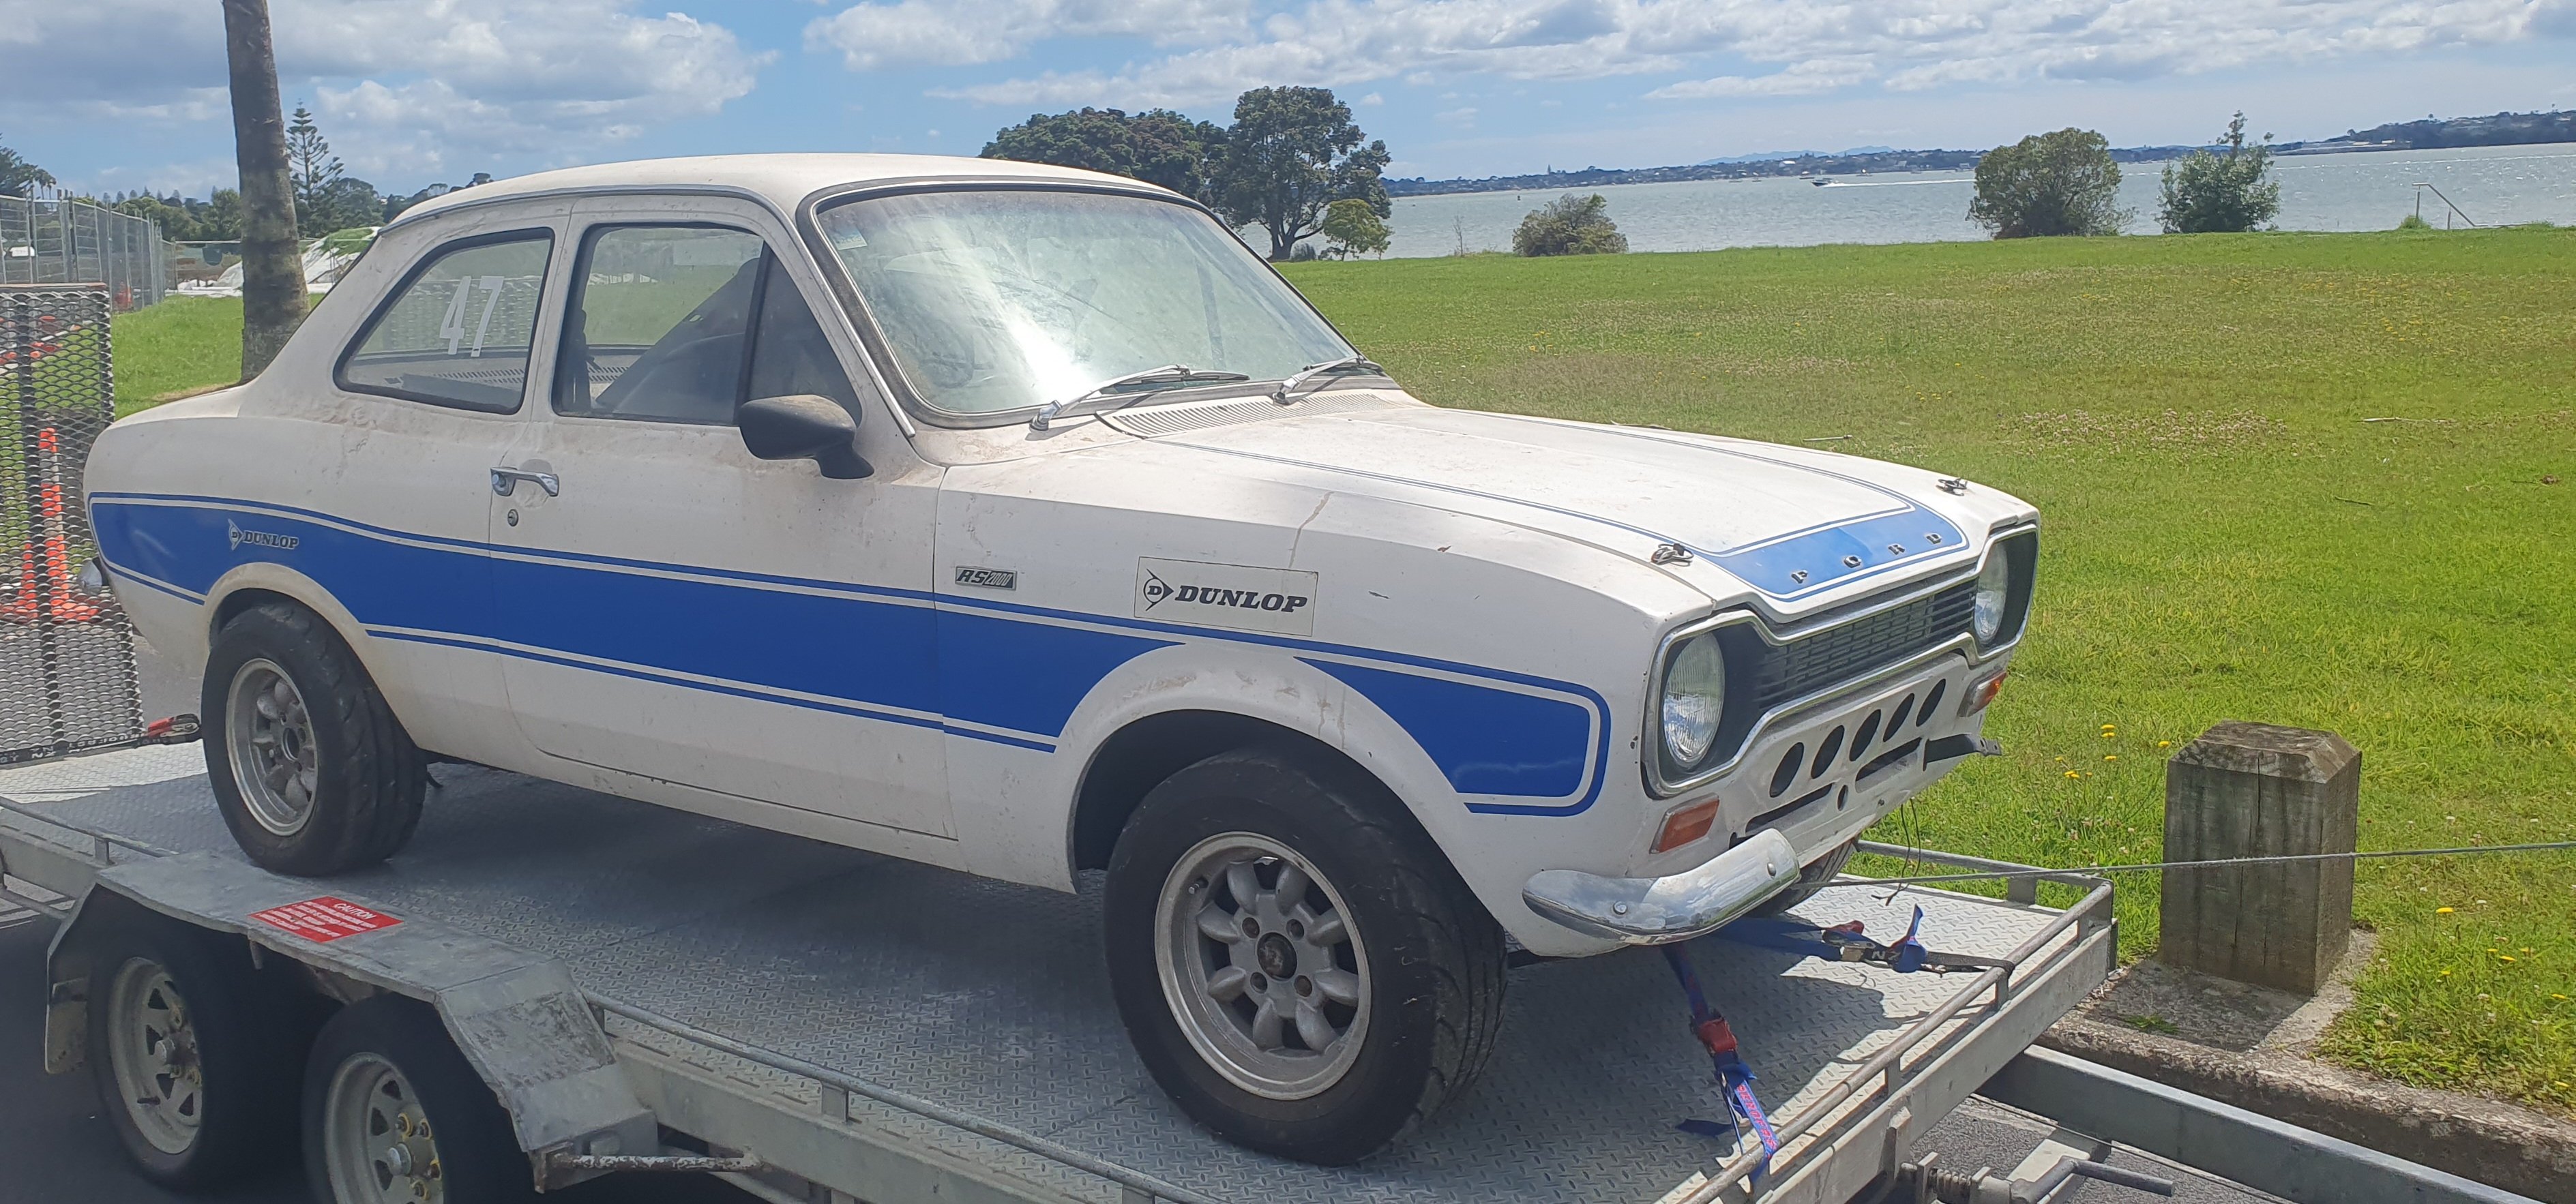
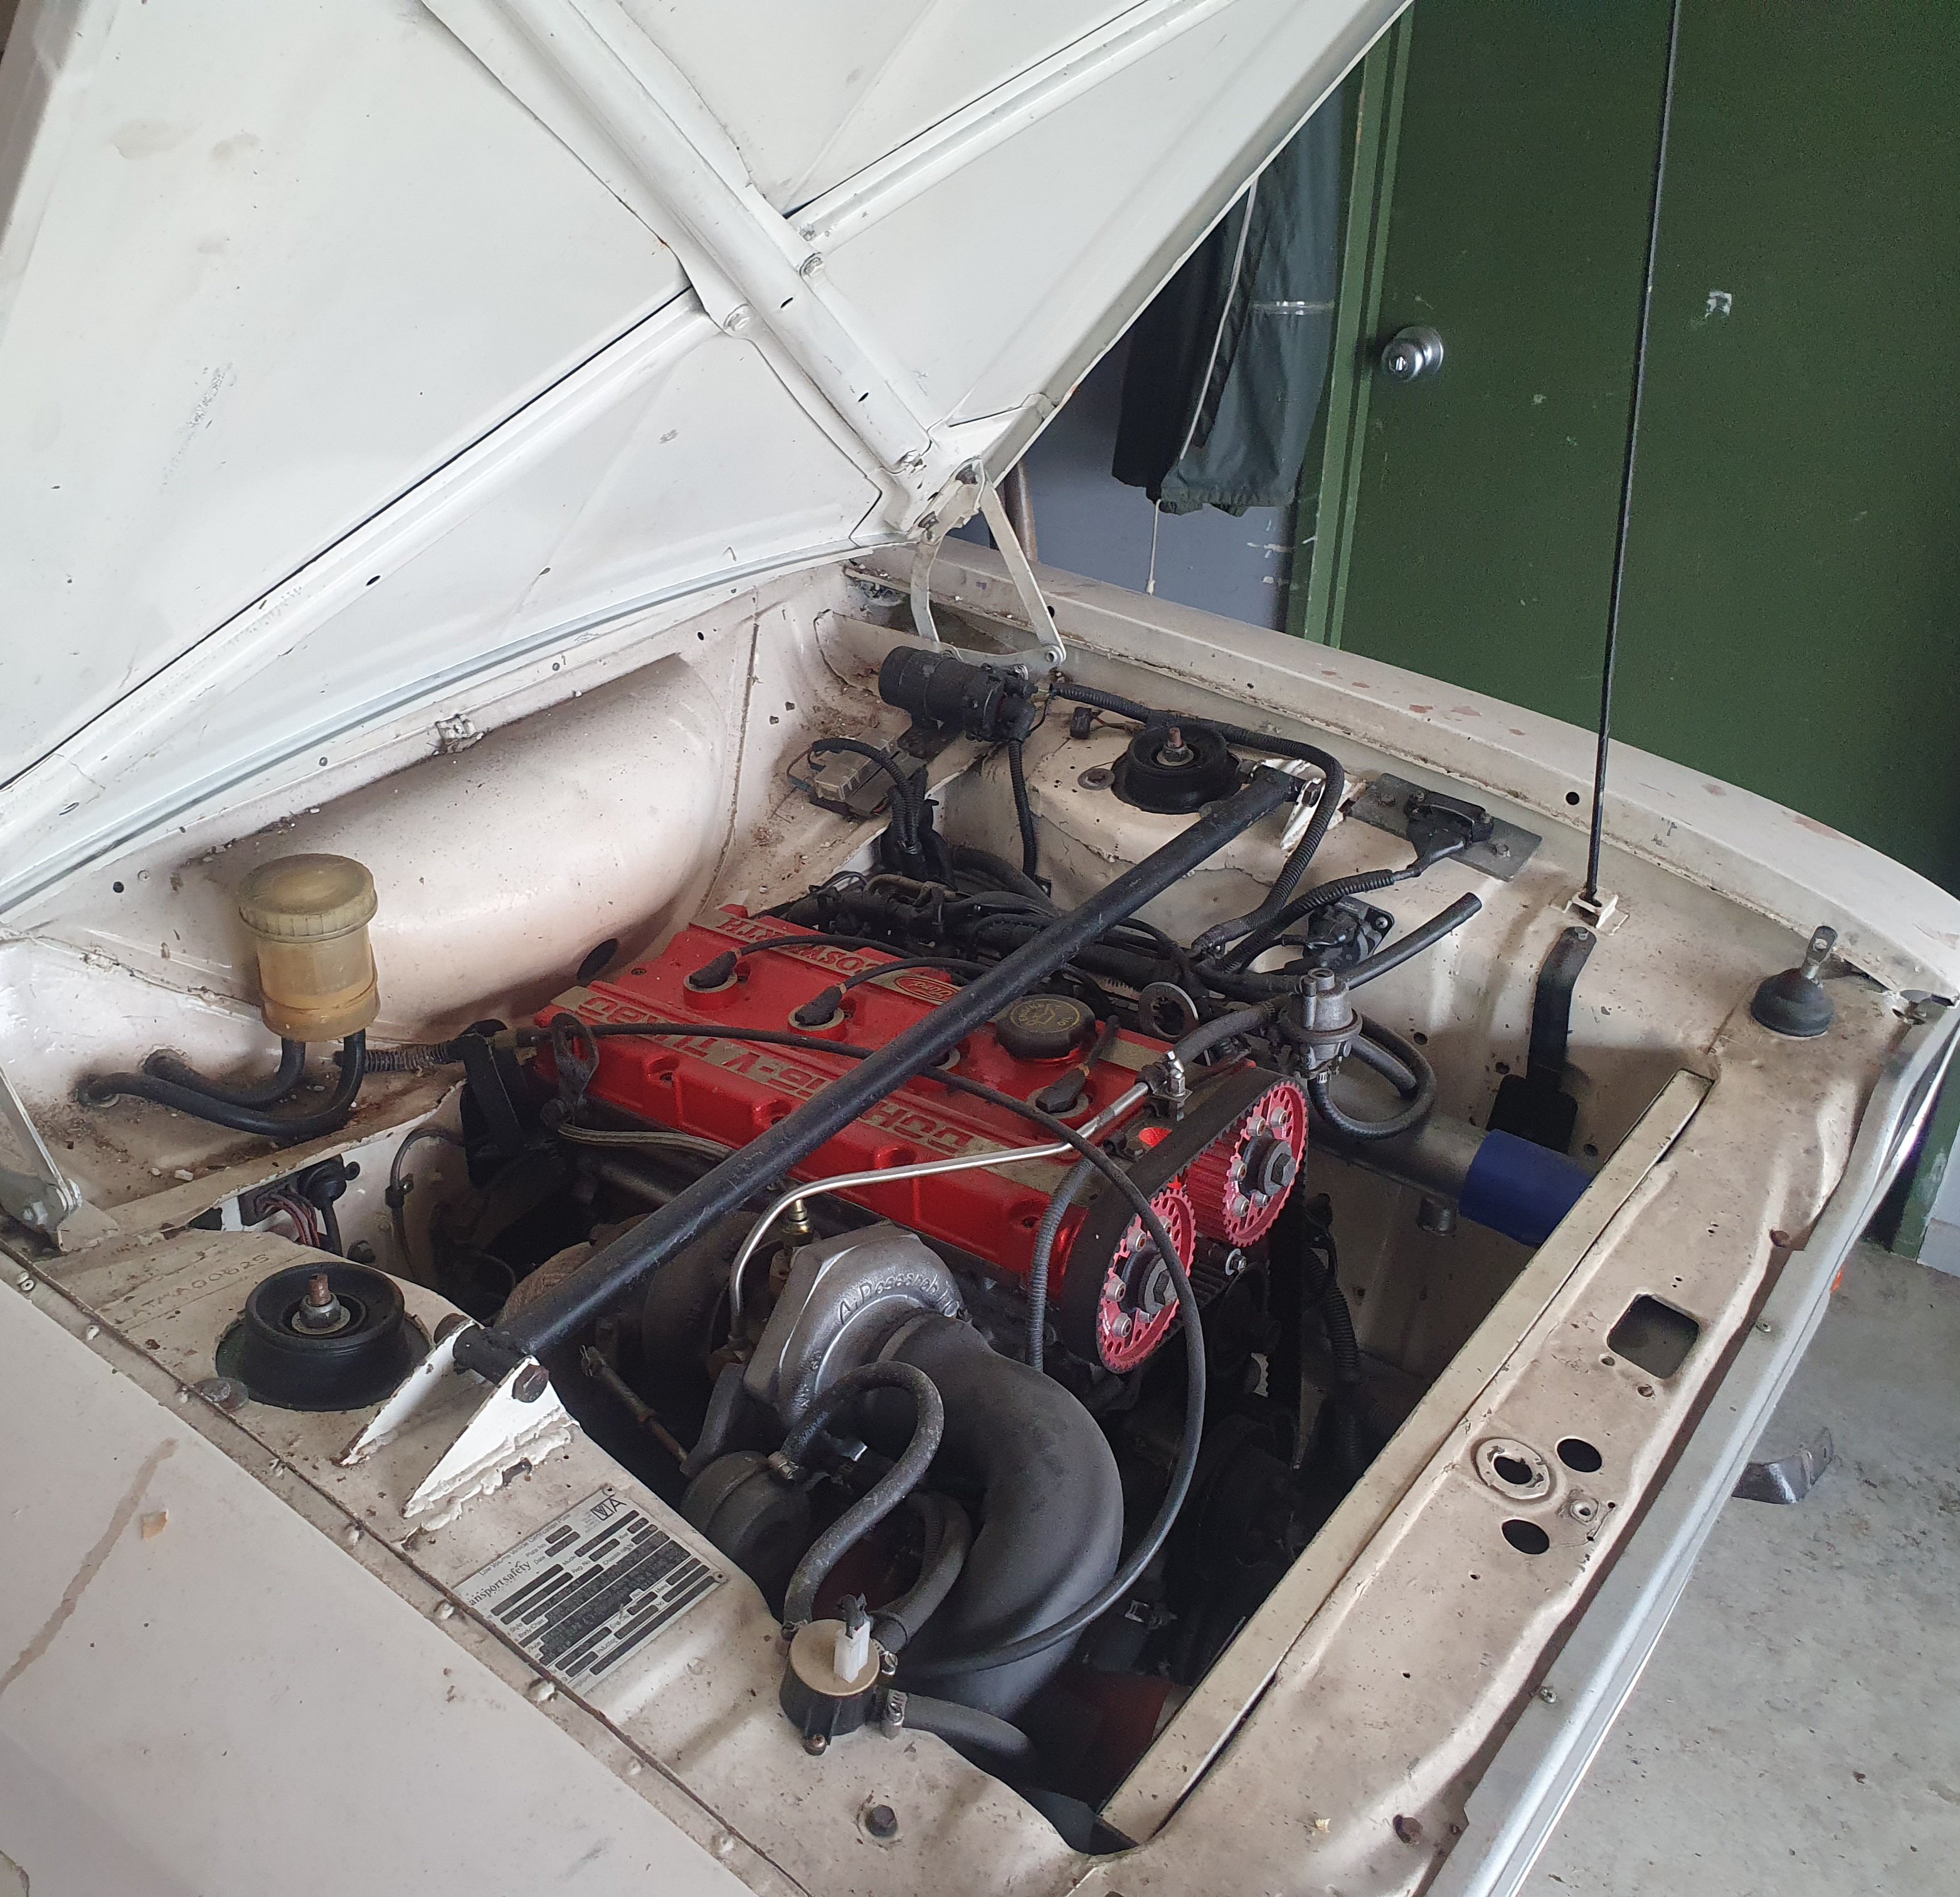
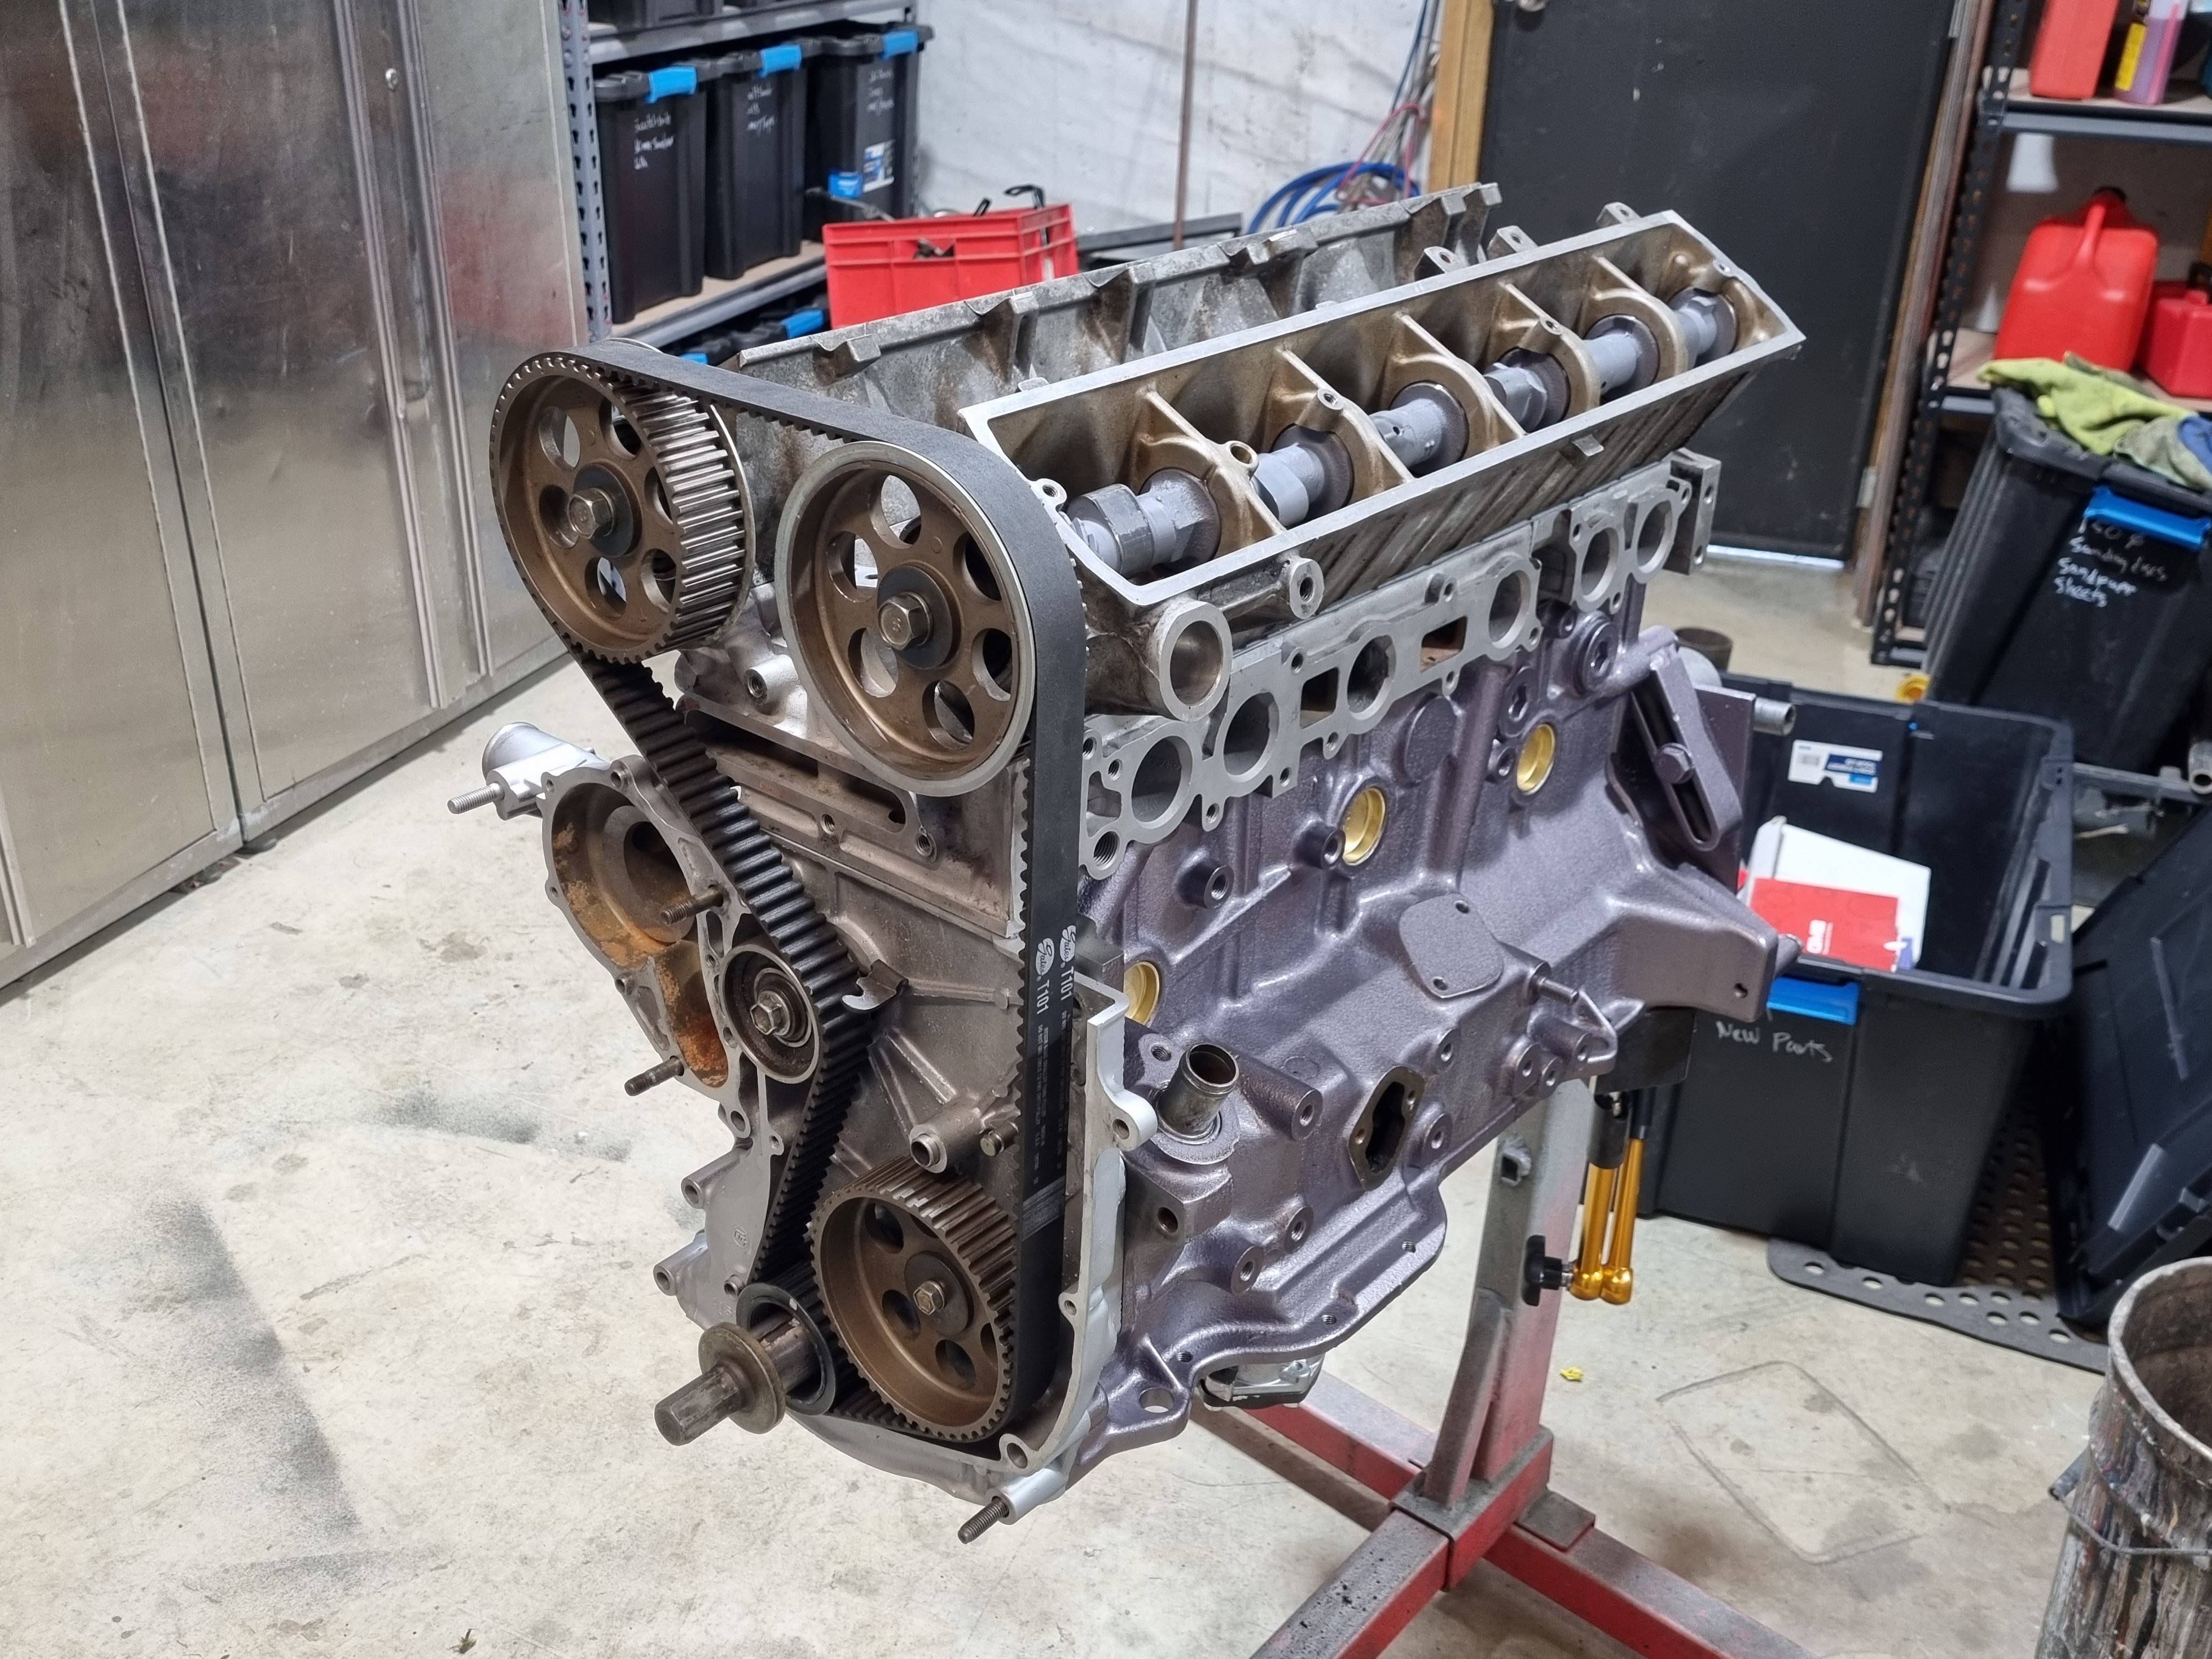
The mighty Cosworth
2 points
-
Did the other side, pretty much the same deal so imagine those pics mirrored. For a break I decided to start in with the wiring install. If you remember this is pretty much where I got to; Then it immediately turned to madness Then after a couple of days effort rerouting and reterminating it got much tidier Working on the front of the car wiring now, and I'm probably going to have to drop the engine to do it justice in the engine bay and back of the car. Thats fine cos I want to sort a couple of things on the engine/clutch/gearbox.2 points
-
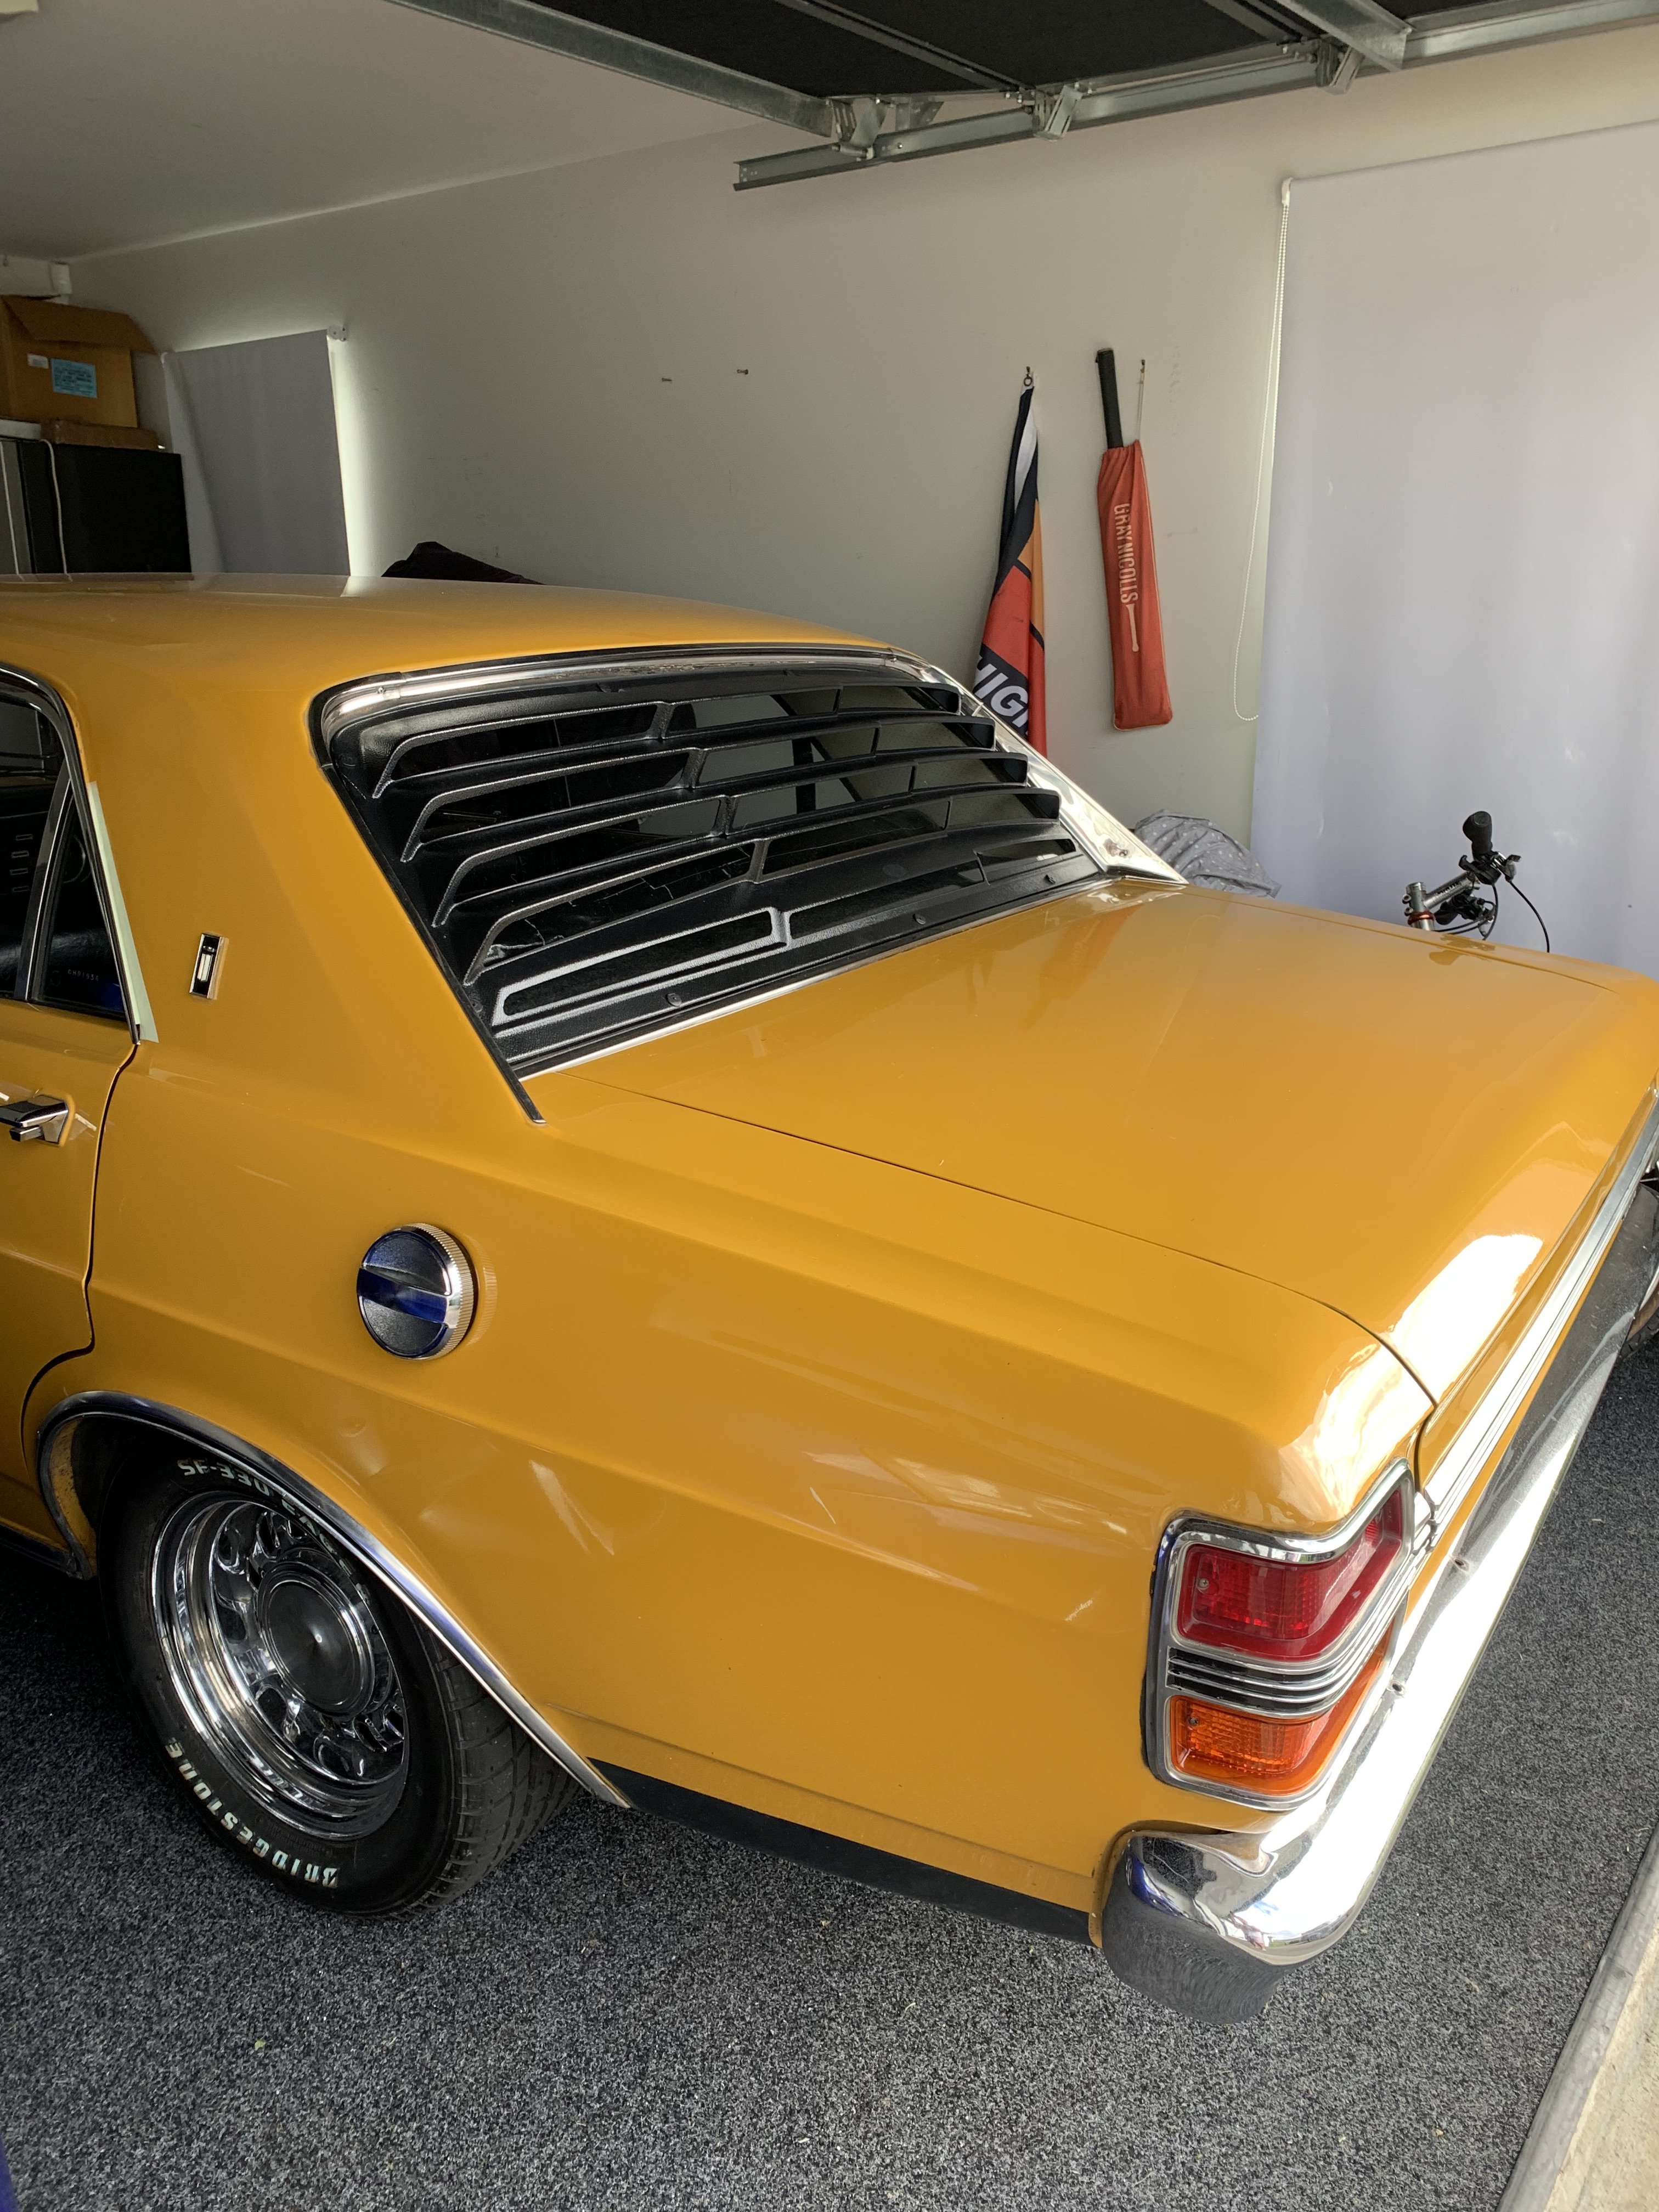
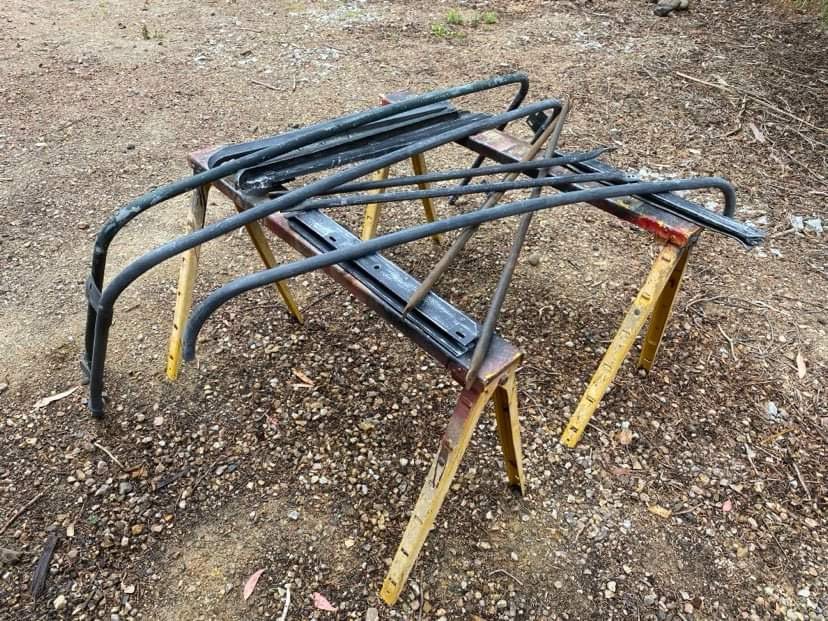
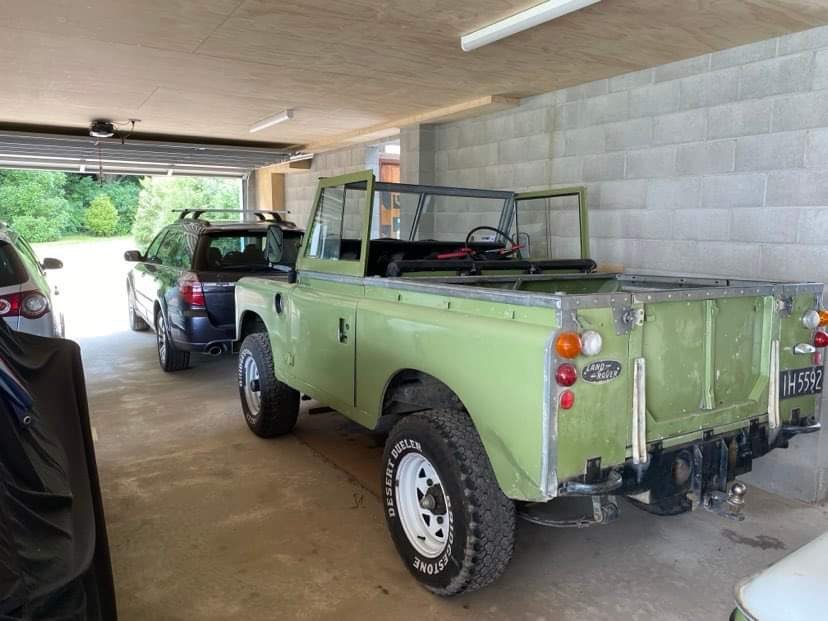
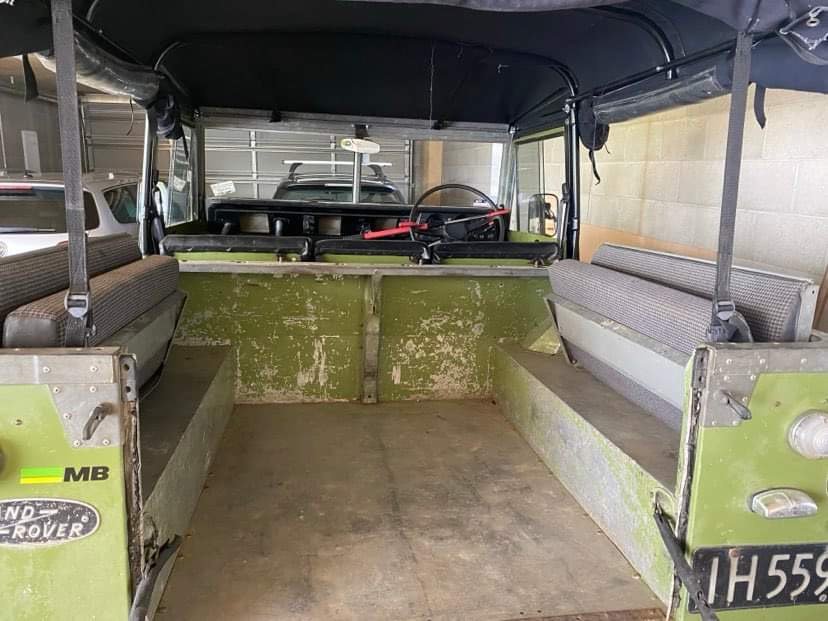
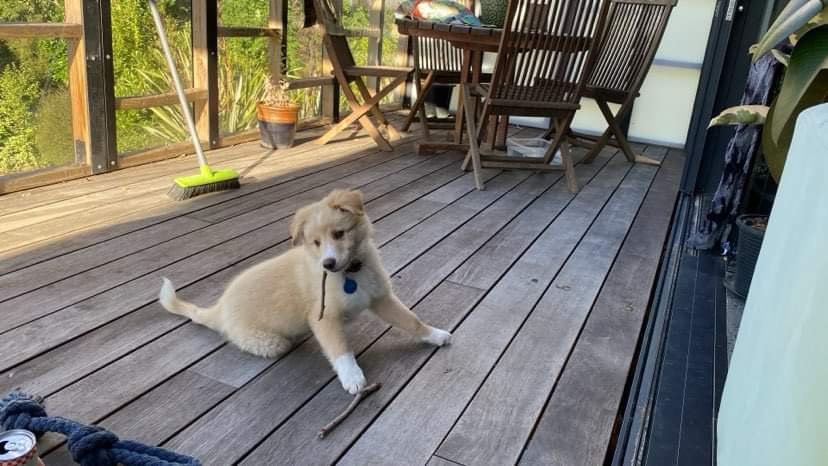
Dredge… decided now I have a garage to put the soft top back on. Repainted the hood sticks over the Christmas break. I’ve ordered a seatbelt bar for it as well so I can take the whole roof off and retain the 3 point retractable seat belts. Currently only bolted through the front hood support until the bar arrives. Had a set of bench seats for it as well so put those back in. Black wheels this year I think. Mostly did this so we can take our new little mate to the beach, off to the dag thread with me
2 points
-
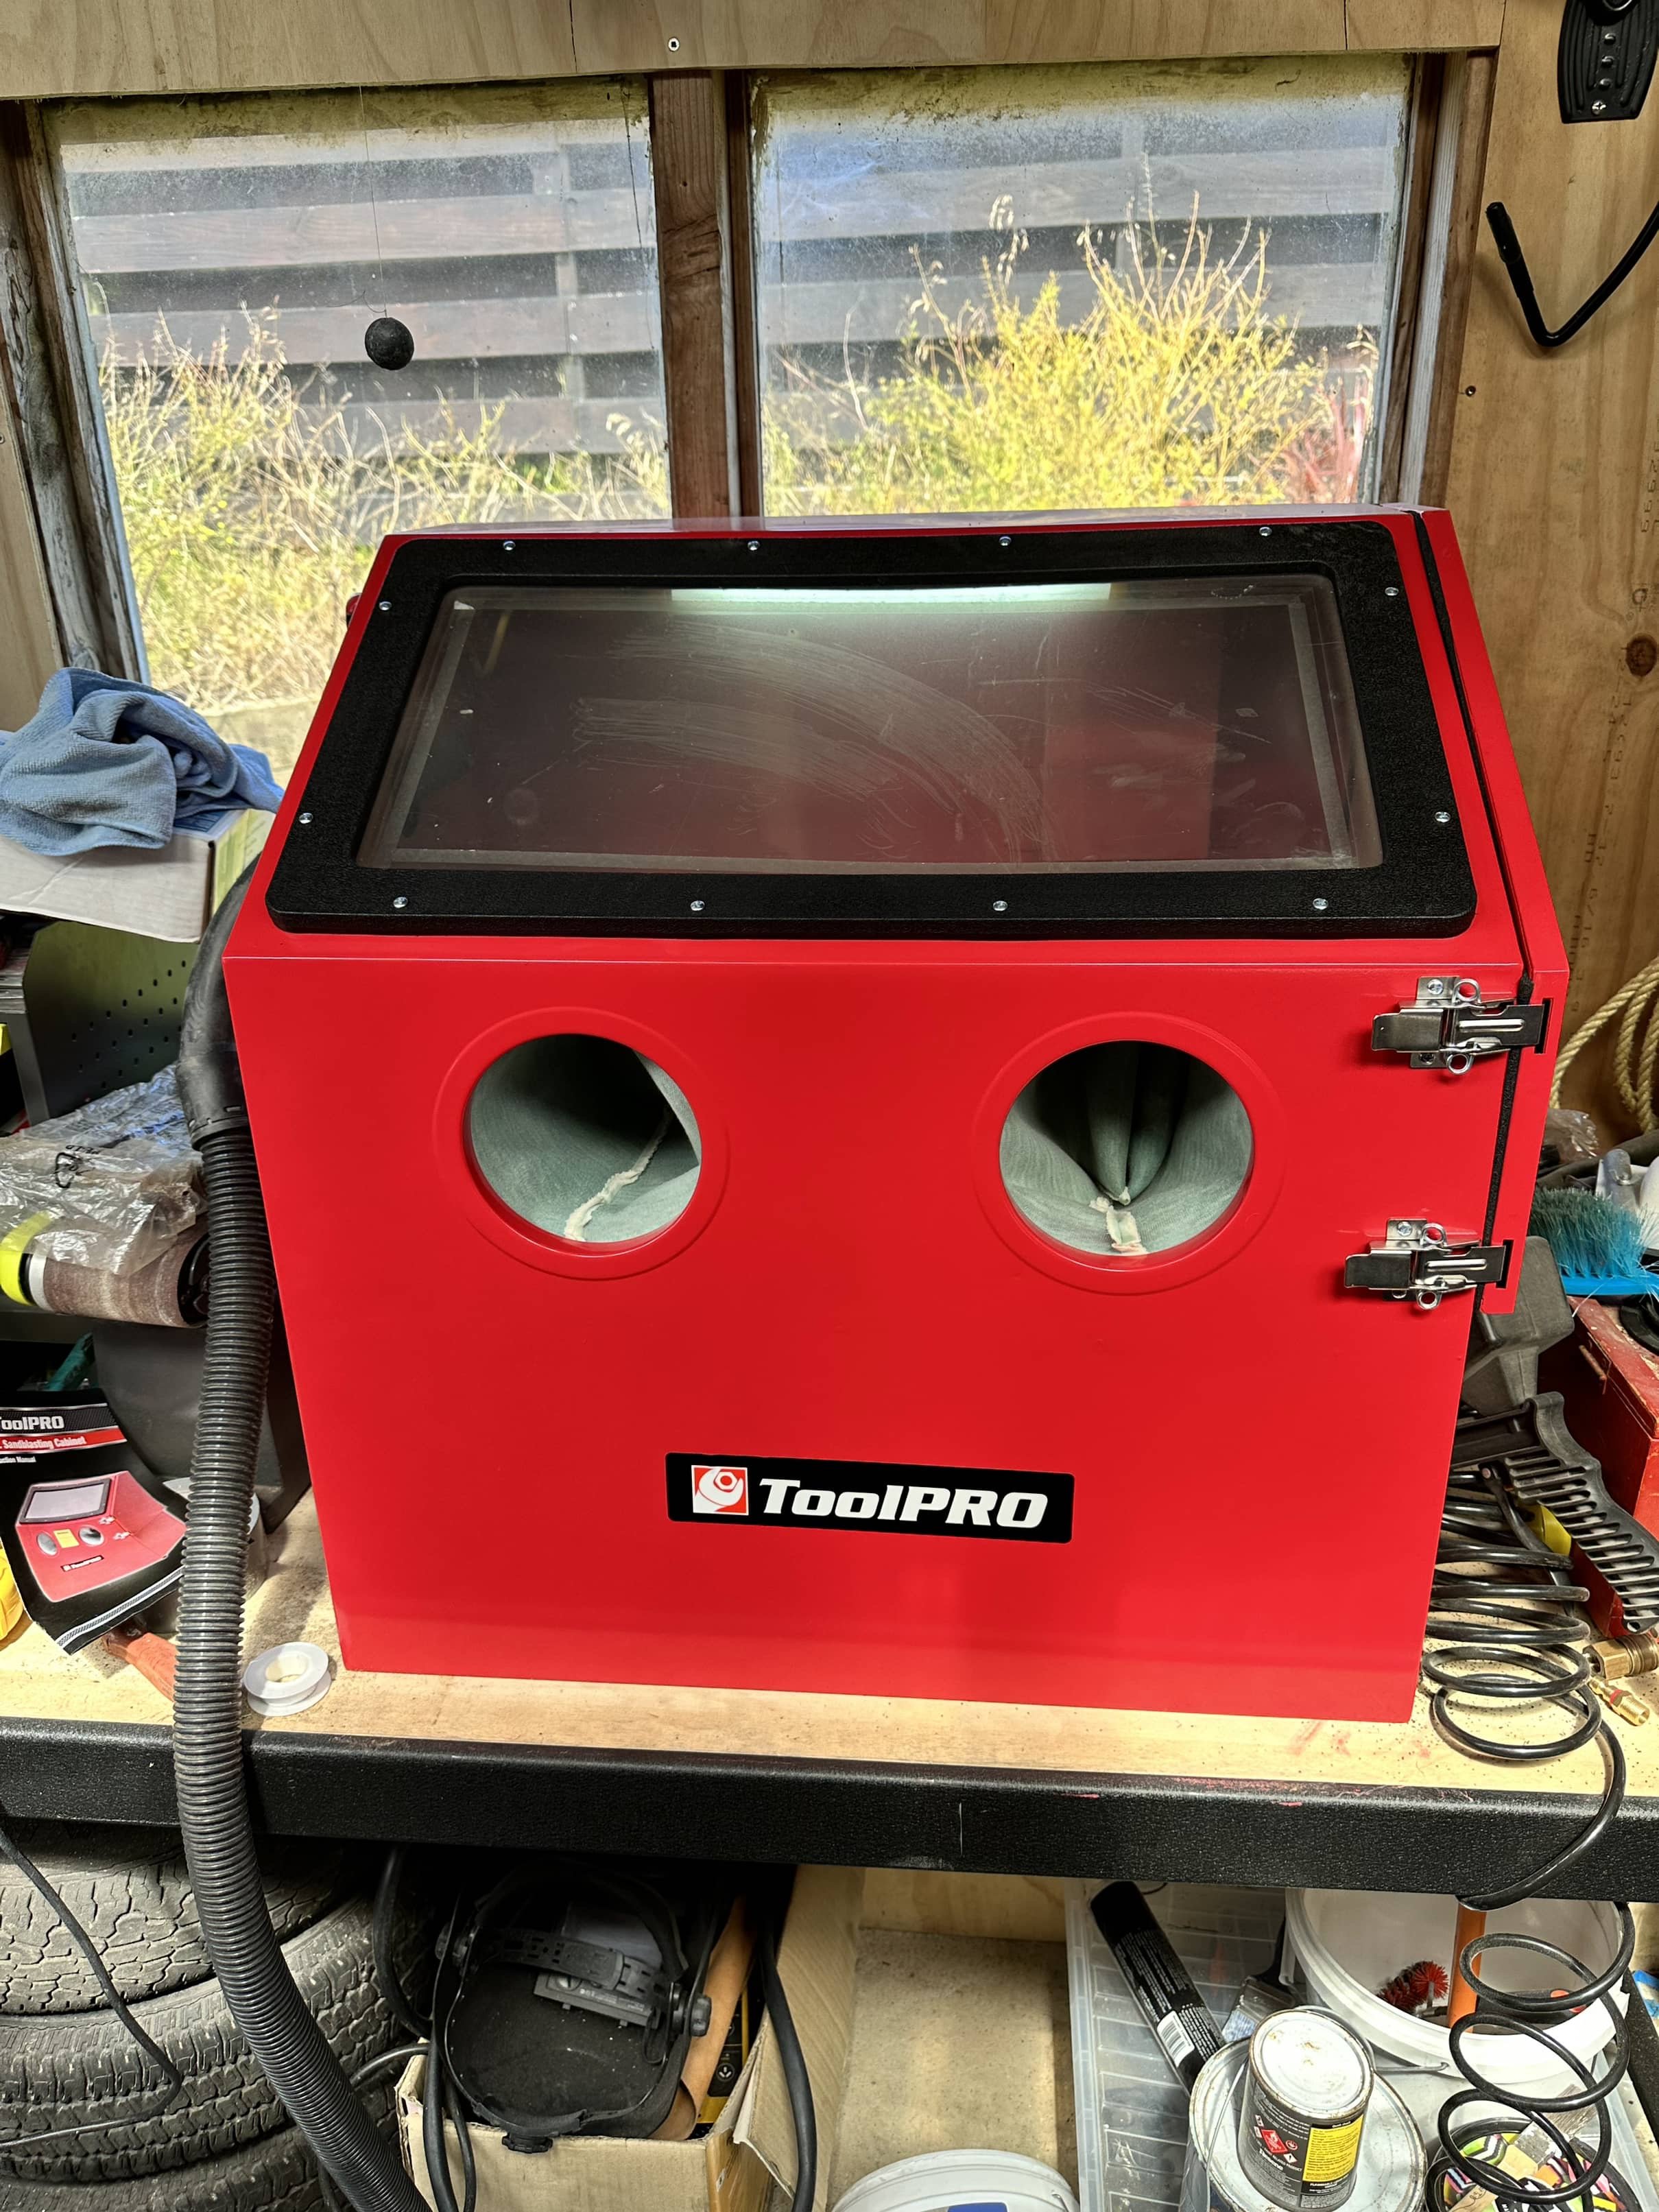
Time to get back into this project. I brought myself a sand blasting cabinet from Supercheap, have been playing around with the nozzles and air pressure. 100psi certainly gets paint and rust off components but is probably at the limit for my 50l 2hp compressor.
2 points
-
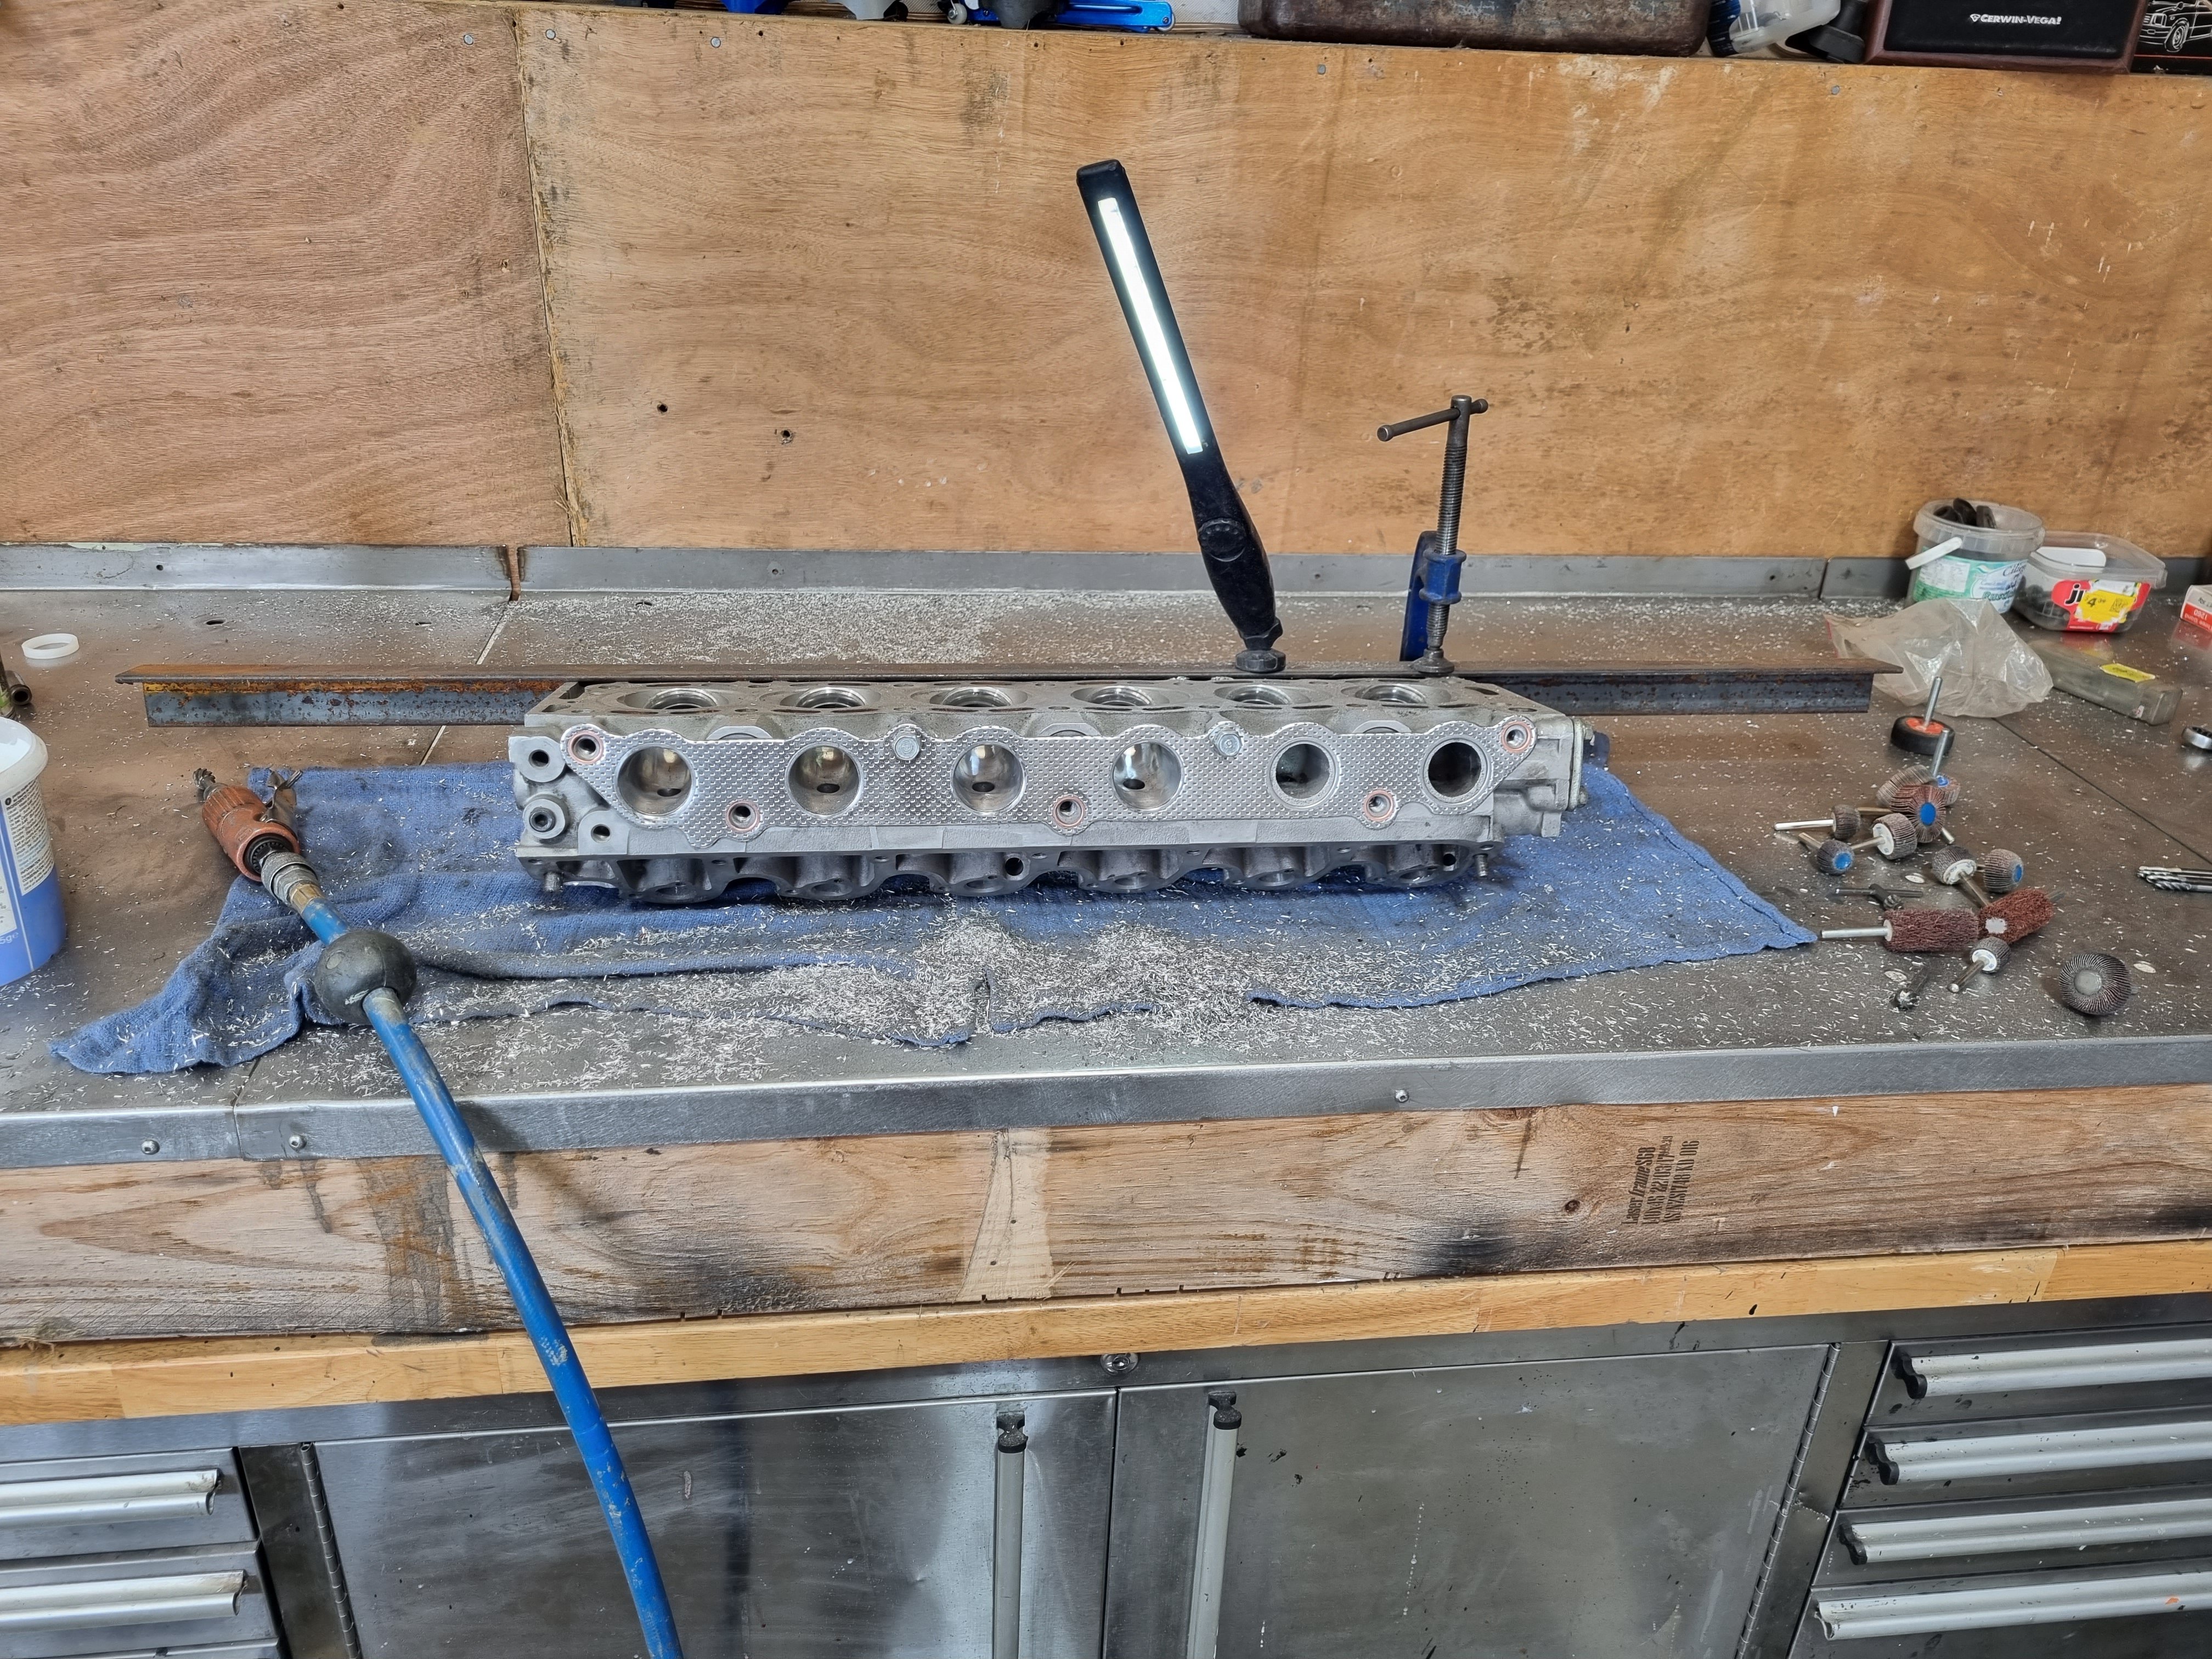
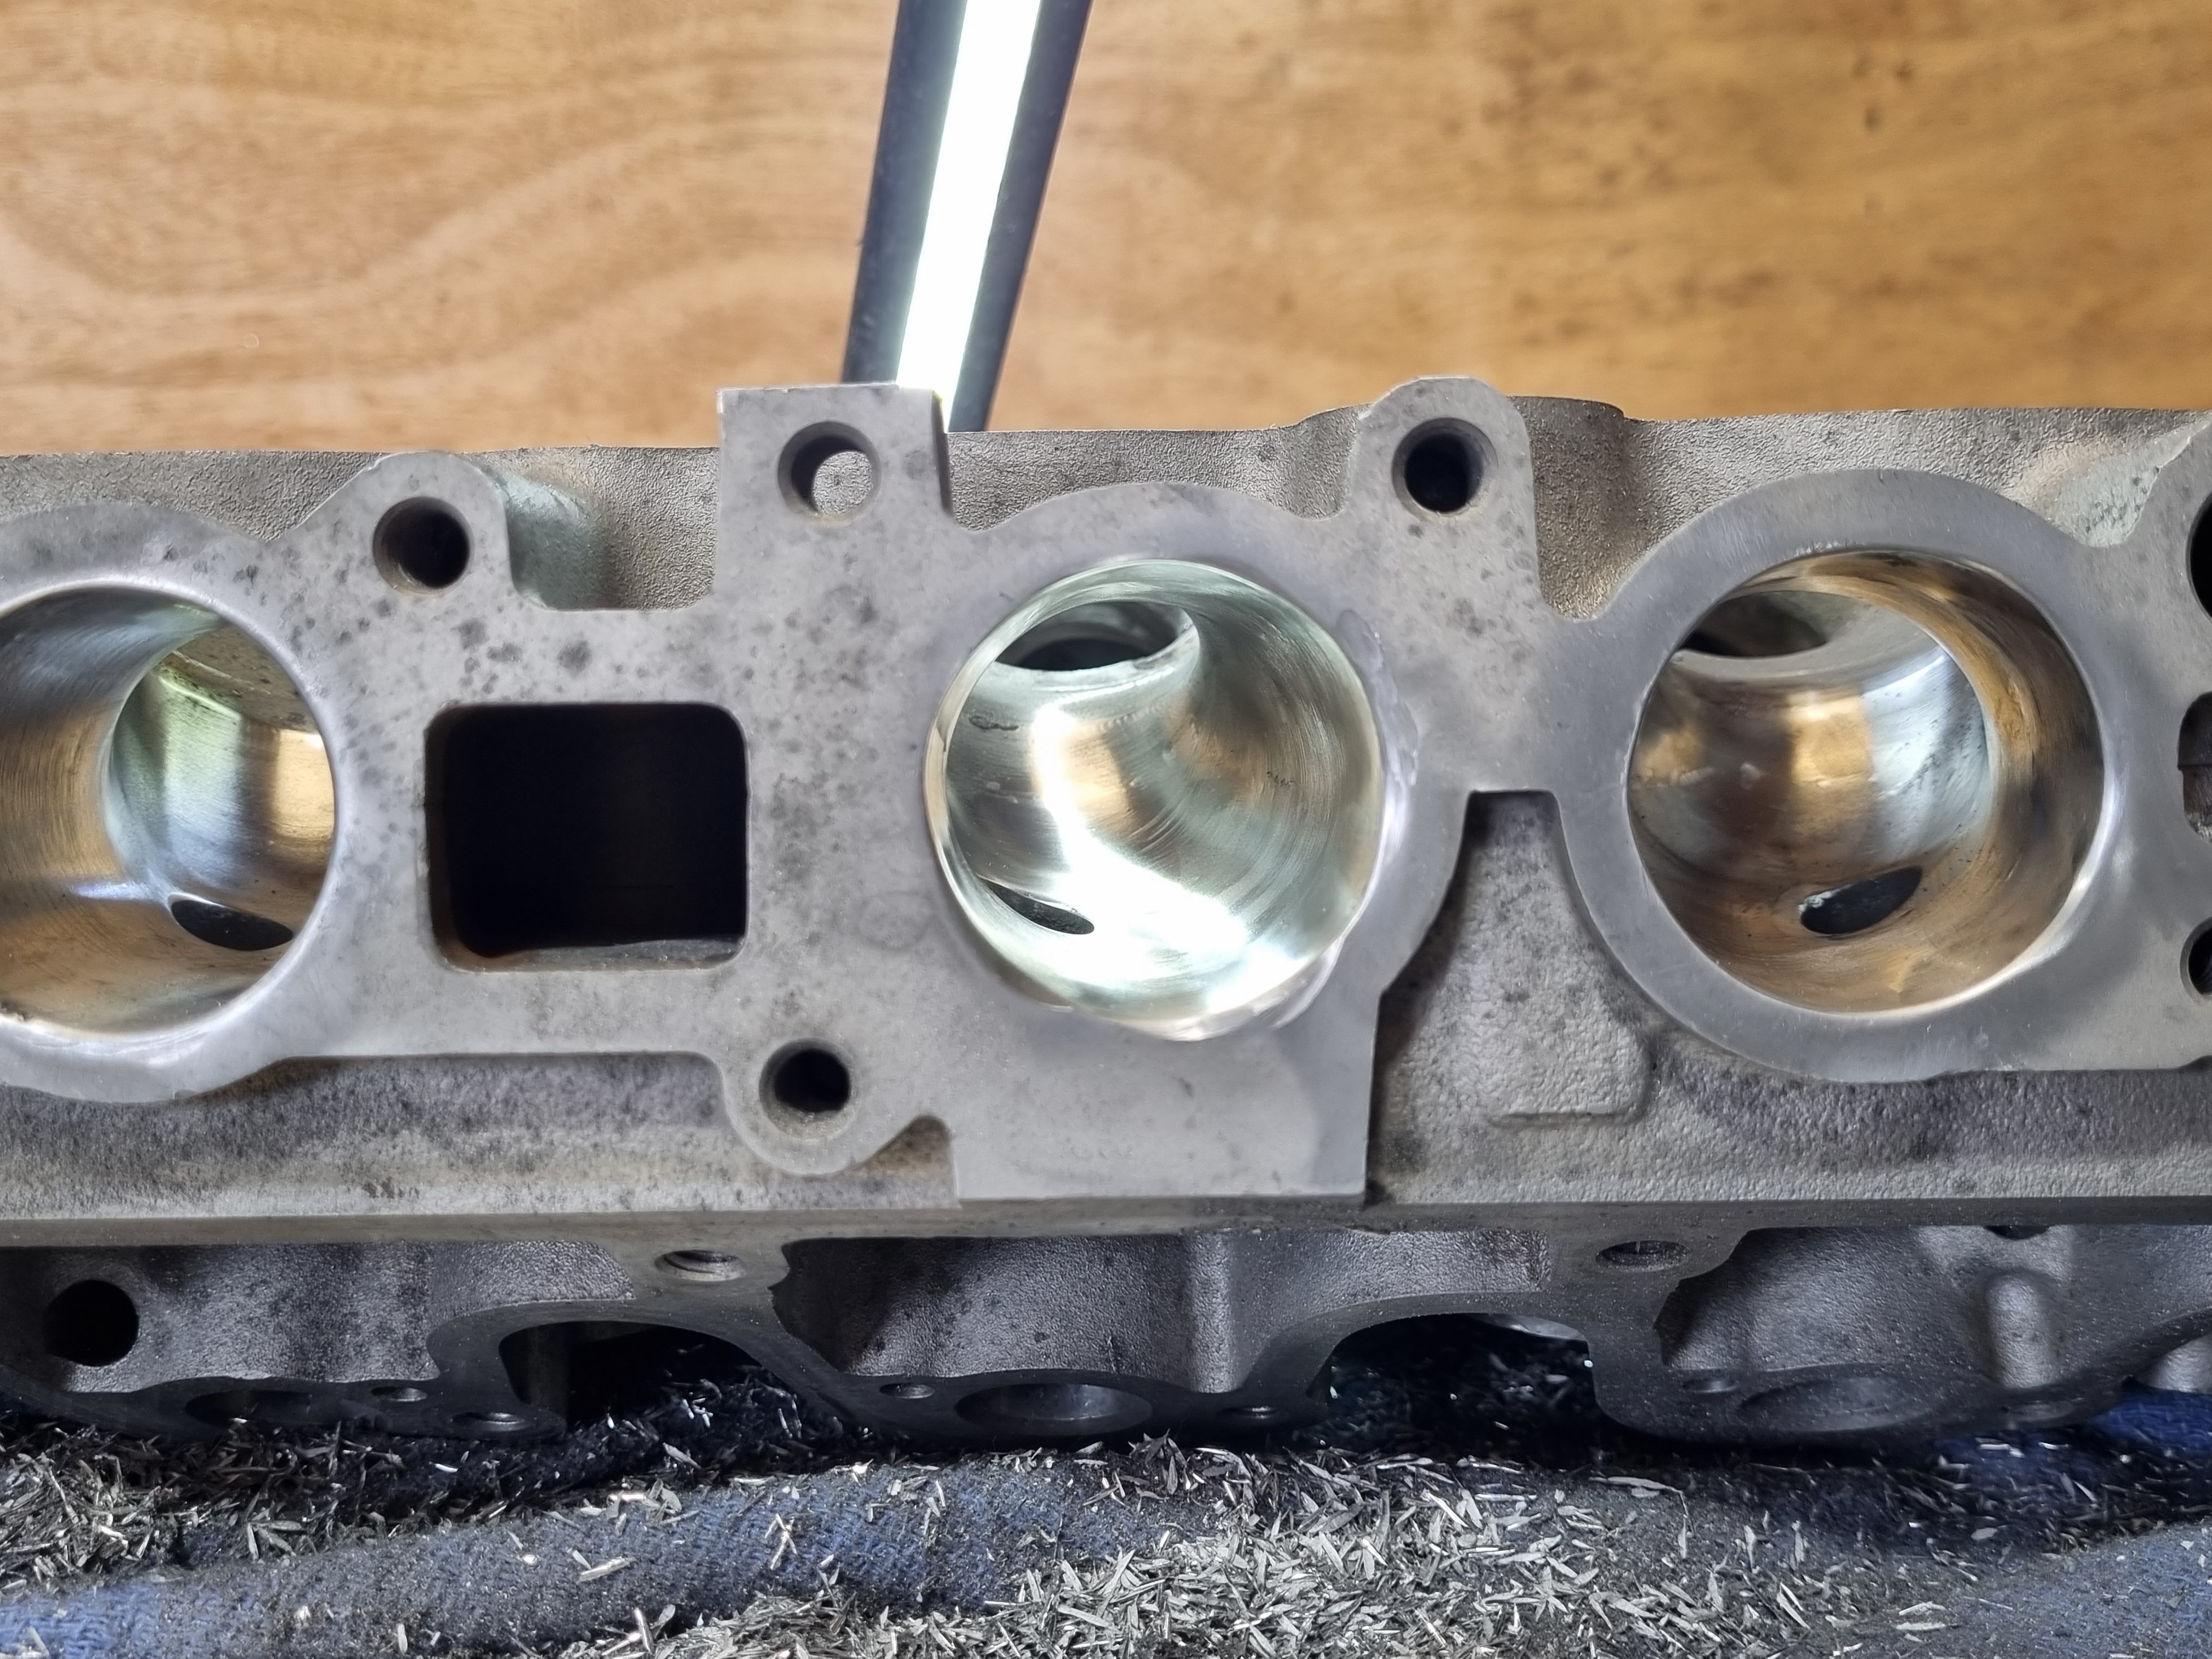
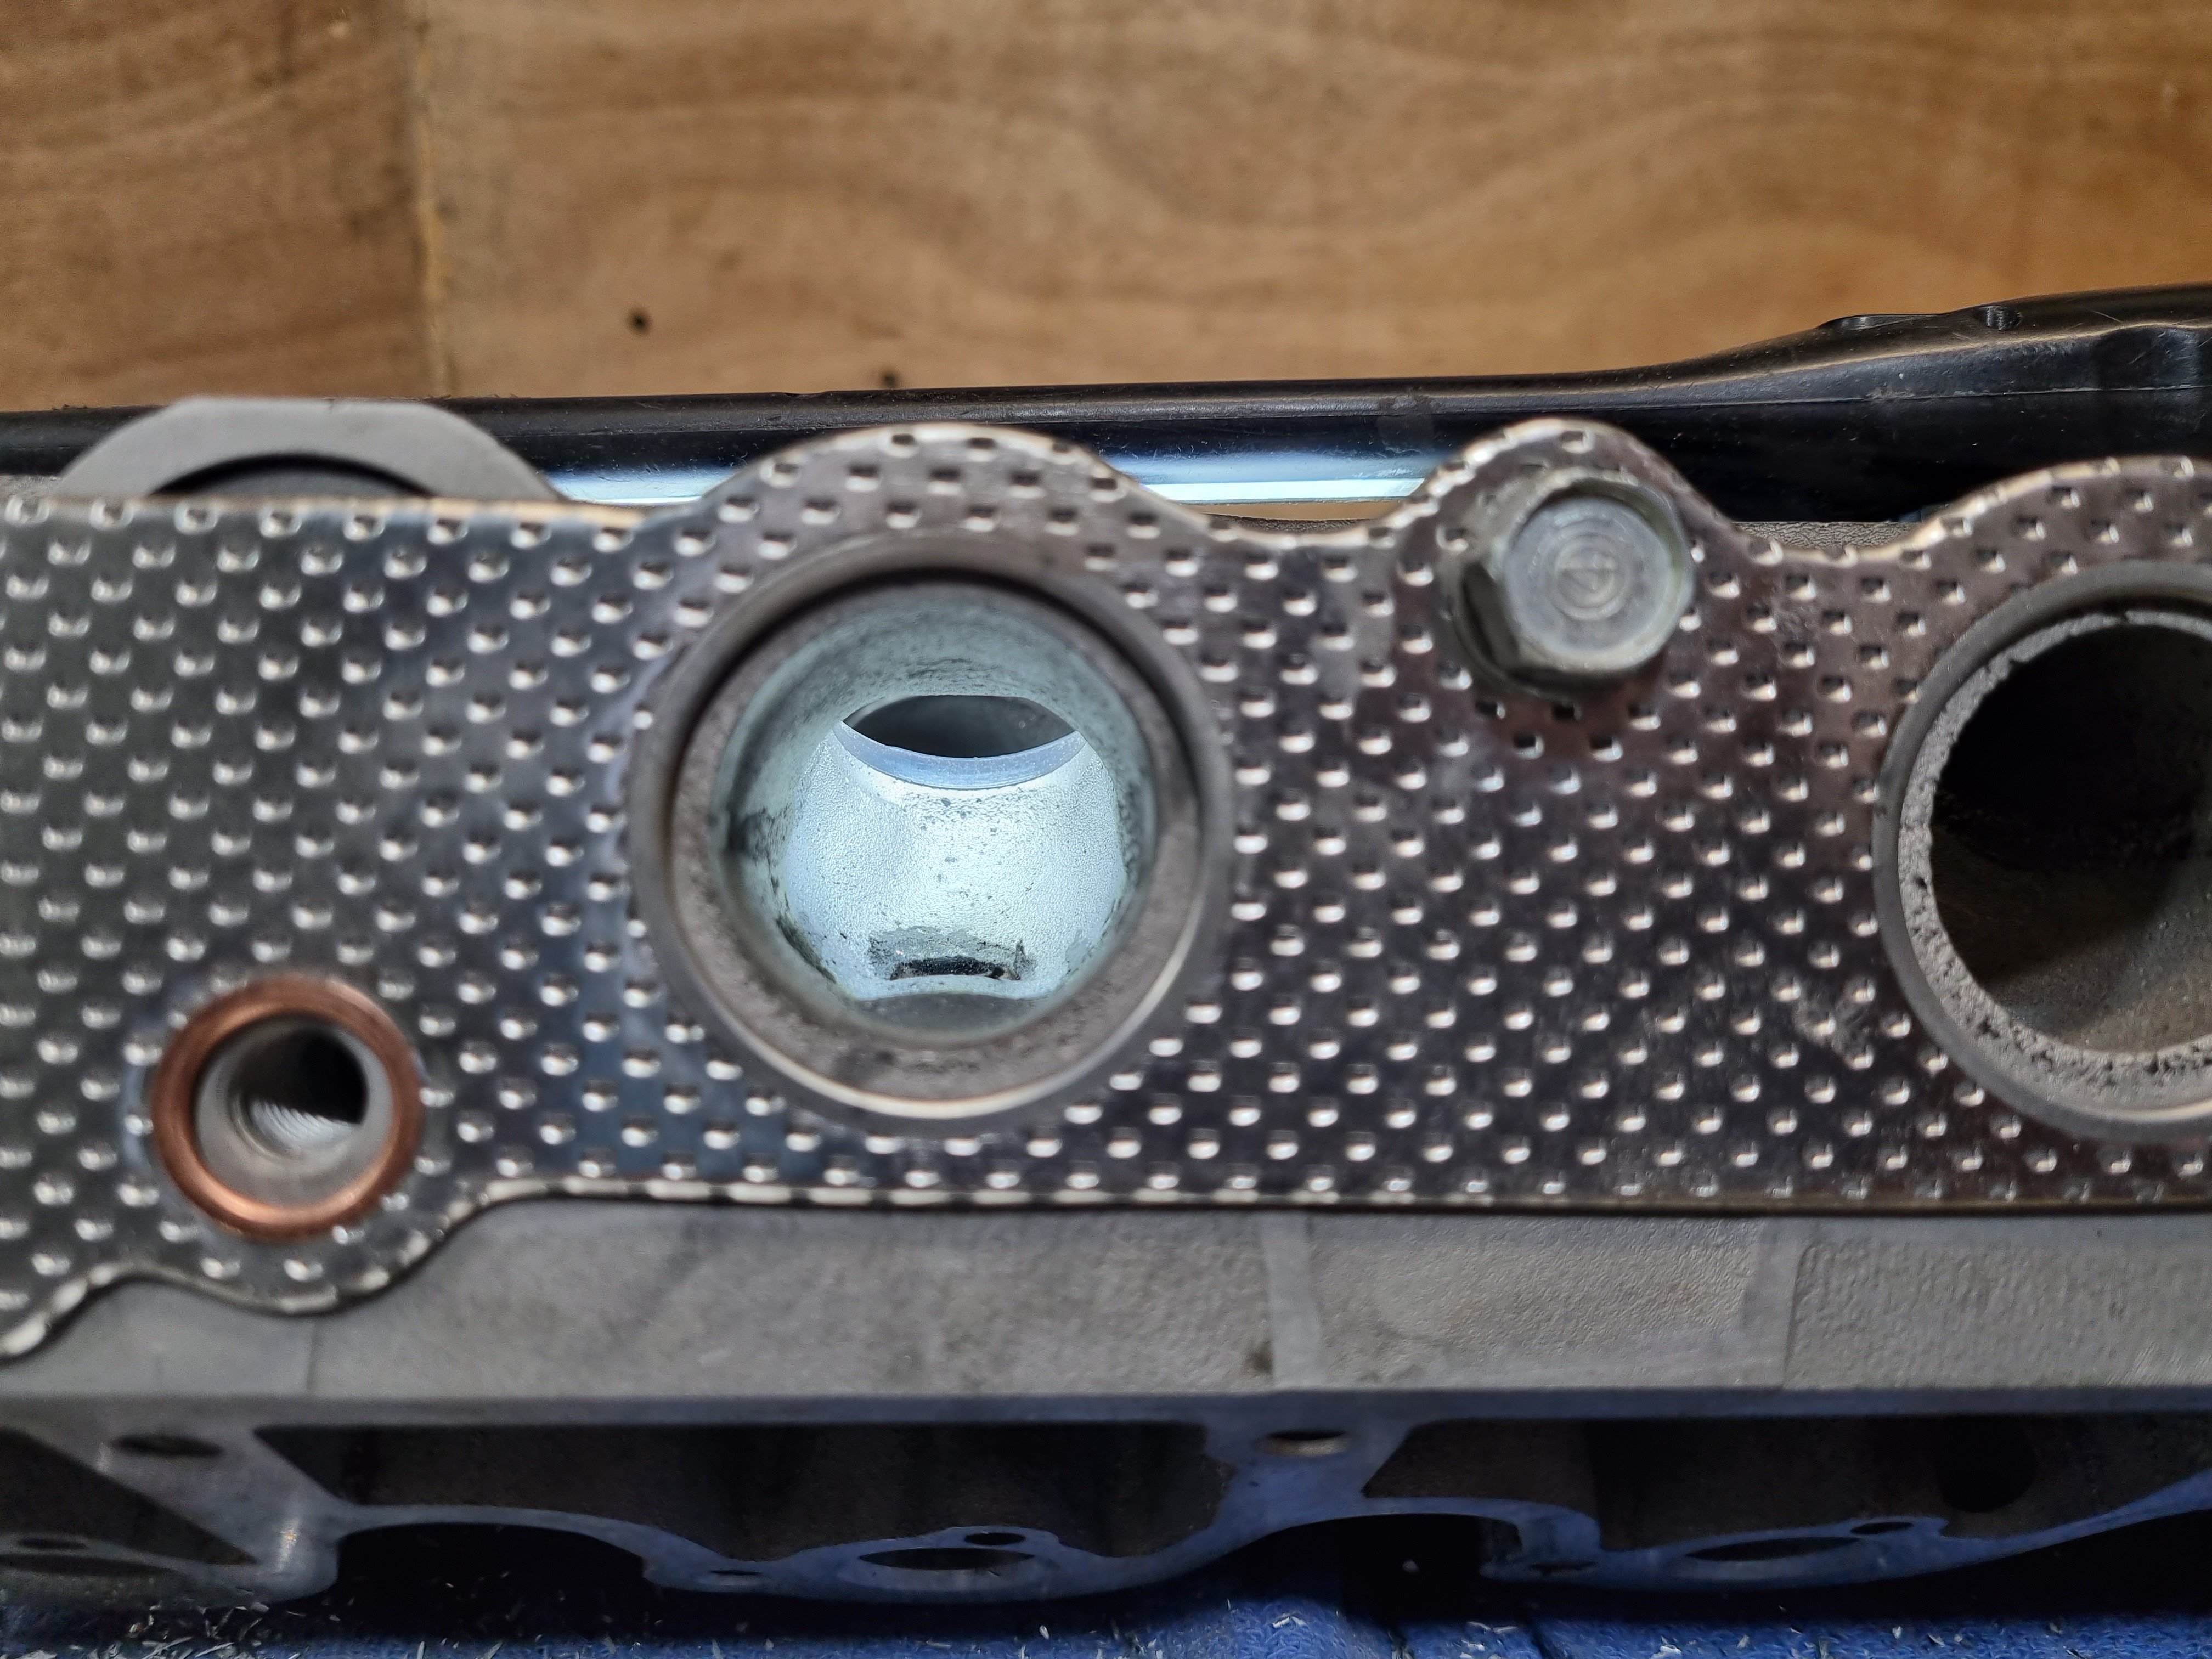
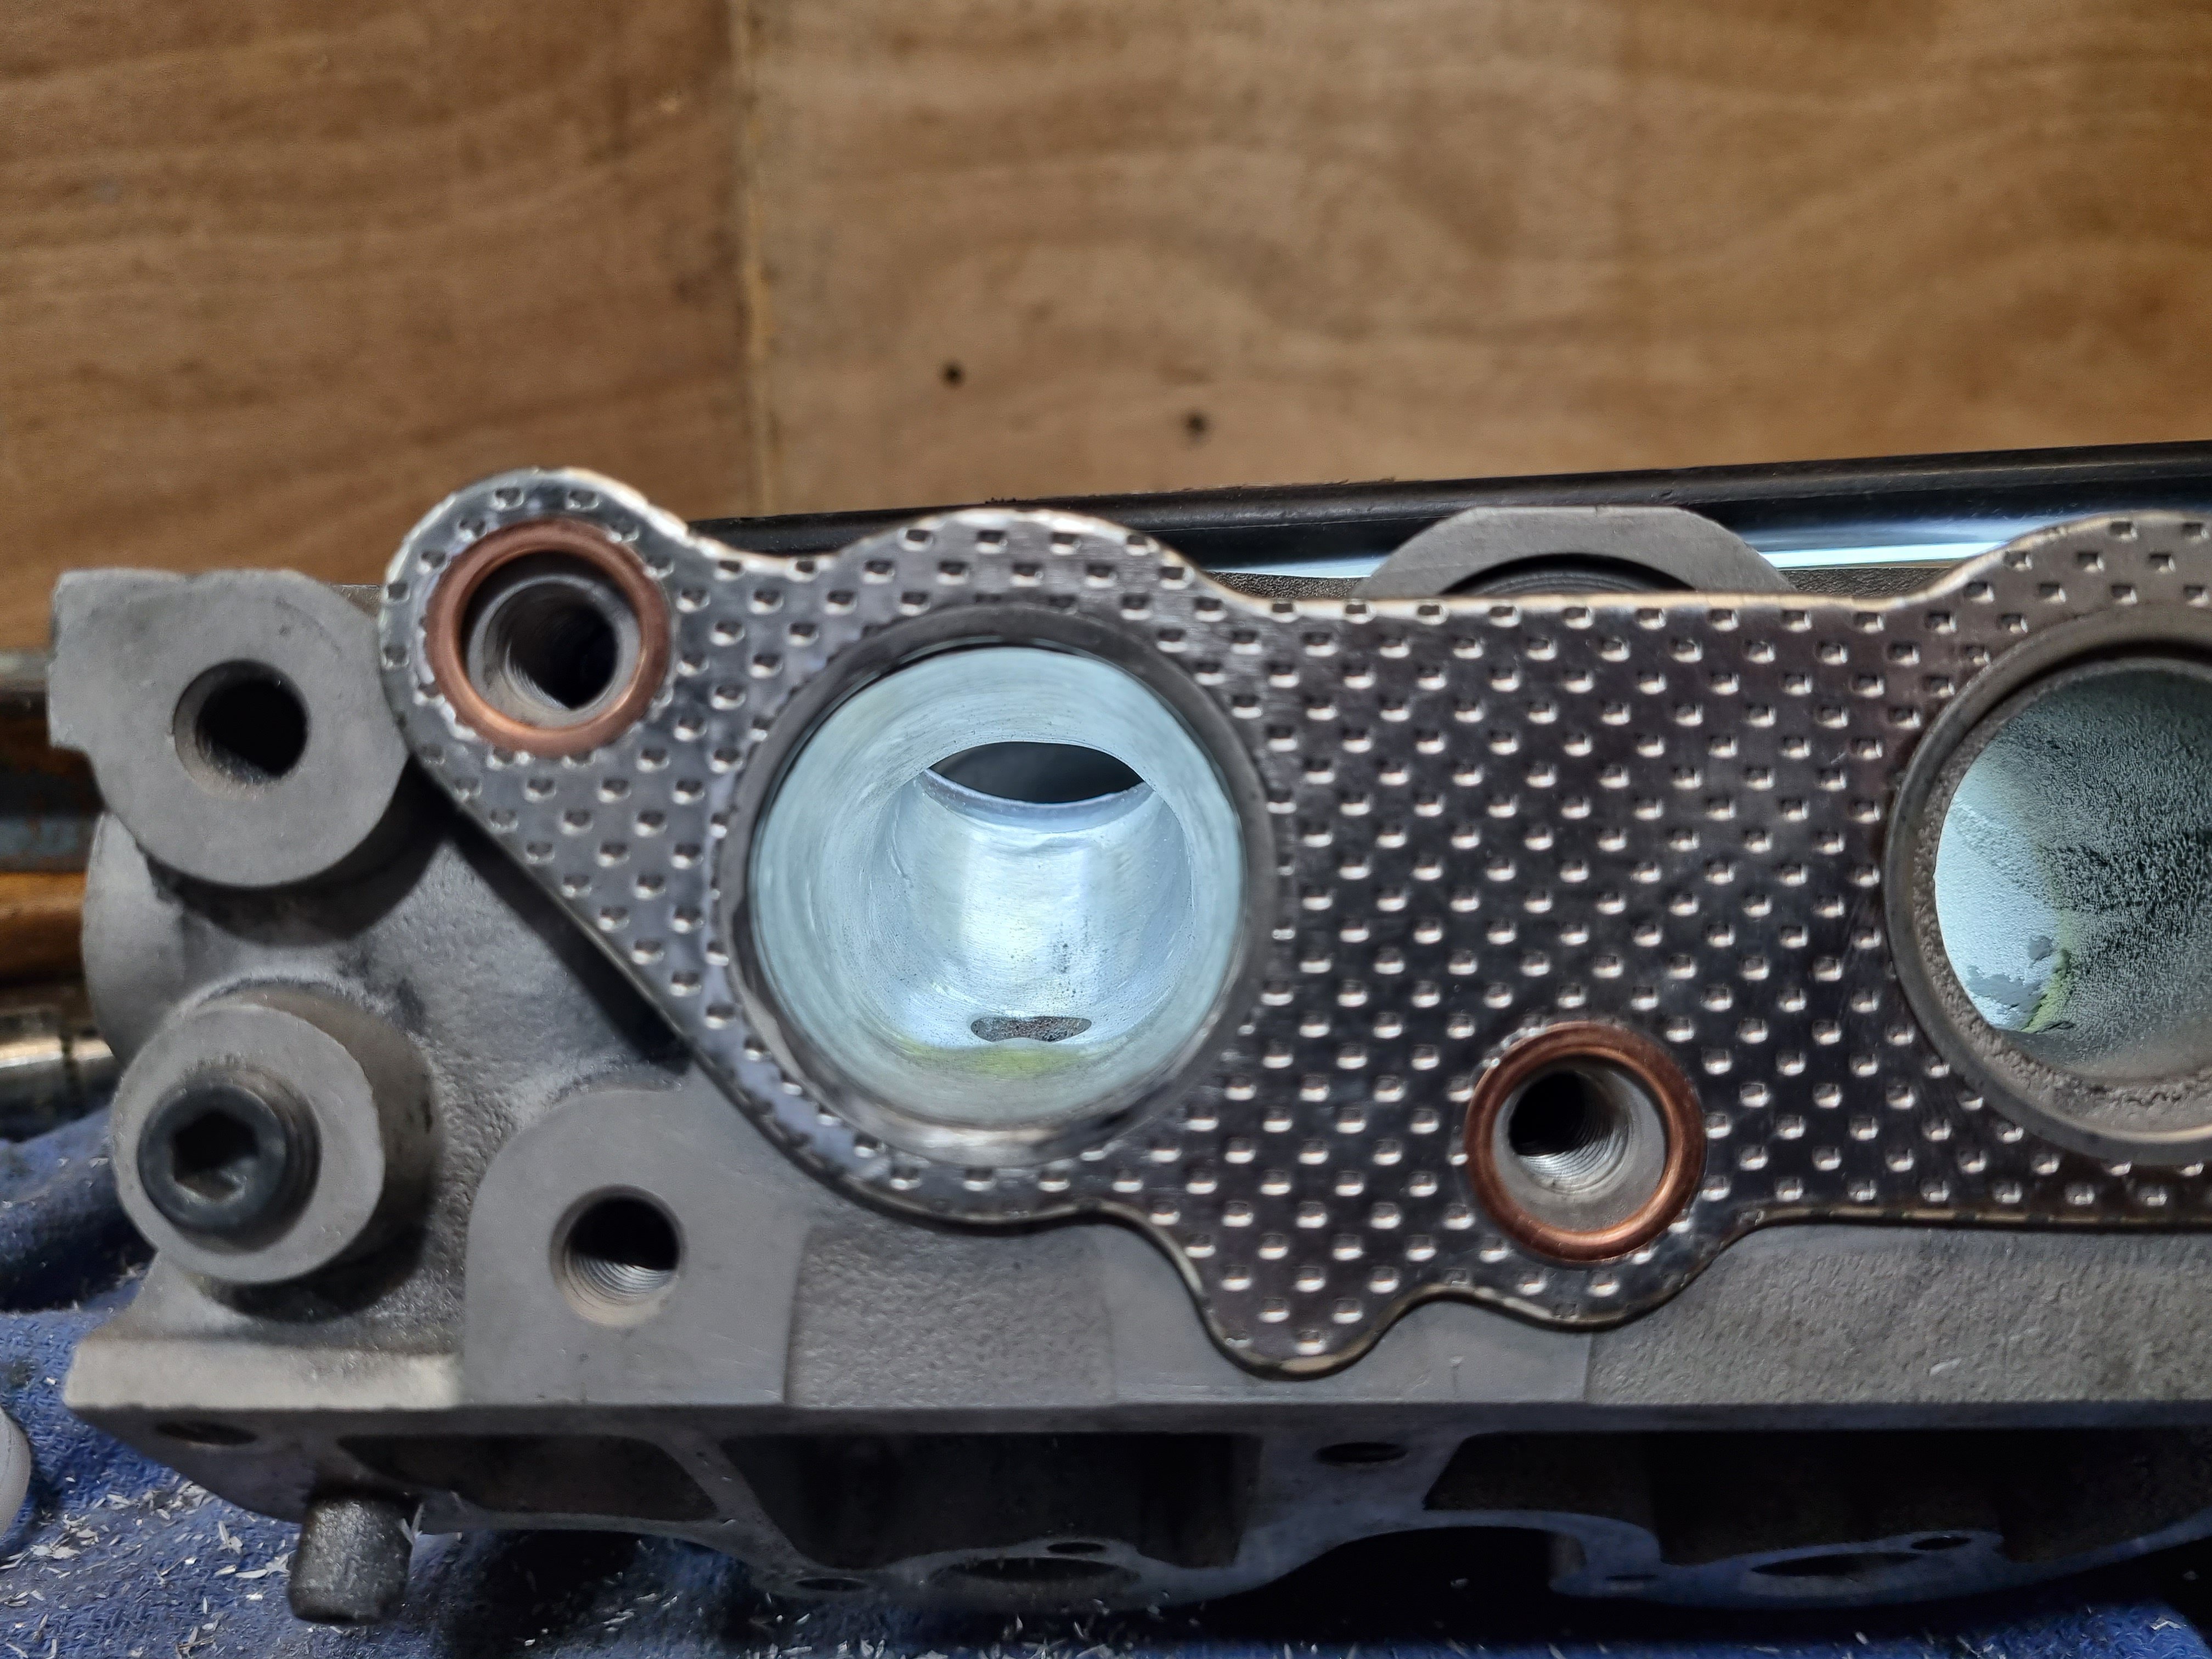
all finished. was a pretty messy job and took two days but its done now. i removed 400g of material from the ports. it will be interesting to see if it flows any better. ill get it back on the flow bench as soon as i can and see how it compares. fun fact, i ported one of these heads about 25 years ago and i cant remember how crazy i went with it (im guessing not very) but it made no difference to the motor at all. tbh that motor was a stock turd with stock intake and exhaust so porting it was a fucking waste of time but that was the style at the time. i think i planed the head to try to raise compression but that's a waste of time too given the stock piston design. ANYWHO, thats done. i took the exhaust from about 31mm to 37mm and removed a fair amount of material from the bowel, the intake went from around 31 to 38mm with the same stock removal from the bowel area.
2 points
-
Got some matt clear on it and kindof reassembled the front and various bits like the wiper mech. Bear in mind there is no wiring loom in there so it is not all that. Still it looks pretty great.2 points
-
Wasnt it an AI that wanted to nuke the russians? And right before the missles launched they asked it to play noughts and crosses with just one player. where it learned that nobody would win, and it aborted the missle launch? I feel like it's name was Jacob?1 point
-
Yep, Wargames Best hacker movie of all time1 point
-
Is that from a movie in which a pair of American teens inadvertently access NORAD and almost start WW3?1 point
-
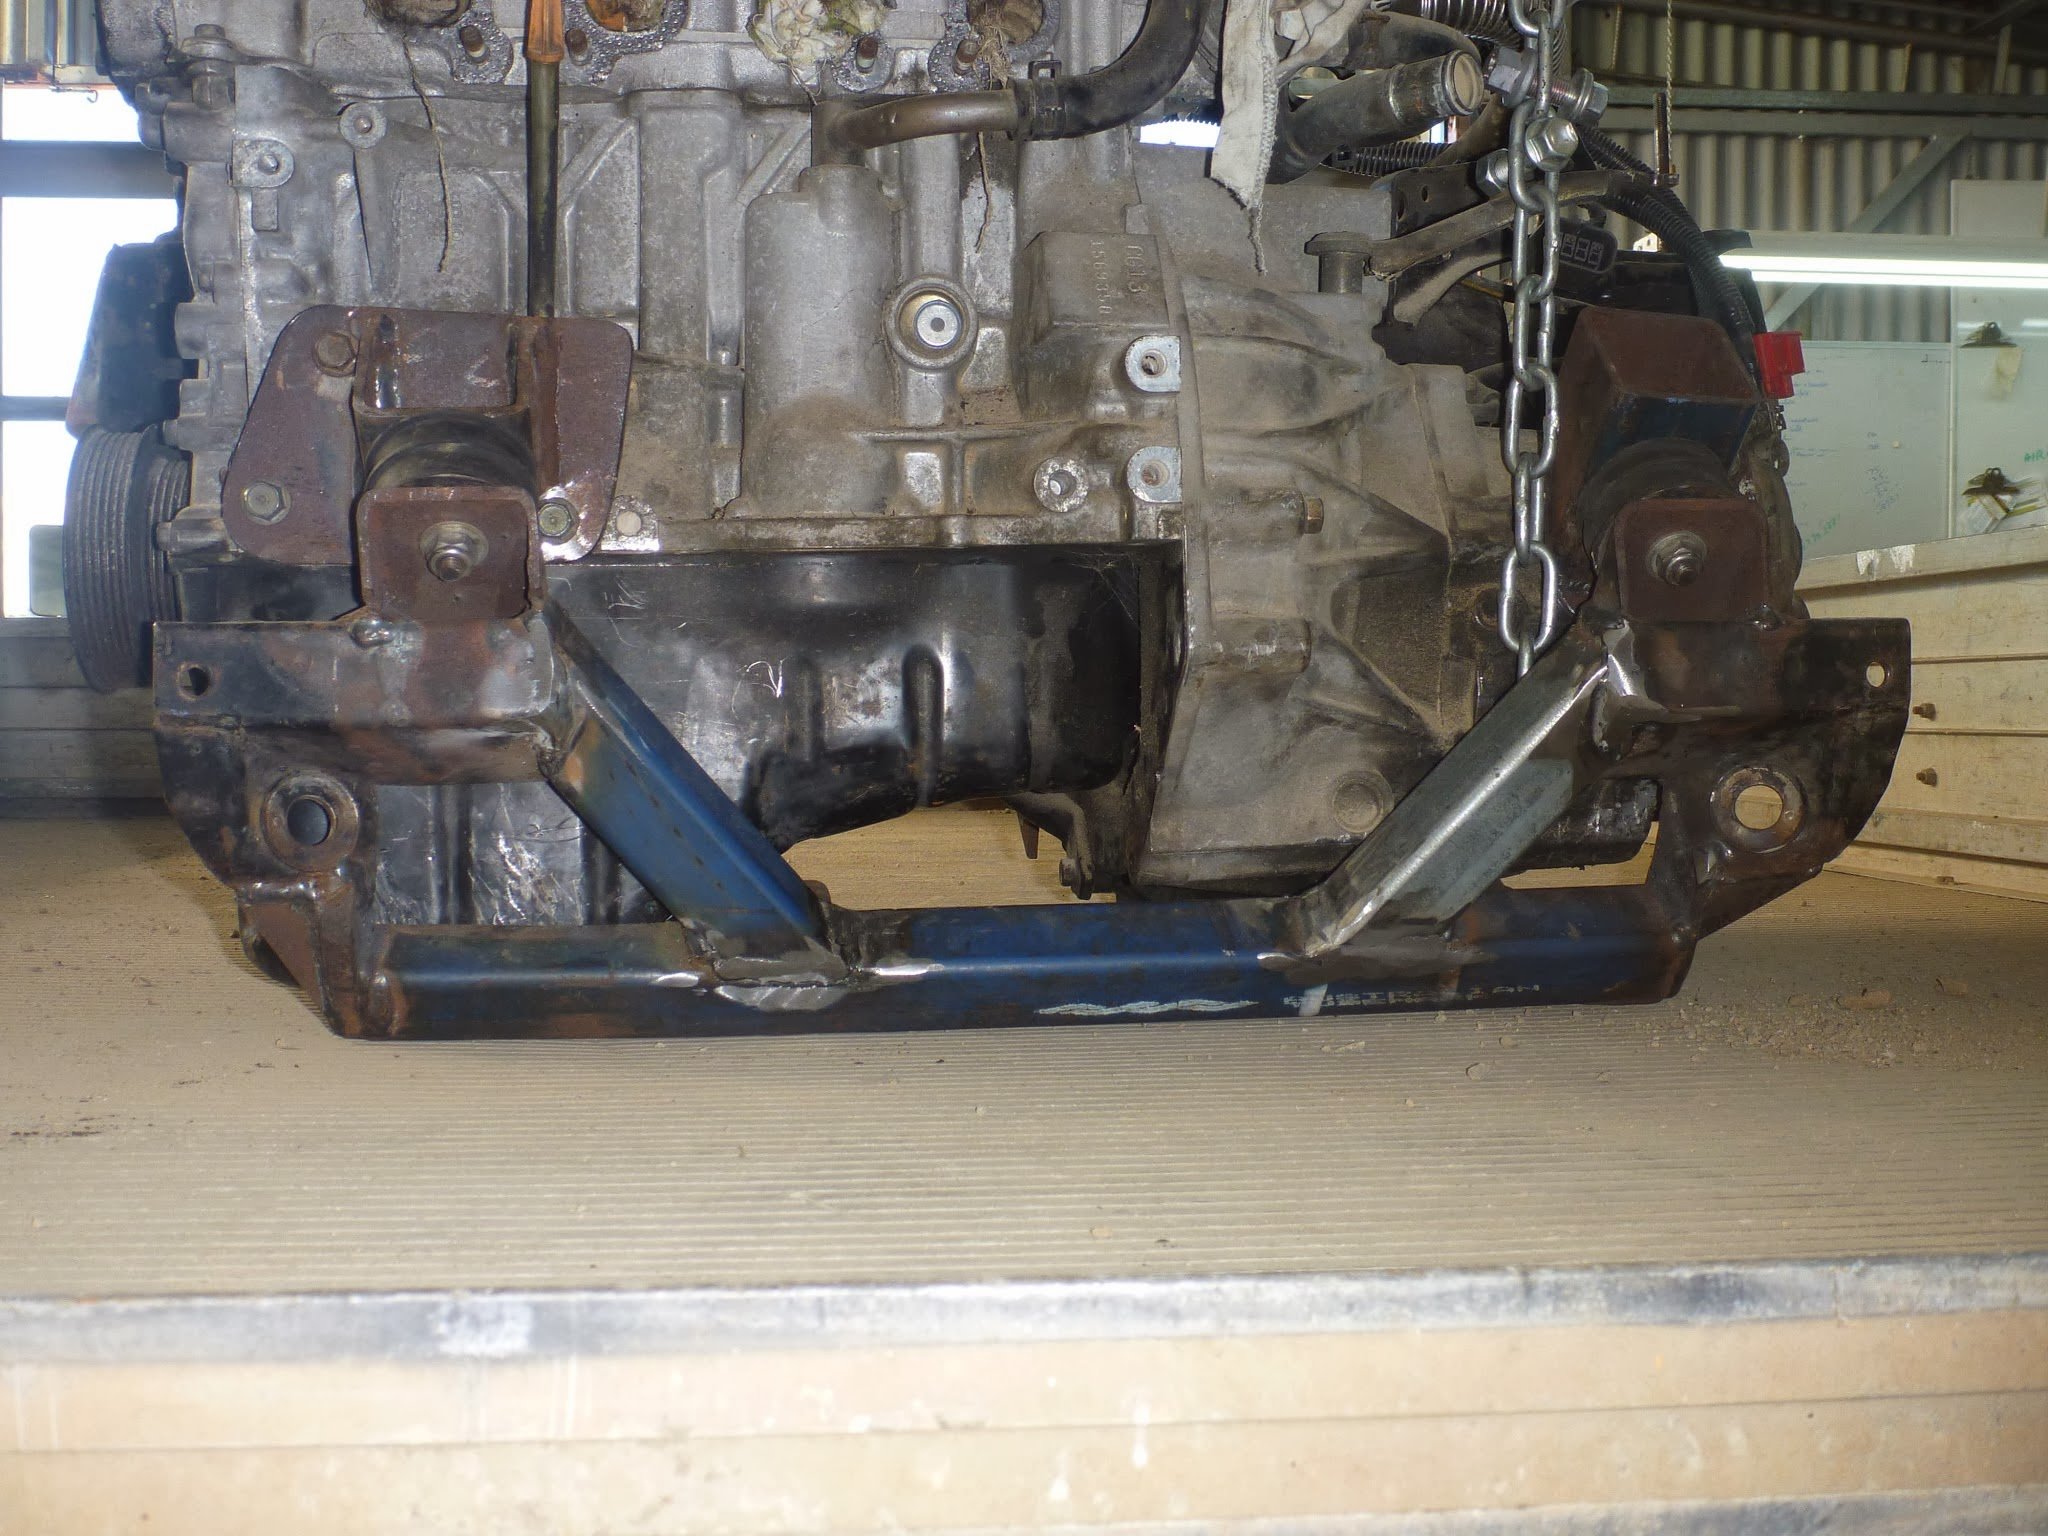
I was looking at your subframe work, I reckon it'd be a close thing but you might get the frame in. When I did mine the rail on the sump end goes in between the sump and the gearbox and shares space with the exhaust, means that its not much lower than standard. Trouble is the rail uses the space where standard micra extractors go so the exhaust needs to be custom.
1 point
-
It's a profile gauge1 point
-
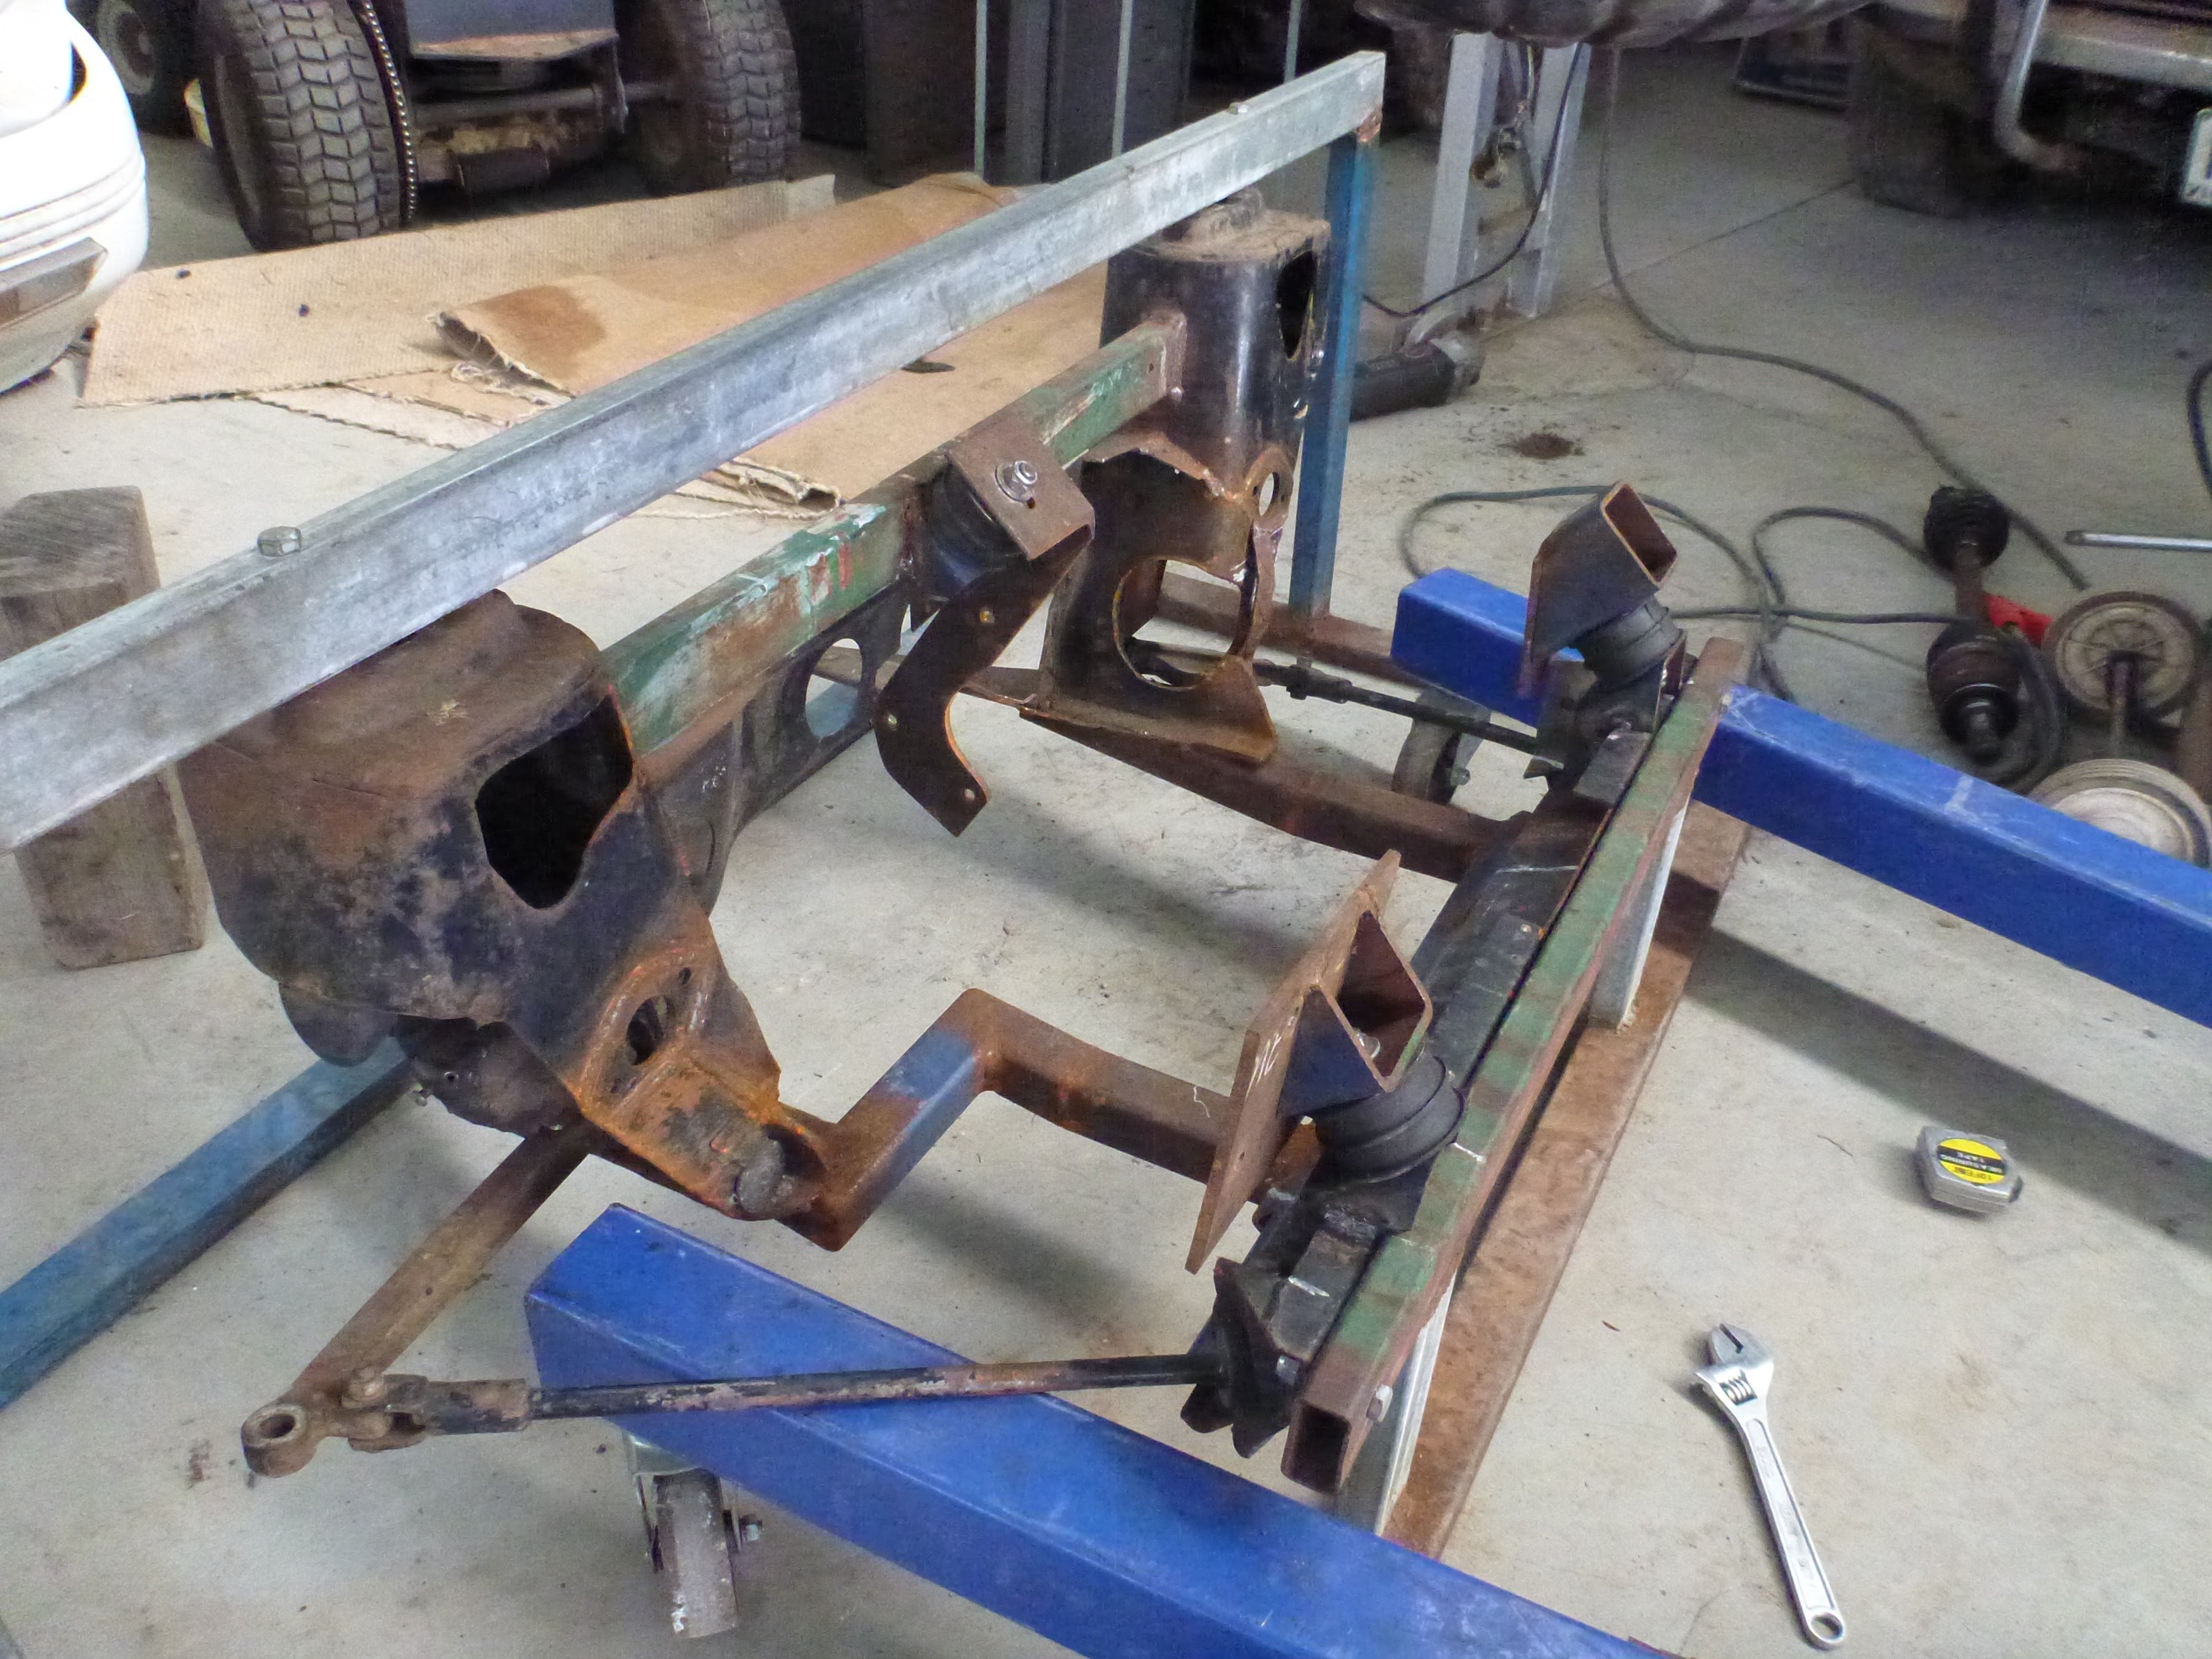
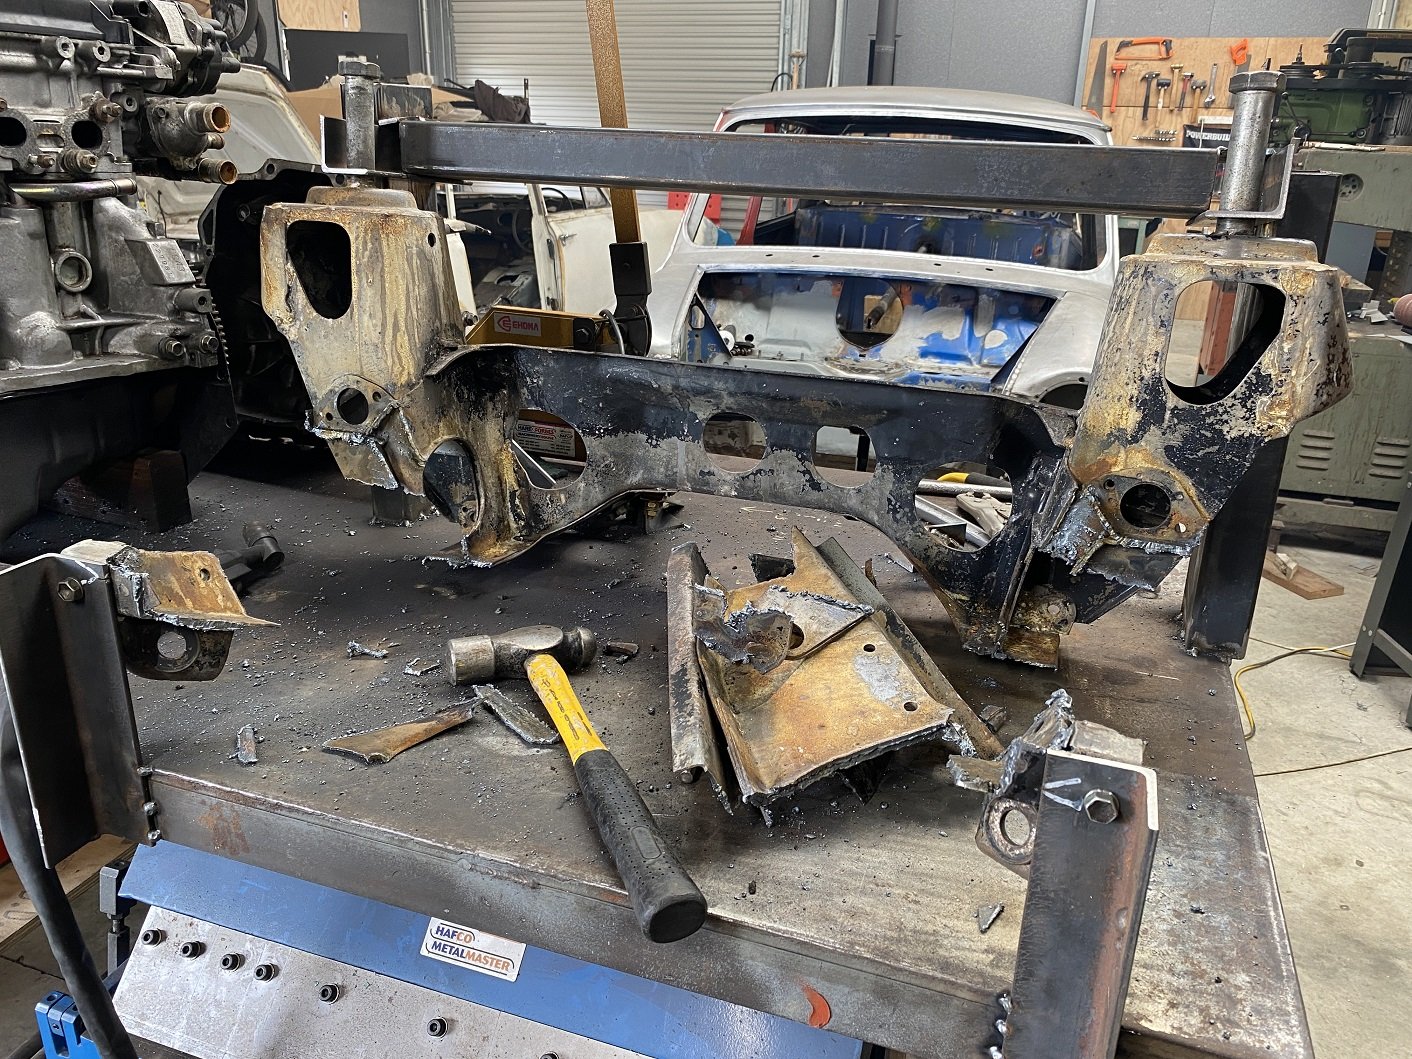
I thought I'd do some work on the poor neglected mini. I took out the subframe and welded a jig for it on my steel bench so I could cut it up and weld new bits in and have it still bolt into the car. I used the plasma cutter for the first time in years and years. After cutting it up I realised that I'd mounted it too low to fit the engine in the subframe while it's in the jig. Le Sigh. I guess I can work around that by fitting the engine in the car to ballpark where stuff needs to go then use the jig for the welding. I've since added some tabs to the jig to prevent the front mounts from turning on the bolt. Right now, the big bit of the subframe is in the paddling pool full of citric acid to clean it up a bit.
1 point
-
Hey man, client's design, I just machine to drawing.1 point
-
With the wipers all sorted the next job on the list was to re-instate the glove box. Chucked it in for a quick test fit to make sure it cleared my new wiper mechanism, and the good news is that it does. The not so good news is that while I was mucking around with it, I noticed that the almost 60 year old cardboard material was crumbling with just a light touch. Scratched my head for a bit, then decided to chuck on a few thick coats of water based paint as a binder. Left it in the sun till the paint went off and no more flaking so I'll take the win. To give it a fighting chance I thought I'd line the bottom of the interior with something. Rummaged amongst my stash of junk and found a roll of that PVC based drawer liner stuff left over from our kitchen reno. Shaped a bit to line the bottom and chucked the box back in. Looks pretty good and the drawer liner stuff stops things from sliding around, so double bonus. A bit hard to get a decent photo with my potato camera, but here you go:
1 point
-
After 20 years of sitting under a house, dug this mk1 out with a few surprises... What do you reckon?
1 point
-
How important is your steering to you? That should answer your question.1 point
-
Did this bit. This bit is supposedly where it got a nudge and there was half a tin of bog on there. It was weird because under the bog there was like a 5mm push in that basically wasnt even worth worrying about, but also a 'welded' patch that essentially came off with a screwdriver, and a strip of holes under the back sill that had been completely ignored. Commence sorting; Smashed some more black on those two rims while I was waiting for coats to dry, plus pottered with some other stuff. The tyres are the same ones that were on it when I sold it so I think it will be getting some new feet. Any suggestions in a 175/70-13 ?1 point
-
ive sorted most of the clearance issues with the dash 10 crossover pipe but until i get a 4M sump i cant finalise everything there. so now its time to get on with the head. i needed to mock it all up again and remeasure everything because its been so long since i did it the first time id forgotten everything. so i put it all back together and checked valve piston clearance again (have never checked it with the actual oversized valves so it was worth doing) just to be 1million percent sure it was all going to play nicely together. no dramas with all that so that's good. what is a problem is the clearance between the spring retainer and the valve stem seal. currently there is negative 2mm which is about not enough. i need to machine the valve guide pedestals down so there is a gap between the back of the valve retainer and the stem seal. i reckon 3mm should do it. ill have to shorten the valve guides as well but that super easy. now i had reestablished all my measurements (and written it down this time....) all that's left to do is to do a rough and dirty port job on it. no sciences were harmed in the making of this porting job, i used the "hog it out a bit and hope for the best" method which has been used since the dawn of time. to some degree of success..... i actually have flow bench numbers for this head in totally stock form so once Ive finished butchering it ill re-do it and see if its made any difference.
1 point
-
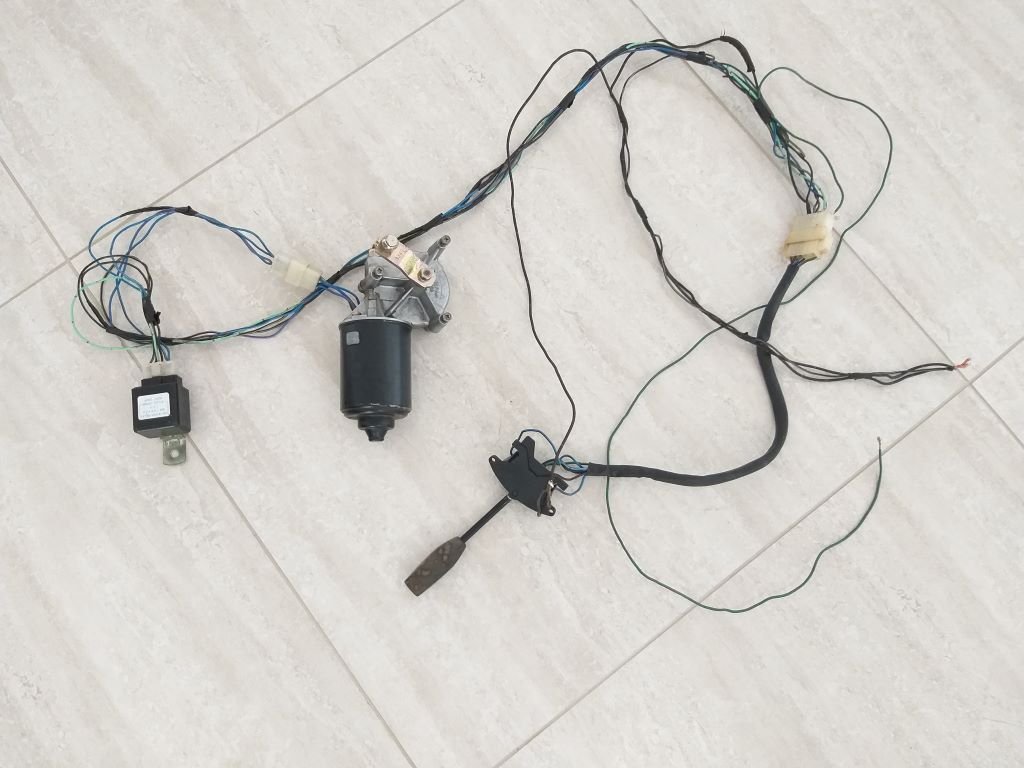
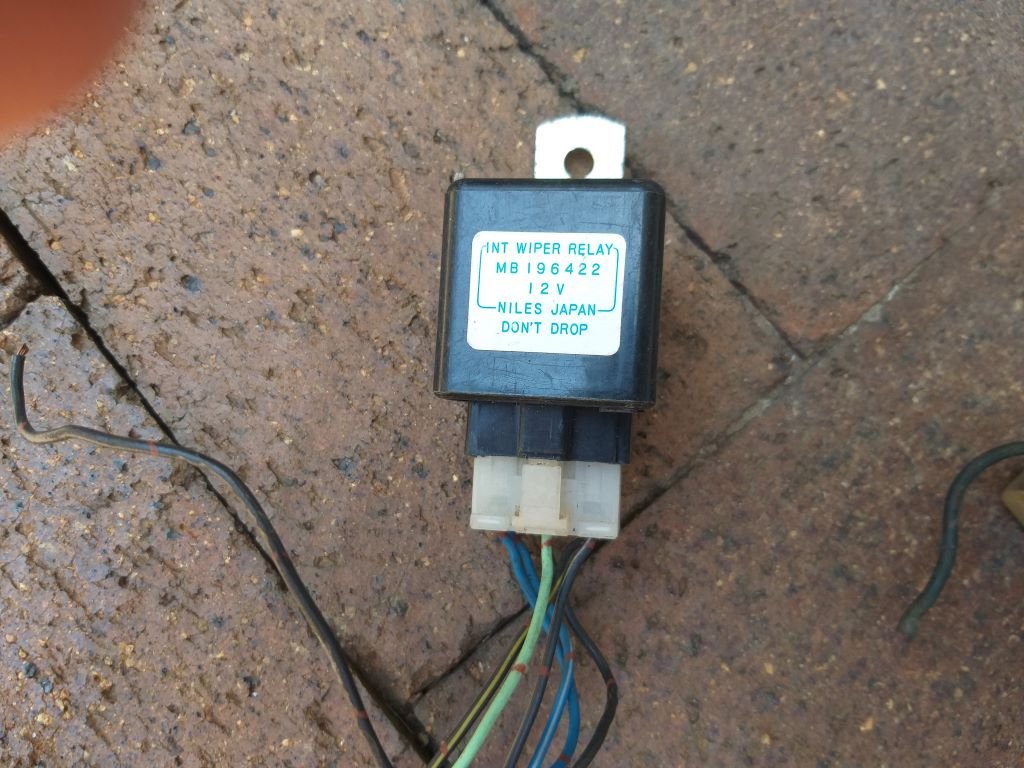
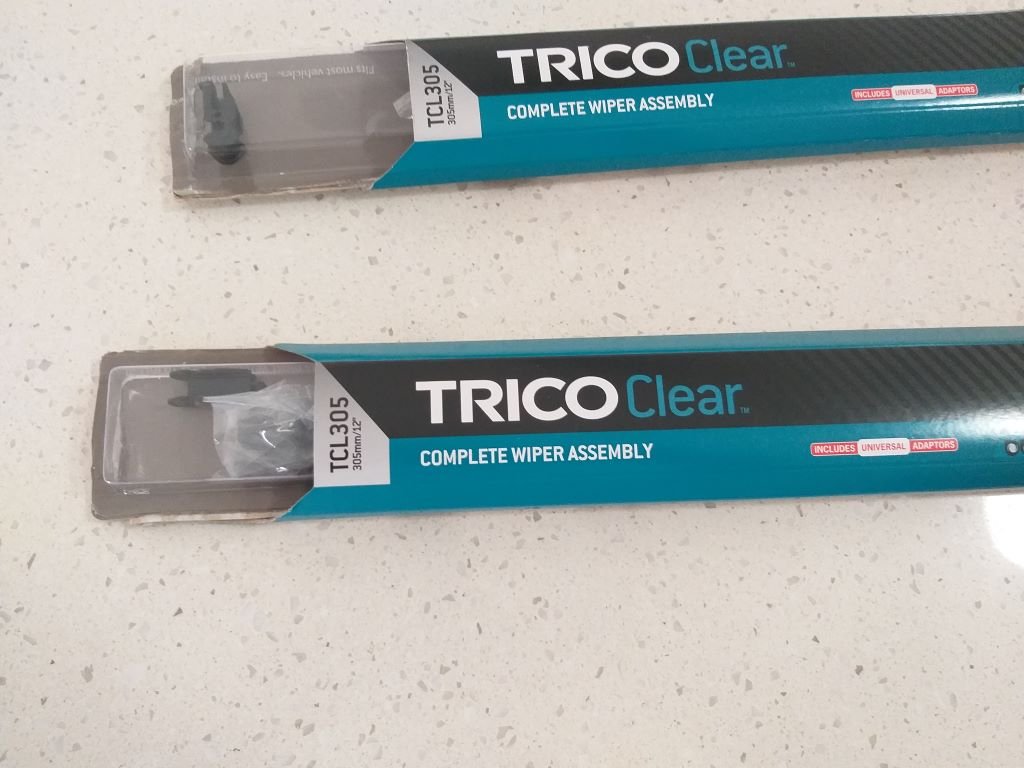
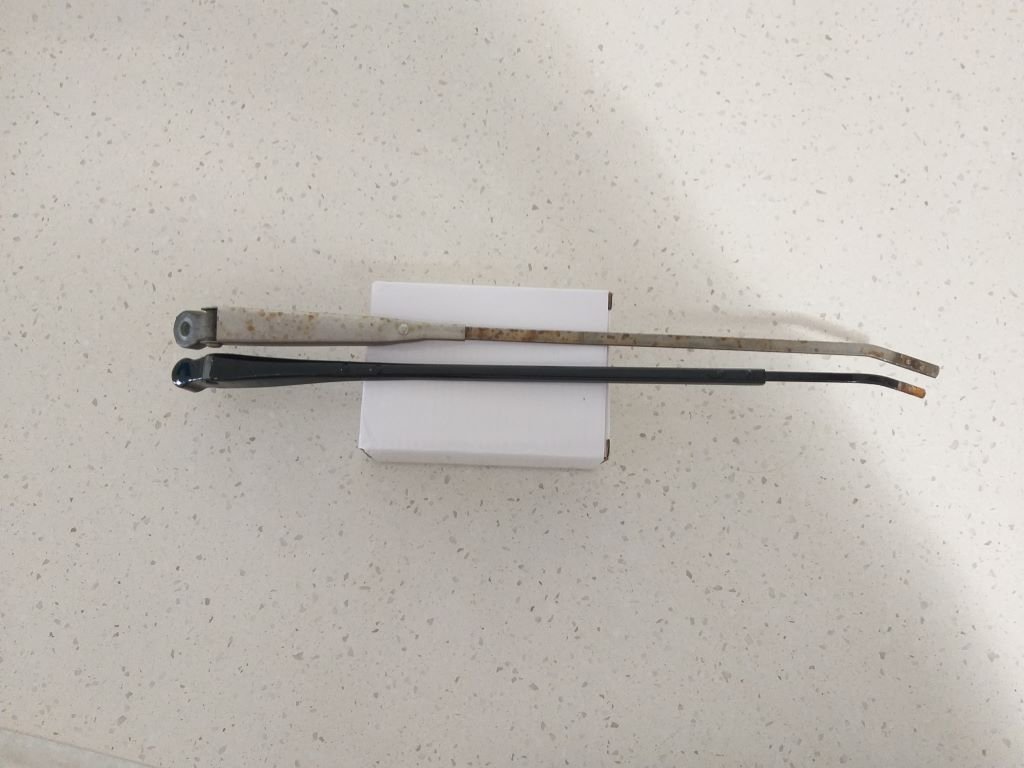
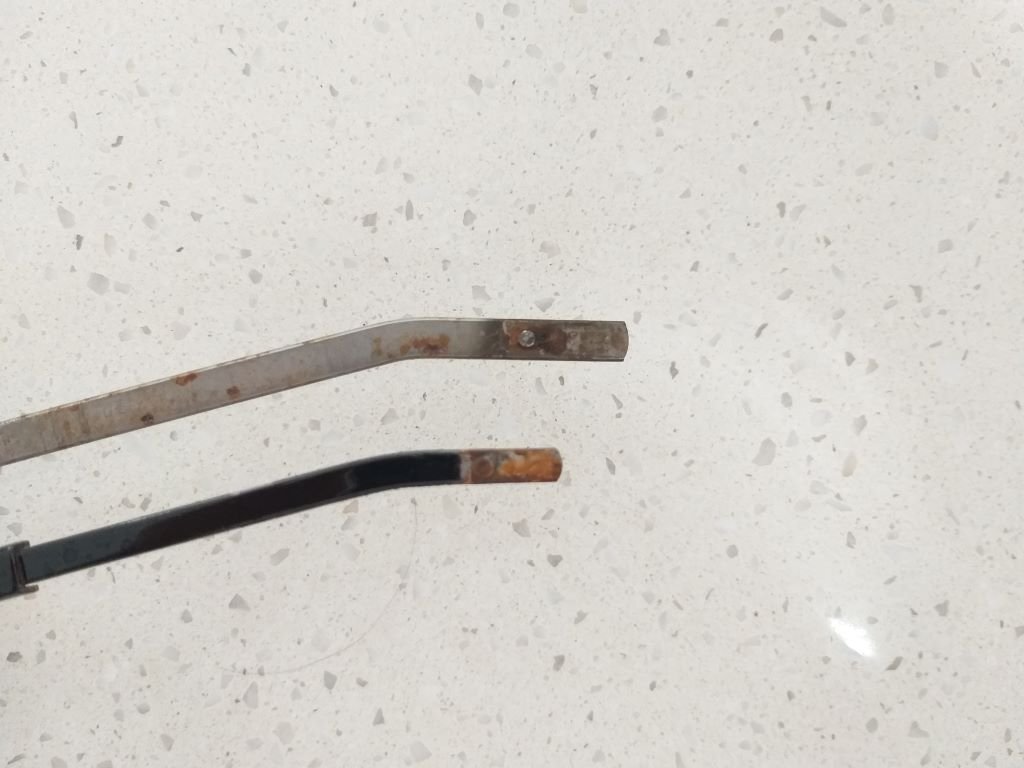
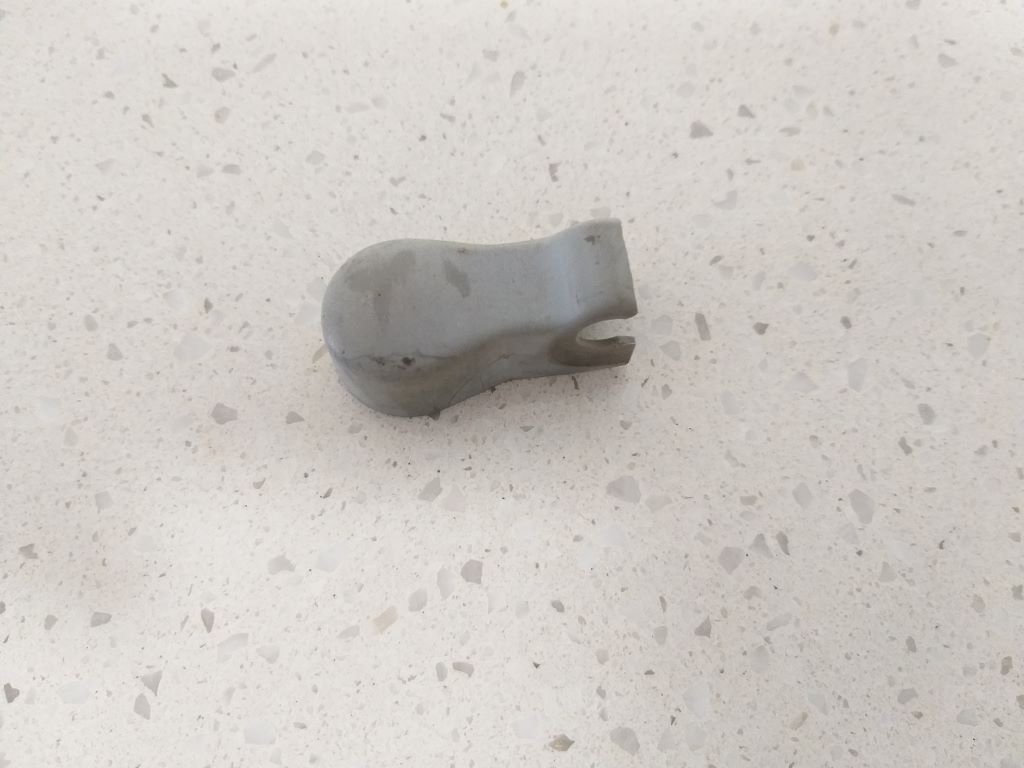
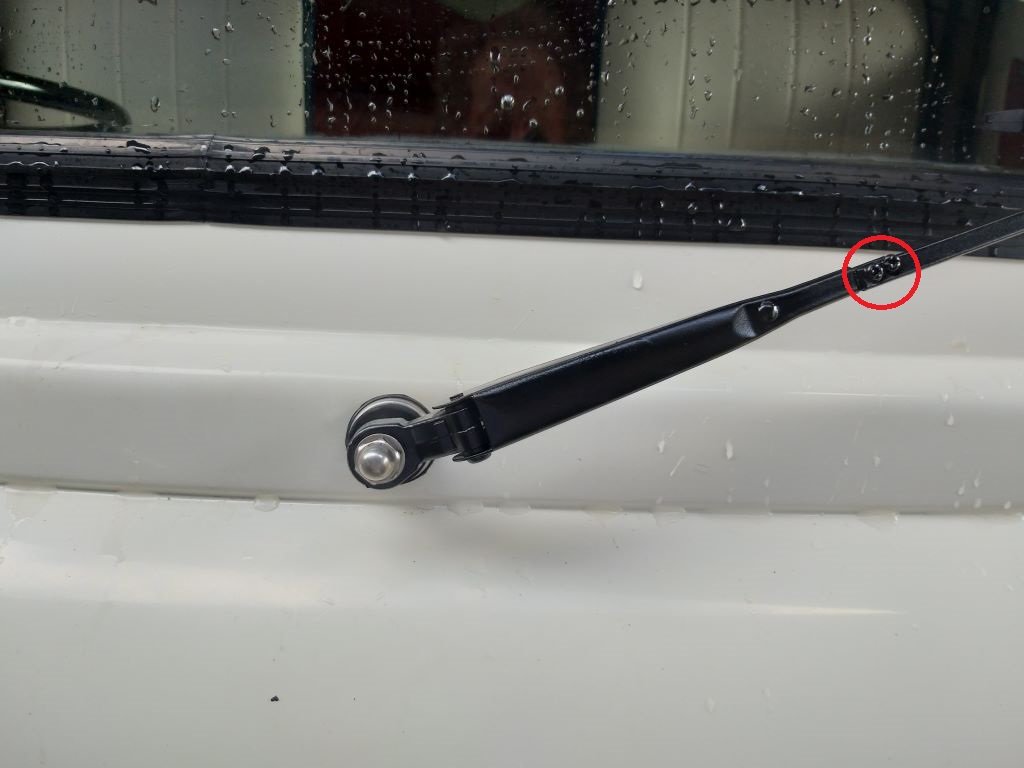
In my last update I mentioned that whilst I was messing around with a new wiper setup, I was going to attempt to get the park function working. Whilst I got some really good advice from a number of oldschoolers, it turns out that whilst most wiper motors have a "normally closed" park switch the one that I am using has a "normally open" park switch which makes things slightly more complicated for someone with my barely adequate wiring skills. I even tried stripping the wiper circuitry and components from the donor van that the wiper motor came from. But upon testing the system it appears as though this little Mitsubishi box of tricks has given up on life: To be fair to it, the label specifically states "don't drop" and since it's been kicking around the shed floor for a few years I can't blame it for packing a sad. I do have another wiper motor with a "normally closed" park switch in stock, but unfortunately it is bigger than the Mitsi unit and just won't fit into the available space, so the long-term plan is to source a smaller unit that has a normally closed park switch, but for now I'm just going to live without the park function. So with that episode behind me for now, I cracked into completing the rest of the wiper setup. On Boxing Day I headed into town to grab some car related stuff at the usual less 25% sale and grabbed this set of 12 inch wiper blades that suit the Mitsi arms: Next step was to nip and tuck the wiper arms as the Mitsi units are about 15mm longer than the Thames ones: The extra length on the arms caused the blades to hit the windscreen seal at the very top of the stroke. So,after a quick bit of surgery and a few coats of the usual satin black, I was able to fit everything up. My hackery isn't too noticeable: The Mitsi arms originally had those little plastic covers for the spindle nuts, but one was missing, and the other was sun bleached and really brittle: So, I ended up fitting a stainless-steel dome nut which looks pretty cool and is kinda in keeping with the vintage: With the drive shaft disconnected I did some test sweeps which looked really good, so I slapped in the modified driveshaft: Chucked some water on the screen and gave it a whirl. I'm stoked with the result. Way smoother than the original Thames setup. I'm looking forward to working on something other than wipers now. Thanks for reading.
1 point
-
Paganism appears finished, the family went out for the day and must have felt that it would be painful to me to waste a day sitting around on my arse and so didnt invite me along. My wife is very understanding. Some wirebrushing revealed even more lovely holes; Ran out of brunox, just as well I have the wiring to get through if I run out of welding to do.....1 point
-
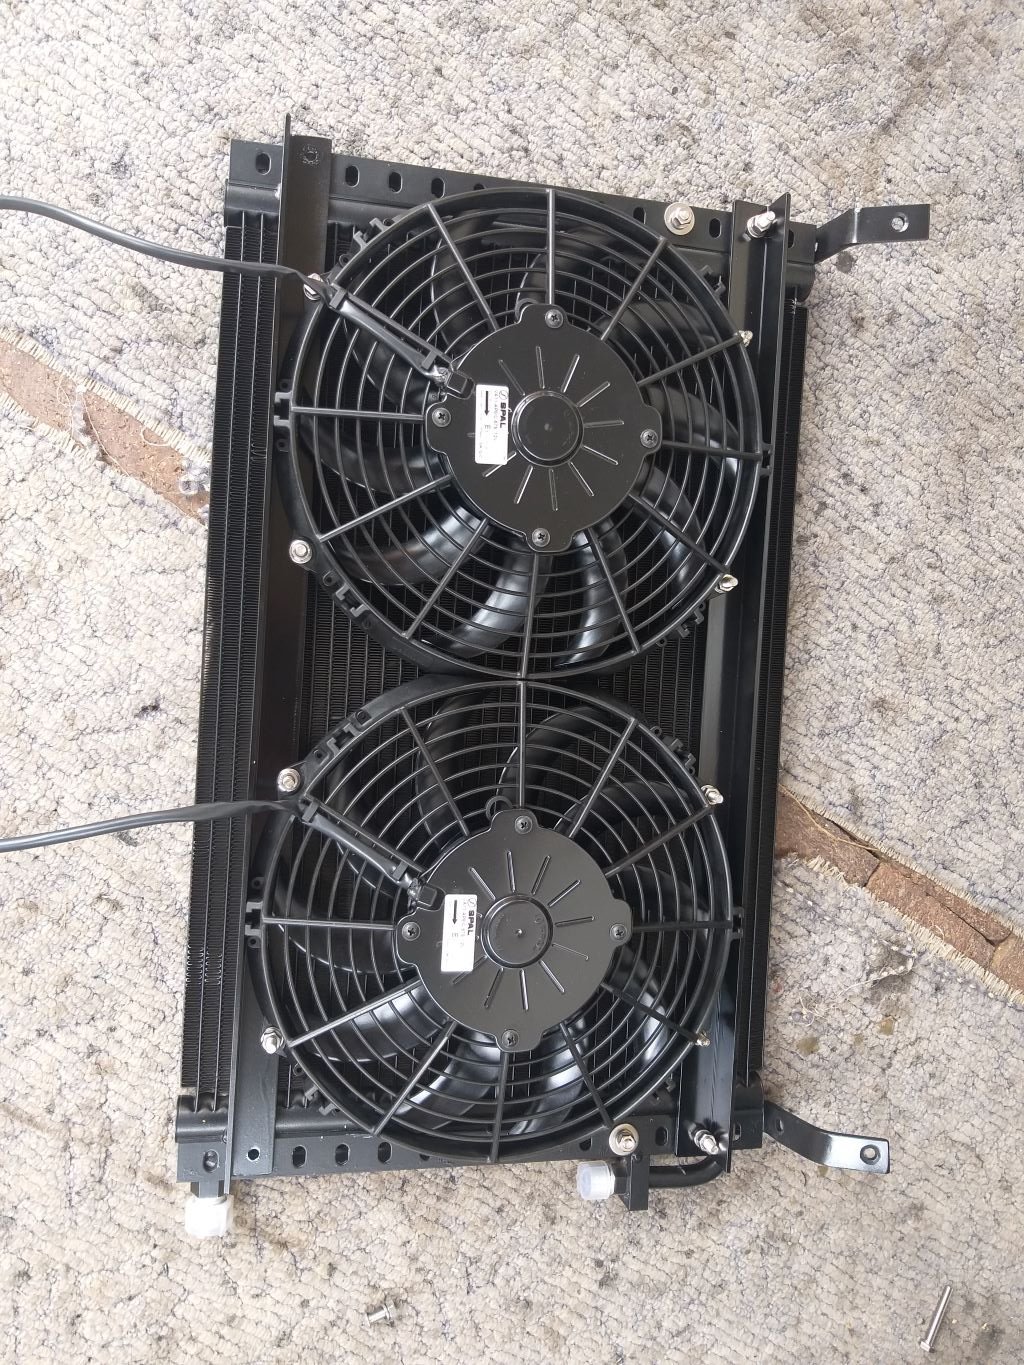
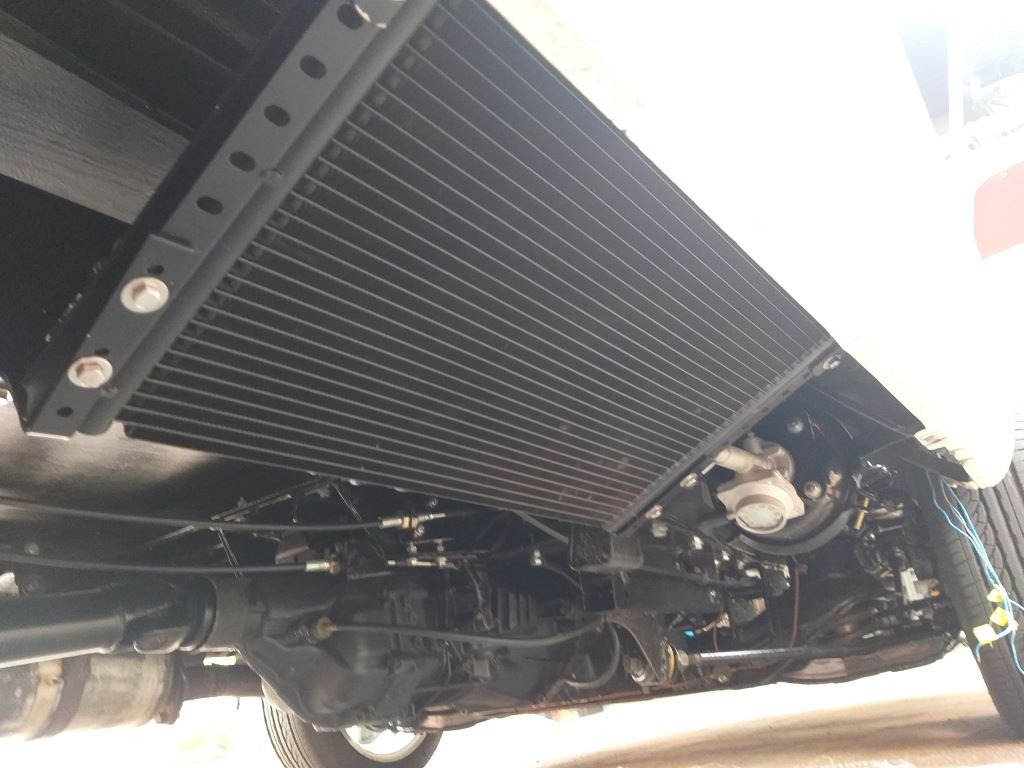
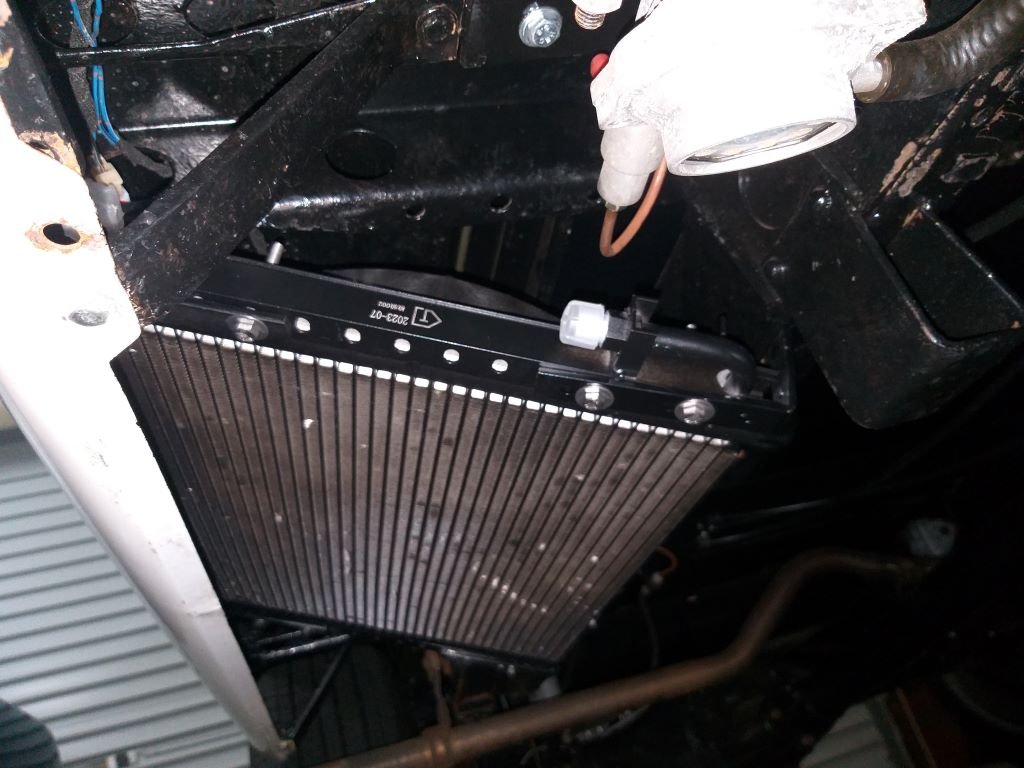
Late last week we did a town run and I was able to source the stainless steel nuts, bolts and washers that I needed to complete the a/c condenser installation. Chucked the freshly painted brackets back on and took one last photo of the condenser in the light of day. Managed to wriggle under the van and wrestle the works into position. Not easy to photograph, but you get the idea. Next up is the mounting of the receiver/drier bottle.
1 point
-
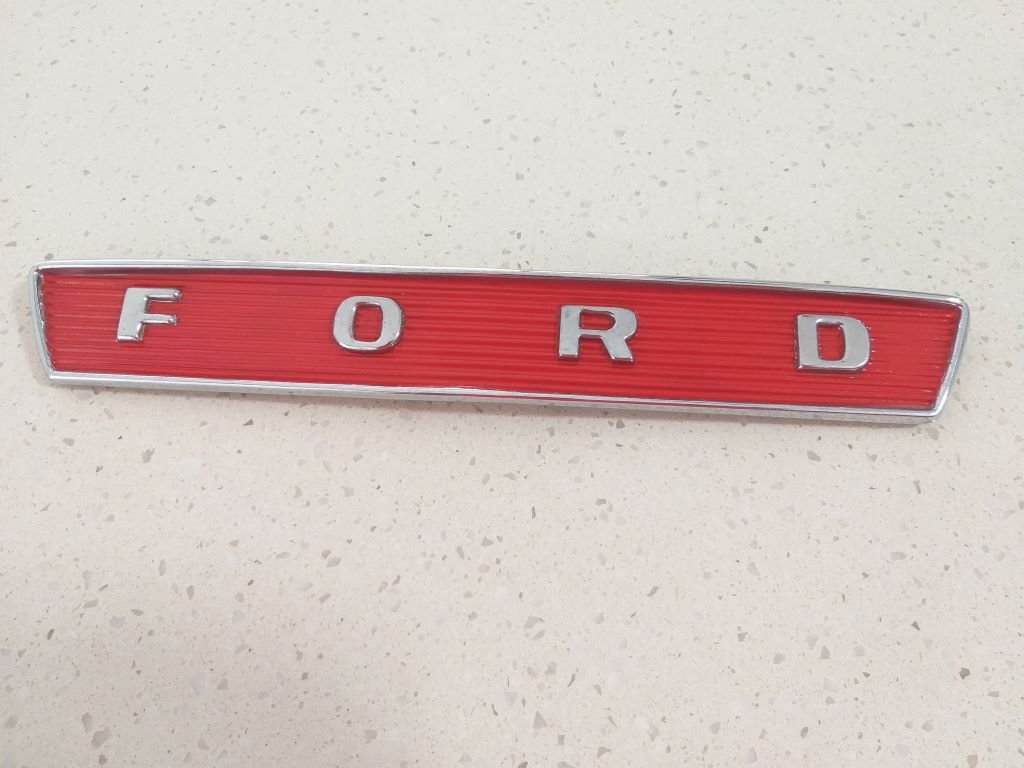
The front badge is a NOS unit so came already painted but the red was a bit patchy and faded from many years in storage. Mrs Flash gave it a fresh coat and it now looks minty.
1 point
-
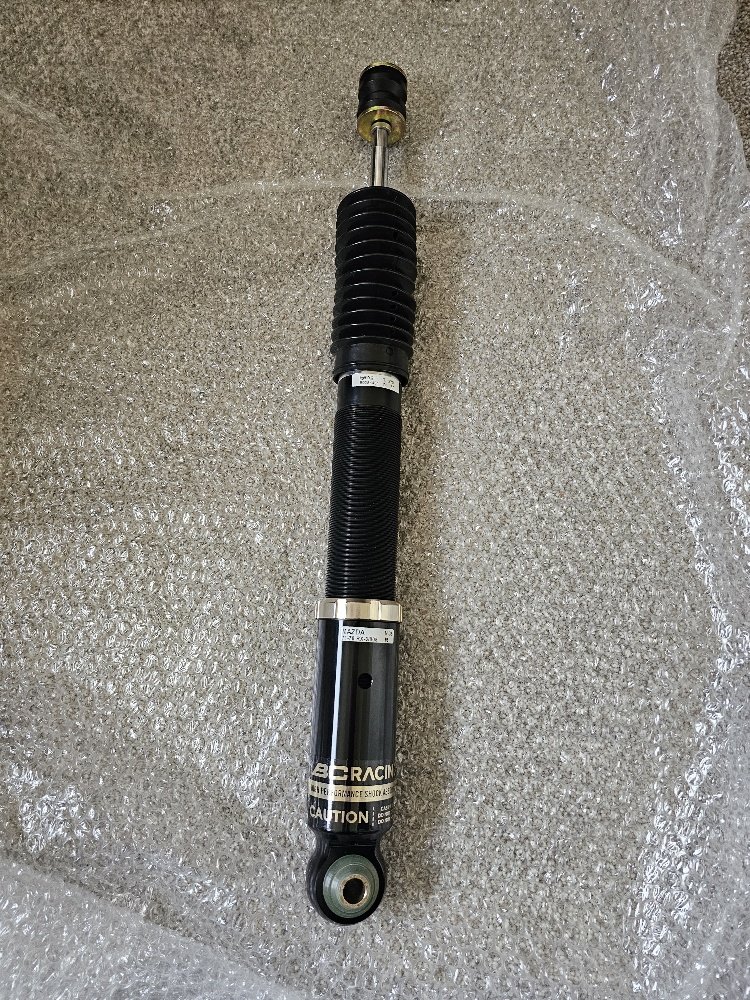
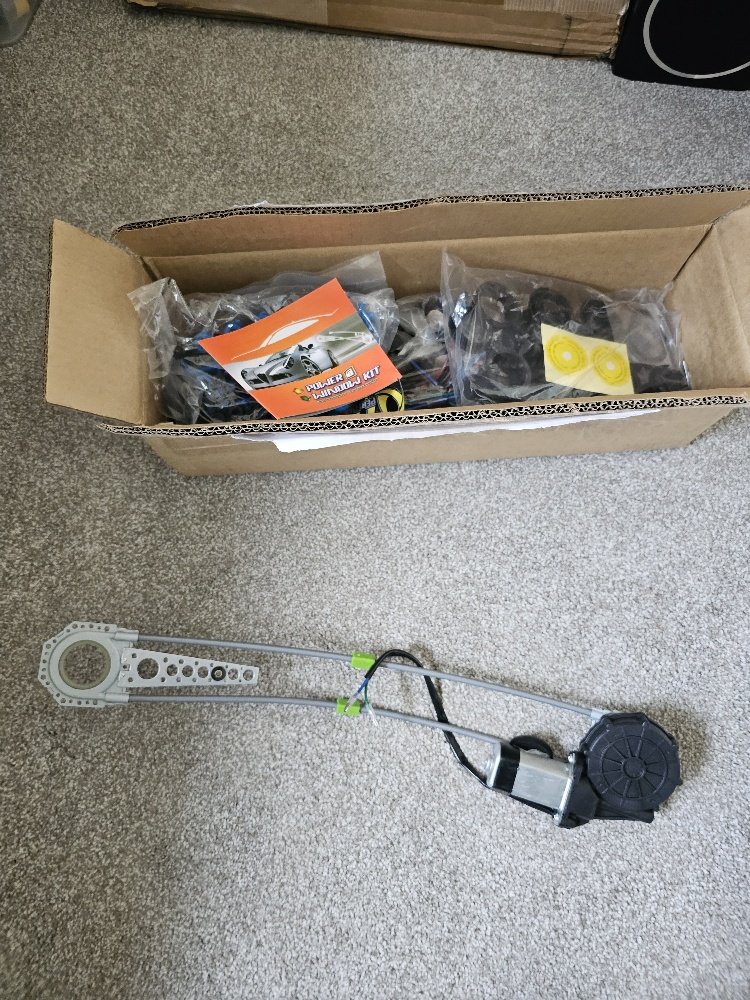
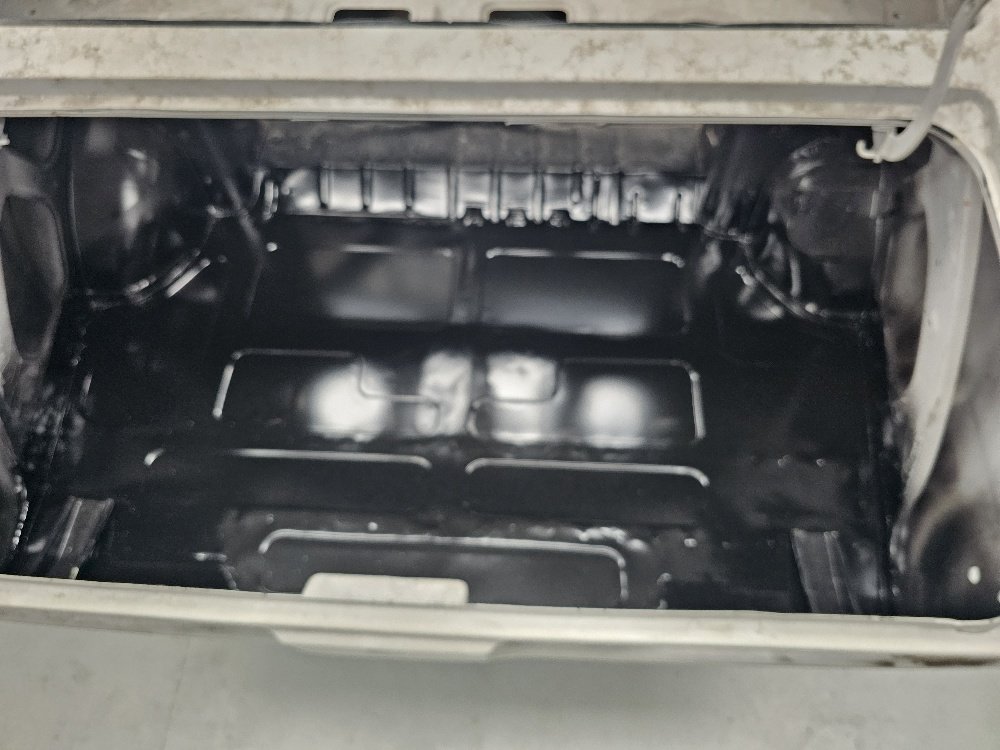
Few more things happening in the background. Marks finished my sump so ill pick that up next week. Azhar has sent me a few more goodies, They got stock of coupe boot lids so i got a new one instead of fixing my old one/s up. Also got some BC Gold damper adjustable rear shocks and the new power front window kits they released, thought why not be kinda handy having electric fronts while im at it! Cars finished at fab now flat boot floor, patches in the engine bay, oil cooler mounted, DBW pedal mounted, couple of other minor jobs done as well as a hidden washer botle setup under the front guard. Will pick it up one day next week when the weather is good and bring it home. Next mission will be to chuck motor/box back in and do all the brake, fuel, oil, water plumbing probably over summer holidays before pulling down for final time for paint.
1 point
-
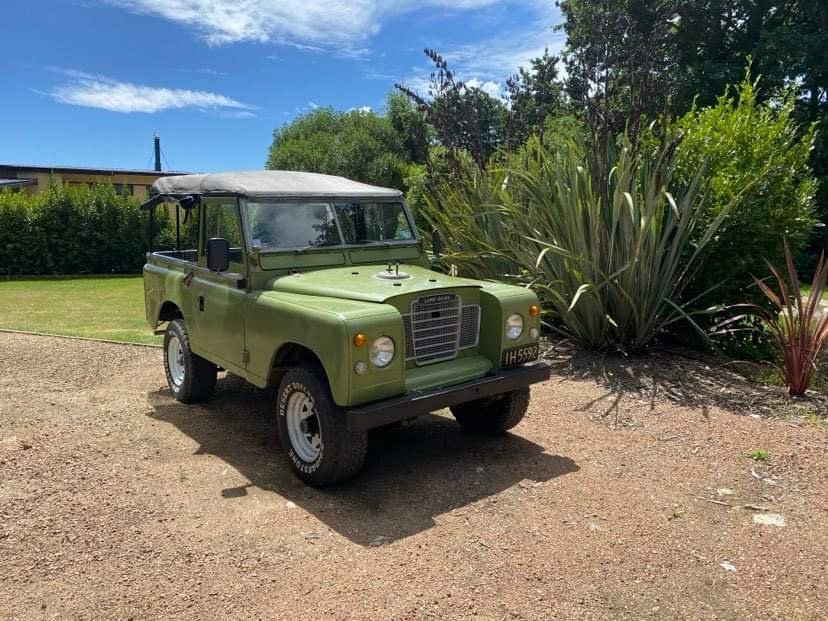
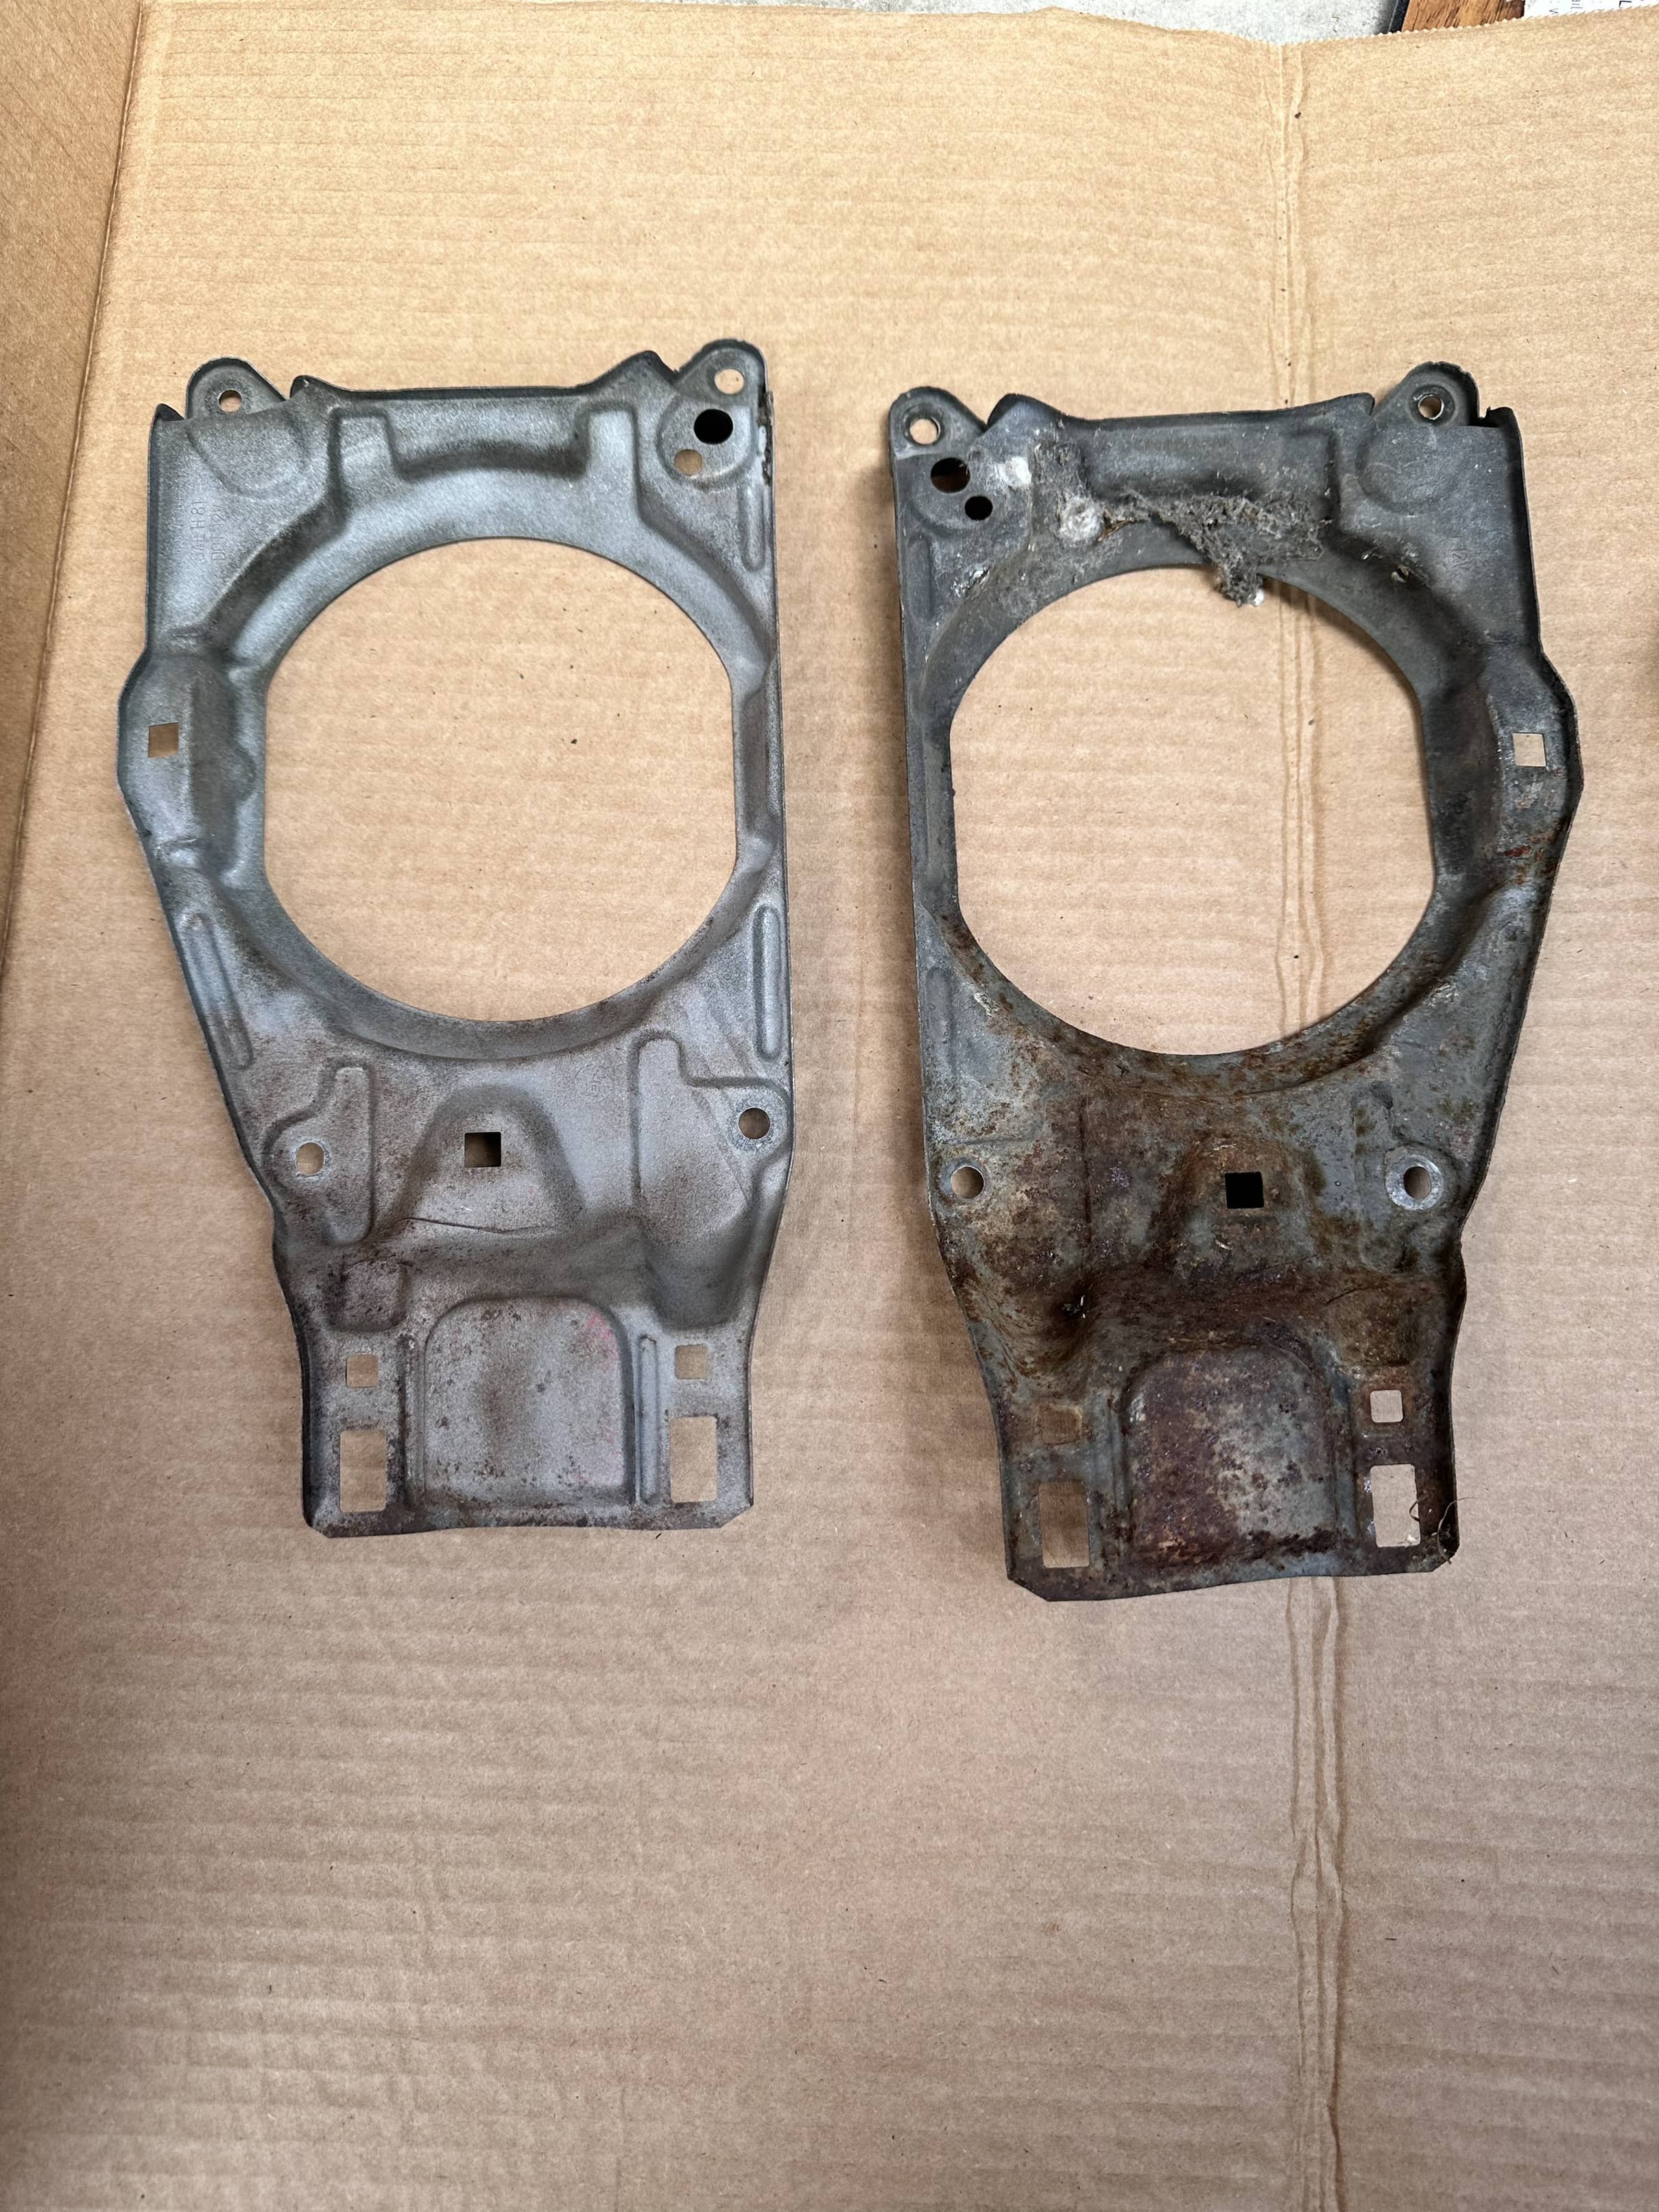
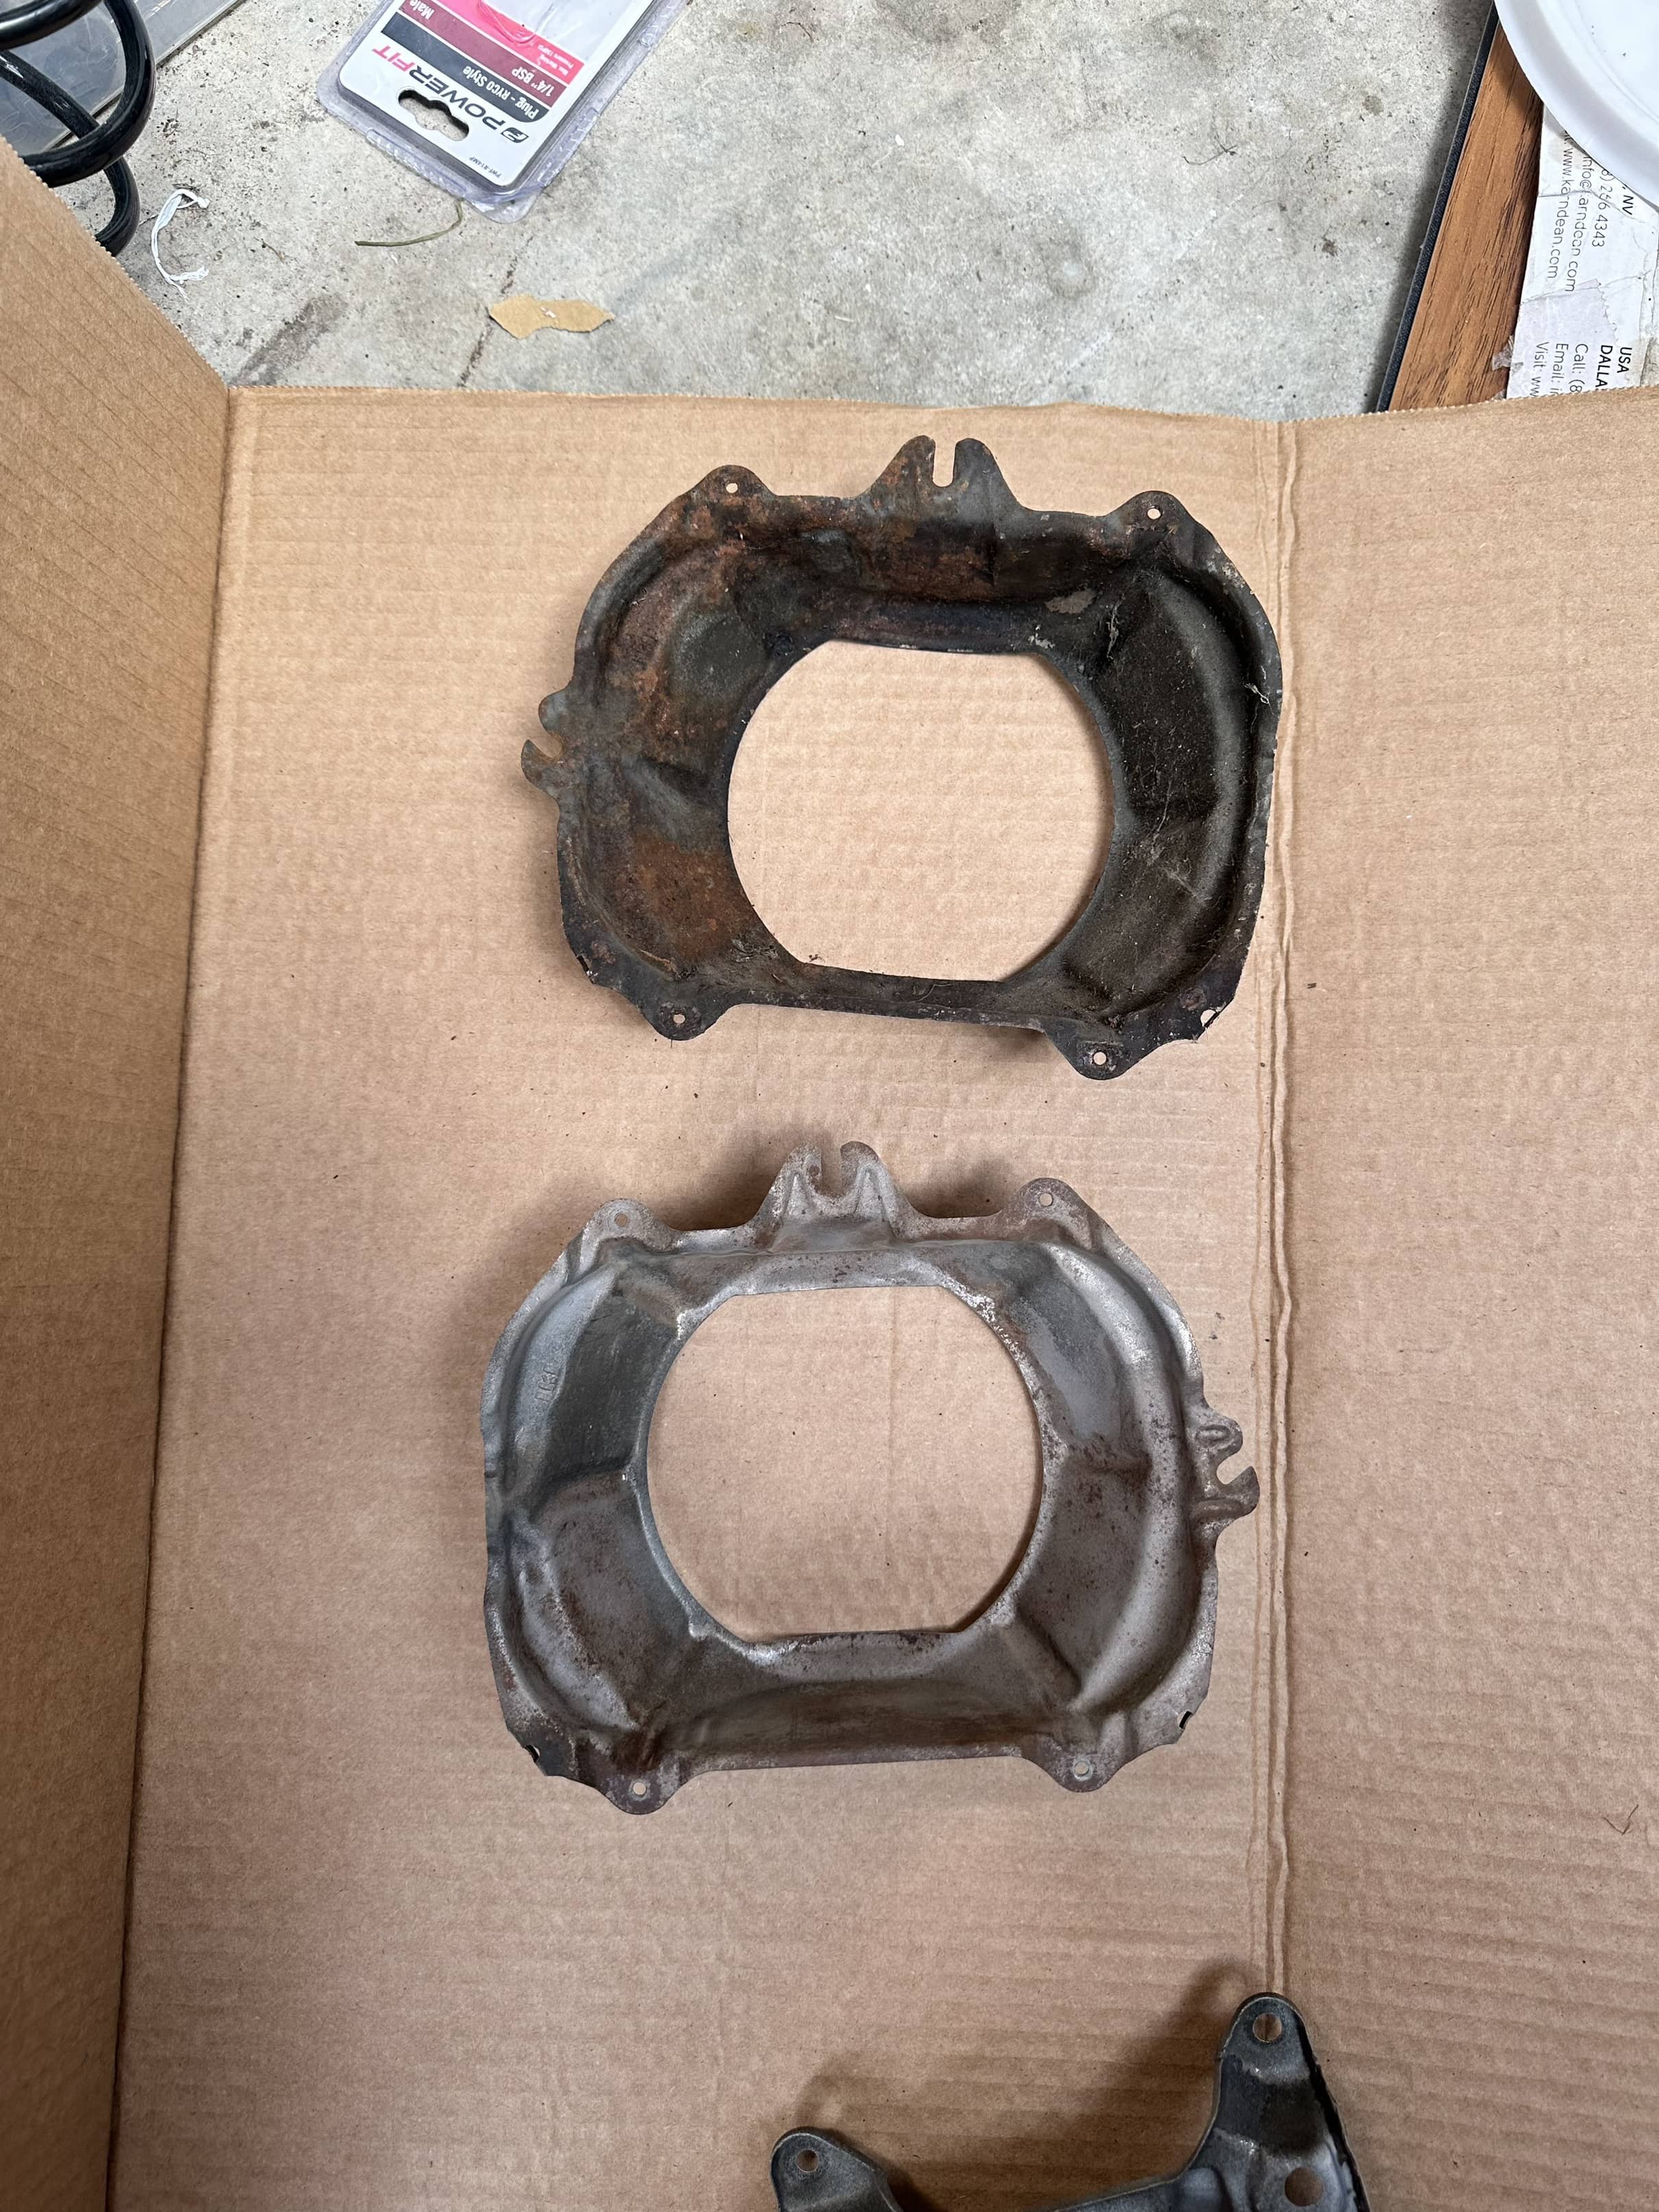
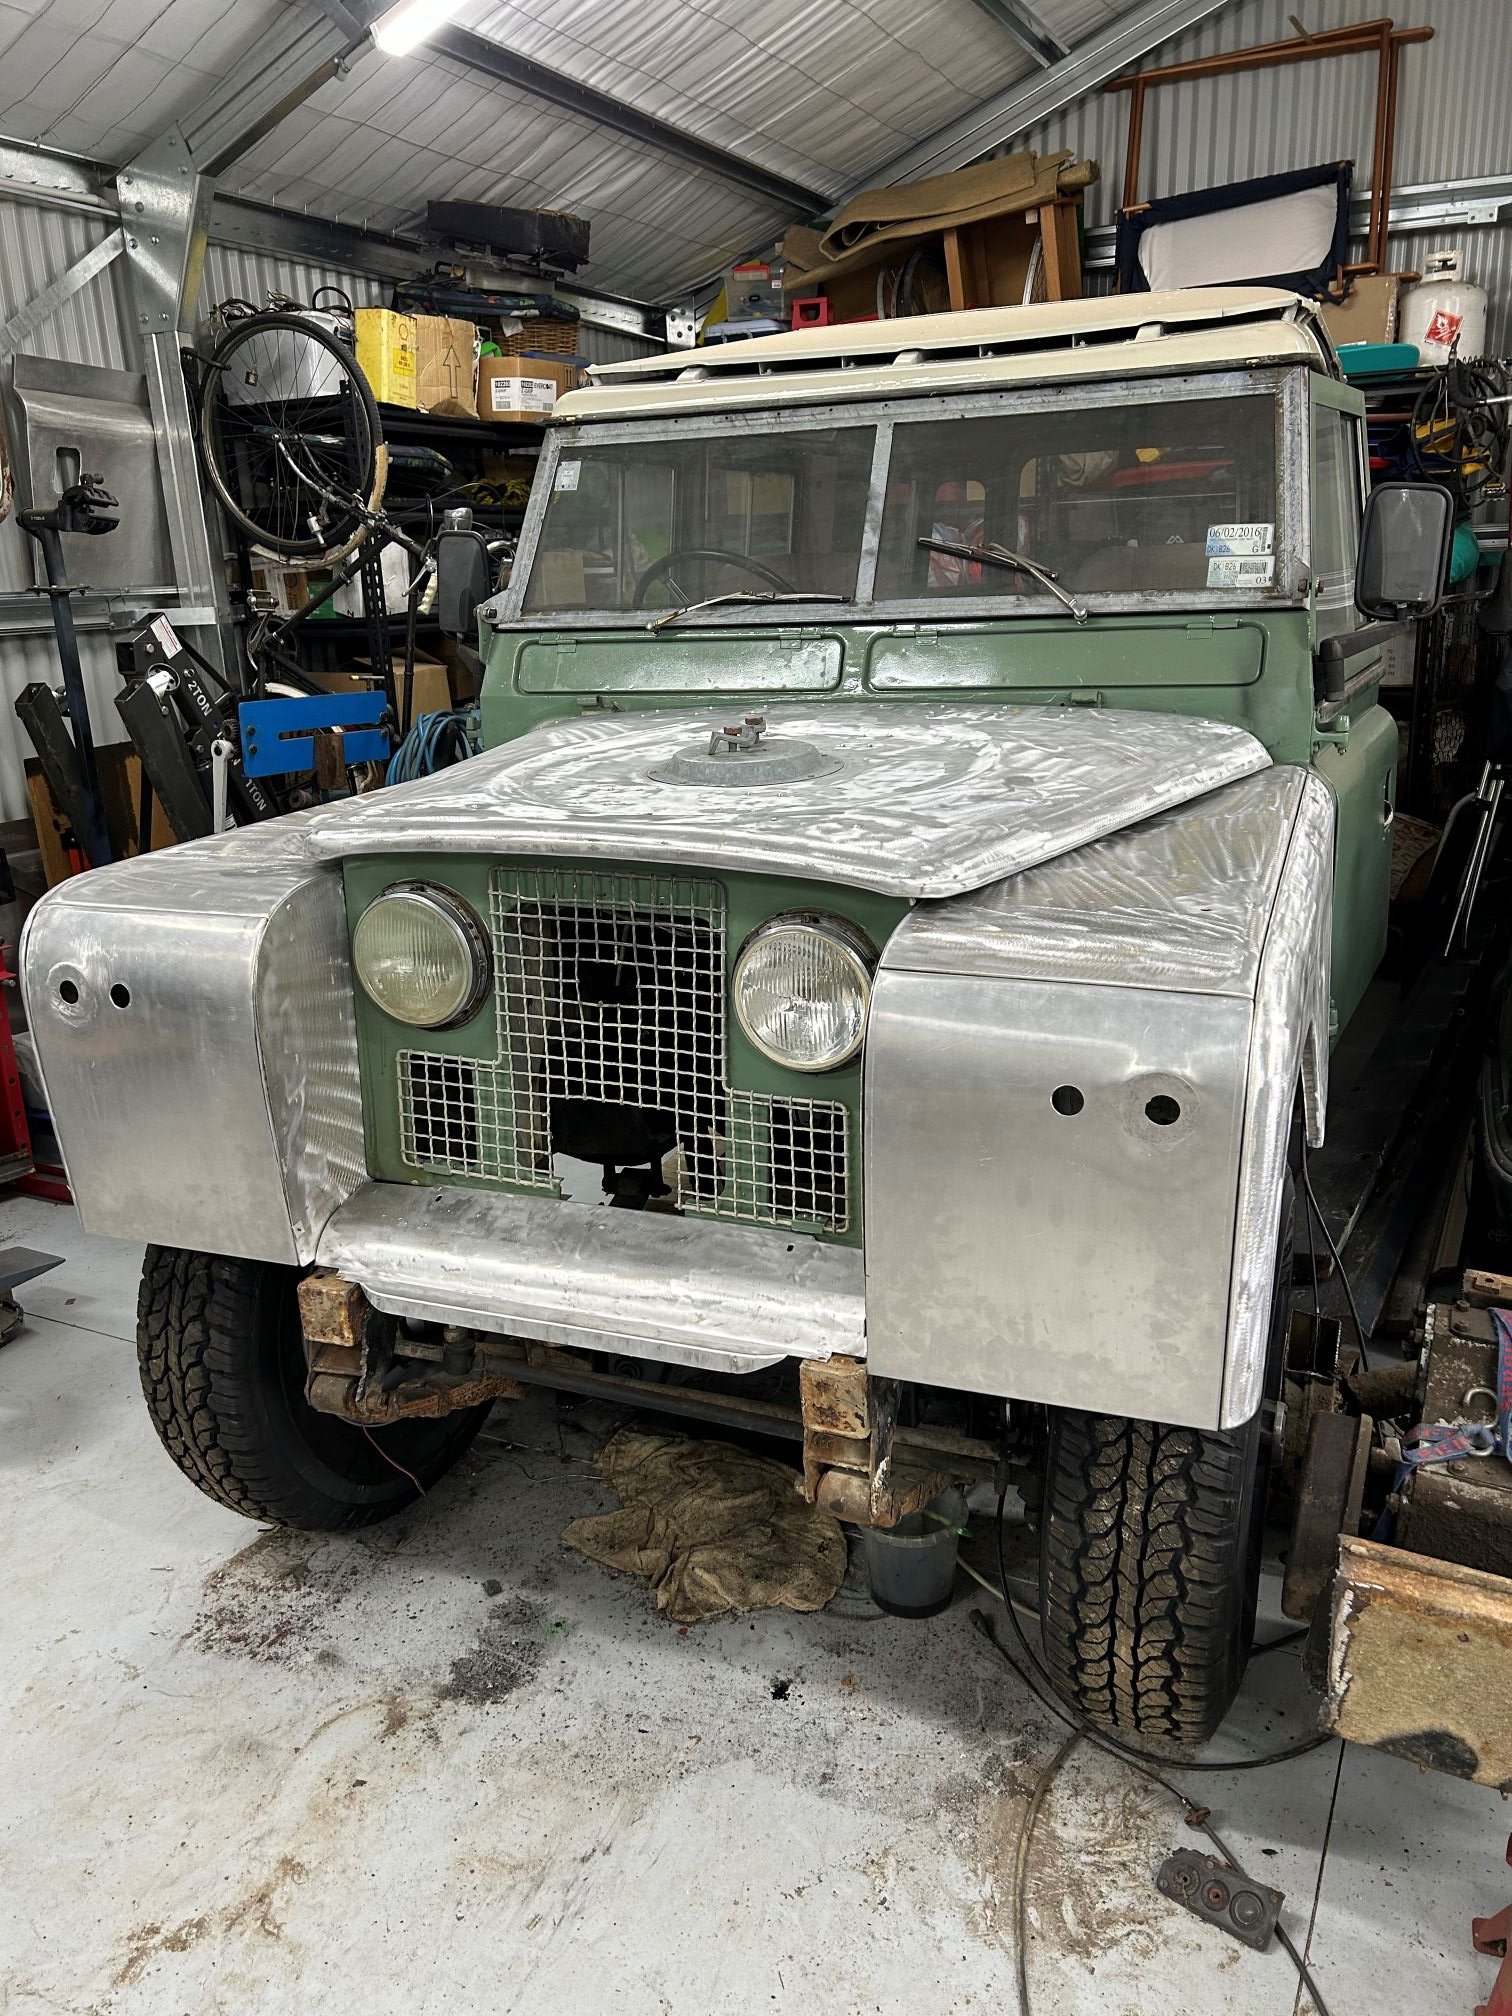
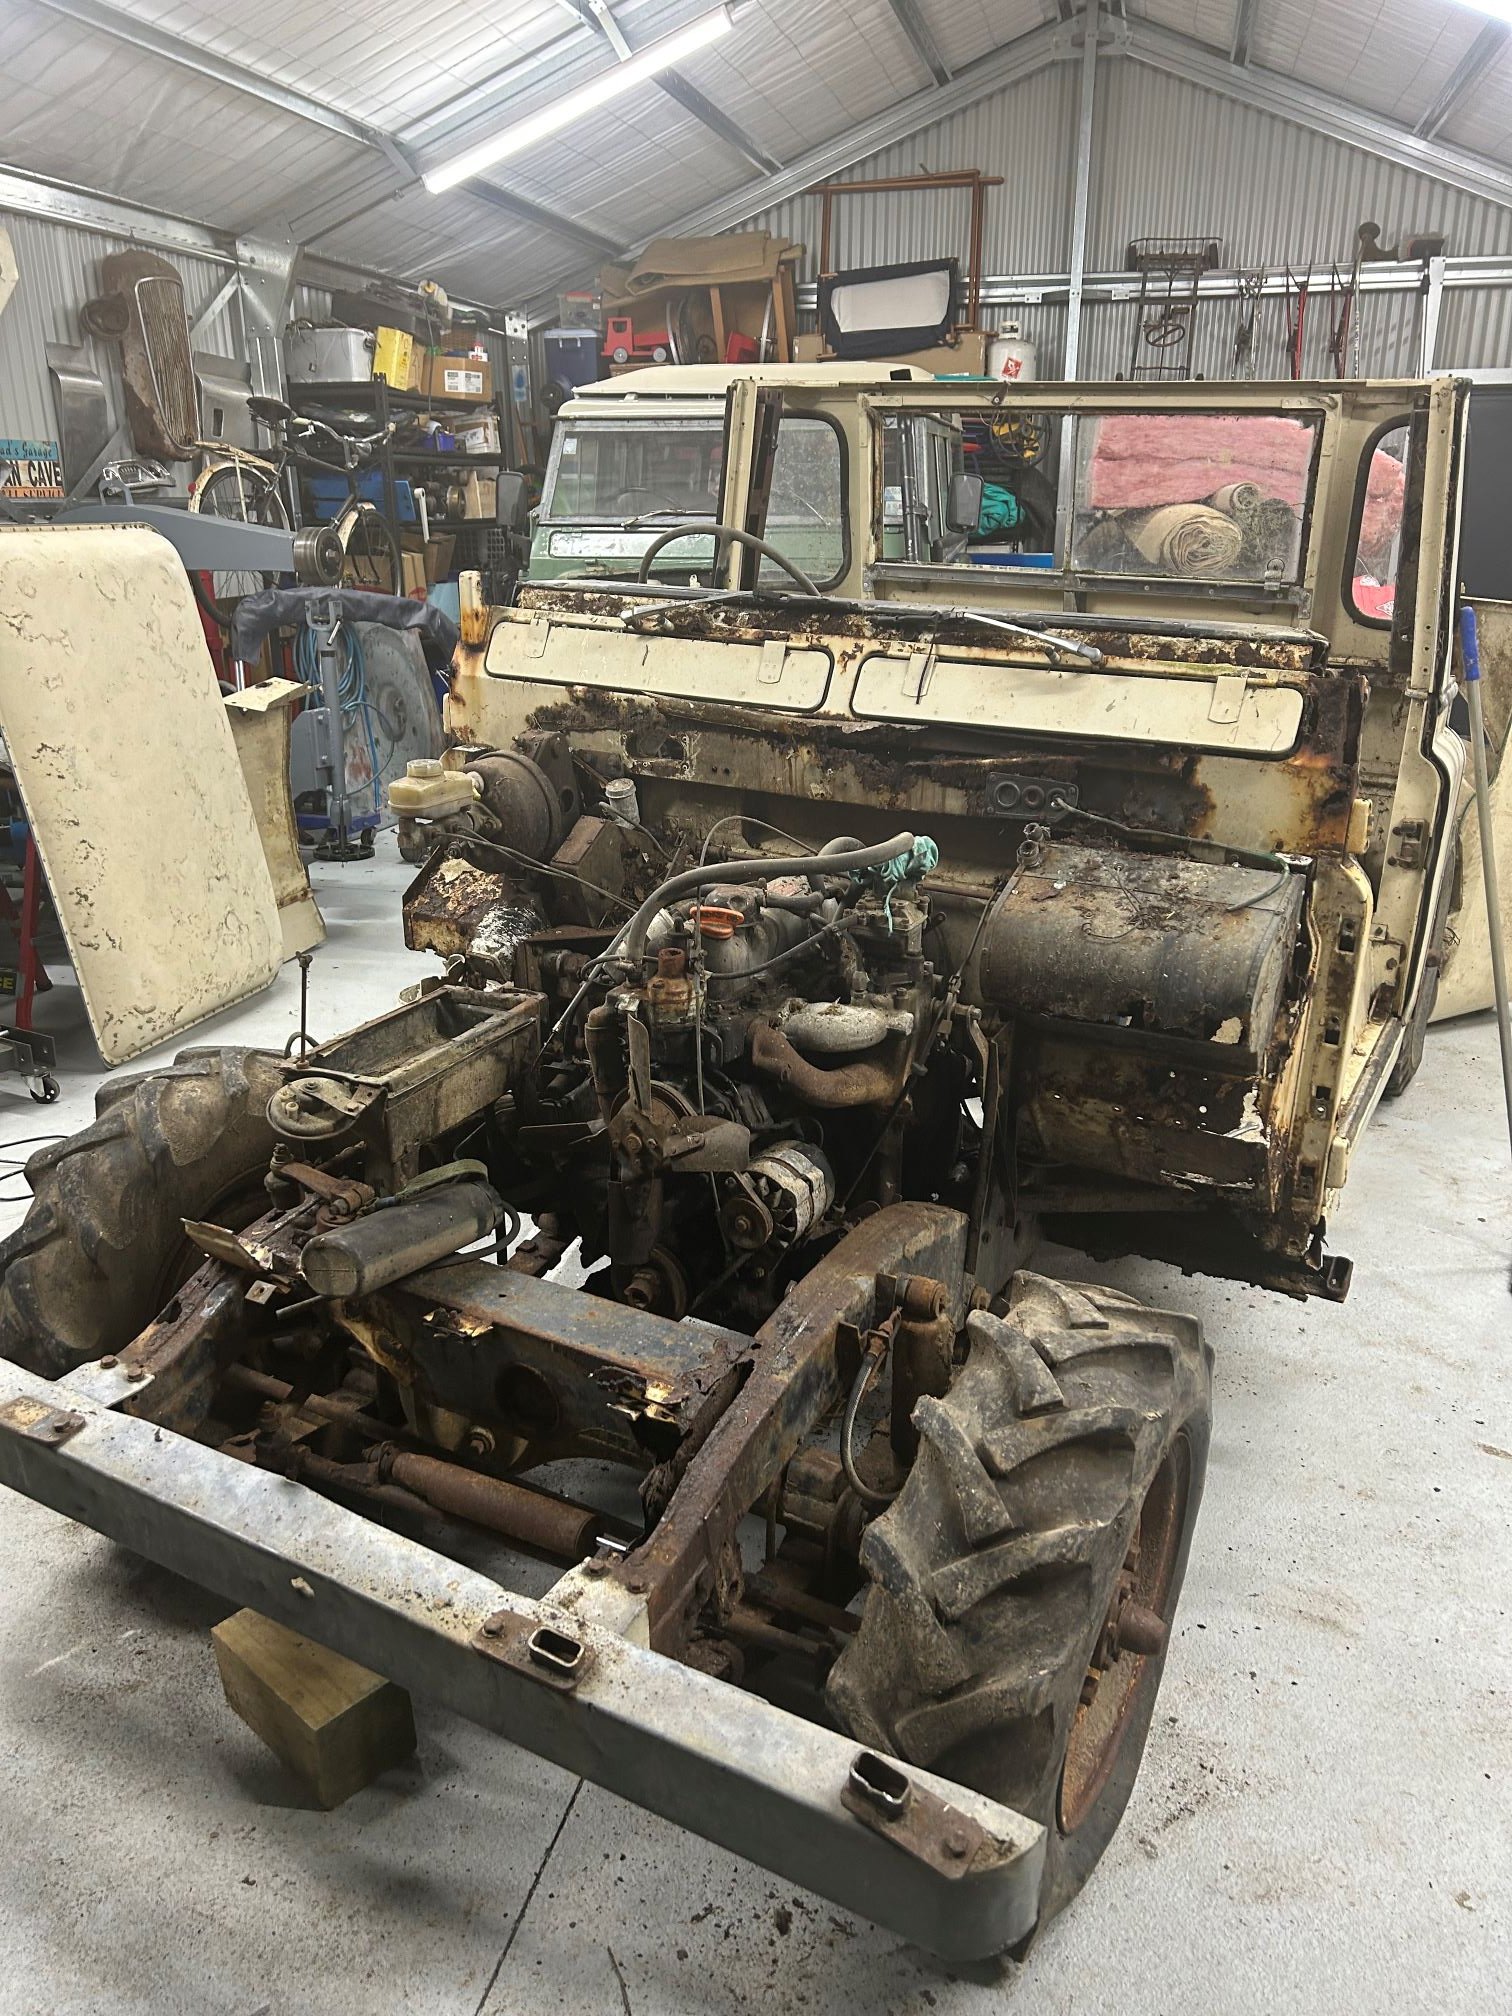
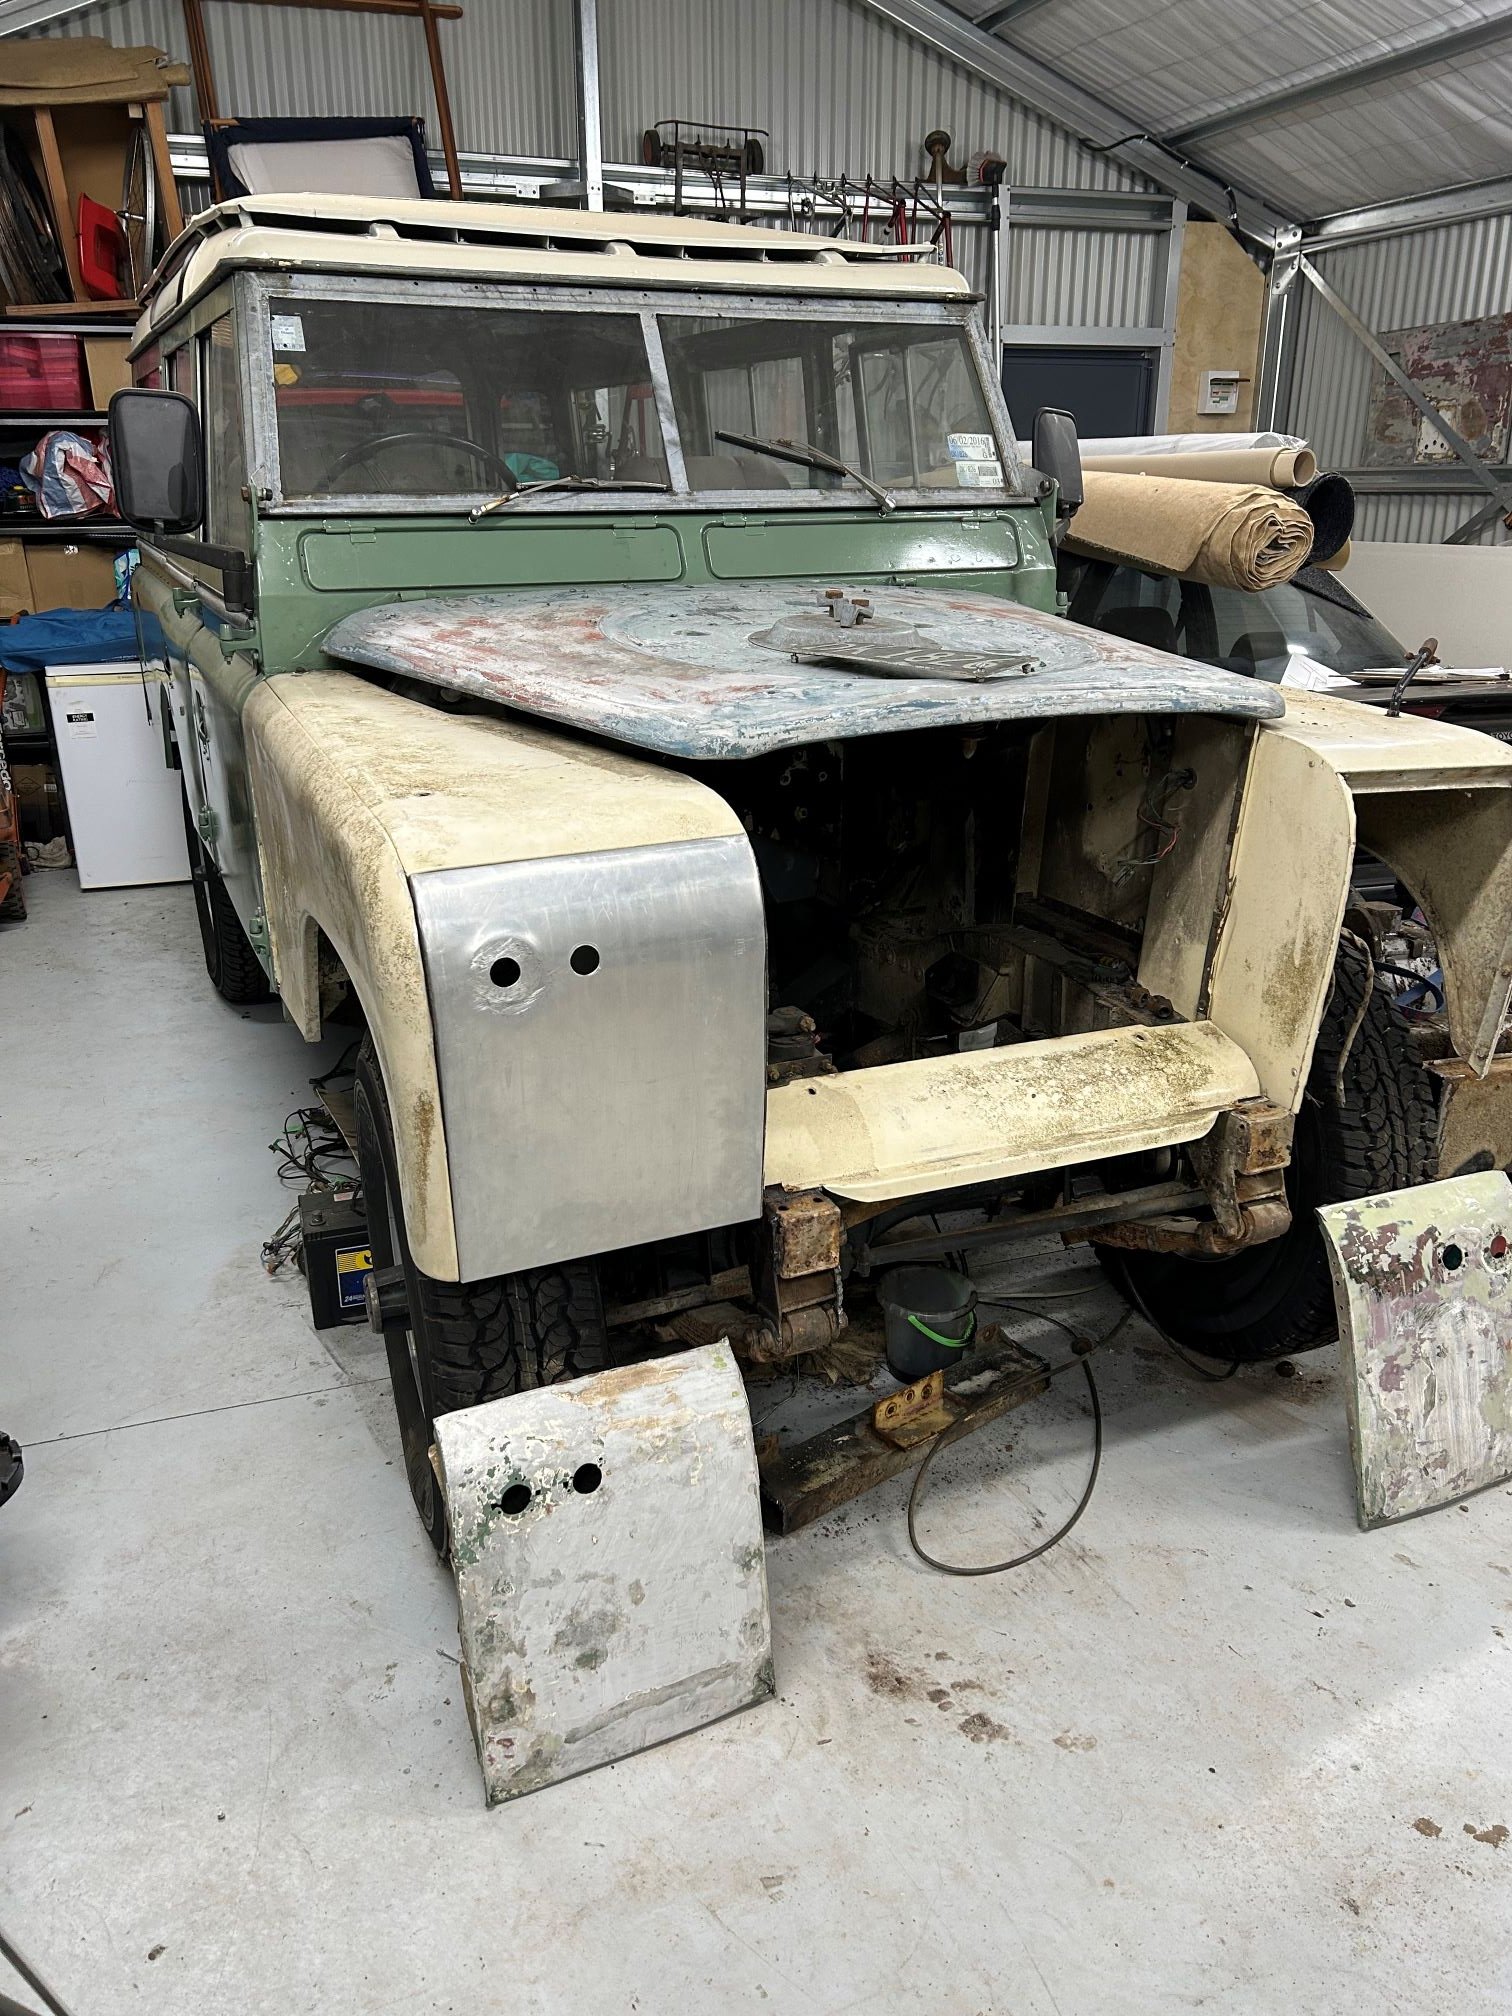
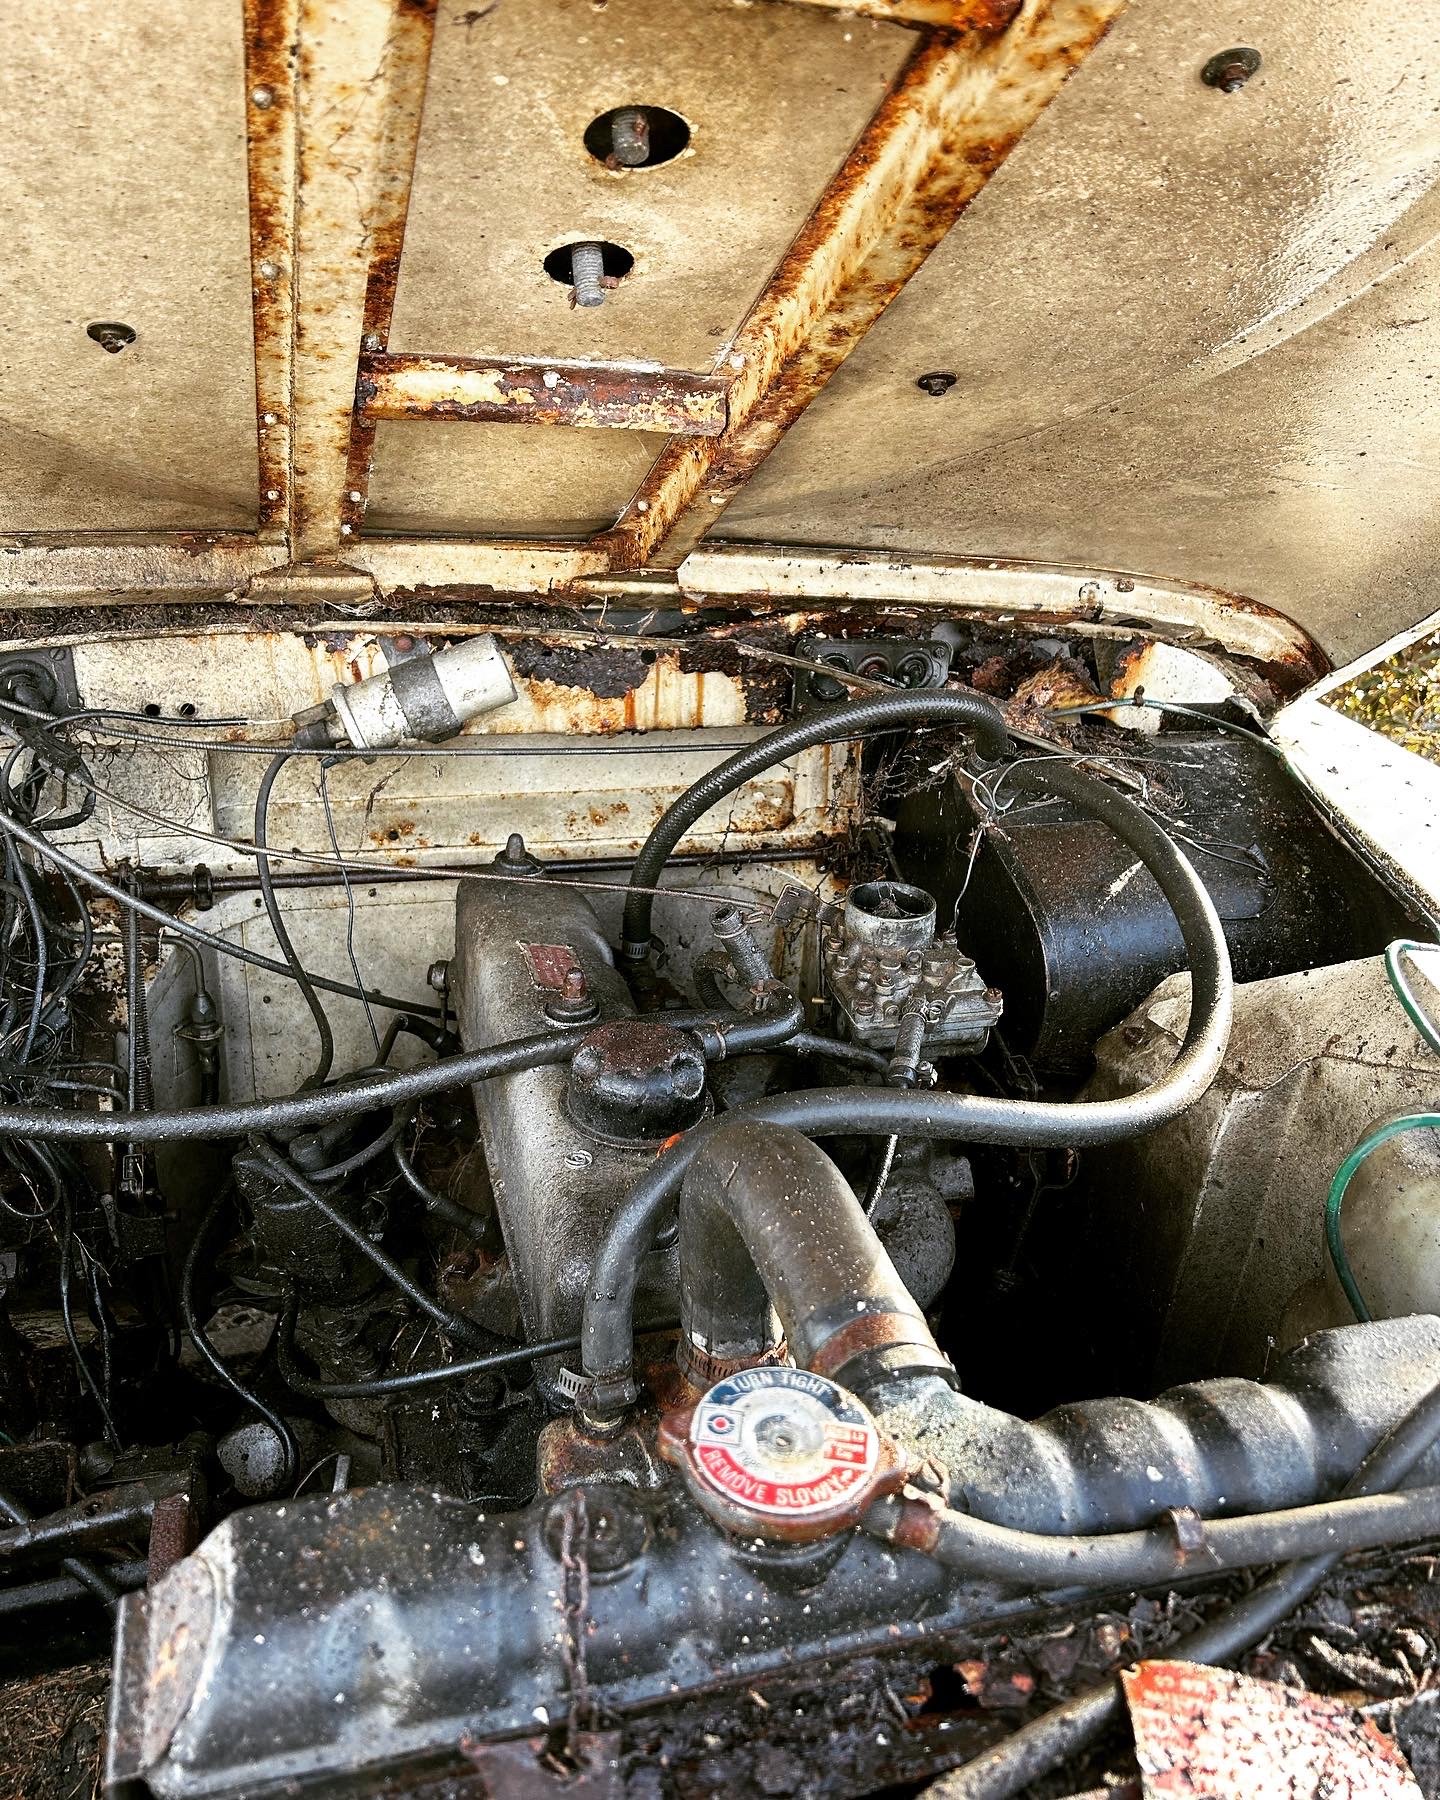
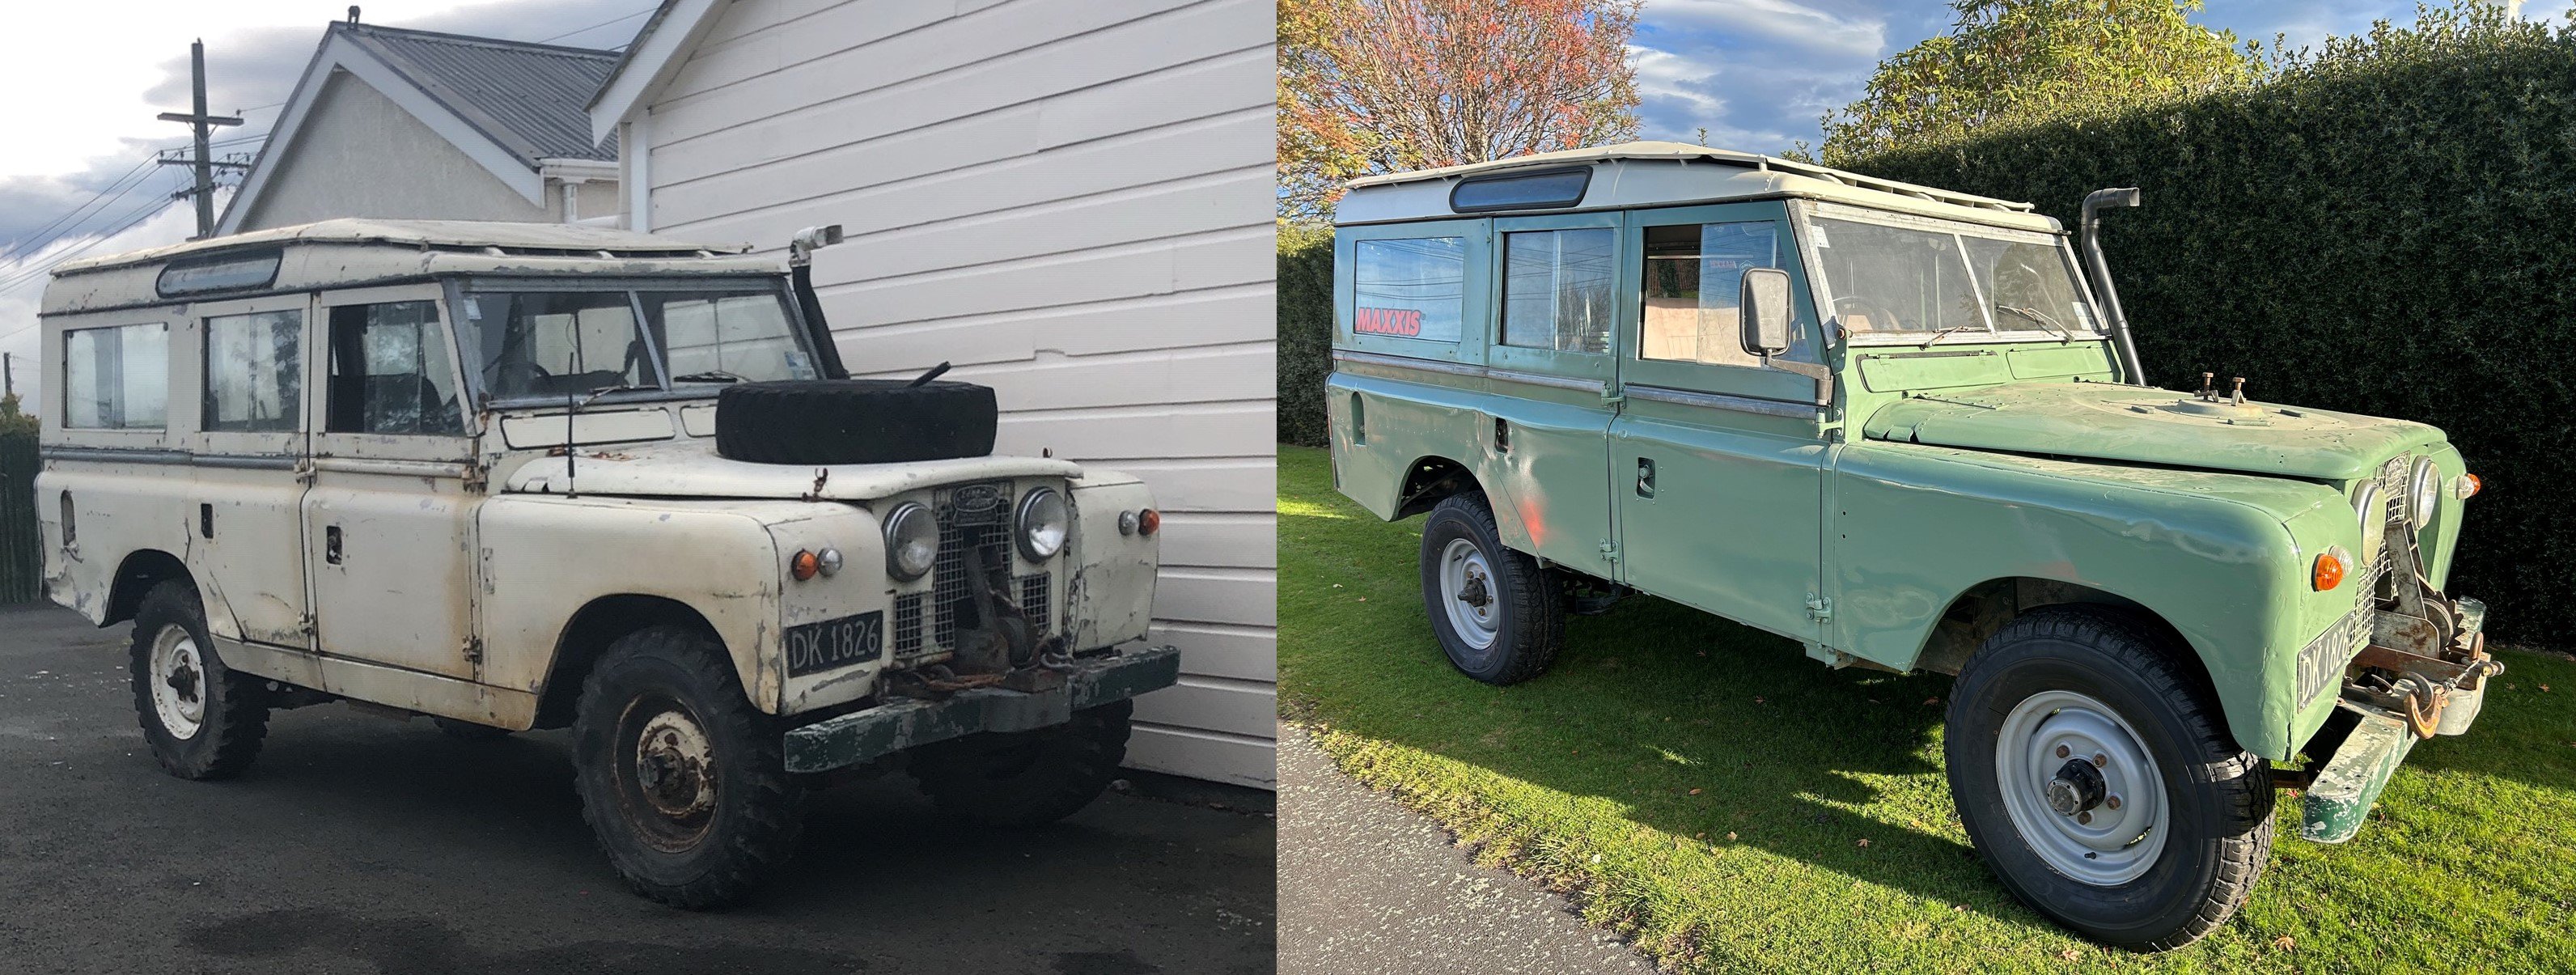
Playing catchup with this build thread.... The parts truck turned out to be a good buy.... replaced the ignition system, a squirt of oil in the cyl and some fresh fuel and the engine fired mostly right up. Its technically an early, low comp 2.25 for a SII, so matches the era of LR its going into. Likewise pulled the wiring loom out intact and a bunch of other smaller pieces which I'll used. Sliced the rest up with the new plasma cutter for the scrap man. Old running gear (Nissan diesel) has been sold, to a guy who drove down from Blenheim in a S3 no less Decided to use the front guards from this also, as they are uncut and in generally better condition (but still need some crack/dent repairs) The profile of S2 to S3 guards are mostly the same, except for the obvious difference in the front where they put the lights in the guards. Continuing with manufacturing new sections of those areas, its easy enough to cut out the rivets and replace with my new S2 portions. Its a handy swap to make since its getting very hard to find the early S2 guards in good condition, while the rest are a bit more abundant and cheaper. Need to get back into some steel repairs to return this front end to original, then back to mechanical.
1 point
-
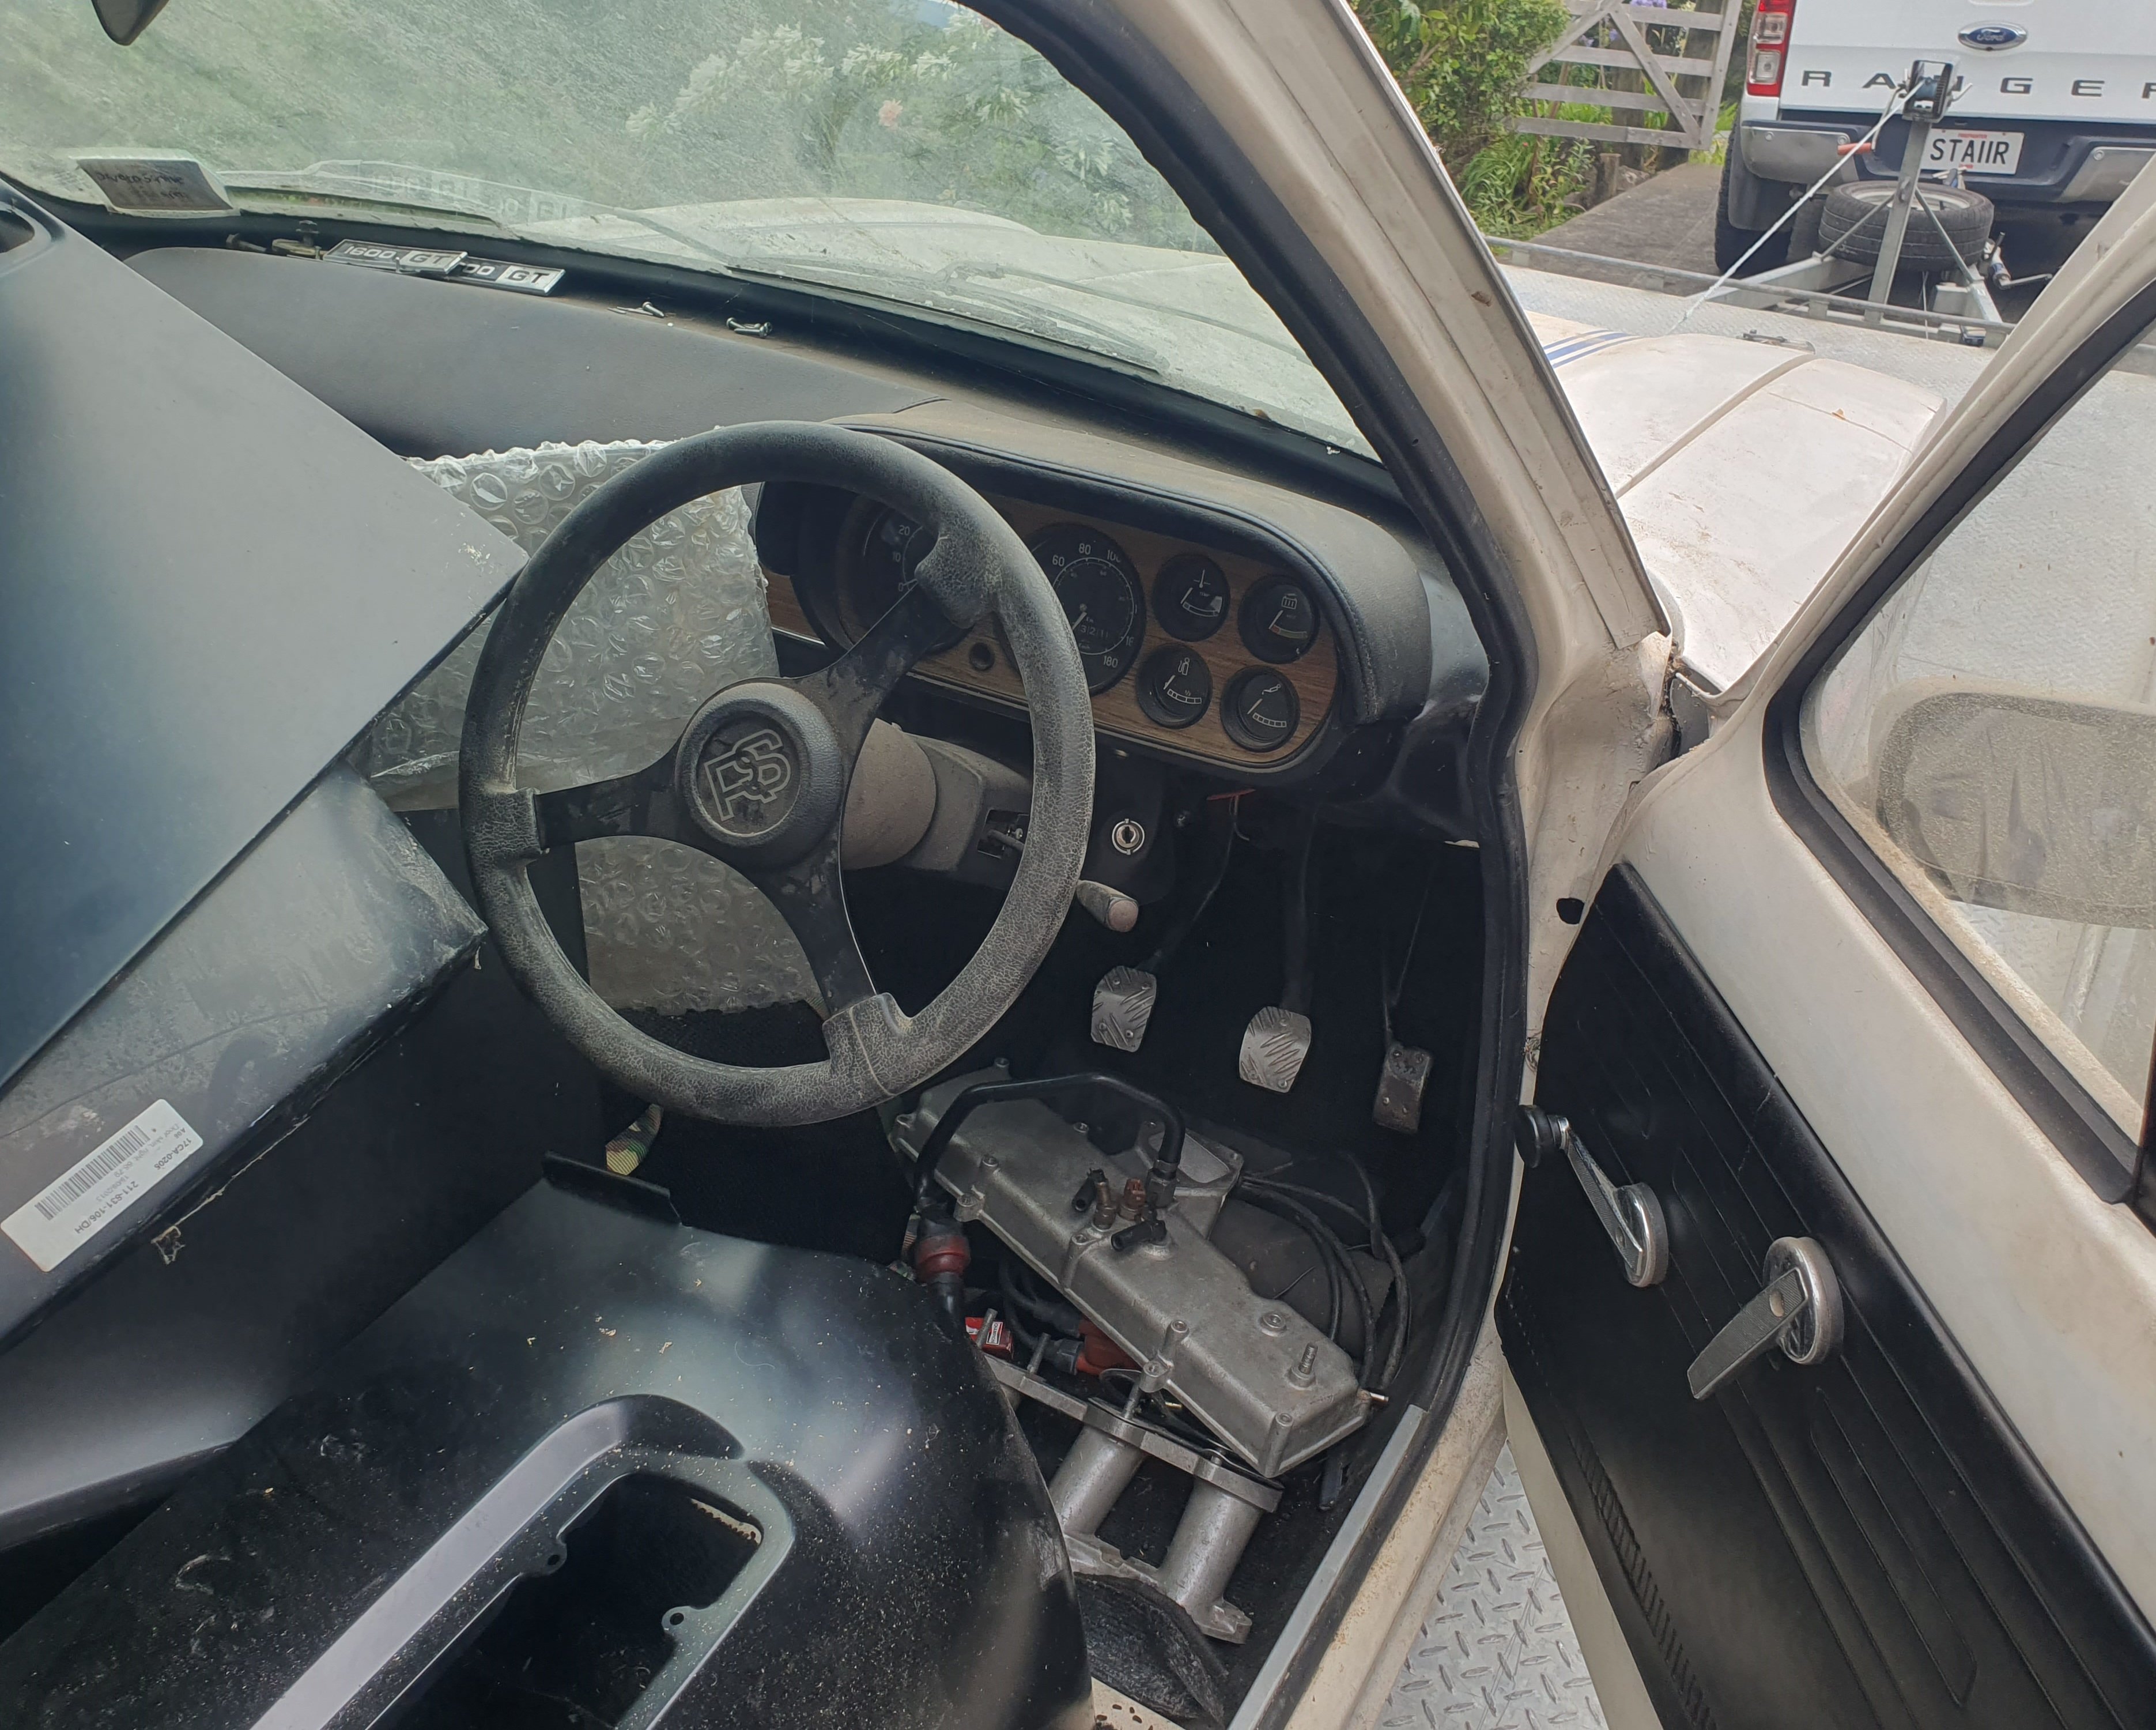
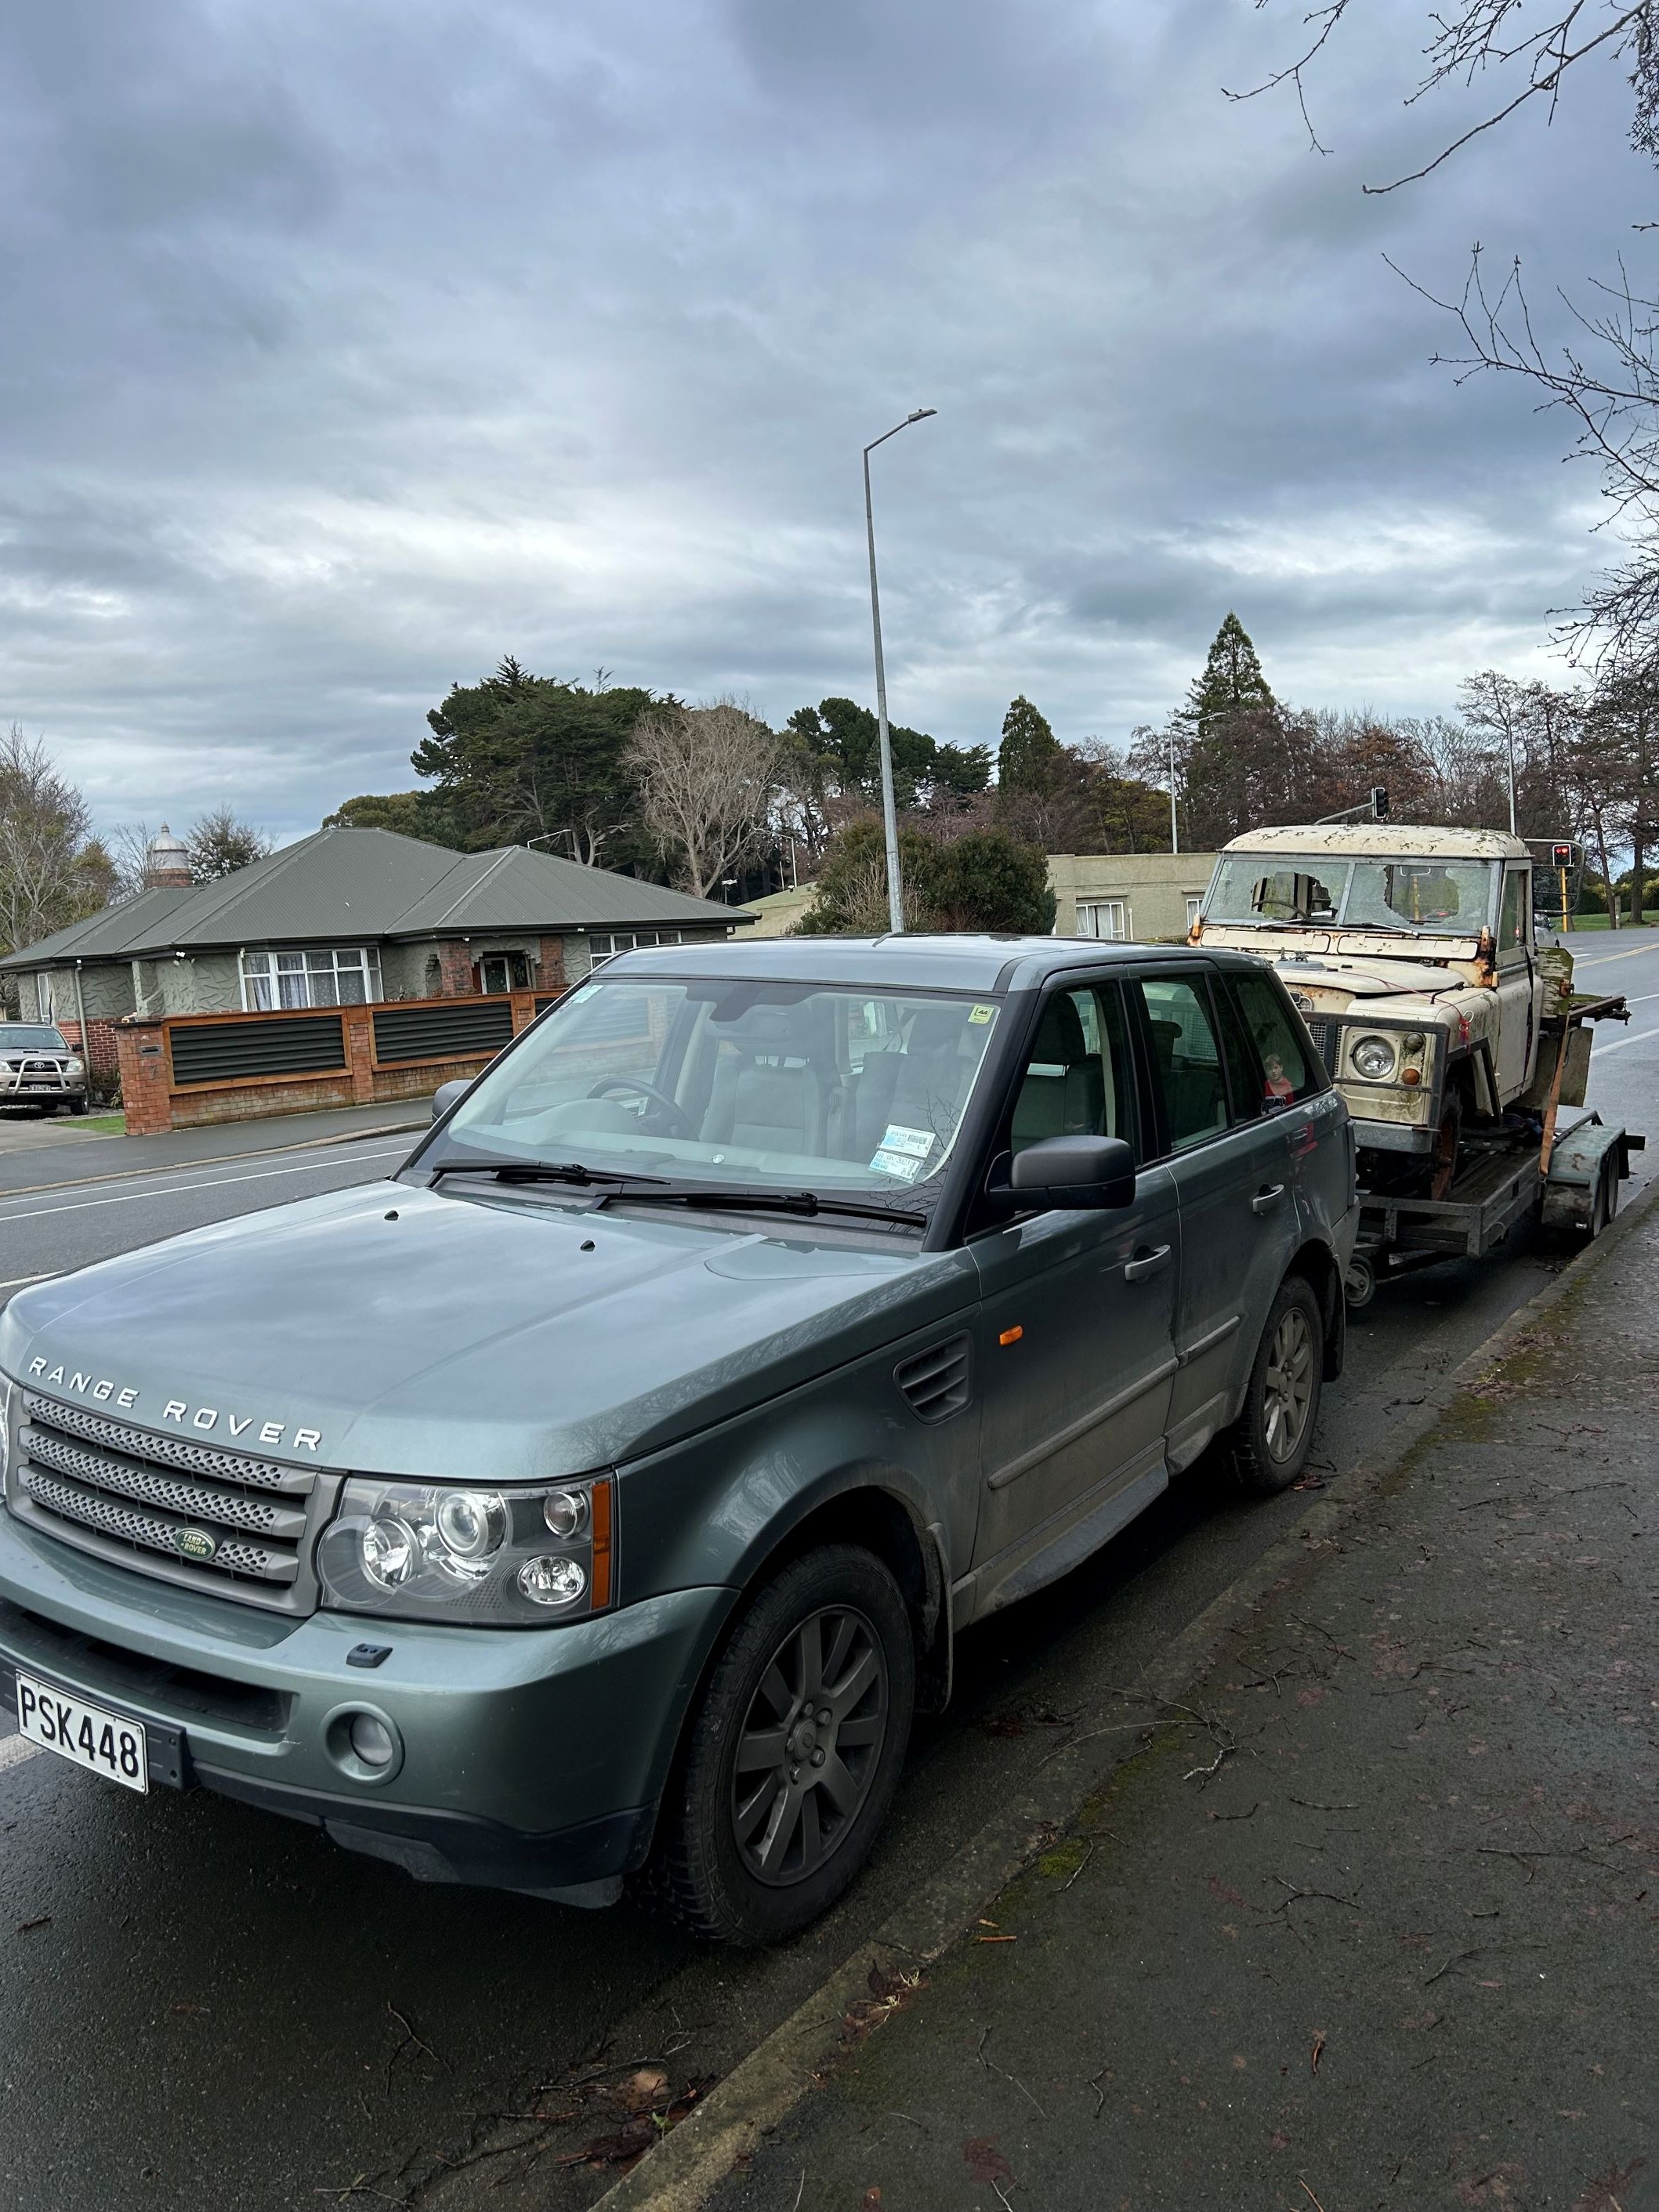
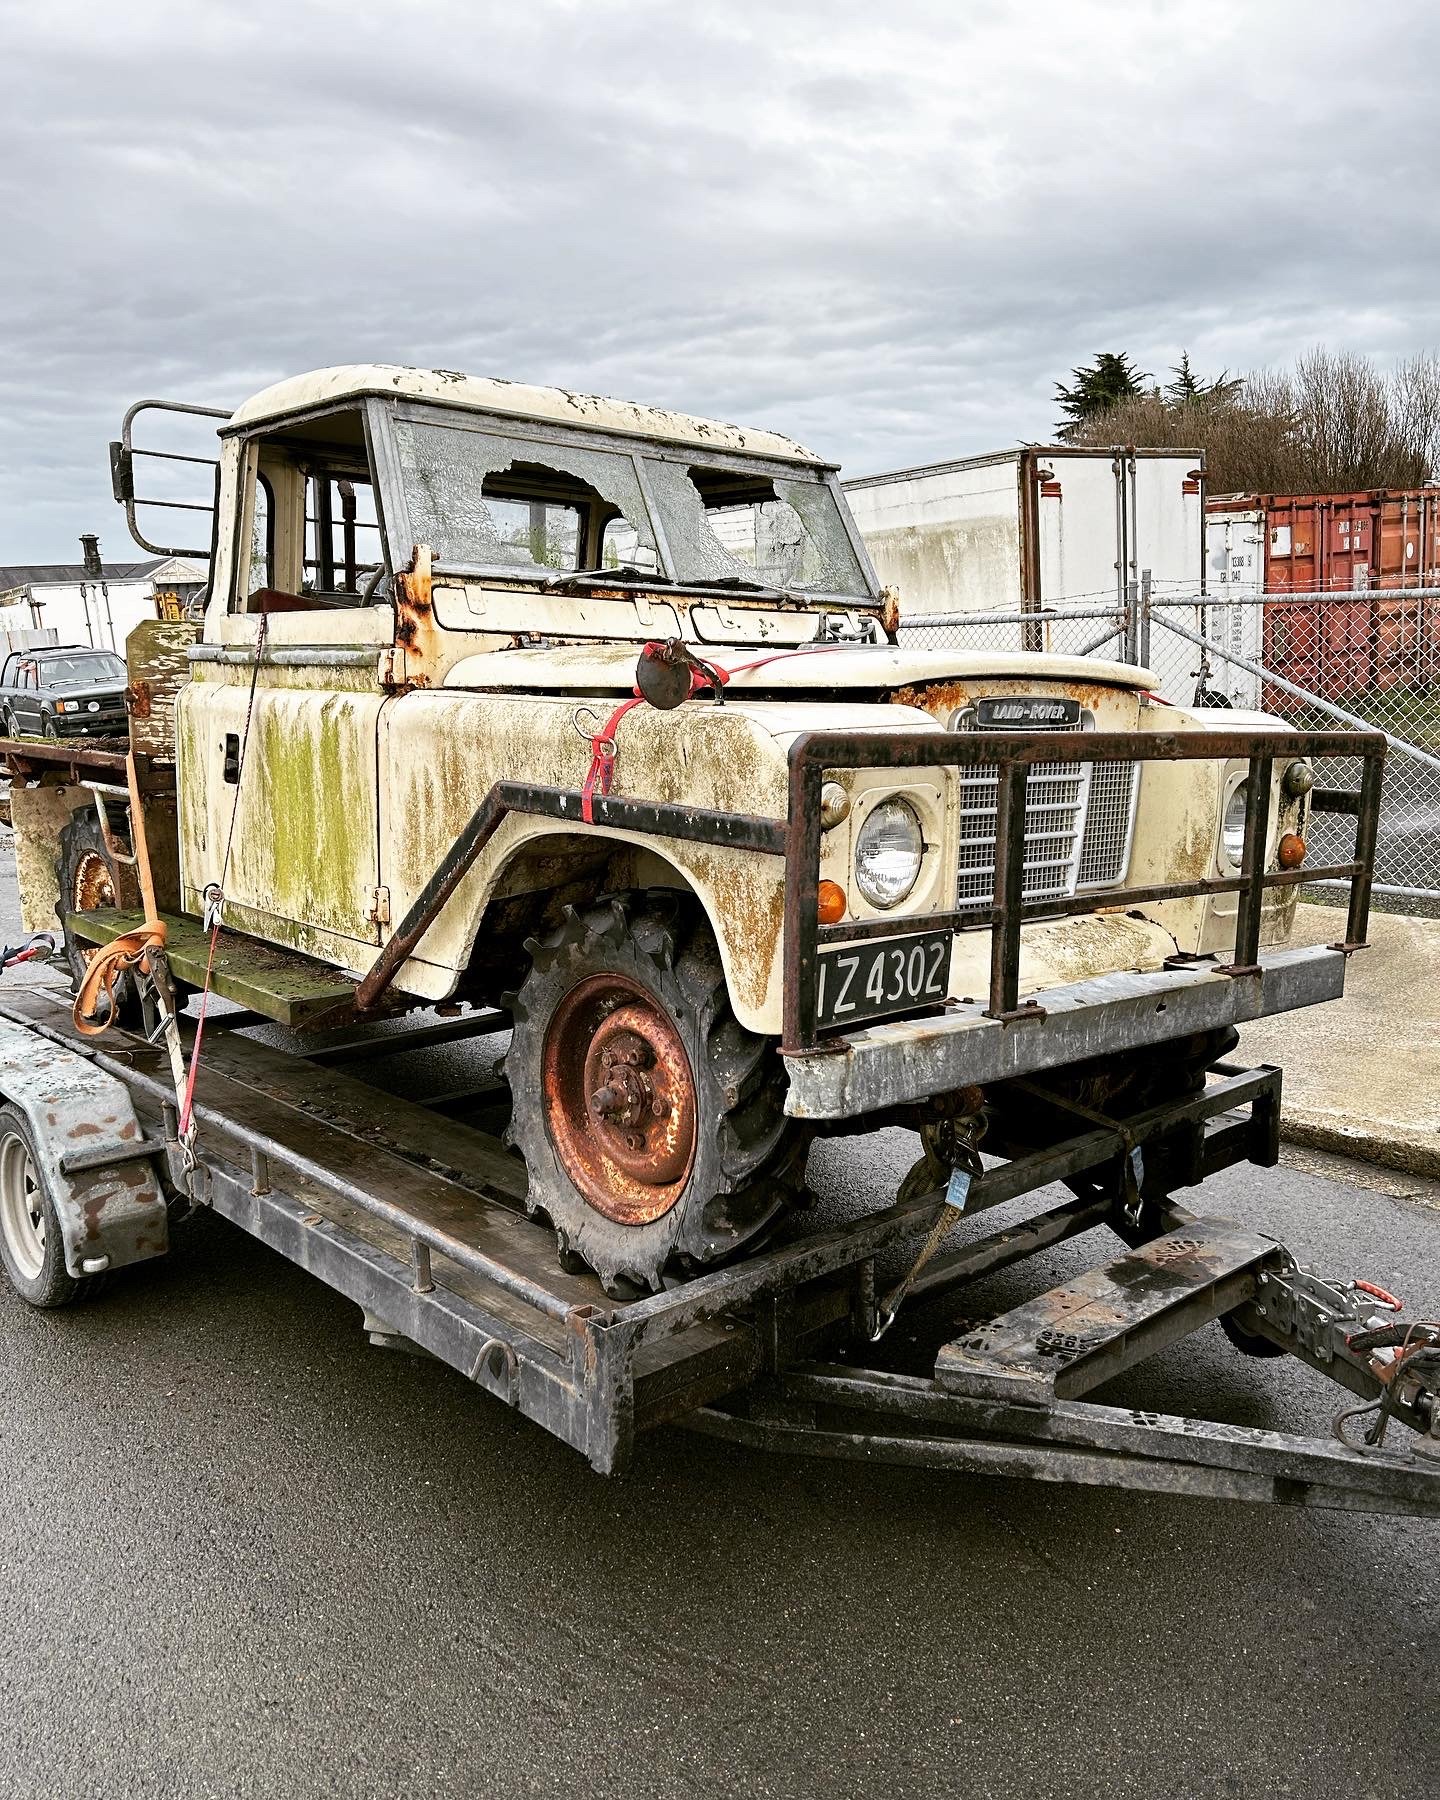
Somewhat dropped this into a few other threads... A decent parts truck same up for sale in Invers which I couldn't say no to. Where many would see something suitable for the scrapper, I see original petrol running gear, good condition front fenders (will swap from S3 headlamps to S2 panels), a front apron, better condition bumper, a wiring harness and a whole bunch of misc.... I took the water blaster to it when home, and while it is rusty as hell, it has the essence of farmer ute. Note the steel box tubing on the steering wheel and the uni joint shaft - went through the cab window to another wheel mounted on the tray so the cocky can put her in low box and drive around a paddock throwing hay off the back. Big question is will this run... it turns over at least which is a good sign. Time will tell....
1 point
-
Drove it outside for some sun... had to replace some of the brake cylinders and so it needs a good bleed. Tidy up some wiring, fit the seatbelts (and new brackets I have on order), take it for a shakedown then off for a WOF....
1 point
-
Since that last post, I have now run the car up to temp with the water in the system, cycled the fan twice (which worked perfectly), and then dumped the water. It was still coming out quite brown, but not sludgy. I flushed the system with more fresh water, including the block drain. After flushing the system until it ran clear again, I refilled the system with a proper coolant mix. I ran the car and cycled the fan again to bleed all the air out. So far, touch wood, there are zero leaks and everything seems quite happy. The temp gauge seemed to only just creep above cold and no higher, and I know the gauge works (goes to full when grounded), so I have ordered another temp sensor to see if that will fix it. This weekend I have booked in a full day in the garage to try and get on top of the bodywork. I mainly want to finish the welding, and do enough finishing work to be able to get the door back on.1 point
-
The old ‘ran when parked’ deal. Had been sitting for 12 months. Got it home and chucked in some old 2 stroke mix I had laying around and jump started it. Once the starter decided to move it burst into life. The throttle cable is broken so drove it around the house with the bonnet off while sticking my fingers into the throttle mechanism. Good times. I plan to keep the 12hp Briggs unit and work from there. Maybe even keep but modify the governor as a rev limiter that still gives wide open throttle on acceleration. This will be a slow project and I’ll probably use this thread as a picture dump for useful info and ideas for when I start stripping and modifying the spare frame. If anyone has built similar or wants too please feel free to jump in with your 10c worth.
1 point
-
At times it feels like I'm playing Whack-A-Mole with the rust, but I am steadily knocking rust on the head and putting new steel in. I know it's probably not particularly interesting to most, but it is what it is. Once the bodywork is done, I can return to the fun mechanical stuff. I left off the last post with the no sill, and a blimmin' great hole in the quarter panel. The first step was to get the new sill on and return some strength to the car. A quick test fit of the sill, with the door on, showed that it fit nicely It sits a little high with it only clamped at the bottom, so should pull down a bit when welded. The door is adjustable if I need to tweak the gaps. Next was to spend the next few minutes punching holes in the flanges. There were dozens of holes, and all of them needed to be punched out and welded. I'm glad I have a proper punch, and I wasn't drilling these one by one. And finally, after some tweaking of the placement, it was all welded into place. I ended up using a jack under the lower flange of the sill to help align it with the inner sill, since it appears that wasn't welded straight from the factory (which explains why the old sill I removed was barely spot welded along the bottom) A quick skim of filler along the top edge should make the repair invisible And some filler to shape the front edge too. In hindsight I should have angled the edge so it matched the guard line, but oh well. This is where I took a bit of a break from the sill/guard area, as I had found a donor arch section for the rear (from a sedan), and was waiting for it to arrive. Instead, I moved on to one other area that needed attention; the window frame. Before venturing further into the story, it occurred to me that I completely forgot to mention that a few months ago I removed the rear QTR glass, because I knew there was a rust hole in the B pillar. This was a bit of a faff. Being a Deluxe, it didn't get the pop-out windows the TC did, which are easy to remove, so I had to lever the old, hard, rubber seal off and try not to break the irreplaceable window glass. I started with getting just that section over the lip, and one by one moved the screwdrivers further along until the window finally started to pop out. Once it started to come out it was quite easy to remove. This revealed the horrors hiding under the seal This is the hole I knew about But there was also rust at the rear of the window Interestingly, this also confirmed that the B pillars of the lower spec models are already provisioned with the holes for the hinge blocks for the TC pop out windows, albeit with the top one covered in tape I cleaned the B pillar hole up and bit, and its quite sizeable So yes, that's been like that for a few months. Moving along, I wanted to repair both of the holes. I started with the one in the B pillar, as it was more straightforward. I stripped it back until I found good metal, and then using my best friend, the air body saw, I cut a nice square hole Made up a nice patch for it Welded it in, and ground it back. I did have one shocking surprise when welding that in. I didn't realise, but the joint with the quarter panel had been lead loaded, which is where they fill and shape the joint with lead, instead of bog/filler. I only found this out when the lead got superheated by my welding near it, and blew molten lead all over me when I used the air gun to cool the welds. Thankfully I had my welding mask down, and the rest of the lead just peeled off my clothes. The same was also present near the rust at the rear of the window, so I made sure to grind it all back to bare steel (wearing appropriate PPE, of course; powered lead cant be good to breathe). The rear rust was much harder to do. I cut it back until I had solid metal, revealing a large hole And welded in a couple of patches (one for the flange, the other for the curve). It was really hard to grind the welds back, so it's not pretty, but nothing a skim of filler won't fix. I was laughing with my wife about how hard it was to weld this, as previously all my welding had been low down and I could just put the light I use to see what I'm welding, on the floor or wedge it against something. Because this was up high, and my light is massive and heavy (cordless Ryobi foldable light) there was nowhere to put the light. I mentioned I had been holding the light between my legs, or pressed against the side of the car. My wife looks at me, and asks "why don't you get a little magnetic light?". It's so simple. I bought one the next day and life has been better since. Another tool that has improved my life is this power file/finger sander. It's amazing. Way better access than my grinder, and grinds welds down like butter. I took the recommendation of a local forum to get some "green zirconia" belts for it. I had been using the ones that came with it and they were good, but sure enough, the green ones tear through anything and will wear out before they snap (which is a common issue; The other spares I bought with the tool snap within seconds of trying to grind welds down. They were cheap, but they're useless). The next day the arch section arrived. I bought this from a seller that was wrecking a sedan. The coupe shares the same basic arch profile with the sedan, even if the quarter in front of it is different, because there is a door where the coupe doesn't have one. I started by drilling out the spot welds, to separate the inner and outer arch sections, as all I needed was the lower outer arch I finally got the spot weld cutter to work. I used a 2.5mm drill bit to drill through the middle of the spot weld, and this pilot hole holds the cutter in place and stops it from slipping around. I did go right through on a couple, but I wasn't trying to save the inner arch anyway Unfortunately, I did find this arch also had filler in it. Not as bad as my old one, but enough that it was annoying. I only really needed the very bottom of the arch, so I kept going anyway After some tidying up, and lots of measuring and tweaking, I welded the arch section in. I trimmed down the end of the sill, and pulled the top edge outwards, to match the shape of the arch This meant I could cap the end of the sill. I used the donor sill to get a basic template, and made the panel Welded into place After grinding everything down Next was the hard part, making the filler panel to fix the large square hole. I measured and cut this a few times, and I'm still not 100% happy with how it turned out. Next, I made the last patch. I had originally planned to reuse the section I cut from the guard, but it was easier to just make a nice fresh new section. I also plug welded these new patches to the top of the sill, from the inside of the car. And there we have it, all welded in. I had agonised about the damage, and how hard it was going to be to fix, but at the end of the day, although the donor arch helped massively, the rest of the job went quite smoothly. The only issues I have are that the bottom folded edge of the two patches don't line up (filler will fix this), and there was a raised high point where the panels joined It is hard to see in photos, but was really obvious in person; it looked like a big raised peak. I wasn't sure how to fix it, so I just took a hammer and dolly to it and now it's about 80% better The main thing is that I have retained the seam between the sill and quarter, and the swage line above that seam is somewhat straight. I spent ages with tape measures and straight edges making sure that the swage line would be near straight. That's it, other than some filler and paint, the sill is finally done. Next on the chopping block was this rust But on the way there, I poked at the inner guard, behind the wheel... Yes, I should know better. Well now, I couldn't just leave that as it is. I also poked around at the rust I was meant to be doing, and made it much worse Looking at the inner guard, the only option I could think of to fix it properly, was to unfortunately cut the lower edge of the arch off, so I could access the full section Remember, measure once, cut thrice But now I could see the whole thing Which made slicing and dicing it much better I barely had to cut down the sides, it was that rusty I cleaned it up And used the old rusty section as a template to make a patch The only thing left was to weld in the section of arch I cut out. This was a real mission as the metal was super thin here. Beware, it's ugly. Awesome folding magnetic light that has made life better. It's wearing a little nappy to stop metal shavings from getting jammed around the magnet on the base Much better. Just needs some sealer down the side (as it was from the factory) Now it was time to finally deal with the rust I came here to fix I did some poking around, and made the target area bigger Using the air saw I cut the area back to good metal, and carefully split the seam where it was spot welded to the outer quarter. I made another patch, and clamped it into place for test fitting And then welded it in. I welded it in from the top as it was easier than welding on my back. Look at that penetration though, and not a single blown hole. I plug welded the new seam to the old one to make a nice solid flange. I also plug welded a right angle into place to support the spare wheel Job done. Probably one of the quickest and easiest repairs on the car so far. While I was there, I wanted to weld up the surplus holes in the rear panel. The car had previously had towbar wiring bodged onto the rear panel, via a couple of holes drilled into it. There were also three misc vertical holes on the RH side by the light I got rid of the plug ages ago, so it was only the holes left to fill. The towbar might stay, I'm not sure yet, but I don't really intend to tow anything with the car, so I won't be reinstating the wiring for now. I ground all the paint around the holes back (using spare welding gloves to protect the chrome bumper from weld spatter) I made a small "round" filler for the big hole from scrap and held it in place with a magnet A few presses of the trigger later, all the nasty holes are gone The three remaining holes above the big hole are for the Morris badge. A quick squirt of some epoxy primer to keep it happy in the meantime, and we are done for the day. Speaking of, I recently found out that painting over zinc-based weld through primer can be problematic and not recommended. This is a pain, as I have painted over EVERYTHING I have done with zinc-based primer, to protect it. Now I will need to go back and strip it all to bare steel again and paint it with epoxy primer. The zinc primer is good for inside spaces, or between two bits of steel, and that's really all it should be used for. Oh well. I'm getting really close now. I have to cut out and fix the rear valance, which is very rusty, and then the major rust work is done. After that, it's the boot seal flange, and a couple of "cosmetic" areas that need work, but they can be done at any time, even after a WOF check. Lucas will be at British Car Day on the 12th Feb, but unfortunately the Marina just isn't quite there yet as I'm a couple of months behind where I wanted to be. Such is life, but I'm happy I'm finally making progress again.1 point
-
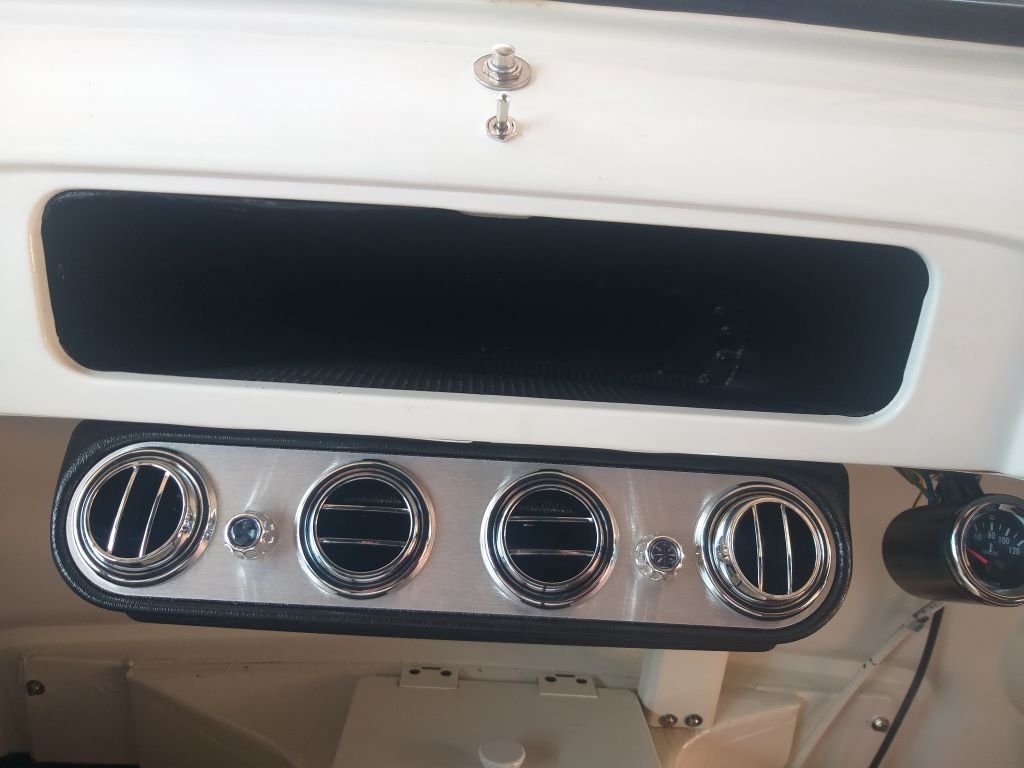
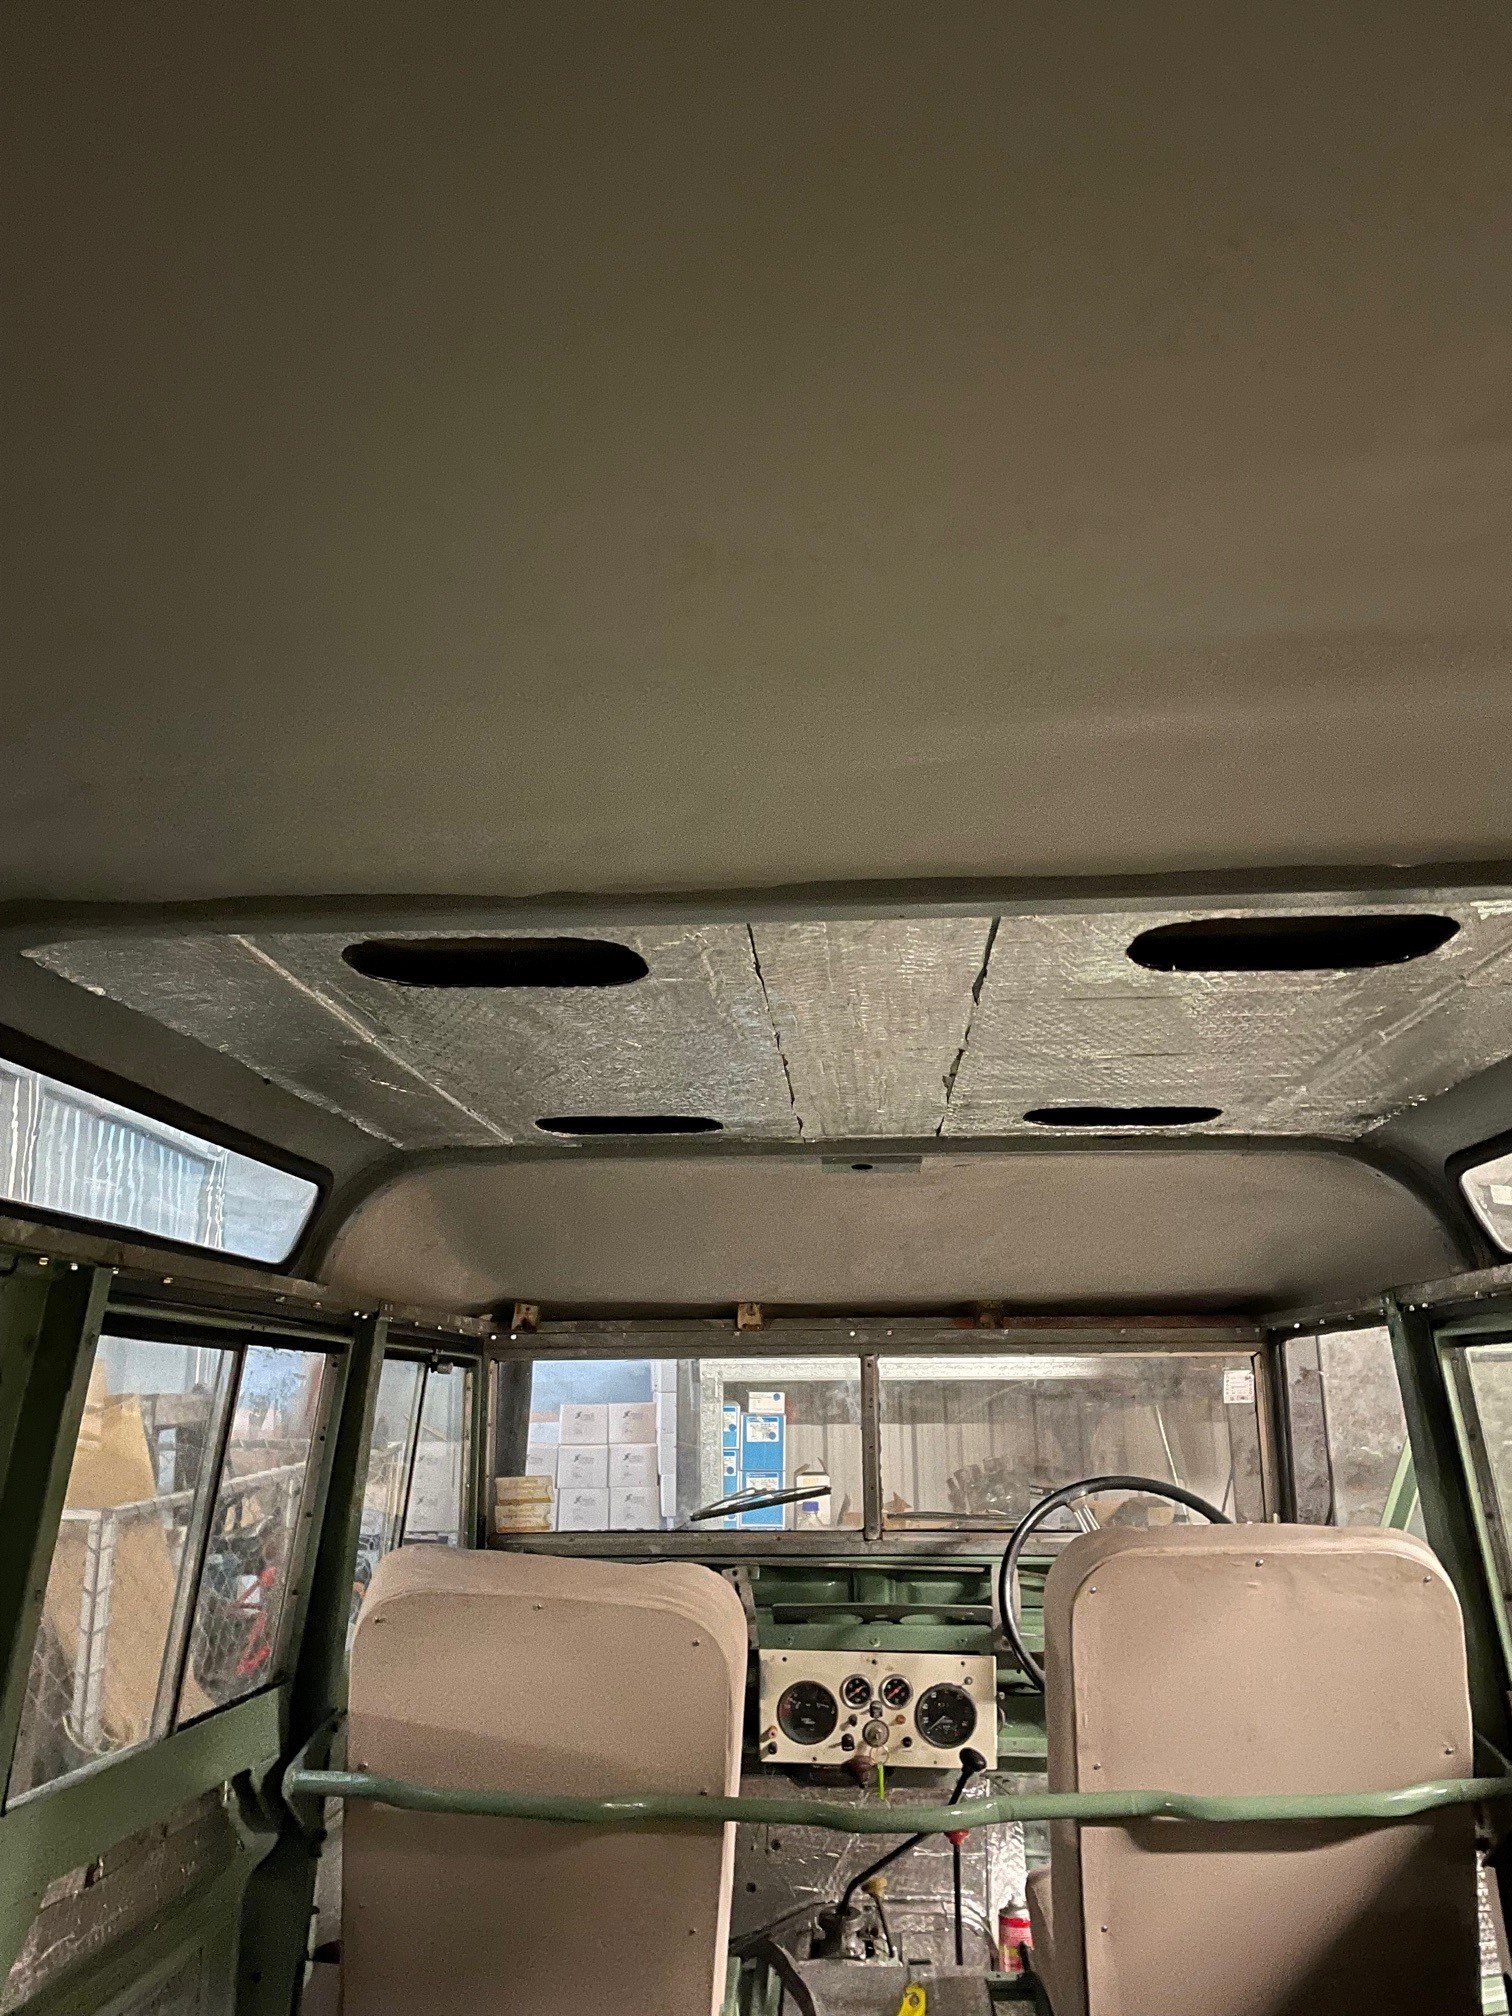
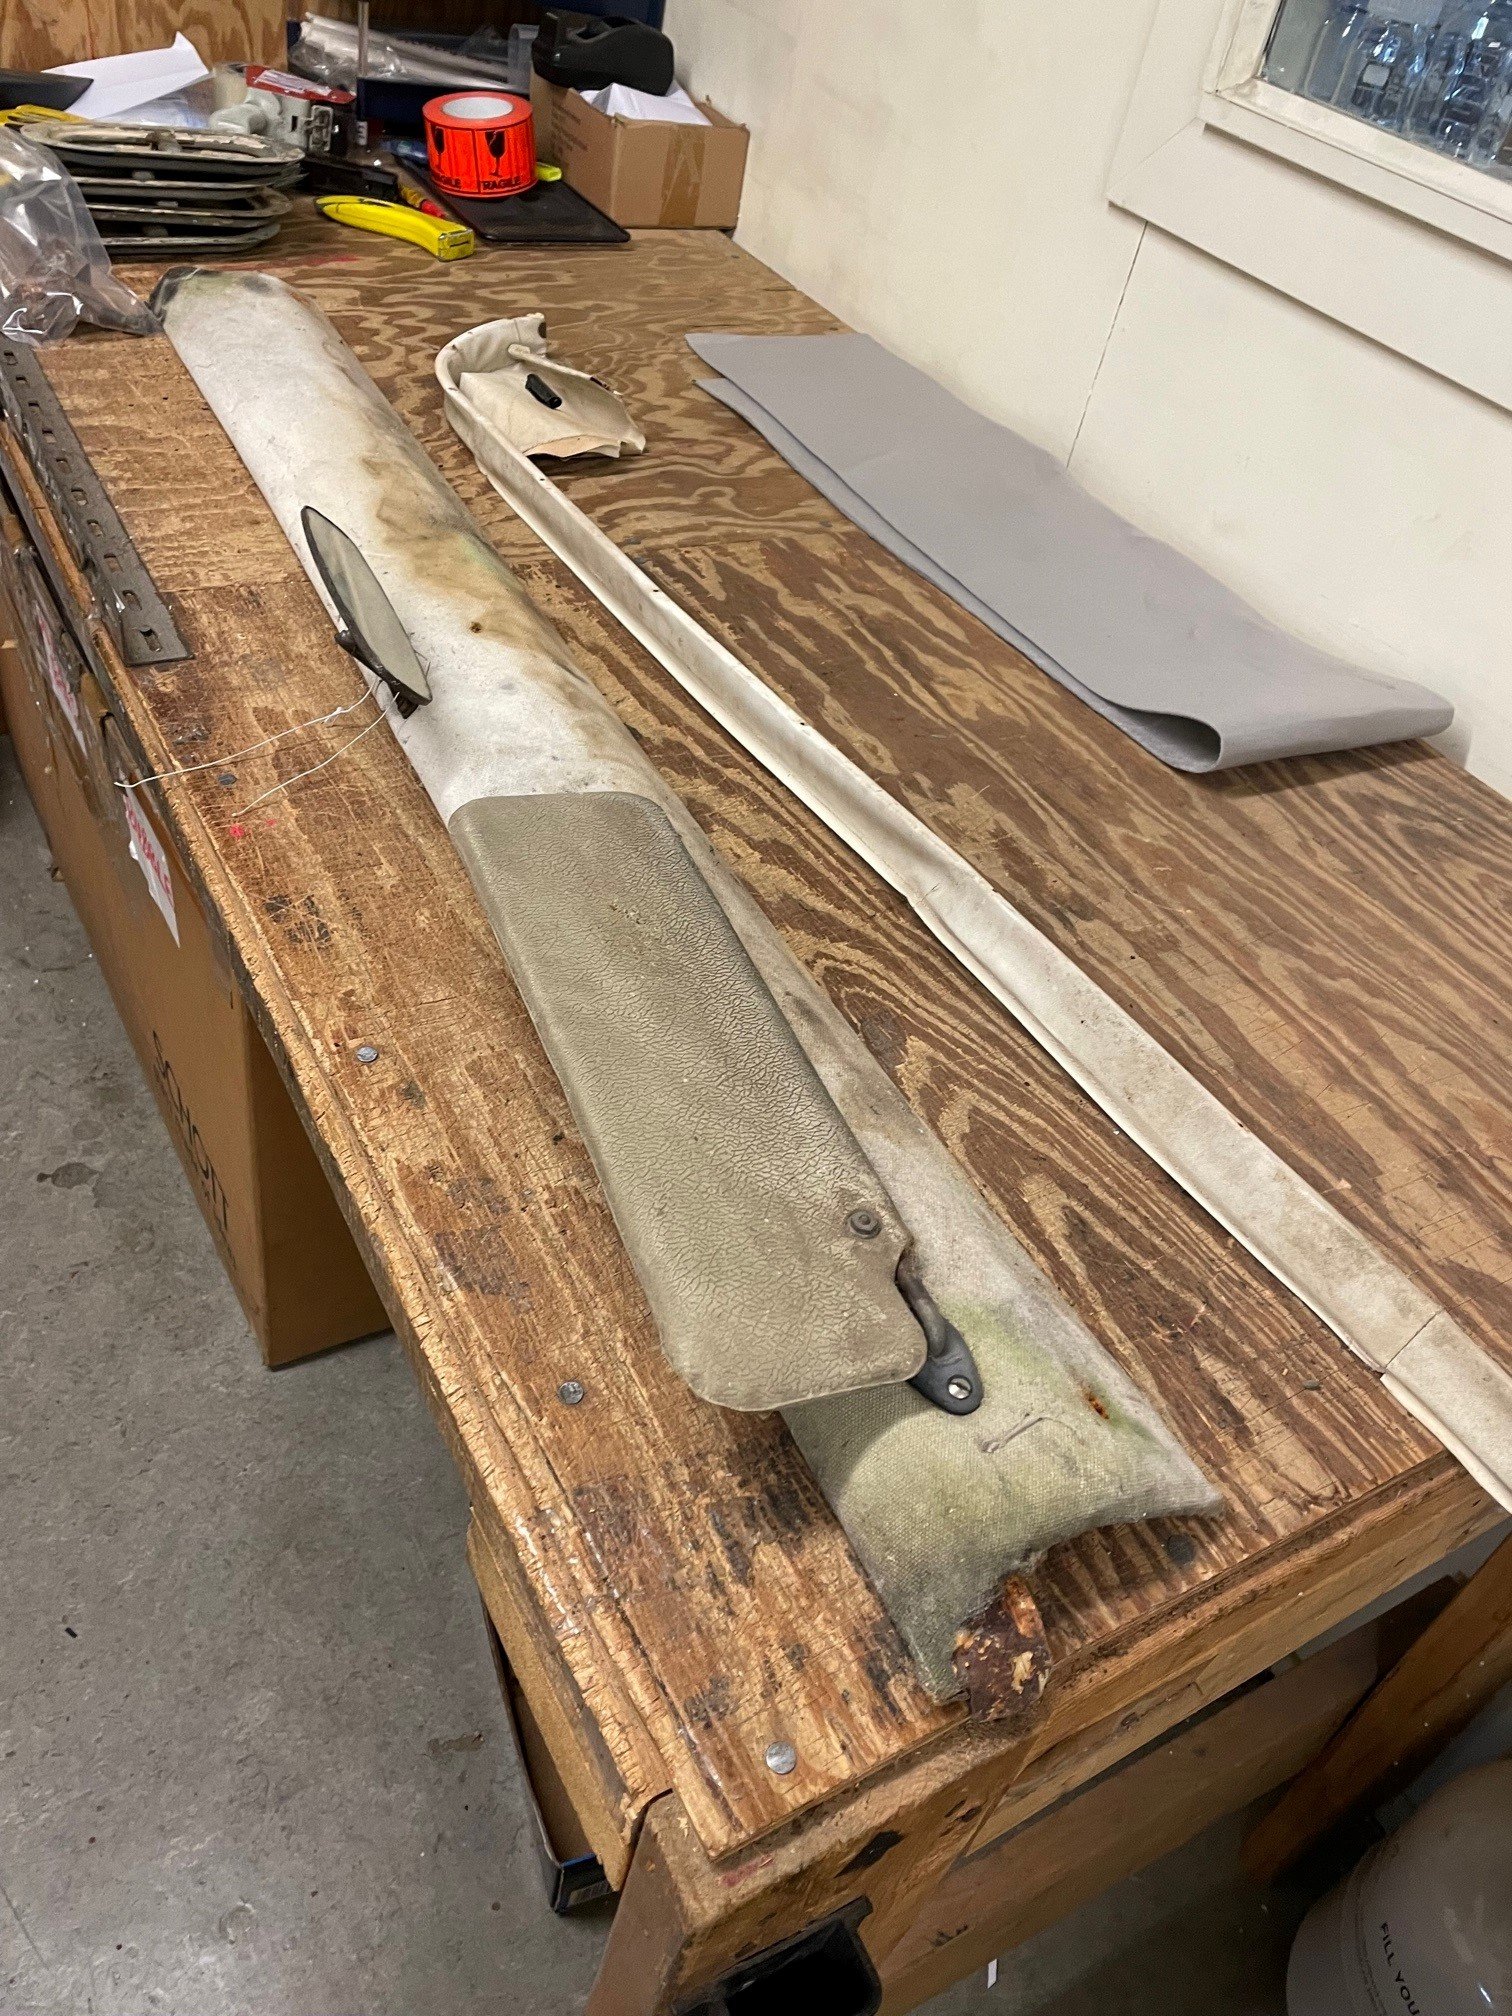
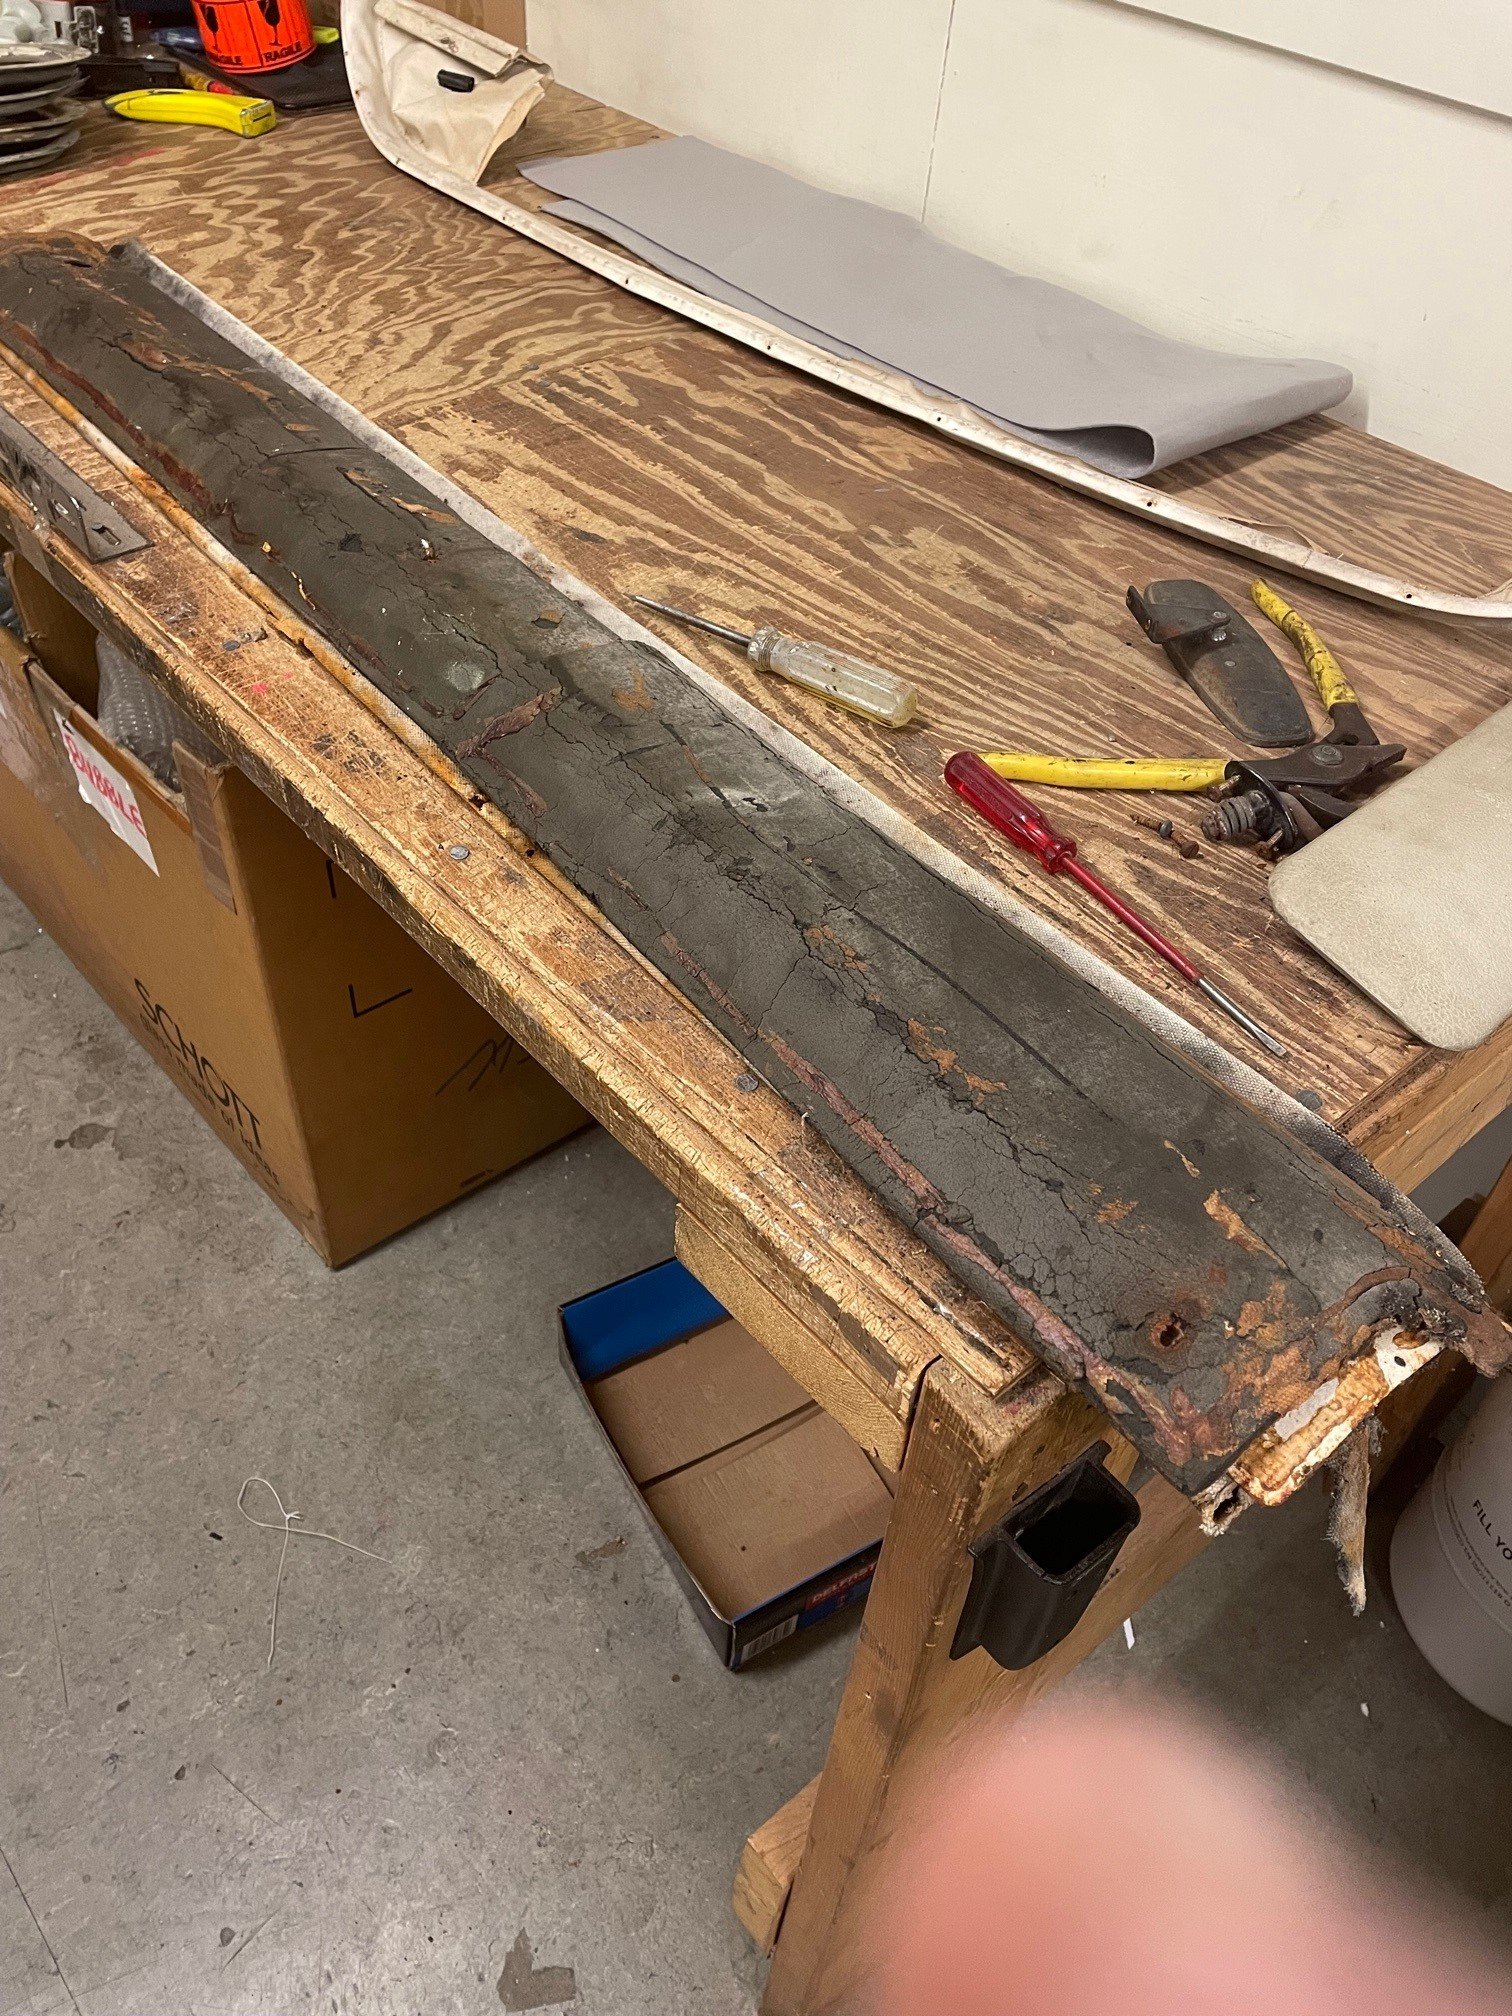
Still working on the interior, I have 2x rolls of tar mat into this thing... To go over it I bought a generic roof lining kit, initially failed by trying to do it all in one go. Was much easier to cut panels in between the roof bracing. Also a cleaner look methings, can run the wiring for the internal light a bit easier too. I should have just enough material to re-pad this panel which goes above the windscreen. Some auto-archeology in pulling it apart, its just sheet steel in behind the dried up foam.
1 point
-
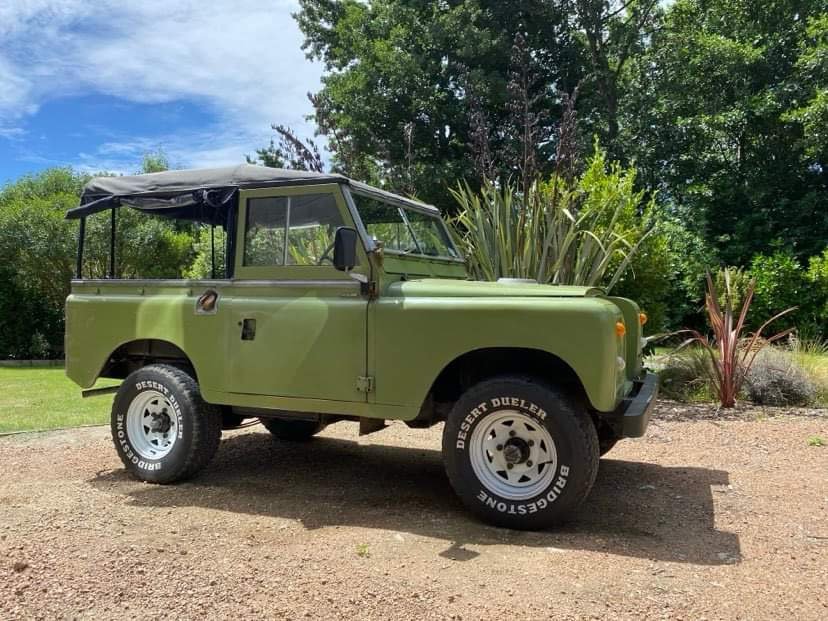
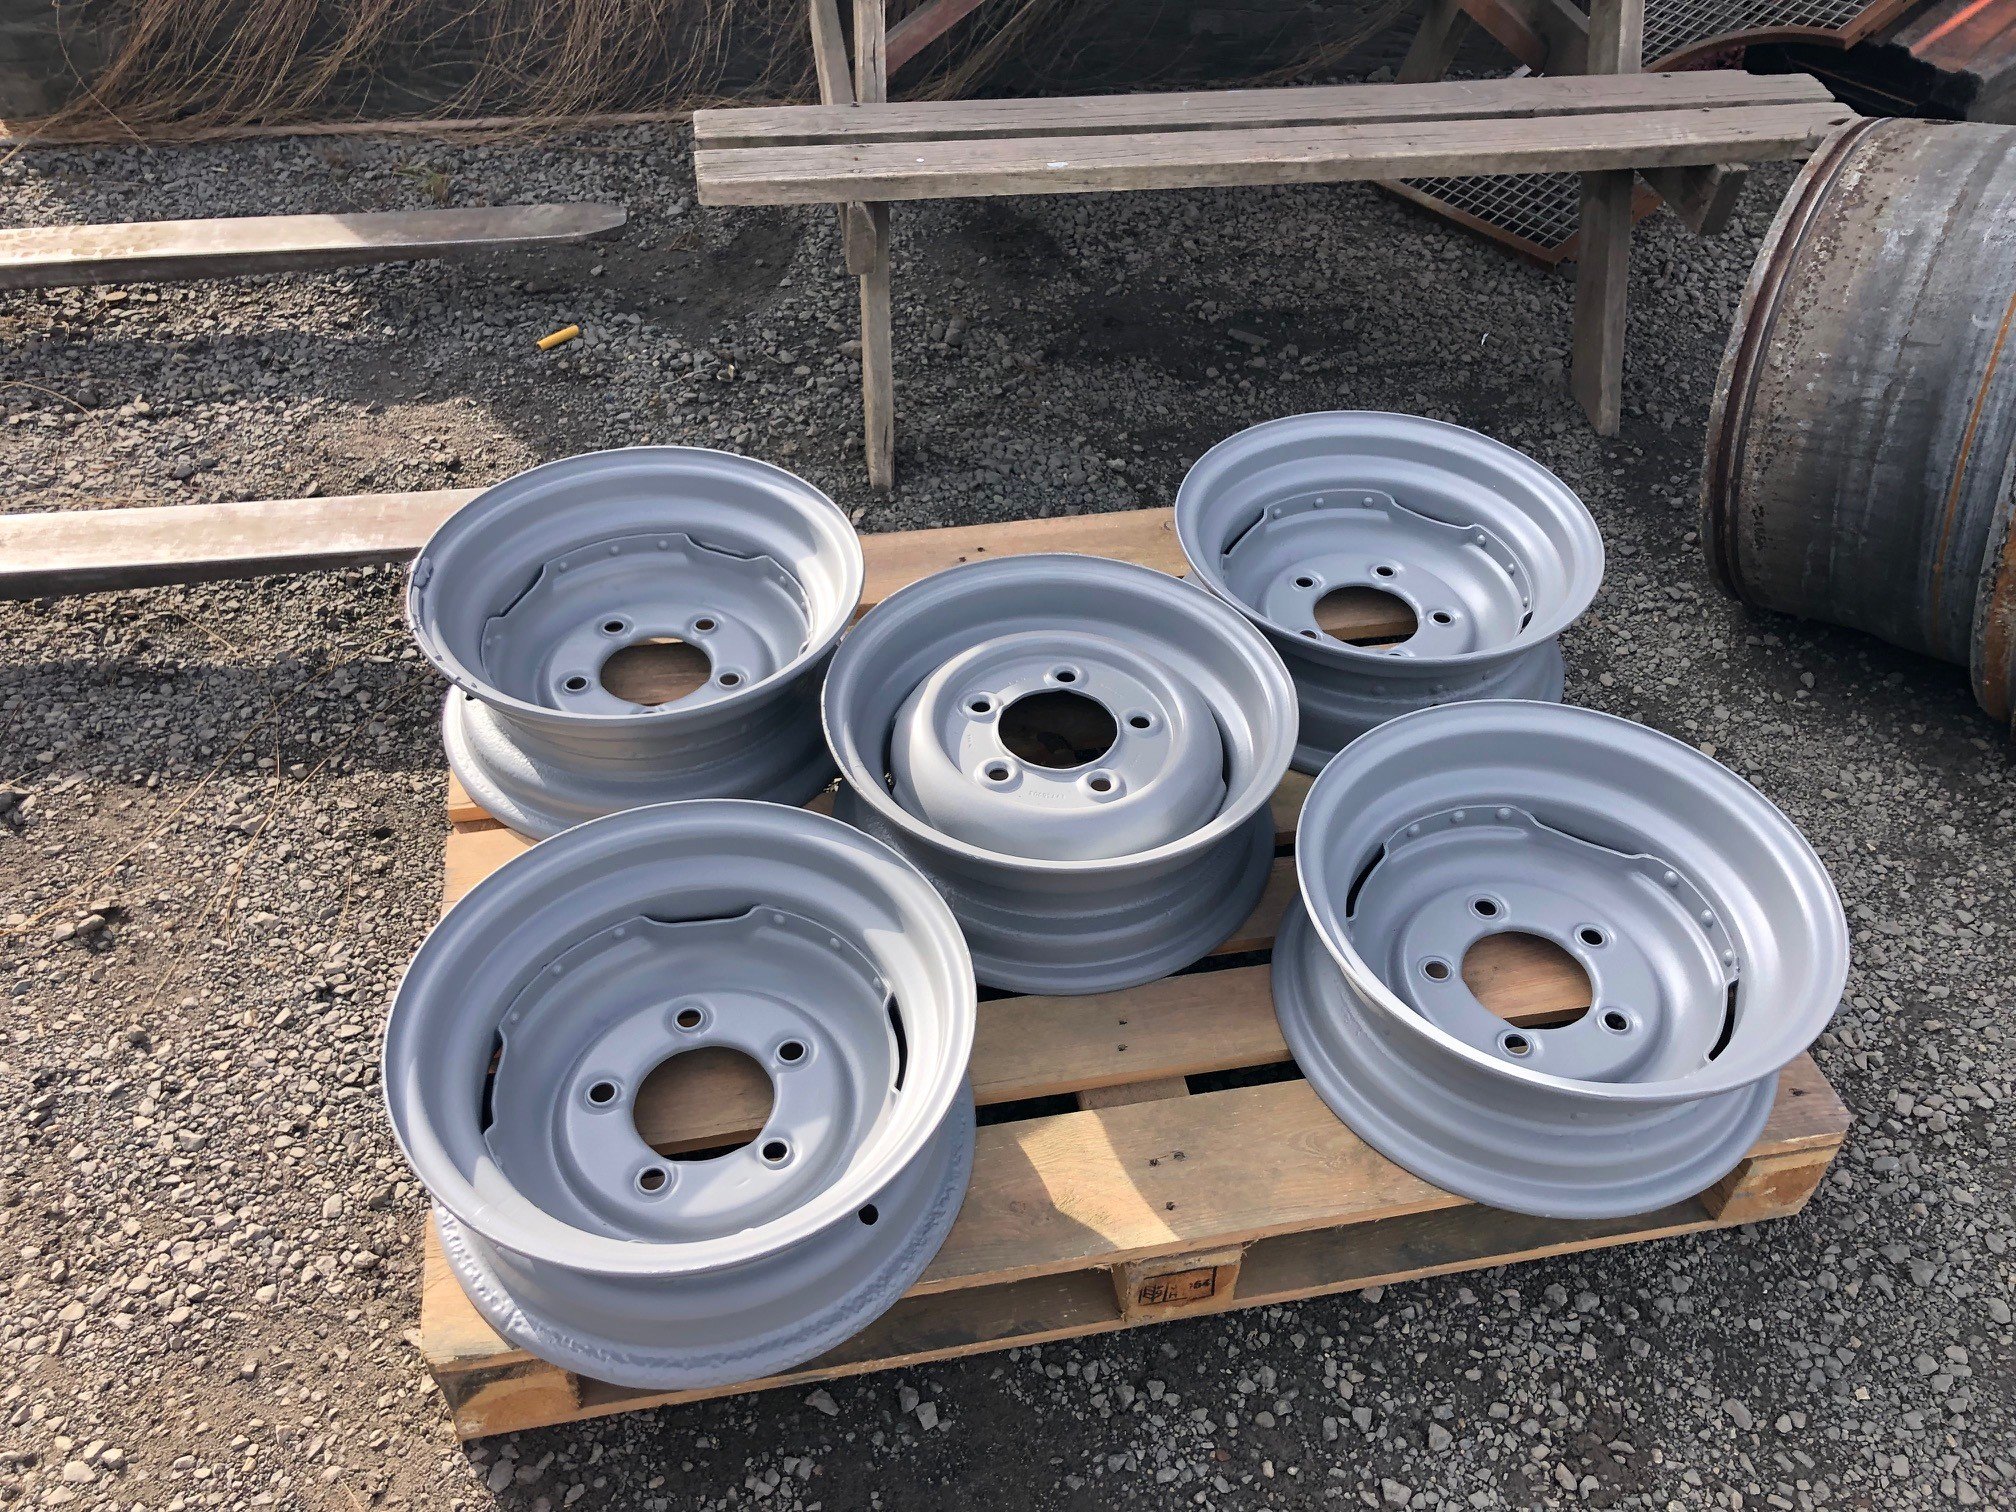
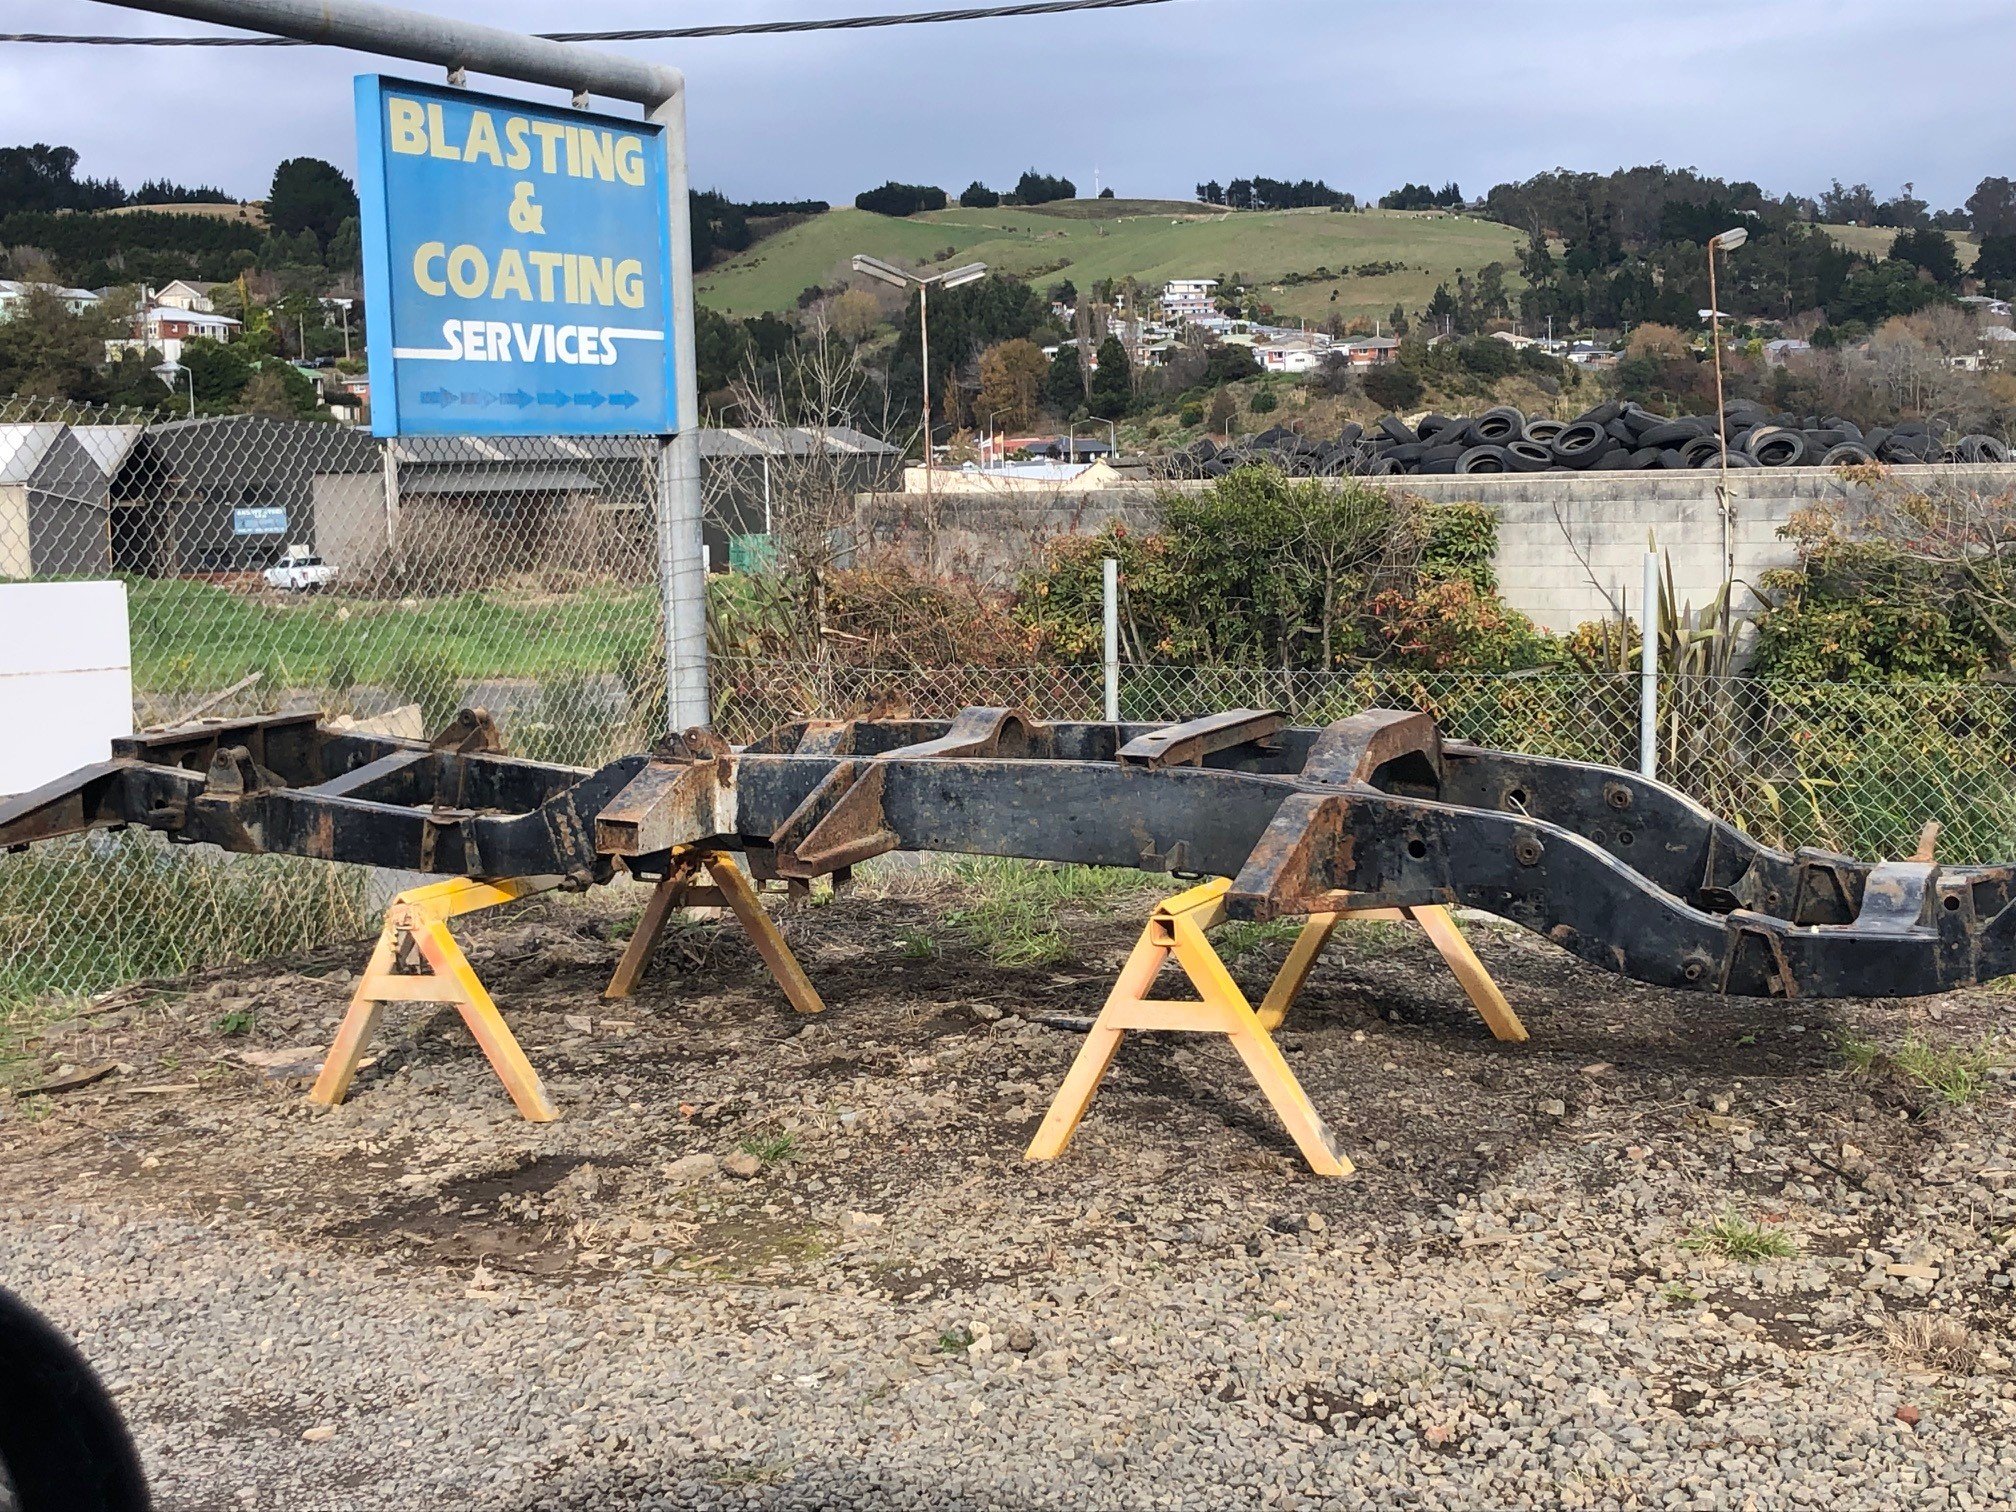
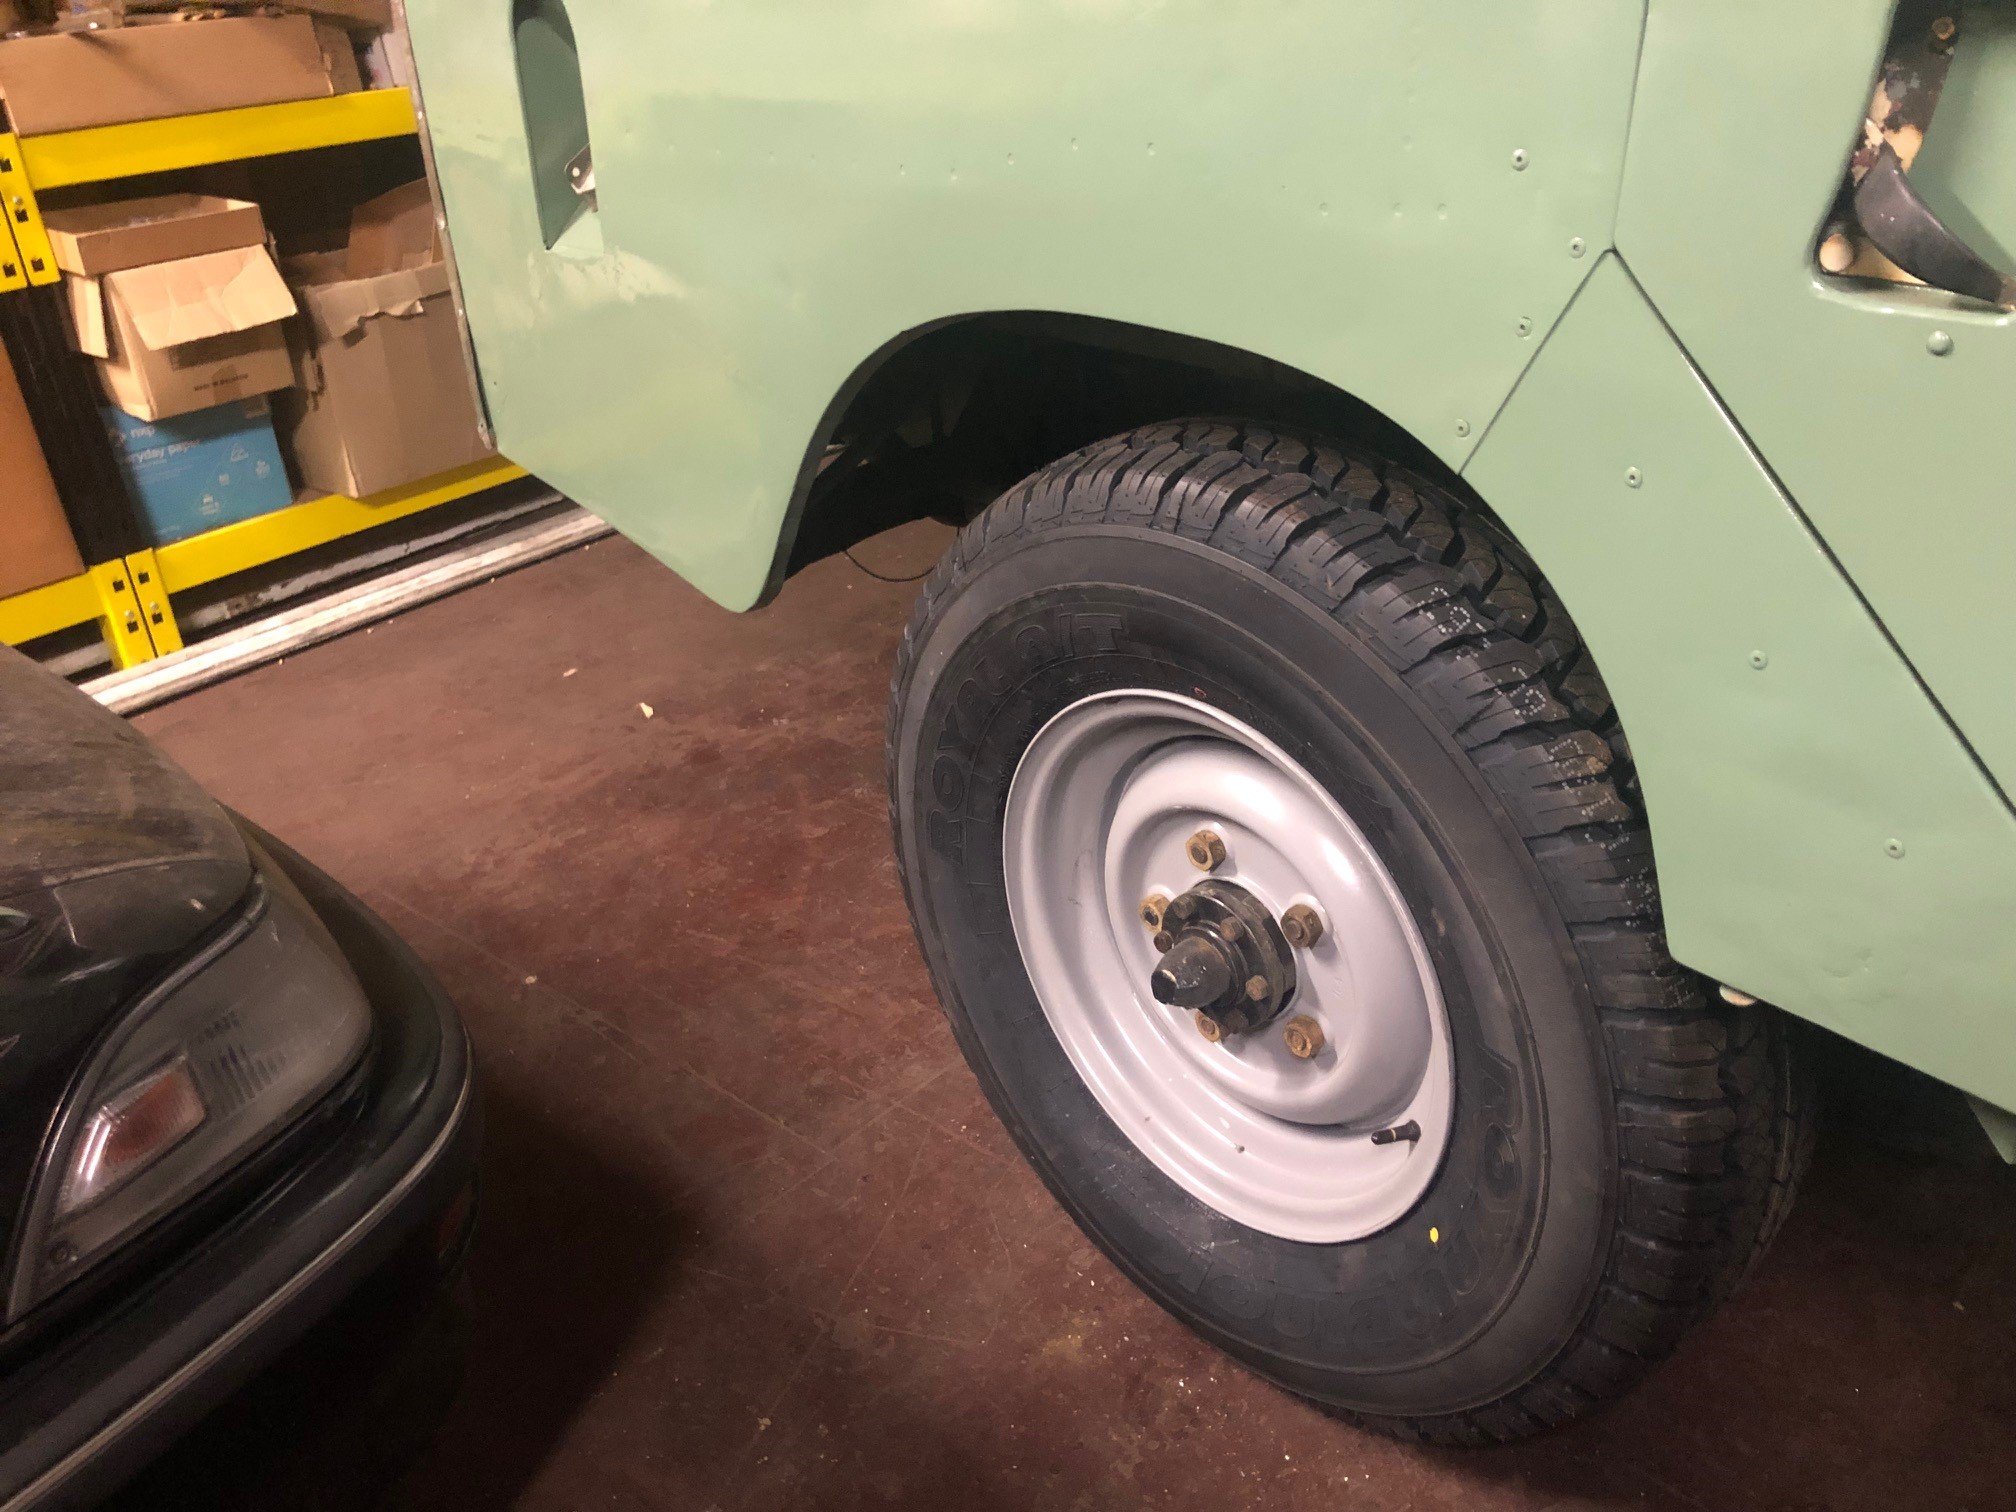
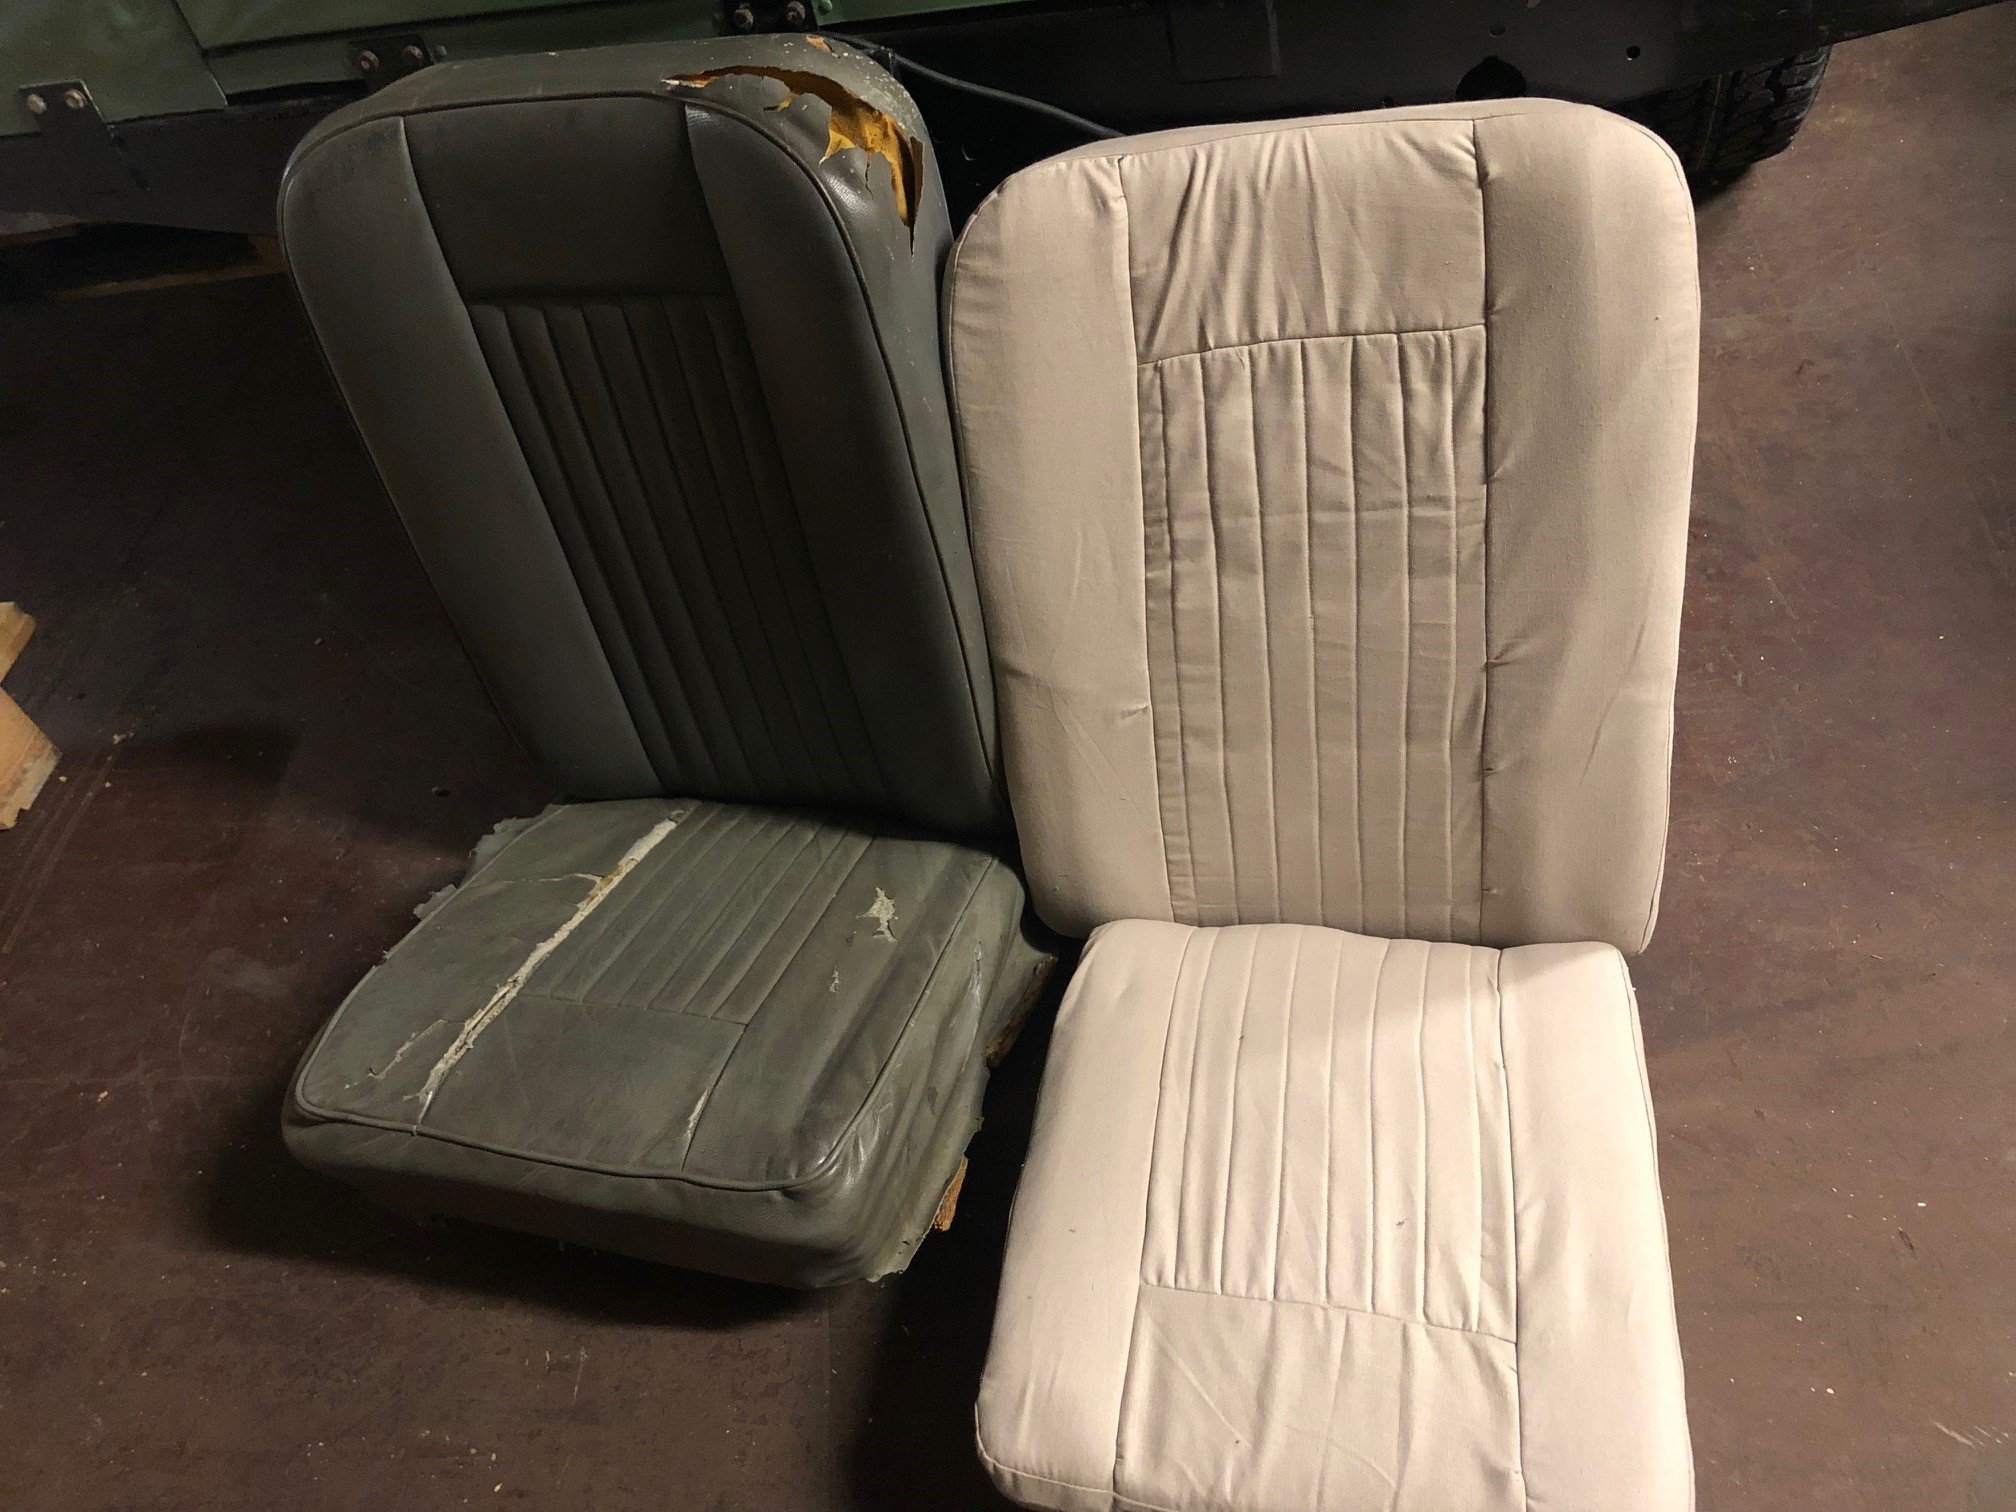
I feel like I've made the most progress in a long while... Got all the old tyres pulled and sent the rims to the blasters, added a good thick layer of 2k while they were at it. Decided on a generic grey rather than white (to match the roof) as will likely get scratched up and look terrible. Came up well There was also another 109 chassis waiting to be blasted when I was there, so thats always a good sign... Got a good deal on tyres (correctly 235/85/16) and after wrangling up some muscle (aka @azzurro) to haul them back to the warehouse, got em fitted up, reckon they look quite the part. As per the discussion thread, I've been (rightly or wrongly) having a go at my own upolstery, got one set of seats completed so far. Pros and cons with going with the canvas but will see how we go long term
1 point
-
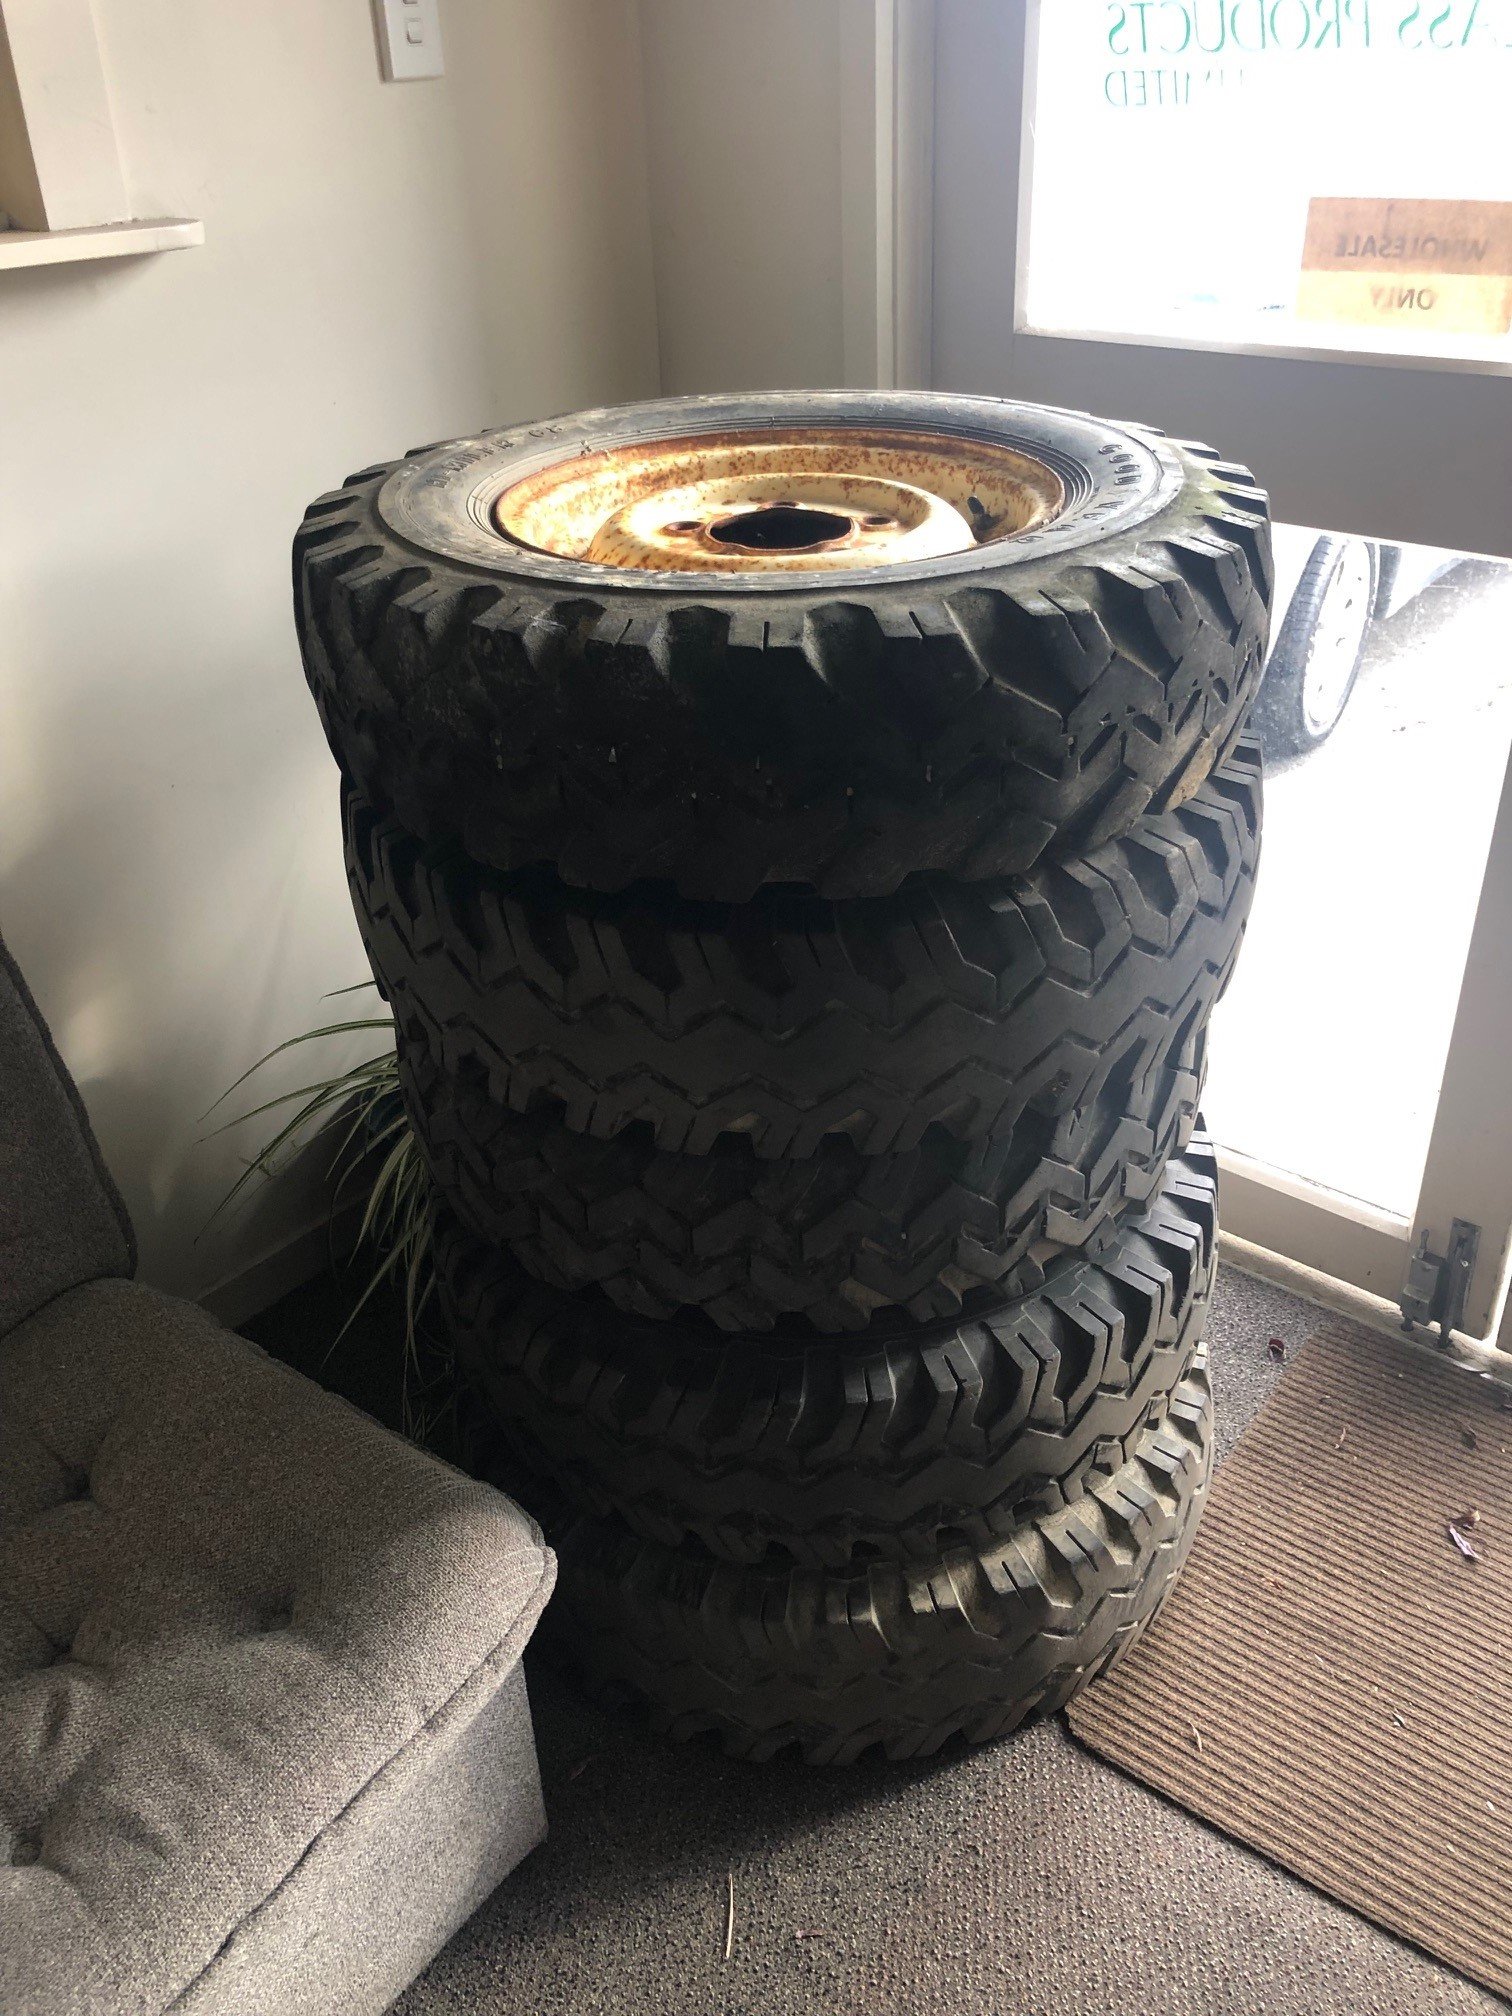
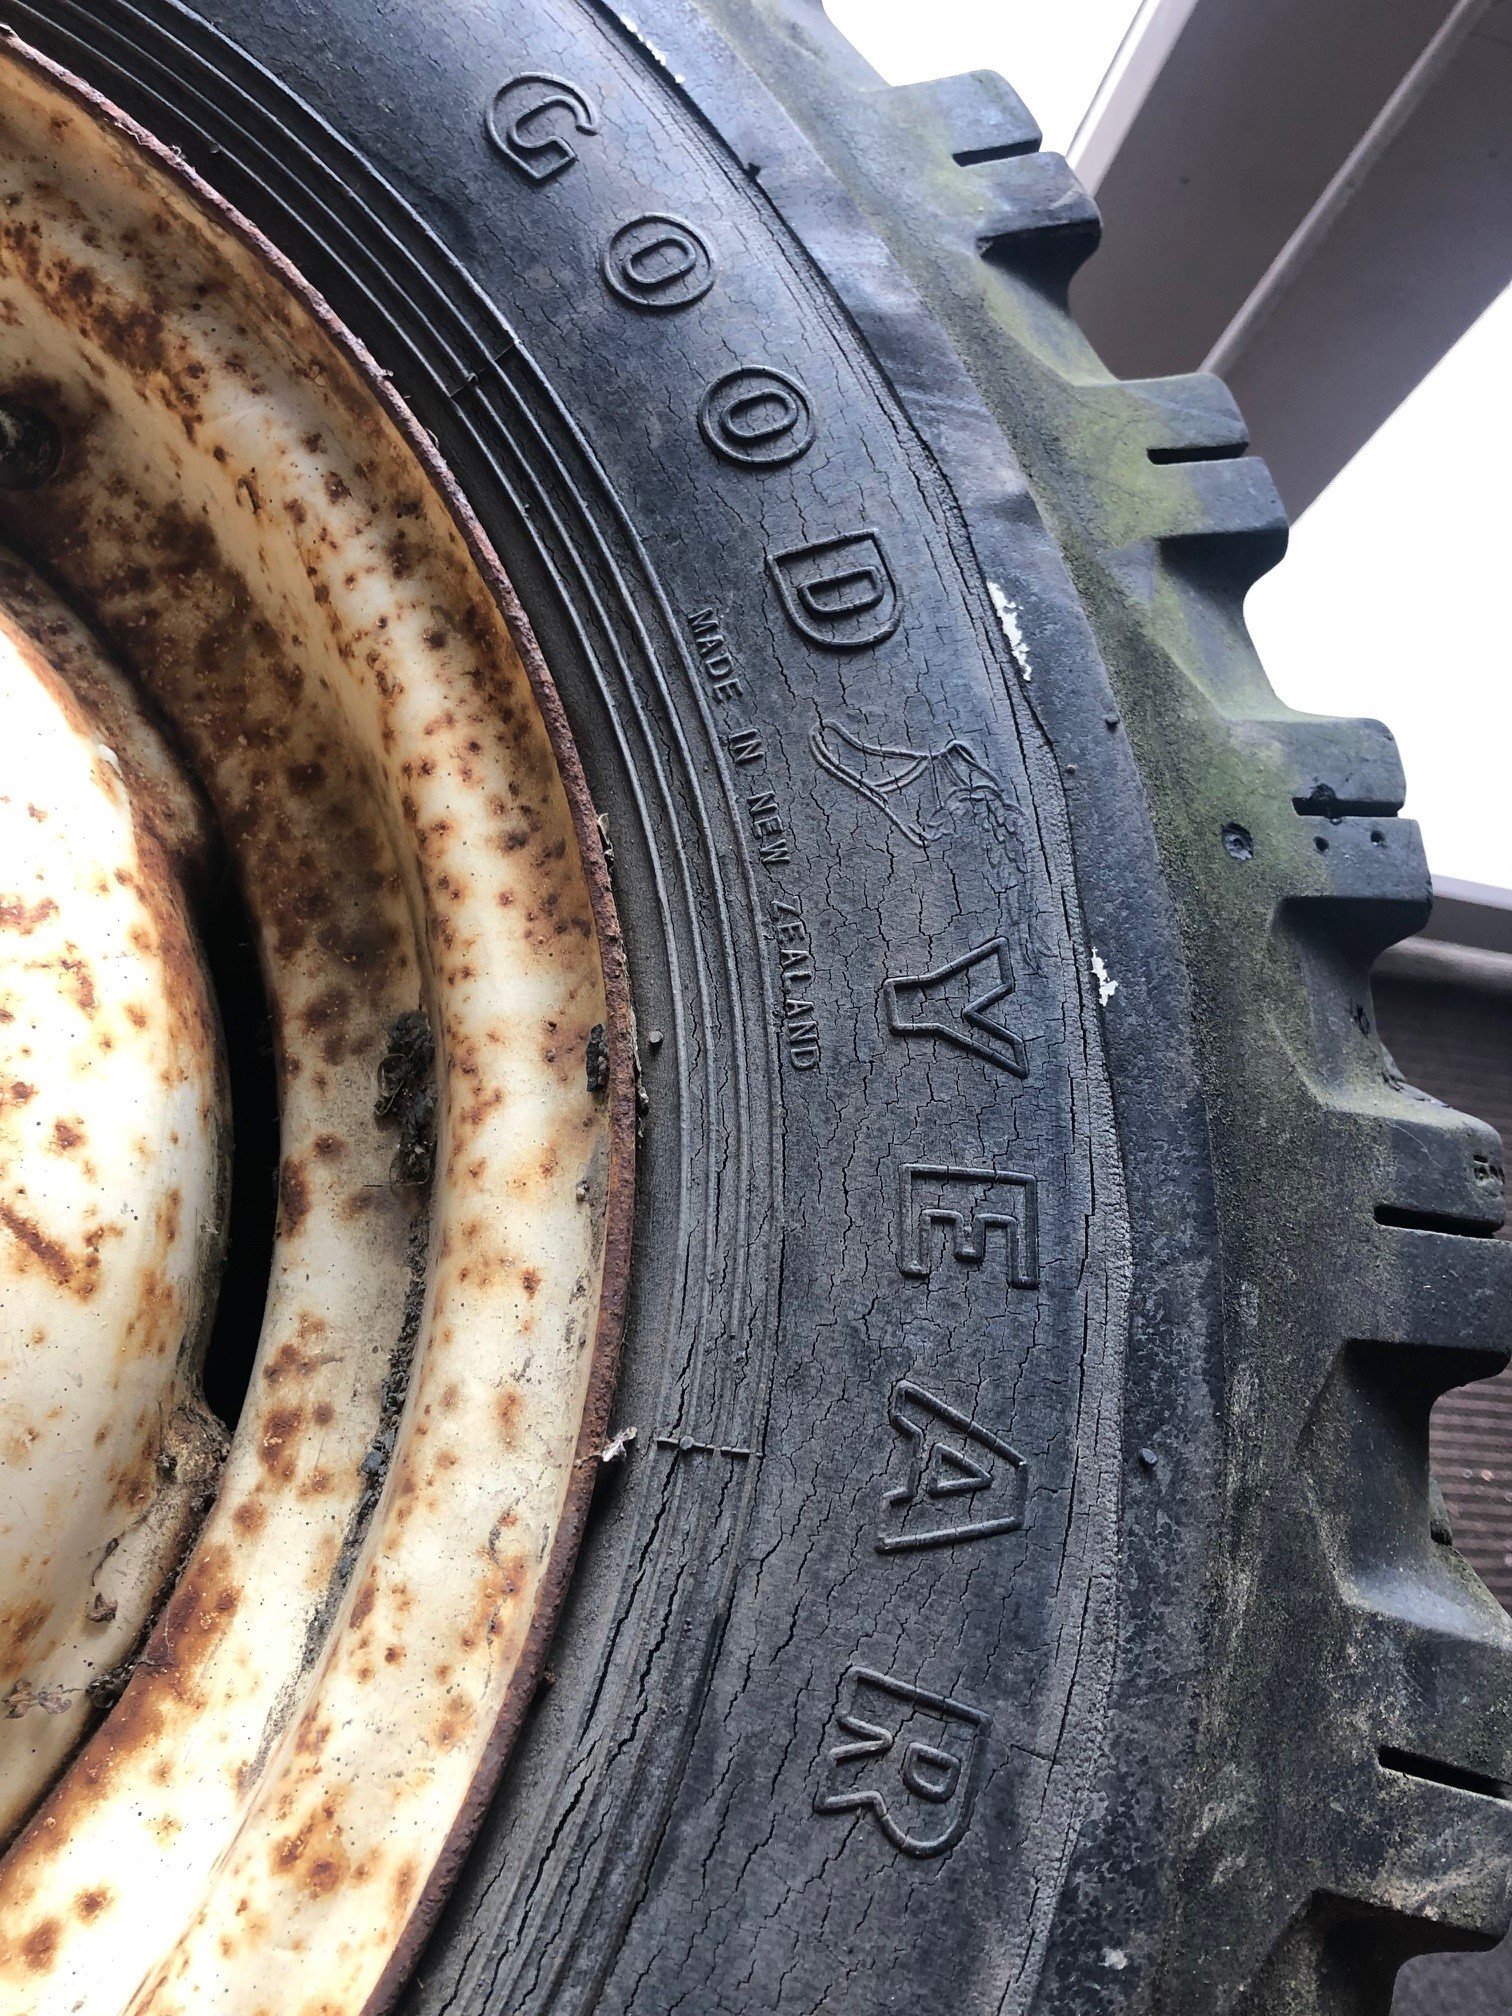
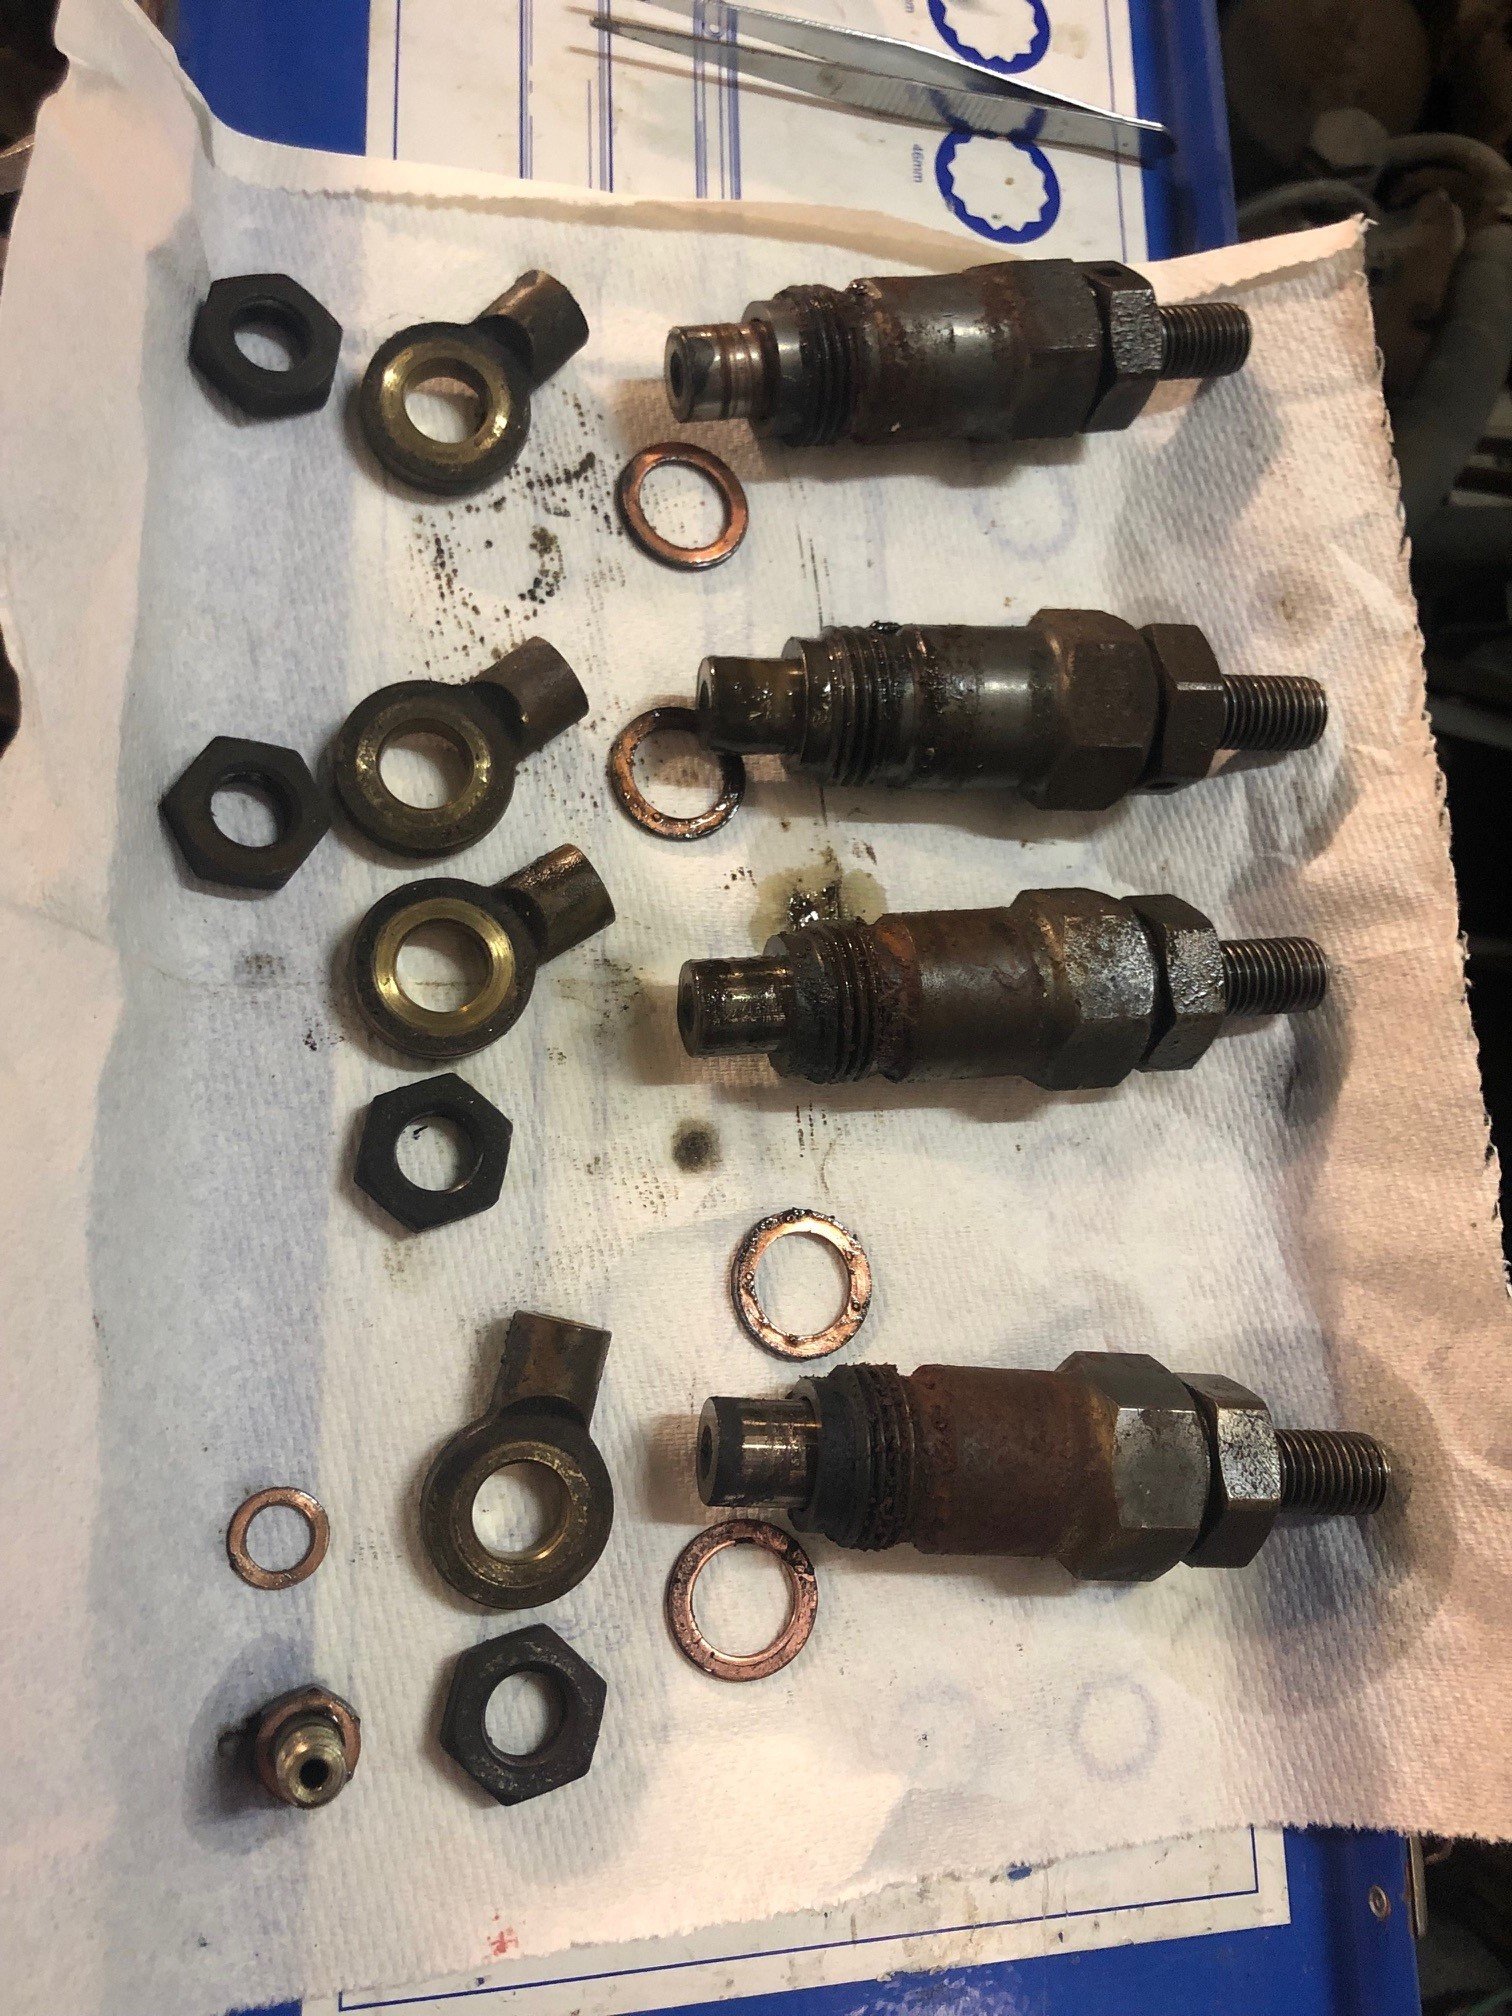
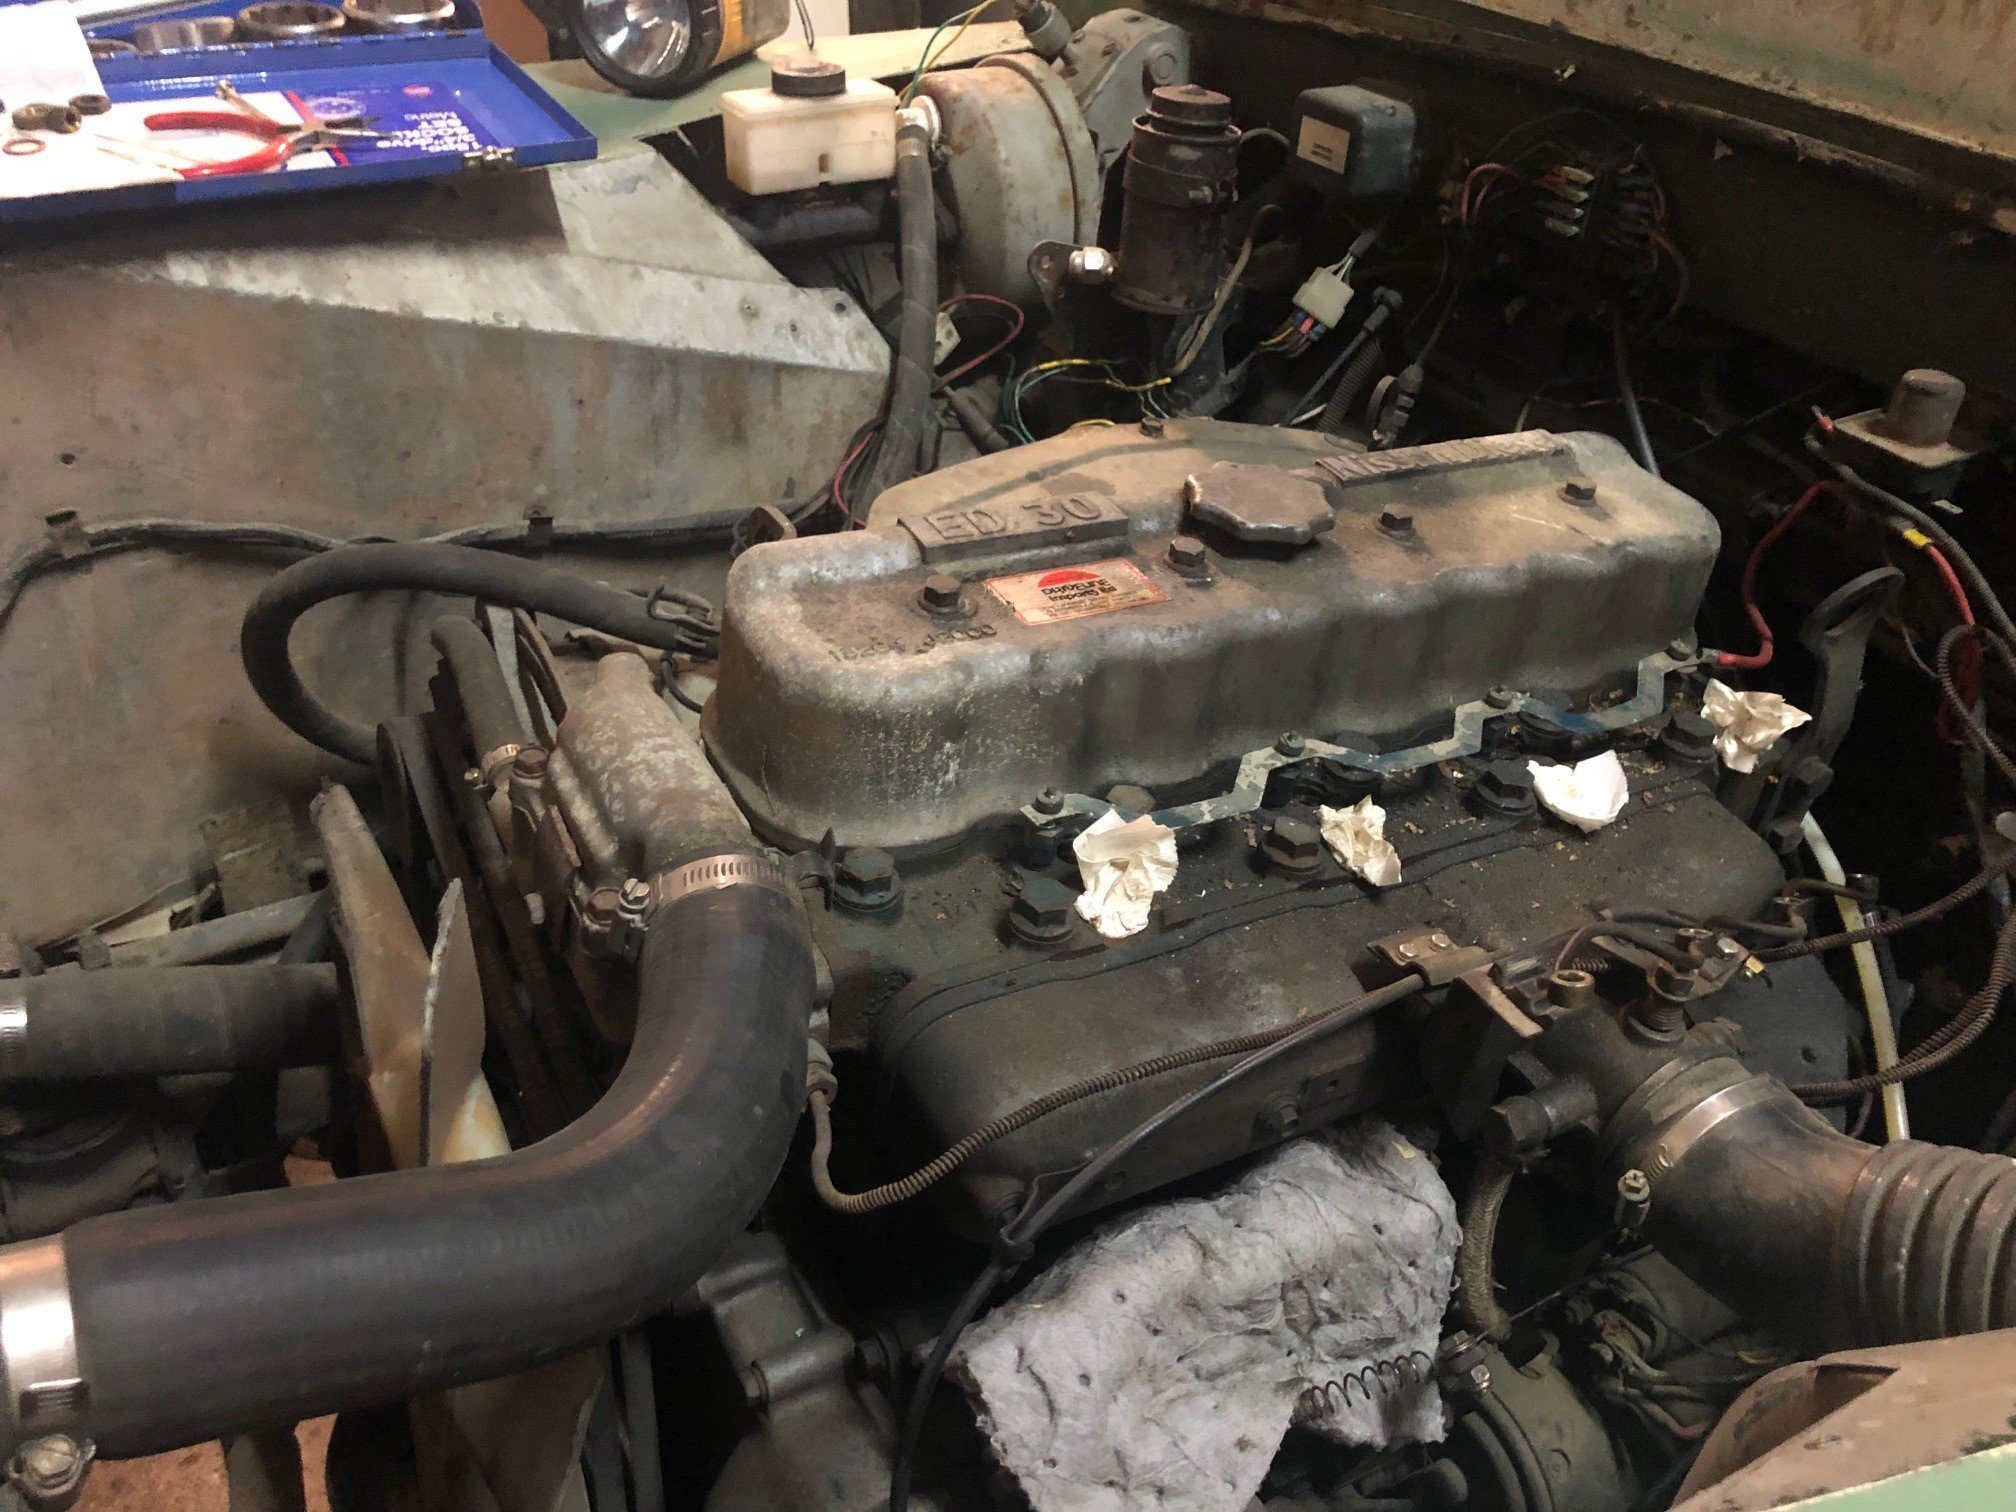
Decided to stop feeling sorry that this is tucked away and get to work on it some more... Its always been a smokey beast... have pulled the injectors to get them re-tipped. The nozzles did look pretty bad Getting these off to treat for some new shoes. 285/70-16 is what the landy barrys say I should be going for. How long ago did Goodyear make these here...?
1 point
-
I am now 'Facebook Page Guy'1 point


This leaderboard is set to Auckland/GMT+12:00