
Leaderboard


Popular Content
Showing content with the highest reputation on 03/10/23 in Posts
-
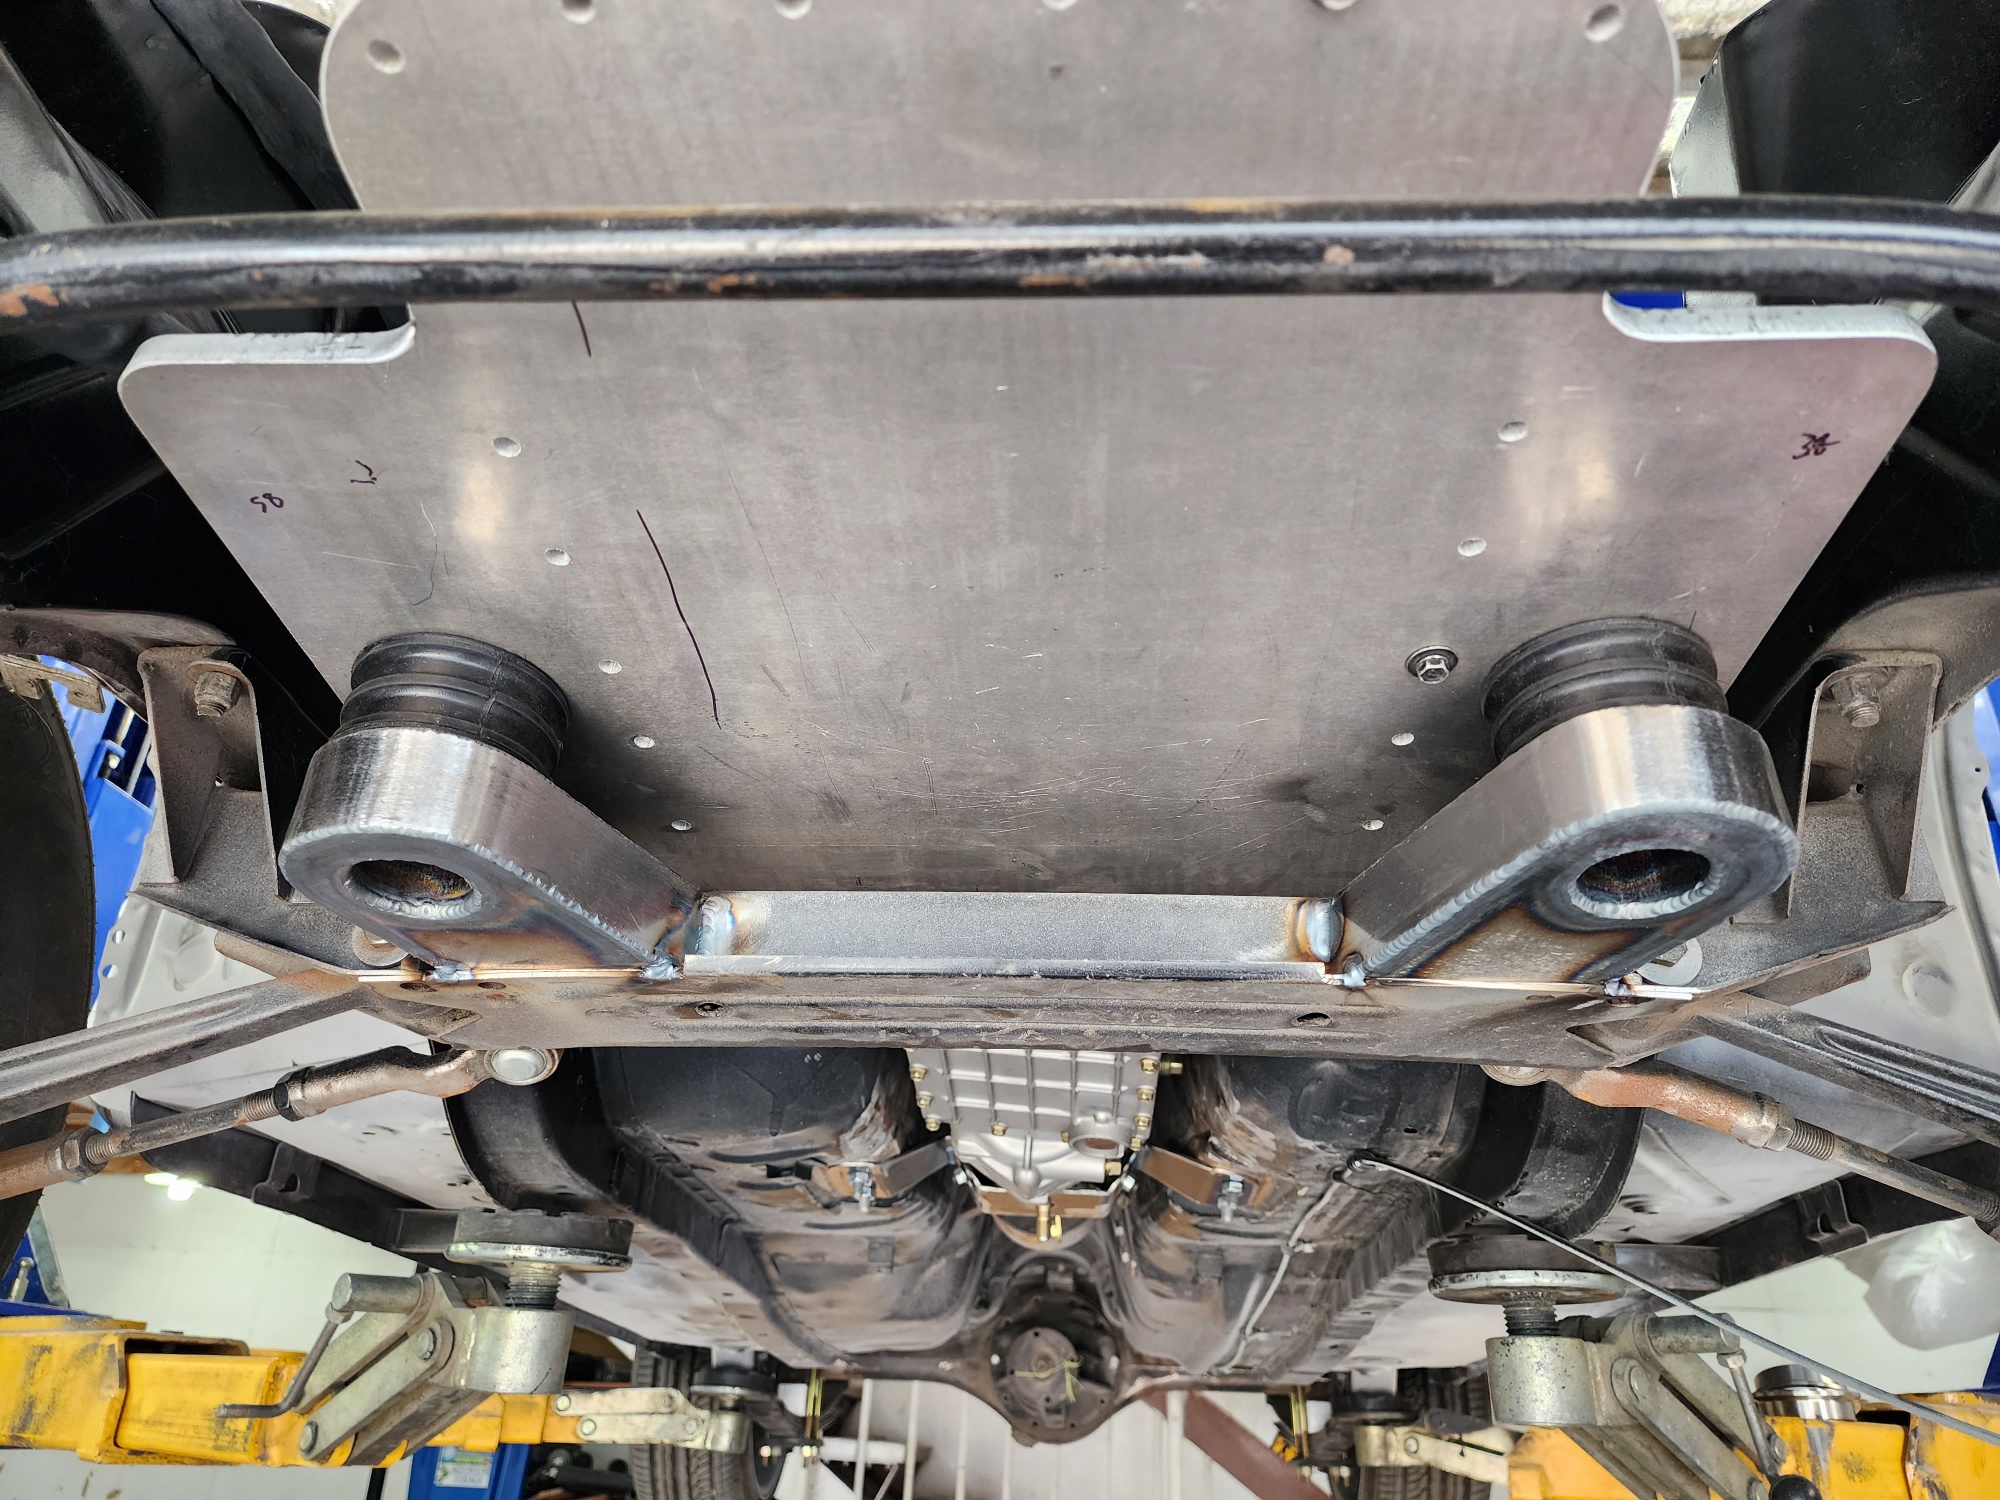
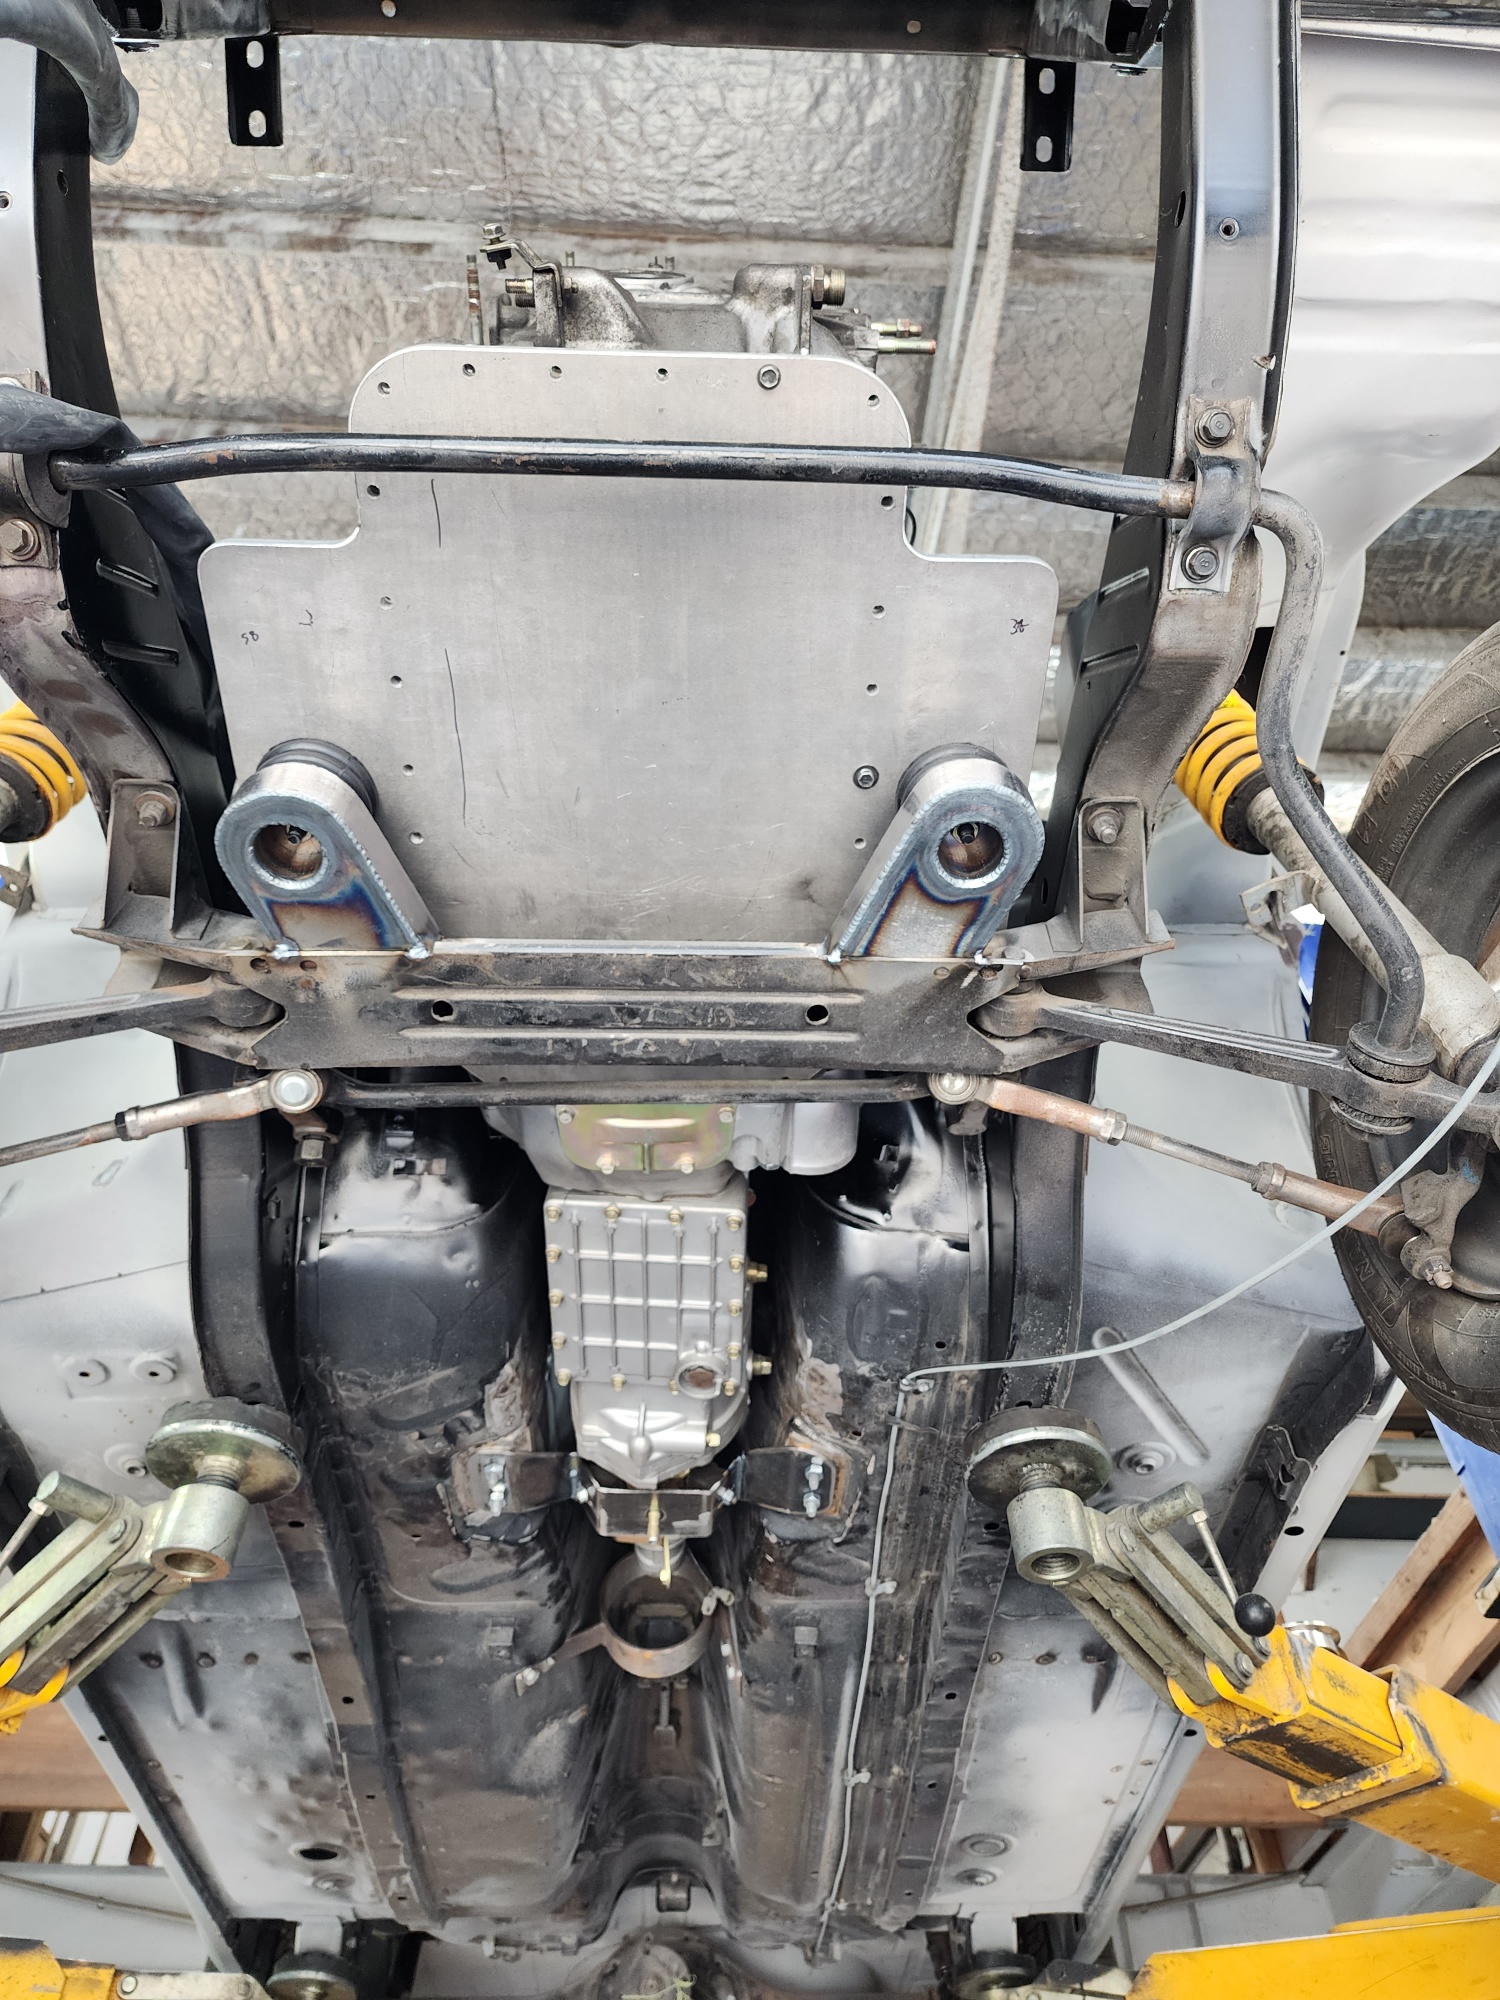
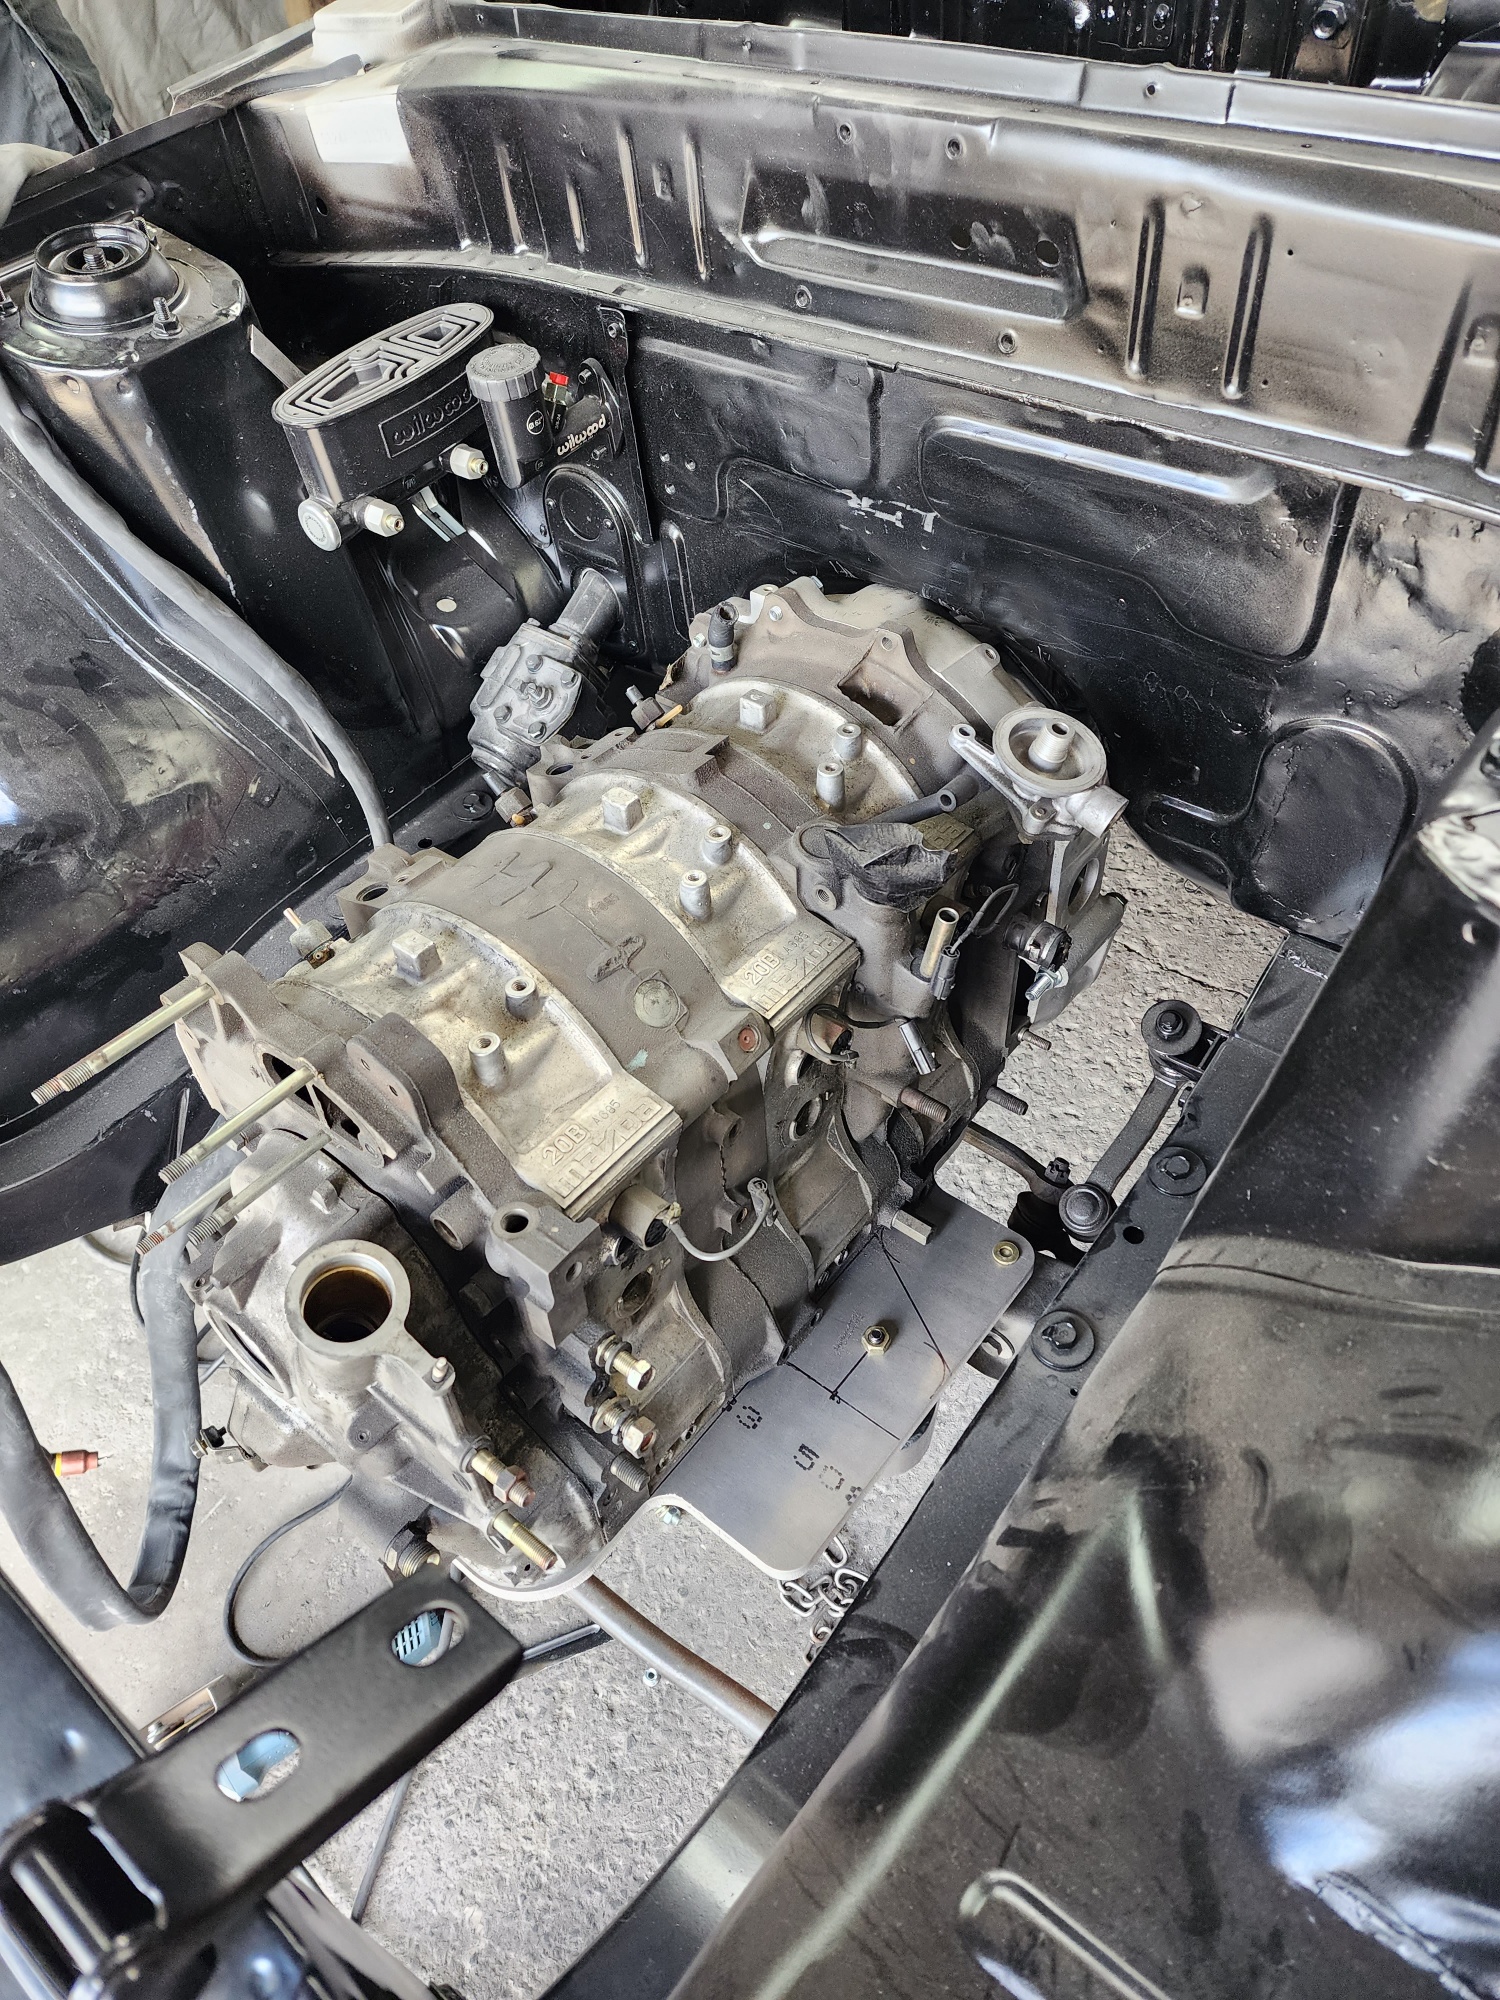
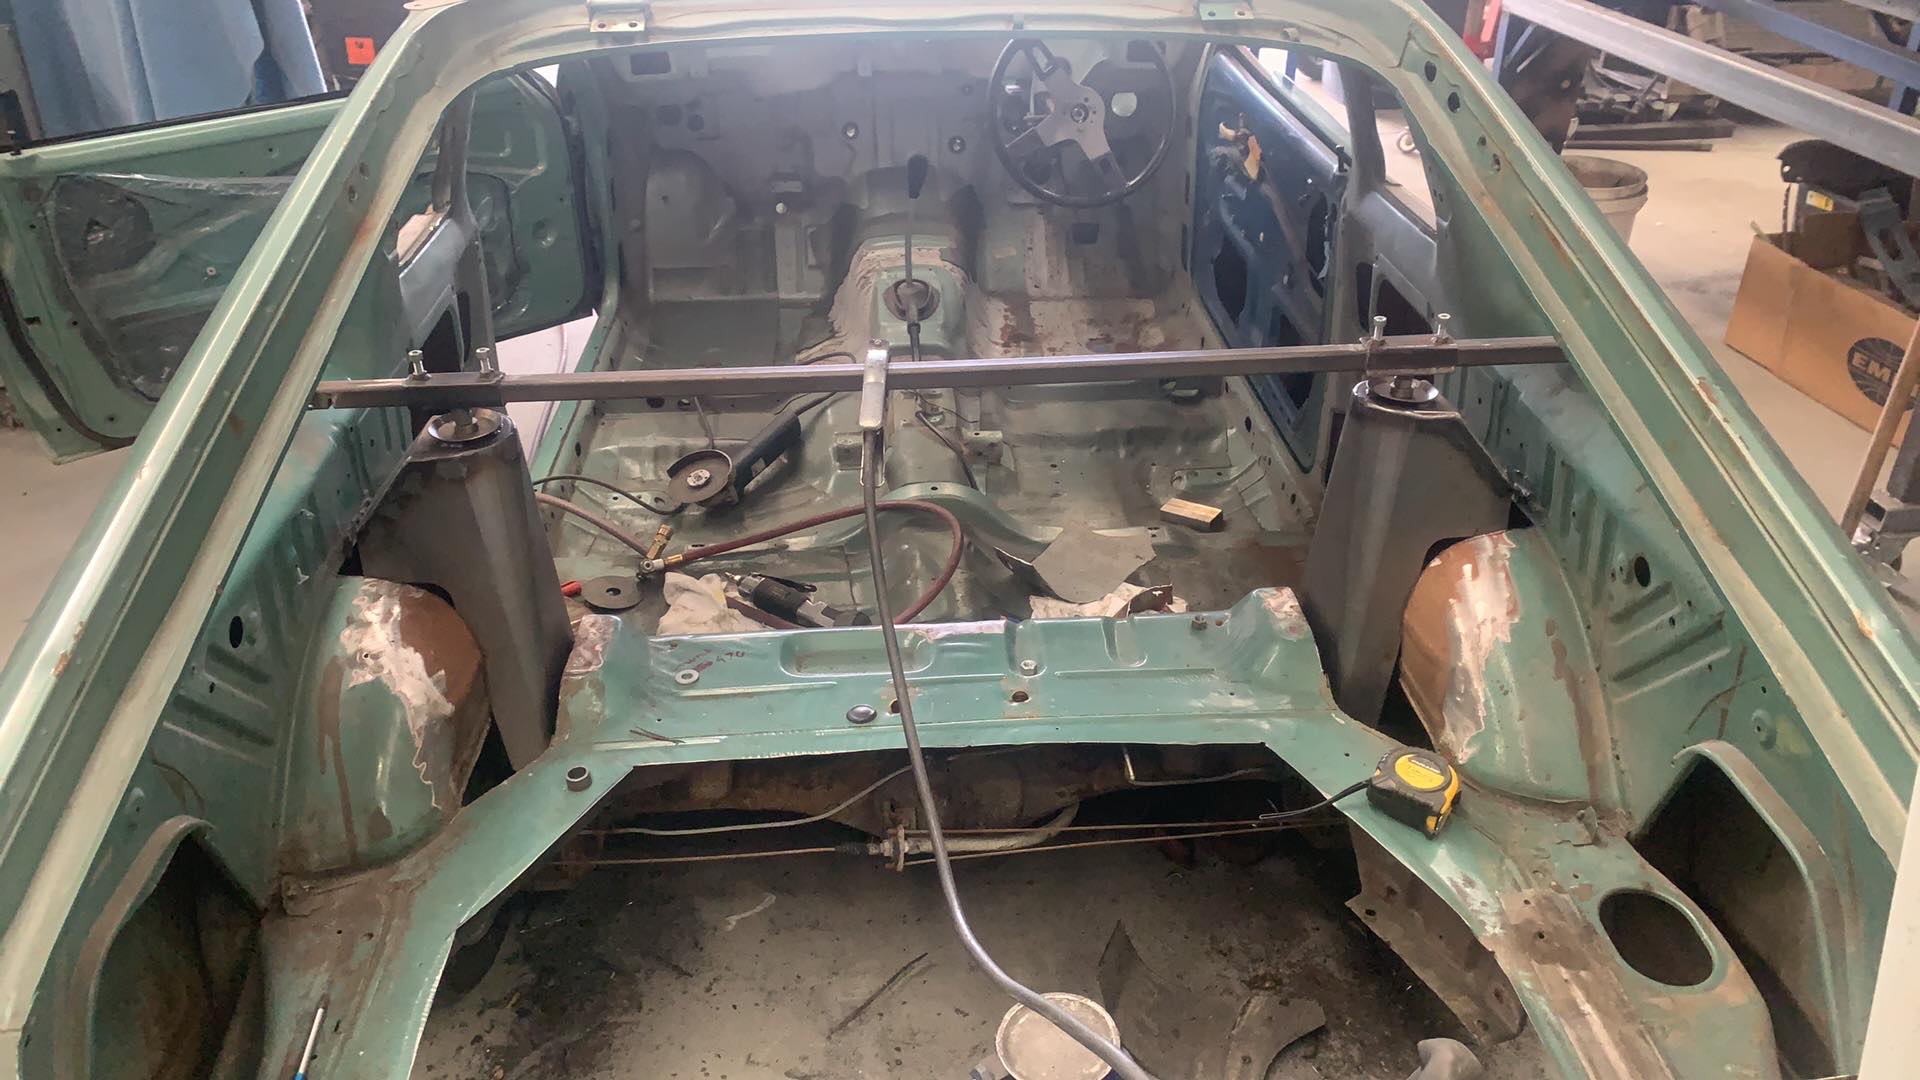
Wee while no update. Things have slowly been ticking away in the background. Car has sat at fabricators for a while parts have been collected and he finished existing workload. Plan is for him to do the following: -Custom sump/engine mount & gearbox mount -Custom radiator (Tucked under rad support panel) with PWR core and Oil cooler to suit -Full stainless headers/exhaust -Catch cans/overflow bottles -Battery box for in the boot Hes made a start in the last few weeks and its coming along nicely! Motors mounted in the hole and fits nicely. Going to go to steel bellhousing for my S5 FC box which will give me a little more tunnel clearance and mean i don't have to try jam a scatter blanket or shield in if im wanting to run the drags once its done. Will also be converting to hydraulic release bearing to remove the clutch fork and slave again for tunnel clearance. Can get away without cutting firewall or tunnel doing all of the above which im stoked about as didnt want to cut up. Hopefully next month or so will be done here and on to the next stage.
 19 points
 -
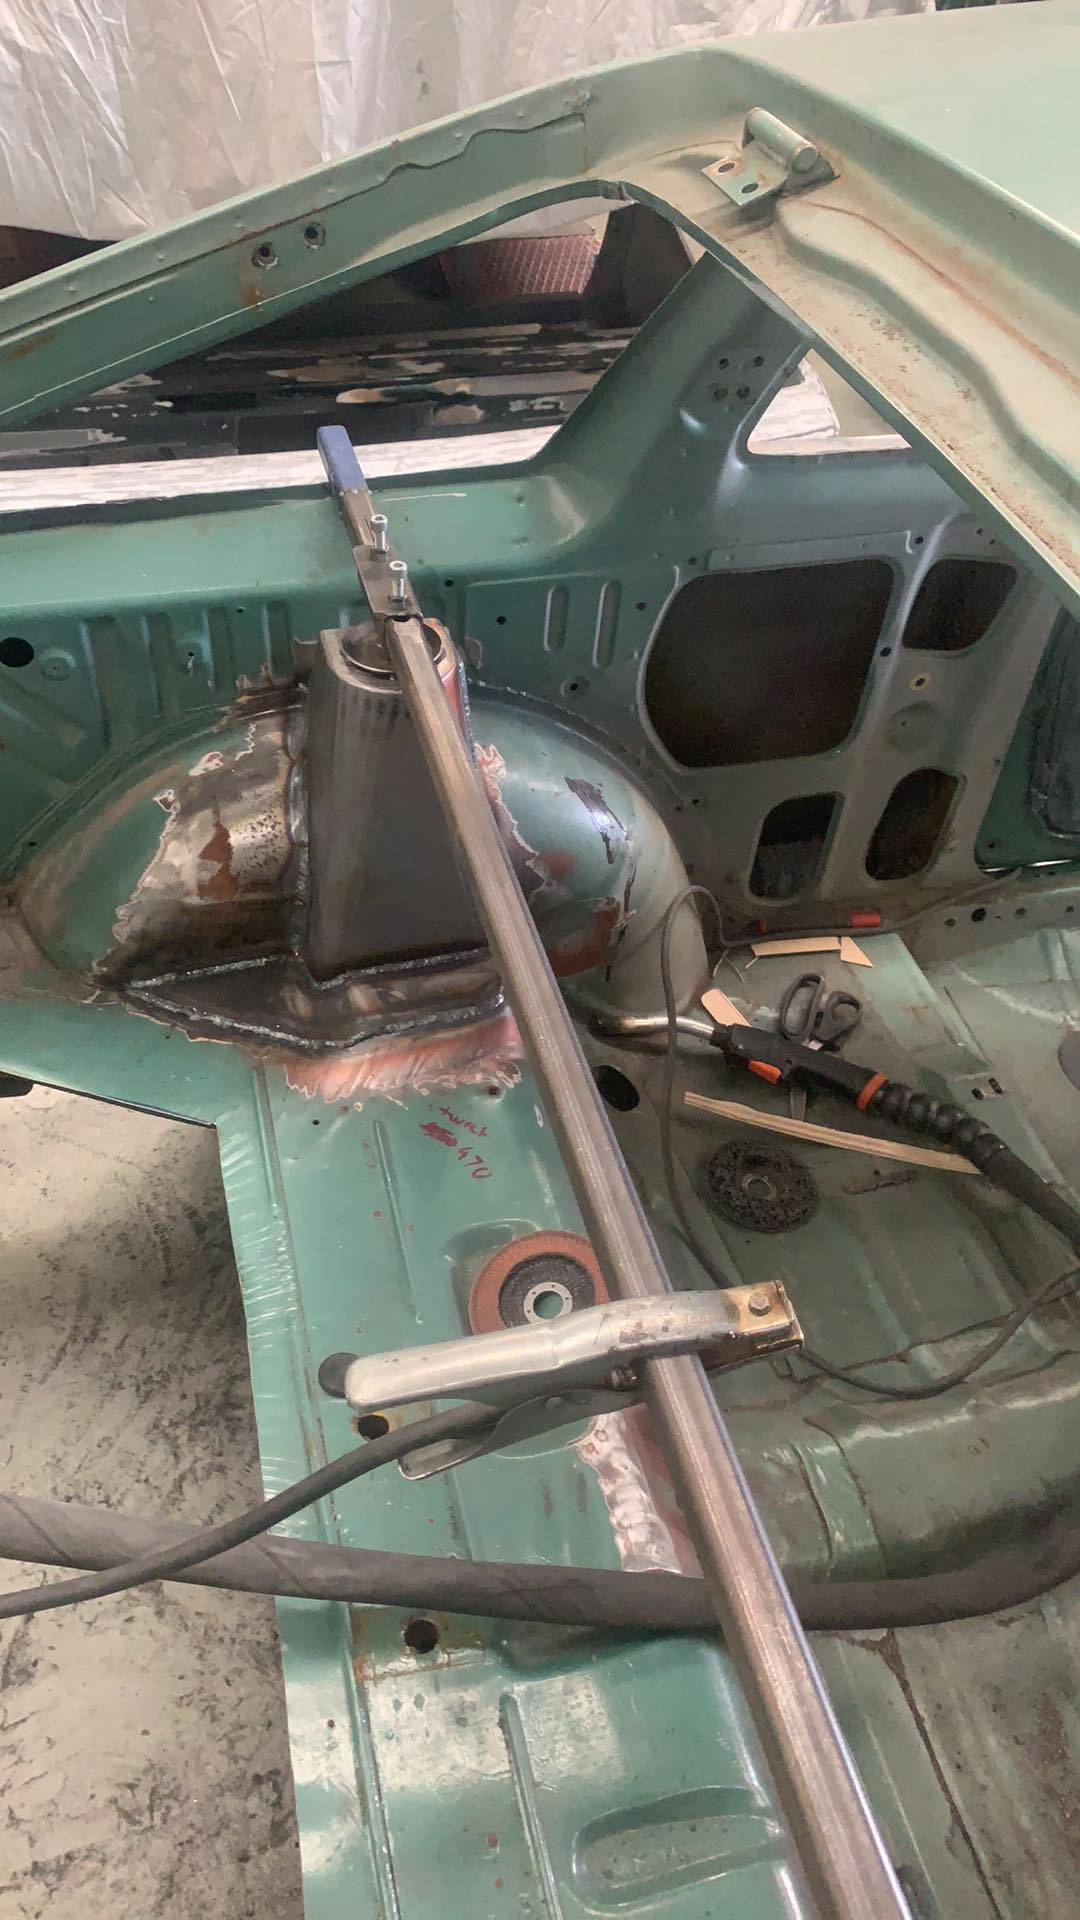
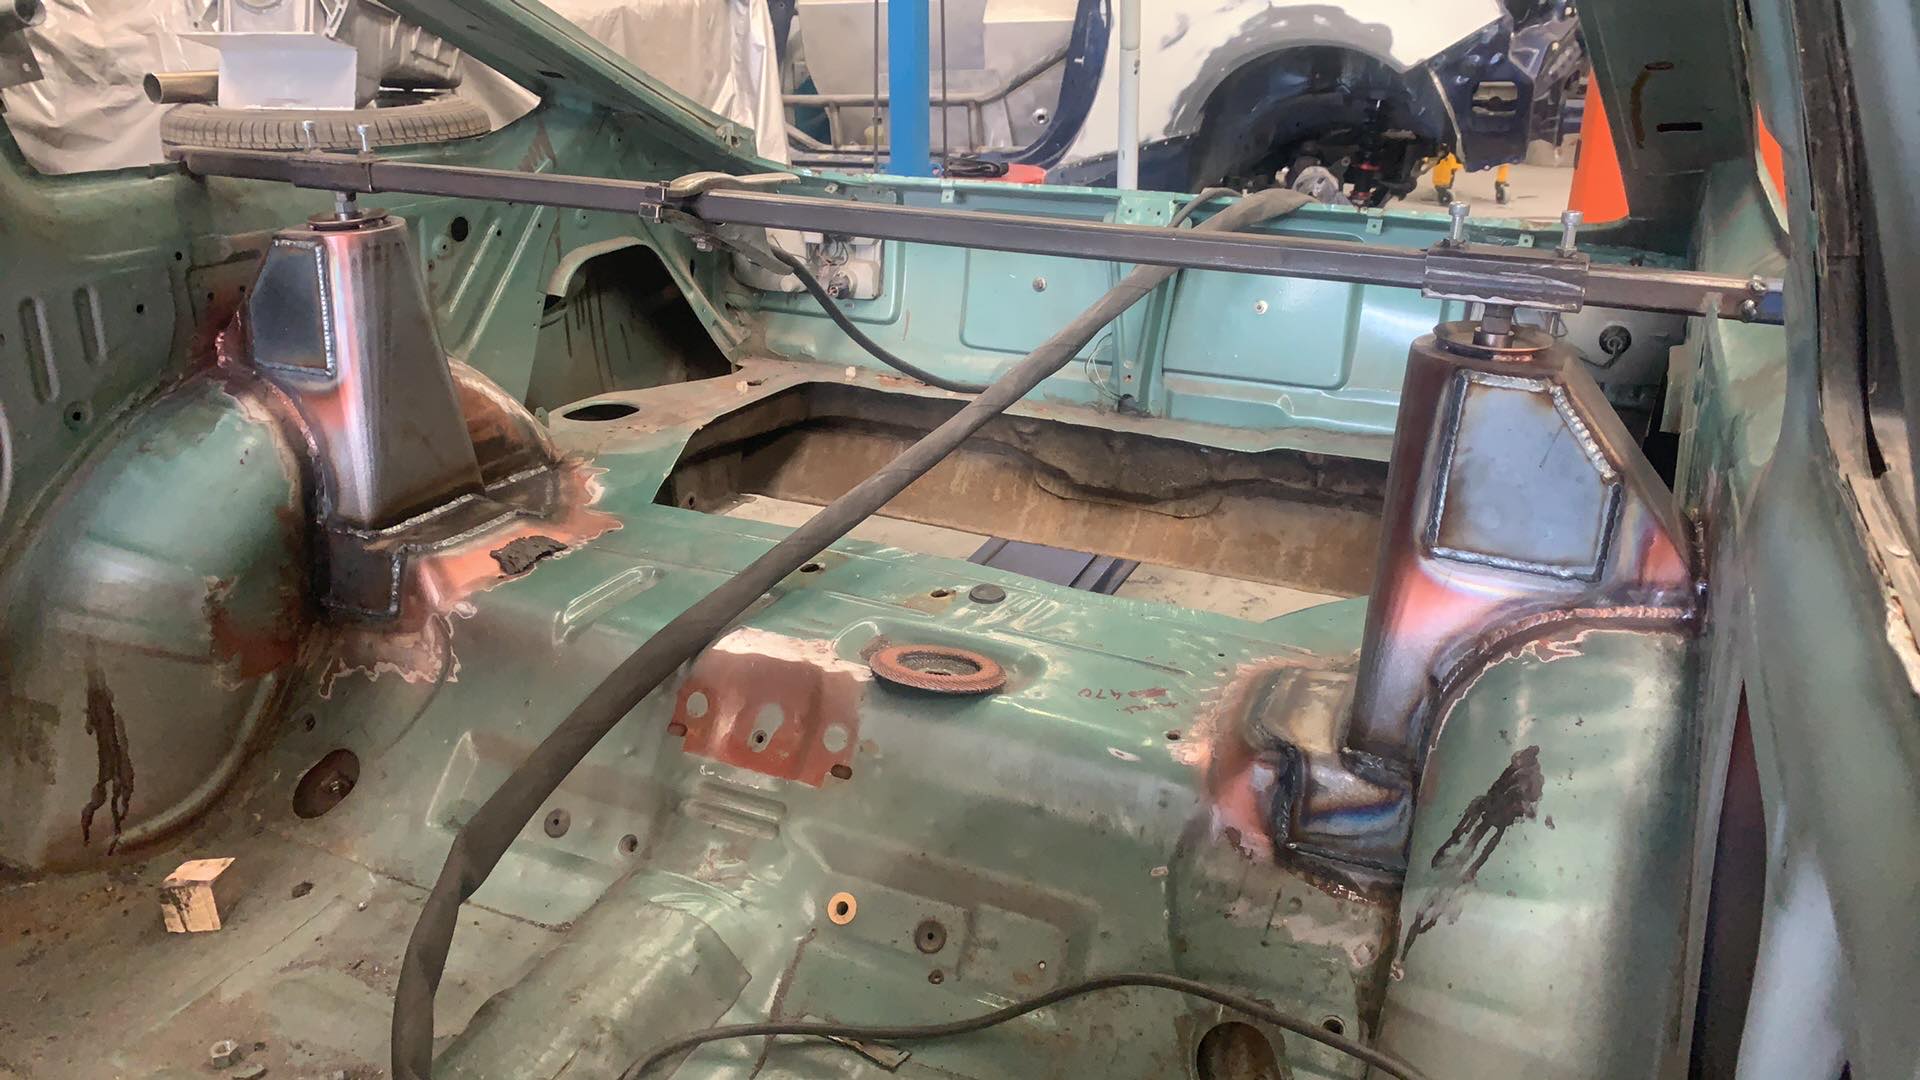
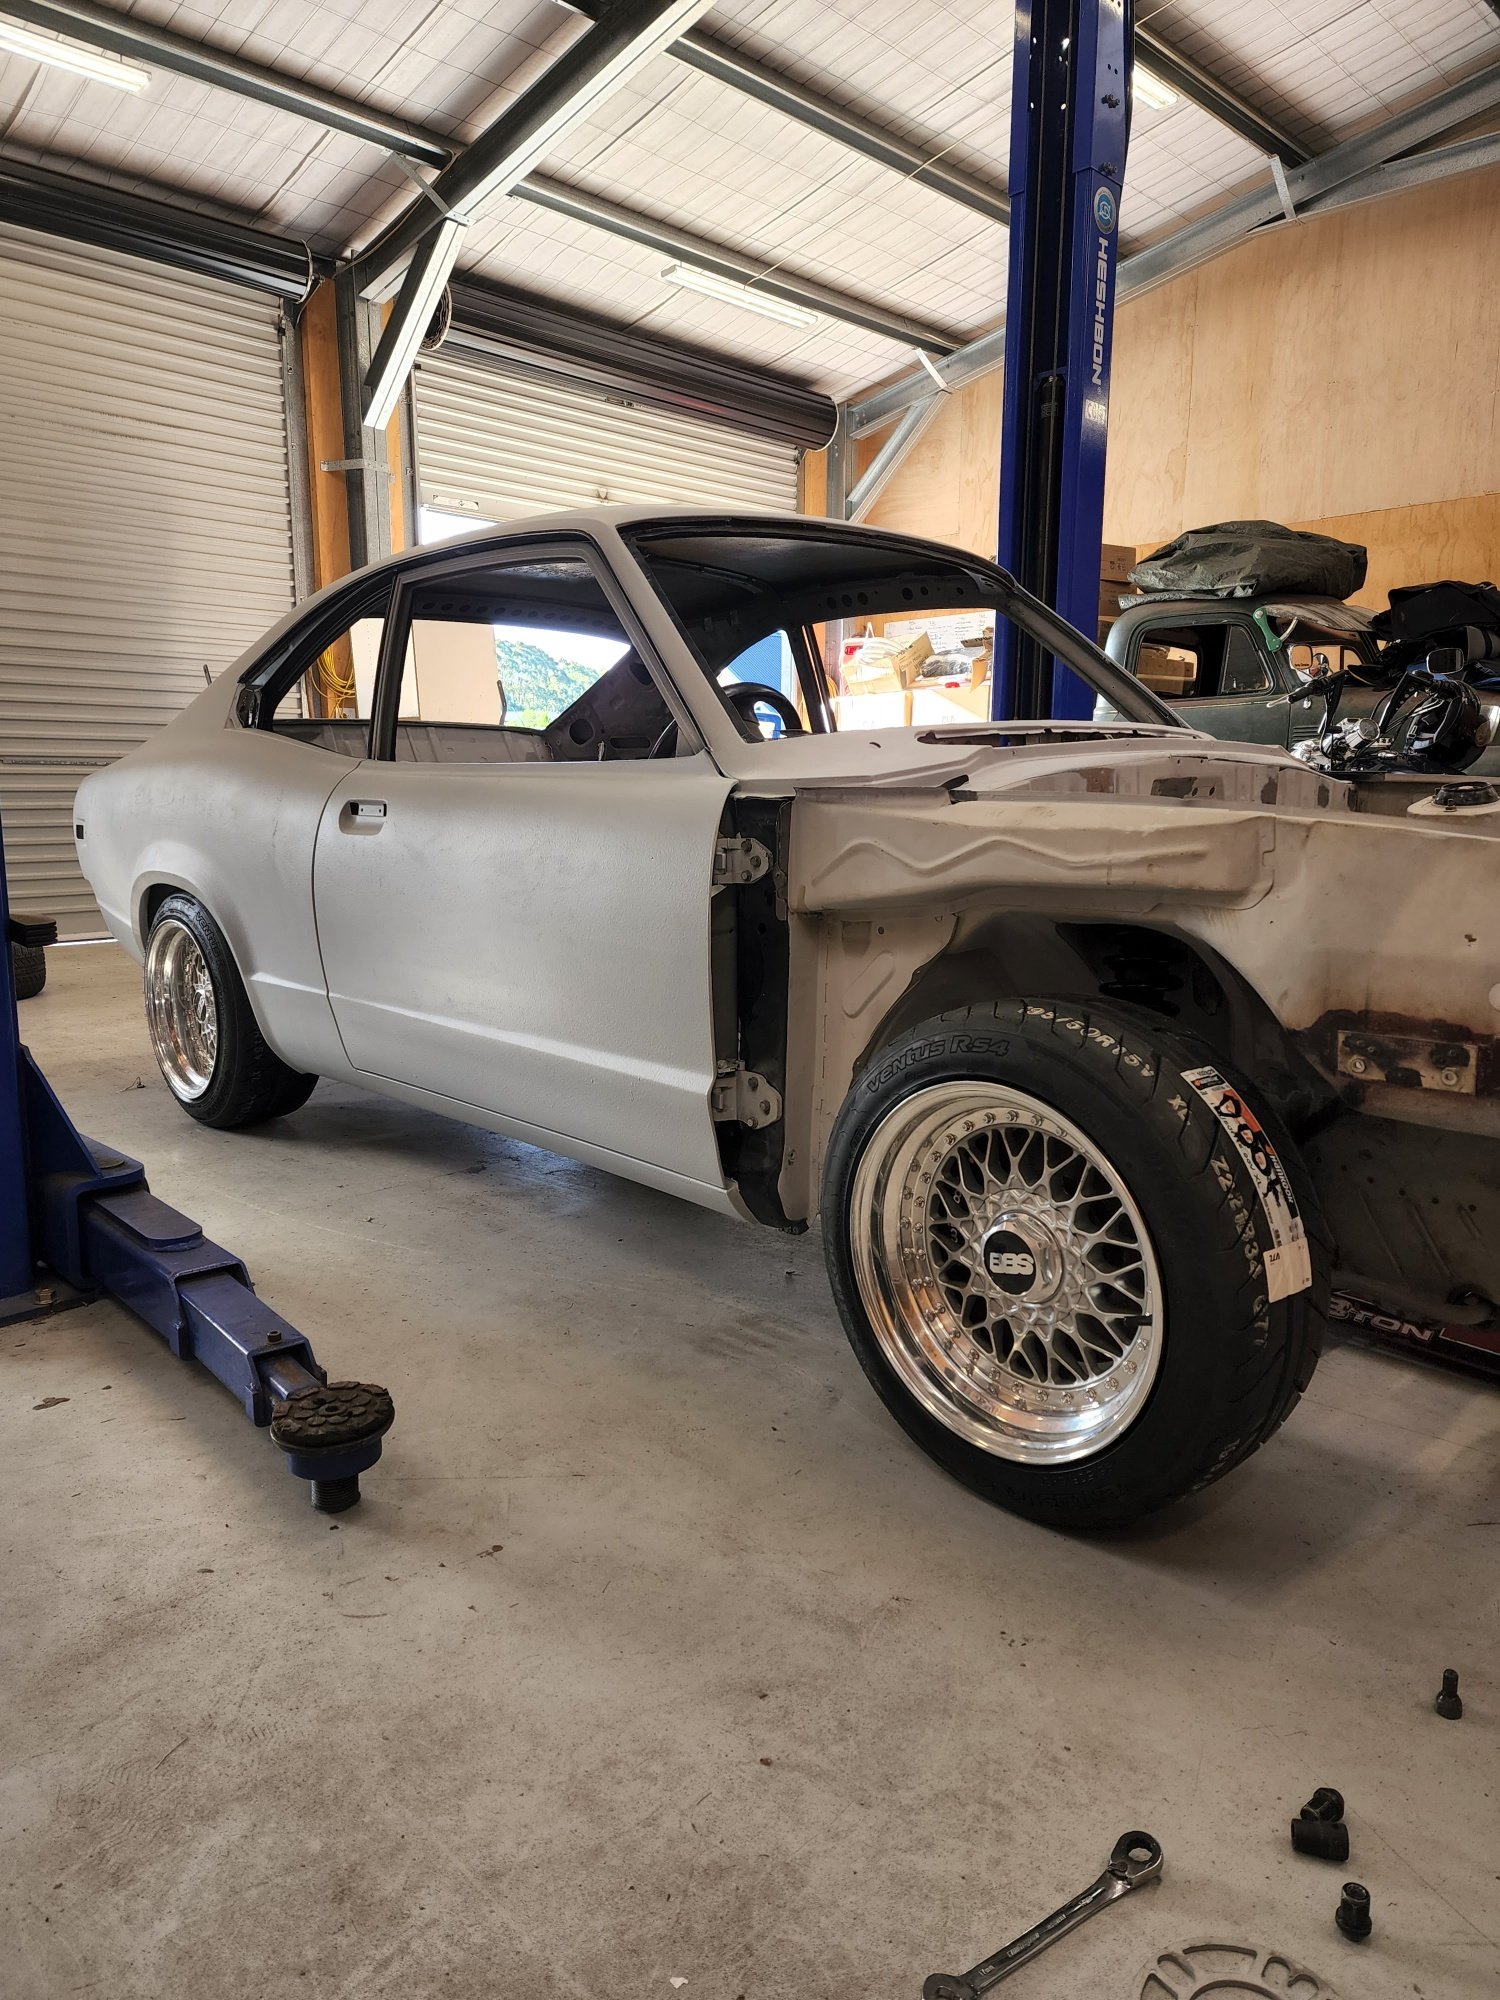
Turrets all welded in now, looking great.
14 points
-
10 points
-
Here's the remix.10 points
-
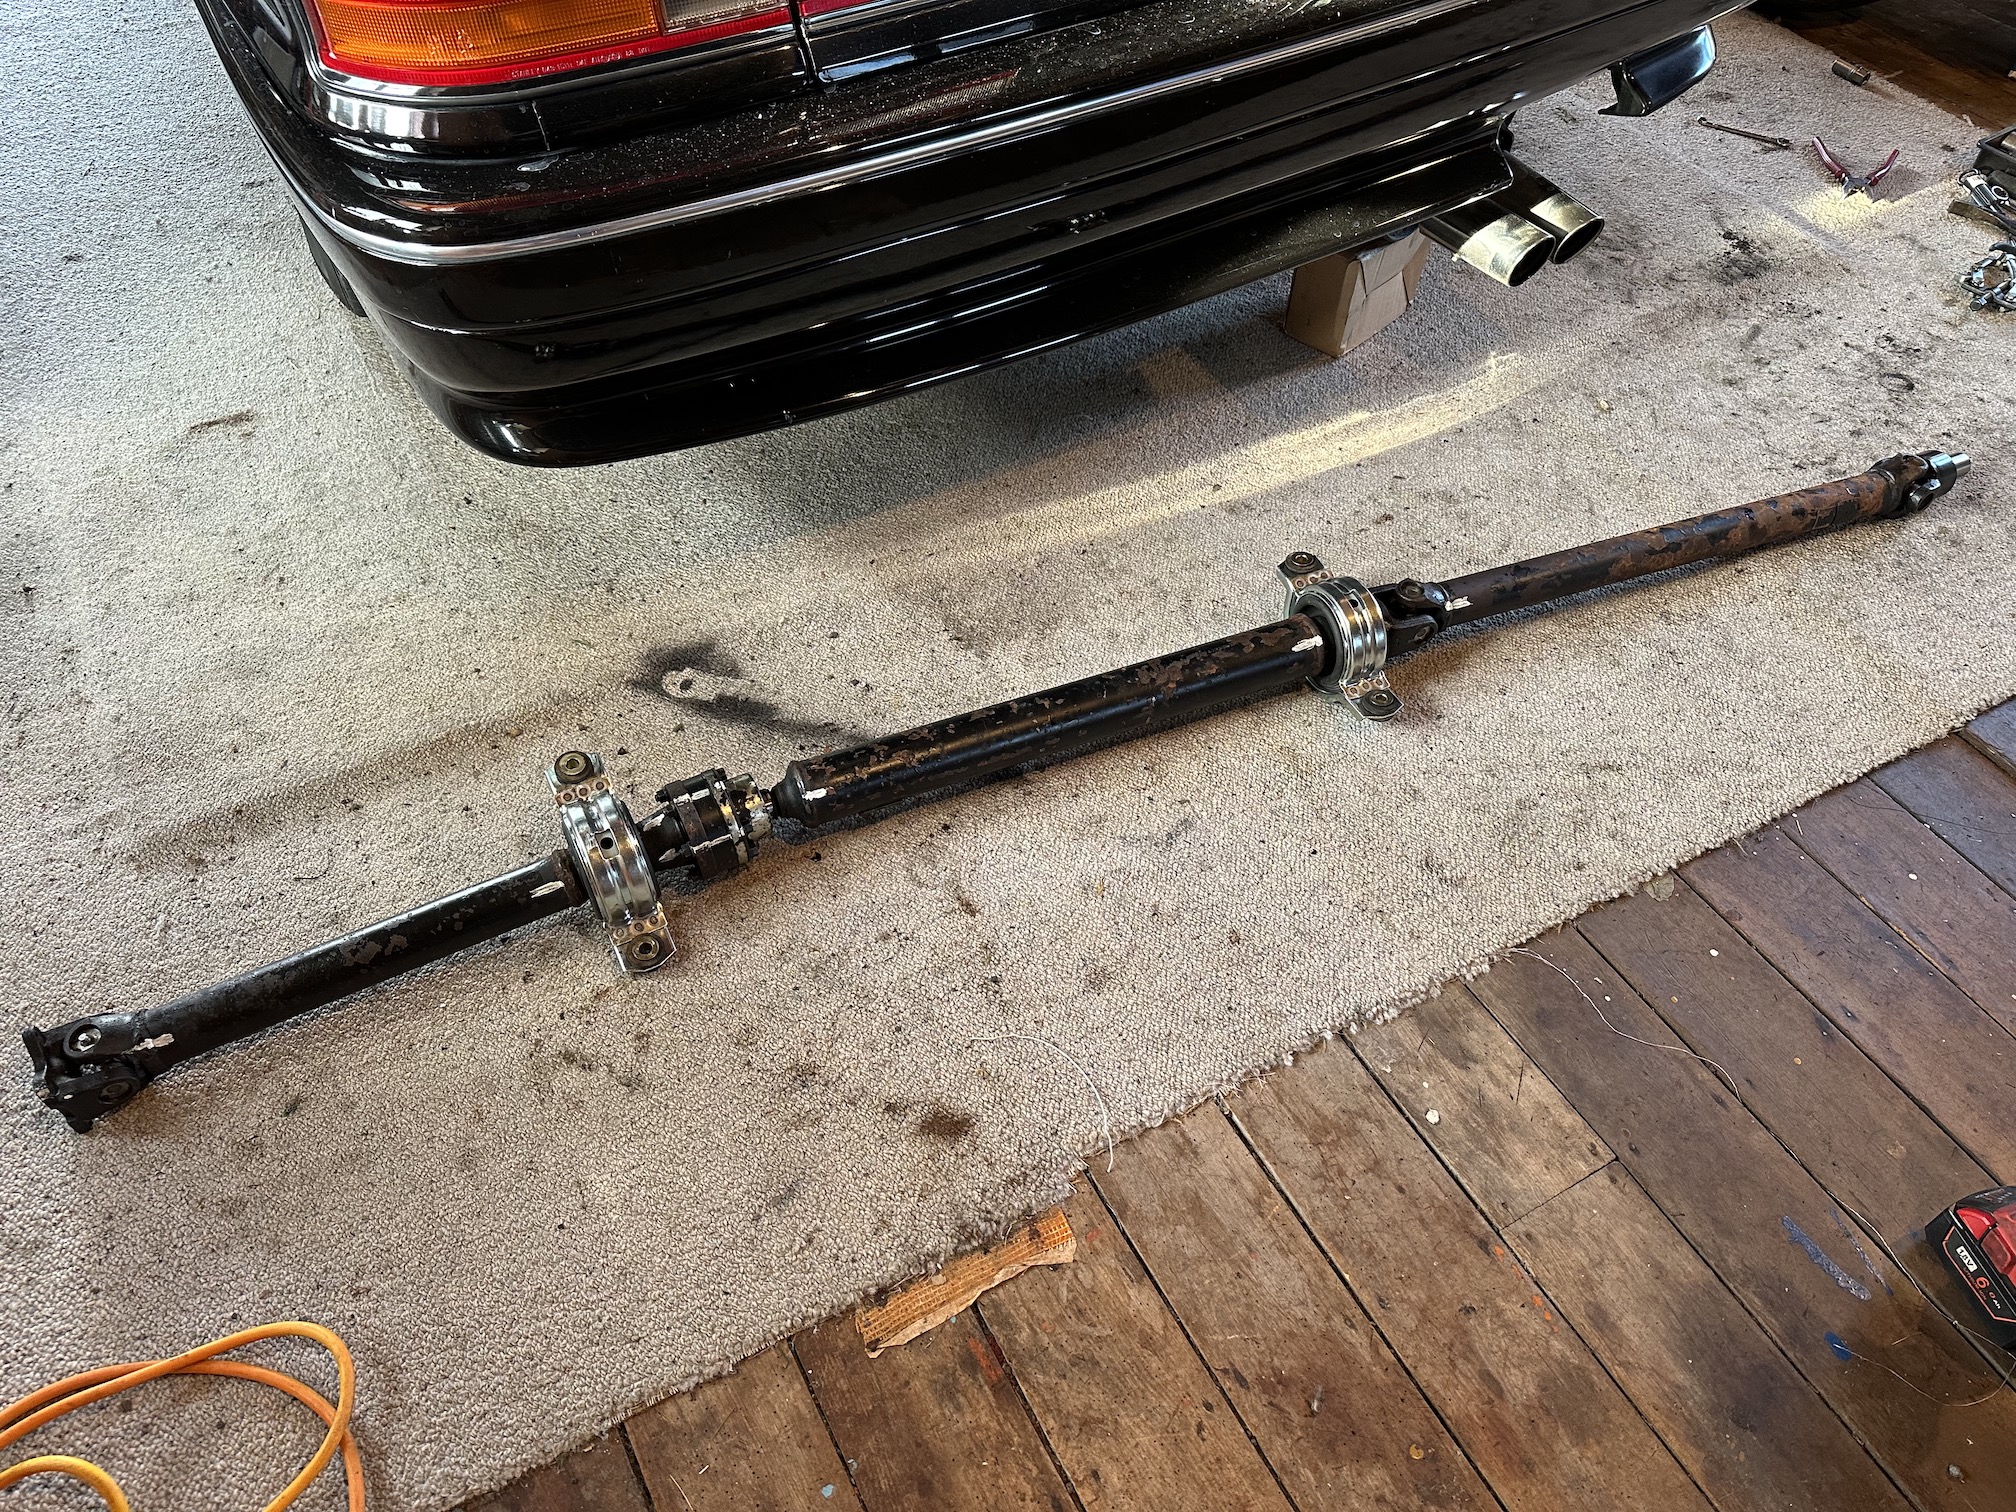
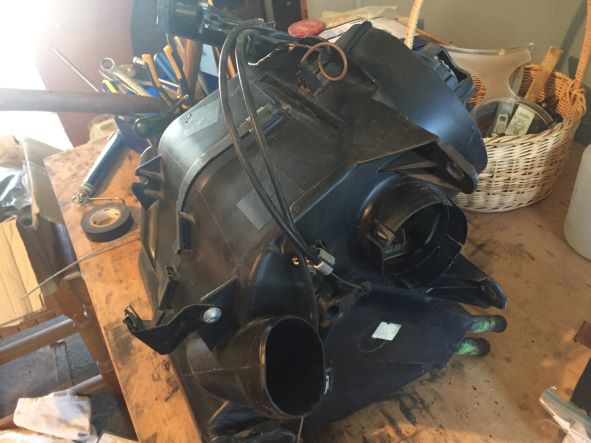
Found in my stash some new driveshaft bolts/washers/nuts and gearbox/transfer case oil fill bolts I must have ordered new years ago and forgot about Driveshaft back in with new hardware installed - shame no one will see my handy work. Can see the abovementioned new clutch slave sans 10mm spanner And.... the noise is still there. I have a spare transfer case think I will swap it in and see if it makes a difference. The original transfer case had a leak which there was a recall out to fix the leak (which comes from the driveshaft yoke rather than the transfer case itself). The recall applied to Japan and the US but of course not used imports into NZ. I got a 'recall kit' some years ago which included the yoke, first uni joint and tailshaft seal and swapped them on which sorted the leak but am thinking maybe damage was done if it got a bit too low in oil.
7 points
-
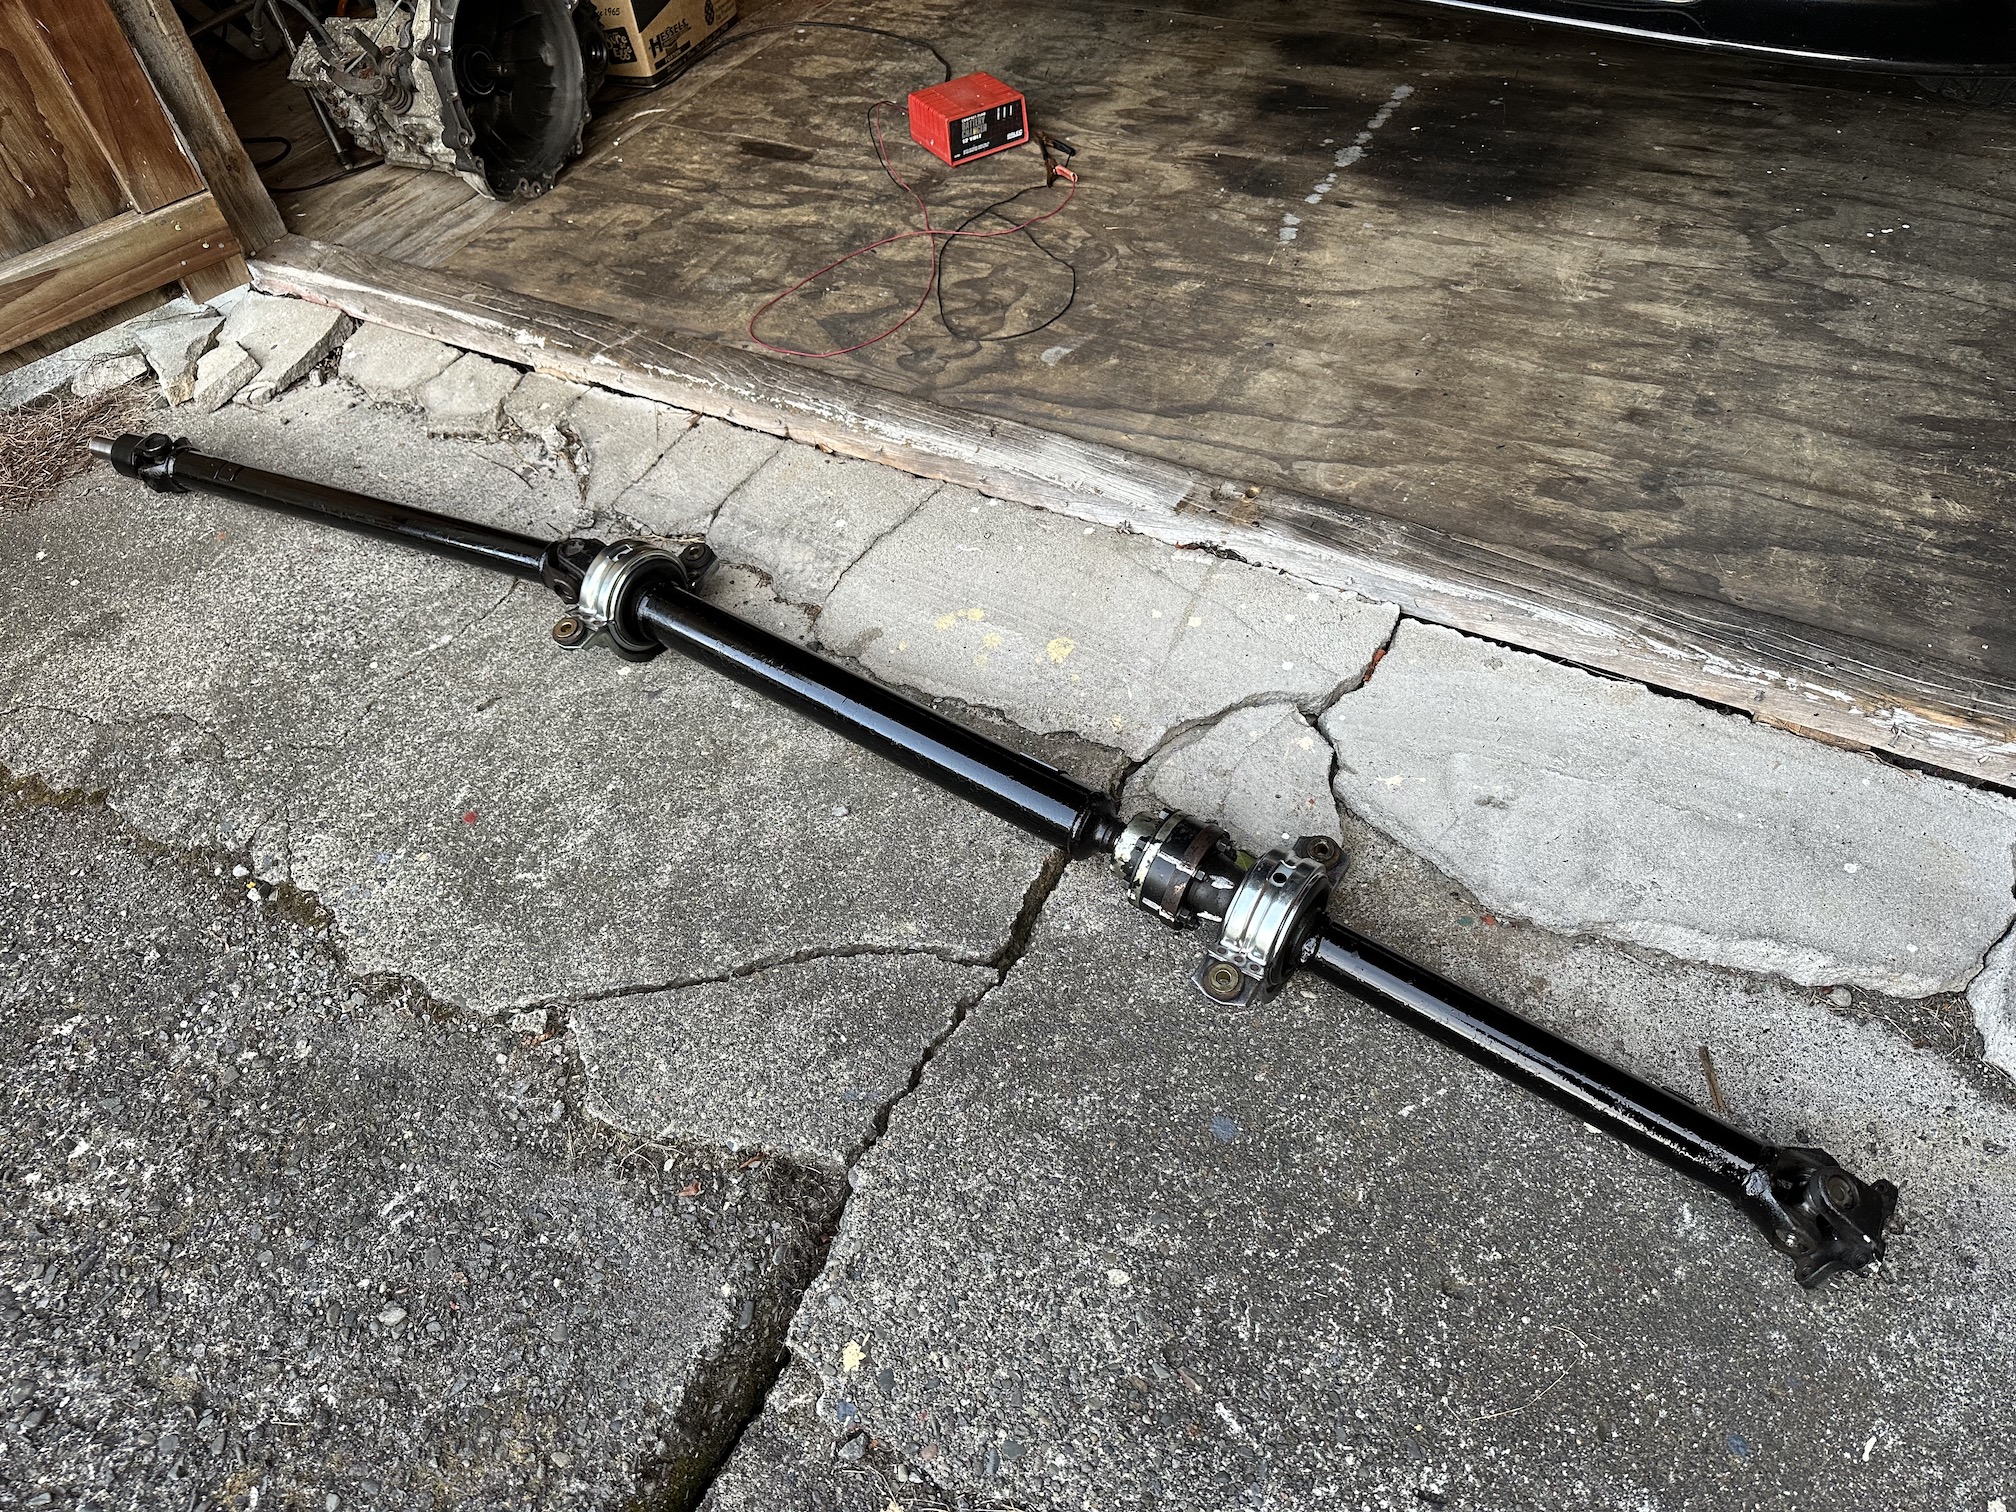
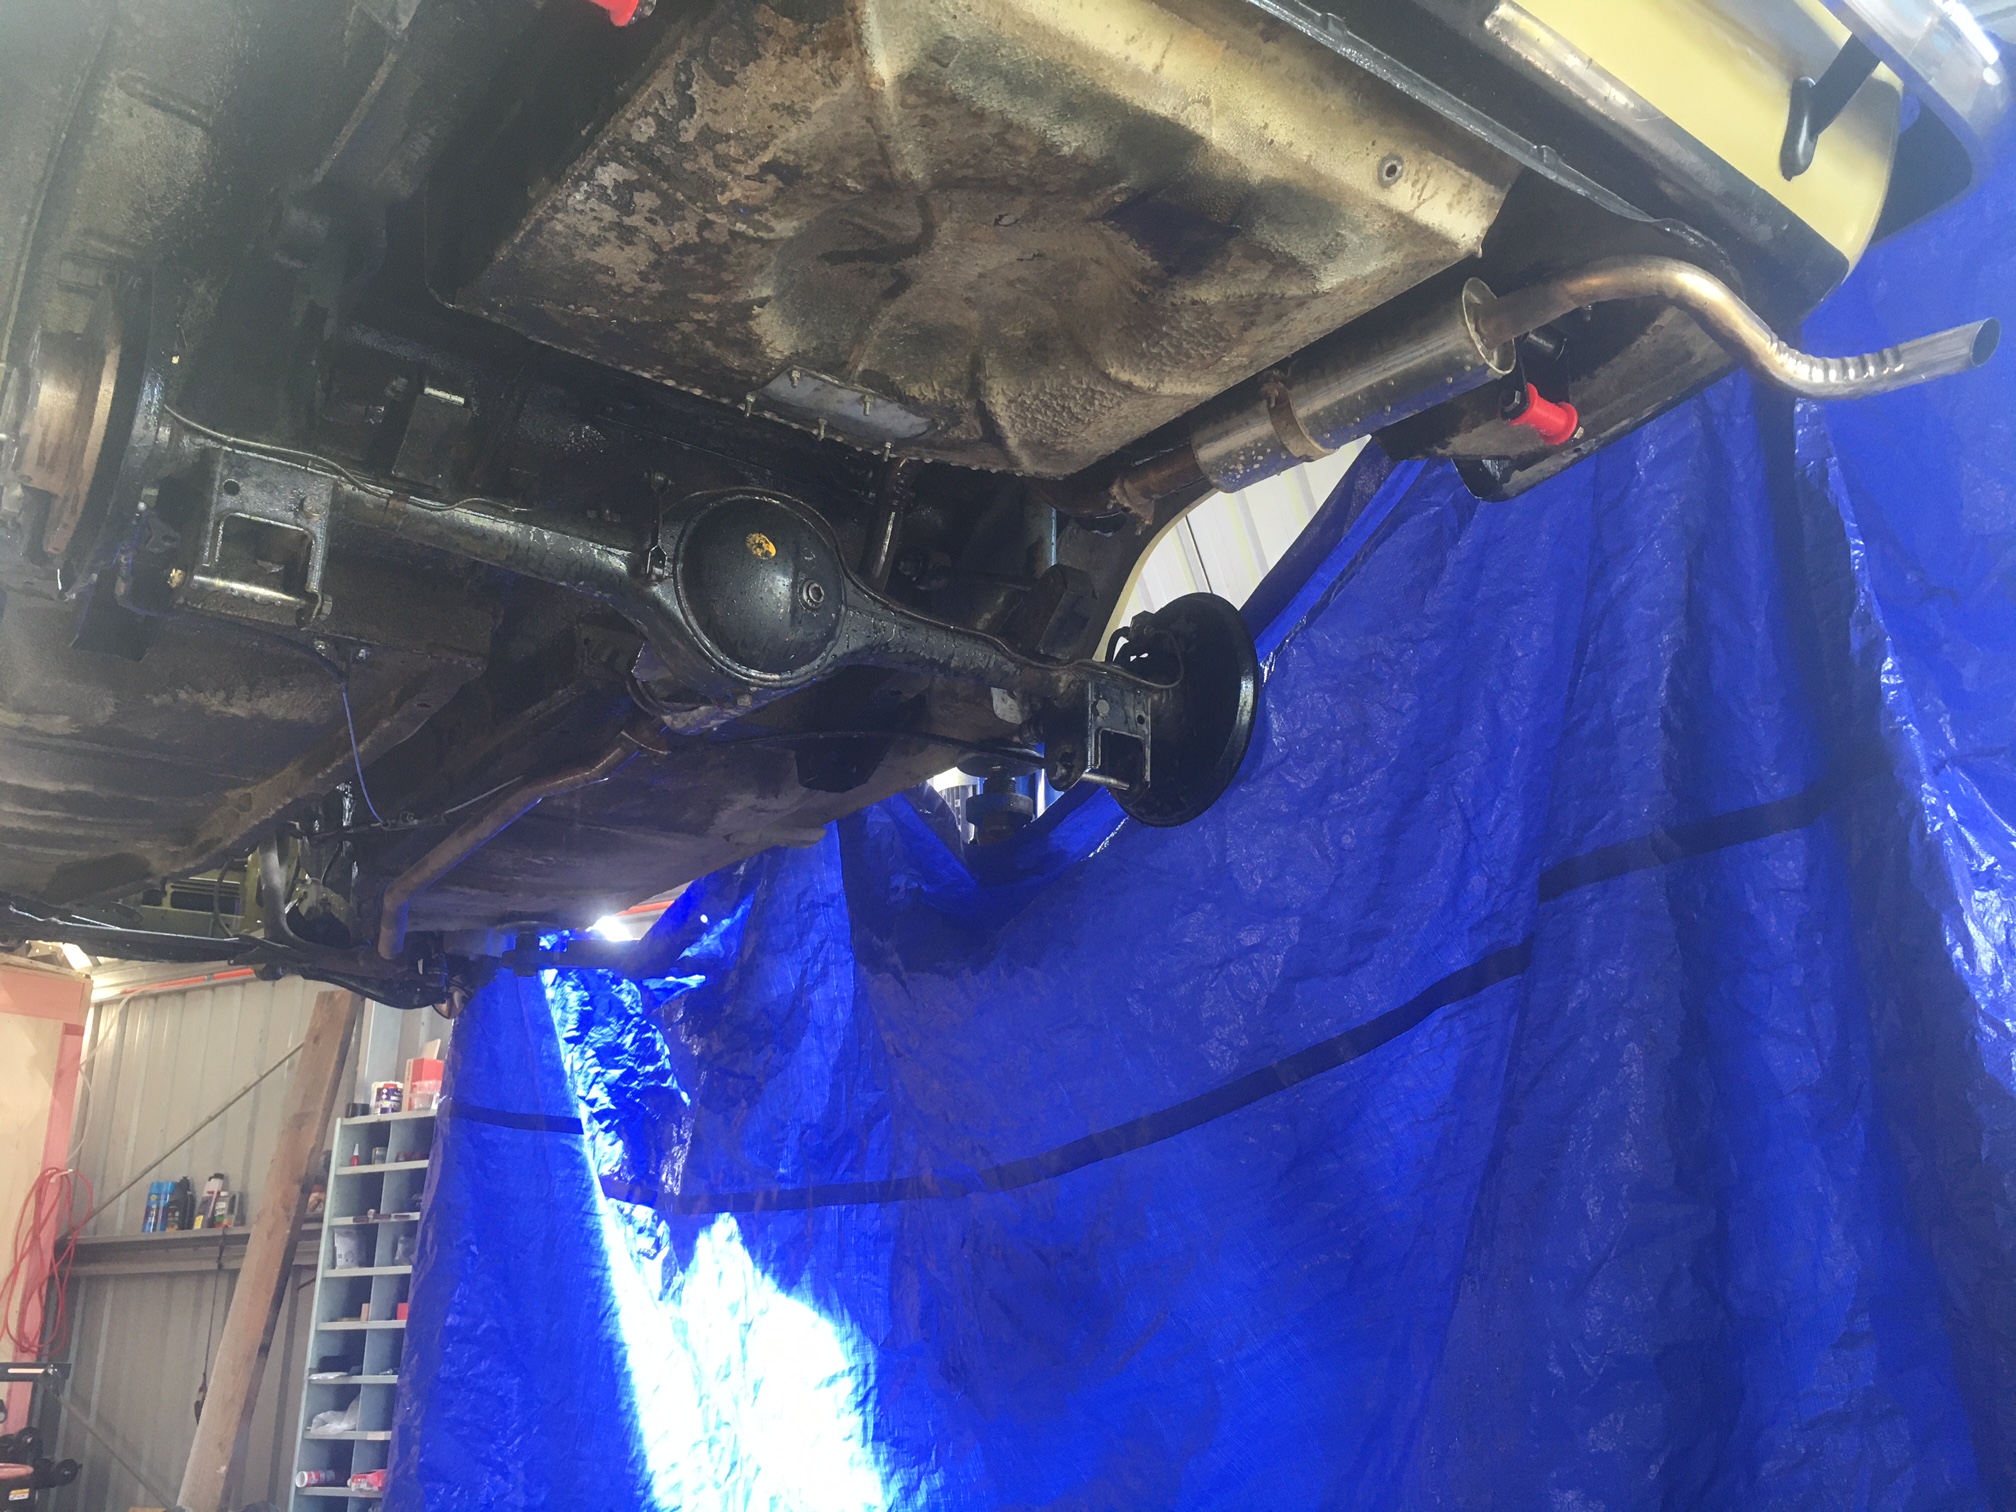
Married the pieces all back together And gave it a lick of rustkill paint as the original paint was flaking off and starting to surface rust up pretty bad so wanted to keep that at bay. Just waiting on the paint to dry before I refit and find out if it made any difference or not.
7 points
-
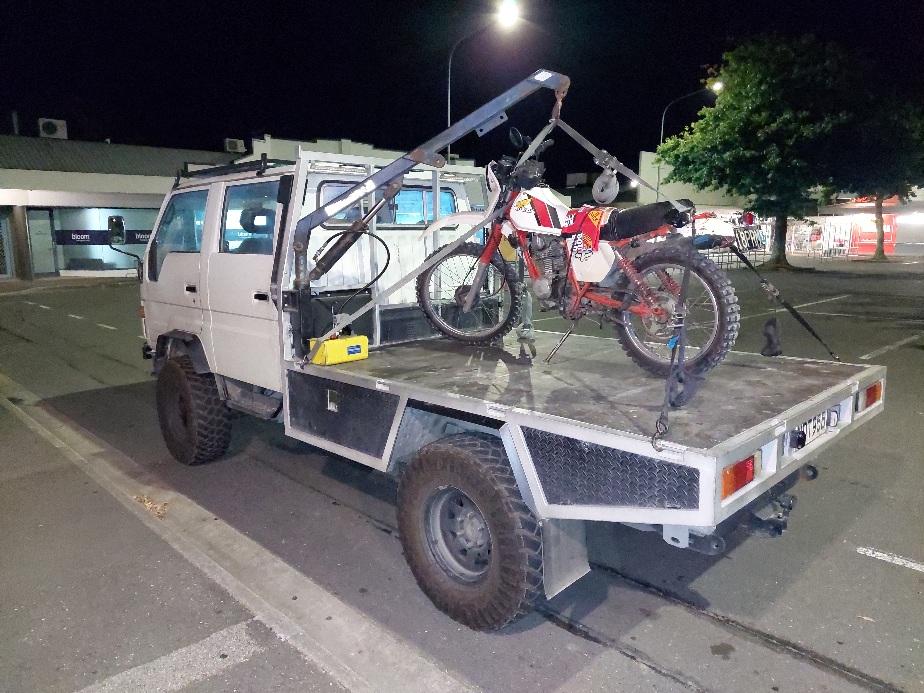
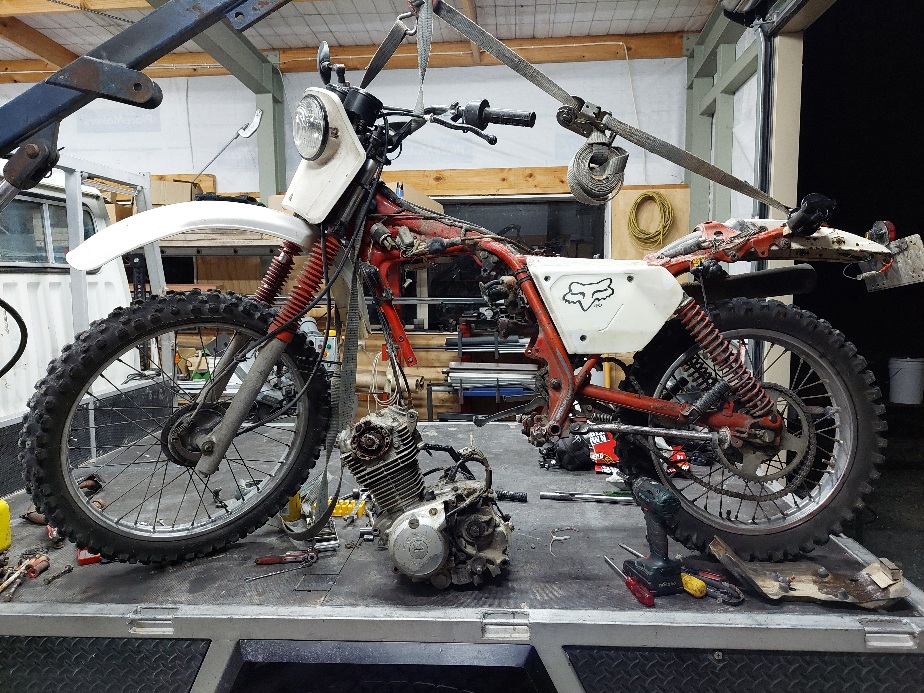
Late night engine swap mission with assistance from @ThePog
6 points
-
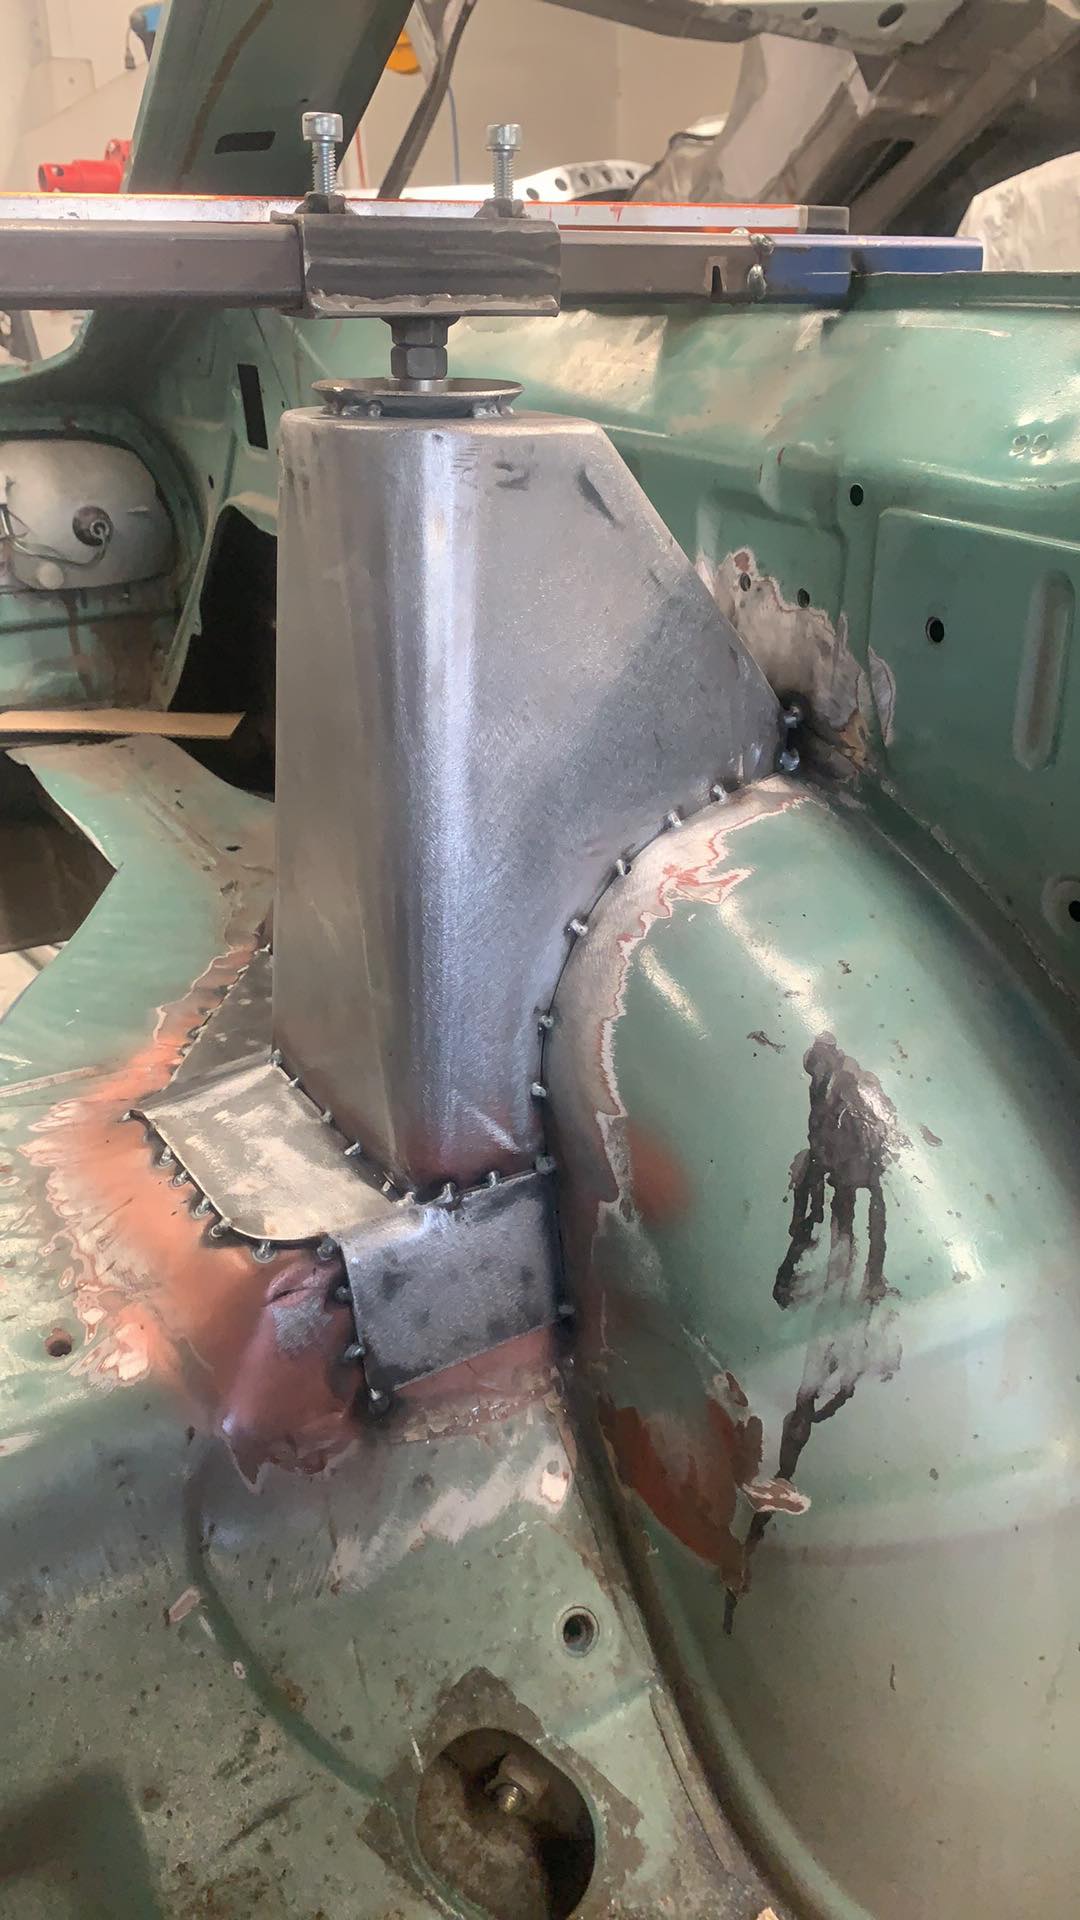
First up, turrets. Using some Group 4 Escort ones, though Nick has had to do quite a bit of work to get them to fit due to my required belly scraping ride height.
6 points
-
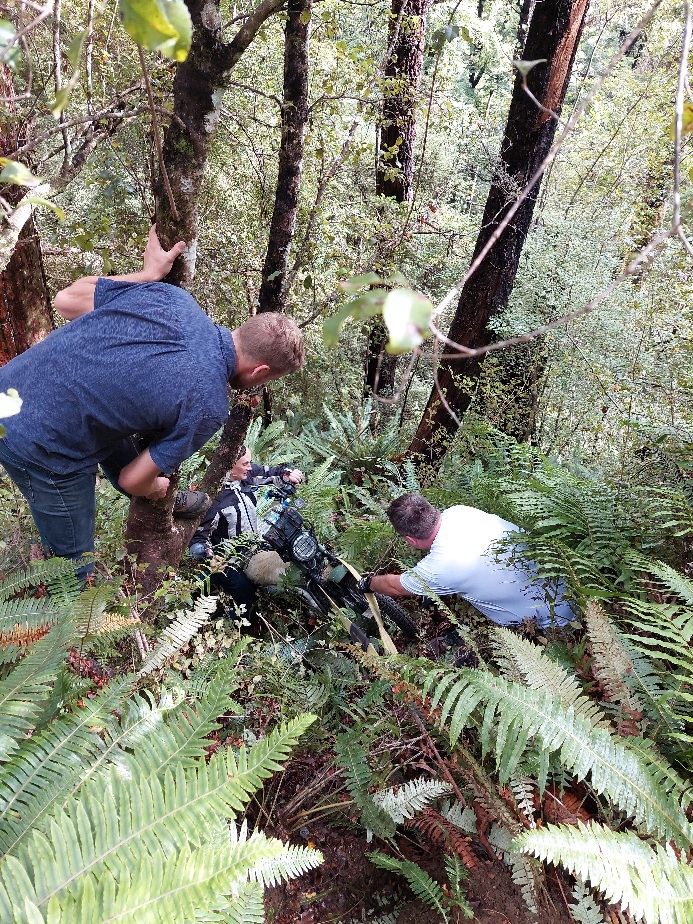
Today was mechanical carnage. Two bikes engines have expired, a handful more have lost power. One off road excursion (all ok). Has been a long day, and about to get longer for me...
5 points
-
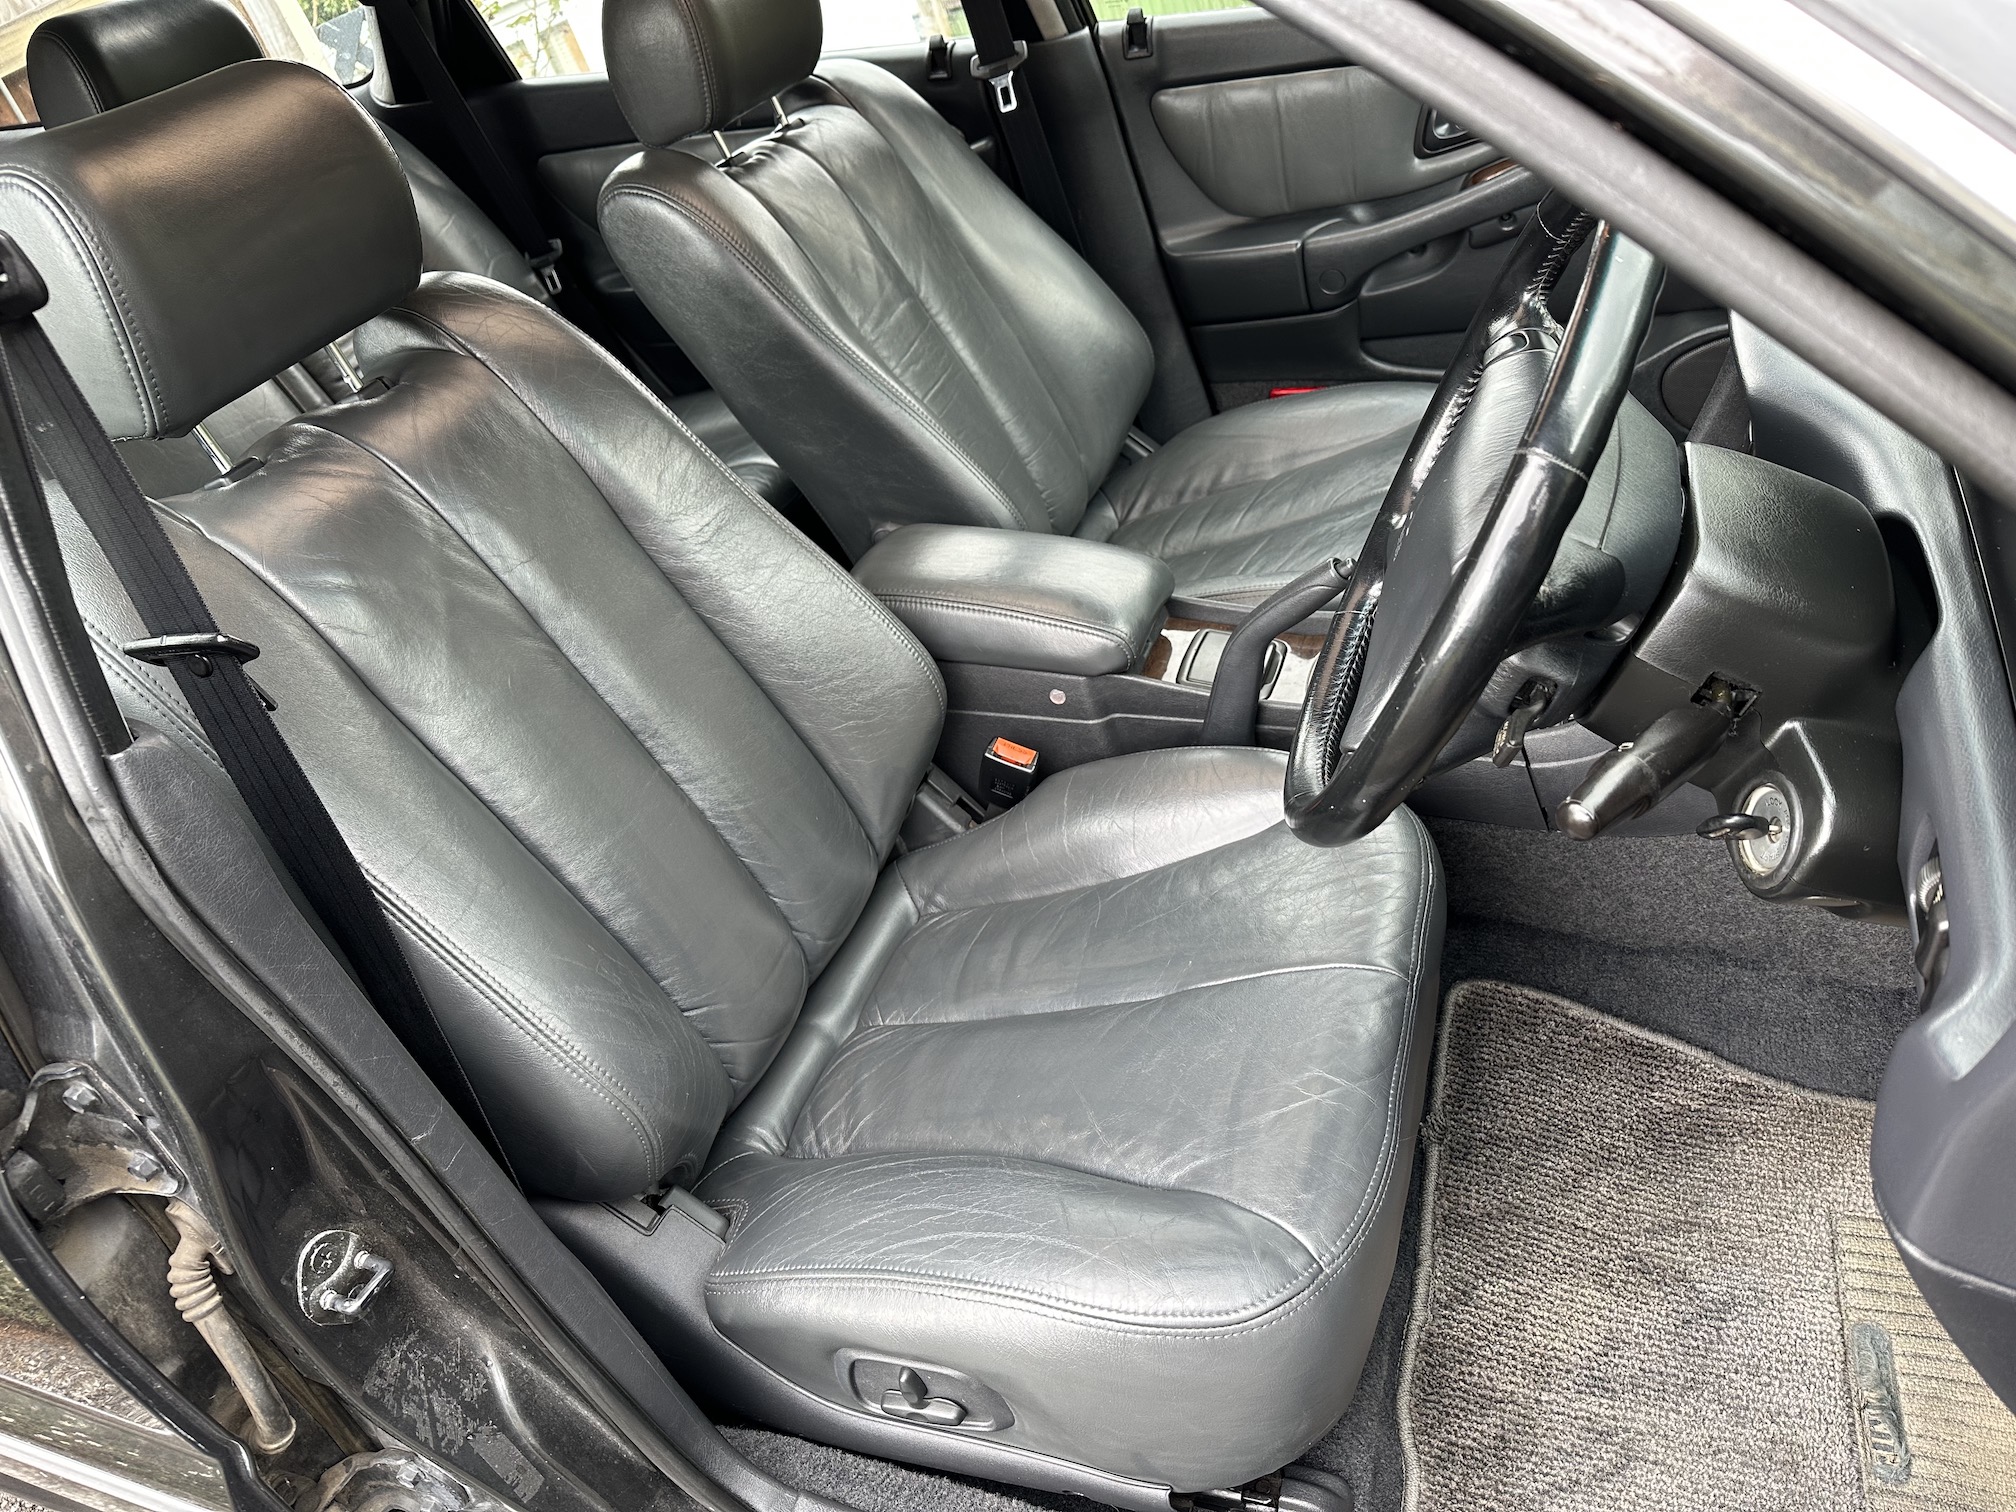
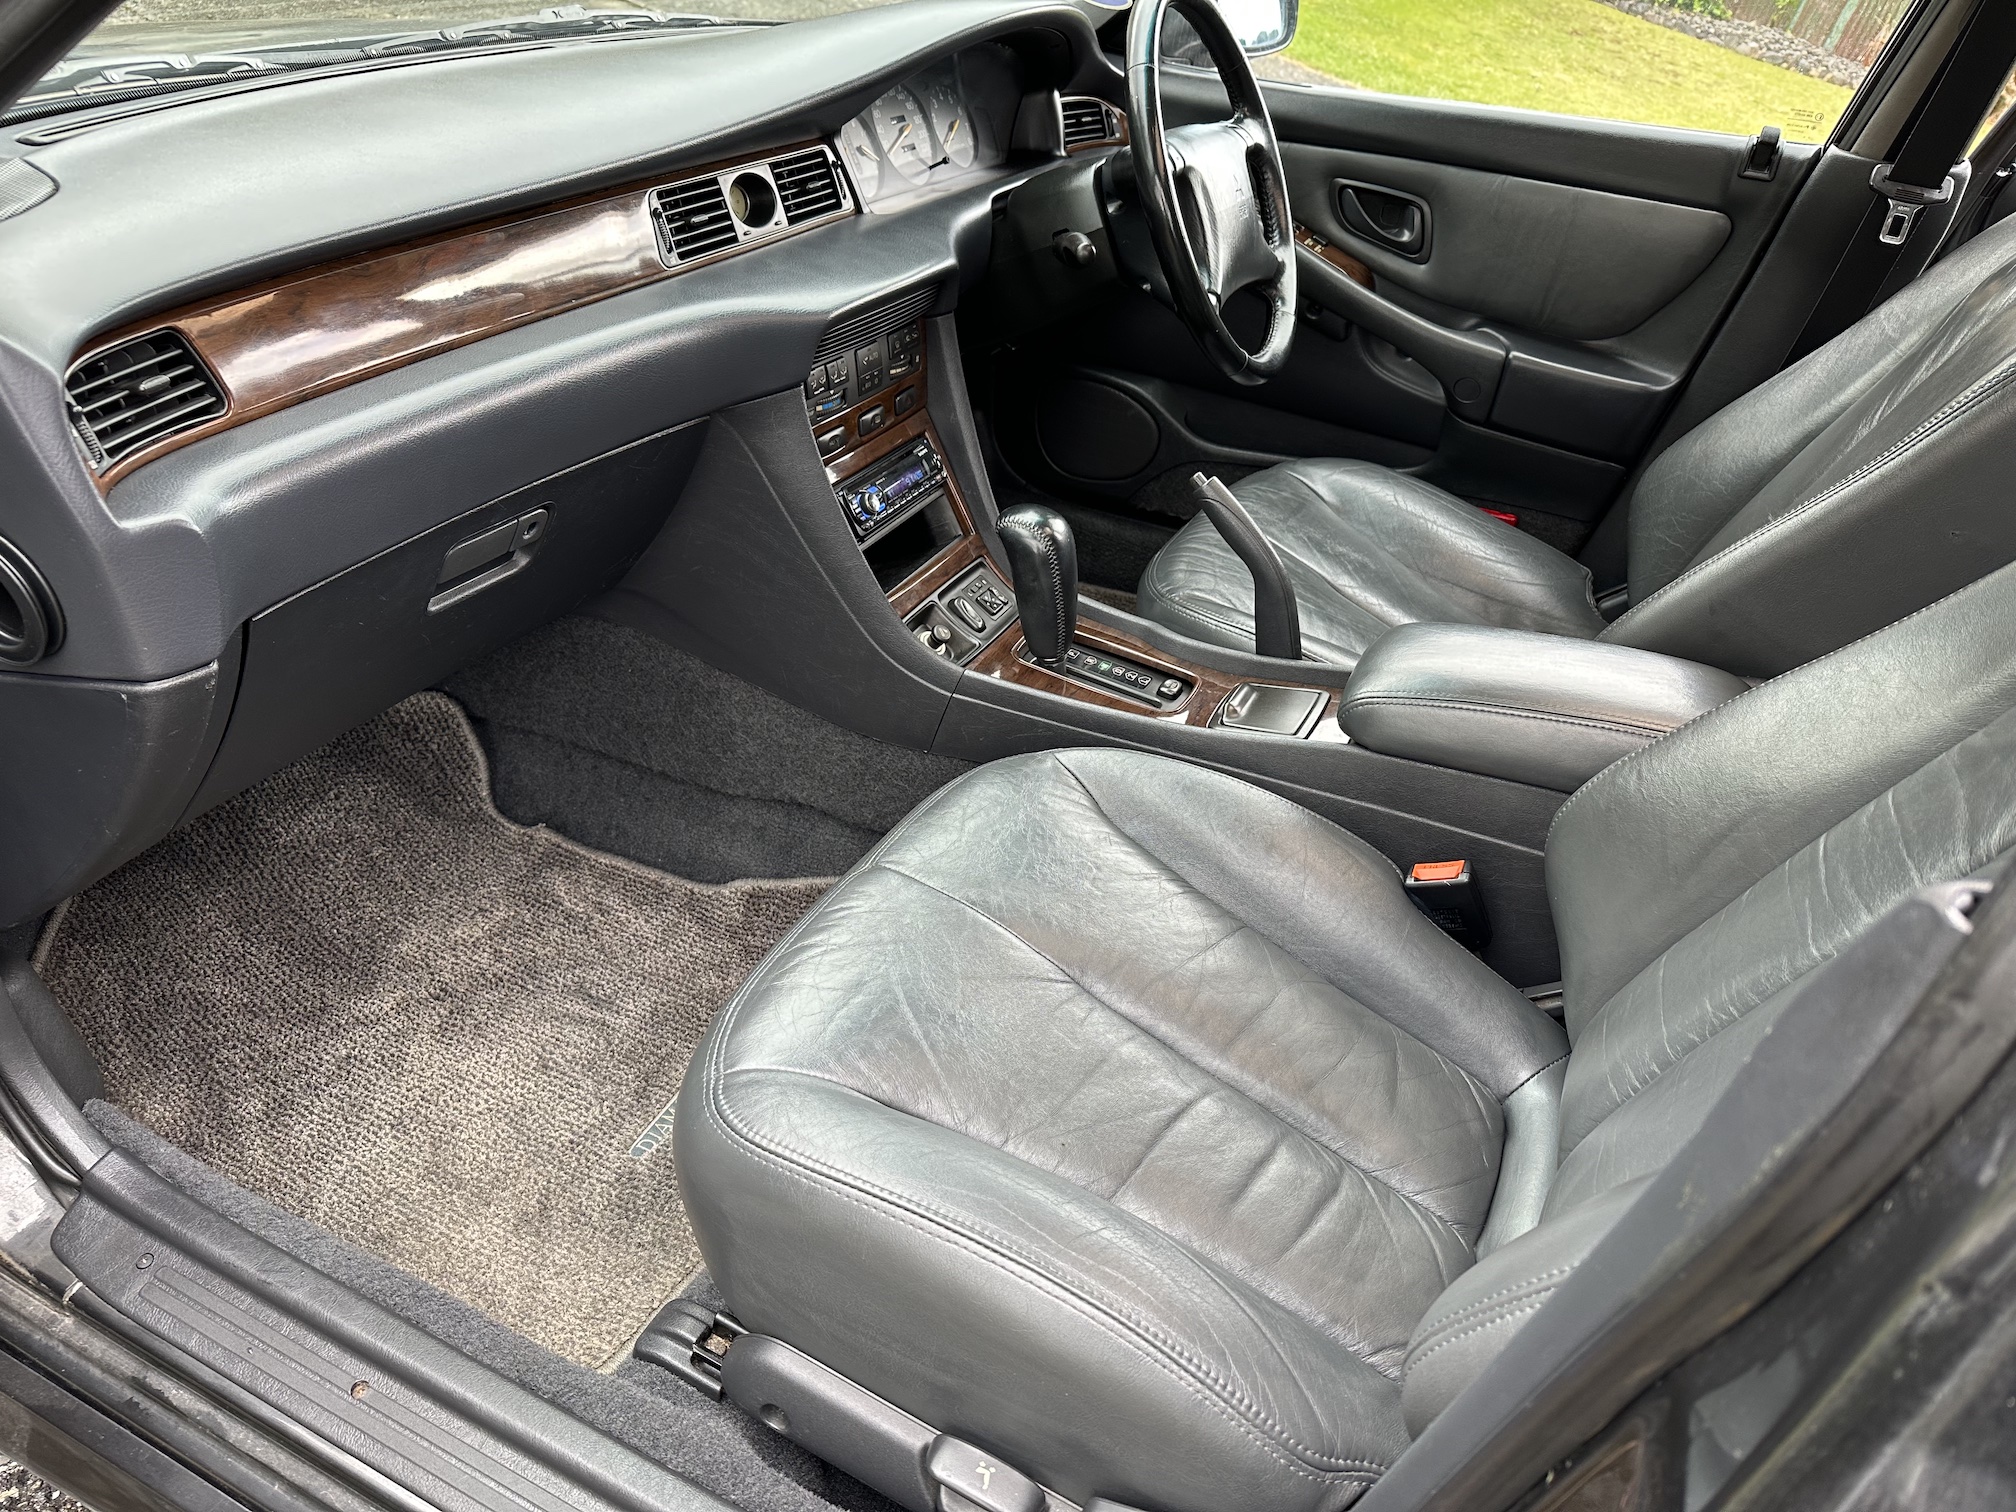
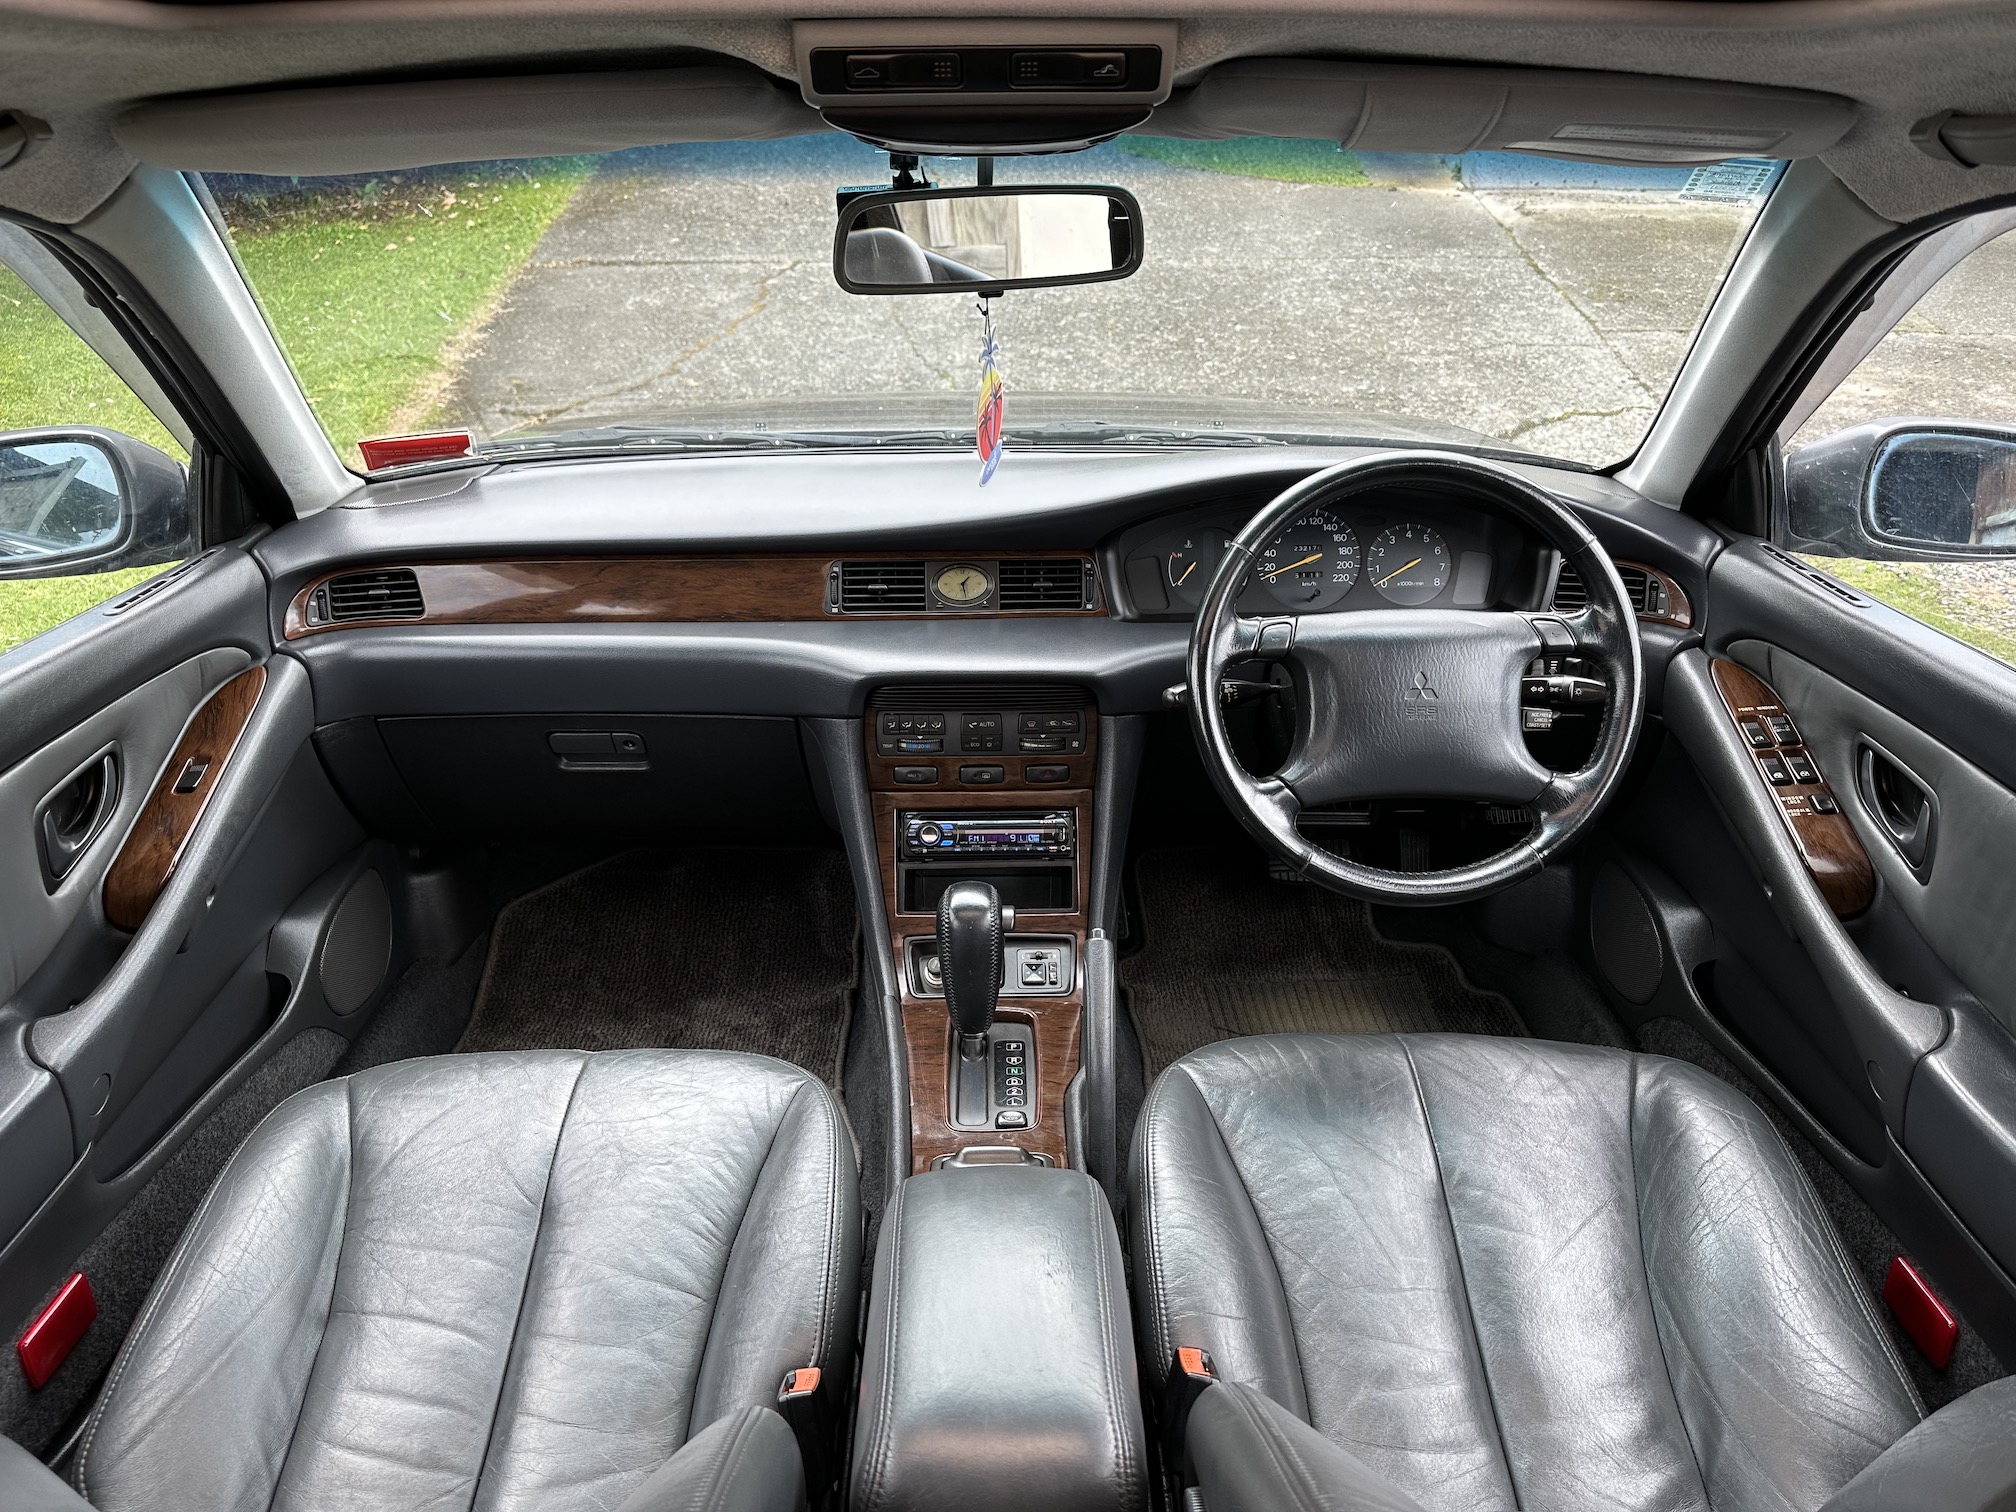
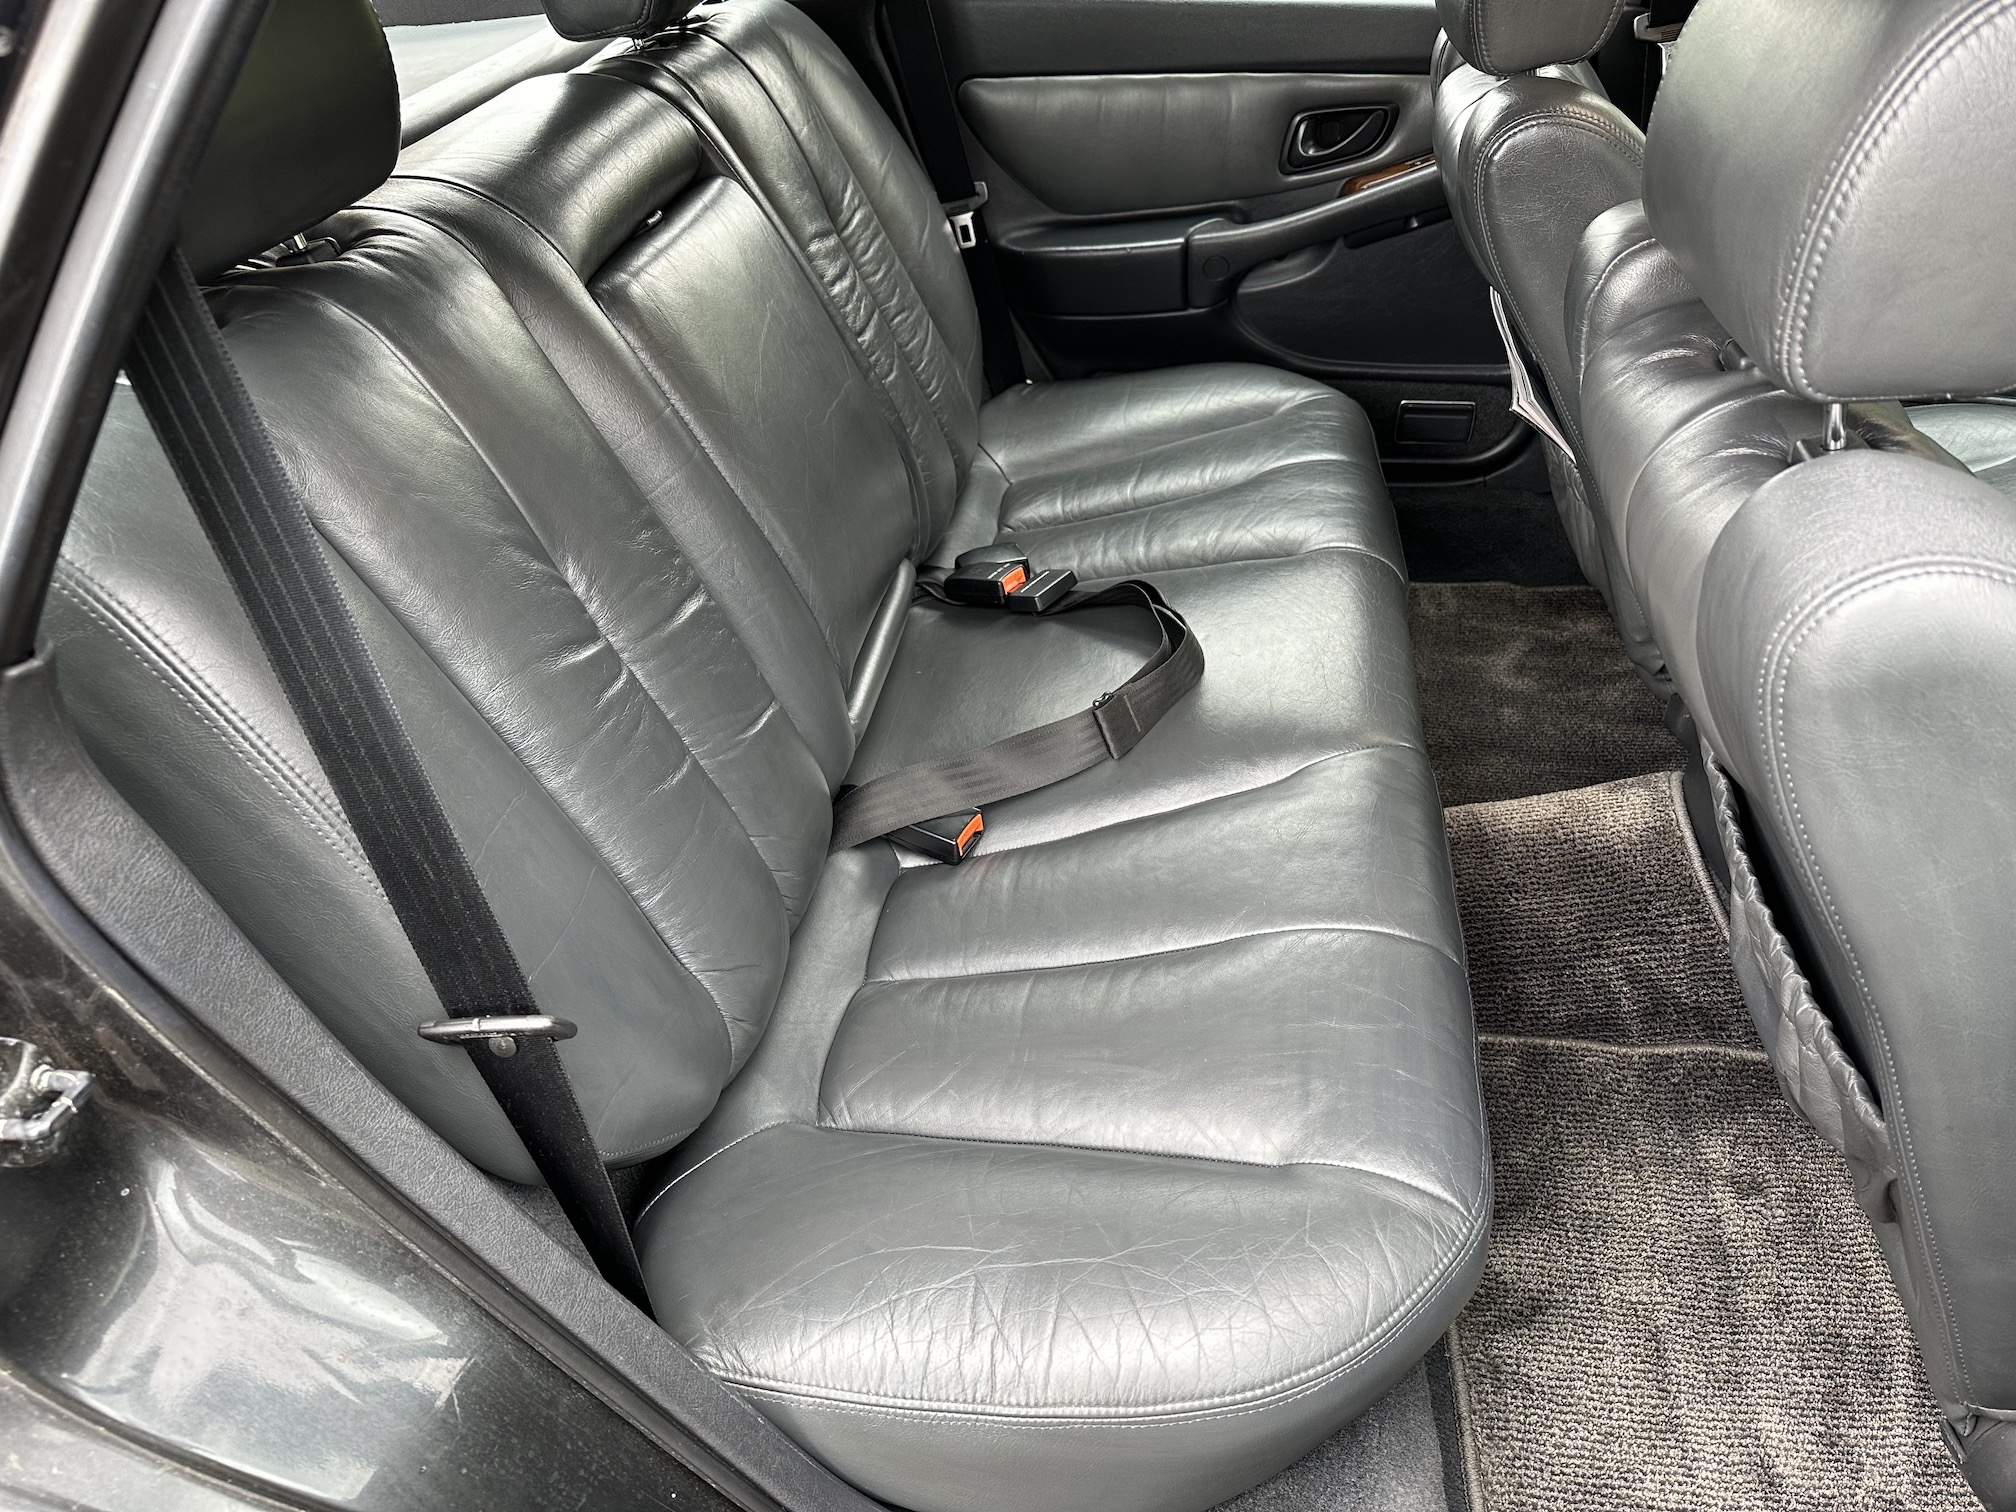
Now all back together after everything was out, I also applied some leather colouring balm to the seats and door trims and they came up better than before, can hardly tell there is 230+k kms worth of wear on the interior.
5 points
-
didn't get around to posting up pics last time but did end up swapping on the rear GTO 2 pots, can see them peeking out behind the BBSs here. Gave it a bit of a scrub up too
5 points
-
Off to MFS for some goodies!
5 points
-
surprisingly good haha, any stench must have dissipated by the time I got to it. Once done it smelt like carpet shampoo until I spilled some gear oil in the boot and now it smells like gear oil haha. The source of the gear oil was the almost complete manual conversion parts gathered from @MaxPower the GC last weekend, who knows when I'll get around to doing this though.
4 points
-
4 points
-
4 points
-
Got them home ready to reassemble Can see the originals had sagged and rubber perished, not that I heard or felt any thumping while accelerating, though there was a bit of noise and vibrations on deaccel but think that's the rear diff More grease in the lobro joint (didn't bother replacing this or even the boot because it seemed in good nick still)
4 points
-
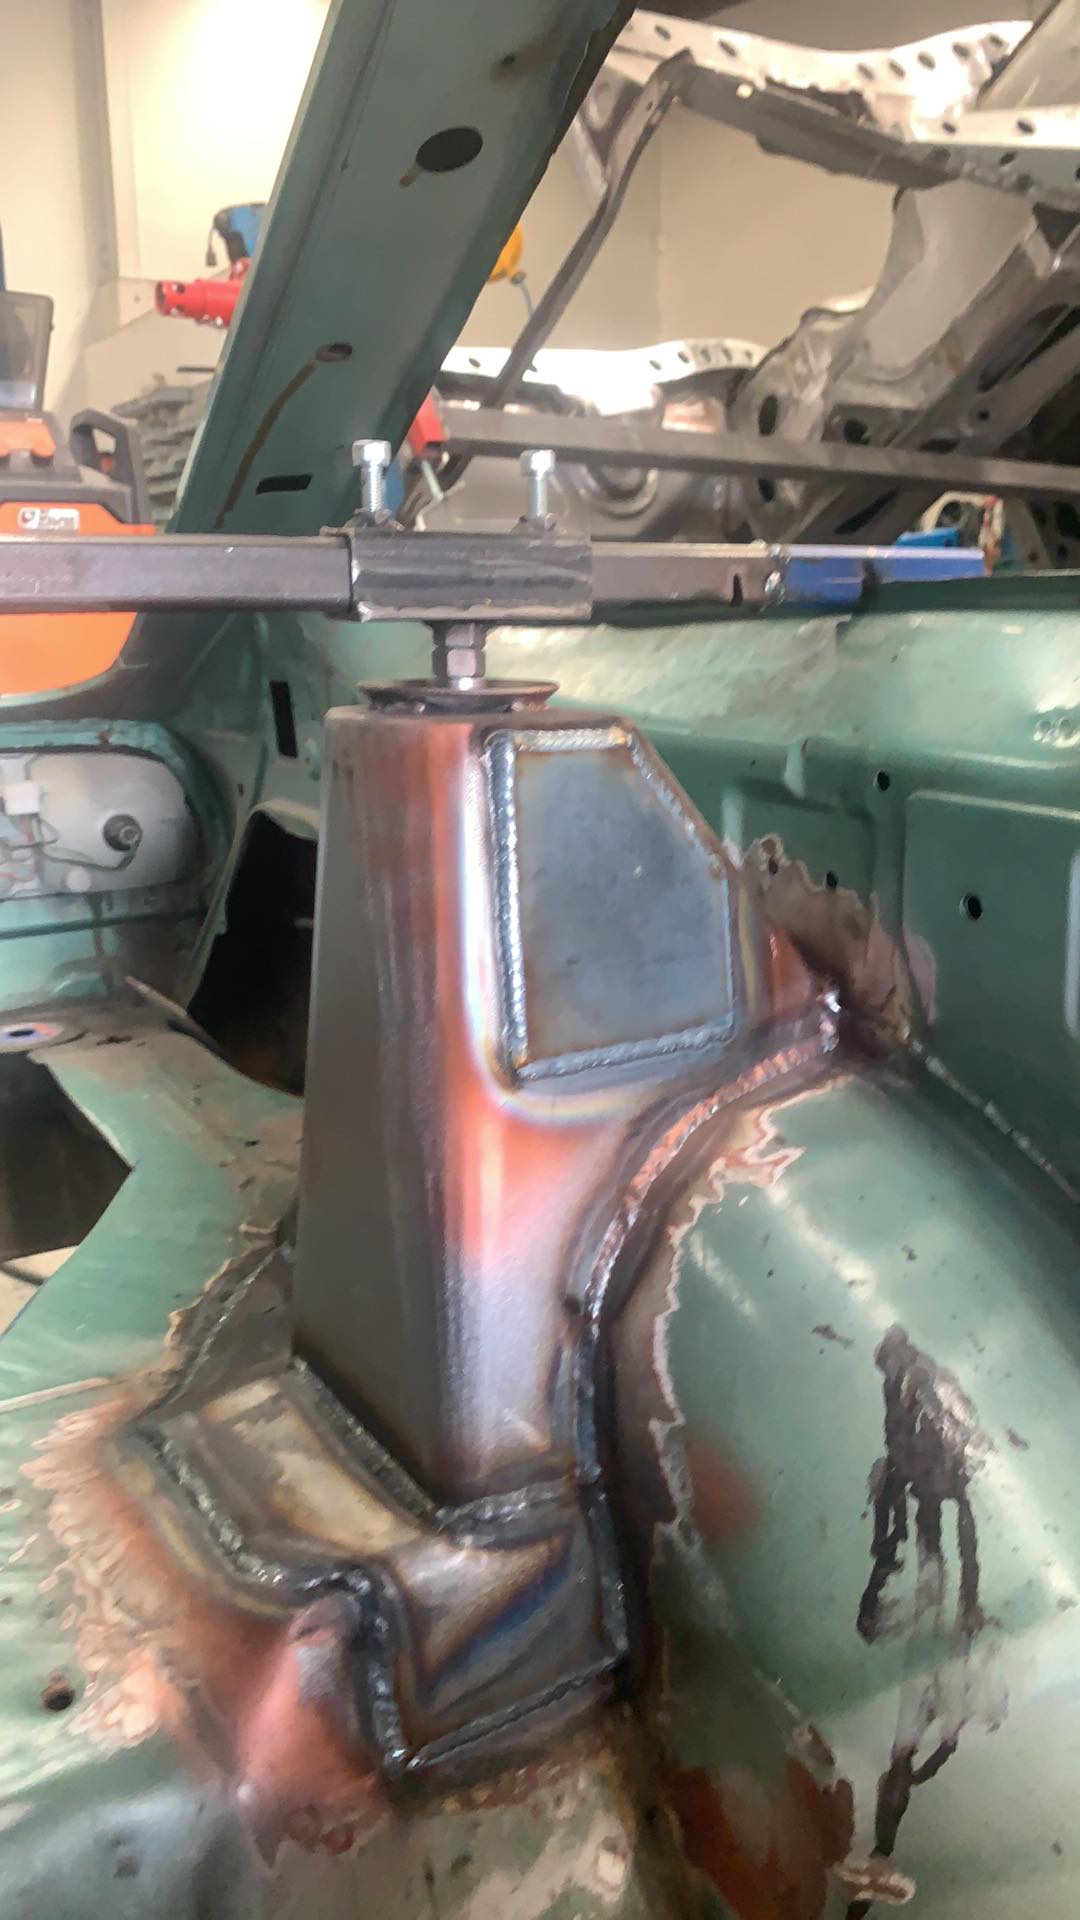
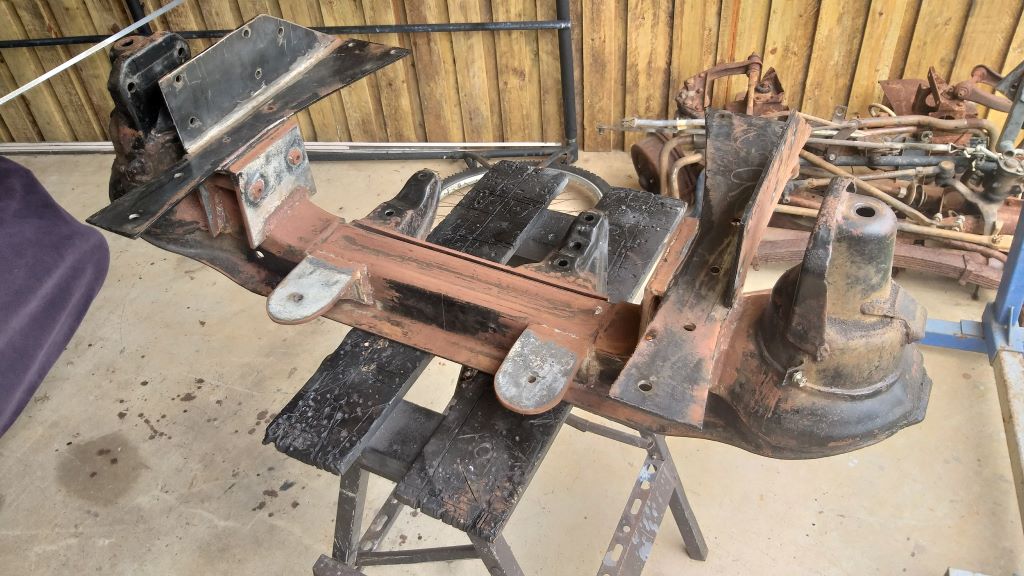
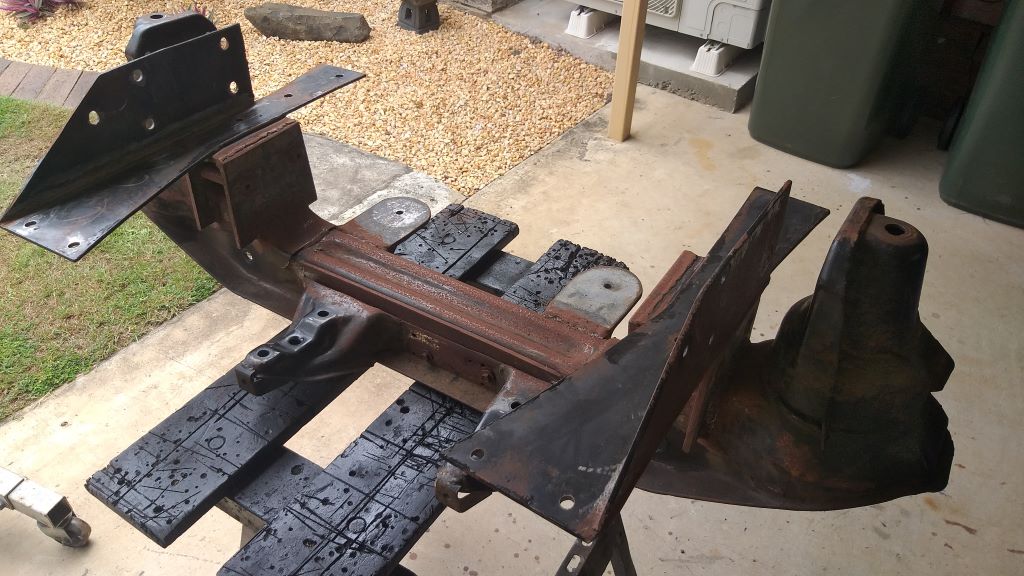
In other news I've triple checked all of my front suspension measurements, so it's time to fully weld the new mounts. Stripped it down to the bare beam yesterday and I'll give it a quick fizz today.
3 points
-
I fired up the Imp this morning to go and get some bread from the shops. As per usual I was hit on by a couple of boomers and the Imp performed flawlessly. I did notice that the WOF is due next month and I don't think I could be bothered renewing it. I know it will pass but I simply don't drive it enough. Time to put this thread on hold for a while whilst I clear out some more pressing projects. I already have a new motorbike engine for it (VTX1300 V-twin Honda) but frankly it works perfectly fine as it is. I always thought I'd blow the engine but in the thousand or so miles I have put on it over the last year it really hasn't skipped a beat on the road. The fuel economy is criminally good. Anyway, please enjoy a couple of pics before it goes for a long sleep and thanks for stopping by.3 points
-
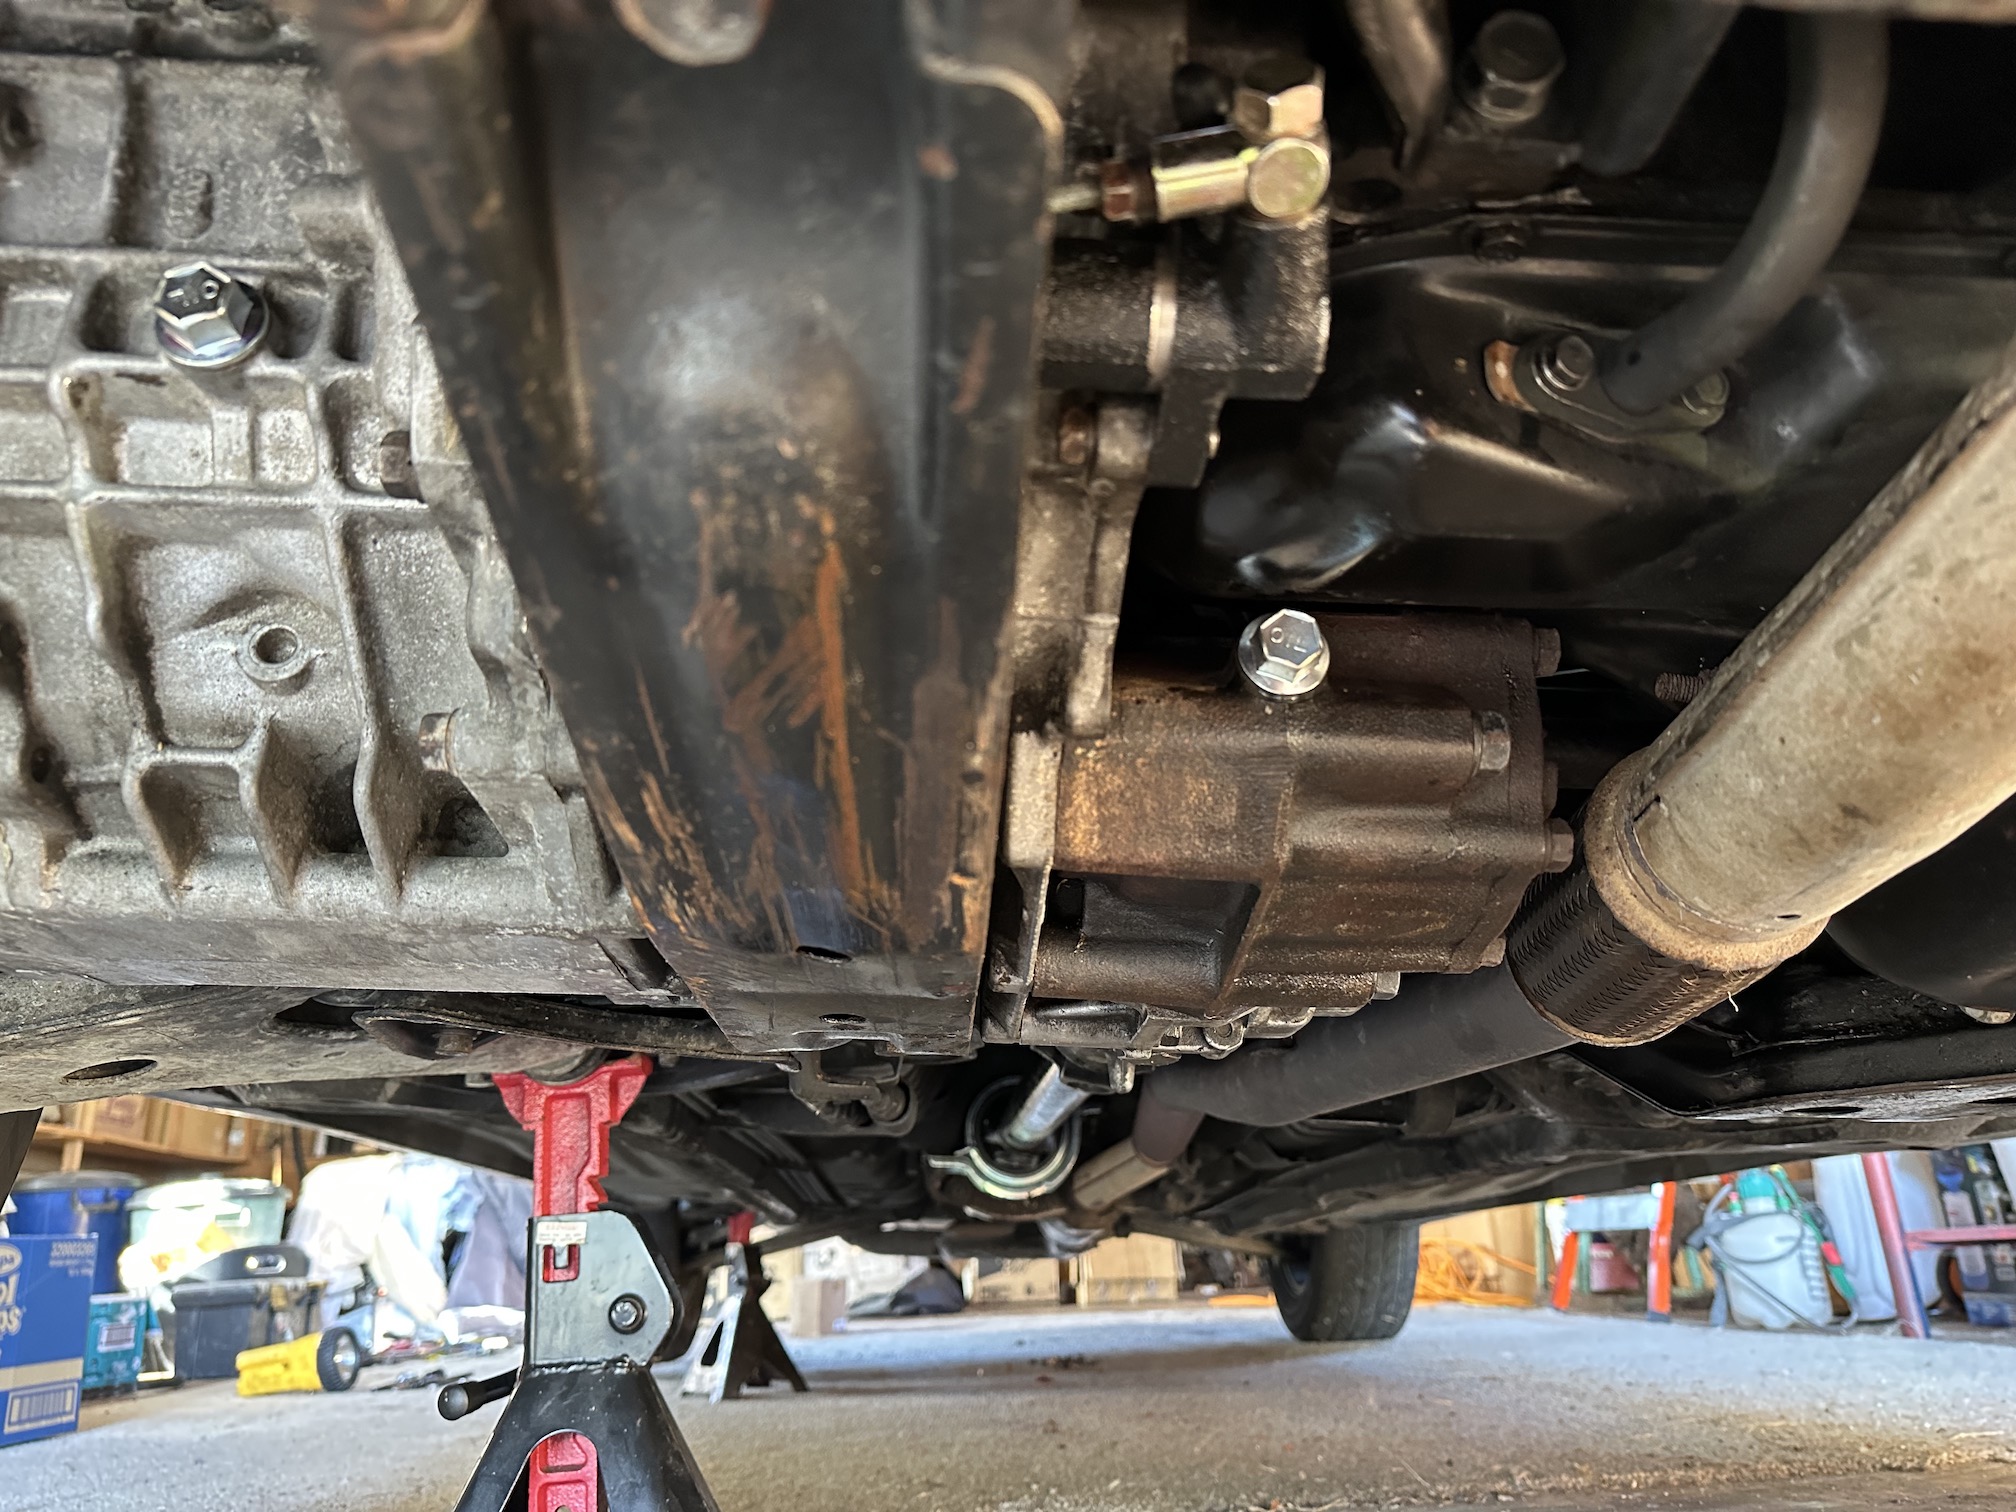
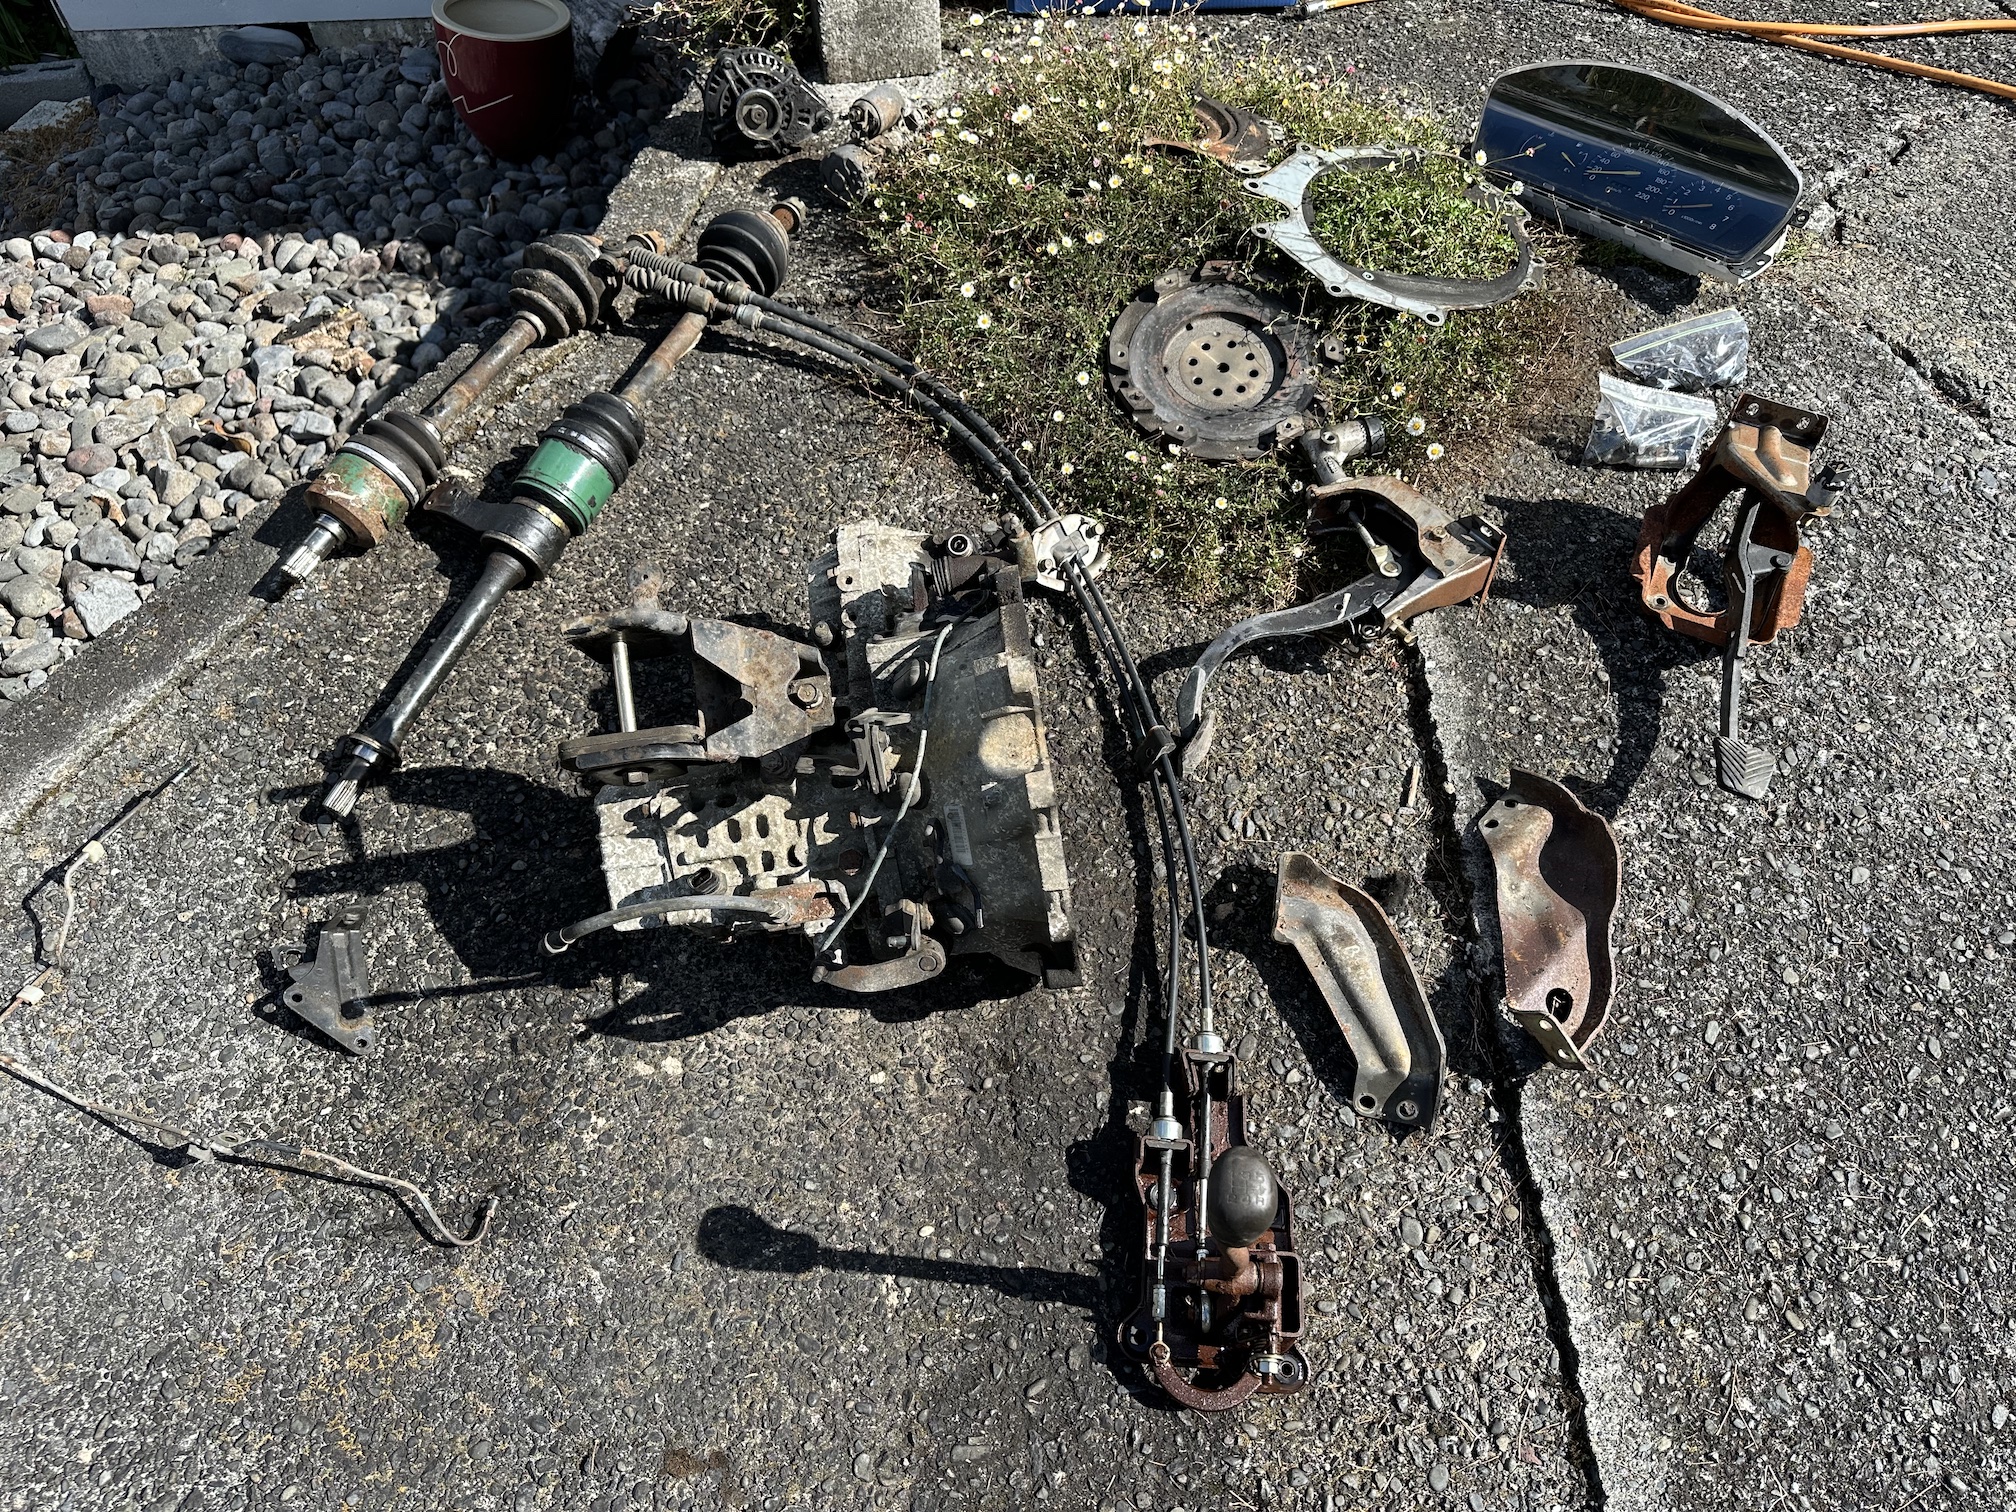
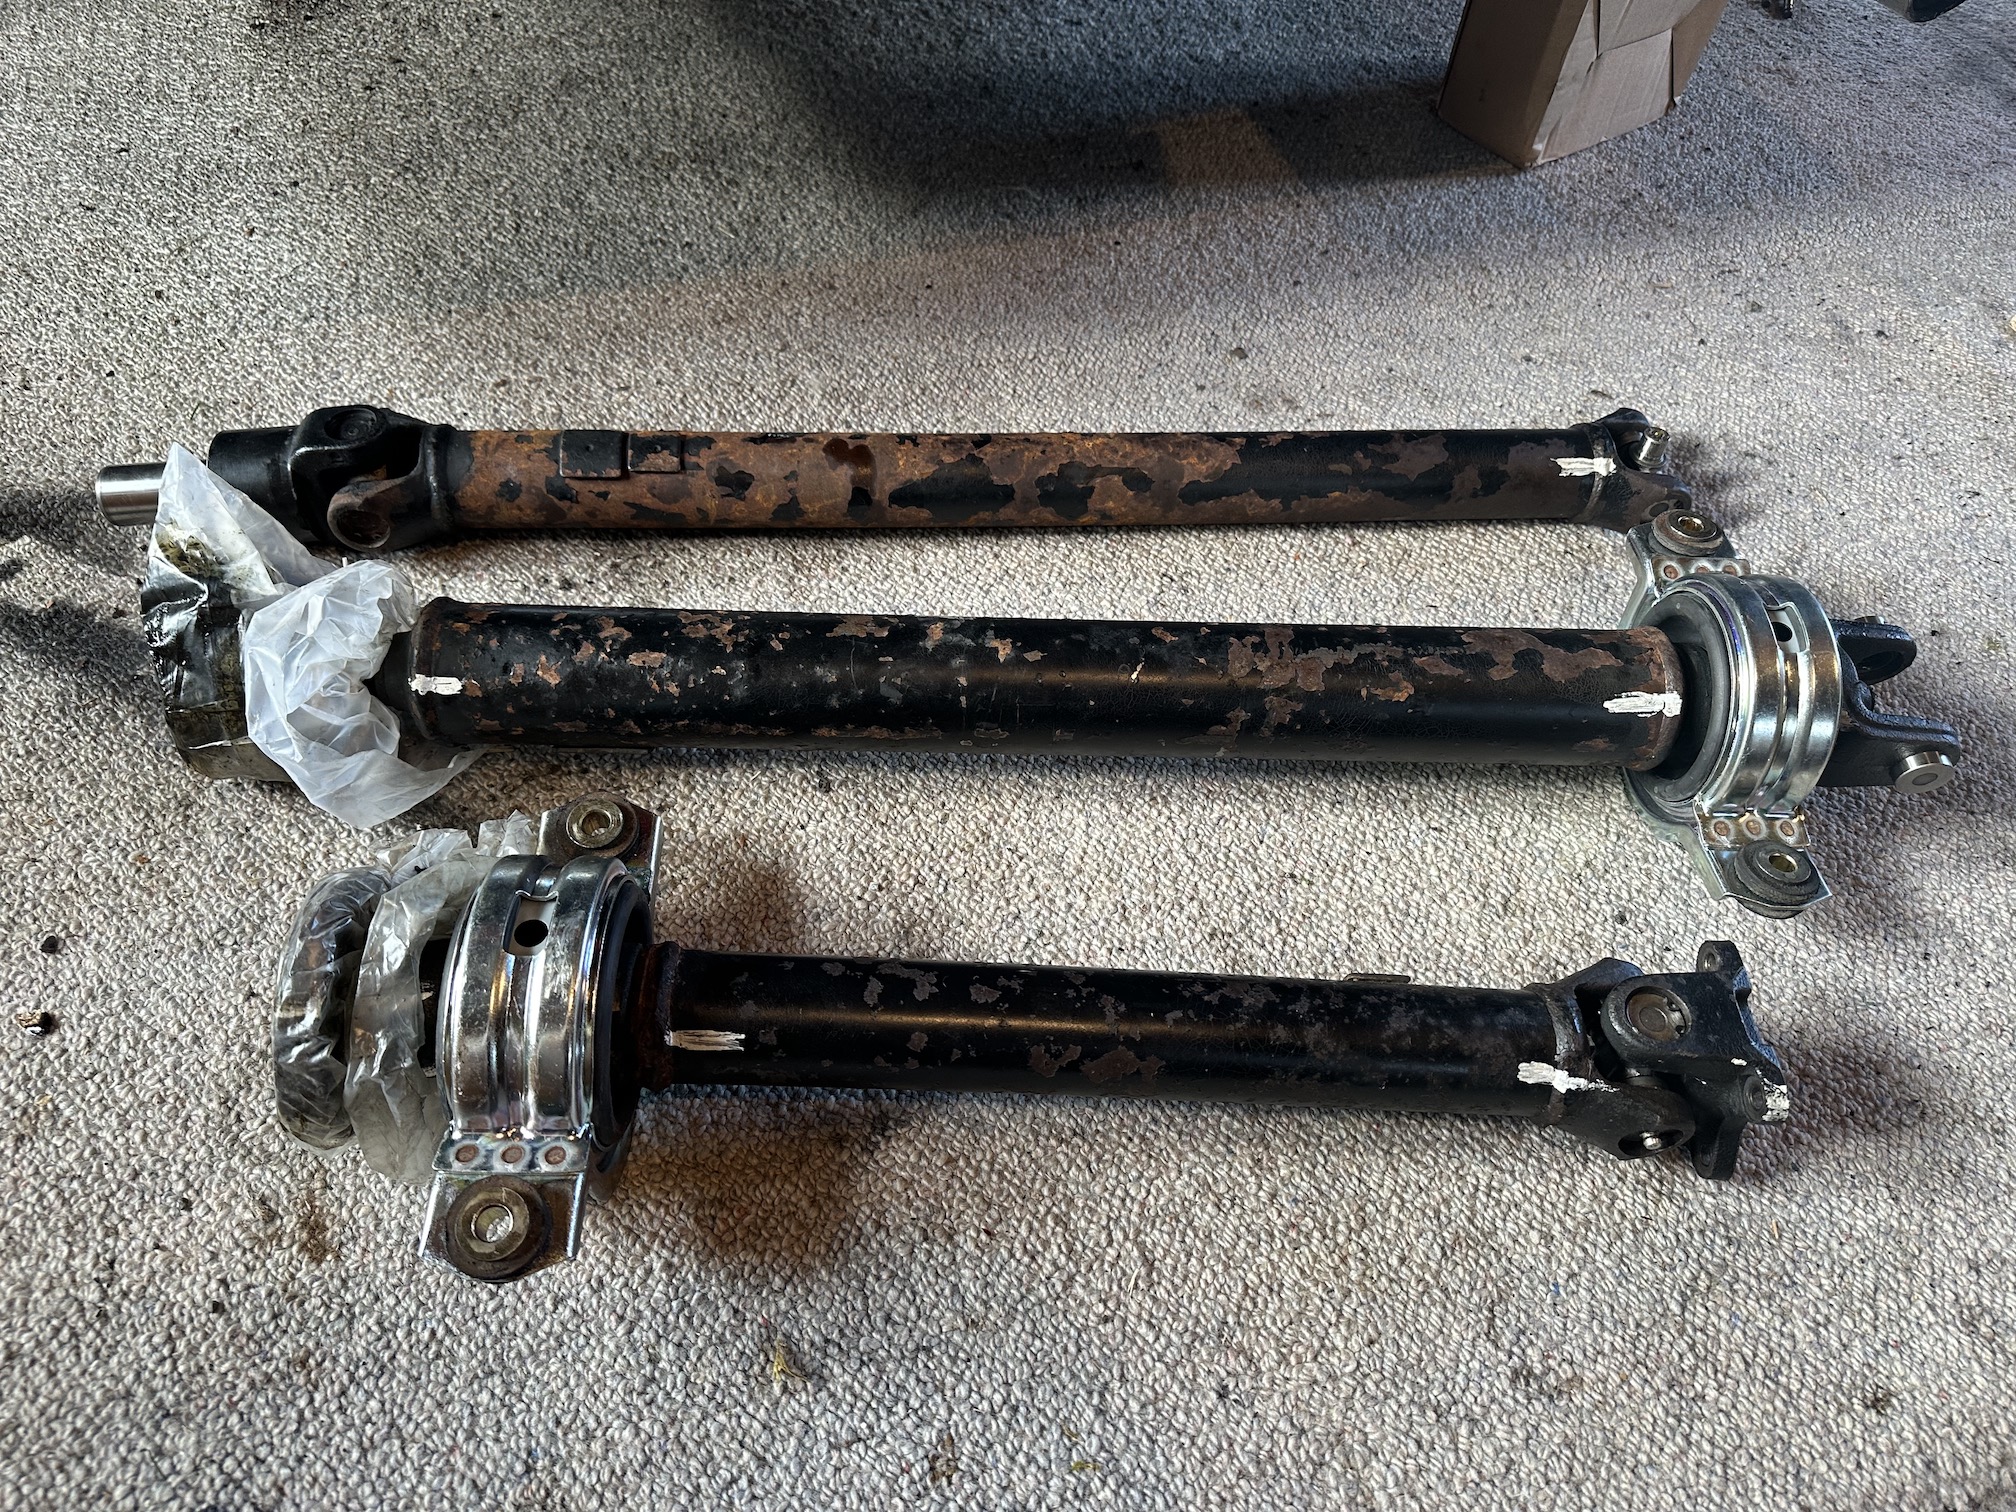
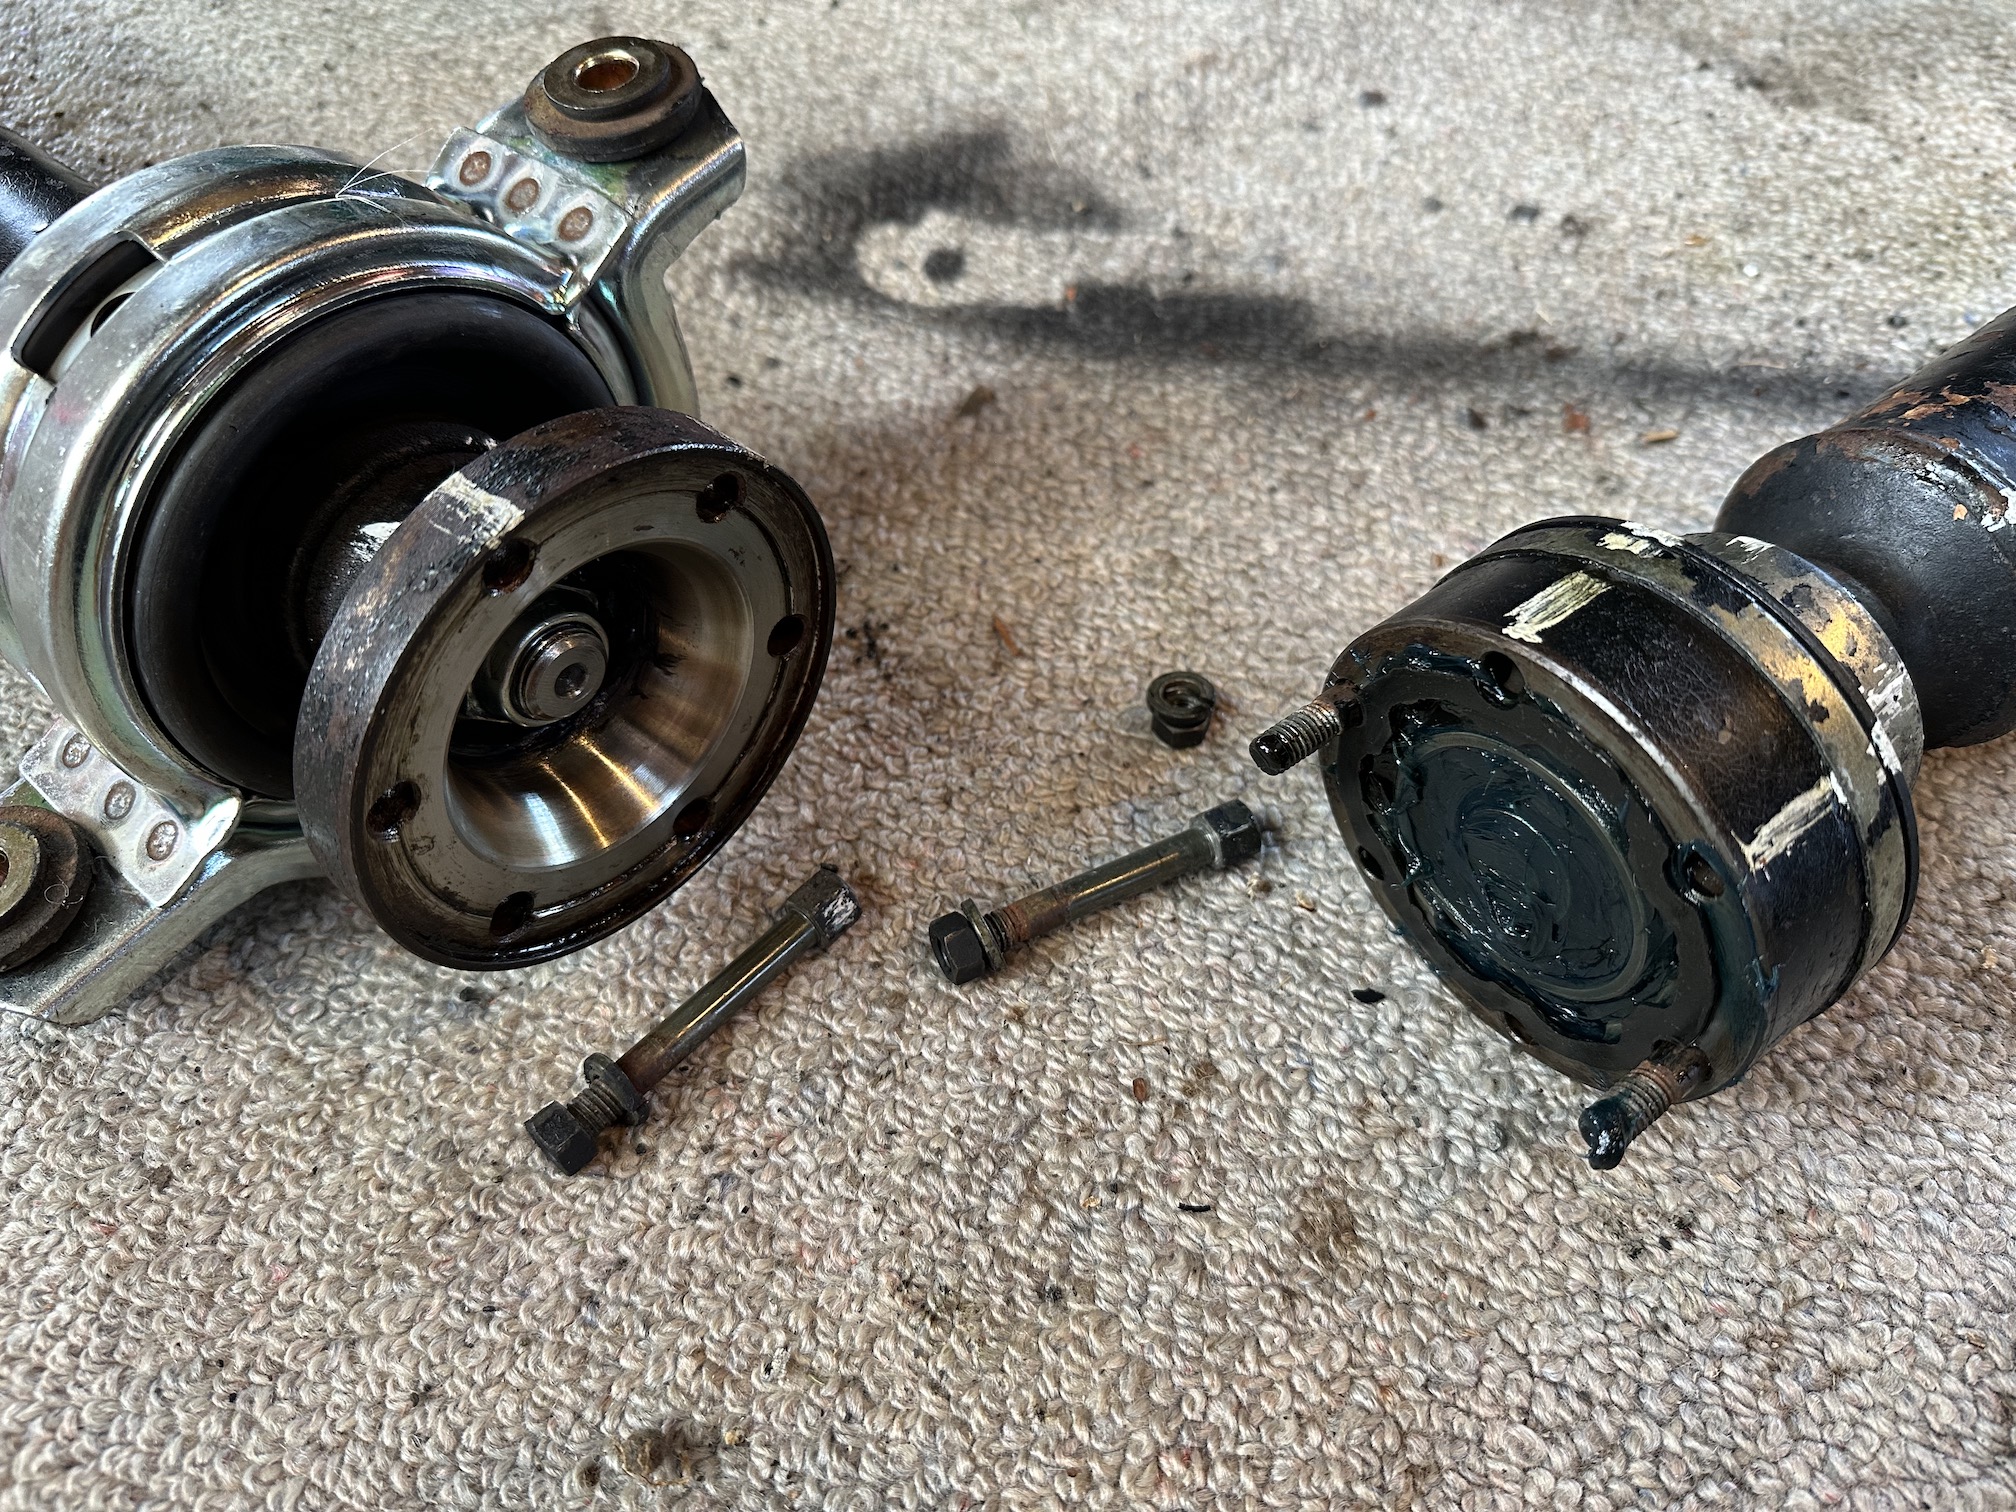
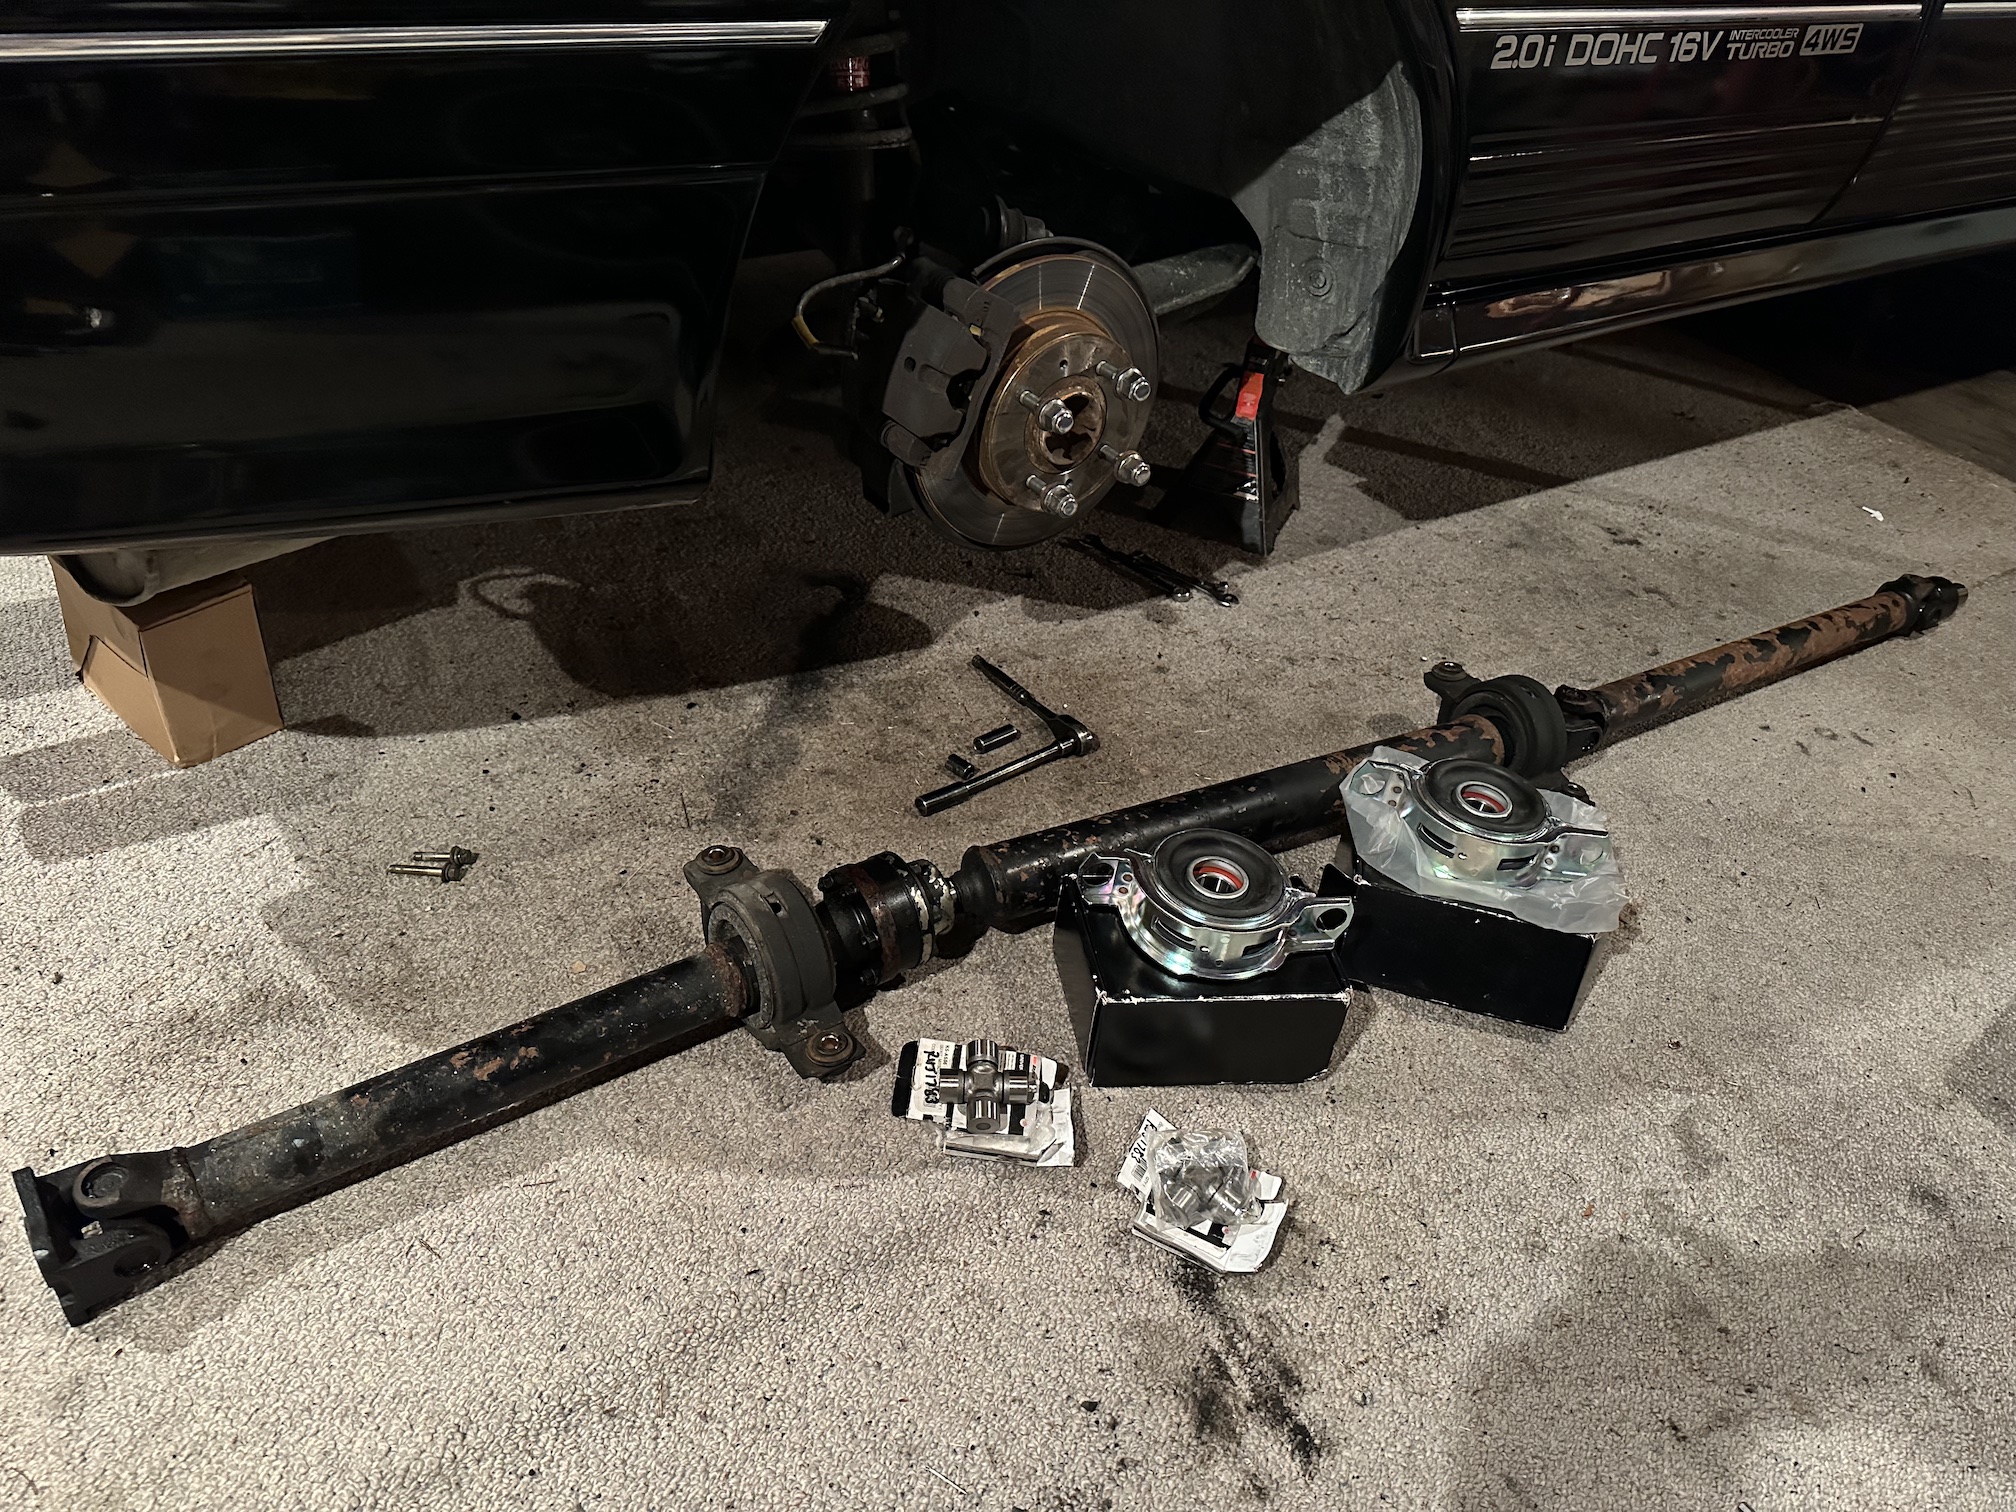
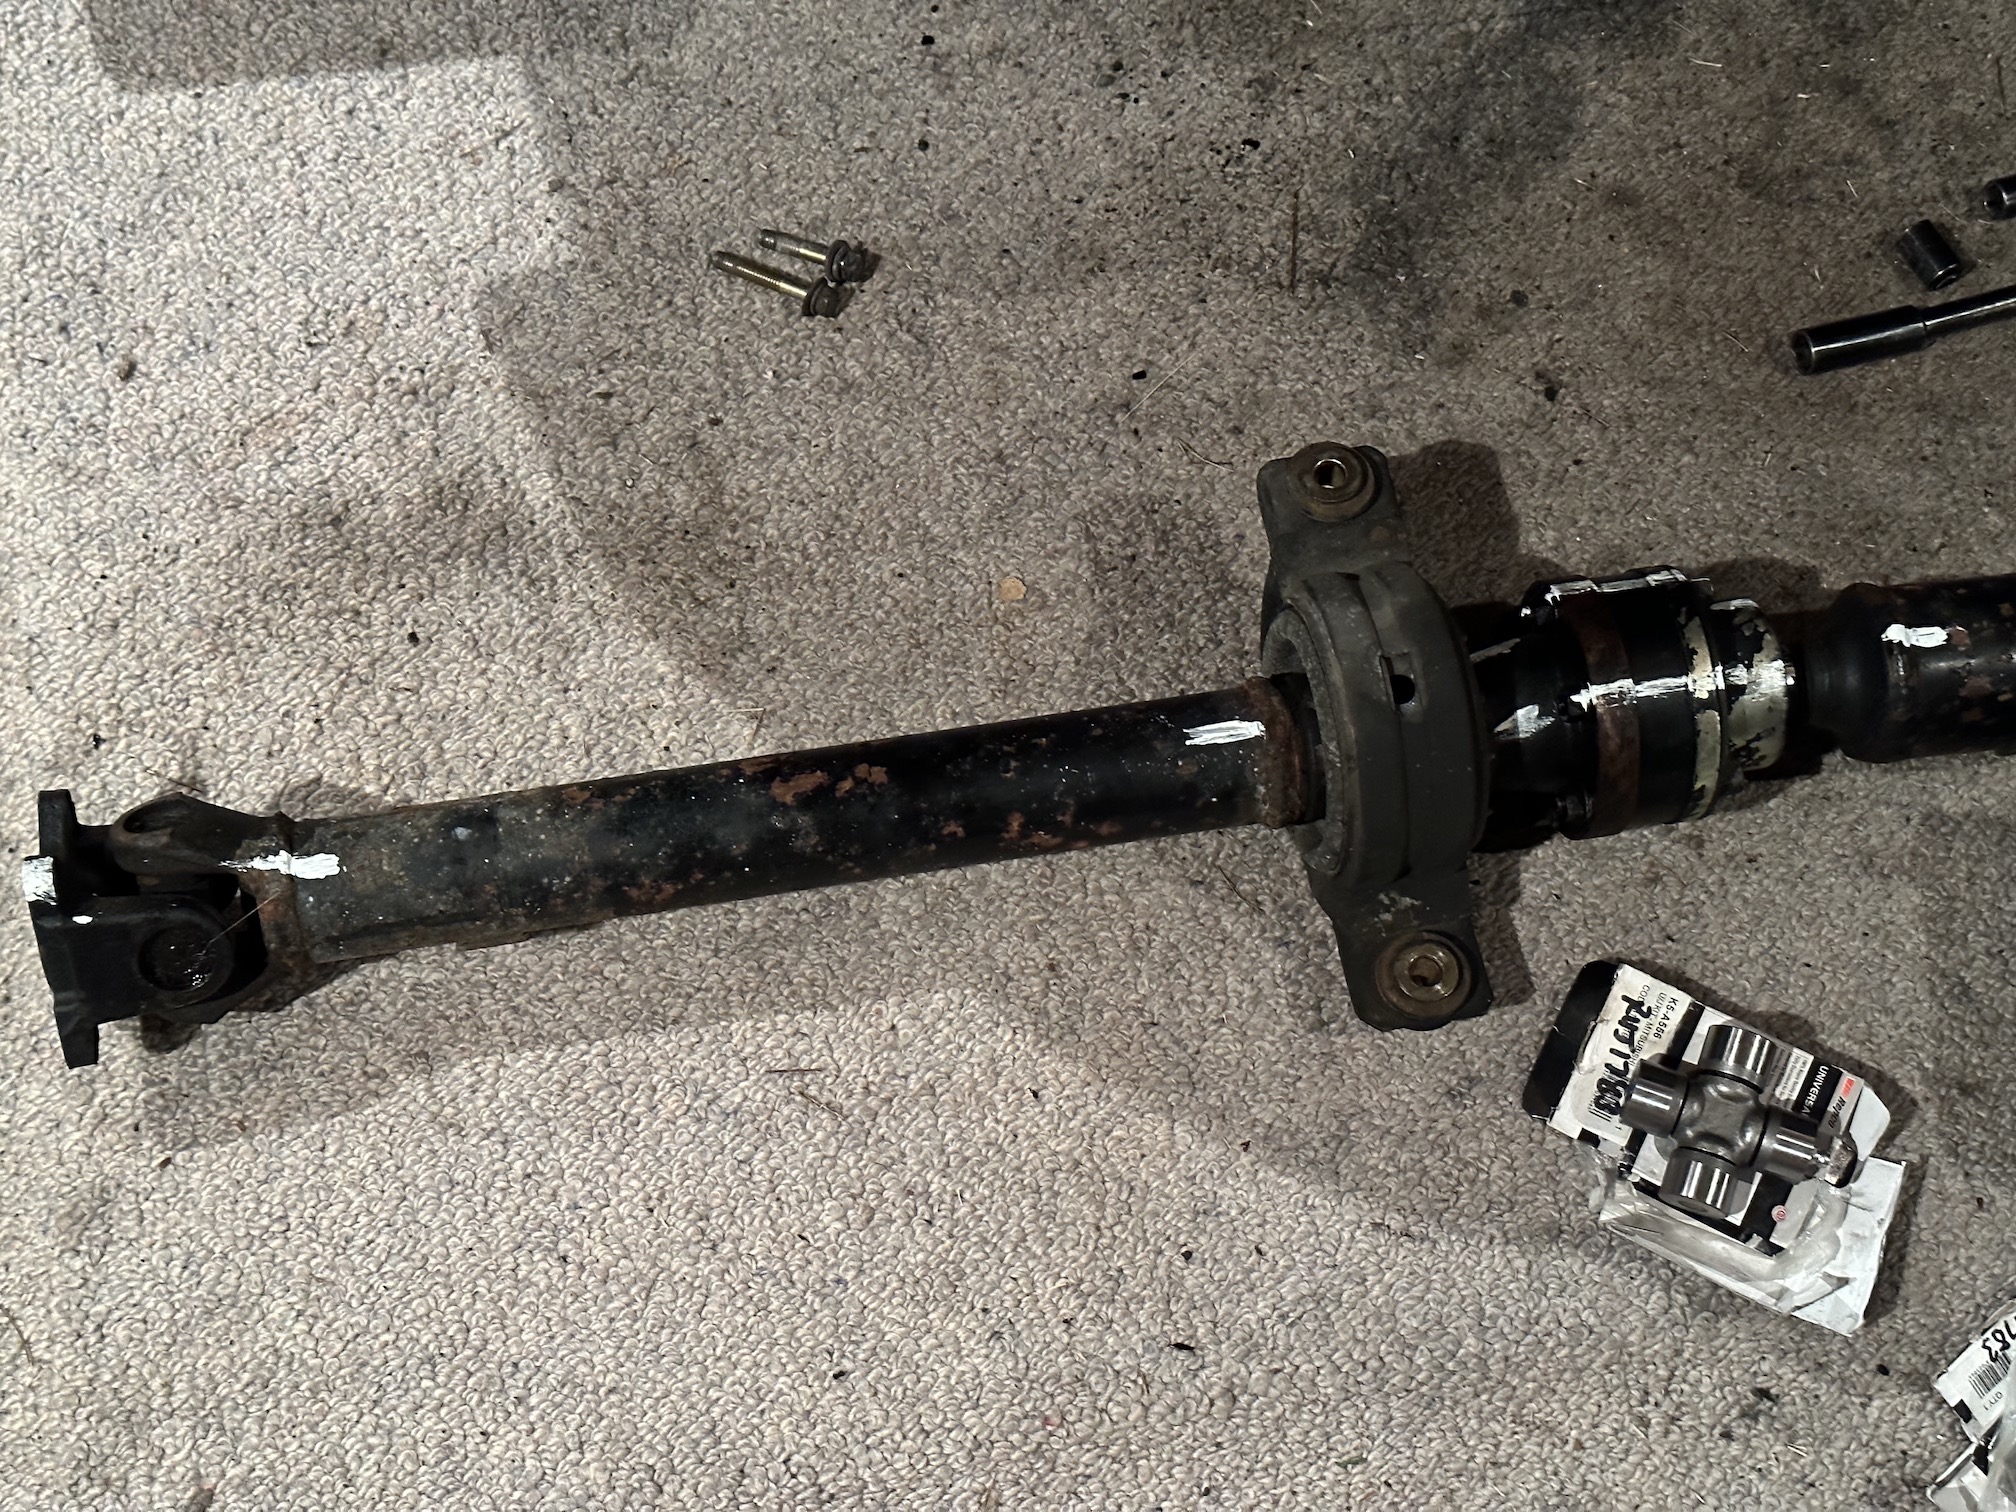
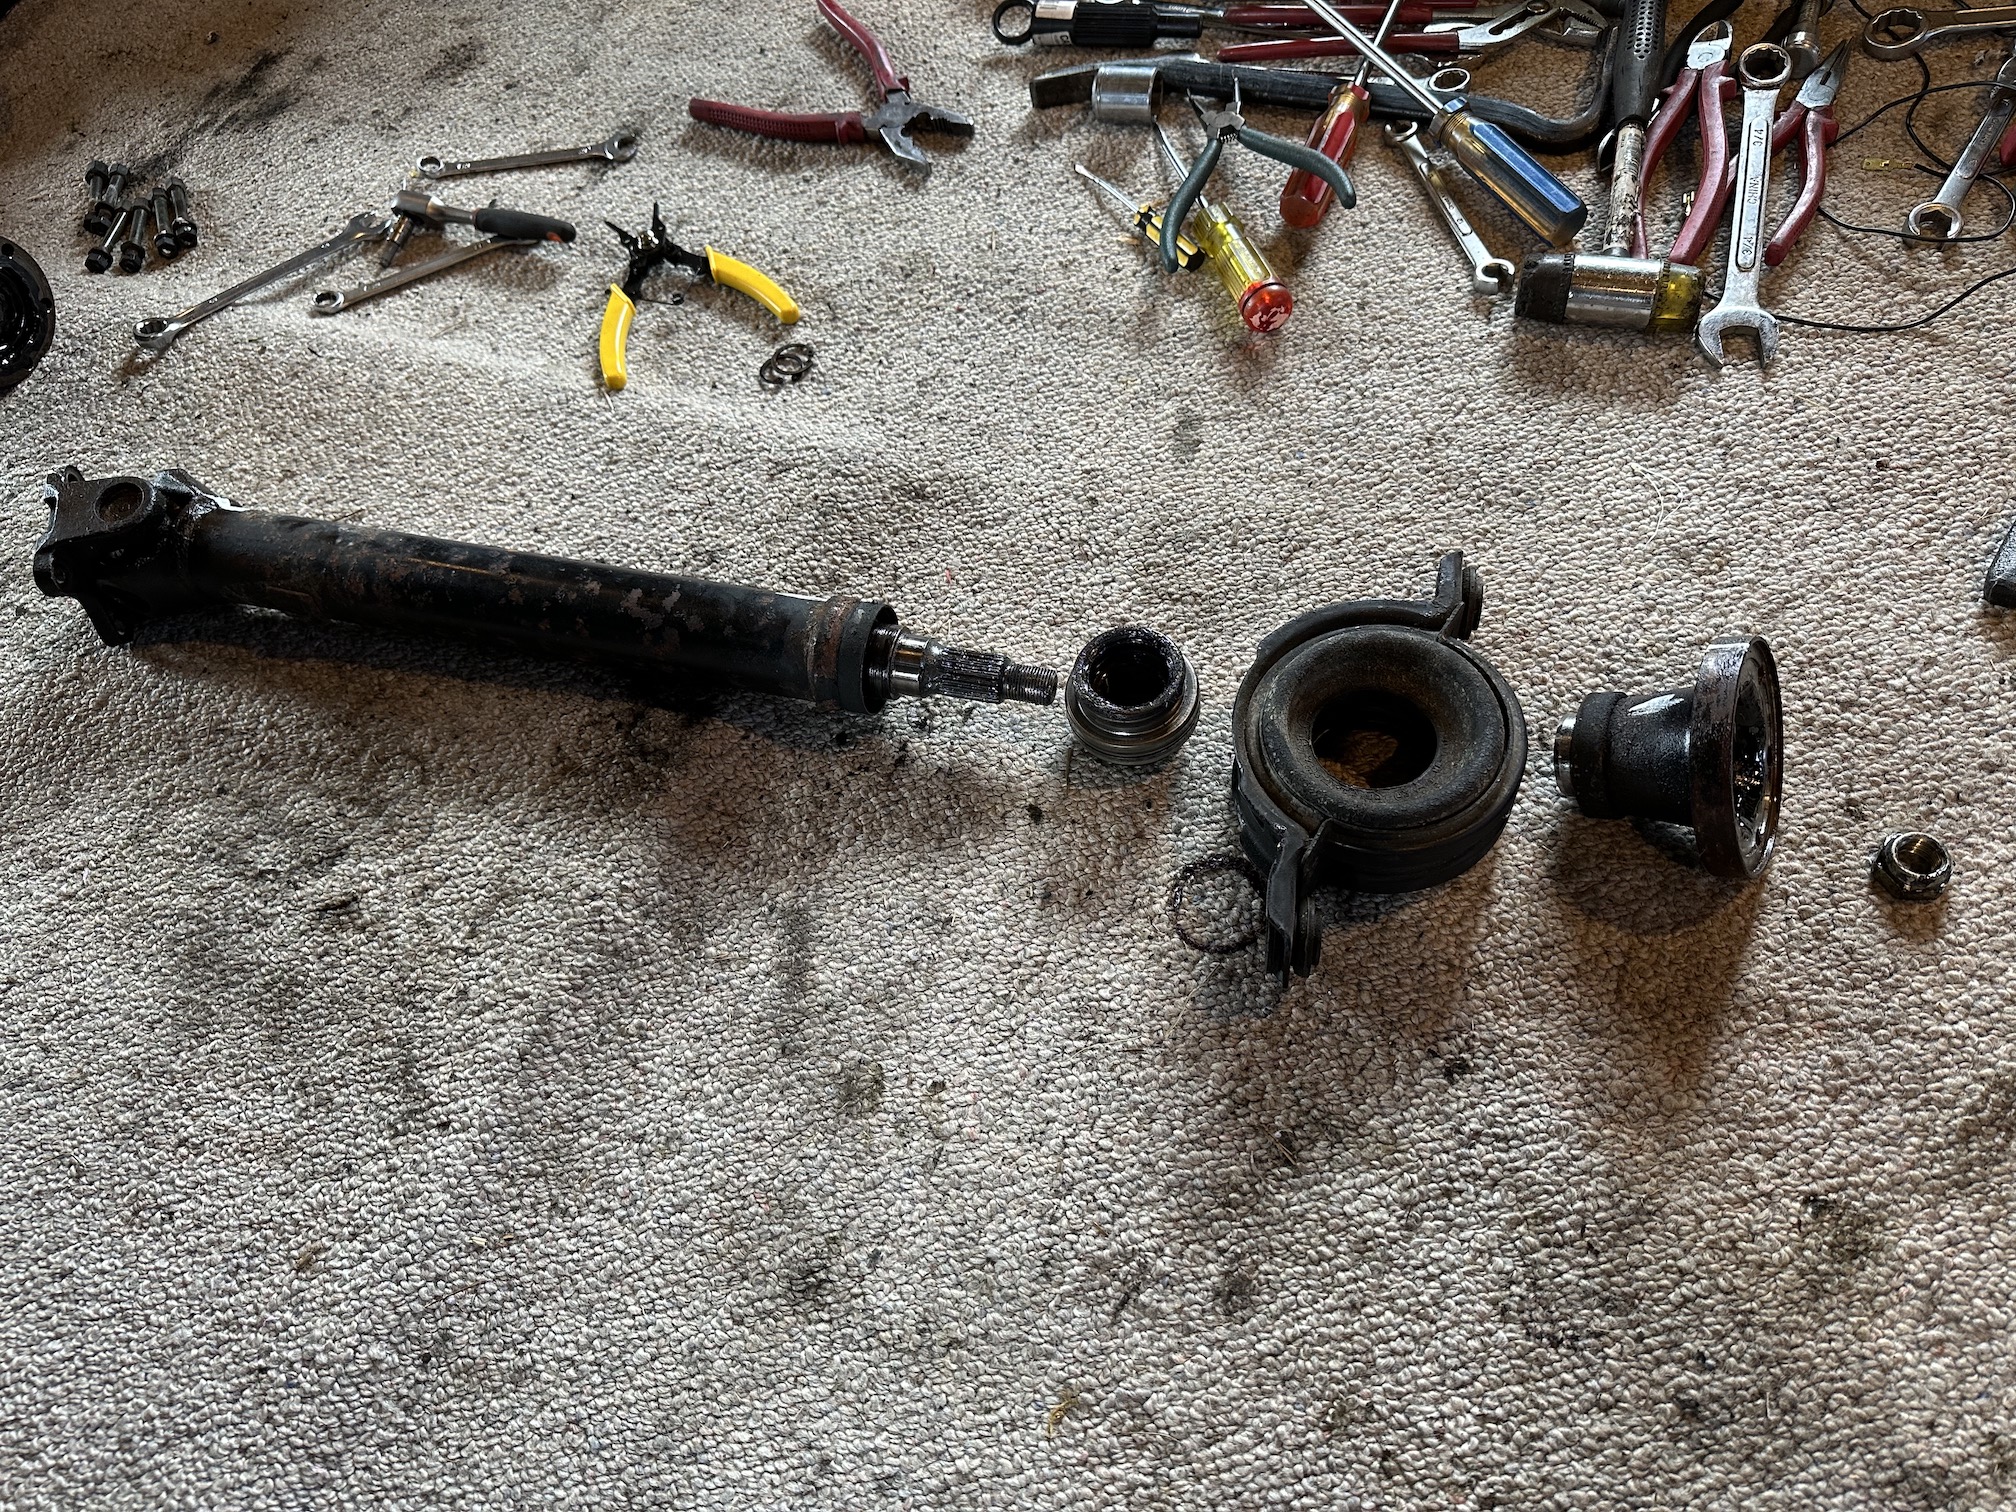
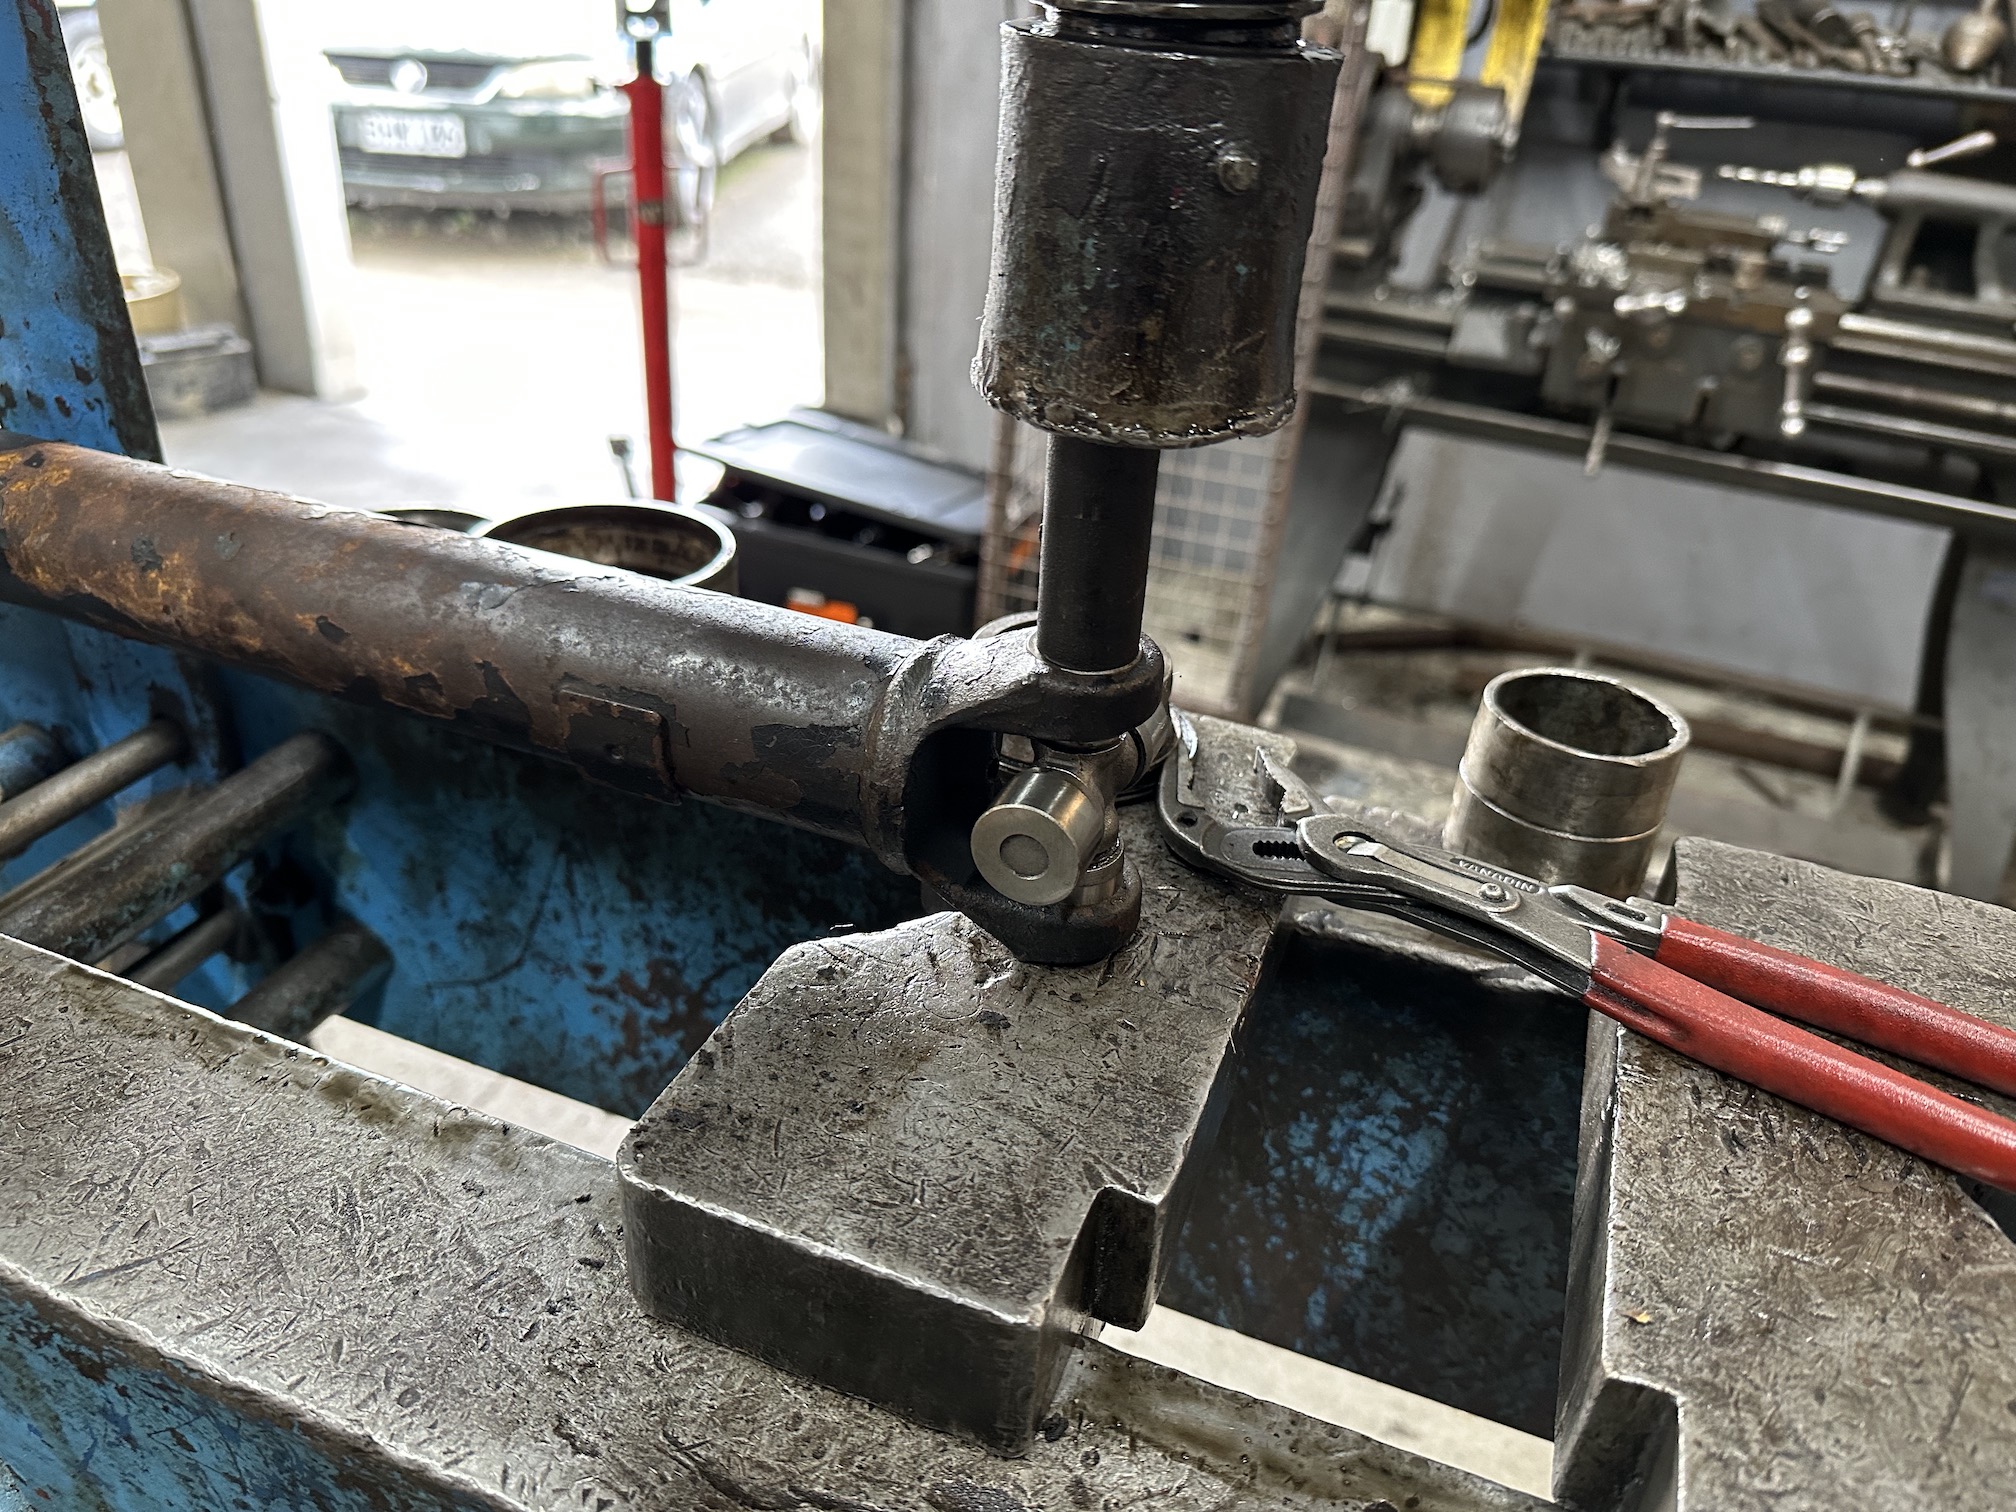
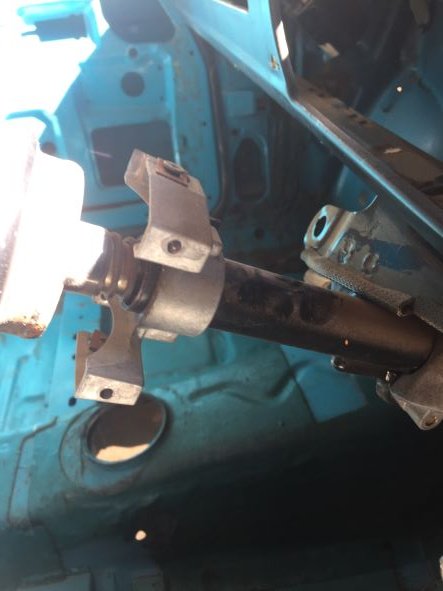
After driving this thing the ~1200km to nats and back it went largely without issues, blew off an intercooler hose while four up passing a car which was mildly inconvenient, and I stupidly left a 10mm spanner on the clutch slave bleed screw which made it all the way from Taumarunui to Marahau - cheers to @Cullen for spotting that cause I wouldn't have for a while, prob not until I was back haha. Just some maintenance updates really - swapped out the clutch slave yet again because it seems the previous one I fitted ~5 years ago was wrong all along (thanks Rockauto) and that was what was causing my shifting issues as the clutch wasn't fully disengaging. The bleeder screw on the correct unit is in a much more difficult spot to access so no more accidentally leaving a 10mm spanner hanging off it again. I've also had some new driveshaft hanger bearings and uni joints that I got off trademe yonks ago for like $50 that I've been meaning to get around to swapping out. There is a noise in the drivetrain somewhere which has been driving me crazy for the entire time I've had the car, it is hard to pinpoint where it is coming from but it sounds like metal on metal scraping and can generally hear it above 50km/h especially when the windows are down, to me it sounds like it's coming from the left hand side but mostly because the noise reflects back off things like houses and parked cars which are typically closer to the left side. Figured I may as well start with rebuilding the driveshaft and then work my way through process of elimination rebuilding or renewing things along the way. I know it's not the wheel bearings or ABS sensors because they checked out fine when I did the brakes, reckon it has to be a driveshaft bearing, front driveshaft hanger bearing, transfer case, rear diff or gearbox. Pulled the original shaft out and got the new parts ready Mark the sections so it remains balanced and joints in sync
3 points
-
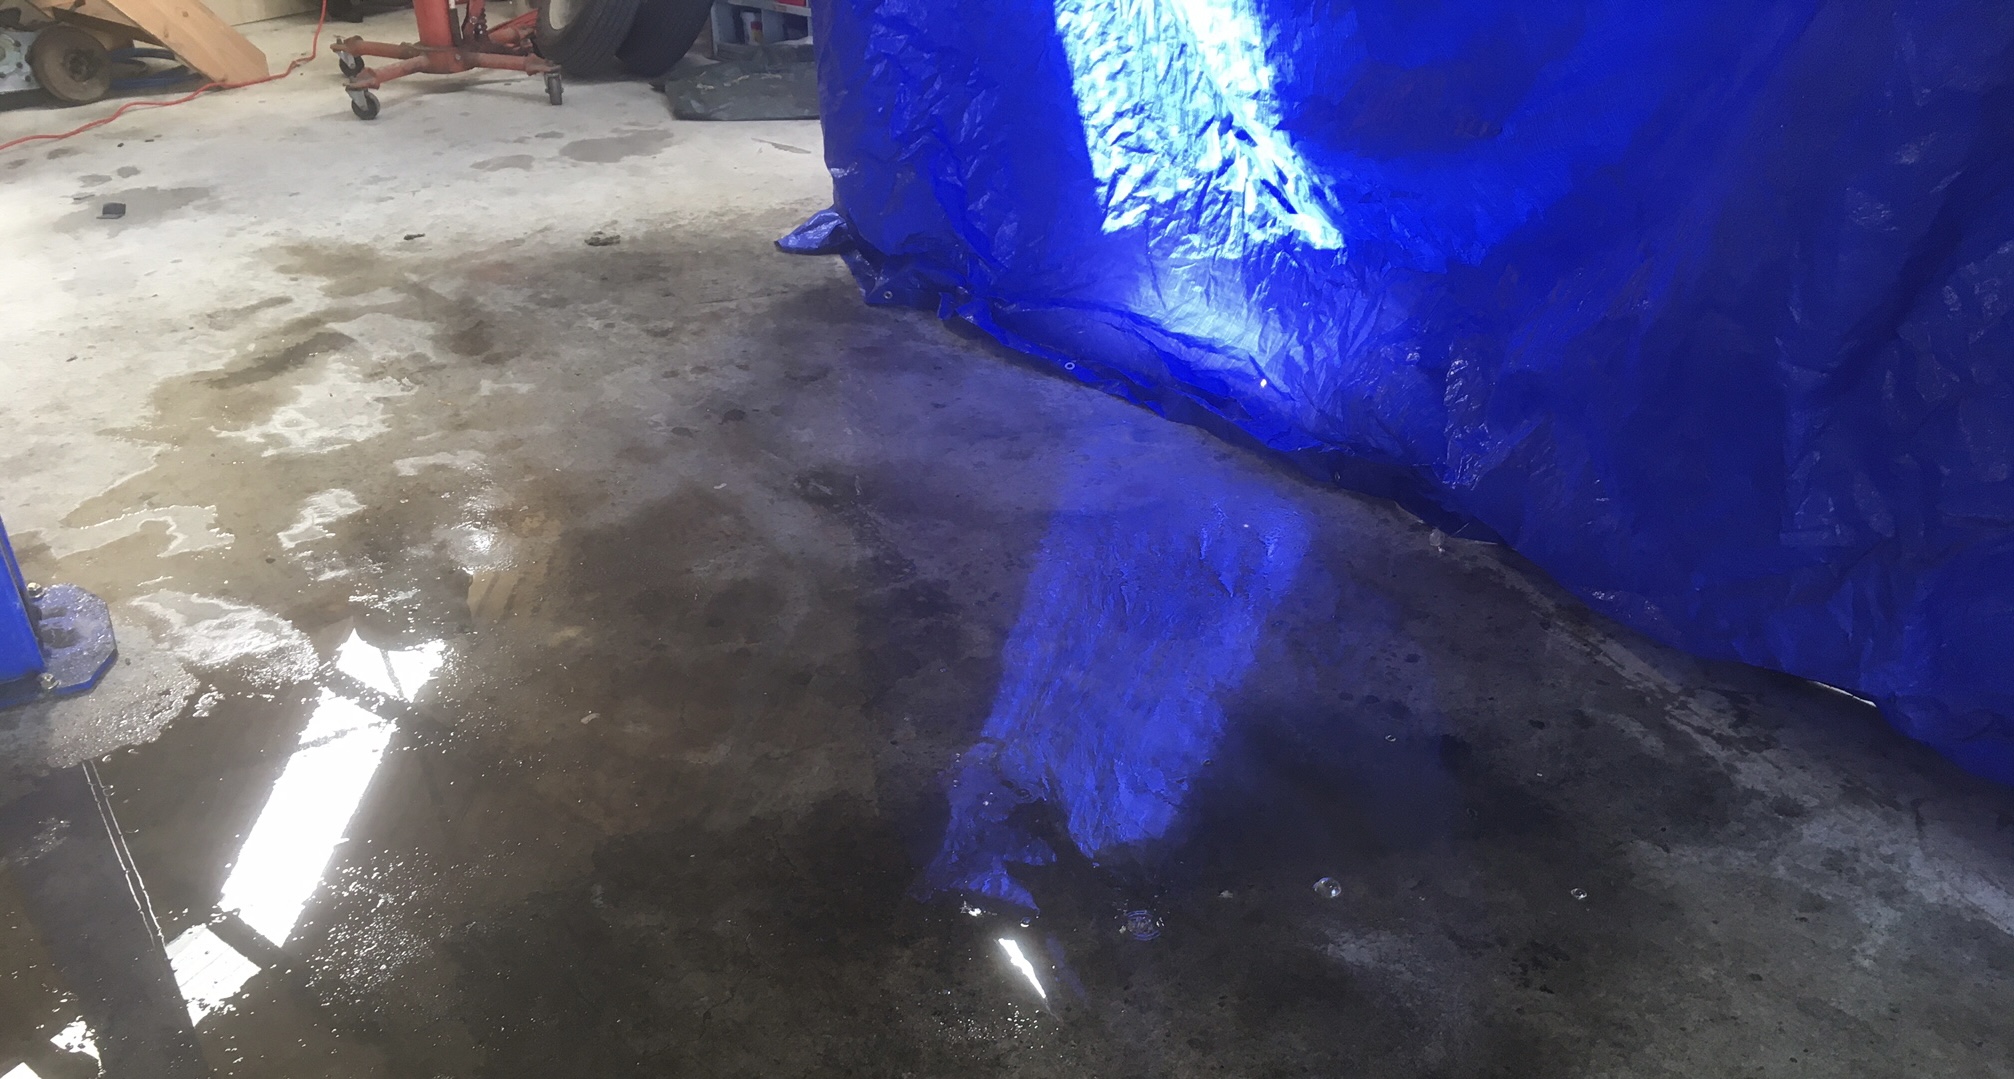
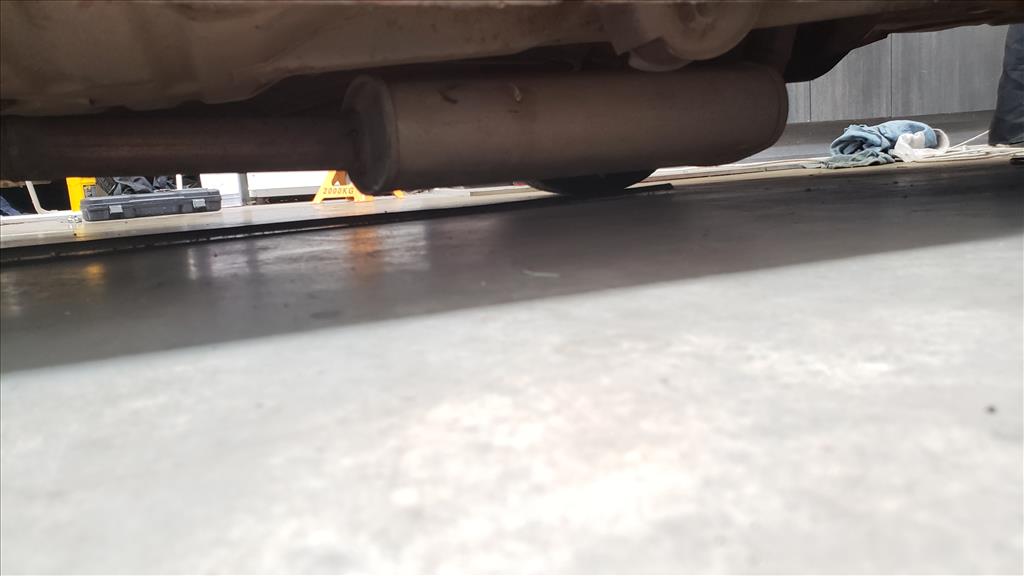
While it’s up in the air, I thought “why not give the underside a clean?” Because it would be a horrible job of course! So I did it anyway. The whole underside has a layer of gravel road dust on it for some reason. Now it does not. Btw, waterblasting inside the shed doesn’t make as big a mess as you think as long as you’re careful with your aim and you squeegie excess water out the door before it can flow under your workbench/tools/other treasure.
3 points
-
I was thinking a limited run of handcarved woodprints. Limited by how bored i got after printing 3 of them3 points
-
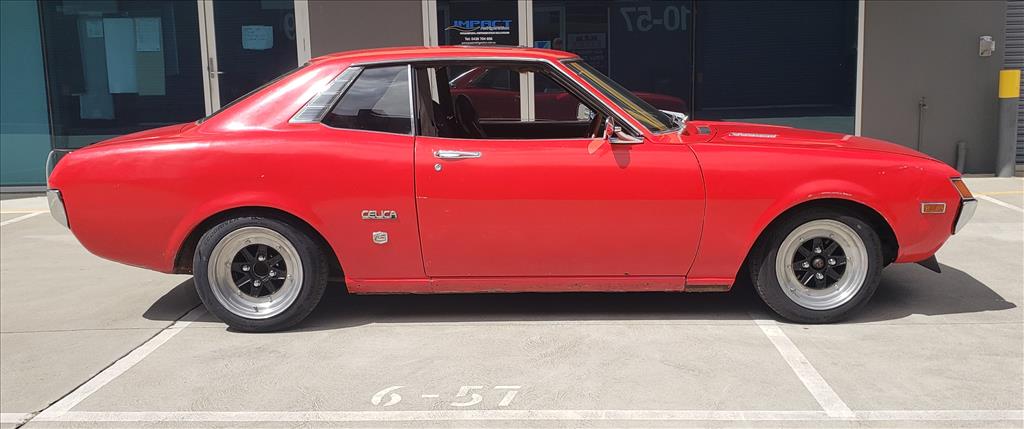
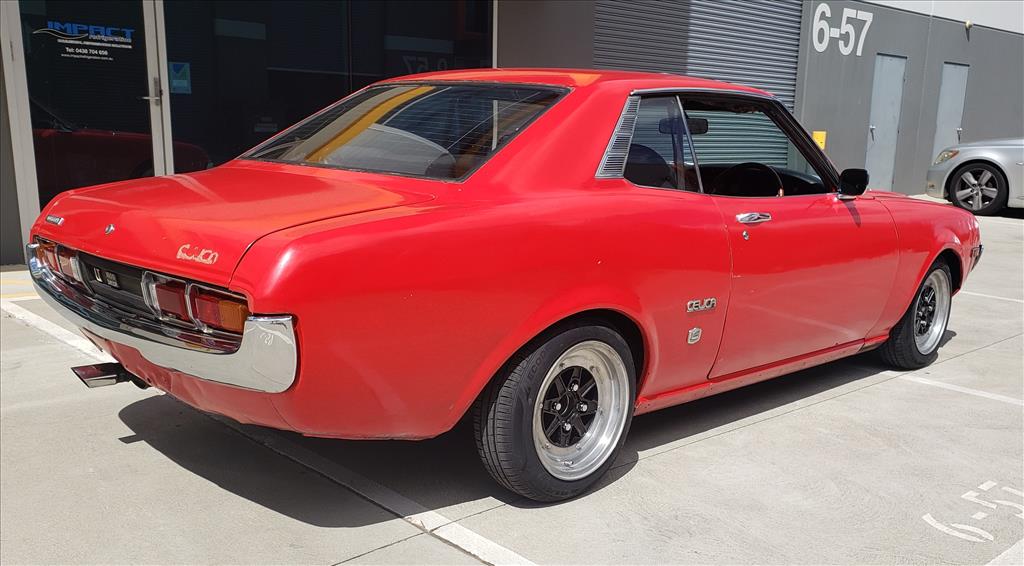
Had a pretty good week "finalising" the Celica for the time being. After doing a bit of screwdriver tuning it runs happy enough and I did a full brake bleed using a stack of new fluid but now about 95% of the existing brake problems are resolved. The rest of the slightly strange braking may be down to worn out bushes or simply alignment. I'd ordered some 25mm spacers that also arrived but sadly the front studs seem to protrude too far out and the wheels do not have cutouts in the back. I didn't want to cut the factory studs down so will probably just try to find larger spacers as it needs it anyway. In the meantime it's just got 10mm slip ons up front and the 25mm bolt ons in rear. It doesn't look super duper low but now this is annoying, future Alex problem. Overall, happy with the direction things are heading.
3 points
-
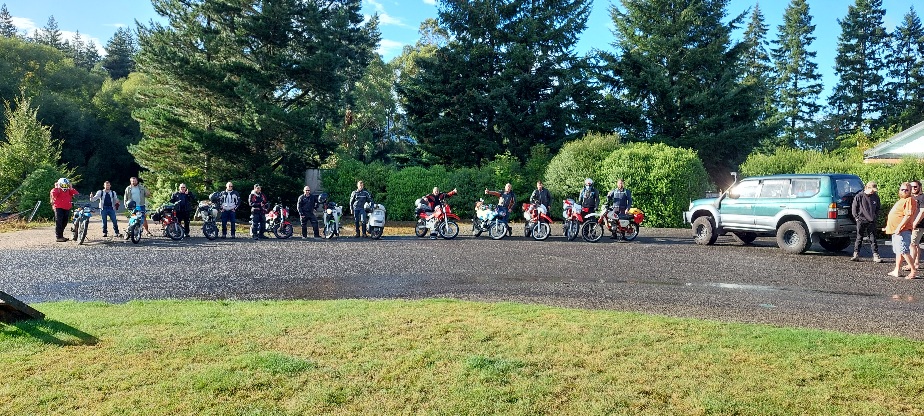
Yes! For those playing along at home, We have two dead bikes, one rode off a particularly gnarly track. (Down about 5m) I hit a massive patch of wet clay, dropped my bike, and snapped the end off my brake lever. (Just the tip/that's what she said) Holy fuck it was a long day!!! Left hanmer before 9am, and reached our accommodation after 730pm. The good news is, tomorrow is a similarly massive day. (Albeit not as challanging terrain)2 points
-
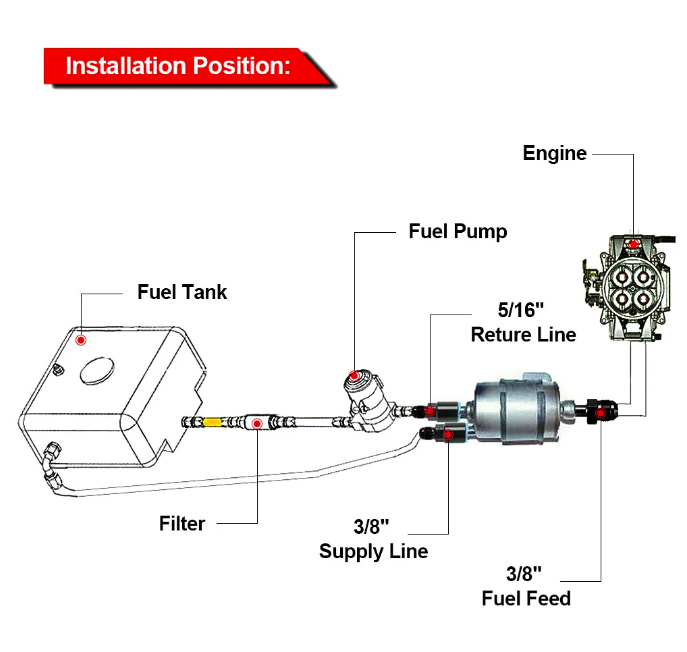
I've bought a Corvette fuel filter, someone mentioned somewhere ages ago that it has an internal FPR, and runs at 60psi. So its an easy way to make a "returnless" setup when there's no provision for an FPR on the rail. After the filter I can just tee off the fuel lines from there to each bank. Will keep the quick release fittings on the fuel rails and make up some AN-6 lines to them. I will need to reroute my fuel hard line a bit though, as I'll have exhaust pretty close to it now. I bought some of the cheap/common dual H bridge boards (L298n) to run the e-throttle motors, but reading further people say that these are quite inefficient (so run hot, and have a big voltage drop to the motors) So might not be as snappy on throttle response as I'd like. However, they're here so I can at least put together a prototype of sorts. Doing some further digging around and people reccomend the mosfet based ones instead, my ECU uses a mosfet based setup. So got these. BTS7960 43A H-bridge Will wire everything up to my ECU and then start writing some code. I will hopefully get everything that the e-throttle module needs into a single CAN frame, maybe two. Then run it on its own canbus network with nothing else on it. Will run the widebands and dash on the other canbus line. Other stuff on to-do list currently: slot flywheel holes This is with Dad, hopefully finished on CNC machine this weekend. Then will bolt it up and take a look at bellhousing situation once I can center the gearbox on the spigot bearing. Sump Pretty close! This version would be good to go, except for that I'd prefer the pan to be a little further back from the swaybar. Will get there. Starter motor This is going to be interesting. As although the 3S flywheel works with the gearbox and crank okay once the PCD is embiggened. The ring gear diameter is a little smaller than the 4GR one. So this means the Mark X starter motor in its normal position wont work. Then the 3S starter position wont work either, because it's normally tucked in on the side of the block up high. But now there's a vee in the way. So I still might need to look at rear mounting a starter. Lots of problems to figure out. Sort of getting there but also feeling like I've hit a bunch of roadblocks at the moment.
2 points
-
Oi updates and pics plz bitches.2 points
-
Only 13 years later Andy!2 points
-
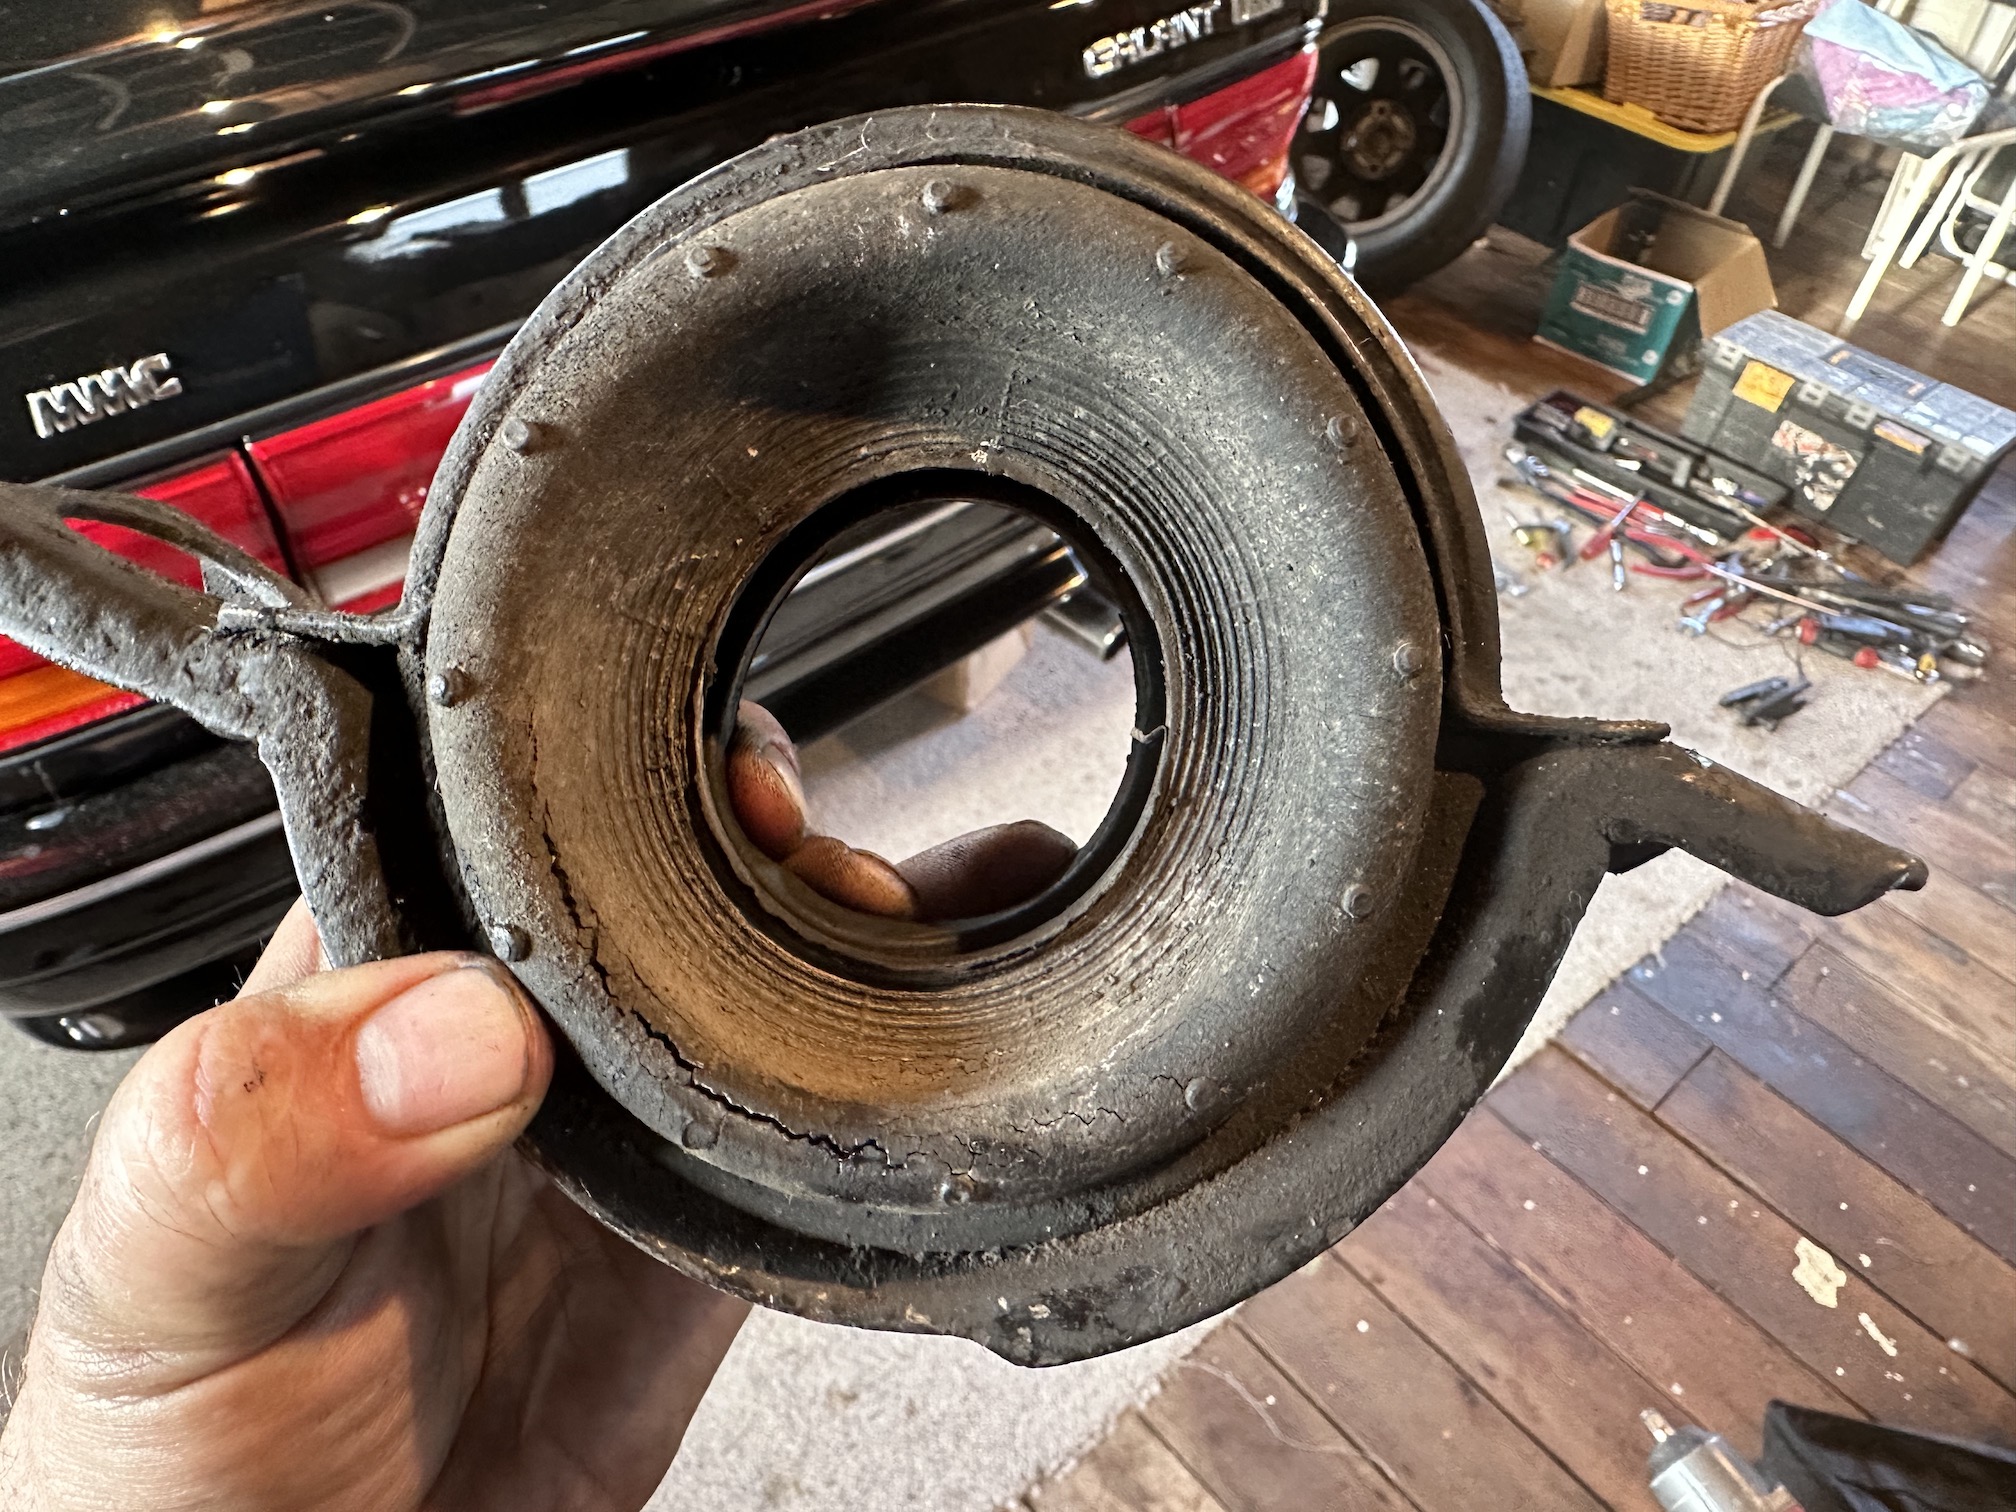
Got her out, yeah. It was actually welded in! They’re a funny wee thing with two little pimples on the flange/head. I’m guessing the factory probably used some kind of electric welding process to melt the pimples. Combination of hammer and chisel got it done.2 points
-
Rear section was the first to be split, was easy enough to undo the nut and pull the flange and old hanger bearing off. I struggled at home with a vice and g-clamp for ages trying to press out the old uni joints and then had enough and took the lot down to my local workshop, thankfully my mate there is a GC and let me press them out myself
2 points
-
I'm sure we had one of these back in the 90s. Does all the vacuumed up crap go through the fan then into the bag? Our family one sounded like an orchestra of children playing the recorder being fed into a wood chipper. It got replaced by a nice quiet Dyson that sounds like a F-86 at takeoff thrust2 points
-
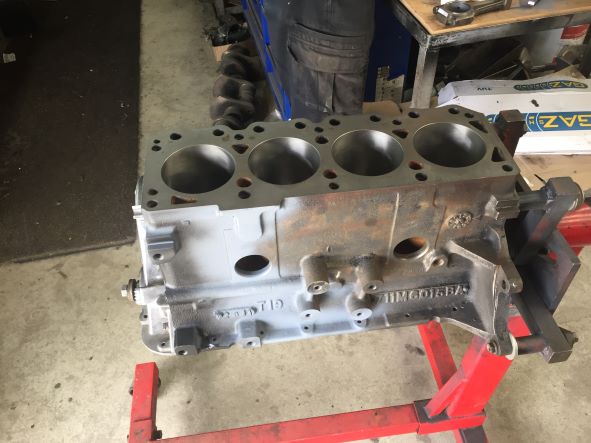
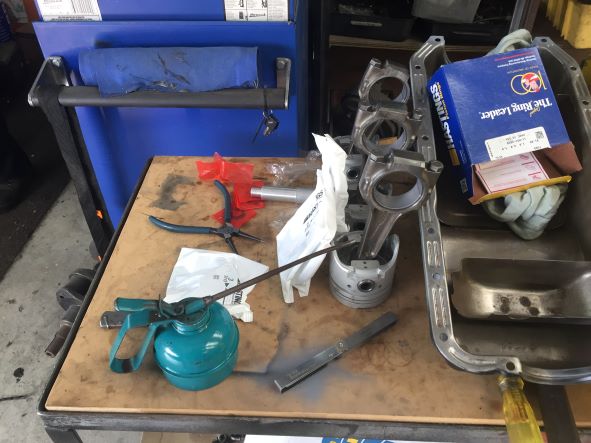
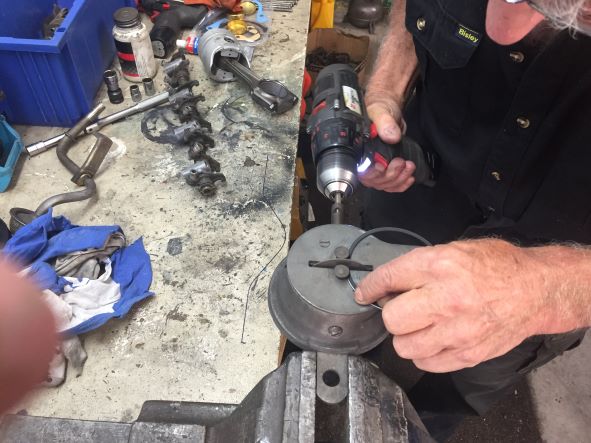
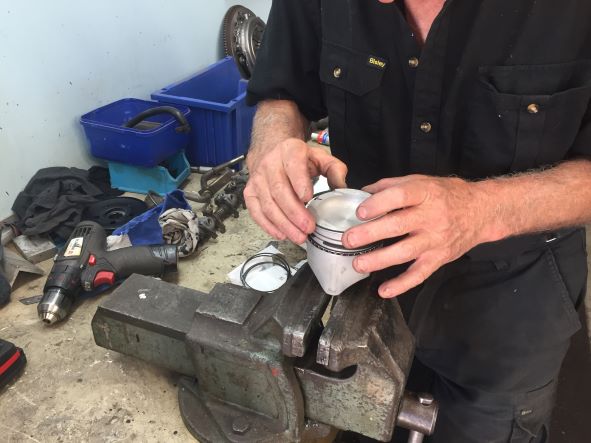
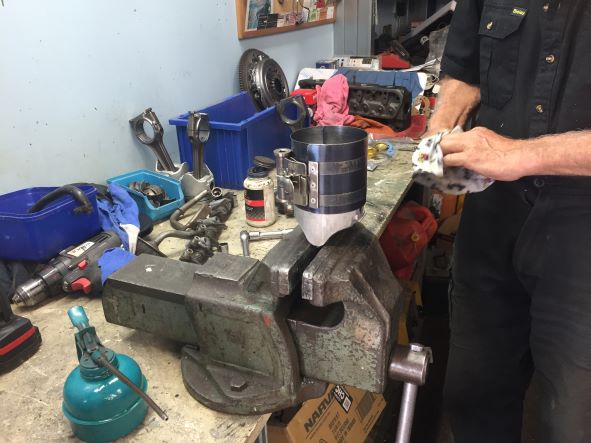
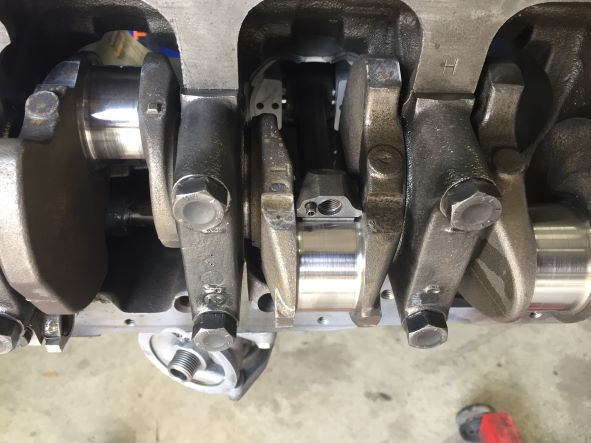
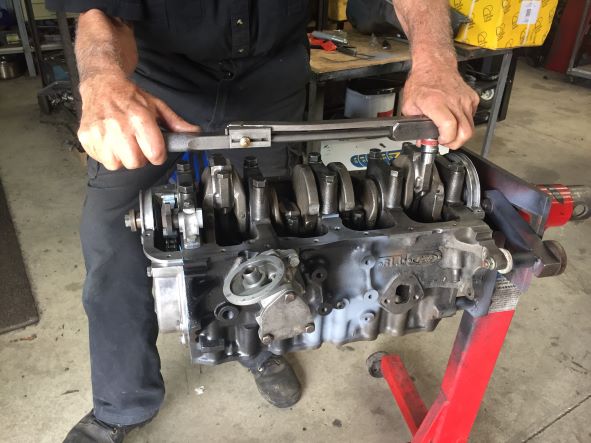
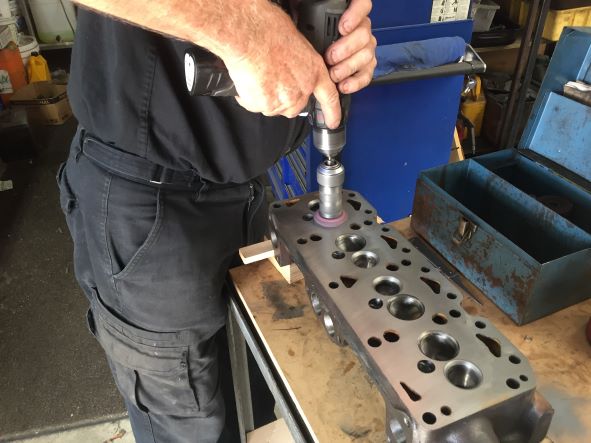
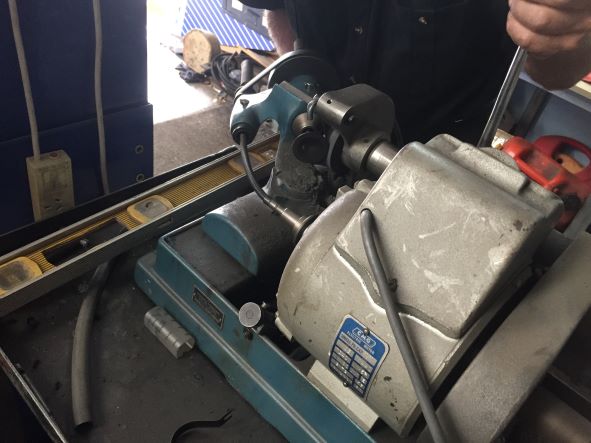
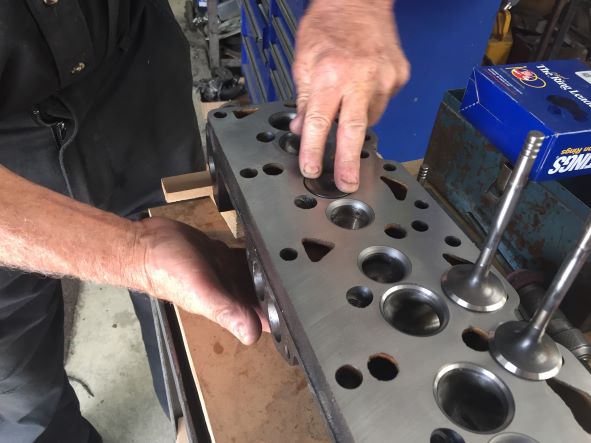
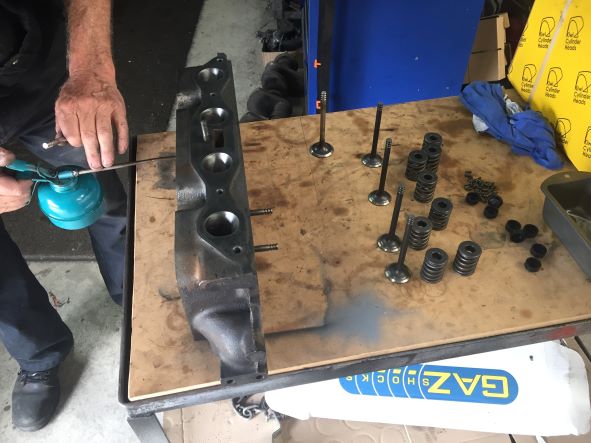
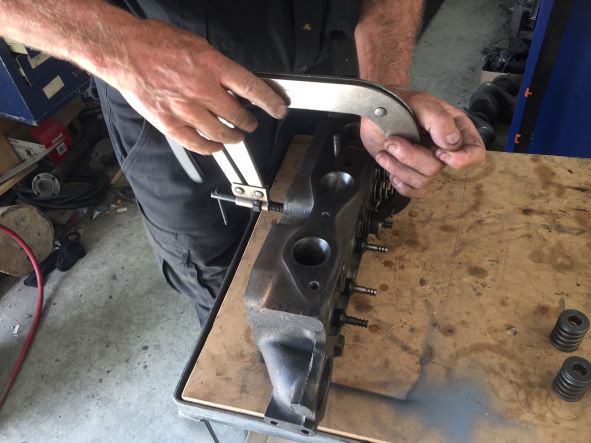
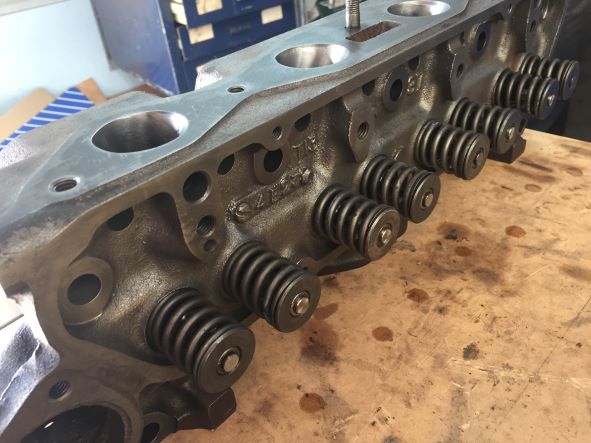
Have been getting some work done on the motor that came in parts with the car when I bought it. Block has been bored out 40" and planed. Crankshaft just needed polishing and put back in with new bearings and seals. Next put in cam followers which have had a surface grind. The cam has had a light sports grind and put back in. With all timing marks lined up new timing chain is fitted along with new tensioner. Timing cover and oil seal fitted. Looking good Next we fitted bearing shells to conrods and caps. Followed by fitting new pistons to conrod. Then we gapped the rings and fitted to pistons. Next pistons inserted into block and and caps put on, all with plenty of oil. Torque down all bolts and we are done. Next onto the head which has been planed and had new hardened valve seat put in. We then ground valve seat and valves ( needed 4 new exhurst valves) and checked fit. All good so fit stem oil seal, springs and collets. Head has been ported so just have to match to intake manifold. Oil pump has been refurbished but need to get a new water pump, petrol pump and distributor. Also need a set of head bolts which ar hard to find in NZ. Good to be putting things back together. Should be a nice motor when finnished Project Discussion https://oldschool.co.nz/index.php?/topic/84912-petes-mk2-escort-1600-sports/
2 points
-
I do have parts to build a short stroke L16 so that is a possibility down the line too.1 point
-
Have gotten a lead on an alloyhead motor with the right version of the head to suit my needs. Hoping to pick it up in a couple of weeks so started making a rolling cradle to sit it in. Had a spare sump left over at work so have designed it around that. Finished tacking it up today. Complete with lugs to tie it on with for potentially longterm storage. Just needs paint then will take photos for thread.1 point
-
Stick with J160, becoming more popular which is good for parts and some amount of crossover with other variations of it is good. It's a good box. And if worried about torque just do the fix the Silvia guys do something internal which I can't remember specifics of.1 point
-
I got way too excited to click the link when I saw there was an update The sump mount looks trick!1 point
-
20B too long to run mount off the front like ya normally do with 13b, Seems to be the common way most people have been doing it of late that iv seen, doubles as sump flange and engine mount. Just been taking the lead of the engine builder and fabricator who both suggested doing this way. Guess it spreads the load throughout and mounts are in a more central position than an end as well? Still needs some refinement/trimming up of the wings as well.1 point
-
Have a great ride today gents, I'll see you tomorrow!1 point
-
I keep forgetting that this isn't going in to the Echo...1 point
-
No probs. I've got the solution for you!
1 point
-
Yep. Reckon the cab will fit on that Isuzu of yours?
1 point
-
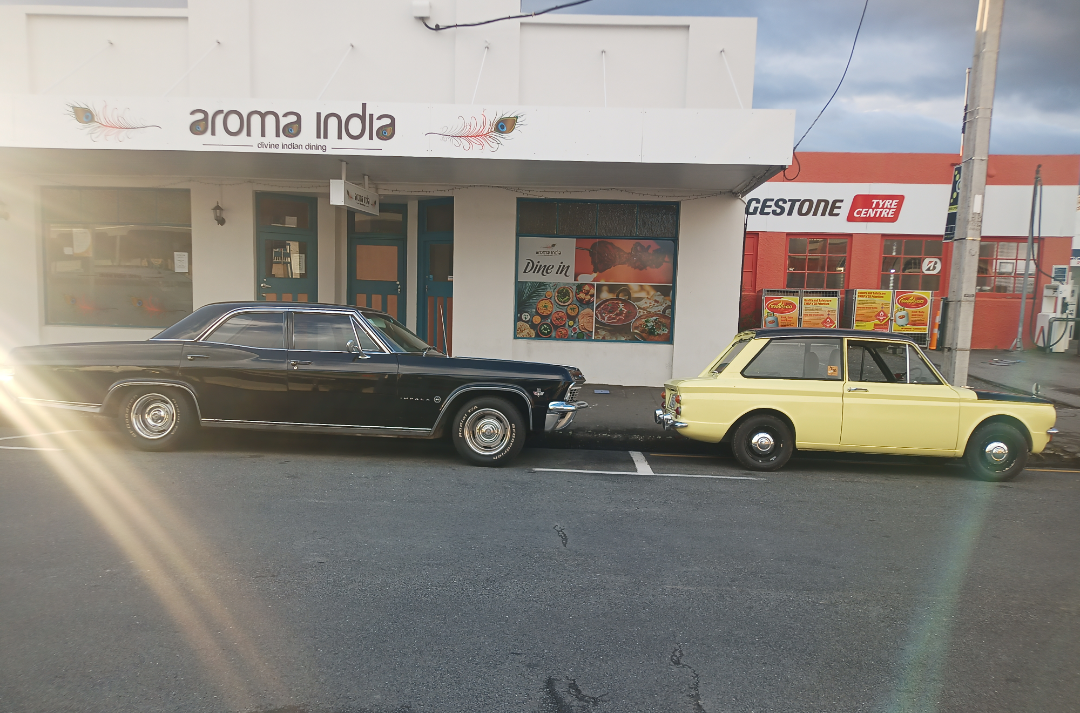
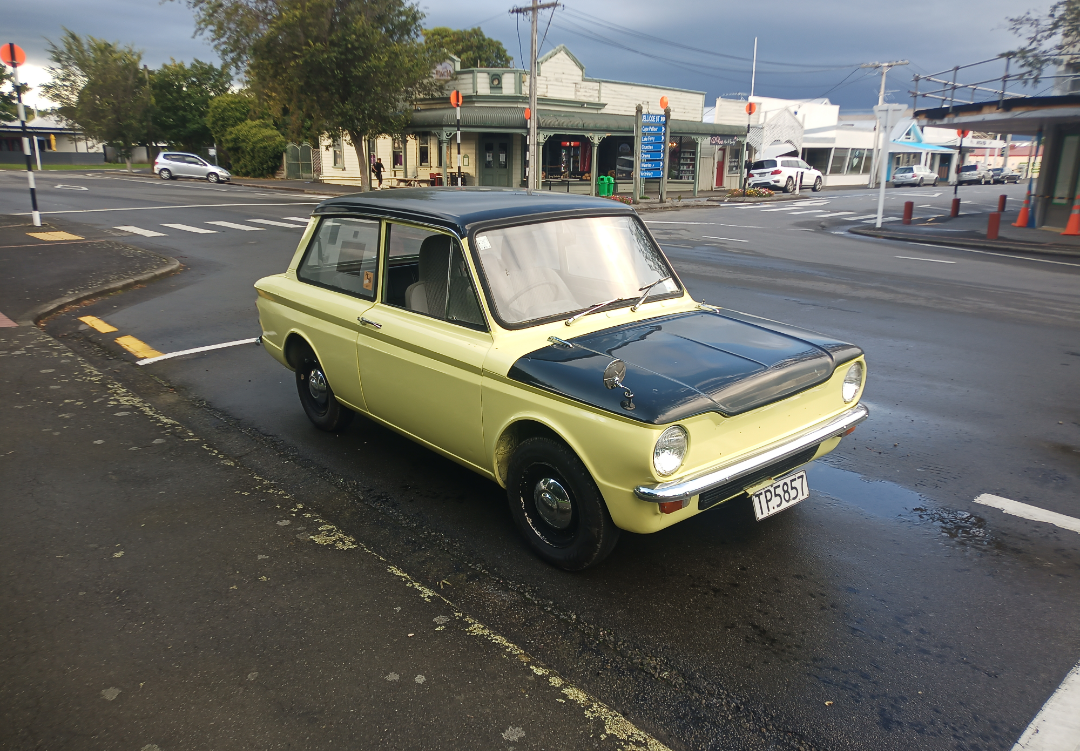
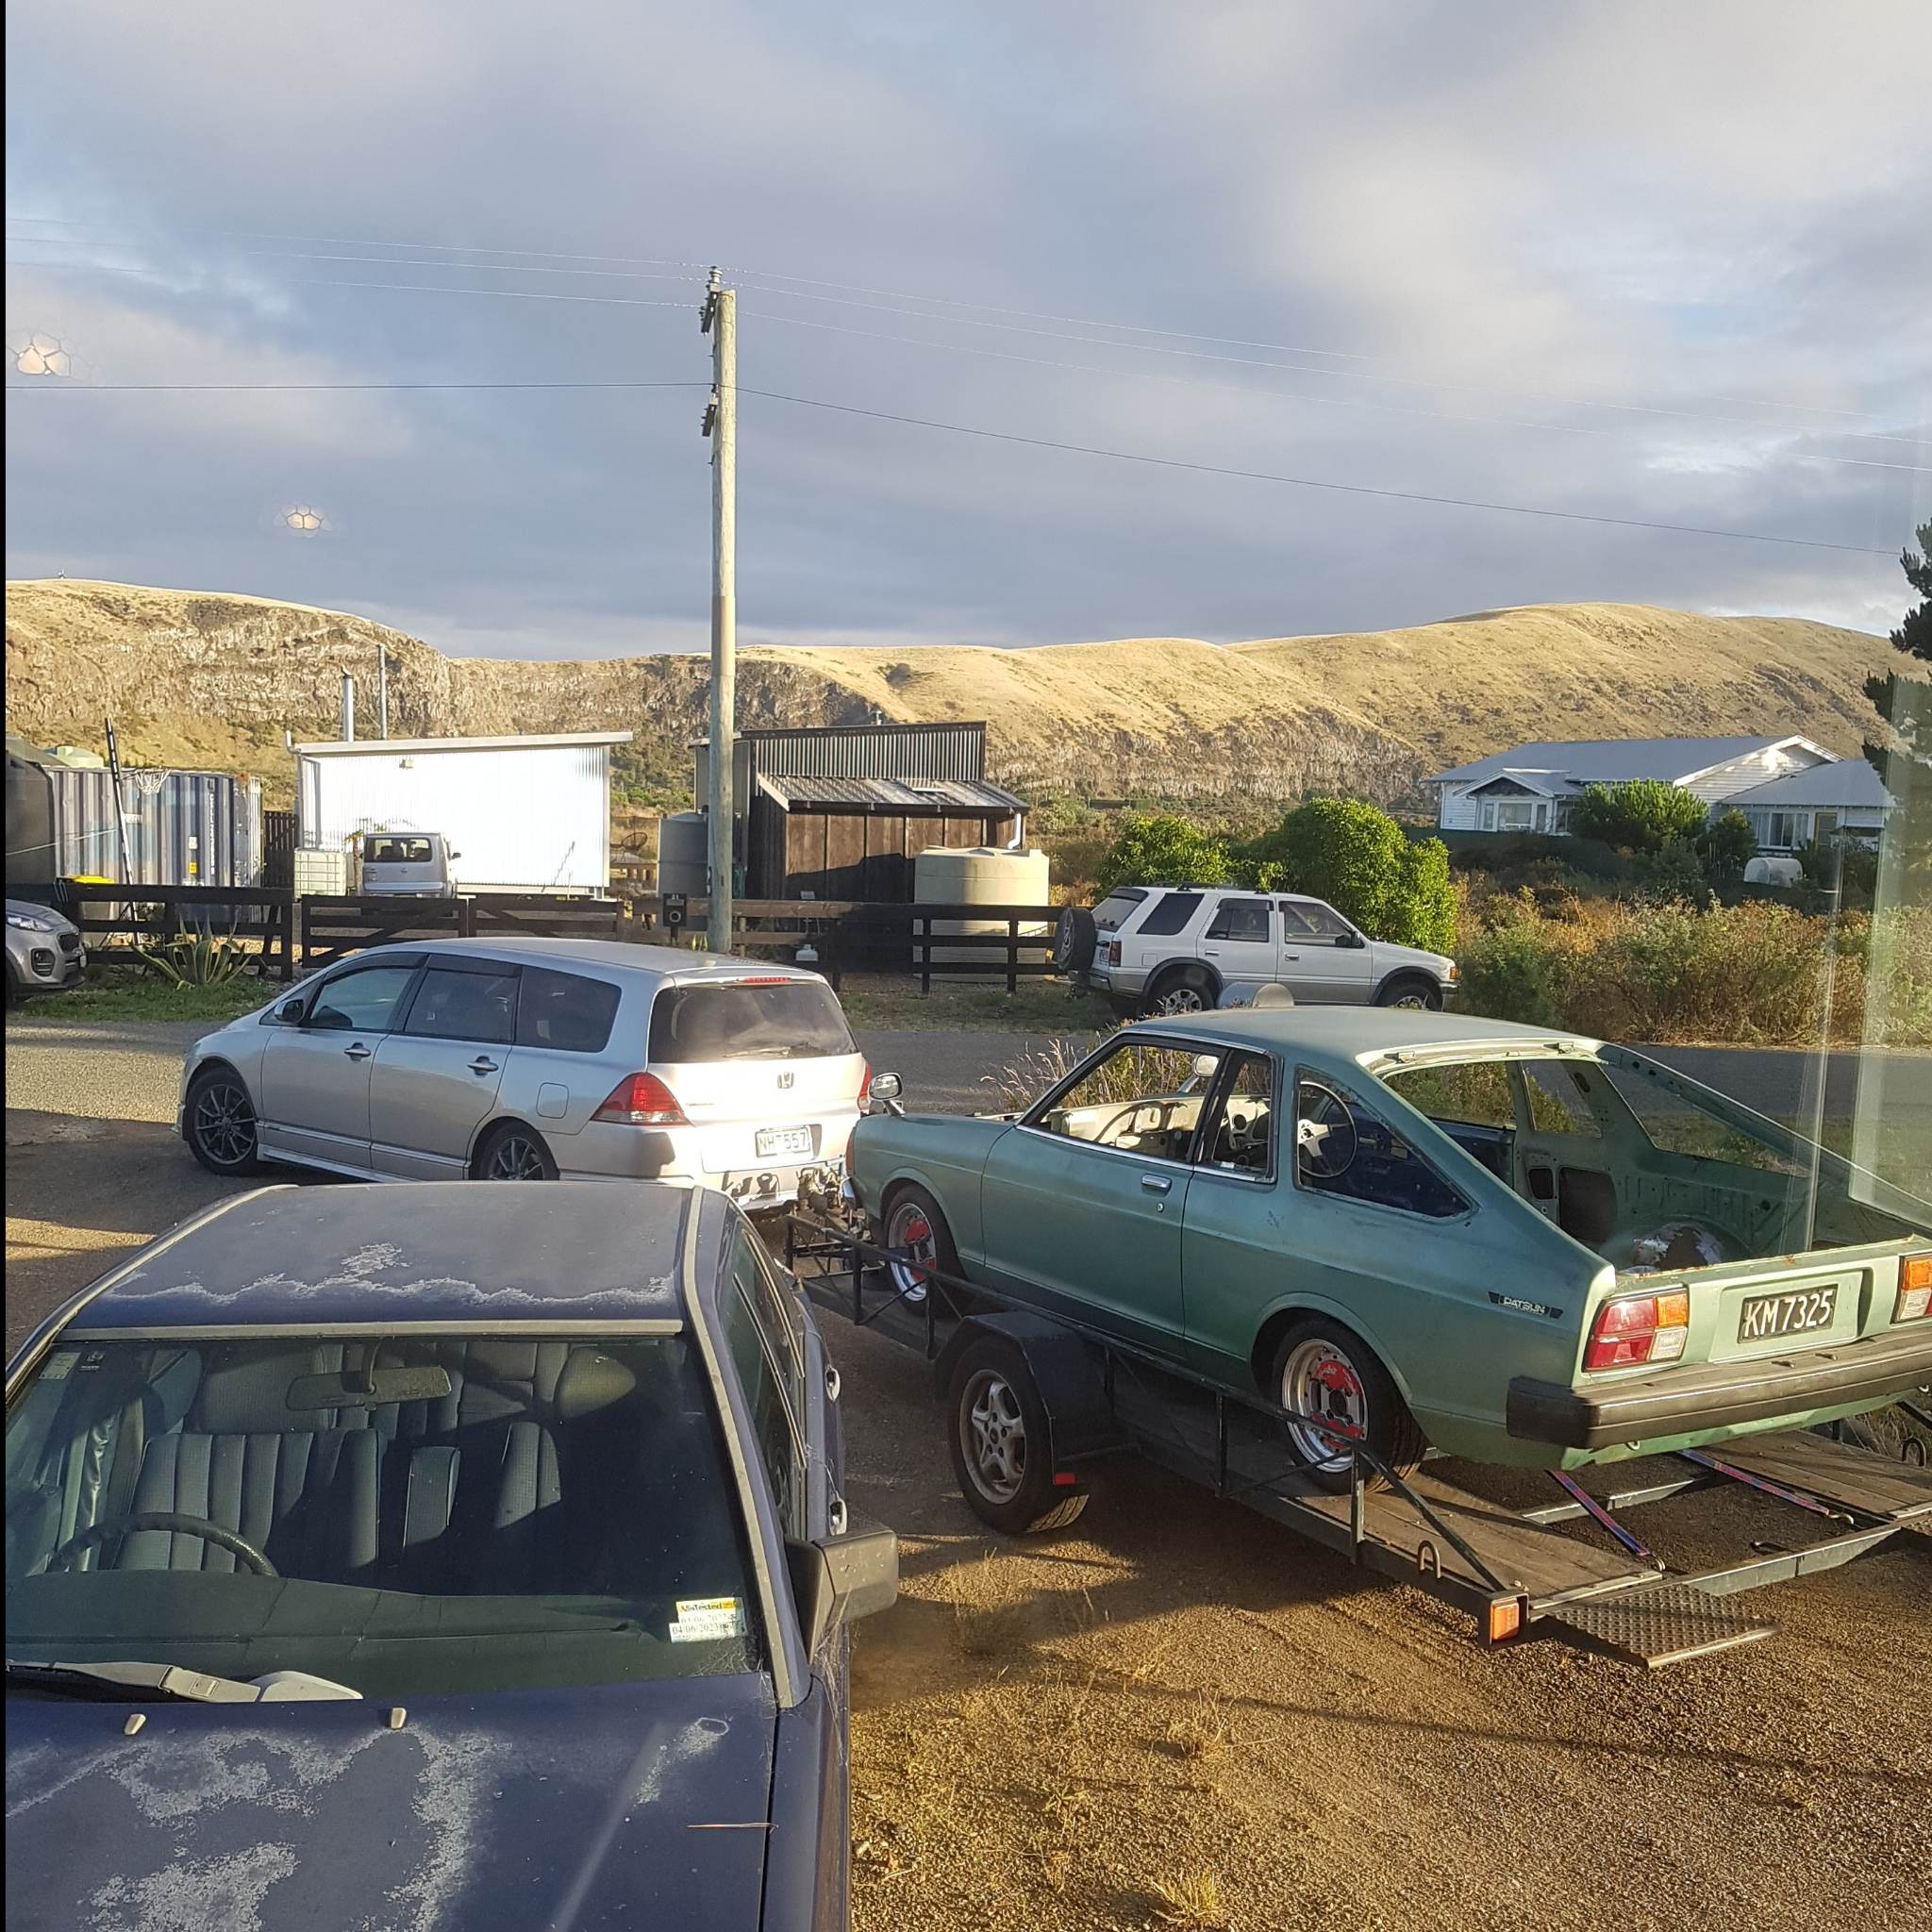
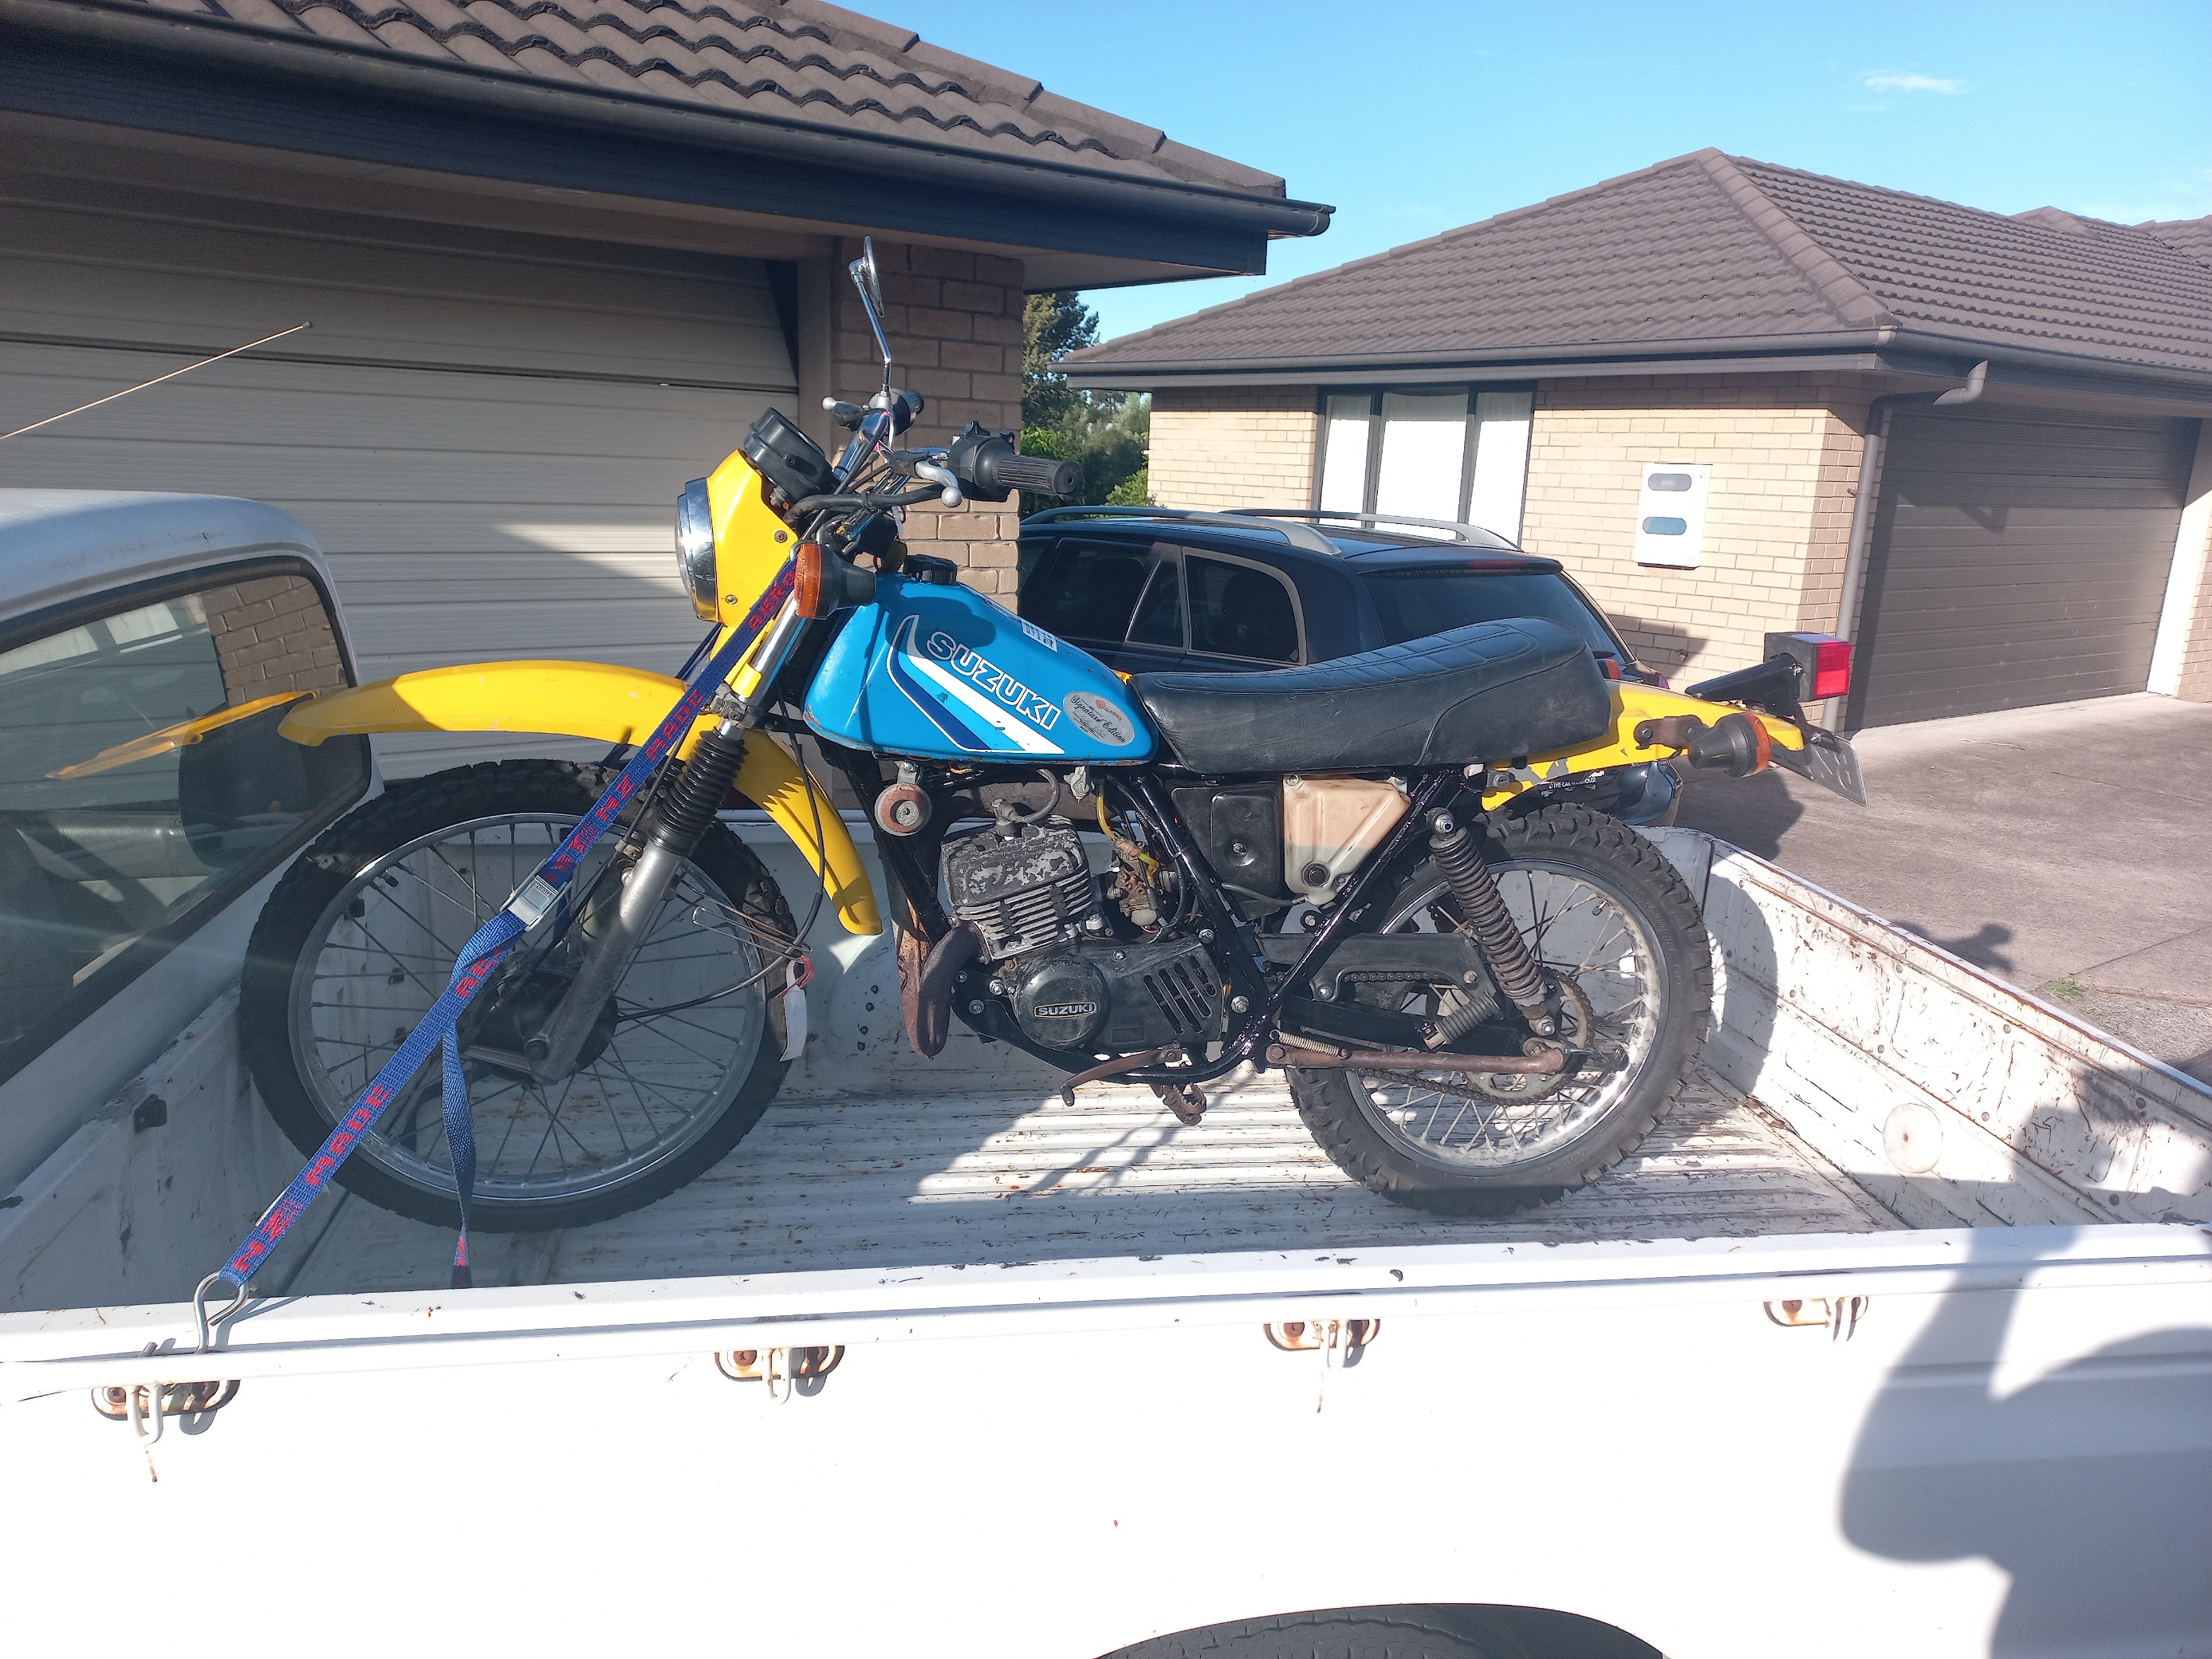
After a piss around with a freight company I decided to drive this thing filled to the absolute brim with a coupe 60s mopeds and other possessions including almost 2 year old son to Christchurch. Got to Taupo and got the old canceled ferry with no rescheduling available. I'd already booked accommodation at foxton beach and a flight home from Christchurch Wednesday morning so decided to push on through and see what I could organize. I wasn't going home when i have to do the trip in 3 other vehicles over 16 days.
1 point
-
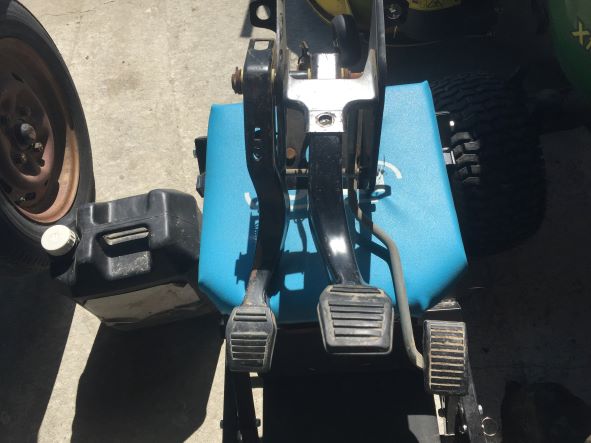
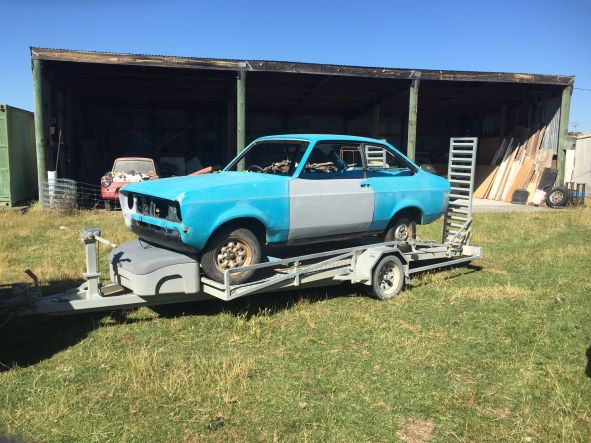
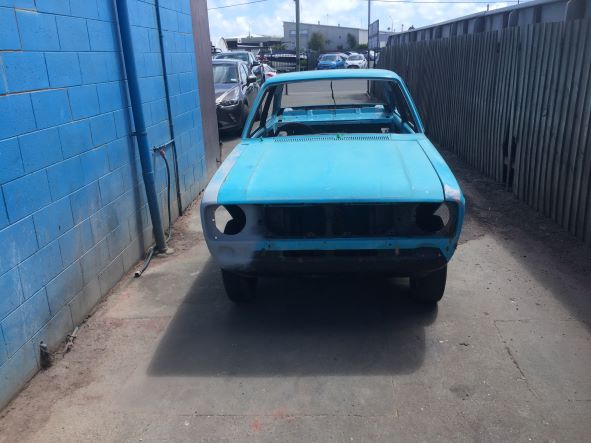
Have got a bit done since last post. Removed heater unit and dash vents. Removed pedal box which then allowed me to take out the insulation up against fire wall. This is not in very good condition so not sure what I can use to replace it. Any ideas, let me know in my Project Discussion. Next removed indicator storks an ignition-steering lock. Decided to leave window wiper assembly in place. Ready for he panel shop. Took photos of all black paint areas for reference when getting it painted. Also photo's of all rust-dent areas that require work. Its going to take a while I think. Onto the triler and off to Christchurch. Had to unload onto footpath and then push across four lanes of trafic but finally there. https://oldschool.co.nz/index.php?/topic/84912-petes-mk2-escort-1600-sports/
1 point
-
Even has a bloody WoF! Leshgo!
1 point
-
Today's progress Trailer has a legit WOF from not my workshop. Rotten hole has been patched and faired. And painted. Not exactly Roman levels of fabrication excellence, but it's getting done. Bought some epoxy barrier coat and antifouling paint for the hull. This weekends mission is to get that sorted.1 point
-
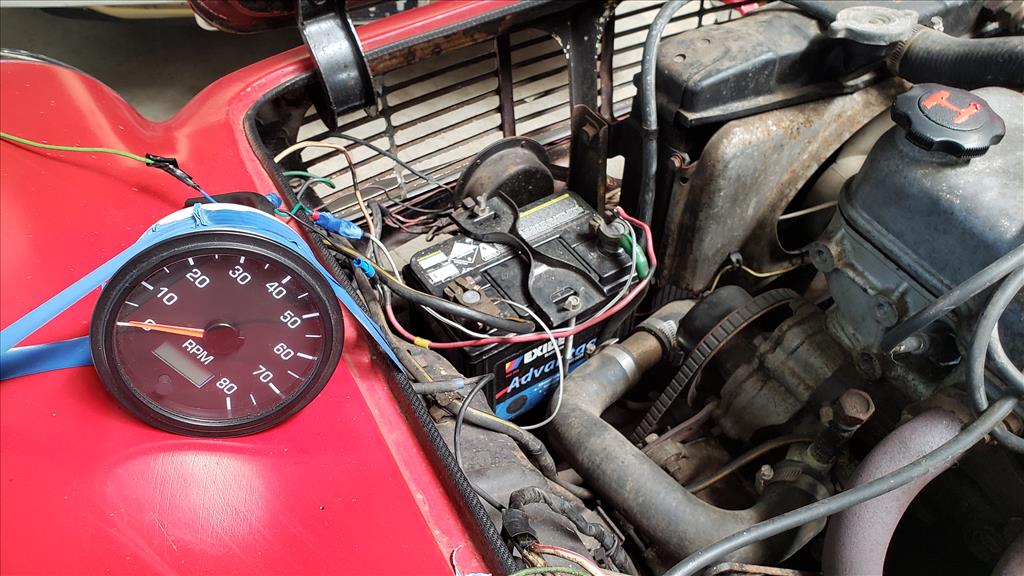
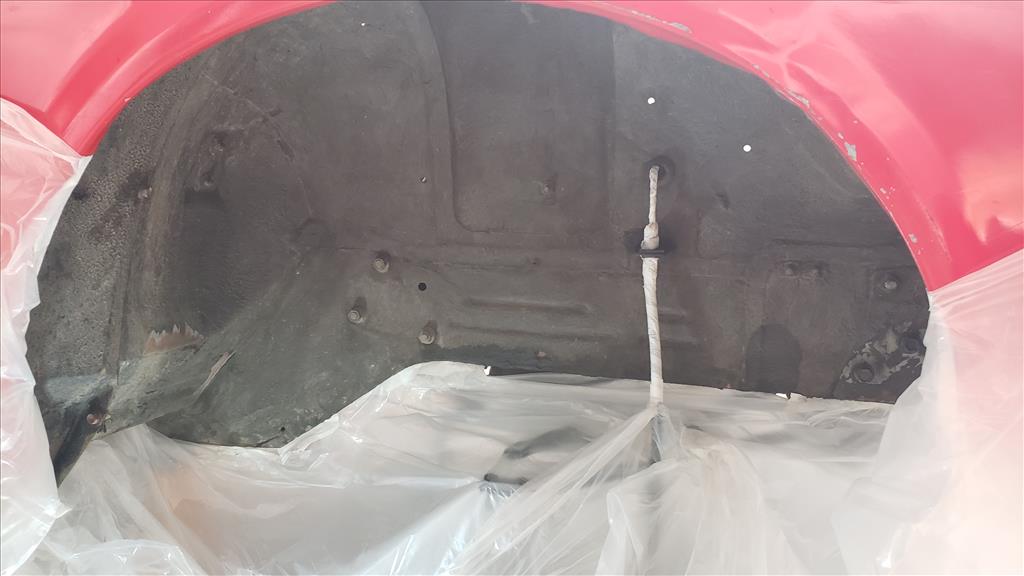
Today we're team red! First up, while the front end is apart on the Celica I decided it would be a good idea to put some undercoat spray in there. First I cleaned up with some scotch pad and soapy water and glad I did as the water that came off that was nasty. After that simply waited for that to dry off and spray on the stuff. I used a Sika product and it sprayed really well but was only enough to do light-ish spray on both sides. As you can see on this side it's still a little patchy so I've ordered more. Not sure if people usually do the guard side as well? There's no guard liner so might as well. Made some great progress on Barry too. I was able to work out some more of the wiring situation by doing some sketchy shit and got the tachometer working so that's cool. No idea how accurate it is and it's some kind of machinery unit as it has hours in the digital bit below which is funny. Then I started to do some CAD (cardboard aided design) work on the new dash panel. I had to do some clearancing behind to get the furtherst right 2" gauge to fit but looks like my plan will work great in general. Unfortunately it seems like the speedo cable is not connected at the gearbox end as it doesn't spin when the car is in gear so I couldn't get the speedo working today. Bonus content
1 point
-
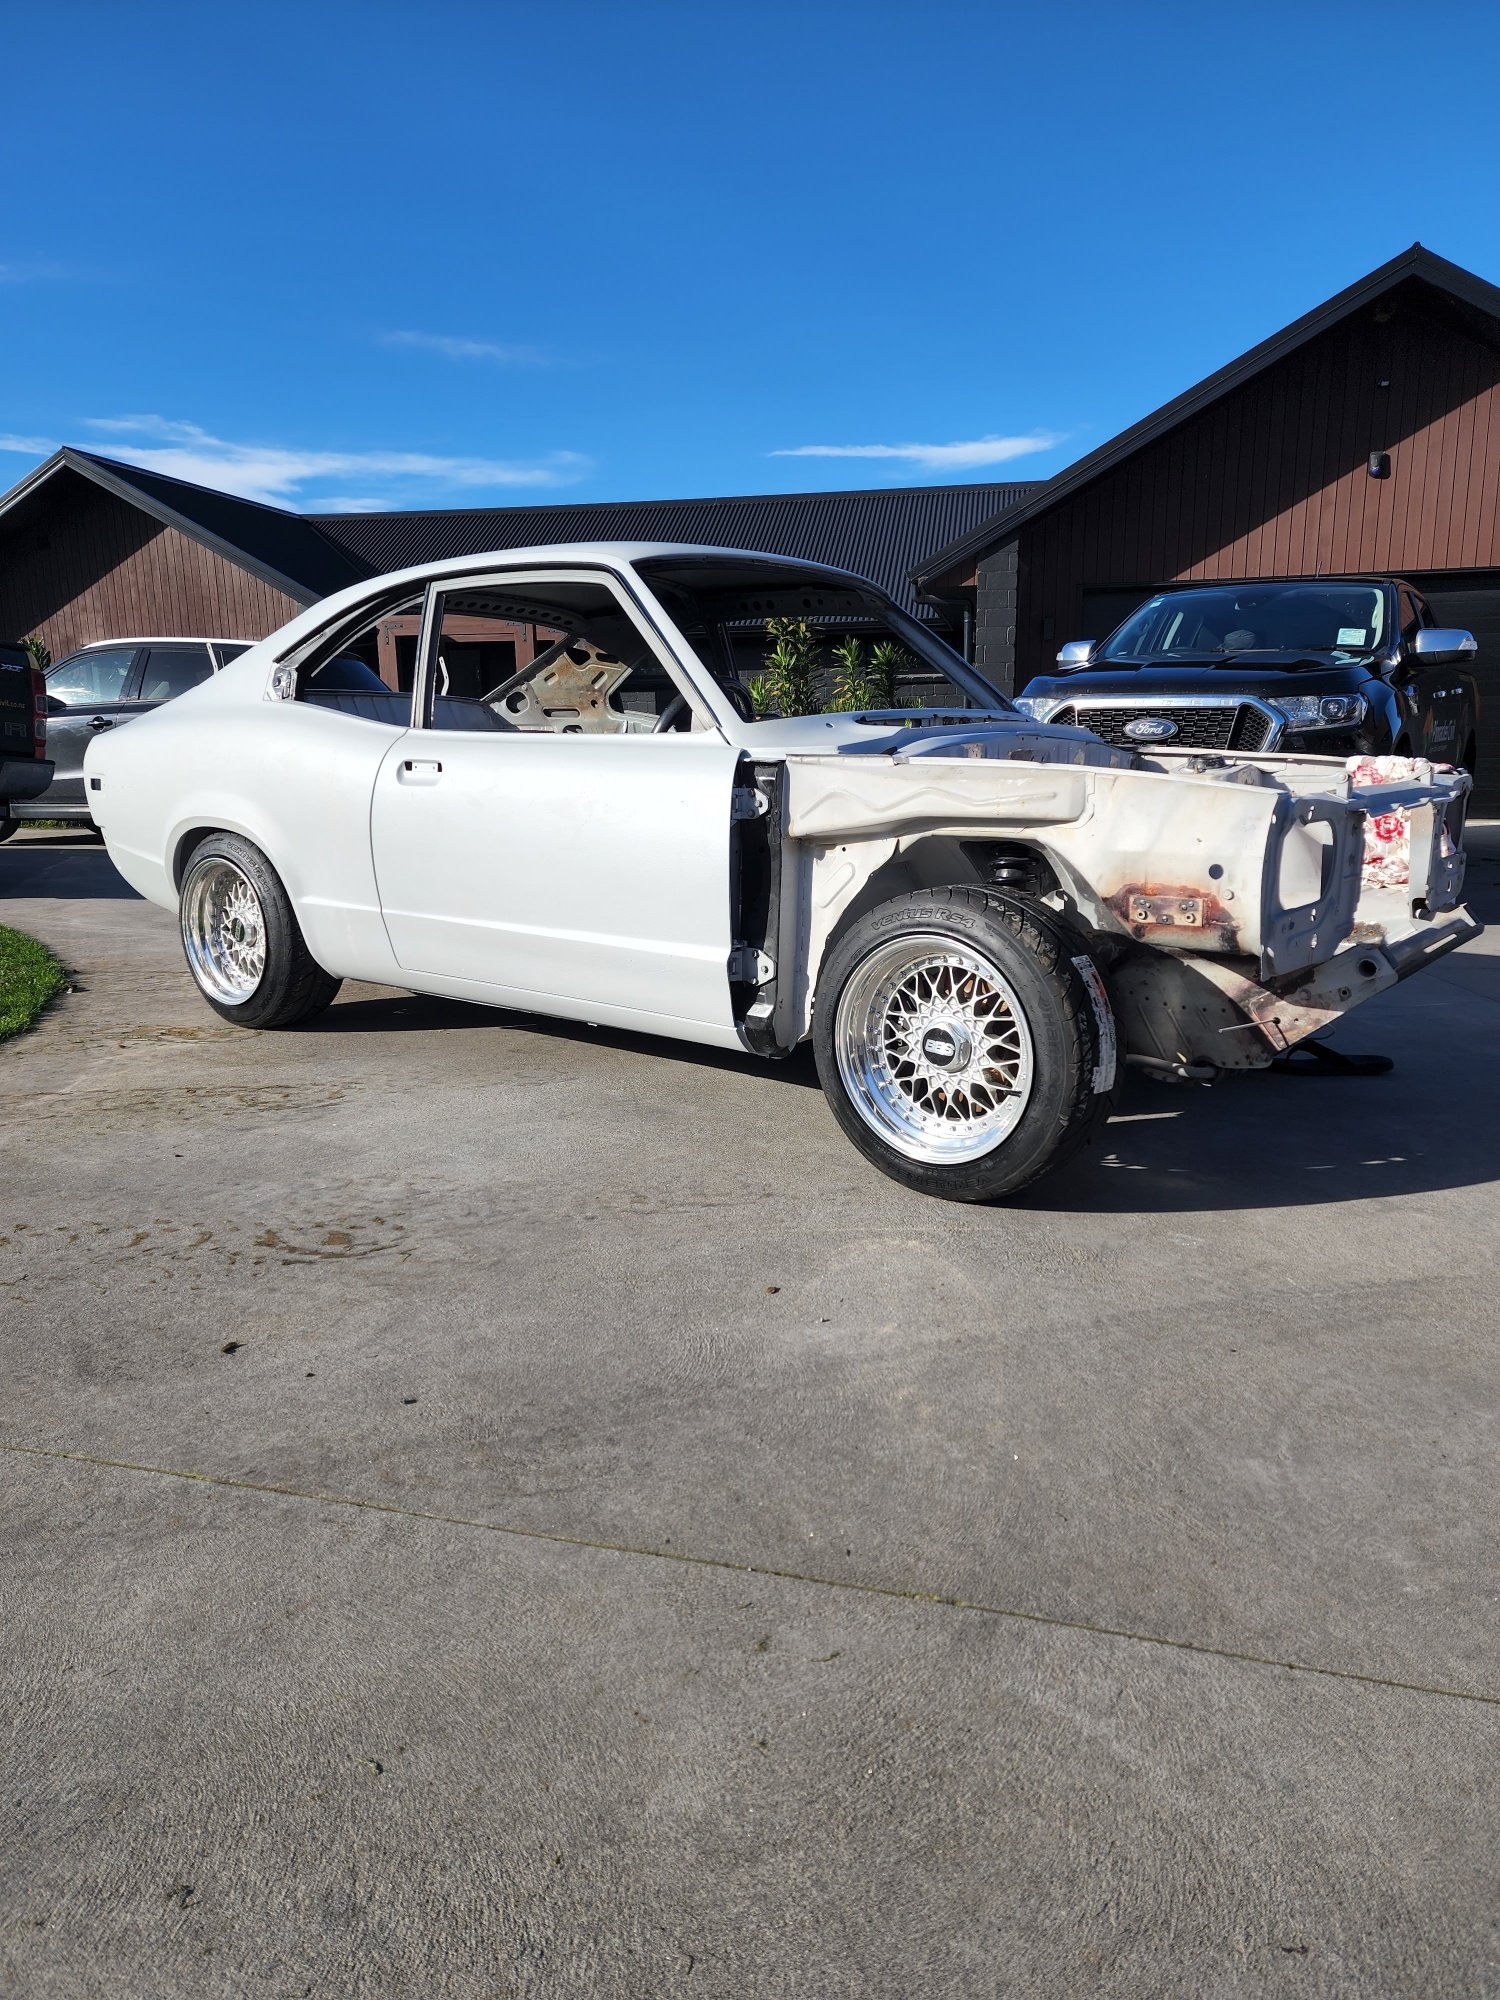
Scored a couple of hours on the weekend to shoot out to the shed to test fit the BBS, Got 2x Hankook Z232 RS4 Semis and fitted one to a 8 and one to a 9 to see how they fit. Good looking tyre and the reviews seem to be decent for them. Rears fit perfect with a 5mm spacer (the 3 piece nuts hit the caliper with no spacer as the brakes only just fit inside the 15). Fronts look allgood with no spacer, just got to test fit with a guard and make sure they clear at lock. Picked up the front guards today so ill test fit them with the coilovers and both sets of wheels to make sure they fit, Have just had a guy radius the front edge of the guards so 17s can actually turn (they hit the front edge of the guards if they arent cut/modified). Booked in to get engine bay and boot sandplasted and epoxied on Friday weather permitting.
1 point
-
When are you going to do it saget? Touched lately!1 point


.jpg.743100b25efa65c0d53c2244a4b4fd07.jpg)


This leaderboard is set to Auckland/GMT+12:00