
Leaderboard


Popular Content
Showing content with the highest reputation on 12/08/22 in all areas
-
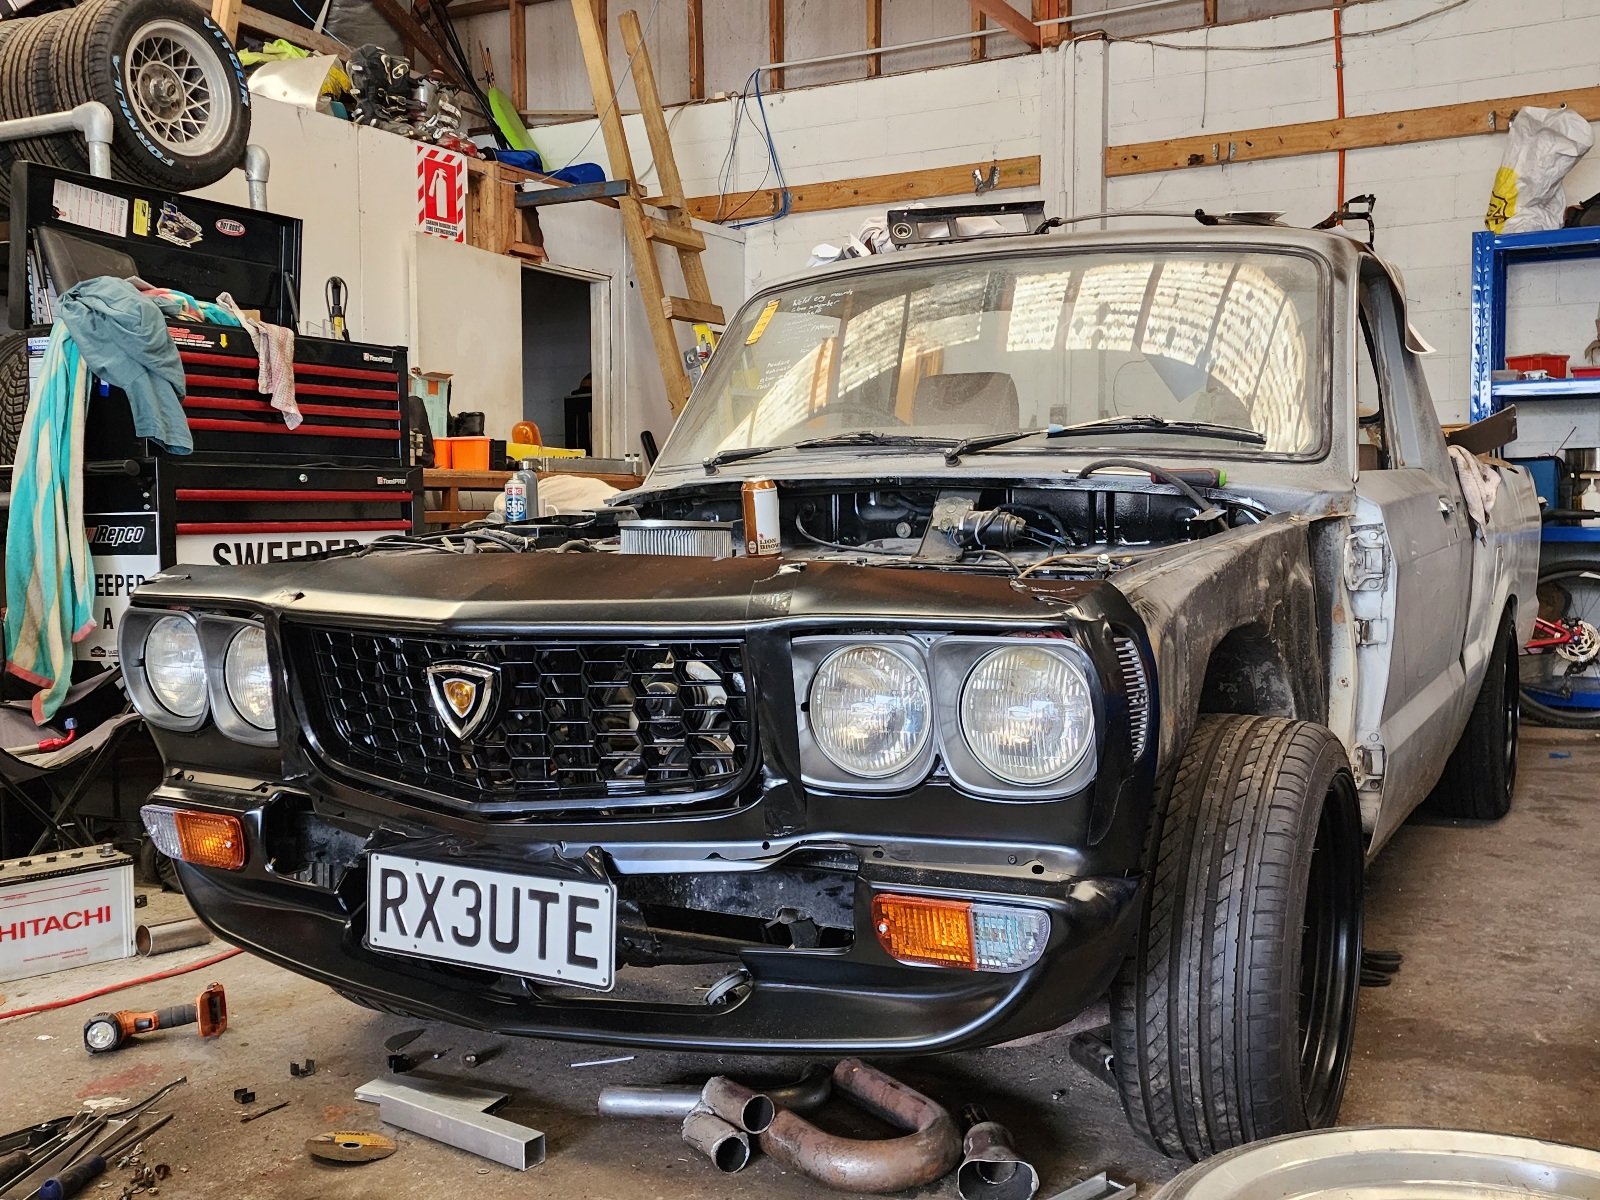
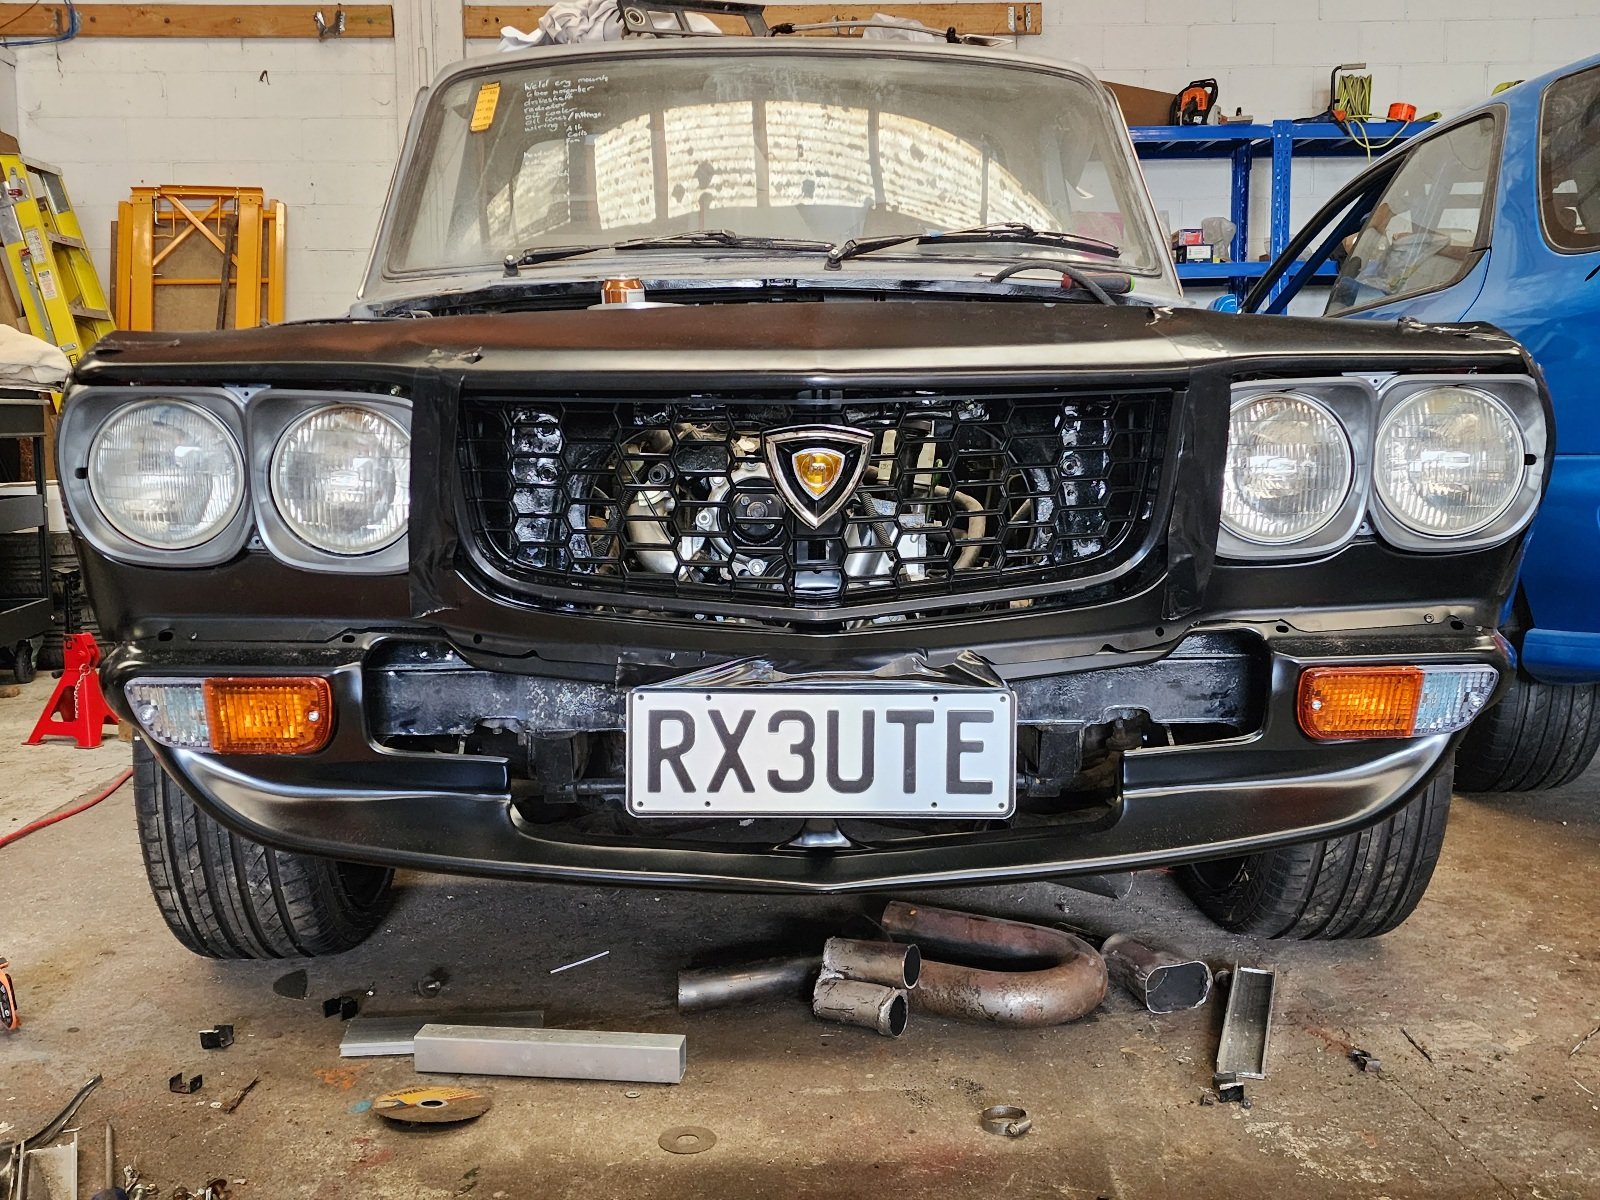
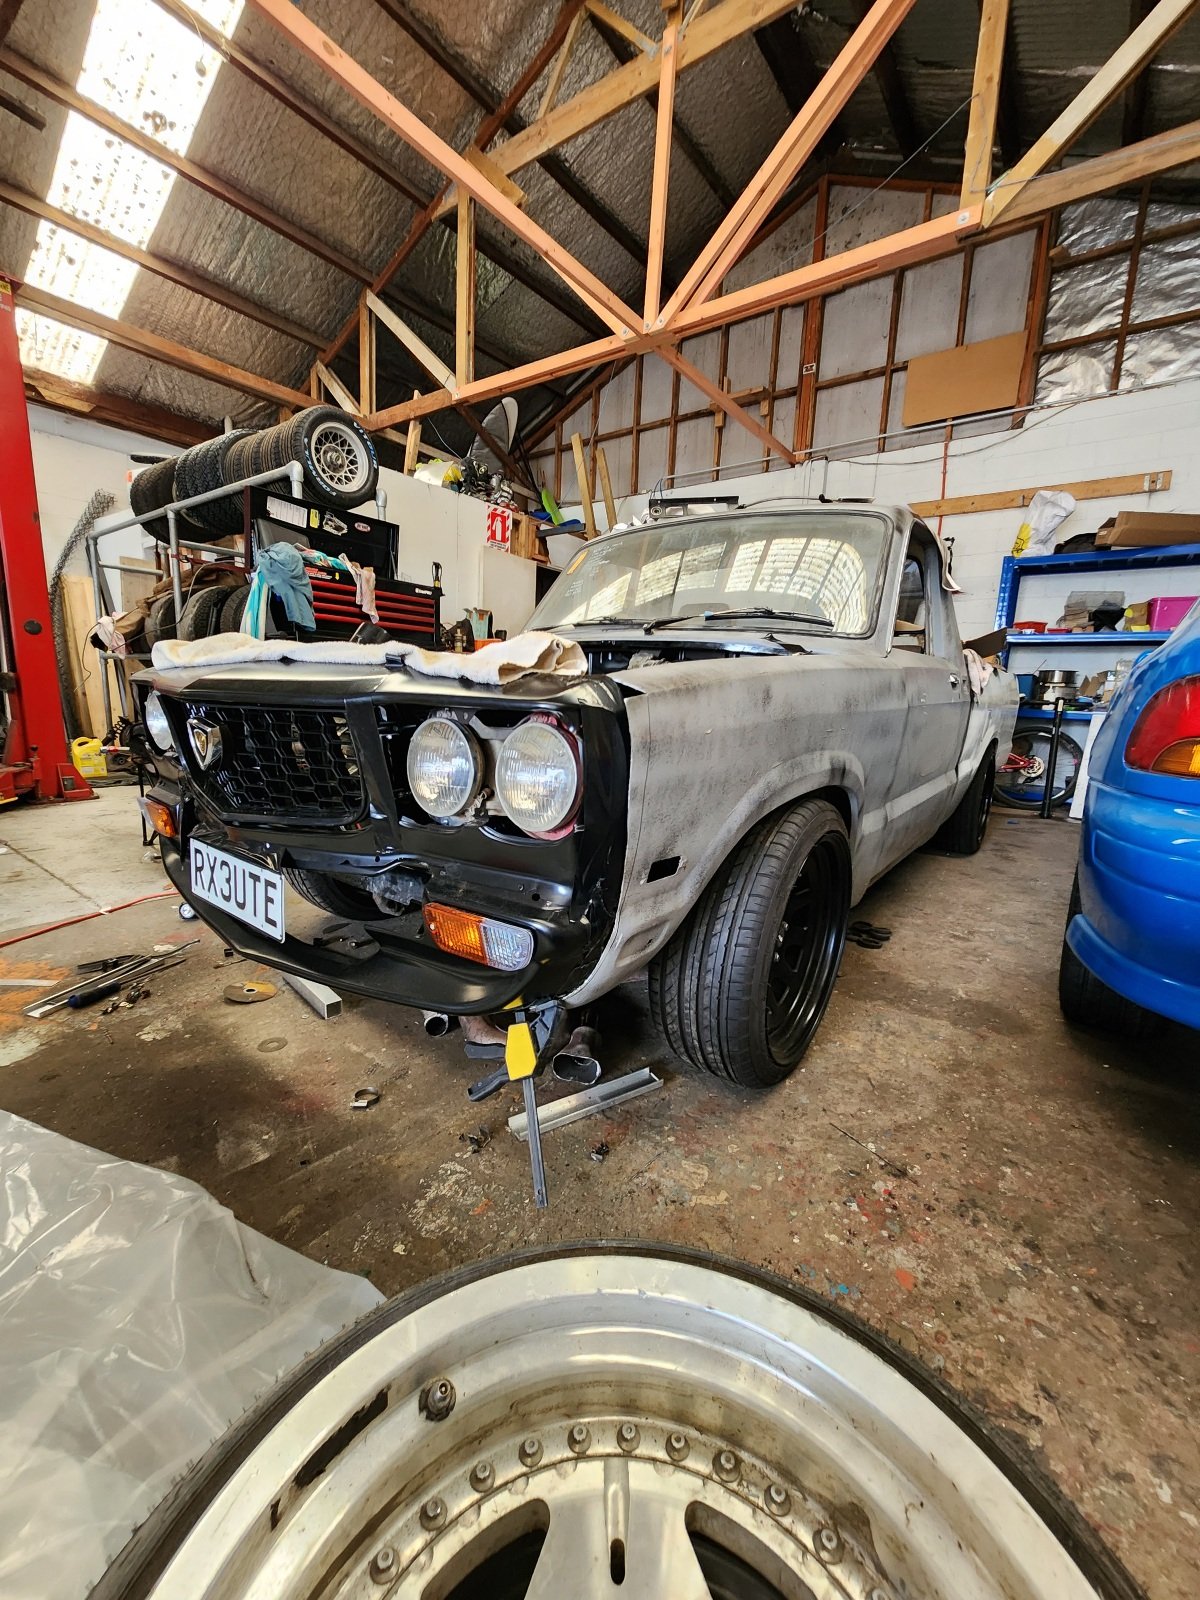
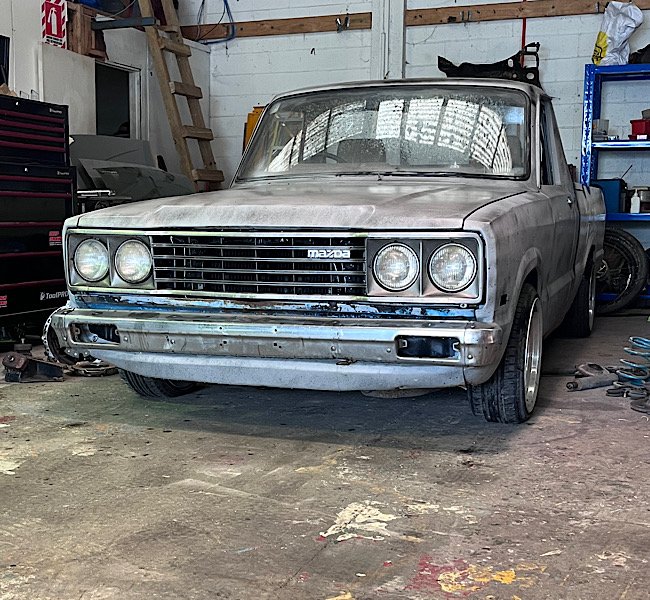
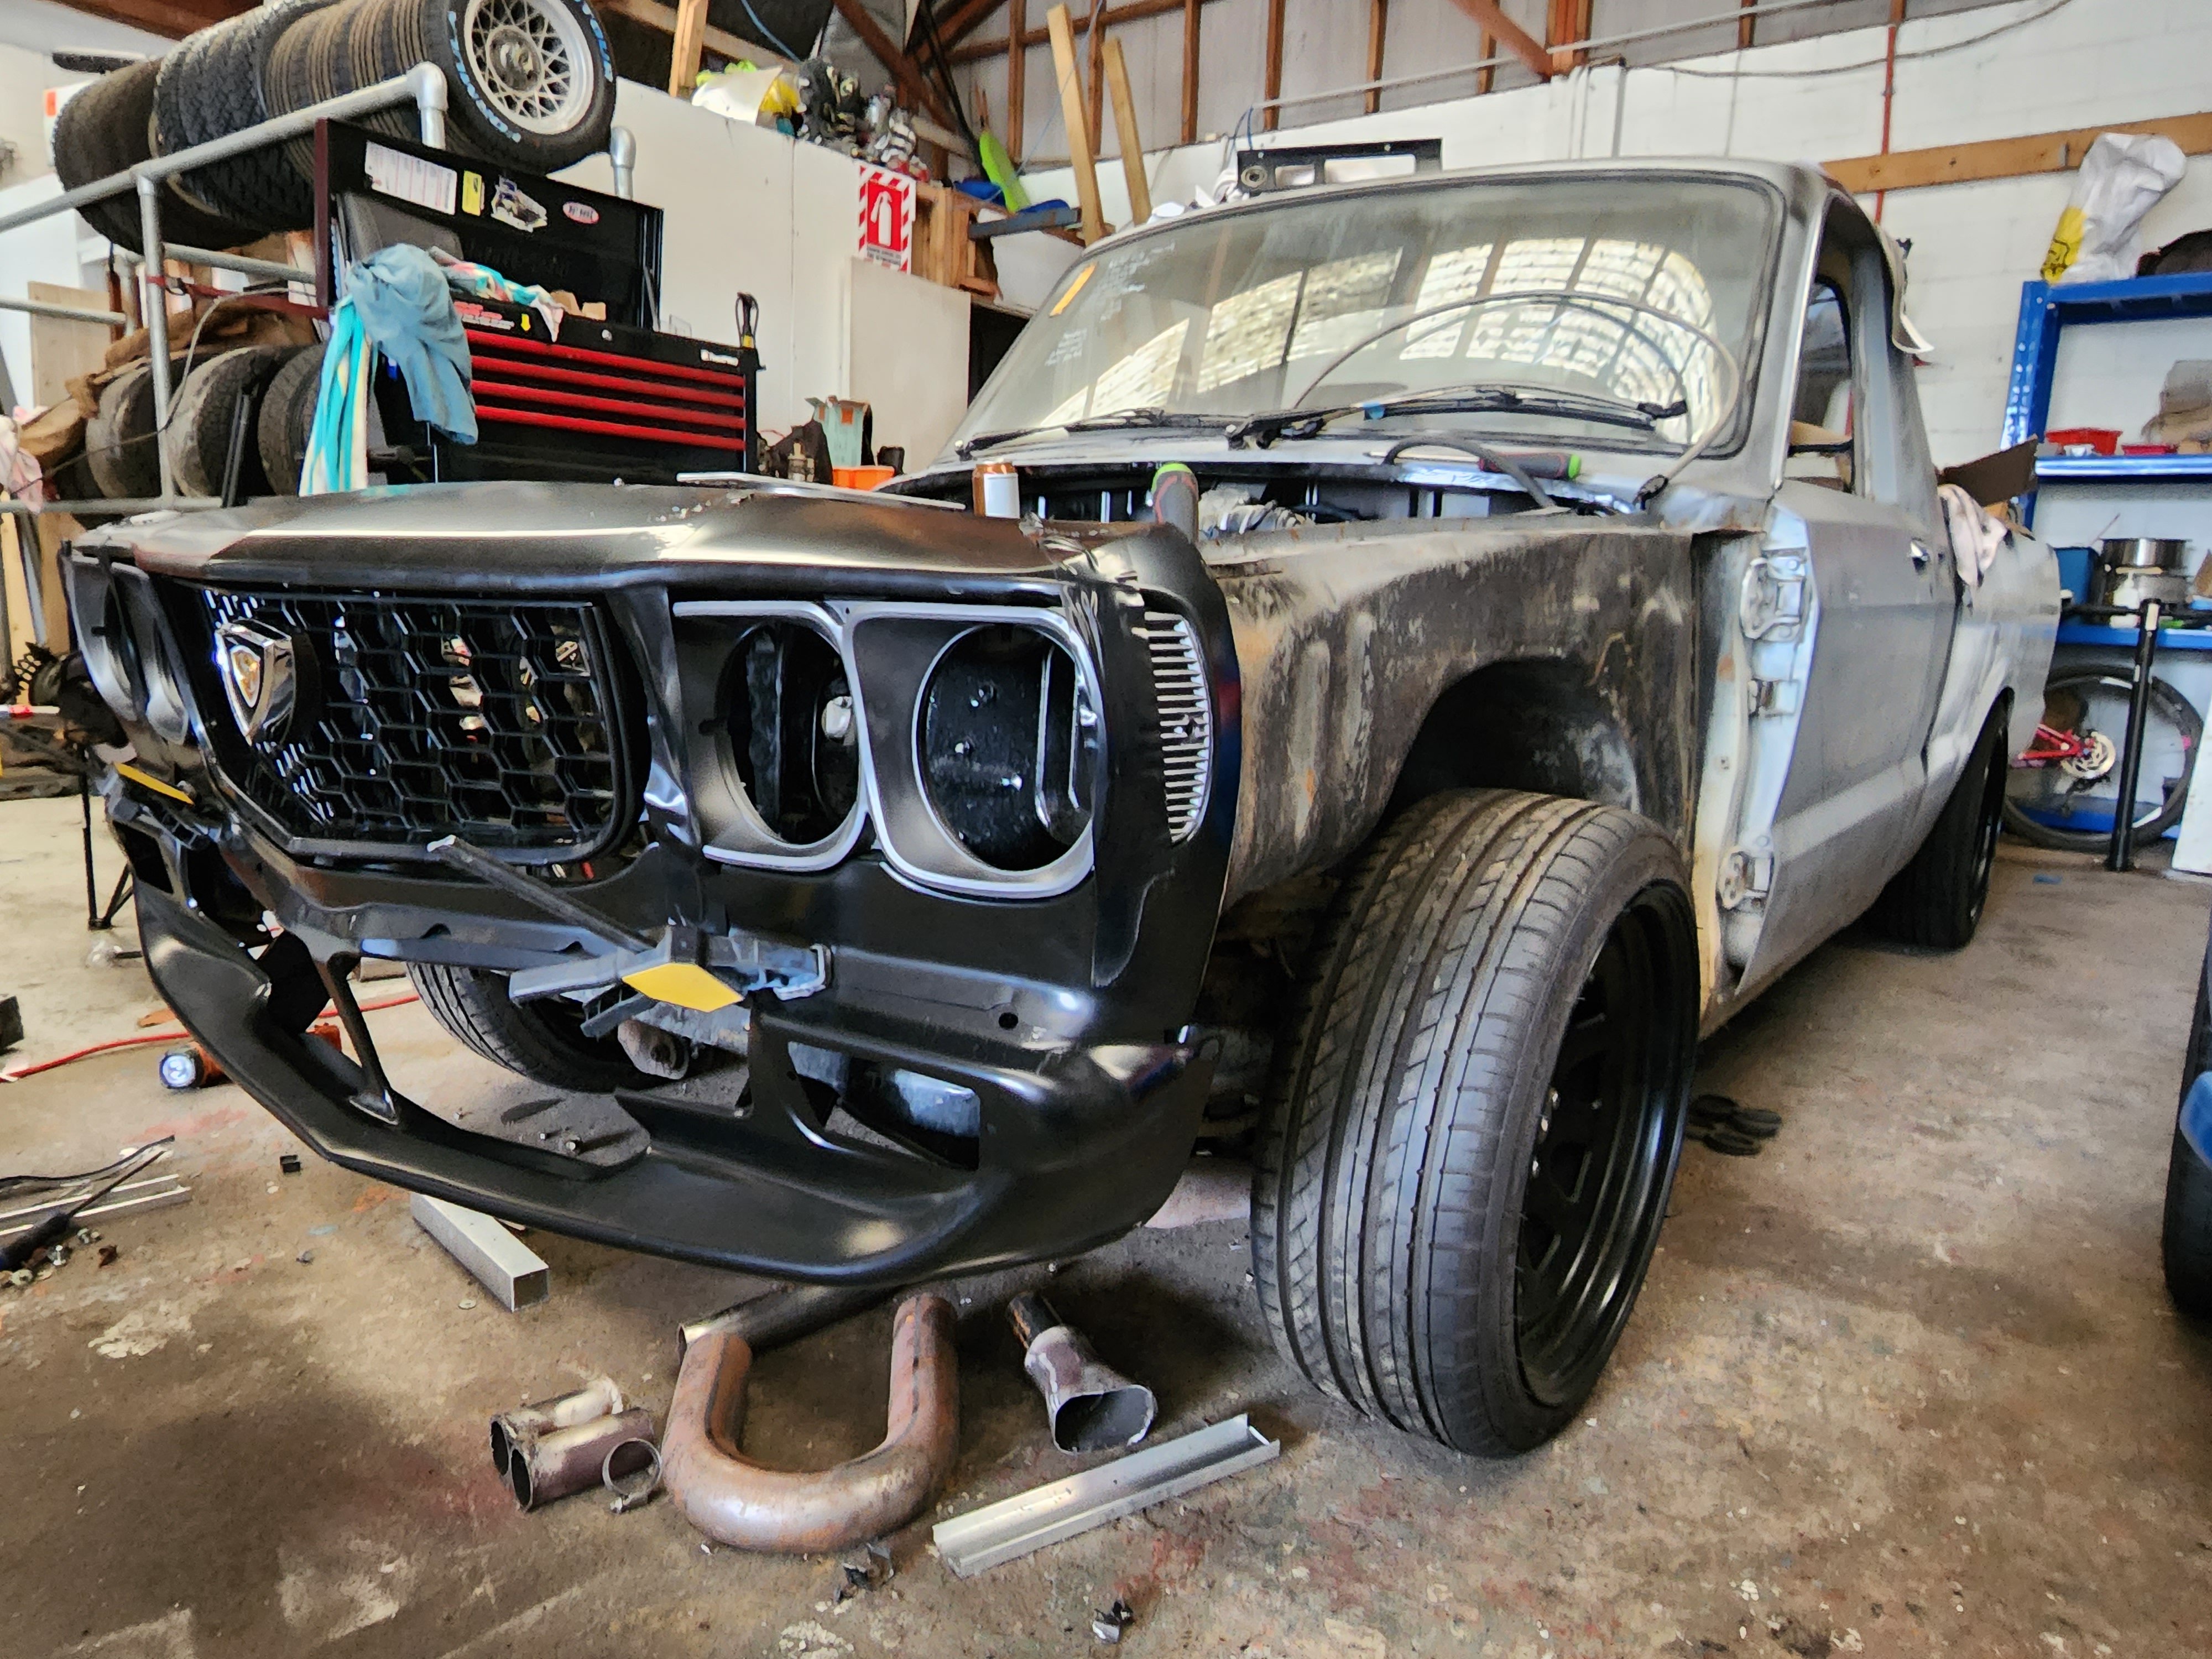
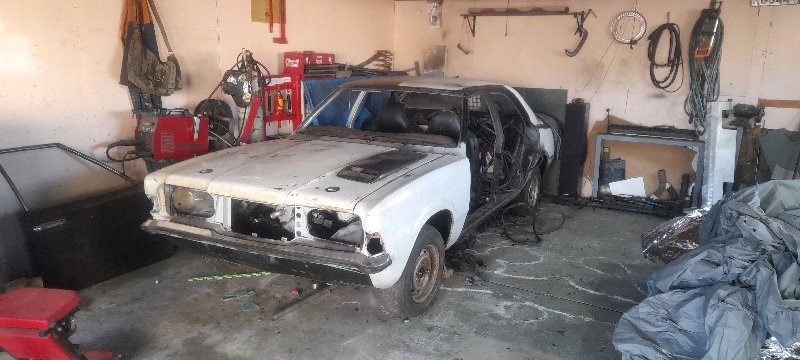
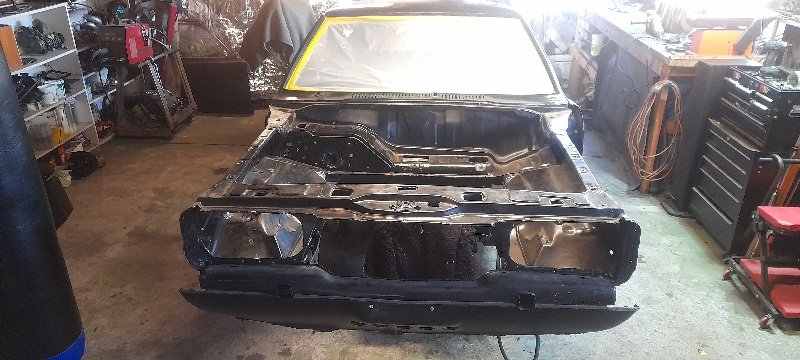
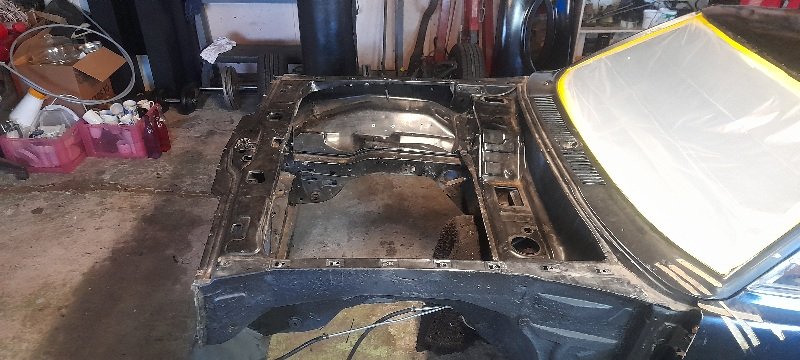
Current state of the conversion. Headlight buckets mounted, fine tuning required post breakdown for paint. Nosecone is 100 percent mounted. There is a small section i had to trim from the rad panel mount..not needed on this. Started trimming a guard to check fit up. Think ive found 2 rx3 guards to puck up on the weekend. Plan is to slice the front half off the rx3 guard and tetris it into place, then massage the b1600 body line to blend in at the top of the nosecone. Sat the bonnet on it to see where what and how. Its uncanny how the b1600 and rx3 body lines fall almost in the same place and a similar nose shape on the bonnet. It is very much in the no going back department now. Really wanna get the original photoshopped to see how itll look black. Im loving how aggressive this front looks. Next update will be the engine and driveline.
 33 points
 -
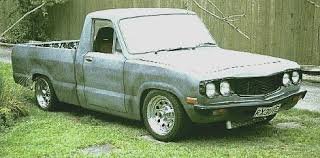
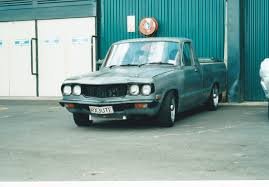
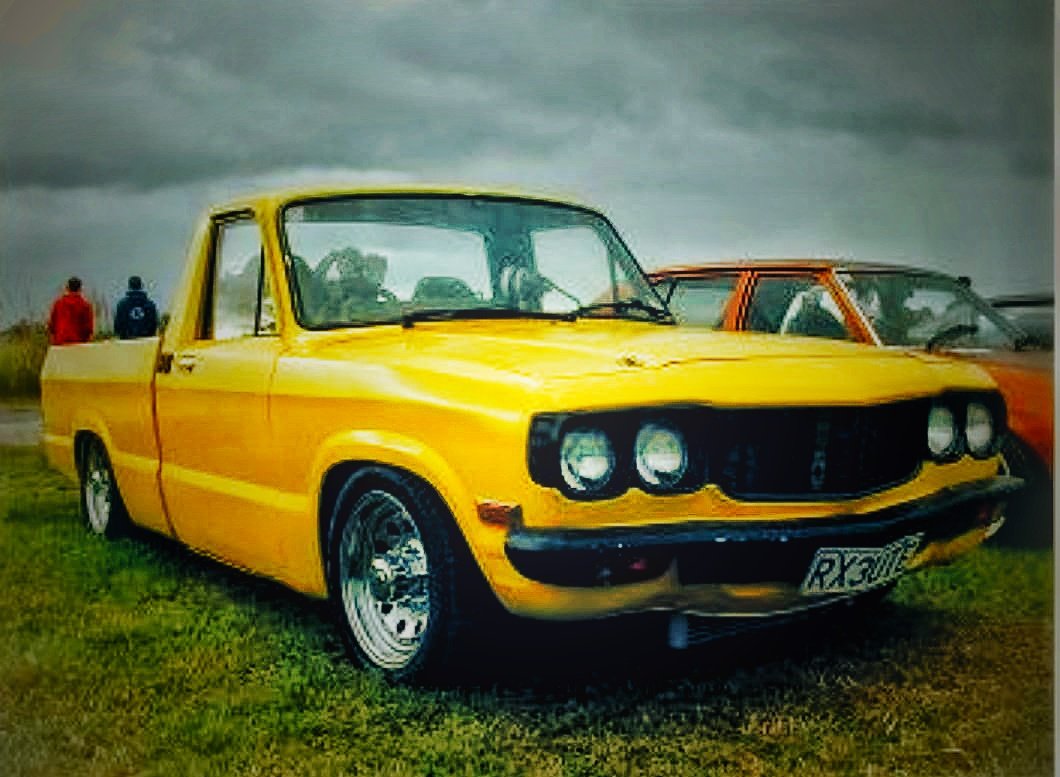
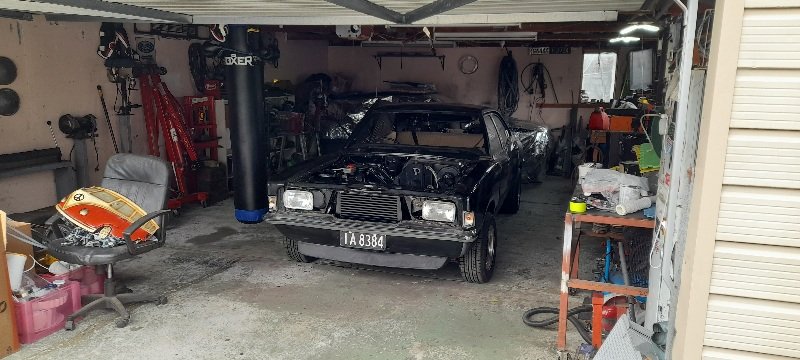
2022... I put the call out for a 78-84 b1600... Got a pm about one down in chch. It is an 83 with an 80 front on it. I let it pass due to ligistics. Ive done too many interisland vehicle purchases to wanna trade again. But then 4 months later i got a lead on the owner of the plates RX3UTE.. Asked if he was keen to sell, yup but at $1500. I ummd and arrrd.. left it for a bit. Got hold of the guy with the ute, "still there?" , "yup"... sold. Arranged for transport to Auckland, $1400 later..ouch. It arrived, and i was expecting a complete pile. It was fairly sound. Didnt run though.. But thats fine..i had my 12a to go in there. He offered to buy back the engine and box, so i won there. 3 weeks after getting the ute to the shop, i had the 12a and box in there. Made the purchase to get the plates back. It was ON!!!! RX3UTE is making a come back.
23 points
-
Four score and 7 years ago, no umm 20 years ago, I built my first ground up build which was a little more than adding wheels and nasty interior add ons. It all started with a Opel Monza that I happily swapped for a rough 1980 B1600 wellside ute, featured faded yellow paint with rusty wheels, no wof or rego as usual, and a very large exhaust leak. It was 4 on the tree and fun to drive. First mods were slapping on some 15x8s and blocks in the back. Gave it a one tone paint job aka primer. Drove it round for a year or so until some scumhole decided that they wete more entitled to own the wheels and things that were on it. In doing so they destroyed the sills when they dumped it on blocks. That was my daily driver totaled. Luckily i still had my GT bmx to daily to work. After seeing Andrew Smiths blown 13b B2000, i decided to put some love into it. I completely blew it apart down to the last nut and bolt. Had the chassis blasted and painted. Fitted a s4 13bt block with nikki carb. I got it fired up by myself which was amazing as i was no mechanic. A mates workmate offered me a genuine 12a rx3 nosecone for $250, so i grabbed that and set about doing a front conversion. I was actually surprised how i pulled it off. I got it all mocked up ready for a local panel beater to do the finish work. The bonnet chop would be the hardest bit to do. But when i picked it up from him, i was blown away. The driveshaft cost me more to have lengthened than what he charged me. Plus he primed and guide coated it for me. After i got it back home from him, i set about reassembling it.. fitted wrx seats, rx3 console gauges and some crude camo fabric everywhere. Andrew Smith rang me one day and said " fancy putting the ute on the dyno at the Nats?" Hell yeah.. its first public outing past my driveway. I remember driving up the motorway at night on the friday, cars were flying past and slamming the brakes on to have a look. Was pretty cool. After the nats i decided its time to paint it.. it was 2002, it had to be loud haha. So i went with Lemon yellow with a green pearl. I painted this myself in my driveway..my first ever paint job. It came out good with no runs. But it needed a cut n polish..i never did that. A month or 2 after that i got contacted from a guy up north who asked if i wNted to sell..he made an offer of $13k.. I reluctantly sold..and never got it certed. A year later i was up north visiting family, i messaged him to see how the ute was going. He offered to let me drive it. I was pumped.. finally got to have a legal drive in it. But he changed the wheels to oajero 18s, yuk.. Another year after that he called and said it was dead... he crashed it on its way to the airport to meet its new owner. RX3UTE was no more. I pined for it ever since. Tried getting the plates back at one point. But i didnt have the coin. This is where the story of the original RX3UTE ends. A lot of people hated it, thats fine.. I loved it, it was an accomplishment for soneone with very little mechanical skill, to build it themselves in a single garage with wharehouse spec tools. End.
20 points
-
Fuck that was a massive amount of sanding! George was delivered to the painters this morning. Very exciting times. I was thinking this morning, that its been a decade since I finished building my CB650, and this is the first project I've managed to get to this kind of point since then. I also took a few minutes the other night to test fit the new wheels I got for him, they fit and look great so now I can arrange some new commercial tires for them and get onto painting the rim centers. The instructions for the painter: FIZZING
11 points
-
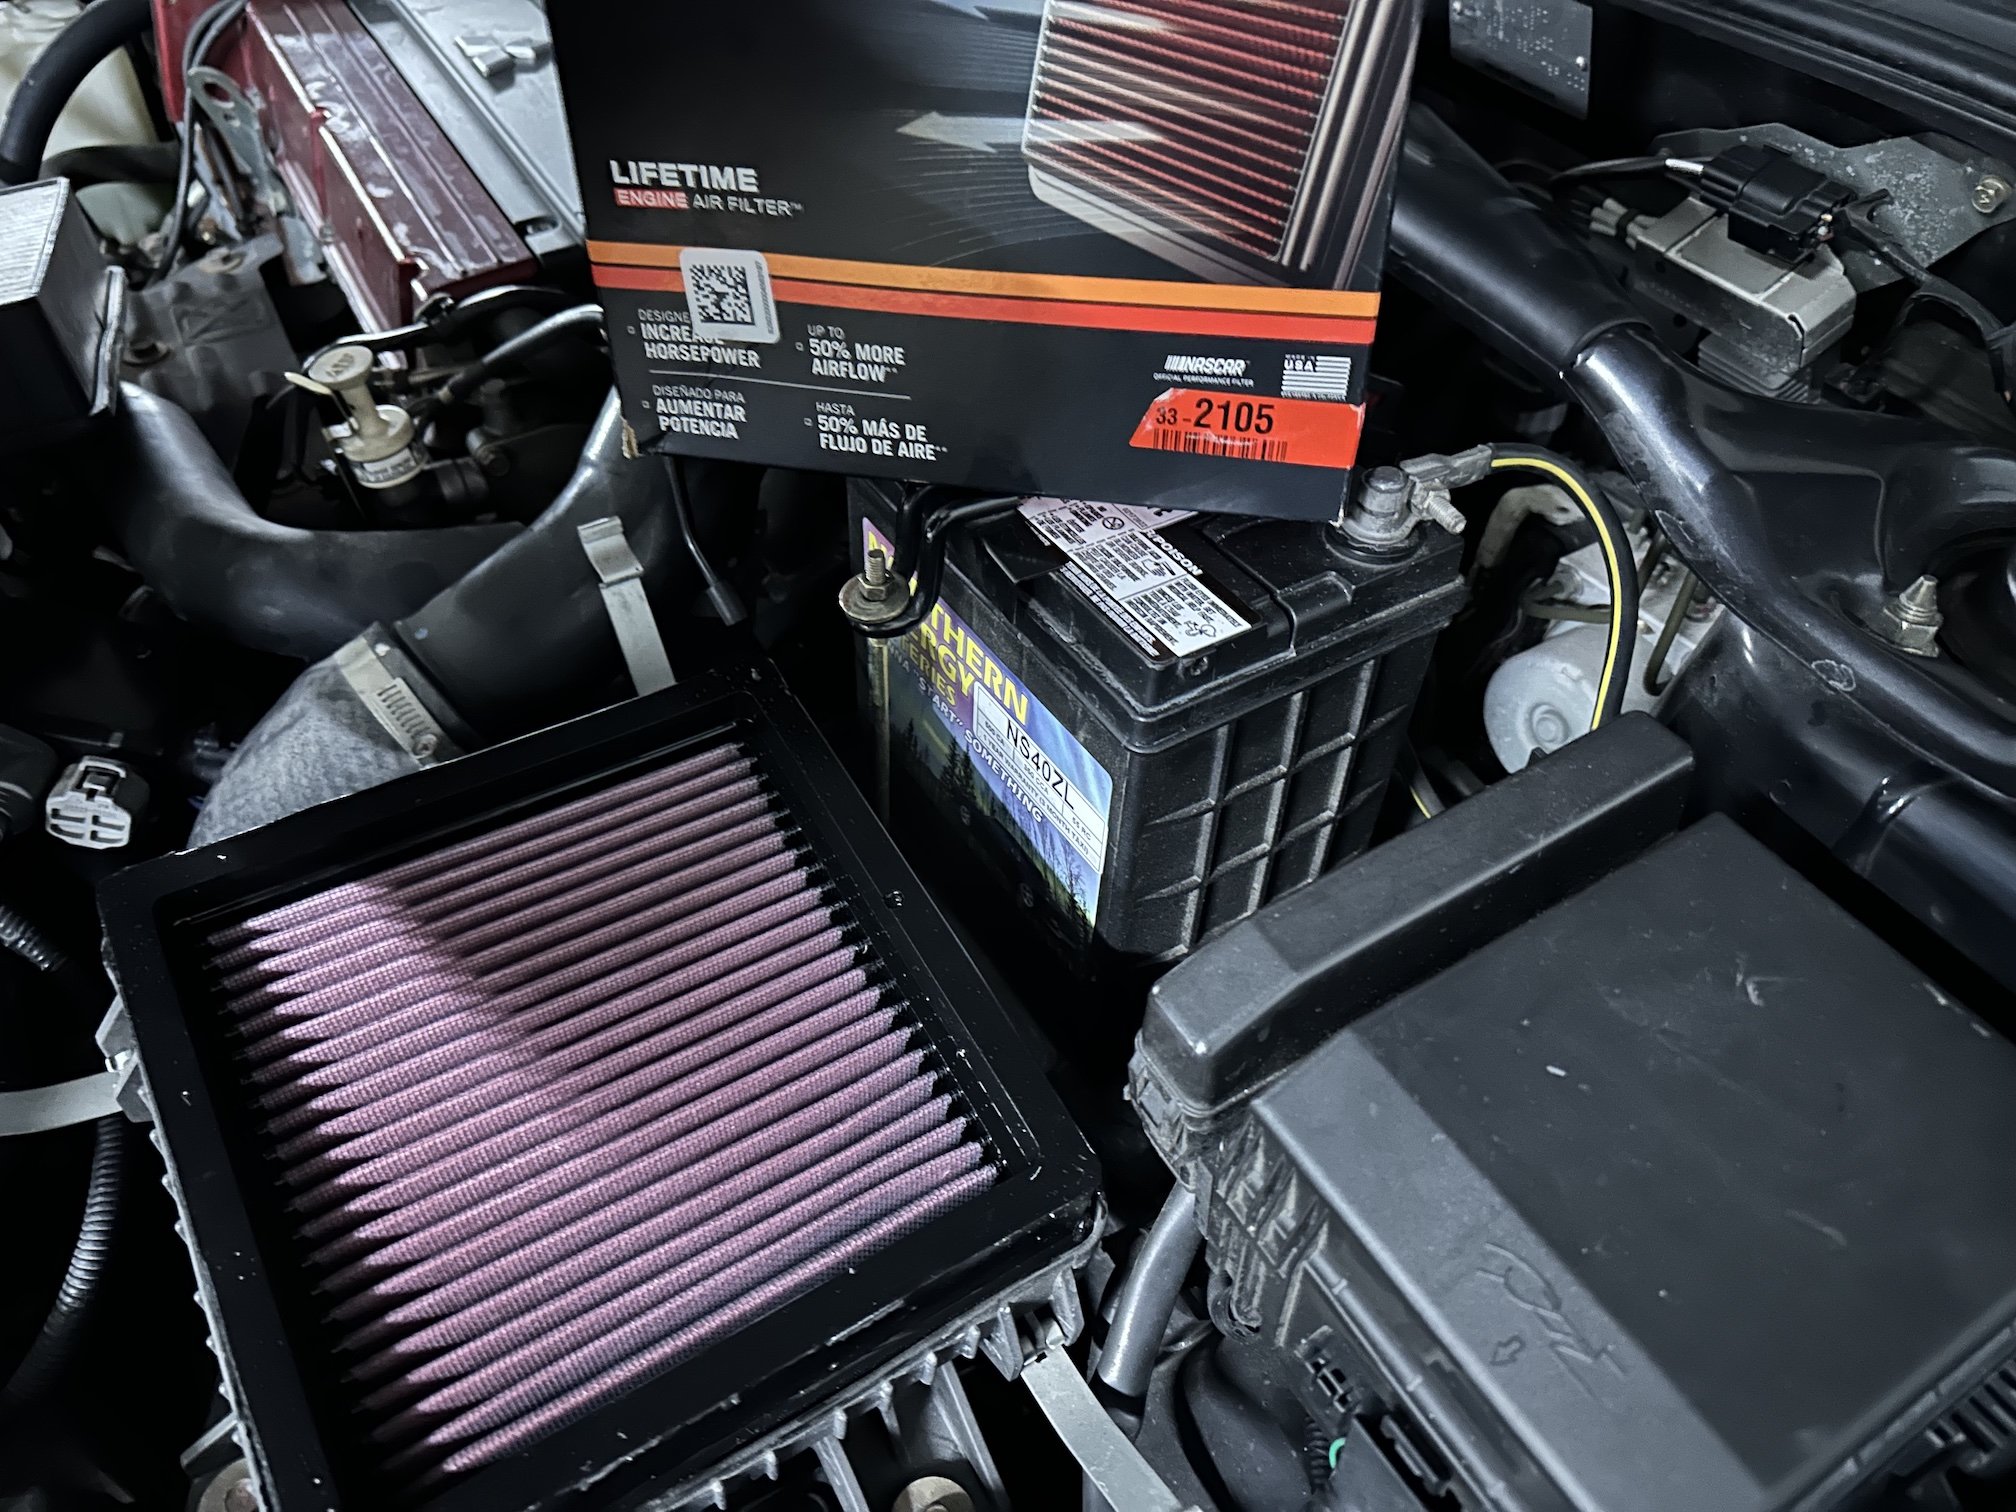
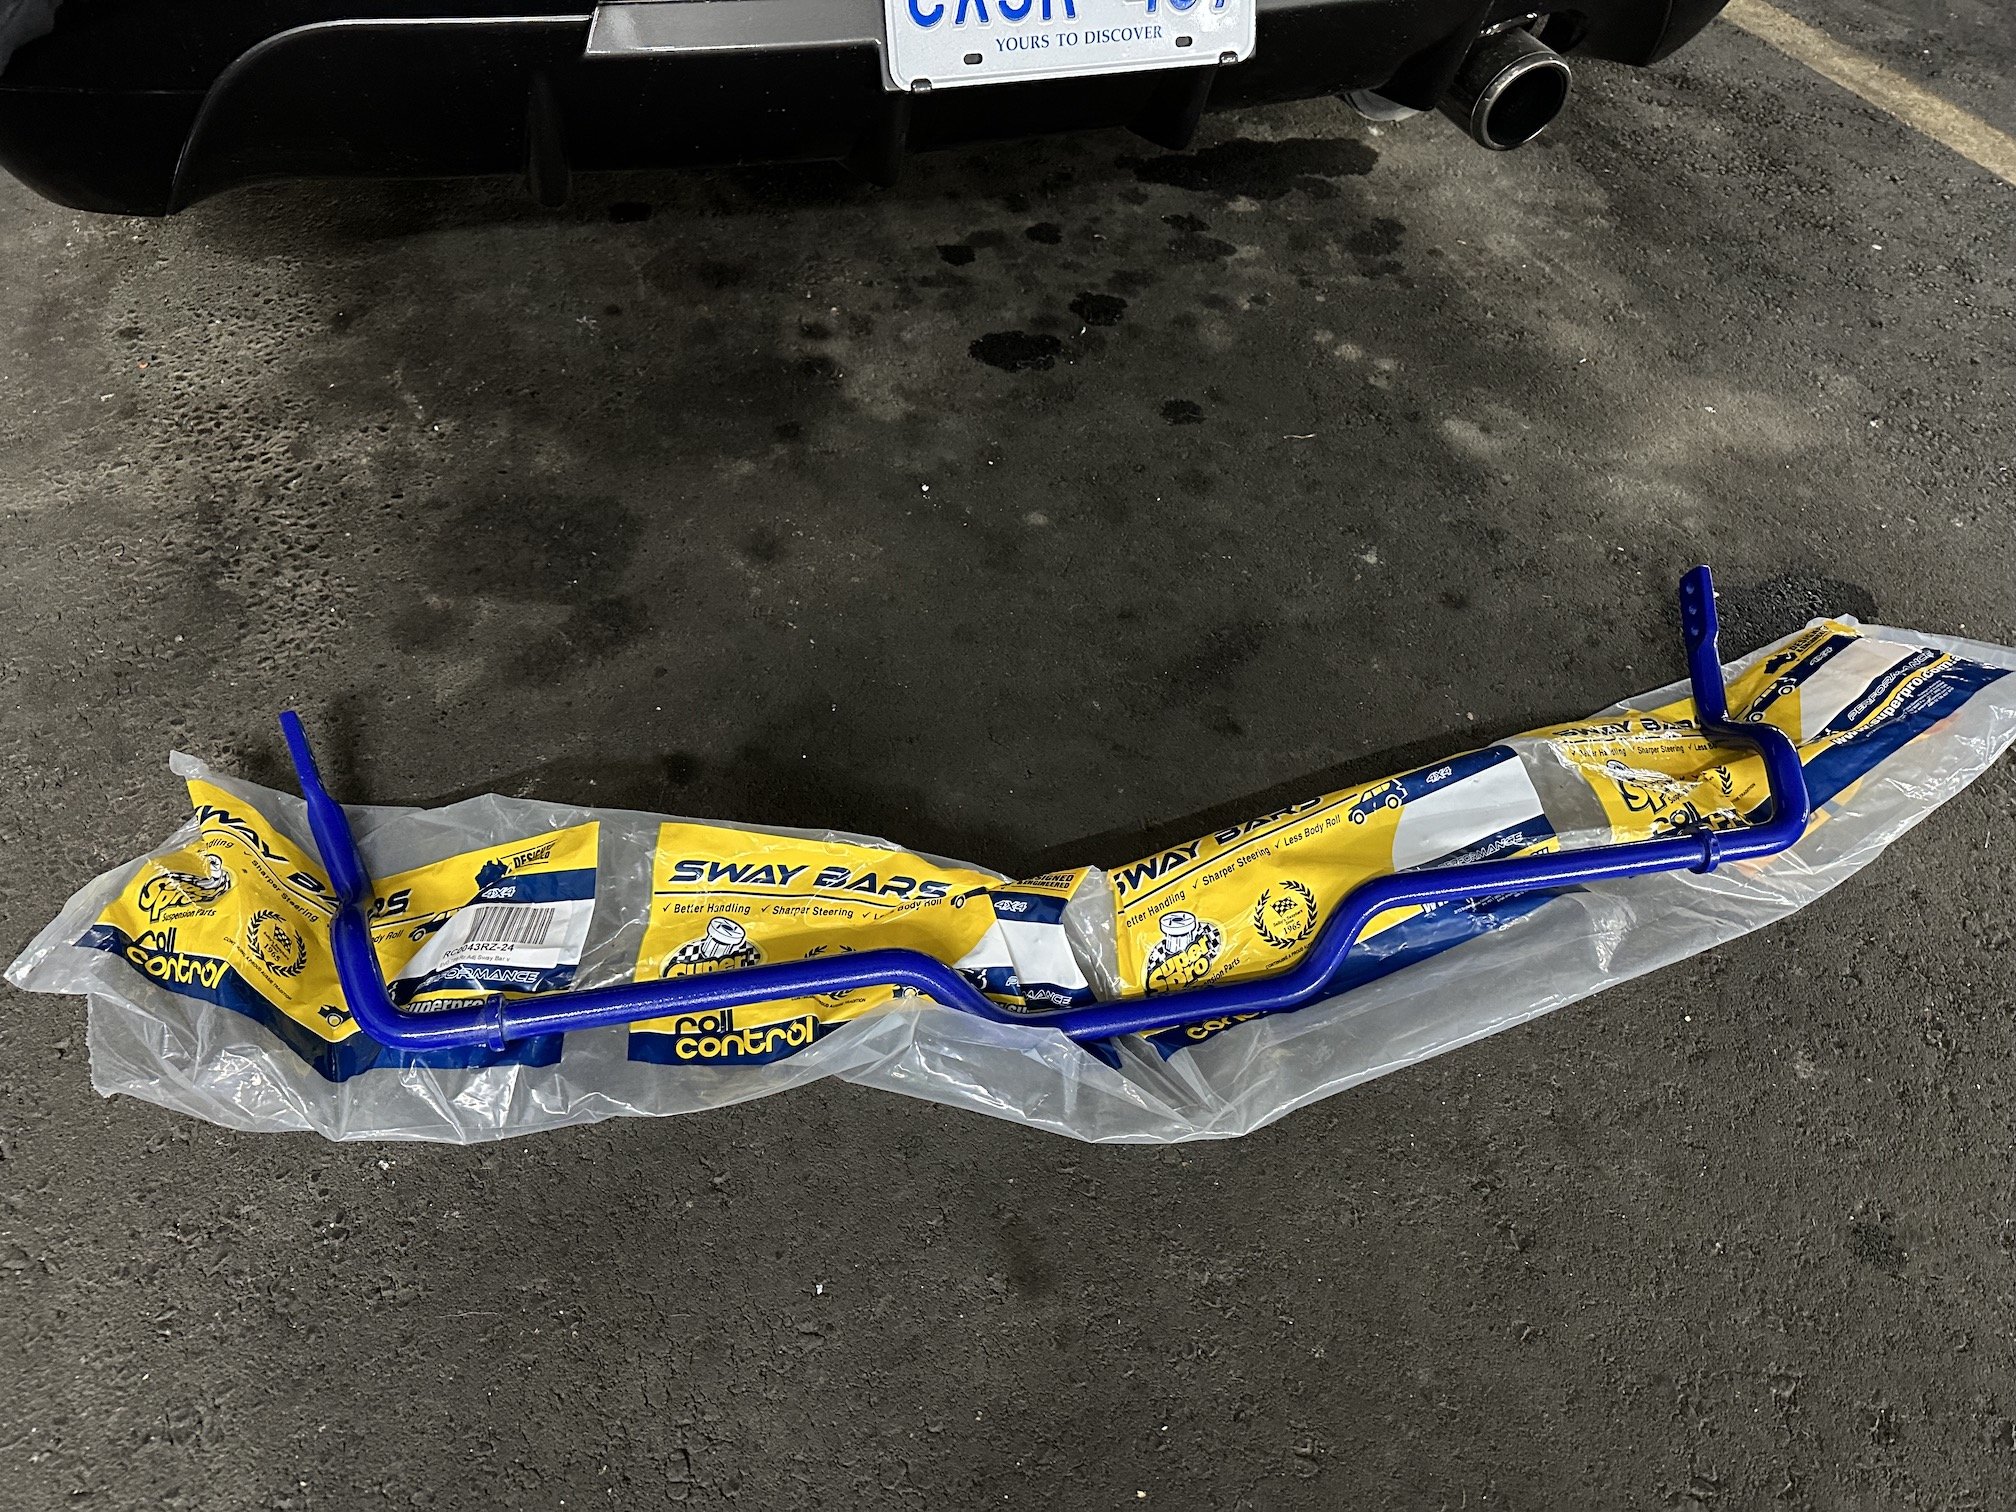
Swapped in the K&N air filter for sweet churbo noises, into the original airbox for stock look. Small chance I may be picking up a Ralliart CF air box when I'm in Australia end of the month. Superpro rear sway bar waiting to be installed. I need to drop the exhaust to fit the sway bar, and I have since picked up a Kakimoto 3" catback that I will swap in at the same time.
8 points
-
Yeah it's not worth it for those. $330 for a PickaPart motor where you have no idea on KMs, or if the motor is even alive... and you have to bust your arse for a day to remove it. When it's sub $500 for a wrecker motor with low km and a warranty (that I instantly void...) However if any more NCP13s come through I'll spent the time to go get the box out every time haha. Holy shit a brick there's not many sleeps left till drag day. Legitimately more exciting than Christmas. Hopefully the weather holds up!8 points
-
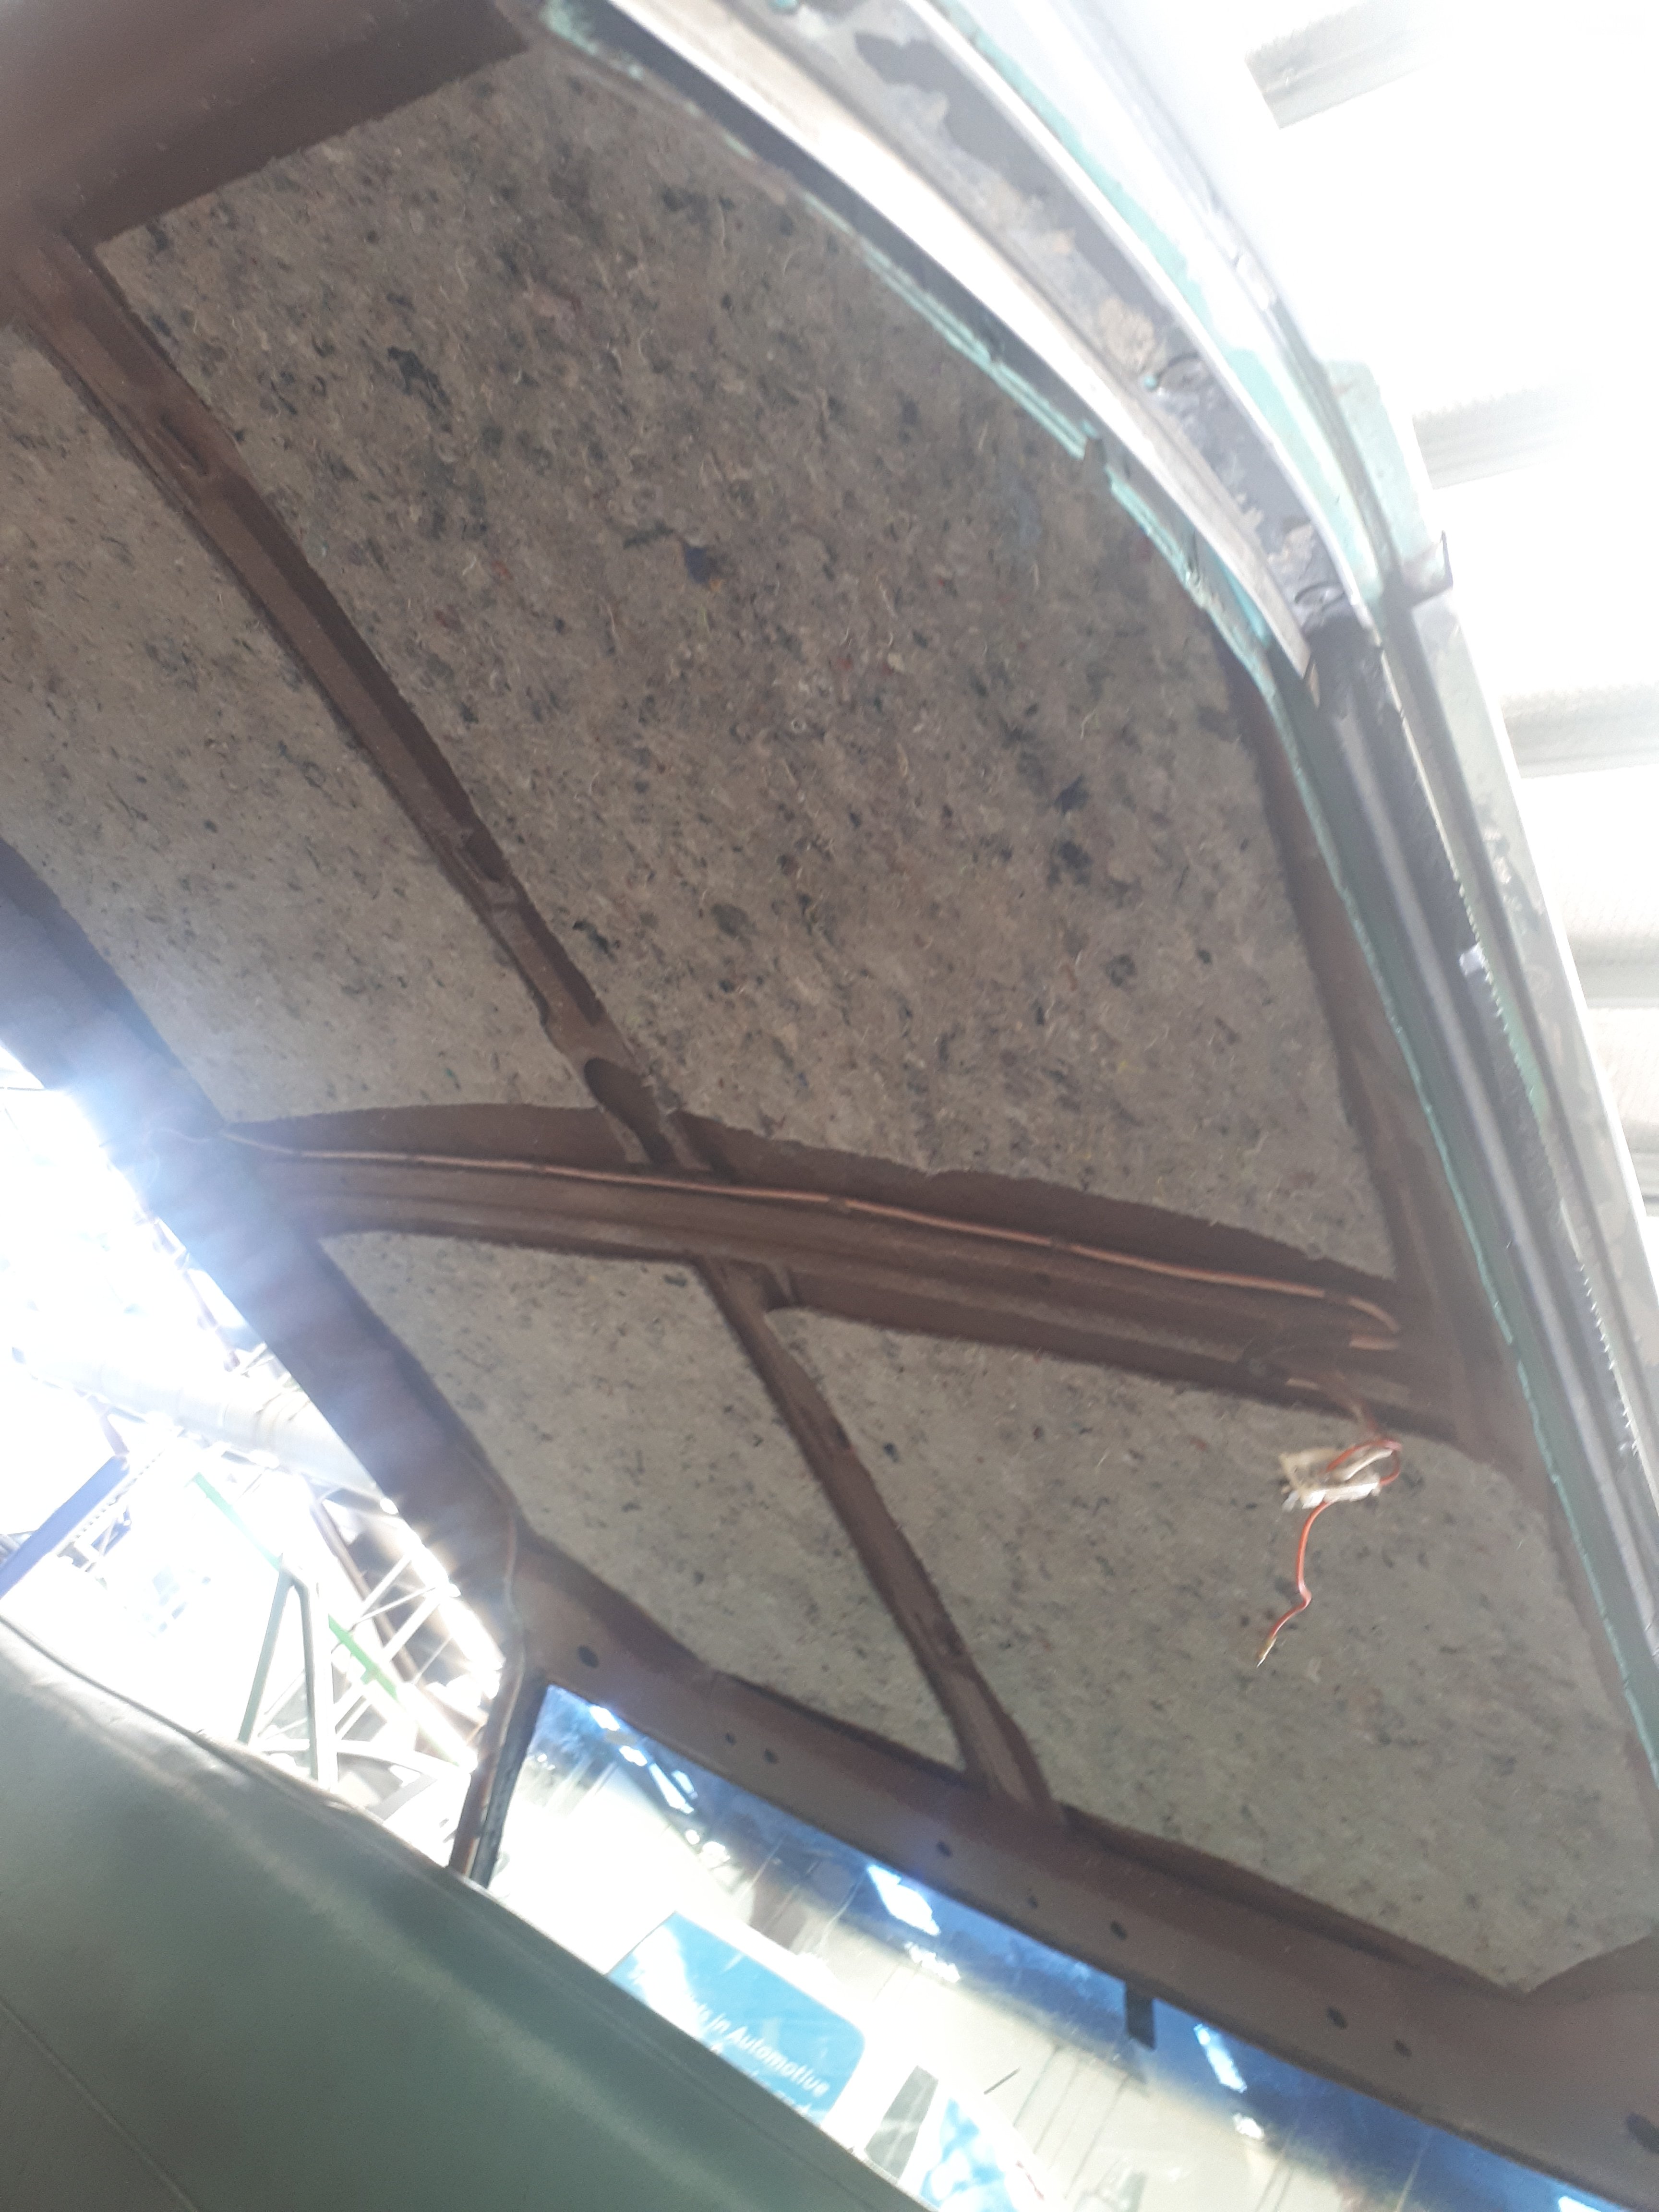
Stuck some felt to the roof. Hood lining in saturday with any luck
6 points
-
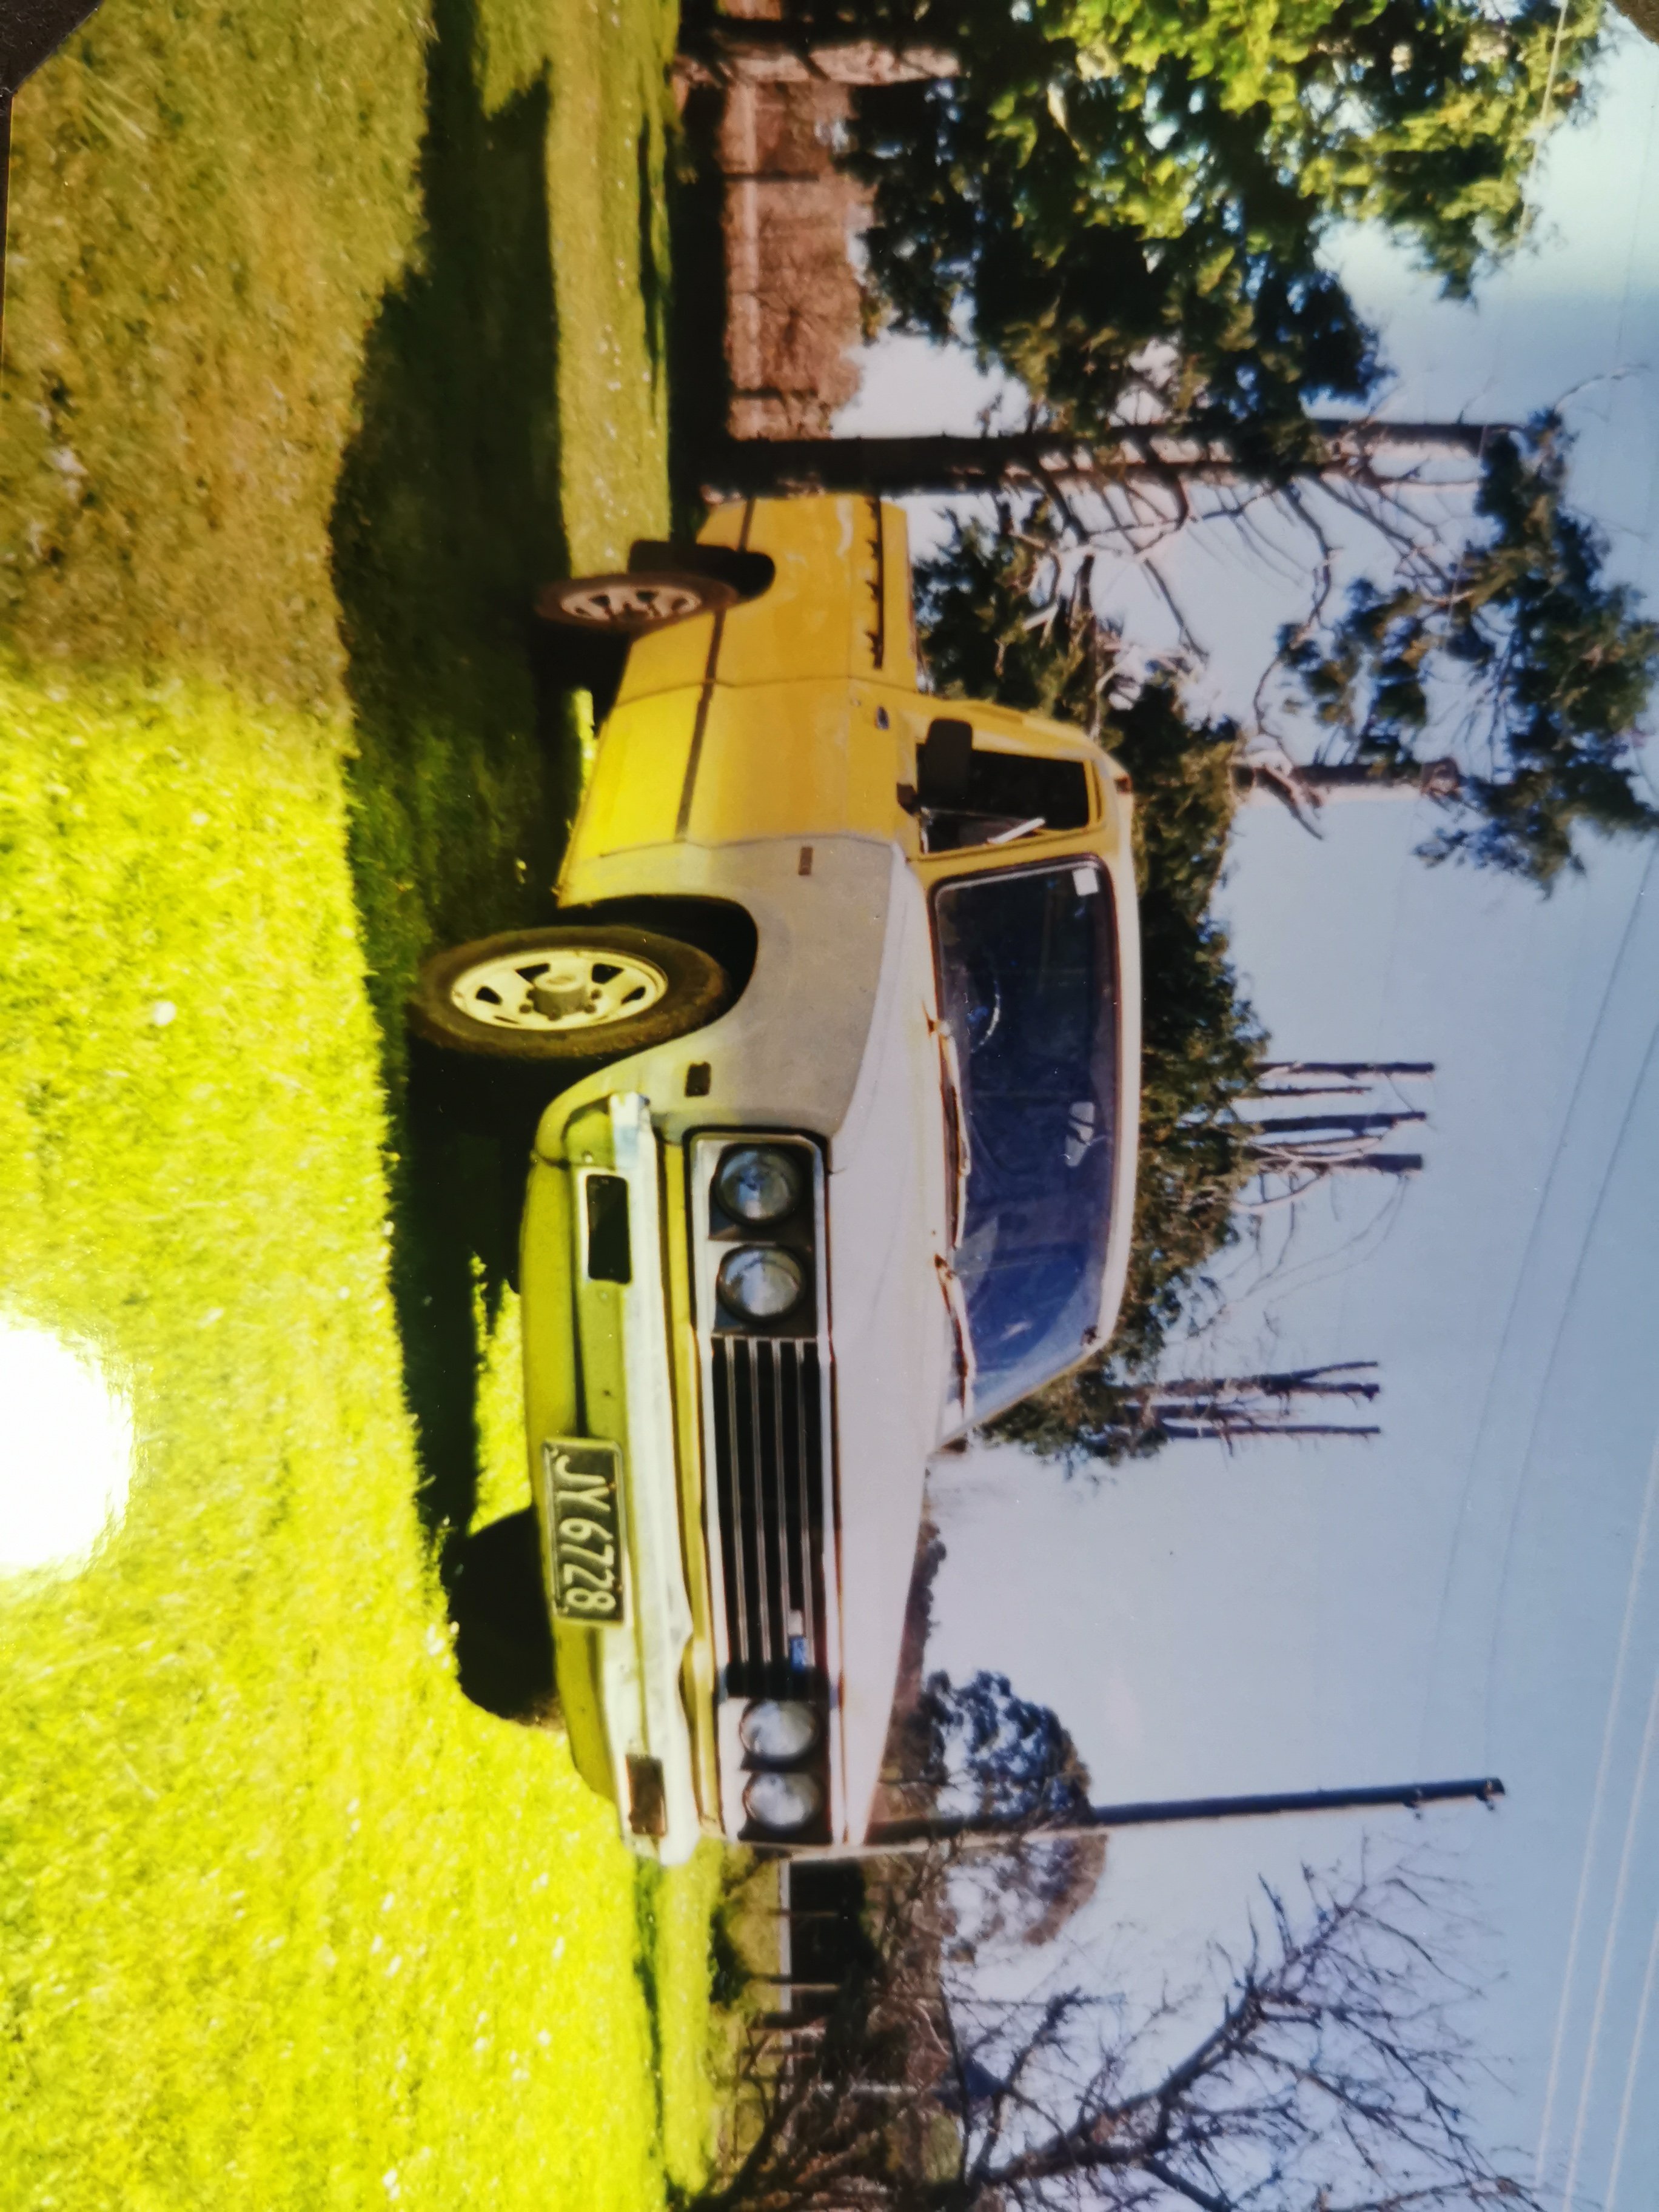
The OG ute, the day I picked it up. I think i ripped the seats out of my GSR to put in it the same day.
6 points
-
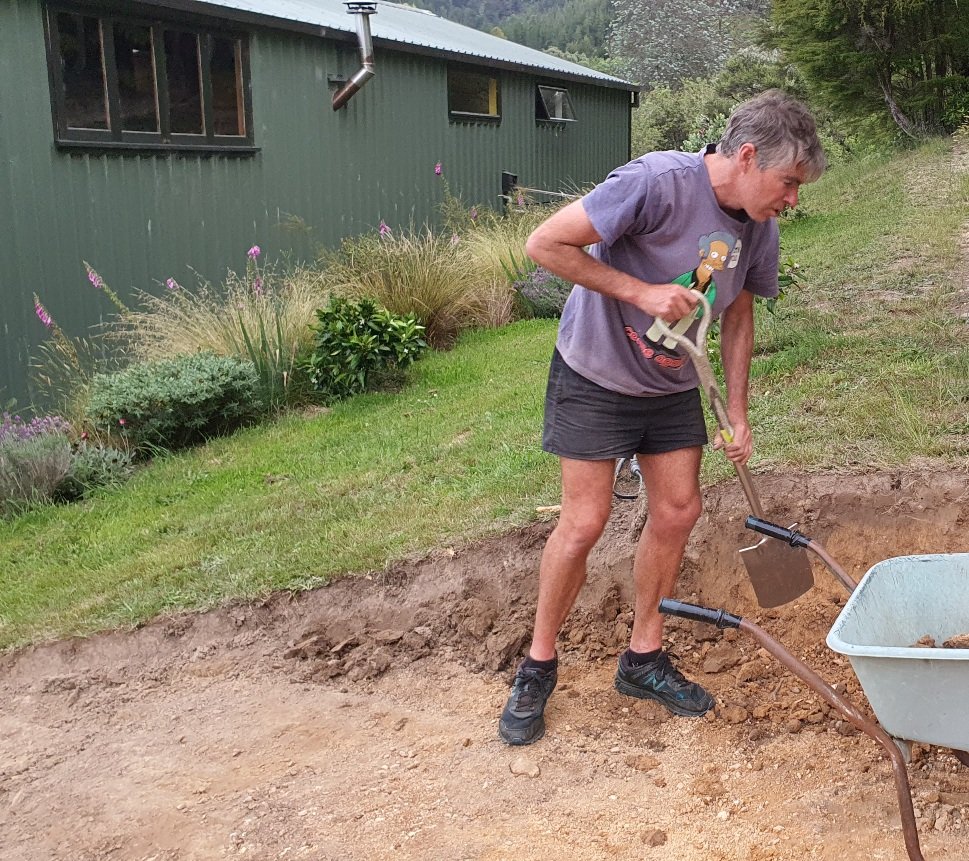
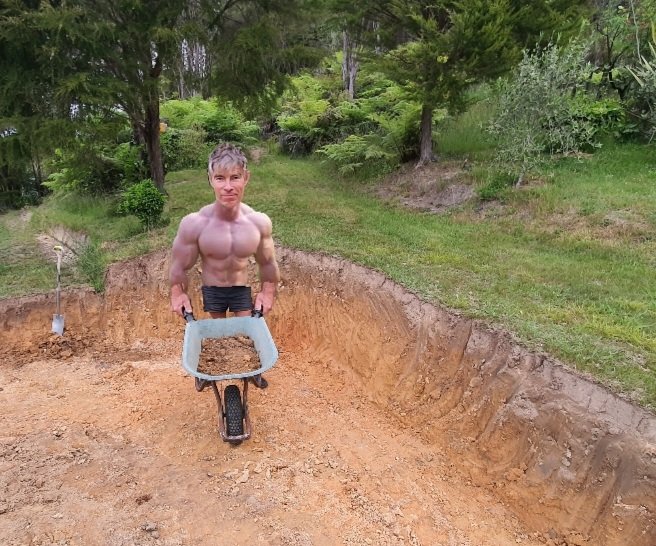
Phew! What a day. Started out full of beans but man it was hard work.. I'm sure I've burnt some fat and bulked out a bit. Started off digging in here.. Sun was intense but was getting into it. I changed my outfit.. But the end of the day I was pretty wrecked and my muscles felt pumped!..
6 points
-
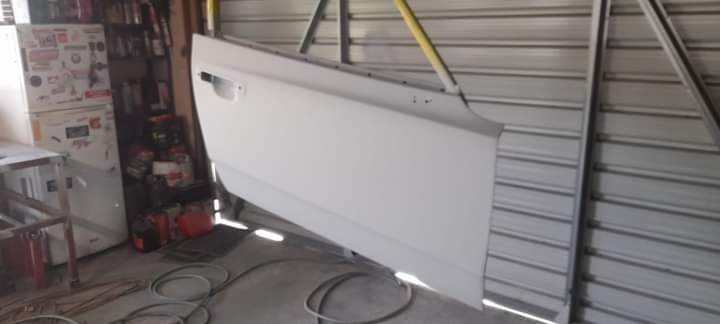
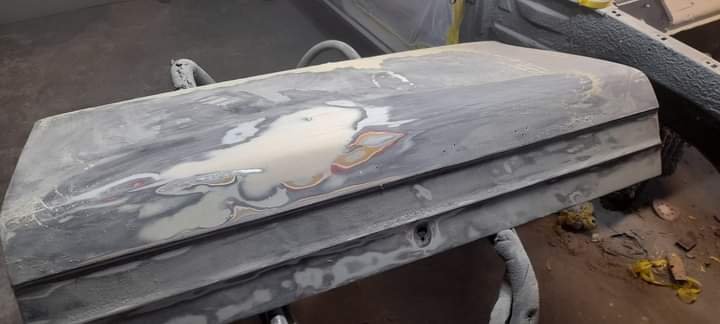
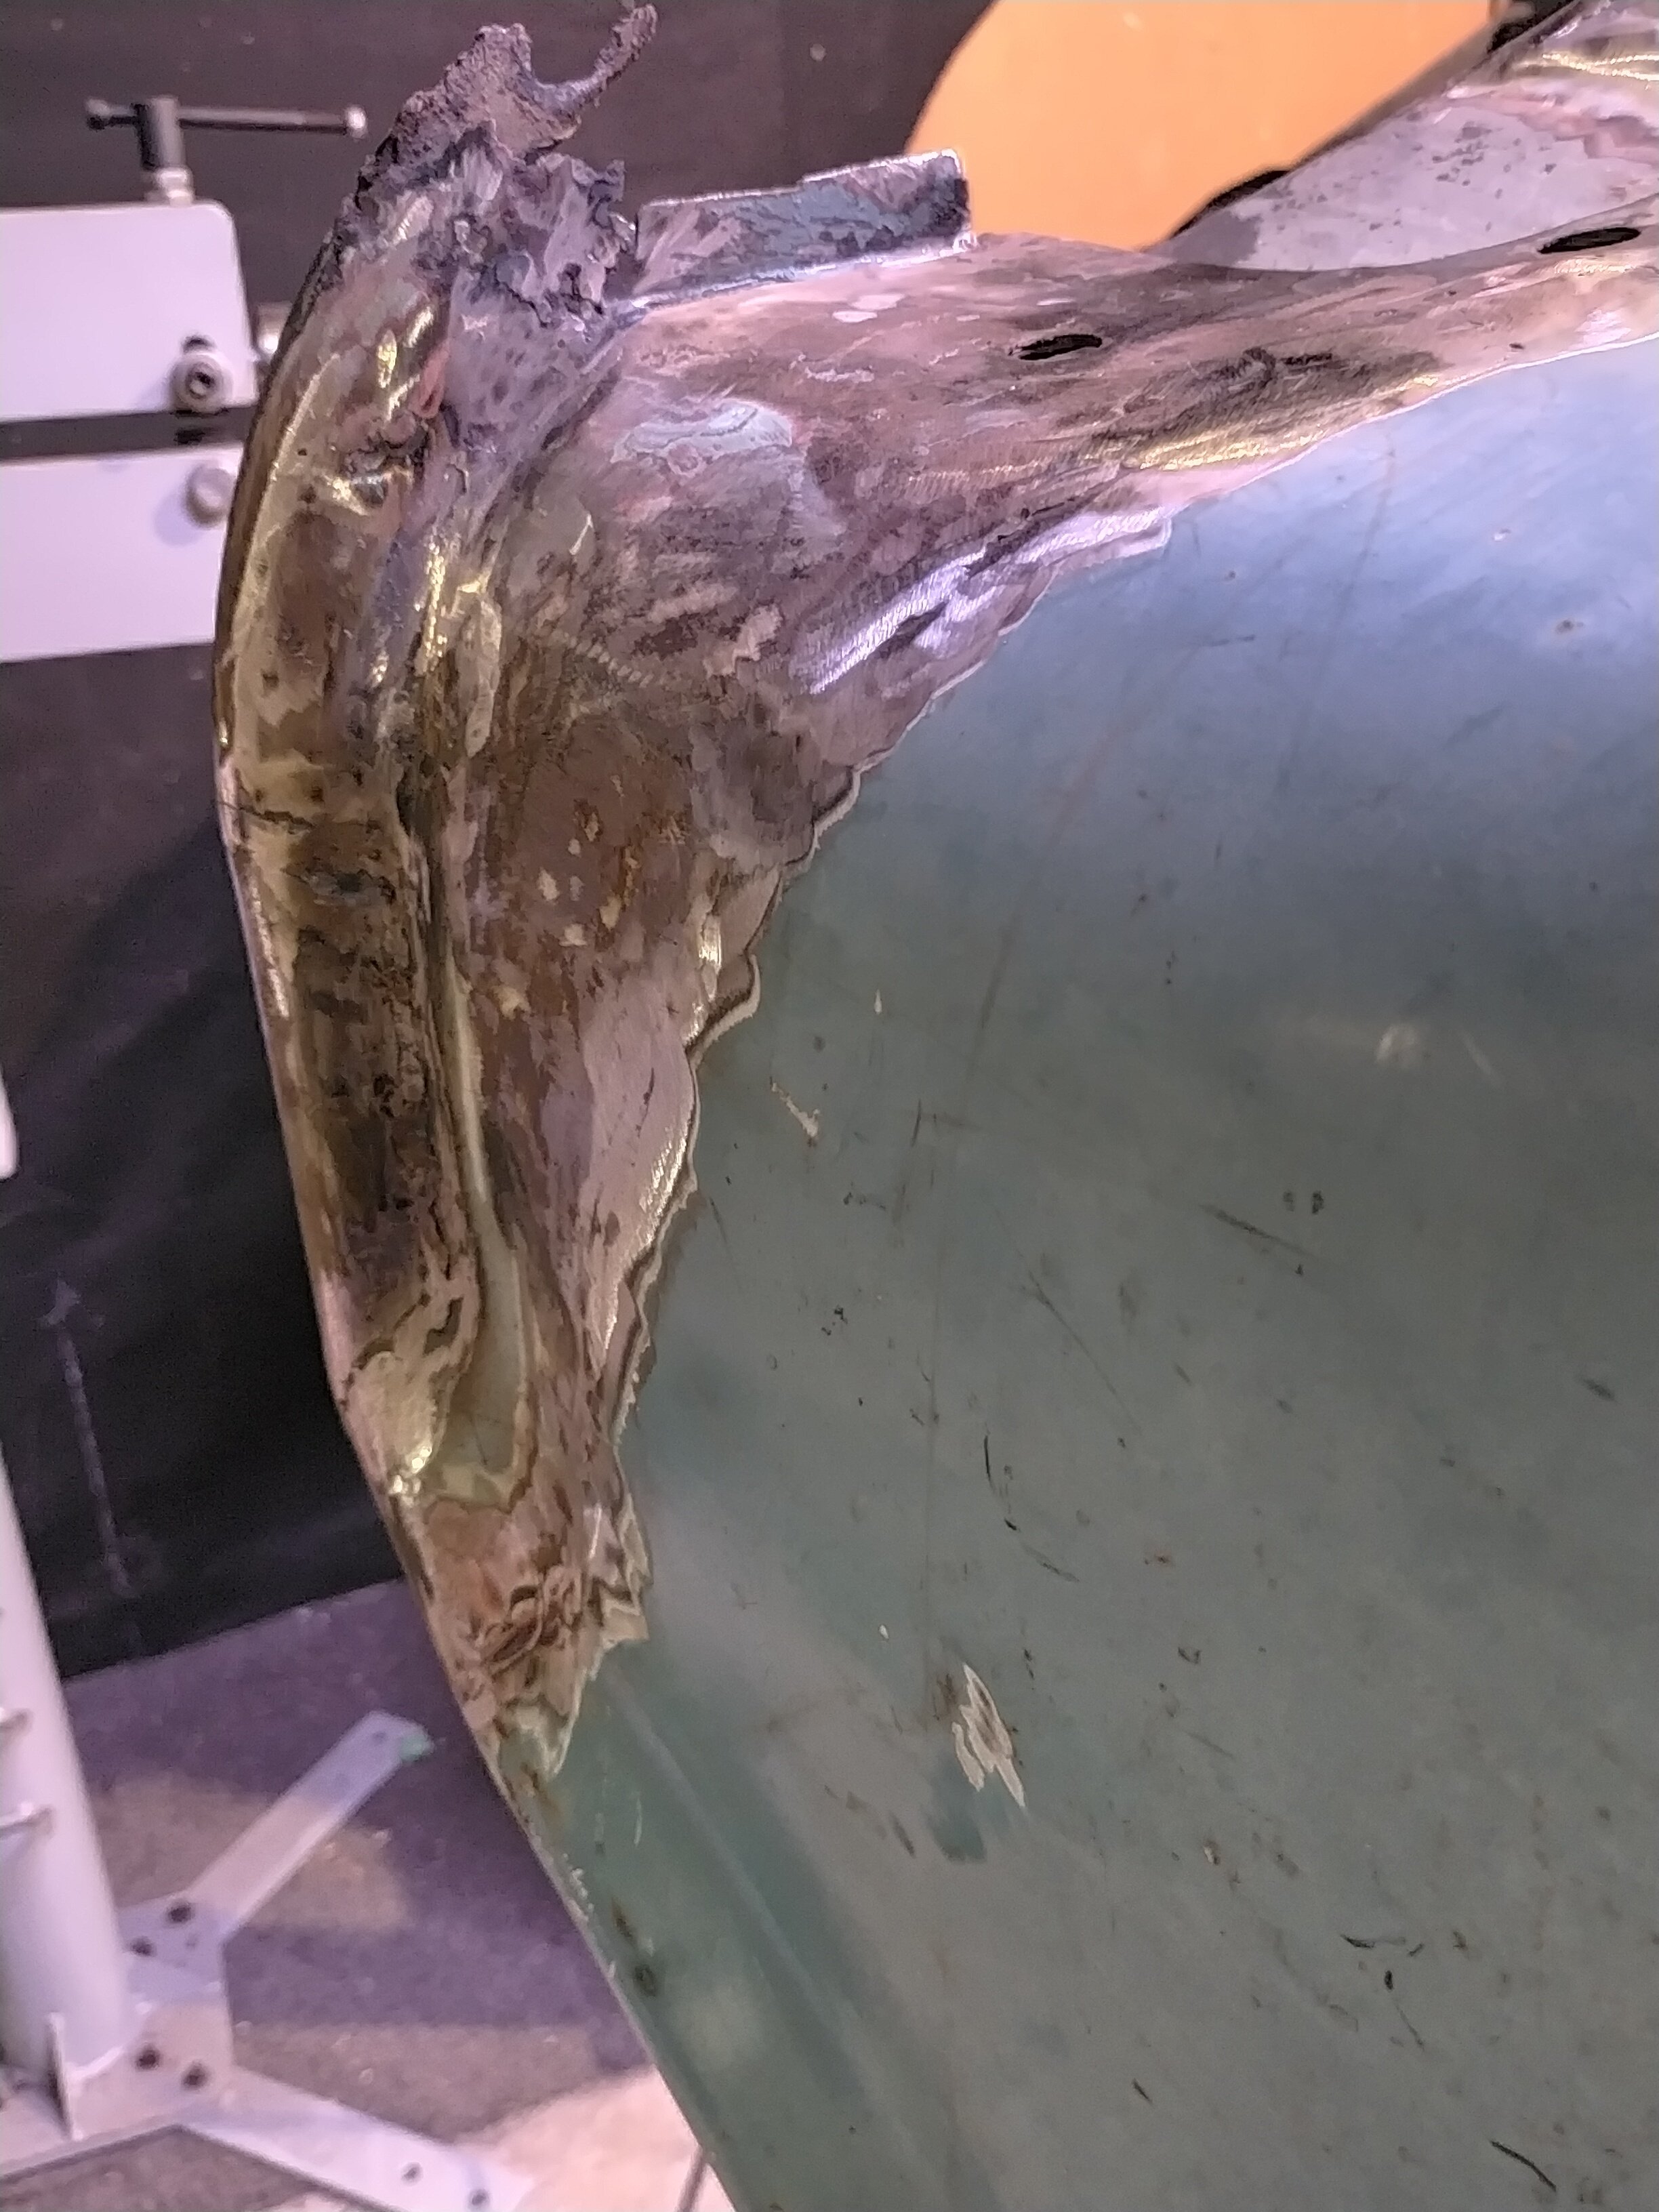
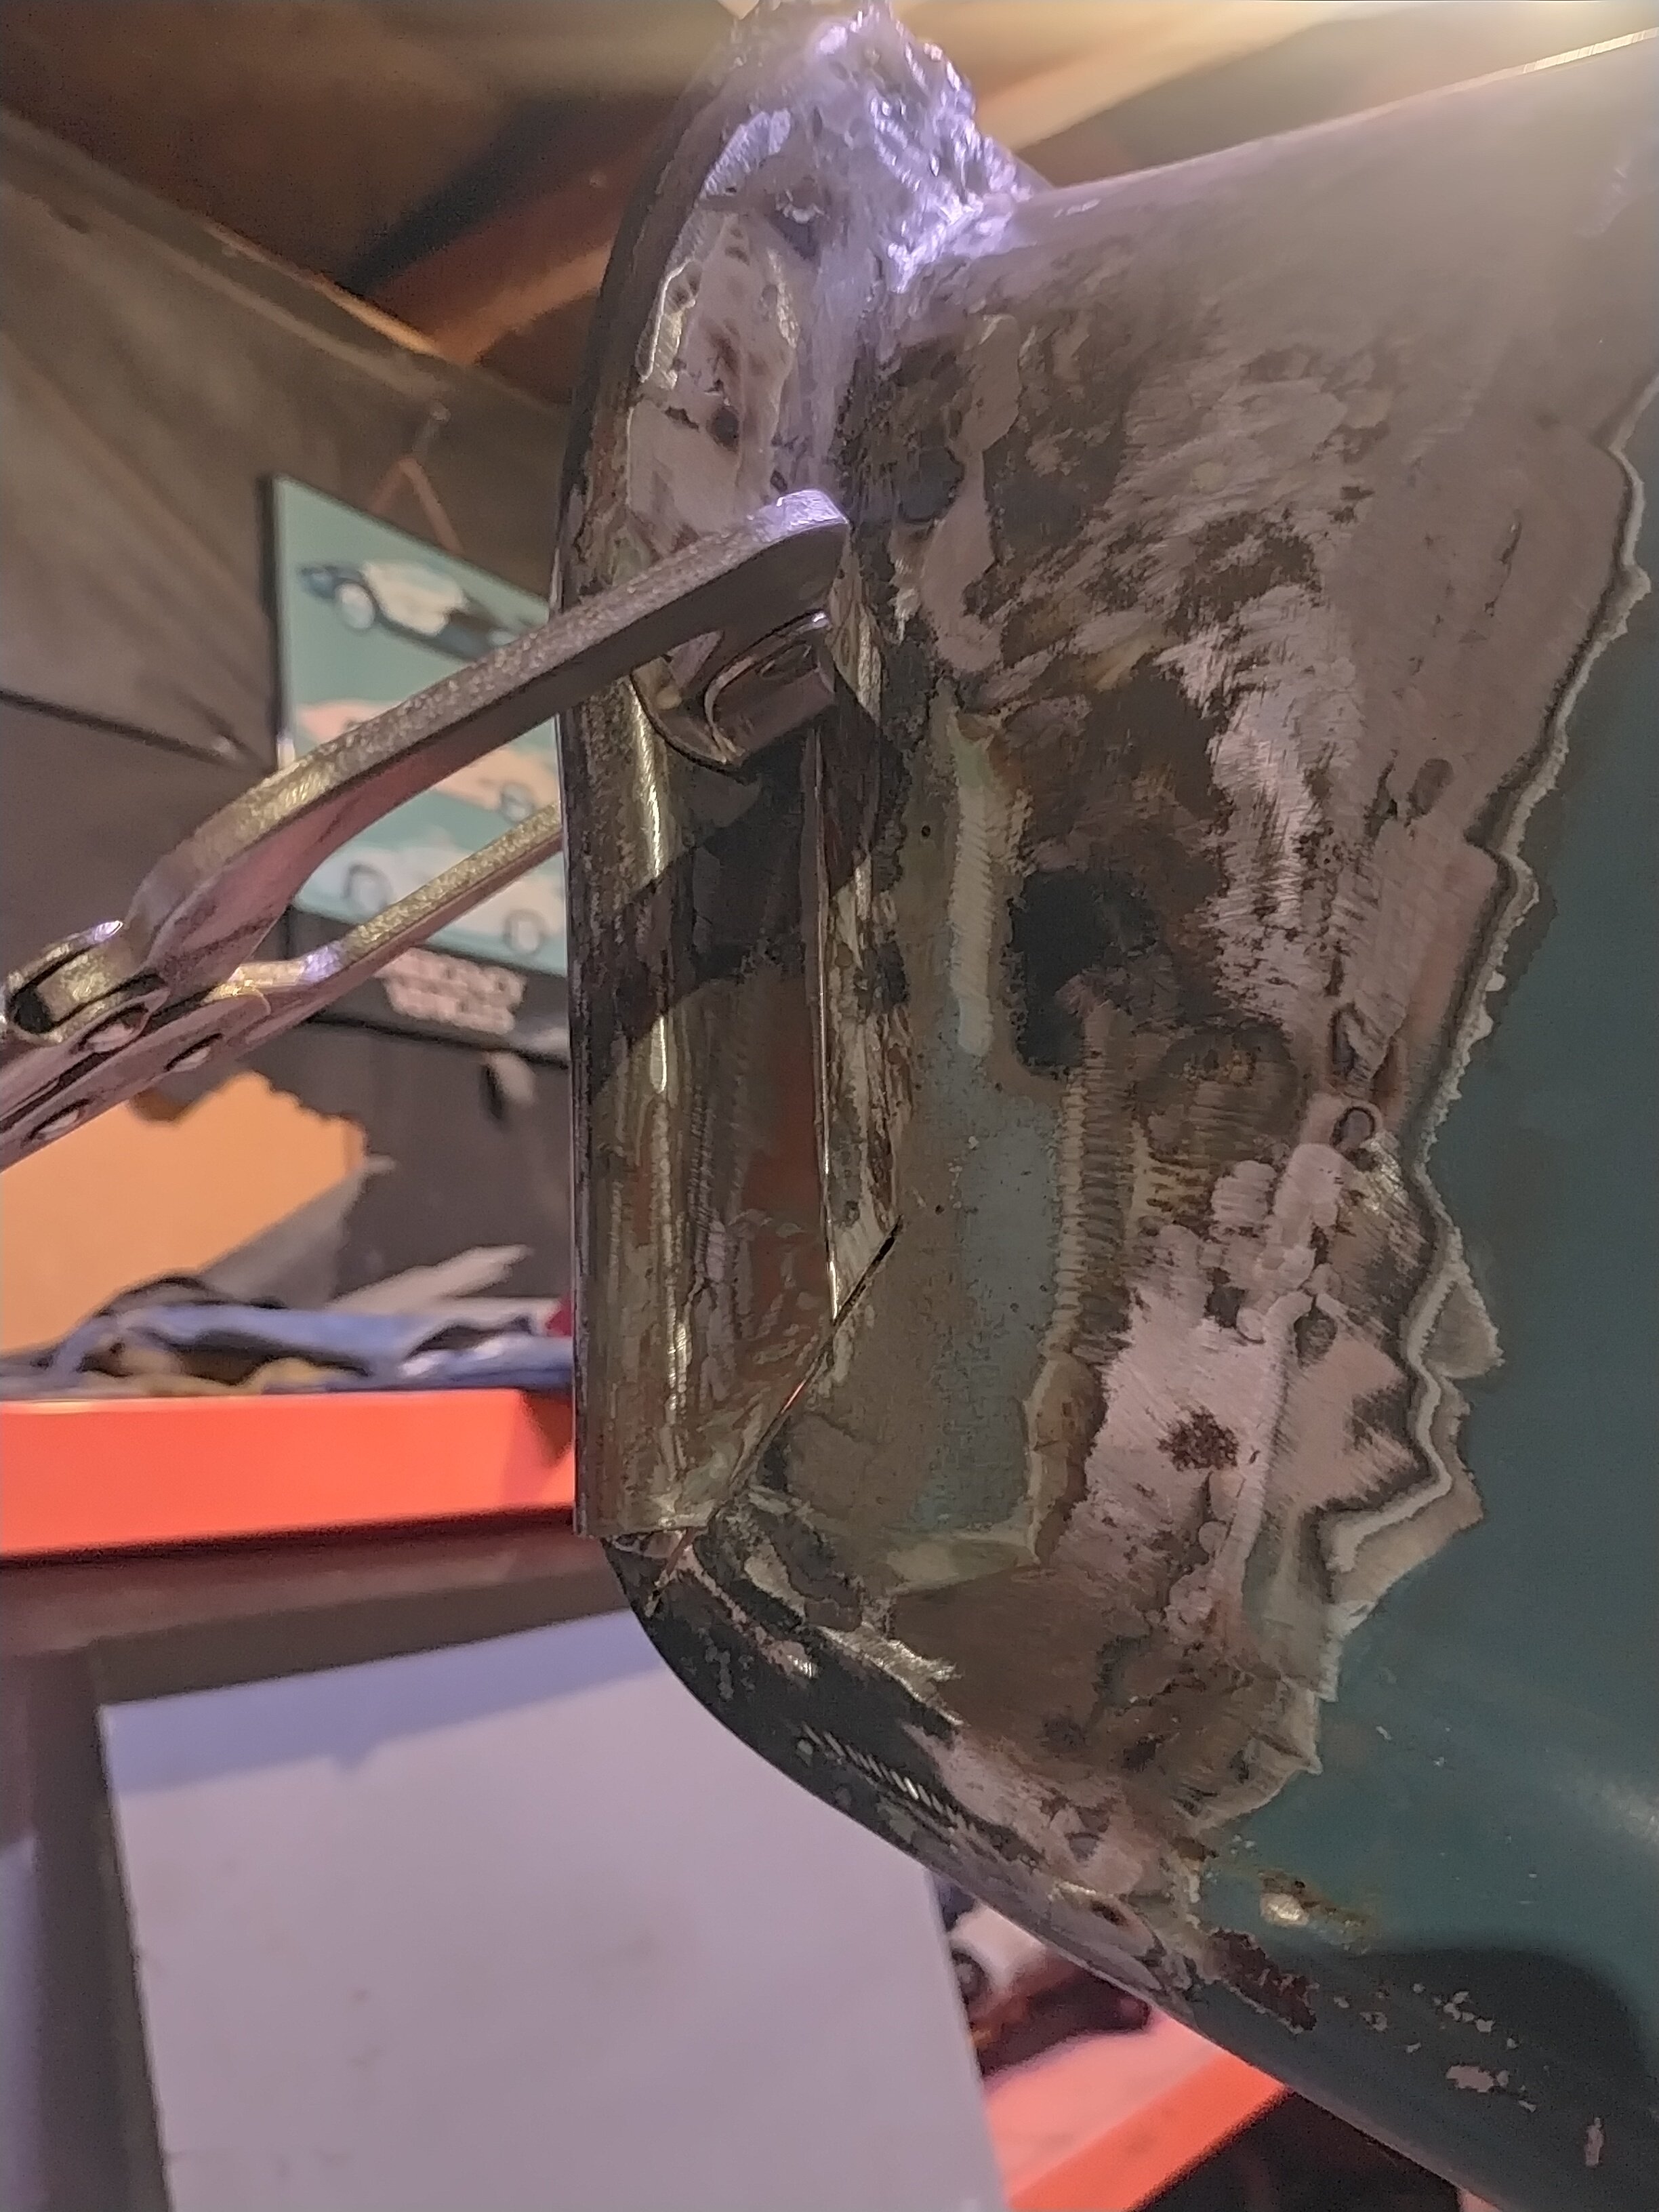
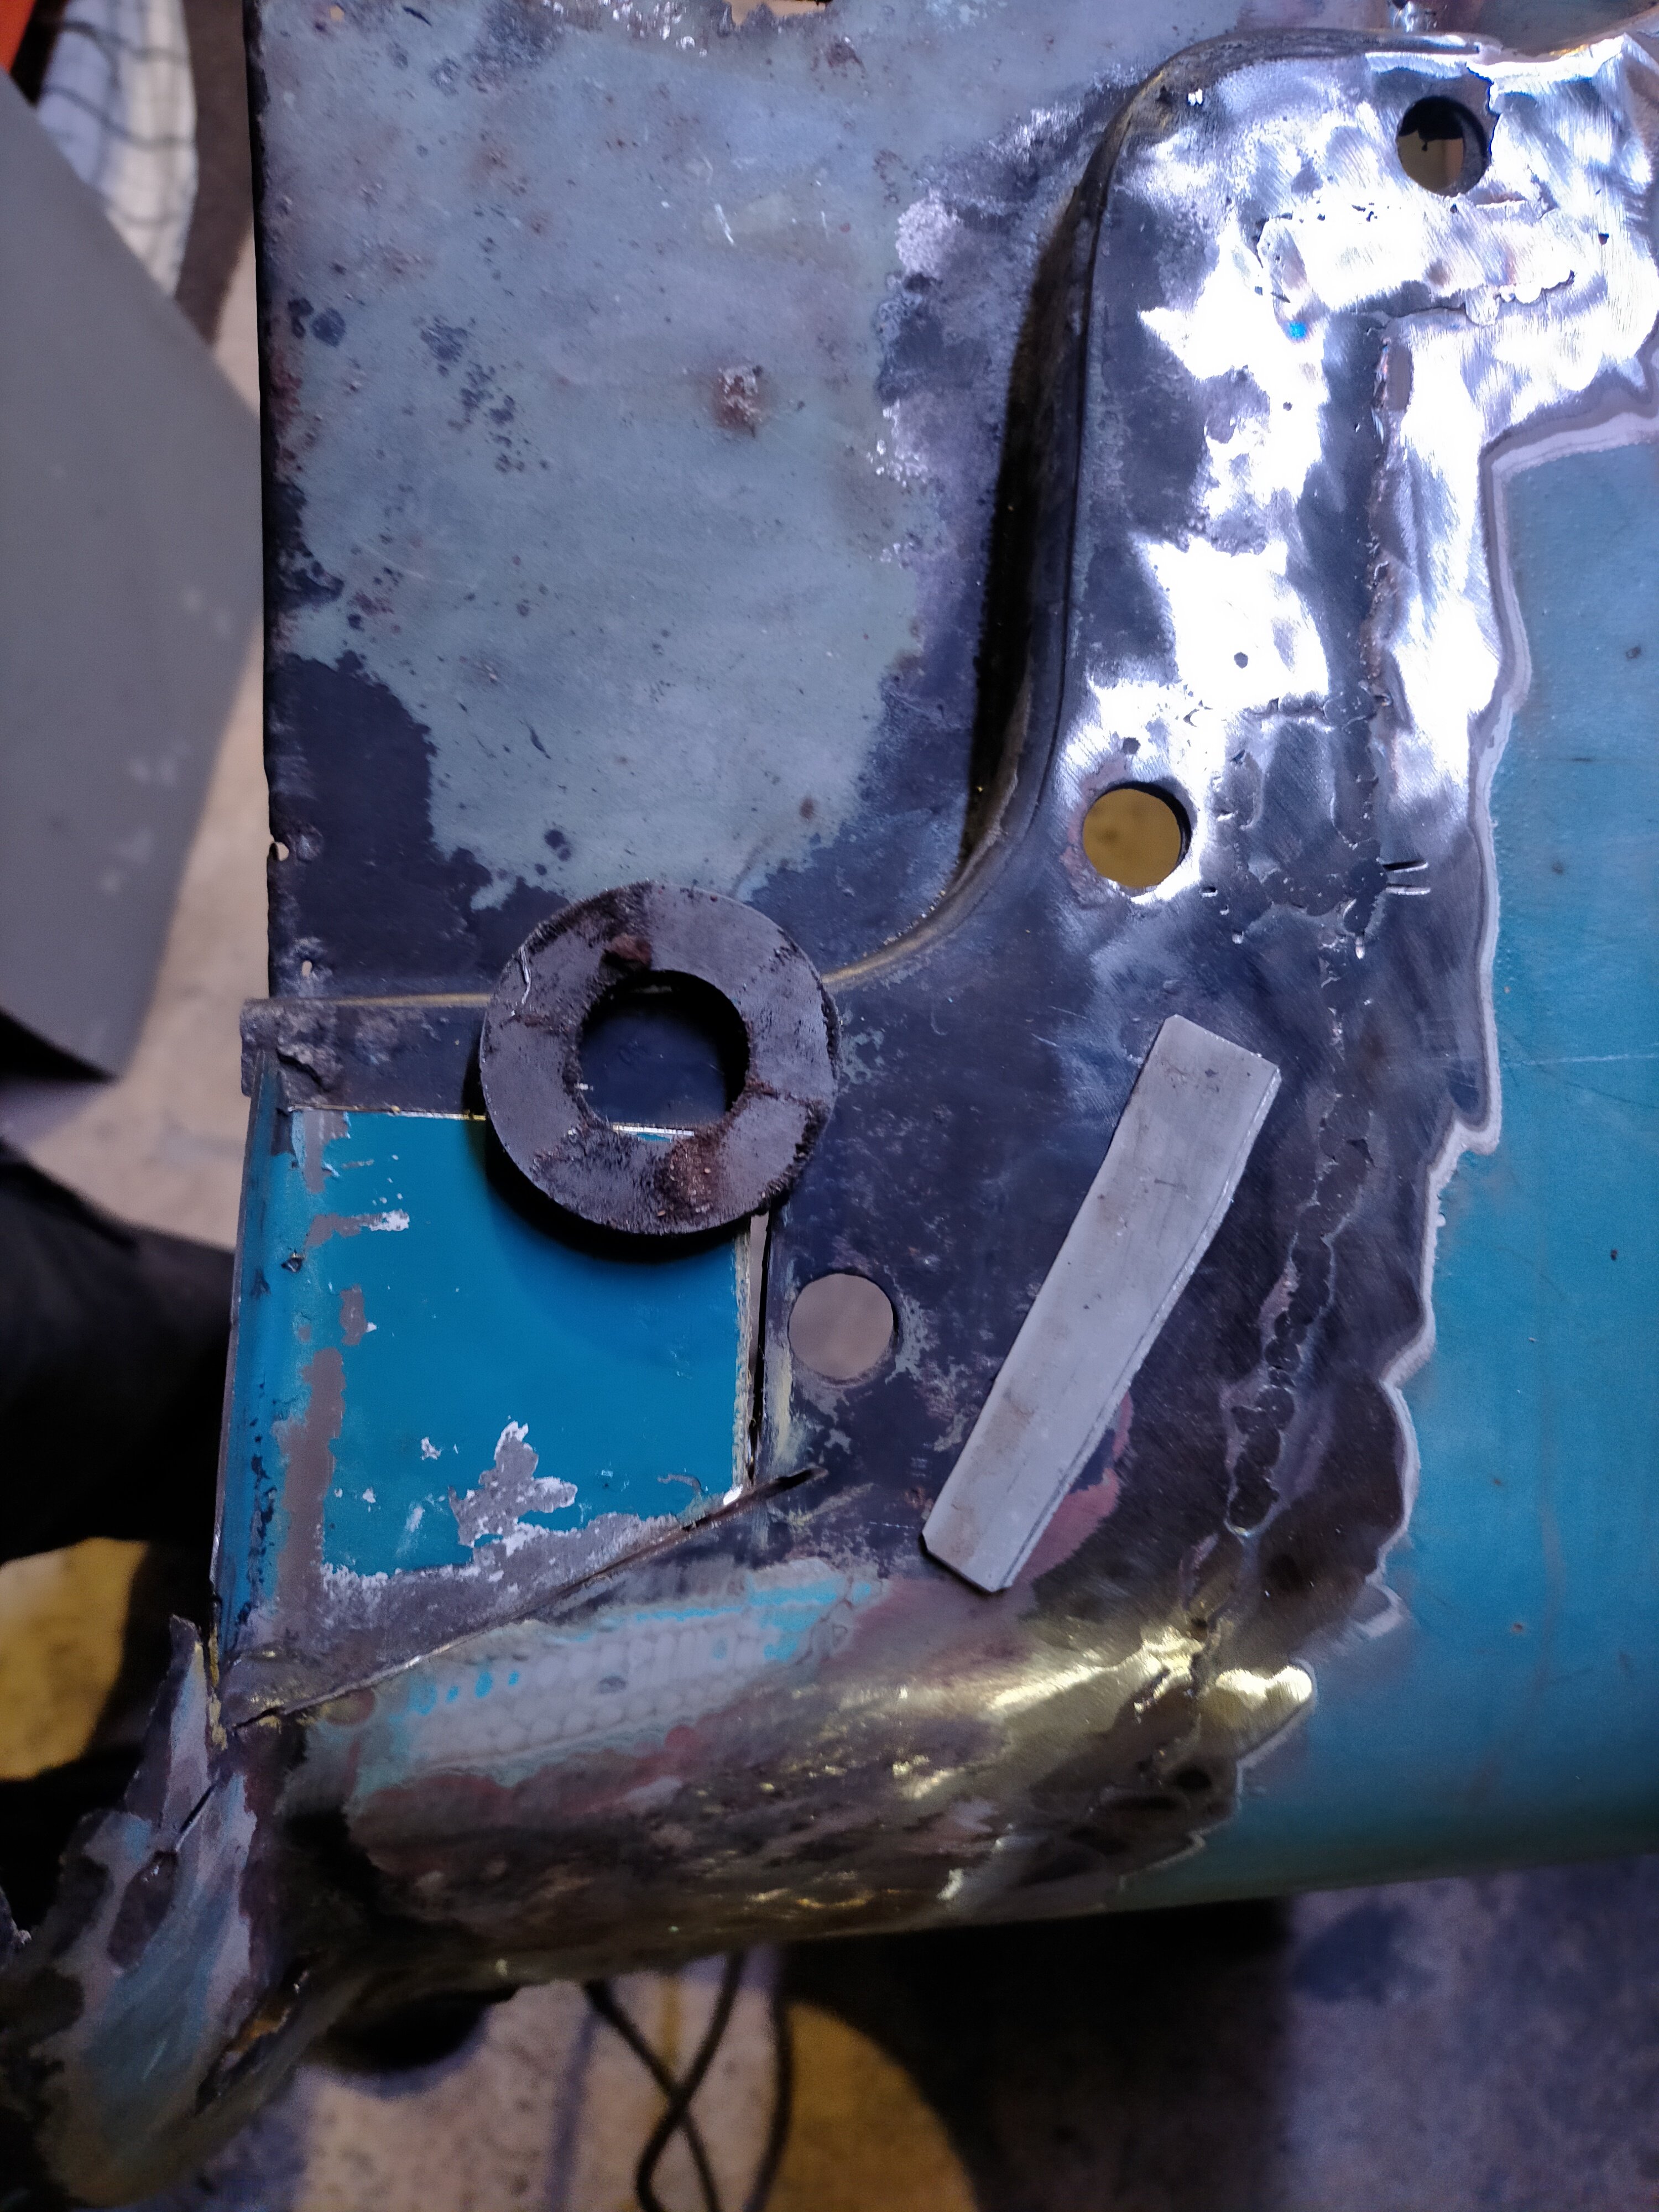
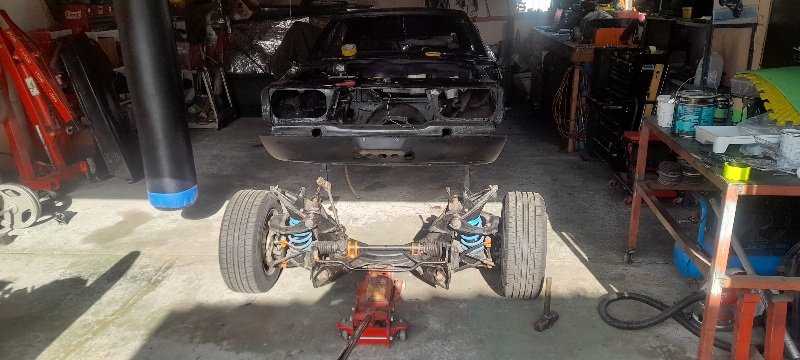
Did a thing today.. Lost a stack of cash.. Got hold of Azhar and picked up a 12a RX3 nosecone set... so good, comes with the grille chrome, upper trim and eyebrows. Got back to the shop, looked at it..and went full send. It actually felt like i had done this before.. Haha.. Actually come together quicker than previous one. Upper is fully bolted on. Will bolt the lower to the upper and try my best to find a pair of rx3/808 guards to use the front 1/4 section for the flange. This will all be bolt on this time.
5 points
-
4 points
-
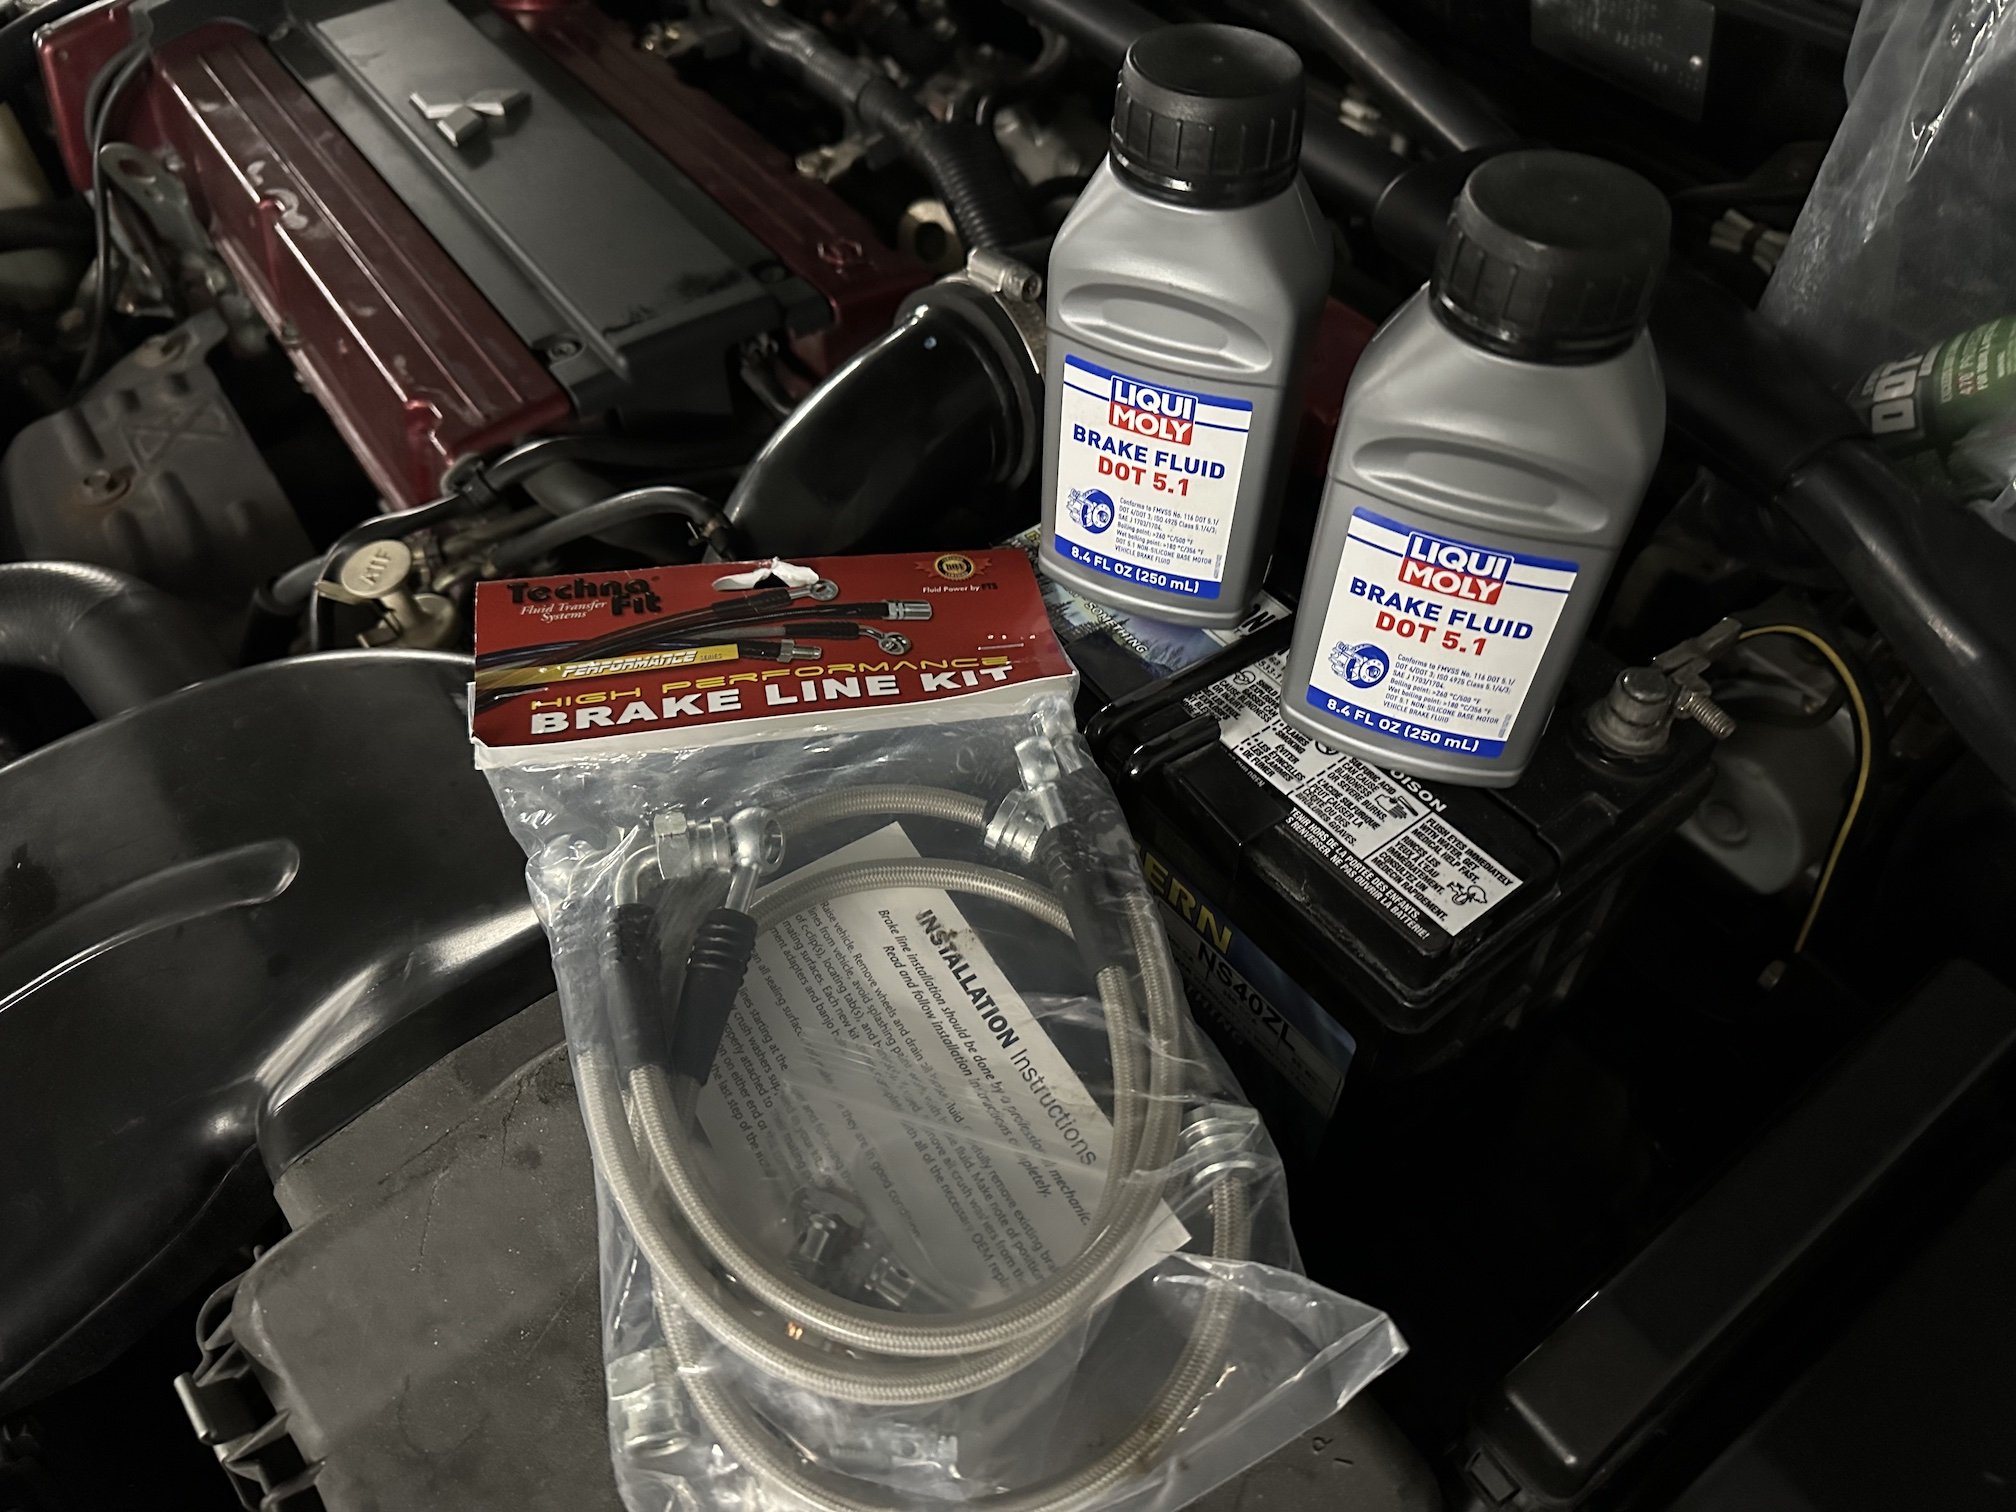
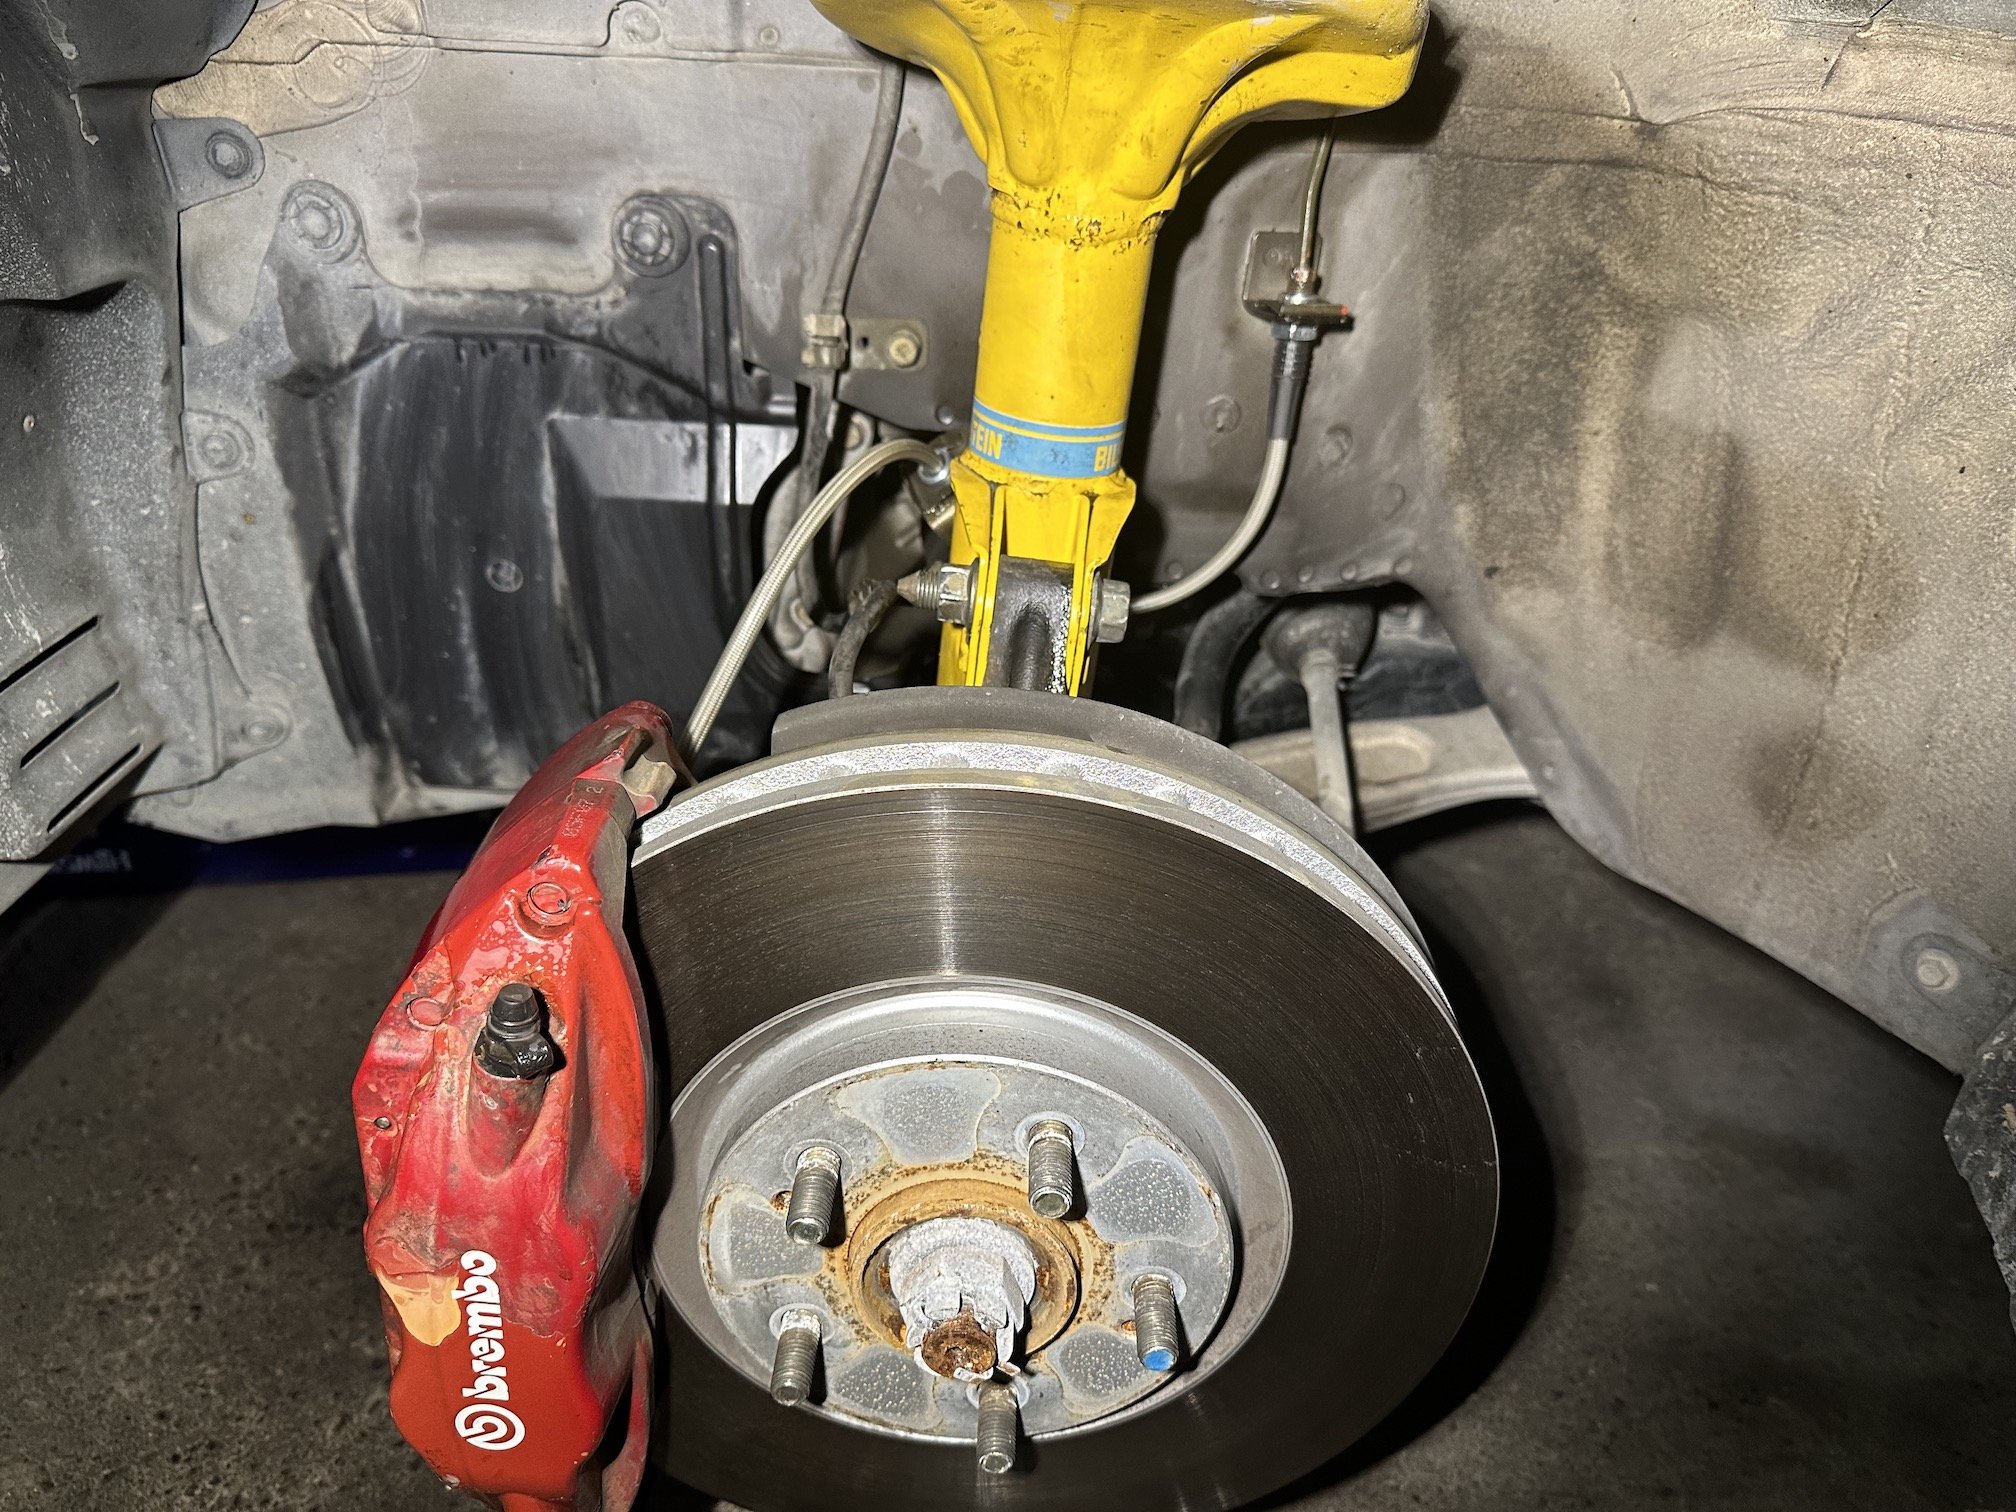
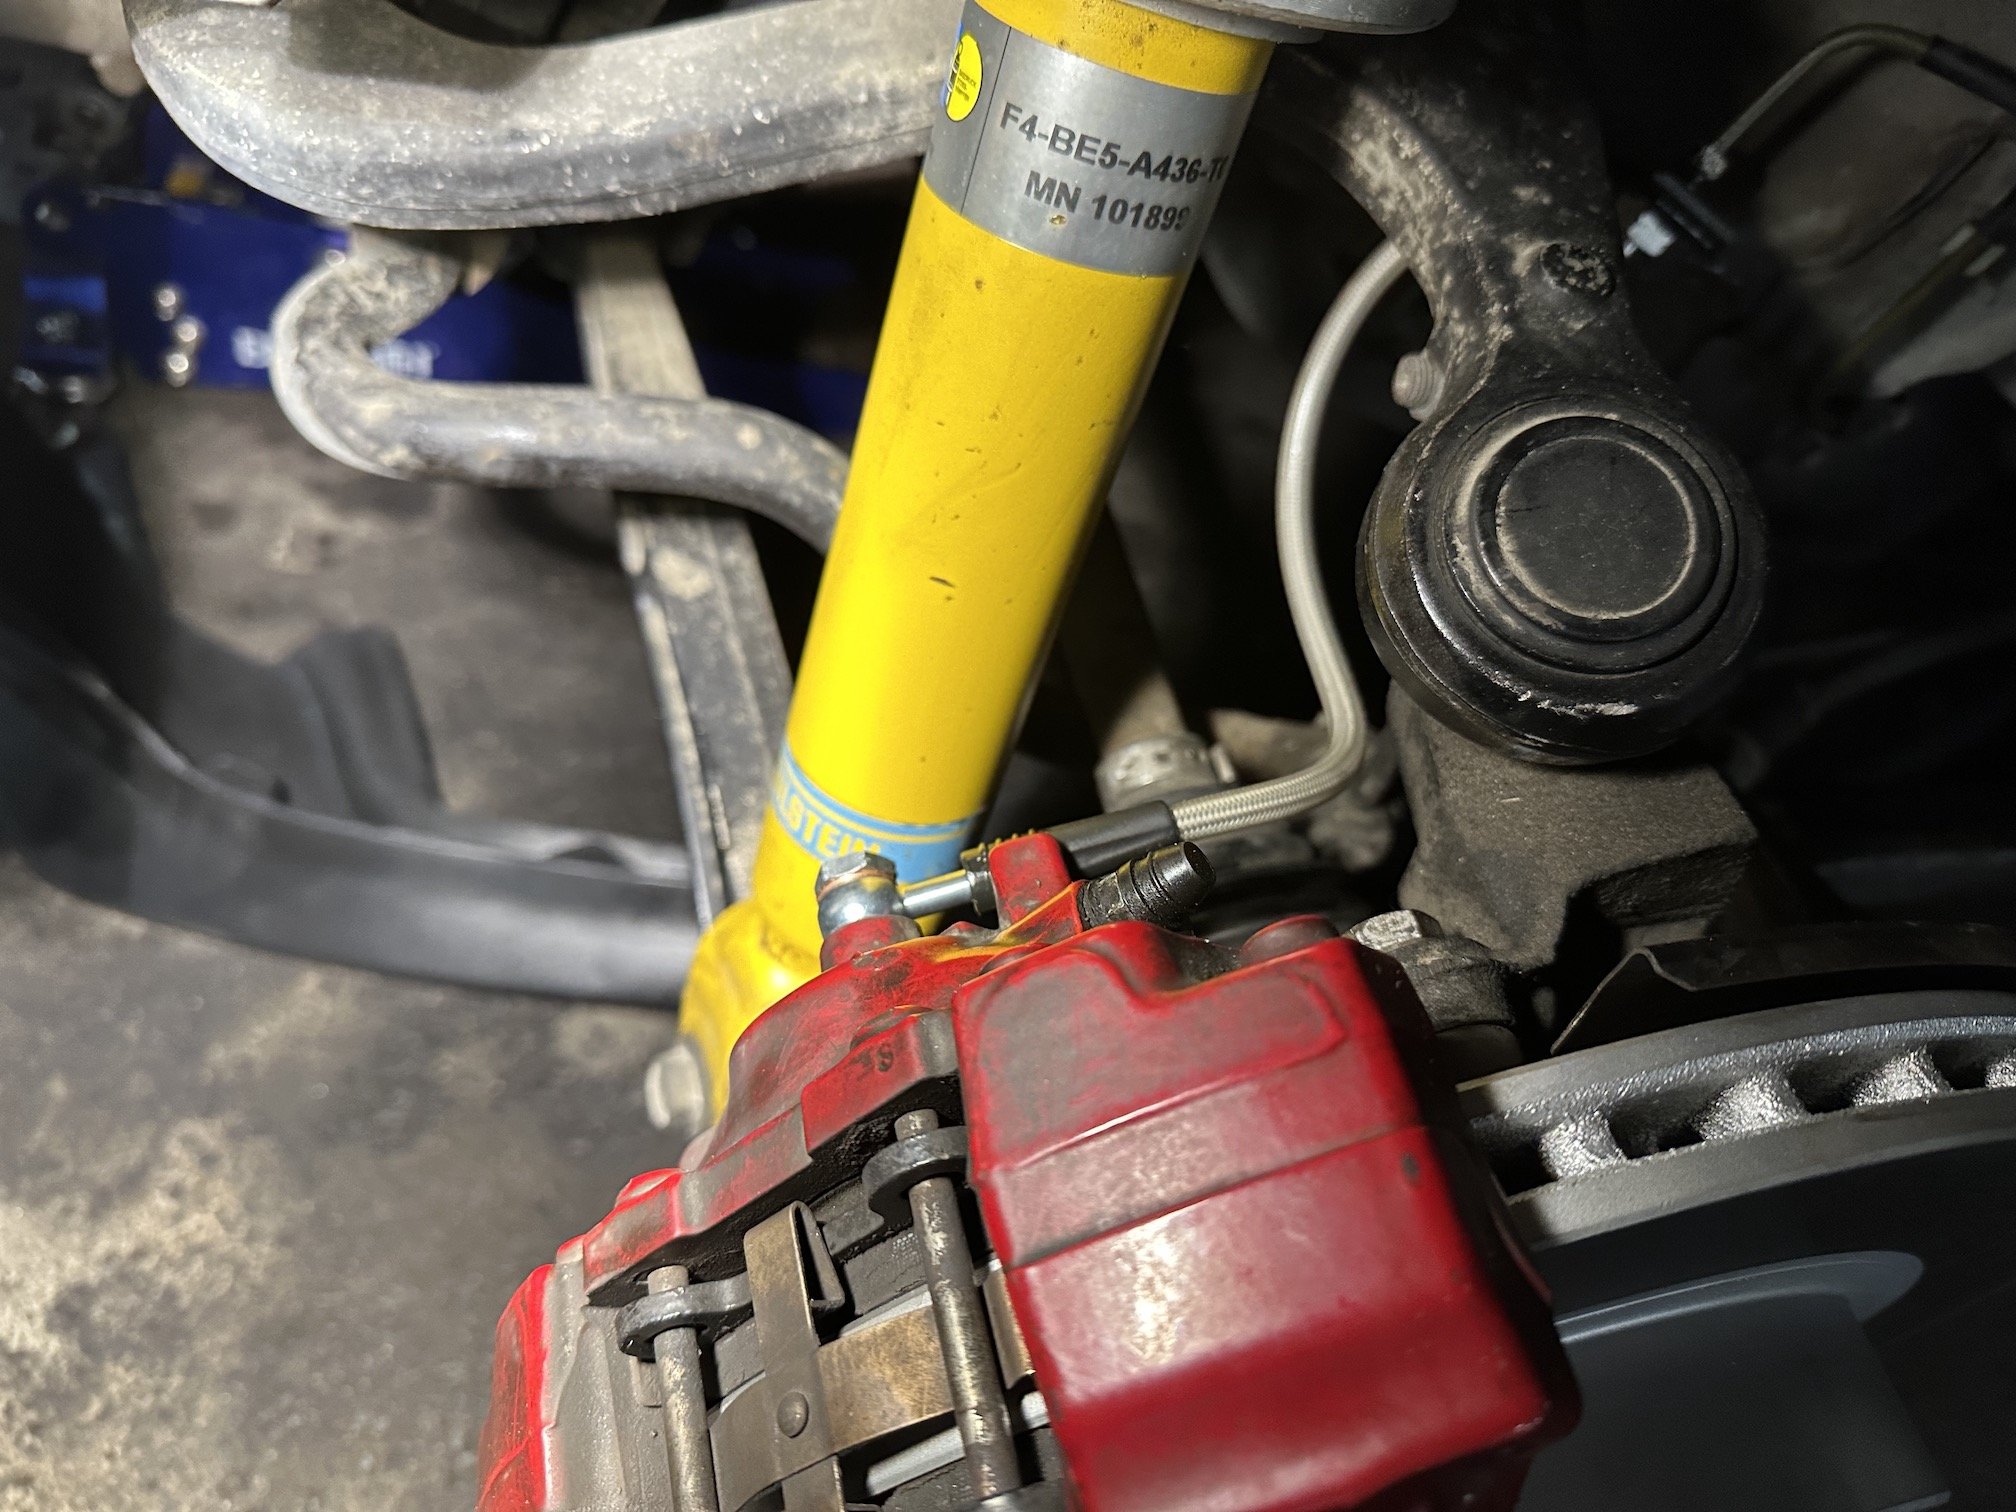
Black Friday has come and gone which means I picked up some stuff: - Braided brake lines - Superpro 24mm rear adjustable sway bar - Varis CF shift knob & shifter bushings (for when I do the 6spd swap) - Rear diff poly mounts - K&N air filter Made a start with swapping in the braided lines. You can see the brake calipers need some love as the original clear coat is peeling and fading. I have to swap in a different brake master cylinder reservoir when I do the manual swap so when the brake fluid is all drained again I'll get them done then. Have ordered up replacement brembo decals already. The existing brake fluid seems fresh and not discoloured which is a good sign, I opted to use some regular DOT 4 fluid I had on hand for the brake line swap and will wait for the new master cylinder reservoir and caliper overhaul before using the good DOT 5.1 stuff.
3 points
-
You are looking at “Reasons for rejection” so it will fail if the light is not any of those. /plate lights must be white.3 points
-
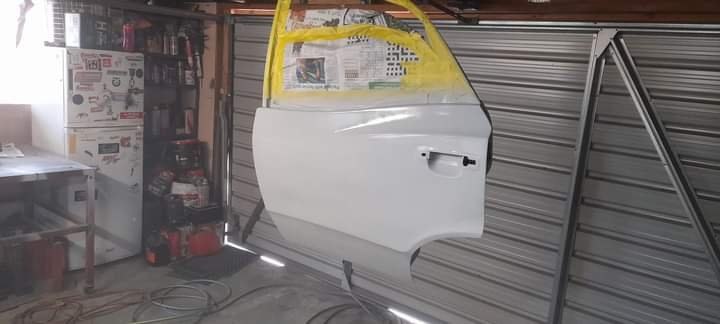
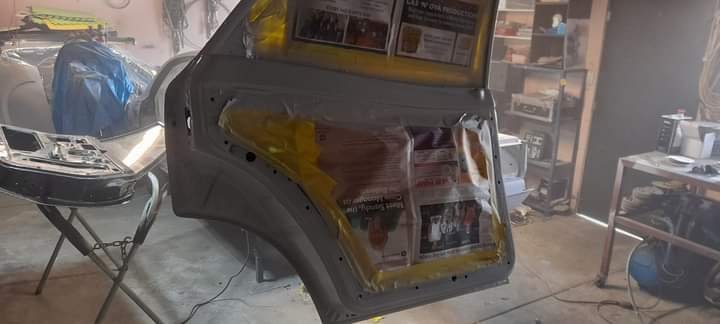
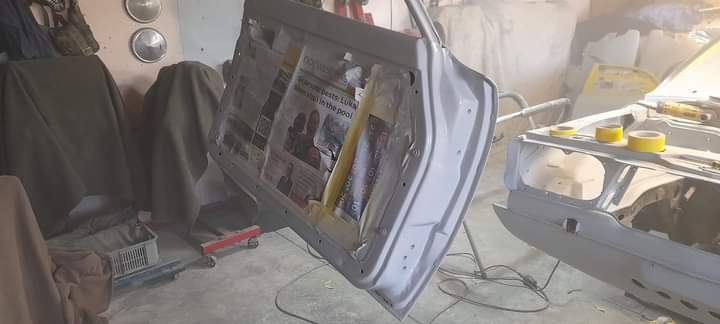
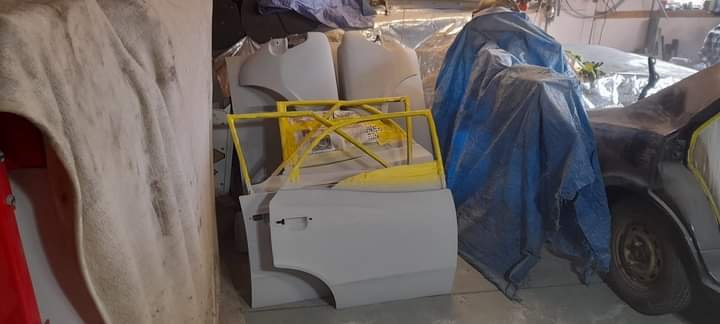
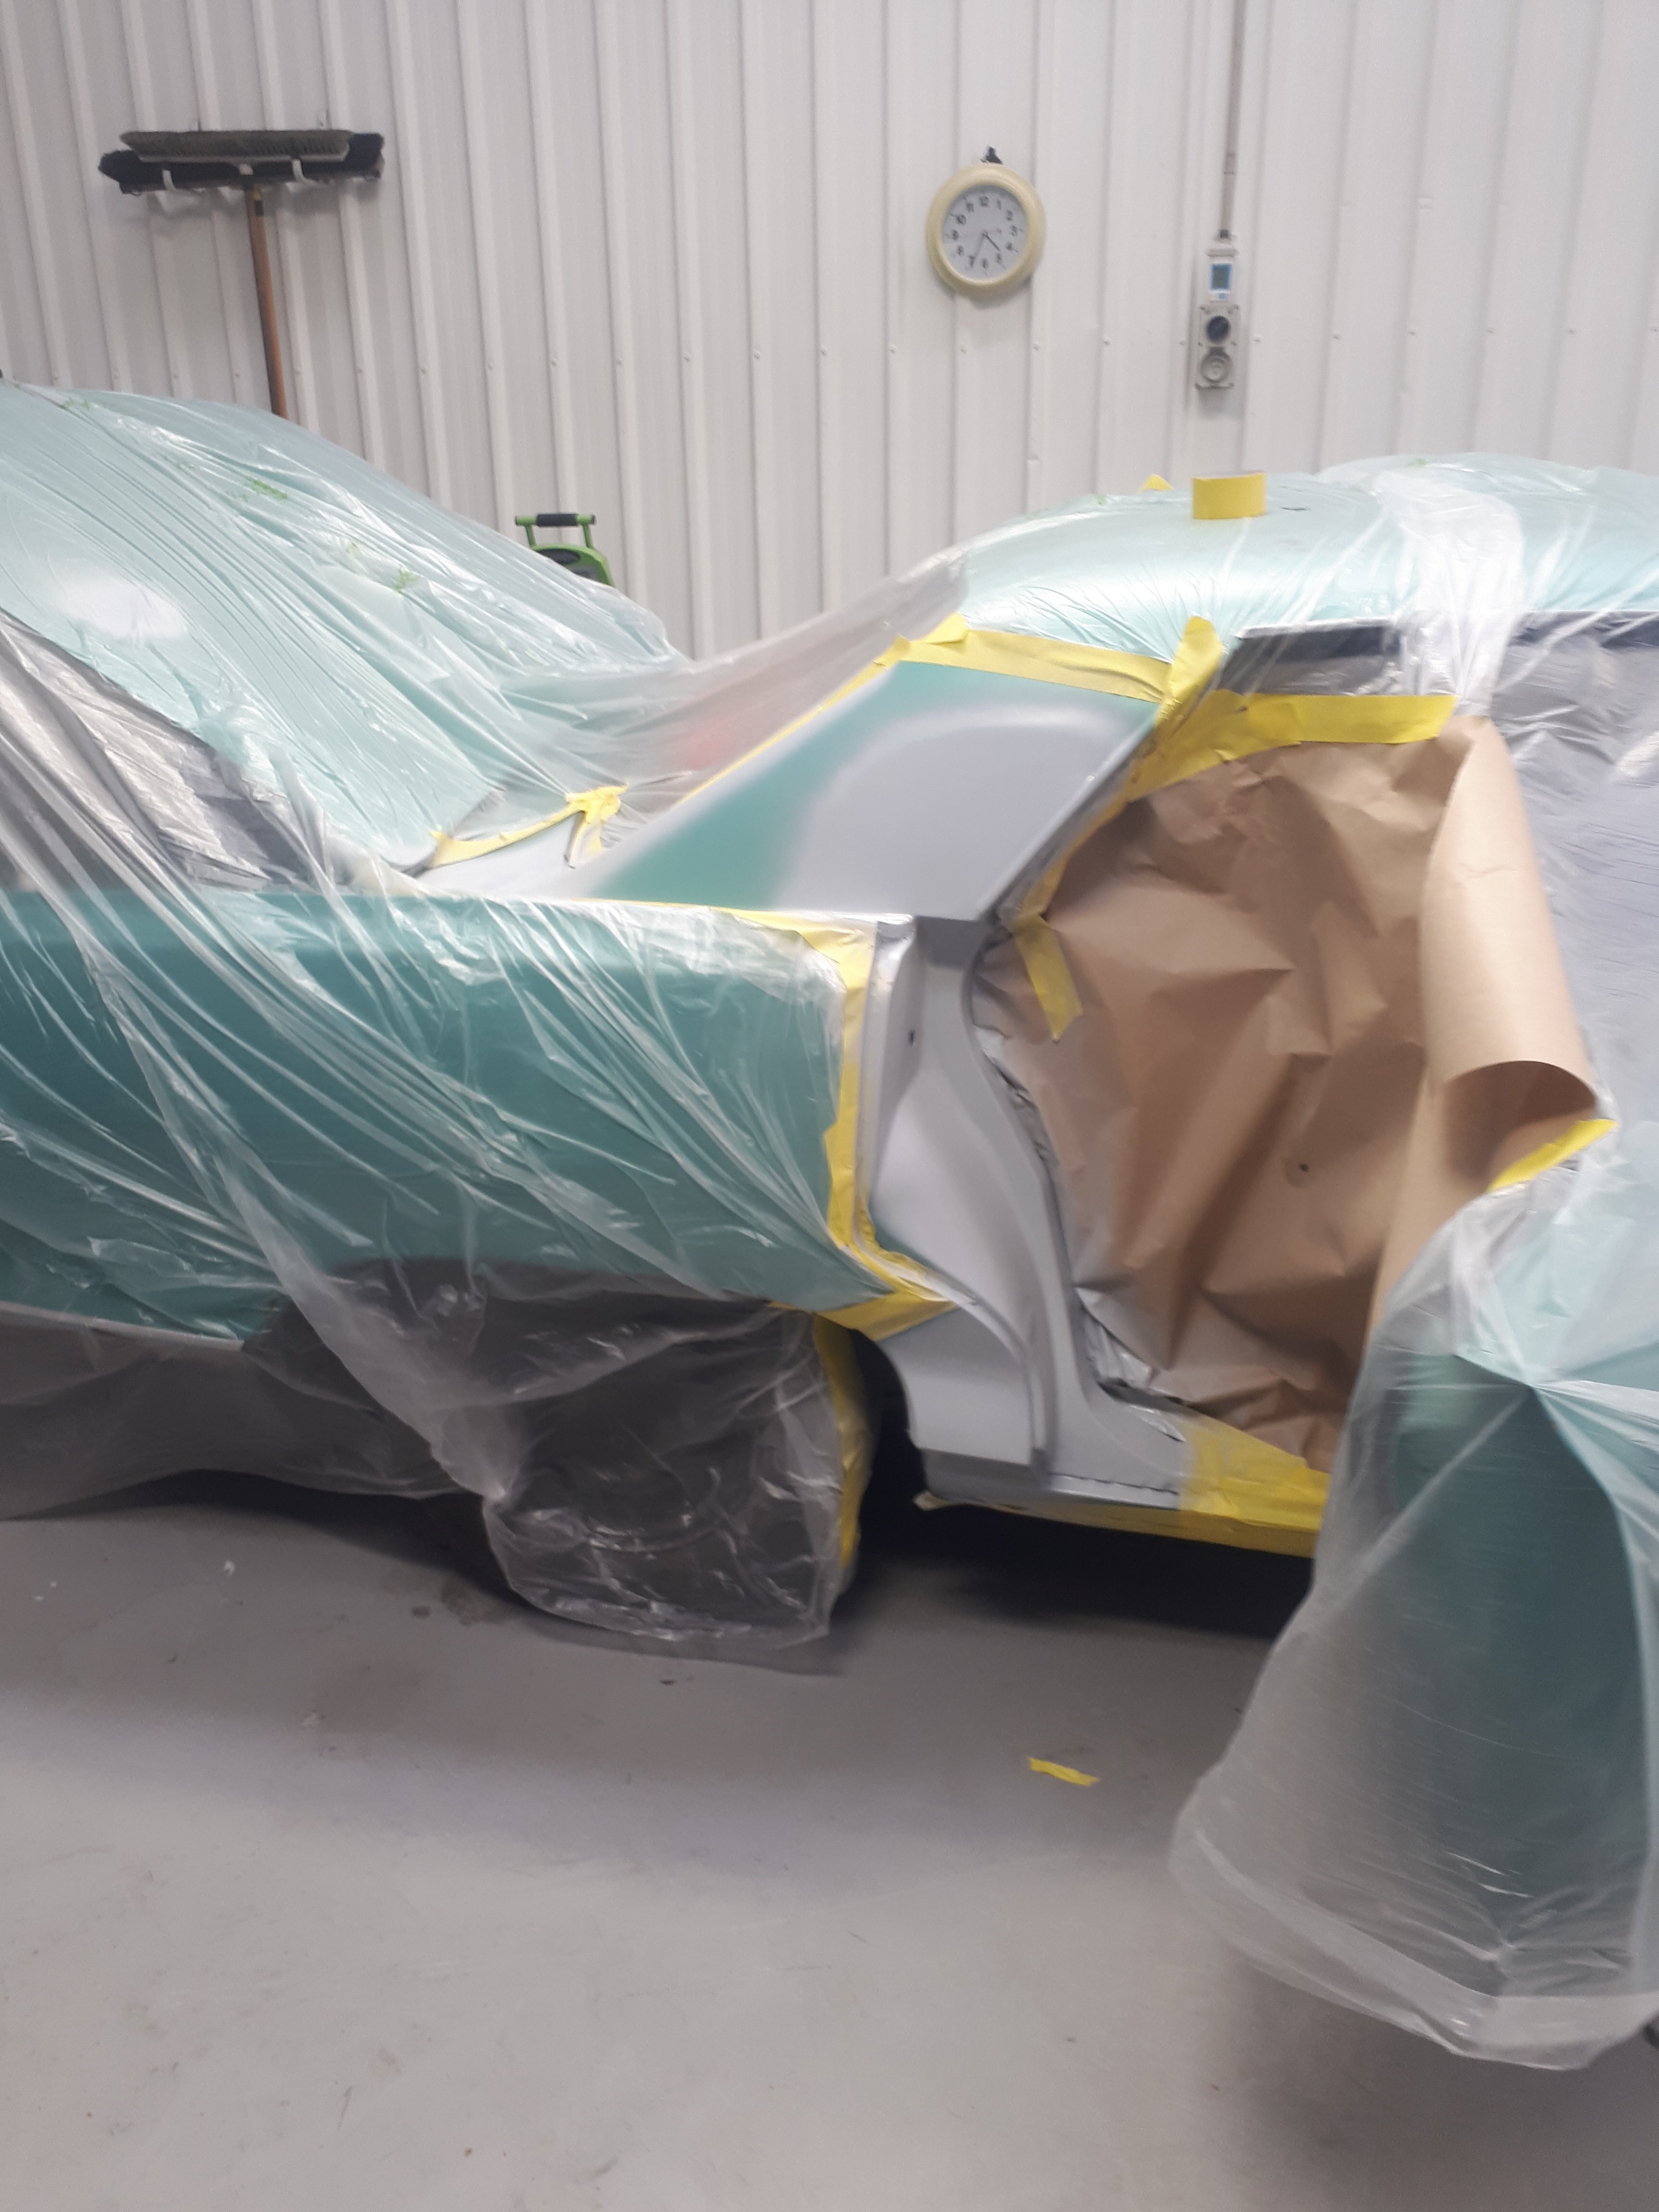
i got all 4 doors sanded down masked and primed.. to be honest the doors are fucking mint.... no sign of any rust.. last was the boot.. I know this had a huge dent right on the curve... I know this as I'm the idiot who did it.. I managed to bash most of it out and then some good old bog and primed top and bottom and last to do is the shell
3 points
-
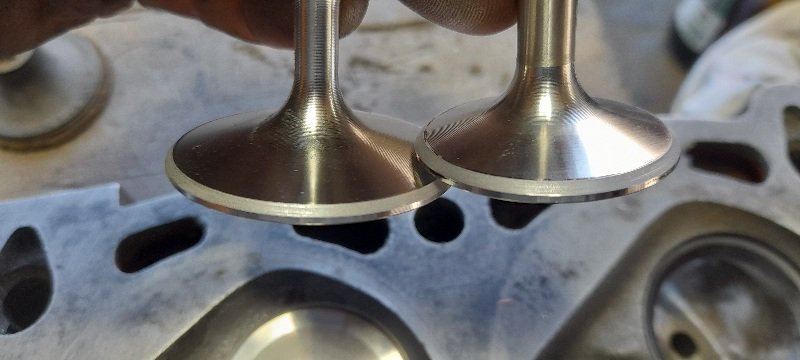
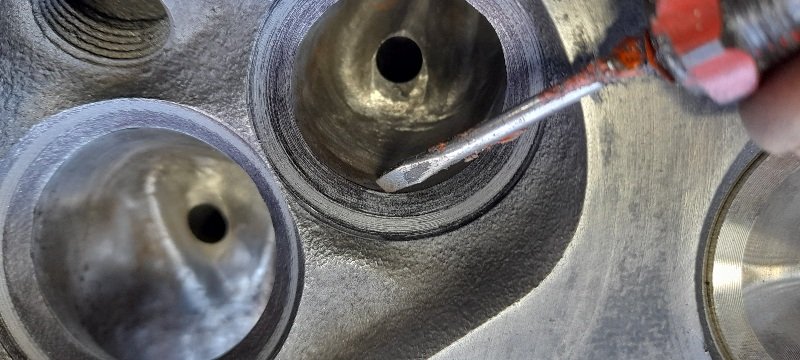
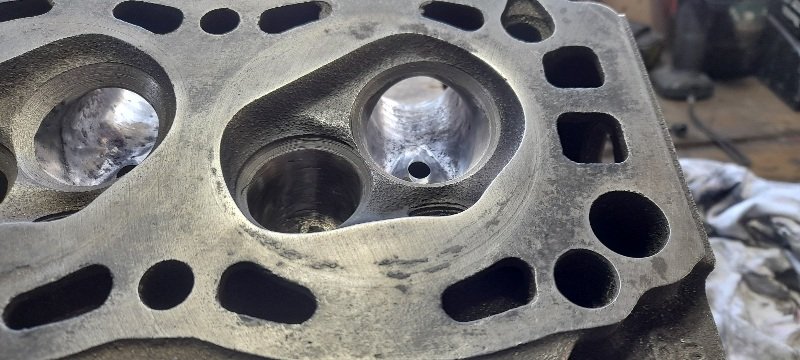
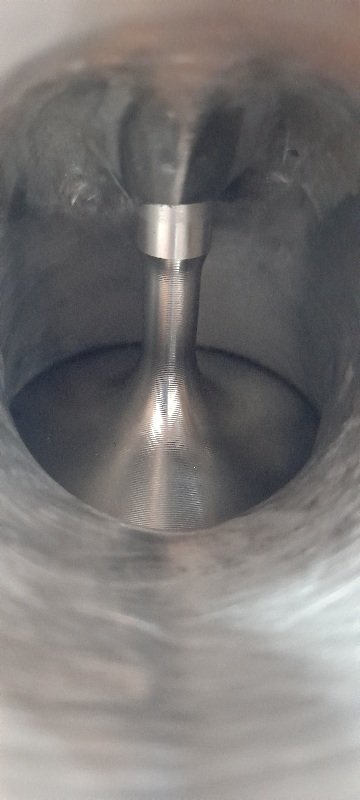
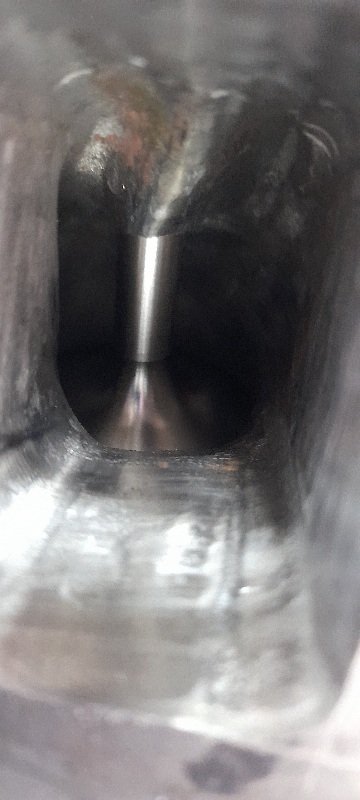
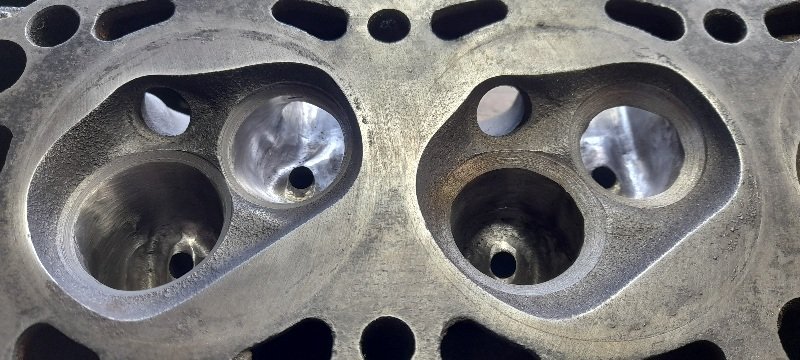
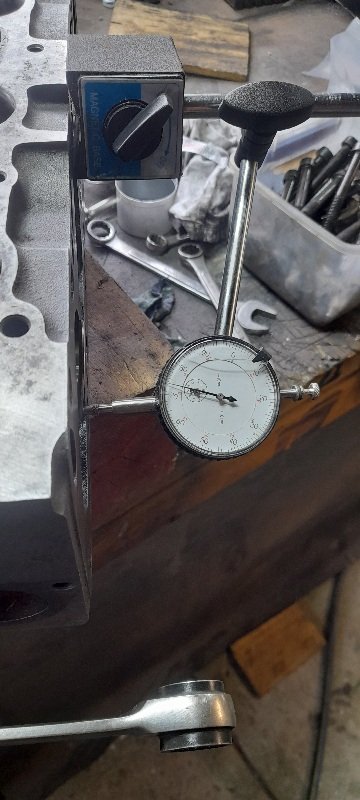
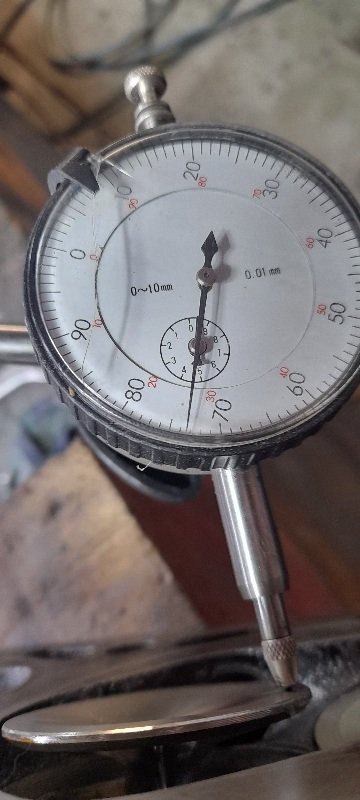
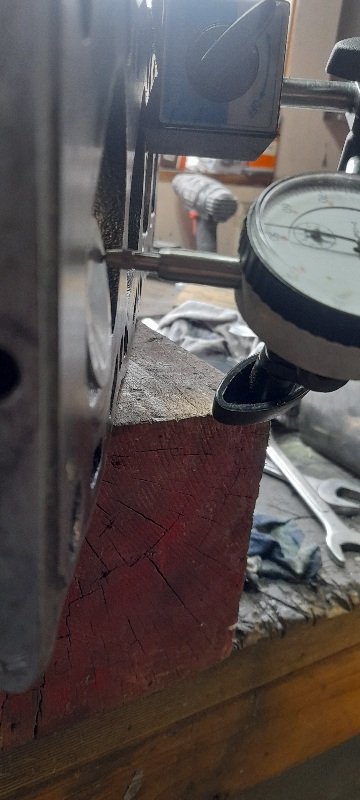
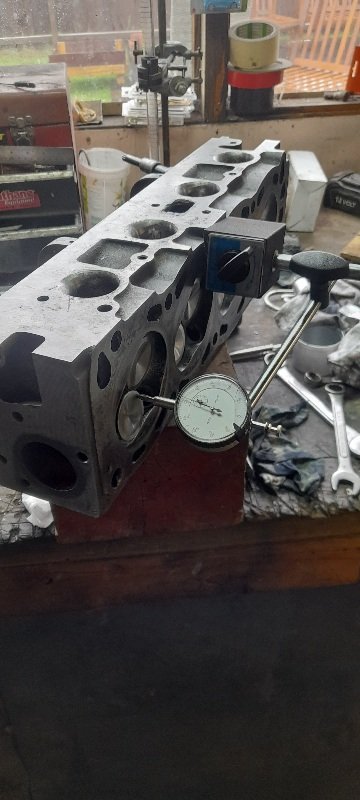
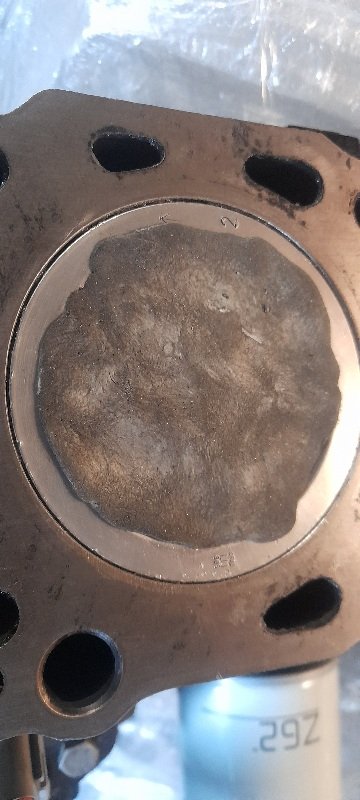
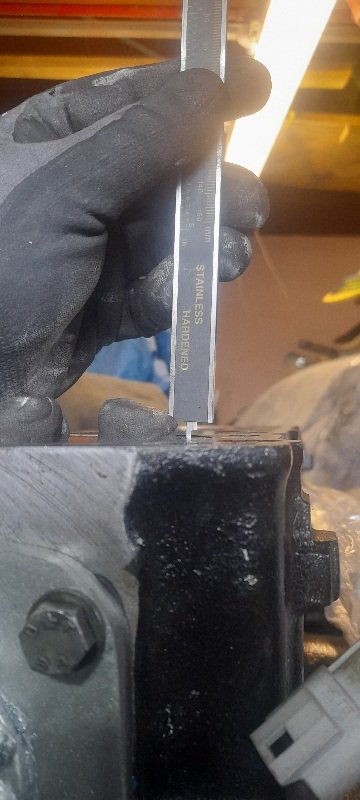
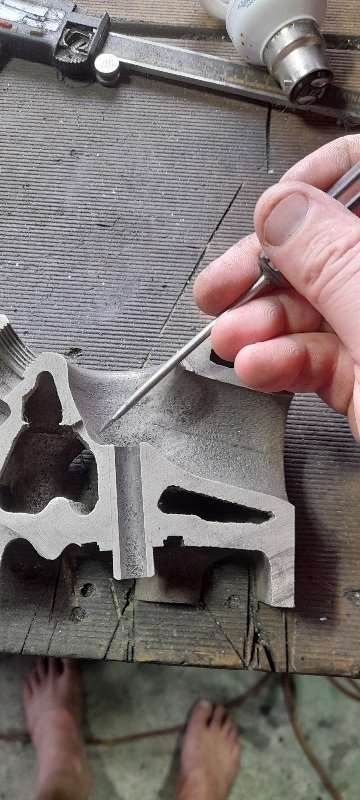
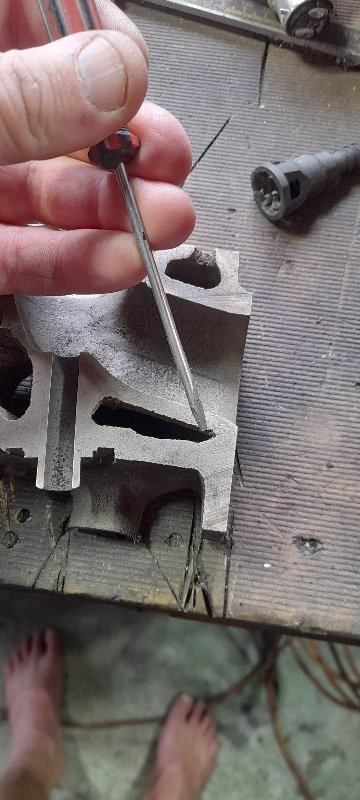
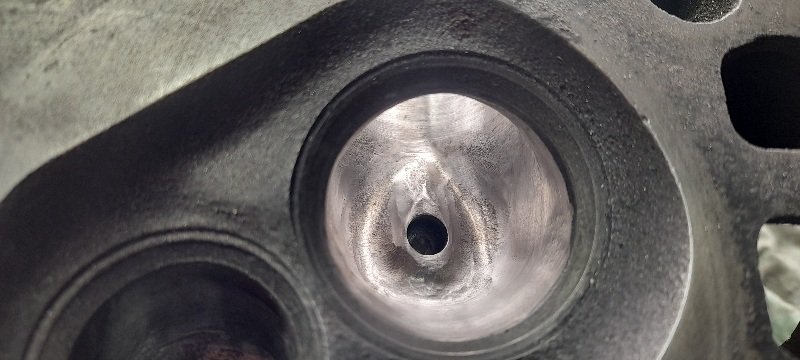
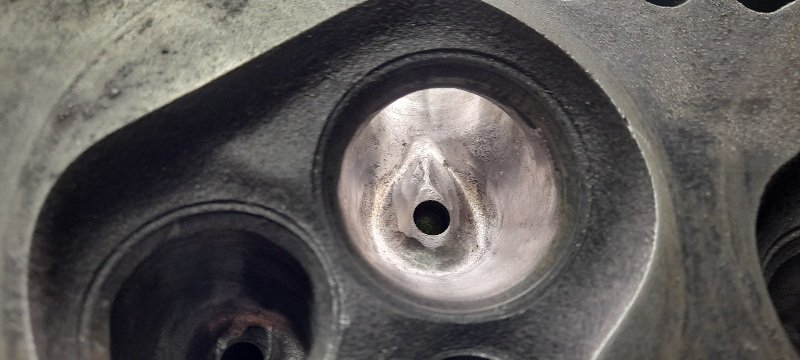
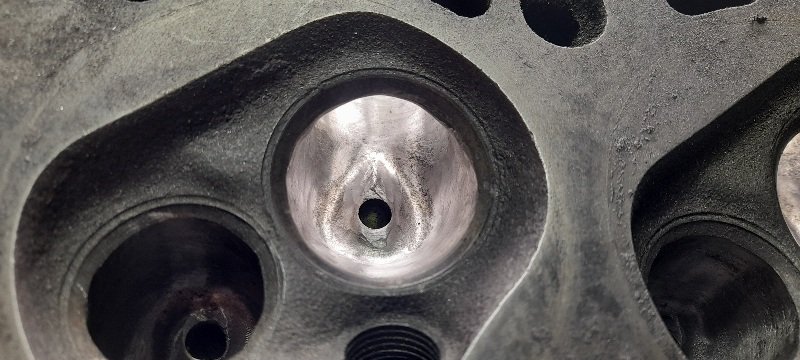
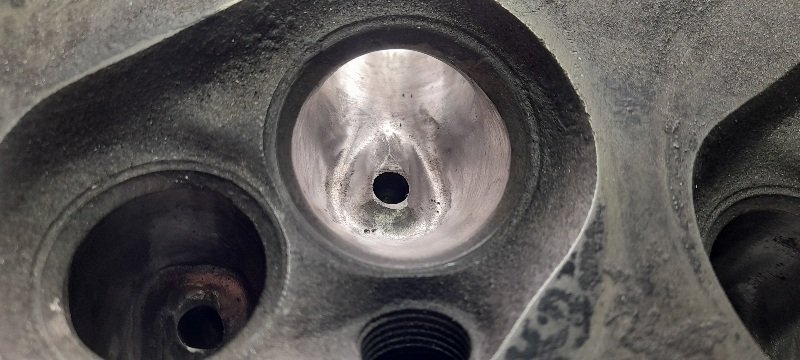
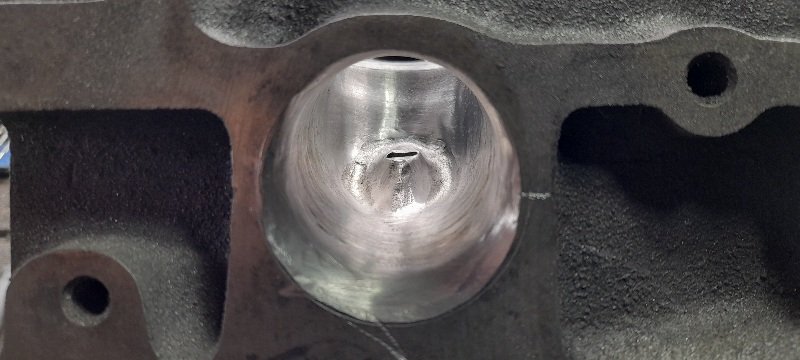
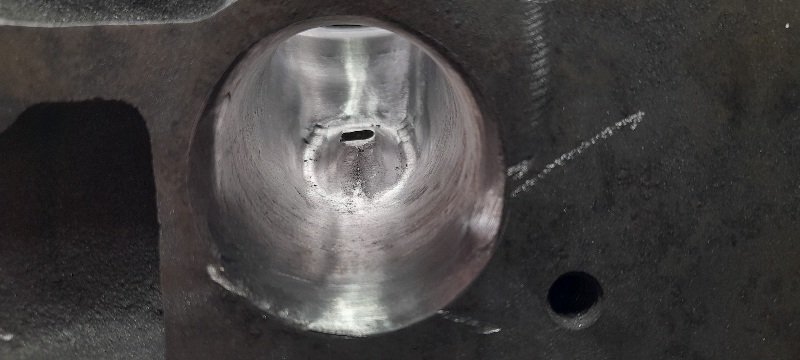
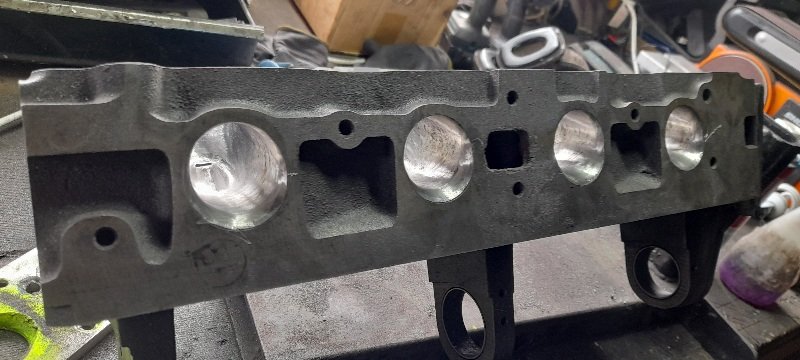
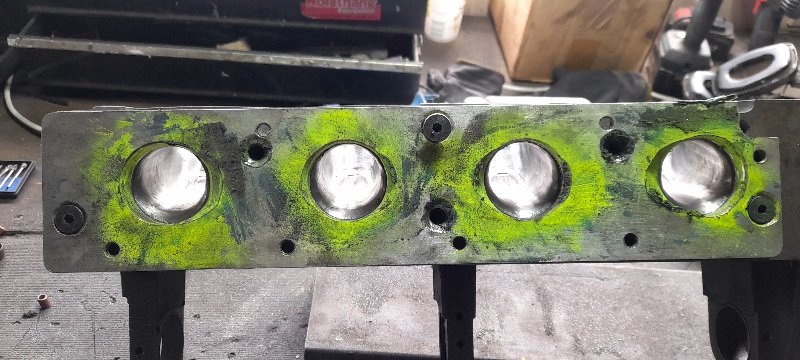
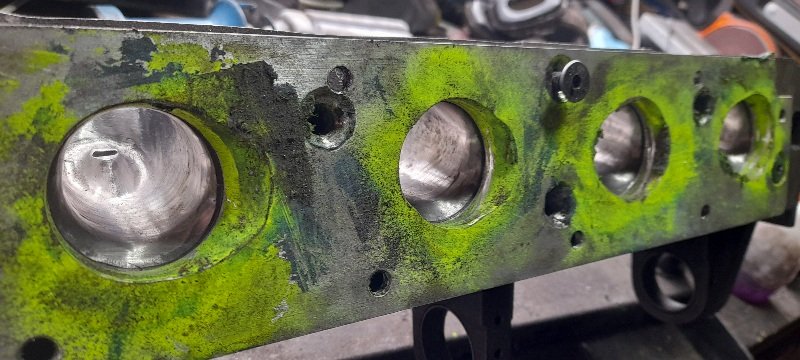
borrowed a mates valves seat cutters and thought it's about time I learnt/ had a go. took some cutting but big valves all in I then got a vivid and cokothe cut face in and lapped the valves. you can see by the black how much I can now open the port upto for the new seat I only got as far as getting #4 done but it certainly opens it and and I was also able to remove heaps more from the inlet port floor where it falls off to the valve seat. opened to valve seats compared to just cut and a shot inside the ports. still got 3 more to do and some cleaning ... then I'll be able to measure the CC and decided how much I want off the head.
3 points
-
The thing which leaps out at me about this build is, with the unaffordability of old rotor shit, that nose cone must have cost a kings ransom?2 points
-
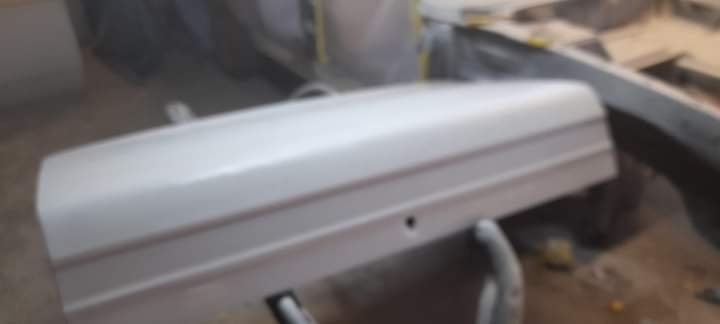
Yes sir, dont tell the mrs. It was a 4k kit right there. It took some courage to put the drill and grinder to it. Mind you i only cut a small puece off it that isnt seen. And used a couple of self tappers to pin the 2 halves together for now. So shes pretty much ad it was. That was my goal for this one...do it better incase it gets damaged. Ill get some fibreglass moulds made of the finished guards too.2 points
-
It's because no one uses CD's anymore* and people want laptops that weigh nothing. I haven't had a CD drive in my PC since forever. On the plus side, USB drives are cheap and you don't have to carry around CD drive components in your laptop for that one time you need it. *Certifiers are made to2 points
-
2 points
-
Gave the repairs a smear of composit materiels yesterday . Primed today . Good enough for now. Will flick some color on it in the new year
2 points
-
Ill be creating its on build thread shortly as its quickly overtaking the hunter . Although that should be running over the xmas break.2 points
-
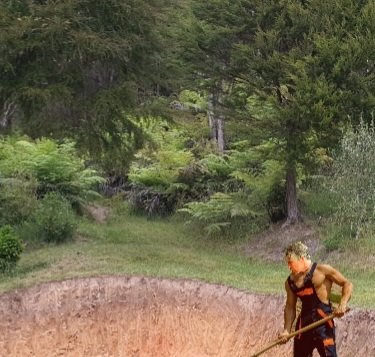
Gonna dig this whole bank out and create some sort of nice seating/eating/chilling area. Started this evening... I'll report back soon - with more muscles. And a sore back.
2 points
-
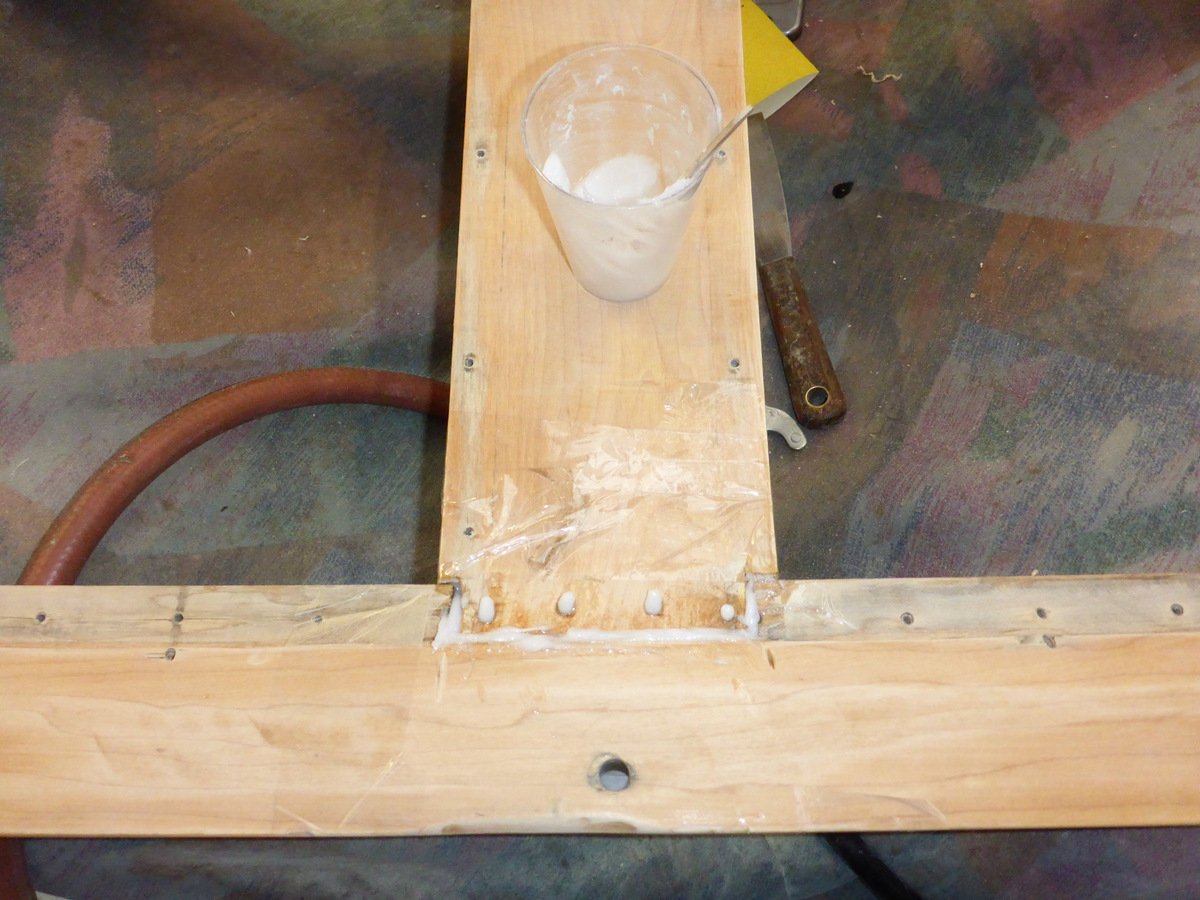
Mixed up the epoxy in 5:1 and brushed some on the joint surfaces first Then added some filler and mixed again. Came out fairly thick, filler ratio isn't very important, just get the consistency you want. Gooped some into the joint And 'clamped' it up. Will see how it looks after 24 hours. I've gone deep on the West System stuff, now everything looks like an epoxy project Epoxyworks - Building, restoration, and repair with epoxy
2 points
-
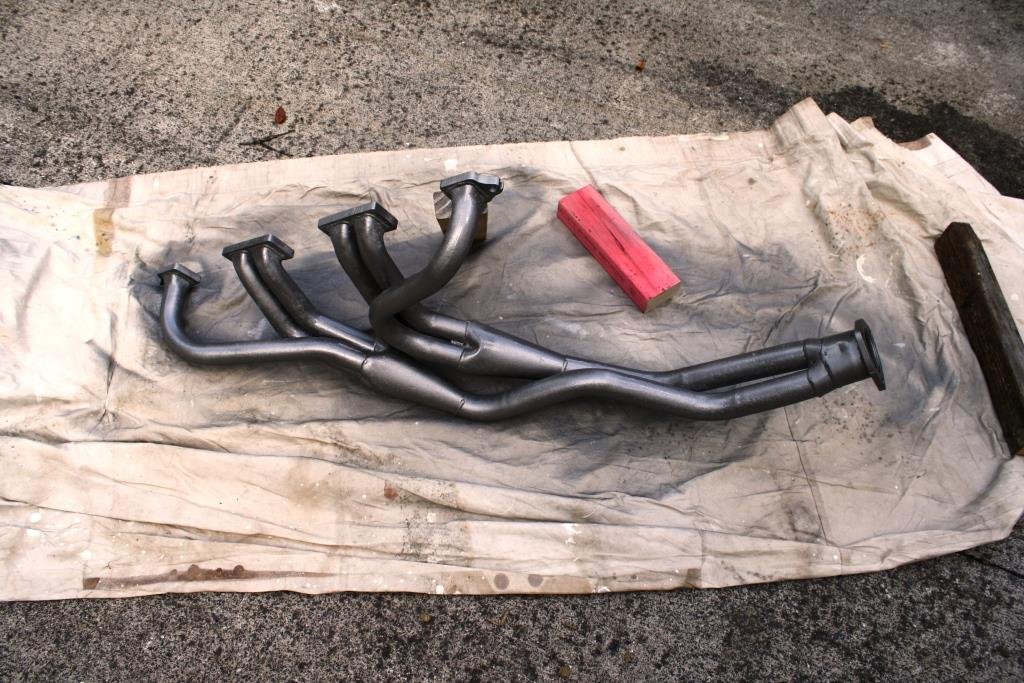
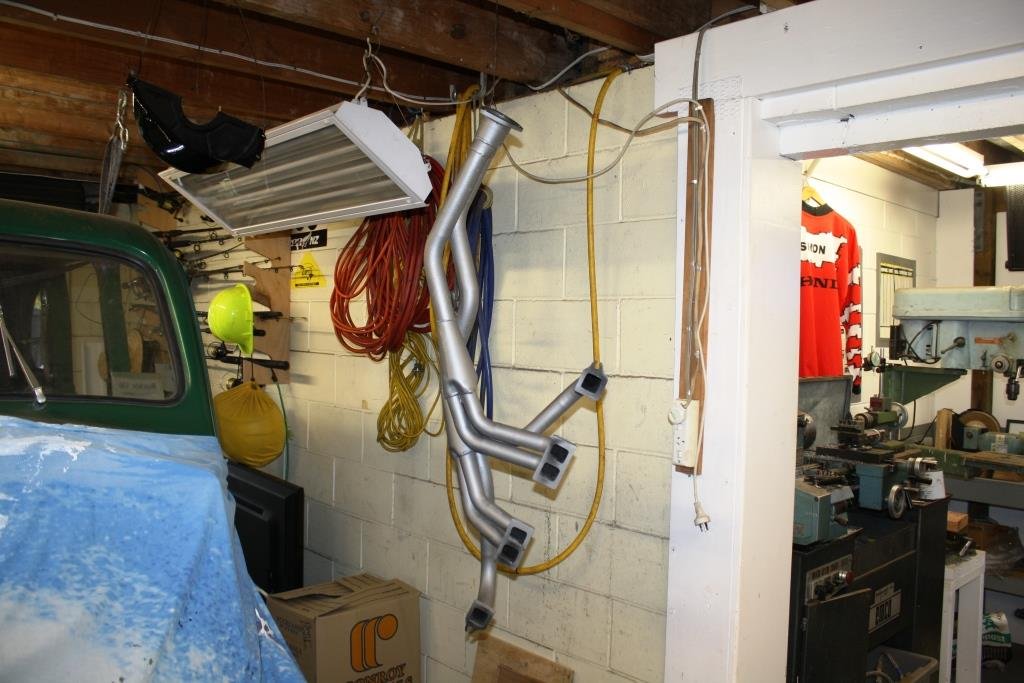
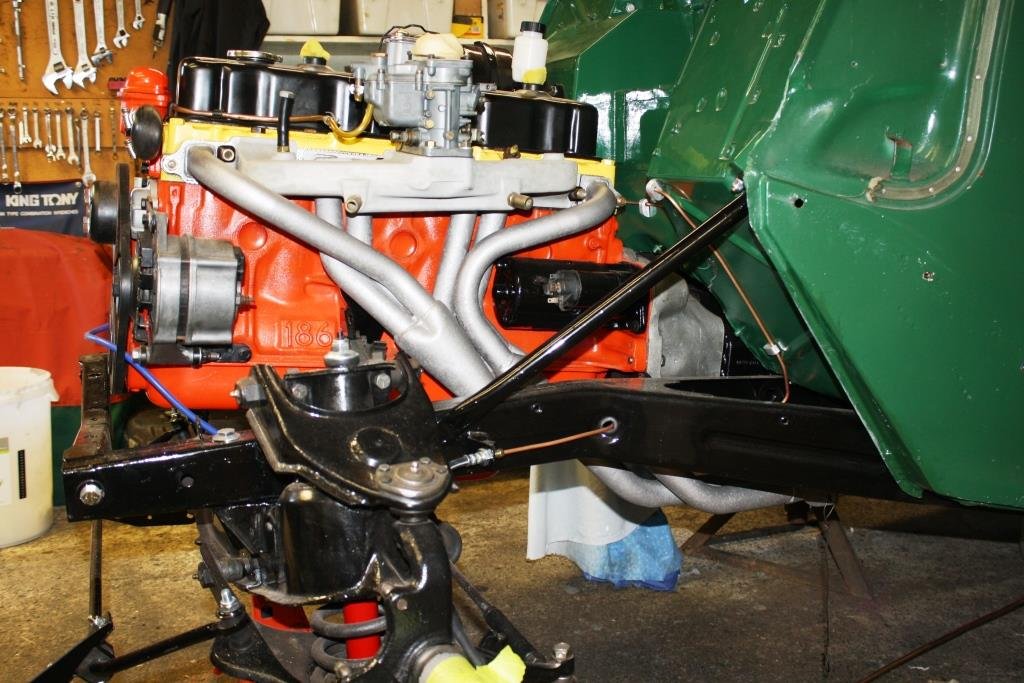
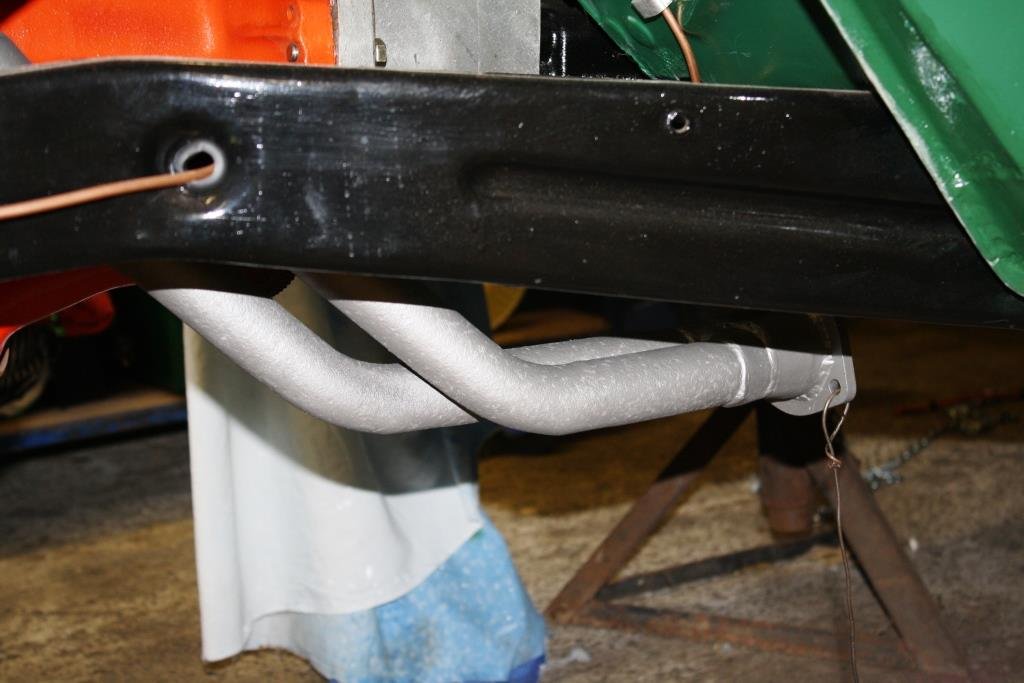
Dug out an old set of HR? headers I had laying around, they looked like a good fit. Cut the old exhaust pipe….. Started fabricating a collector to go from the two into one join into a 2 ¼ inch exhaust. Found some scrap that fitted the “Sticky Flanges” flange…… Pictures are often better than words……… Sits alongside the gearbox in the right place……… Decided sand blasting and ceramic coating was to bigger expense as I plan to build a custom set when I build the stroked motor. Spent some time sanding and rust killing…….. All painted with high temp VHT and ready to fit….. Happy with the result.
2 points
-
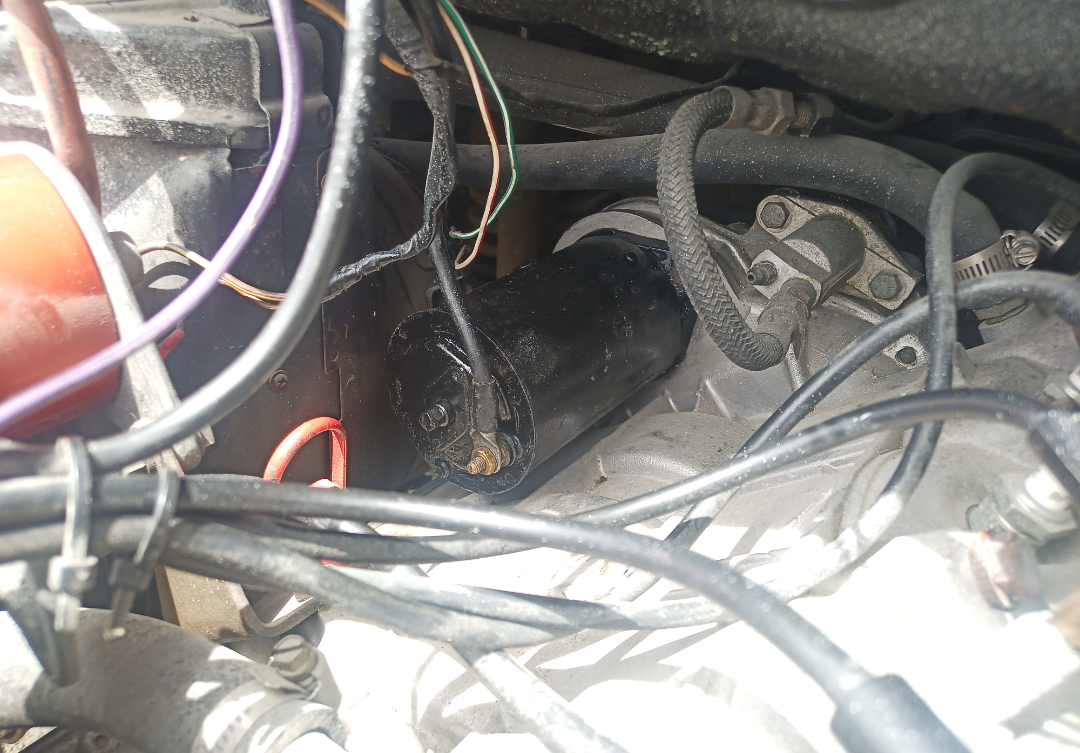
@smokin'joe saved the day by sending me a starter motor. I greased it up and gave it a restoration in a can and it works perfectly. Now I can get it outside to wet sand and ready for round 2 of painting. Like a rat with a gold tooth in there.
2 points
-
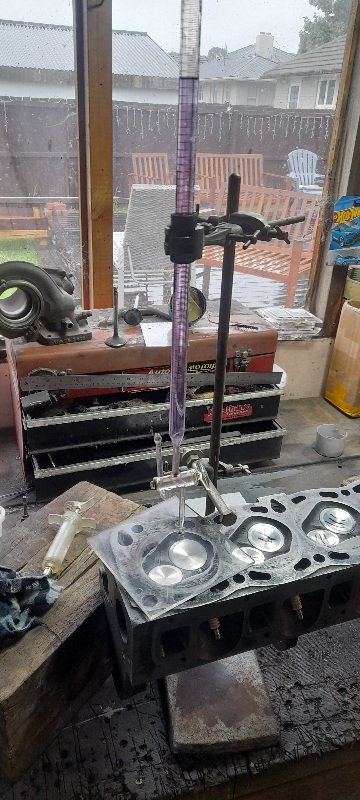
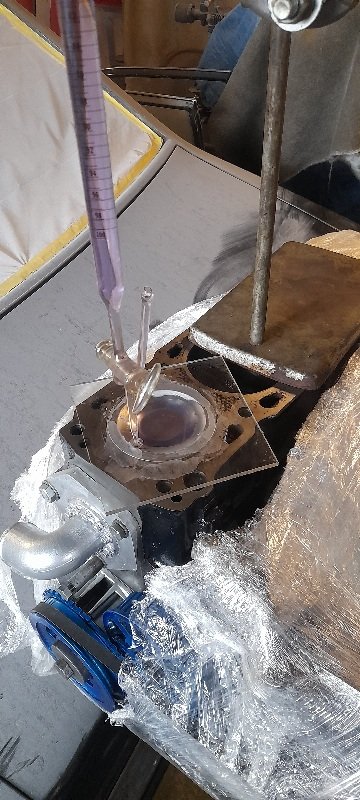
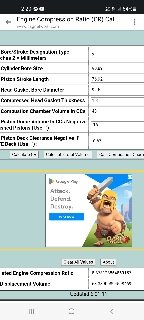
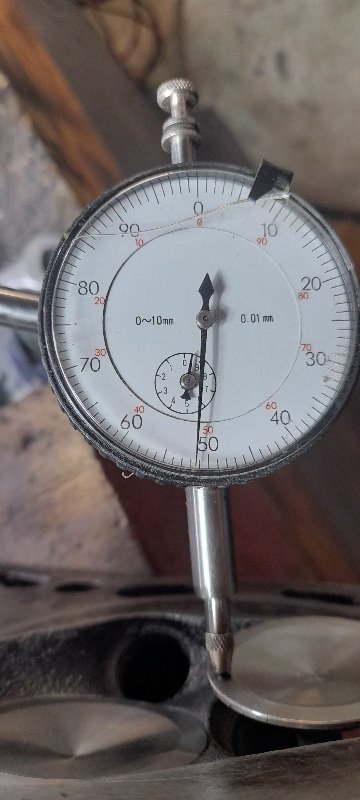
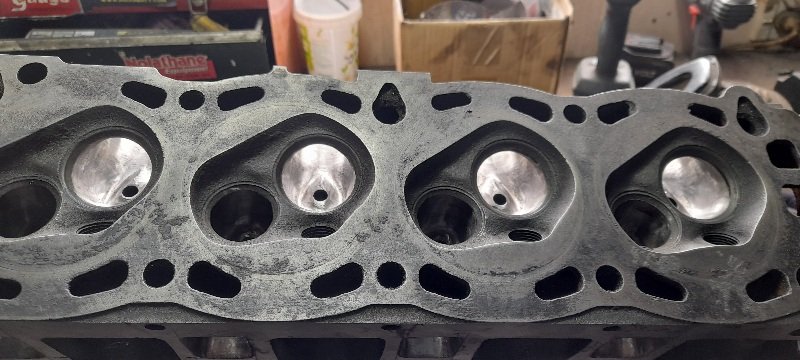
. so today I've been spending time measuring and I'm glad I did.. I measured the combustion chambers (internet said around 47cc factory).. this head has had a skim at somepoint and I got. #1 - 43.1 #2 - 43.4 #3 - 42.8 #4 - 42.9. not sure what is a good tolerance to have between them. measure the dish in the pistons (internet said 19cc -20cc depending on yb cosyears). all of mine came it at 16cc. all that I ended up with 8.873-1 CR I'm after about 9-1 CR so that means if I got the head skimmed 0.2mm that will give me 9.043-1 and if skimmed 0.3mm that will give me 9.131-1 I put some rockers on inlet and exhaust on #1 and also slipped a standard cam in to check some clearances.. inlet lift was 9.73mm and exhaust lift was 9.52mm.. I sacrificed a head gasket and slapped the head on ( with some bluetack ) to see if anything is touching now.... the head gasket squished was 1.67mm (obviously torqued down cold ...but to 85 ft lb) the head gaskets I will be using will be 1.3mm squished. . I realized I had missed an opportunity to see how much room I DO have between valve and piston.... so I stacket up the bluetac and bolted the head down again and put the belt back on.... turns out I've still got about 6mm to play with. so far so good nothing is touching ... so next will be to contact Mr PK at kennelly cams . cheers
2 points
-
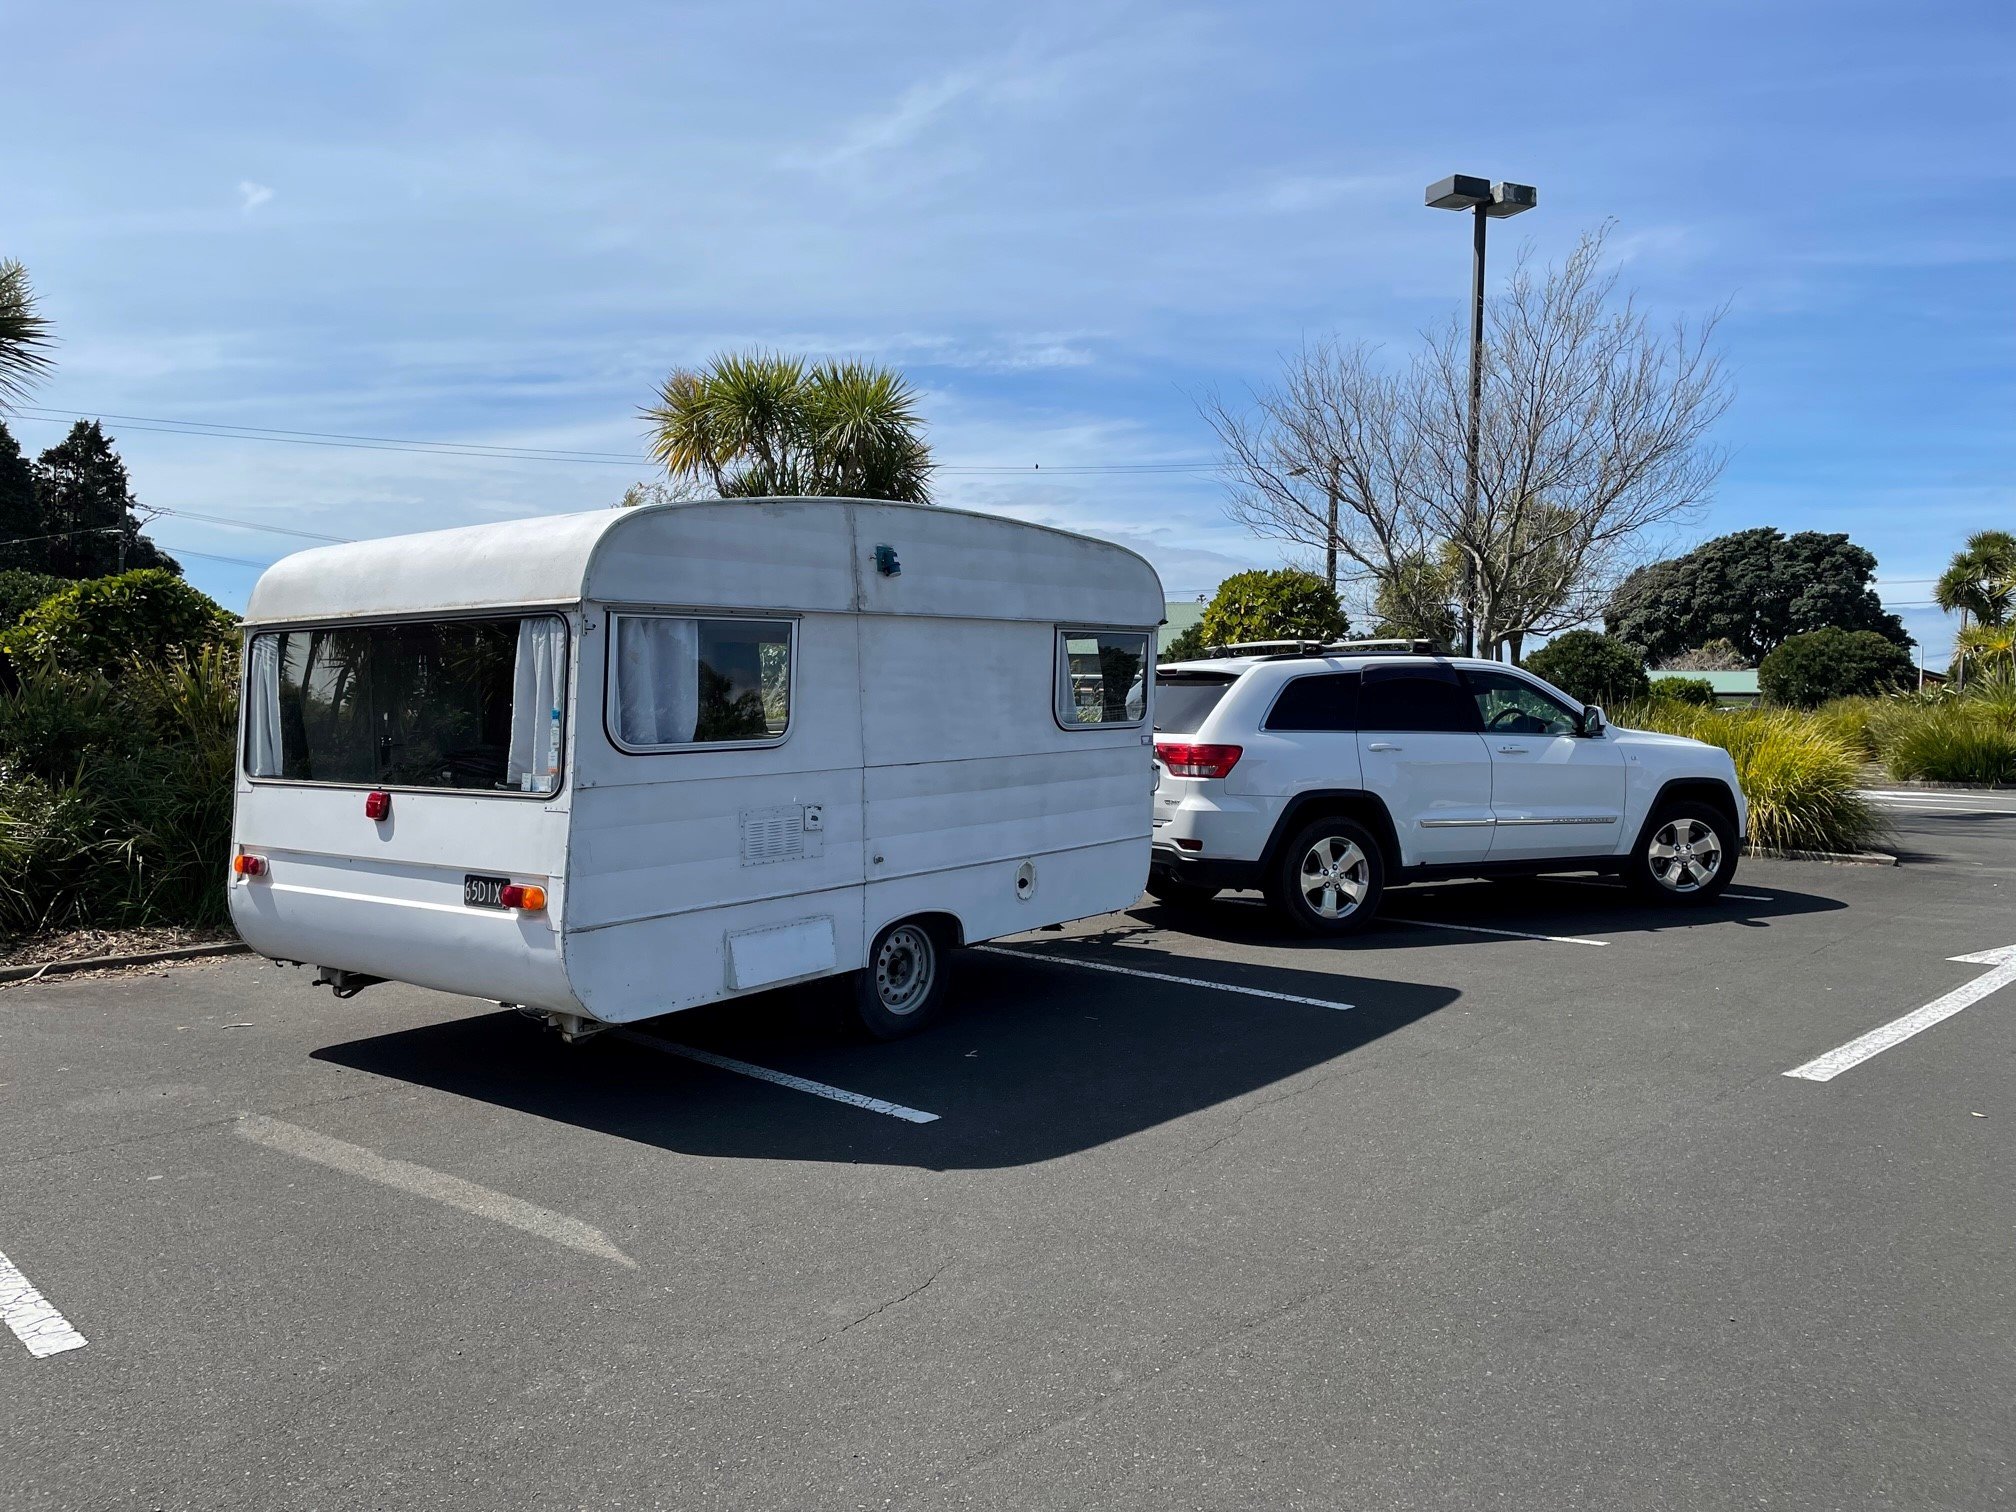
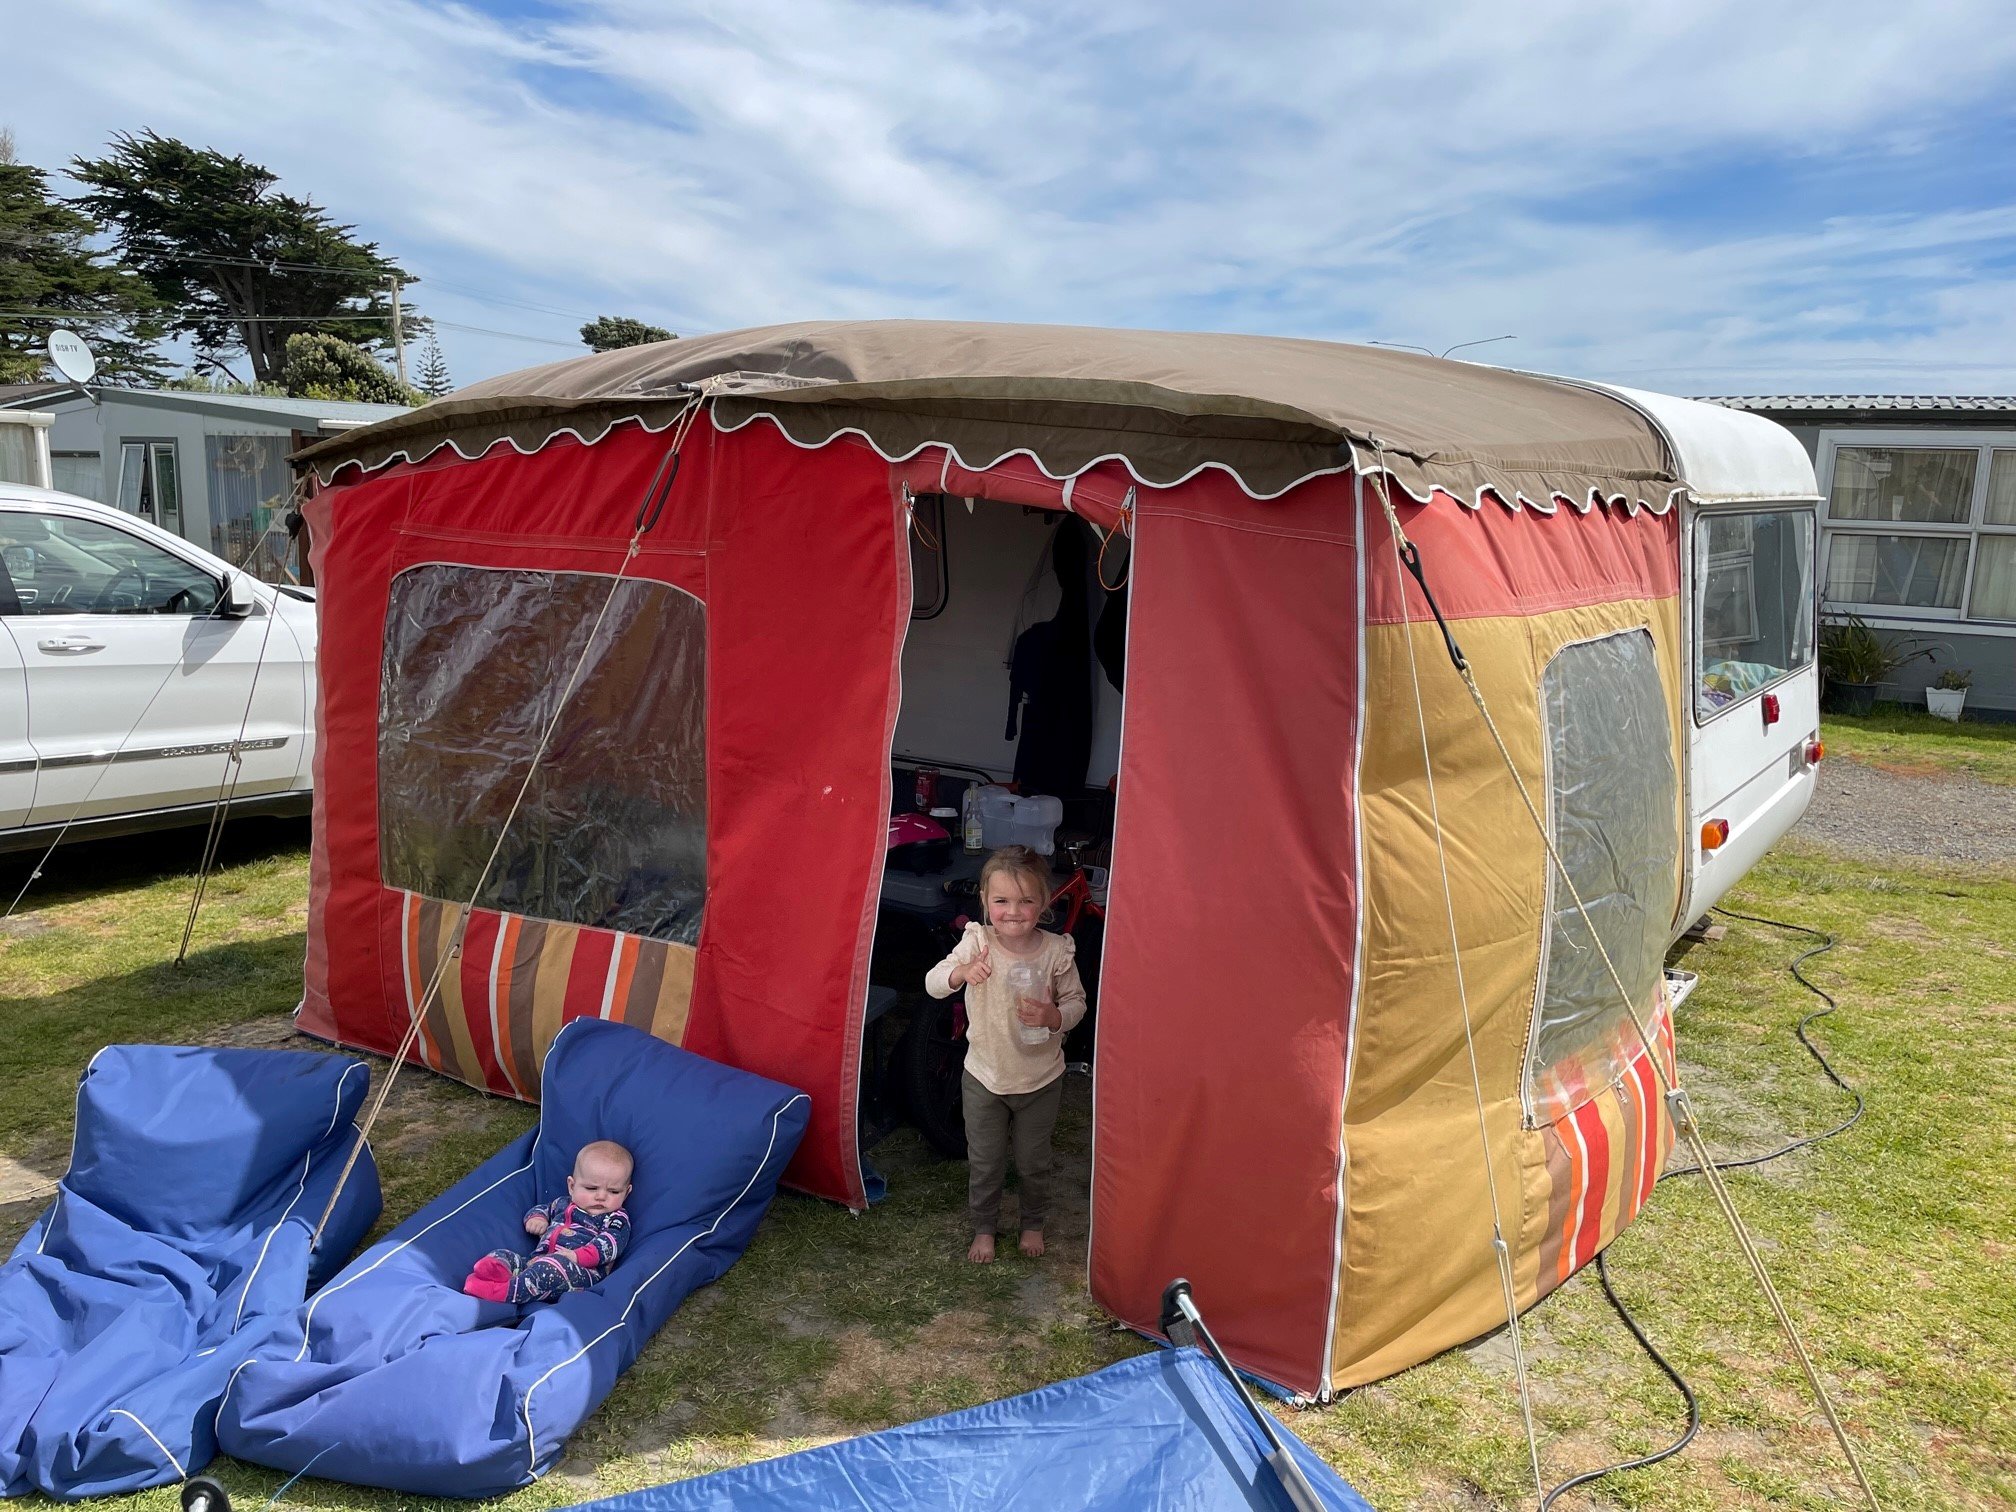
The Himatangi Beach trip was awesome. We had a great time. We were a little later arriving at the camp ground than we had hoped, and had never assembled the awning before... It was getting dark really quickly, so I just threw it all on the ground and asked the neighboring group if they had ever put one up. Suddenly there was a team of about 6 of us assembling this awning, and we were friends with our camping neighbors just like that. Successful trip. Yay! Camping!
2 points
-
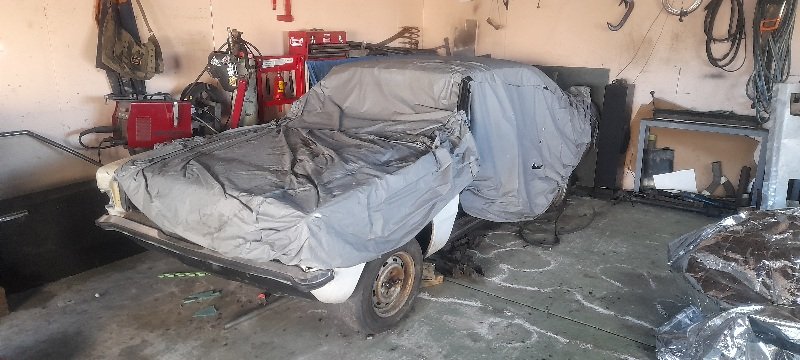
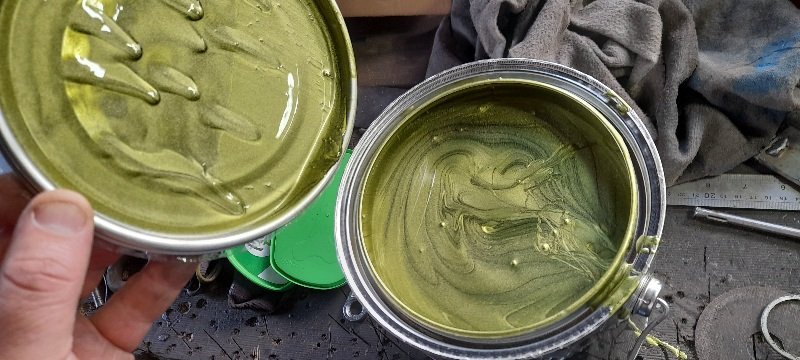
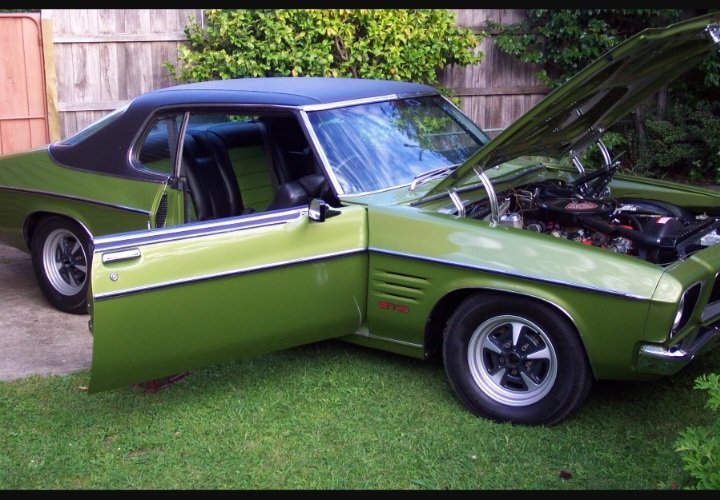
well dues to postage issues and time delays I'm not going to have this running and tuned but end of next month.. so I have decided to pull her apart and paint her now instead of next year sometime.. just do it now and once she is all together and running she's all done just need to get legal.. as for colour I allways wanted green like ford furniture green .. but then started looking at dark metallic browns ... and yhe fucking bang just like that ..a xu1 torana pulled out of a petrol station last week and sat behind me .... and I instantly thought that's a stunning green.. so I got the paint and supplies to start the job.. 1970s holden lime green metallic I also decided I need more room in the garage to be able to start doing body work and pull all the panels off the car. moving the white to the back of the garage was the best way... been years since a cover was pulled off this one. and after a shit load of hours this weekend I'm almost trade to start pulling panels off. body does need a fair amount of work but I won't be digging to deep.
2 points
-
Since the last update we made some signs for the garage. Took a while to decide what to write and longer to actually take some time off other jobs and paint the things. Sketched out the main centre board first which hannah then painted - like a big colouring in book I downloaded various images of car badges and the sketched them out for hannah to paint over. They look good but a bit 'new' so hopefully they'll fade soon enough and start looking old. We'd sort of finished the signs a couple of weeks ago but finally got around to putting them up on Friday. They still need the capping fitting. I snapped some pics that evening. I'll get some pics soon of the kitchen which, but for fitting a built in oven and a couple of bits of trim, is pretty much finished.2 points
-
This is tits! I remember photos of that Ute on here yonks ago. Good job1 point
-
yeeeeesssssssssssssssss1 point
-
Well shit. My expensive $800 Optrel panoramaxx 2.5 helmet I bought in 2019 doesn't charge anymore. The battery is supposed to "never need replacing", so is not user accessible. The helmet still works while the charging cable is plugged in, but totally dead when unplugged. I've optimistically emailed the supplier in the hope that it's a known fault and covered by some warranty. I really can't justify buying a new one every three years.1 point
-
1 point
-
I always imagine that the CD's sent to LVVTA just get stored in some vast vault underground
1 point
-
I haven't done much lately but worked up some motivation to sort this mess. I did a bit more to the template I had started earlier, cut some wood, cut some metal, bent some edges and ended up with something better looking. The curvy bits are the lugs for the ECU tray to bolt to. I tried to keep it as open as I could so as not to restrict airflow too much. There is still a bit more to add to it like some holes and captive nuts plus the oil cooler sub-bracket. Old and new I also fit the water pump controller and tidied all the wiring. There is not much space for extras but the wheel tub gives a nice clear view.1 point
-
I really couldn’t help myself - the 14x8 prostars are on with the 245 50 14 nankangs. morenfor Eagers preservation more than anything…. GT gas cap is en route and I cannot wait to fit it Koni short shocks will be ordered soon and then slamming time with reset leaves and super low springs
1 point
-
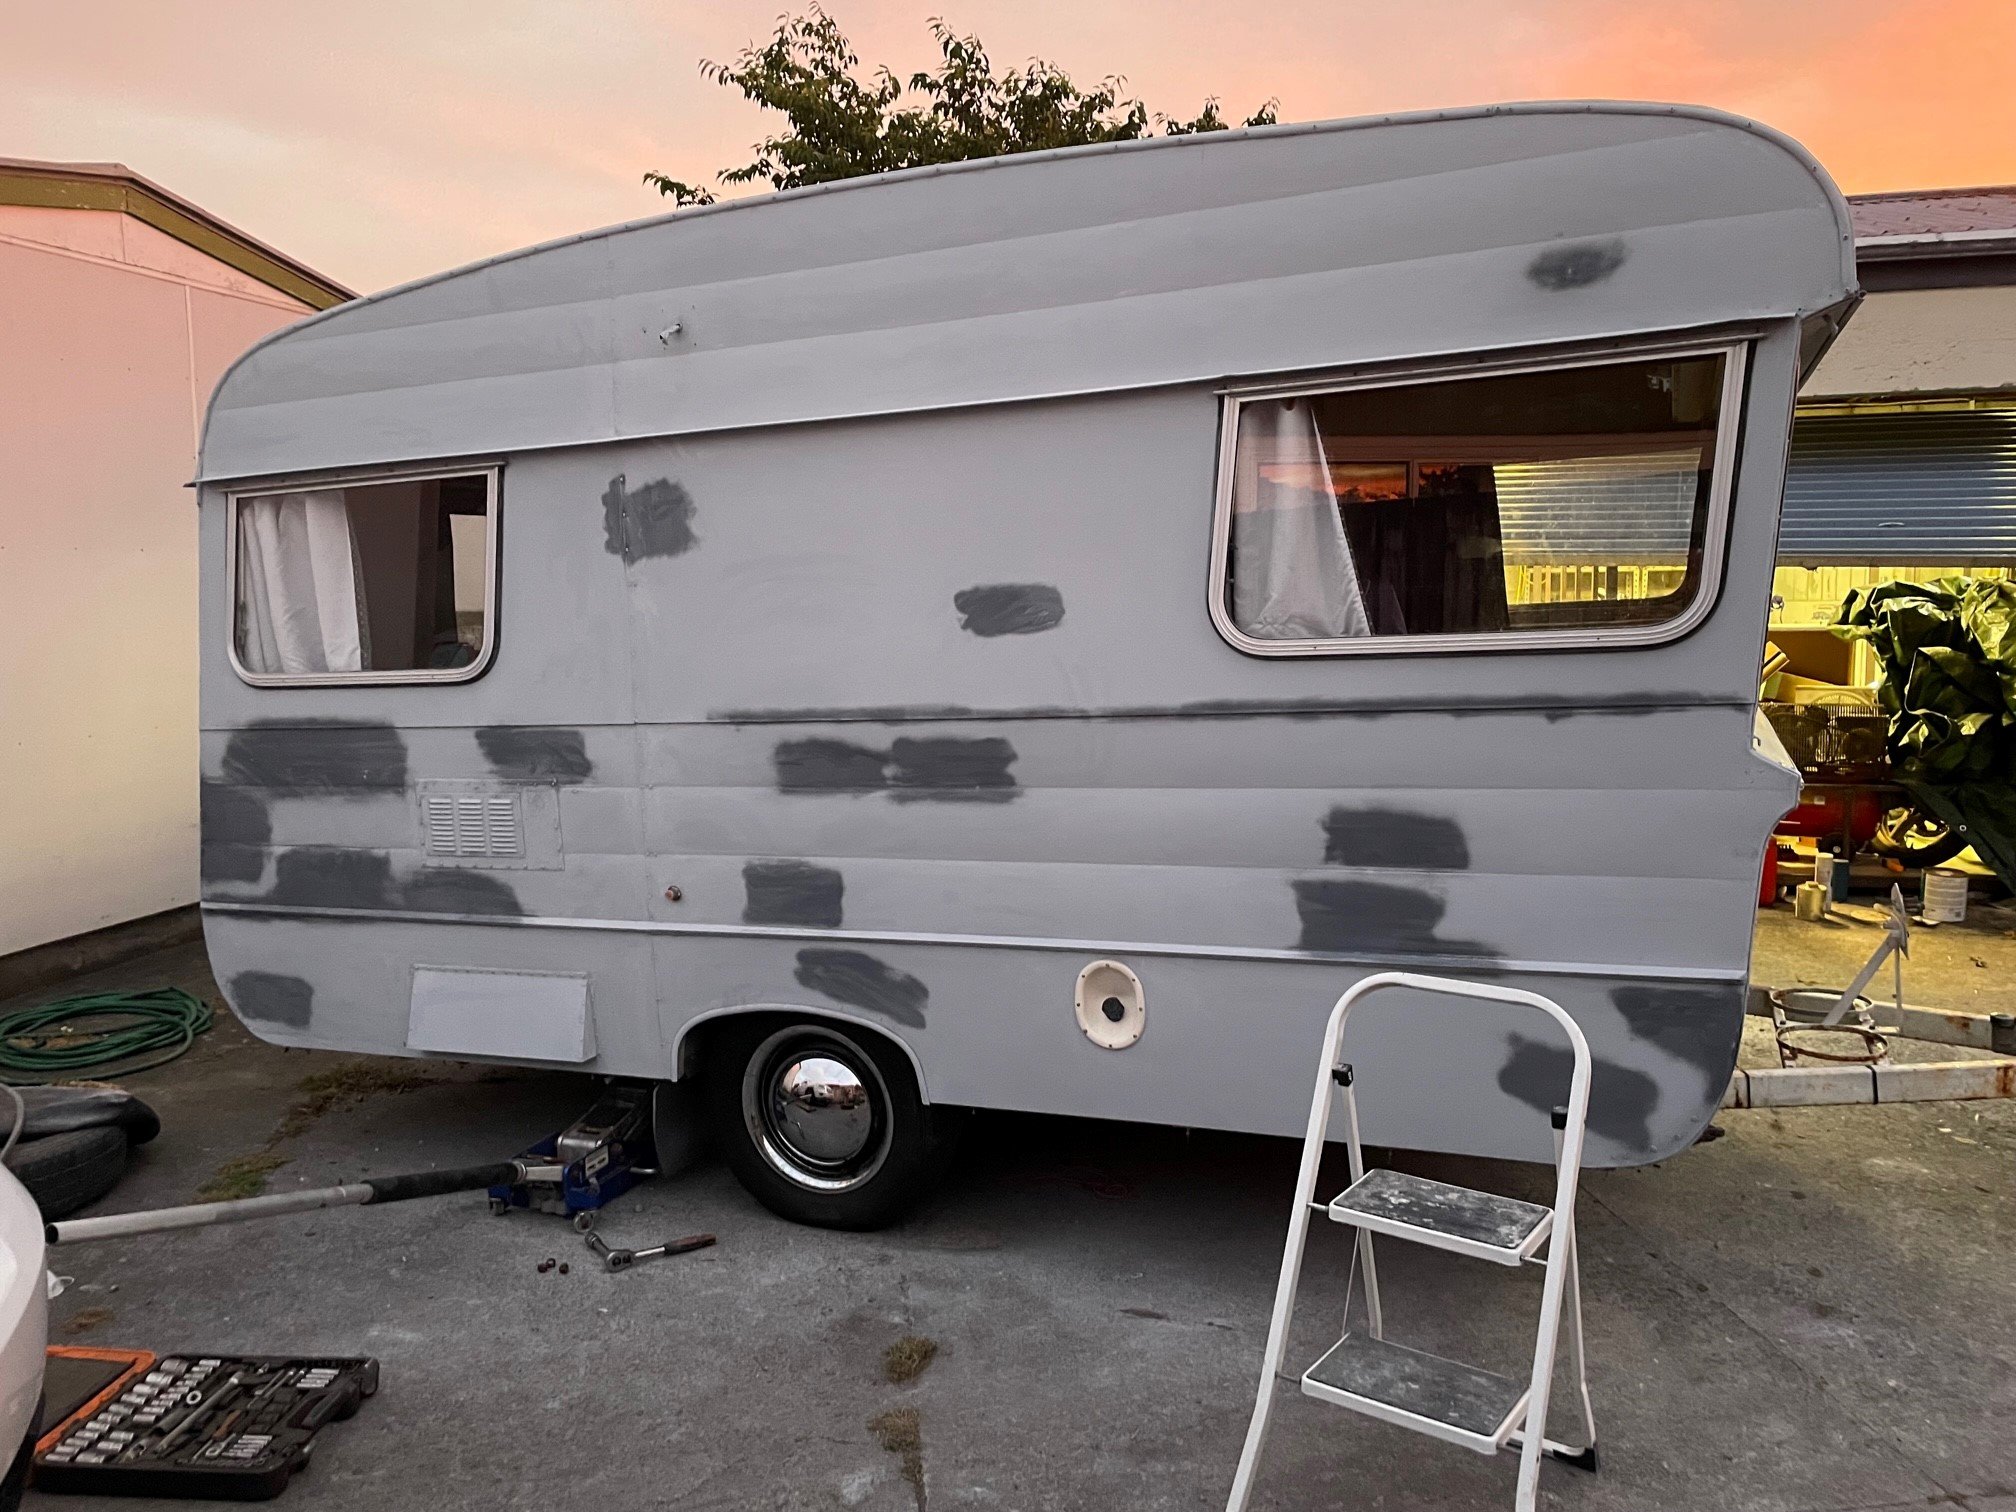
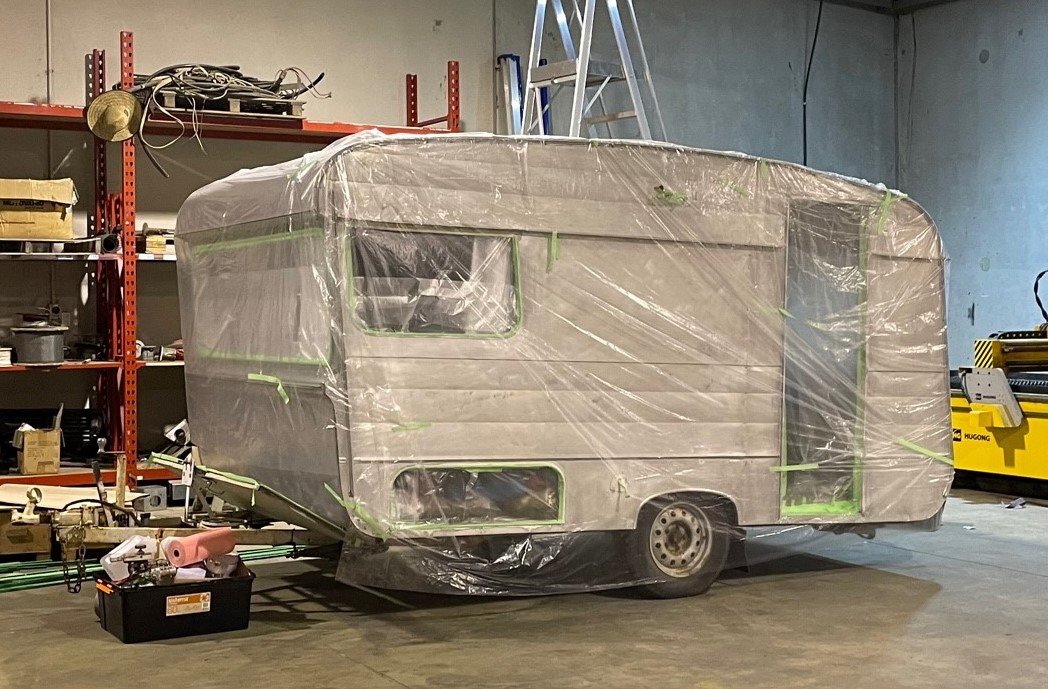
I had hoped to get him into primer on Sunday, but by the time I'd finished the rails, then done all the masking and wax and grease remover, it was midnight on Sunday night. I've been borrowing some floor space in a local workshop, and was supposed to be out of the way before they opened again for the week I hid the caravan in the corner of the workshop under a cloak of un-invisibility (pictured below) to get through Mondays work day... Then come Monday after work I got stuck in. Etch primer: I suspect I laid the etch on a little thicker than its supposed to be. The paint salesman told me it goes on thin, just a dusting... After emptying the gun the first time and the realisation that "holy shit I'm gonna run out of paint fast at this rate" I dialed back the settings on the gun a bit. Followed by the primer. I finished up and got into bed at 1am, and then back at the workshop at 5am to un-mask and put it back together enough to take it outside and get it out of the way before everyone started work for the day. Now I've got an acre of sanding / filling / sanding / spot priming to do before he goes off to the painters. Pretty stoked to be at this milestone though.
1 point
-
Blackened1 point
-
Well I did spray bog the top of the quarters Tuesday , didn’t have much left so practically one decent coat. Then Friday evening I found the expensive 2k spritz I forgot I brought last year when I was doing the doors! So I sprayed a few coats on the tops of the quarters and Down the Swage that runs half the length. Saturday was a nice hot one so I was all geared up to prime, but the spritz was too soft.. spanner in the cogs but ok, I’ll do other stuff and prime Sunday. Sunday comes and it’s pissing, there’s too much moisture in the air to safely spray, but that fucking spritz is still soft. Could scratch it with a fingernail like fresh house paint. Monday is warm, that should cook it off. It didn’t. here I am laying into my putty-covered finished bog with 18 150grit pads on the sander, clogging up faster than the shitter at a cheap restaurant. dogs cock, fucking defeating. I’ll prime it tomorrow after work cause it’s supposed to be hot. Wet weekend forecast so it will be perfect for me to start blocking it by then. This spritz thing will bite me in the ass ~ not sure where or when but soft paints don’t tend to lead to 100% success rates. While I wasn’t able to spray, I cleaned and vinyl dyed my door cards and sun visors, drilled holes in floor and half installed gas pedal, oil changed for some Penrite diesel oil with zinc I got in a deal that will help clean the engine initially. Also found some engine bay ‘inspection flaps’ I’d forgotten about so cleaned up and refurbished the clips. Re-painted some other clips and the marker light housings that got a bit wet and a bit crusty while stored. Spread some bog on the front spoiler and got that ready for primer too. No pics sorry, the door cards look all wrinkly and shitty by themselves but will never notice when installed1 point
-
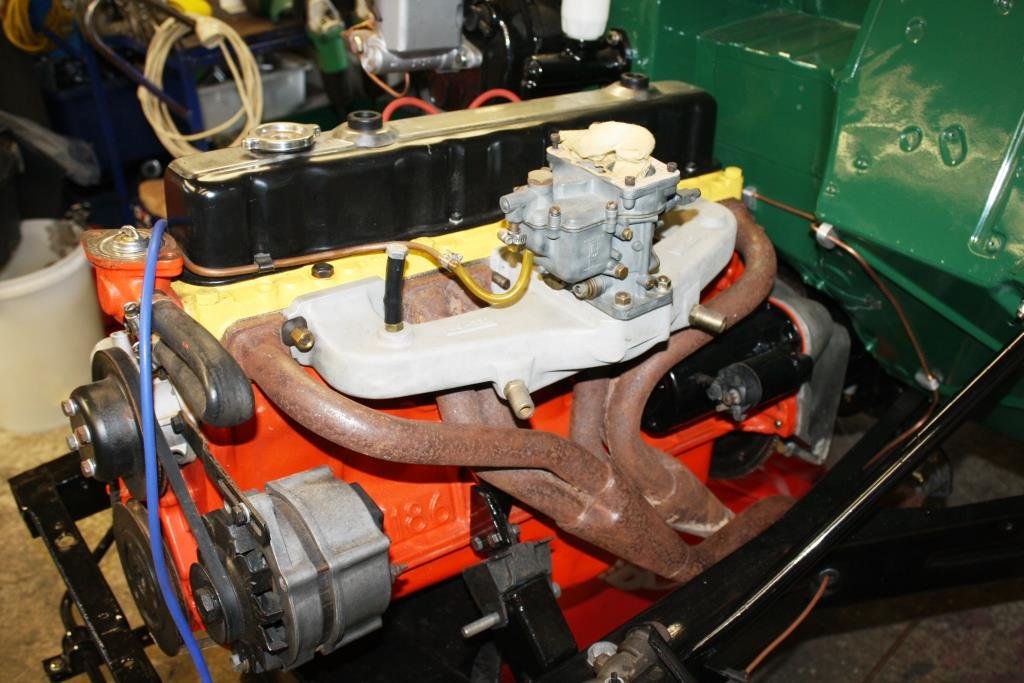
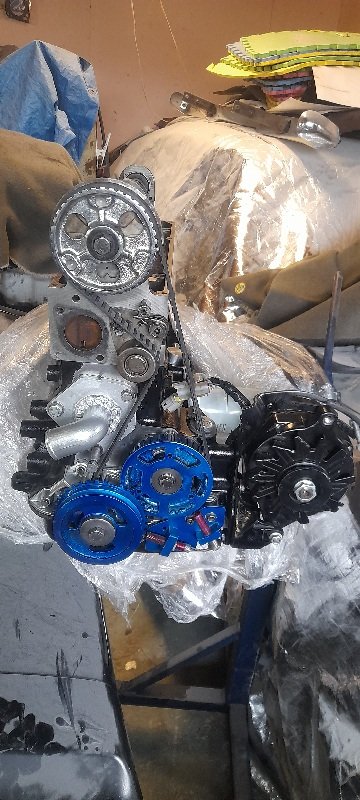
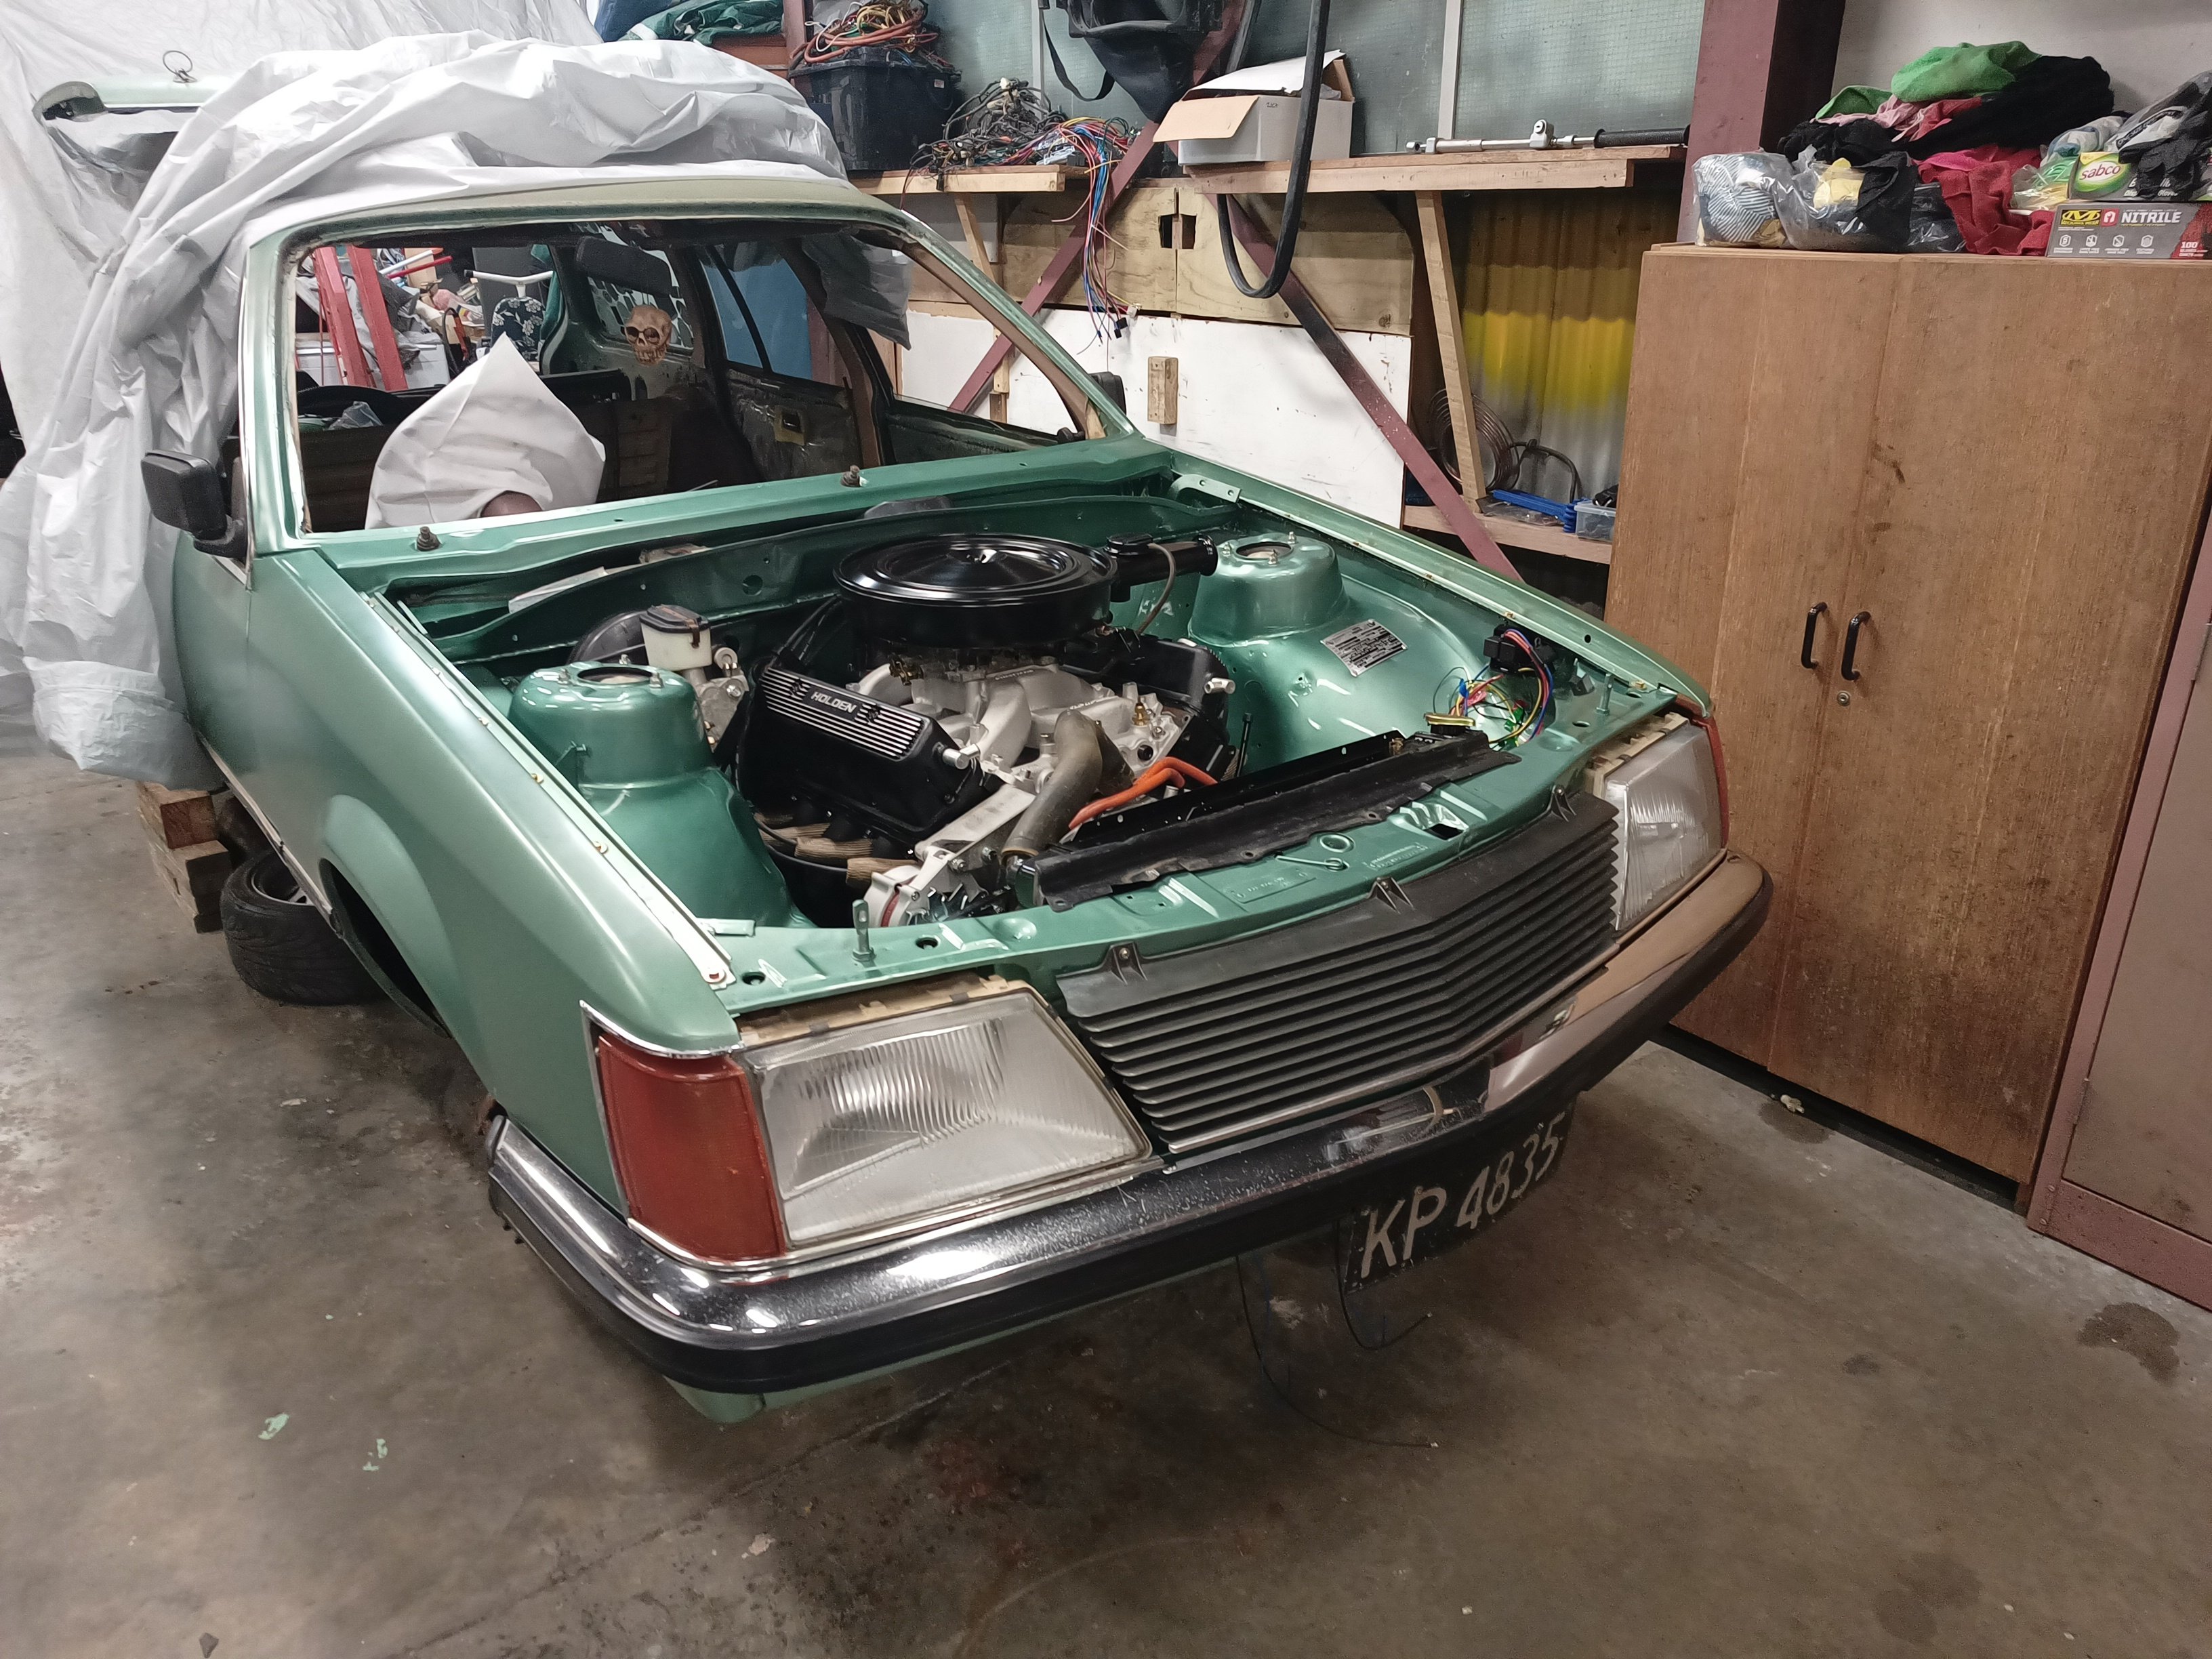
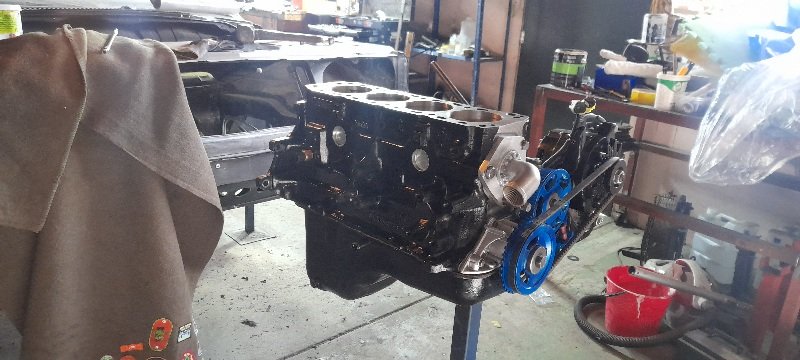
Quick update. I have been bolting stuff on to the car, engine is painted and in, EFI manifold is on. The corvette brakes are back on, with the new tie rod ends the bump steer is much better. As the suspension drops it doesn't go cross eyed any more. I'm sure it does move a bit but nothing like stock. The plan has been to clear the piles of parts up from being spread round the house and put them back on the car. I have been procrastinating about bolting the front guards on. Basically I'm scared of scratching the paint, first gen F-bodies must have the inner guard bolted to the guard and then the whole lot put on the car. Need to find my big boy pants and just get on with it. When I was going through the EFI stuff I opened up the box for the regulator and found a fitting missing. This is the only thing let to get to finish off the fuel system and get it running. Not looking good for getting another one before the end of the month. I promise a better update and photos soon.1 point
-
Heart transplant was a success.
1 point
-
KP61 Hero Contributor-6-Edit by Richard Opie, on Flickr Still running well, clean sheeted it's first WOF after cert and generally been relatively minimal, but happy motoring. No 13's on it because, I'm lazy. And it drives really nicely on these, but the 13s will find their way back on soon. I've had the paint (that was done in 2007) colour sanded and corrected and it looks ridiculously good. This shot doesn't really shot it, but it's flat, glossy and much more vibrant. All I have to do now is look after it!1 point
-
Shape has been finalised.. although very close, I still have to finish the tops of the rear quarters. I think I’ll spritz/spray bog the area and then do the whole car in black primer so I have a clean fresh base to start blocking, rubbing back and finishing! There’s some really complex shapes behind the door as it pumps out from flat and a couple of style lines thrown in but I’m happy with it now. The rest of the car, pinholes and all the hidden bits were then sanded smooth ready for a nice prime when time and good weather align.1 point
-
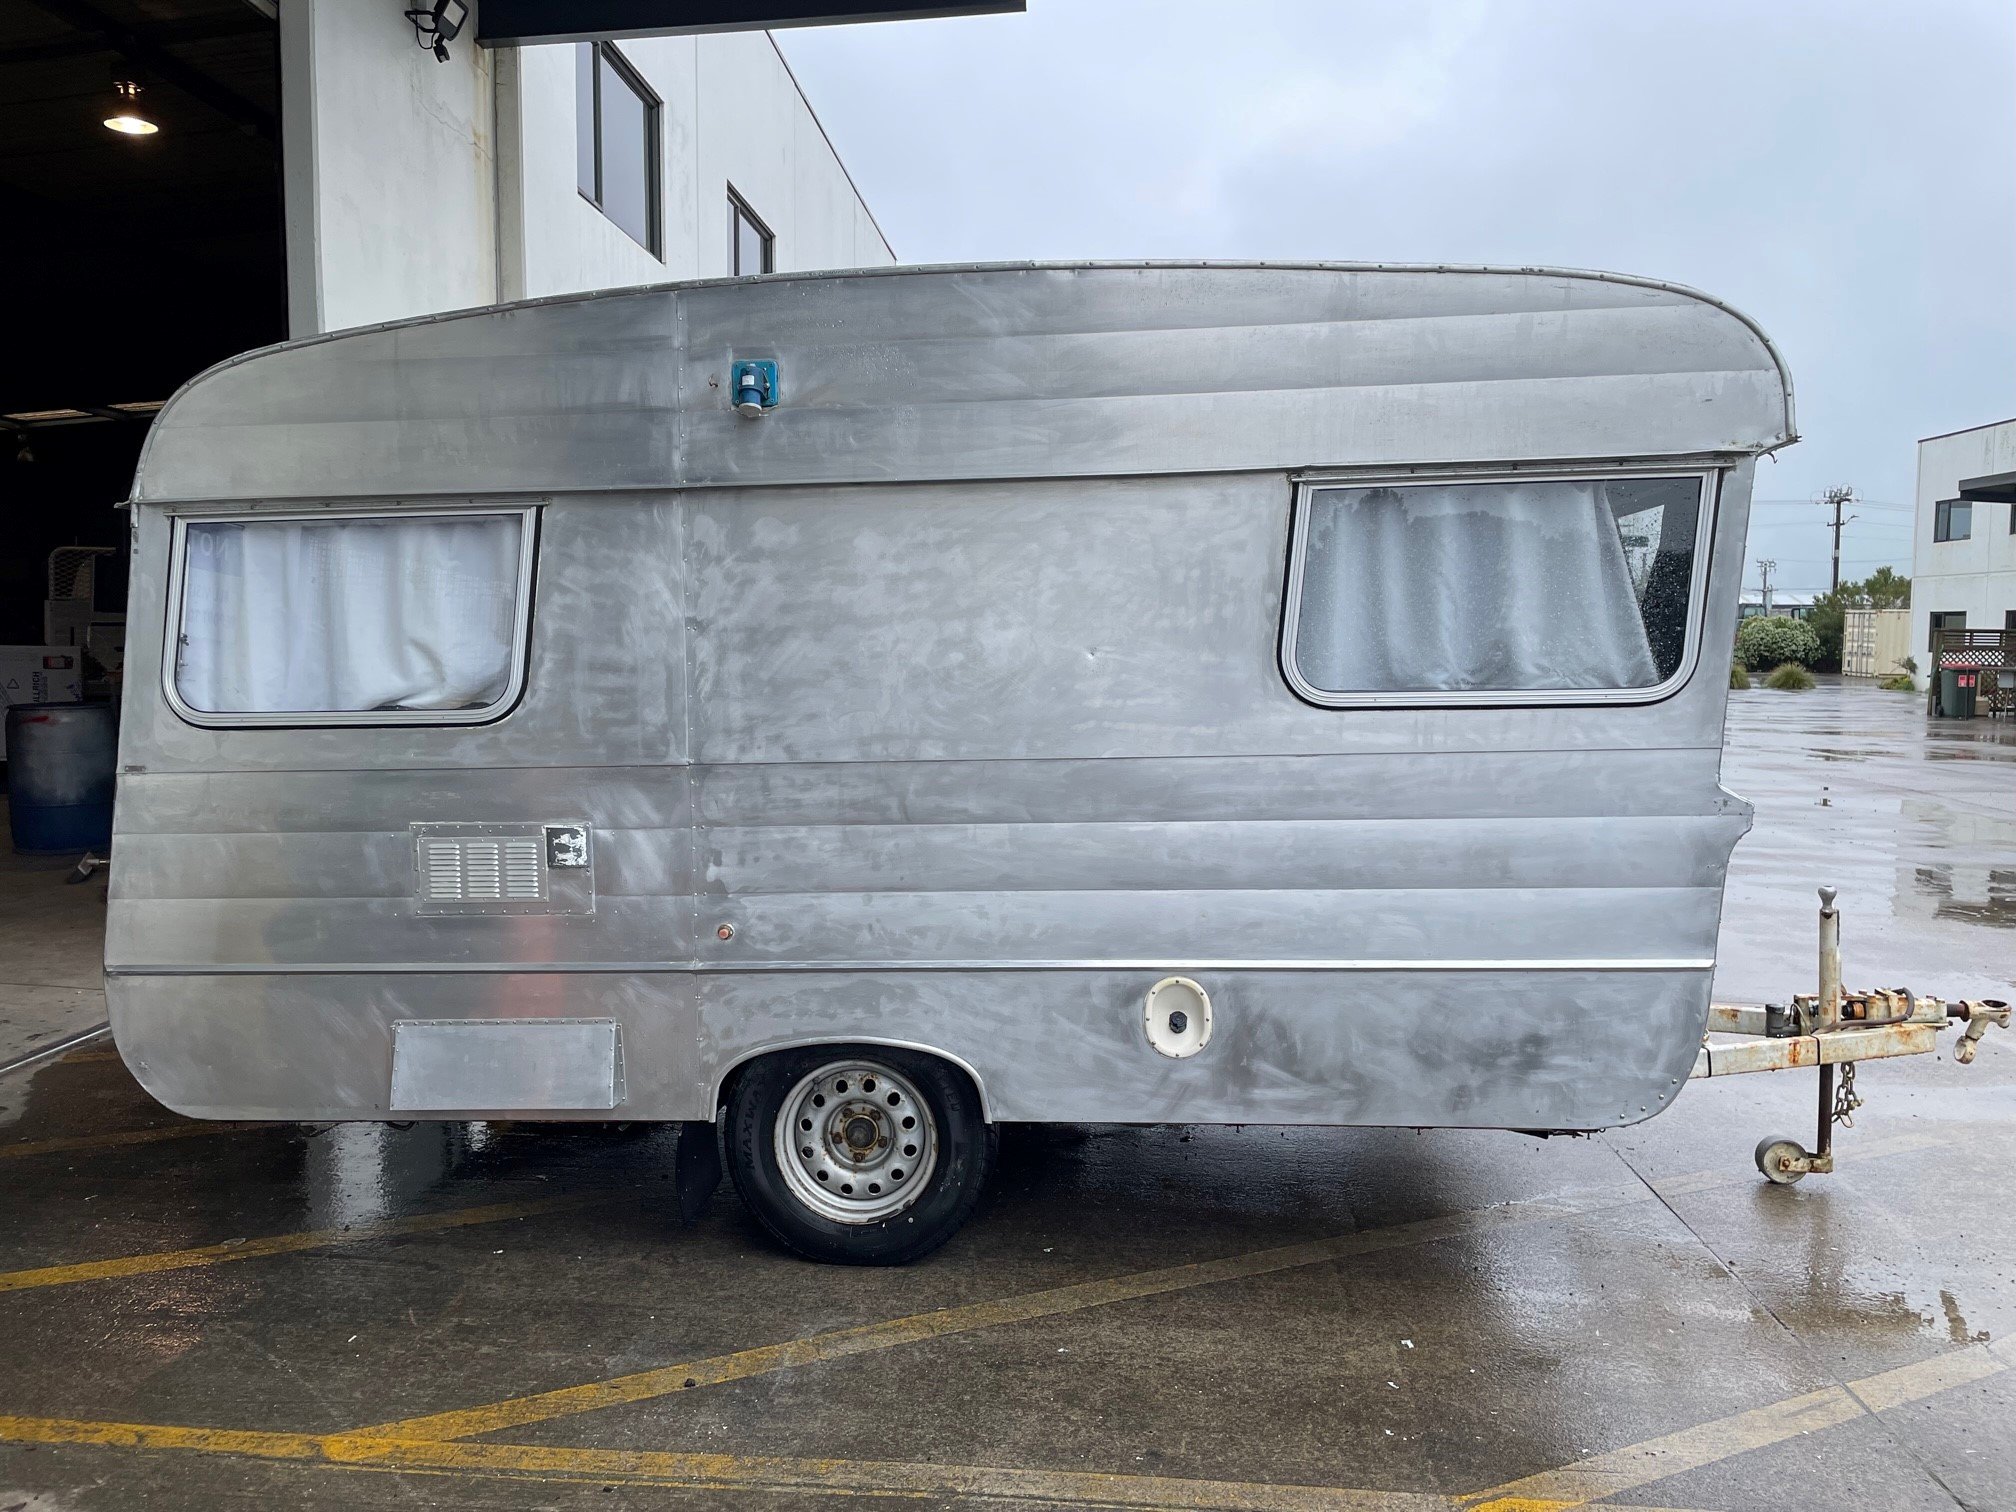
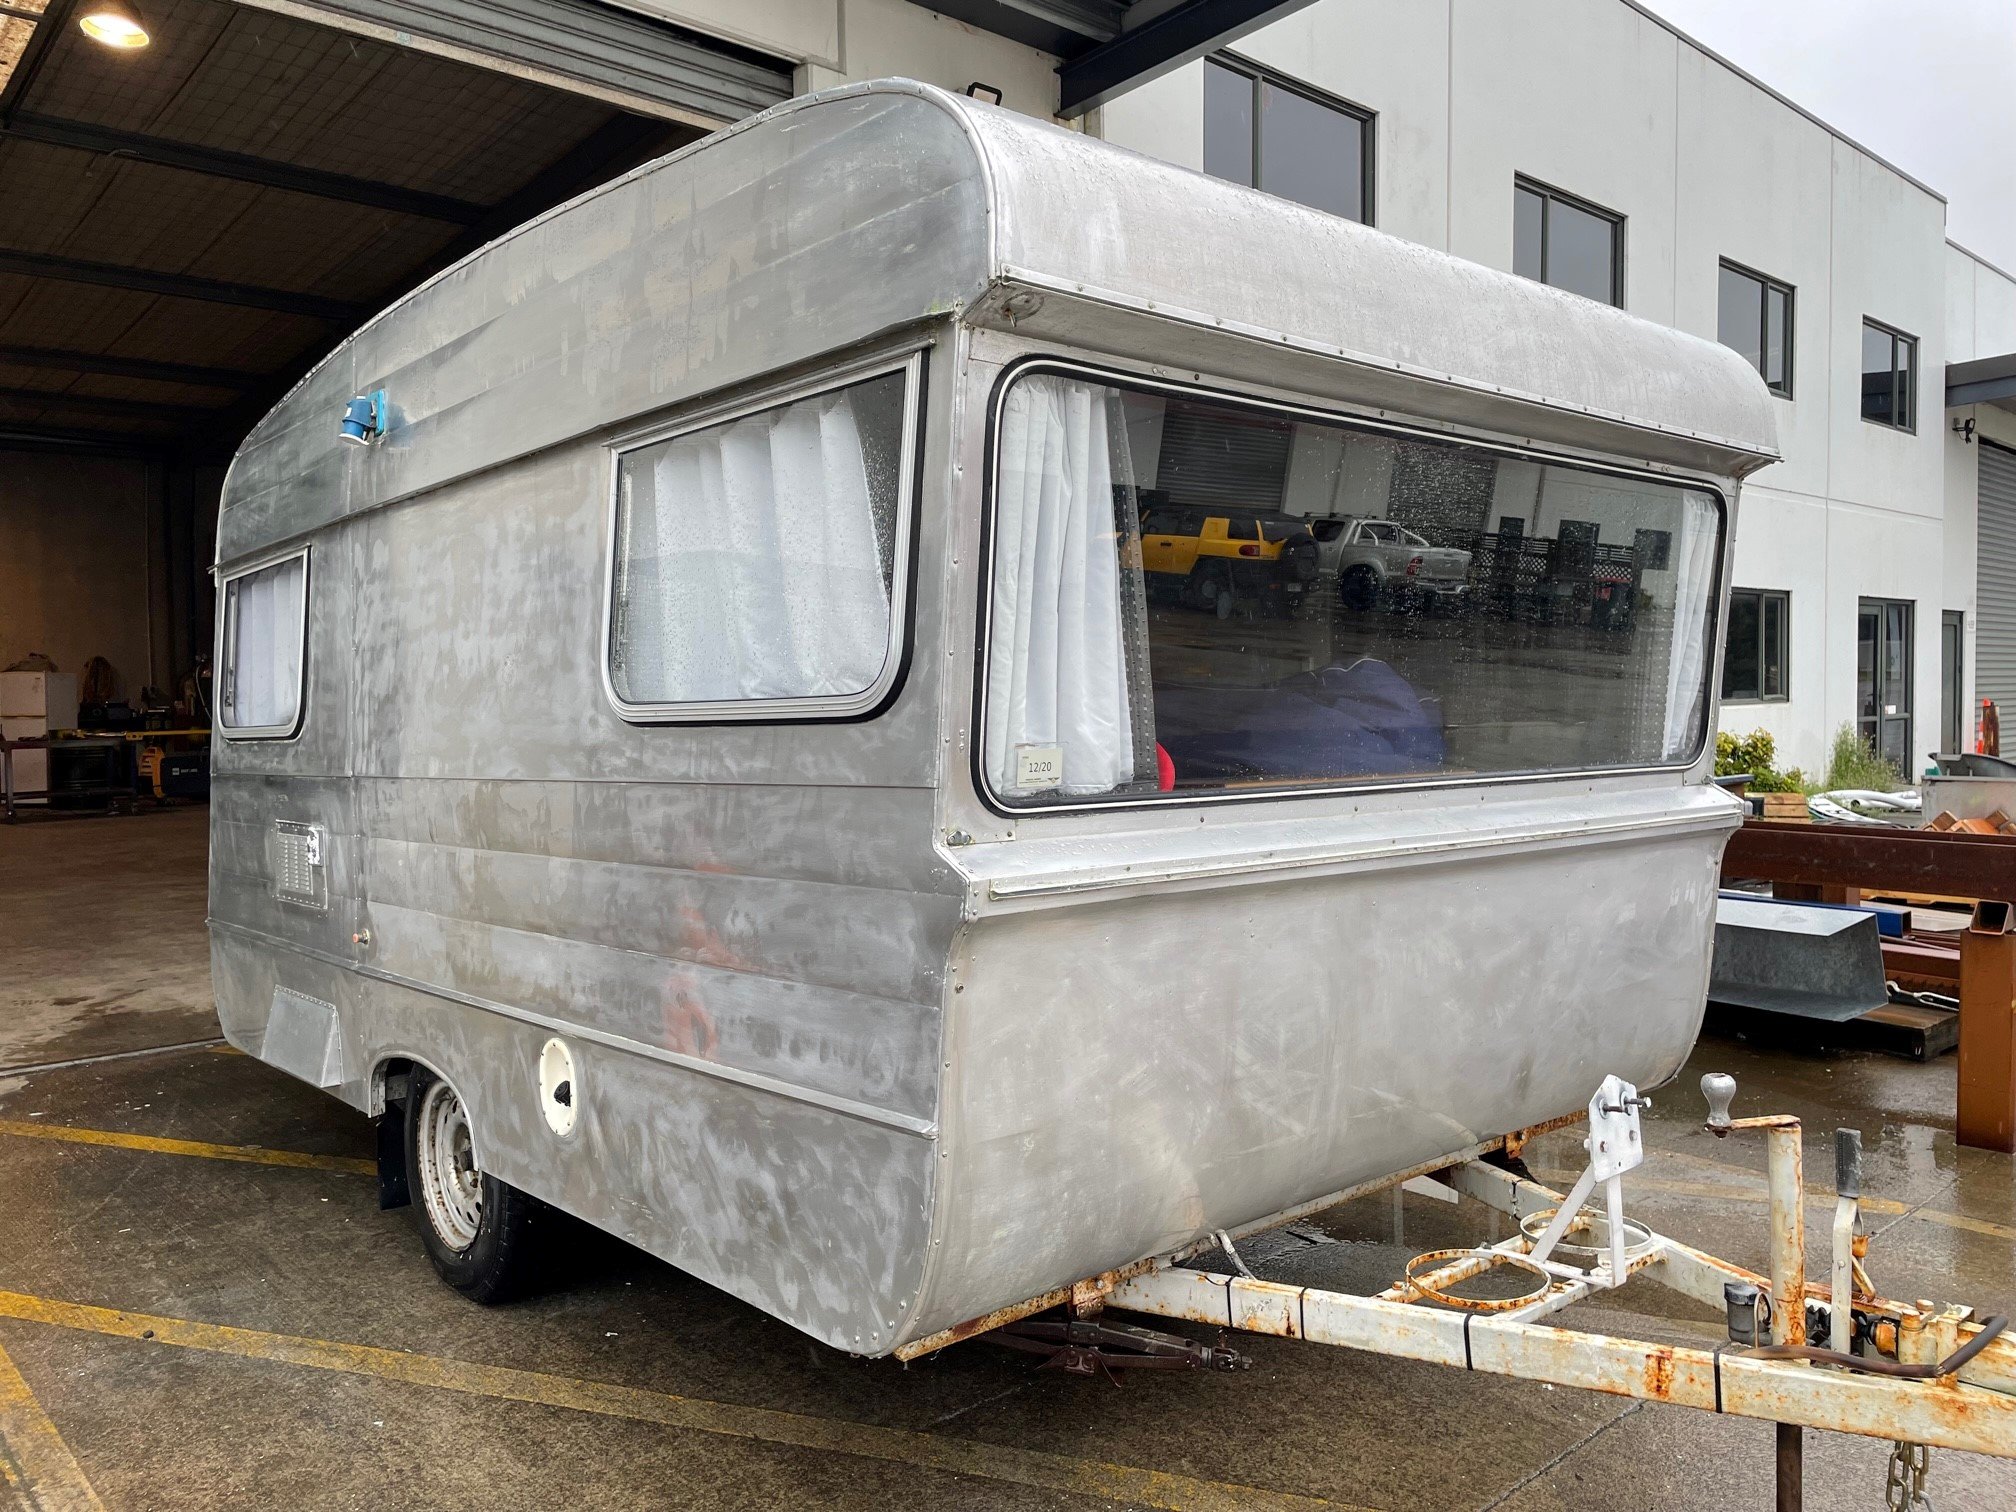
Pretty much paint free now! I'm hoping to get into the etch and primer this weekend. I'm also really tempted to pull off the J-rails and Awning rails and redo the sealant behind them. It would suck to go to all this effort only to find I've created a leak somewhere with the paint stripper. But it does look like a shit of a job...
1 point
-
1 point
-
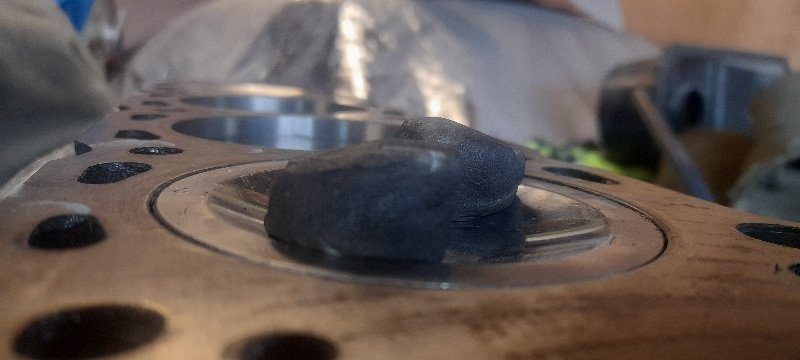
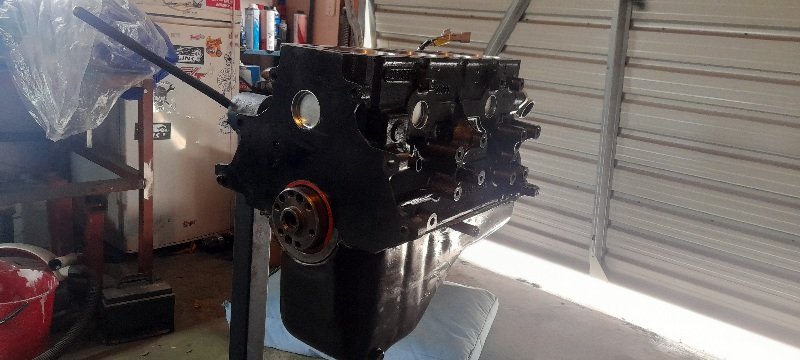
working in and around household and life in general duties I got the inlet ports of the head done... you can see on this section of head how thin it is around that back of the port and where I went through on the last on.... (don't worry about my feet I had my safety jandles on most of the day.) and this is the area I was paranoid about going through at the opening...as I had to open the ends up to match the adapter plate. but that's as far as I'm willing to go. tried to get them as even as possible. and with the plate on
1 point
-
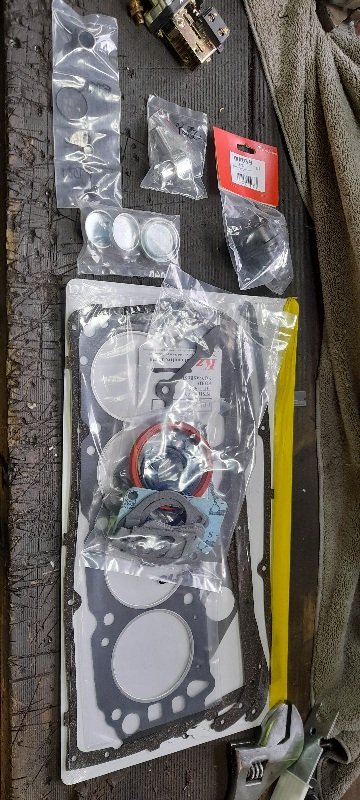
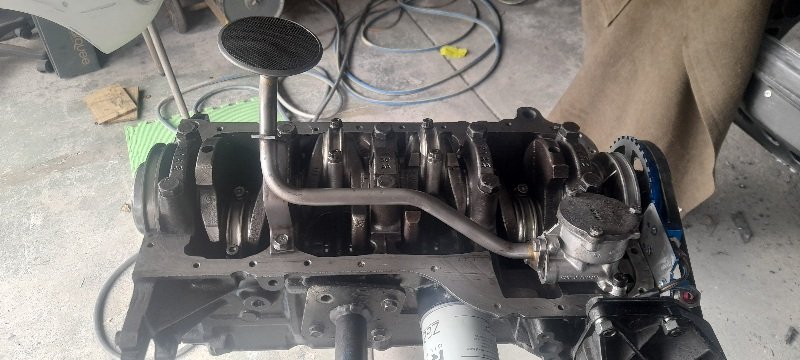
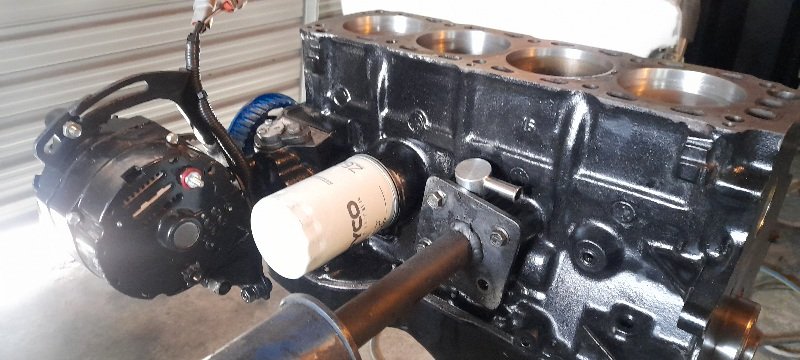
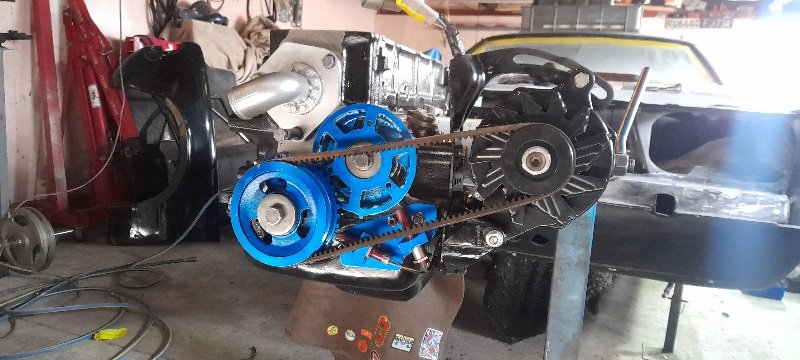
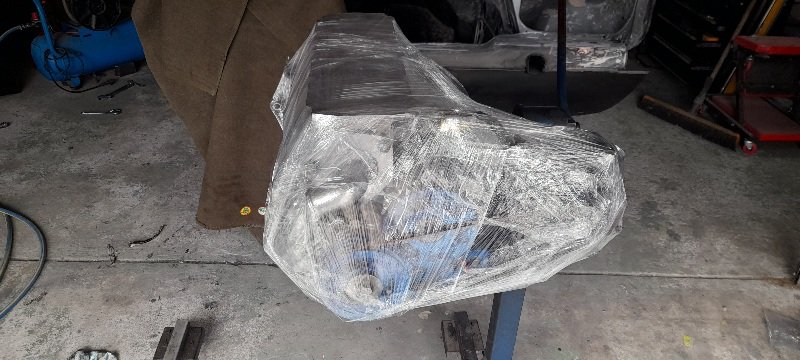
had some parts finally arrive and with some parts that arrived last month and the fact I've given up on the gasket set and head gasket ever showing up..... I but the bullet and grabbed a gasket set from palmside (will look for another head gasket later on.....the one from palmside is fine for a standard rebuild... but maybe not for what I want). so cleaned and area up and cranked on with the bottome end. *new main oil gallery plugs *new stainless frost plugs *burtons block btrather *1600 xflow OIL filter *new spigot bearing *new seals and gaskets. and that most of the bottom end together now.and all wrapped back up and put away.. should really Crack on with the head....and body work. cheers
1 point
-
1 point
-
Got the engine bay stripped out this evening.. Bunch of holes I would like to weld up ... and maybe paint strip it. Not removing any interior so try and keep it all masked up and as clean as I can... once doors are removed.
1 point
-
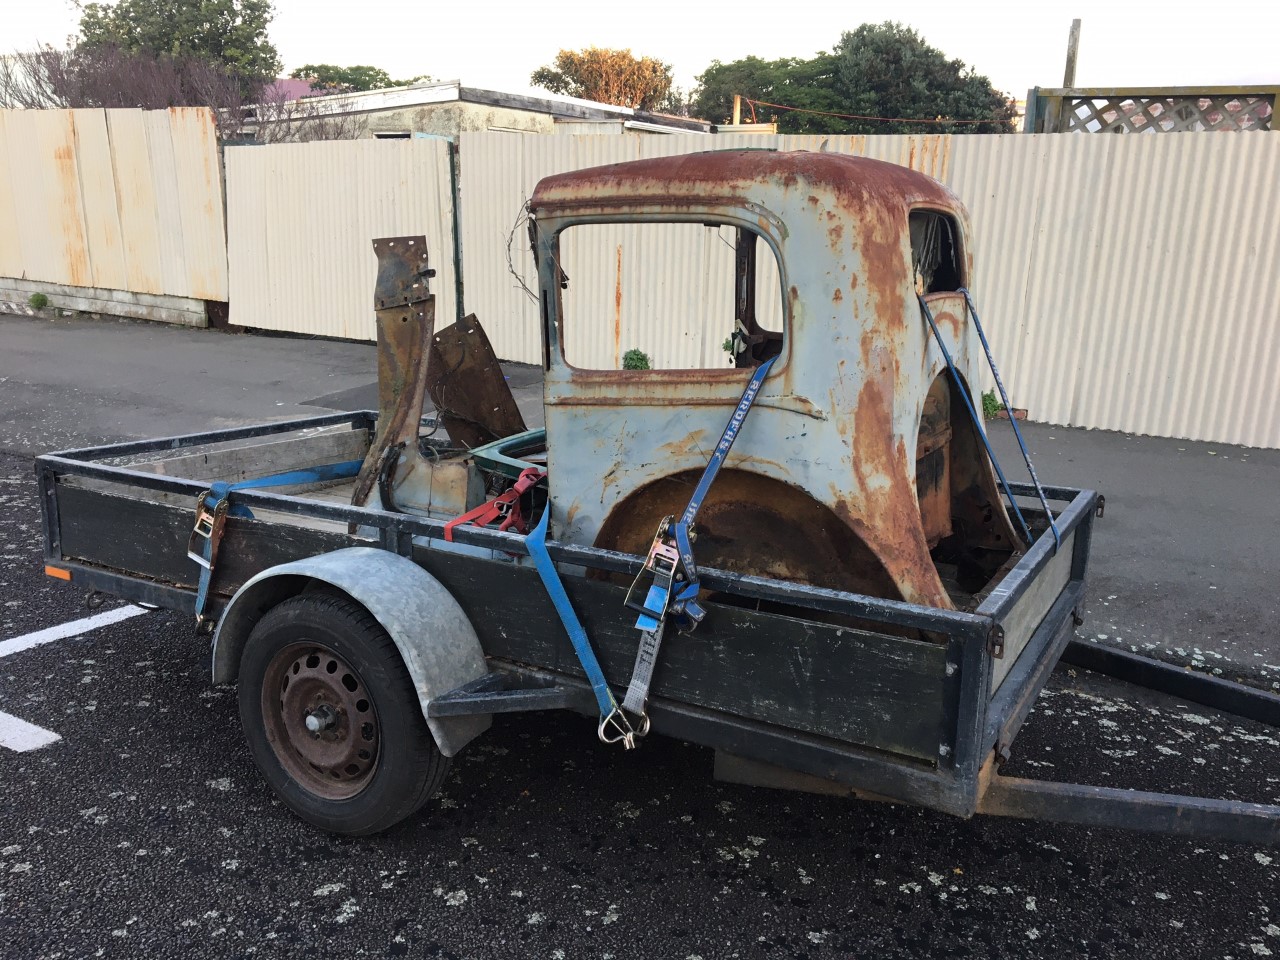
I picked this up yesterday: Its mostly completely fucked... But it does still have the rear apron section which has completely rotted off mine. Unfortunately I think its too dinged up to cut off and use, but it will at least give me a pattern to make a new one.
1 point


.thumb.jpeg.e0a4bff61111e0c8c7396950fcc94da1.jpeg)


(Medium)(Custom).jpg.23094b0f74b0c2bba4b712db4b43395f.jpg)
(Medium).jpg.9f83e45ff70dbac48b26bad40469061b.jpg)


.jpg.14cad72f9ba9e707f9af3f8bde87a678.jpg)


This leaderboard is set to Auckland/GMT+12:00