
Leaderboard


Popular Content
Showing content with the highest reputation on 10/22/22 in all areas
-
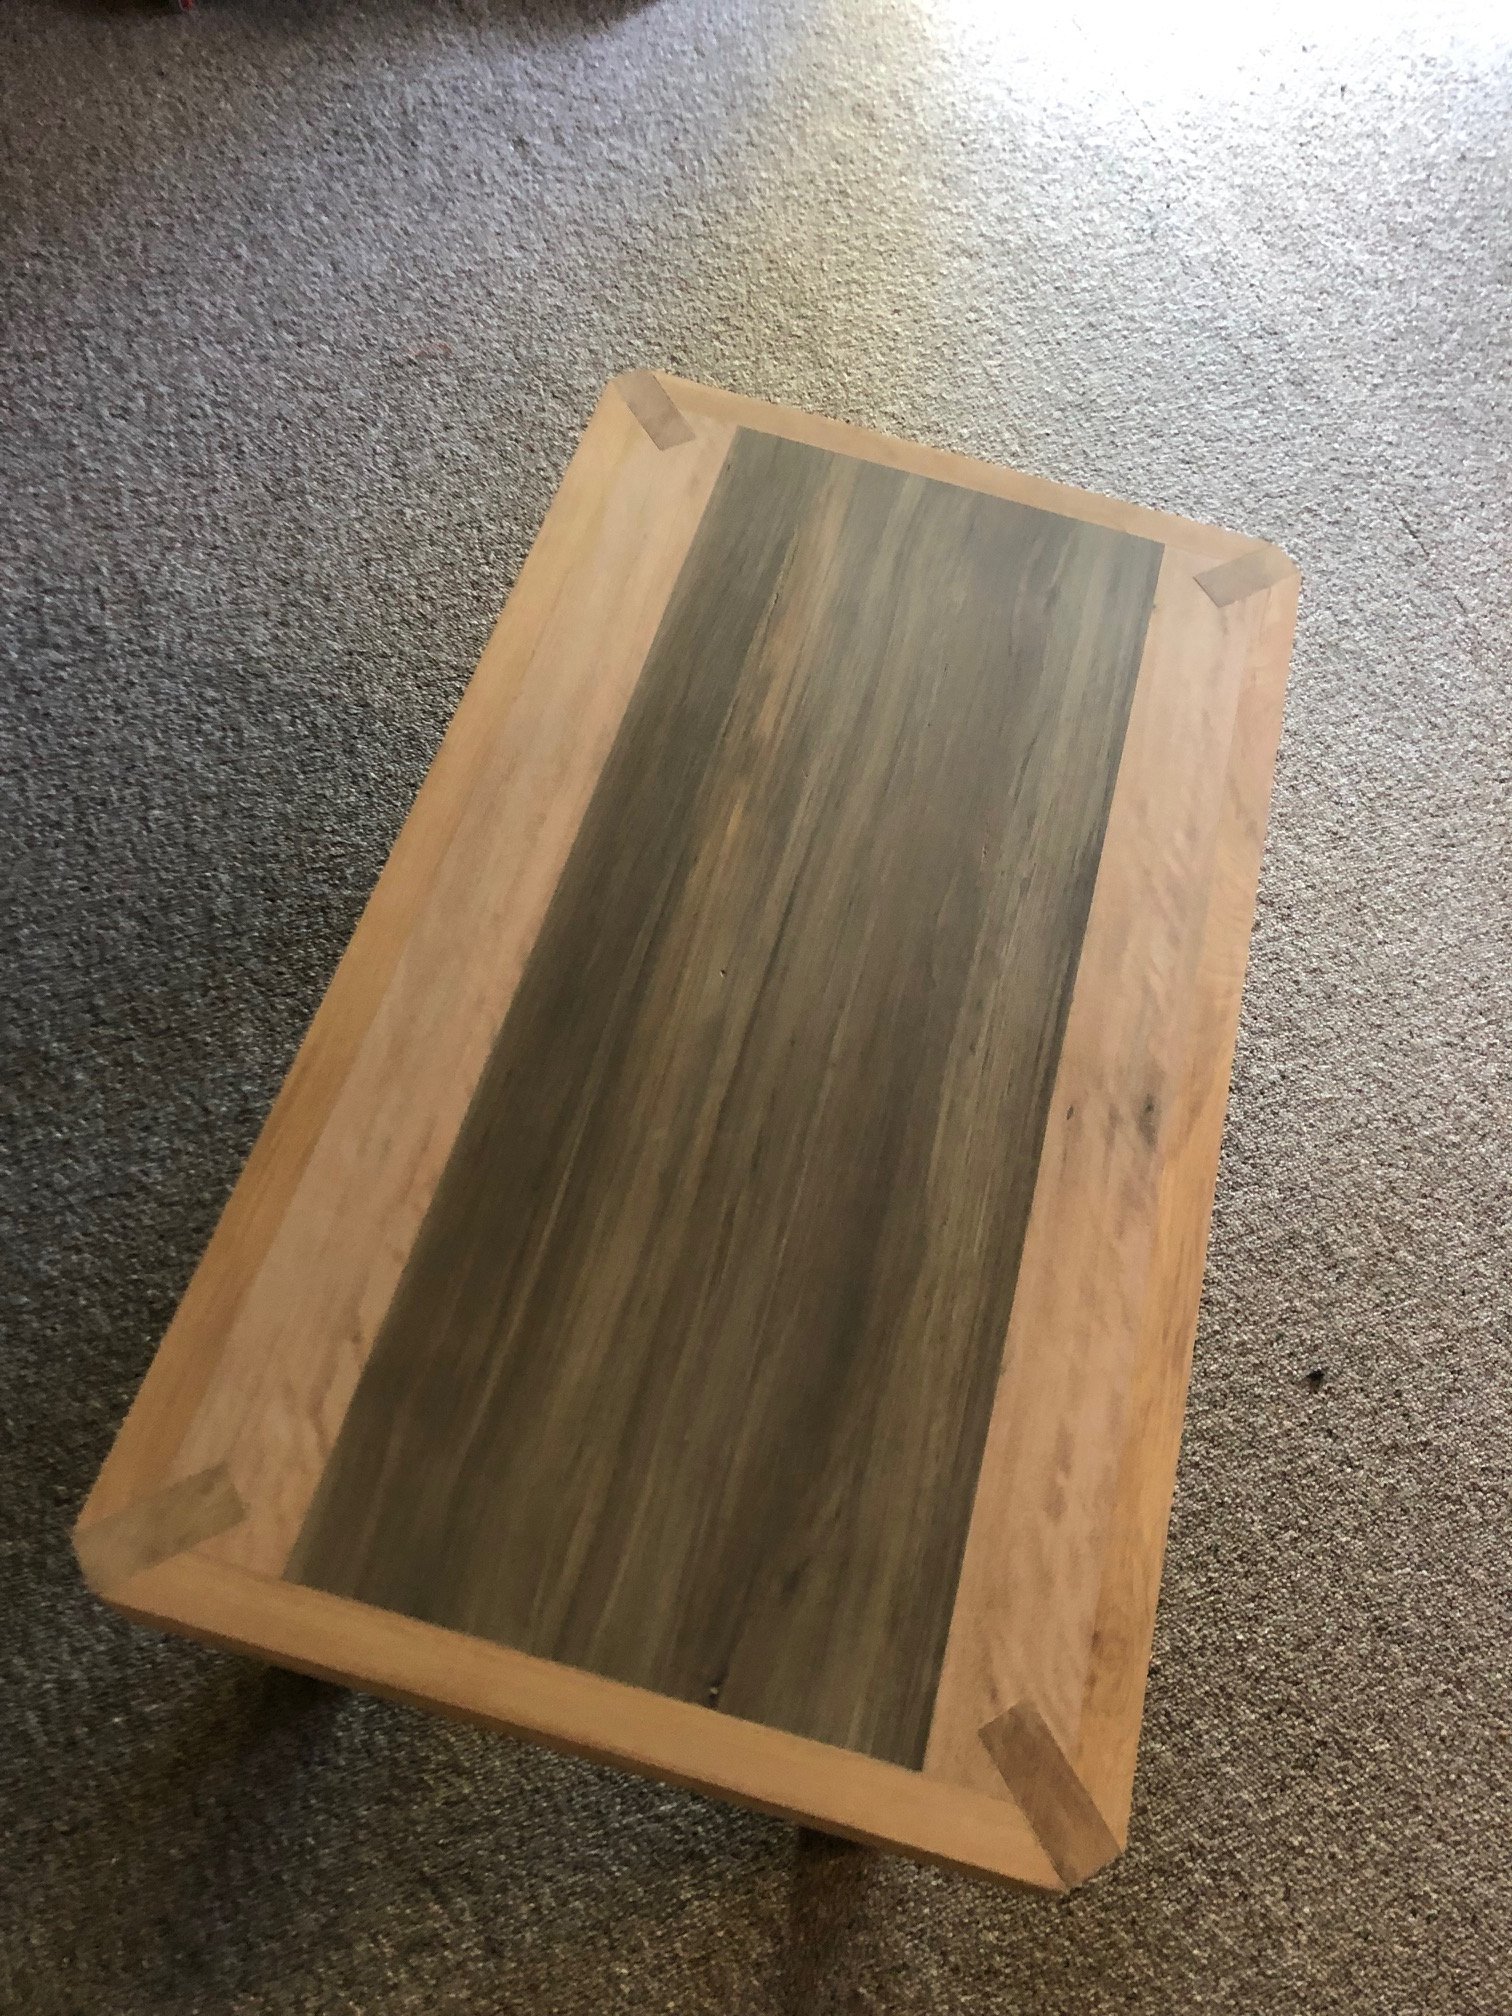
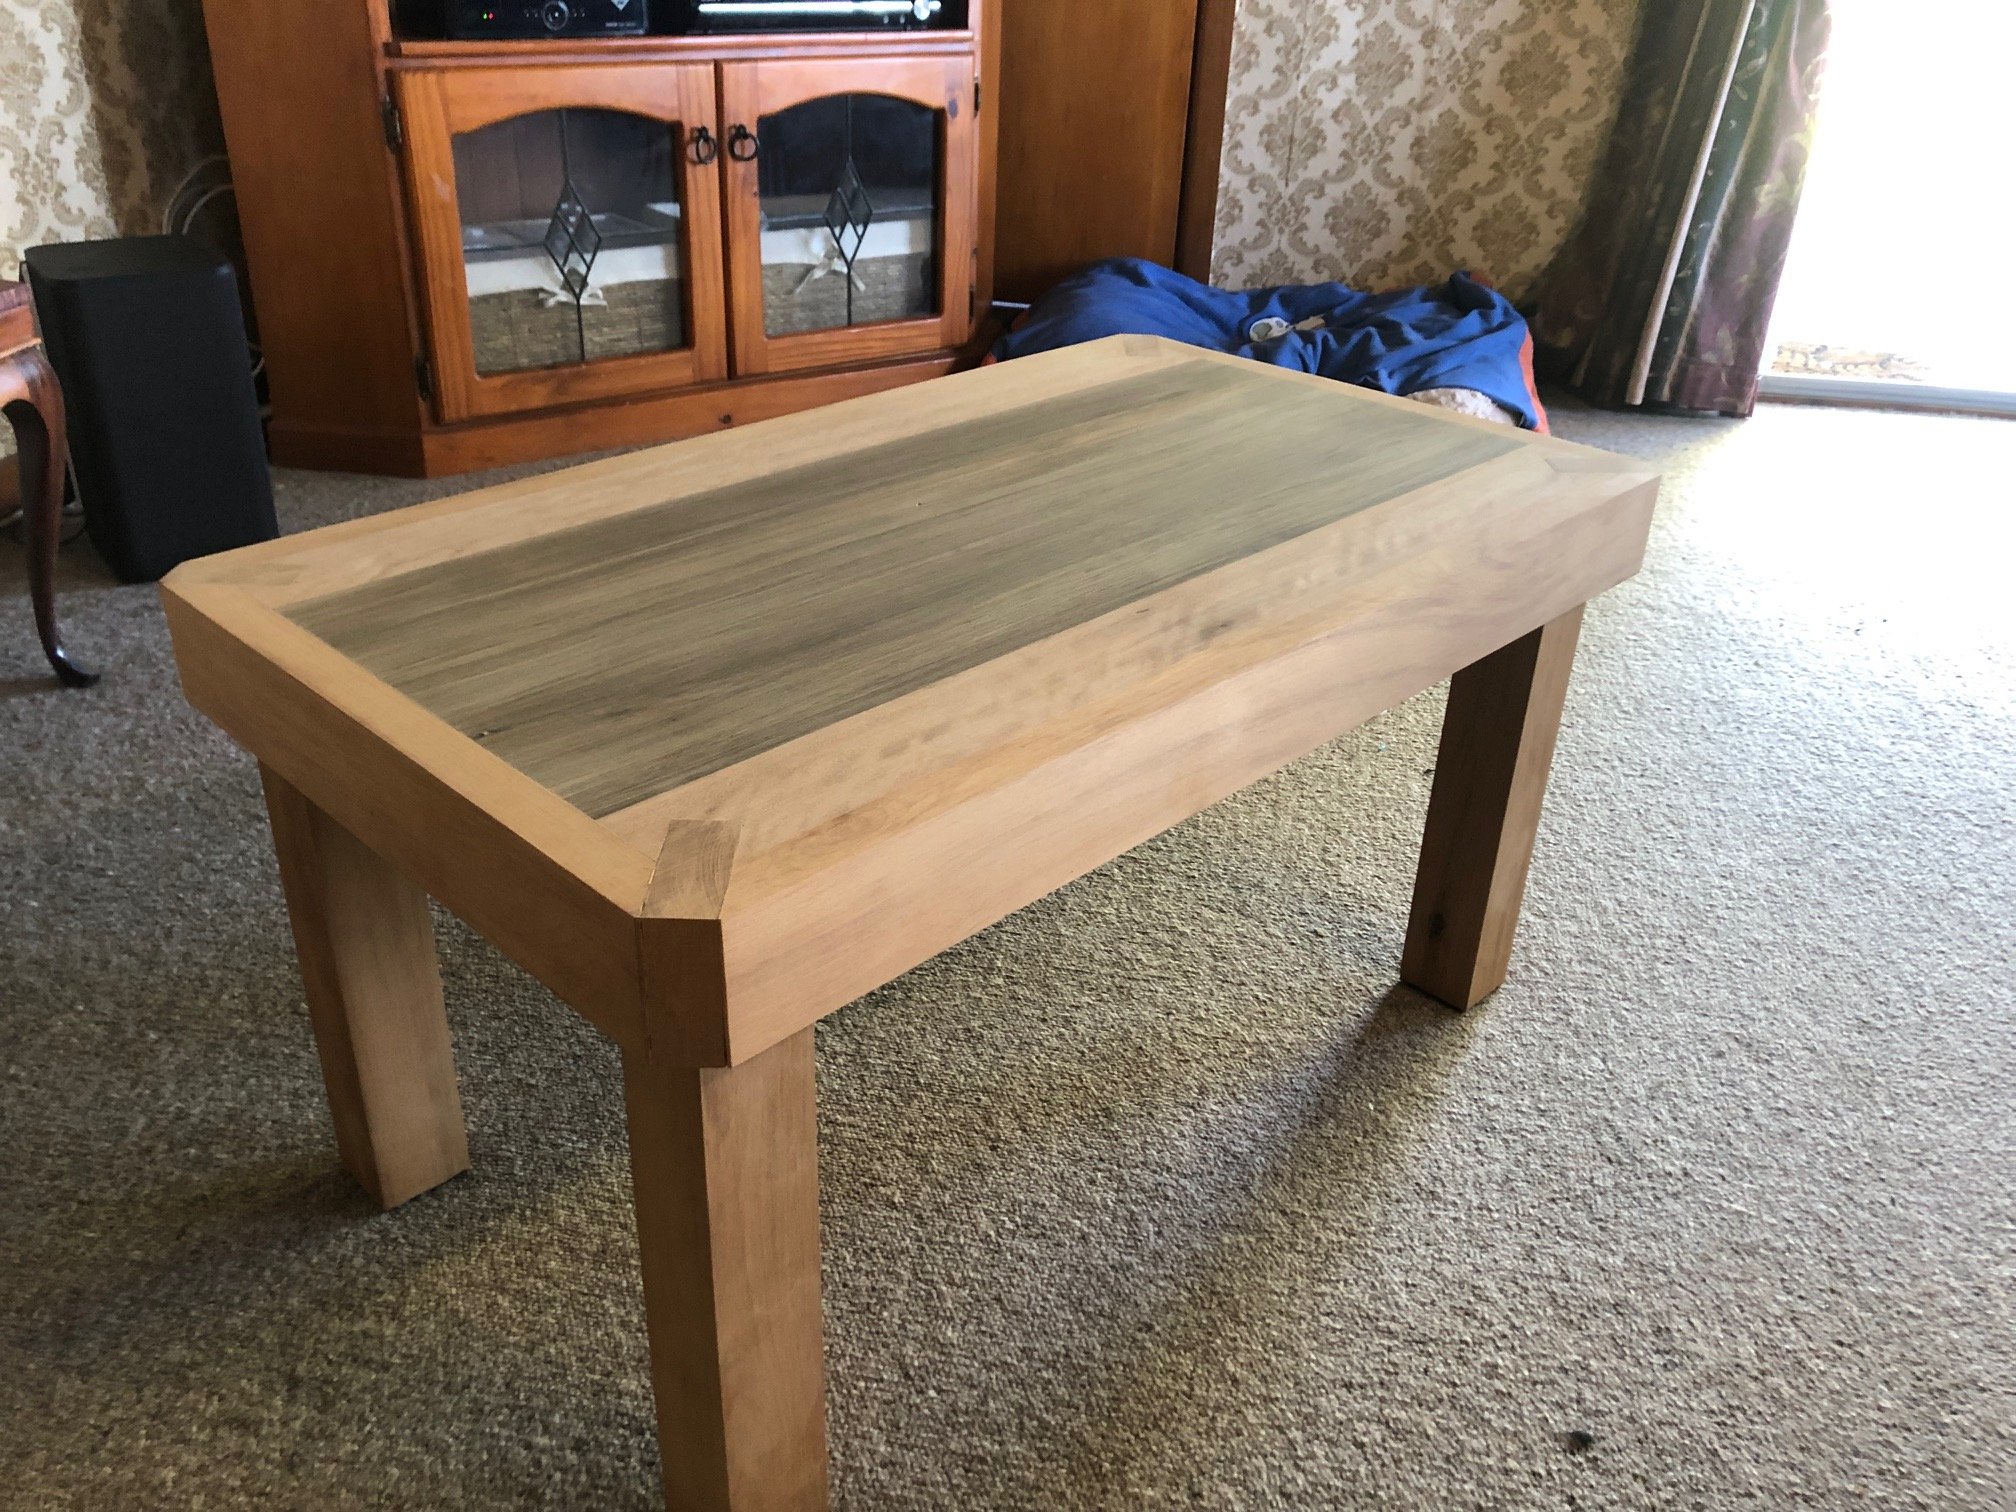
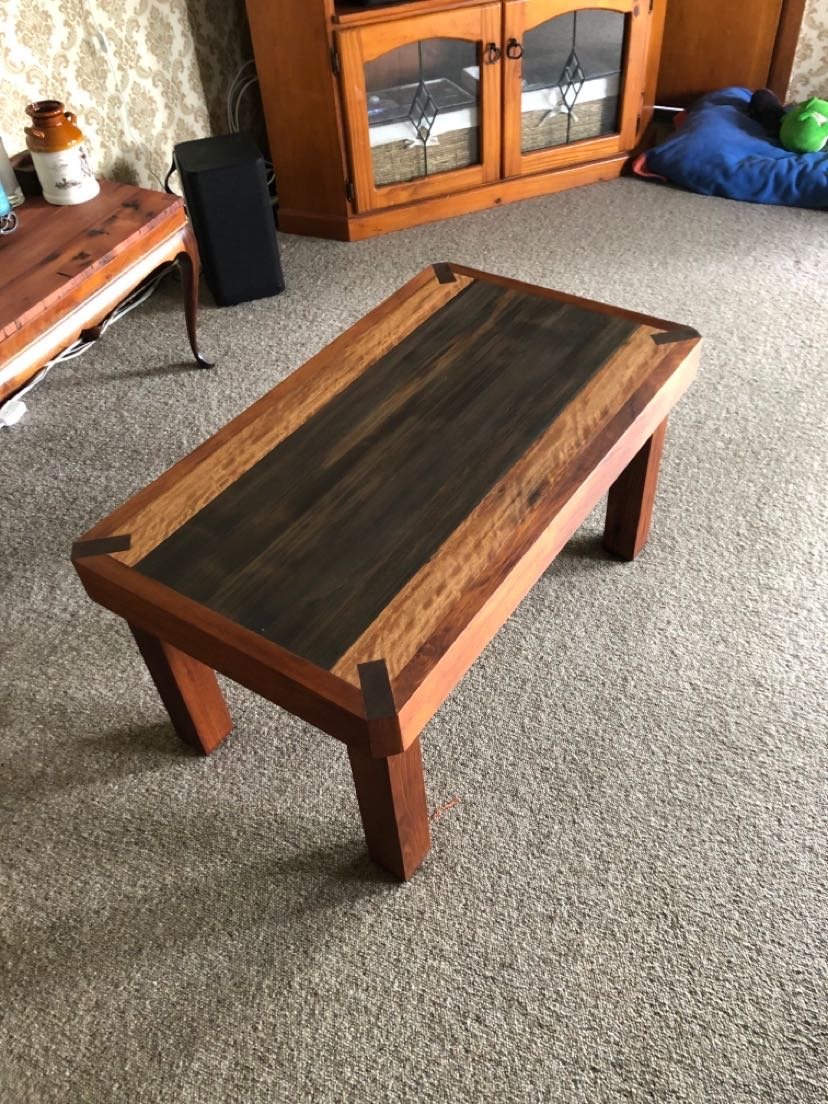
Ready for a bit of oil now, I’m happy with the fact I only used dowels and 4 screws to put it together and the use of limited assortment of hand tools all finished
 12 points
 -
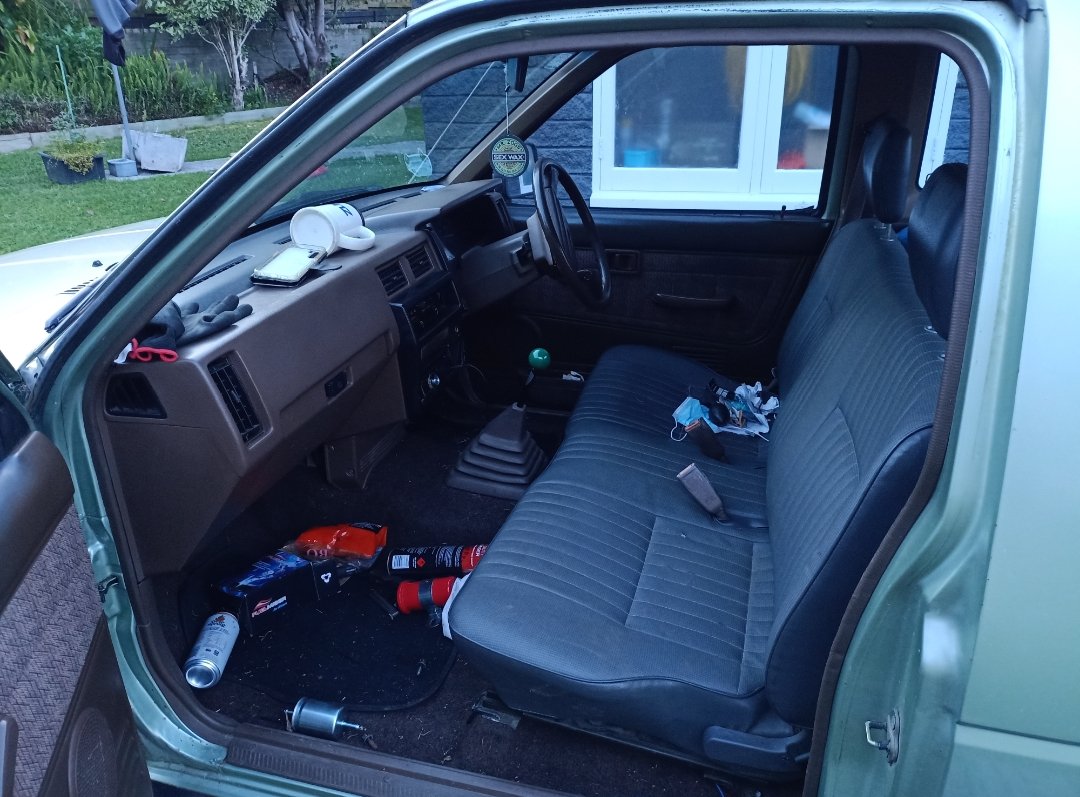
Well, no massive update, It got parked up in storage until I got my house then was used to haul everything there and well, stayed parked up. in that time have slowly done a few things, gave the interior the mother of all cleans ( still needs to wet clean the seats etc), serviced the engine and greased it etc, and have slowly been unloading everything out of the back. by last week its was finally clear of any possessions, threw out the grot and dissolving floormat things, scraped out god knows how many years of Schmoo and then hit it with copious amounts of sodium hydroxide degreaser and water blaster ( how good are water blasters) Didnt take a before pic which is a bit unfortunate but holy moly the difference is amazing. I love living in the outback where all the schmoo is now outside the environment and its warm enough to clean and have it dry in a few minutes. Run up the compressor, the bloody thing started in 3 turns after sitting for well over a year! amazing. 13hp vangaurd on it and it runs beauty! Love the unloader valve, old D2 just hanging off the side, along with zero cage on the rotating assembly. Anyhow , had a long term plan of maybe going out on my own and using this. nah being a wage employee is my life atm, soesh with the mortgage now. So plans now? well , after I get back from NZ im going to start removing all the steel in the front end that was used for toolboxes etc, I will leave enough to keep the body solid and wont be touching anything in the reel section, prob remove the big toolbox thing in the centre section. then as Ive said befoire make a mezzanine for a shitty bed, somewhere to hold water and some living things, and something to hold my KX. and then pretty much im going to use it to go on not too difficult wonders. Have started looking at what it would take to put a hairdryer on it but thats a dream atm. one thing is to get a bigger fuel tank because currently it only has a 70L one and its fucking garbage spesh seeings as its shaped like a brick and eats fuel tbh 17L per hundy is what I calculated. Anyhow some pics. All cleaned up Doesnt even break a sweat running this, shame its petrol instead of diesel Ohhh yeah , maybe 3 mins empty to unload, thats pretty good. So good, D2 off a truck and no gaurd. no worries right.6 points
-
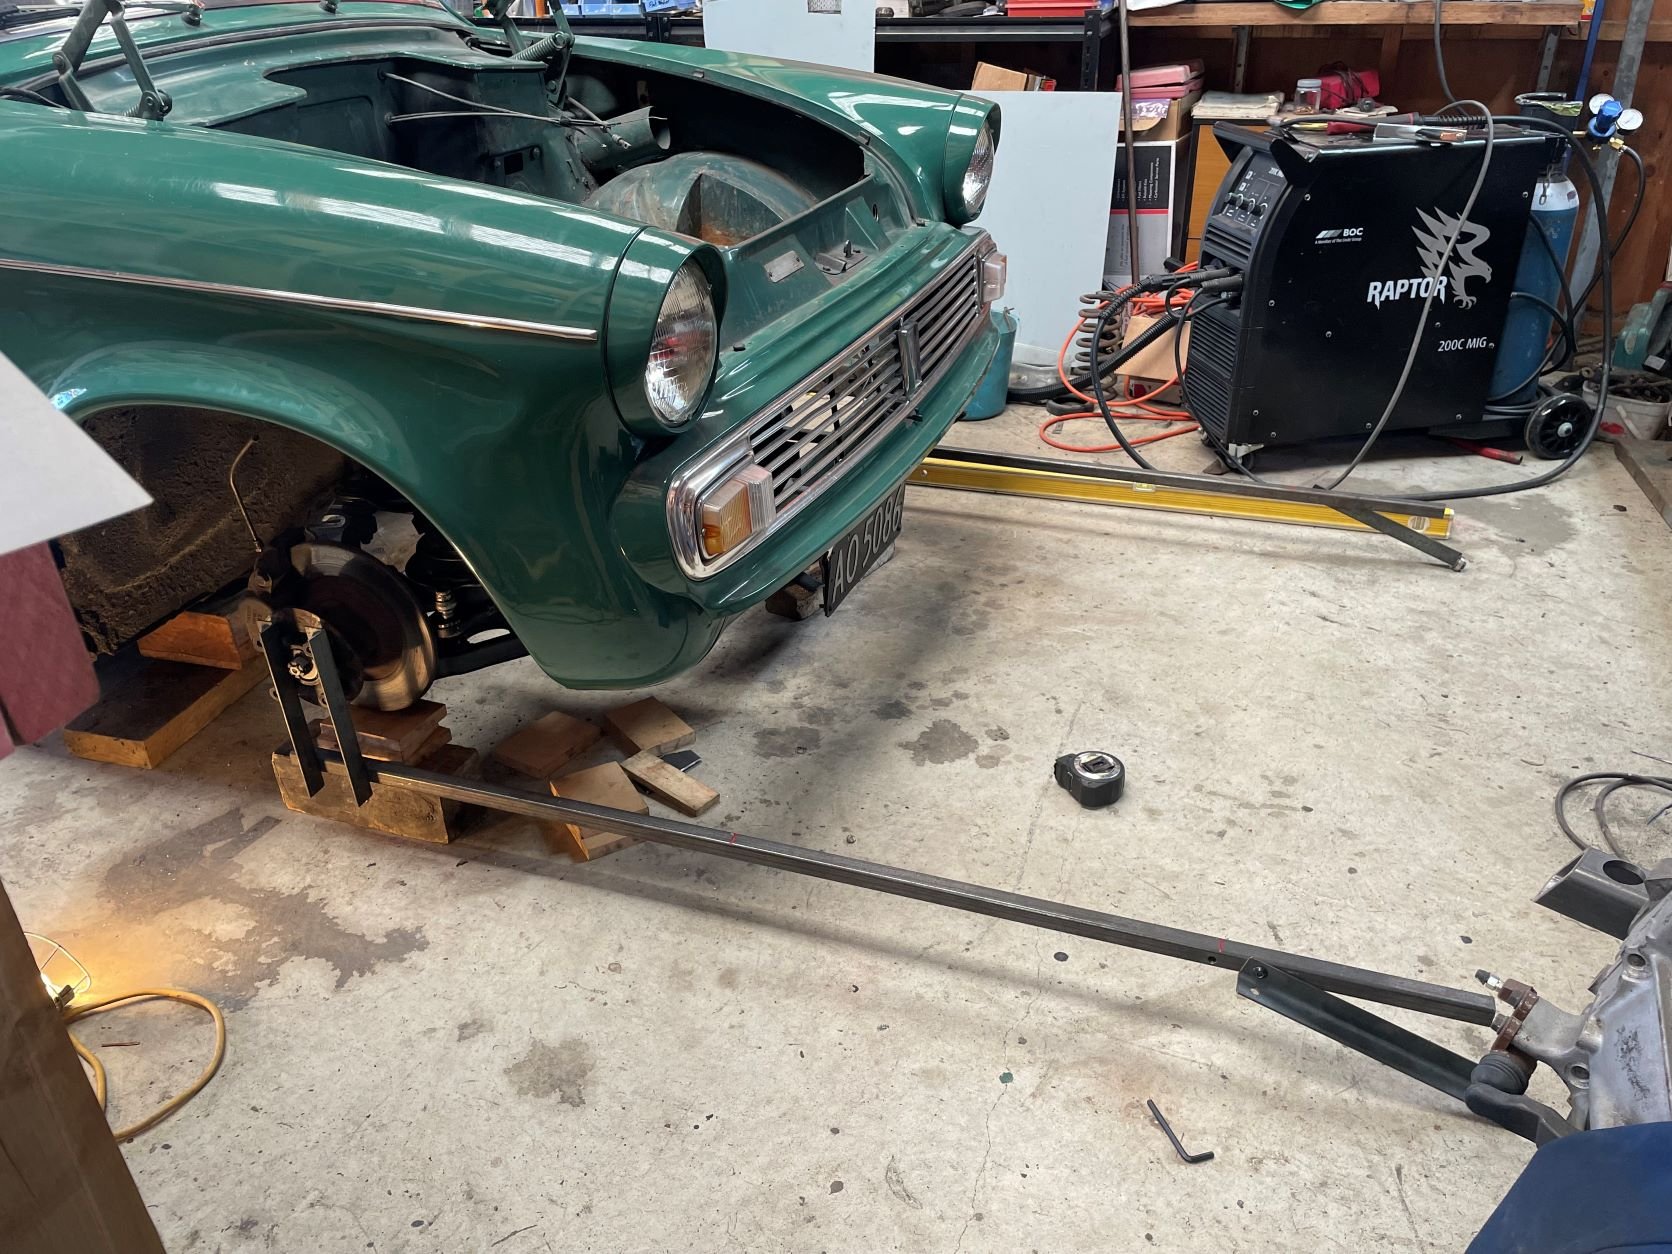
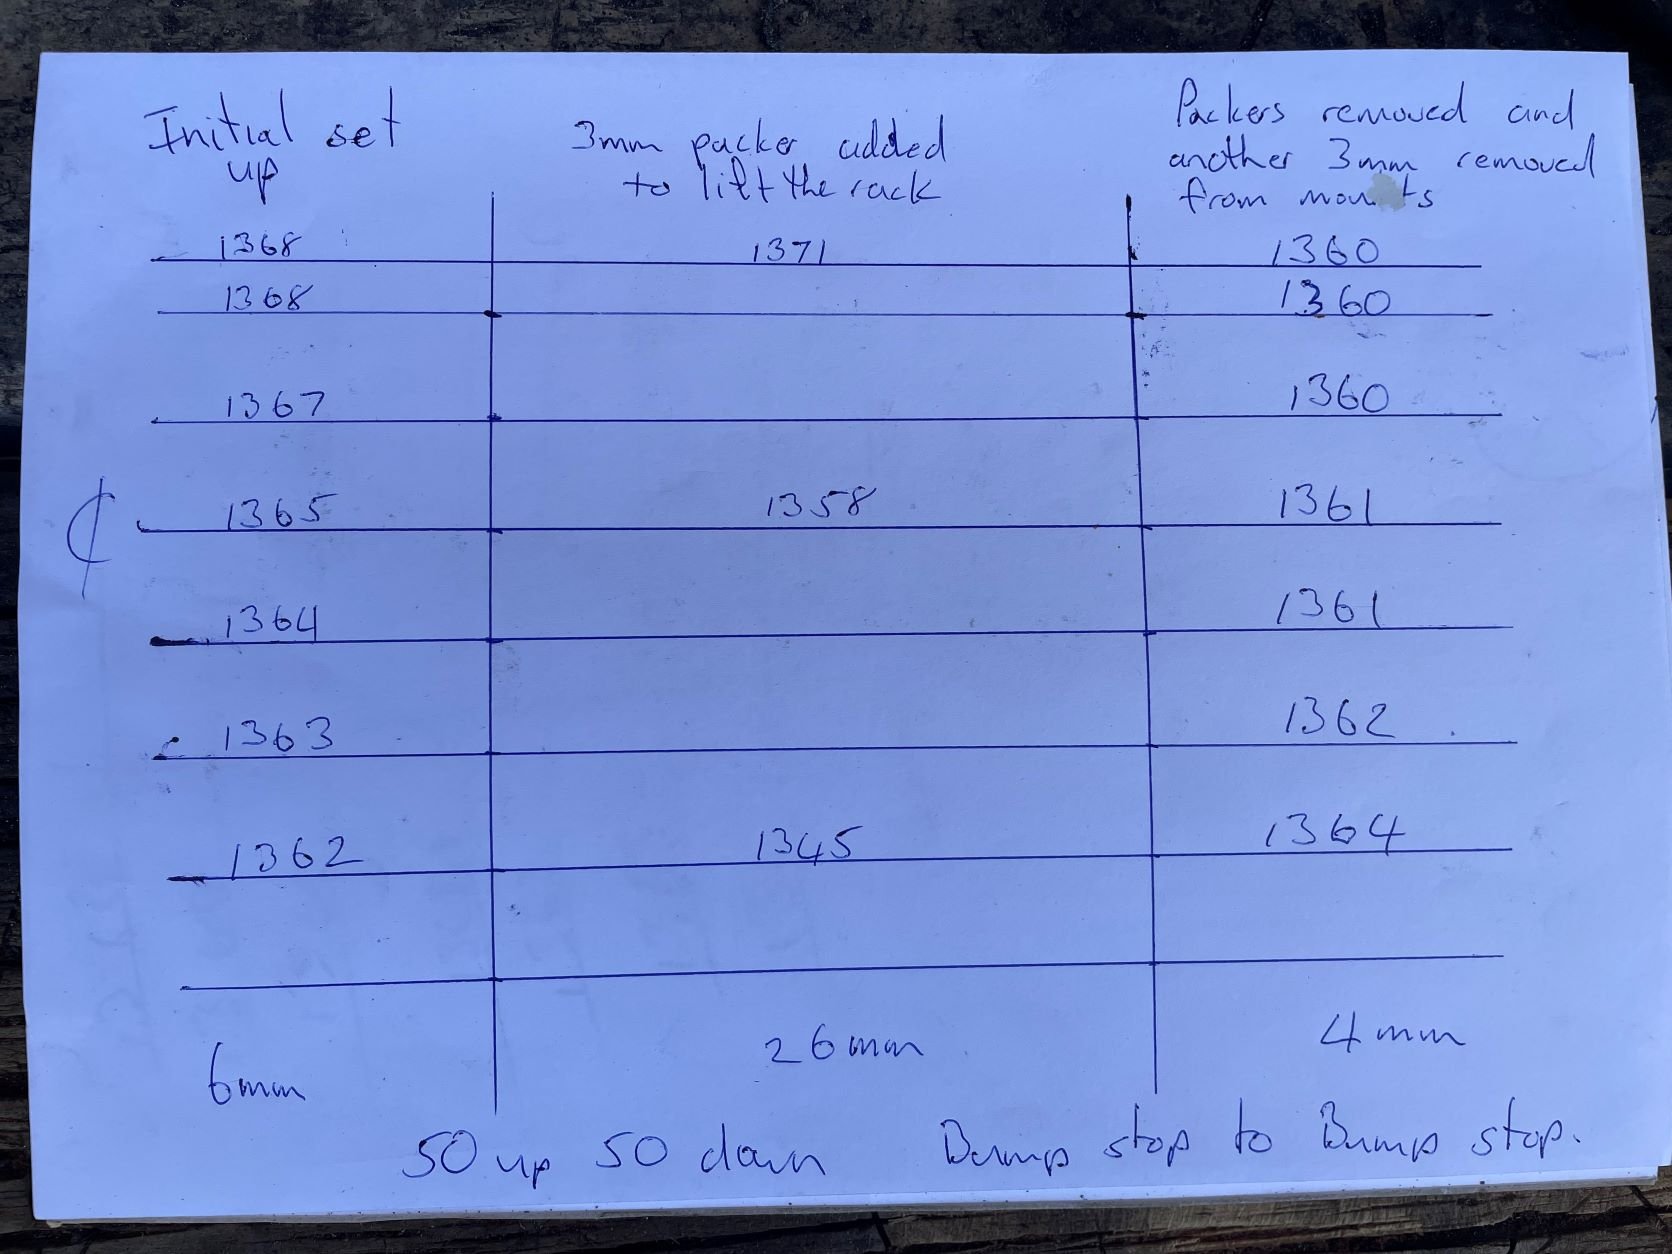
I did a bump steer check today to see if I had the rack at the correct height. The first time I measured 50mm up and 50mm down which is from bump stop to bump stop I recorded 6mm of toe change which is getting a bit close to the max 8mm it can be. Didn't want to weld it all up only to find out it was just over when it was measured officially. I used some 3mm packers under the mounting brackets to lift the rack and remeasured it and it made a huge difference in the wrong direction with 26mm toe change. I removed the mounts which were only tack welded to the X member and lowered them 3mm and did another swing check and measured only 4mm and it was pretty much 0 through most of the travel so i am happy with that. I will finish off the X member withe the mounts at this height.
5 points
-
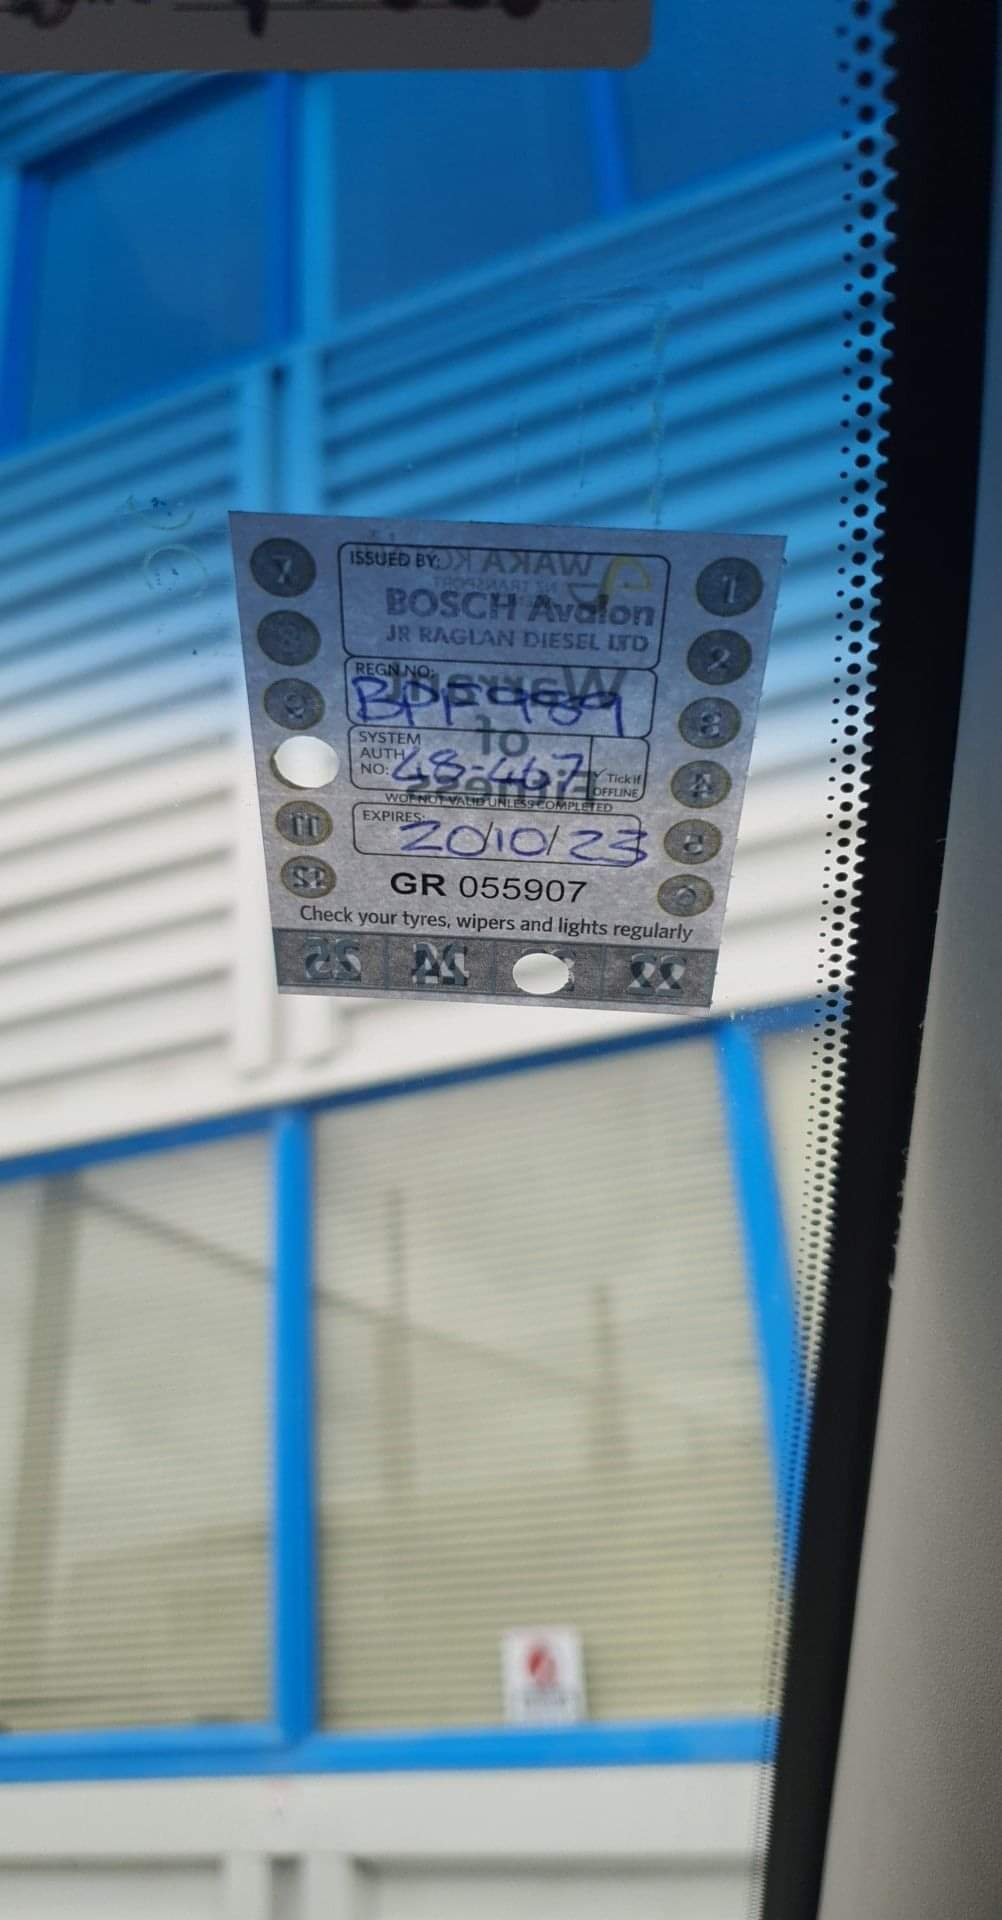
And she’s all legal, took 3 days for the cert tag to go live, flew through a WOF on Tuesday and then a gentle 400km test drive on Wednesday - ran like an absolute dream. Such a better car now all round- (much) quicker, better brakes, more direct steering and it’s way better fuel economy wise.
3 points
-
People swap them into dr125s for light flywheel race action. Basically a GN125 part2 points
-
Bit more progress: Finally got around to cutting the rest of the kitchen components and have pieced most of it together to make sure was all going to work. Im pretty happy with the result, still basic but a big improvement over the original stuff which was really in quite a state. It will need to be broken back down again to get through the door. On the inside Ash has put in a heap of hours painting everything with many many coats of paint. She's used a bathroom paint as the top coat and while it doesnt look much different in the photos, in real life its looking really good. Theres a few areas to finish off but the back of it is definitely broken. We have templated and cut the new vinyl for the floor which was quite a dick to do. I've also removed and patched over where the original foot pump was for the sink taps - Ive got a 12v pump to go in instead. The vinyl is just sitting in there for now till I get around to gluing it down but its quite a big step forward visually. Now the flooring is down I can fit the new kitchen and start finishing things off inside. The squabs should be back from being recovered in a 2 weeks time so really want to have the majority of it sorted out before then. I've picked up a new battery for the solar setup so will leap into the wiring side of things once the kitchen is done. Ciao for now2 points
-
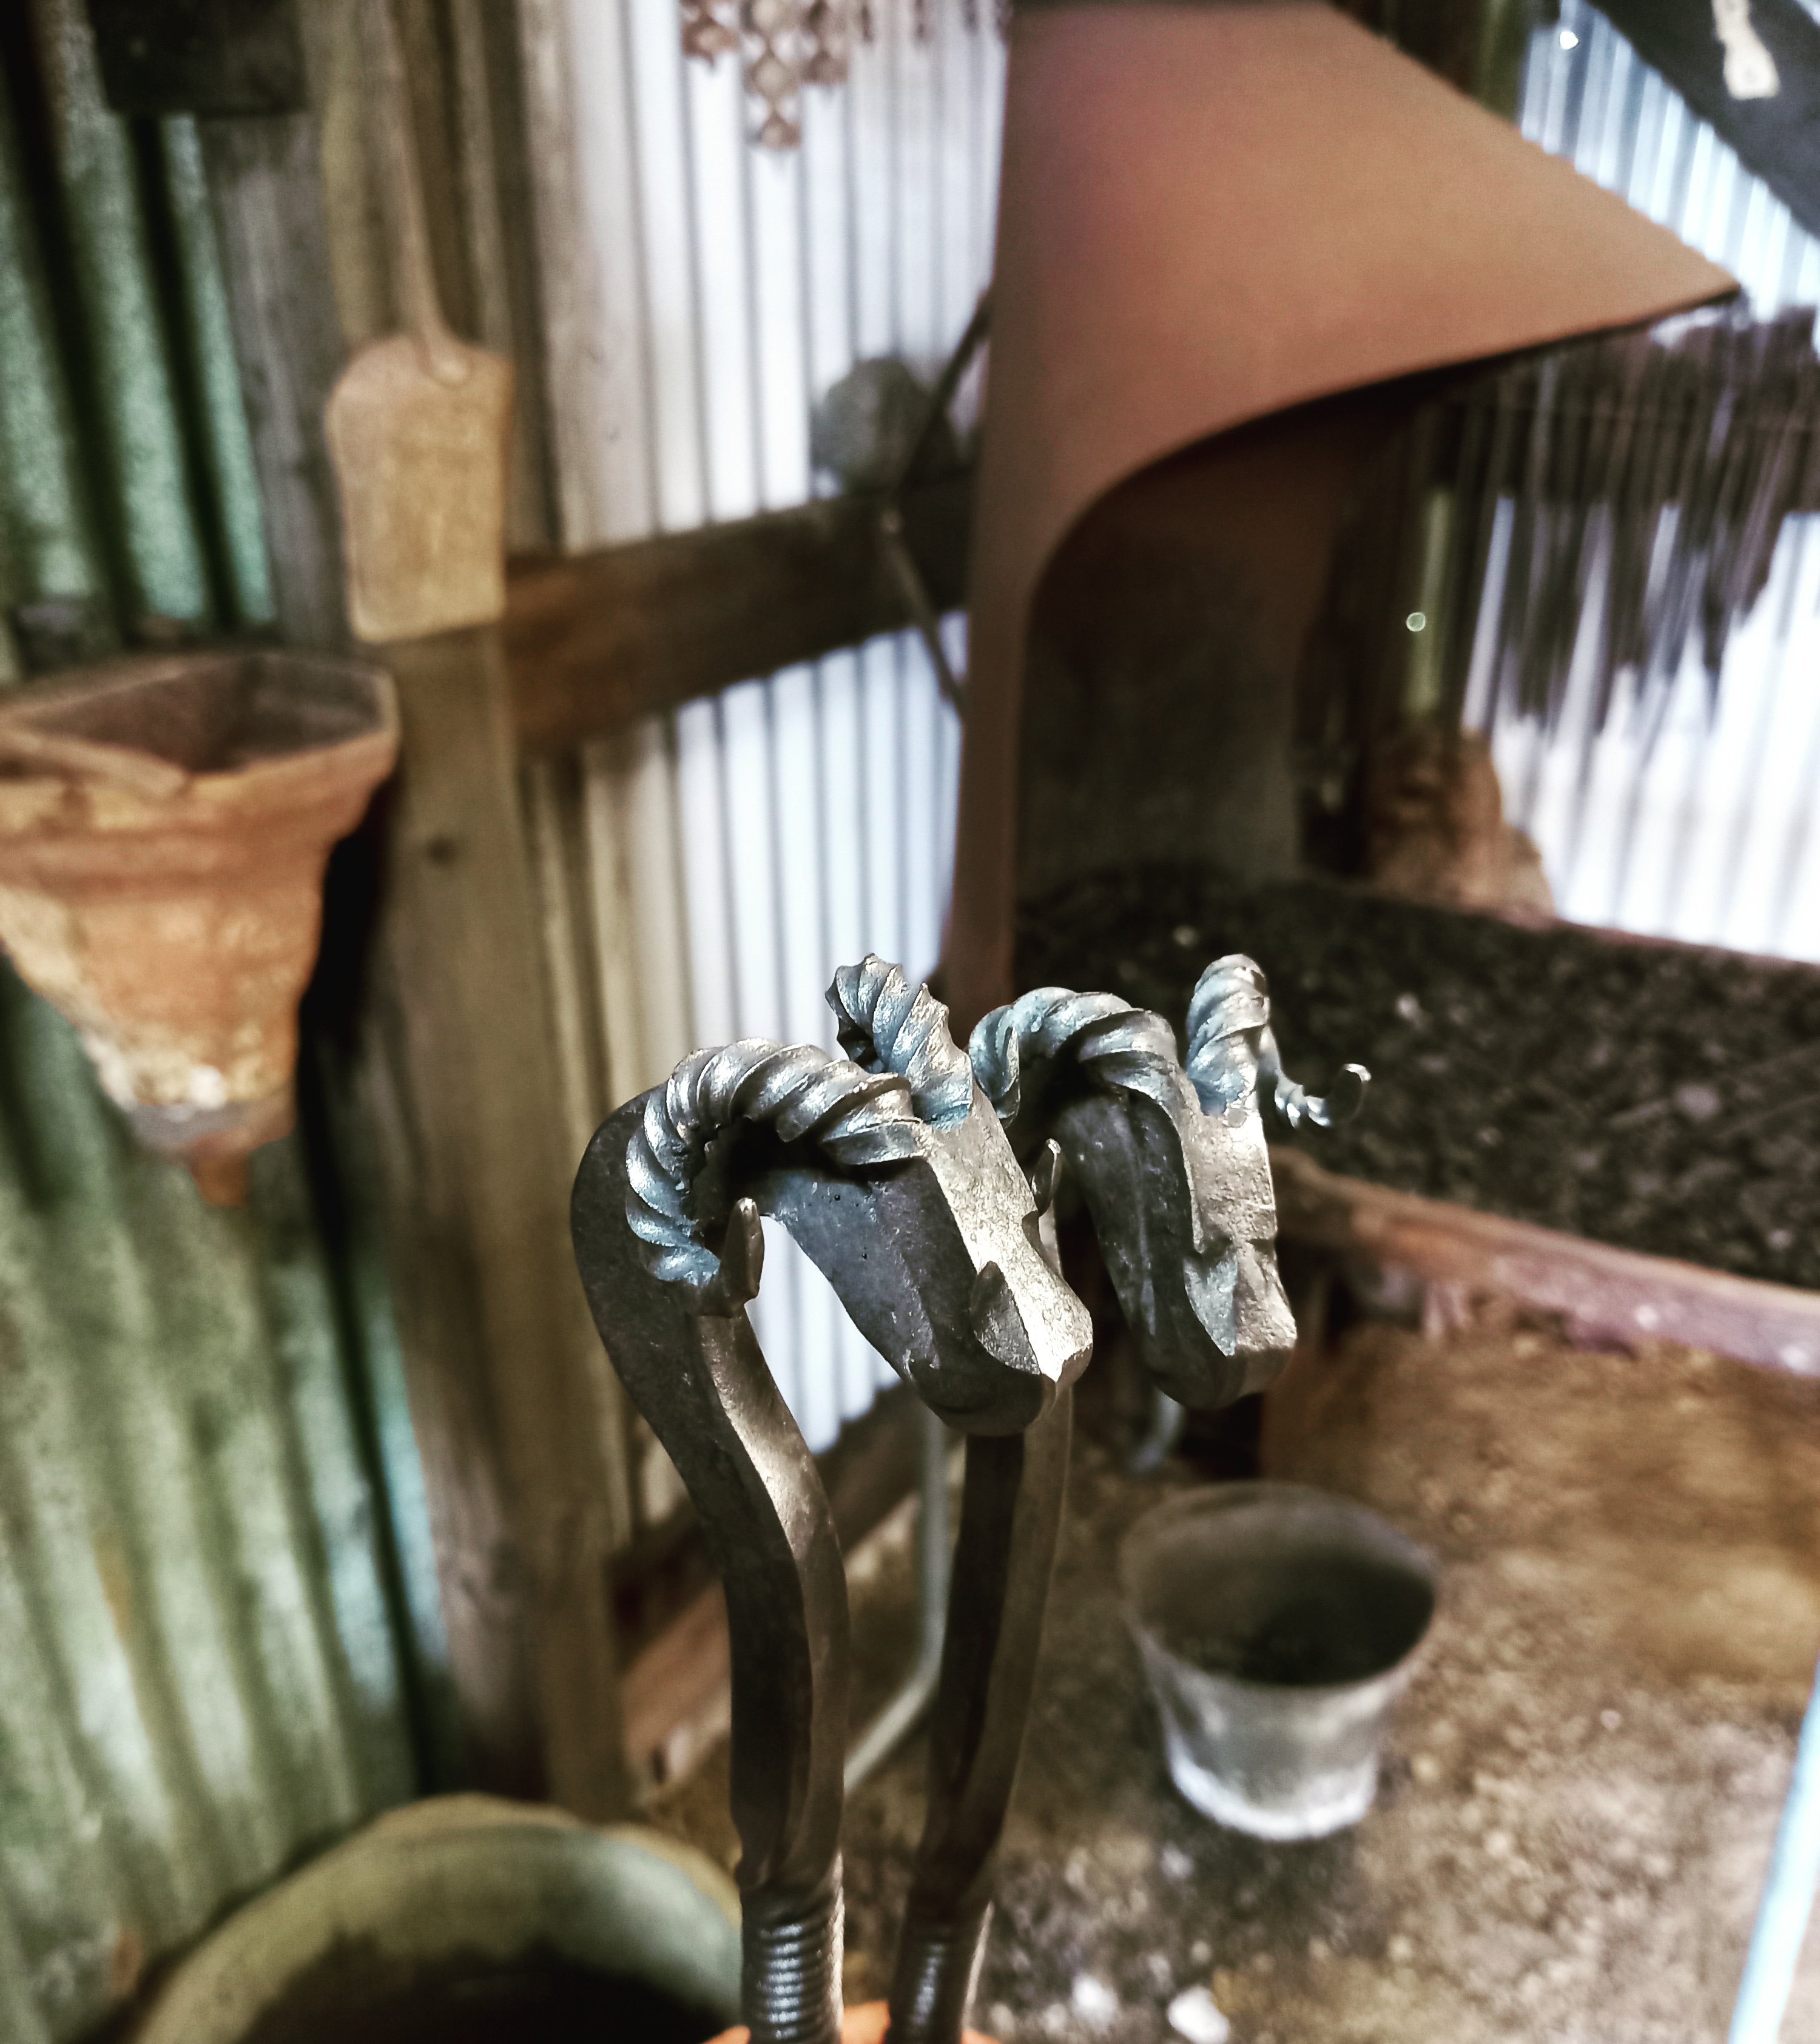
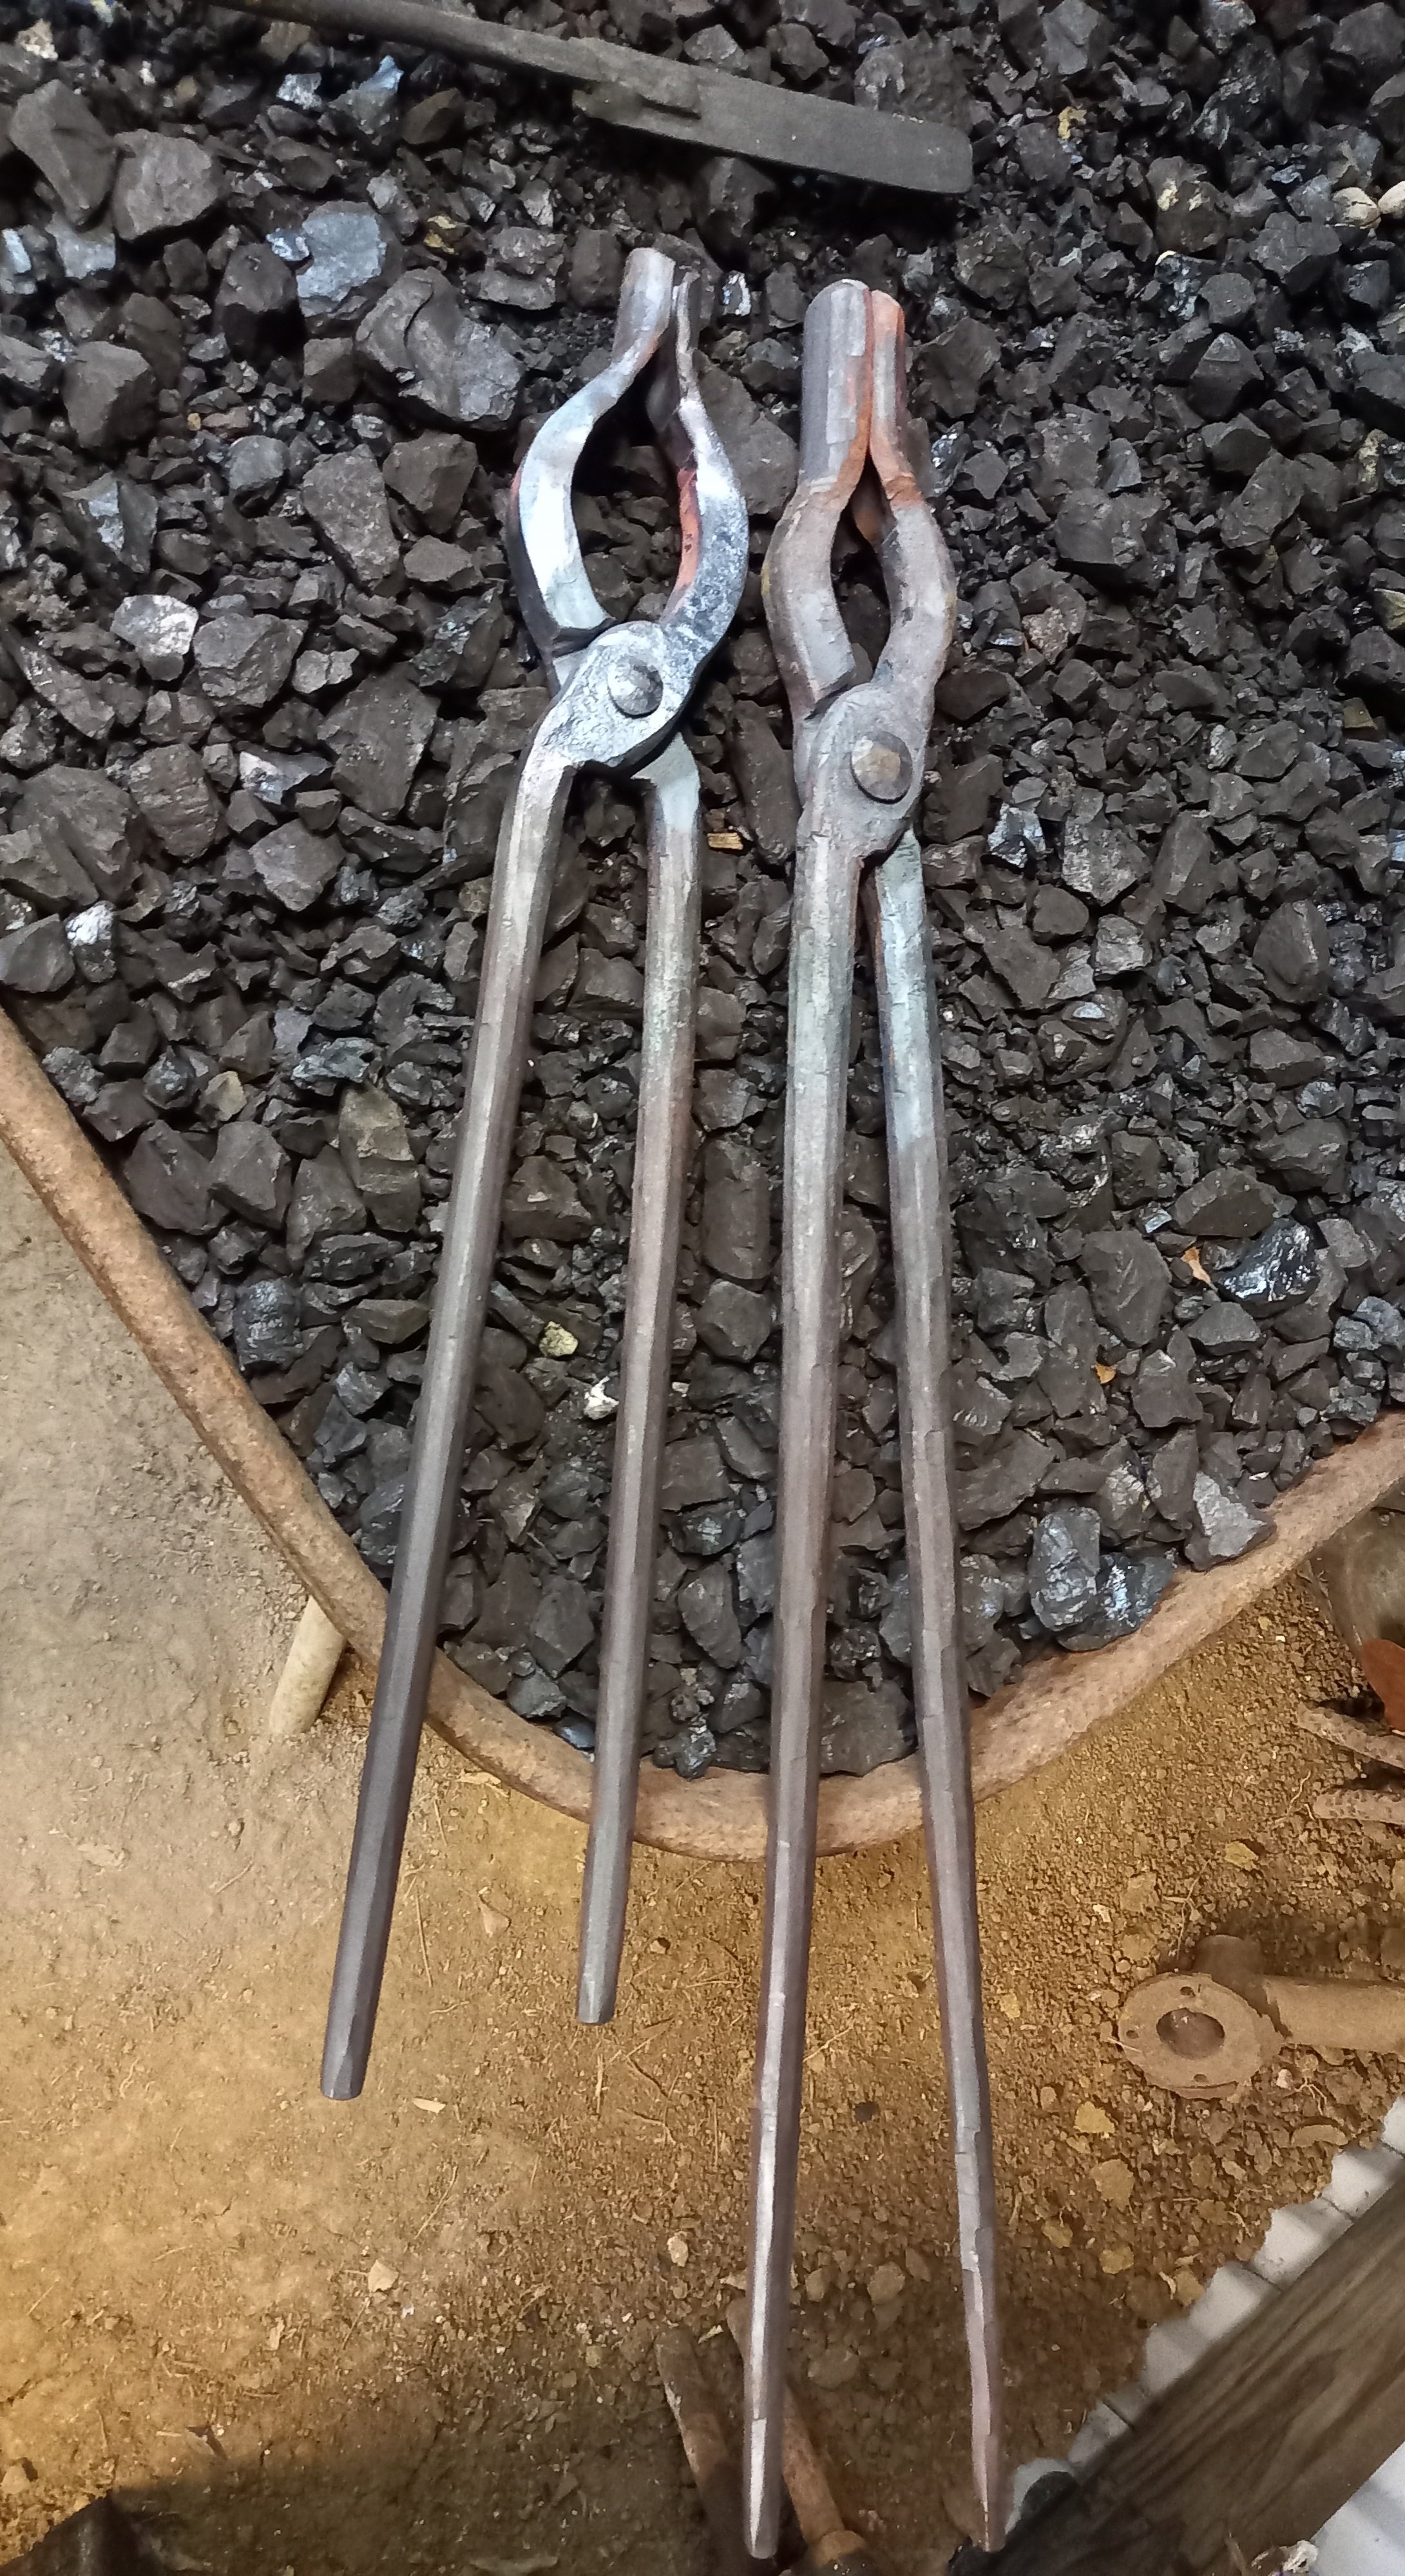
12mm and 16mm square jaw tongs I made the other day,
2 points
-
For ages I've wanted to dip a toe into the world of porting heads, which of course means you need some way to measure results. So a flowbench is needed. There are lots of plans online, however most of them use water filled tubes and other completely valid forms of measurement which arent any good for drawing graphs on the internet with. I've now got an okay handle on programming arduinos and touchscreens and understand sensors well enough that I'm gonna try put something together that's fairly well automated. It will probably start out simple and then I will get bored and not finish it I will add more bits to it So the first part of the problem. Valve actuation The results of a flowbench usually show a graph that demonstrates airflow from the valves being mostly closed, through to right open. Something like this: So you can see that this particular test opens the valves and tests in 0.05" increments. I thought it would be nice to be able to both measure how far the valve has gone down, and also have a mechanism for pushing the valve down, automatically so it can just take measurements at set intervals. So this way there's good repeatability without human error but also it helps automate the testing to be less laborious. Even with soft-ish valve springs fitted it's still a reasonably strong force to push the valves down. Speed isnt important but high torque and being able to hold in place is. So a stepdown geared worm drive motor should be good for this. Not a stepper motor, just DC but doesnt matter as the worm drive gearing holds everything in place (hopefully) For measuring how far the valves are depressed, I found out that some dial indicators have a data port on them, so they can spit out measurements over serial. sweet. In order to get the USB connection into an arduino, need a USB to serial converter like so. So the idea is that the dial gauge will sit on one of the valve buckets, then the stepper motor will be a fork shape that can push down on both of the buckets separately. So you can find "zero" position by reversing the motor until the value on the dial indicator stops changing. Then you know you're at home position. So I'm going to try make an assembly that holds all of the above that can easily be moved from cyl to cyl. So it will likely attach to something that can bolt in place of the regular cams, or use the cam cap bolts. It's important to note at this point that I've ordered all of the parts, but not actually done any of the work apart from percolate ideas in my head for a long time.
1 point
-
Hi all, it was mentioned I should start a thread on my KT250 project. I don't really need another project as I am still building my Riley Brooklands car but a bike has been on my mind for a while since 1. I am running out of room for cars, 2. I don't want to do another car since the process of getting them on the road is getting harder all the time, 3. as my taste in cars keeps getting older the next one would have to be a bloody London to Brighton car and 4. getting all your parts from overseas is starting to get very expensive. So I considered some kind of vintage bike type project. Something for me to learn about bikes, something to learn to ride on and someone to just put about the garden and neighbours fields on. I don't really want to ride on the roads, it's dangerous enough in low slung 30s sports cars I find. Talking to a friend who has some knowledge of such things (and owns bikes) he said vintage bikes aren't ideal for various reasons and not that great to ride. He suggested a classis trials bike like a Montesa, Bultaco or Ossa. Those are expensive and hard to find and you still have that 'parts from overseas' issue. On TradeMe I saw a book about Trials riding by Don Smith and bought that just to learn more about it. I ended up chatting to the seller about such things as he sold other parts for bikes and asked him if I was looking for an old bike where is the best place to look other than TradeMe and Beaded Wheels. He more or less said 'have I got a deal for you' and you can guess what happened next. So now I own a 76 (I think) KT 250 Kawasaki. It's a project but it is mostly all there and original but a lot needs doing. It came with some parts and manuals and more parts should be coming too. Has 4000 something on the speedo (which is in miles). I wrote about it in the bike appreciation thread but basically I checked it over, tested spark and compression and so on and that the oiler seems intact and working and got it started. That was actually easy, took 3 kicks! The clutch was clutch but following some advice in that thread I worked on unsticking that by rocking the bike back and forth in gear and once it felt like there was some slipping there I started it up and chucked it into gear. That worked and I was able to ride around the garden in first. I think I did manage to find 2nd once but as a new rider I am just getting the hang of things and am still working on the likes of not falling off and not over doing the throttle at the moment. Plans so far, putt-putt about to get the hang of it then eventually strip it all down, learn how it works and rebuild it nicely I guess. But for now I am busy making the ash timber frame for the car then the aluminium skin so am not sure when this will happen. It gives me time to find parts and things I need, a lot of which are available locally which is one reason I went for this bike. From what I understand it wasn't a great trials bike in the day. Or rather others did better. But they were good farm bikes making them popular here. Here are some as delivered pics. Simon1 point
-
Some mags can still be good at 90 years old, but could fail at any time, I killed one on my B31 I recon from the lead falling off at full trottel, rebuild cost $1200 from the Maddocks, armature, was sent to Australia. That little alternator/ ignition is from a Lifan 125, it has 3 lighting coils and a source coil and a pick up for the CDI, I will make it so I can retard it from the handelbar control1 point
-
No personal ownership experience with iPads myself, but even older ones my mum has replaced still look perfectly fine to me. So as far as resolution and display quality goes, i'd save the $500 and go 9th gen iPad. Both options are going to be amazing compared to what she has now. As for being outdated, for those basic tasks even much cheaper devices (not iPad) will handle them for years to come. So I wouldn't be concerned about that when comparing those two devices.1 point
-
Never had a problem with the Starlet, run it right down to just about fumes a few times. I guess the tank is a bit more of a simple shape than some other cars. I think there may be some slight factory baffling in there too. Hilux on the other hand is a piece of shit when you get near the empty line on the guage.1 point
-
I had the same problem with that fucking cunting cocksucking 4x4 primera I had. The next day another set of eyes found a bolt we'd missed.1 point
-
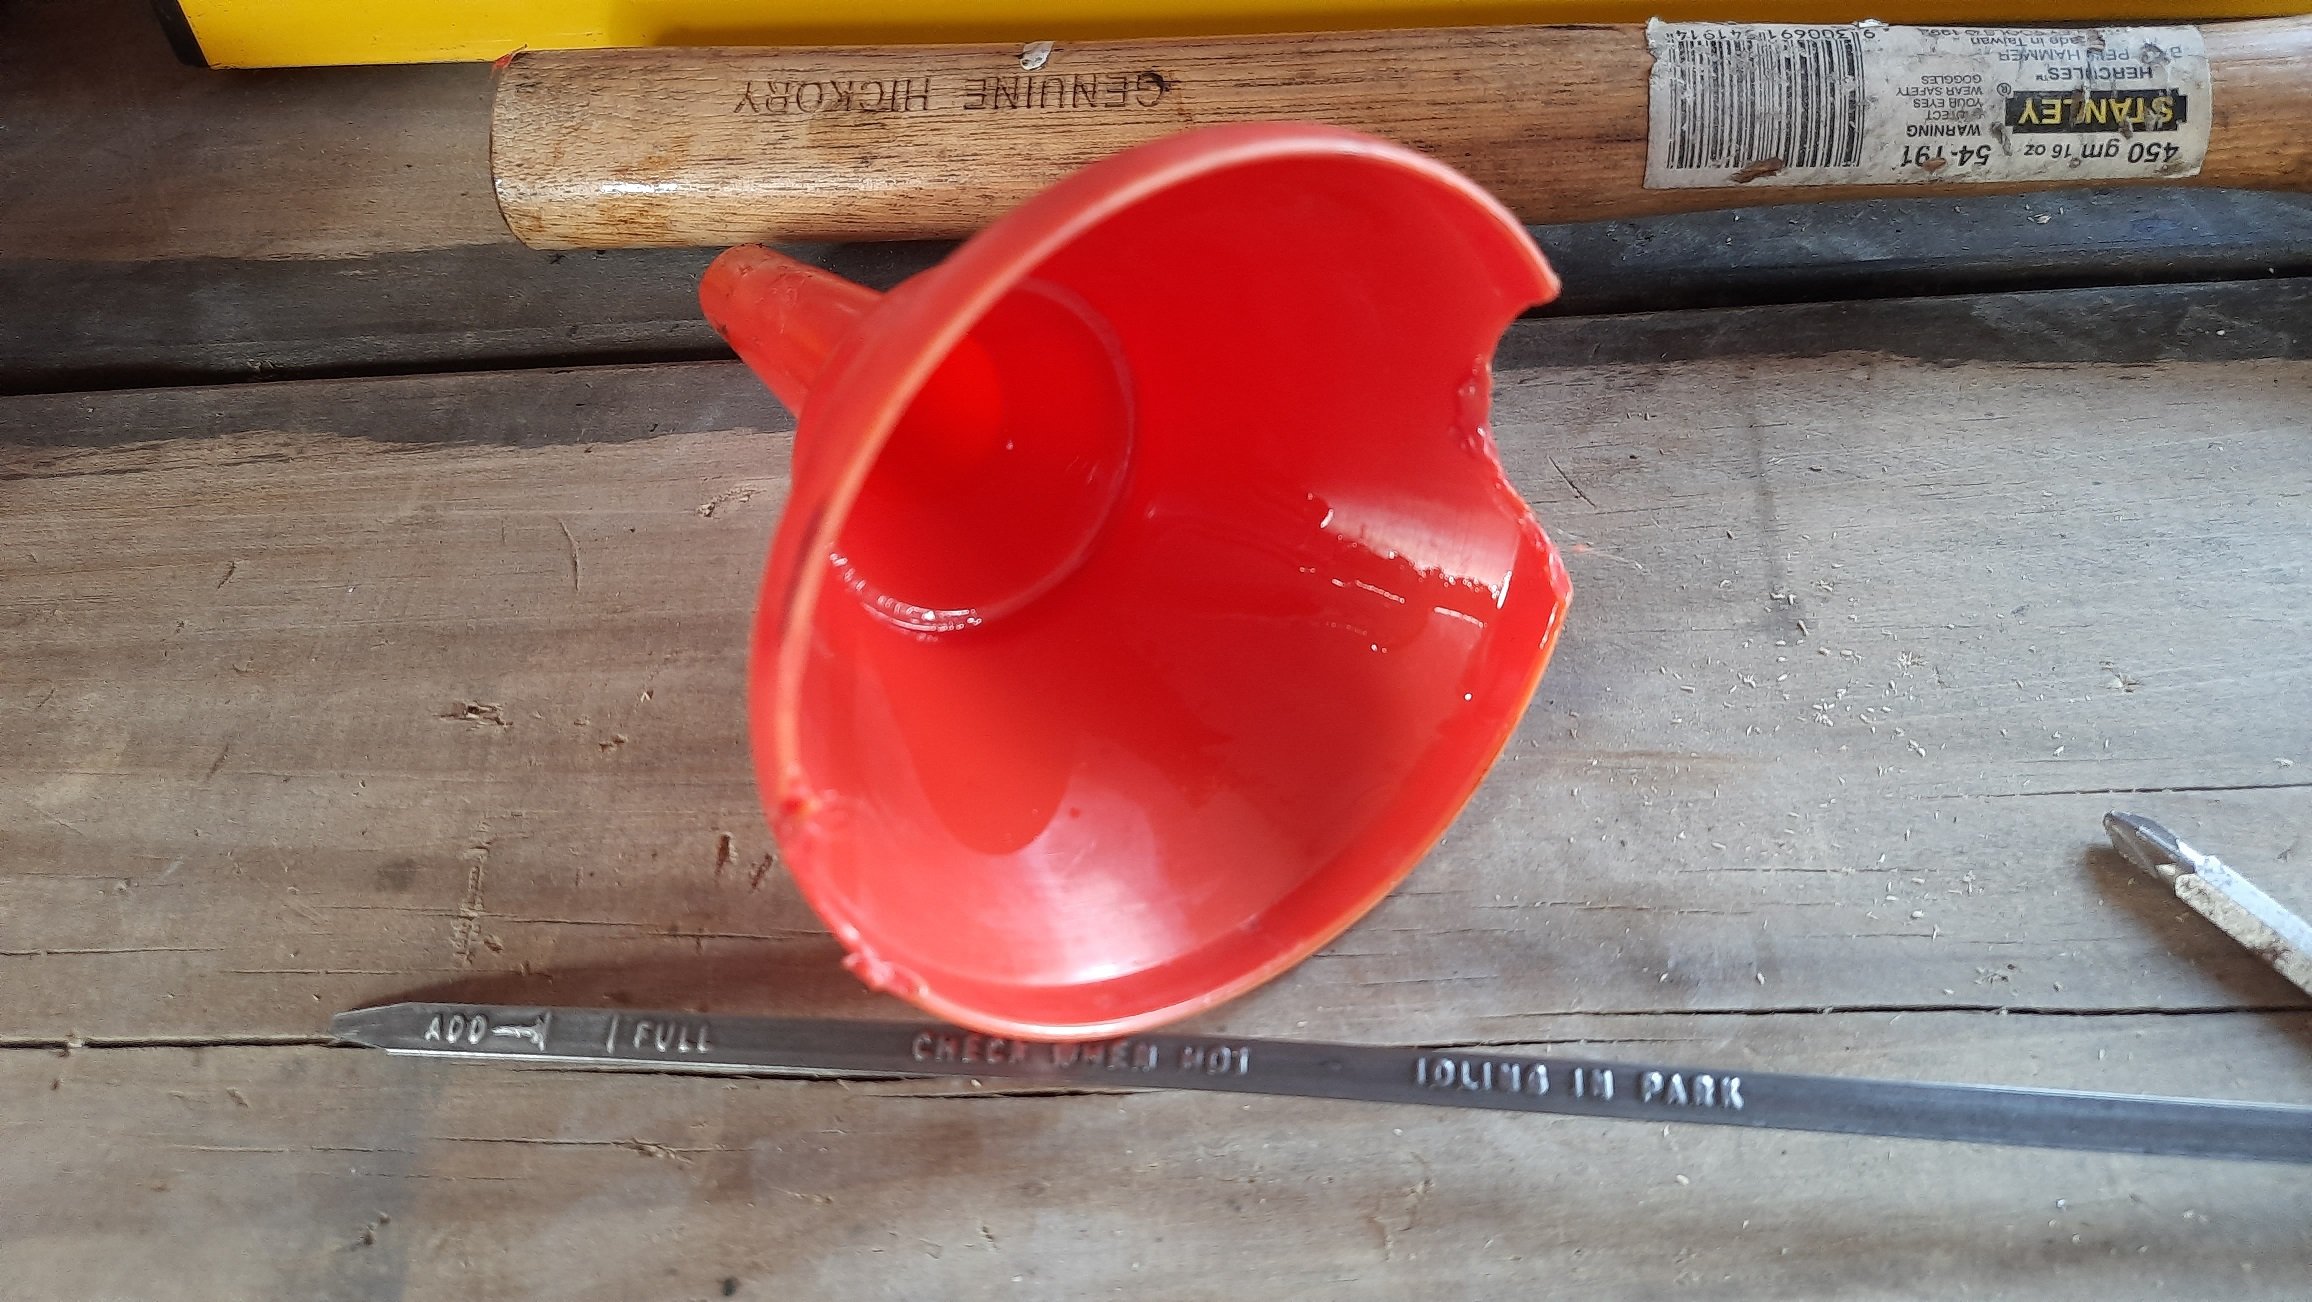
Finally found some Type F and topped up the trans. It took around 1.5l so was definitely low. Did have a wee issue topping up with the car idling in park to check level... Plastic funnel and hot headers not a good mix. Muppet.
1 point
-
What a honey, jealous of the wheels1 point
-
Legal beagle again see everyone at drag day where I expect to compete with company Corrola's and perhaps mopeds. May Jack my self up on red bull and aim for the perfect reaction time. True goal is just a baseline and next year come back turbo and try shave 5 seconds off.
1 point
-
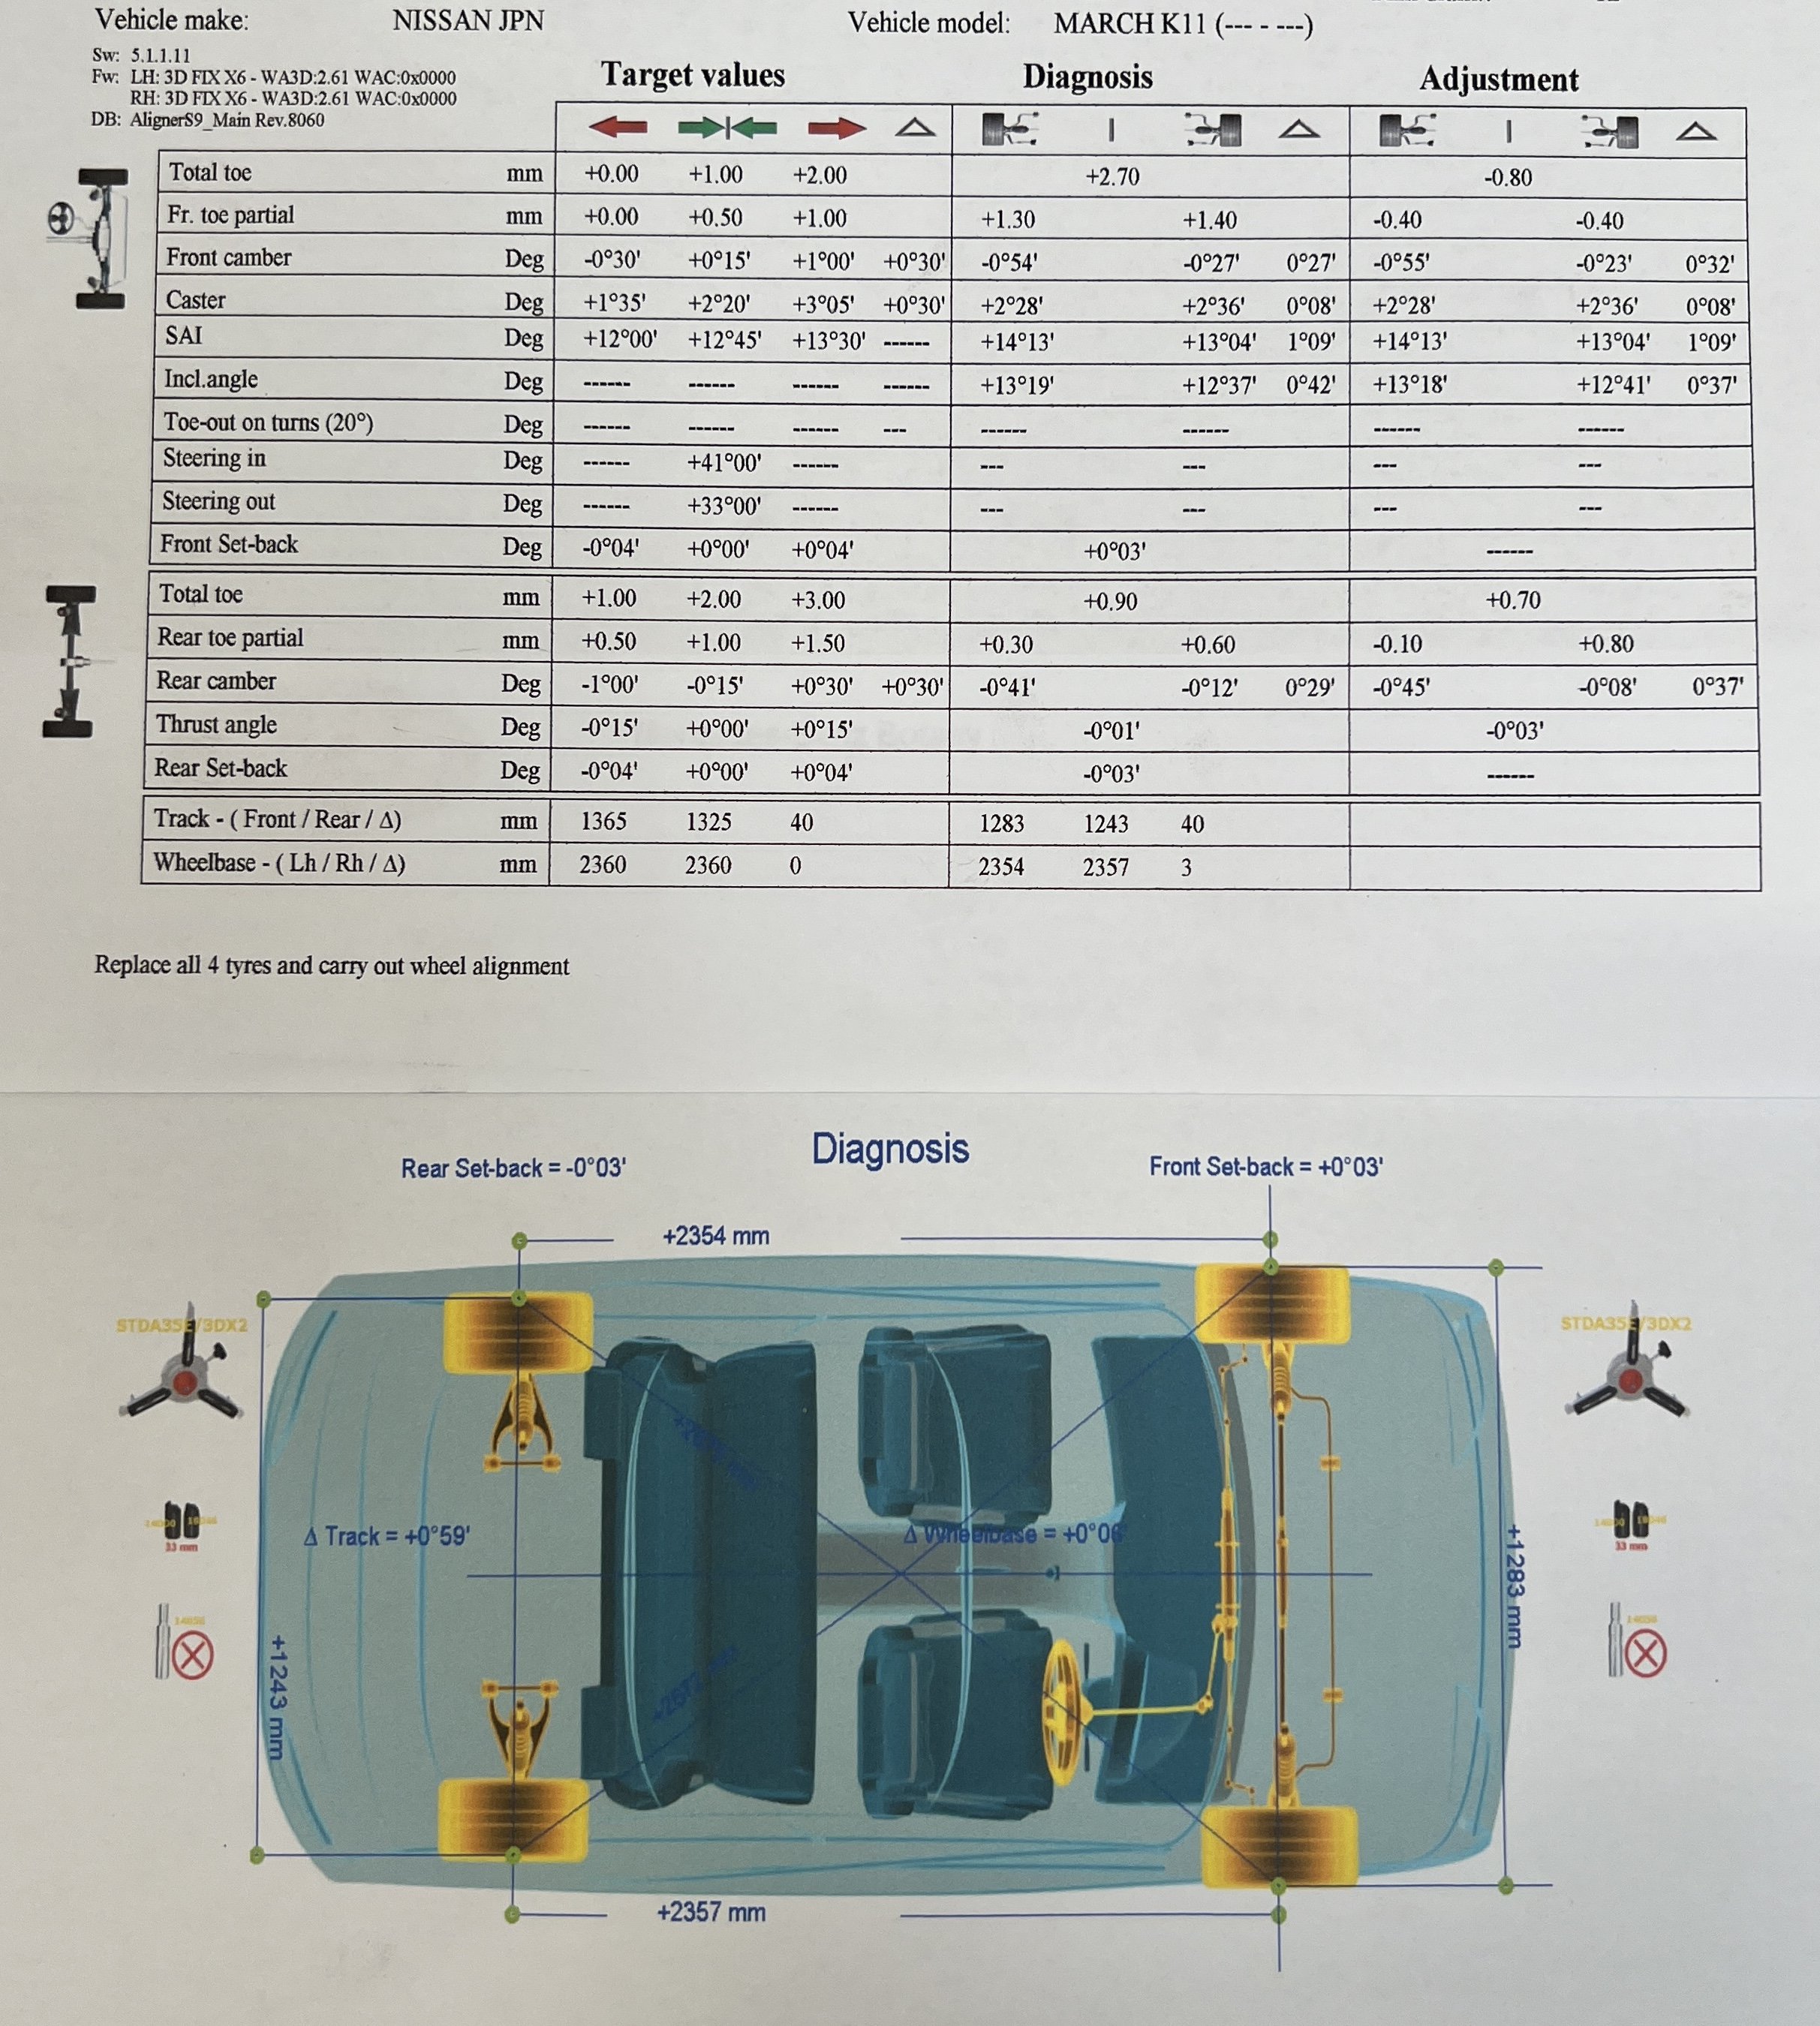
Tyre guy fitted them all up, and aligned it (we decided we would try an ‘fast street’ setup to give it good turn in when your rushing to get the groceries and need to dive into a carpark at pace) -He’s also suggested I need to get a adjustable panhard rod and some rear spacers to even out the track width so they’re next on the list Then road test - Definitely has more grip than the old hard supercats it came with and turns in pretty well now. + 10 go kart improvements
1 point
-
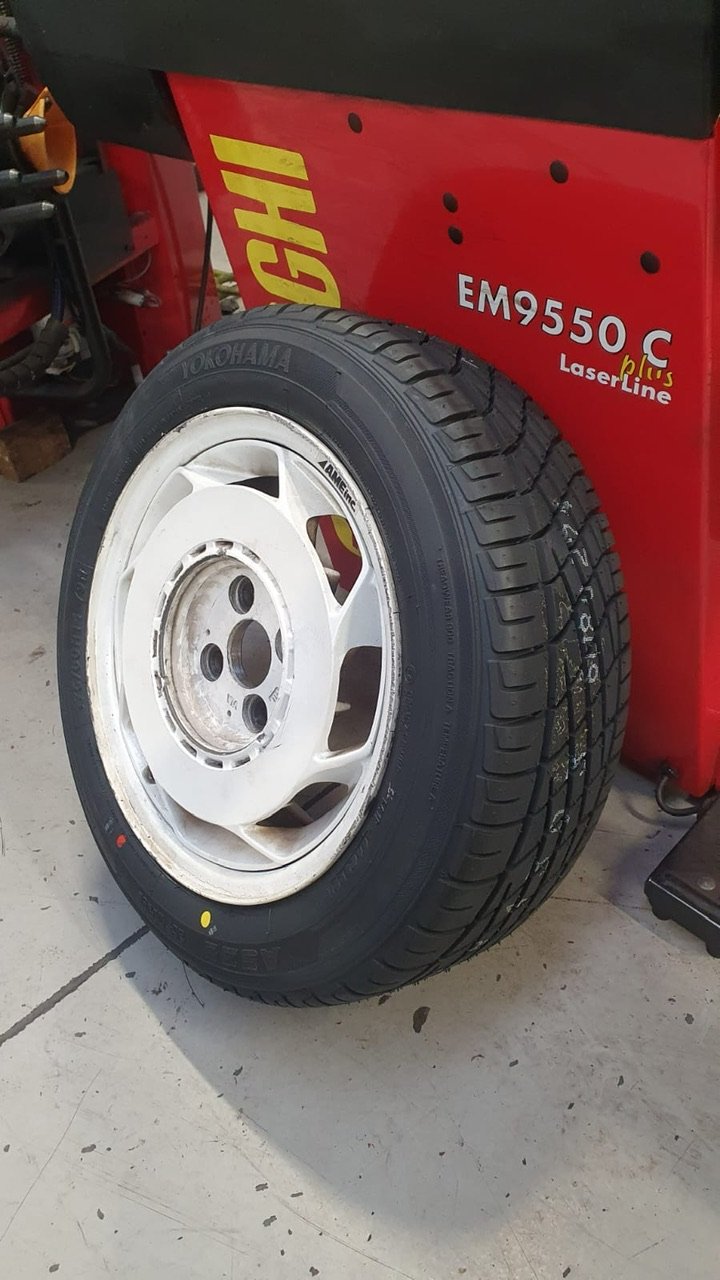
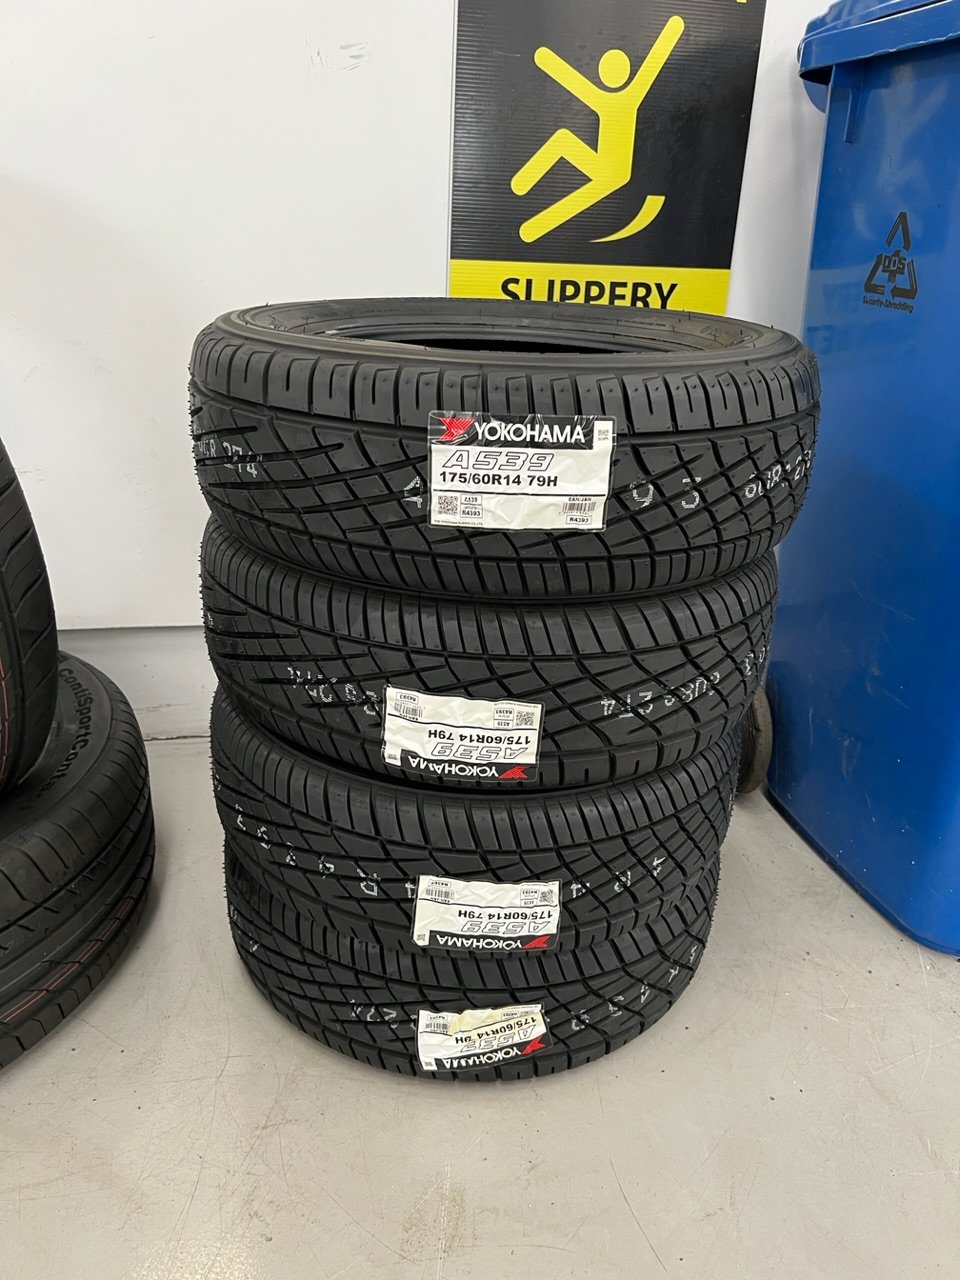
I got the tyres stripped, asked tyre guy at work to keep them aside so I could put them back on he and said nope, they’re old and shit then promptly disposed of the tyres. I ended up doing a pick-a-part mission, and grabbing a rear hub then dropping the wheels and to an engineering shop and said make these fit that. Picked them up a few days later and with my wallet lighter tried them on the car and was happy that they fitted. -I’ve got intentions of getting them dipped, the kerbing welded up and machined back to OEM edging, and then repainted/powder coated with new decals, but my budget does not allow for that at this present moment in time. I requested the tyre guy at work to find me some tyres to exemplify the go kart handling characteristics of the might K11 -we had settled on a set of Advan ad08rs but came to find his supplier had no stock. So ended up with a set of Yokohama Advan A539s in 175/60r14 79H -which were budget friendly and not a super low quality tyre like most else in the segment. proceeded to fit them to the alloys
1 point
-
About to start on the front brake conversion on my Mk1. Currently has Falcon XA-XF brake discs (DBA slotted) fitted with early Falcon/HQ PBR calipers. Going to fit AU3 PBR calipers in place. AU3 caliper sat on back of discs to give an idea of size, it is massive compared to the early Falcon caliper! And thanks to being aluminium, instead of cast steel, it is about 1kg lighter than the early caliper. Fits inside 15" alloy wheel easily, and appears to be correct diameter for the disc. Brackets will be tricky, but I think I know how I will do them. I will update this thread as I go. Should be a good upgrade.
1 point
-
So seats have been a bit of an issue. The factory drivers one was fucked when I got it, so tracked down a pair of terrano seats a long time ago and have been rolling them. They were better but not great. Then a bench seat popped up locally (and we all know bench seats are superior) in reasonable condition and cheap cheap, so nabbed that and figured I'd need to get creative to make room for the shifter. Thankfully I was wrong! And being tall helps as I want the seat as far back as it can go for leg room anyway. It can move forward enough that the misses should still be able to reach the pedals, and back tips forward so can still get people in the back seats. Just needs a seat cover/nice blanket to top it off. Chuffed. Excuse the mess....
1 point
-
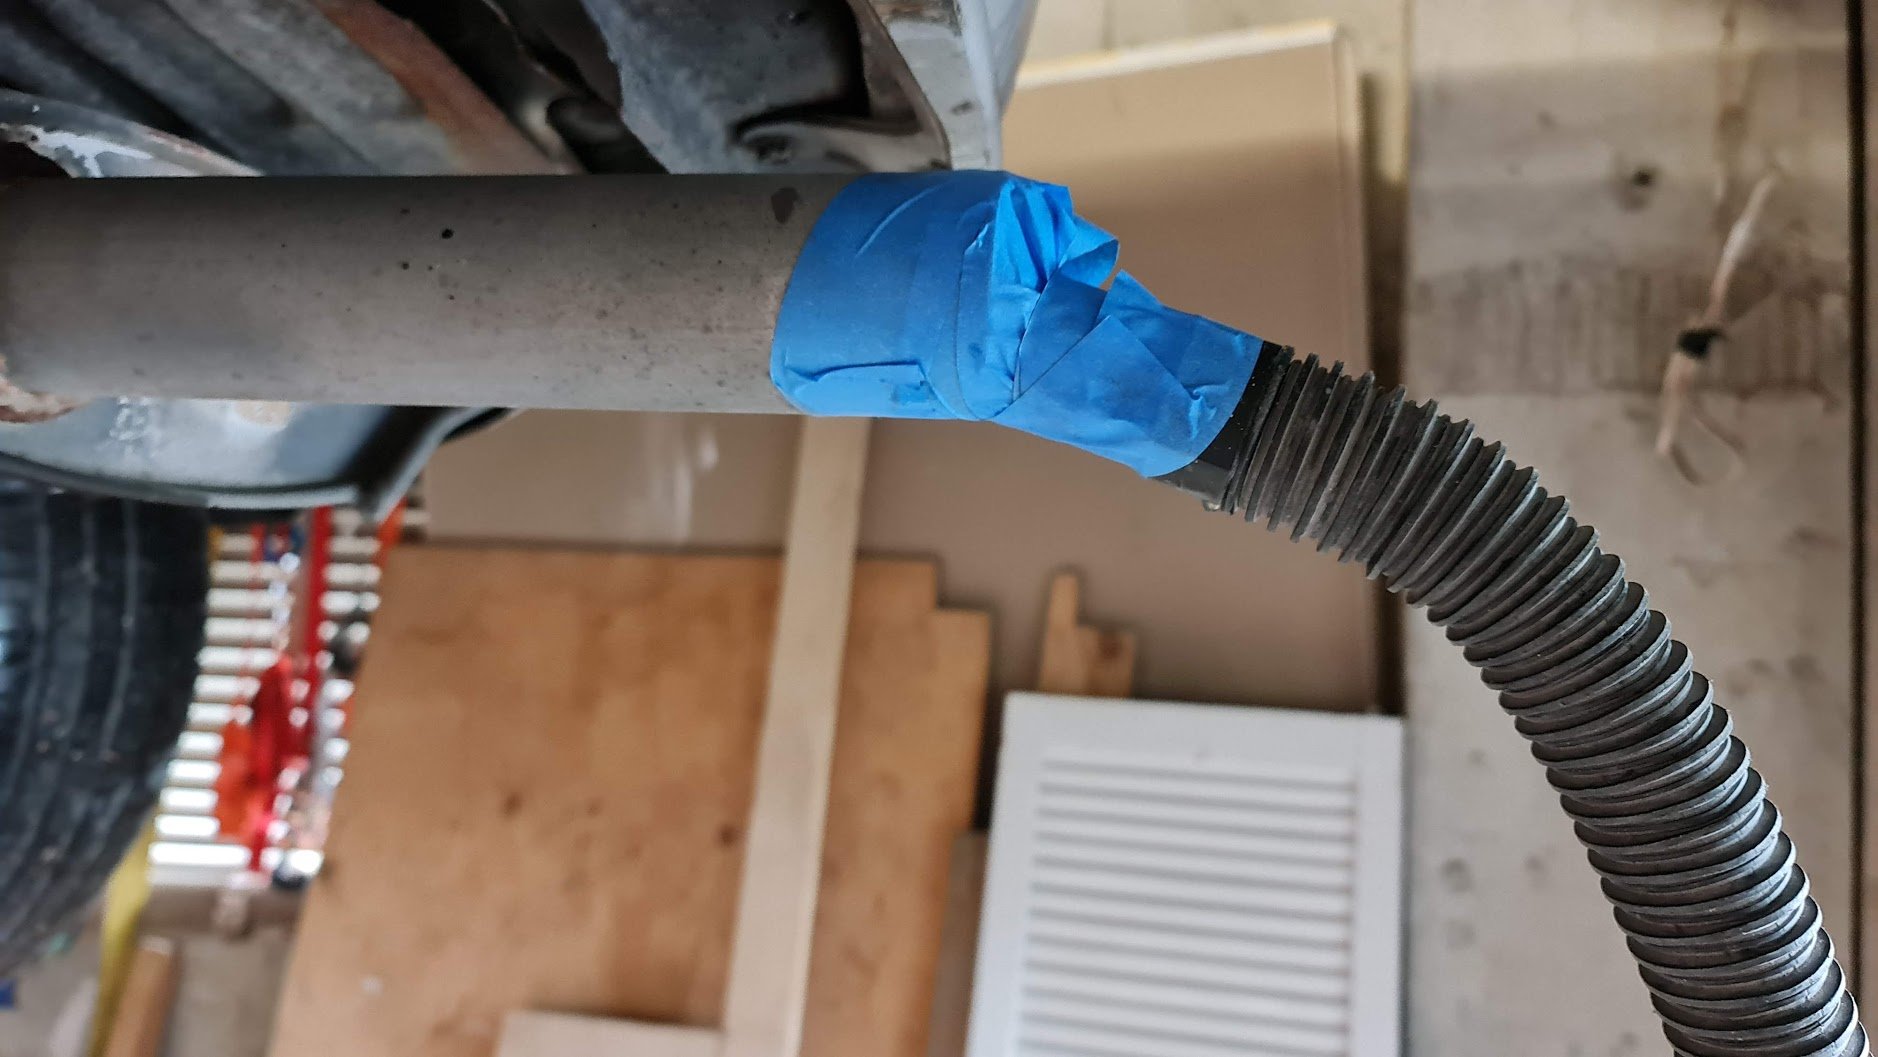
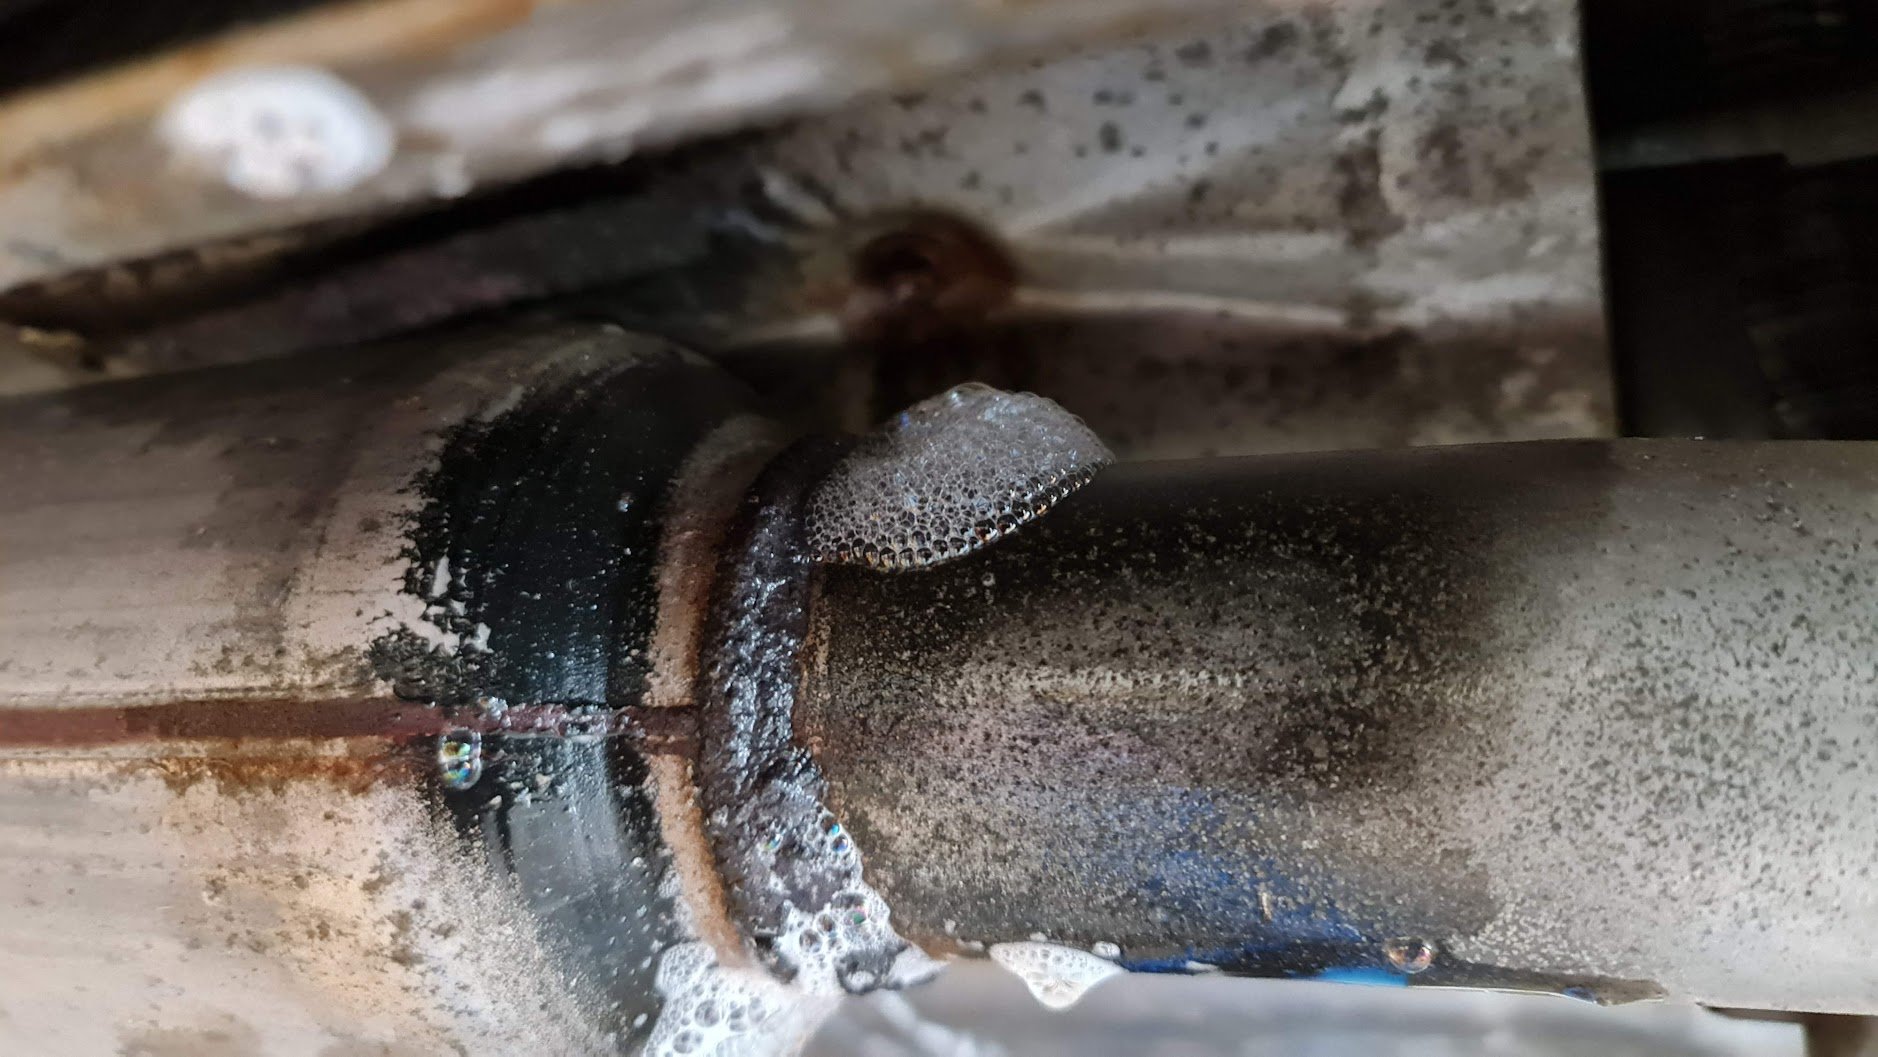
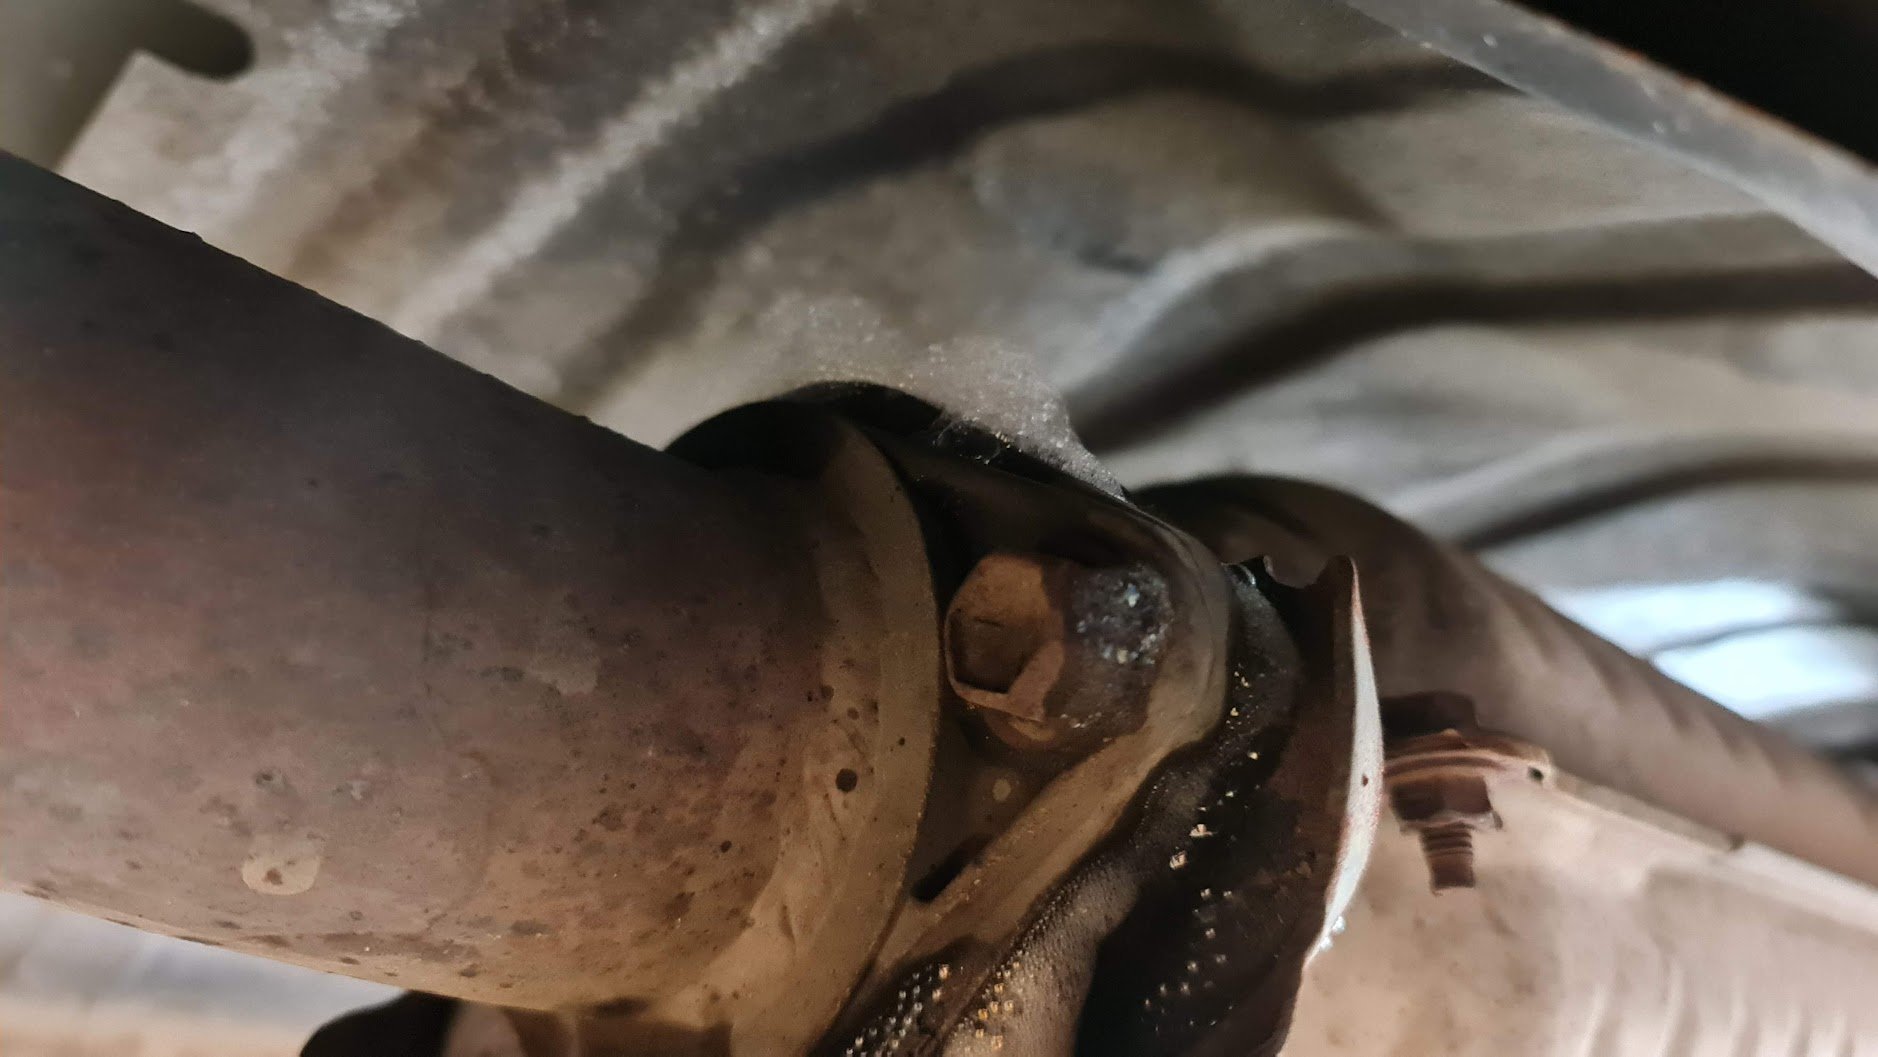
Not really 'built' but it worked well. I needed to find an exhaust leak, so I taped the vacuum cleaner hose onto the exhaust tip and put it into reverse flow so it would blow into the exhaust. Then sprayed soapy water onto exhaust and found a couple of places. Looks stupid but it works.
1 point
-
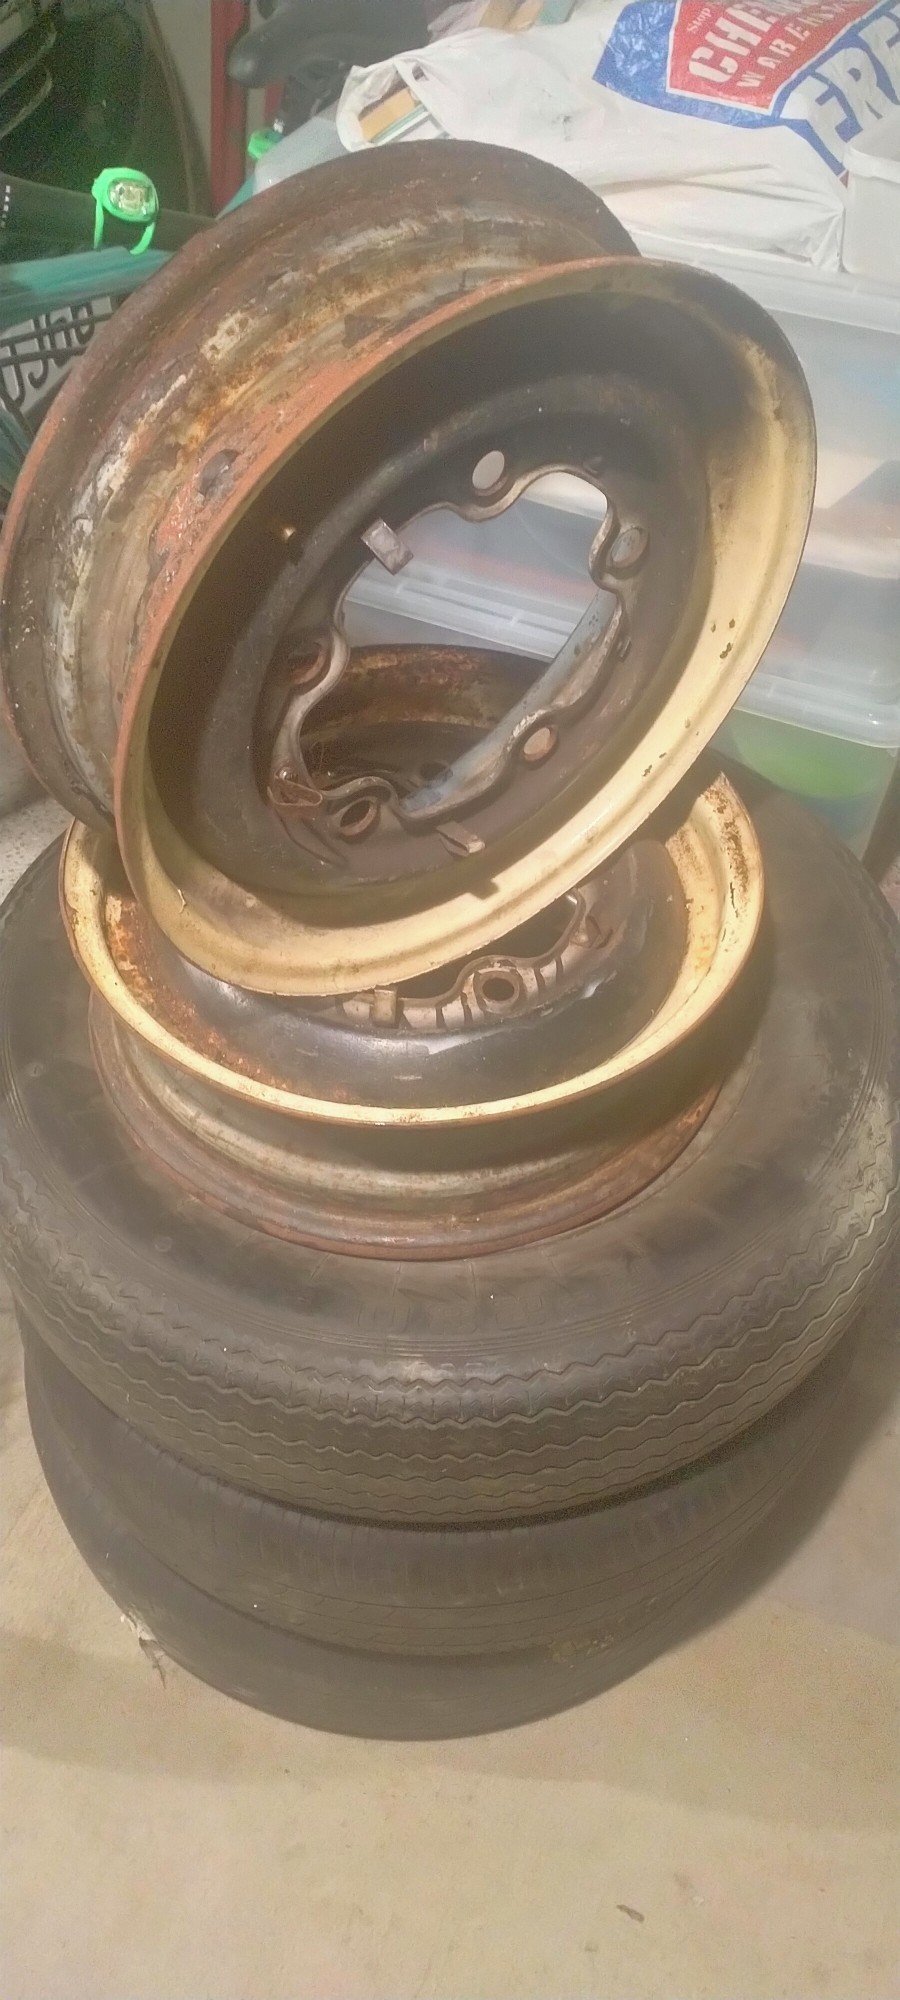
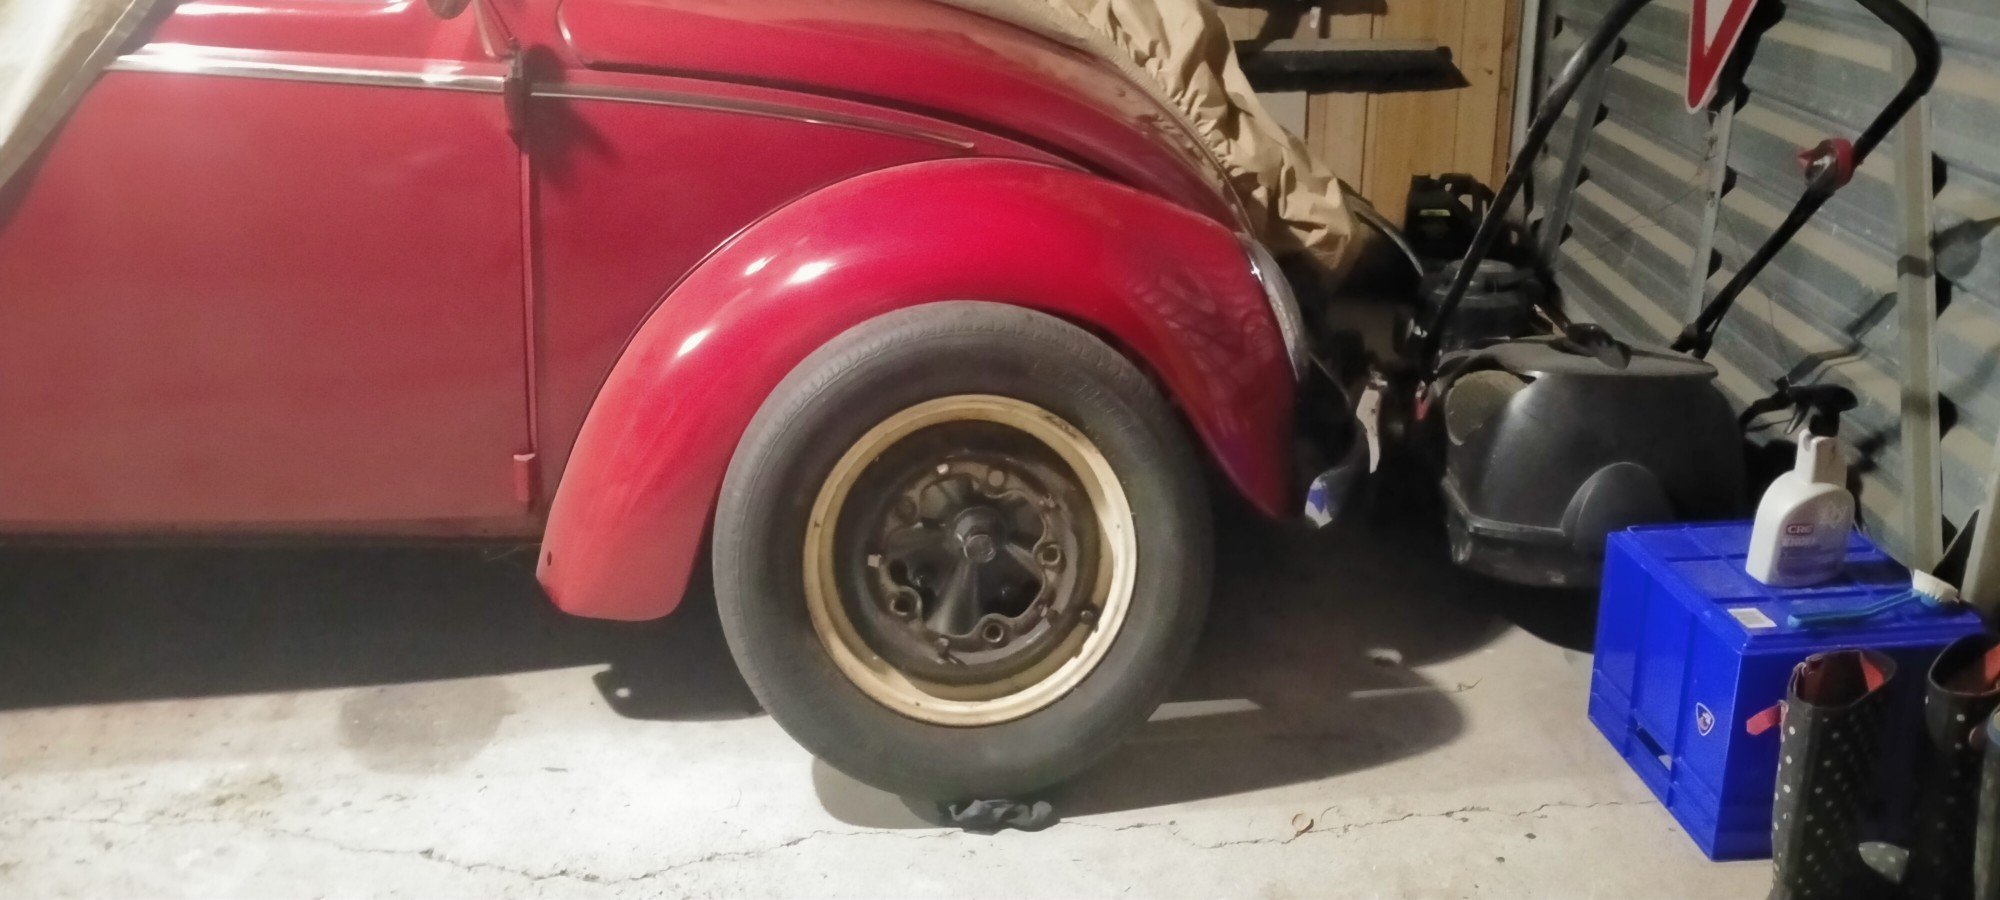
I've been looking for some steel rims for ages, the empi 5s could do with a repaint and I think they might polish up nice. Found these on TM and snapped them up for 20bucks! So these will need striping and painting then swapped out and then the alloys can have a birthday. Would completely change the look.
1 point
-
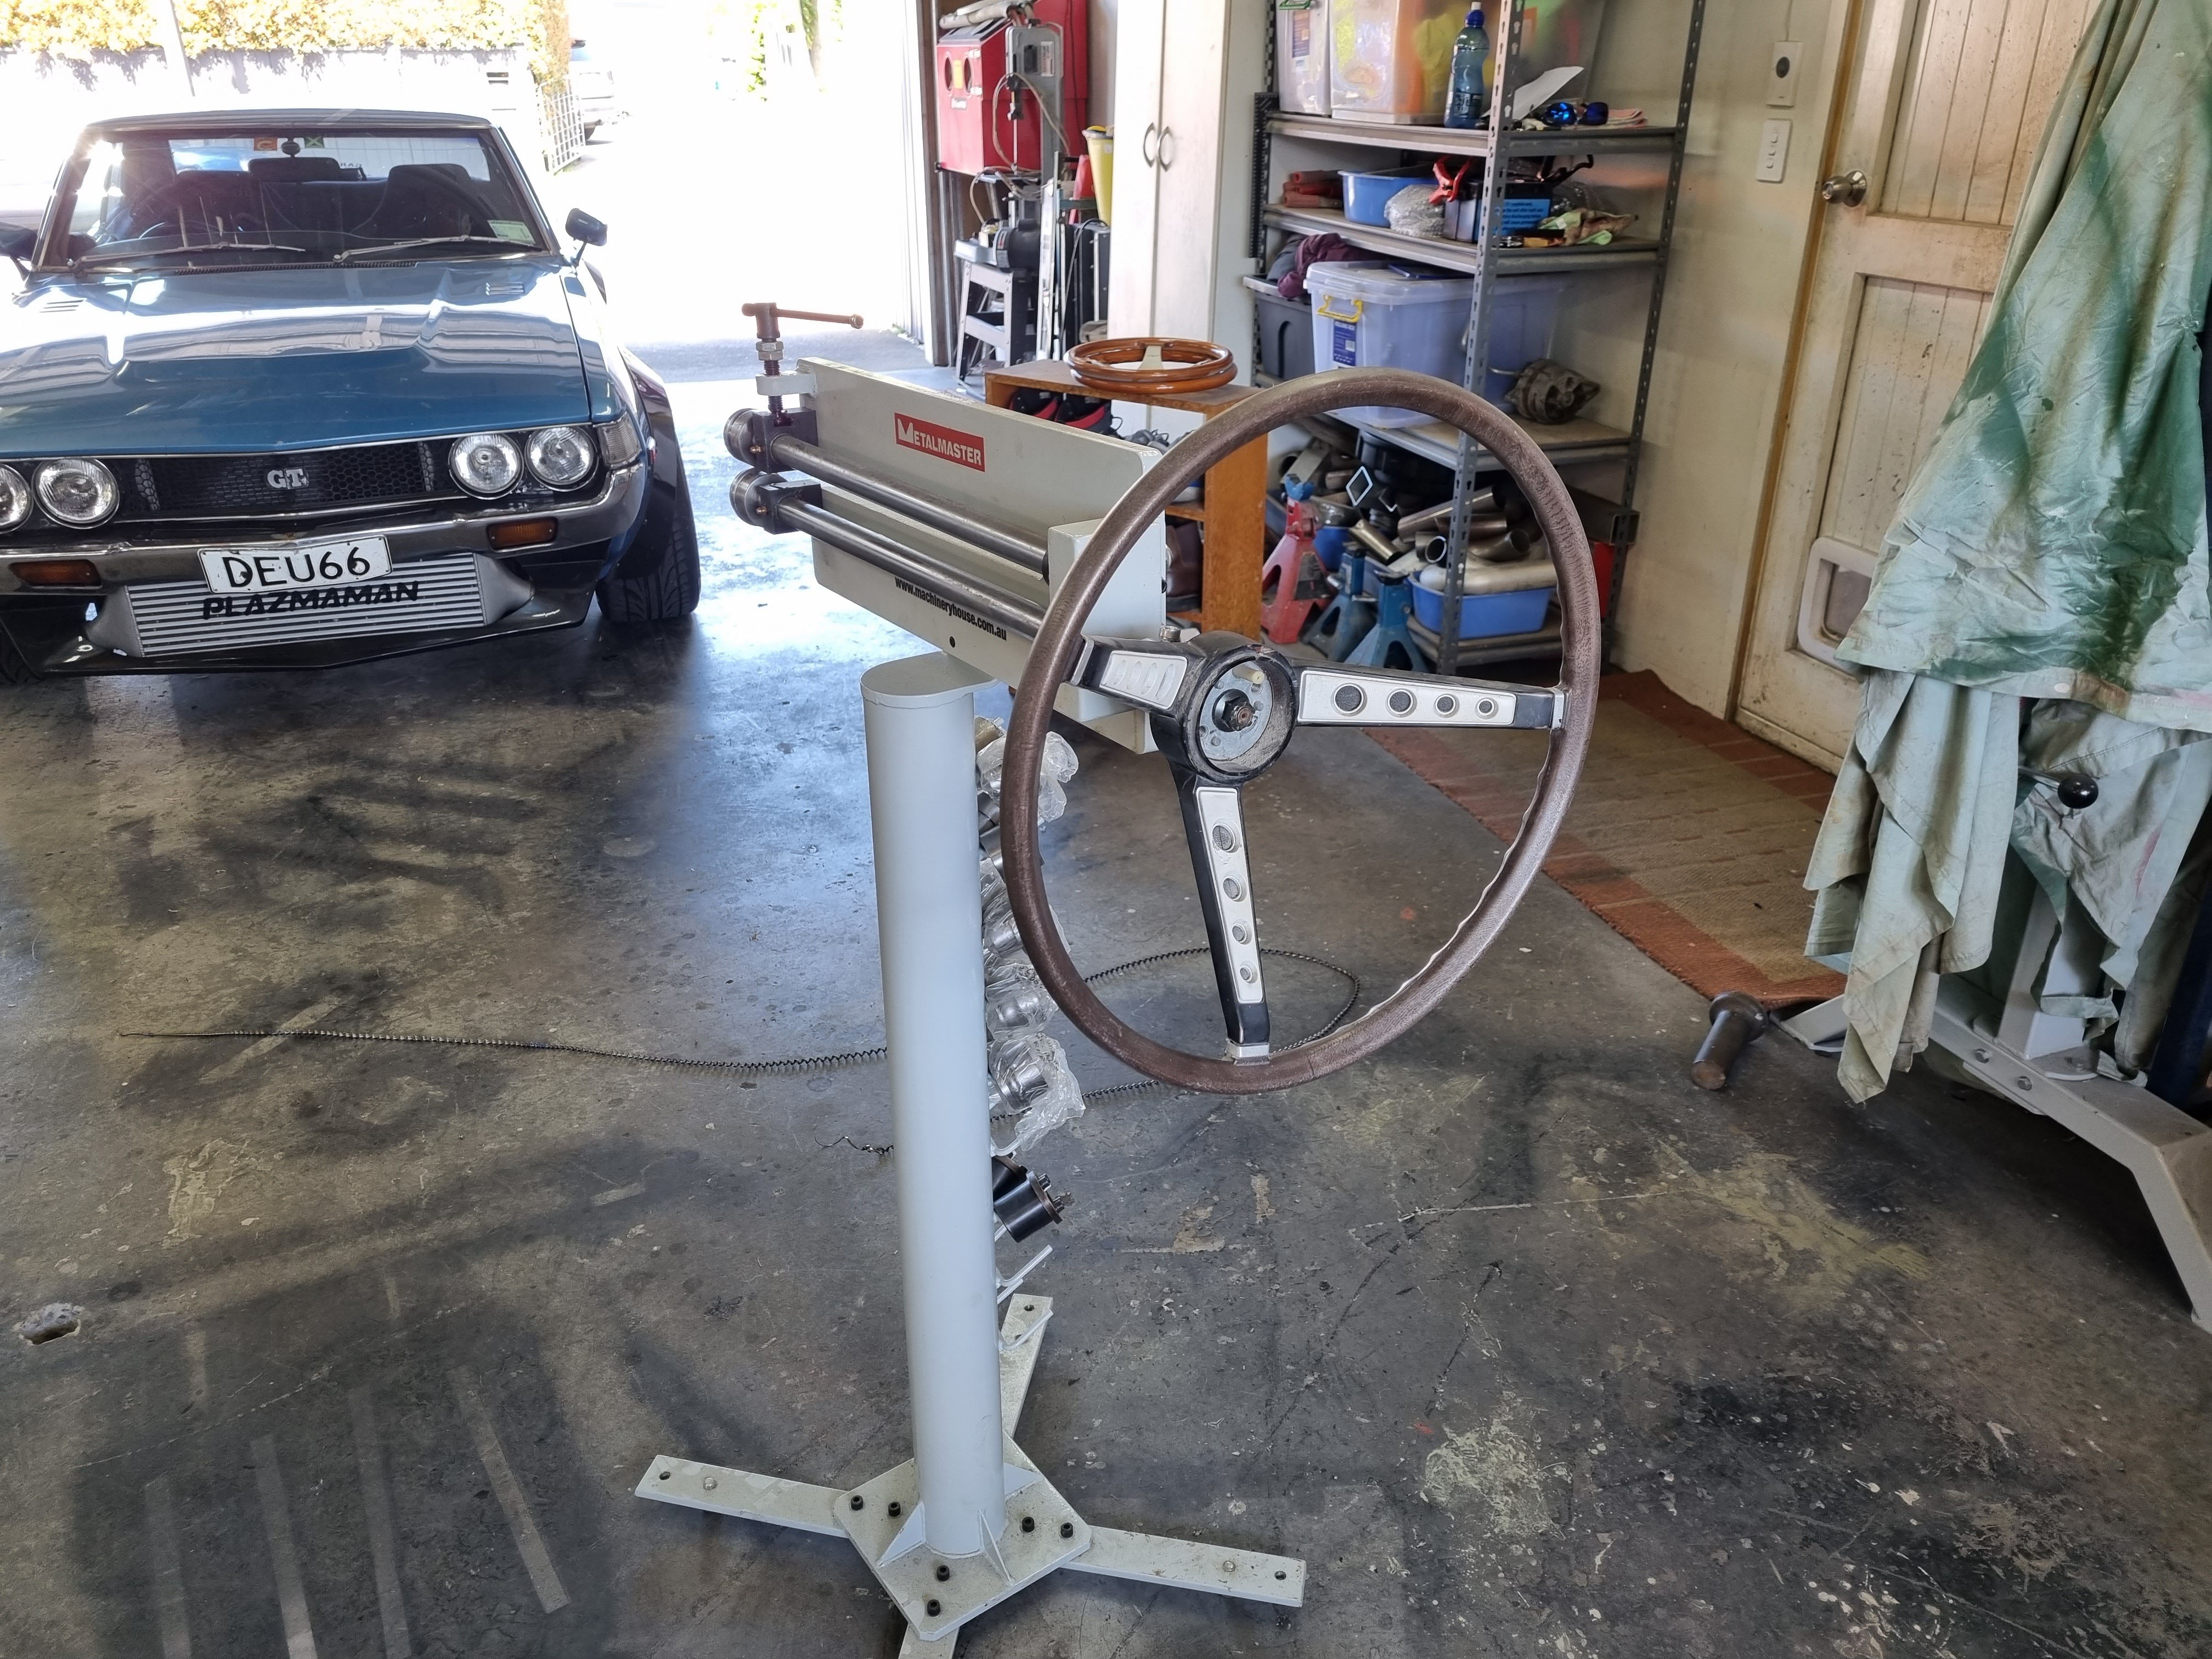
Someone on here posted a picture of their bead roller with a steering wheel on it and I thought that was a good idea so I put one on mine. Amazing.
1 point
-
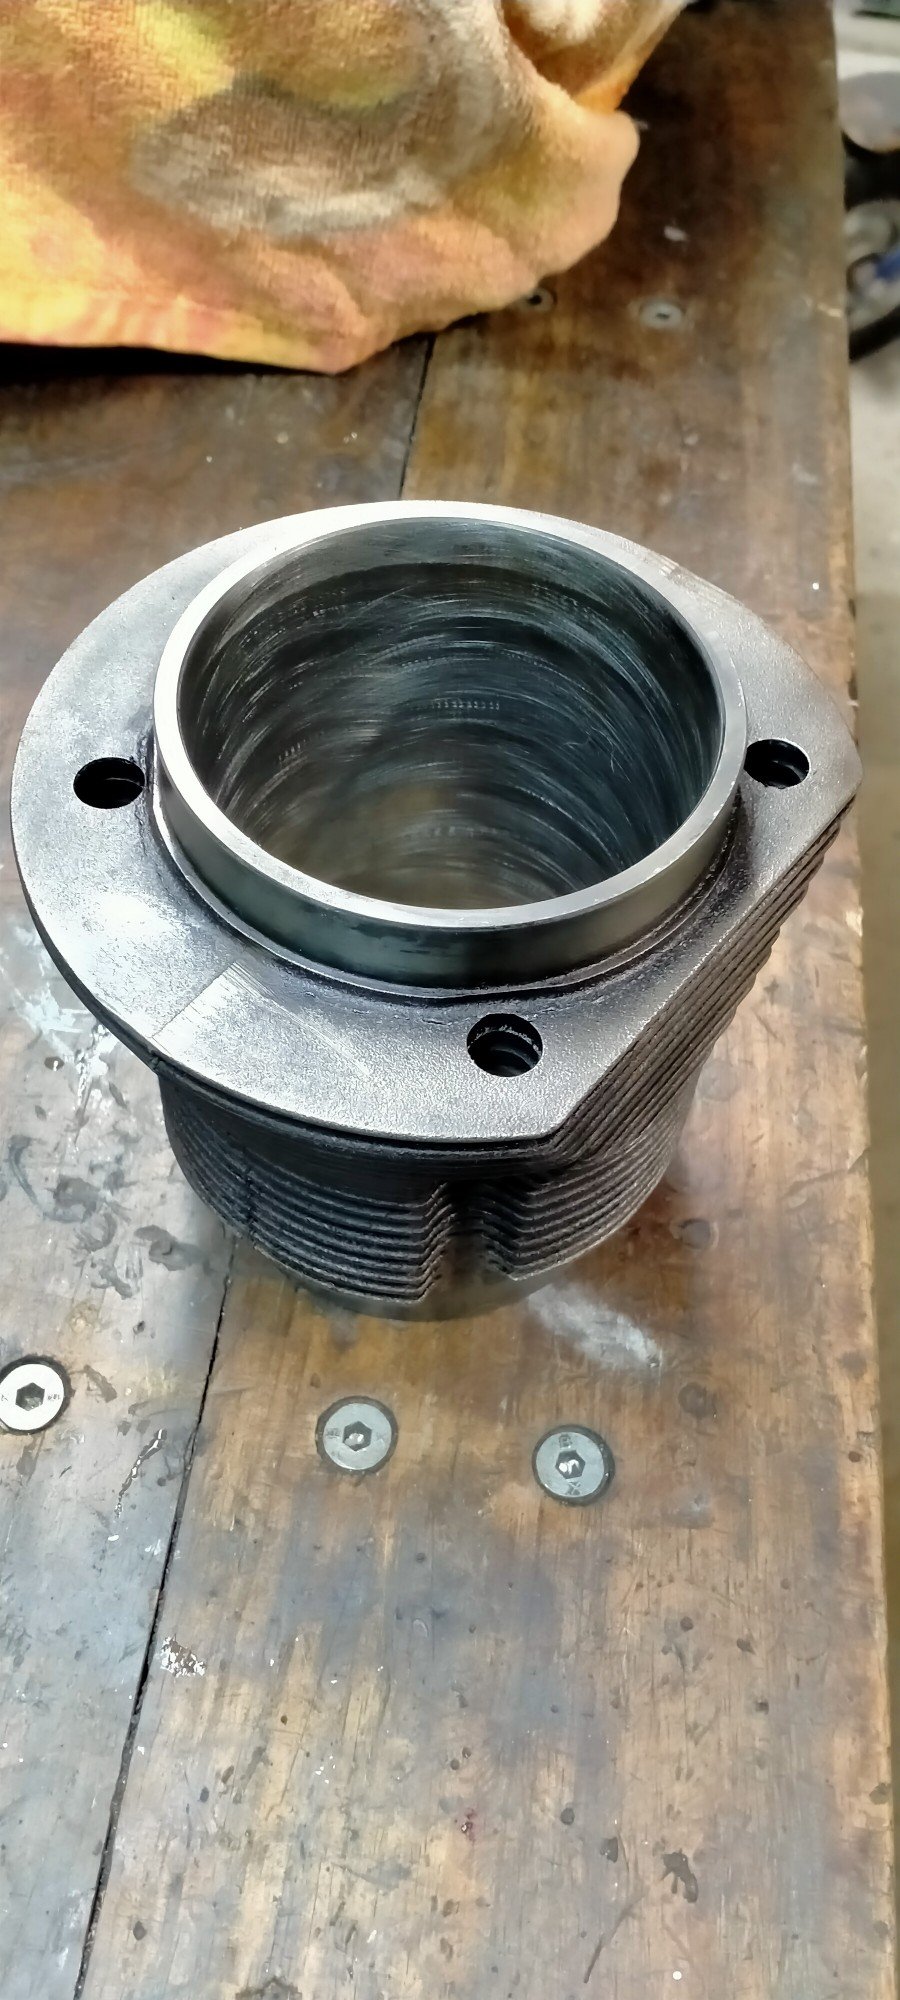
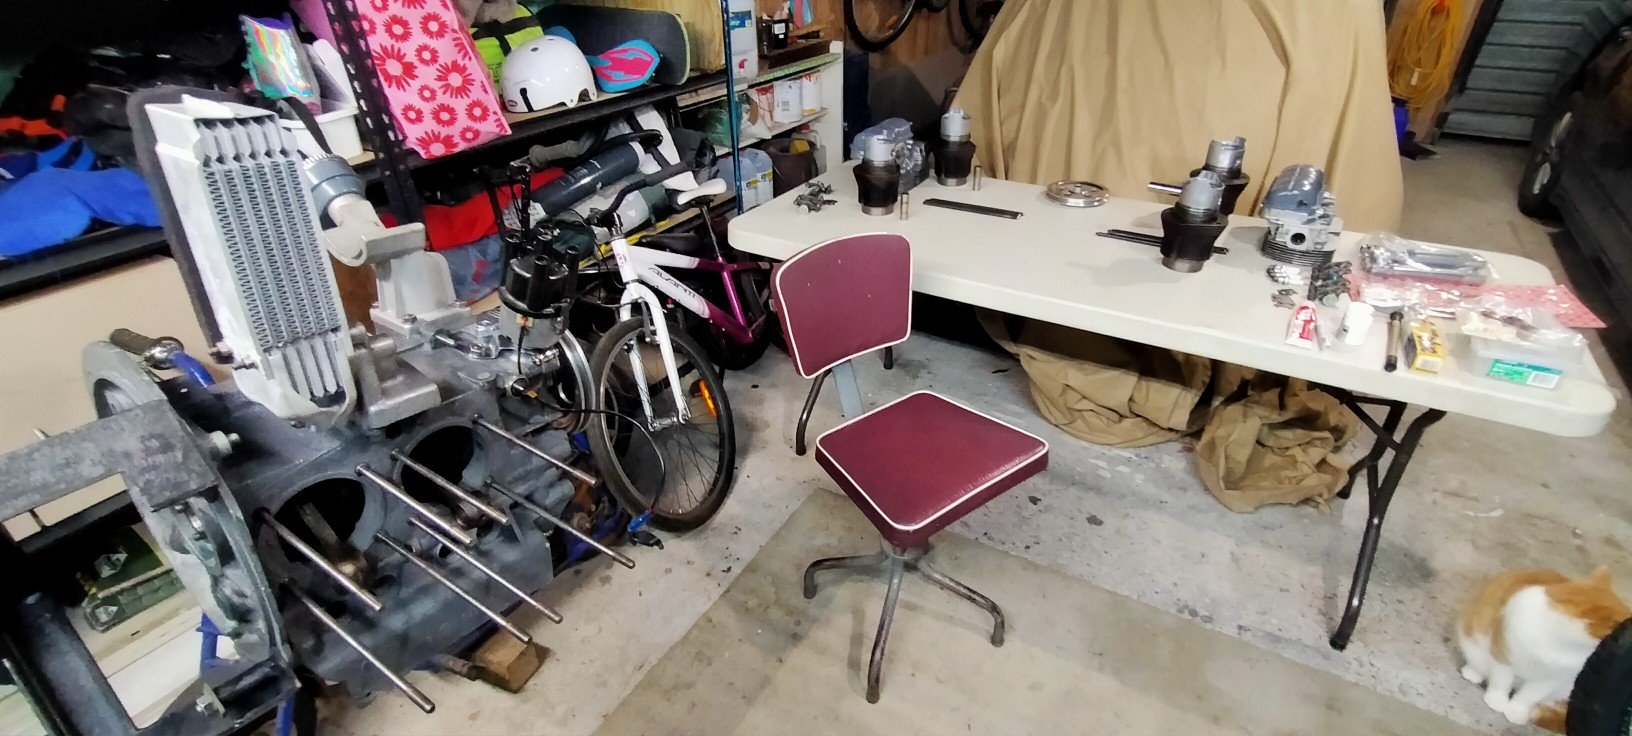
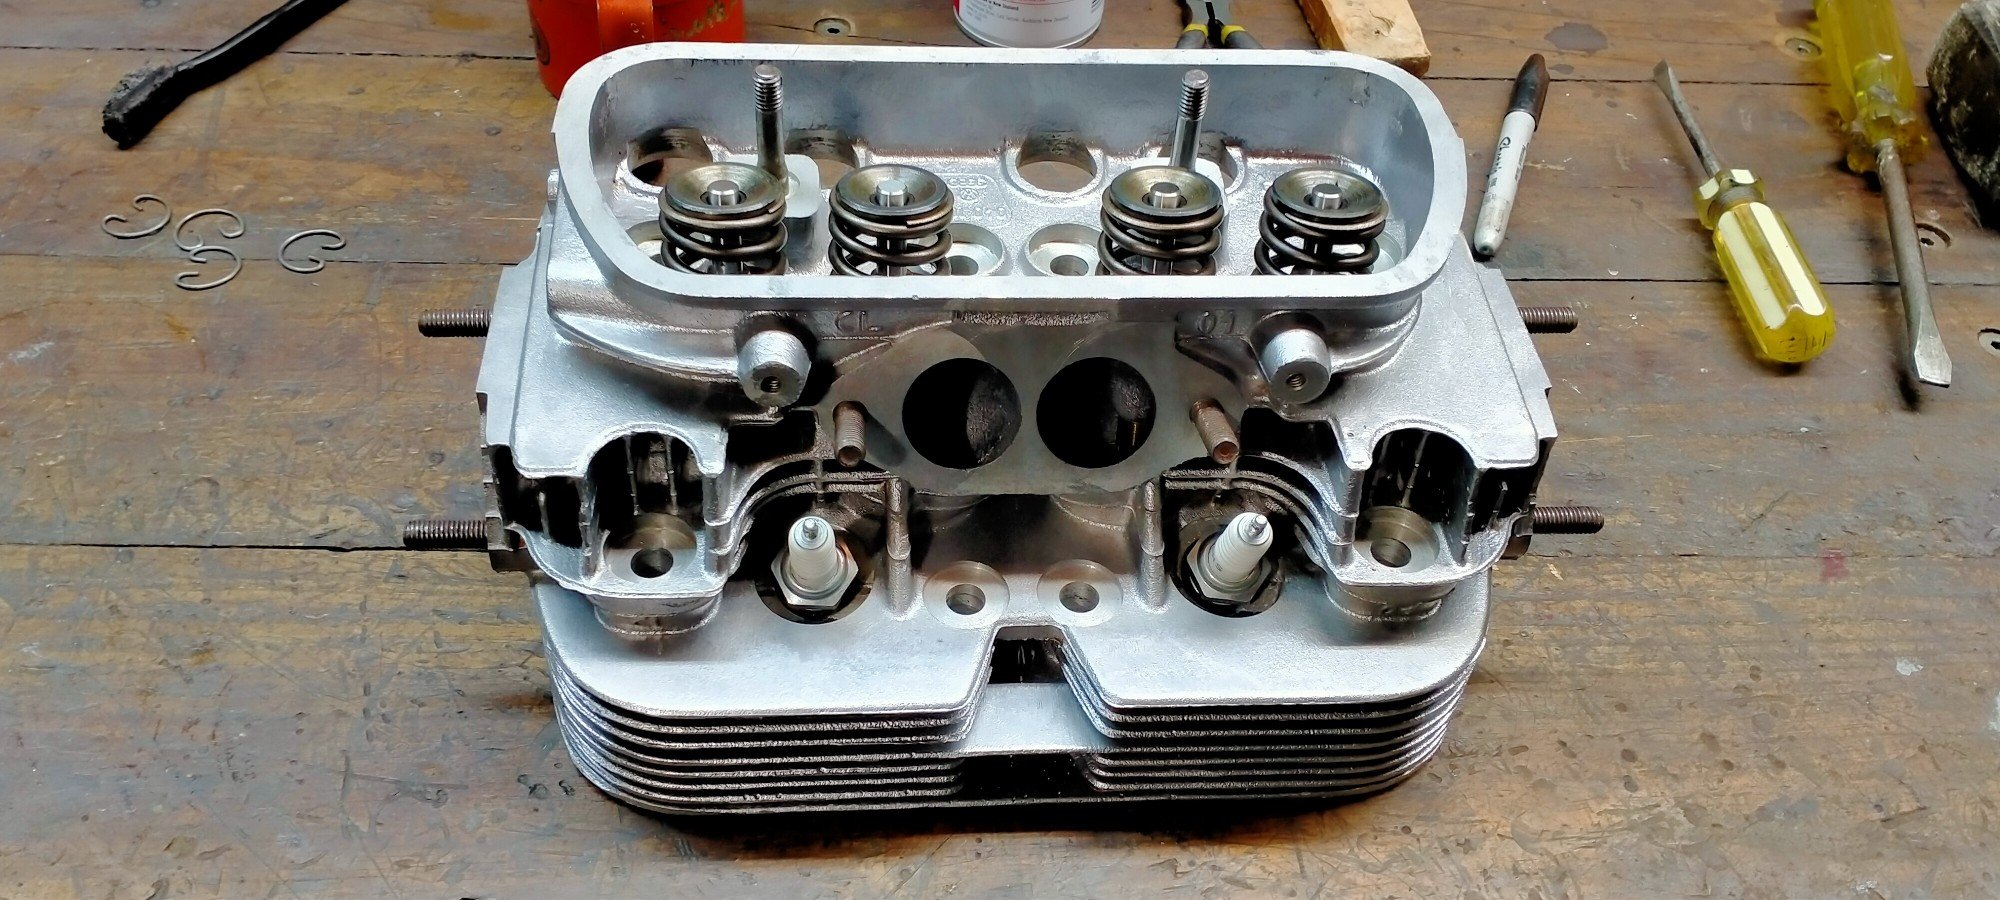
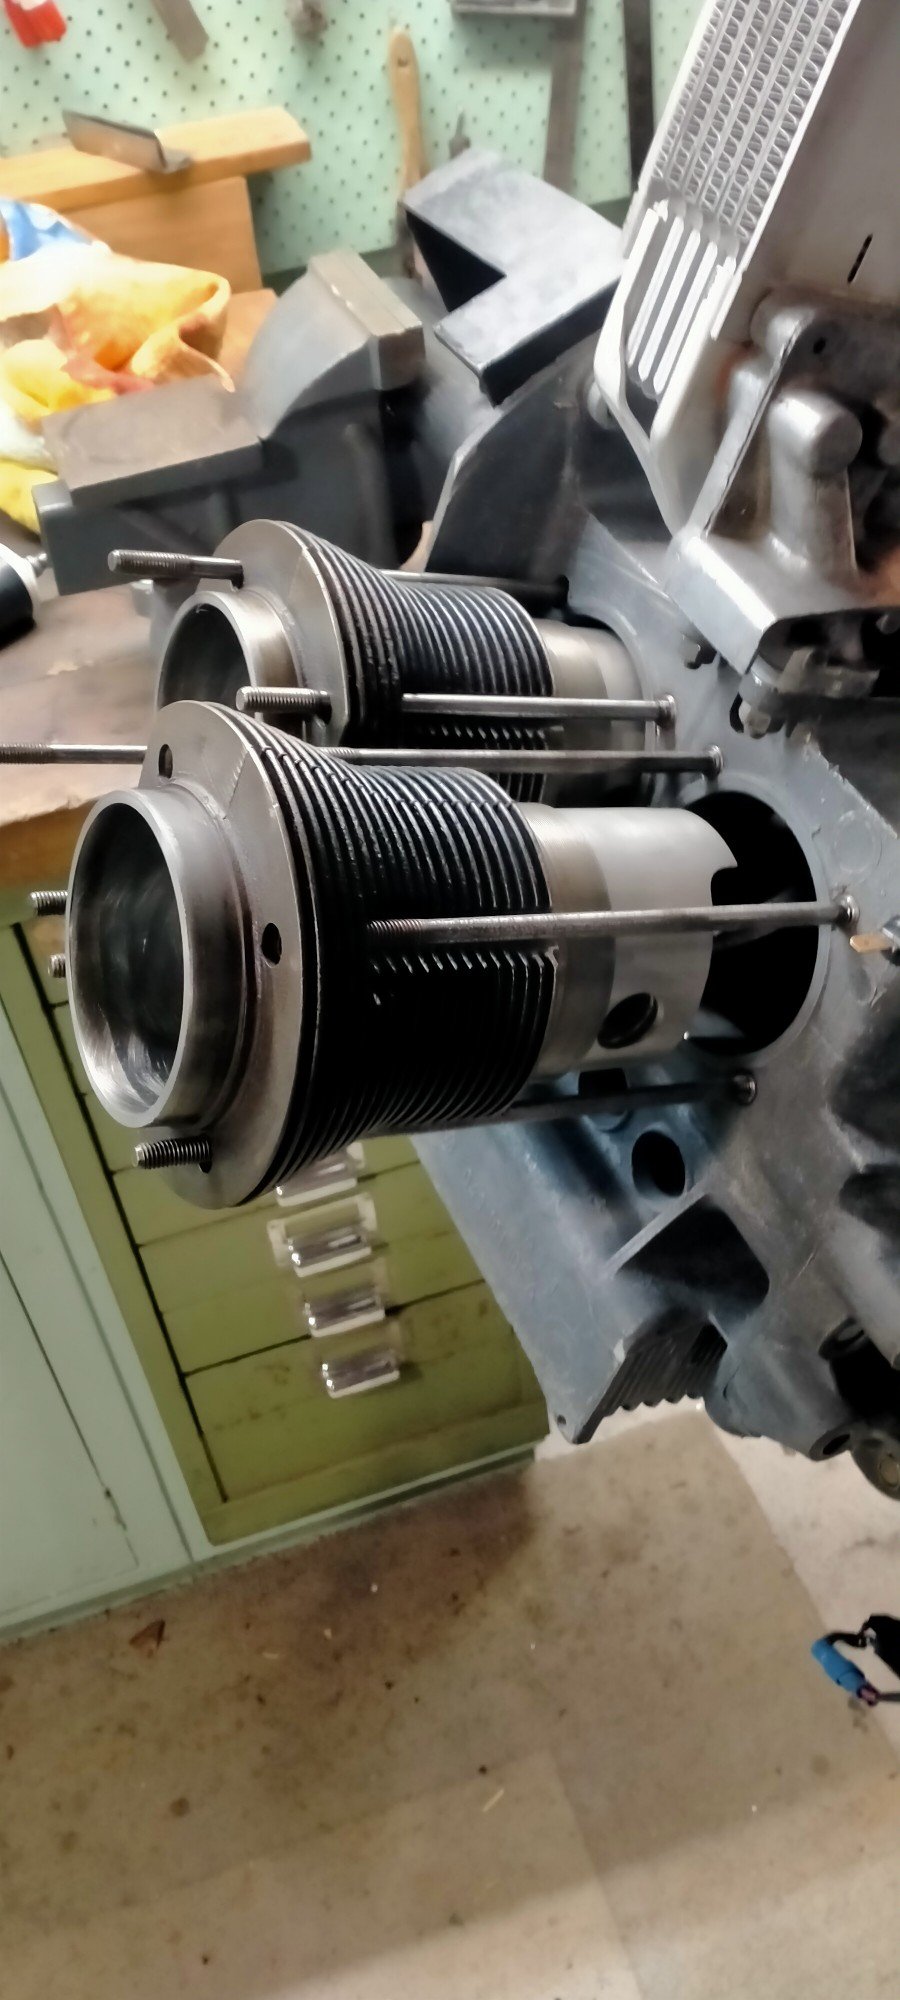
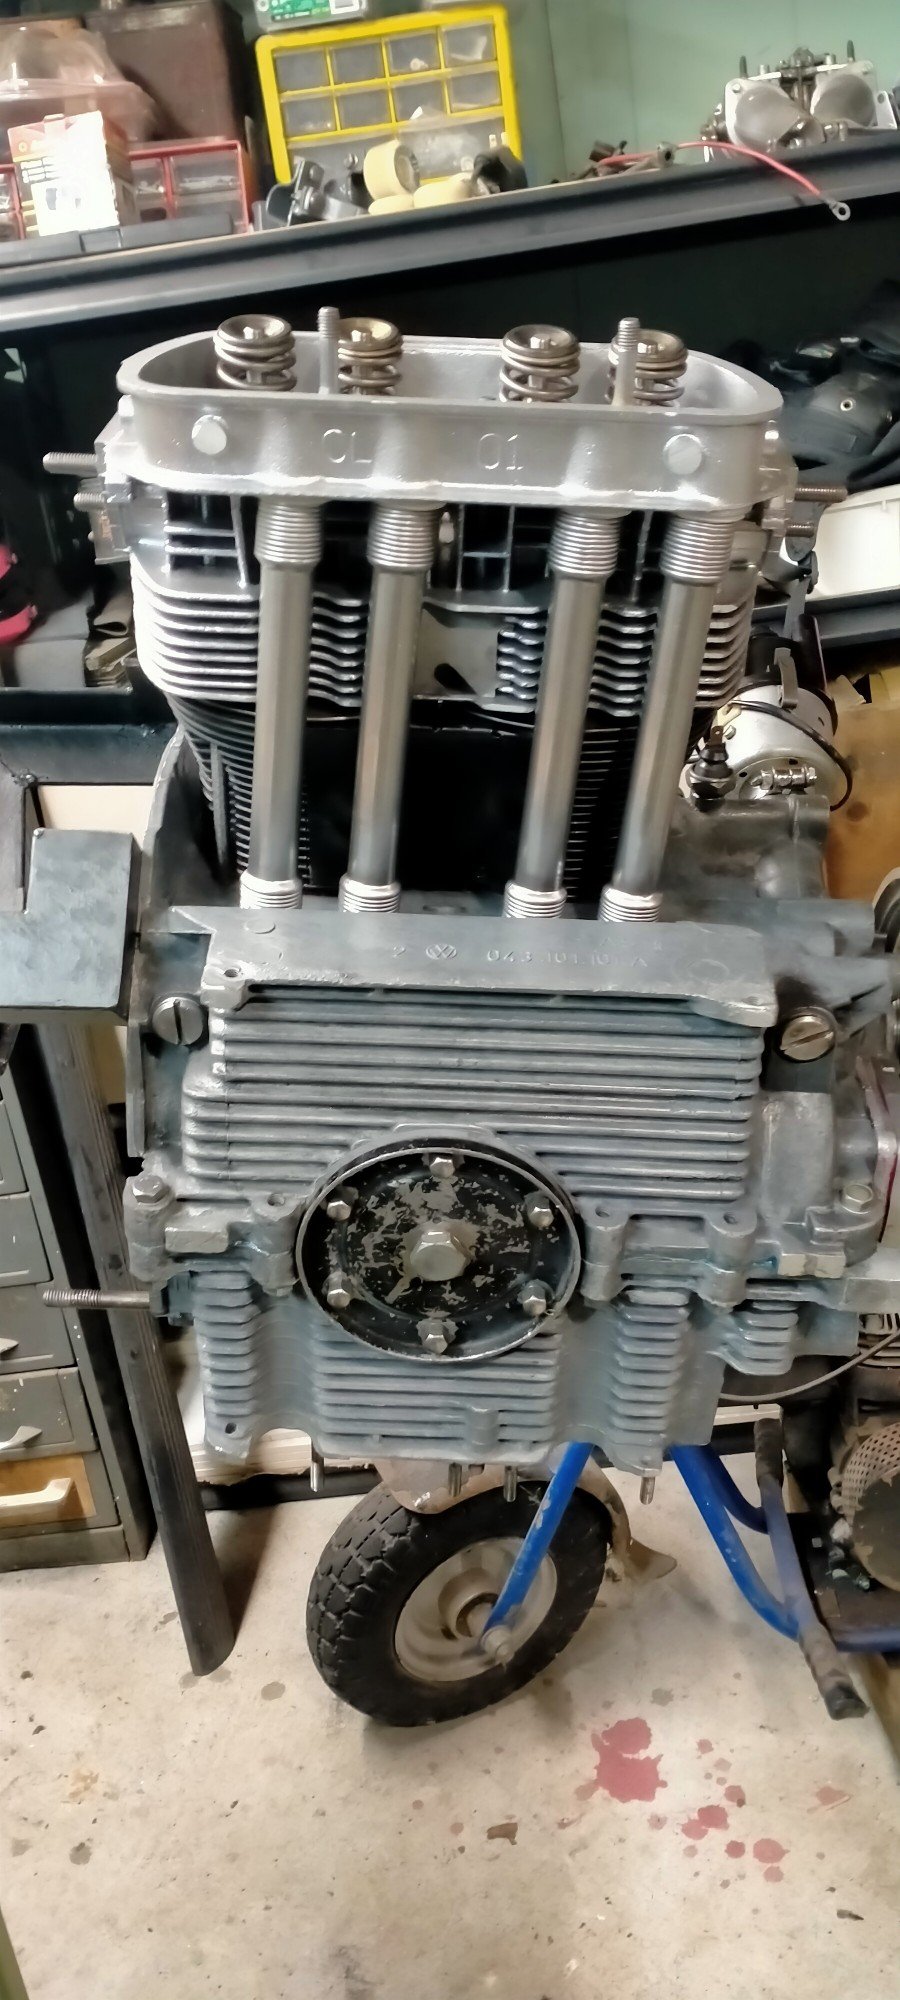
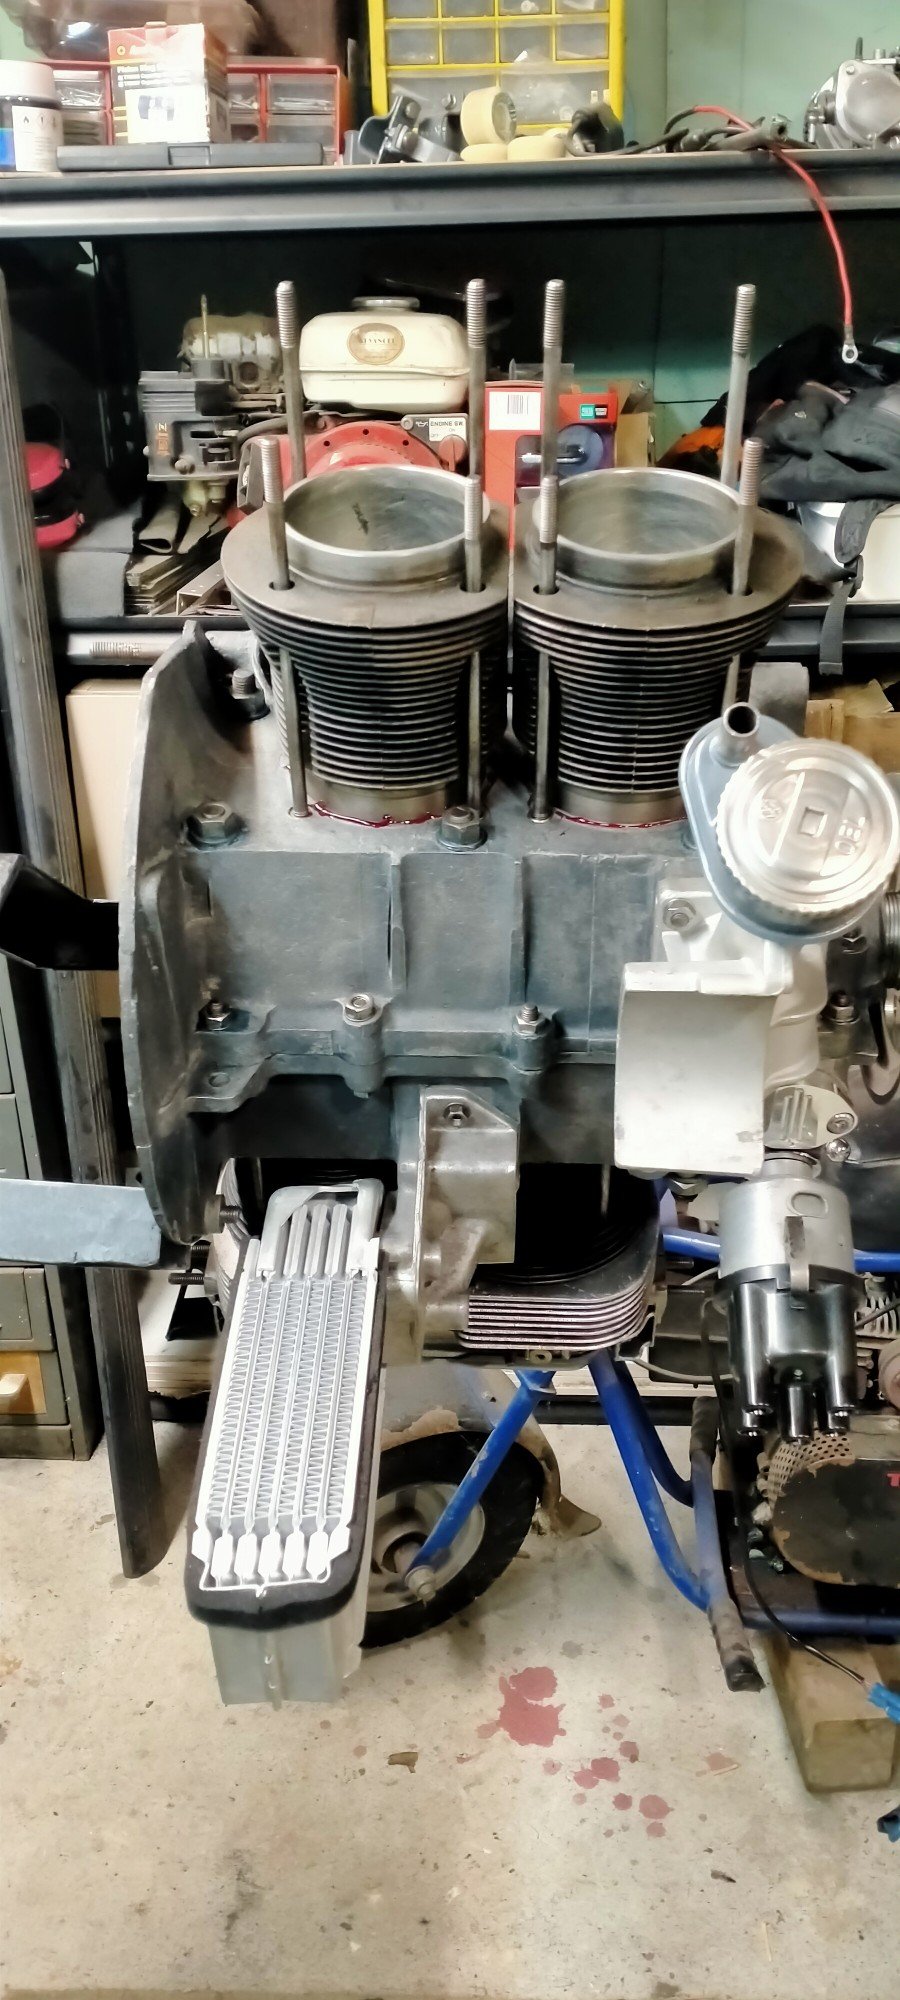
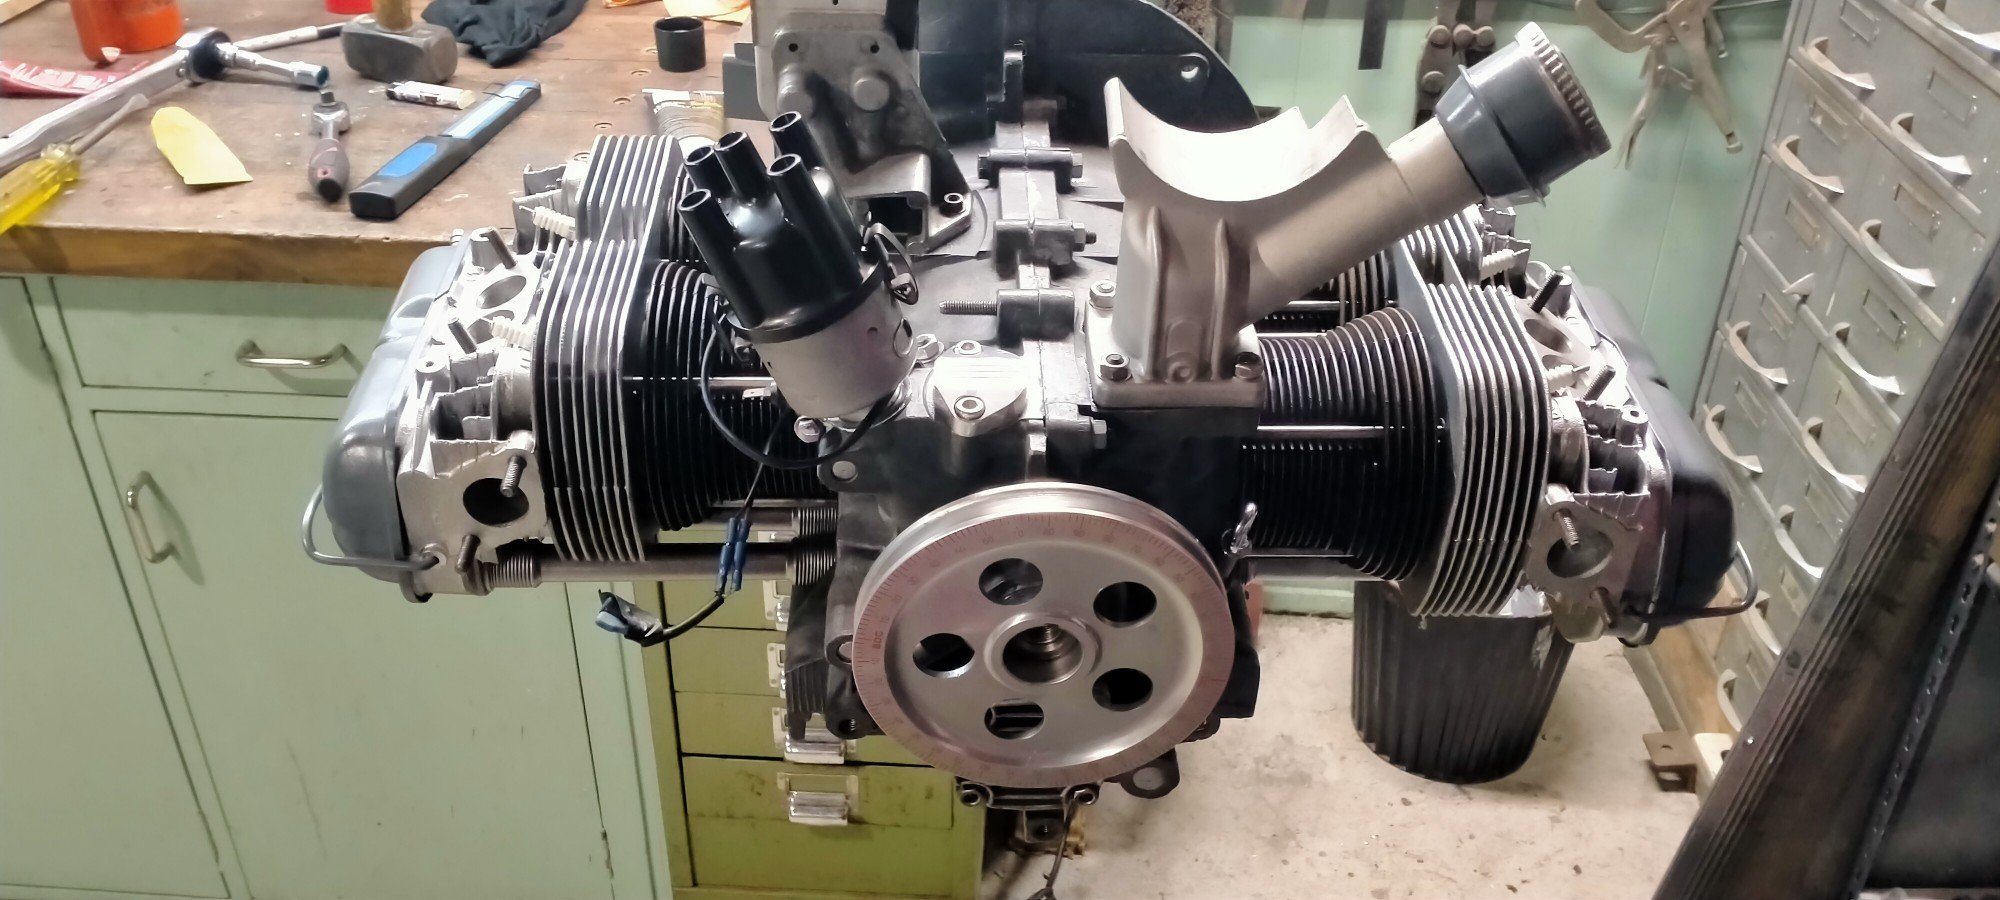
So with the short block done and the heads prepped, it was time to close it all up together. Also a good time to attach the oil cooler. Sparkplugs will never be this easy to install. Inside will never be this clean! Borrowed Darrell's hone and refreshed the cylinders. The trick is to use the ring compressor to install the pistons inside the jugs, then slide them onto the head rods, install the pins through the conrods and then seal the cylinders to the case and bolt on the heads. Quite the fuck around. All the while holding the pushrod tubes in place. Not forgetting to install the lower air deflectors like me! 180 degrees and repeat. Nearly a complete vw engine!
1 point
-
I'm stretched really thin working on the starlet panel work, the 86 wiring, plus a couple of other engine looms that are on the go at the moment. With normal work on top spare time is at a premium and I can only scratch together the odd hour here and there so I've been focusing on small jobs that don't take much effort and ticking them off as I can fit them in. First small job was fitting a new jockey wheel so got a basic one from Supercheap as they were on sale with a bolt on bracket, seems to do the job. Yes the cover is a mess but I've got plans for that. The last electrical cert was in 2008 but everything looked reasonably ok and I checked a few things before plugging in a new lead and waiting for the inevitable smoke to leak out. But it was a touch boring when nothing went bang and all the lights and plugs worked fine. I've spoken to my electrical inspector mate and he wants me to fit a RCD and then he will test and sign it all off. Will sort that out once the inside is mostly done. Externally I've cut and polished one side and also removed the black pin striping too, still have the blue stripe to go, but the weather has been a bit shit and its a dick of a job. I've got new pin striping from Decrastrip, found a guy in Hamilton that sells replacement Liteweight and Tracker decals, and will cut new blue graphics at work when the weather improves. Once all the graphics are back on I'll give it a final gentle buff then wax it all. I have zero interest in painting it! On the inside it all needed a bit of a refresh and the kitchen was in a sad state so we decided to give it a bit of a make over. I would have liked to keep it all relatively original but the closer I looked at the issues the more convinced I became that we could give it a pretty nice make over without spending the earth or taking too much time. We are keeping the layout the same, building a new kitchen, putting some fake timber flooring down, and giving it a paint etc. Ash has decided on the fabric to recover the squabs and she's dropped them off to a mate of hers who will recover them and have them back to us in about a months time. She's also been really busy cleaning out, sanding and painting the inside. I think she's 4 or 5 paint layers in already as the wall linings have been soaking it up big time, but its starting to look great! More on that later. The original kitchen was very tired - the fridge has rust holes in it and replacements were eye wateringly expensive. I managed to pick up a second hand fridge a while back off a super yacht for a steal - it has a really nice gloss black front but its slightly larger which meant rebuilding the cabinetry. The gas hob has rust and sink was pretty average so out it all came. I ordered a new gas hob and sink but they took nearly a month to arrive which slowed progress a bit. Here's the original - not too bad from a distance but bad up close: Drew a quick model of the new version, basically the same design with new components. Cutting a drop in insert for the sink that will double as a chopping board. Out it came: Have started on the new cabinets and cut the new bench top from some Kwela - the cut is amazing and almost no finishing will be needed. I was a bit nervous cutting into the sheet so started with the sink insert on the bottom left of the sheet - rookie move though as the timber grain is the wrong direction and wont match the benchtop so will cut another one as there is plenty of offcut. Bit of oil splashed on the wrong part and it looks pretty great! Will use it for a chopping board at home. And ages back I bought a solar panel mounting kit of trademe so have fitted it to the panel and sat it on the roof - will get around to fixing it down sometime soon. That's it for now.1 point
-
Far out, is this the first vehicle on OS to ever get a WOF first try? Looks like you'll be ready for some summer caravanning in no time! Well done.1 point
-
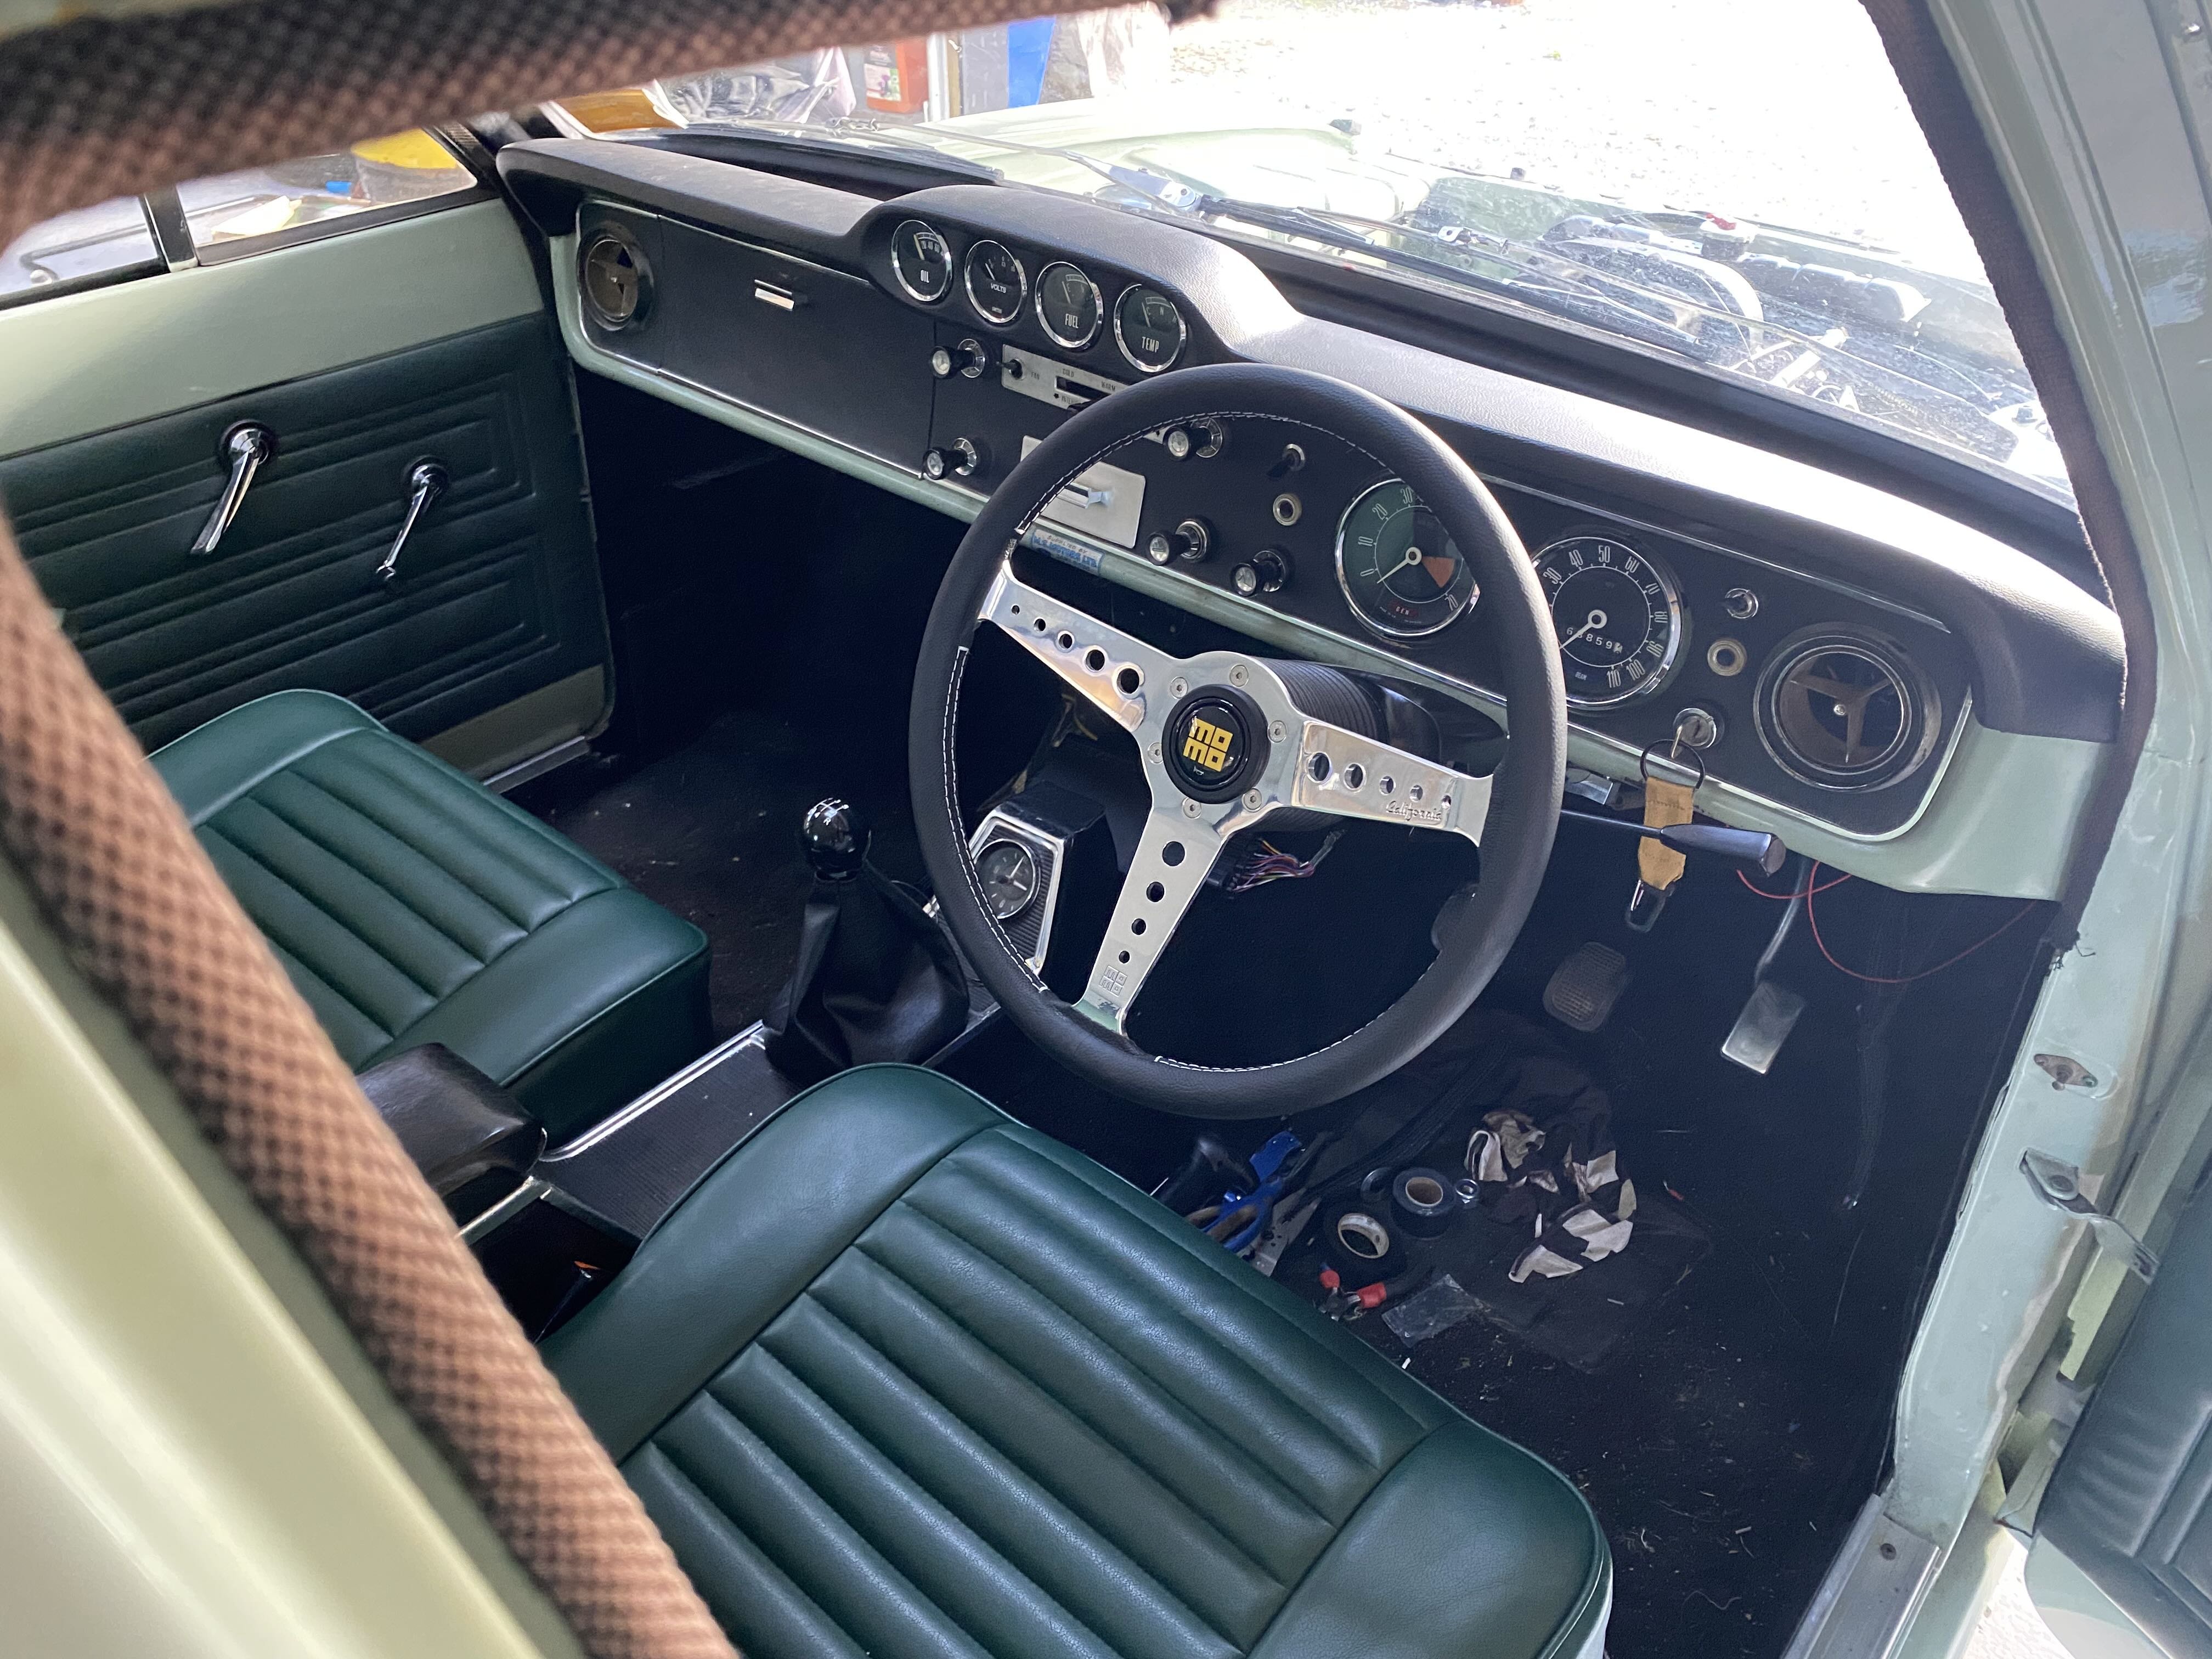
Still wrapping my head round the EFI/ECU life but my layman’s understanding after playing around for a bit is that my ECU isn’t sending ground pulses to injectors 2&3 which seems to be my issue. Injectors 1&4 are on a different pin from the ECU. Hopefully not too much of a drama to sort out. I’ve been plodding along with the interior, have managed to get all the gauges working, including rev counter which is a bonus. Slight issue is that the old 1968 rev counter only goes to 6k rpm’s, where redline in the ST170 is 7200, I’m going to try and rig up the shift light output from the ECU to be where the old generator light was in the rev counter at 6500- really need the engine to be running properly before I can see if that will work. Speedo and rev counter still need to have the outer bezels attached but that will come after final install. Have an underdash parcel tray to go in also but will hold off on that until everything else is finished. Could wait to try out my Xmas present from the better half- a nice Momo California which tops it off I reckon. She also made the shifter boot .
1 point
-
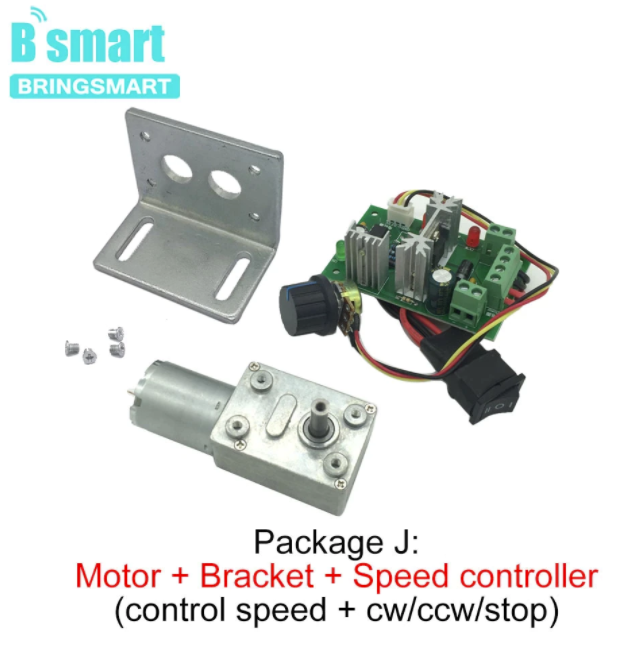
So I've just got my intake pipe with MAF in it, attached to throttle body, attached to intake manifold. Then everything on the manifold blocked off. Then printed an adapter so I can shove a vac hose into an intake runner. To test two, or more, I unblocked off the other runners and jammed more vacs in. But also tested them one by one in a single port. The worst had about half the flow capability of the industrial one. The other two somehwere in between. @h4nd do you have any good thoughts about wiring up 4x 240v motors? I've been looking at some 240v speed controllers, one I saw had 4000w capability. So could potentially run 2 motors full blast (or just on/off) then vary the other two at the same time to reach a goal flow amount 240v wiring makes me nervous!1 point
-
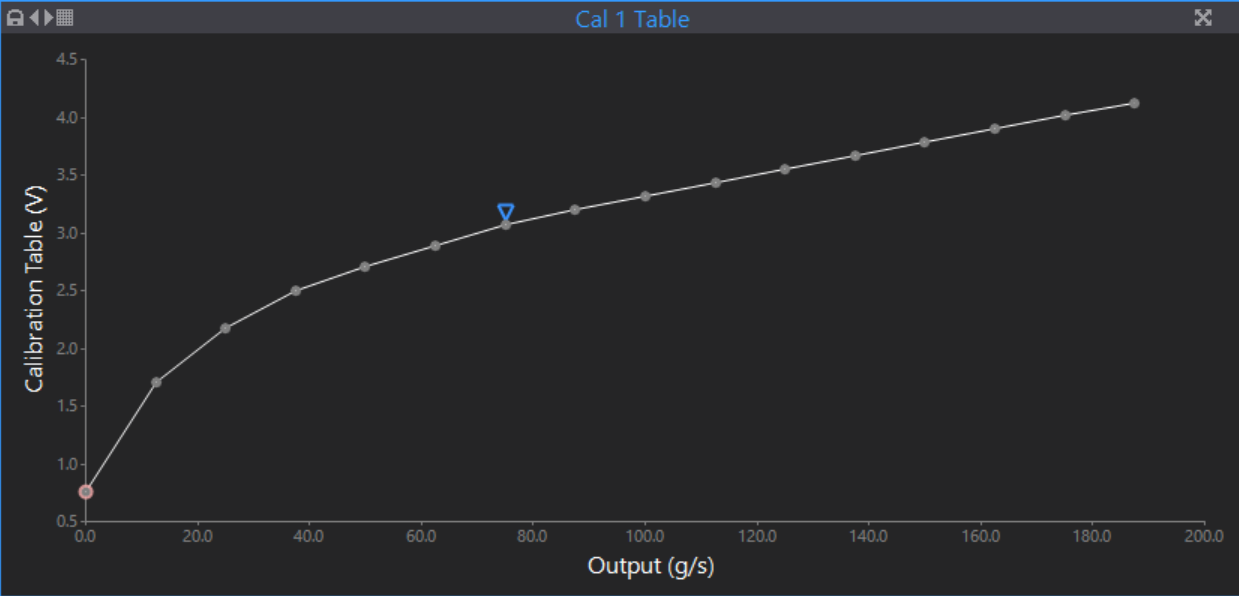
This has been slow going, waiting for parts to turn up / other shit going on. But I managed to get my MAF in a pipe hooked up to my arduino nano. So I could quantify how good/shit each of my vac cleaners are as a vac source. I've already got a MAF scaling for this pipe size, from my engine tune. So I can just refer to this for voltage to airflow conversion: So with my big industrial shop vac, it reached 2.68 volts on the MAF. so this is about 40 grams/sec of airflow. Which is about 60hp worth of air. I tested the other vacs that I've got, and they were worse than this. Using the best two running at once, I could get the MAF up to 3.0 volts. So around 70 grams per sec / 84 horsepower worth of air. So is that enough to simulate a single runner? 84hp x 4 runners = 336hp Which sounds good but unless you have a 720 deg intake cam, this is not representing anything close to the peak or average airspeed at all. 268 deg cams out of a 720 deg stroke = 37% of the time it's breathing in air. And then much of this time is spent at less than full lift obviously. So to truly simulate the airfow through a single port on a 4 cyl 150hp motor I'm thinking I'll need at least 100-120 grams per second capability. So I will look at getting some vac motors all of the same and wiring them up. Maybe 4 to start with. It's a better situation if all of the motors are identical rather than mix and match. But I can rule out the idea of running just a single vac to get meaningful results anyway, even if its a grunty one. On my previous search I only found more expensive ones, but 2kw vac motors are $50ish each delivered from aliexpress so might start wth 4 of these, and hope that it's overkill! https://www.aliexpress.com/item/32966020456.html?spm=a2g0o.productlist.0.0.7e675d6fuVKTf7&algo_pvid=8dca2d00-4acb-4a6d-b88a-a9401a618dcd&algo_exp_id=8dca2d00-4acb-4a6d-b88a-a9401a618dcd-3
1 point
-
Airflow The next issue is being able to pull enough air through a system in order to create a big enough pressure drop that it actually simulates the properties of a port/valve. What I mean by this is that if you are at max valve lift but you are only flowing a tiny trickle of air through, it's not going to illustrate differences in flow because nothing's a bottleneck. Generally flow benches that use manometers (water tubes) for measuring inches of water as a pressure drop, run at 28 inches of water which is something like 7kpa below atmospheric pressure. Any less than this, and it's not really going to be illustrative of the shape of a port etc. I think basically it's a case of higher vac the better, but it just becomes impractical. So 28" has become the happy medium that's adopted as industry standard. Another reason for standardizing the vacuum level is that it makes the maths much easier to work out CFM from manual calculations. As flow benches have existed long before computers have. So the less restrictive your head is, the more air you need to flow in order to make 7kpa of pressure drop. What I'm wanting to test for starters is a garbage spec 1NZFE head so I'm hoping I might get away with a single motor setup. However some use multiple vacuum motors in order to get enough flow. In this case I've got a fairly decent sized motor in a commercial vacuum cleaner that I'm hoping will do the trick. Since its not 1947 and I am not planning on doing any manual calculations for airflow. I have no intentions of sticking to a fixed pressure drop for sake of easy maths. I am thinking that if the valves are only partially open, and this creates a higher pressure drop than when they are fully open, this is fine! It will be a closer approximation to real life situation inside the engine at low valve lift. I will still have an accurate mass airflow number, and the higher vac level should show any changes with better "resolution". My thoughts on this may change once I get it working though. The sensors I am going to use for airflow are... -Normal Toyota 1 bar map sensor -Diesel particulate filter sensor (which is a cheap differential pressure sensor) -Toyota MAF sensor (For mass airflow results, and temp sensor) I'm thinking that the MAF sensor will do most of the work, but I'm not betting the house on it. Since a normal map sensor reads 0-5v from say 0kpa to 150kpa, it doesnt have a huge resolution in the relevant range if we're only going to something like 7kpa below atmospheric pressure. So a differential pressure sensor can be useful for measuring vac chamber vs atmospheric with good resolution, as they are 0-5v output but over something like +- 10kpa range. However before you turn on the vac source, the regular MAP sensor can also earn its keep as a barometric pressure sensor. Also, I think its incredibly important to have as fewer variables as possible away from your actual motor as it sits in the car. One of the "gotchas" of porting a bare head, is that your car never drives with a bare head. So it's kinda pointless knowing how a bare head flows. The sharp corners at the entrance of the port can bias the flow away from areas which are more important in real life when the flow into it has been straightened by an intake runner. So what is common is to build up a bellmouth entrance onto the head using putty or something, like this Which I think is a bit silly, because with a normal manifold on you're likely gettting a much straighter shot of air into the port than an aggressive turn in, right at the head. You could be introducing weird swirling or turbulence or whatever else that isnt accurate to normal operation. Also, the repeatability of making a shitty bellmouth entry like this is debatable. You might see changes simply from how much you've smooshed it in place, or how tall it is each time. So I'm planning to run it with a complete intake manifold on, as it would run in the car. Because ultimately that's what is going to be correct. If your test shows that the head flows way better than your manifold does. Then there's hardly any point being a fuss pot over the state of the head.
1 point


.thumb.jpg.570970b401ac8d26ce9af7c1bf2bd8cd.jpg)


.jpg.dabbec740b3e5b8d29270fe0a8b0d383.jpg)
.jpg.c34f5b14193af150850b3179805f0867.jpg)


.jpeg.bea24b8980dfb334752a3f68bb8c3faa.jpeg)


This leaderboard is set to Auckland/GMT+12:00