
Leaderboard


Popular Content
Showing content with the highest reputation on 09/01/22 in all areas
-
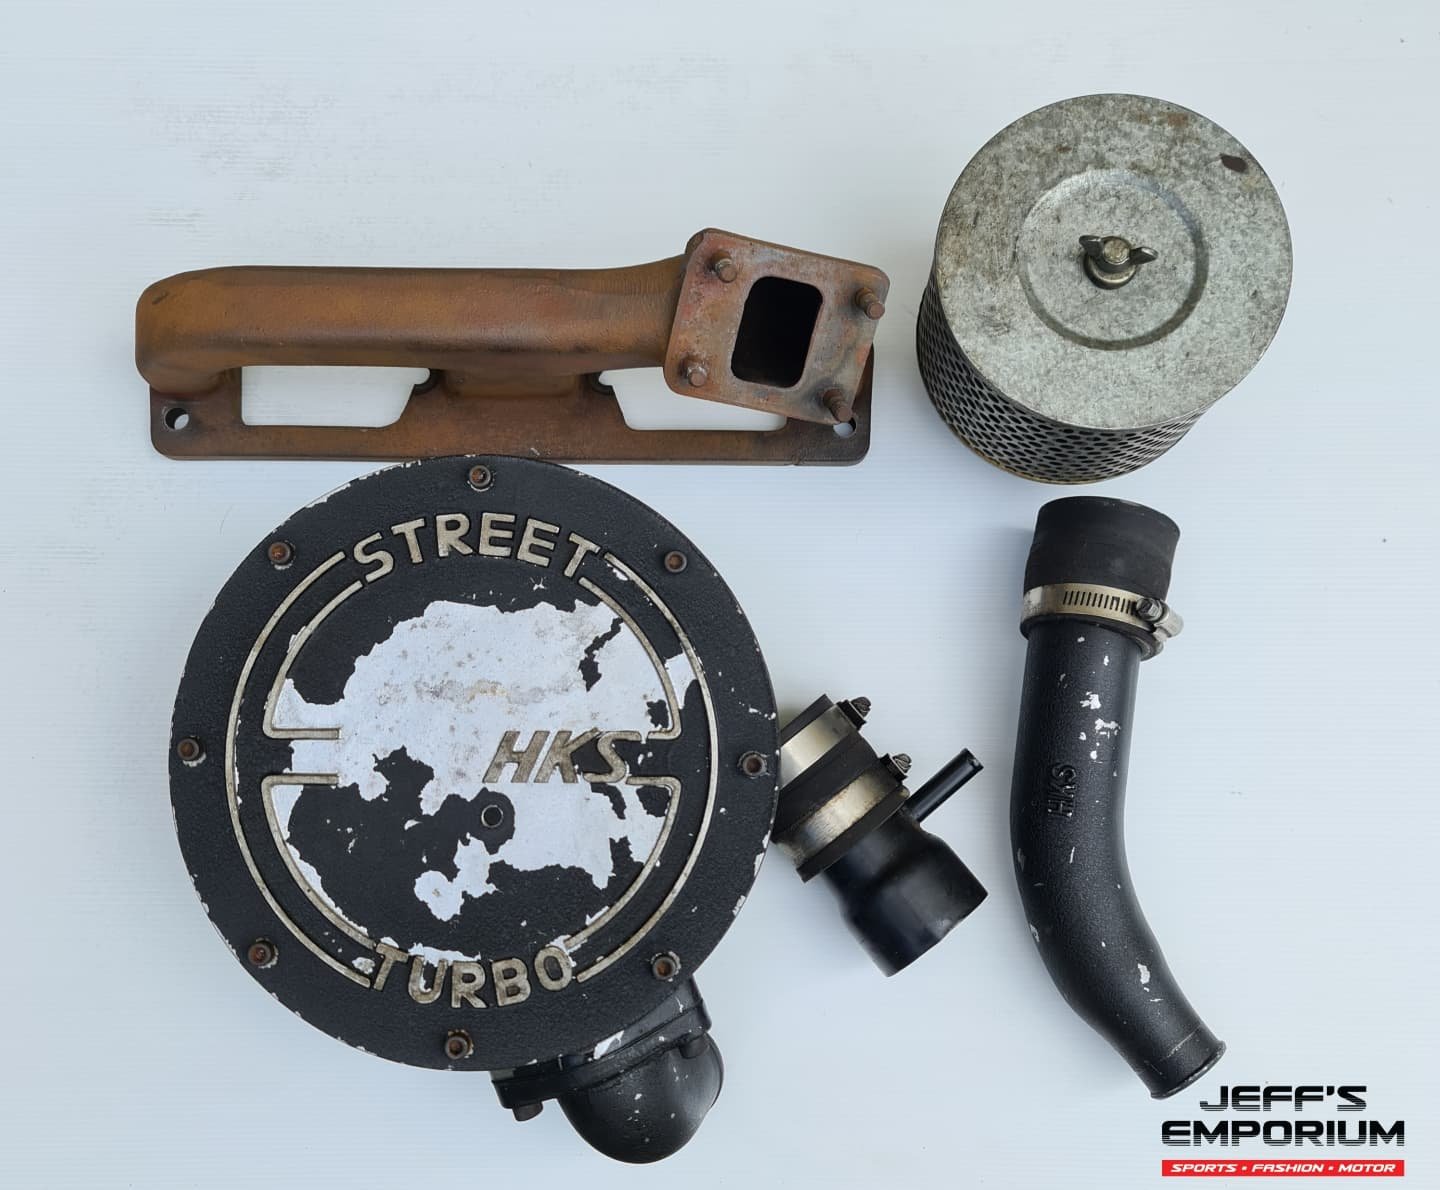
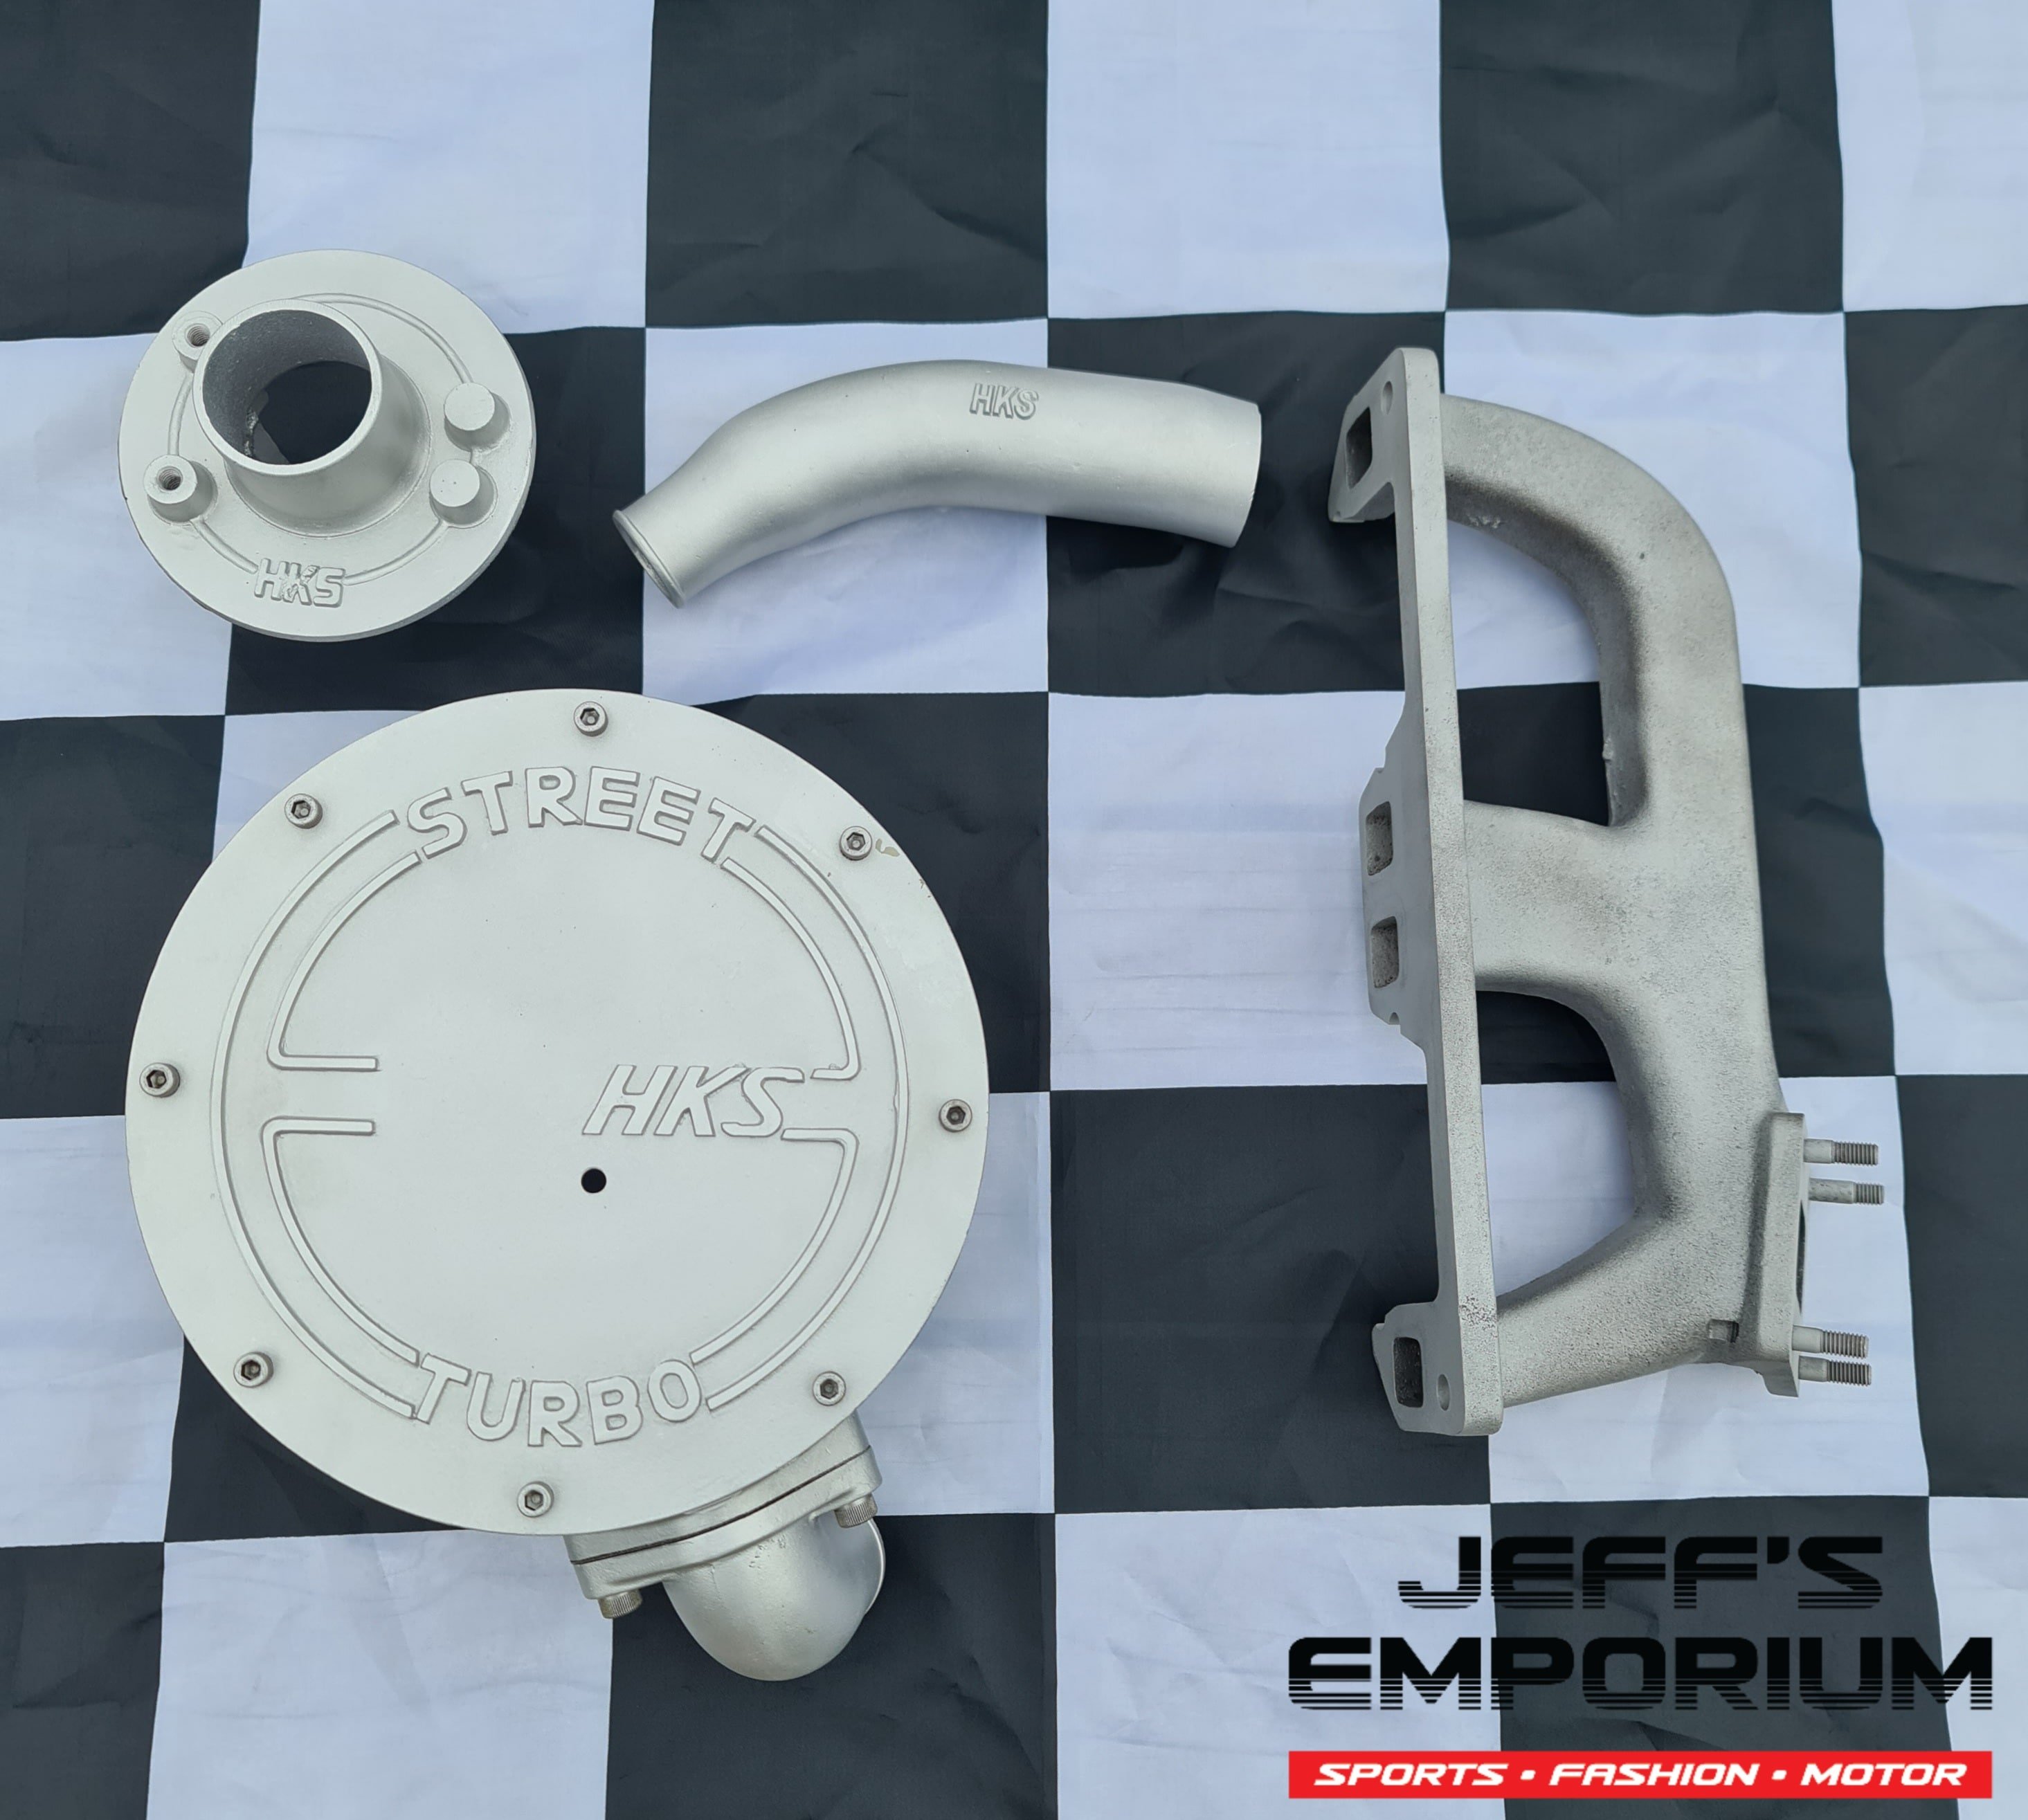
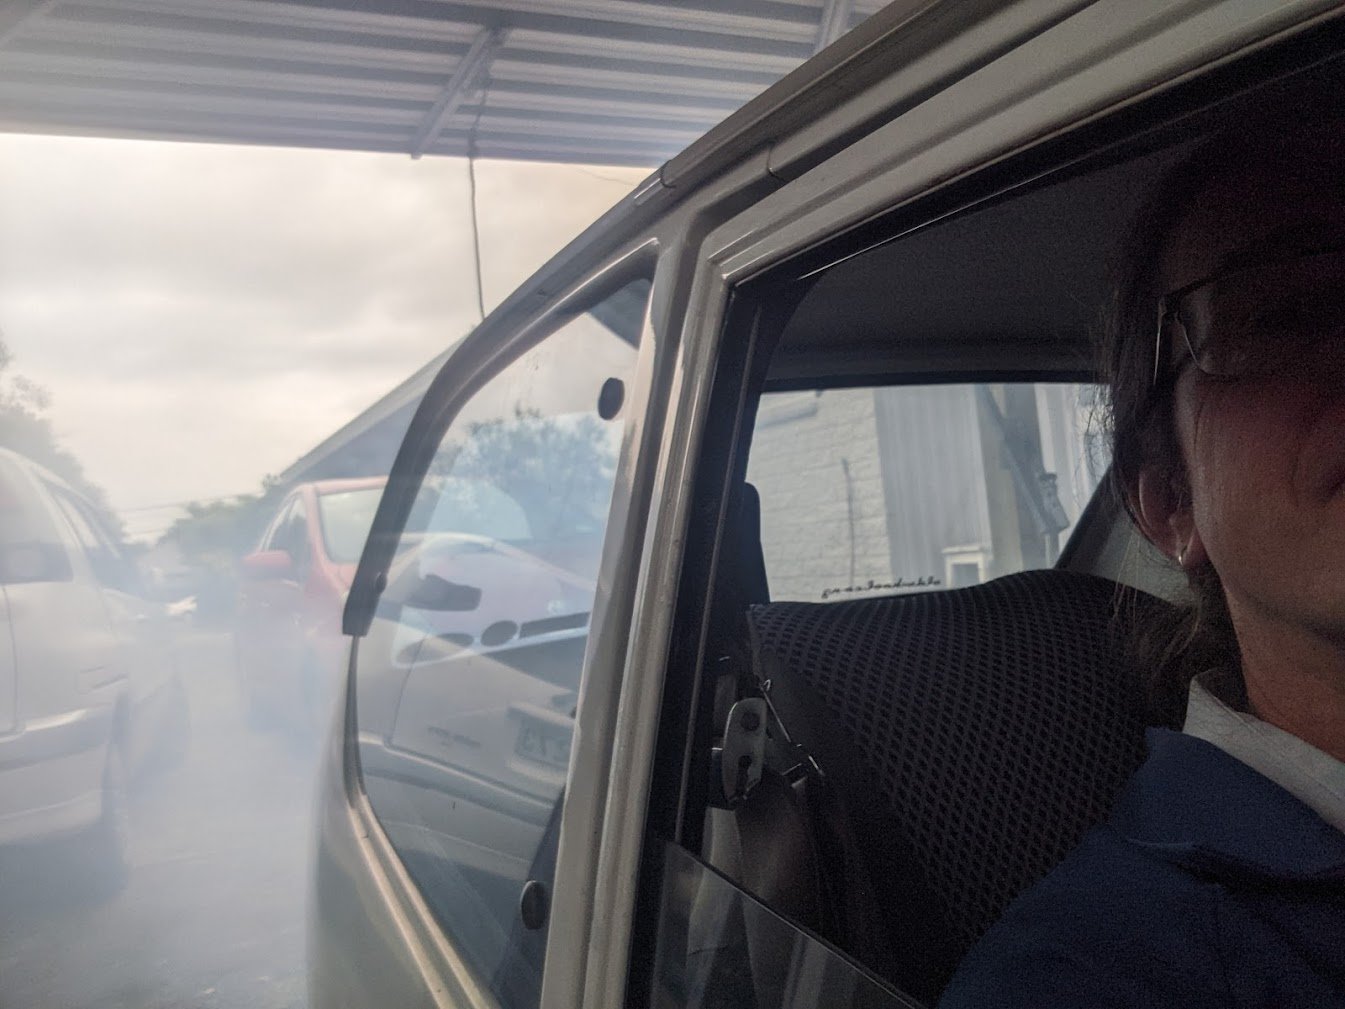
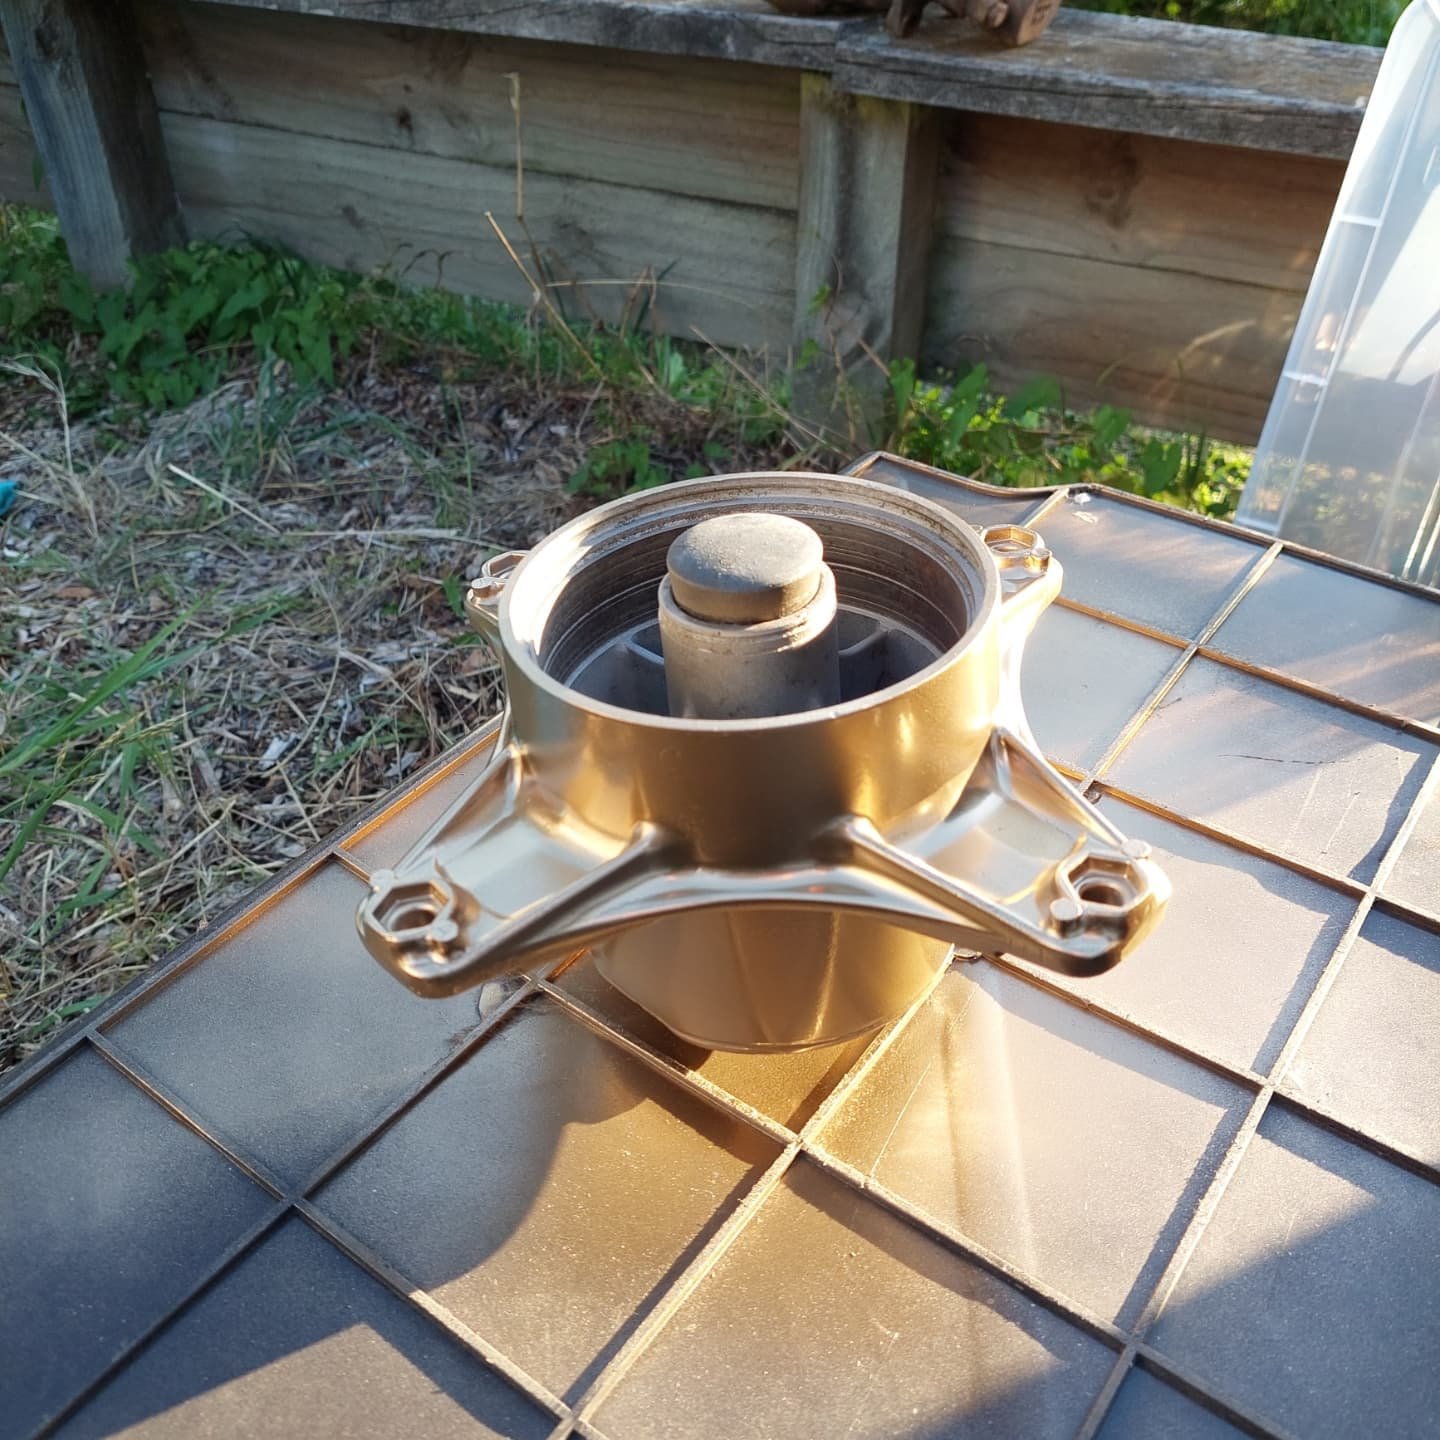
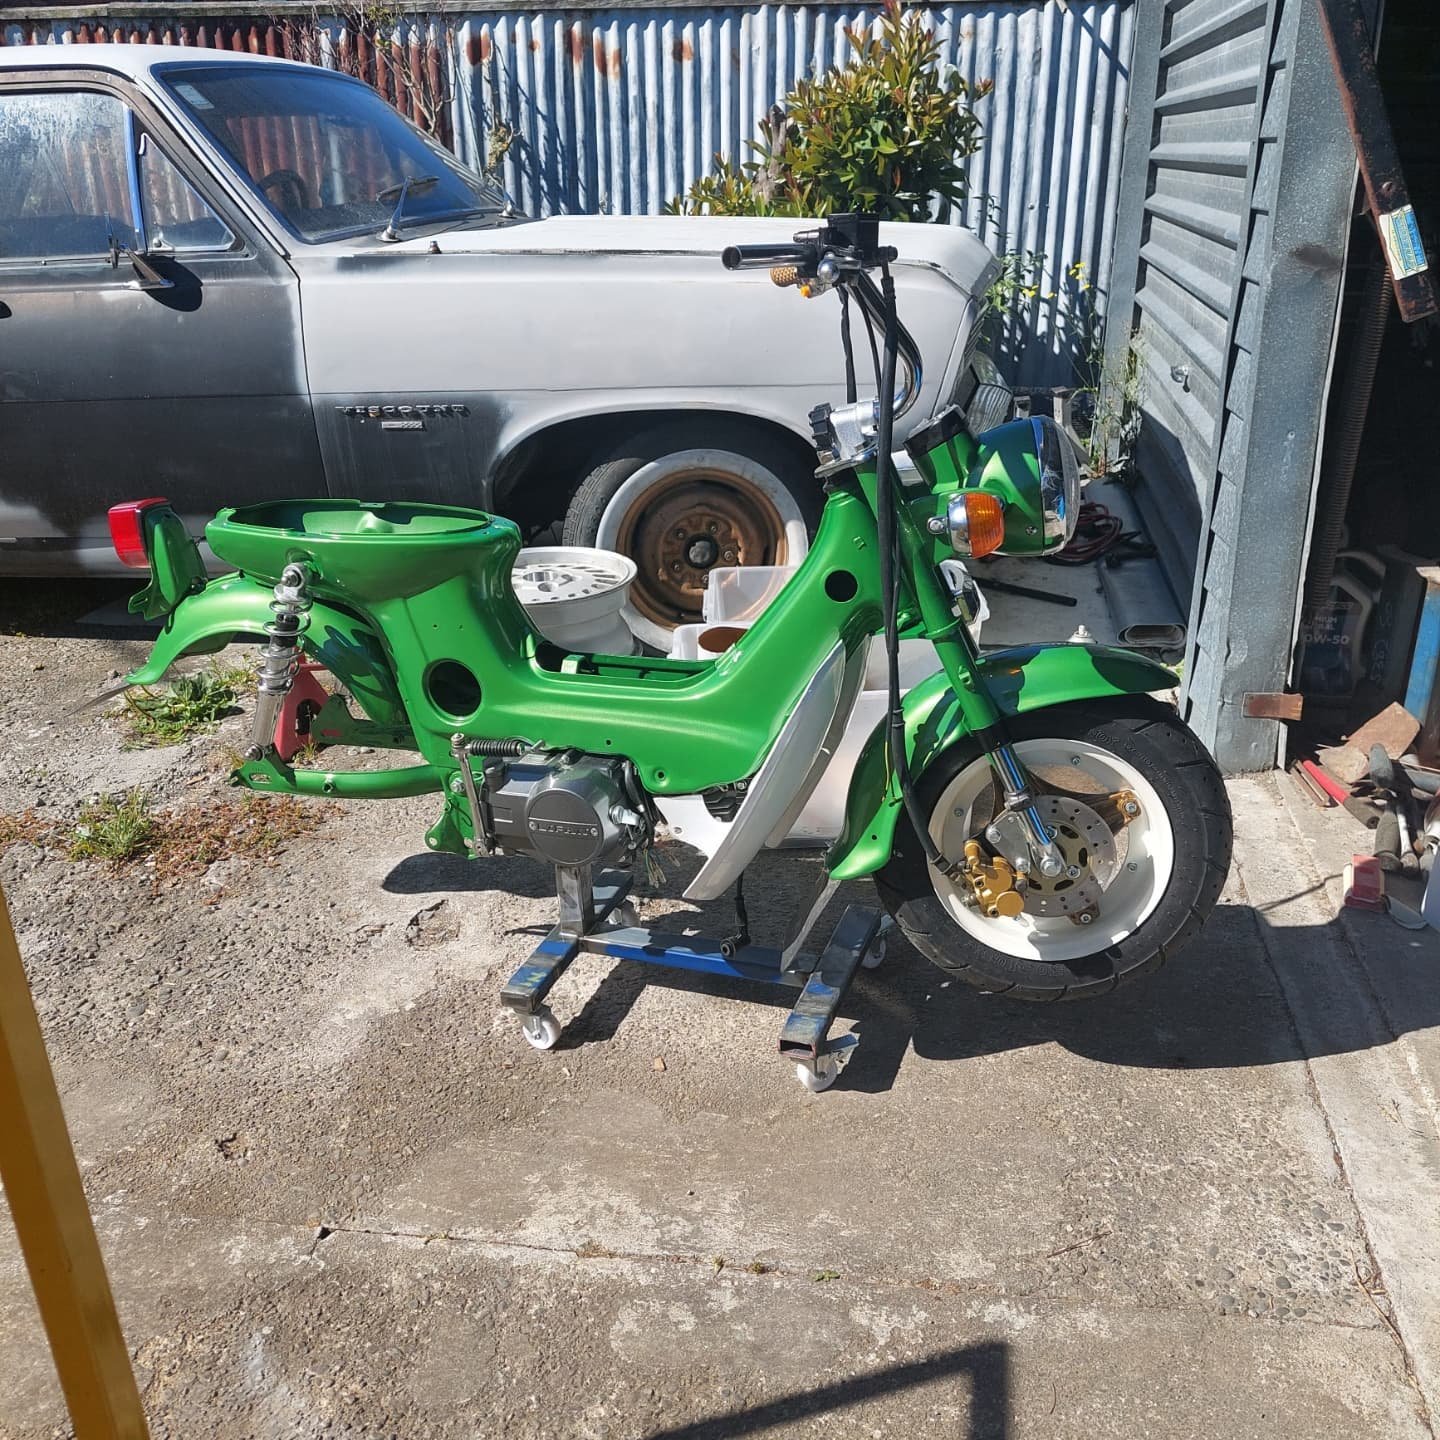
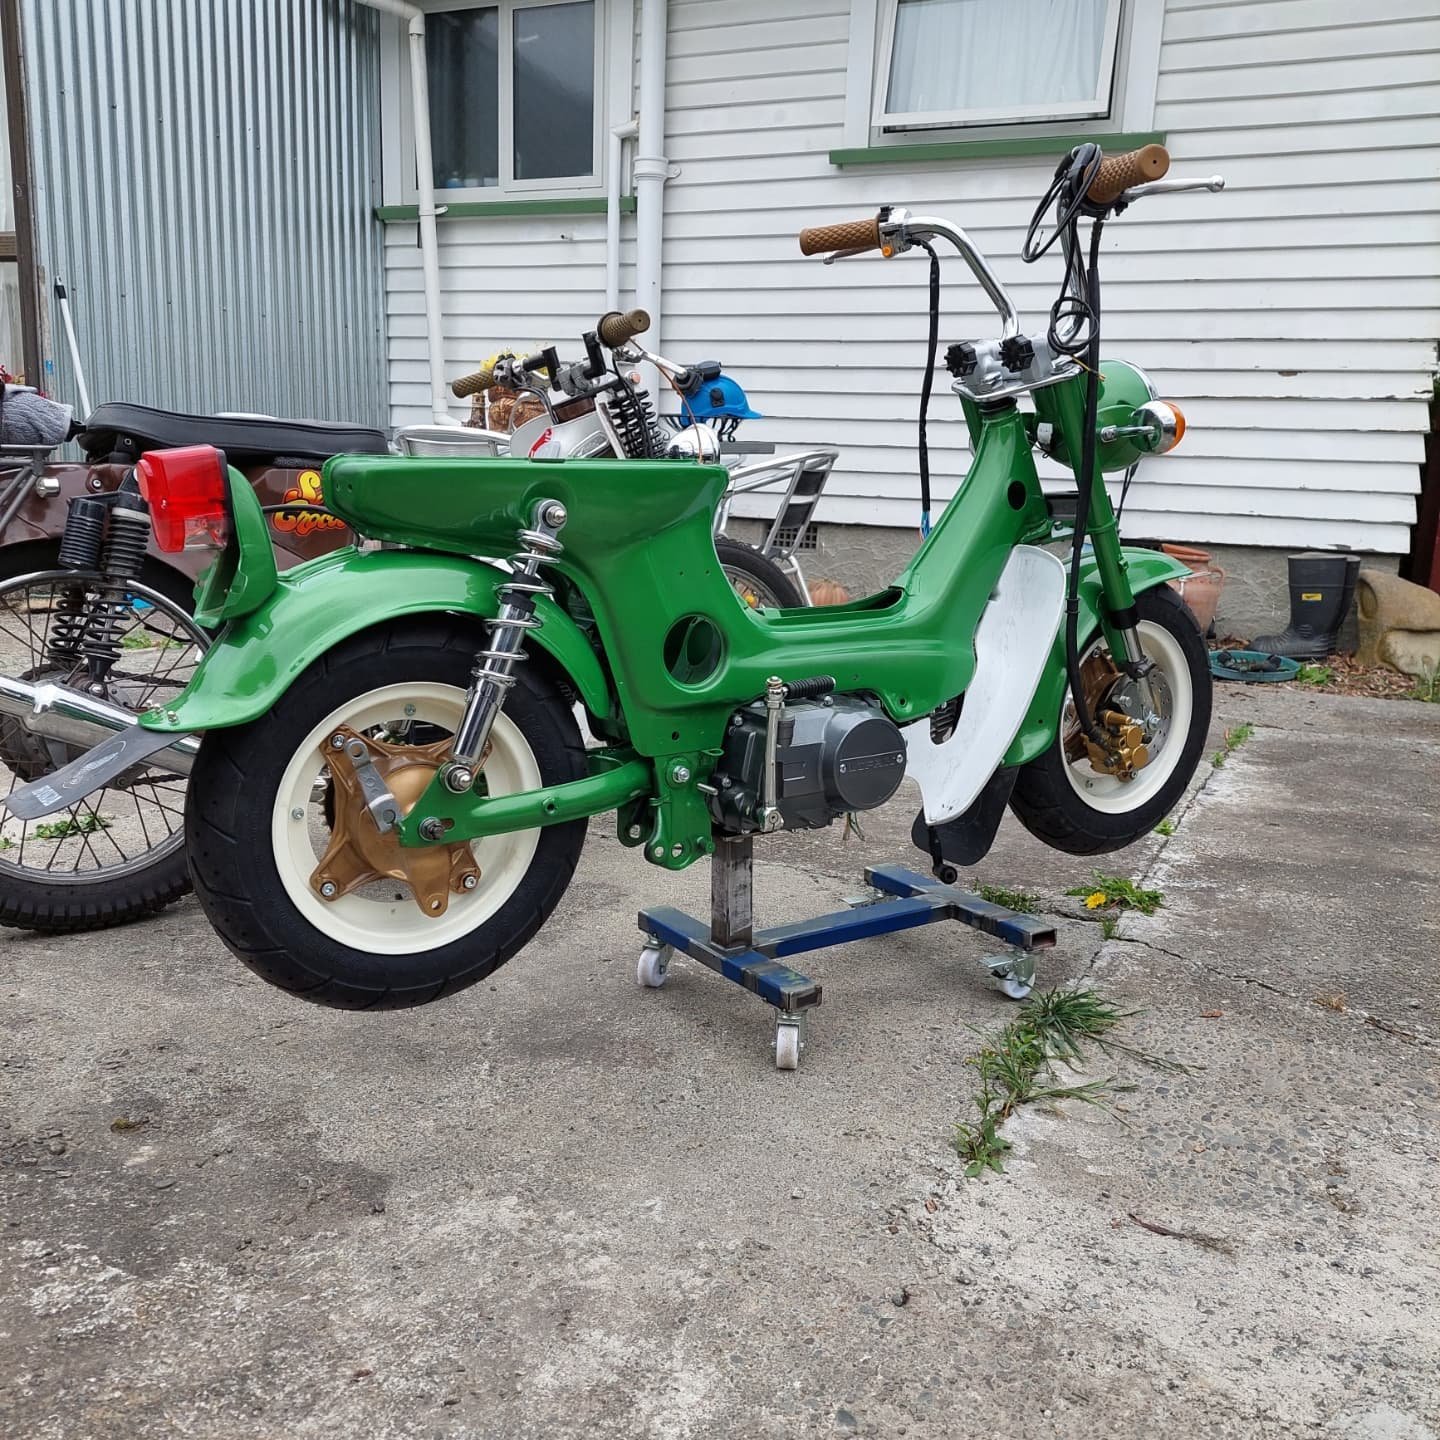
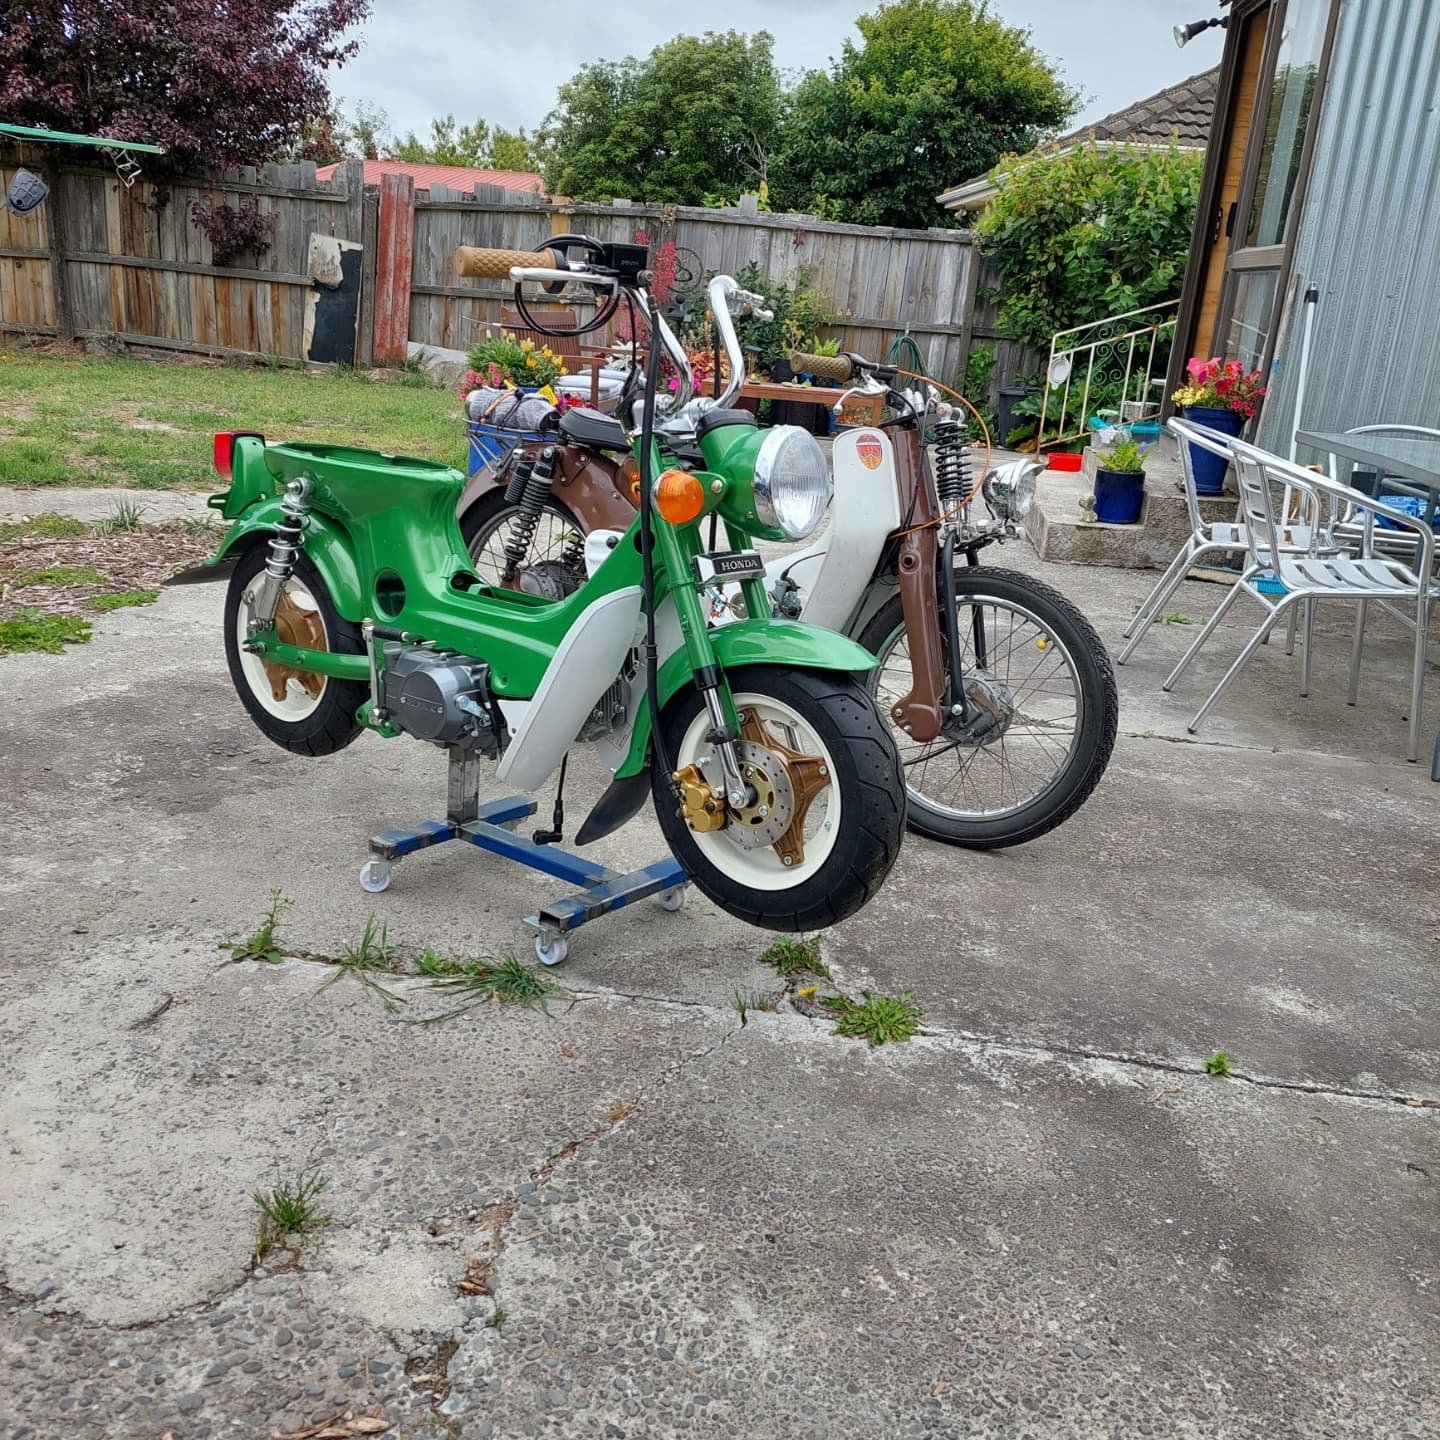
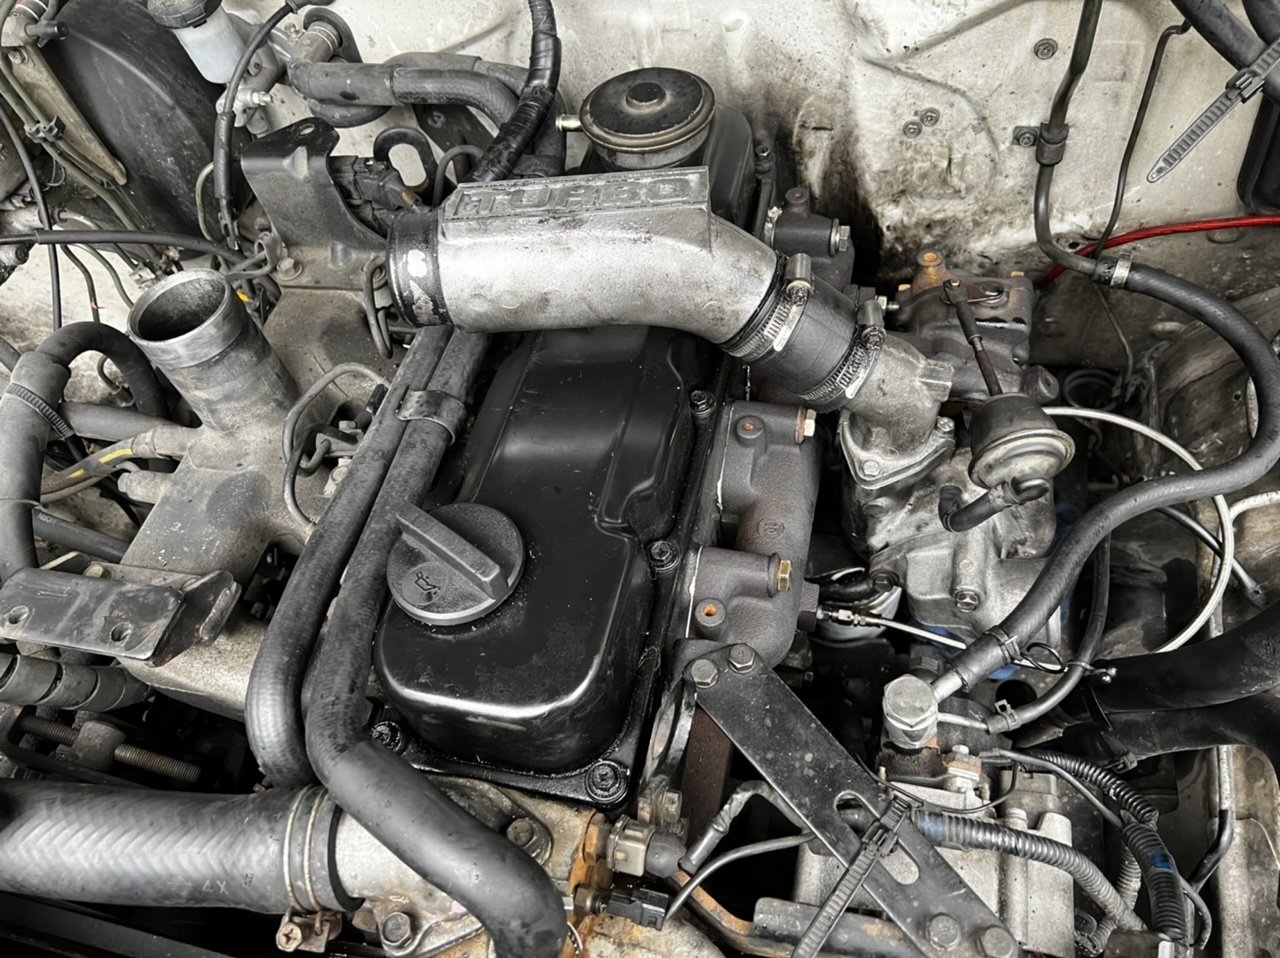
Hopefully OK to share in here/it's pretty relevant Recently I purchased an HKS turbo kit listed for kp61 starlet for my small online based parts business. It utilizes the original carb in a direct blow through setup. Seriously considered going back to 5k to use it in the van but luckily someone purchased it before too much thought. Happy to say it will be staying in nz and they have decided to let me restore it for them also. Jordan at Autoparts Vapour Blast has done a great job vapour blasting the flaking wrinkle coat off so I can re-apply for the new owner
 13 points
 -
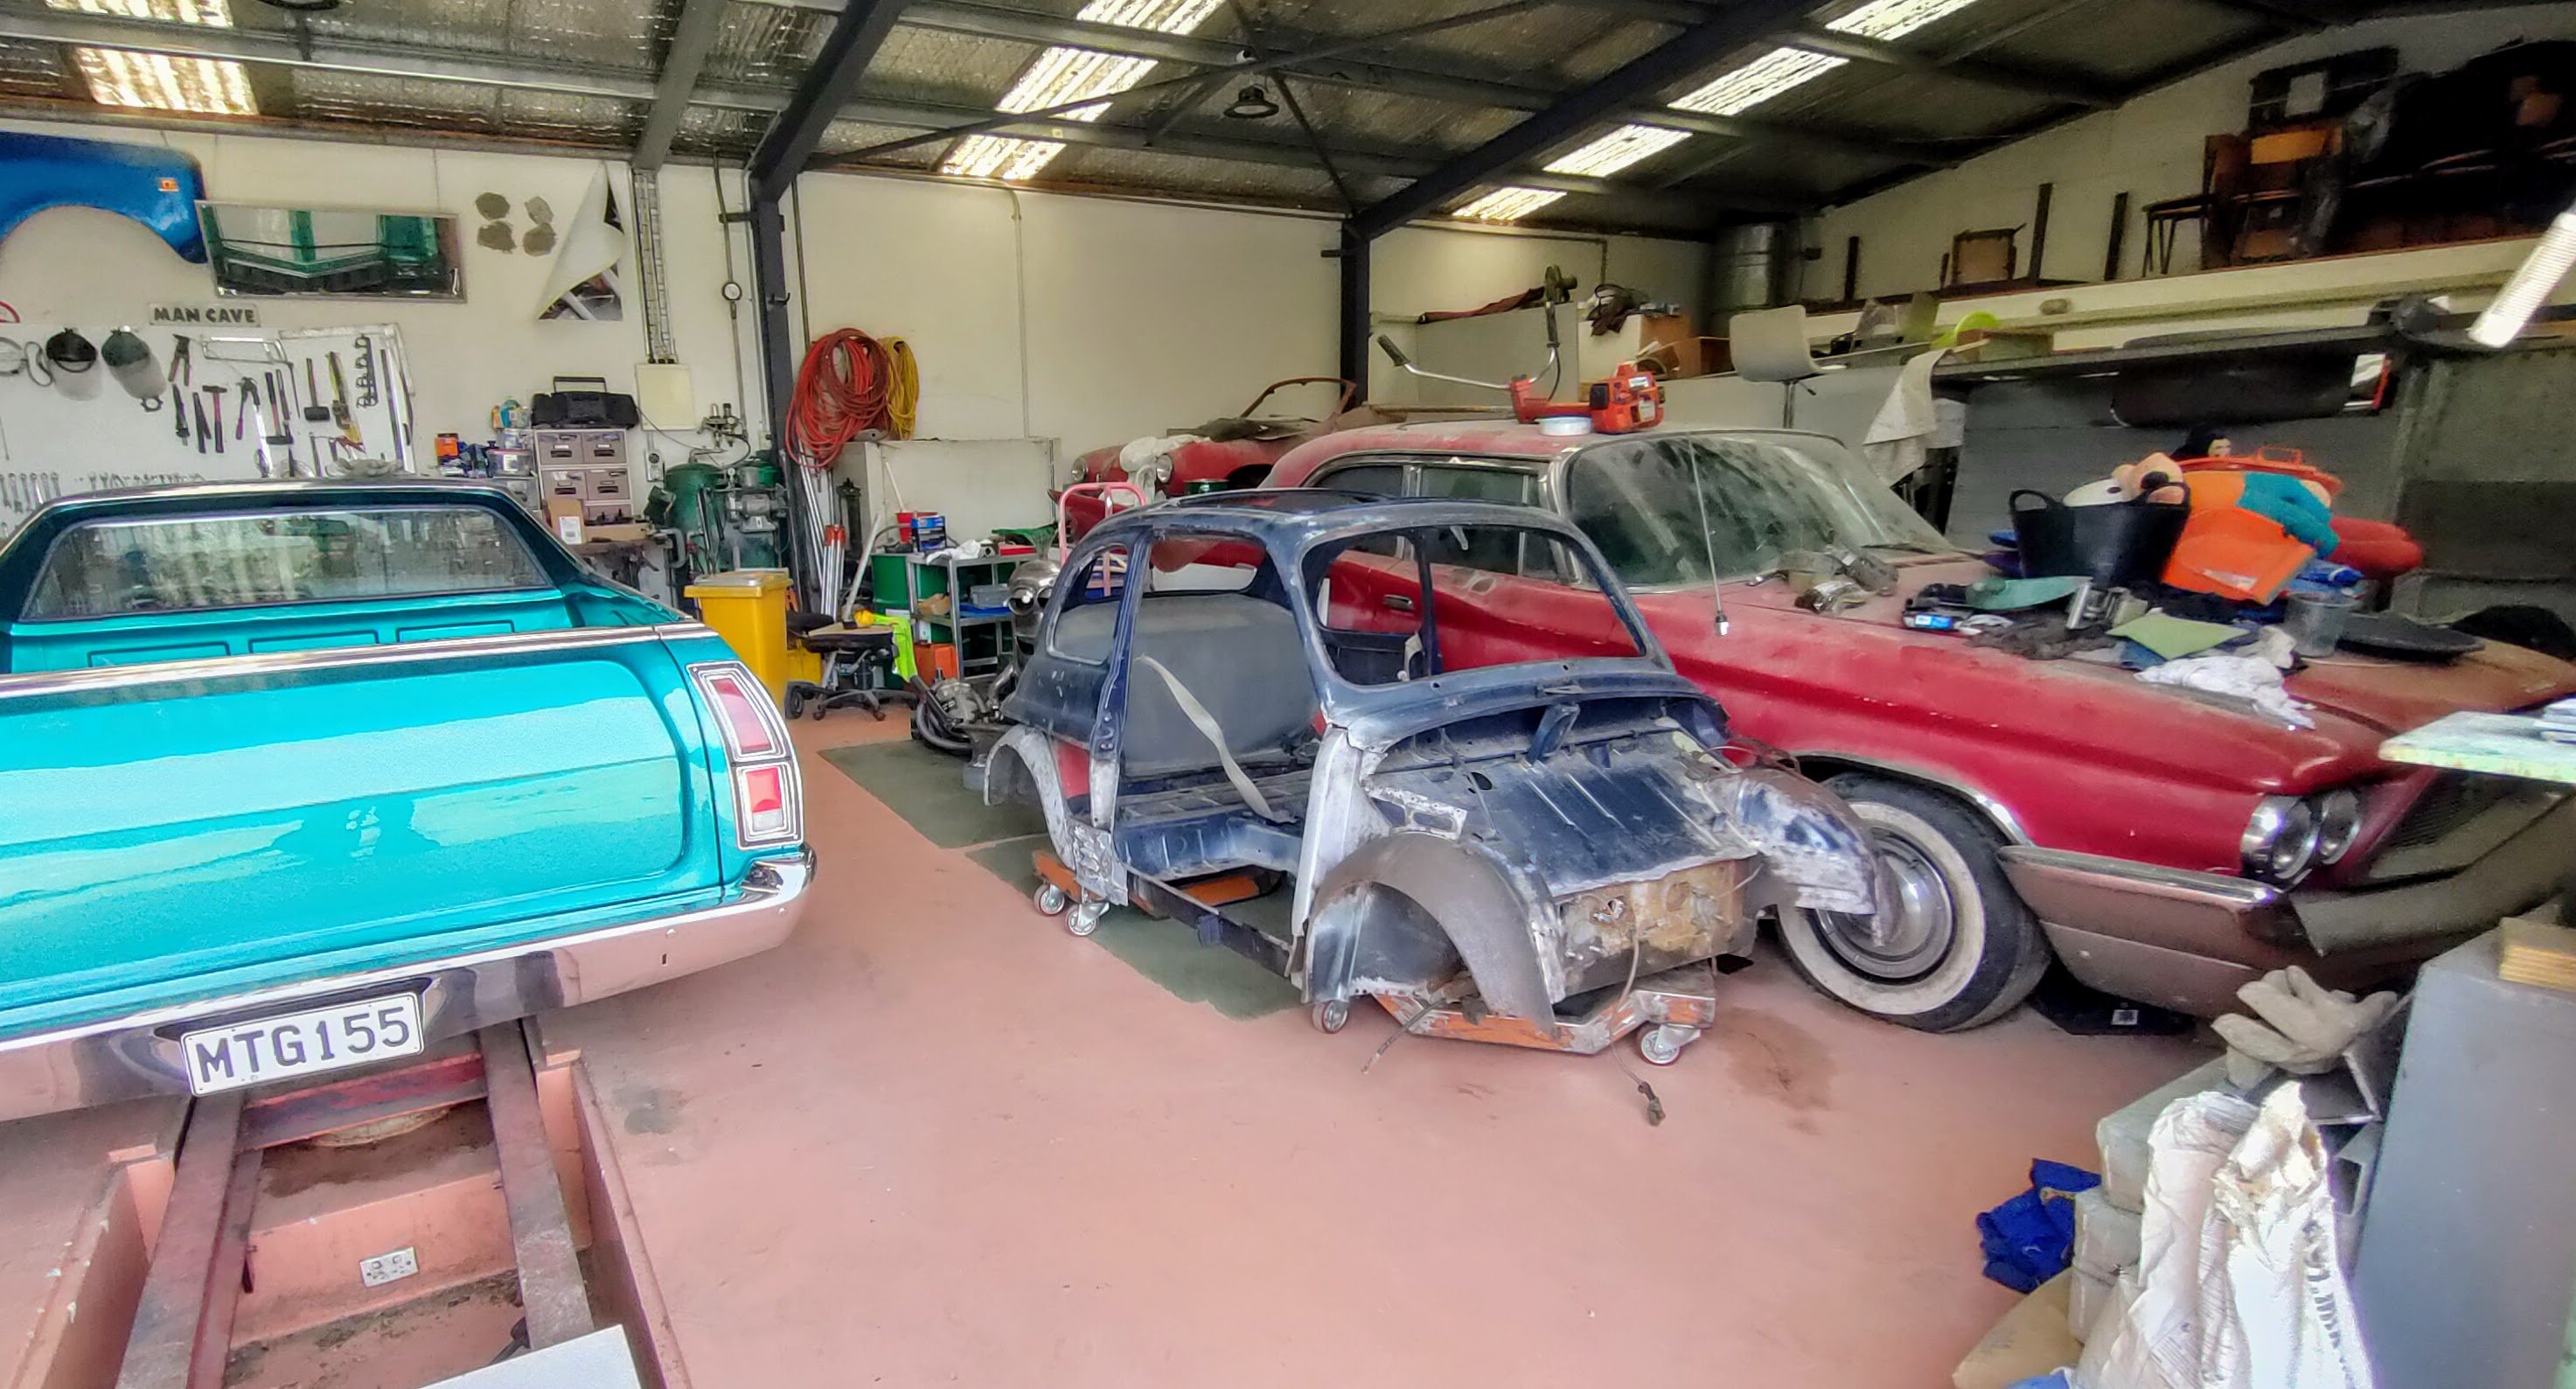
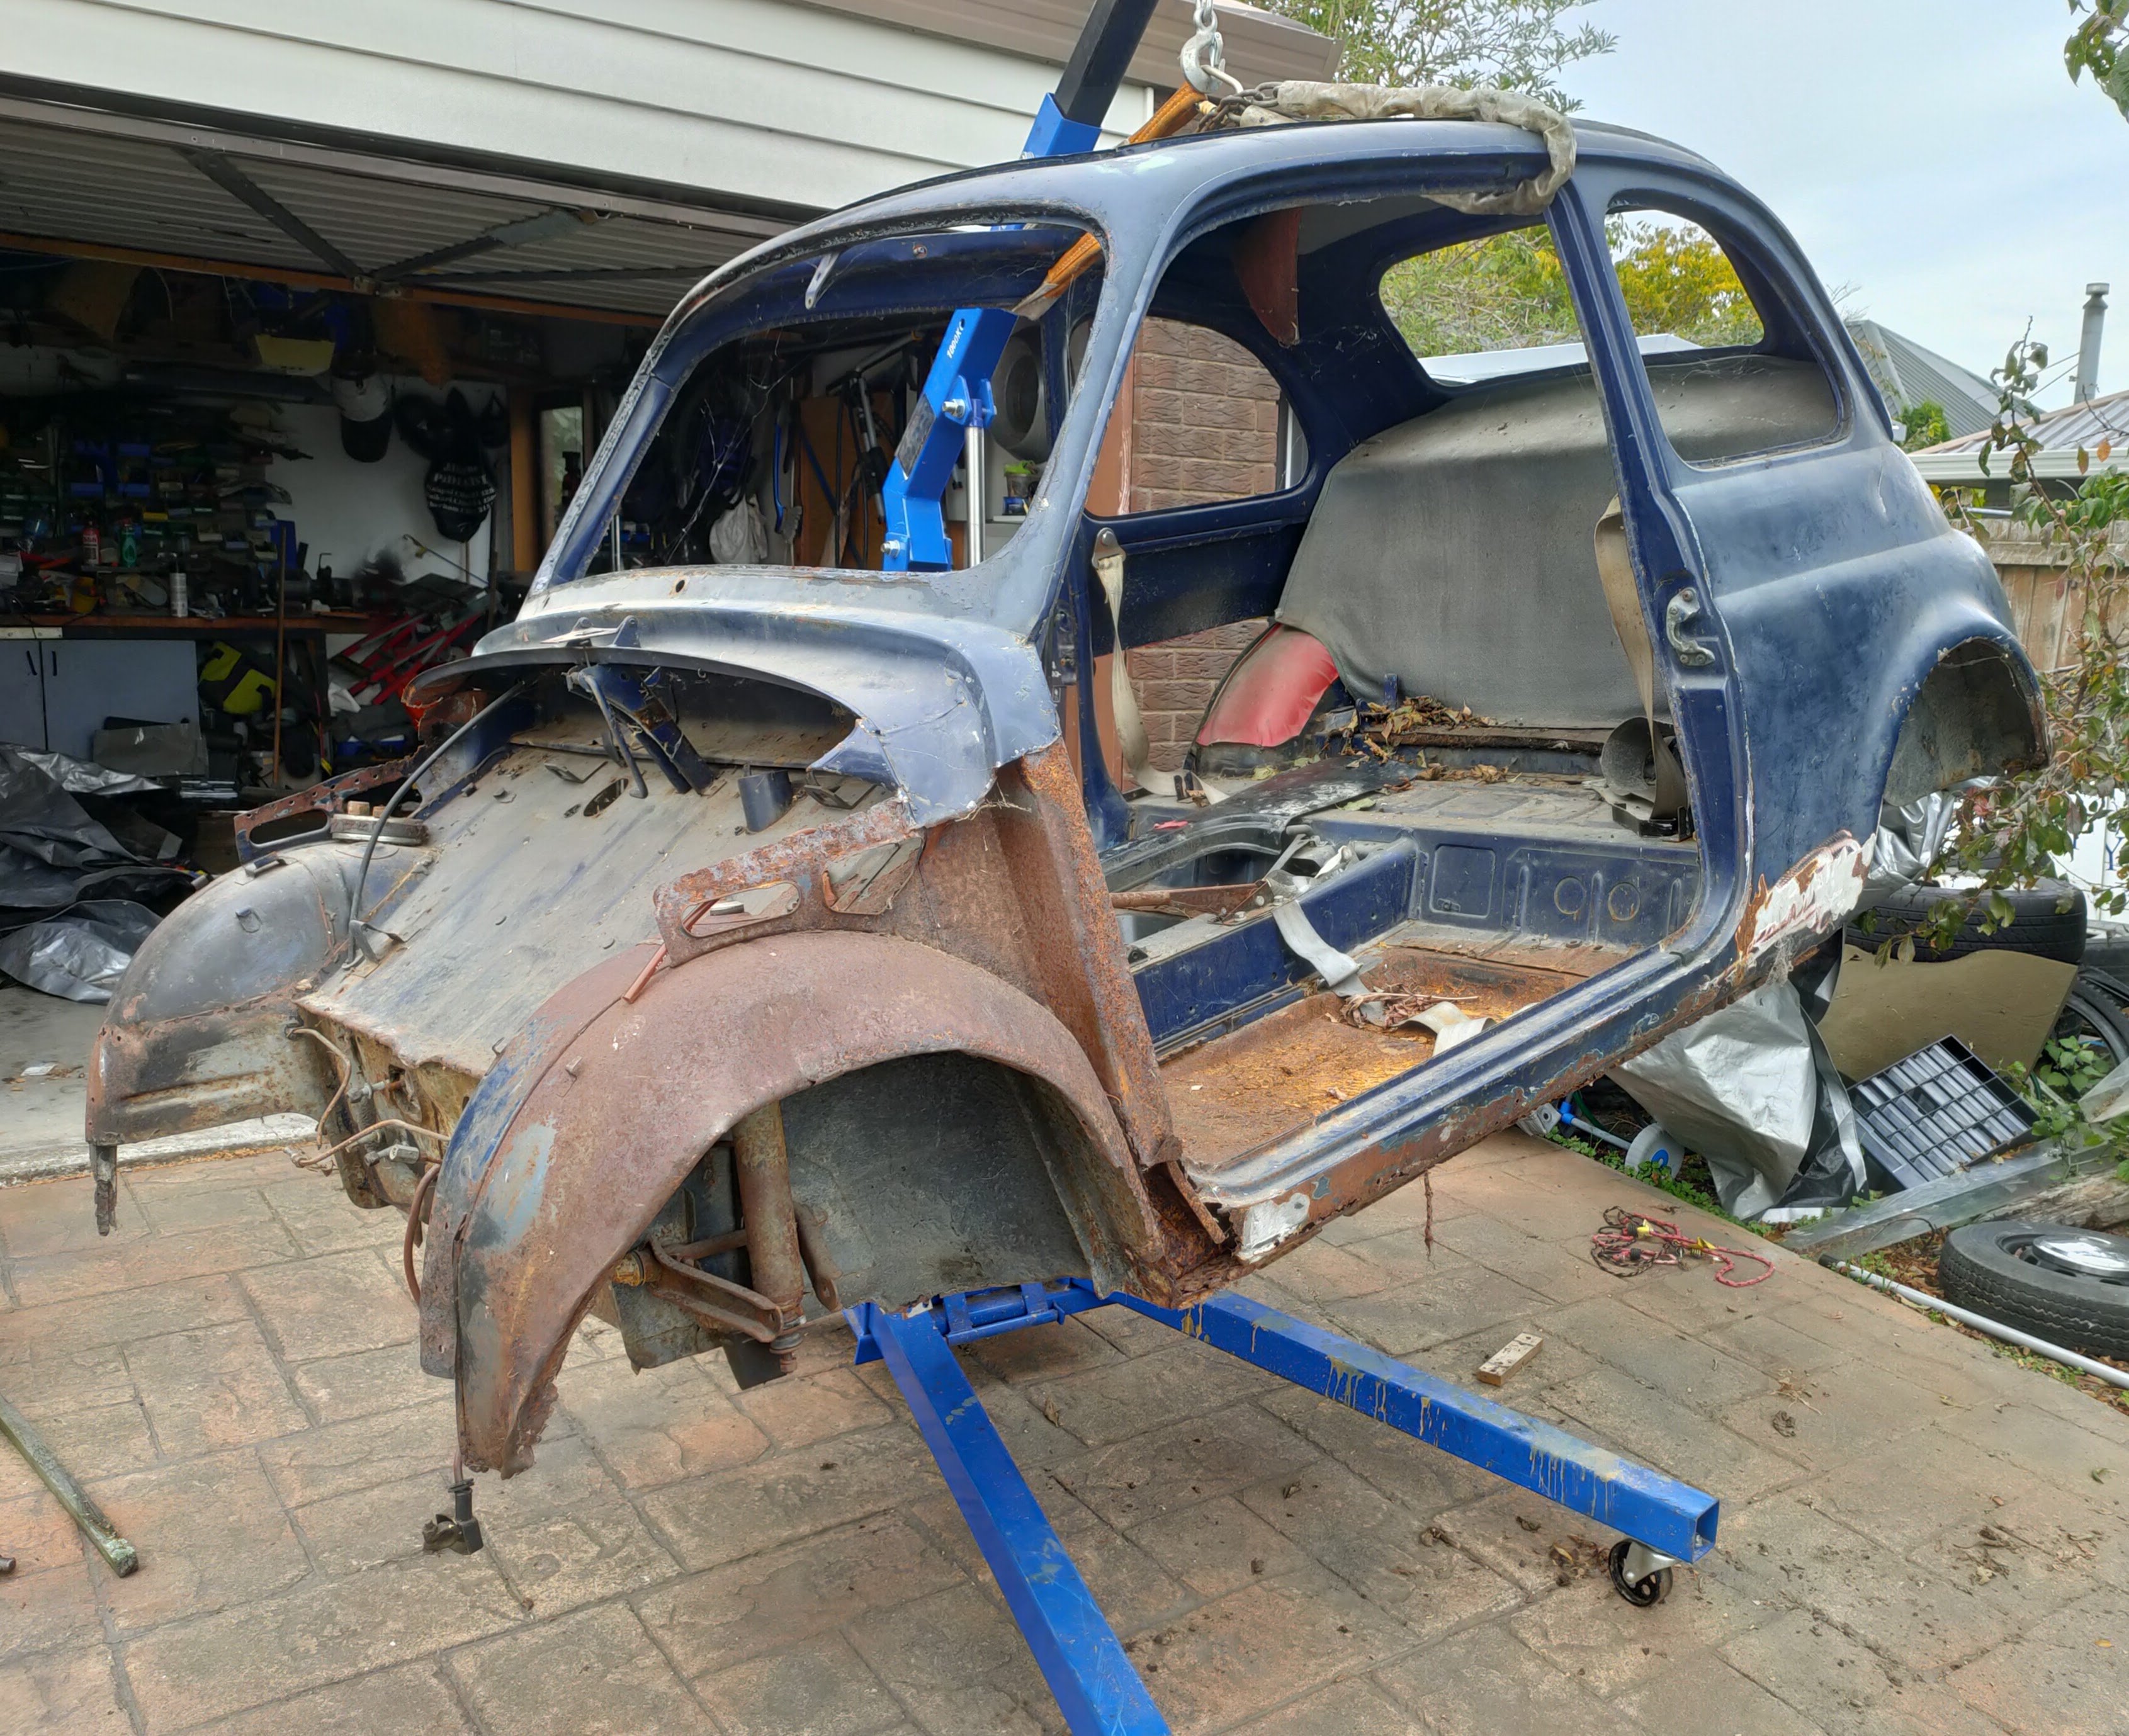
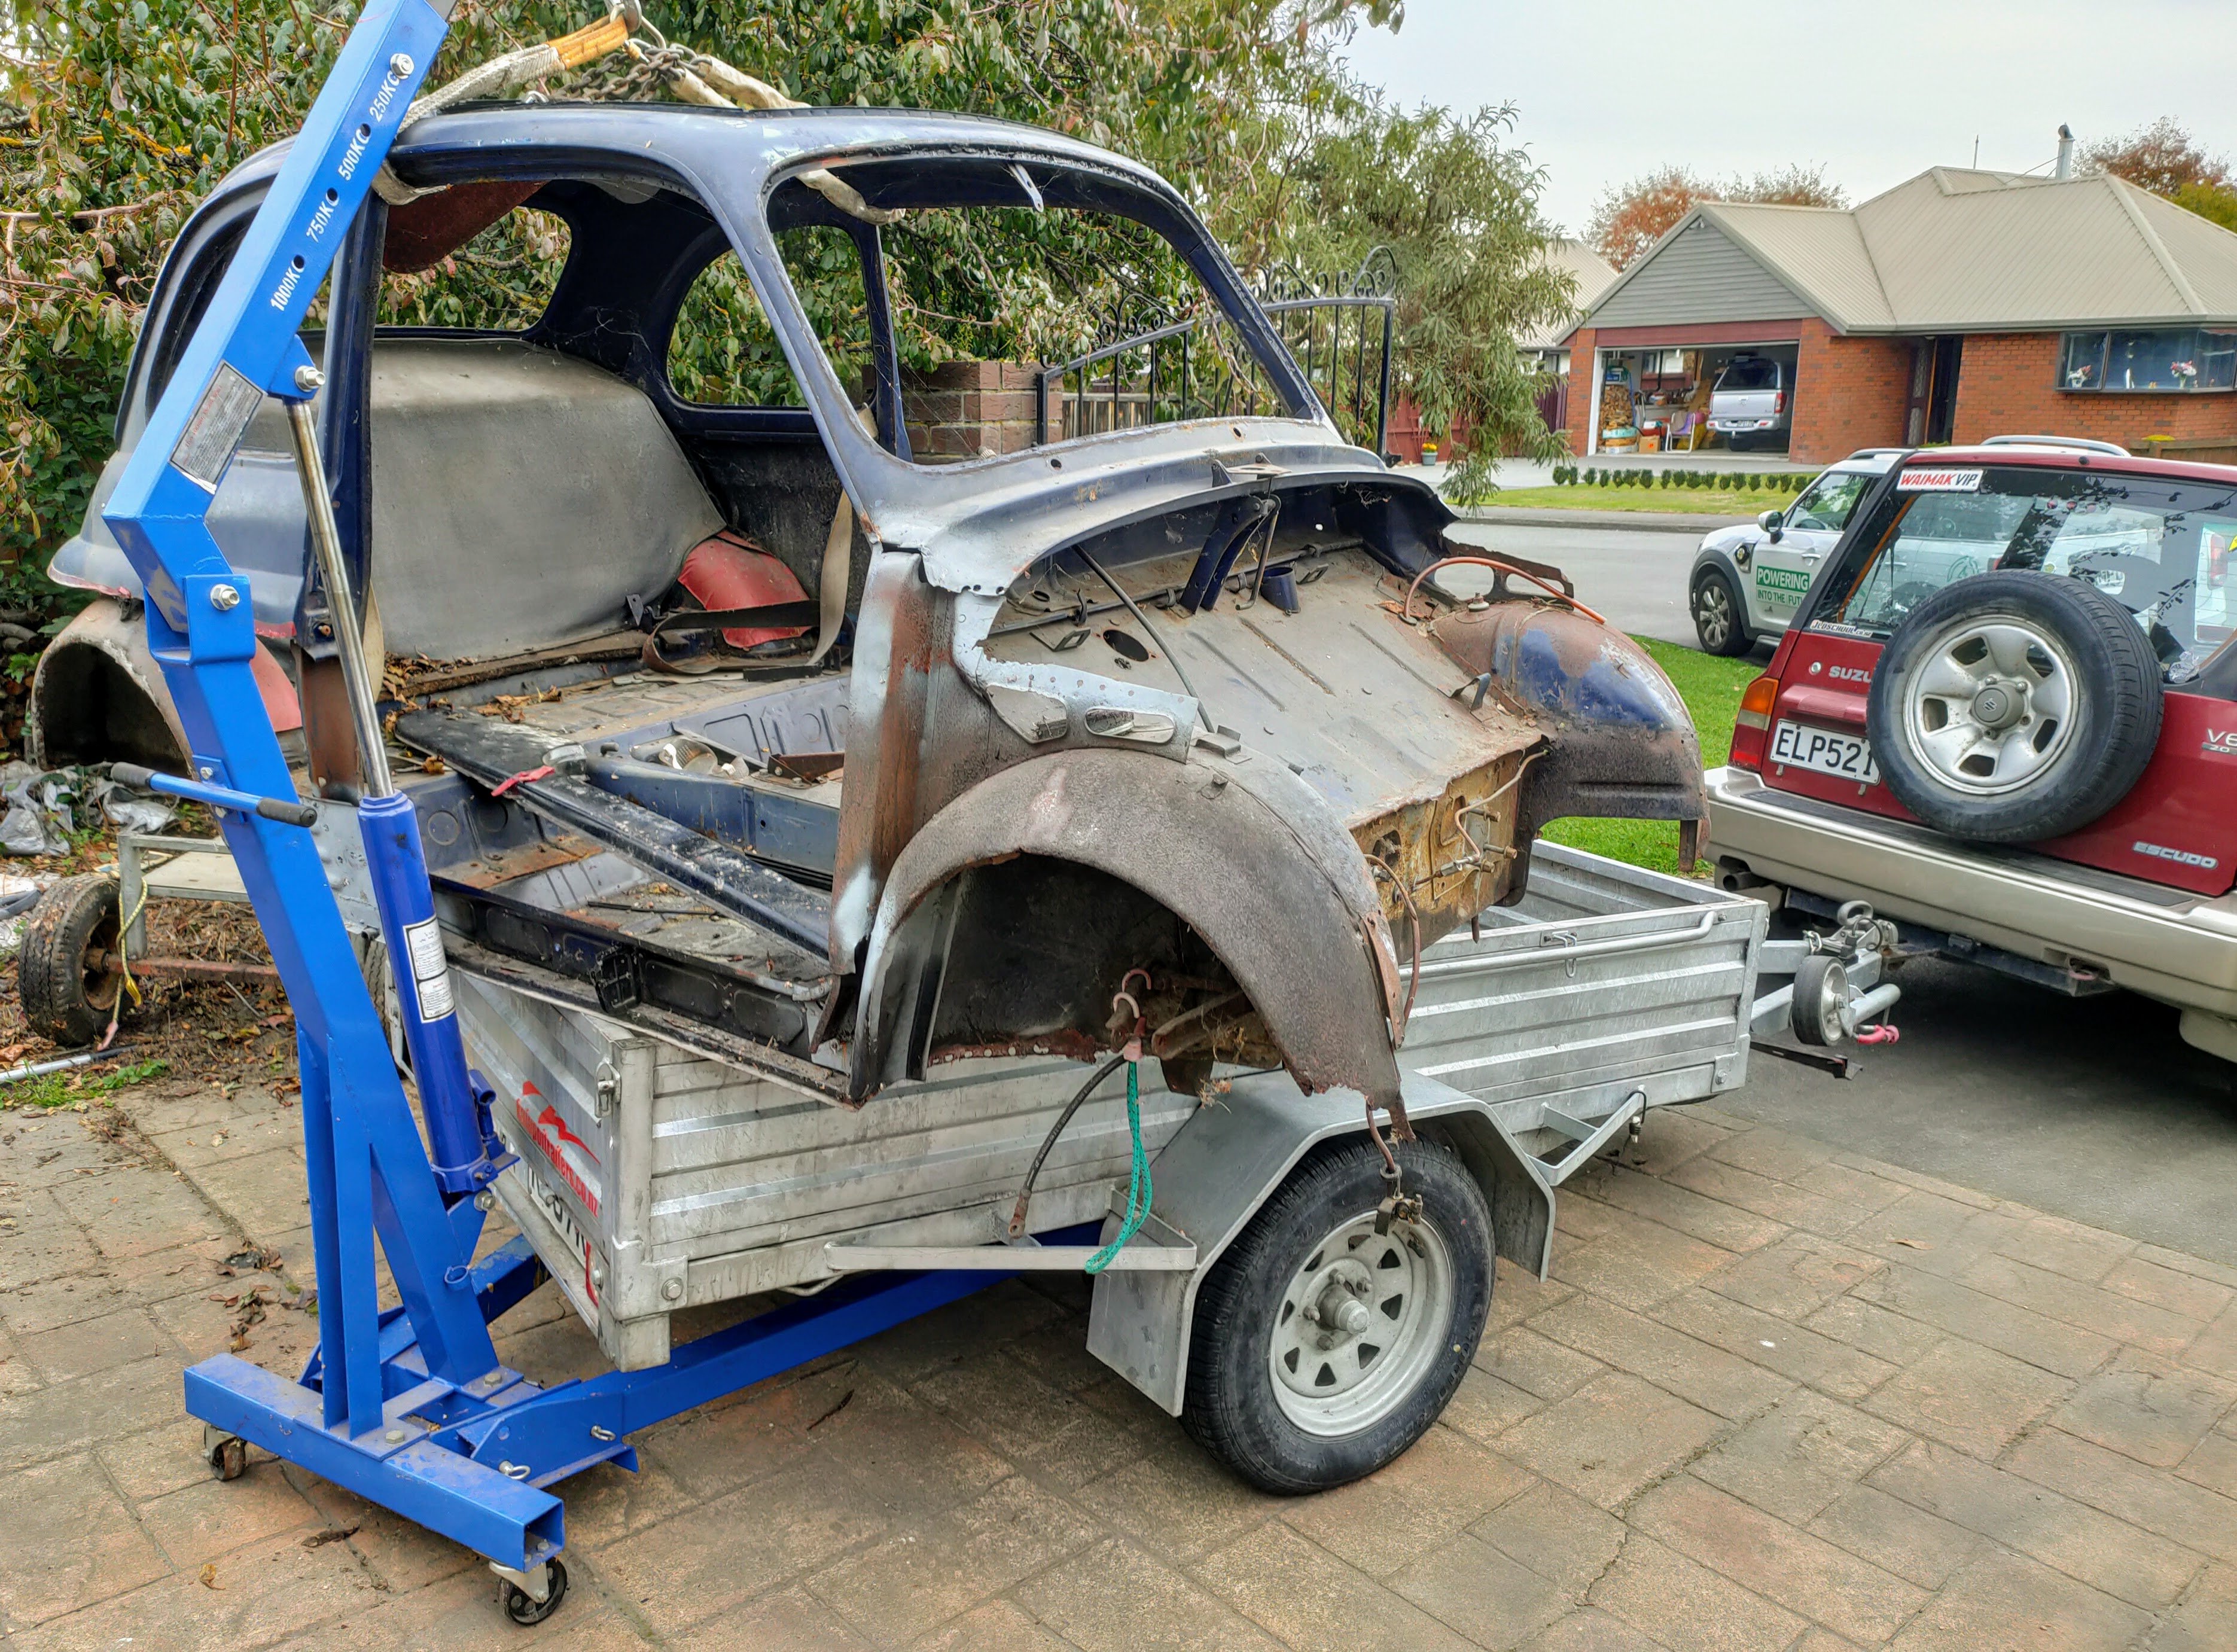
Then put it inside along with its much larger American friends - looks even smaller now, I will be back onto it next weekend now I have help in the form of an expert panel guy. aka my cousin - the owner of the Americans!
10 points
-
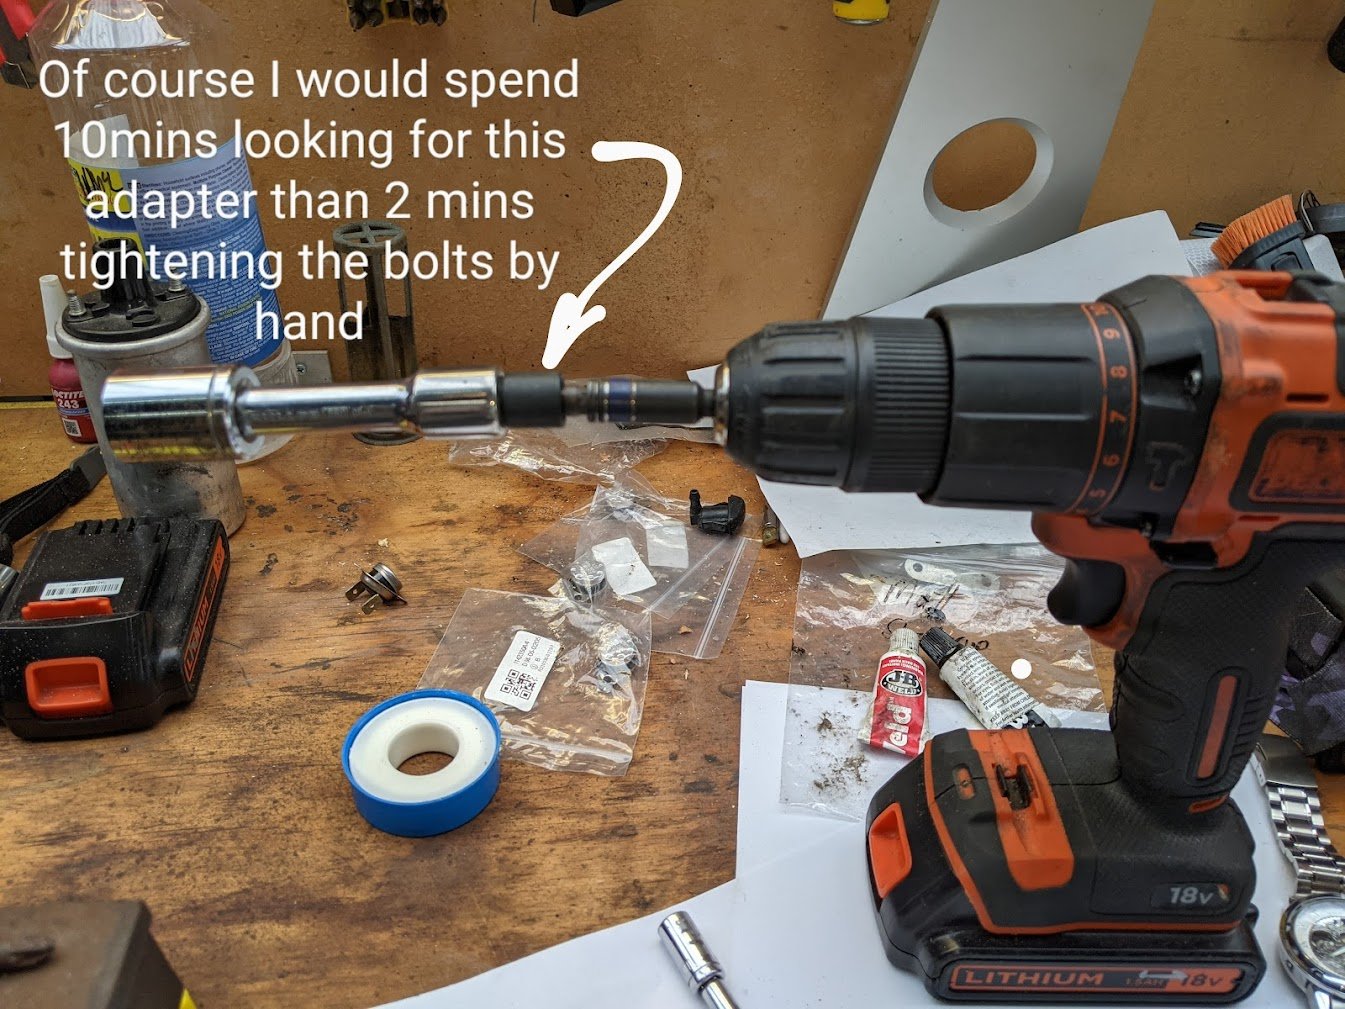
This is dragging on a bit, but the end is in sight. The other weekend I had a friend help me reinstall the gearbox. It went fairly smoothly, just with the usual limitations on space making it a bit of a pain to wriggle into place. A bit of wiggling and jiggling got it to slot into place. It appears the clutch centering tool did its job again. With the gearbox back in its home, there were a few other jobs to attend to. One of them was to check the heater hoses. OEM replacements are NLA and have been for years. There is a group buy with the Rover Coupe Club to replace them with a moulded silicone set, but it's cost-prohibitive for me since I'm trying to slow the spending snowball down. Thus, the plan was to use some T pieces and generic hoses to make a replacement. I got most of the way there before deciding it was too ugly and scrapping the lot. The moulded OEM hose above my monstrosity. If I just had one more 90 degree it would've been better, but I didn't. I thoroughly inspected the original hose and found a couple of areas of concern. One end the hose had burst, and the previous owner had just slipped the hose on a bit further. There was also a small cut in the hose further up. The rest of the hoses although old were in good enough condition I'm happy to reuse them for now. I did cut that section out and joined a fresh piece of hose to it. It'll be cut to length once the heater pipe it goes into is reinstalled. The hose was then refitted. I wish it was just a normal pair of hoses without the moulded ends and joining section, but it wouldn't be Rover if it was. The speedo cable was next to install. This was a pain. There is a clip that holds the cable into the speedo drive, but the rubber boot needs to go over the clip without pushing it out of place. I had a lot of trouble with this until I removed the speedo drive and installed the cable and boot out of the gearbox. Then it was a case of installing the drive into the gearbox again, making sure to locate the retaining slot correctly. I found it easiest to do this from under the car (mainly due to the height that I have the car lifted to). Next I reinstalled the rear mount bracket, clutch cable and starter. I sourced a new lower bolt for the starter since it was completely missing. It turns out the crank position sensor cable has a bracket that is meant to be attached to the starter bolt that was missing, so that's now secured properly. With the gearbox mostly installed it was now time to reinstall the upgraded shifter linkages. I had installed a kit to rebush the U-Joint and poly bushes on the steady bar. I found it easiest to install the round front bush on the steady bar (loosely so you can lift the bar up), and then the UJ before installing the bushing at the rear. It's a bit clumsy otherwise. I had to change the orientation of one of the bolts through the UJ as the longer threaded section was catching on the gearbox casing. It's very tight though. With the front installed, there are two bolts to install in the rear of the linkages. Remember to fit the plate to the bush too. Tighten the round bush on the front and that job is done. I couldn't help but jump into the car and see how it felt. It's very direct with little to no free play. I'm looking forward to smashing through gears with it. Before the gearbox could be filled with oil I needed to install the drive shafts. The short passengers one was all good, just a quick clean up and a new retaining clip was all that it needed. It popped nicely into place The drivers side though, needed some work. The main thing was that the splines on the very end had been damaged, but there were other warnings signs, such as the boot having a single zip tie on it, while the big end was being retained with hopes and dreams. Not that it mattered, it's not like it had any grease in the joint (and no signs of it having ejected the grease) The retaining collar was all beat to shite too. I'm glad I didn't choose to run this joint. I split the outer joint off, leaving just the tripod. No, I haven't cleaned it, this is how little grease was in it. The tripod is retained with a circlip Once the circlip is removed, the tripod can be removed from the shaft with a puller. The new tripod was then hammered into place, and the circlip refitted. The boot was cleaned up, grease pumped into the joint, and new bands were used to secure the boot in place. The old retaining clip was removed And a new one popped into place The shaft was then slid into place and the inner joint clipped into the diff. Now it was time to fill the gearbox with oil. I chose to use Penrite Trans Gear 75W80 this time as it's cheaper than the Honda MTF I used last time but meets Land Rover MTF94 spec. It was pretty easy to fill. I just popped the pump from my filler bottle right into the oil bottle and pumped about 2.3L of fluid in until it started to run out. Now it's playing the white paper game, where hopefully I will come out tomorrow and see no oil on the paper. Before wrapping up for the day I gave the heater pipe and battery tray a good going over with the wire brush and then rust killed them. I'm prepping the pipes as I still haven't secured a replacement yet, and I can't have this car off the road taking up garage space much longer, so I will refit the original pipe for now and swap it out later when I have a replacement. Hopefully it won't fail in the meantime. The battery tray is pretty bad, with a couple of decent holes in it, but the main part is solid and it still bolts down OK. Both got a good coating of black zinc paint, in the hopes it will protect them. They're drying now, but will be refitted soon. Then it's just a case of waiting for the replacement lower coolant hose to arrive from Greece, and I should be able to have the car rolling again.9 points
-
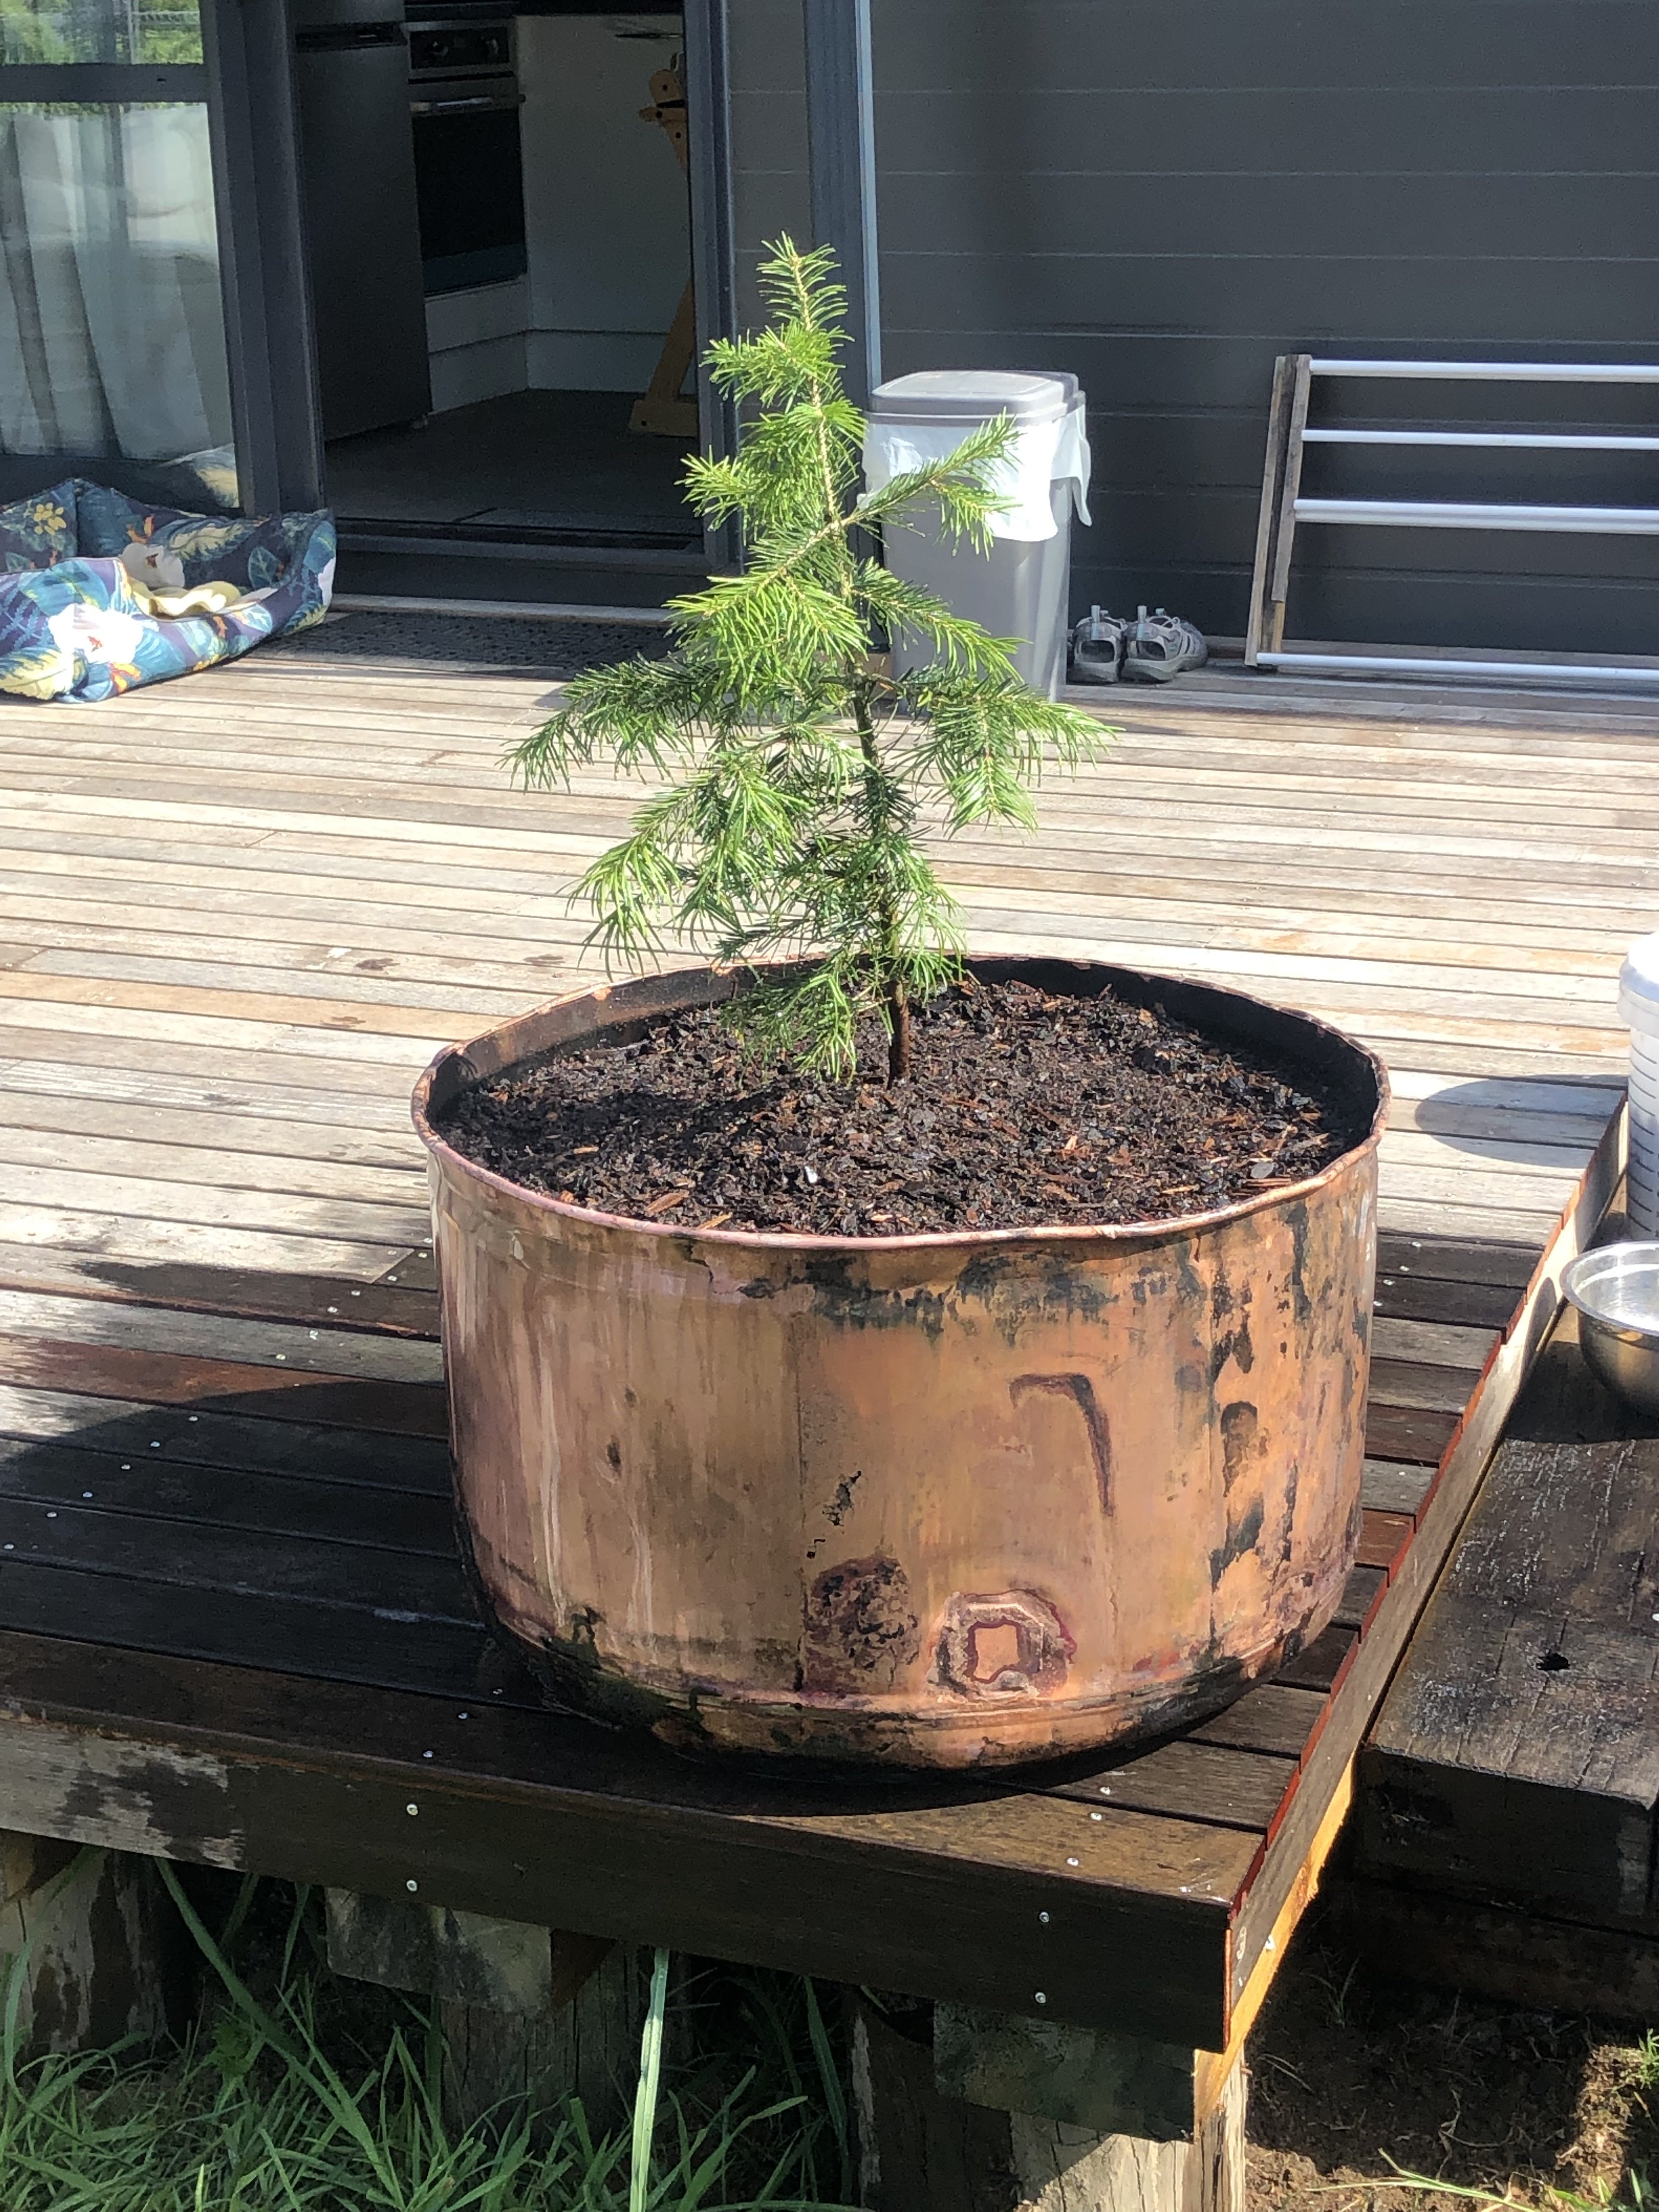
Made a shitty planter out of an old cylinder, brazed up the holes and put some pipe round the top for safety left a hole in the bottom for the rain.
8 points
-
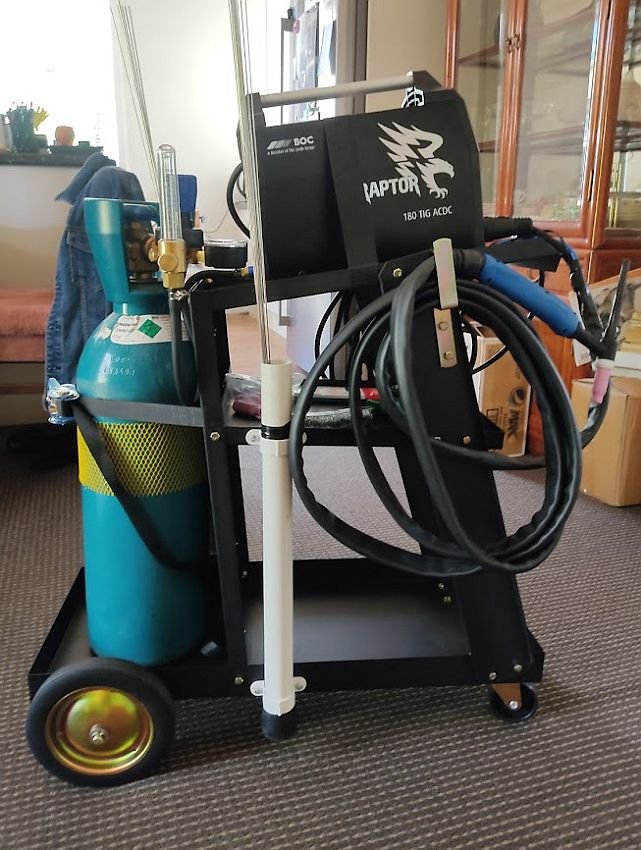
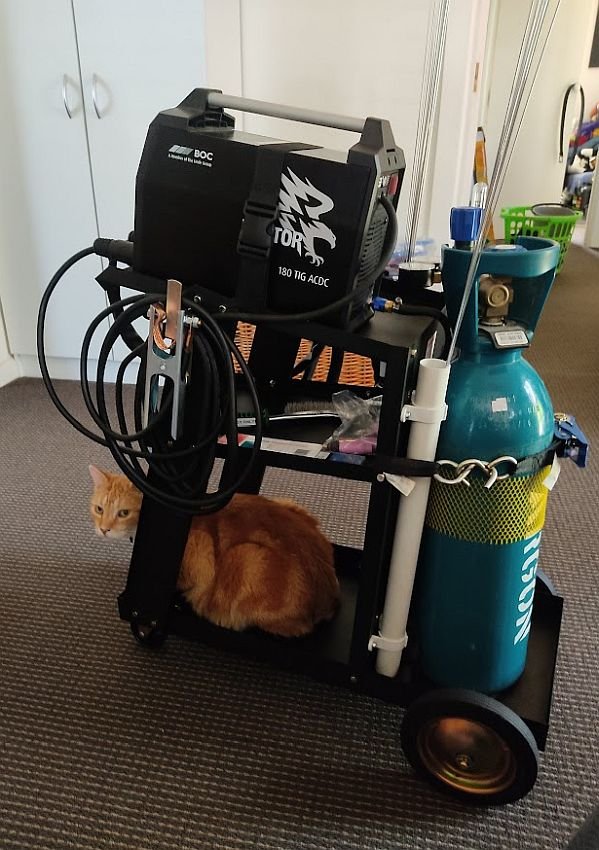
Mostly posting as it'll likely be the only time it'll be this clean/organized haha Grabbed another trolley from Bunnings as well as a meter of 32mm pvc tube, cut it in half and got carried away cleaning up the ends ha SS filler on the side, alloy at the rear.
7 points
-
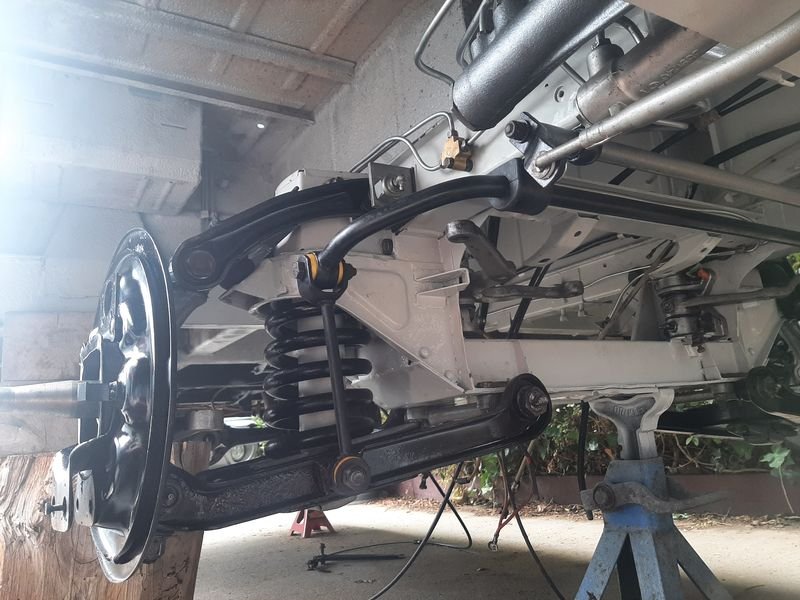
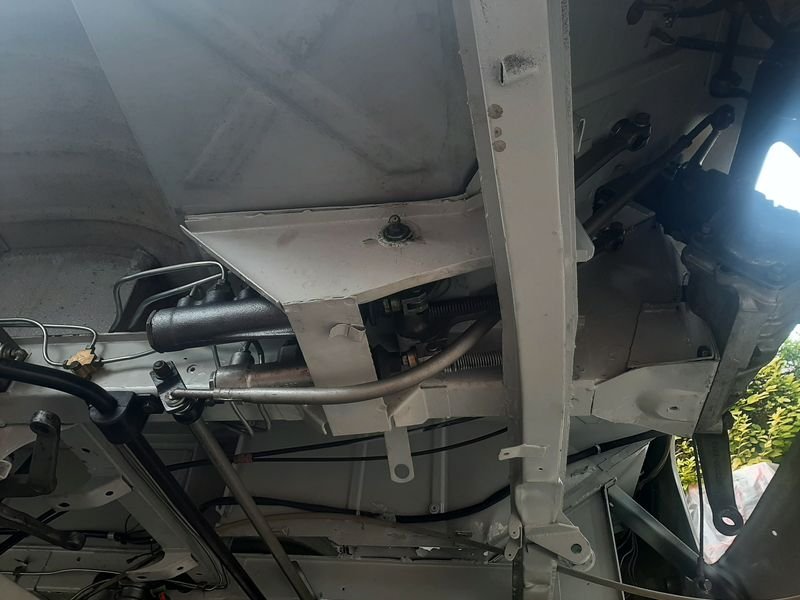
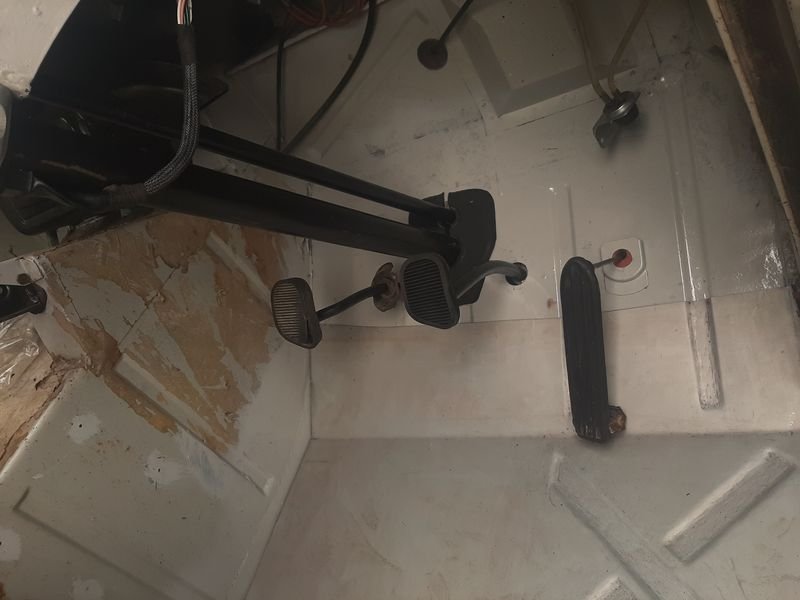
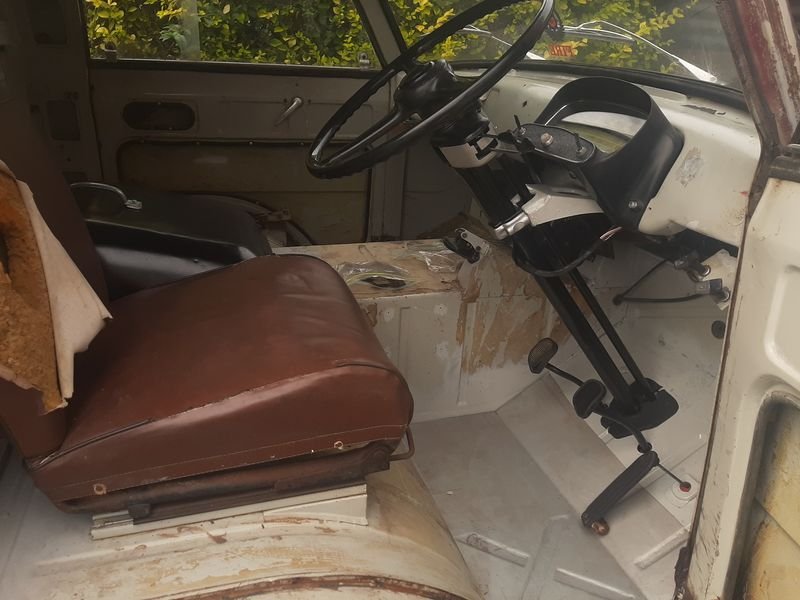
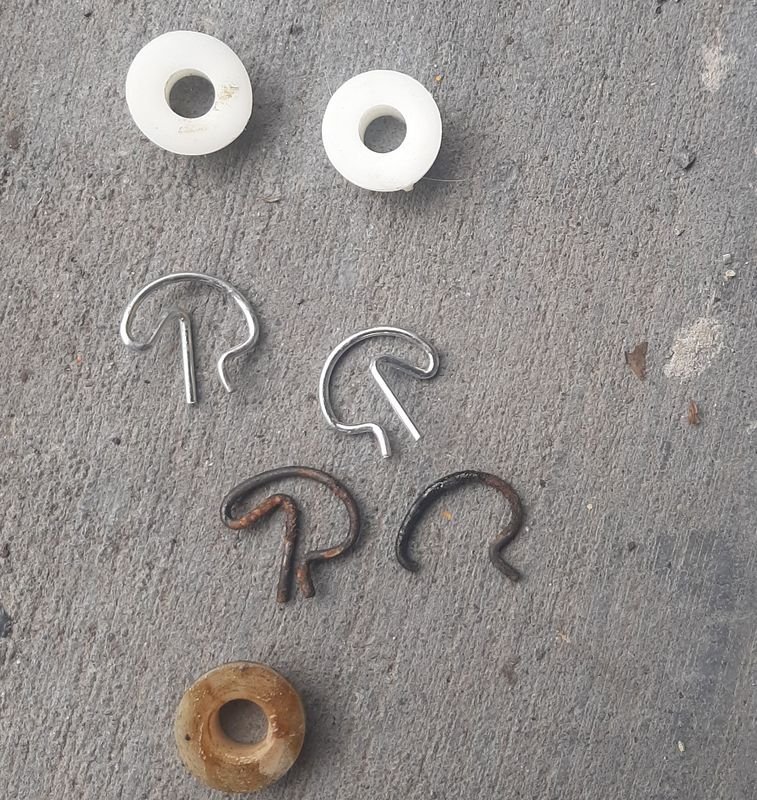
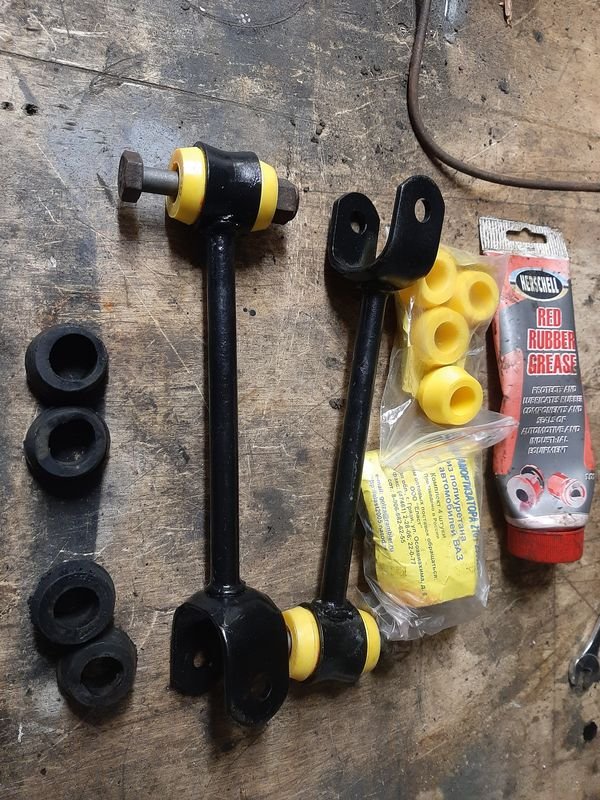
Bolting more stuff on, Suspension all back together, didnt need a spring compressor, just jacked up the lower arm till the top kingpin nut poked through, so thats good news for easy future altitude adjustment. Fiat parts bin allows new top quality russian poly bushes for the front swaybar, for picking up a few extra 10ths around Bathurst. Also got the steering box and gear shift in as well, got a helper for a couple of weeks Front half of the gear linkage in, the rod takes a totally bonkers path though the middle of the master cylinder box to a shaft to the other (ie LHD) side where the rear rod takes over. Fiat first gen Panda linkage bushes and clips are a perfect replacement and will also suit the 2300, and also very cheap so i bought enough for both vehicles Compared to the madness going on under the floor, the interior is pretty clean. Pedals back on and first time they are not at floor level. Ill clean up the accelerator pedal and mount it to the floor repair panel so it can be driven easily in the meantime. Dash and column back together, and with a seat, thats pretty much the entire interior, lol
6 points
-
However finally back onto it today, sandblast for a start.
6 points
-
6 points
-
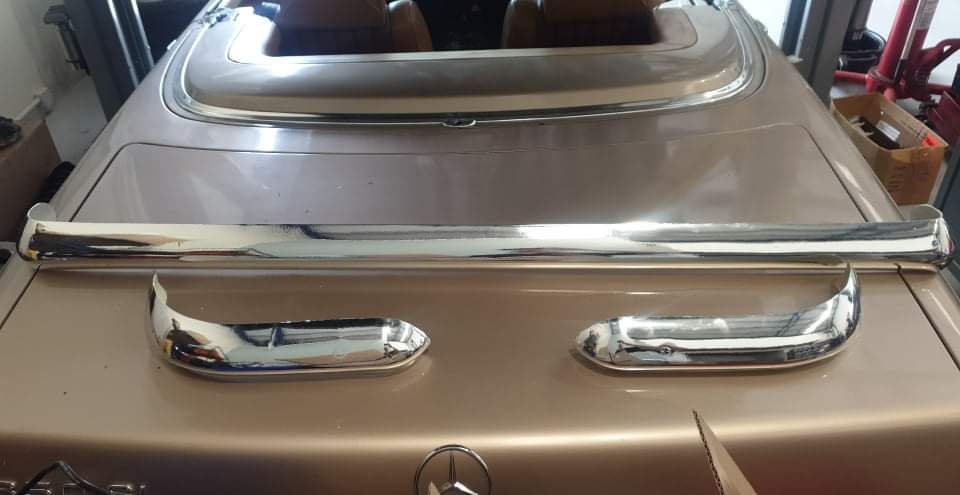
Such a excellent blend/colour match you'd never even guess it had been painted Boots on and lined up. A tweak of the latch and its actually shutting nicely on the first attempt now5 points
-
Cables tucked away in some sheathing with cloth tape securing the ends. All getting clipped in to the factory mounting points
5 points
-
The hot seat
5 points
-
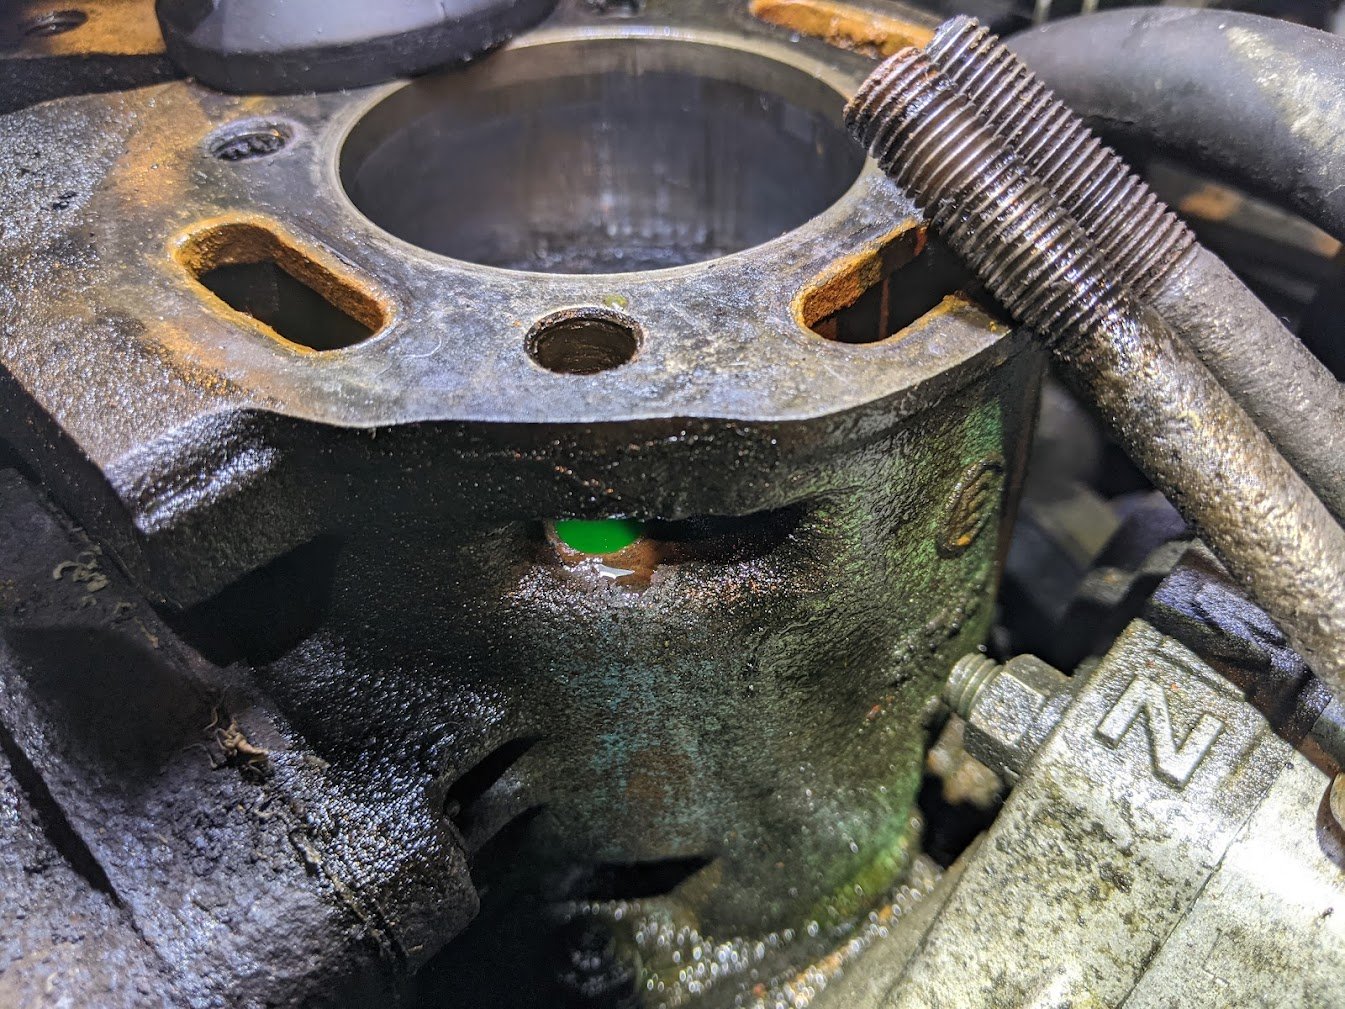
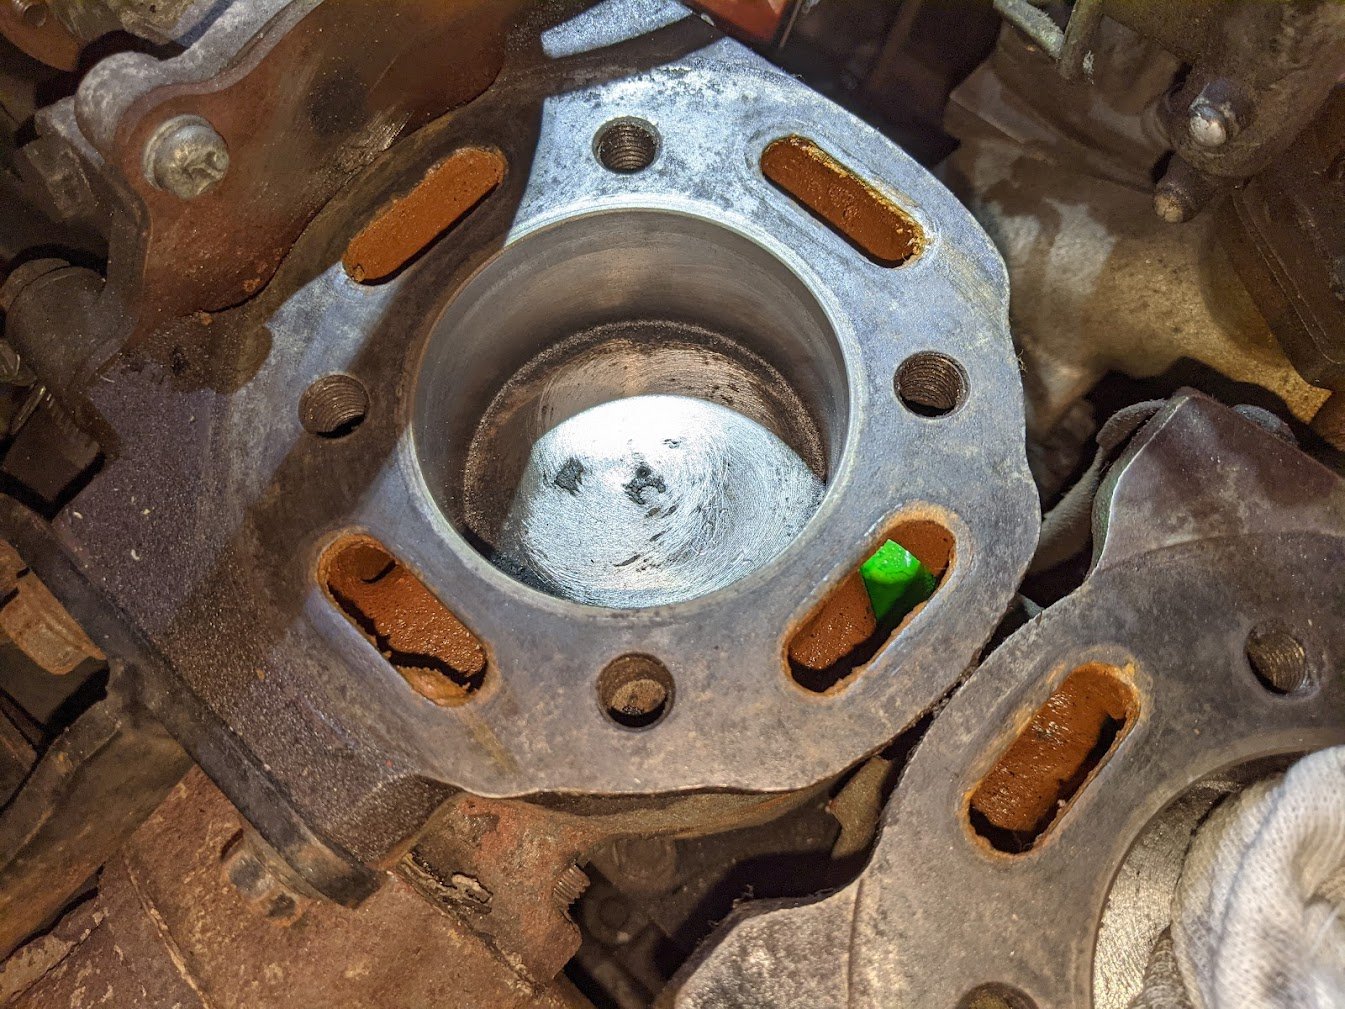
it was this: Ah, ok, some bogan had put the bolts in the wrong place, and the long one eventually wore through the water jacket. I had a think, and realised the cooling is only 15psi at ~100deg C, so, JB Weld! Tickle up the top of the piston Button up the top of the engine Then decorate the front of the Prius...
5 points
-
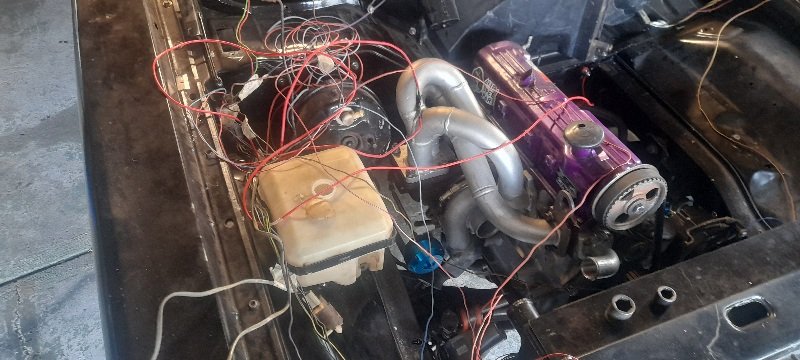
Just ordered some 850cc injectors so I've got plenty of headroom incase e85 becomes available at pump again and I decide to go forged rods and pistons down the track and try make 500hp at the wheels its got plenty of juice available. Started looking where to jam turbo, definitely passengers side wont know where it will physically fit till turbo arrives plenty of room for a 3.5" dump pipe. Obviously getting drivers side exhaust over to other side of engine bay is going to need doing will go across front of engine no issues lots of open space there. Something like the below will probably work best enough room for MAF and air filter and straight shot out then down for exhaust.
4 points
-
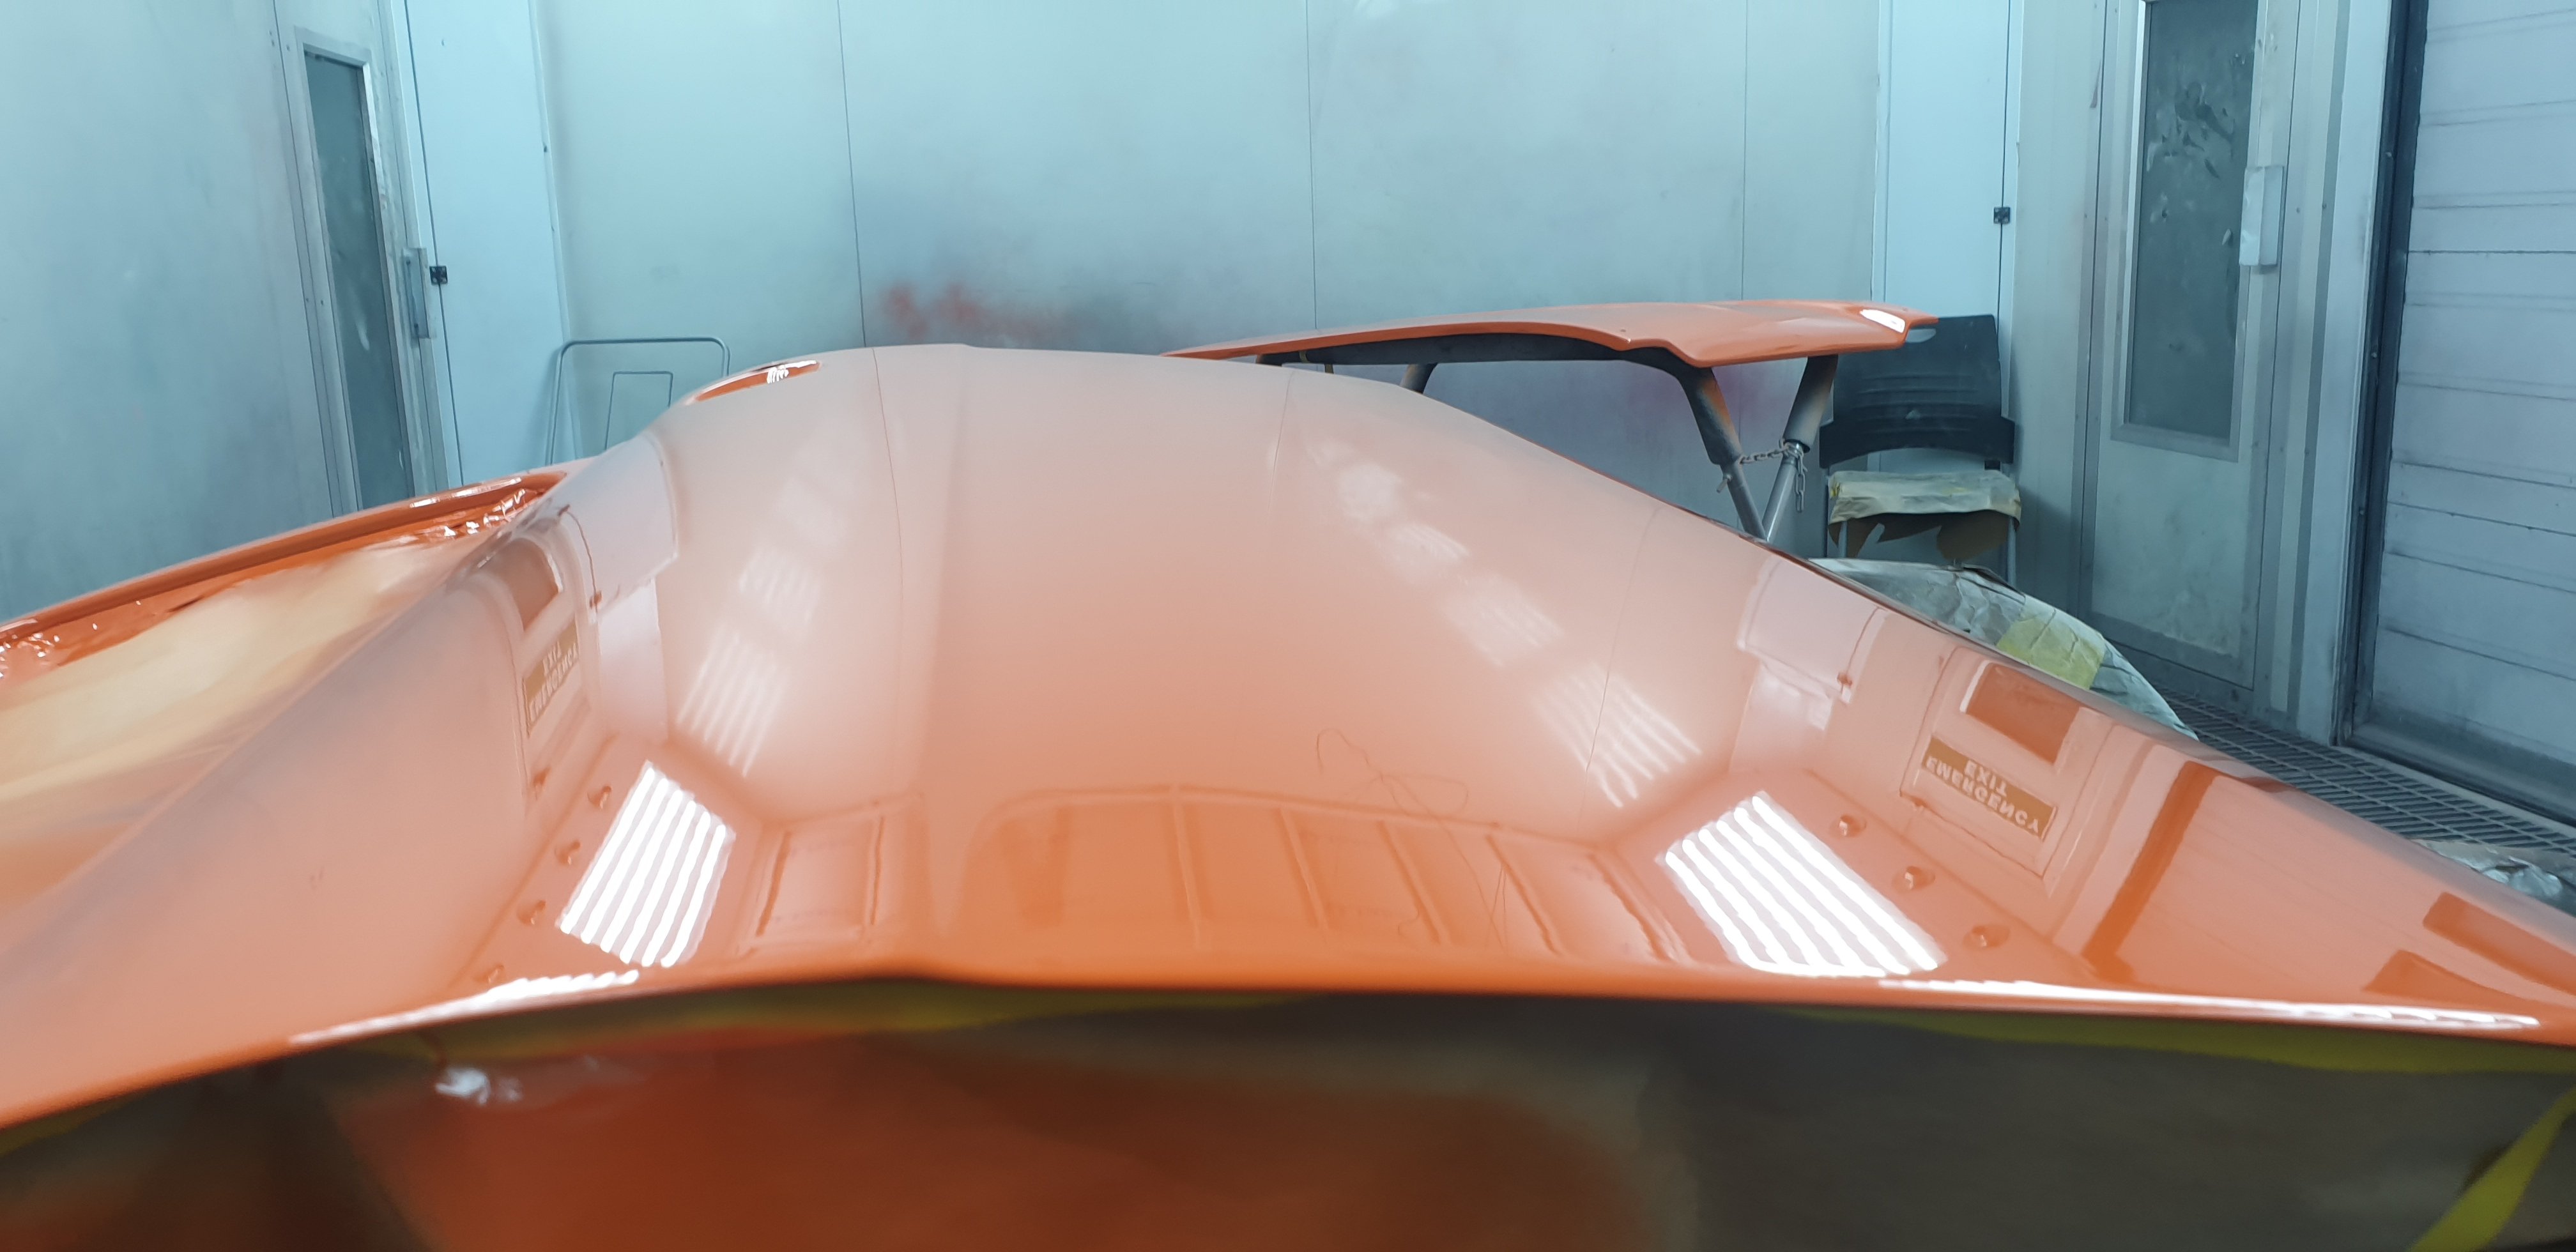
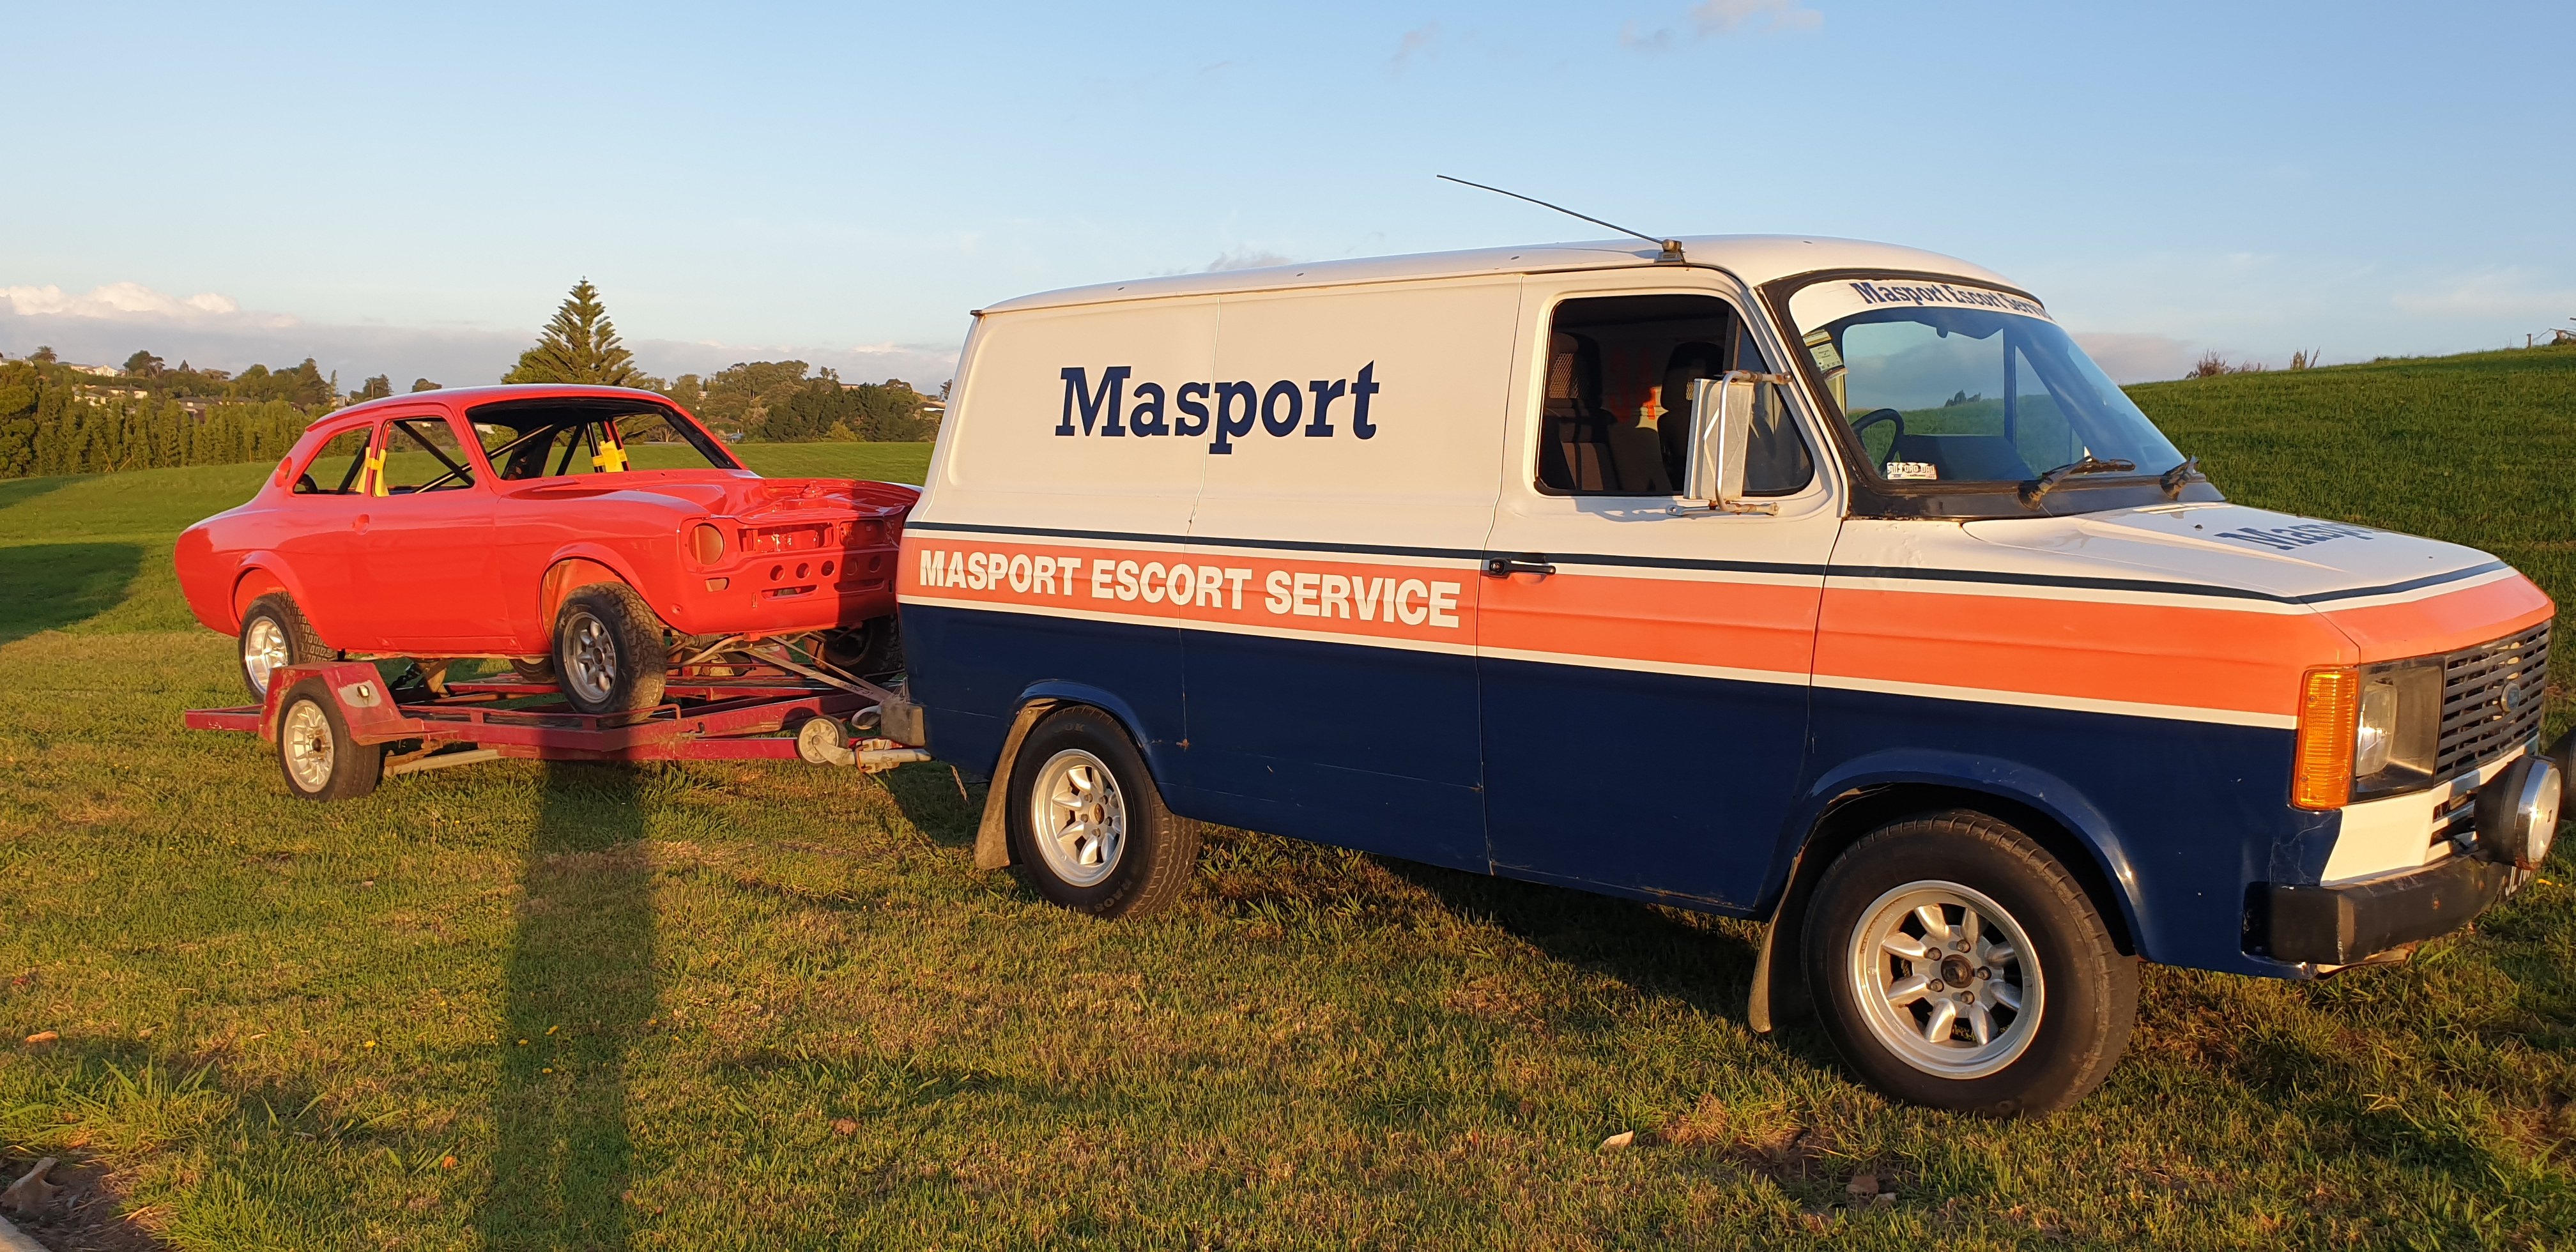
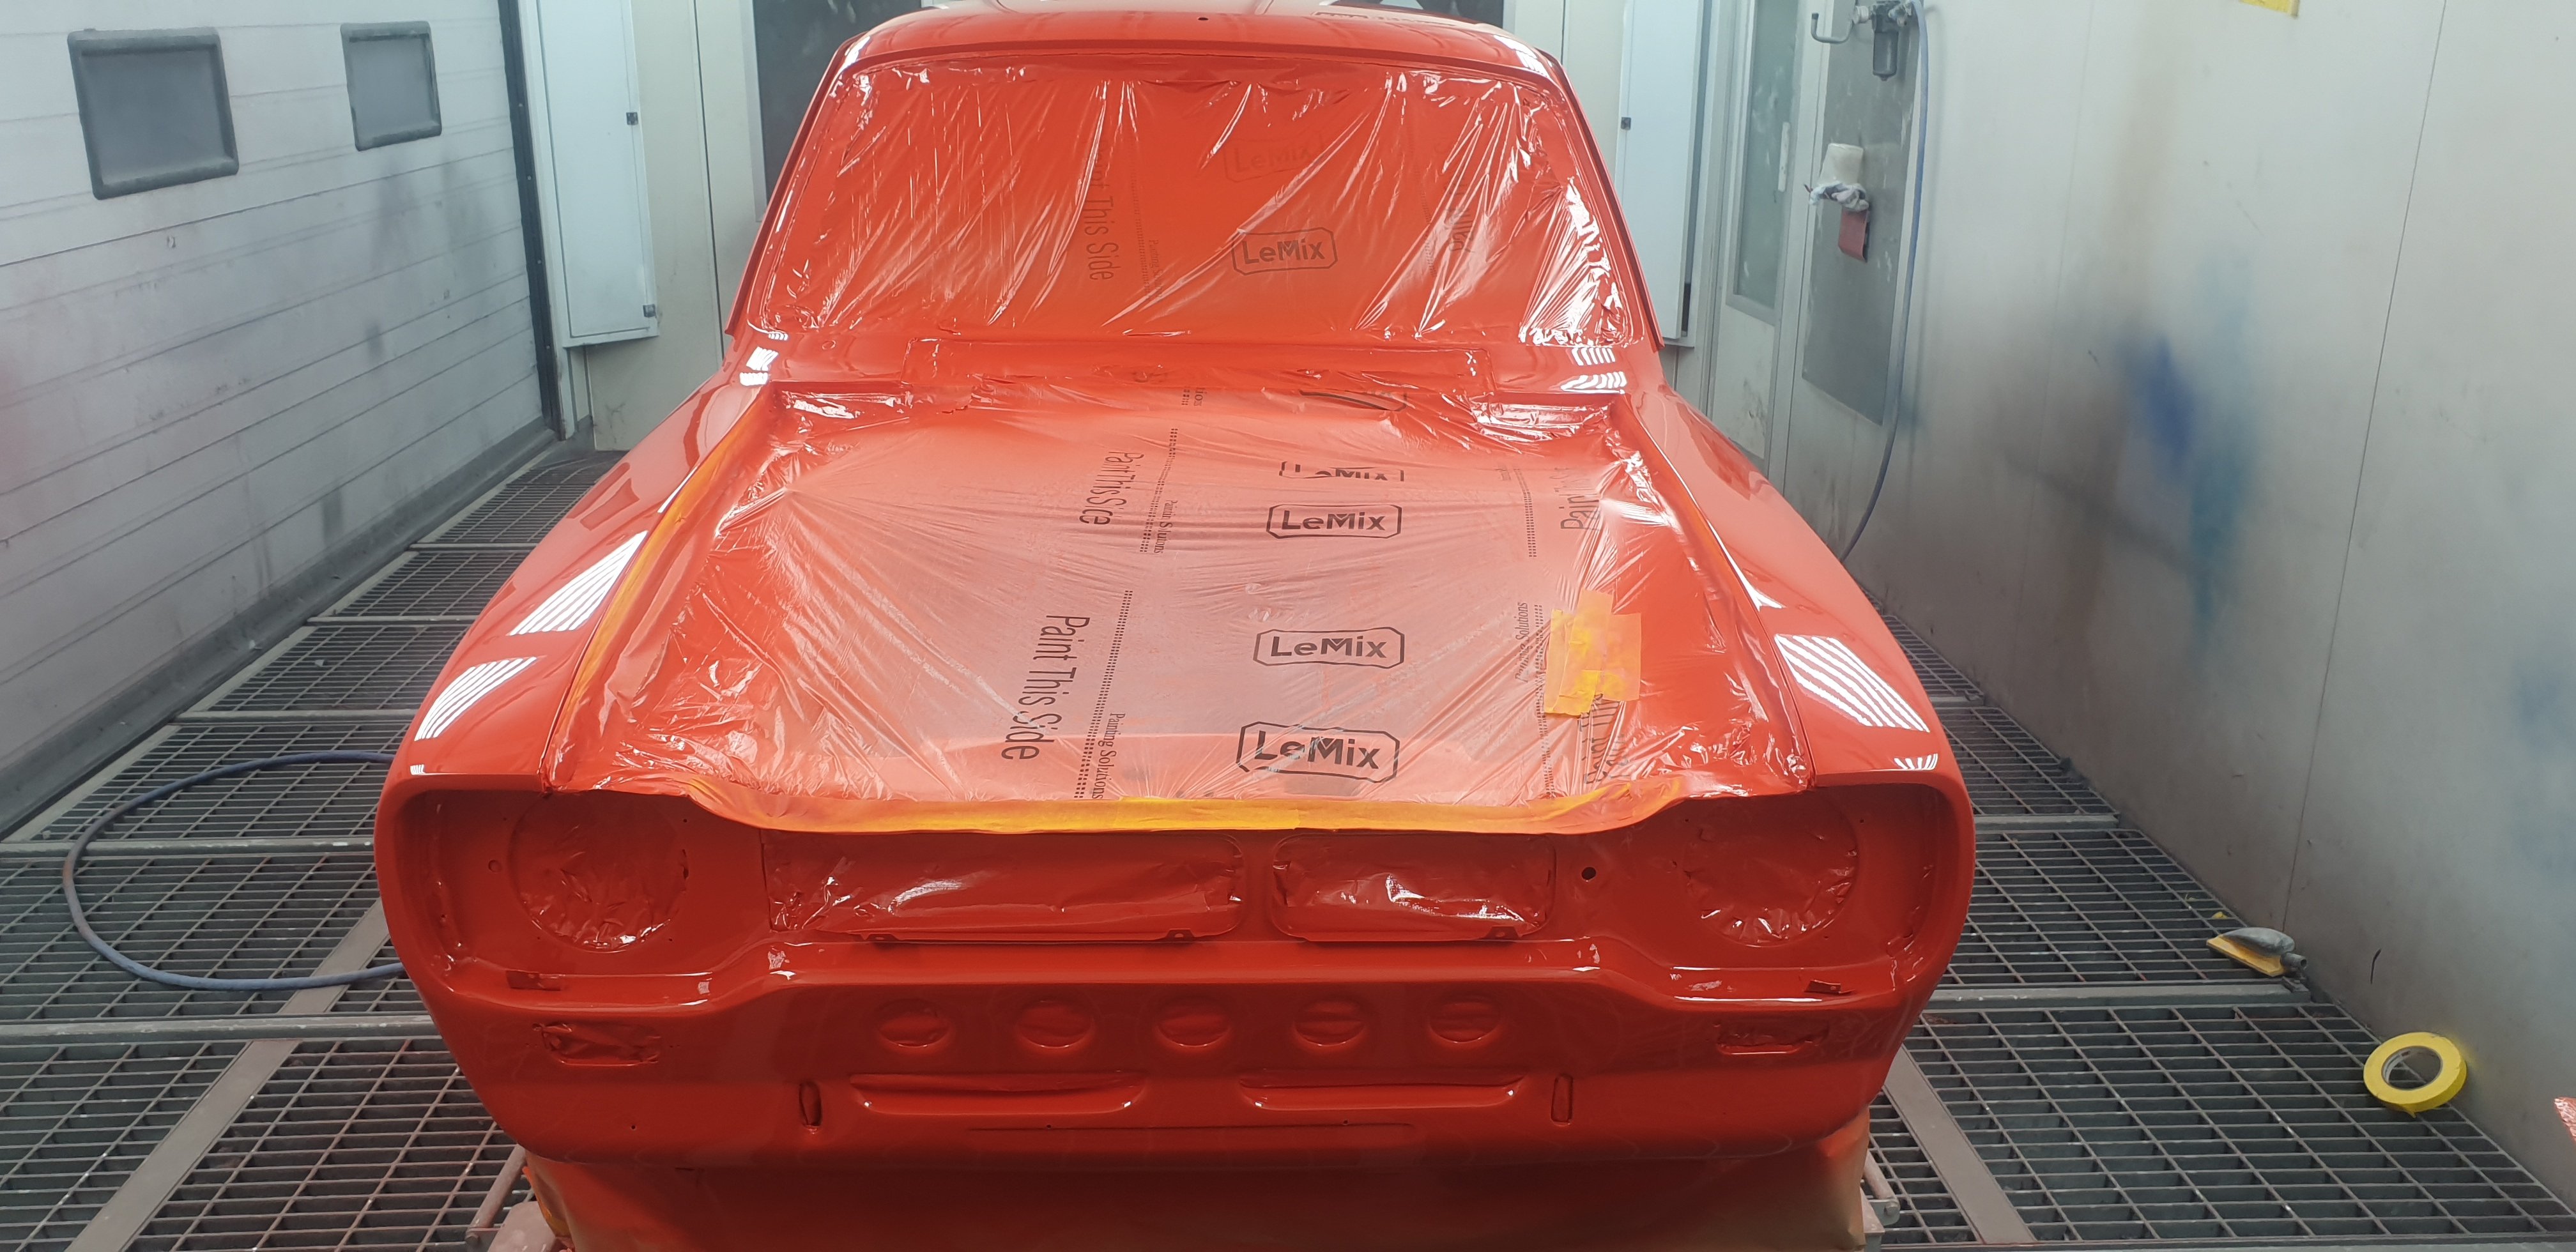
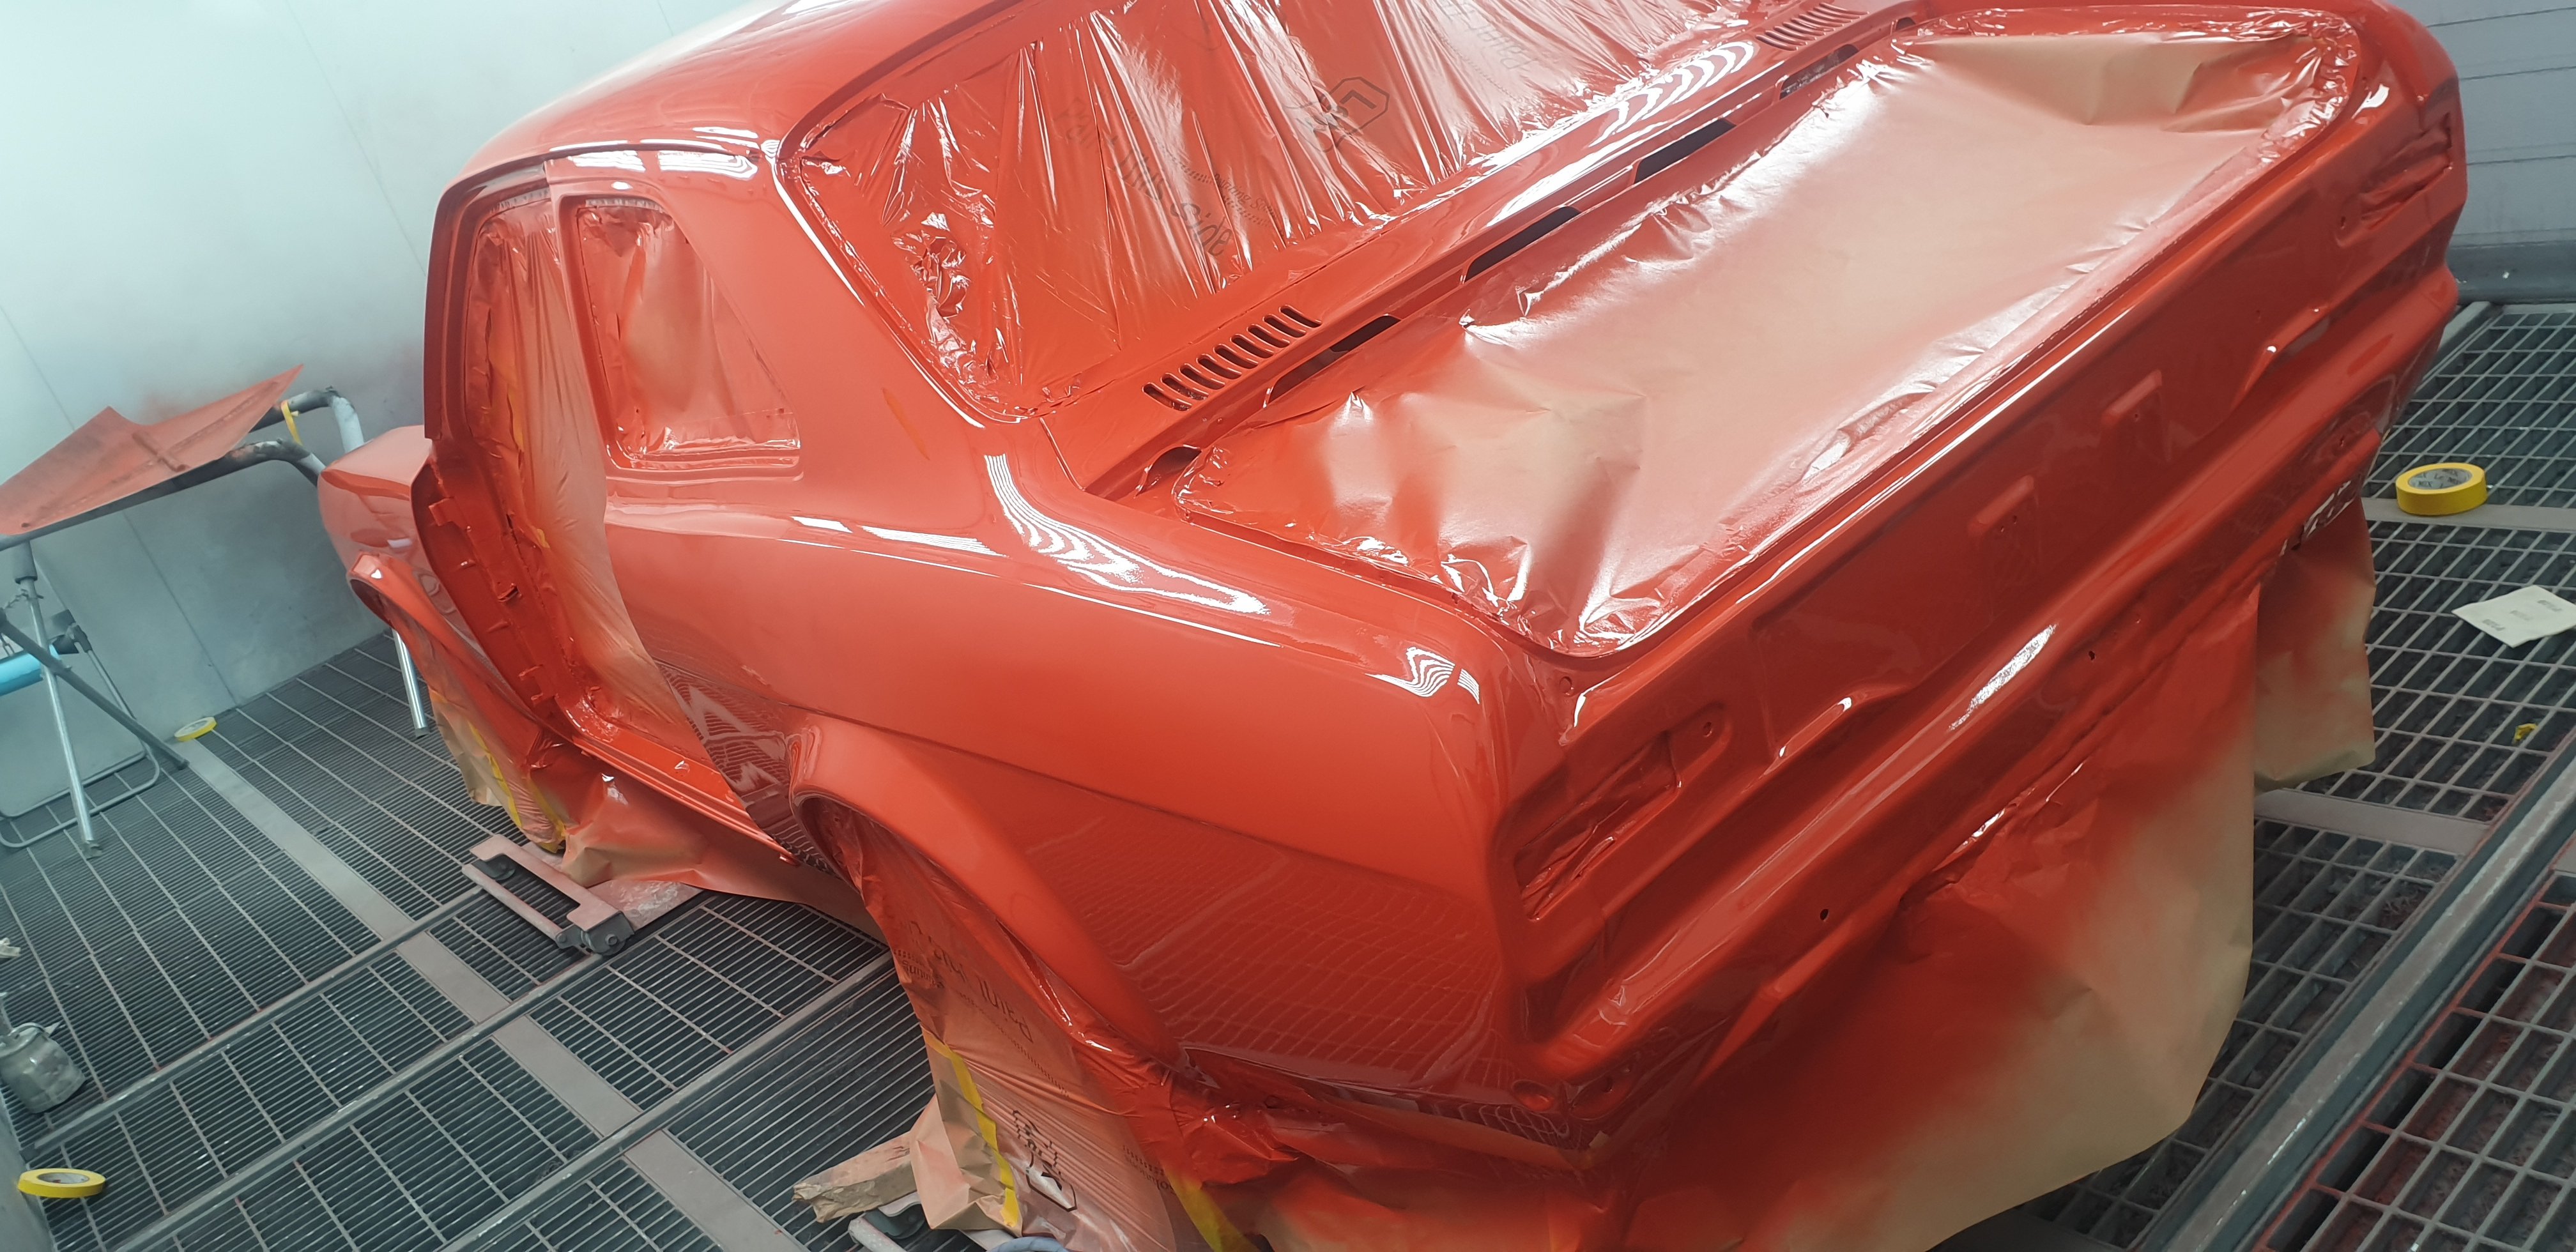
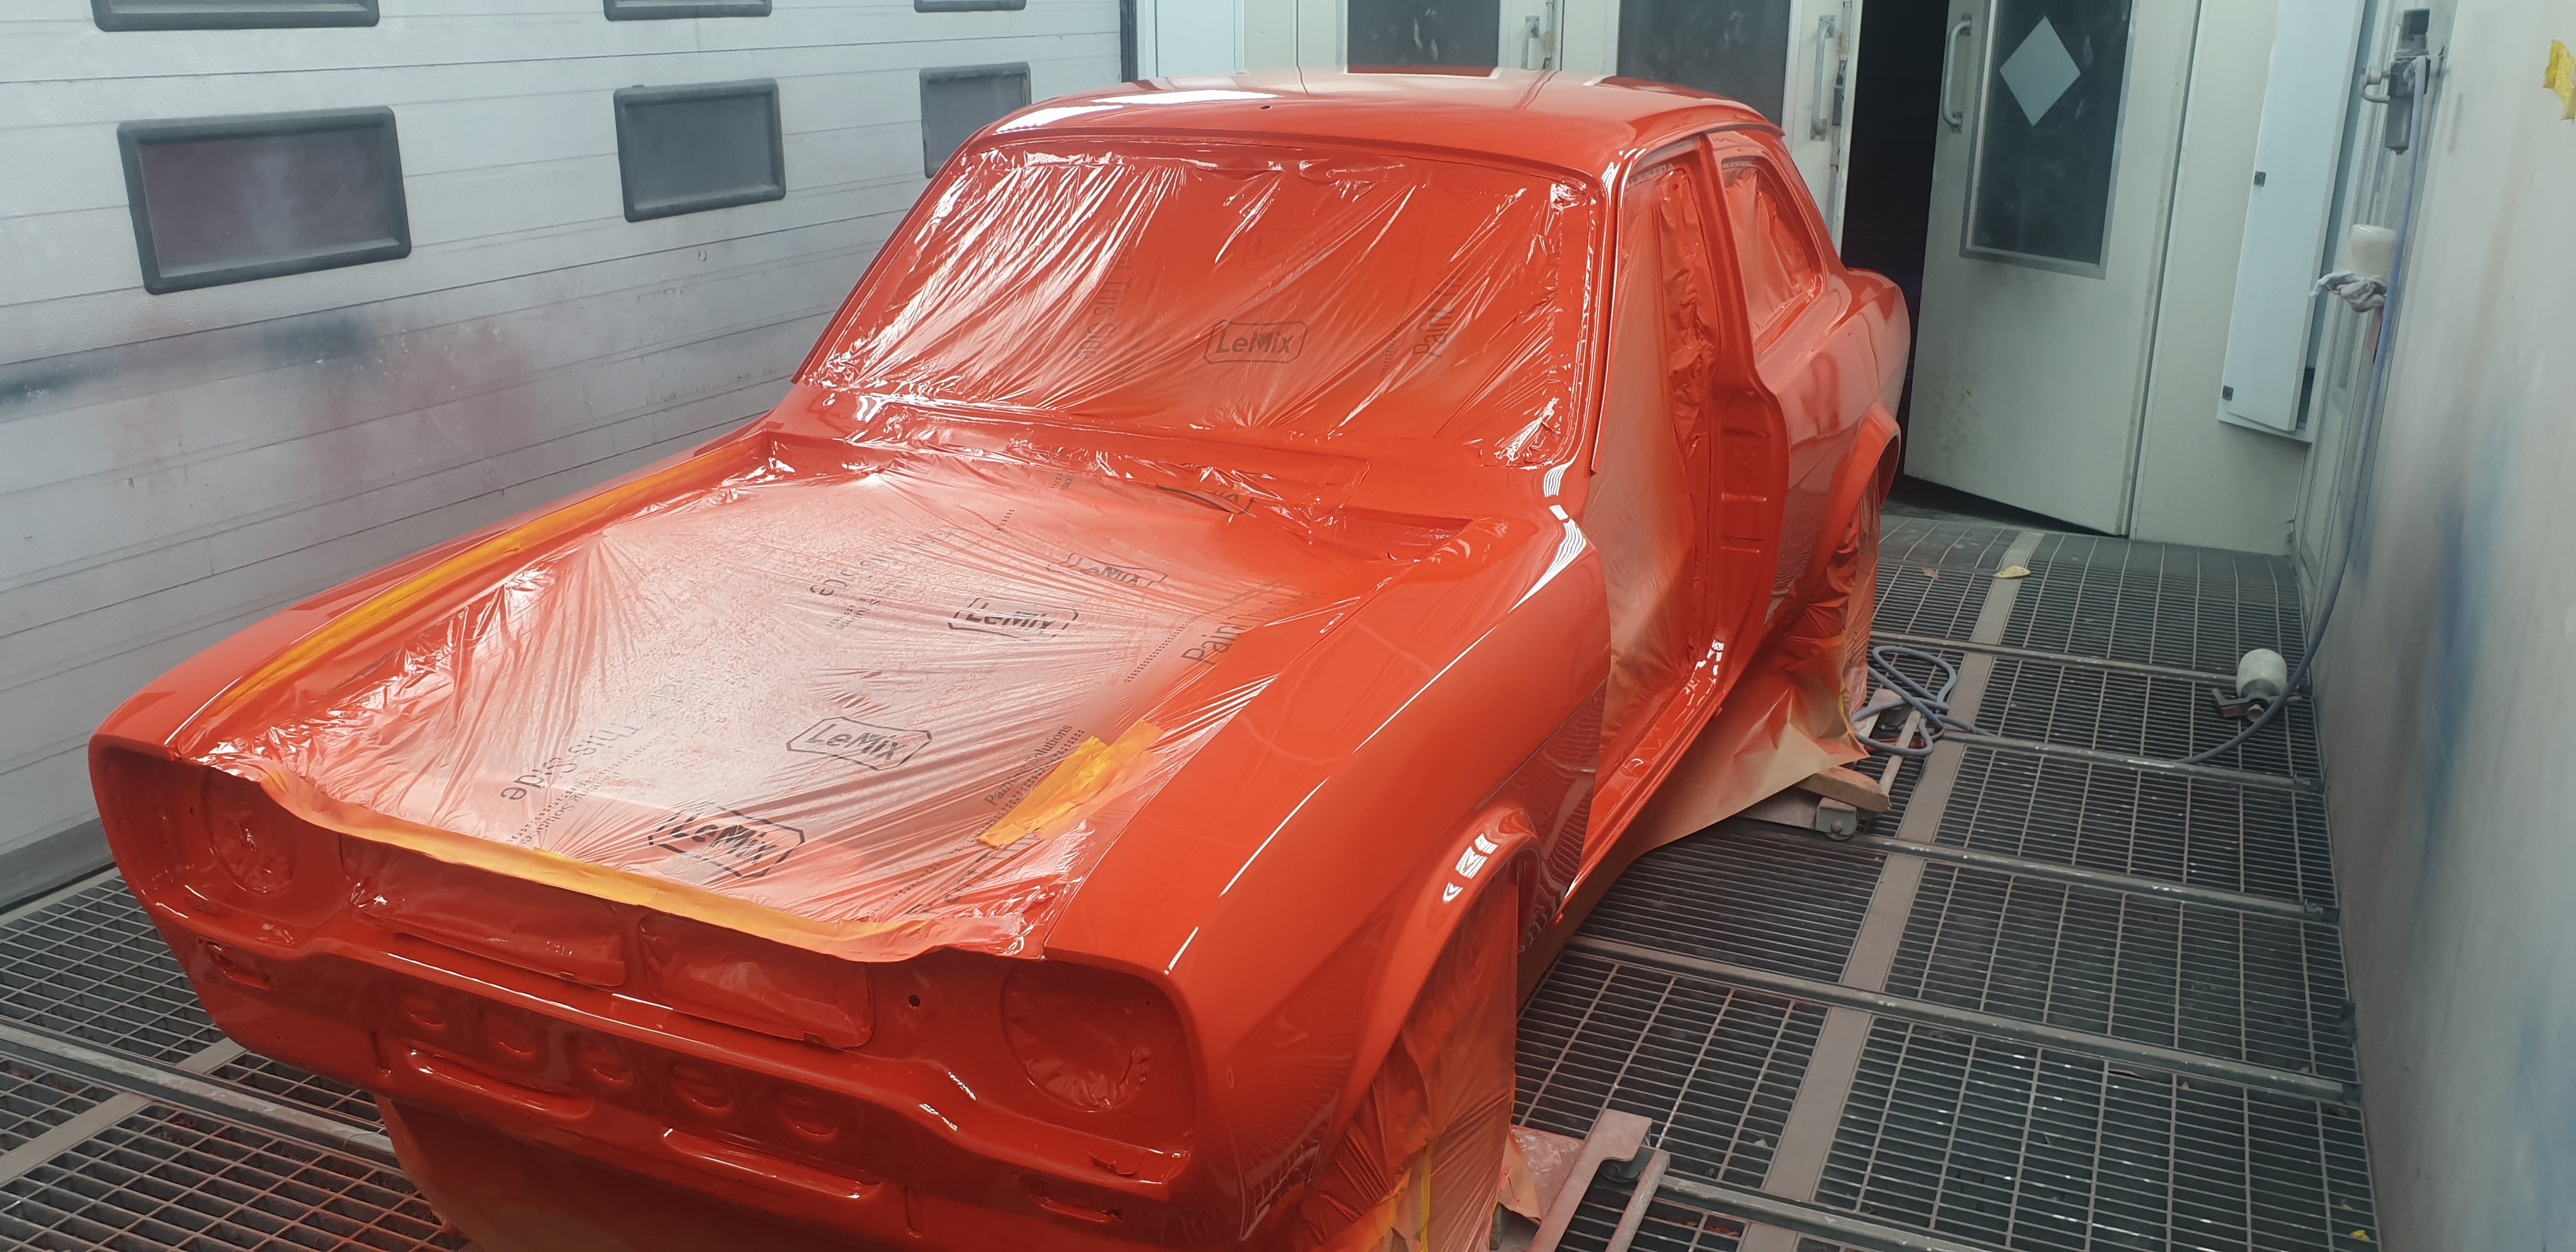
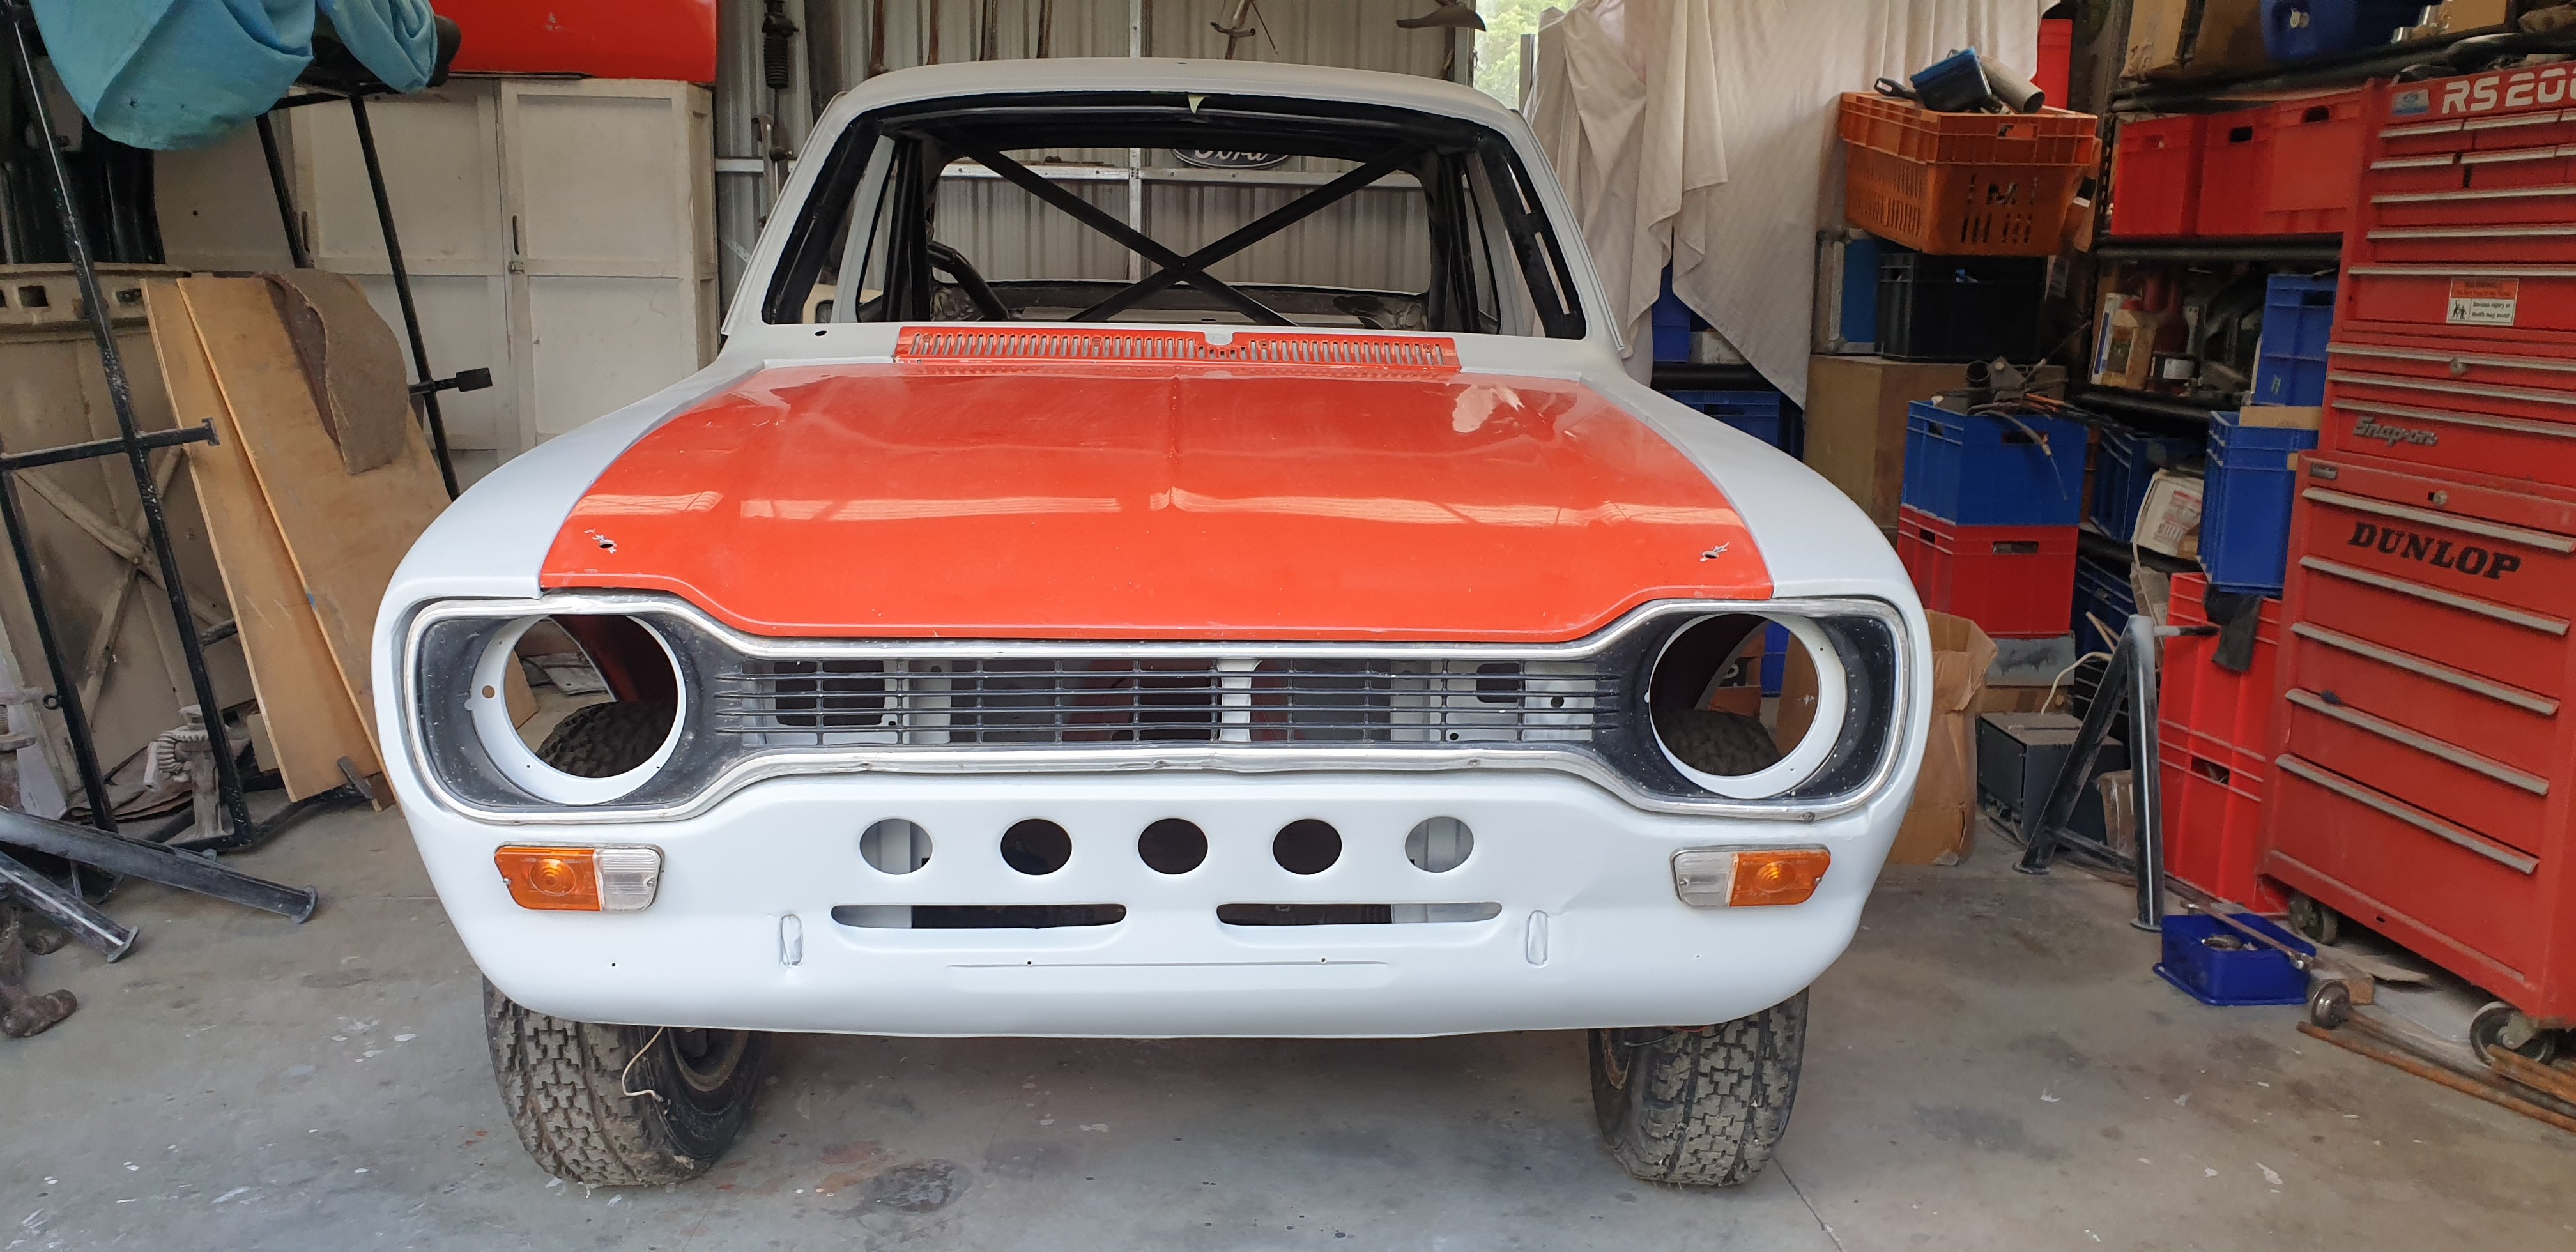
This evening I got the call. "Come and collect your Escort " So I jumped into the Transit and headed down to the paint shop. Had to get a couple of shots of it in the sunlight. Excuse the poor pics and shadows.
3 points
-
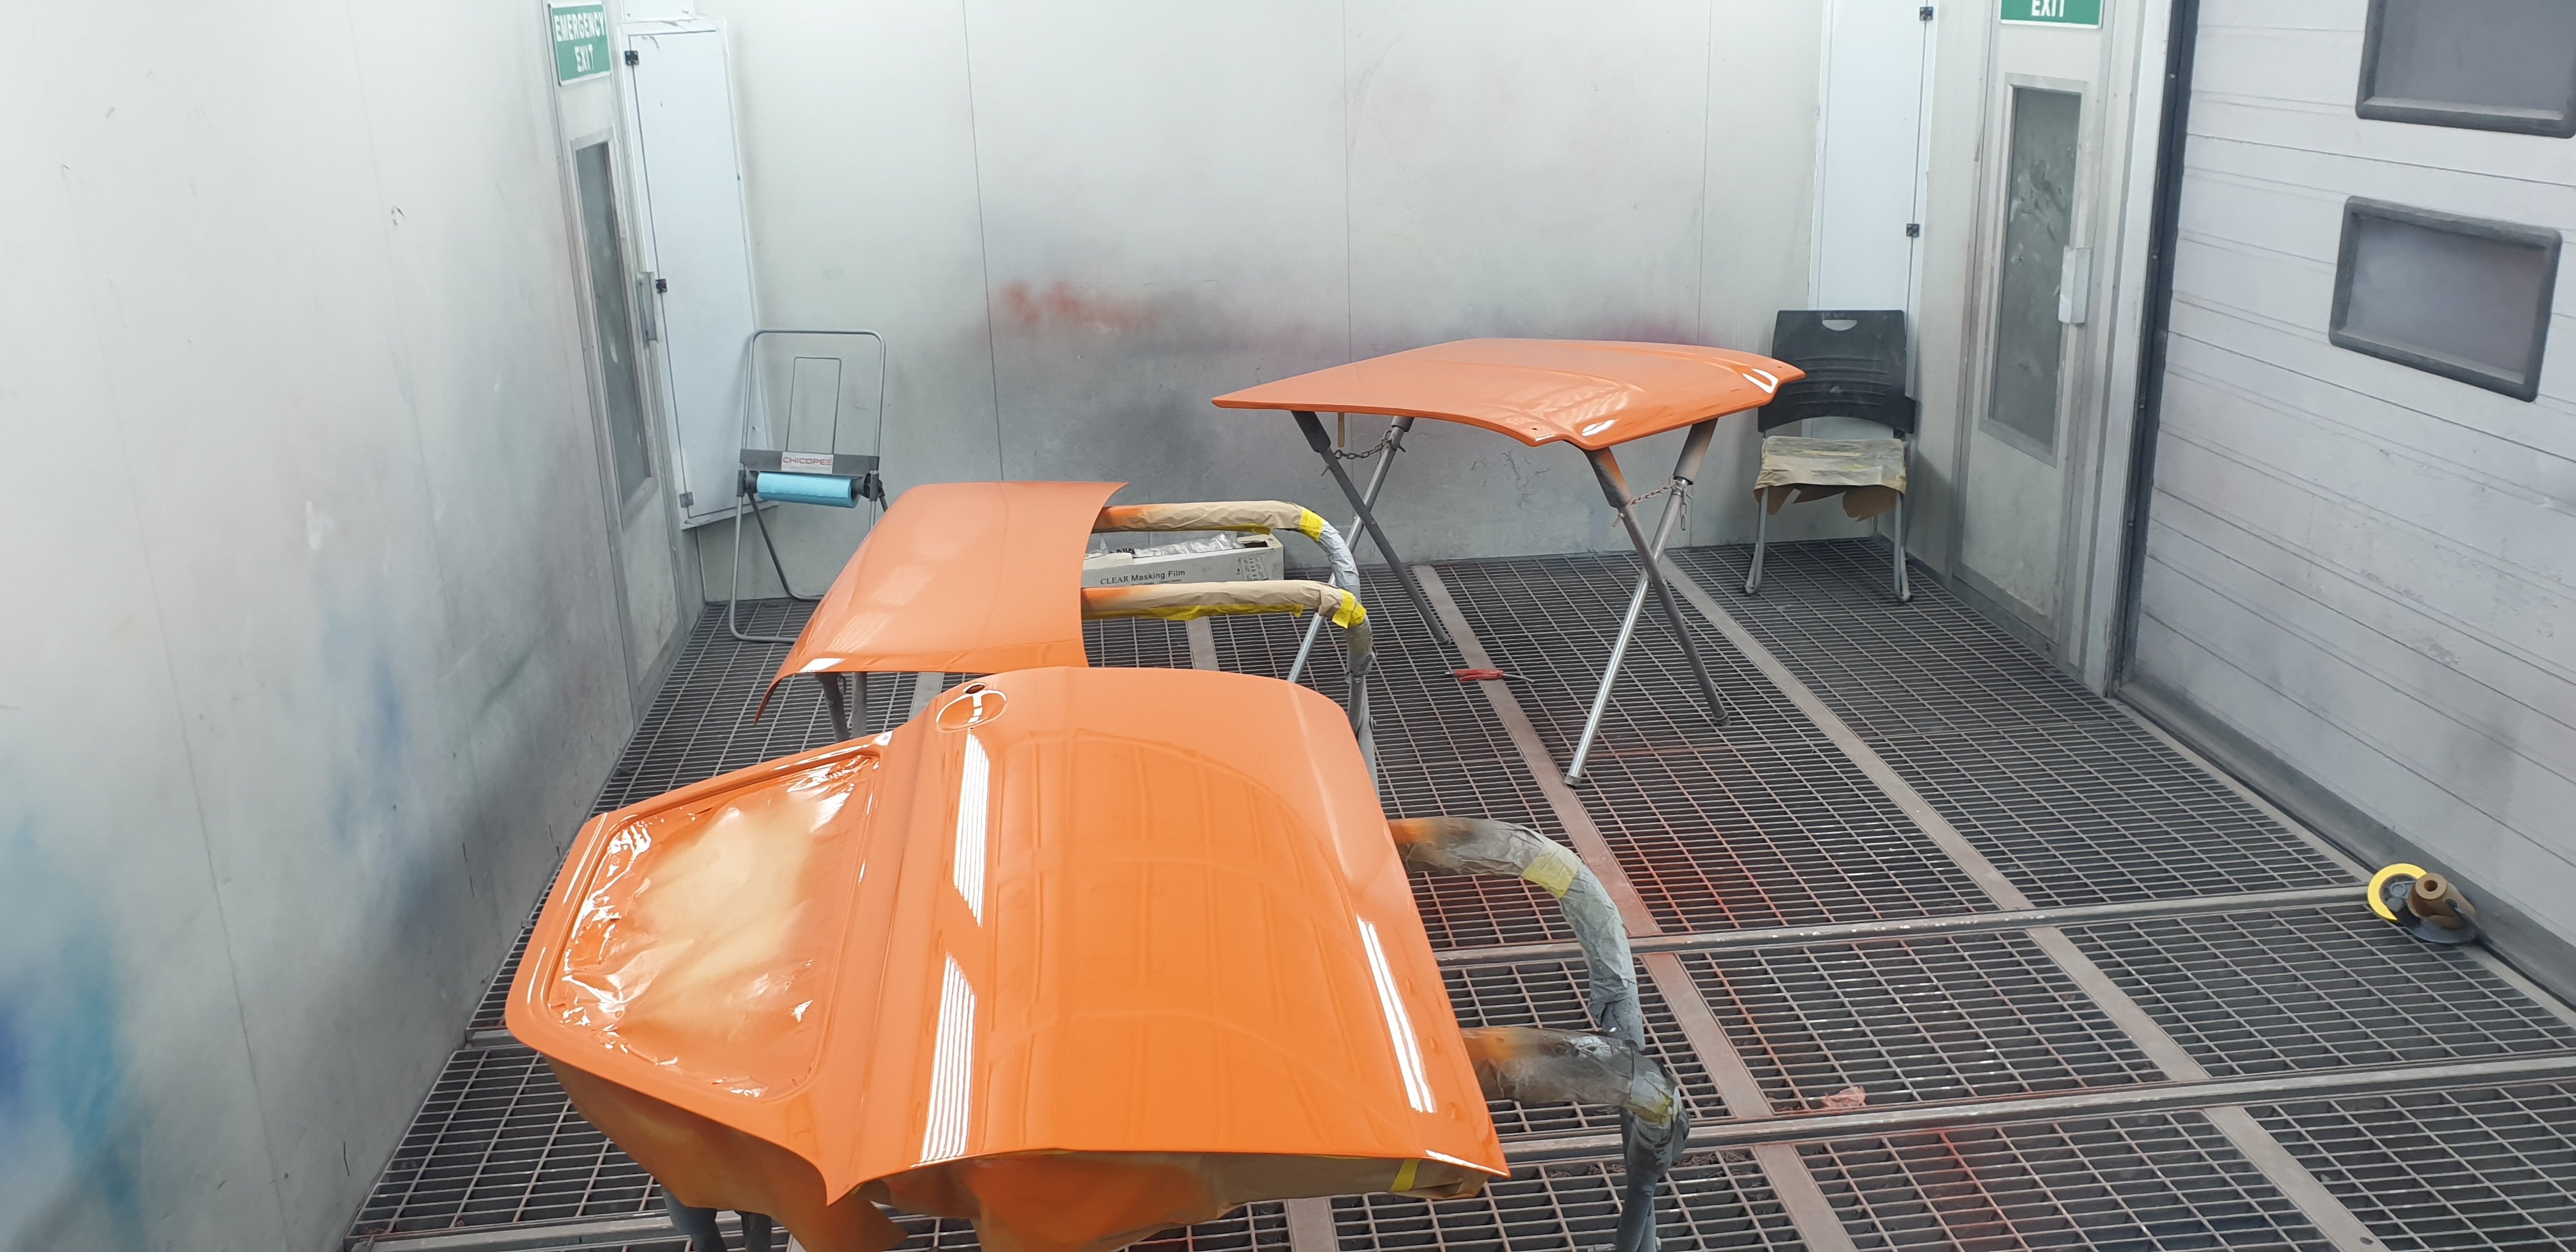
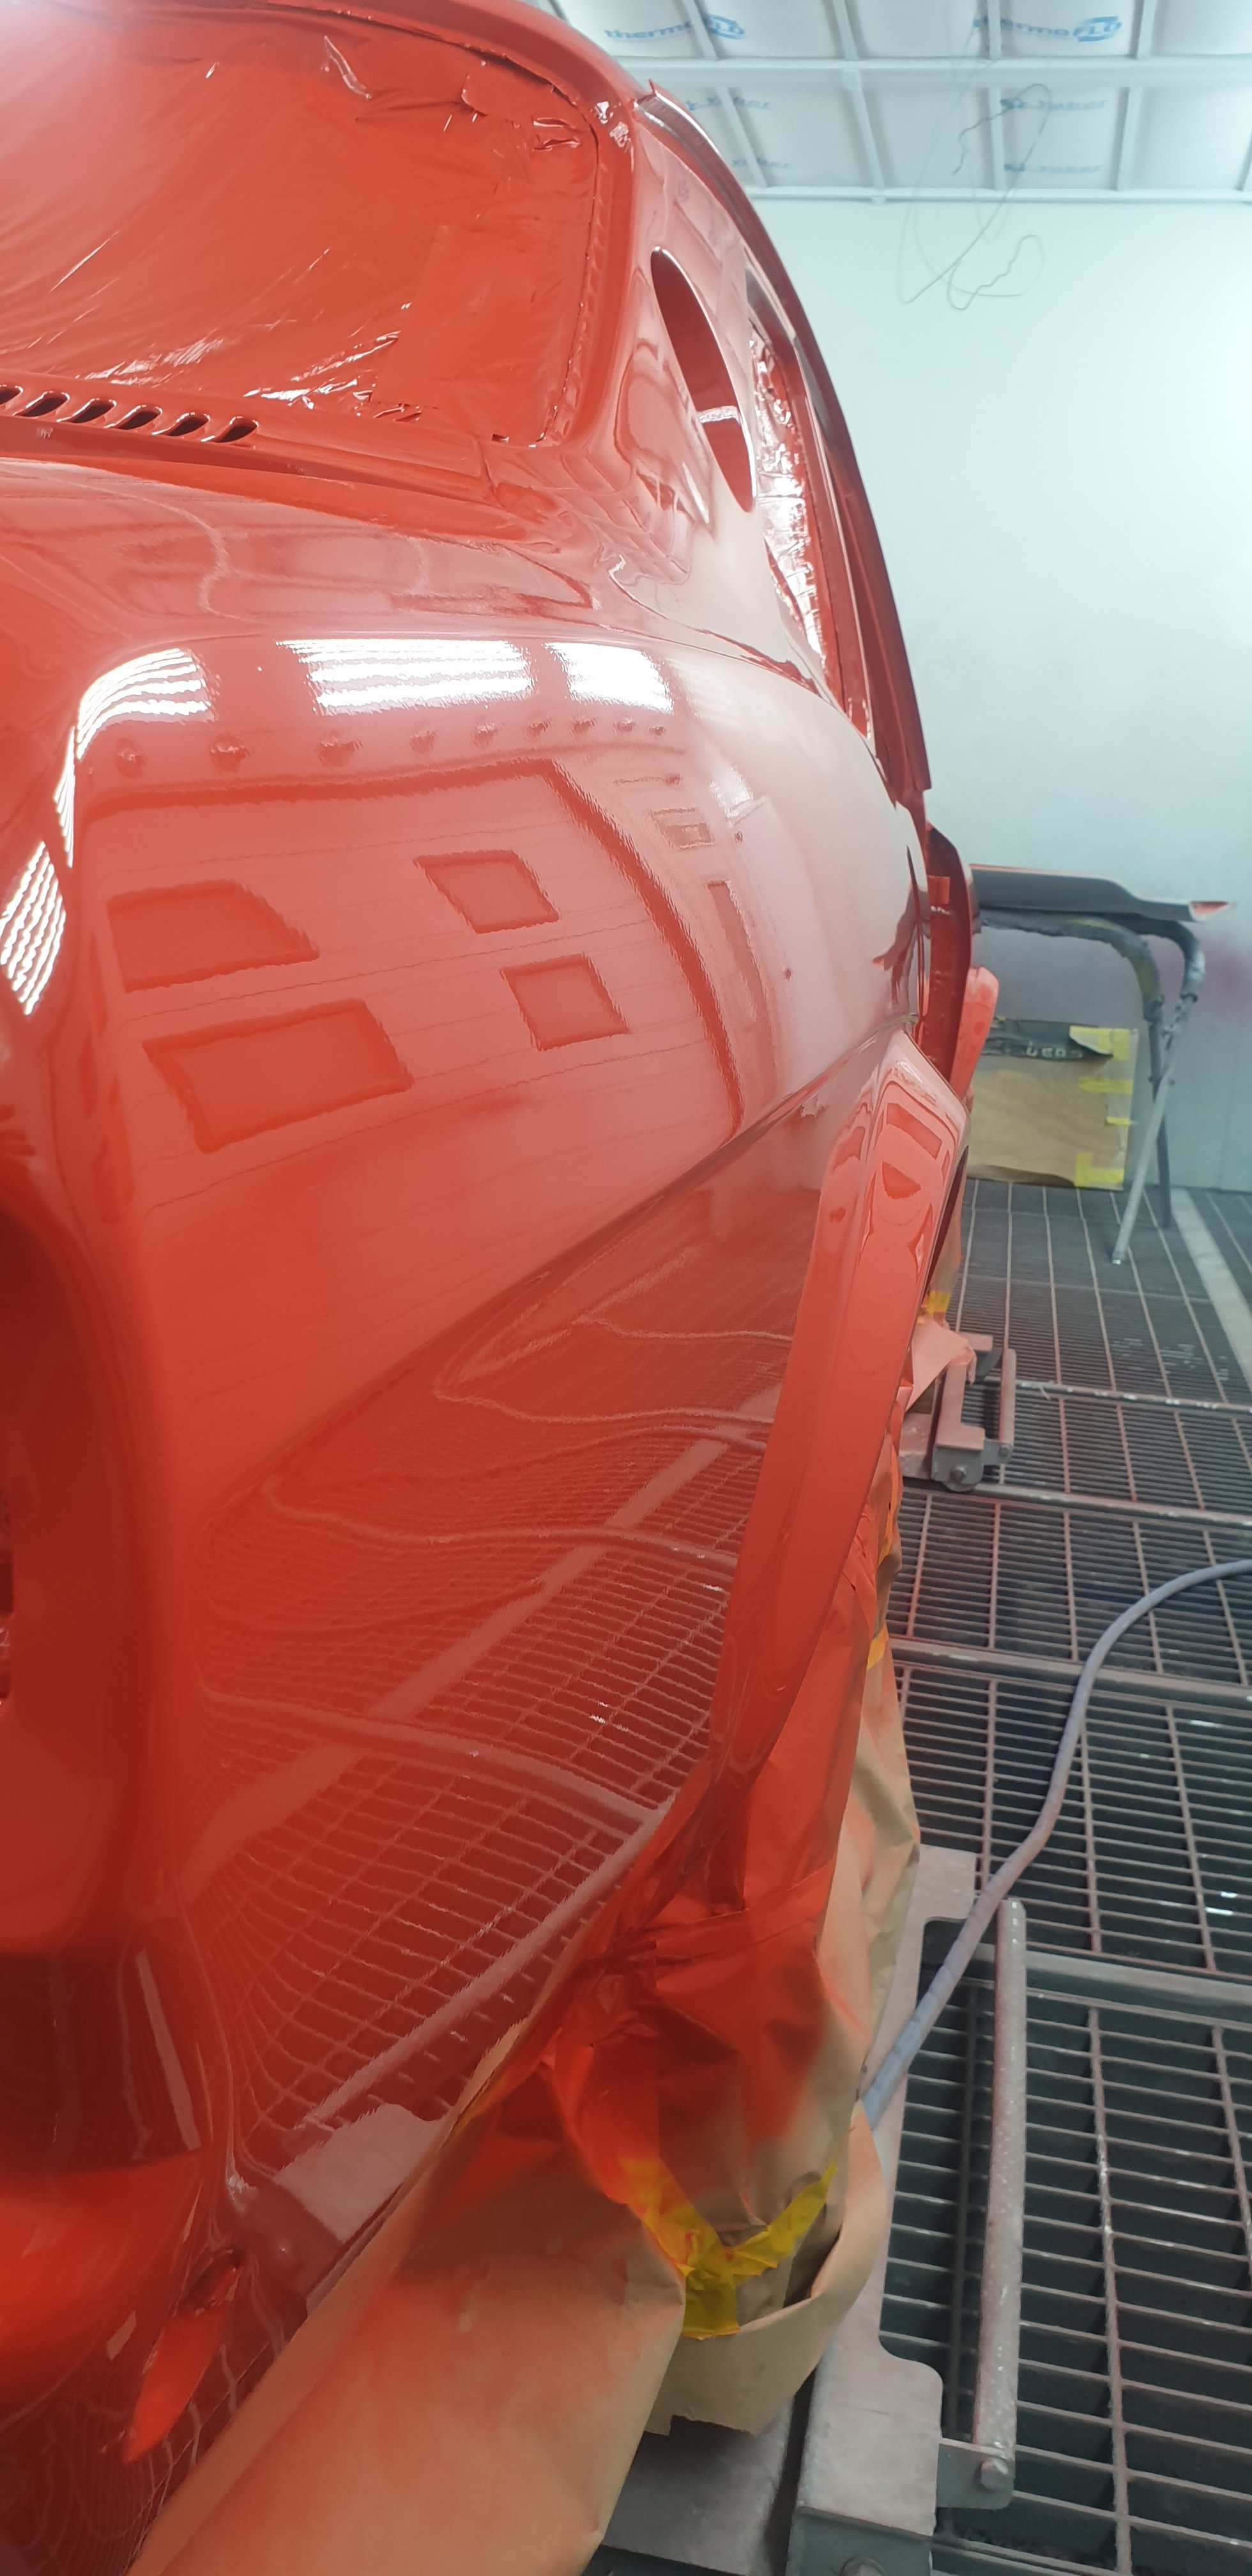
Late last night the doors, bonnet and boot were getting the first couple of base coats applied. Hopefully collect the car this afternoon.
3 points
-
First time working on a car "maintained" in NZ??3 points
-
Of course, the next day, on the way to the xmas BBQ, my rash fit of piston cleaning caught up with me so I was down to one cylinder again, but that only took a couple of minutes to sort out. Good. So now I can go sort out that shitty carpet...
3 points
-
Hi All, Long time listener first time caller. Finally around to posting this up as I've now made a start with it. "It" being my 1982 KP62 Starlet. Shes a 4 door example, in beautiful tan/poo/brown/orange colour (no pics from her previous life for now sorry). I've owned for about 8 years, and had it as my daily for 3 of those, but in 2016 took it off the road due to a very tired motor and an exhaust that was in two large pieces. Being young and dumb I thought why not pull the motor and hook into a rebuild? Well taking the motor out was no problems, but then life stepped in (figures). Being in my parents garage a 3.5 hour drive away didn't help etc etc, and so there it remained, a sad looking shell taking up precious space in my old mans cave. 5 years and a move back down to the dirty Duds later, here we are. Towards the end of last year I went bugger it I'll have a go at getting this thing on the road. Now at this point I must disclose I have minimal mechanical knowledge and experience (can do a service on my car etc.) but the plan has always been to learn as I go and call on help from mates/others in the classic kiwi way. The dream has always been 4AGE. Redtop, smallport, maybe supercharge. That dream is still a dream for now due to a few reasons (money, time, all the good ones). So the plan was to rebuild the old 3K, get a new exhaust built and just enjoy it for a few summers. But plans often change... So what's actually happened you my ask? Well just before I was about to make a start, I stumbled across a rebuilt 3K head and block for basically the cost of the rebuild. Figured would be silly not to grab it and save myself some money and time... But there's another problem, I'm a bit of a perfectionist and a bit "all or nothing"... So once I had this rebuilt base and began pulling tired, crusty old parts off the original motor to swap over I thought, why not try and replace/restore/rejuvenate these? Or even better thoughts like "Why not upgrade?" or "You've come this far" or "you're not going to do it later are you?". And that's where the wallet opened up and the previous comment about saving money and time needed to be redacted. So where are we at today - well I have managed to get most of the bits I wanted for the rebuilt motor. Just waiting on the camshaft (regrind) and valve springs to come back. Also have to order an upgraded alternator from the guys at Olds Cool up north (among some other bits I'm praying they have, we'll get to those). And then we can finally start assembling the motor. We've hit a few roadblocks, which I'll throw up once I get a discussion thread up. But lets leave it at that for now, will follow up with some pics soon. Looking forward to the times ahead, I hope you lot are as well.. or at least at having a chuckle as I battle along! Rob.2 points
-
Its been 3.5 years or so, blame Covid lockdowns and Lazyiness. In April 2020, loaded it up - so easy with a car this small - and hauled it off to another workshop with the intention of finally making some progress.
2 points
-
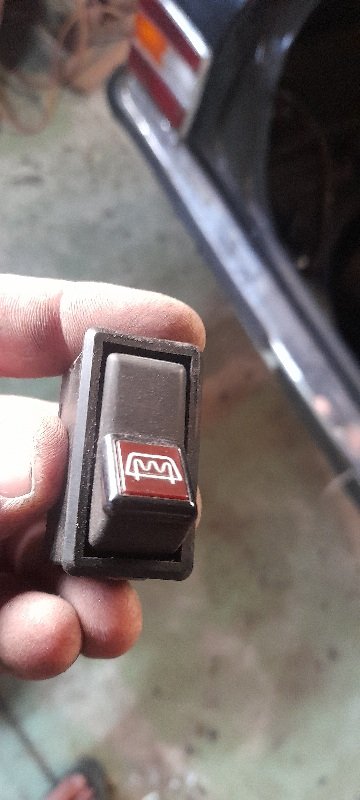
Sizing up the switches for these they will fit nicely into two blank plate slots in the dash
2 points
-
You cunts better stay at the woody in Renwick.2 points
-
An yesterday i picked it up from the booth and took it back to the panel/painters place so he can fit up panels and get stuck into it.
2 points
-
2 points
-
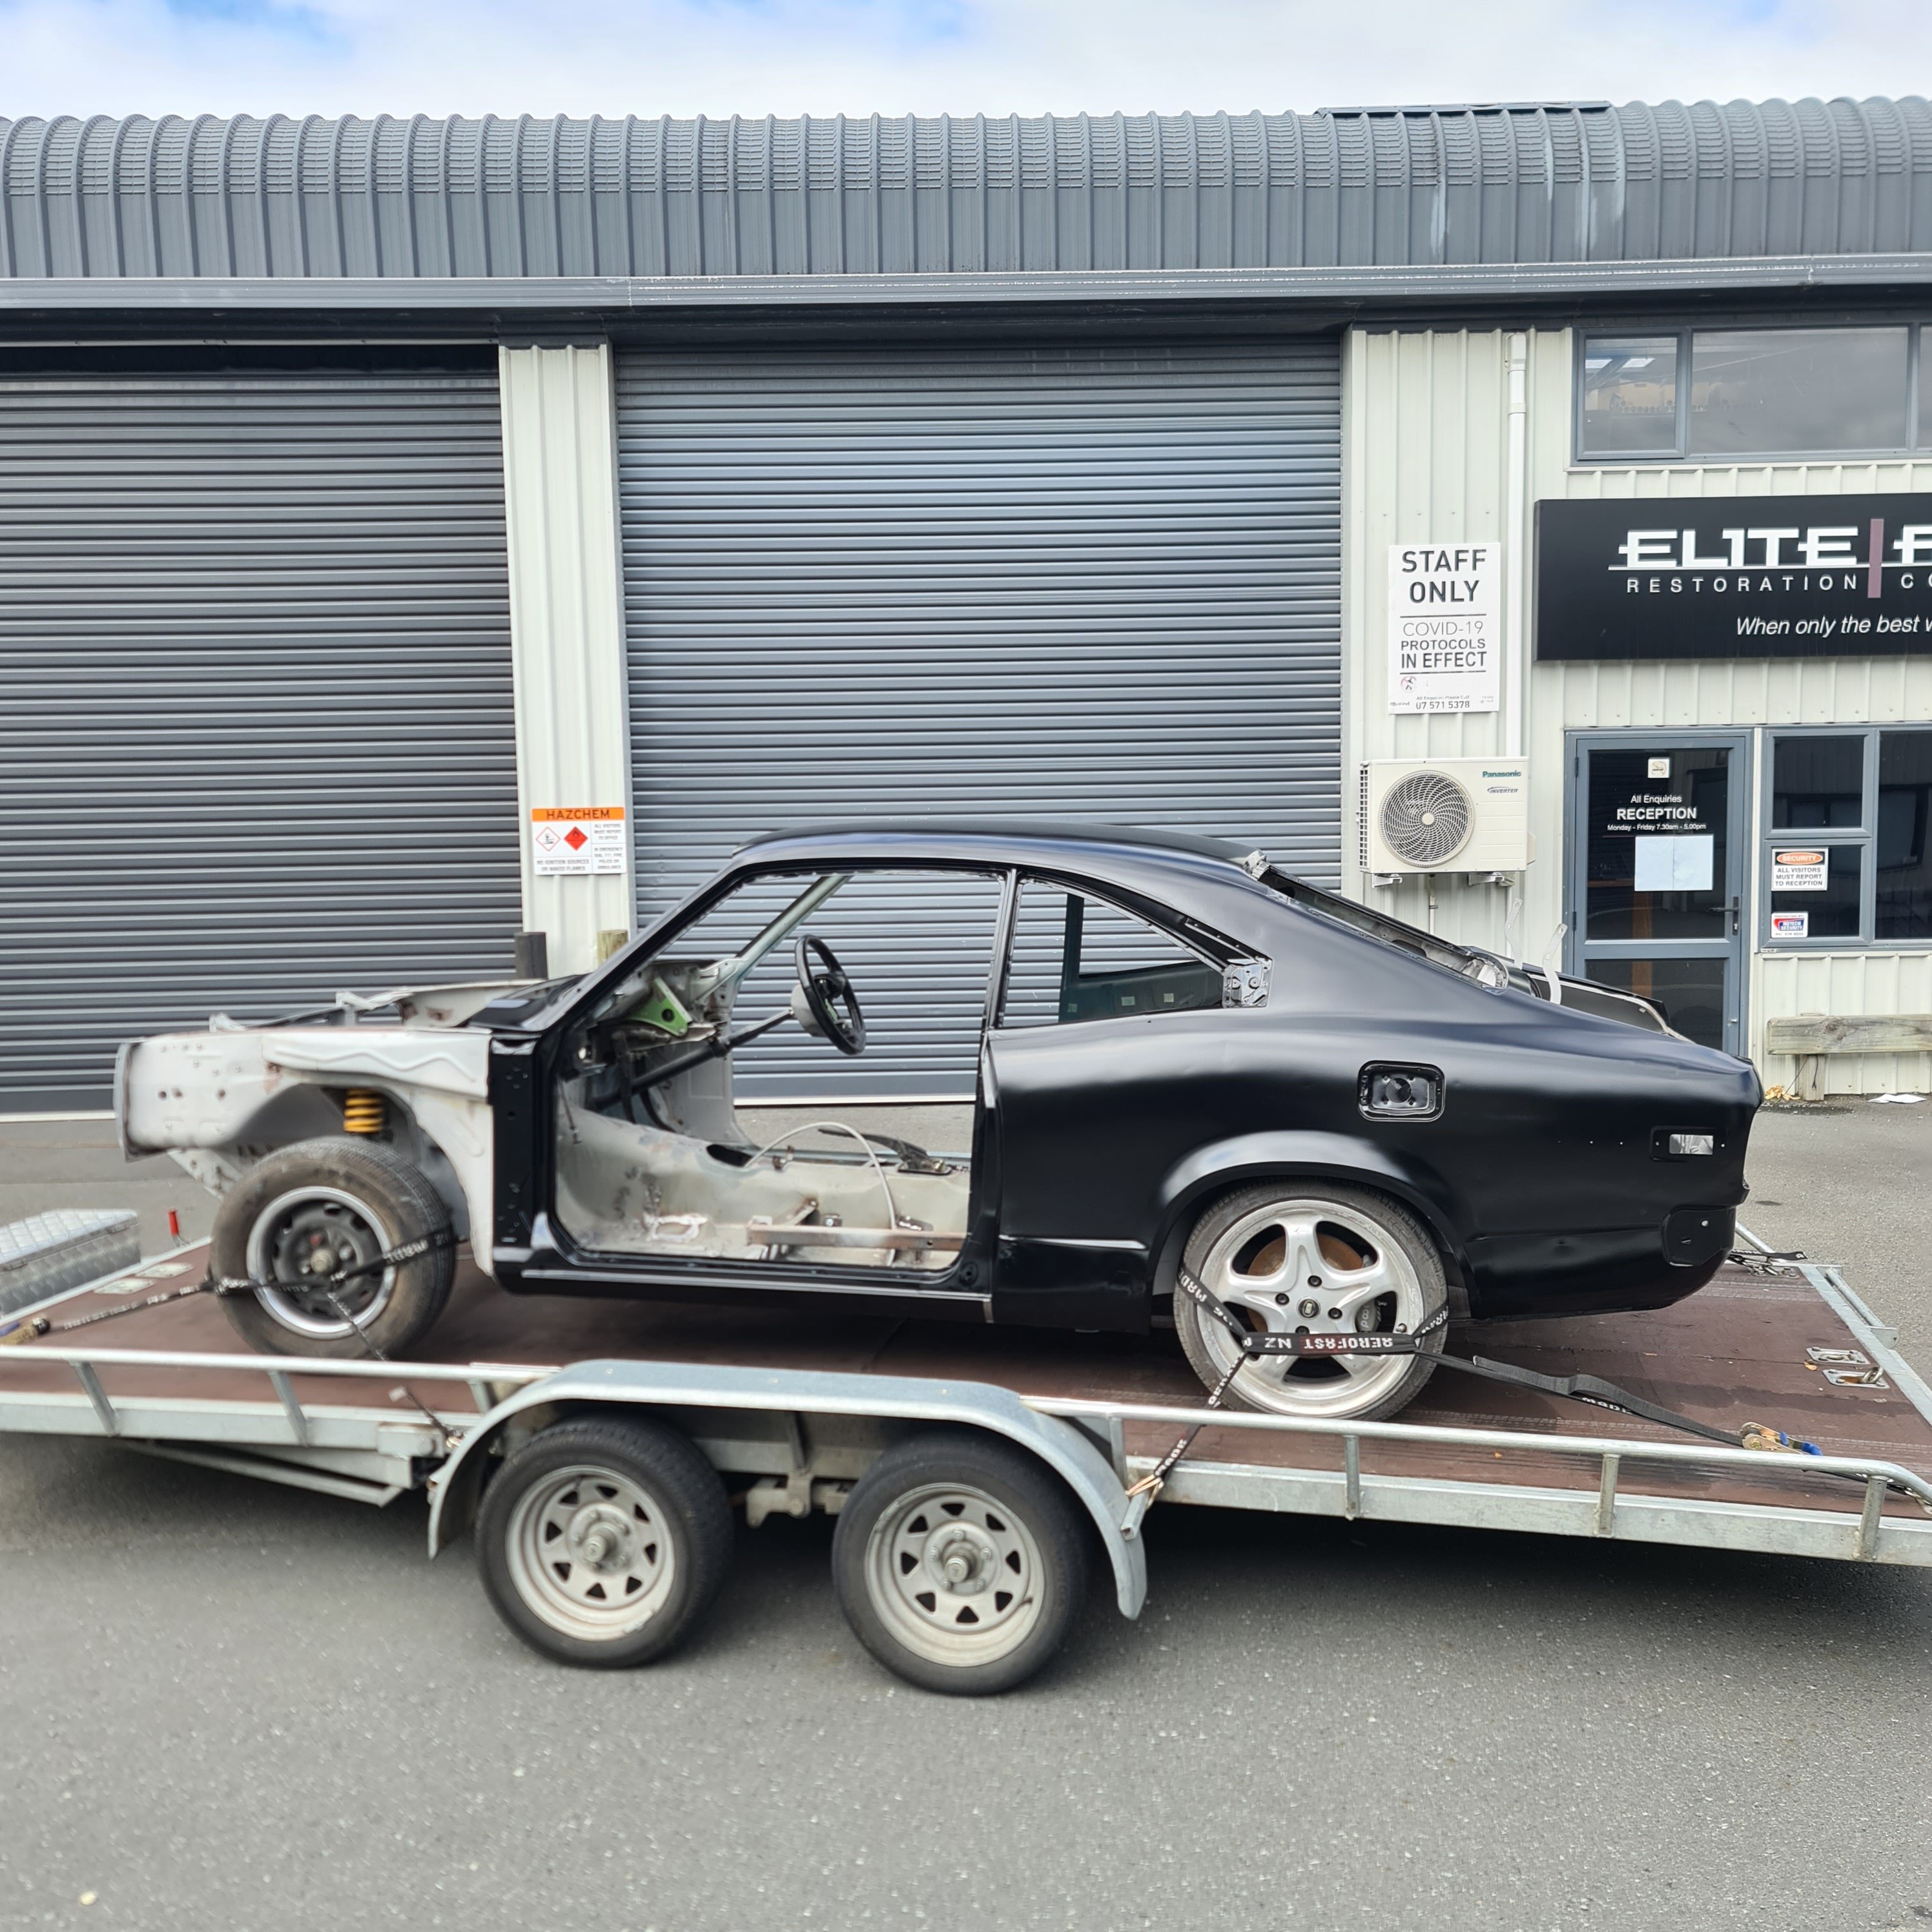
Ok, these next pics are what all of us are aiming for. A freshly painted shell / car that we can finish and detail and finally enjoy. Hopefully you guys enjoy these as much as I have.
2 points
-
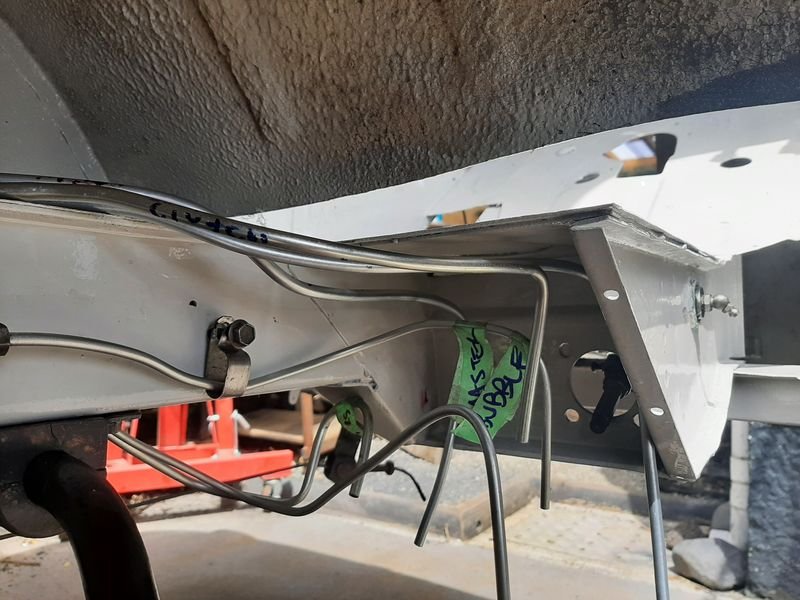
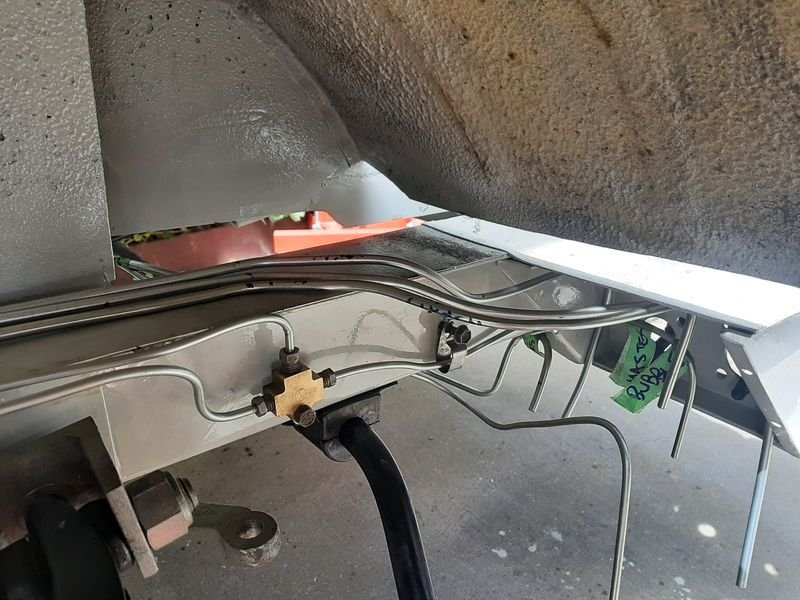
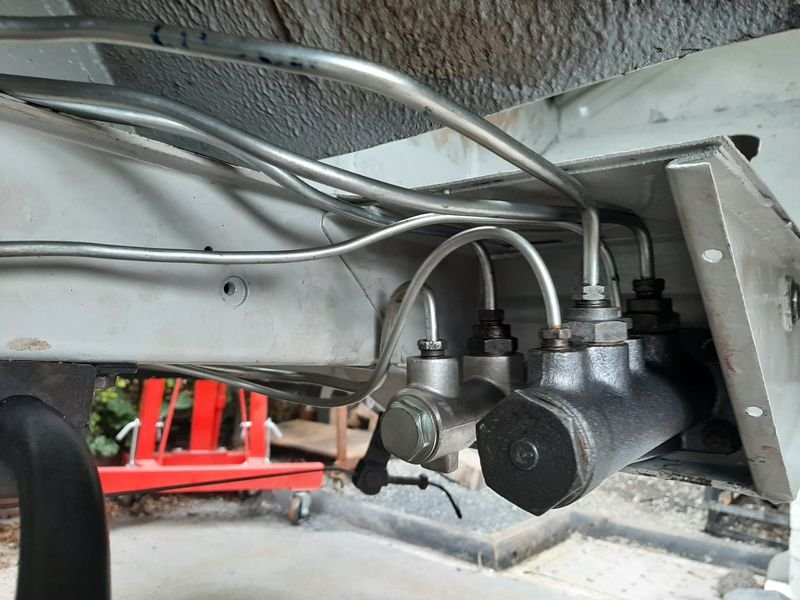
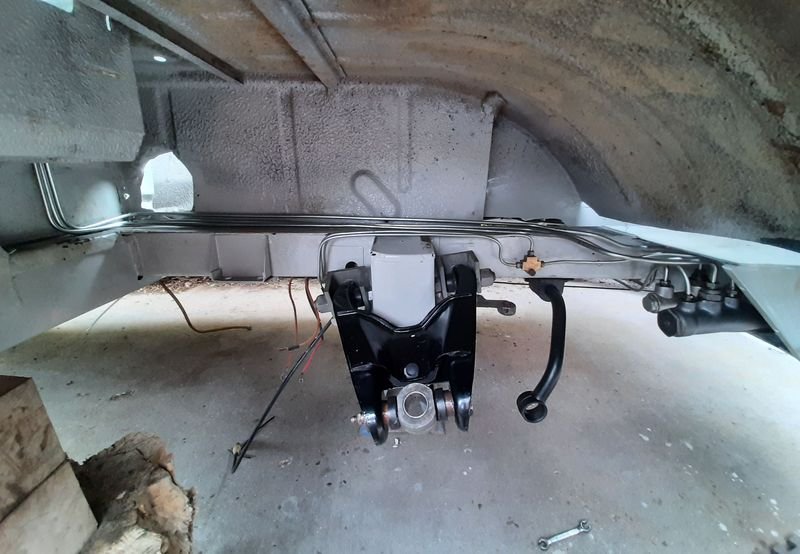
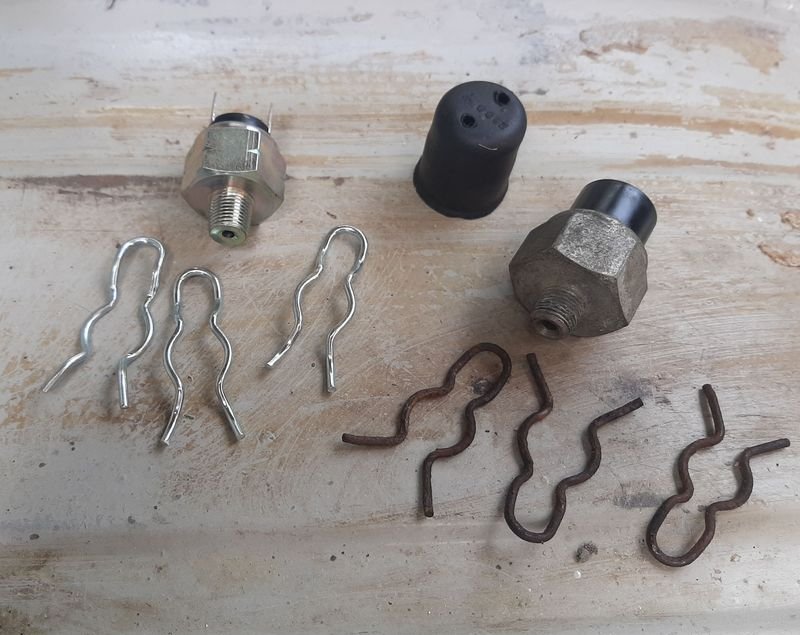
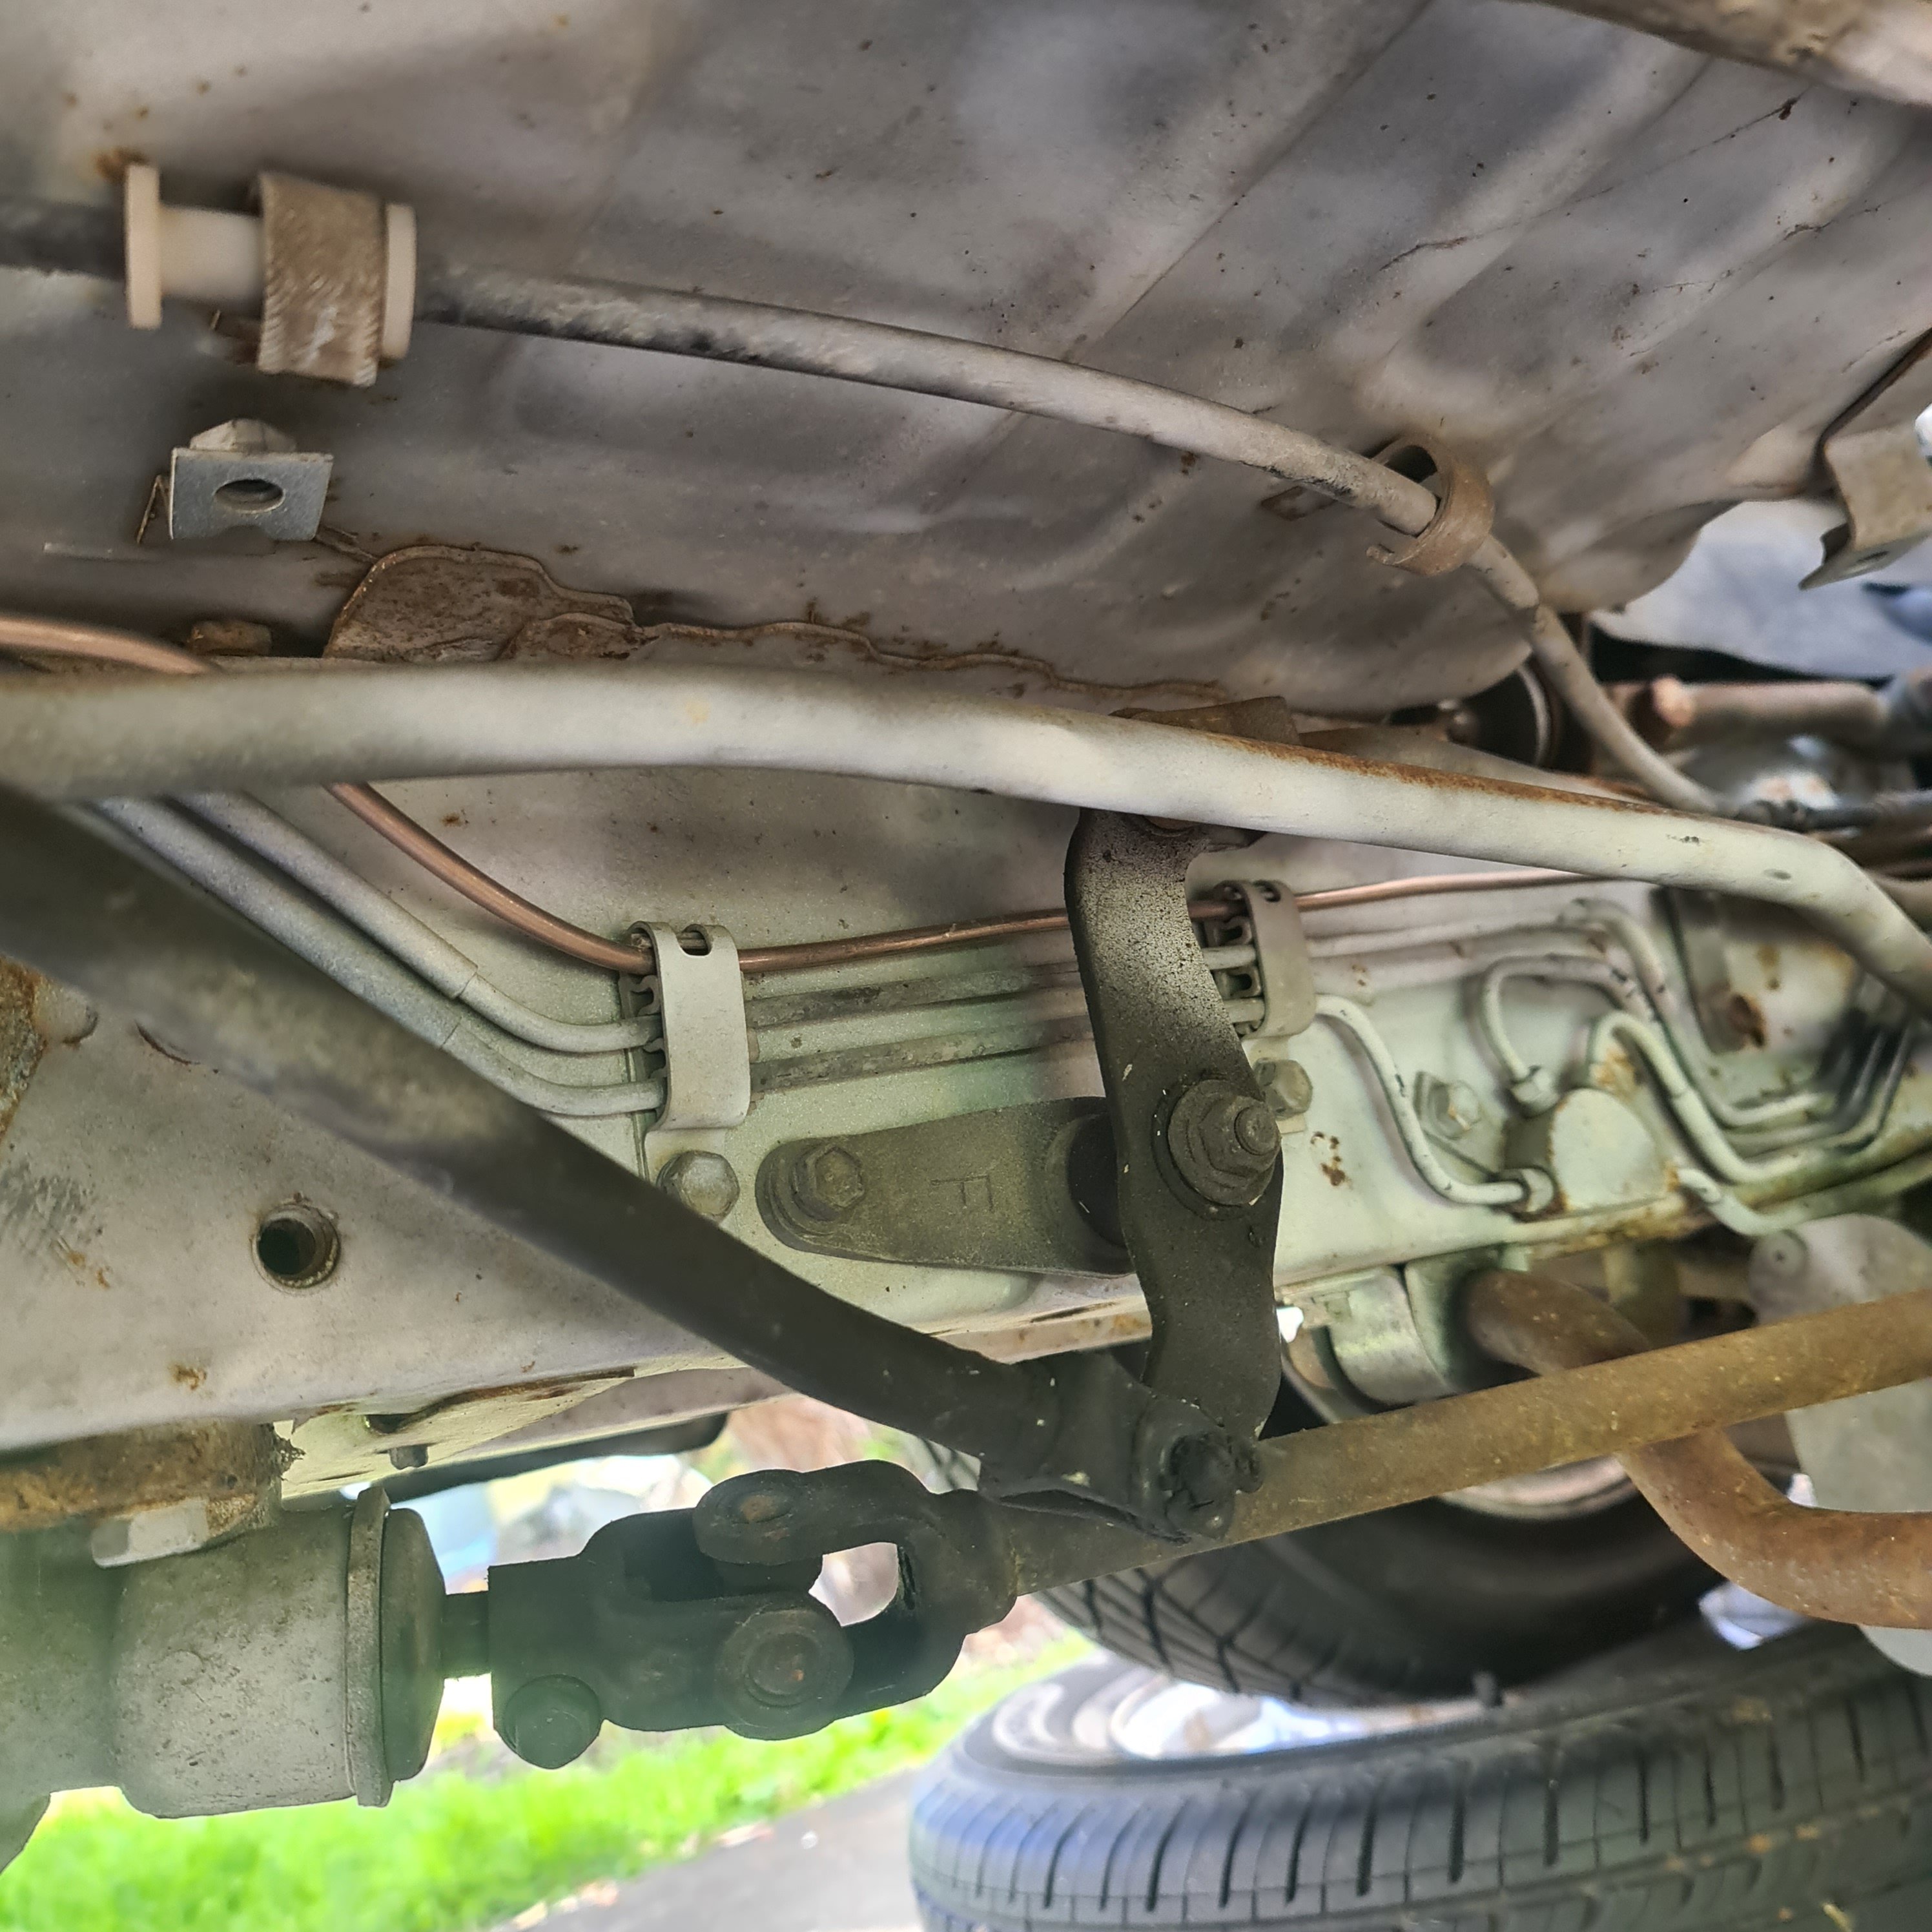
Yay 2022. Putting stuff back on. First up, hydraulic lines. Usually the first thing installed at the factory for the same reason im doing them first, its much easier with everything out the way. Also the reason for painting the driver side wheel well and master cylinder mount even tho there is still a big hole in the floor and rust in all the doors. I had picked up plated cunifer line, 6m of 1/4" (for feed from the reservoirs and the clutch line) and 26m of 3/16" for all the brake lines. This is the brake and clutch master cylinder, where 6 lines, 4x 1/4" (3 inlets and one clutch outlet) and 2x 3/16" (Front and rear brake circuit outlets, which both split off L & R elsewhere): Woops, wrong photo! Here it is: Basic process was use the original lines as a template to start with (leaving them a bit long both ends) fit up on the van a million times and finally cut to length and flare. Then cut off the flare, put the line nut on, and flare again... This is the front brakes, single line from the master then splitting at the T to the right (short) and left (long) Feed lines from the reservoirs: Getting closer... Now has - New Clutch Master - resleeved Brake Master, - all new plated cunifer lines - refurbished OEM line nuts (I got new nuts but they are a bit different and didnt clamp the lines in the fittings, so i couldnt use them) Still need to clamp these all down but pretty happy: Other New brake related bits from the fiat parts bin, -pressure switch for the brake lights (if the OEM one does not work) and - clips for the reservoirs: Reservoirs all fitted up too. Will put a bubble flare on the feed lines to make a better seal i think. This all ended up taking waaaaaay longer than i thought, and im not quite done yet, but at least its all laid in and plumbed up and i can start putting the suspension back in.
2 points
-
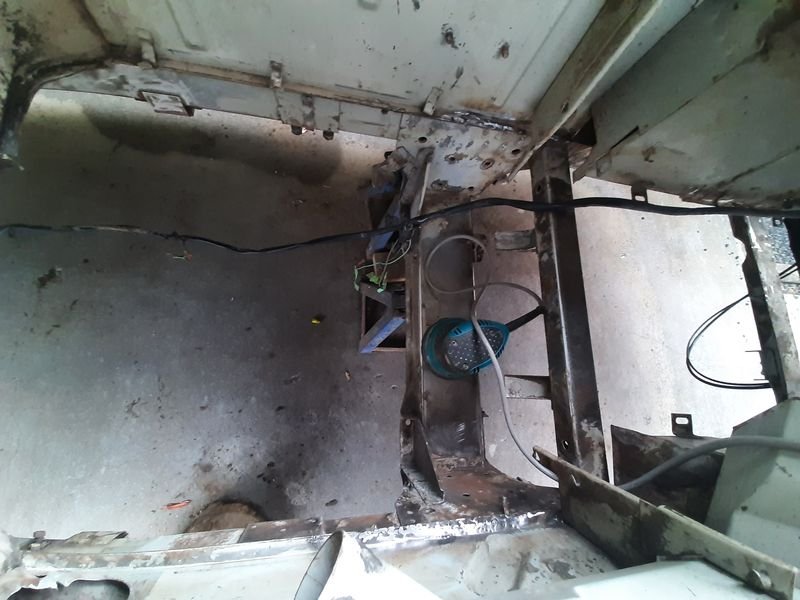
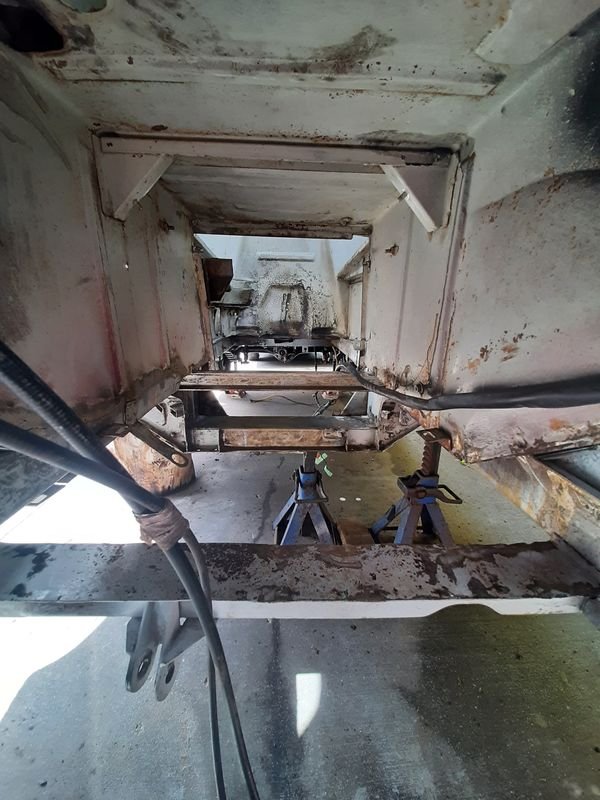
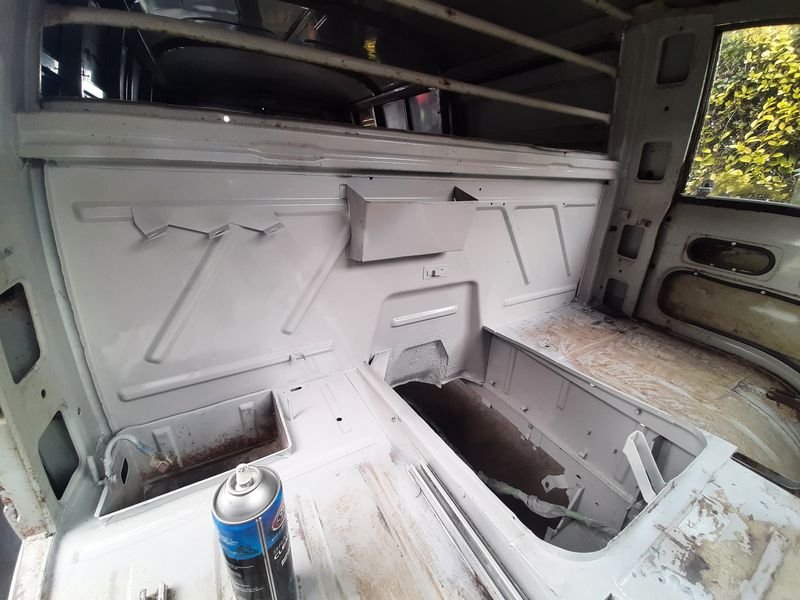
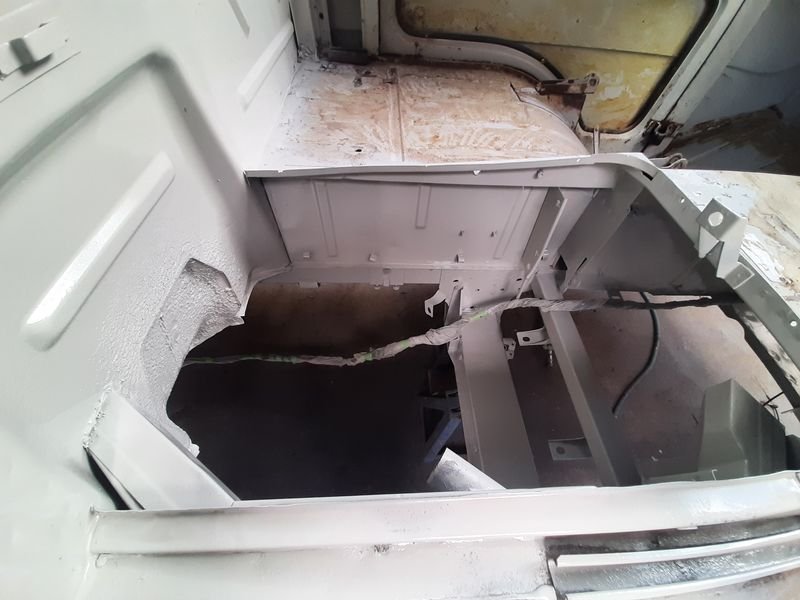
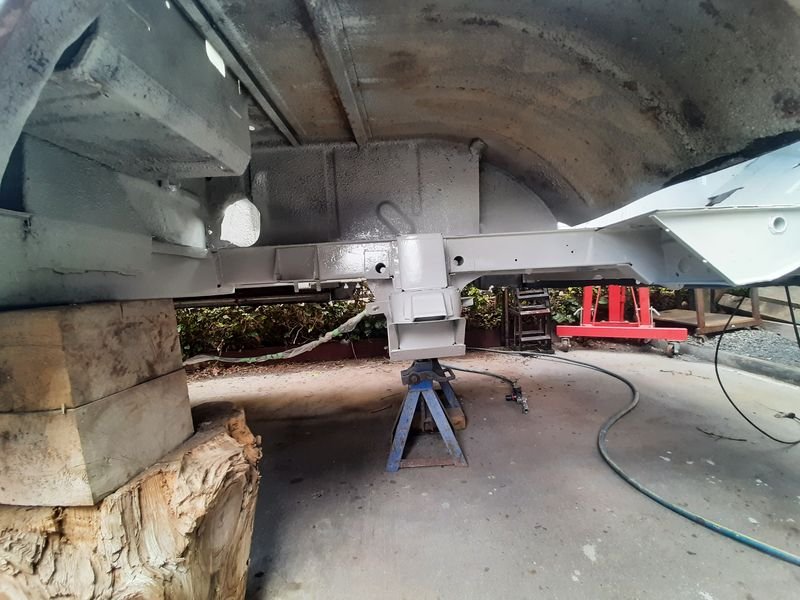
Vajazzled the gubby underparts. Engine Bay: Stage 1: Get sick of catching sandpaper and fingers in brackets and tabs. Wax and grease remover spayed everywhere (i wish i liked paint prep better, cause stuff would turn out better, but, well, i just don't) Stage 2: Get primer mostly where its supposed to go. Lying on my back painting up mostly. Stage 3: Top Coat. Very happy with the colour Radiator Tunnel/body smuggling area: Similar scenario as above, but i did my *first welding* on this thing and let in a piece that i cut out with the floor, as it carries a couple of brackets. Had a few more rounds of hole filling and grinding after this shot. And a bit of a waft over the cargo barrier/battery area - the three brackets are carry the clutch and brake fluid reservoirs which made the whole area pretty rusty And the in the wheel wells, concentrating on the suspension mounts and brake/clutch pedal and master cylinder mount area. This photo from before i got into the master cylinder mount area, shows what nice clean metal was hiding under the grubby rust on the frame rails. Painted. Stoked to get to this stage by the end of the 2021. 2022 will be all about putting things back on.
2 points
-
1 point
-
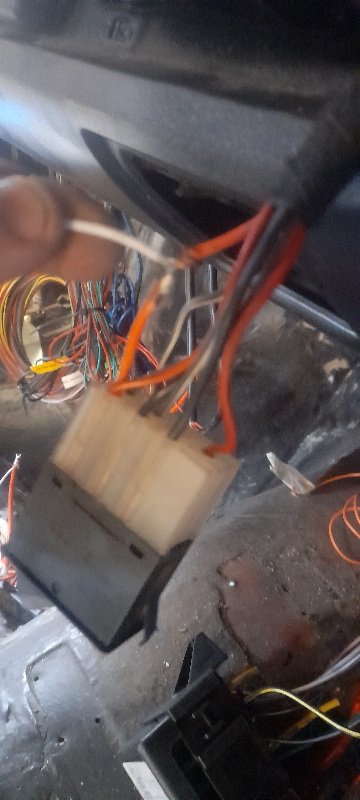
Used these wiring diagrams I found online for fuel pump control with carters oil pressure safety switch and for the thermoswitched fan with a manual override. Have also put a manual override allocation on the fuel pump incase there are any issues. Used a couple of powertech 30A pre-made relay circuits with switches and swapped pins around to suit my needs
1 point
-
I have sourced one from China a while back that is indeed that one1 point
-
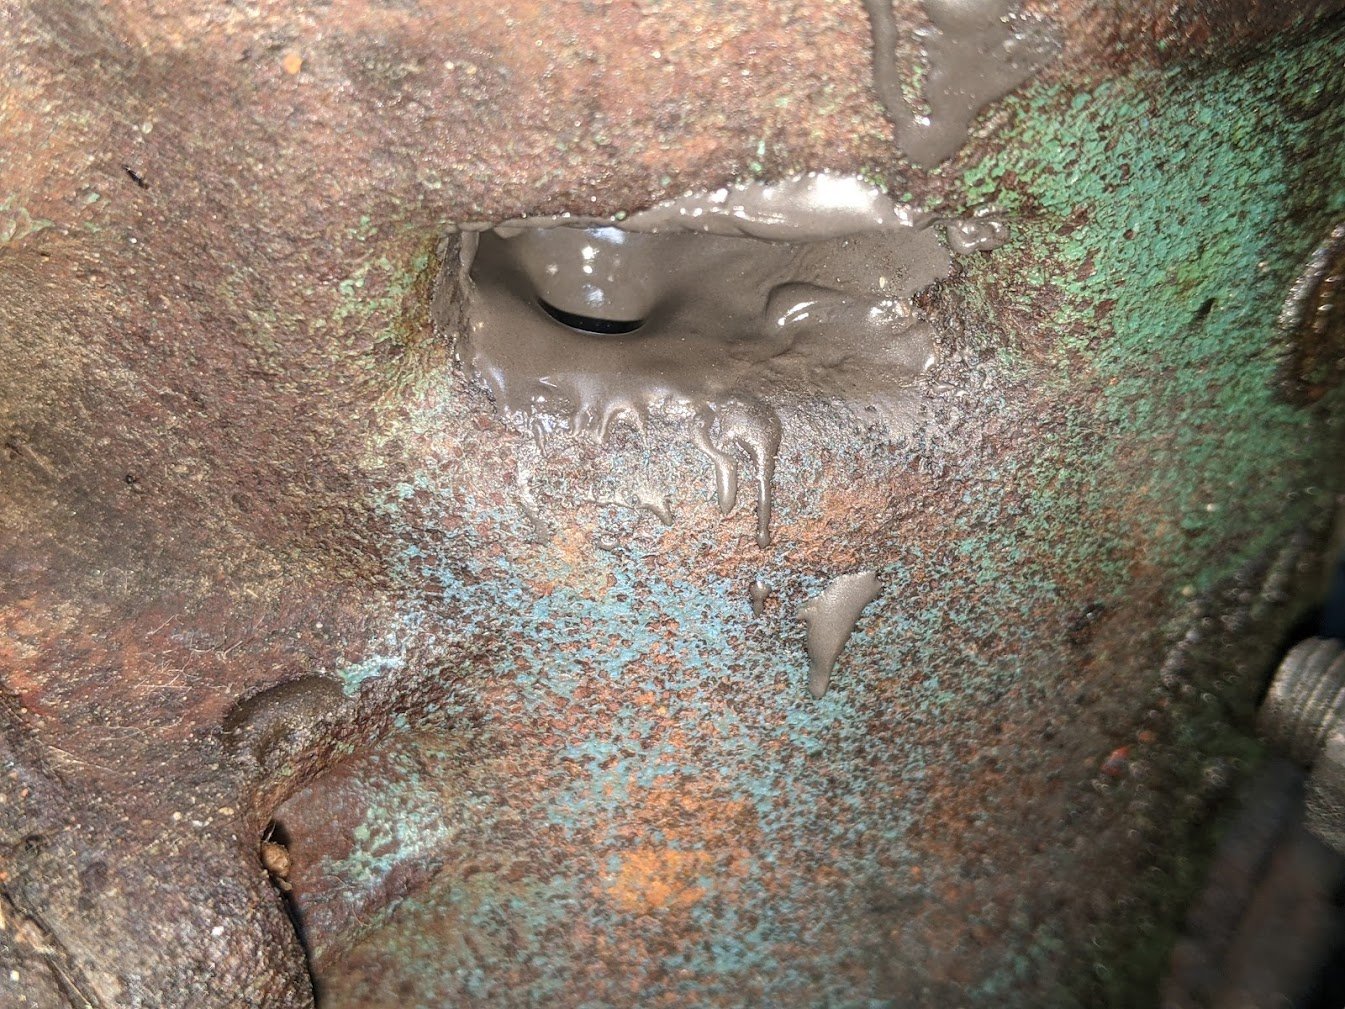
Must of got his hands on some Triumph 2500 Lucas radiator grot, ive had worse just wast expecting it this far into the 2020's.1 point
-
Might be some of the factory issued cooling system mud? https://www.ebay.com.au/itm/2637729909751 point
-
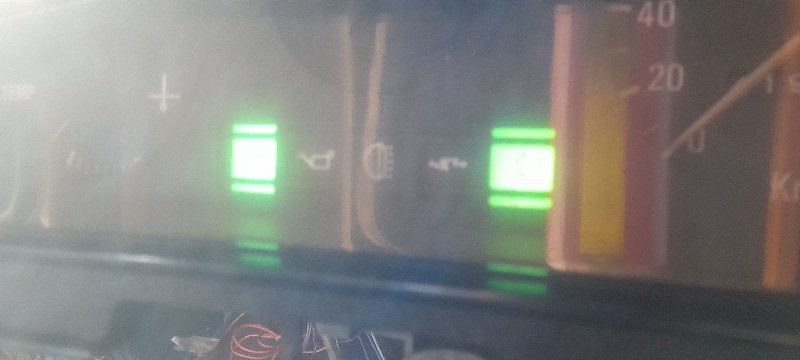
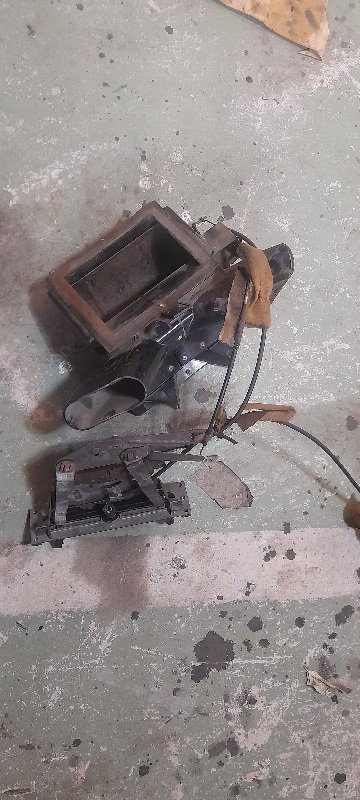
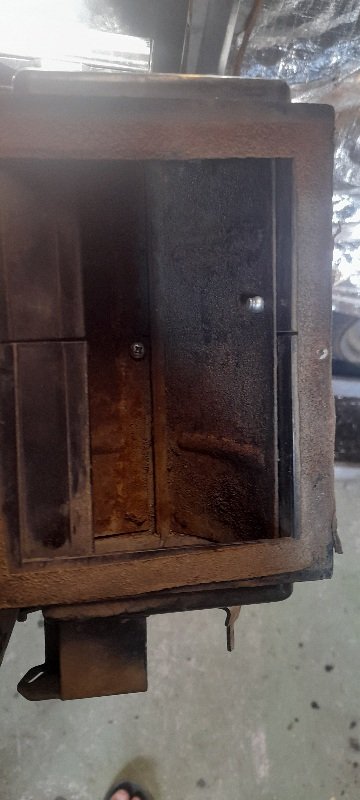
I was about 99% done with the wiring from rear end to bulk head ...till I hit the hazard switch.... it didn't work ....I turned the key off...shut the garage door.... that was last weekend. just having a play with the engine bay loom with what's going to go where and start laying it out and I thought I would have a quick look at the hazard switch ( thought I might have left a earth offf) turns out ut was a power wire.... temporary power to one red wire fucking bang ......hazards are go also couldn't get the heater motor to do anything other than be on or off. and seeing as I only want demist I decided to rip it all out . screwed and riveted the heater box to demist so it won't move ..removed all the controls and shit and going to replace with a simple switch........1 step forward 2 steps back ...but may as well do it now
1 point
-
Damned Posties intimidating other road users...
1 point
-
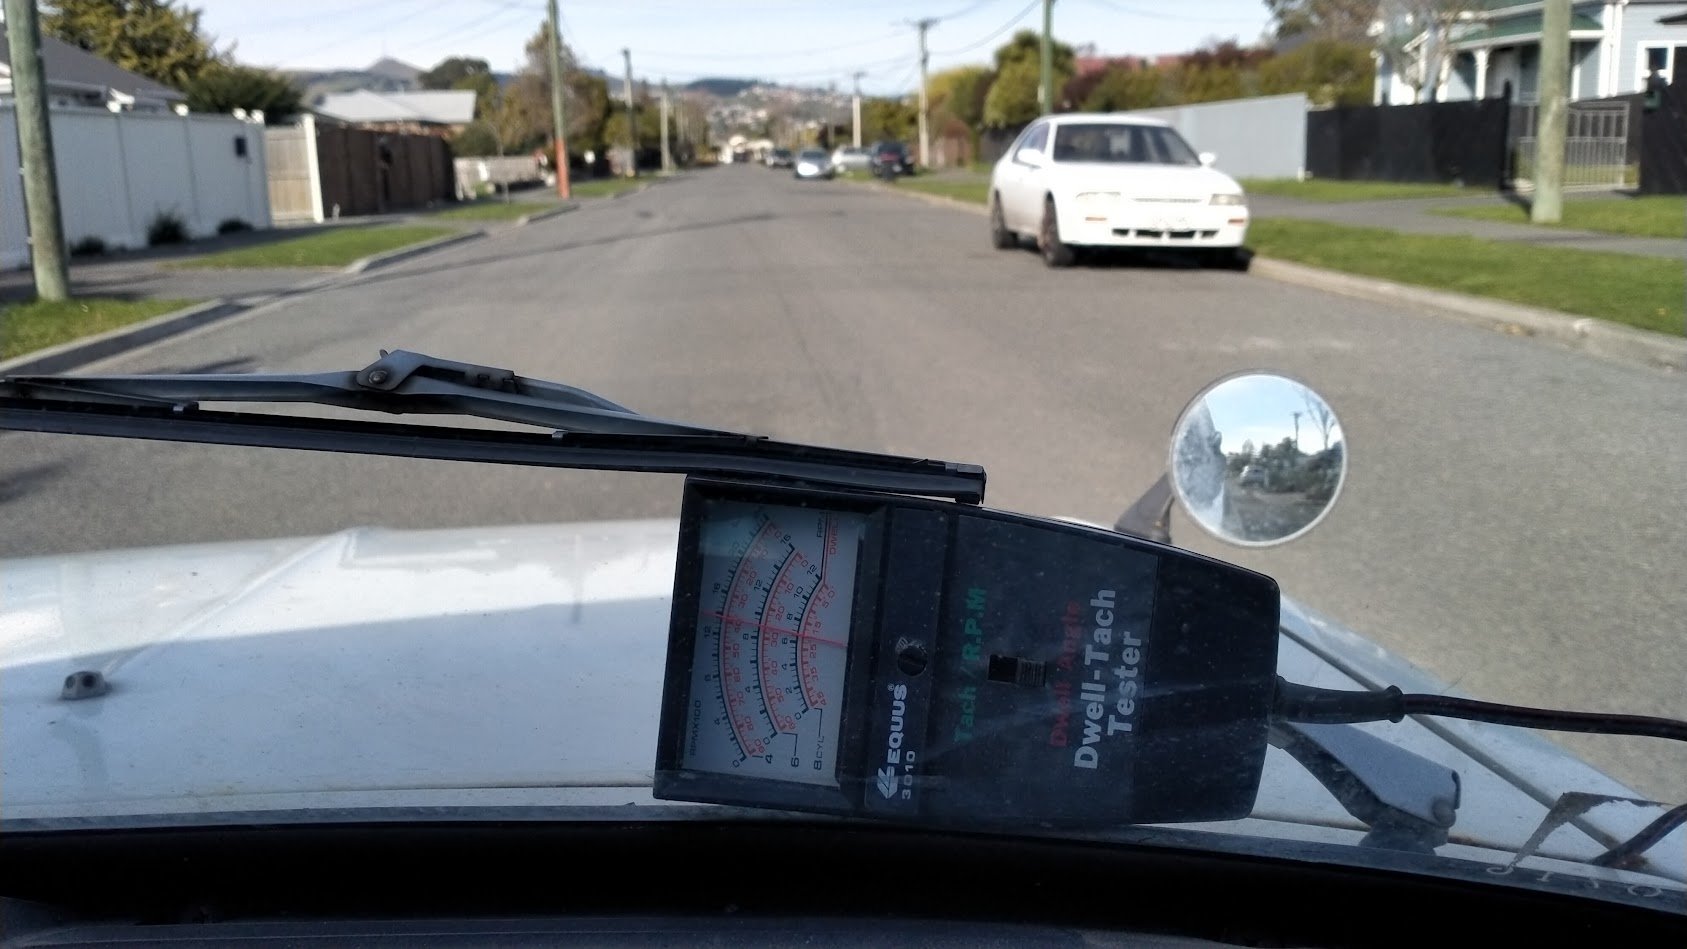
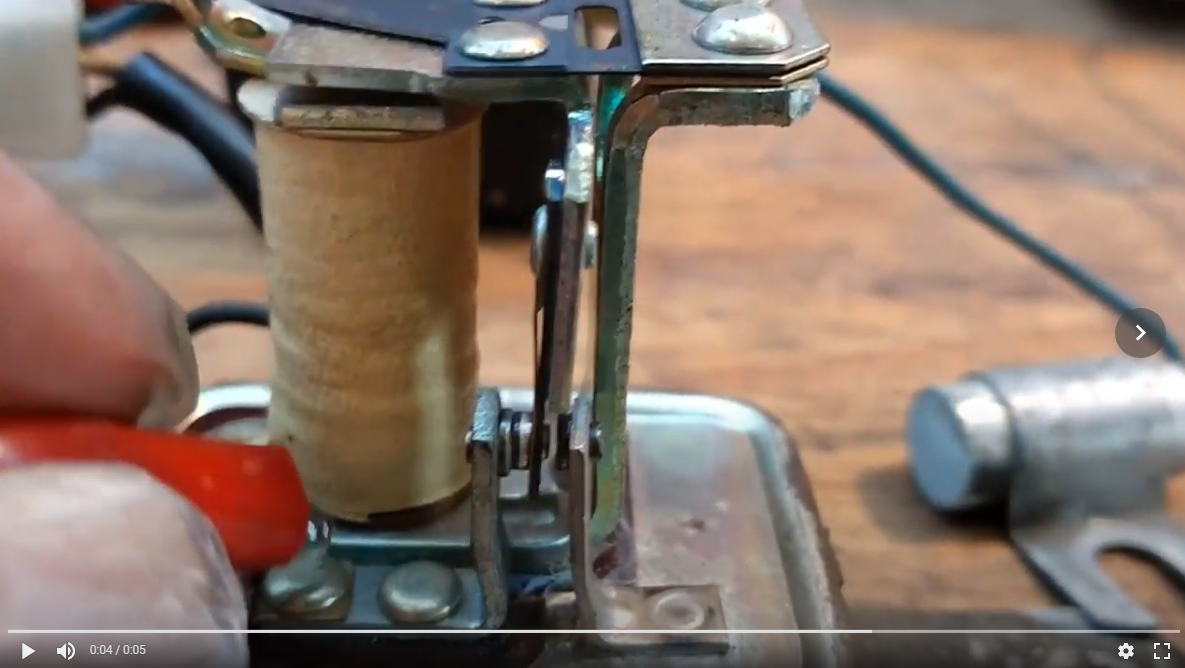
Set the points and check the dwell with the meter @governorsam gave me (thanks man!) running out the bonnet: Sweet, set.
1 point
-
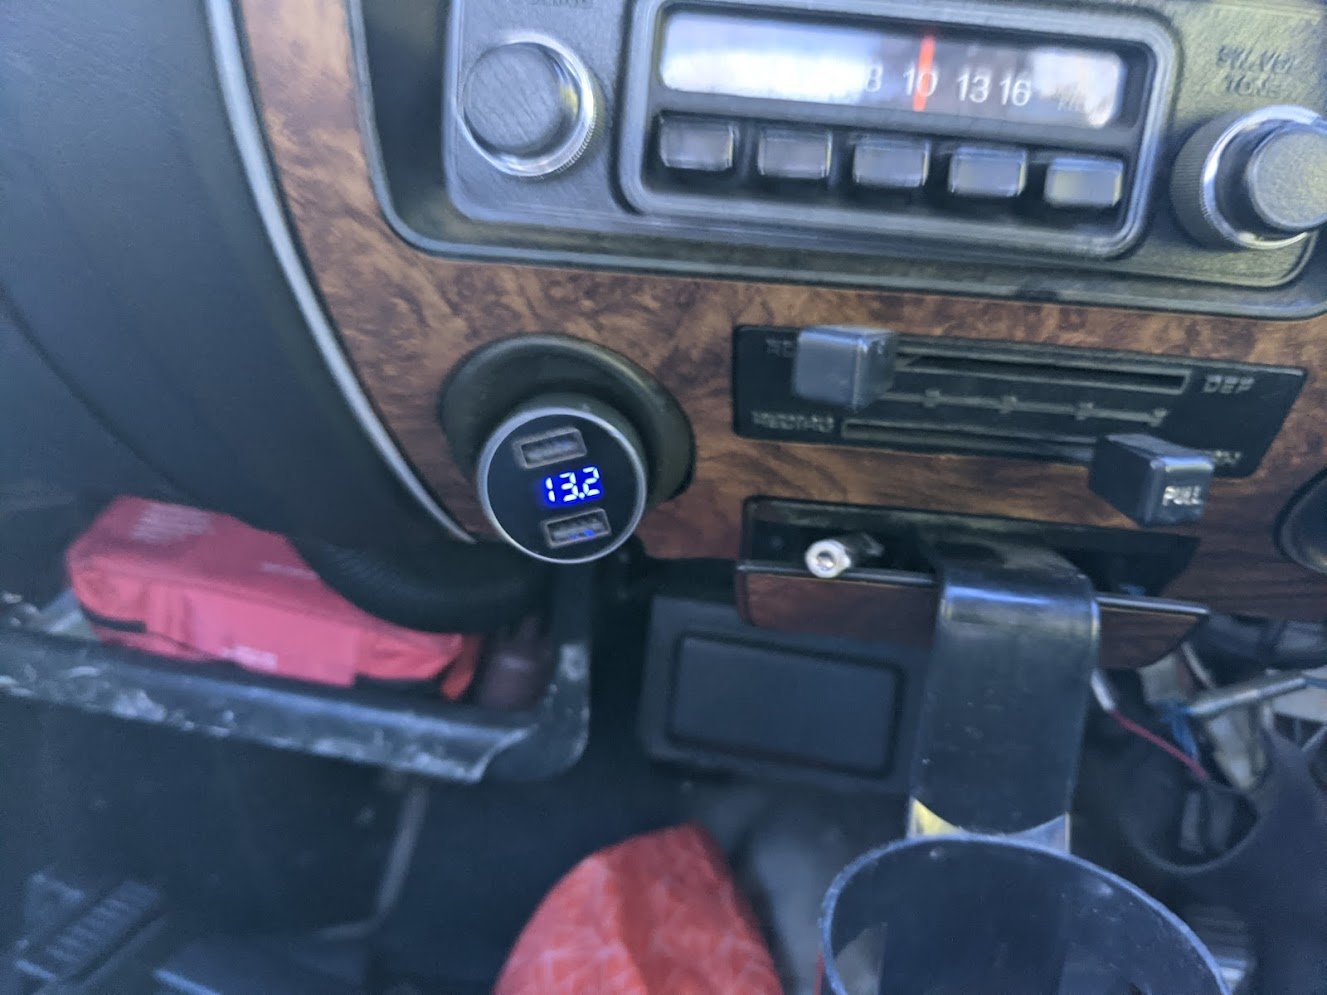
Except, no. I got to pondering the battery fail. I have a phone charger with a V meter. So I plug it in, and start watching. After a start it's between 13.8 and 14.5 as it should. Then after 5 min (replacing the charge taken by the starter motor), it started climbing, the gauge started flashing at 15V (nice feature), so at 15.7V, it's pretty clear why the battery was boiling off and putting white crusty around the terminals. Ah, oops. 5 or 8 years ago, it had that problem, and I took it to an auto-sparky, but now I think about it, it's killed a couple of batteries since then. Testing, testing: I put it on a variable power supply, it makes a cute buzzy noise. OK, looking closer, he'd bent the high-V contact away (incorrect, there's a spec gap), but the switching V was also incorrect (too high). So I set the gap in the contacts at the bottom correctly, and adjusted the switching voltage by bending the tab holding the resisting spring (per online guides). It Bench tests OK now. Tossed it back in the car. It's a shade low at start when idling, but now comes up to correct V, and doesn't over-charge. Golden. I wandered down to the battery merchant who'd been a GC, and told him it was a car electrical fault that killed the battery. He wouldn't accept payment for it, just told me to let him know if I was ever selling! Cool. People can be really good, if you treat them right.
1 point
-
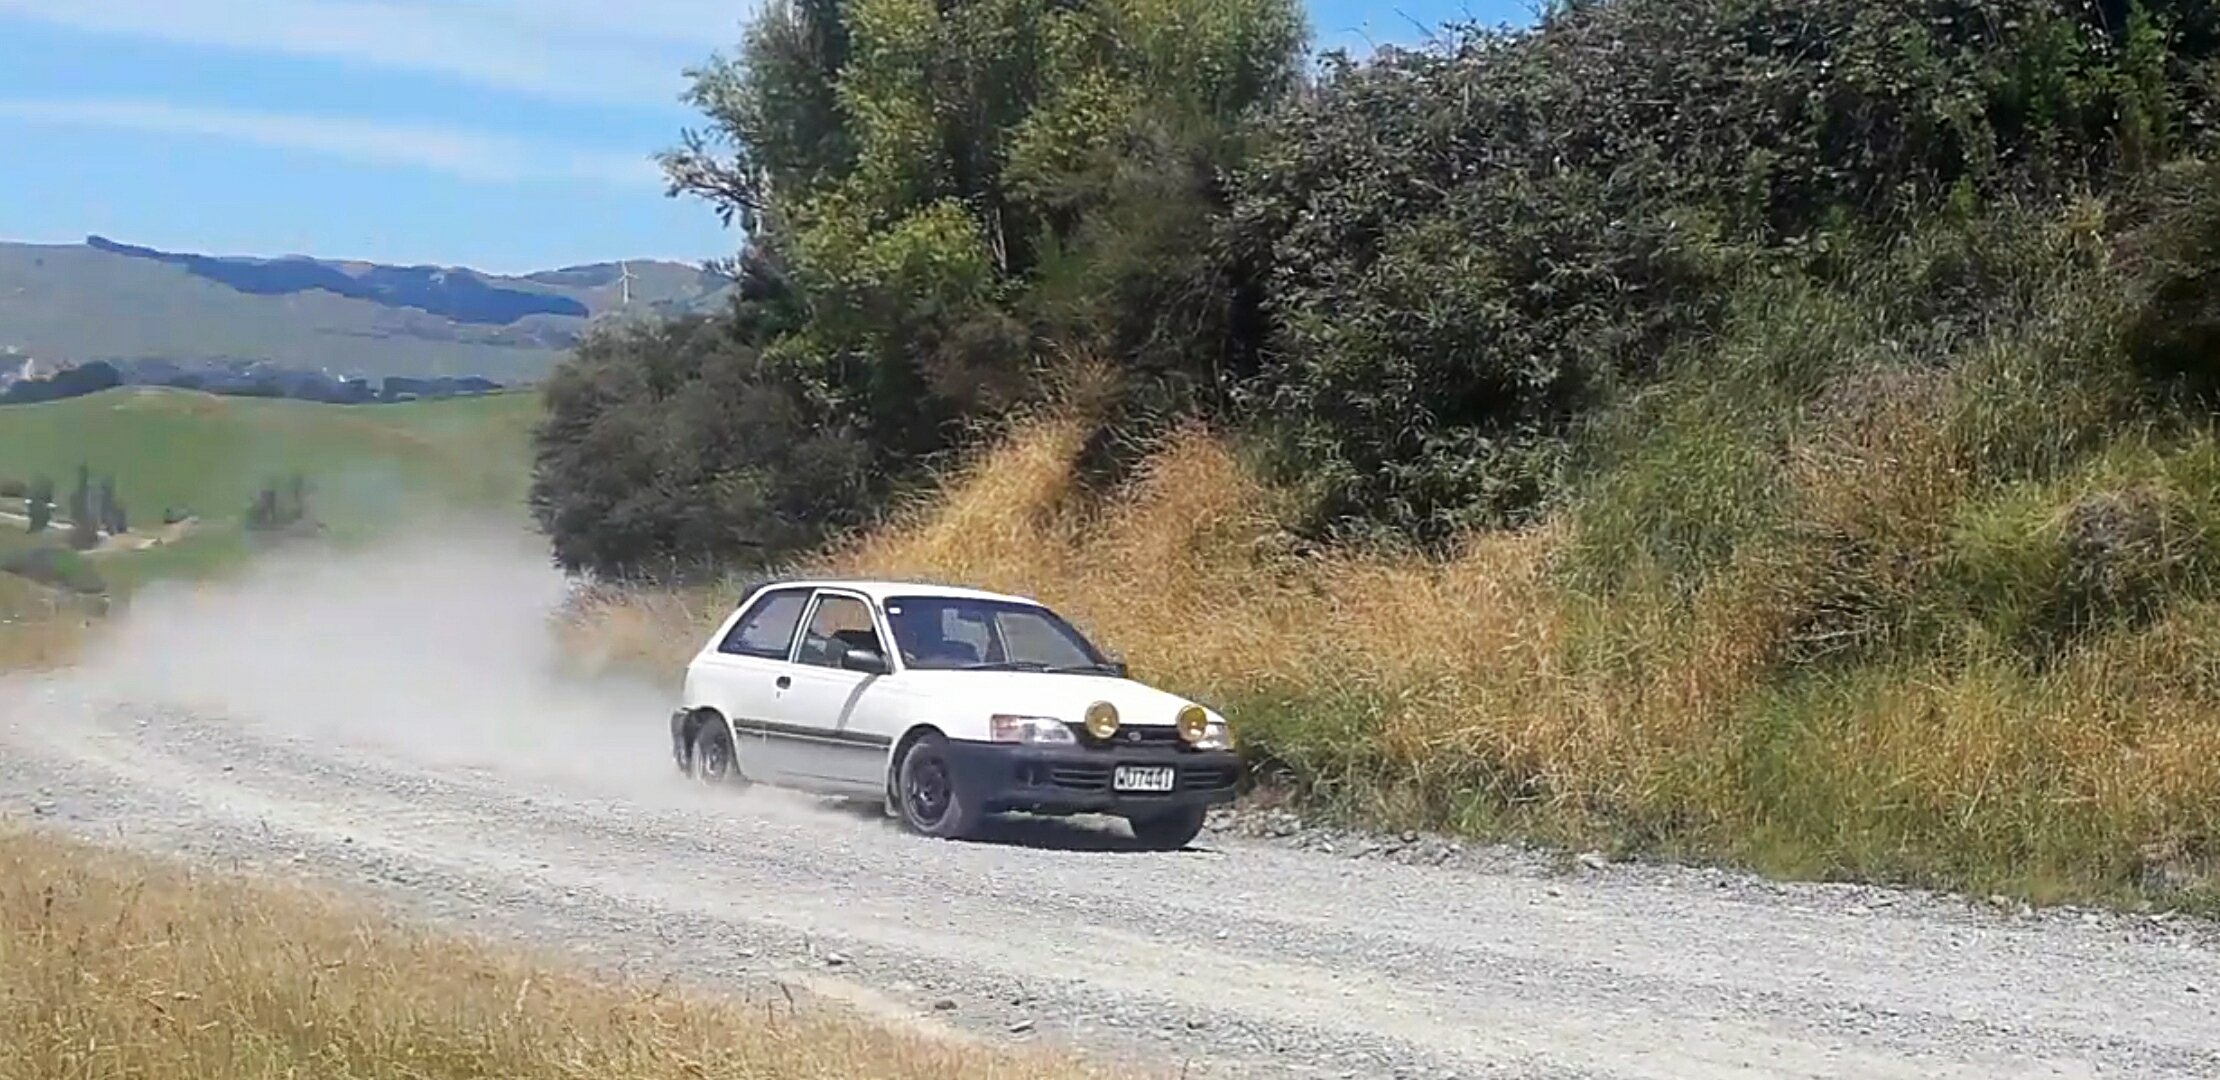
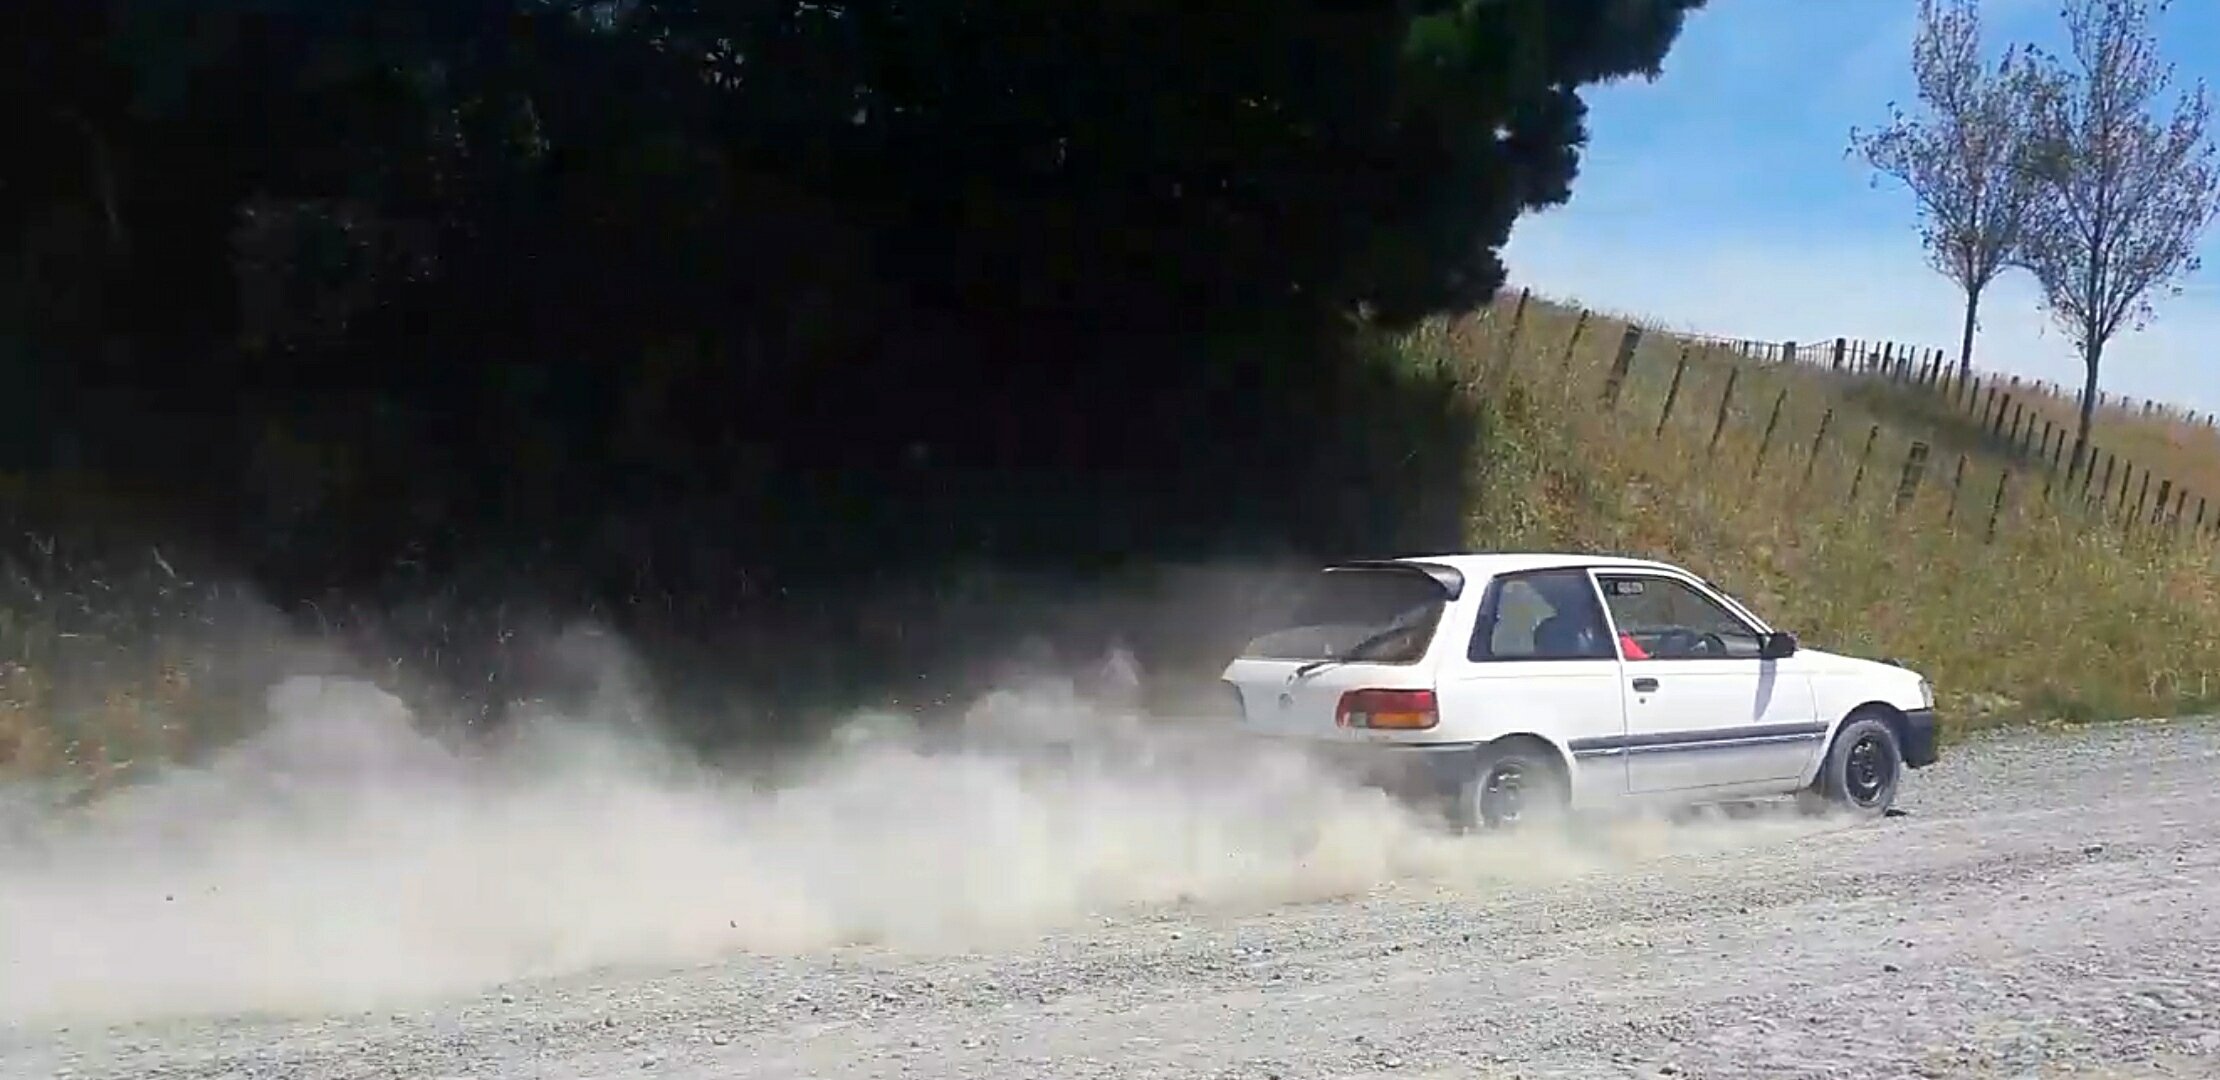
Big day today full send it did well didnt overheat but definitely need q bigger radiator to help keep cool. Found radiator fan wasnt workn so wired to a switch and finally wired spot lights up
1 point
-
Happy 15th anniversary car! Sorry you're still rusty and covered in shit, stuck in a shed, and not going anywhere anytime soon. Also, I really should send those wheels away to be fixed, lololols.1 point
-
After a long stint, over a year, of not being motivated she is back, went for red oxide primer, may get a top coat may get a patina look, will leave her as is for now and see what grows on me? Decided the tray was too high so chopped the top rung off also lowered the door to the same height, end result much lower look. Have plans for some form of cover for the tray and cockpit area, more soon….. Hopefully?…………1 point
-
1600cc n/a shouldn't make too much heat! get your old core modified, so the bottom hose swaps sides and they add a divider plate half way up to make it twin pass, Trevor French Radiators in Otahuhu are real good for this type of work, old school processes and old school prices1 point
-
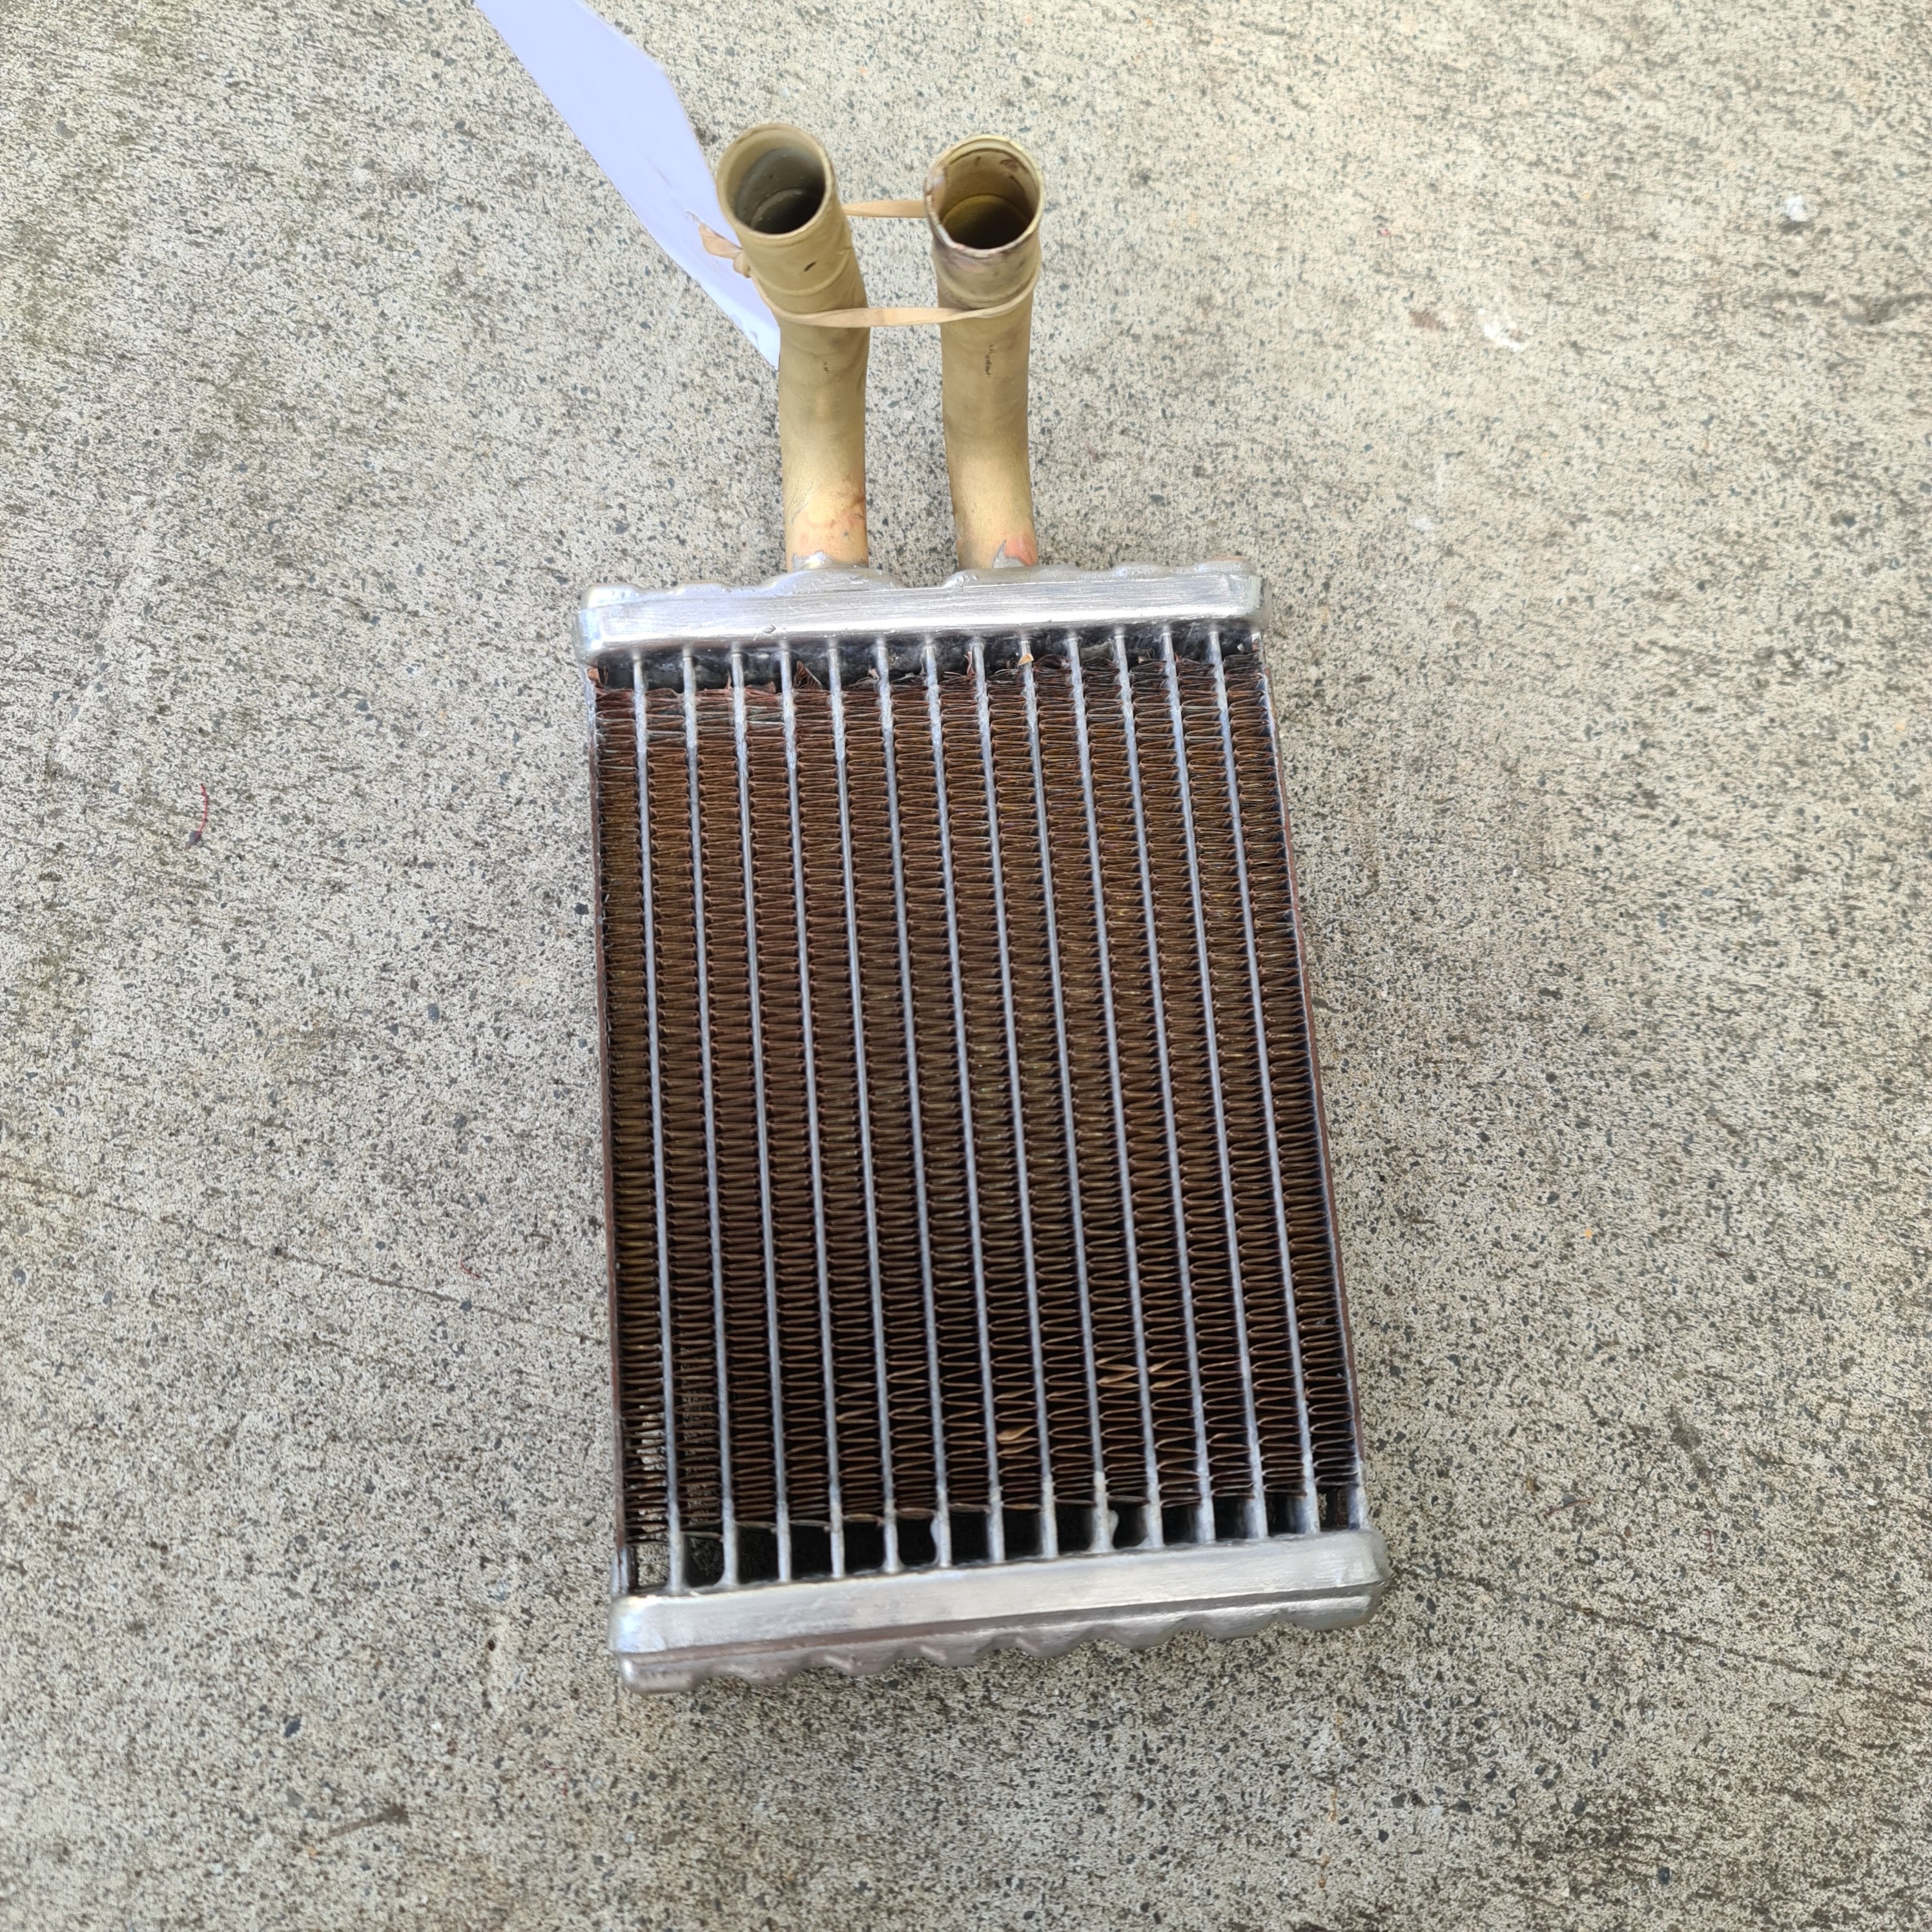
Have been making good progress on the wiring. I feel like each time I do it I learn from my mistakes and take a bit more care and make it look more factory Just collected the re-cored heater core from Auckland radiators after spending about twice as much as I wanted but it was one of those not keen to take the dash out again moments Hoping to receive $430 worth of warm toes in winter.
1 point
-
To these. Far from perfect but perfect from a far...
1 point
-
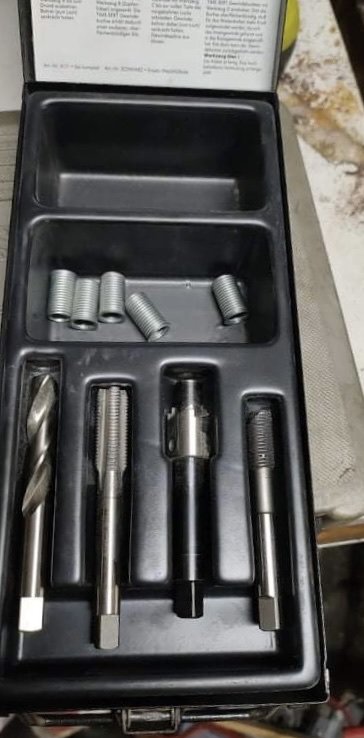
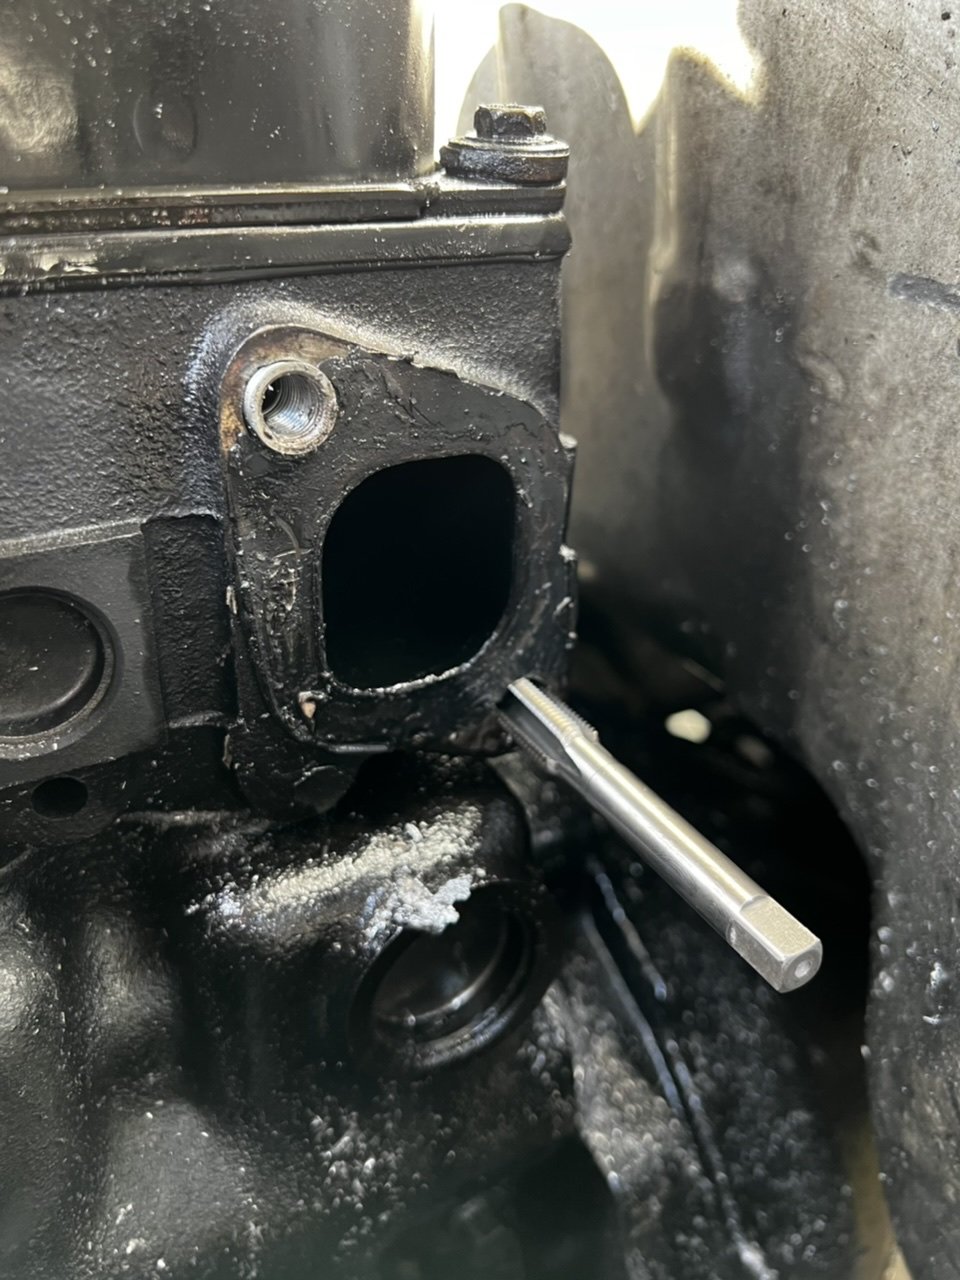
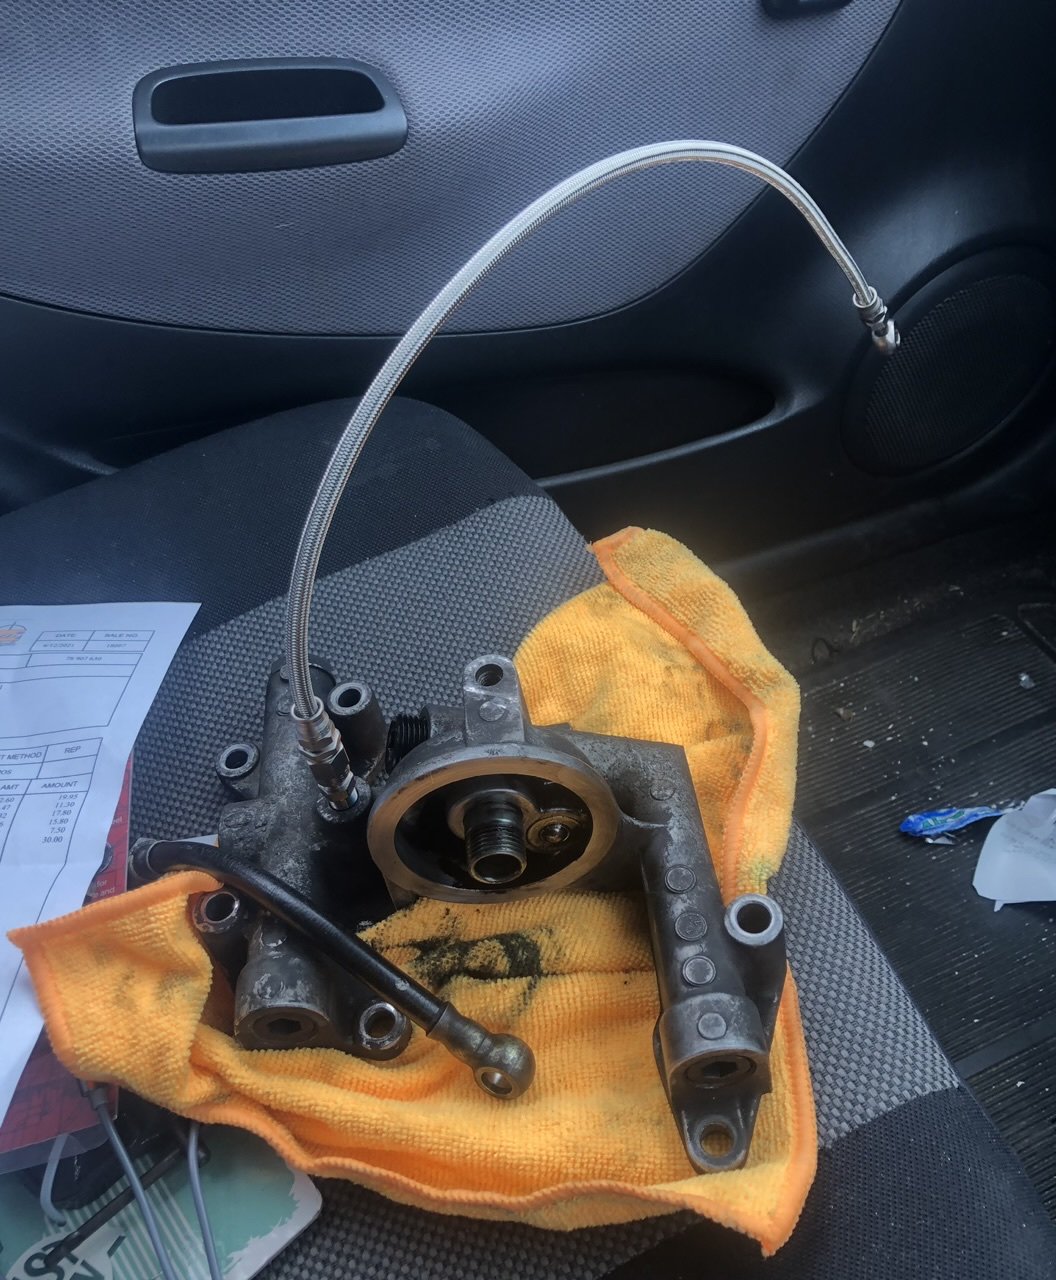
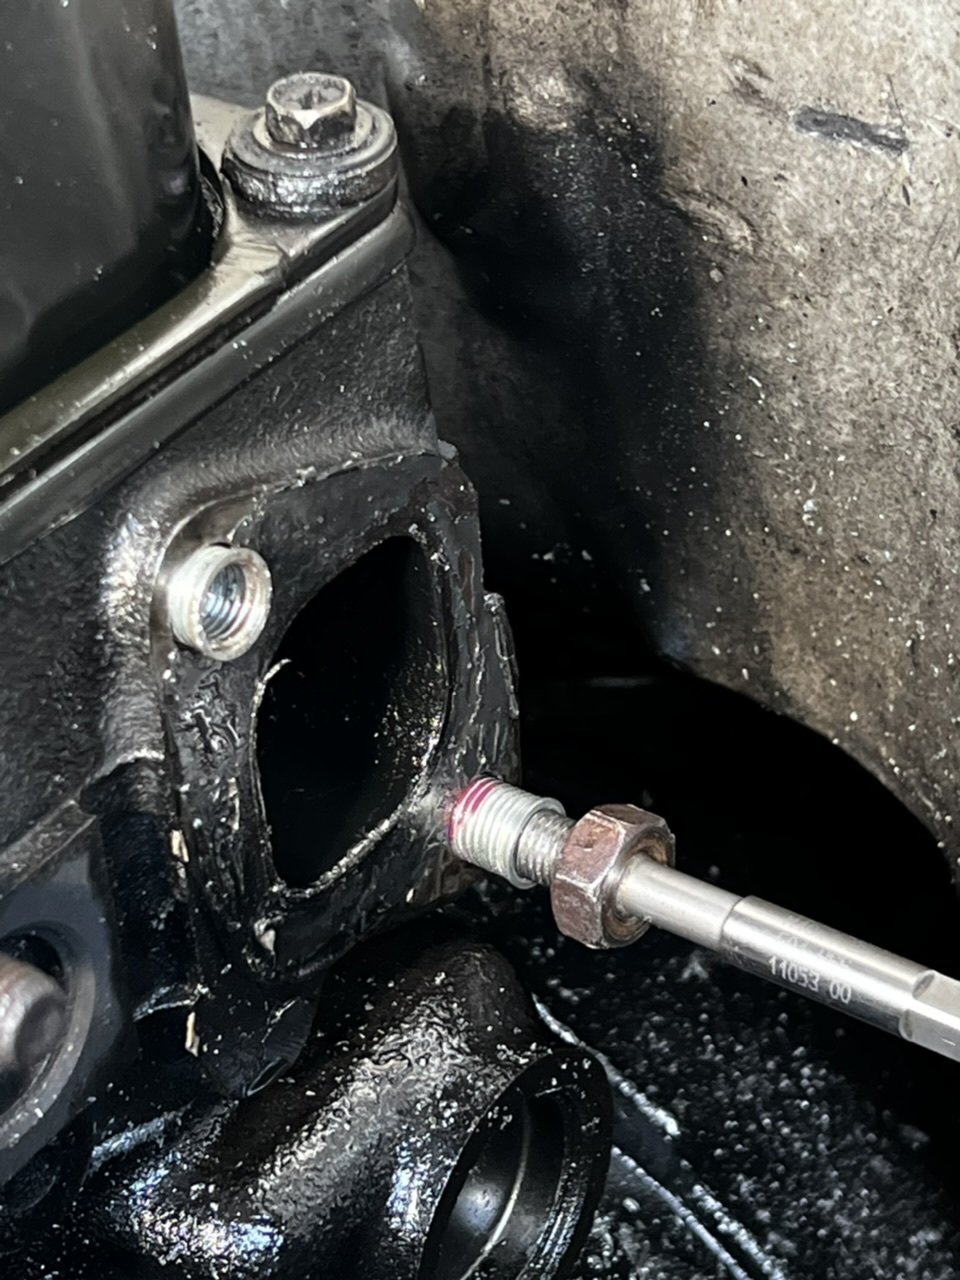
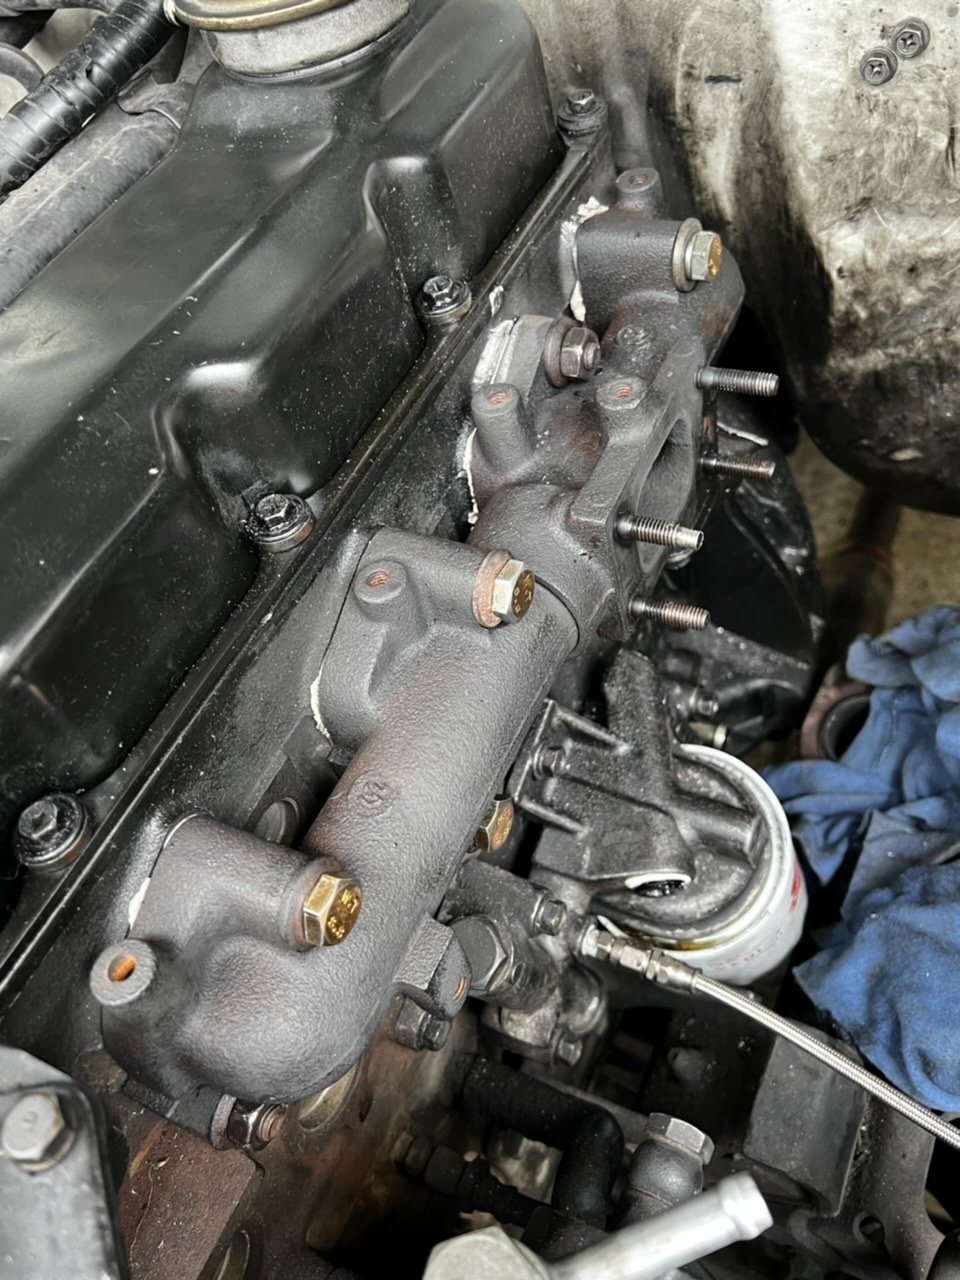
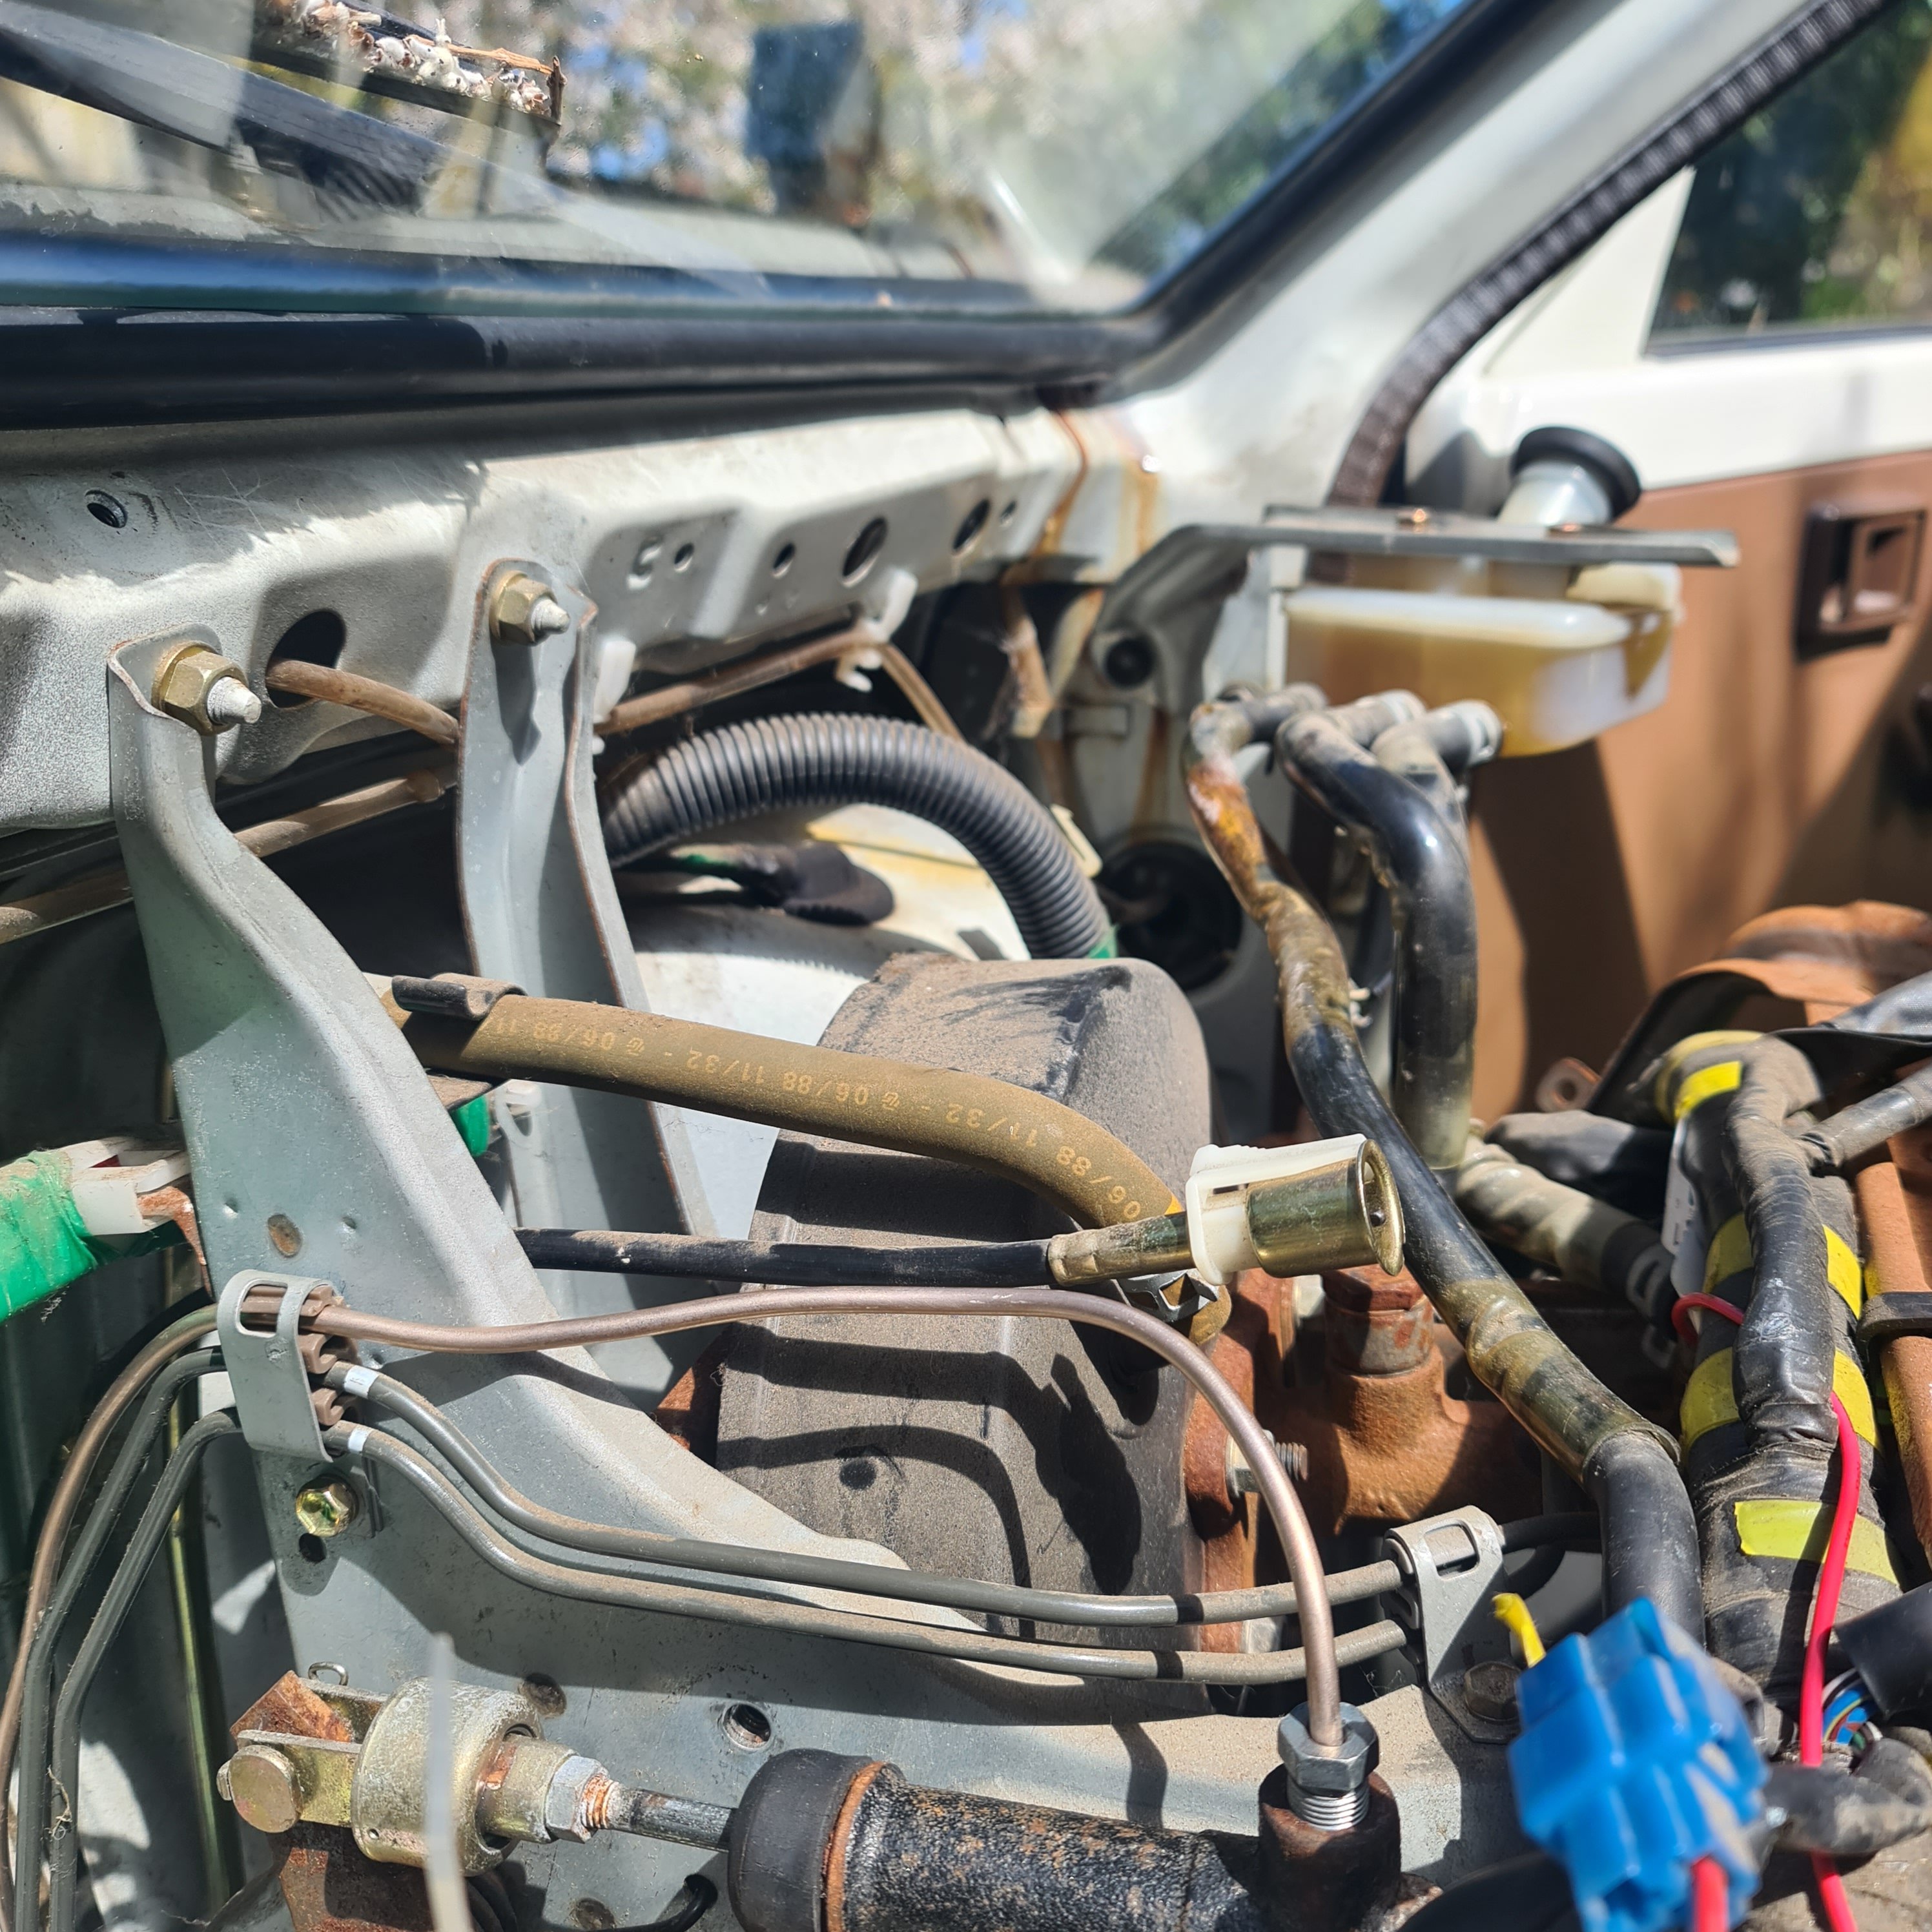
I also did turbo diesel stuff this weekend, plus T’ing a TD27 Nissan Datsun D21. First time playing with turbos, almost at the stage of @Raizer’s exhaust work ^ Acquired box of turbo bits from a Terrano, top end gasket kit and the desire to go up hills in not second gear. Unfortunately upon removing NA manifold (after fighting a downpipe stud for hours and cutting it off) found the two rear studs were actually bolts, m12 fine thread not the m10 coarse like the rest. One was actually missing and the second barely in there, hence the exhaust leak onto the firewall I hadn’t really noticed. however luckily @mo999was coming up to visit so brought along a really nice Wurth Timesert kit took a bit of effort to drill the broken studs out nicely as they’d been attacked before but got there and wound in some M10 inserts, they were a little long so just flappy disc’d them flush. The tap in the set cut the cast head really well. Used a nut as a locknut so the insertion tool wouldn’t bottom out and ruin the end of the insert as it was broken off unfortunately. Got an oil line made up after chipping out the wrong part of the oil filter housing to get oil feed for the turbo. Same shop was able to supply a bung for the fitting I took out needlessly however. Factory fitted drain bung used here too, had a fitting in stock for this. Sunday Mitre10 / Repco trip for bolts that work with the new inserts and longer ones needed for turbo manifold. turn key and it goes! Makes all the right noises even. Just need to get the correct silicone intake hose as the one I grabbed was too big and wind up the fuel pump a little. Then exhaust…
1 point
-
Now to dummy up most of the external parts
1 point
-
Spoiler on to keep that raw power to the ground hahah
1 point
-
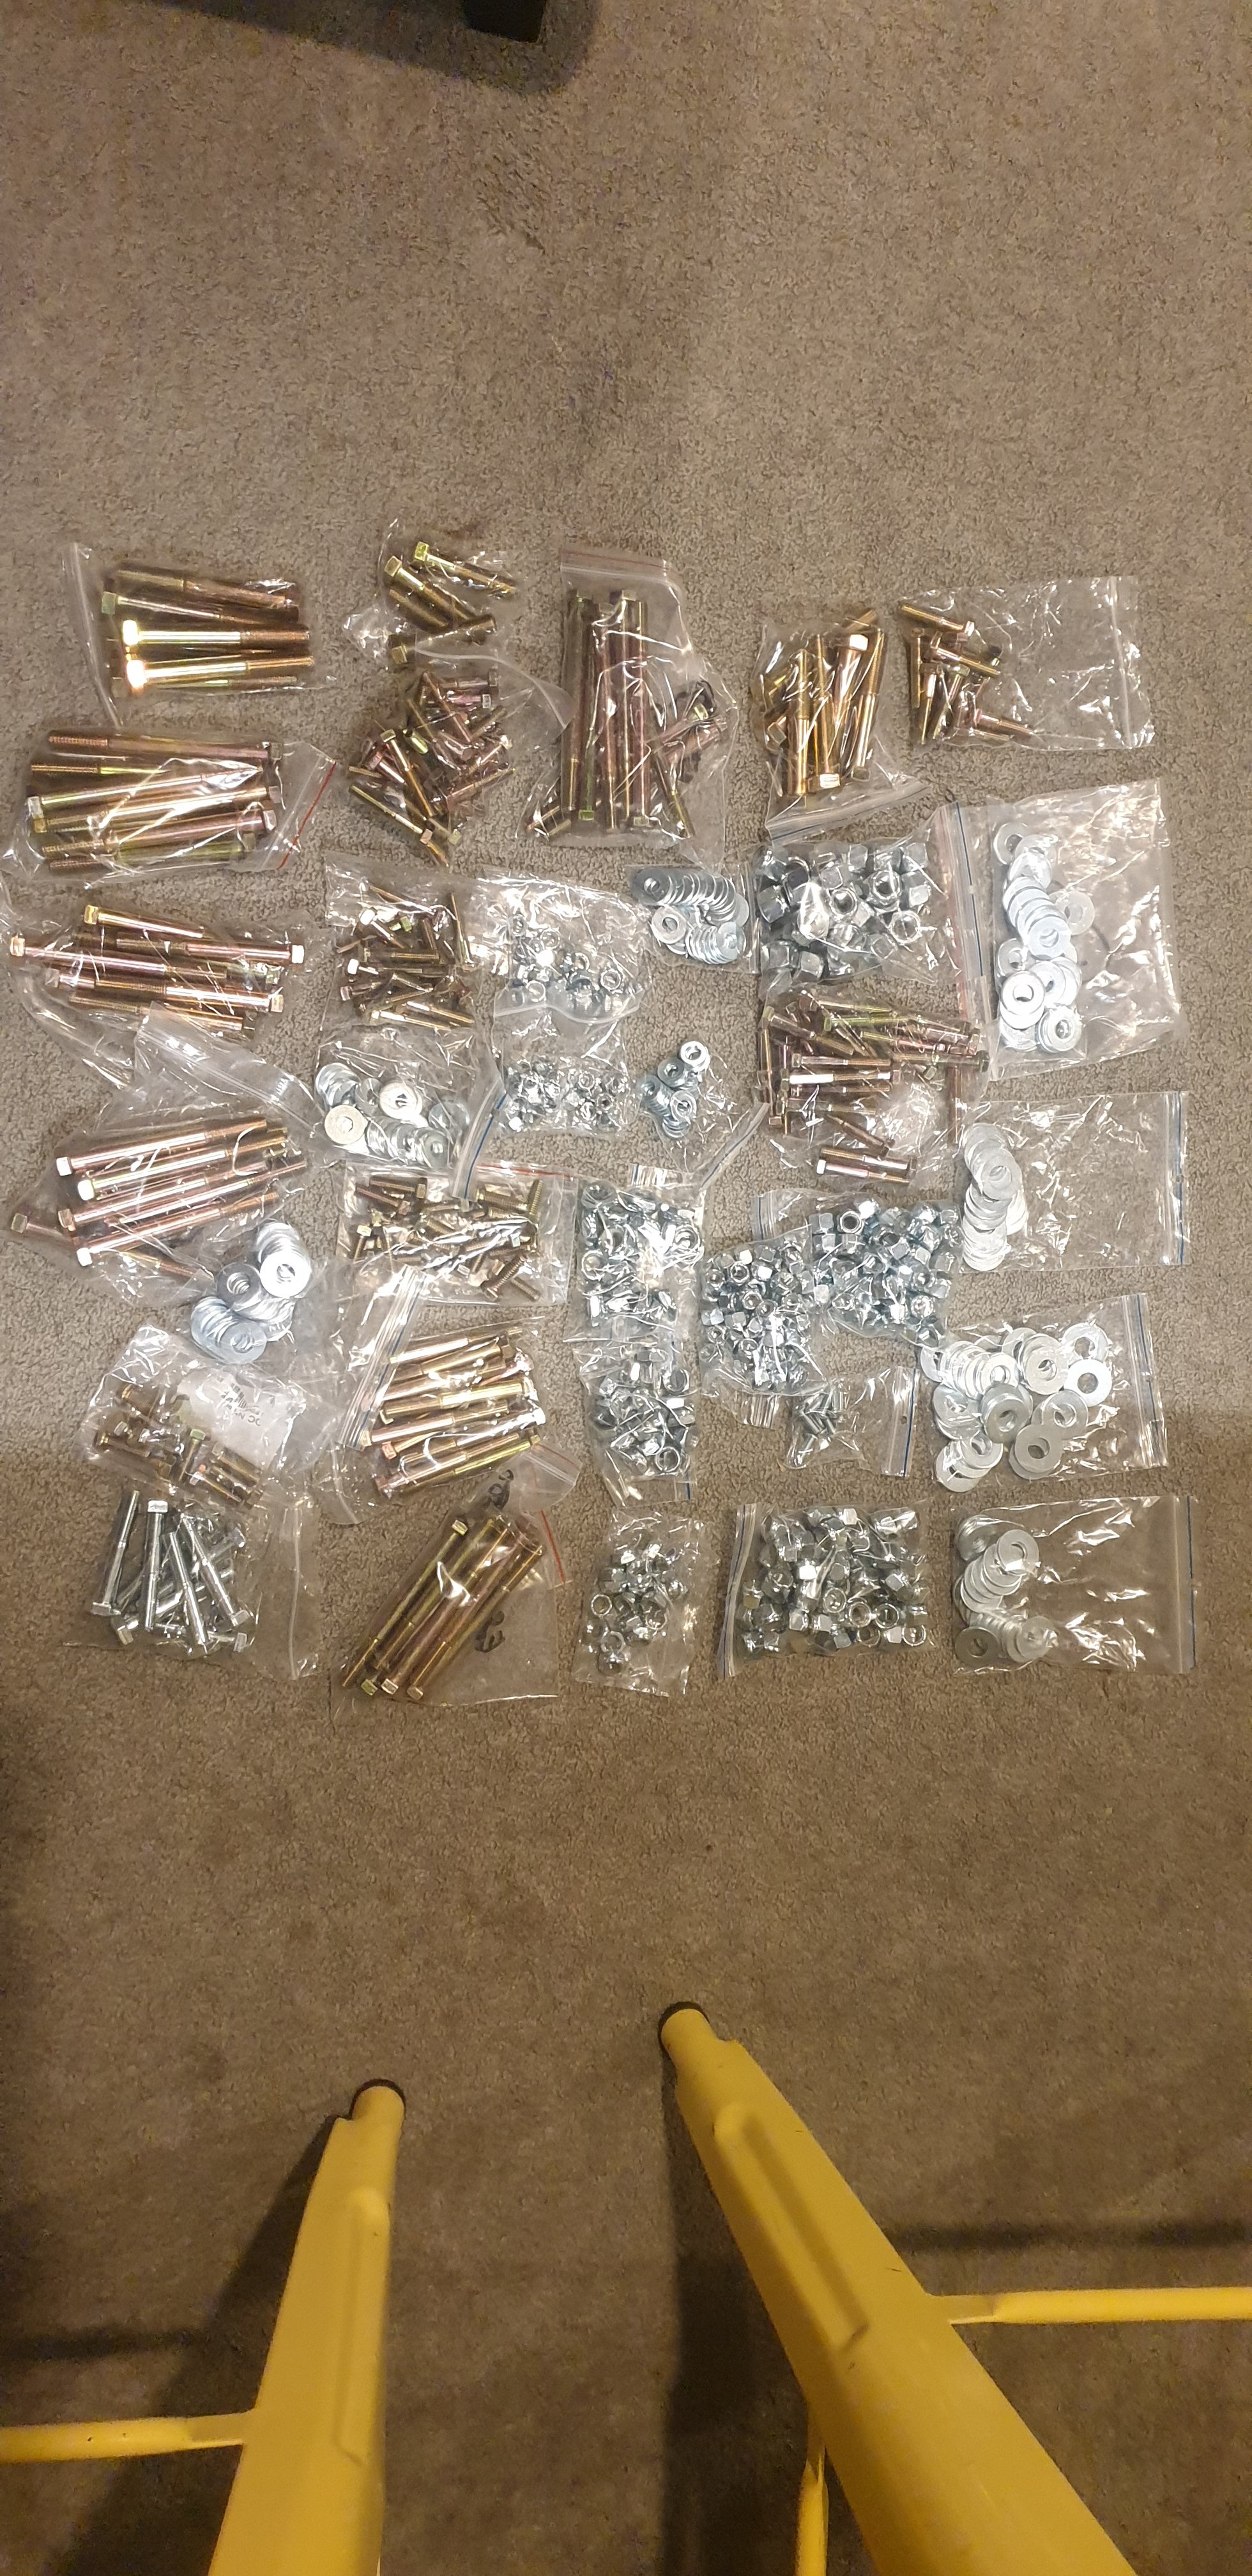
Here's a pic of today's purchases from the Bolt Shop... Hopefully everything a Mk1 Escort rally car needs to hold it together.
1 point
-
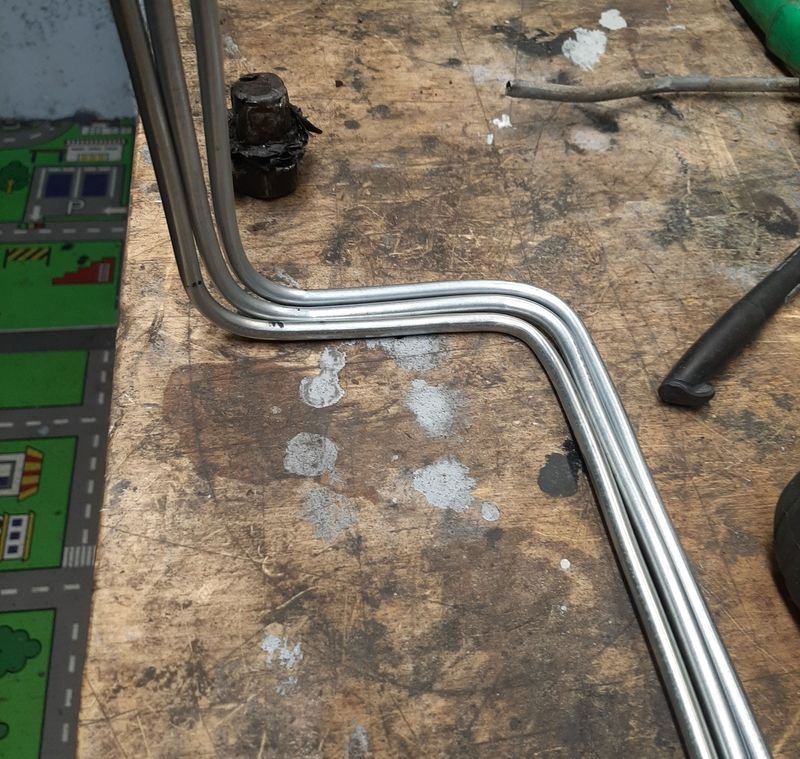
3 photos of the hydraulic clutch conversion because it's that big of a procedure with 8 or so line clips to run through. I ran a peice of string through all the clips then measured it, rolled it out of my tubing then took to ebc for them to flare. You'll see the different reservoir swapped in with the 3rd line fitting for clutch. I did have a nice round on tube coming off the master cylinder but it was running higher than reservoir outlet and making it hard to bleed. nicely clipped up in the allocated spare tube holder
1 point


(26).jpeg.0defc1a2b7761478a93f6d0da1a0947f.jpeg)

.jpg.b7d606618868c6fb35f6cb665b28e952.jpg)


.jpeg.f2ef3250bc8134febf5b10ad469d2db9.jpeg)
.jpeg.870dc93879726fac6a8eb0dded6abee0.jpeg)


This leaderboard is set to Auckland/GMT+12:00