
Leaderboard


Popular Content
Showing content with the highest reputation on 18/04/21 in all areas
-
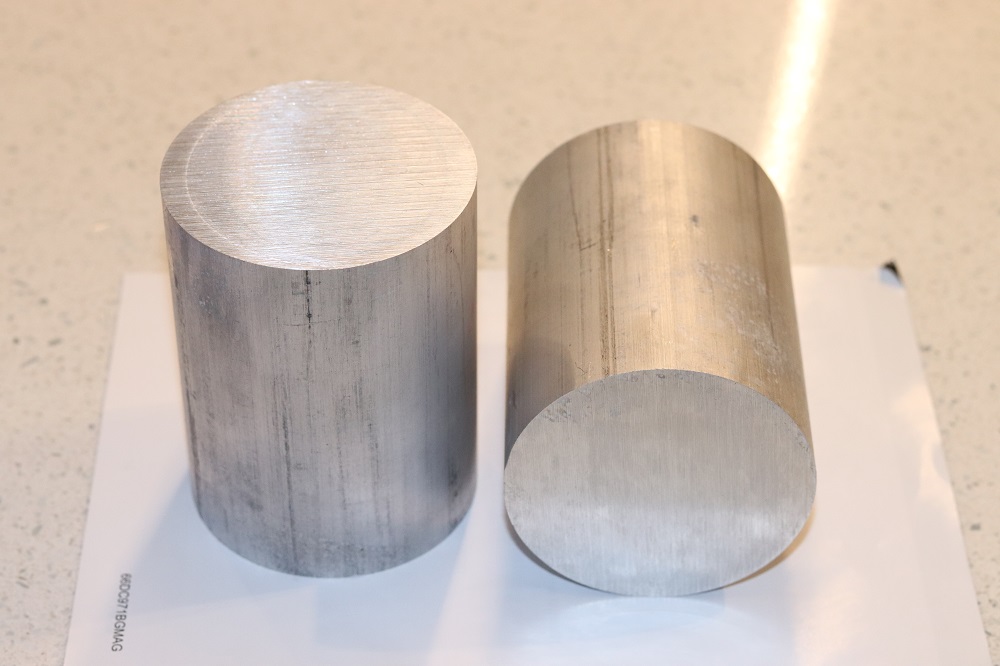
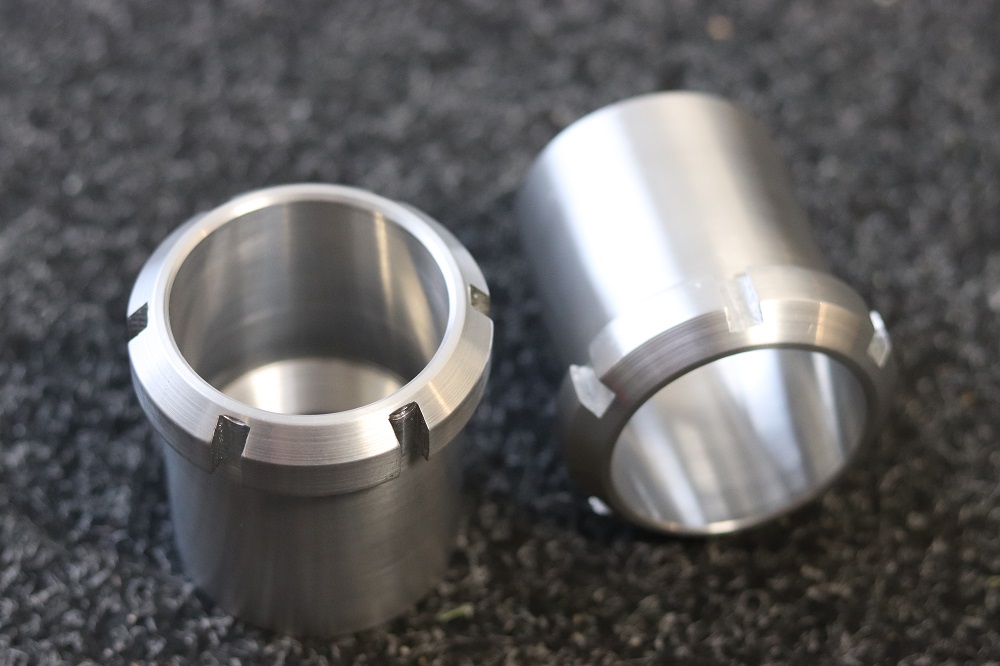
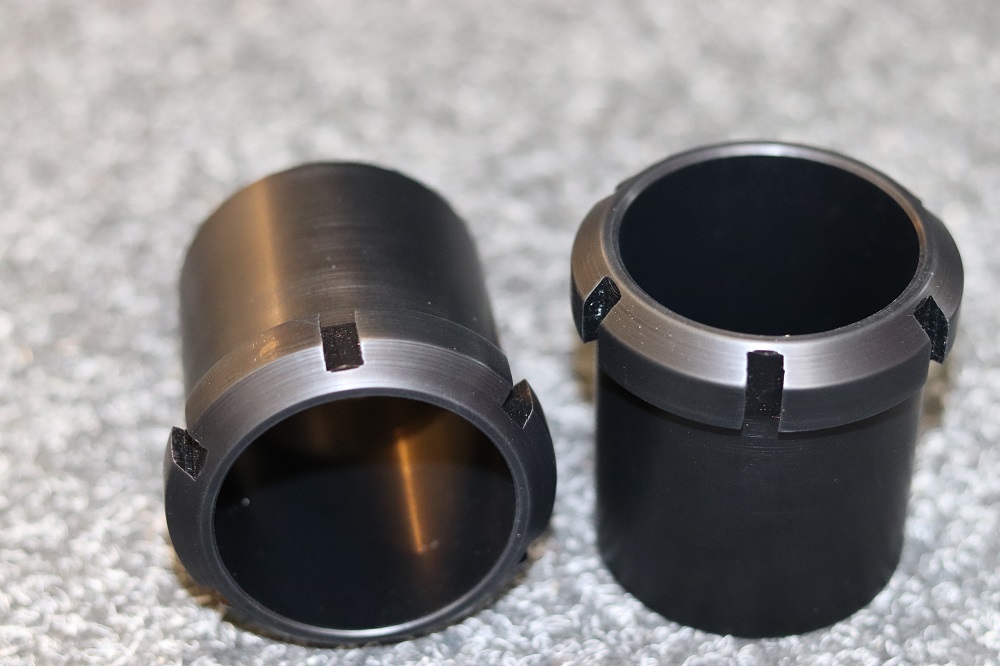
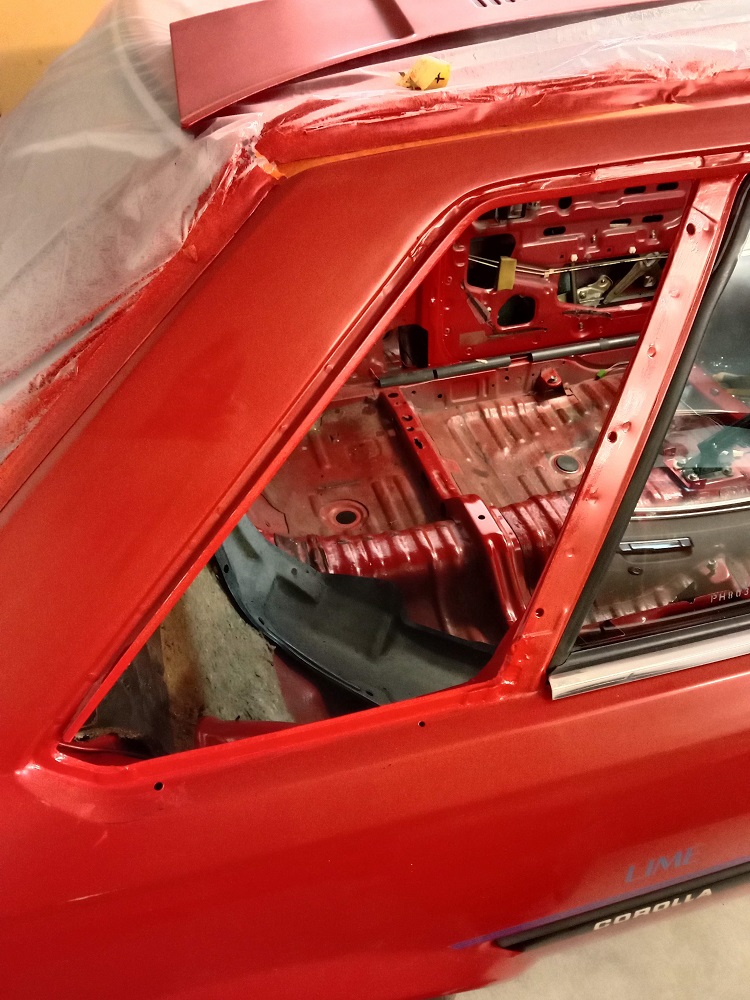
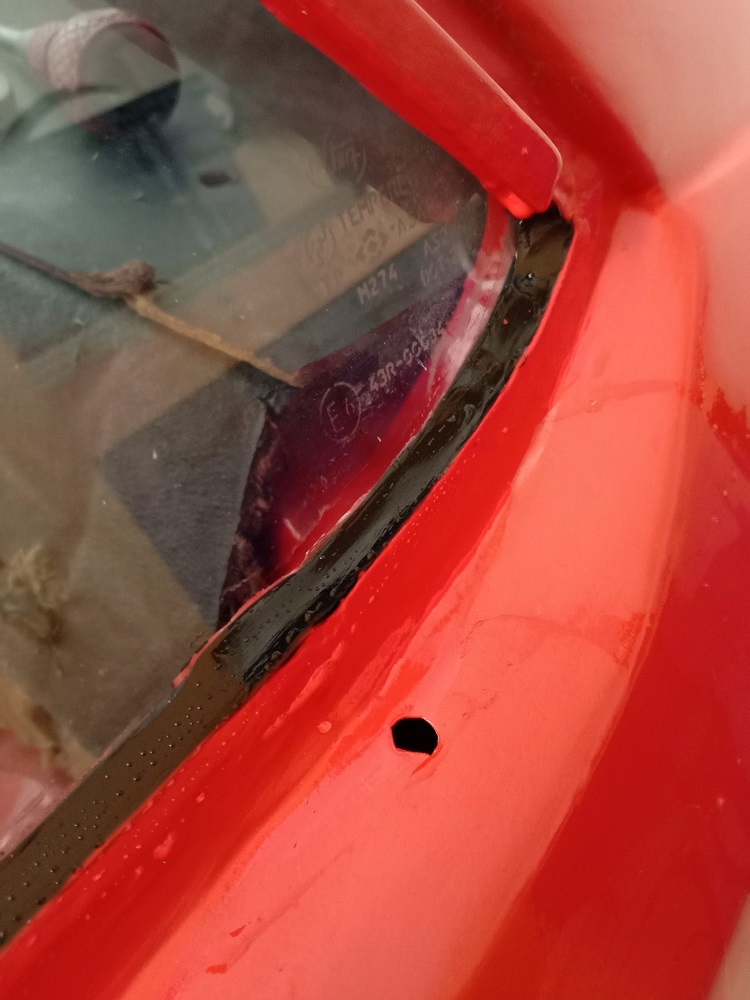
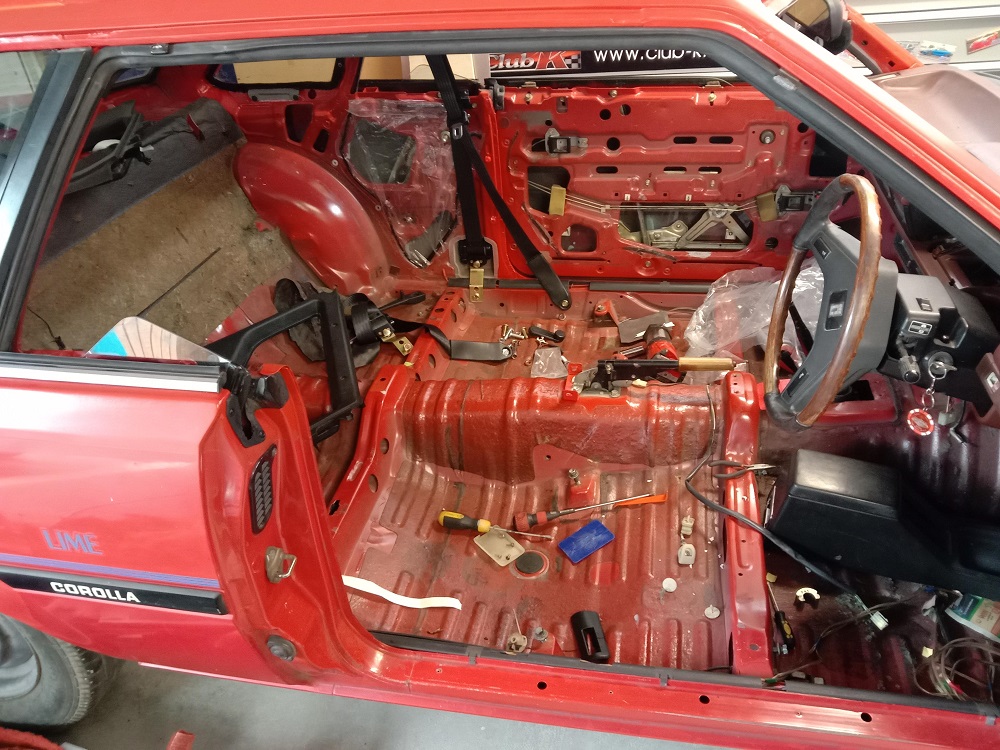
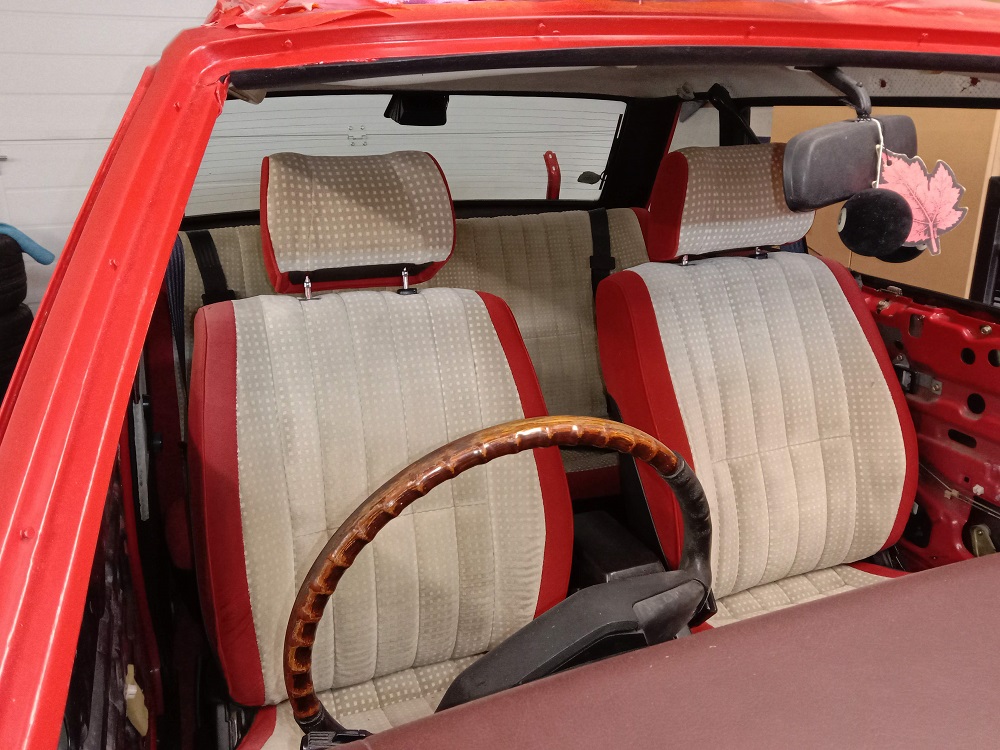
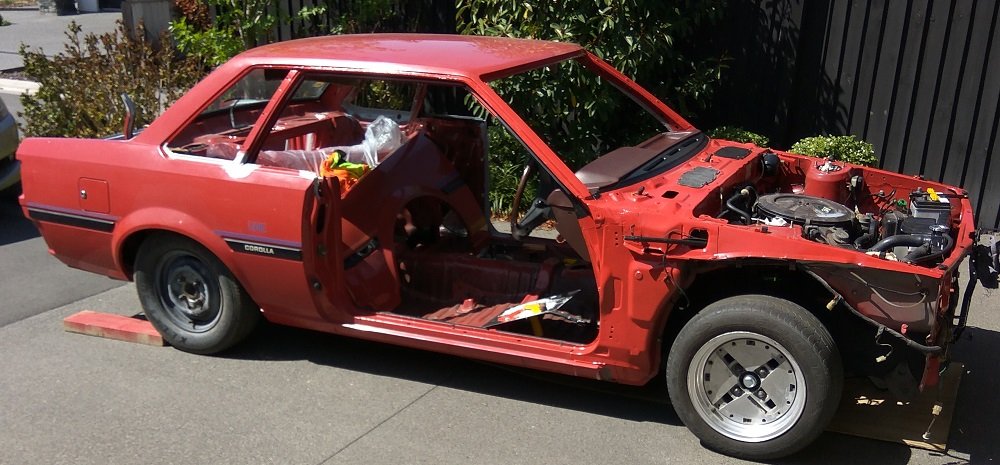
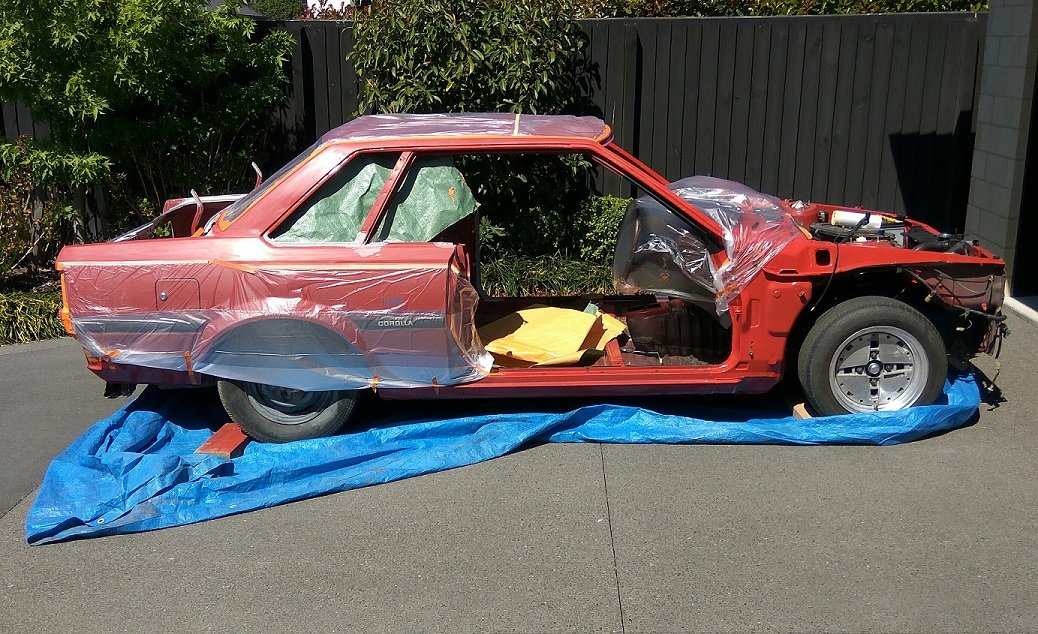
Six months since last update, feels like a year... Spent the last four months with a new member in the family so car time has suffered accordingly. Will keep it brief with a few pics. Have been working my arse off the last week or so to get the car back together. Lots to still do, but I finally have a window of time to get things done, so I have to get it done. Last update ended with lack of clearance between strut and wheel. It was the locking nut to be exact. I spent a long time working out spacer requirements and longer wheel studs needed etc. Problem with spacers is that it shifts the wheel closer to the guard, which I can't afford to do, so I had to come up with another solution. I worked out a design and showed cert man and got the green light. Had a word with Anton @ajg193 and he did a proper drawing of it. He then set about filling his garage with aluminium swarf and made me the parts. I then had them anodised as per @mjrstar's recommendation. The whole design was focused around moving the locking ring further up the strut as due to being angled inward, this would provide the clearance needed without shifting the wheel with spacers. Bottom section has internal thread to match the shock body, Anton did a great job. Installed Gave the rear 1/4 frames another lick of paint or two where the trims will be, to offer a bit more protection. Removed all of the sticky shit off the frame and windows and glued them back in. Then it was time to start putting the interior back in with the new belts. Previous to that though, I spent give or take a day installing all the moving windows in the car, aligning the doors and then adjusting the windows till they operated correctly. I've got them pretty good, but I just don't have the time to get them perfect right now. If they even can be given the seals are all poo and the panels don't line up due to a hit. Happy with the end result though, even if it's not close to waterproof lol. Thursday: Friday Saturday That's where I am at for now. Some up and coming jobs: Install brake master cylinder, make brackets for front hoses, diddle with the handbrake cables, eyecrometer the alignment, organise windscreen install, fit plastics / door cards up front blah blah, too many other things. Thanks for playing.
 27 points
 -
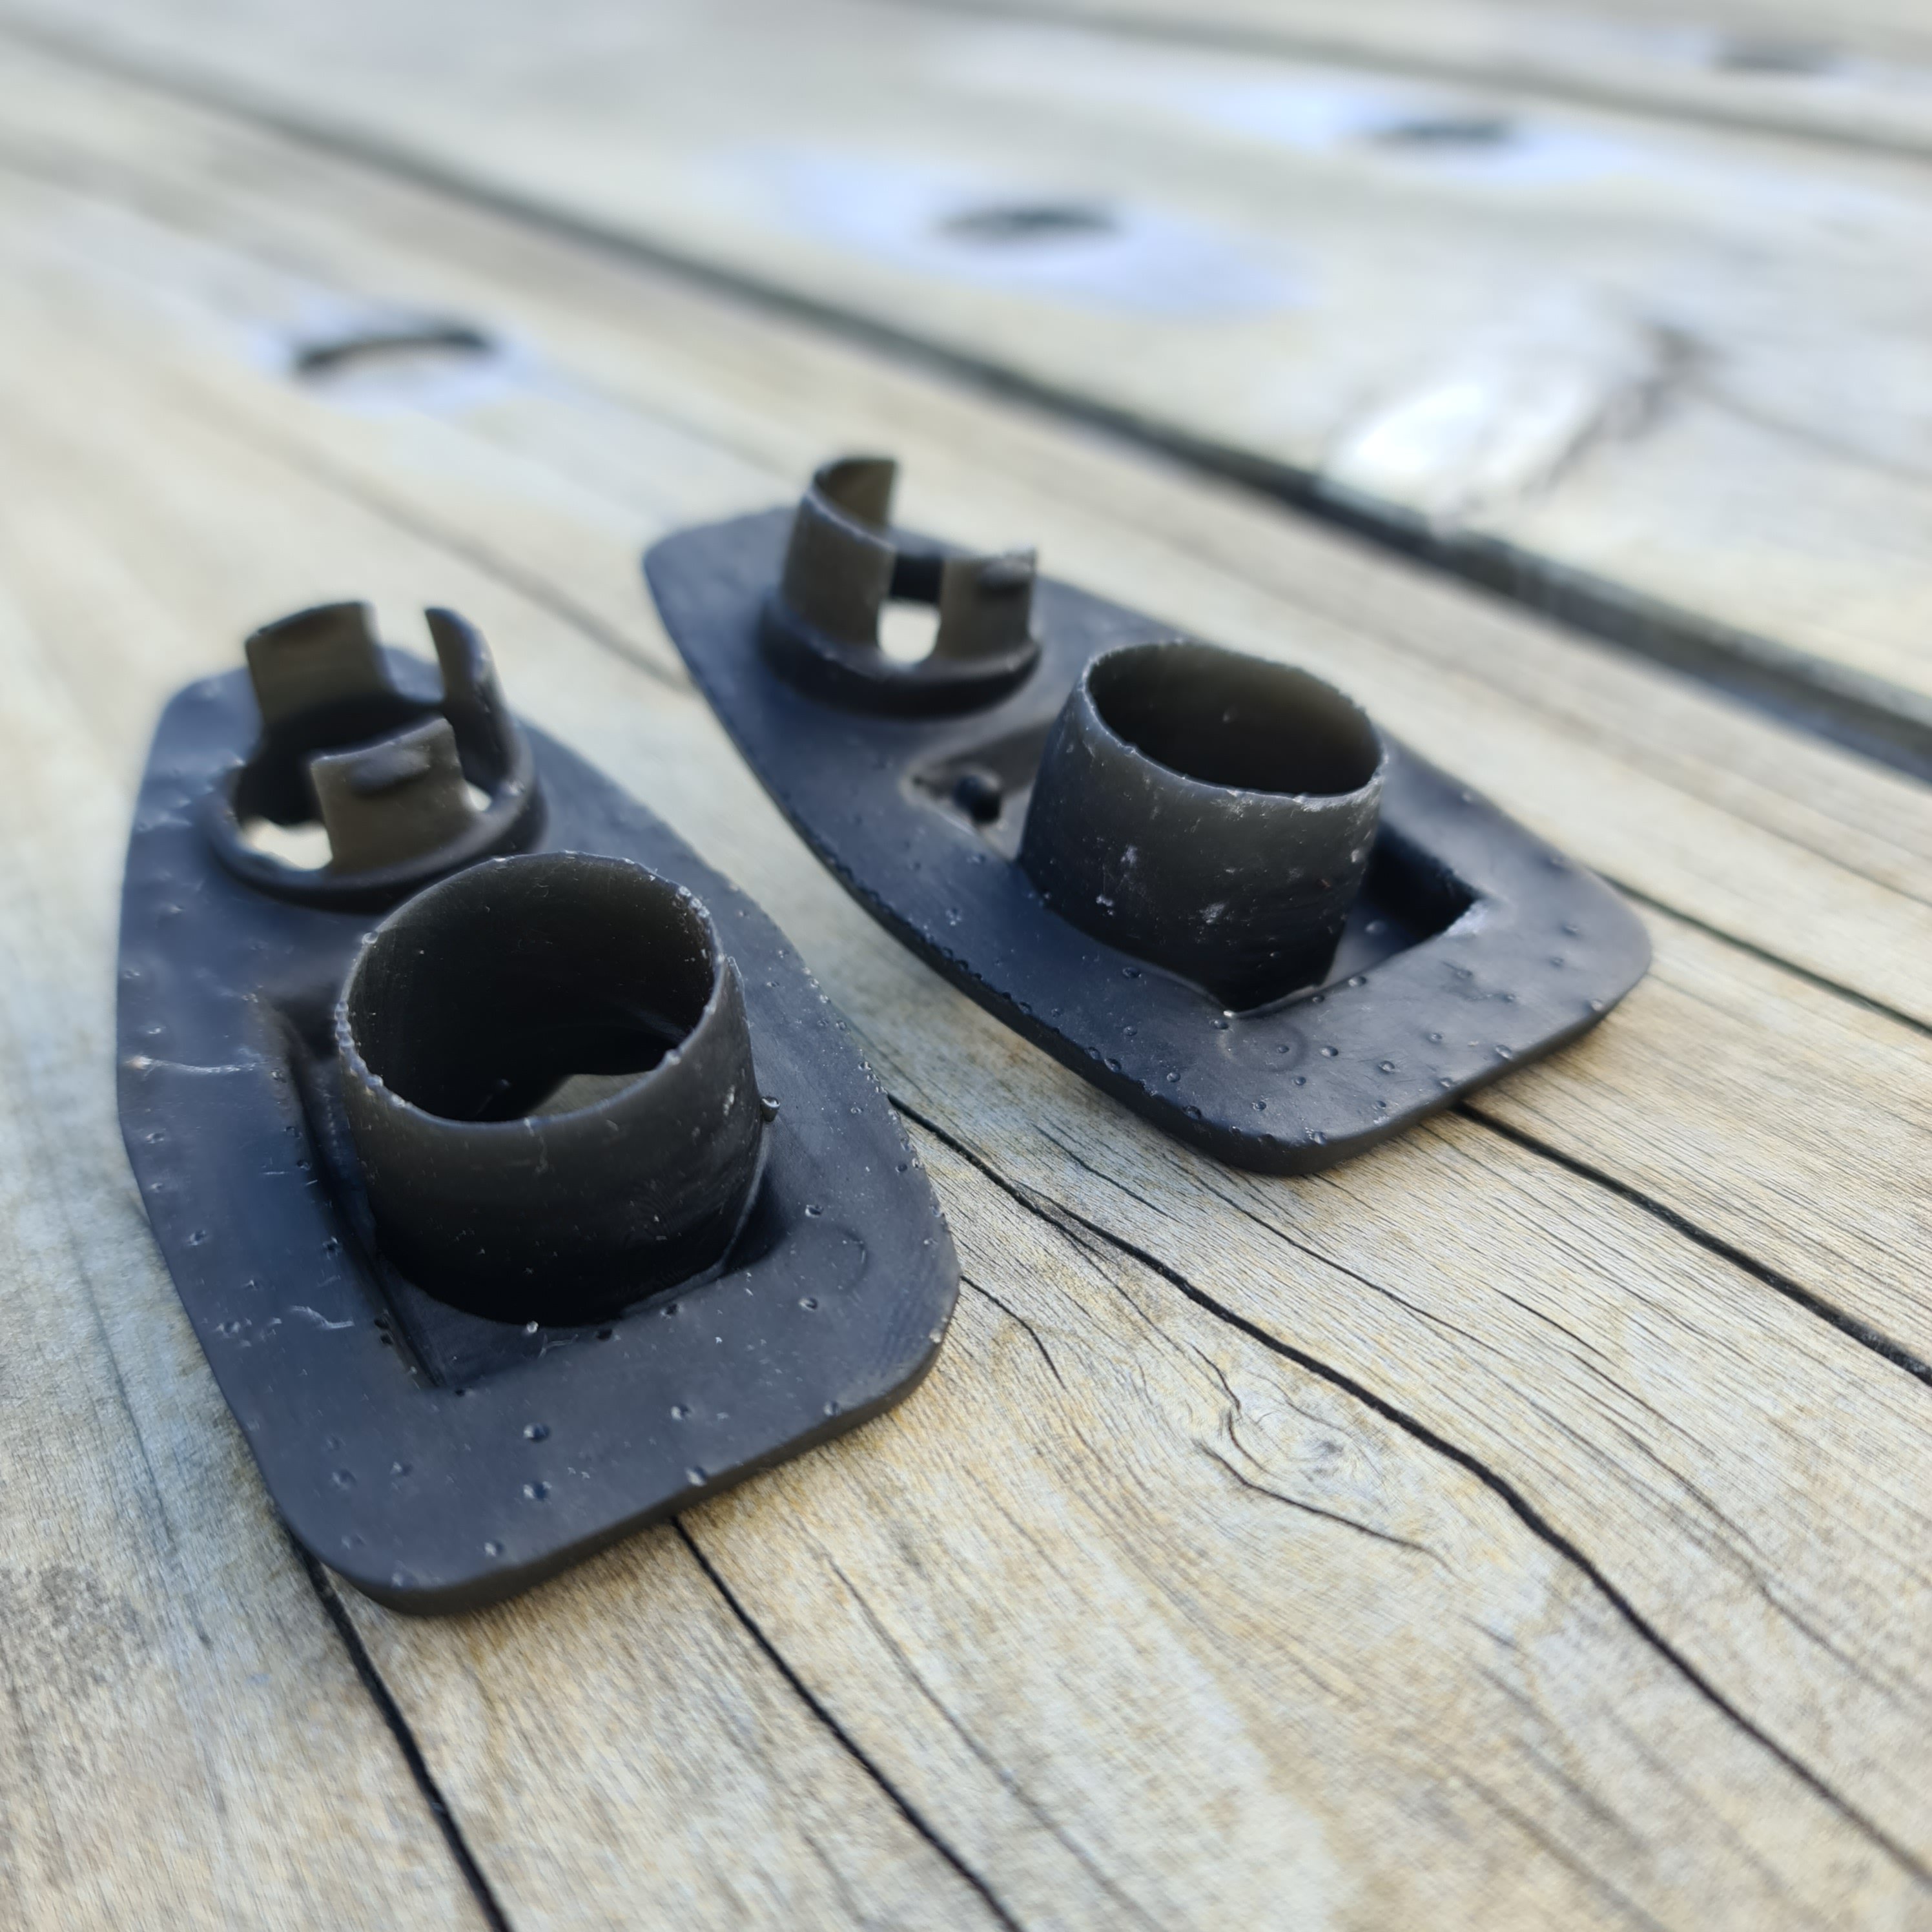
A week ago I sold some 19" 3p weds lips to a fella who runs a 3d modeling and printing business. I mentioned I was after some fender mirror gaskets for my gx61 as one had blown apart (common fault) I sent my good one up to him and he scanned it and flipped it and printed of this new pair for me in an ABS like resin. Pretty happy with the finish being smooth on all the seen surfaces and I'll just need to fine sand the dimples off the bottom
18 points
-
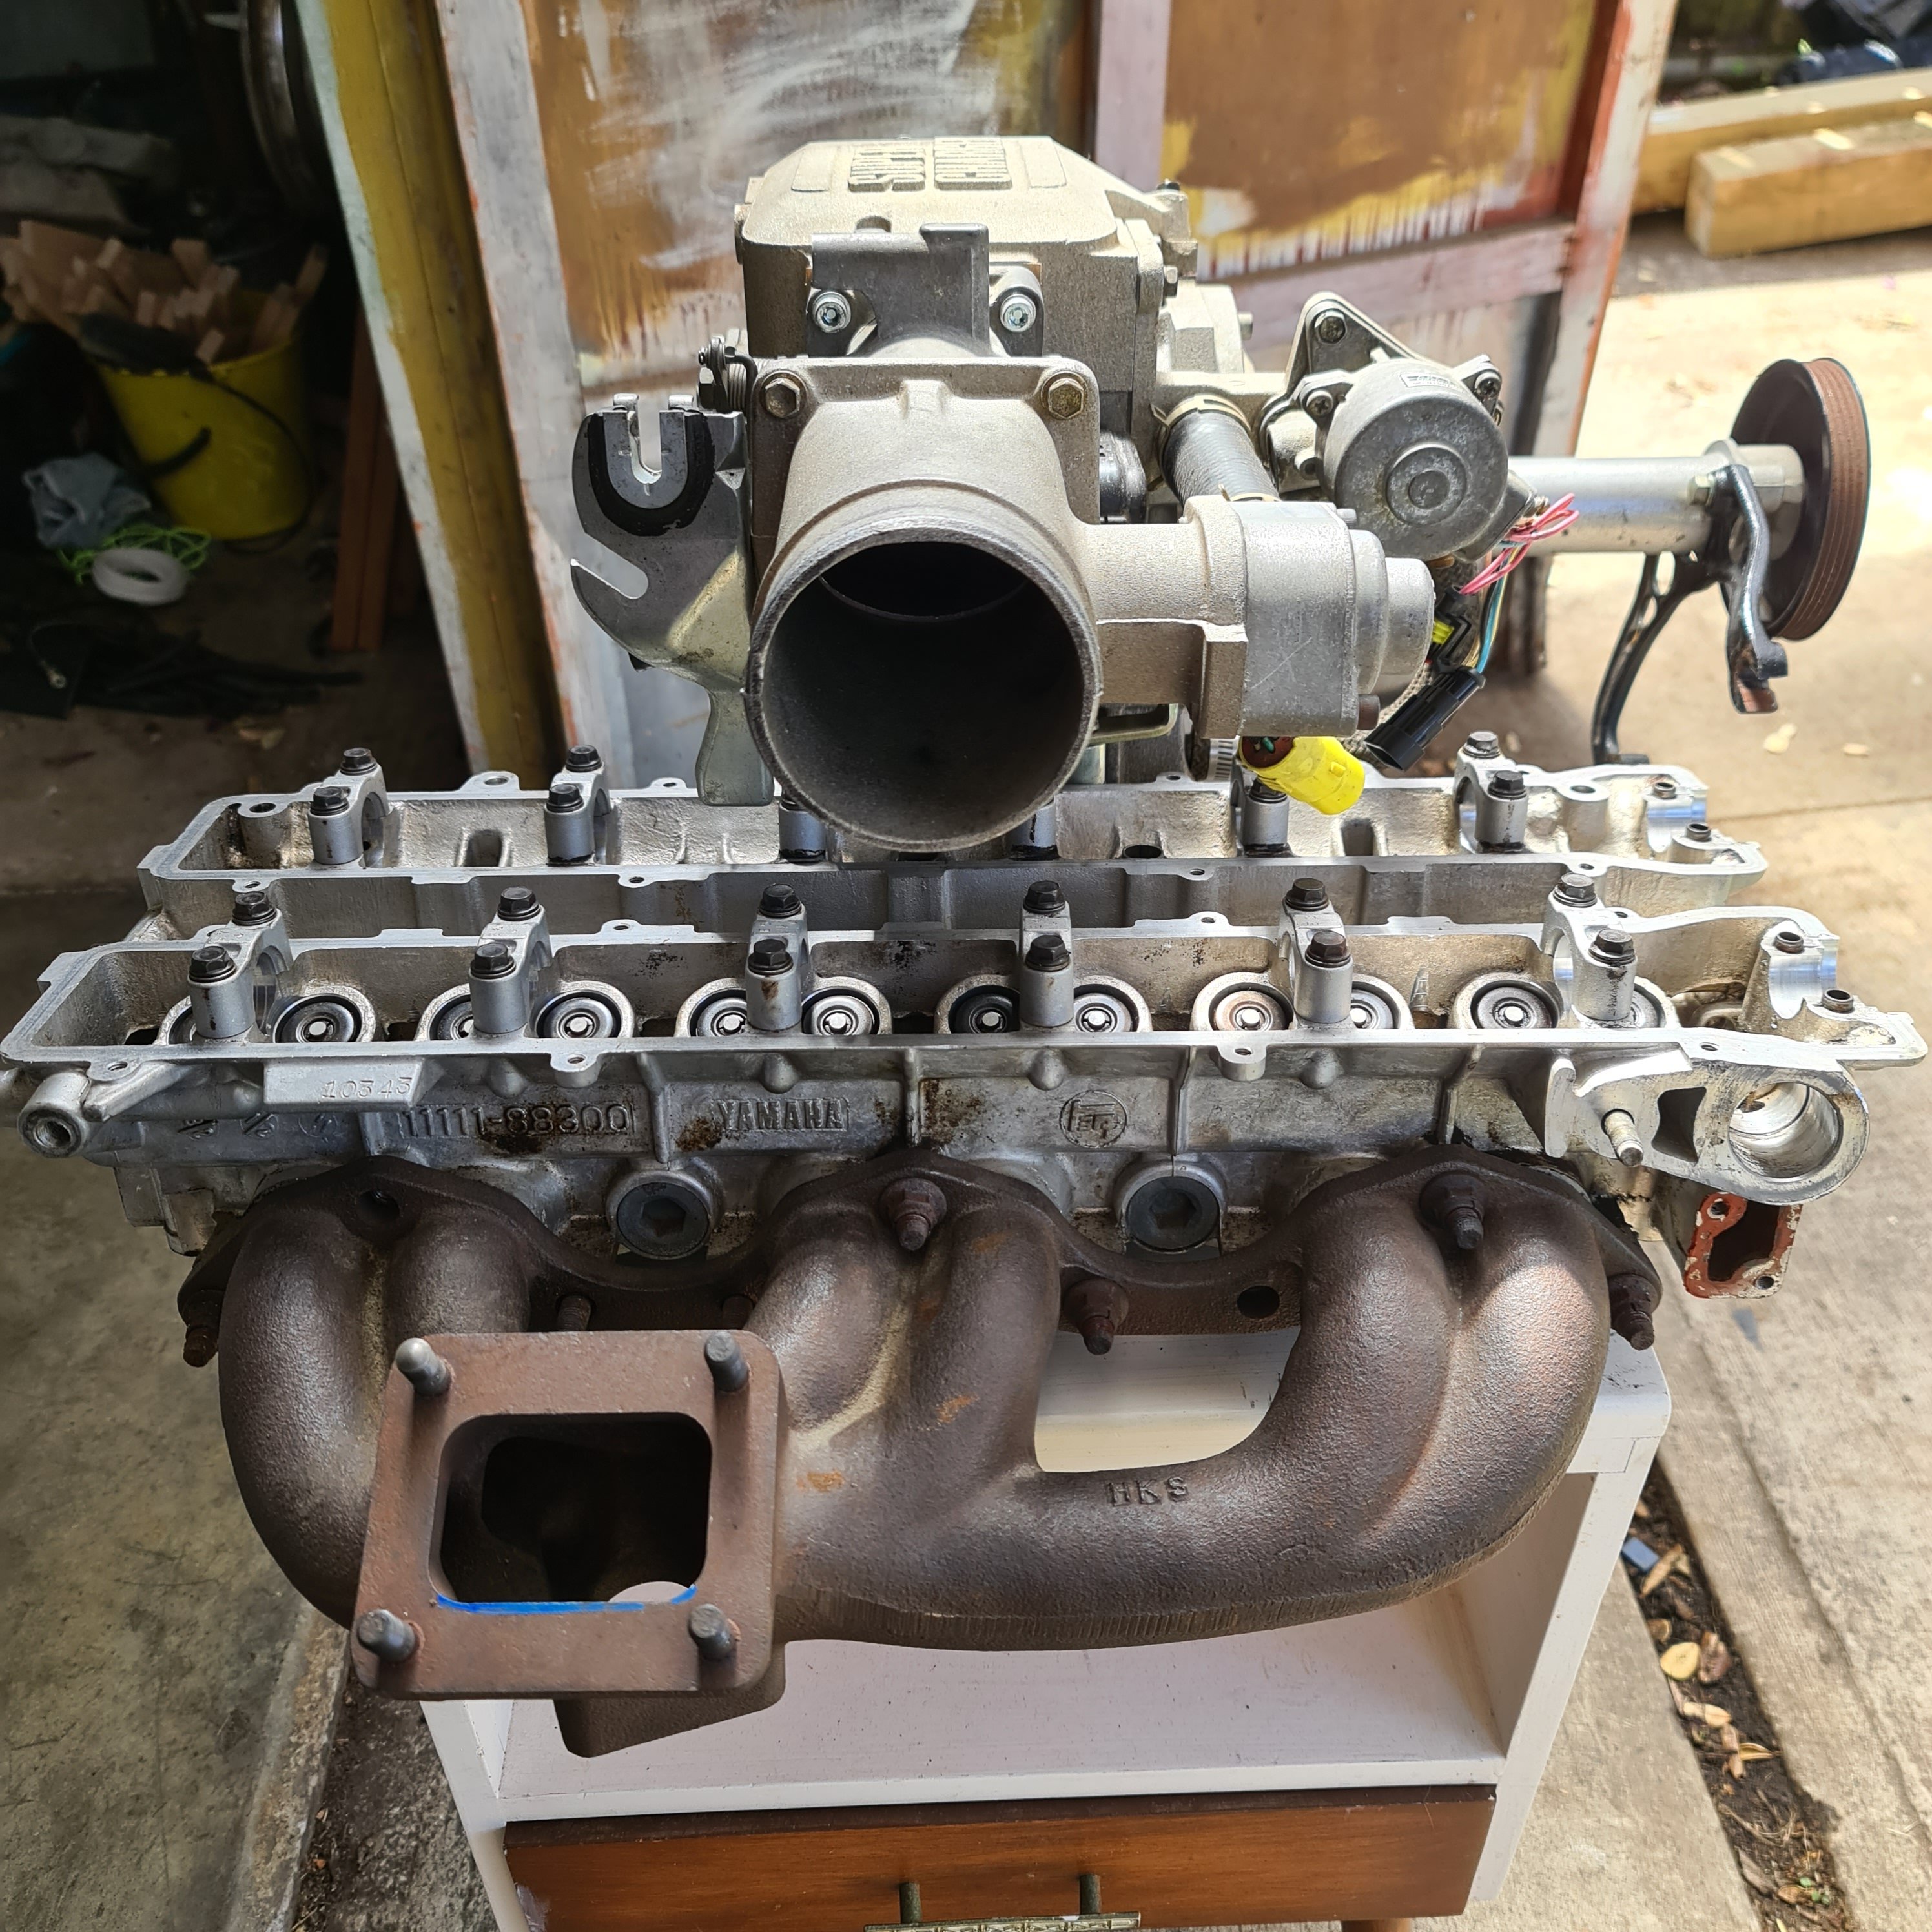
So this happened. ive purchased a toyota granvia with the 1kzte to shoehorn into the wags . il keep the box and fuel system also But to keep with the restomod theme, i plan to not make it look like a kz . Also will make custom intake/exhaust manifolds and intercooler. plan on keeping the a/c. I have an old aftermarket under dash unit
16 points
-
Got the small cores made and bonded in. Will try not to break them off when installing the main core.16 points
-
Runner mould done. Was being a bit too fast and didnt mix the sand as well as I should have. Really soft section at one end. This wouldnt be good because it would erode like crazing and send sand through the fill. Managed to cut it out and repair it. Hopefully it doesnt leak.16 points
-
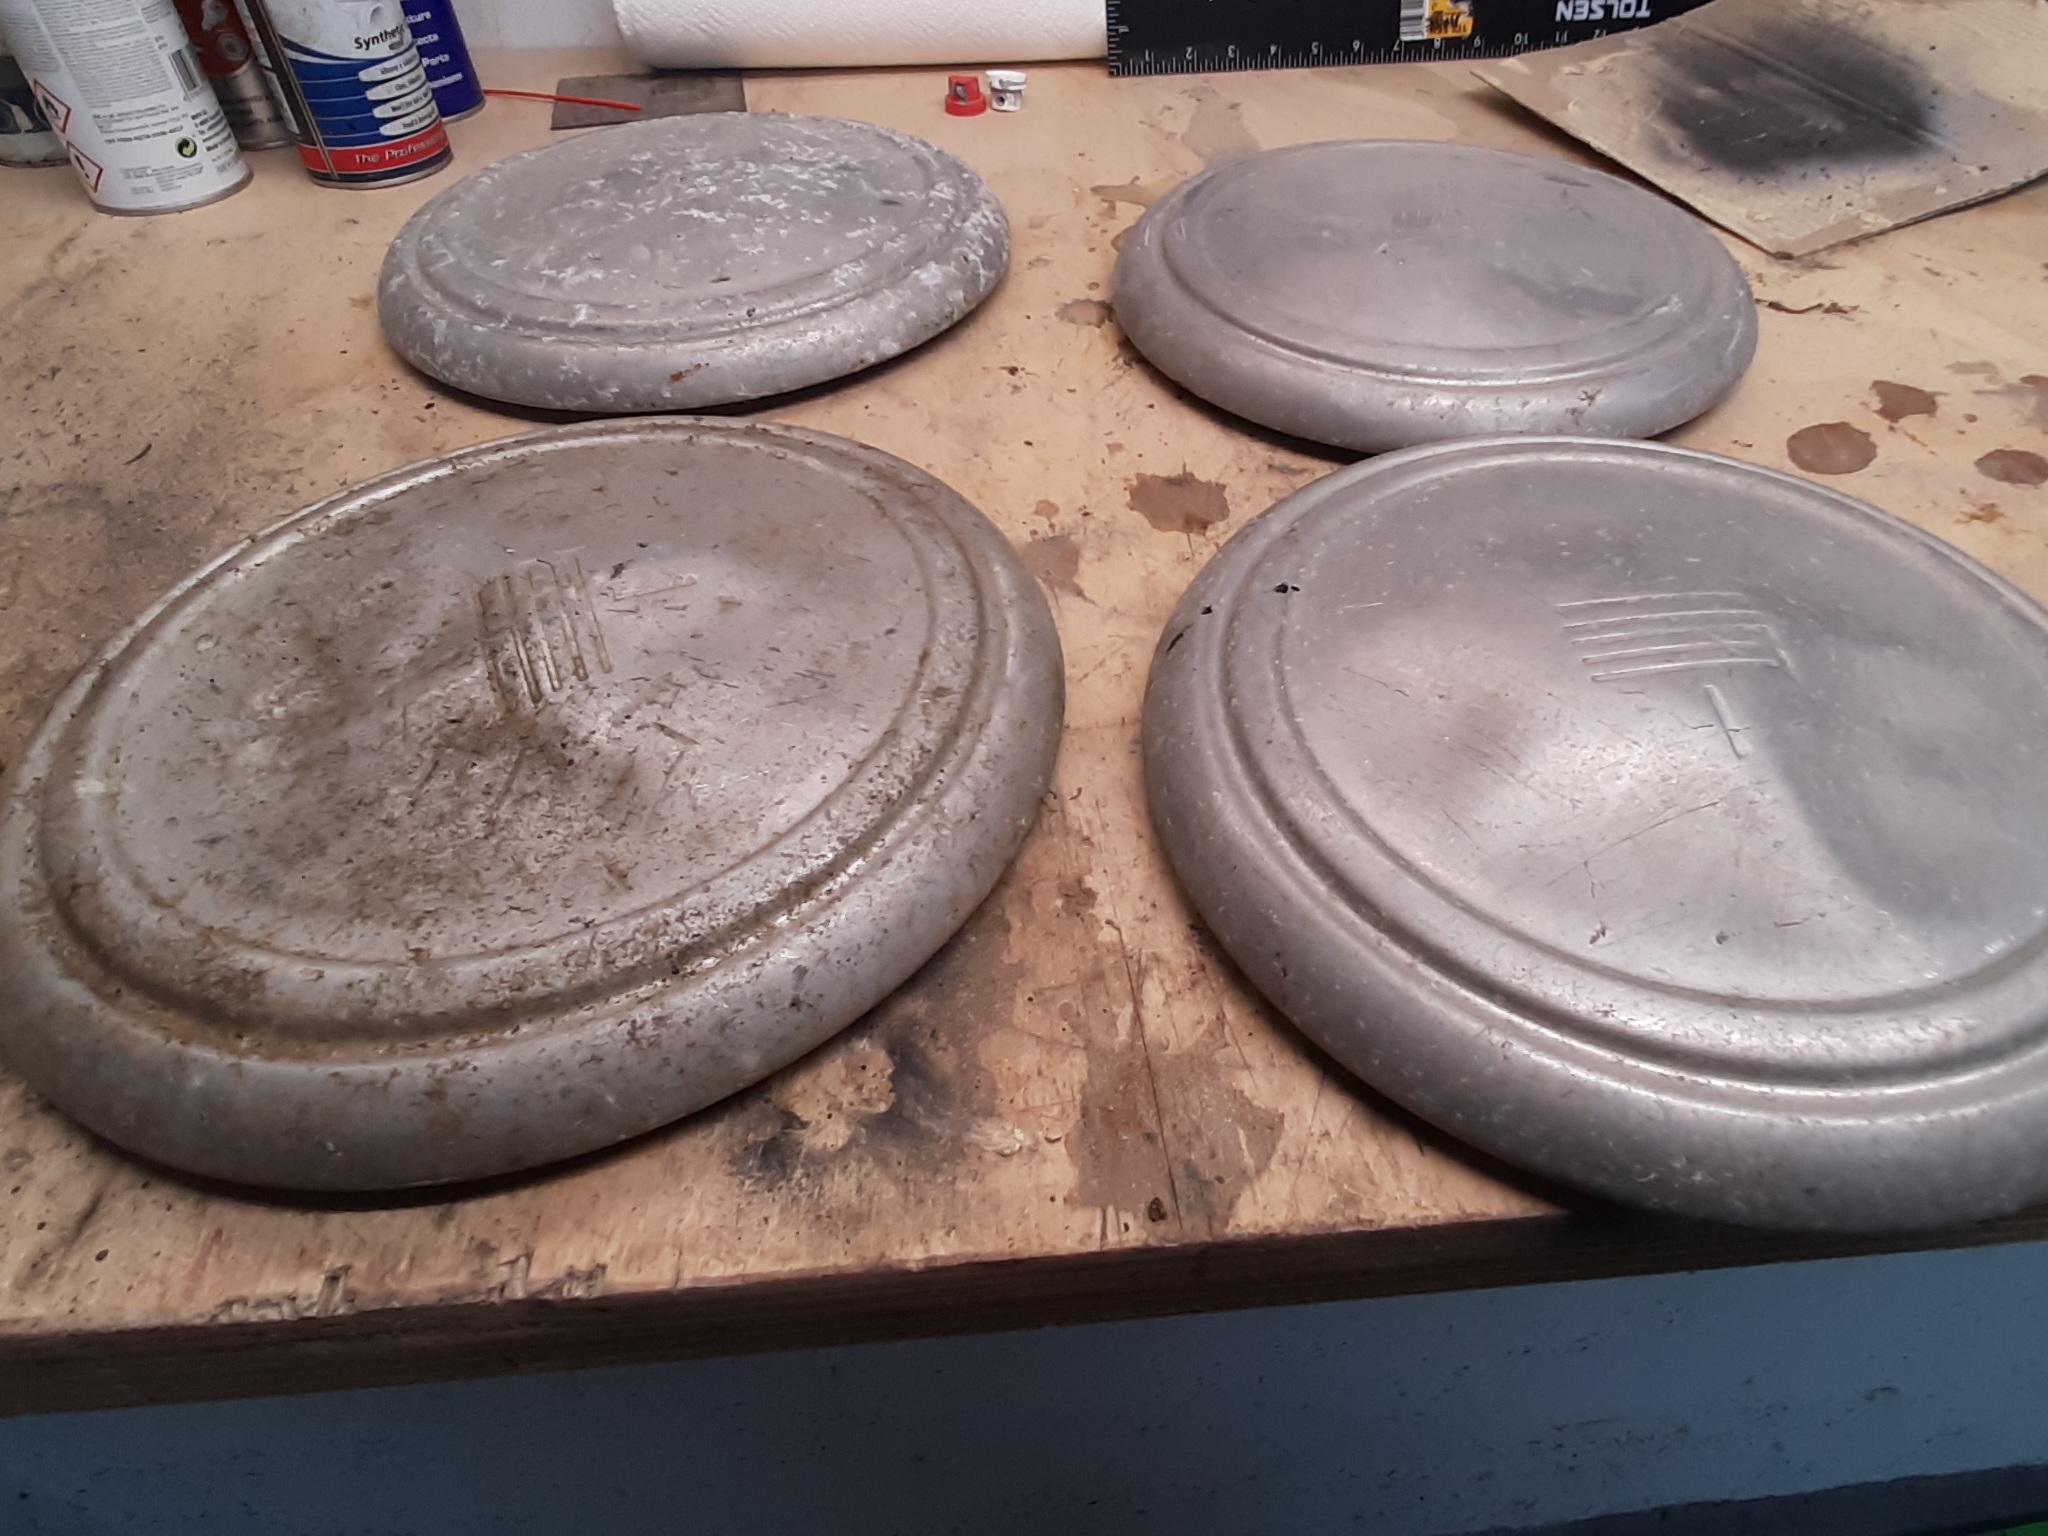
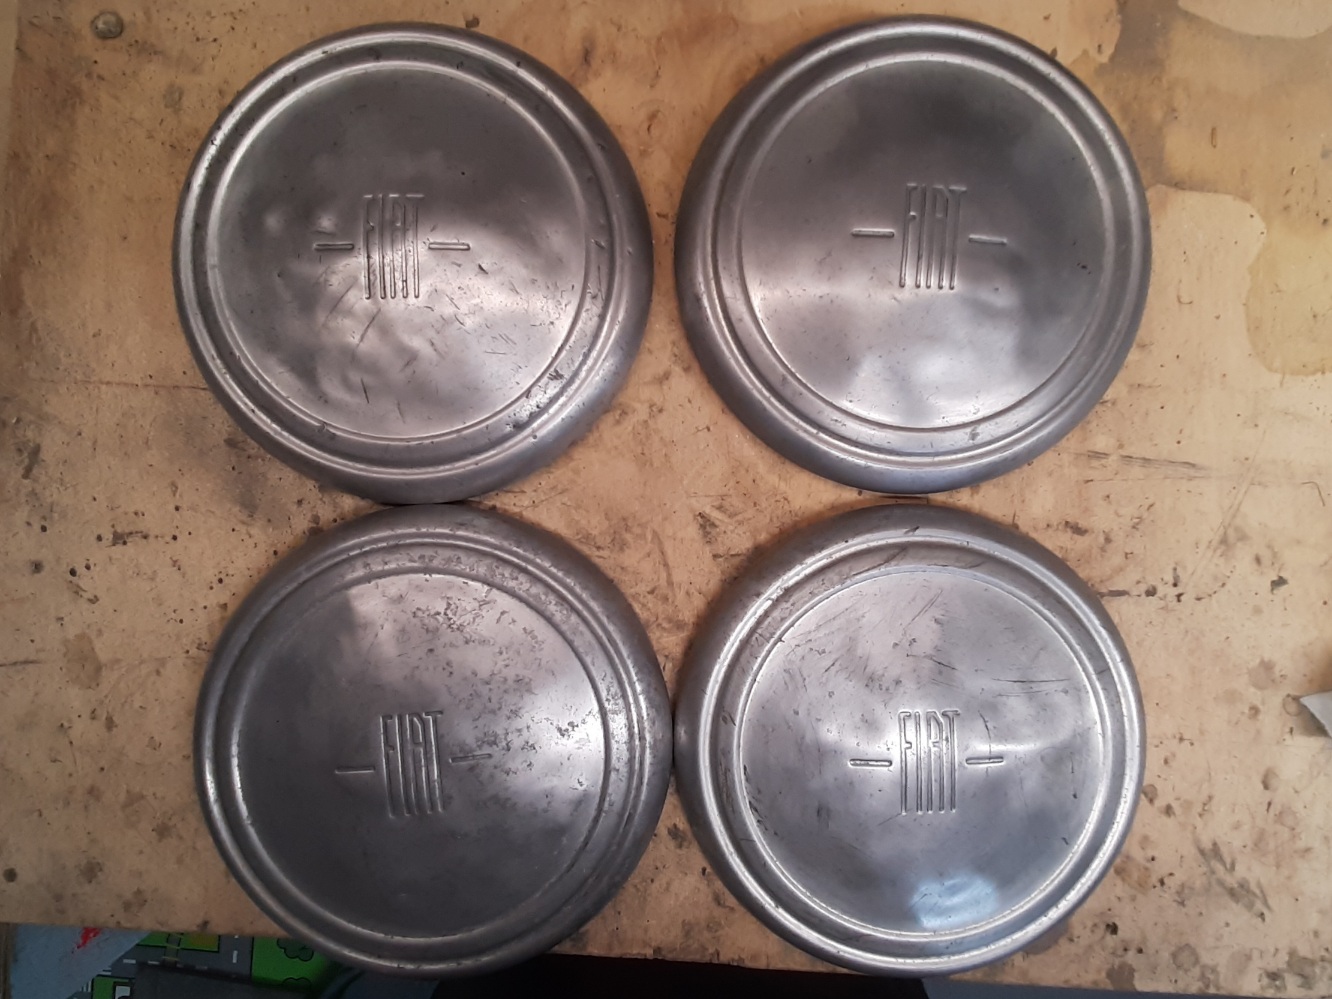
I also tidied the hub caps. Came with all 4, which i happy about as they are van specific too, but they had all been given a good kicking. Underside to show the ring that clips into another ring on the rim, and, A former owners address? D. S. Clark Kelso 5 RD Gore Again alloy, so came up much better, certainly good enough, after tapping the dents out and a whiz with the scotchbrite and wore wool. Ill give the rims a fresh waft of black and pop these on tomorrow.
16 points
-
15 points
-
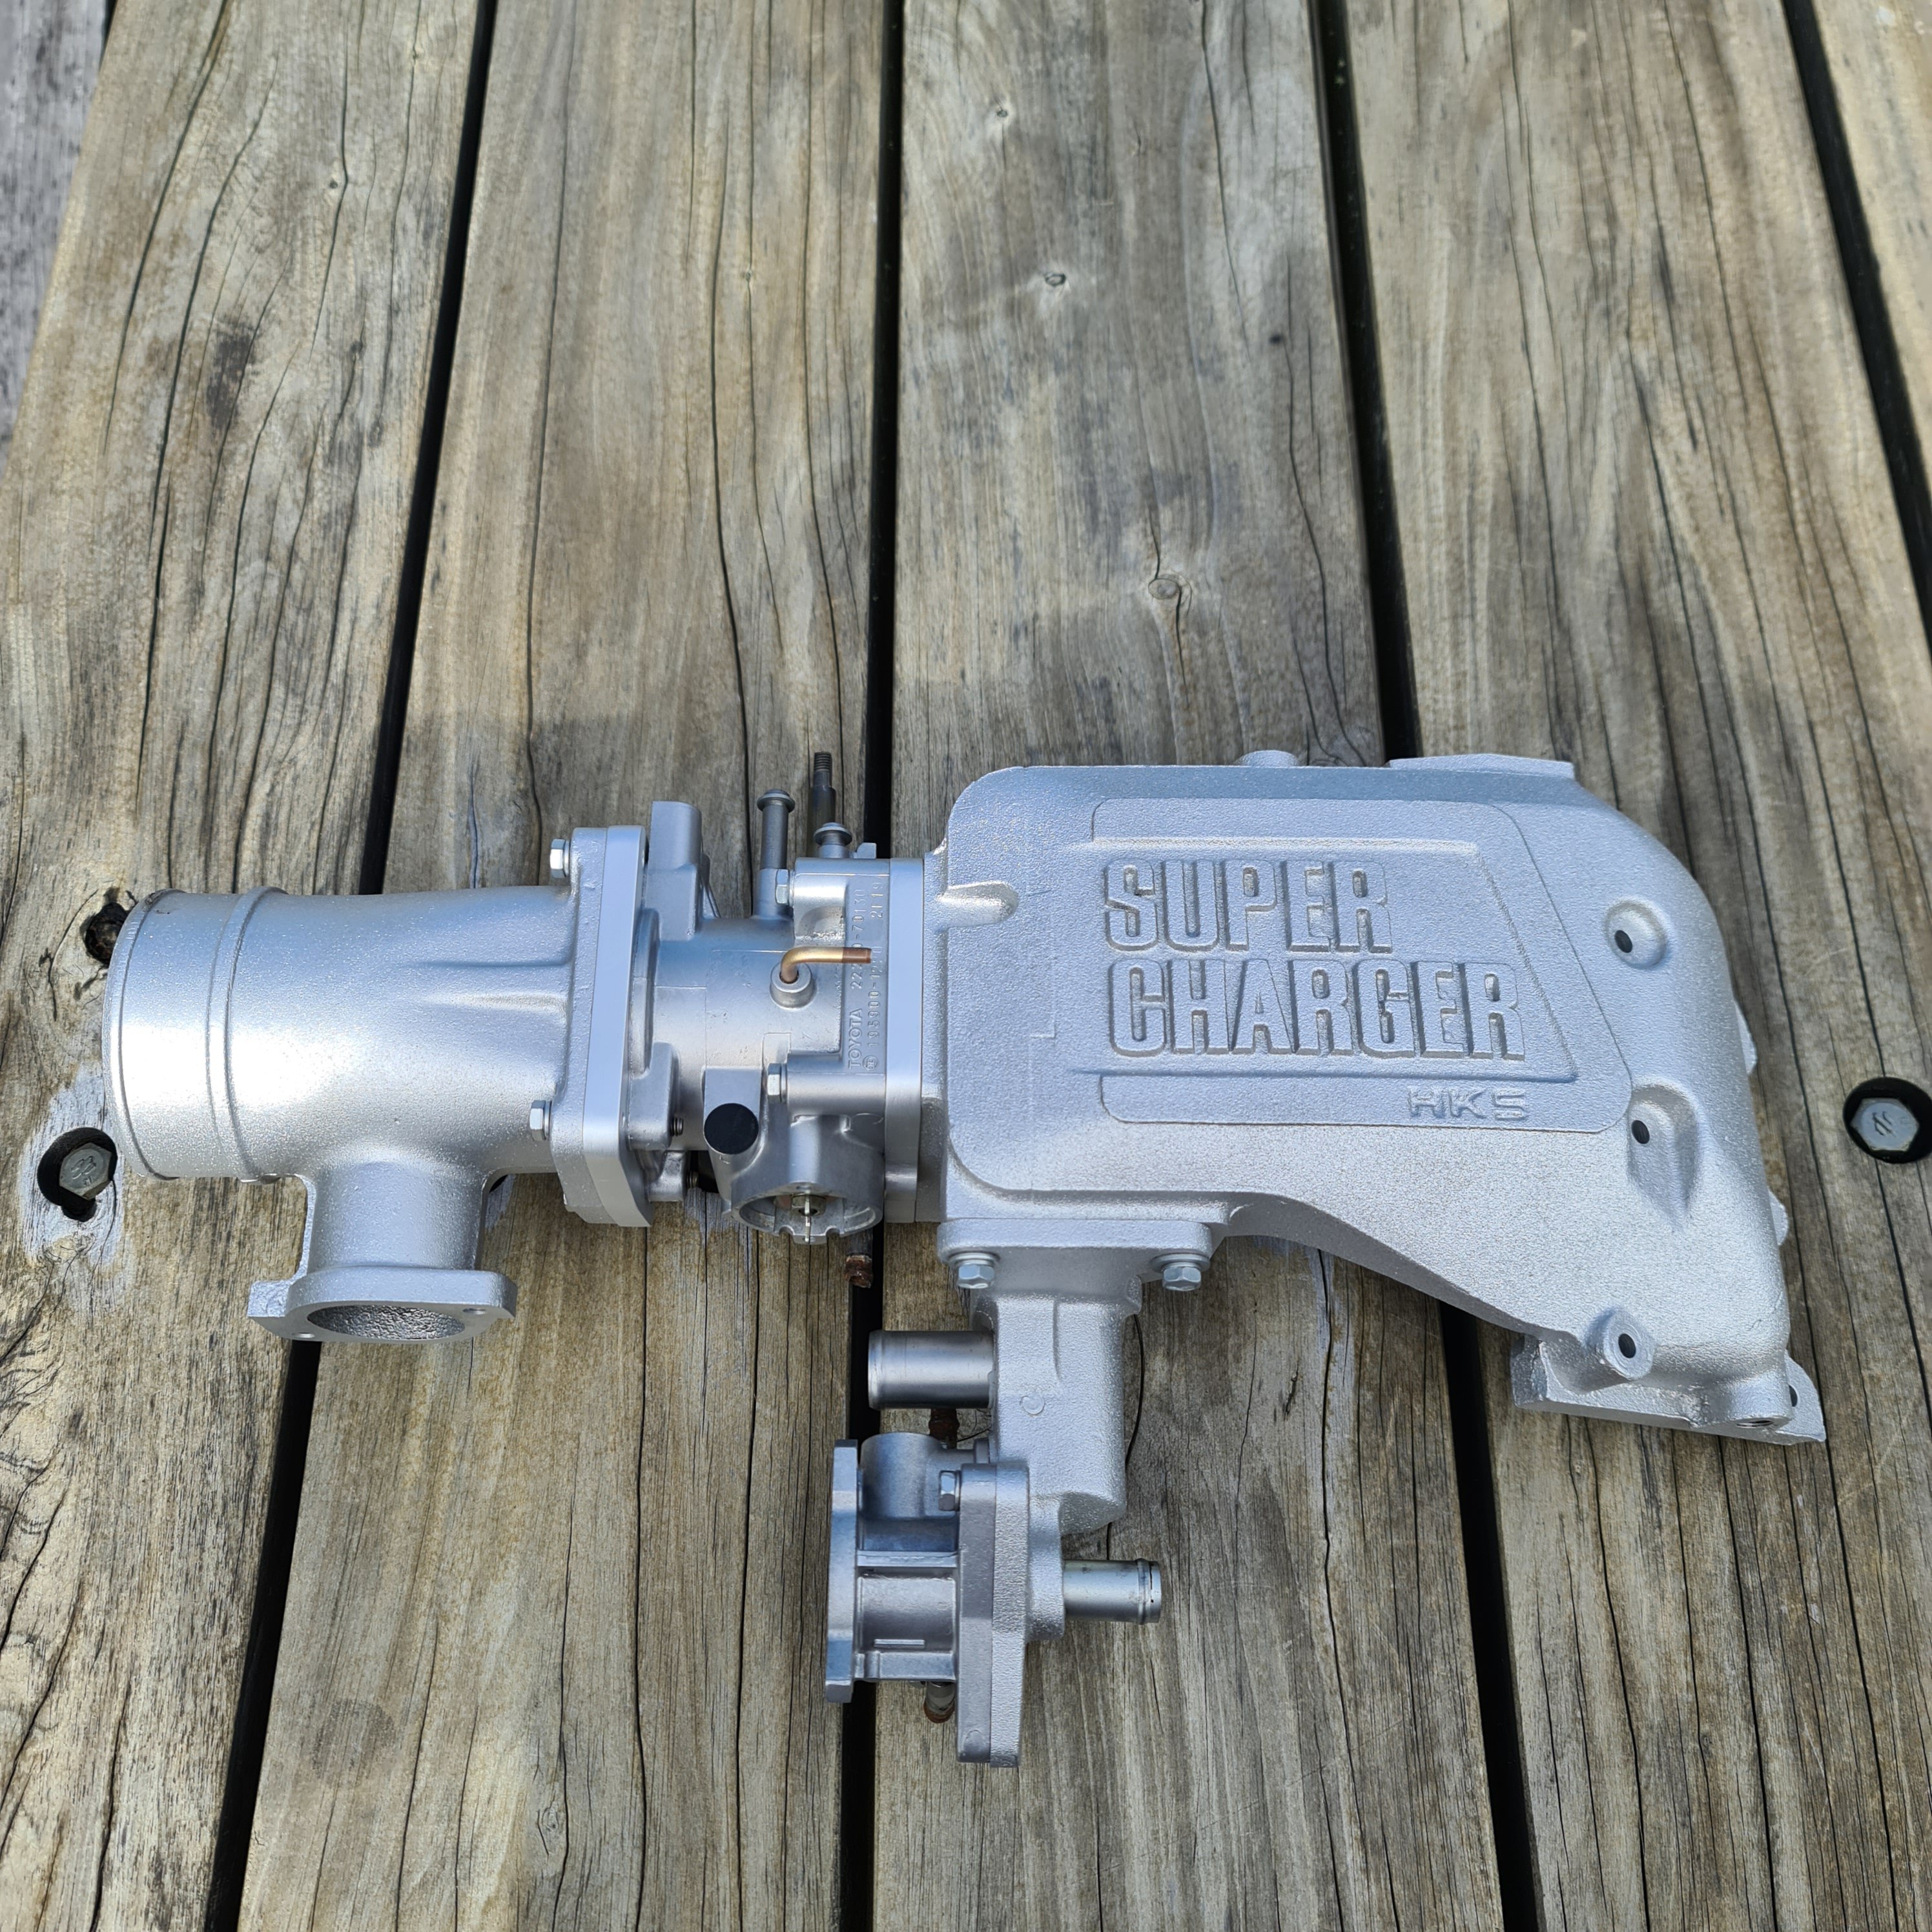
Pretty stoked with how that's come up I could see vapour blasting becoming quite addictive if rebuilding an old engine, the finish is like new. Spent yesterday making up new gaskets to go between both adapters and swapping over the iscv and cold start injector and vacuum ports
13 points
-
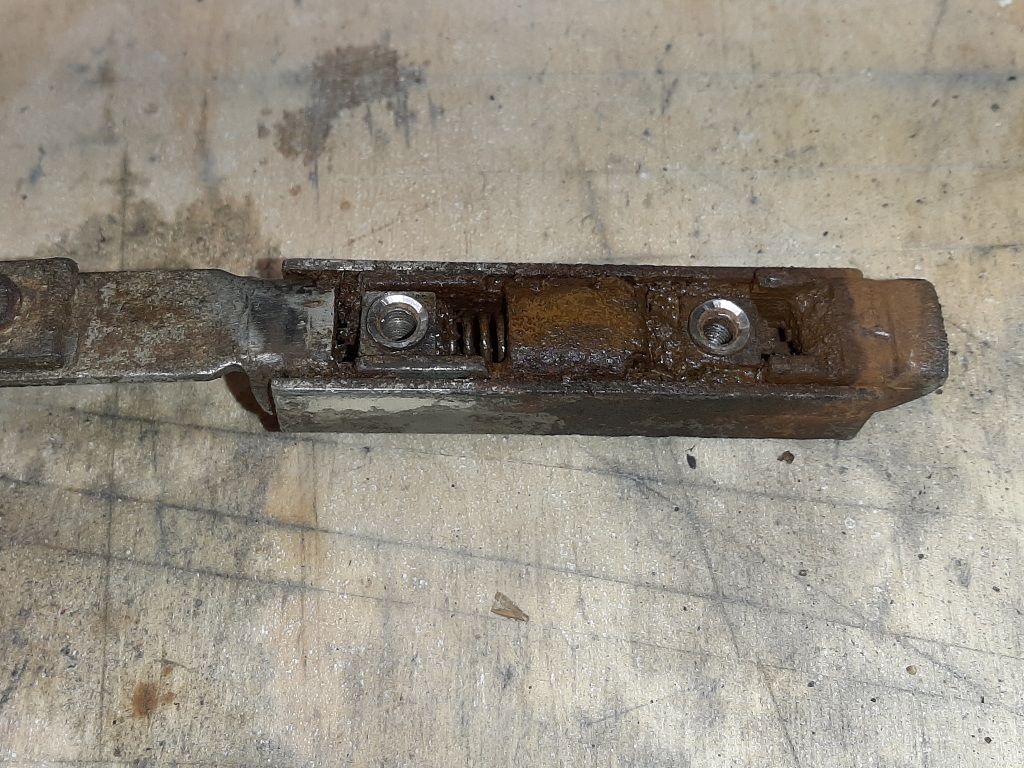
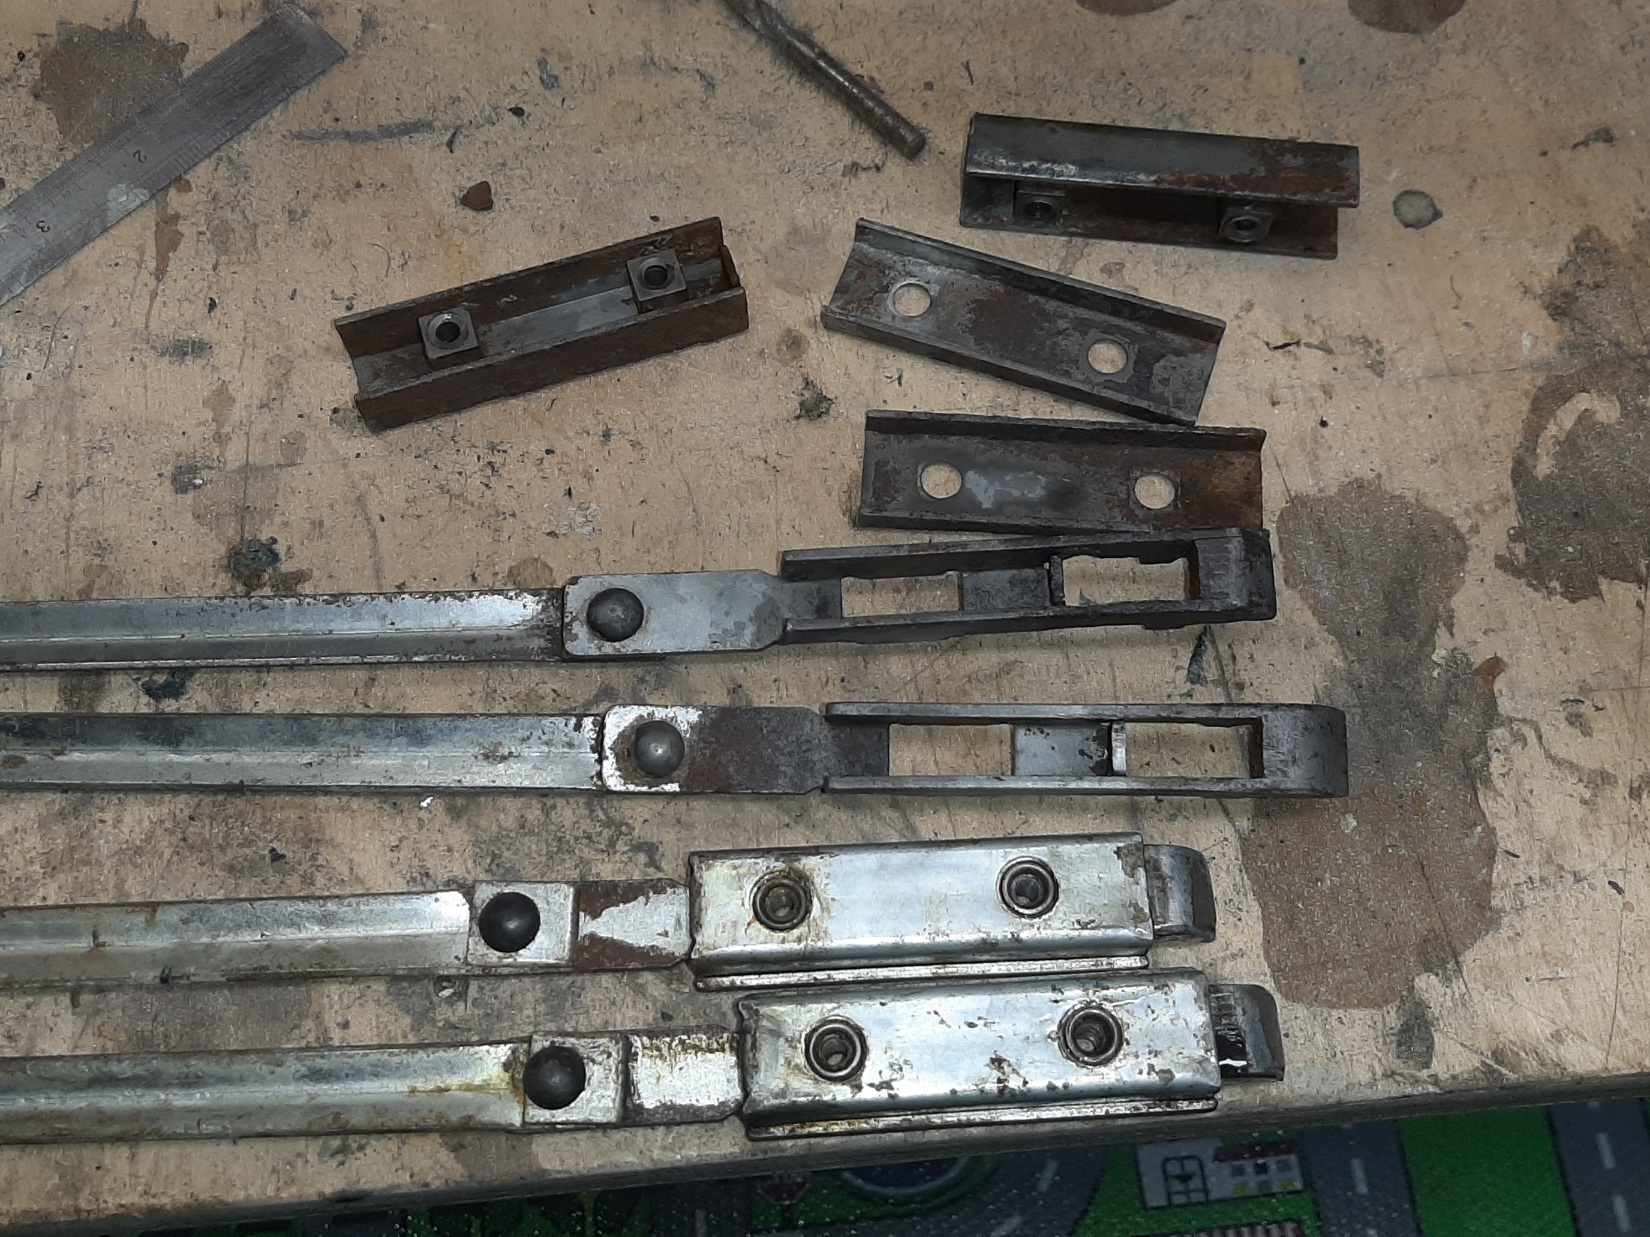
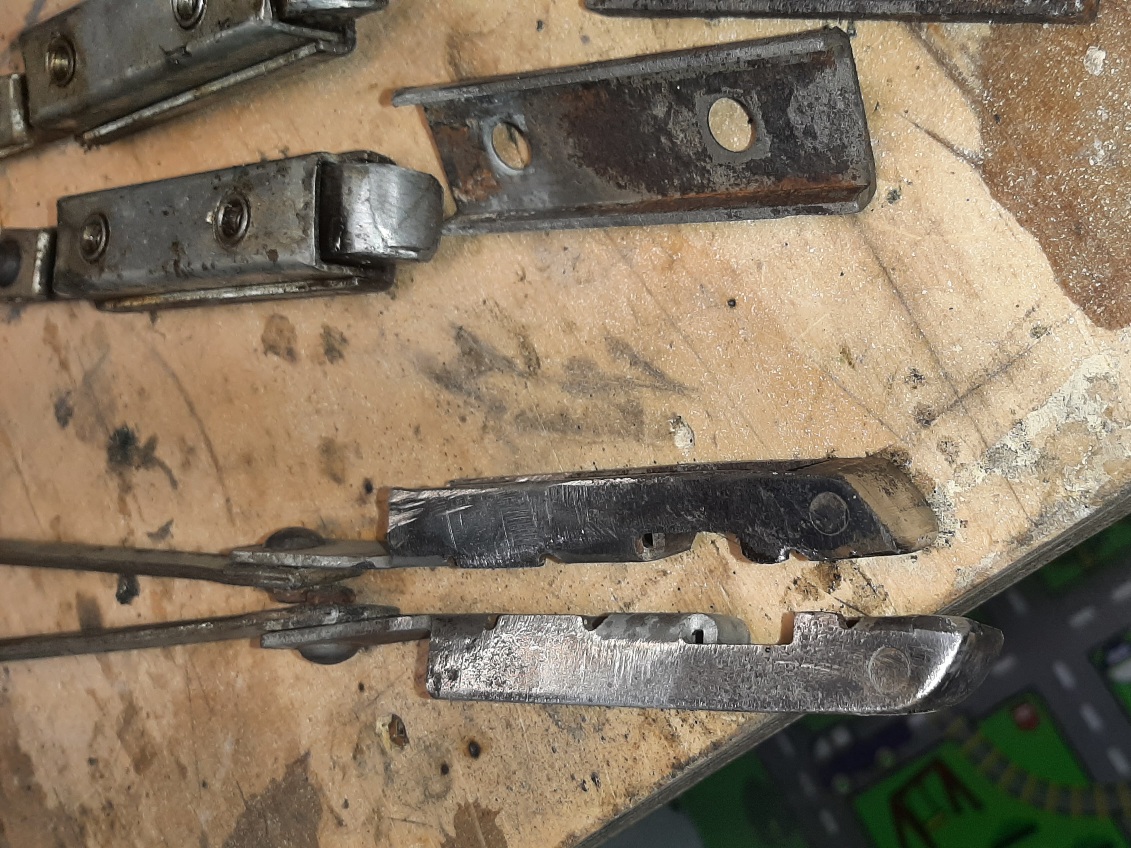
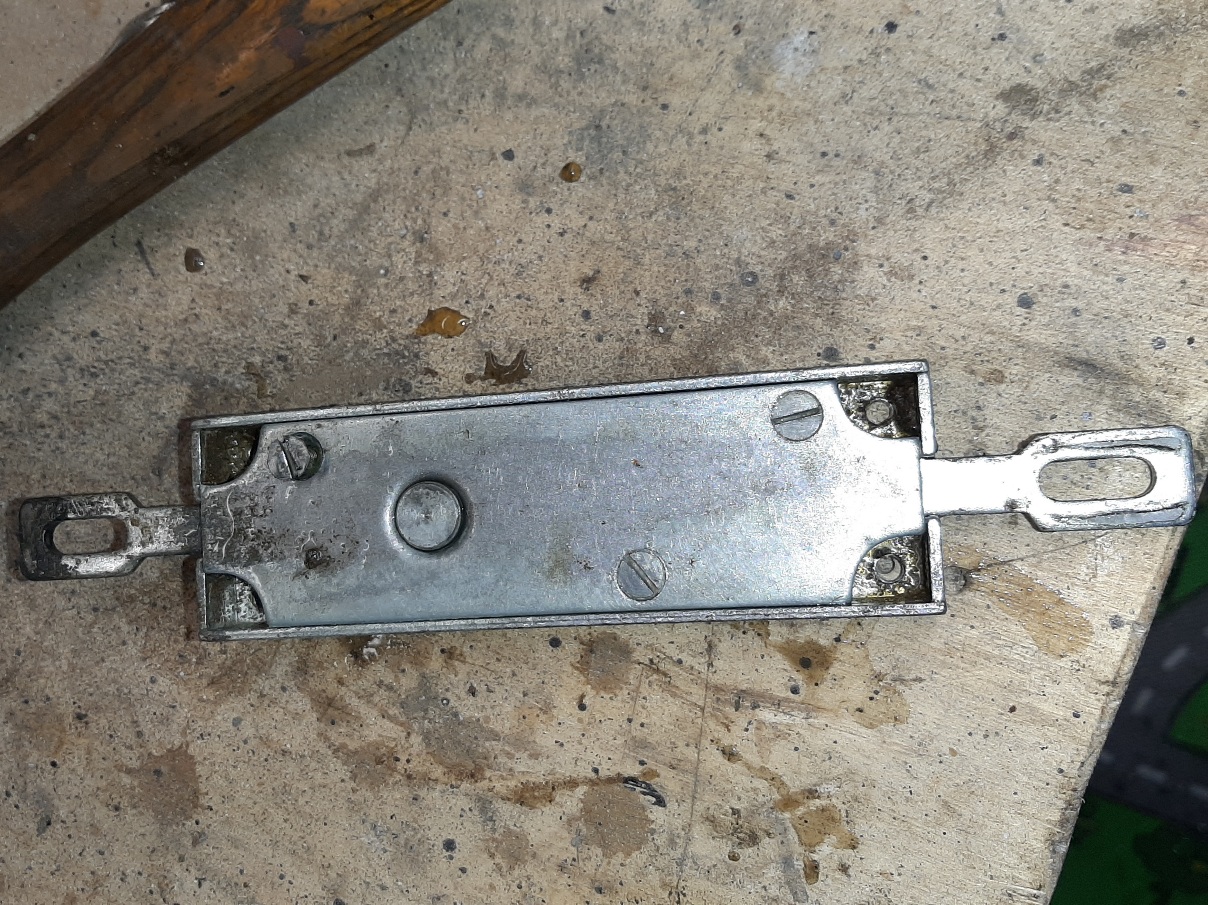
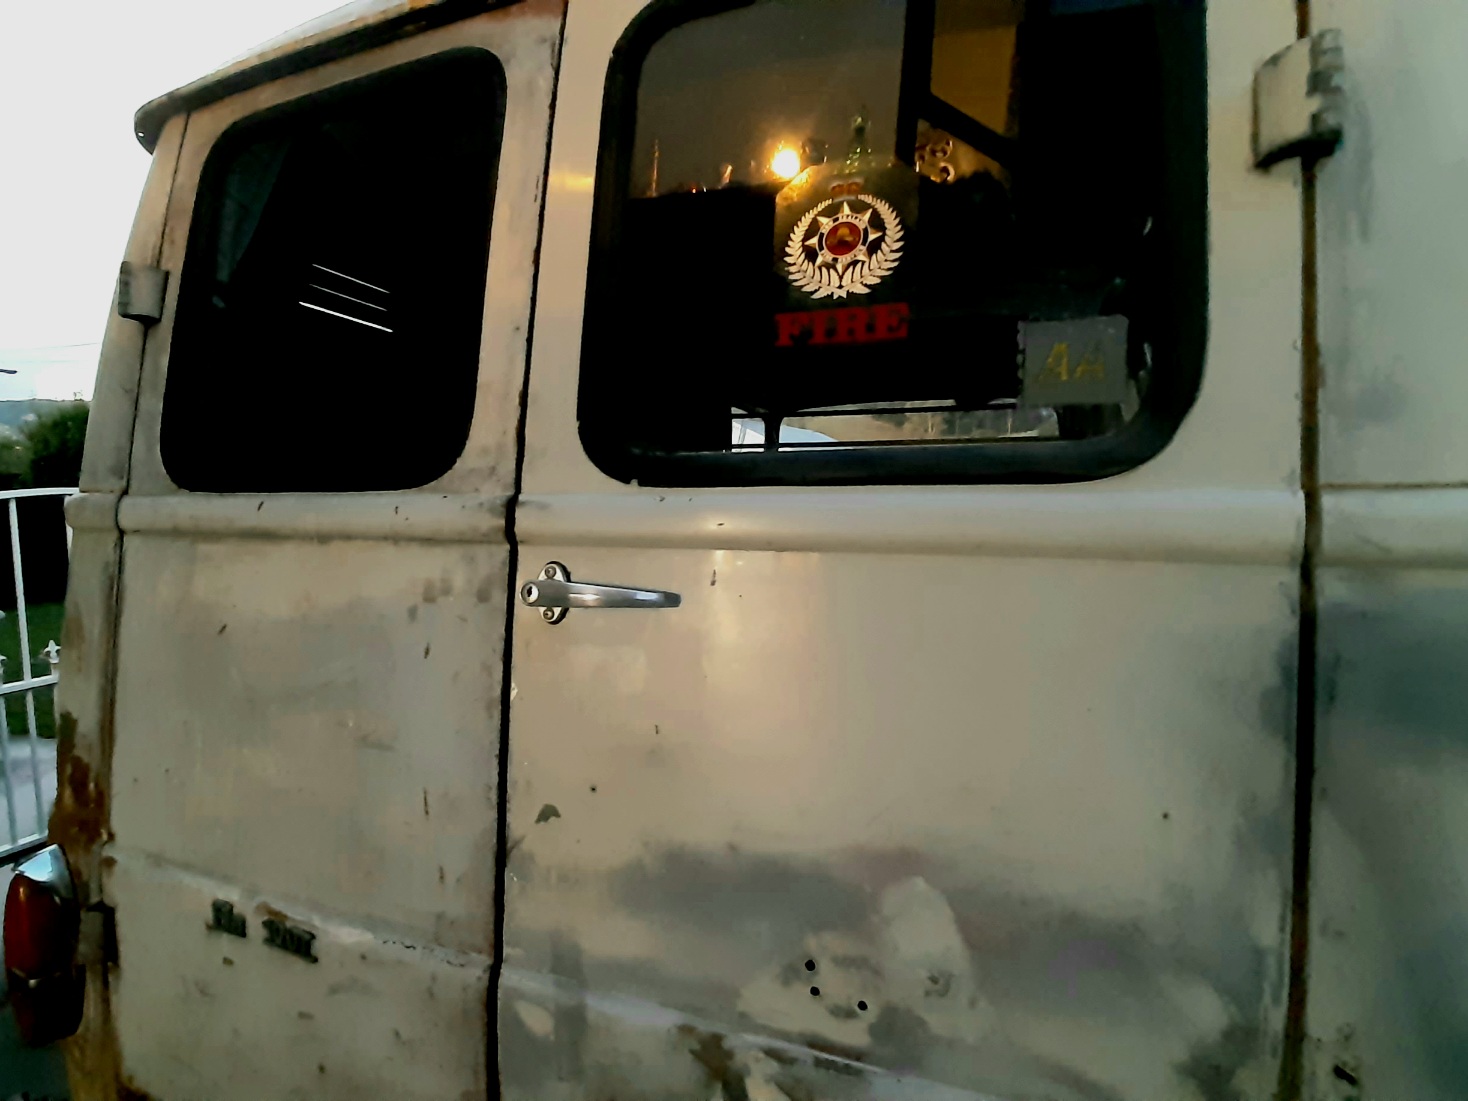
None of the door handles really worked so the doors dont really close properly. Lack of use had made them stiff and sticky. I was most worried about the rear door handles and mechanism because thats stuff is van specific, and well, good luck finding another one, and it was jammed. Tap tap with a hammer didnt do anything much so drastic destructive action needed! That'll do it! Both bottom latches were full of gunk, that could get in but not out. Cleaned up ok, very different life compared to the top ones which look like new! a bit more weld to fill in the wear areas, fill with grease, assemble and weld closed again. oh, and dont forget to put in the spring, silly! The latch mechanism tidied up well too, a degrease, soak in evavorust and reassemble with new grease All the exterior shiny bits, of which there aren't many, are all lovely cast alloy. disassembled as i far as i could without keys and withscotch brites and steel wool came up nice and satiny. Should be able to open and close the doors easily for the first time in many years tomorrow
12 points
-
Another great days boating with @johnnyfive and @keltik. We did the Waimana and upper Whakatane river, and had a go at this little stream, Was surprised I made it that far tbh. Did a little bit of damage to the boat, but nothing major. Keltiks vid of the incident, It was quite a ride. All in all a good hoon, would hoon again, A++.8 points
-
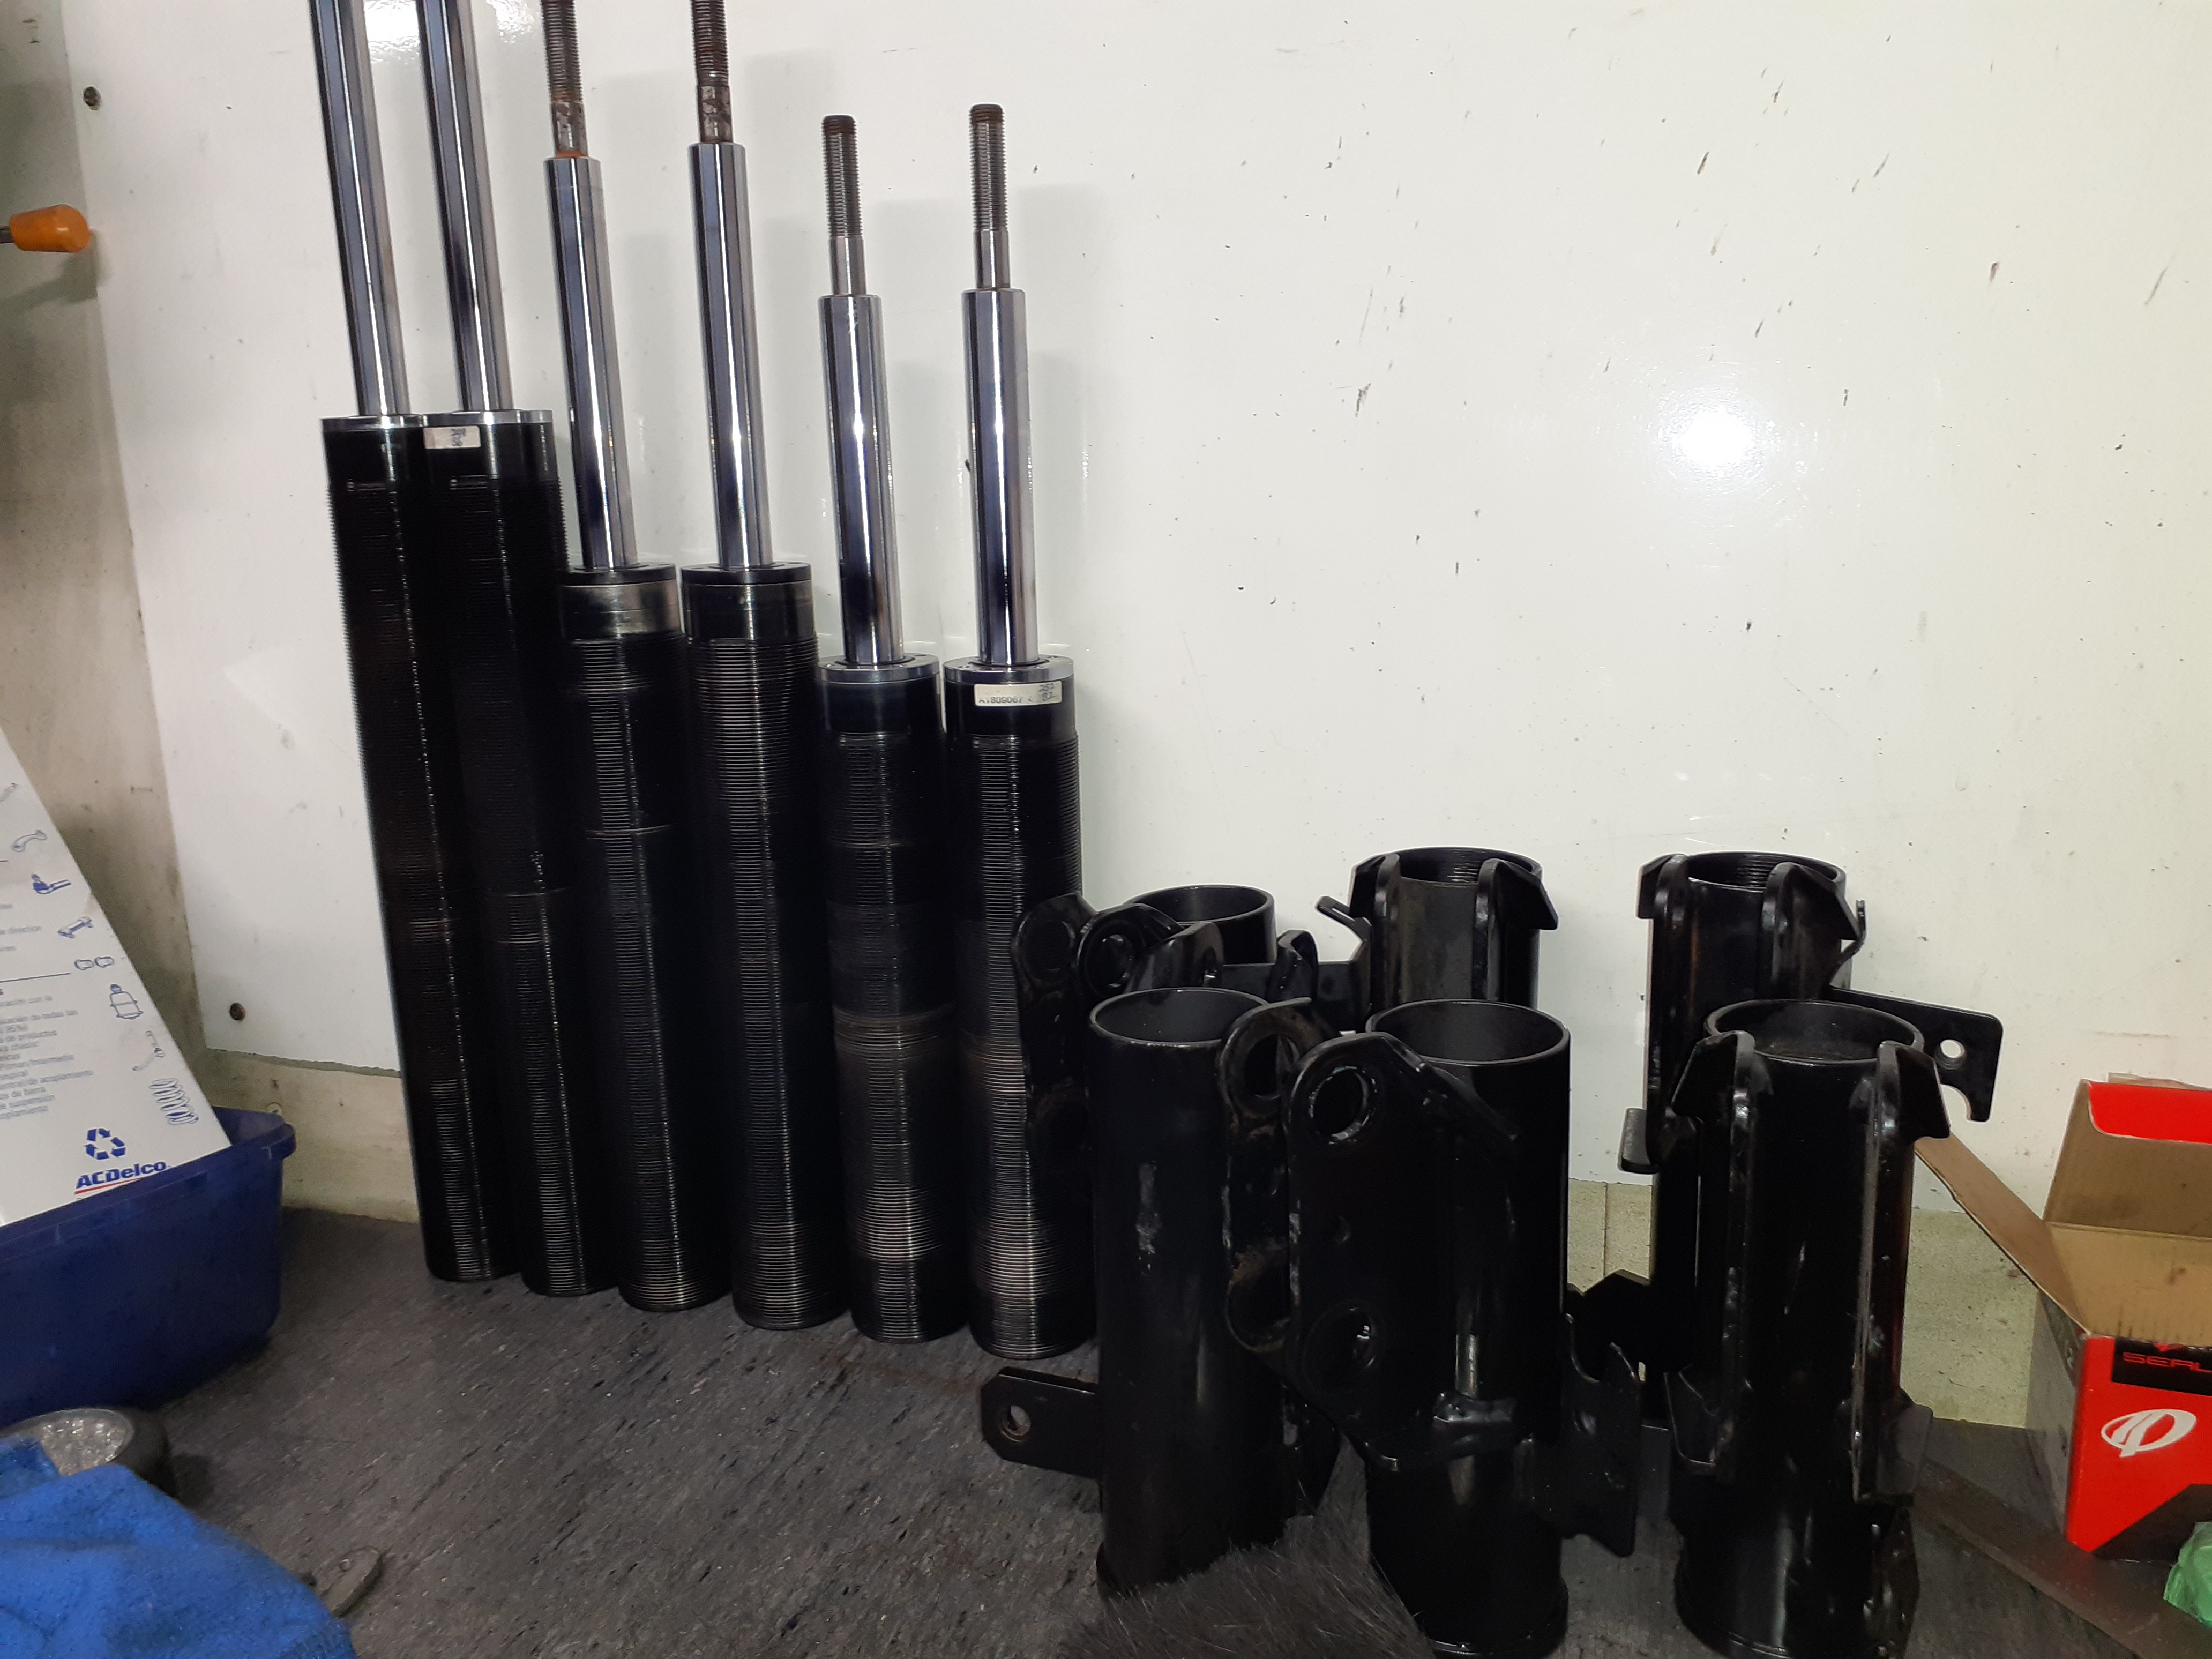
And rummaged in my box of coilovers , I've got a plan to make some rear shocks for it The biggest problem with the usual axle flip (the diff housing gets put on top of the spring instead of underneath) is shock angles- they are on a big angle factory, then when it gets lowered 6 inches the shocks end up on stupid angles and dont do anything so the big lump of a diff flops around all over the place The best driving slammed ones, have the shock brackets moved to straighten them up, and decent shocks so they actually have some hope of controlling all the unsprung weight I've got 3 pairs of adjustable damping shocks with the same threads so I'll figure out the best length and make some top and bottom mounts
8 points
-
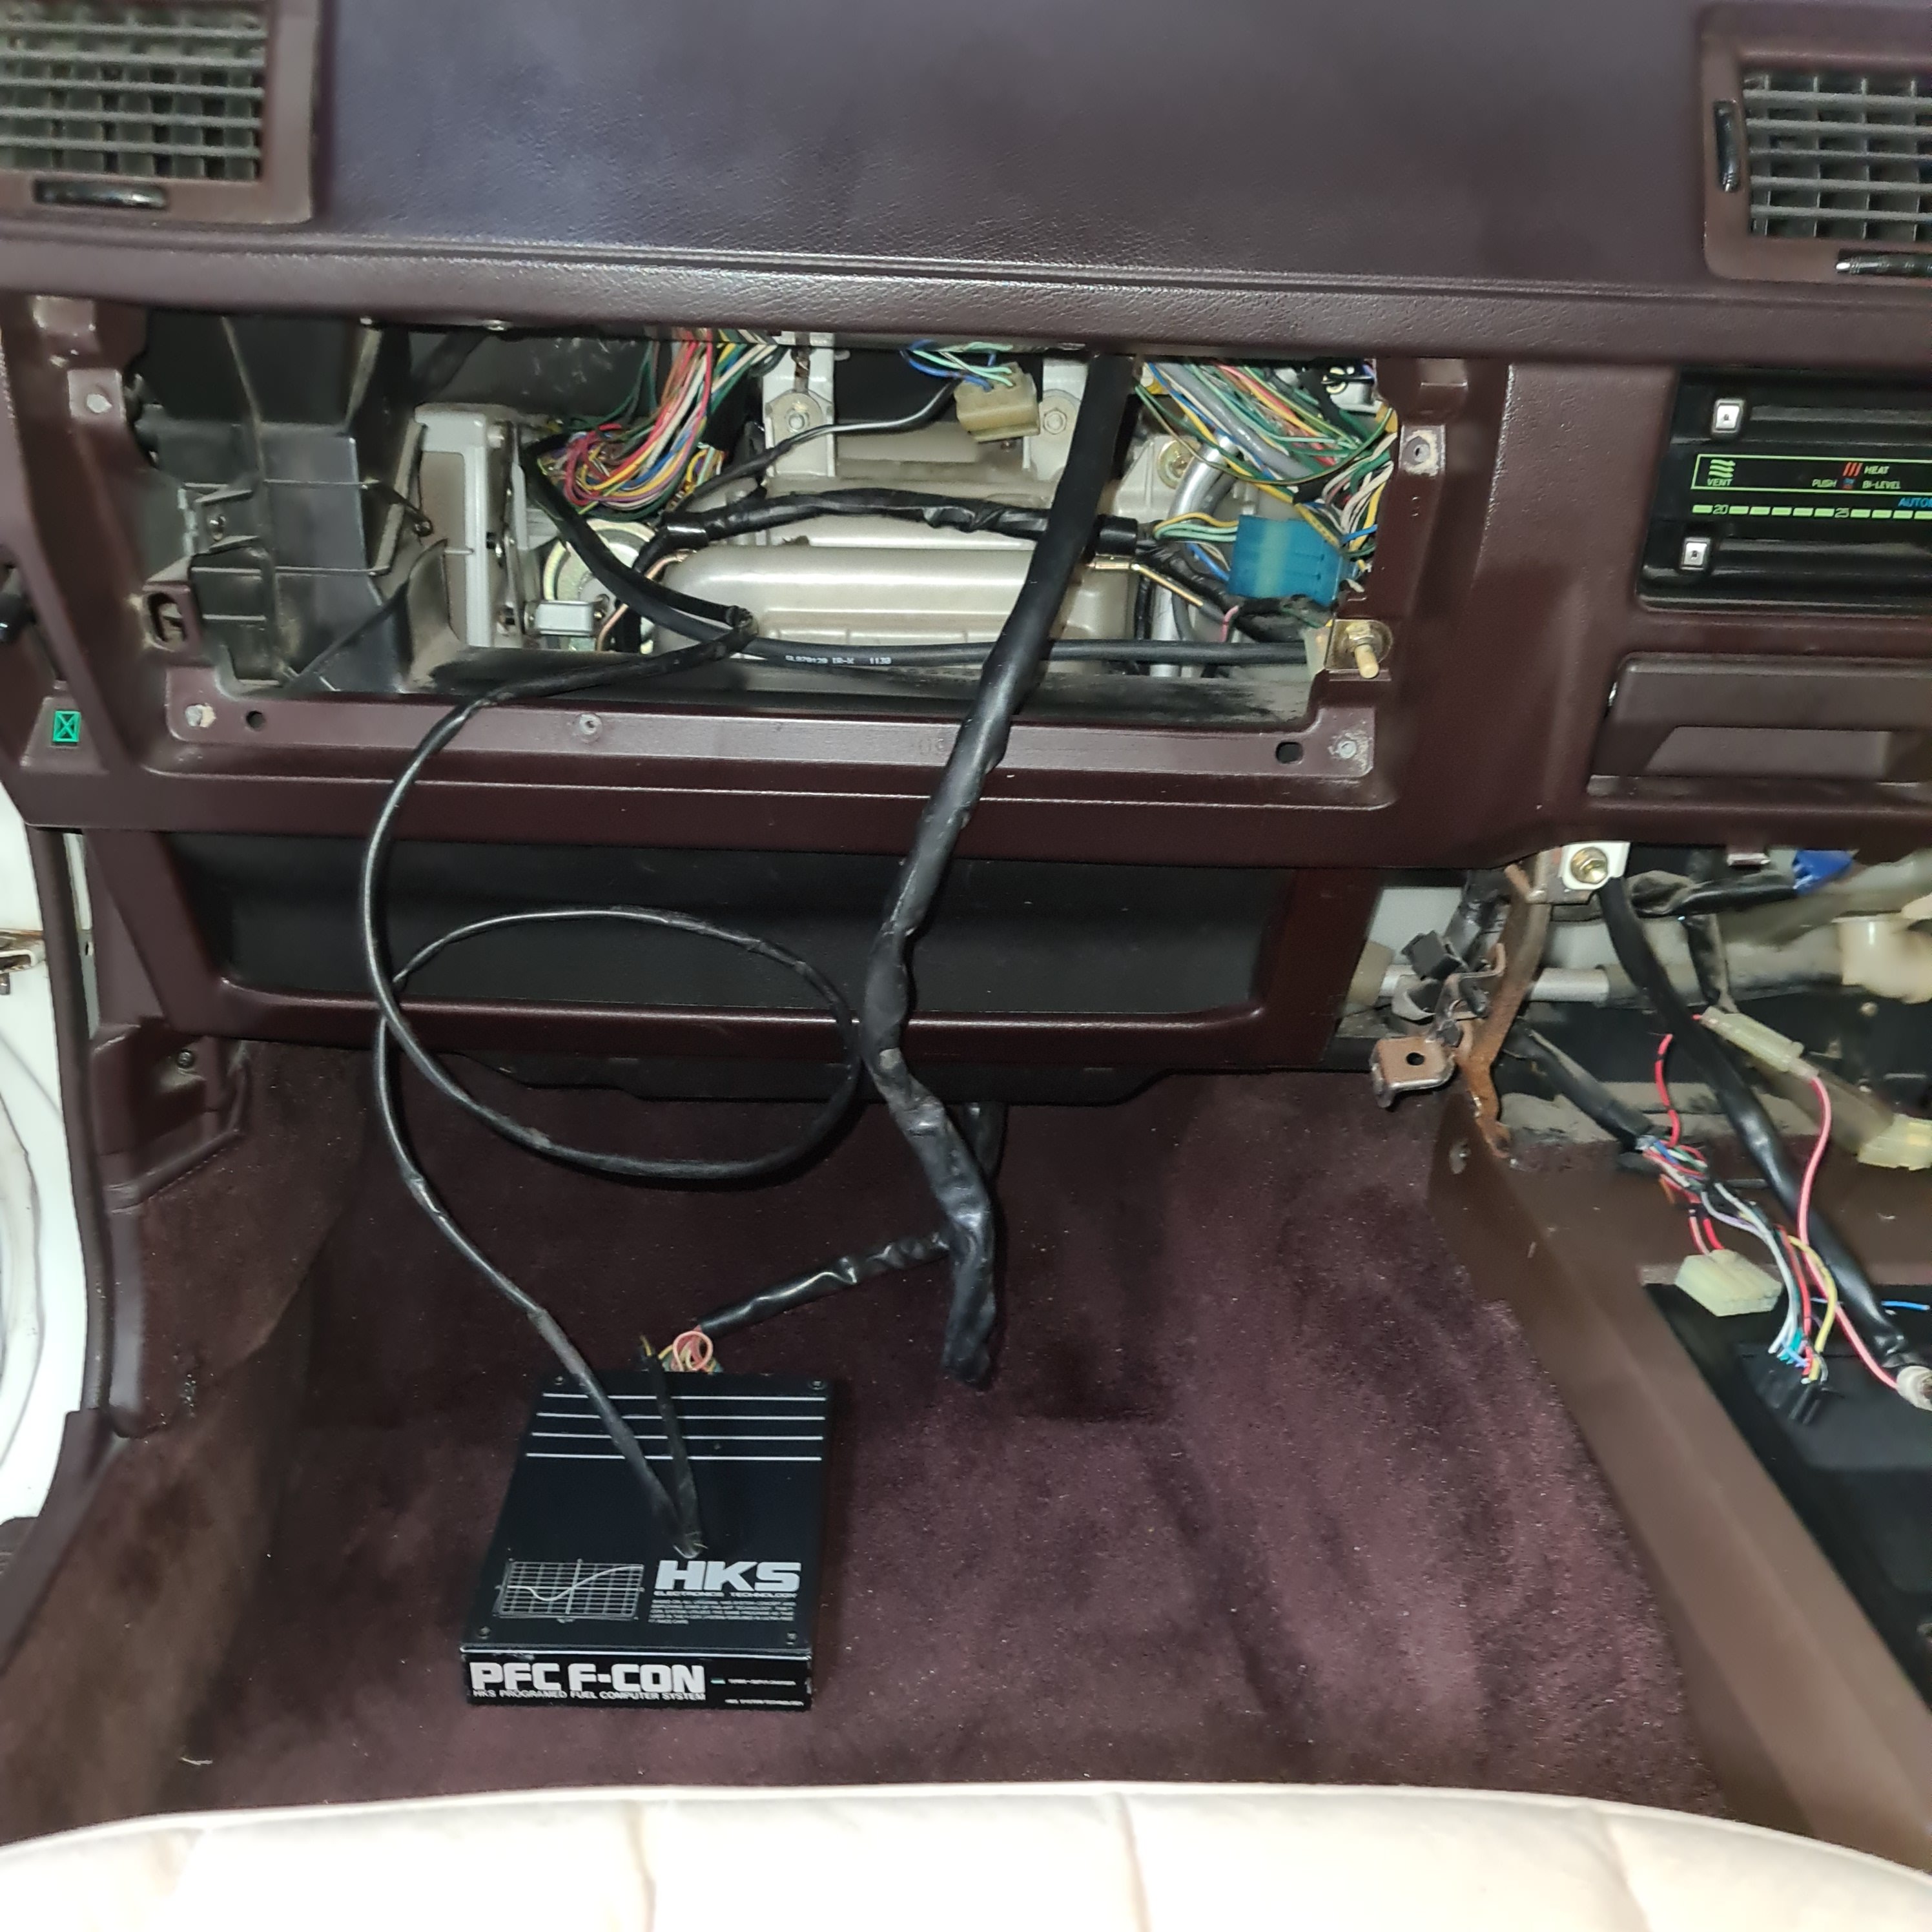
F-con plugged in and ready to go. Just needed to run the map sensor plug and boost gauge hose through the firewall grommet. There is a nice amount of length on the f-con harness to tuck it somewhere else as there is no space by the toyota ecu with the glove box sleeve in
7 points
-
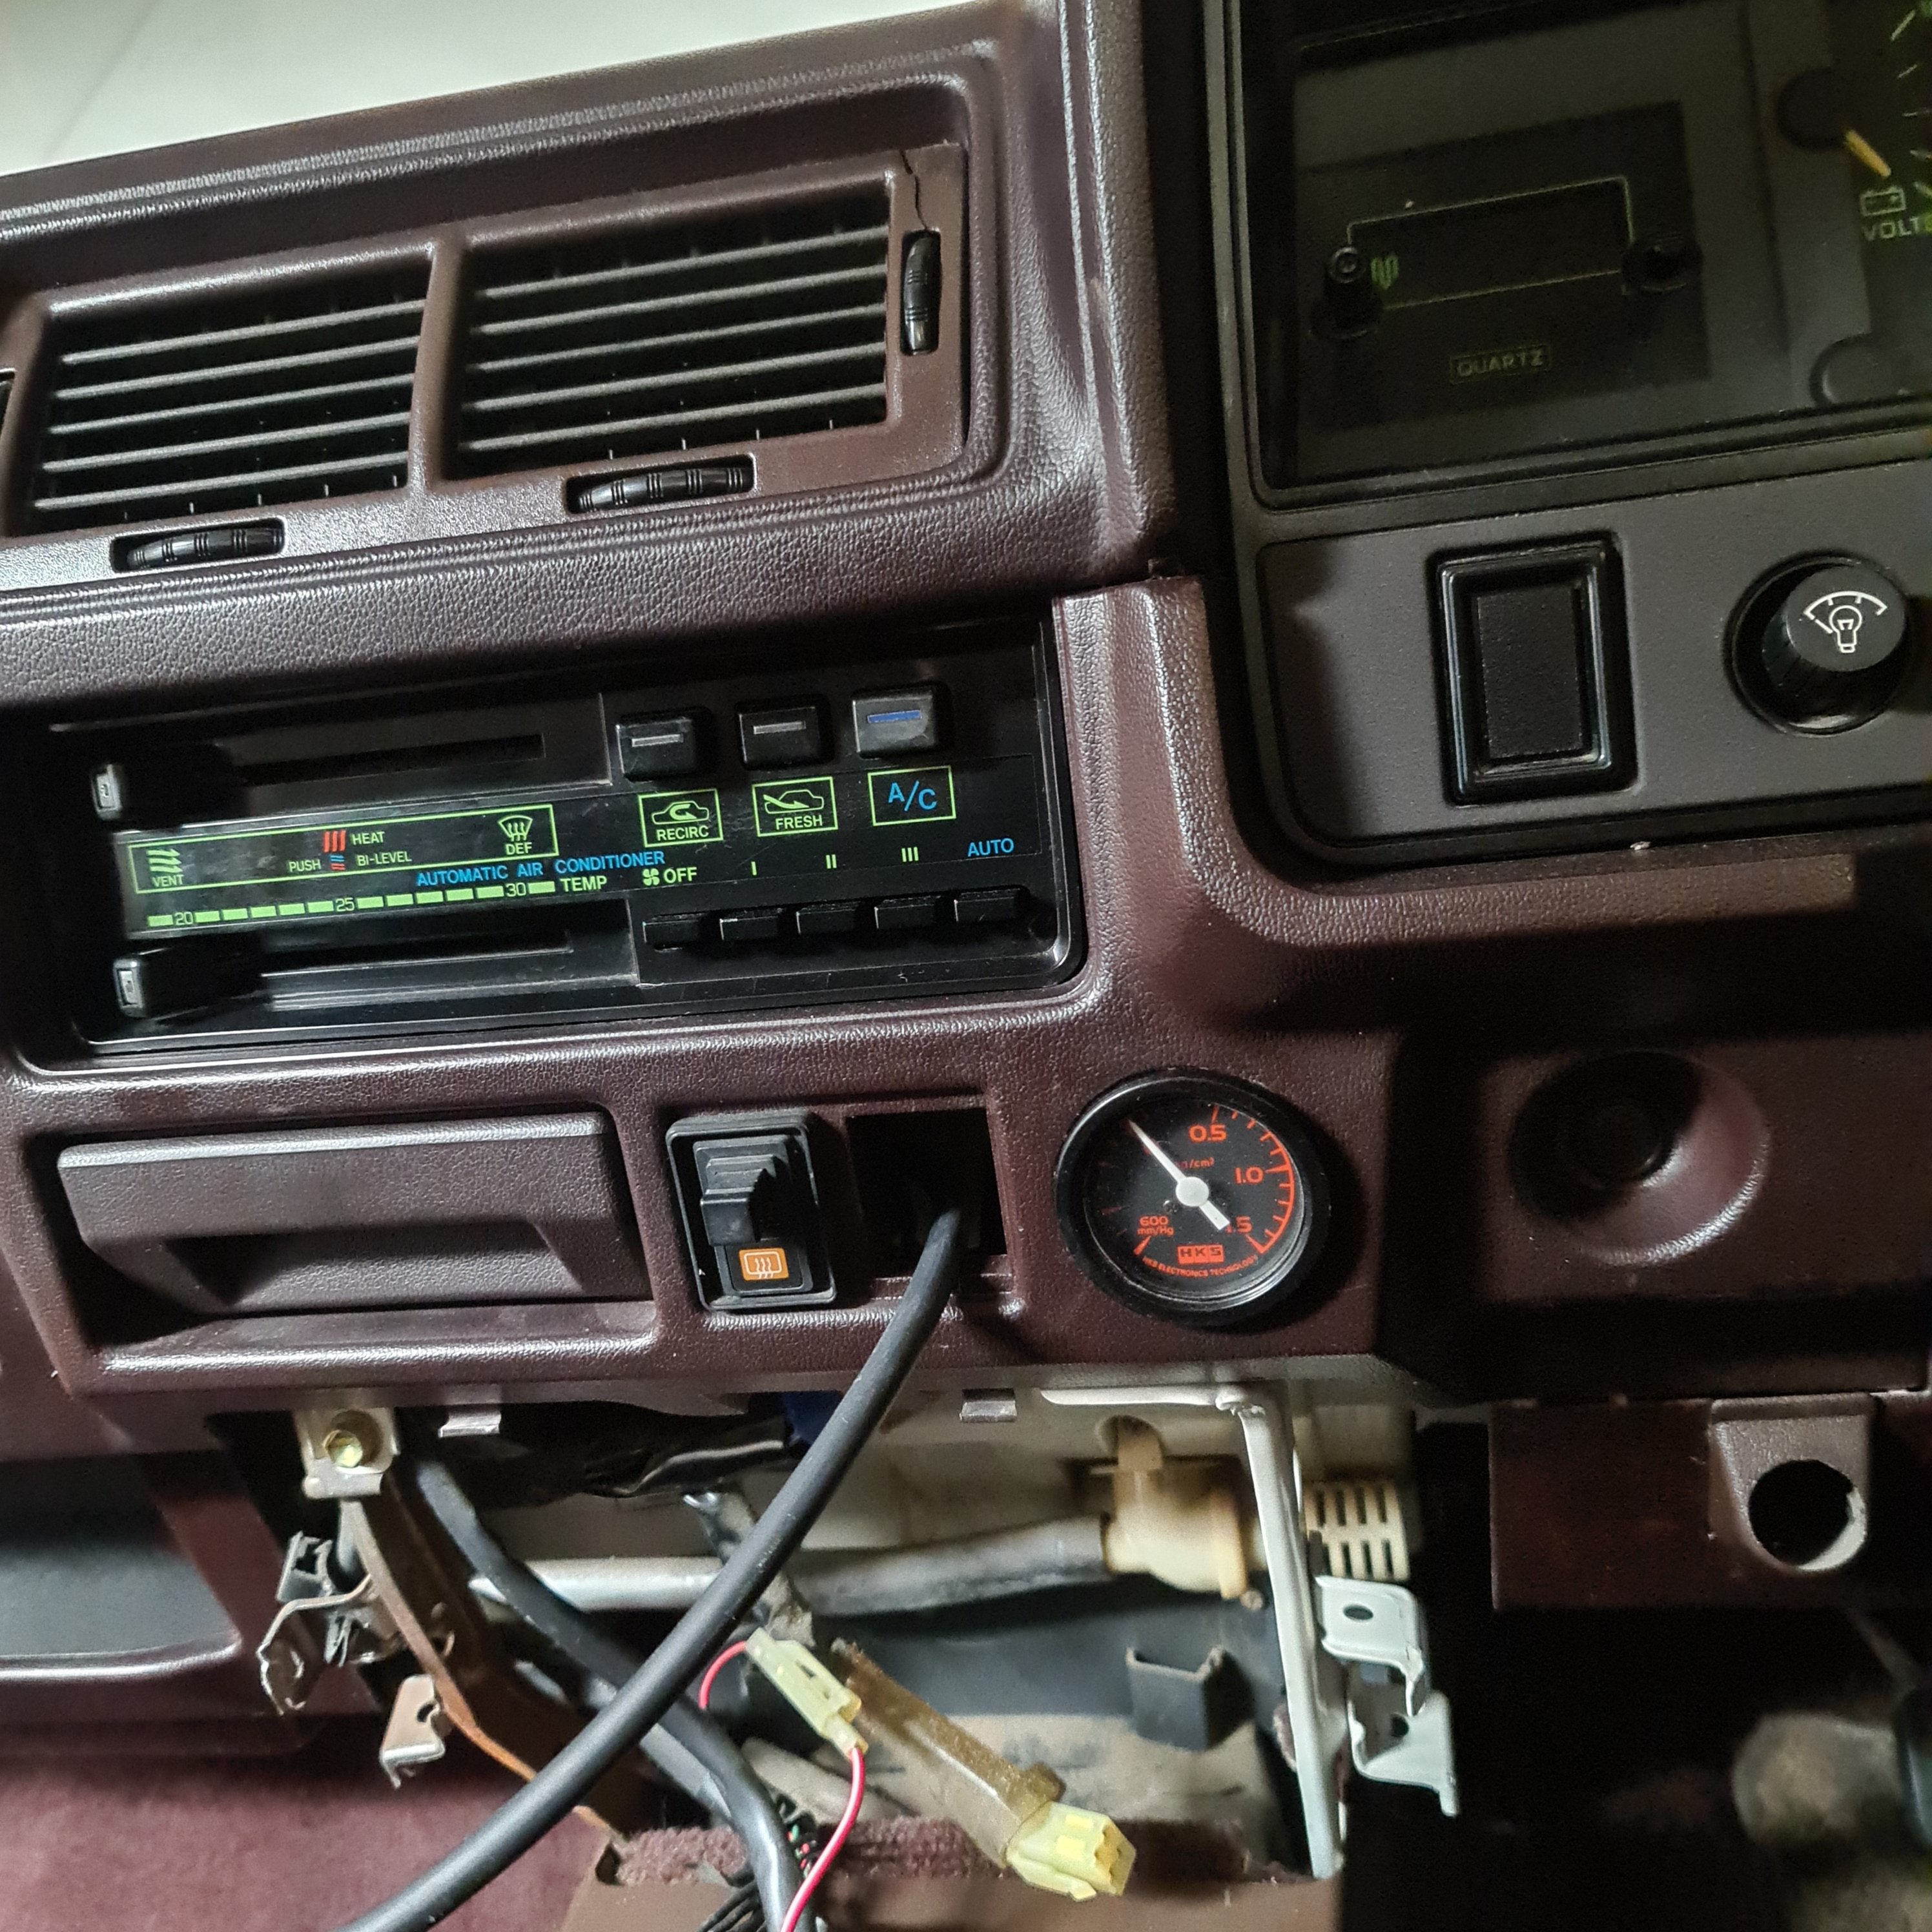
46mm hks boost gauge fitted in place of the cigarette lighter
7 points
-
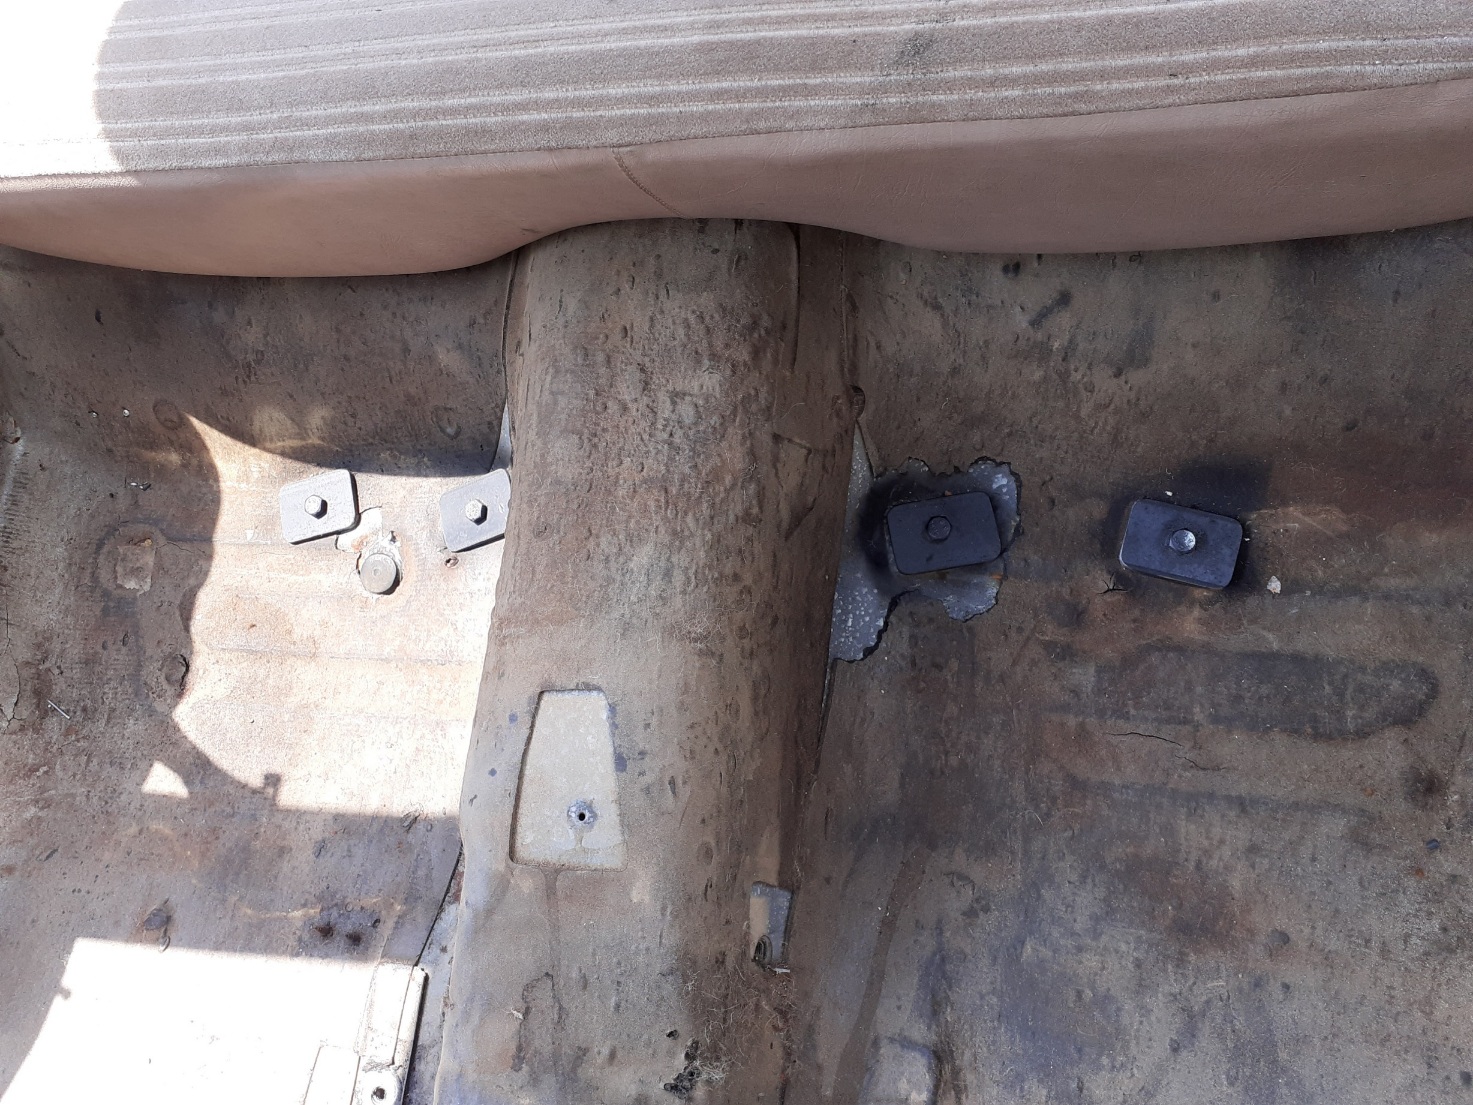
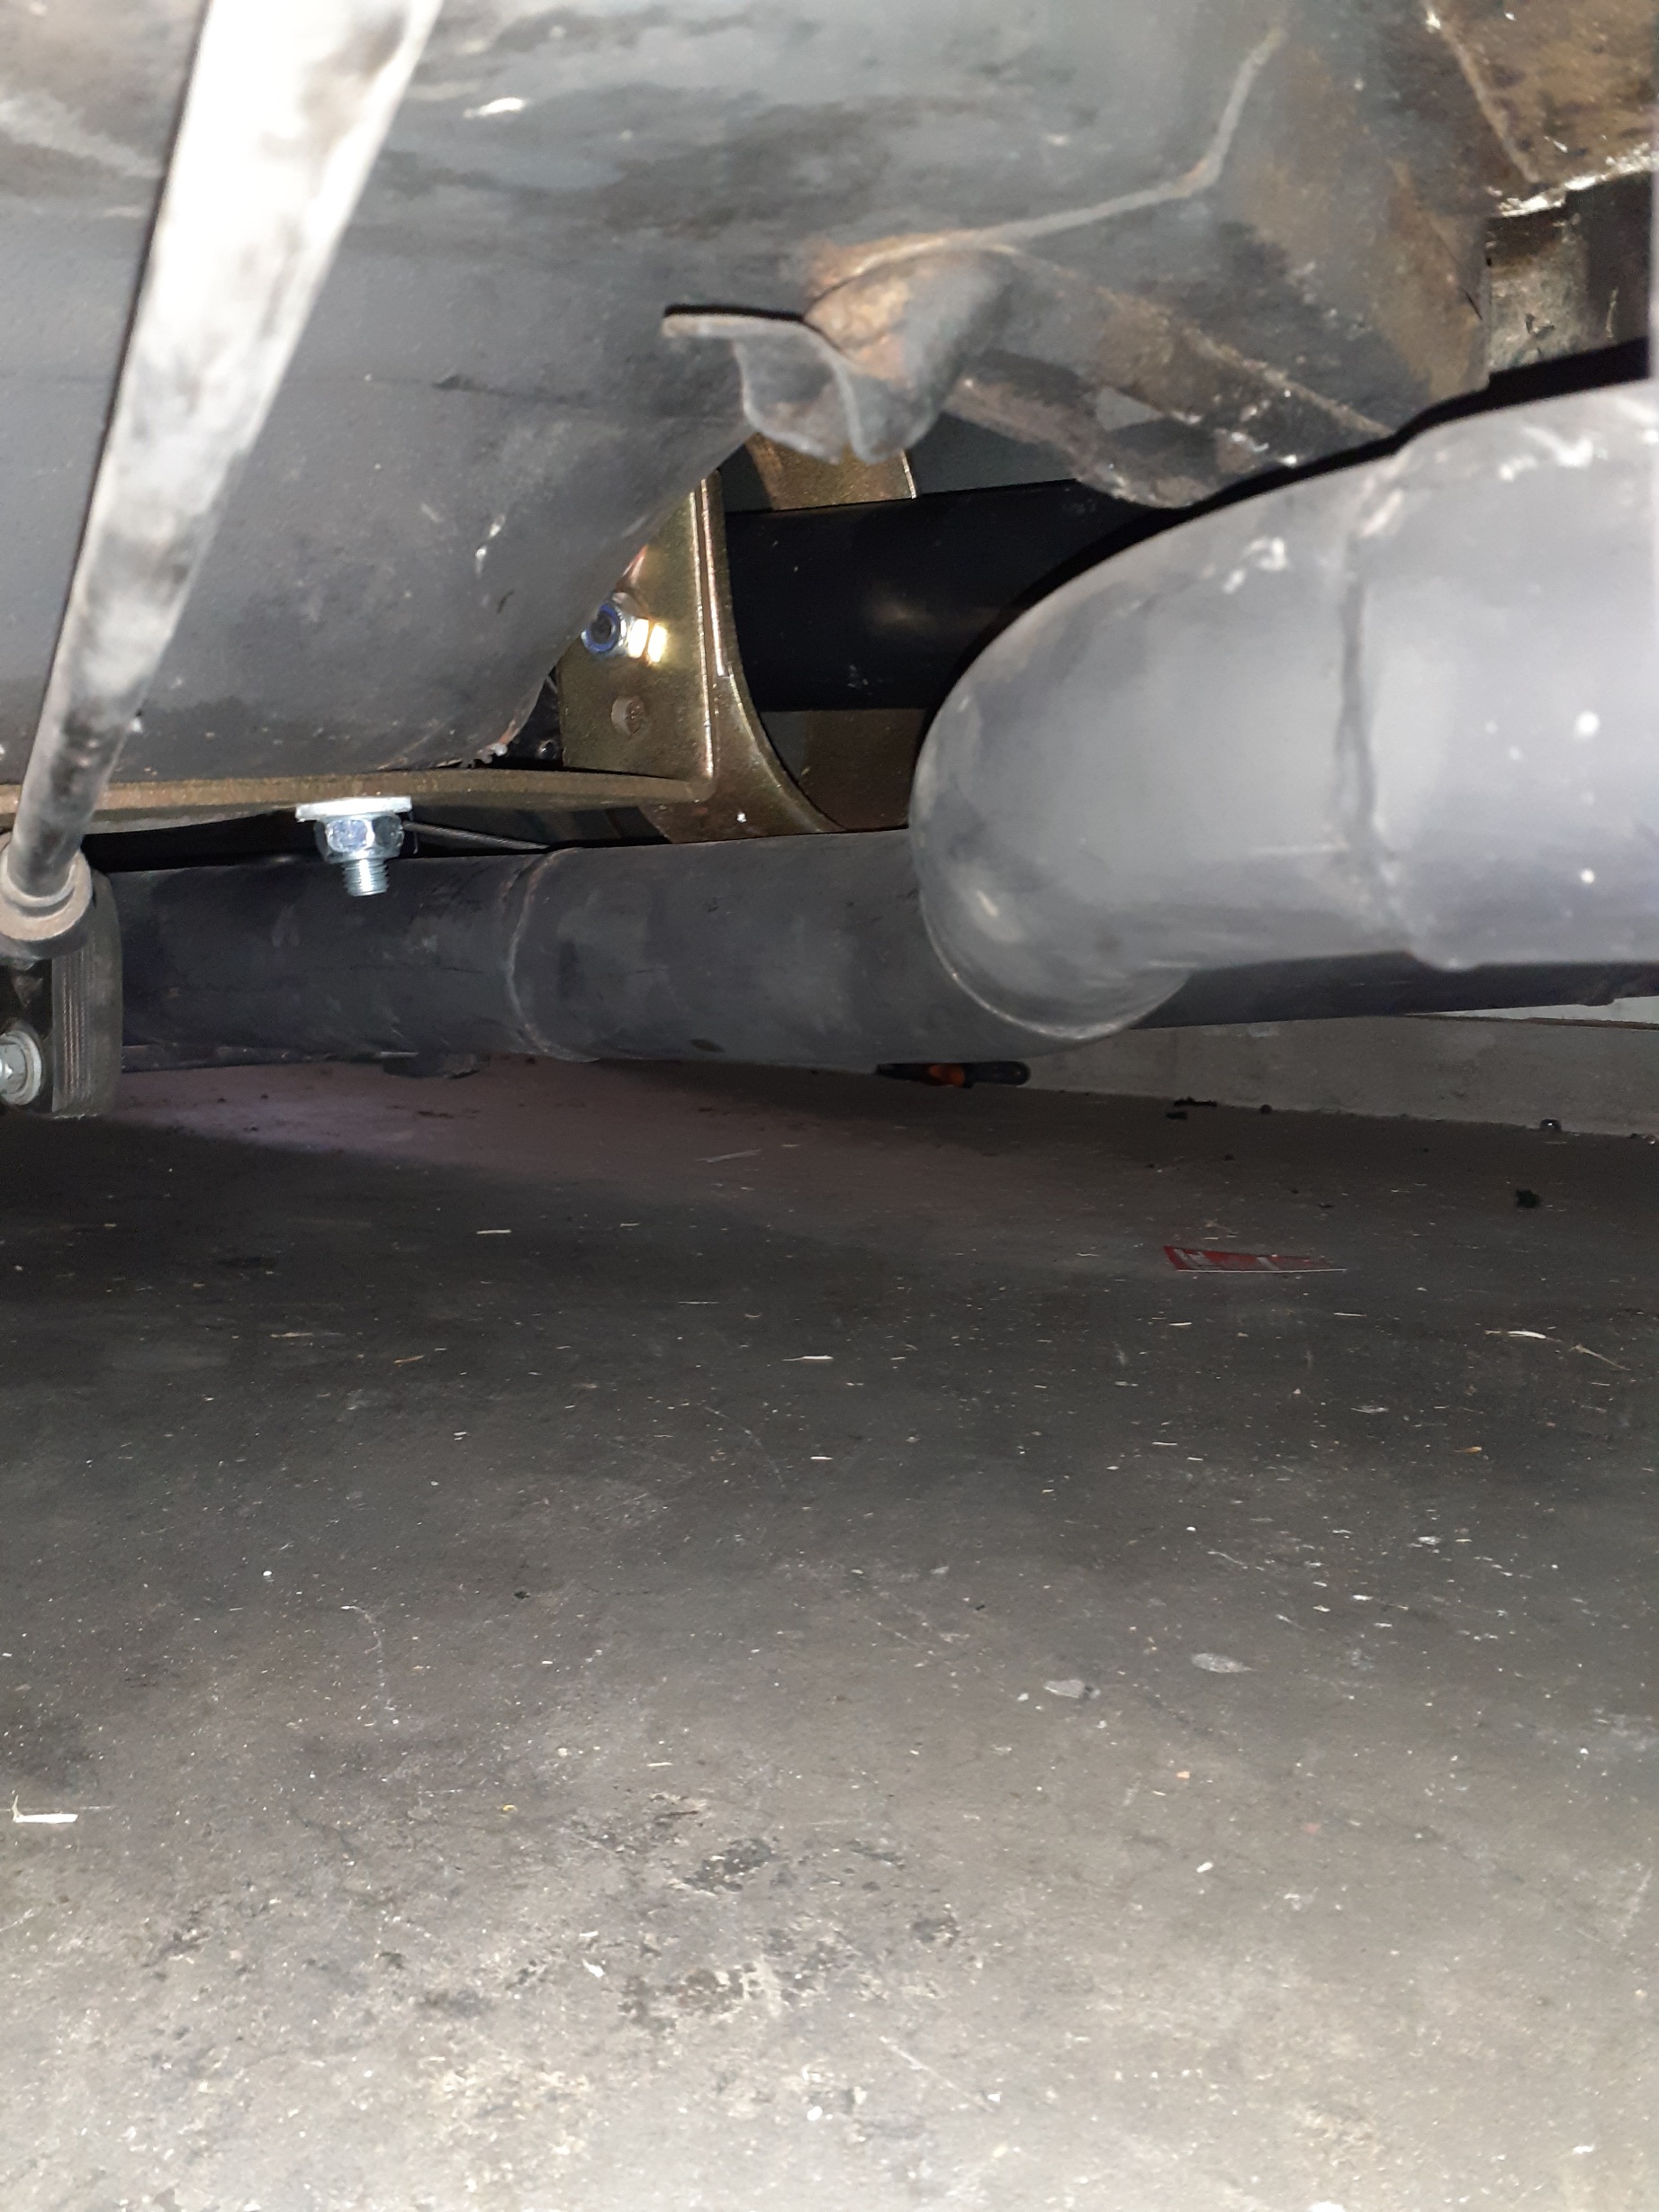
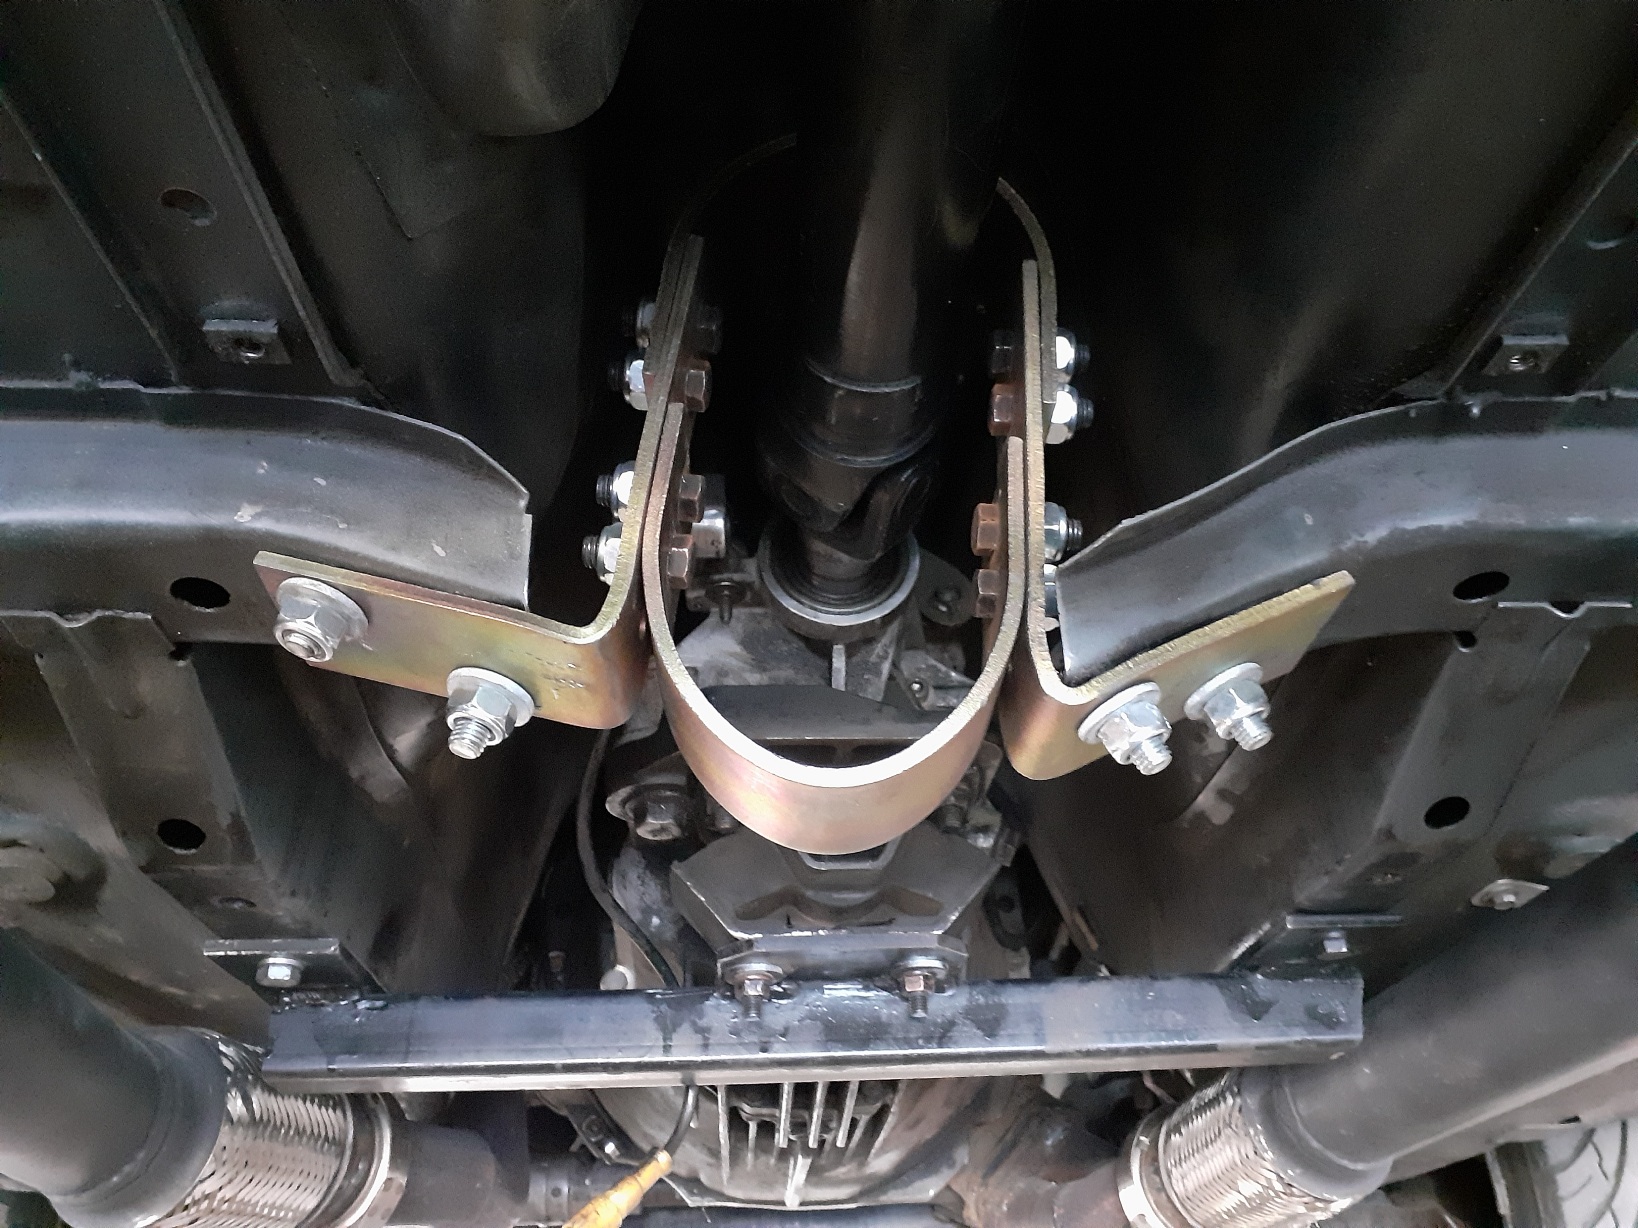
Started getting cert ready too, installed both driveshaft loops ... next time I'm using a lift..
6 points
-
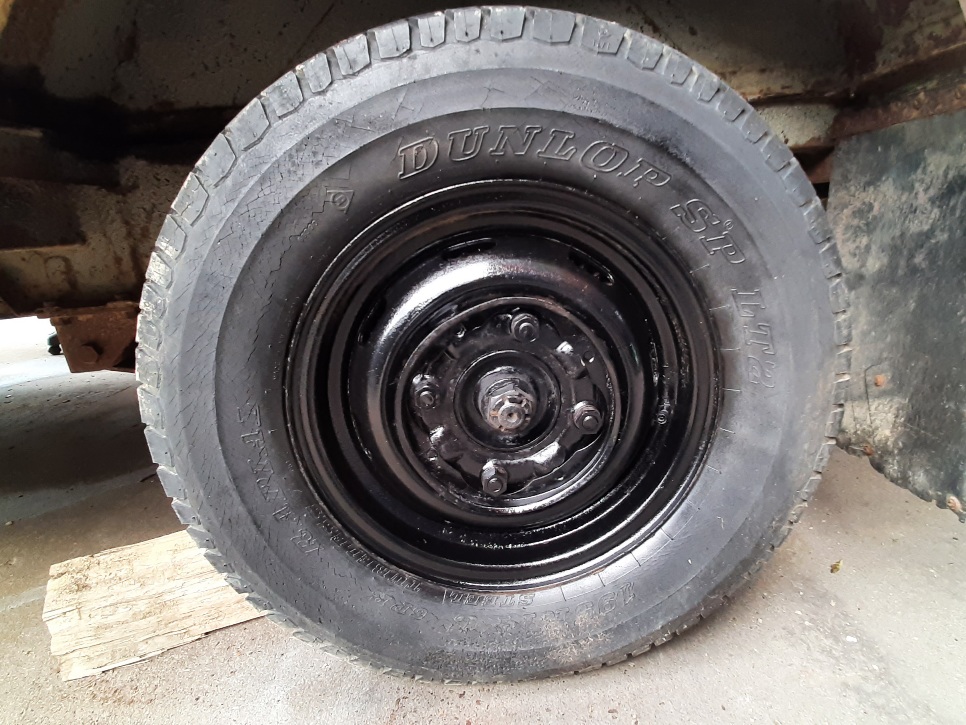
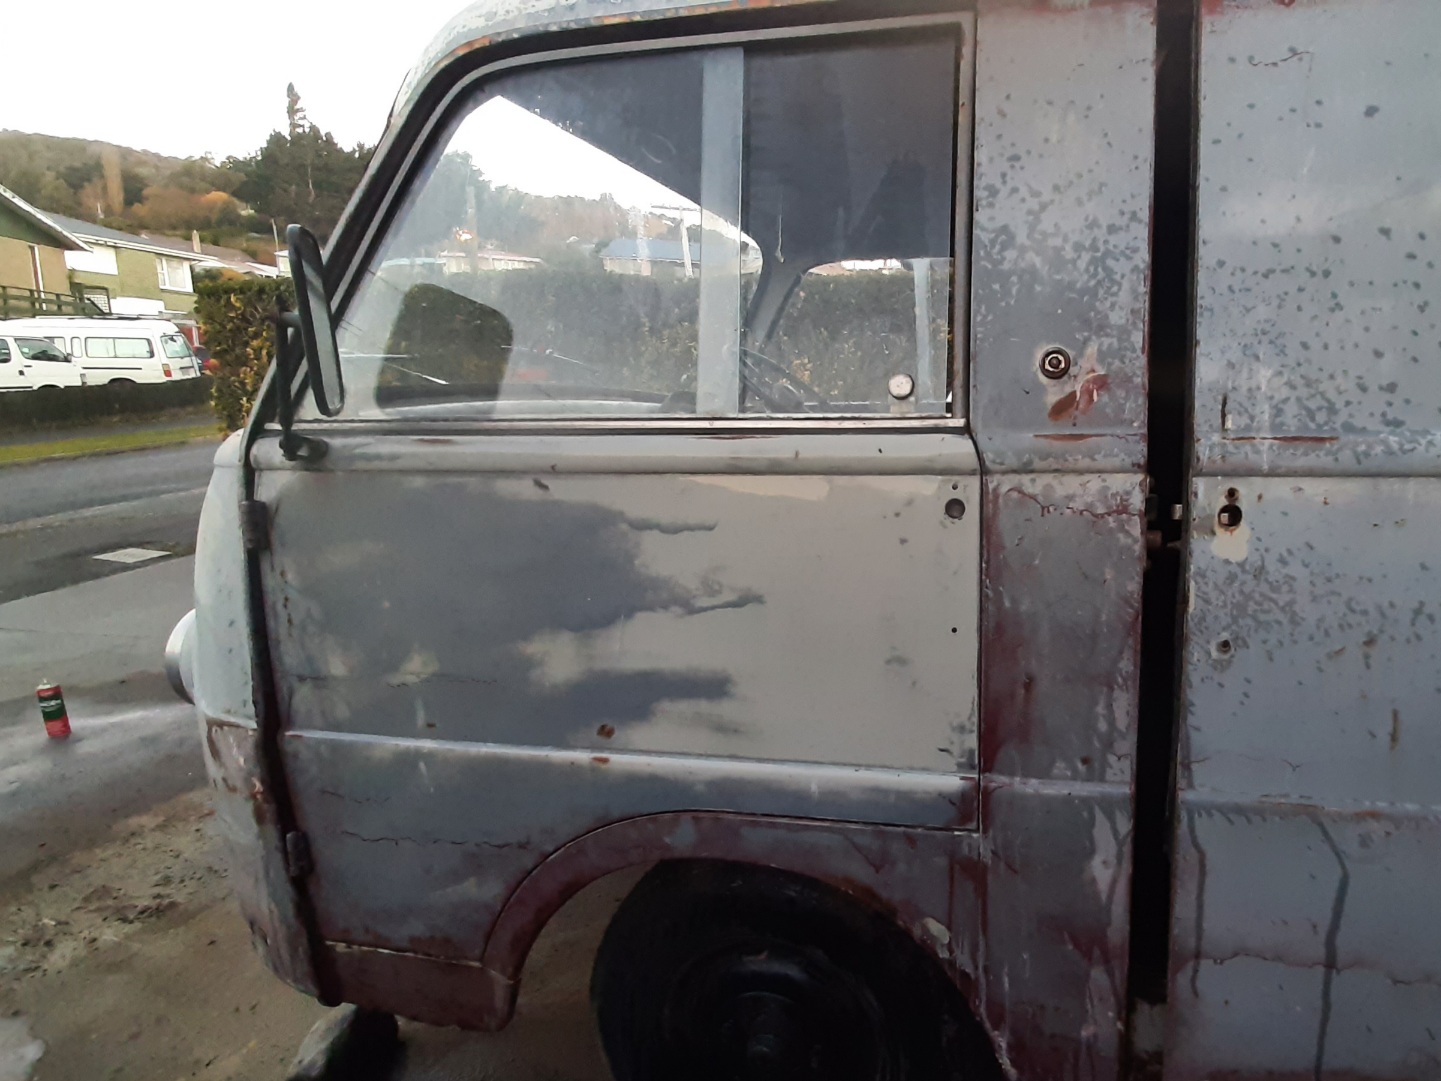
Sprayed some black rust remover and metal restorer on the rims. Massive stud pattern. Ill take the drums off to look at the brakes another day. Im sure they are juuust fiiine. Cop mode. Put the rear doors back together and straightened a few things out and did a bit more sanding. They are still busted but now they open and close nicely. Pulled the front door apart to get the inner latch out. Safari! Some percussive maintenance needed where the limit strap had bent in the door flange and the door now opens and closes lovely.
5 points
-
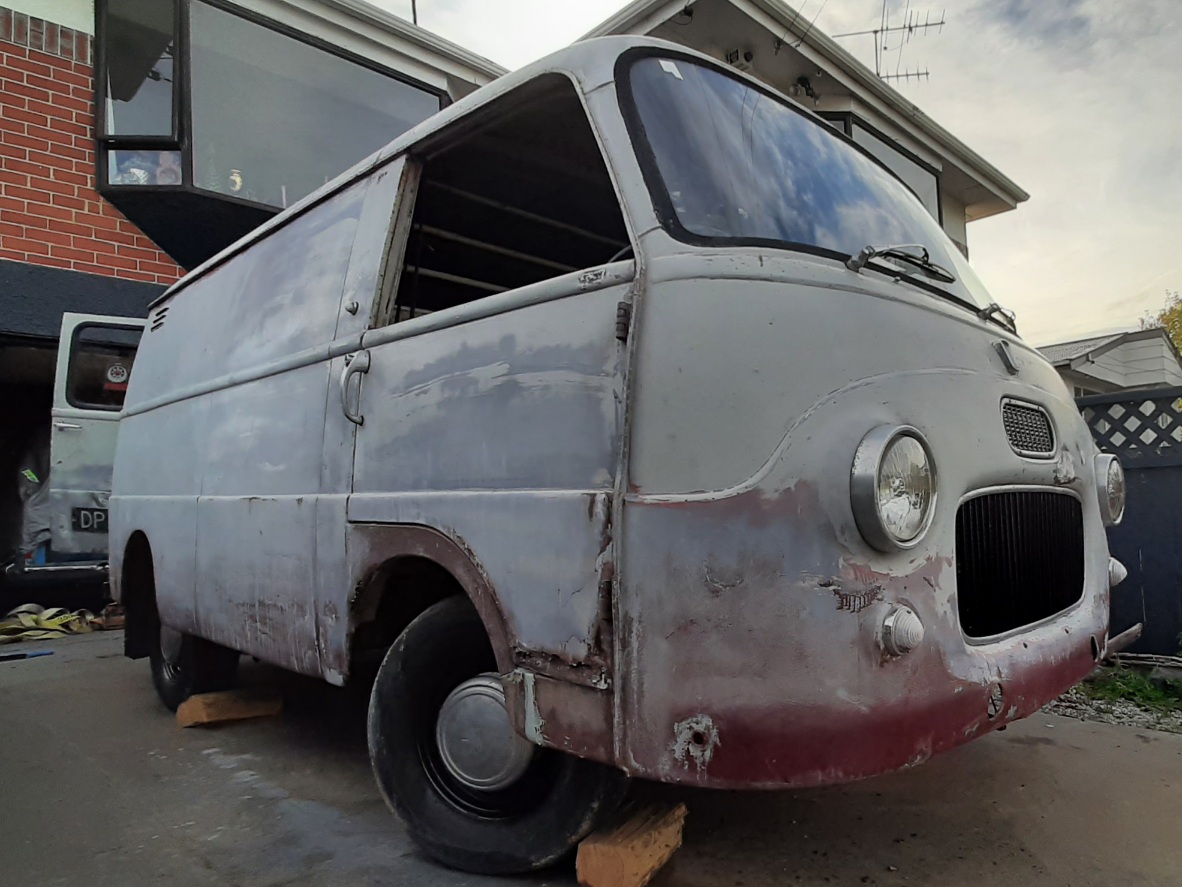
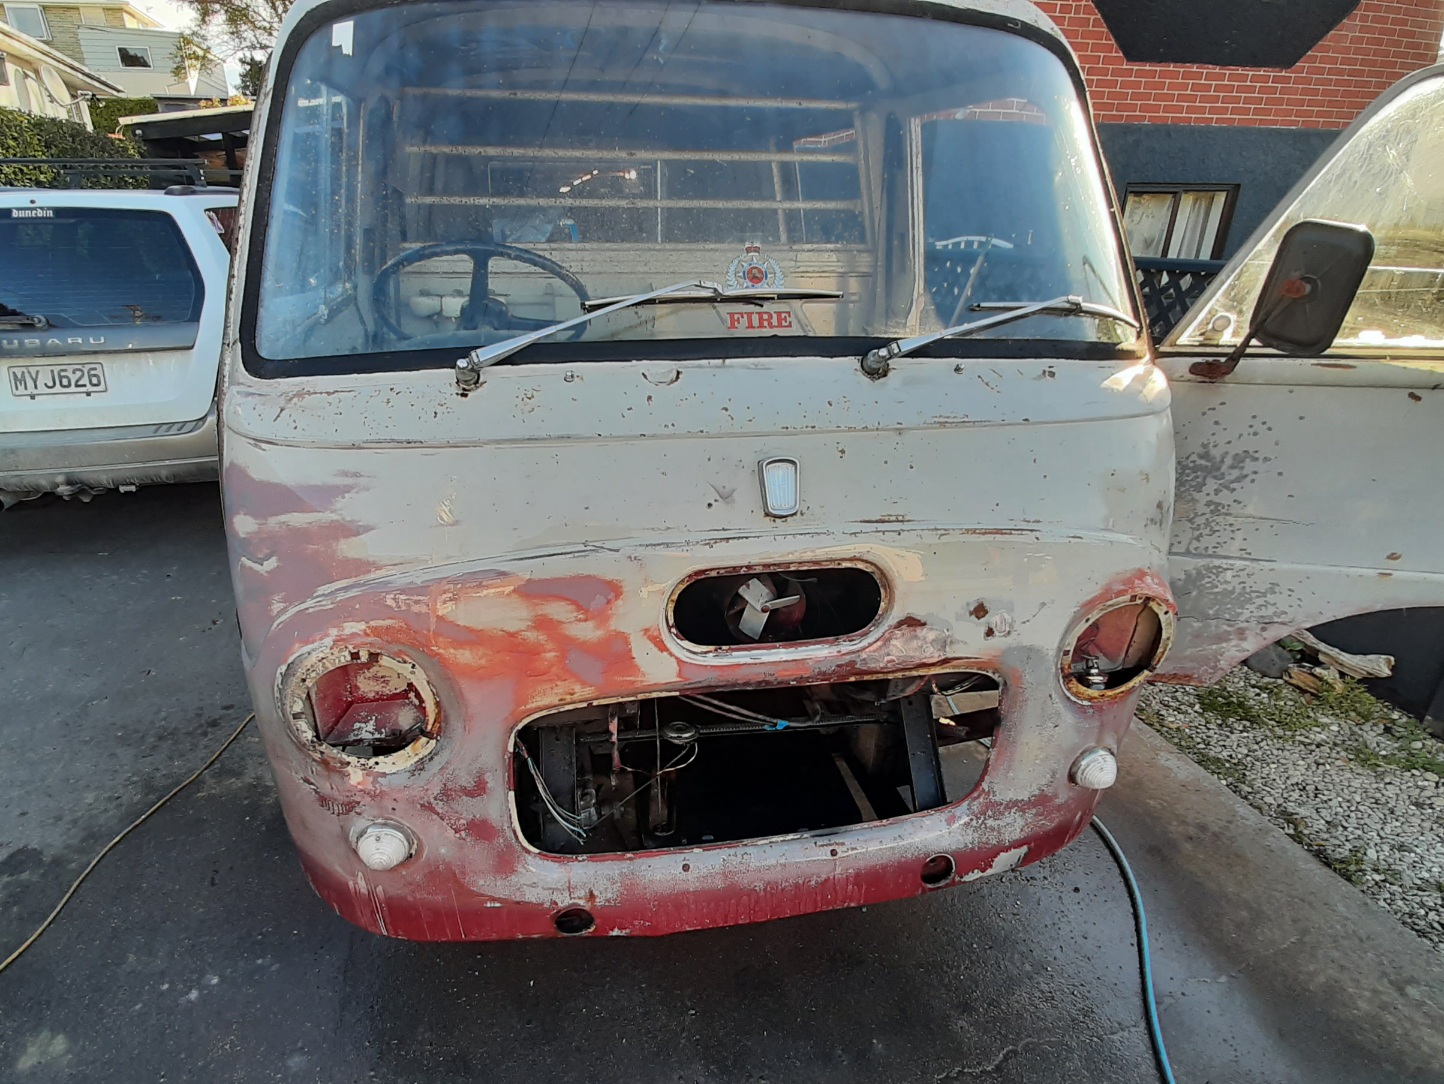
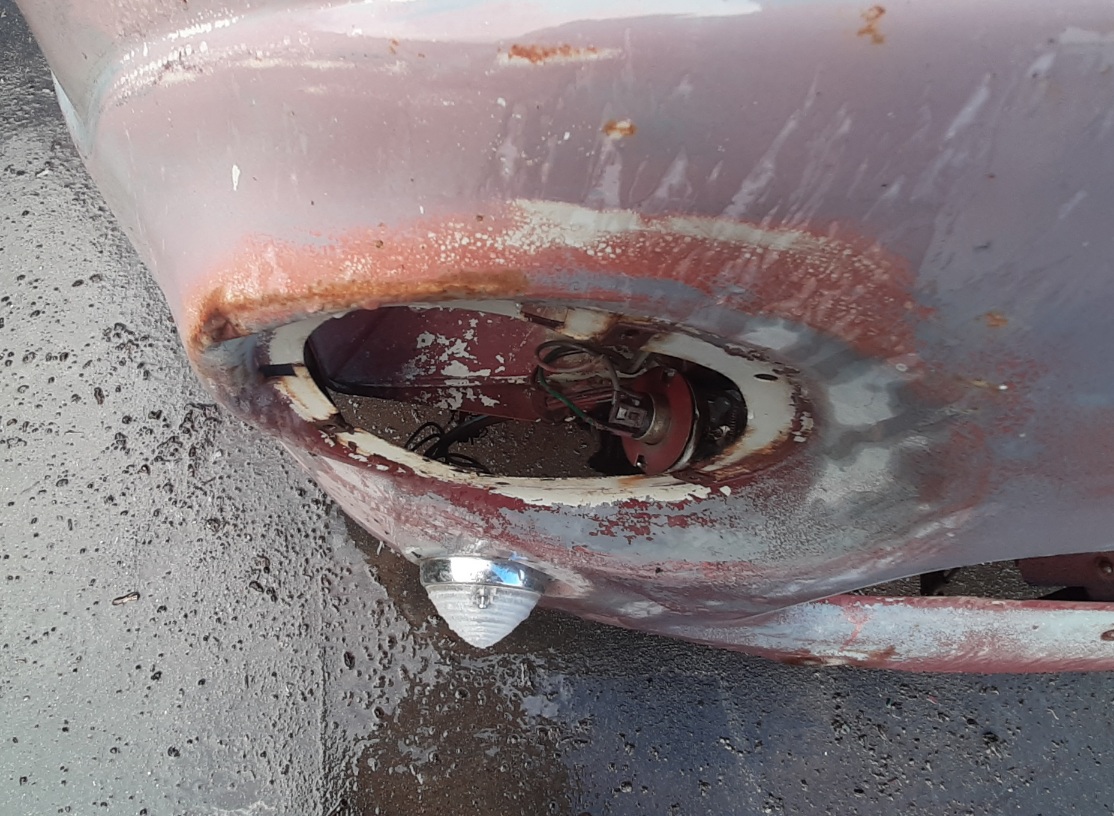
Bit more wombling. Took the front bits off for a tidy up, and hit a few dents out, drivers headlight bucket had had a dint (as they say), headlight spaced out with a stack of rusty washers the paint underneath what remains of the maroon had only been lightly scuffed and the front looks waaay better after a bit (a lot) more wet and dry and the bright work (all cast alloy) given a light tidy. I think it will come around, but gosh, i just really fricken hate hand sanding. Ill do around all the door handles for now so i can pop those back on tomorrow now they're all cleaned up
5 points
-
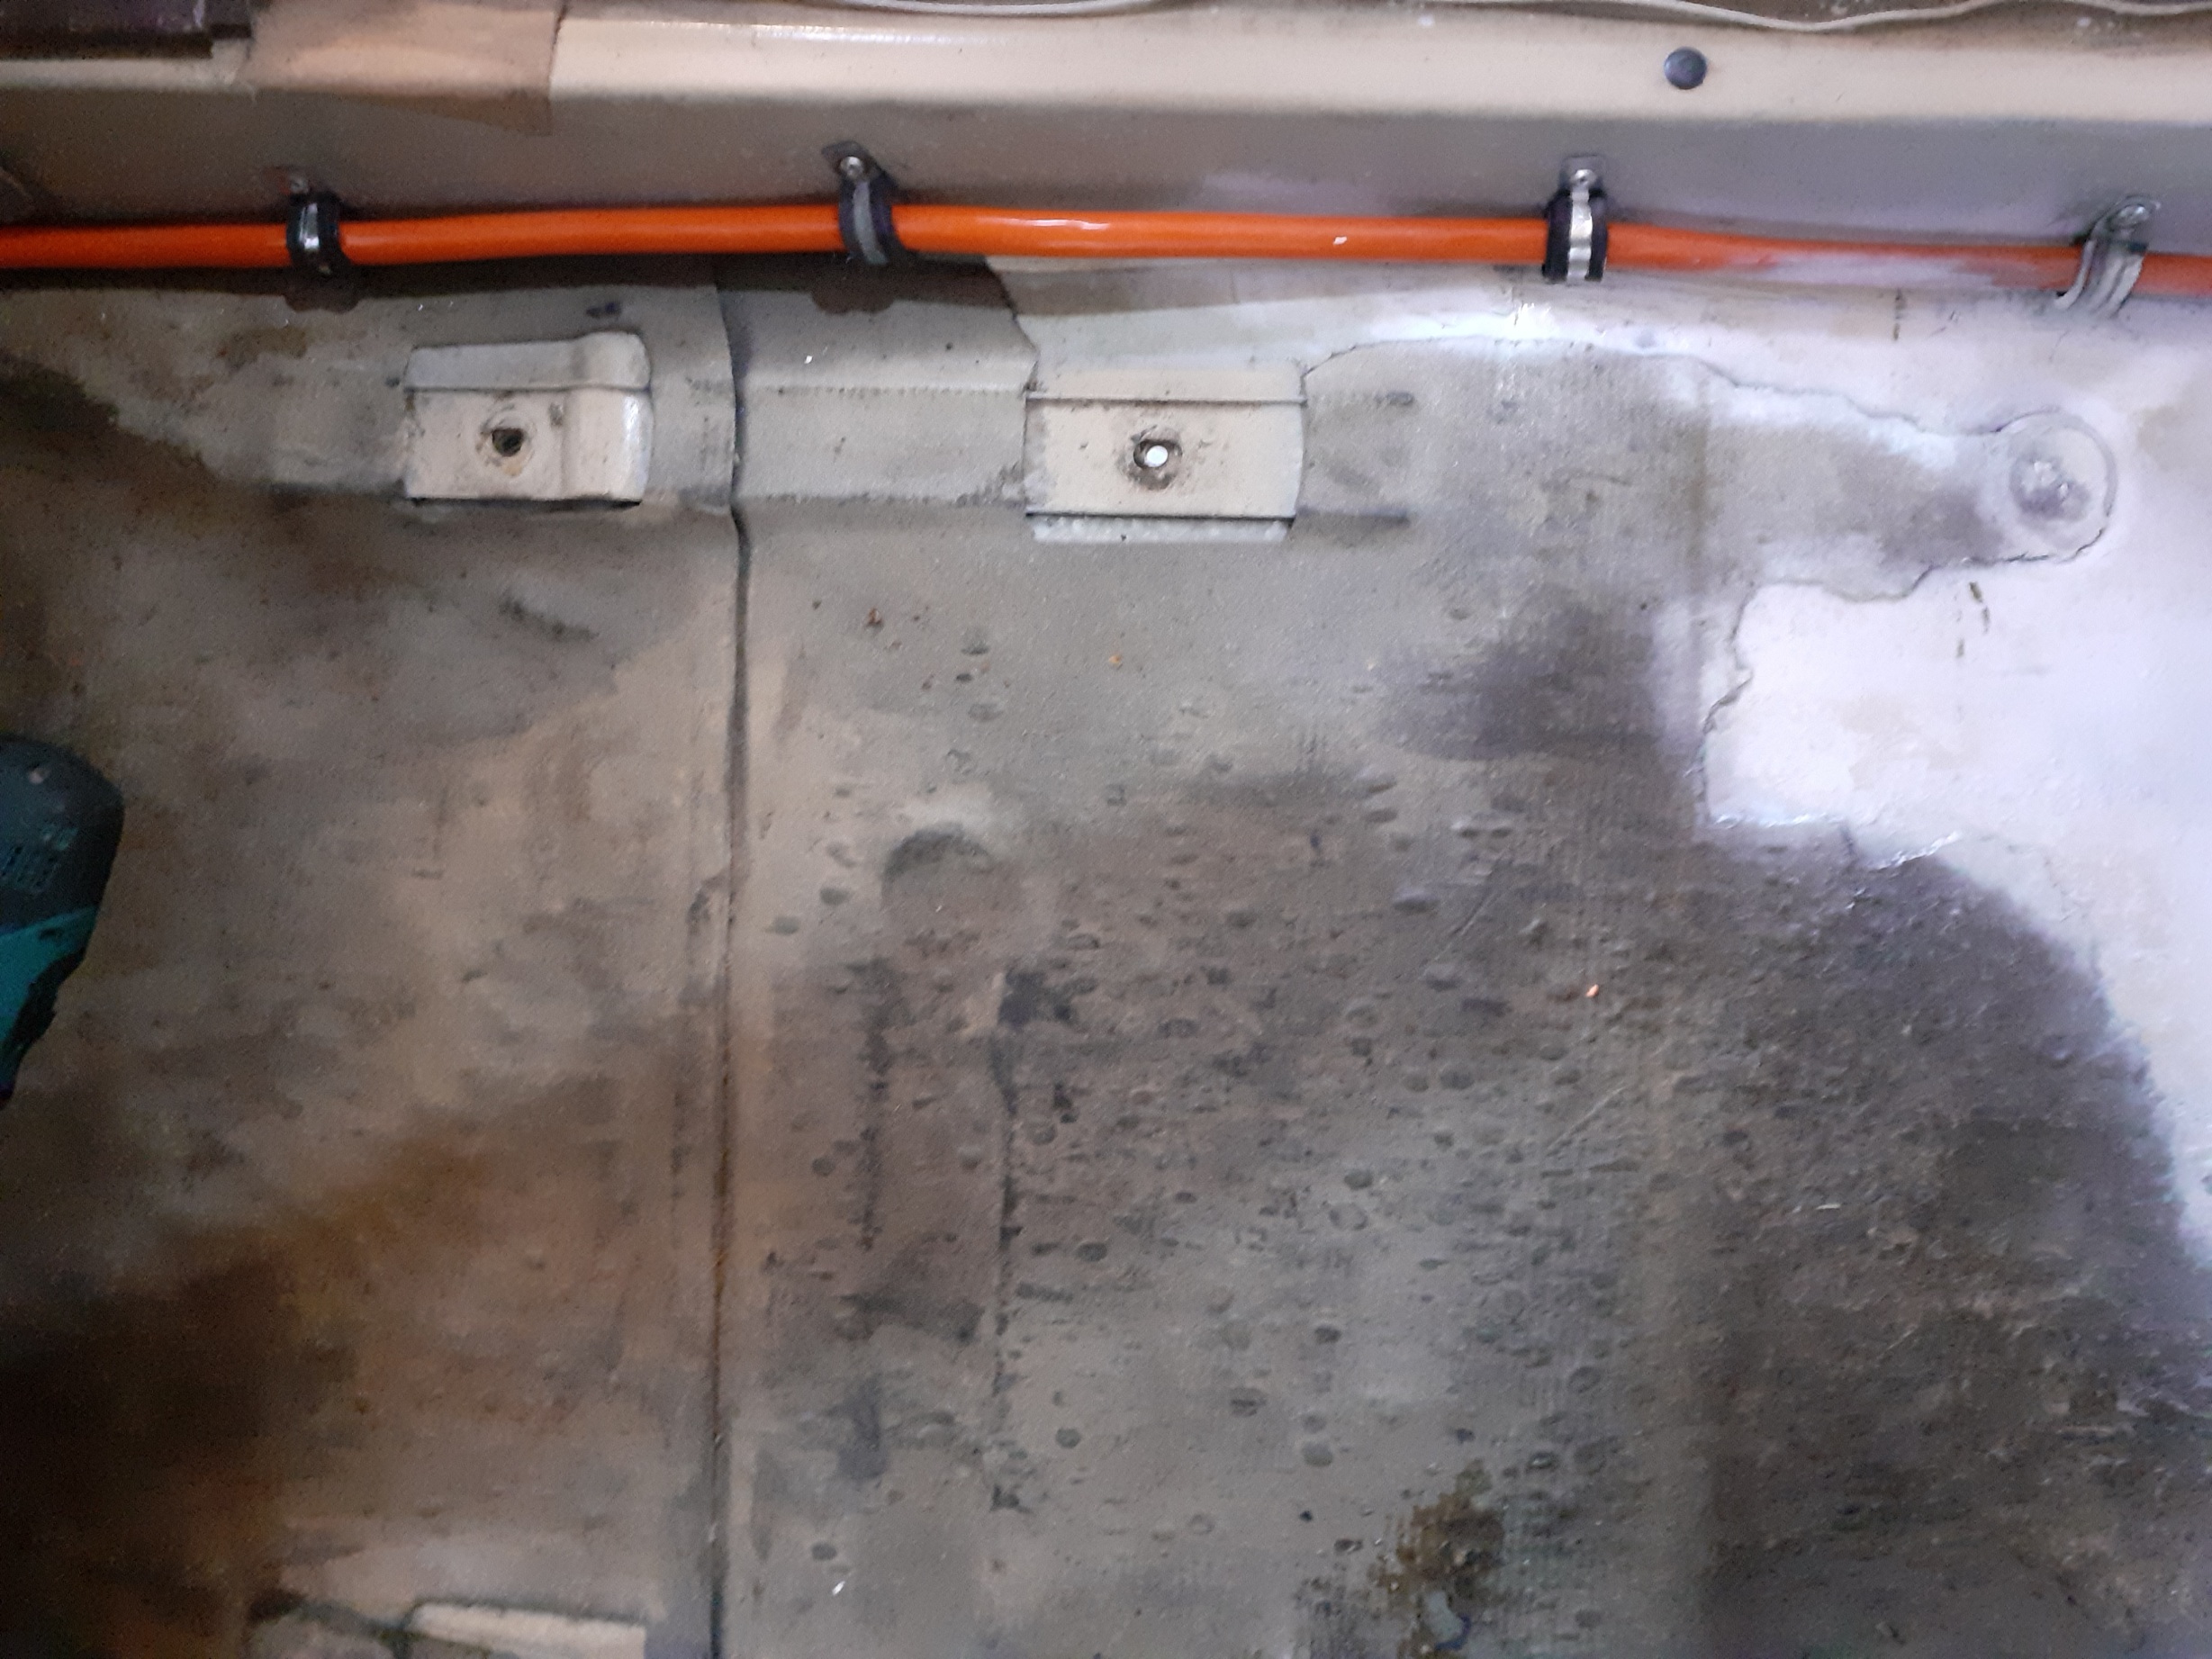
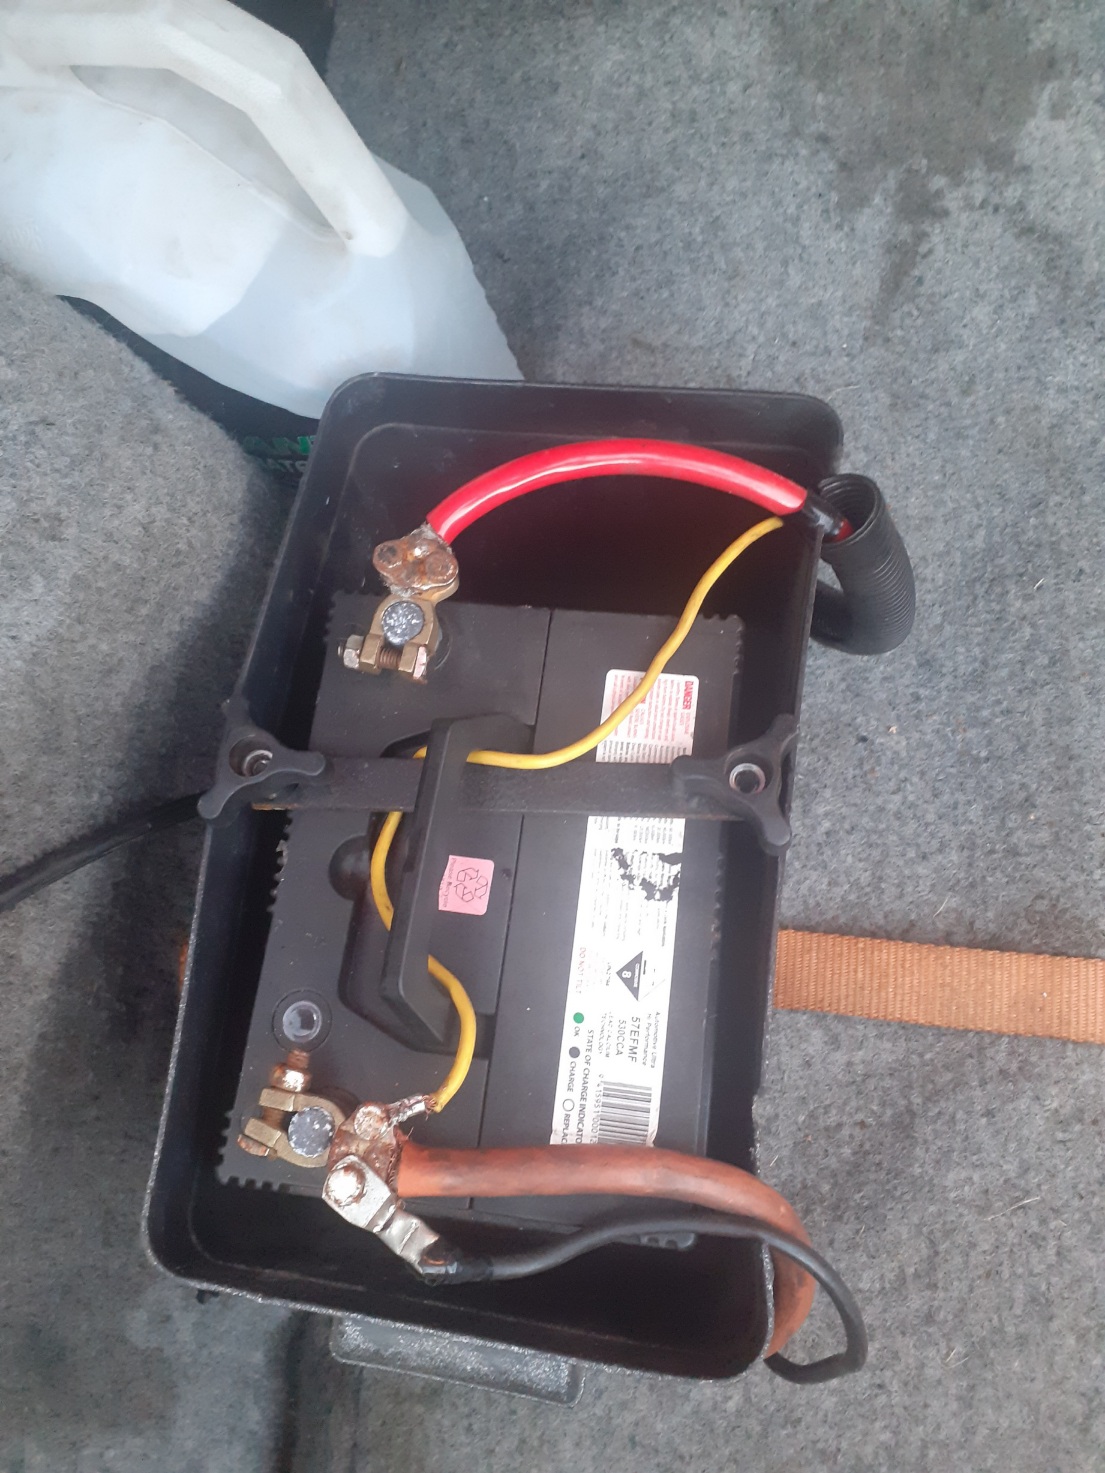
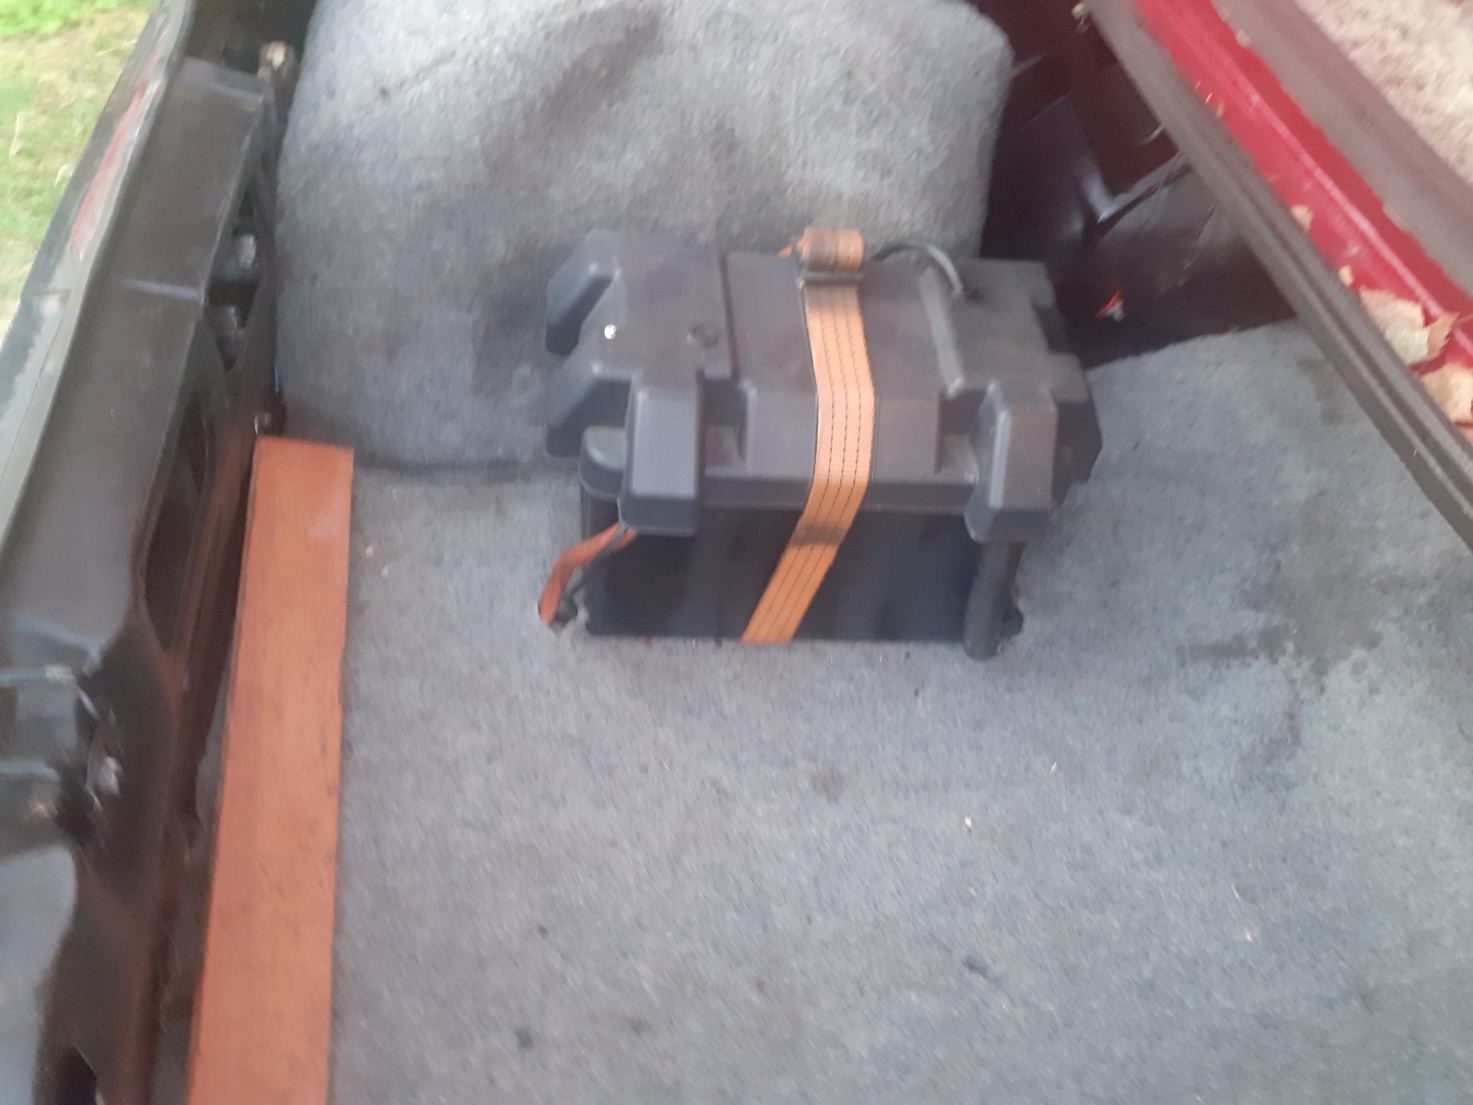
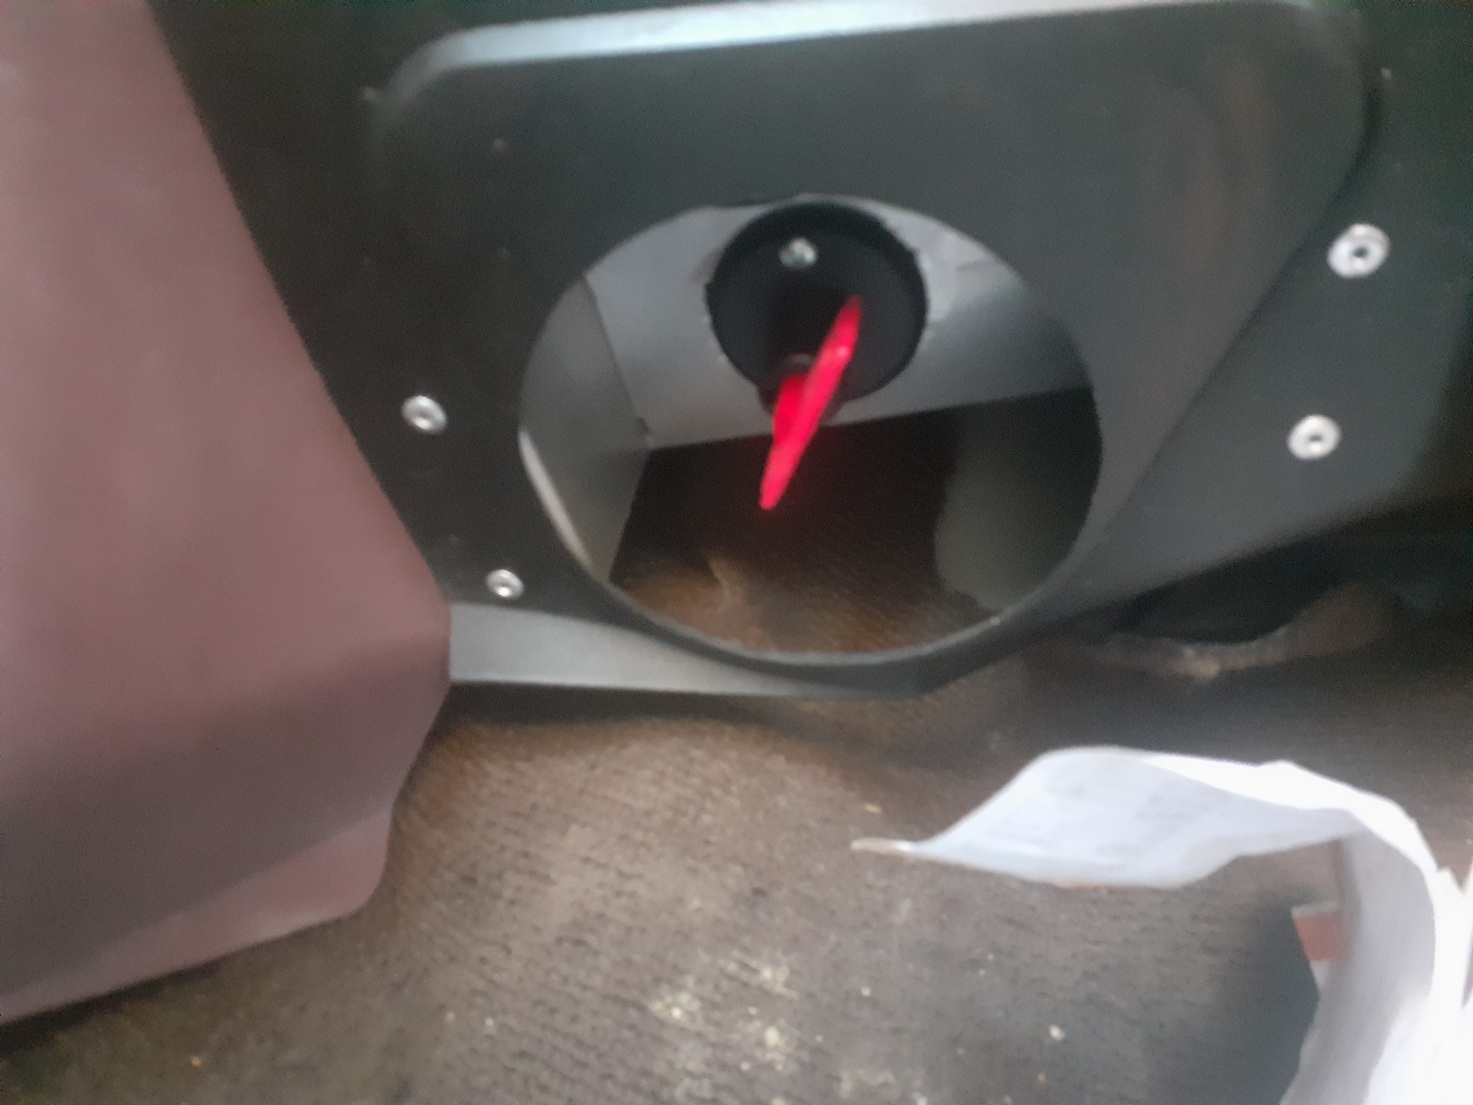
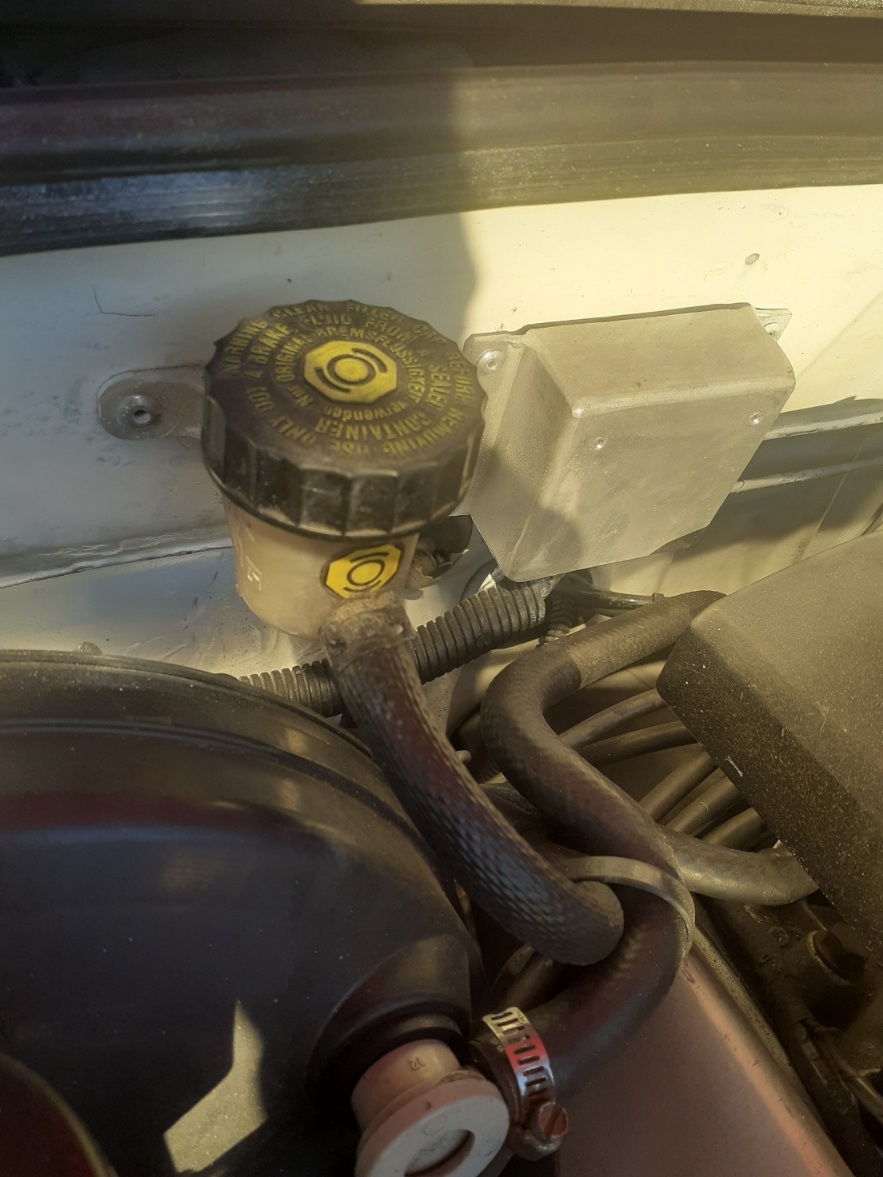
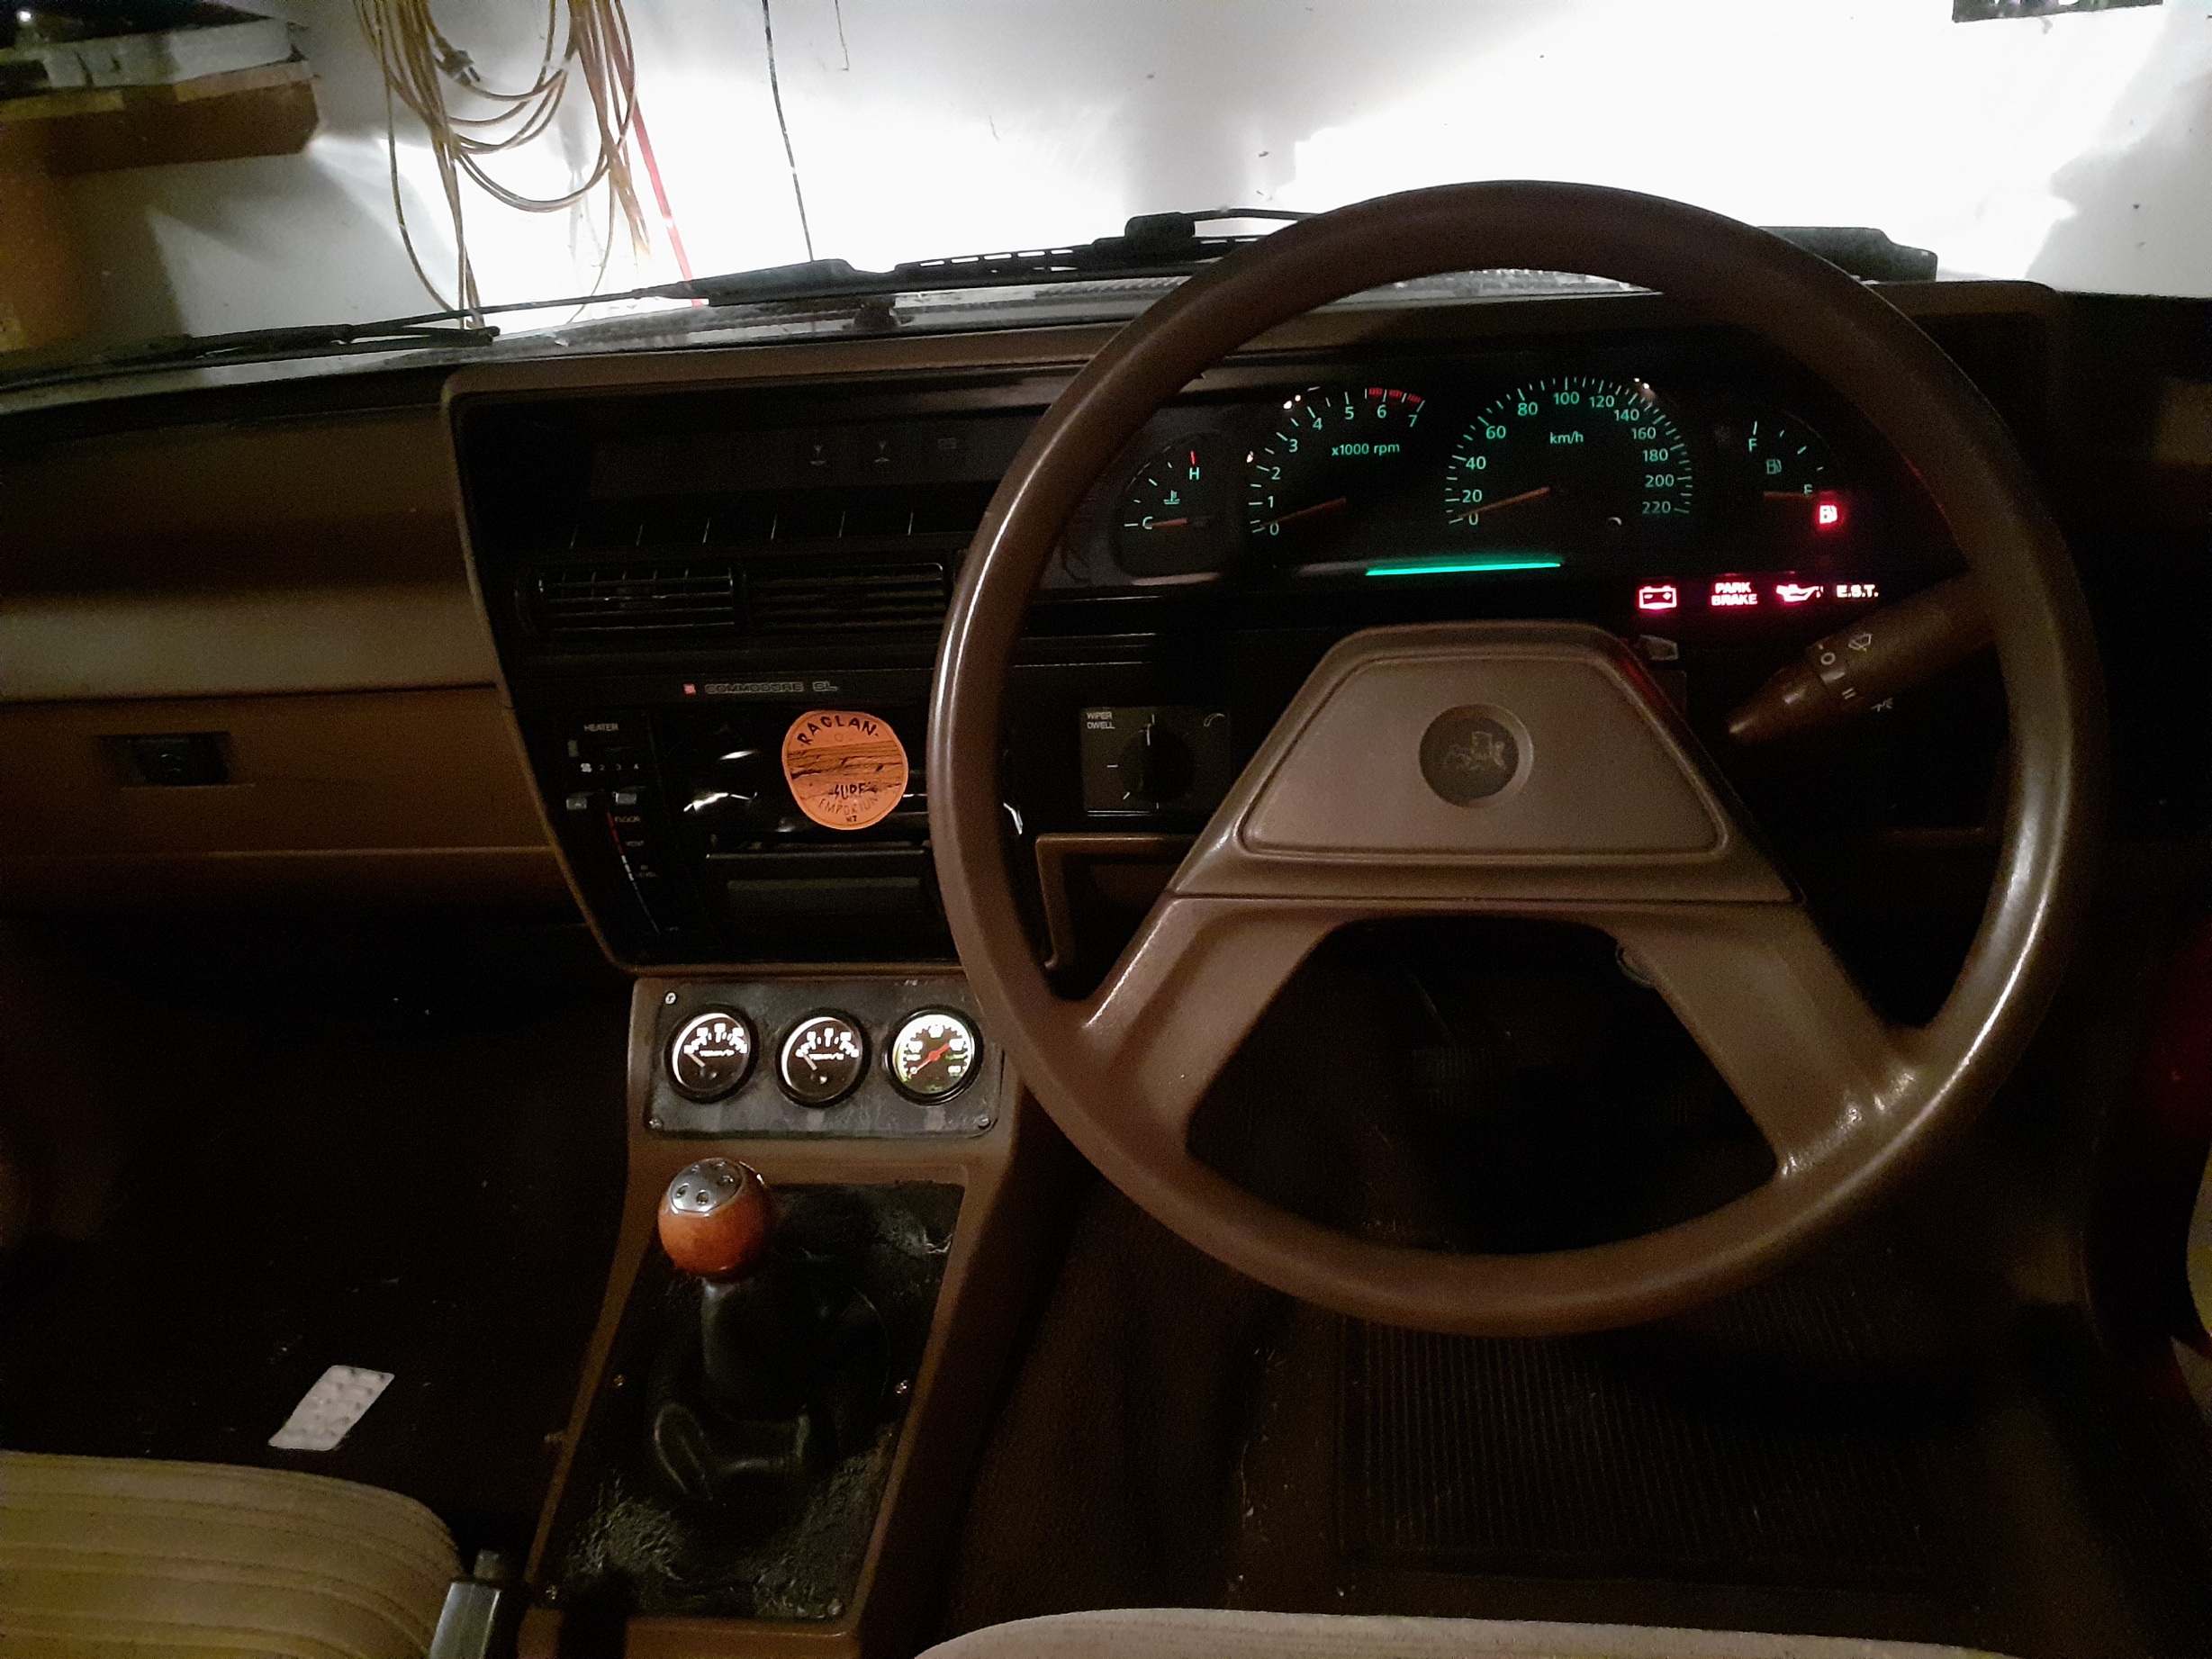
At this stage the gearbox was all done, I'd put clutch resiviour in, bleed and put new oil in the box, all the interior was taken out and cleaned, carpet washed with soap and a water blaster (bit oil stained) And installed the battery in boot properly with all-thread welded to the boot floor, with a steel hold down clamp , with isolator in passenger footwell which can shut all power down to the car, after all the wiring has been moved so much I thought it a good idea. The inside was now much cleaner and tidier.
4 points
-
Still been cracking on with this, 70% finished with our tiny home build so that's taken priority over this unfortunately.. Still been trying to get this running. Installed exhaust with lambda o2 sensor in it. No photo though. Fucked off the extra 2 injector loom and plugs and terminated the end. I used my soldering iron to engrave the plugs so I no which is which. Loom all finished now. Mounted ecu and relays on bottom side of glovebox hidden and out of the way. Used 2 bolts thru from glovebox into perspex so can remove easily enough if need be. I can access all the fuses so hopefully shouldn't need too. Fired up ECU and went thru all the pre start up checks. Everything works, and is what it should be, coil 1, injector 1 etc. no error codes not bad! Green LED is my AEM methanol light, if an error code pops up it'll flash depending on the fault code/low reservoir. I've set it up in the ecu that if it throws an error/low reservoir it'll engage the supercharger clutch and switch fuel tables that ill get setup at tuning stage, pretty handy failsafe. The led illuminates brighter when it starts spraying. As I got further into setting up the ecu it didn't come with its problems.. Firstly the bmw e series tps had failed/was already broken before installing was a pickapart special. After testing with multimeter it was apparent it was stuffed. Back to pick a part for another, with my newly acquired testing skills I tested another before buying. After installing i was able to sync it to ecu so win! Then when trying to sync my trigger 1 with ecu, nzefi coil on cylinder 1 randomly blew the coil fuse at the relay and then when changing the fuse it would instantly heat up real quick and almost be untouchable within 10 seconds. All the other 3 worked. I had already checked for spark etc in ecu before I got to this stage. Re checked wiring and all is correct. Anyway nzefi were good about it and Chris sent out another but warned in past its been due to incorrect wiring. Got it all hooked back up and I was stilling struggling to sync trigger 1 with ecu. Turned out the crank sensor my mate gave me was a magnetic pickup and not a GS sensor for ferrous metal.. picked up another cherry GS100502 but am yet to change it over. Should do the trick though. My gauge pod turned out so I started installing, the 2 gauges are oil pressure and boost gauge. The oil pickup i will run to ecu and set up a failsafe then ecu to run the gauge. As previously mentioned i decided to mount it on steering column behind steering wheel. Pretty happy with how it turned out. Couple more pics of engine bay cuz why fuckn not Thanks for looking Almost there now3 points
-
Neat project! Looks pretty solid for its age I had a valiant that was dereg since the 90s, nothing came up on carjam but it was on NZTAs database3 points
-
3 points
-
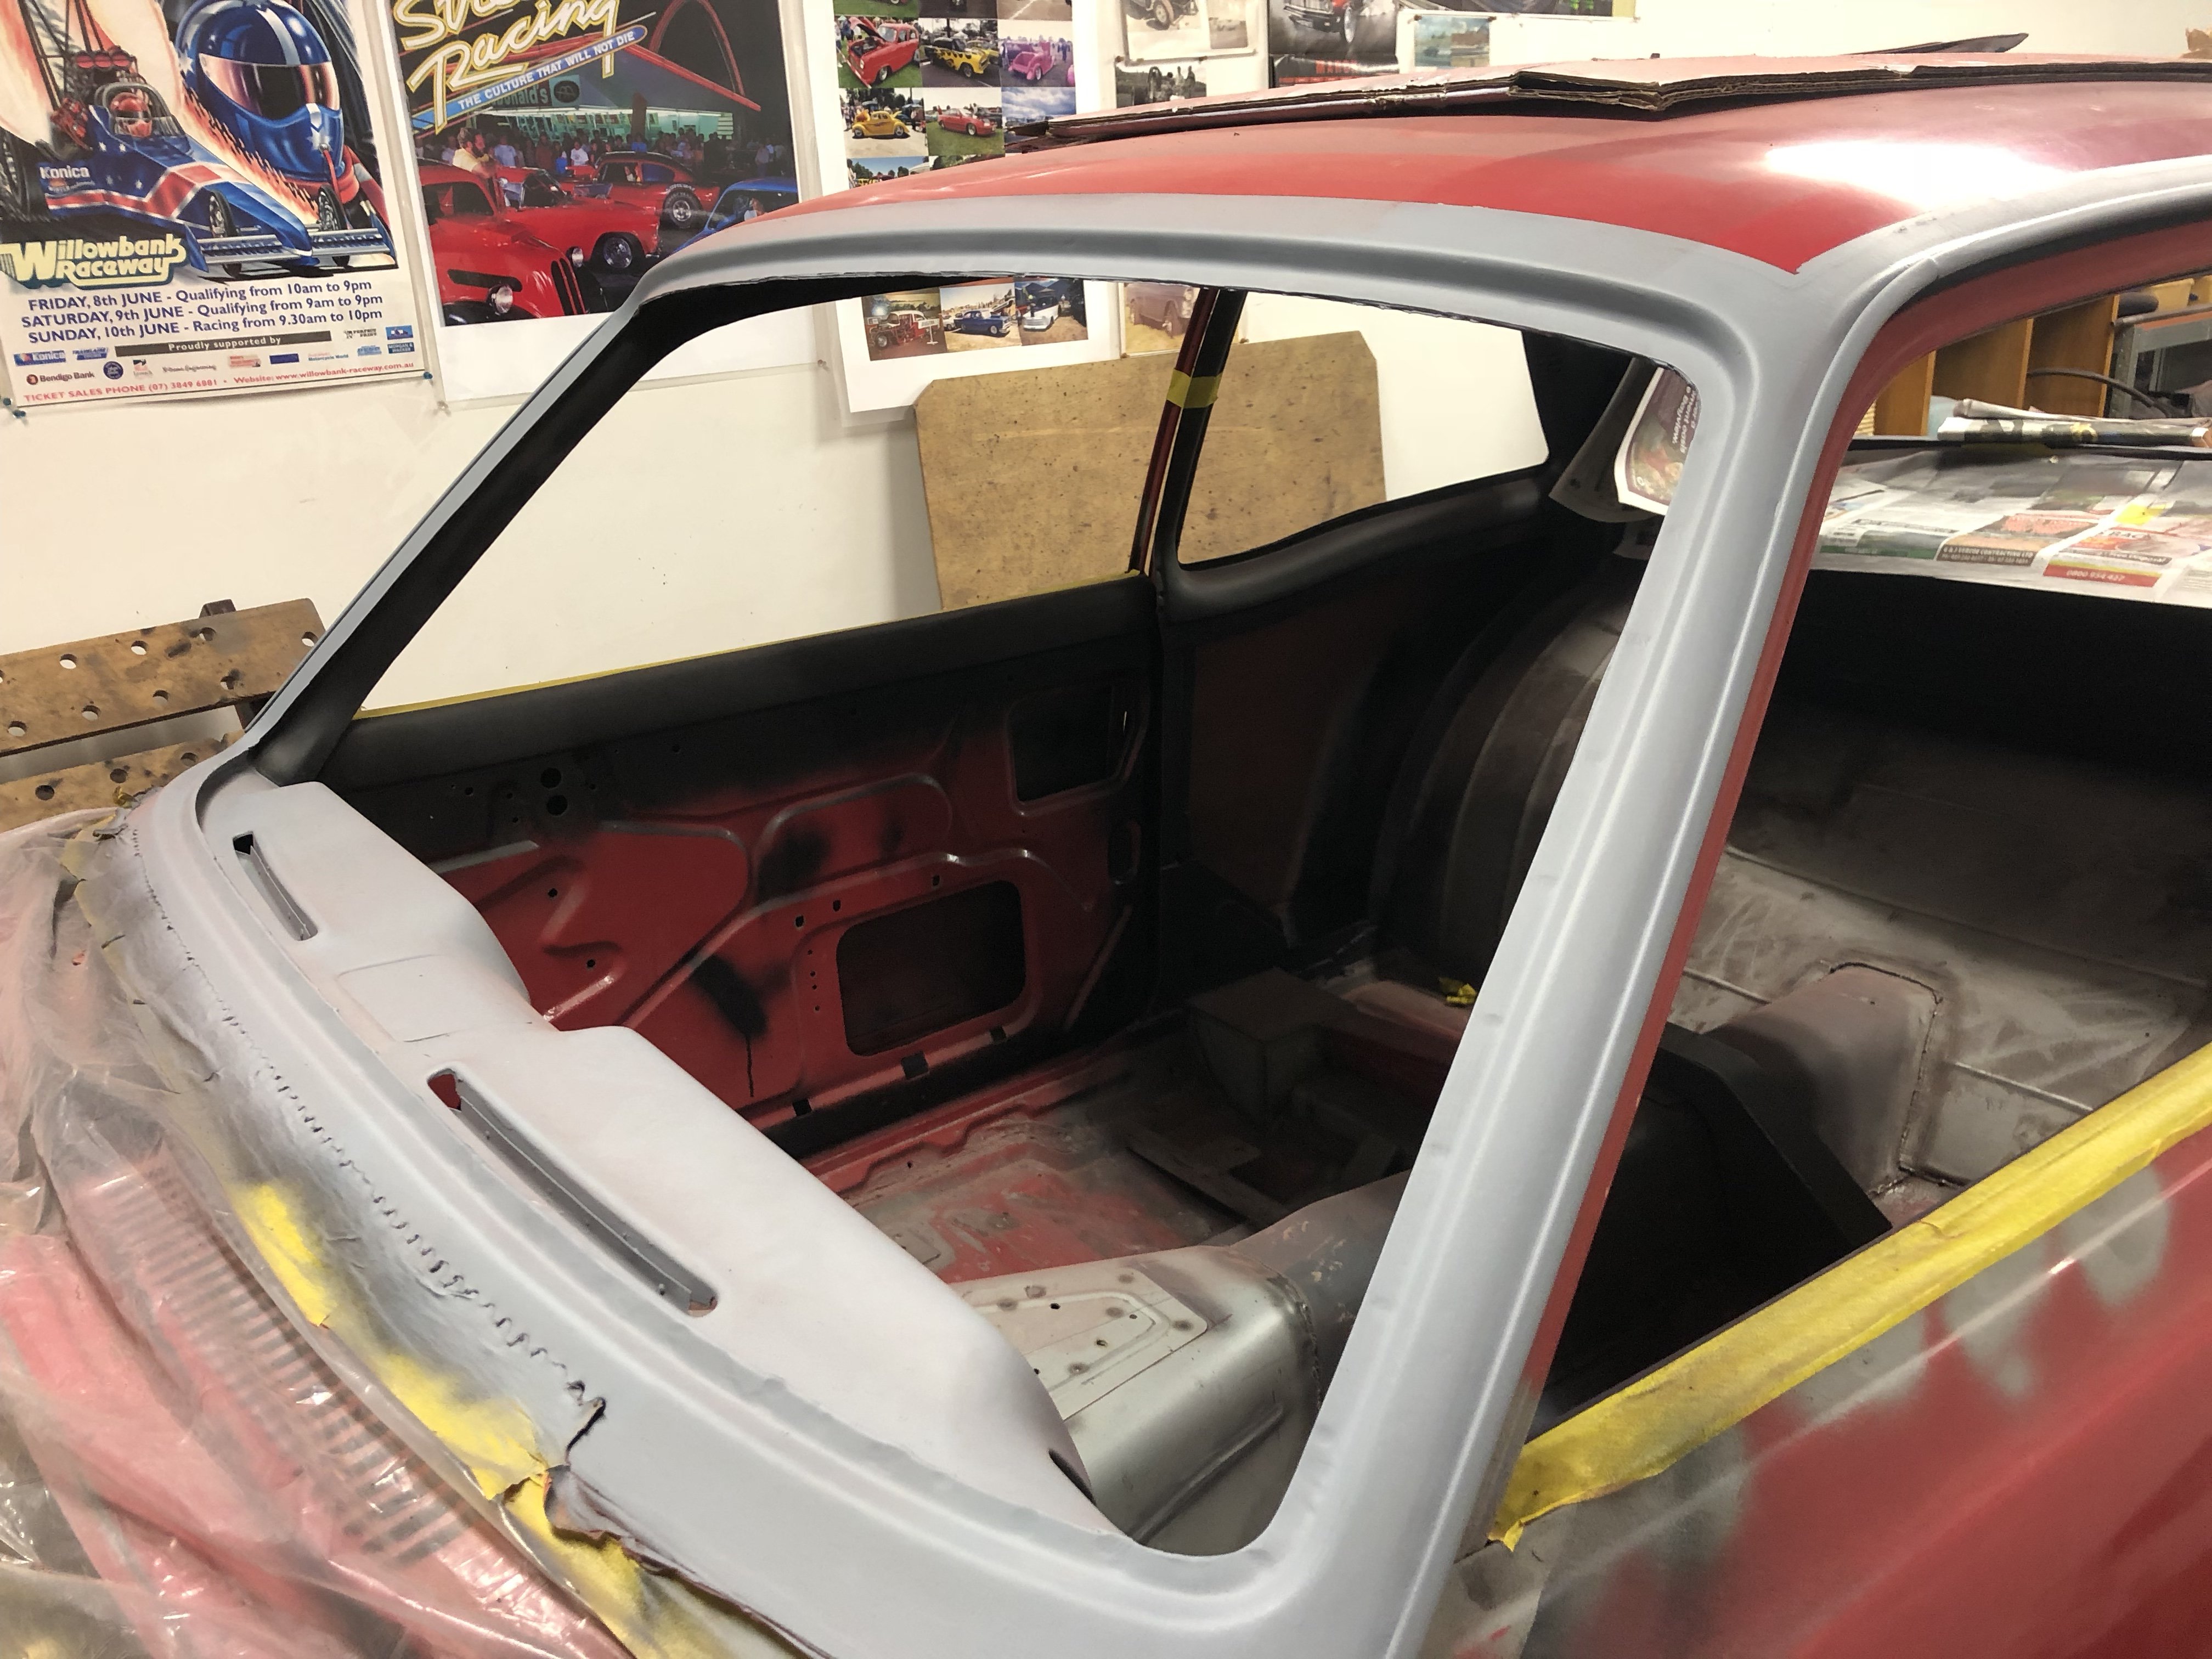
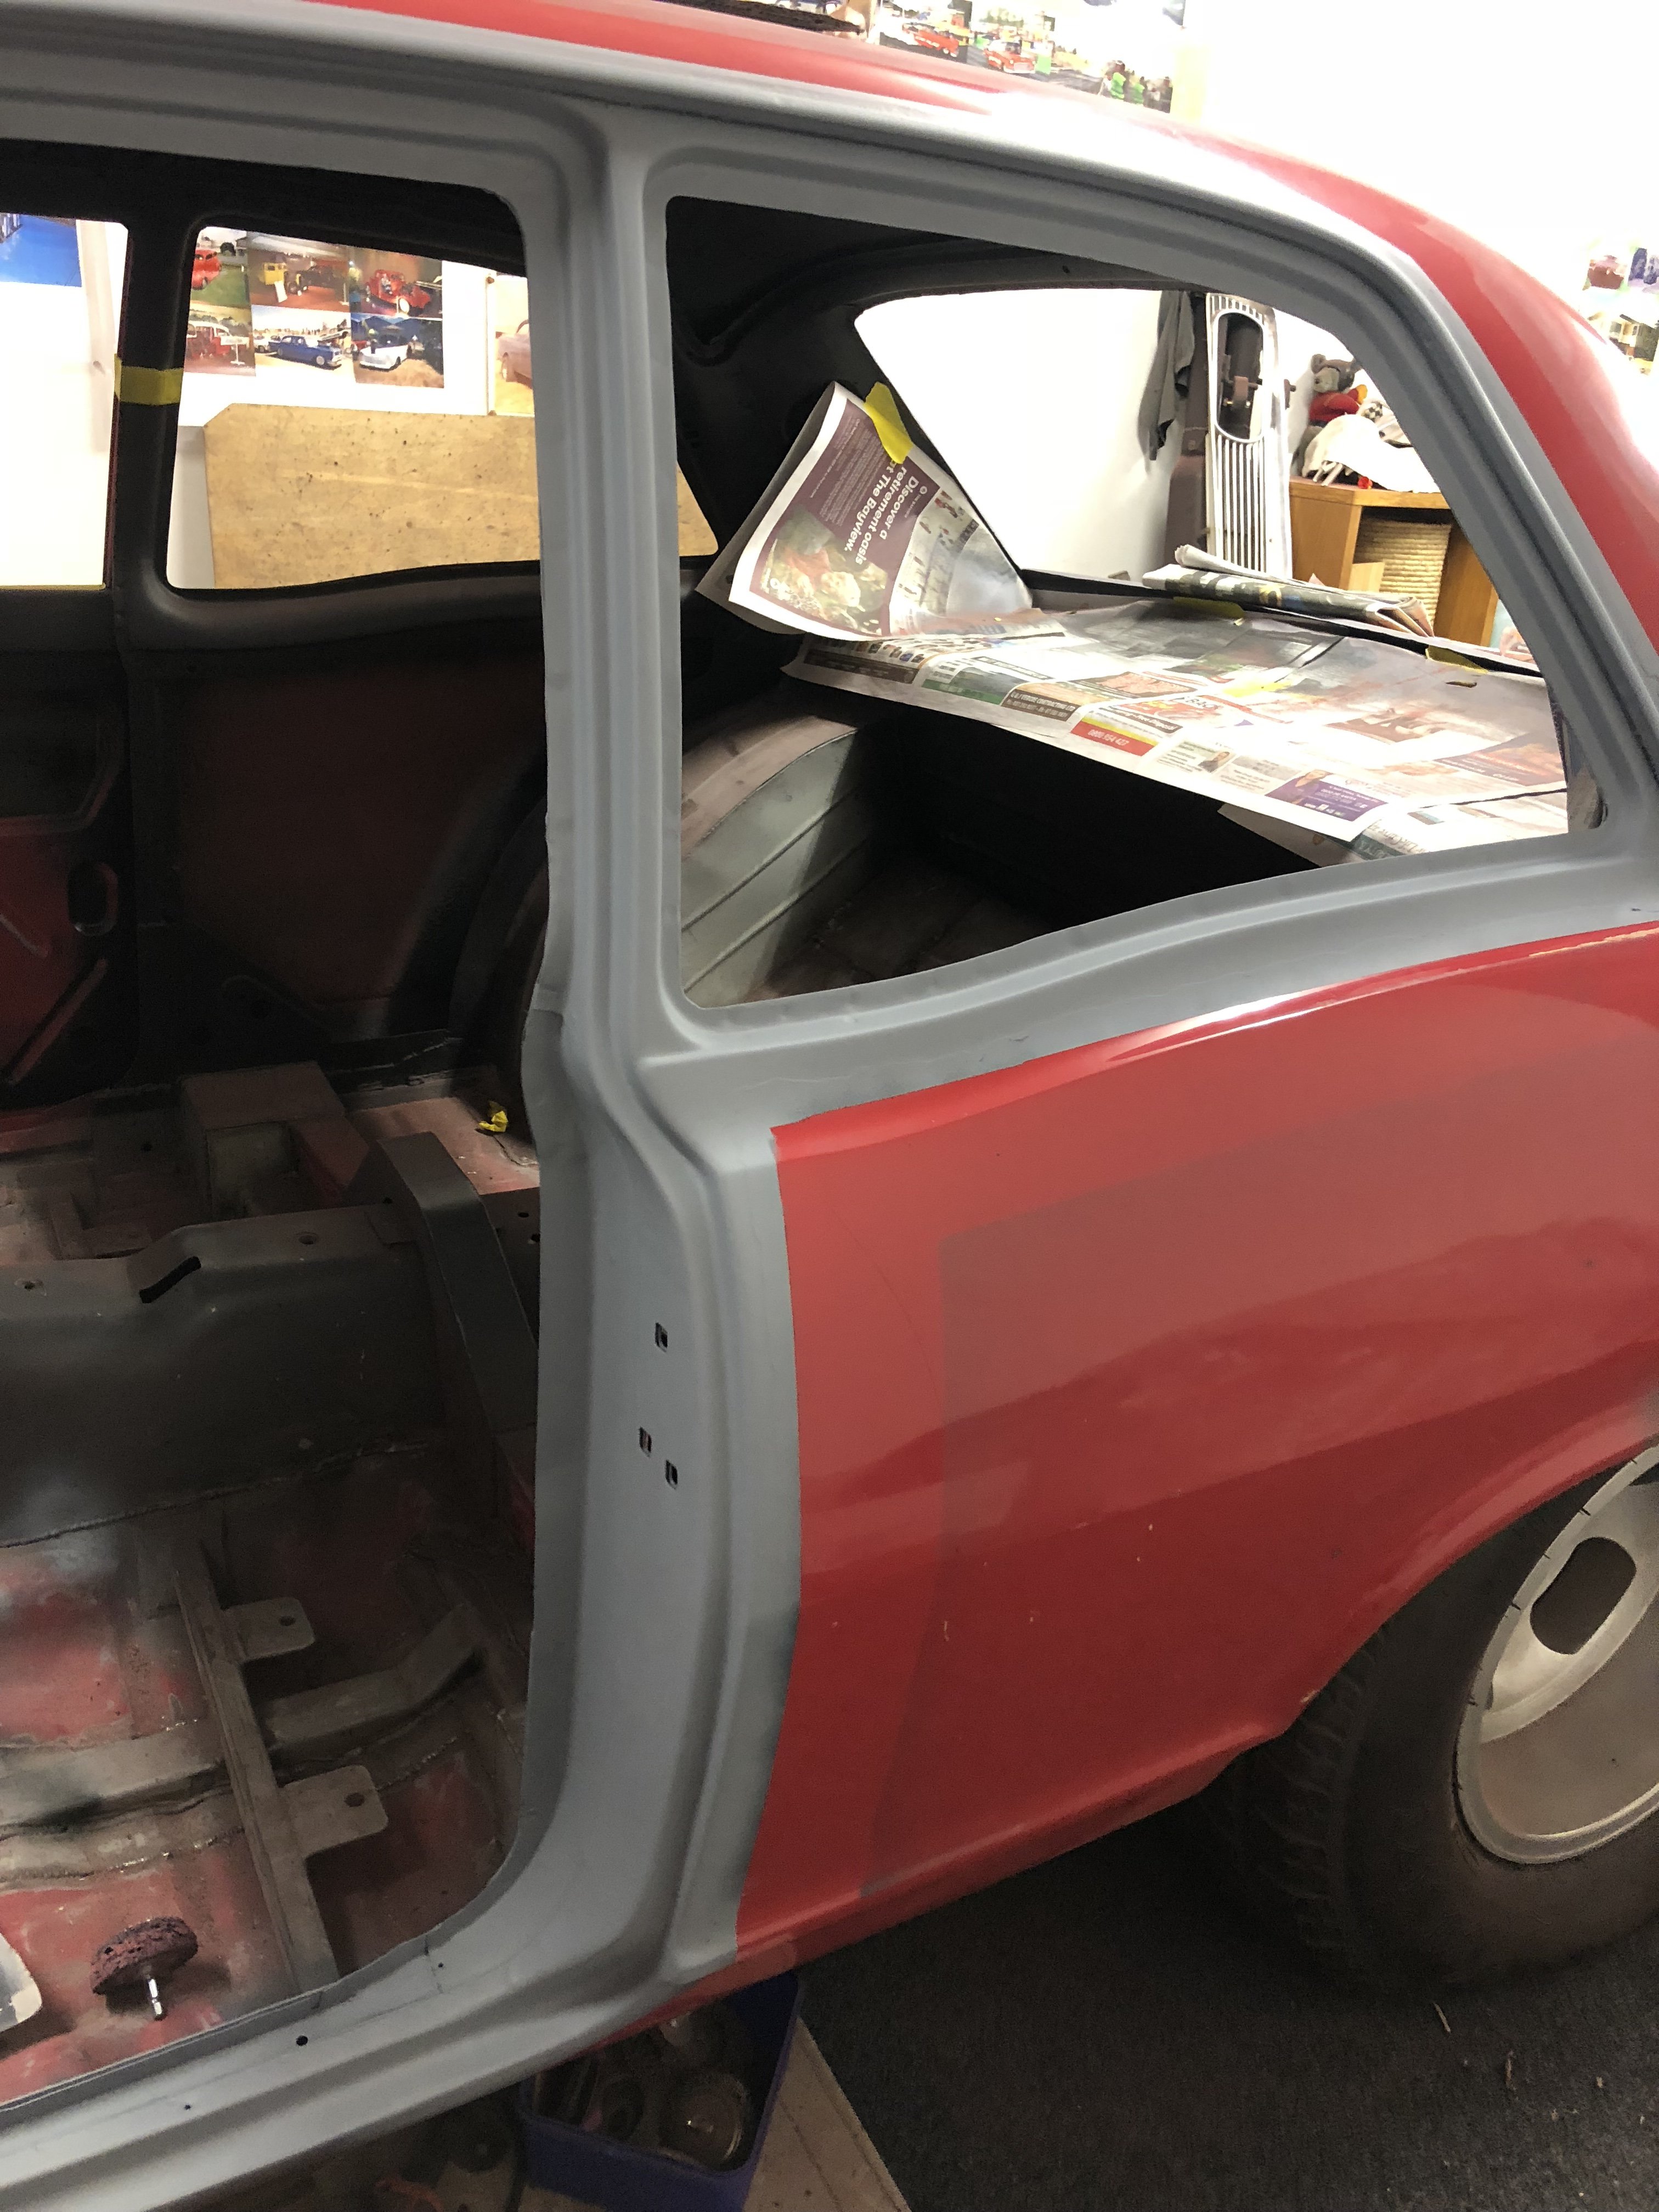
Slow progress on the interior but we’re getting there. ive black etched and primered all the window openings so we can spray them in the green. We have gone with the same original colour of the viva wagon which should be cool that way I can keep moving and install the windows.
3 points
-
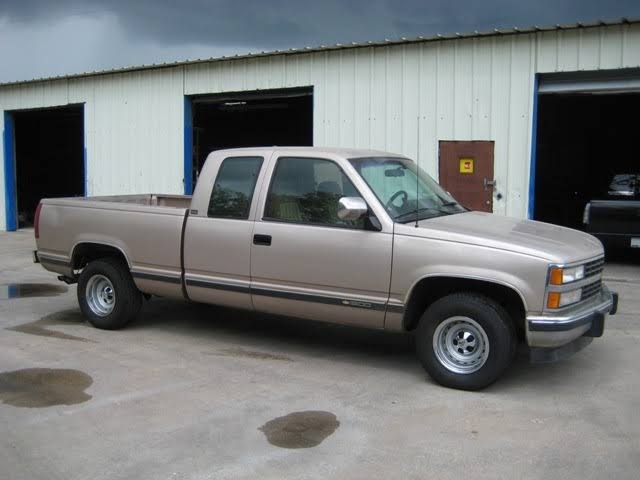
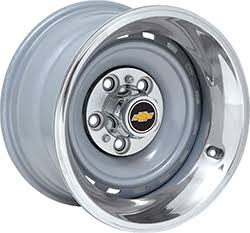
Have been collecting parts for slammage, got some new belltech spindles and 3" lower springs. Called into a workshop and a guy there had bought a C10 and wasn't going to use a lot of parts on it so I got some spring mount plates and axle flip brackets , and set of 15x8 factory earlier model steelies for $100 so that was a good score, gives me another wheel option, I'll get them powdercoated silver and hopefully the stock 98 center caps work I like this one , it has later model van center caps though
3 points
-
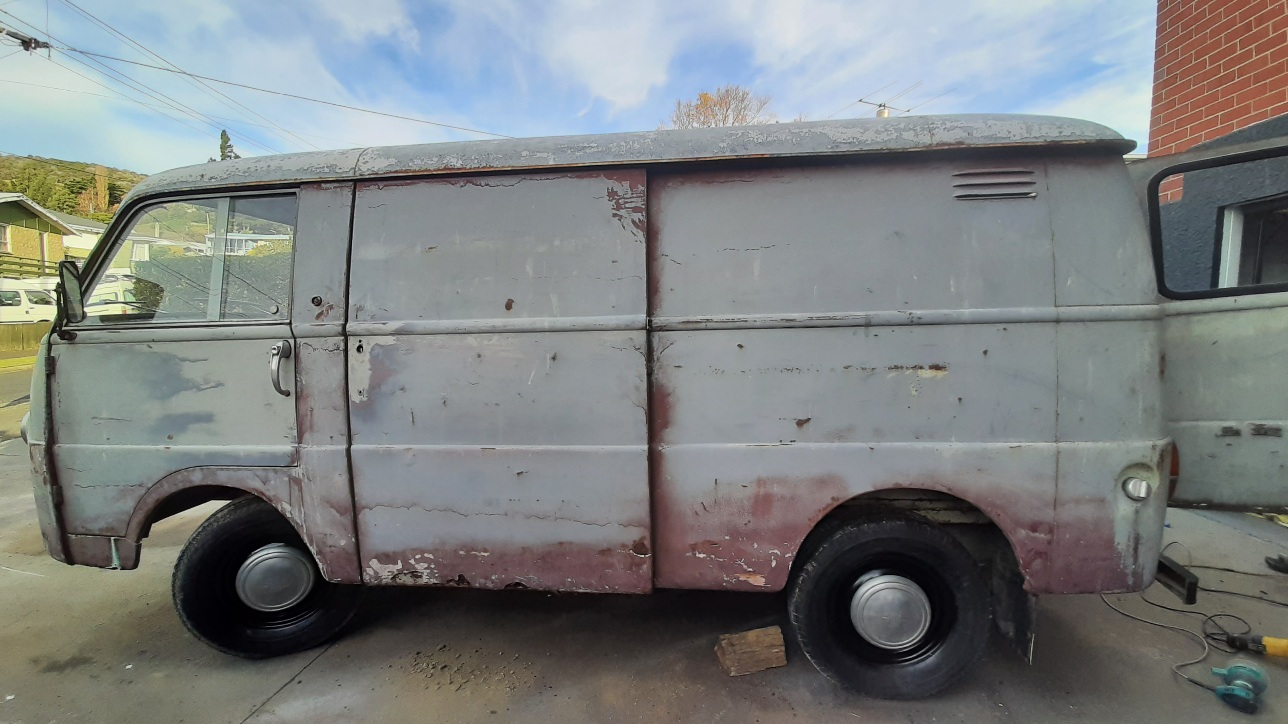
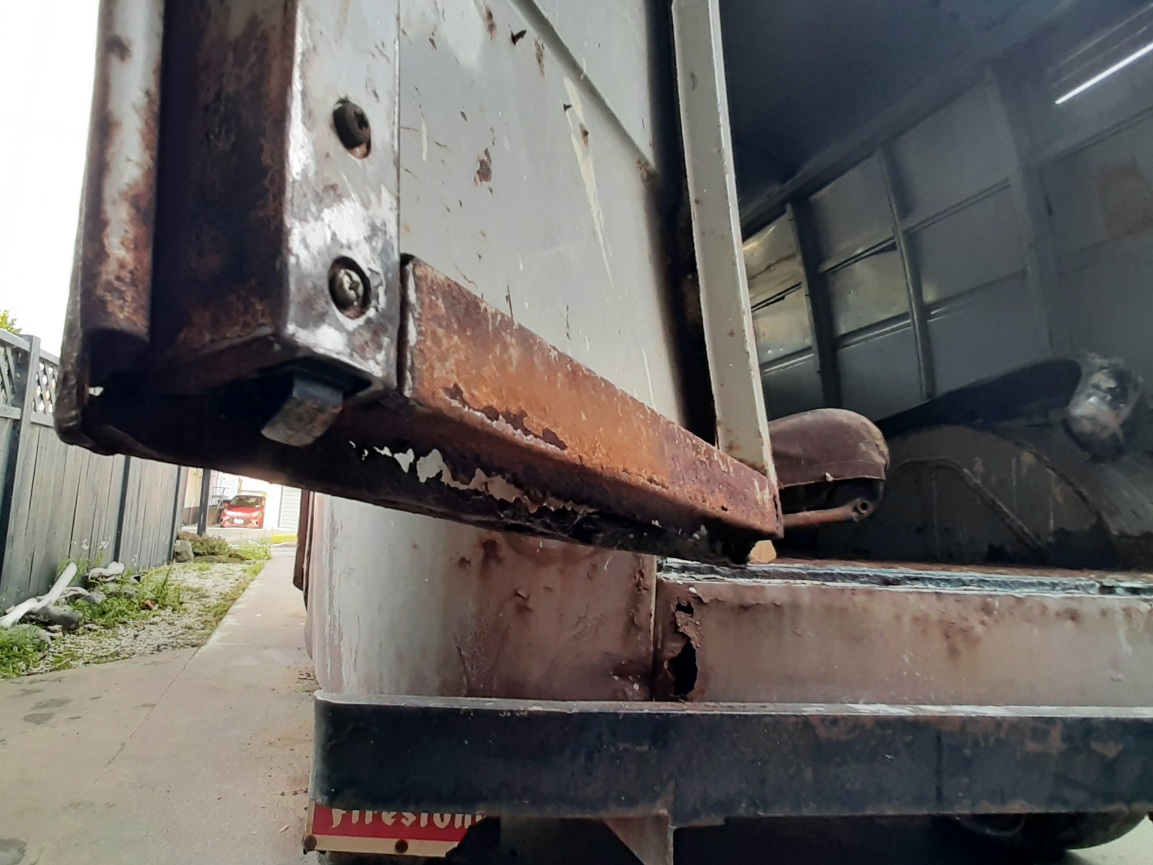
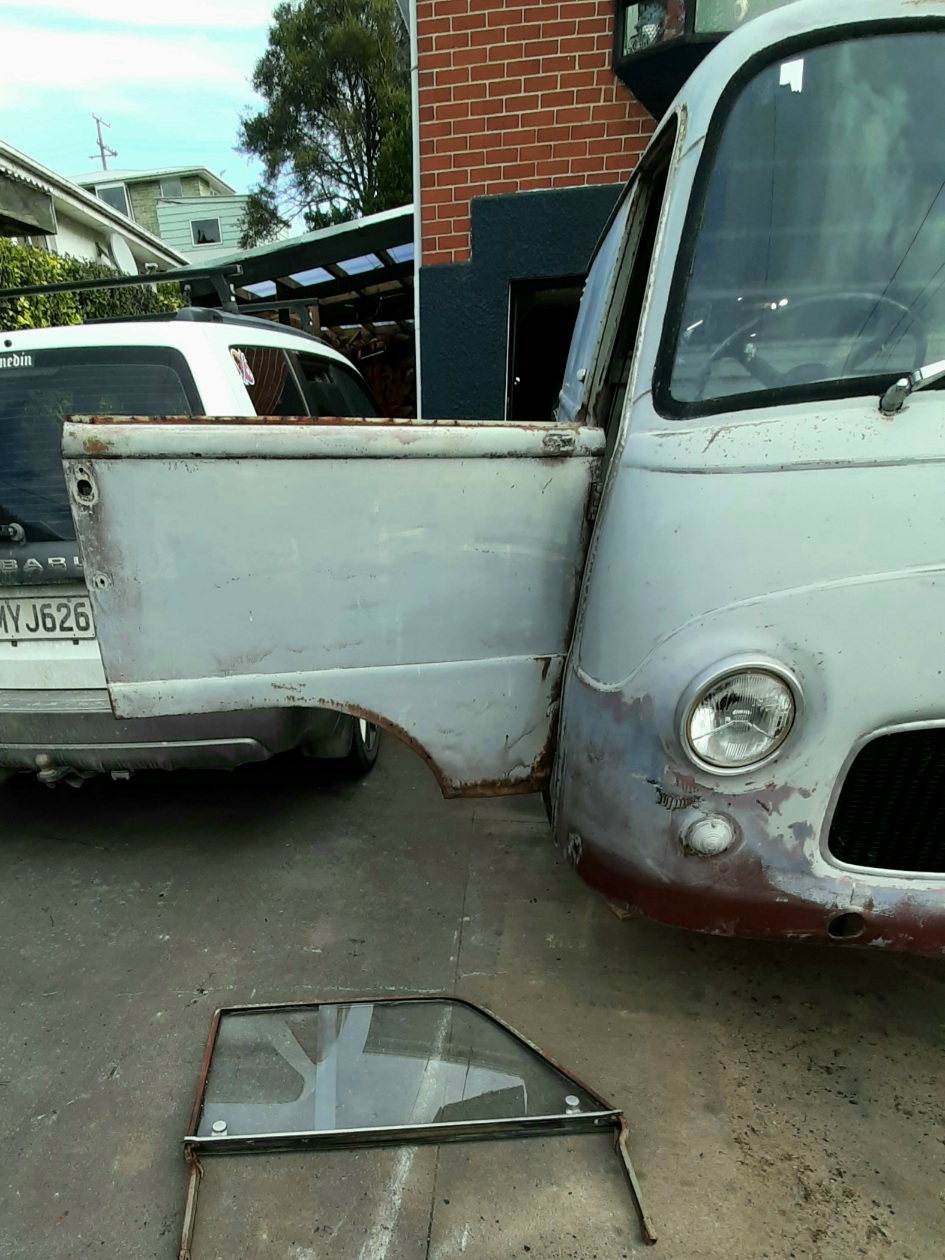
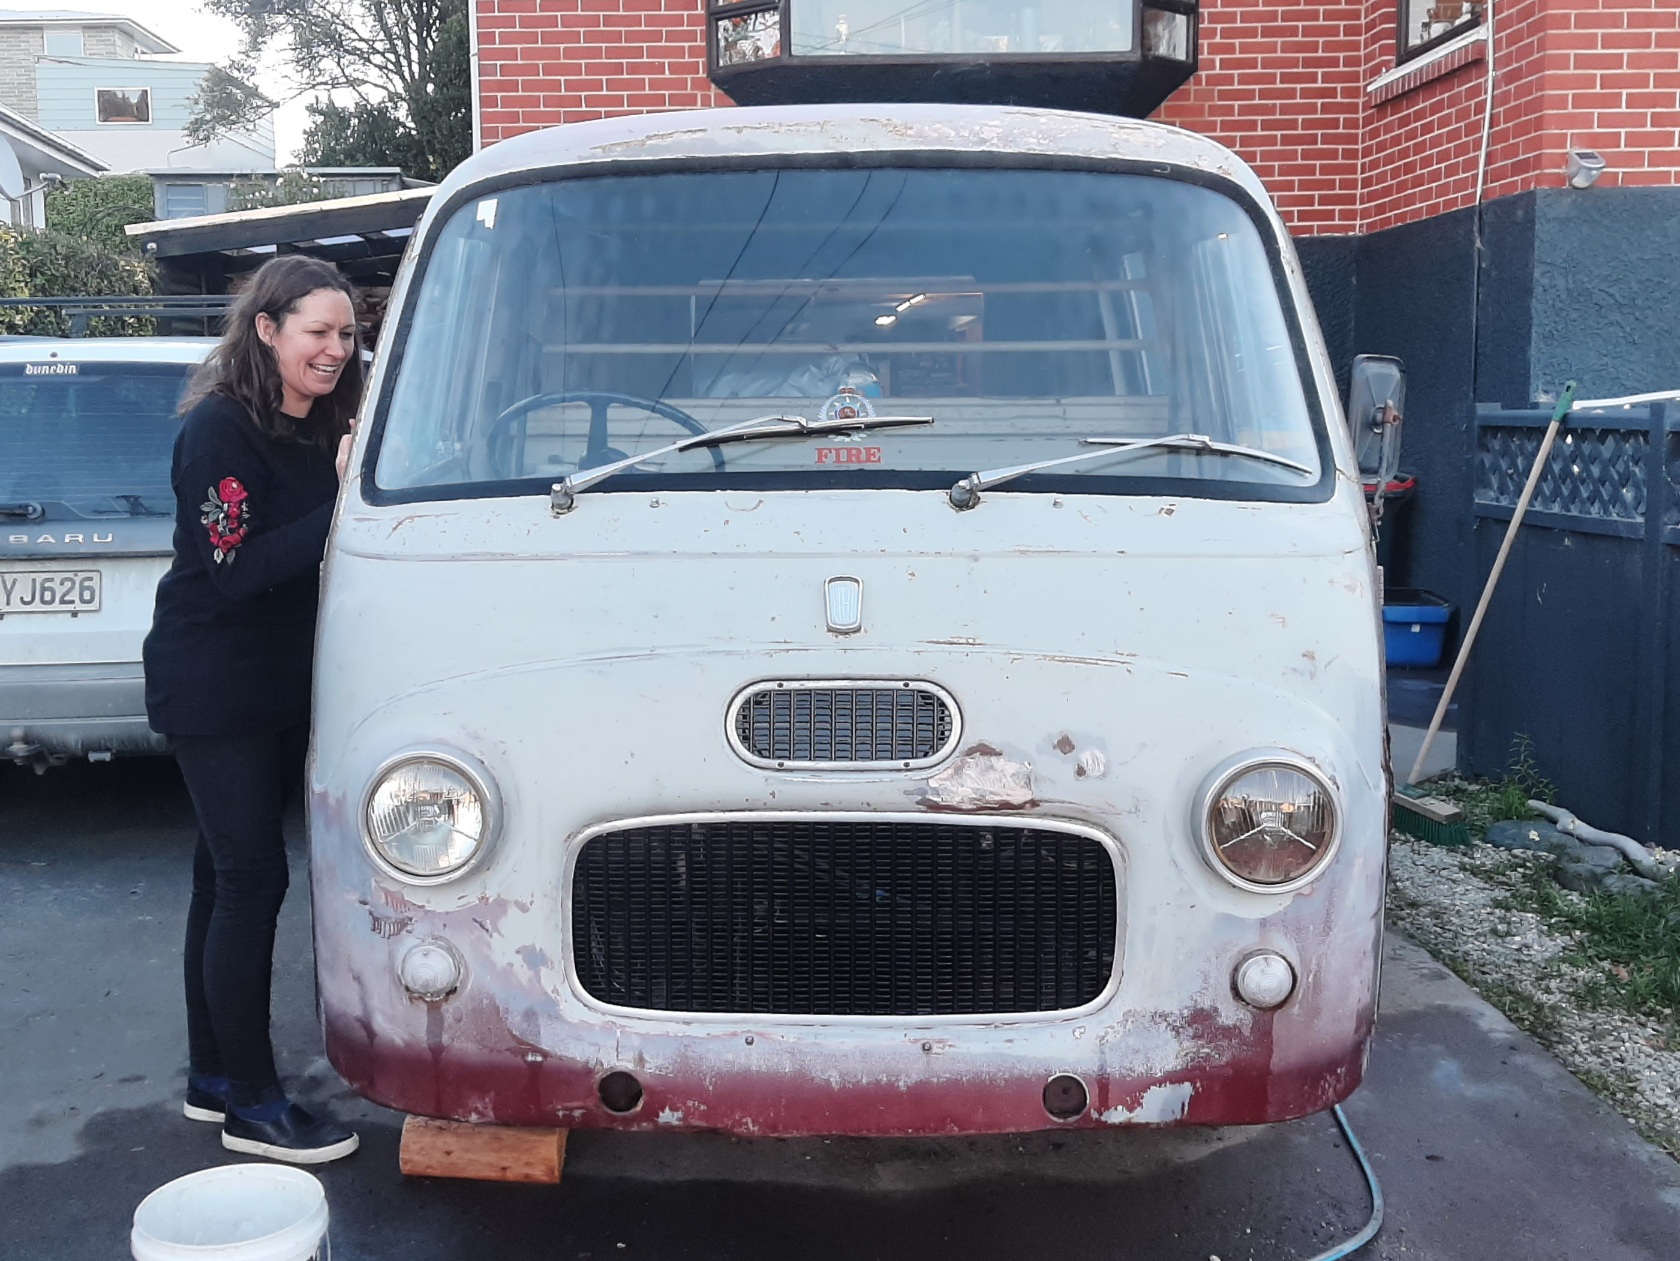
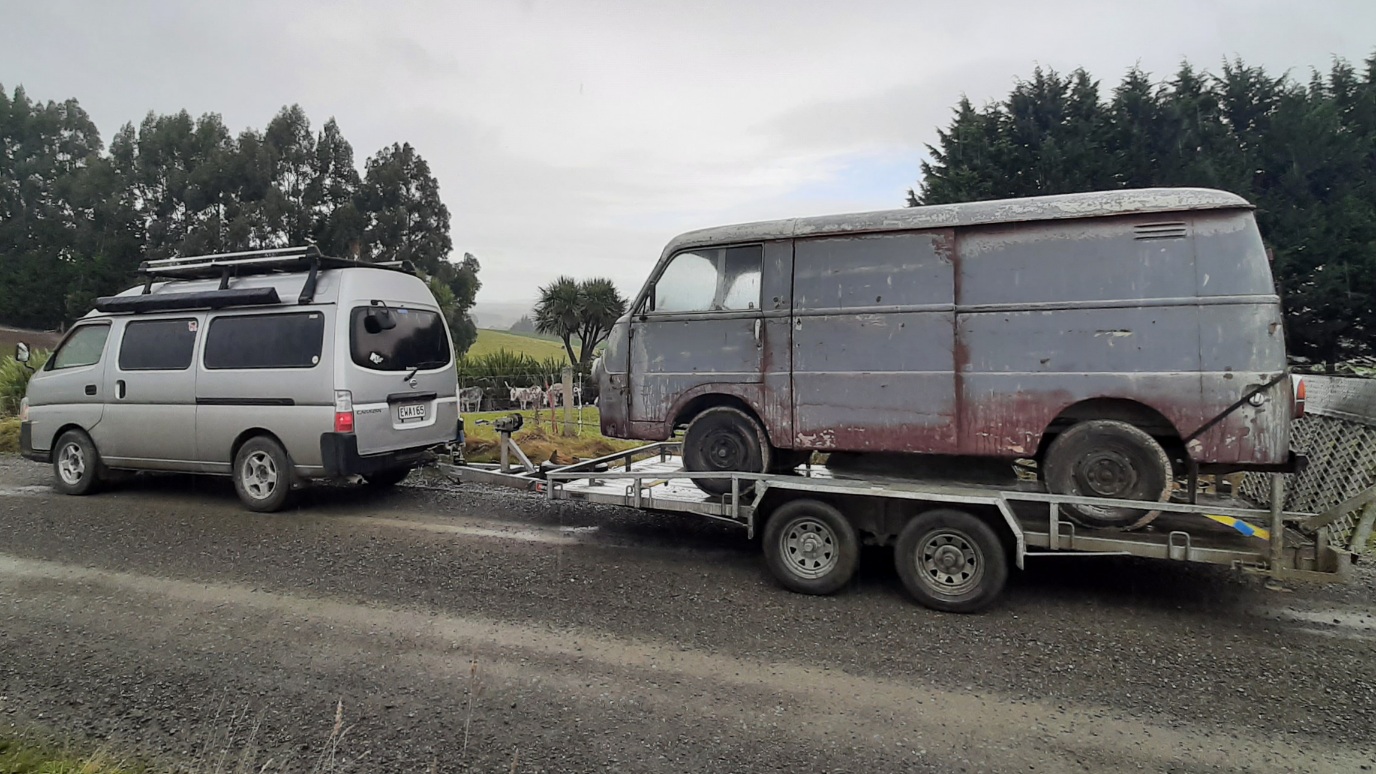
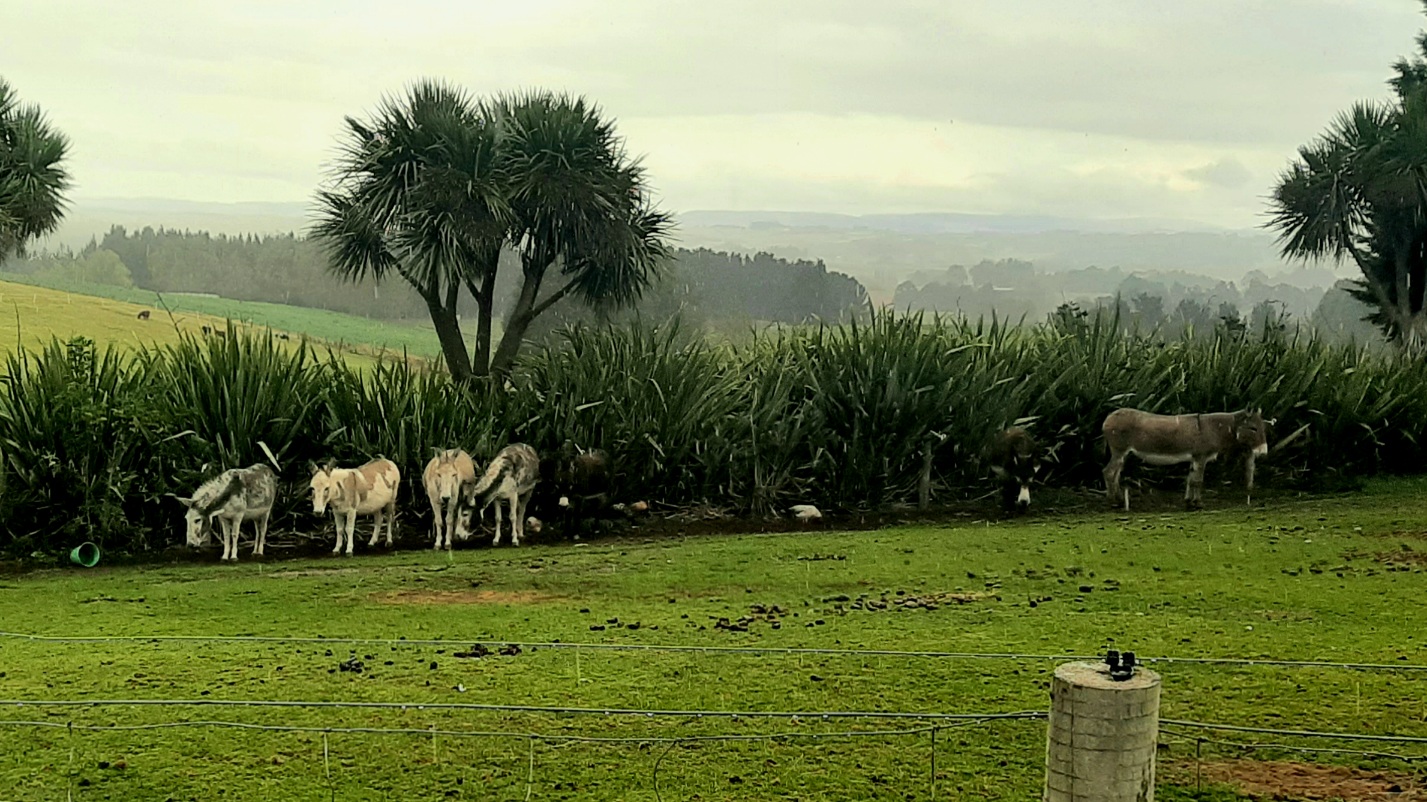
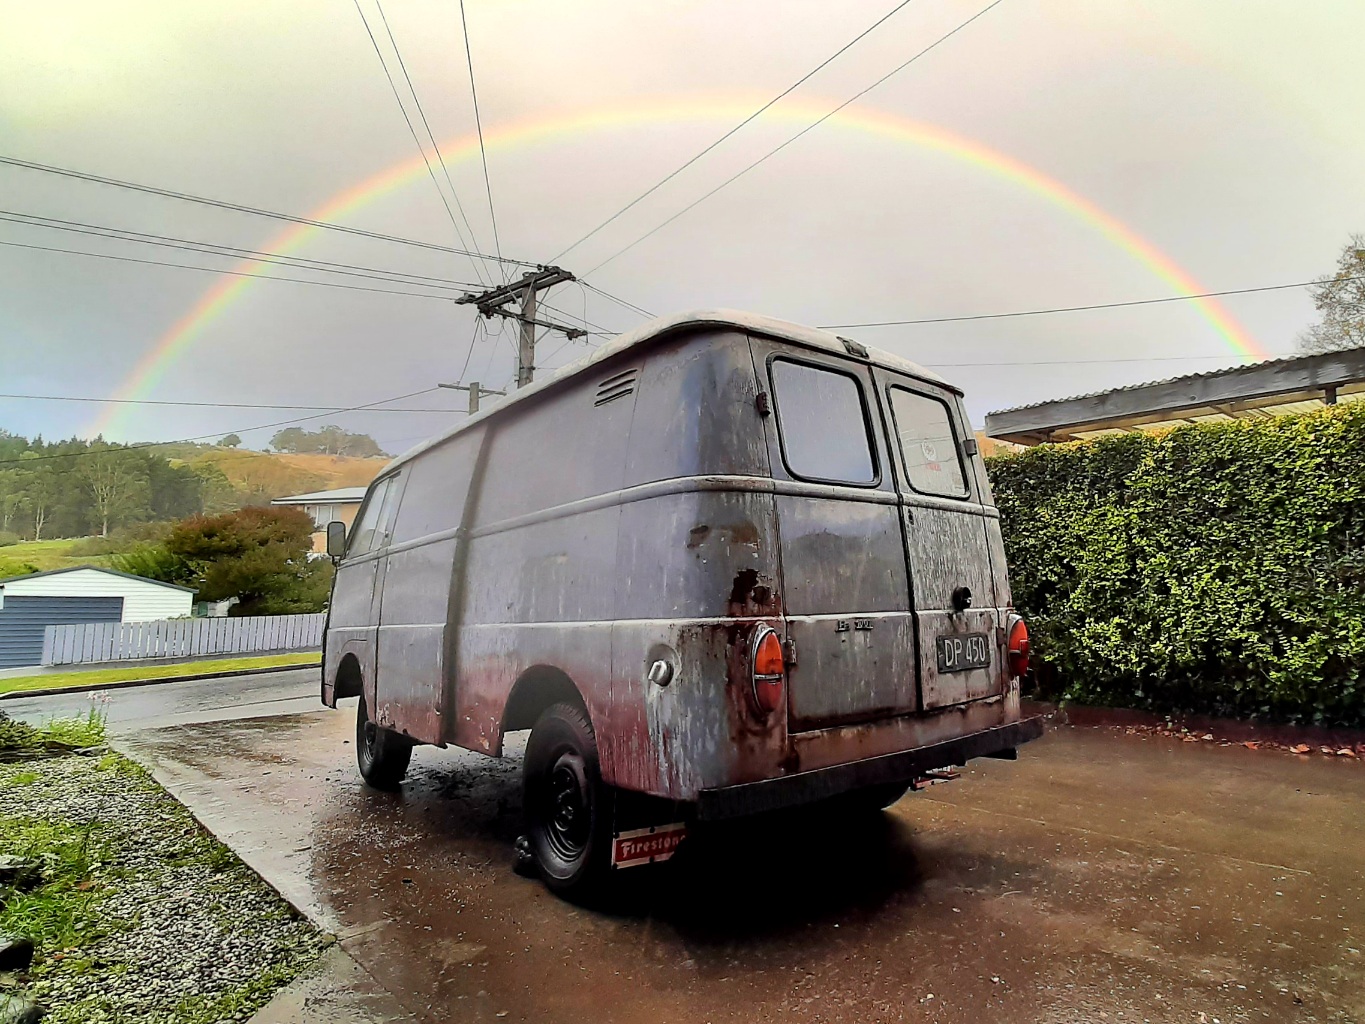
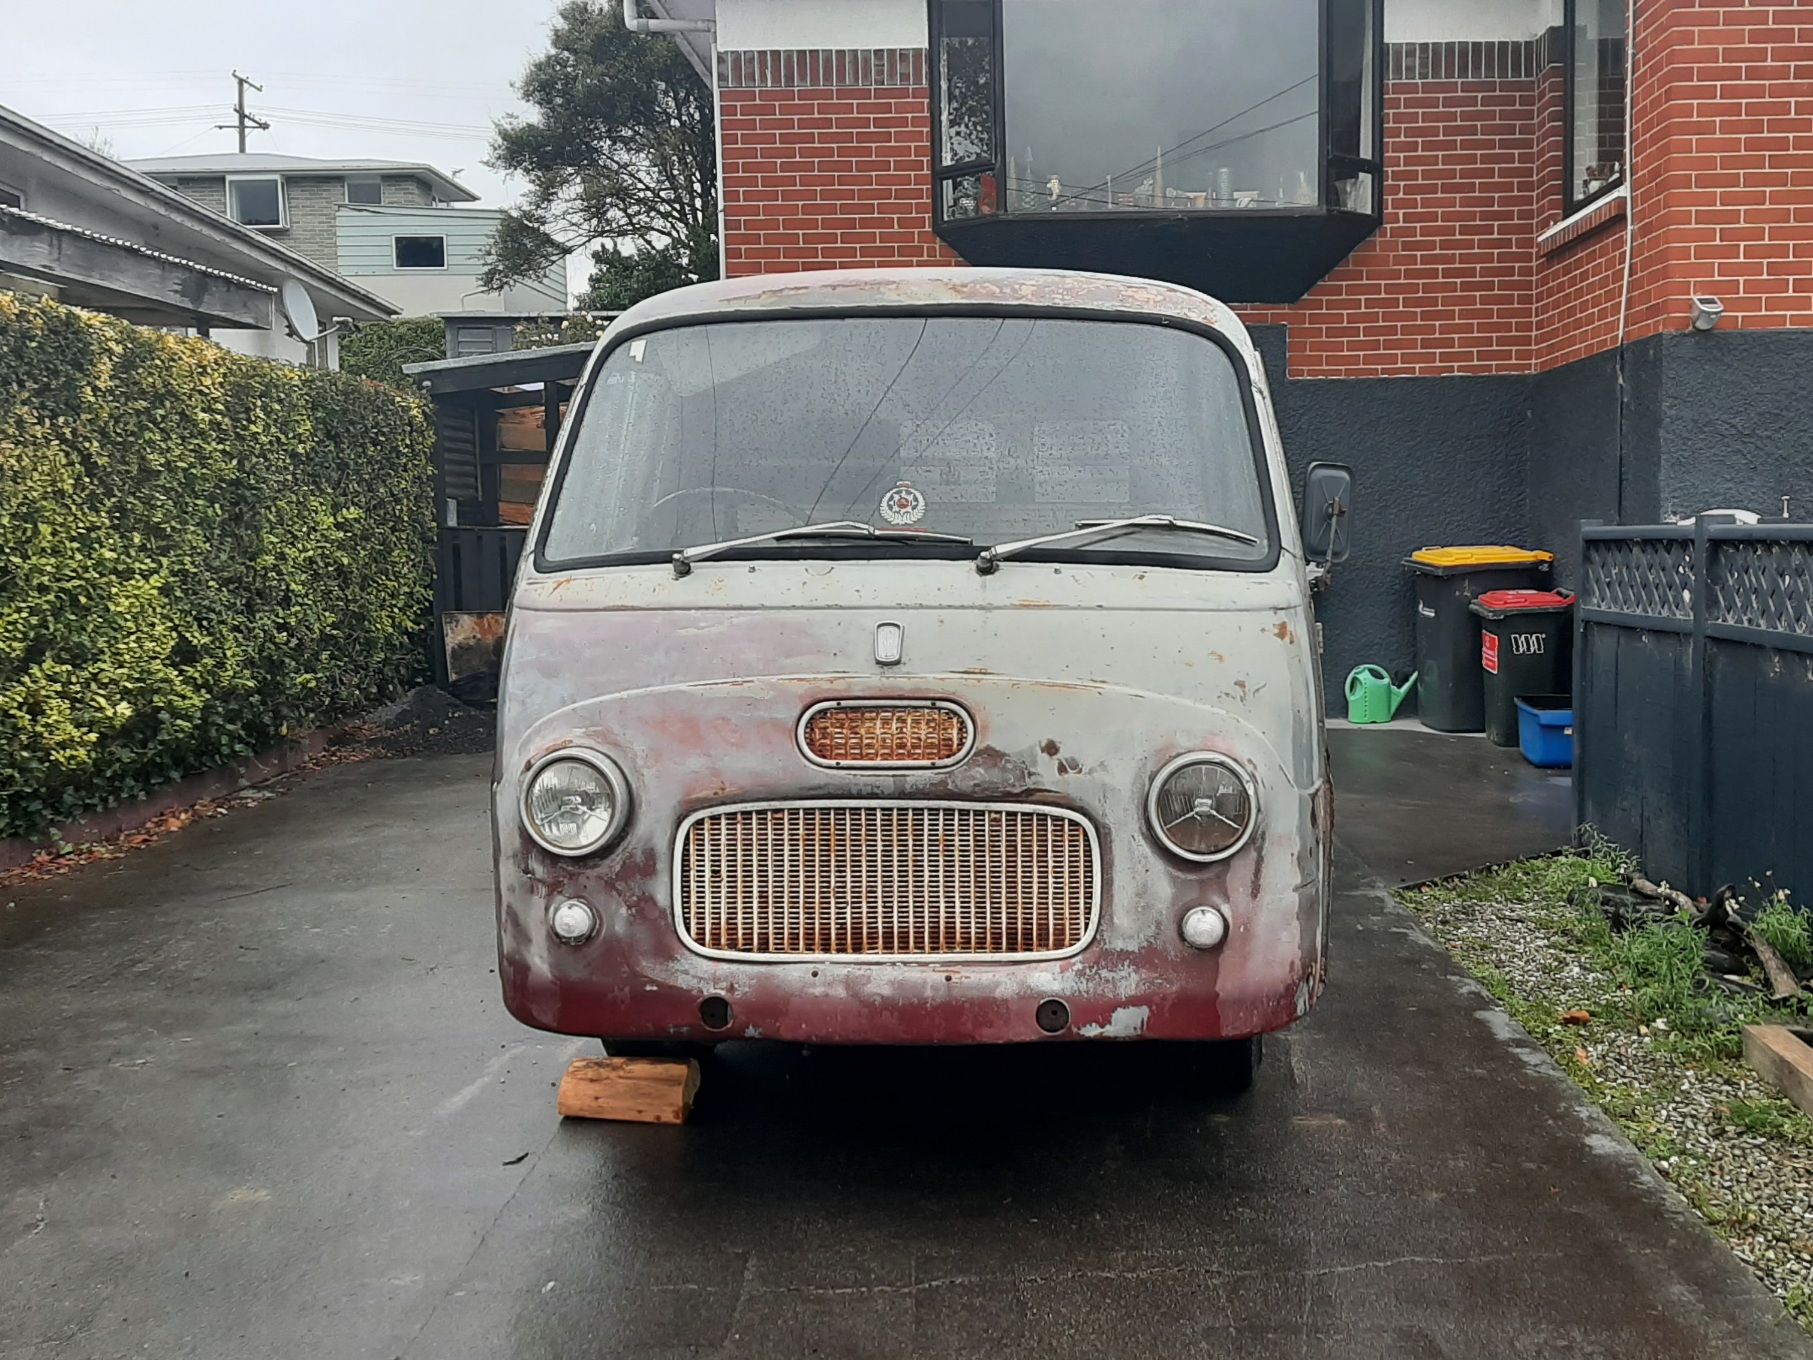
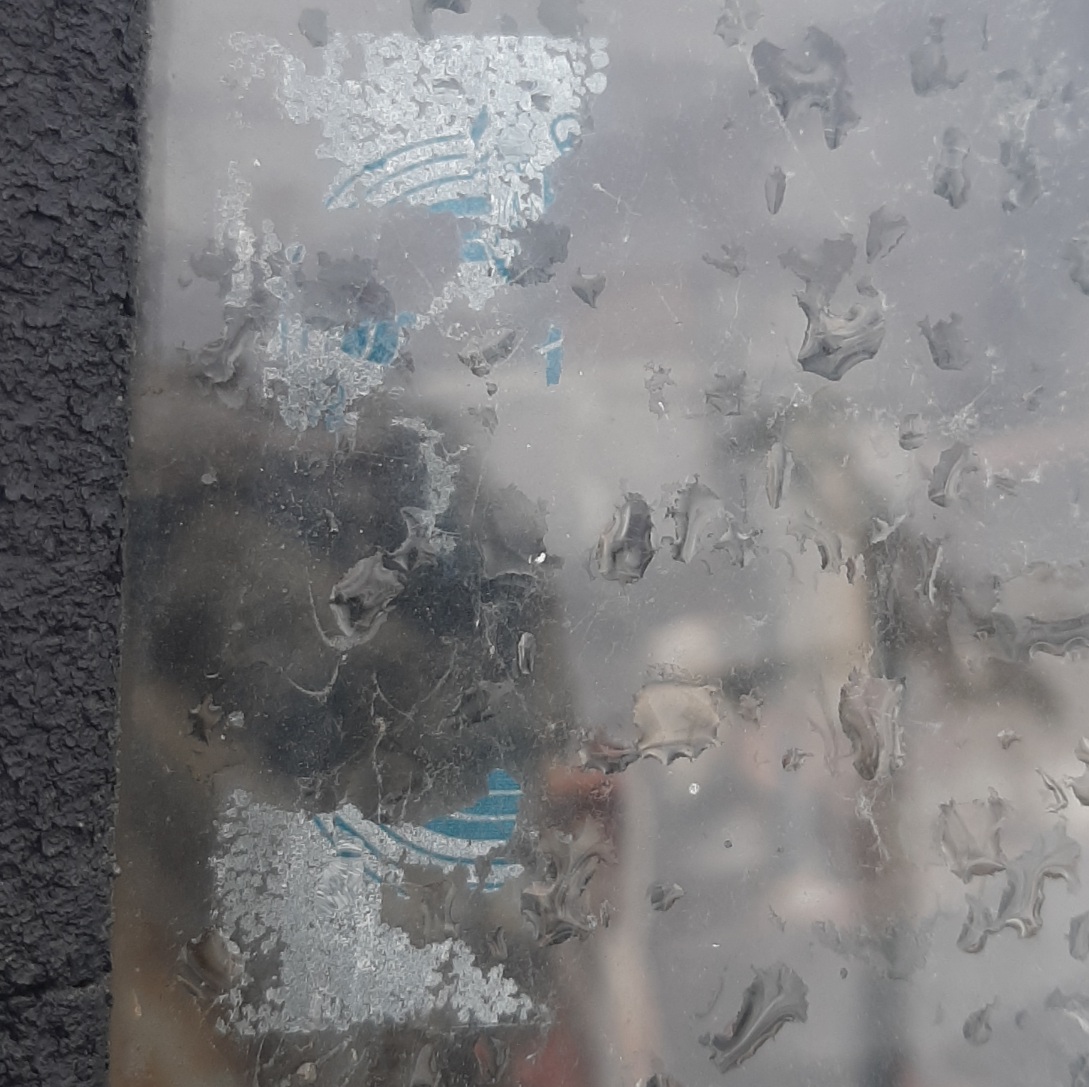
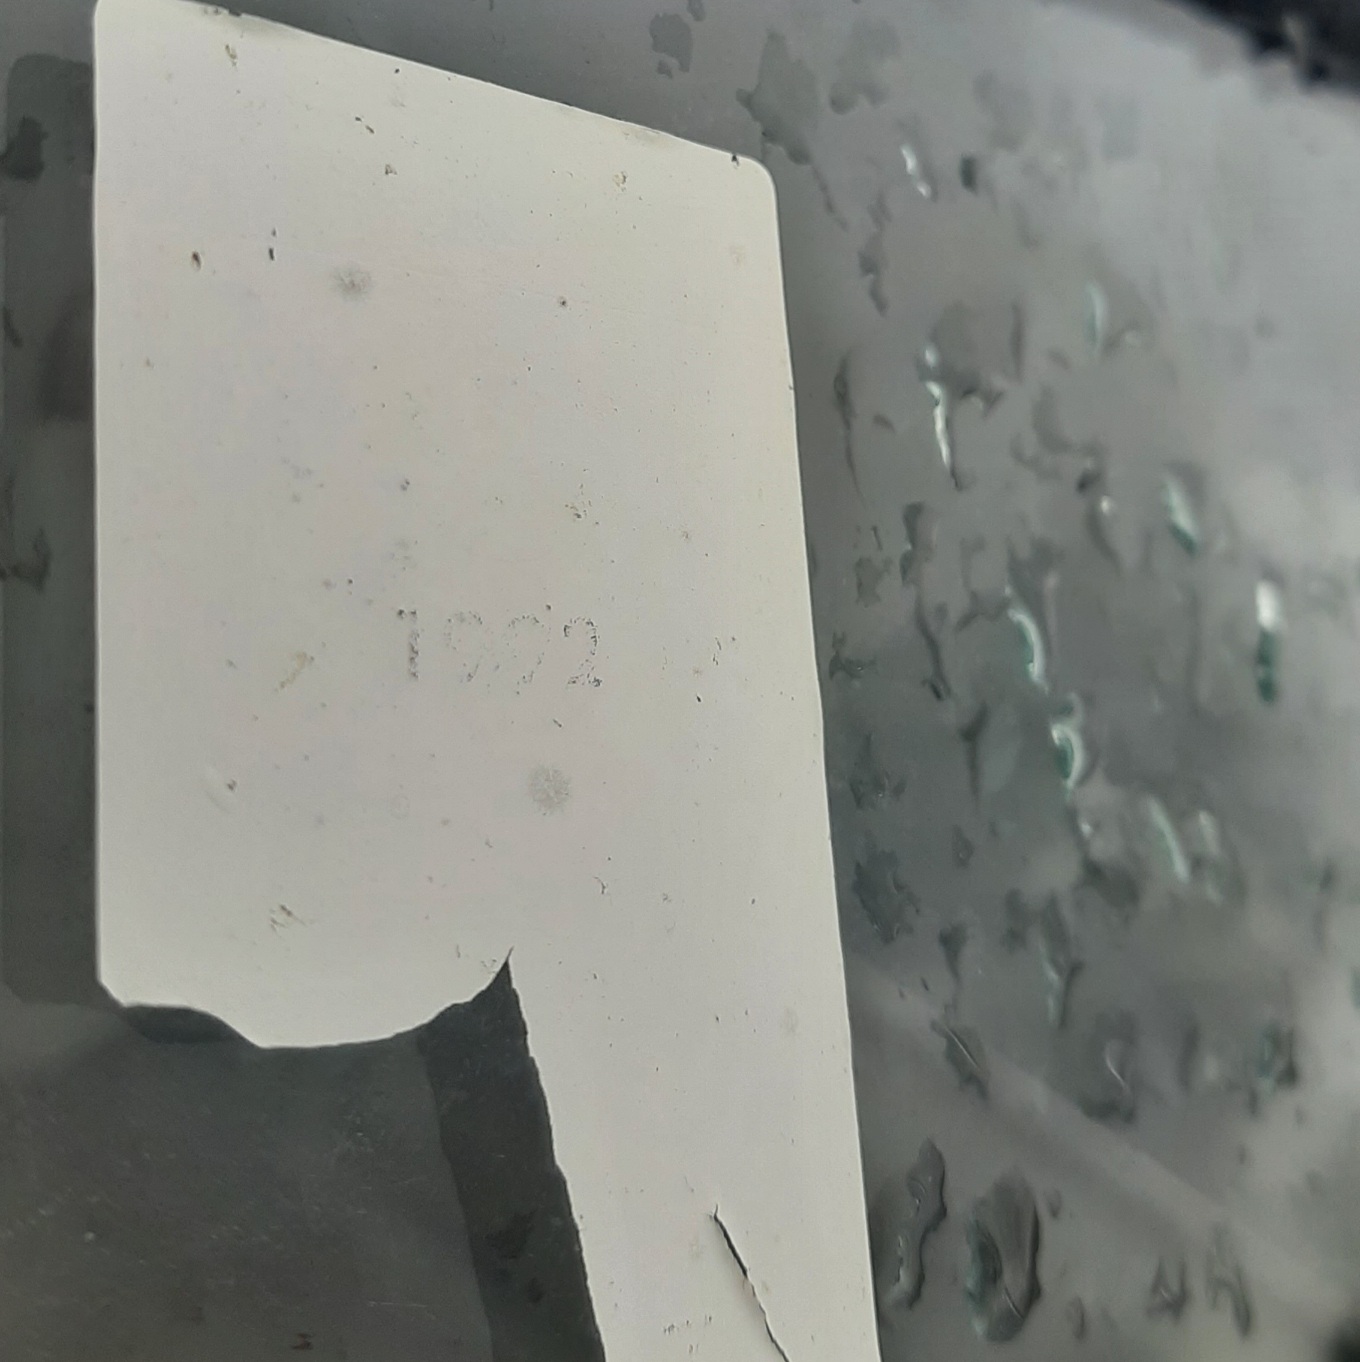
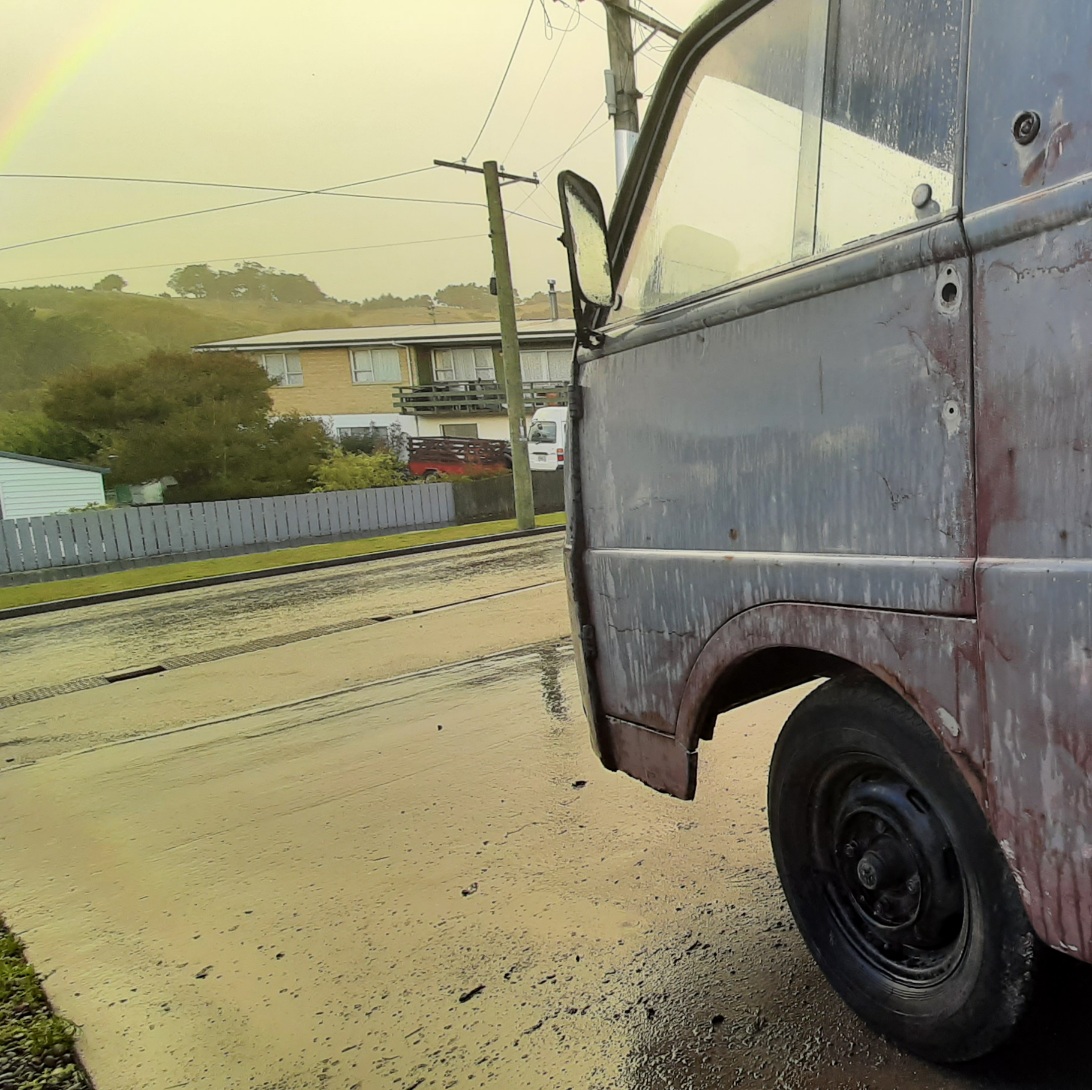
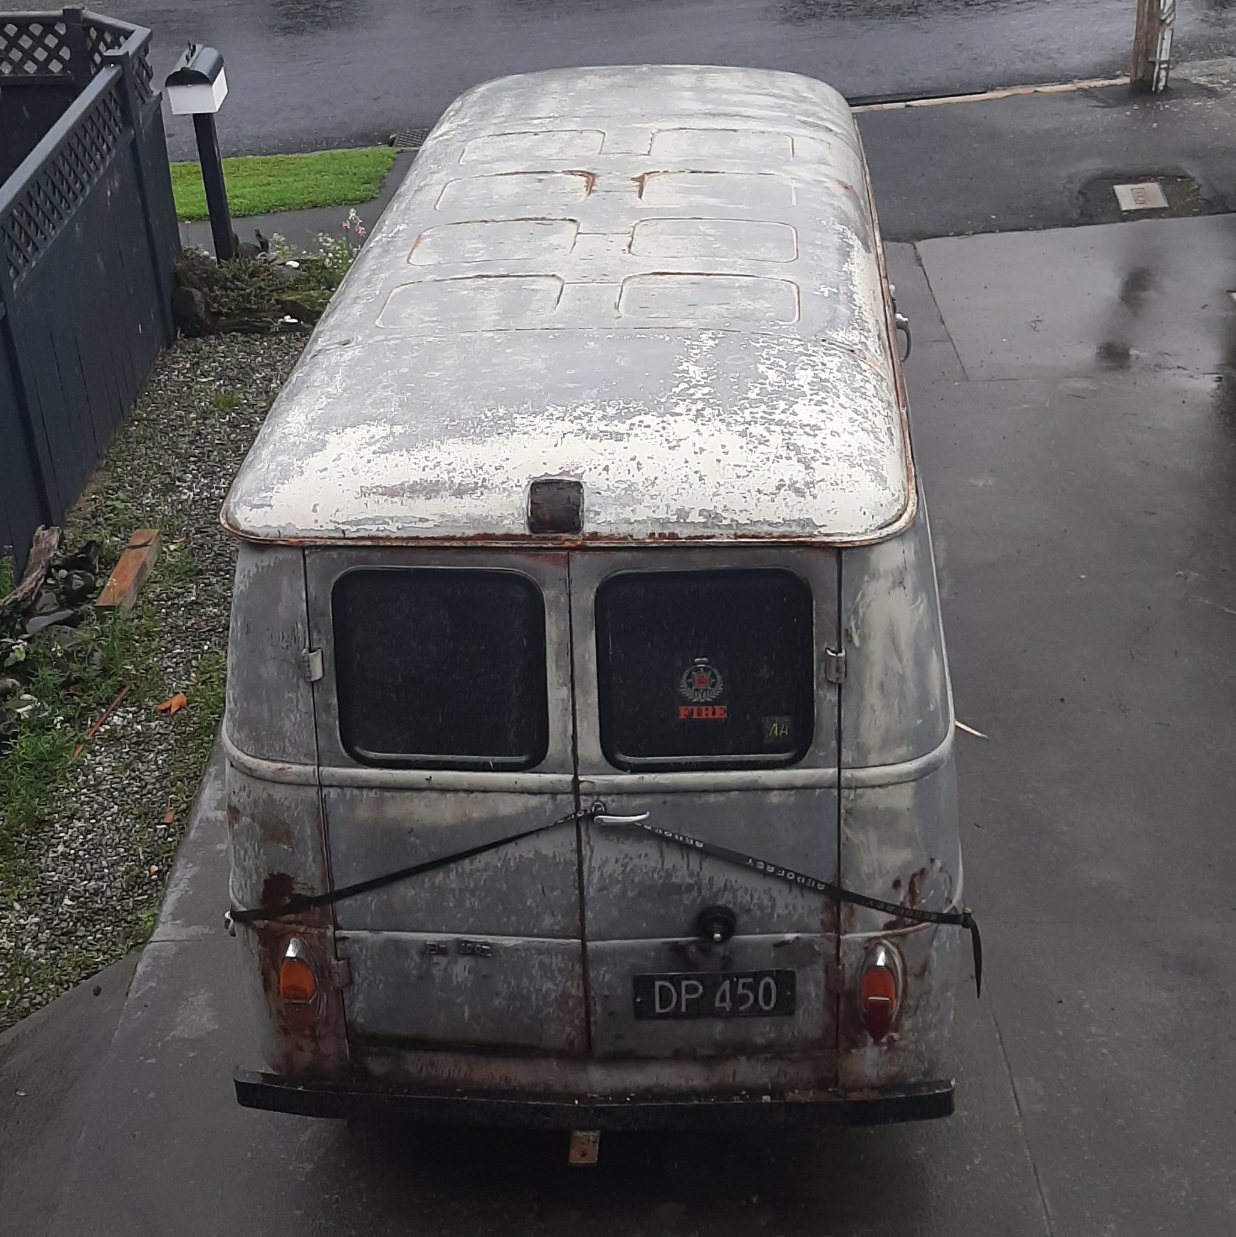
Took the day off work today to pick this up. Donkeys! Then home. Gave it a rinse inside and out with the waterblaster, and started digging in to see what I got/whats missing. It is mostly complete, box of spares has old brake bits, which might be ominous. It has a 4x148 or so stud pattern, which ive never seen before. The body is pretty good, just the bottom of all the doors and front floors are crispy. All the switches are bung. Windows are stuck. Found the chassis number, data plate and an faint image of an old wof sticker and an old style reg sticker with 1992 faintly on it. Pretty sure it was repainted maroon over grey primer and roof left cream, and the maroon has fallen mostly off. I think the grey primer might wet sand off. I also think it was a painters van for a while based on the range of colours and depth of house paint splatters in the back. None of the doors close or work properly so i started by adjusting the catches then taking the door handles off to clean and lube them up. Fixing the rust will help the door stiffness too.
3 points
-
So yeah, buttoned up the refreshed pump, went for an outing last month, was expecting a night and day improvement, I mean, its better, but still struggles get a decent 'bite' on the water till you're nearly up on top of the water. Still quite driveable with 1 person, but more noticeable with 2 + extra fuel etc. Anyway, travelled from Whakatane up to Taneatua, and some distance further up the Whakatane river towards Ruatoki. There was really not a lot of water around at this point in March beyond Taneatua. Travelled about 65km, used heaps of gas going slow near Whakatane. 7-3-21 by John Bell, on Flickr2 points
-
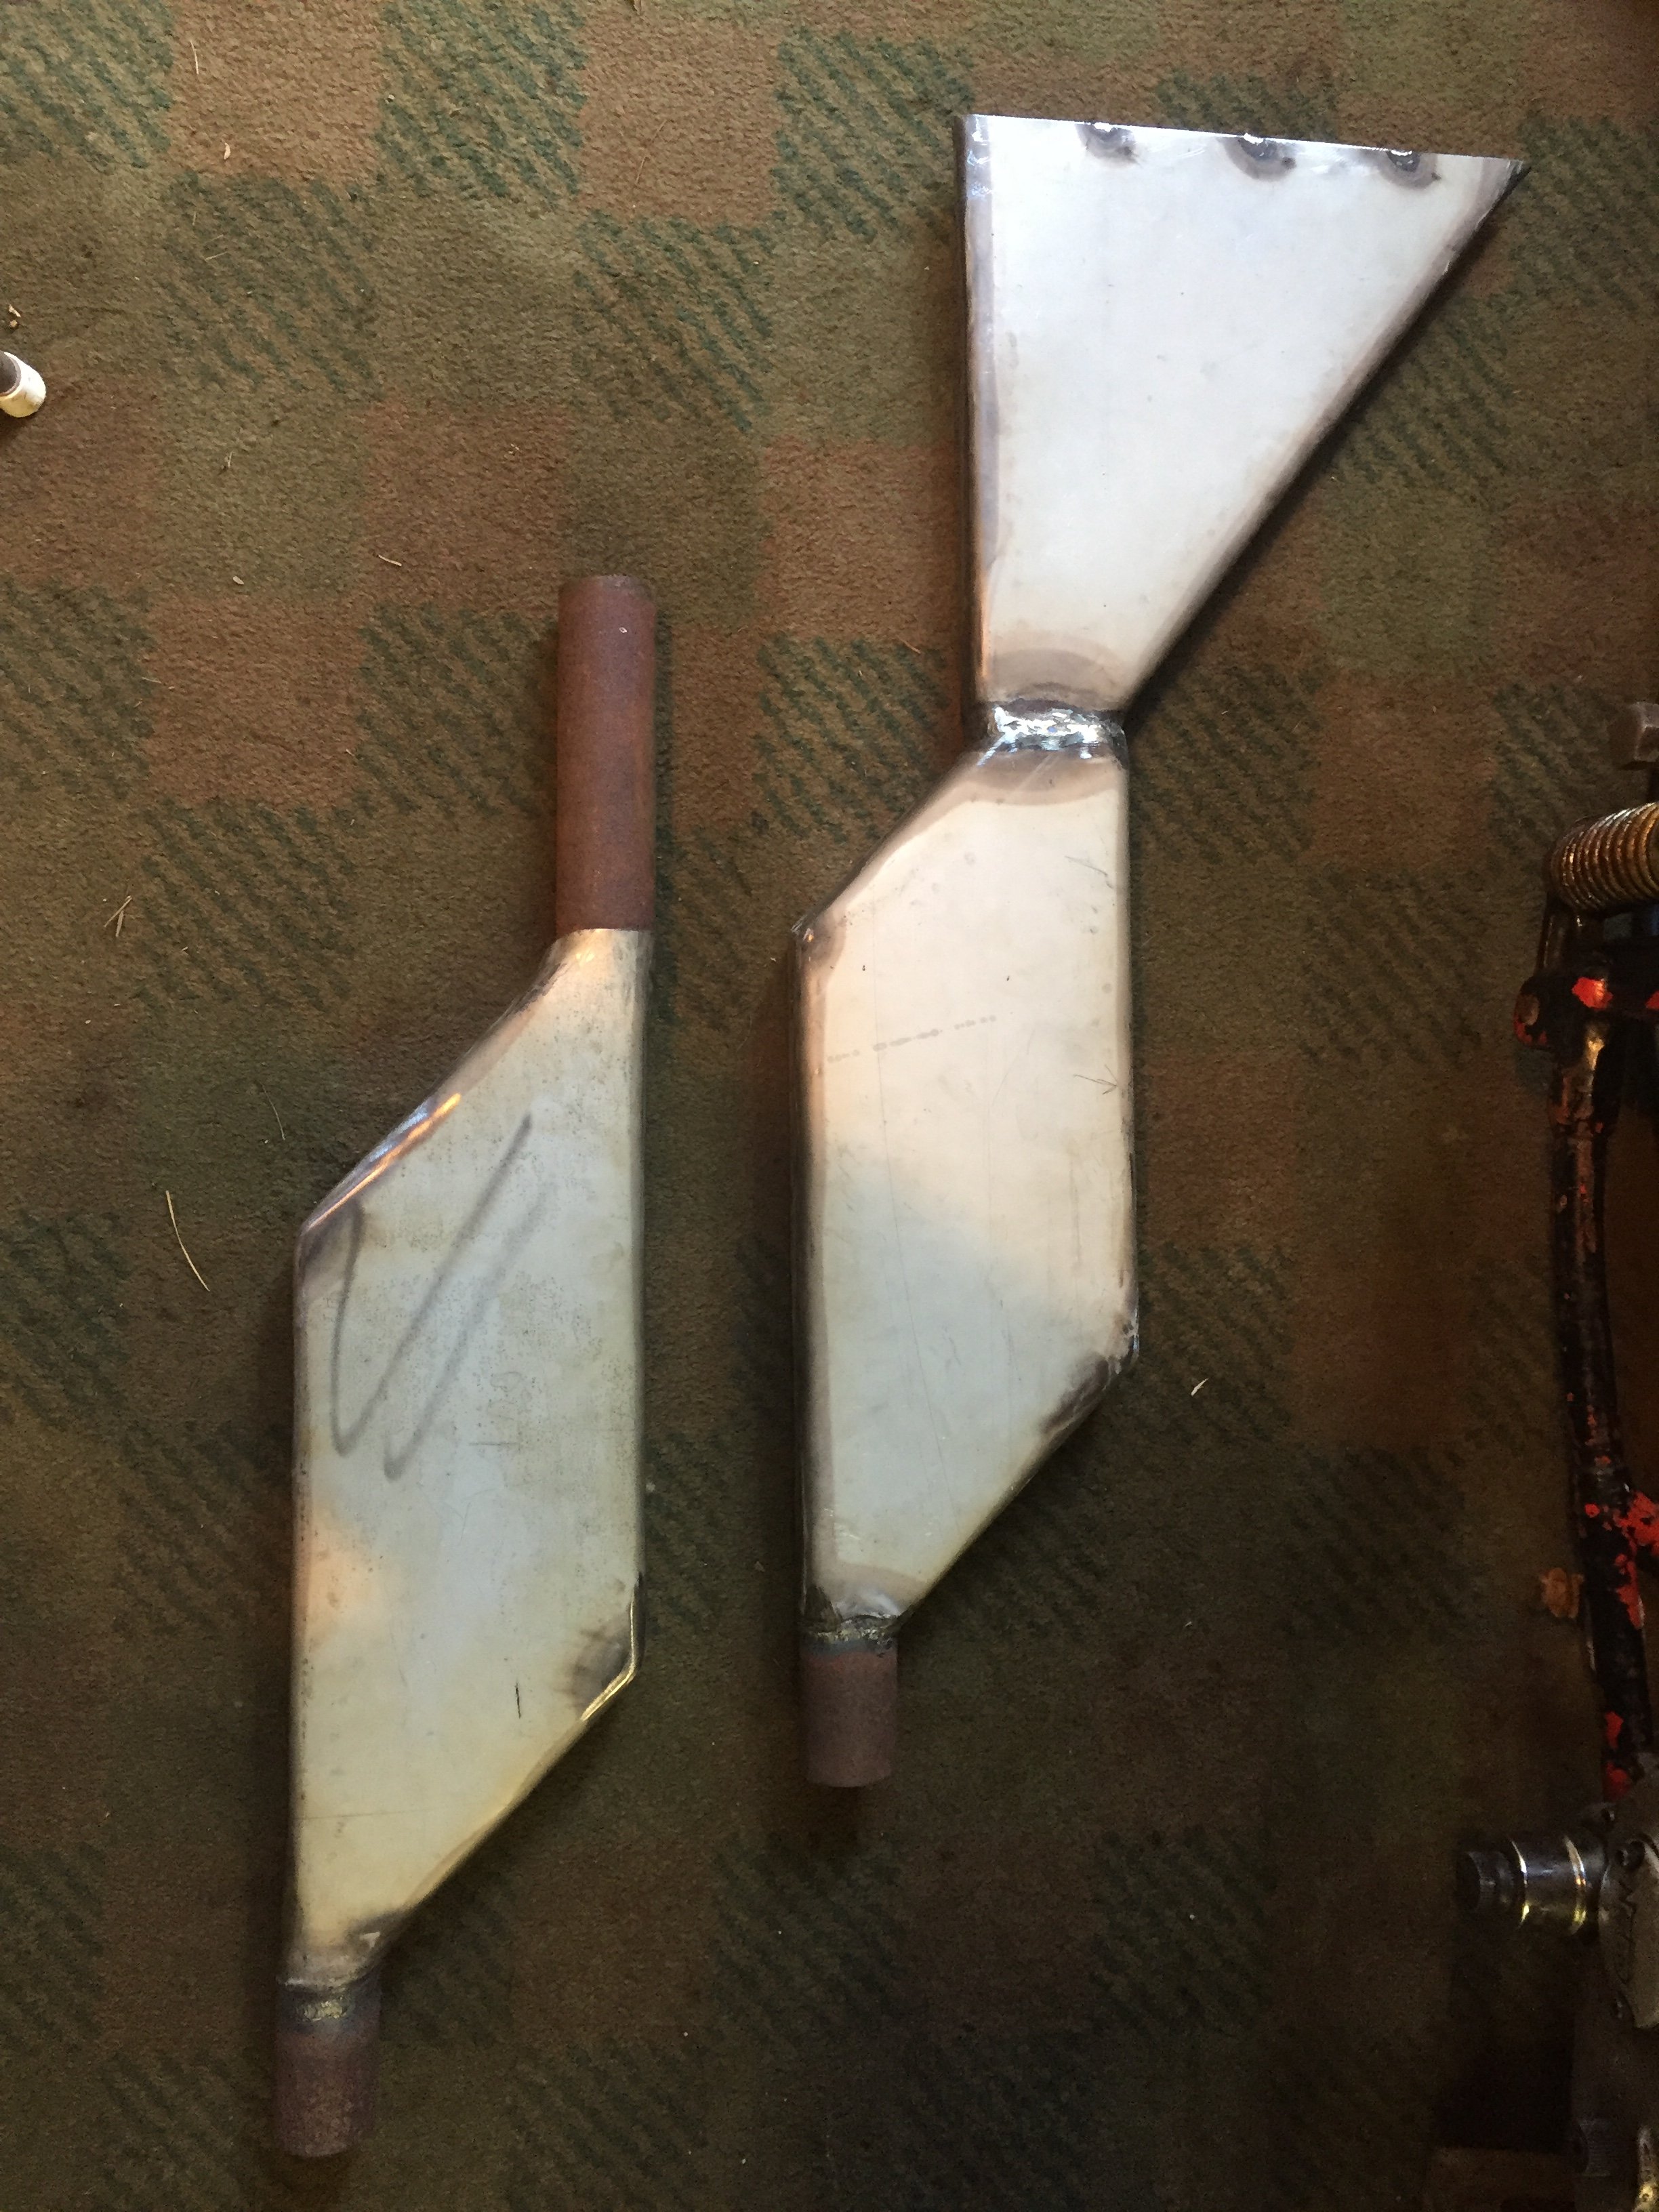
That’s better. The epoxy glue kinda sucked so I whipped up a wee reinforcer plate. Once bolted back in against firewall she’ll be safe. And I scaled back the front runners. ..just for sandblasting.2 points
-
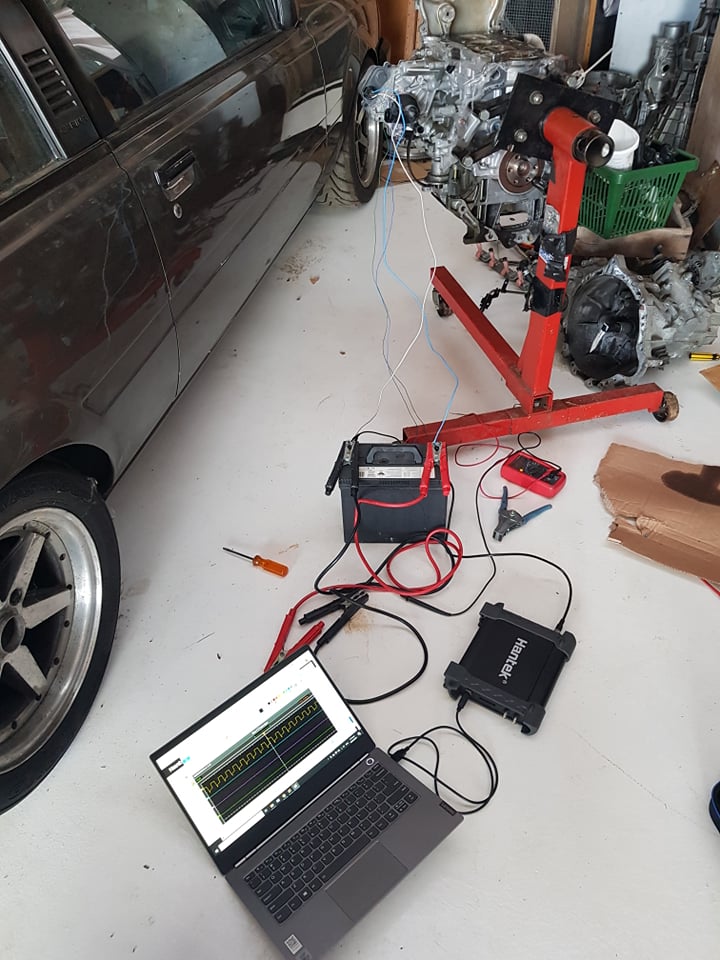
Figured out the EWP and got it working easy as. It's just 2 high current wires for 12v supply and earth. Then one is a pull to ground PWM signal to control pump speed. Then the other is a square wave pump speed signal which you can feed back to the ECU. (which is what I was hoping for) So you can tell if its jammed or stopped working before the motor overheats! Cool. It's got a failsafe so a high duty cycle on the pwm signal slows the pump down - So if there's no signal, it runs at full speed. Trying to work out the water line situation though, I'm not sure if there's a water bypass for if the thermostat is closed. What looks like a bypass hose also looks like a heater line. But if that's the case, no flow through heater core if the heater line is shut. There's also an extra heater sized water outlet on the exhaust side of the motor, which isnt there on the normal motor. Hmm. Might have to try find an engine manual that shows how it's supposed to go. Finally used my Aliexpress spec USB oscilloscope for something. I also got my head back from the engine shop with the new valve springs fitted, $75 saved me about 100 swear words and 10 hours so a good deal. Hopefully cams here on Monday.
2 points
-
Had a design in mind for the wall up to the lounge from very early on. Was gonna take a bit of time but I thought it would be well worth it. Cut and planed lots of batons from Rimu off cuts Its not a techy thing. They went up along the wall and are spaced just so that as you enter from what will be a hallway it sort of looks like a solid wood wall. Then as you walk in and past you can see the orange paint through the gaps... Neato. Much neater. I like the effect. But I also had this planned... and all the colours in between Today we went to the big smoke (Nelson..) and met up with @CPR Sierra who gifted us loads more leftover timber plus loads of insulation from a house build. Top fella- thanks so much Morris! This is just what we need to now continue on with the kitchen smoko room and bedroom sickbay build.2 points
-
Wiped up another muffler as so I can chop and change
2 points
-
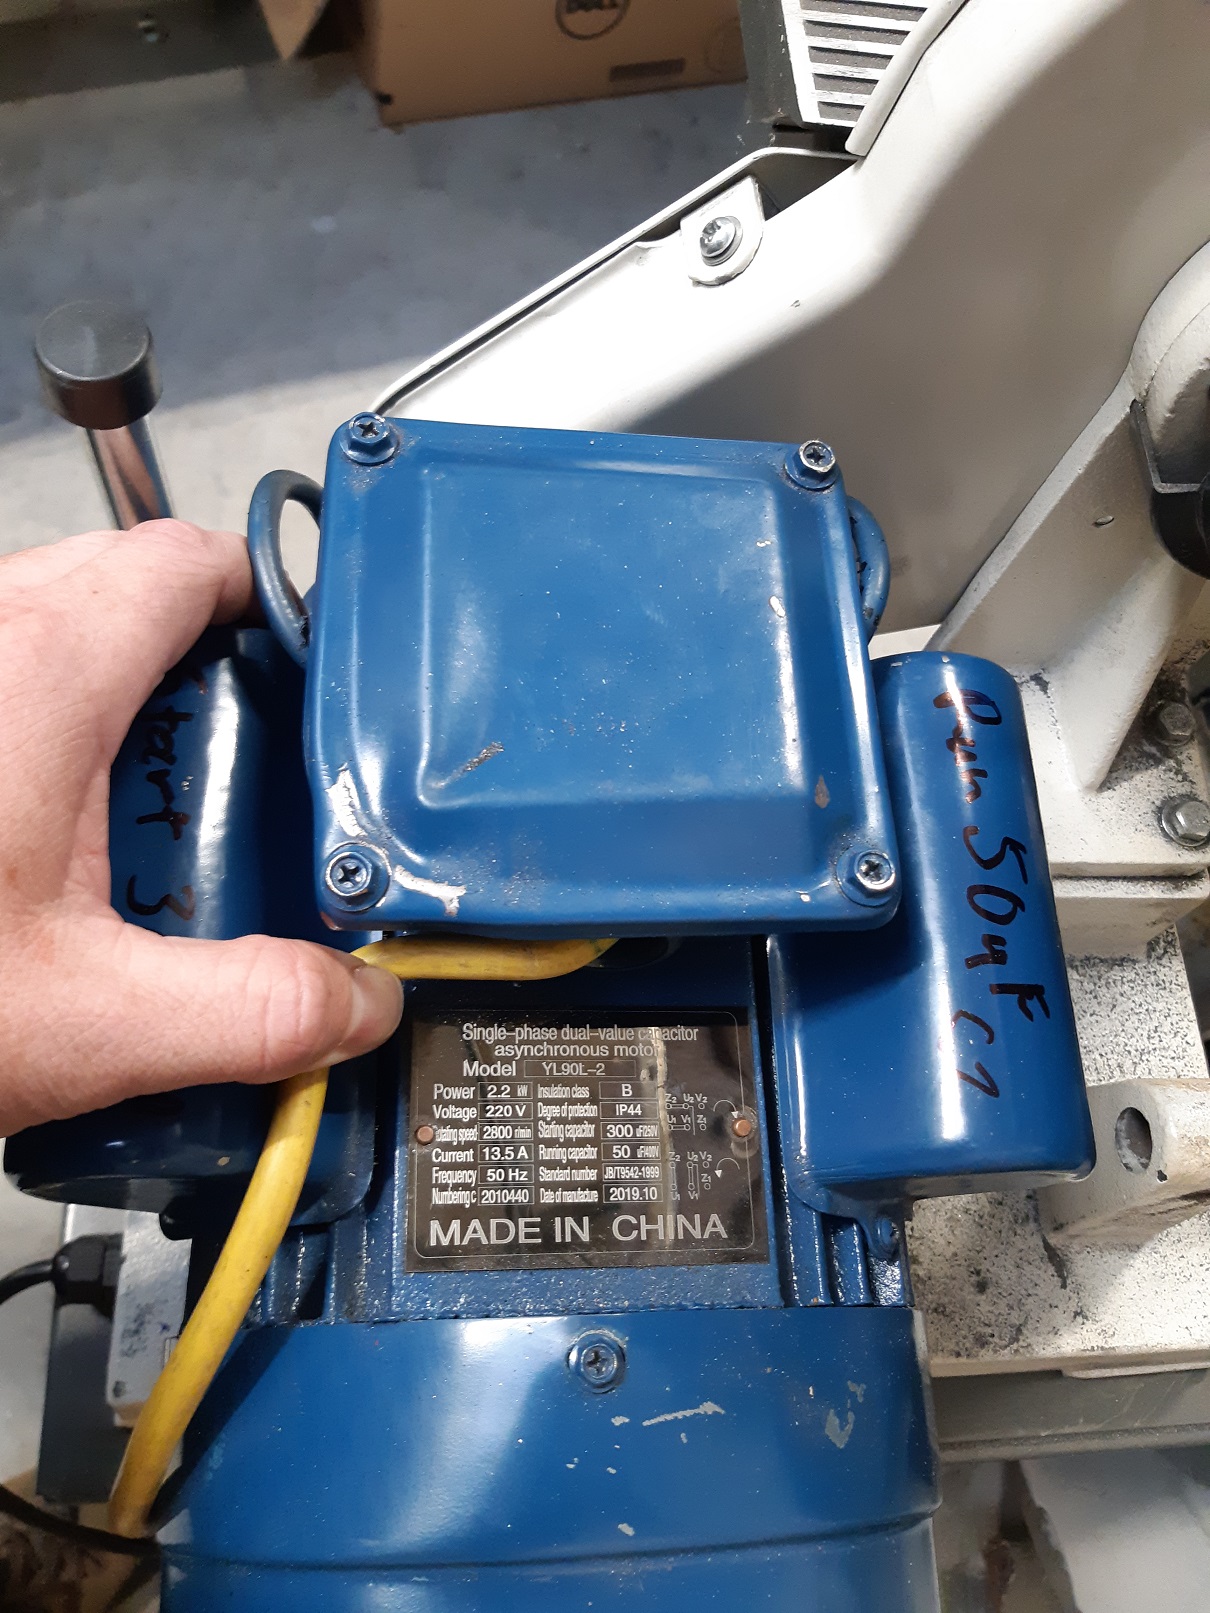
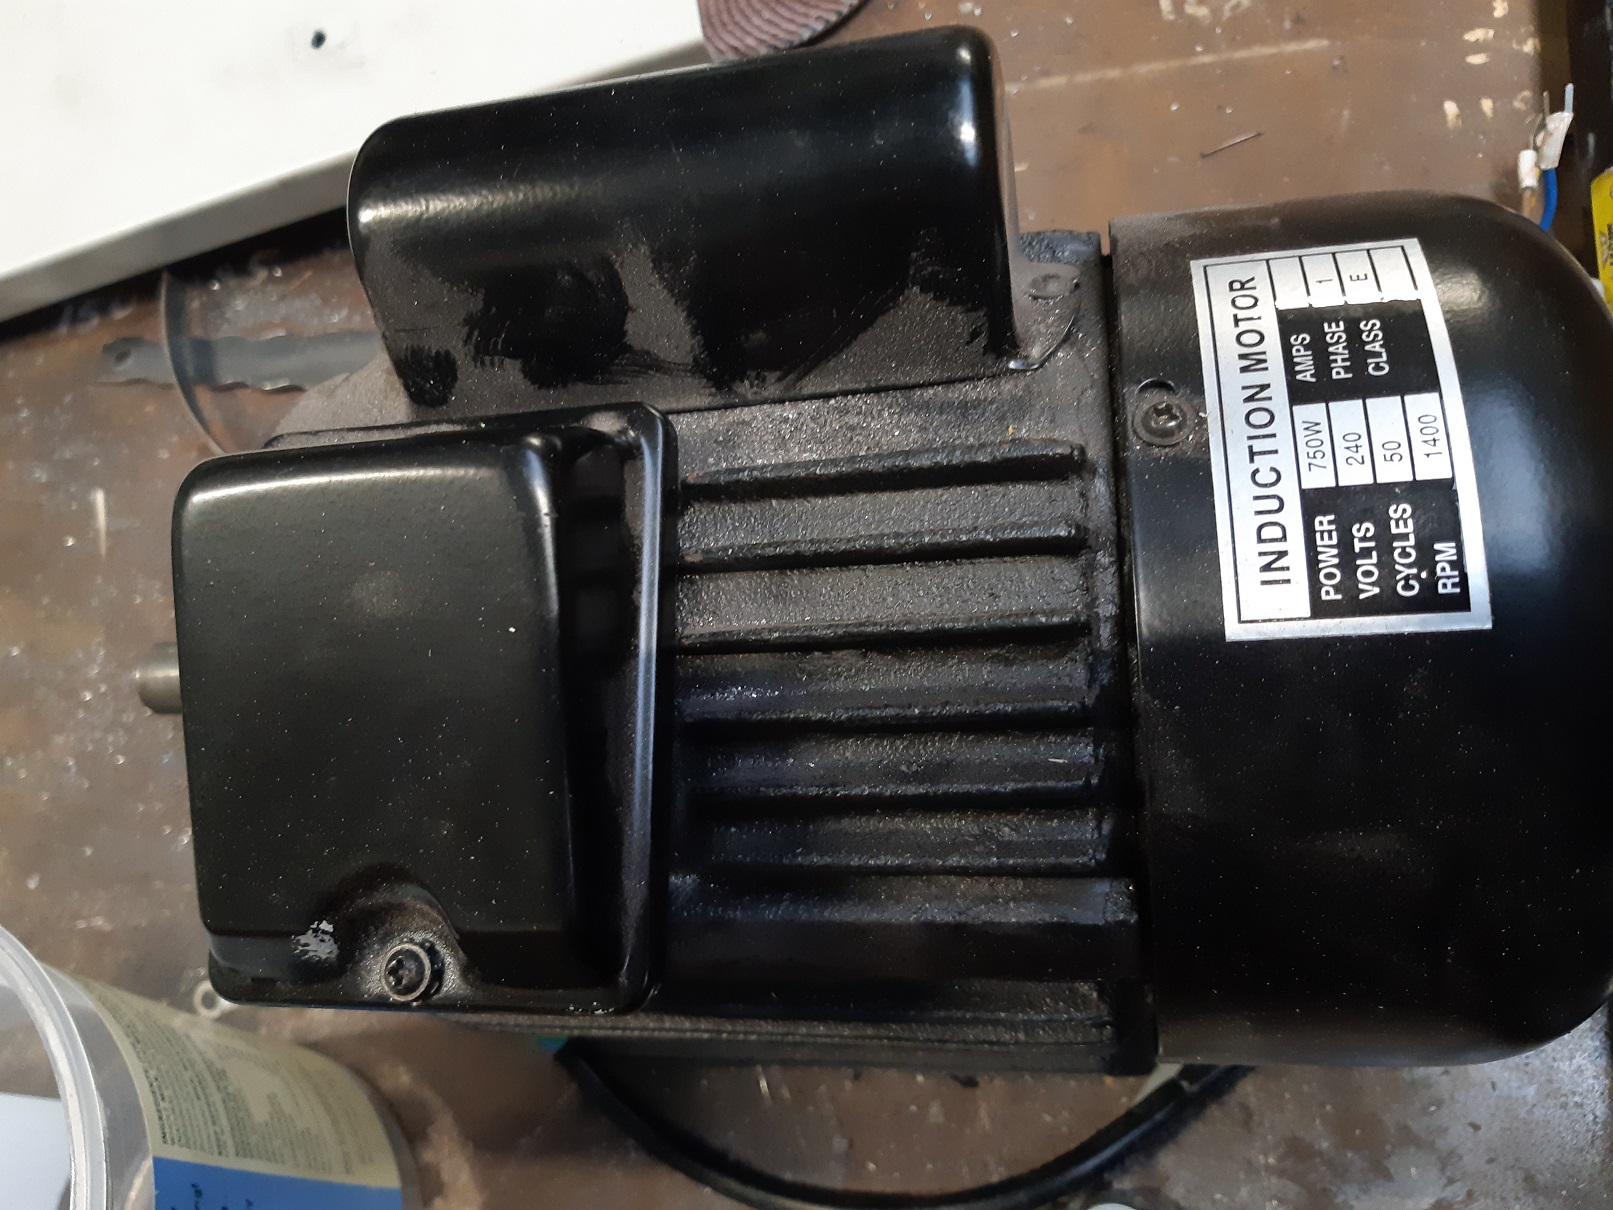
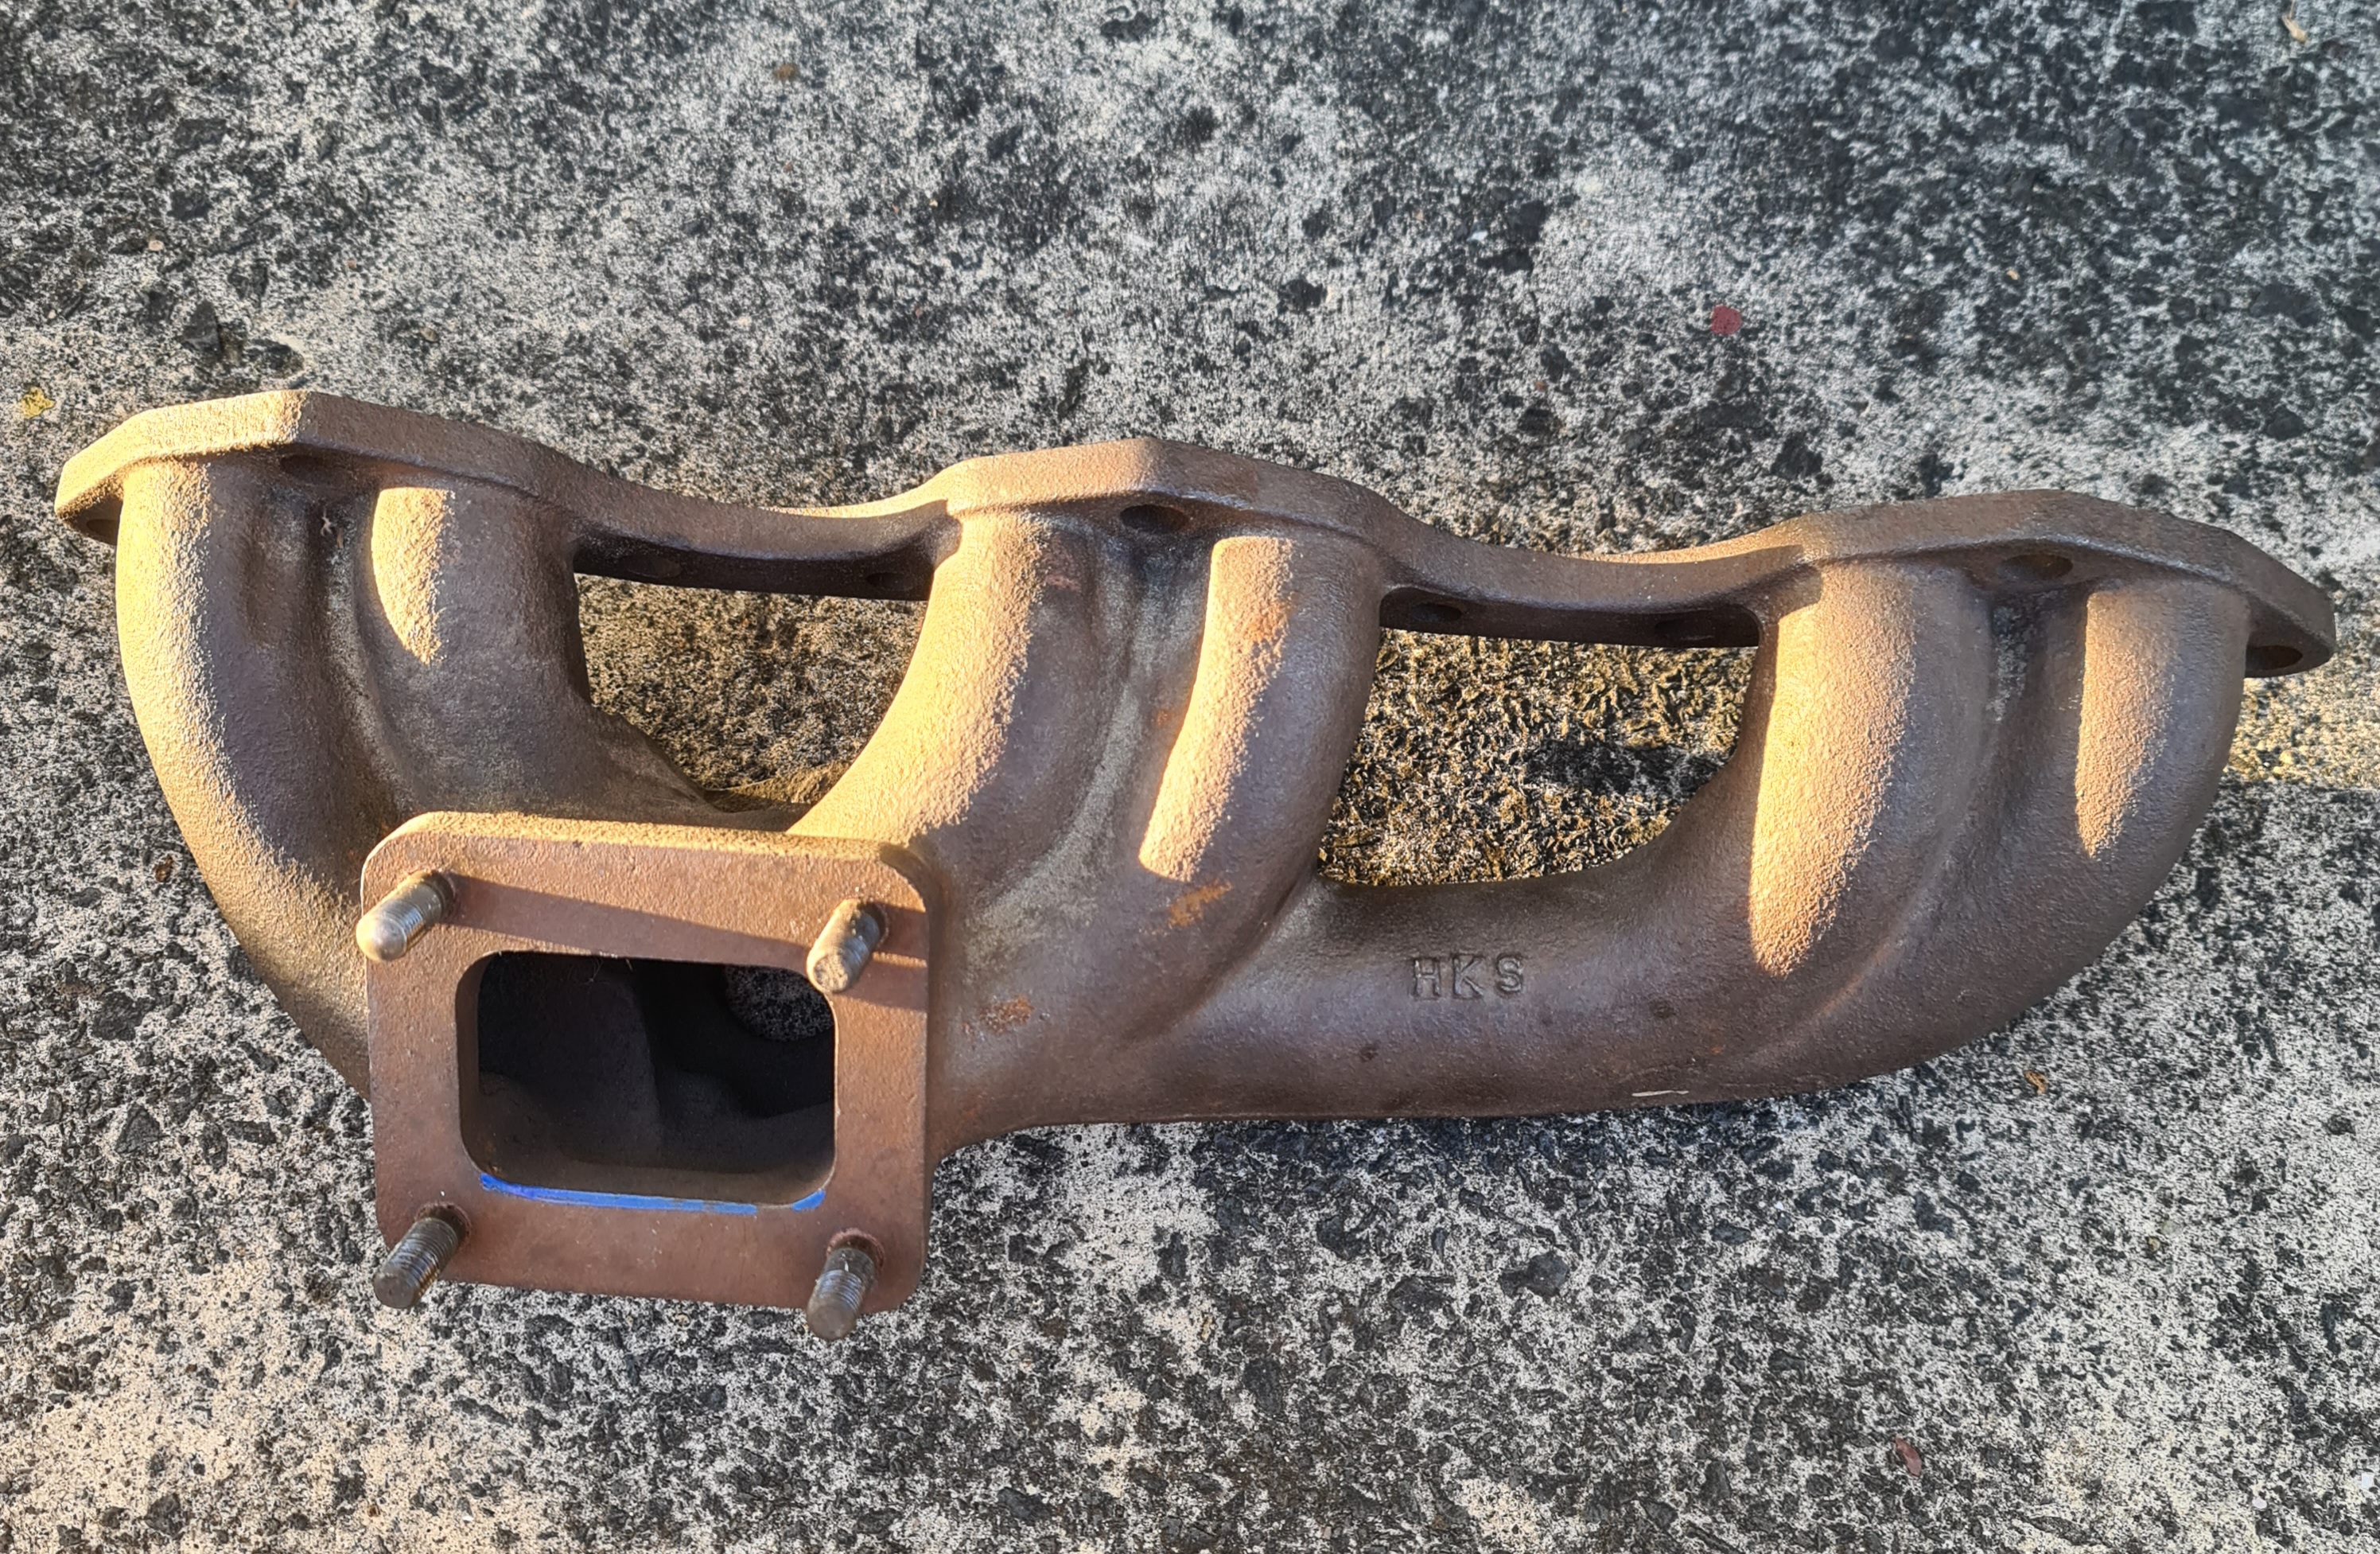
I bought a ToolShed linisher/belt grinder/sander thingo a while back. It had mediocre performance and it was easy to stall the belt. It came with a 1HP 1400rpm motor. Boooo! There! I've fixed it! YAAAAAY! Three times the power and double the speed should do it. The belt guard is off here. It's a bit shit and rattles and vibrates. It's almost as if they forgot to add fasteners to that lower bracket. I'm gonna sort that out. Should be able to flatten my exhaust manifold flange now.
2 points
-
BH 2020 another pic from FB
2 points
-
2 points
-
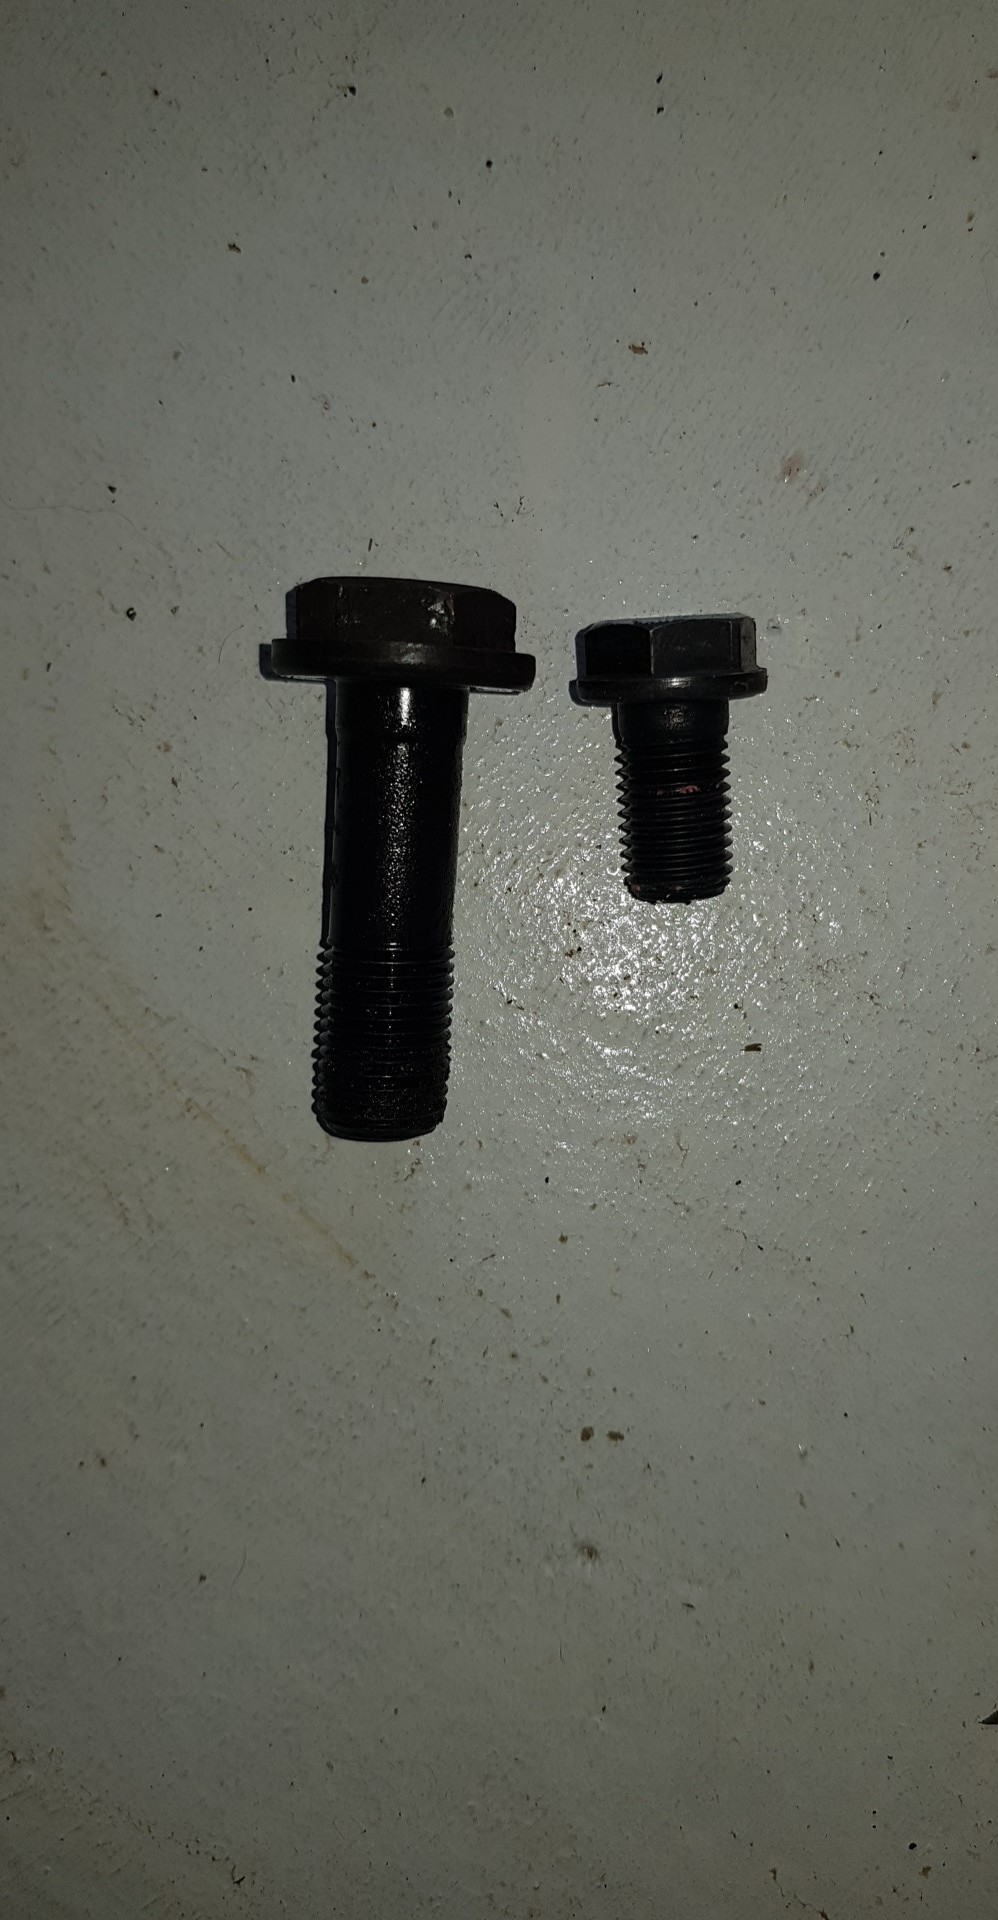
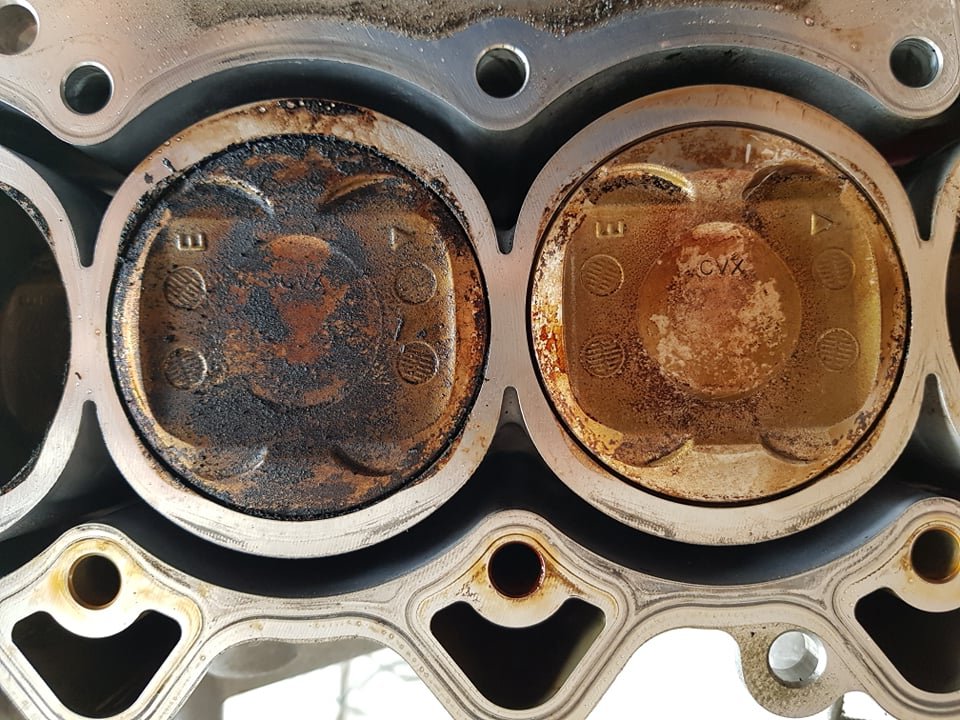
Progress! Finally got my motor home, and have had a little bit of time to muck around with it. Still amazing how clean and new everything is. I decided the best first thing to do, would be swap the sump over. So I did that, with all of the necessary patience. Cleaned everything, piped out some silicone stuff, let the goo set, then flipped it back over and started on the valve train. I got the valves, old springs, and retainers out no problem. Trying to fit the new ones in, not so easy! Springs are much stiffer, and these retainer keepers are fucking infuriating! So tiny and dont want to sit in the right place. With one of my ham fisted efforts, I ended up dropping one of the keepers down an oil gallery... into the bloody sump. The half of the sump of course that means I have to pull the whole bloody thing off again. So pulled that back off, and after some various attempts I decided there's not really any way to do this short of taking the head off. So pulled the head off, and holy hecka the combustion chamber and pistons were absolutely coated in nasty nasty EGR shit! So gross. And this is only a 30,000km motor, they must look fucked by the time they get some big km on them. As these pistons are coated (apparently?) I decided to not use anything more volatile or abrasive than petrol and a toothbrush, and a toothpick to get some shit out of the tight parts. Came up good enough. Hopefully running it for a while without EGR will clean everything up a bit over time too. The combustion chamber looked just as gross. People say these motors gum up the piston rings, I can see why. Also, I had a laugh at this. On the left, we have a beams 3SGE flywheel bolt, for an 8 bolt crank. On the right, a 1NZ flyhweel bolt for a 6 bolt crank. Hopefully I wont have a 9k rpm flywheel come buzz saw through my brain
2 points
-
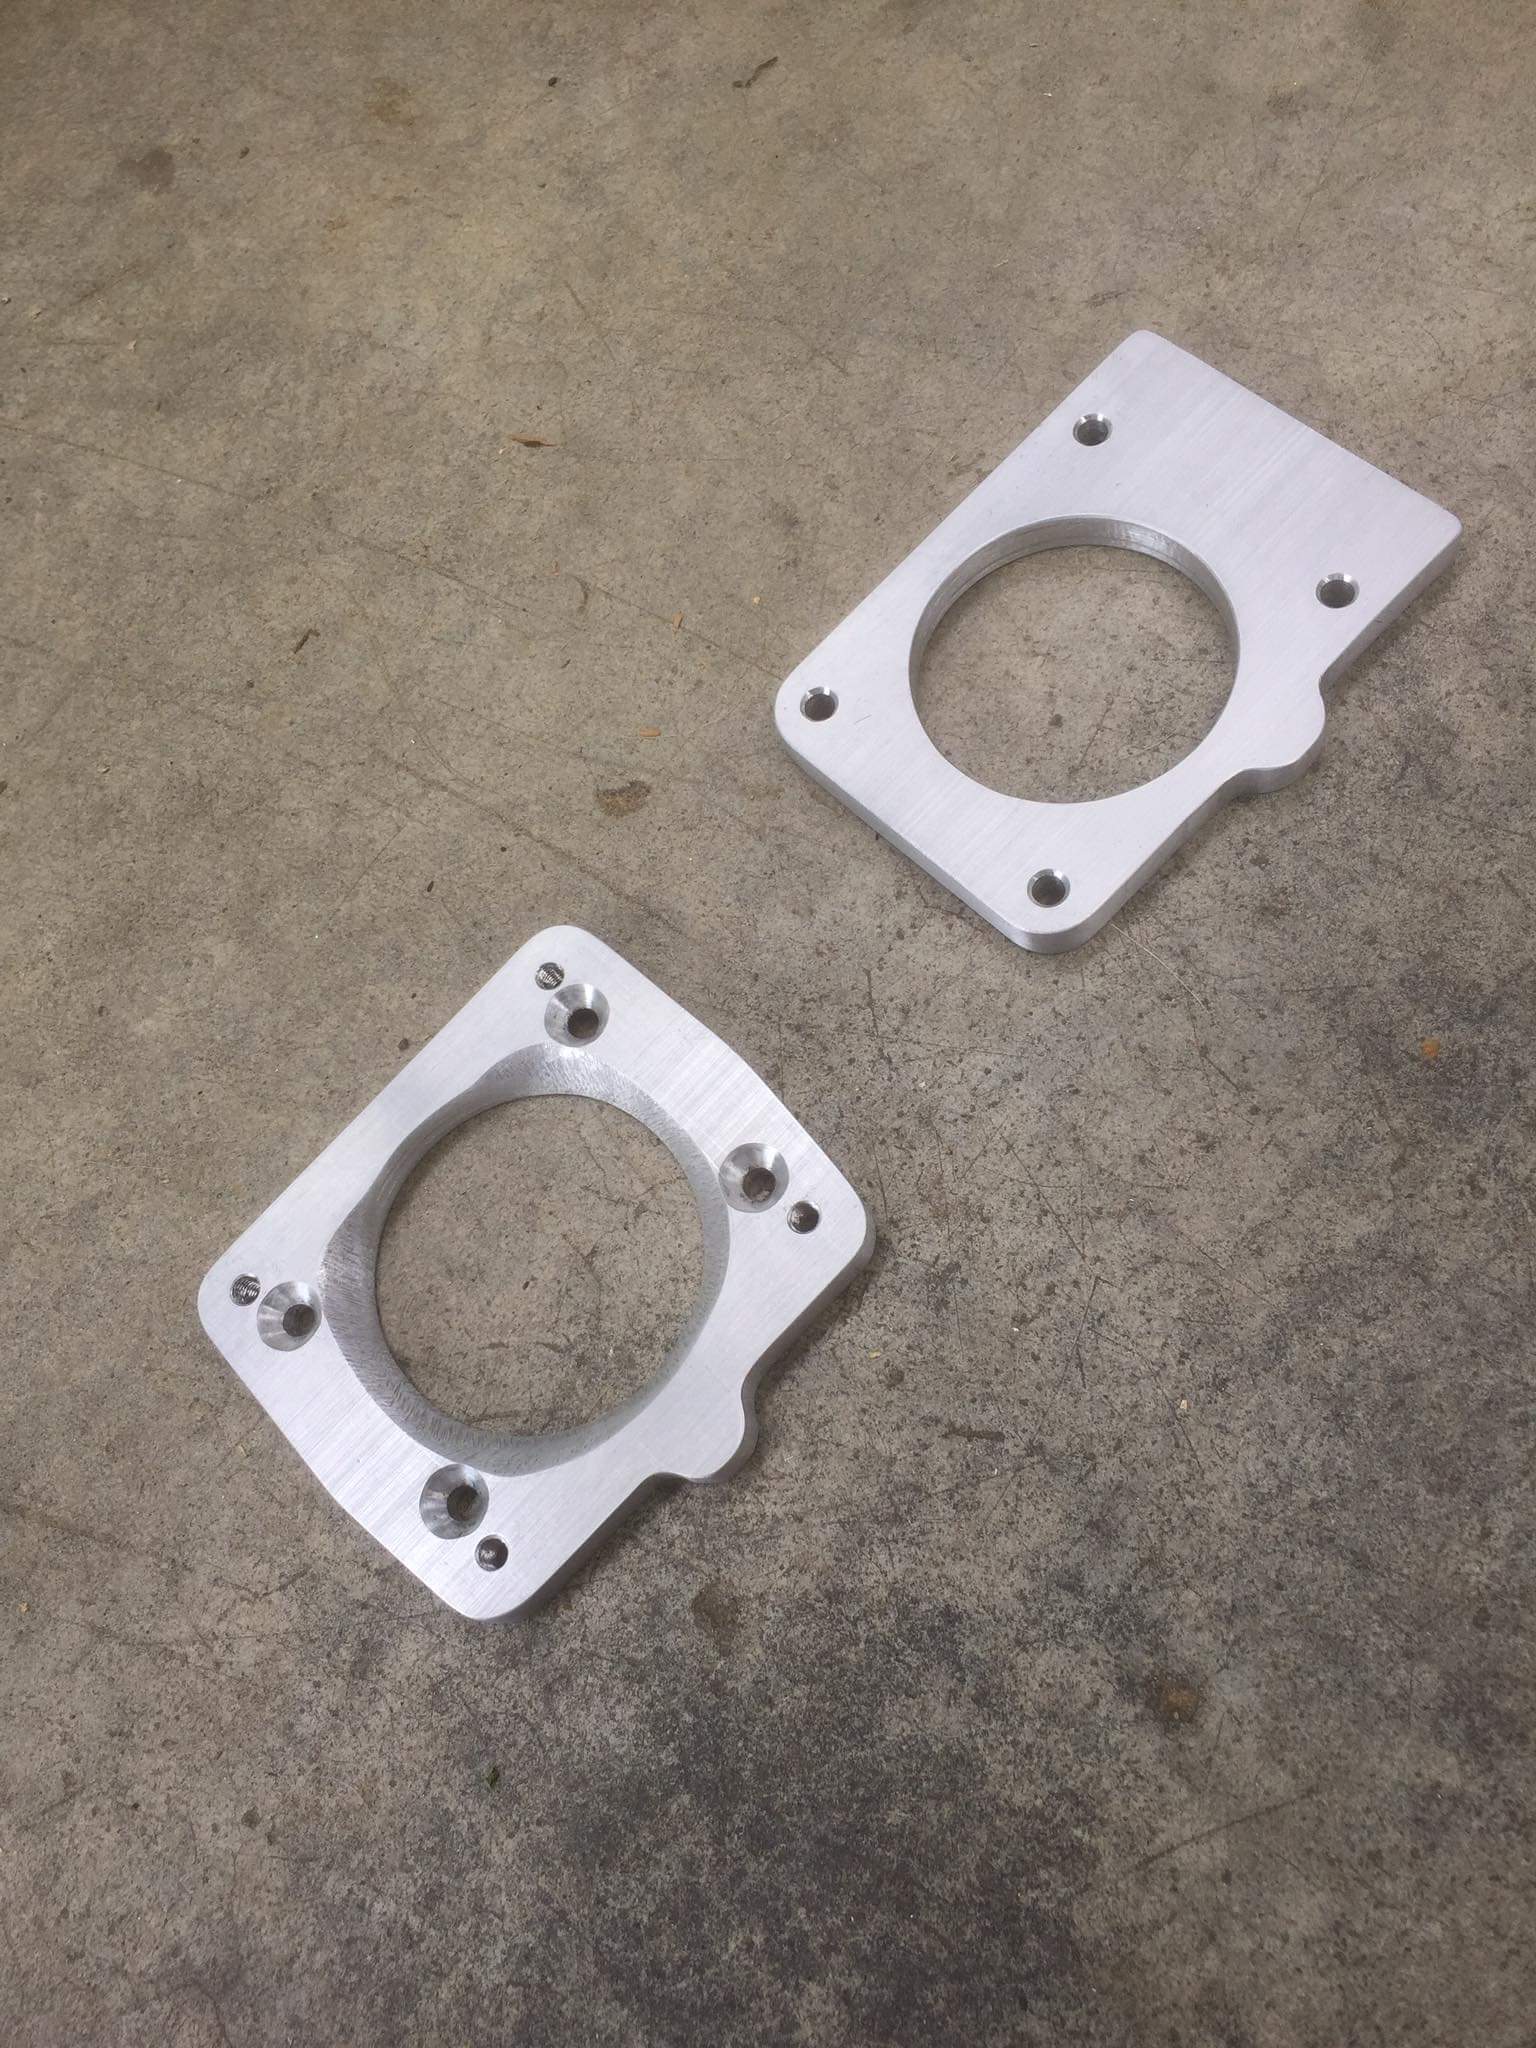
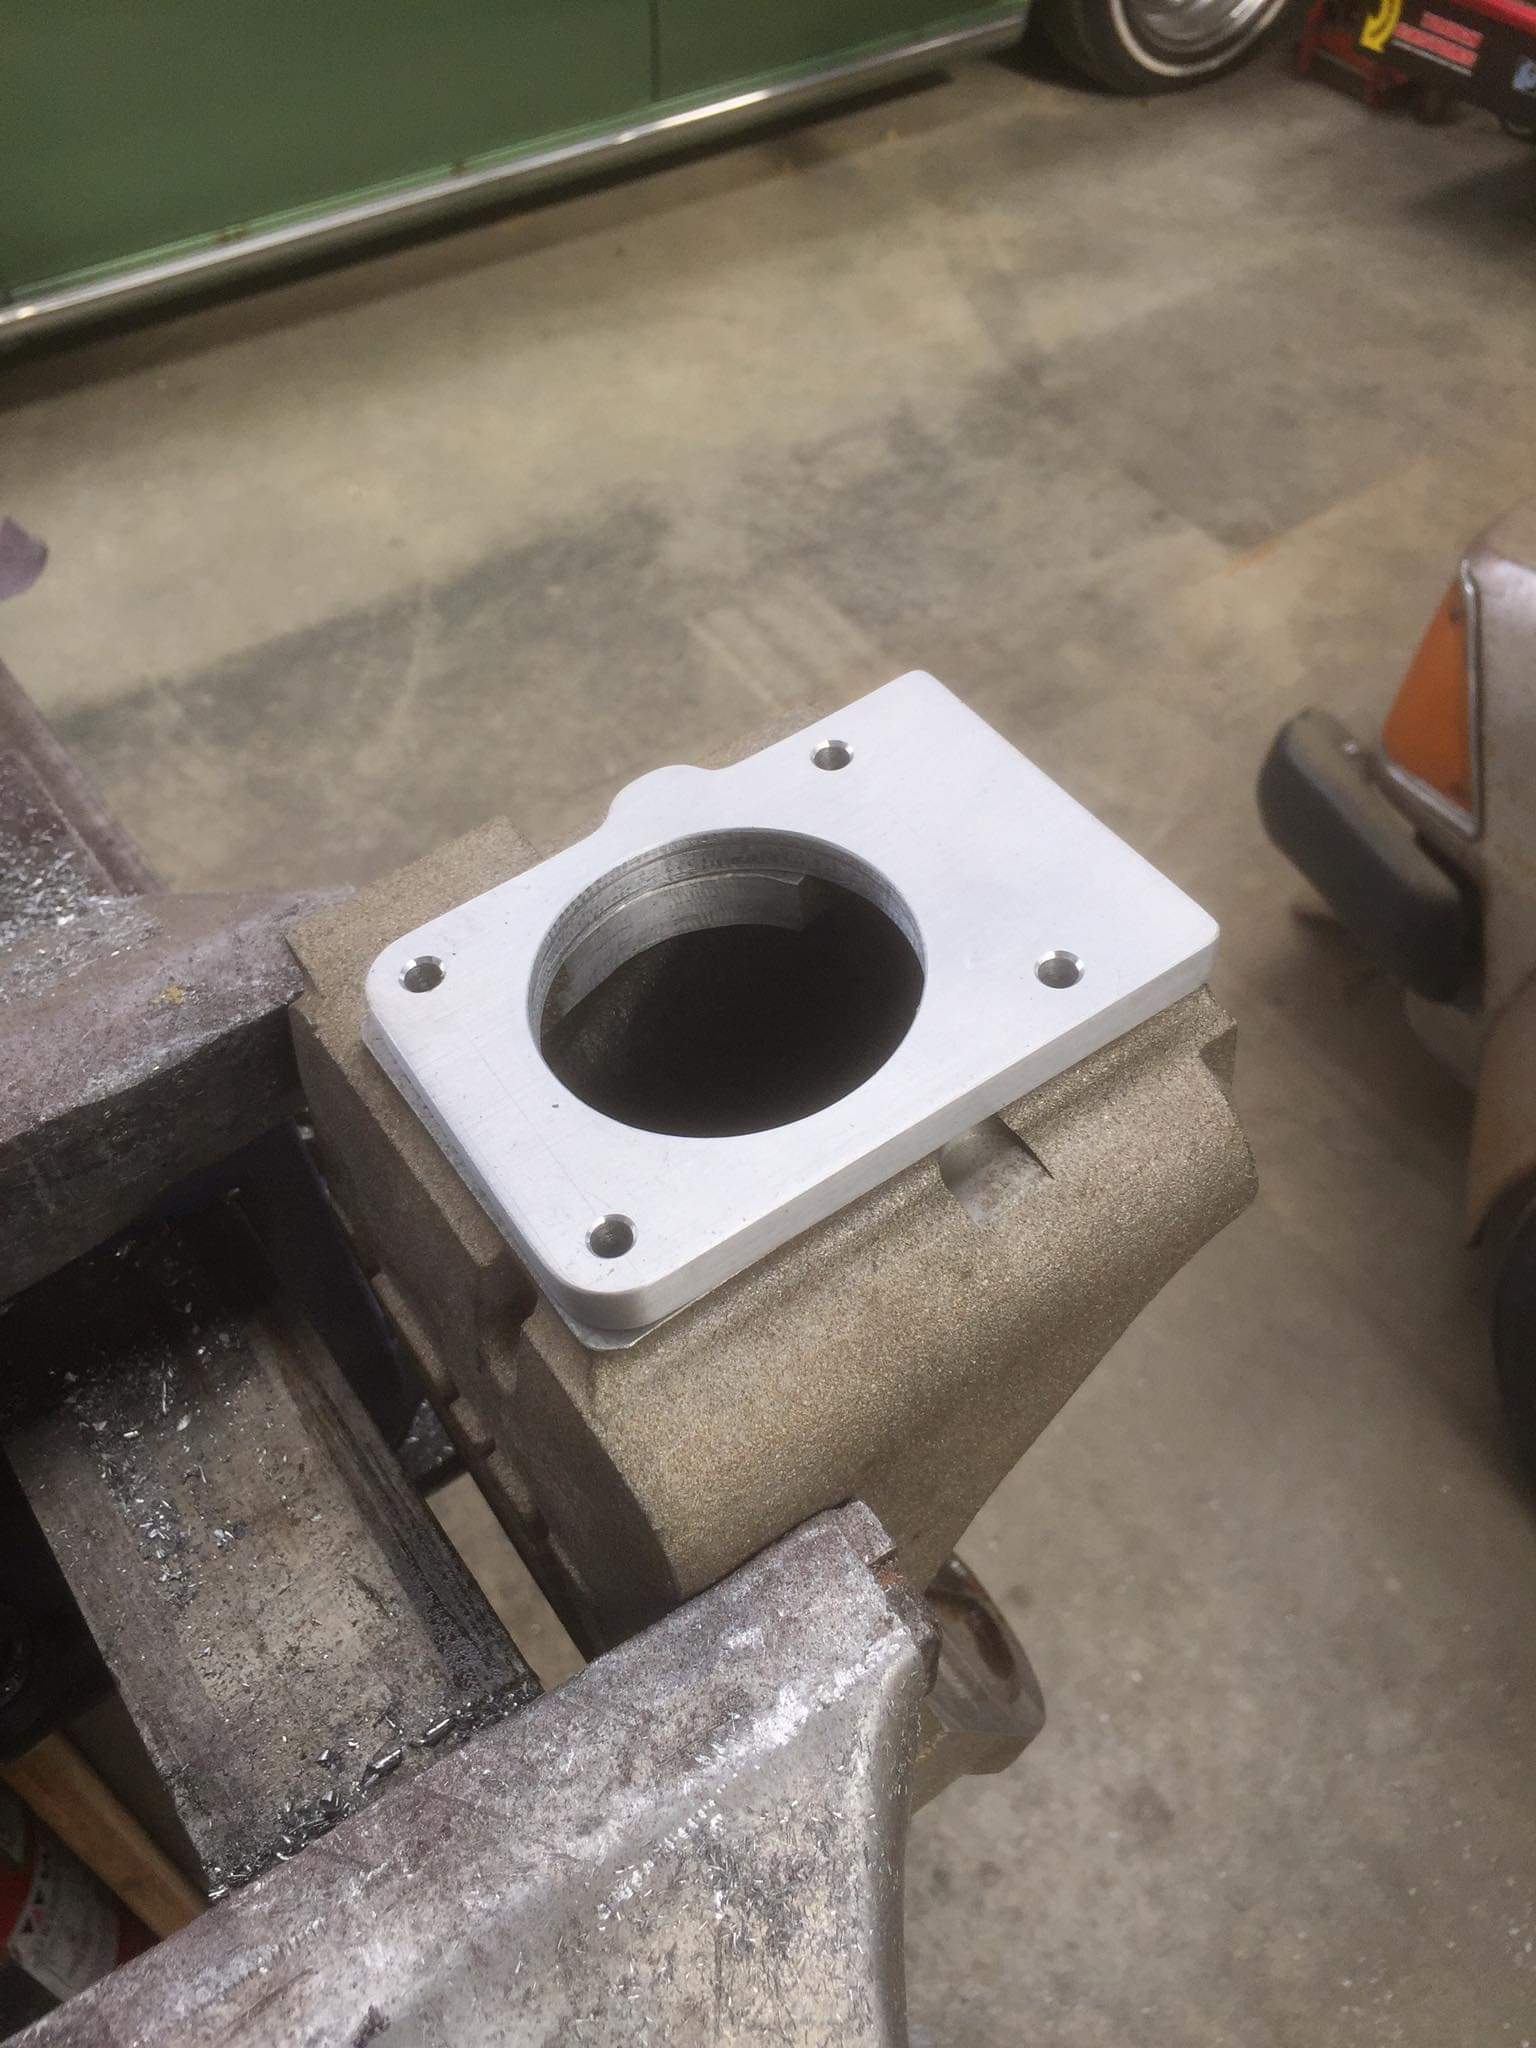
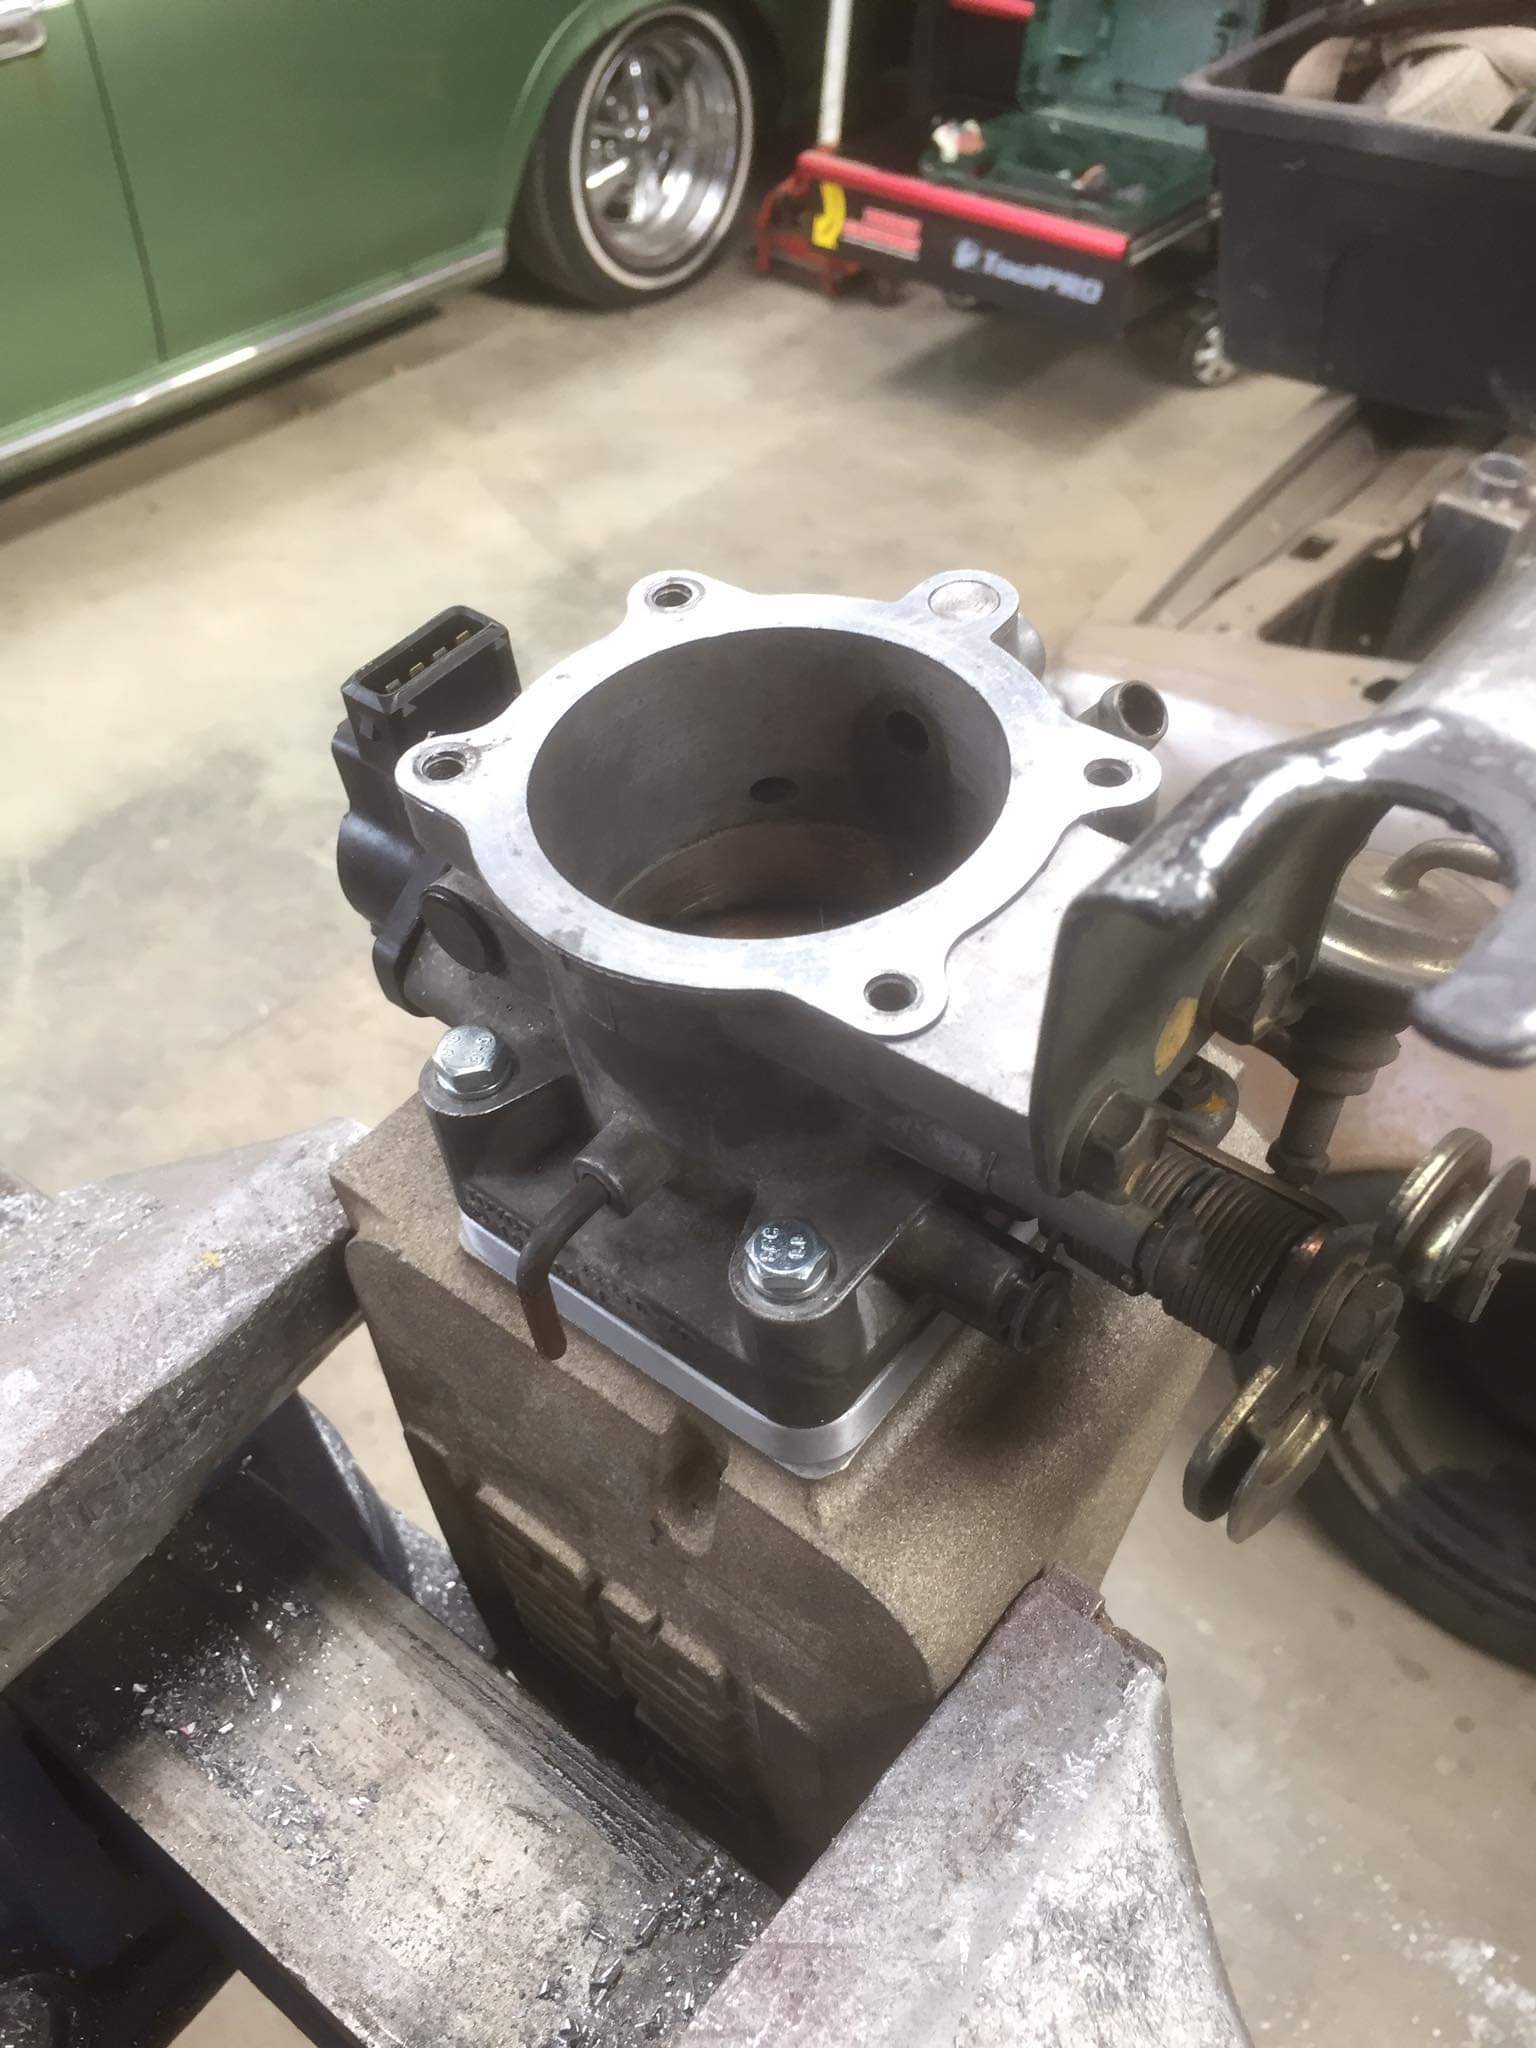
F-con arrived after what felt like a long wait. Browsing on yahoo I found I could purchase a harness which meant I could run my current gen 2 loom and ecu instead of having to change to the gen 1 afm setup. @oftensideways knocked up these adapters so I could run my gen 2 throttle body on the supercharger kit so I didn't need to try boogie up the tps to work on the gen 1 throttle. I also didn't have the correct throttle cable bracket for gen 1 throttle Super happy with the work and a very quick turnaround. This has worked out really well as the other throttle body was quite a bit thicker so even with adapters the end of the intake tube is still in the right place across engine. I've just dropped it all off to to get vapour blasted and the tp-8 harness has arrived from Japan this morning. I now have everything to make this work I will just need to extend tps plug and cold start injector plug so fingers crossed for a fire up in the coming weeks
2 points
-
Painted the door window frames in 2k matte black and then assembled them back together. Hatch assembled and back on. Finally found some factory fender mirror, in pretty good condition too! Sanded the tail lights and sprayed them with some clearcoat. Got it off the rotisserie in the weekend, after being on it for 16 months!2 points
-
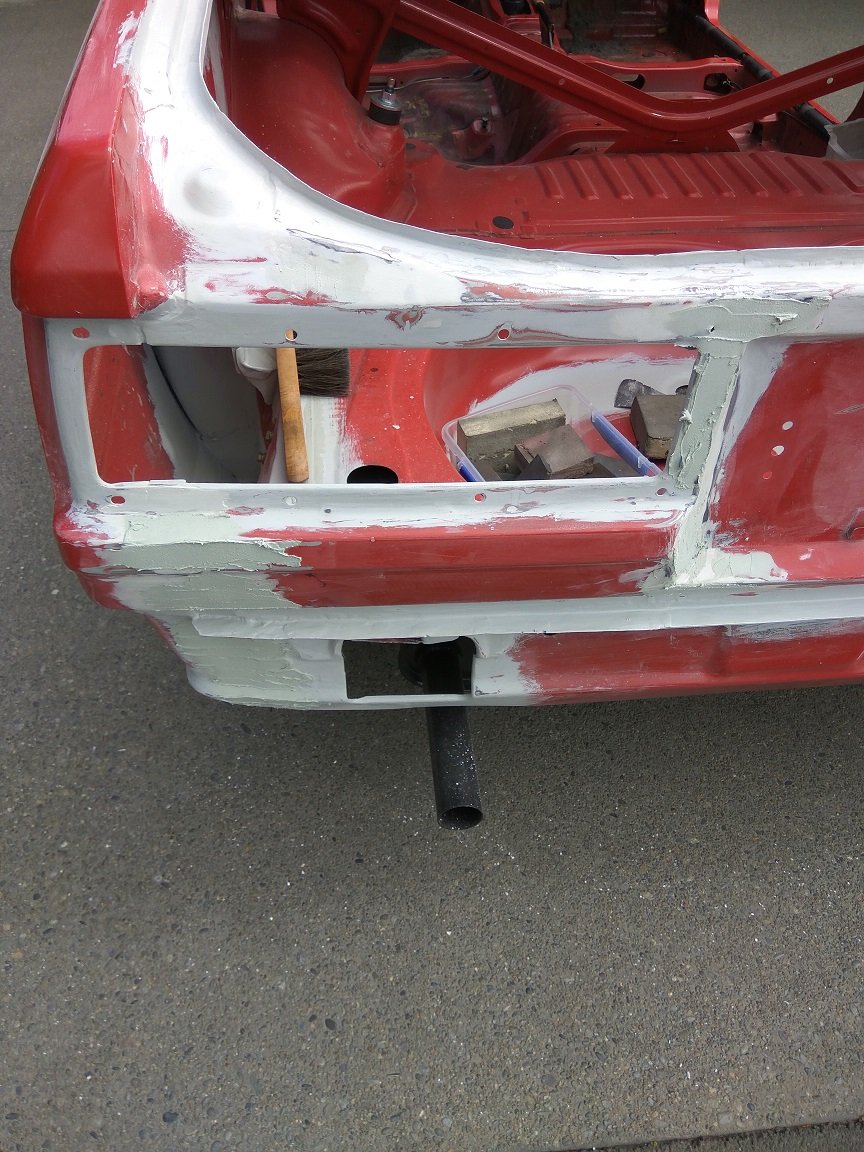
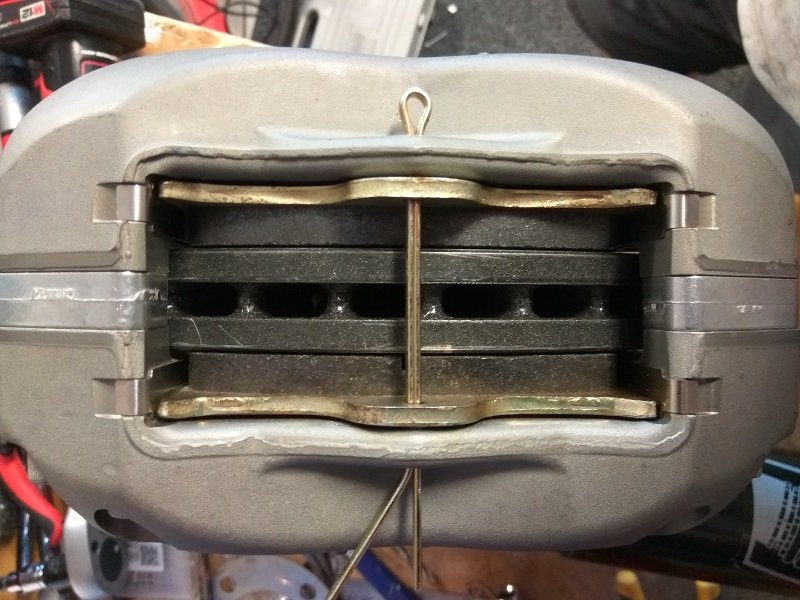
So yeah, famous last words last month with brakes together for last time. Turns out that all the bolts I got with the brakes are unsuitable. 12.9 bolts are not suitable for cyclic loading and use with steering, suspension or brakes. As per the Car Construction Manual. 10.9 and 8.8 are fine. They would probably be fine, but not something I can be bothered replacing later if they get picked up. So grabbed all the replacement bolts and Nord-Lock washers this arvo. Pulled it all to bits, replaced bolts / nuts (including the also unsuitable nylocs (thanks for the heads up @cletus) previously shown) and added so more grease for good measure. Since last update i've had the front edge of the bonnet repaired as it was rusting in the seam and had blown out more than a fat person in a cake shop. I had a pro do that as i'd most likely fuck it up. I also finished welding in the door patches and remade the bottom corners. Ground it all back and dropped the doors at the restoration man. He will remove the distortion in the first door I did. He gave me some tips for repairing the second door and it made all the difference to the end result. I have dropped him that one too though as there were a couple of hollows in the door to pop out. Should get those back in a week or so hopefully. Ordered tyres last week after asking in spam about sidewall sizes. Went with RE003's as they were one of two tyres I was looking into and @xsspeed mentioned the sidewalls aren't extreme. Getting them fitted to wheels tomorrow arvo, so will give the wheel bolts a quick polish, last minute spec. Have been spending all my time on other car jobs until I knew tyres had arrived in stock. Fingers crossed the weak offset wheels fit on the front without contacting the struts. Coilovers means thicker diameter shock body by probably 10mm or so. So it makes it a really tight fit to jam a 7" tyre between the strut and stock wheel arch. Nothing extreme here size wise, it doesn't need it. Closer the wheel sits to the shock the lower I can probably get it before it rubs. Will be doing some sanding of bog and priming to finish out this week. Will likely need to get some more colour match cans as I don't have the space to use proper gun, so proper backyard shit job it is. Don't really care what it looks like though at this point, just need it in for cert next month. Which if you looked at the car in person, you'd just laugh and go with "yeah right" Photo so this isn't a photo-less update.
2 points
-
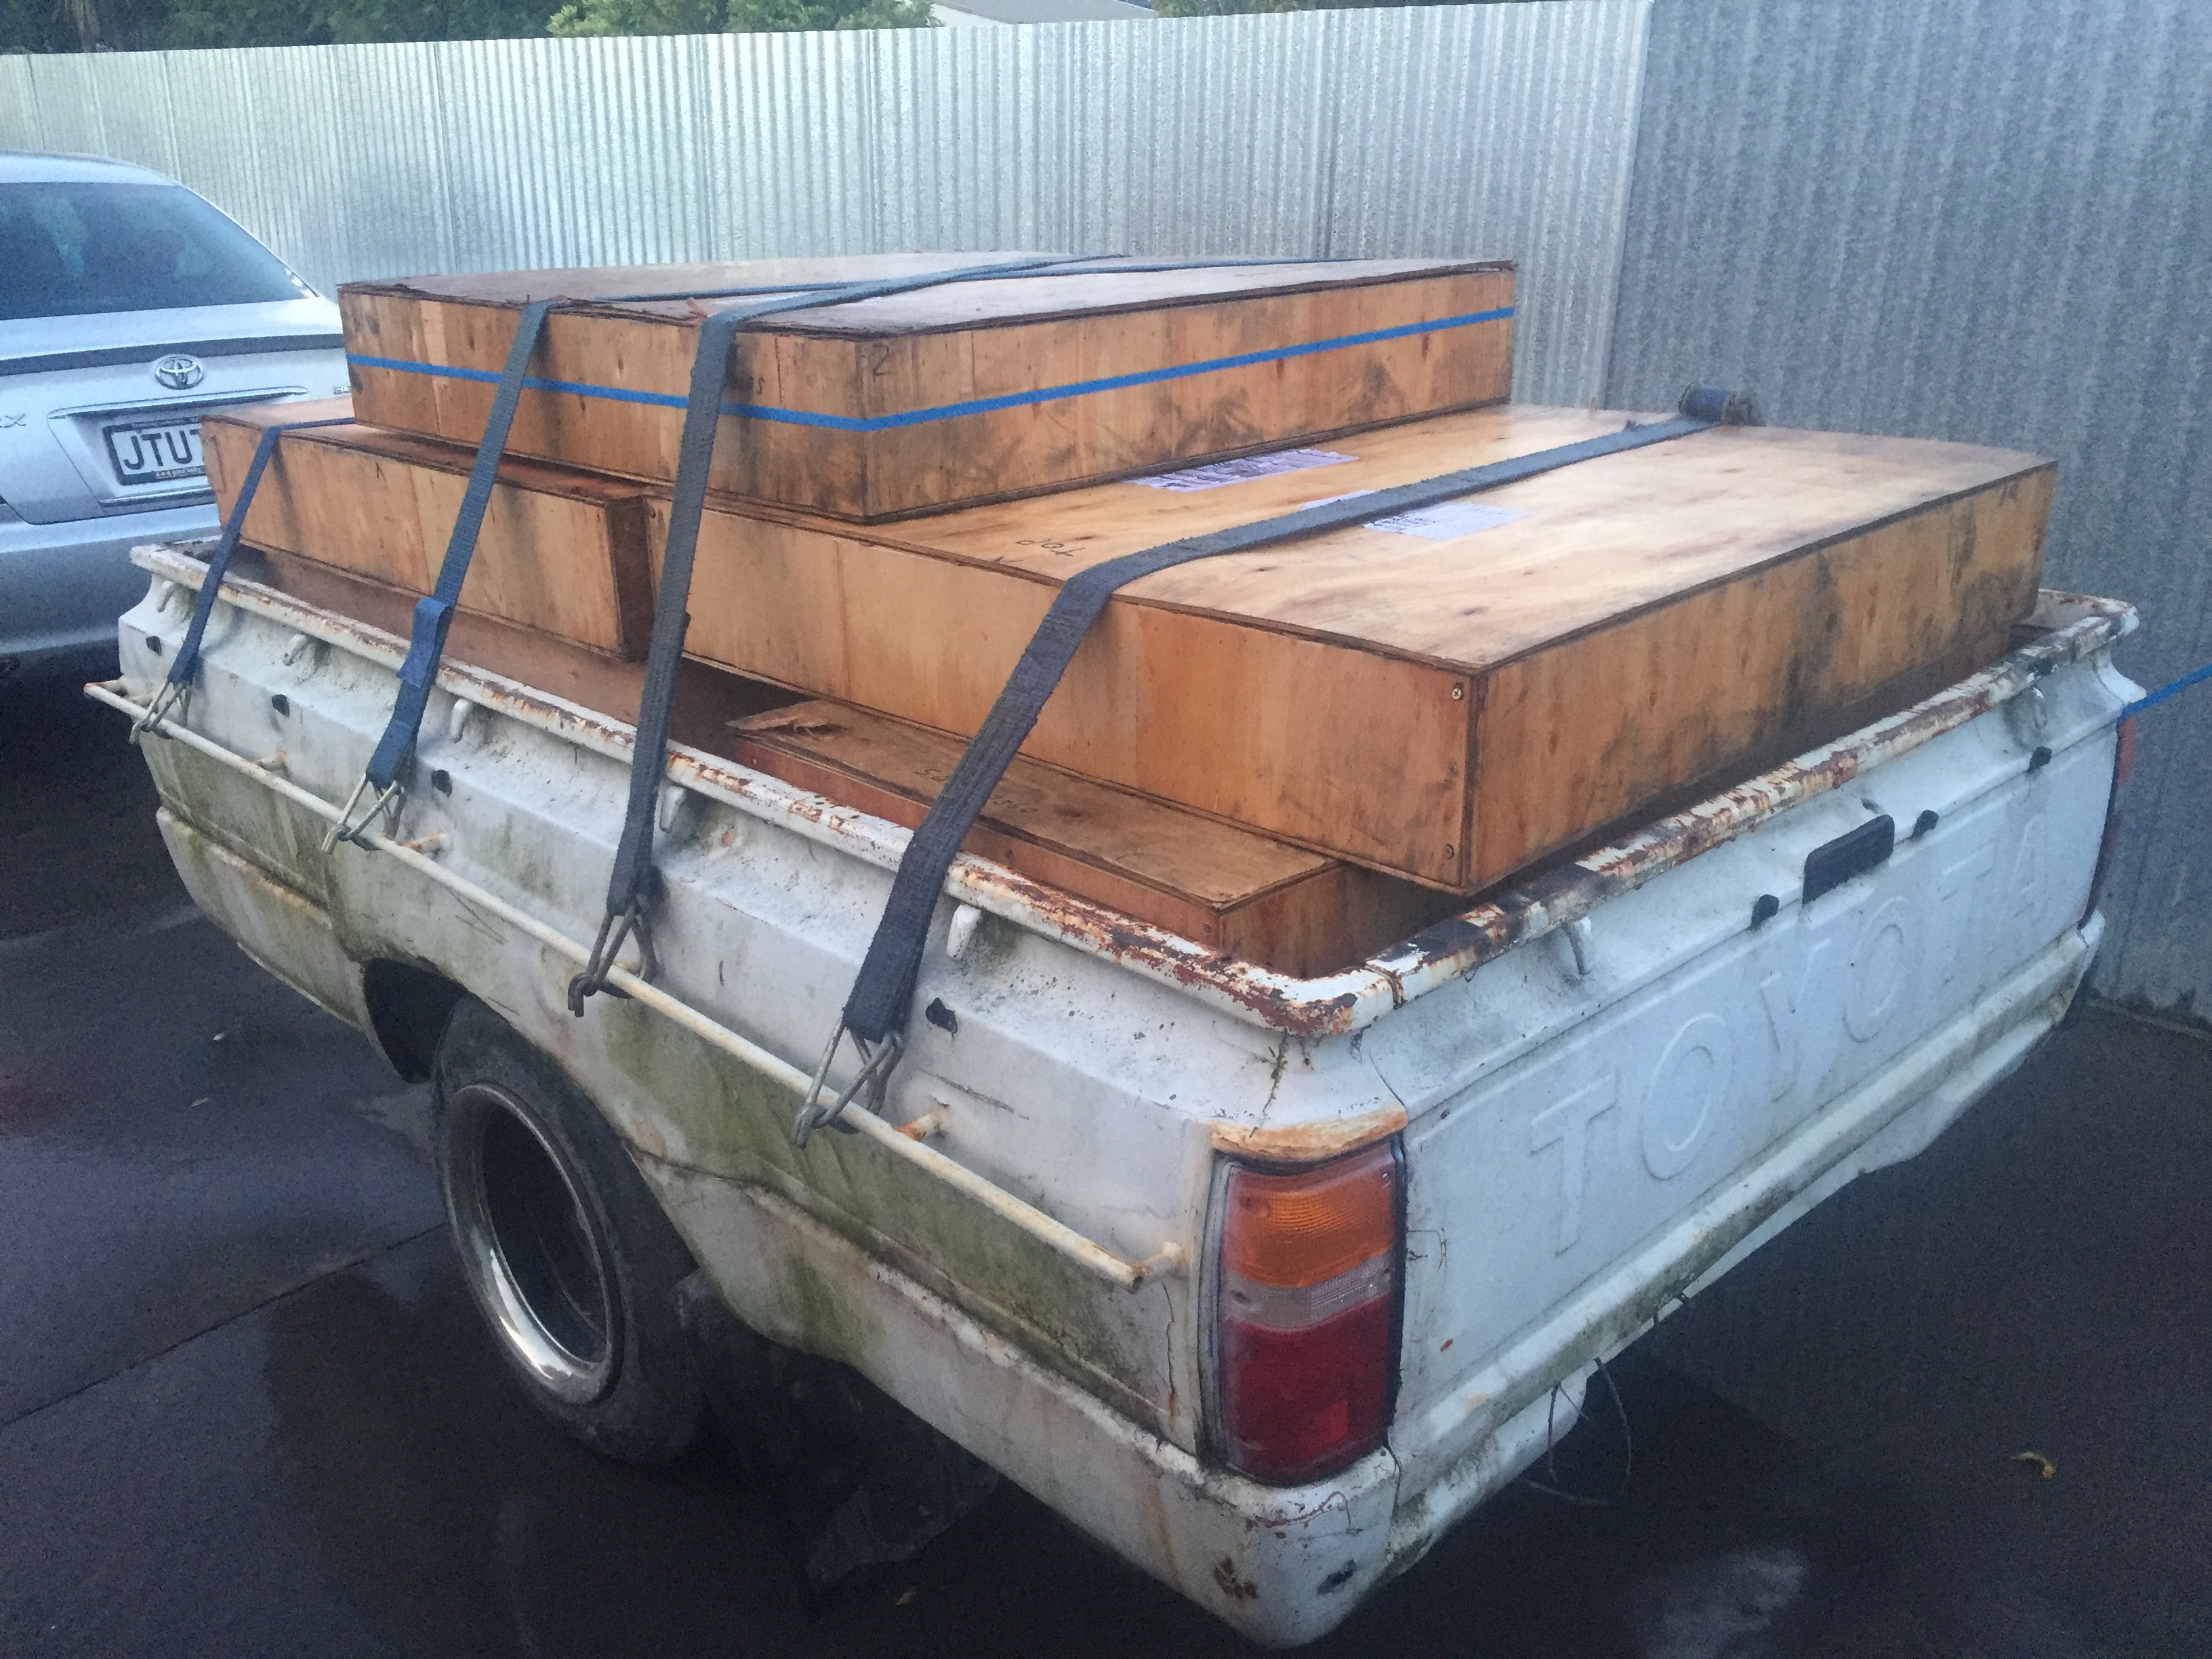
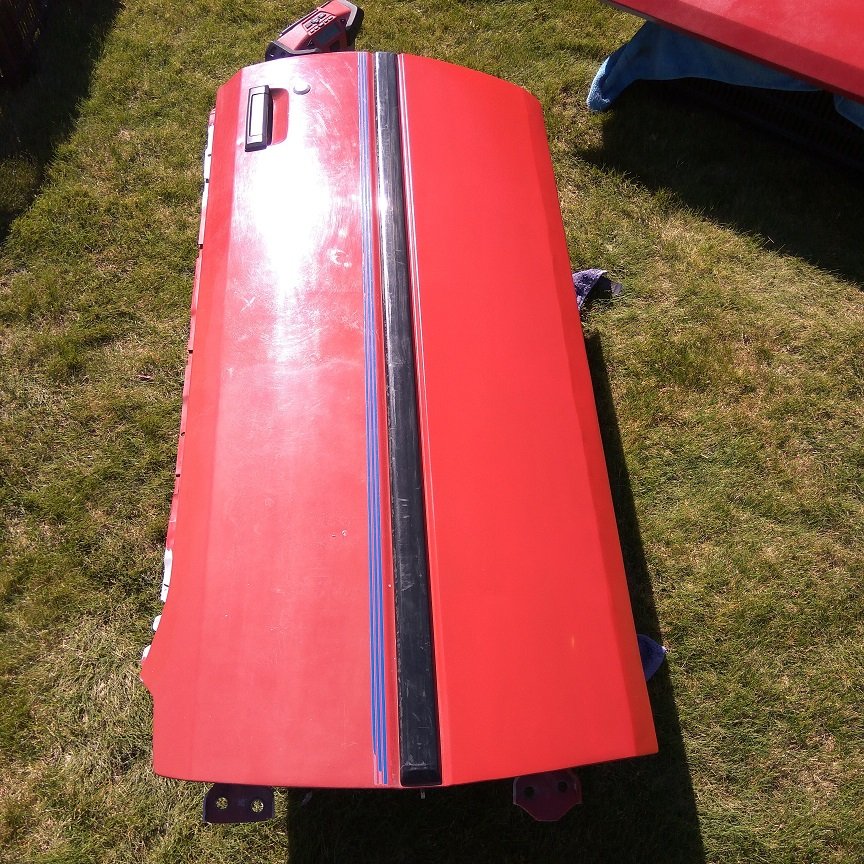
Ahhhh progress I randomly one day last year stubbled across a guy on FB selling newer crown parts,in the back of a pic was a ms53. I messaged him and he was willing to sell me some bits,after nearly a year of organising and conversions I imported 8 boxes of parts!! 4 doors,a tailgate,a superdeluxe benchseat,trim pieces and other parts that my car needed for the resto. This car has been abit of an international affair .being 1 of 2 known in NZ ive had to get used and nos parts from Thailand, finland, norway, the netherlands, japan and canada . Hopefully that should be it for now.... for anyone wondering i used CFR line in auckland to bring the parts in. Super helpful and great pricing
2 points
-
About to kick off quite some work on the Datsun and among the parts i'd like to restore the yellow zinc finish to fasteners and brackets. Totally aware that there are numerous places around Chch that offer this service and that its not all that expensive but as i'll be doing a stack of work in to clean up all the parts prior and my insane paranoia of loosing stuff or forgetting what goes where 6 month later, running smaller batches in my own time would be very useful. A quick search of chemicals online shows how unsavoury they are and at higher concentrations not available to the general public, but has anyone got a DIY friendly recipes or suppliers I could contact? Feel free to post your setups and experience, its all motivational!1 point
-
We are due for another meet Going to burger fuel as per oldschool tradition now they are open @MACKAZ @ESKIN8R @WhangareiKE701 point
-
I did say things would slow down First target in my sights has been to fix up the tank and its bits and bobs, and get the rear side of the fuel system 100% sorted. The tank has surface rust inside, and a fair bit of deposited rust from the pickup tubing and gauge level rusting away. Most people I talked to told me not to worry about it, just clean it out and be done with it, but... that just doesn't sit well with me. Rust must perish! My tool for the job is a POR-15 tank sealing kit. There's a bunch of guides online but they all seem to differ somewhat or have missing bits of info so I figured I'd detail my journey. The first thing to decide was what order to do things in because I needed to strip the paint on the surface as well as there are some bad and rusty spots. I decided I'd rather not get chemicals or rusty dust or anything inside a freshly sealed tank so I opted to strip + quickly prime the surface before I started on the inside. There's a lot of paint stripper to choose from and it seems like they all really do have a large range of reviews from "perfect" to "did literally nothing". So I spent way too much time looking around and settled on TERGO paint stripper. I chose correctly, this stuff is fierce. I was worried it wouldn't touch the rust converter I had on it but the stripper just totally nailed anything it touched, including the brush itself. Lots of PPE for this! Next I used a strip wheel to clean up what the stripper didn't quite get. I learned I should have started with the wheel and then gotten the fiddly bits with the stripper afterwards. I also used some wire brushes to get as much of the rust off as I could from the fiddly places. This pic is halfway through the top before the rustening. Then it's paint time, I'm no expert here but I figured the more layers the better. I've got some self etching primer and the plan is to tidy up and go over it again later with some (also self etching) black paint. It's going to get banged around a fair bit and so I'll need to repaint it but I feel like this is the better order to do things in, I can easily clean up and repaint the surface but the POR-15 kit is expensive and time consuming. This is a logical break for a new post, but.. how big can these things get? POR-15 TIME So there's three steps here, clean/degrease, metal prep/rust removal, then seal. The $150 kit comes with stuff for all of this. I didn't need to spend all that honestly, but as a beginner I really am trying to minimise the amount of faffage I need to undertake. Past Tom was smart enough to write all this shit down as I did it because I knew I'd forget intricacies: Degrease! I plugged up the tubes using a technique I read about online, with pipe+bolt - this should help prevent the sealant from creating a plug later on. I used duct tape for the larger openings which worked well, however I noticed a small leak at one point in my initial taping and when I re-did it it was WAY worse. I noticed that the tape wouldn't stick very well despite drying it down with paper towels or using degreaser or even a little sandpaper (needed to sand it anyway). I ended up solving it by using a heat gun to dry the rim thoroughly, the tape stuck very nicely after that, so pro (lol) tip. I then poured the degreaser and warm water in, along with some bolts, and began my daily workout: shaking the absolute shit out of a large unwieldy fuel tank with few opportunities for grip. I would rotate to each side and different angles and slosh enough to hear the bolts fly around in there, taking breaks as needed (lots of breaks). I kept this up for probably 30-40min. Then I used the pet cock to drain the tank and added about the same amount of cold water back into the drain hole, sloshed each side to rinse and drained. I did this about 8 times with each time coming out a bit less brown, but I noticed that the water still had a sort of cloudy colour to it so as the instructions suggested I repeated all of the above with the second bottle of degreaser they sent me. Here's the stuff from the first drain. After that I did my absolute best to drain the shit out of it. At one point I took all the tape off and stuck a hose in each opening spraying on various angles with the tank in various angles until there weren't any bubbles forming inside the tank and the water was mostly clear. I used a magnet on a stick to get the bolts out because my hand is way too big to fit inside. This whole process took a fairly long time and is a serious workout, something the motorcycle tank guides won't tell you! The instructions said it didn't have to be bone dry for the next stage but I used my heat gun to get it some of the way. Sticking it into the tank did really well, heated the whole tank and even the exterior dried within 10 min. However lots of fumes so moved it outside really quick. Looking at the structure of the tank with all the pipes and baffles in the centre of the tank, it's clear that this mostly only cleaned the walls of the tank, but hopefully that's good enough because I don't think I could get it any cleaner with what they gave me. Oh hey look a logical breakpoint. Metal prep! Next I put the petcock back in, poured the bottle of metal prep in and re-taped it up, swished it around all the sides and paid special attention to rapidly rotating and shaking it to try and get enough of the interior structure coated as I could. Then I left it and rotated it every 30-60 min making sure to get all sides. The duct tape held up OK but dribbles started when left upside down for too long. Then I poked a heat gun in it and left it in various positions for an hour~ which was really effective at getting it bone dry. It was getting a bit late in the day and the sealant says it can bond with flash rust so I left it. Checked it out the next day and... was unimpressed. I could still see and feel rust coming off like sand. It did a little work, but here's a couple pics to show just how little work it did. Before: After: I did some googling and found a guy who'd done it a few times. He said the metal prep is fine for small amounts of rust but if you have more than just surface stuff you should use proper rust treatment first. I'd already been faffing for so long with this thing and was ready to be done with it, I very nearly just rolled the dice and proceeded with sealing it as-is but after a deep sigh my risk-averse brain caught up and actuated my legs over to mitre10 to pick up 5L of rust remover. So I sealed everything up, poured all 5L in and intended to leave it overnight on each side... and the duct tape started failing after 30 or so minutes. Blah. I tried many things including making a custom lid out of a takeaway container but everything eventually leaks. If only I had an L&P bottle. Mate to the rescue! He had made some C H O N K covers for another of his mates and cut them down to size further for me. Talk about overkill but it works so well! Along with some old gasket maker these sealed it up extremely well, in fact when opening them back up they'd let off a fair bit of pressure from gas build up inside. A++ Look ma no leaks! I also figured out a better way to seal the filler hole. So I left it on various sides rotating and sloshing once per day to a different side, for a week. Then I opened her up and.... not bad. Parts that were sandy rust are now absolutely smooth to the touch. A pipe with a bunch of growth on it is now clean. Vaguely surface rusty parts are now looking much more uniform. There's still some somewhat-sandy rust on a part of the top but... I'm happy enough to proceed. Short of cutting it open or getting some chains to try and go around the heavy baffling inside this thing, I can't get it any better. Obviously I can't re-use the metal prep but the rust remover and the copious amounts of water used to flush shouldn't have changed the quality of the surface any, I hope, so here's a different dice roll! Now I should make another post for the next part of the story. ... THE SEALENING Final stage! I opened the can and stirred for 10 mins, it REALLY doesn't want to become a uniform colour but my online research says that's normal. Then I sealed the tank back up, poured the sealant in, turned up my TV and sat on my deck for an hour just slowly rotating this thing. Occasionally I gave it a shock-turn to try and splash or dribble onto the baffle structures as much as I could. The low point in my tank is unfortunately around the petcock hole :\. With water I can just vacuum it out. Can't do that with sealant, and I don't want to stick a rag on a stick in there or anything. Someone online had gone overboard and rotated his tank for 2+ hours and that had the side effect of having the sealant essentially distribute and harden up during that final hour meaning he had no leftovers, so I was trying to go for a happy middle ground where there shouldn't be too much pooling. After an hour I opened it up and was beholden to all that was good. I was expecting the sides to be coated and then incomplete splotches on the baffles and the pickup cup etc but EVERYTHING IS 100% COATED and I am SO HAPPY. I removed the petcock and drained the best I could. It turns out quite a bit of sealant is still in there after an hour :\ so backup plan after removing everything else off the tank is to rotate onto its sides over the next couple hours, to try and get it to distribute a little more in there as it solidifies. I feel like a massive blob of it around the petcock is probably not ideal. Final thing was to use some turps to clean up the petcock hole threads and area, the petcock itself, prop it up and leave it to cure. And then abandon the garage with all the doors open because even with PPE I don't trust those fumes, The next day I am greeted with this lovely sight. I am extremely happy with how it turned out. The pictures show some semi-rusty bits, they're totally grey IRL so I don't know what that's about. It hardened to a plastic-like substance that I can't scratch with my fingernails. Finishing up Finally I tidied up and re-primed problematic parts of the exterior (I flower-pressed some grass into the bottom with the heat gun), re-masked things up and added a few layers of CRC black. I was going to clear coat it as well but the feedback on that was "why?" and I'd already spent enough time on it so .. ok. One giant post, and one giant tick box. I shouldn't have to do anything on this tank again. Yay! Now it's stored safely wrapped in plastic under a bench for the rest of the car to catch up!1 point
-
That worked quite well. Used a different mould release, sand just fell out of the pattern. Rods are holding it together well by the looks.1 point
-
Crikey its been a while since I updated this thread. Quite a bit has been built since the last update, in between customers jobs, mucking about buying old Bedfords, playing with bicycle builds and general enjoying summer stuff. Now that its 'late summer' here in the Tasman region and its starting to get a little bit chillier in the evenings we have been cracking into the build so we can hopefully move out of the cabin before spring Autumn arrives. Our bay seems to have a bit of a micro climate and ignores winter here, going straight from autumn to spring and frankly its more nicerer that way I still want to be living in the shed though- its gonna be nicer all round and I might actually then do more work on the Imp 911! So last time I posted we had sort of started the building of some walls upstairs. We got sick of the mess and clutter downstairs and once we had the wall up in the lounge we carted all the boxes of car/bike/workshop related stuff upstairs and stacked them in the lounge. Then we took down the old shelves that all that stuff had been on. Moved the washing machine, folder, guillotine out of the way, put more burly posts up and built the store room. I didn't really take any photos of the process but you can see it in this photo... Its about 1.6m wide and spans half the workshop. Really good amount of space to store lots of boxes on some shelves we built up there. With all the stuff shifted up off the workshop floor we could now make the most of the extra space. We shuffled things around, measured, schemed, planned, deliberated and pondered the layout. Still wanted some shelves but not as big. We ended up with it looking like this... Much better. Really happy with that. Those shelves will soon get cluttered up with a variety of Nissan micra bits as we do that planned swapsies game. Now back to work upstairs. Speaking of stairs...we got sick of clambering up and down from the lounge area using a step stool so we made these... I built them to replicate the main stairway. We picked through the largest bits of pine we had and created some sweet steps. Really stoked with how they came up once varnished. There will be a handrail on the wall side to add in the future. We bought some things. We've never had a new mattress. Time to splash out and get a decent one... (another reason for wanting to shift outta the cabin asap- the cabin only has a double bed and it gets crampped when we have to share it with a big fluffy cat) Also started hunting for chest of drawers etc. Found these slightly art deco styled ones cheap at the recycling centre - $40. Nicely built from solid Rimu. Hannah sanded them and varnished them... We kept plodding away at the build. Annoying when we had to stop to do customers jobs but hey that's life. Walls and ceilings went up. Some free insulation from local friends. Hannah painted some of the walls. Yet to decide on other colours to be used. Bought a nice second hand full HD projector and a new 130" motorised screen. We had deliberated about going the projector route or just get a large telly. Projector won and its amazing! Installed the lovely large 'fill the room with deep smooth base' speakers we had been gifted. Made some burly speaker stands that replicate the posts holding the mezz up. Screwed them to the floor because earthquakes.. but also make sure nothing moves but the speaker cones. Gawddamn its a mighty nice setup to watch movies in now- exactly what I have dreamed about. When I spot a 65" etc TV in the shops now they seem so tiny. Viewing a movie on a projector screen also seems much easier on my eyes than looking at a telly screen. I added more circuits to the breaker box and ran out all the wiring before the walls went up. Always so fun to turn new lights on and have wall sockets to use rather then trailing extension cords. I have a local sparky mate who will be checking/signing it off etc when finished. Get all our bits at trade from him too- LOL at the markup on electrical stuff !!! Pics... Spot the vent added in the top- without windows it was a bit hot up there. Vent works well! Need to make a pretty porthole window to cover it. Some nice carpet will be laid on the lounge floor (oatmeal/Kevin coloured - bloody fluffy cats....) I had posted up some pics in the shed thread of this happening a few days ago... Wow- I wish we had done that earlier on. We've had a window to fit in this spot for ages... My brother had spotted it at the Blenheim recycling centre. $50!!! All cedar sashes and lovely Rimu frame, solid brass mechanisms. Couldn't believe our luck. Hannah cleaned it up and painted the outside in dark 'Karaka' green to match the other windows/doors on the shed. Here in primer... We needed flashings. I didn't want to deal with the main Nelson crowd that we'd used and been mucked about with before. We had a load of brand new gutters that had been left in the bush by the previous land owner, still in the plastic wrap and in the exact same Karaka green we needed. So I decided to use them as material to make our own flashings. We needed a folder. So I built one... It folds 2.4 metres. No good for heavy steel but fine for shed steel, car steel. It will be a handy thing to have for future jobs so it made sense to but a little time/money into making one. It fits neatly onto a large mobile steel bench. Made flashings and fitted windows. Then had coffee looking out into the bush... We will be chopping down heaps of the Kanuka trees we now look at- the block the evening sun that comes through the window and there lots of really nice ferns that we'd rather see come up. So that's firewood sorted for another few years In the last few days we've been adding trim, making another bookshelf to mimic the one we'd made earlier on the other side of the lounge. Wanted some nice timber and found a large plank of what we thought to be old pine. Turns out it was Macrocarpa so that was a nice surprise... Finished that book shelf last night and Hannah varnished it this morning... We uncovered the remaining Rimu stacked outside and brought it up to the shed to process... Quite a large amount left. Most of it cleaned up nice... Now we are machining it down to a variety of shapes for trim, skirting boards, corner cappings, railings. We really need to make the bannisters before someone falls 2.4 metres to the concrete floor below. Wow. Wall of text. I'll try to post up more often so its not such a mission to write/read. Really looking forward to fitting the kitchen/bedroom windows soon and then start building the respective rooms. Then we can move in. Then I can tinker with flat sixes till late and know my bed is only a flight of stairs away - not a cold walk up to a cabin. Alex1 point
-
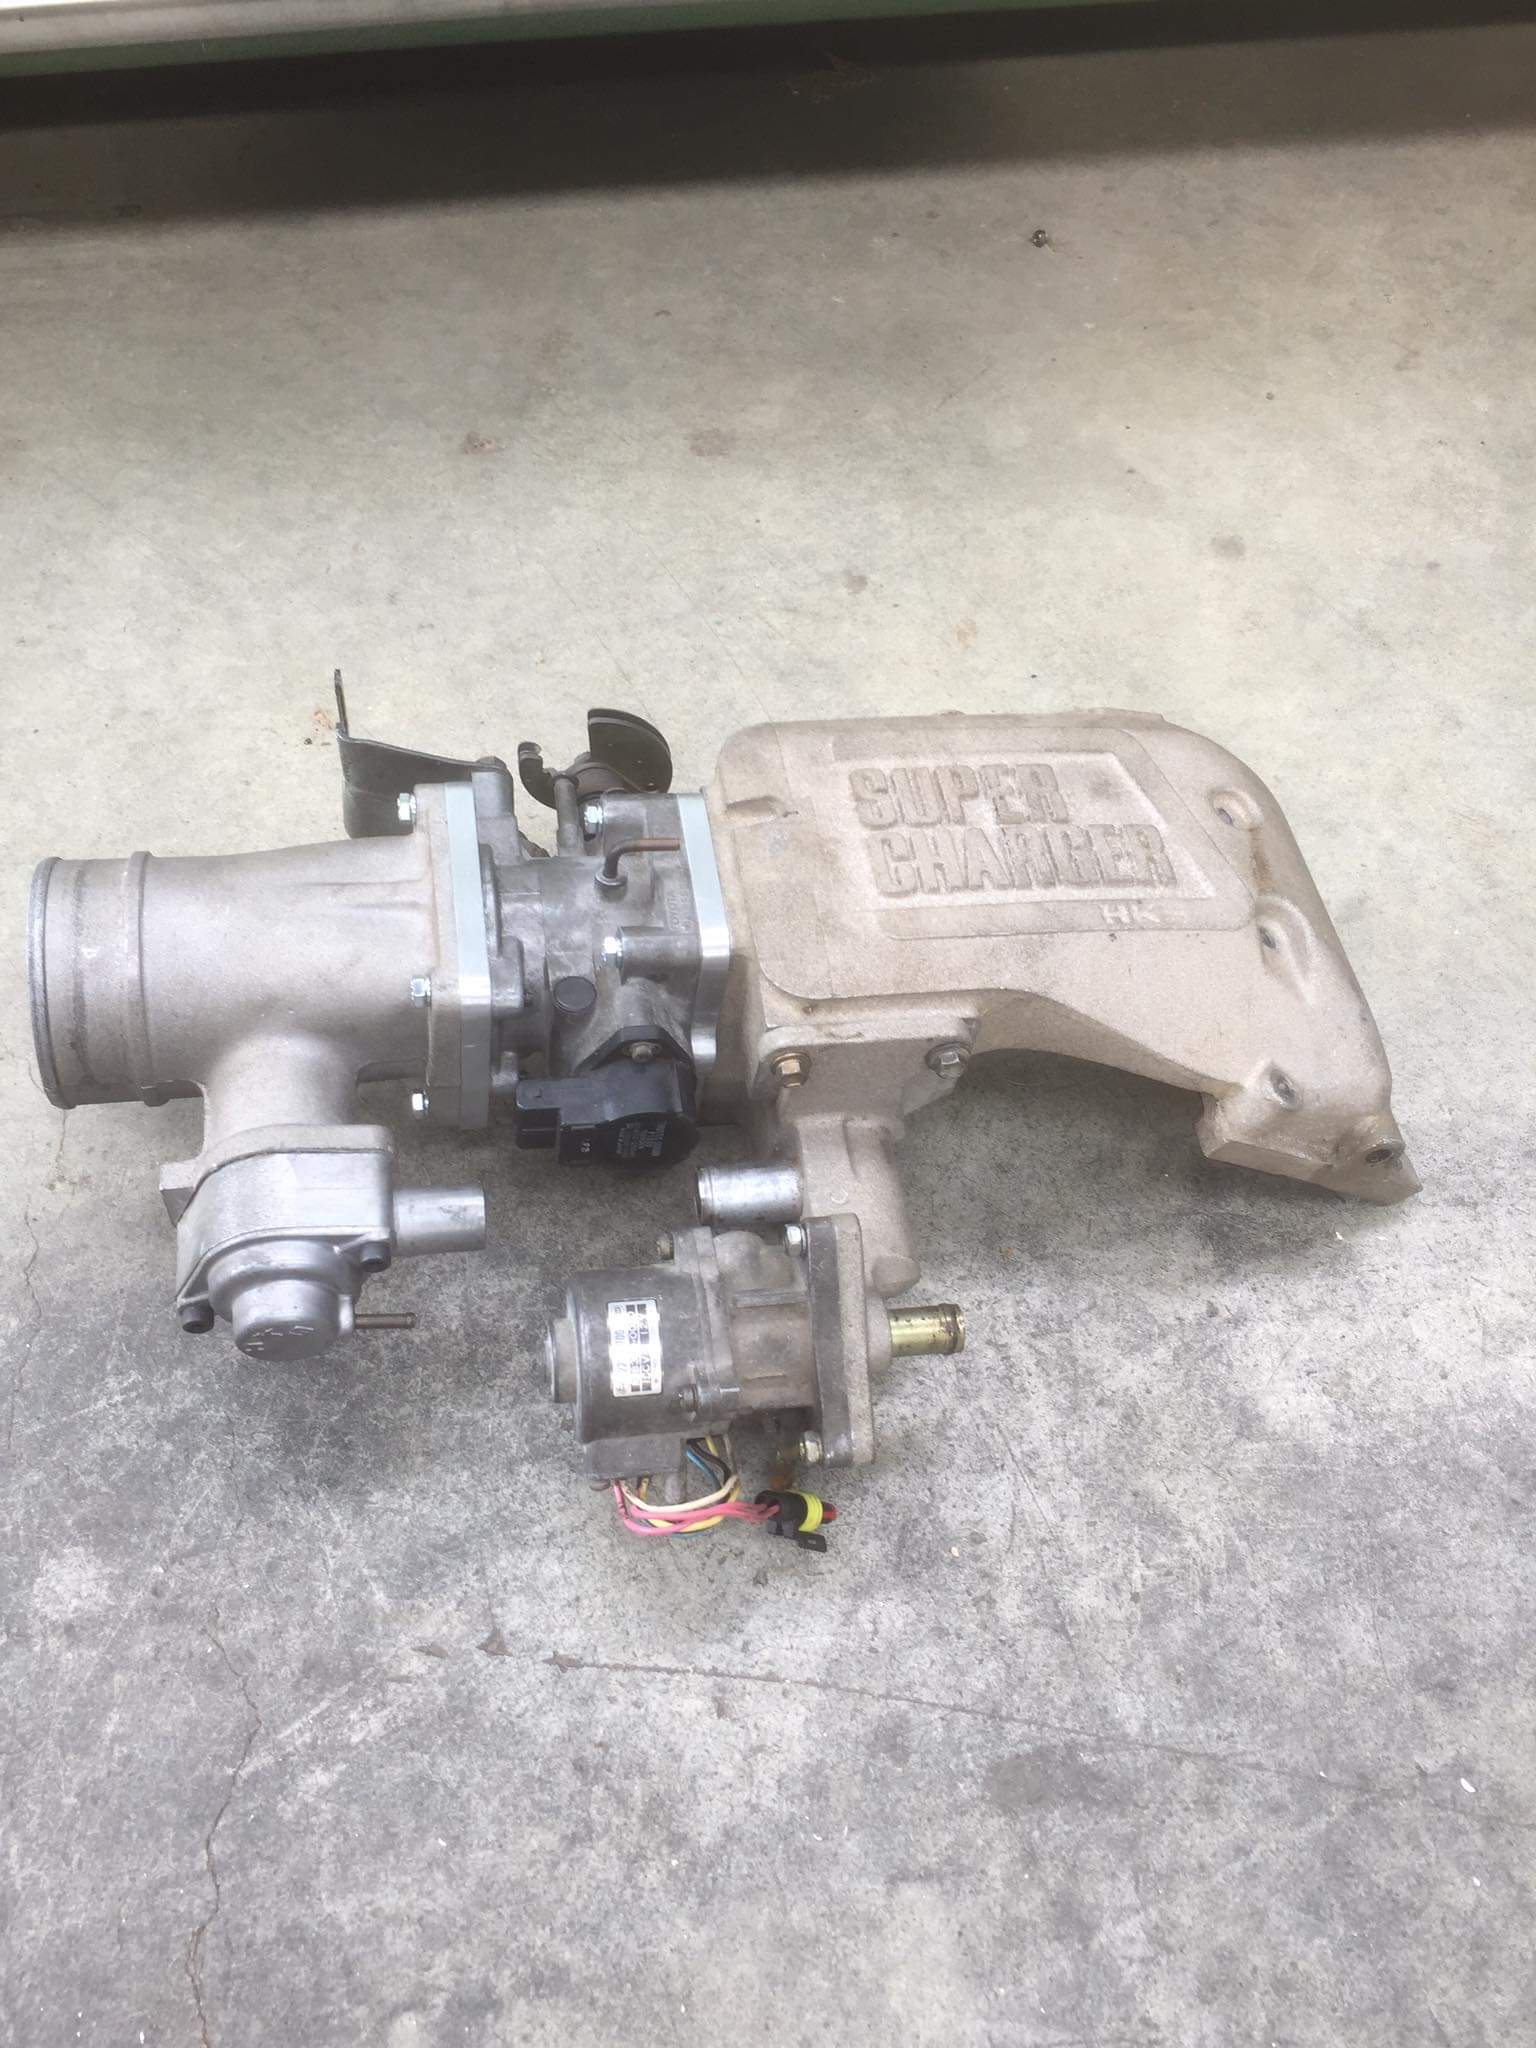
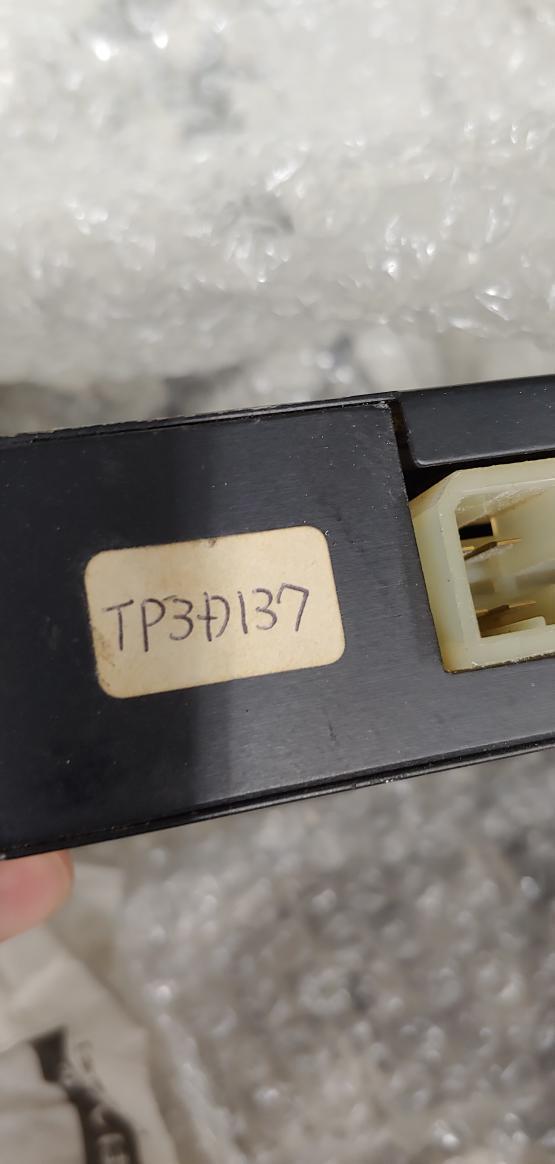
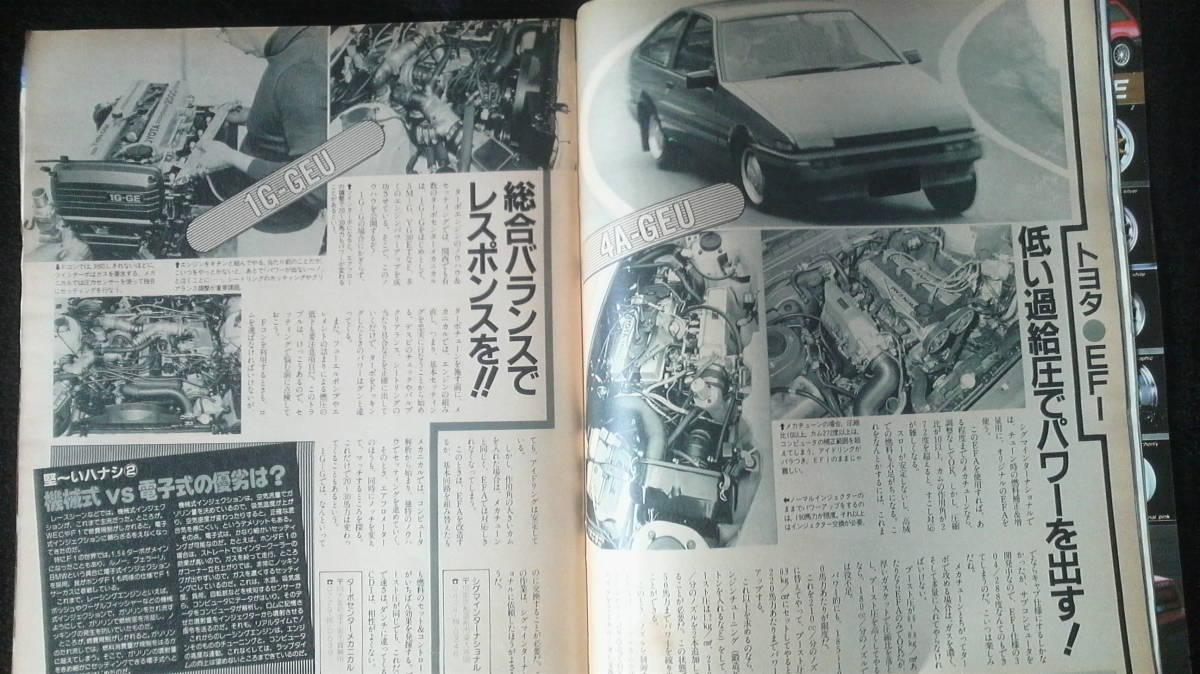
Have had a bit of a breakthrough with the supercharger kit this week. After I posted the above on Instagram with a 1ggte hash tag I went on a bit of a search and found and old post of someone with the same kit. I sent the fella a message asking if it was complete and if he had had it running. Kyle then told me he had purchased the kit 20 years ago but it was missing the actual supercharger, if I needed part or all of his kit to throw him an offer. He has the correct f-con and is sending it my way Toyota Plug 3 ROM number D137 This screen shot it from a 1993 onwards brochure where they had changed from D ROM to E ROM and changed the pressure sensor. I have confirmed the pressure sensor I have here is to suit the FC3 PCB from the article below. I didn't actually expect to be able to find this ecu and still can't believe it, I can't imagine there are very many of these kits out there. To have cut out the cost for going with a full rewire and link ecu is amazing
1 point
-
Full Hks Barry mode
1 point
-
Adding to the catalogue in my garage I've found this pretty epic twin charge build in an old carboy magazine
1 point
-
Thread is just turning into assorted magazine articles at this point... My kit is posted on the bottom right and is showing it originally came with an intercooler. The thing is the supercharger is directly bolted to intake manifold which is directly bolted to the engine so how??? I also purchased a unidentified hks F-con Pfc from yahoo just to see what exactly they are
1 point
-
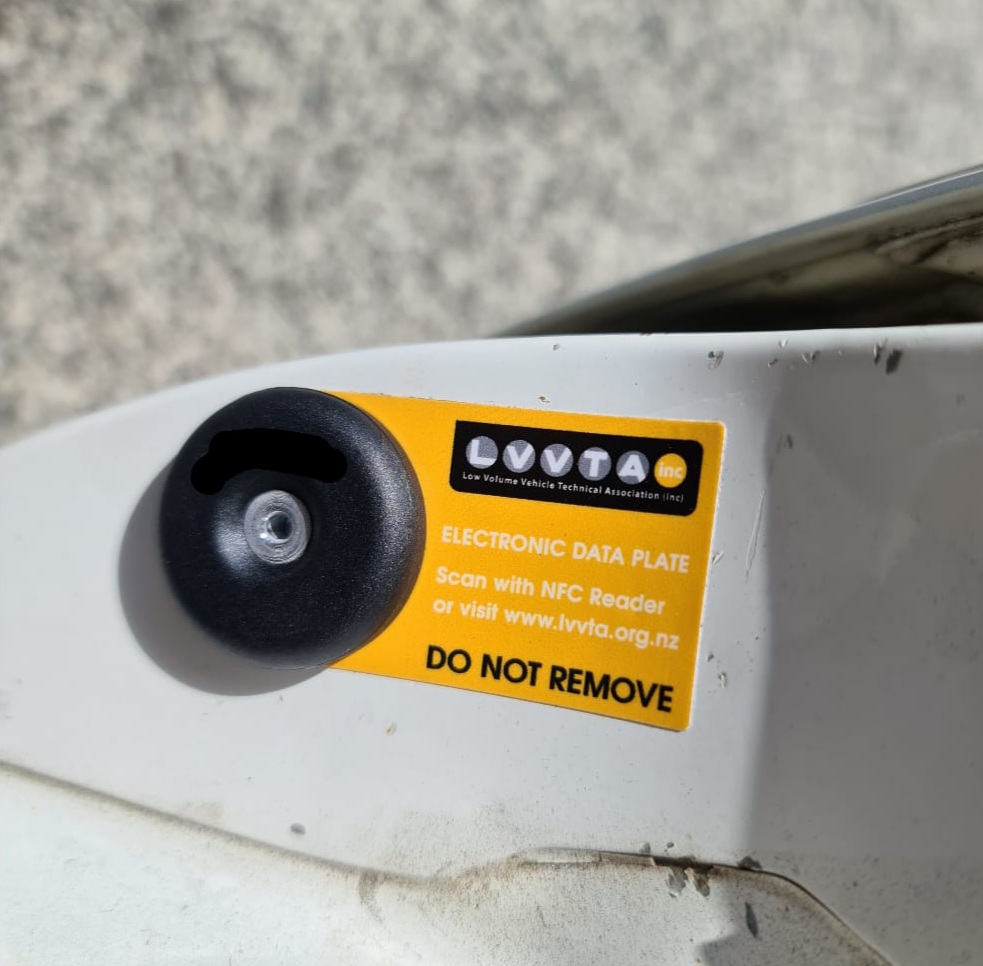
Today I got a new mind reading tag thing so the government knows what I had for dinner on Wednesday
1 point
-
@Barnz.NZ had a batch of leather shifter boots made up, much nicer than the poorly fitting rubber accordion that's been in place for 2 years Have been driving this every chance I get, still doesn't feel real being able to its been that long. Planning to find another 1gge long block to assemble the supercharger on a stand to set everything up 100%. Have been trawling Google to find any more photos or specs or anything for the kit, have ordered a couple of Japanese 'Carboy' magazines from YAJ that have a few gems inside. There is temptation to twin charge with the hks single turbo manifold that often pop up (currently a NOS one being sold locally) Must refrain.
1 point
-
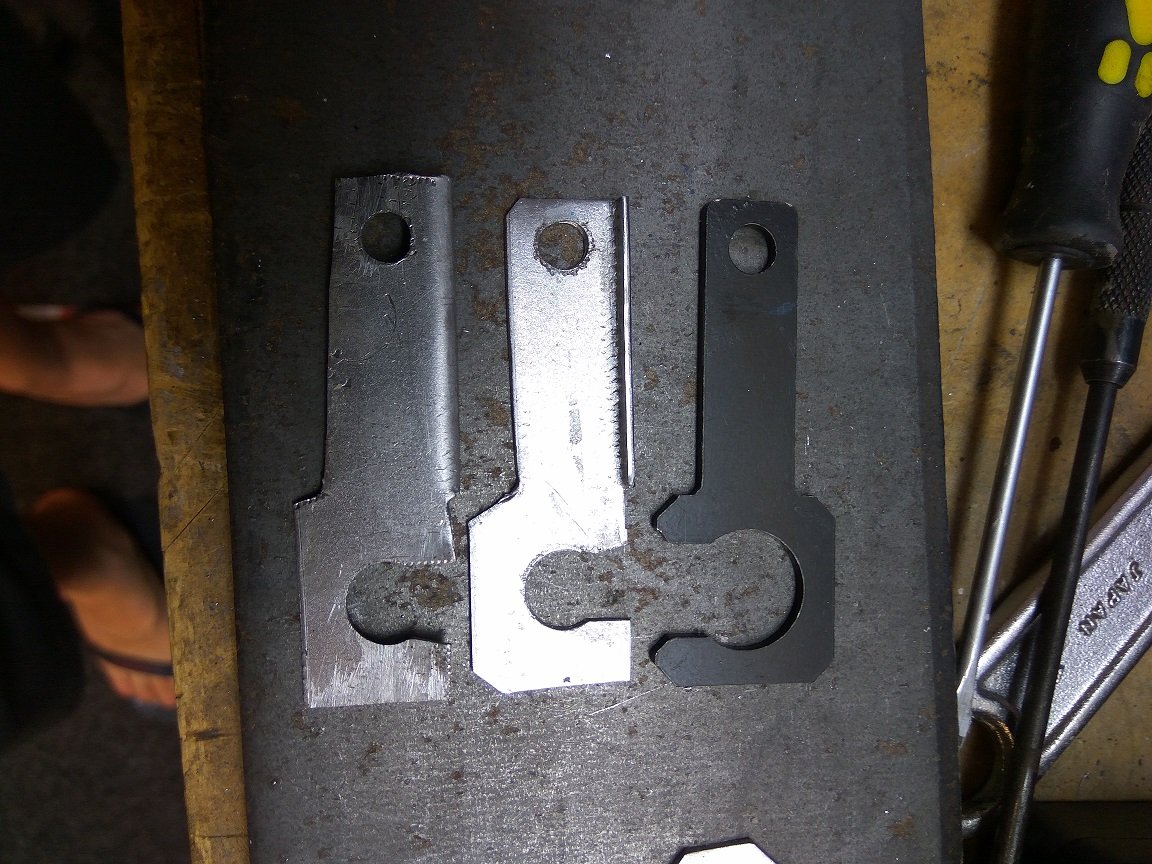
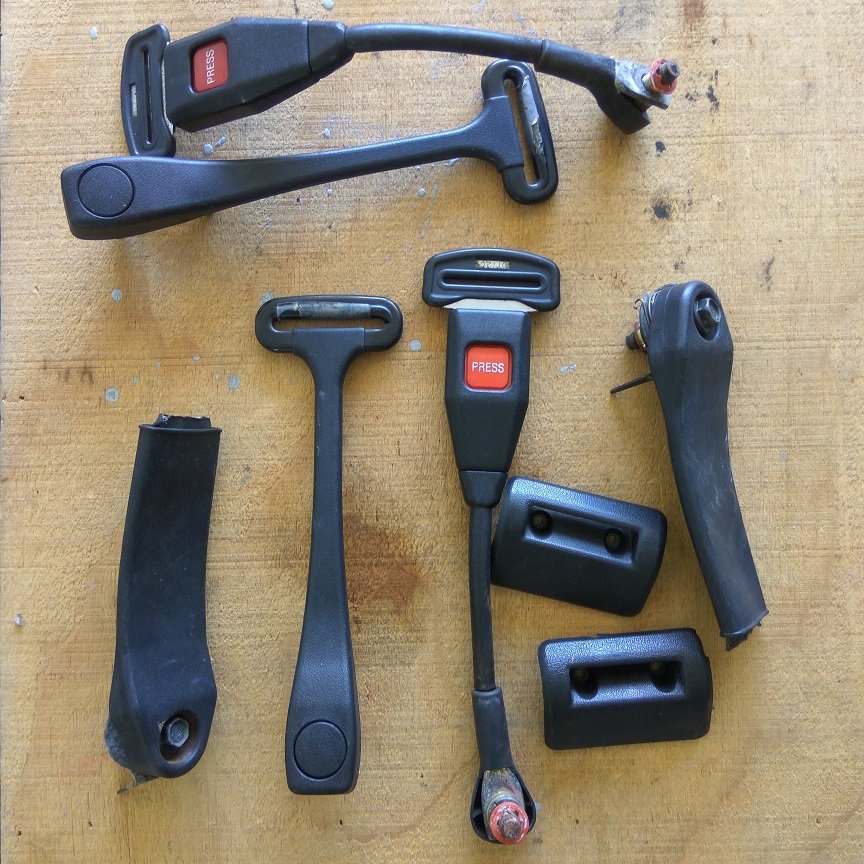
If you don't want to read a book, just look at the photos, I waffle a bit in this post. Not many decent photos this time, have been focusing on getting stuff done and forget to take progress pics. Have given the exterior repaired areas a coat of paint. Ran out of paint pretty quick, so ordered some more cans off the paint code, close enough is good enough. Ran out again, so had some made from the 500ml of paint code paint I had lying around, and a couple of cans made from paint I got matched pre-lockdown. Up until about last week, I was still planning on getting first cert inspection this year. Bit everything on this car is fighting me and so i've come to the realisation that just isn't possible. More rust, wheels don't fit properly, brake lines don't fit properly, certain parts i've struggled to track down, parts from Japan destroying my wallet (will explain below) list goes on. Anyway enough of the negative vibes, here are some potato photos. On the plus side, i'm hopefully getting a deal on a DSLR next week, so quality of photos may or may not improve. Content of the photos, will not improve. First the rust, doors had quite a bit, I removed all I could, and rebuilt quite a lot of it. Then had Warrick @ Canterbury Auto Fabrication work his magic. He fixed the rust on the bonnet previously, and subsequently took most of the distortion out of the doors. Due to lack of time / skill I have just given then a quick epoxy / bog skim and paint. Appearance is at the bottom of the priorities for this car. So long as the rust is sorted, it can be painted properly down the road / never. So yeah just a couple of pics of doors. One of the doors after a skim / paint. Will need a buff up to finish the paint off for now. All repairs got two brushed on coats of epoxy primer, then seal sealer. So they are well sealed and shouldn't cause me any problems for a long time. Rear end bog, lots of epoxy on this too, a quick tickle up, then primer / paint. Rear end got a primer and paint with colour matched paint. Bit light in a few areas after a tickle up, so will give it another couple of coats, then buff up. Will do that after spray bombing the inside of the boot as this is currently all epoxy primer and seam sealer. Brackets that come with coilovers for brake hoses don't fit. Either I am missing something, or they just sell them as two separate things with zero interest in making sure they work together. /rant. I made up some sheetmetal tabs that when the supplied brackets are fitted, lock to the bracket and mean the hose support is locked in place. Gave them a coat of Mathew Black ZincIt, noice. Supplied one of right, which the brake hose passes straight through, the others are mine pre paint, probably obvious because sows ear. They both got tidied up since this photo so they are closer to identical. Car came with one correct belt, which had camo treatment, and one sedan looking belt. Tried to source some poo brown ones locally but to be honest got the run around, so said don't bother in the end. Sourced a pair from Japan. Drivers side looked to be in good enough condition to install as is, passenger side needed repairs. Grabbed them through Buyee as they got listed with pretty short auction lengths. Won both auctions, thought I was doing well. Turns out they wouldn't send them internationally. So I could either bin them or have them sent within Japan. Thankfully I know someone there, so had them sent to them. Much to their annoyance I bet. Had them cut the belts off the parts I needed and bit some perfectly good bits, boo. They sent them to me and I had them in a week. Sweet, by this stage i'm bleeding money, just to get original parts as I want the drop downs from the roof due to them being low profile and sort of a must with the hardtop look. They got the last laugh though, they sent them in a box nearly 10 times the size of the belts and filled the box with heavy packing (not actually protecting the parts, they were at the bottom). Thanks bro... But hey, beggars / choosers eh. Anyway, said parts, which i'll now pay even more money to get remade into usable belts haha, fuck my wallet. From a liftback I think, so the covers for the door panels are different, not a big deal at all. I have one good one and one that needs fixing, so i'll do that then paint them both black. I don't think i'll add up the cost of making these belts, i'll just cry. And last pic the wheels that don't currently work due to lack of clearance from front struts. So i'll scratch my head over the holiday and see about getting some spacers made. Guess I should find out from cert man what clearance he'll be happy with. 1mm currently won't cut it, so i'll try for 5mm, even though spacer maker man said 5mm was too annoying to make, we'll see. Anyway, peace out, probably won't do another update this year.
1 point
-
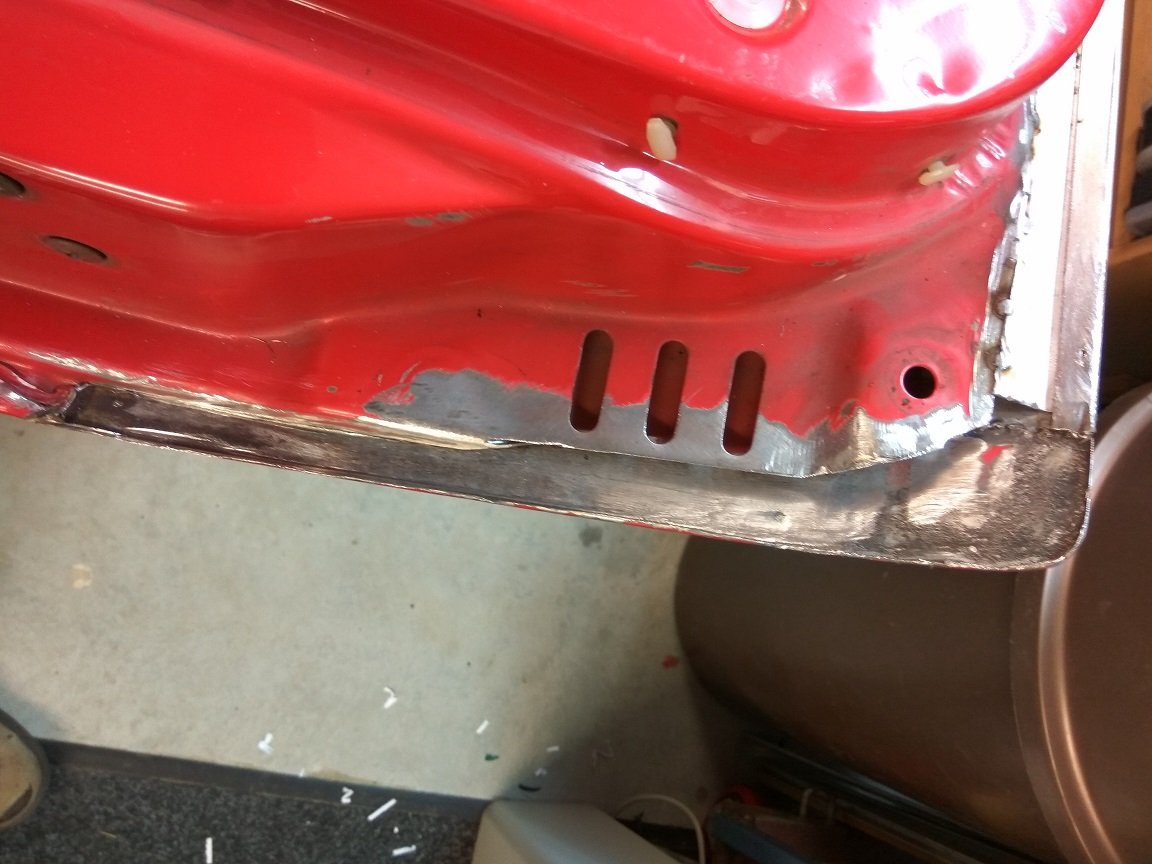
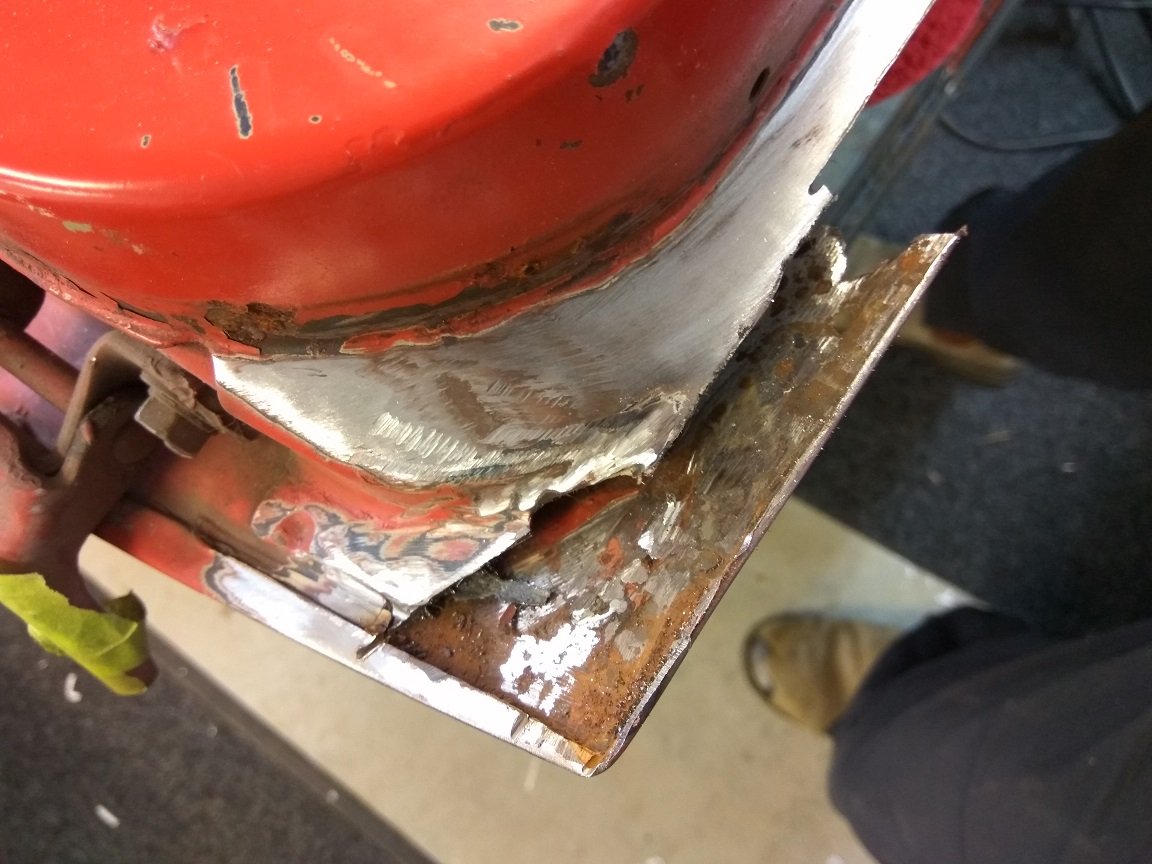
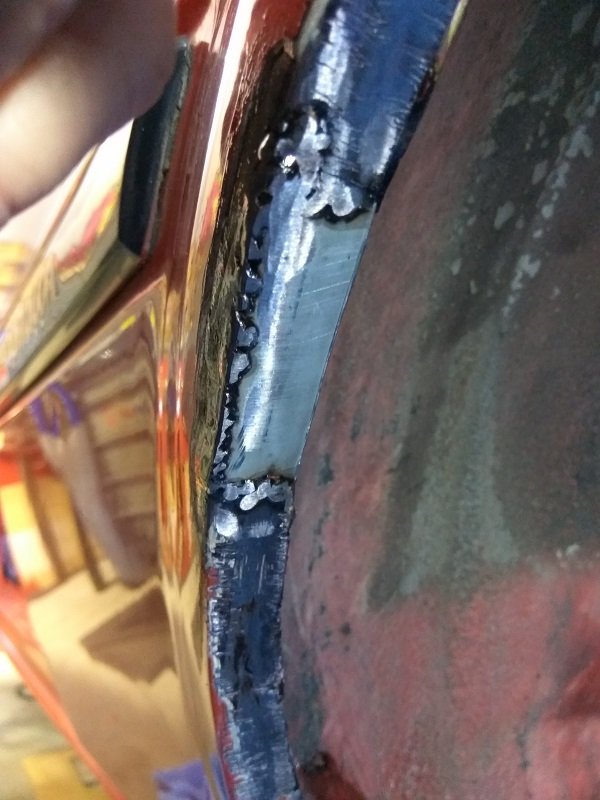
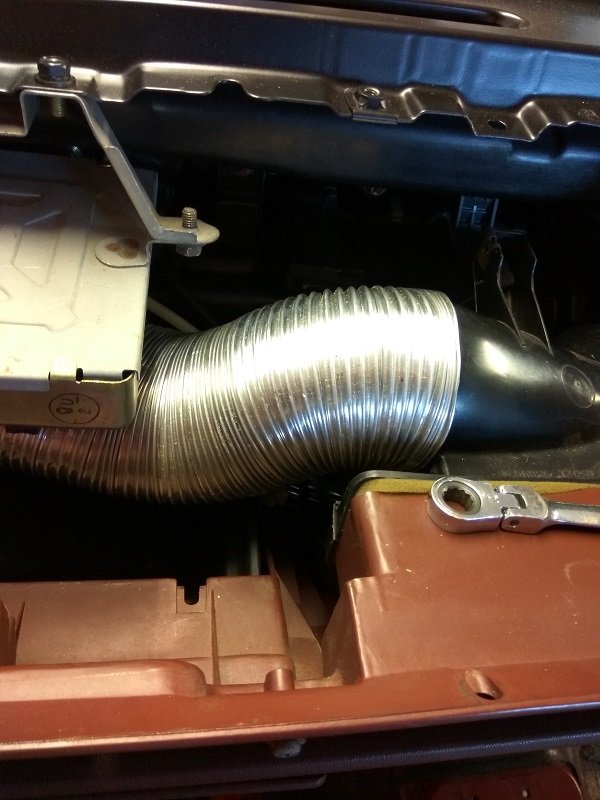
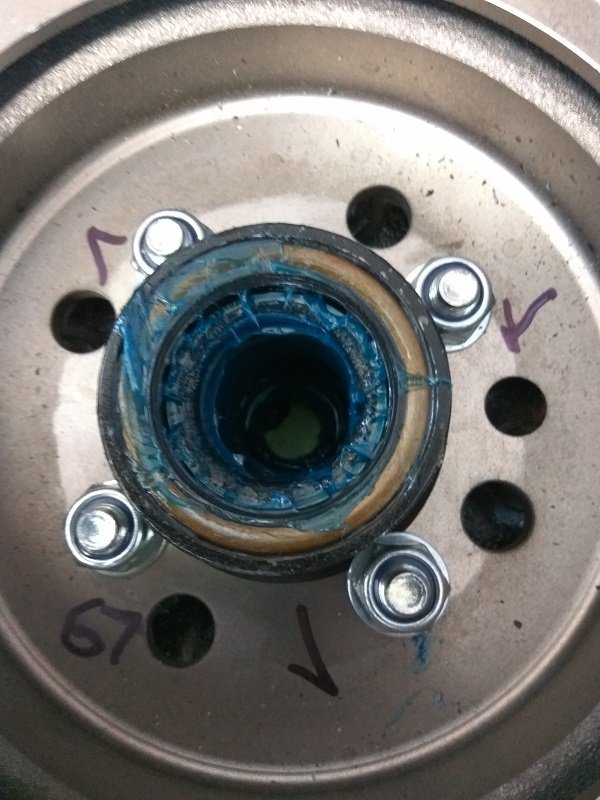
Have been chipping away slowly. Torqued all the the bolts on the front strut's up to cert specs. Then had to pull both struts apart as a ~0.5mm spacer wasn't needed. I had previously found it was needed as one pad didn't fit. This time I found it wasn't needed... so hopefully a drive around the block will sort the slight rub of one pad. Without the spacer plate, the pads have a gap sub 1mm, with one slightly touching, still easy enough to spin so I think that will sort itself after a drive. Installed the diff back into the car, nightmare one man job. Took a lot of pissing around as some of the arms are super tight. Got there in the end. I stripped the surface rust off all the arms and gave them a couple of coats of paint. No pics of this as I spent too long cursing and losing the will to live. Bolted an adjustable MRP panhard rod in for the first time, shocks bolted up. Still need to work out what i'll do for bump stops, not being able to chop some down is a bit of a ball ache. Have left handbrake cables flapping in the wind for now as I need to bleed the brakes first. Drums were completely rebuilt, so that side of things is done. Hoping to get the brakes up and working this week, then I can get it off the axle stands it's been on for months and get it outside. Boring update, but just trying to keep the momentum going. I've also installed the dash back into the car and hopefully plugged everything back in correctly. Brakes together for hopefully final time Heater ducting, couldn't find a duct in the parts pile for this section so made one up with some 75mm flexipipe stuff. Had to flatten it below the emissions ECU as it's a tight fit between that and the glovebox. Hub installed with bolts for brake upgrade kit. Ticked and torque written down so I know it's done. And wheel arch repair. Was the only part that needed replacing, due to a prang which caused it to rust out. The rest of the arch has some surface rust so I gave it a really good clean up and sanded off what I could. Then put some Brunox over it. Will epoxy prime the inside too so that any moisture can't get to the area. It was either that or replace the whole rear arch for the sake of some very light rust between the skins. A: that's above my paygrade B: seems a bit extreme as it won't get any worse. The repair I did took an hour to weld as it's so thin I could only do a couple of spot welds at a time, while letting it cool again. Relatively boring update done, if you made it this far, you've done well.
1 point
-
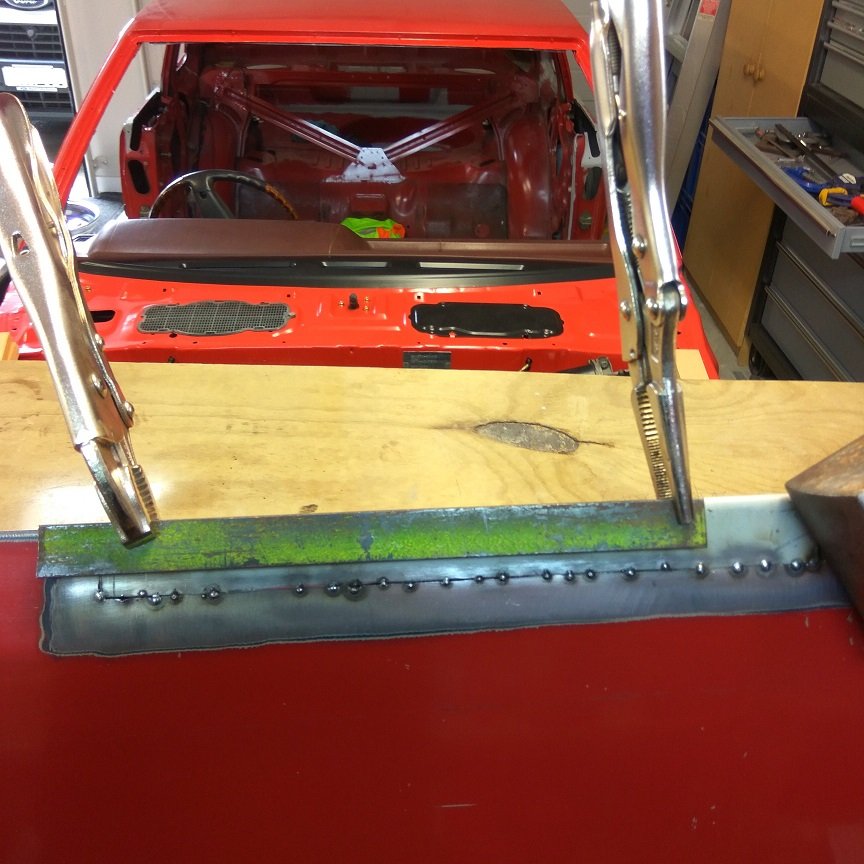
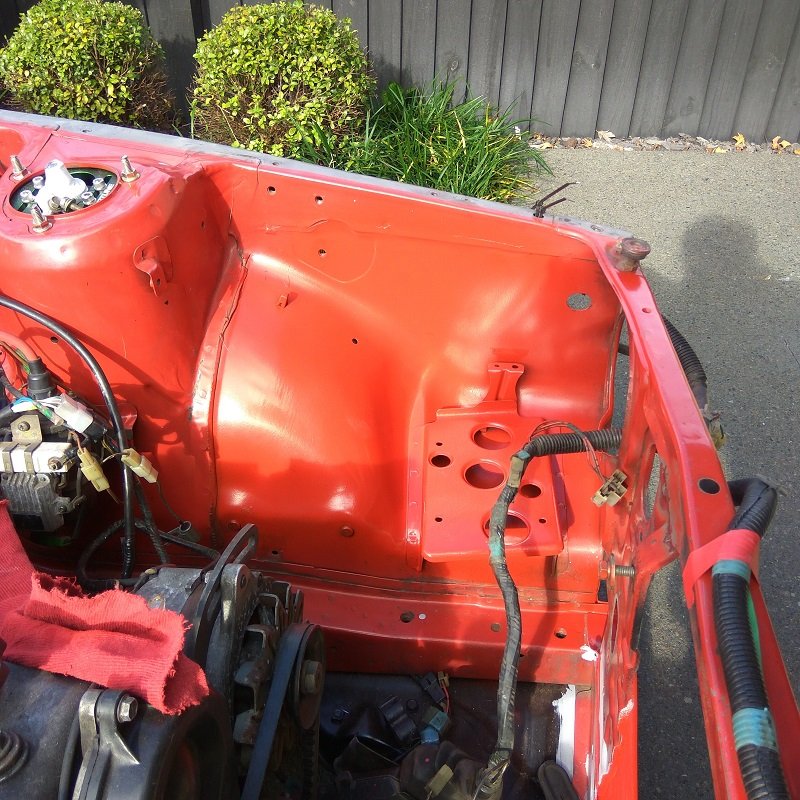
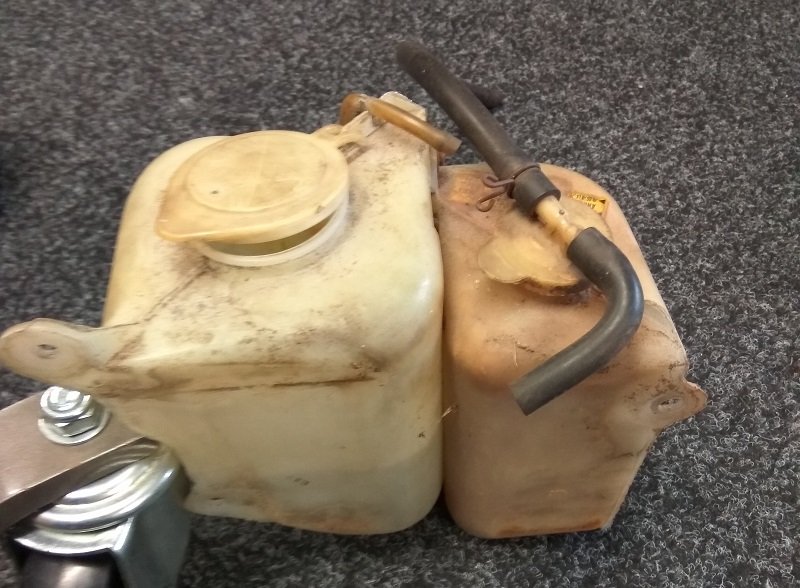
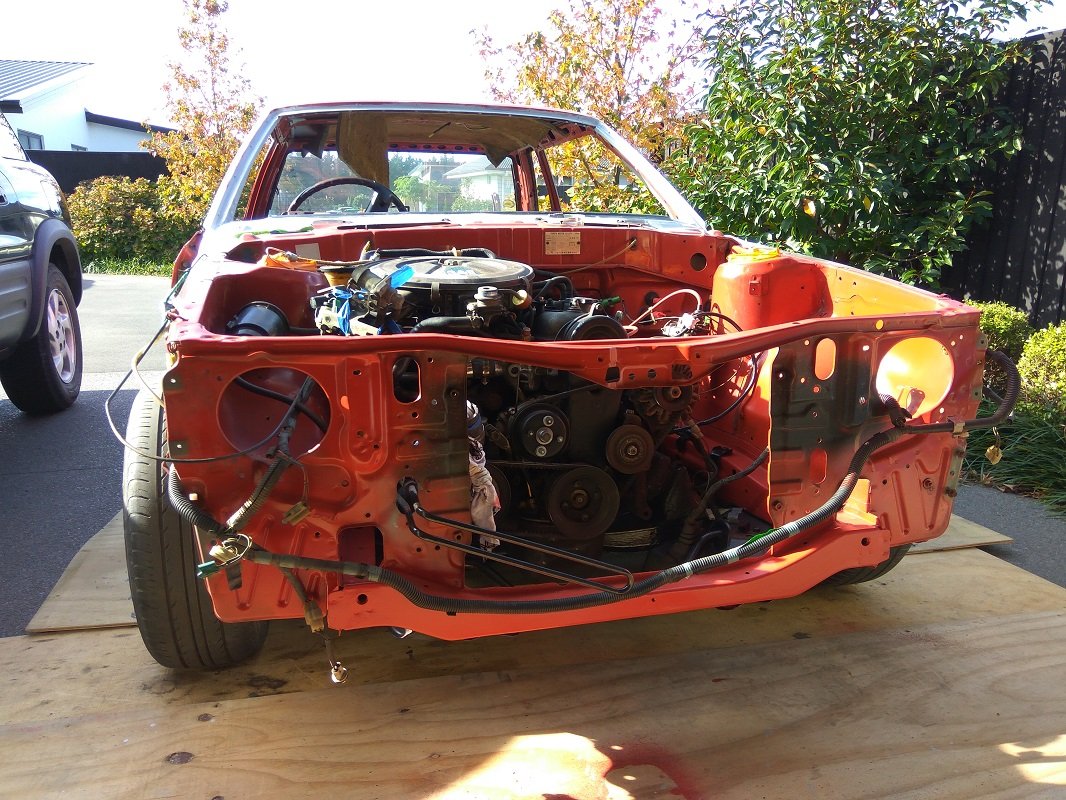
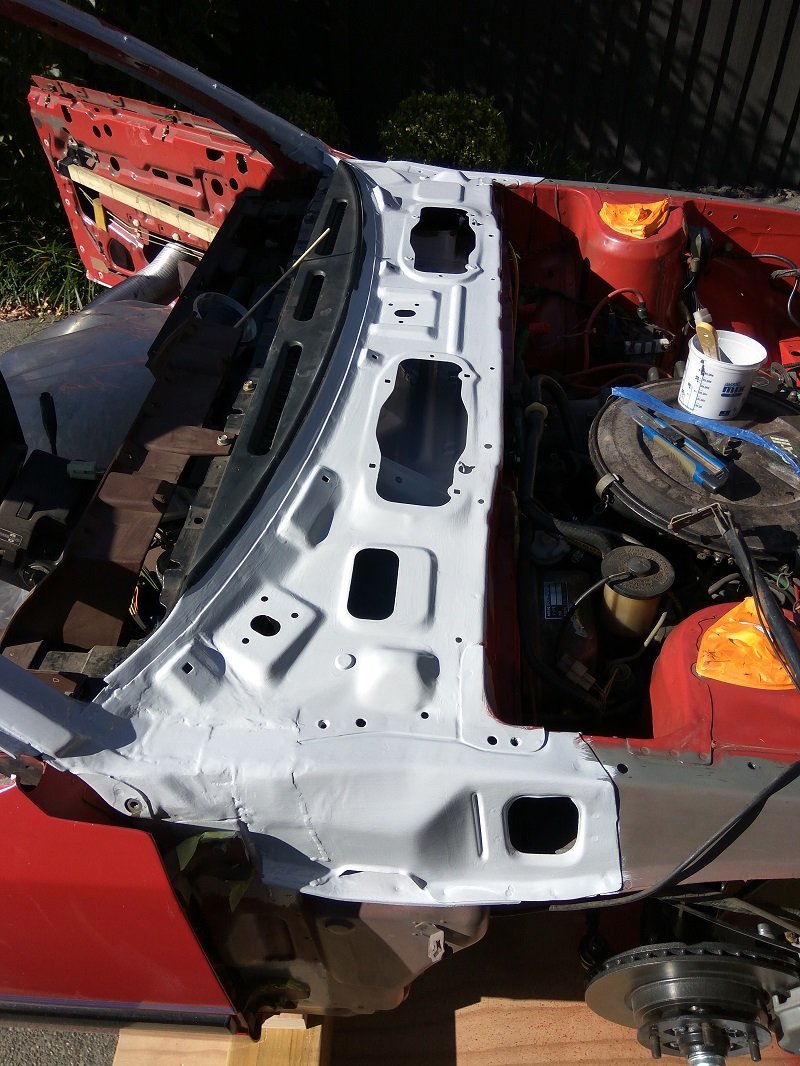
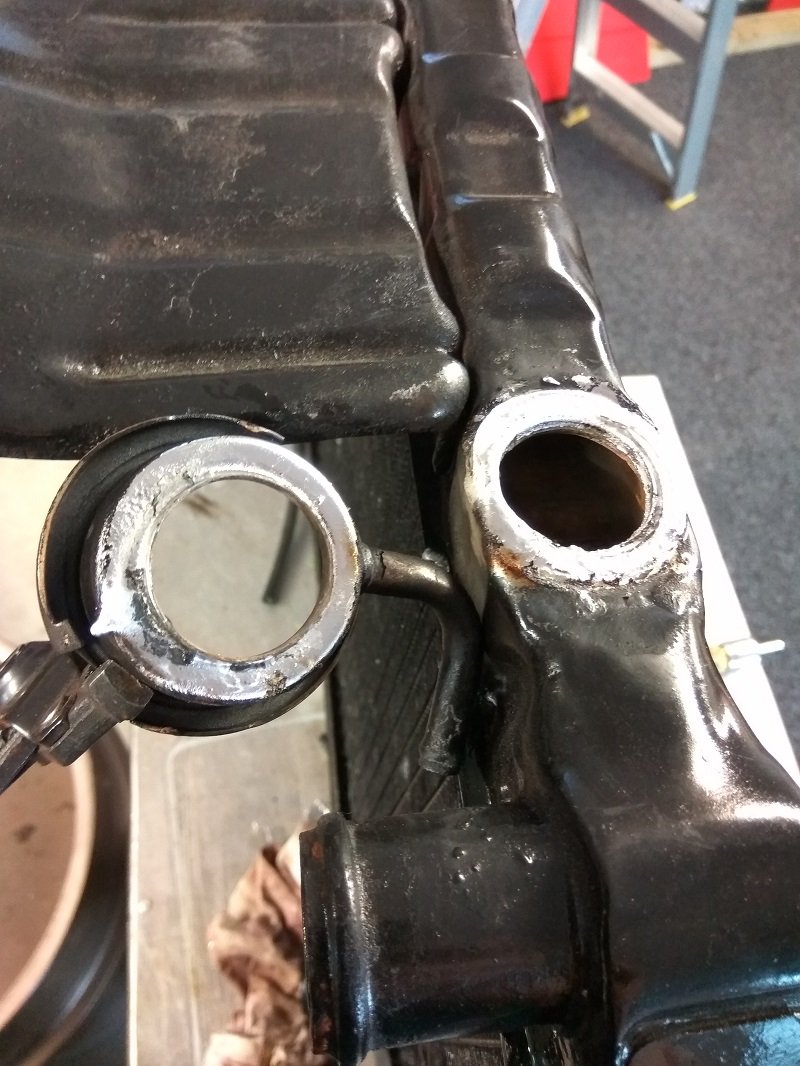
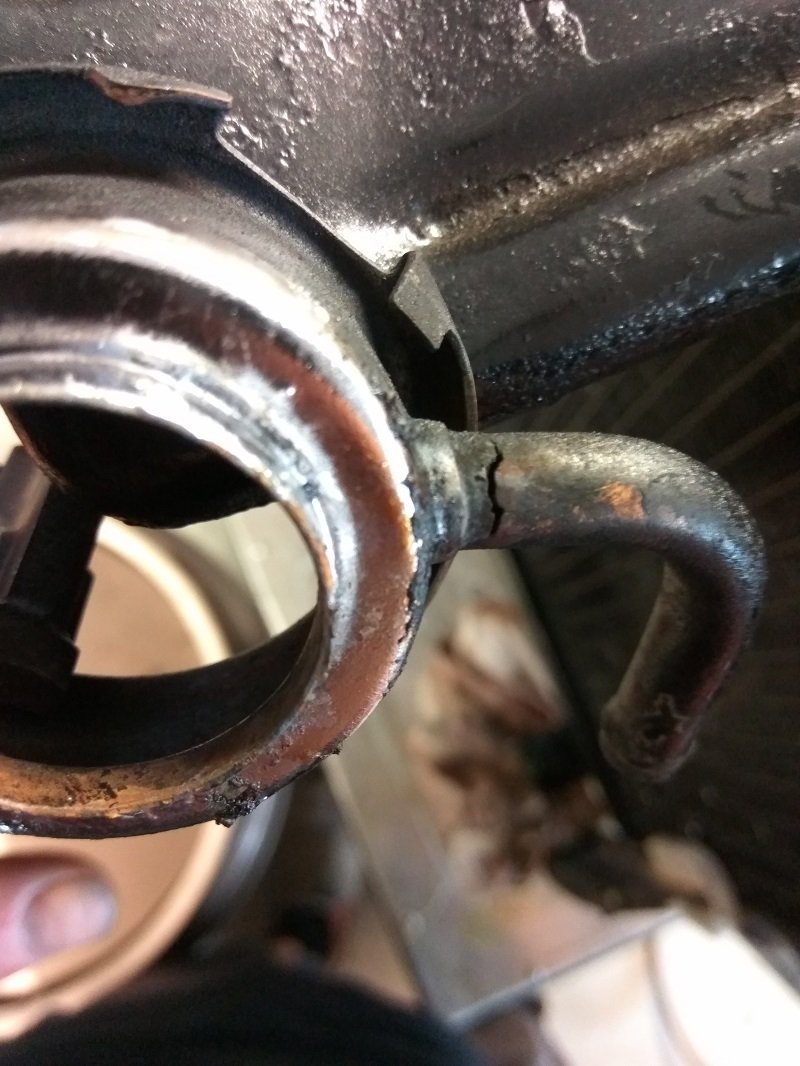
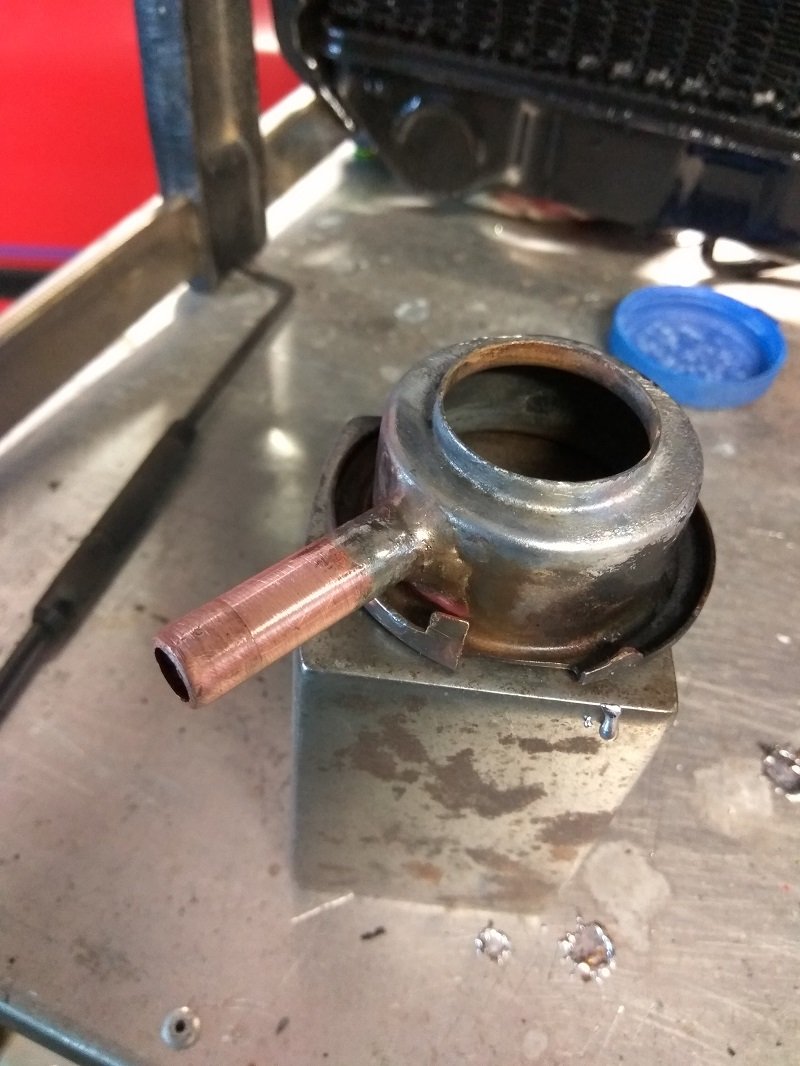
Two updates in one month, lockdown eh... Have been epoxy priming lots of things, under wiper area, gave it a good scrub out, clean, and epoxy. Some areas that I couldn't reach to remove every tiny bit of surface rust I sprayed 3-4 times with Brunox, then epoxied over the top. It wasn't that bad to begin with, but figured i'd stop it now. Any water that gets into that area now has a clean run along the epoxy (to be top coated I guess) and out the side of the car. Have some seam sealer so will do along the front edge to stop any water ever getting to the firewall metal panel sandwich. Also finished painting the radiator area, so the brackets on the underside got another coat of paint. The radiator support area got two coats of epoxy after a lot of wire wheeling and surface rust treatment. Then a couple of coats of red. Now I just have to be careful to not scratch it. The brackets on the underside are currently not bolted up as I want the paint all 1000% dry before bolting the surfaces together. So with all that paint work done (photos aren't 100% current as I don't always remember to take them), I installed the radiator. I had a slow leak on it fixed before lock down. So was expecting a nice and simple job. I should have known... turns out there was a relatively large (to the pipe size) crack on the overflow pipe on the radiator. So after a lot of pissing around trying to fix it in place, I removed the whole neck. I then removed the existing pipe as solder would not stick, even with flux and a super good clean. Got some 3/8" copper out of the van and dremeled it down in diameter to fit in the hole. Braised it up and called it good. At some point i'd like to throw a Fenix radiator at it, as this one is past it's used by. But it will do for now as the whole system will still have a bit of shit in it. So once that is nice and clean i'll look at new rad. Some before and after pics of the overflow / washer bottles, as they were rather grot. Lots of scrubbing later after splitting them apart, they came up much nicer. Also removed the brake master cylinder and will replace / rebuild that at some point. So yeah, some pics. Battery tray which was super rust pitted, spent a long time on the wire wheel. Epoxy, epoxy, paint, paint. Front on, have since fit the loom back in place and painted black the areas seen through the grill. Epoxy finished in this area now. Red top coat to go on, and whatever top coat colour I have lying around for in the gutter. Washer / radiator bottles before And after, enough time spent on these that I had priced up universal ones. Wouldn't look right though, so I soldiered on. All fixed back in place with new bolts from "Car Clips" based in Dunedin I think. Didn't take much heat to pop this off. My gas torch is not suited to this job at all, so you'll notice solder here and there. Even on low it's enough to send the solder running. Such a small crack, such a massive pain to fix. Copper pipe installed, took longer to sand it down to size than braise it in place. And job done, find out tomorrow how porous the cooling system is. This part at least should be sound.
1 point


This leaderboard is set to Auckland/GMT+12:00