
Leaderboard


Popular Content
Showing content with the highest reputation on 07/23/20 in all areas
-
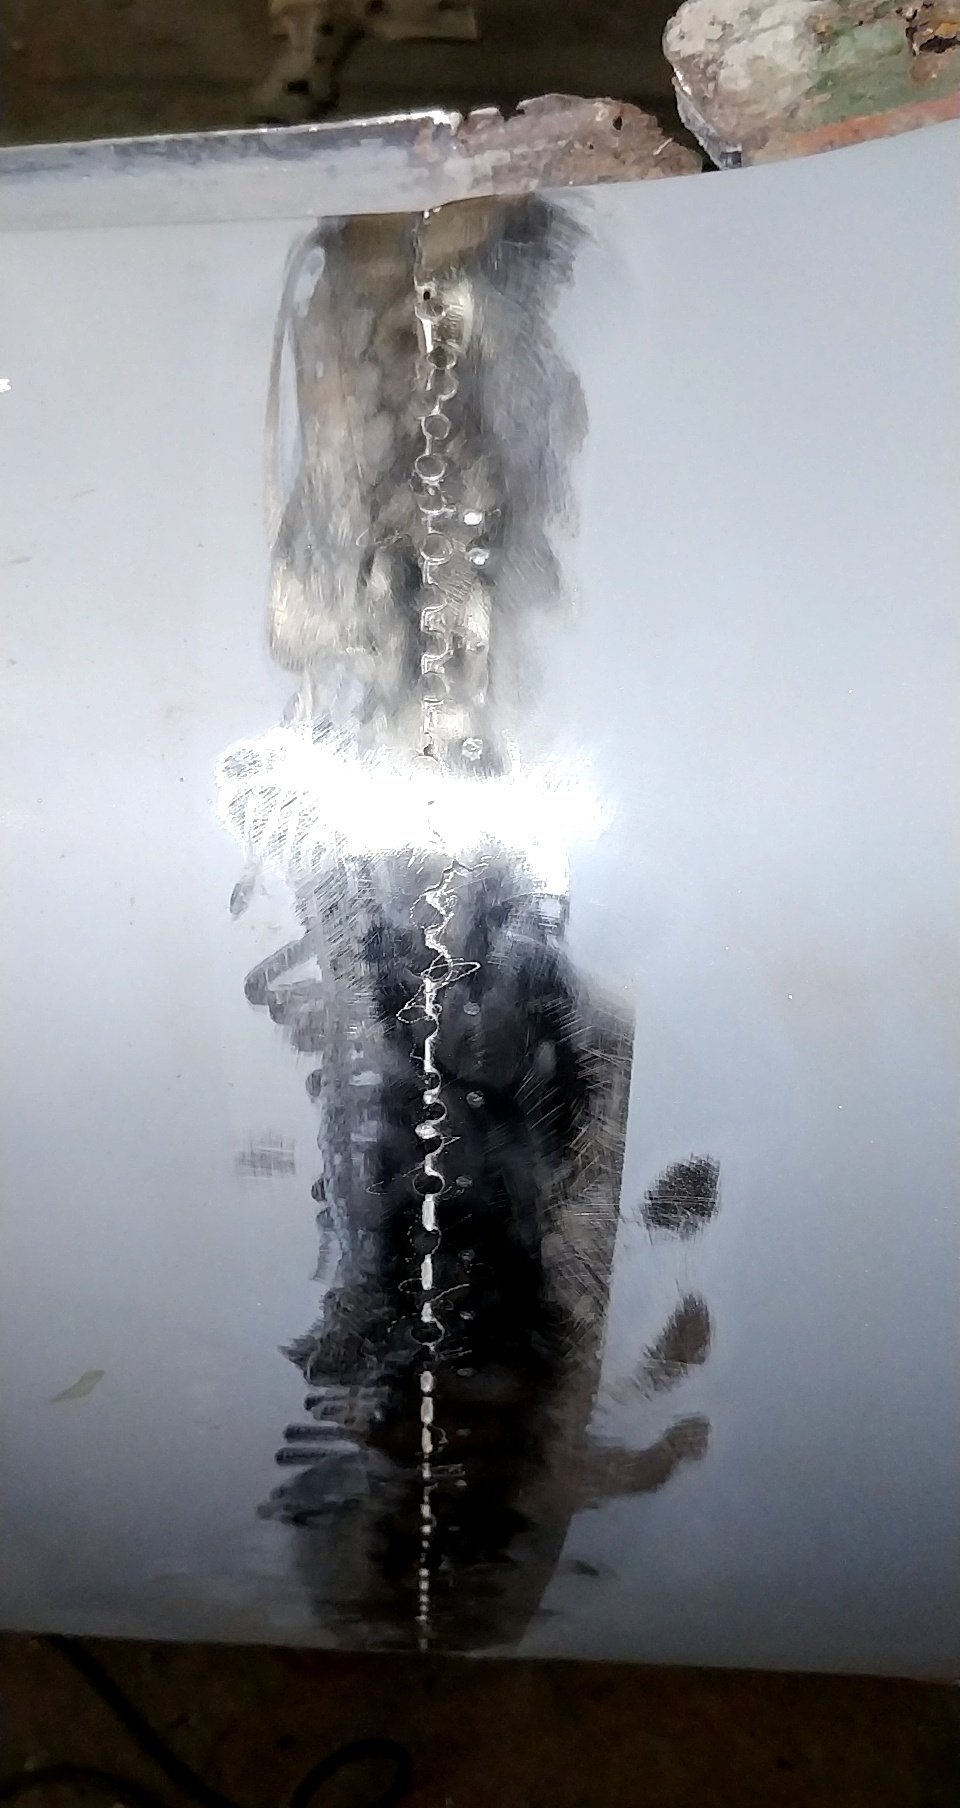
OK so I had the engine sitting there in pretty much the spot I wanted it. I had taken loads of measurements and pondered many aspects in an attempt to really look into the future and pick up on any potential problems that could arise. It was pretty obvious that the bodyshell was going to need a fair bit of chopping about in the tunnel region (ooooooohhhhh I can see the originality preachers trembling already..) and that the engine was too low in its nether regions. You can see it here. Its not stupidly low and I have seen worse but for a car that has to navigate our driveway with its rocky surface it needed to be better... It had a nice burly bottom but my intentions were to raise that and make a removable sump plate. Still with fins though to help keep the oil cool. Here's what the underside currently looks like... I pulled the engine out and sat it on the bench. The Imp then got its little Datsun heart bolted back in place and reassembled to working order (yay for no more leaks I thought..but it still leaks because British) I poured myself a whiskey. It might have been a few. I studied the crankcase and sump carefully... I then went over my plan of attack. My main issue was the oil pump. It was going to have to move further up in the block so I had to find a suitable place to mount it. I also had to work out how I would drive it. Originally it there was a larger spur gear running off the crank, driving another spur gear. Off the centre of the spur gear was a sprocket which ran a chain down to a sprocket on the oil pump shaft. The oil pump shaft ran not one but two oil pumps. The main pump in the sump area and a smaller scavenging pump in the clutch housing area which squirted oil up over all the gears. The shaft also ran through the main pump to the front of the engine (what is now going to be the back) and powered a water pump. A bit tricky to picture? Well here is a stunning bit of pencil art I did just now ... Plus a photo of the all those gubbins on view at the back. The driven spur gear is missing in this pic but you can see the splined hub it slides onto with the driver sprocket on inner end... Honda had made it all very neat but also all very complicated for what I required. I just need one main oil pump to feed the bearings. So I move the oil pump up. Fine. I'll mill a flat area and make new mounting blocks to suit. But because I have removed the spur gear arrangement (no room for that lot with a custom flywheel planned for the crank) I'll have to chain drive the pump with sprockets (at the correct speed too). OK. That should be easy enough. But no spur gear means the pump will be running backwards. Oh bother. So how about I mount the pump on the opposite side of the sump casing and so turn it around. The shaft is long enough because it goes right through the pump each way. I took the pump apart and checked if this was feasible. It was. Yes! Now why not just run an external oil pump and dry sump it etc ? Well mainly because I am not Mr Money and hence prefer (have) to do it as cheaply as I can with what's at hand (more of a challenge this way and more satisfying too) Also- if I use the Honda pump and keep the required oil routing sensible then it sort of remains factory. I am also going to do my very best at keeping the external look of the engine as clean as possible with a nice uncluttered engine bay. That's just the style I like. Plus we were only just into lockdown here and I wanted to crack on, get as much fabrication as I could done while on my ' holiday in the shed '... So now I had a plan to follow and could start chopping things up. I chopped it just below the engine mounts I intend to use. There is a myriad of long bolts running through the cases clamping them together. The main larger ones are all up around the crank area. Then another two lines of smaller ones below (which hold the cases together under the against the loading of the transmission shafts- now gone) Plenty enough bolts so the lowest are now gone. This lot will be stronger when I have finished with my idea. I kept chopping it up. Took a bit more off because it was fun. Lovely alloy too I might add. Very clean castings. Ended up with an engine a fair bit shorter in height... I got the cuts pretty square and straight. Made easy by the fact that Honda had nicely added reference lines for the purpose- just like on a pack of butter... Now I had to mill it flat. It would take decent sized knee mill to clean up something this size and awkward. Or how about a little drill mill, a steel bench and a big plate of steel I had rescued from a Japanese dentist chair I stripped for bits... I had to position it just right and use the swing on the radial drill mill to run over the cut edges. It looked a bit suspect but it worked fine with light cuts. After the bottom of the sump case was flat and square I then milled a flat area on the face below the crank flange. This would leave a good flat surface, perpendicular to the crank centre line, to mount a plate with an idler sprocket on it for the oil pump drive I had sort of nutted out in my head (but really had not gone any further then just that and it could well have been just nutty) That area ended up like this... The pump would fit somewhere in here like this... Then I threw the lot on the fire... and swept up all the alloy chips that seem to have gone everywhere! When it was nice and warm I welded some new flanges on. Very carefully and slowly I tacked them, taking my time to make sure they stayed true and square and keeping it warm in between tacks. They did. Yay I welded as much as I could reach with my torch along the tricky edge leaving just a few spots that I'll seal at build time with JB weld. It turned out so good that I barely needed to give it a tickle with a larger file, more just a clean up and sits square on my bench. Straight edge reveals my bench is indeed flat too- I had to check! I was so happy at this point because it was one bit of the conversion I feared could go wrong - however I think the warming up and that fact the block is a complex very rigid shape helped keep it all straight. I sat back with a cup of tea and admired my nice burly flanges that I will bolt a plate to...30 points
-
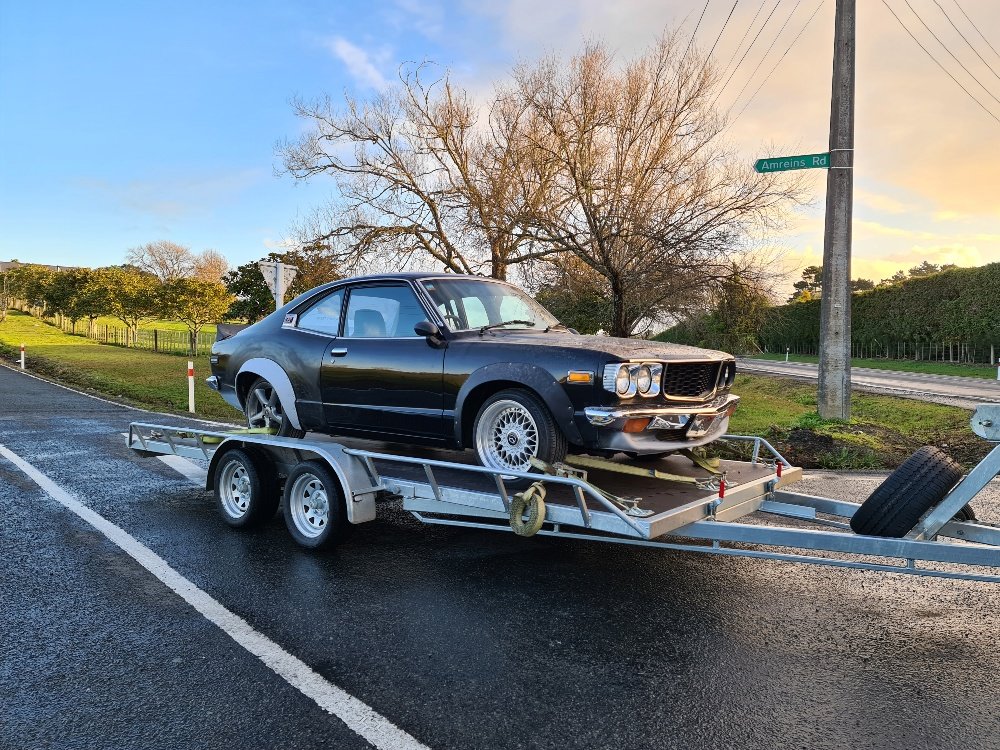
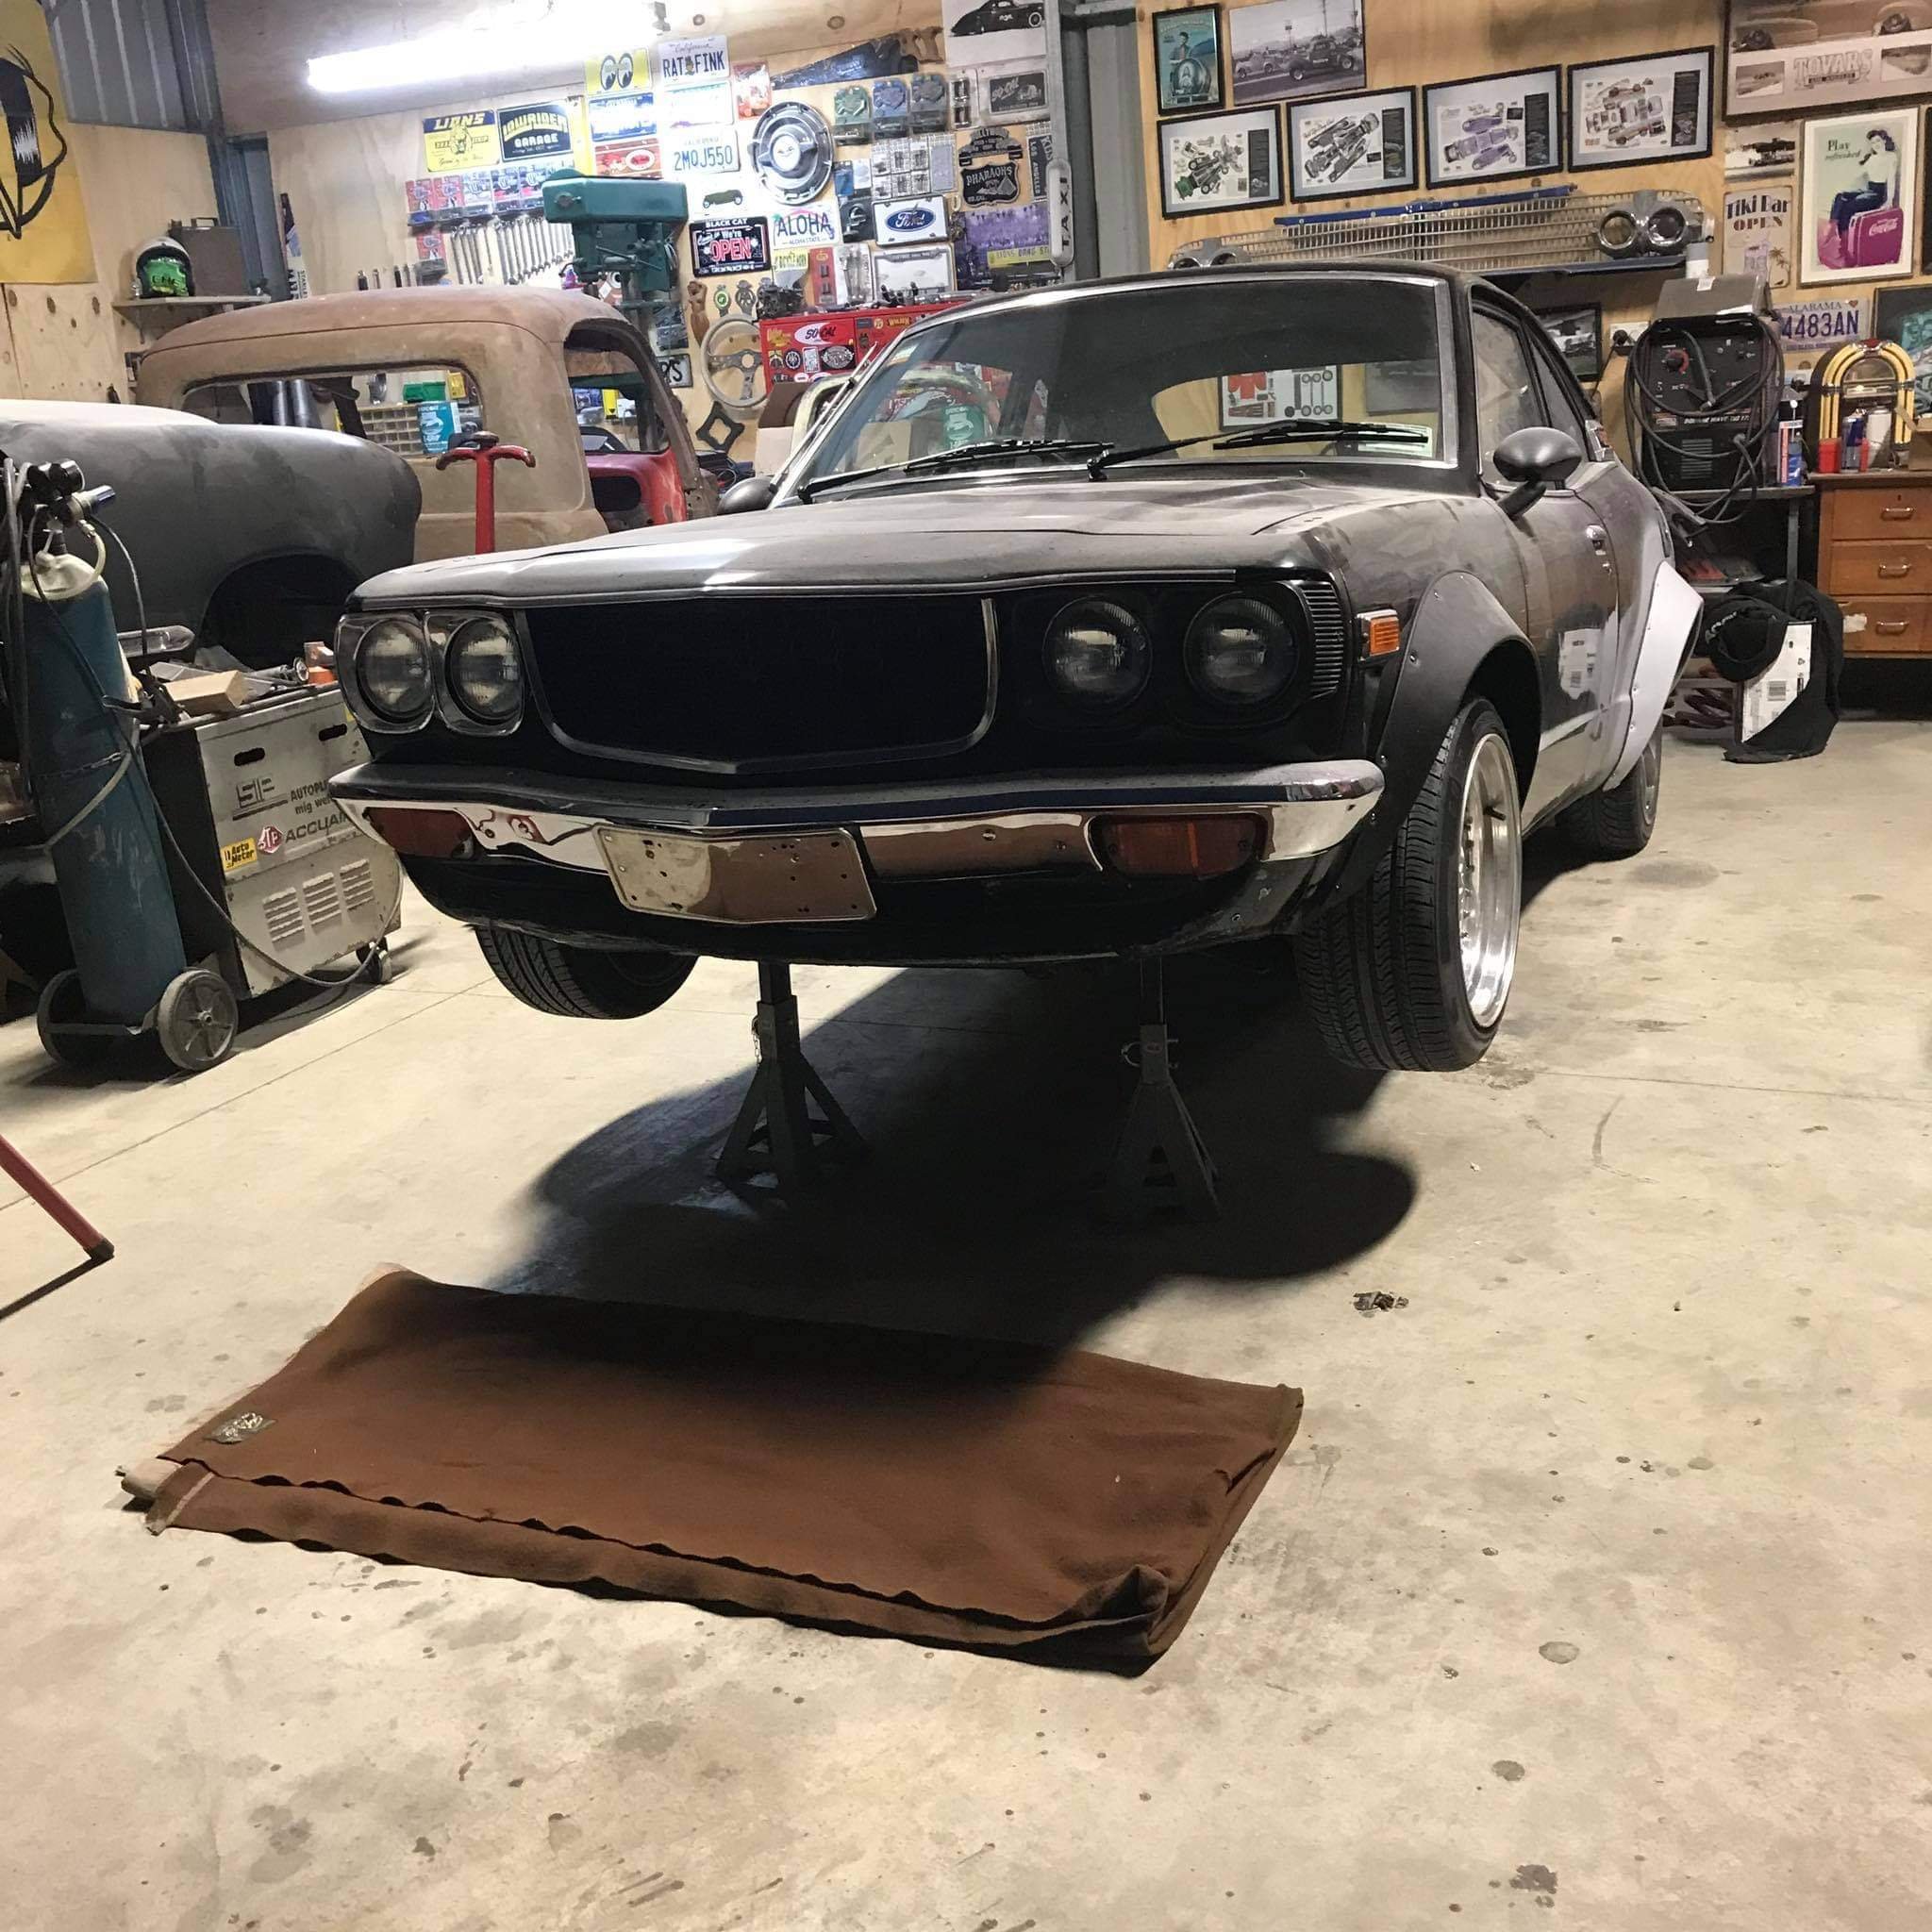
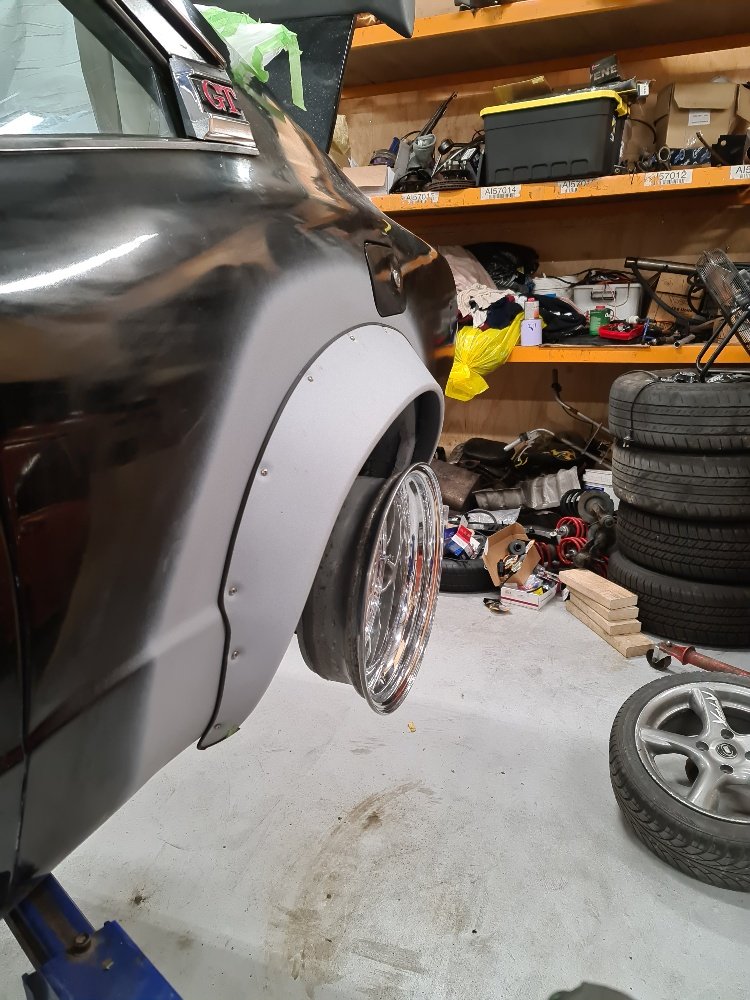
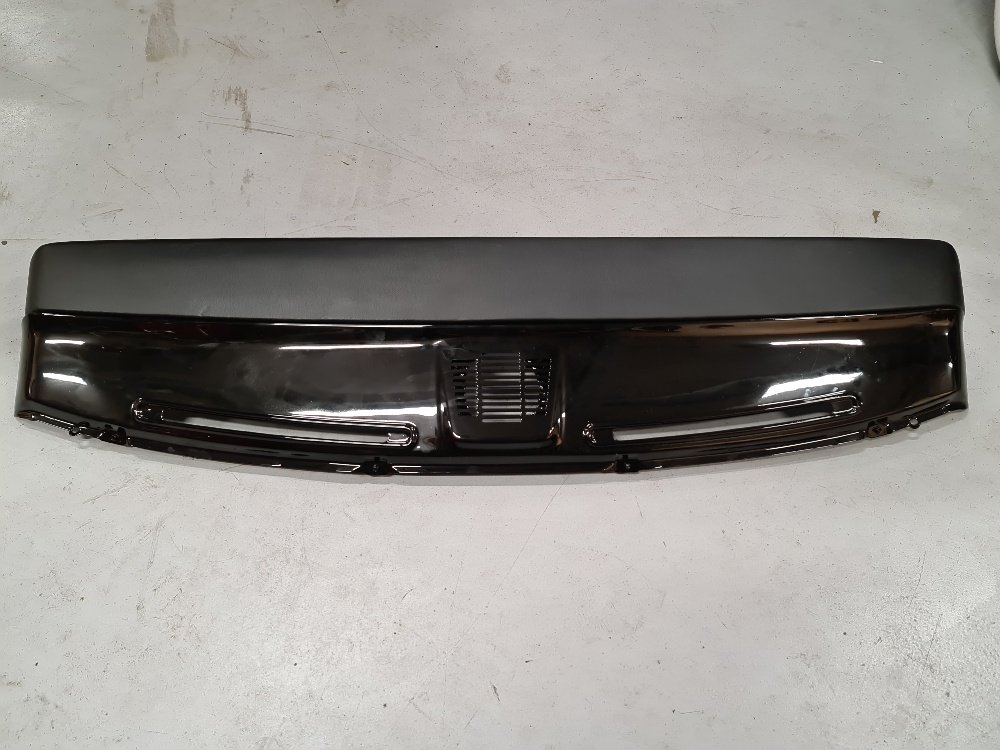
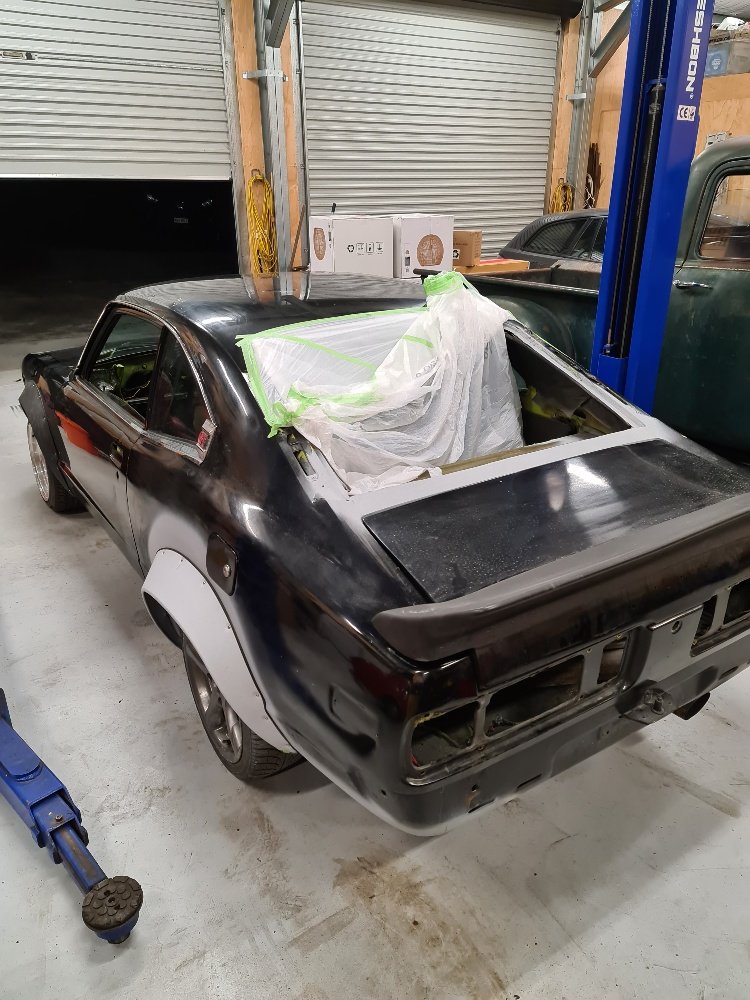
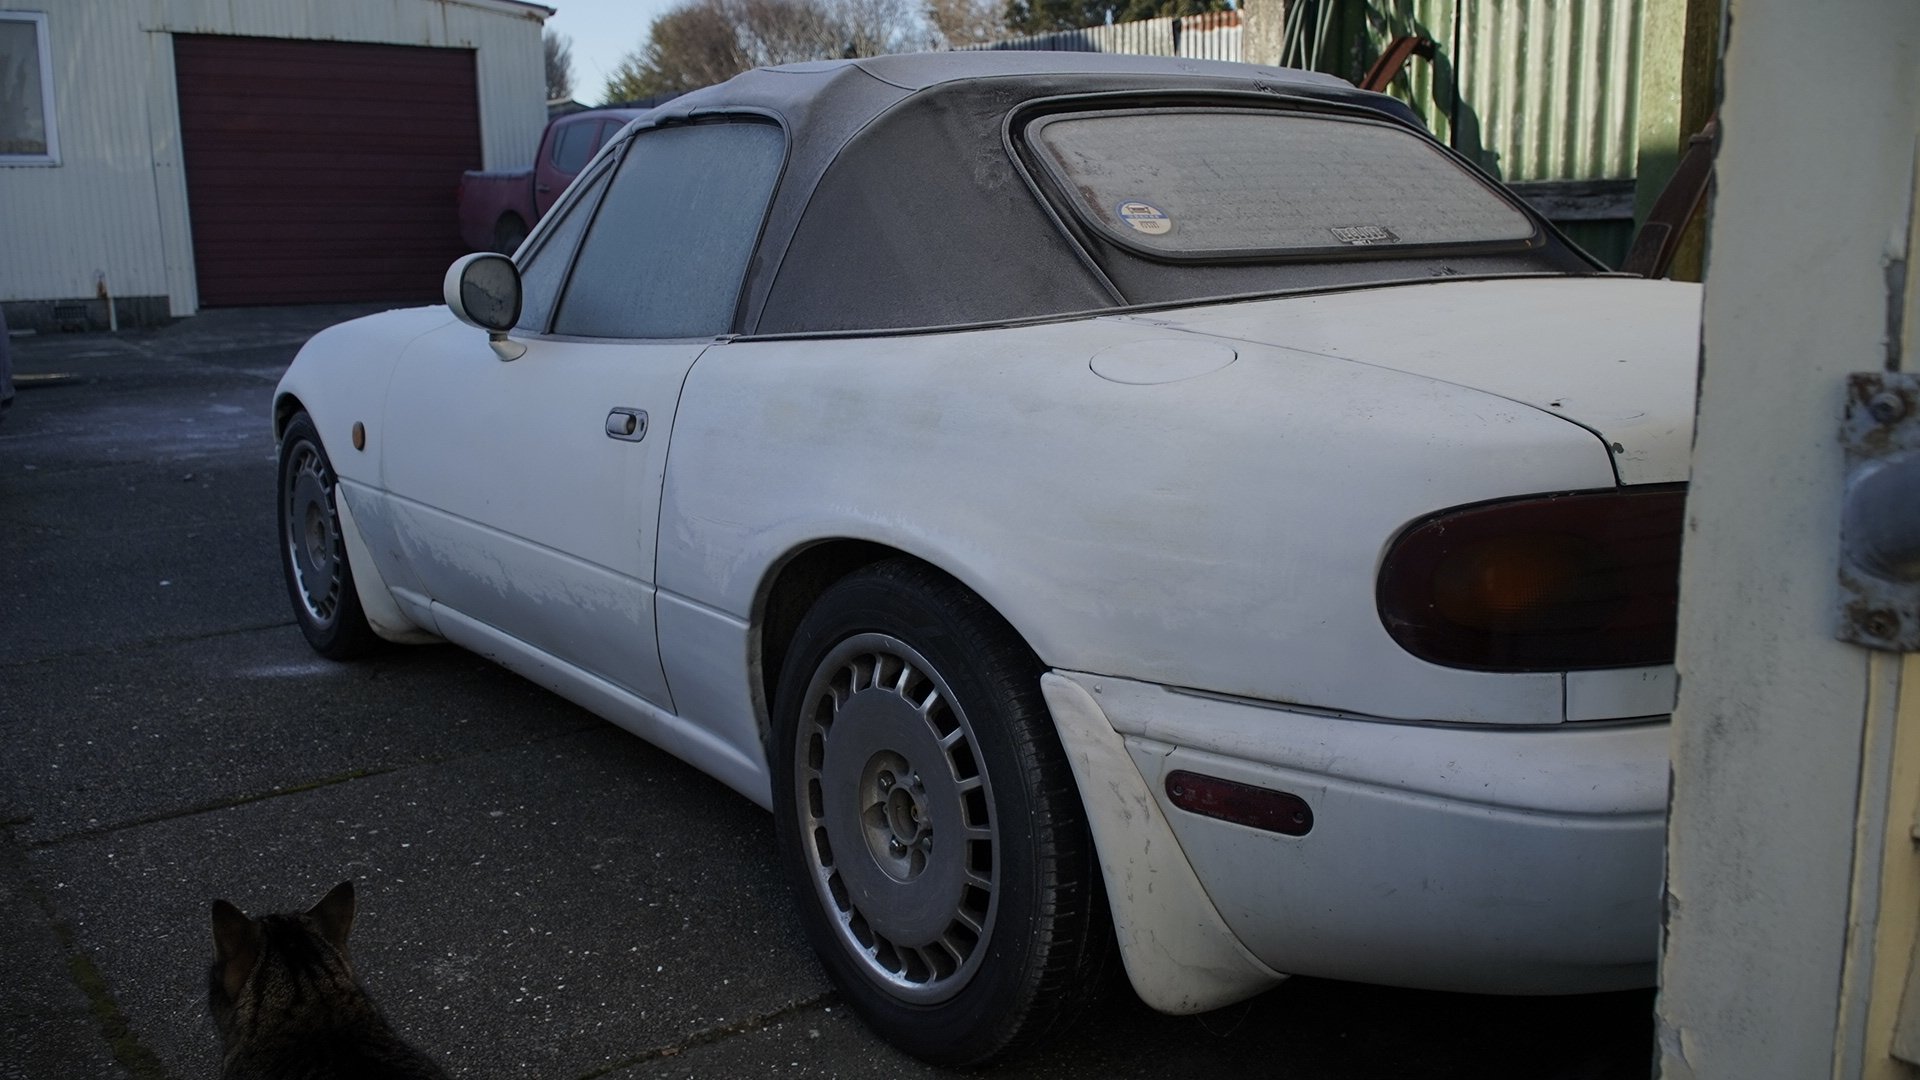
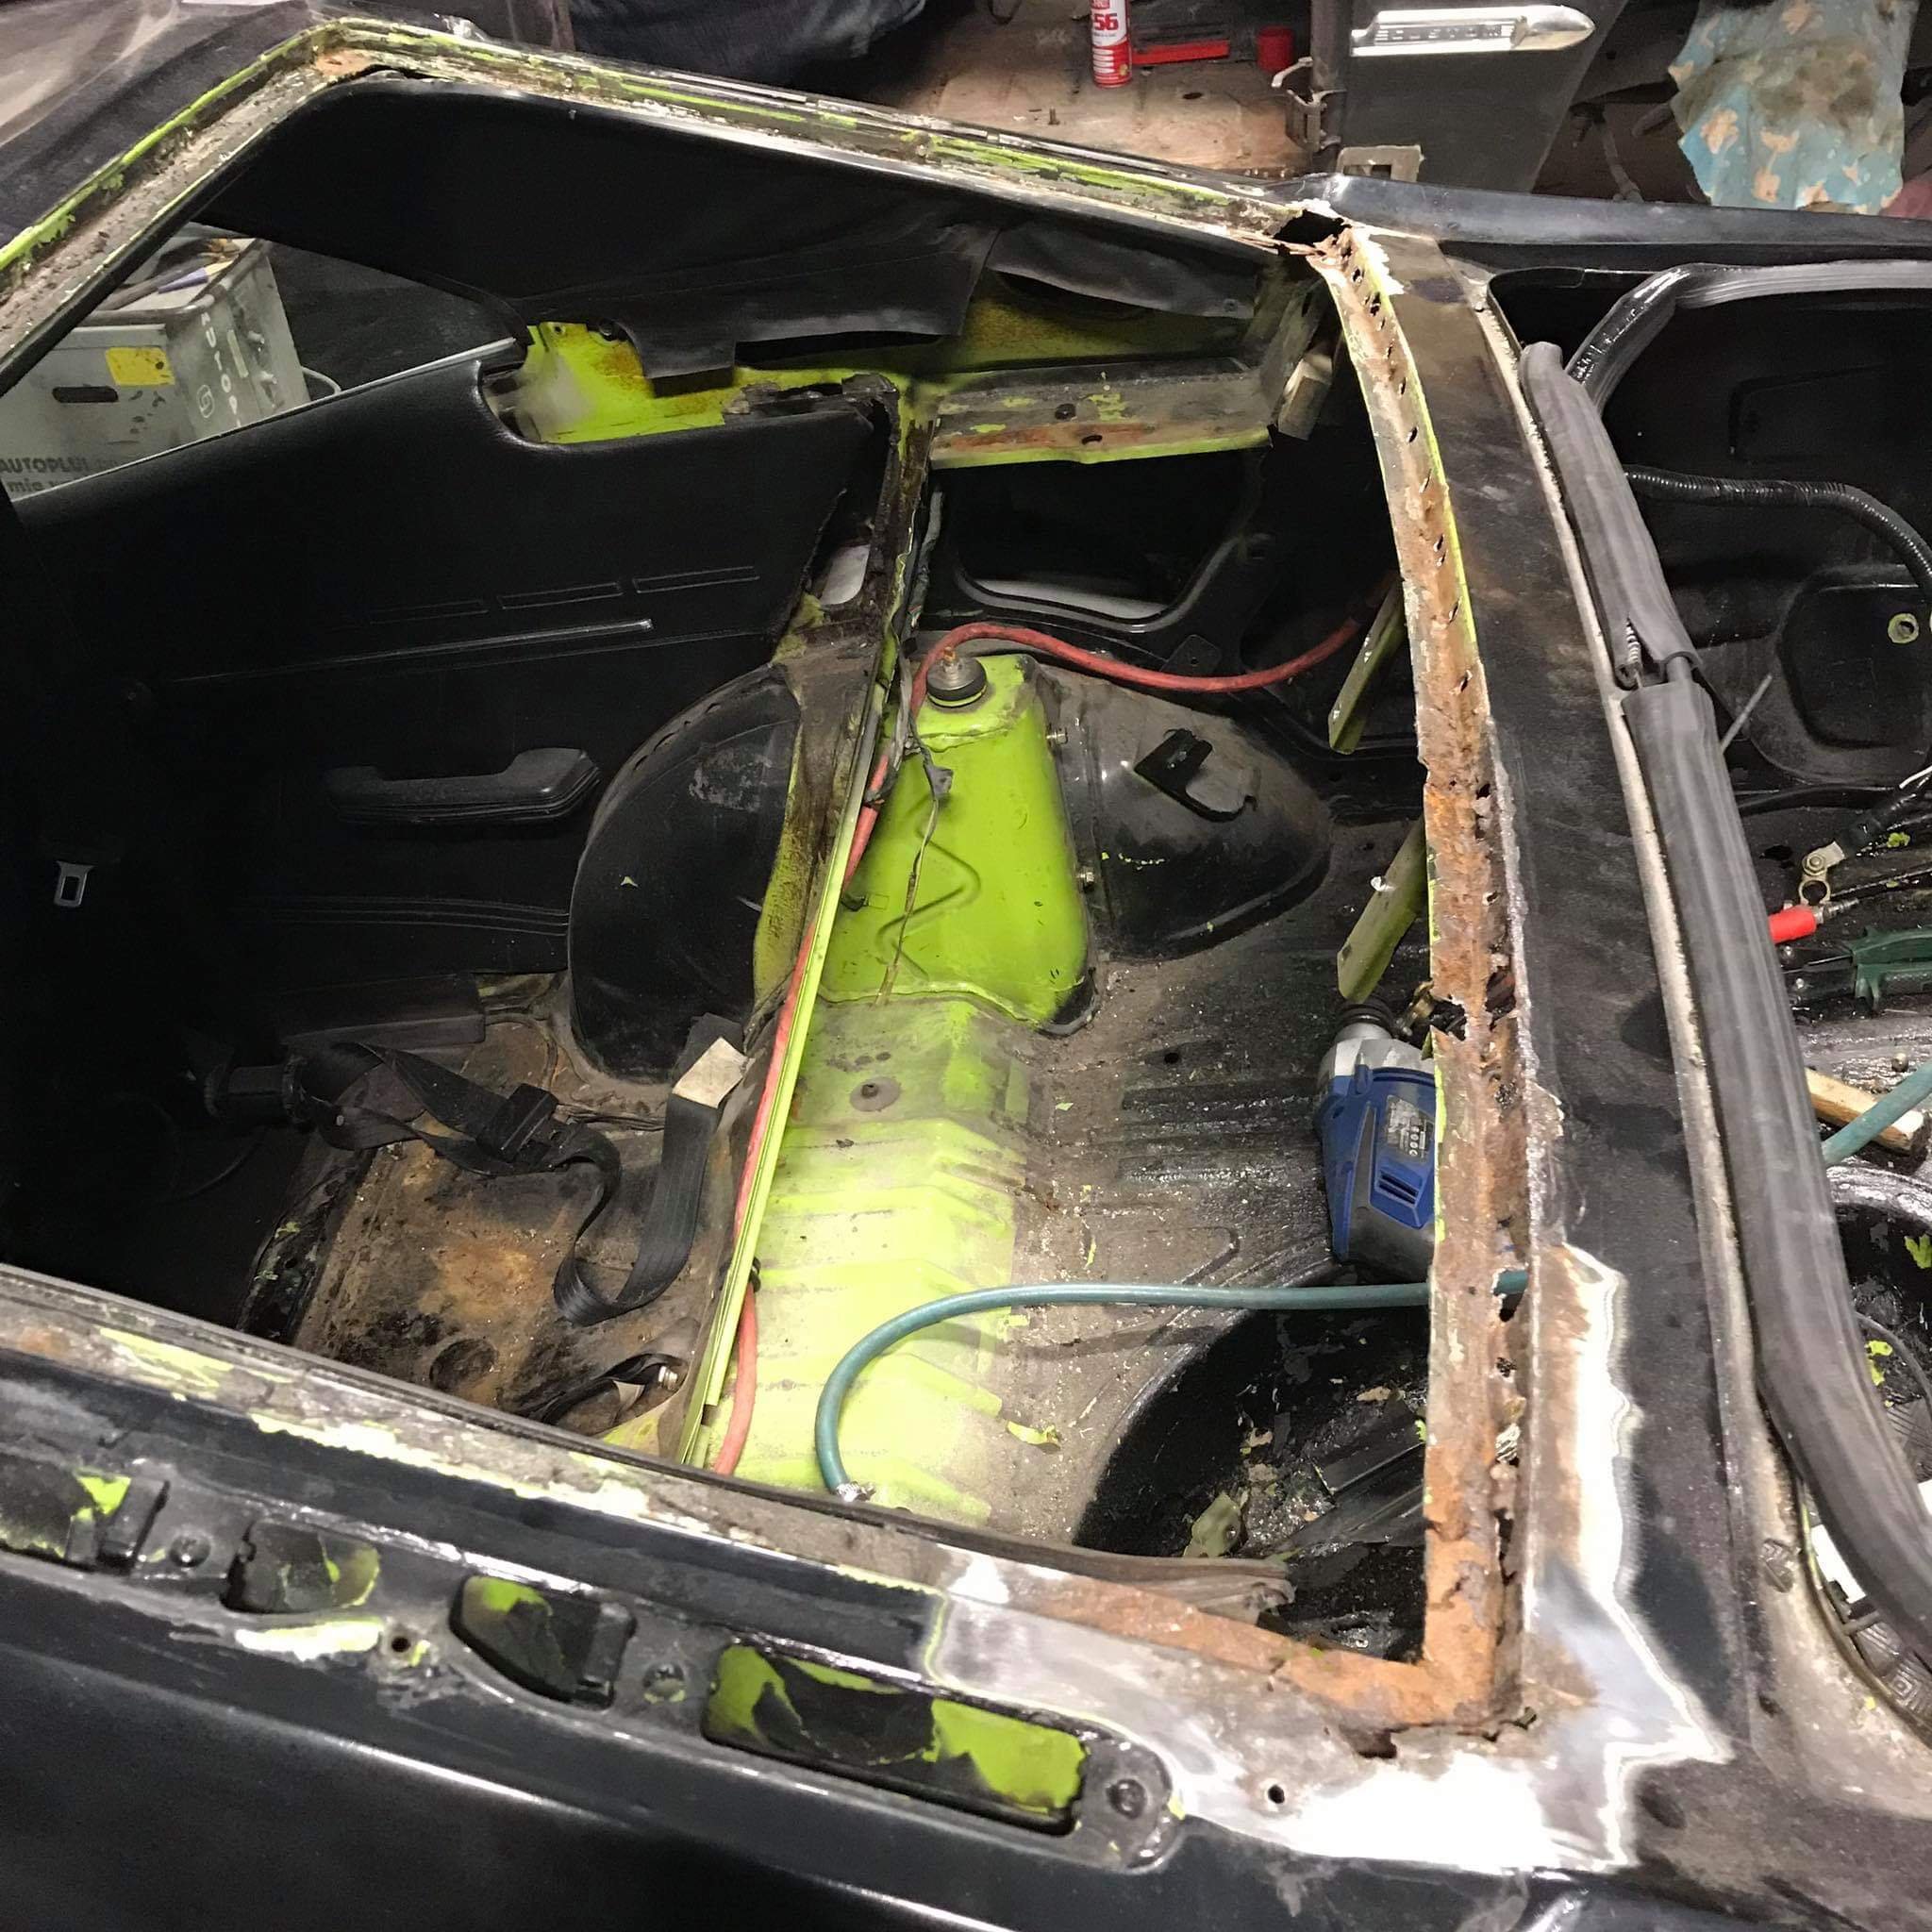
Well picked up the coupe from Steve at The Shed Rust Repairs this week. Hes fixed the minor rust in the bottom of both quarters from the rear windscreen rust leaking water in, fixed the rear screen, replaced the hacked up parcel shelf with the cut from Riggs RX in Canada and then filled all the holes in the front lip that had been put into it. Also refit the new rear flares Did a real good job of it all and its alot better now than when i got it! Got it home and did a dummy fit of the 15x10s minus rear tyres and looks like itll be bang on hopefully. Will fill the guards out nice. @64valiant and the mate Jimmy T smashed out the upholstery and the painting of the dash topper so looking massively better than the wrinkle painted mess that was on there. And finally started stripping the exterior for a bit of paint to go down this weekend so looking forward to that!
 14 points
 -
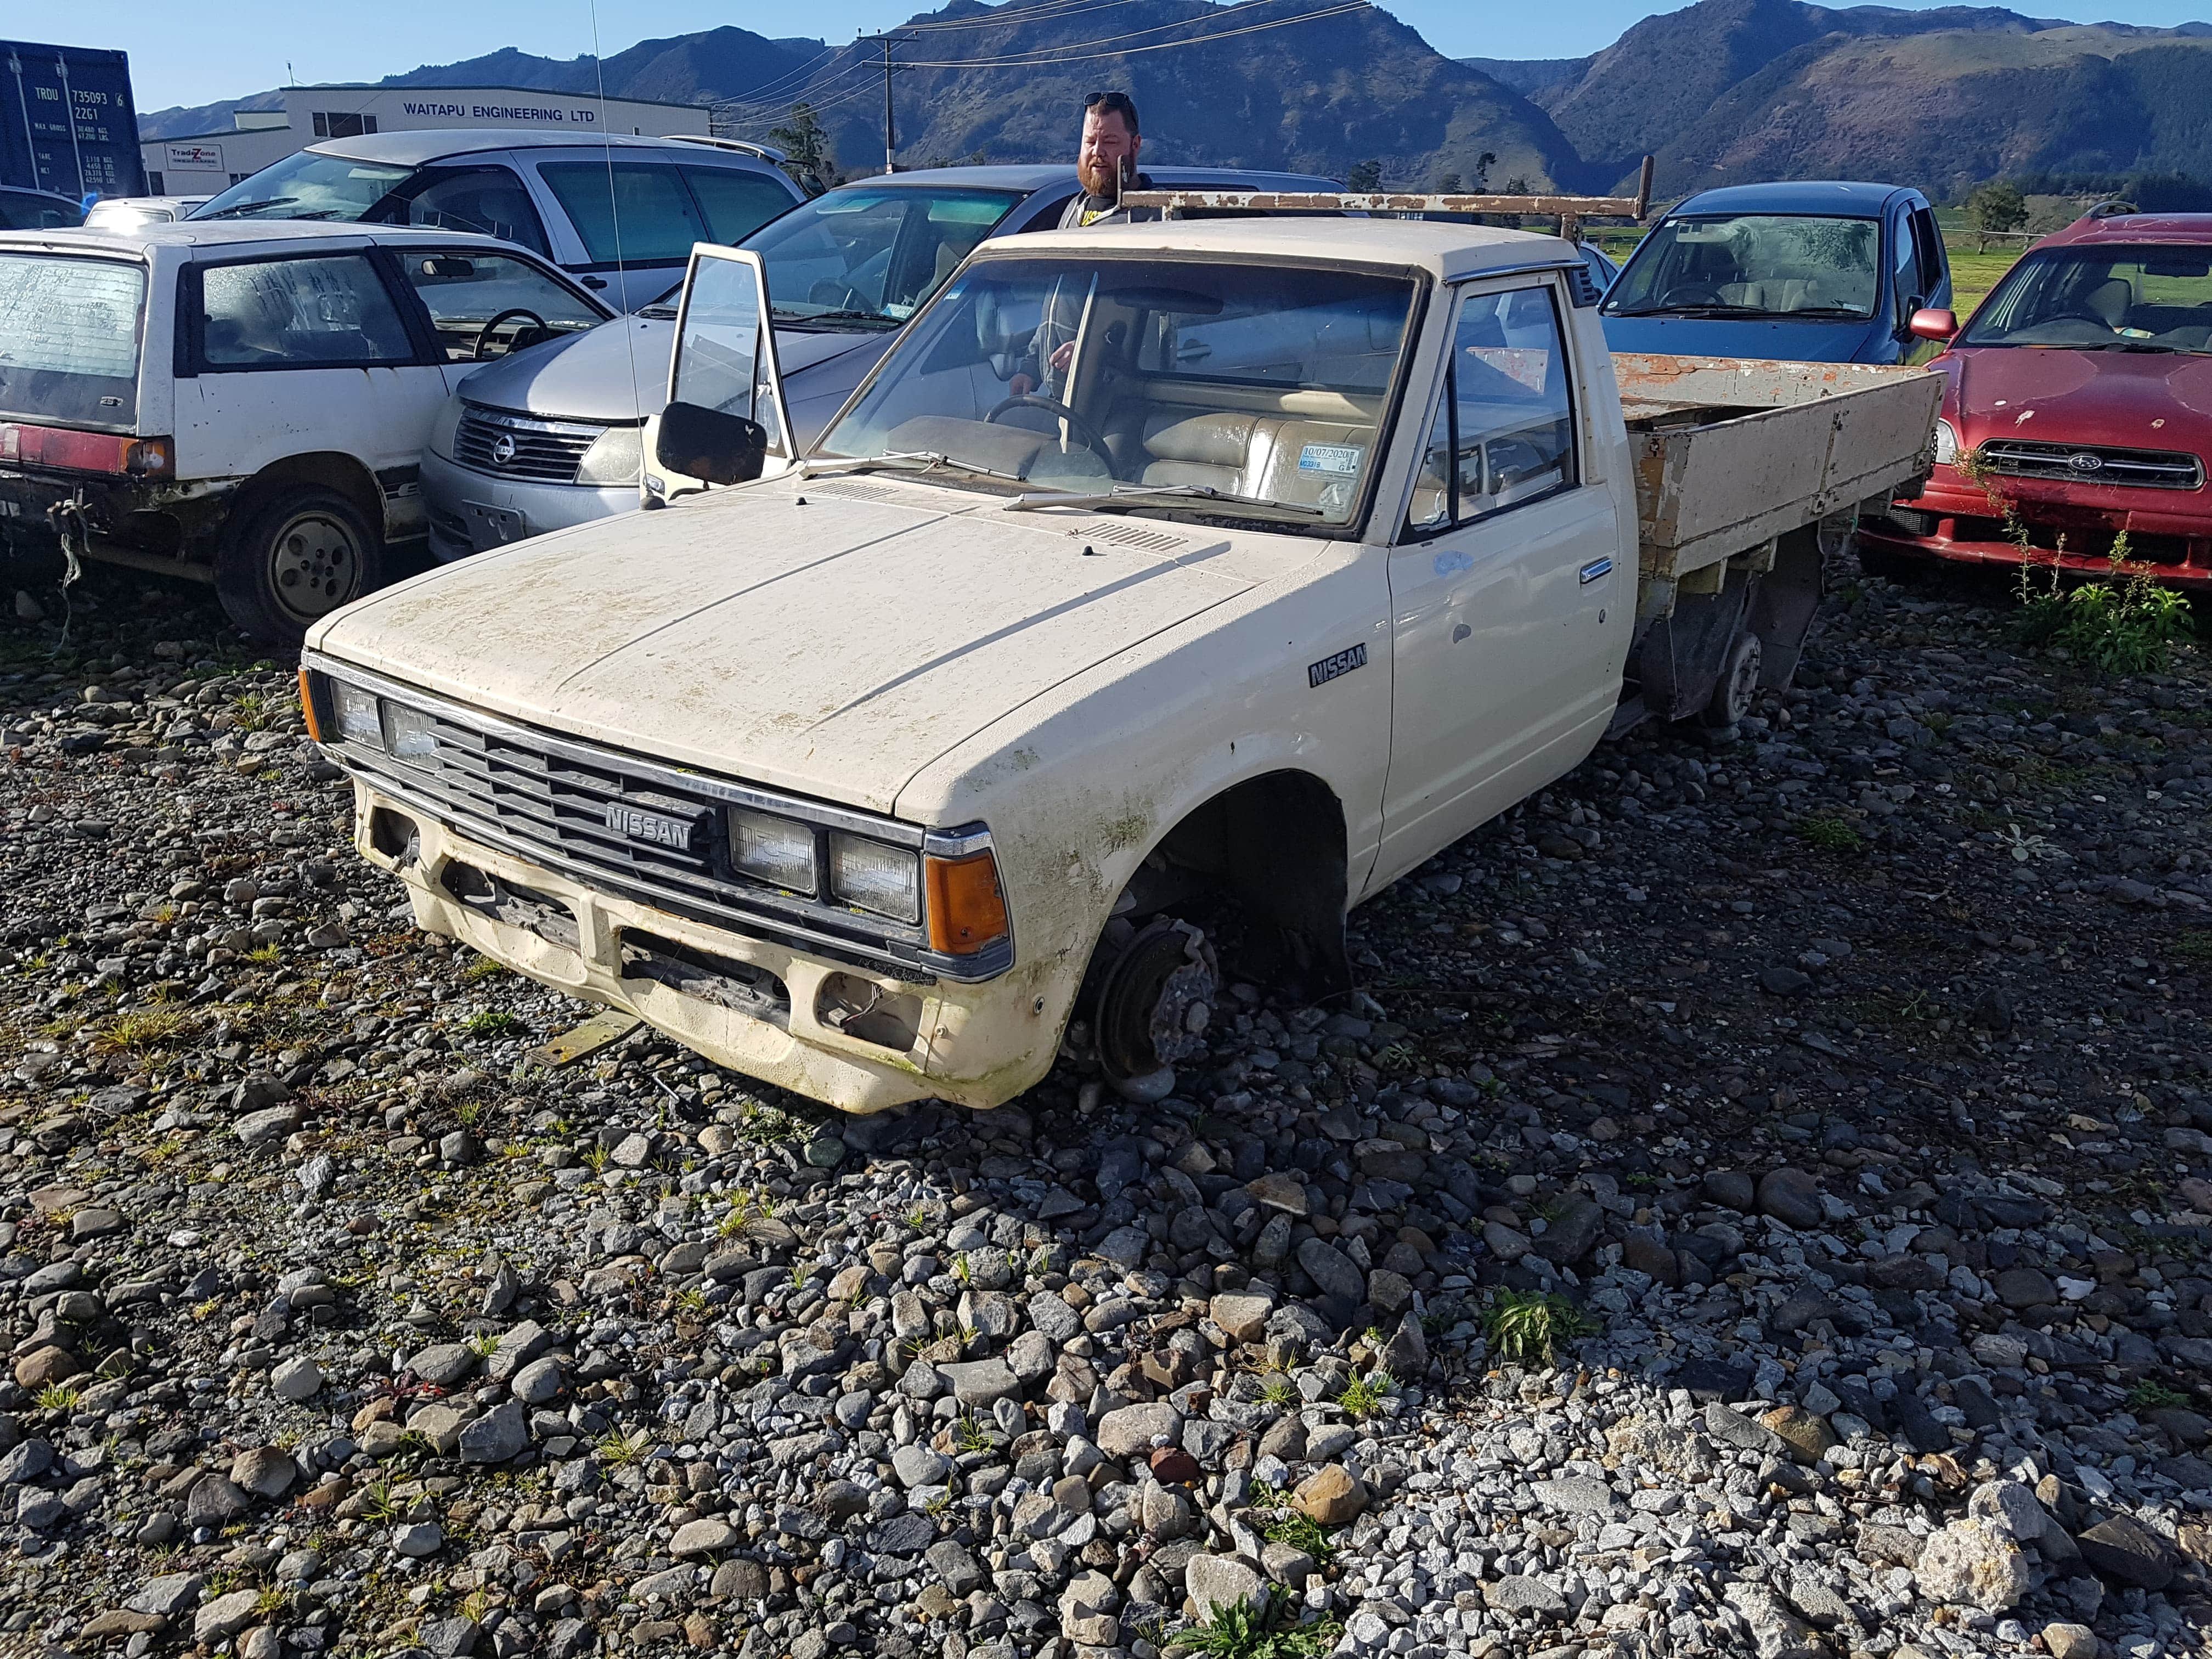
Long story short @- i5oogt - @azzar and myself were in takaka to buy yet another mk2 Mirage . The car was in the impound yard at Orange mechanical also in takaka. We went for a wander around their yard and in their , to be crushed pile was this cream nissan 720 no wheels. No bumper or plates. On closer inspection it had two rego labels........ It failed a wof on rust in the floor. The owner not wanting to spend the money getting it fixed. Decided it was the end of the road for the little ute. Strange since hed owned it for nearly 20years and had never taken it out of the valley. After contacting the owner a deal was struck and plates and wheels were obtained from his possession. The wheels having 4 near new maxxis commercial tyres. First hurdle was the takaka hill..... in a sd23 powered ute Not to be scoffed at the little ute chugged up the hill in 4th gear most of the way. (Had to find 3rd for the real tight corners). The sd23 was quickly proving itself as a force to be reckond with A quick stop in motueka to wash the moss and lichen off using @Slacker_Sam. Car care kit. And off we set to Christchurch. Register but no wof. Made it to murchison for a meal at the pub before dark. But after that was all nigh running. The sd23 was more than happy cruising along at 100km and seemed to be a set and forget in 5th gear up hill and down dale 5th gear did it all. 6hrs on the road from takaka to chc and over half at night. And over 450km in a ute destined for the crusher. Better yet it didnt use a drop of oil or coolant on the drive back
10 points
-
"yeh nah yeh you could use a 10x10x42 steel belted rotational on that mayyyte lemme go get the fucken verniers...." good cunts sorted me out, trade price too
10 points
-
Well great news, and slightly delayed, the Covid19 pandemic allowed time for a bathroom sink(!!) Made from an old brass preserving pan, and brought the copper pipes down to the valve taps. Stoked with it! Prior to this great update, we spent a day coating the walls with $100ish of driveway anti-slip - stops all the dust escaping the 25 year old tilt slabs and seems to keep it a more moderate temperature, but in hindsight it made the walls really rough to touch as there is evidently sand in it... I should've understood how it was anti slip. But anyway it's still far better than dust and can confirm second winter round, it's bloody warm in here and that is without any heating and still exposed roof. Since lockdown it's become my full time office space until the travel industry picks up again, so I've spent many hours (and dollars) on artwork and instructing old mate what furniture to make me. But finally finished off the feature wall with a favourite picture from my parents work, Rod Millen in the RX7 in the Santa Monica Hills. I spoke to him yesterday and he confirmed it was the first "official" test of the 4WD RX7 (other than around the workshop streets at night) and his team mate explained how it was 3 images cut into 1 image. Also over lockdown it became home of various additional rotary projects, from the strip down of the 12a Twin Dizzy for the RX2 to starting up and restoring the Sachs rotary bike. It's currently home to both 808s which is surprisingly fine as the floors cleared out more so they don't really get in the way. Have started discussions with alibaba about a car stacker for when the RX2 ever eventually moves in. A massive shout out to the great people who have given us amazing additions as well! Got given a vintage fuel pump from Rodney's vast collection of 60 of them, and a oil can from the airport he used to book out to test the Celica for Pikes Peak, amongst some signage too. Got some amaaaaazing signs like Rotary Engine Specialist and rotary goodies (on lease apparently ) from @73crownwagon and with some brilliant new LED lights straight from Mr Jackson @UTERUS it's coming along really well. Also picked up this cool Turkish rug to hide the petrol stains the blue 808 caused, and protect the floor from the oil leaks the rotary provides. Pretty sure I've forgotten a lot of things but yeah, it's still fucking cool to be here tbh.9 points
-
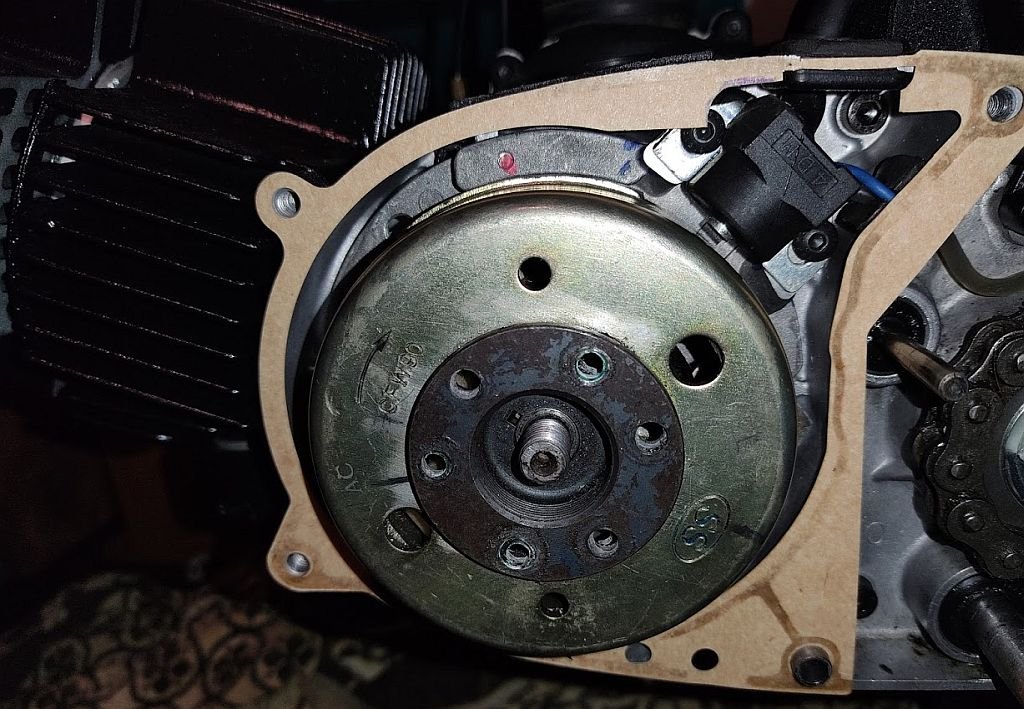
So yesterday was the day to do the first start, but yeah had a few issues with timing and had to redo the flywheel. How it was at TDC: Compared to another engine So yeah it was trying to fire well after TDC. Bit of mucking about got it here: With room to adjust timing still Loaded fresh bolts up with red thread locker, spring washers + nylocks this morning Then this happened...
8 points
-
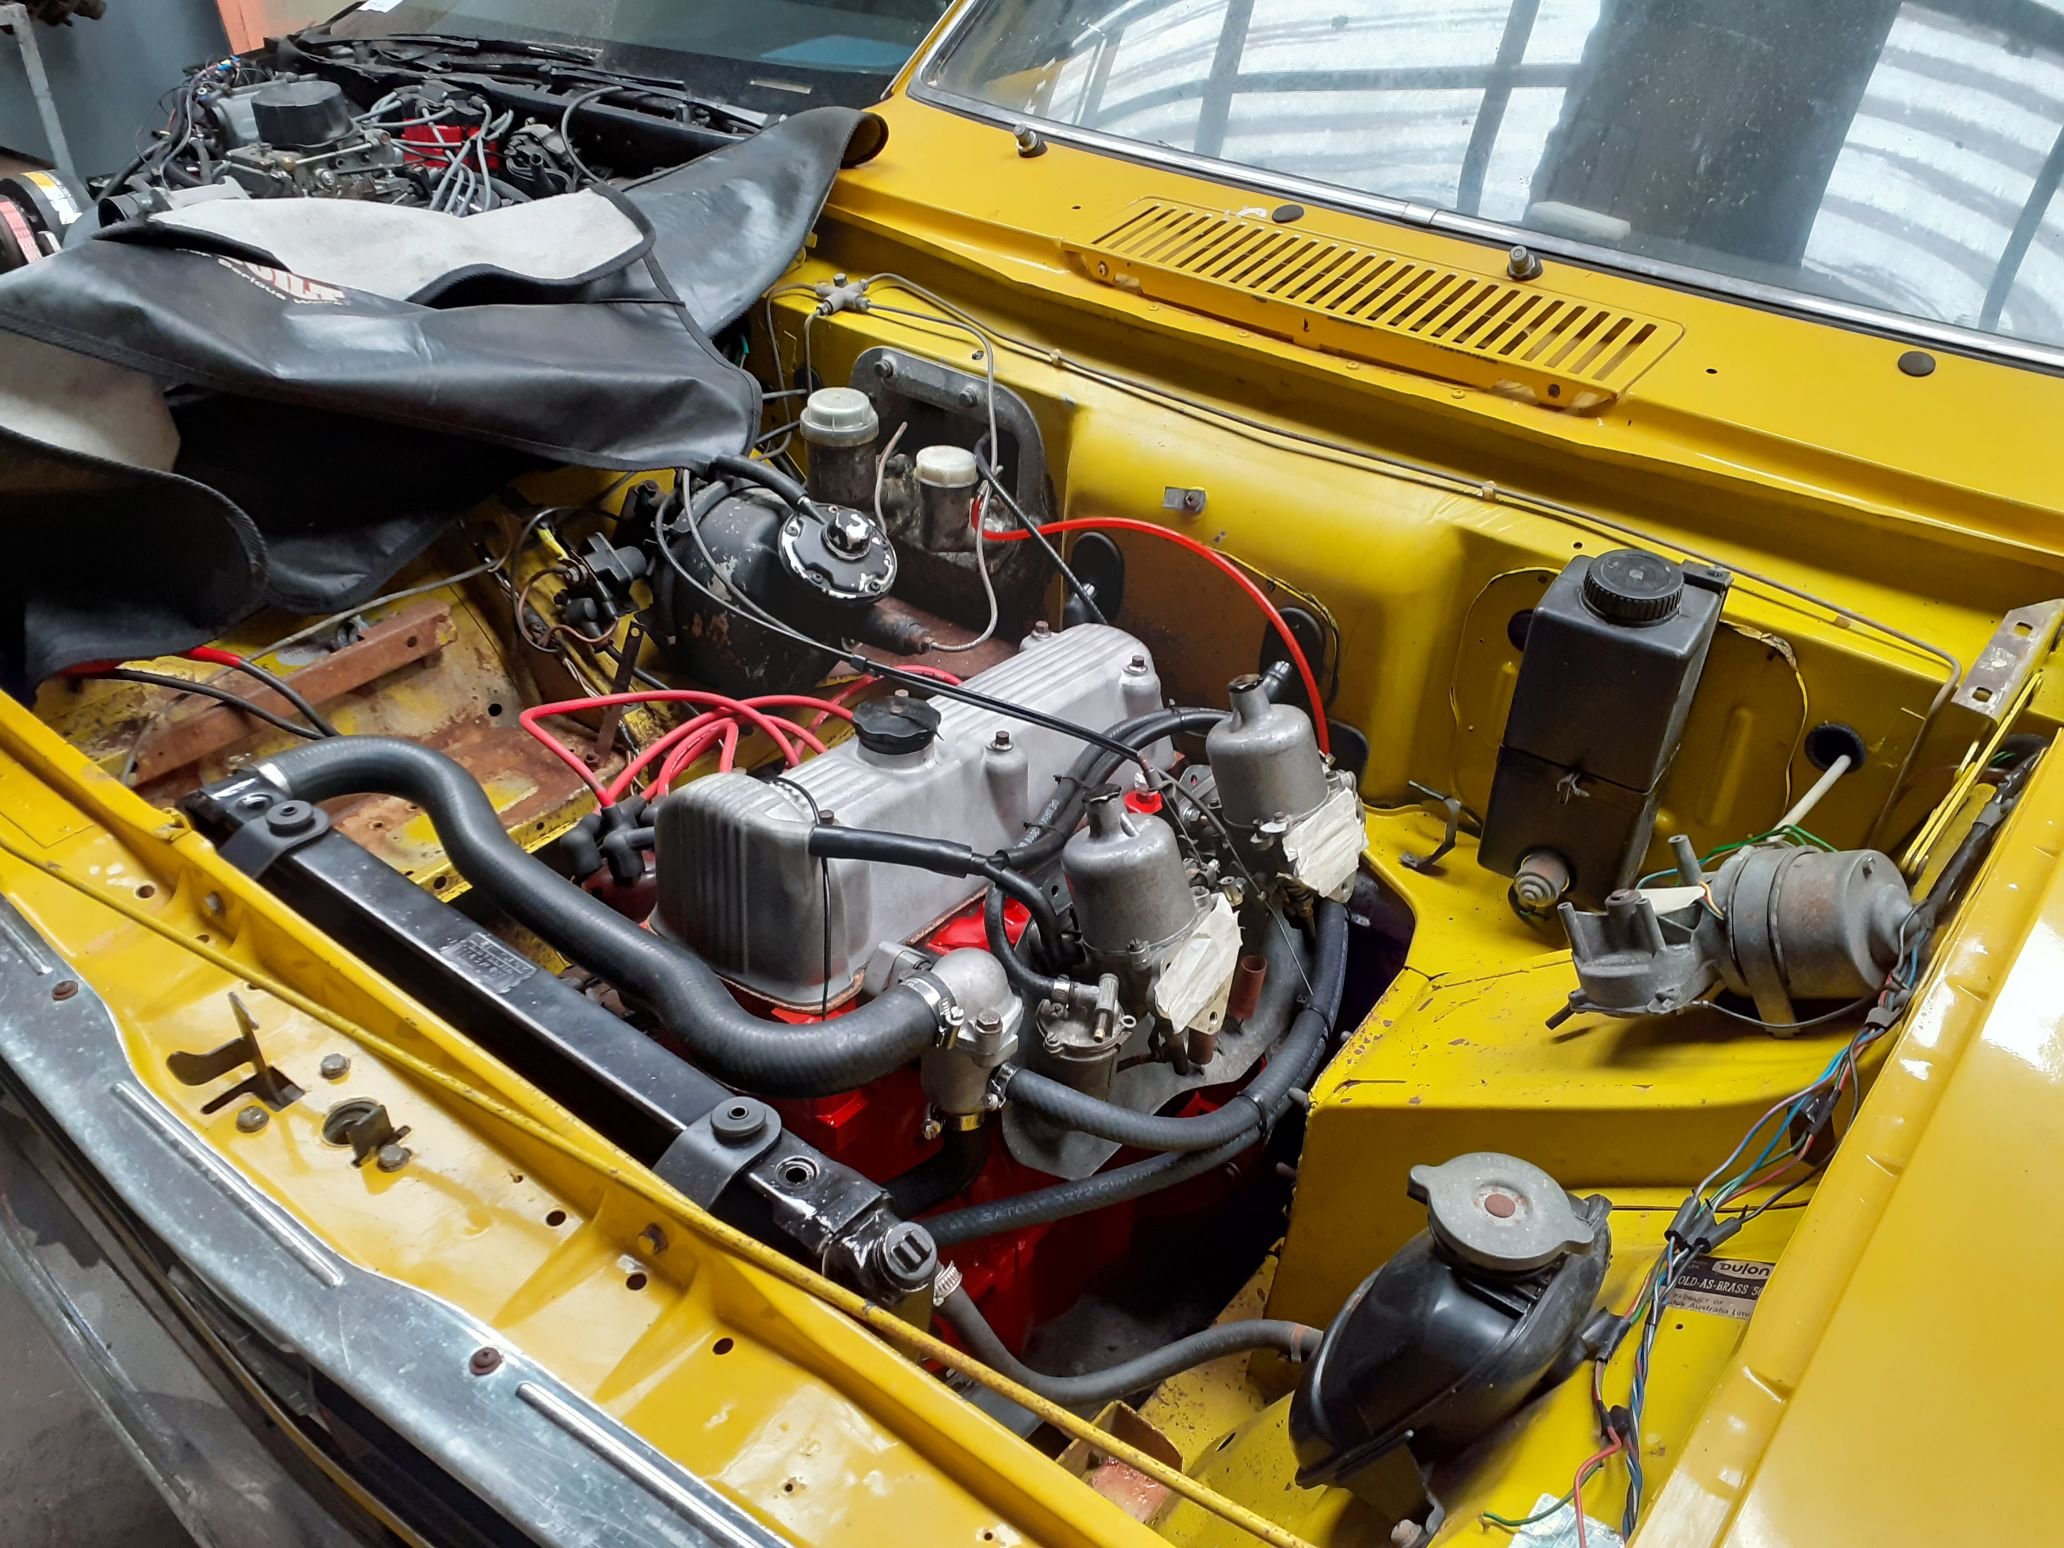
Dropped off all the piping at HPC, ordered some stiffer shorter springs for the front, booked in at autoblast to get the undersides blasted and painted , and booked in at gt refinishers for engine bay paint. I pulled the engine out again so when the car is gone I can get things done on the sump7 points
-
Long time since the last update. Engine was sent off to West Auckland Engine Reconditioners for a freshen up. Turns out it had been bored out .040", and just needed a hone plus new rings and bearings. Cam had been reground at some point, but was a bit worn, so was sent off for some attention. Required new cam adjusting shims to be made, as the correct ones couldn't be found in the required thicknesses to suit the reprofiled cam. Also required repairs to the backing plate, as this closes off the rear coolant gallery and had corroded badly. Had to be welded up and ground smooth. Mysteriously, the dipstick and tube were missing. Fortunately an acquaintance in Invercargill with a restored TC Coupe, had found a rotten TC in a paddock and was able to supply the missing parts. Gordon was also able to salvage the hinge blocks for the rear quarterlight windows, which are no longer available new. Also missing from the engine was the original distributor, so I opted not to get the original Lucas 29D recurved, and ordered an electronic 43D from Powerspark in the UK.
7 points
-
Finally redeemed my air nz credit from 'rona nats. So my flights are locked in to come to the other island for this small bike extravaganza.7 points
-
Foot flat for 12kms from culverdon to balmoral reserve this was maximum speed Oh and the speedo read like 8kms fast...... Shes not winning any races
7 points
-
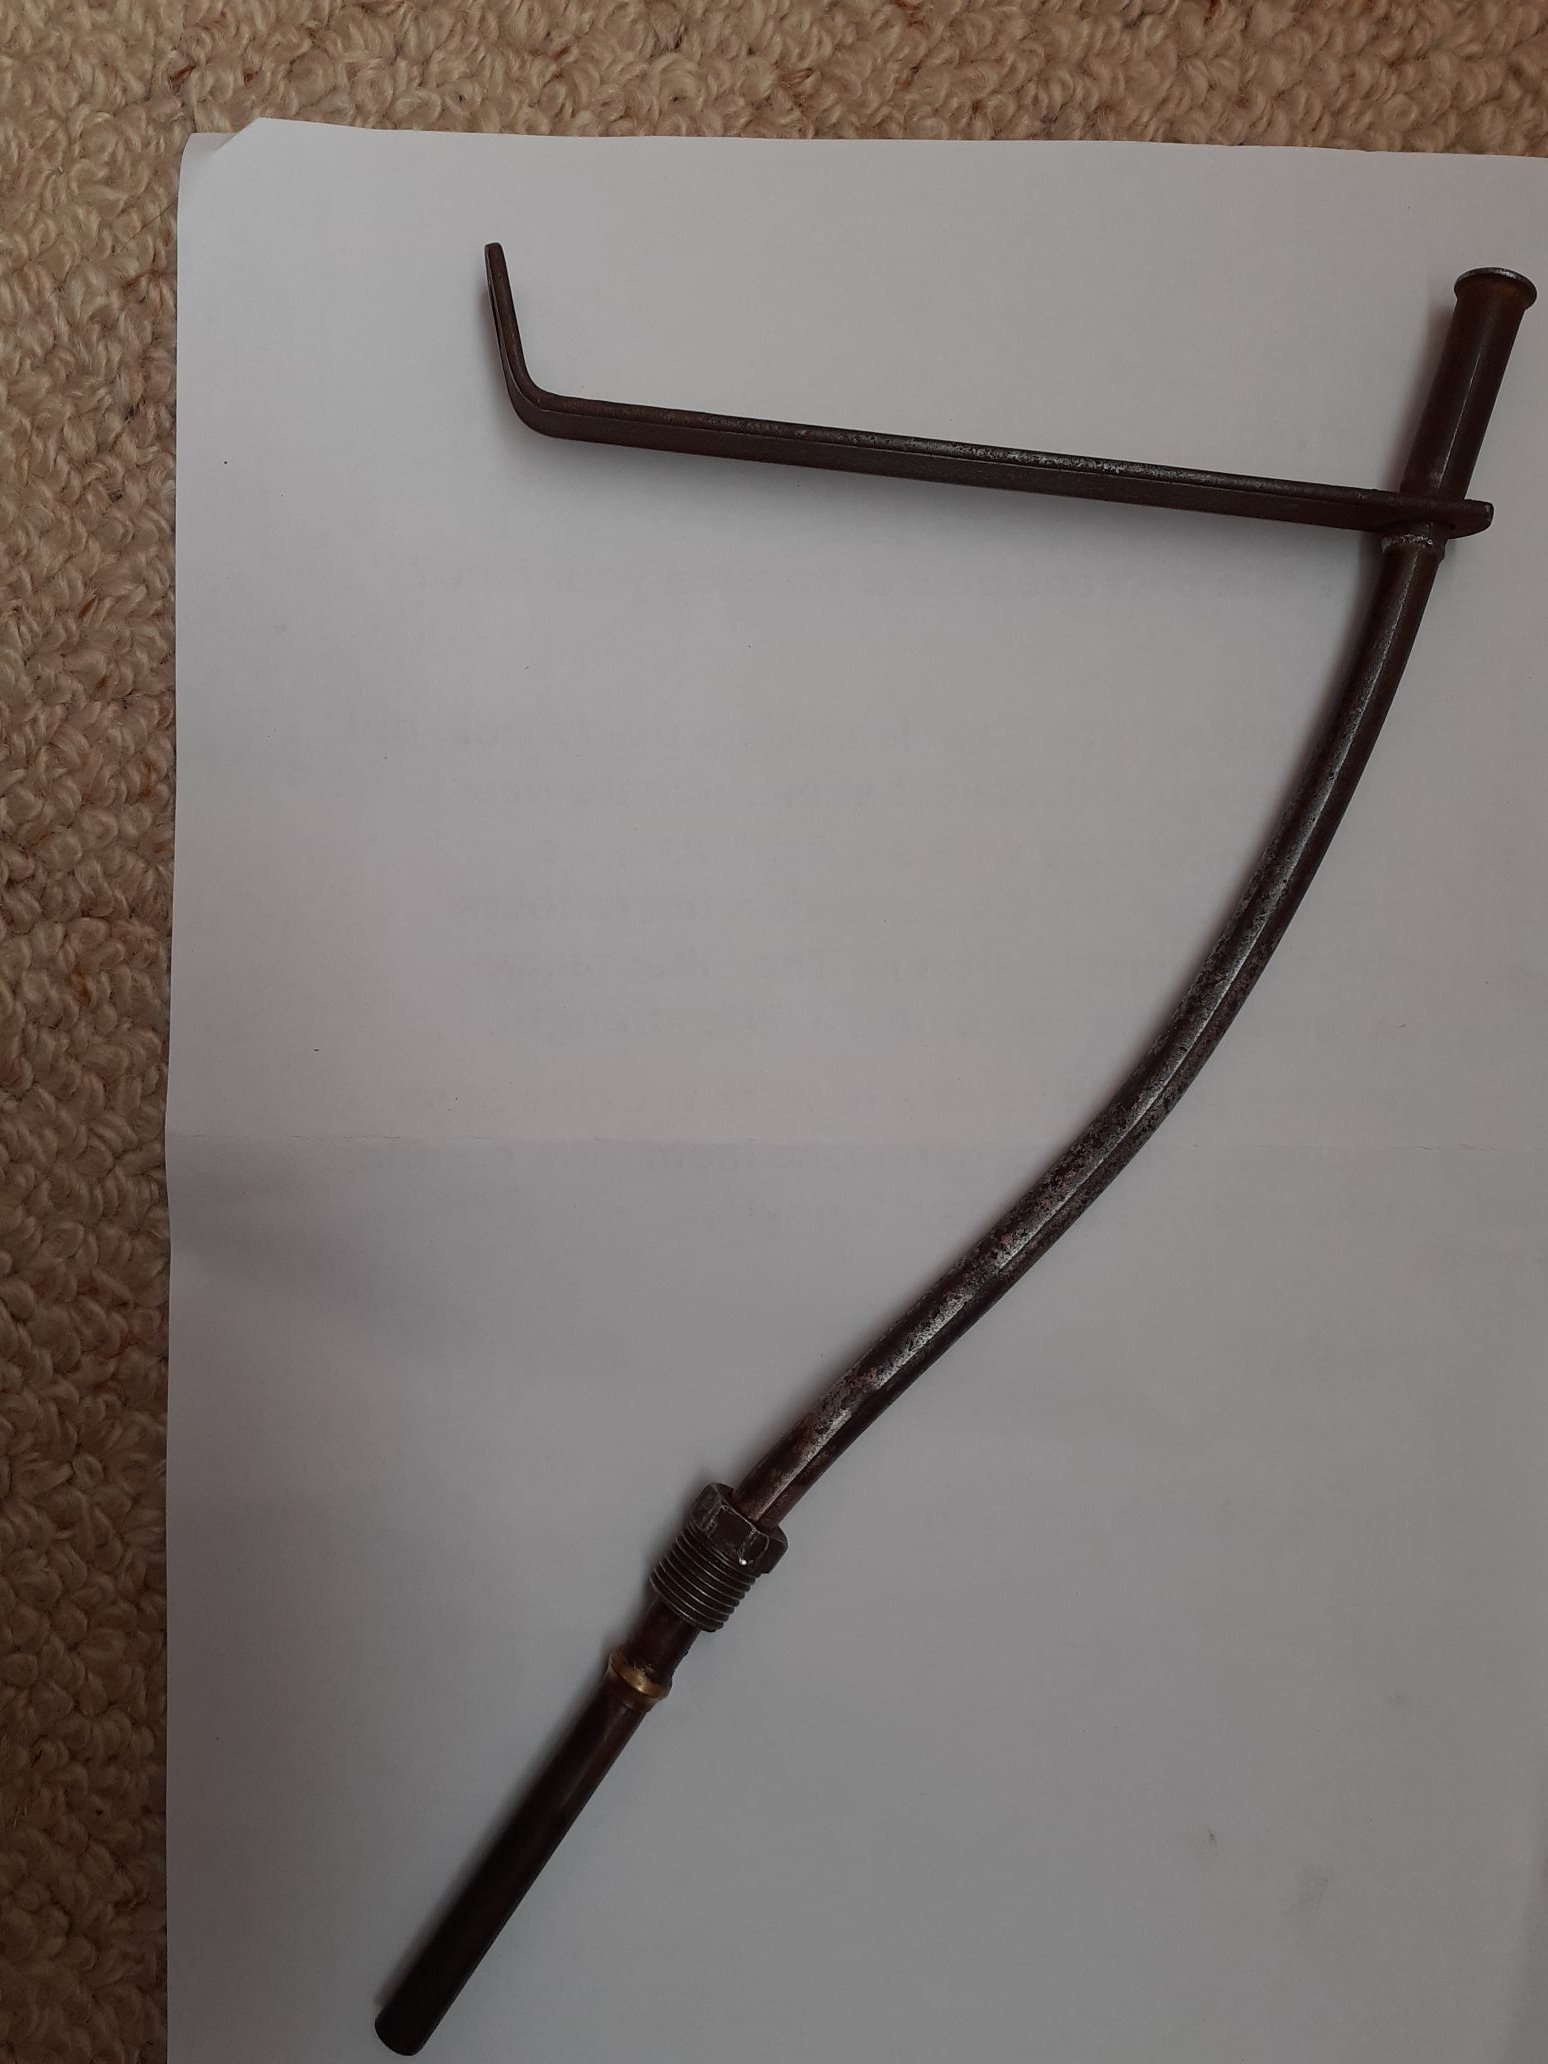
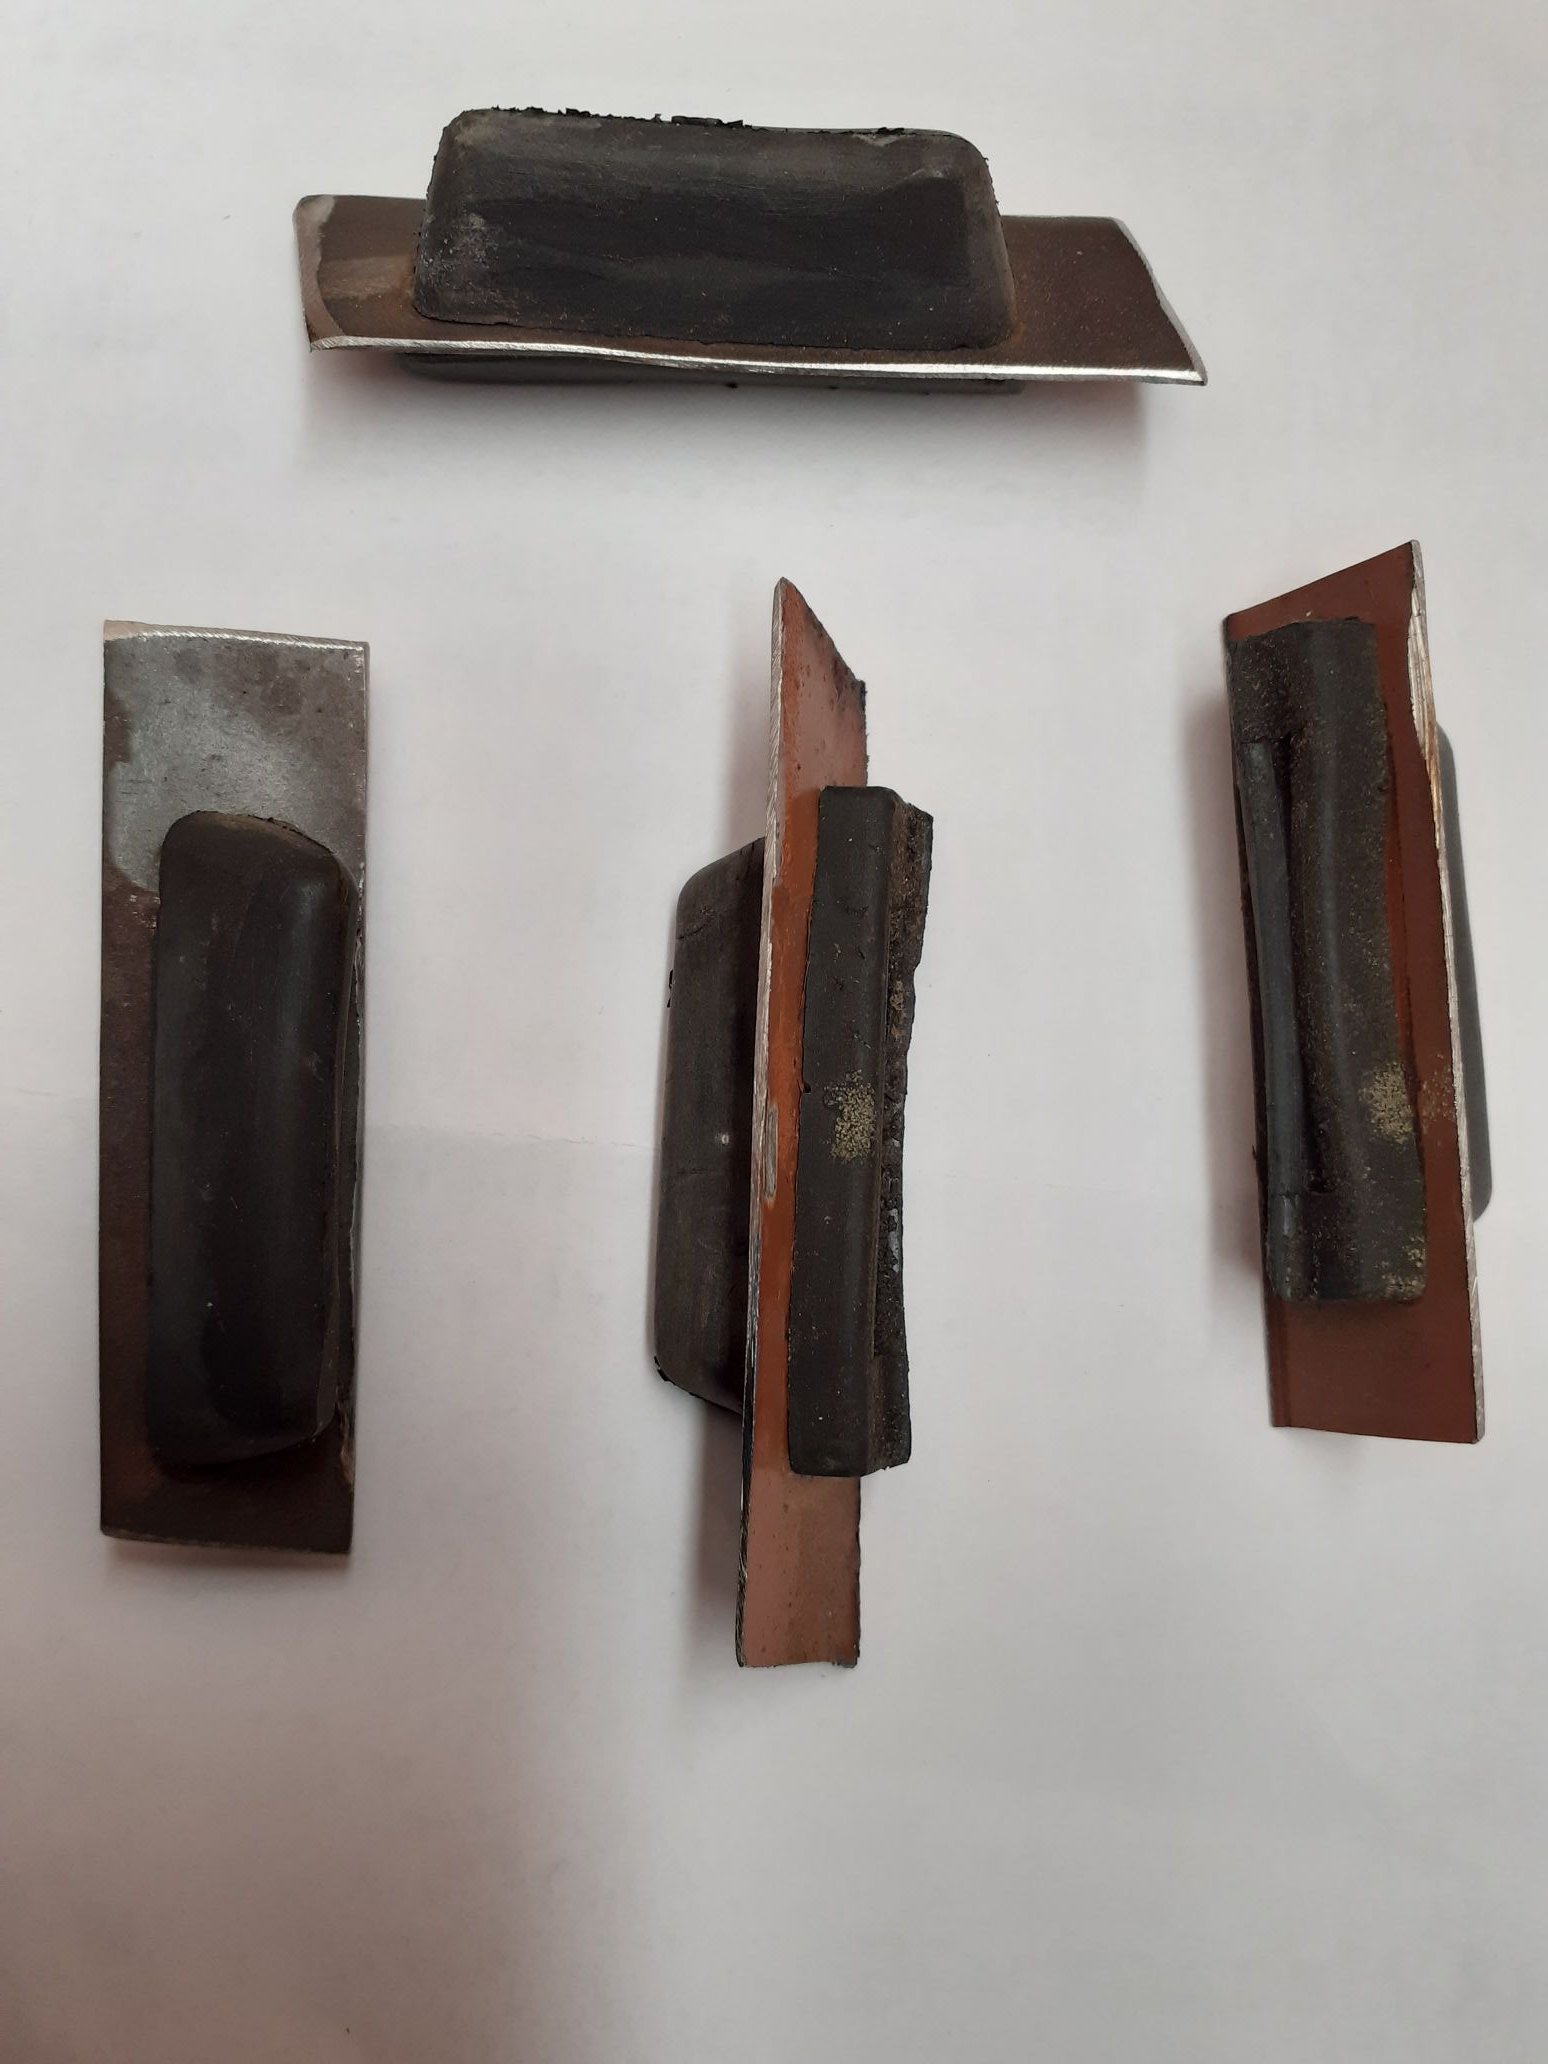
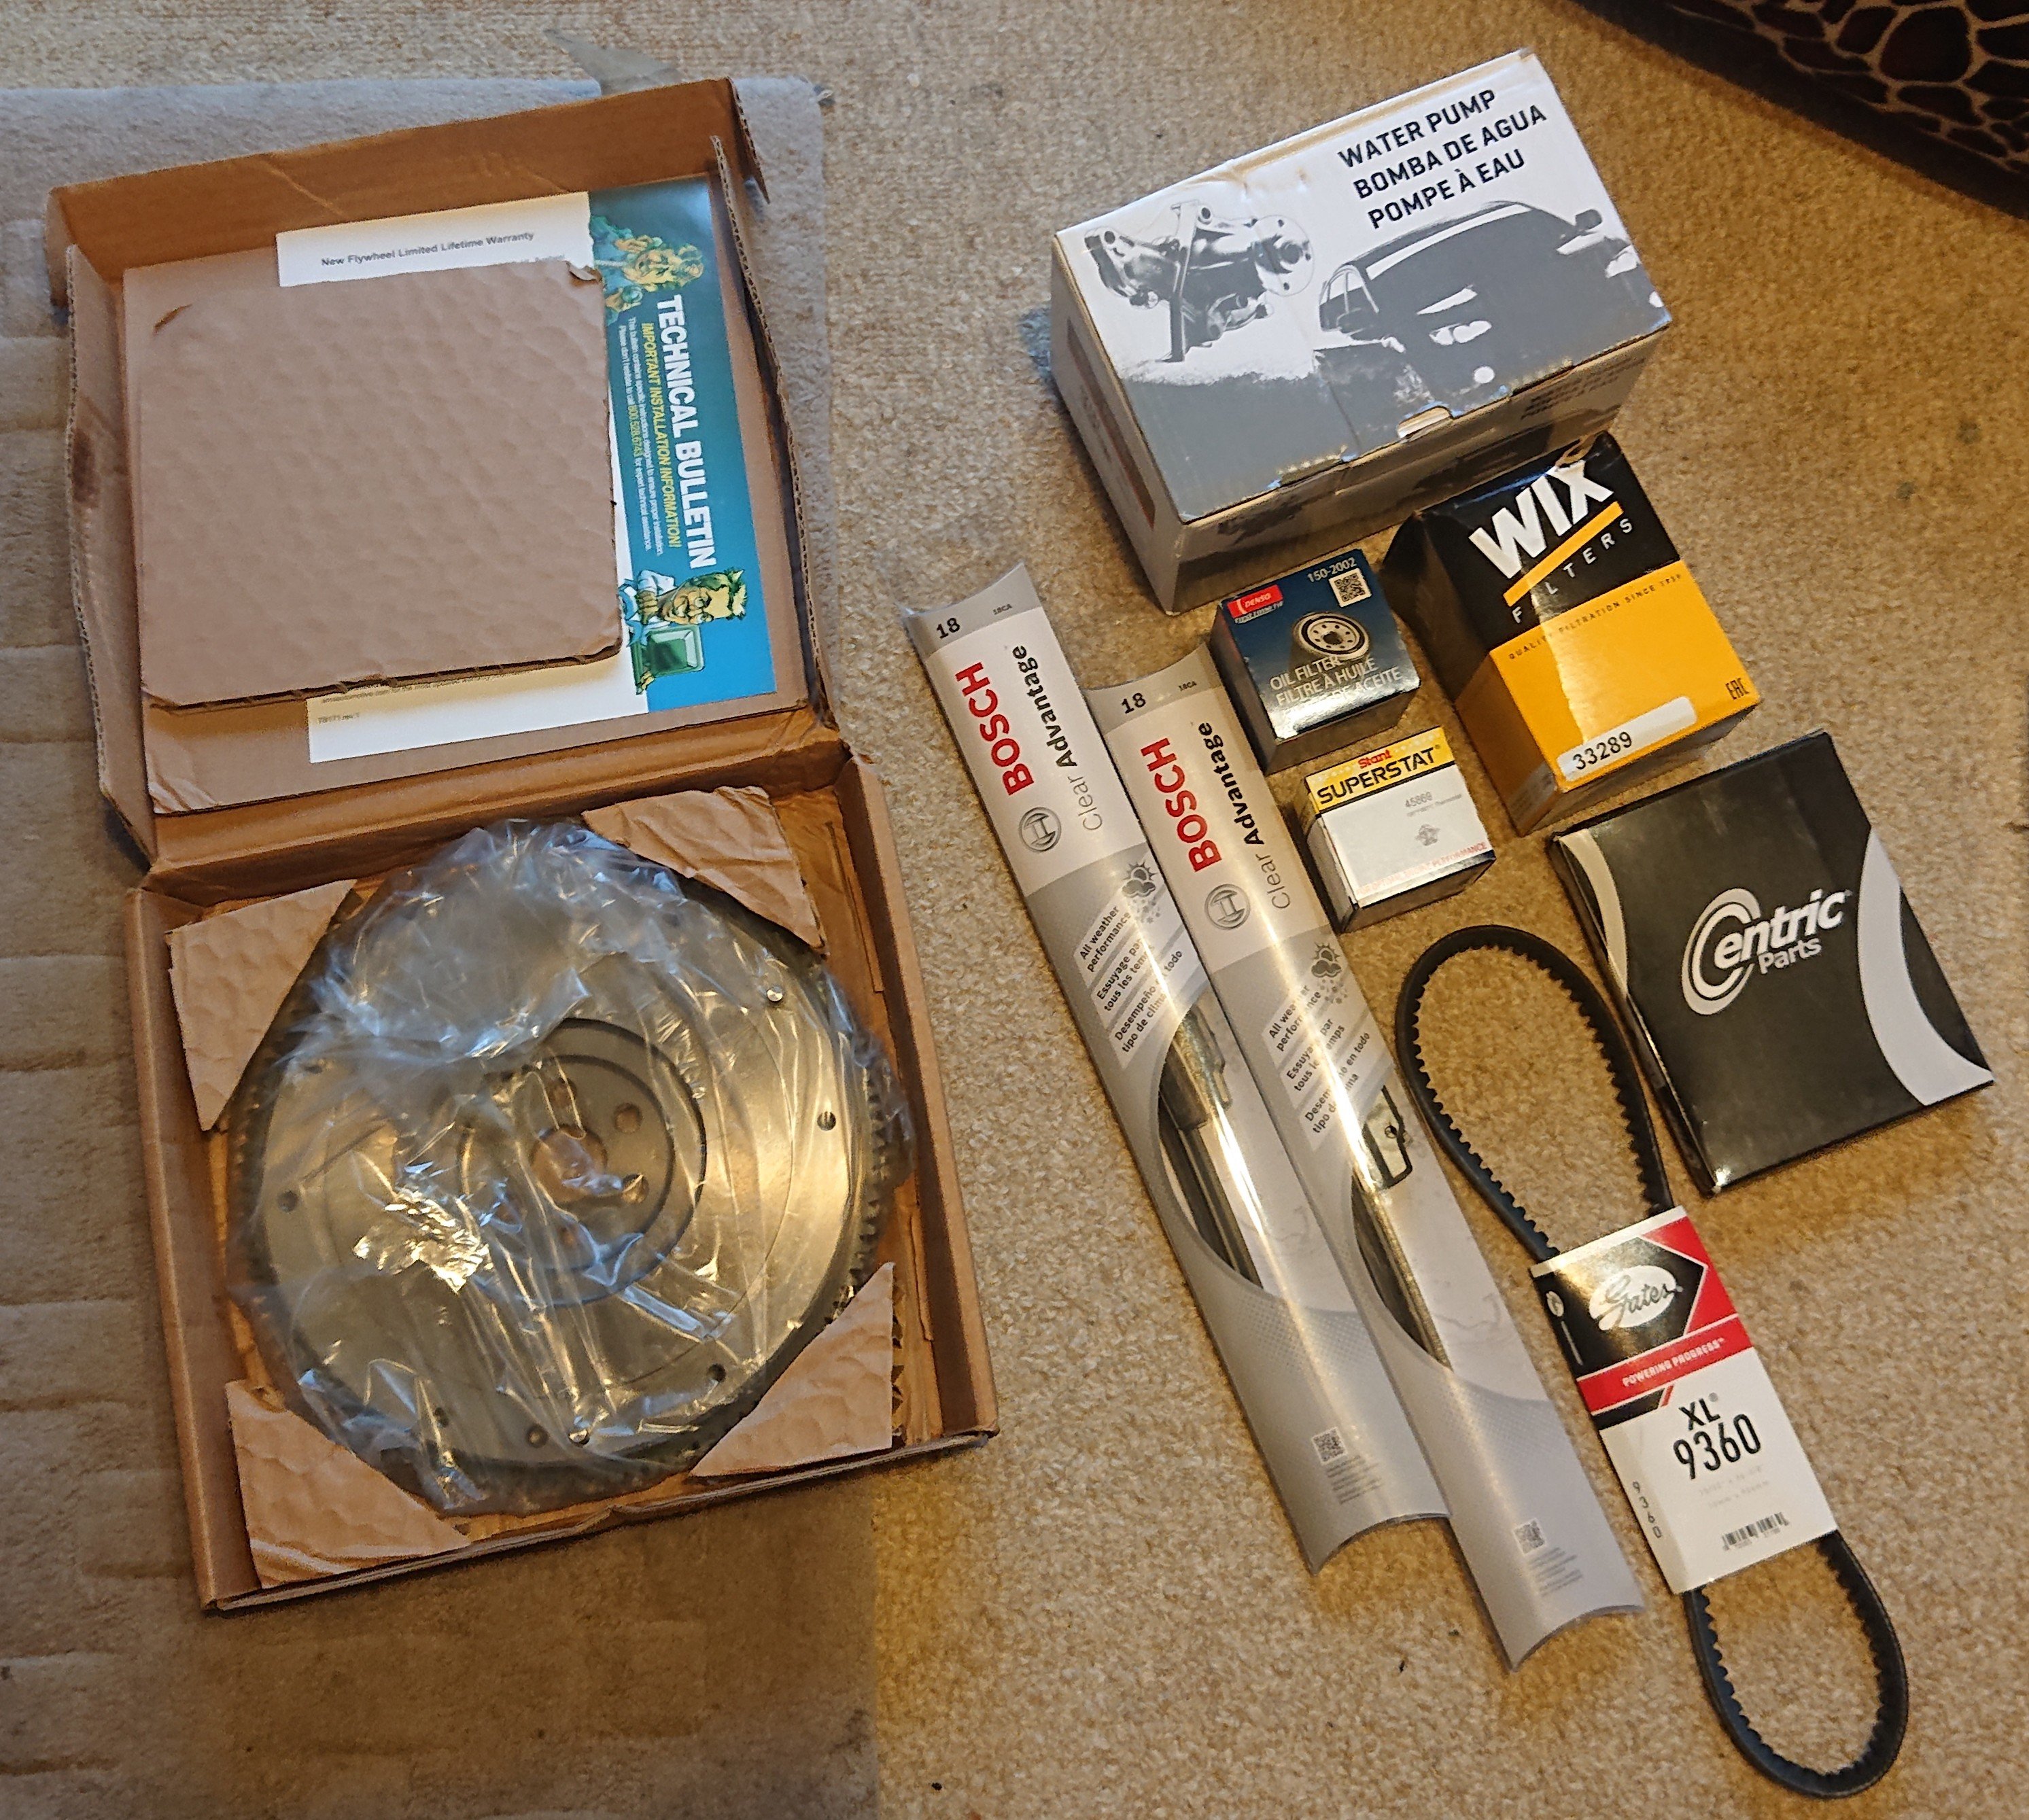
The weather is not looking good for getting the clutch done but oh well, I drowned my sorrows in more purchasing. Garage Vary lip and rear panel will be coming in the next stacked container (along with a rear seat for the Gloria) and some lights that I am hoping to make work with that panel will be enroute shortly also. The remainder of the main haul of parts arrived also. Filters, belts, wanker blades, flywheel.
6 points
-
Bit of details It's a 1995 nissan 720. Has a sd23 2.3 non turbo diesel. Making a cuntsmashing 73hp. 5 speed floor change. 206,000kms allegedly genuine. I almost believe to be true as it drives so nice and it's not completely worn out. Also the old Barry I got it off didnt seem like the sort of person who would wind it. Real povo spec. Dash doesn't even have a trip meter. Gave it a decent clean after work today. Got all the takaka dirt and spiderwebs out of the dash. Blacked the tires and washed the body. Almost looks presentable What are my plans for it? I dont know. Has a few rust holes in the floor that I need to deal with. But likely slam and differnt wheel. And maybe zutututututu Who knows5 points
-
As with most projects that have been through several owners while dismantled, a few odd things went missing and required a global search to find replacements. The rubber seal for the front passenger's quarterlight window had gone AWOL, I eventually found a NOS one in Arkansas, from a guy who had acquired the parts stock from a mid-west MG and Austin dealer. A set of new TC wheel covers came from another NOS parts collection in Australia. The engine was fitted with the wrong oil filler cap, a tall vented Mini one, rather than the correct short non-vented one. A Facebook search eventually sourced one from an Austin 1500 owner in Aus. A replacement for the worn oil pump drive was sourced from the UK, fortunately one of the few Maxi parts that Leyland Australia had used and retained the original part number.4 points
-
15x8s... Not mine Picked up for Joe. Will try them on properly for laughs at some stage.
4 points
-
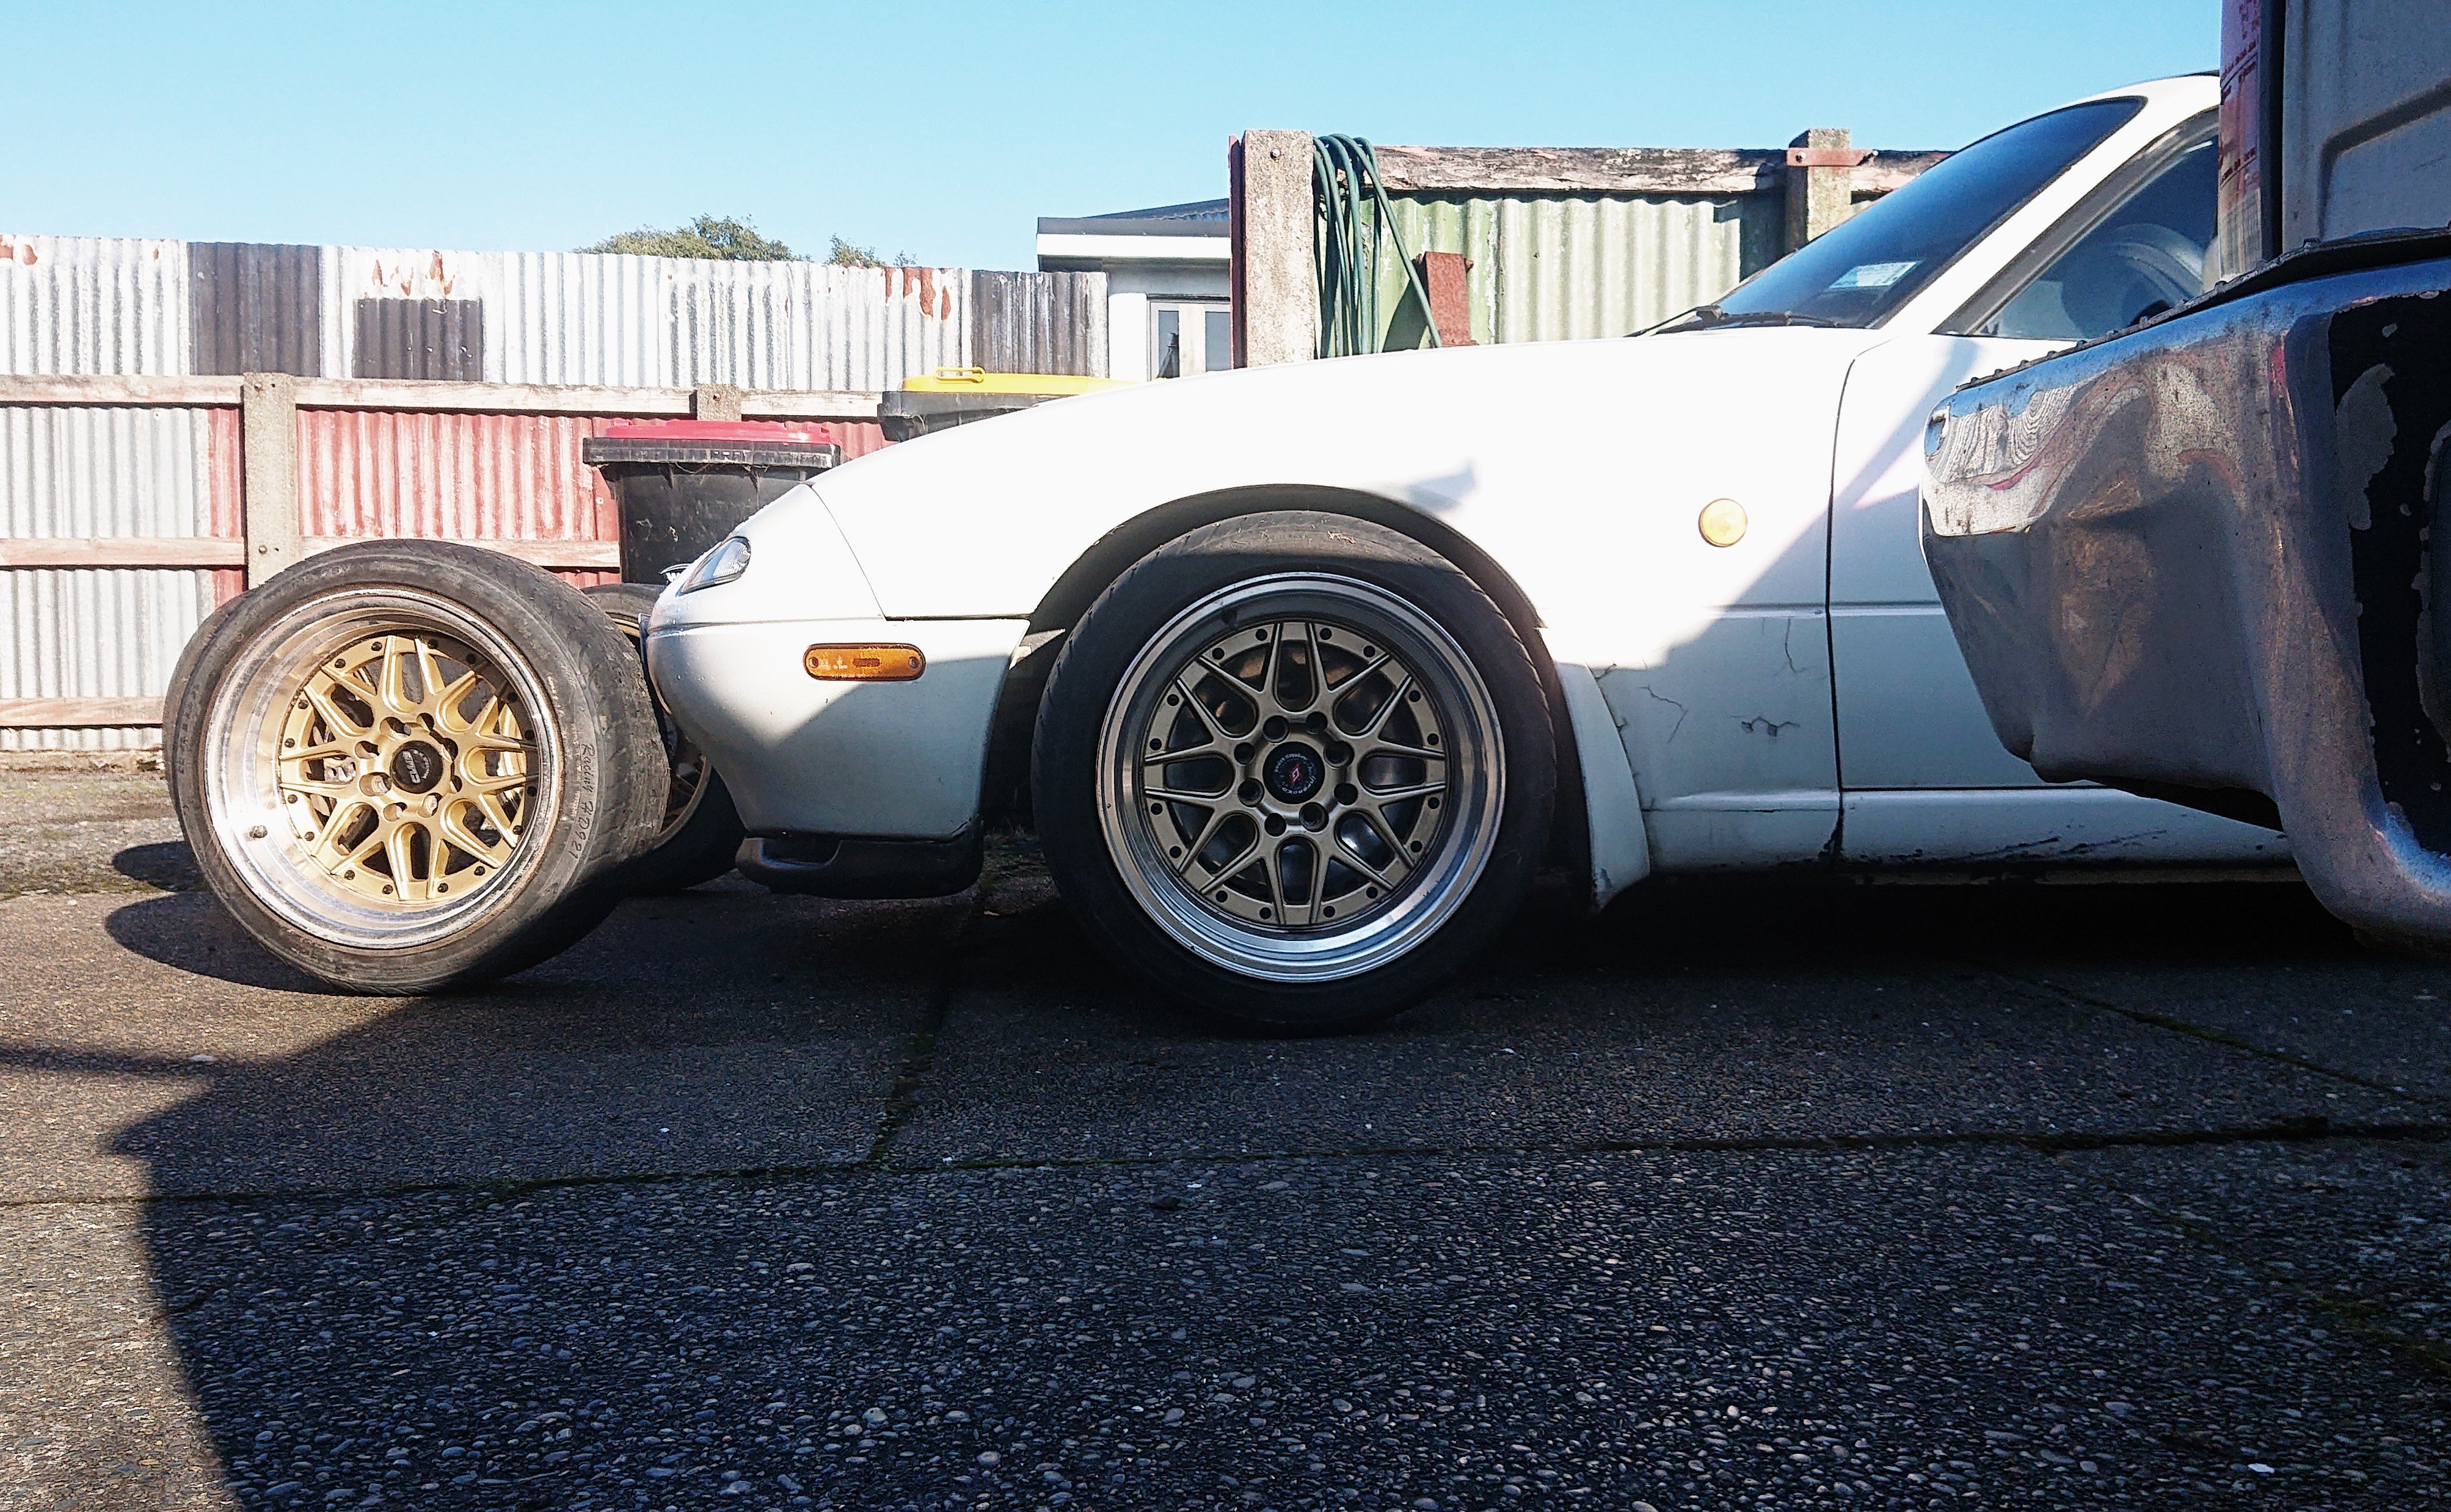
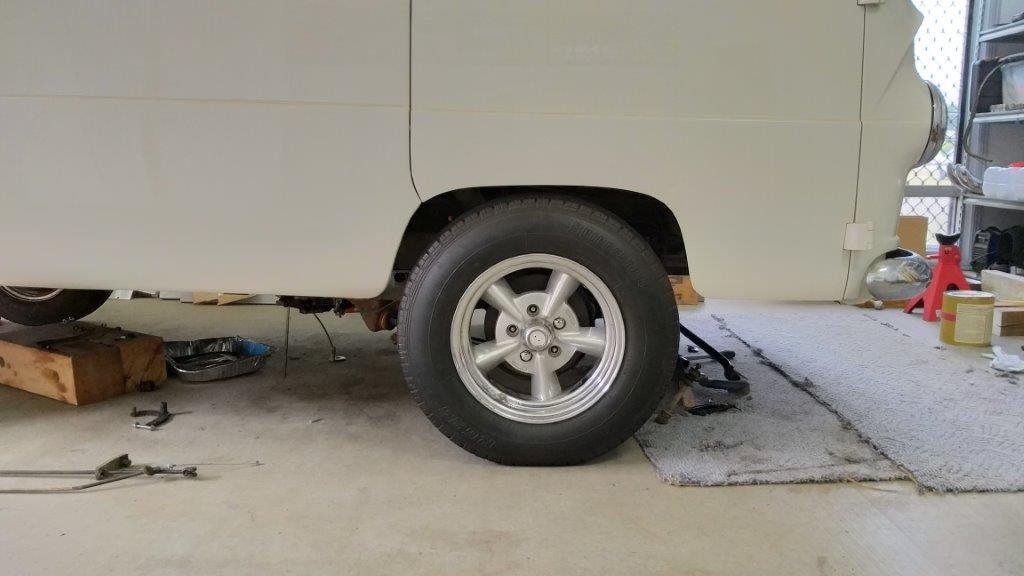
And I took another picture of the front wheel setup. This time at a better angle.
4 points
-
Gearbox time. As mentioned in the last post I was pretty set on using a Subaru Transaxle. I could also have entertained an Audi unit or perhaps a Renault 21 item but they are harder to find and more expensive. Subarus are everywhere! So way before I had found a engine to buy I started looking. Now initially it was a Legacy front wheel drive trans that I was looking for but when I realised that early Leones also came out as front wheel drive with a smaller lighter 5 speed Transaxle they got added to the list. Not as easy to find though! Then one day a leone boot lid popped up local to me on my Trade me favourite search. I contacted the seller on the off chance that he might have a box. He did. In fact he had two. A early 1600 item and a later 1600/1800 unit. So we went for a drive and paid him a visit and what a thoroughly top fella he turned out to be. A mechanic by trade, ran a local garage before retiring and now works from home on locals cars. However its what he does in his past time that was really interesting. He has been building small hover craft for years and became well known for building one with wings that could fly.... https://www.youtube.com/watch?v=xhGN4gFYPLk But I digress. He had some boxes because he had been using subaru engines for his hovercraft. So I bought a couple of boxes (one which came with a 1600cc subaru engine attached) , two starter motors, an 1800 ring gear. All for bugger all because I think he just liked the nuttiness of my plans for the Imp. So here is a box. The earlier 1600 in the small casing. about 4 kgs lighter with a smaller diff and takes a smaller flywheel.. This next one is the one I'll use... Its a later Leone 1600 T71G which shares the same slightly bigger stronger casing as the 1800cc. Ratios are 1st 3.636 2nd 2.157 3rd 1.266 4th .885 5th .725, Rev 3.583 - these coupled with a 3.9 final drive ratio should suit the Imp pretty well on its 13" 175/60 wheels. Here it is again next to the stock Imp box. Its not too far off but the gear selector is higher and points up at an angle. The box is also taller at the rear so the tunnel will need to be raised and the removable cross member chopped about. At 35kg its about 9kg heavier than the Imp box. I can take that. An interesting and very handy fact is that the box selector rod works in exactly the same way as the imp item, even the movements in are pretty much the same in travel both in rotation and back and forth ! So that is nice. Now as discussed previously there is the fact that the Honda will be rotating this boxes input shaft in a direction opposite to the norm. It has been done successfully with Audo boxes and I know of a fella who has run a box backwards behind a 440ci engine with no dramas. I'd also had the discussion about the new thrust loadings with a fella in the UK who's into Goldwings. Came to the conclusion that being a Japanese box from a much heavier car, optionally with a Turbo. So its not been to much of a worry however more people have questioned it and now I was really curious. I decided to strip the spare 1600 box down (same internal structure but a smaller diff and different casing) I got as far has the last bearing and syncro hub to remove and my puller broke. I'll use friends press but even so I am now happy that it will be fine. 5th gear is the one with the least thrust area when run opposite direction but that wont be so loaded up. Here's some pics I took... A beautifully done bit of technical description in this one showing original (green) and new rotation thrust bearing positions. (My Samsung note phone needs a new stylus!) On a side note- it has to be the easiest gearbox I have ever taken apart (ignoring the fact I need a press to remove some bits from the shaft) so I will take the box I'll be using apart and rejoin the casings for mocking up purposes later on. Much easier on my back. So lets put the box away in the corner and get back to the fun bit. The flat six. I was really looking forward to seeing how much lighter it was gonna get as I removed all the un-needed bits from inside. With the alternator, starter, inlet manifold and coolant pipes removed I weighed the engine. It came up at 105kg. Diet time! I removed the rear clutch cover that has the slave cylinder built in. Removed the clutch unit. Took off the drive gear housing. Ohhhhhh. Clean and shiny. Neato. I was told that this engine was possibly a low mileage unit but I was not to know until I began to strip it. I was fearing sludge or bad staining inside the castings but its super clean. Here's a shot with a few of the spur gears missing and showing the various bits... Clutch unit added back but without the main rear casing on so you can see what it looks like.. This was fun. I like learning new engine layouts. Here's the front of the engine which will now be facing backwards. Cambelt covers removed and you can spot not one but two VR sensors for the Honda CGI ignition setup. It has a 12 tooth trigger wheel which with a tooth removed could be used as a crank angle sensor for the EFI I have planned. More likely I'll make a 36-1 wheel the same size for better resolution. There is also plenty of room for a cam angle sensor to be fitted- Ideally I would rather run this engine on full sequential injection if ("if !?.... hahahaha" they laugh..." he said if " ) I use ITBS. Cam covers off. One of them had some welding. I suspect that the reason is that the bike was crashed and one cover got hit. Fella who originally had this engine for his project had bought a complete bike. You can see the nifty hydraulic valve lash adjusters.. I removed the cams then the heads. Carefully stashed all the bits in order on a shelf I had cleared. All the bolts and bits were being placed in organiser trays I had bought for the project. I knew full well that this project could well drag on for a long time given life etc. With the help of Hannah we split the crank case and revealed all the gubbins inside... Lots of heavy stuff in there to weigh in! Yay. All this stuff I didn't need went in this box... and that box went on the scales... 35kg Sweeeeeeeeet! That's more like it. A little bit more to lose when I start hacking the crankcase apart. Now I'm aware that I'll be adding some weight back with a flywheel and clutch but hey- this is a good place to start. Its now a 70 kg flat six. Next thing to do was sit it next to the box and line some things up... You can see where I'll have to fabricate a bellhousing to fill that 40mm gap. The Imp was at this point in time 'up on blocks' as I had the Datsun engine out to replace the rear main seal and ring gear. How handy then because I wanted to see how the engine sat in place! I bolted the heads back on loosely and slung the lot up under the imp. I lined the transaxles outputs with the driveshafts so positioning the engine front to back. I took a few photos, took some measurements and noted some stuff. I then removed the transaxle from the equation so I could lower the car down so the engine would sit roughy where it will end up. I stood back and admired it. Wow! It just looked so bloody spot on in there! Man - if my juices weren't fizzing with excitement previously as I stripped the engine down they certainly were now. I'll let these last photos I snapped end this update4 points
-
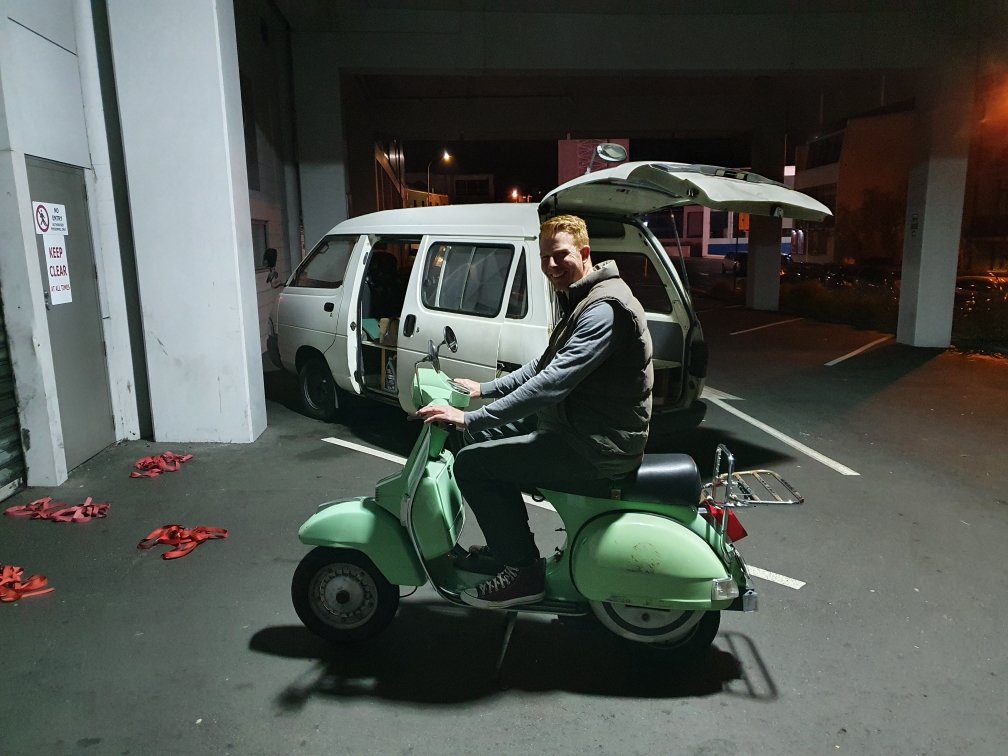
I take back any and all derogatory comments I've ever made or implied regarding vans, and any suggested links to pedophilia. Cheers Mike...legend! Scooter safely getting transportation in the luxurious comfort of a sexy van of fine distinction.
3 points
-
Thanks to @bigfootand Sally a great night was had by all. Thoroughly enjoyed it. Thanks.3 points
-
Plus I'm a fucking good looking bloke with with a full head of dashing (greyish) hair and a chiselled manly jawline. I'm also incredibly modest. But I've no time for doing youtube stuff. I entertained the idea and then looked into how much time might have to go into making something decent enough. I feel awkward in front of a camera and don't know that I have that sparkle. But mainly its a time thing.3 points
-
Runner system printed. Crazy how fast this printer goes. Only took 7hrs3 points
-
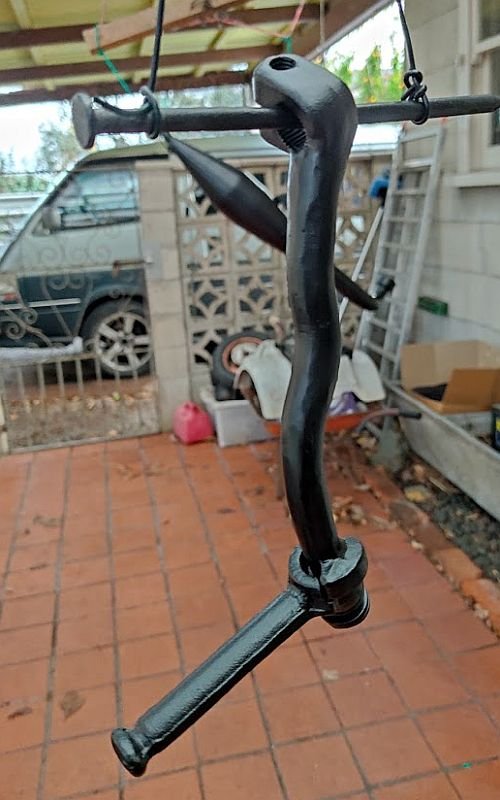
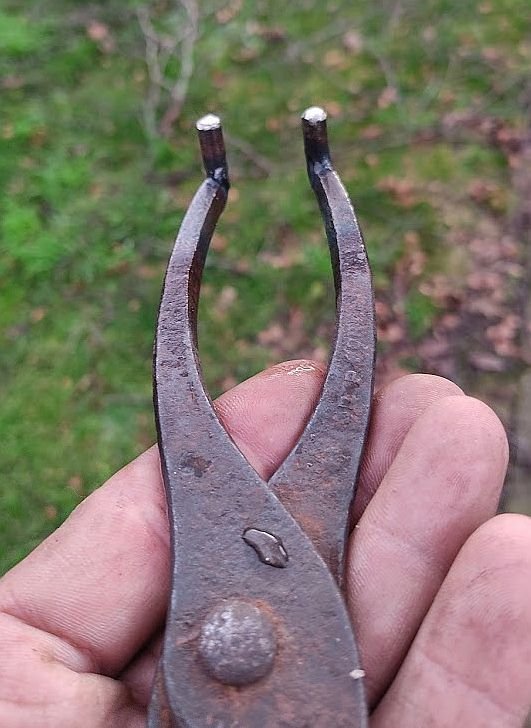
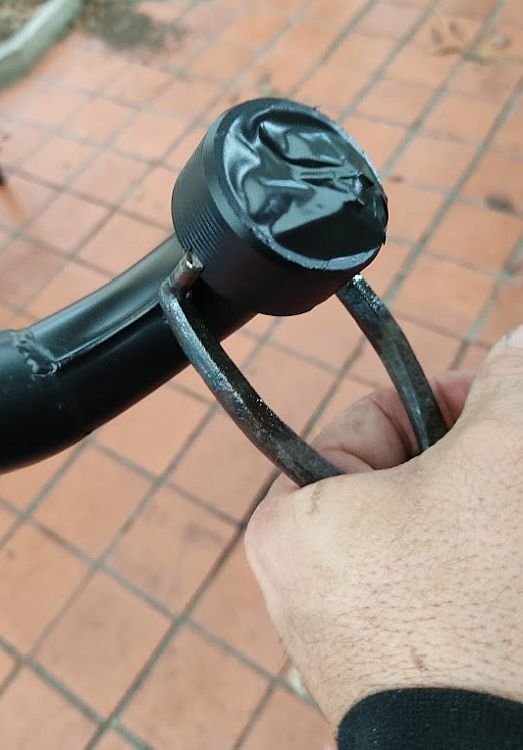
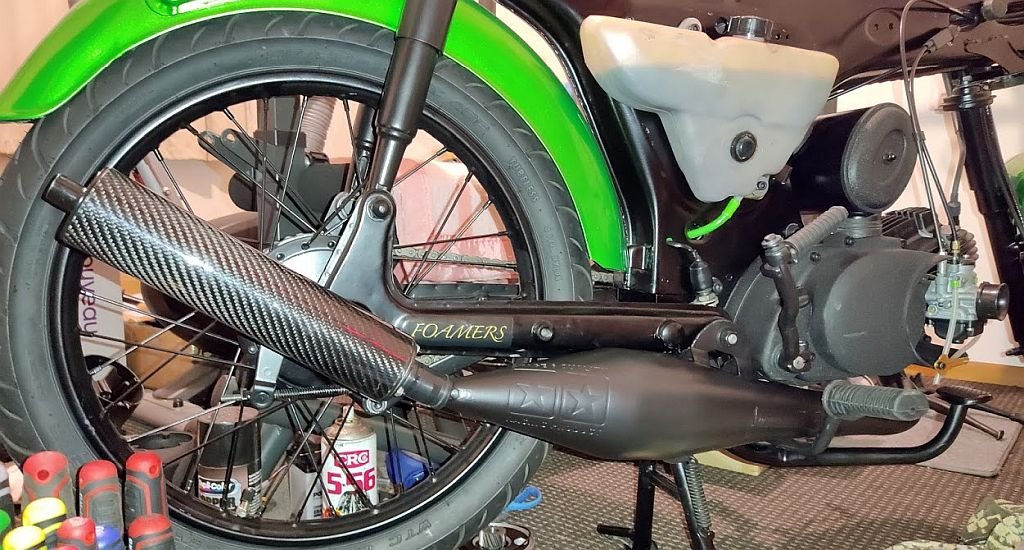
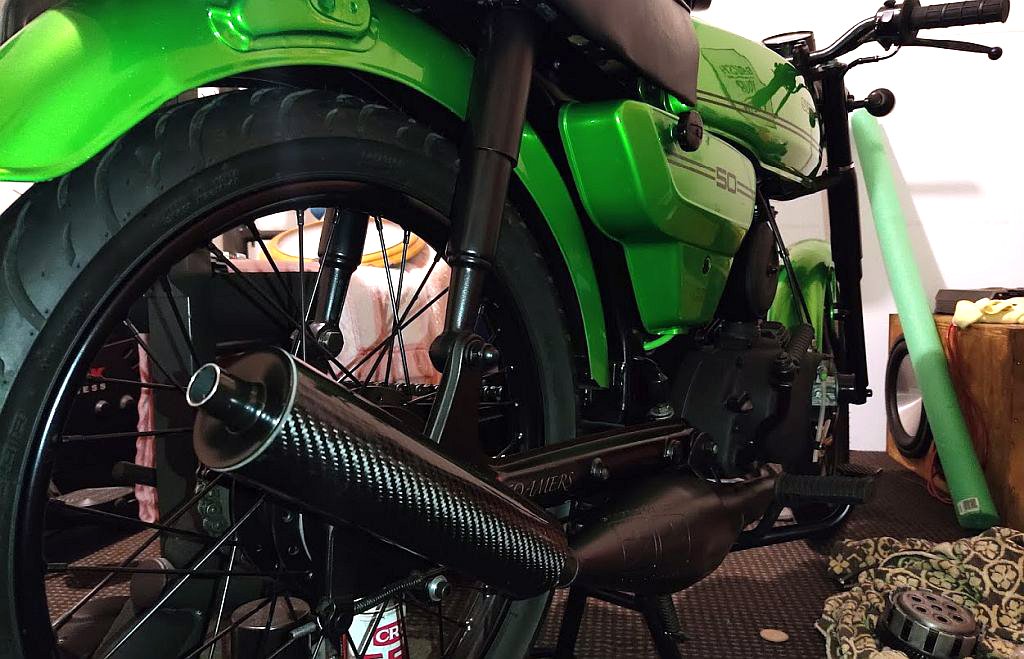
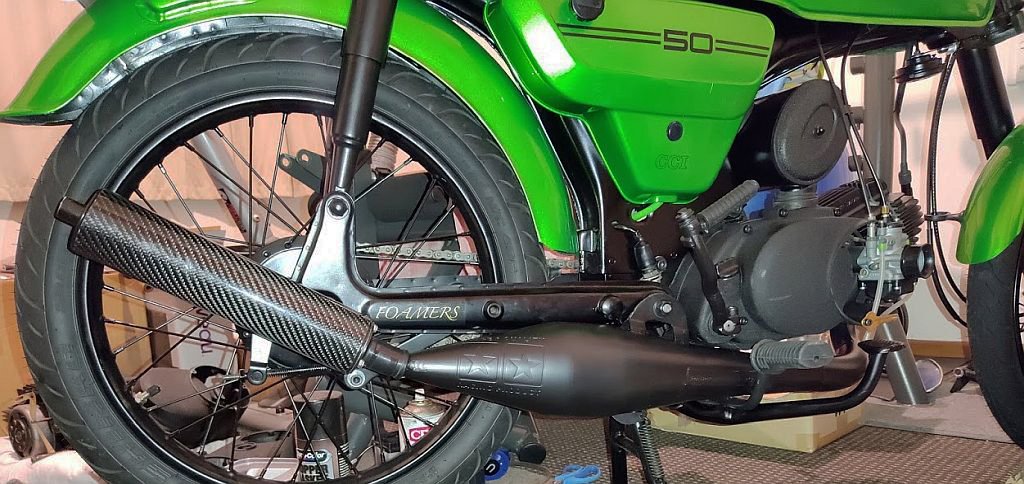
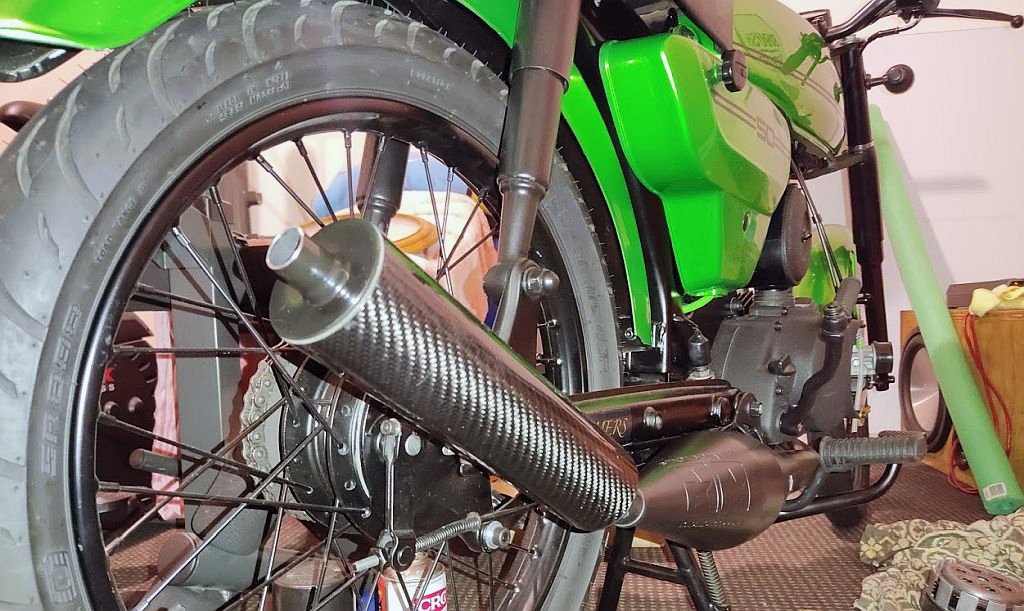
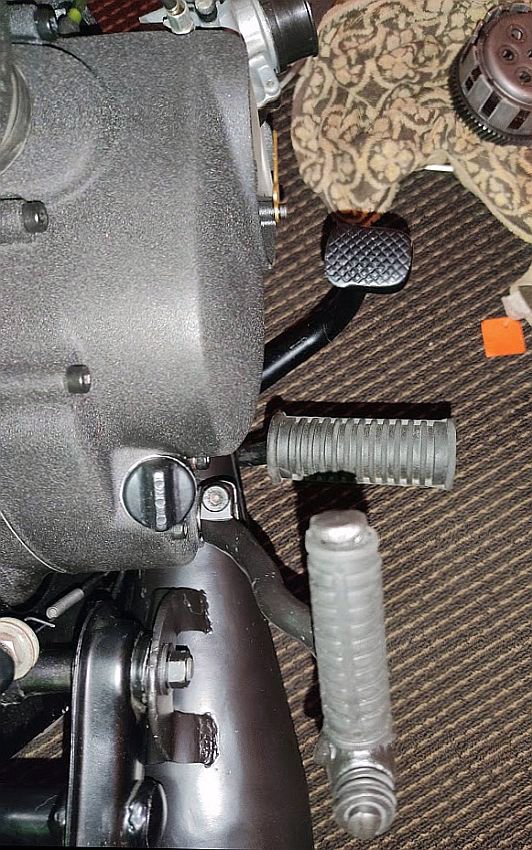
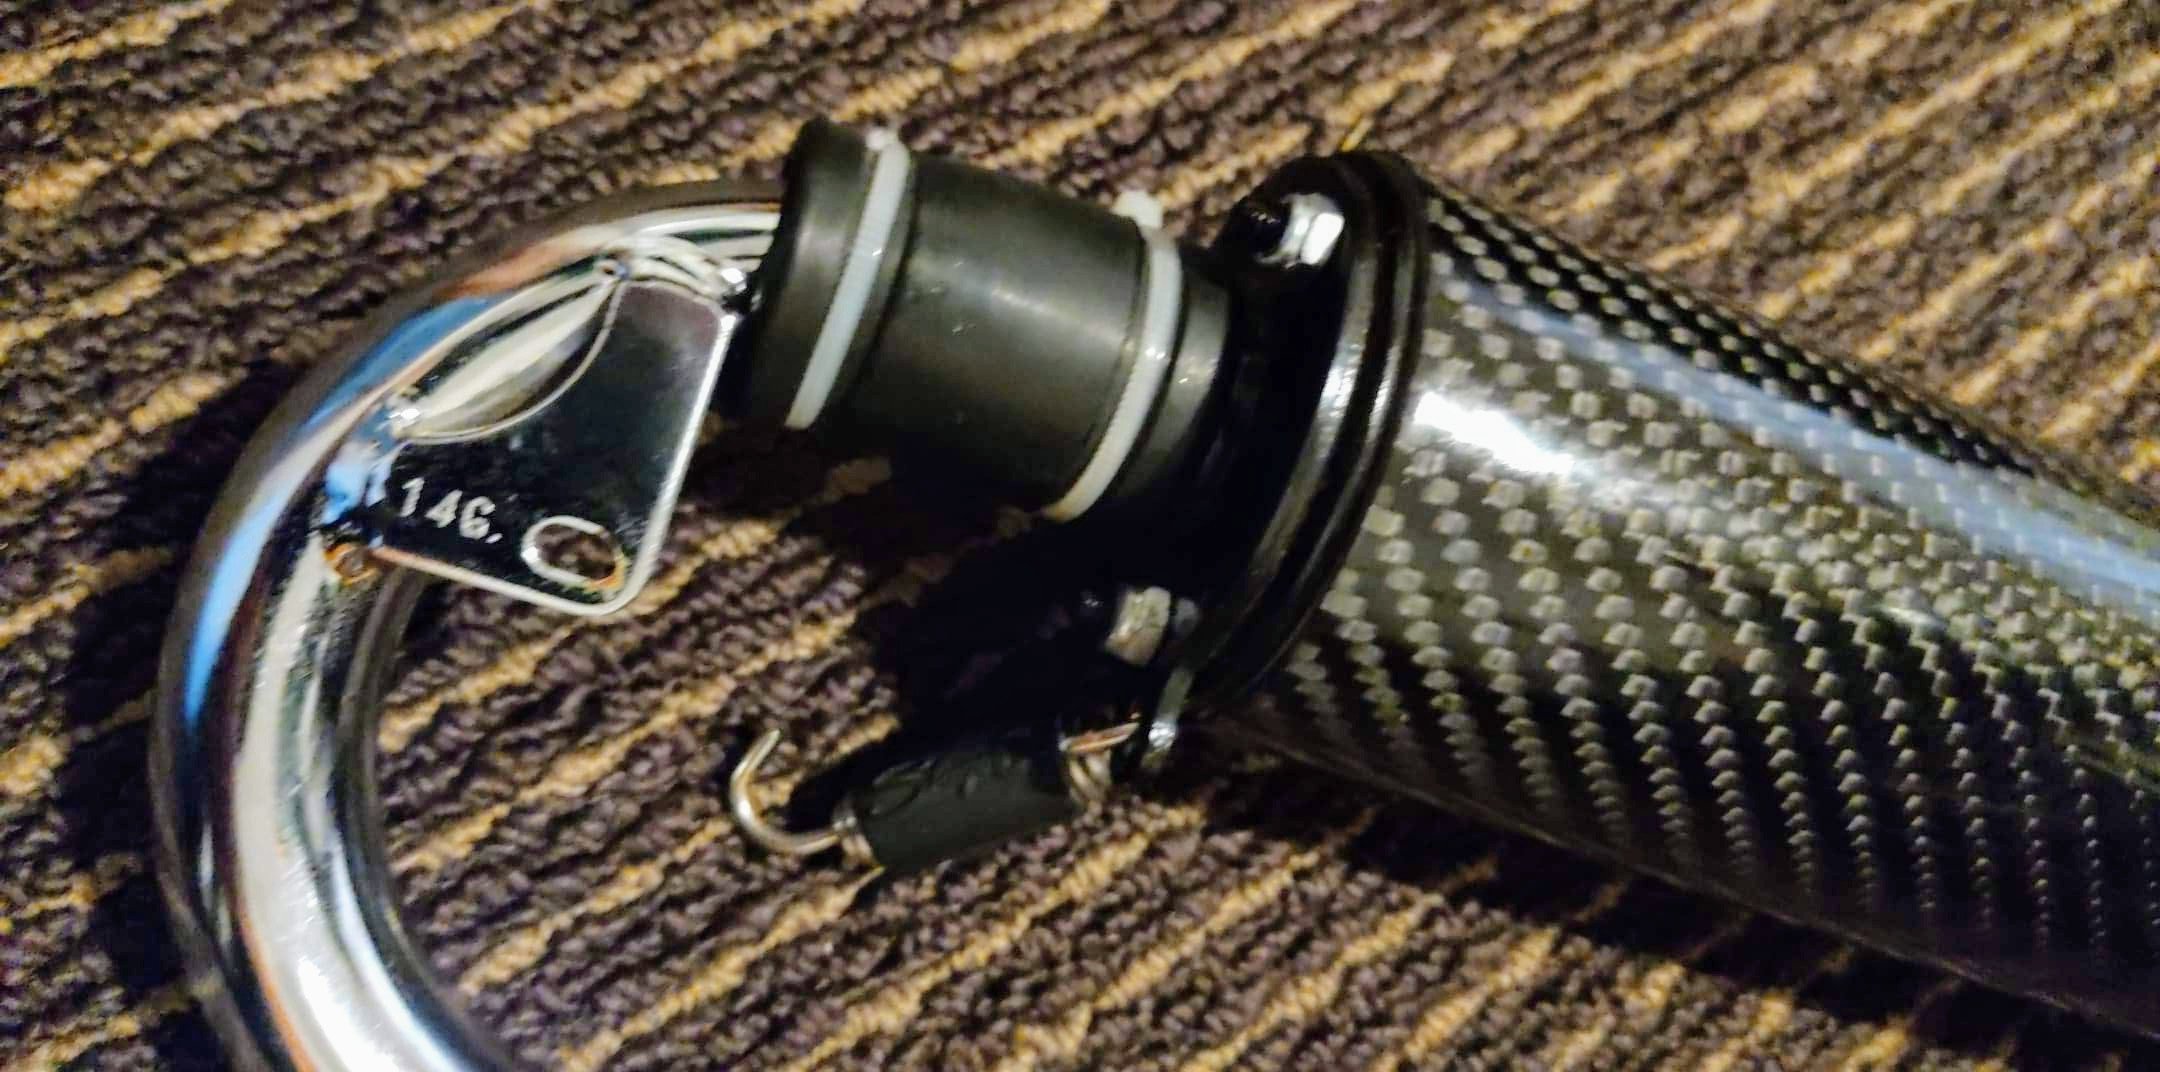
Cleaned up the kickstart by filling in a few spots with TIG filler then ground it back, swapped out the glass beads in my blast cabinet for some medium grit garnet, that worked real well to key the pipe and kicker. Quick coat of CRC Hot Black high temp paint (highly recommend it over VHT!) And old pair of pliers + a chopped up drill bit were repurposed into a pin wrench Assembled the pipe, pics are a bit crap, we changed to LED bulbs and my camera isn't loving it. Ended up grabbing a 32x38x2 copper flat washer to use as the gasket, really needed 32x40 so I used a smear of maniseal to glue it into position on the flange, fingers crossed that it didn't move and that a non-crush washer actually seals! Threw the tank etc back on, finally looks like a bike again! Also noticed the other night that the kickstarter is meant to be on an angle, gave it a go and while still not great, I can actually get my foot on the peg now lol Long rides aren't going to be too comfy hahaha Just need to fill the gearbox with oil, drain the petrol tank and mix up a couple liters of 2t for it to run on while the oil lines prime and it should be all go to fire up! Will print off a degree wheel and chuck a timing light on to make sure I got it at least close lol
3 points
-
I had hoped to work on this, this weekend but I got called in to work both days and managed to somehow do a number on a muscle in my right shoulder. As if life wasn't painful enough without adding a physical component to it. Have these instead.
3 points
-
3 points
-
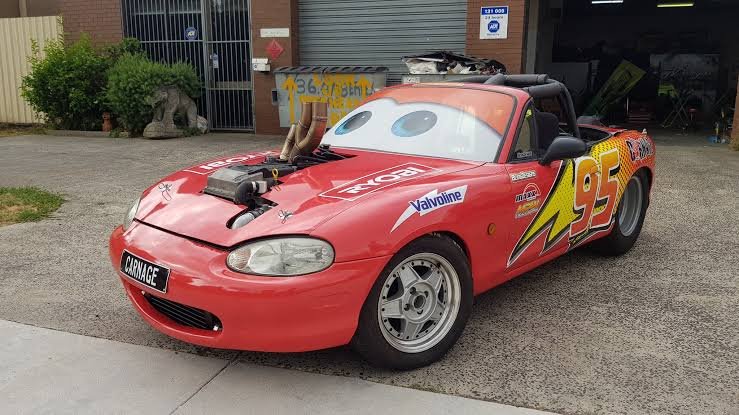
She's got a Barra mate. Bolts straight in because Mazda and Ford share parts....3 points
-
I have used house foam underfelt its quite nice easy to cut and doesn't really soak up water. Changed back to thick traditional underfelt just sits better over all. Also easy to get from my suppliers and used on a bunch of other things. Either works just as fine.2 points
-
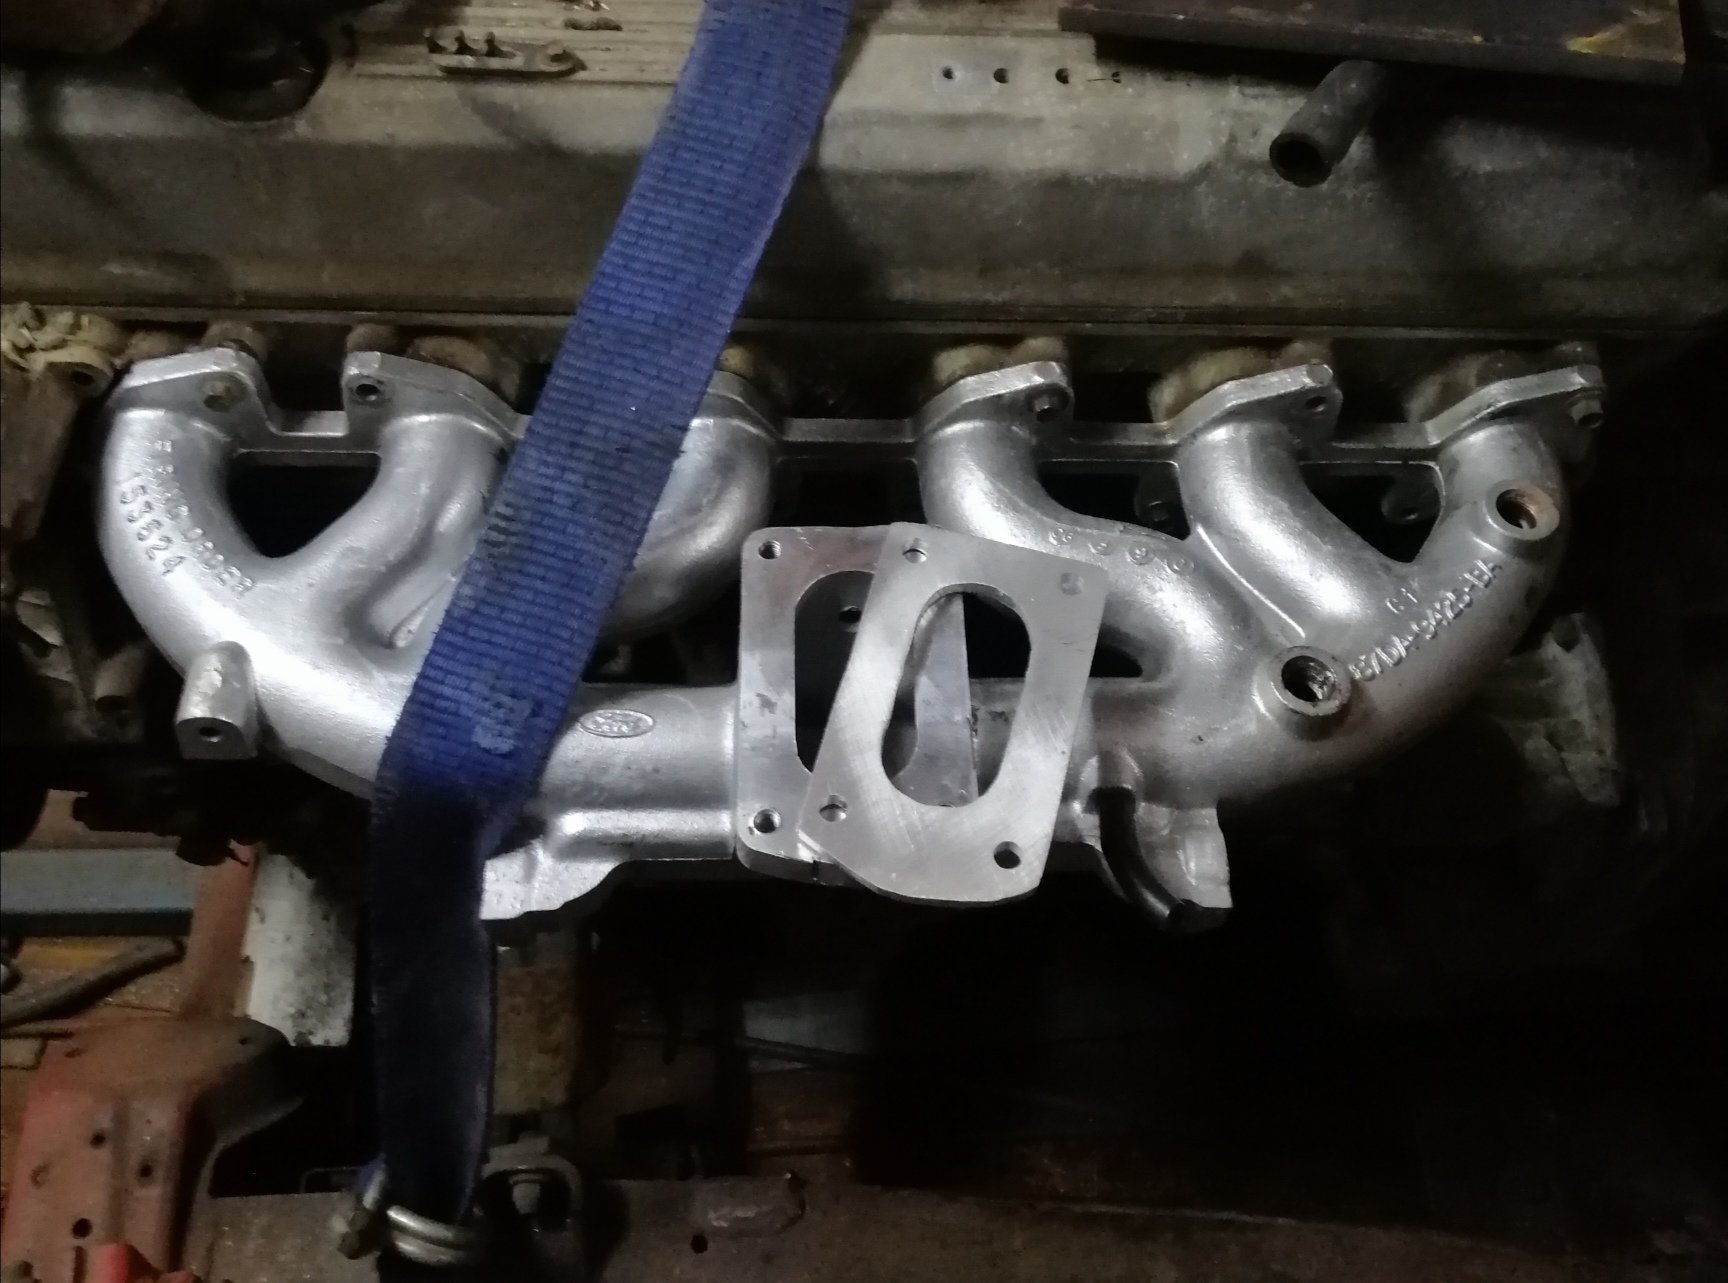
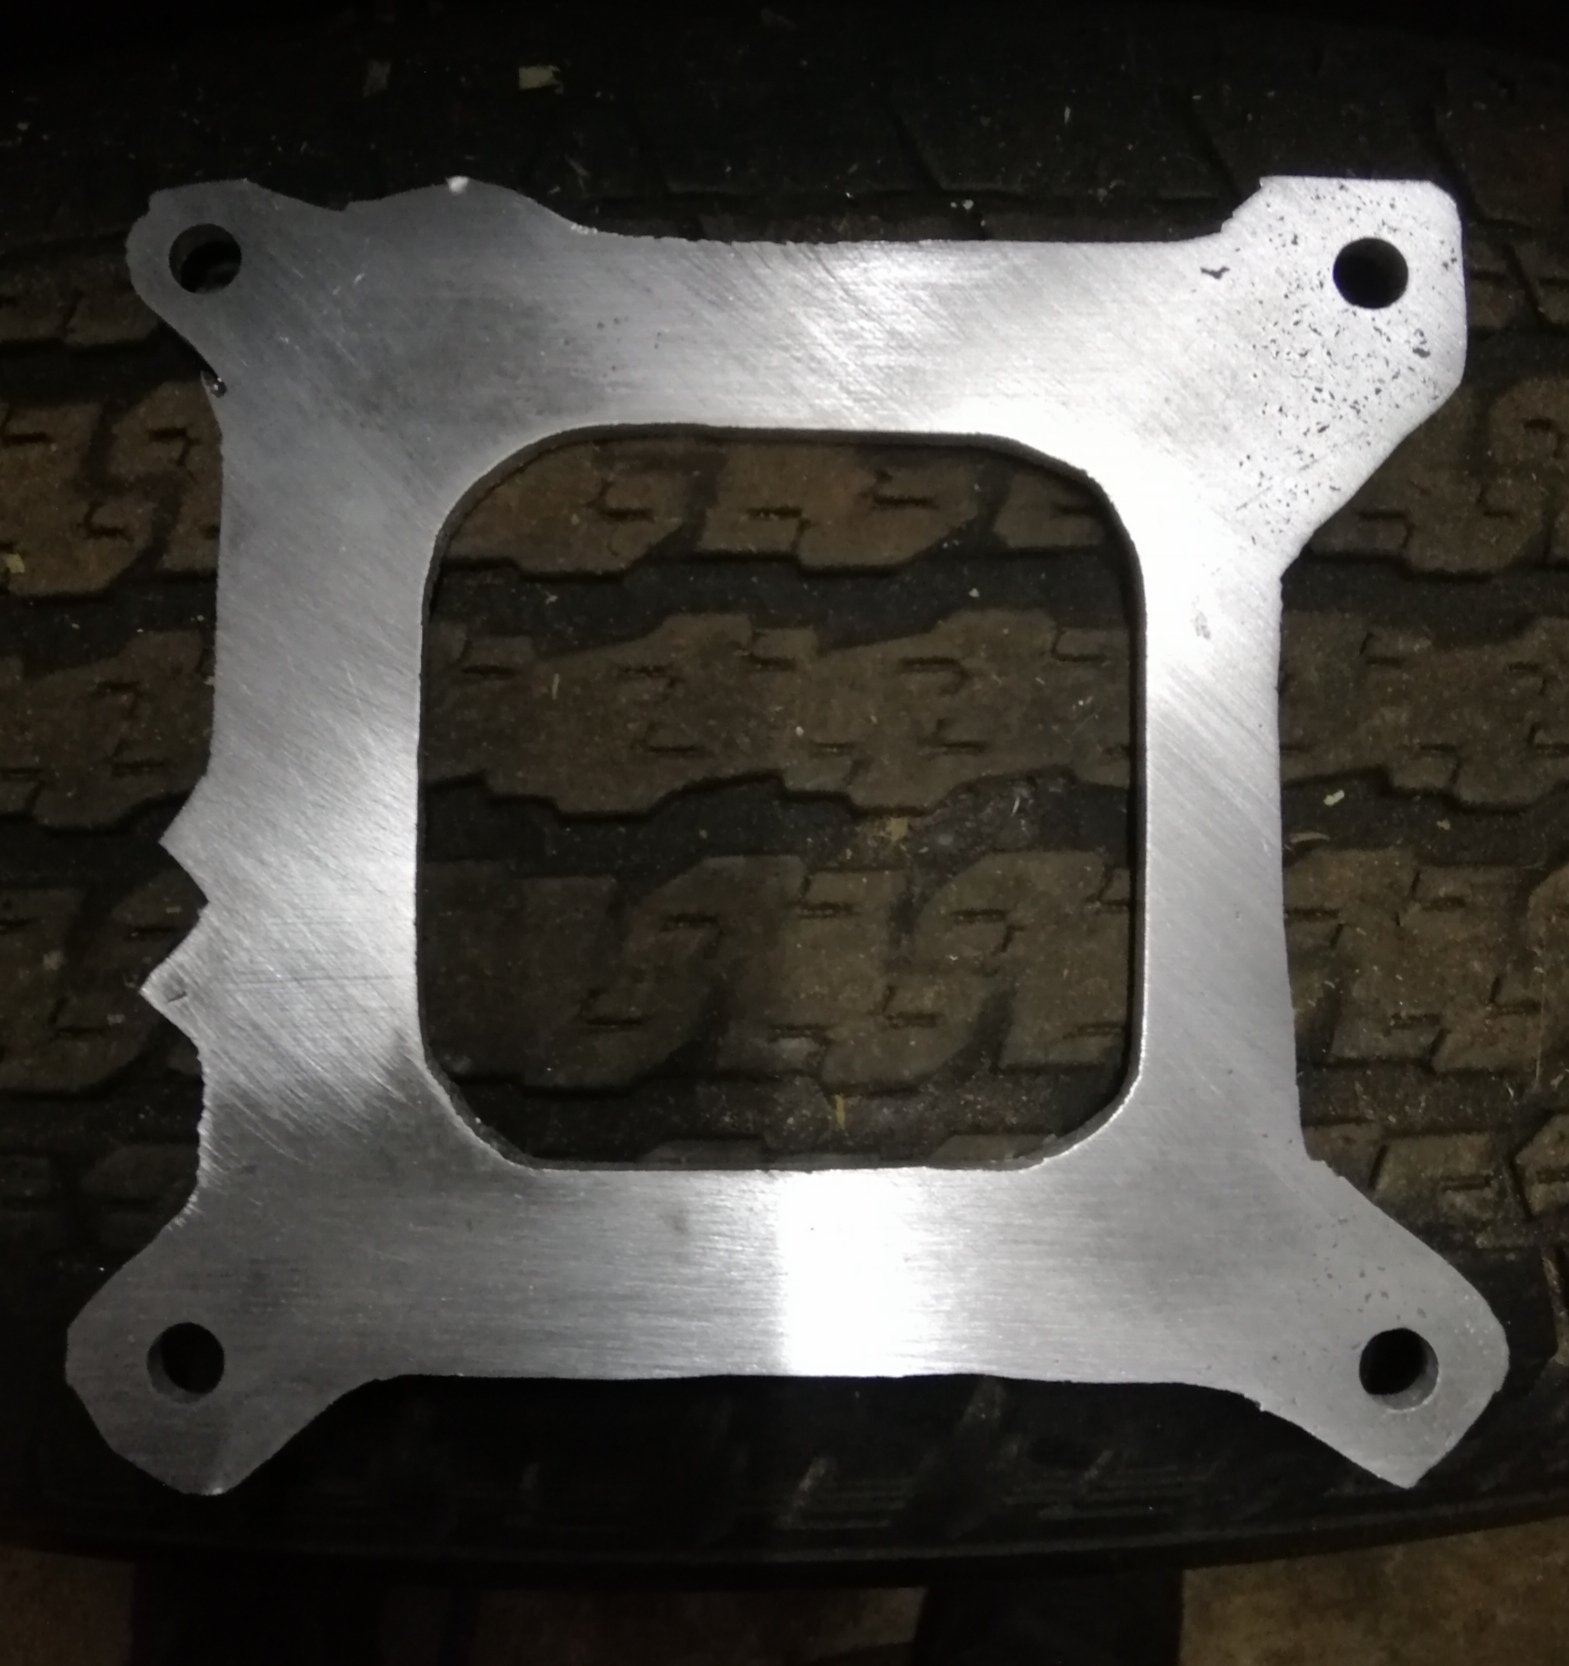
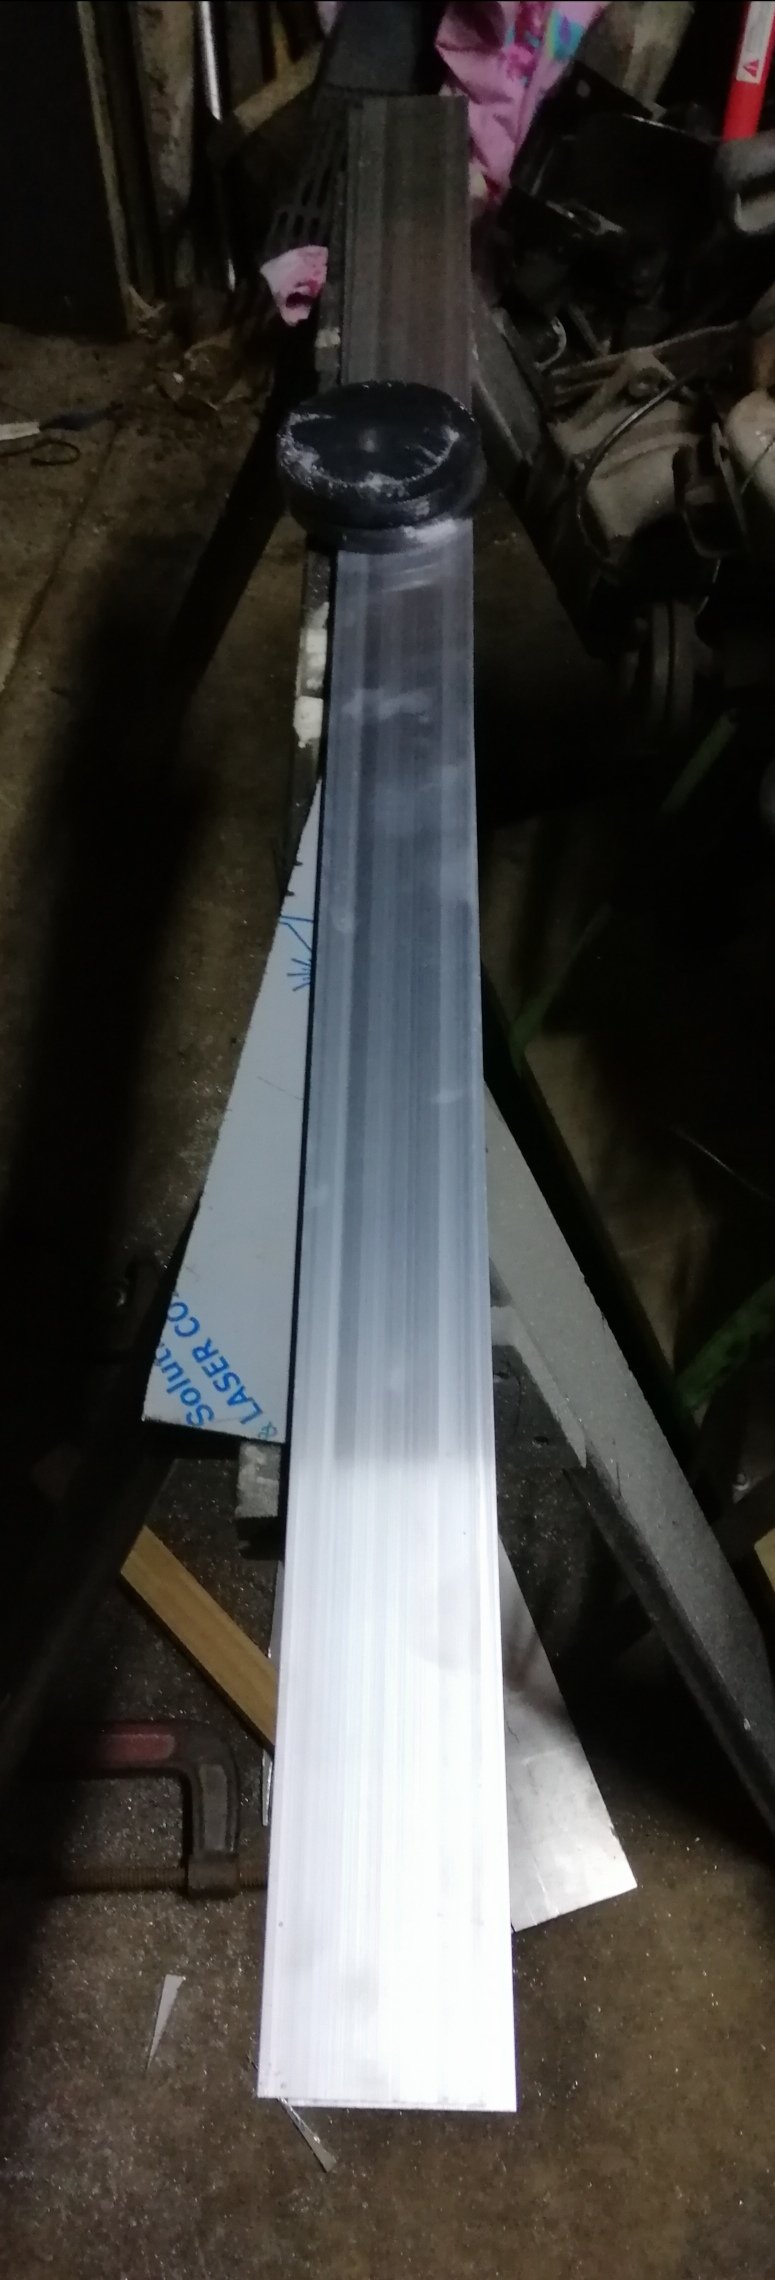
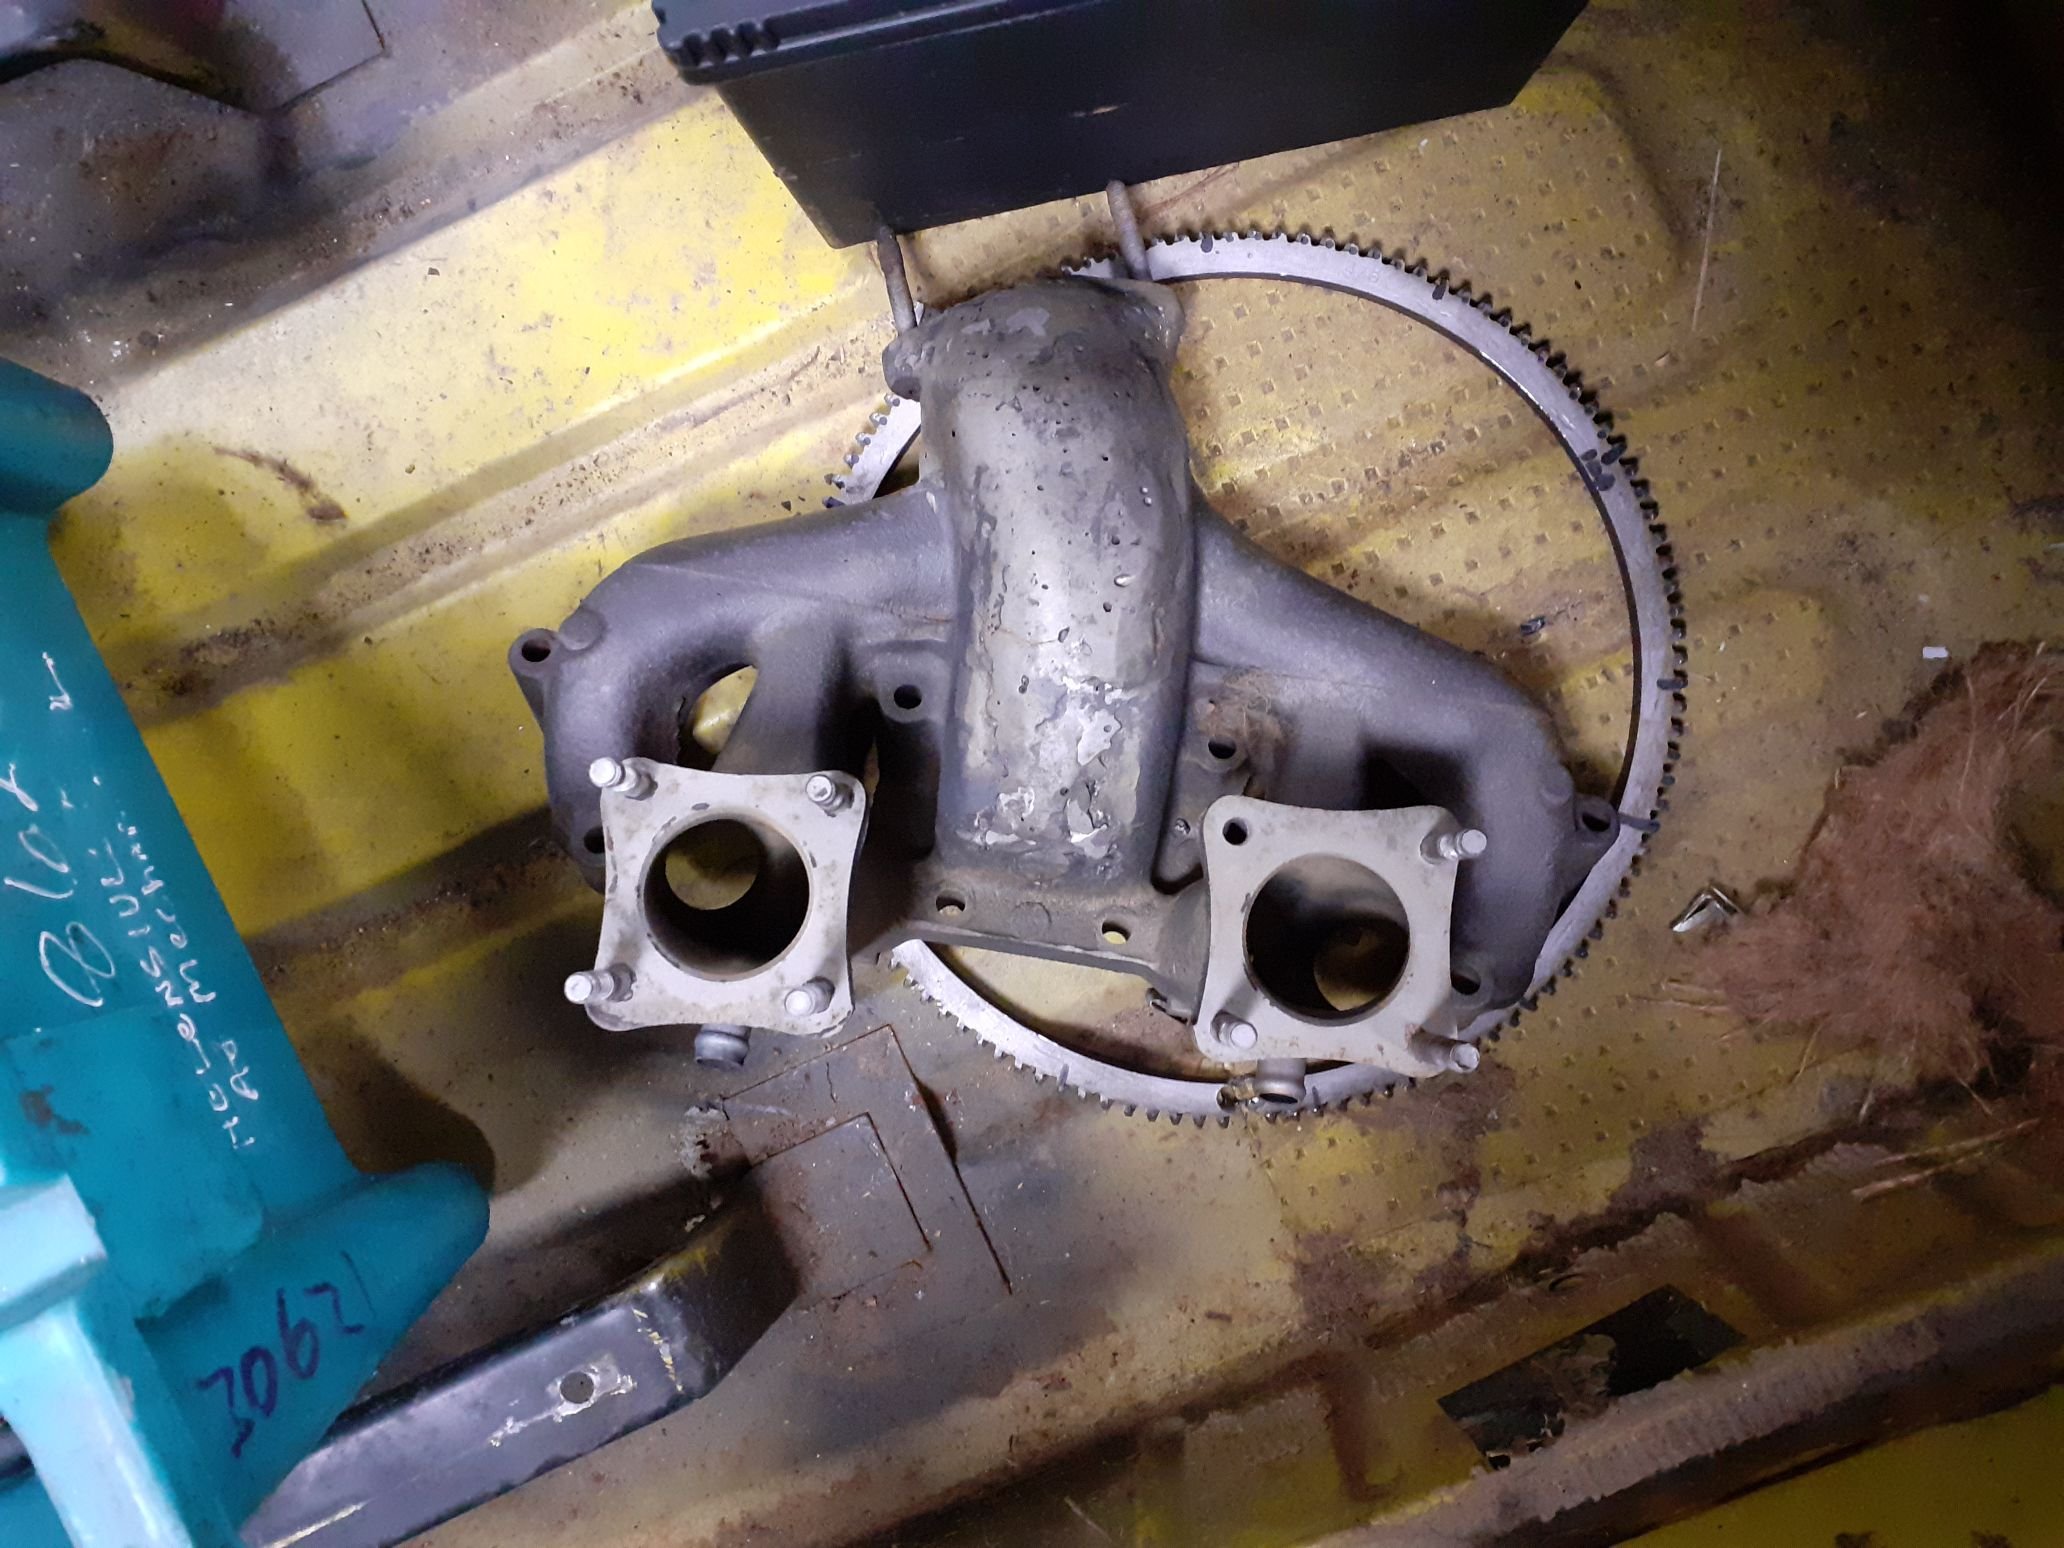
Steam cleaned manifold and its come up good, too good. Looks out of place. Went to one of our companies truck body builders and asked to raid his scrap bin. Acquired a nice piece of 8mm plate and cut bottom and top plates out. Raided works scrap pile for some 3mm plate and tried to cut it into strips. Failed miserably. So bought a half length of 75x3mm. This will be cut into sections to make the riser.
2 points
-
After stripping the engine, WAER found the cast iron manifold had been badly repaired in the past and was beyond salvation. Thankfully there was a spare in my stash of parts, so that saved the day. Fortunately the worn ring gear was easily replaced.
2 points
-
These are $36inc each at Trade Zone ATM, picked them up this morning.2 points
-
Usually he doesn't do it. Just gets one of his plebs to do the running around. Well that's probably why he can travel 2.5 hours for that stuff. If anyone wants lessons I'm sure @MRWEST can pass on brodies number. (inside joke)2 points
-
Hell yeah! Such a tidy job all round looks great.2 points
-
Yep i am, I know Steve through the Impala for years so might as well use someone i know was the theory, 2.5 hour tow each way though bit of a mish haha2 points
-
Iv got something that was in there but need to check it actually fits properly or not. Yes boooyyy haha2 points
-
Amazon. Came out to like $190 ish?2 points
-
@flyingbrick had it on his honda MB 100.2 points
-
@JustHarry enjoying the start of the takaka hill road
2 points
-
I understand your pine at the fuel injection/elec start life now. It's quite superior.2 points
-
M8, I don't know any of you, I'm just out for a ride.2 points
-
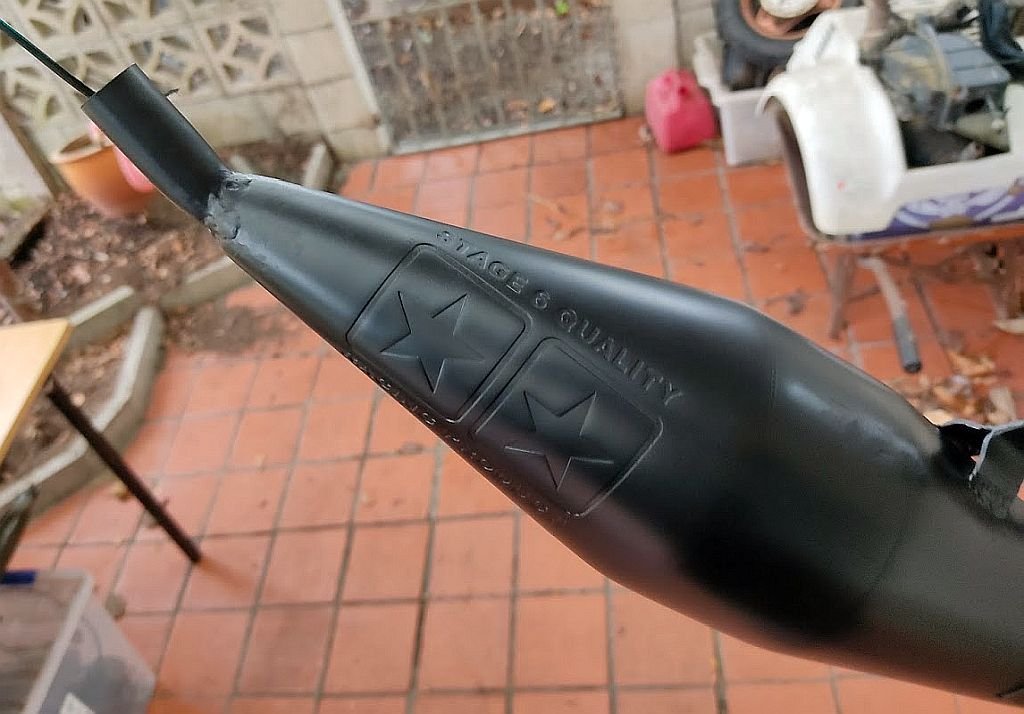
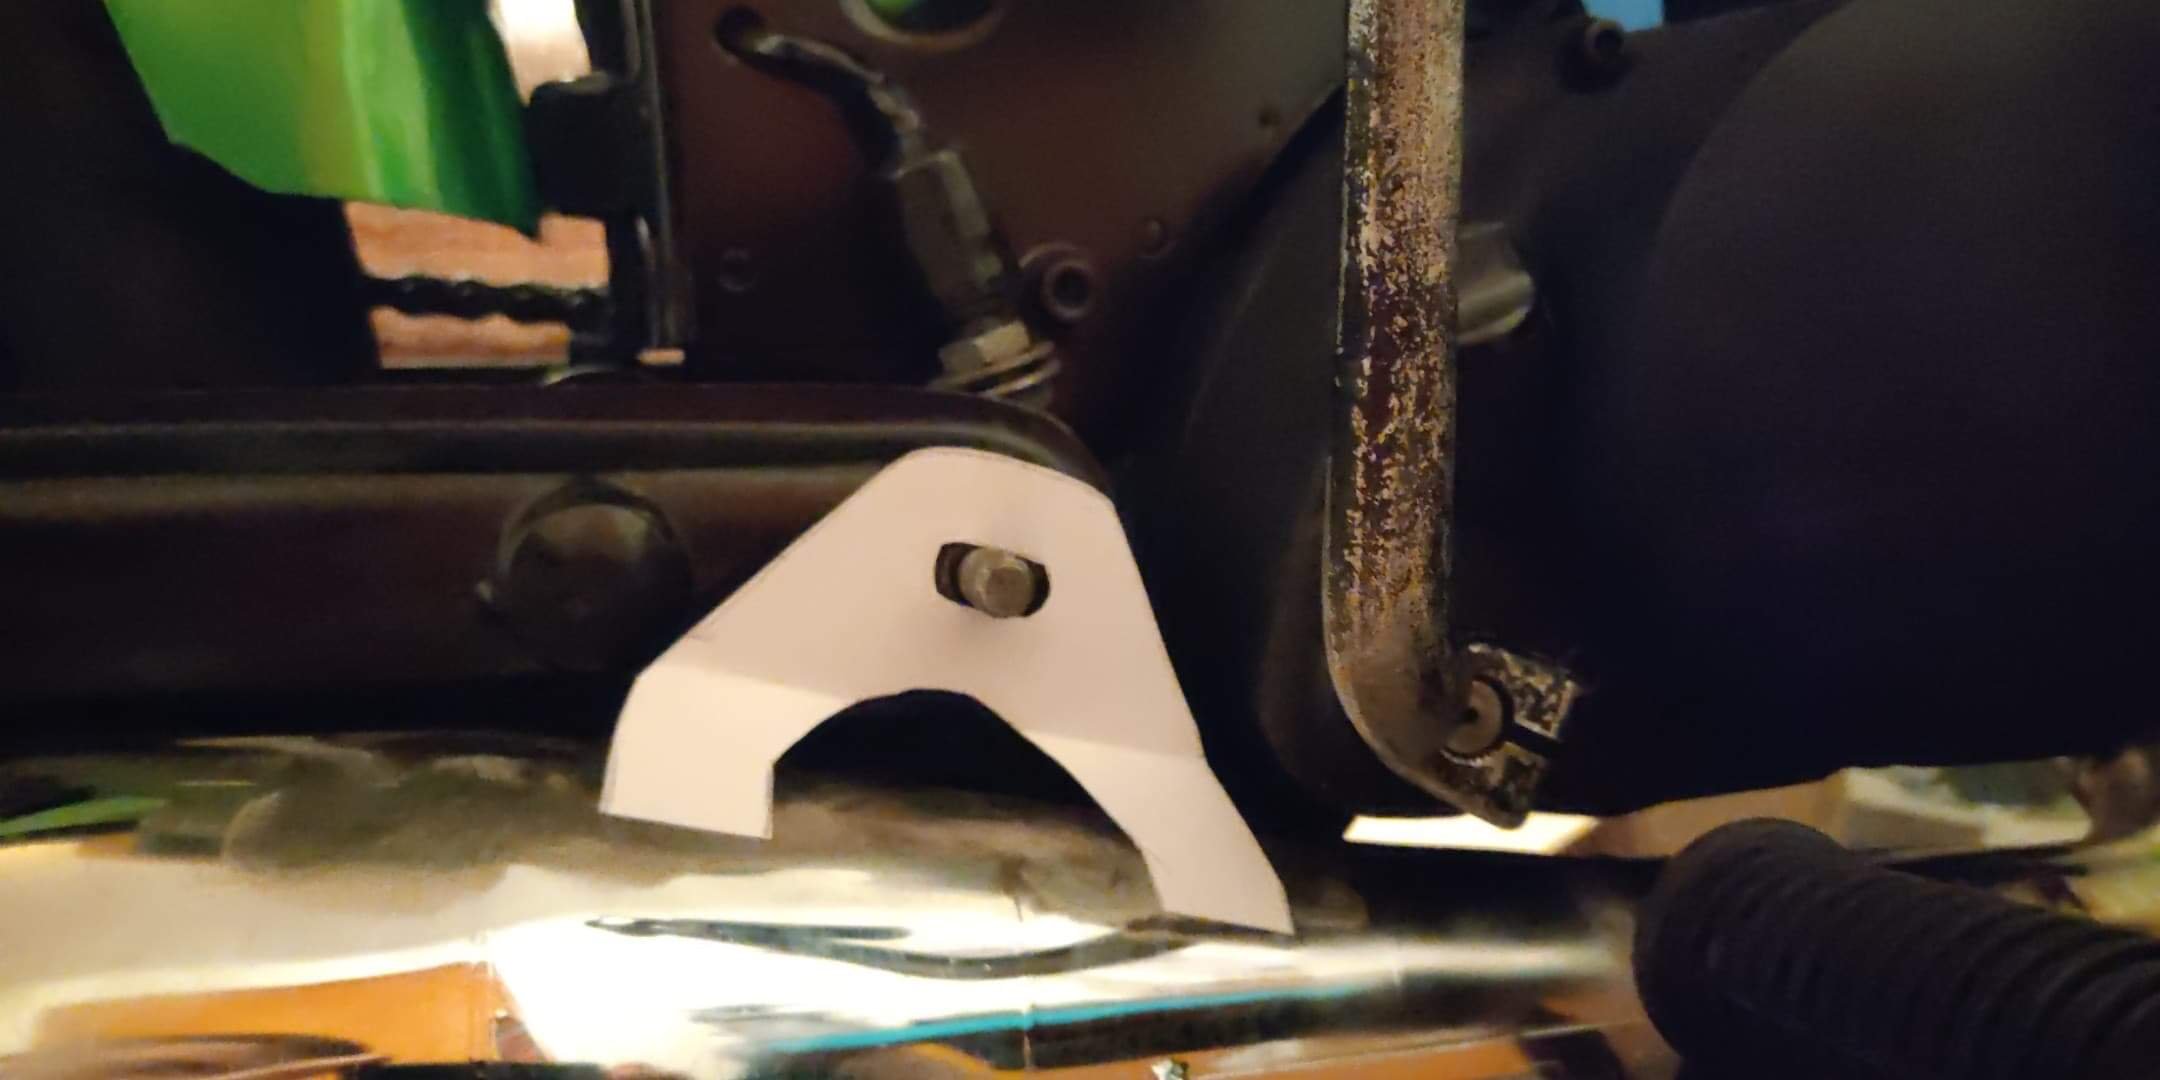
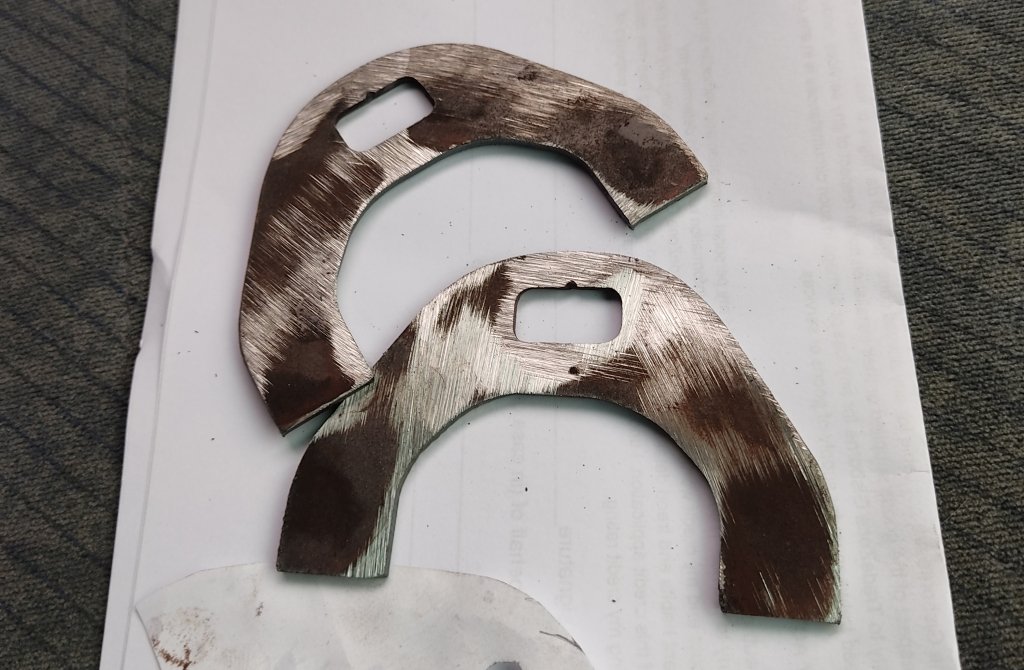
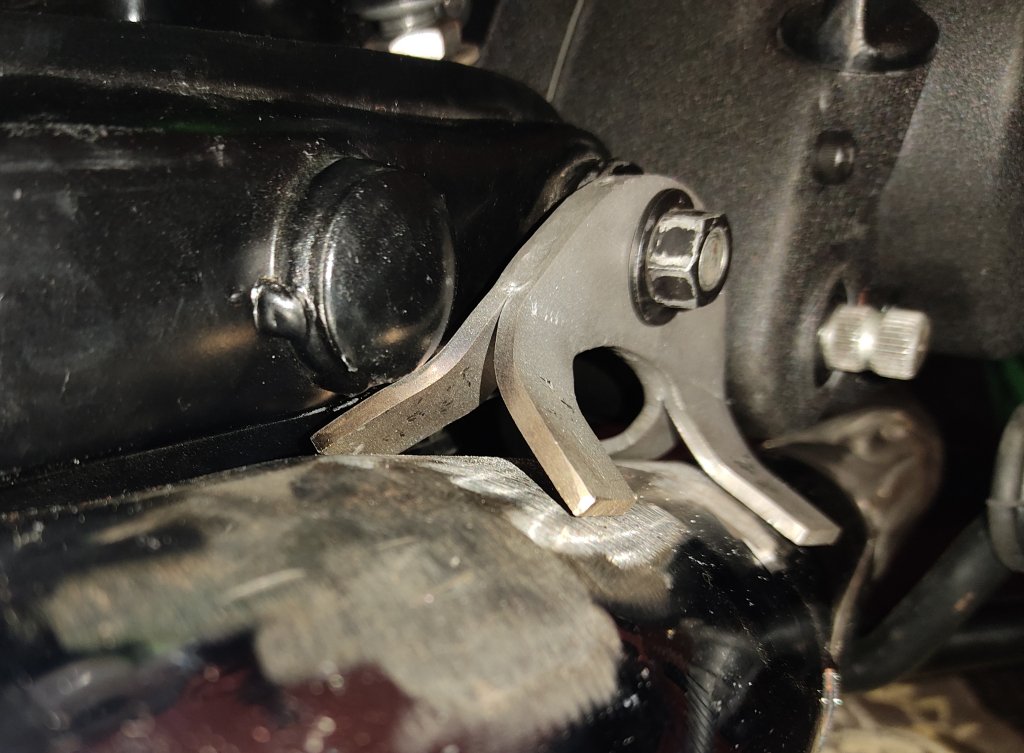
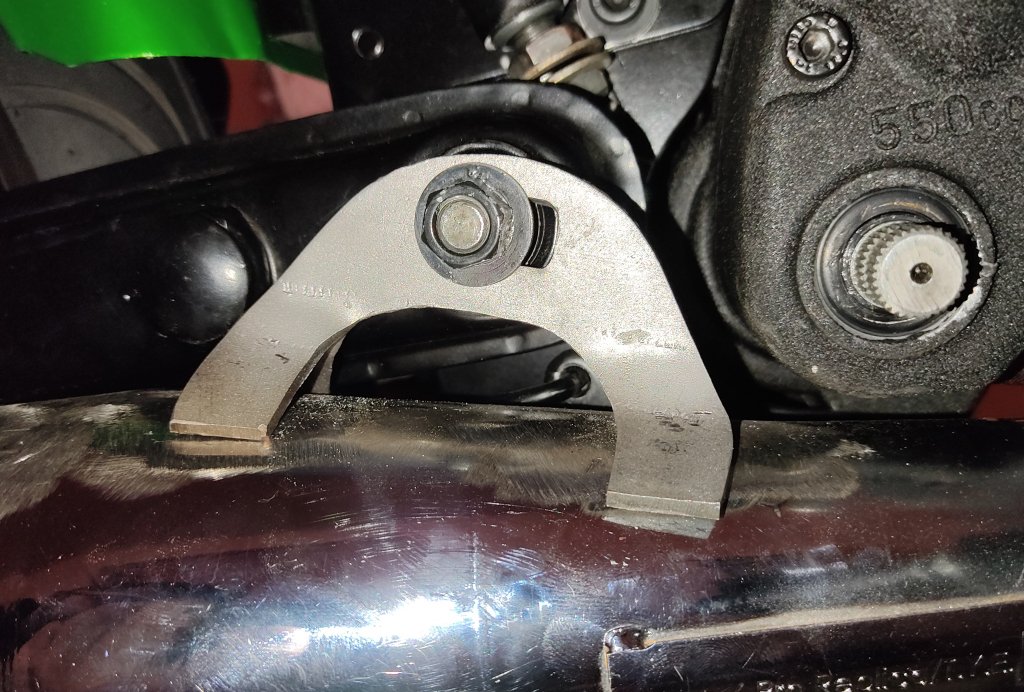
Maybe lol, either way I think the carb is going to be louder than the pipe ha! CAD prototyping lol I really want one of these!! Cleaned up and welded together for a test fit Bit chunky, I'd spec'd 2mm plate but they got cut from 3.2, but having it in the steel has shown a few small changes I'd like to make to the shape, so will grab some 2mm plate tomorrow and try again. Am pretty happy with the way it's going though, should be a more than solid mount!
2 points
-
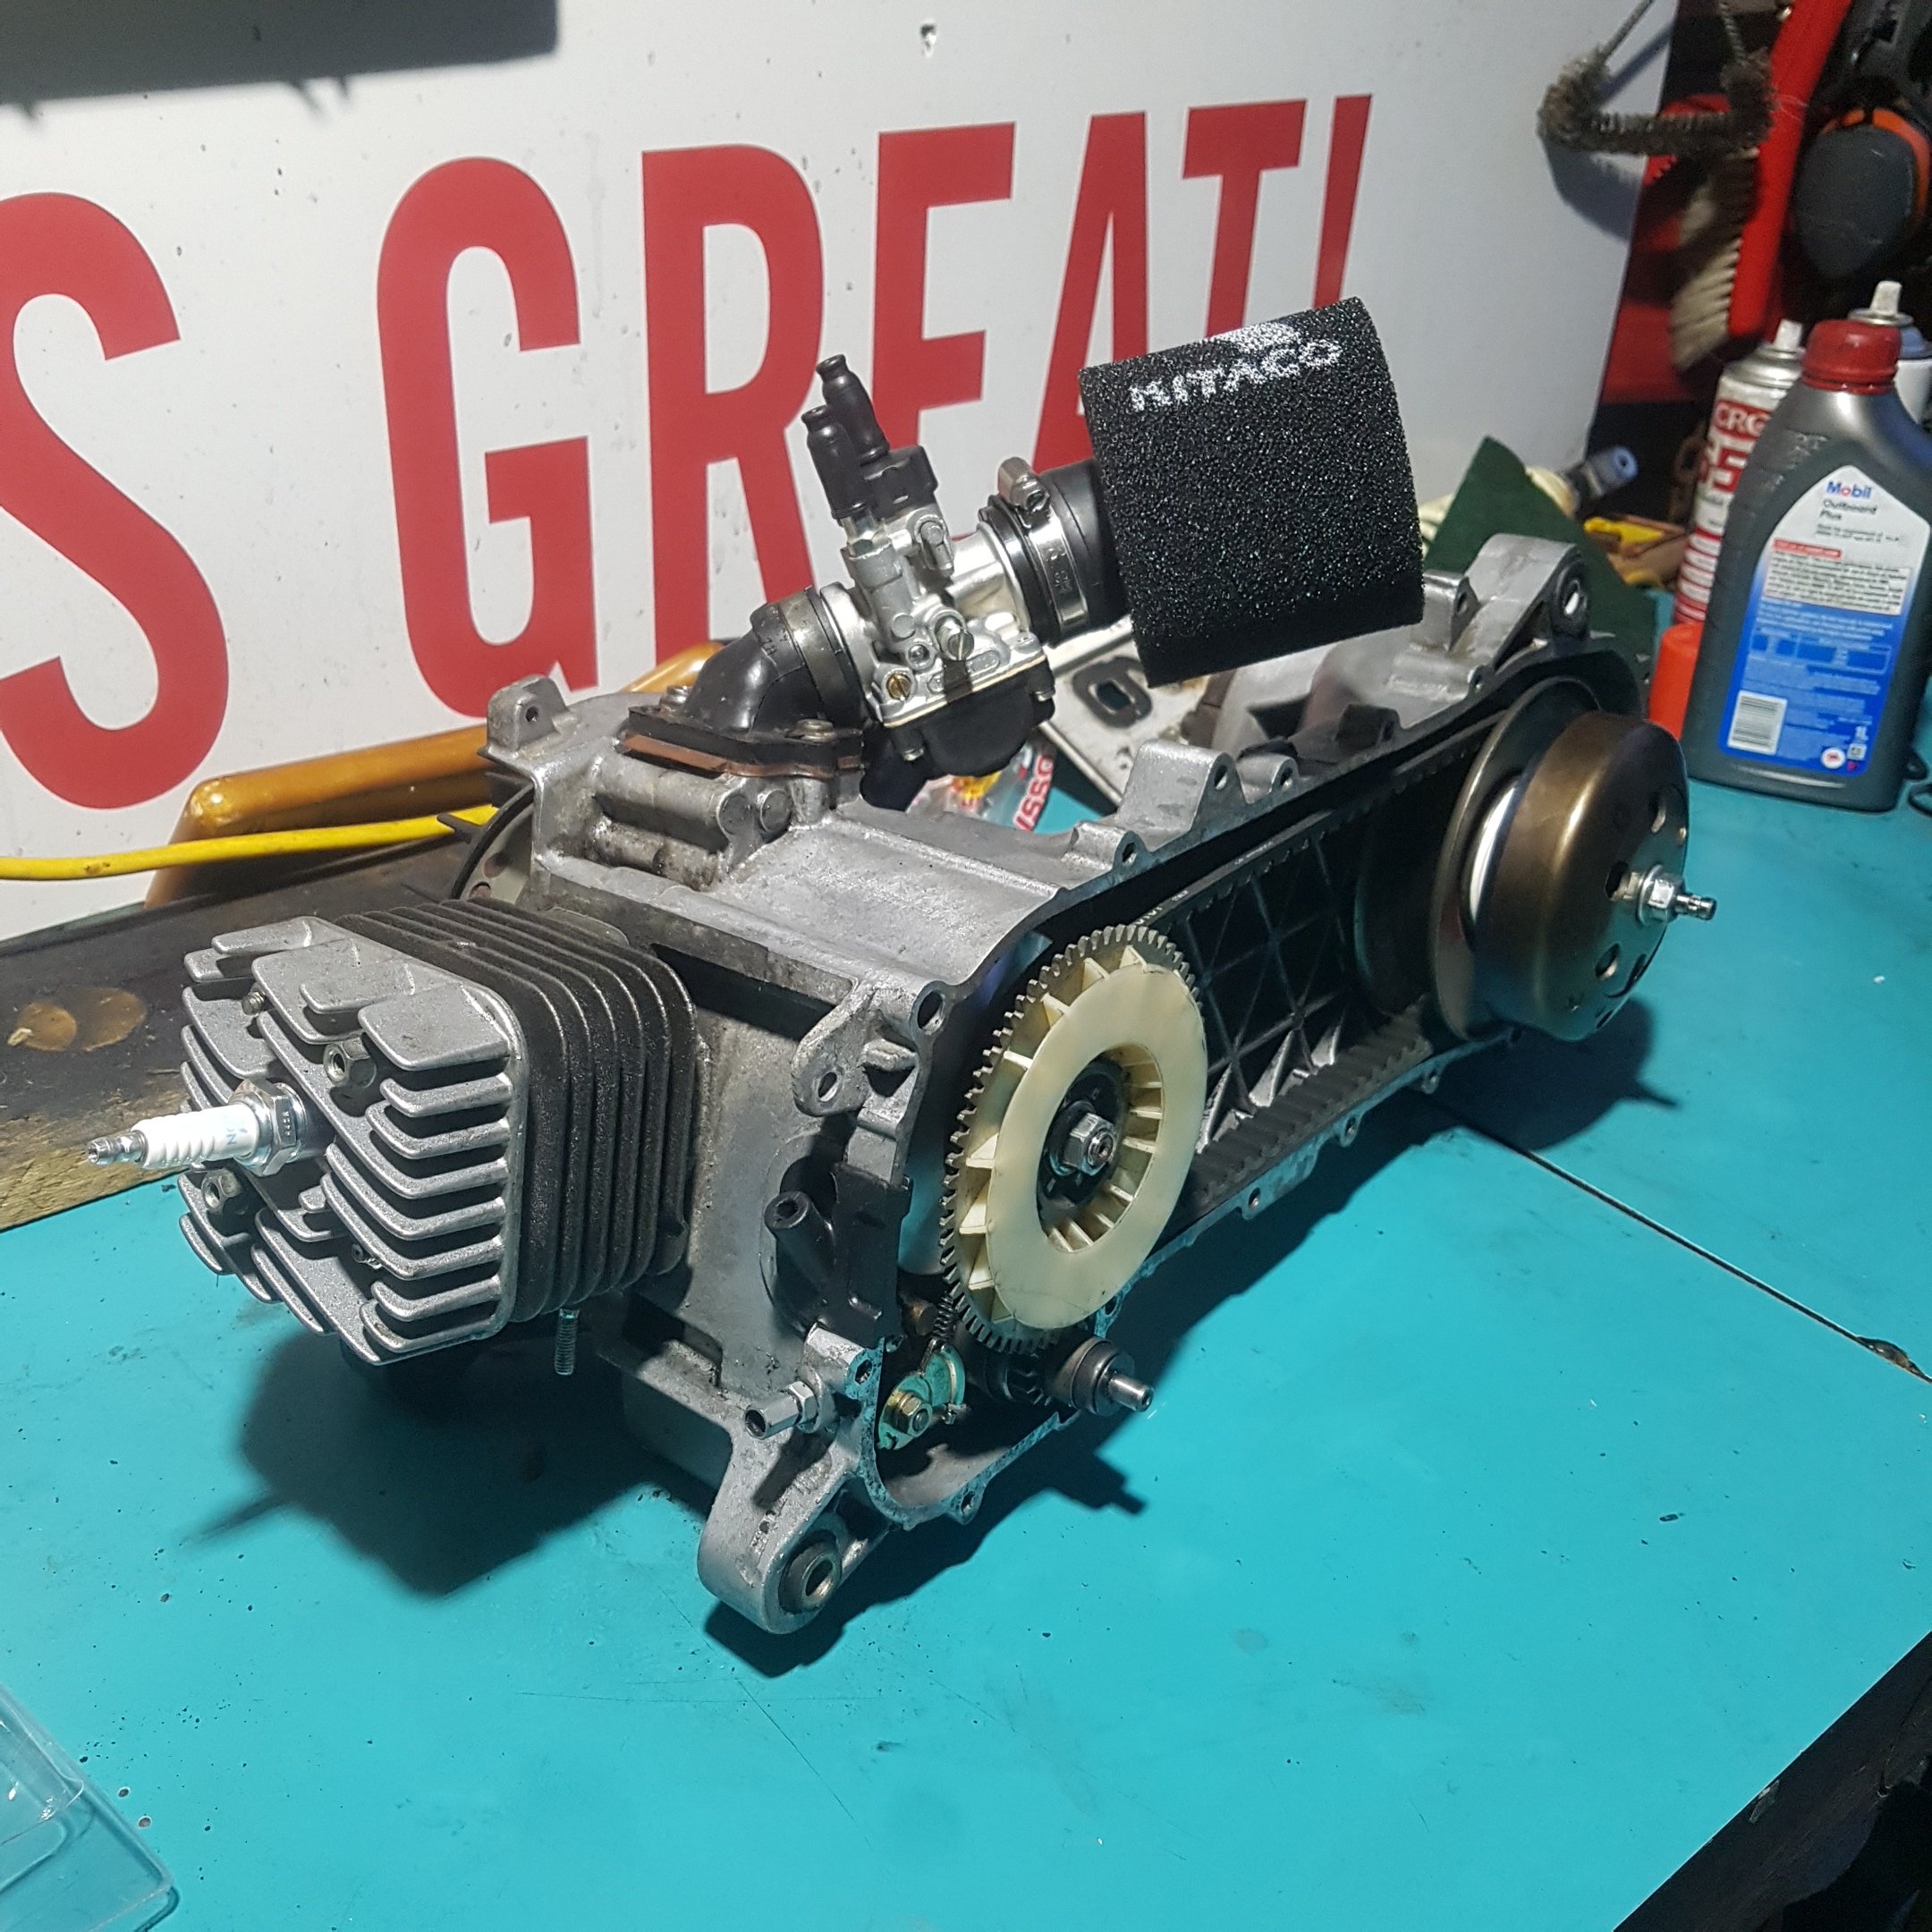
malossi 70cc cylinder kit, malossi variator kit, 21mm carb, carbon reeds, 140 main jet (standard 92), and bpr9hs spark plug installed
2 points
-
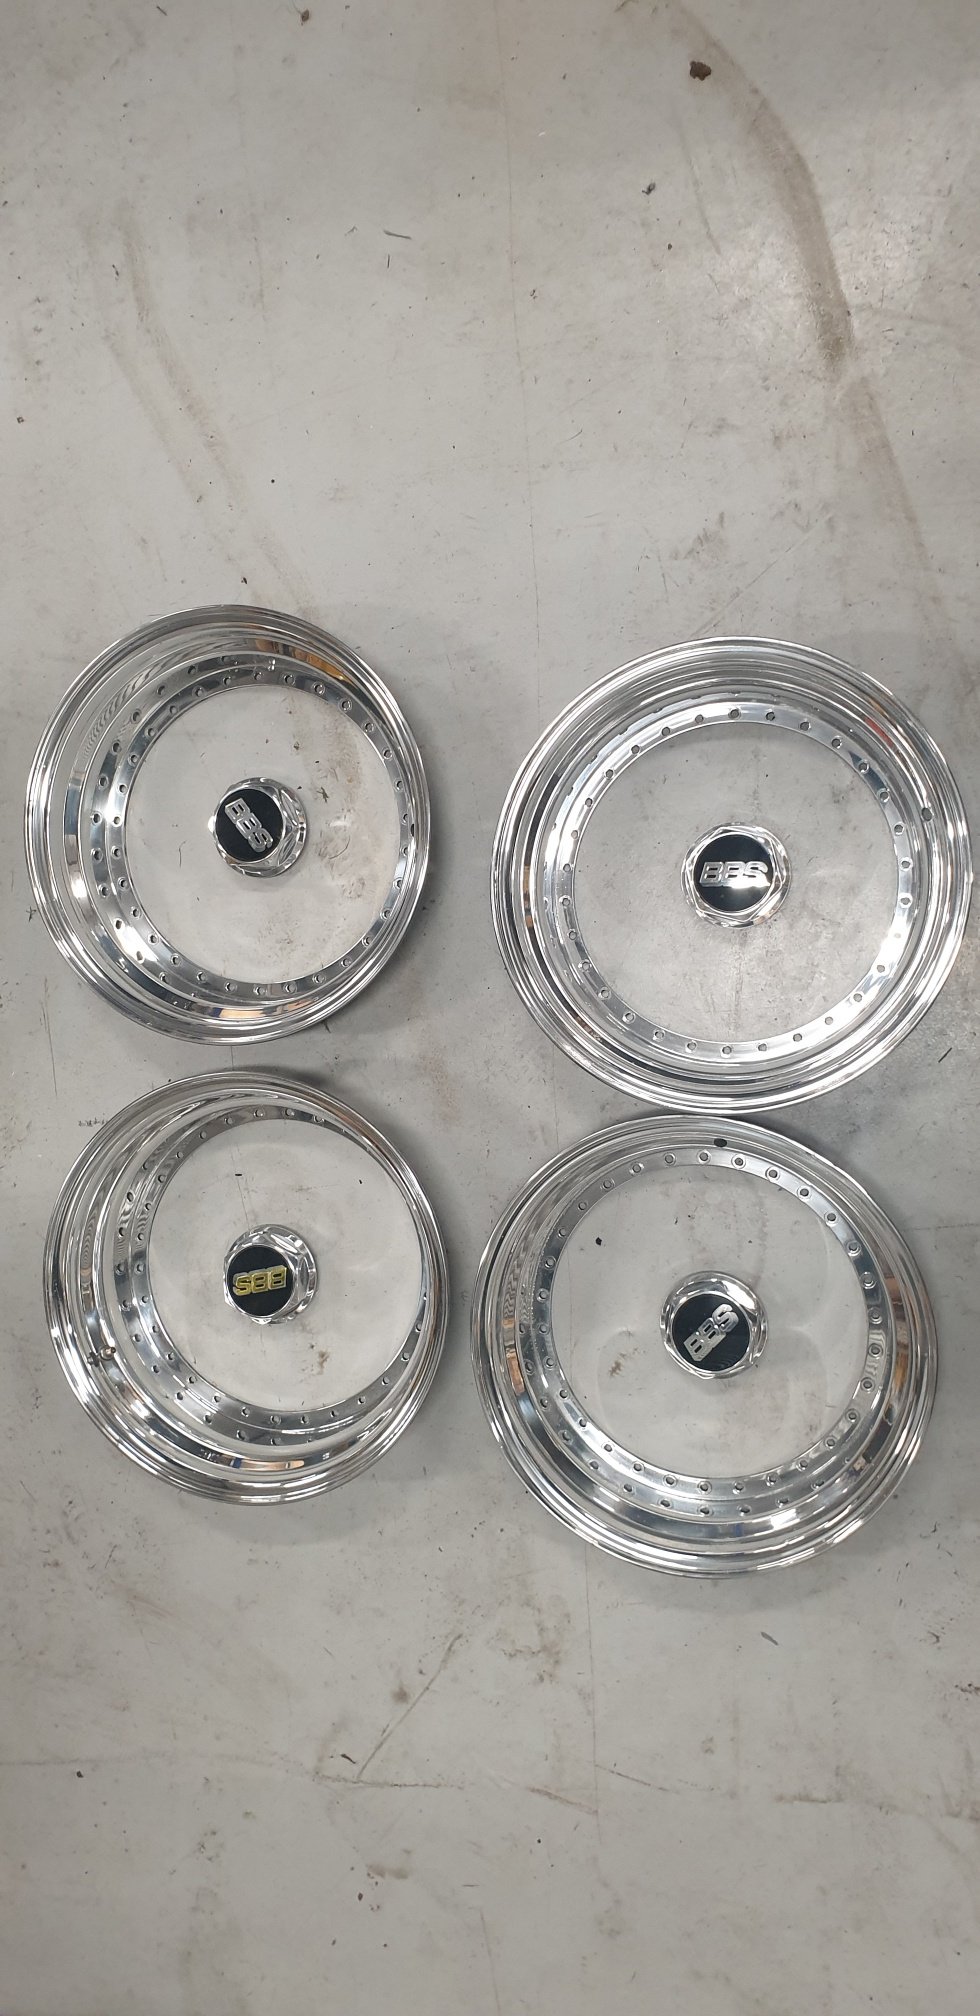
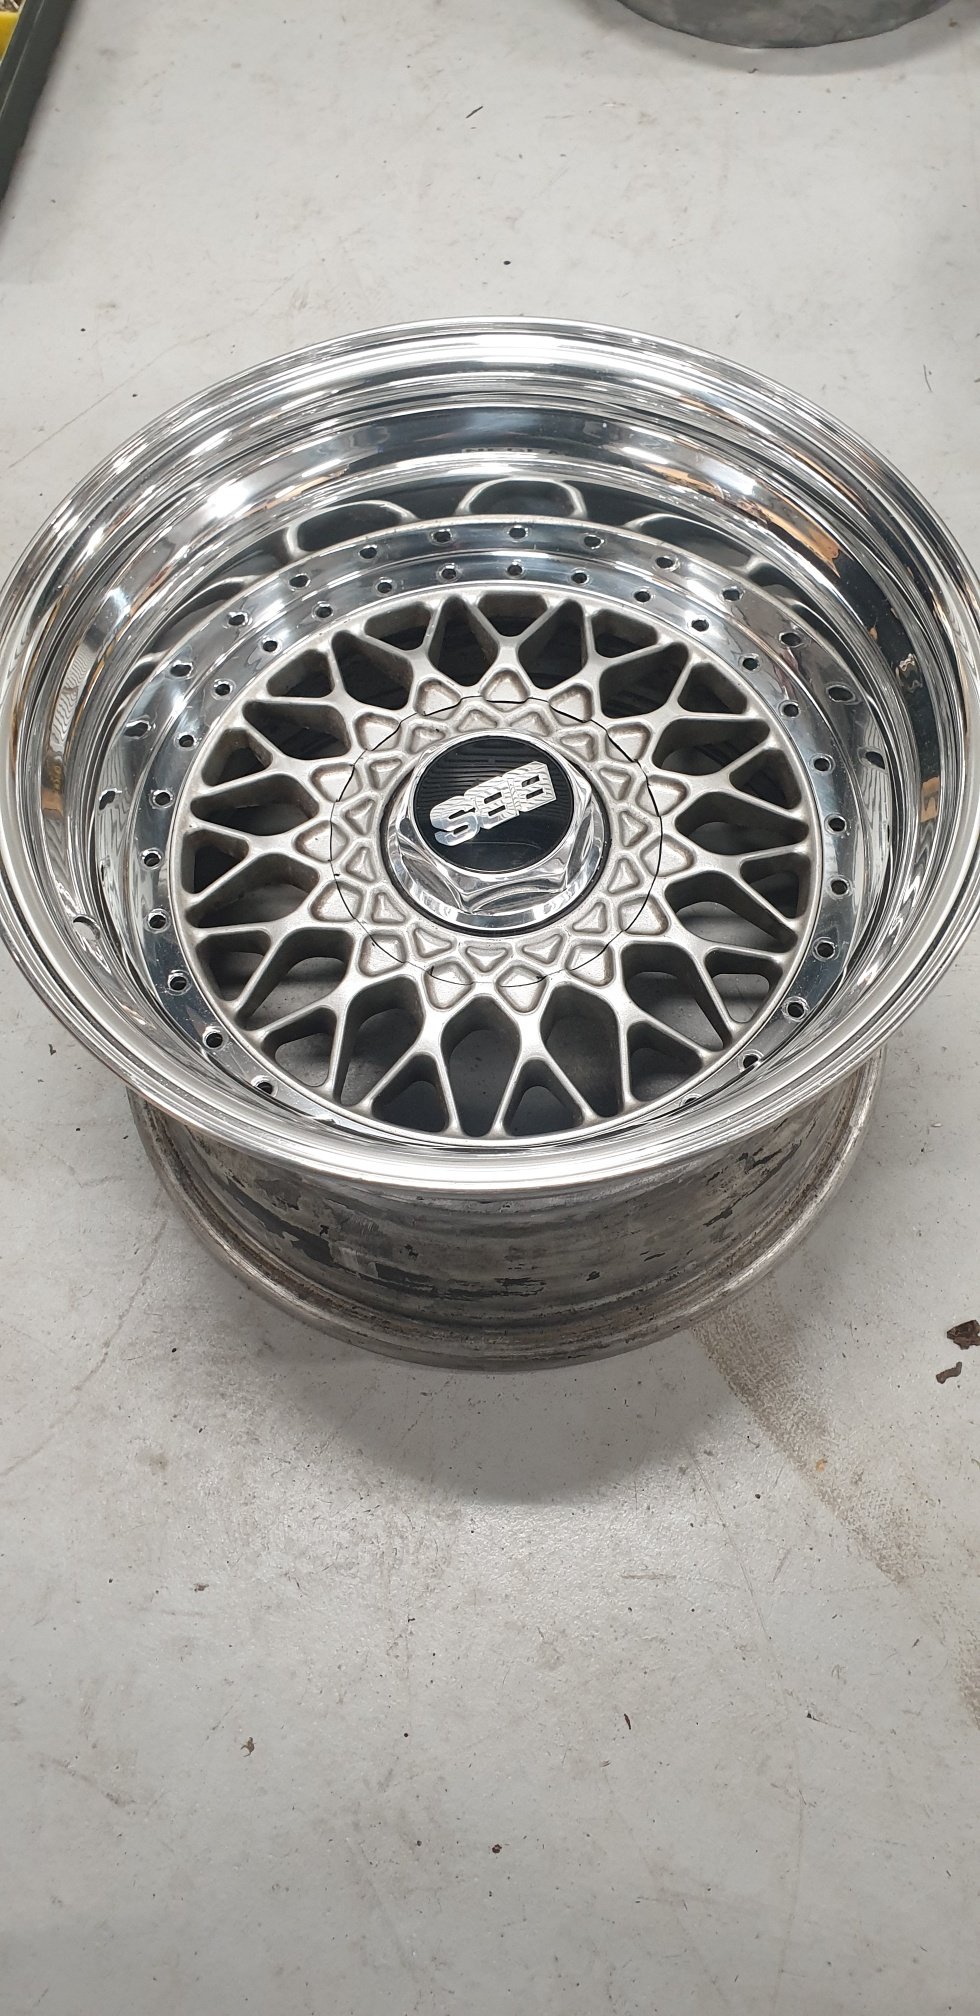
Rust repairs have progressed well, Waiting on parcel shelf to turn up so can finish that and windscreen rust off. In the meantime Toby at BOP Polishers has been hard at it getting the outter lips and centre caps of the BBS's polished up and looking mint. Stoked with the result, just got to clean the centres and rears and assemble them now!
2 points
-
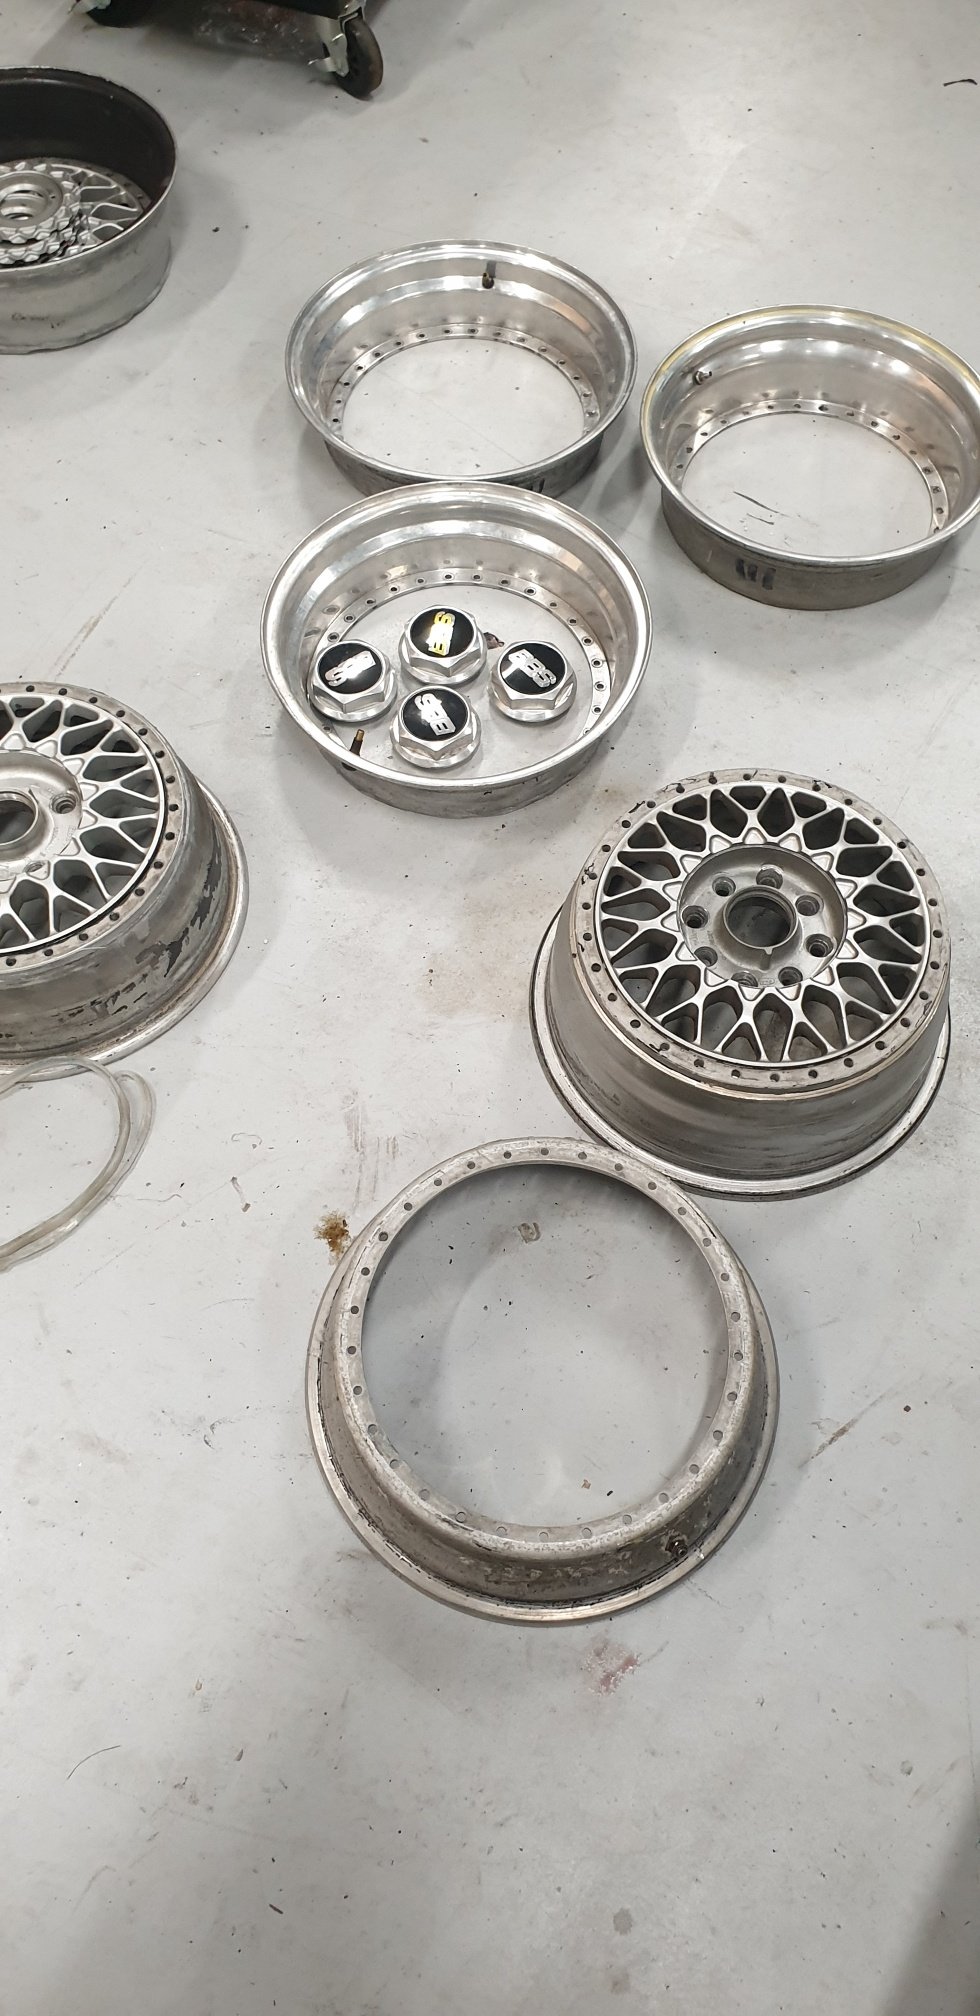
Bit of progress this week, Wheels have been split and lips dropped to Toby at BOP Polishers to give them a once over and get them 100% again. Steve at The Shed Rust Repairs has got into the car this week, Windscreen rust was worse than we could see which was probably to be expected. Nothing that cant be fixed though! Parcel shelf is out and awaiting the new one to turn up so can get that back in as well.
2 points
-
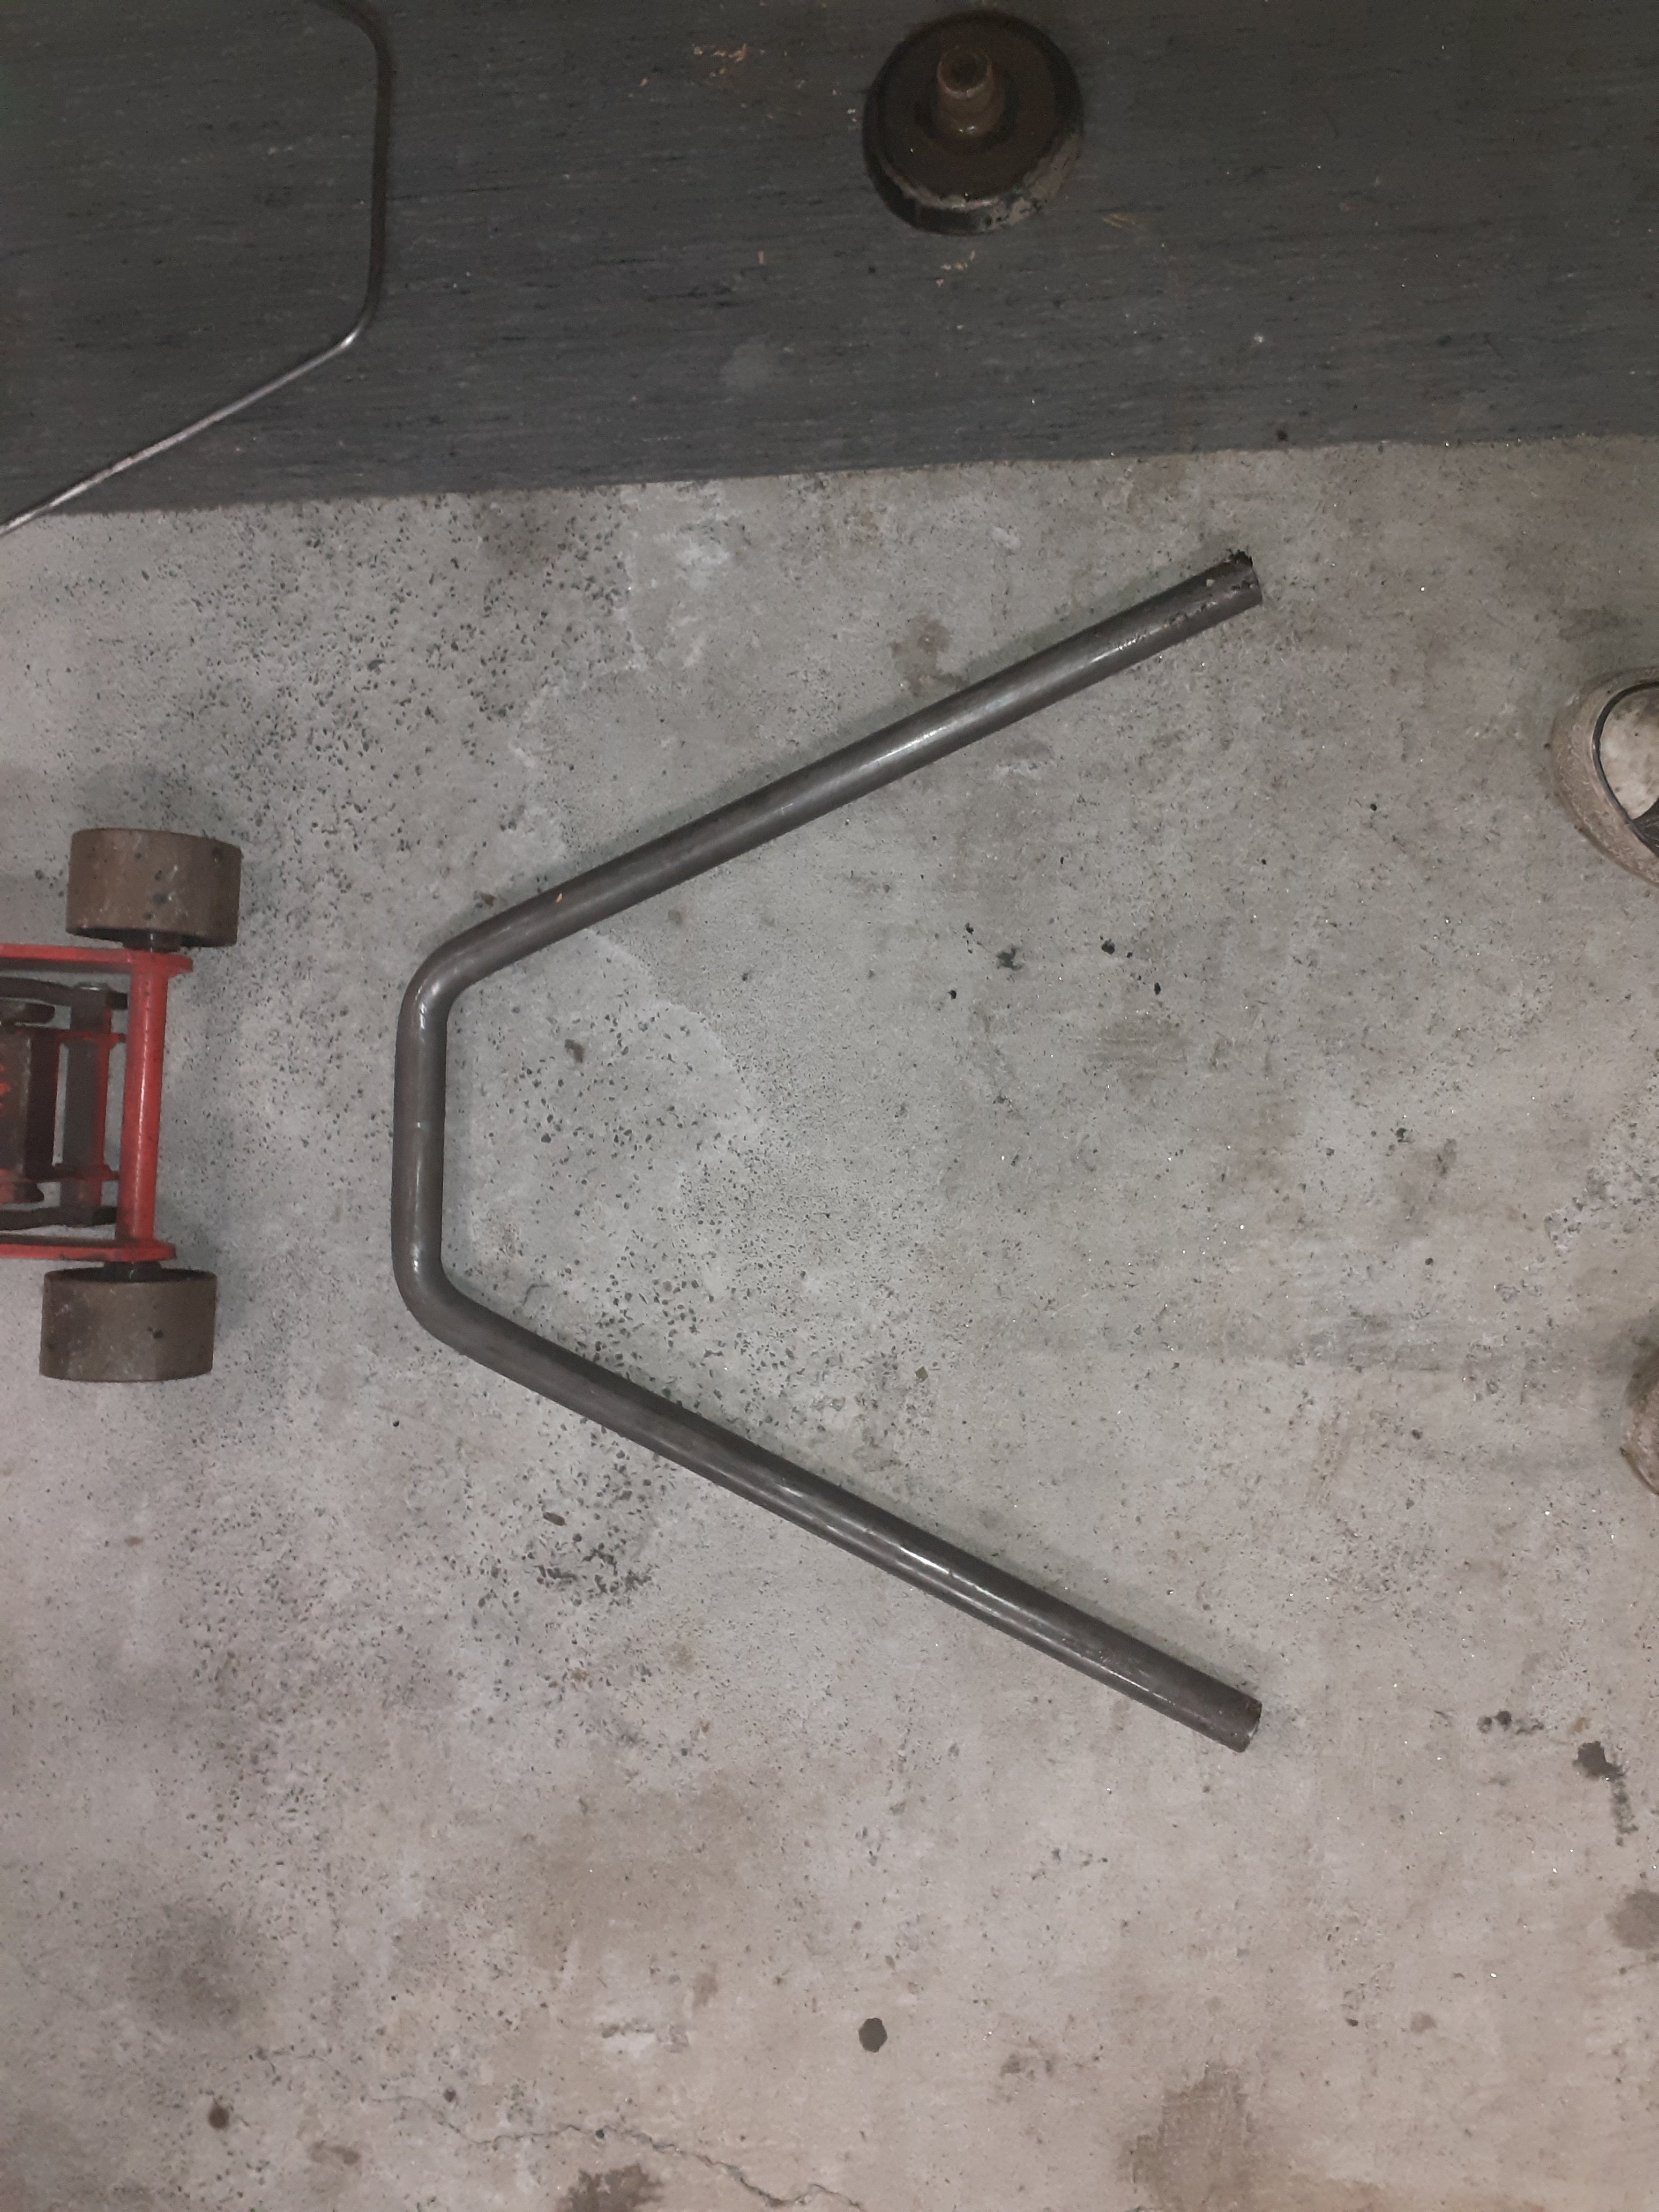
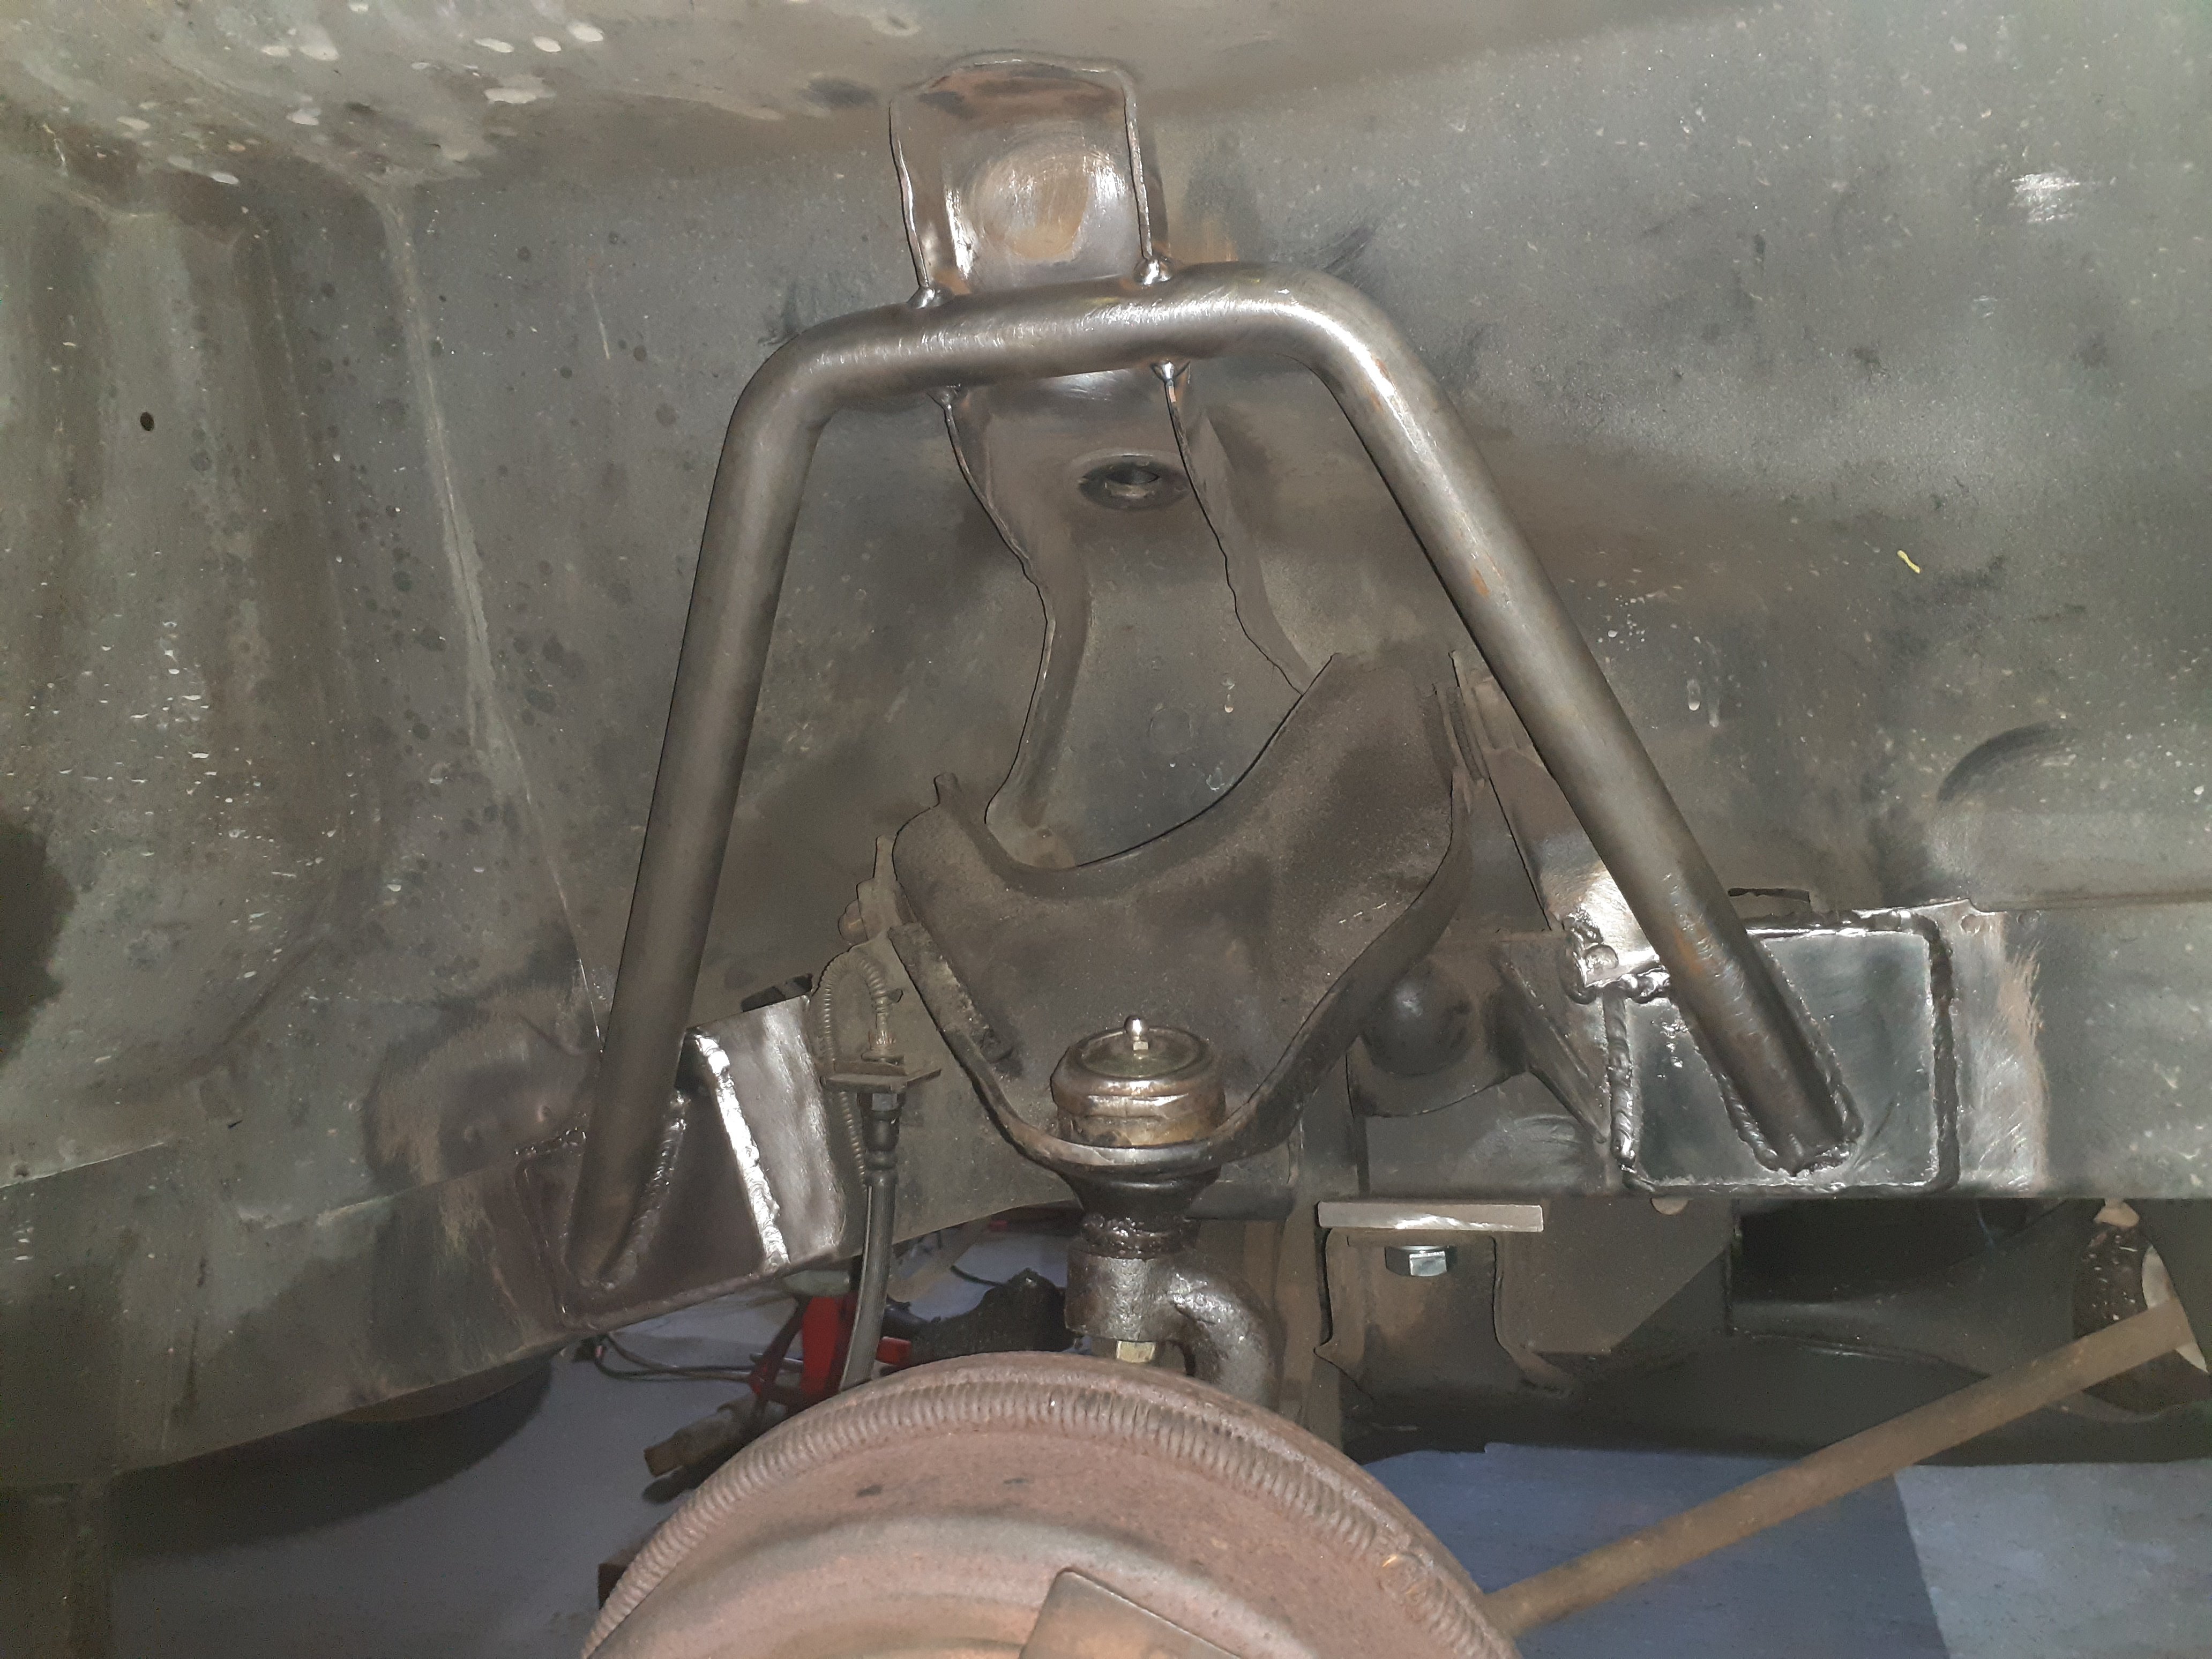
One side done, got some 25x4 tube bent, 3mm plates on the chassis rail and glued in
2 points
-
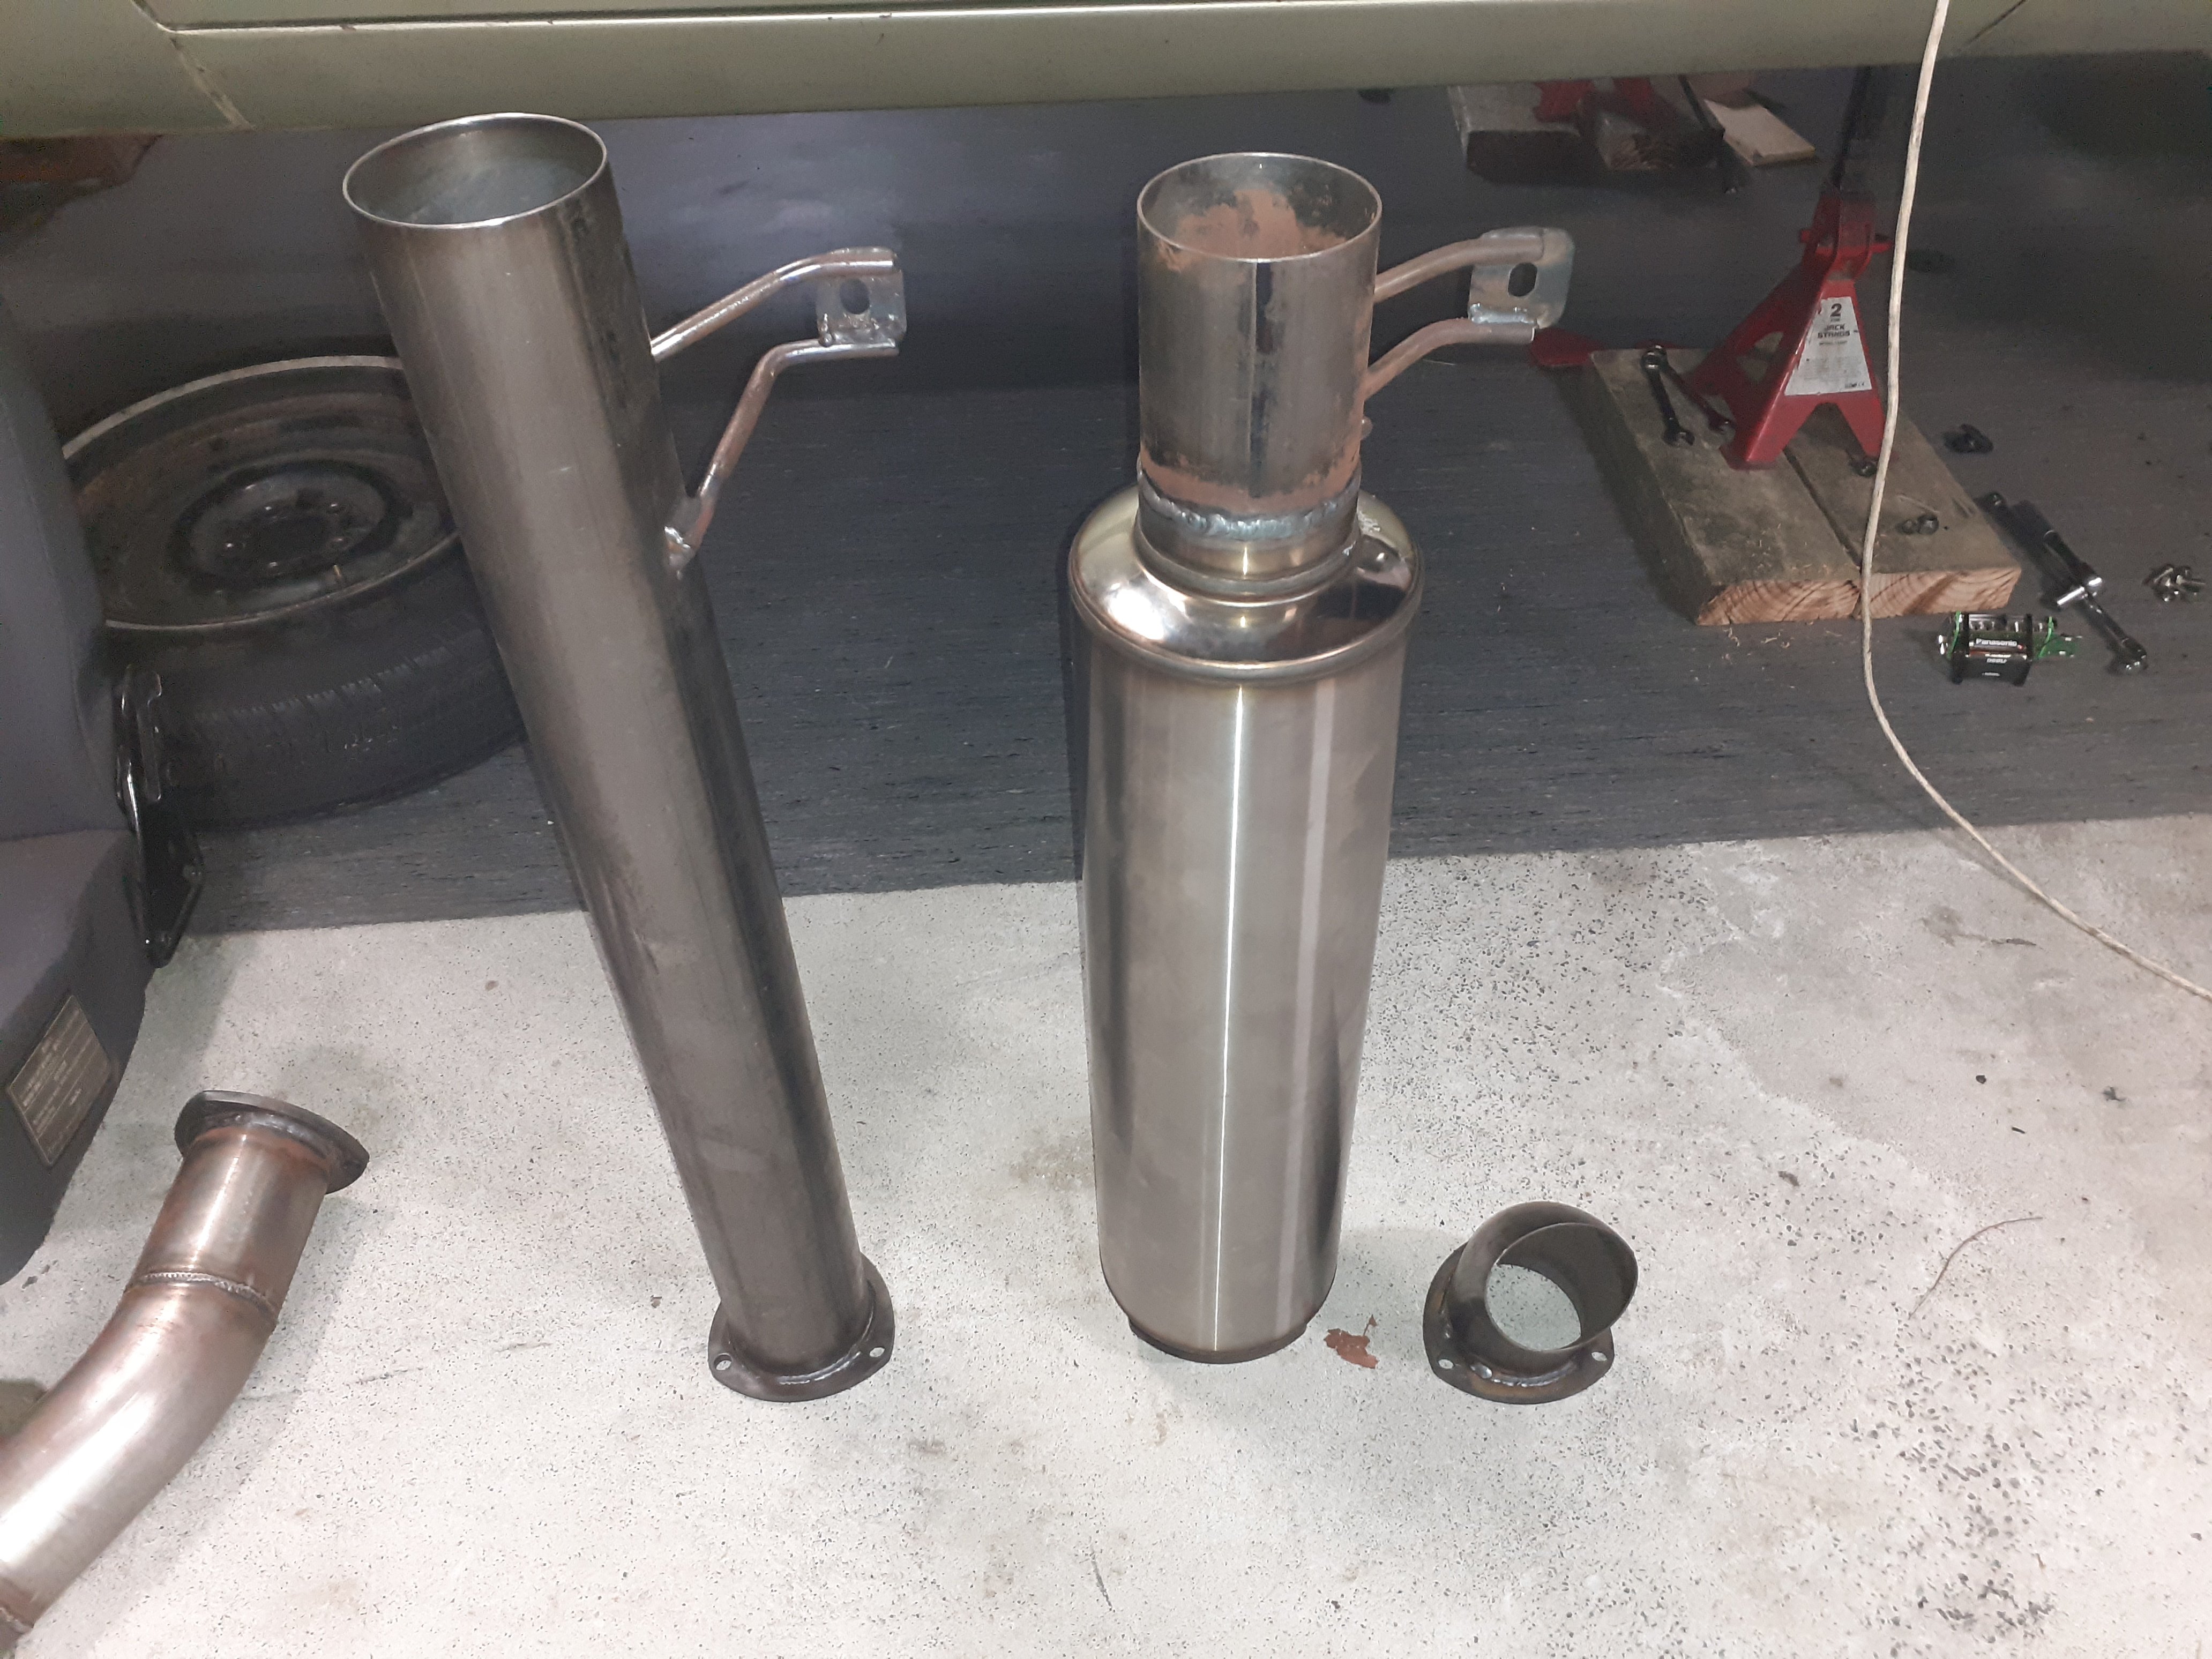
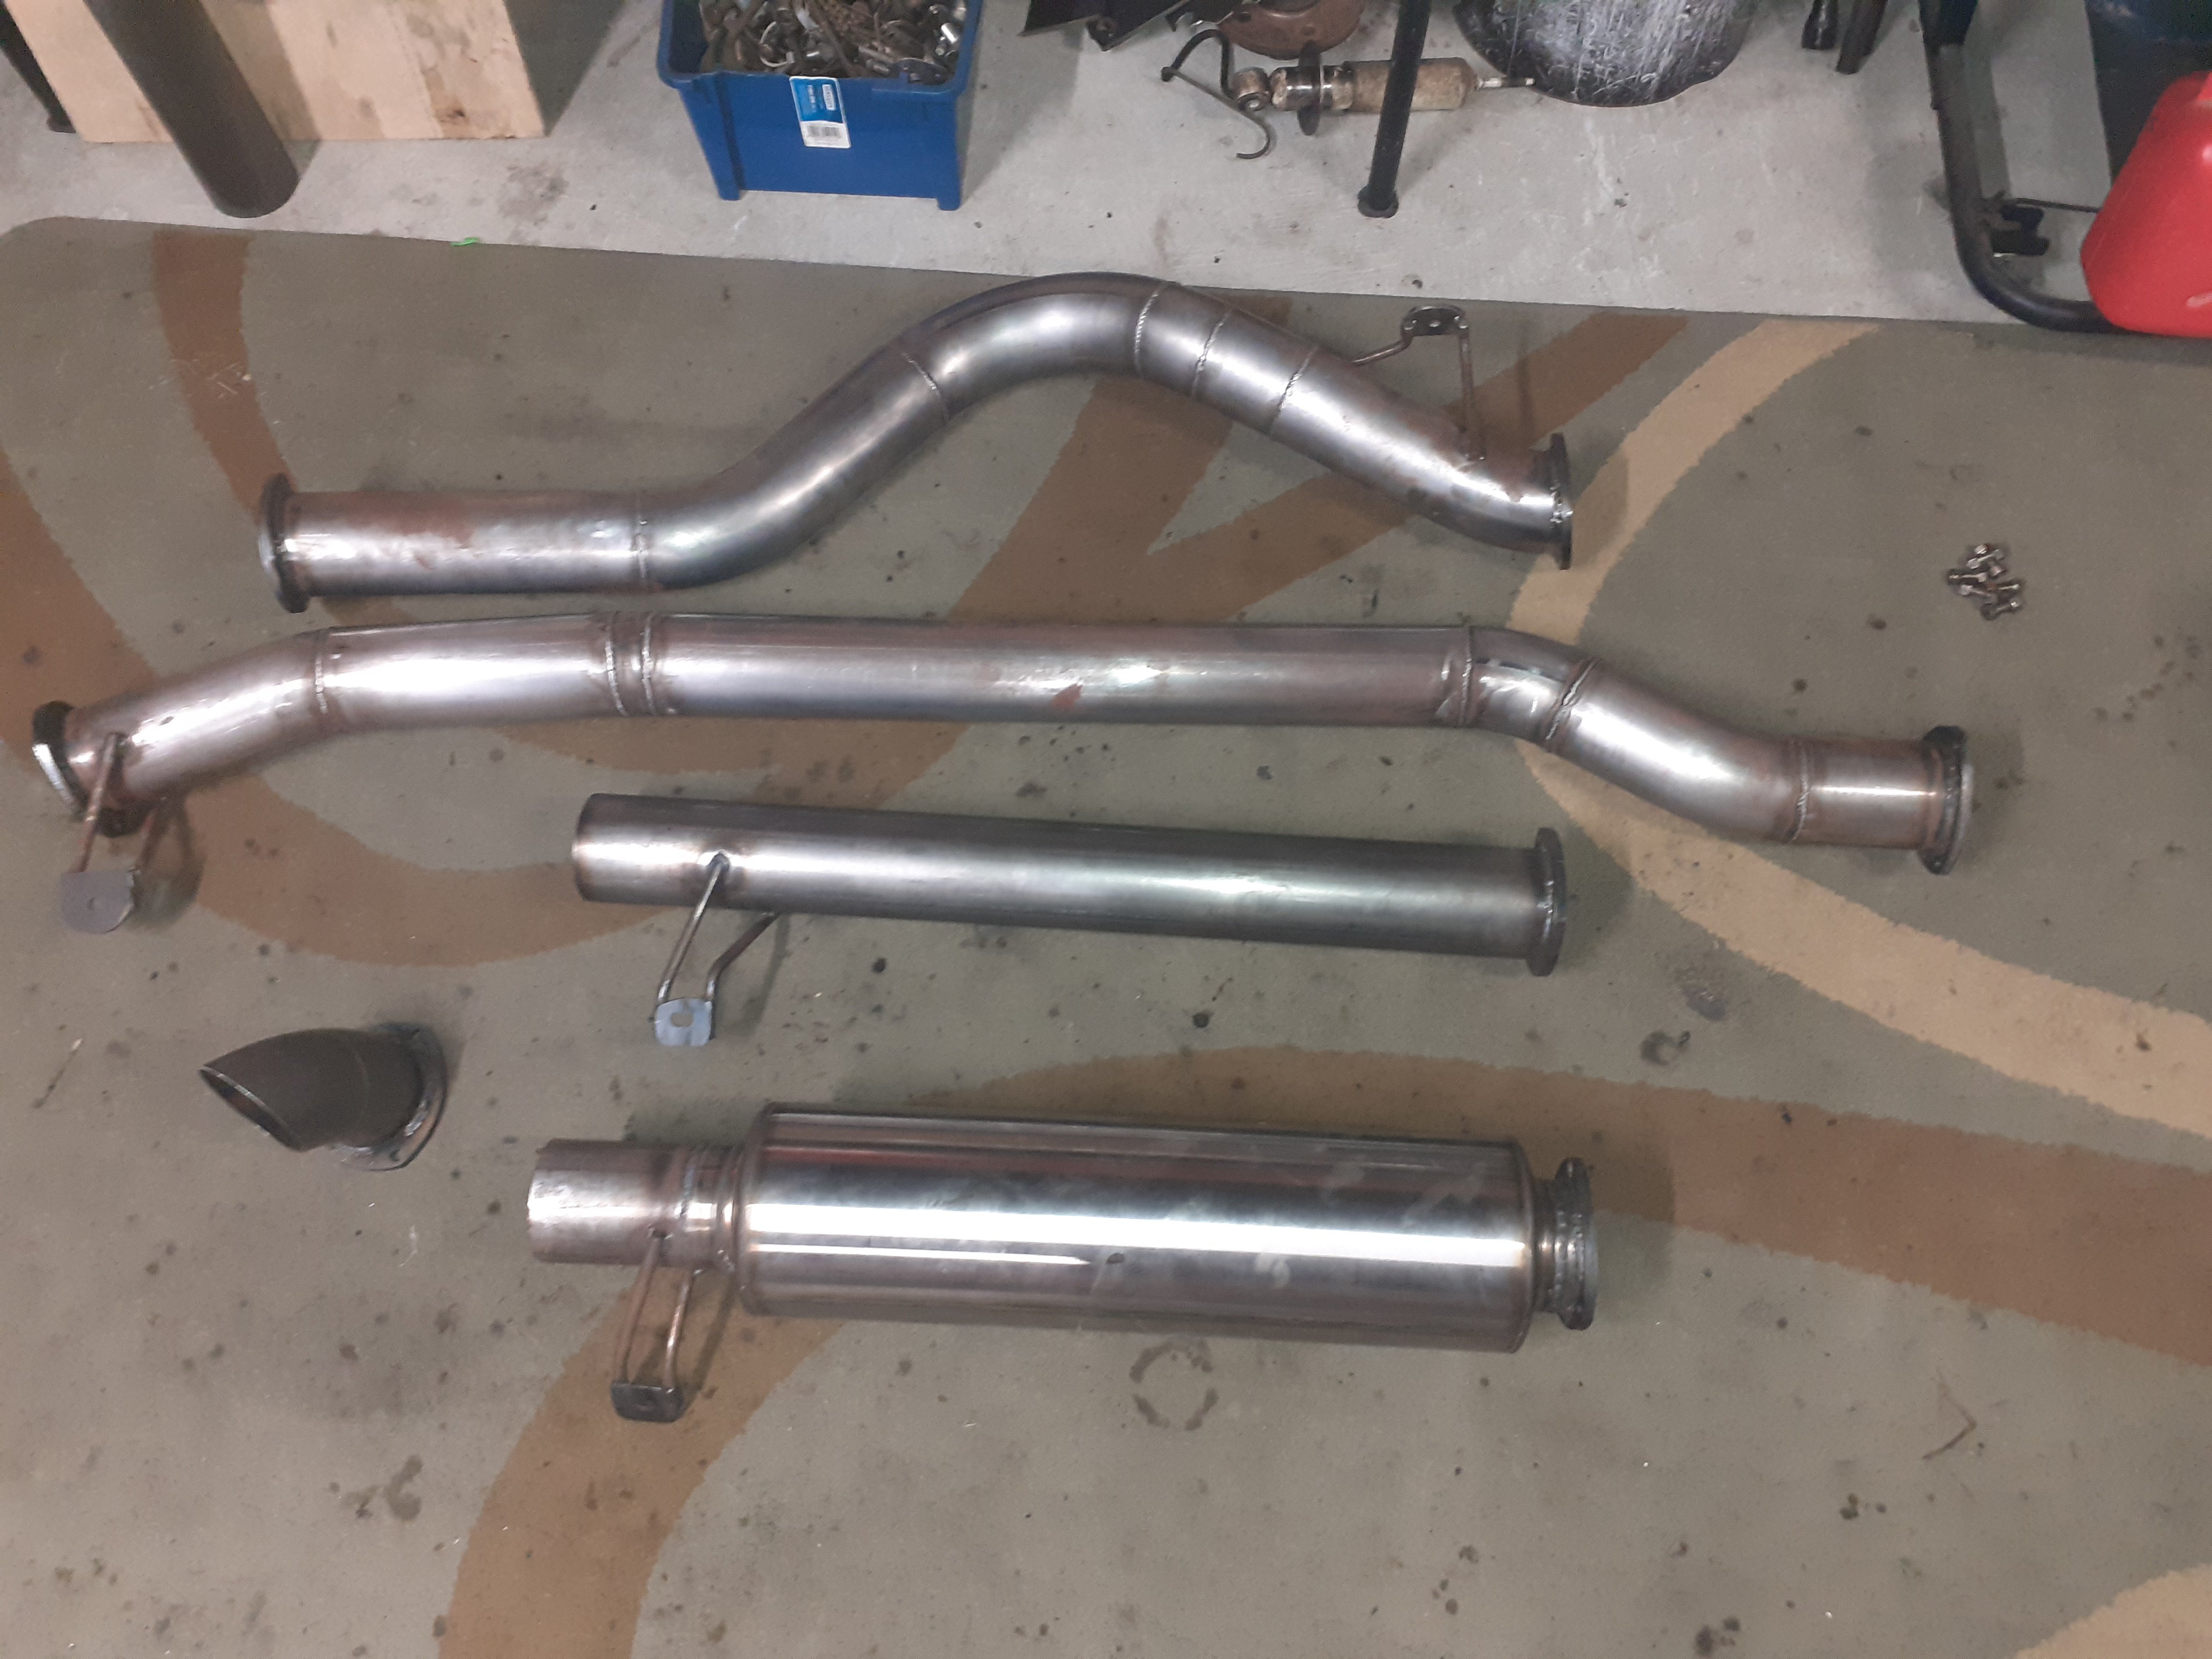
Because I'm a wanker, i made some other exhaust options, a mufflerless tail pipe that bolts on in place of the muffler, and a turn down that can bolt on to the 3 flanged sections, so behind the diff, in front of it, or at the front pipe, so I can have varying levels of loud Exhaust is ready for paint now. I'll probably get the front pipes HPC coated again
2 points
-
are you gonna mod Mk1 Cortina lights for the tail panel cos that'd be bangin1 point
-
Nice save there!1 point
-
Felt is a must. Packs out the carpet and makes it nicer and if you glue your carper to your underfelt it will stay in place better and hold up longer/won't look like ass really fast. Also the black tar product will get stuck to your carpet and will rip the carpet. Won't rip the underfelt.1 point
-
i put felt down as well. i also did double deadening in some places and double felt in some places depending on the type of noise and size and shape of panels depends how lush you want it. The deadening and felt acts on different frequencies so both makes the best outcome also depends on space, your carpet may not fit so well in places with lots of deadening1 point
-
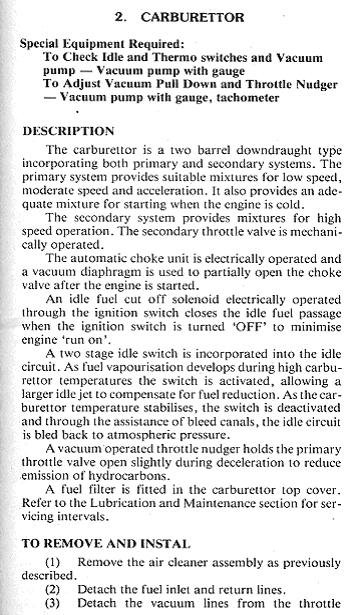
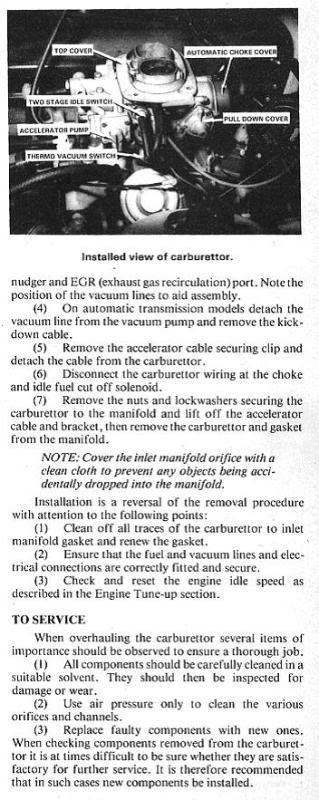
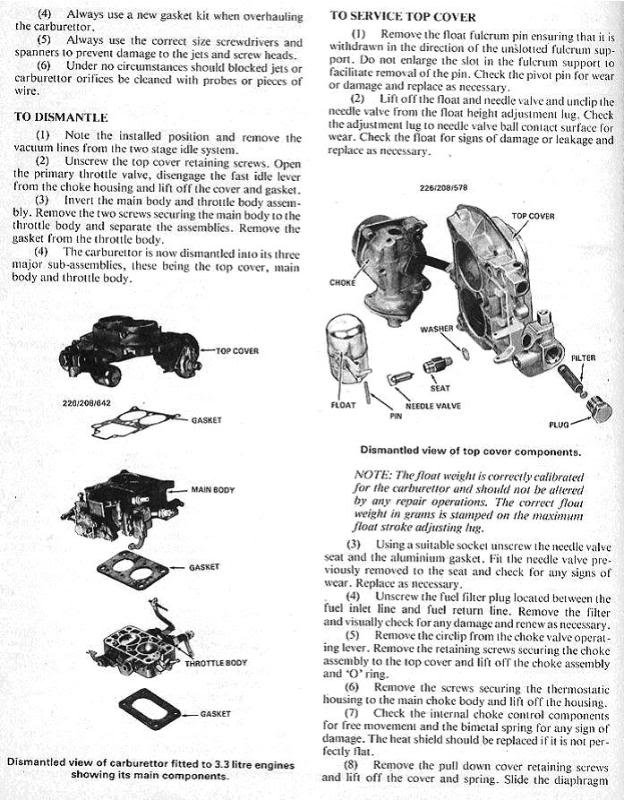
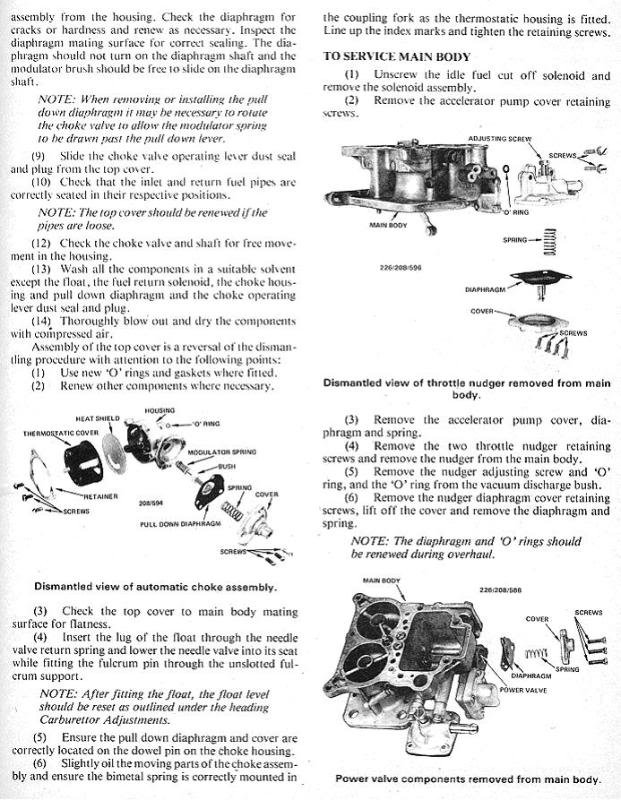
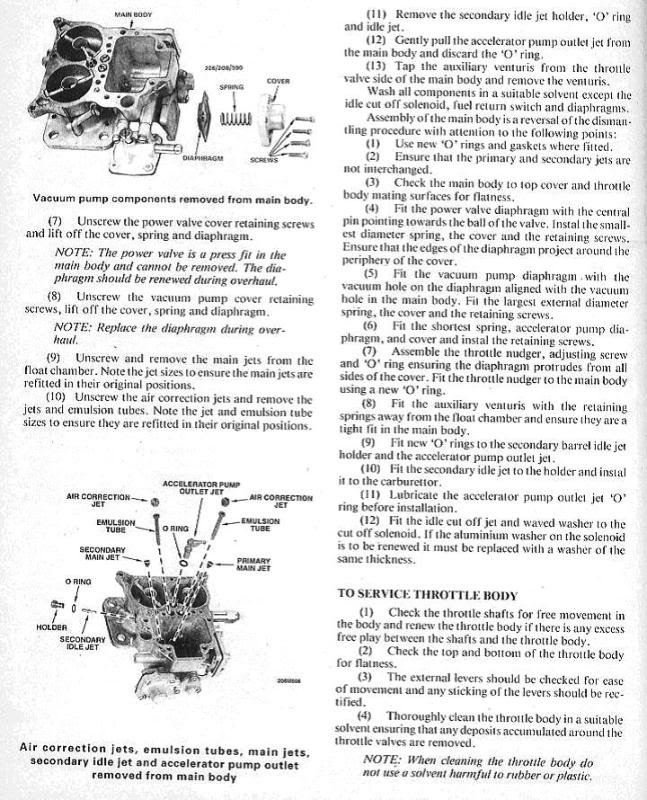
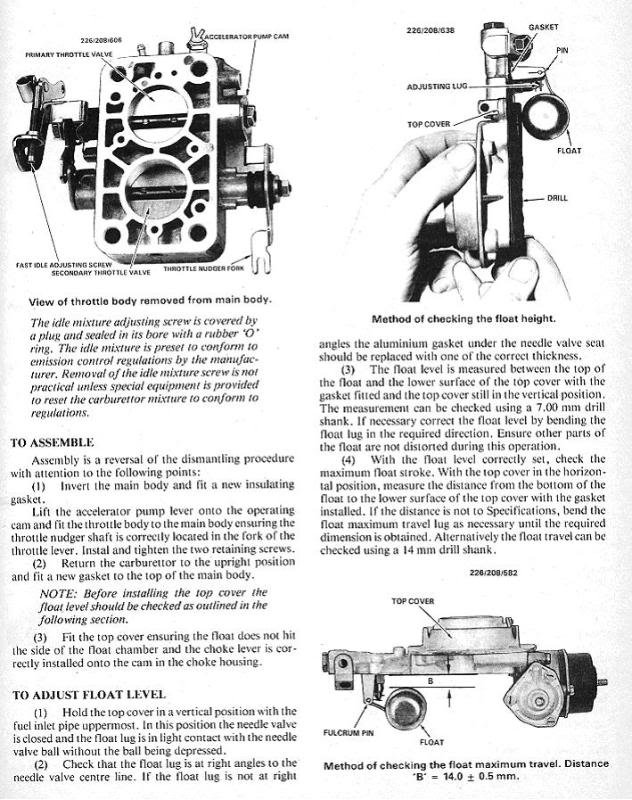
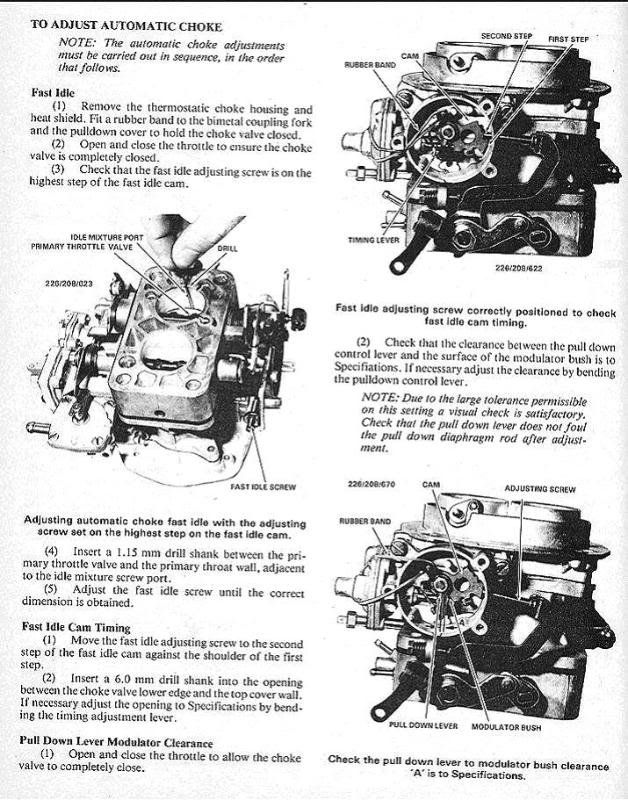
After a little digging through files on my old laptop I found the overhaul instructions for the carb. If all else fails we can always read the instructions.
1 point
-
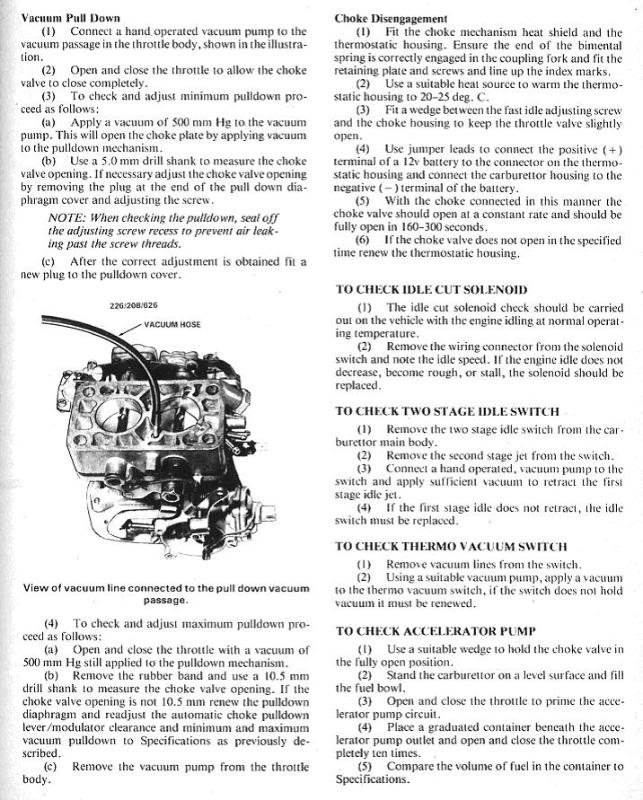
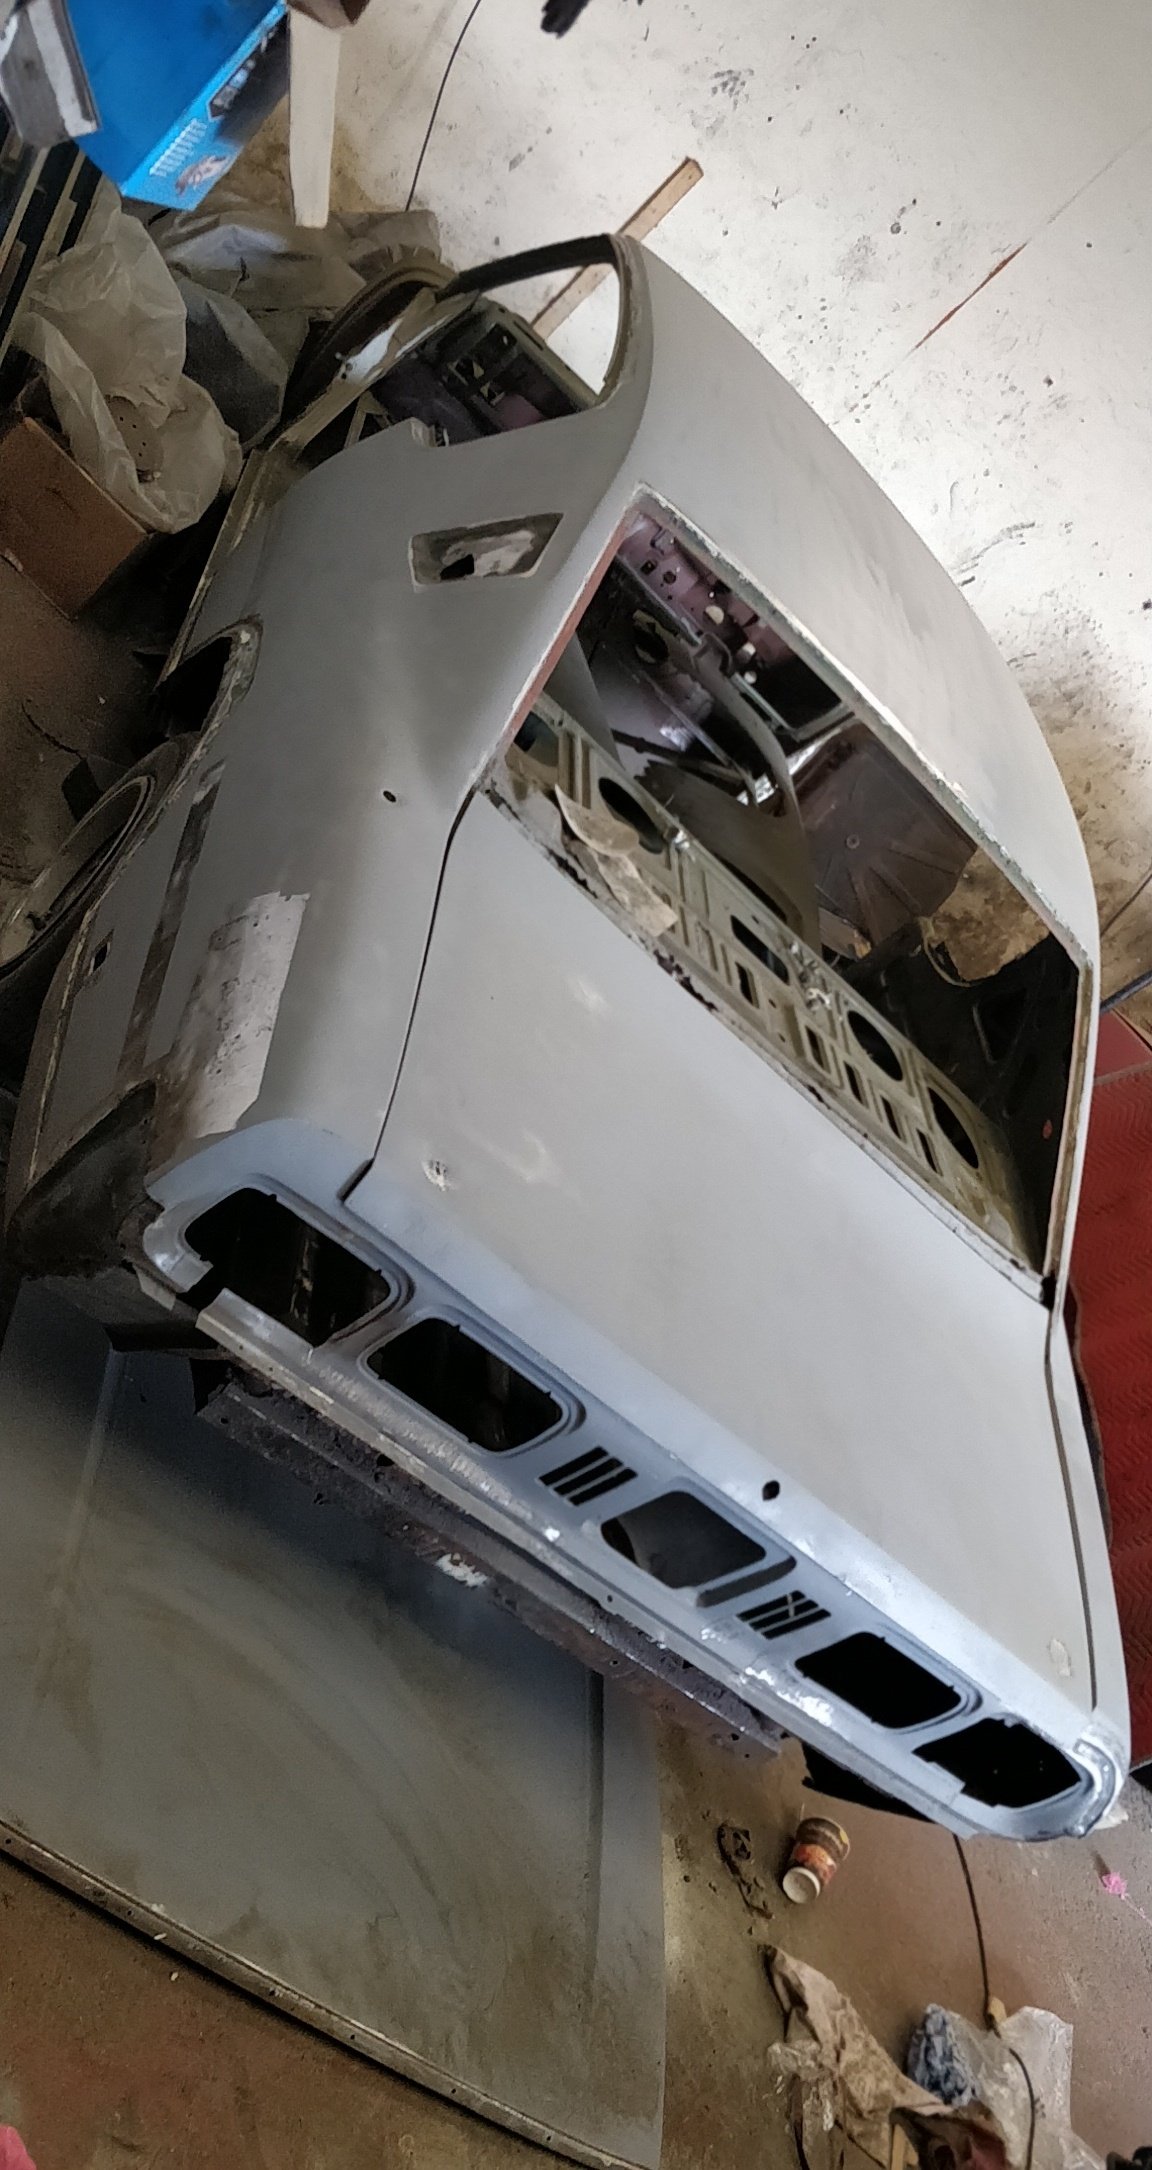
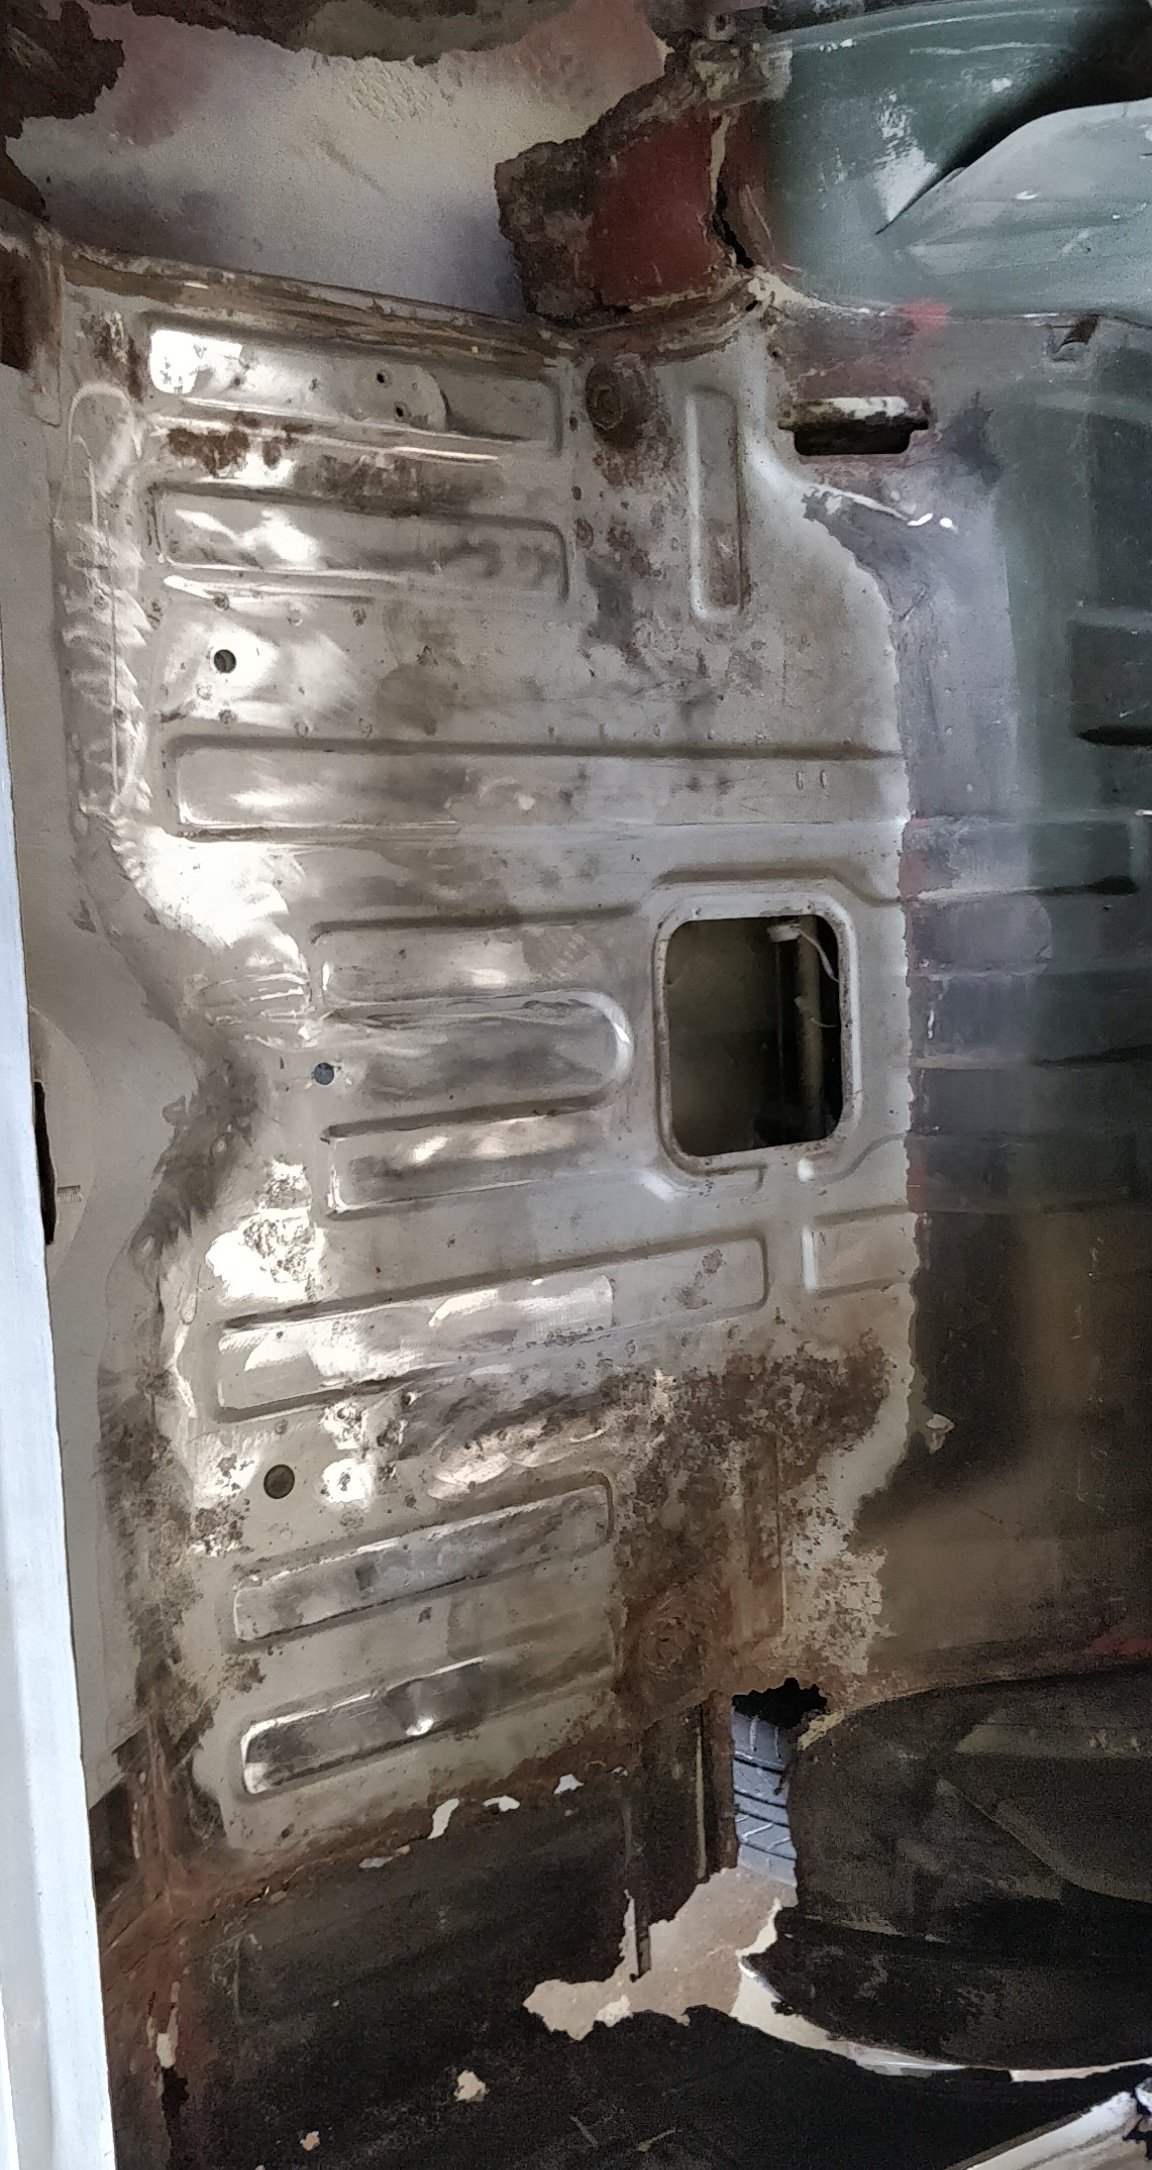
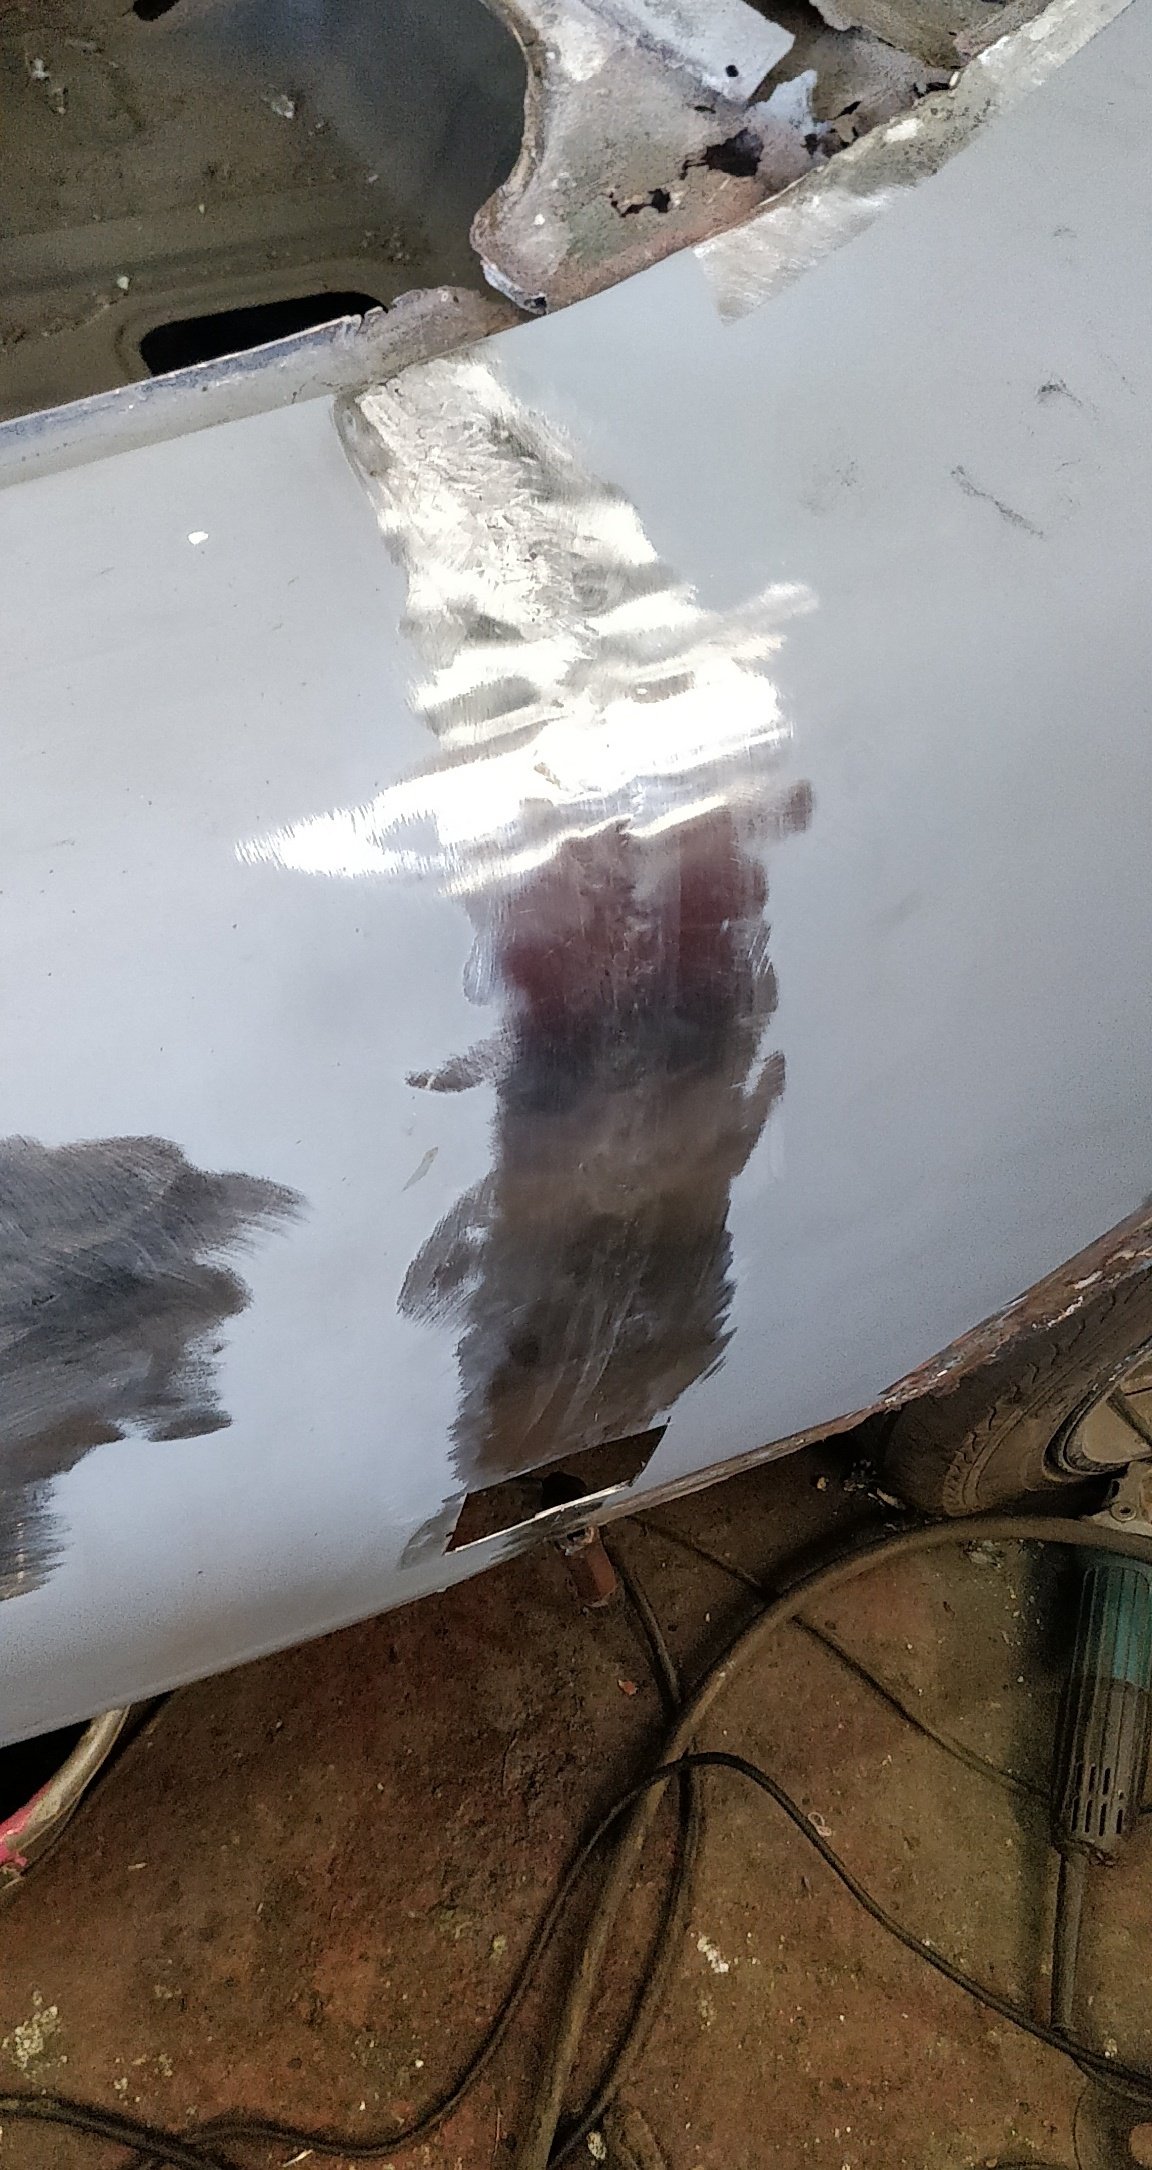
Busy week last week - paint stripping complete on the roof and passenger side: Boot floor shotblasted: Rear quarter repair improvements started:
1 point
-
Dropped the second half on with no drama. So its all bolted up now and ready to go to the foundry at the end of the week. Nailed it Thats like 1000hrs work right there!1 point


.thumb.jpeg.e0a4bff61111e0c8c7396950fcc94da1.jpeg)


This leaderboard is set to Auckland/GMT+12:00