
Leaderboard


Popular Content
Showing content with the highest reputation on 07/25/19 in Posts
-
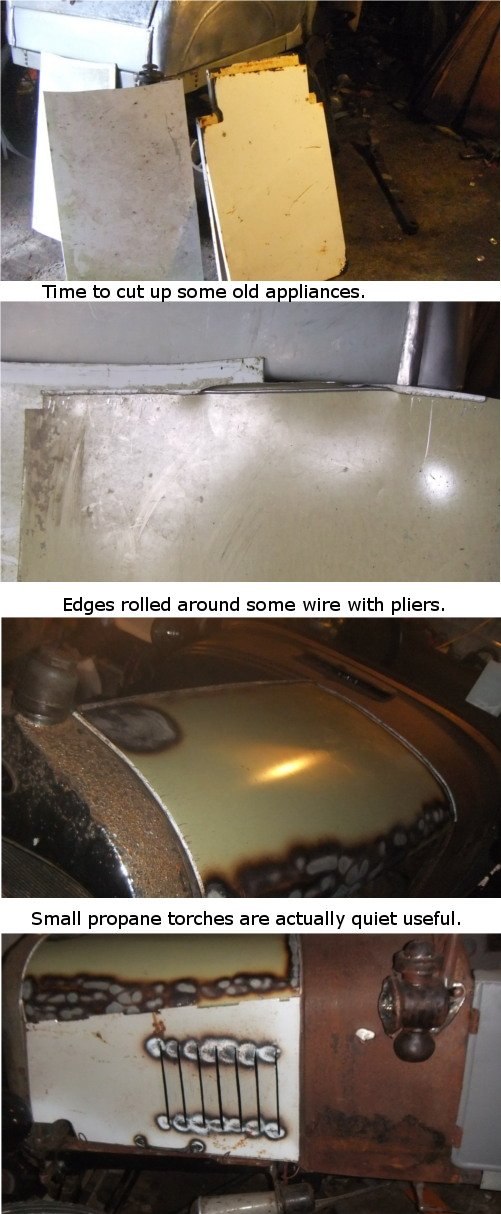
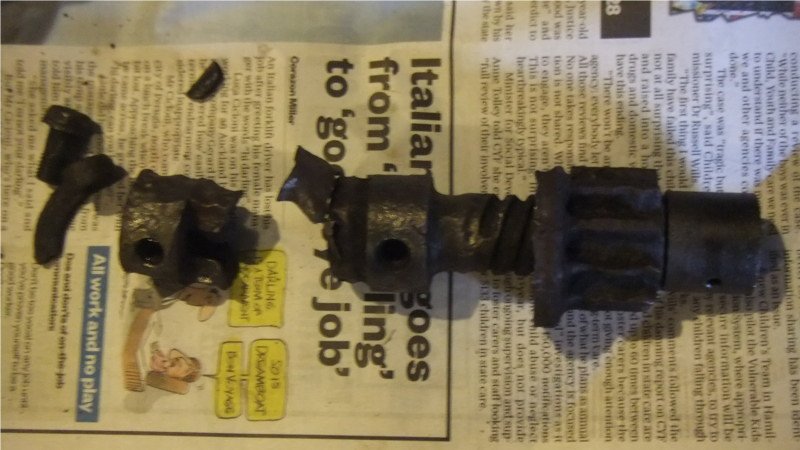
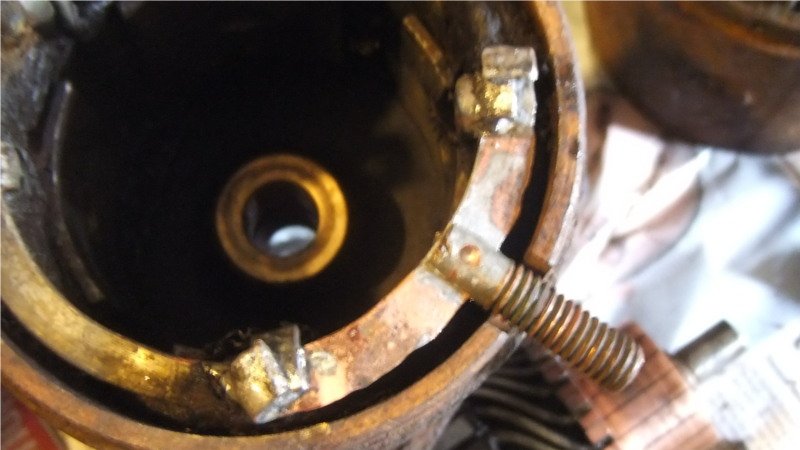
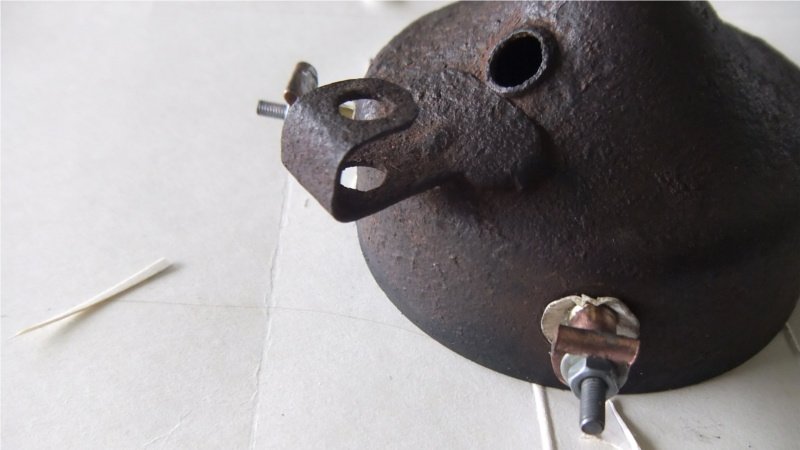
"Straight through" Holley NH carb's share many parts with the economy version carb'. Same basic thing, but the economy version had more restriction. I'd be tempted to smooth the venturi a little, as it has a rough finish, but don't want to mess it up. I'll choose to believe that rust pitting help the mixture. So i filled in some pitting around the rim of the bowl seal with an epoxy. Used white metal normally used for engine bearings to build up work throttle shafts. Drilled small holes in the broken castings and poured white metal into them to build up the areas where casting had broken off. Built up the worn nut with more white metal. First i tried to replace the bronze throttle link with chunks cut from a worn bronze bushing, that turned out to be fragile. So i riveted and soldered, with more white metal (more resilient to vibration than solder due to no lead content) copper strips. I choose to believe i have improved this carb's condition compared to when i found it.
 11 points
 -
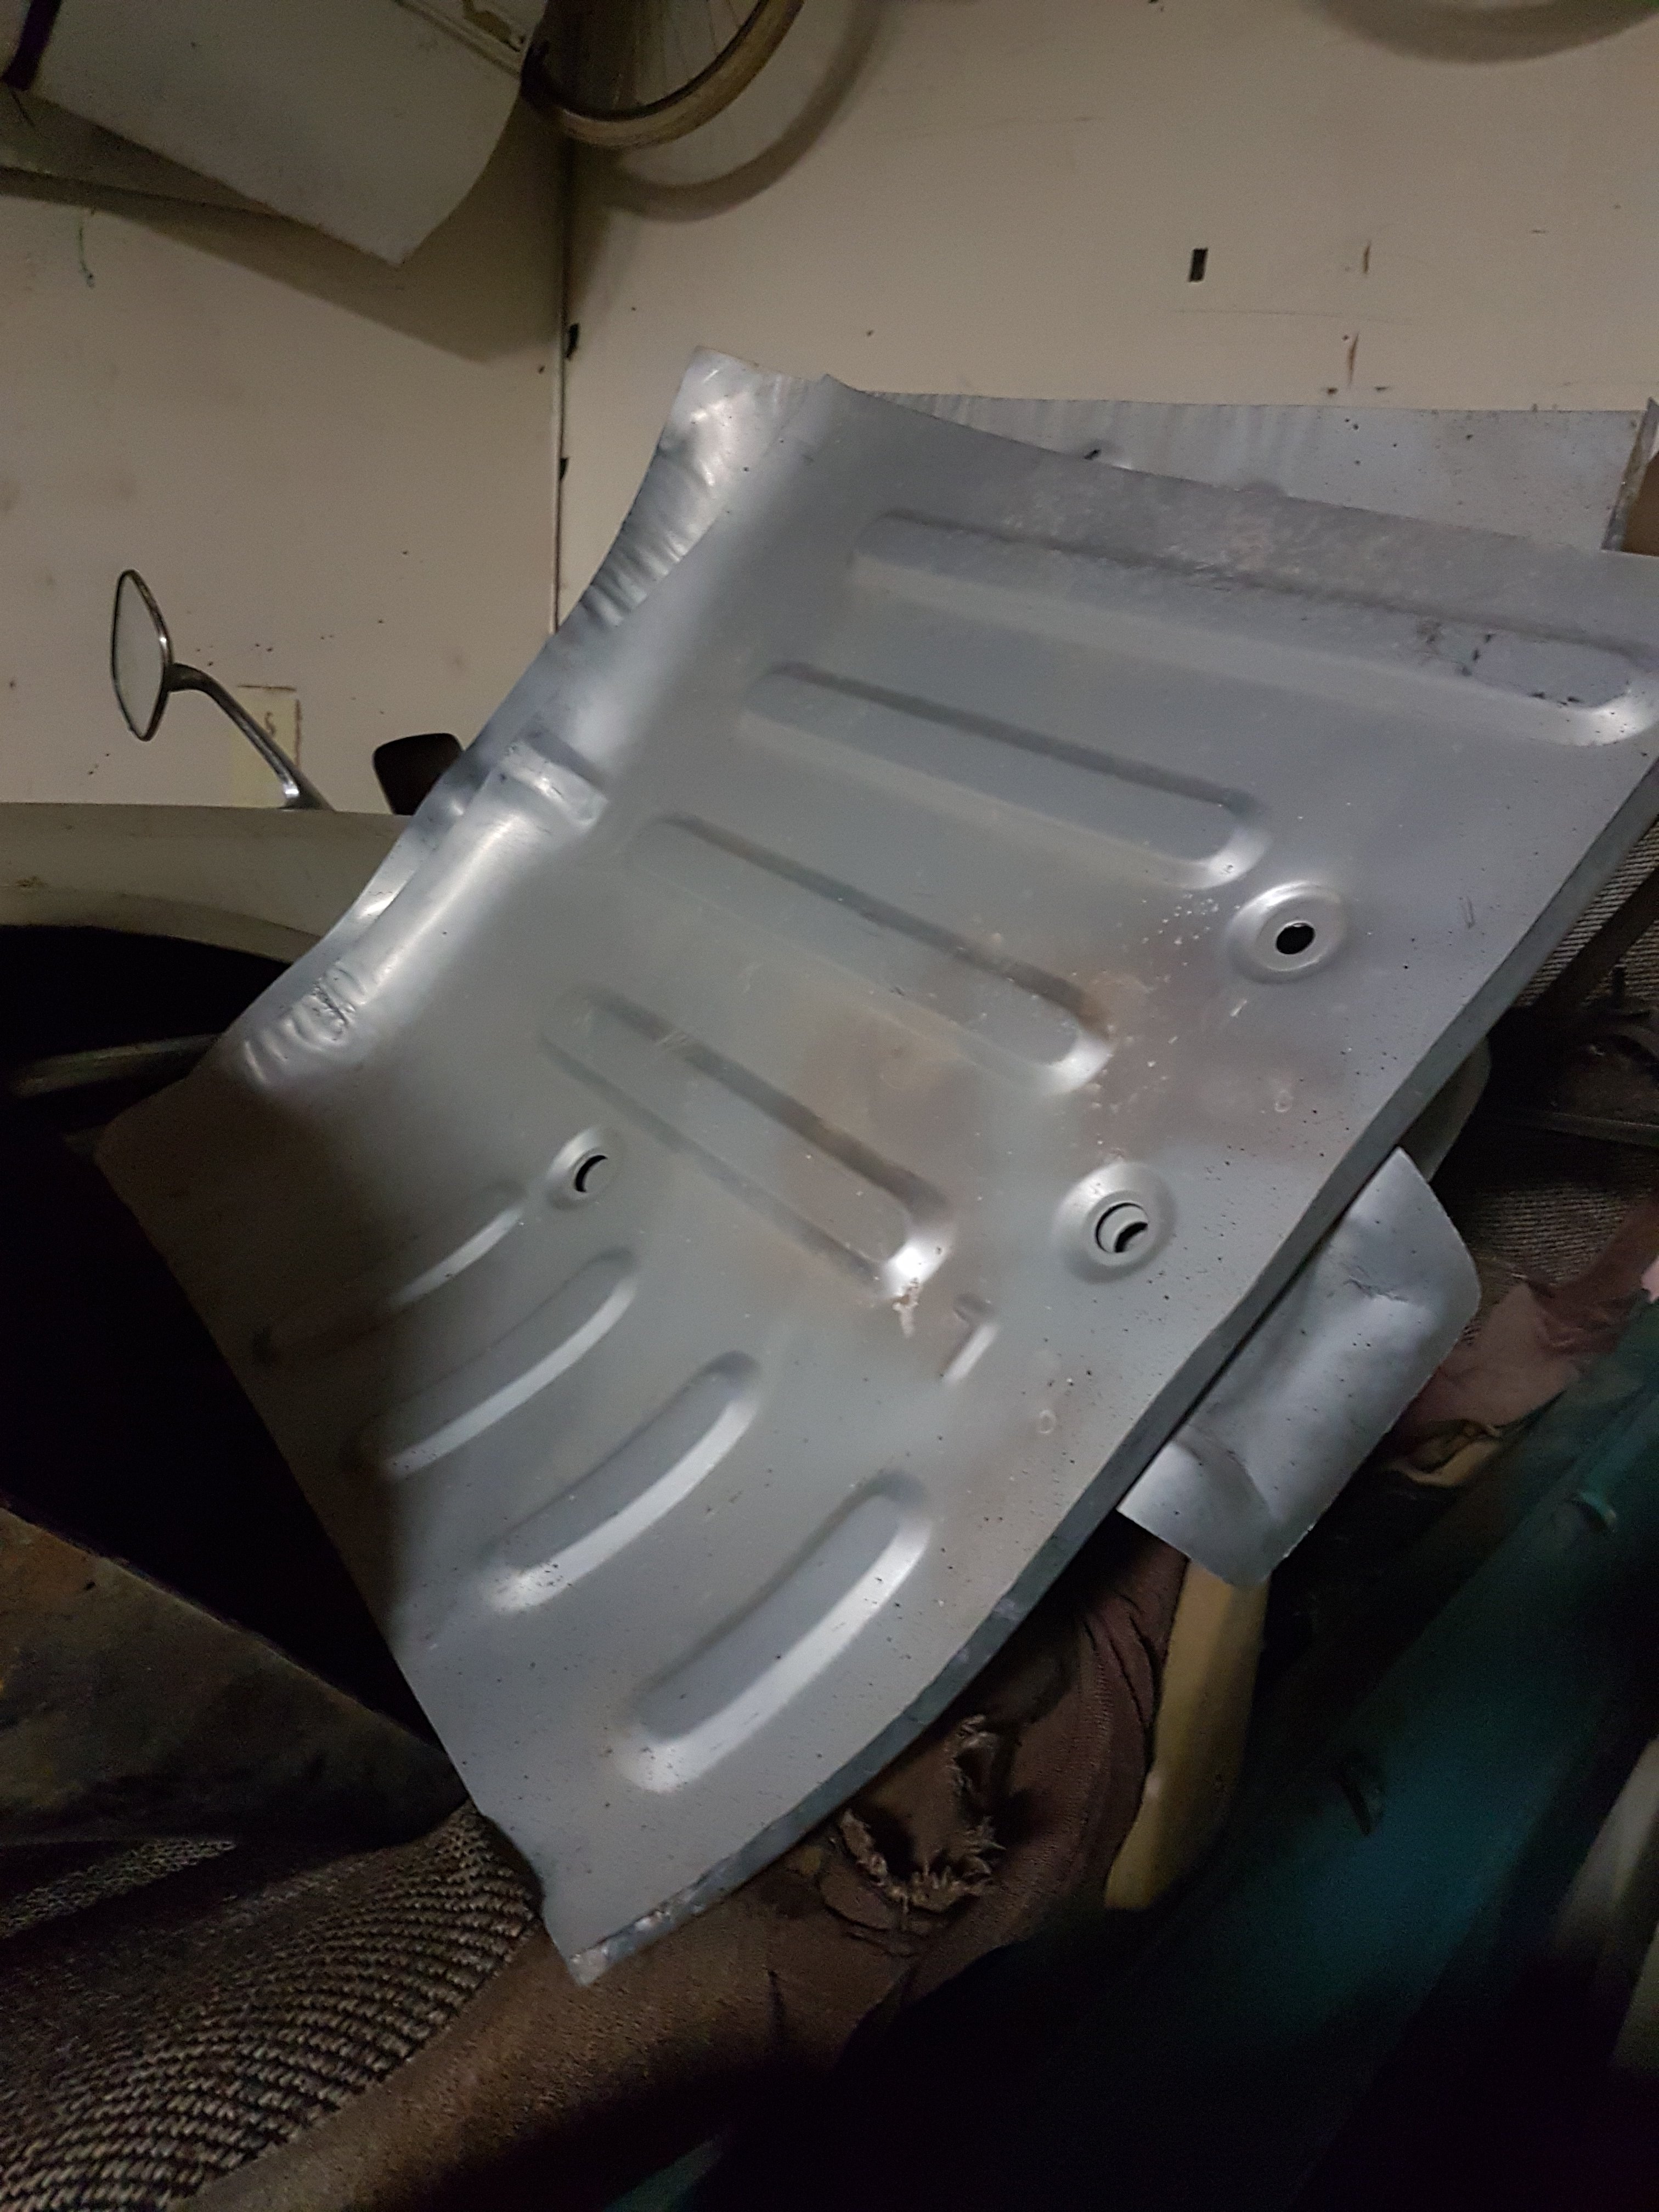
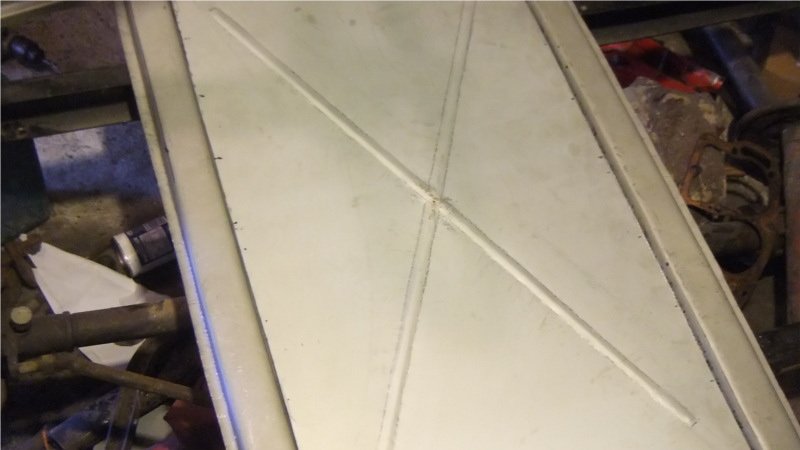
Actually, i did buy some floor pans! Kinda progress..
9 points
-
Update! I never said progress....
7 points
-
Show me your Swedish bits..... Admittedly via Britain but its the thought that counts. Bill at SaaBits is an all round GC and will be getting much more of my money. Was asked when it was going in. I replied "When the outside temperature gets over 20...."
6 points
-
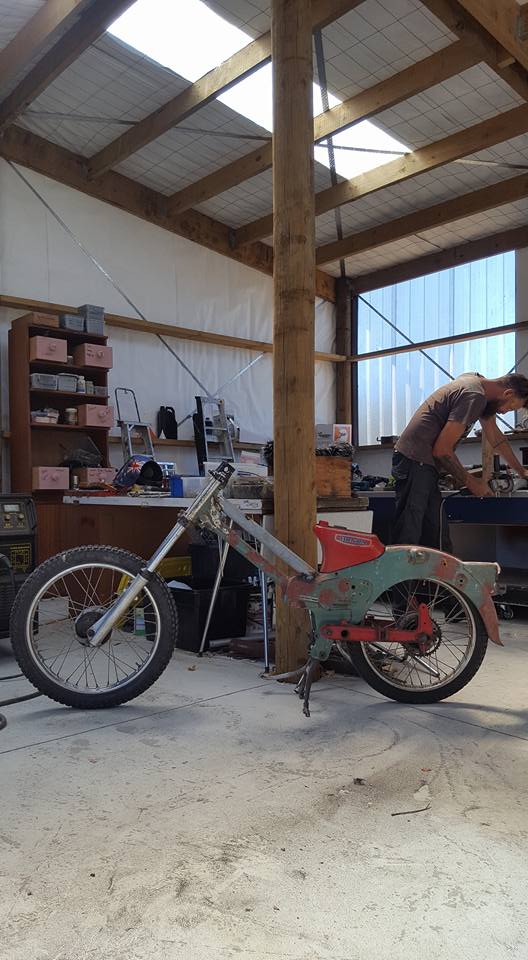
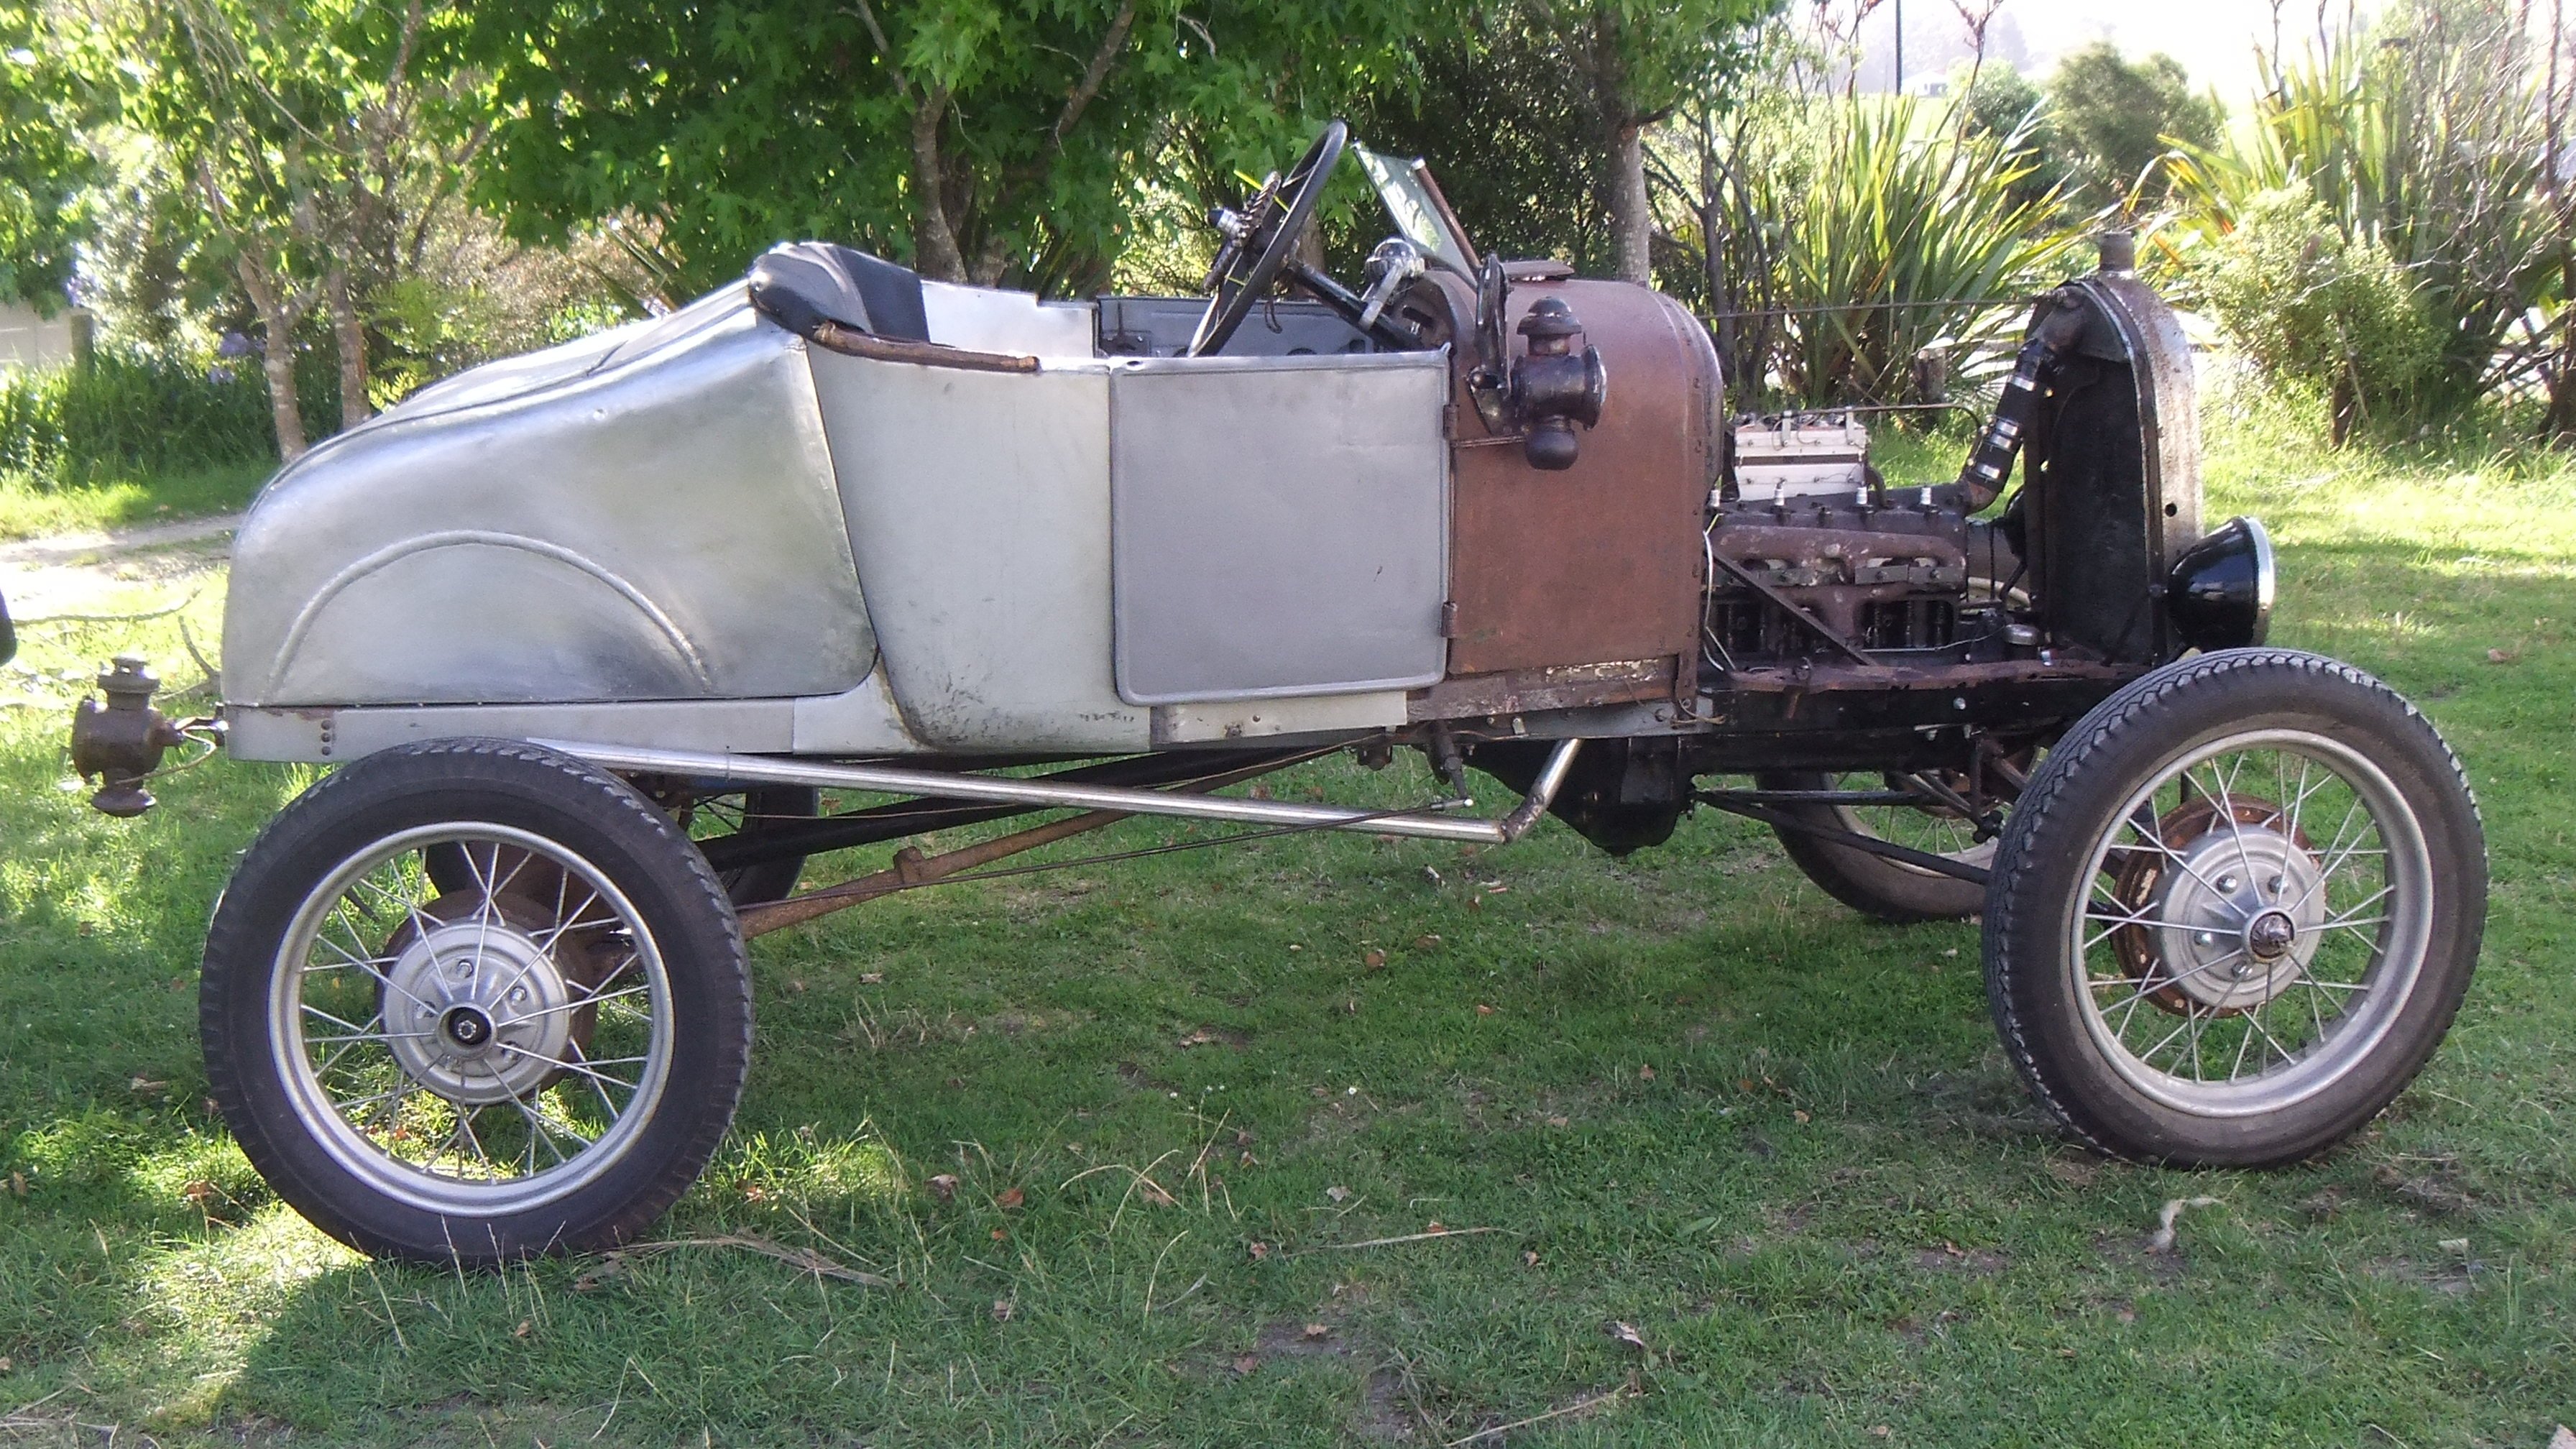
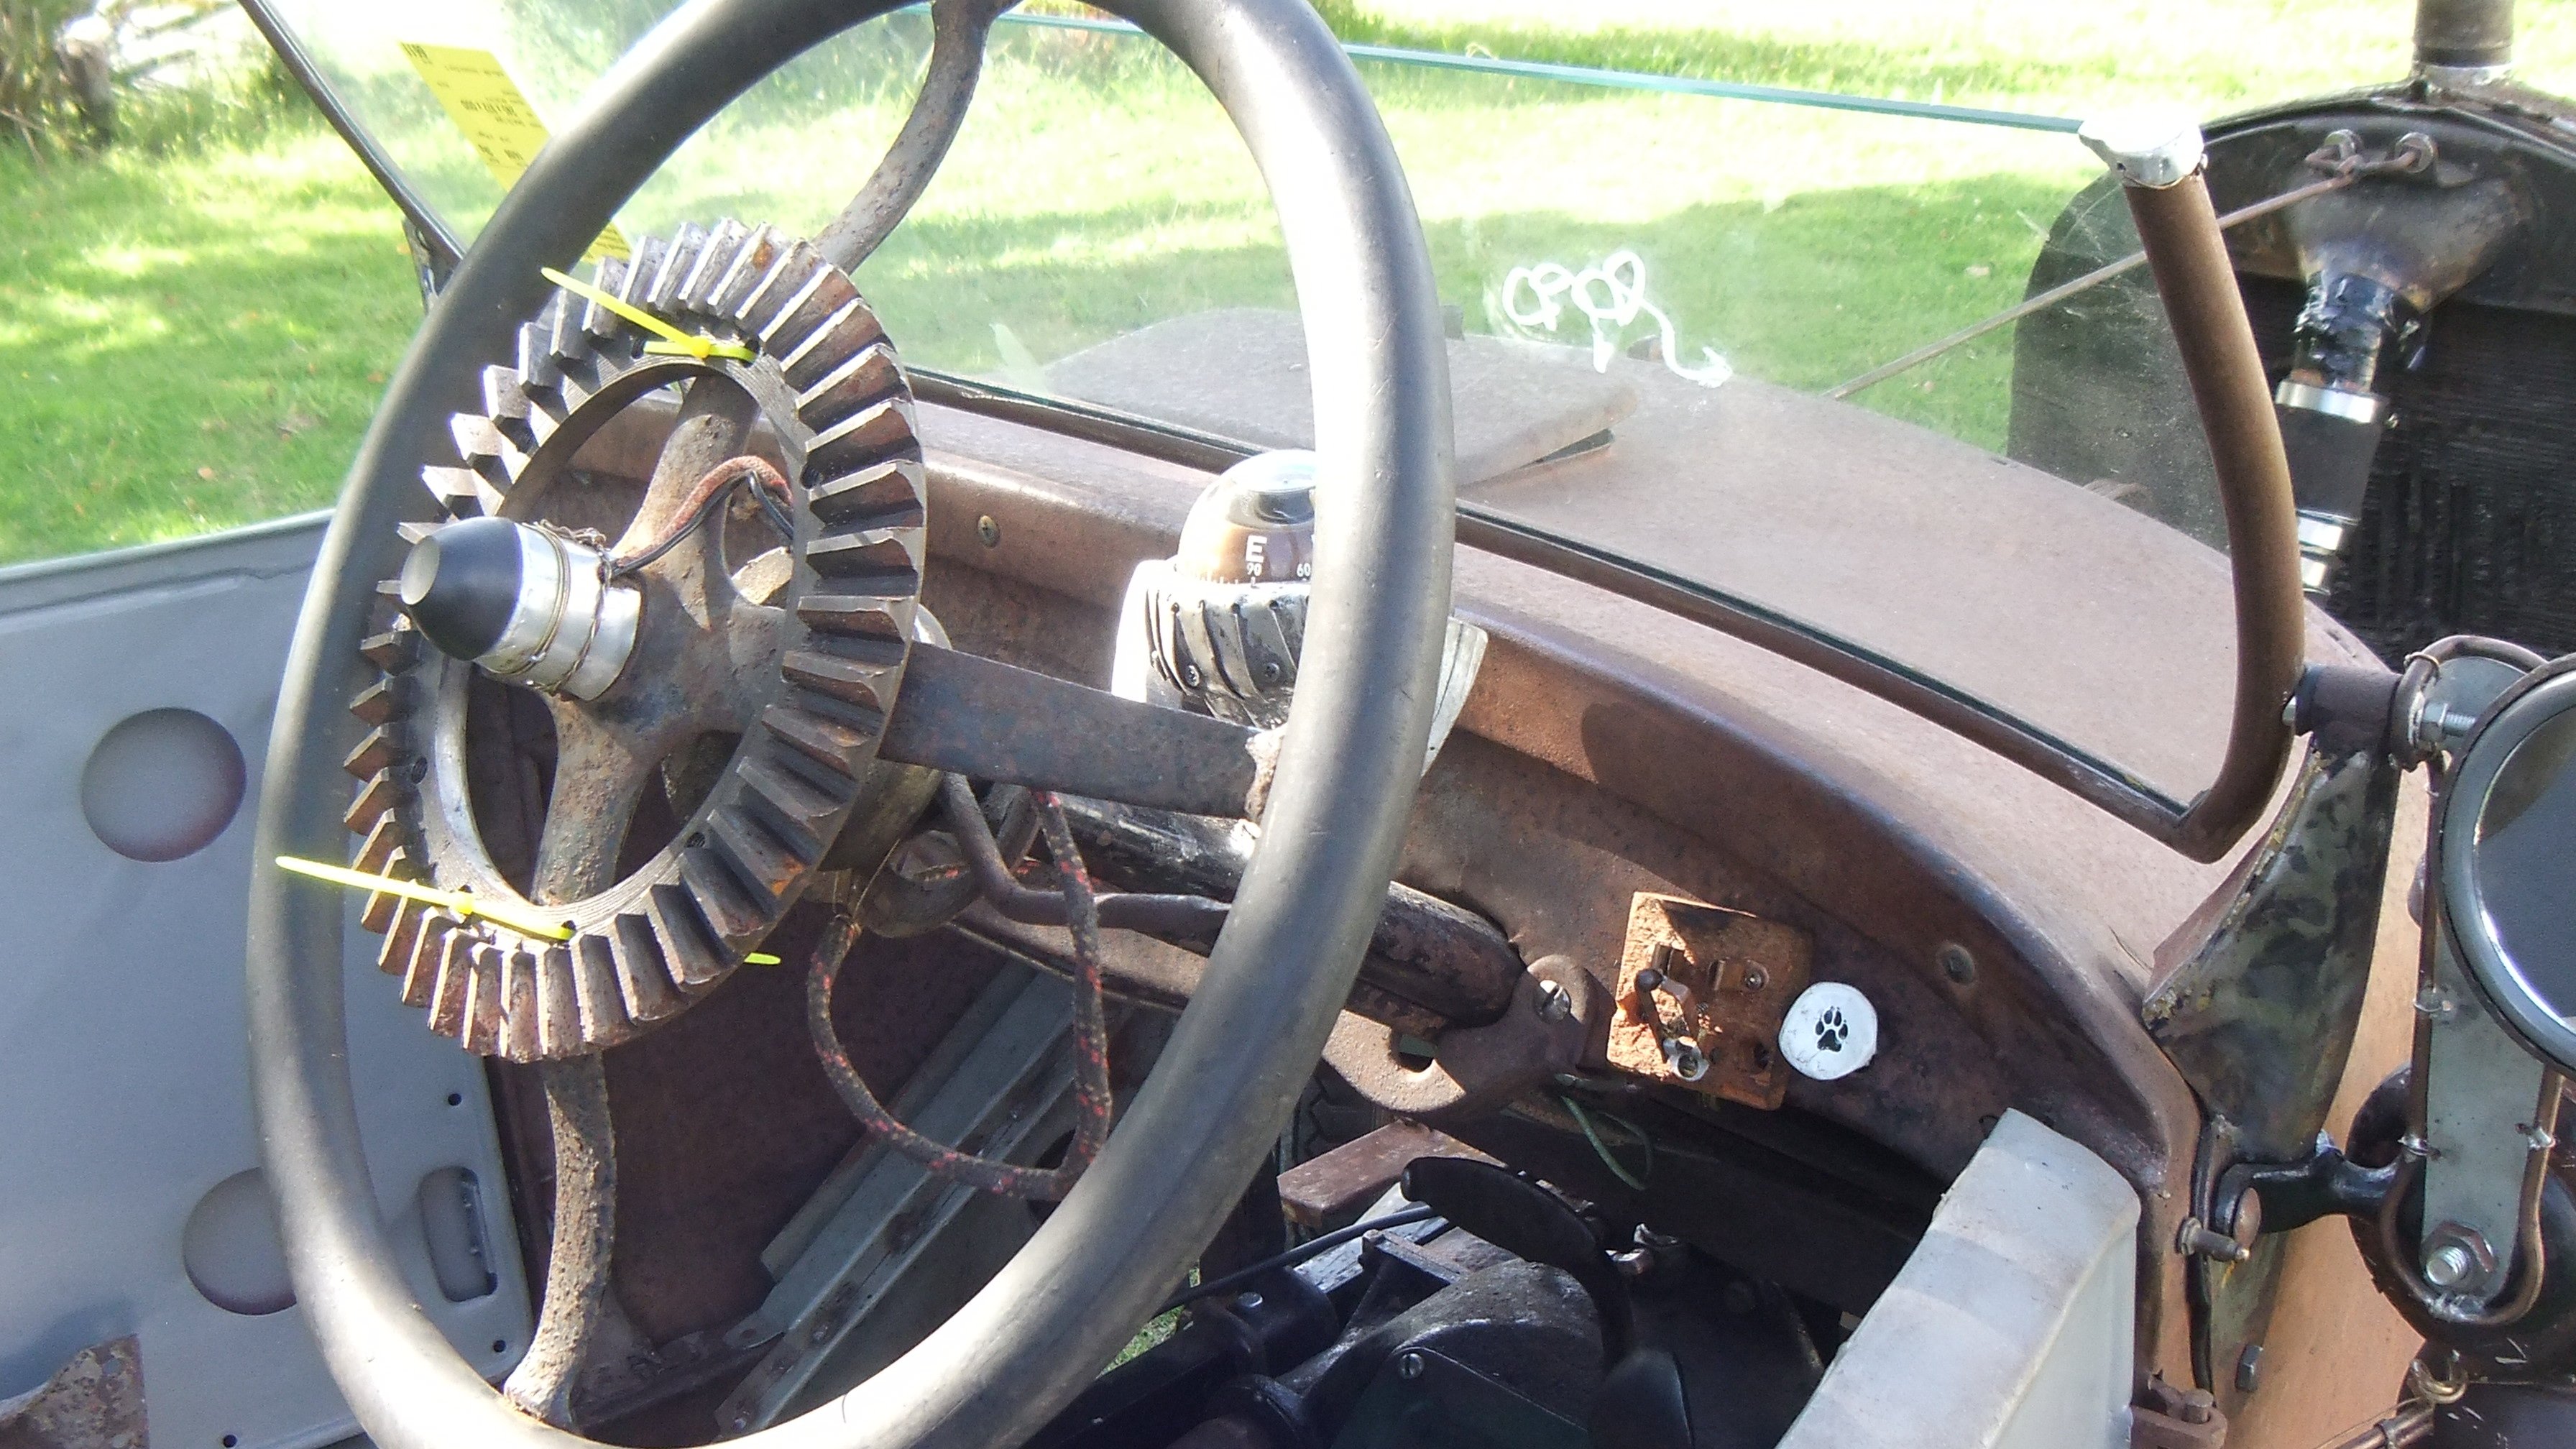
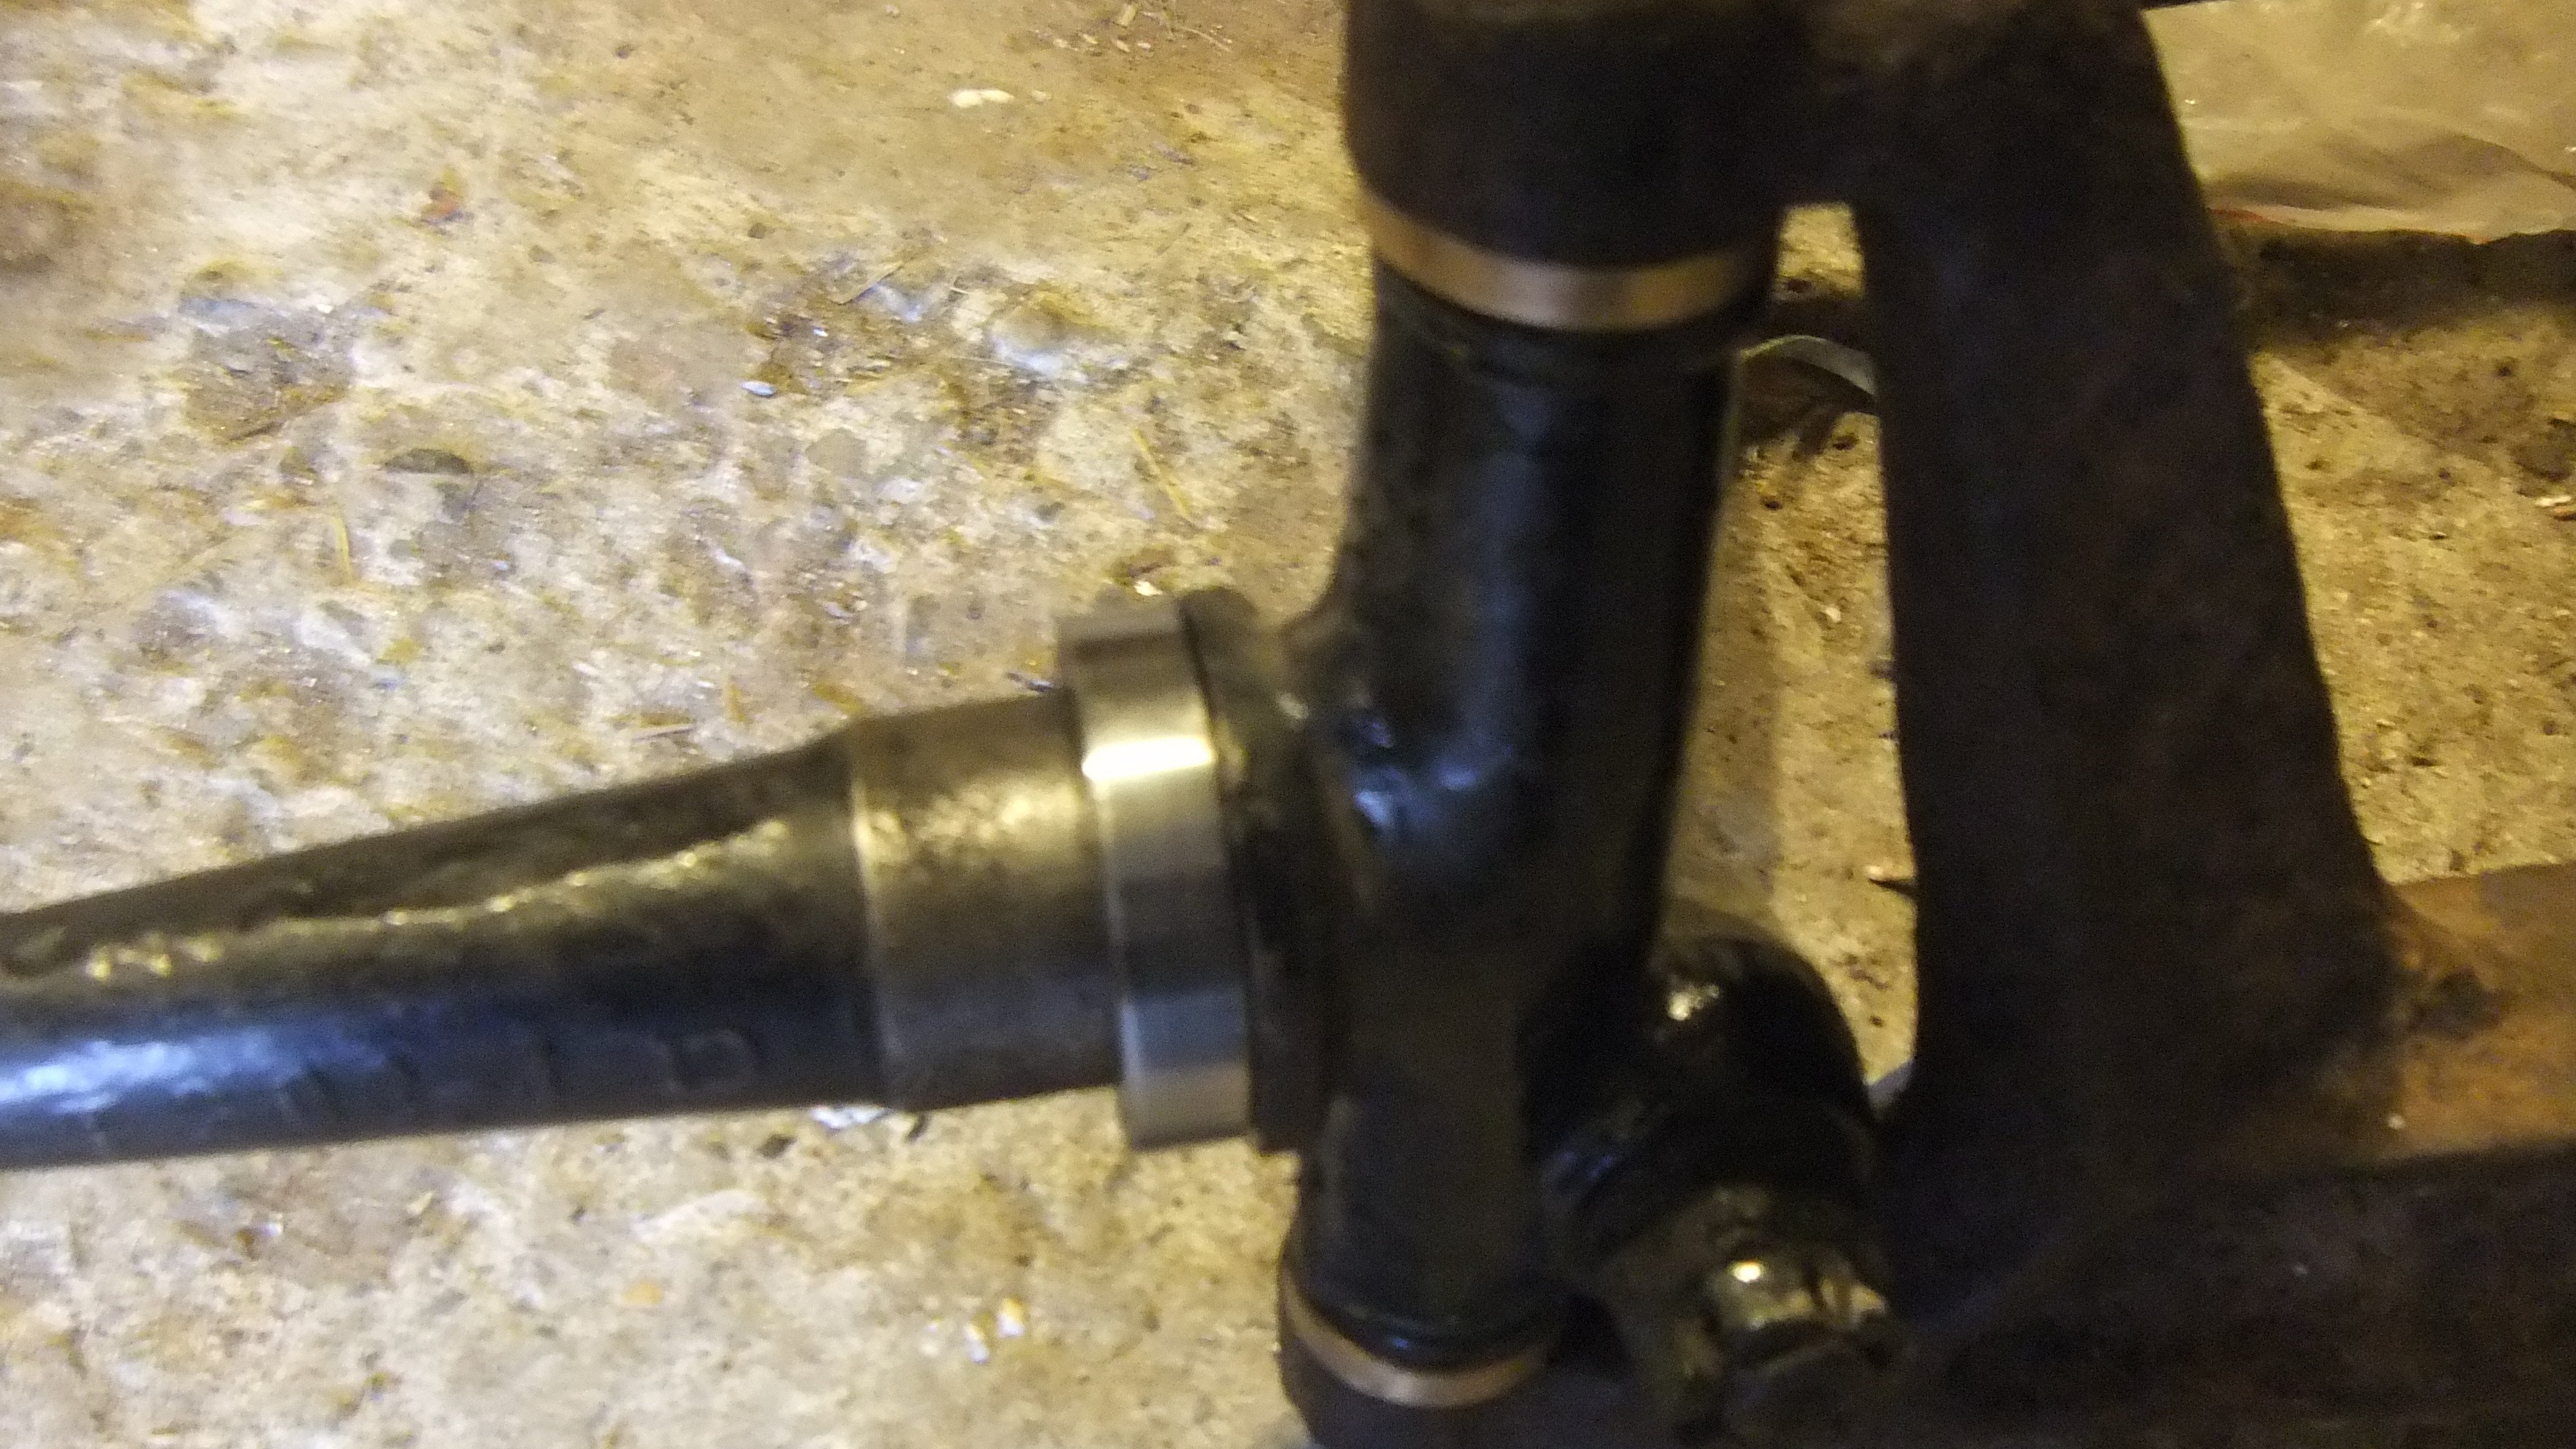
So I've done a bit more on this dirty Berty. I flipped it over to finish off the frame extension, and cut off a few unneeded bits. Seeing as it wouldn't rev or idle with no choke, I cleaned the carbs out, they had sea weed growing on the float needle things. I also welded up the plenum, and played around with restricter sizing (had to go down to a 35mm opening) this resulted in it running waaaaay better, and revving out like it should. I also removed all the washers that had been put under the needles (they were trying to make up for them not lifting due to lack of vacuum) and it ran even betterer again! I needed some way of mounting the air filter, and remembered I still had some silicon left over from the hektik Hilux, it was perfect, and pretty! Little vid of it running betterer, the linkage was a bit sticky, hence the high idle then dieing out at the end. Then I took the wrap off the headers as it was fucked, and cleaned the headers up a bit. Then I changed the muffler out for a prettier one, it's from a GSX1200, so even though it has one chamber (the other was straight through) it has a larger outlet than the original, so should flow well. I had a sprocket that needed boring and keying, but decided to go with a plate wheel and bolt it to the original sprocket hub. Bit bigger than the OG one. I then put the back end together, and ran a brake line up to the slave cylinder. Got a few hoses from the wreckers, this female - female clutch line from an AE100 Corolla made life easy, used the mounts and all. Then I made a new gear shifter linkage, as the old one was fucking rank. I also moved it forward a bit to suit me. Next was sorting the steering wheel/shaft/rack. This was a bit of a mission, but it worked out well. Managed to mount the wheel on top of the bar it used to be below, and move it forward a bit, so I can pilot the vehicle, with the added bonus of being able to get in and out of it. Also put the front suspension back together, so I could work out the pedal position, and the position of the bar that mounts the steering bearing, clutch and gas cable mounts, and the brake master thing. The brake master has to be in this funny frame thing to miss your legs and still fit under the hood. Once all that was done, I crimped the cables, but they were too short due to me lengthening the frame, so I made little extension doofers out of D shackles. Now the back ends done, all the controls are pretty much done, and it's running better, I'm getting onto doing the front steering knuckles and tie rod ends. Still much to do, but progress is being made! Regards, VG.5 points
-
Time for a rebuild
4 points
-
this took WAY longer than it should have. i decided to mount the speakers as flush as possible. both Celcia's have sticky out type "pods" with the speakers in them and i have knocked the shit out of them getting in and out of the car with my big work boots on and the speakers have taken a hammering because of it. and i kind of wanted to cause the least amount of disruption to the look of the door cards as i could. so i did it like this. 20mm spacer which has black carpet on it but ill probably put some matching red vinyl on them eventually. while i was in there i ran wires for the central locking and put some sound deadening in the doors. now i need to run a power feed for the small front amp, mount the crossovers and finish the wiring. all the wires are run to where the amp and crossovers are going to be so that should make life a bit easier. i'd also like to get the power steering installed this weekend but we'll see how we go. 2019-07-25_09-12-23 by sheepers, on Flickr3 points
-
The 20 year wait is almost over, I remember waiting 10 years to have a hoon once. I hope you have a better experience than mine. In the 10 years the chassis had sagged, there was gravel rash and excessive piston slap. Mind you I only got a bottle of Marque Vue into her as prep, you have done the full rebuild. Well done Sir!3 points
-
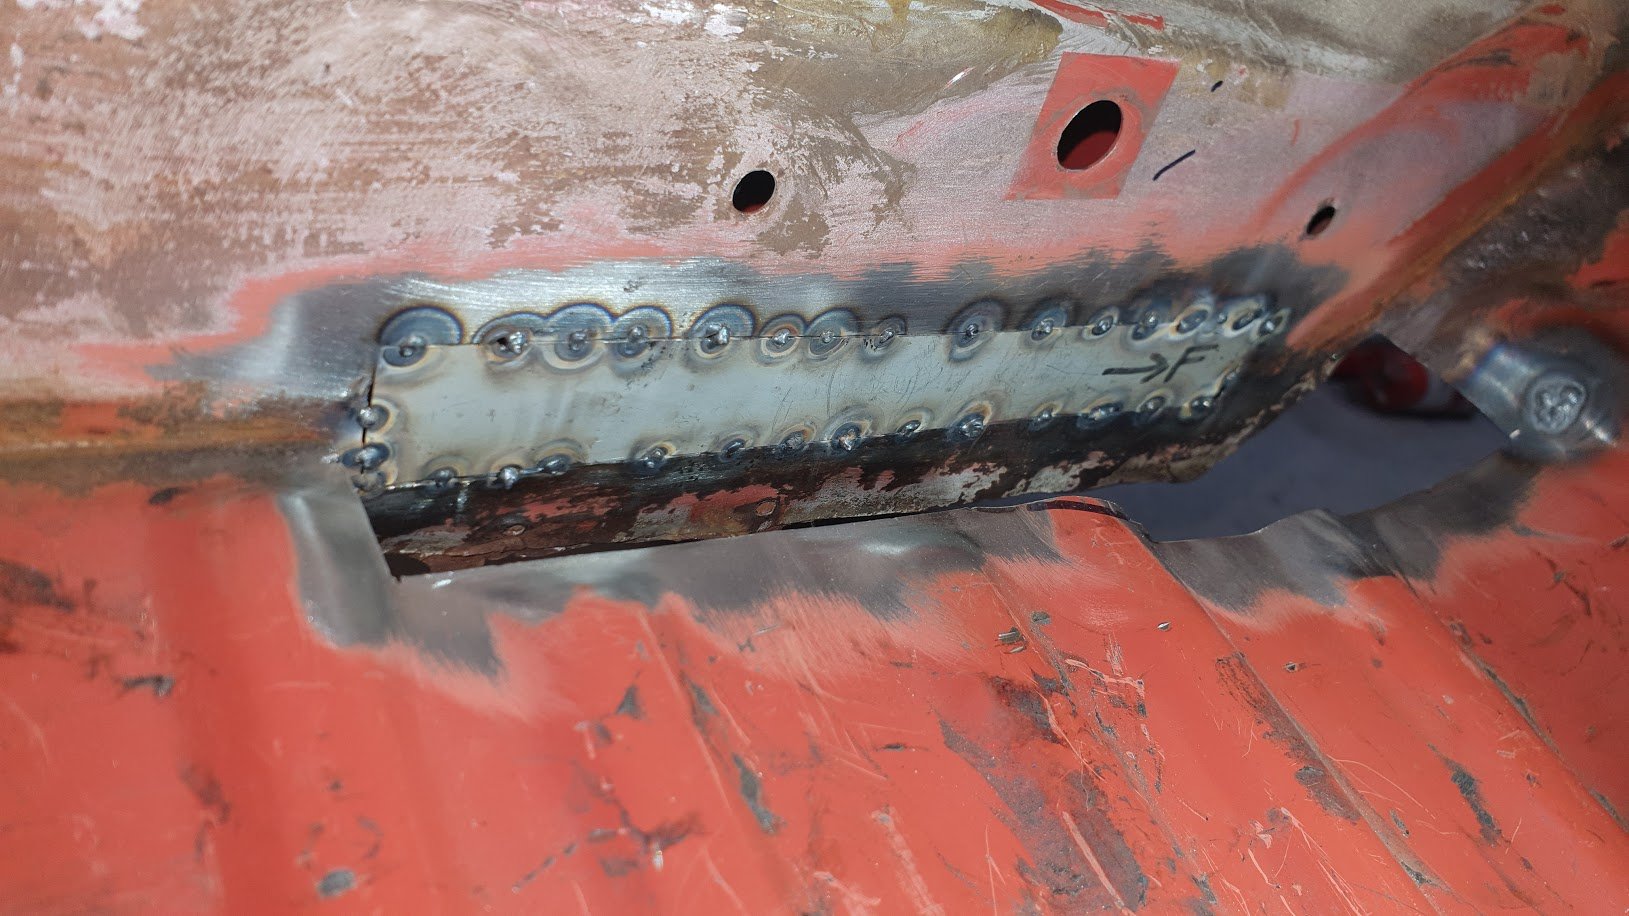
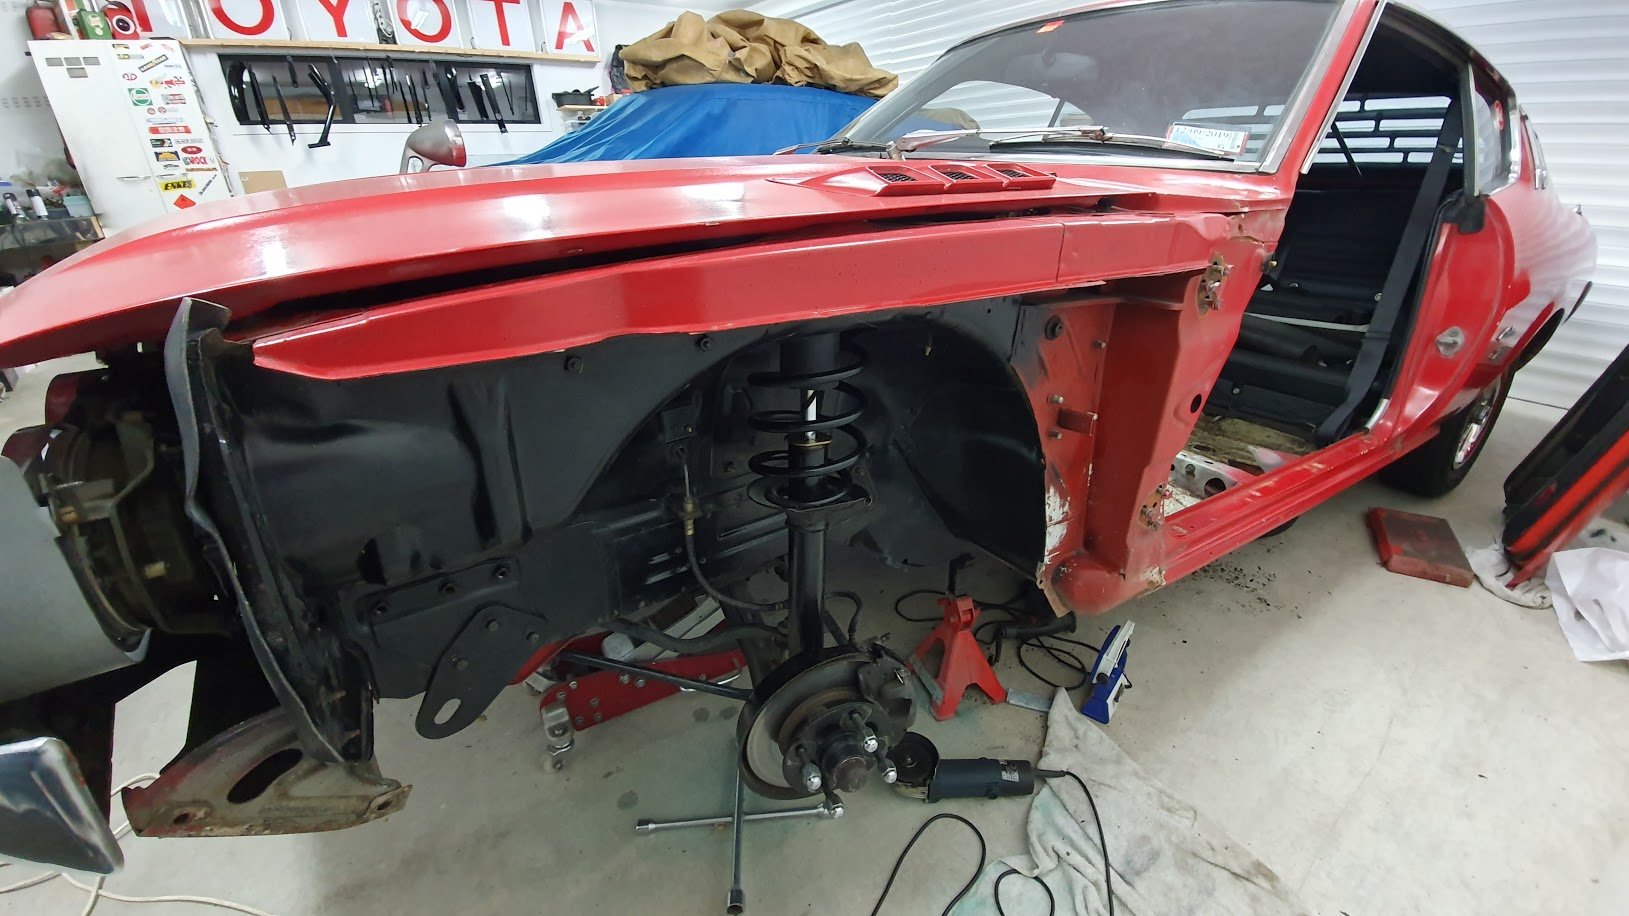
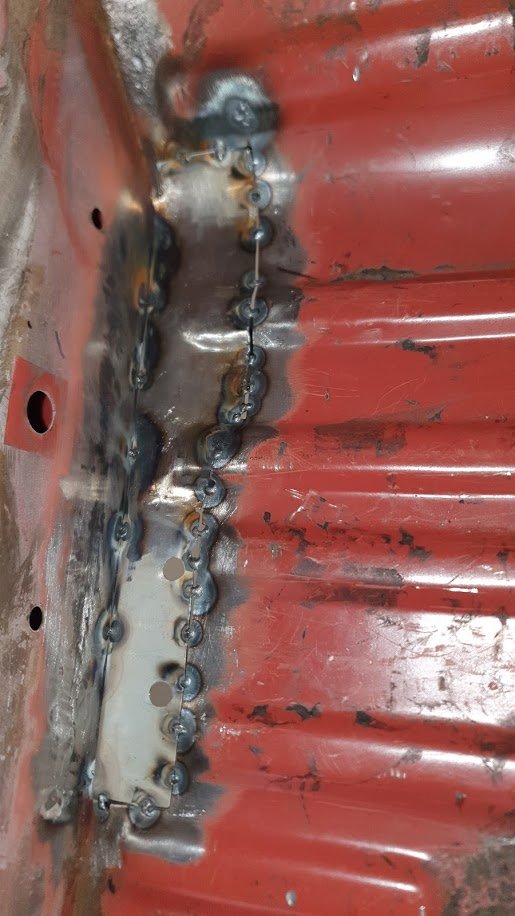
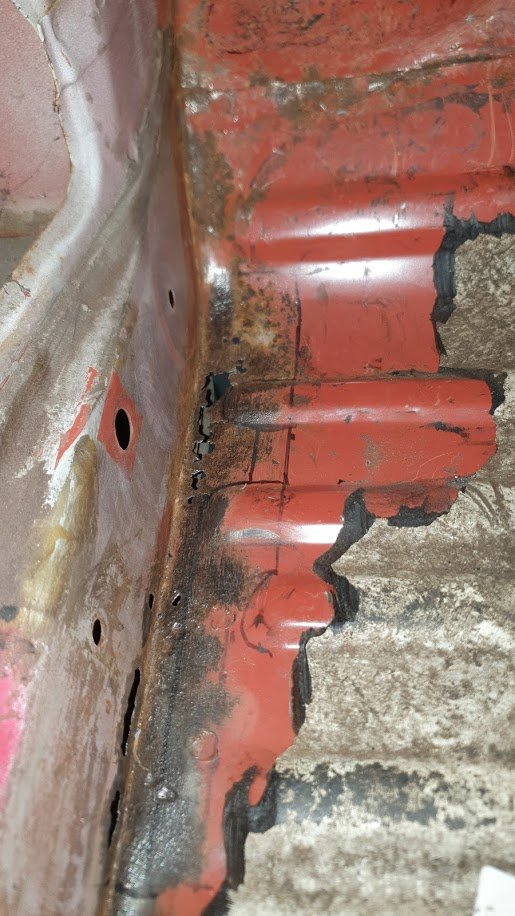
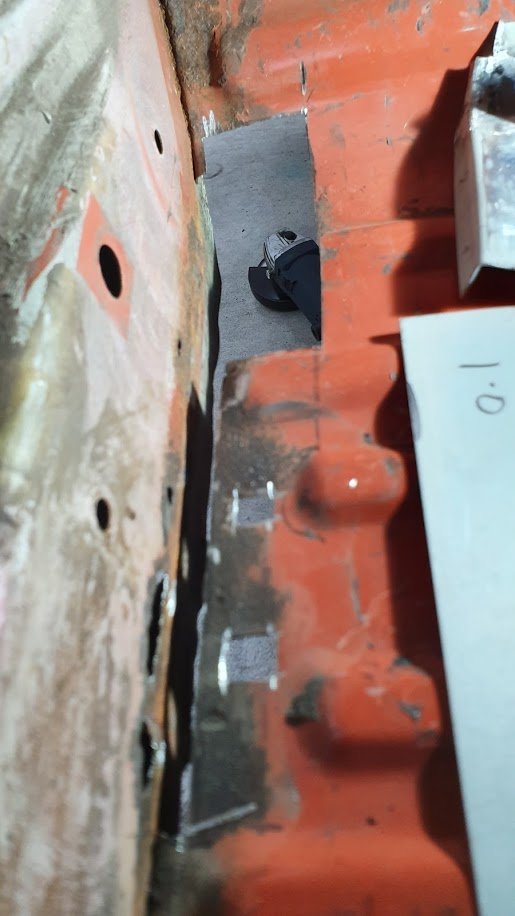
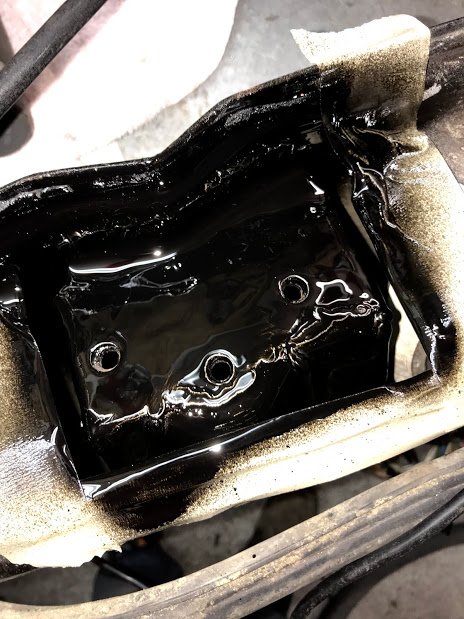
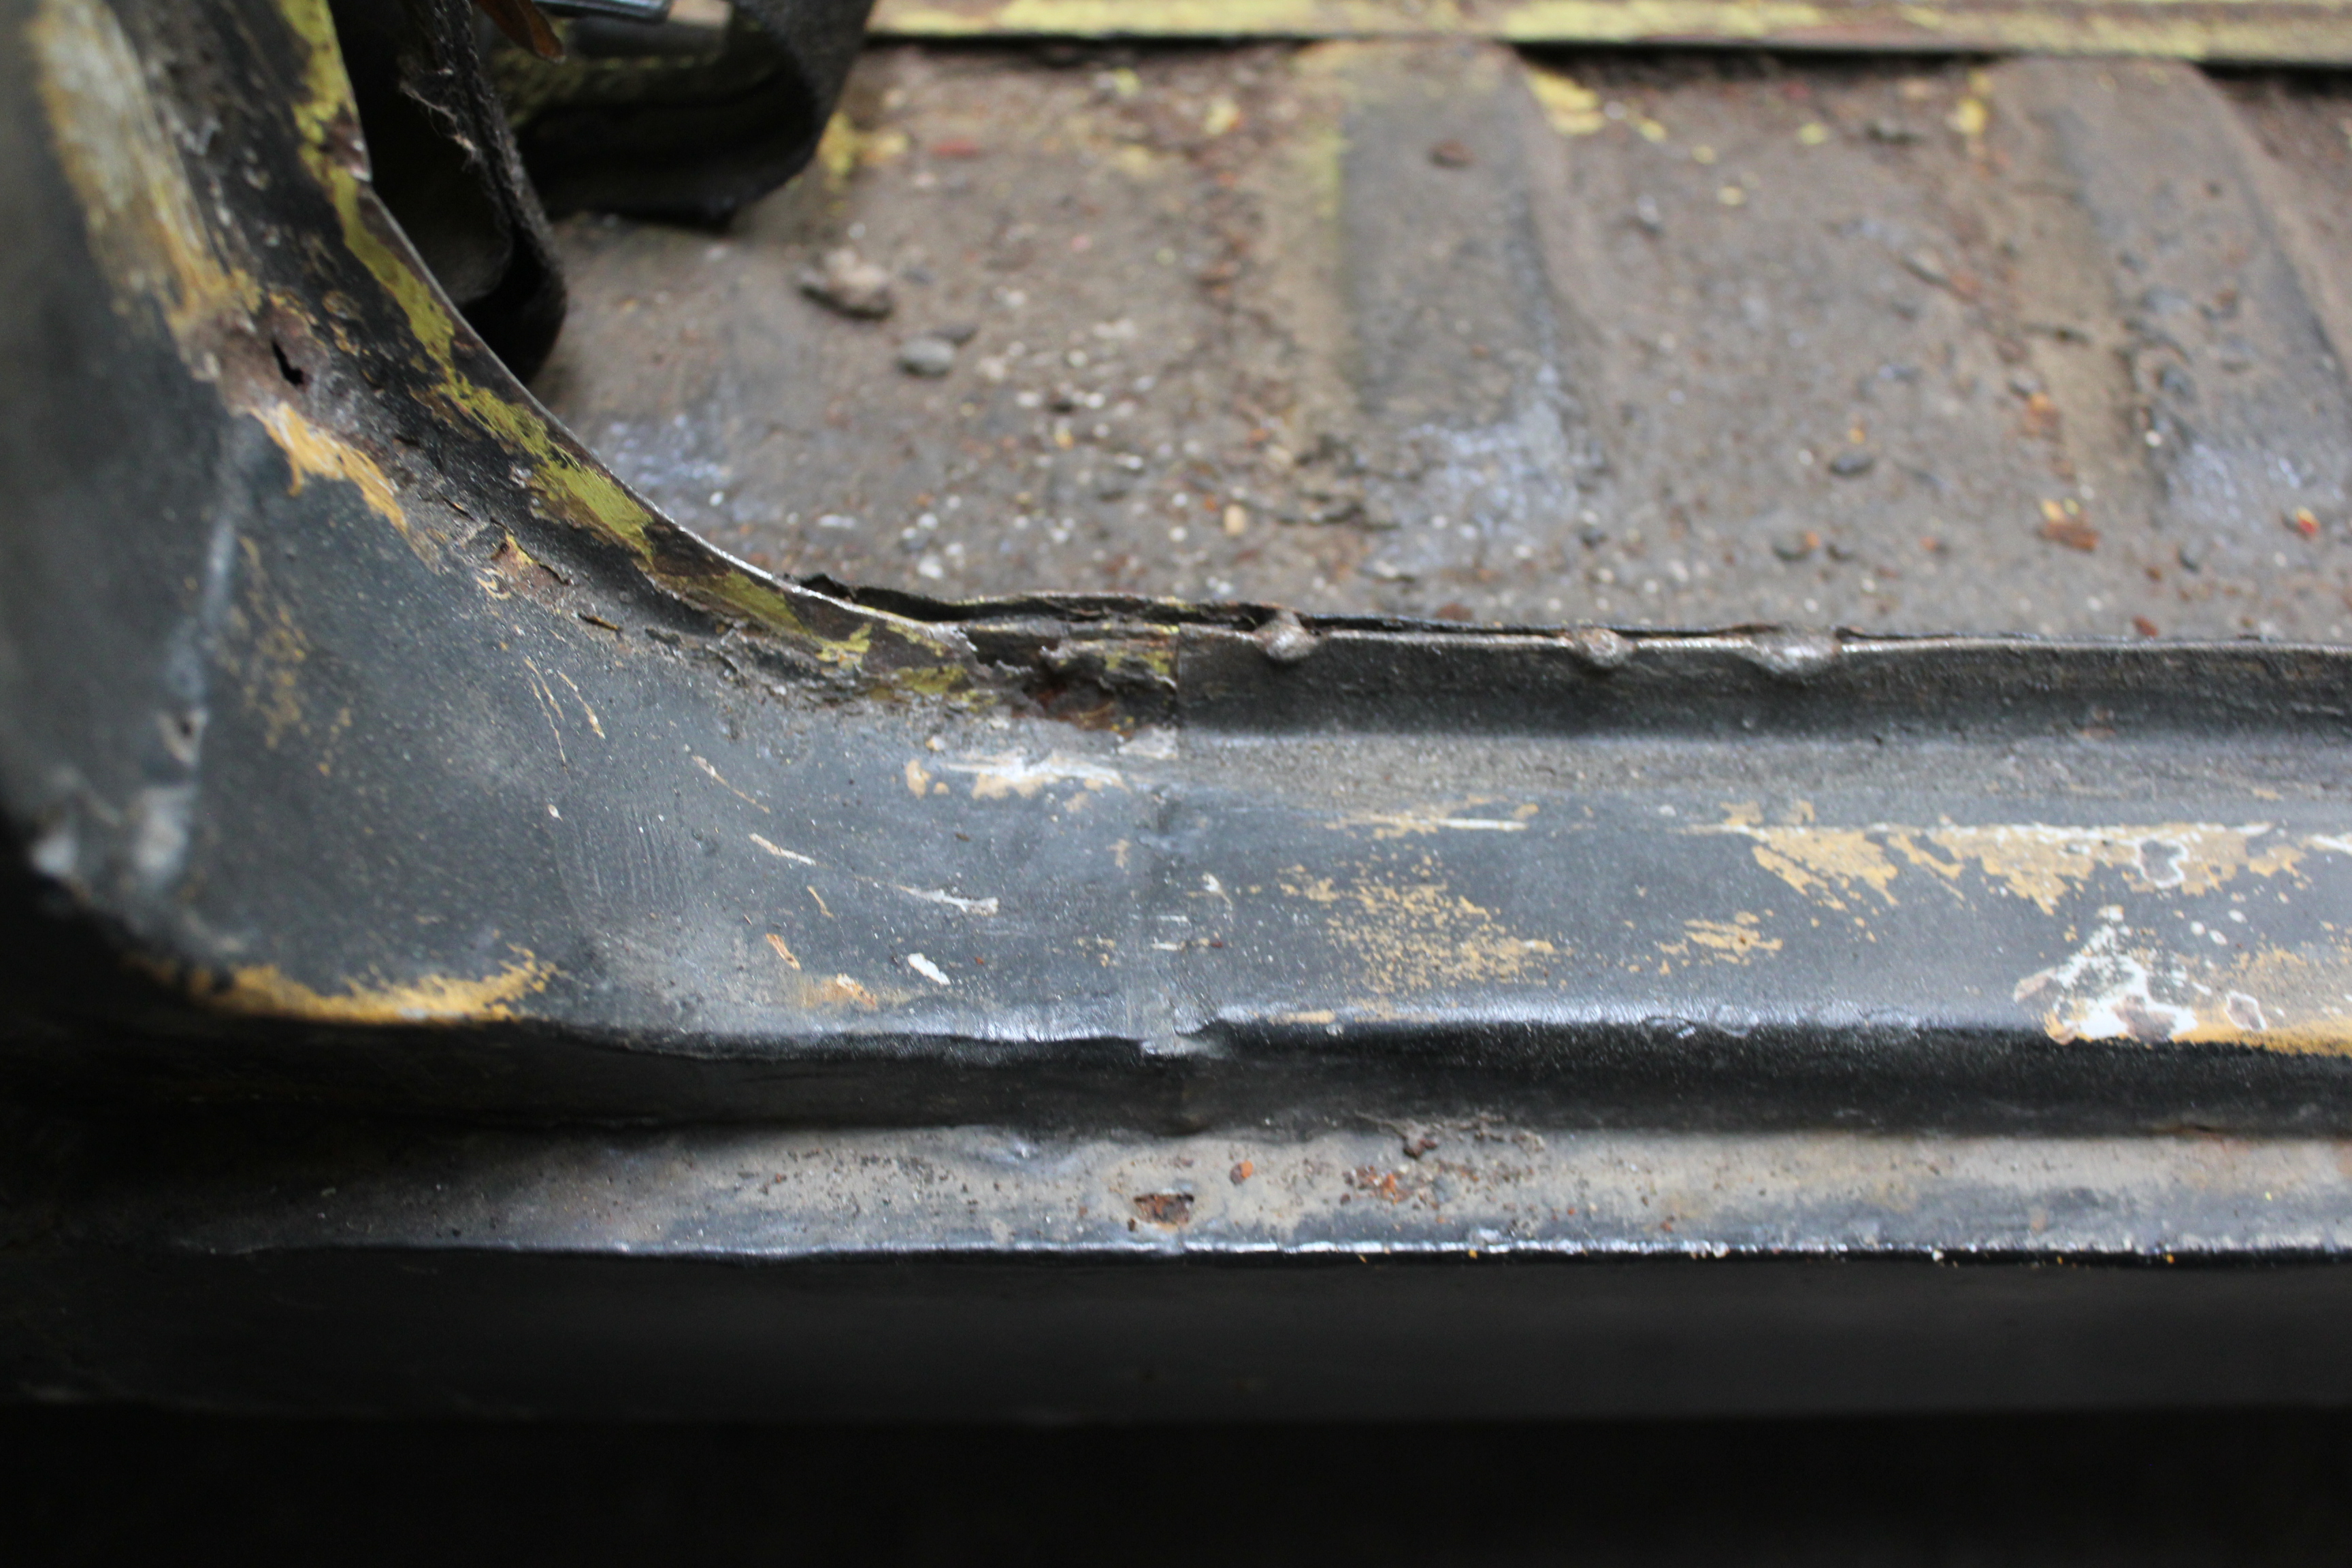
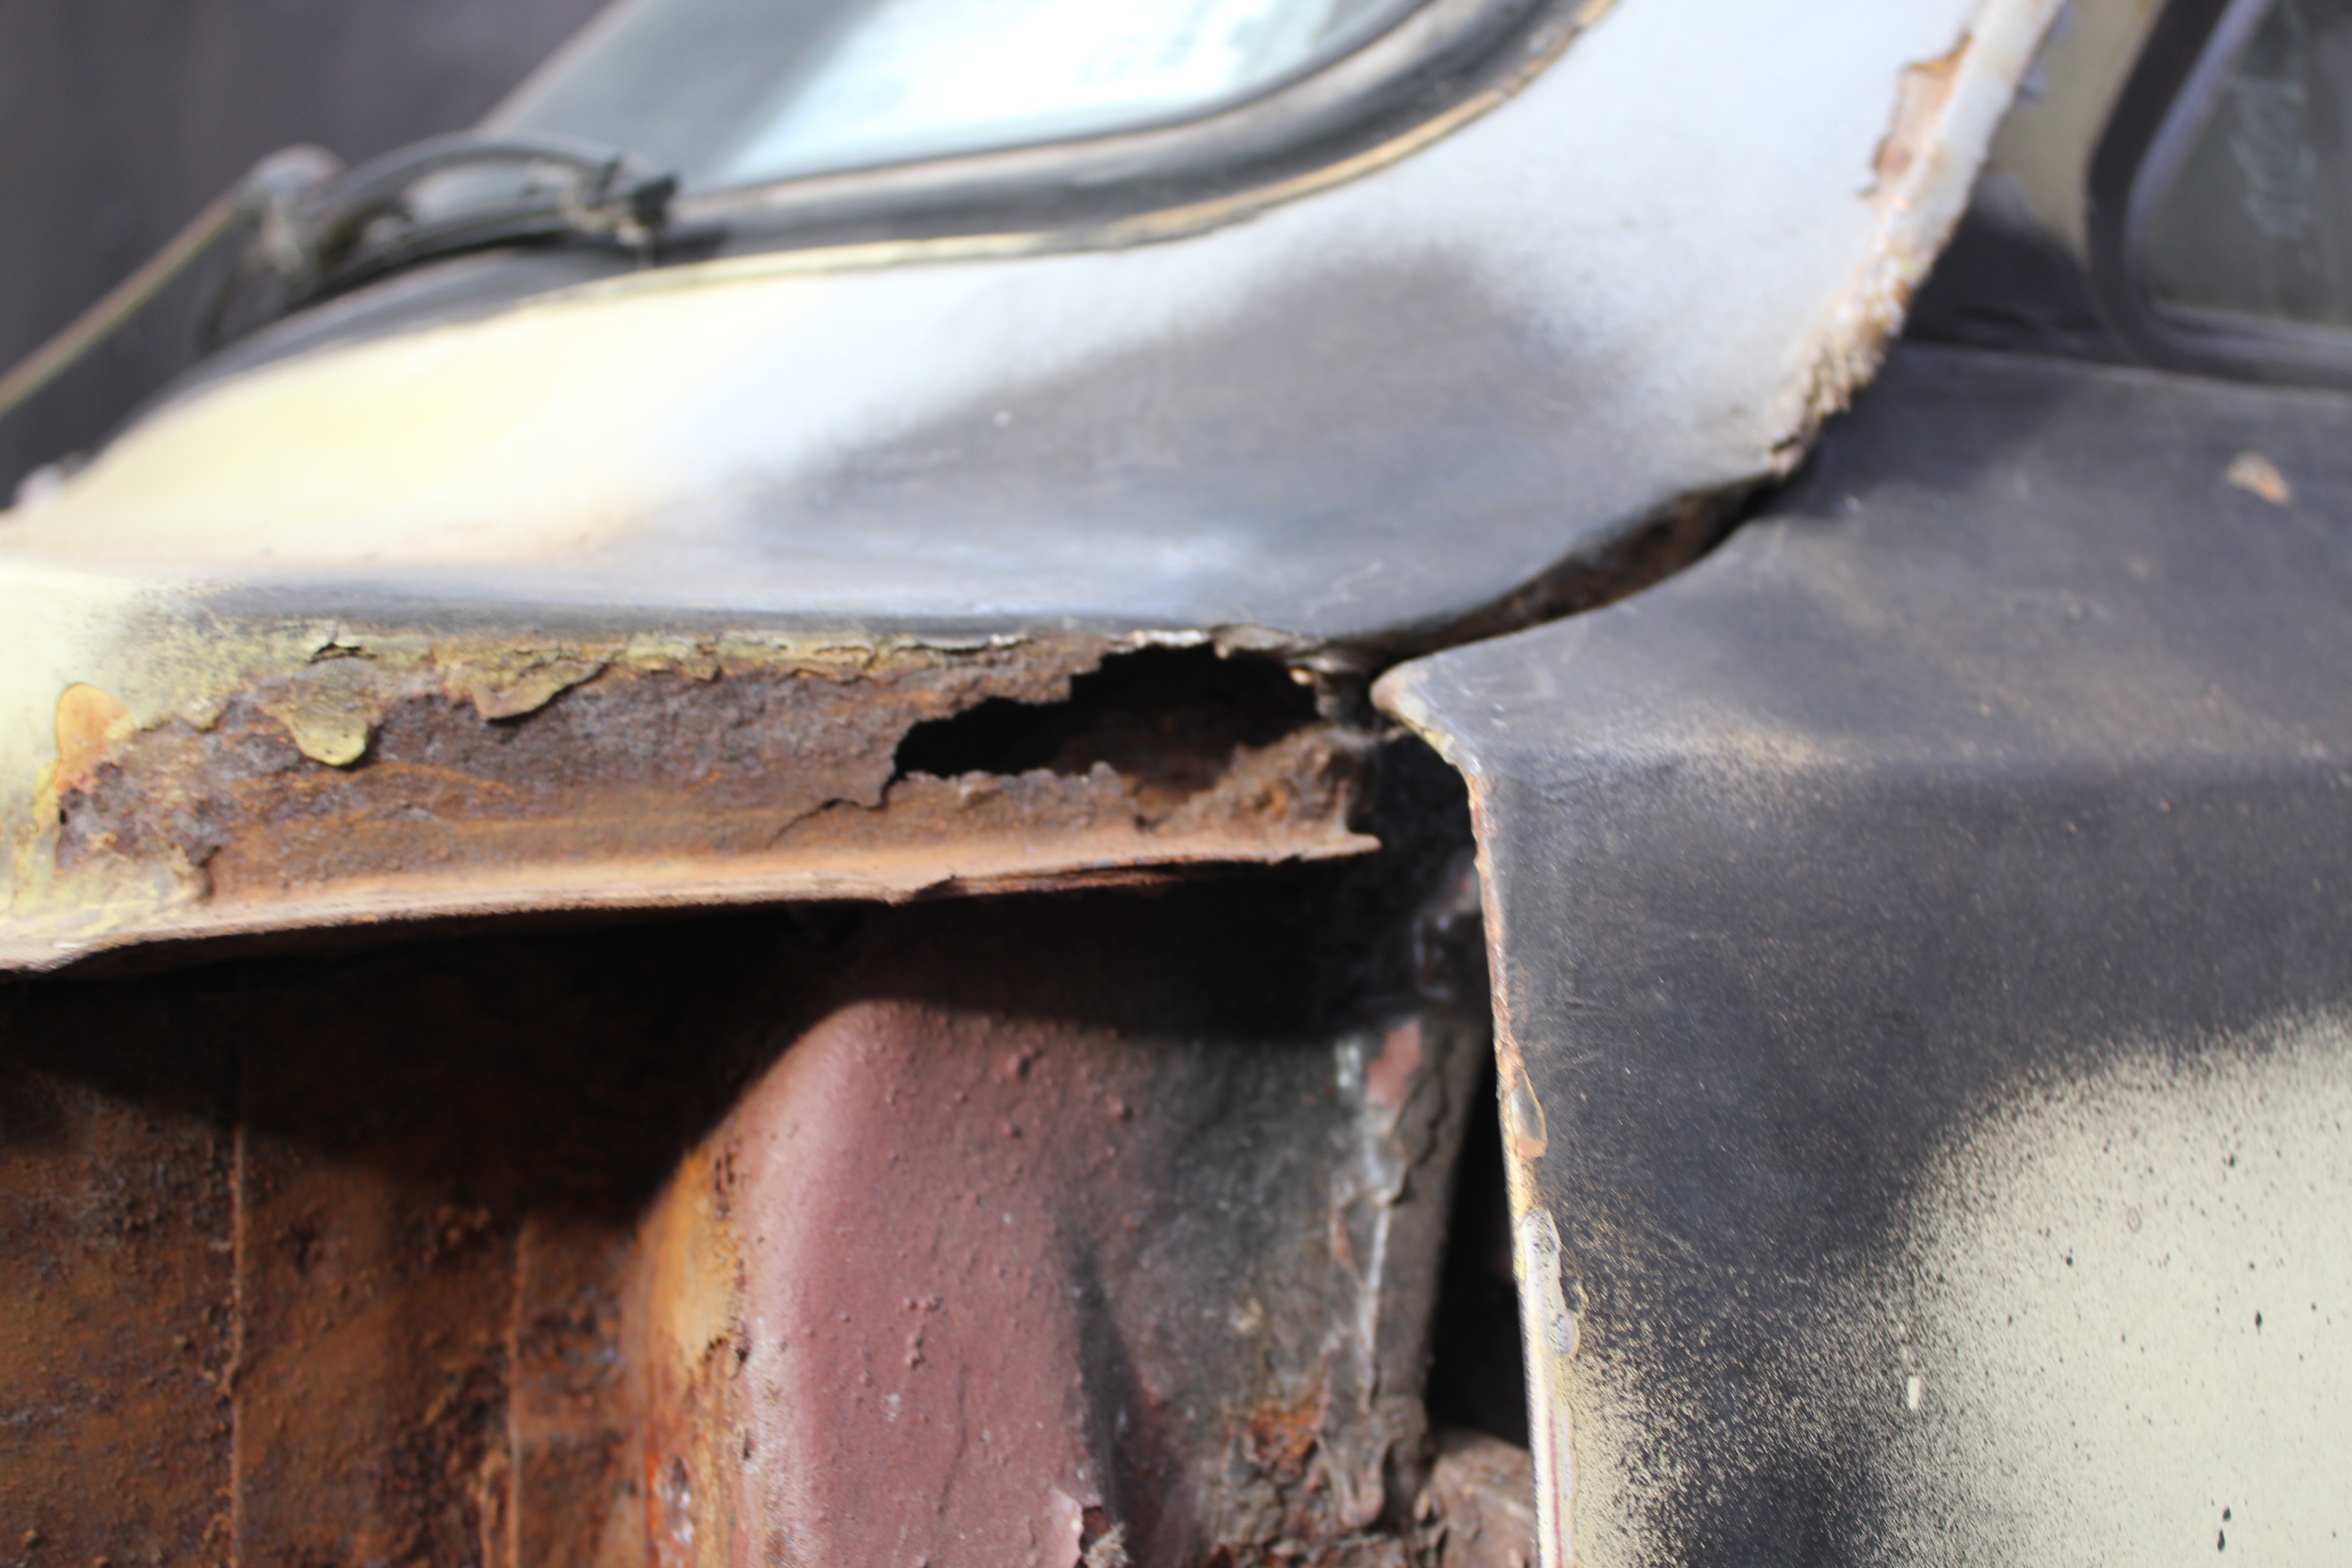
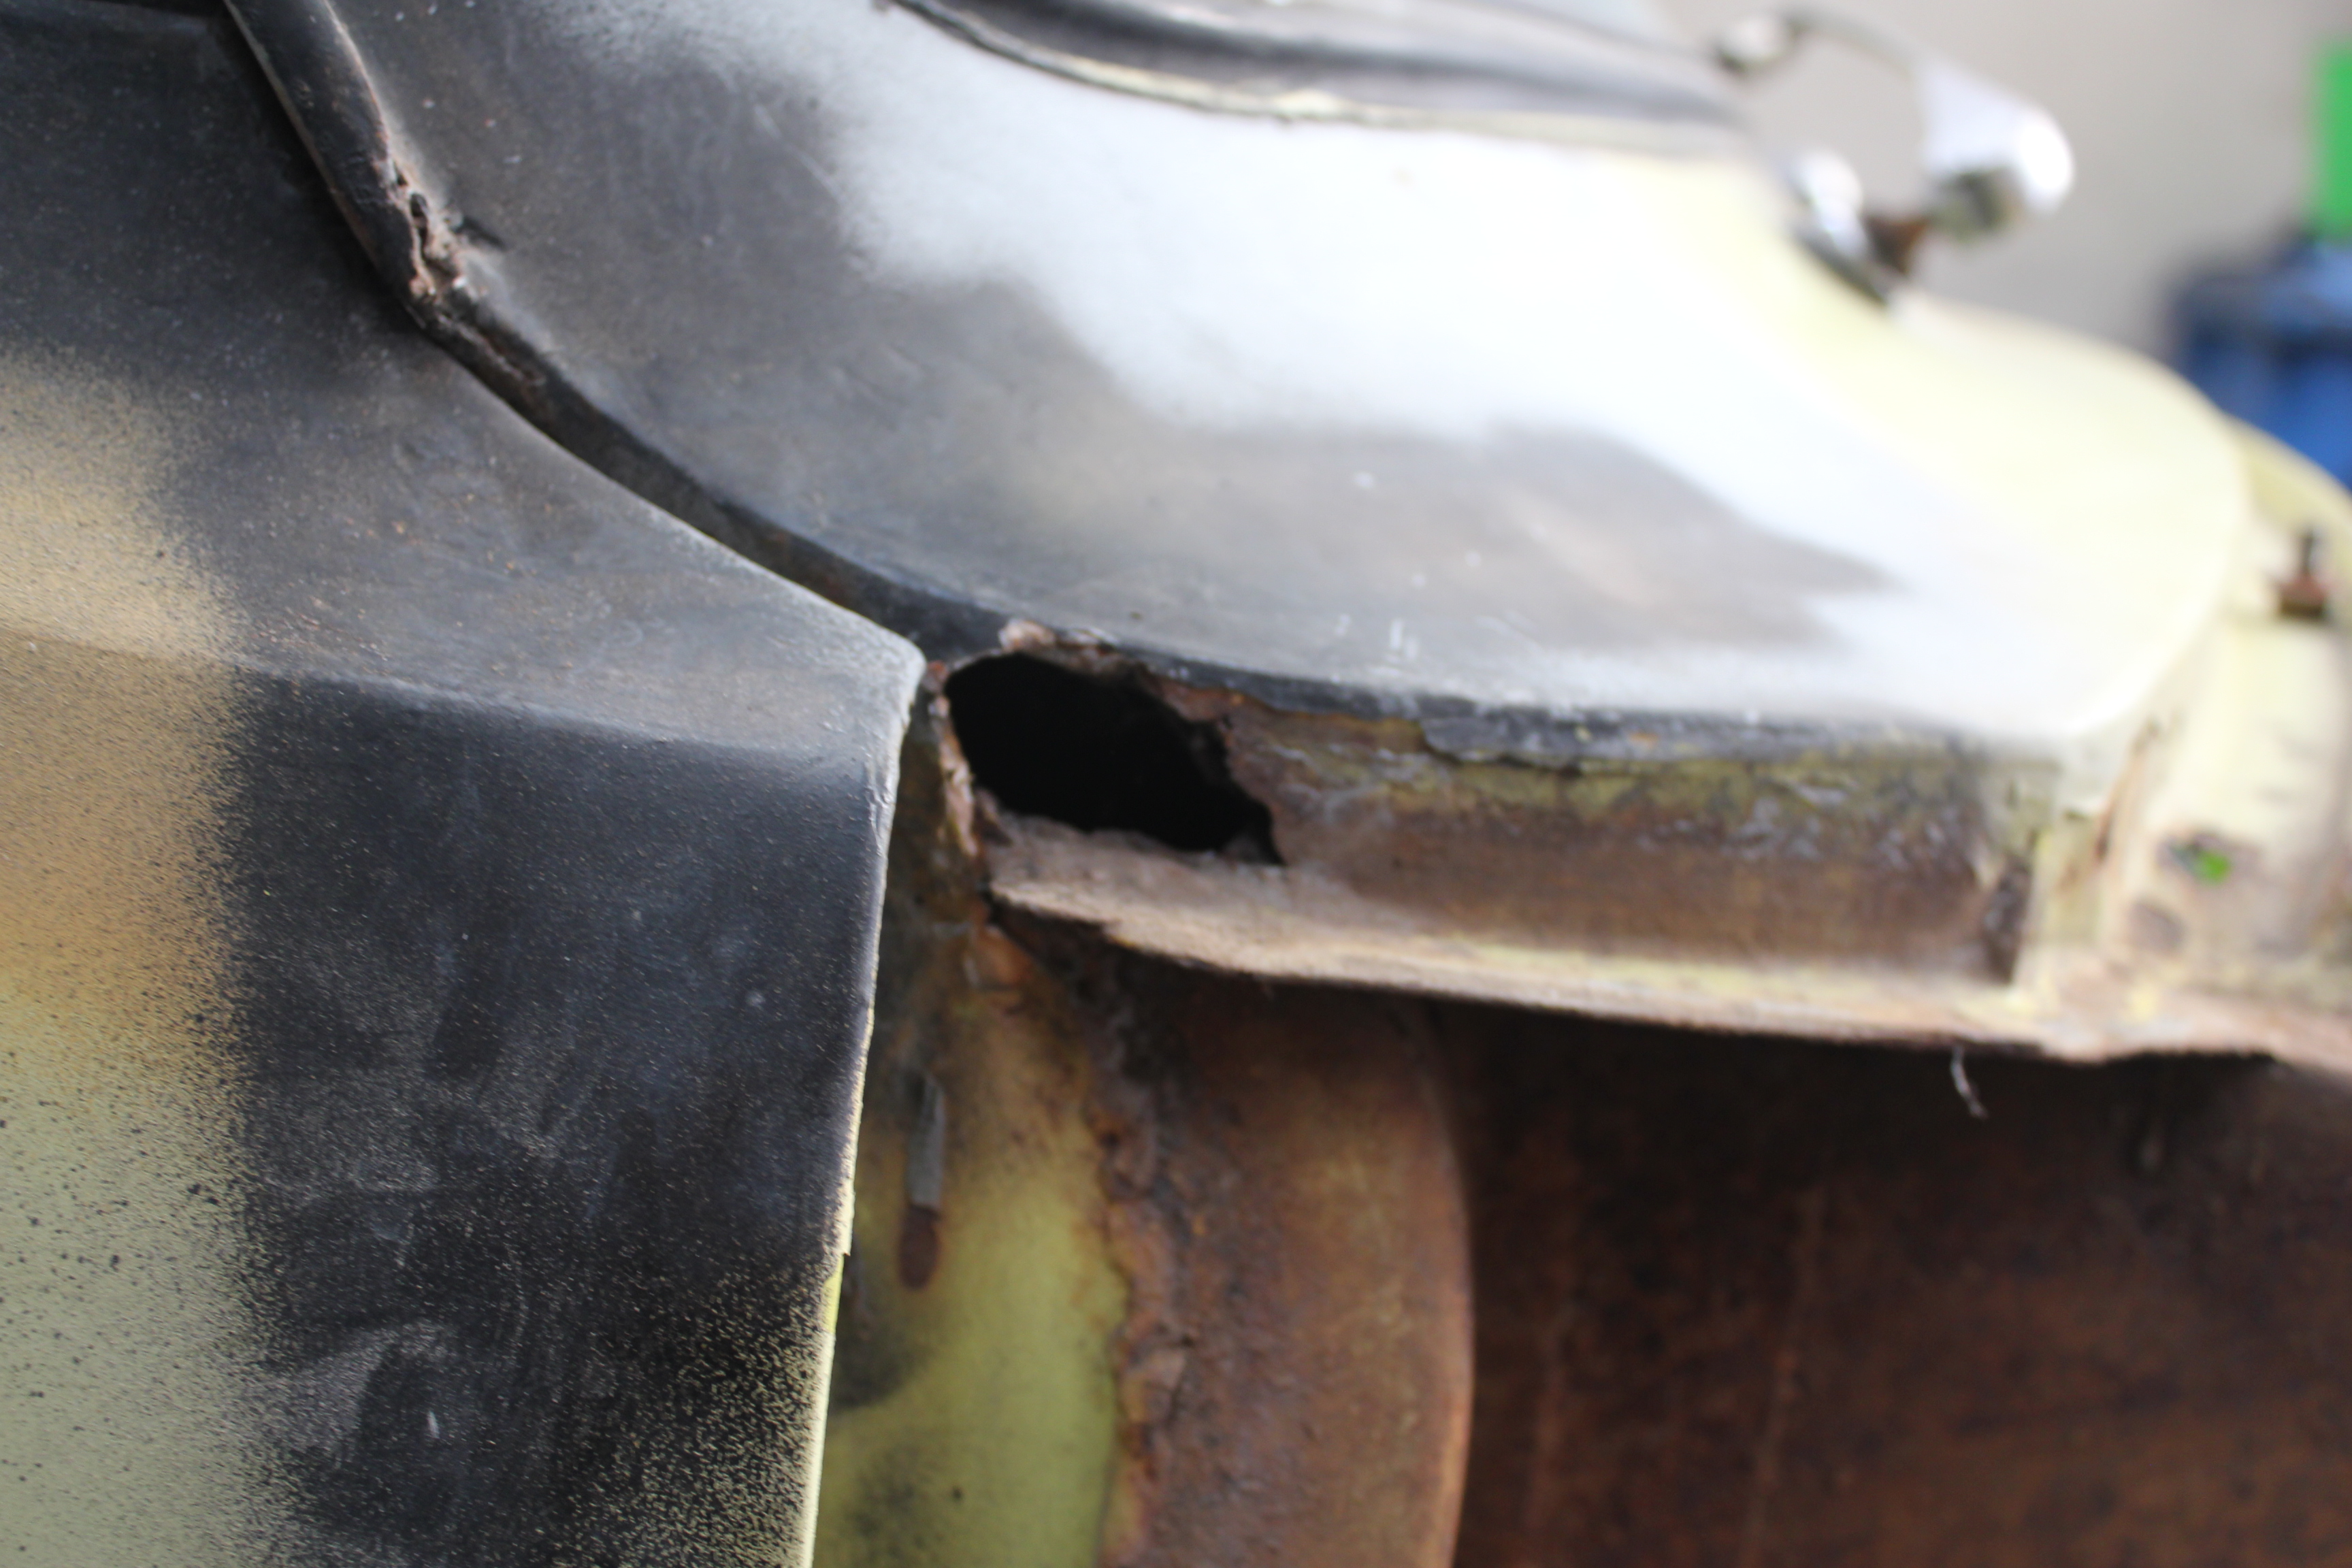
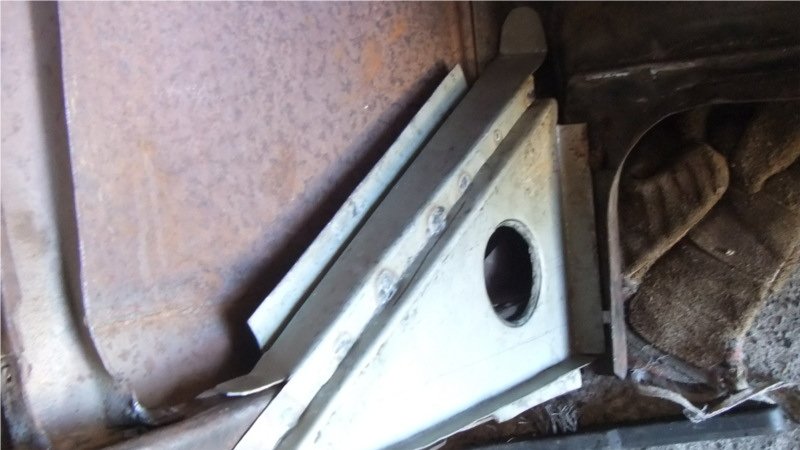
So... a change in the place i took this for a WOF meant it had a bit more of a thorough inspection. It didn't fail but he mentioned that some rust in the passengers floor would need attention soon. So some investigation happened. Turned out that hiding under the sound deadening was a little more serious than anticipated. Likely a leaking windscreen caused this. Out with the cutting disc and I had at it! And then glued it all back together Grind, Sand, and Prime - phone was left in the house so no pics except after And finally a renewal of paint and anti-chip coating. A nice tidy up for it.
2 points
-
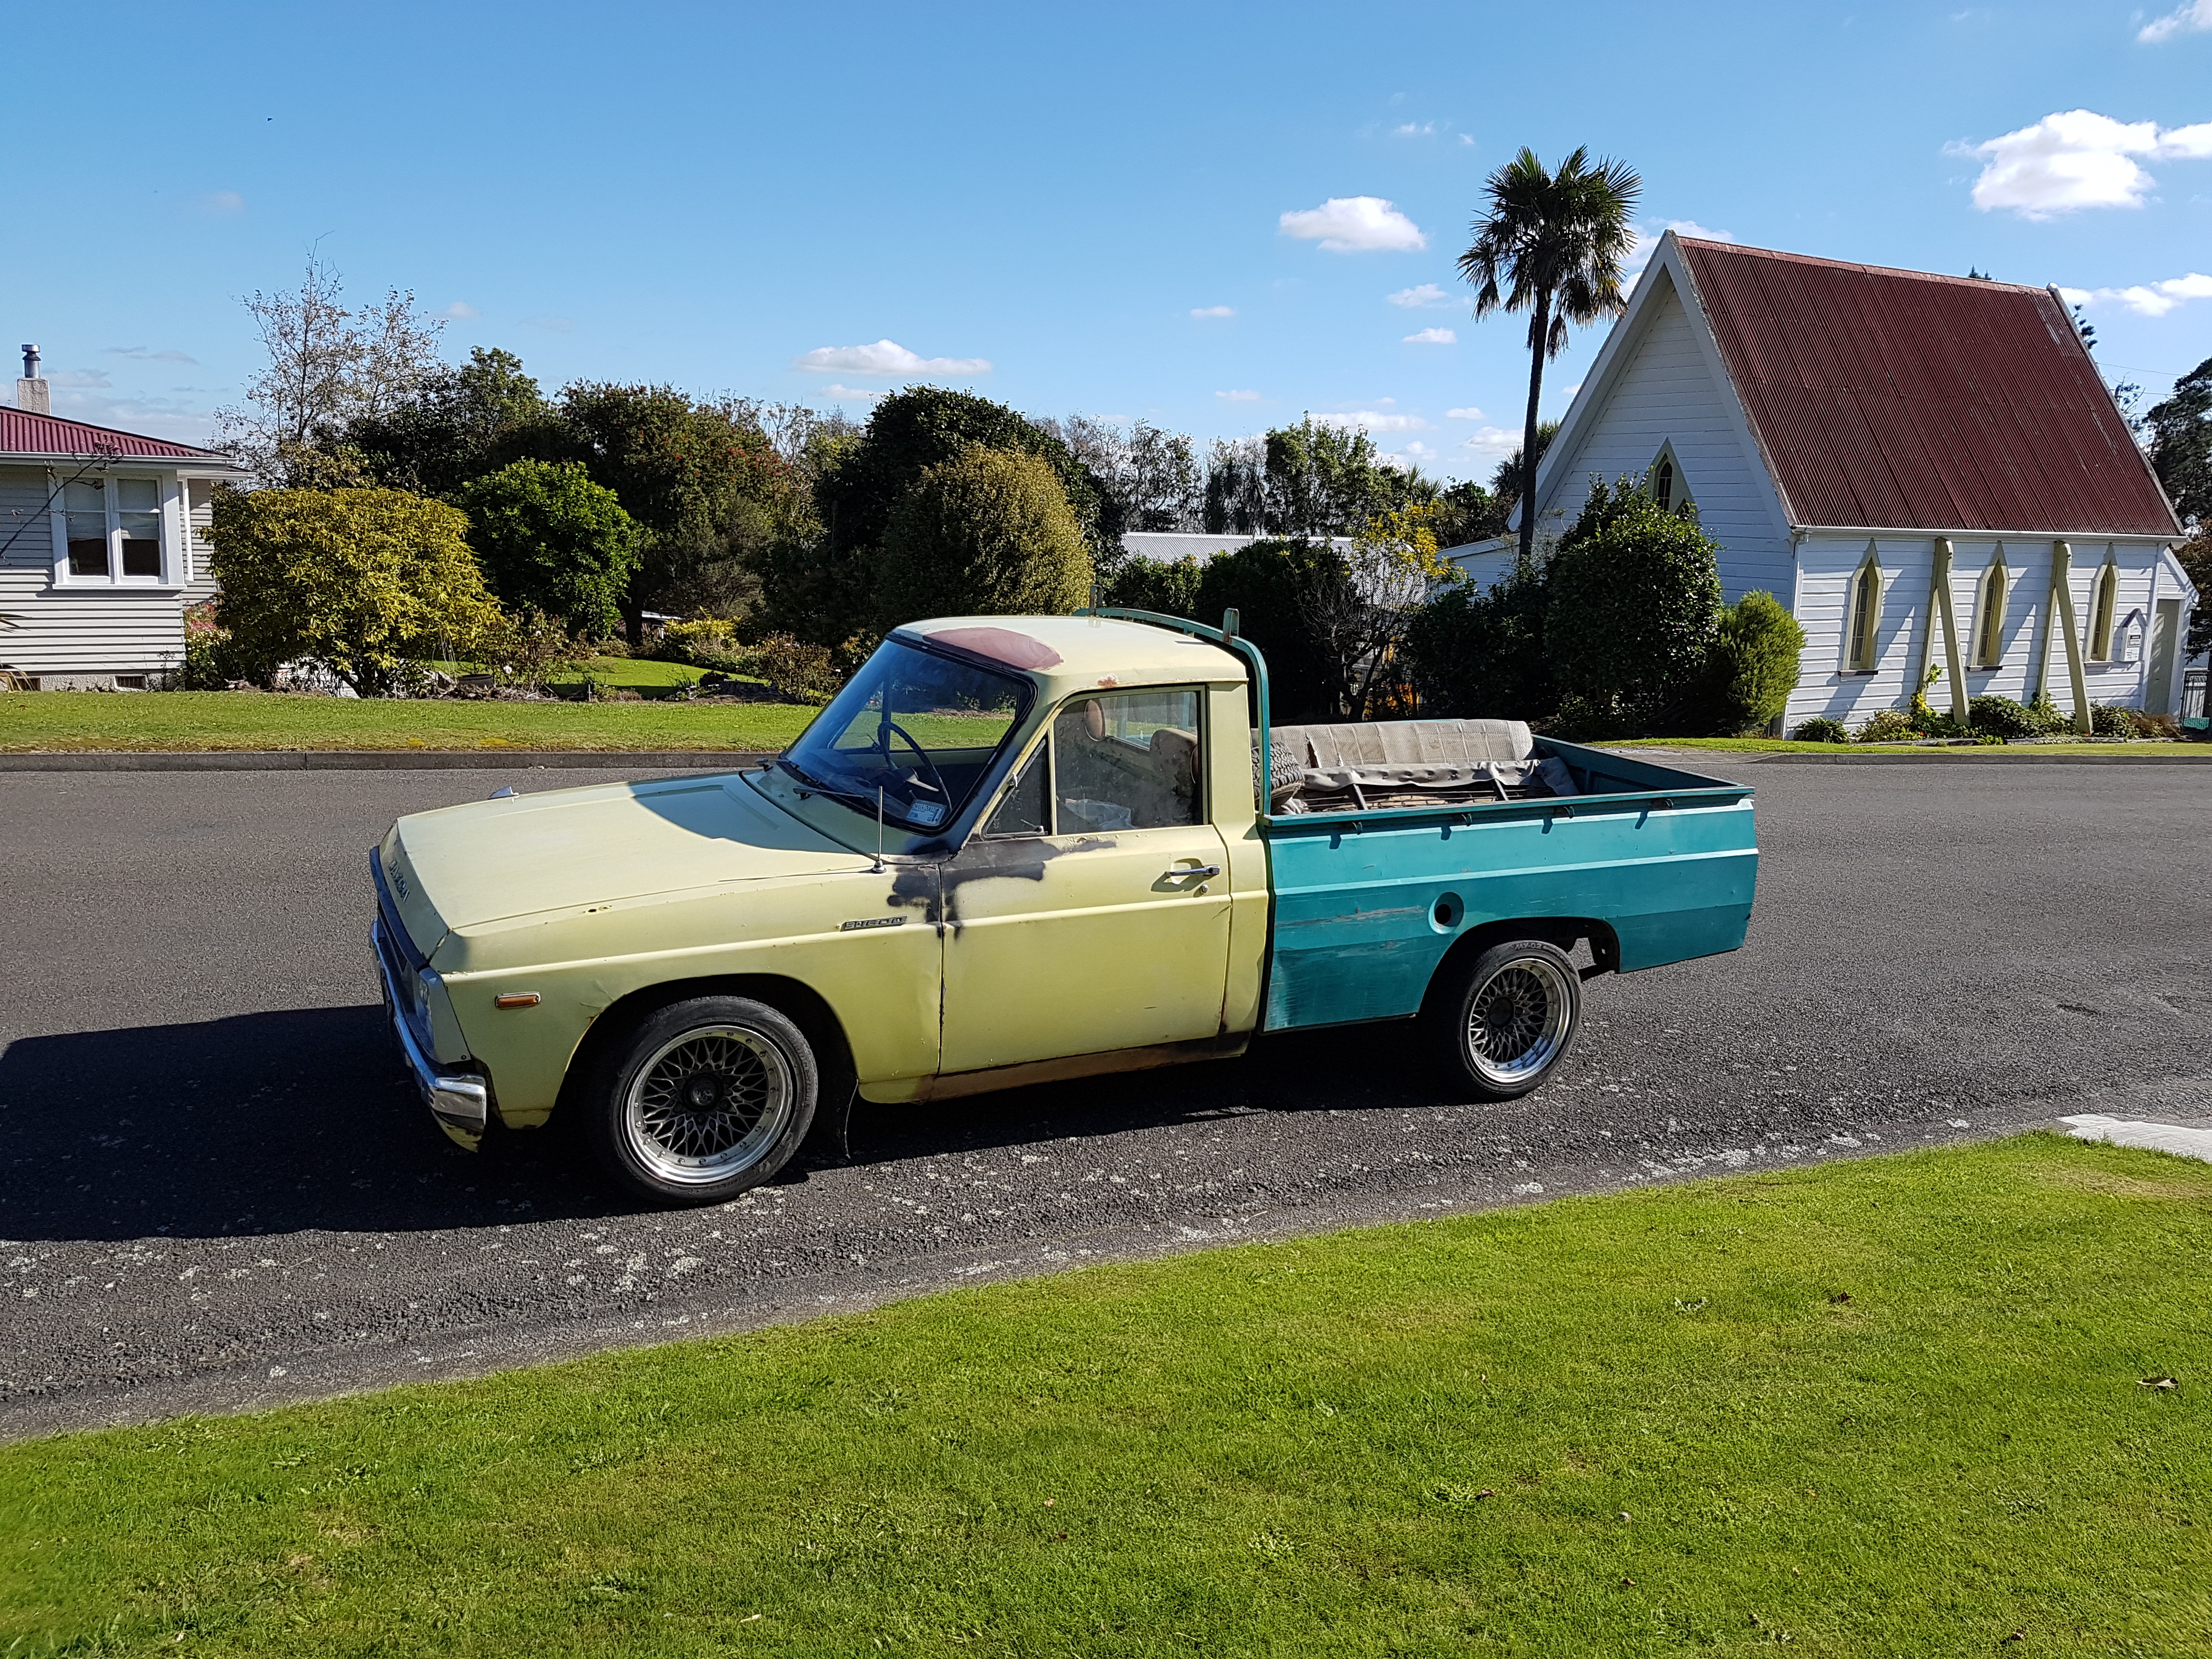
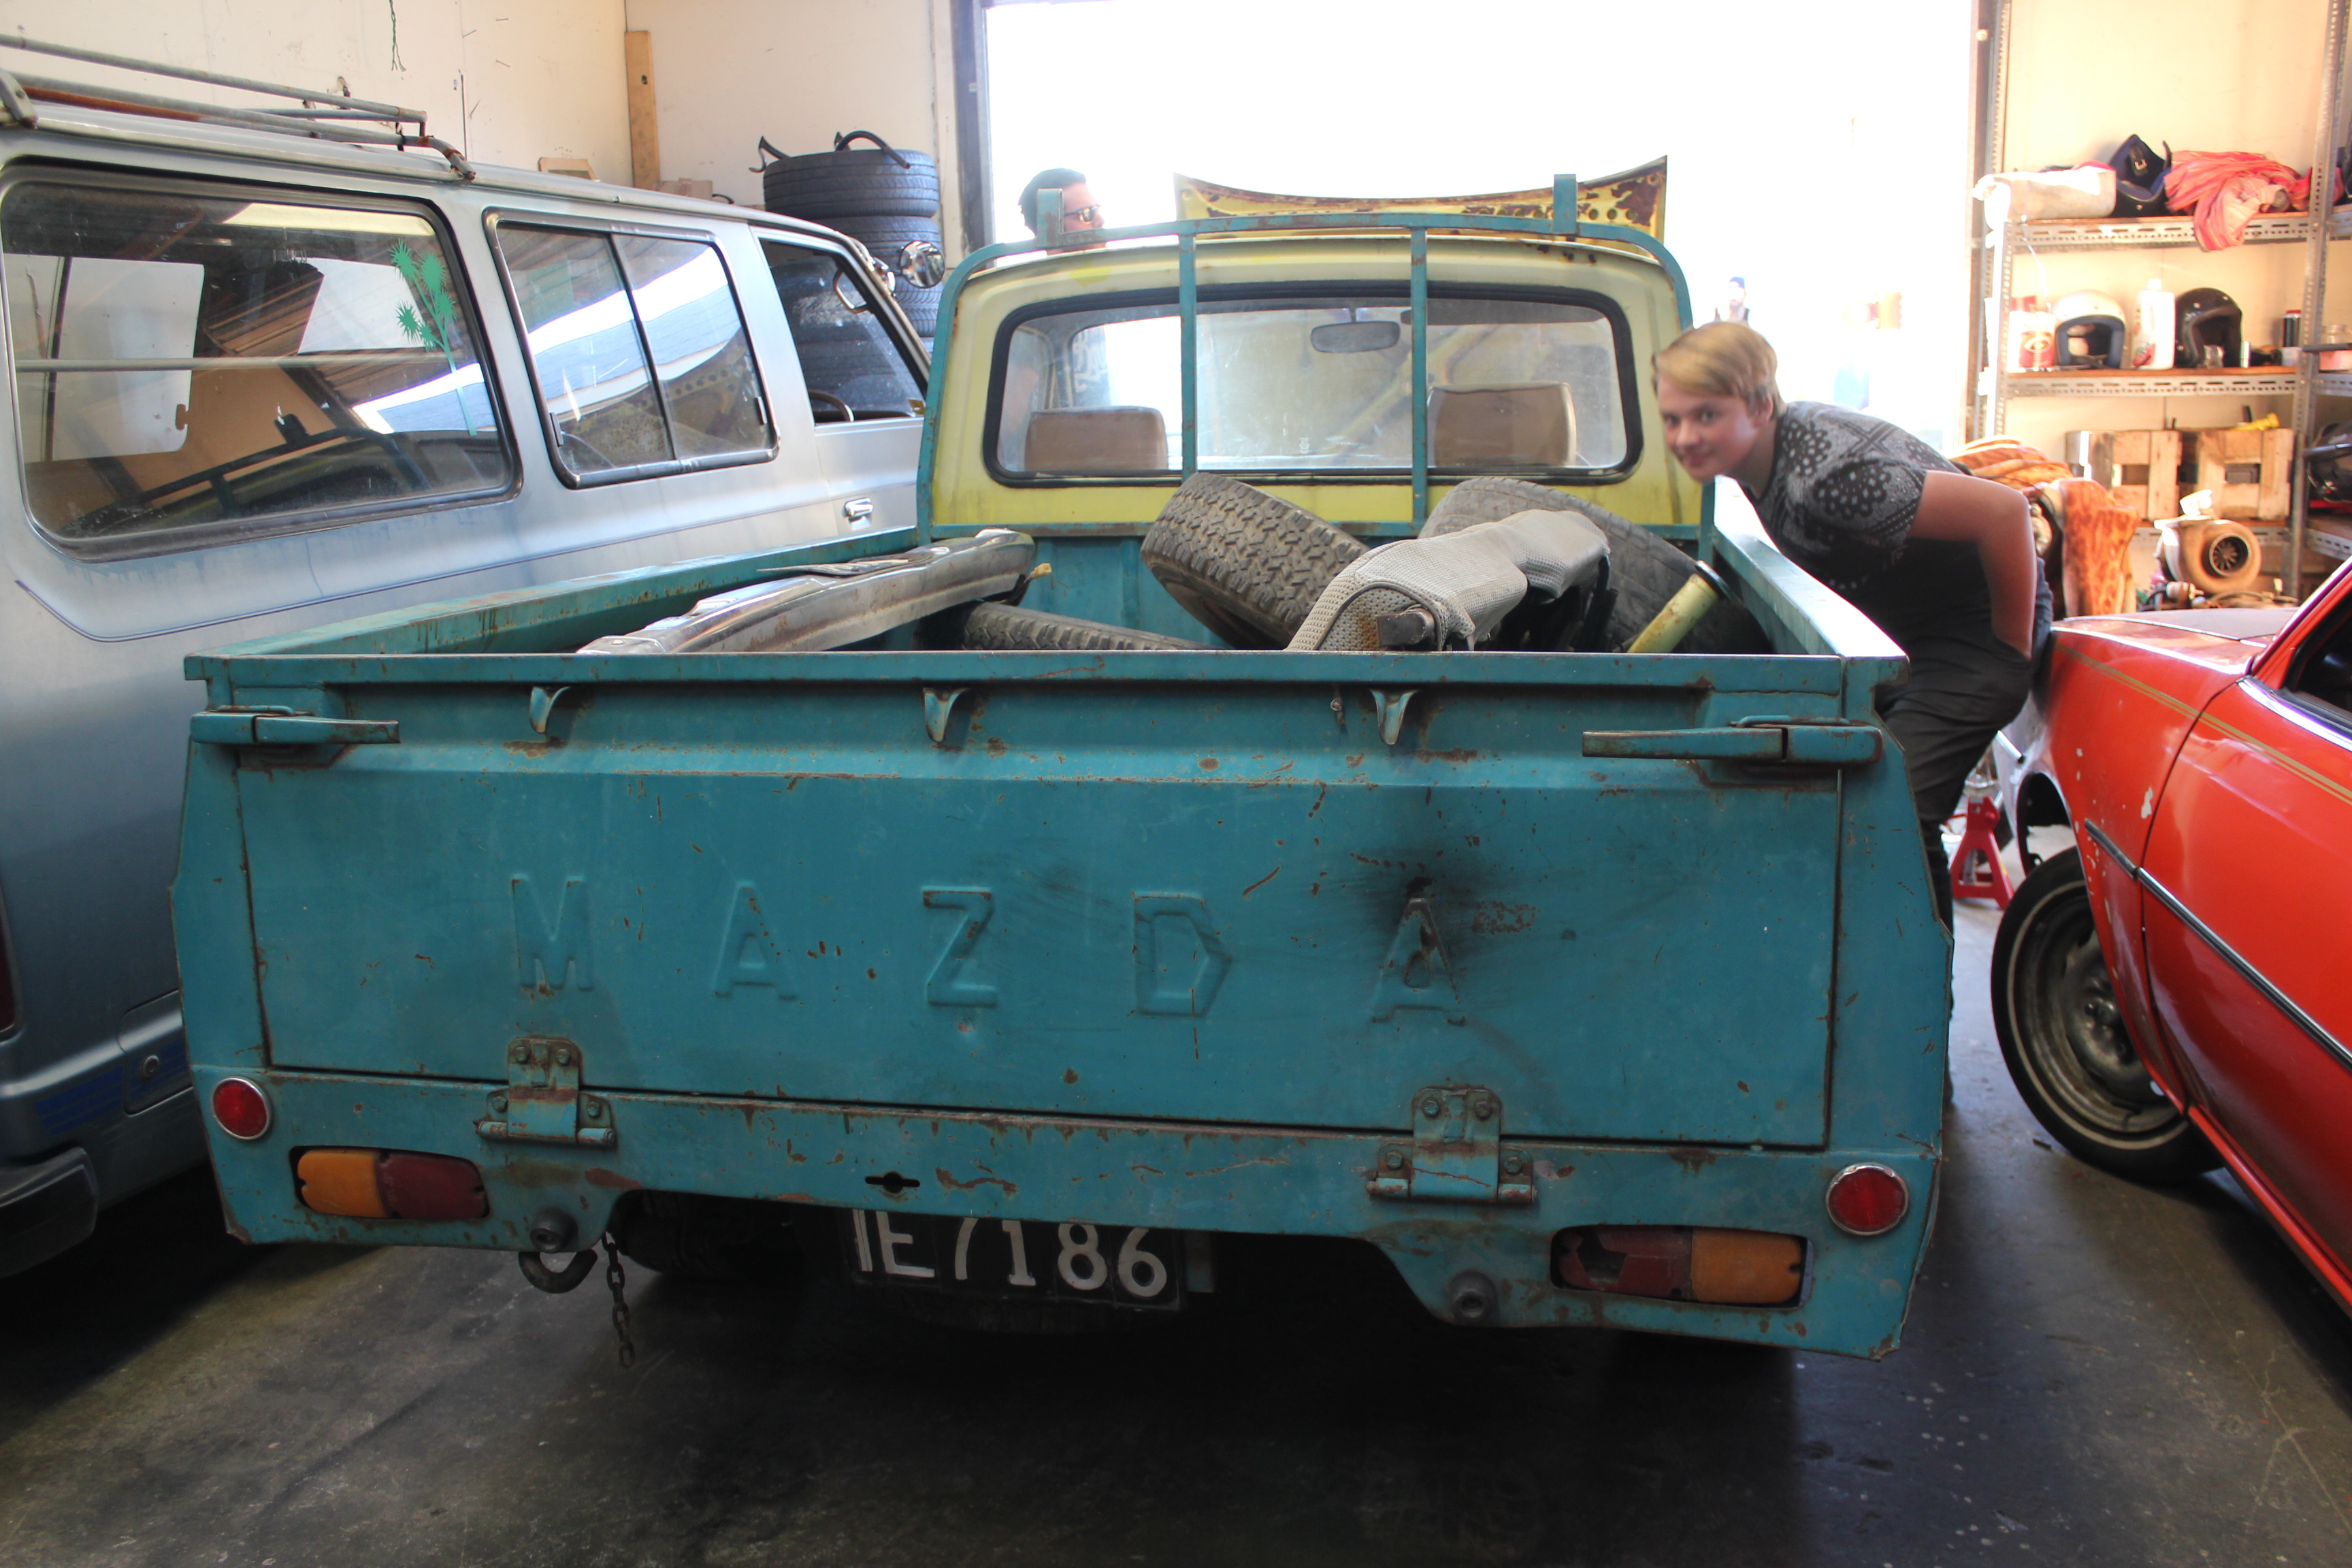
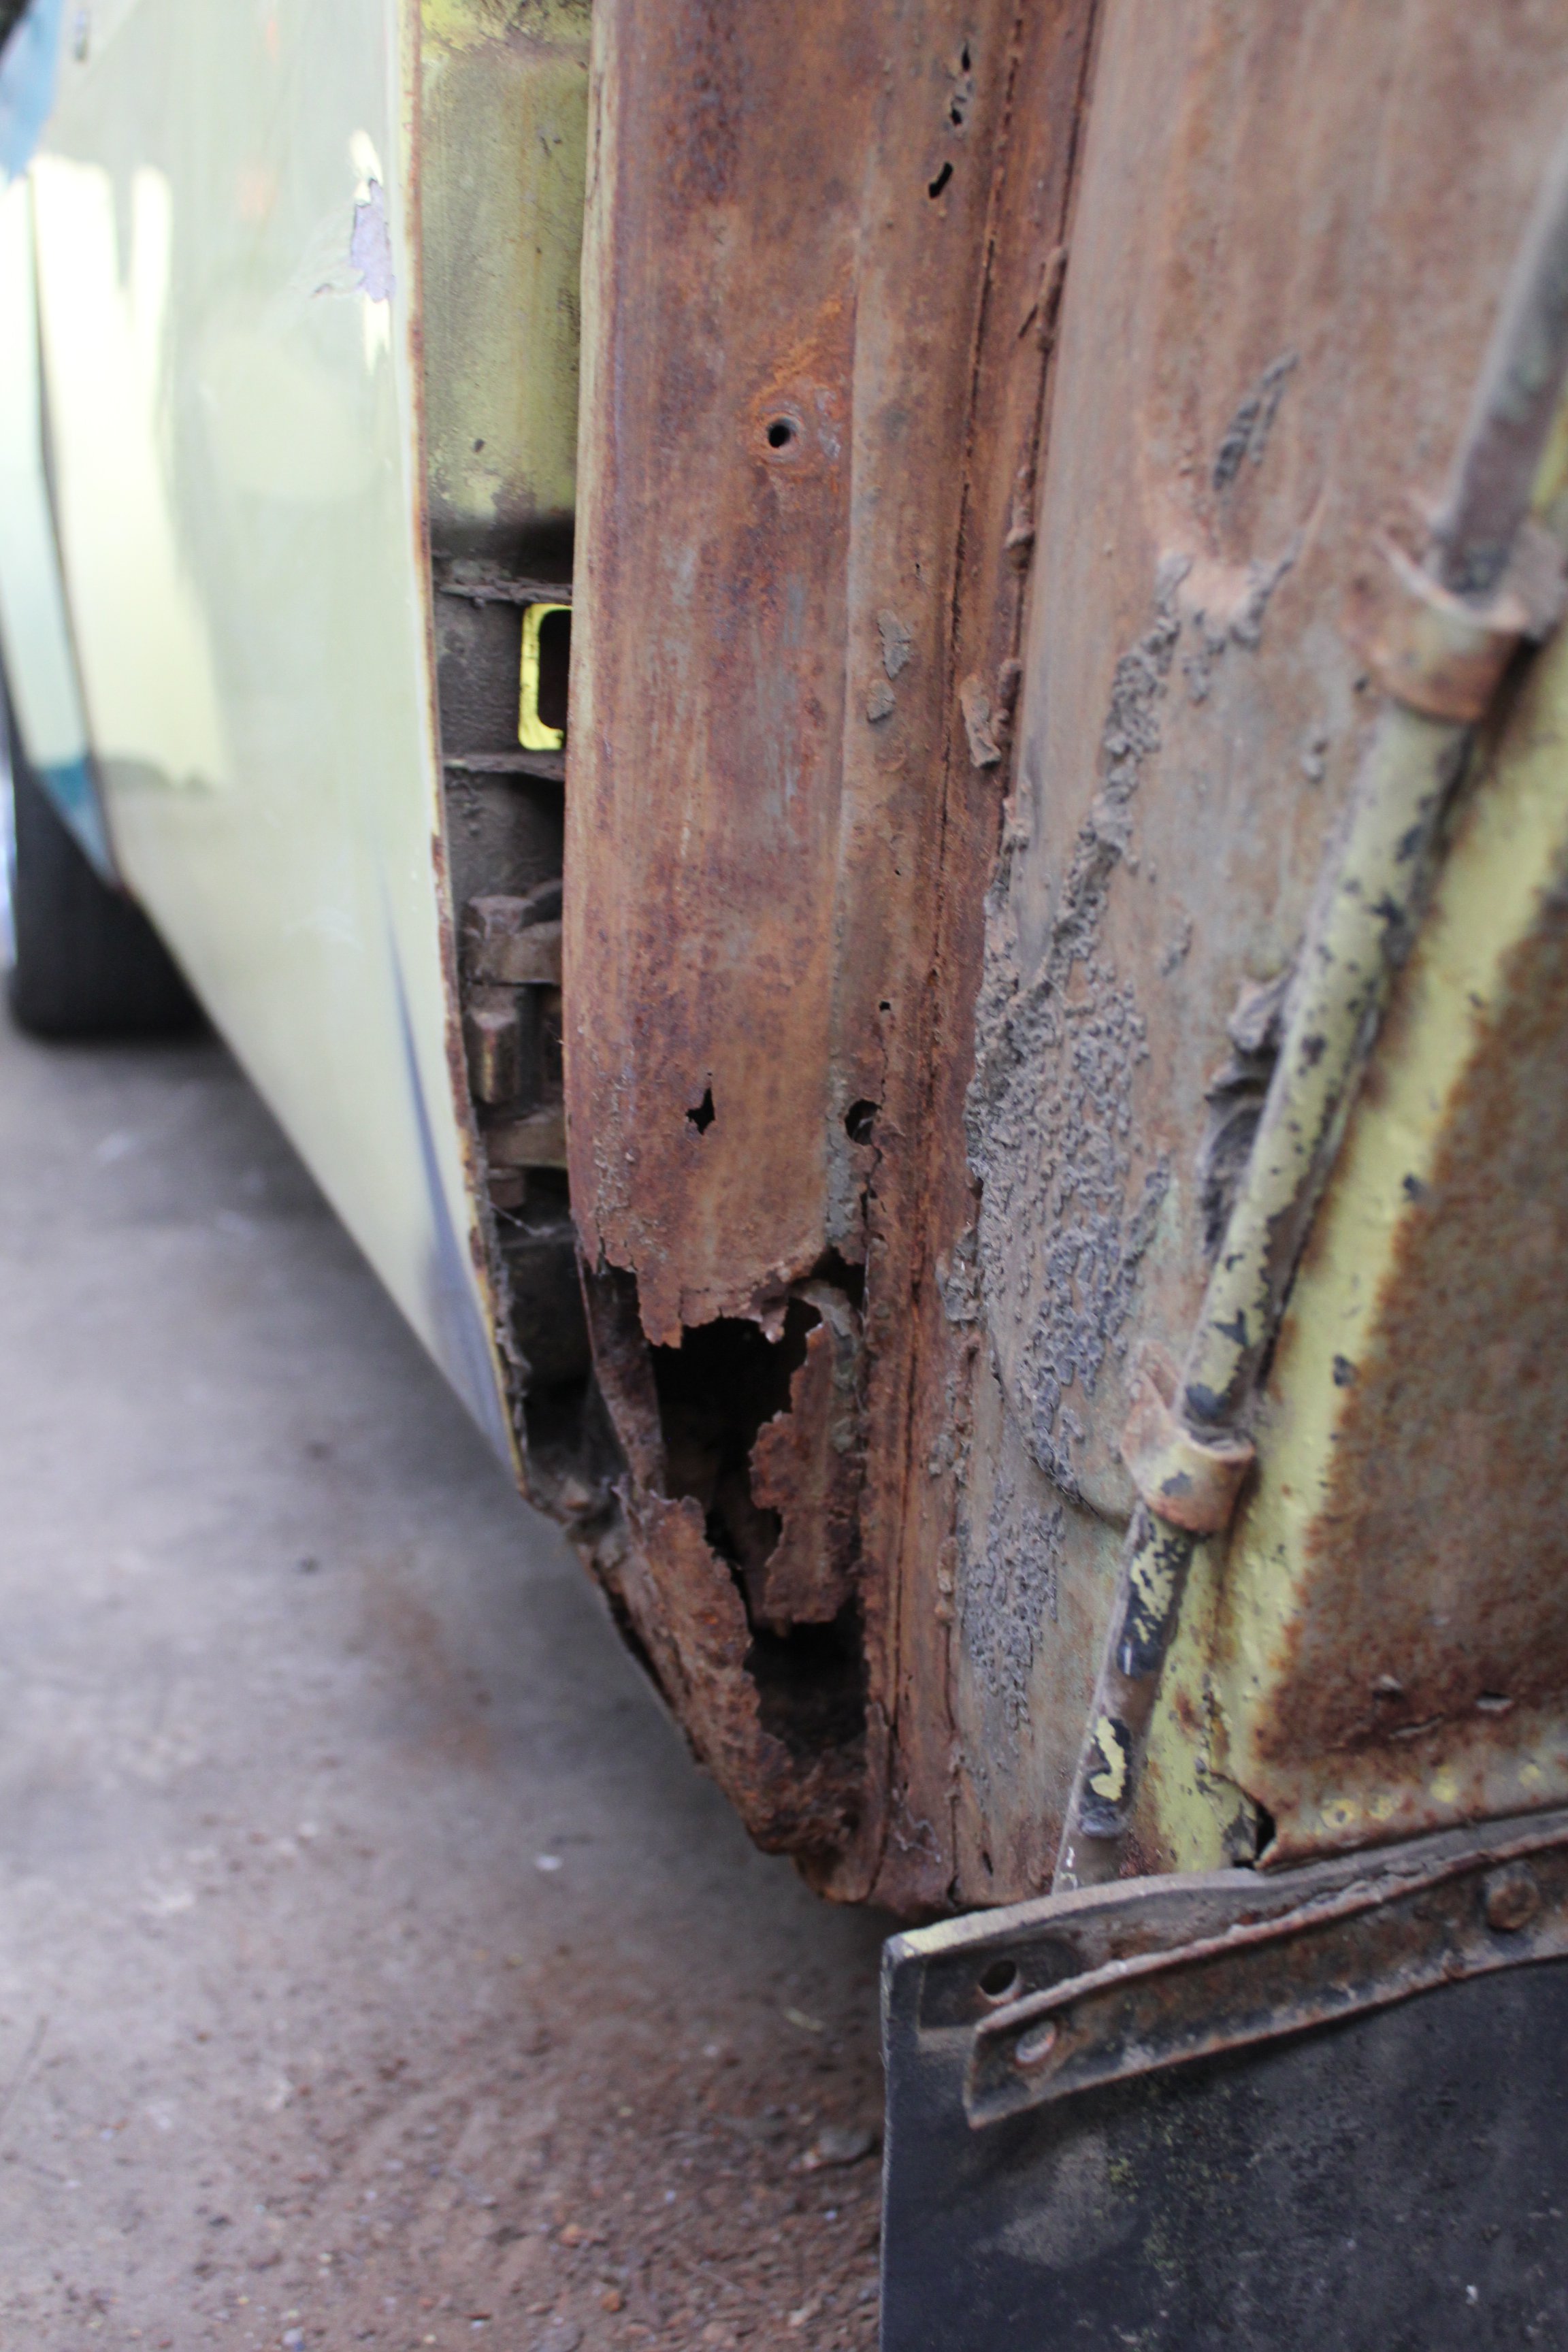
This beauty popped up on Facebook. I say I want it. Allan says (without even knowing what it is) buy it. Next thing you know Allan, Joe and I are sitting in traffic on our way up to Tokomaru to have a look at this magnificent beasty. Wellside is in pretty good condition, no concerns with that. The cab however is a different story... Swiss cheese floor pans and the passenger sill is a similar story. But no worries they said! So buy it I did. The bench seat that was in it looks to be out of an older model, but he had the original one, so plan to whack that back in. Also came with some more leaf springs to get the back sitting even with the front. First thing to do, learn how to weld! Discussion
2 points
-
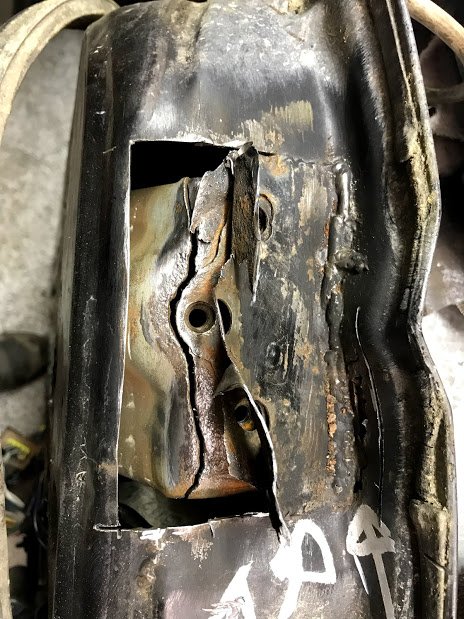
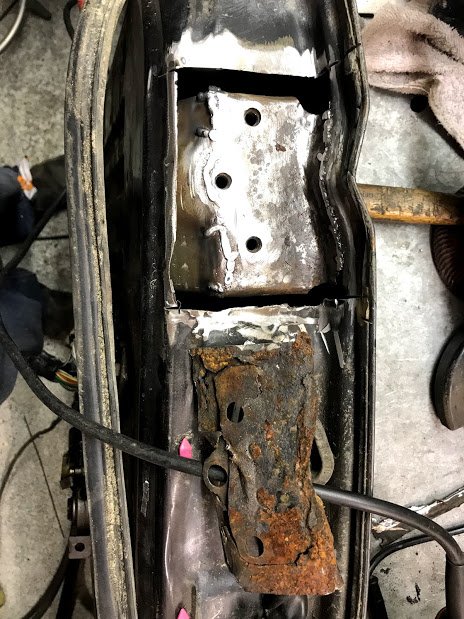
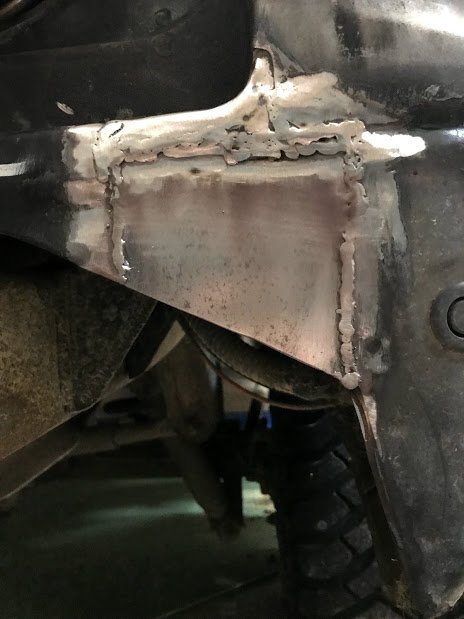
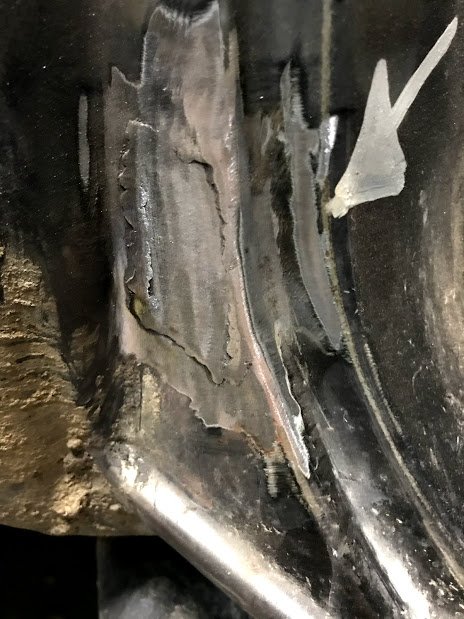
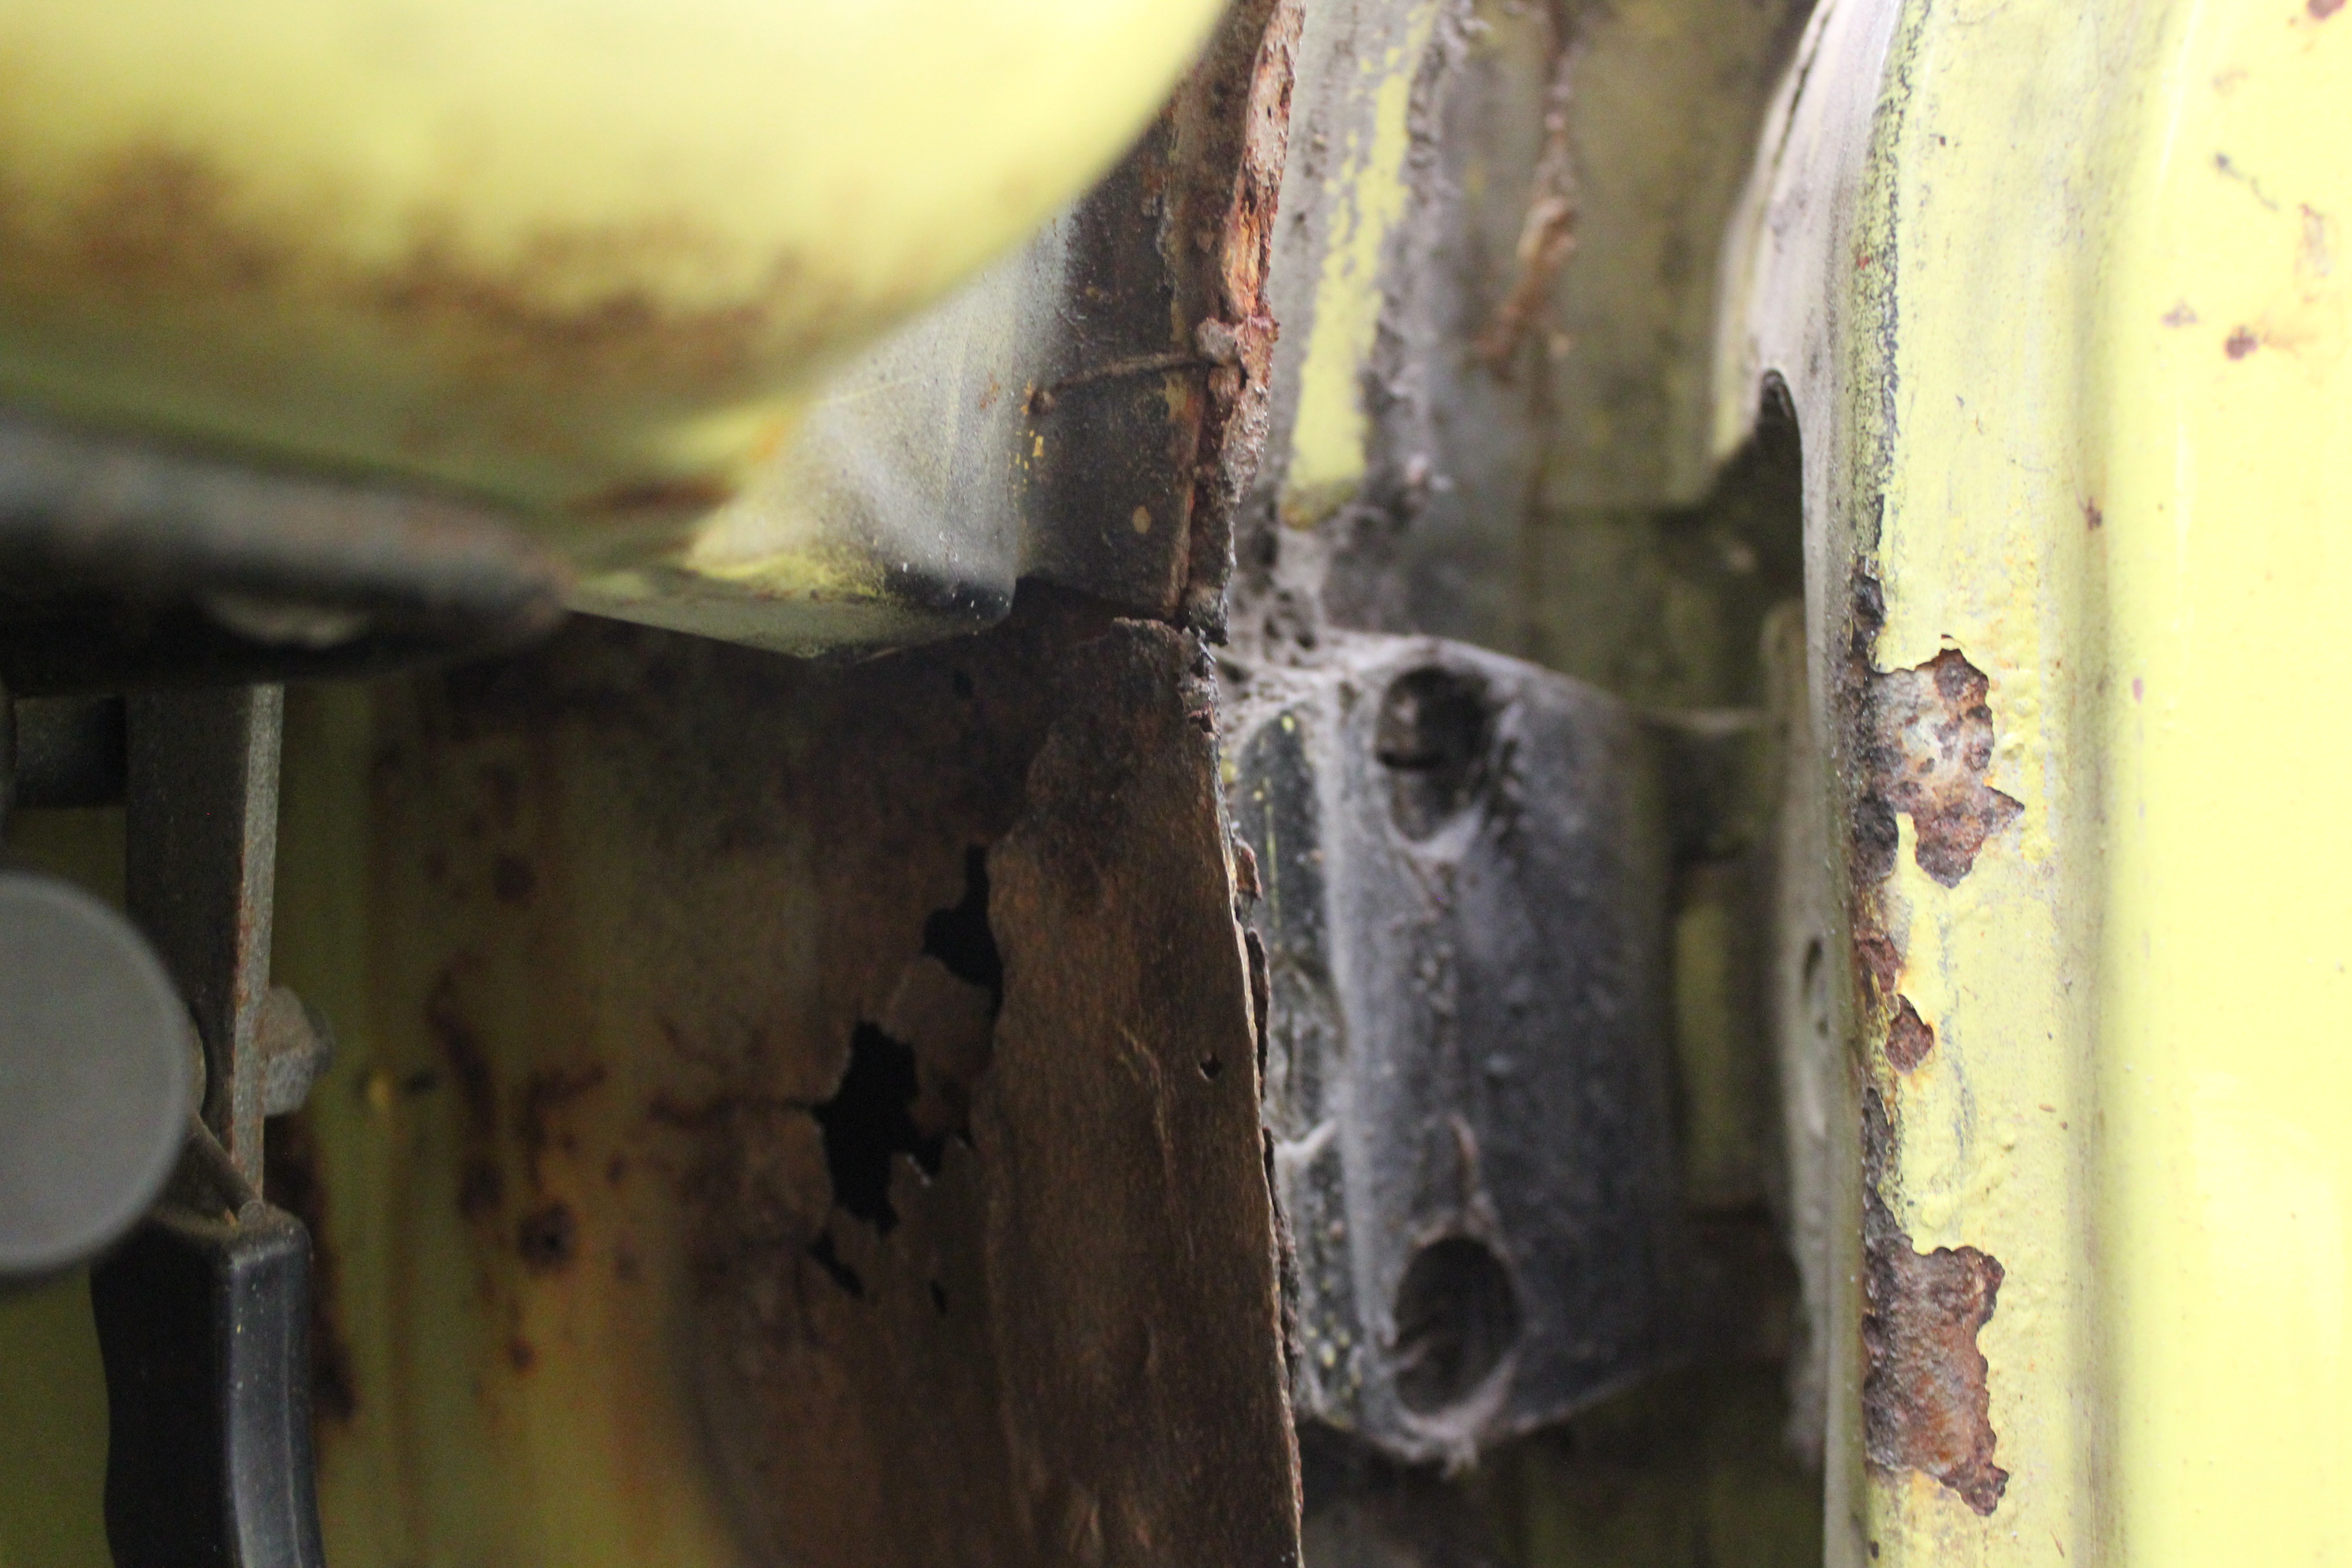
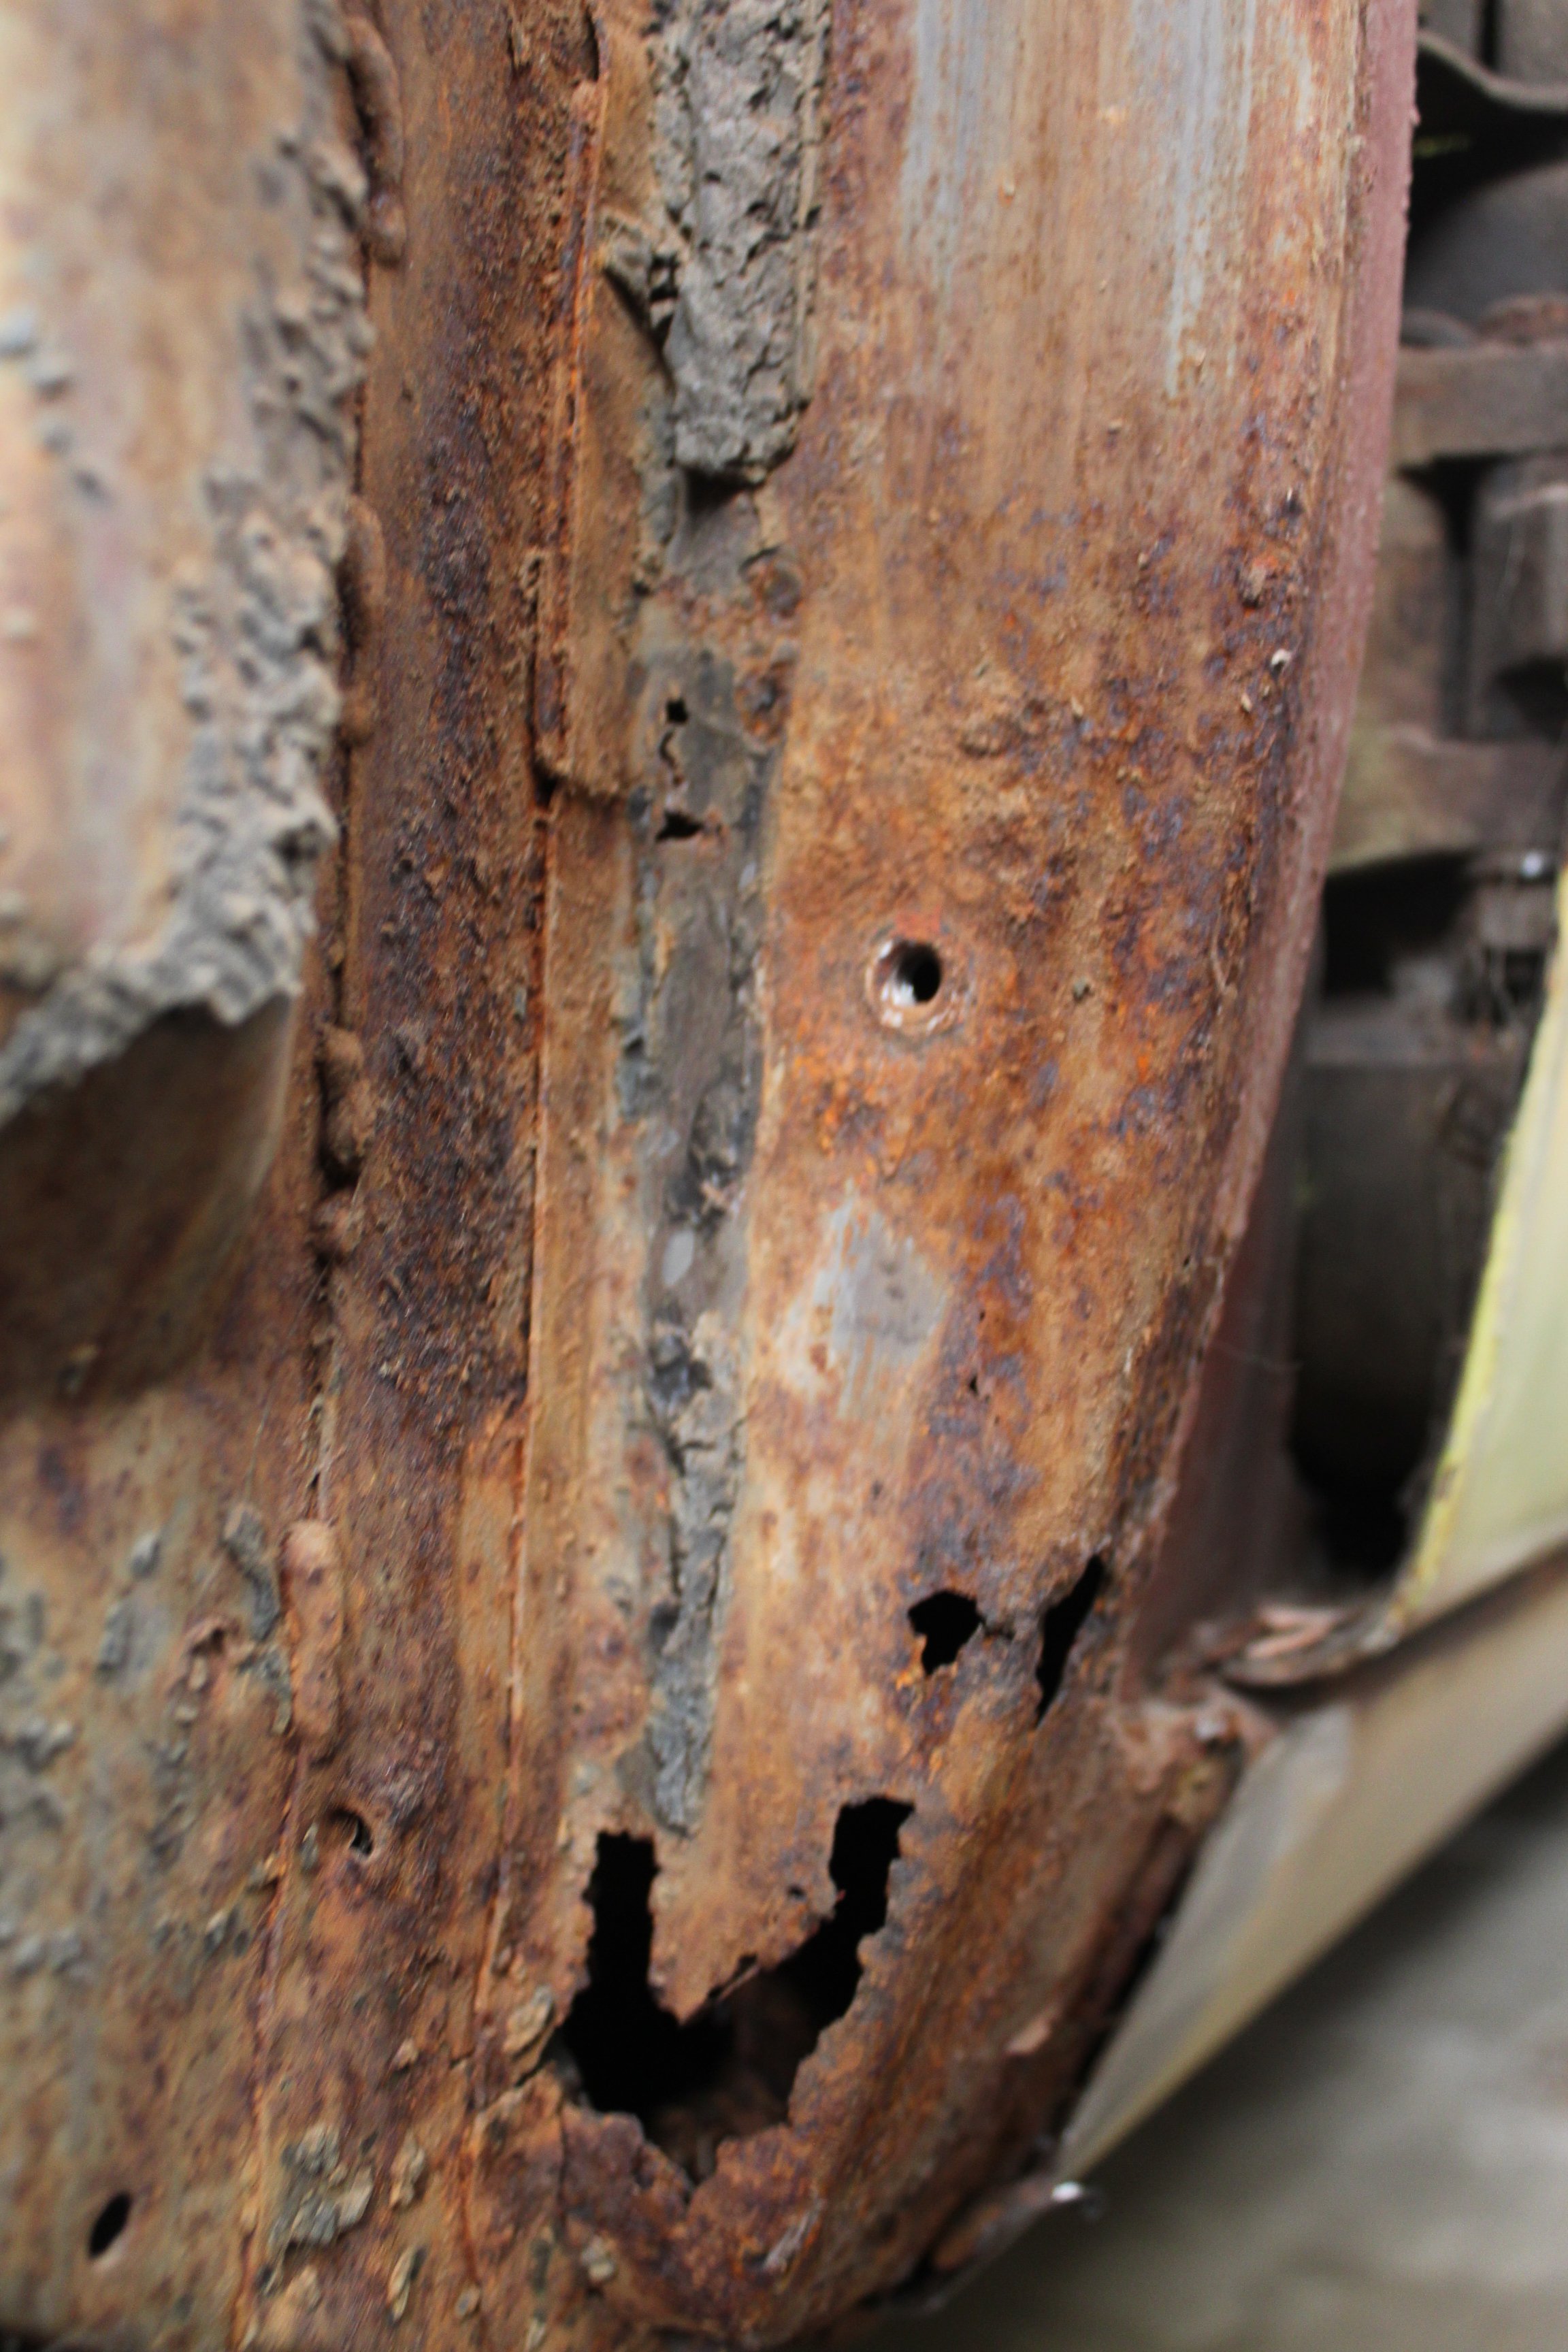
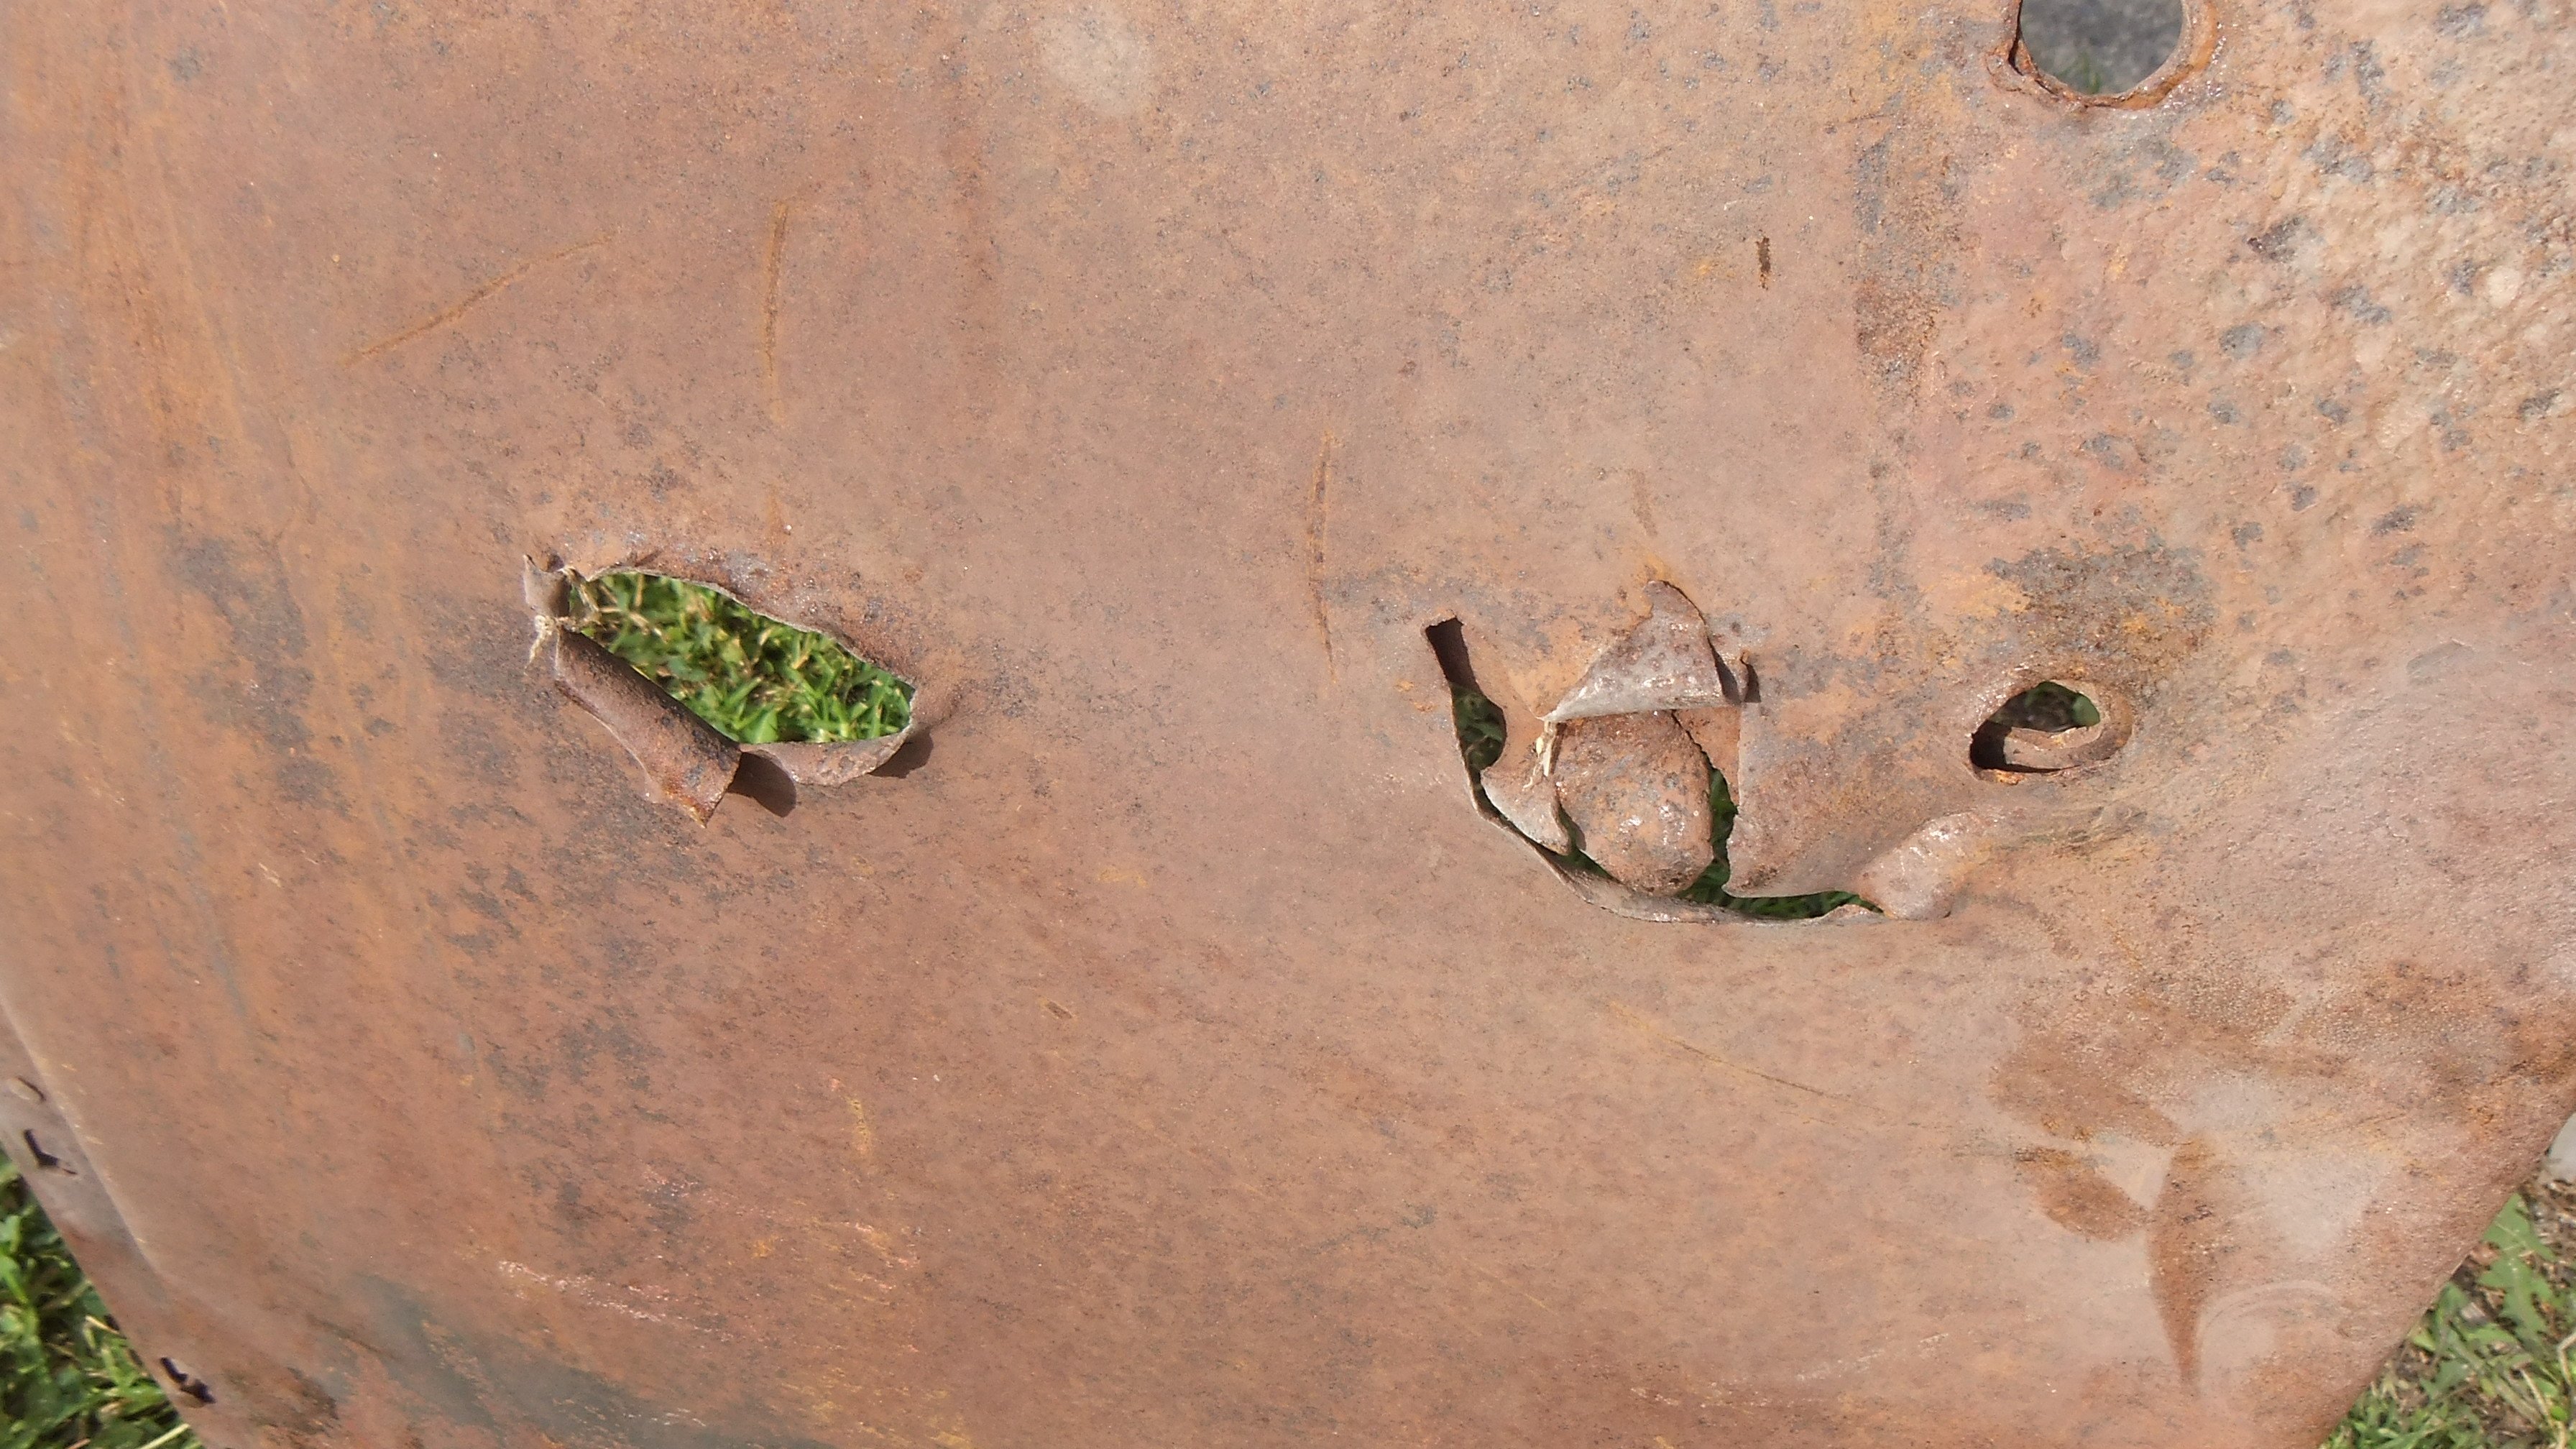
Wof man noted rust, I knew about the bit on the back but had never been a problem. Difficult one was around the door hinge where I hadn't seen it. Looks like it was repaired previously and not rust protected behind the plate. Started cutting it out and found a support behind it which had cracked, strange break... Had a look inside the door and everywhere else is rust free so it was worth doing the work. Arrows from wof man showing rust coming through on the original steel behind the previous owners weld. I've had this 6 or so years now I think and never saw this welded on plate. Then found the support cracked: Once I had a couple of spot welds on the crack I could completely cut out the plate knowing it would all line up again: Bucket of paint on the welded support thing, I welded some ribs going down from the weld figured it can't hurt. Plate welded over the top, bit of a rush job so not my best work but its solid and flat: Removed rear bumper to cut out this section and weld in a new plate, had a couple of reactions with something but again its solid and not a show car lol. Can't see most of it with bumper on anyway: And the rear door jam, this one was caused by rust starting around the plastic screw female insert jobby to hold on the wheel arch trim. Had a look inside when cut out and its totally rust free everywhere else in there which is great. Again wasn't worried too much about finish because its mostly under the trim. Good for another 30 years? EDIT: also failed on door hinge play on drivers door and the rear barn door is fcked from the weight of the spare wheel. Tried some suppliers and that lower rear barn door hinge must be pretty common. No one that I tried had stock, one offered to bring in from Japan but that was a 6 week wait. There's a guy who wrecks Safari's down south, he says he has some with no play. So bought those to get wof. Hopefully they really do have no play.
2 points
-
Some years ago I found a four cylinder Ford manifold with a Holley carb on it lying in the grass behind one of my sheds. Looks like it's off a T or an A. Don't know enough about them to pick the differences. No idea if it has any usable parts left on it but if it's any use to you you're welcome to have it.2 points
-
Rockauto delivers again. This time I ordered parts Monday. Received them Friday. just for the size comparison here is the later model dodge starter vs the factory one. Fairly sizeable difference still plodding away on cleaning and painting suspension parts and replacing the bushes. No pictures as I’ve not actually finished any this completely yet. And now I’ve run out of etch primer Got the bill from the machinist for the engine work which ended up being a reasonable amount more that planned (there was extra work done to justify it) which has completely drained the bank account. Also my headers are in the country now so just waiting for them to clear customs etc, all in all still chipping away at it.2 points
-
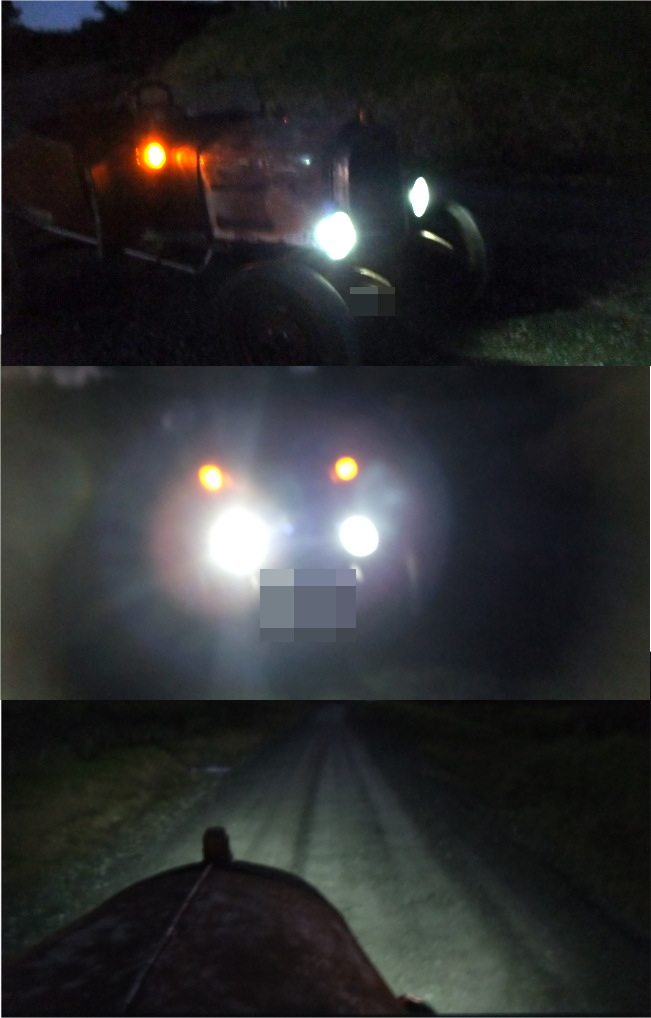
Have i tried to sell you on the merits of LED lights lately? Even on high beam the amps draw is maybe... 1.2 amp? According to a century old gauge anyway... much less than the 10 amps they were previously drawing. And other people can actually see the lights now.
2 points
-
Ugh, close enough. Cant be bothered fitting it better at the moment. Think i'll sand the paint off though.
2 points
-
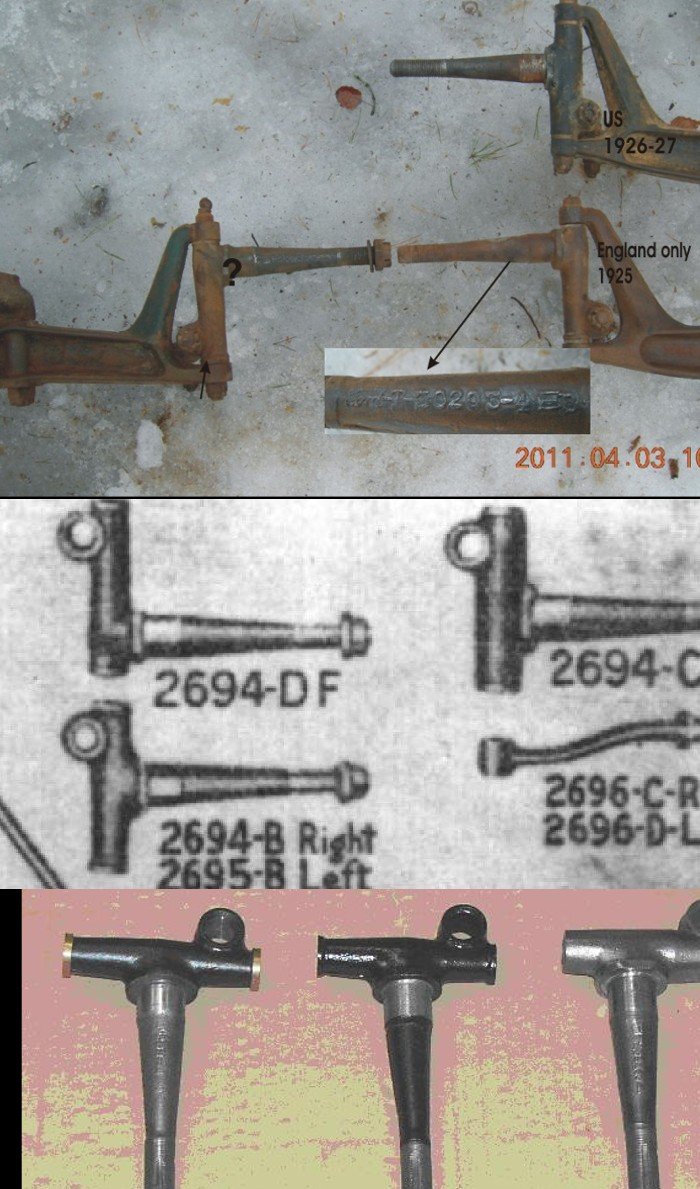
So people talked me into this, and i need the advice (clueless). Noticed the following for really old crap is small on here (sure there are forums for this but they don't need to obey NZ road regulations and those that do are esoteric to me) but there is some people into it so... So after buying piles and piles of rusty parts at swapmeets i decided i want to build a car. End goal would be something like this pictured. But i lack enough V8 parts yet and for some reason the NZTA type people make you register them as a 'replica' with stoplights, window wipers and seatbelts, stuff i don't want or I'd go buy a modern one. So how do i get around that? Register it as an original, but then i have to use original parts when getting VIN right? OK, first incarnation can look different and i change it later right? Changing it being swap body onto V8 chassis and return existing chassis to stock and resell it. (not sure if this reasoning is correct...) There, that one looks cool. Would be keen to replicate that look. Just so happens the chassis parts were cheap or free at a swapmeet last weekend because nobody wants them, body parts are expensive though. So how to lower? Because 2 feet of ground clearance apparently isn't cool these days. Think these are called Z shackles. Is this legal to do in NZ? If so i might do that. Problem is i would have to move the spring from rear crossmember to another new one installed a few inches further ahead. And rules around that? Is bolt in or riveted acceptable? Alternative is to move spring forward and put crushtube? (anticrush tube?) in radius rod and the bolt spring hanger in it. Small problem is the chassis i have has steel plates riveted inside the rails along its length, fishplating, not surprised considering how much they flexed back in the day. Is this going to need a cert or can a friendly inspector ignore/sign off as satisfactory? Then there is the front radius rods. If i lower it using the Z shackle style depicted above i would need to extend them. Then there is this bracket which does not need Z shackles or extended radius rods. This would work but i don't know if it is legal to fab one from steel (Xray testing?) or have a pair cast somewhere, although cast would be kinda awesome, what is the regulations around cast one-off parts? Or replace entirely with later model ones, with welded on brackets, i can't see this being a piece of cake to cert' though. Also wanting to move the body back about 2.25 inches to gain clearance for using studs to hold the head onto the block (and maybe aftermarket cylinder head). If it is only lowered and body moved a little i won't have to pass the 5 cycle brake test (or whatever it is) thing or anything will i? Pretty sure the 2 wheel brakes would never ever pass that. So what parts do i have so far? A rusty body with missing subrails. Is it legal to repair this with box tubing with the bottom cut out of the tubing? Or even tubing left intact? This is the only place the body brackets would be a problem if i moved the body backwards 2 inches. Fortunately this area needs repair and the bracket is riveted to the subframe and the rivets look crap, there is only one bracket, the other is missing so i can rivet it on further forwards when i install one. Would this need a repair cert' or would an inspector kindly overlook that it was moved? Don't know the regulations about this myself... This picture shows the frame rails with the bracket to the firewall. Is it acceptable to redrill the holes in the frame back 2 inches or should i use spacer blocks? New holes would be better. Also visible is the rivets for the fish plating. This is a rusty wishbone in case i had to split it, didn't want to split the one that came with the chassis, its like, 90 years old and still in good shape, this one is rusty, might have too deep pitting for a cert'? Then there is the rear ones, options include repairing or replacing with a new tube with a kink in it (for the correct geometry) and a crush tube for the spring mount. Can only guess there was water in the tube and it froze and burst? So yeah, am i on completely the wrong track here? Lost my mind? (think that happened last year) or is this a good idea? Better make a discussion thread as per forum board rules so you can tell me which is best for VIN/cert'/tell me i lost my mind and to give up already. //oldschool.co.nz/index.php?/topic/47381-rustiz-1920-26-ford-t-bucket-of-rust-discussion/1 point
-
I did similar to one of my carbs. Used jewelers rouge to lap the tinned shaft in1 point
-
very good idea, so good that i know where one is cheap for refurb.1 point
-
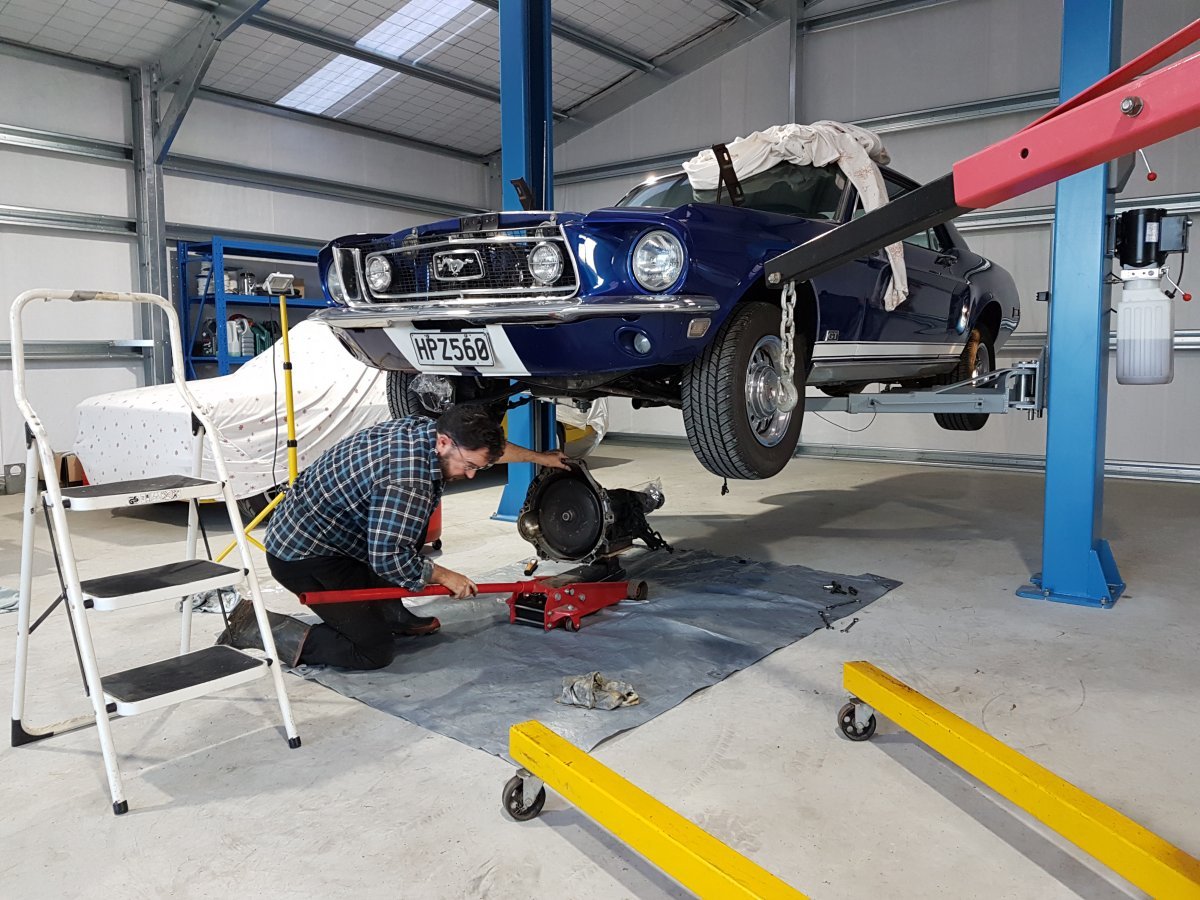
Bought this recently as a bit of a cruiser. Genuine matching number GT built in San Jose January '68. 302 with C4. Interior needs a lot of work but CJ Pony parts in the states are awesome. Picture makes it look better than it really is as it hasn't been looked after the last few years.1 point
-
Gave it some thought........ For about 5 seconds. You think I'm just building a box to sleep in........ Hell No!!!! This is my mobile grandstand to park around the back of Teretonga too!1 point
-
I've heard of people taking chassis to powdercoaters (think industrial scale) to have their steel chassis stress relieved in the powdercoaters ovens - let it "cook" over night then slowly come back down in temperature. Worth a shot, and your item is a whole heap smaller...1 point
-
pencil me in plz1 point
-
BIG DICK SWINGING1 point
-
1 point
-
I’ve done a couple of things, sold some bikes and bought some more of course. Probably should update this. Stay tuned1 point
-
Made a nice job of it too.1 point
-
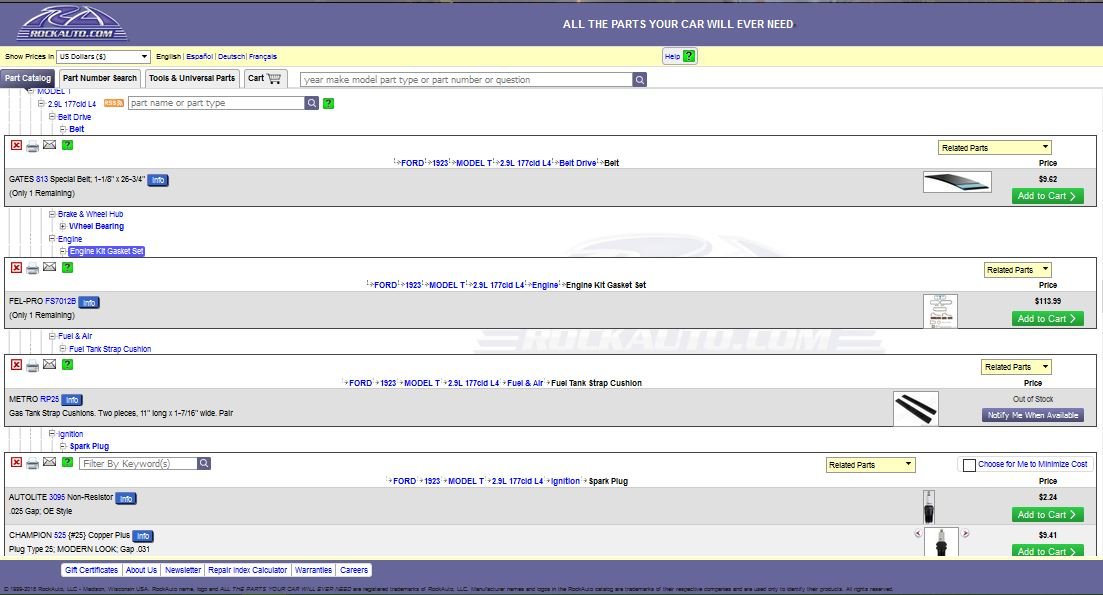
RockAuto is really low on stock, wonder why. Factory drop spindles still available, used. No UK spec' ones available though.... NZ got canada spec ones.
1 point
-
Someone had deemed these "junk" and left them in a fish bin full of water outside for a year. Some time ago i cut open a dead RB25 coil hoping to see what was inside. Such fine wire, so many windings. About a million of the finest wire windings i had ever seen, trapped in resin plastic, sealed and unable to be unwound at all. At least by any methods i could see. These 100 year old ford ones remind me of the same thing, except the wire is slightly thicker and there is 2 lots of 1million windings. 2 per coil around a heavy primary winding. Accidentally put a chisel into the primary and is still works. Not for 100 years anymore as it'll corrode now it's damaged but still... not many ignition coils you can pull the windings out of, involving chipping away or melting the tar they were packed in. Those brown paper things are capacitors. Condensers effectively, like you have for a distributor. While i'd heard of old timers making their own from paper and chewing gum wrappers back in the 1940s when they were poor kids fixing their first car... i'm not that keen. These had real tin foil, not the alloy foil we have today so they solder really nicely. A couple tested within spec' so i re-used them. Others i replaced with orange things. Mix and matched the wood. And going ot do the same with the burnt out windings so i can turn 8 burnt ones into 4 good ones... hopefully. Had some burn up after 10 minutes of driving because i didn't realize how keen they were to have inch long sparks jumping inside the box if i didn't put the glass plates and tar back in. Opps. Bit marked up, some have clear borer holes in them but not too bad for 100 year old ignition parts. How many of you are still running original coils and points at 1/3rd the age?1 point
-
Hood tie down strap made from a leather belt. The belt is so long it forms a loop for someone 3 times my size. Could wrap that around my waist 3 times before it met the first belt hole, and it has a functional lock in it. Why would it have a lock? So i don't know if i should start a technical thread on "How to make trembler coils" as mine are toast and one of the borrowed ones died today. Never successfully made an ignition coil before, i think i'll need help of the electrical gurus on here.1 point
-
1 point
-
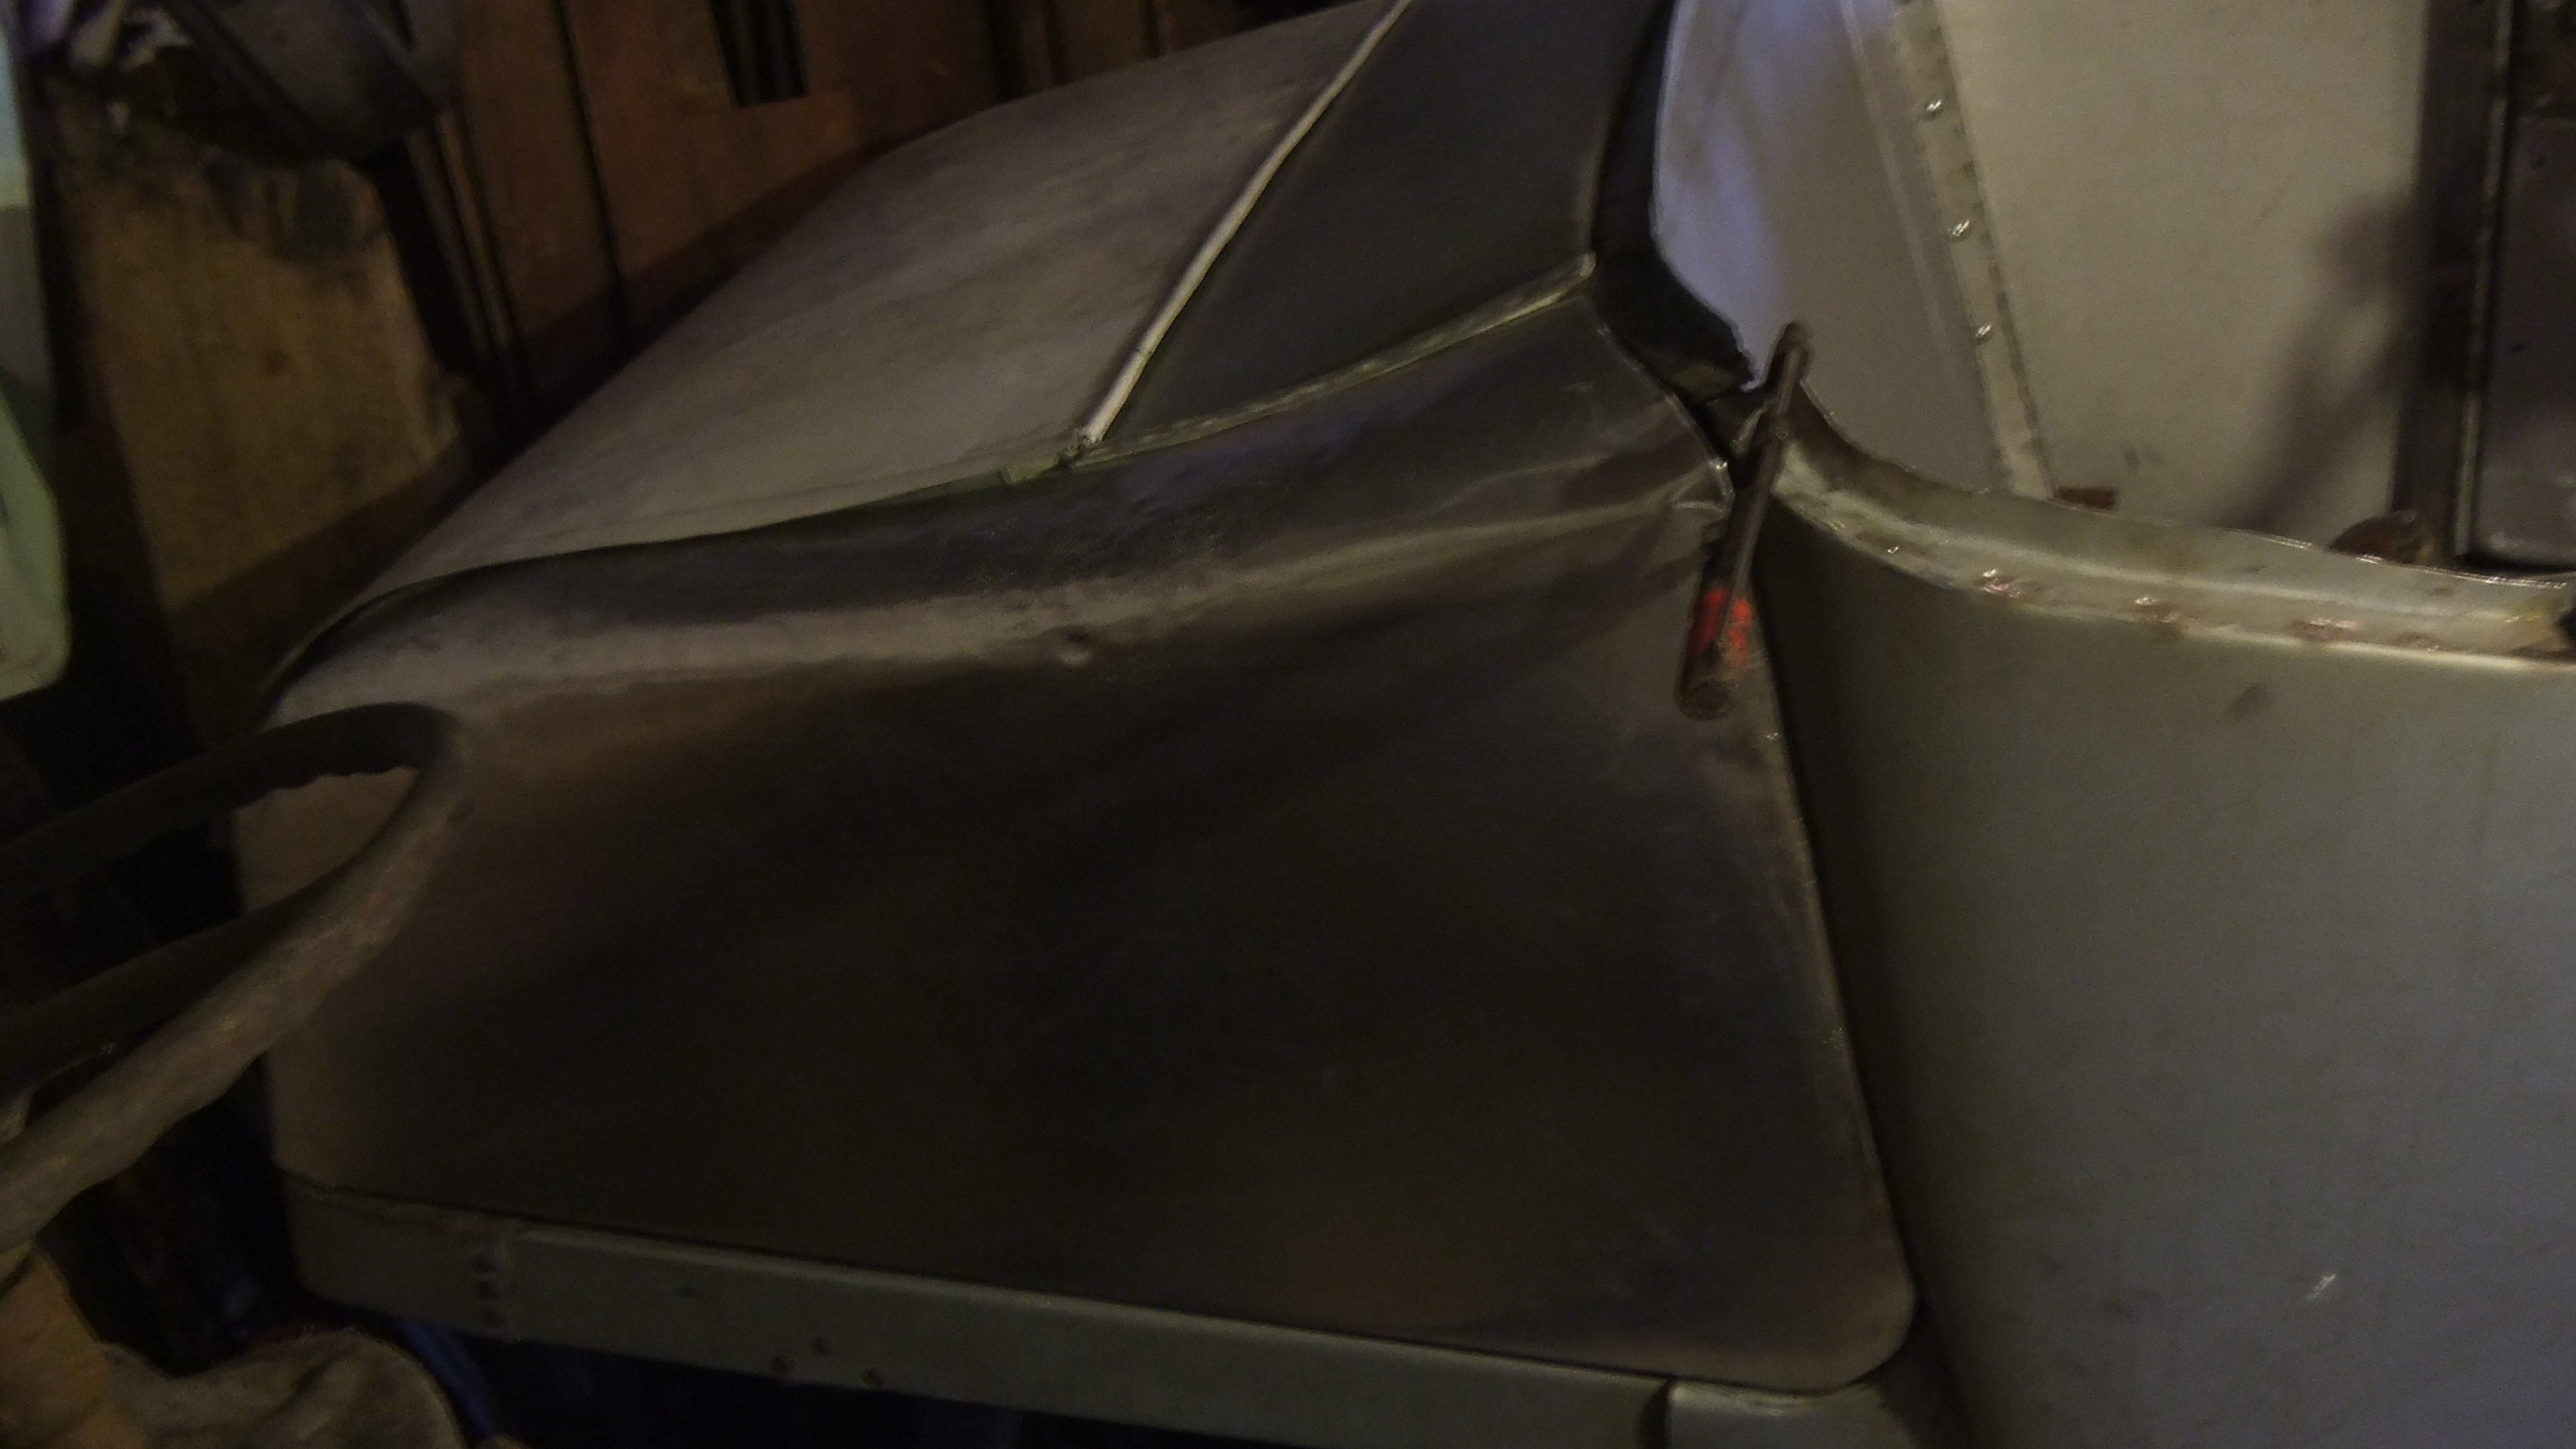
UPDATE! First things first, Who the fuck welds fenders to the sills??!! Yesterday I started by wire wheeling the sills to see how bad they were under all that paint. GOOD NEWS! Not as bad as I thought. A couple of rust holes here and there, but or the most part they're all gravy. That is unfortunately where the good news ended for the day. I removed the covers in the footwell next to the door and discovered a rather religious patch right where one of the drivers side hinges attaches. Less than ideal. Allan suggested removing the fenders to see what was hiding in there. After removing 5 of the bolts I discovered the bonnet had to come off to reach a 6th bolt. Ok, cool, after Allan worked out how to remove the weird-ass spring that's on there, bonnet was off followed swiftly by that sixth bolt. After 2 solid minutes of trying to remove a 7th bolt and it not moving I asked Allan for assistance, at which point we discover the welded to sill feature. What. The. Fuck. Allan very kindly cut them loose for me (I'm pretty sure he was scared I'd lose a finger or set fire to everything if i did it). Then YAY, fenders were off. Under which was a whole lot of caked on mud that is probably older than Ty and a shit load more rust. My favourite. The fenders themselves are not in very good shape (sorry, didn't take any pics of them) so I'm in the market to find some replacements. I also poked some more holes in the back of the cab. Who lets me have a screwdriver?!
1 point
-
By my deeds i honour him V8
1 point
-
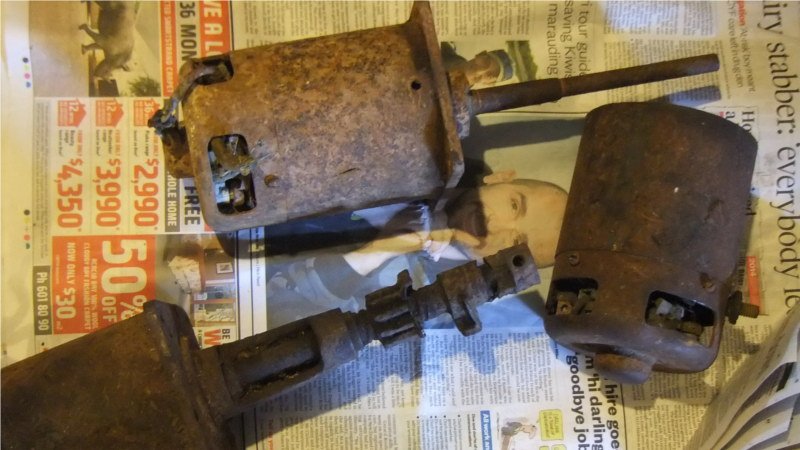
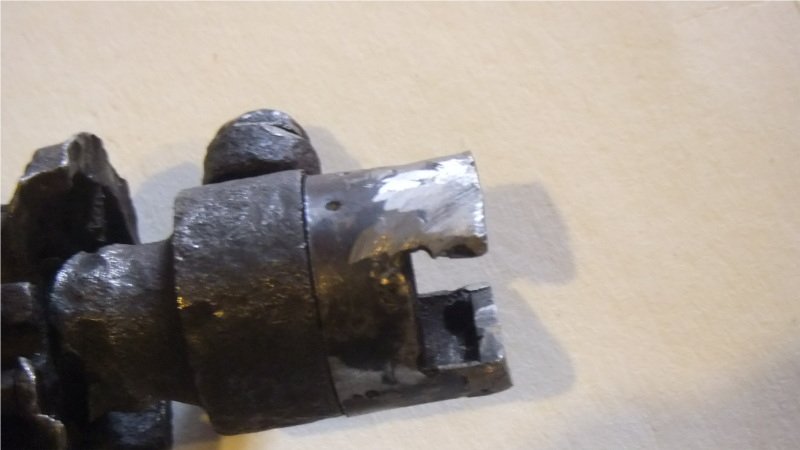
Found pieces of 3 90 year old starters. Enough to make nearly one, would be enough for two but someone cut the bearing nose casting off one of them. Made new spinny parts from bits of tube and offcuts. Slightly better than rusted away to nothing parts. Old contact thing had copper bolt riveted to it, sheared off from over tightening. Old timers would have thought that 6 volt electrics were so bad after tightening things and they get worse. Made new one and soldered in a copper nail through the hole in the old bolt. Most of the brushes are still good. Can't be bothered uploading more pictures but this thing too ages to fix, like 5 days worth of work. Had to repour the front bearing after i accidentally melted it out while trying to free up the rusted parts. And made new insulation from shoe laces, which is what the old insulation looked like, with cord wrapped around it with beeswax to seal it.
1 point
-
Disclaimer: this video may be faked. i took some time to polish my wiring loom. *Imagine a wiring loom made from copper tubing with wood insulators that was polished. This didn't last. Putting wire inside the tubing was ok for a while but when the wire gets damaged inside there's nothing i can do to fix it.*1 point
-
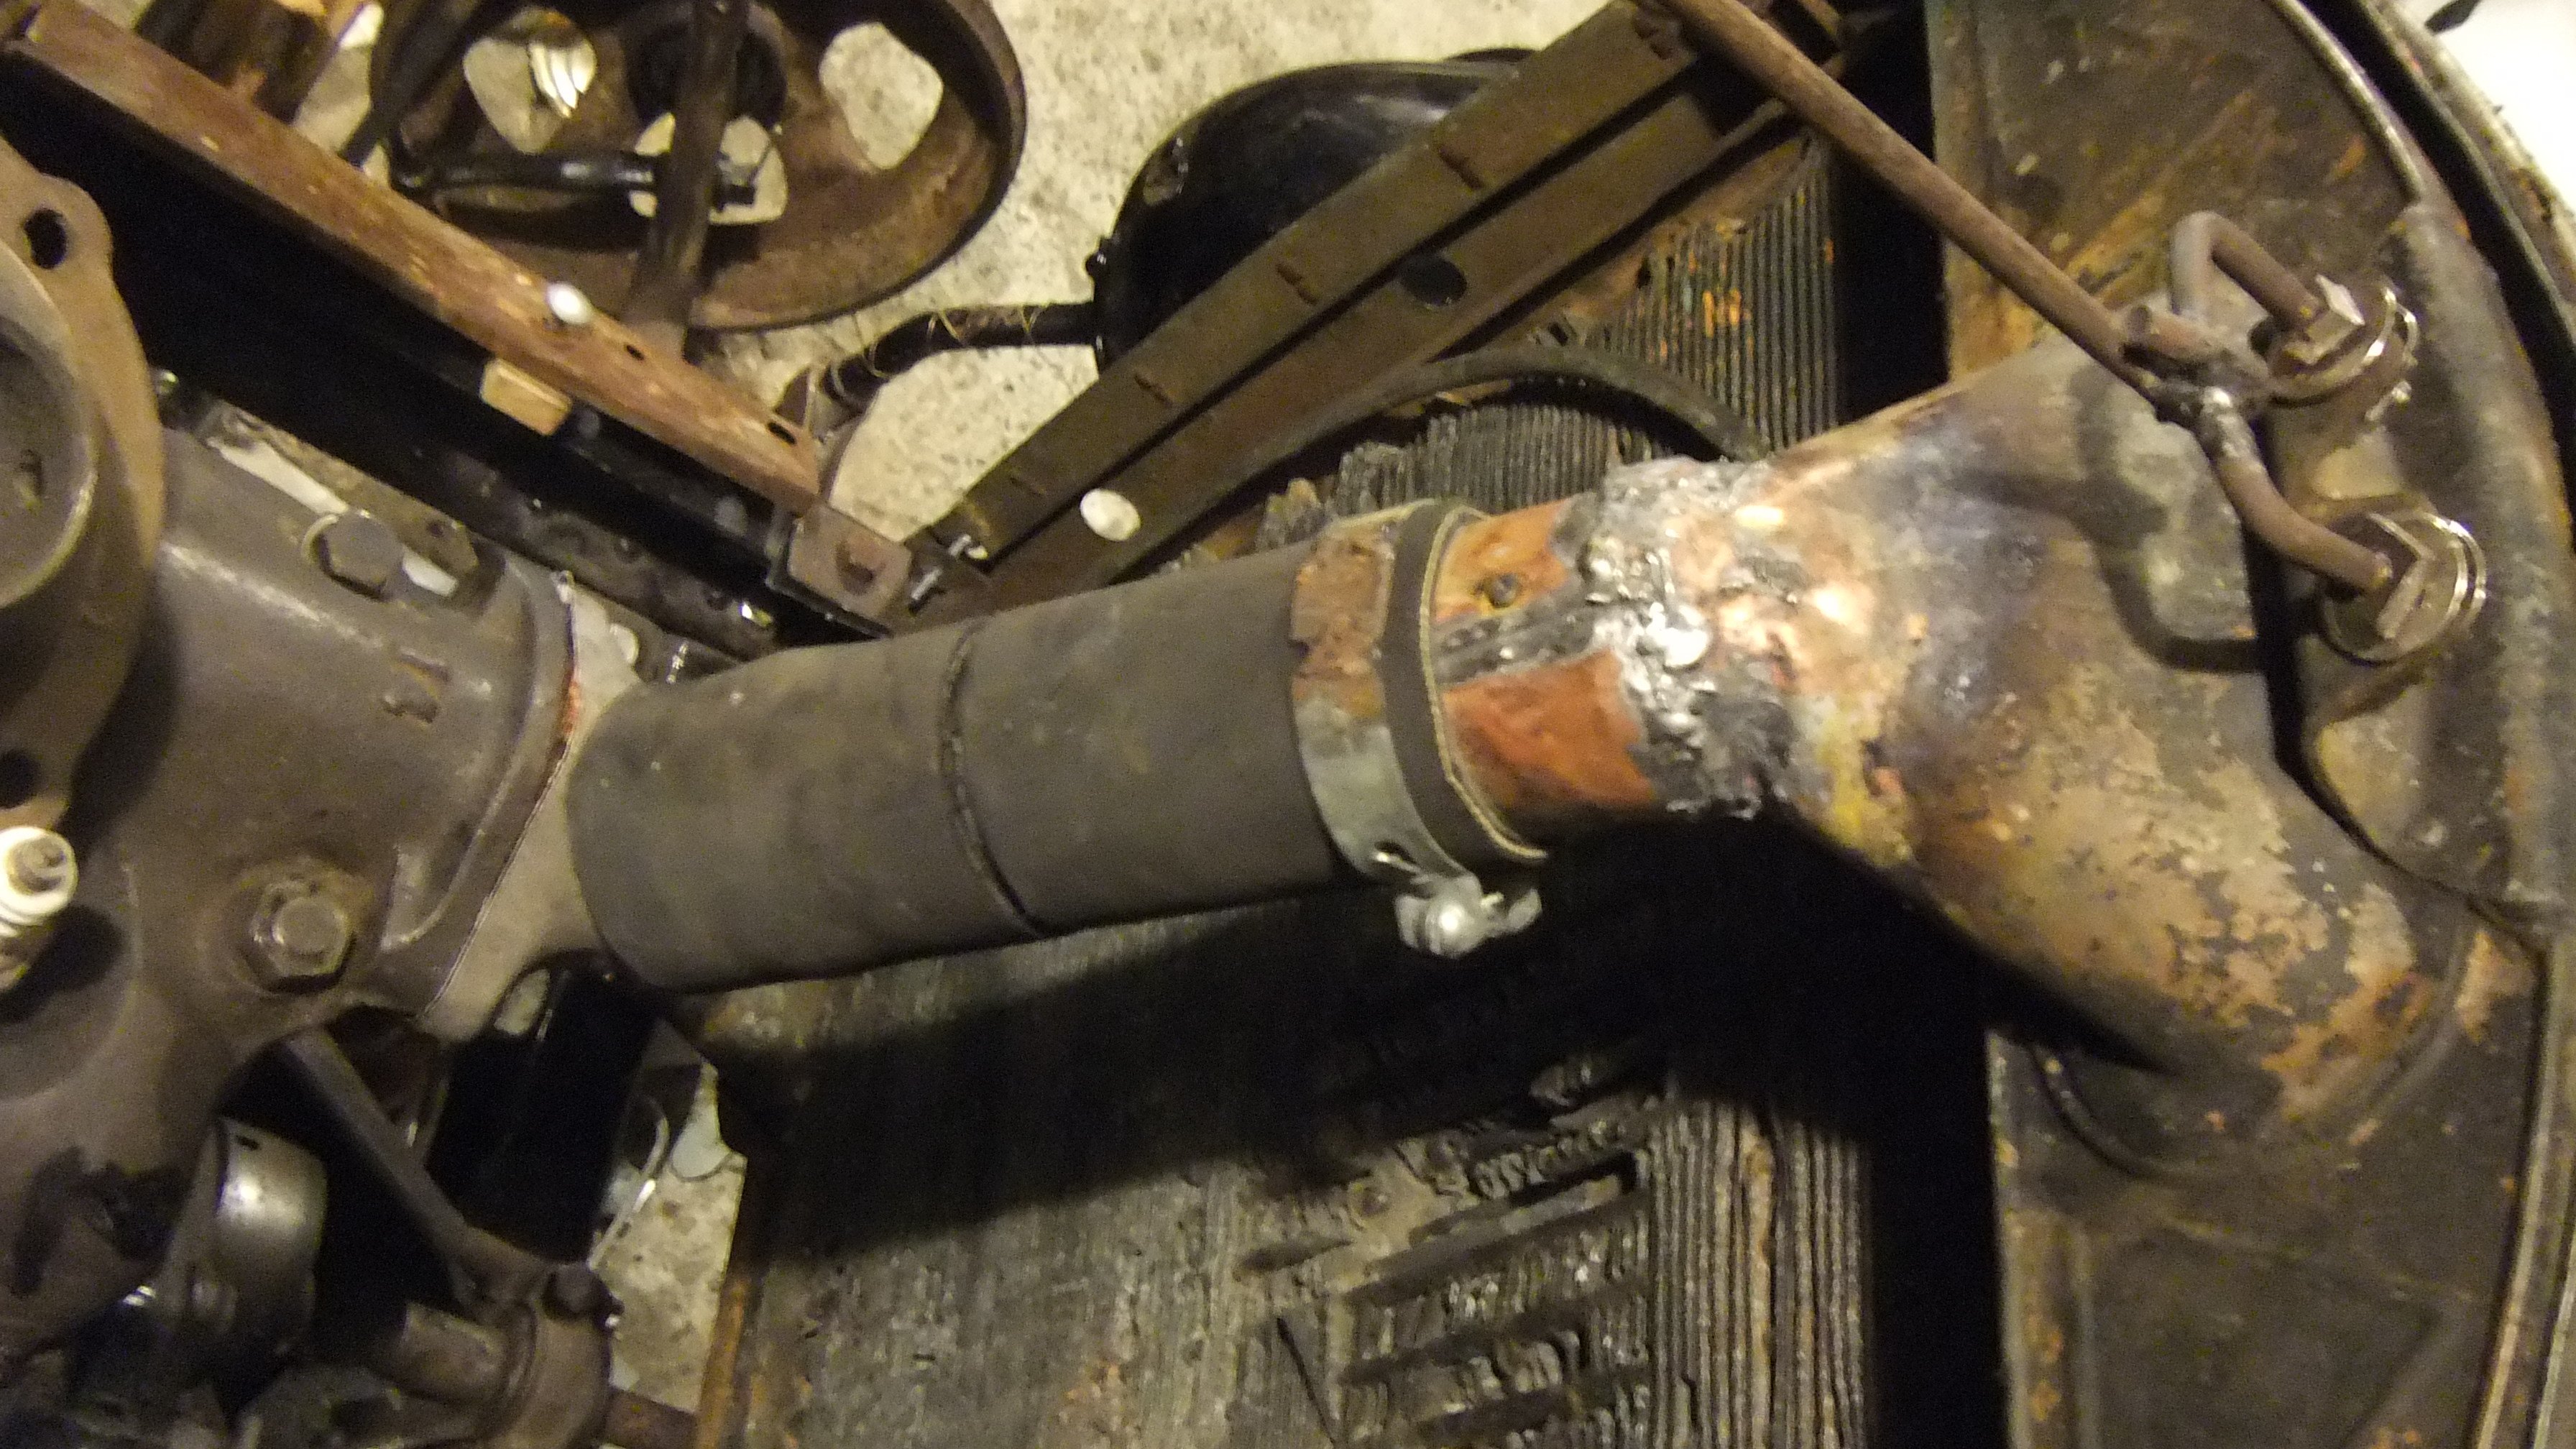
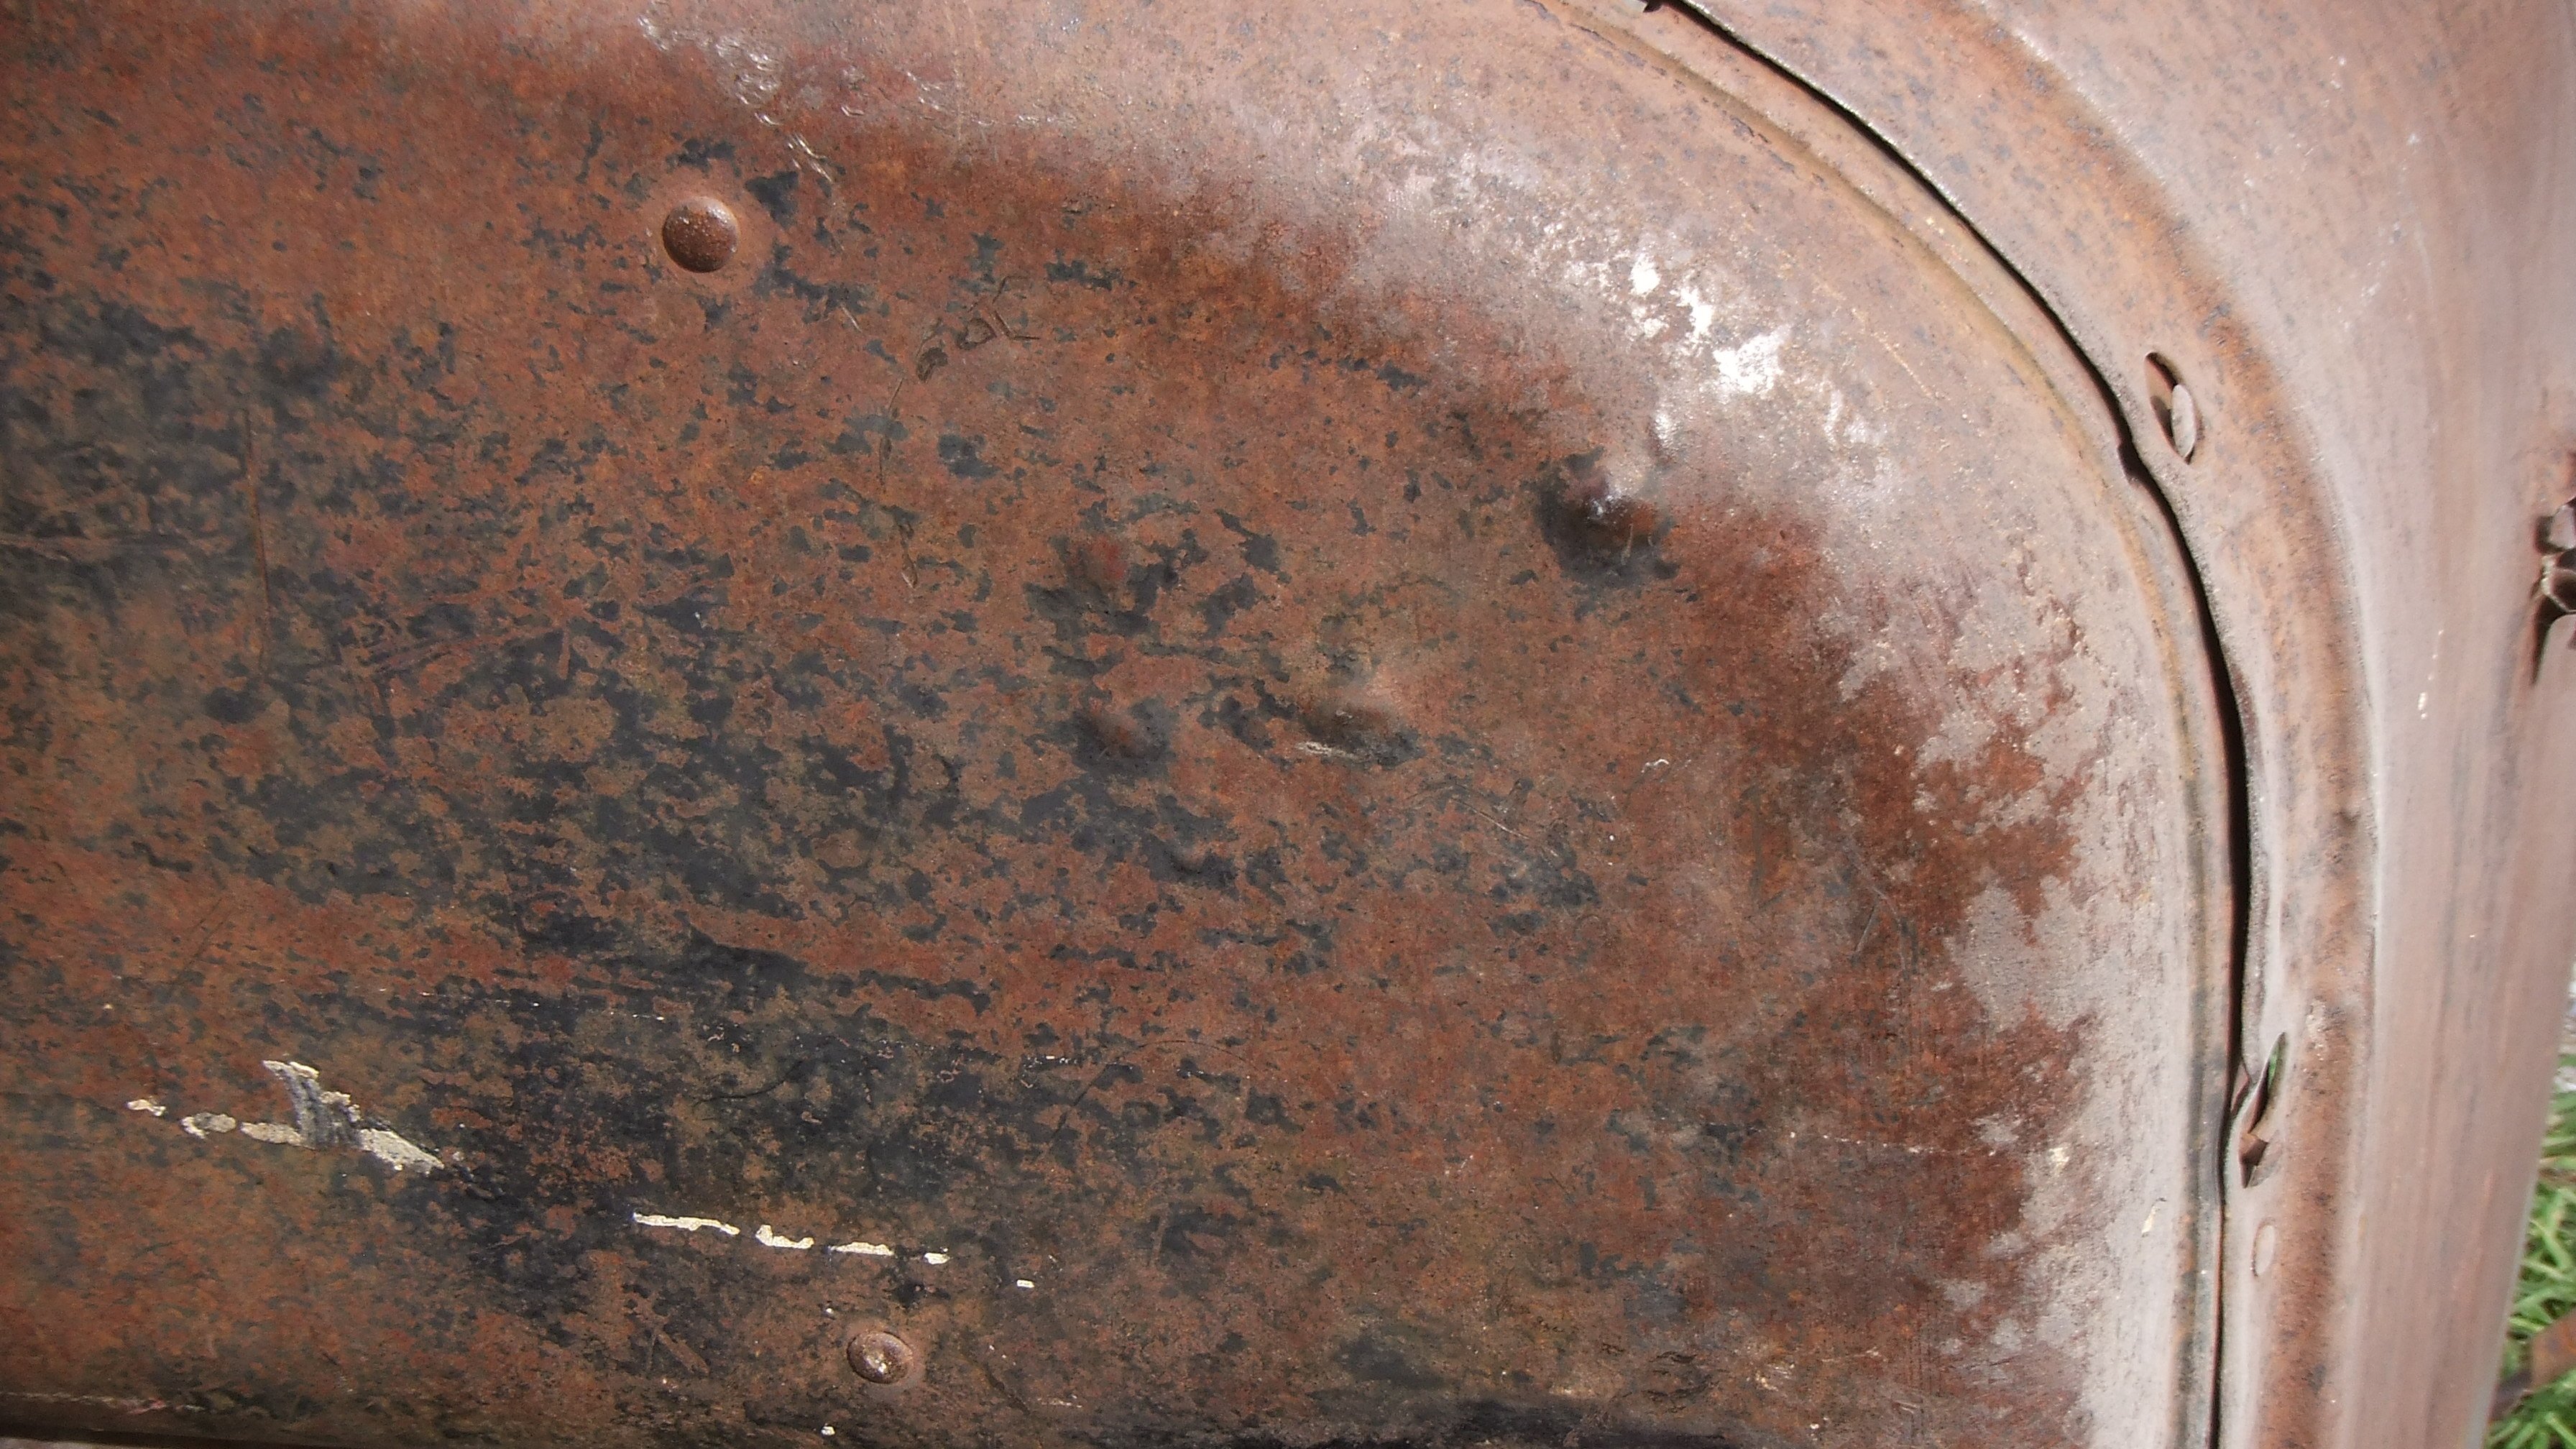
That radiator is full of holes and half the tubes have been cut and soldered up. Some when a fan went through it, some from what might have been collision damage. Tanks are pretty had it too. Can't make a new one as i don't work at a radiator shop anymore. Metal fatigue has taken its toll on the top hose fitting, it is cracked in several places and the pipe rotted off completely so i soldered this copper strip on there. Not sure how long it will last but then i'm pretty sure the rest of that rad' is nearly dead too. Liking the way it fits the whole "barely much left of anything" build style. (Edit: lasted until the year 2020 when i got tired of it's leaks and overheating on hills. Would still work on something driven to the ice cream shop & back once a month, if you wanted to shove black pepper and bread into the holes.)
1 point
-
Trying to get the old ignition sensor working again. Made some connectors from offcuts of copper and some bullet casings. They fit, i will need to get some coils to work though. Was thinking about making a kind of MOSFET exciter thingy, i have some transistors from an old stereo amp but they do not behave the way the transistors i grew up with behaved. Today i found some red hard fibre washer material so i'll replace the insulation on that thing.
1 point
-
The tube sticking out of the dashboard is a light, like a map light but can be turned to light up the instrument and switch on the dashboard. Supposed to look like this. Mine is made from a small piece of copper, a nitrous oxide canister of the kind that used to be found on every roadside, a disused trim clip spring and a piece of wire that was one of the tie wire / safety wire bits on one of my connecting rods. Waste nothing.1 point
-
So SOHC helped me turn these wheel bearing spacers. Actually he did most of the cutting out, i only did one cut and the radiusing of the corners and honing and gave them a really rough polish. Now more modern type wheel bearings will fit //oldschool.co.nz/index.php?/topic/47381-rustiz-1920-26-ford-t-bucket-of-rust-discussion/
1 point
-
You can tell which piston ring i made because it has some file marks on it. This block is pretty bad but i can't find anyone who'll touch it, definitely need to cut some valve seats some day soon.1 point
-
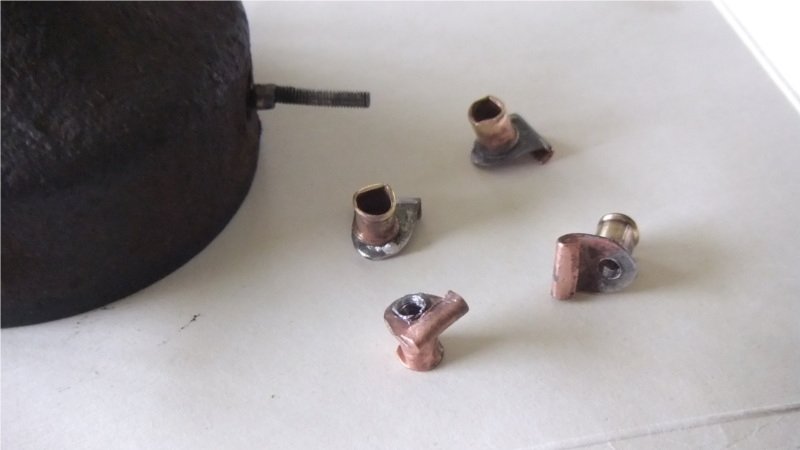
So after finding the once widely available fuel line fittings i knew during the industrial revolution are now considered "old fashioned" and not available at any place i could find i resorted to making my own. Notice the air line hose fitting is a close fit to the tube. If i cut it in half it becomes a perfect match for a 1/4 BSP fitting as used on old tractors. Bad picture but the fit is good. How convenient.1 point
-
So today i made a knife switch to operate the starter.1 point
-
Factory horn button actually looked like this, as in a wire running through the spokes of the steering wheel. Henry ford didn't want to change anything when electric horns came into fashion.1 point
-
Took apart a diff'. Great thing about the old dinosaur oil is it has been underground for 100 million years and hasn't gone rotten. This bolt still had some on the threads after 70 years in the weather. Under the crumbly leather and felt oil seals the bearings look perfect. Too bad the shaft sticking out the end is so rusty, only good if i wanted to narrow the diff now. Brake backing plates might need replacing but the brake cams freed up nicely. Will probably replace those though because they have some rust pitting that the LTSA might be prejudice against. In with the old and out with the new. Replaced shiny bracket with rusty old one. Floor boards don't fit exactly but i guess i can trim them. Free bracket with chipped paint anyone? Another oldschool user has provided me with a a template for making the windshield glass, just one problem. My frame is made of round tubing while the originals were flattened tube, hence the glass would be a tidy bit too small. Random shot of light bracket. Only problem is there are no places to bolt fenders which i'd need if i don't get a fenderless exemption. But i think fenders would look dumb on this particular car anyway.1 point
-
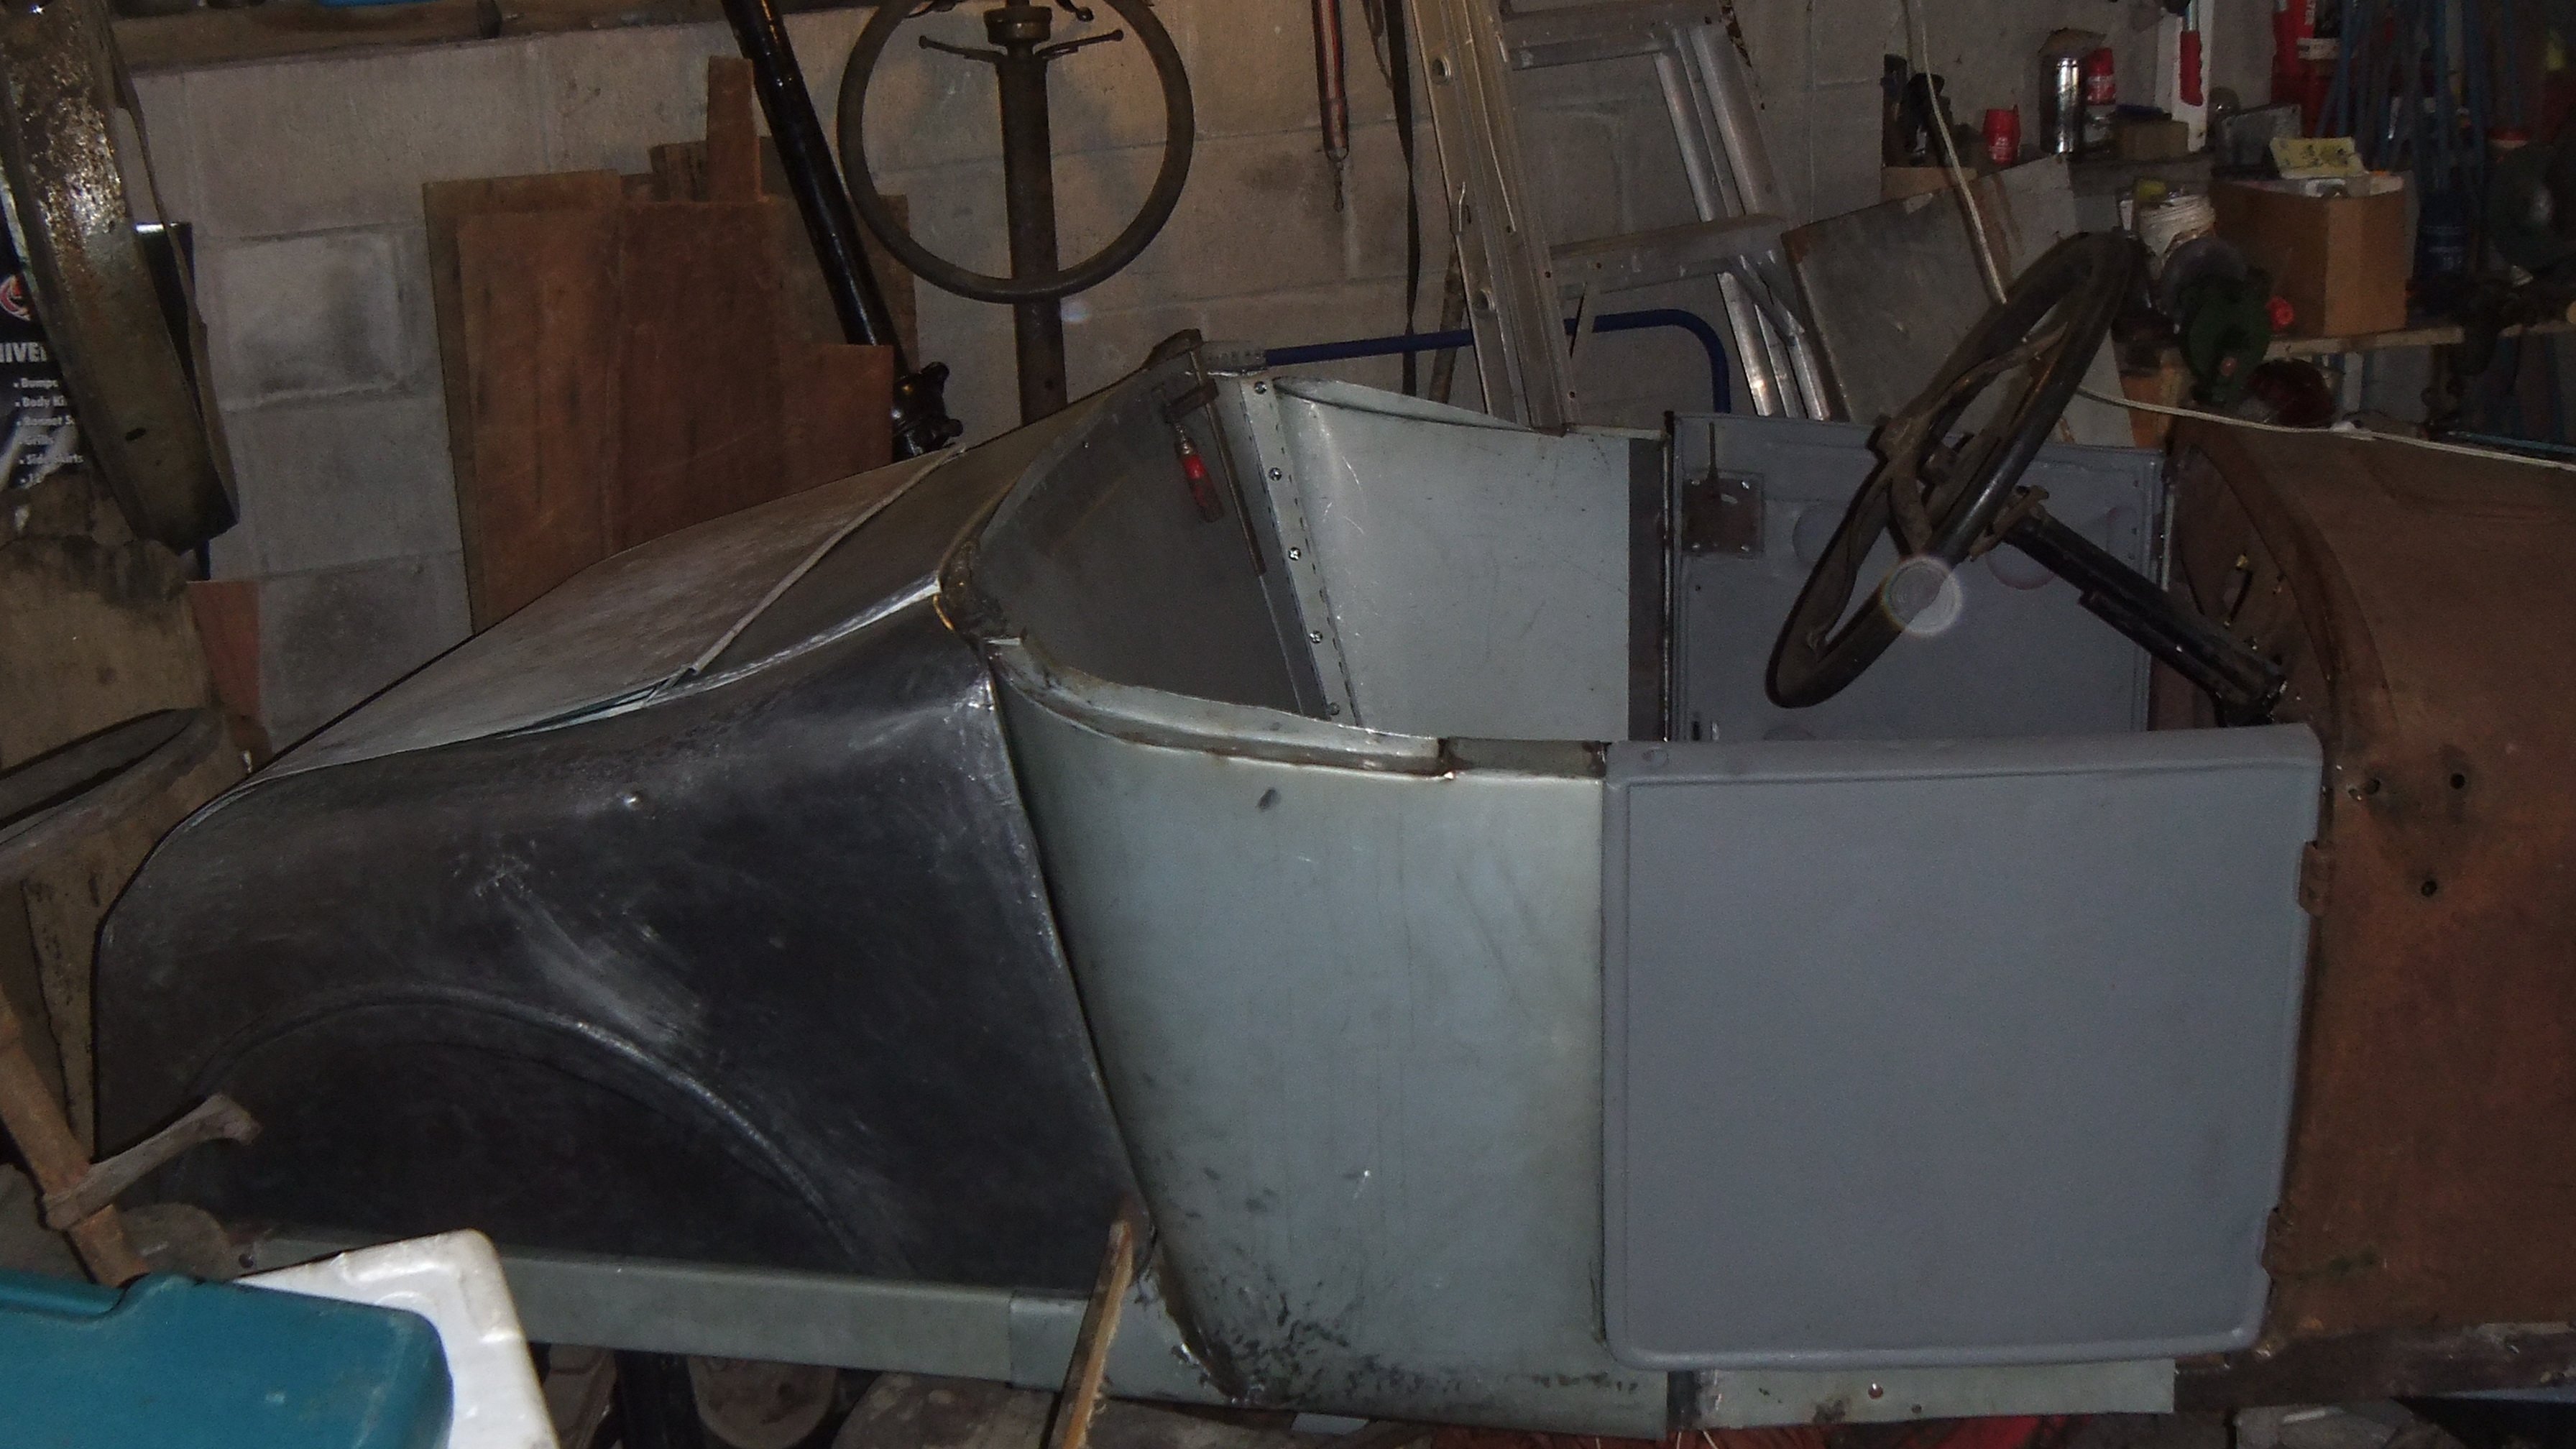
Looks less bad now. But it looks like i gave up on the bootlid... One day i may make a new one. the panel gap is terrible. People see this and ask me why i'm not a panel beater. This is why
1 point
-
After reading this tech thread, //oldschool.co.nz/index.php?/topic/46841-swaging-panel-steel-with-simple-tools/#entry1459298 i loosely followed tortrons method with a piece of rod and 2 rough lengths of wood. Didn't even grind the rod like he suggested because i am running low of grinding disks and true enough the end of the rod cut the sheet metal in one spot.
1 point
-
And a few shots:
1 point
-
This is progress right? Just so you know i'm not making this up out of my head. i even had a workshop weld the steering column mount. This is a new floorboard riser thing, i made it myself and had someone redo my welds because my welder kinda died. Only 2 exit wounds that i can find but little bullet shaped dents are evident in the dash and firewall, focusing on the gas tank.
1 point
-
Here is a problem i believe i tried asking in one of the technical threads but those posts are apparently deleted for being weird. Today while measuring whether i can fit ford wide5 hubs on the old spindles i found i cannot, so i tried measuring up the hubs next to each other. i believe the hub flange will sit slightly inward of where the wide5 hub flange would be, but the original hub was designed to carry the weight in between the 2 flanges it has on wooden spokes. The ideal place to have the wheel adapter wound be between those 2 and they are 30mm apart. From what i read on some government looking website http://www.lvvta.org.nz the most you are allowed to space the wheel is 20% of the rim width, the wheels i would like might only be 4-5 inch wide (they still have tyres on so i can't measure very well ATM) So what do you recommend the wheel adaptors be made from? i would like steel, 5mm would be be about right weight wise and be thicker than the wheel pressing but 8 would look beefier, but stupidly heavy. Would i still be allowed spacers behind the adapter? It's ok if not allowed but i would like to have the weight of the wheel nearer where the factory intended.1 point


.thumb.jpeg.384ff72c8d2b0ee0d34a7bdedb55bdcf.jpeg)


This leaderboard is set to Auckland/GMT+12:00