
Leaderboard


Popular Content
Showing content with the highest reputation on 07/06/19 in all areas
-
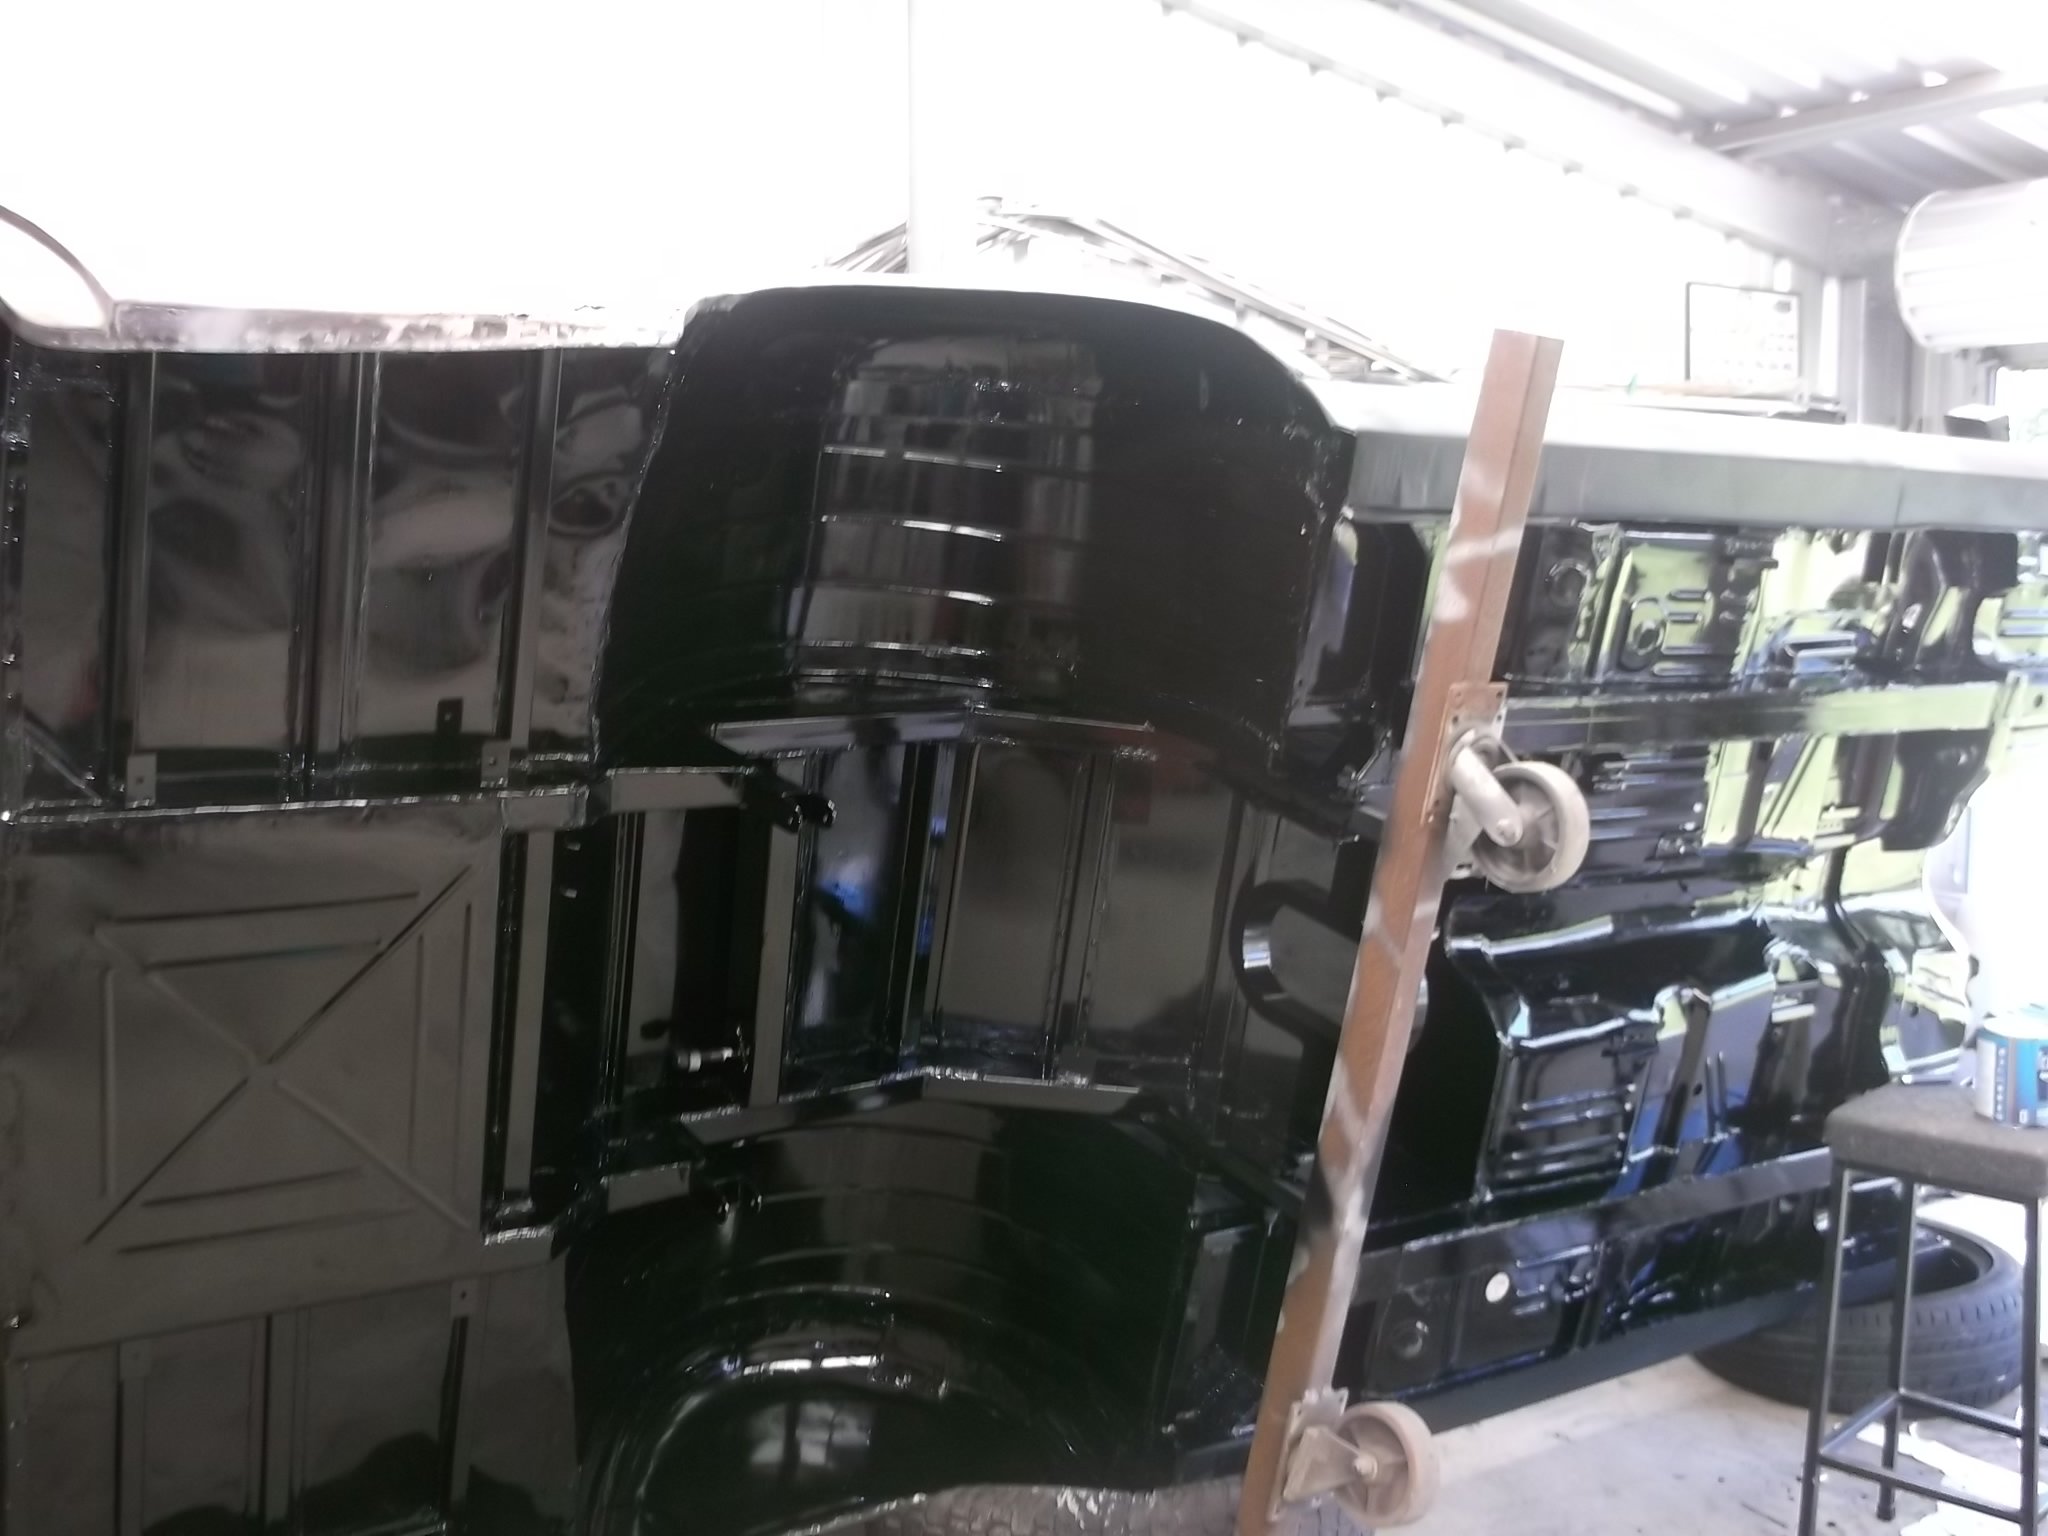
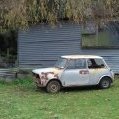
so yea. legal as. and now that is legal again it time to start doing all the illegal mods to it that i want to do. first up was installing an adjustable brake bias valve because i wasnt happy with how the brakes were before and im going to be putting a disk brake diff in it soon and ill need it for that. second was installing a smaller steering wheel. 2019-07-06_05-04-31 by sheepers, on Flickr then it was time to lower the front a bit because i wasn't happy with how it looked so the front springs got a mikita haircut. now its sitting much better. 2019-07-06_05-04-40 by sheepers, on Flickr 2019-07-06_05-04-49 by sheepers, on Flickr 2019-07-06_05-04-58 by sheepers, on Fl next will be painting the hood lining i think. its a fucked grey/mostly stained colour now so i think ill dye it black.12 points
-
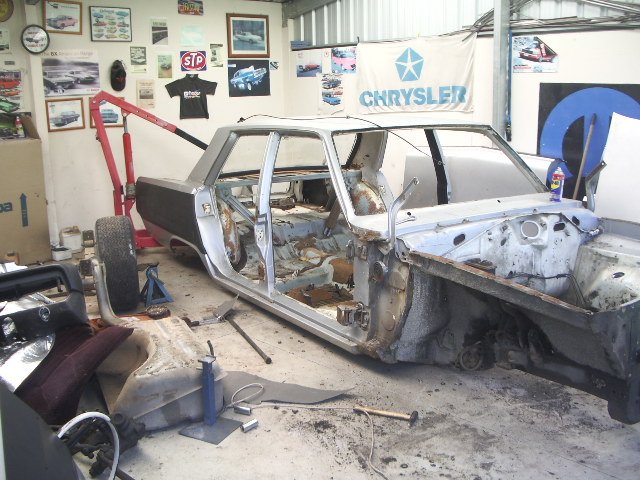
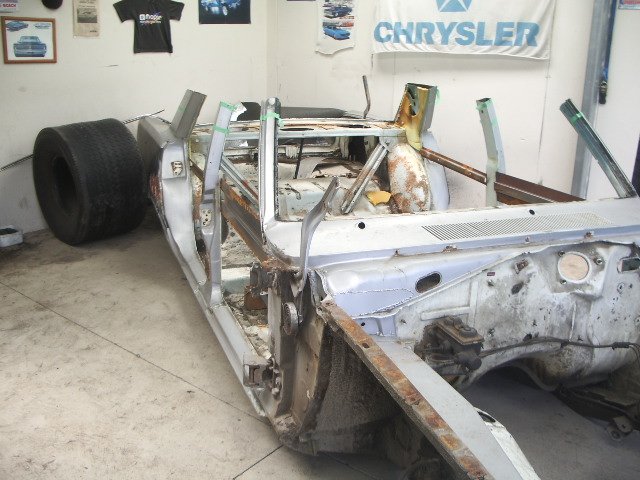
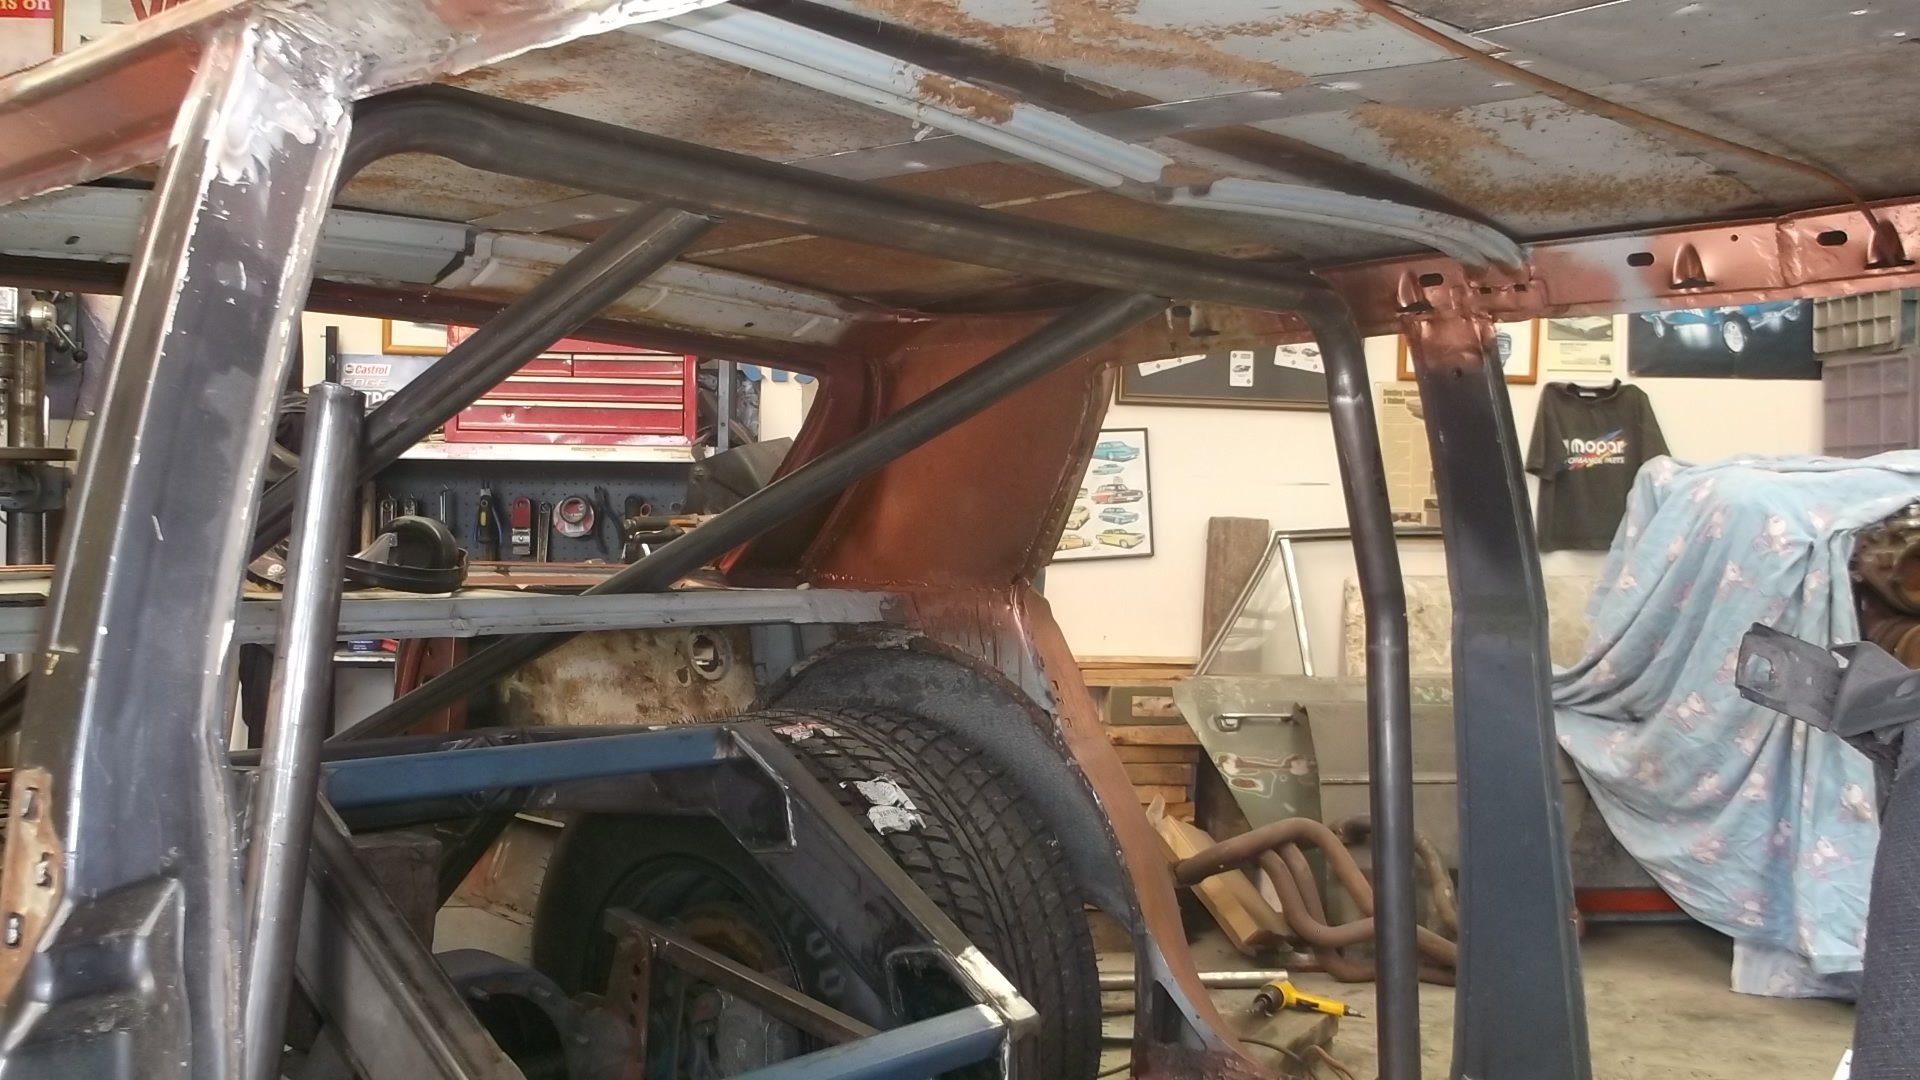
its had the b pillars moved back and made into a two door .dash has been changed too
 9 points
 -
8 points
-
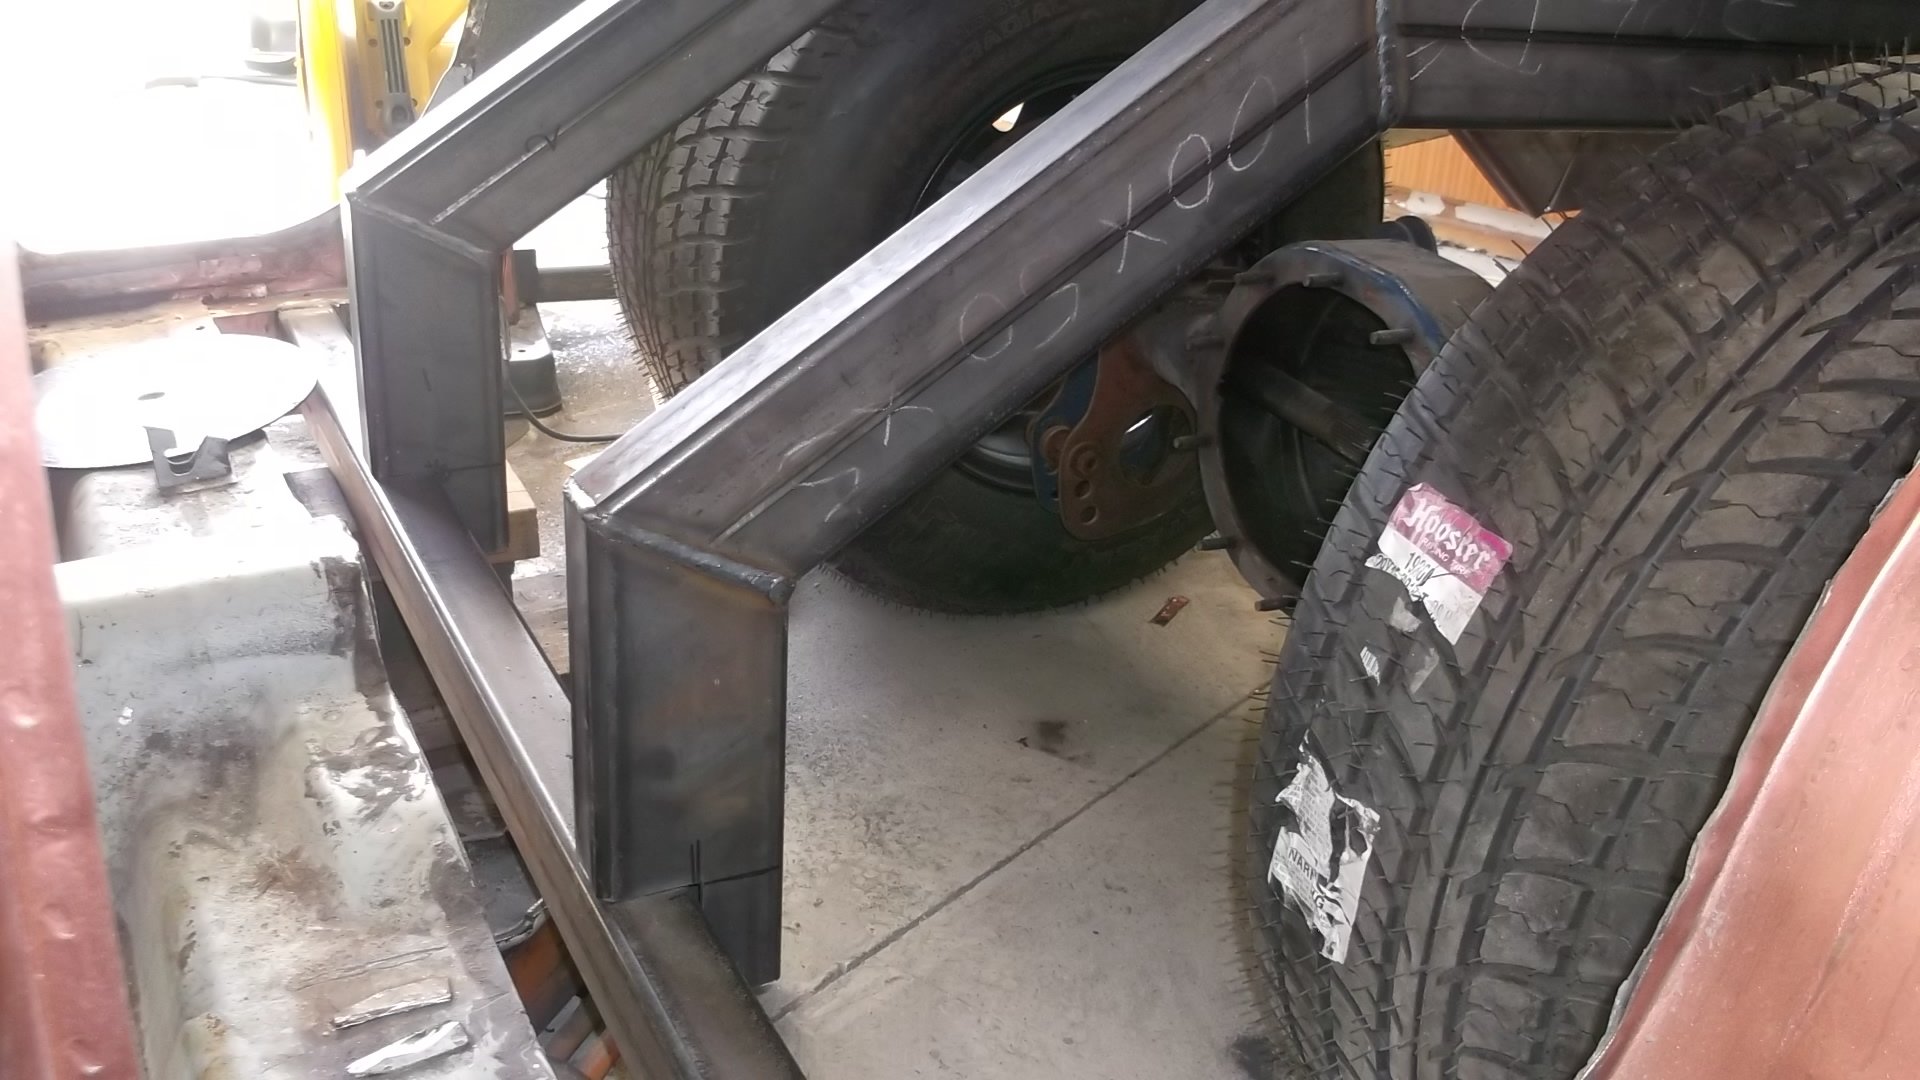
its also half chassised with 15 by 15 under it and a 383 big block
8 points
-
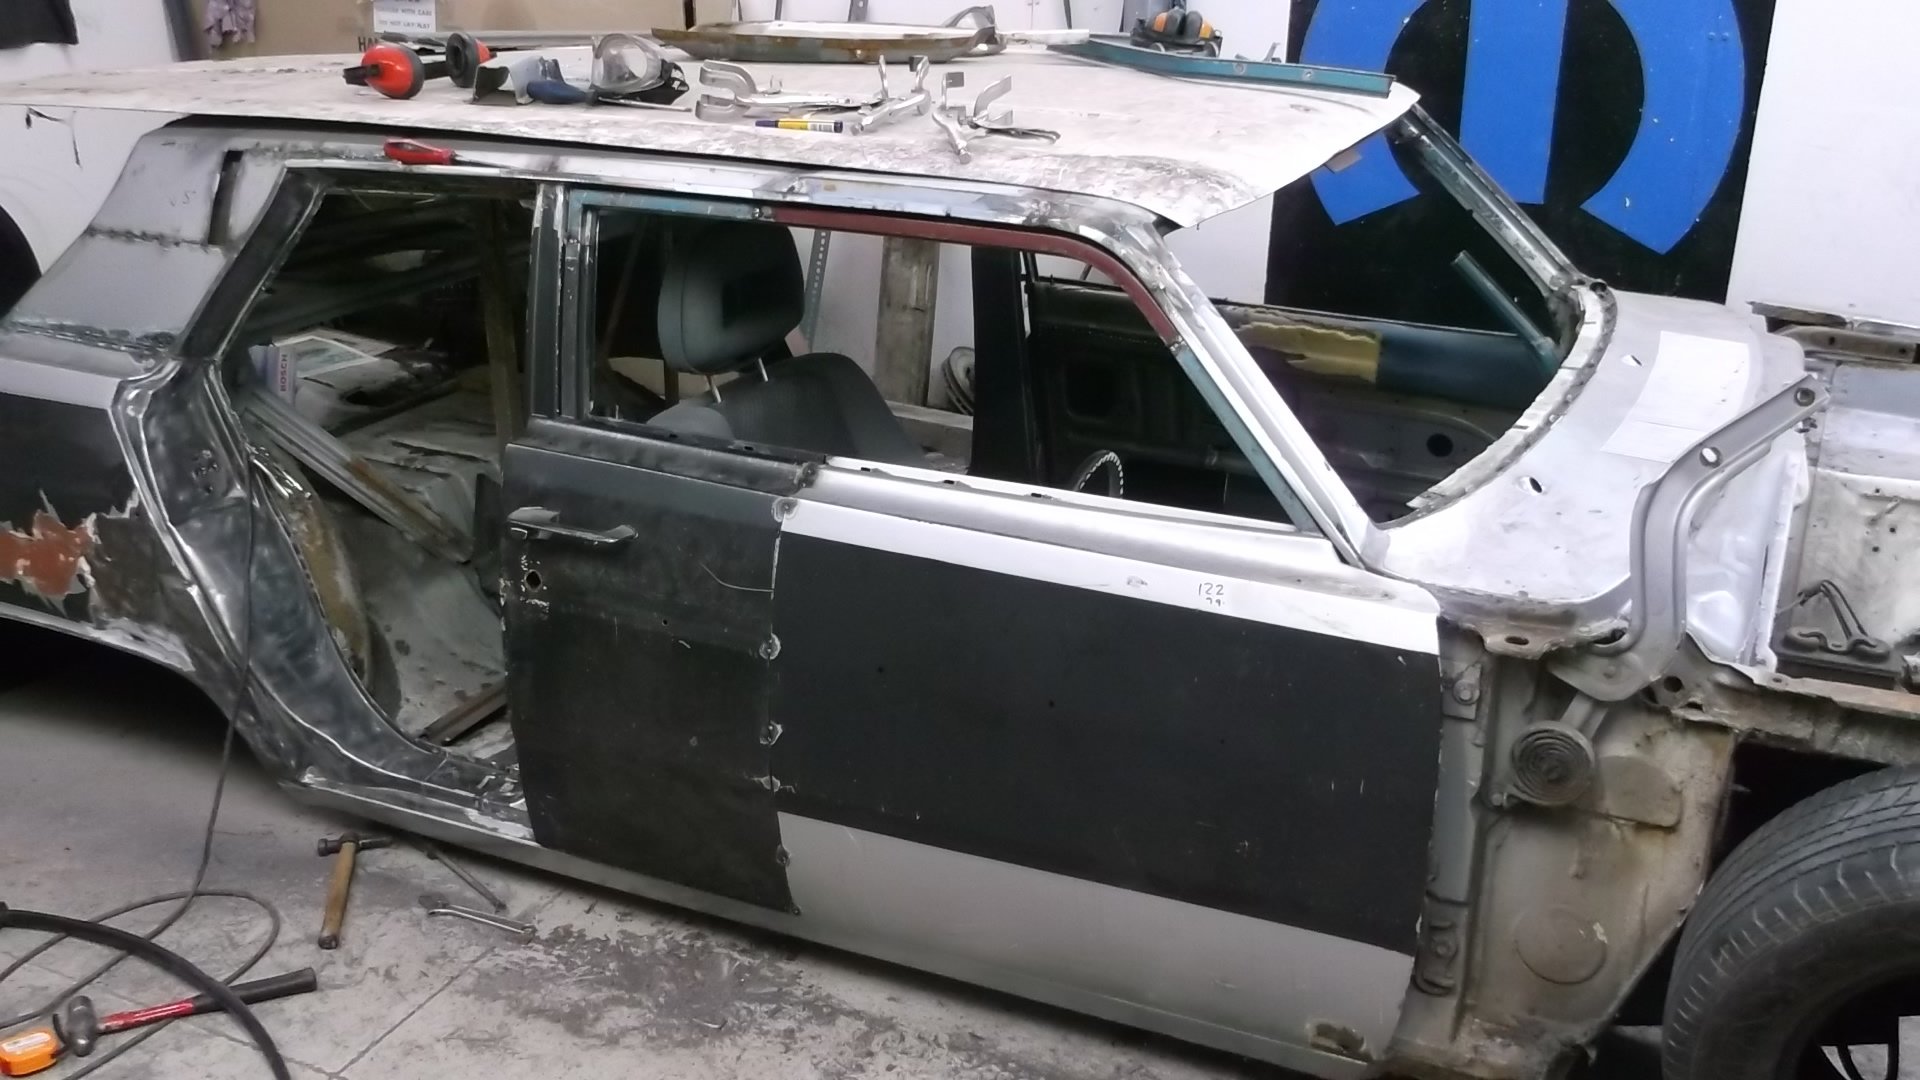
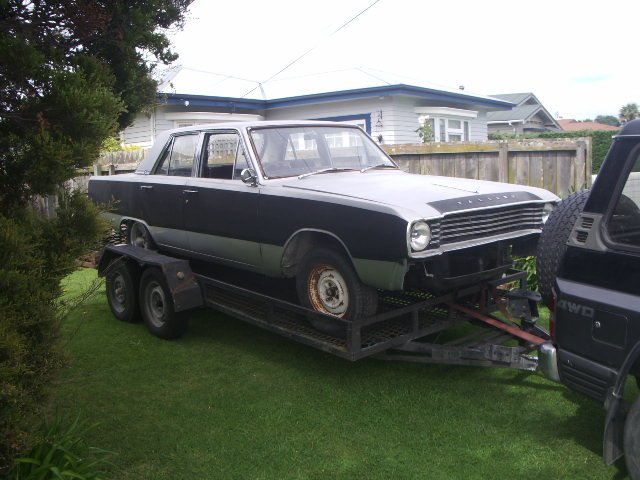
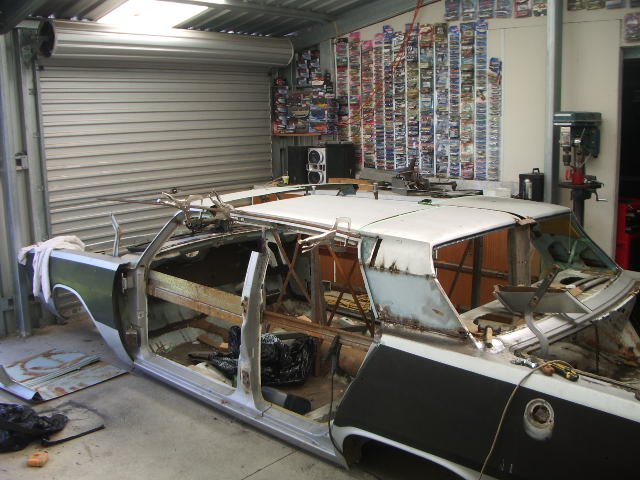
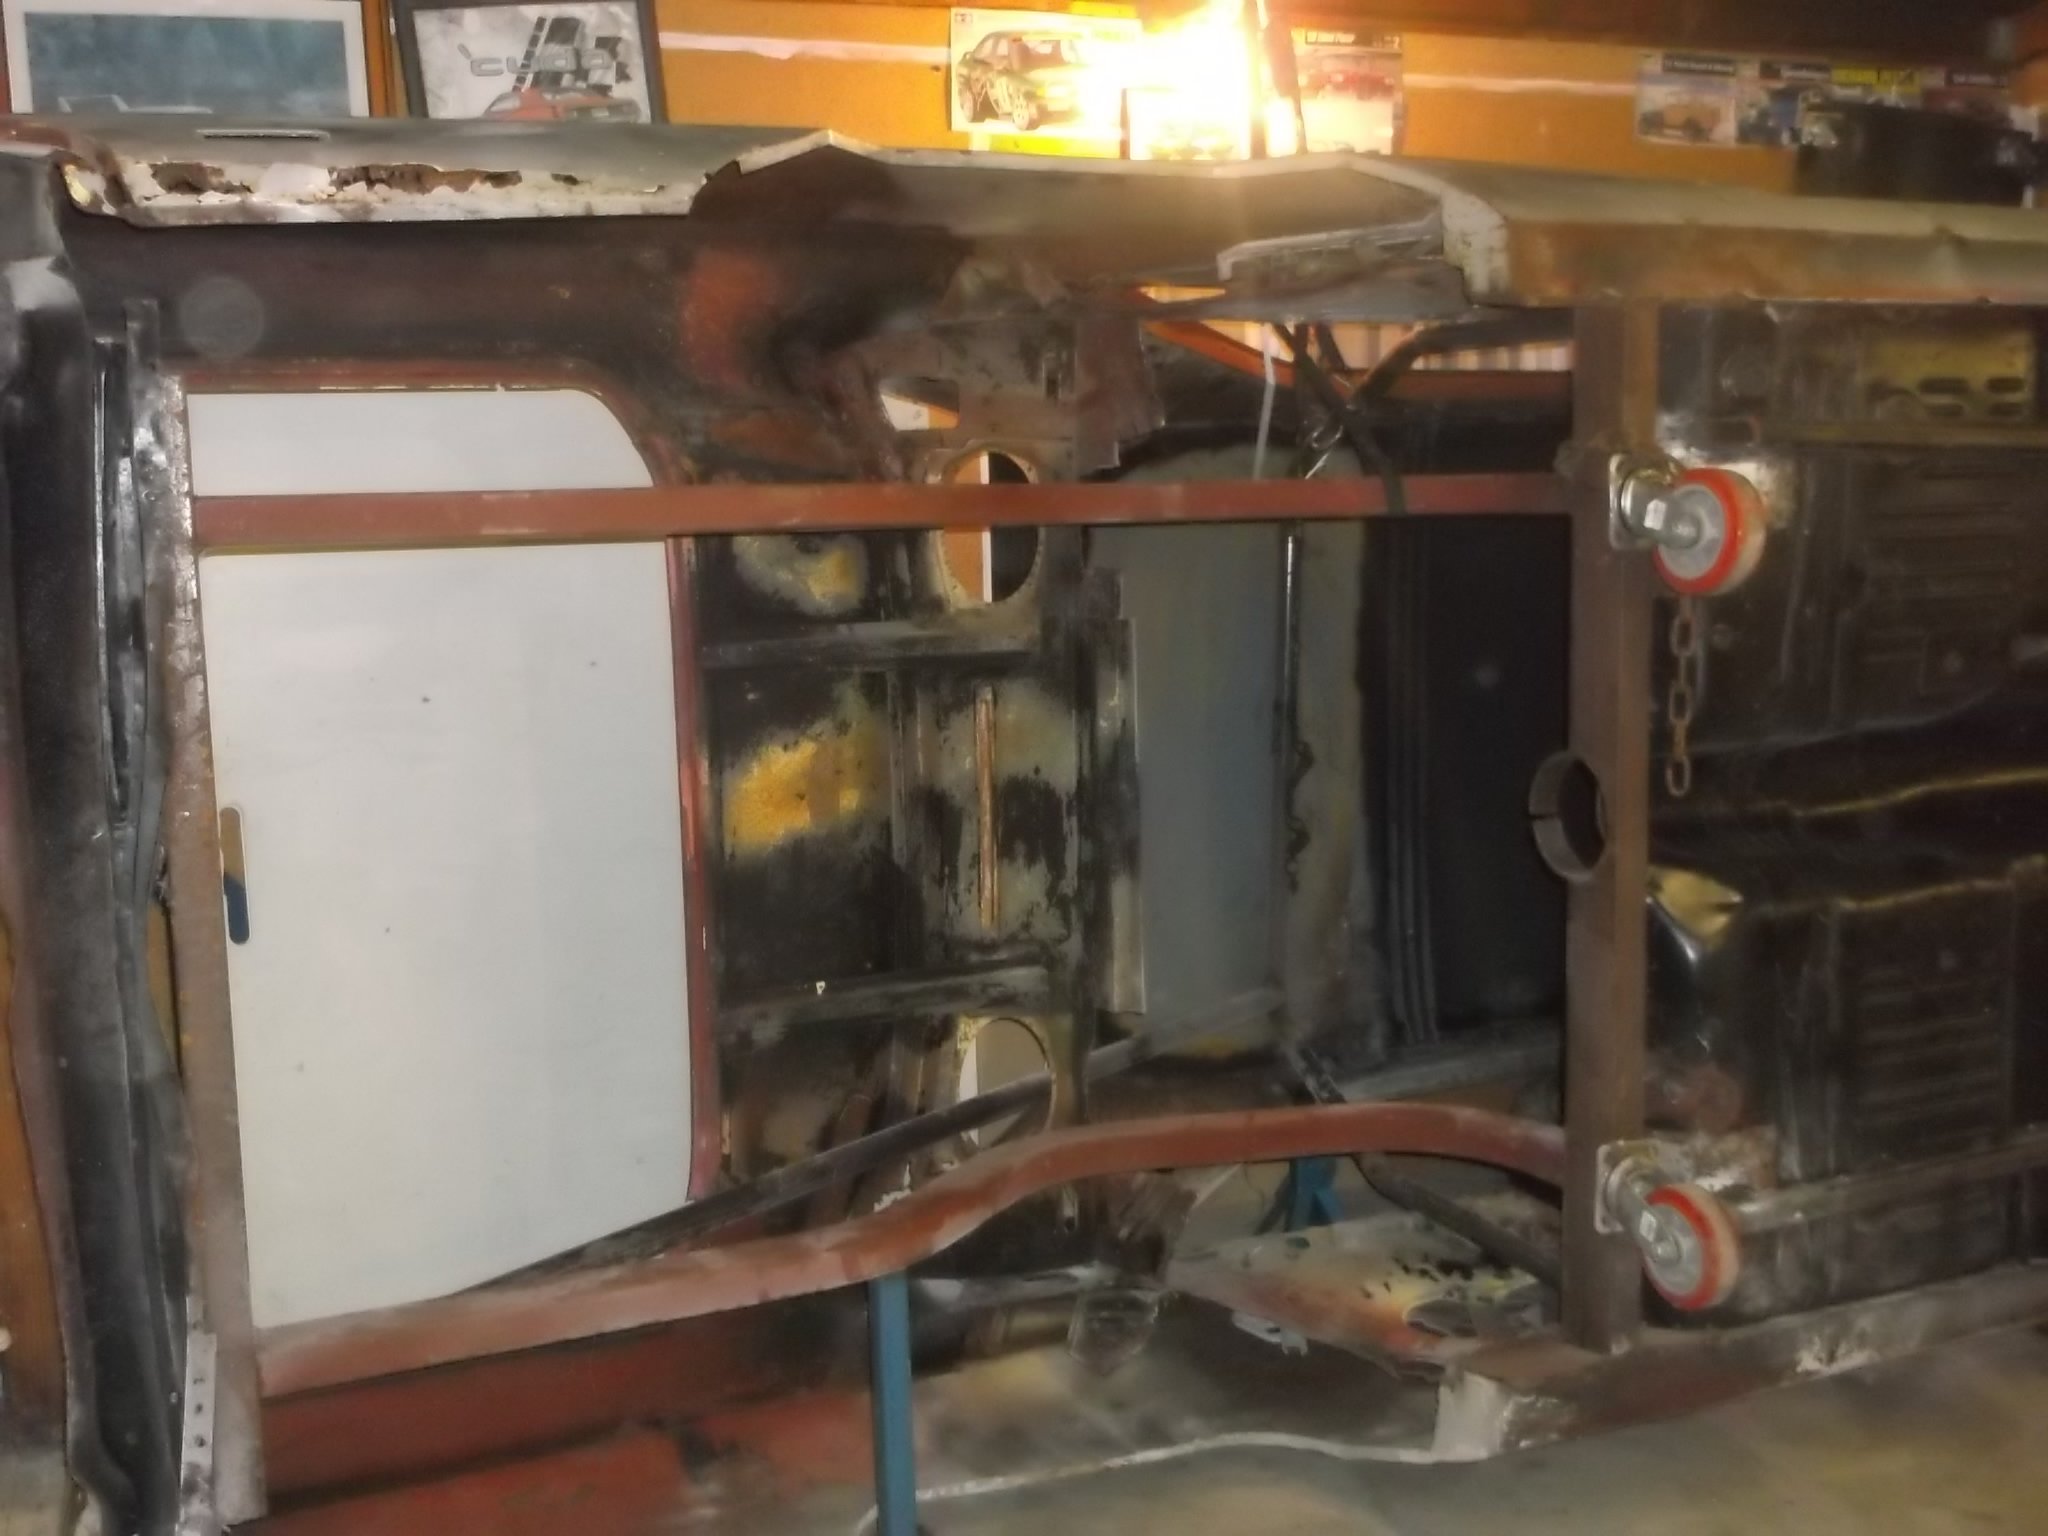
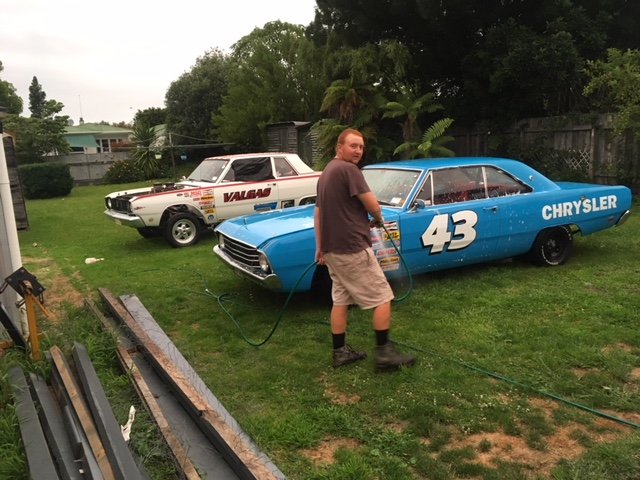
hi all con here thought i would share afew pics of my car ,its a 68 ve valiant . been working on it for five years .4 inch roof chop
7 points
-
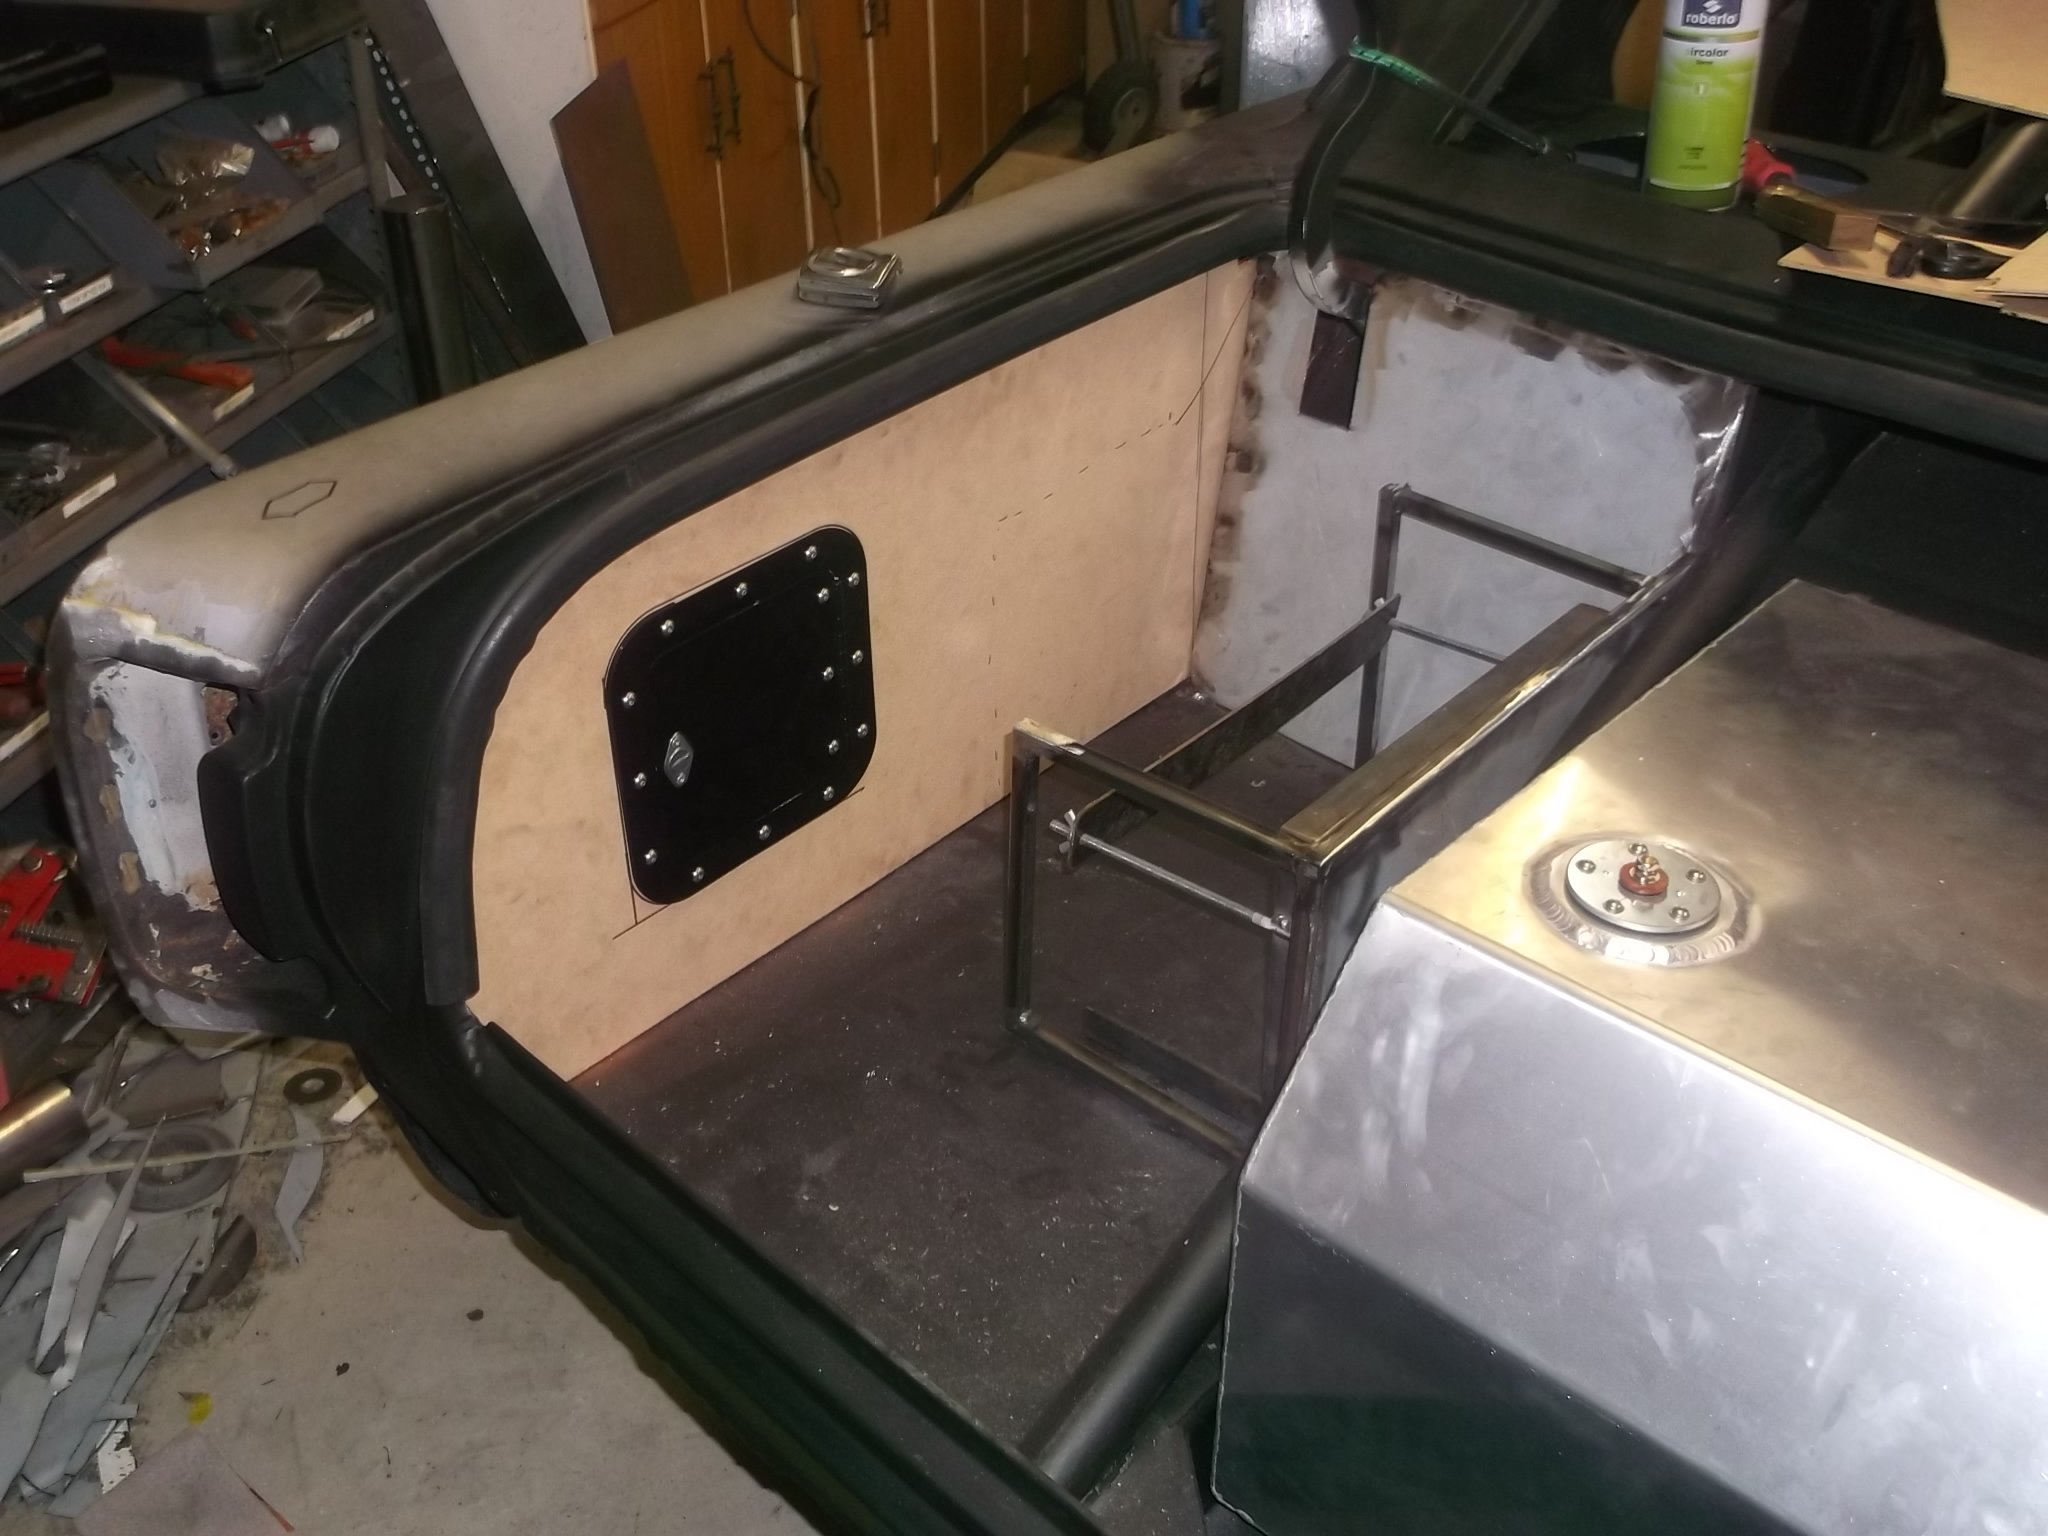
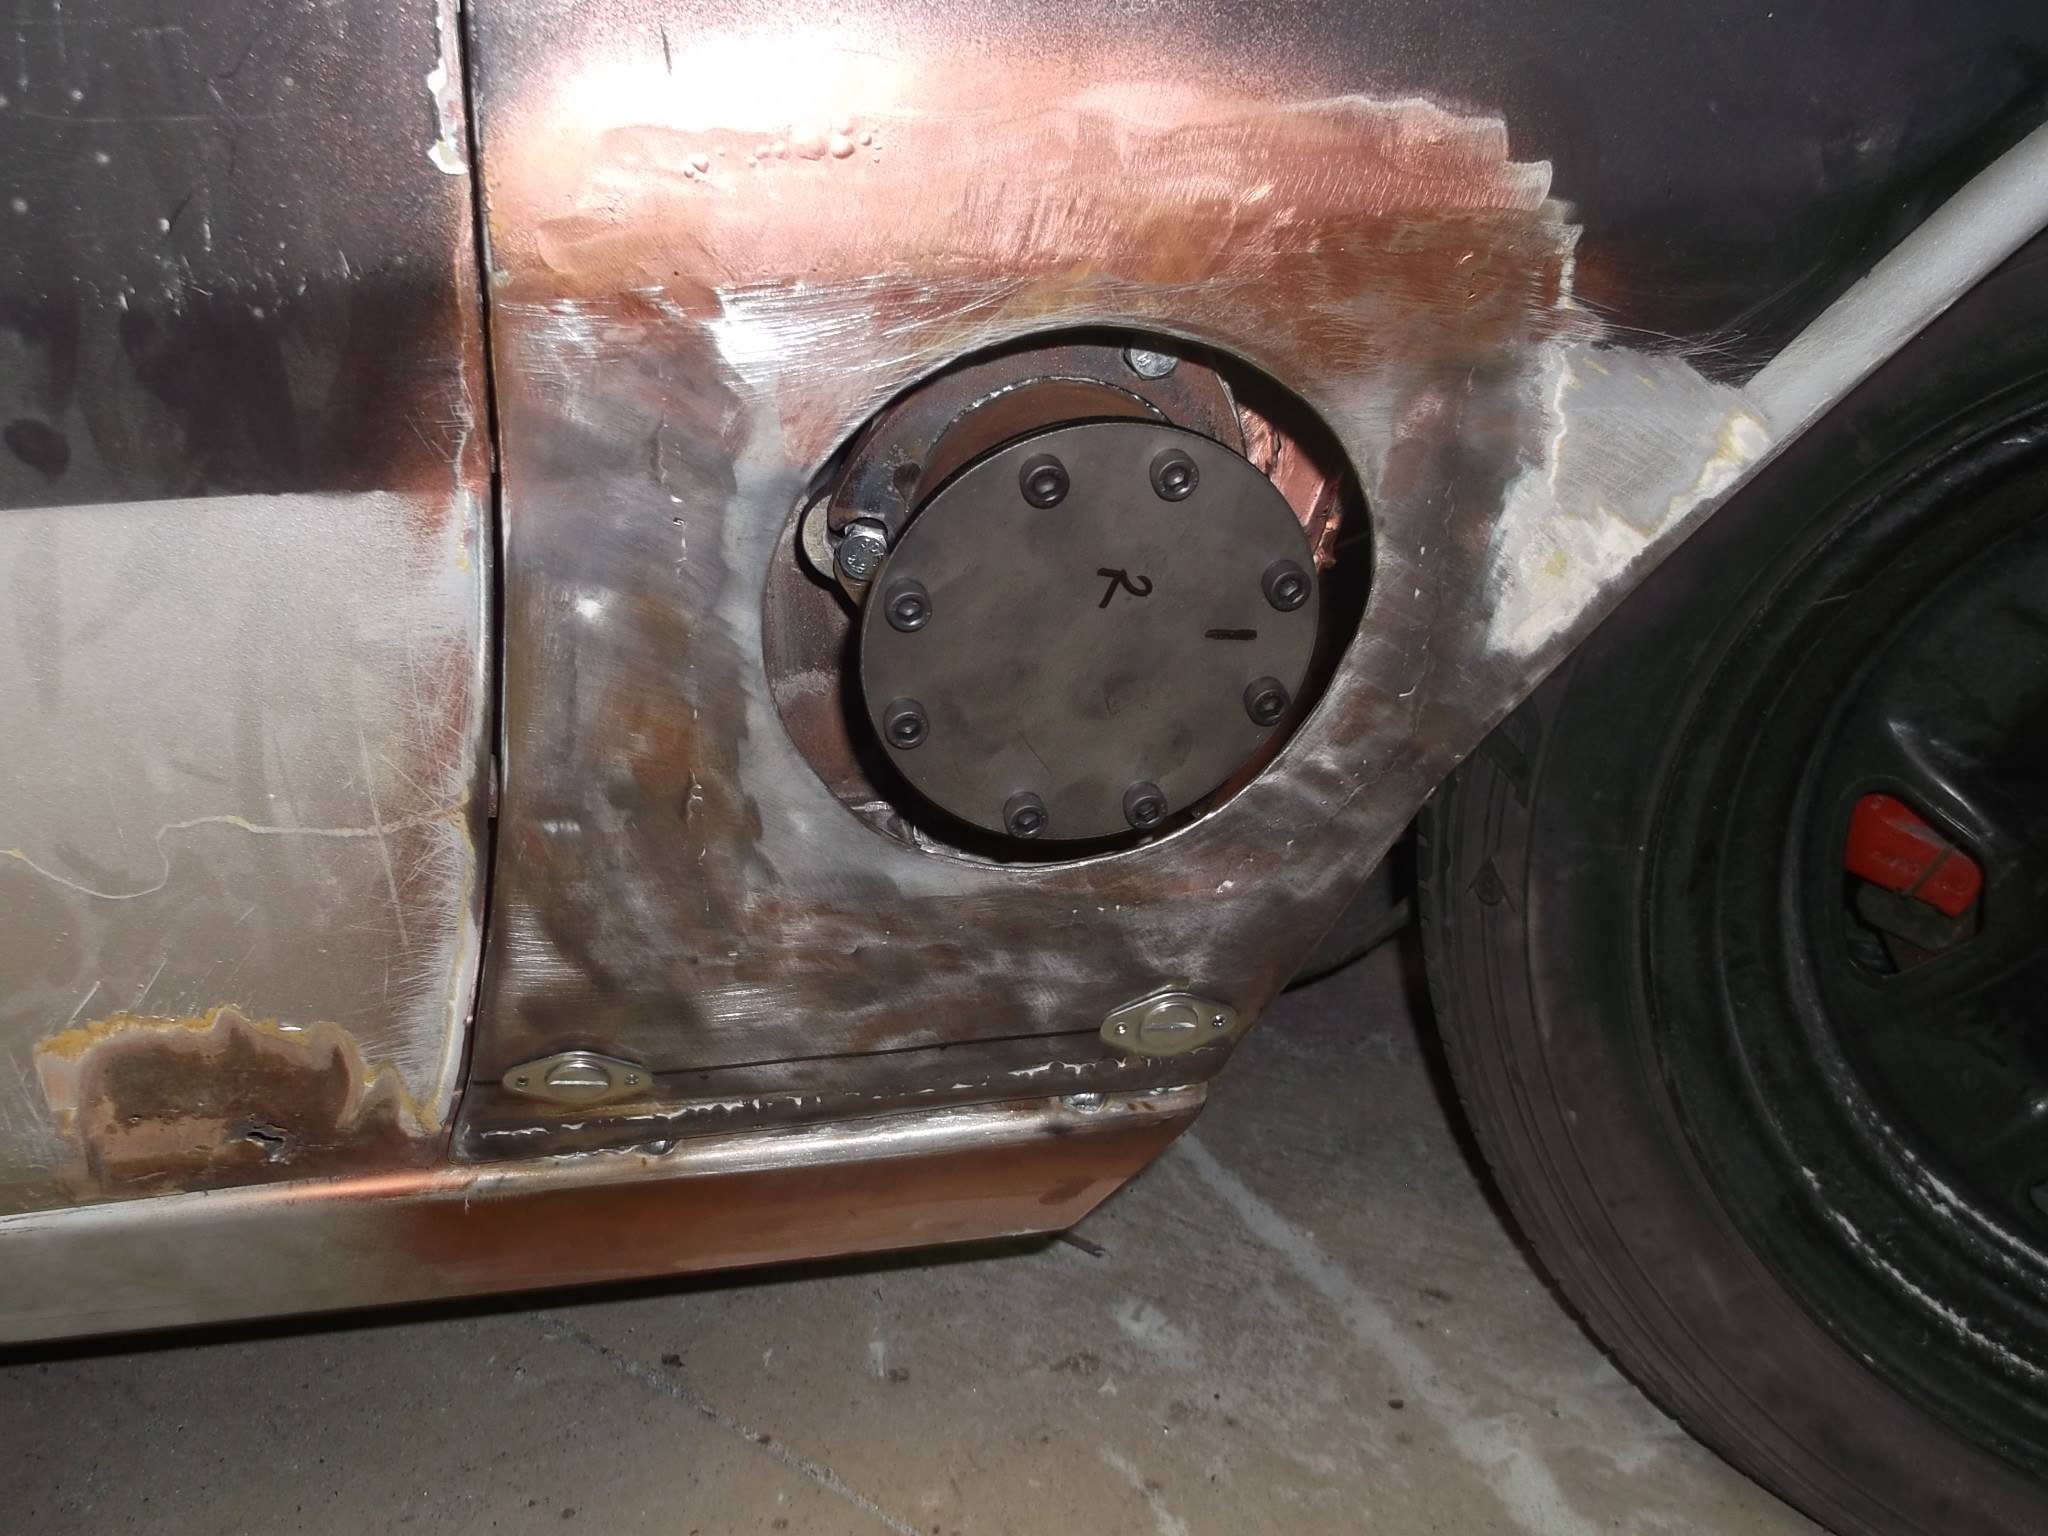
been doing the new inner guards the last few weeks,boots all lined with new tank as ell
6 points
-
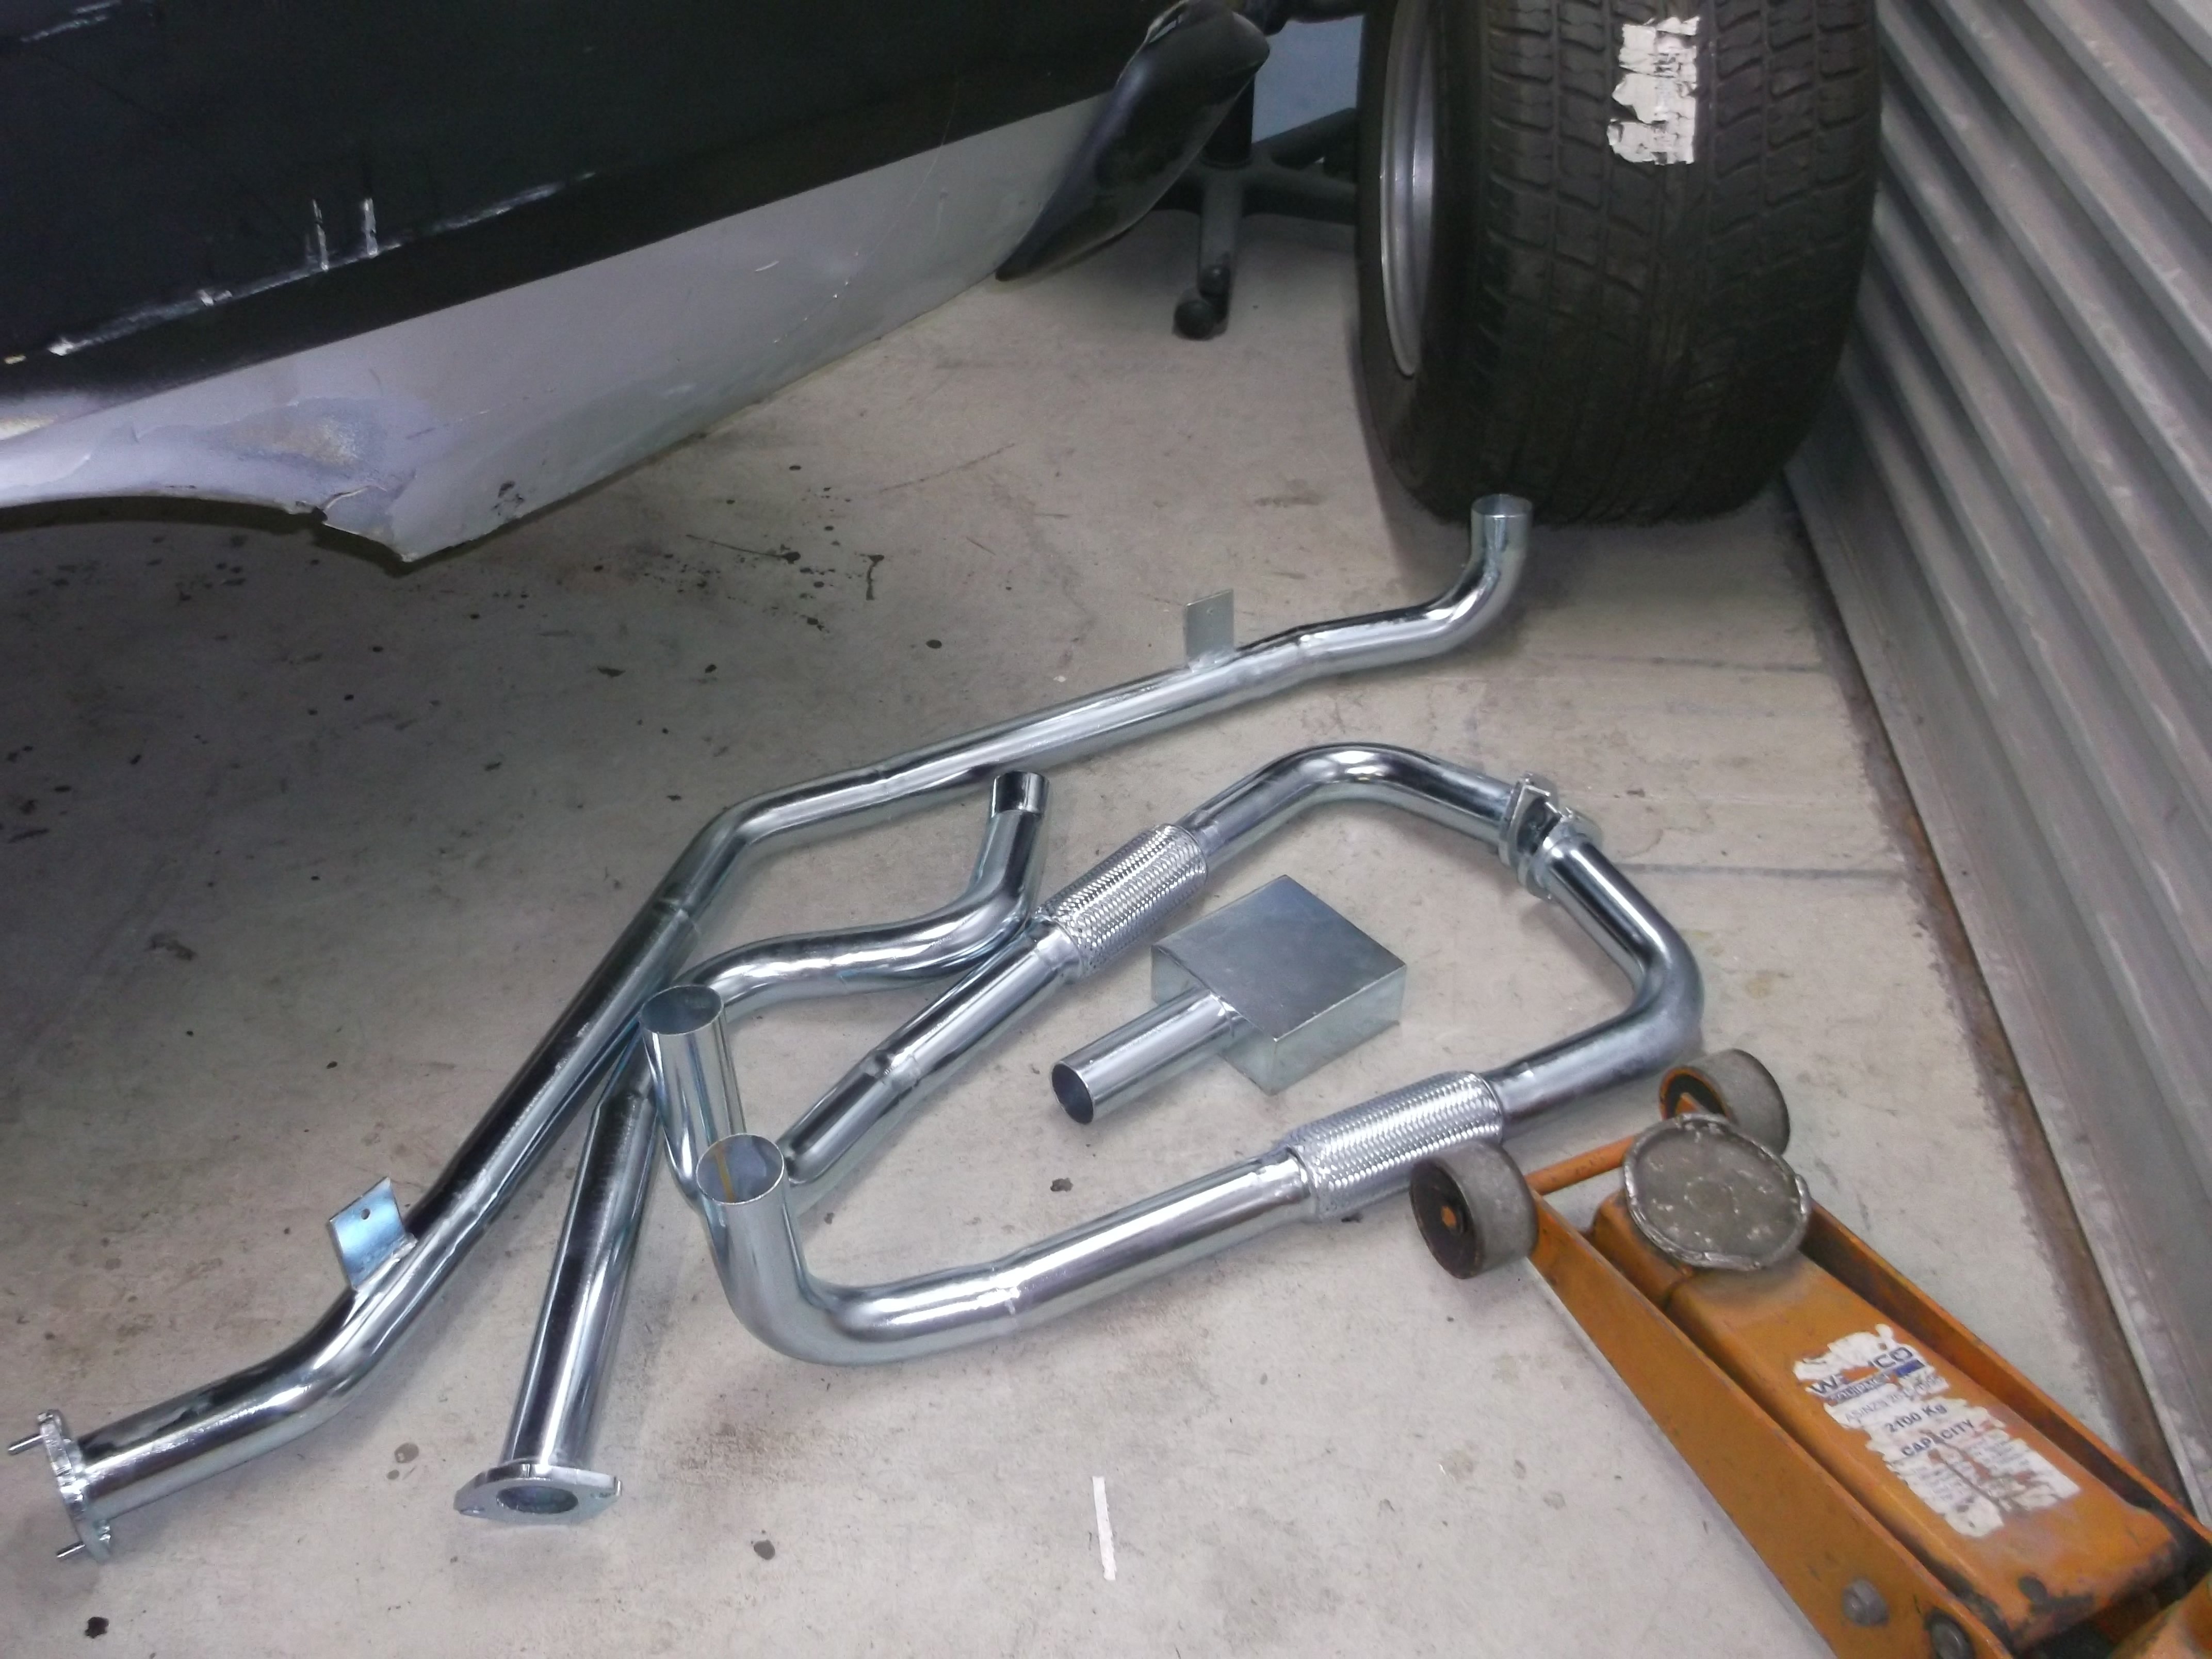
made my own headers and full exhaust .
5 points
-
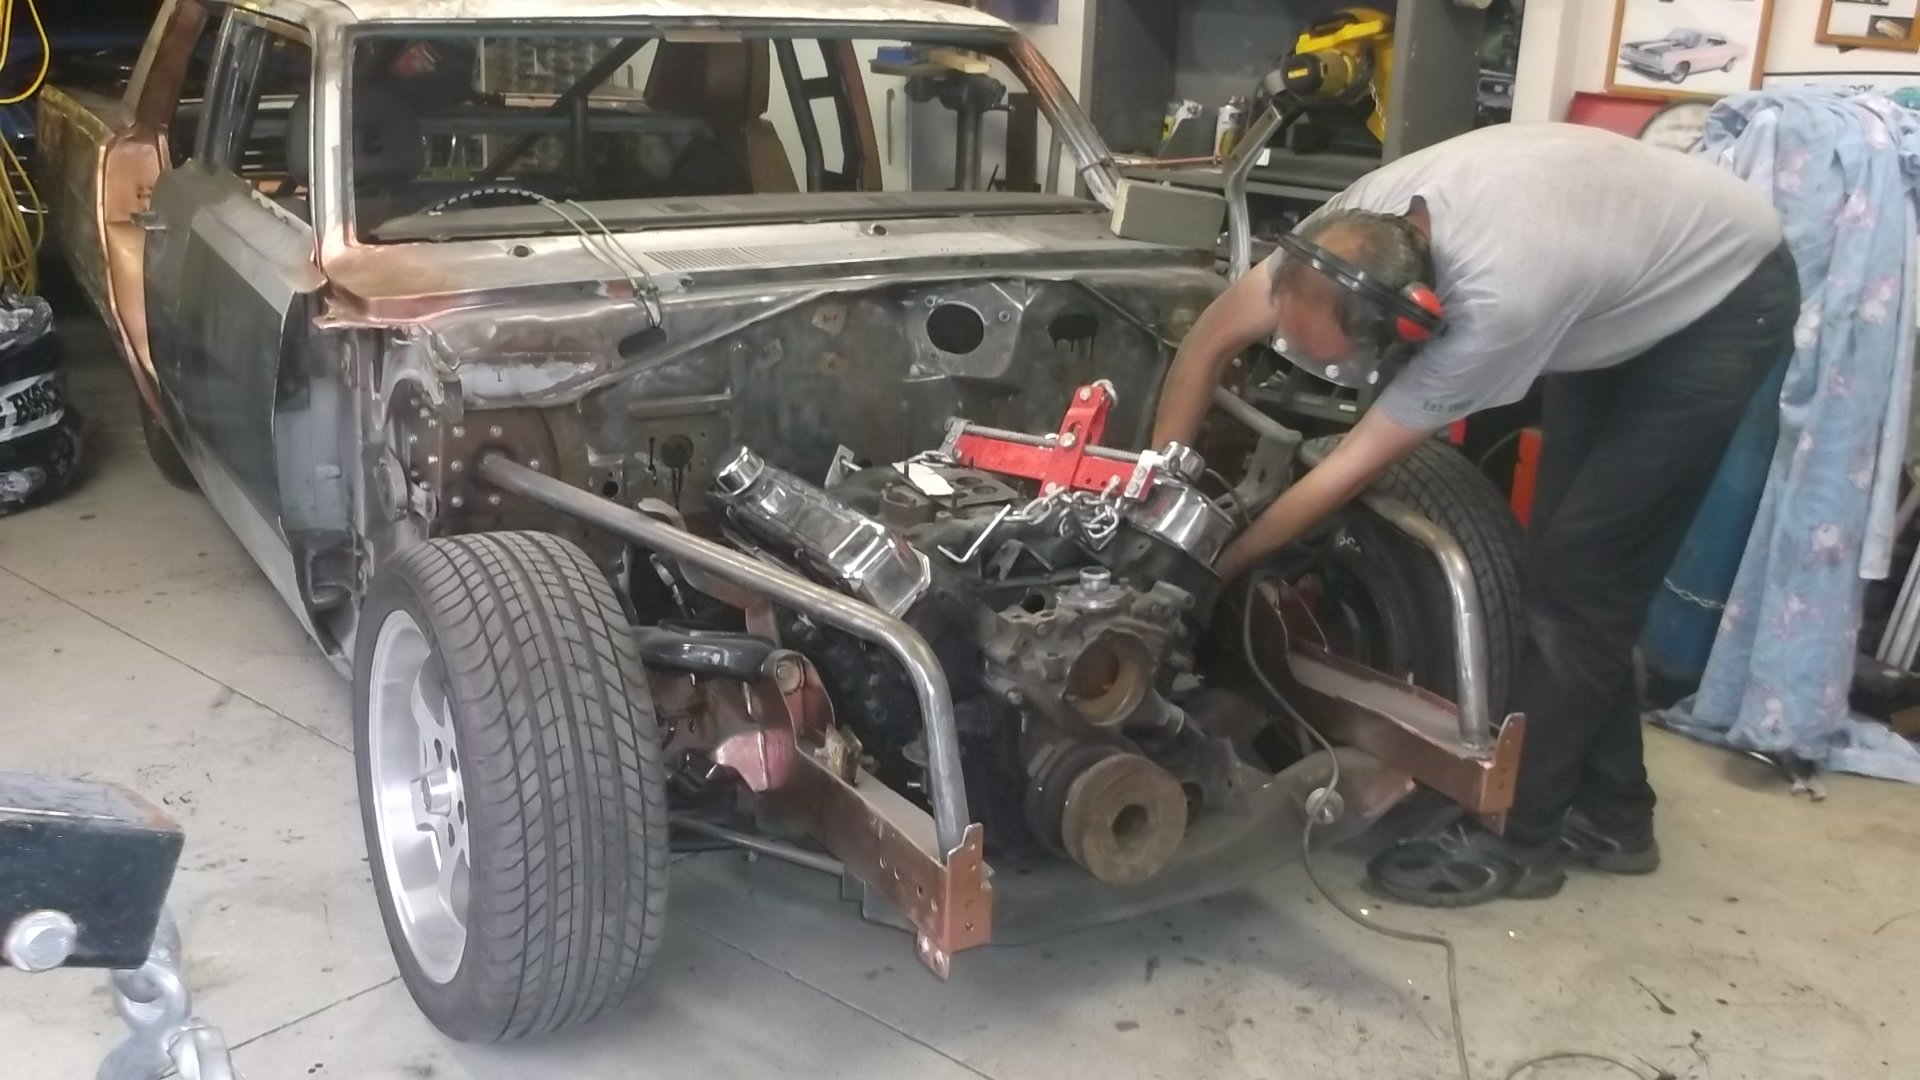
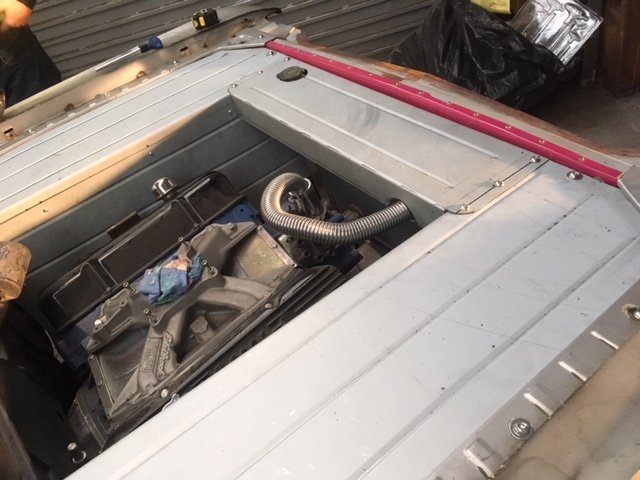
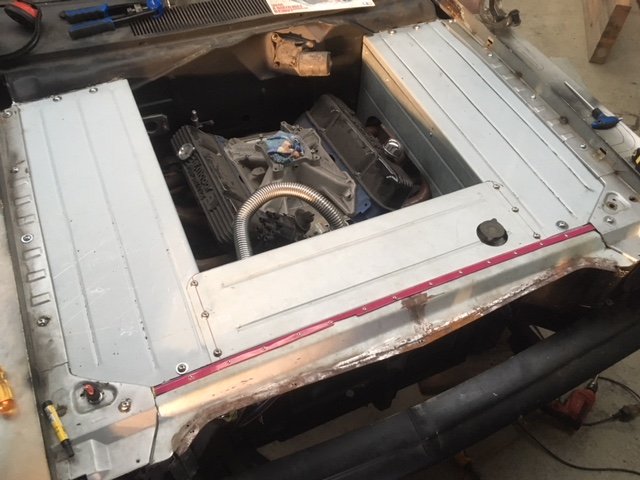
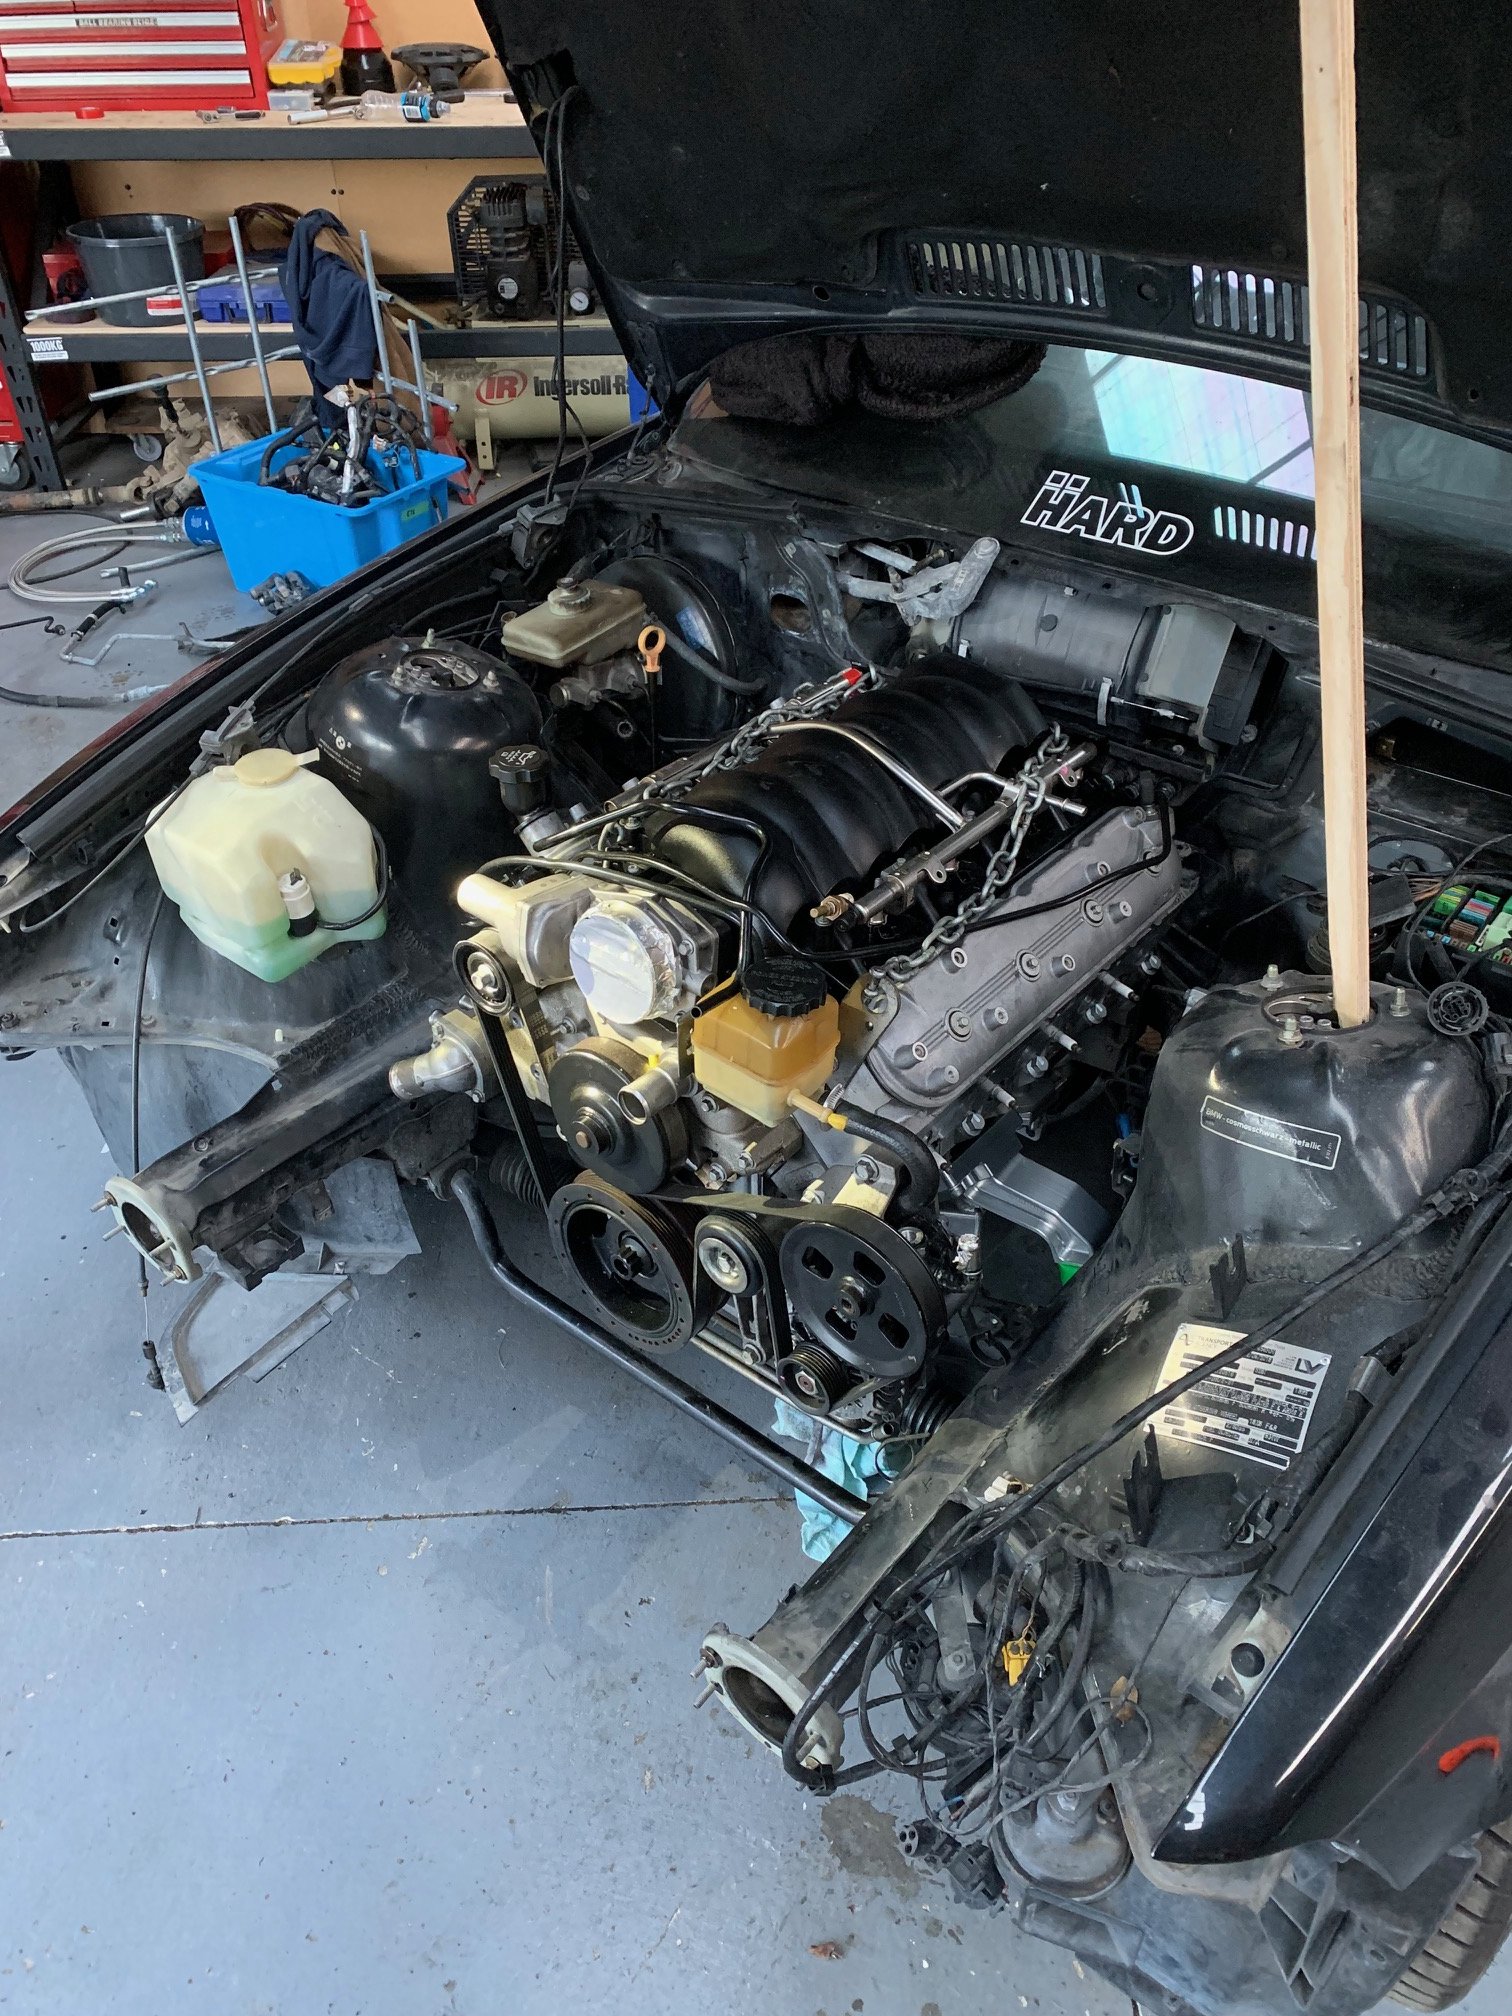
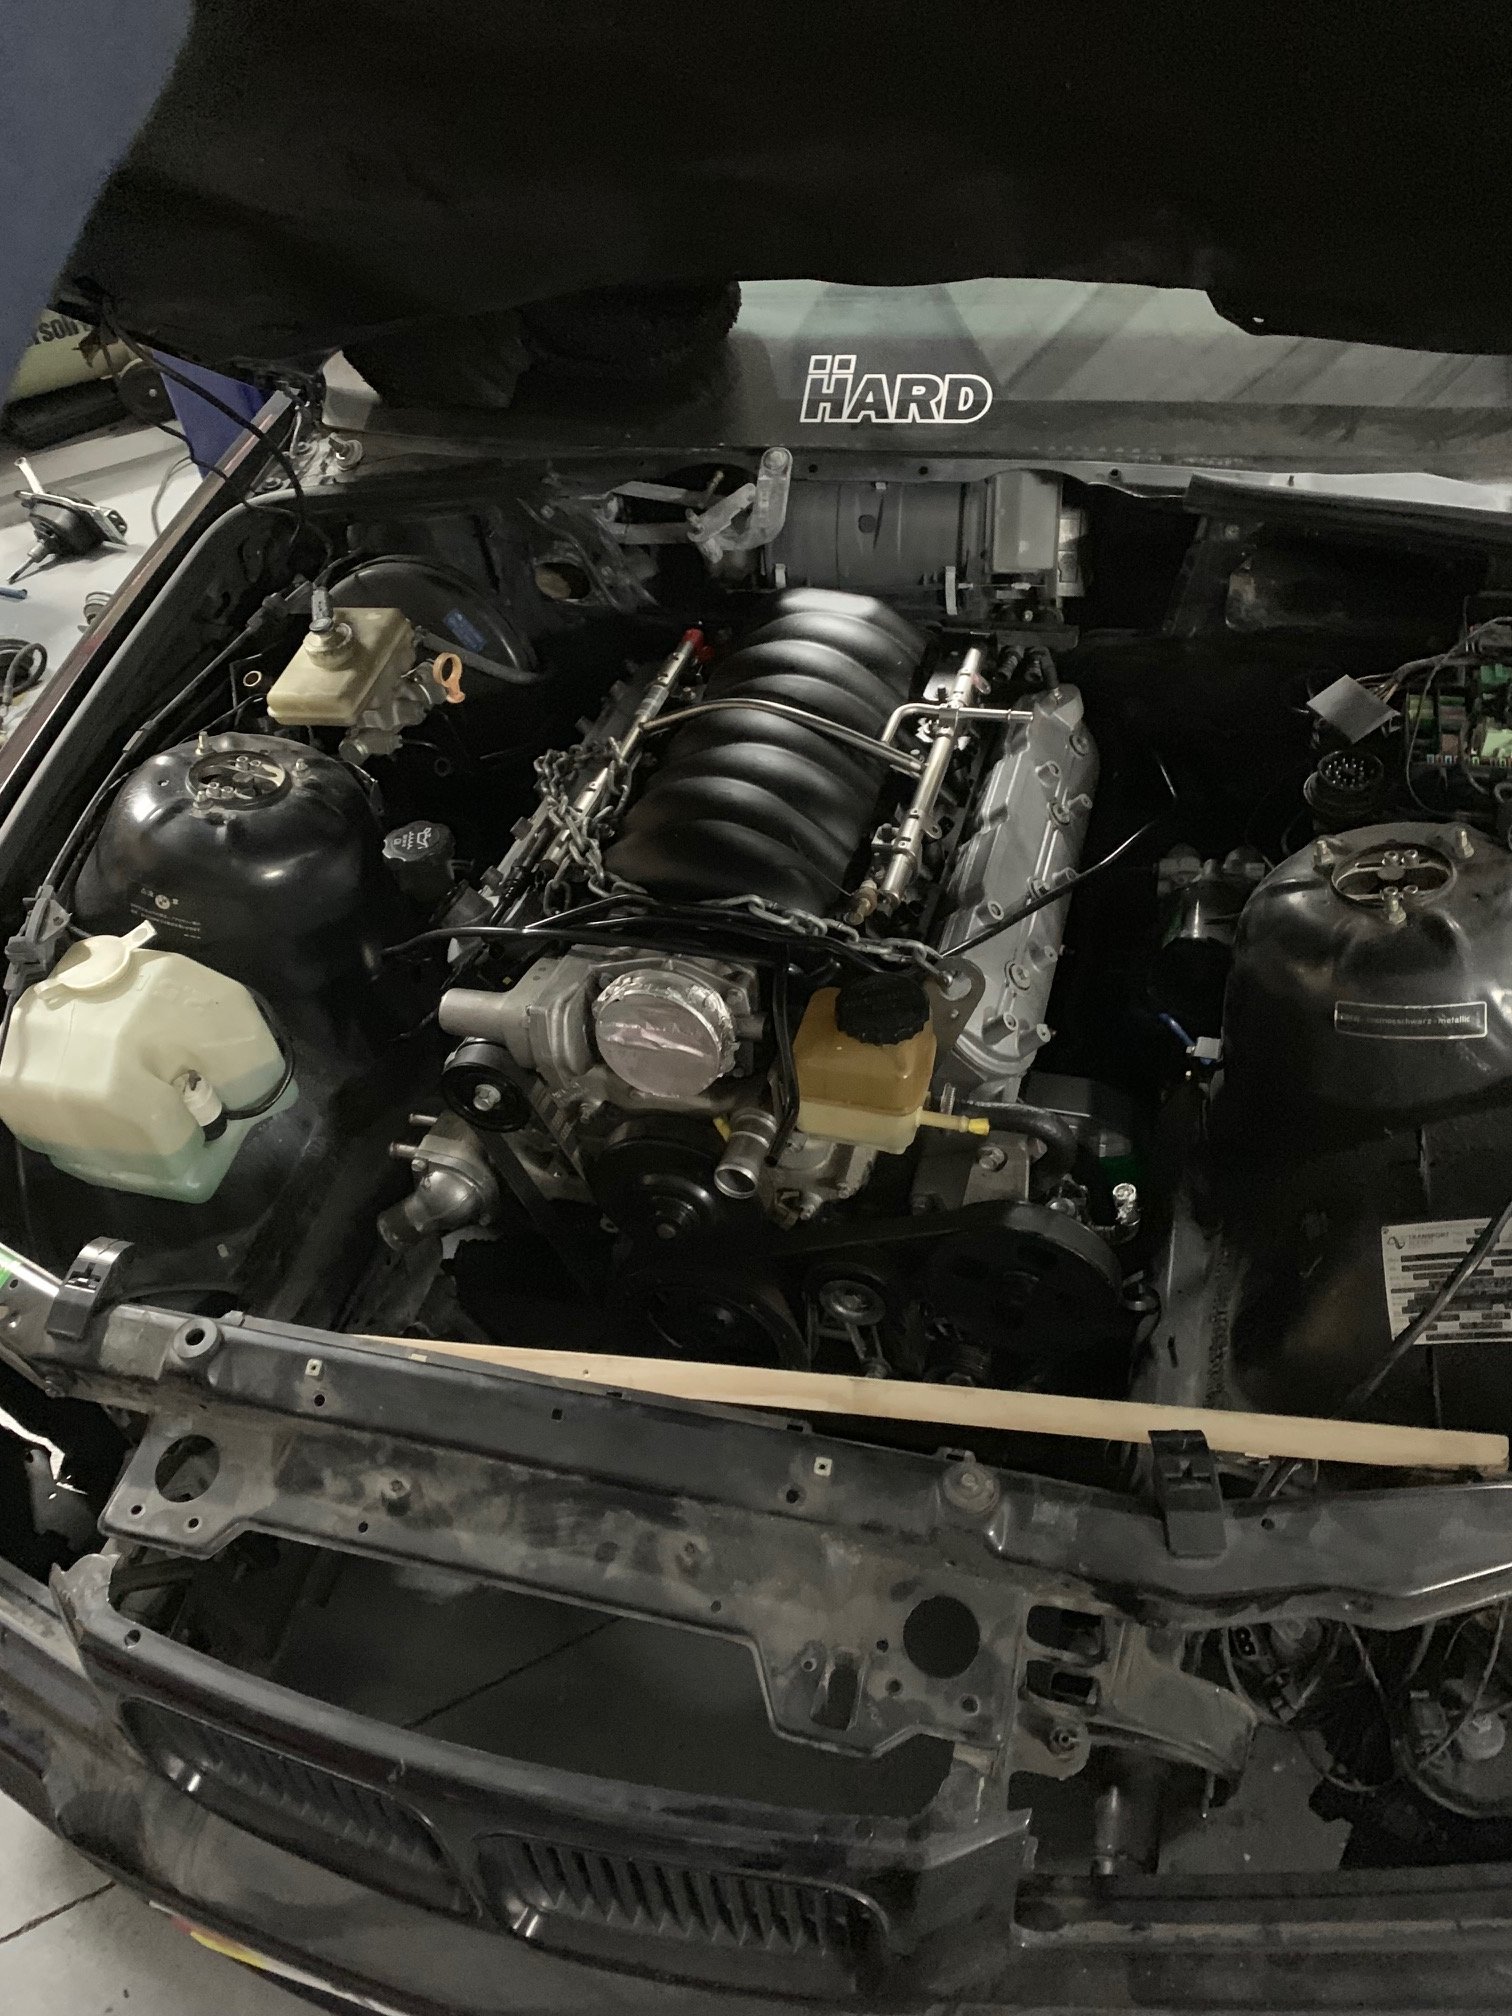
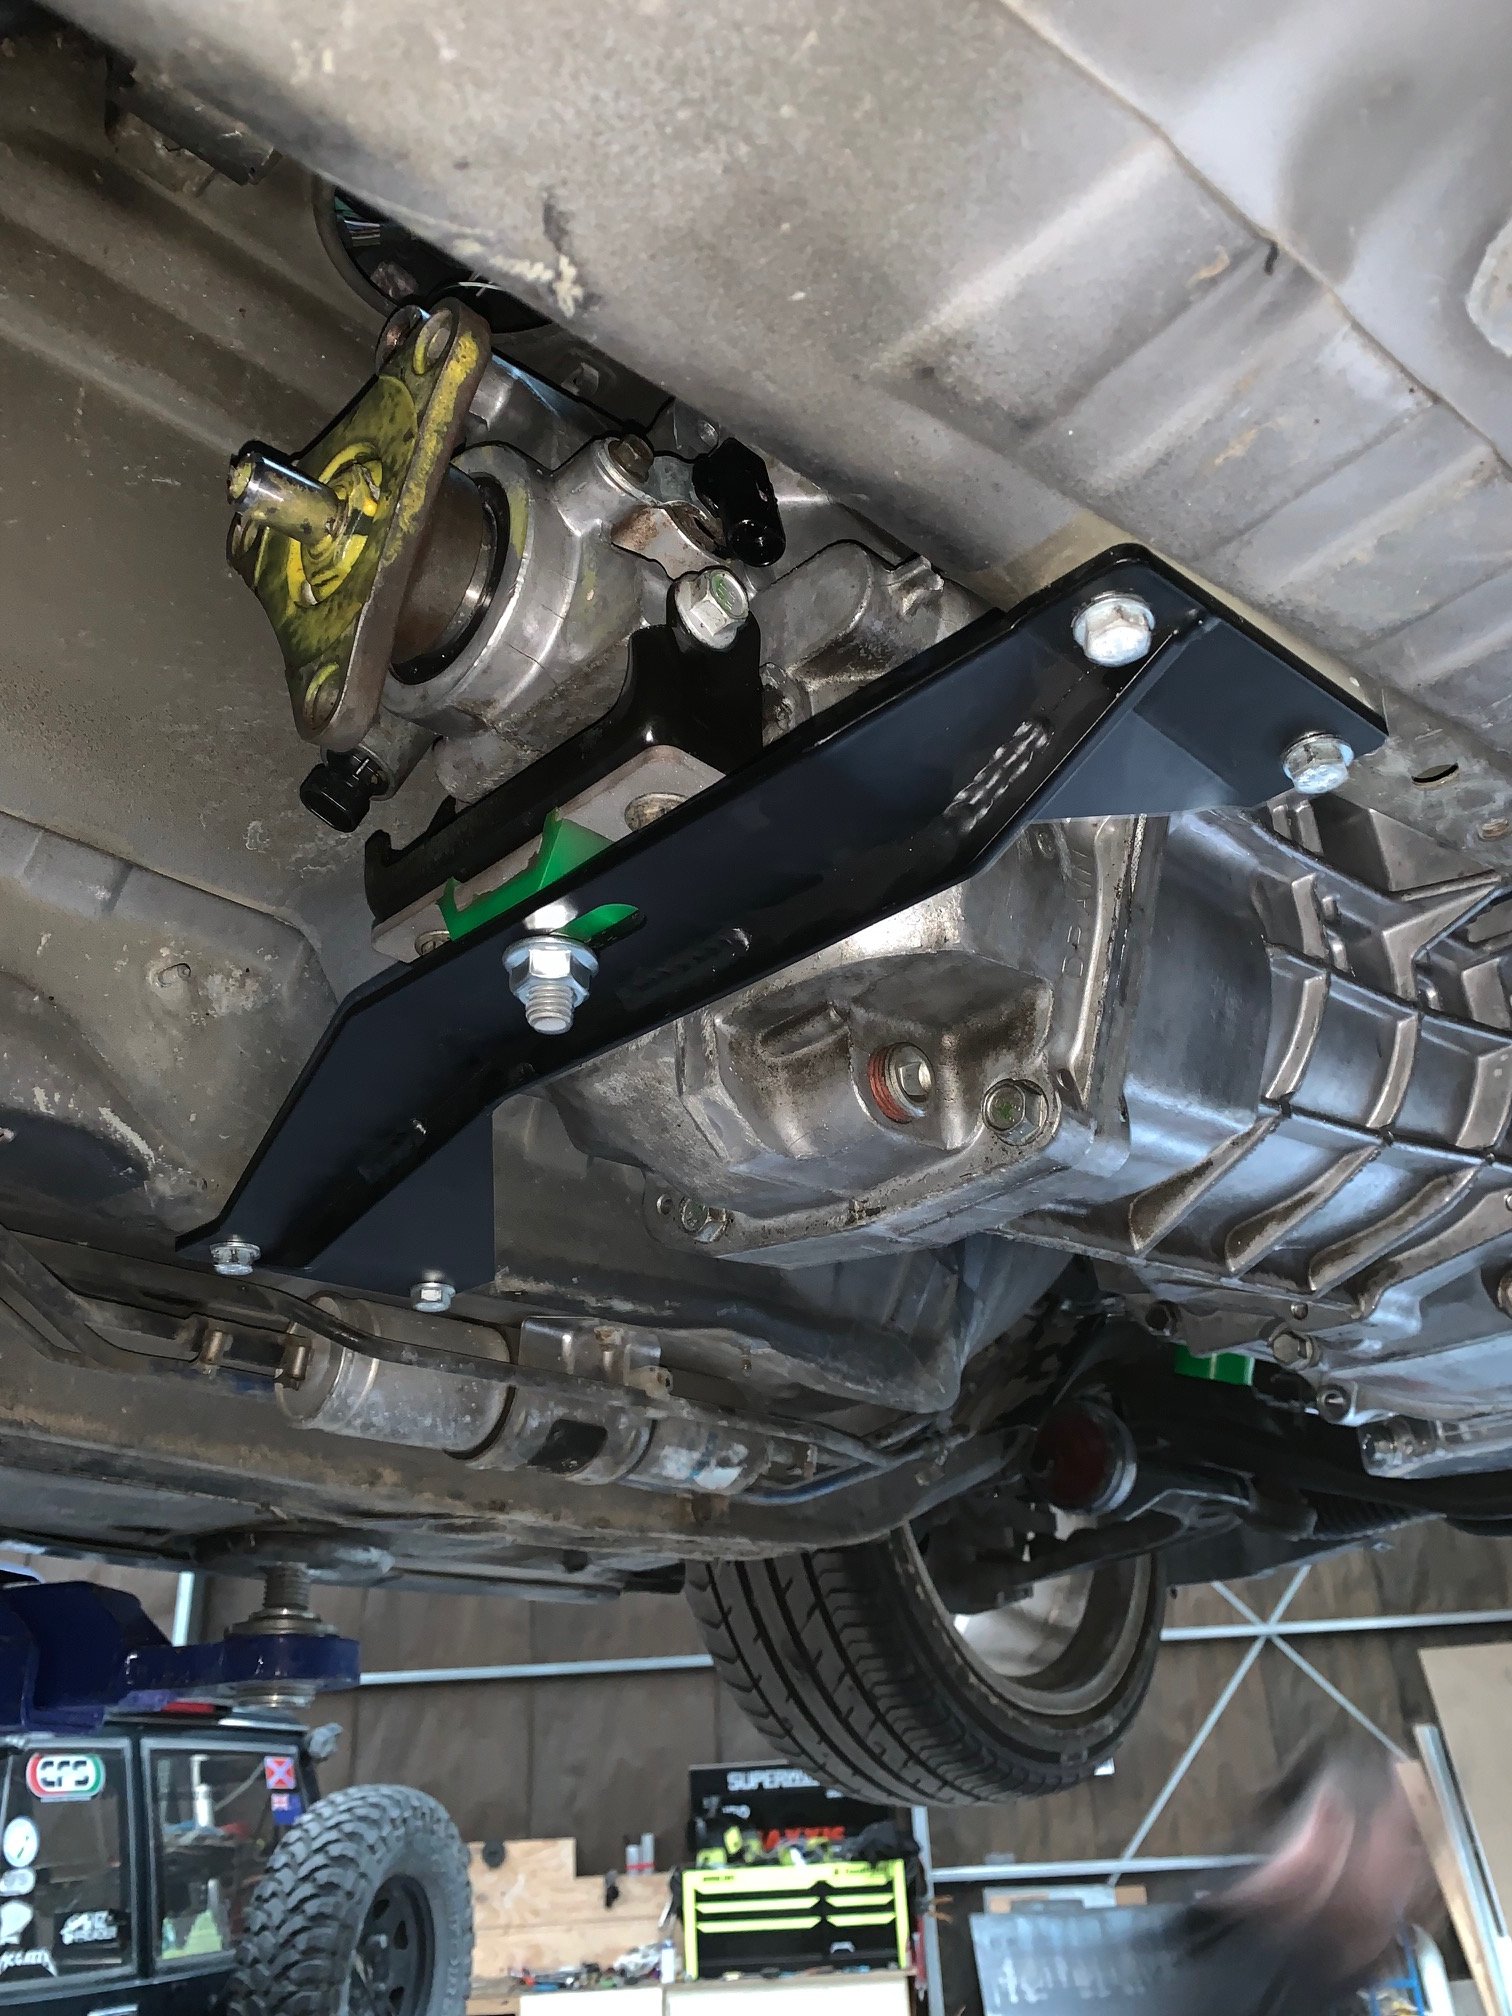
Yeah it’s mental. At the top of fourth it finally gets its legs and snaps your head back in the seat! It’s a weird sensation when something pulls harder and harder through the gears. Especially considering it’s got fuck all lag. Anyway today was a good day! Engine and box are sitting in the car and fit well. Gearbox mount is for a T56 but fits close enough. Will space it up so gbox sits a lot higher. Shifter will be a bit of a dick so I’m going to have to fagricate up a shorter mount and linkage. I think standard position sits about 5” back from the current hole. I was tempted to move the hole but then have to ruin trim and move my hydro and handbrake back and I want the interior to look pretty standard. best thing is the huge amount of room available at the front! I have a Fenix M3 radiator coming for the gap, straight bolt in... and that should provide heaps of cooling. It’s what all the USA people are using (M3, not Fenix) with no trouble. I’m not keeping AC and theres a big daddy oil cooler to compliment it. Still weighing up an oil thermostat but almost think the added complexity isn’t worth it. Headers on drivers side are going to be a real cuntflap. Writing this in the bath, hoping I don’t drop the phone. Too many diesels! Nek steps are to make new steering shaft, move ABS pump or delete it, get driveshaft made, and send loom off to the pros. I’d really like to sneak this up to Raglan but it’s not old and won’t be finished! Wish I still had an E30
5 points
-
Image size limit reached Bolt ons for days Also one of these. Fits a N2O canister for uhhh nitrogen filled tyres
5 points
-
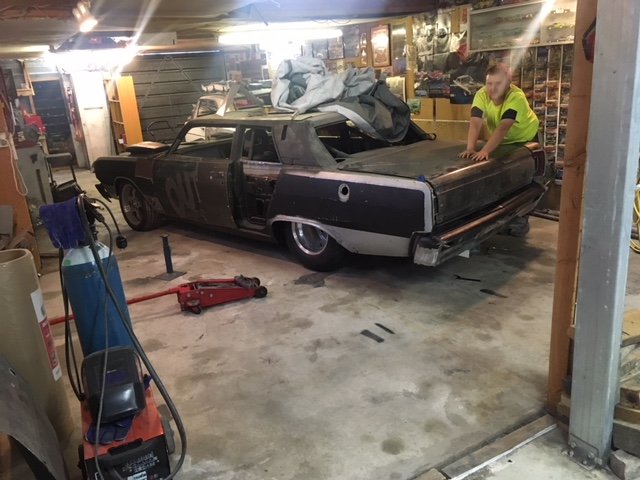
got anther coupe as well needs a lot of work
4 points
-
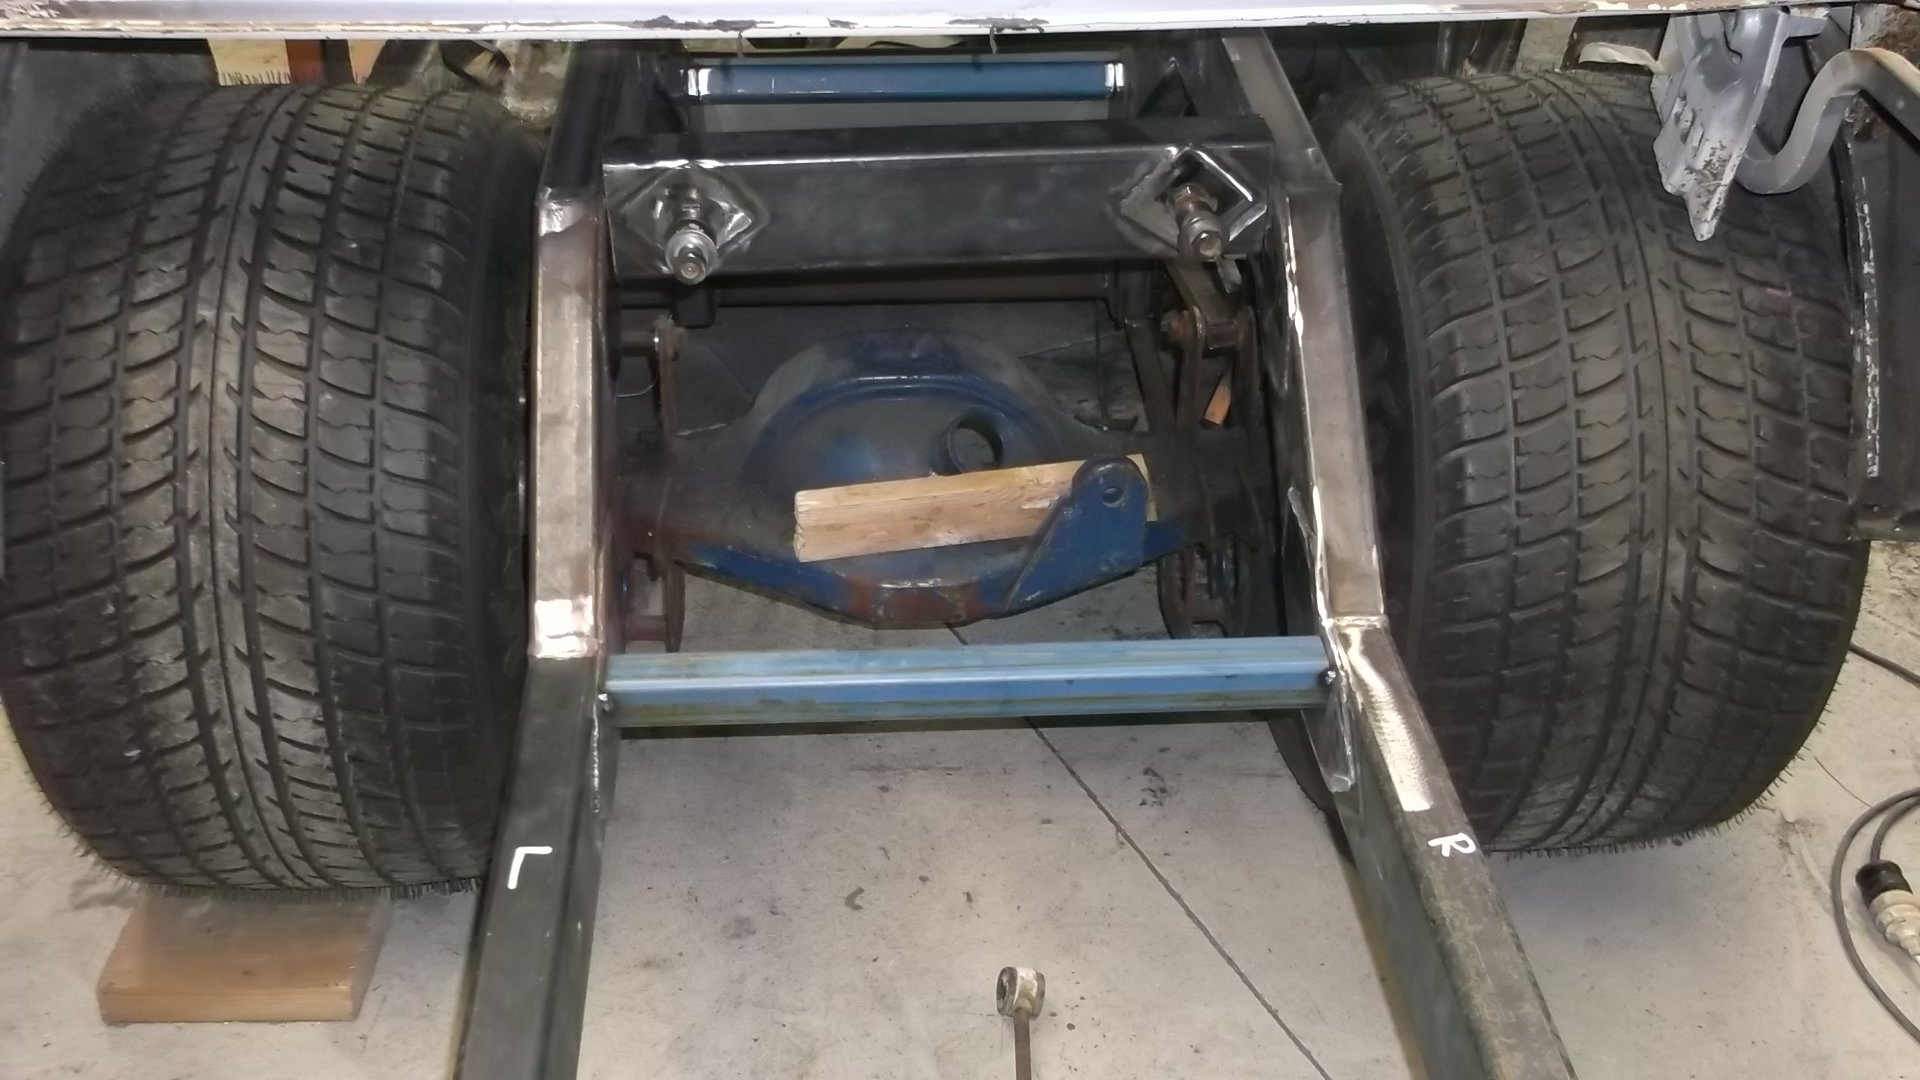
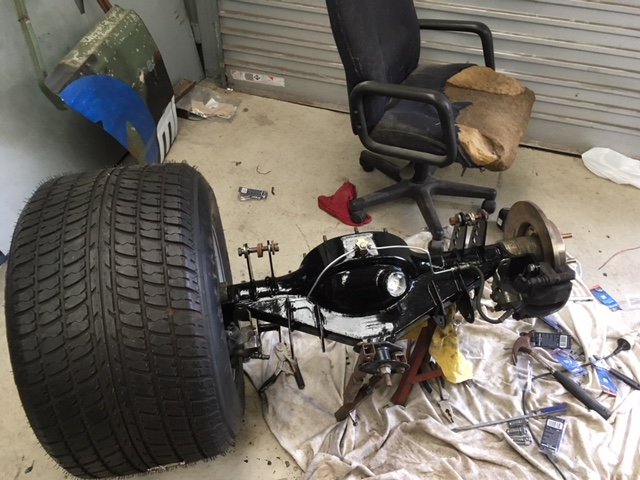
diff and rear wheels,and rool bar and rear legs in
4 points
-
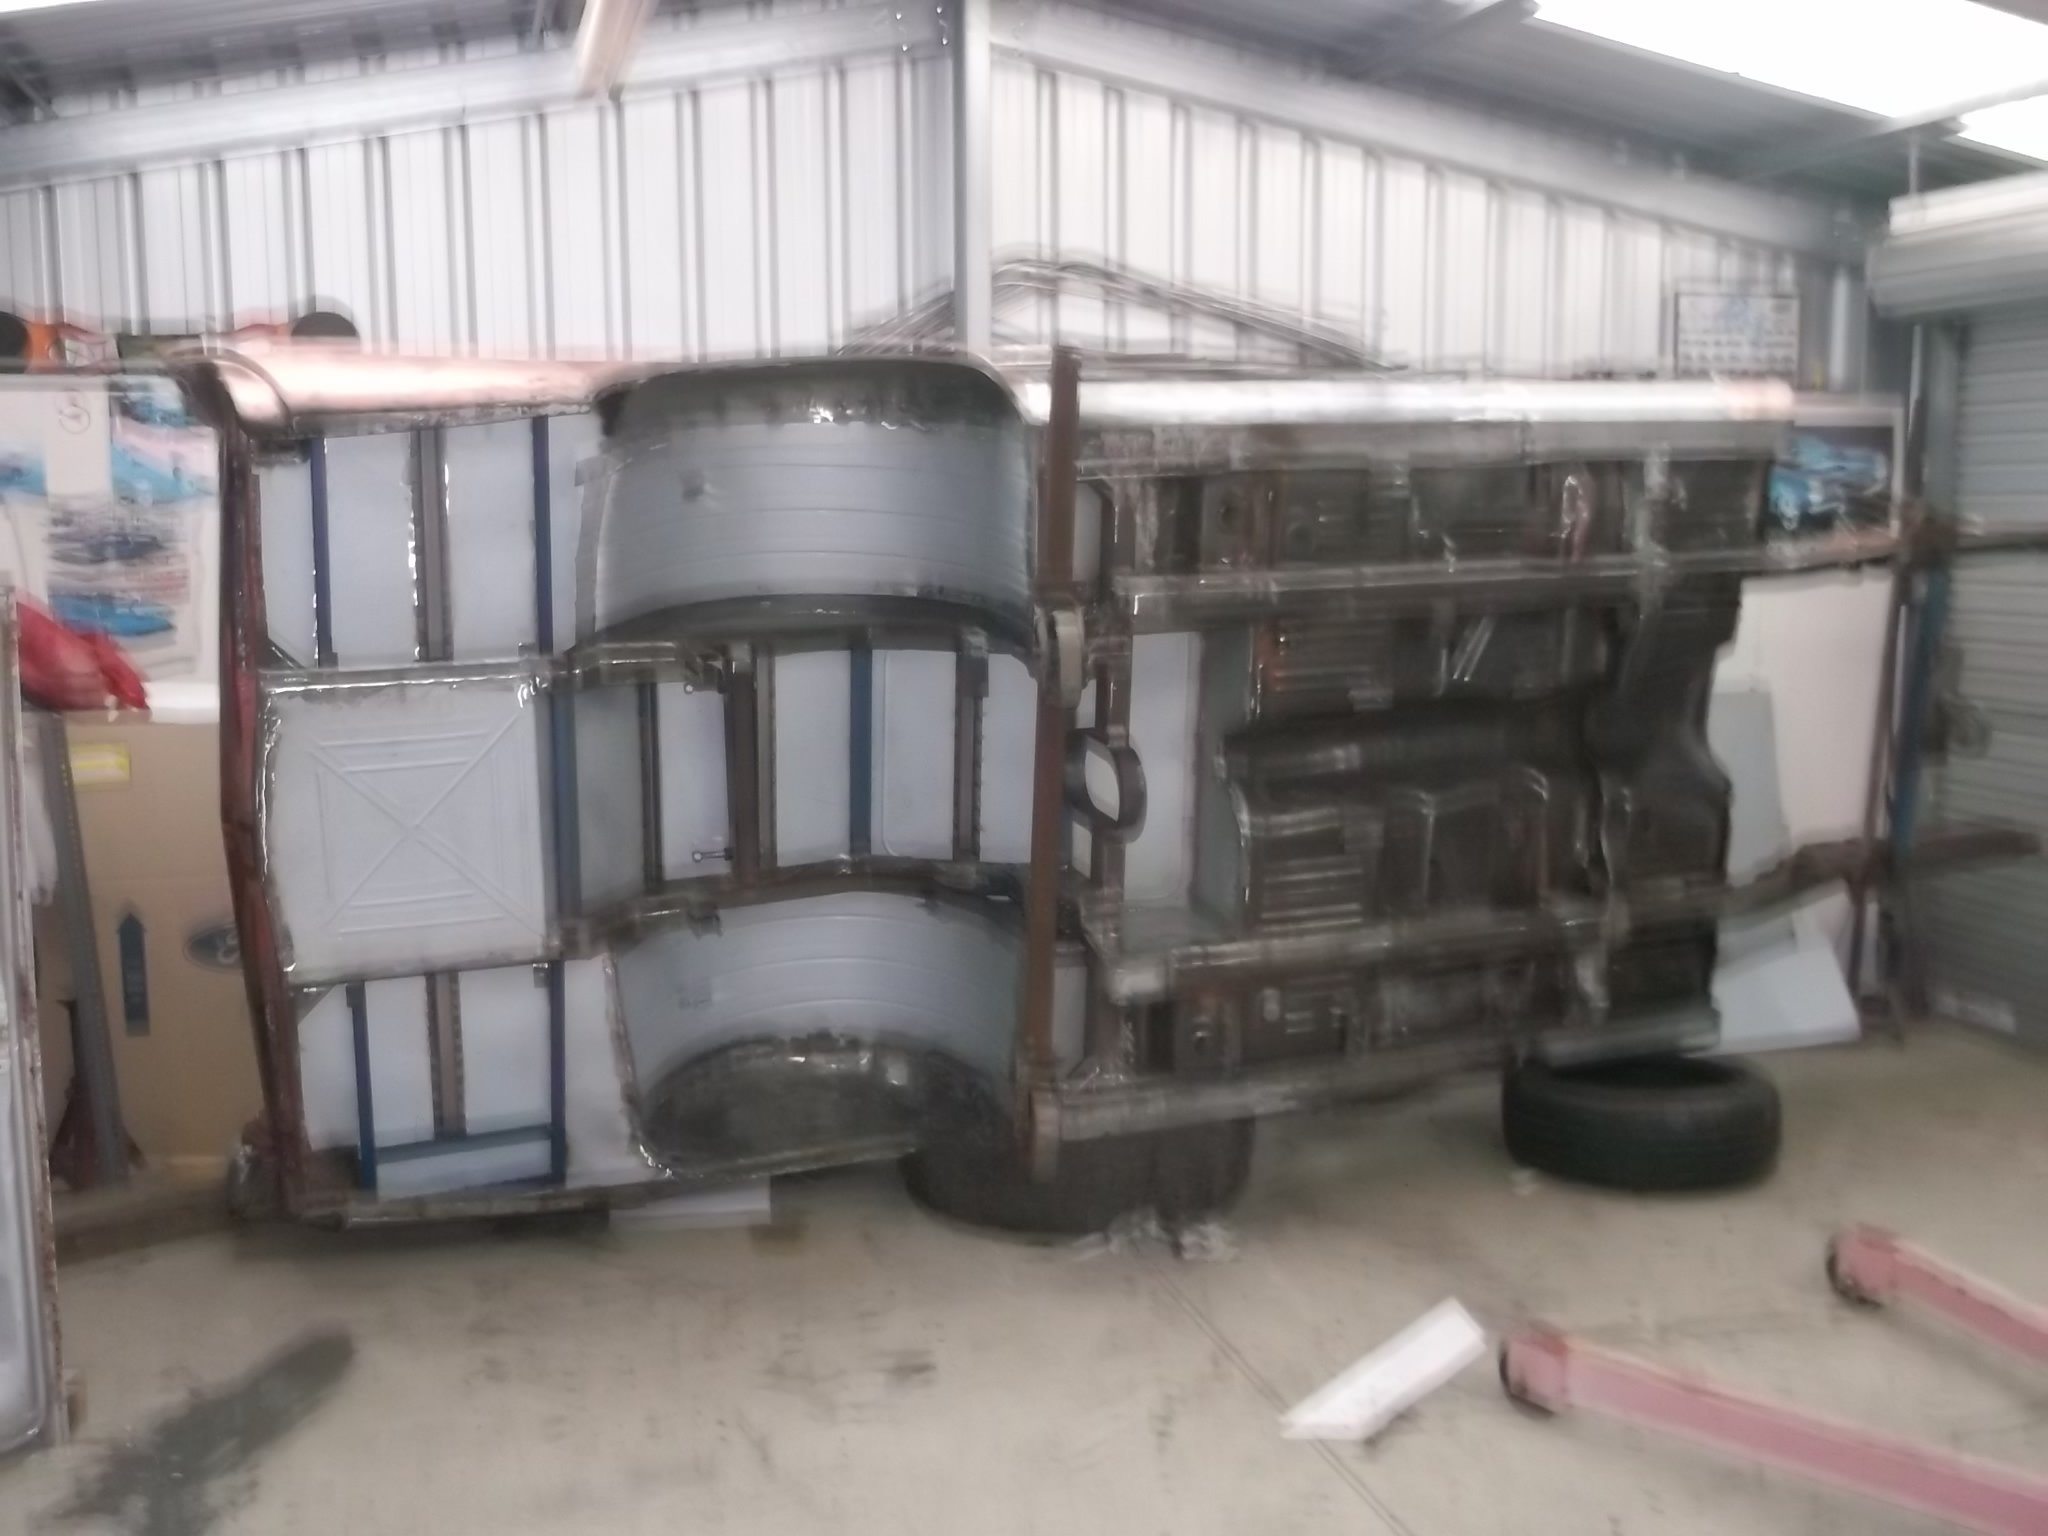
under side is all done full chassis connectors .
4 points
-
Righto! Finally finished this thing. This is the first time I've heard it running ever: Then, I swapped out the exhaust for the expansion chamber: And it would be rude not to test it on the driveway. The phone sitting on the ground always gives terrible perspective...but it goes pretty fucking fast for 22.5cc. I've got a few quicker gopeds, but not by a lot. It would really benefit from a bigger carburetor, as its tapping out way to early and I know it's got way more potential in it. So that's the plan...find bigger carburetor...try again. Anyway, these things are never 100% finished, as there's always room for improvement in anything you make. But overall it's pretty sweet! I'm putting it down as a win.4 points
-
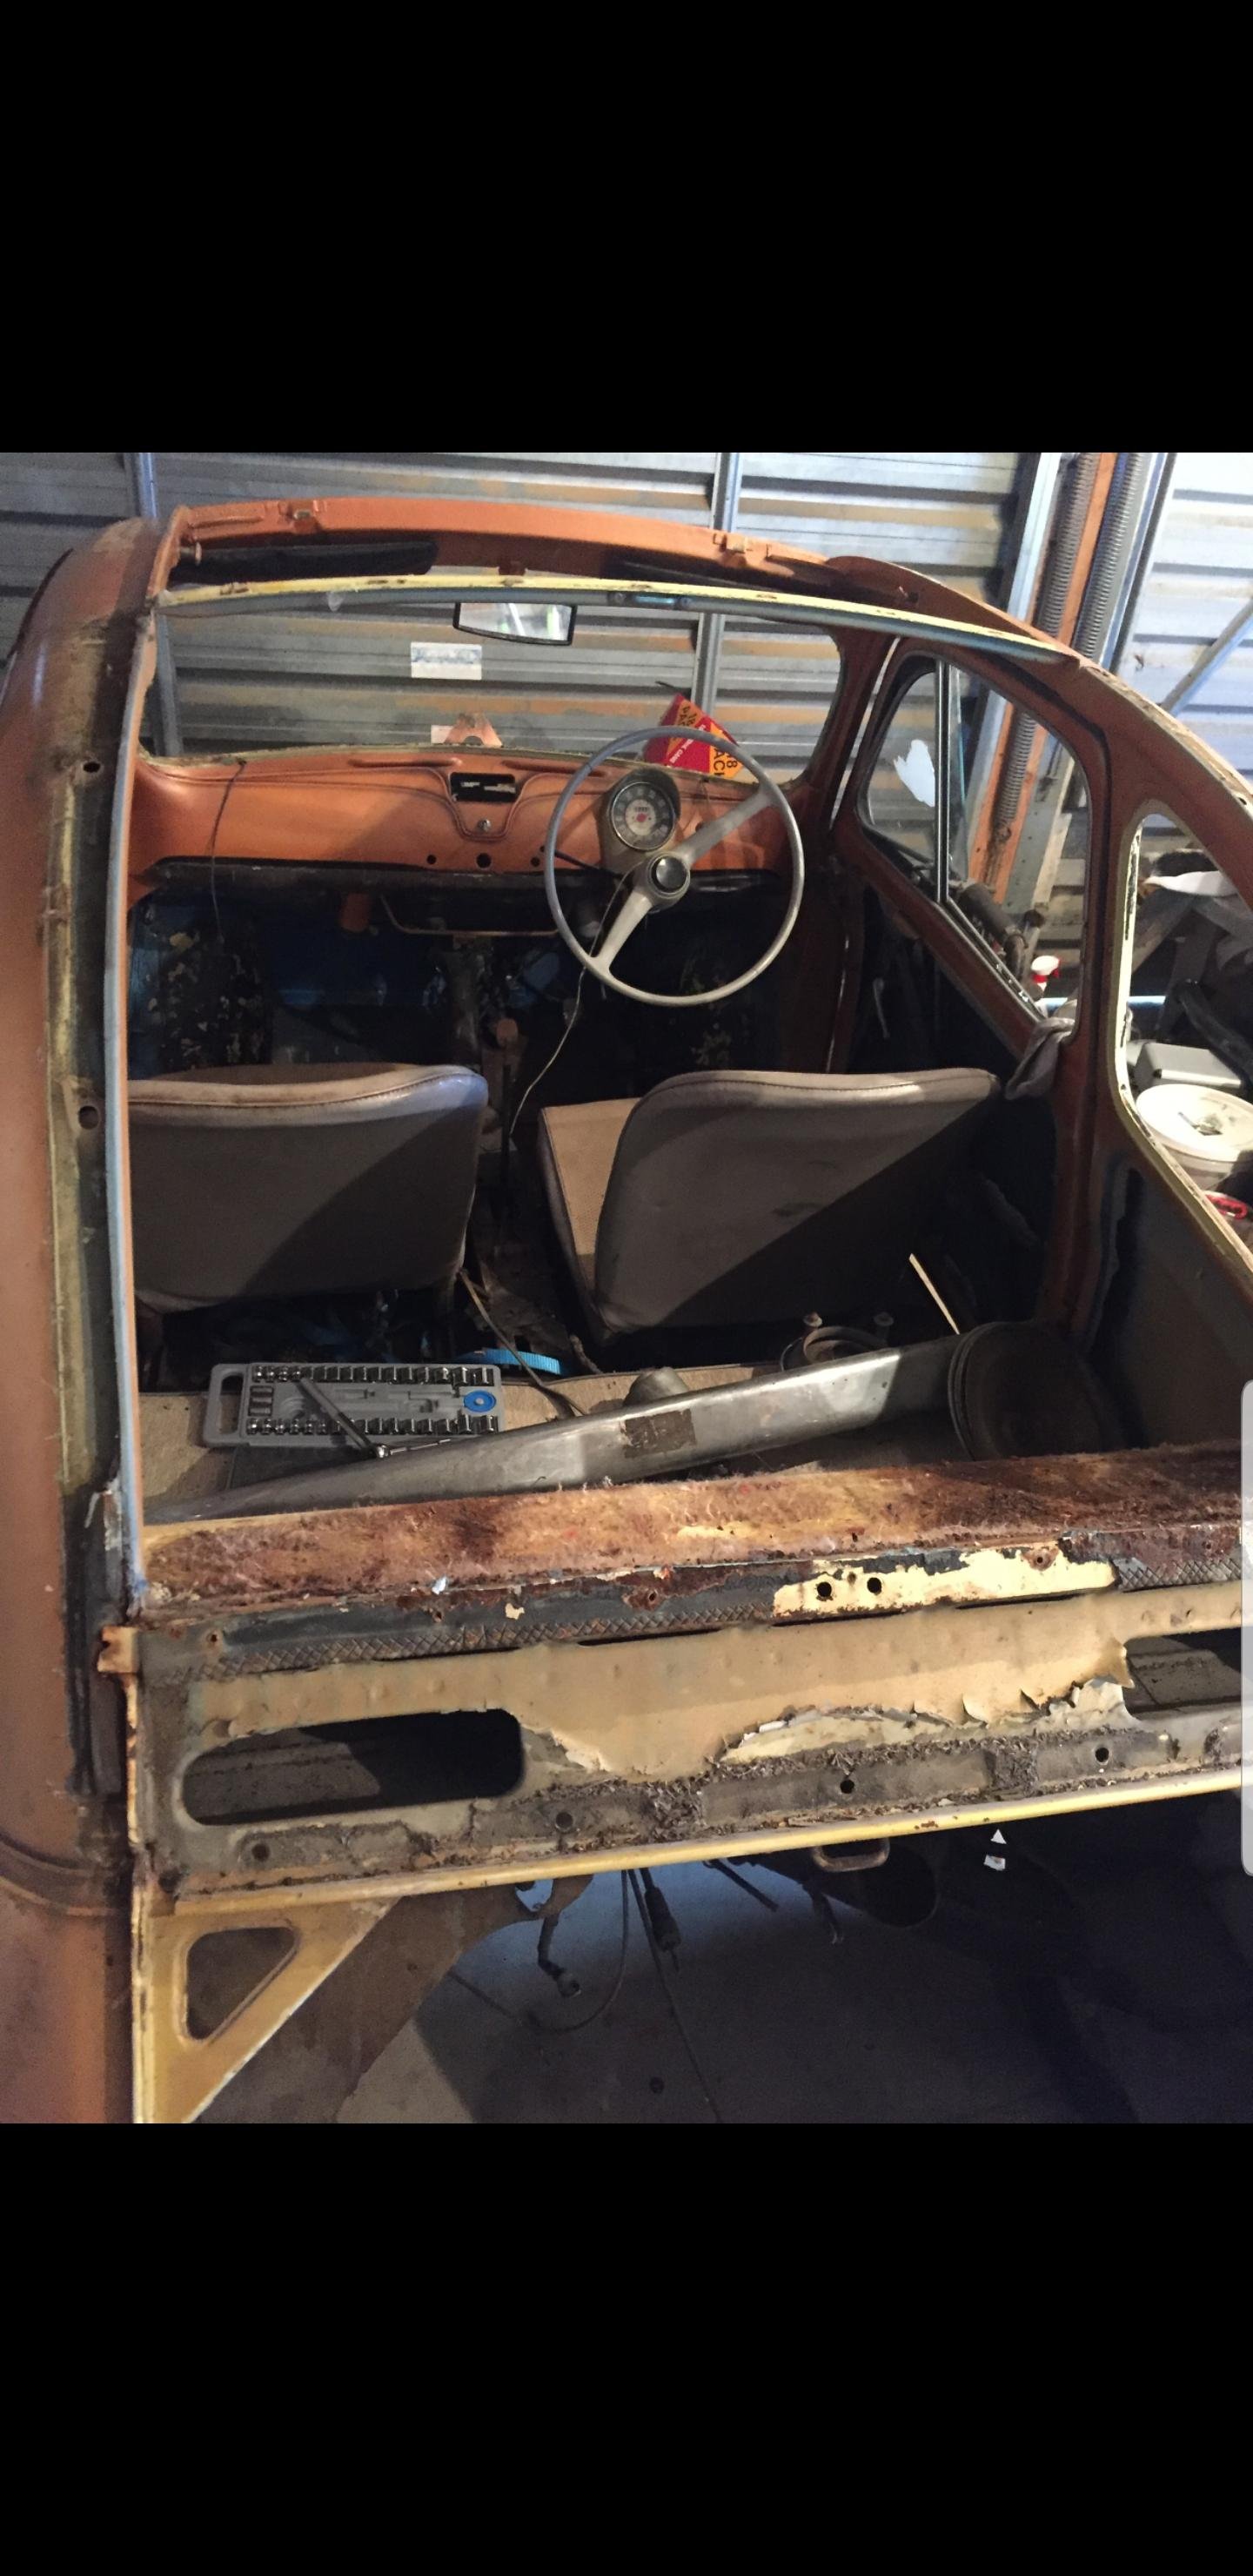
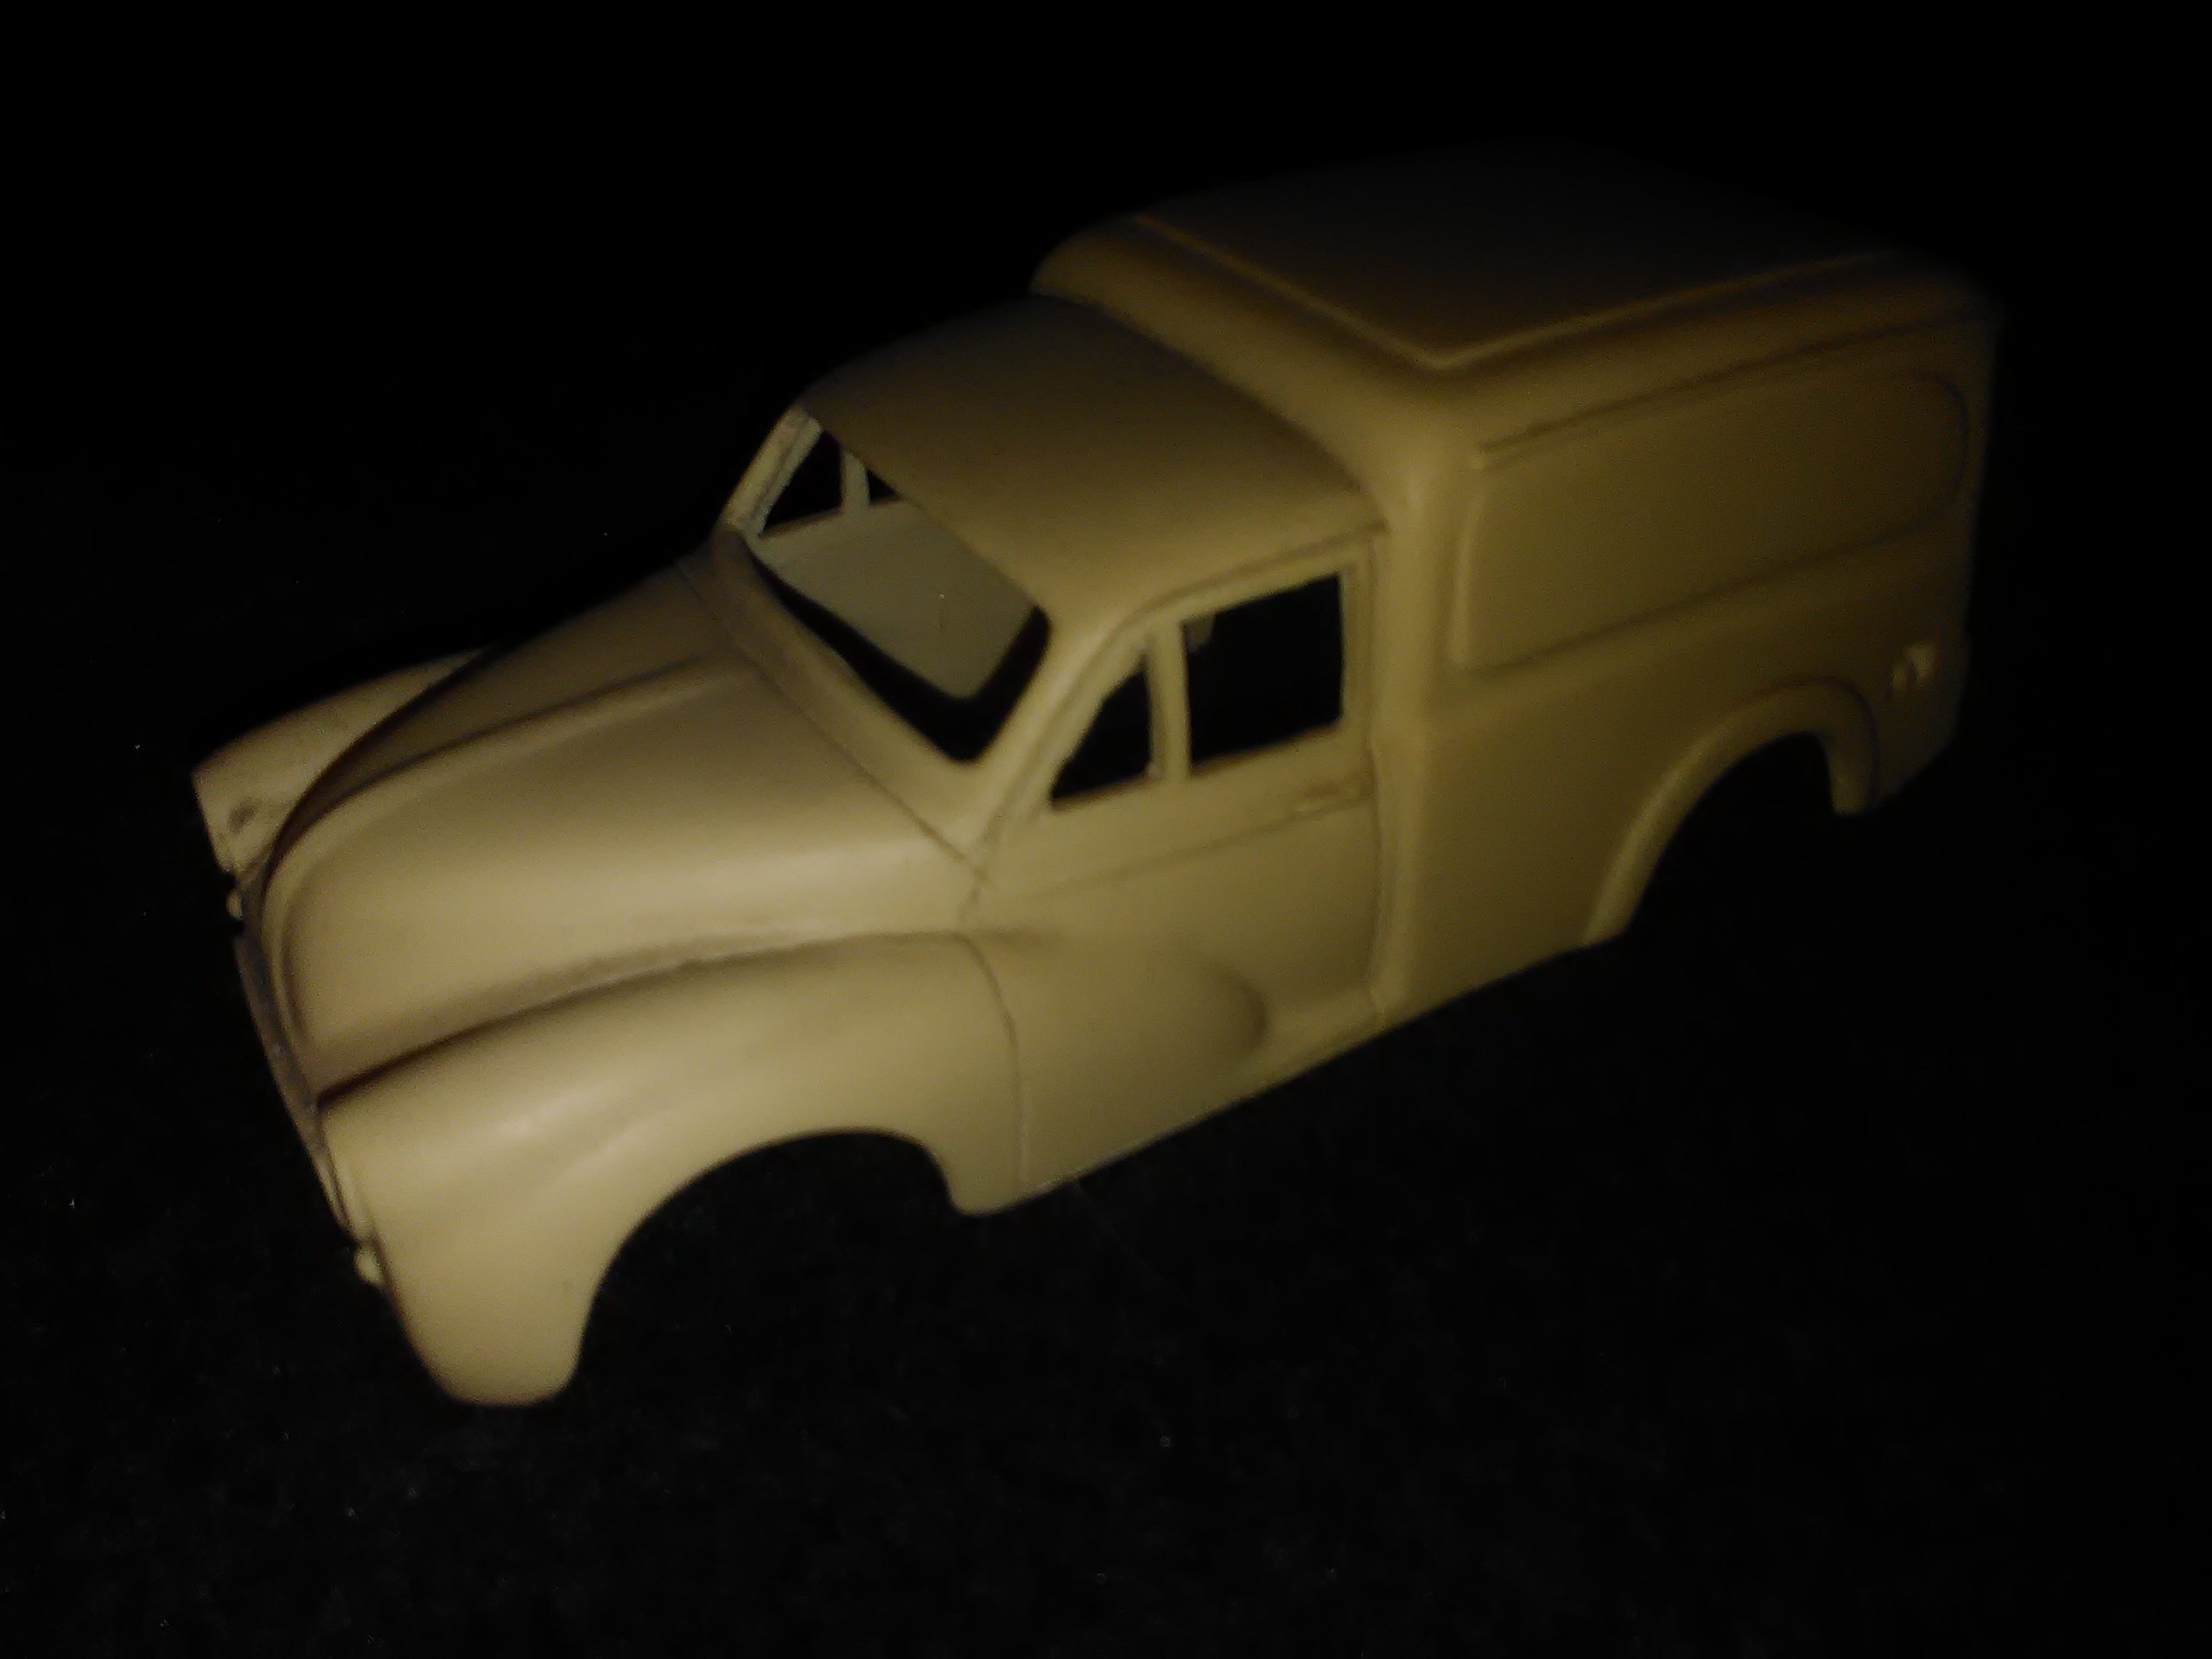
Time for a smol update on the fiat. Have been chipping away with making patches and buying parts/paint stripping etc. Gave the mrs a wind up about getting motivated to finish it and she pushed me in to actually buying parts. Parts are in the country but the a holes at customs forgot to process the gst invoice so I'm back to bodywork.
4 points
-
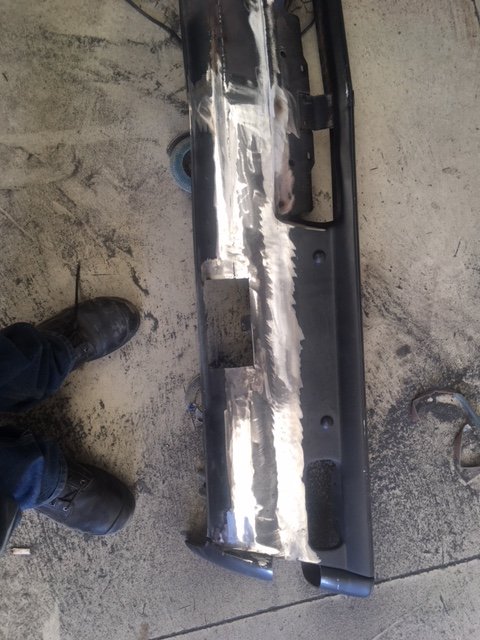
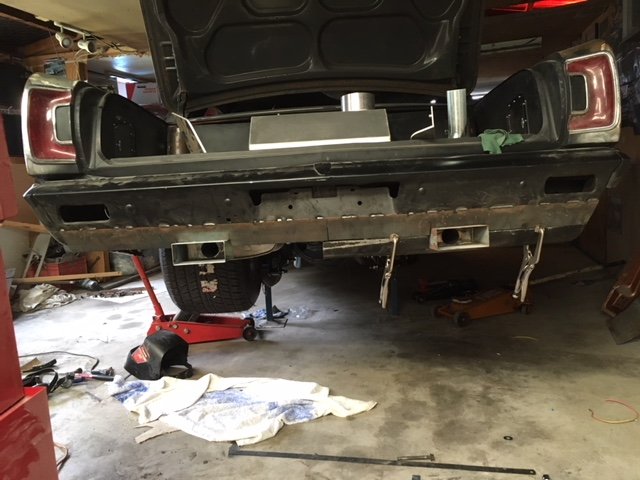
just doing the doors and rear guards at the moment new skins on doors and rear guards and new sills had them made deeper so car looks lower to the ground ,also cut the rear bumper and added two inchs into it
3 points
-
I reckon keep the AC if you are able to do so. It's just one of those great little luxuries.3 points
-
yes still have gasser and coupe
3 points
-
WOW I DIDN'T NOTICE3 points
-
the headers go though the fire wall and out though the a pillar .with electric cutouts in behind the front guard , and a t section going to the rest of the exhaust
2 points
-
Nang while you fang?2 points
-
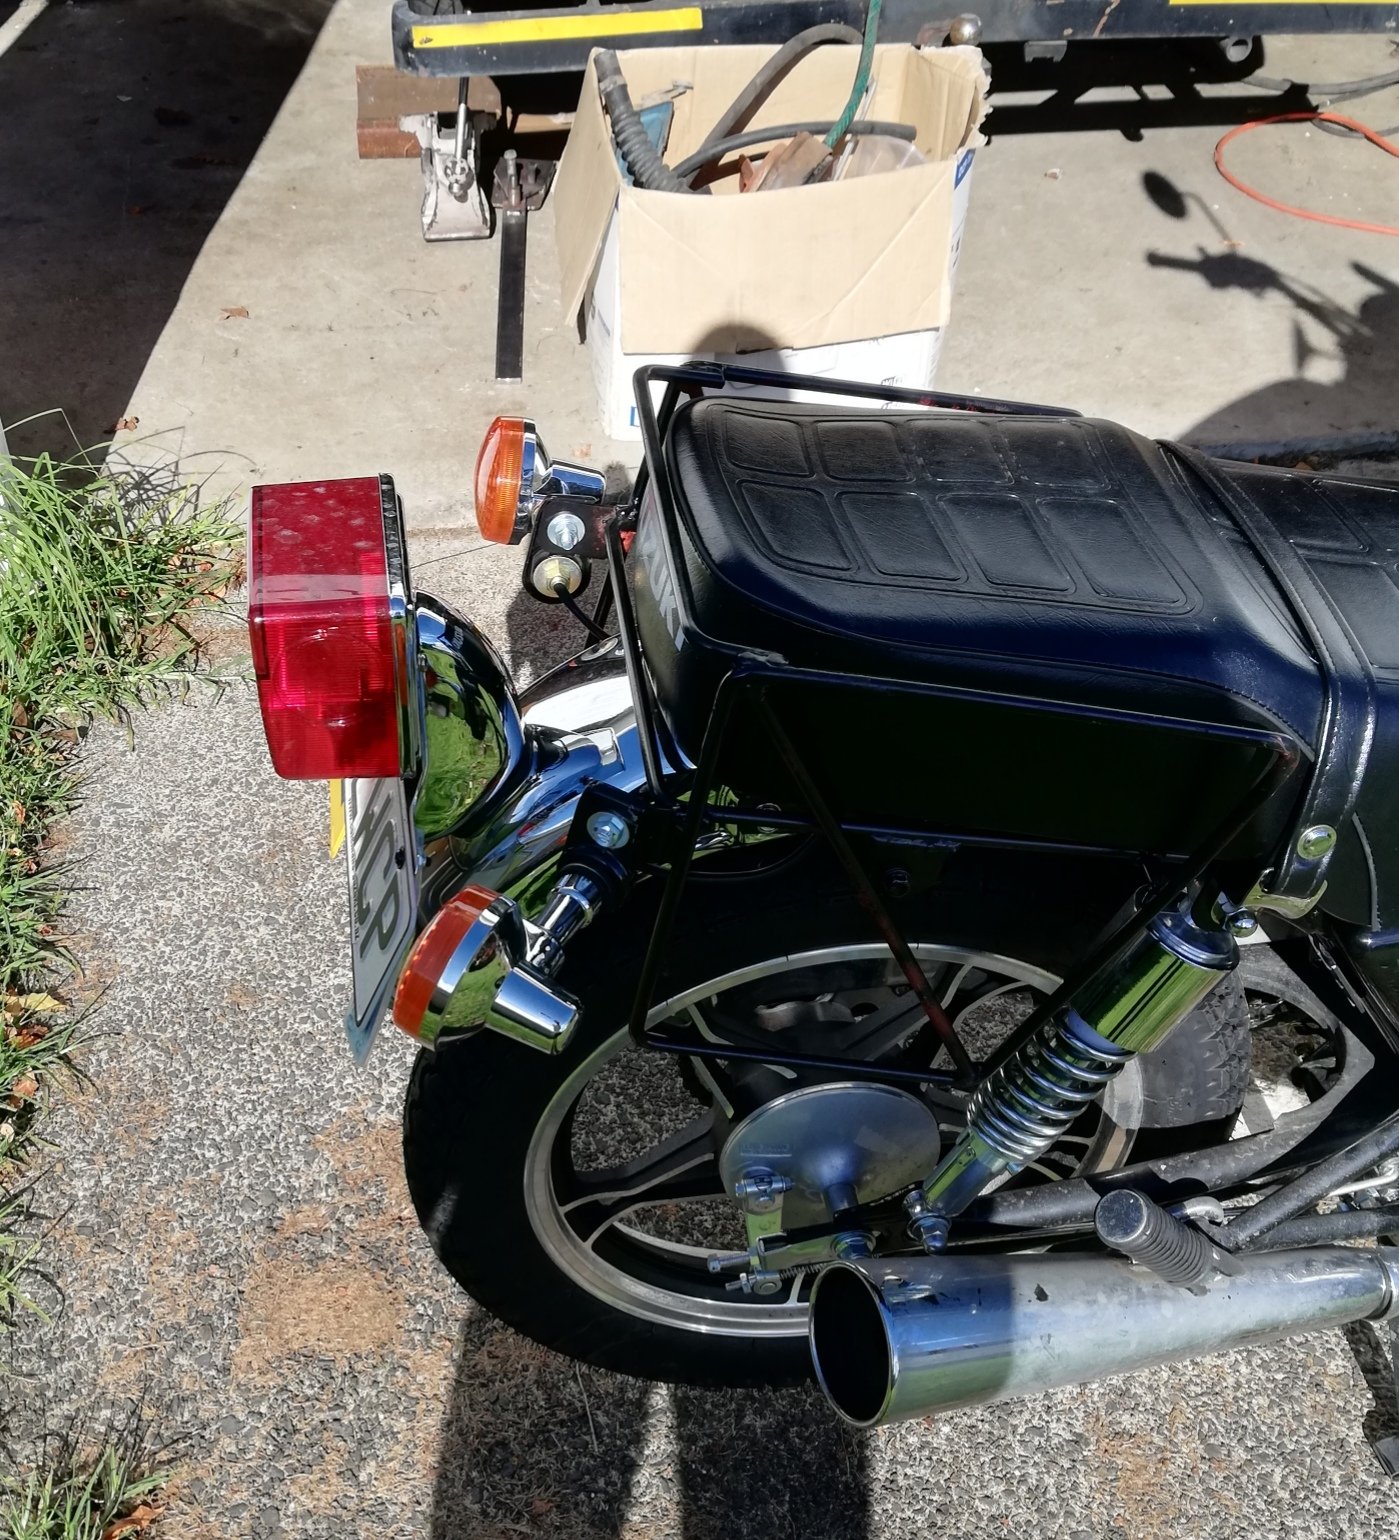
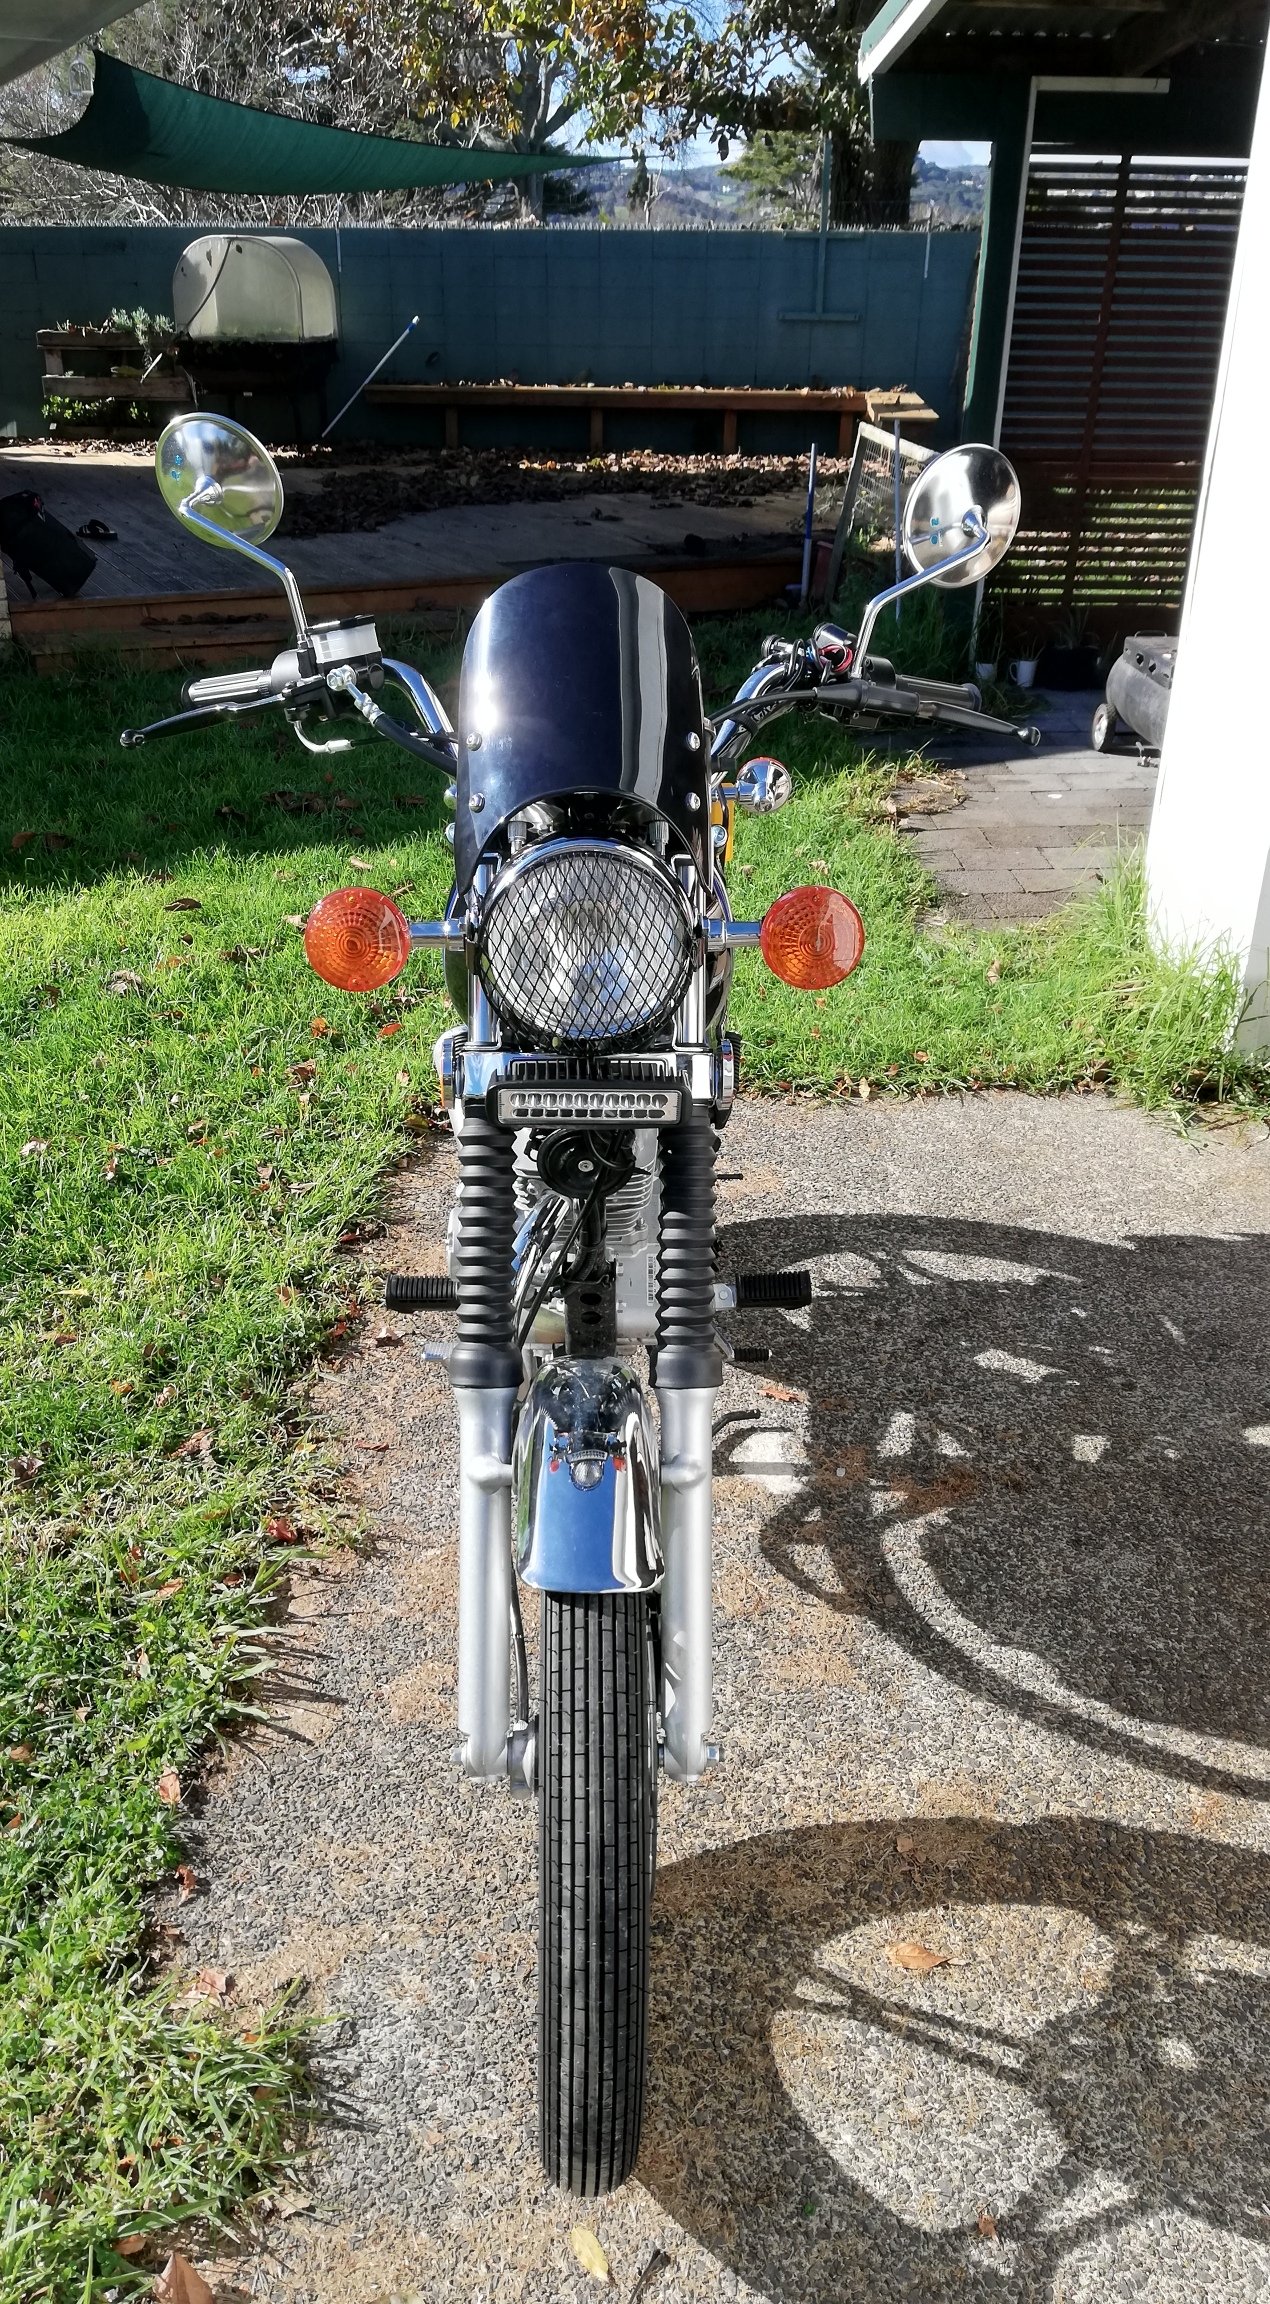
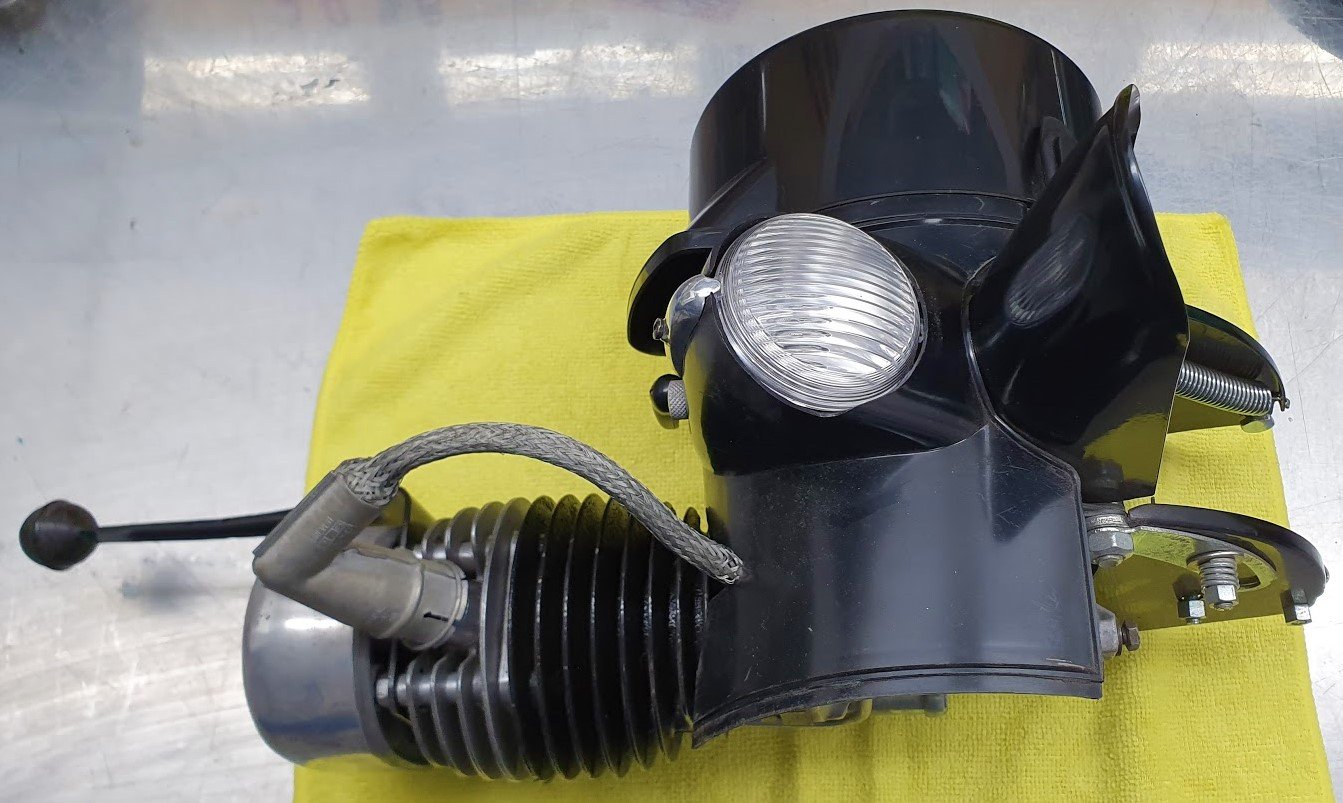
Tbh I wasn't too sure how good that led bar would be. Riding home on back roads due to multiple road closures last night and it really proved it's worth. About 10x brighter than the standard headlight (that IL probably convert to h4 like my 250, but I'm sure that took. 7"lamp as I put one I bought for my minor but had a flat lens in it, 125 is a5.5 or whatever the common bike size is anyways) So could actually see the road which was nice. Was too slow getting though a pedestrian gate Indicator is unscathed, just bent the tab, which was my desired outcome. Hopefully similar will happen if dropped. Panniers protect it but I didn't have them on. Not super keen on getting battered by wind, this might help or at least keep the rain off the instruments
2 points
-
Join the club Oh wait....2 points
-
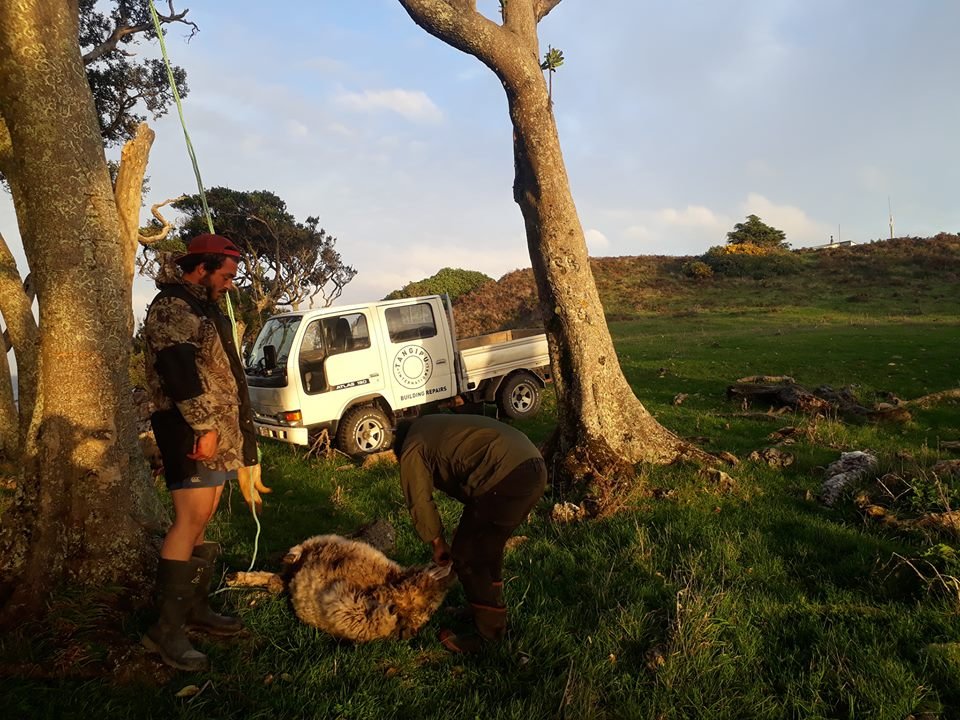
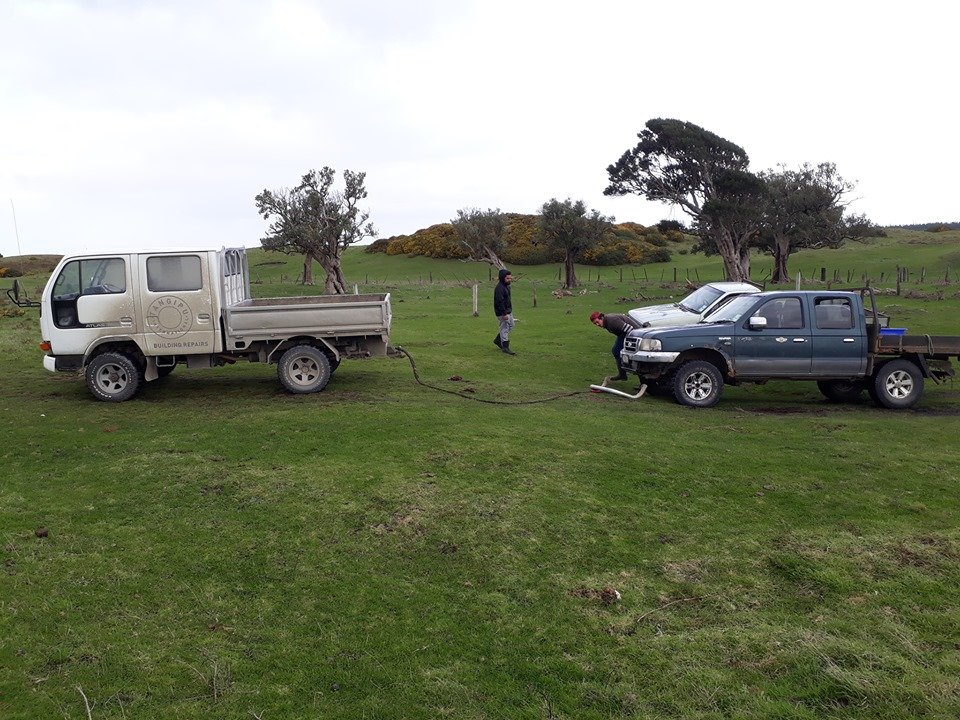
After 2.5 months and about 3,000kms of Chatham 'roads' the Atlas has seen some adventures. Unfortunately the clutch master cylinder has failed which makes driving a slight challenge, but I ordered a new one a couple of weeks ago and am hopeful it'll get here on the next plane. TBC. The engine's getting tired, and I'd love to fit some auto-locker diffs, but apart from that this truck is absolutely perfect for what I need. I lubs it.
2 points
-
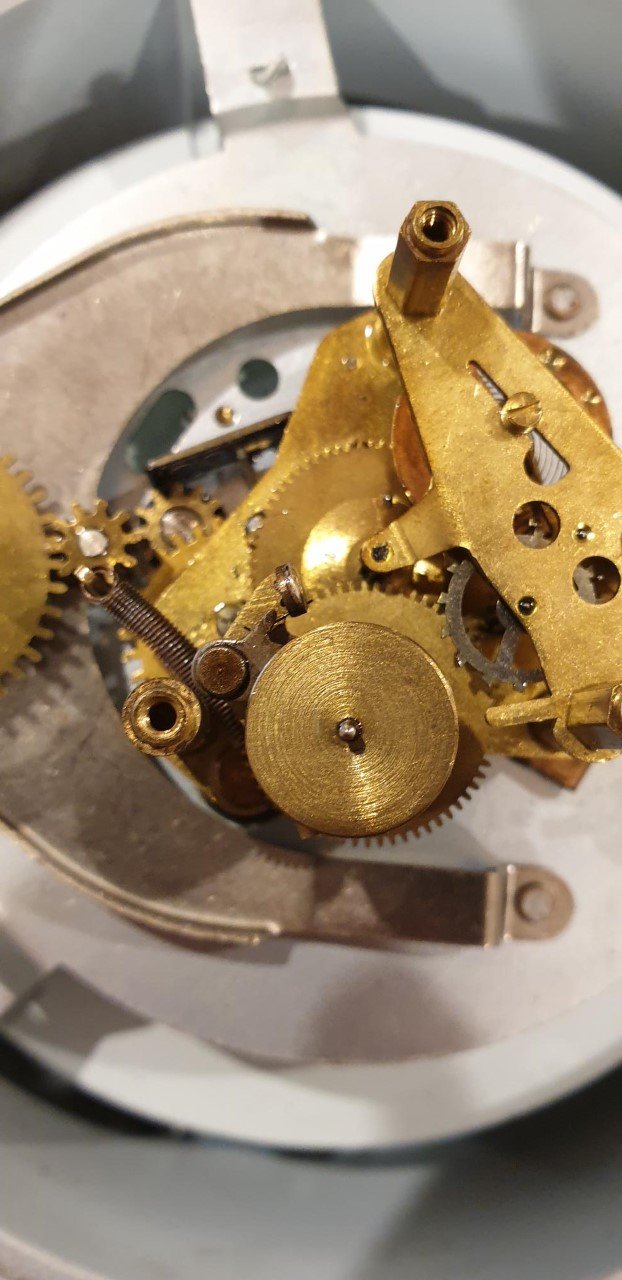
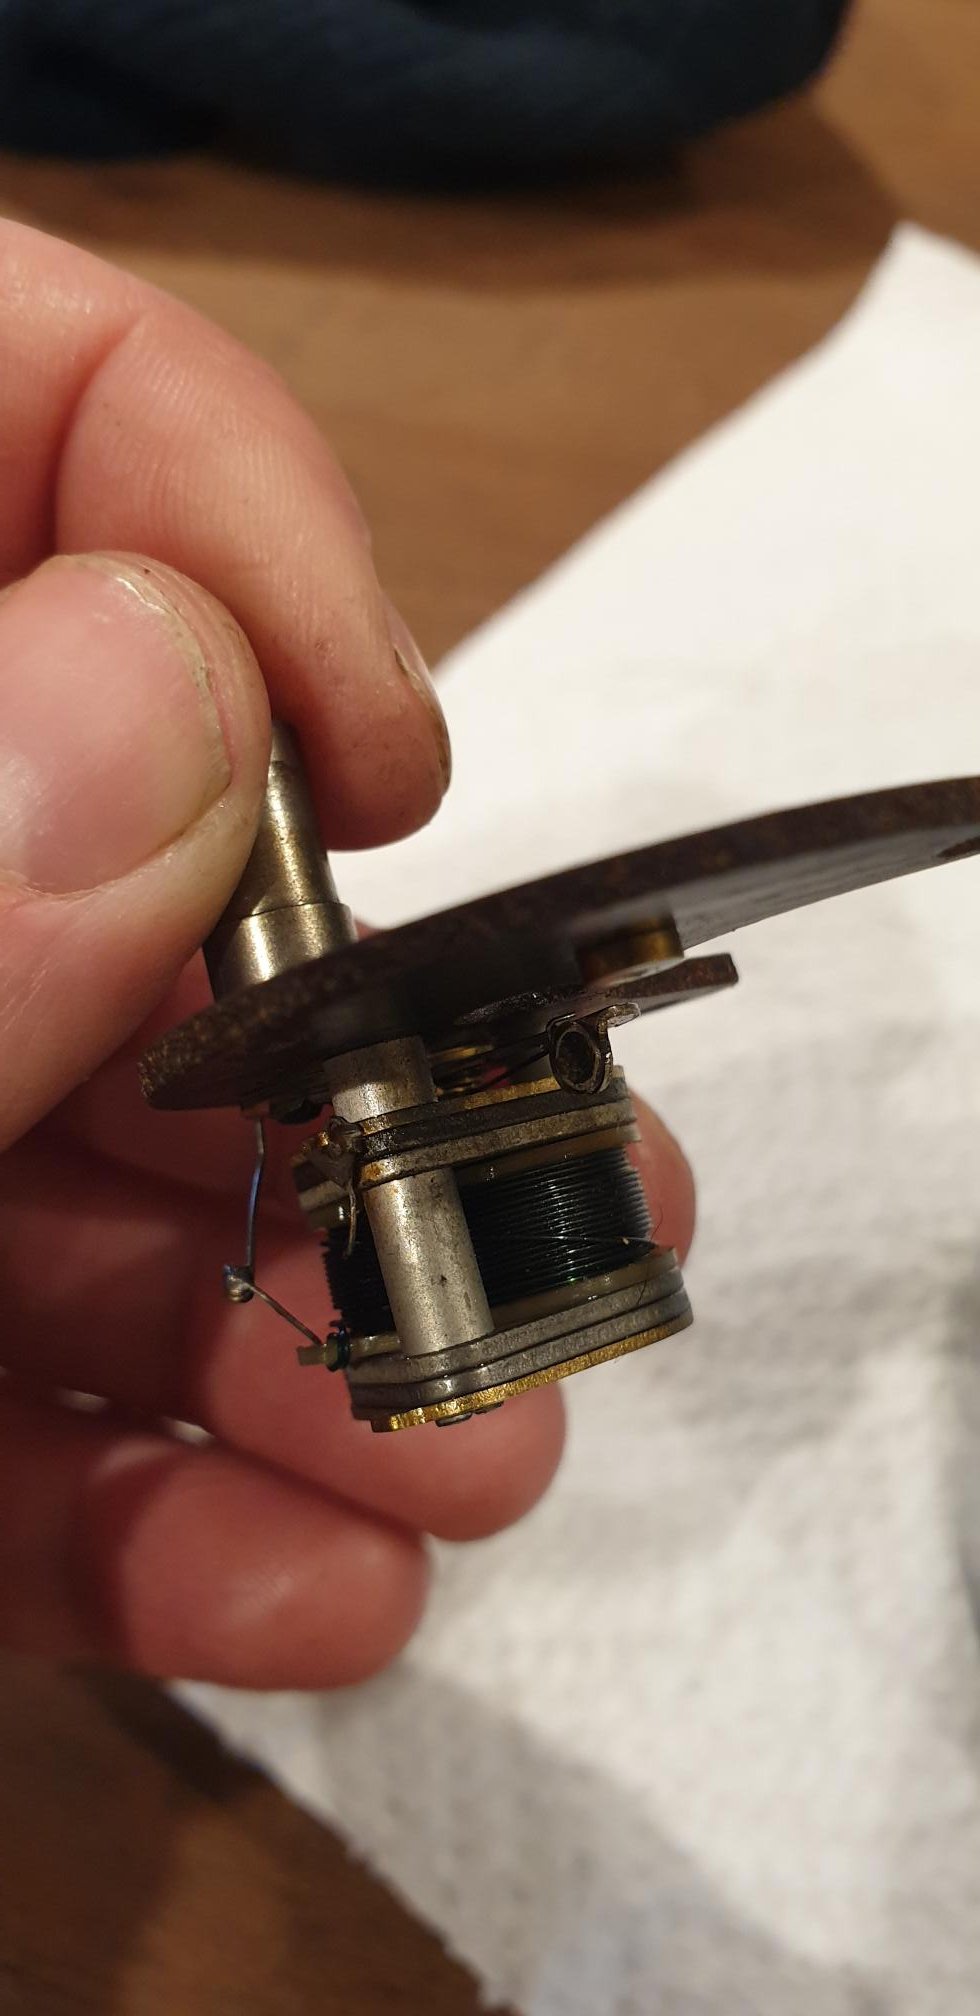
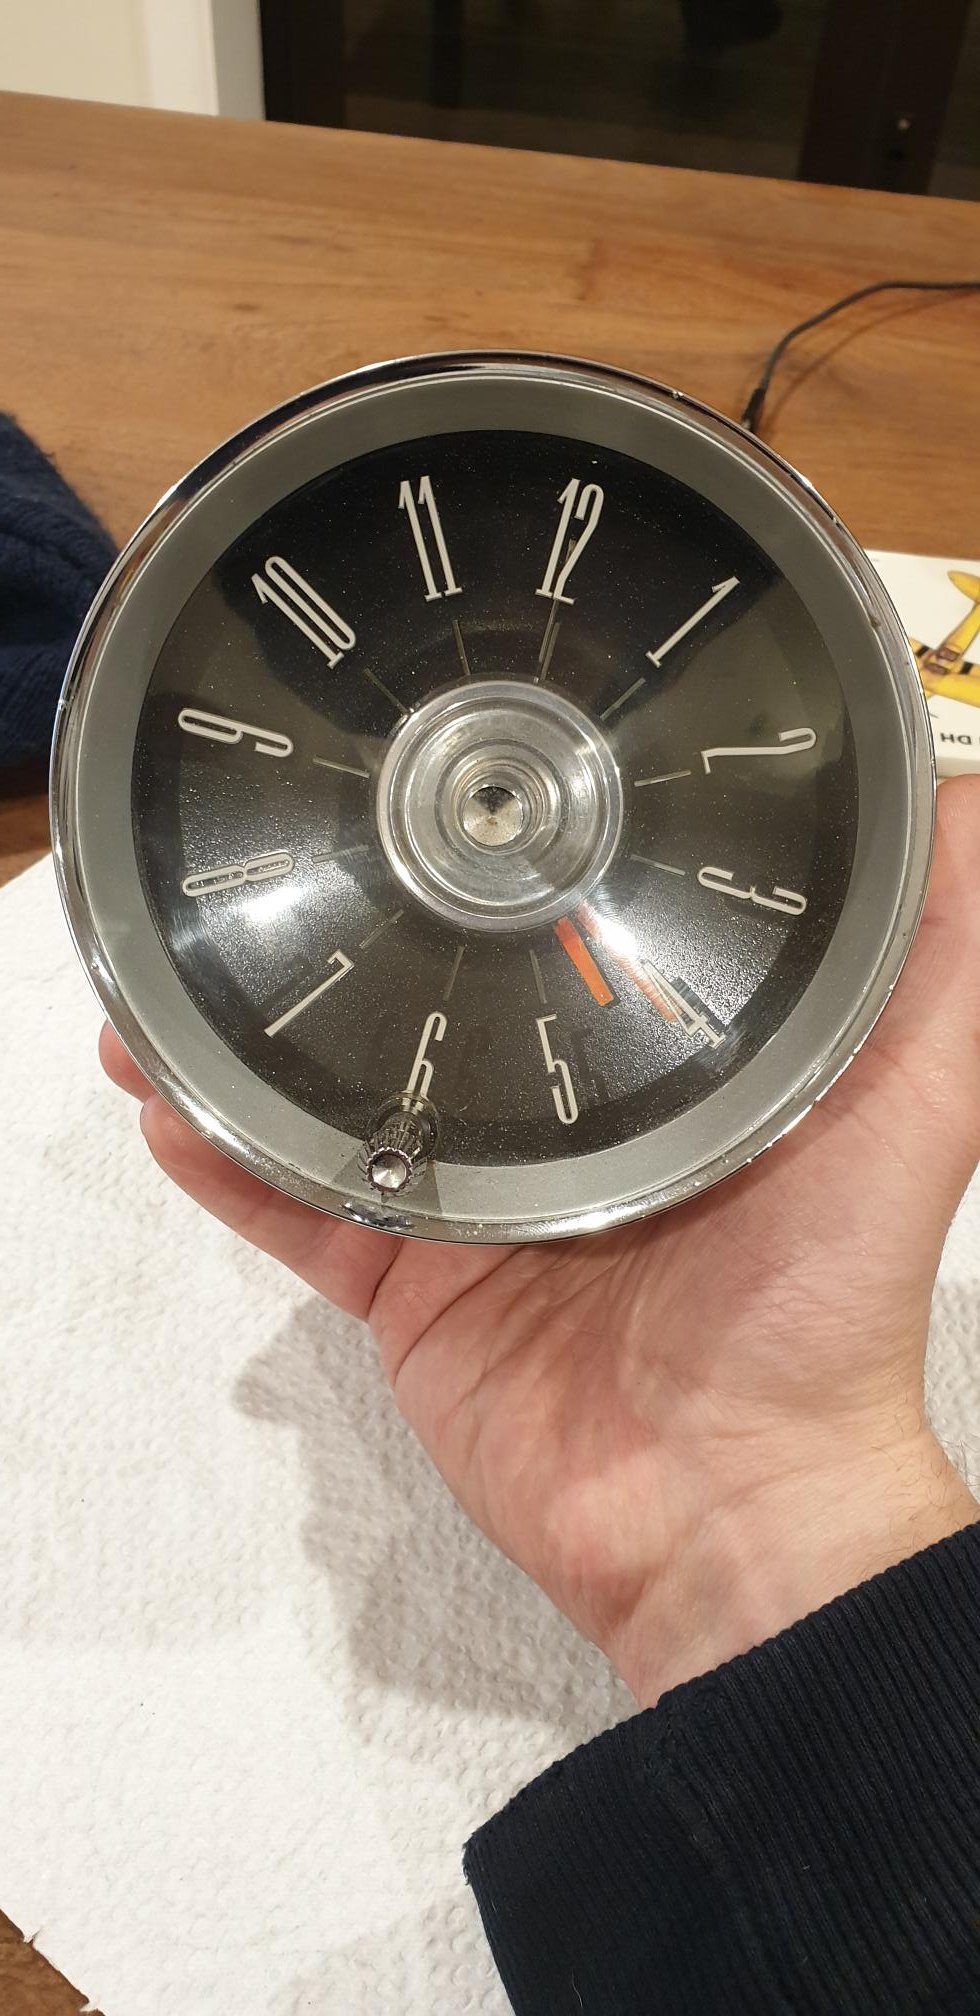
Got the clock going tonight, strange place to start but the clock comes out and the shed is cold... Some pics of inner workings,the solenoid winder and the front of the clock which still needs a polish up.
2 points
-
Car passed cert today - awaiting Cert plate. You beauty2 points
-
Ones for the brothers FD. We are going exactly the same spec so that we can have a fair race at some point!
2 points
-
Discussion Thread - //oldschool.co.nz/index.php?/topic/53921-bugatti-t5759-engine/ Embarking on an ambitious project to build a Bugatti T59 Replica. Using modern manufacturing techniques, 3D scanning, 3D printing, CNC machining but keeping all visual details authentic to the original.1 point
-
It’s already pulled out of the car and the engine doesn’t have an AC compressor which I don’t quite understand. But... anyway I am leaving the E36 side of it unbutchered so I can add it easily if I want to later. Generally in a bmw the heaters are on full hot to prevent bhg lol, and I don’t remember ever using AC with the old engine. Maybe it didn’t work. But I pretty much leave AC on in my van and E46 just to dry the air, so I definitely see the benefits. I’m just terrified of never finishing this car so don’t want to bit off any extra!1 point
-
Isnt that meaning of owning a classic car?1 point
-
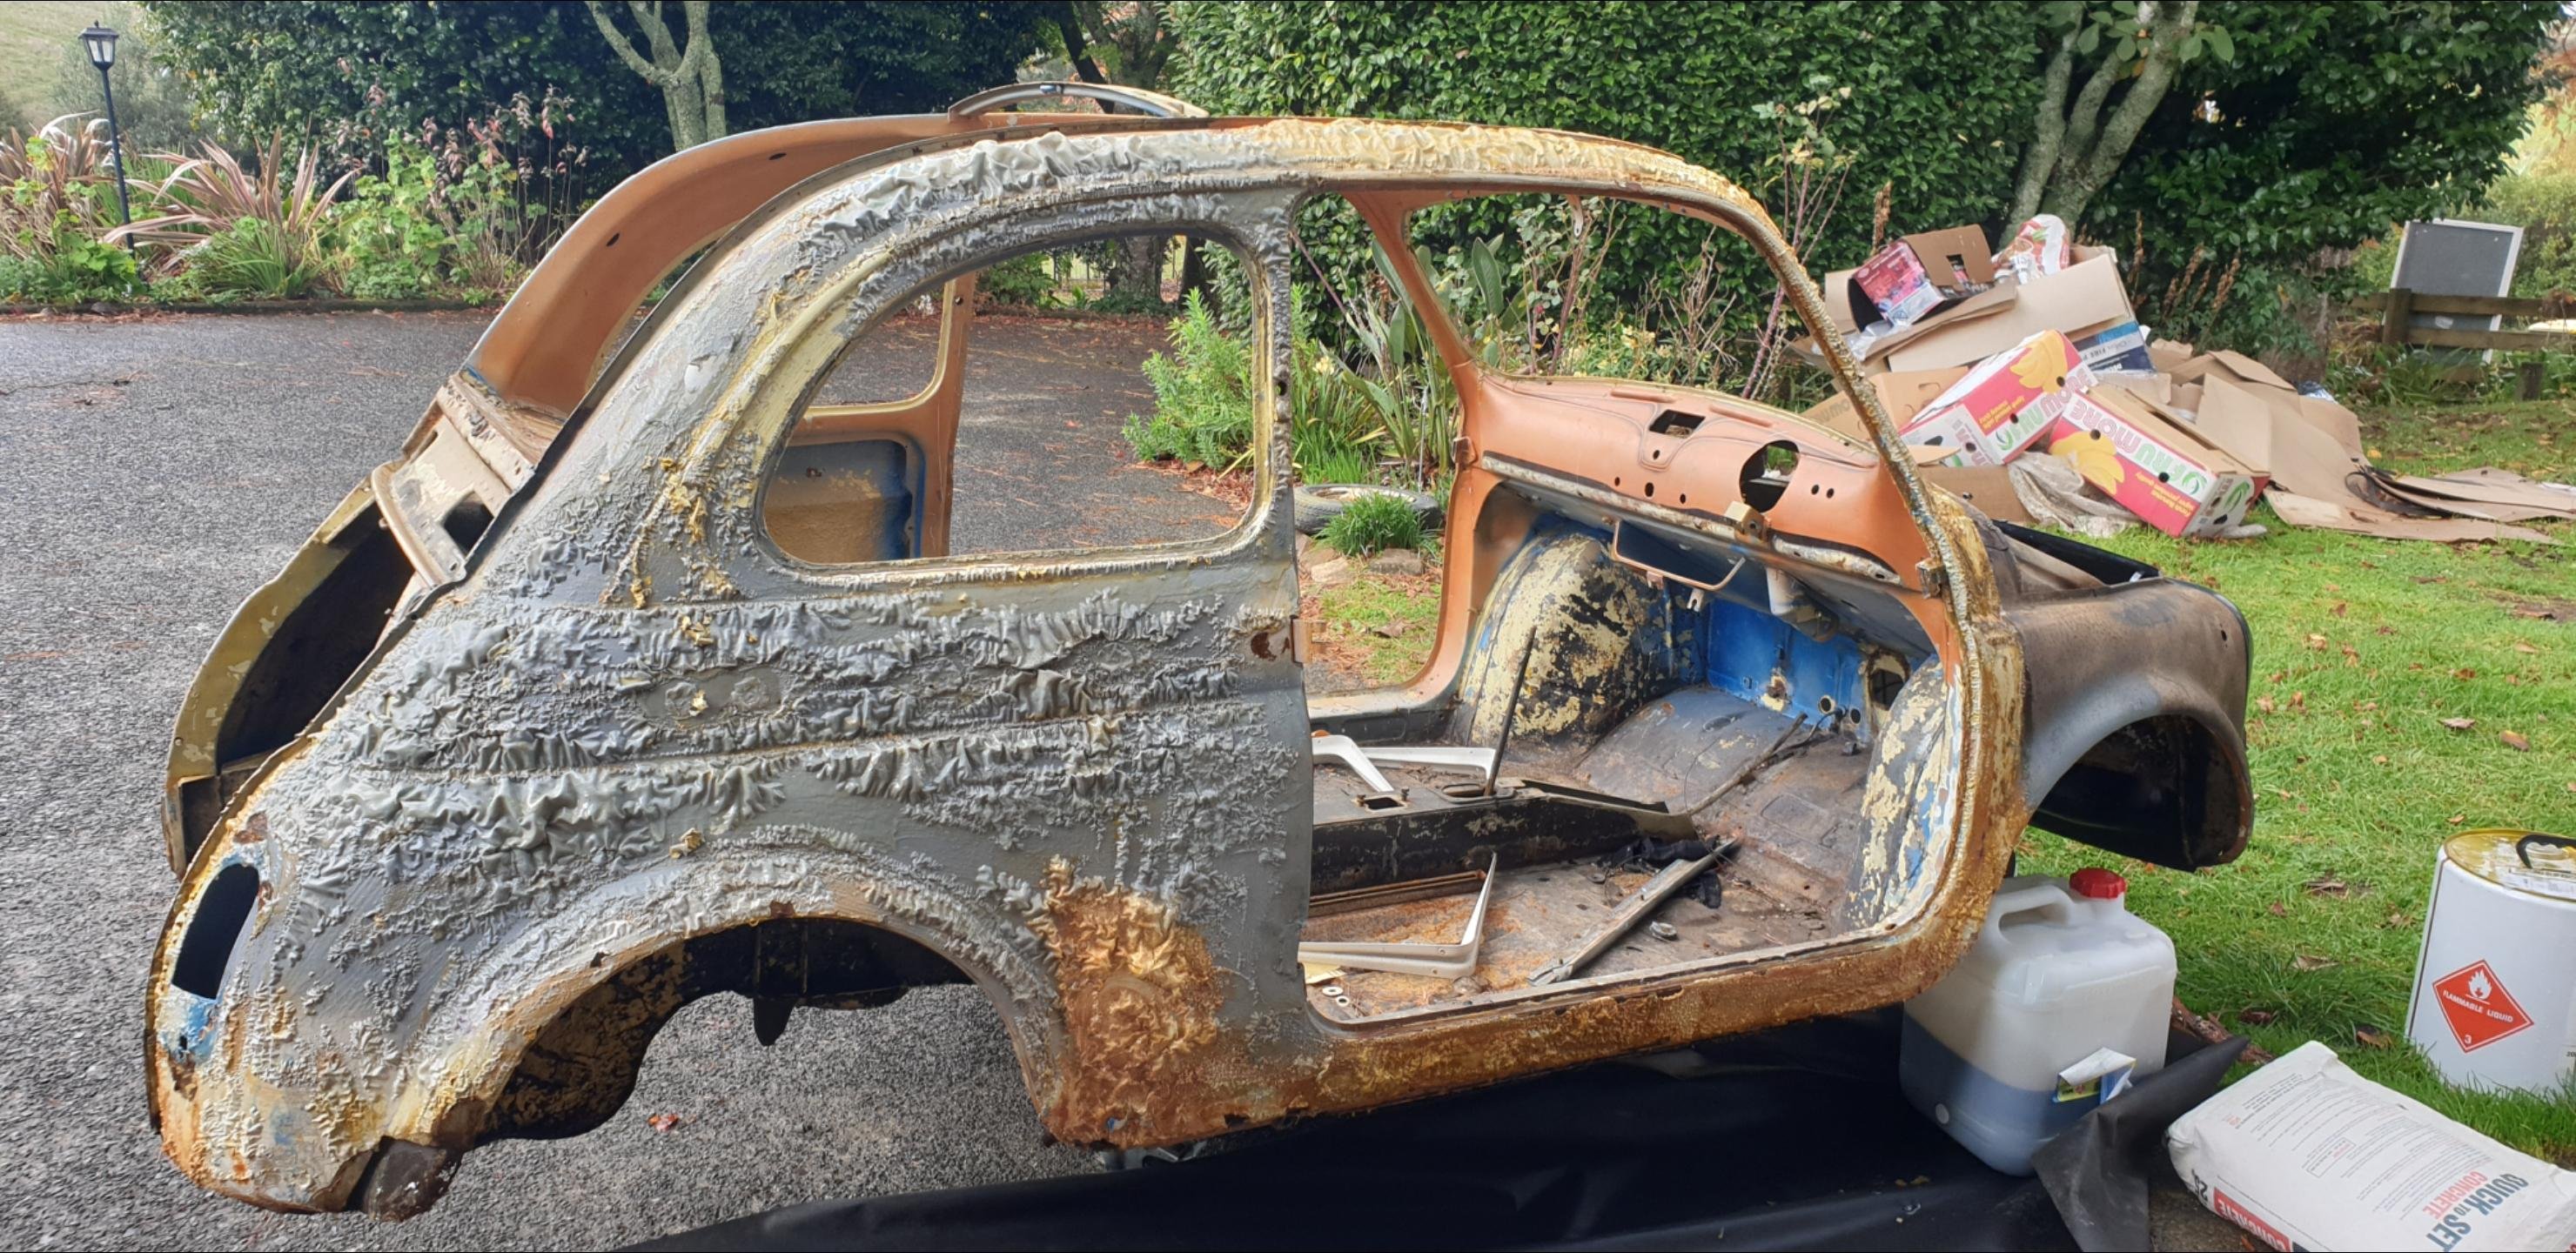
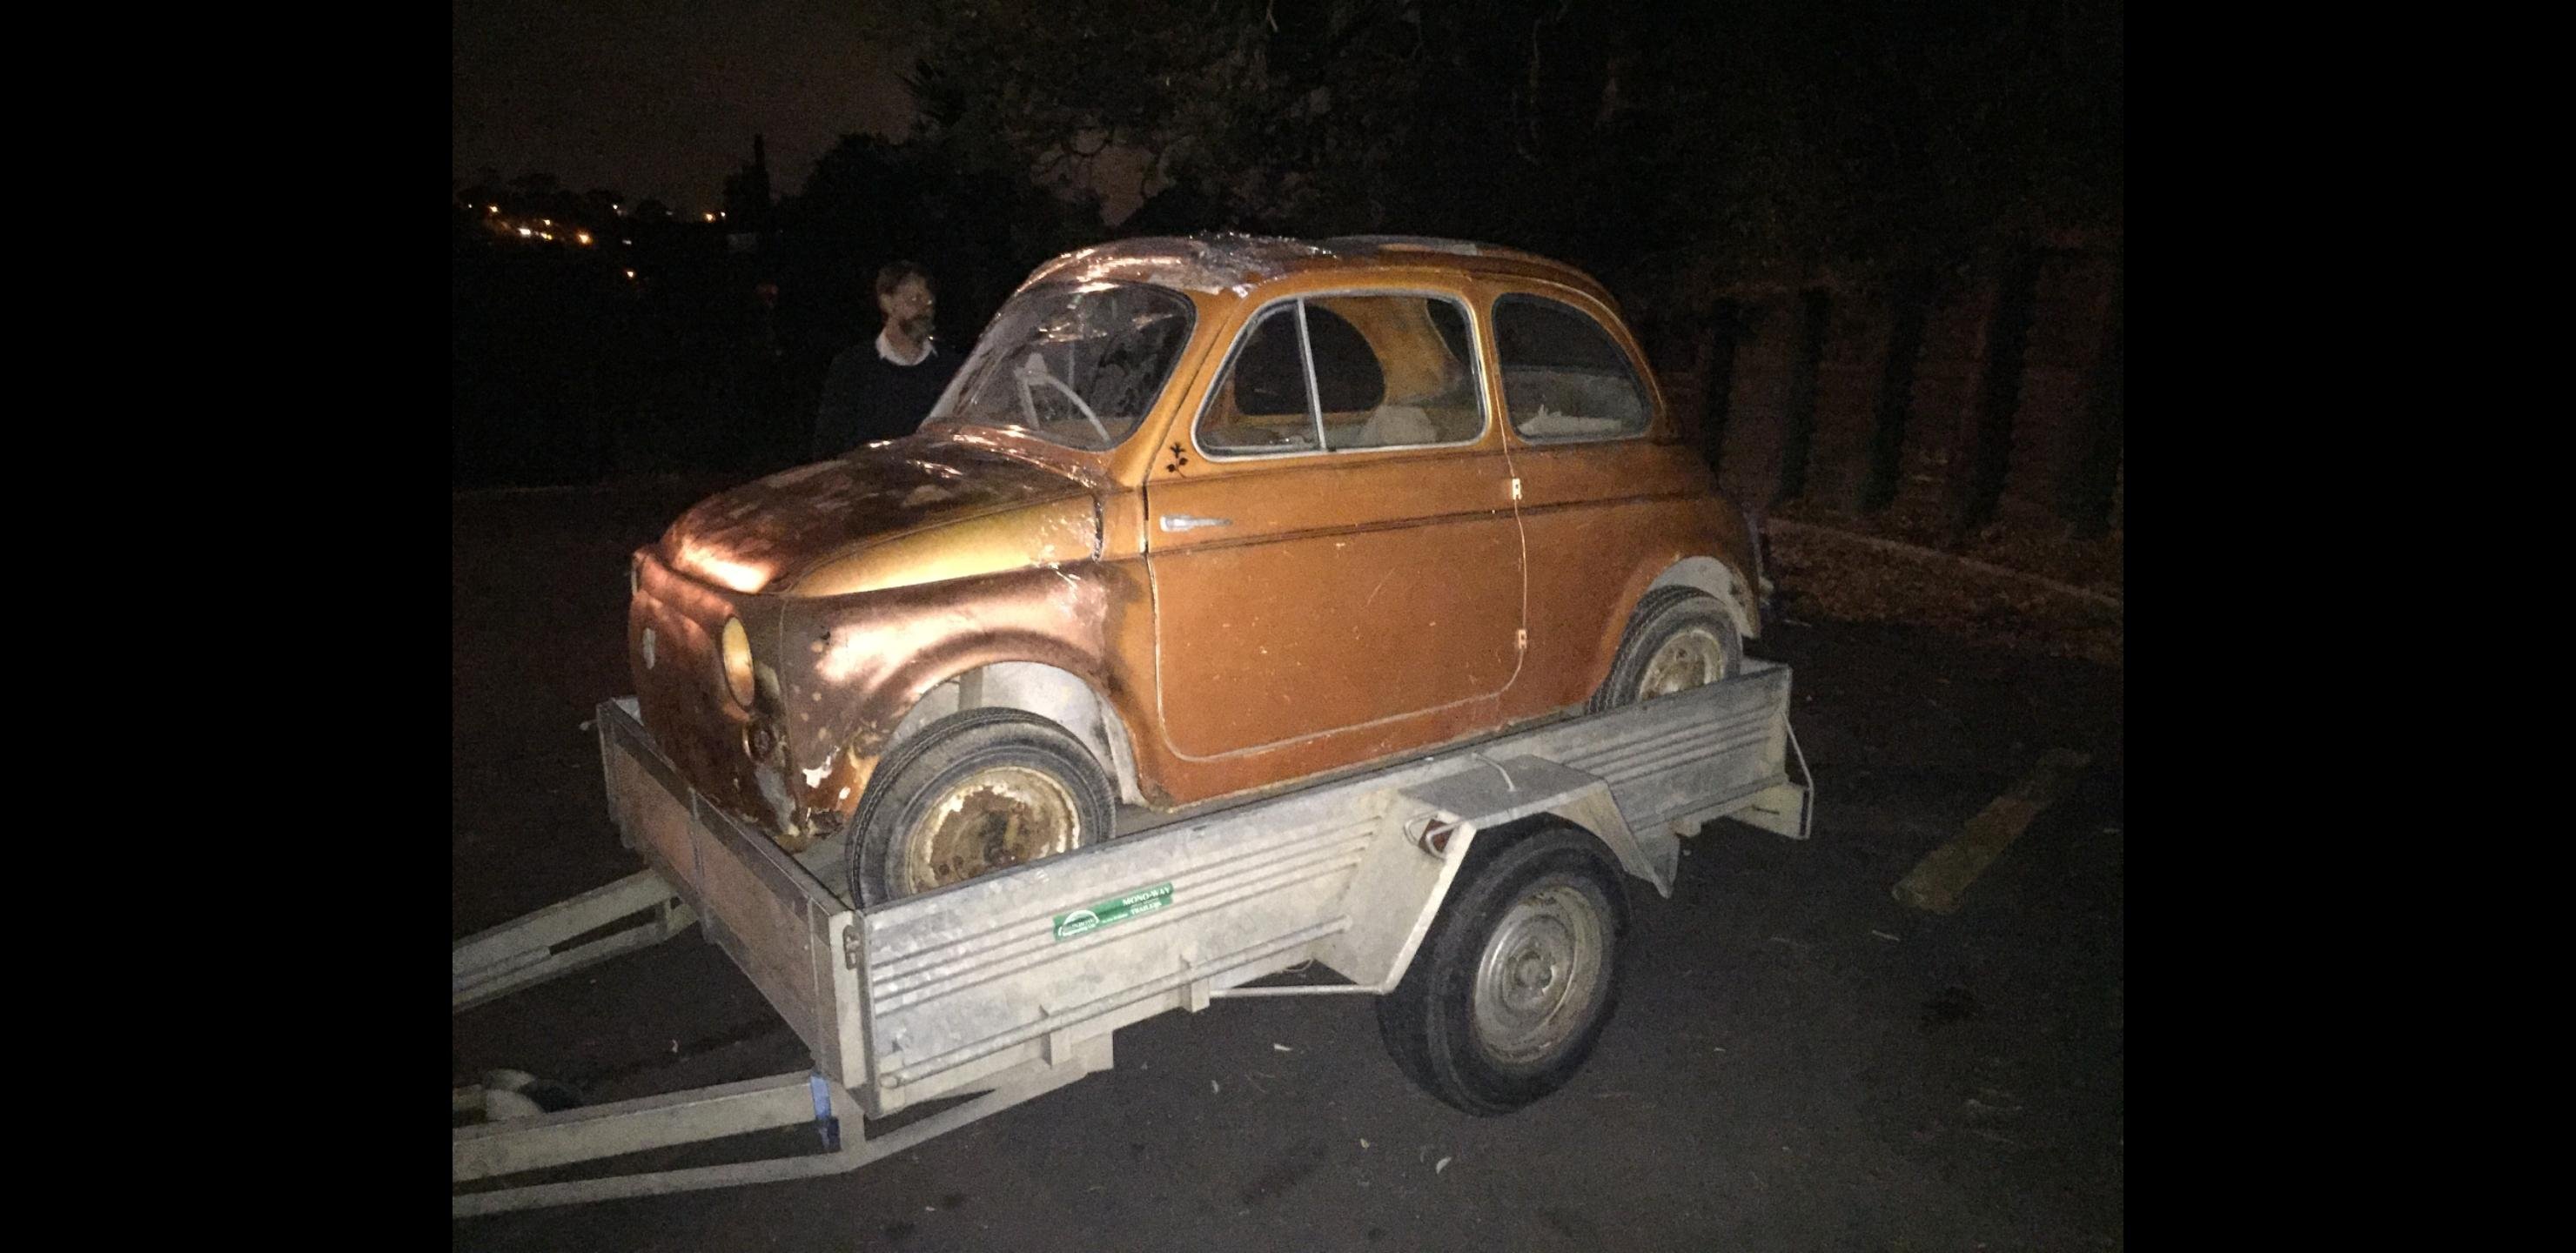
Bought a Fiat 500D a couple years ago for the Mrs. Was supposed to be a quick panel and paint, re reg and enjoy. Had beers with angle grinder out. Discovered many cancers. Got depressed. Moved overseas and forgot about it. Moved back to NZ and it hasn't turned itself in to dust so I decided to get it done. Hopefully making a thread will motivate me to finish it.
1 point
-
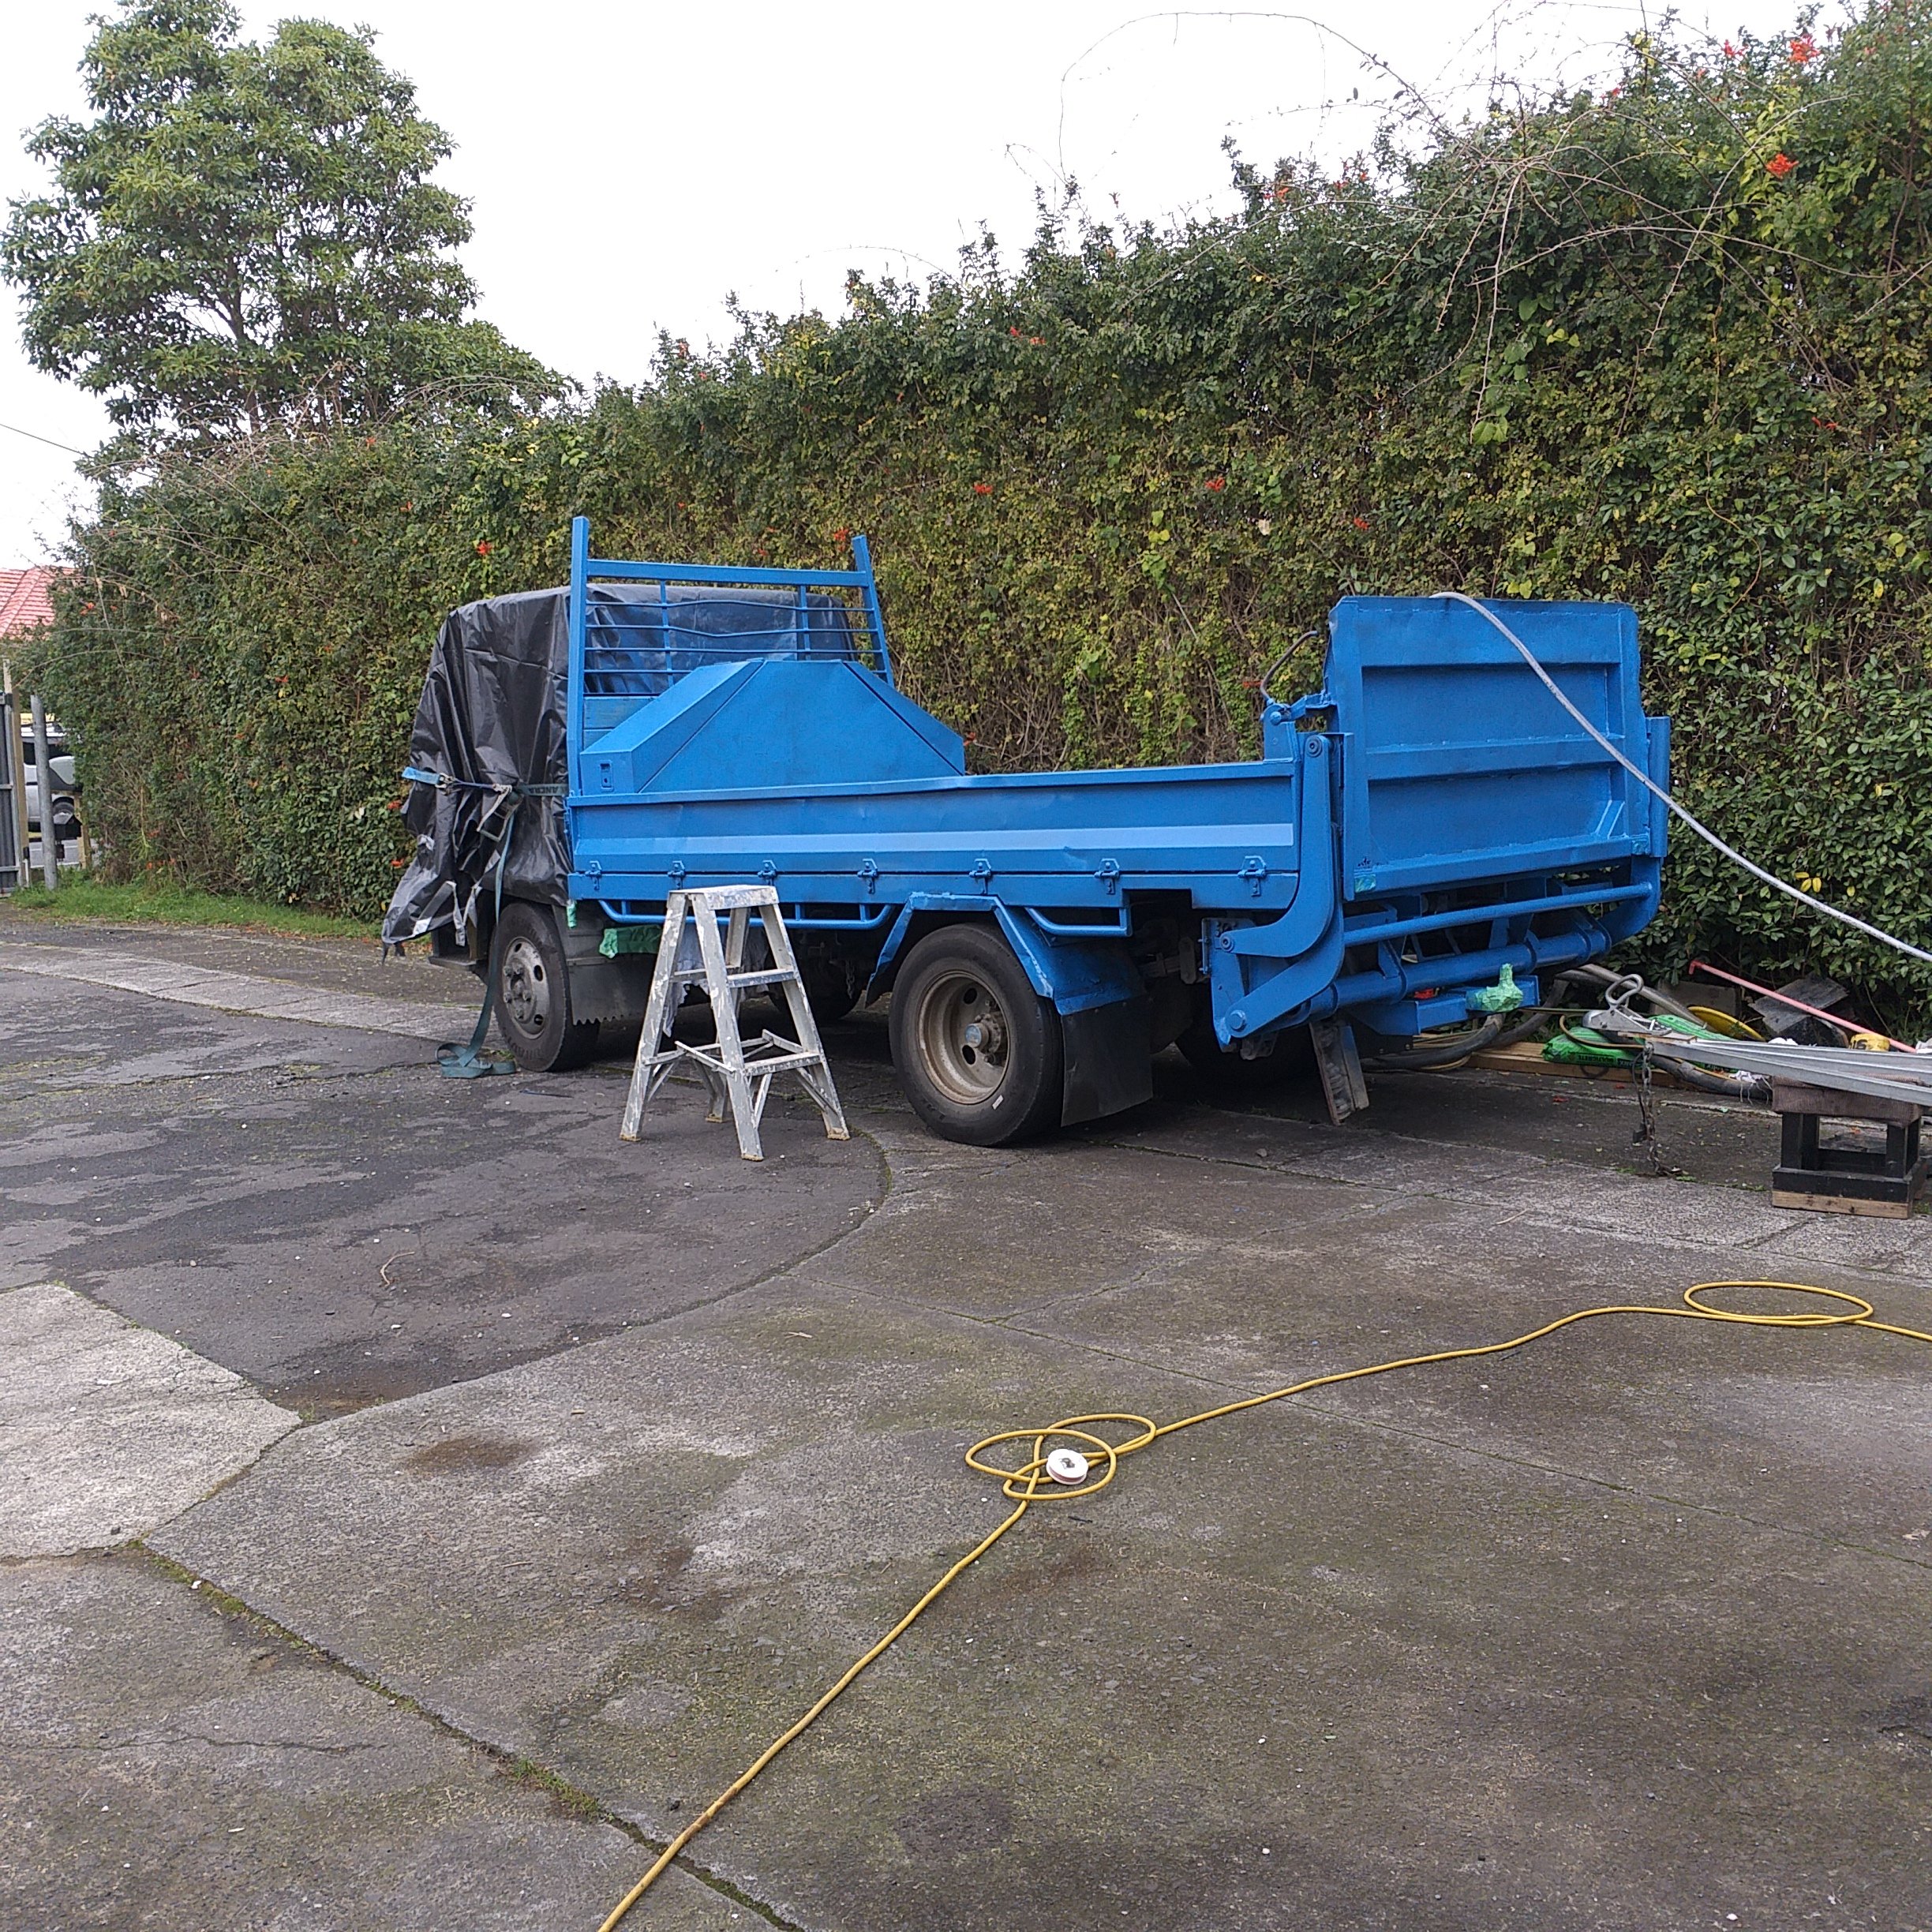
second coat on. a couple of runs but over all it look mint.
1 point
-
I went down that road and bought a couple of different styles as I figured some would be shit. The ones that are "square cut" like, they are drilled from one side and drilled from the other. Avoid. Most of them had a small piece of swarf still stuck to it internally! Went straight in the bin. These ones were good (I've used them with fuel and oil for several years, including a lot of do ups and undos with no issues at all) https://www.aliexpress.com/item/32741180690.html?spm=a2g0s.9042311.0.0.27424c4d670JXq https://www.aliexpress.com/item/32718466578.html?spm=a2g0s.9042311.0.0.27424c4d670JXq This style, avoid: https://www.aliexpress.com/item/32743291389.html?spm=a2g0s.9042311.0.0.27424c4d4HvP3k I reckon the biggest cause of fuckups with AN lines though is putting them together improperly. I found putting masking tape around the outside then using a cut off wheel gave the best results. But need to clean a bunch of crap out of the line afterwards (But need to whichever method you use)1 point
-
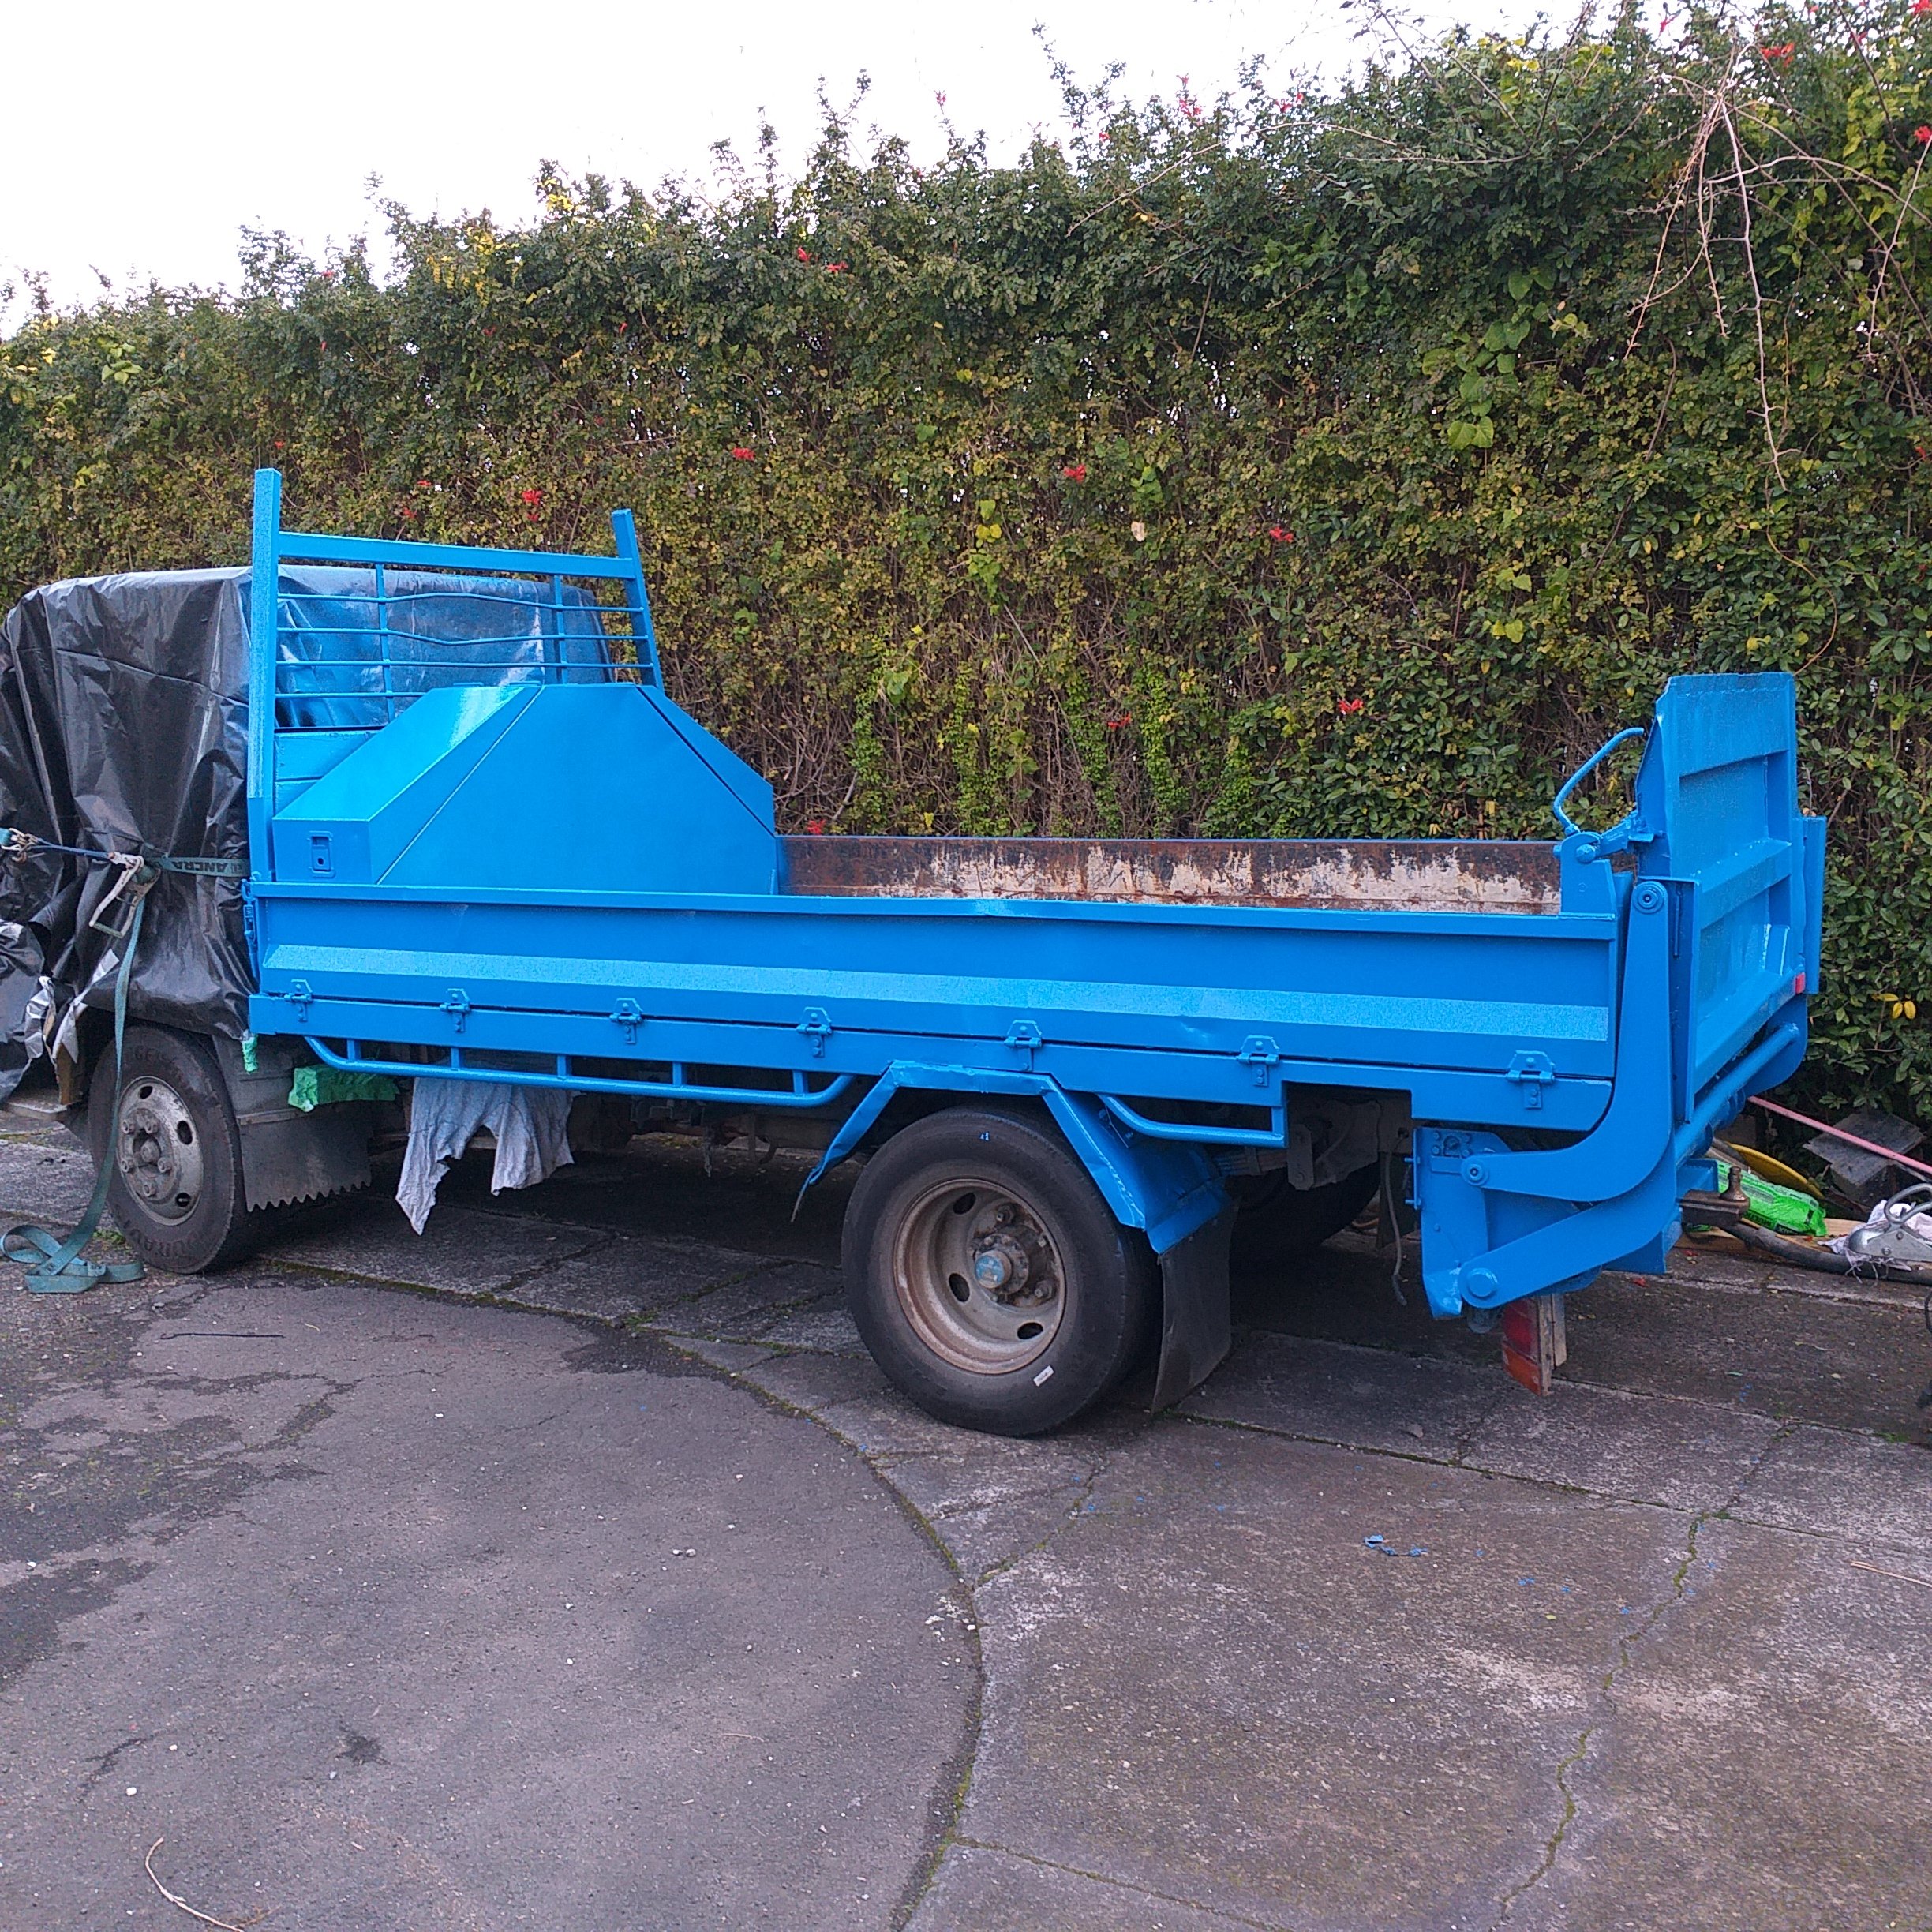
been productive day so far. happy with the first coat. just a quick scrub with the grinder and wire brush. so don't get close. need to flip the cab and prep that ready for a coat of primer. but will do that once this is finished. now to go clean the mess in the shed.
1 point
-
Haha, cheers man. I’ve never been much good at bogging, so half the fun was learning how to mix and lay it again... The stuff I’m using doesn’t change colour when you add hardener, so I doubled down on hardener the first time and ended up with a streaky mess to deal with. Recent applications have been much nicer! Plus the sanding is basically cardio . Its getting there now - bit of filler primer and seam sealer done. Now it’s time to start applying filler to the other side and get the rest of the bay cleaned, sanded and primed for paint.
1 point
-
motor is still in bits.. been making progress but slow due to doing other stuff and trying to get the machinist to come in on and Saturday and help work on it. did some stuff last Saturday but couldn't assemble heads due to wrong valve stem seal but should be sorting that this sat its Actually quite depressing when ive spent more time working on it than ive ever driven it.1 point
-
that looks great. in the next week or two im gonna be jamming alot of that black japan stain over my kitchen floor. looking forward to the results! got me thinking i should use any left overs to make a similar coffee table!1 point
-
1 point
-
Have a few. Made the civic had it white and silver 2 tone, made a mistake on the black trim so ended up doing the whole thing silver. hated it got so ruined it more and thats how it ended up. Haven't touched another one in the fear i will stuff it up.1 point
-
Yep, when it's carrying pressurized fuel or oil, I'd rather pay more for quality.1 point
-
Yup. I am all that is man.1 point
-
Ok it’s back to normal with filter change, need some dry roads to do some testing. Have bought a couple of fuel filters, to swap a few times after some km’s. Love the sound this thing makes.1 point
-
Outer mould patterns finished and ready for printing. 3D printing is good but it also means to have to design the under side! Twice as much work!1 point
-
Fab mates had a baby 6 weeks ago then been on a corse so the legs got put on the back burner for a while. 30x75 box tube. 110 degree angle. i was planning on doing them square but he talked me into an angle and I’m happy he did. i wanted something with a large foot area so it’s easy to slide around and with a large surface area won’t fuck the carpet. still needs another coat of clear and I do the bar stools and dinning chairs in the same stain excuse the mess we’re redoing our laundry atm so there’s shit every were. hopefully get onto the coffee table soon when funds replenish from reno’s. If anyone needs any electrical work done let me know
1 point
-
Sunday of productivity. Water pump back on, filled & warmed up. No leaky, no squeaky. Messed about with the front brakes but couldn't work out a way of fitting the new calipers without it turning into a fearsome bodge. I'll take the calipers & current flexies into the workshop tomorrow & make up some hard lines and brackets. Rear brakes went well though. Offered the shoes up and they looked good enough for a country job Everything fitted perfectly so I can confirm that 1971 Datsun 510 rear brakes are the the same as Hakos. Do with that information what you will.... Also done a vid. Really to demostrate the tappet rattle for comparison after I've adjusted them but it sounds like the cam's not bolted in. It's really not that bad. So that's about it, hopefully full braking will be restored by the end of tomorrow and then I might even give it a clean. Once I've adjusted the valves I'll give it the beans, I've been staying below 4 grand (mostly) because of the water pump but it really feels like it wants to pick up between 4 and 4,500. Thank you for your continuing interest.1 point
-
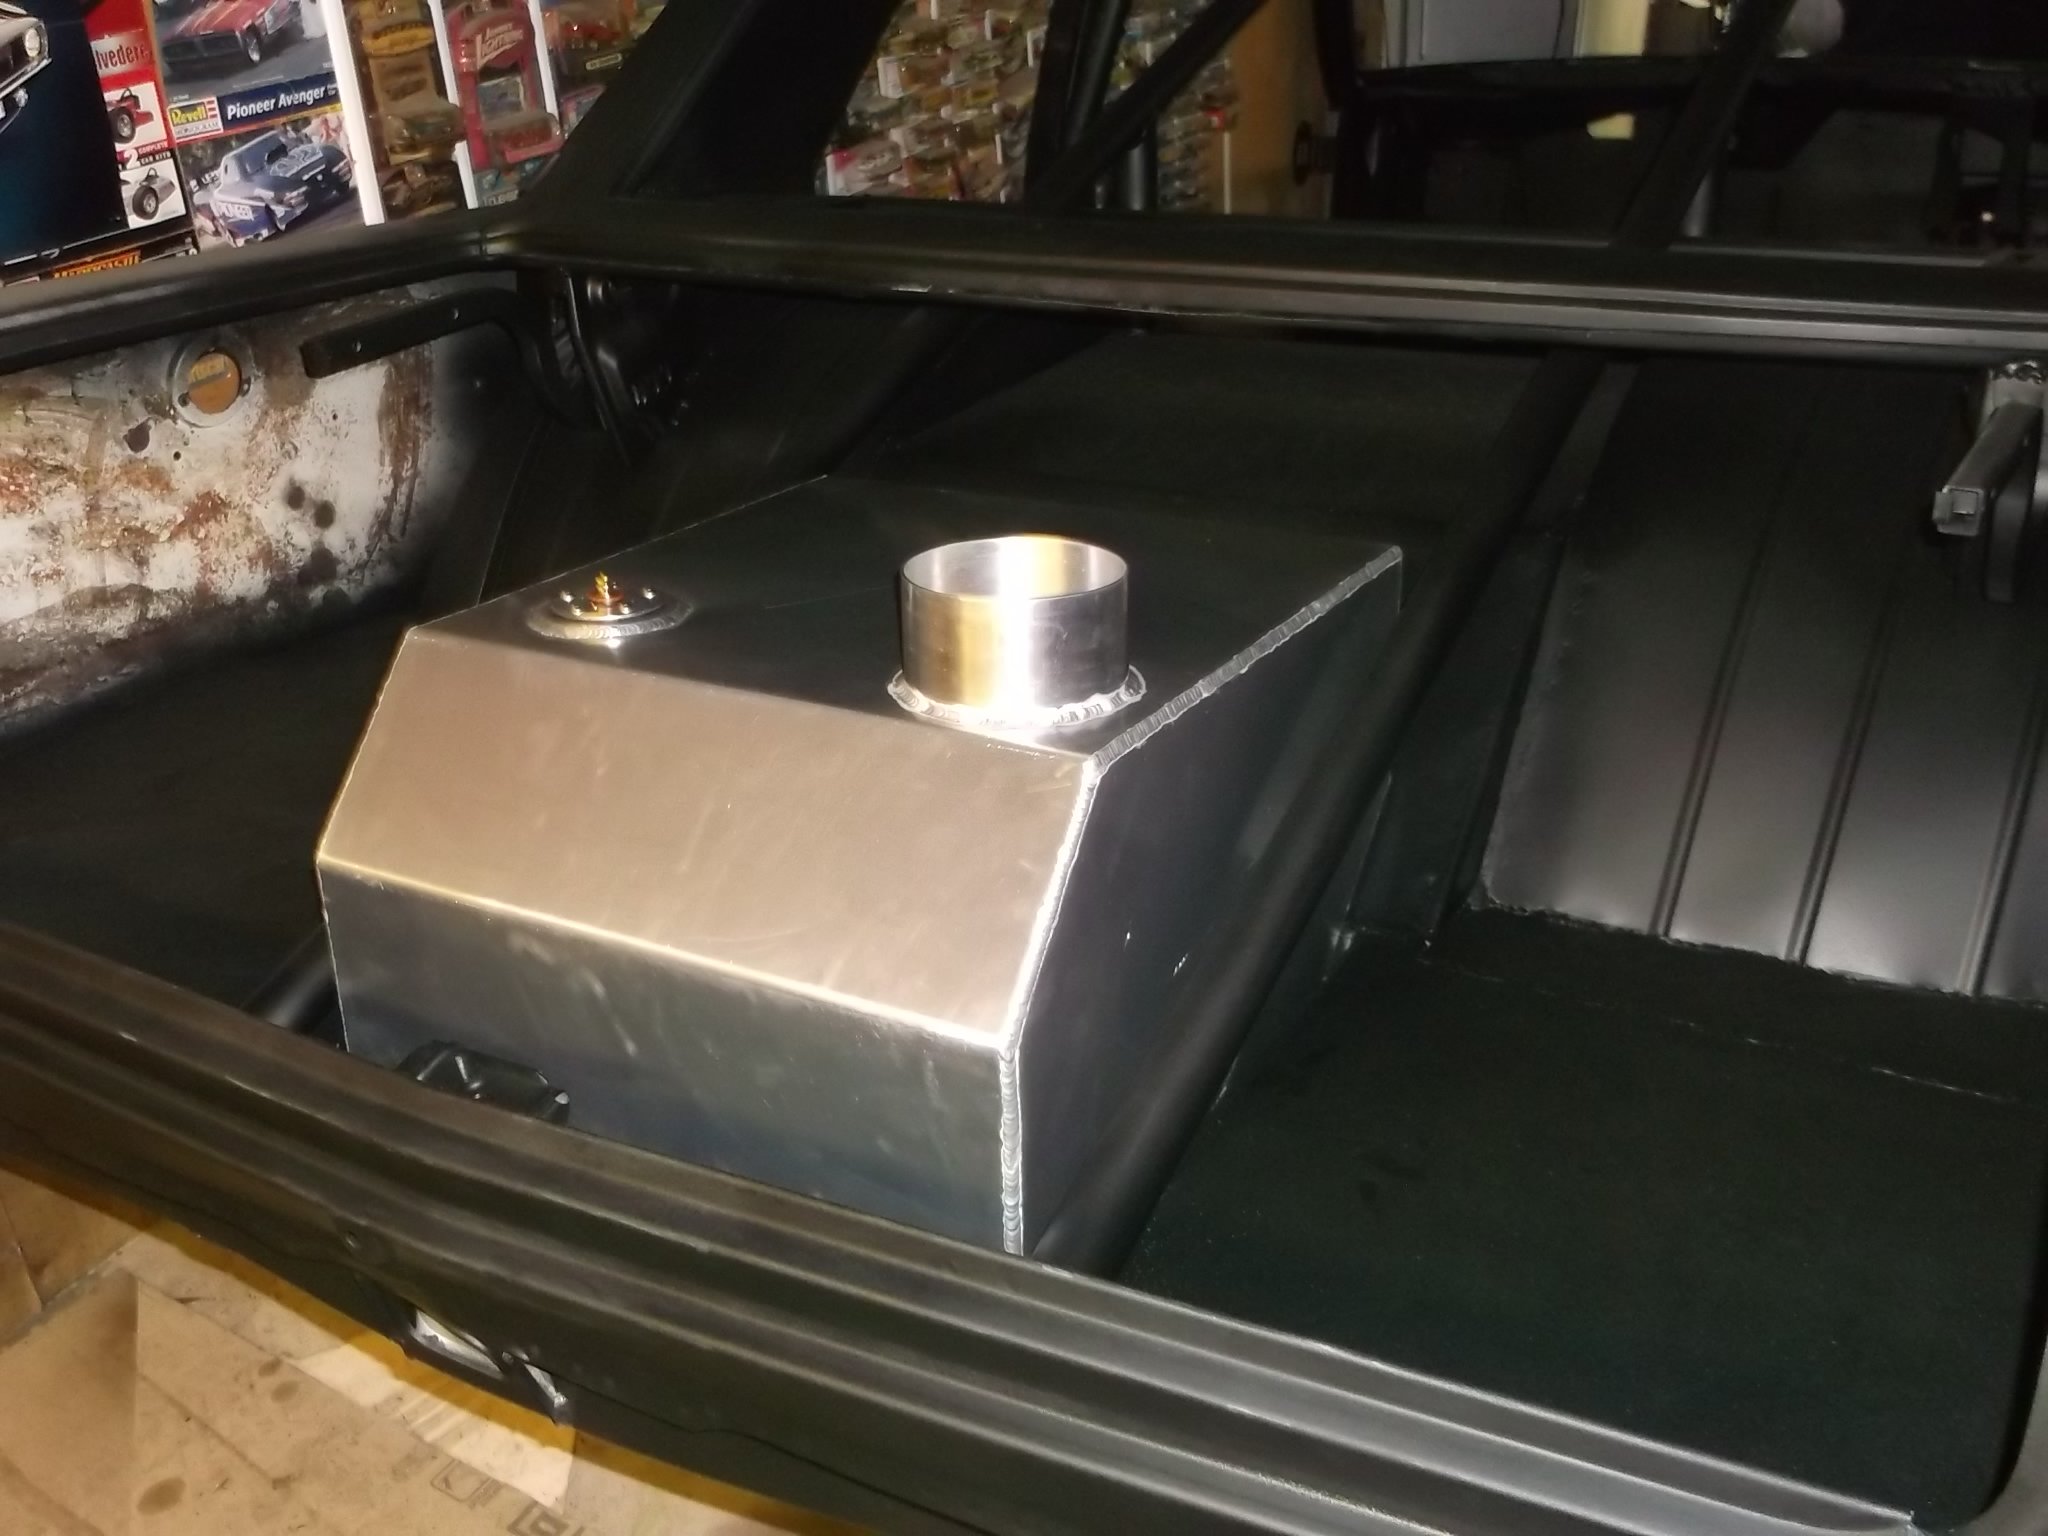
The wiring is pretty much there now bar the speedo cluster, a bit more tidying in the cab and adding some Deutsch connectors in the rear. And a licence plate light. Now I am a difficult bastard at the best of times, and part of this is that I hate car stereos with all their bullshit inputs, eq settings and animated screens, another part is that I have not willingly listened to the radio or watched television for more than two decades, a small and ineffectual rebellion against capitalism. I only listen to talking books over Bluetooth when driving and fucking hate it when I get into a car after someone has been used it (Shane you dick) and has fucked about with the stereo and turned on the radio. So to prevent this occurrence I have bought a top quality Bluetooth mini amp off Ali express for $54, this has two tone knobs and a volume knob, and no display. Perfect. It is a nobsound brand lol, right up my street https://s.click.aliexpress.com/e/u5tcaeM In other news I have had some front driveshaft adaptors made so I will be sorting that out shortly. I will hopefully have enough cash for a radiator in the next few days as well. In the realm of actual work I have mounted the rear seats. Not masses of legroom but they work well and pack away nice and tidy; It will be tight for the engine cover but do able.1 point
-
2019-06-19_01-30-25 by sheepers, on Flickr 2019-06-19_12-40-53 by sheepers, on Flickr 2019-06-19_12-40-43 by sheepers, on Flickr1 point
-
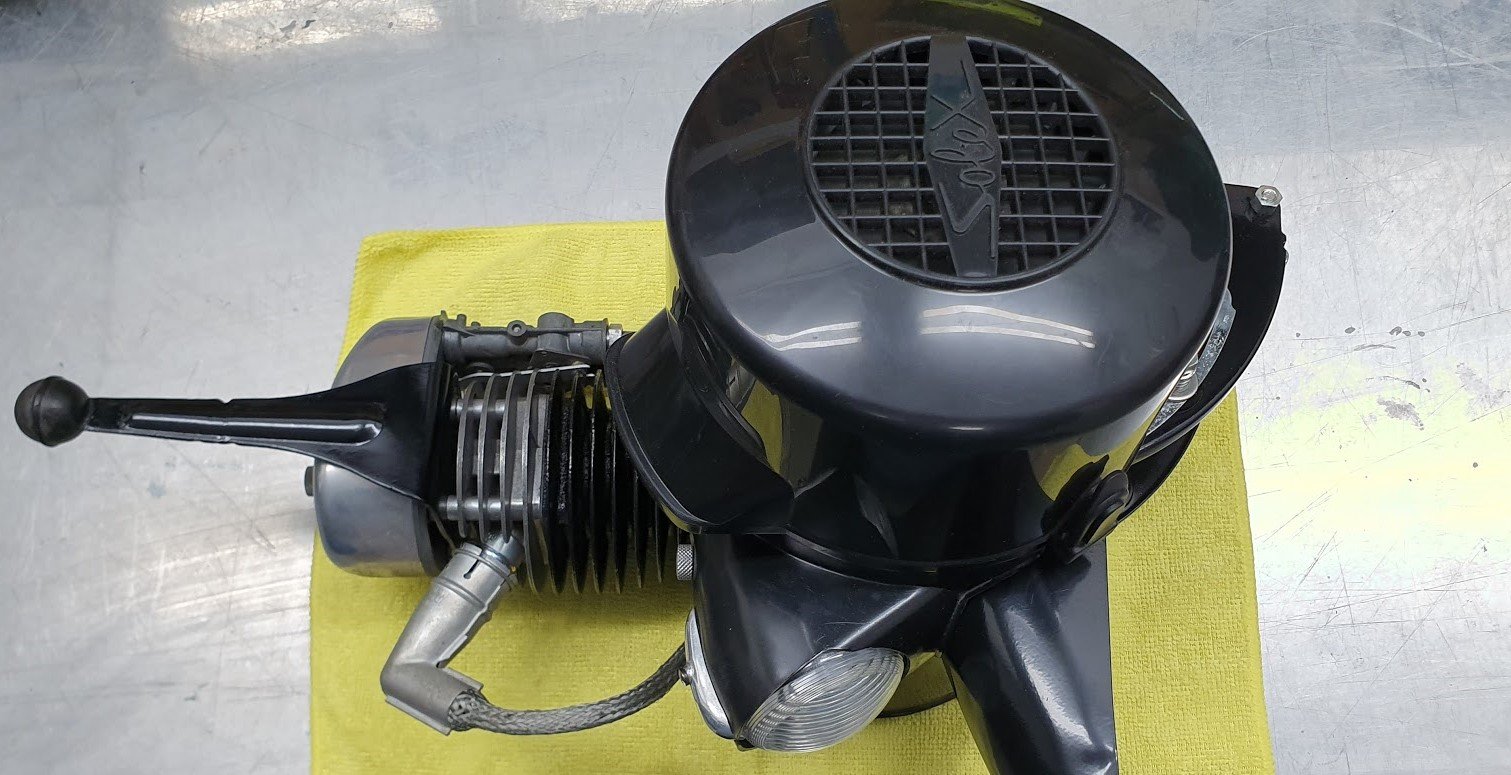
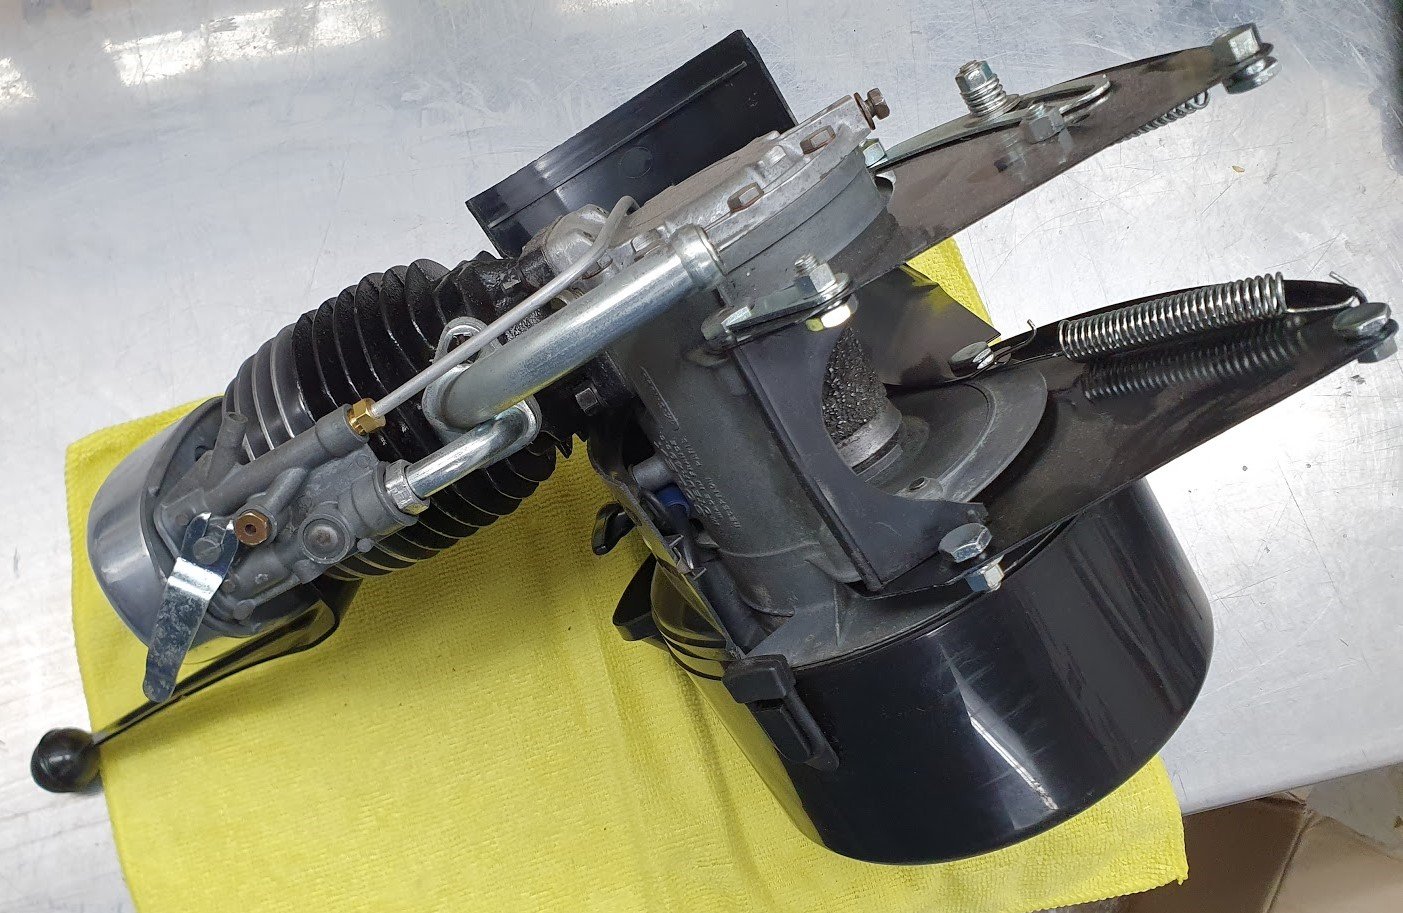
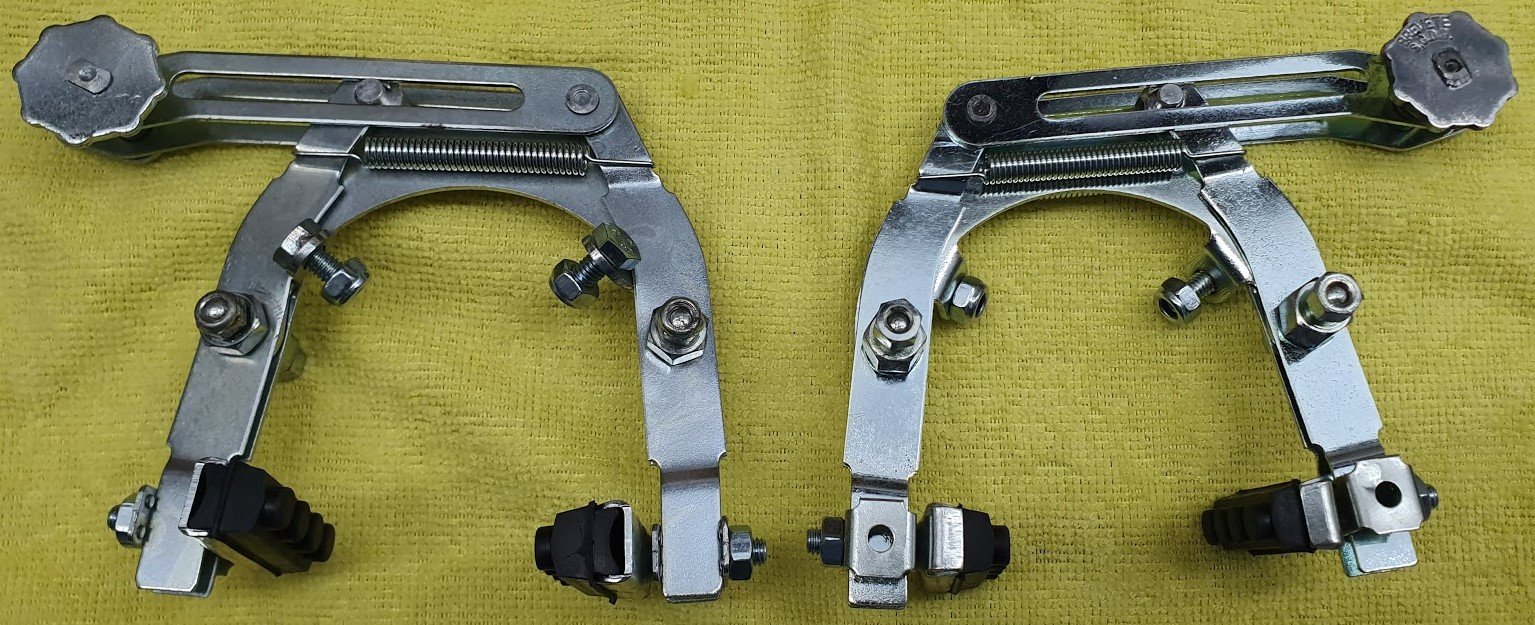
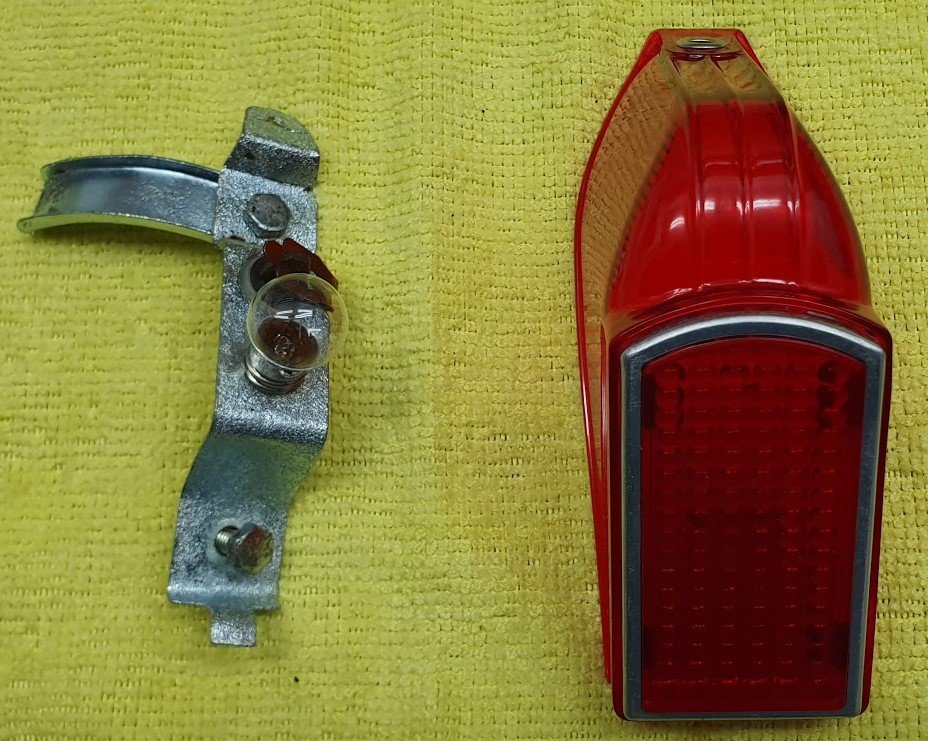
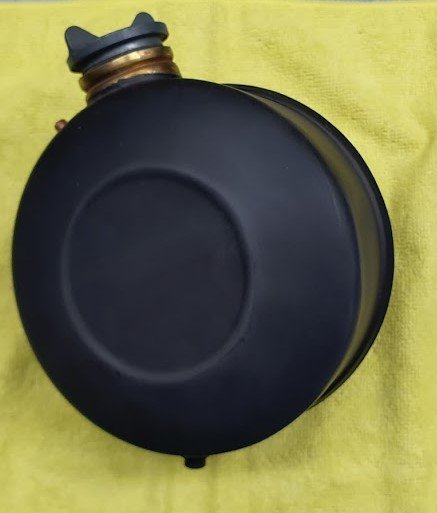
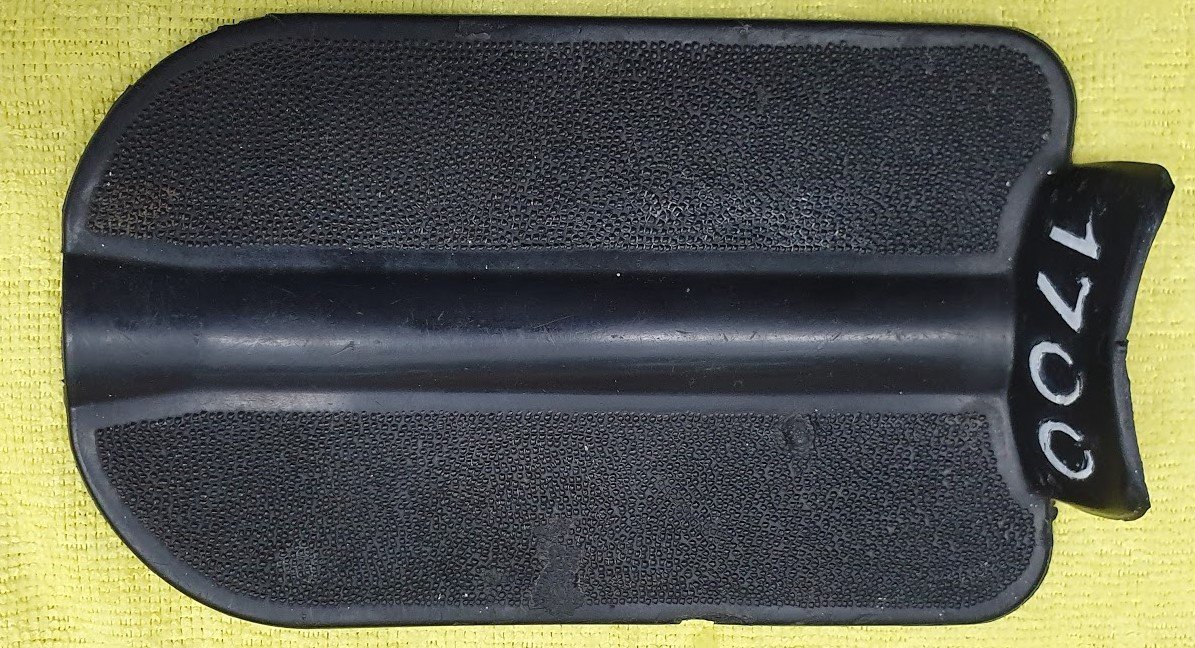
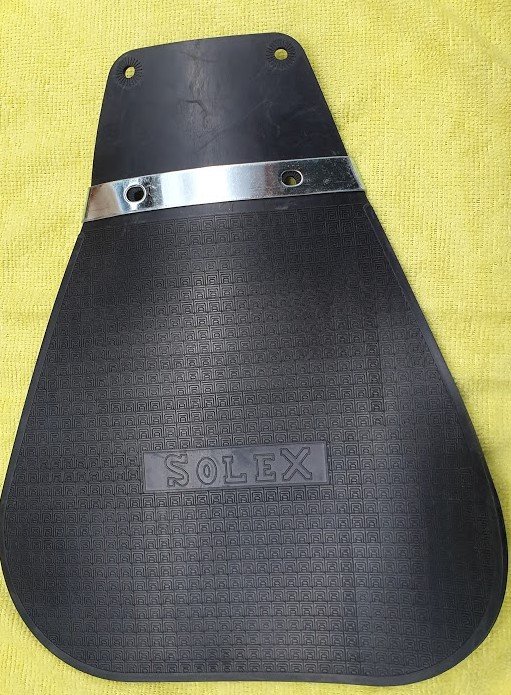
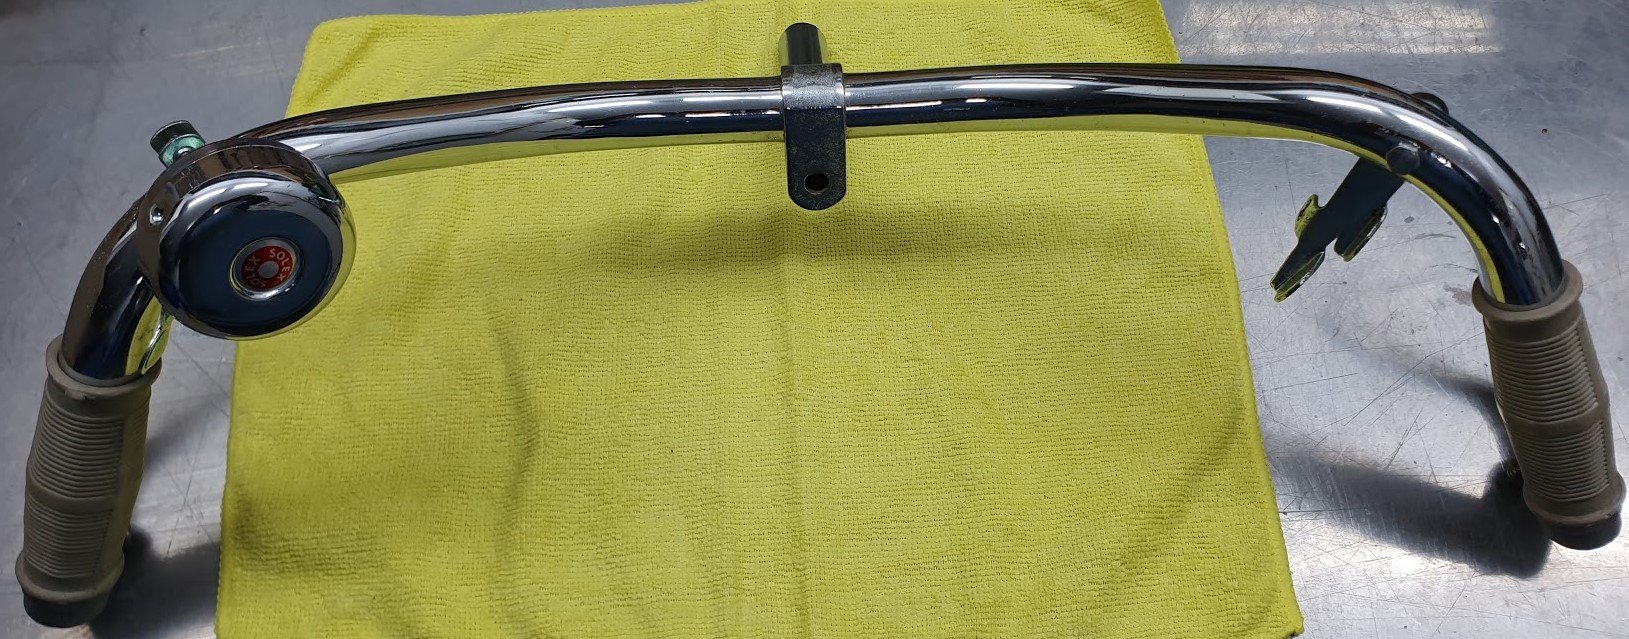
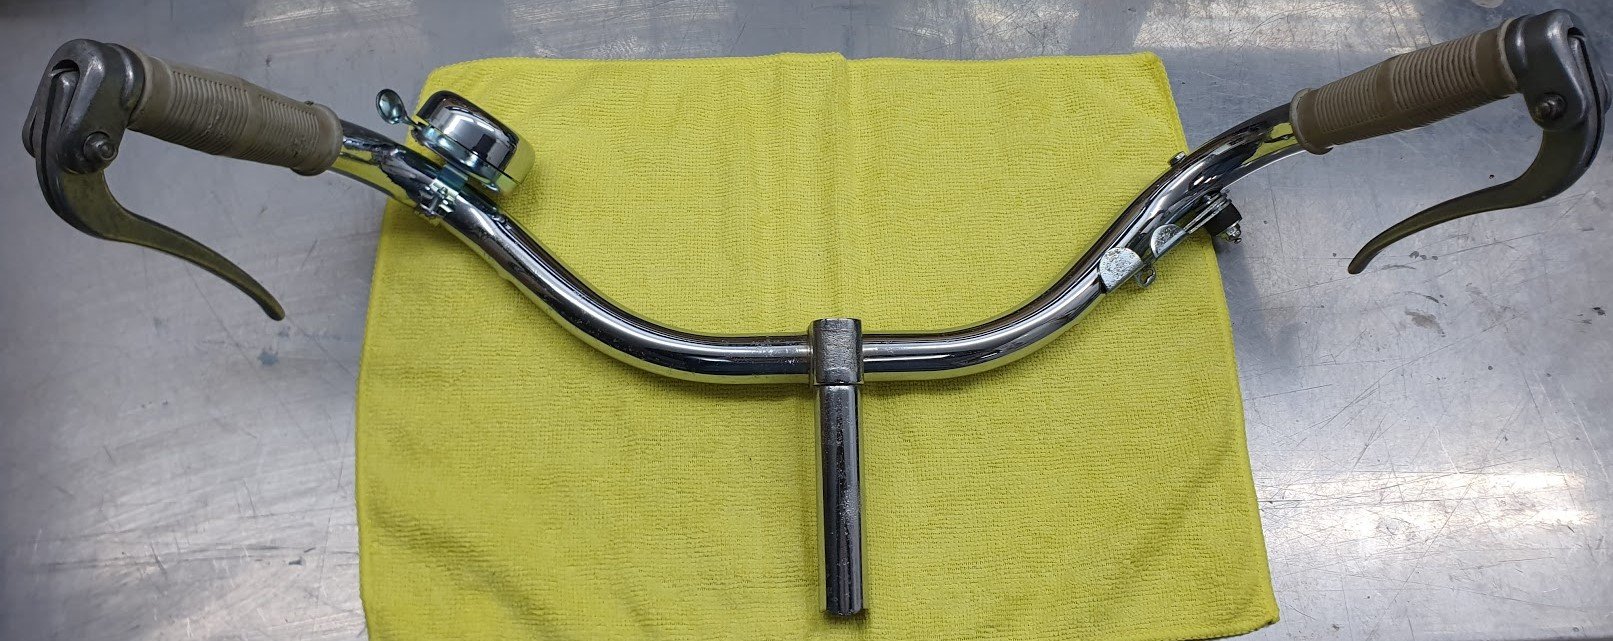
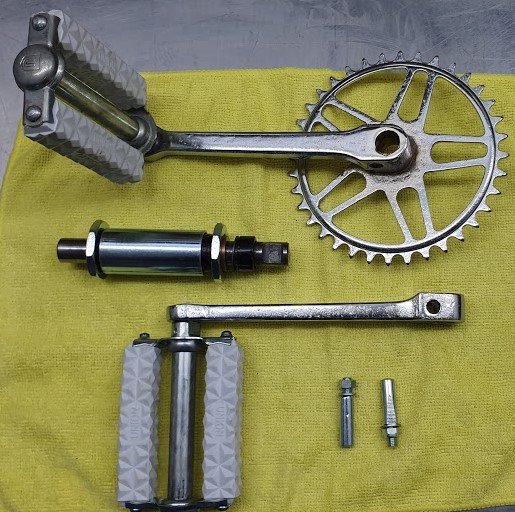
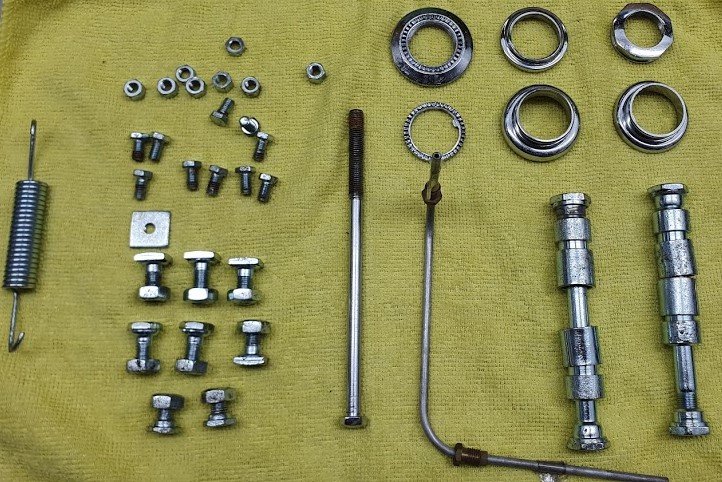
I had also reconditioned a whole pile of other bits. i unearthed all those today too.. Moteur all done - big-bore 50cc piston, honed barrel, new headlight and plastic side cover. Front mudguard and engine mount plates painted and everything plated. Including fuel tank that took way too many hours splitting it apart, panel-beating it, sealing it back up. still to be painted. before.. after.. Exhaust - gutted out and tidied up Brake calipers zinc plated and reassembled. New tail light and re-plated/refurbished bulb holder Tread plate cleaned up new mudflap + re-plated support handle bars re-chromed and everything cleaned + re-assembled. also new bell The auxiliary power units were re-chromed, nos pedals, and rebuilt main bearing and lastly - re-plated bolts throughout
1 point
-
Ready for the first pore. The guy at the foundry likes classic cars and was really keen to help. Will charge $5 a kg for casting. Thats cheap! The filter area was too thin and failed after it filled up. So it filled properly and then just before it solidified it half drained out. . I knew it was dodgy but thought I might get away with it. Even though this failed, this is a great success. The cores worked perfectly, they didn’t shift or break, the surface finish is great and there are no cracks or porosity which is really common around the port and cylinder head areas. This is definitely the coolest thing I have ever made! Next step is to cast two cylinders.1 point
-
Then time for the outer patterns. Filter and sprue area added. Then fit them all together. Then stack them on top of each other to make a 40kg sand castle.1 point
-
Fitting 3D printed patterns to get the CAD right.1 point


This leaderboard is set to Auckland/GMT+12:00