
Leaderboard


Popular Content
Showing content with the highest reputation on 05/22/17 in Posts
-
and this it todays efforts.holy shit painting a car takes ages!!!this was about 5 hours work, sanding down all the insides of the bonnet, engine lid and all four fender.I was hoping the do the insides of the doors aswell but didn't have enough time.I don't think I used any filler inside these panels because why? except for the engine lid around the vents, so the finish isn't great and the bonnet had to lay on some cardboard on the floor. less than ideal but its all shiny and red and thats the main thing!14 points
-
With the car now off the rotisserie its time to start looking at the front end. As is blatantly obvious there is a slight lack of one currently. Its laying outside somewhere. The old Hudsons one although fine in the days of dirt track NASCAR was a little lacking for what I was after. That being an updated drive train with disk brakes, power steering, airbags and room to fit the engine & trans in. Unfortunately the heavy old setup fell short on pretty much all these points. Now I think I have already rambled on about the process of deciding what to do up front and so wont go on about it to much. Basically it boils down to shelving ideas such as restoring & updating the old setup, to a Fatmans front clip, to Jag IFS, to a Holden HQ-HW setup, to the current custom made setup that is made to my ride height, weight, drive style with zero bump steering, anti dive and all that guff. It also meets all the rigorous New Zealand certification requirements. The little progress we did on Saturday was just assembling the fronts hubs & brakes along with nailing down the desired and final air out height up front. So nothing to hardcore. Using a Wilwood setup. Main thoughts being I already had Wilwood at the back, they sell the complete hub & brake kit so things should fit together easy, and they should give no worries with stopping the heavy hung of iron. Also the kit should fit under most 15" wheels but would be fine with larger wheels upto say 20inch. - yes im still unsure what im using wheel wise. The kit used is a 6 piston, vented, drilled & slotted 12.19" rotors with ford stud ( part no. 140-10741-D ) purchased from Summit who had them on special and nicely also chucked in stainless hose brake kit for free valued at near $60 USD. Nice perk that will make it not only fit all together easier but will look sweet as well. I must admit I think Summit Racing is one of my favorite stores in the world *~*' Bearings and aluminum hubs all fitted together nice. packed up with high temp grease. Of course Wilwood would have to be different and used bleeping star shaped T40 & T45 headed bolts. And naturally we had to drop everything to pop down to the local engineering shop to pick up a half inch set so we could torque em up. Once back said newly purchased sockets firstly snapped trying to torque to a small 20 or 25lbs then twisted trying to do the next size ups 40lbs. Was more than disappointed with Teng Tools quality and they will be going back. these happened to be the only ones they had in imperial at the time. It will all be pulled off anyway when we go to paint everything but still... holdups and crap tools. Sure many of you know the frustration of it all. And whats one of my posts with out a bunch of photos... Setup on the welding table. Sitting in front of the car. Drilled holes in the shock bars at air out/low height and have it set to that. This is the car at our original ride height. note the 25mm/1 inch bar up front under the car. Bleeping low and we have decided to raise the front up another inch so will have two inch clearance at this lowest point when air out. Will also give a slight rake to the car whats cool. The rear can be raised or lowed as well as its on its middle setting but we are planing to keep it there currently. And to give a better idea of how high it currently is.. a pic of yours truly standing next to the car. Love how the roof looks chopped but its still factory. Again note this is air out not at ride height.13 points
-
Finished another patch of rust. Hate trying to do them when you can't get in behind with a dolly, makes it difficult. Made up some strap sort of things to mount the fuel tank. Spent a lot of time trying to figure out how to mount it and decided that adding another bar between the chassis rails was the best. The straps pull the tank up against the top brackets, should hopefully hold it in place well enough. Made up a aluminium tray to mount the air tank and compressor in. Being able to draw stuff up in cad, program it, laser cut and use a CNC press-brake is pretty great! It's pretty tight but fits. Will swap the tank to the back as the tank will look better being visible through those holes than the compressor. I'm sure I'll paint it black so it's a bit more subtle. Got the rest of the exhaust tacked together as well. Not sure if I'll change where it exits, because at the moment it sort of comes out between the tailgate and bumper or just leave it as is. I think the whole exhaust has 10-12 u-bends in it now haha.12 points
-
So before our wee accident last year I had left some money with a friend to get a truck or van to send home. The plan was to spend a day or two with him when we returned the rental car. That didn't quite happen but he still had the money. We both spent months looking at craigslist and looked at a few vehicles but nothing was right. I saw this van one day but It was FULL of tools, I thought to my self I can't ask Scott to deal with a van load of tools so I passed on it. I was talking to him on the weekend and he said he just bought a van full of tools.... HE siad he bought it off a old guy who was retiring and ended up chatting for a few hours. It was a bit more than I left with him so I transferred some money to him and a deal was done. A few months and many thousand dollars later I get a email with the collection documents. @piazzanoob Offered to help pick it up so I met him at the shipping yard. I was stoked when it started nicely for the the guy bringing ti to me, no horrible starter noises like my old c10. I put some fuel in, topped up the radiator and drove it home. I didn't receive the title or and paperwork so i'm hoping its still at the importers somewhere, I'll email them before I start panicking Getting picked up from phoenix I finally spotted it at the yard (just) The old guy has made some pretty decent cupboards etc, I found a lot of receipts in the glovebox. The screen was replaced in 2004 and the trans was rebuilt in 2002 by the looks of it. I was wondering what the small peddle on the left was.. He had cruise control installed too, there is even the paperwork& guarantee with it! I'll have to figure out how to get it to work. The aircon has been converted to r134a so it should just need regassing and it'll be lush. Its got lovely plush seats with two arm rests and old mate has even made a cupholder with a build in stubby cooler! Lush. Scott got a whole load of parts for me too as its easier to have them arrive with the van, a set of shocks (air shocks in the back) pads, ignition stuff and a fuel pump. It was better than Christmas tbh. lush cupholder/drawers There is a full length shelf beside these She just squeezed beside the house which is good Don't even need a free candy sign, piazzanooobs nephew came with him for a ride and was right in the passengers seat as soon as it was unlocked. I'm really poor now so progress will be slow for the next few months, I'll give it a good wash/wax and polish then start with all the service parts. Probably do a de cat at some point too as its huge and its too quiet, you can't hear any v8 rumble at all. It should be easy enough, just replace the cat with a section of pipe .9 points
-
Since the car has been on the road again, I’ve put on a set of Bridgestone Potenza RE003’s and printed some custom hub-centric rings. For the hub-centric rings I used ABS plastic which should be okay, its transition temperature is around 105c and it would probably still be okay around 140c. Really its only used to locate the wheels while doing them up and don’t really serve a purposed after that. This is where I am today, almost the middle of 2017, 12 years after buying the car. Where to from here?8 points
-
Coming together nicely... Need to start on the engine bay.
 7 points
 -
So, steering box had a bit of a leak. ID'd it as a 2nd gen l200/starion/dodge d50 box. ordered a kit from the states stripped it down, input and output seals were dried out, output seal shattered to bits when I removed it. Teflon inside was looking sad and the fluid was pretty dirty tight as to pull it out, but not as bad as it could be cleaned up and resealed back in and bled. went alright actually, but id be a rich man if I were getting paid hourly6 points
-
Yep agreed, great write up. Not many people take the time to do this since Facebook came along and most forums died off. (Note: FB is a fcking awful alternative to forums).4 points
-
It was awesome, little intimidating when I arrived and everyone was unloading their dedicated race cars off their trailers, then all donned their flash race suits while I put on some overalls that i grabbed from work. But once we actually started it was all good. The car ran like a champ so now the driver just needs to get a whole lot better / braver.4 points
-
This!is my new best friend.Going back again.don't leave those chrome knuckle guard things on your car to long!thats a bunch of rust and a small hole in a stupid ass place.primer on small things. Last bit of the old red paint getting sanded down.going back looking at the old pic of the sides it looked okay, after I worked it over with the 2x4 it needed alot of work, I must have but a good 8 hours into each door and quater panel in this thing.getting closer and closer to top coat!finished up at about 6pm, temp was dropping, gun was blocking up and spraying like shit, hopefully it will be okay.last little bit under the tank/beam mounts.4 points
-
okay so going back a wee bit, I had to find all the bits and bobs from their hiding places.made sure the new lights workedhad to make a few small repairsshut up! it might work!!! got the front seal holder on and bare metaled the whole thing, kinda had to as there was much missing.extreme close upgot some mud mudded on.started on the rearI hope I never have to do these again, very tricky, not 100% happy with the back one but, its done now.also repaired the very top points of the rear valance, when I removed it all those years ago, I'd had to drill out a spot weld right on the tip of both sides, so I had left it in the toohardbasket till now, welded it up and ground it down in a few minutes really, guess I have learned a few tricks on this project?3 points
-
I only seen a couple of oldschoolers today, and they were too busy driving fast to talk shit with me. Plus I spent most of my time there hiding in the bushes with my camera. With such a wide range of vehicles it made for an interesting day and listening to all those unmuffled engines as they flew past was worth braving the cold morning. I will start off with photos of Matts(MattJ) Anglia and Tonys (Ynot) Punto. Followed by random shots So i've been thinking about over the winter months to having our meets at a local spot (Pub, Cafe, somewhere) on a set date every month like alot of the other cities do. Whats peoples thoughts on this? location suggestions welcome3 points
-
Just a small update We have Low thanks to 2" lowering springs up front and 2"blocks in the rear.
3 points
-
Ass end is pretty much done! Well the hard parts any way. Full ridetech 4Link tacked in and Moser housing in place. Useing HQ 8000 series Shockwaves from Ridetech at the back. The mounting brackets have three height settings. All welded in and a quick coat of black. This is shown at the lowest height. once the skirts and rocker panels are on its going to look pretty good on the ground at this low height. Guess i will do a bit of a write up of whats going on gear wise back there. Whats in and still to be put in sitting in boxes. Talked about the Ridetech 4Link but im also using the before mentioned Shockwave airbags from the same brand. For those not in the know click here to check them out with all the fancy videos and marketing guff. Basically they are air bags that mount like a coil over but with air shocks with 26 tuneable rebound clicks. The company was great to deal with and extremely helpful. Another company who had exceptional service was Moser Engineering. Drag racing heritage & brand so built to withstand alot of abuse. the guys build and race the kit they build. Website here. Man i feel sorry for Brian Miles as he steered me through the process of ordering the custom 9′ rear end. A million emails, measurements, re-measurements latter we got it sorted. Bare classic looking Ford 9″ Housing made to my measurements. (2inch narrower than stock Hudson) Moser axles w/bearing package 5×4 bolt pattern with screw in studs. Moser perf nodular case. Trac Loc posi 31 spline. Nodular support. 1350 Pinion yoke – steel gearing at 3.50 fill & drain plugs. Wilwood breaks i will cover when i get to installing. Should last me well. So next step is taking it down off the rotisserie and sorting the front end. It will be back up on there a few more times yet i imagine3 points
-
Hey ya. So recently I picked up a new project now my 52 Buick is complete – a 1949 Hudson Super. Story goes I was browsing auctions with no intention of buying anything just cyber tire kicking so to speak. “Hey a cool old barn find car has surfaced 45 mins away. Want go take a look?” i ask my better half. With a promise that we would go get something tasty for lunch we pile in the old 52. Walking up to it & seeing the fastback shape and roof that looks chopped straight from the factory the better half mutters “I wont say no if you want to buy it” ^^ what more can i say… talked the price down for cash & shook hands with plans to pick it up the following day. Next day swapped the fat wad of bills for the original registration papers, original ownership papers showing two owners (father then son), a few old photos from 1962 and a set of keys to a car that hadn’t been started for 47 years. Now I already have a Straight 8 in the Buick and not really interested in another inline. Fabulous Hudson Hornet NASCAR history or not. Saying this im not into chevy swaps. I do like Buick Nailheads… rare here in New Zealand and always catch my attention when dressed up. I look at the Husdon, scratch the ol chin and go “yus sir that would be mighty fine”. Nailheads have an old school look that would suit that engine bay mighty fine. Images from the Auction & First Look. So what the old timer said was wrong with it: Fuel tank out as he has had it patched n cleaned cus had a few small leaks. trunk floor has a split where fuel tank mounts. guessing due to weight & old NZ roads being not the best etc small patch rust on left rear skirt. patch rust on right front panel. front right door pillar has a split at bottom. apparently he use to chat to people leaning on the open door and thinks this might of been the issue. brake Master cylinder needs put back in as it and all the drums have been redone. Water pump is at a shop getting redone. Rats have nested in seats. All easy stuff really. the splits are clean stress splits with no rust or nasty stuff to be seen. Still trying to figure out my build. Any help or ideas are most welcome. I do know the history of Hudson and NASCAR etc but I already have a hotrod looking restored car and dont want another. im after a more custom look. I haven’t been in a Hudson moving under its own power so im unsure of many things like suspension etc. Plan so far: worked 401 Nailhead. (hard to get here so may need import) Worked 700R4 trans rewire using American Autowire highway 22kit. Wilwood disks all around. Media blast. Shave the handles. French the lights. and do all the normal custom shiz Change up the grill. Lower it. new interior. Thinking 9 inch in the rear to handle the Nailheads torque and power. Not sure what ratio. Not sure for front end. I read how great the near 70 year old front end was. Maybe new hubs for disk brakes and a thicker swaybar. But then i think why not just throw in a jag IFS. comes with disks, power steering etc and is cheap here in New Zealand (cheaper than reworking the old hudsons setup) Driveshaft – unsure. one or 2 piece… So ideas? Suggestions? This will be an expensive project for me. Being at the bottom of the world/New Zealand means expensive shipping. We have a lot of Holdens here and a fair few Euro cars. after a old school look & sound with if possible a more modern handling. Thanks guys Alex2 points
-
Moutere Inn is a much nicer spot!2 points
-
I've got a pair of axle stands you can borrow2 points
-
Up until this point, I hadnt had anyone else work on the car except myself, but I was just getting to busy with life to spend time working on the car, I also had a bit more cash flow to do things properly compared to 10 years earlier which lead me to take to the car to a fabricators to help get the car to the next iteration. We started by removing all the crap from the boot, the W2A resoviour, sub, surgetank and fuel pump and in the bin. What is left is just an nice, lite, empty boot space. The lunch box on above the battery is the fuse & relay box for he fuel pumps. Which has been moved under the rear passenger seat with a custom surgetank and new ½” lines to the front of the car. Future proofing if corn juice is to ever be needed, though I would probably need something a bit better than an 044. What happened to the W2A resoviour? It was moved into the engine bay. The fabricator made a new intake for the turbo and built two resoviours, one closest to the air box is for the barrel cooler, next one across is the overflow for the radiator. The W2A pump was moved to the front of the car which has helped significantly shorten the piping run lengths and helps reduce total water volume and weight. I pissed off the air horns and replaced with a set of dual tone Mitsubishi 380 ones. With the larger 6 piston Wilwood’s the 1” brake master was a bit small. I grabbed a 1” 1/16 brake master from an Evo 7 and a Legnum brake fluid reservoir and had some custom lines bent up to take a brake bias valve installed on the rear lines. The car does stop good, but as I mentioned before it still feels very under assisted, you need a pretty strong leg to get it to pull up. There must be something I can do about the booster, but I haven’t found any other options. Something unfortunate happen during this time, I seemed to have gotten fatter, much fatter and could no longer fit in those stupid Bride fixed back bucket seats. I put the stock passenger seat back in and found a genuine Bride recliner that is sooo much better, Worlds apart compared to the fixed backs and people of normal size can actually sit in the damn thing too! Here is the engine as it sits today, changed most things over to black silicone. And it was just recently tuned again… On a different dyno and a totally different tune, it made 300hp @ about 21psi, or 25 hp more than before – but it’s hardly an apples-to-apples comparison. This tune is much nicer, they spent far more time getting the idle and cruise conditions perfect which has made the car much nicer to drive. The tune is also running very rich at 11.5:1 and there is only a max of 17 degrees’ total advance compared with 20 degrees previously. So, over all its made slightly more power but with a much softer tune. High five! It has been nearly 9 years since I had the car in a drivable mode and I am amazed at how old I’ve gotten. The car is raw, grumpy and takes a lot of effort to drive – god it’s fun – but this isn’t something I would appreciate driving every day and I don’t think it’s something I could.2 points
-
Off the rotisserie. Sitting at Air out lowest height. Looking at assembling front clip this week at some point. Then from there its fabricating the new front ends rails etc and getting it all together.2 points
-
Now that some of the old crap is off the rear its time to start the cutting and welding madness! God damn but i am excited! So as you can gather from the above posts the springs etc have all been ripped on out. I chose a RideTech Triangulated 4Link to take its place. Must say im happy with the product. 5.6mm(0.219inch) wall thickness tubing and 4.8mm(0.188inch) laser CNC brackets – included is brackets for the shockwaves. It just feels sturdy and built right. Ridetech sales reps are great to deal with and more than happy to go over everything making sure the right product was ordered for the car, weight, ride height and driving style. I chose triangulated for a few reasons. One being no panhard being needed to free up room with luck for the exhaust as not much room under the Hudson for two pipes. Another was i could get tighter wheel to fender clearances due to less or no side to side play compared to a parallel 4link. They should give a much better ride quality than springs whilst being able to cope with rising and lowing the car better as well with bags. Anyway a refresher of how it was once the big stuff at back was stripped off: Below you can see the old brace and spring mounts. Flockie dealt to these. And then fabricated a Hudson bracket kit & pipe support to replace original chassis brace for each side. Good thick 5mm plating. Welded the four brackets to the car along with the ride tech one. Everything is rust killed and sealed up under the plates. With bottom bar attached. Bottom bar & mount. Right hand side bottom bar done. Left hand side bottom bar. And done! Bottom two bars attached to car via with some nice brackets. Next is notching the chassis to allow diff, rising the unscraped section of trunk floor a bit and attaching the top triangulated bars. Flockie just sees the gear and the car, visualizes so quickly how it will go together, quick glance at the NZ certification rule book to make sure its good then attacks it.2 points
-
Got asked if i have any pics of the car from when it was in storage. The better half did a quick search pulled these off the interwebs. Since it was off the road since 1969 im guessing it also had other older accommodation at some point. Three owner car so i guess the person who took these was the second owner who had it for a handful of months & we purchased from. And a few old photos we got given of the car & scanned from before it was painted mid 60s. Dated on the back 1962.2 points
-
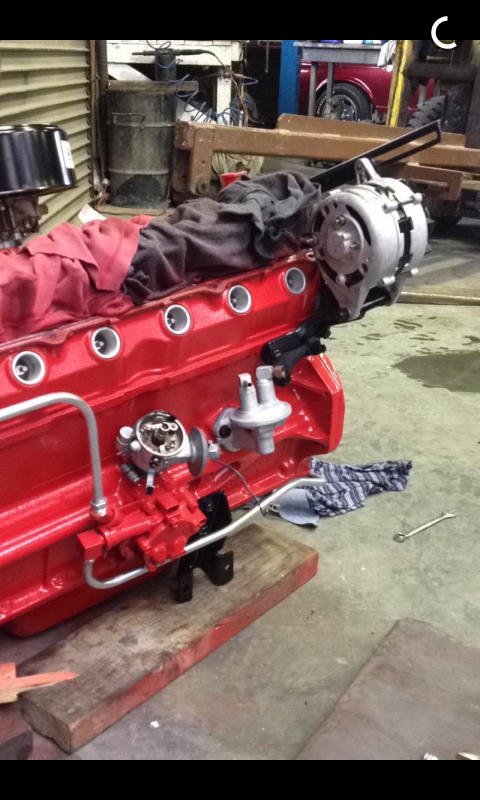
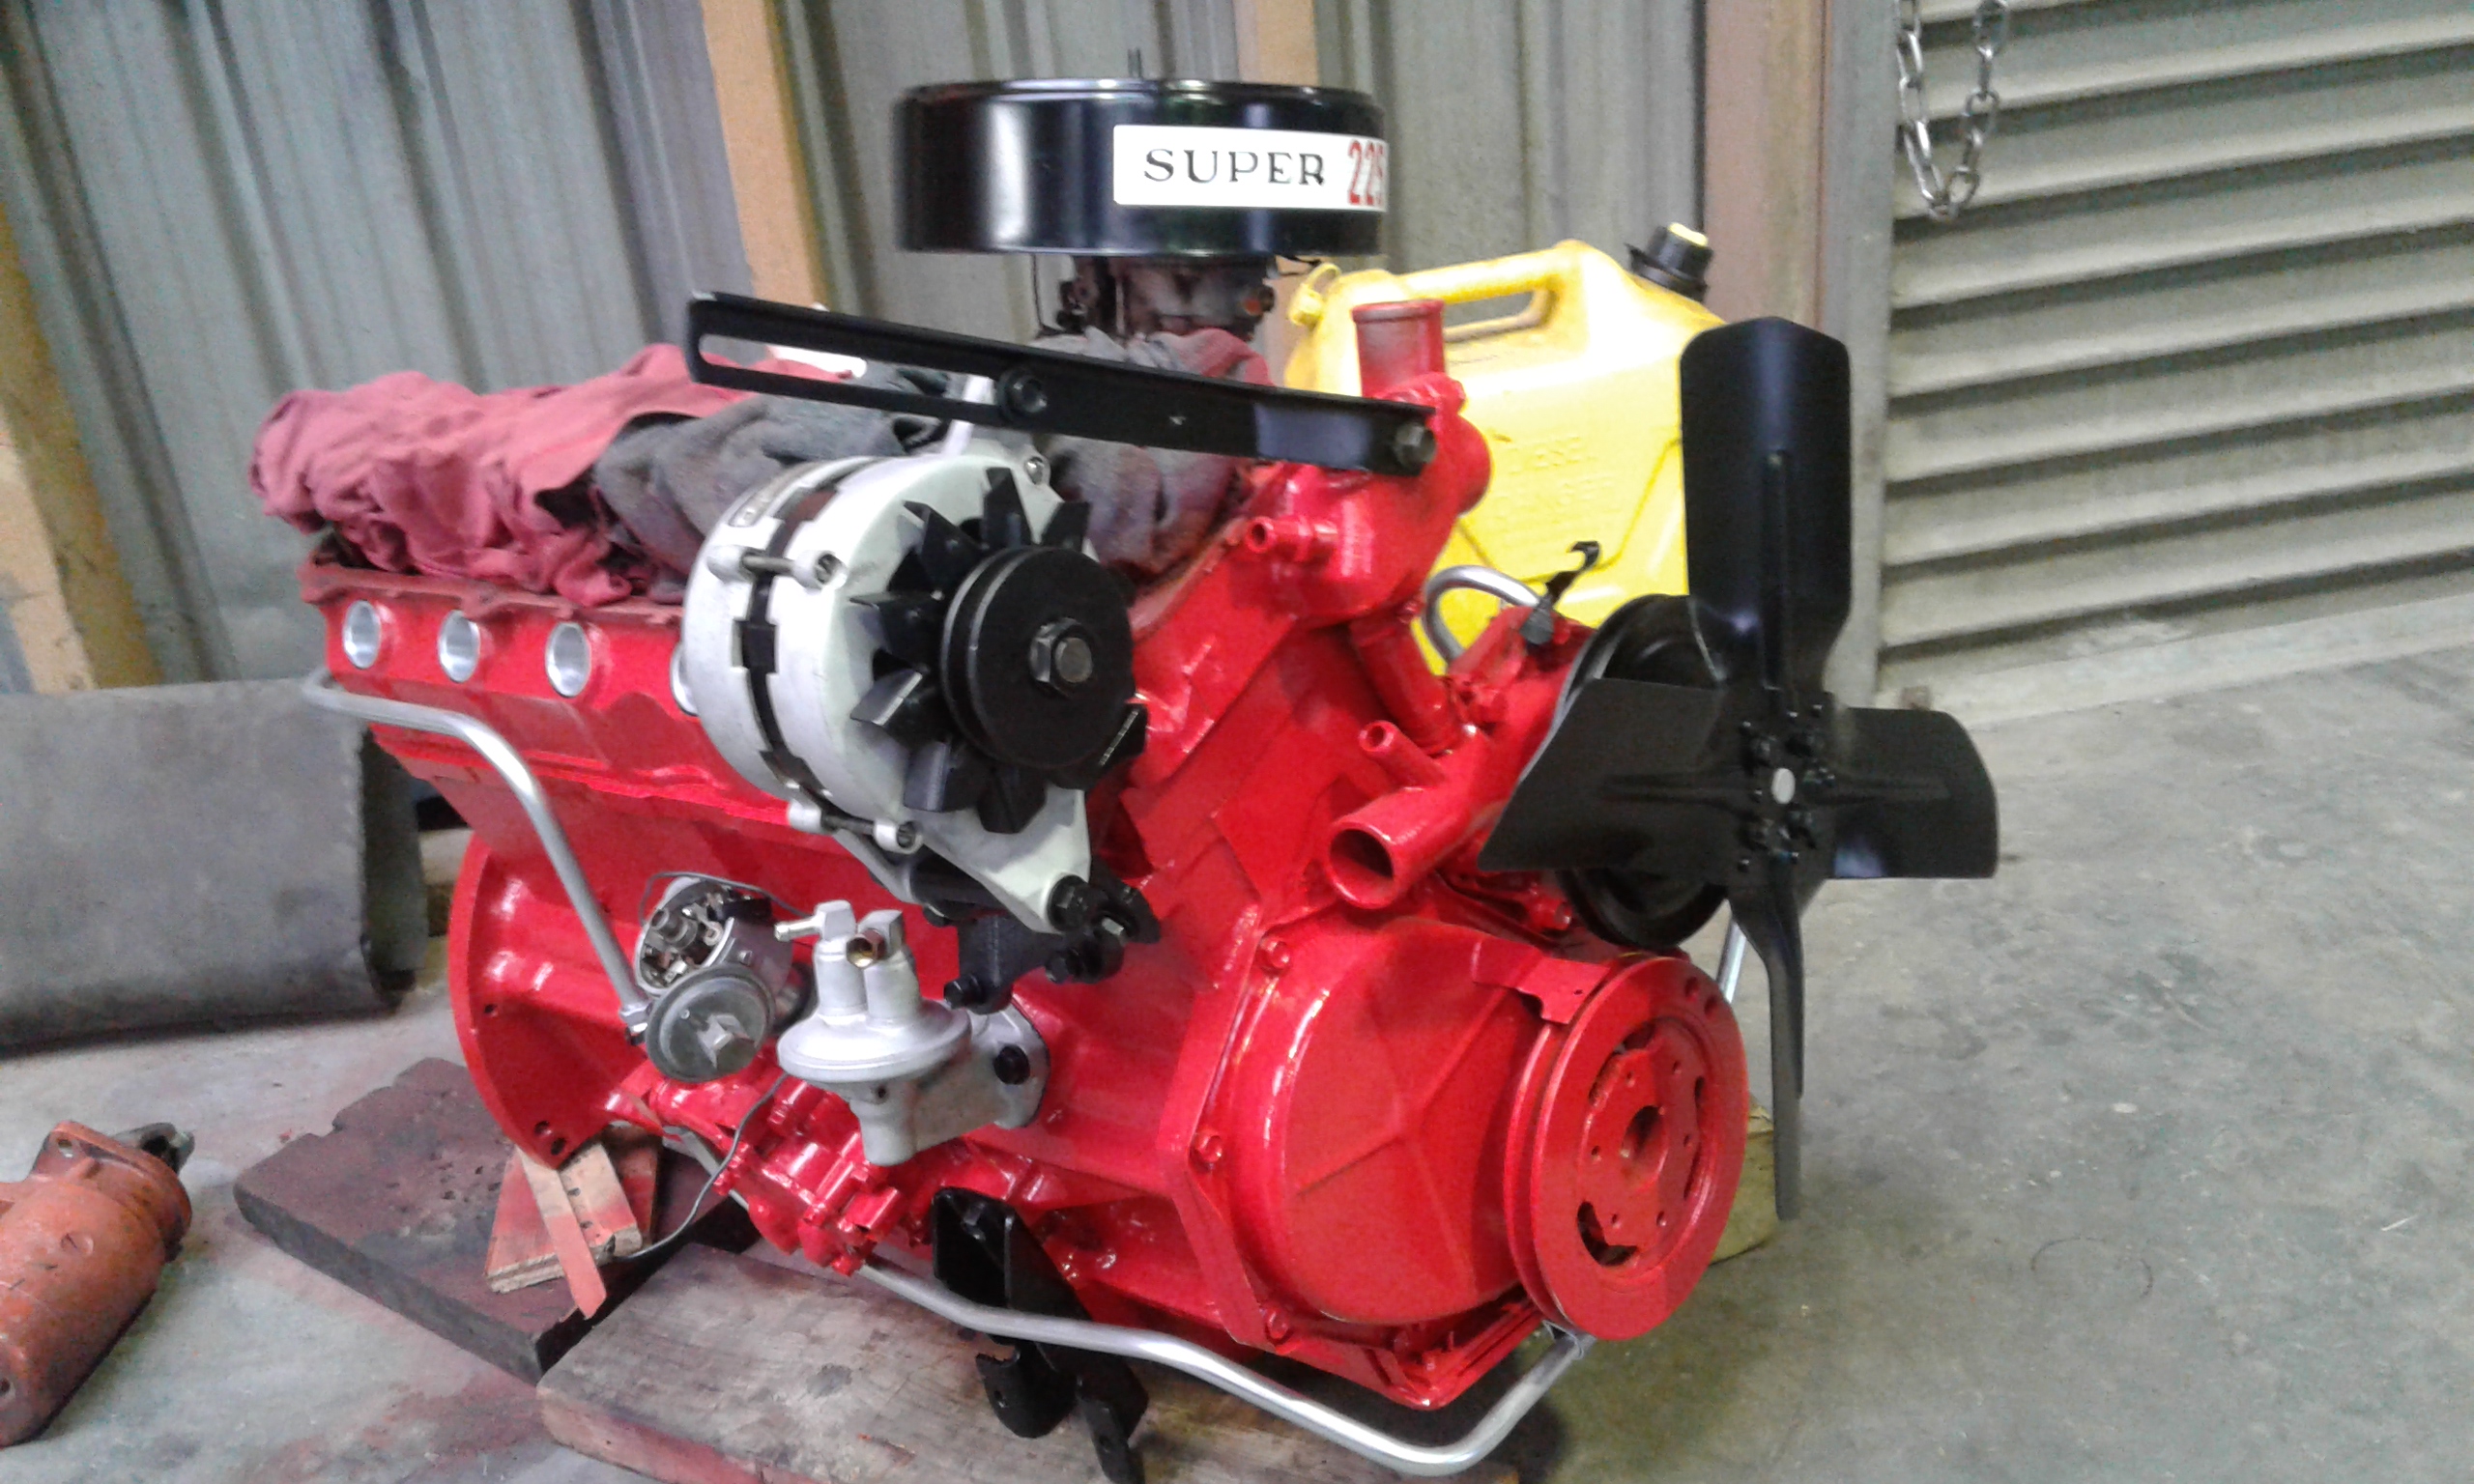
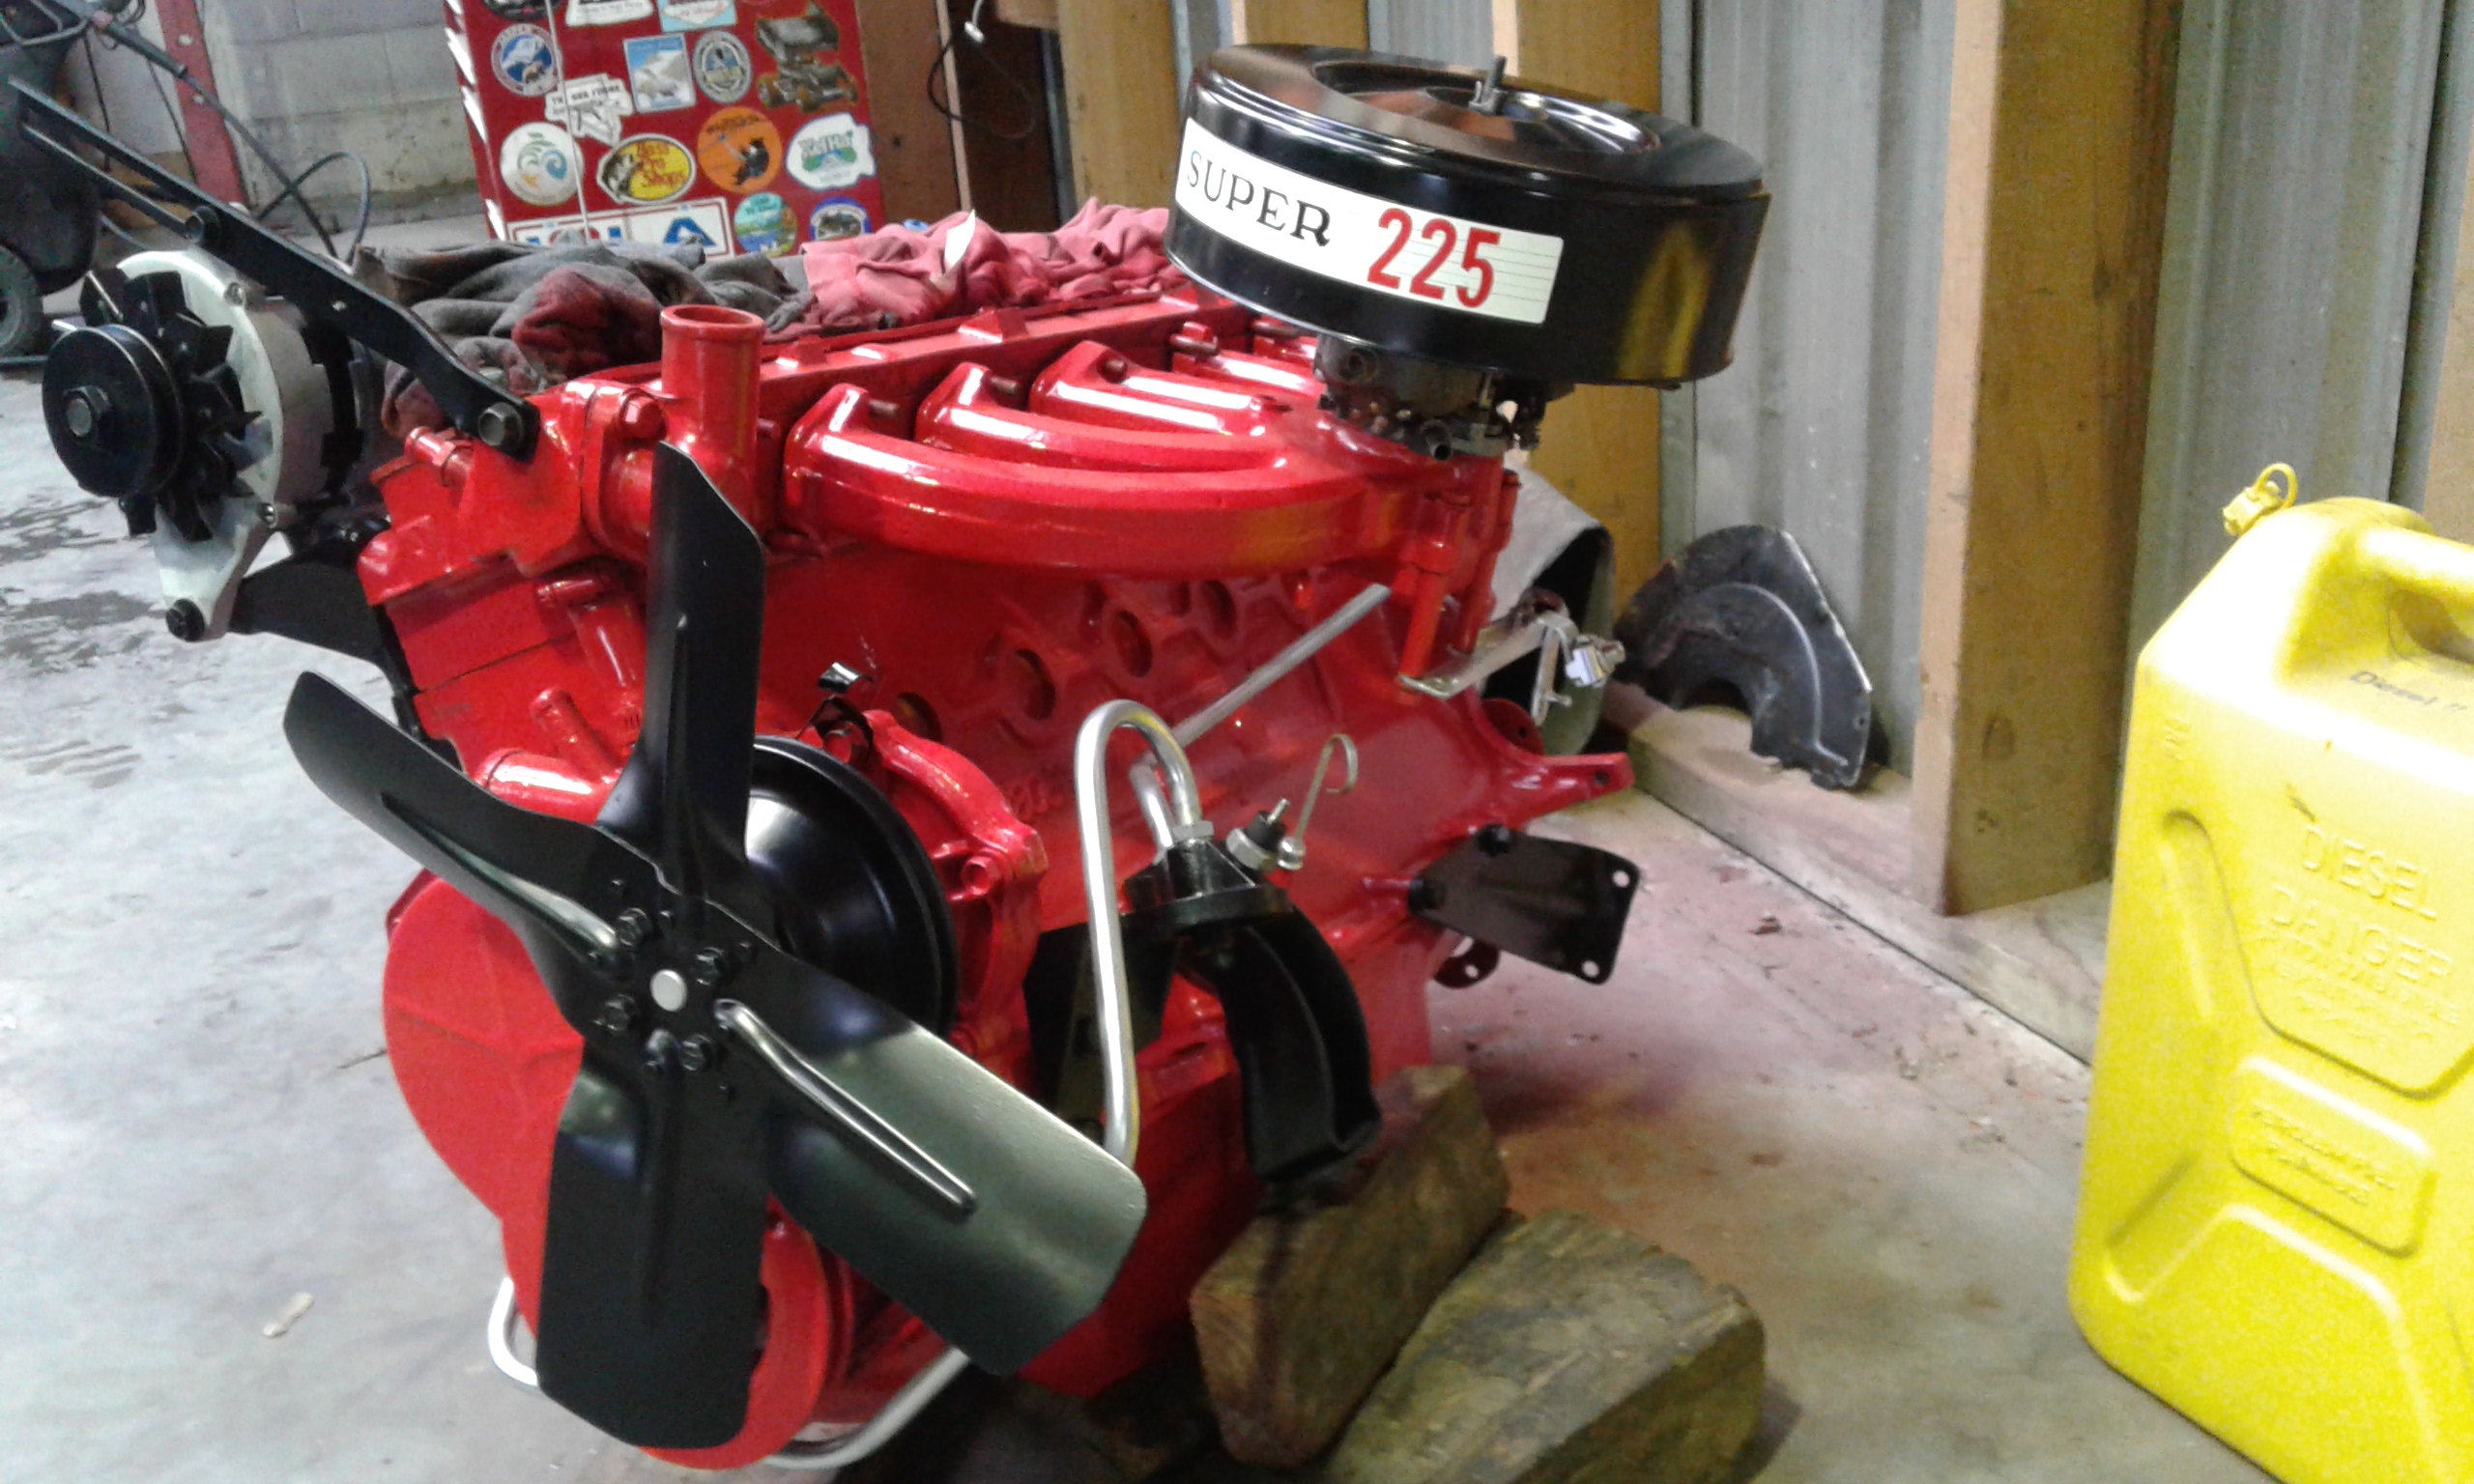
Works been flat out this week so haven’t had time to get in the garage much. Engine is sitting waiting for me to pull my finger out and hook the trans up to it. And talking of the Trans. Its a 700R4 from Monster Transmissions worked up to handle 650HP & 600ft/lbs torque. Medium firm shift kit. Wasnt happy with the service from Monster trans. Order took 6 weeks to build, test and ship. During that time they didnt answer a single email and only a few Facecrack messages. Still it was very well packaged on the crate and looks to be of decent build quality. Time will tell though how it shifts and handles. They have discounts every day from 5-20% off with free shipping USA wide along with cash discounts. I was able stack like 3 discounts to get it at a reduced price by just checking back every day for a few weeks. Package Link: 700R4 SuperStreet master conversion package. Comes with pretty much everything needed to install other than fluids, cross member and driveshaft. Kit contains: 700R4 SS Mega Monster Transmission, rated up to 650hp/600tq What’s Inside The Transmission: 5 PINION FRONT & REAR PLANETARYS PRECISION MASTER OVERHAUL KIT SUPERIOR HIGH PERFORMANCE REPROGRAMMING SHIFT KIT SUPER PUMP DIRECT/REVERSE INPUT DRUM TURBINE INPUT CLUTCH HOUSING MODIFIED SUNSHELL DRIVE GEAR TO INCREASE REAR PLANETARY LUBRICATION MODIFIED INPUT SUN GEAR TO INCREASE FORWARD PLANETARY LUBRICATION UPDATED/MODIFIED ACCUMULATORS RAYBESTOS PRO SERIES KEVLAR BAND UPDATED & MODIFIED GOVERNOR w/SPRING KIT & NYLON GEAR RECALIBRATED VALVEBODY w/UPDATE TV VALVE ASSEMBLY RECALIBRATED VALVE PLATE FOR SHIFT FIRMNESS NEW HIGH FLOW FILTER NEW LOW/REVERSE HEAVY DUTY SPRAG NEW 29 ELEMENT HEAVY DUTY FORWARD INPUT SPRAG NEW HIGH PERFORMANCE ALUMINUM SERVO What’s Included With Conversion Package: Performance Torque Converter, your choice from 1650-2500 Stall Universal Fillertube with updated Locking Dipstick Updated Universal Fit Throttle Cable with metric bolt Metric Linkage Nut 2 Brass Coolant Line Fittings Metric Torque Converter Bolts Universal Transmission Mount with bolts Speedometer Drive & Driven Gears Speedometer Housing & Support Bracket Speedometer Housing O-Ring External Lock-Up Kit 700R4 Chrome Throttle Cable Bracket Hayden Transmission Cooler Kit 700R4 Universal Dust Cover 700R4 Stock Depth Chrome Pan Unboxed: Painted up to match the engine: Using a trans adapter to mate the old Nailhead bolt pattern to the 700R4. Seems well made but the manufacturer ( Bendtsens ) is a jerk. Total ass hat and i wouldn’t ever go back to him. Once i get down to the shops to get some locktight i will get it all together. God i hate those annoying hold ups. already to go but cant find my locktight after ages of searching. frustrating to say the least. On a different note the Hudson is away at Flockies kustom chassis hotrod shop. Moving the car about is a breeze with the tractor. /Jealous. His boy is following close in dads footsteps it seems. Even though he is young he is out there helping wrenching along side his dad learning the skills. Till he gets to an age to use the welder seriously he is stuck with cardboard and making some serious customs and hotrod models from scratch. Kid has some great ideas and sure likes to chat about them to any who will listen. Exciting times i tells ya. just wish i had more time to tinker.2 points
-
Well haven’t updated this for some time. Yet on that note i haven’t done much to the car really until now. Up until this point I got it going on its old motor, gave it a bit of a drive about. took a few vids for proof that it moves & stops under its own power etc for when i would sell the heart of the old beast. And affectionately dubbed the car “Crudson” due to its ratty & oily crud smell. Well i guess that wasn’t the full extent of my endeavors to date. I have gone and spent a fair bit of wedge on the mechanical side of things. Raiding the cosmetic budget (paint n panel, interior etc) to get the car setup solidly underneath where no one will likely ever see. Seemed like a good idea at the time. Said parts have enjoyed a lovely cruise on a ship around the world from the states to New Zealand then been fumigated & inspected by NZ customs and finally released for pickup tomorrow. Will do a few pics etc of whats to go in the car and my experience with the vendors once i have the goodies here and inspected. I will say Kiwi Shipping who freight forwarded nearly a tonne of parts to me was great to deal with and would go back to them any day. The shipping part (not customs etc) was only $665NZ($470USD) what i thought was bloody good seeing it had to go half way around the world & that i normally pay half that per order from Summit etc Happy as this certainly made me i suddenly realized i hadn’t even started pulling the car to pieces to slip in my new found treasures. There is a certain joy in the freedom of not giving a fek about the parts you rip out of a car. Often for me its “ohhh i should keep this just in case…”. But seeing everything under the car etc will be replaced i haven’t had those moments and i have had great fun ripping everything out. Few choice words have been spoken yet a fair many beverages consumed to date. Making it better my Better half has been right besides me the whole time learning whats what and how a car goes together hands on. Got to love a girl who not only loves lipstick n heels but also lets me store parts in the spare bedroom. So im rambling. Heres the progress made today with various tools of destruction. – started with screw drivers & sockets but soon progressed to wire cutters followed by a hammer or two then for the finale saws etc. Shrunken Head was one of the first to go but he will be back. Hood off and ready for destruction! Electricals, Rad, Bumpers, Lights and other junk out ready to unbolt the anemic inline. One thing i like about these old Hudsons is the large Engine/Trans/Drive shaft access panel. Lift the carpets and unscrew a dozen bolts on the front floor gains you easy access with no need to raise the car. Engine unbolted and ready to go. Tell ya engine levelers are great if you dont have one get one! Garage Kitty El Spokecamino (so named due to his ripped up ears and he can be a mean lil b@$#ard) supervised under Kreeps our 52 Buick for most of the time.2 points
-
Dragged this home yesterday. IMG_20170513_102342 by John Bell, on Flickr Needs a little bit of a birthday, but really is in pretty good shape for its age. It came from some family friends who have had it since the beginning of time so has a bit of a history. I'm new to Land Rover details, but I think its an early Series 3, although the plate inside the cab says 2A. Its been fitted with a Nissan LD28, and has no sign of a cert, but has been issued Warrants in this configuration so I need to figure out if it ever had a declaration and if a copy still exists. The LD28 doesn't exactly fit very well though, and the diff head hits the oil pump, this apparently is a fairly common conversion so I'm curious as to how others have gotten around this. Apparently the original motor didn't have anything wrong with it, and is still available so if it is too difficult to get the LD28 to work (and legal) I may look into this. The tyres are a set of very perished 'oodYear' retreads which I find hilarious, my guess is that GoodYear didn't like you reusing their casings for retreads so they all have the 'G' rubbed off. The wooden deck is solid enough for now, but it might need a bit of attention, I'd love to be able to fit a wellside to it possibly. For now its home back indoors. I've got to sort out a few things before I get into it properly. I'm pretty excited to have a project that you can buy parts for. LD28 IMG_20170513_111906 by John Bell, on Flickr IMG_20170513_113127 by John Bell, on Flickr IMG_20170513_143948 by John Bell, on Flickr IMG_20170513_144002 by John Bell, on Flickr Tell me the secrets of Britannia here1 point
-
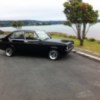
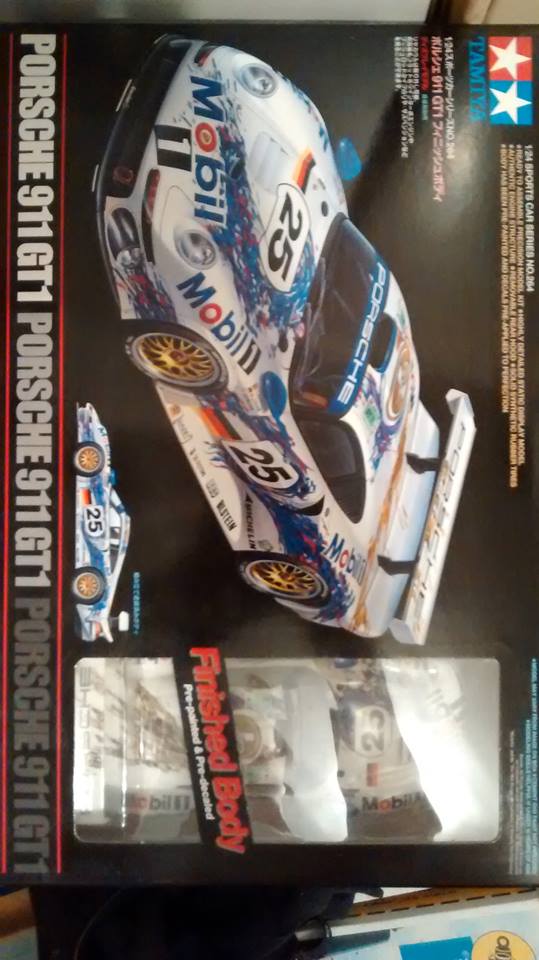
Thought I'd better post a pic of my latest family member and life long project car... NZ new, second owner and only 77 thou k's now, rust proofed when new so very very tidy, everything works including air ride, digital dash and not a single squeak or rattle while driving. I real gem I recon. Got a few reliability plans for the EA82T to keep it alive forever (under bonnet air/water intercooler to get that intake temps lower and stainless exhaust plus a few other tricks learnt over the years), but keeping it as standard as possible will be the mantra throughout. Bit of a dream car for me to be honest from the moment I saw one in 1985 at a motor show, i even had the Tamiya model of this exact car/colour/interior as a kid!. I think it's an interesting car from an interesting time that people either love or hate (both the time and the car haha) Joins my Brumby as a permanent member of the family along with the everyday drivers.1 point
-
The second option for sure, I'd love a apache panel van or fleetside pickup. patina/worn paint with a ls and good suspension under it1 point
-
That combination of hot dip galvanising and Hong Shin 175/80 never fails to be the cherry on top for a potential award winning show car.1 point
-
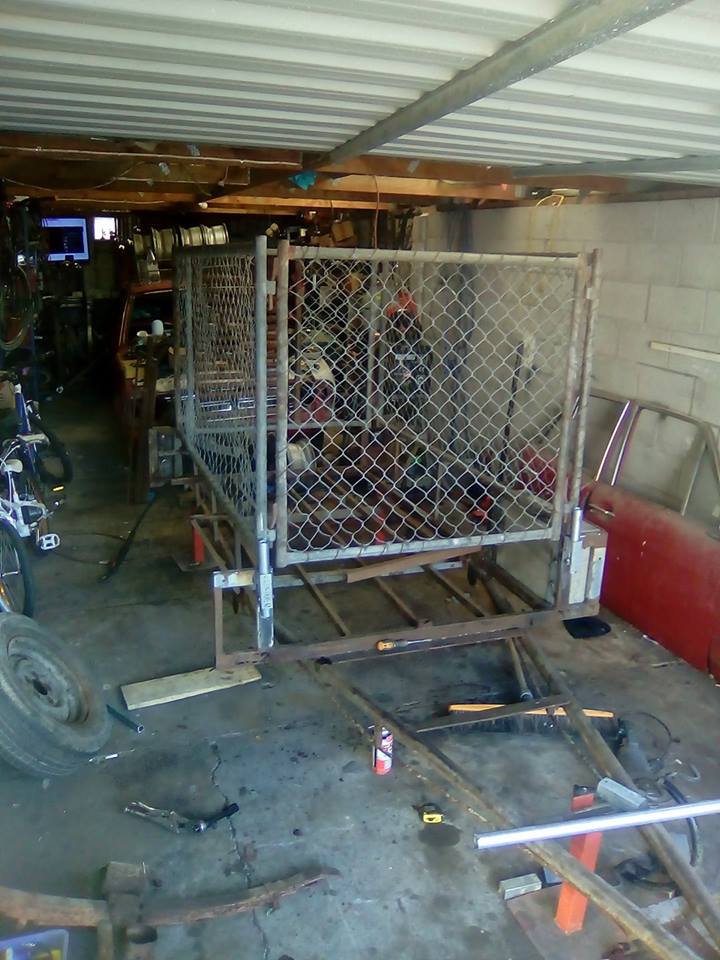
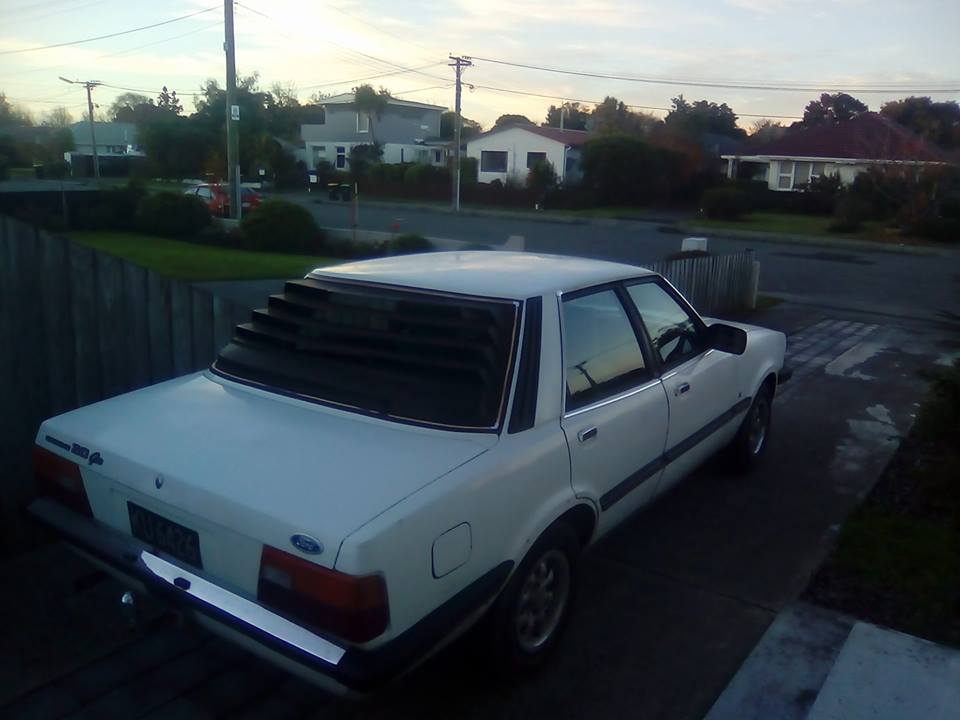
on the trailer side of things i got the removable cage mounted and all it takes is to undo 4 bolts.....i even used 4 bolts the same...(i know not like me at all) on the cortina side of things........got the louvers on.... now its mint
1 point
-
Any of you peeps had the misfortune to have to turn spanners on one of these? Mine has begun making noises gonks bad enough that I'm not gain to keep driving it. Anyone know what goes wrong with them?1 point
-
I'm not a huge fan of speights ale house. Shit coffee, expensive for average food and it's generally too busy/noisey. How about the Moutere inn? Thanks for the input though1 point
-
I'm sure that somebody will take you up on that offer. Definitely bring it along.1 point
-
No problem at all Matt, what's the best way to get it to you?1 point
-
If I brought this to the meet would anyone want to trade a burger for it?
1 point
-
So here's the plan. Last time I pulled this car apart it was a major, it was properly broken and couldn't be used until a whole lot of stuff was fixed. This time things are different as the car is running great, has proved to be very reliable and doesn't really need anything major in order to keep it on the road. This project is all about fixing up a whole lot of little things that are bugging me and I want to starting getting the car finished to a higher standard. The to do list: My friendly WOF guy politely suggested that I should replace the upper control arm bushes and one of the upper ball joints before the next warrant check so this will be done. The weather belts on all the side windows need to be replaced as they are all in bad shape The side window glass is all pretty average as well and I have collected up a full set of replacement glass for the car so all the side windows will be replaced. Door seals are leaky and looking very shabby so all will be replaced Door cards require some attention to repair and replace the trim clips that hold them on, a couple are held on by screws that don't look too flash. The stainless trim on the side of the car also requires some renovation, a couple of them are held on by rivets so they will be removed, repaired and refitted with new trim clips. There is a little bit of rust showing in the left rear guard and this will be repaired before it gets nasty. I am sure I will discover plenty of other little things to tidy up along the way but I want it all finished before the start of summer so will do my best to stick to the plan.1 point
-
Success, Karapoti completed trouble free. image upload no resize1 point
-
Poor thing Didn't want to start for me last time I tried so I cranked it on the starter until it got here. I'm actually quite liking the steelie/whitewall combo. I need to tidy the garage enough so I can get it inside. I have ordered some bosch ev1 plugs off aliexpress so I can replace all the fucked injector/temp sensor plugs1 point
-
1 point
-
Towers done. Paint isn't really the same colour, but i'm sure it will all blend in through the first mud hole Gotta weld a bend to the compressor housing to clear the tower. other than that everything seems to be fitting1 point
-
Trojan trailer components has a sale on1 point
-
Up in Nova Scotia now, just left cape Brenton national Park, quite an amazing drive if you get to do it. It's been a bit cold and rainy but I totally recommend the off season, apparently a zoo in the summer. All the campgrounds were "closed" but no one said anything about us parking there, so it was an affordable few days . Got some biking and hiking done. Also I totally recommend carrying tire plugs and and air on long trips, got a nail in the tire, much quicker to just fix it then swap it. I use a co2 paintball cylinder and a fixed pressure regulator but a 12v compressor would work too.1 point
-
VR4 Brake conversion all completed, I ran a seal kit through the front and rear calipers while at it. With the new rotors and calipers, combined with a re-sleaved 1” VR4 brake master cylinder and the car finally stops reasonably well. It still feels like it needs a larger booster ratio as you still really need to step on the brakes to start hauling up – buts its much improved over standard. A month or so after doing the brakes I noticed a couple of drips of gearbox oil on the driveway. It seemed the 5th gear retaining nut had back out and cracked the end of the gearbox housing. A quick torque up again and a bigger hit with the hitting stick on the 5th gear nut crush points seemed to solve it for the time. A benefit of transverse mounted engine is that it is easy to replace the front gearbox cover, just jack the car up, take off the driver’s side wheel and there it is. Now as luck would have it, when you own an odd ball car, owner’s kind of group together and someone not too far away from me had two KM221 gearboxes for sale with transfer cases, these are the standard Cyborg gearboxes with the 2.844 ratio diffs. I borrowed one of the front covers from the gearboxes I had just collected, problem solved. If you recall earlier in the thread I mentioned I had a habit of launching the car, well I had been itching to try this “stutter box” out and… well… when I did; 1. The output shaft of the transfer case snapped off. 2. A whole bunch of teeth on the rear diff crown wheel were ripped off. Seems the on/off nature of the twin plate clutch and fused center diff attacked the next weakest links in the driveline. It still drove that broken though, with the locked center diff it was just and open diff front wheel drive and it sucked, it would fry the front single wheel in 4th very easily and was basically unusable. Thankfully though, I had a spare transfer from the gearboxes I picked up earlier and I also managed to source a 2.844 ratio rear mechanical LSD off retardme.co.nz, I’ve never heard of one let alone seen one for sale, score! Speaking of ratios, VR4s/RVRs and Evo 1-3’s share a common set of rear diff ratios, 3.547, 3.909 or 3.312 for some Auto’s. The diff ratio doesn’t equate to the total final drive though as there is also a primary reduction ratio of 1.275 in the gearbox and a further 1.090 ratio in the transfer case which brings the total final drive 4.929 for 3.5’s and 5.433 for 3.9’s. Where am I going with this? Well the pre-1990 Cyborg’s were the only series that had a 2.844 rear diff ratio and this is because they used a KM221 gearbox which has a different primary reduction ratio of 1.640. With the transfer case ratio of 1.090 this brings the total final drive to 5.084 very similar to a standard VR4’s. Anyway, I digress, I put the spare transfer case in and swapped in the new rear LSD and it was good. For about a month, then I kept on hitting ignition breakdown, it would just start running on 2 cylinders, which in a wasted spark setup points to a coil. I swapped in multiple different coils, changed out Power Transistor Units (Ignitors), probed the loom looking for issues but I just couldn’t keep the car running reliably, it seemed to be spitting coils for some reason. Looking back at it now, this is where I think most sane people should have stopped and just maintained/fixed and enjoyed the car, but I must have been dropped on my head when I was a baby as I continued tipping money into this thing at an increasing rate. I cracked the shits at the ignition problem and then this happened. Innovate LC-1, Link Plus G3 with wire in loom, 7 bar Map Sensor, Dual – Twin Ignitors and a Jaycar kit to make a set of “Det Cans”. I bought the Link Plus G3 a few months before the G4 was released, but thankfully the hardware is the same in the G3 and you can unlock the same features as the G4 with a $150 software unlock. And so, begins the next round of mods, my solution to the ignition problem… At this time, I also pulled the engine and gearbox out again, this was so I can get rid of the twin plate clutch and put something in that would actually act as a fuse on the driveline, rather than the murderer. It was also a suitable time to swap in a gearbox that didn’t have a welded center diff. I didn’t drop in a standard gearbox though, I modified the center diff off one of the gearboxes I scored earlier for a 4-spider center. This is a rather simple mod that almost doubles the power holding of the center diff and also helps a little with shocking load capability. The mod is straight forward you machine the cross bar down… (machined left, standard right) …and then slide a set of additional spider gears on and machine a small amount off the side of the center diff housing. It was fairly expensive machining the crossbar as it was hardened tool steel but a local tool sharpener was more than happy to have a crack and he did a magic job. All bolted together an installed into another good gearbox. I’ve kept the gearbox with the locked centre for another time.1 point
-
A few months later all was complete and with the locked center diff it made the car a bit of a fun to drive, the inside rear wheel would skip if turning at low speed or if trying to reverse and turn, the inside front wheel would drag. It did cause no end of a confusing looks at petrol stations from the local bogan’s. I entered Motovation 21 at Perth Motorplex with Old School Toys and apart from the blazing heat it was an amazing experience. Unfortunately, I couldn’t enter any events as the Fuel Pressure Gauge failed, leaking fuel everywhere and the car would overheat if it wasn’t getting enough air flow through the radiator. At the time, I thought the overheating was probably the dodgy super cheap slim line fans. First mod post Motovation was improving the Brakes. Standard Cyborgs run a Single Piston front and rears but they just don’t slow the car down quickly enough, especially now it has double the power of the stock motor. The obvious move is to install the VR4 braking system as its meant for a heavier car with similar amount of power – this is exactly what I did. CB Lancers and by extension, Cyborgs run a captive front rotor and there isn’t any option to increase the size of the rotor from 236mm to the VR4 sized 276mm. Removing the rotor also means breaking apart the whole hub assembly which means you may as well replace the hub bearings at the same time. Bugger. Thankfully a friend had been down this path before and the remedy is to disassemble the hub, replace the bearings and machine down the stub axle to fit inside the VR4 rotor. This is the stub axle, effectively I need to have about 3mm machined off the outer edge for it then to fit inside the VR4 rotor. This then turns the front braking system into a floating disk. Now some might be wondering why I don’t use a whole VR4 hub assembly? Good question grass hopper. The problem with swapping the whole hubs over if that the geometry is different and the mounting point for the steering arm is upside down, this all impacts handling and gives the car a tendency to tramline over any bump, not something I really wanted. Once the stub axle has been turned down it slots easy inside the rotor, problem solved? Nearly, but now the rotor is effectively offset by the rotor hub face thickness, which means the caliper is no longer centered with the disc. In the end, all that’s needed is some 6mm spacers behind the calipers to bring everything back into alignment.1 point
-
still sanding....1 point
-
Was tired of the torsen lsd starting to open wheel getting into works driveway so made a plan to build a bit of a Frankenstein diff. Bought a front diff out of a kia sportage to get the 7" ring and pinion out of it which is 4.778:1 ratio. Got a factory non-turbo FC clutch type lsd from USA which takes the 7" ring gear and has the same splines as the mx5 axles. All of this was bolted into a MX5 housing which allowed it to bolt straight in. Car accelerates a lot nicer now but the speedometer is 12% high even after changing to a different speedo drive. Got some Dunlop Direzza Zii's for the rear to match the fronts then went on a charity cruise up to Paihia. After the cruise we camped out at Matauri bay then I decided to take the scenic route back to Auckland starting from Cape Reinga.1 point
-
When Flockie called saying come over and rip out the seats n stuff cus the car will be going on the rotisserie an image of the crudson slowly rotating in a giant BBQ flicked through my head. What can i say i love BBQ and for the last years I have done rotisserie turkey with good results at xmas. A bit of Apple & orange glaze with a touch of manuka smoke and yeah good times. Of course this isnt what he had meant but i still find it a rather humorous image. Saturday the better half and i rolled up with rubbish sacks & got to work. Front seat was already unbolted so removing the seats was simple. Rats really had had a field day in the seats. stuffing, crap & walnut shells littered every inch of the interior. Keep im mind we already had filled a sack or so of this junk when we did the first clean out. Another half sack was soon recovered with an easy other half sack still lodged in the seats springs. That can be attacked by the vacuum at a latter date. Door sills also got removed. Will give them a clean up to see how they look. If i can track down some repo ones i may get them depending on price. Bumper was stripped off. Original thought was to turn the three piece bumper into a one piece. Wield it together. cover up a few old bolt holes and get it rechromed. Maybe move the bumper guards more into the middle to frame the number plate. Re chroming is bleeping expensive and i can pick up a new triple plated bumper from the states way way cheaper. But if i was to do this then i would be staying three piece. Looking at the bumper Im thinking if it was deeper ie the measurement from top to bottom of bumper was larger it would look better as it would look lower. Ideas and suggestions? Anyone know if other Hudson steepdown models had a deeper bumper that would fit? Rockers – the body panel that runs along the side of the car below the doors also removed. The right hand side panel had a large rust hole. Was worried it may of also effected the chassis rails behind. Was relived to find this wasn’t the case. Both sides of the car showed to be rust free, dry and straight. Although looking inside the boxed frame there is a good 2inch or so of dirt that has accumulated inside the chassis rails. I aint kidding the rails are half full of dirt. Flockie just patted me on the back saying i was going to get very dirty and wet once the car was flipped on its side and waterblasted. Loaded the seats and other parts we ripped out into the station wagon. Windows down and the car smelled a tad Ripe to put it mildly. Ratty piss n shit seats sure do have an aroma I wouldn’t recommend to anyone. Car will be put on the rotisserie this week at some point.1 point
-
Ahh what a weekend. Honest last week sucked with one day being a family funeral then the other days working till 8:30 each night as I worked to a time frame that is still closing on me in a most desperately horrid fashion. Yesterday (Saturday for those future cyber readers out there) in a semi hangover state it was deemed a most suitable idea to jump in the ol 52 Buick and cruise along two and a half hours of highways around lakes, gorges and wide open roads to a small central Otago NZ town called Cromwell. Calls of fame being some giant fruit statue thing, a hydro power lake, vine yards and for the last few years a car show attracting a wide following of people from around the South Island NZ. A good chilled turn out of 600-700 cars i guess. Some pretty cool cars. But the inspiration i was looking for wasnt present to tell the truth. I was after interior ideas. Paint ideas. tail light ideas. and well… ideas in general. This fine day was followed by more liquid refreshments & fish n chips -a kiwi classic and mighty fine cuisine in moderation when coupled with a Mexican blanket, a good woman and pumping tunes in summer. Saturday done and pass resulted in a overcast rainy Sunday. Fine day for garage mayhem really. And that is what happened. With a general check over the 52. not much to report. rock steady. Following this beverages where served and car chats between the better half and my self progressed. Good times chatting over cars we saw yesterday, looking at photos and being those critical bastards as we picked at bits n bobs from each car. Flockie from Flockies Kustom Chassis & Rods flicked me a most welcome text saying basically to check facecrack. Faster than a speeding ticket I was online. will note as fast as i was “she” was going “FUCK ME! HE CHOPPED IT!” before i could figure out whats what on my phone. beating me to the line by a good 30 sec. ( i work IT and got thrashed) Measurements taken. Flockie in the background getting ready. Available real-estate is promising upfront. Checkout that sweet ride in the background. Diff out. Looking pretty good under there for the age of the beast. Ass end is dropped on out. But man that crap up front just aint doing it for me. Wonder how that can be fixed…. ? Something that makes sparks maybe? ps dont mind the slide in the background. a reason to all madness. last i was at the shop he was fixing an early 50’s F100 hood that had been used as a sled for the kids behind a truck in the fields by the last owner. Touching wheel arches. Damn those big old guards can swallow up 28 inches of tire. I see this and just grin. Of course bumpstops and bla bla bla will add a few inches but still. BRUTAL! Side pipes will be on there as well to make it that lil bit lower… Im thinking a C Notch is in order my friends. Check out below pic and tell me what you think. God im almost tempted to say tubb that fucker and get some serious fats on the back. Unfortunately i doubt this will happen though. those guards are a pain to get fat tires off but we will see what can be done. Gud damn son! Low enough? Front off, ass dropped and sitting pretty. This is the pic that got the missus screaming “he chopped it!” over and over with squeals of glee & frantic social media postings. This generally only happens normally for lipstick releases from her fav brands, cats, new episodes of Vikings and leadsleds in general. So a big TICK in the only female perspective i care about. I plan to use this photo to combat the “maybe i should curve your spending on the car line” should it rise its ugly head. Top job Flockie. Thanks Ash for the pic’s. He has a Truck he was air bagging today at the same time Flockie was taking care of business. o.o i have a new desktop wall paper.1 point
-
driving home this afternoon my temp gauge was climbing to 3/4 then wouldn't go down even on a down hill it seemed to go even higher, the radiator has only 50% of its fins but it didn't matter until today, I had a spare radiator that was better but not 100% so i fitted that and the temp was still high, then I realized I was looking at the fuel gauge.1 point
-
A client said to me “got to make Hay whilst the sun is shinning” the other day. Fek the hay give me a wrench and a cool bourbon i thought and promptly went home to rip into the Crudson. With a tag team effort my better half and I removed the front panels. Was told when we brought the car it was brought into NZ by a farmer. Im guessing he lived on a gravel road by the accumulation of dirt and stones inside the body and rails. Said dirt would rain down into the hair and down the back of the neck as you try to unseize old bolts under those big ol guards. The amount of dried old gorse was a tad unsettling and made me wonder what the fek he actually used the car for. Visions of drunken paddock missions chasing sheep and running over fields of gorse flickered through my mind as i plucked the thorns from my hands. The patch of rust up the front looks easy. Cut off, form up a new bit of metal and weld back in jobbie. that whole lower panel under the doors unbolts and is currently full of dirt and stones. i think by the end of emptying the car of road dirt n gravel I will have enough to build the small wall out the front like i have been wanting to do for the last few years. Should also lighten the car by a bit as well i would imagine. The missus also did some fine devastation to the old brake lines, some wiring and god knows what was ripped out. Most amusing & I wouldn’t have it any other way. about ready i to get Flockie involved. Will be casting my eye over the engine and trans next. painted up and put together so we can work out placement etc more on that latter.1 point
-
So got the old beast going today and went for a drive. handling is horrible but that was expected lol. Vid showing it running. Smoky as its exhaust pipe is only like 3 feet long and in the middle has a big hole. And a walk around the old Hudson. orgional colour was Blue. someone painted it mid 60s. a bit of surface rust but on the whole its in pretty good condition. So the engine and everything under the hood will be up for sale soon once i rip it on out. Heck pretty much everything under the car will be for sale. Any restoration guys after parts let me know i guess. Alex1 point
-
next meet: Spitfire Square out by the airport from 7pm see ya there Discussion Thread: //oldschool.co.nz/index.php?/topic/Chenery/1 point


This leaderboard is set to Auckland/GMT+12:00