
Leaderboard


Popular Content
Showing content with the highest reputation on 04/09/17 in all areas
-
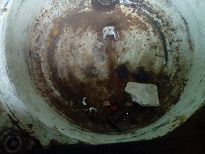
Got the tray and cab back on. Plenty of room for the exhaust to go out between the chassis rails and guards. The cab was sitting slightly on the driveshaft hoop, so cut a hole and made a patch. Then cut a big hole in the floor!5 points
-
I ended up getting some cans colour matched by Auto Industrial Supplies and painted the doors and guards below the white lines and the tops of rear quarters. This has advanced the paint job from 'patchy bogan shit-heap' to 'good meh from far but far from good'. It's at least mostly shiny and mostly blue now. Went to Caffeine and Classics a couple weeks back, not a bad turn out considering the weather was iffy and Beach Hop was on at the same time. Got some pics with the other GTO guys: Turns out my car must have had a full respray at some stage with another, exterior only touch up at a later date. As you can see above dwlee's factory Himalayan Blue 75 is noticeably lighter. No wonder I had trouble finding a match for my mystery blue. I had a couple of little things done in time for a fresh WOF recently. Rear wheel bearings, nice and quite now, they were getting pretty past it. Tightened up the steering a bit. General servicey fluidy stuff. Flew through the warrant but with the note that the strut tops are starting to get a little perished. Apparently these can be re-vulcanised if no replacement part can be found but the plan has always been to replace with coliovers anyway. Guess I need to get on that sooner rather than later, just need to save up some of my not-enough-money. I don't know a lot about working with leaf suspension for the rear but I think retensioning to lower and stiffen a bit, maybe combined with small blocks would be the go? The slight rake has always bothered me, feels like the bum could happily come down quite a lot.3 points
-
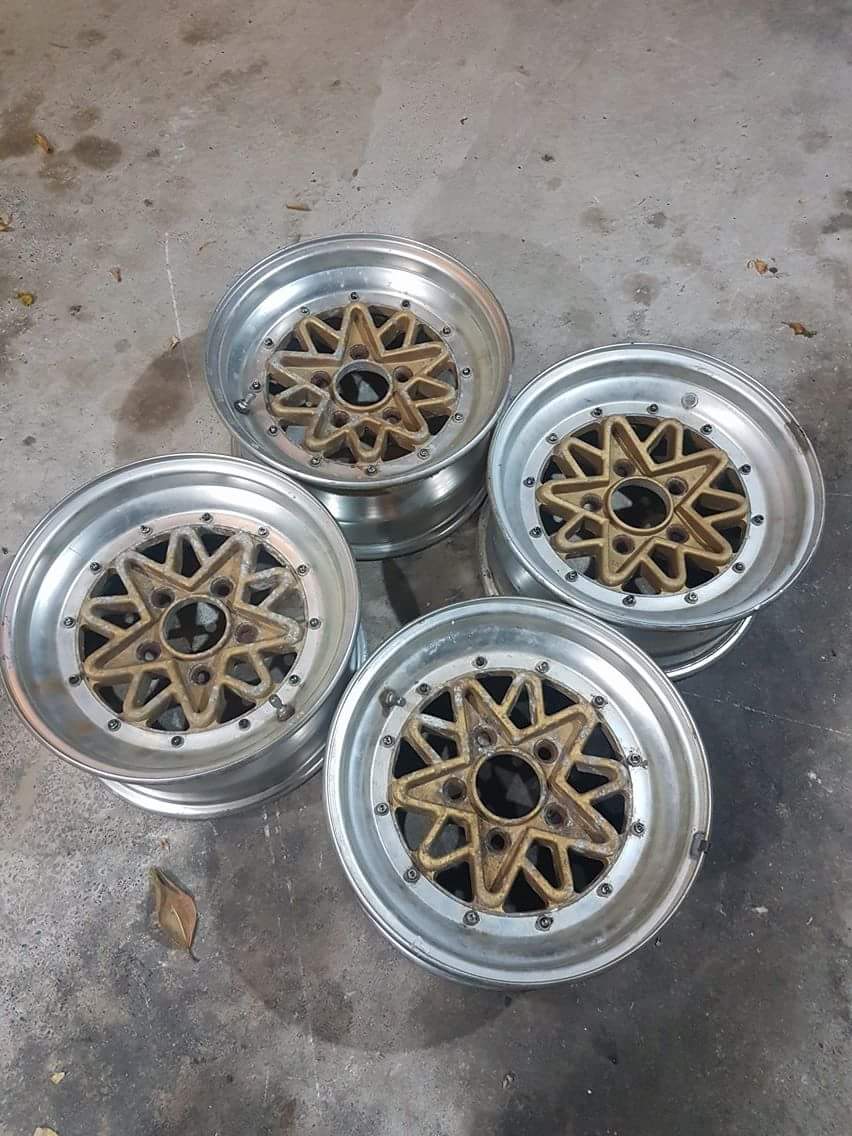
wheels from Japan ssr super stars 14x6.5
 3 points
 -
Not the big 6 pots that were intended but at least it's got the 355mm rotors on it now. Took about an hour all up / pretty lazy upgrade. Edit: wow talk about shit photo's.2 points
-
This weekends effort.. Didn't really start putting any on till almost lunch time yesterday, was busy trying to clean up plaster dust and wood shavings from the architraves round the windows in the bedrooms. Coz we had to push the windows out 15-20mm I had to put a cunt of a little fillet in between the arcs and the window reveal, did I say it was a cunt.. it was, done now tho. Bit of painting going on inside too..2 points
-
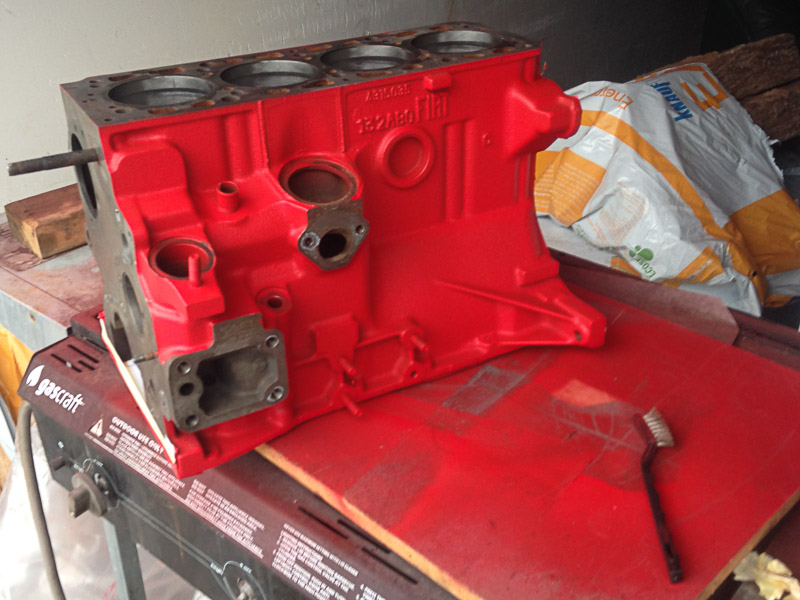
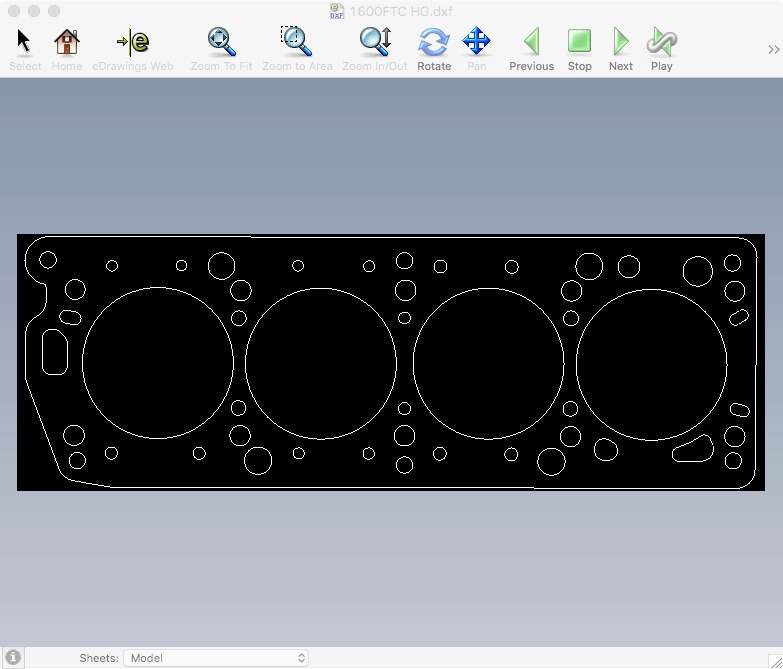
I had plans to get the Niva ready months ago, but work had different plans, I finally dropped the engine off to have all the vitals tickled, while its not going to be a 'performance' build, it will be a darn sight better than previous, i'm hoping to at least have compression back! With Otago rally on this weekend, I was hoping to use the drive there and back to run the engine in, sadly the weather has been absolutely terrible and in my crampt shed with not enough light, achievement has been low. Utilising the parts cleaner obtained off Bart, I've sparkled up the underside bits, ultimately, only the wof man will ever see it... Threw on a lick of speed enhancing red Multifunction 2105 workbench: Forgot how much I enjoy assembling engines, checking, cleaning measuring and torquing, no pics cos its dark, but the block is back together and awaiting a break in the clouds to lift it all into place I've also sealed up a 5 speed box I rebuilt ages ago, 4 just wasn't enough! Sitting out the rain I got onto the computer and drew up a head gasket, my sources have all dried up on standard thicknesses so i'll run a thick one until I get one waterjet cut from copper to give a hoon, hopefully it works......
2 points
-
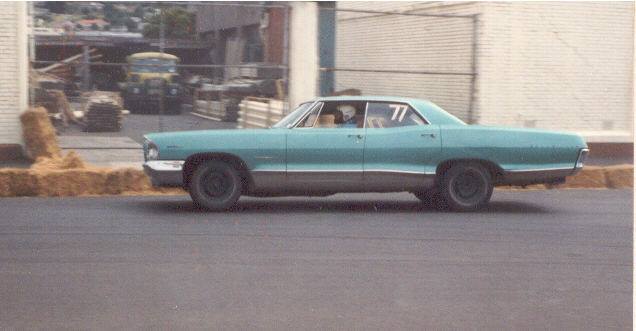
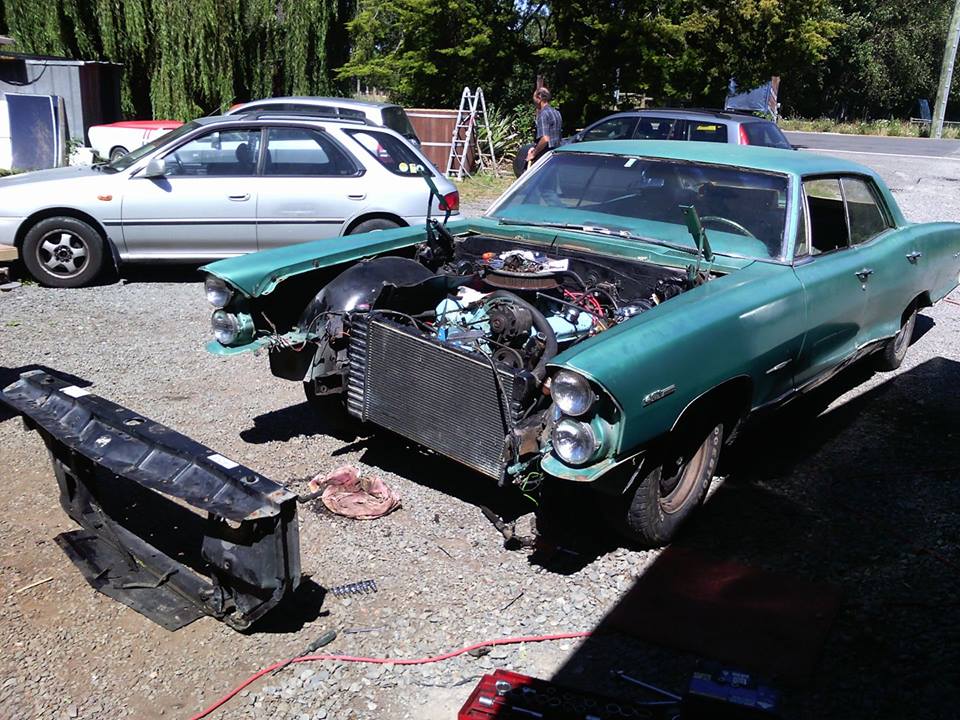
for those interested in an already involved project here is my dads 1965 Pontiac Bonneville when it was raced in the 80s it has beefyer swaybar in the front and one put in the rear. the front suspension has been lowered and aligned for racing and good turn in. disk brakes are installed in the front to replace the drums. along with a dual circuit holden hq master cylinder. the motor is the original matching numbers 389 couples with a th400 trans also original and untouched driving a 2.56:1 diff also original. the car is now just giong to be used as a awesome powerful cruiser. with some racing heritage. He has had the car 40 yeas this year. the last 20 of those it has resided in the garage in hibernation. during the new year i set about installing the 389ci v8 back into the car and making it run and drive.....stopping was another issue.....later though as typically an old car does it has some rust so that will need dealing with before i go for a wof nothing to bad just a little in the radiator support panel/cross member , both c pillers around guttering, right rear door shut area and the left rear dogleg . all fixable though. this is how i went about fixing the radiator support panel... just take the whole lot out and put it on the bench....... much easier drive down the road to wals... no bonnet....no reg..... no wof...no worries for those interested i have some old racing photos of the car from the 80s. i will try take more photos of what i do on the car.
1 point
-
Have you done anymore on this project?, I have been enjoying the progress. contrary to popular belief the Oldsmobile 350 diesel is a fine engine.1 point
-
It is currently cranking very hot air into the bus as a test run.. the only issue is that it is a bit smokey when starting, but I think its first start attempt is about getting fuel pressure, and it is burning off what it did get in there, as it always starts on the second go.... It is a sweet bit of kit tho, dem Germans know how to build stuff.1 point
-
So the shop replaced the spark plug and had it running mint they advised to change the air filter as it was extremely dirty and they were right. they also tried to fettle with the carb mixture screw but it is seized. now after changing what must have been a very clogged filter it was running lean with the new exhaust was getting a backfires ect and would stutter revving. Now my exhaust came with a ls650 jet kit so i thought id try the smallest one now it has factory a 125 main jet I swapped in a dynojet 138 main jet that may seem like a massive leap but a 138 dynojet jet = a 130 mikuni main jet and now its running mint ive tried everything to free the mixture screw but alas nothing has worked so il have to come up with something cunning but for right now its running mint.1 point
-
Hi. WOW!. I am amazed to see this. My name is Peter, I bought this SR coupe when I was at Hornby High School as my first car just when I got my licence about 1997 I think. It was very original but in good condition for its age. The guy who I bought it off, his mother worked at the post office and she saw the number plate in the system while working there so she quickly grabbed it for her sons car, if I remember right it might have been her car which she passed down. About 1999-2000 I decided to "do it up" a bit, my best mate at the time Lee just got into the car painting industry so he and myself tidied it up and painted it calypso blue (Honda colour), I bought after market brand new front guards and bonnet, put deep dish hot wires and eagers on it ect, I got the original mods cert. At the time it was immaculate, particularly being teenagers with limited experienced. I sold it to Lee's brother Luke about 2001 because I went over seas, he continued to do it up. If you were around at this time and did the Colombo runs on Friday and Saturday nights you would remember this and other SR coupes particularly Shane's yellow "spitfire" SR which was awesome. Thanks for sharing this I am happy to see it still around and see someone fully restore it. I will keep watching. Will post some old photos when I find them. cheers Pete.1 point
-
wow long time no updates the rambler has been used most weekends, its been a good family cruiser. have brought a 2 barrel holey carb abd adaptor so will fit that up in a few weeks as ive had no luck finding a replacement carb1 point
-
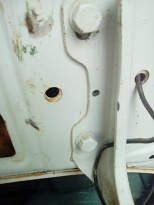
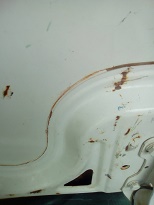
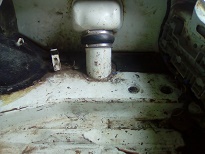
so i finally finished the rust work on Karls mk4. all cut out,,welded up painted and cleared. now i could get the old mk4 in the garage to start having at look for the leaks . starting with the boot..thought i would align and drill a 4.9mm hole in each hinge before i take it off so that later on when i repaint it it will always go back in the perfect spot while playing with the boot i found some flex.......like the glue shit they use has come away...will put some tacks on before it goes back on. the boot itself is on very good condition only found 1 small hole in the wheel well very cool to see all the factory carboard is all there as well as the phome that sits over the wheel archs and the carpet. so stripped it all out to be cleaned up loom and all the boot is in amazing condition reallly the drip rail and rubbers are all awesome . found a couple of suspect bits. big hole for the wiring to the number plate lights......bung not used as they shuved the towbar wiring threw the same hole also found a lot of moister on the drivers side light ......the rubber gasket thing and some blowen bolbs
1 point
-
This is tomorrow smales farm on the shore. prob should have put this up earlier opps. I'm guna take the little anglebox along.
1 point
-
a mate came over and gave me a hand and we smashed it good. there are no ceilings and all the roof that im going to remove has been removed. only thing left is external walls which are wobbly as fuck. 2017-04-08_03-30-26 by sheepers, on Flickr 2017-04-08_03-29-43 by sheepers, on Flickr1 point
-
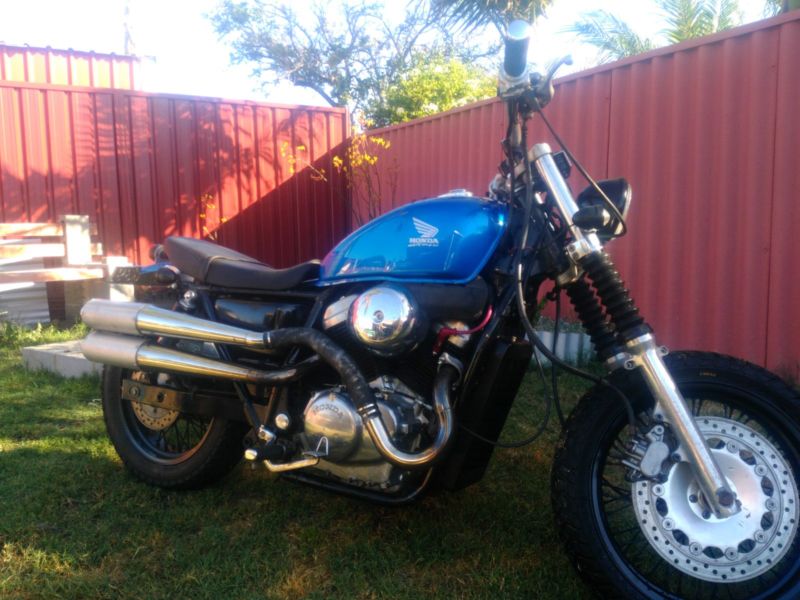
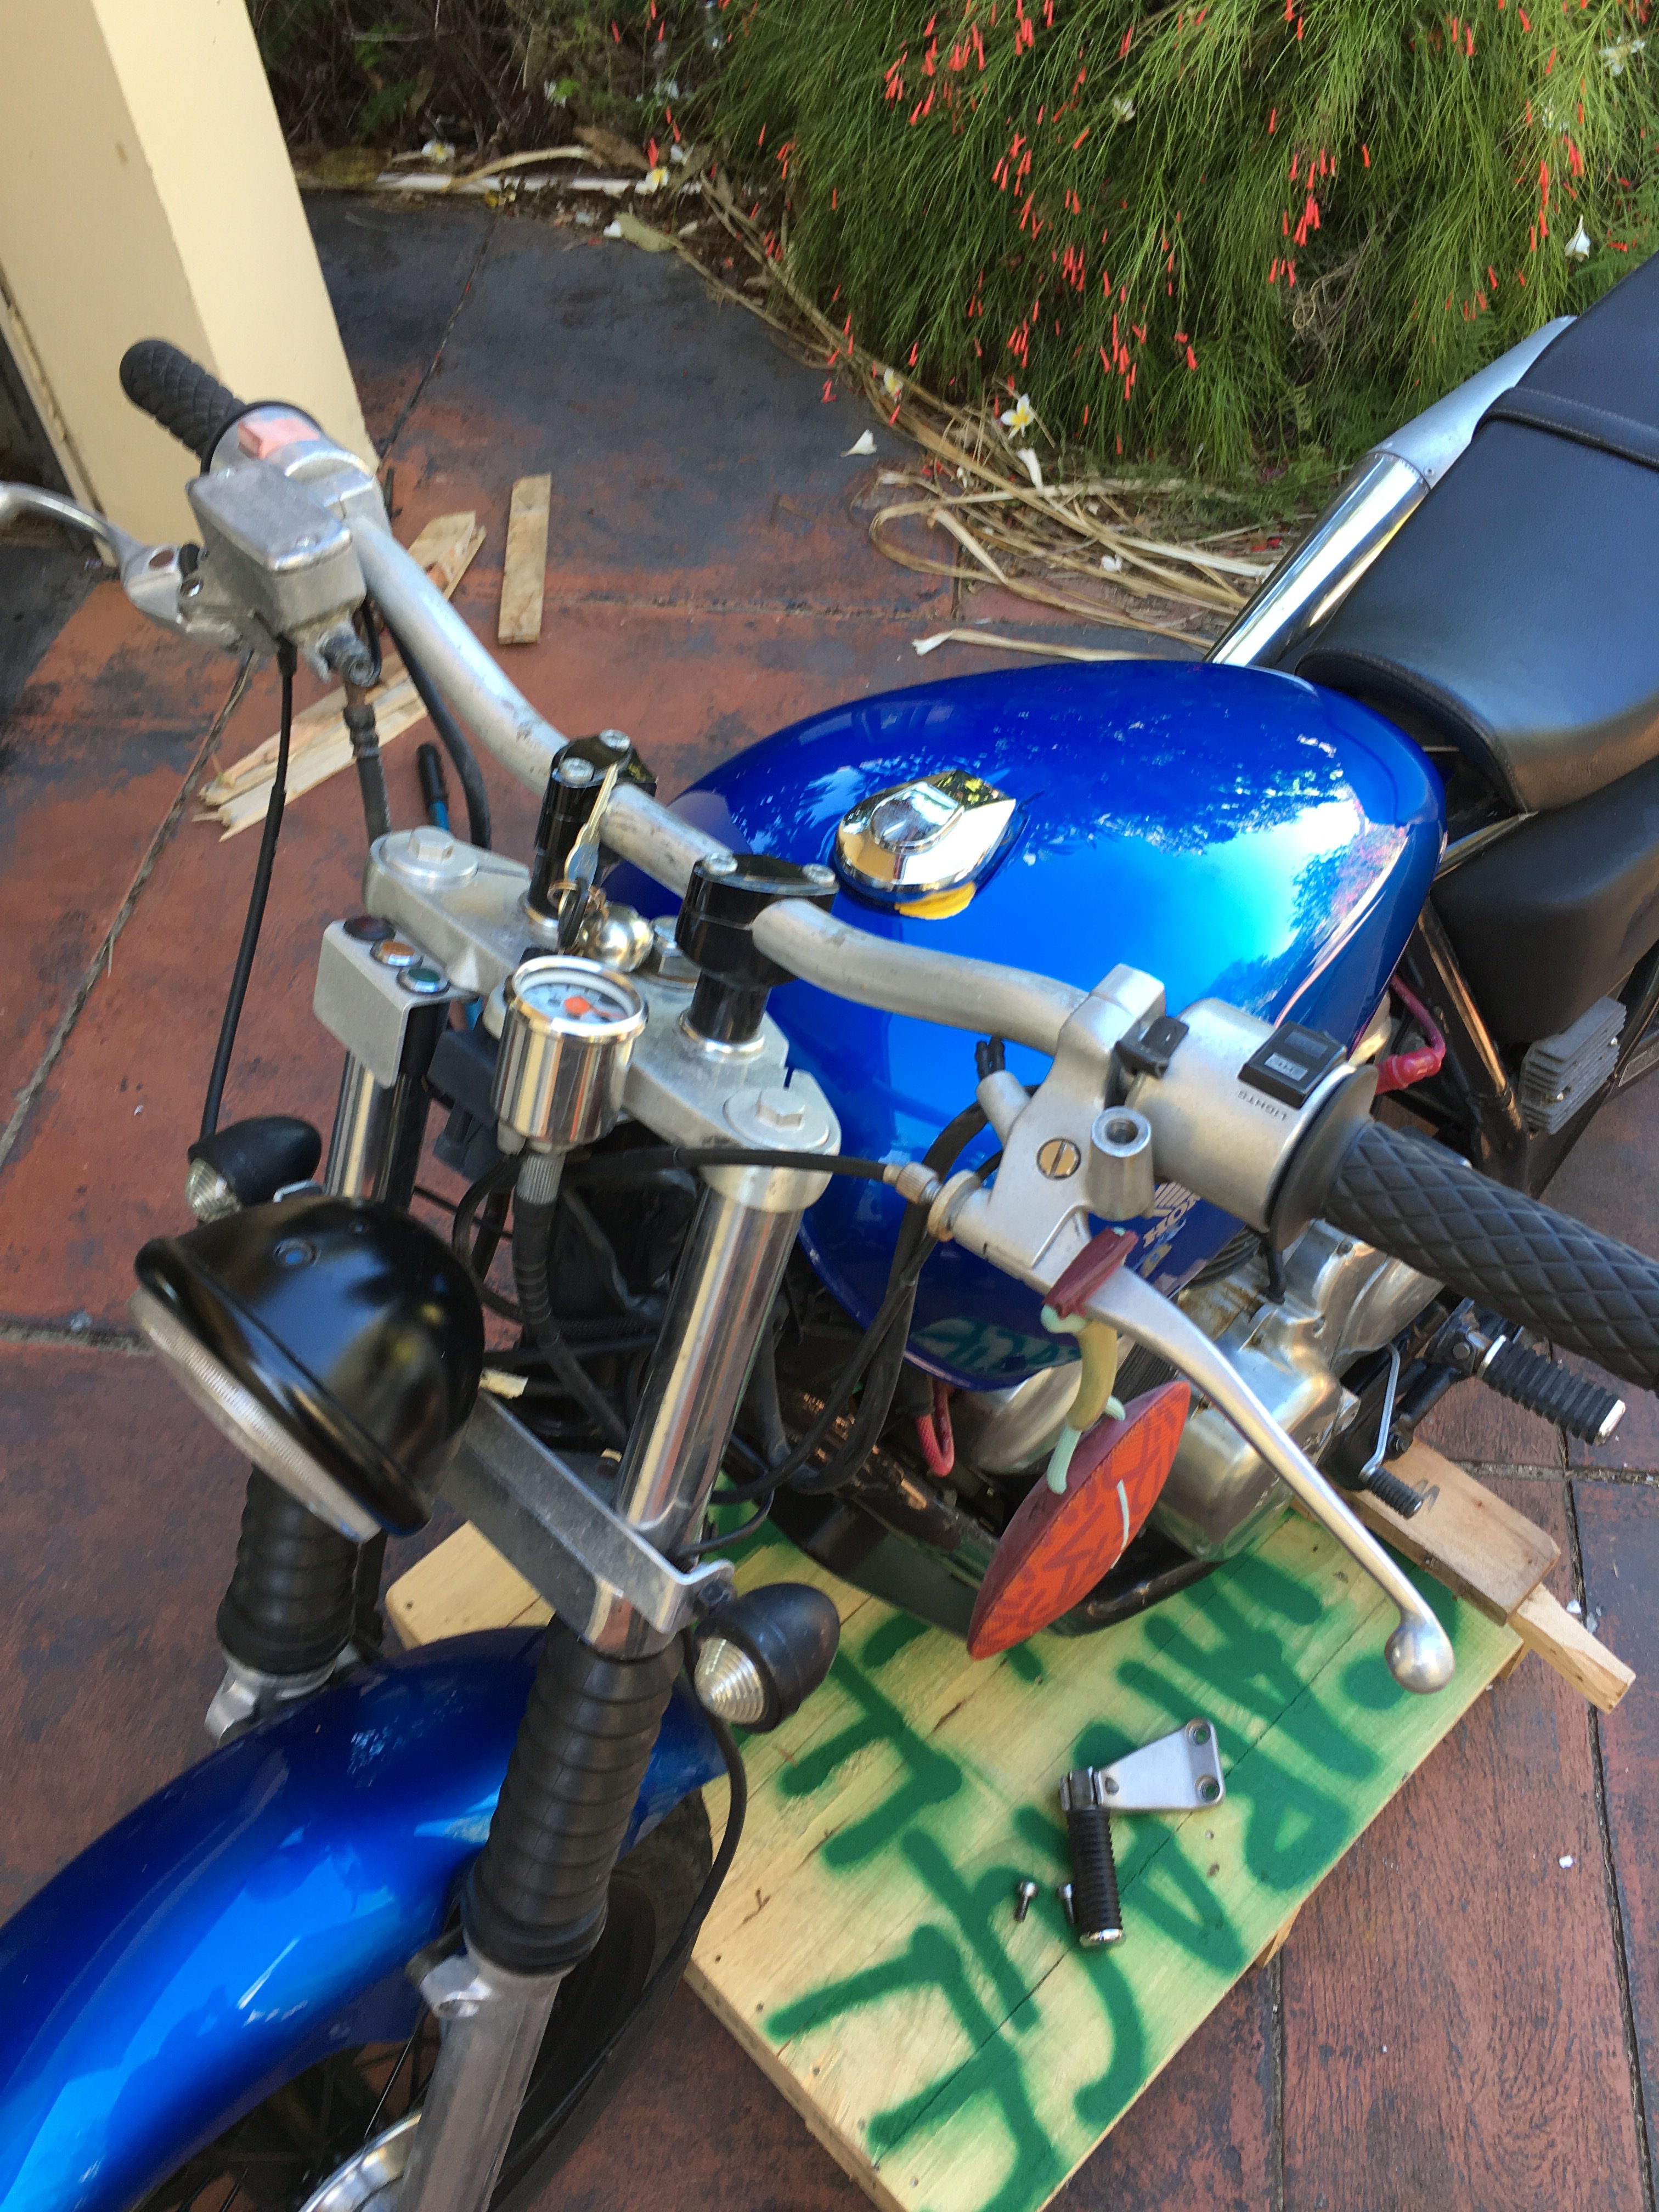
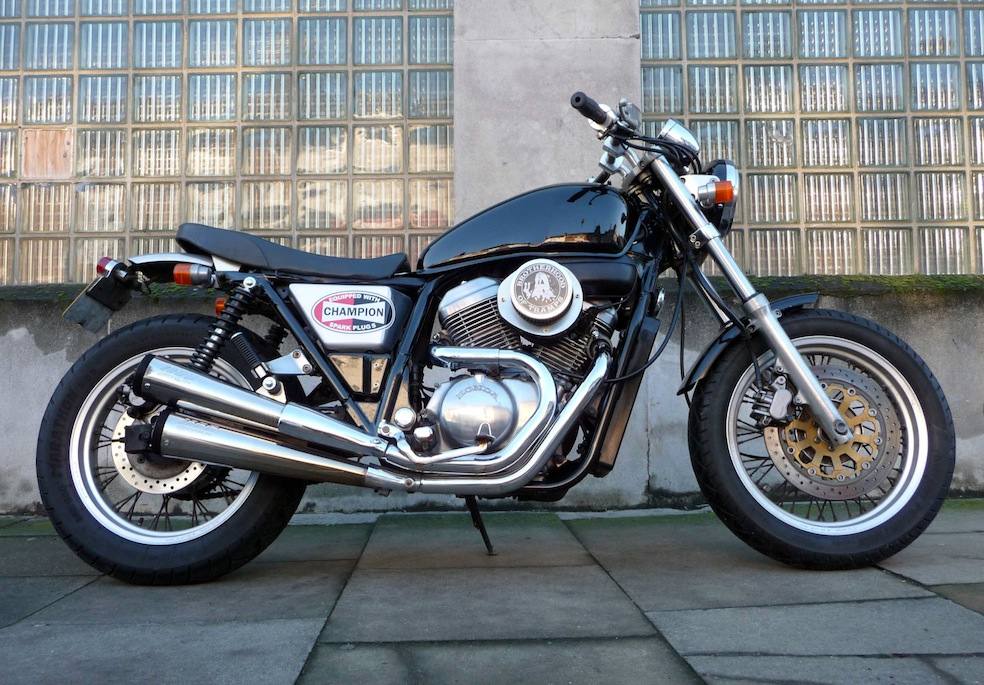
Howdy ya'll, it's been quite a while since I had a project on here, so I'm bringing you my current cashhole from Perth, WA. It's a 1998 Honda VRX 400. A water cooled v-twin bike they made for a brief period in the mid to late 90's as some kind of pre custom bike fad factory cafe. They were mostly Japanese market only bikes, and while there are a few customs out there they're pretty much all japanese shop bikes and there's no info etc online as far as I can tell. The bike is rego'd as an 88 here as pre 89 bikes enjoy lax regulations around importation, doesn't bother me much at all as it means it's easier to rego and keep on the road. This one came to me like this for only $2500 rego'd and running... First thing I did was put a bit more bend in the 1" bars, pulling them back slightly as the near flat angle was killing my wrists and felt gamy as fuck. Actually thats not true the first thing I did was melt my workboots against that unwrapped bottom pipe... but moving on, the bars feel alot better now and will make do until I order a set of Biltwell's 1" moto bar. I'd really like to fit a protaper or renthal bar on it but they all have 7/8" hand control areas and this bike is 1" from the aftermarket riser clamps to the hand controls. It's unusual to me being a small displacement jap bike but apparently common on Honda's cruiser stuff from 600cc upwards so potentially it has controls from a vt600/750. I also replaced the stock grips as they're fat squishy foam pieces of shit with plastic looking chrome bits and just generally look like try hard harley bits. Went with Biltwell Thruster in 1" and so far I'm happy with them even though the vibration to the hands increased slightly. They look like this now...
1 point
-
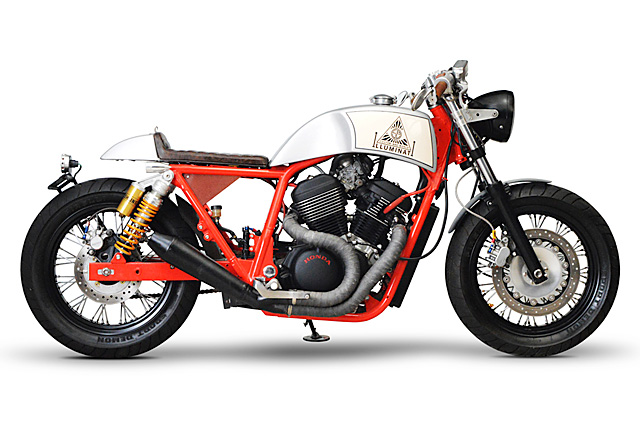
Aside from the above I've chased out a few little electrical things that were bugging me, I've got a couple left that I'm working on right now like the right rear indicator not working (not the bulb) and the neutral position sensor not always knowing it's in neutral. The neutral sensor thing is super annoying as I've gotta admit I've tried leaving the lights a couple times and been sitting there in N waiting for the light to change... and it also means that unless it's sensed N (15~25% of the time it works) it kills the motor as soon as the kick stand goes down. Here's a pic of a pretty clean one from japan, not quite where I'm heading with mine but I like the stance and the lack of colour. Those are the stock pipes and although I like them, the high side custom things on mine are great and sound awesome, I'll wrap more of the pipe round my boot area, and possibly make up a heat shield as they are super fucking hot/great for warming my hands at the lights. And I'll also change the cans at some stage either for straight pipes or just do something about that alloy, I'm not sure yet. Here's the most recent custom I've found it's from a shop in Sri Racha and I hate almost everything about it except the engine, the foot controls and those rear shocks (black springs though come on m9) Looking super closely at this custom I can't believe BikeEXIF featured it, lot's little details piss me off like th front guard drooping, the tribal looking tank, the gross colour way etc. but it's a shit tonne more built than mine at this stage so I can't pull it apart too much. Here's a bike that, although a harley, pulls off what I'm trying to do.
1 point
-
1 point
-
open plan living. 2017-04-07_06-12-59 by sheepers, on Flickr 2017-04-07_06-13-08 by sheepers, on Flickr 2017-04-07_06-13-19 by sheepers, on Flickr1 point
-
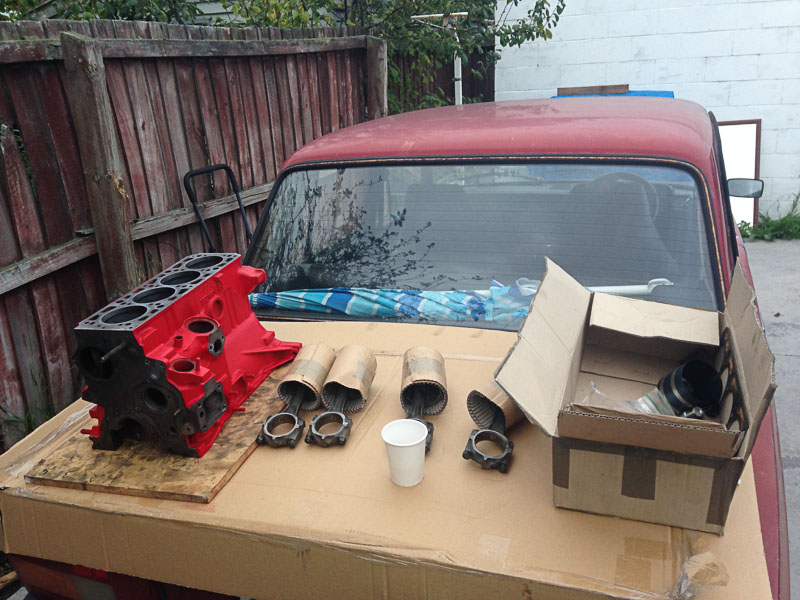
Scratch built velocity stack. There are easier ways of doing this...but I only had a scrap chunk of aluminum at hand. Yes I know you can buy these for very little money off trademe...but where's the fun in that?1 point
-
Well someone bought the old bitch off me, and it left the mainland this week; So yea. What I need now to distract me is a very cheap but live reg 60 series diesel landcruiser. You bitches make that happen for me.1 point
-
Hey everyone. Had a few drives in the Cortina over the last few months and ran in to some trouble with my clutch gearbox. It was making noise when I put my foot on the clutch when stopped but alright when driving. So for the last 8-9 weeks I have been trying to fix this to no avail. I also noticed that when I would be driving at 90 - 100 kph it would be revving really high and I really missed that 5th gear. So on my 6th time taking out the gearbox I got grumpy and decided that if this was coming out again it isn't going back in without a upgrade. I did a bit of research on what I could replace it with and I ended up buying a t50 Toyota 5 speed to put in. At the moment I am making the adaptor for the bell housing to box so will keep you updated as I plod on with that. So with the car being out of commission I bought some wheels and made a centre console up for around the gear stick. here's some pics.1 point
-
fuck you roof. 2017-04-06_06-30-20 by sheepers, on Flickr 2017-04-06_06-30-07 by sheepers, on Flickr1 point
-
Day 4 & 5 The long Drive Home Passing though the Mrs hometown. Stopped off at the FILs place in the 'Ding for the night on the way back. The Mrs put her name on the next project, its been in the FILs shed for 20 years, runs the engine with 4 on the floor and buckets from the Torana her brother rolled when he was 16 . Jim Currie Reserve just out of Tokoroa (reccomended!) Waikato River south of Huntly1 point
-
Day 3 - Scavenger Hunt etc Austin Farina Traveller, a brother from another mother. To the beach! Beach! Prize Giving + Fancy Dress Party was later that night, the first Photo i took after prize giving :drunk: , Best Wagon and People Choice1 point
-
Lucky enough to go for a ride in sheepers coupe at Toyota fest hapmton downs
1 point
-
Longest exhaust build ever! What a stupid idea it was to design it like this haha. So far has 5 pairs of flanges on each side if you include the ones at the end of the headers. Will have another pair after the diff as well. Got some flexi's and welded them in, as well as the rest of it. Need to put the tray back on now and see where the rest of the exhaust can run out the back. Made some mounts, after making them incorrectly to start with. Had the rubber hanging under tension where-as it should be compressing, otherwise it would most likely tear the rubber in half. Also made some gussets for the 4 link brackets since they didn't quite look strong enough. Might make some to tie in the other side as well. Need to make a start on the fuel tank soon. Any recommendations on an in-tank fuel pump to use? Don't really know much about them, 255LPH should be enough? Tank will be about 220mm deep if that matters.1 point
-
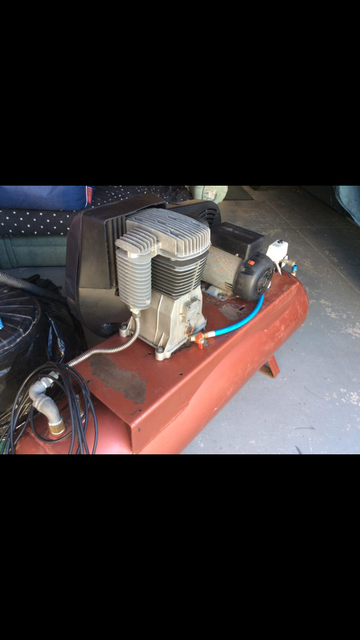
Another coat: That was with my cheapy 40L Blackridge 2.5hp compressor which can't keep up with the HVLP spray gun. So I bought this for when I do this outside (a couple of cars to do): Its 3hp, 15cfm, Ingersoll Rand pump on an old Hindin 270L tank. ALLL THE CAPACITY!
1 point
-
Almost finished painting inside. I was tempted to just fit carpet, but I think I'll use the 'new' looking carpet in the other 200sx. I mixed some Hammerite silver with black until I got this colour. I originally brushed it on but the brush lines were really bad, unlike when I did the same in another car with white. So decided to try spray it, I thinned in with proper hammerite brand thinners because apparently its something special... It worked pretty well but I definitely need a better compressor. Looks much better than the photo a couple of posts up there ^^^
1 point
-
I've always been one to have a project or two on the go. Then there's the ones still in the "planning stage" i.e. they only exist in your imagination. Well there's nothing like a deadline you cannot negotiate an extension on (Christmas), and kids would have to be the toughest of all the negotiators to deal with! So when I foolishly thought out loud 3 days before Christmas about an idea I had - that may or may not work??? ...well the pressure to deliver was all on! So: String line and inclinometer dusted off Holes dug, posts in, concrete mixed and poured. Guy wires, main cable tensioned and clamped (that sentence sounded flippant-ly easy... this was a challenge) I had three bits of wire rope. The longest was 50m, so this became the bit between the two posts. I then machined up a connecting rod for each side, that hooks up to the guy wires. Complicated solution...but it enabled me to get the longest span with the free wire rope I was given. Its designed to slip, so tension remains the same in all components. I used basic trigonometry to calculate the forces involved. But if my theory is true, then it should all be good. So I'd call it a success. Now 4 months old and still working well Kj1 point
-
Look what I found ...............1 point
-
Heater works sweet now. We have been using this relentlessly for weekends and day trips, fuck it is sweet. It is warm, comfortable and spacious for the four of us. I did build a new dismantlable bed at the front, the fold down side one was a pain, and now we use that area for clothes/thermette storage. This works a lot better on all counts. I added some LED lighting strip. This is under the gutter and is completely invisible until you turn it on, then it is like the sun has come up, that is if the sun was a spectral type O and a long thin shape. I got a flat, so I decided to smash some matty B on there while the wheels were off, looks sweet I reckon. COF due this week, hopefully nothing major has gone wrong. The dude at the testing station said he was looking forward to seeing the finished build, so hopefully he is the one who checks it as we already have a special relationship. I got this off a dude for a ridiculously small amount of money, it is an Eberspacher D1LC diesel heater. The current version of these sells for around 2k as a kit, and I am way too tight to spend that sort of money, trust me it was cheap. It has no glow plug so that is coming from the UK, when i am satisfied it will run I will install the beast.1 point
-
Booked this in for a WoF today. Didnt quite make it all the way. (run out of gas) Lucky i had someone who thought it was flippin hilarious driving the support vehicle Looks pretty cool even busted on the side of the road, but "get the fuel sender working" is now at the top of the list! Ive put about 30l of gas in it since i put the tank back in, and ive driven it maybe 3km, so not sure where it all went! Cruising in traffic. Goes pretty good, but i think i will get the radiator swapped out for a newer one that doesnt leak and maybe a couple of pusher fans. Dash guage reads near the top of normal when its sitting, but the mechanical one reads normal (~90degC), but thats in the lower hose. Up on the hoist. Nice to see the underside from more than a foot away! Guys were pretty happy with it. !!!WOF AQUIRED!!! After that popped around to Mr and Mrs Grants to show off, and went to Burger Fuel for lunch in it, gets lots of looks and thumbs up, and 'what is its?' Swung by the beach for a surf check on the way home No surf, so then made a start on the post-WoF list of things to sort! - Fuel sender - wheel alignment - radiator + fans - door & boot locks (no key for any of them) - more driving!1 point
-
Went out to buy some resonators, realised how overpriced for how simple they are, so decided to make my own. Rolled up some perforated sheet, wrapped in stainless steel wool and fibreglass strand. Will probably make another couple to put in behind the diff, which hopefully will make it reasonably quiet. It's a real shame no-one is going to see underneath here once it's done.1 point
-
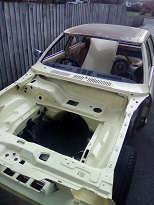
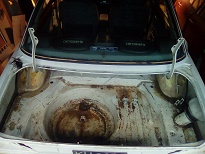
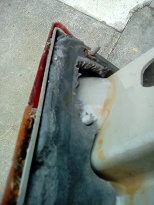
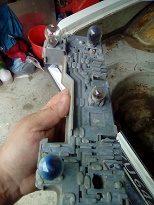
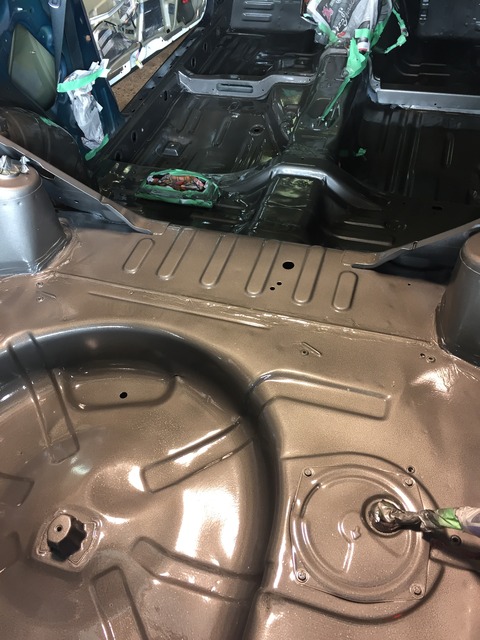
Got the cab back from sandblasting. Has also been etch primed. They did a very good job of it. Patch panels for the right hand side floor should be here in the next week or two. Made up a plate to replace the door hinge captive nuts that were turning. Plug welded it in. Pic for thread because these updates aren't that exciting and so I don't forget how cool this will look once it's done.1 point
-
1 point
-
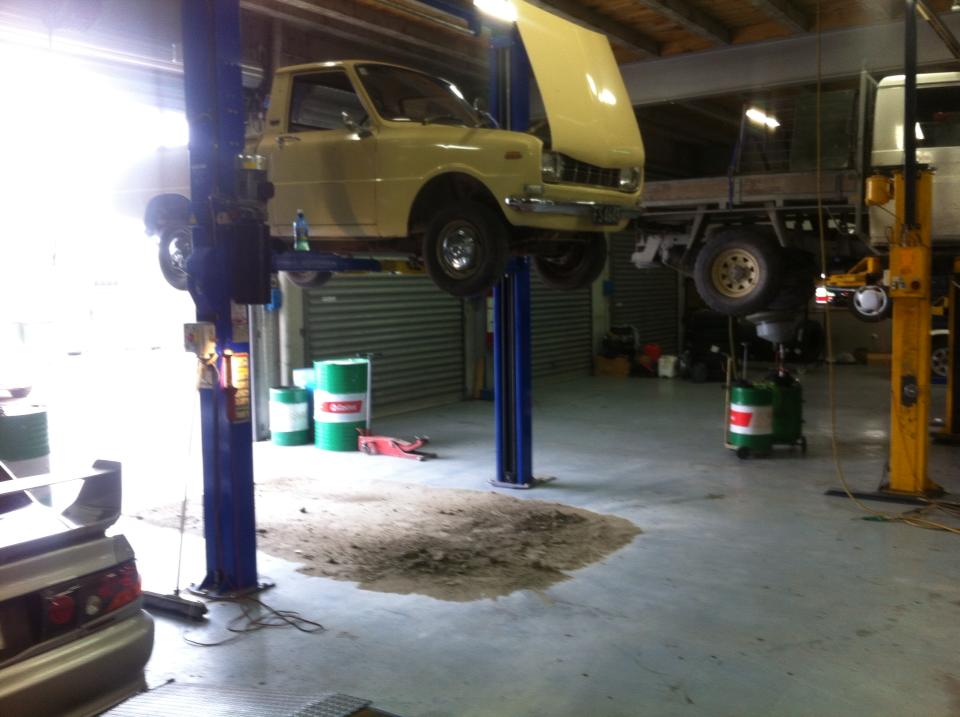
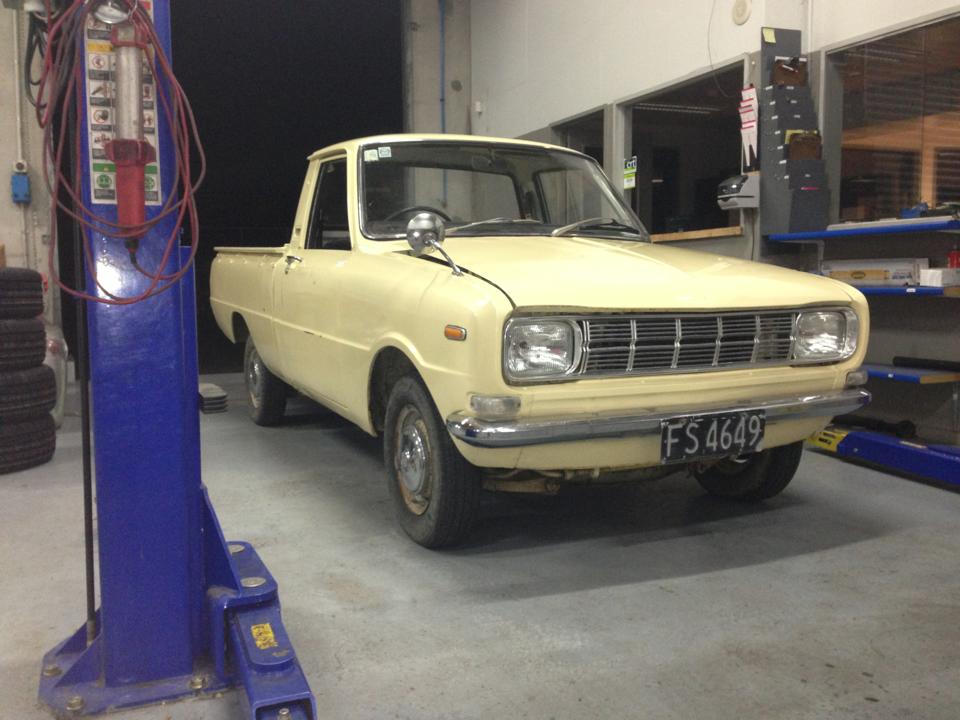
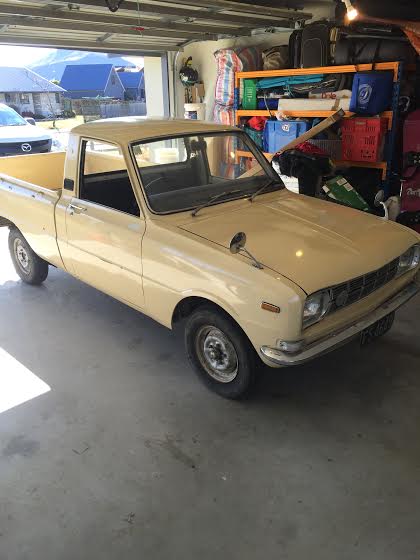
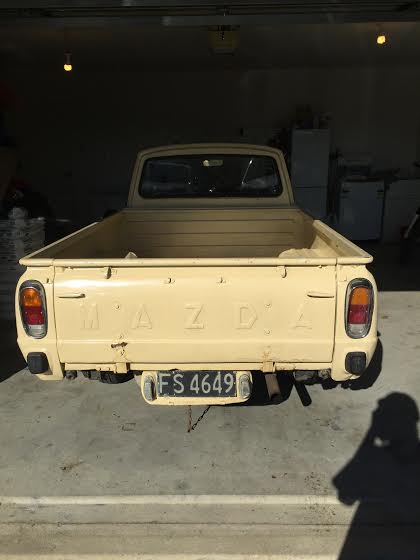
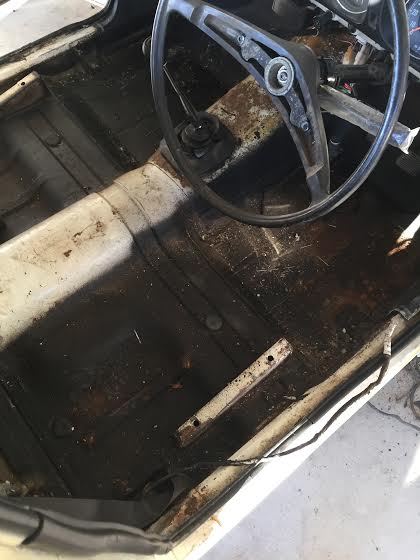
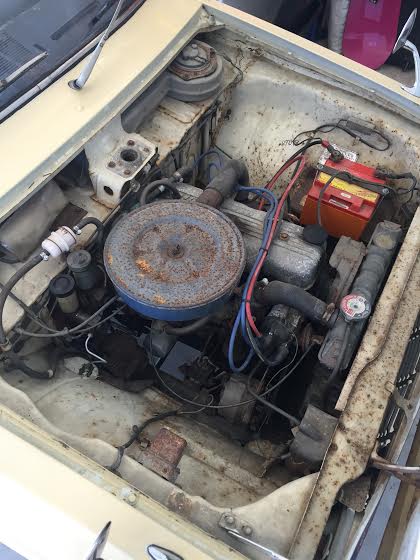
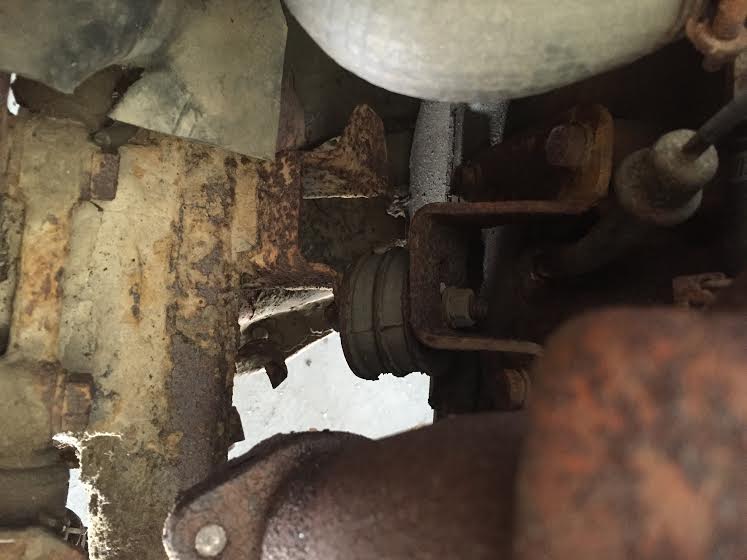
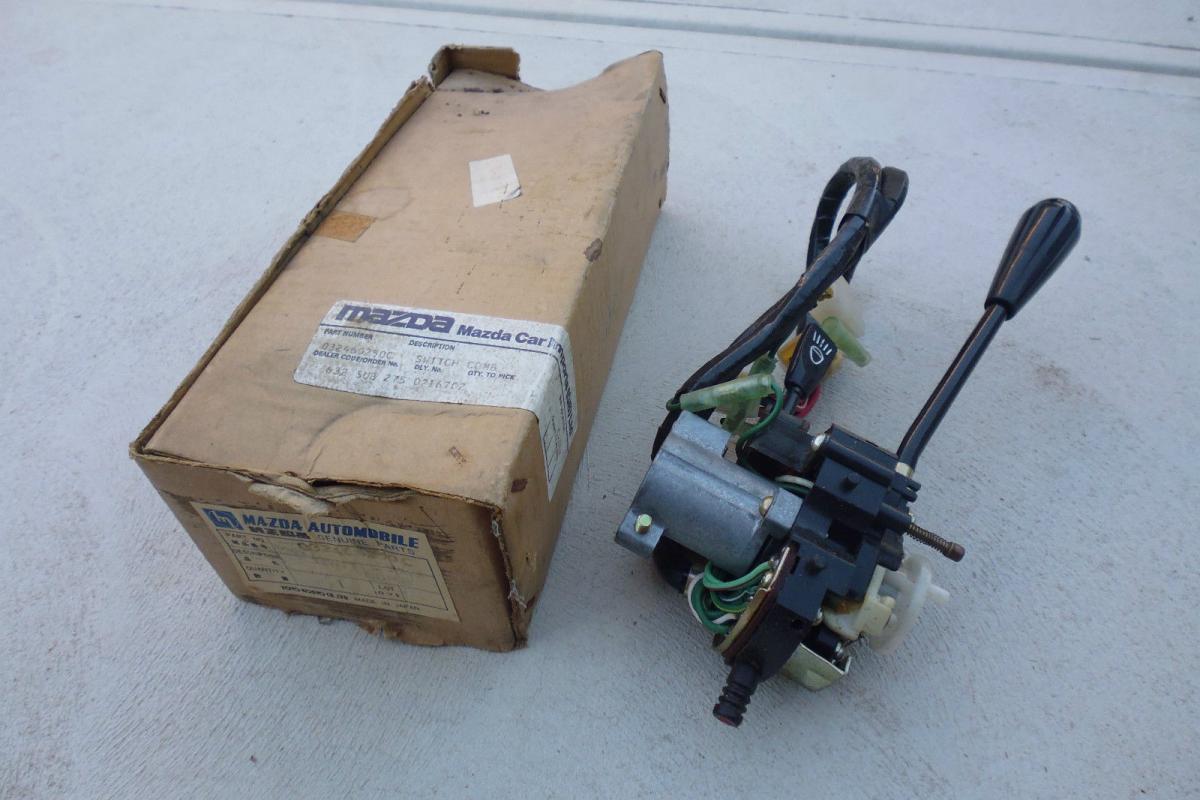
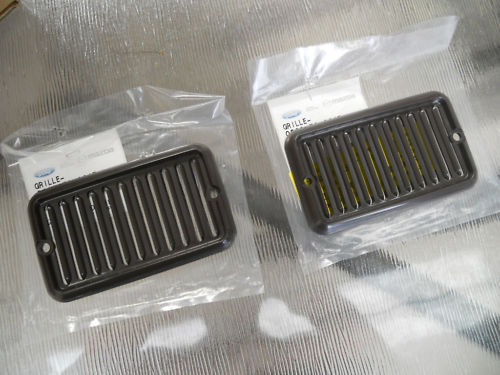
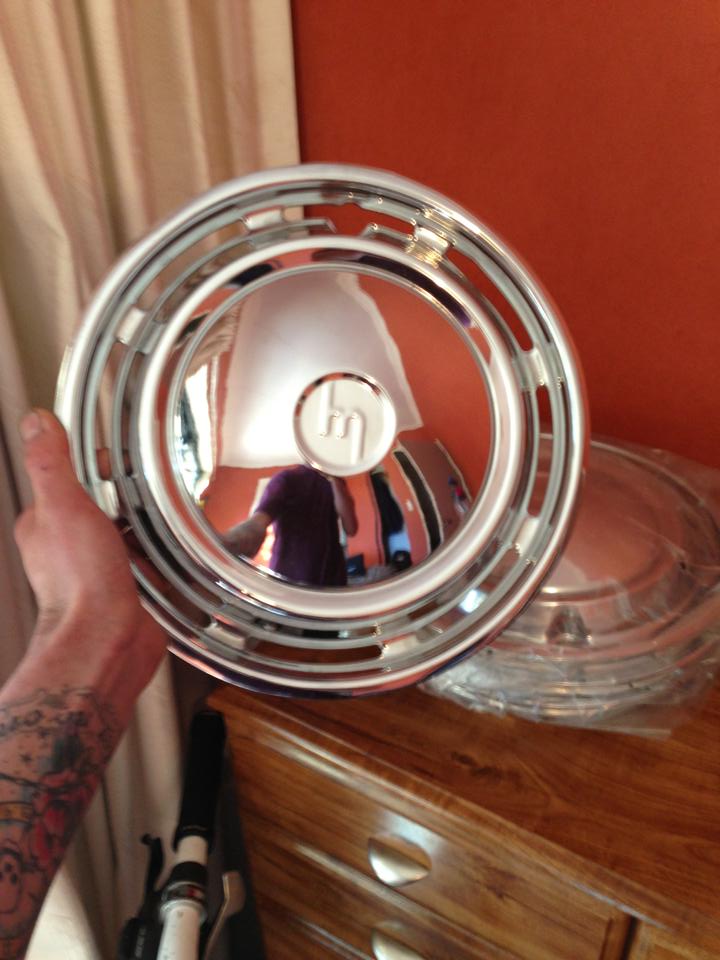
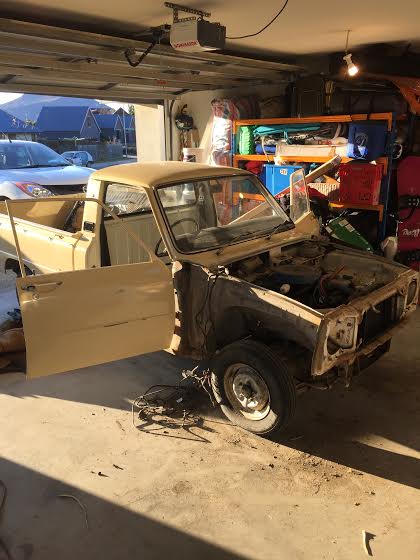
So I've been floating around these pages for a while now, Had a build thread on here of my 12a 323 wagon. Moved down to Wanaka, left the 323 in my home town of Ohakune. Long story short, the newly built 12a had a knocking rotor bearing so kinda lost all motivation with that old girl. While all this was going on i herd about a Mazda 1200 ute that was up for grabs in Queenstown. So went to check it out, turns out it came up from Stuart Island where an old fella had sitting in one of his sheds on the farm for many years, sold the farm and whatever was in the sheds came with the farm. I had to have it! So i cut a deal with the new owner of the farm and took it straight to work got it running better, cleaned out about 3 tons of dirt that was everywhere! Figured i was just going to get it going, wham a new wof on it and just use it. But time came to put on a new wof and rego had lapsed… Shit. Old owner said it was on hold but its not, Should have checked but was far too excited about this wee girl! Seeing as i need to revin the old girl now i figured id go the whole hog and go balls out full resto. Slow going but any who heres what we are all here for, Pic's!! Some of the dirt! Hard to tell but has had new floor sections put in at some stage. 323 engine and 5 speed, Will be ditching this in place of standard 1200 ASAP!! Stuart Island spec engine mounts NOS Combo switch $$$$ NOS Pillar vents Set of NOS hub caps, Not 100% on what they are off but they are badass!! Discuss://oldschool.co.nz/index.php?/topic/51587-barn-find-mazda-1200-ute/
1 point
-
How she sits at the moment. About to move house so not much happening.
1 point
-
D-day/week, second week of January and the mission was on had a week to fit engine/box, get the car rolling, panels on and packed up with parts to roll into a 40ft container with the Mrs' ke20 for their journery to Auckland with all our other crap. Borrowed some ae85 struts off a mate as the coil overs still aren't finished and fitted them up with ke35 top hats to get the car rolling. Quickly primered the insides of the doors/boot/bonnet to fit up and painted up the block with engine paint as well as the rear half of the box. Reassembled gearbox and fitted some ta22 engine mounts to the motor (the shorter ones) that I had picked up a while back. Also finished brake/fuel lines under the car etc and fitted tidied up genuine toyota brake master and clutch master/slave. Engine went in like a dream, the ta22 mounts put the engine nice and low in the factory position on the te3# x member and the factory te3# gearbox x member lined up perfectly with the rear pair of the 2 lots of x member holes in the body, forward position shifter also came straight through the factory hole in the floor. Just had to dig some factory filler stuff out of them and it bolted straight inreally happy everything fitted together with factory sourced parts and I didn't have to hack anything up, I also have three T series drive shafts of different lengths, I haven't tried yet but hopefully one goes straight in and I don't have to worry about modifying one. Engine cleared the added rack and pinion perfectly too which was awesome because I really didn't have the time for big backwards steps. The only real set-back was I had originally fitted a larger 3t corona front sway bar which fitted together on the subframe sweet but fouled on the castor arms when I slammed the car back down so it was swapped out for a factory ke35 one for now, motor still clearances it fine but it looks a little funny as its tiny and offset for the lean over K motor. I'm hoping to find something to replace it at some stage but I'm not sure yet, either find and try an ta22/ra28 one and see if it fits or hunt out a te3# one from the states. Anyway most importantly plenty of room either side for dellorto's and high rise headers With that the car was ready to be packed with parts and loaded up, both cars made it safely to Auckland without any damage and it's good to have them up here! Still mucking around with my track car but that'll be out of the way soon so getting back into this in a big way. Aiming to finish the car this year, really have to stay motivated and get it done!1 point
-
Thanks matt, greatly appreciated. might add some info I've found/researched. 2jz ARP main stud kit will work for 1G mains and head bolts. Gen 3 crank is 44 mm and harder to get new bearings for. more on oil system, copied and pasted.. 1G-GTE Oil Mods There are a few things you can do yourself to improve it, as long as the engine is still in pieces. The first, is pull the oil filter off, and have a look at where the oil comes from the oil pump into where the filter screws on. Its the hole at the bottom. You can barely get your little finger in there. Grab a die grinder with a stone or pointy bur, and open up this hole. Don't just hog it out, but lay the edges back and round them over so not only is the oil coming through a bigger hole, it flows smoothly as it disperses. Imagine your porting a head and you want max flow, all nice and rounded. Next, take the timing cover off the front. Have a look down the bottom right side of the block. There are 2 holes, one is the suction side from the sump, the other the pressure side from the oil pump. Do the same here, rather than sharp corners, round these out and smooth them into the surrounding material. These are the first 2. If your still keen at this point, pull the threaded bit out of centre where the filter screws on. It goes in too far. Cut about 5mm off it, and held in a vice, radius both sides and round the corners so the oil flows around the corners into the block easier. You can radius inside the hole where we just pulled that piece out also, but I wouldn't advise this for the inexperienced, you can damage the thread in one little miss. be VER VERY careful, you only get to damage the thread once and its stuffed!! The next 2 are a little more tricky. The main oil galleries in the block that feed the mains are 7mm where it enters the bearings, but if you get a 7mm long shank drill and stick into the main oil holes, they are only 7mm for an inch or 2, then they go back to 6mm. Drill out main oil galleries 1 and 6(there are 7 main caps in total), the reason being, that the main oil gallery feeds the rods, and 1 and 6 rods/mains are the furthest from the centre where the oil feeds in, you don't want to increase them all, and don't do number 7, as it feeds nothing. I have 2 more mods done to mine, but I'll only divulge one of them. The bearing shells when sat in the block don't line up with the centre of the oil hole that feeds them, they are off to one side. You need to find someone with a dremel tool or something very very fine. You may be able to do it by hand with a very fine jewelers round file. Put masking tape on the bearing face and just uncover the hole in the bearing. Put some bearing blue on teh back of the bearing and push the shells into the block. The hole will leave an outline where it lines up with the shell. You want to file out the shell so it matchs this hole perfectly. I would get someone who knows what they are doing to do this. If your tricky you can do it yourself, but you need a scraping tool so when your done, you can cut/scrape a radius back on teh edge of the hole so its not sharp. When your done, give the shells the very lightest of rubs with scotchbrite green pads and soapy water. Make sure everything si clean first. Your just cleaning teh surface, not trying to scrath a new finish on it!!! There you have it. I have one more, but like I said, its staying with me. It is however not possible to do yourself and very tricky to do, an I don't know how many people out there "could" do it or have any idea how. Lastly, check your clearances. You want around .002" on the mains on a 400rwhp street engine and .002-.0023 on the big ends. For a 500+hp engine I'd go .0022" mains and .0025" on the big ends. Don't run thinner than 10w50 oil, and put a 1.2mm washer under the oil pump spring. If you use thinner oil, you will have very little oil pressure at idle when hot, less than 10-15psi. I personally run 15w60 Penrite oil, I think its HPR30. Street engines with tighter clearances you could run a 10w40 oil minimum, just keep an eye on hot oil pressure at idle. If its below 15psi, then chuck some thicker oil in.1 point
-
Some people believe the 1G is a larger version of the mighty 4AGE but it actually shares a lot more with the old 4K lump other than some twin cam goodness... The most important puzzle piece for extracting a few more horsepowers from the 1G boat anchor is in the camshaft department. What you need to do here is find yourself a set of cams from a 1GGE as they are given a healthy 10% extra lift. Next on the equation will be some new valve shims, these are best found in a st165 celica or from a 16 valve 4AGE. Do not bother with aftermarket cams, If you plan on running past 8000 rpm go and buy a VTEC. If you want more than 400 flywheel HP buy a 2J. Hear porting – don’t bother mr Yamaha has done a great job no real gains to be had here the only thing i would consider would be an anti reversion step on the exhaust manifold – i’ll let you do your own research regarding the pro’s / cons of this bit of trickery. Moving downwards you will need new valve stem seals, once you have had a heart attack after pricing these up individually (about $7 each and you need 24) you will decide that full seal kit is a pretty good option (including head gasket and a whole lot of other goodies such as cam cover seals. Standard pistons are more than up to the task, but as you may or may not have found out rings are pretty much unobtanium (unless you have a large wallet) so here is where the 4k can help you out, of course you will need 1 and a half sets of rings. And this will do the oil control rings and lower compression rings. The upper compression rings won’t work as they are 1.2 mm thick. What you need to do is talk to Bowden engine parts dude and get a set of top compression rings from a D15A Honda ( I think this is a SOHC VTEC ones) which also has a 75mm bore. Standards rods are all good. – rod bolts can be replaced with ARP units from a 4G63T but i would not bother – read above regarding 8000+RPM Bearings – thrusts are available from the 1G (if you get really stuck I think I might have a spare set of new standard sized ones still in the box. Bearings Mains and BE – there are 2 different sized big ends – 42 mm and 44 mm i think the 42mm setup is a Gen 3 1GGTE setup which is not as common, the early 1G bearings once again can be donated from a 4K (one and a half sets of course) Oil system – here is where things get interesting, as you may or may not know the 1g has an appetite for # 6 BE bearings. What i did was drill the oil feed for the back main bearing out by 1mm (pretty easily done) then cross drill the crank oil feed out oversize too. From there shim up the oil relief for a bit more pressure (can’t remember how much extra i gave it but your engine builder should be able to assist) next is some porting of the oil pump galleries on the block, follow this up with some porting of the oil filter housing (especially facing rearwards towards that #6 big end) Head bolts – i have re-used a set of healthy looking OEM ones as they are not torque to yeild , but measurements suggest 1J head studs would work . ECU- i know nothing of the factory ecu. Injectors –plenty of options to upsize injectors I used Vr4 450cc units but evo 510’s of 560’s is what i would use next time – they will drop straight in to the factory rail setup. Disclaimer - the info above worked for me on my engine please check for yourself before going ahead. Cheers Matt1 point


.thumb.jpeg.e0a4bff61111e0c8c7396950fcc94da1.jpeg)


.jpg.f8e94d8625df5fcaf9a9d629d0f9f023.jpg)


This leaderboard is set to Auckland/GMT+12:00