
Leaderboard


Popular Content
Showing content with the highest reputation on 07/07/16 in all areas
-
Discussion Thread So I took this to work to try get some work done on it so I can get it wof'd and back on the road! I was meant to do this Instead I did this, hopefully tomorrow might see some more practical work done but it will most likely see the other side get the same treatment and maybe some work on the new wheels for the back. [/url]8 points
-
Door Card Clean Up Managed to get hold of some RS2000 door cards a while ago that have been sitting in the shed. They had a chrome strip on them but the chrome had all come off, but were in otherwise good condition. Masked them up and gave them a coat with some satin plastic paint then got stuck into them with some armourall vinyl cleaner and they've come up great. Original Condition: Masked Up: Painted: Ready to Go:5 points
-
I have an American car! Also, thread jack, If you like American cars, there's a burger/Parkup night at Carl's junior in takanini on the last Thursday of each month started recently by my hot rod club (manukau rod and custom) Should be 28th of this month. They have a 'no jappers' rule because hot rod barrys. But Merica! F**k yeah! Ima start a thread on it actually3 points
-
Mines well underway at the moment. Iv got a sc14 from an estima and a dellorto 40mm side draught. Manifold for intake is being laser cut currently and will be underway with the supercharger mounts this weekend. Also managed to score me a high flow fuel pump that's a direct Bolt on replacement for factory which is a bonus3 points
-
Thanks roger. Turns out I really didn't need that and this was easier than I thought it would be. After stripping back the wires to tge plug for the reg, I found the 3 wires I needed. Which after alot of confusing my self I discovered the colors match from both the car and the alternator plug. I confirmed this with a multi meter. So now I just have to cut every thing to length and solder, and everything will be lovely.2 points
-
They are non-crossflow, there's tape over the exhaust ports.2 points
-
Hey Pete https://www.carthrottle.com/post/brace-yourself-someone-has-stanced-a-ferrari/2 points
-
New Bits New Wiring Loom New Loom has finally arrived from the UK. Took a while to get made up and get here, but the end result looks great. Will probably still need a few mods as I go but I'm very happy with the result. Inner Door Bits Have everything I need for the doors now. Combination of new speakers from Hyper, some NOS bits off ebay, and some clips and things from uncle Ali. Burton Order Also finally got my latest Burton Power order with a few nice new bits2 points
-
Underseal Clean Up The underside of the car was sprayed with a bitumen based underseal a few years ago but it never set properly. It's fine under the guards but under the floors it was really wet to touch and looked pretty average. Made the call to strip it off and do it with a better quality product. I was going to leave under the guards with the old stuff, but looking at the new stuff now and how much better it is, I'm going to do the whole thing. Spent some time doing some research on a product that I'd be happy with and it's worked out really well. It's textured enough to make it look tidy, but goes on quite thin, really nice product to work with. Getting the old stuff off was a pretty terrible job, but a heatgun and a scraper has worked a treat, and although it takes a while was well worth the effort. Old Bitumen stuff: After 8ish hours of scraping: Masked up and ready to go: Product I went with: Finished Result (Haven't done outside chassis rails yet)2 points
-
Here's a peak of the now flash paint job in my engine bay. Show's off my mighty rattle can paint job skills.... I might sand out a couple of dribbles that occurred and lay on a few more coats but even as is I'm pretty happy with it considering I was originally intending not to paint anything at all.2 points
-
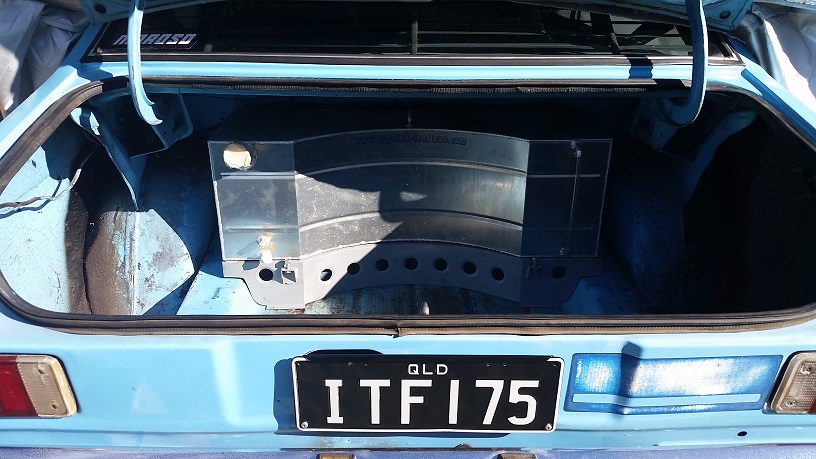
Paint work's nearly done and it'll be off to the upholsterer this week. Have also got a full rubber kit, new headlining, and a brand new windscreen to go in. Should look bloody good. Boot's been sealed off with a 3M texture coat and painted white.2 points
-
Another day in on the car today. Joe and I finished prepping it for the paint shop on Thursday and I dropped it off this afternoon. List of jobs to do are: - Clean up White Paint Front Screen Surround Rear Screen Surround Sunroof Hole Parcel Shelf Boot Spotlight brackets Wiper Holes - Paint all trim bits Satin Black Front Panel Around Side Windows Tops of Doors Dash and inside A Pillar Bumpers & Handles Fuel Tank & Cap It should all be done by next weekend so fingers crossed... Once that was done, we spent a couple of hours this afternoon cleaning up all the glass so it's ready to go with the new headlining and complete rubber kit. Method was: 1.) Scraper to remove Silicone / Black Paint over-spray / General Crap 2.) Meths to remove sticky crap left from tints and more general crap 3.) Glass cleaner and news paper All screens came up looking mint, very happy.2 points
-
Passenger door in the booth...1 point
-
Yes i would plumb the vacuum advance in as you said and leave the atmosphere vents as they are. Sounds about right.1 point
-
Hey have any of you guys ever tried to super charge a 1600 crossflow as im wanting something a little different for my mk1 escort project Cheers Hogan1 point
-
This is for 1981 Crown with Carb. 004= Externally regulated alternator. 076= Regulator. 005= Internally regulated alternator.1 point
-
Last week car went in and flew through its warrant no problems, have now done 400km on the new motor and hasnt given me any problems. Excuse the dirtiness drives down 2km of gravel road each day.1 point
-
I've been using Brunox for years. Rust where steel replacement isn't necessary, grind or sand as much rust out as possible, coat in brunox leave for 24 hours or longer. If it's a exterior panel requiring a quality finish, sand out as much of the brunox as possible before prepping. If it's an area you don't care too much about like under carpet, you don't need to sand it out before coating depending on your coating material. It says it converts to a primer, but this is not suitable for panel finishing. It has poor adhesion and may react with certain coatings. Where steel replacement is necessary, I spray on after the repair is complete. Again, leave for 24 hours before prepping further. Fish oil for surfaces that won't be painted1 point
-
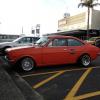
They look alot better on Maggie then sitting in my garage1 point
-
I'm not sure I catch you Bangbug, come again?1 point
-
Noice So have done a bit more investigation Based on other similar Suzuki ignitor pinouts the only wiring change you'll need to make is either stick the black and yellow coil wire where the red arrow is or the white coil wire where the yellow arrow is. Then you'll be back to a single ignitor. The middle terminals are unused on the 6 pin plug. Plug your preferred ignitor in. Instructions for testing with multimeter. (4 pin plug is the signal generator lead wire coupler) Also check your engine earth lead for corrosion etc.1 point
-
Hi mate, did them myself haha just chucked in the lathe, machined out the centers of 4 donor rims, then parted them with how much offset i wanted, then parted the front lip off the sigma steelies then welded on the new lips.1 point
-
just this;1 point
-
ok this is cool. Don't do this though, k?1 point
-
Bit of rust in the door... All gone Forming right/rear panel1 point
-
Quick update accompanied by some smaverage iPhone pics. New vs old: Got them in, a few nuts to tighten in super cramped places (just the usual) and a couple of mods to get to the new manifold to fit. Now just have to plumb in the fuel, connect throttle and choke, connect up rest of the exhaust (but not before a cheeky drive with just the manifold). Then give them a tune - anyone have any tips for this?1 point
-
Hogan got his esky running, But he never got it tuned properly. I sold my supercharger kit to a bloke who Is as keen as I was when I started out. I have two more blower set ups that i plan to build. SUPERCHARGED! because.if it doesn't have a belt, you're probably wearing a dress......1 point
-
oh and also you'll struggle to get the handbrake much tighter than that one is unfortunately. The ae series handbrakes are just poo's and never work that well. That is the best feeling handbrake I've ever been able to achieve! Worth a shot to adjust but set your expectations quite low1 point
-
Hopefully a friend will be turning up in his '68 Dodge Charger. And I will be bringing something a bit different. I've also learned how to publicise these monthly meets through the Oldschool Facebook page which is great because now the young people who only ever look on facebook for stuff to do will know about our meets, as per the other regions which have been posting their meet/meat details on facebook for some time. Will that translate to a better turnout? I'm not too fussed as we do pretty well even in the colder months. But the more the merrier and hopefully we'll gain some members.1 point
-
If I may add my 2 cents here. once you have all the correct parts to run a column shift manual v8 in the car, you will not be able to run much in the way of aftermarket headers/extractors on the RH side as the shifter linkages will be in the way. without some cutting and welding of the pipes. That is of course if your going to chase a few more neddies out of said V8.1 point
-
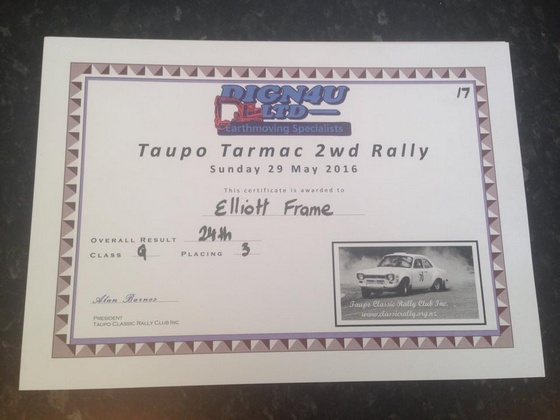
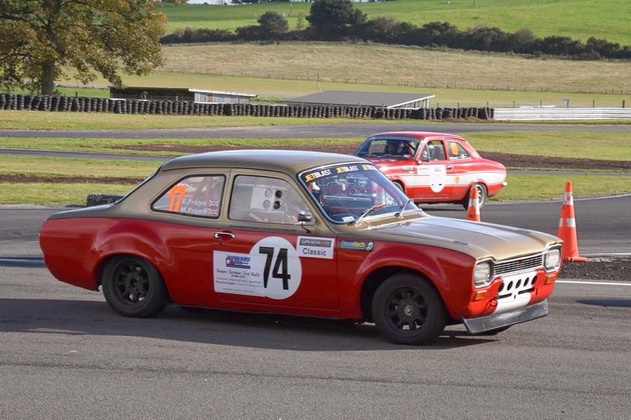
Certificates and a shout out to Uniscreen for my paid entry into the next Taupo Rally in August Thanks to Alan and the crew at The Taupo Classic Rally Club for running such a fun event and for the action shot below
 1 point
 -
1 point
-
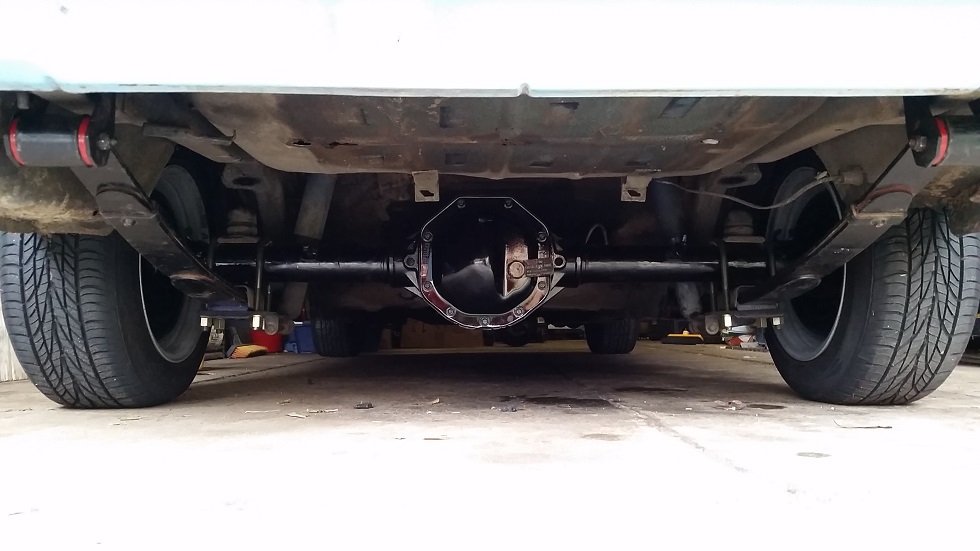
Things are moving along steadily. I got my diff back yesterday (how big are the 28 spline axles!) We installed it today along with the king springs, new bushes etc. Next will be the fuel system and sorting out the rear brakes & handbrake. Fuel system is GRP4 alloy tank- 100 micron filter- Holley Blue lift pump- Proflow swirl pot- Bosch 044 pump, 3/8 Gates Barricade EFI hose, 40 micron filter, 4 x Siemens 630cc injectors, Turbosmart FPR800 fuel reg, back to swirl pot. It will be suitable for E85 but will do the initial tune on 98
1 point
-
C & M performance do 10lb bottle refills for $250 + GST.1 point
-
A G sized bottle would hold about 60 pounds nitrous... So 10 bottle refills. So $205 per refill if I did it myself, not including bottle rental etc. Oh wait plus GST. Yikes. Eeep! Did I say 60 shot? I meant a 2hp shot so it lasts longer haha. I guess can see why it's not such a popular option then. Maybe I'll use 1-2 bottles for lols then sell the kit again if it'll end up costing a billion dollars per week.1 point
-
Looking forward to seeing how this works out. It's like Need For Speed in real life. You have to get a colored purge going.1 point
-
Most suspension in South Auckland is lowered due to carrying overweight loads. Of people puhuhuhuhu1 point
-
Another productive night last night. Got the starter mounted up and turning the engine over (Cheers Joe). I was expecting this to cause a bit more grief as it's a honda starter with an adapter plate and has also had the ring gear on the flywheel replaced to suit and notched to help the starter engage. All seems to engage very nicely and turned over the engine for the first time since it was assembled. https://youtu.be/p9ecmp-AupM And also mounted the carbs1 point
-
Floor is now painted with 2 coats of CRC Zinc Rust kill paint. Have also got a box of Dynamat on the way, and some new rubber bungs from Aliexpress. A couple of spots to fix up with the welder, then time to paint the boot and move on to getting the engine running. Cheers Matt1 point
-
IDs are meant to be pretty good at low PWs, so some cheaper injectors may not be so flash. But as lith says, 390cc is fine I also lold at the 12:1 afr, but fuck it, it works. (point I was actually trying to make) If you had injectors that big chances are you wouldn't run it on gasoline anyway tbh, so would probably idle fine on e85 etc1 point
-
Got the wheels on Bluey and dropped er' down a wee bit. Might have taken a wee bit too much off the front springs, is pretty much on the bump stops. And just under 100mm clearance, but aaah! The Po-po should love it anyway! Back height could go a little lower, for the meantime I've just got a few 25L containers in the boot to drop it down a little.. A few piccys. Hope their not too big.1 point
-
Productive night tonight. Engine Backplate Cut a piece out of the engine backplate so it slots in nicely with the starter motor adapter plate. Clutch and Flywheel Flywheel and clutch torqued and loctite'd. All very straight forward mating it up and aligning the clutch. Engine and Box Engine and box bolted together ready to go in. Engine In Jacked the car right up and just slid the whole drive train under the car, also pretty straight forward. Just need to sort out my gearbox crossmember and straighten up the engine now. Pretty sure all the paint will fall off as soon as it started but ah well. Cheers Matt1 point
-
Gearbox Gearbox is back from the Cemick Engineering in Petone where Carl shortened it down. I needed it to be 82ml shorter and he managed to get it to 75ml. Should be plenty though and means I can use the standard gear level hole, and have the shifter in the nice factory position. Also means I can keep the standard centre console. Ended up costing $350 but that included swapping the ring gear over on my flywheel and then machining let-ins on the teeth for my new starter as well. Have also replaced the front and rear oil seals, oil, gaskets, and bellhousing bolts . A bit of paint and it's looking all good Cheers Matt1 point
-
New Bolts! Have got new bolts for nearly the whole engine, plus most of the front suspension/steering including some lowering blocks for the gearbox cross-member. This should tidy things up heaps. I have 3 extra complete sets of all the engine bolts shown in the first photo for sale (thought i might as well import a few sets). PM me if you are interested.1 point
-
Small update: Box and flywheel are still at the machine shop. Small bit of info in case anyone else gets caught out... It turns out that near the end of the production run Ford changed from a 110 tooth flywheel to a 135 tooth flywheel. Mine happened to be a 135 tooth flywheel, and the Palmside starter motor kits are toothed for the 110 tooth flywheel (The 135 tooth ones are quite uncommon... apparently). This means I had to find an older flywheel to get the ring gear swapped over from since my flywheel had already been re-drilled and doweled for the sierra clutch, and had also been lightened. On the plus side, it means I have a newish engine. So yea, if you are going to buy a pre-engaged starter kit from Palmside, make sure you have the 110 tooth flywheel first1 point
-
So finally progress is happening again! Went back up to Gisborne for the rally last weekend and picked my car up from Dannevirke on the way back through. The panel work is largely finished now, the whole thing has been undersealed as well, including inside the boot. There is a little bit of tidying up to do so I'll get some more underseal and do that when I get around to it. I also haven't done any of the black trim (mirrors/handles/bumpers/window trim) or the rubbers yet. Will do a full rubber kit and black paint at the same time, but for now the focus is getting it moving under its own power. First step was to order some new bits and get some bits machined, so I have ordered: - 2x Reconditioned DCOE Webers with linkages and filters, plus an electric fuel pump all jetted and choked etc for my engine from Weber Specialists in Auckland. - Ashely Extractors from Palmside as it was going to cost me over $200 to get the cobys coated and then they would still just be cobys. - Honda pre-engaged starter motor with adapter plate for the Sierra box from Palmside. - 2x Kelpro urethane engine mounts. - Dropped the gearbox at Cemeck Engineering in Petone to get shortened so I can keep my shifter hole. - Also dropped the flywheel at Cemeck to get some grooves cut in the teeth to suit the new starter motor. While I'm waiting for all these bits I've been getting the motor in a position where its ready to drop in the car. I've pulled the cross-member out and plan on bolting the engine and gearbox all together on the floor/trolley and the just lifting up the car and dropping it down on top of it. This means I am far less likely to scratch up my new paint dropping in an engine, and I can muck around with the new starter/clutch/engine backplate on the garage floor where I can see and get to everything easily. Also needed to modify the engine mount brackets to suit the new style mounts. This involved cutting off the bonded rubber from the mounts (an old one on the left), then drilling a hole in the bracket followed by a spot of paint. Just like new. Decided it was also a good time to fit the new front pulley kit... and neither of the pulleys fitted.... They were both really close though so just filed back the water pump a tad and now it is snug on there. For the crank pulley I got out the Dremel with a sanding bit and then a polishing bit until I could get it on the crank. Also fitting perfectly now. That's all for now... hopefully some new bits show up in the next week or so.1 point
-
Parts from Burton So after well over a month of waiting for my order its finally here. You guys were right, they are really slack at following through but after a few phone calls and emails it finally got shipped off. Was held up mucking around with customs etc for about a week in NZ but that's another story. Few good bits in here, mainly the Alloy radiator, new single piece drive-shaft for the Sierra box, silicone hose kit, and front drive kit. Plus a bunch of gaskets, side entry dizzy cap, new performance leads, bolts and studs, thermostat, fuel pump blanking plate, engine back-plate, oil cap, electric radiator fan, and a new alternator (from TradeMe) that I can swap my polished housing into. Good times!1 point
-
Just submitted the big order to Burton... should be here in a week or so. Images to follow1 point
-
Engine Bay & Guards Painted + Stripe Kit Applied Engine bay and guards are all painted up and the stripe kit is on. Just need to finish under sealing the whole car, then paint for the bumpers, handles, around the windows etc. Some new rubbers might be in order to really set it off as well. Should look nice ones its sitting at the right height Front End with Paint and All New Bushes1 point
-
Starting to fit the flares Got this set of flares for $100 off TradeMe, they stick out 55ml. Far better option that the bigger ones that I had. Should look good once the airdam is on and they are molded to the body.1 point


This leaderboard is set to Auckland/GMT+12:00