
Leaderboard


Popular Content
Showing content with the highest reputation on 03/07/15 in all areas
-
Stripped the struts ready for welding, Then got sidetracked by yahoo auctions again and bought my dream wheels. 14x6.5/7J Focus Racing Spoke. Ripe for widening to 9/10A specs. Currently on a boat. V excite. A+ etc4 points
-
one more step forward tonight Goal is to spend an hour a night on it (will prob end up more) It needs to be campable for easter(ish) Cheers for looking4 points
-
Cheers Valiant for the calipers! I got a bit carried away this afternoon Completely forgot to get a pic of the state of them when I got them, but this is the state of the struts they came off, the car had been on fire Stripped down, Wire wheeled, honed, sanded, painted And fitted And back on wheels, first time since June Discussinate //oldschool.co.nz/index.php?/topic/43865-mofs-1979-escort-panel-van/2 points
-
Couple weeks ago I decided to get my wheels tidied up .. got em back yesterday really happy with how they are now to seal em up n chuck em on car .. Tires being used r 185/55/r14 .. thinking of increasing rears to 205/55 or something of similiar for something decent.. 9" rim Here's some wheel porn here's what they orginally looked like Got wheels taken off bead.. Tires r a good fit lol centre's were tigged to the rear lips had em chemically dipped n acid dipped to clean em all up Even took radiator surround and bonnet hinges to be dipped. Centre's went off to powdercoaters . Used Brian n Whyte in kingsland nice guys and really well priced . 40 bucks per rim to go metallic gun metal grey and then clearcoated. Front bands I took to progressive electroplaters n polishers in new lynn travis is the guy to see he's awesome. Here's finished product . What a difference the bands are they are like mirrors now. Thanks for looking2 points
-
Fresh cut top panel for the right hand side, I deliberately put a 50mm overlap on the new panels in case the seams ever leaked. ( bottom panel, bottom edge) Front panel back on now, this was a bit of a challenge as the caravan had to be exactly square for it to fit, it came right with the aid of a jack, some timber and adjusting the temporary bracing inside Apart from some tidy up work and the door area the right hand side is finished ready for painting prep.2 points
-
Oh Yea....... IT'S ALIVE!! Started and running but when I connect the MAF it runs a bit shit and laggy, maybe its a 6 cylinder one? Might have to try and find a 4 cylinder one to try. I still have a bit of work like connect dials and dash, OBD2 to check errors. Bleed brakes and clutch, hook up accelerator, put the seat in, Fuel regulator and pump sort of works ok.2 points
-
The chassis mounts for the upper bars are made from some square tubing I had that happened to be the correct size. I've seen this done on the net, and it makes it easy to fabricate and plenty strong. Somewhere about here should work... After the slight setback noted above, where I realised that the housing on the 9" is not centered between the wheels, I got it all together on both sides. Plenty of jacking up and down followed to check clearances, and it all looked good to me. After getting back from camping in late Jan I finally got the 1" all thread and half nuts (those nuts are expensive - $15 each. If I'd known that I would have bought regular nuts and cut them down in the lathe) so it was time to make the bars adjustable. This involved grinding off the tacks and welding the end to a short length of all-thread. Then the link is shorted up and an inspection hole drilled 1.5 diameters down the tubing. I did have to do one of these a couple of times after failed the 'measure twice cut once' test, mainly because the pinion angle was way out on my fixed length bars. One hunky adjustable triangulated 4-bar top link. Since it is for the rear suspension it can be mig welded (by me) and doesn't require crack testing. Hopefully the certifier is happy. With all the links in place I adjusted them to centre the housing in the car and square it up - just done with a tape measure to reference points on the chassis. I had the wheel alignment done yesterday, and the computer said the rear thrust angle was 0.00 degrees - i.e. the housing is exactly square in the car, so I was pretty happy with that. Hopefully the cert man (Andy Smith) is happy with the design and execution.2 points
-
i lowered it some too. I got the suspension setup changed a fair bit. shorter and stiffer springs, revalved and shortened. figured it wasnt low enough, so Kelvin cut my front strut towers to let the top arms pass through. changed the front wheels to Impul pro mesh. 15x8.5 -8. And bought a set of ssr formula mesh. 15x7.5 and 15x8, unsure of offsets sadly. Uhh, found some OG Recaro SPG. What else? uhh, bought a big Whiteline rear swaybar just to find out that the car is too low to run it.2 points
-
This is my '51 Chevrolet Pickup. I finally got some motivation to work on it after owning it for about 5 years. I bought it back in 2010 with help from my parents, when I was 14 turning 15. It was 100% stock, farm spec when we got it. Was originally from Bakersfield, CA. Had the straight-6 blue-flame engine which has been sold. Currently sitting on a jaguar front end and Holden LSD rear end. It's the longwheel base model, which I wasn't too much of a fan of, but it is growing on me. The extra long tray has been good for storing parts and boxes. Has hardly any major rust, just a hole is the passenger's foot well were the heater was leaking. The plan is to keep the body as is, slam it more with airbags, and chuck in a v8 (probably a 1UZ) Already have new rubbers, chrome badges, handles etc and airbag kit. Next major task will probably be to c-notch both the front and rear to get it sitting where I want / as low as the ground will let me. //oldschool.co.nz/index.php?/topic/47317-matts-1951-chevy-pickup-discussion/1 point
-
Cert guy says my frame wont need crack tested. Just mocked it up. Needs some work. The rear engine mount seems to be about 3 inches further back than I'd like so will chop that centre post out and move it forward Dunno if rake is a little too much?1 point
-
So went to drive out of my awkward (steep+tight corner) garage entrance on the way to the panel beaters to get the right front guard pulled out and the bloody slope did half the job for us! A fair bit of burnt rubber later, and she was off to the panel beaters.. Pulled it out 15-20mm or so, which would be enough to get the tyre snug under the flares (which went on a treat). A bit of a mission getting the car out of the garage again (front flare is a bit too low causing some rubbing only when turning sharp up a hill haha), but no problems on the road as yet. Think we will look into pumping up suspension a bit as the front now looks a little too low. Otherwise we were thinking of sanding a bit off the bottom of the flare? not too sure yet. By no means perfect but a nice temp, woffable (hopefully) look at the moment. Next job, wof. Discuss1 point
-
Must watch :1 point
-
So you've got heaps of time Keen to see how you get on1 point
-
Alltorques all talk, he likes the diddle too. He also likes to finger gently bumholes while they poo. Catching corn and making porn big nips are worth a chew Winnies a bear so sit on a chair and read this whole thread through. I like to rhyme all of the time, these thoughts are mine, wet micks divine, cheap wood is pine, deaf people sign. The best rhymes make no sense 2 pence hence a german shepherd whence.1 point
-
Wee bit more progress this week. Moved the caravan to under the shade of a tree as the heat was getting a bit much. Bottom panels for the right hand side ready to go They're a bit of a nightmare putting them on by yourself as they want to curl over and spring out, I also wanted to avoid buckles and ripples , so a couple of wood offcuts and some clamps came to the rescue1 point
-
Well, I haven't been here for a while! I thought I'd post a sad excuse for an update. I drove the car.1 point
-
Sooo first tests done. 38.1mm tube Max 38.1 Min 37.8 44.5mm tube Max 44.5 Min 43.8 Pretty happy with this!1 point
-
^ Was that your Austin in the pics from Wagnats? To me those don't qualify as excessively low powered cars only capable of a top speed of 70 km/h on the open road. A '36 Morris 8 can achieve average speeds in that range.1 point
-
I've dailied these things off and on since the 80's and still have two of them. Must remember to scan some of my old photos and post them in the appropriate place for the amusement of fellow MOWOG owners. I agree with Muncie with regard to lowered hydrolastic just looking like it's broken. I like the thought of adjustable ride height though. Normal for cruising and being able to raise the fuck out of it to get some decent ground clearance for off road use. Also being able harden up the rear independently of the front to prevent it dragging its arse when towing would be a very good thing.1 point
-
Success! Huge thanks to Karl and Casey at Autoworks East Tamaki for the use of tools, hoist, endless guidance, and some plainly awesome fabrication and automotive skills. Those late nights were definitely worth it. Springs have yet to settle but the car sits a LOT lower now. Handles a whole heap better too, less boating around corners. Tomorrow I'll firm up the front dampers a bit, then I do believe we are ready to rock the Coromandel. Discussion: http://oldschool.co....showtopic=278461 point
-
Drug her and manipulate her until she understands. You did not hear that from me. I did not say that.1 point
-
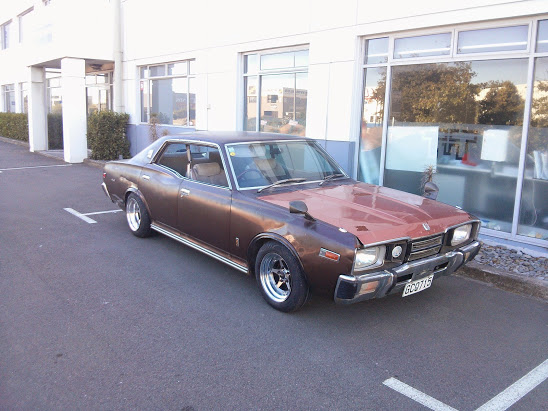
So this happened! Finally got my rims and rubber sorted! Little bit of wheel arch gap so could go lower but i think it looks grouse Hate or love here
 1 point
 -
Went to the Totota Fest today, met a couple auckland oldschoolers so that was pretty cool, heaps of awesome cars on display. and then i thought i miss heard when they said over the loud speaker we could do a couple laps for people to get photos. so i got a couple laps of hampdon downs for the grand total of $0. granted it was more of a cruise but it was still fun! madmax photography got some awesome pictures of my car (and have seen many other OS cars on their facebook so check it out if you havnt done so) not sure if the photos are going to show up since im stuck using ham spec work computers with internet explorer till my internet gets connected.1 point
-
Beast behaviour it is... Rarrrrrgh.1 point
-
Exited the shed last night, first time since May 2014 (I need to work faster!) First test drive went 'ok' ish, until the compressor clutch locked up and the air line blew out with a big bang Cue slow drive back home on bump stops. So, need to sort that and fit a one-way valve to the compressor line. Had a beer after that episode, and left the car outside. Washed it today, need to clean up garage then get it back in to pick up the issues. Looks cool dumped though. Before wash And after.1 point
-
Hey guyz Spent another day down in the garage .. I decided to start stripping the engine bay to start prepping for paint this is my 1st time n its actually came up pretty good few surface rust bits under where the brake cylinder n stuff was bUT nothing serious what so ever . What's the best way 2 go about prepping it for paint can I grind back those rust bits n scuff the rest removing factory runs in the paint etc .. I also want to paint it myself so I csn re assemble it all to get it going how good of a job is it possible to get using spray cans ?? I want to paint it holden gold which is a factory holden commodore colour. Looks like this - Here's pics of the engine bay before n afters Suggestions weclome wil end up doing it on my garage wet the floors etc ... cheers //oldschool.co.nz/index.php?/topic/42444-matteybeans-1978-rt104-corona/?fromsearch=11 point
-
So spent some time at our lock-up this weekend. Mostly taking photos of Tim's 240z for Trademe and fixing a bit of rust on my supra. Did manage to make a template for the trans tunnel and firewall for the celica, as well as mock up positioning for flares and race seats. Gotta get some mounts for those seats that will flip forward so I can keep the rear seats, as well as chop down the back of them so that they are like those classic datsun race seats. Pics: Gonna cut out the steel for the firewall and tunnel next time I'm down, then maybe get some swage lines in the bits, before welding it in.1 point
-
Made up some boxes for the air compressors to go into1 point
-
Hey guys been pretty busy over last couple days have finished the remaining rust patches which r behind the front 2 guards ! Here's some pics CT rust converter followed by epoxy primer. Drivers side Ok so Ive welded everything up shell is now rust free as far as I no ... will finish pulling engine shit out 2m n start prepping that . Paint has alot of chips so will start sanding it all back might even have a crack at bogging some of the easy / more unseen bits lol .. Have also split my rims to take the centre's to get acid dipped ... Discussion thread here //oldschool.co.nz/index.php?/topic/42444-matteybeans-1978-rt104-corona/?fromsearch=11 point
-
Thunderbirds are fucken GO!!!!1 point
-
Yeah please improve this a bit, mentioned purely for your own safety. No second chances if something did go wrong. I had developed a nervous twitch after seeing the gas cylinder in the shower, but the kitchen setup gave me a full on seizure. Bang the cylinder outside and bubble test connections every so often. Other that that, loving your work. Reminds me of when my grandparents purchased a block of land (north of the road on this link)with a run down house. It started in much the same way, all gorse / blackberry. They transformed it into an amazing place. I can see you guys are doing the same thing, so much respect for the hard work you're putting in and the great results!1 point
-
Now for the main part of the grille. I had a friend (Hi Shane) cut the main bars and tig weld them together at the correct angle. I hand filed the welds then finished the joins with various grades of emery tape and a quick session with a buffer. Partially assembled here with some of the plywood mounts to see if it was all going to work. I started the assembly with the shortest (middle) bar and some more mounting brackets Adding bars. The shaped brackets made it really easy to assemble straight. It would have been a real pain to get in alignment any other way. Once fully assembled I blocked the bars up in the grille opening and made some body mounts to span between the existing radiator support structure (or hood latch in this case) and the triangular brackets. This worked well, and made it easy to assemble the grille first. Remember to check at each stage that the grille can be removed from the car without too much dismantling, and that all the mounting bolts can be reached with a socket or spanner. Cutting out some more stainless for the body mounts. This shear made life easy! Once all together I painted all the bracketry (and welds on the backside of the tubes) with a spray bomb. Overspray on the tubing was removed with thinners before it dried. The finished product. I am really pleased how this turned out. It cleans up the front of the car no end. Since this pic we';ve been on a long drive to the Whangamata Beach Hop. No problems with the grille except a fair few bugs stuck on it! (this was done back in 2013)1 point


This leaderboard is set to Auckland/GMT+12:00