
Leaderboard


Popular Content
Showing content with the highest reputation on 08/08/14 in all areas
-
Went over last night. Everythings all lined up looking good. Front shock mounts to weld on and heater box to cover over, hopefully a couple of weeks itl be in the booth. FItted roof and to my great relief it fitted and lined up! Getting bloody excited now!! Terrible phone pics cause camera is farked Discuss here > http://oldschool.co....la/?hl=westpala11 points
-
So this happened this morning on the way to work... adult image hosting Yep- I am truly fucked off. It was a young fella who had no idea about the two second rule and was not looking out at an intersection. Ran right into the back of me. Luckily he has insurance but its not something I wanted to happen ever. His car, a pug 306, looks way way worse- the whole front end is smashed. Next week it will get assessed and then repaired. Will need to get bumper straightened and re-chromed. Ive never seen a mint Viva rear bumper going spare. yeah.. pissed off. Not a happy chappy. Why the fuck do people tailgate. Its not gonna get them there any quicker.4 points
-
I'll find out who's pulling out the concrete pole and try to get them to drop off a length of timber pole (~2m) while they're there. We can sort you out, just kidding about 11m pole.4 points
-
yup, but nowhere to put it just yet. by letterbox i presume you mean gutted drillpress.3 points
-
So I picked up a bit of a "kit set engine" shall we call it. 711M block, A3 cam, (and a spare which is a bit bigger again but not sure what it is), some brand new 1300 pistons, still in the box and a GT head. Crank needs a grind which is no biggie but the block is already bored out to 90 thou and the pistons are 40 thou so it needs to be re sleeved. Looking at a fair few bob to do that so got some time to save. Was planning to have it in the car by nats but with the price of re sleeving the block that may be a bit of an unrealistic goal. Still though, once it's built it should be a pretty sweet engine!3 points
-
A workmate has asked us to make a bait launcher for him so here is some progress. t 2" ball valve! hat to take the end of the lathe off to get barrel in... Adapter from valve to barrel . More pics to come ...2 points
-
Welding a pressure vessel is usually a nono..... But new Zealanders make exception for spud guns. Such awesome.2 points
-
Does it have to be 300 x 300? most of your landscaping depots will sell macrocarpa sleepers which are ~ 200 x 75 x 2.1 mm for about 30 bucks. You could double it and dress it how you like and mac is pretty sweet in the ground for untreated etc....2 points
-
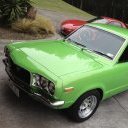
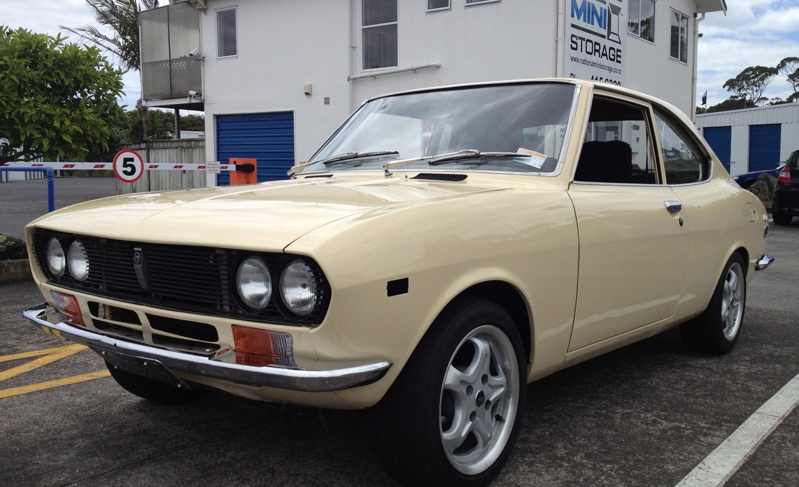
Not a major build. Just getting my rx2 coupe ready for Classic Trials later in the year. Discussion Thread //oldschool.co.nz/index.php?/topic/43873-popwills-rx-2-of-awesomeness/
 1 point
 -
So, I bought this to keep my sedan company : Seems like early falcon utes are all the rage now. Actually been looking for ages as some of you might know. It ended up being the least rusty one I could find in my search over the last 10 months. Its actually really straight, the tray is in really great shape, no dents and still has the original wooden boards as well. It Has bit of a ratty look but I have toned it down a little since buying it. The metal gold flake is quite in your face but its kind of cool. I think I might paint the B pillar sides the same cream body colour though but keep the roof as it is. Im not sure about the pin striping or the gold seats but its one of those things the more you look at the more used to it you become. Gives it a bit of character I suppose! It has a XW 221 pre cross flow engine, BW35 auto with T bar floor shifter, headers, twin exhaust, XF radiator with twin electric fans, stock drum brakes and stock diff, Mercury Comet metal chrome dash surround, plus its lowered of course! I have swapped my steering wheel over, makes it a bit more roomy in the cabin as I am quite tall and these things are not renowned for there interior space! It drives pretty good, better than I thought it would ha-ha. I need to do a few more little things but for now its a good useable ute to have some fun in, plus it was already registered here in Victoria. That was actually the selling point as made it easy to get in my name, so pretty happy with that1 point
-
Guts. Looks like it could have been a lot worse tho. I'd let them straighten and rechrome your bumper. It will end up shinier than ever. Chin up, inhale that nature, dort on.1 point
-
Got hq super lows in it now. It's super low alright.1 point
-
No worries Alex, I'll find one for you. I think they might be up at the old man's but could freight one. I know the original one from my blue Viva is very tidy but it now has fibreglass bumpers so it's going spare. I'll write out an invoice from Vivaspeed Viva Spares and Repairs for $1,000 if the insurance company is paying1 point
-
Will bring mixer back + help dig / place bollard. Just yell when needed, I got work ute for whole month. Gaz1 point
-
Don't thank me yet. They might drop off some rotten piece of shit pole that is the wrong size. Contractors1 point
-
123 Gay Street, Invercargill.1 point
-
Bring it regardless.1 point
-
shock leader/trace, basically what takes the brunt of a cast so you can have nice light weight main line and a leader that 1 - wont break when you load up a cast and 2- give a bit of abrasion resistance if you get a fish that tries to rub you off on a reef. Basically, if you go to a tackle shop I would look at a tapered shock leader - lets you tie the thin end to your mainline and so you wind that on the the reel - it tapers to thicker stronger line with takes the load while casting.1 point
-
shit yeah! this is super rad, might have to make one for the old man for summer.1 point
-
ah yeah sweet spin reel will eat it up, just need one with enough line capacity for the shot1 point
-
My bad.1 point
-
What about turning! It would be roughly 125km round trip through trees and fences and livestock and houses with the amount of lock I had. As the wagon flys. Going to ease the rear end down this weekend1 point
-
Sorry about the boat loads of pictures, got a bit carried away with it! This must be the trickiest area to fix, I took HEAPS of photos so hopefully I can put everything back in the right place. Carrying on from the last post, spotwelds! what fun! meters and meters of fun, stuck together every 10=5mm apart. holy shit thats alot of spotwelds! These ones where not so bad, this is the outside edge of the channel, where the running board attaches. the inside edge however! was a fucking bastard of a thing, I don't think there was enough room to get the spotwelder in like the other side, it was really stuck. and some where invisible, and then someone had double tapped these ones. Like I said such fun! The trick I found that worked good for me, was to drink quite heavily while doing this mind numbing work and listen to very loud heavy metal or punk, Motorhead, bad religon etc... And before you know it the week is finished and victory is yours! this is going to take some thunking. another double layer for strength/rust. There was also a scoop that attaches to the hole, it pretty much fell out. rear end of the channel, Ones I've seen overseas/online have a second pipe running inside the sill, you will notice the lack of any kind of heater pipe inside this channel, wonder if this an aussie car thing? trimmed abit more from the front wheelwell to get a better look, hmmmmmmm. I think I'll start at the back and work forwards, give myself some time to think what to do next, any help would be greatly appreciated, I have no idea right now/suss it as I go. Any sane person would replace the whole thing, but to be honest that scares the crap outta me!1 point
-
LOL, you ain't getting Ohlins for $1500.1 point
-
Anyway, the spring platforms ended up being a little bit off, and not allowing the spring to sit flat against each surface (top and bottom) with the spring fully uncompressed... as we overcompensated somewhat for the diff movement under compression. This resulted in not having enough droop travel when the spring seated flat when under some compression. So this evening sheepers popped around and modified the location of the platforms. Now it all sits as it should, with totally acceptable droop and compression travel. Also, other things: IMG_4533 by Richard Opie, on Flickr Bearings pressed onto axles, now! IMG_4559 by Richard Opie, on Flickr New Bilstein rear shocks, acquired! IMG_4569 by Richard Opie, on Flickr This is a TRD 2way LSD center. T code 4.3:1 ratio. Lush. IMG_4578 by Richard Opie, on Flickr Stack of goodies, new carrier bearings, new pinion bearings and a new crush tube. Diff carrier has been acid dipped and I'll paint it prior to assembly. IMG_4553 by Richard Opie, on Flickr On it's wheels for the time being... it's been a while!!! But happy with the height, and especially the room I now have to play with in the rear guards with the narrower diff.1 point
-
I can't take this seriously with a profile pic like that.... All I imagine is1 point
-
I found this from the other week.1 point
-
Small update, well a big one really. Pictures speak for themselves! Fits in there really nicely, did not even have too many problems. Just need to sort out all the little things but getting there! Big ups to Camel for coming over and giving me a hand to get the old engine out and the V8 installed in one day. Nice work! XY steering box fitted up. Needed bit of a trim to the box and slight tap to the body. It fits in quite well. Had dramas with the drill bit catching the crush tube on the only hole that needed to be drilled but got it sorted in the end thankfully! After the steering box was bolted up, the engine and gearbox went in nicely. Just need to sort a few things to finish it off. The starter motor I have doesn't fit and the engine cross member brace doesn't either, so have to get those this week. Lots of other small things to figure out but its all simple stuff.1 point
-
^If it wasn't for the hot rodders we'd probably be like aussie with next to no scope for legal modifications. Plus have to be a member of a NZHRA hot rod club for two years before even being eligible for application of fenderless exemptions. And then once you've got it you have to attend certain number of sanctioned events and get logbooks filled out to keep it. Plus most rods are usually scratch built so there's little bit more in getting them legal than you bolting your 'precision japanese adjustable suspension' one evening1 point
-
Today, with assistance from the ever so kind and dashing Mr. Sheepers Steaken-Cheese we made a start on operation "chuck a T series rear end in there Trev." So here, in a few photos is how the day went. Firstly, I set about removing all the parts from the AE86 diff, not before a hub to hub measurement was taken so we kind of knew how much to shorten it by. IMG_3566 by Richard Opie, on Flickr Whilst I did all this, sheepers made up a jig of sorts and welded all the old KP arms into place where they sit on the original diff, in the name of easy location of mounting points: IMG_3559 by Richard Opie, on Flickr Then we set about removing the mounts from each diff, in my case I wa stationed on the AE86 housing with the shittier of the two angle grinders. Thanks to thin cutoff wheels everything was a relative breeze and shortly things were looking as below, following a quick burn with a flapdisk to tidy it all up. IMG_3578 by Richard Opie, on Flickr After marking the center line of the diff as a means of lining up each side for re welding and carefully measuring twice the serious cut took place. 35mm chunks were removed where the tubes meet the diff center. After the below pic was taken, the edges were chamfered. IMG_3586 by Richard Opie, on Flickr Now this is the part I found the most interesting - how to keep the diff straight while welding, so as it resembles something not akin to a long bow once stitched back together. Everybodies favourite slammed Crown builder had a technique in mind, kind of detailed below. Basically 4 rings turned up, replace the carrier bearings and axle bearings in the diff. A length of solid round stock is then slipped through them all to keep the diff true enough to tack together. Later on these will also be used to correct and variances in how straight the housing is as more welds are added due to mounts etc. IMG_3596 by Richard Opie, on Flickr As of the days end, we had a tacked together housing featuring a revised width of 35mm less per side. IMG_3604 by Richard Opie, on Flickr1 point
-
IMG_3464 by Richard Opie, on Flickr So I got this. What a K series sellout. Probably the worst call ever but it was a relatively good deal. So... 4AGE smallport, TRD Atlantic pistons, shotpeened rods, balanced bottom end, TRD headgasket, ports tidied up, on stock cams for now. One of kpr's old inlet manifolds with silvertop ITB's. Various new TGP parts abound. Also came with a Toda flywheel and a fancy clutch which I can't remember the type but it is a sprung center 3 puck. Came with a V5 Link which will be up for sale soonlytimes. Also came with a T50 equipped with a C's short shifter, and a T series rear packing a 2 way TRD LSD. Could be fun. So once the car is back on it's wheels, it's time to start removing the ancillaries from this engine and tidying everything up to immaco-spec and make things more hidden. Other plans too but I will enlighten all as I go.1 point
-
car pics are mock up a couple nights ago. managed to get the manifold finished and leak tested (found a hole, yess) today. my alloy welding didnt seem to improve.. lack of penetration, blow through, not much in between haha. floor slowly going back together, fingers crossed it's on the ground later this week. /wiring, vacuum, new spark bits, throttle linkage all that happening at once. shaz tell your old man to write up a clean sheet i'll come pick it up, thanks1 point
-
Right then, since I'm on holiday I figured I'd best make some attempt to get some work done on this old thing. Step one was rolling it out into the sunlight. The front end parts have all been refitted, with nice freshly plated nuts and bolts to maintain a good clean appearance. IMG_7462 by Richard Opie, on Flickr IMG_7471 by Richard Opie, on Flickr Visible in this never before seen shot of both of the jalopies together, are the new refurbished rain gutter trims. These are made out of some weirdo plastic-tinfoil hybrid shit that turns to dust with age, cracks and generally looks rubbish. I'd never been happy with my existing ones and managed to salvage these items off a car Mark (AE25) and I wrecked a couple of years ago. A quick prep, repaint and refit and they're looking better than ever. IMG_7474 by Richard Opie, on Flickr Another piece of work completed by the good lads at GT Refinishers in Penrose, was the painting and fitting of a new bonnet to replace the previous one that while it was painted ok, was royally fucked by the last painter who did some noob sandblasting to it and warped it beyond repair. Now nice and straight and as it ought to be. IMG_7567 by Richard Opie, on Flickr In addition to plating all of my fasteners, some of the fittings and brackets etc have also been done to ensure uniformity of finish throughout. This is the bonnet catch, you can also see the radiator blank off panel which has been powdercoated, next to this but not visible in this shot is a completely refurbished radiator fan which looks brand new. IMG_7493 by Richard Opie, on Flickr And the brake master cylinder and booster have both been rebuilt and painted. IMG_7499 by Richard Opie, on Flickr Here's a size comparison between the new brake rotors and the old solid items. IMG_7522 by Richard Opie, on Flickr IMG_7535 by Richard Opie, on Flickr Over the past couple of years I've been acquiring wheels when I find suitable ones pop up for a good rate. These are some of the current line up, 14x6 +3 BRX BR-1, 13x7 -5 (ish) Riverside, 14x6.5 0 SSR Brightspeed, 13x7 +6 and -8 Hayashi Street and 13x6 +6 Advan A3A IMG_7539 by Richard Opie, on Flickr And lastly, this is what I'm working towards installing this week, although plating and powdercoating of a few items is required before I can do it. New crossmember, new TGP lower arms, new TGP tie rod ends, reconditioned steering rack with new rack ends, powdercoated swaybar with new bushes, reconditioned hubs with longer wheel studs, new grease caps and new wheel bearings, homebrewed coilovers with T3 camber plates, 200lb springs and new Boge shocks, T3 RCA's, Wilwood Dynalite 4 pot with custom caliper brackets, larger rotors and a Cusco strut brace. IMG_7560 by Richard Opie, on Flickr Before I can do this though, I need to get up in the guards and apply some body deadener/underseal type shit. Thanks for looking! Discussion: //oldschool.co.nz/index.php?/topic/18803-snoozins-1981-kpiz-starlet/1 point
-
Legal for another 6 months Managed to get a WOF yet again. Final got a clock for my wagon. With the addition of the Sapporo cluster, ive been without a clock. As little as it seems, it sux without one. A BIG thanks to 'all round GC' Fuel for donating and delivering the parts! Any way, before and after pics Yawn...1 point


This leaderboard is set to Auckland/GMT+12:00