
Leaderboard


Popular Content
Showing content with the highest reputation on 14/10/24 in all areas
-
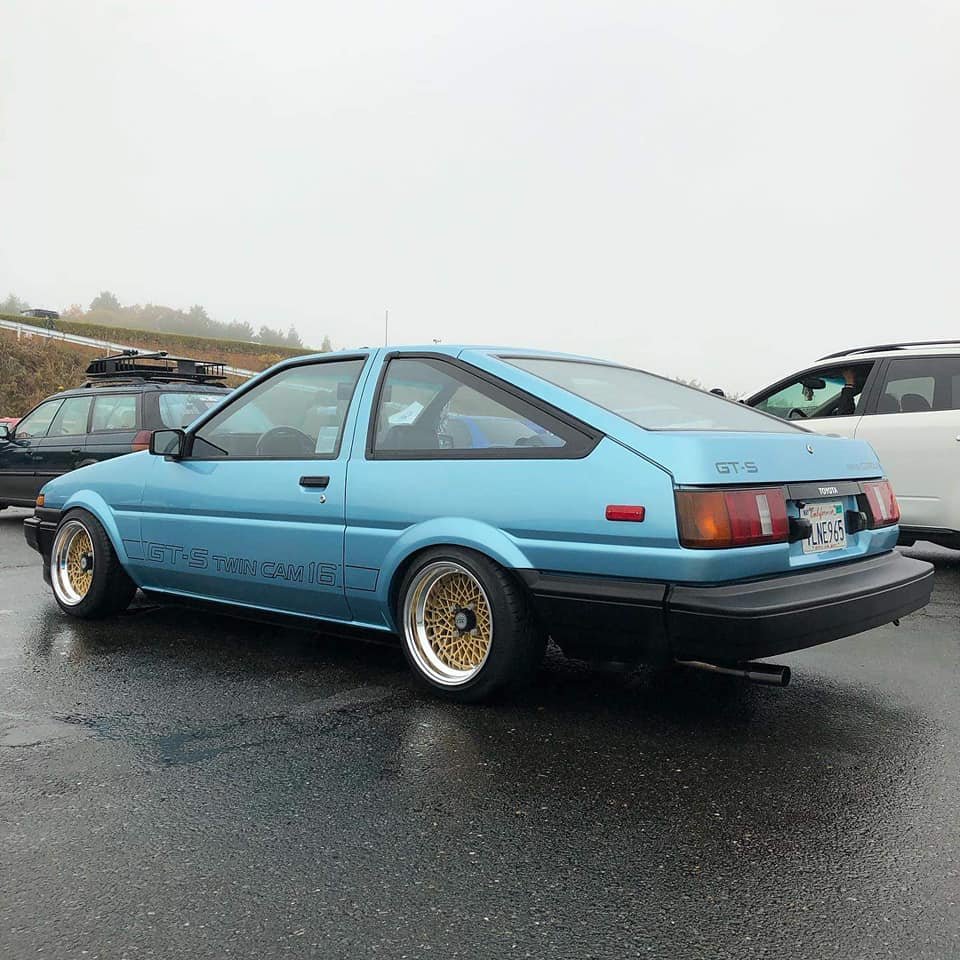
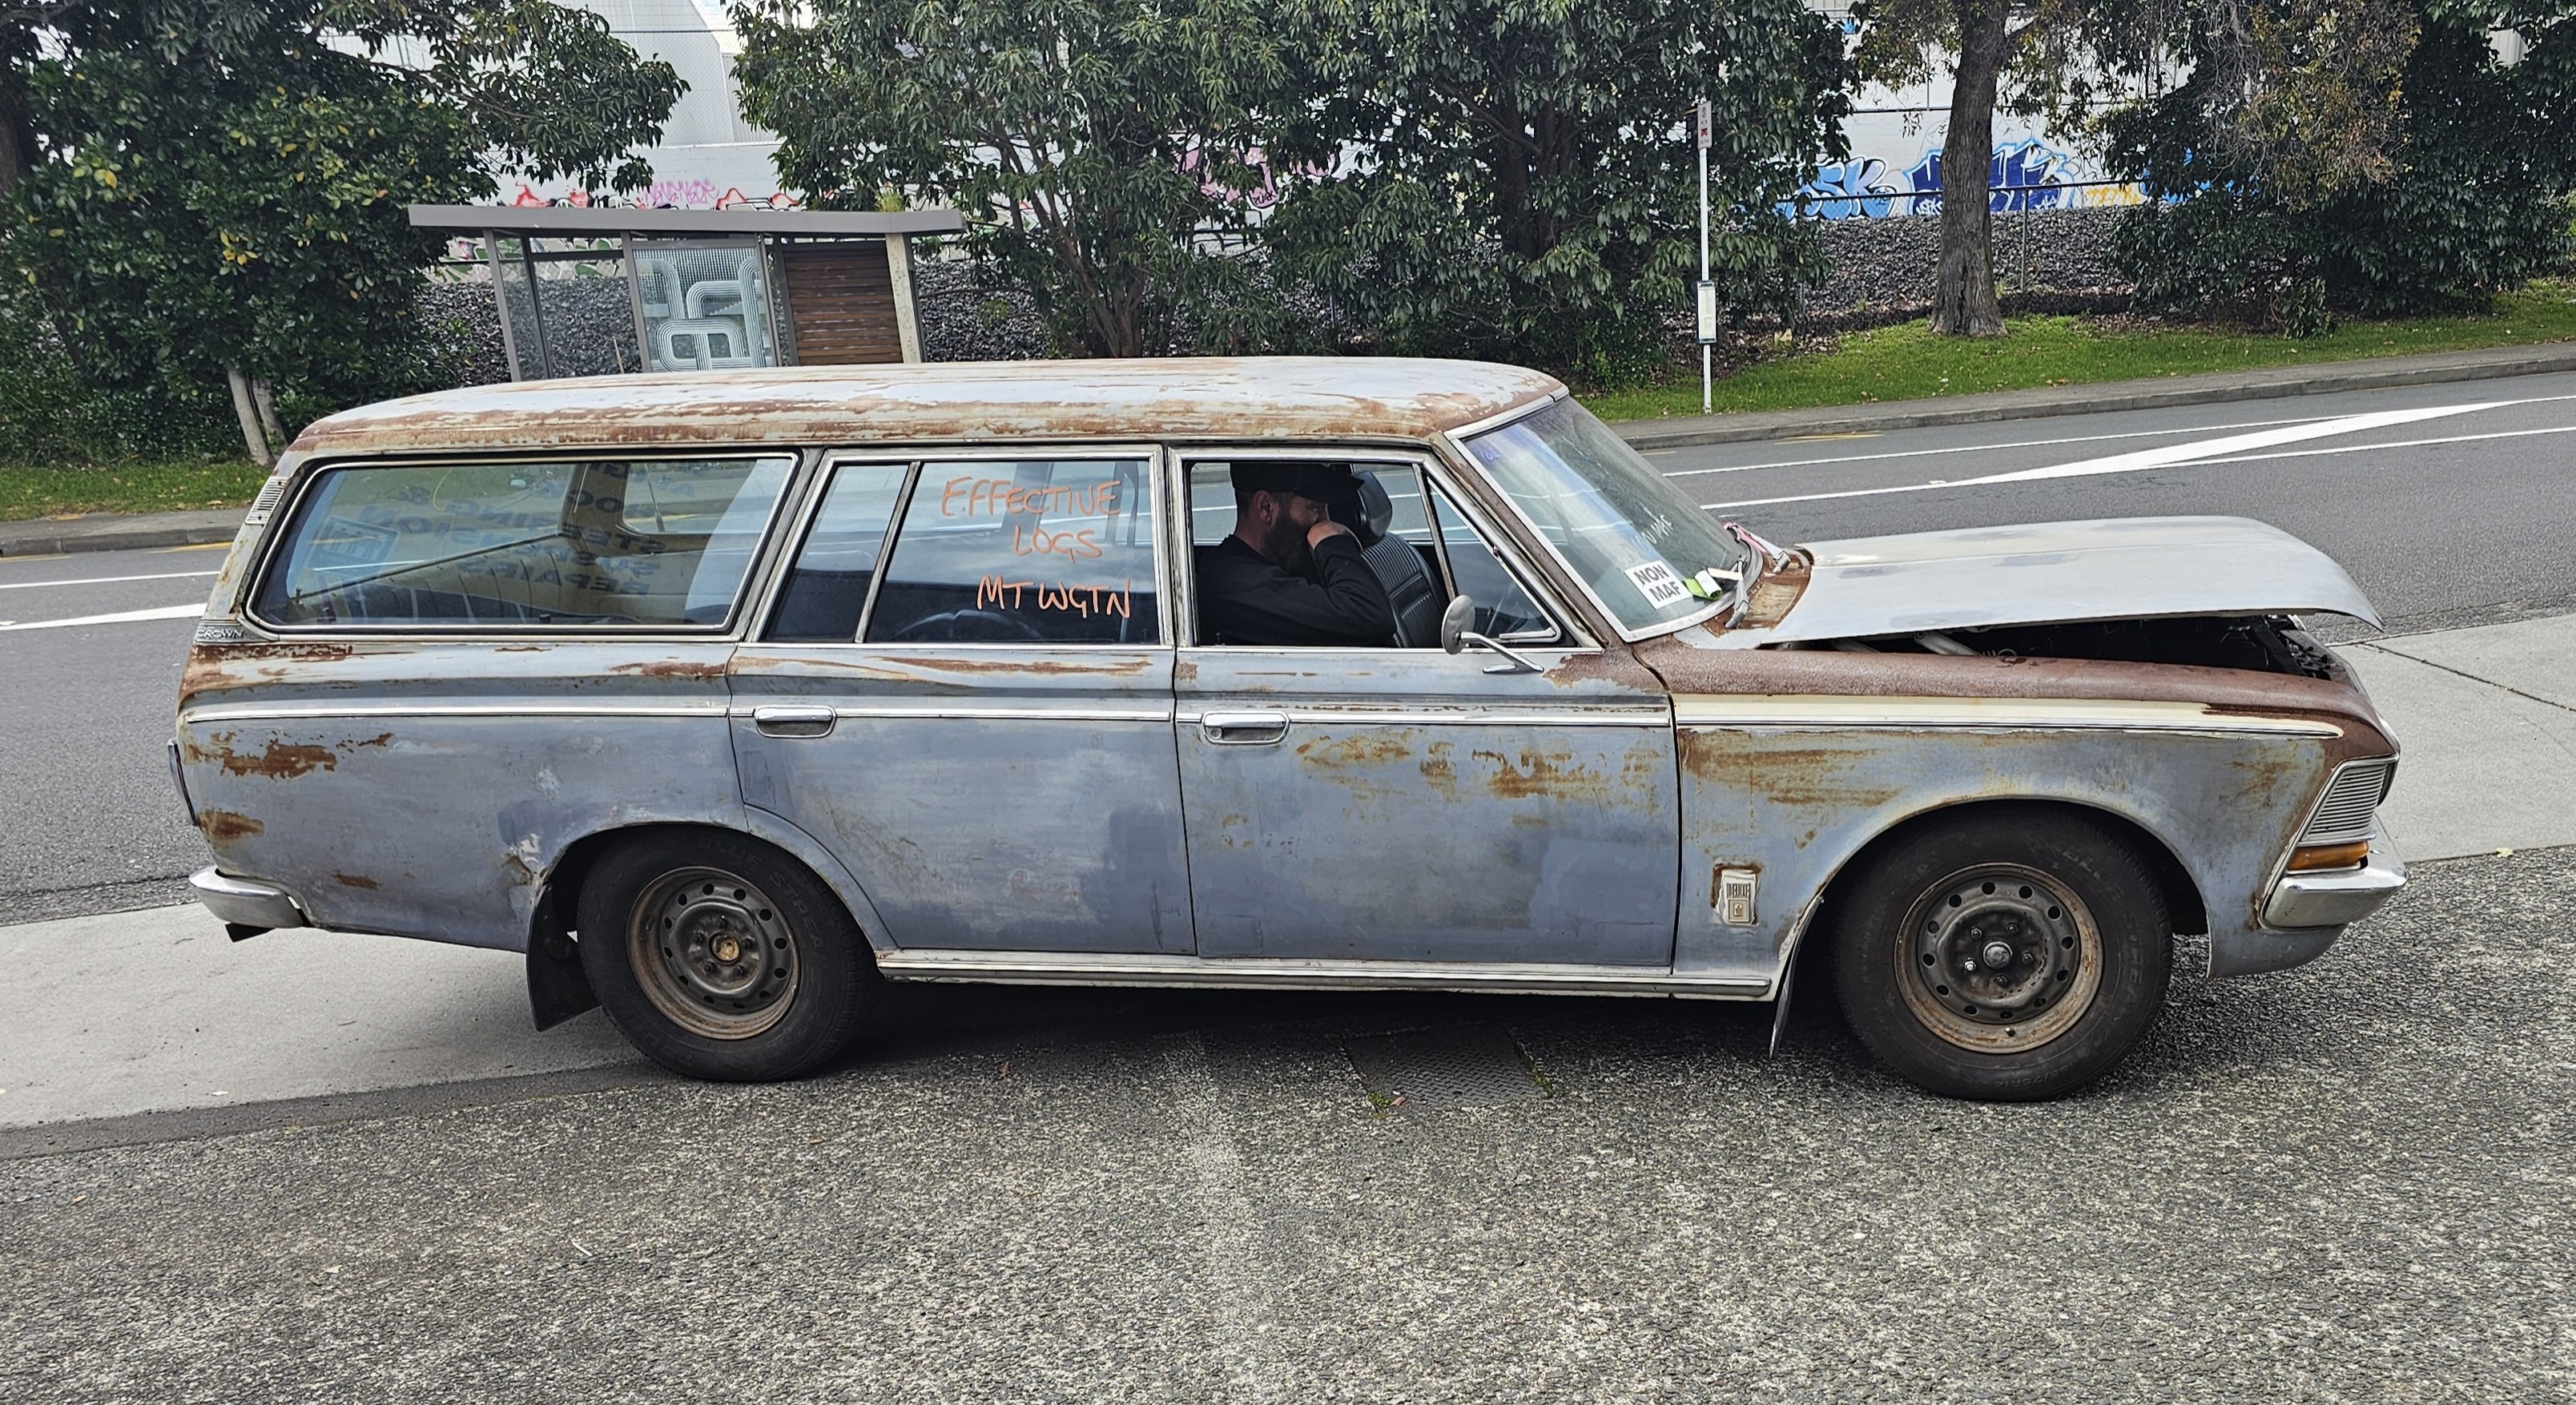
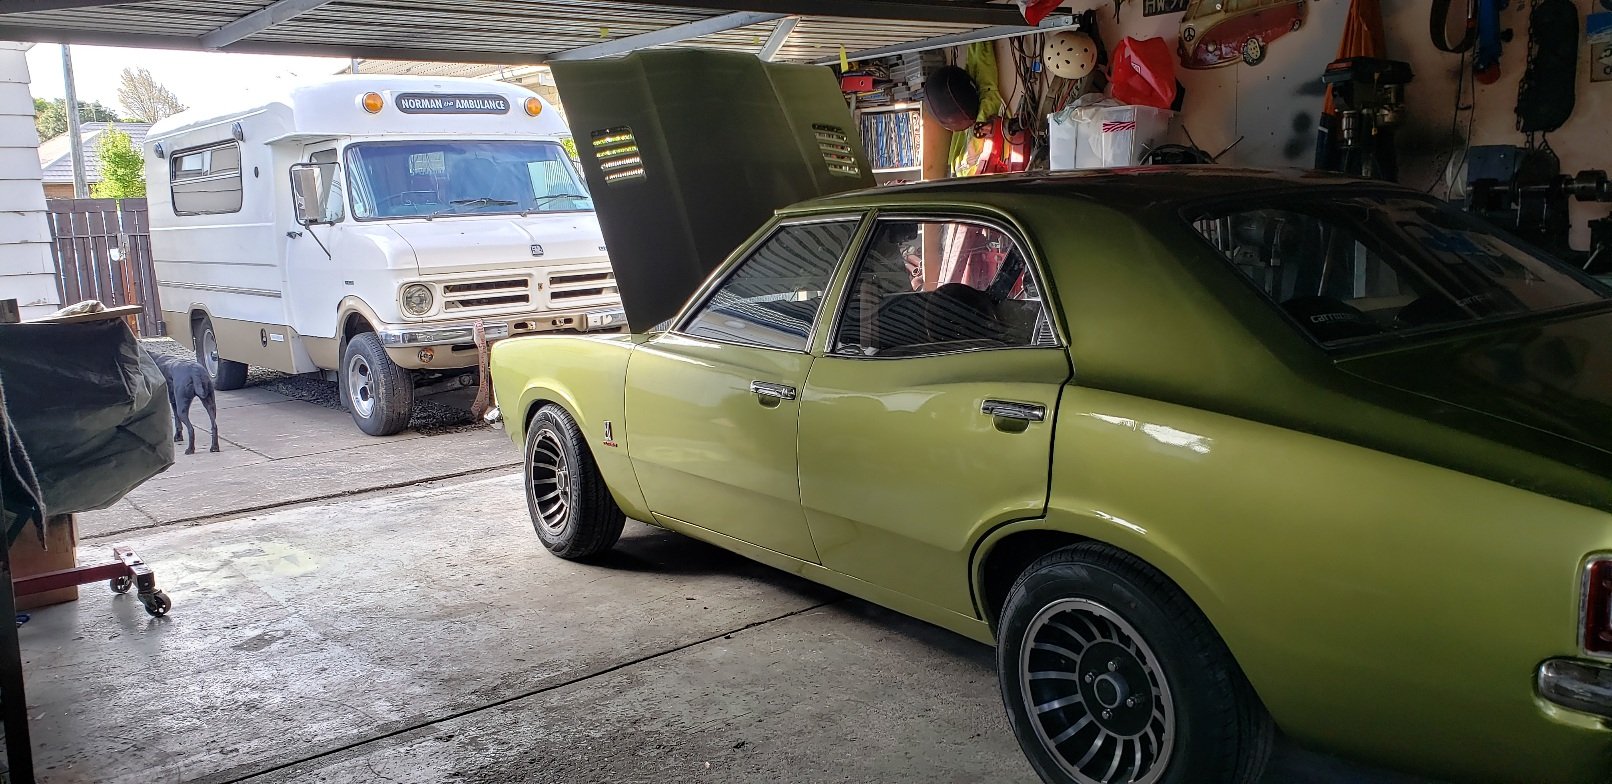
So I haven't used the old girl for roughly 4 years (I think I stopped using it around the first COVID lockdown) and I find myself pining to hoon it again. I was going to give it a real big birthday, but have realized that now is not the time (shitty old house and young kids sucking up huge amount of time and resources) so I have decided to do the bare minimum to get it back on the road. I want to use it for Nats 25, so have roughly 4 months to achieve WOF status. It should need fairly minimal work to get a WOF really, but last time I didn't use it for this length of time (Took me 4 years to panel/paint it, and that was about 10/11 years ago) all manner of I'll shit went wrong with it, so who knows. So it defiantly needs: Cracked windscreen taken out, rust repaired under said windscreen, paint and then new screen fitted. It might need: Drivers side headlight has a small hole in it, but has clear tape over it, it was getting WOFs like this in the past. I have a replacement lens to go on, but in the past I reattached the lens with silicon rather than polyurethane, so might be a bastard to get the old lens off. I've always had trouble with the adjusters braking/popping off, so will try find a solution for that while its apart. Things I want to do/long term items: Change all fluids, bleed brakes etc. Send mesh wheels away to be re-barreled (lols, like that's ever going to happen) Fix up a few dents/chips/cracks and repaint the whole car again. It needs to be tuned again, its running crazy rich under acceleration ATM. It has a few fatigue cracks around the place than need welding up and painting. General clean up of lights/indicators/bumpers etc. FINALLY sort out rear main seal leak Sunroof mech needs a new part, which I think I have, just have to find & fit it. This list will get a lot longer when I actually dig it out of the shed, wash it and do an inspection. The chap that was doing my WOF's before I stopped using it has also moved back to the area and is back in business doing WOFS, so that will help my cause a little. Cars not dodgy, but helps to have a dude do it that knows the car kinda I guess. And a random pic of a very similar looking car for inspiration and to tart up such a dull post a bit. (dem USDM bumper though, yikes) Regards, VG.
 12 points
 -
All done and back in action Pan is still quite low but at least the little bump & drain plug are not hanging down as something to get caught on things I added a drain at the back of the pan , it's only a 6mm bolt and not at the bottom but it's not like changing the trans oil is going to be a regular event, it's not that hard to drop the pan off to drain it completely Side note it takes 10l of trans fluid
8 points
-
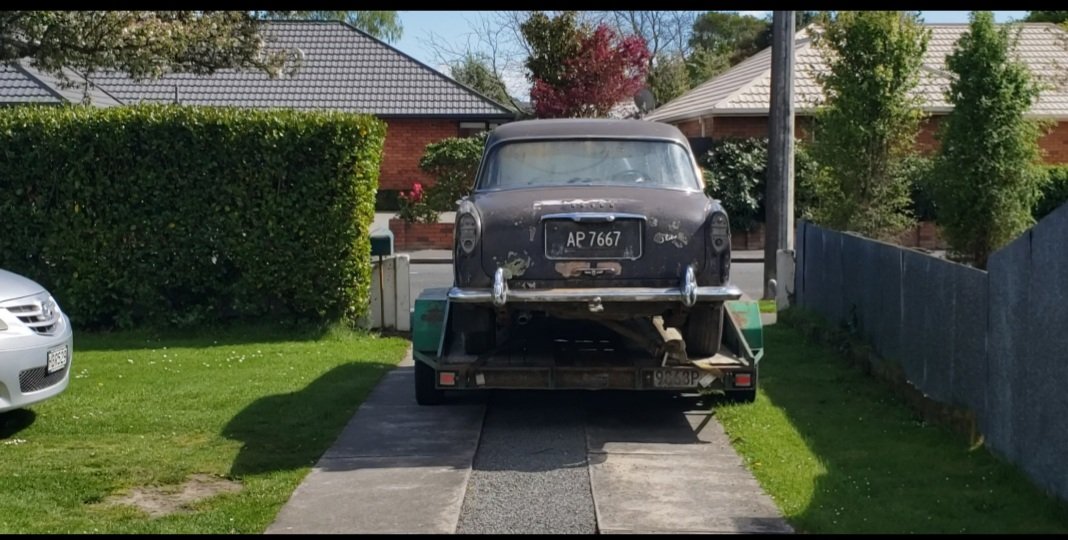
Spoke to a very helpful chap at the local blaster, and the general consensus is that if it's stuck there and not flaking off, leave it, it's doing its job (and it'll be a bastard to try and sandblast off). So I'll roll under the car, clean up the surface rust, remove and clean up and any flaking underseal, reapply new underseal where needed and then I'll call it good enough. A new wheel bearing is on the way to fix the noisy one he picked up, and the slave cylinder which chose to shit itself on the hoist is going to get redone (again). Then it'll be off to a different workshop for a pre-WOF check. A huge thank you to everyone for your support and suggestions, it's really helped to formulate a plan to move forward.7 points
-
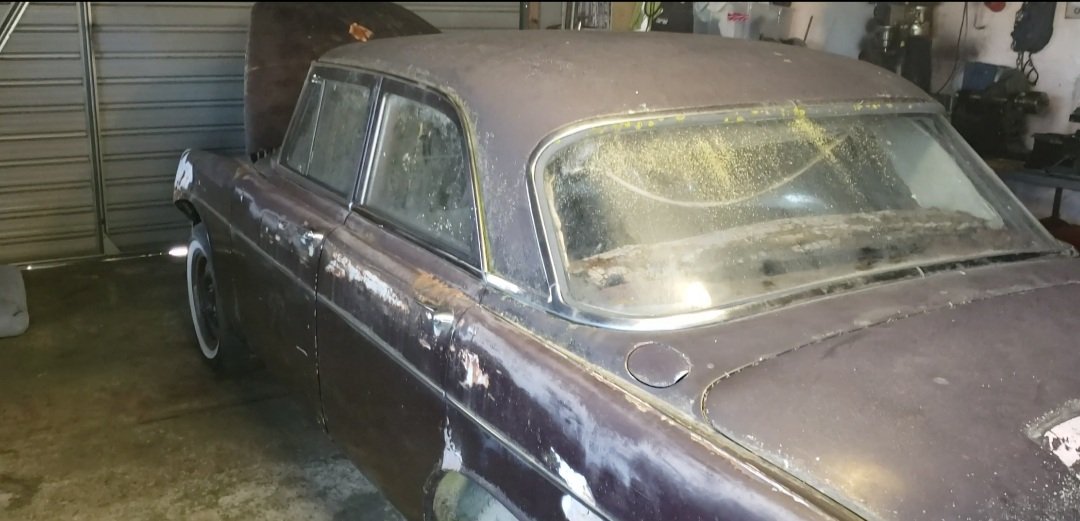
The time finally came. After many years and countless hours of work, it was WOF time. Before the WOF, the first thing to do was to replace the failed Lucas washer pump. This was completely dead, even when powering it straight from the battery with a test probe. It turns out I bought the pump about 3 years ago, and only fitted it in Jan this year, so way out of warranty now. I sourced a cheap unbranded replacement locally. This didn't even get the honour of arriving in a box, just some bubblewrap with a part number sticker on it. Other than the label, they're almost identical. No surprise. Both from China no doubt. I quickly screwed it into place and rejoined the hoses Finally everything was working again. The new Tex wipers were a bit disappointing, with a very average effort clearing the screen, but hopefully they just need some time to bed in. I've been doing some closed road testing recently to make sure everything is working well, and trying to bed the brakes in a bit too. It turns out, I had done almost exactly 10km since getting the car. As bought, back in 2021 The day before the WOF, 2024 In my travels I did notice two things. First, the ignition timing was just a smidge too spicy, and there was some pinging noticeable at lower RPM. Not good, so I wound the timing back from nearly 15deg to 10deg, and that seems to have fixed it. It's a little less keen to boogie now, but it's still 100x better than it was before I set the timing the other day. Plenty of time to play with that once we're on the road. Secondly, the front bash plate that protects the alloy sump from getting its face smashed in, was scraping a lot coming in and out of my driveway, and I noticed how close it was to the road when cornering in the video the other day. So I wanted to raise it just a smidge in the front. Sure, it looks cool as heck that low, but I don't want to smash the poor thing to bits. After MUCH fiddling with the torsion bar trim adjusters, I finally got it to settle at about 10mm higher than it was. It's lost the forward rake it had, and the sill is about level now, but it brings the bash plate just high enough that it's not hitting things now. Finally, just to be cocky, I jacked the rear of the car up and fixed the exhaust leak I had at the join above the rear axle (with lots of paste), and adjusted the handbrake just a little bit tighter. Maybe, just maybe, it'll pass with no issues now. The next day I got up bright and early, played musical cars and fired the Marina to life. It was pretty cold this morning, so the engine was a little grumpier than in my previous testing, but quickly sorted itself out. I backed out, closed the garage, got to the end of my street and turned the corner.Right into the path of a police car full of officers. To say I puckered a little is an understatement, but they didn't even give it a second look and I spent the rest of the drive to the workshop laughing my arse off at the odds of that happening. I arrived, parked up and then the waiting began. For the first time in almost 30 years, the old girl was waiting for a checkup. After a bit of a wait, the tech hopped in, fired the old girl up and took it for a quick road test. Here we go! Seeing him coming back up the road really hit me, it's such a cool looking car to see driving around. I hope when I drive it around, I can brighten the day of people on the street too. He rolls it onto the hoist and proceeds with the checks. TOOT, yes the horn goes. All the lights worked (a miracle), and the wipers and washer worked. They have a good look around with a torch, checking all the nooks and crannies, near hinges, down pillars, inside the boot, everywhere (I'm not sure they're usually this thorough on my other cars...) The hoist goes up, and my heart is in my throat As it was in the air and being checked over, a young couple picking their car up walked by and the girl commented to her partner "oh wow, look at this beauty!" pointing at the Marina. The tech is poking around under the car, checking all the usual things. Bearings, suspension, steering, etc. He also did some poking with a big prybar. After a long wait, I got the news. It's not going to pass. Long story short, he stopped the inspection and basically changed it to a pre-WOF check instead of an actual WOF check. A variation of my worst case scenario had happened, he wasn't happy with the underside. To clarify though, he made no mention at all of the work I had done. The issue he had was the old shitty lumpy tar-based underseal all over everything. In places where it was chipping off, there was surface rust, and for the rest he wasn't happy with what it could be hiding (nothing, I've seen the other side of the metal, but he can't check that). The stuff covers literally everything under there Very old photos from when I got the car There were also some other stupid things that I'm beating myself up over for not sorting, like the chassis rails having some rust flakes still in them, visible through the drain holes (from the old floor and rear panel rusting). Despite trying to clean them up at the time, I didn't do a good enough job. The other spot he was concerned with was inside the boot, near the hinges It's all surface rust and will clean up easily, but I guess since it's near the hinges he wasn't happy with it being like that. There were some mechanical issues, but he wasn't really keen on going into detail on them after showing me the bodywork issues he wasn't happy with. He mentioned the RH Rear wheel bearing was noisy and there may be play in the rack. Overall, I was devastated. It really crushed me, after all that work, for it to fail on bloody bodywork issues. The only positive of it was that it wasn't the work I did (as I feared), it was the work I didn't. I have always hated the underseal, it's on everything, it's really clumpy, and it's uneven and chipping off. It covers all bolts, nuts, threads etc under there too, which sucks to work around. If you try to lubricate anything with CRC, it melts the tar and turns to a hell of a mess. I should've really removed it all when I did the floors. Because he decided to not proceed with the WOF, it also means he hasn't entered it into the system as a fail, and I don't have to fix it within the defined 28 day timeframe. I'm thankful for that, because it'd be a pain if the workshops were busy. So, where to from here? Well, he explained what he wants to see; he wants all the underseal gone, and any surface rust and any uncovered issues to be sorted. He suggested having it sandblasted, treated and then undercoated again in something modern. I've been mulling it over and looking at my options, and I think from here the best option is indeed to have it sandblasted, to remove the underseal I hate anyway, and then have it zinc coated by the blaster. Once I get the car back, I will then paint the underside in a hard wearing single stage paint (yellow, of course). I'm not really interested in undersealing it again, I'd rather have it painted (unless anyone can convince me otherwise? This isn't a daily and won't often see rain). I have some calls to make tomorrow, to see what options are available to me, and the costs. I'm not made of money, but this car has cost me less than any of my other projects (monetarily, it's a complete time hog though) so it deserves to have some money spent on doing it properly. We ain't done yet, there is no option other than pushing forward.7 points
-
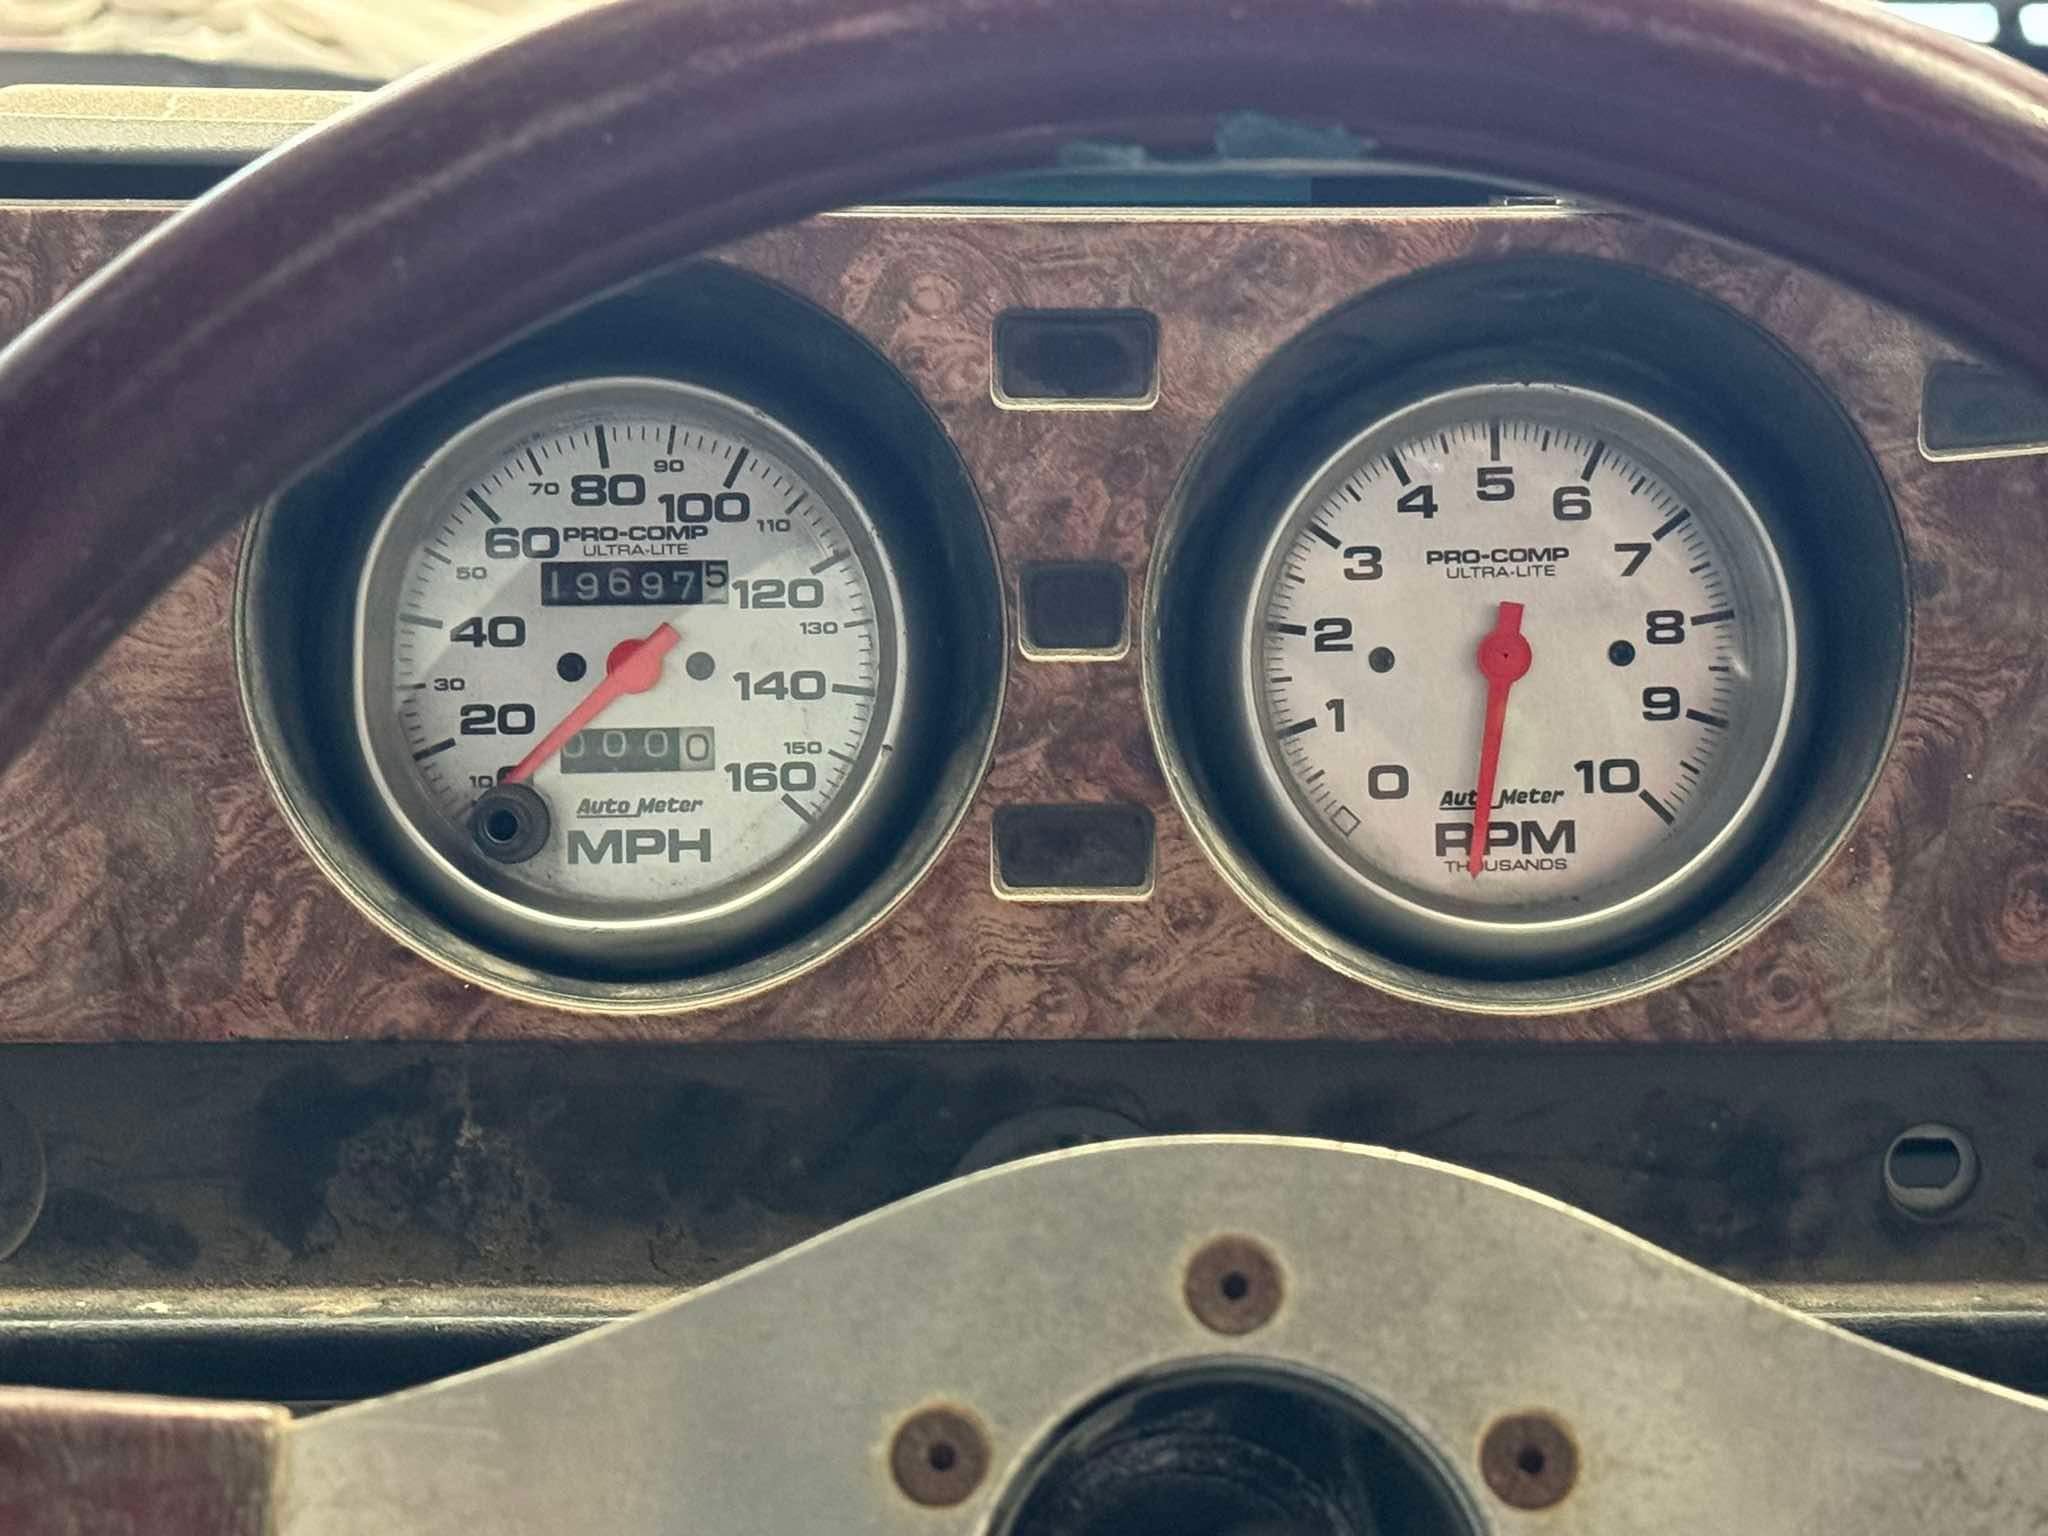
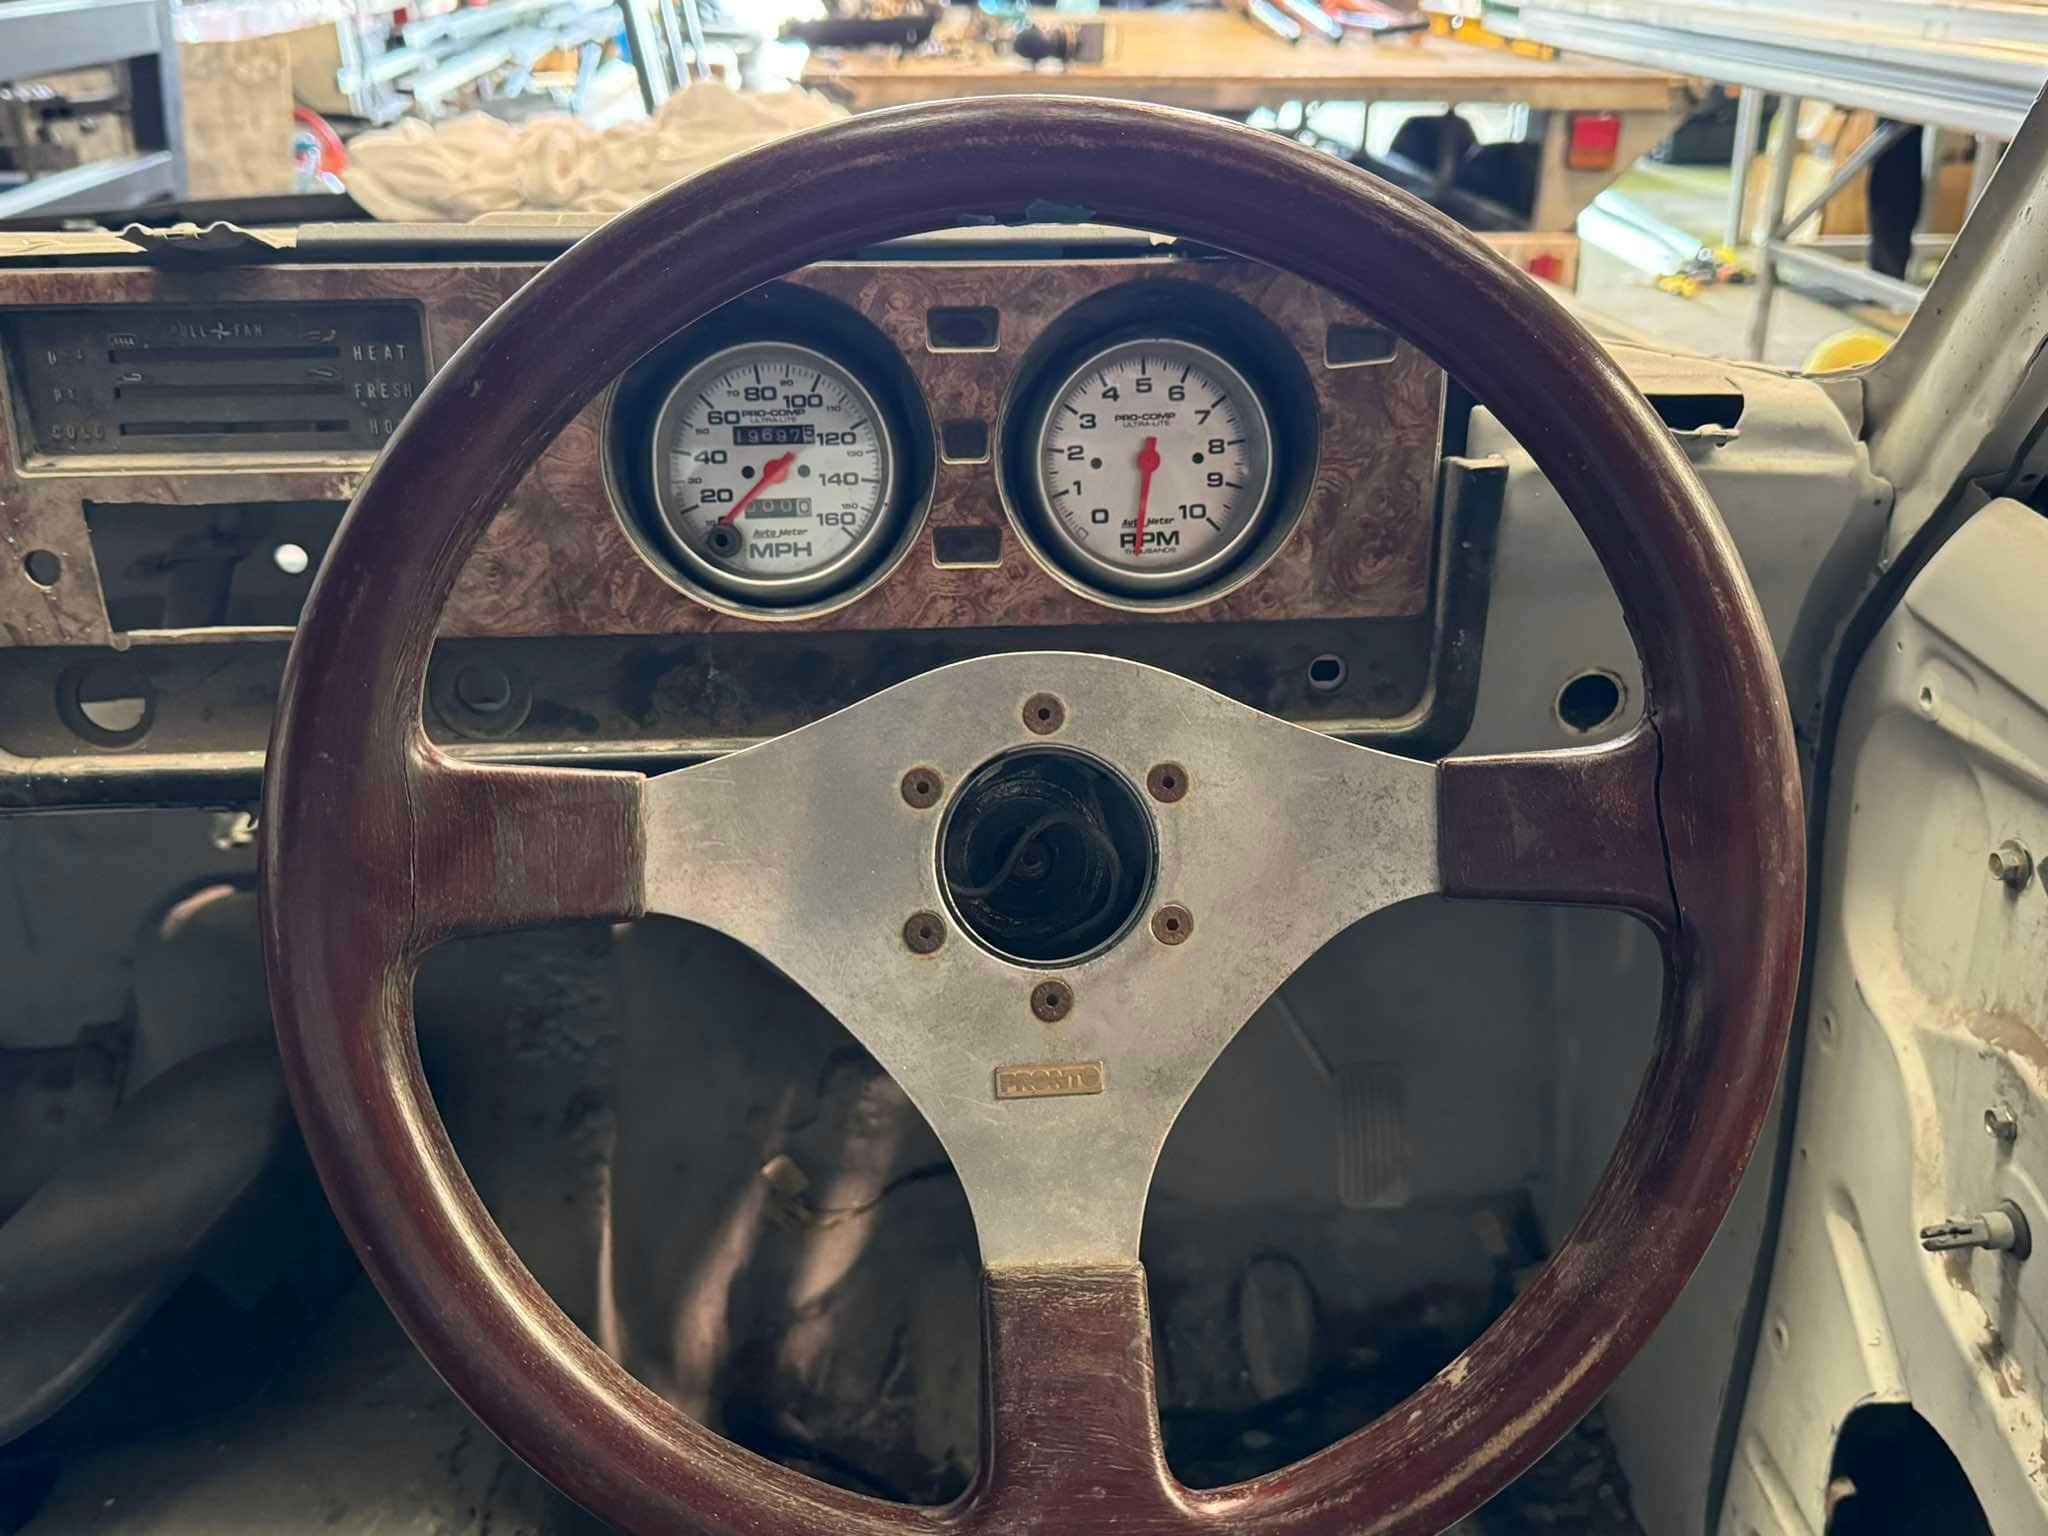
Was planning on gutting out a FD RX7 gauge cluster to retro fit. however I looked at what I’ve achieved in the last 6 months compared to the time left til I’d like to drive it. yup, outta time to naff around with that idea. so, I found some gauges on marketplace and had them sent up. went with the typical Autometer sport comp stuff, which I did actually use back in the day. So period correct for this build. i only need to find out what speedo cable to use/have made. i also have the matching oil pieces and fuel gauges, will also get the overheating gauge
6 points
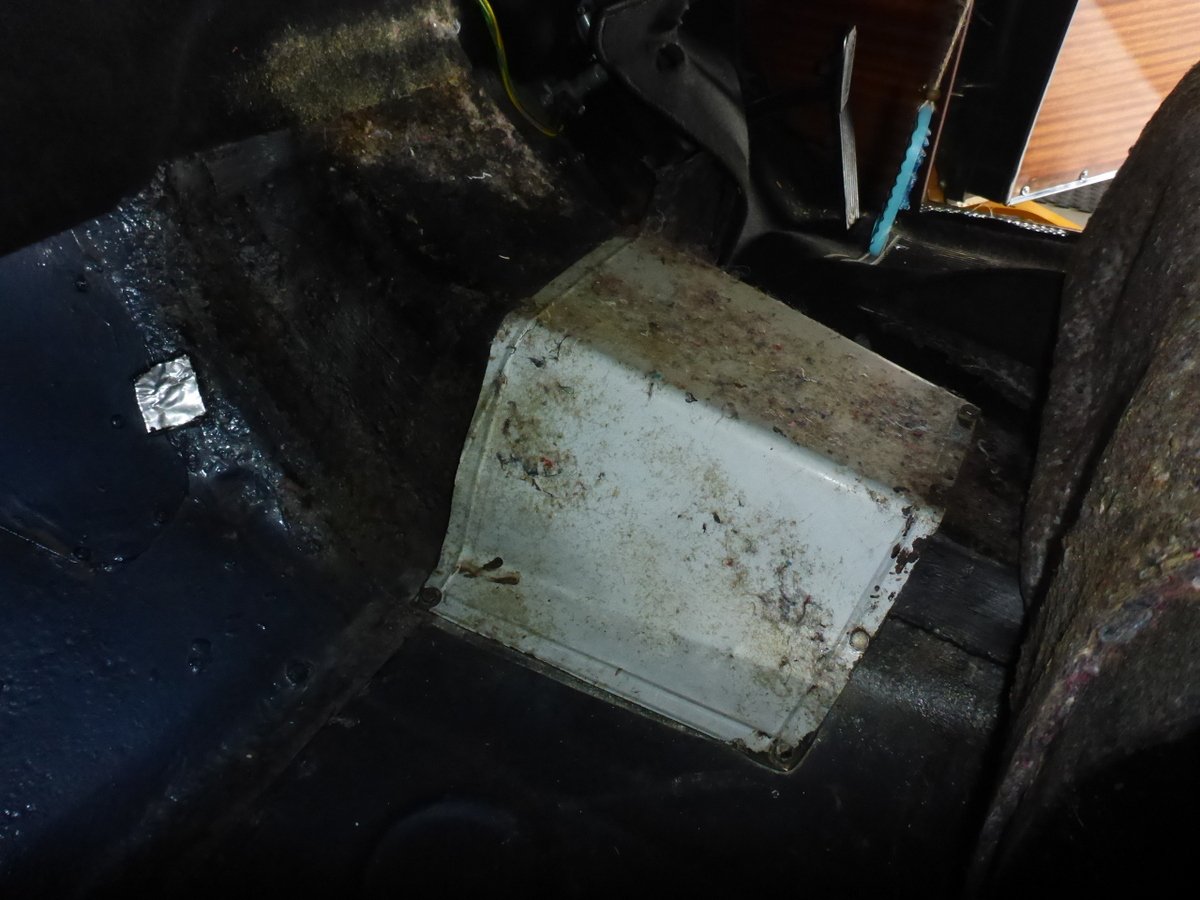
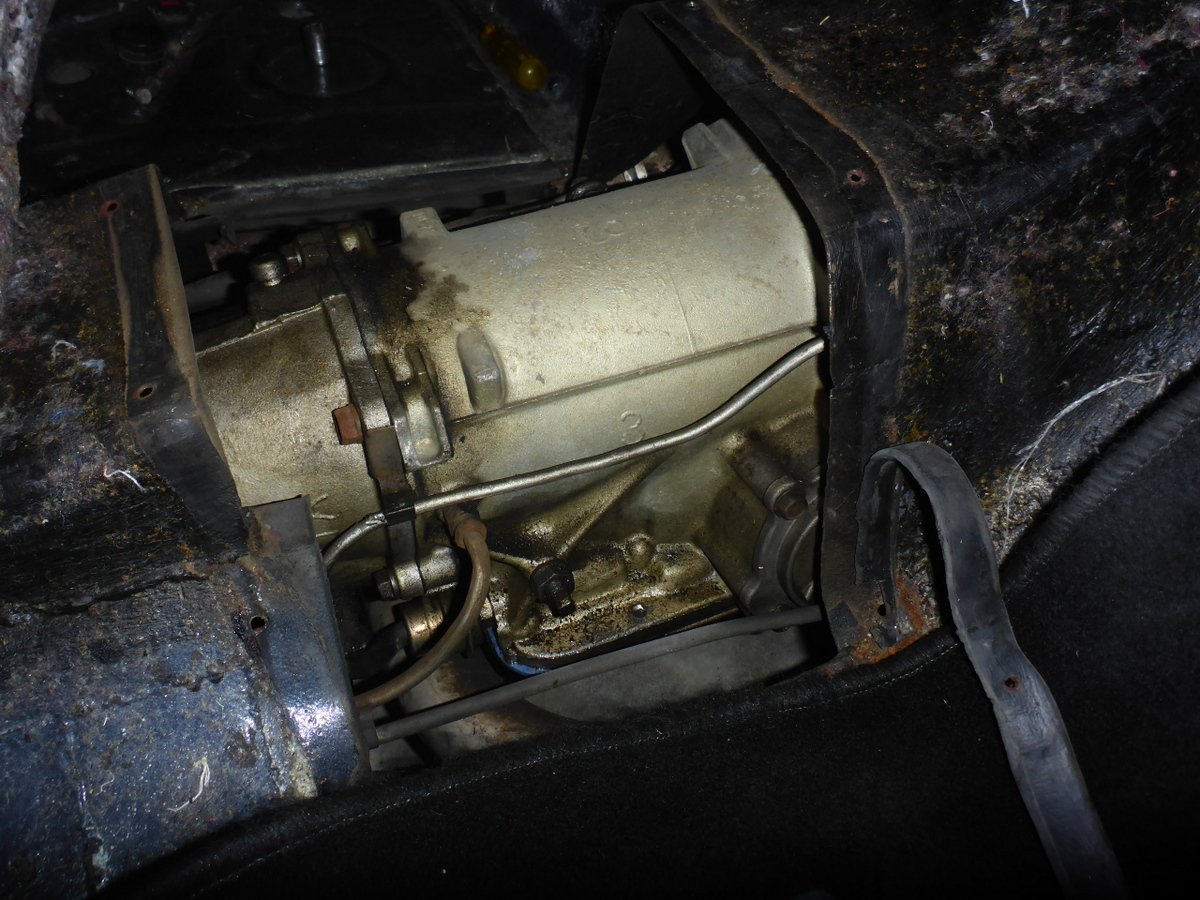
-
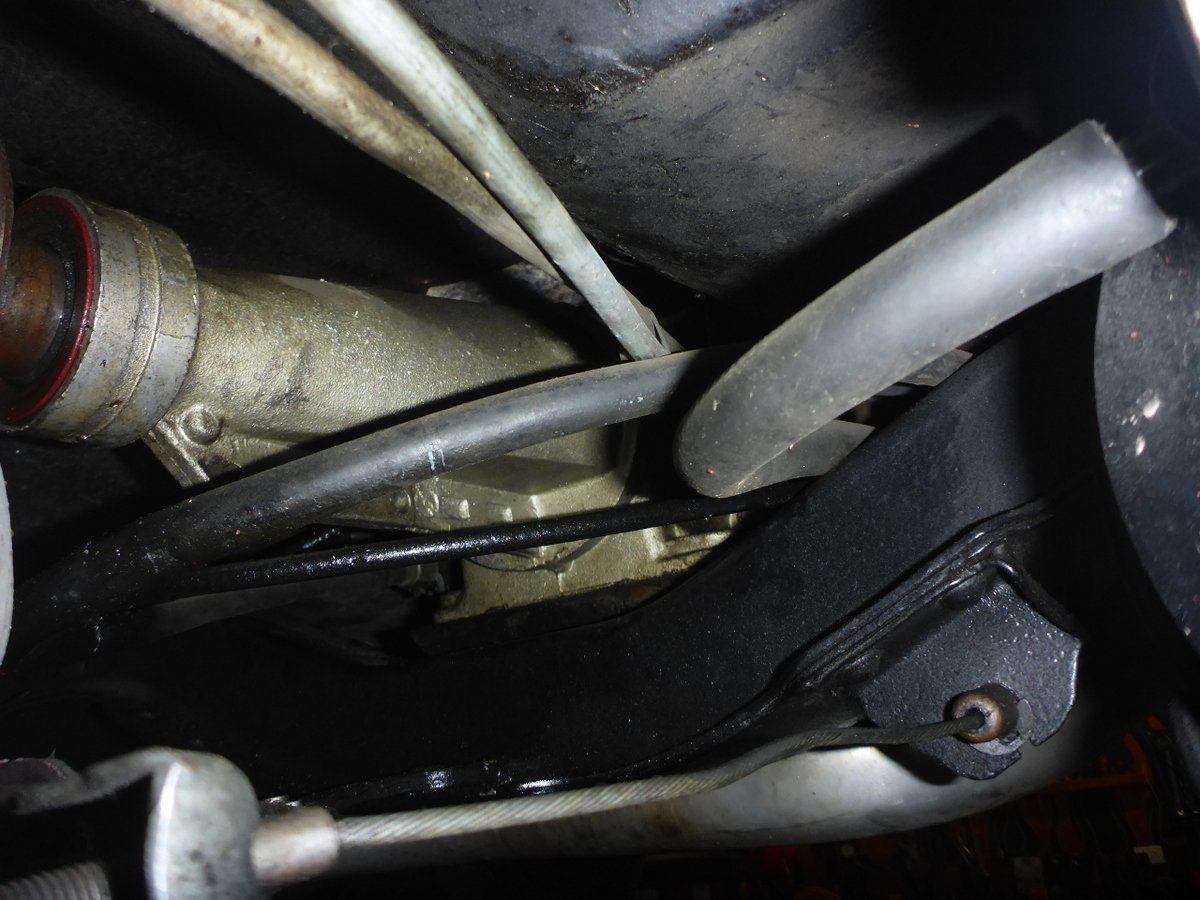
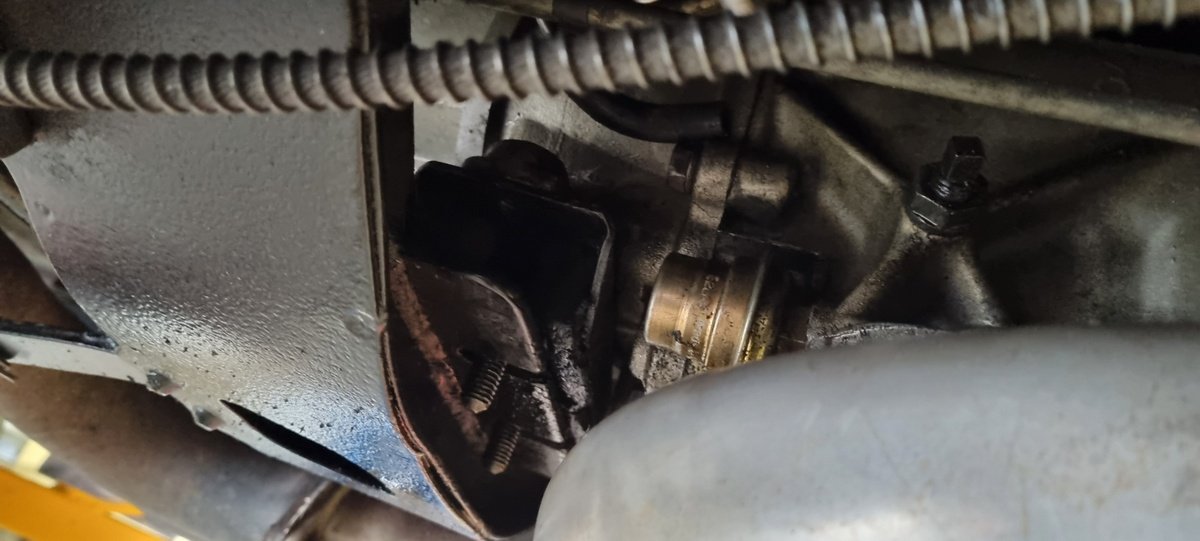
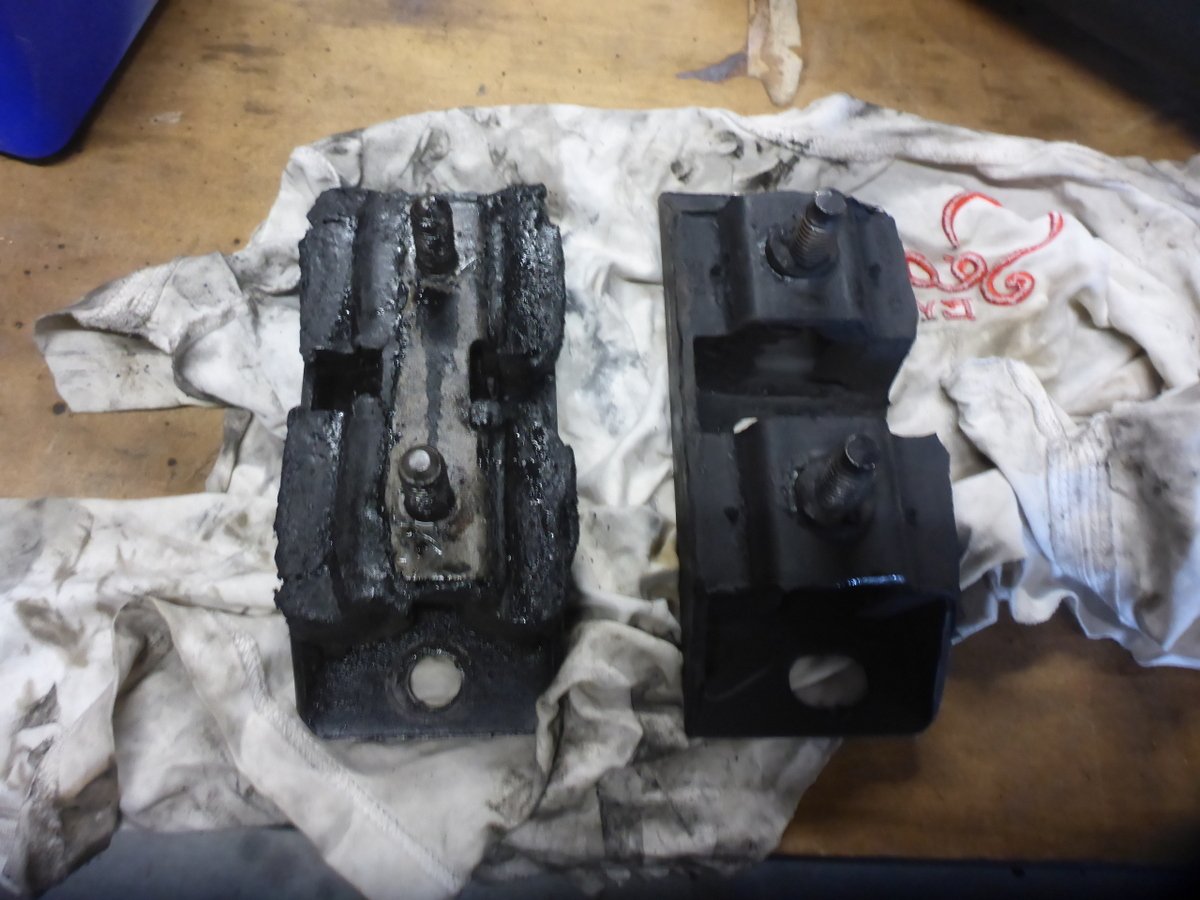
Last on the list was the transmission mount - the one there had gone a bit squishy over the years. How hard could that be? I ordered a generic Ford C4 mount - this seemed a good risk as they didn't have many different ones and it was only $30 or so and shared shipping with the fuel pump. Once it turned up I crawled under the car (still jacked up with the coilovers out) and it seemed roughly similar. Now luckily we have met a neighbour up the road who has some hot rods, and most importantly a 2-post lift in their shed which wasn't currently in use. After finishing up the fuel pump boondoggle last Saturday I arranged to take it up on Sunday, then proceeded to have some beer and G+T. Sunday rolled around and I was feeling a little dusty. We pottered up the road and arranged the car on the lift. Due to the chassis shape it took a couple of goes to get it well balanced and up in the air. The mount was easy enough to unbolt, just two lower studs though the mount plate (welded to the crossmember) and a couple of bolts up into the transmission. So far so good. The big problem was getting it out of the space it was in - not enough room to slide it forward due to the trans casing. Not enough room to go backwards due to the crossmember shape: No problem, grab a tall adjustable stand and life the rear of the transmission up, right? Well, wrong, it wouldn't move up far enough before the linkage hit the floor of the car. Even unbolting the linkage wouldn't give much more movement. At this point I was a bit over the whole thing. The crossmember is bolted in, but uses cap screws and some of those looked pretty inaccessible. Also the body is bolted down to the crossmember through the front floorpans. Rather than continuing I called it quits for the day and had a couple of beers with the shed owner. He was good enough to let us leave it up there so I went back on Monday after work to attack it again. First thing was to lift up the front carpet and deal with those body mount bolts. Hello? What's this? Hmm, a removable panel in the transmission tunnel! Well, that could be handy. I unscrewed it and chucked it out on the floor. This looks promising Now there is more room to lift the rear of the transmission up for clearance. So, back up in the air and give it a go. I lifted the trans as much as I could but still no dice, hmm what is hitting now? Oh the front UJ? Well I could get that out of the way by removing the driveshaft so that was the next step (and mess on the floor). Now I had enough clearance to get the old one out, and (with a bit of a struggle) the new one in. Pic of the old and new, I was a bit greasy so not the best on the camera. The new one had an extension piece out the back which I cut off, otherwise it wouldn't fit into the crossmember shape. After that it was mostly a 'reverse of the removal' process. I did tweak a radiator hose clamp around a bit as it was rubbing on the balance making a weird noise. So WOF acquired later in the week! I need to replace a spark plug lead that is burn on the exhaust, and put some coolant in it instead of water, then it should be good to go for the next few months.
5 points
-
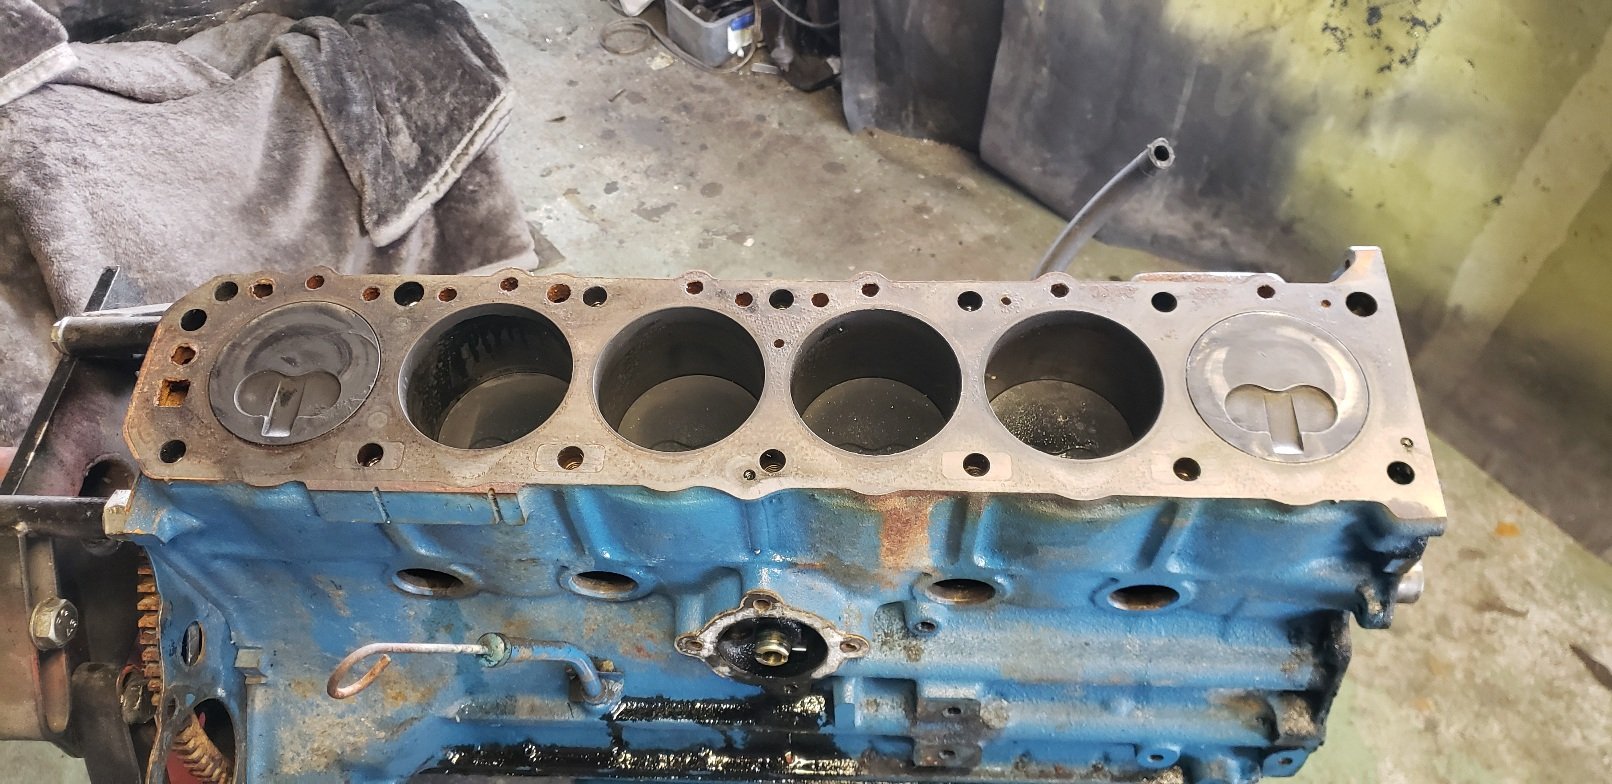
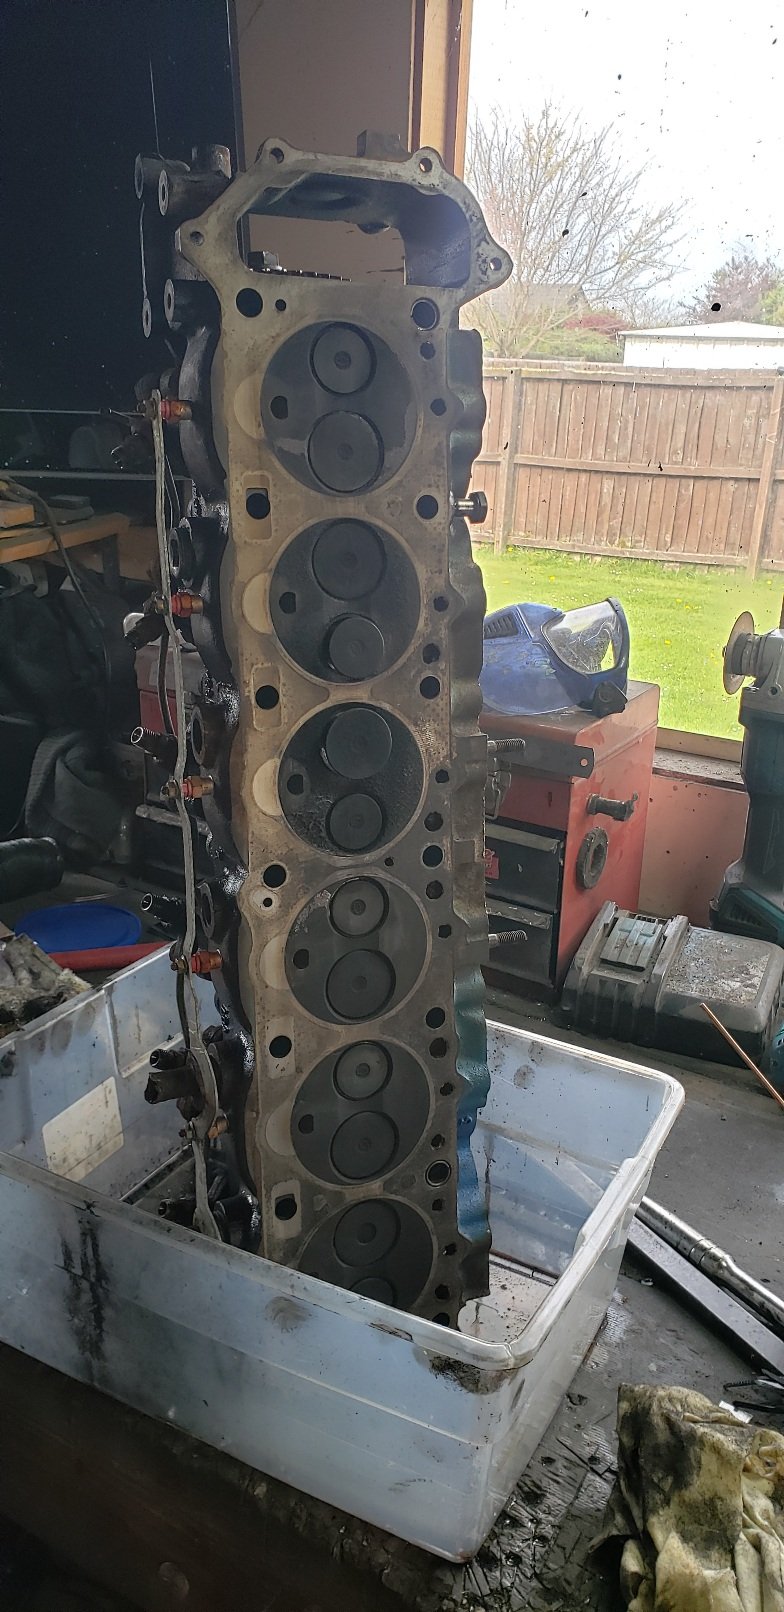
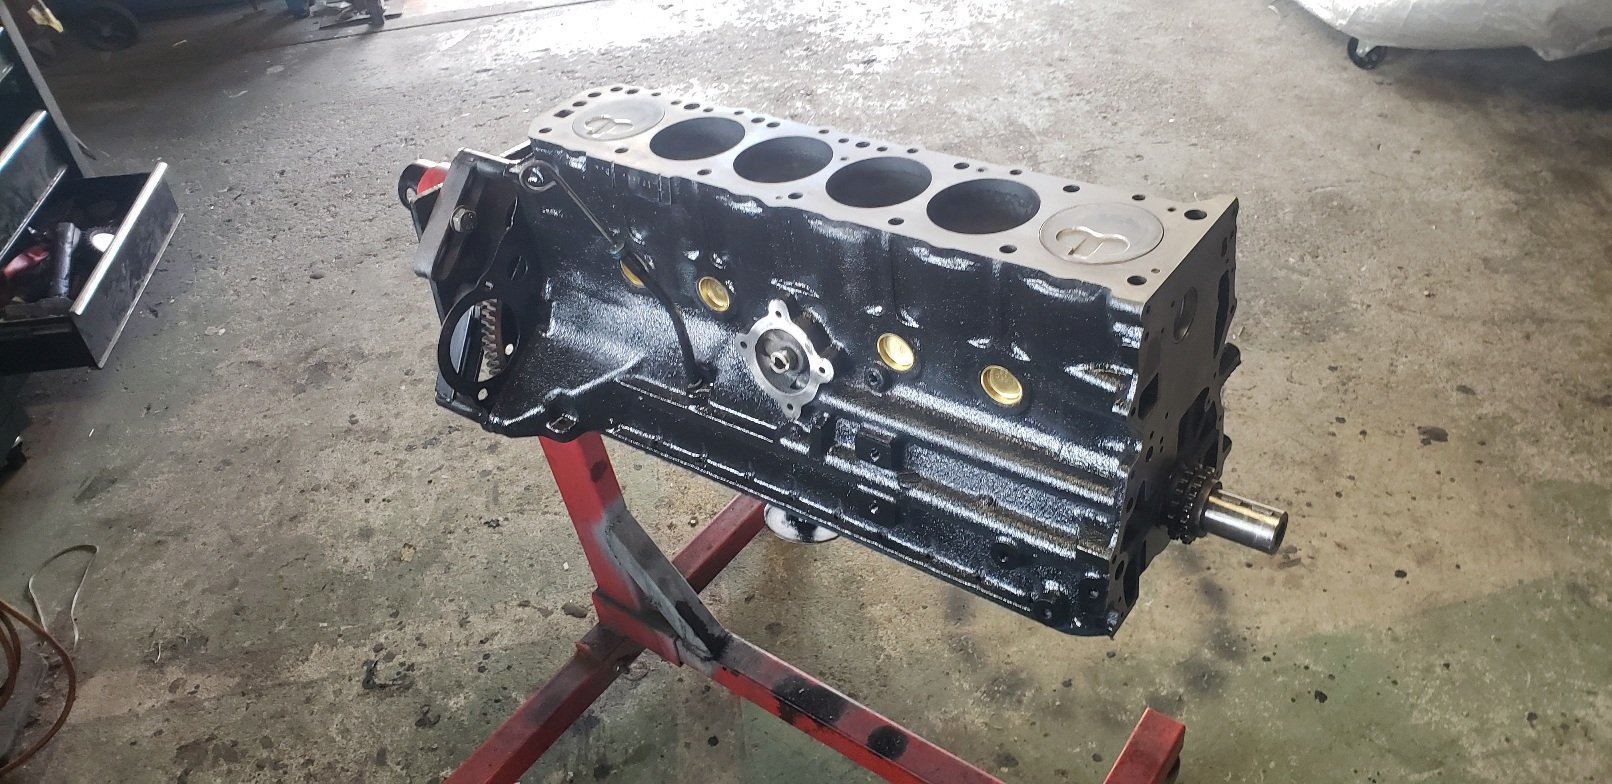
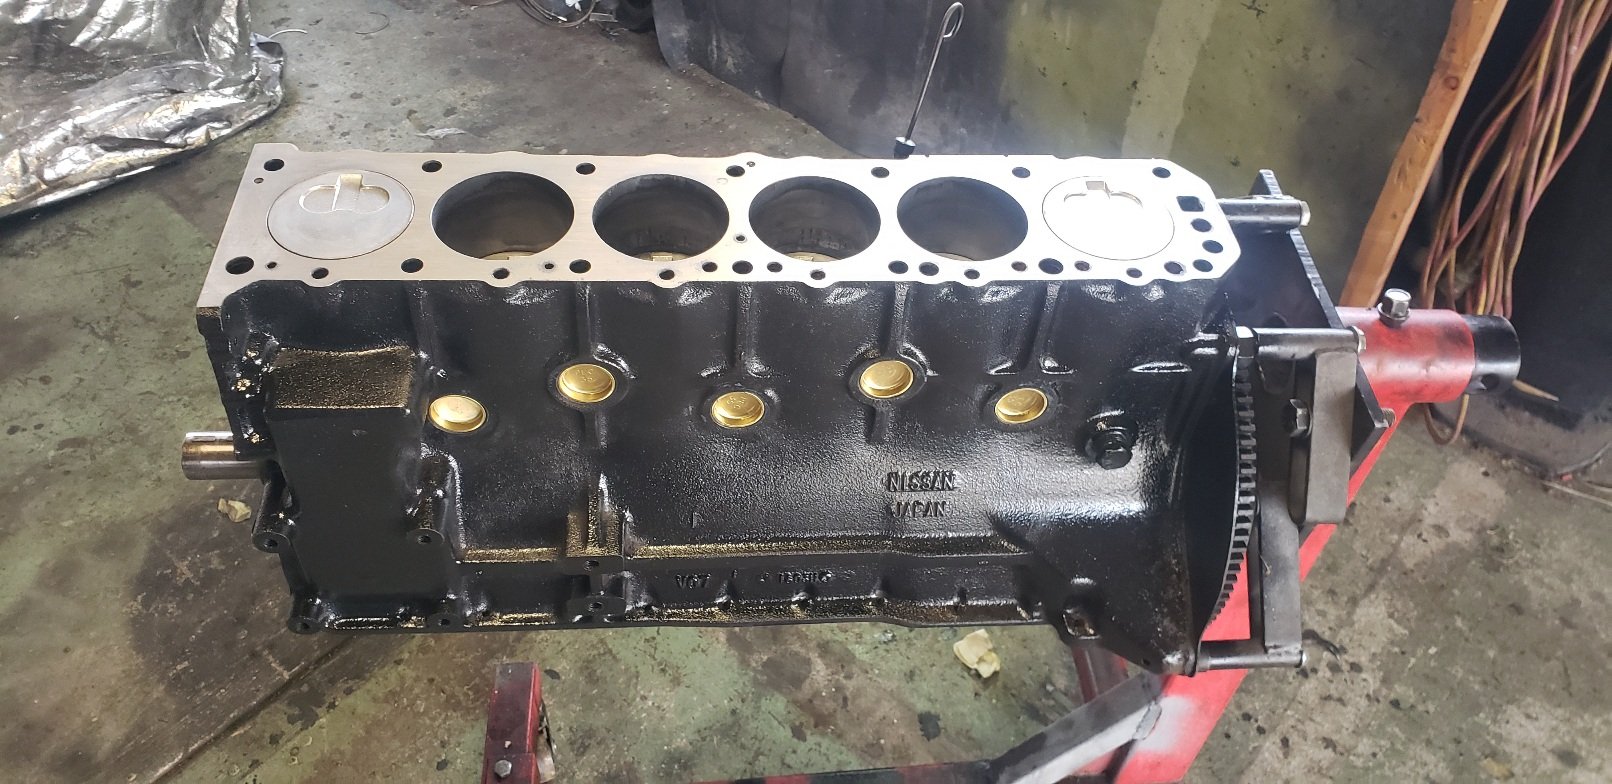
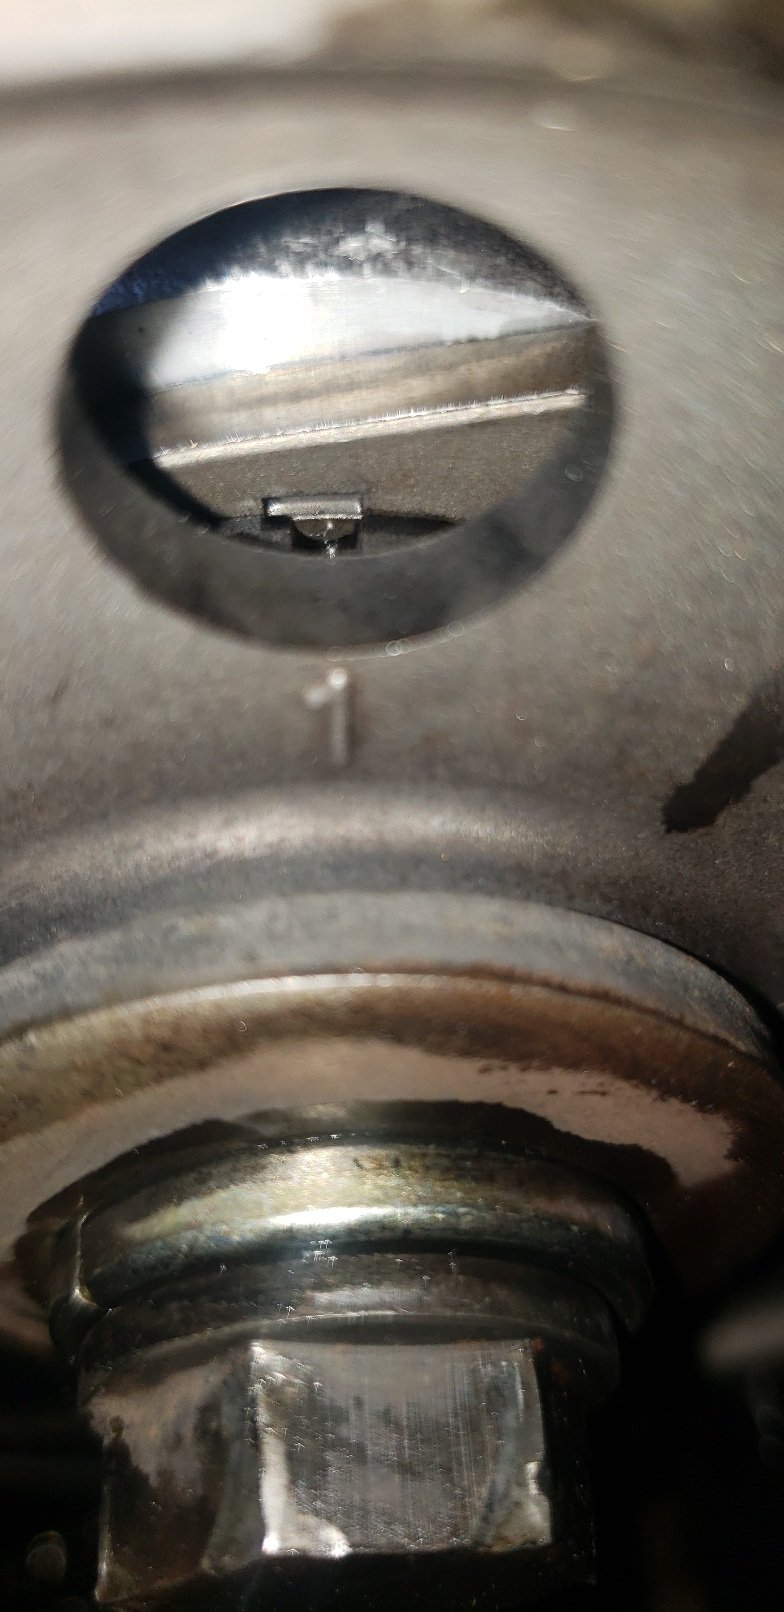
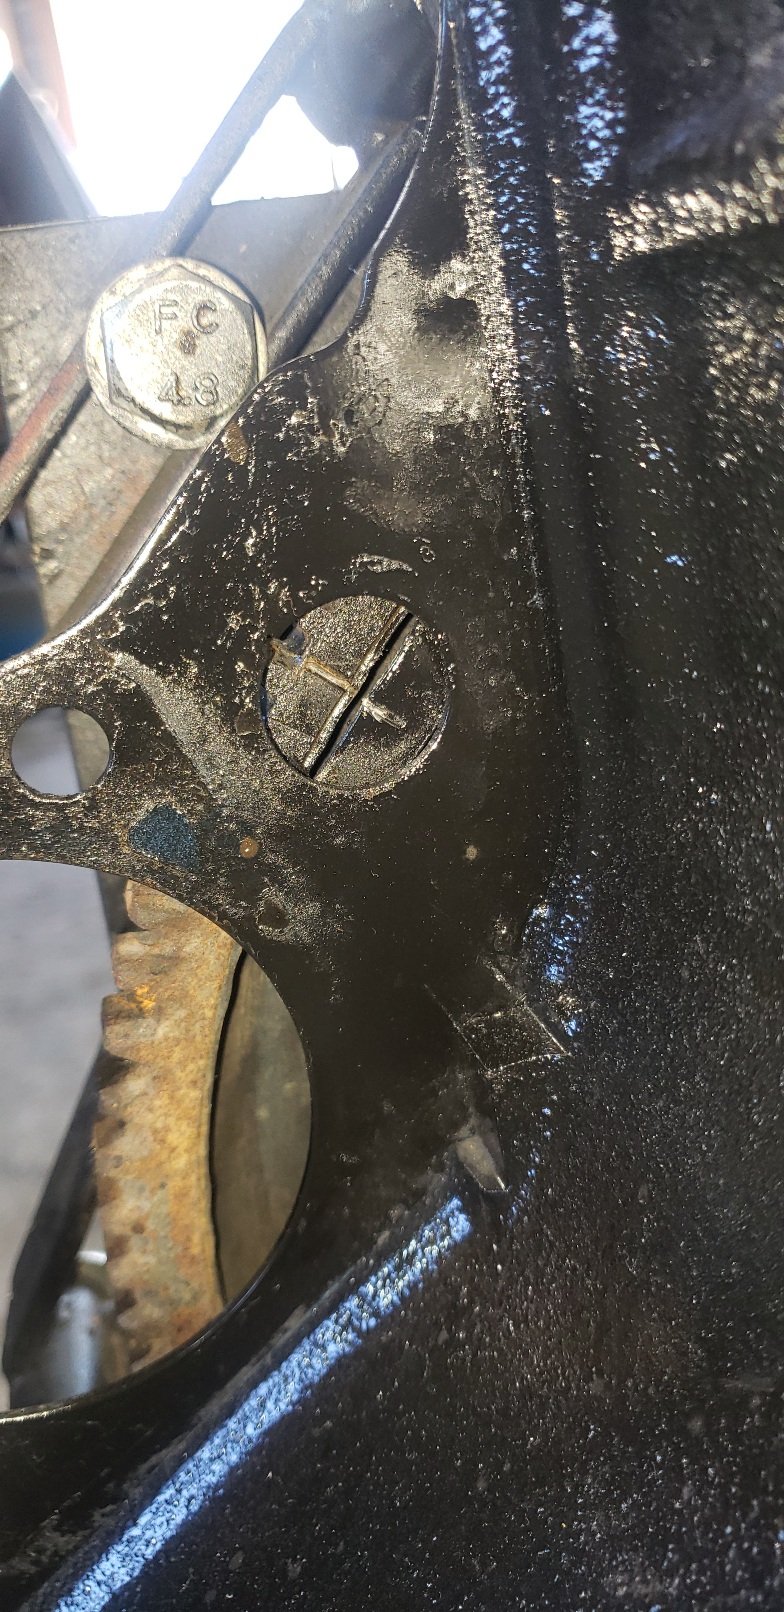
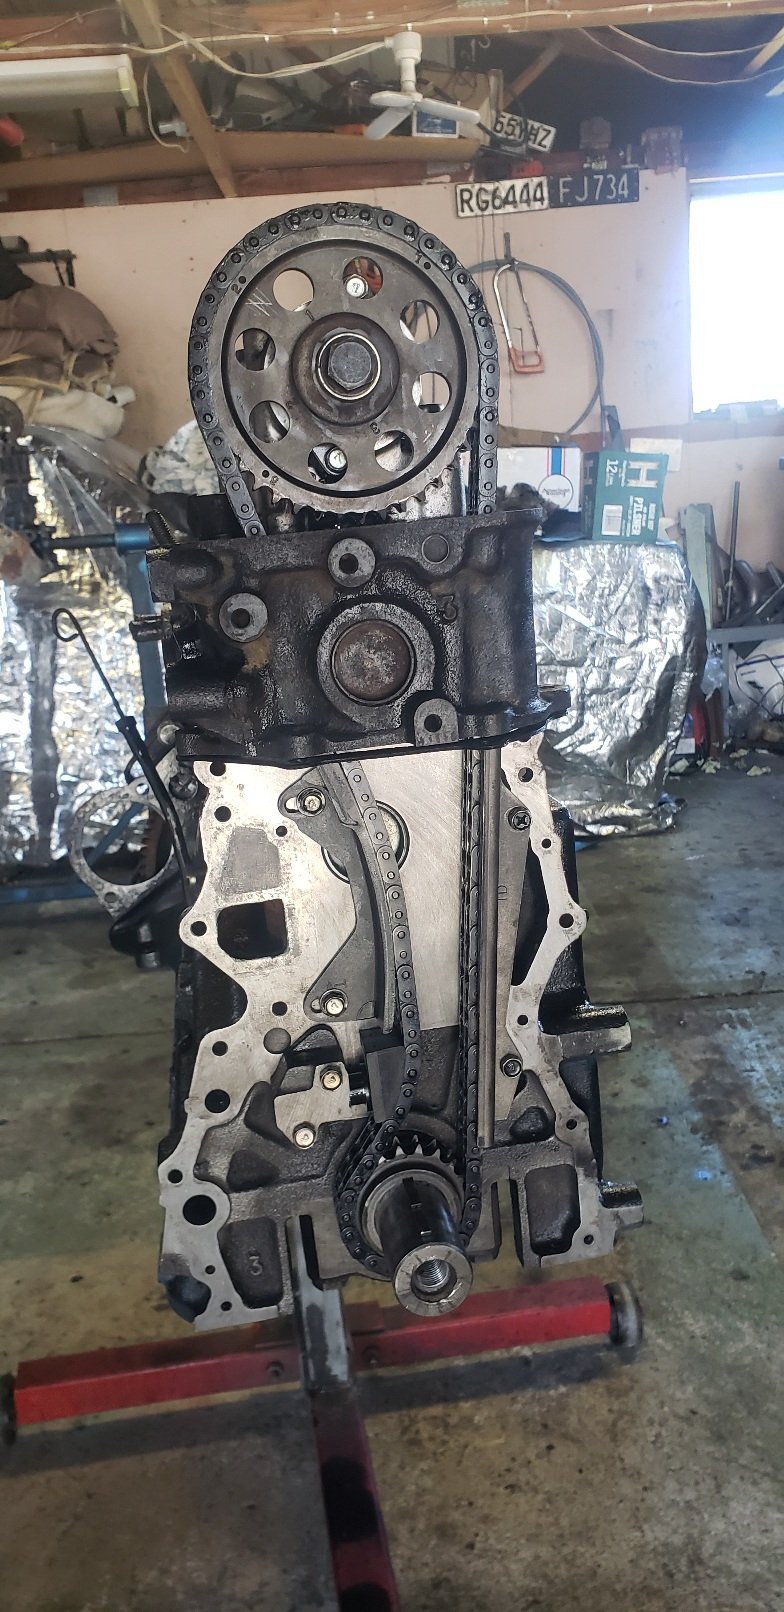
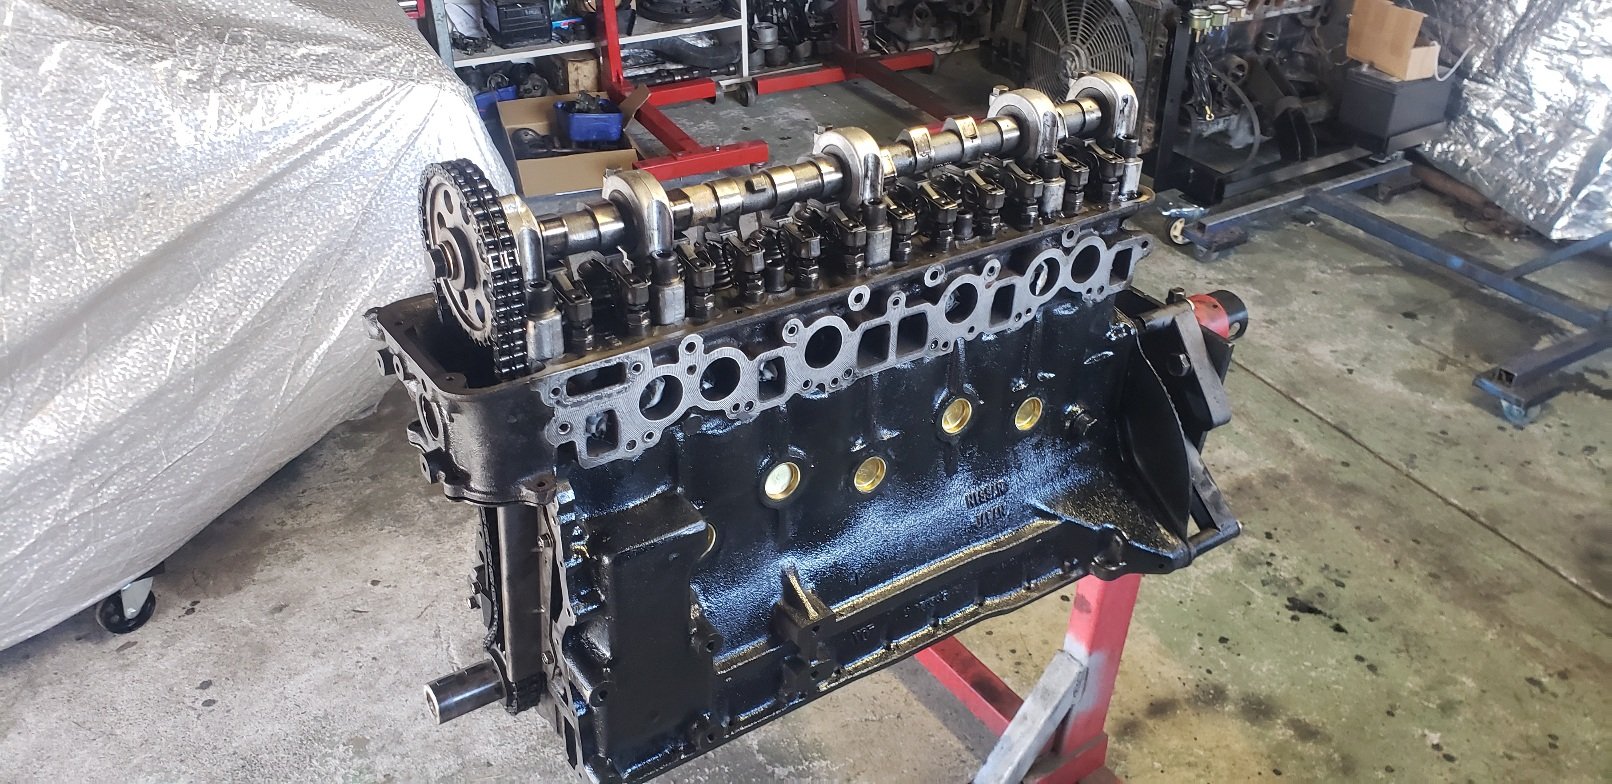
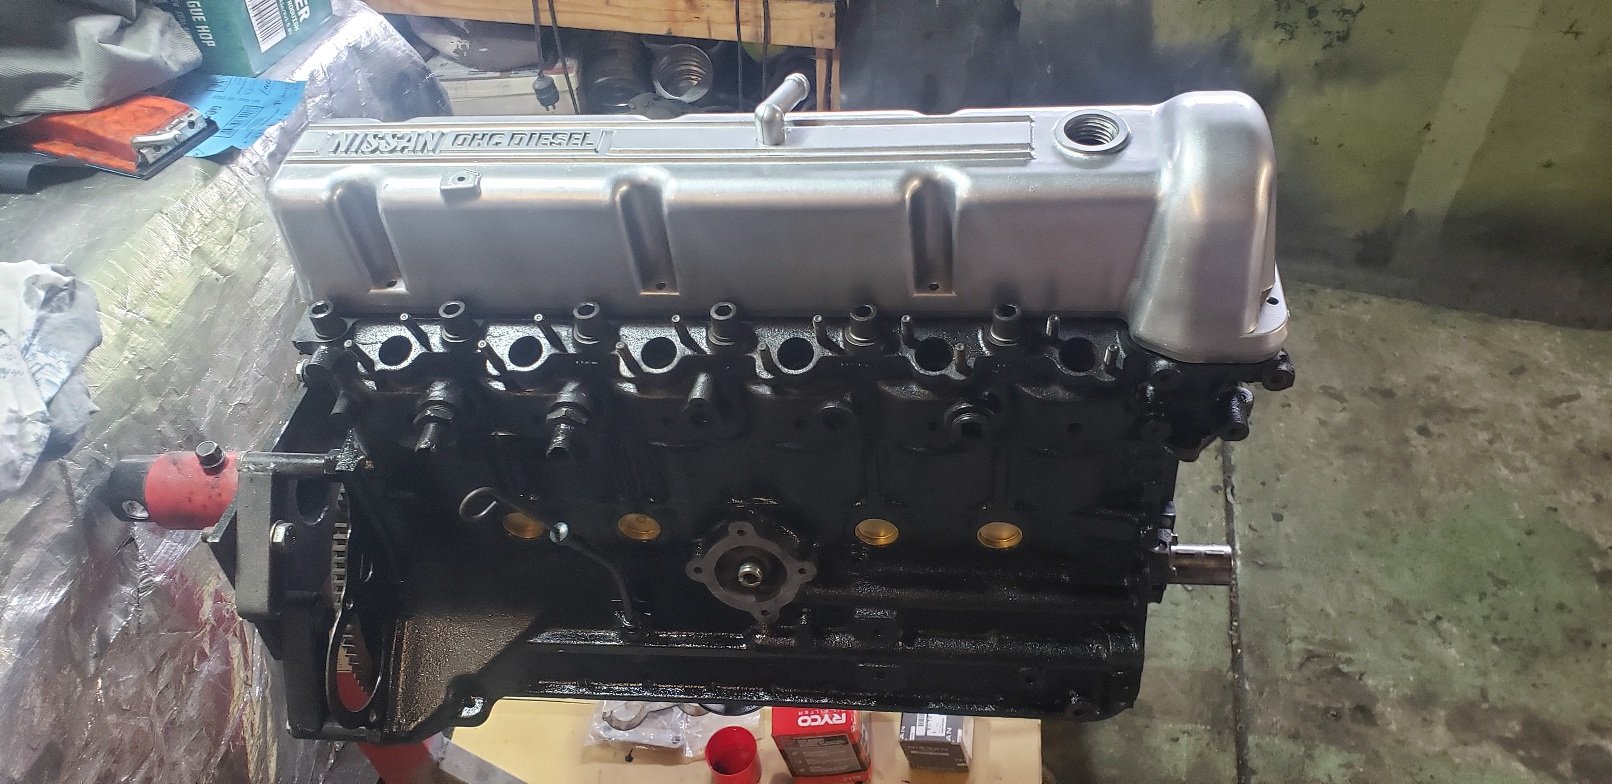
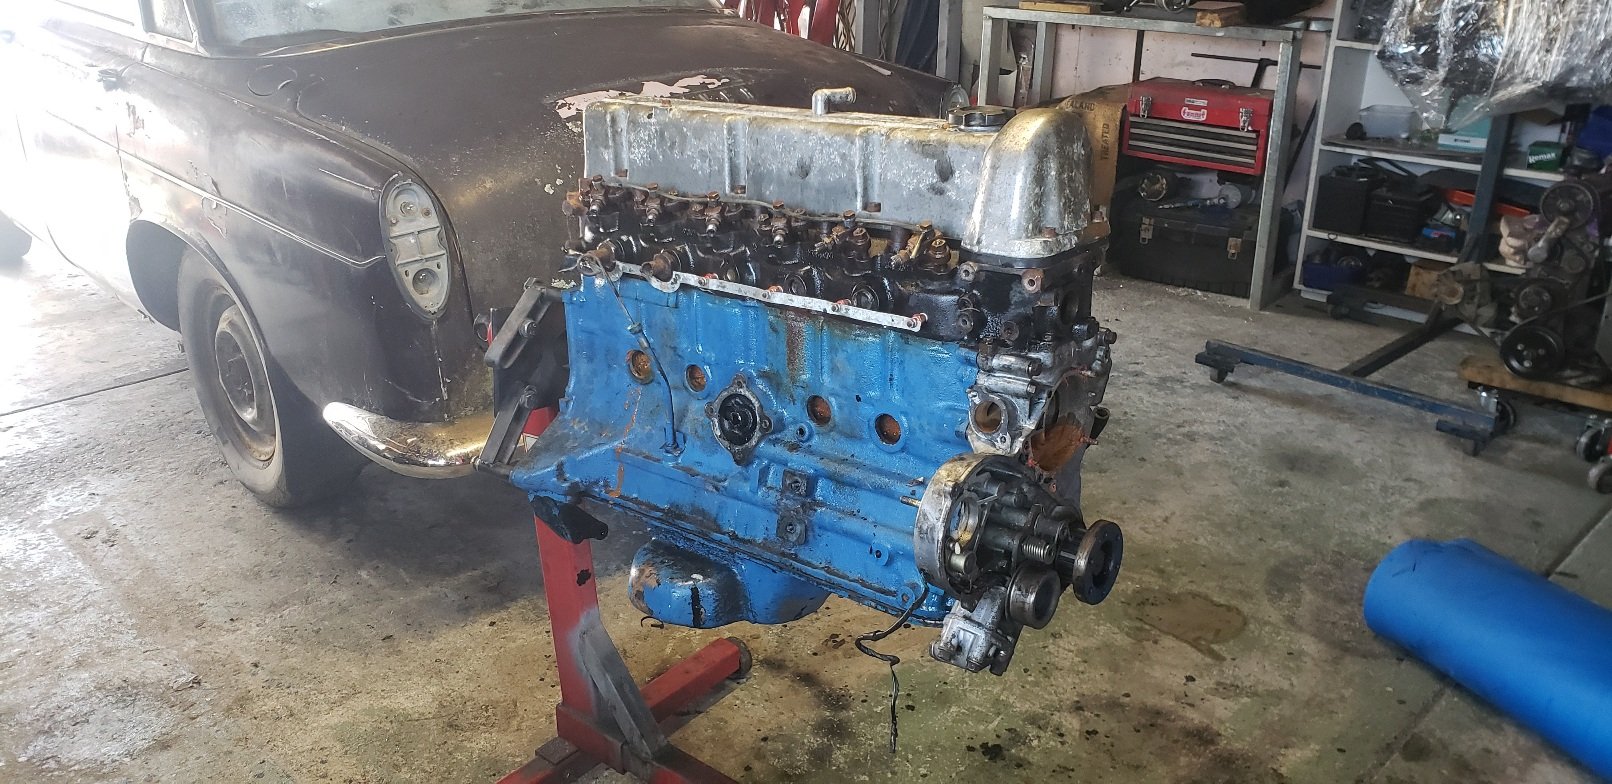
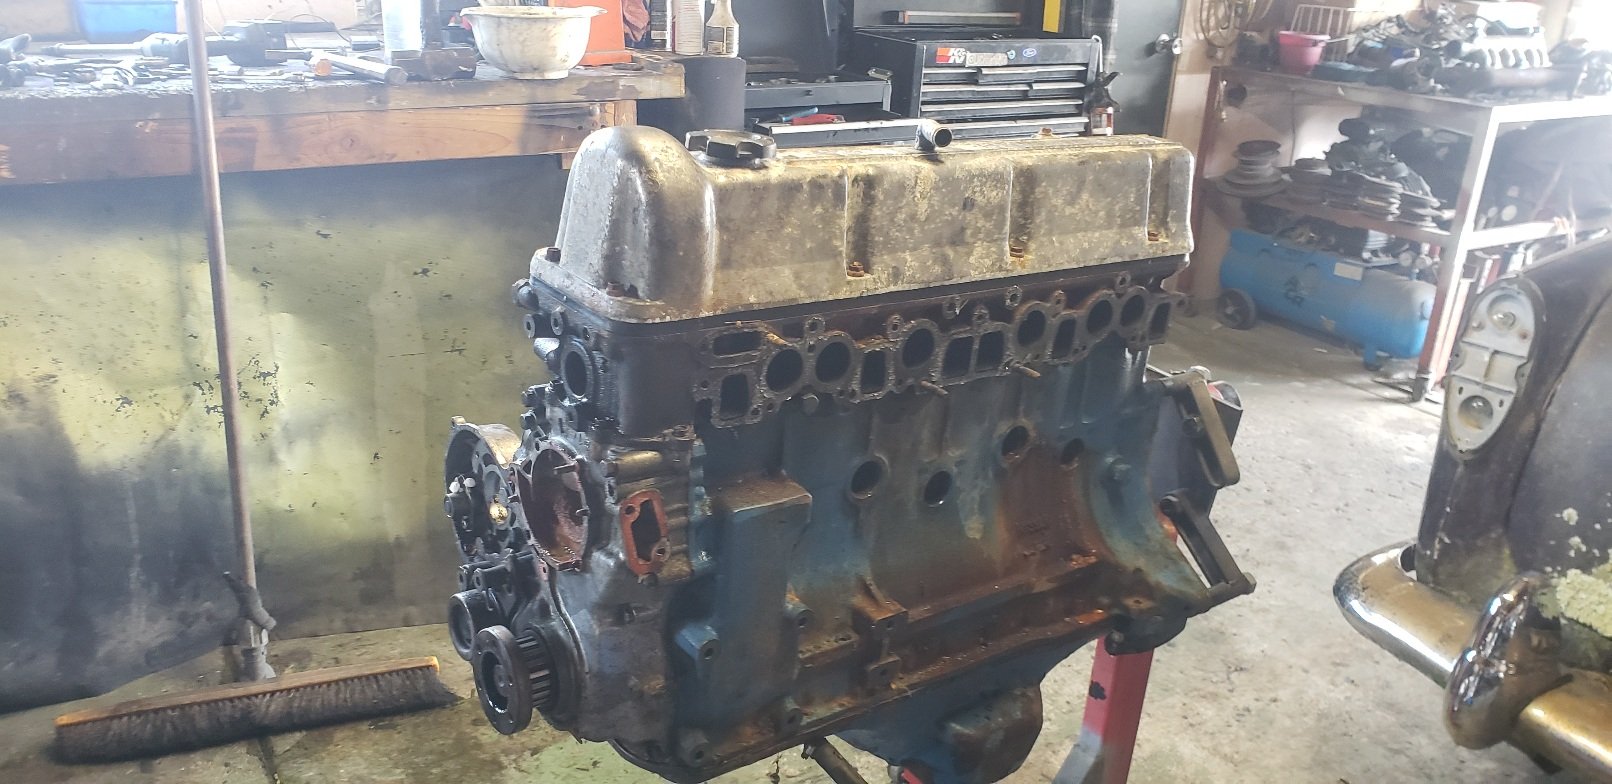
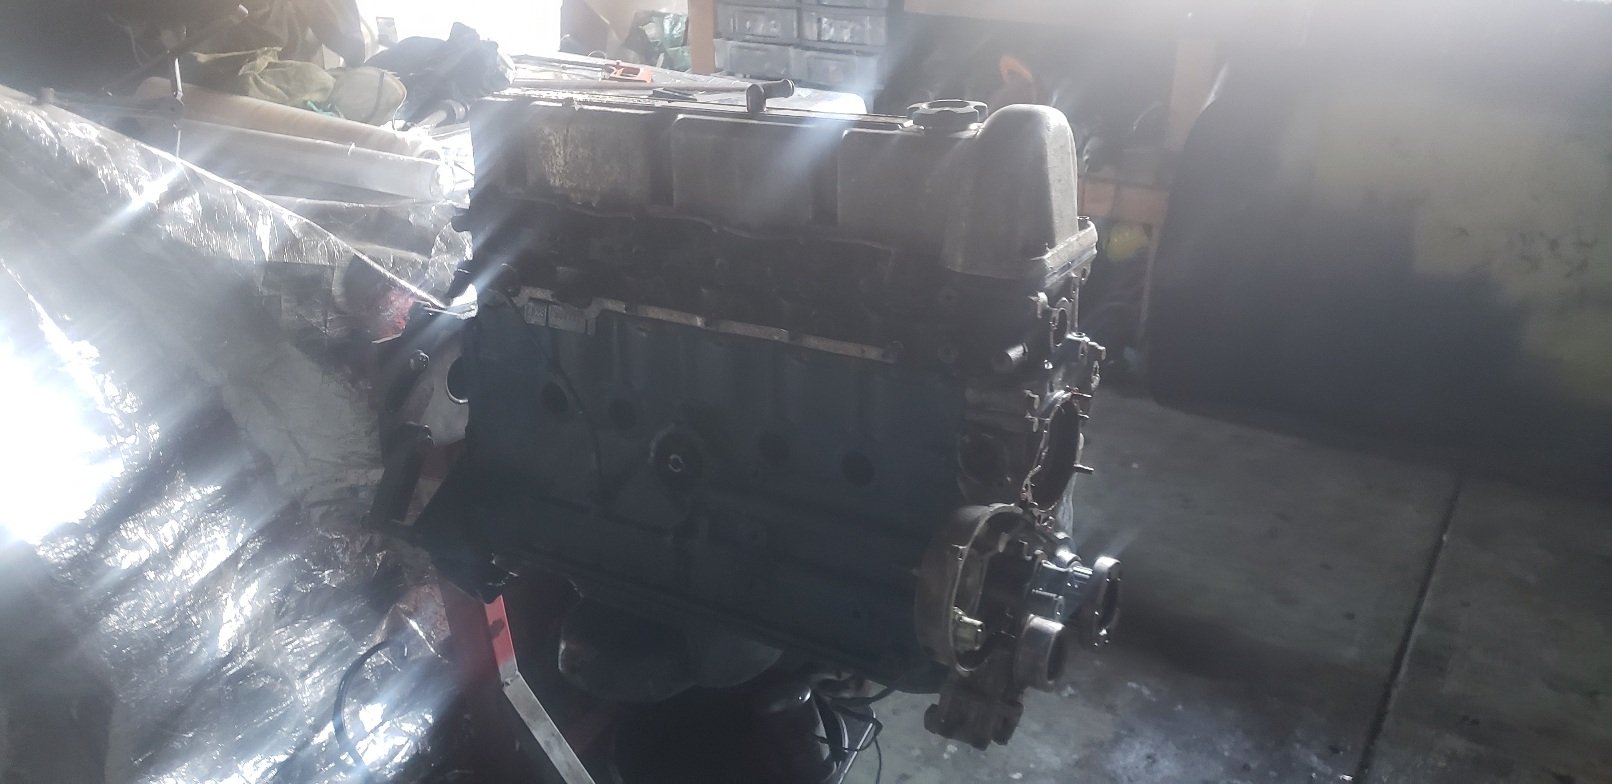
With some advice from a mate and against my better judgment as I've never played with an ld28 ...I stripped the head off to check surfaces and look for cracks Even the head gasket looked in great shape . So I ordered a full gasket set , frost plugs ,oil filter , thermostat and watetpump.. Wet stoned the face of the block and head ...and then out it all back together...even managed to get all the timing marks in place and bottoned down... turns over with no interference.....huge win for ...qas shitting myself ...bit of black paint ..and she's going back together And Thats this thing upto date.. cheers
4 points
-
Anyone who's owned an LD powered vehicle
3 points
-
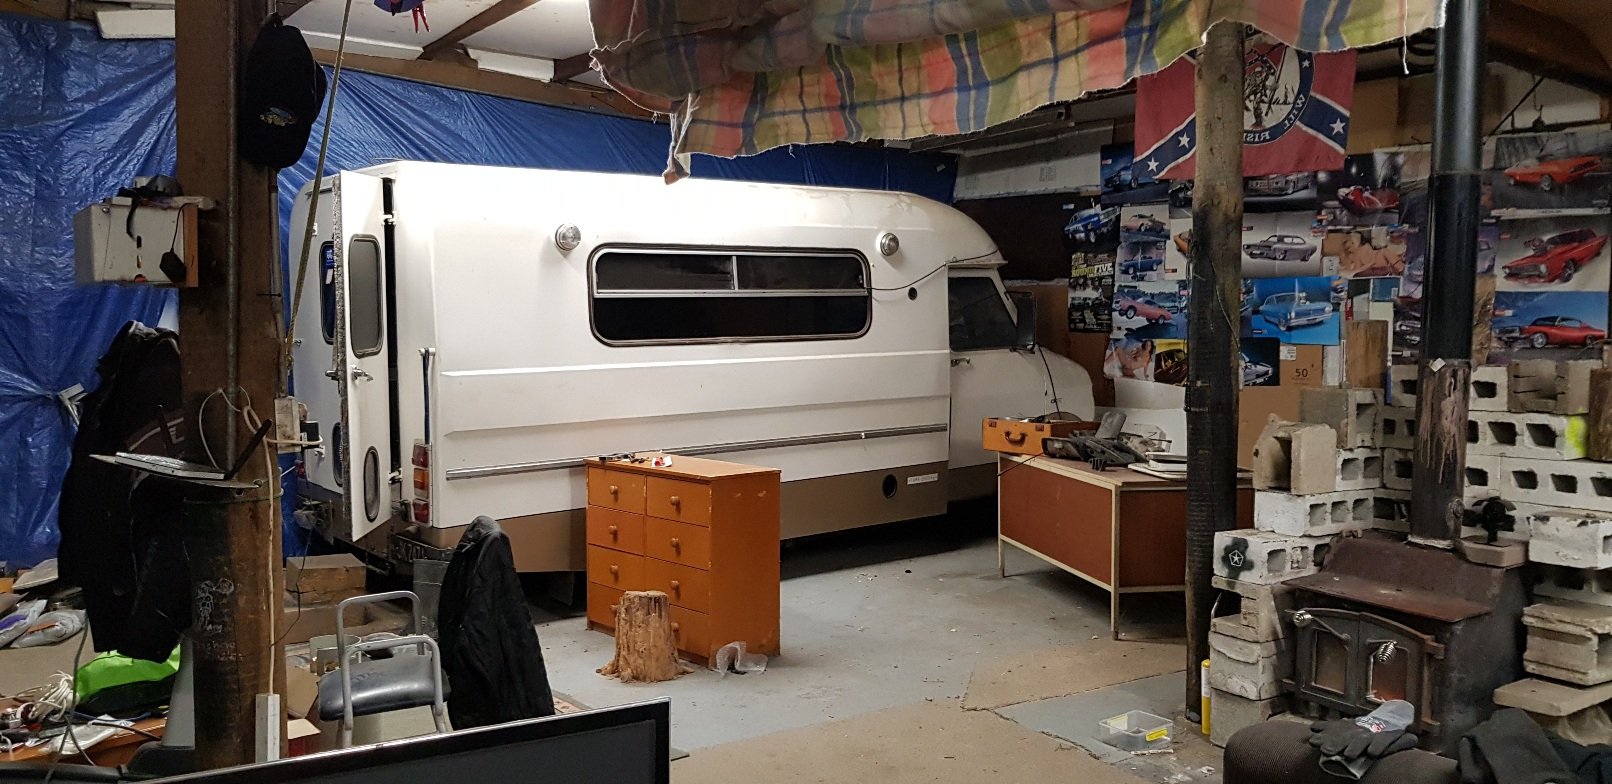
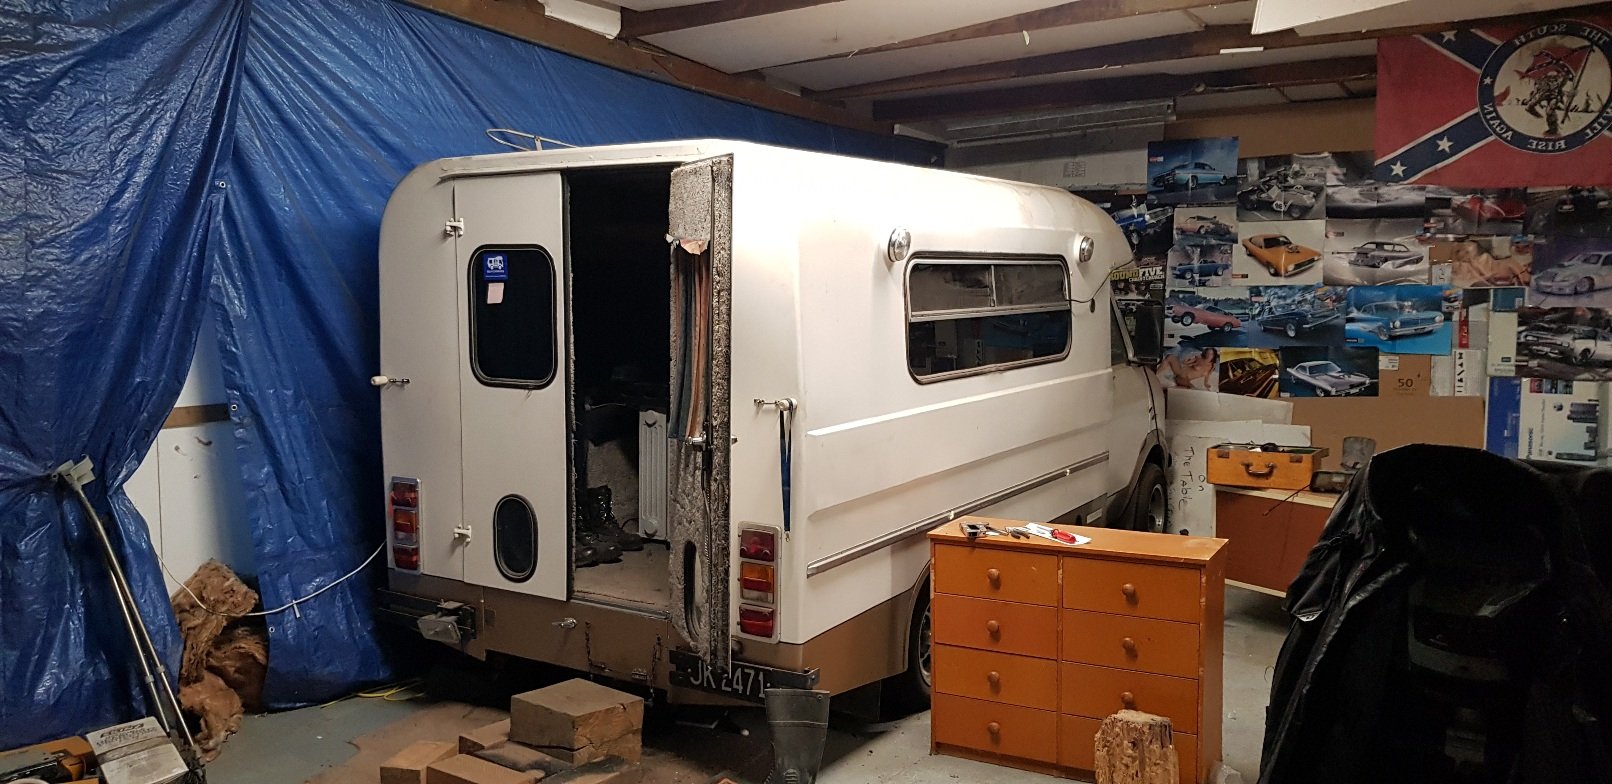
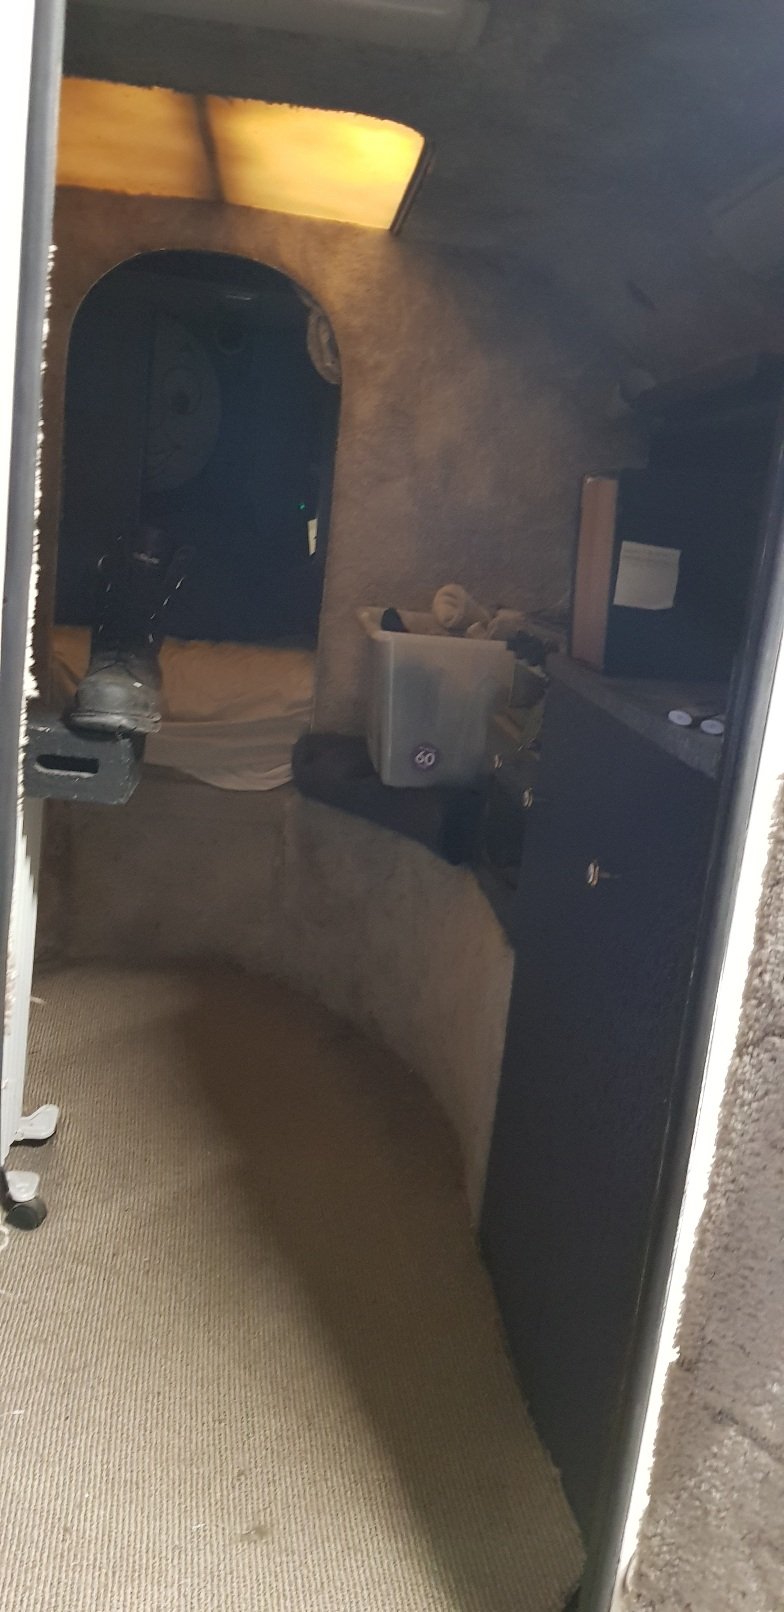
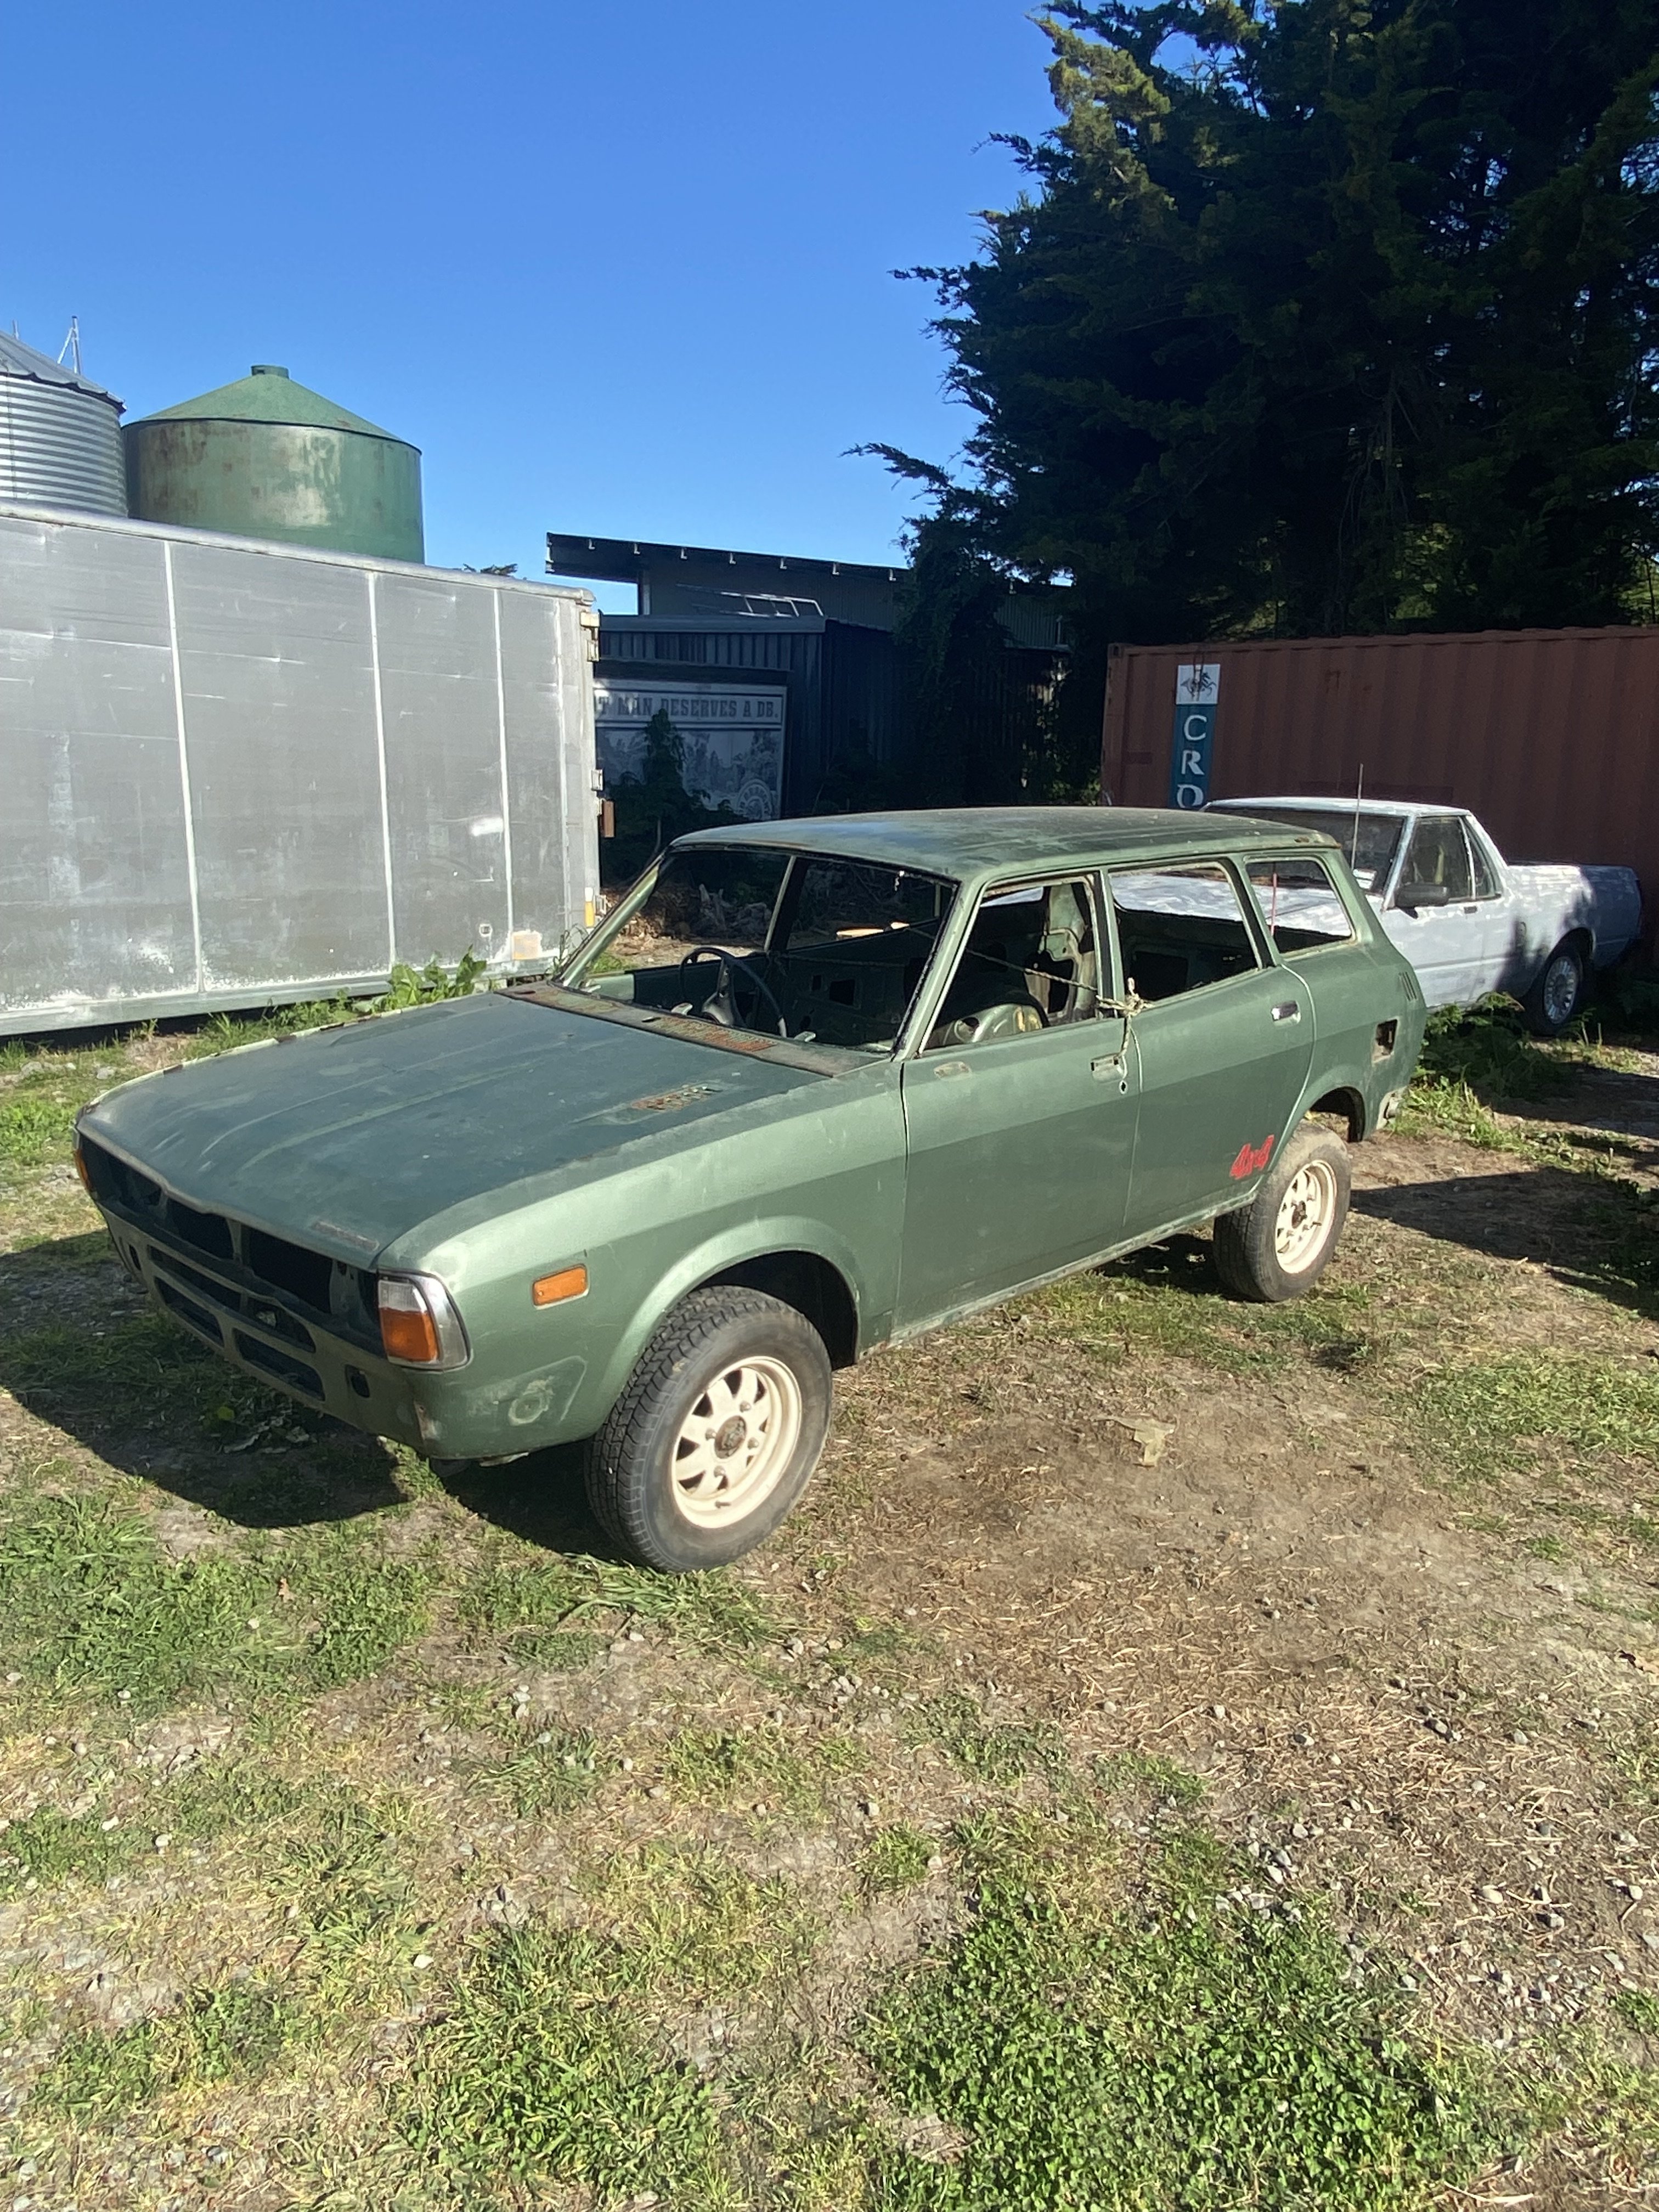
So ive had this for while now... (about 5 years) Been sat out side mine now (under cover ) for a year or so. And be for that it was a mates bedroom inside his shed.... basically been dry stored since 2011 when the last LD28 died and he gave up on it. I got given this by him as a way of saying thanks for me painting his Valiant hearse .... twice (long fucking story). I didn't ask for anything in return.. but he knew I loved the thing and one day messaged me to say he had put it on my name .... I honestly never thought I'd get it but ..he asked me if I was home one night a year or so ago and dropped it off.. It is reg on hold , original black plates and certified for an ld28 auto. (Had no motor or box ). But all ready converted to a camper on the 80s with gold porn style shag pile carpet. This is how it had been for 12 + years
2 points
-
Trust me, I love an LD turbo but a turbo barra will be much better bang for buck. Find a crashed BA Falcon at Manheim and rip all the loom/ecu out of it. The factory ecu is tuneable. The BTR auto is at its limits with 400whp but that's a cake walk for a barra with some basic mods.2 points
-
Happy with Turbosmart for under 200 bucks. If I lose control of the wastegate there's going to be shit sent to space! Or through the turbo which would break my heart (and bank) 8-10 psi it should be happy as more than that i can see headgaskets in the immediate future or running out of fuel supply......... I never did stick that fuel pump and regulator in. Have a week off coming up where I might get that stuff done.2 points
-
Bugger it you all twisted my arm.
2 points
-
Definitely go for a 36-1 trigger wheel. Run wasted spark and batch injection and even the basic Speeduino will still give you the ability to tune the lot to run way better than any carb will. Its all basic stuff and once you get stuck in its super fun to learn and quite addictive to keep striving for an even better tune. Have a chat with @kws about Speeduino. He's been down that road already. I still think there's better support for megasquirt and more information on a wide variety of setups. Both platforms utilise the same tuning software. So keep a look out for megasquirt deals.2 points
-
So school me on this shit. On the 4V in the Dyna I'm weighing up the idea of a speeduino efi conversion. Maybe a future project once running, or maybe before.. my reasons are that I need a set of plug leads, which will set me back a few hundy, and the carb needs a rekit. After which it will still be a leaky carb.. ive previously discovered 2zz toyota coils fit perfectly (conveniently also dirt cheap and common), and was thinking I'd drill/weld bosses to factory manifold for the injectors. Might do this anyway to give the future option if i dont commit immediately. I'd have to run wasted spark, and apparently I wouldn't need cam phasing due to it being a wasted spark v8. So crank trigger and throw the dizzy away? And how many teeth? Curious as to best injectors (300hp would be ambitious for this donk). I like the idea of being able to tune for economy rather than outright power, no shitty fuel seeping carb and associated smells, and all-weather consistent running. I don't like the scope creep, but am entertaining nonetheless. Hardware wise it appears simple, of course the devil will be in the detail. Fuel pump and delivery setup recommendations also welcome. Speeduino recommendations? TPS? MAP? Throttle body or just gut the carb and use?? Apologies for naivety.2 points
-
Yeah if the ld28 turbo doesn't make me happy in the pants......it will get a barra2 points
-
Carjam says 1975cc and not subject to RUCs. Would struggle to get out of it's own way if it's still rocking the original 2-litre slant 4.2 points
-
Thats the one.2 points
-
Dry ice blasting if available works wonders to get rid of under seal. We use it at work and it’s like magic. https://www.cryotechnic.co.nz/2 points
-
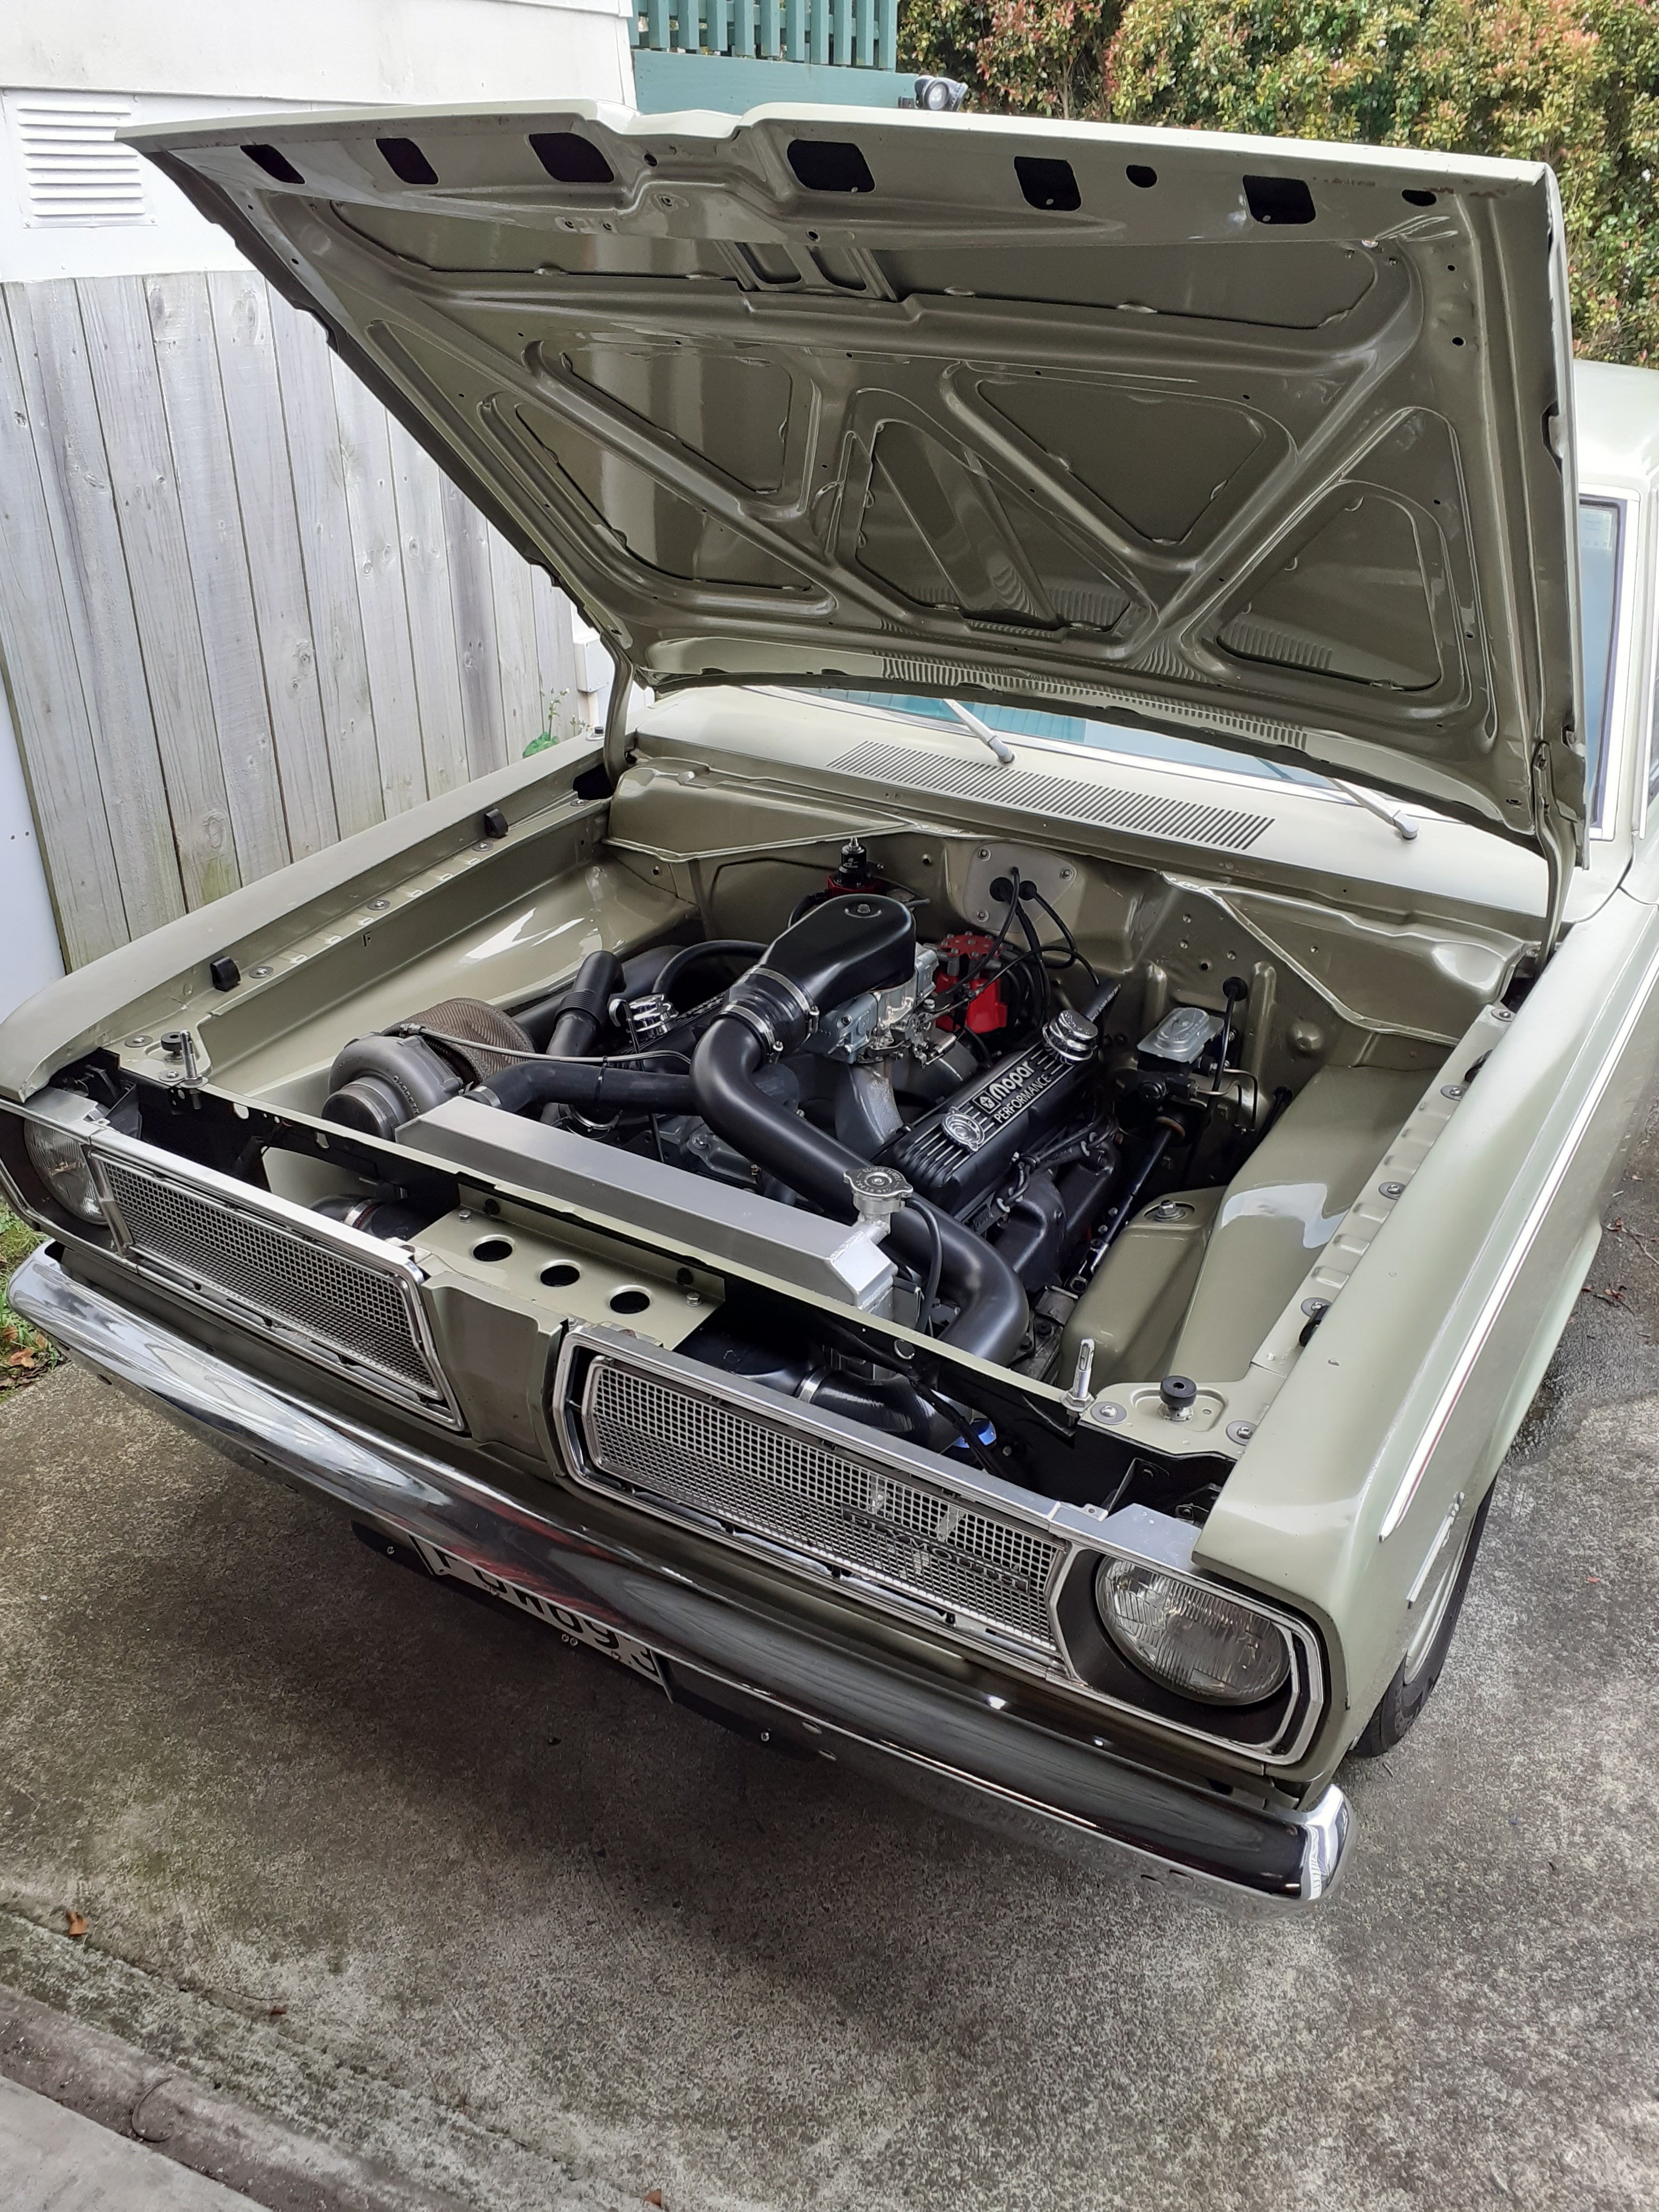
The reflash went well short term fuel trims are basically zero to no more than 2% everywhere except at idle i can live with that. Restart still needs a little work but lights off instantly with some throttle not too worried about it now. It runs drives and feels solid as. Whoop! 3 years since I started ordering parts.2 points
-
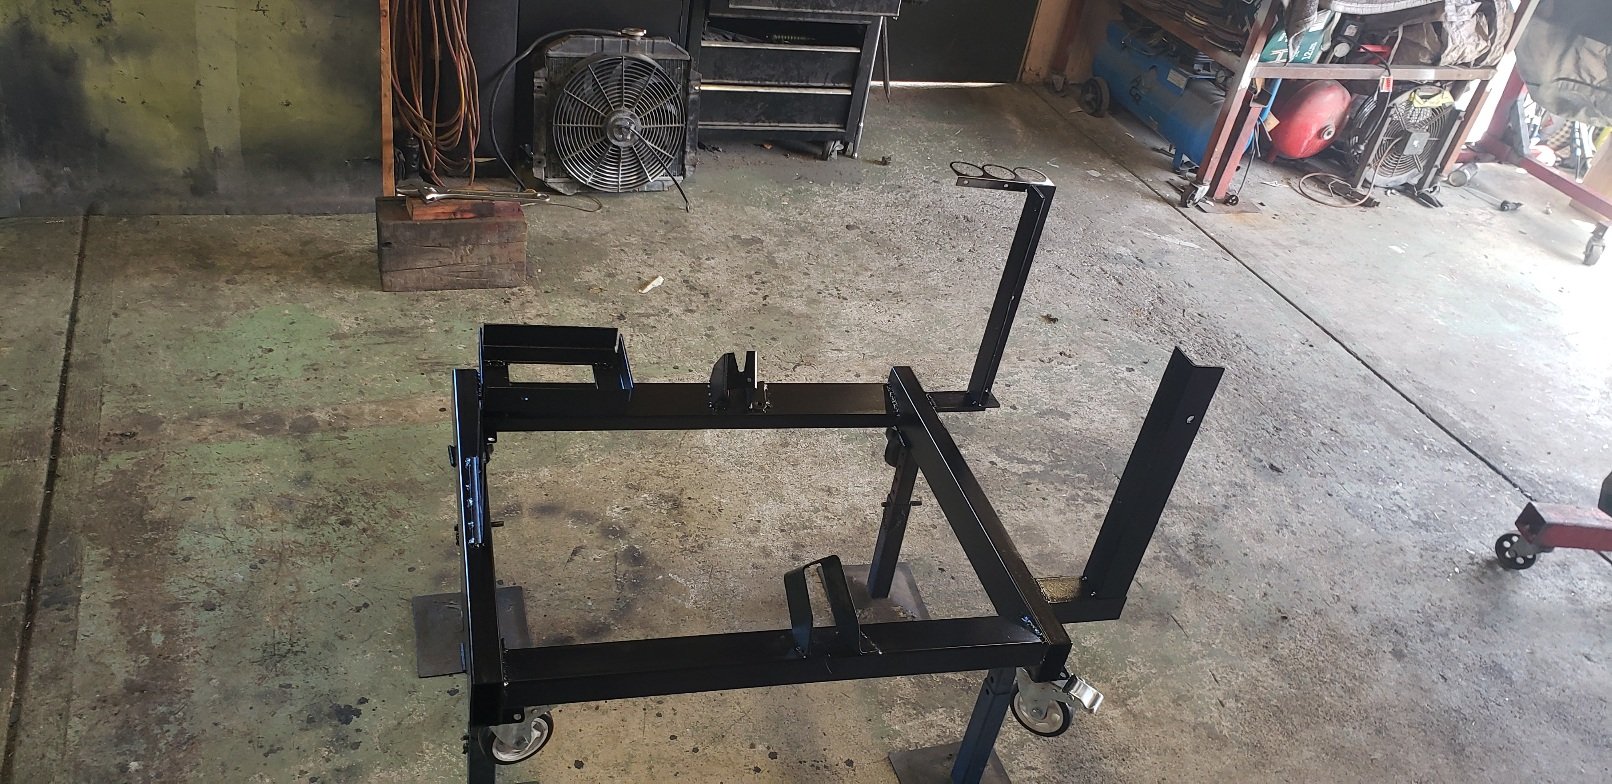
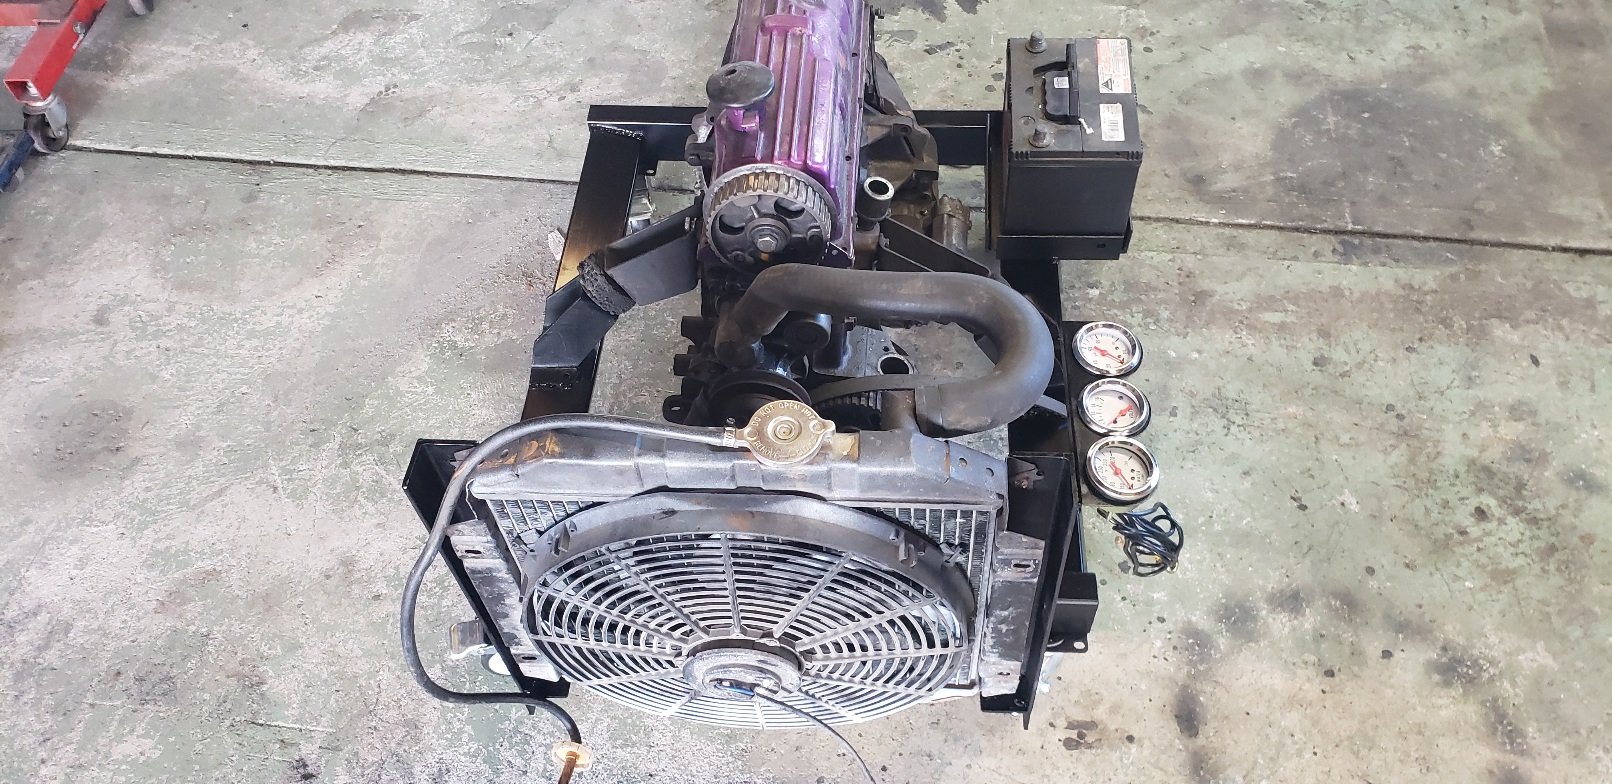
Also made a base i can run motors on.. so once I have a motor running on it (no way to load the motor up ..but can get them up to temp). I'll slap the SC setup on and see if I can make it work
2 points
-
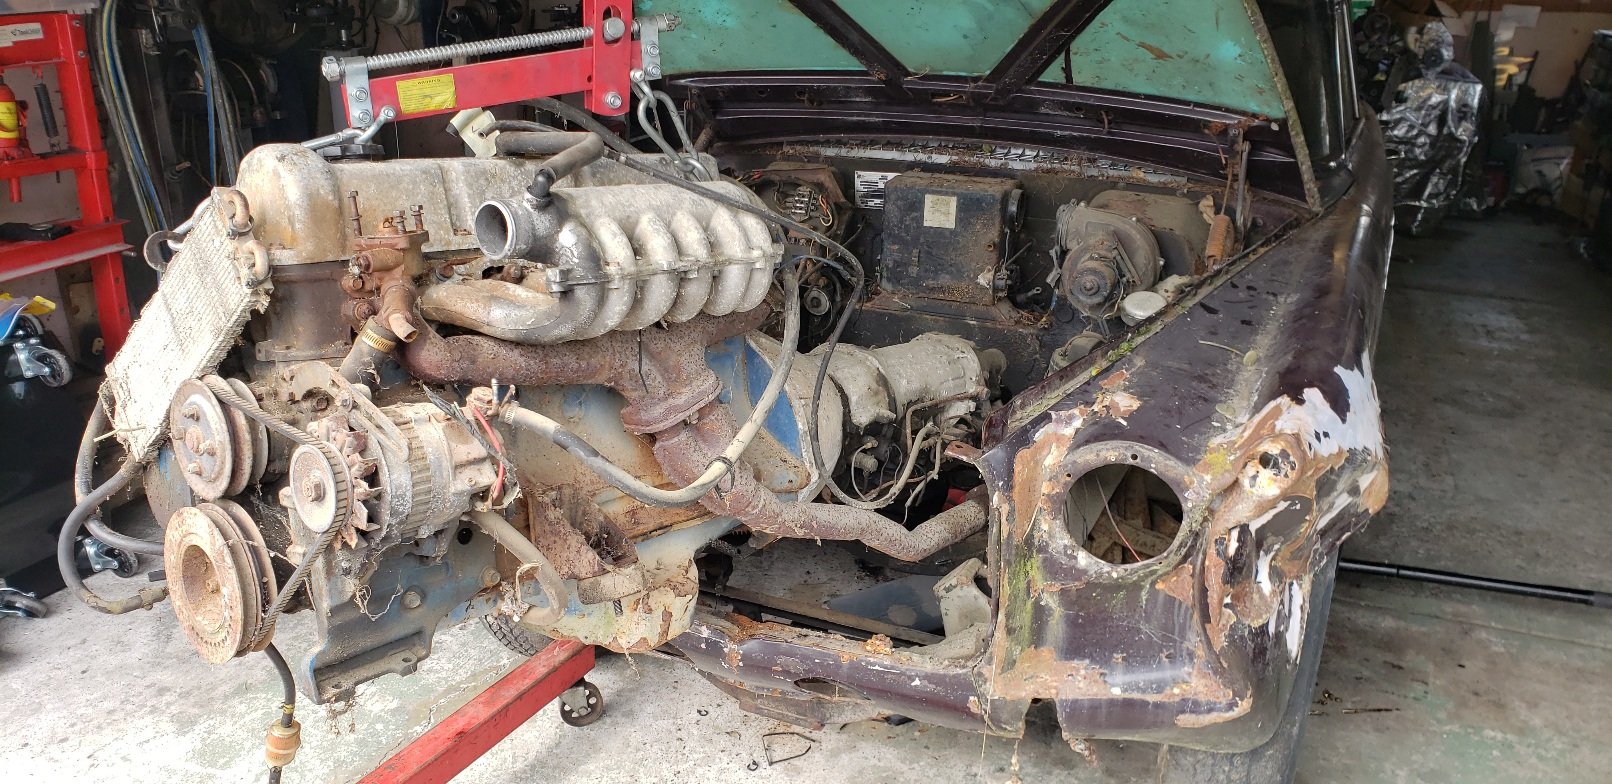
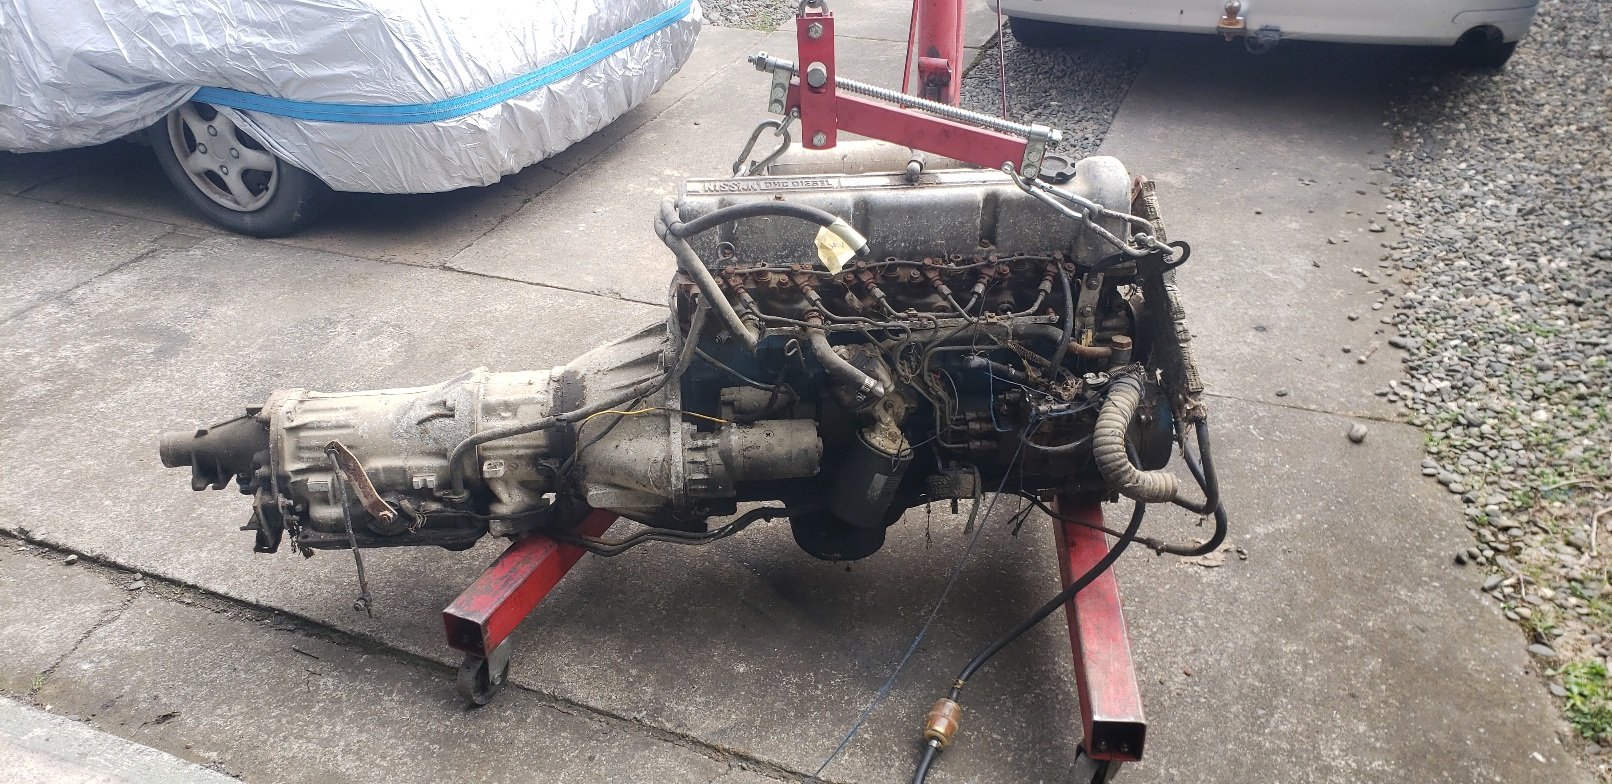
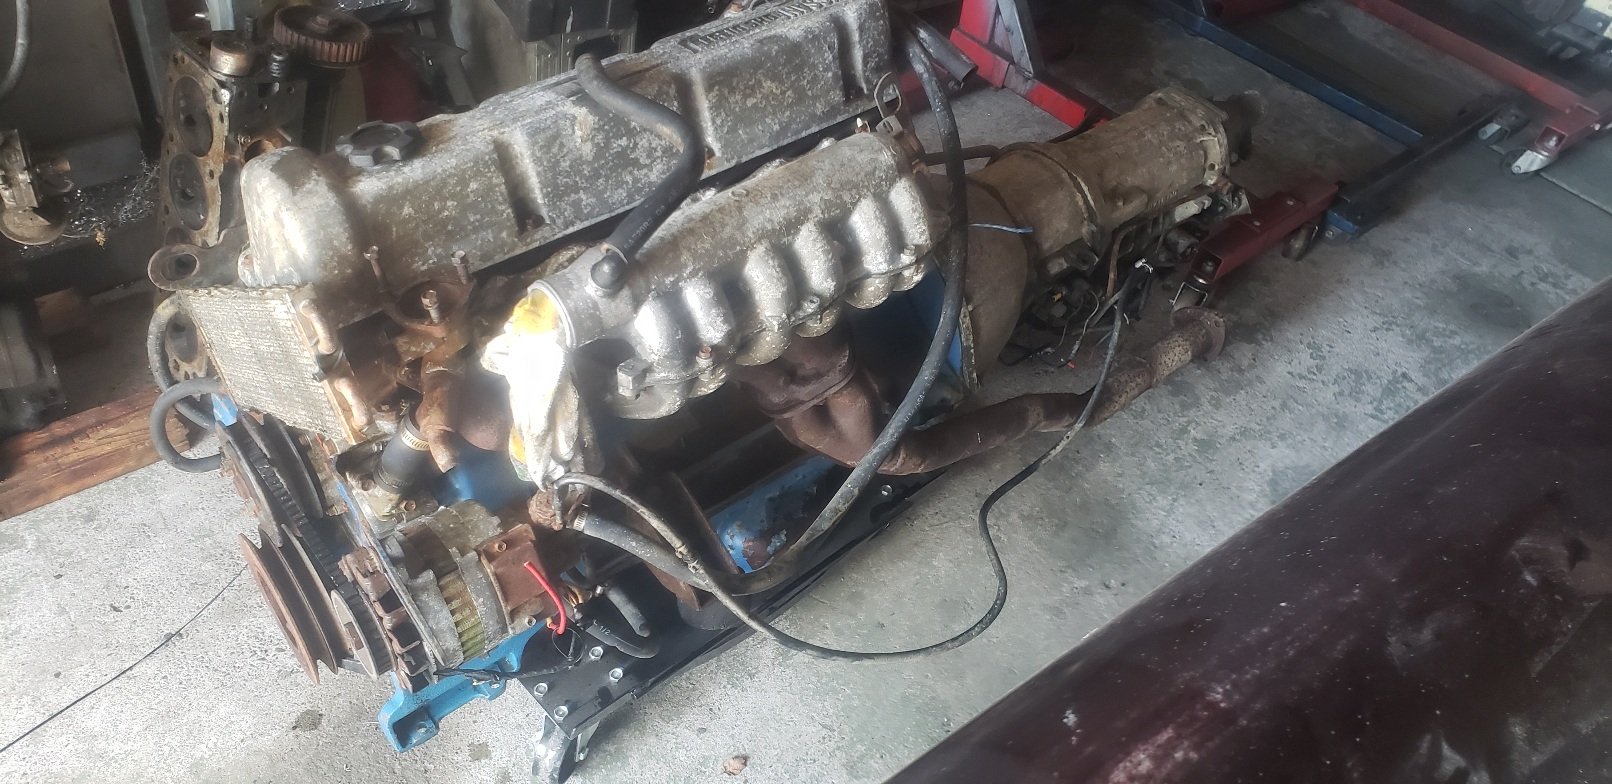
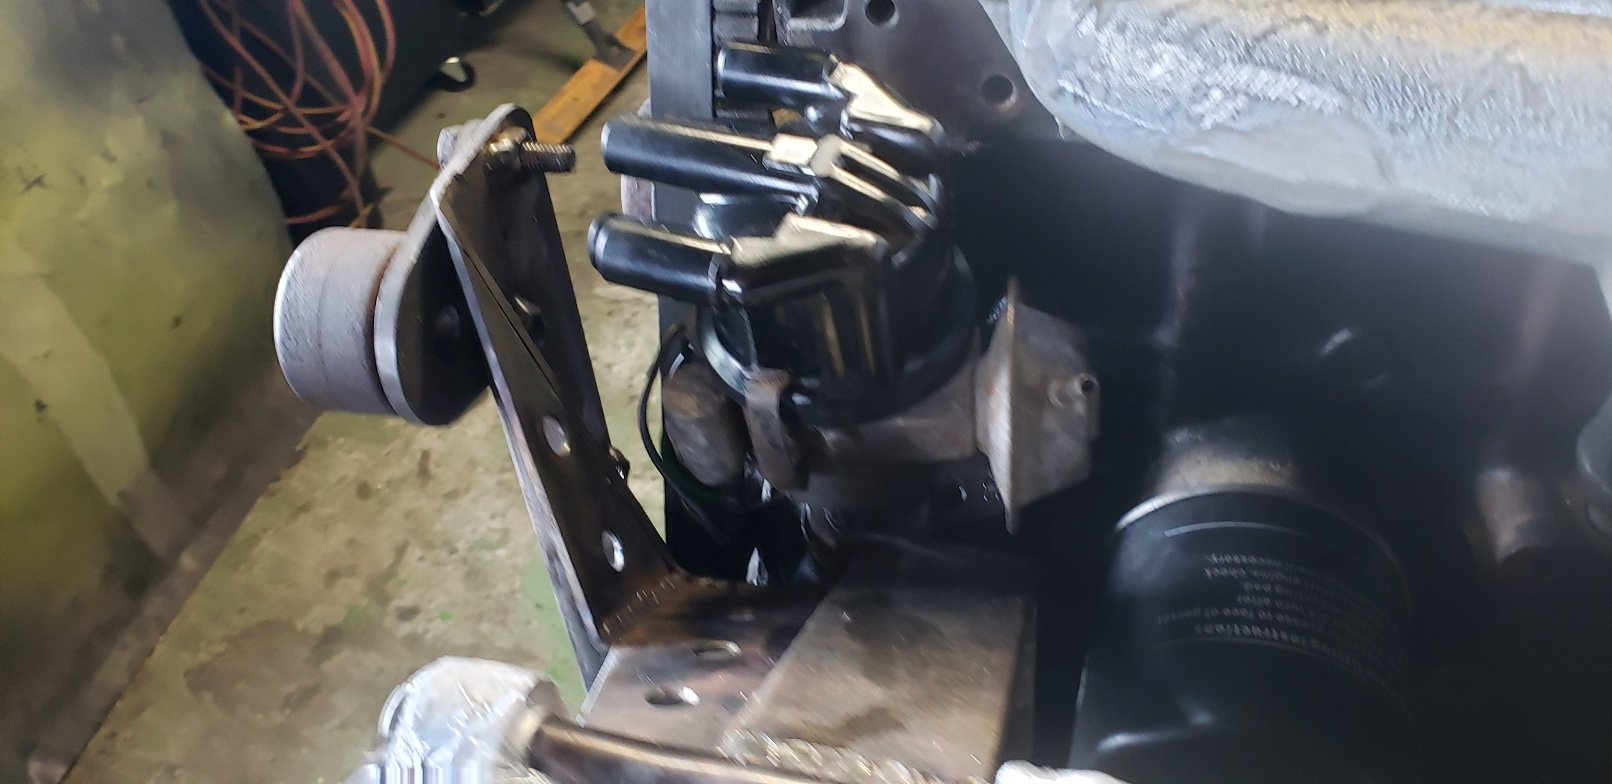
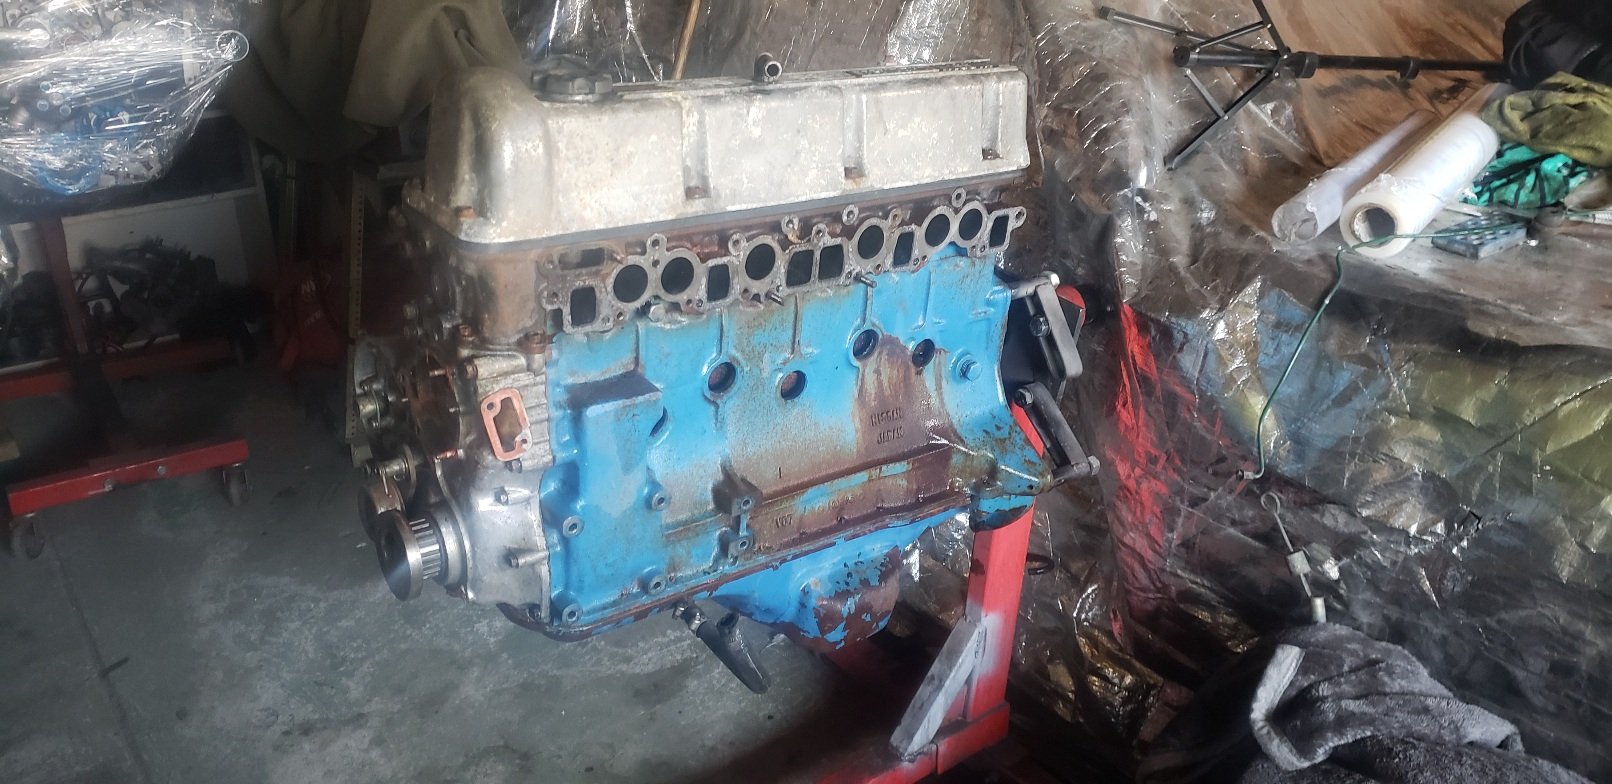
The previous owner claimed the ld28 motor is a shit house and he had blown a bunch of them and I'm wasting my time to put one back in. But I know how he drives and I would imagine that combined with the weight , diff ratio and lack of power with contribute to him breaking a few. I did think about loads of different motors I could put but uts hot a cert for an ld28 ...so it was getting another. I had agreed to put Karl's mk4 together for him and asked him to find me a ld28 and auto box... he going me one that was in a car and had run ... so qas able to pull it all out myself and see whats what. (Never played/touched with an ld28 let alone ). He dropped off this weeeeeeee gem
2 points
-
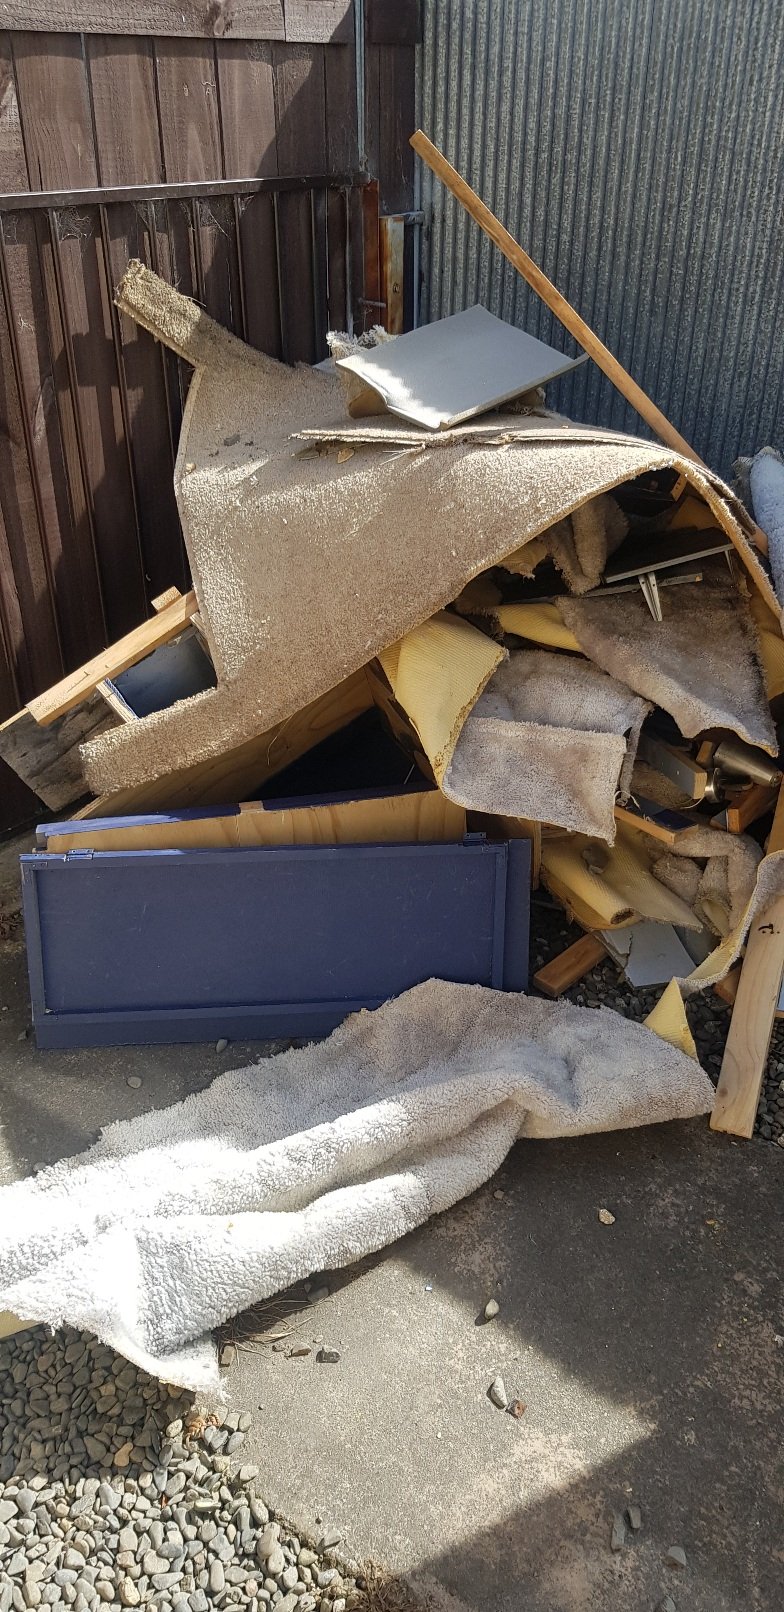
Took today off work and got a heap more sorted. Fuel tank, diff and mounts, all glass and all door insides are now removed. Rust repair cert has been arranged for next week, not looking too forward to the list but it will provide a good amount of direction for the panel beater and I. Few stripped screws causing some issue but nothing a drill won’t fix haha
2 points
-
Wagon is sitting a little lower in the front now and will settle down further, they reckon about another 20mm
2 points
-
The day it was dug out
2 points
-
Awww gummon. Yeh poor car was way down the list of projects to be completed, but has been moved to about 3rd equal now, lols.1 point
-
You will probably get a little oil come out that's sitting in the axle tube but the main oil level should be below the axle tubes.1 point
-
I was only mixing up small batches - 50-80ml worth. The primer itself in the can had gone super thick and gluggy, I mixed it for what felt like an eternity to free it up a bit but suspect I needed a proper tool for this rather than a clean piece of wood. Def no chance of a second coat with a single batch, so assuming I got the ratio right, it must be the fact the base primer was so thick in the can. How does everyone manage getting the paint into the mixing cups? eg, not making a mess and being more precise than just pouring? Noob as questions, sorry1 point
-
For the sake of your sanity, as someone who has grubbed a load of this stuff of the underside of a Spitfire for paint, don't touch the underseal if you don't have to. If this place is a known stickler, give it a try somewhere else first. Or at least go and have a conversation with someone else first. If you've got some pictures of what the other side of the metal looks like I'm sure that would go down well during that conversation. Though I didn't know about the dry ice thing at the time. That sounds like it would make it much easier.1 point
-
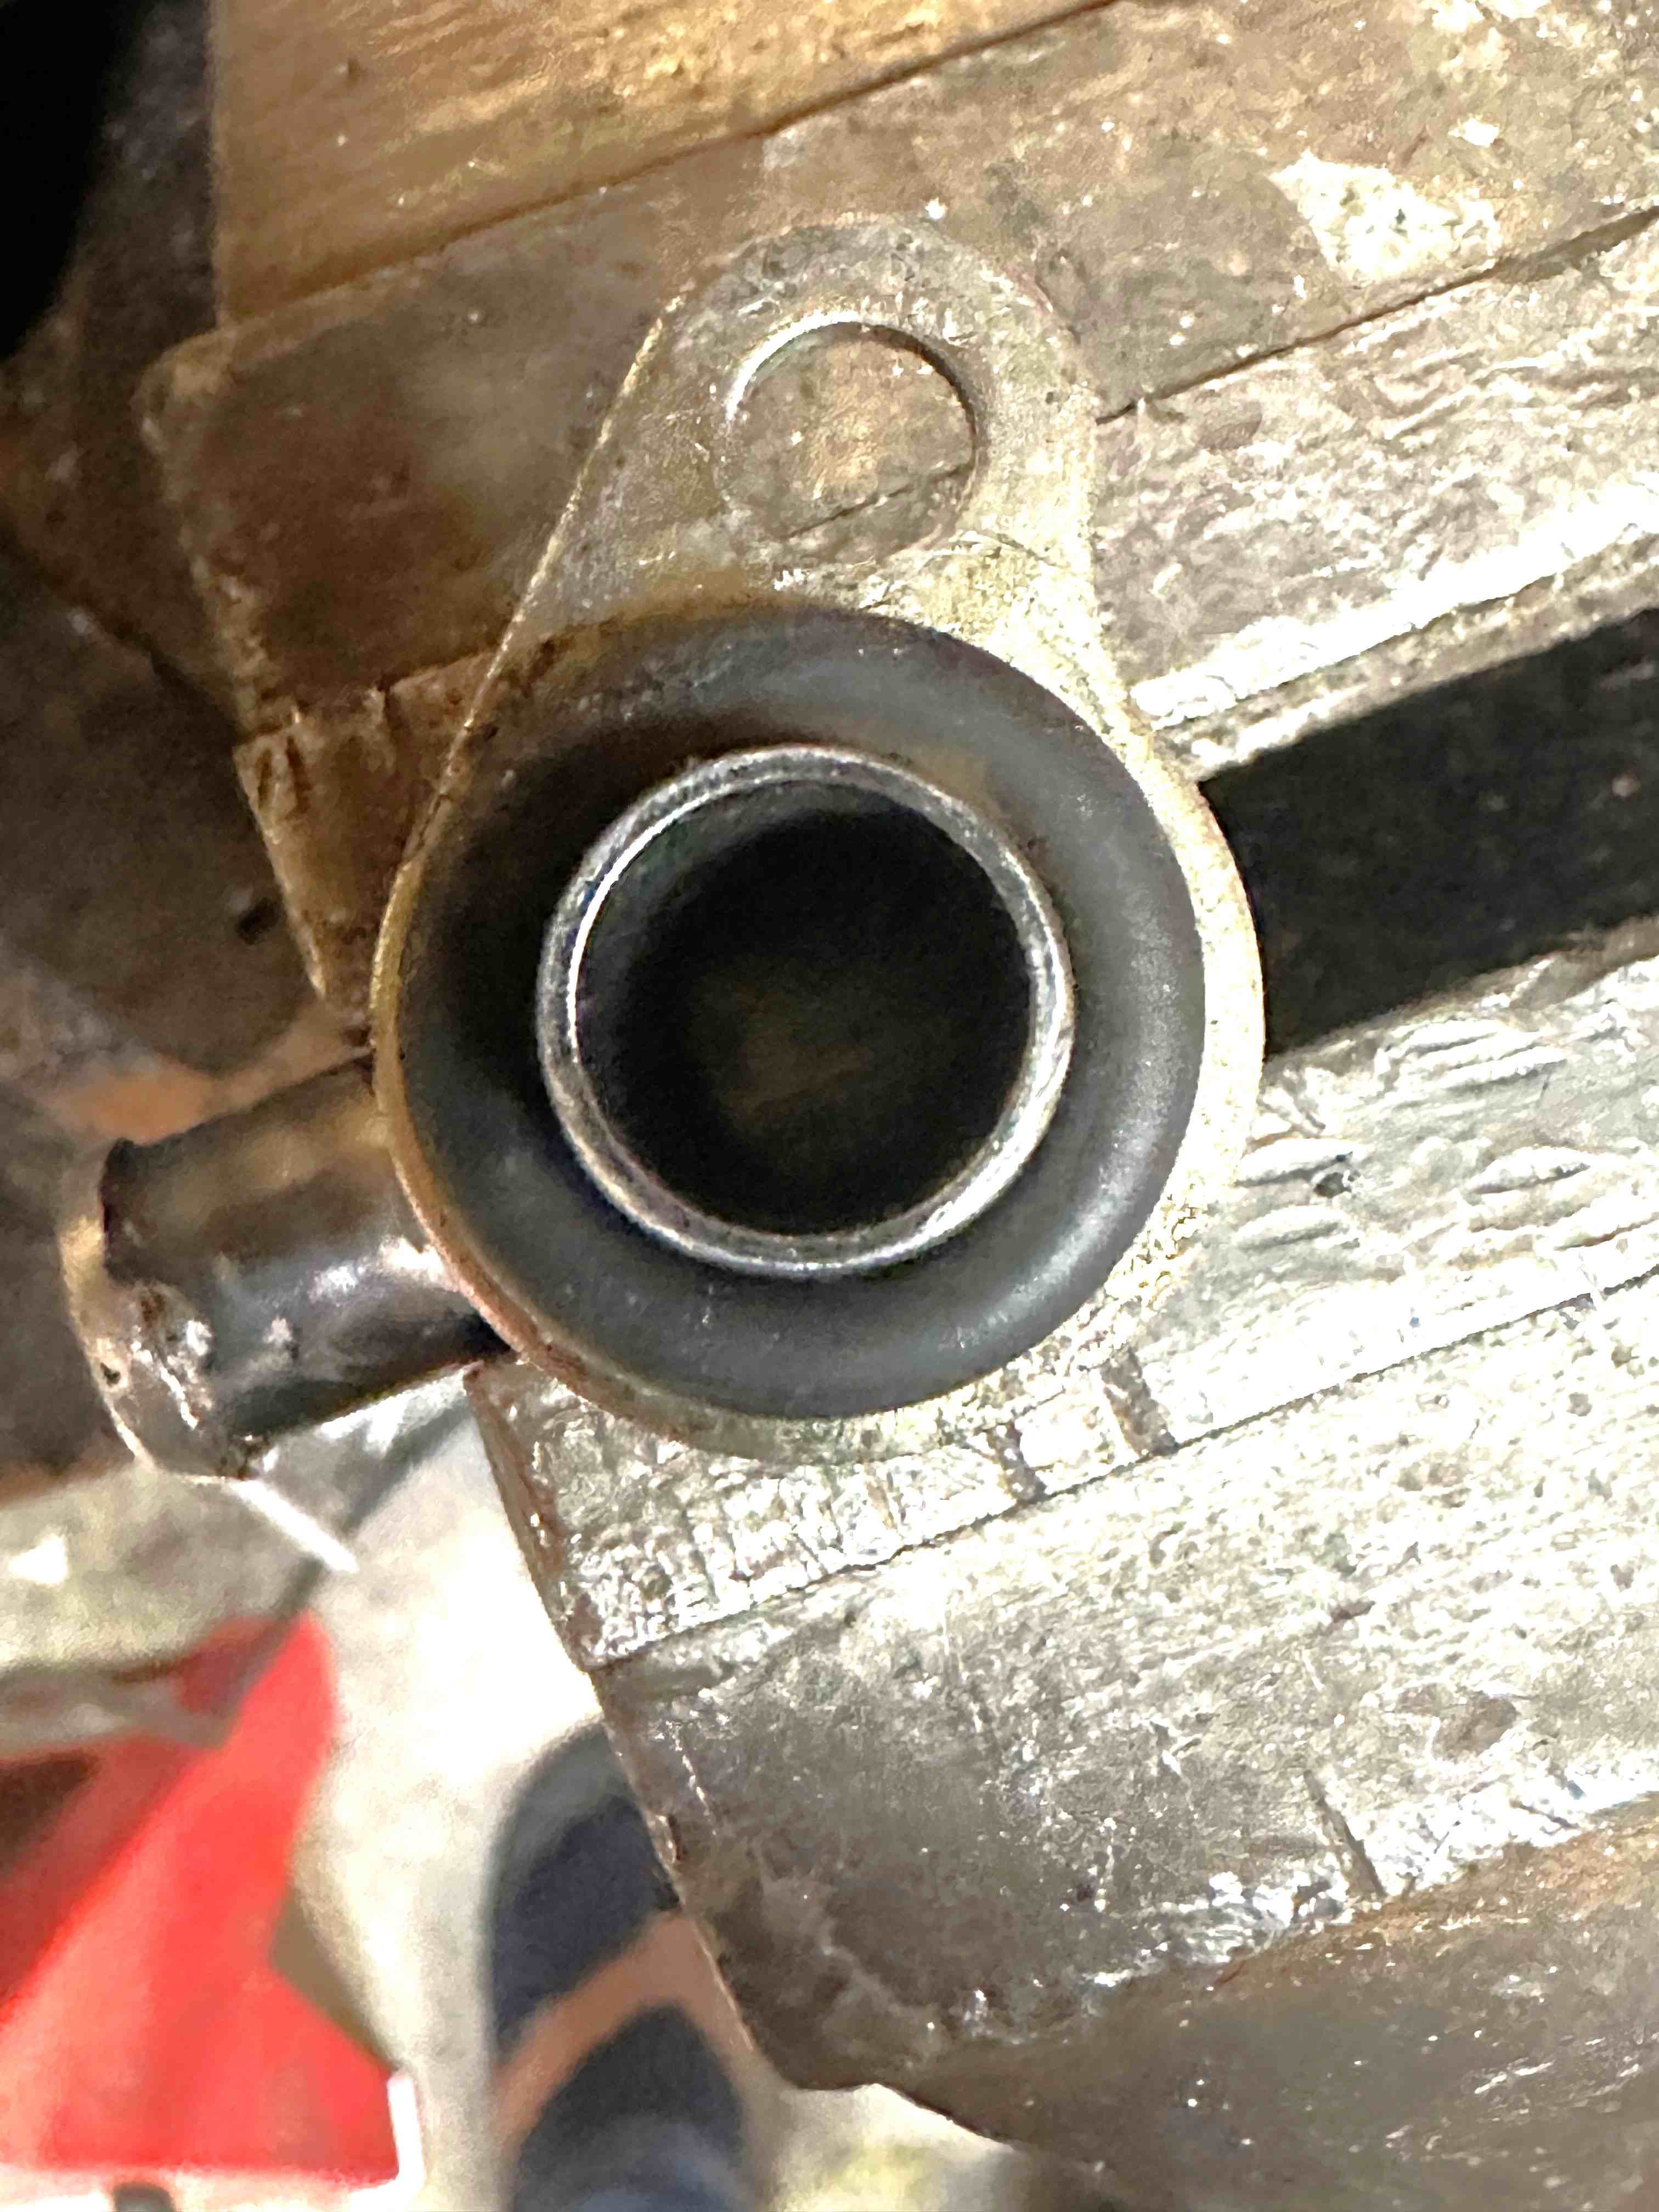
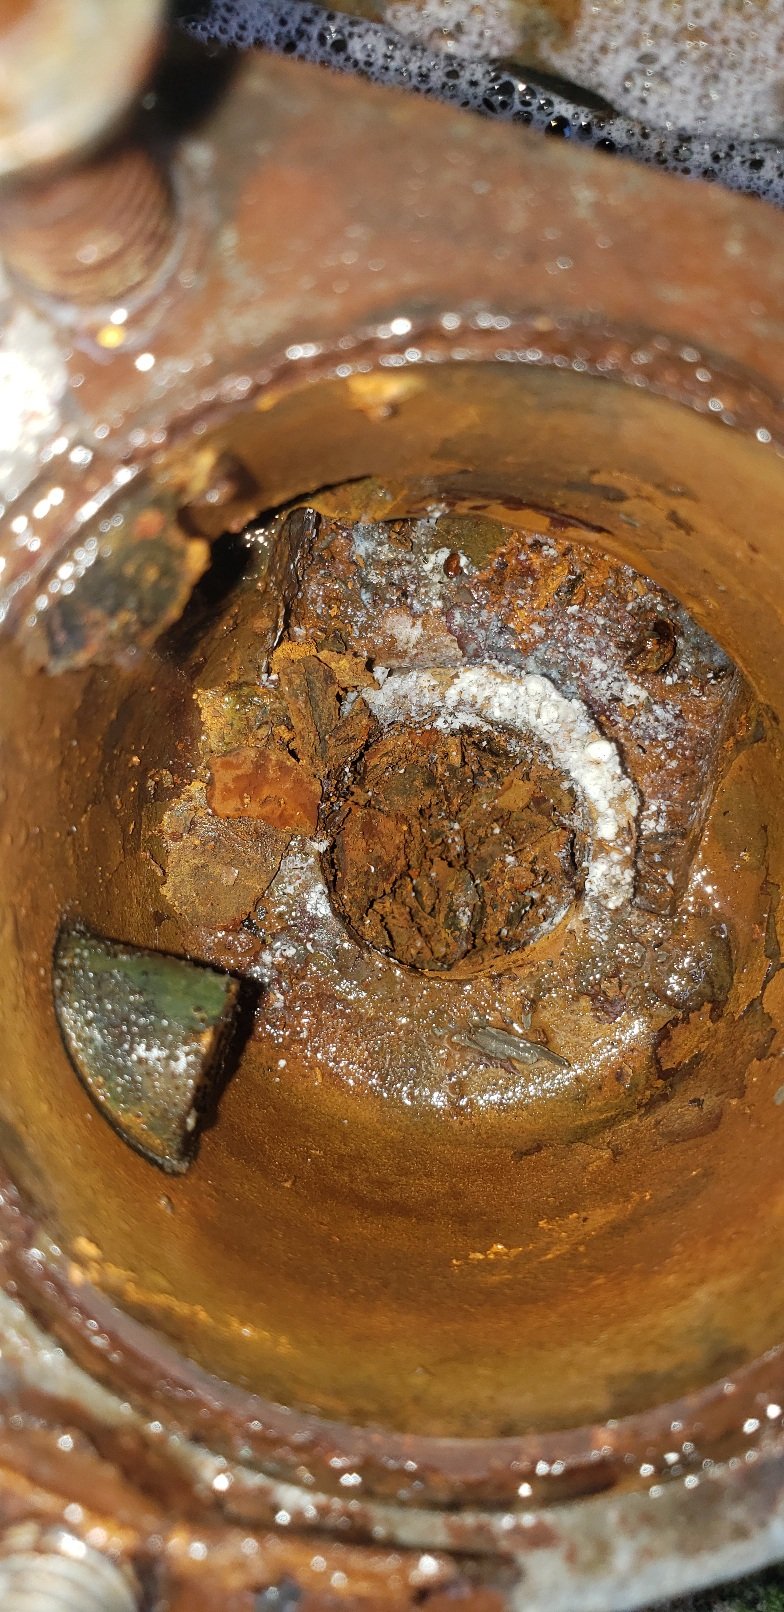
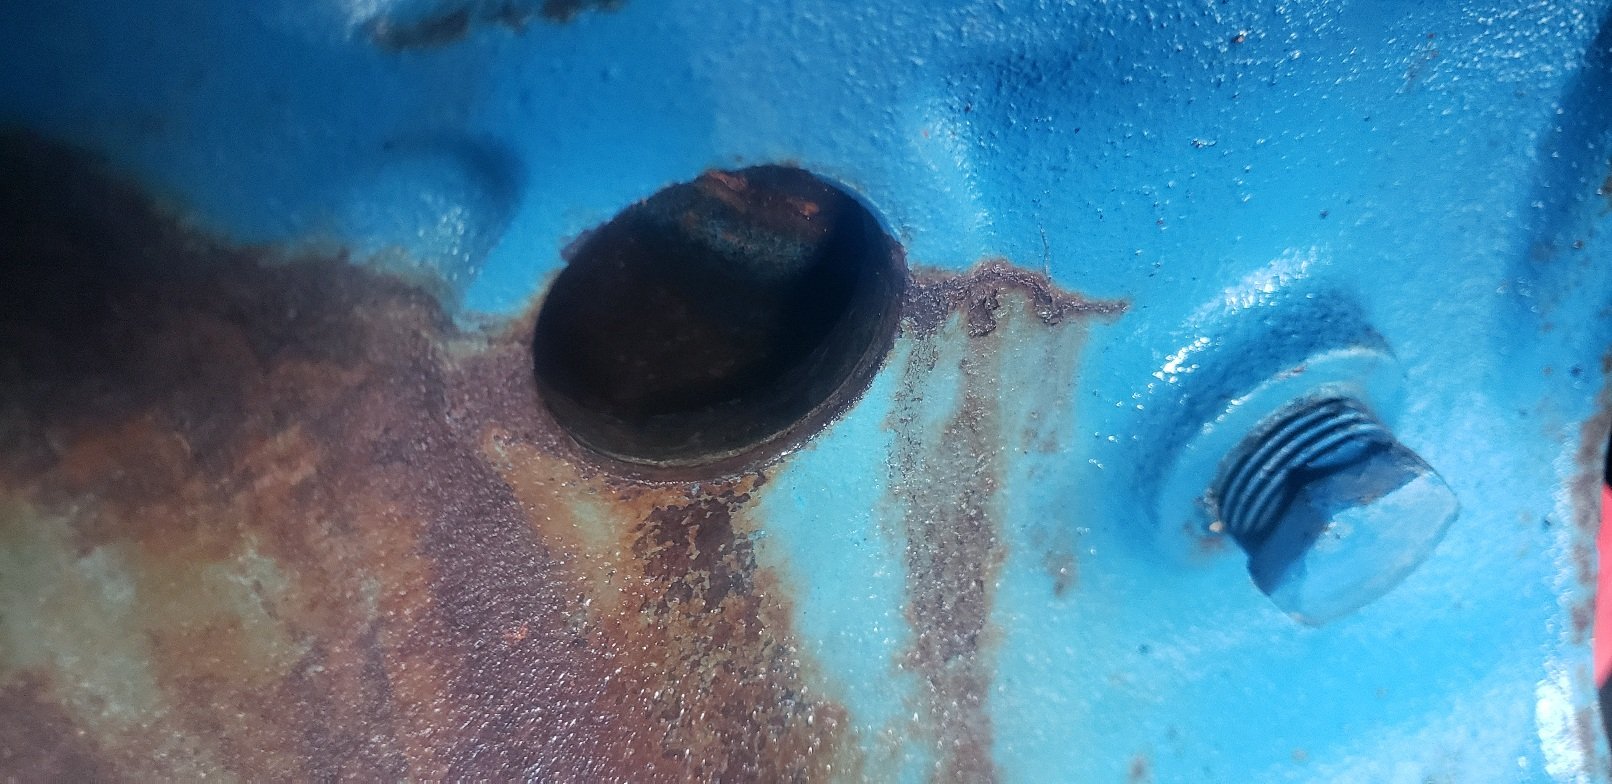
Ok, I didn't need to get the 19mm bolt undone. Once I had another look and remembered it is just a fitting with a O ring that has not set in its housing on the engine properly. So I removed it and tried to get it to seat properly. It is larger than the hole it seats in and just puckers up and puts a lip out so doesn't seal. It is quite loose on the fitting so seems too large a seal for the job. It is the same O ring that was there when I originally removed the fitting so it used to fit. I understand that it needs to be compressed in the seat to seal onto the fitting, but this seems like mission impossible. Do these seals grow in size a little over the years. Any tips or knowledge would be appreciated.
1 point
-
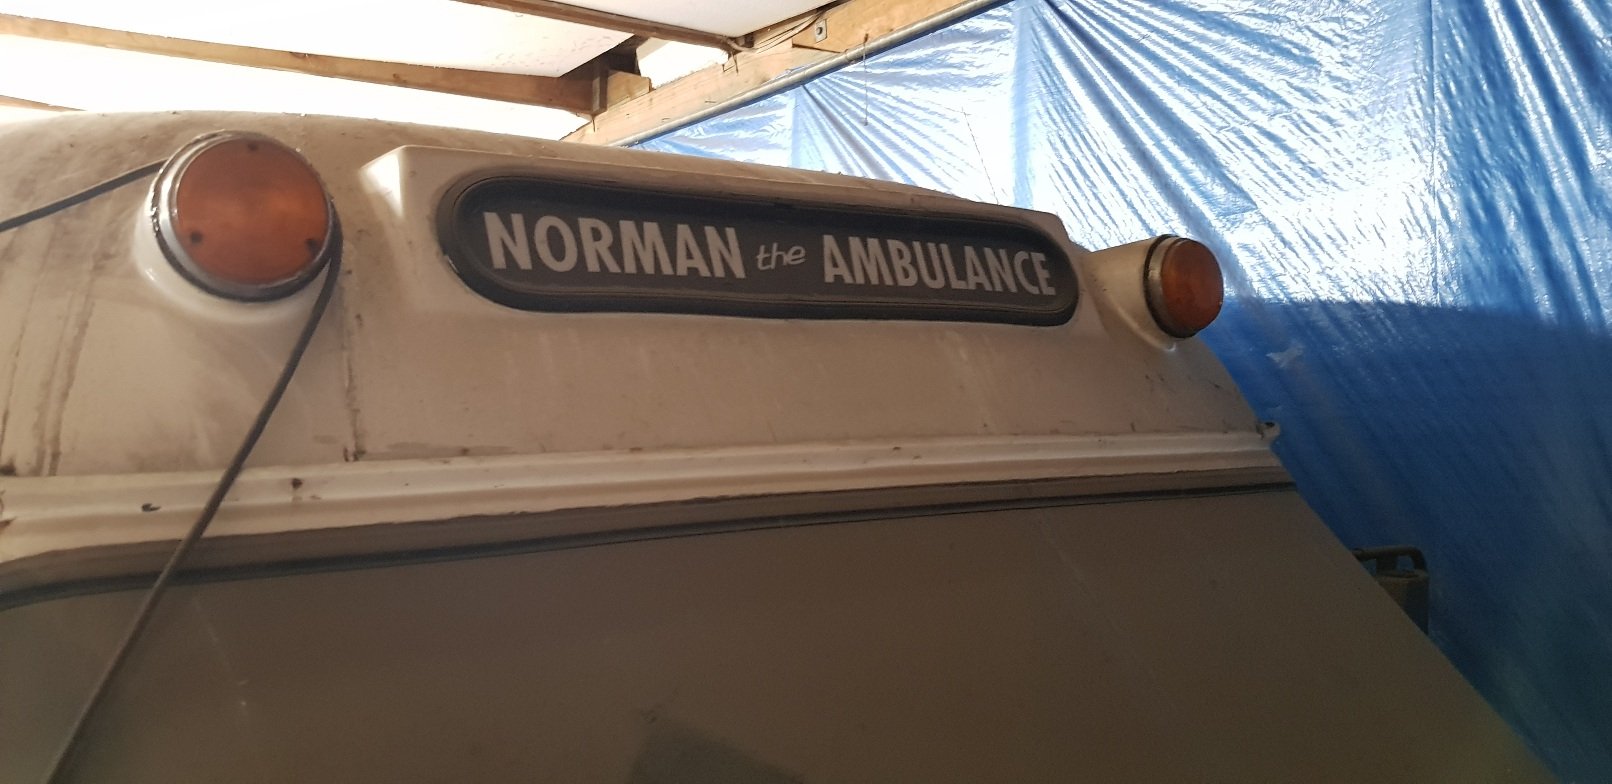
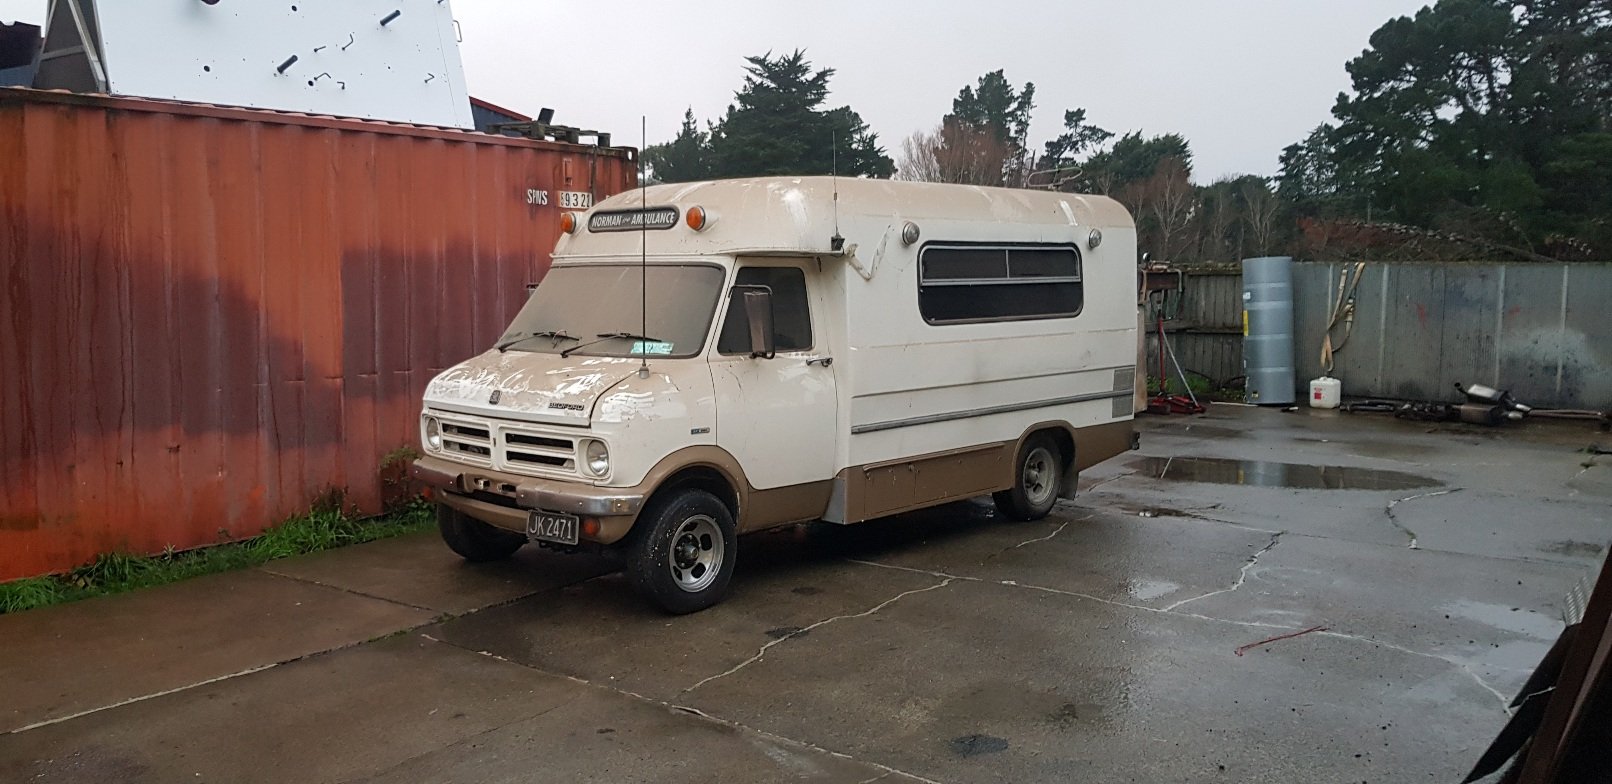
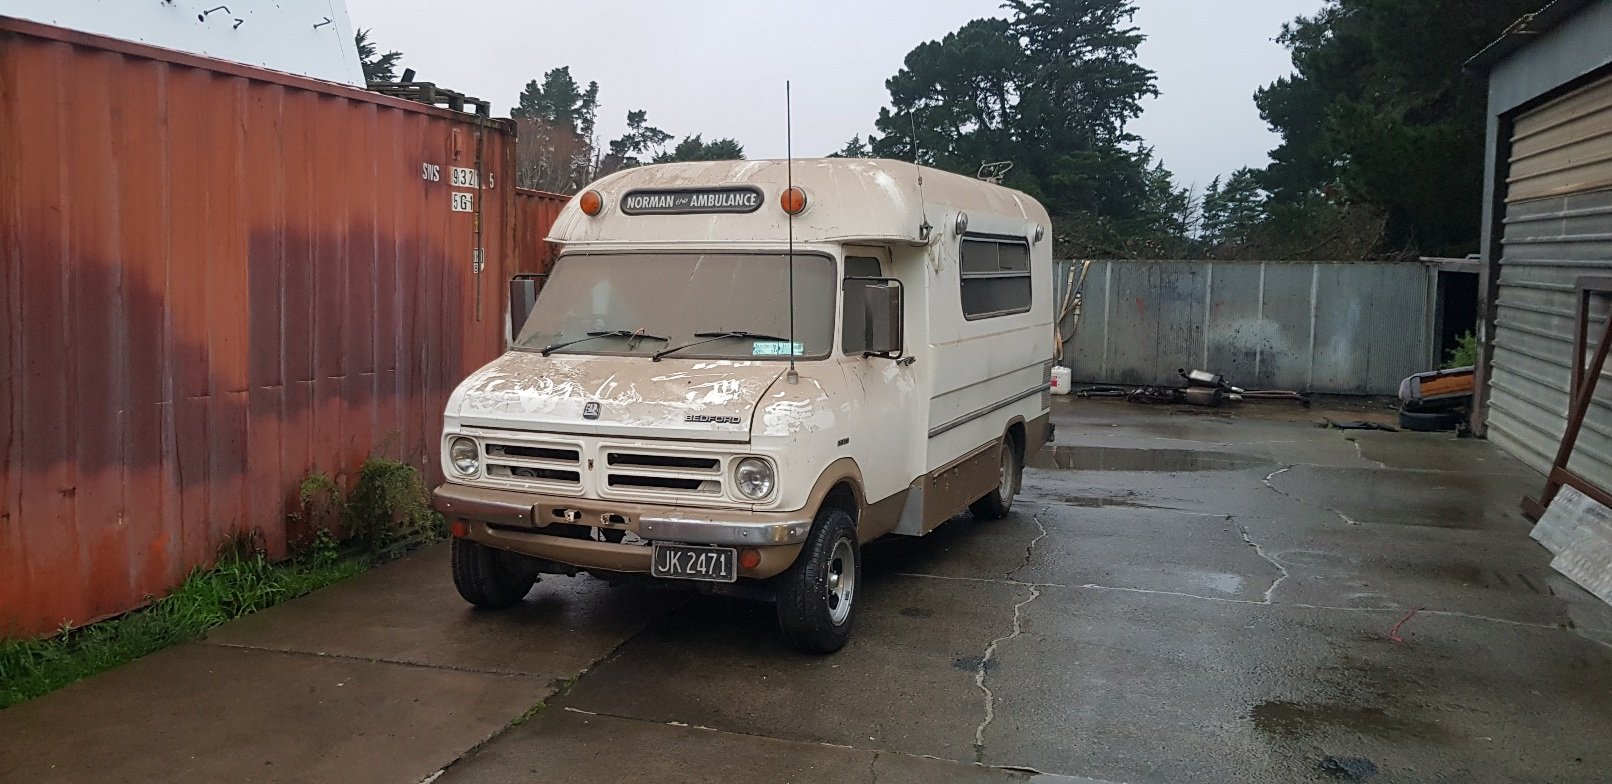
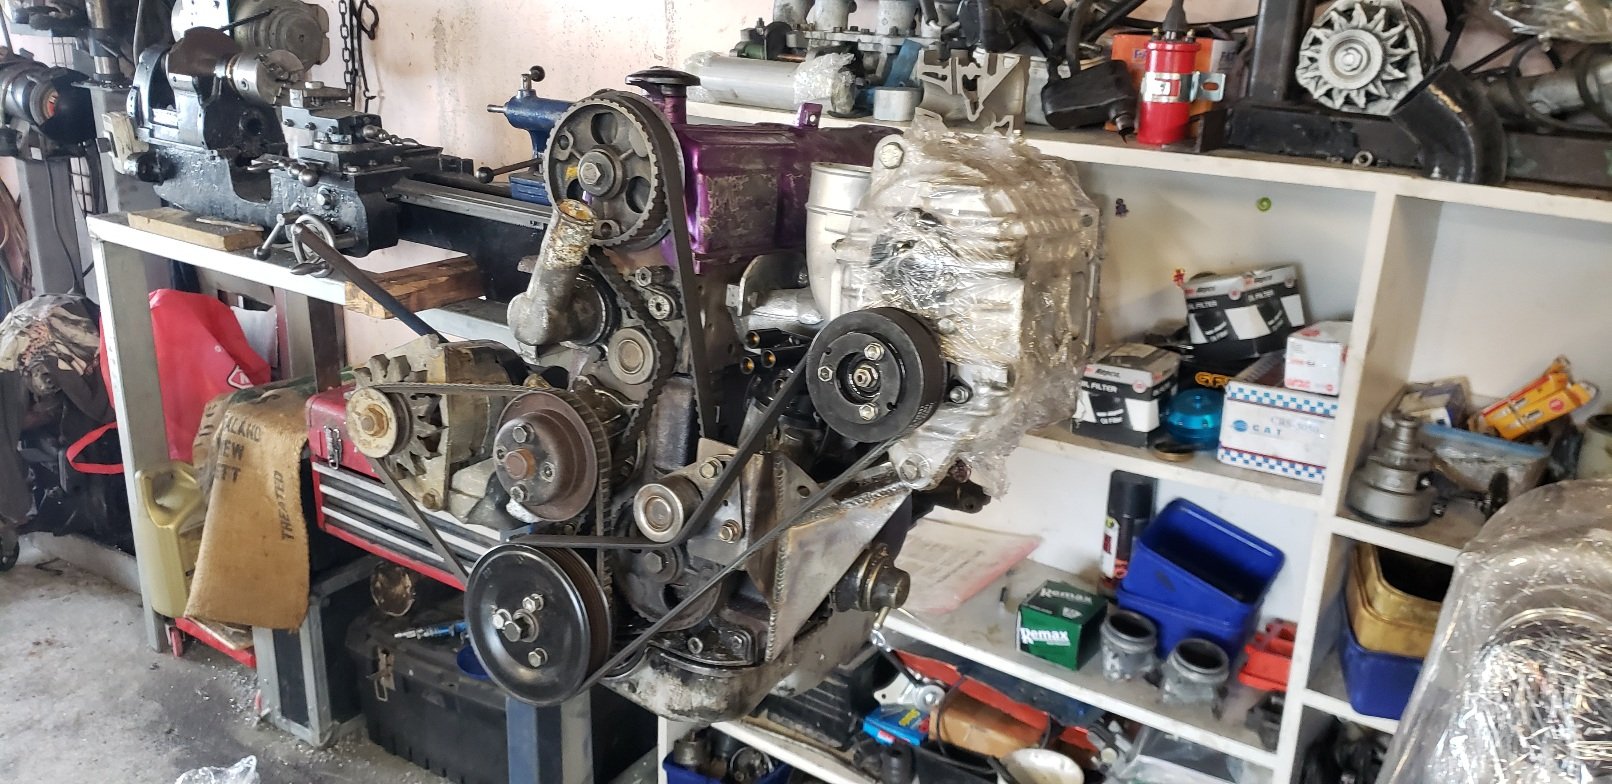
My nephew dropped the mk3 home for me before we moved the ambulance back into the drive. I've pulled the motor out of it. As I'm tackinb the turbo pff it for the ld28 and a lot of other bits atr going on my nephews turbo motor... This motor won't be going back into my car ...I have another I've been building....but I also have big plans for this car once the ambulance is road legal.... Sat it next to my nephews motor..they look bloody good Can never have enough dirty pinthoes I've also still playing with a supercharger setup and almost ready to test.... (probably sell it all off once i know it works) Bought a side entry dizzy cap for more room Modified yhe SC bracket so I can use a factors fuel pump But looking good with a 6pk belt
1 point
-
If you can put dry ice on the floor (assuming it has not sound deadening) cooling the under seal from above should help you chip it off Also I think your Wof guy was scared because its an old car and he may never have dealt with something of that era My local mechanic that does my servicing on my wagon (I dont drive it enough to be a daily, and all costs are written off so no point me doing work myself as its a nana car) I chatted to him about the fake evo (GSR project I had) and he was very hesitant to do any work on it and even a rwc was risky as it was too "old" To be fair tho as you said, you werent happy with the underside. Personally id still replace the underseal (even just for sound deadening) after you paint it, even if you just use an underbody sealer1 point
-
Tuning the handling Barry style...
1 point
-
The motor must have sat for a while as it had plenty of rust in the coolant system and one of the front plugs had rusted out completely.. So I decided to strip things off so j could get to all the plugs.. knock them out and water blast the fuck out of the insides. And after an hour or so I managed to get all the shit out
1 point
-
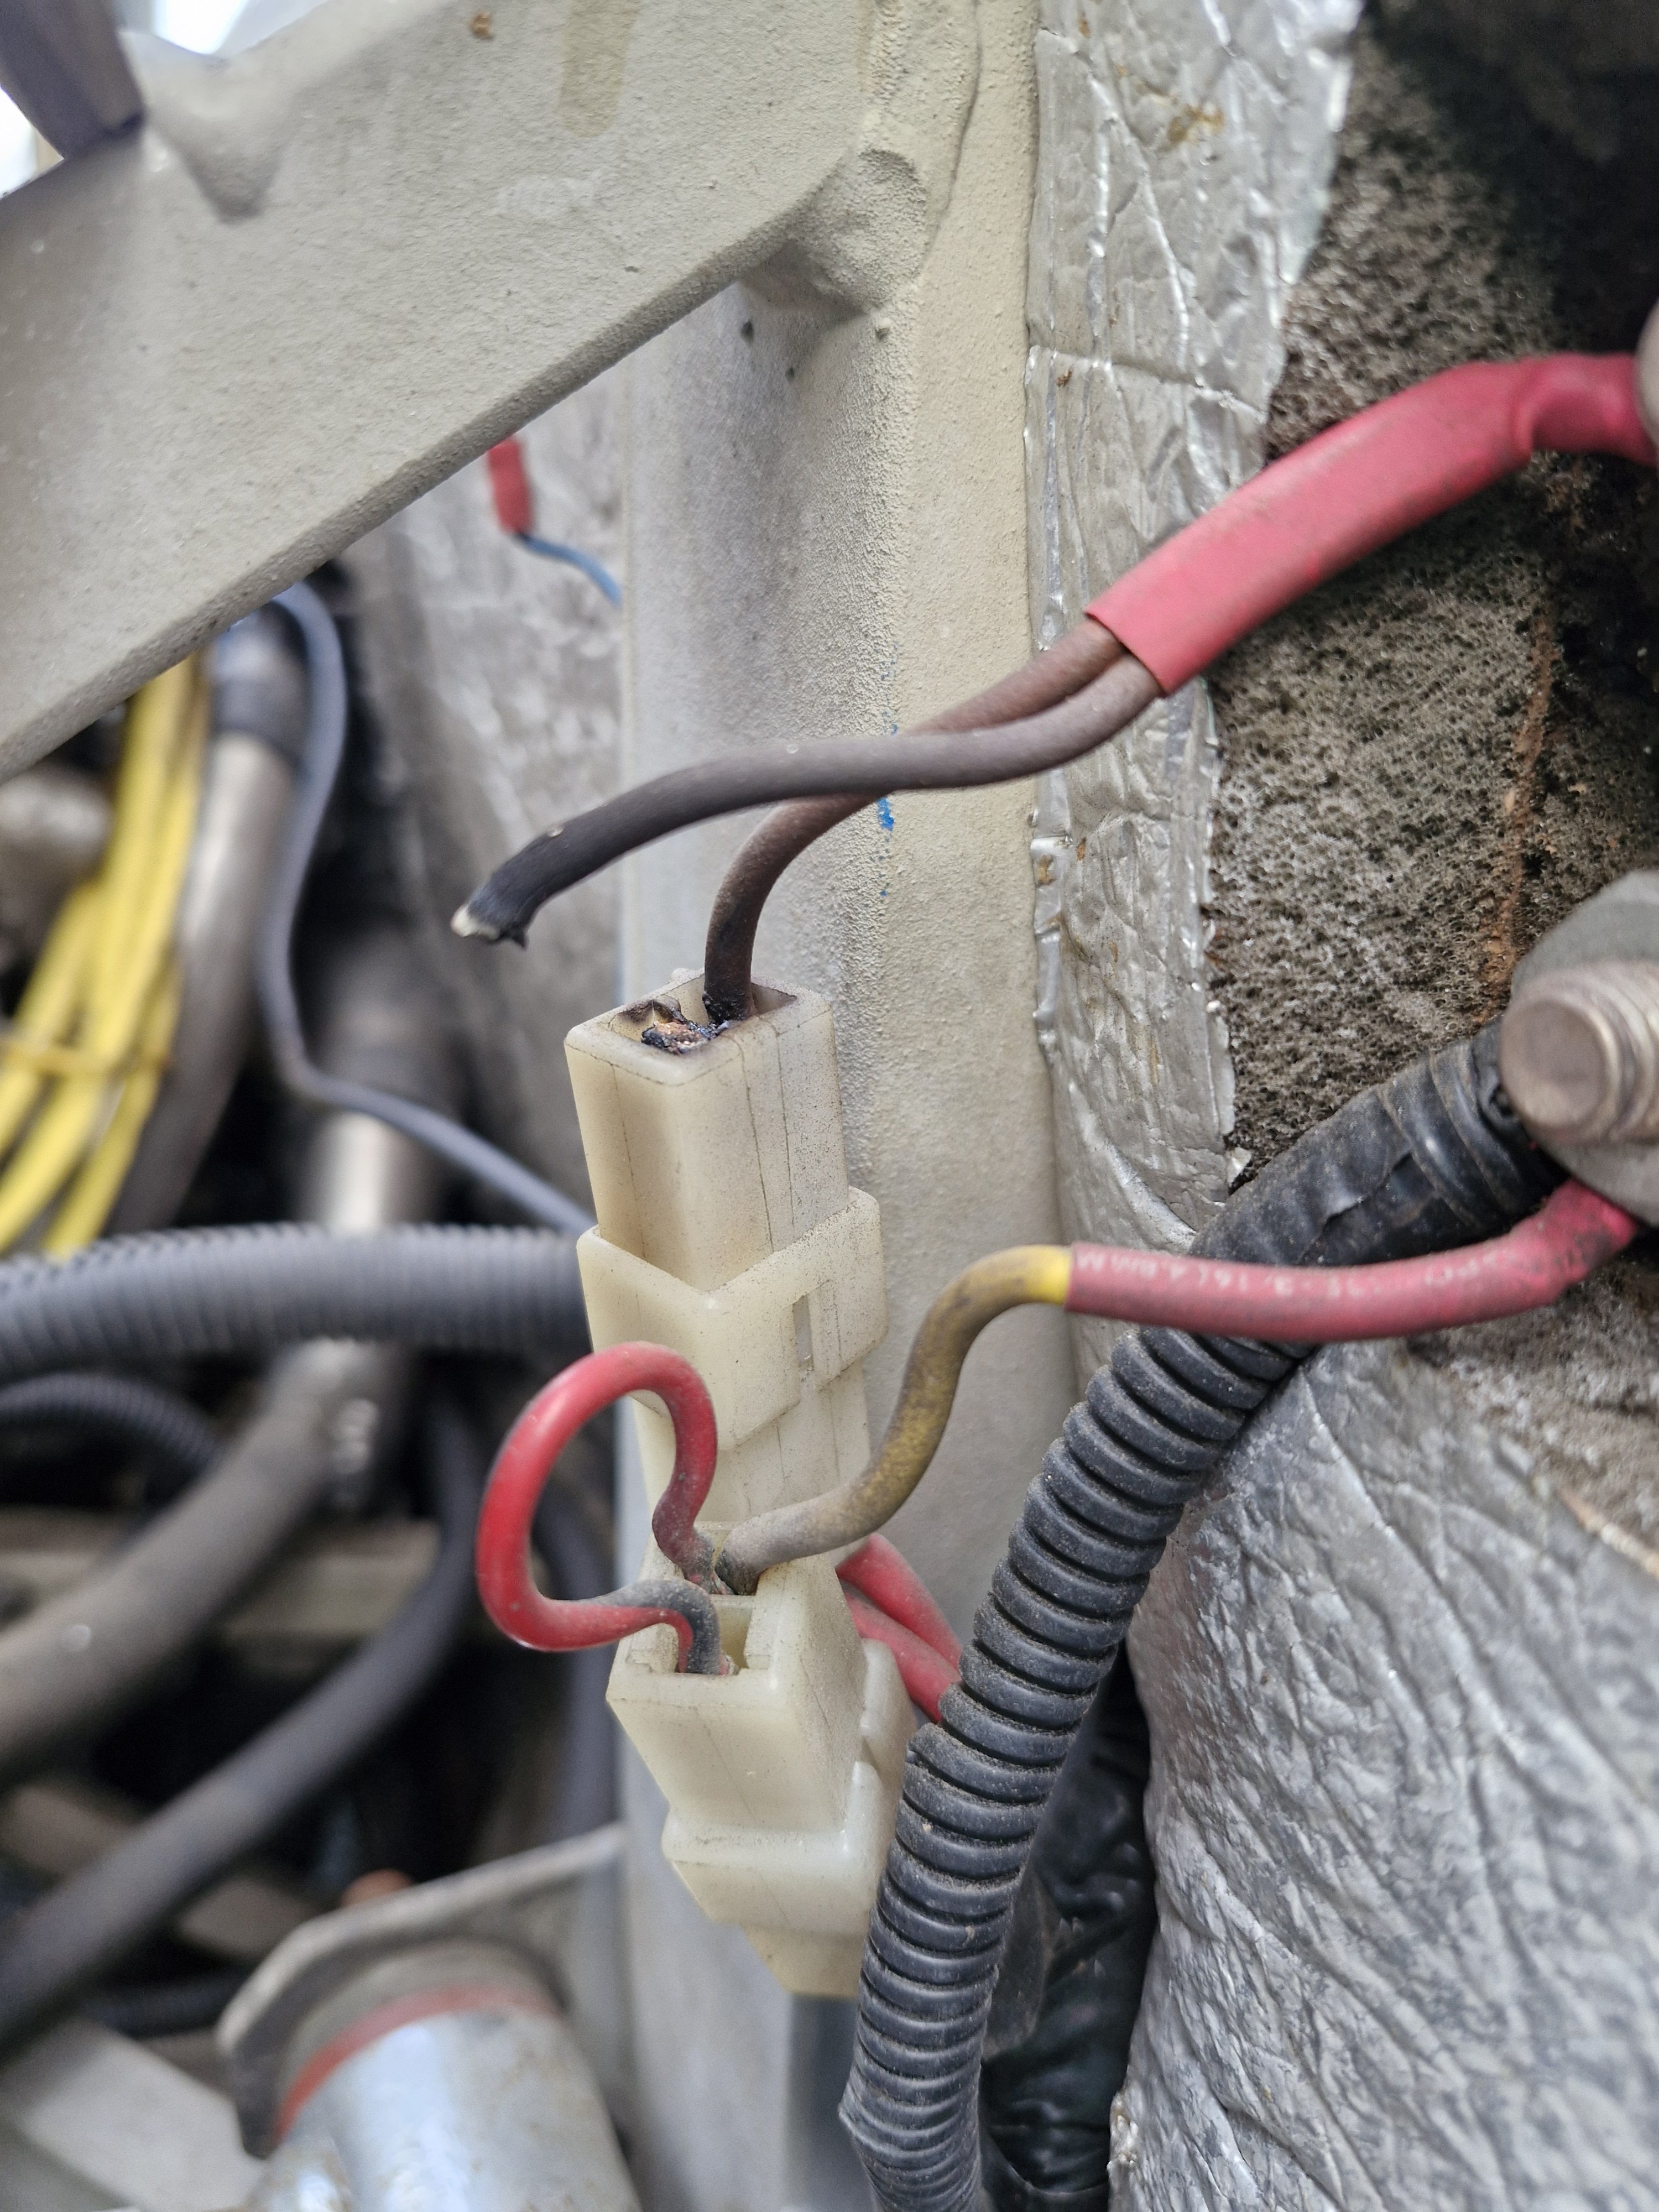
The dirty bitch has bitten already, melted a wire, only off the kill switch, only in the middle of papakura.. mate came and helped push it off the road in to a carpark and wedged a piece of my work lanyard in to hold the wire in to get me home..
1 point
-
The 1st thing we did last year was strip the full camper stuff out as my wife was not stepping foot in it till it was. (She know the.mate who gave it to us..... and was not going in there. I gave away as much as I could and we still dumped over 300kgs of shag pile and shit).. Then its pretty much sat like this till last week.
1 point
-
Iv setup alot of water meth kits now on various setups all boosted stuff, rotaries, 2jz, rbs and even a 6 port direct kit on a 6cyl bmw diesel. I have it in my own car along with spending alot of time on the dyno with Gav at High Performance rotaries getting these setup , pretty cool to see the benefit in almost instant air temp drop and the difference it makes to being borderline knock limited, especially when you don't wanna run e85 in a street car, as for setup on a link, in my vk im running the aem pump nozzle lines solenoid etc, except I have a hella ssr driving the pump driven by a pwm table and enable conditions on a GP output for the solenoid, I have a failsafe setup for low tank level to kill hi boost1 point
-
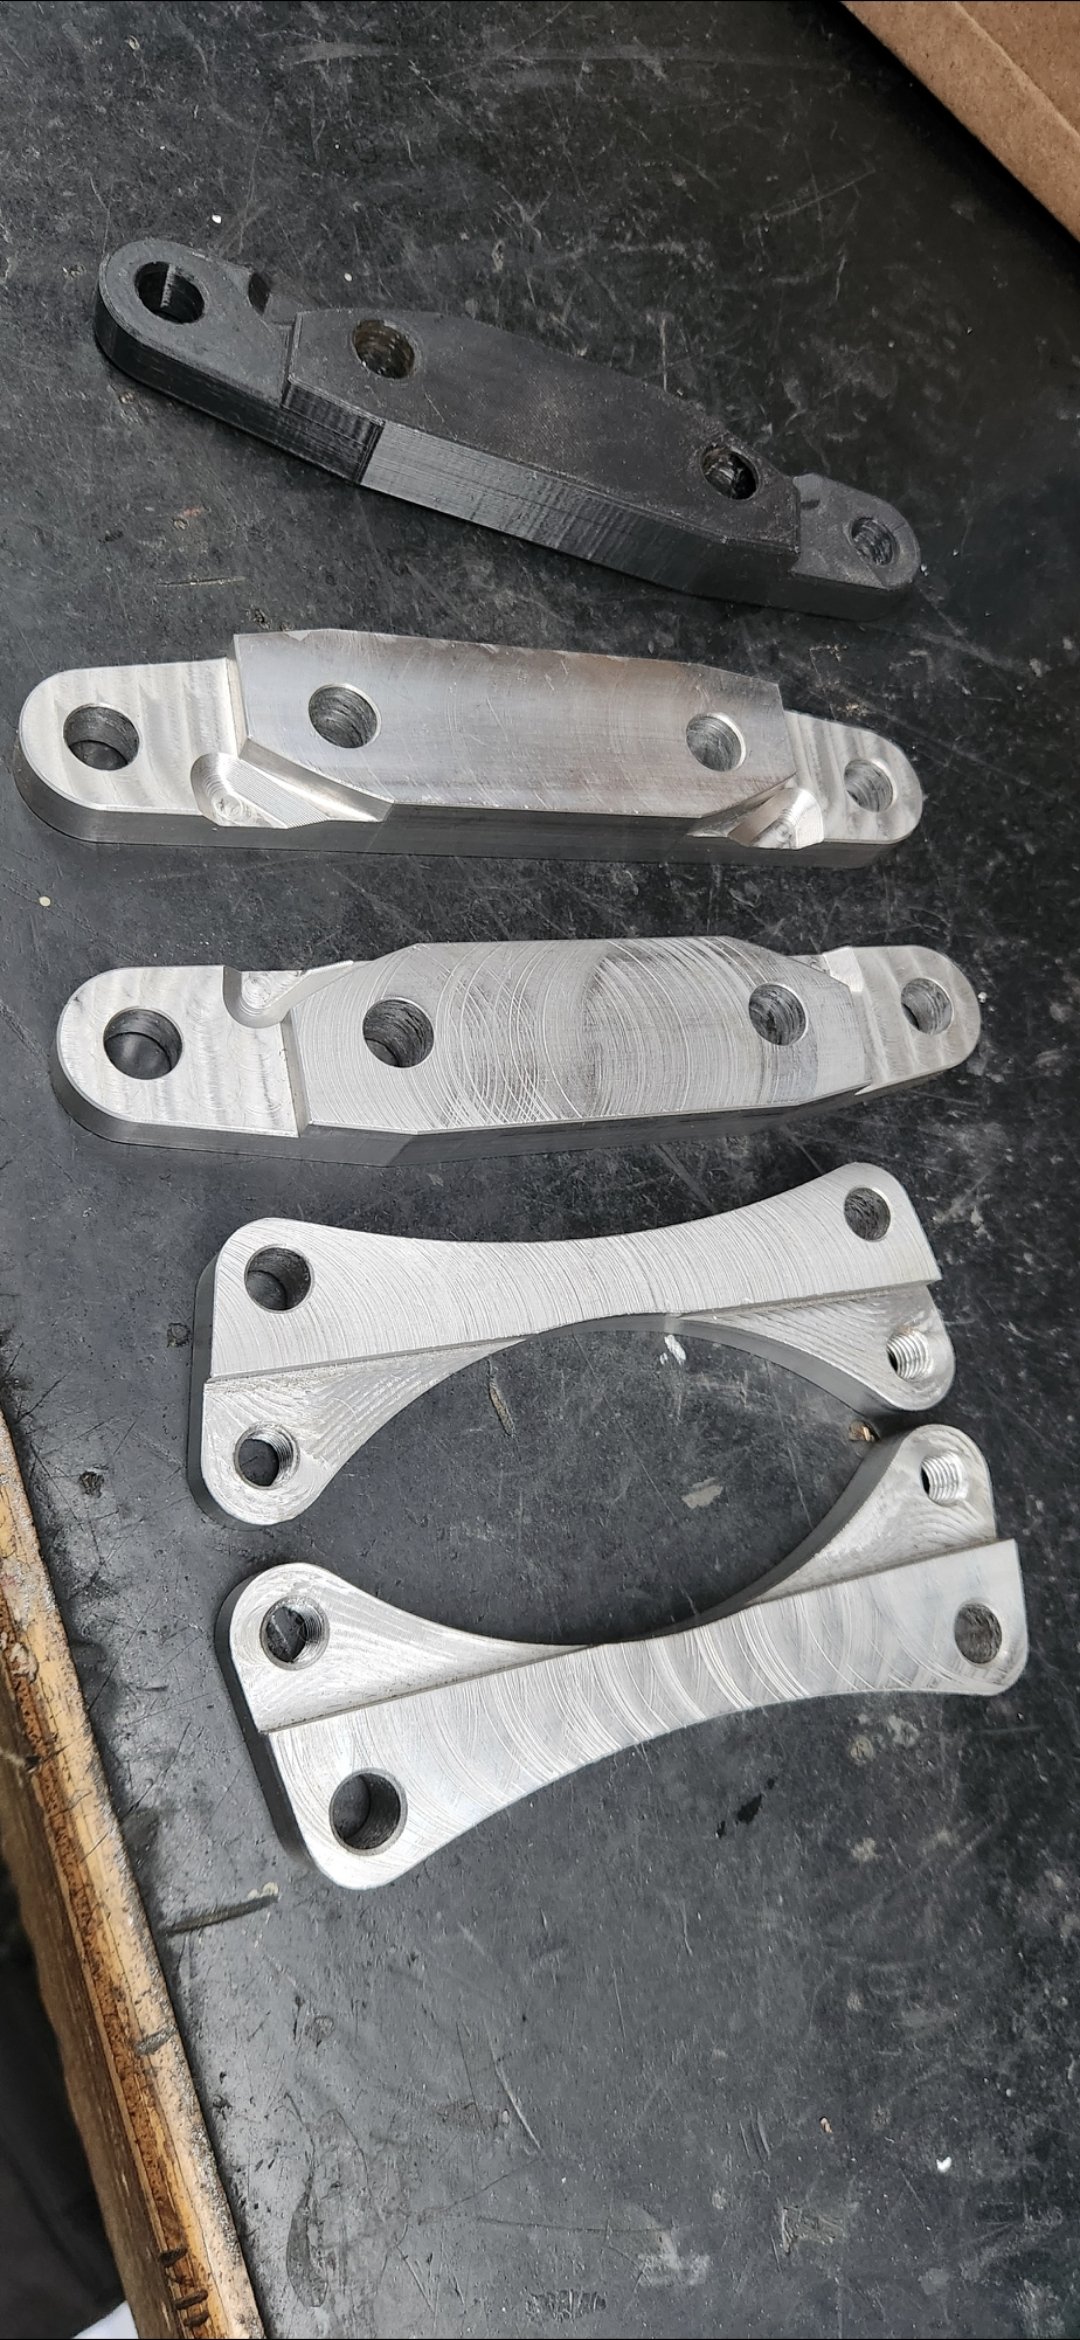
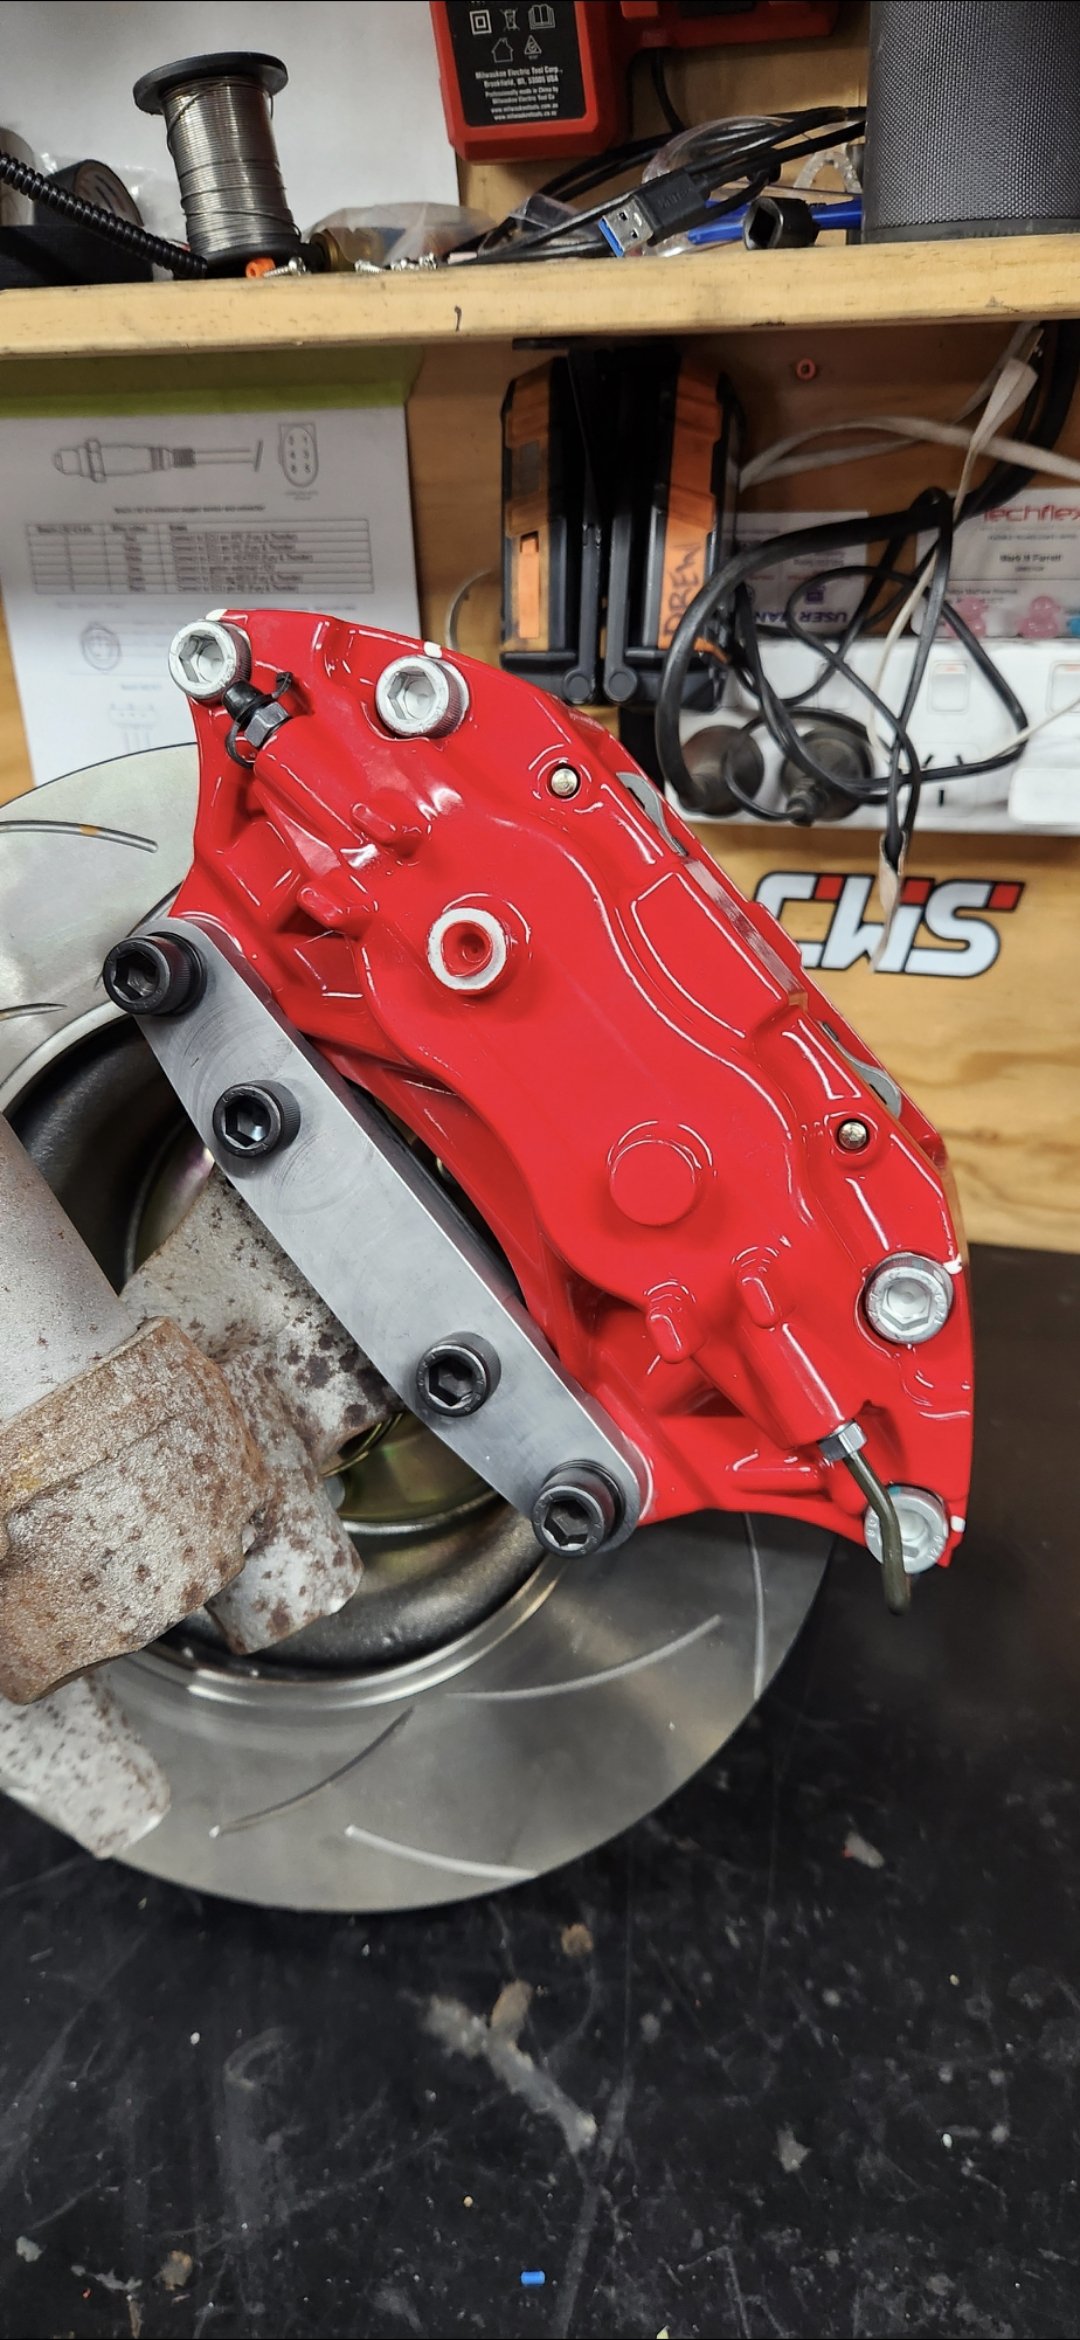
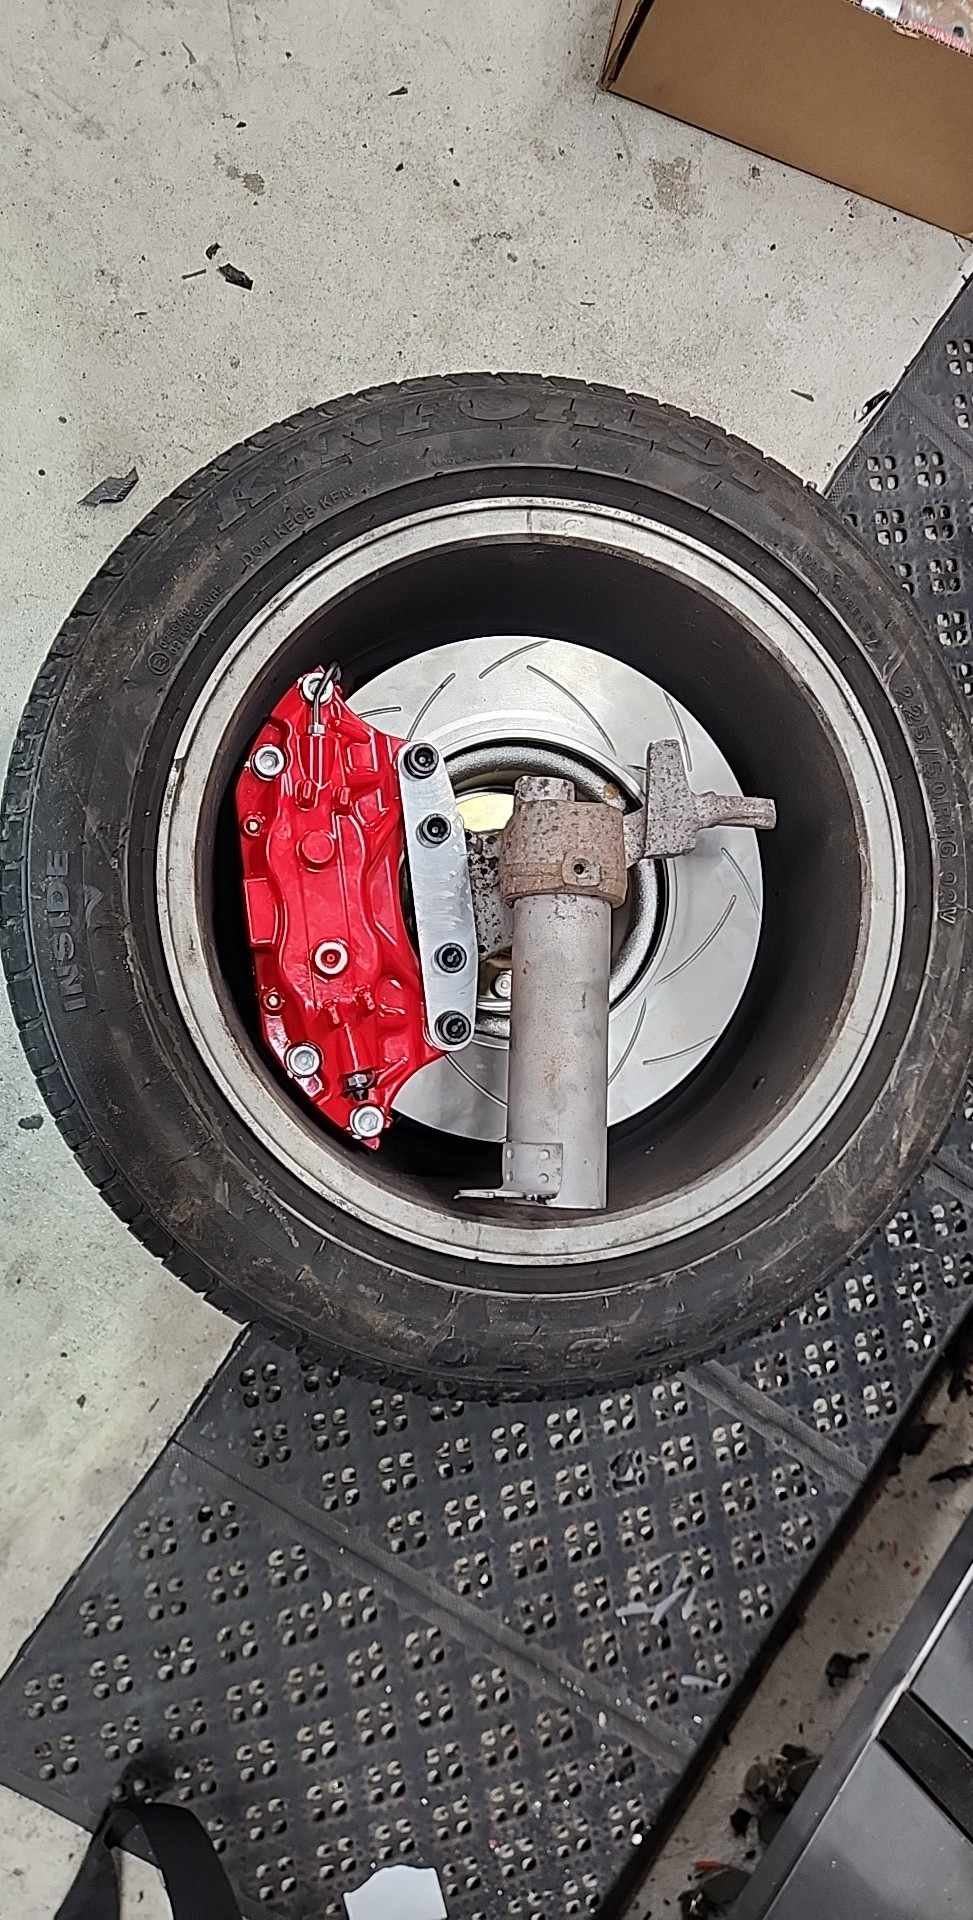
progress on the brake adaptors, a few chunks of 4140 now match my 3d printed models and fit spot on thanks to Moose design for sorting the machining, there's even hope to keep the corvette wheels it's super tight but they do clear in the 16"wheels
1 point
-
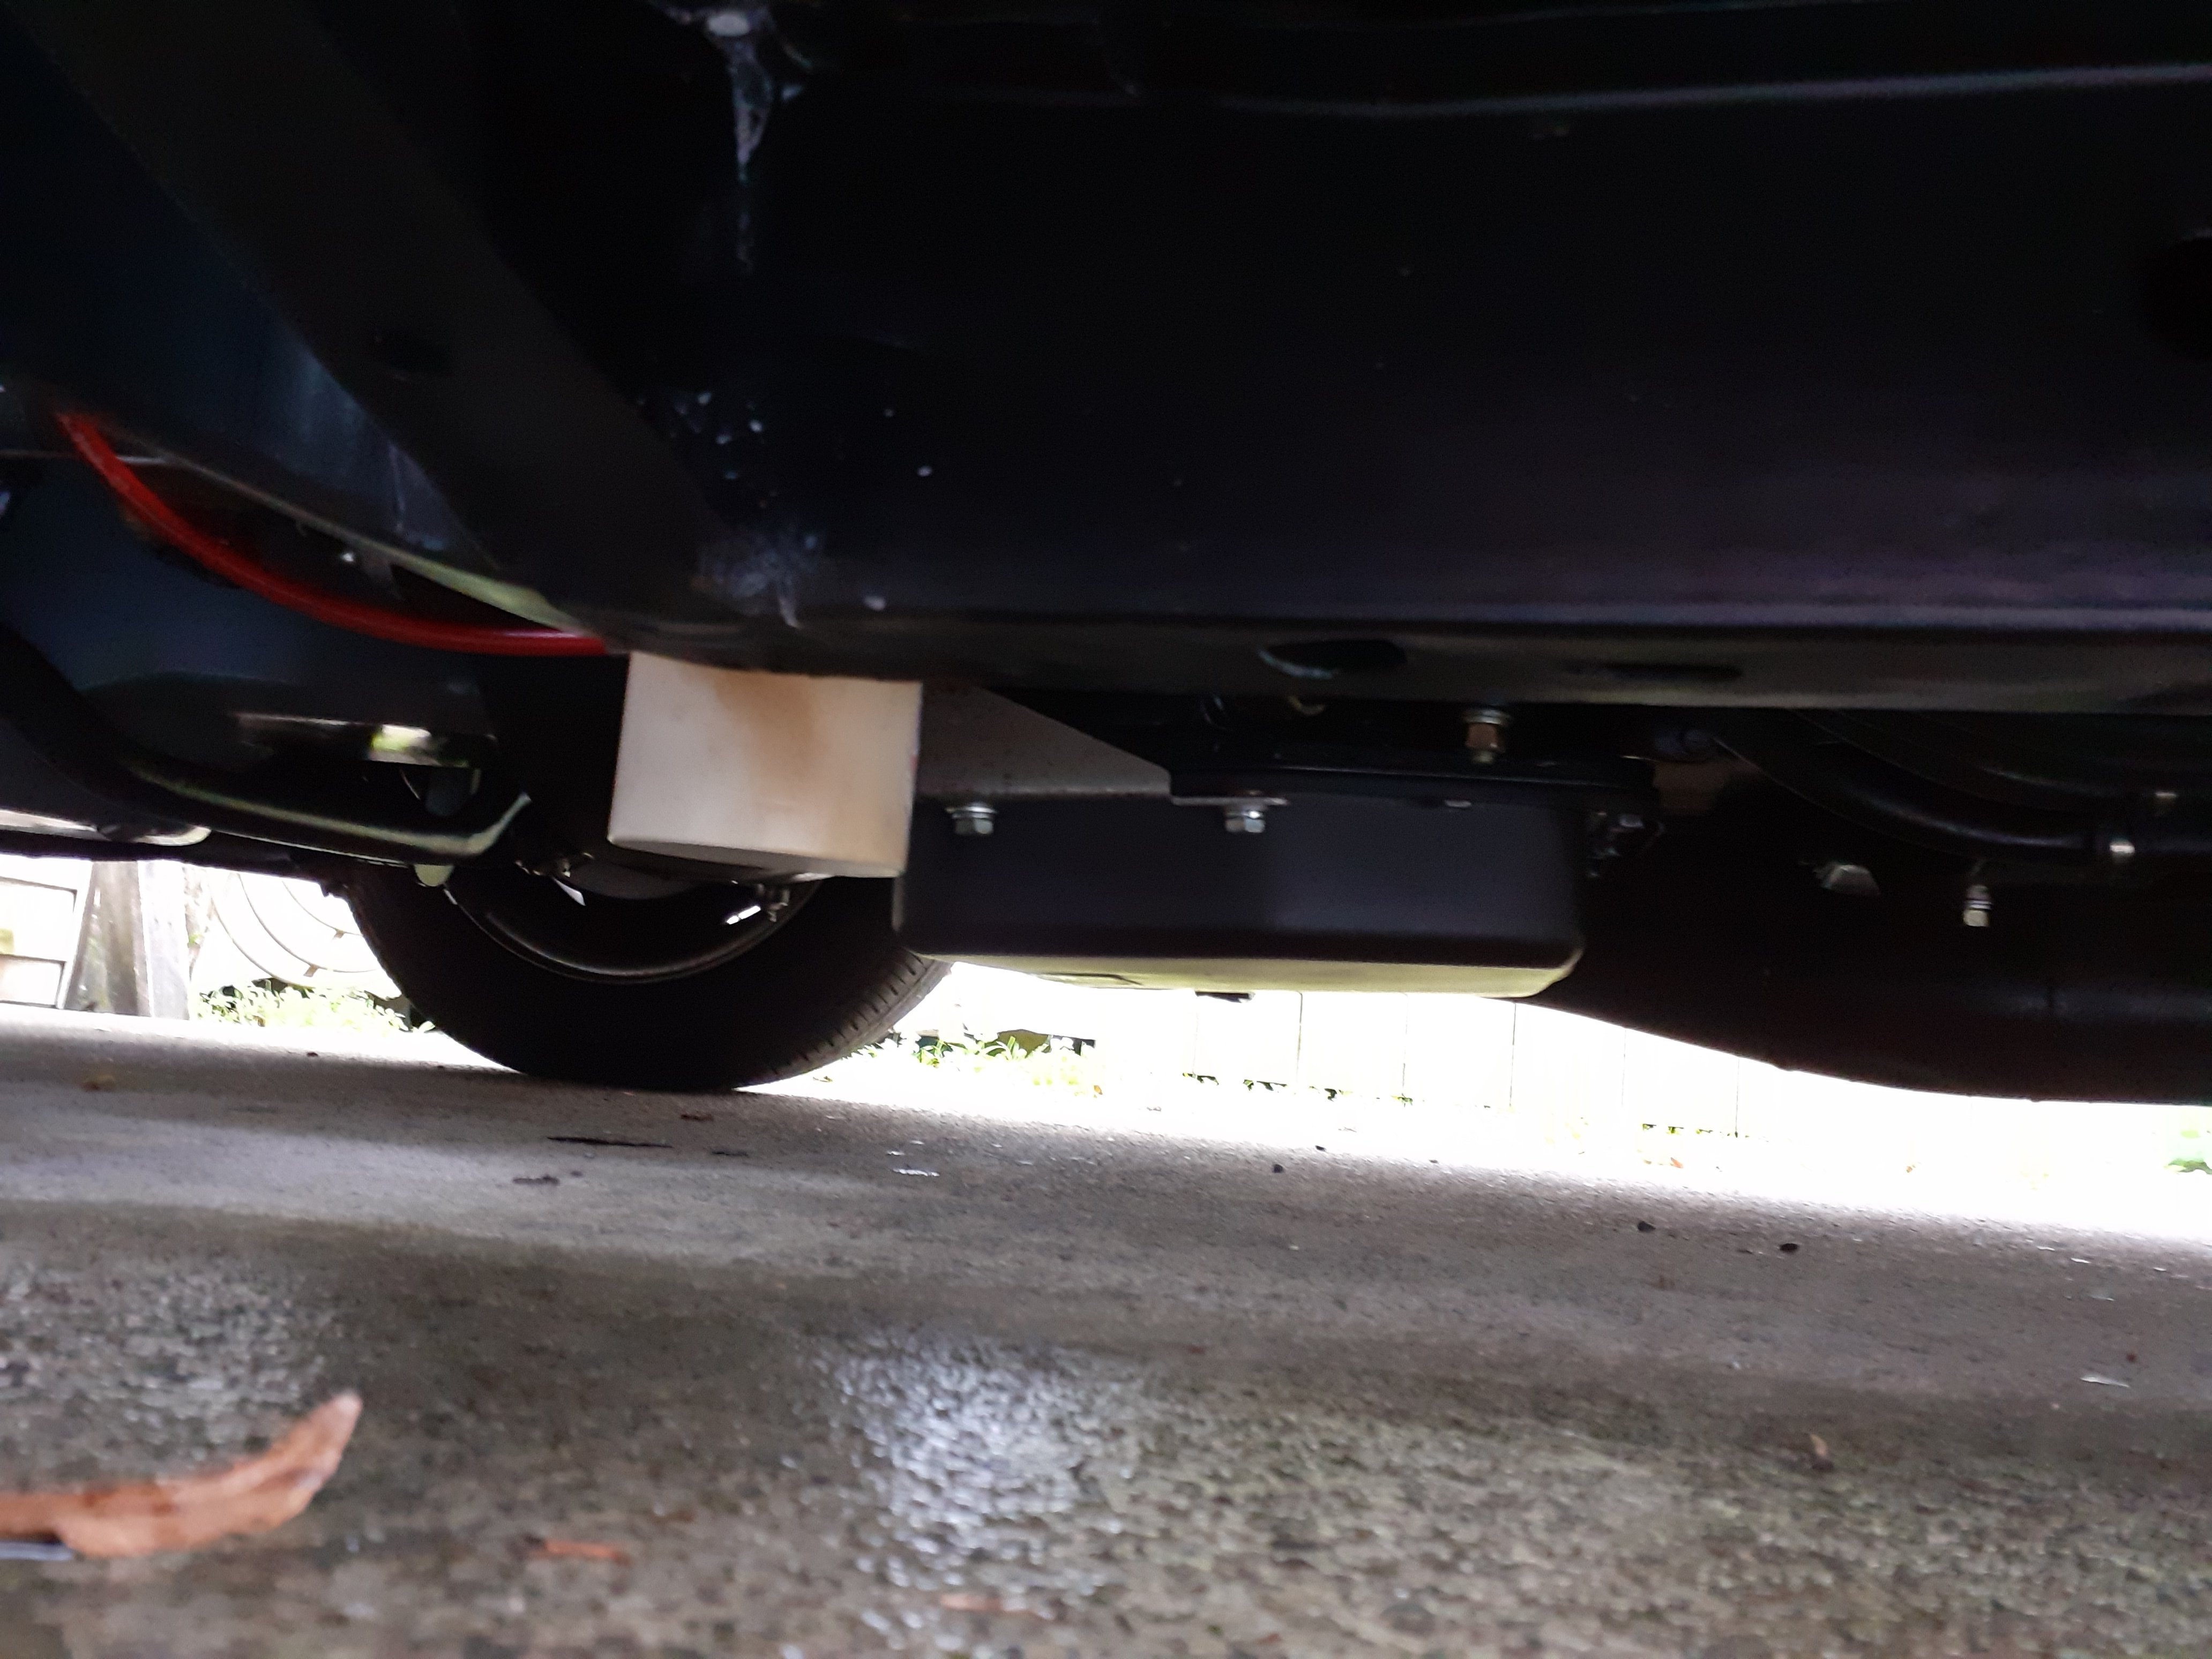
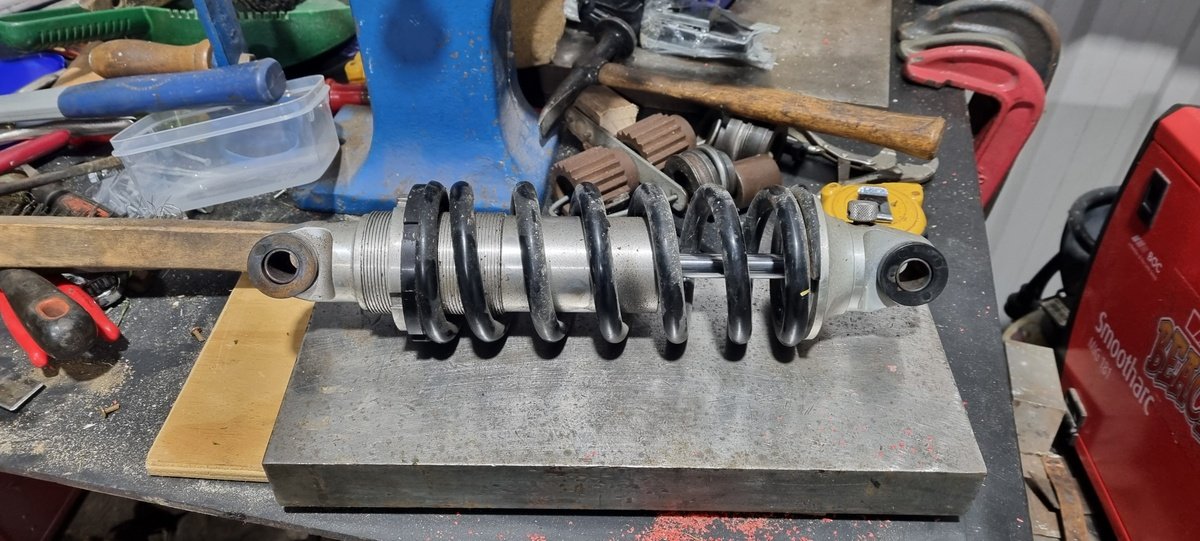
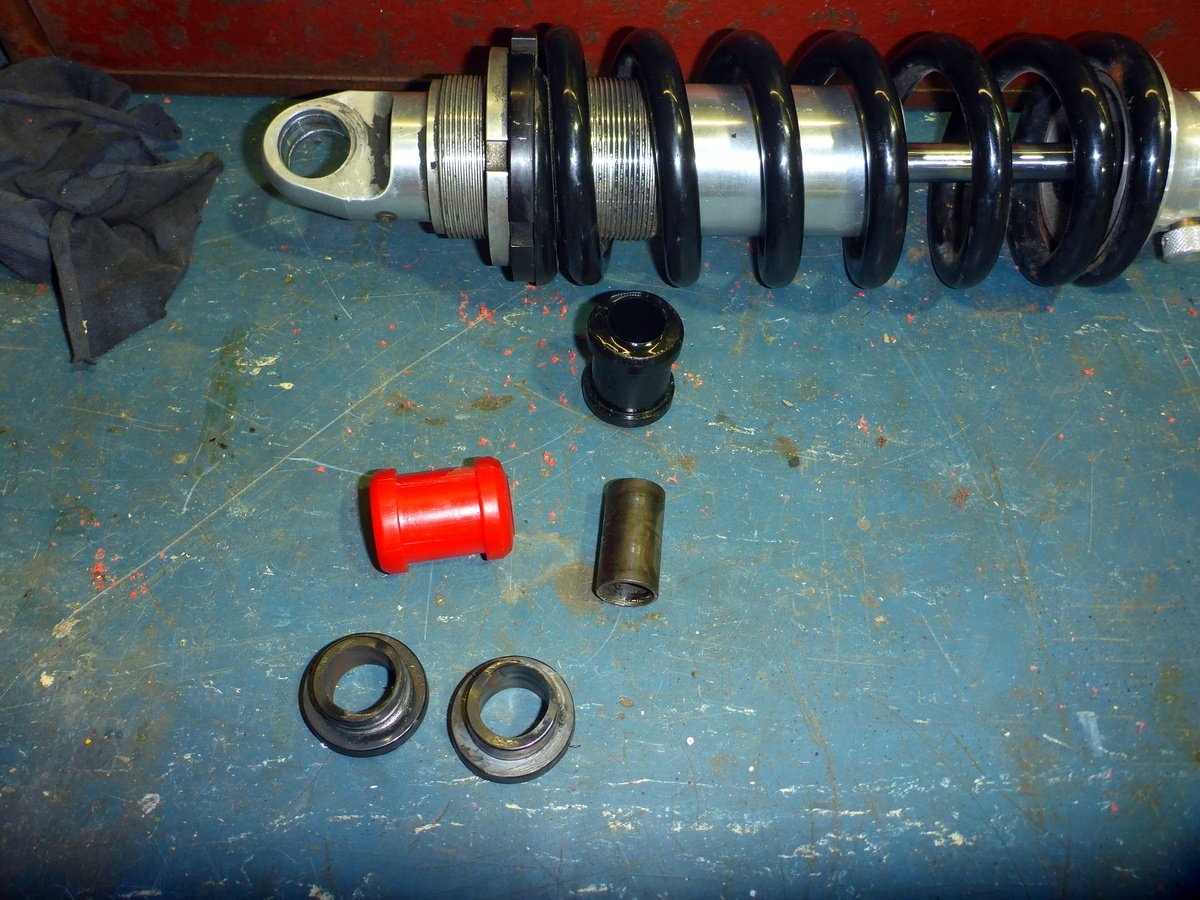
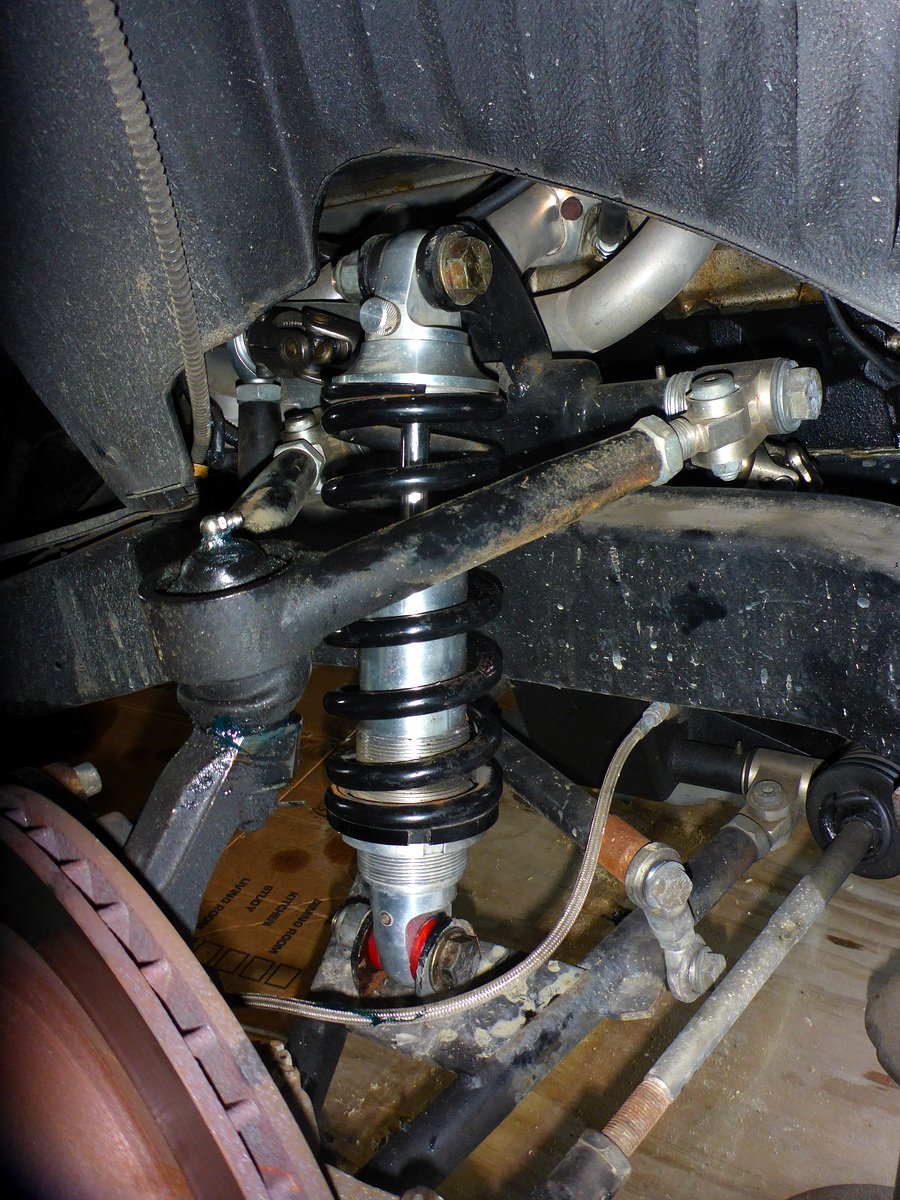
OK, so new town new WOF man. Nothing too serious I though, lower front coilover bushes, fuel pump leaking, and transmission mount a bit rooted. Coilovers first, pretty easy to get out just jack up, remove wheels and remove the top/bottom mounting bolts. Coilovers are Aldan I think. The polyurethane bush was a bit out of shape one each side. I couldn't get an exact fit locally, but these generic ones would do the job, after cutting in half and trimming down to size using a power file. Autolign had only one black, so I ended up with a red one on one side. And fitted back up without too much bother. This turned out to be the easiest job of the three by a comfortable margin.
1 point
-
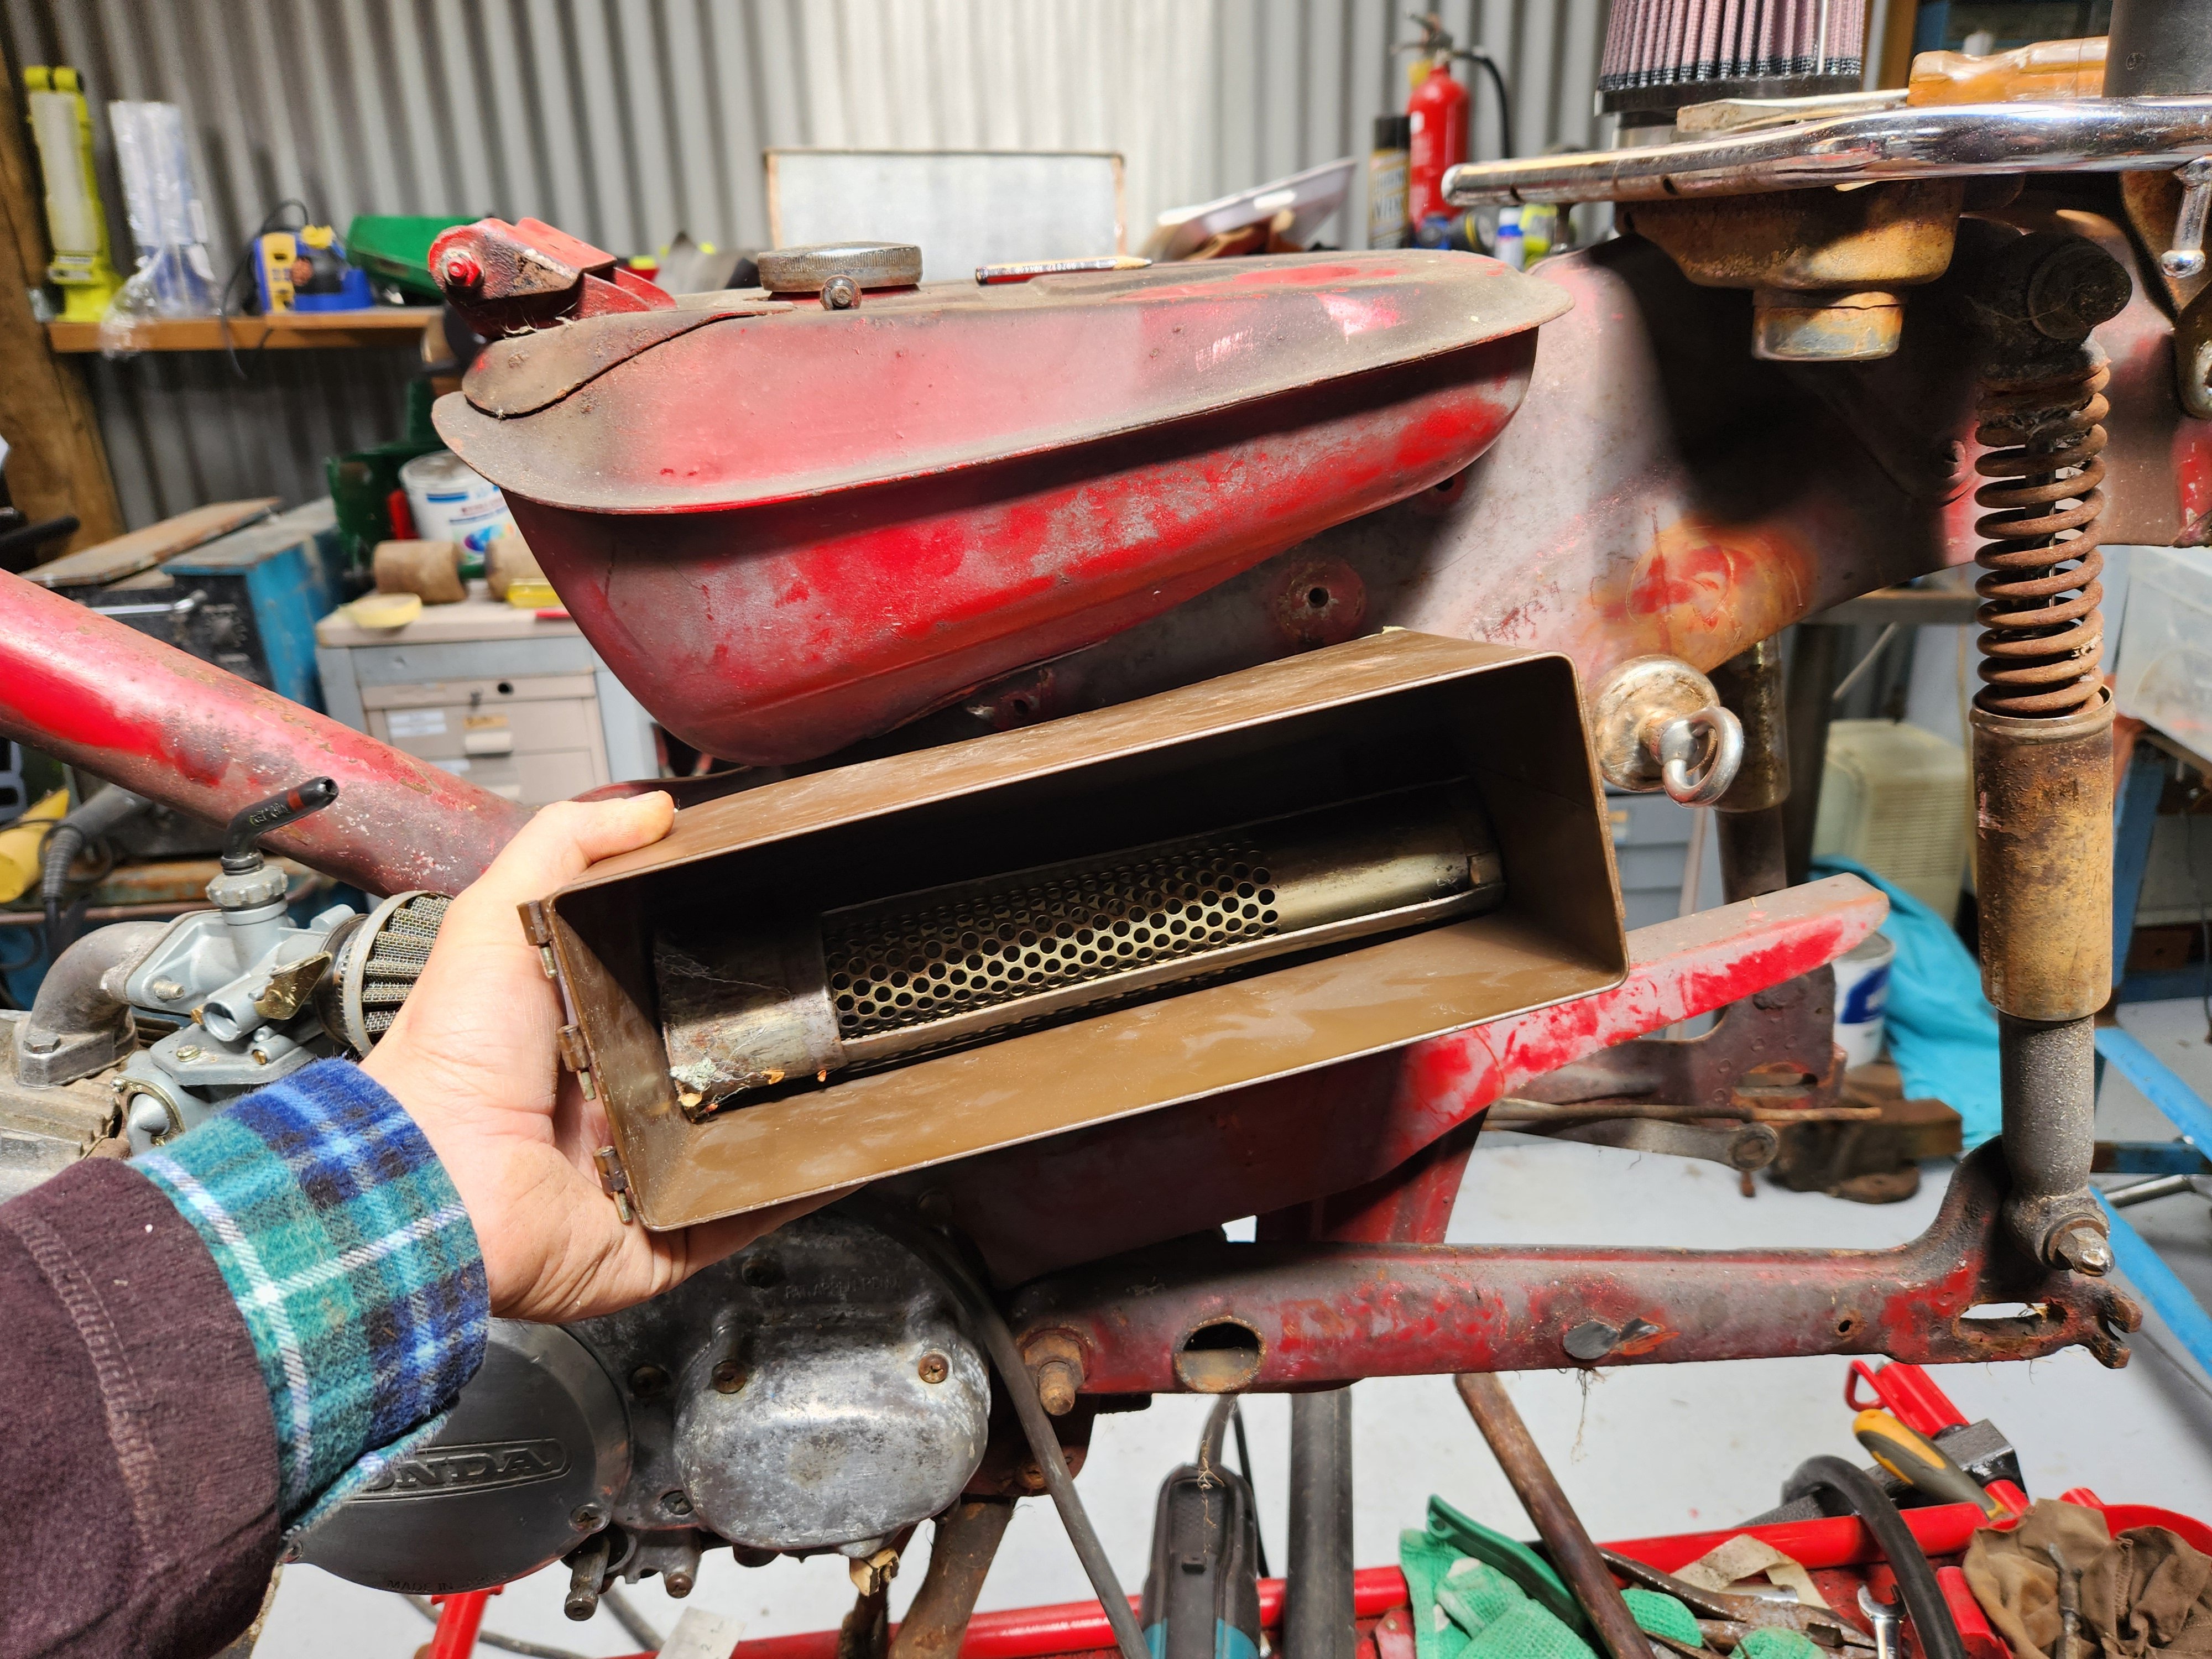
Also while looking for scraps, I found I still had the internals of the original filter Which fit exactly into the ammo tin. Also, if I were to cut it down further, to give it a square profile, I could use the original filter set up, and mount the tin on its side, so it opens out. This would also let me use the top surface for the intake/snorkel to rack tube. Which is convenient
1 point
-
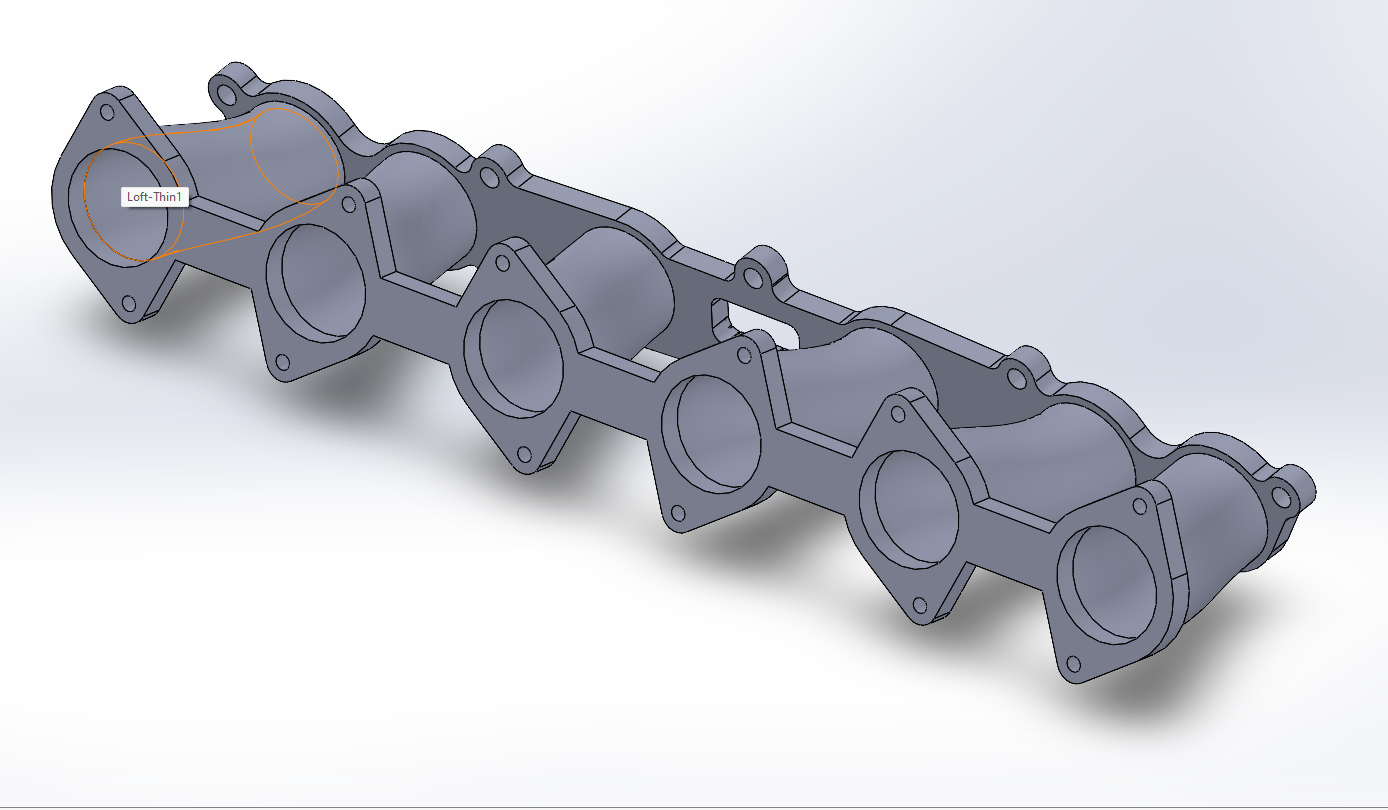
i have been fucking around with a manifold design. i have been looking at the EFI hardware stuff, mainly becasue it looks like it might work. be keen to hear what your thoughts are on the different options for generic throttles. the EFI hardware stuff can give me a throat spacing of 90mm which i think i can get to fit. we have a rapid prototype machine at work now so i can probably print myself a test manny to see how things might workout. anywho, here's wonderwall.
1 point
-
At this point of the project I'm both open to help from others but can get around a Reflash pretty effectively. I've got a repository of good tunes both N/A and Turbo if anyone wants some basic stuff done like VATS switched off etc hit me up here.1 point
-
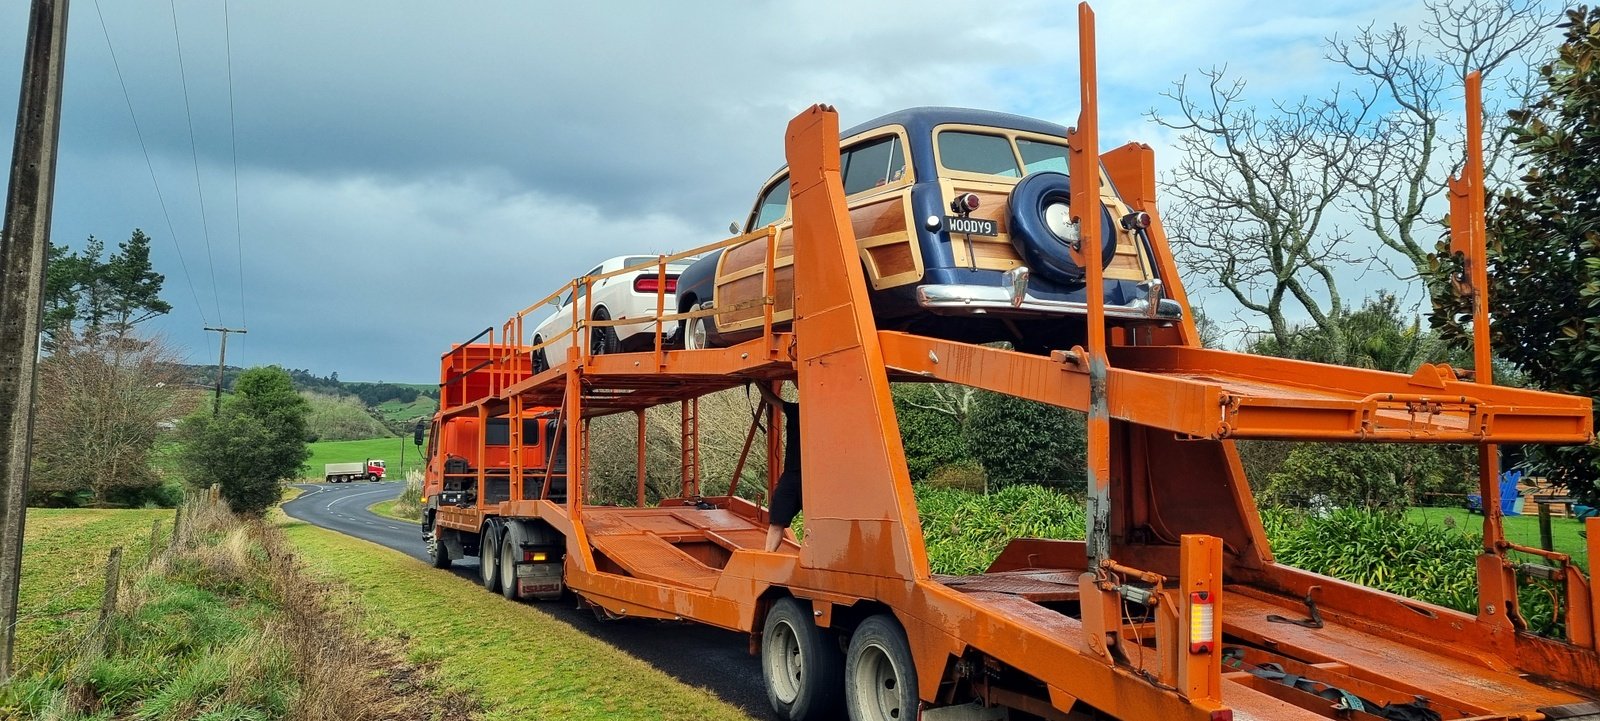
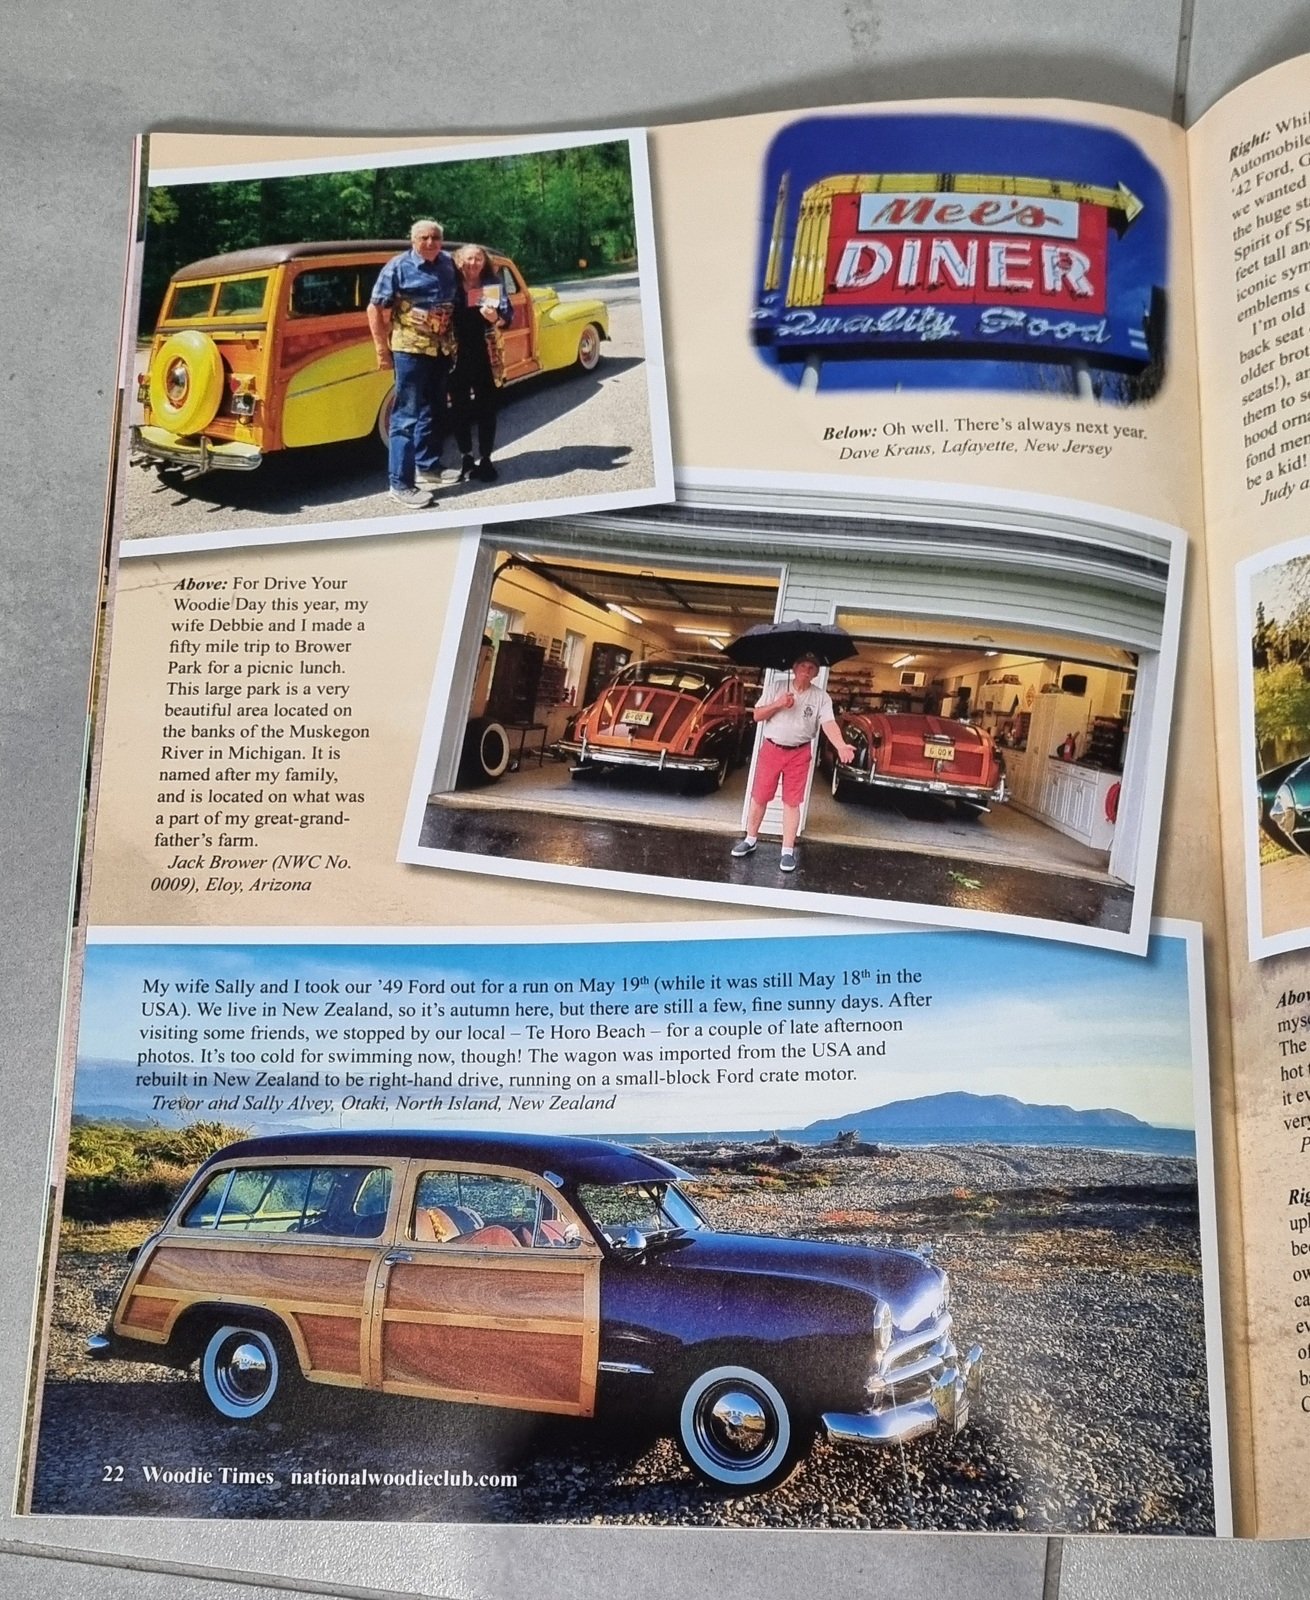
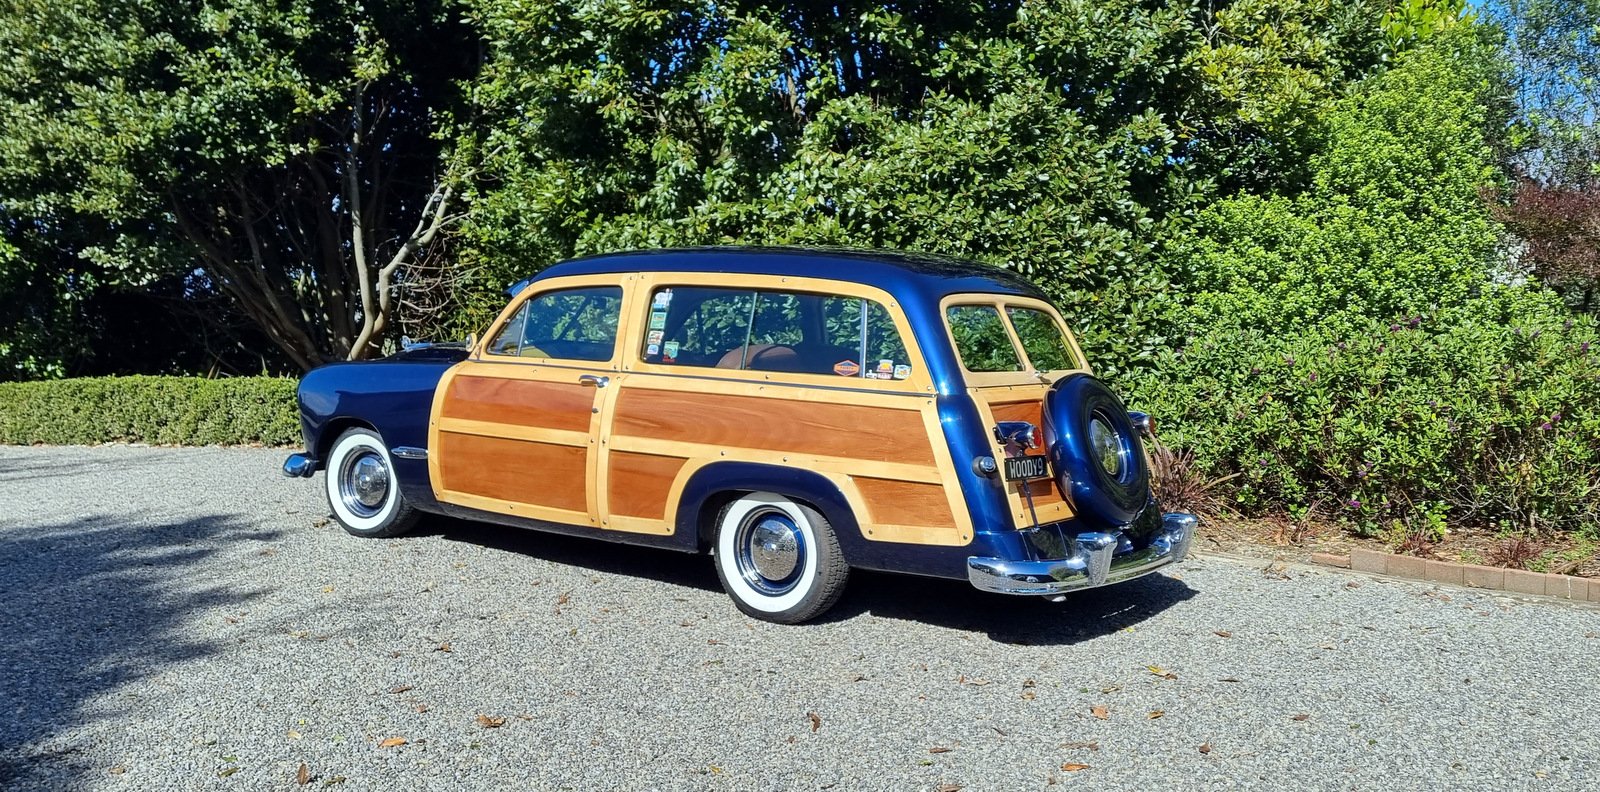
This one came north on a yransporter, wasn't much fun reversing it down the ramp in the rain. I took a couple of pics for 'Drive Your Woodie Day' and got one published in the Woodie Times (club magazine for the US-based National Woodie Club)
1 point
-
1 point
-
A few of @Snoozin's pics for posterity
1 point
-
So, the Morris has gone down the road to Dunedin @Indiana_Jones. Buyer flew up and I met them at the railway station and they headed off to drive home. I didn't hear anything so assume they got there OK.
1 point
-
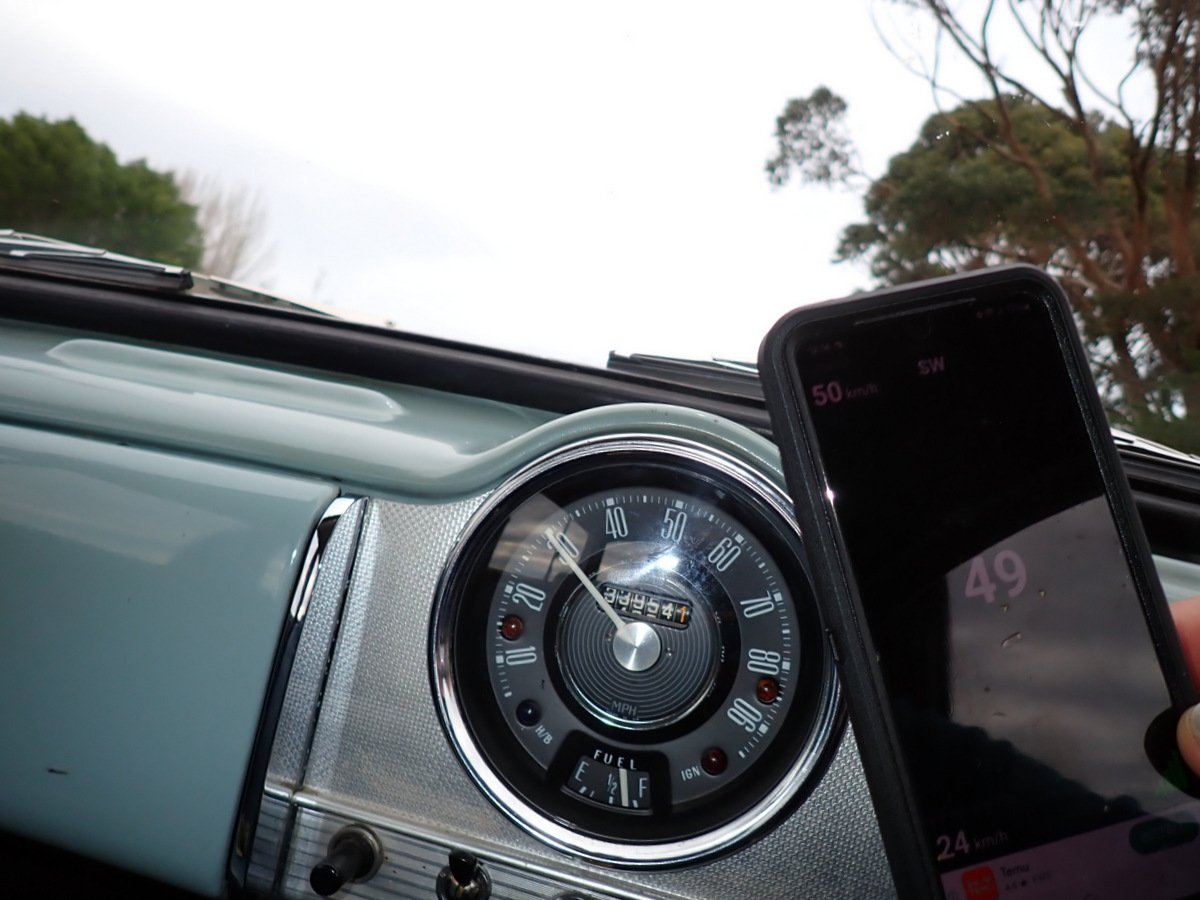
Received back yesterday Installed And tested (on a closed road because taking a pic with a camera while also holding a phone GPS speedo is tricky) Pretty happy with that, cost was $240 including shipping back to me.
1 point
-
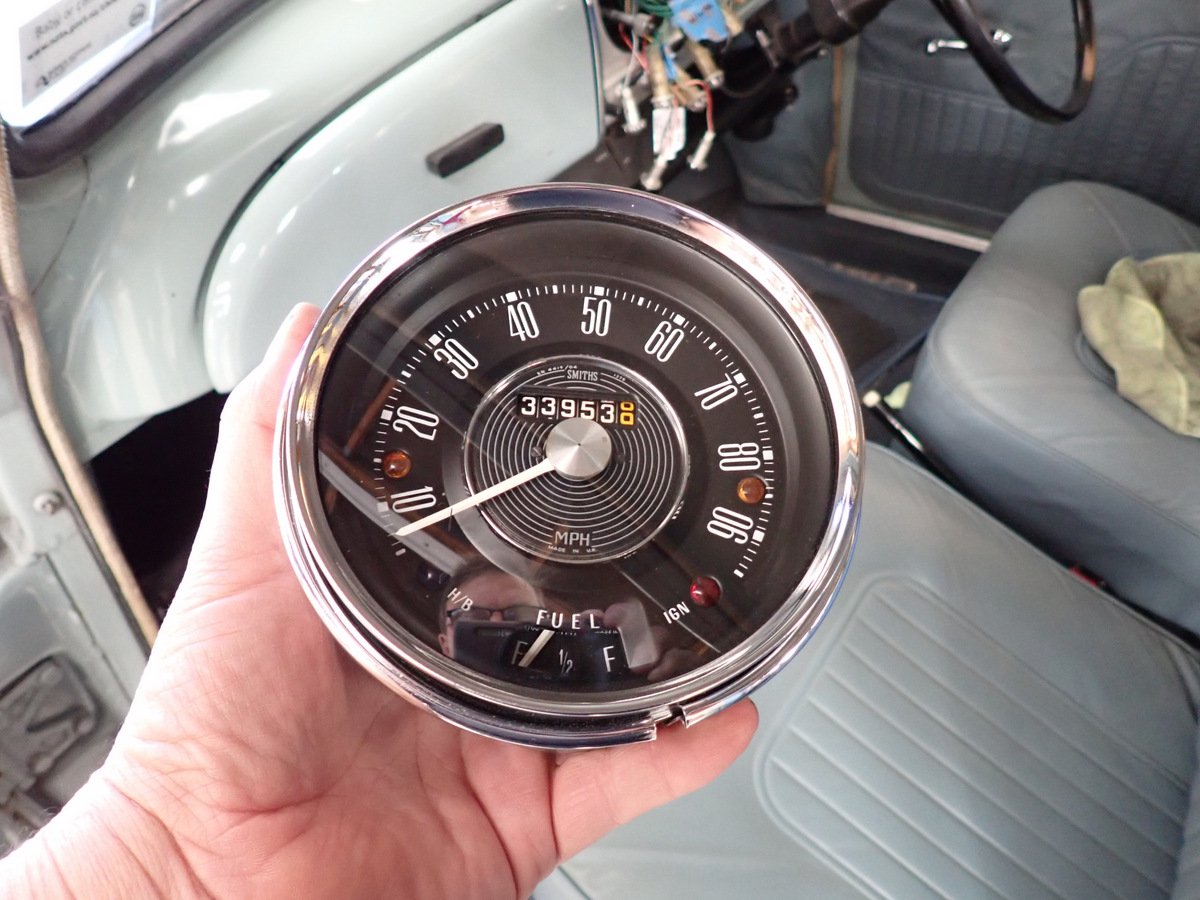
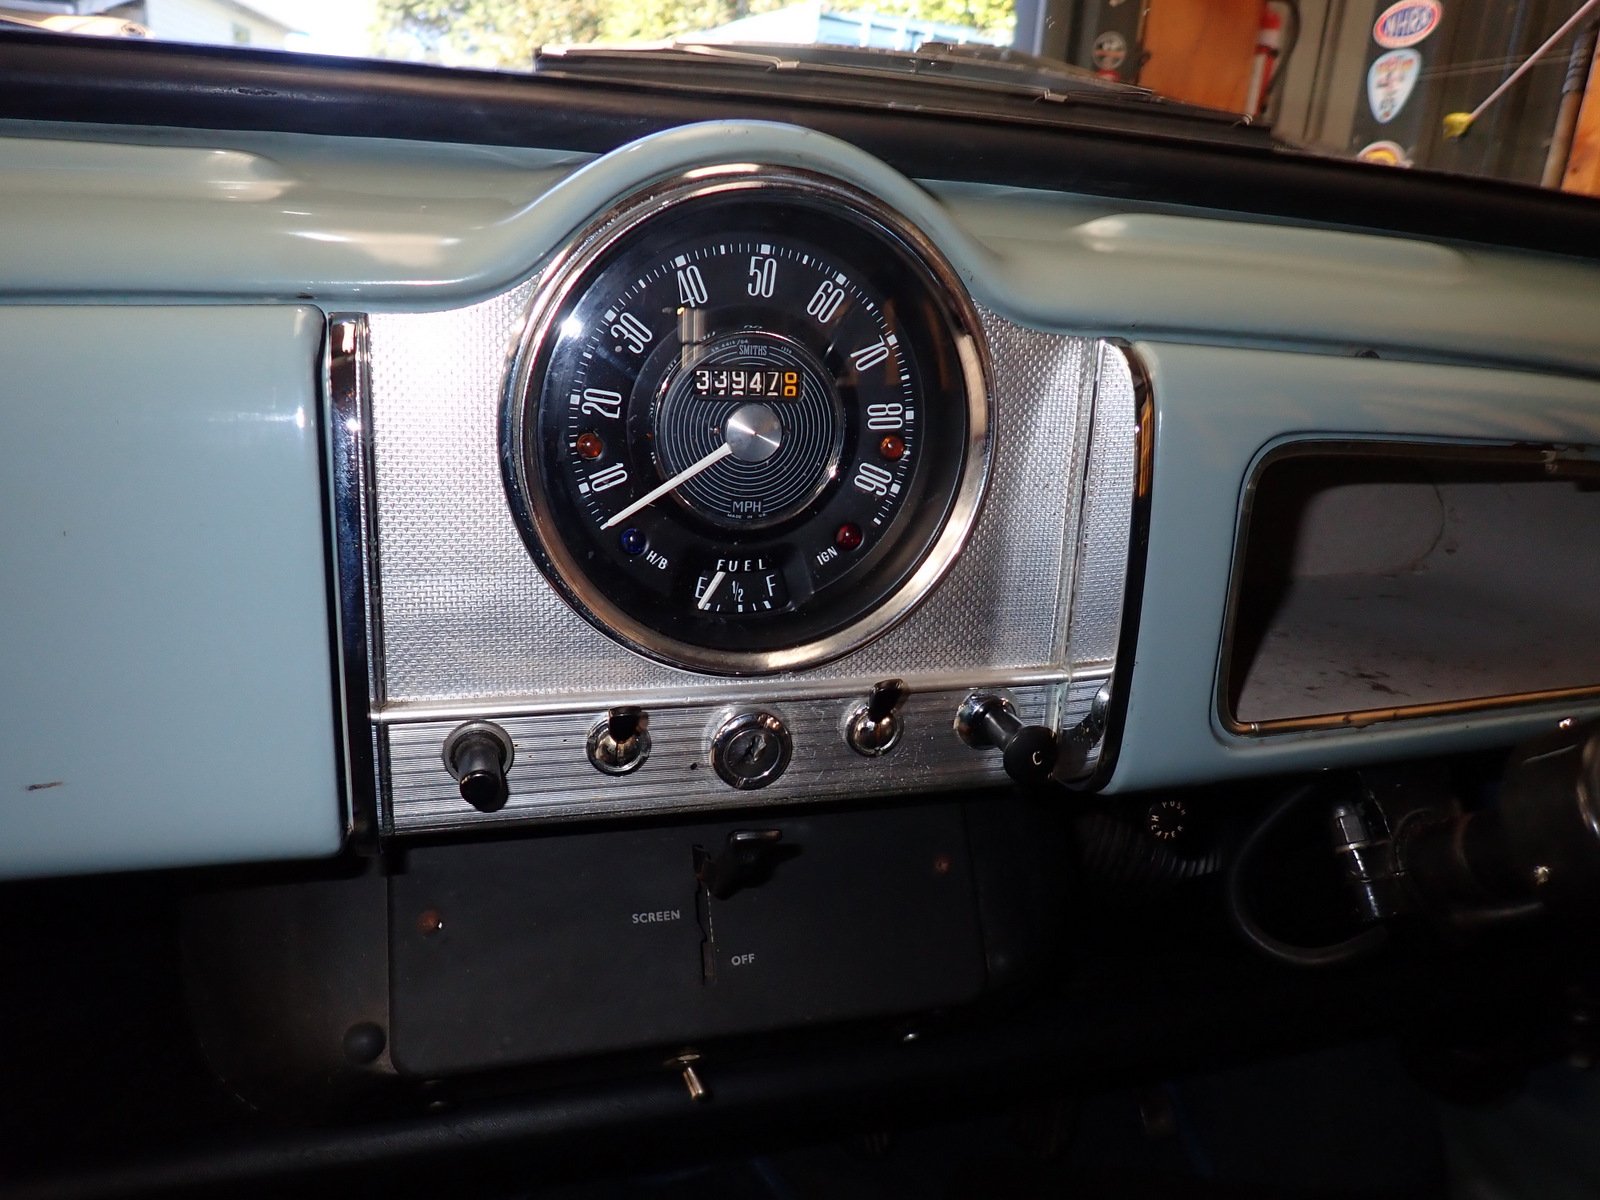
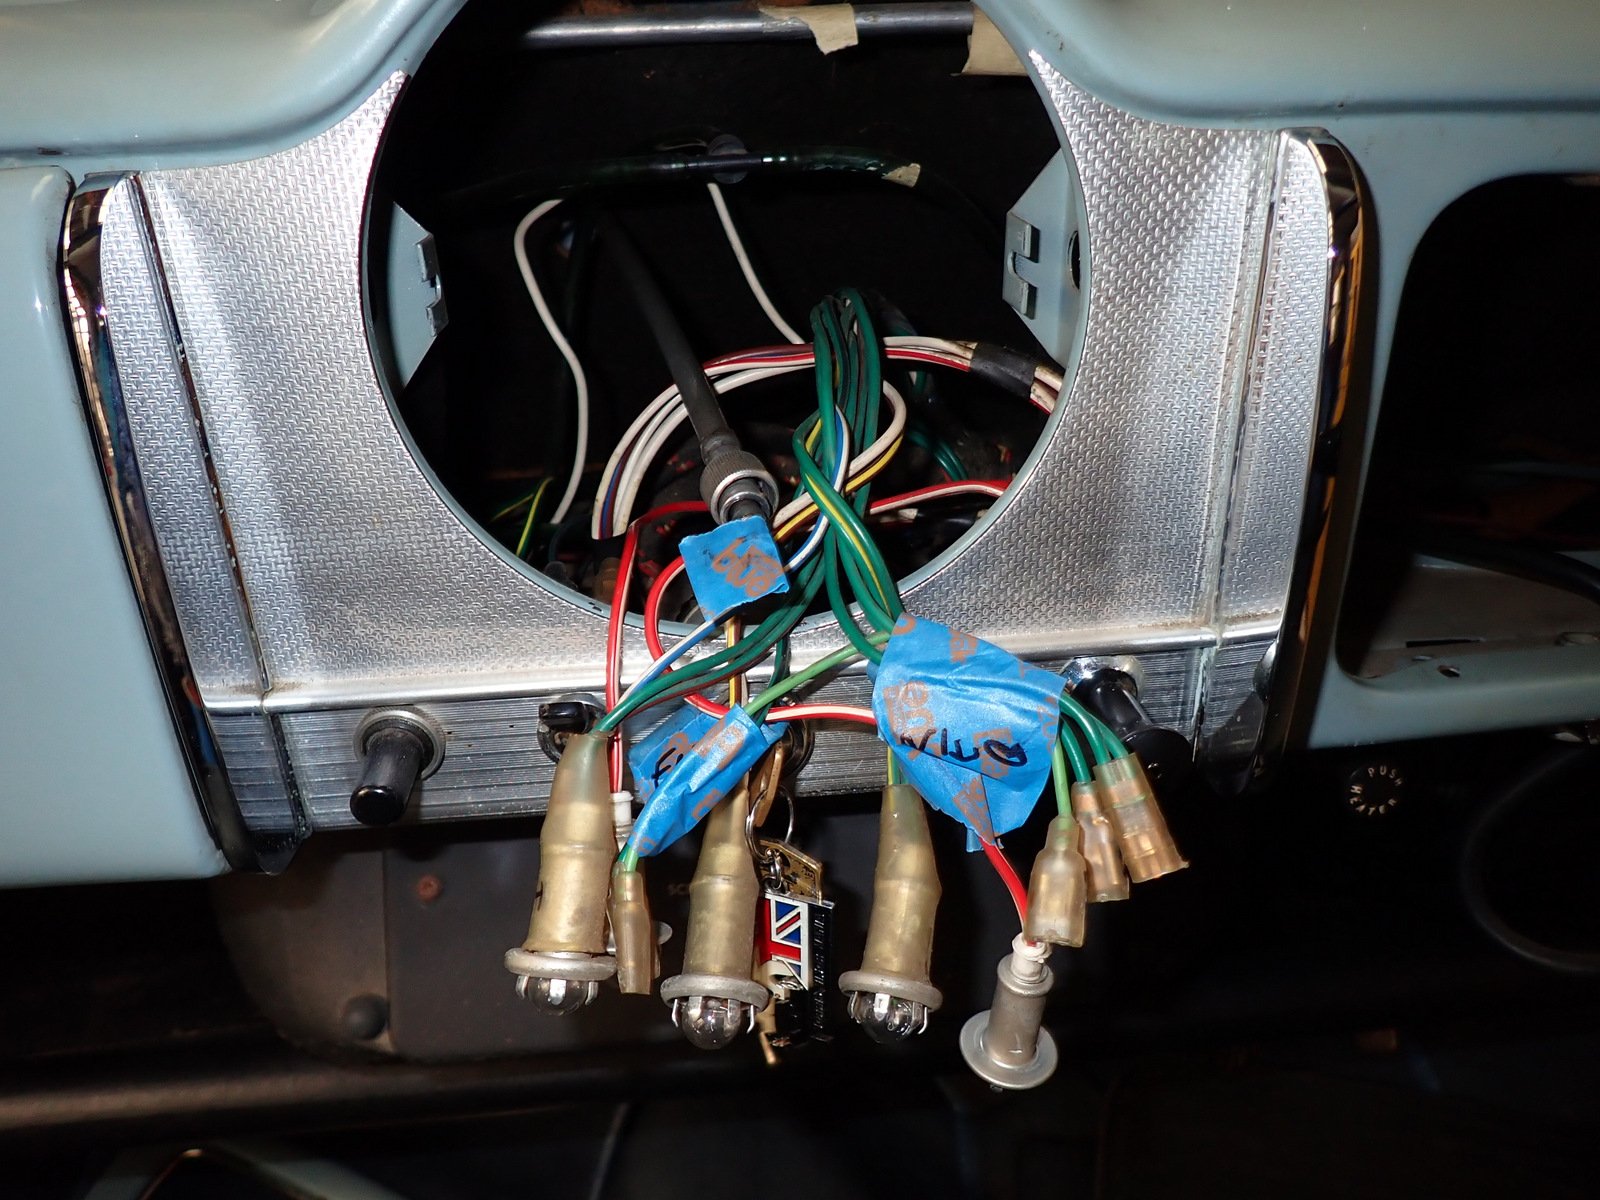
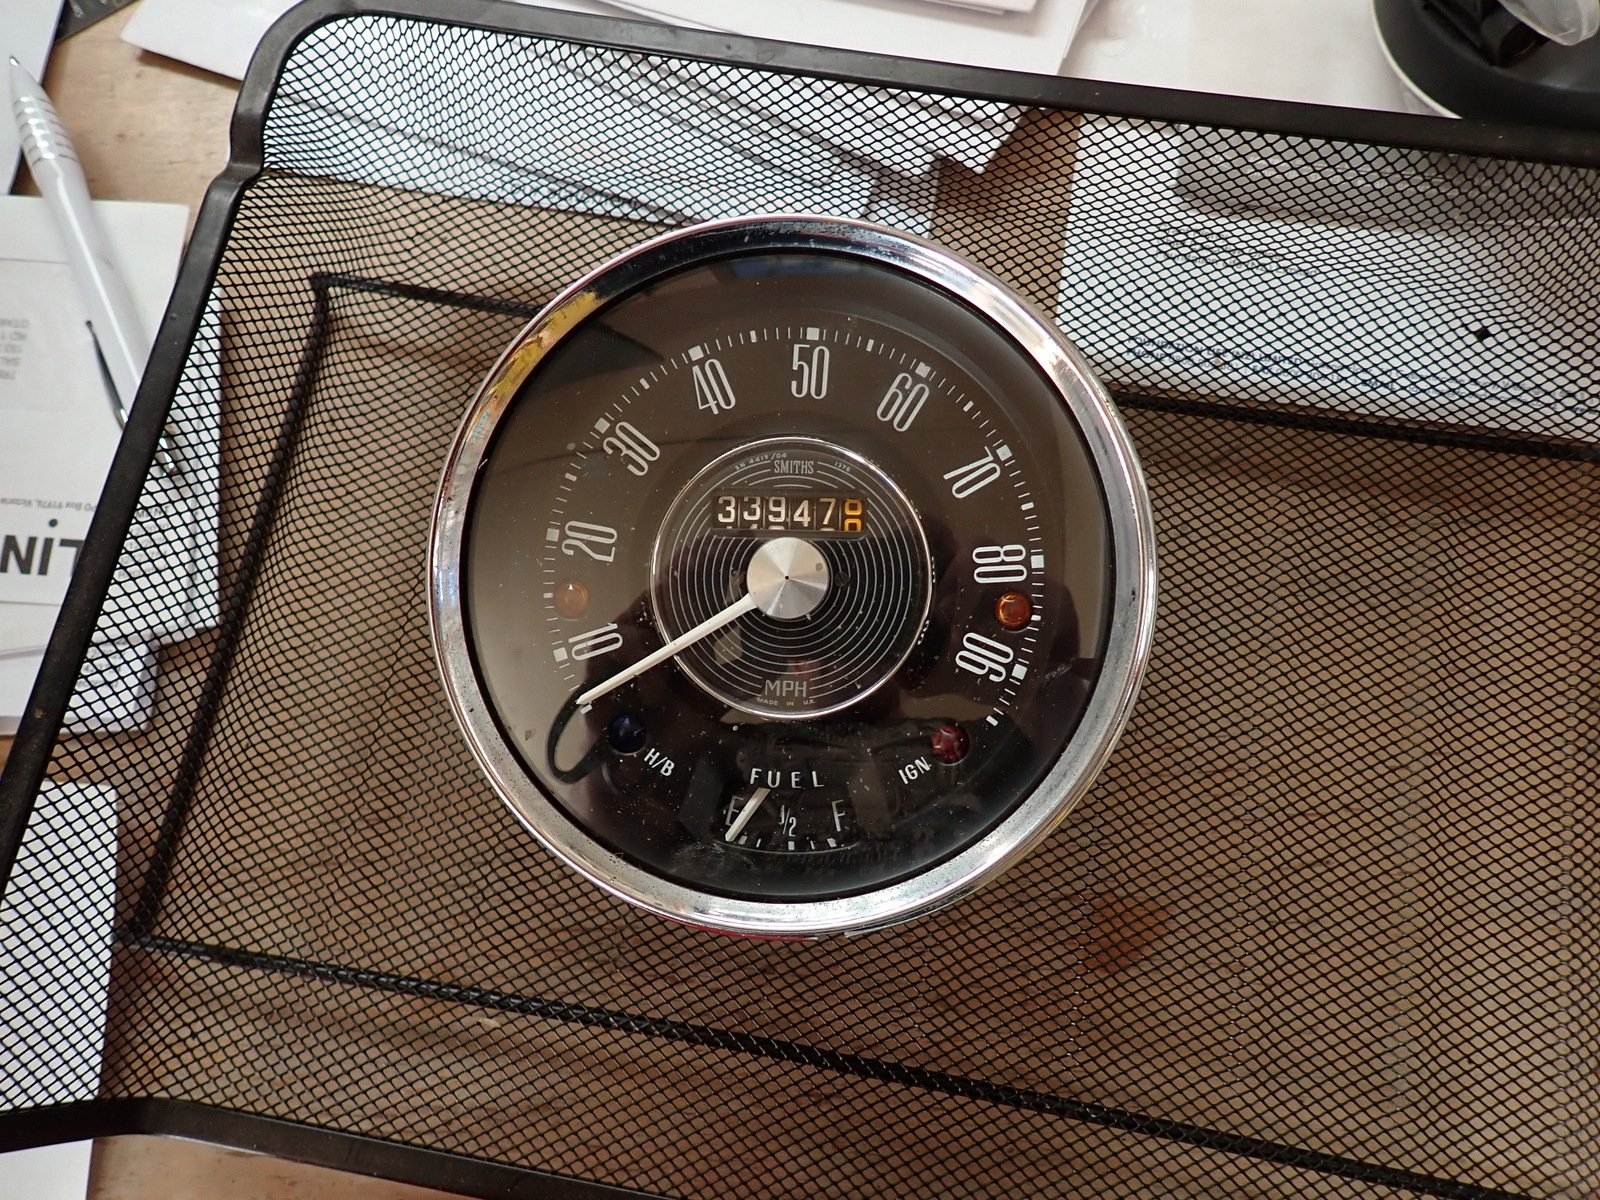
Morris is still here so I'm doing a few little fix-ups before trying to sell it again. WOF man mentioned the speedo accuracy last time (it's been awful for many years) and since it's due for a WOF again I thought I better get it sorted. So distinguished! The mechanic recommended Auto Instrument Services in New Plymouth so I gave them a call. The instructions were to pull the gauge and tape a 'flag' onto the cable drive, then count the turns over a measured 50m distance. So it came out without too much bother. Worked out as 44 turns for 50m, so 1416 per mile, speedo spec is 1376 turns per mile. It's way less accurate in practice though, about 45% out. So I packed it up and sent it out
1 point
-
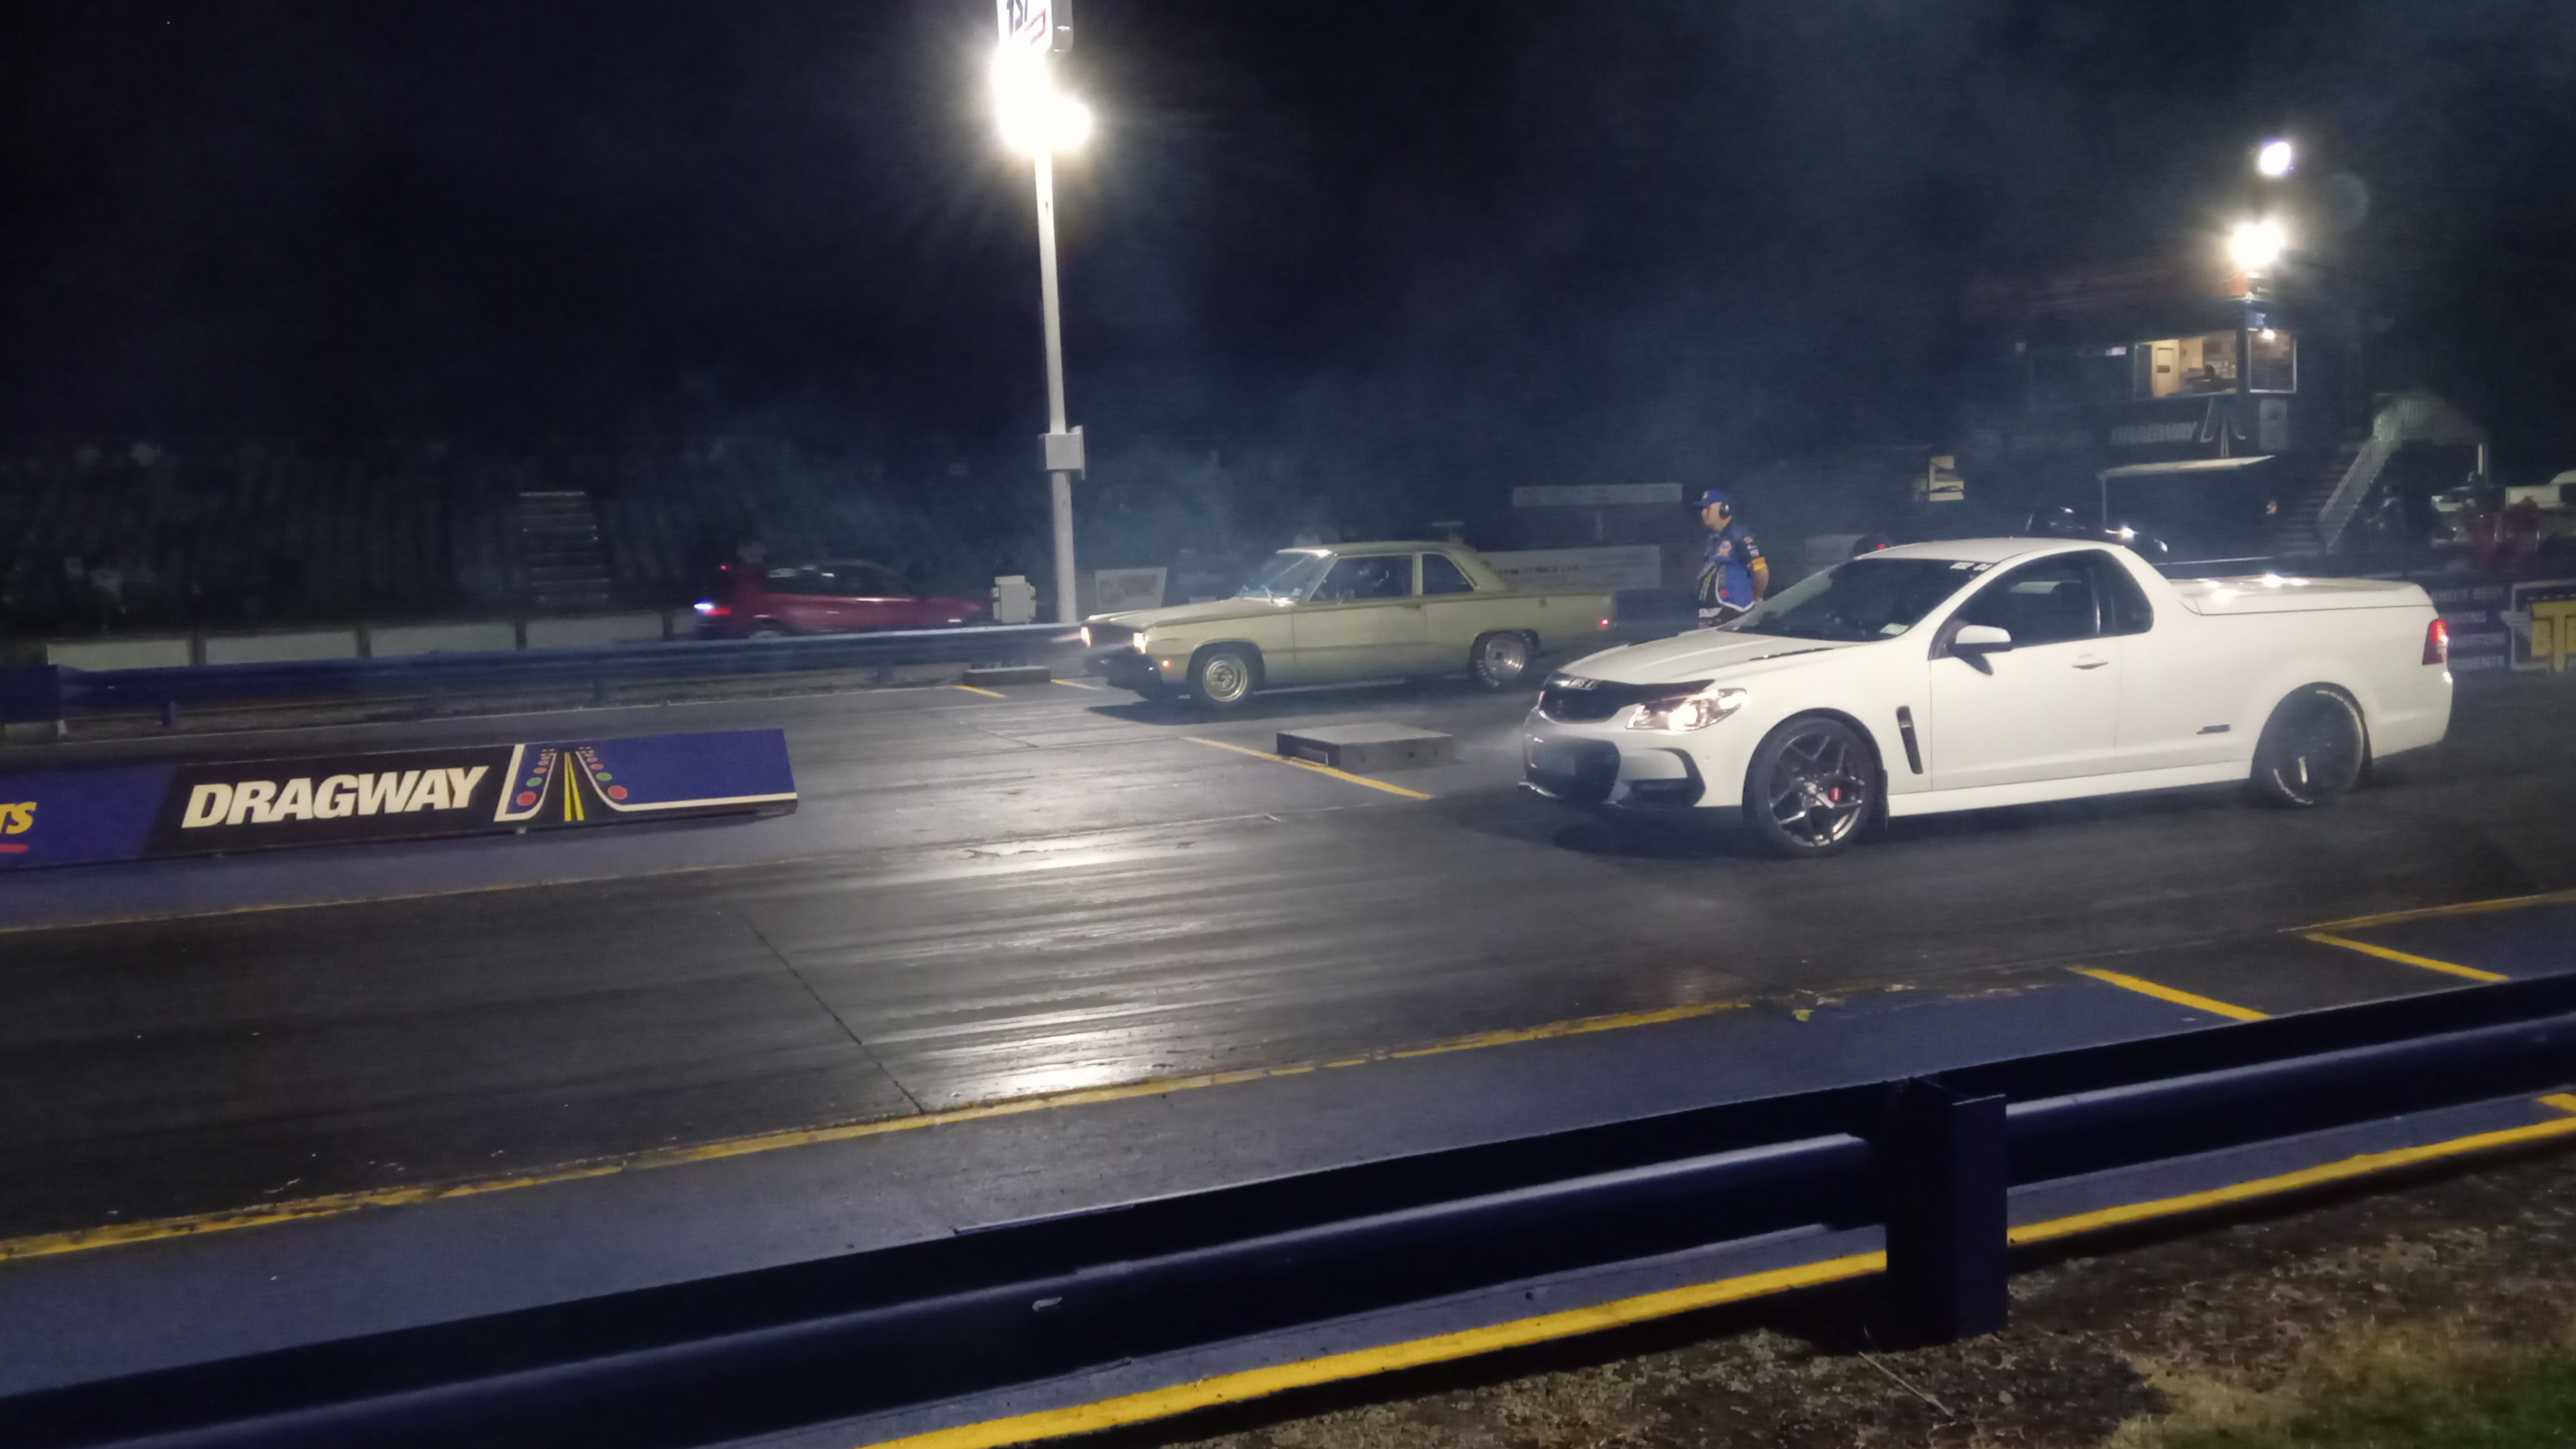
New springs made it more consistent,although slightly slower. Different wheels and muffler off when it did the 11.35 previously 11.5@118 every pass I have turned the 2 step rev limit down slightly as it was having trouble holding on the brake which I can probably fiddle with to improve I'd like to get it down to 11.0 so it's more competitive at the night drags https://m.youtube.com/watch?v=kdfGgT2pKHw&pp=ygUMVW5kZXJjYXJ2aWV3
1 point
-
Back together - a few minor dramas with order-of-assembly errors. WOF now due - I found one brake light not working in pre-check so will have a look at that.
1 point
-
As of today, I've owned this old piece for ten years! HAPPY 10TH ANNIVERSARY CAR!! xoxoxox Regards, VG.1 point


.thumb.jpg.570970b401ac8d26ce9af7c1bf2bd8cd.jpg)


This leaderboard is set to Auckland/GMT+12:00