
Leaderboard


Popular Content
Showing content with the highest reputation on 11/27/23 in Posts
-
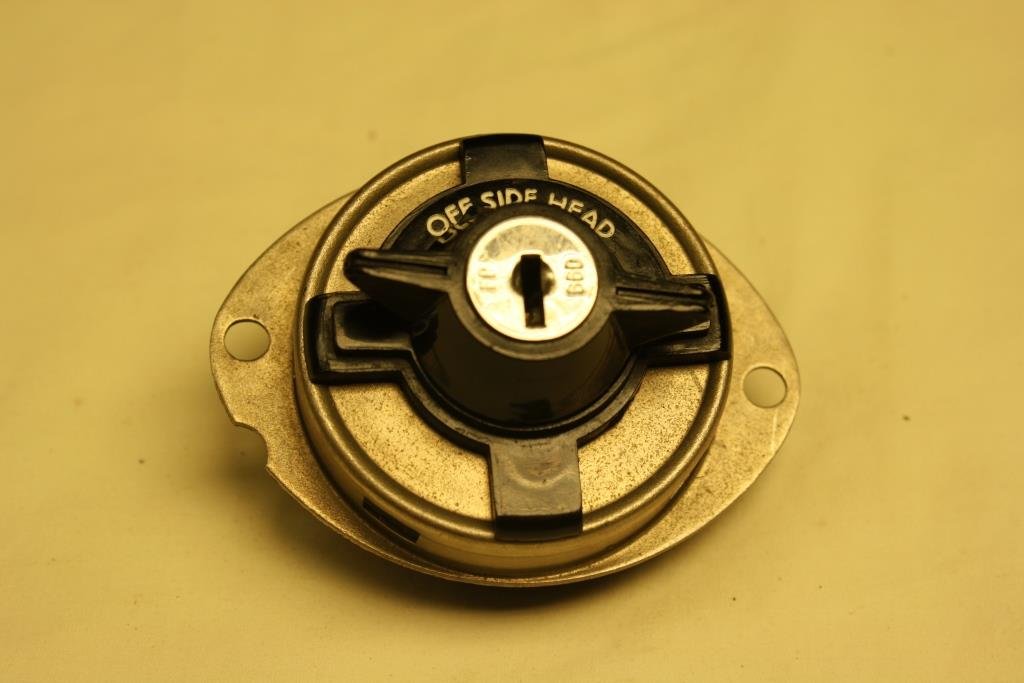
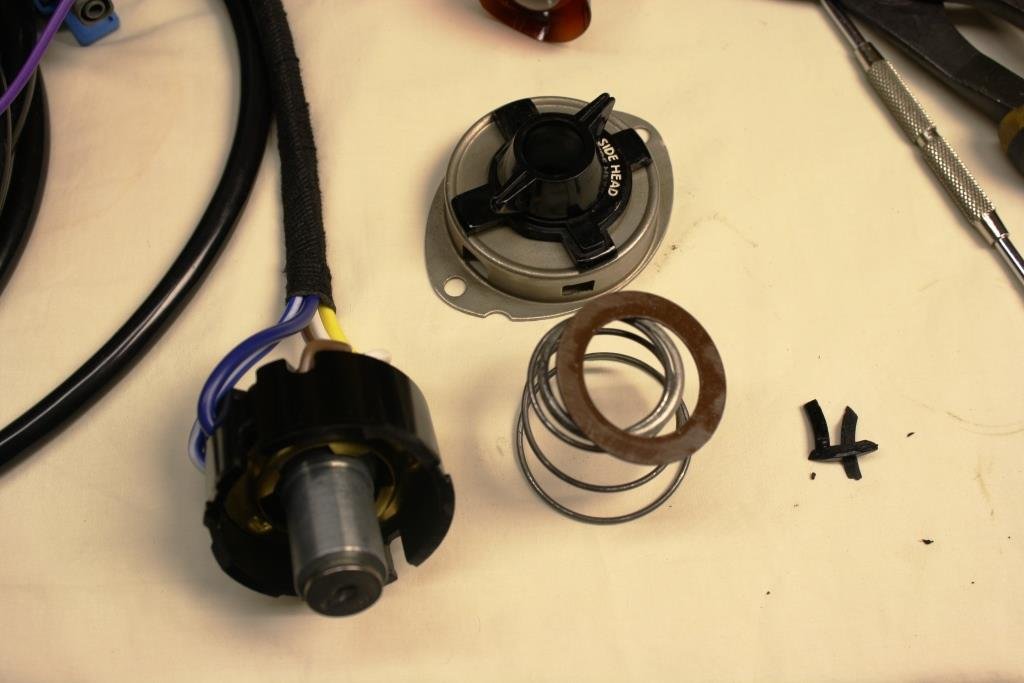
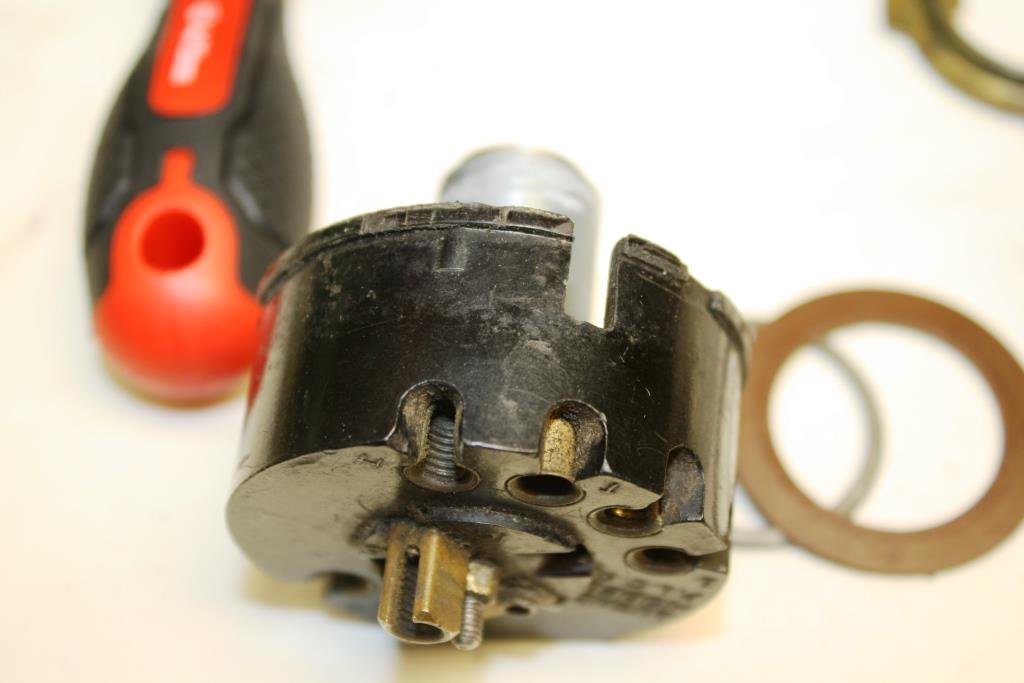
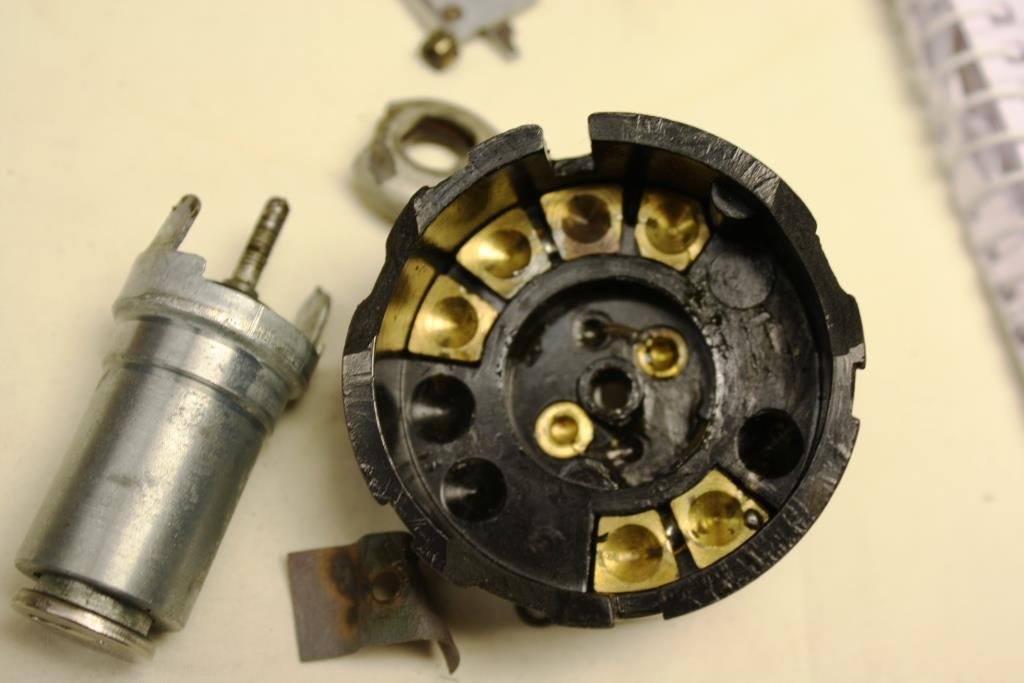
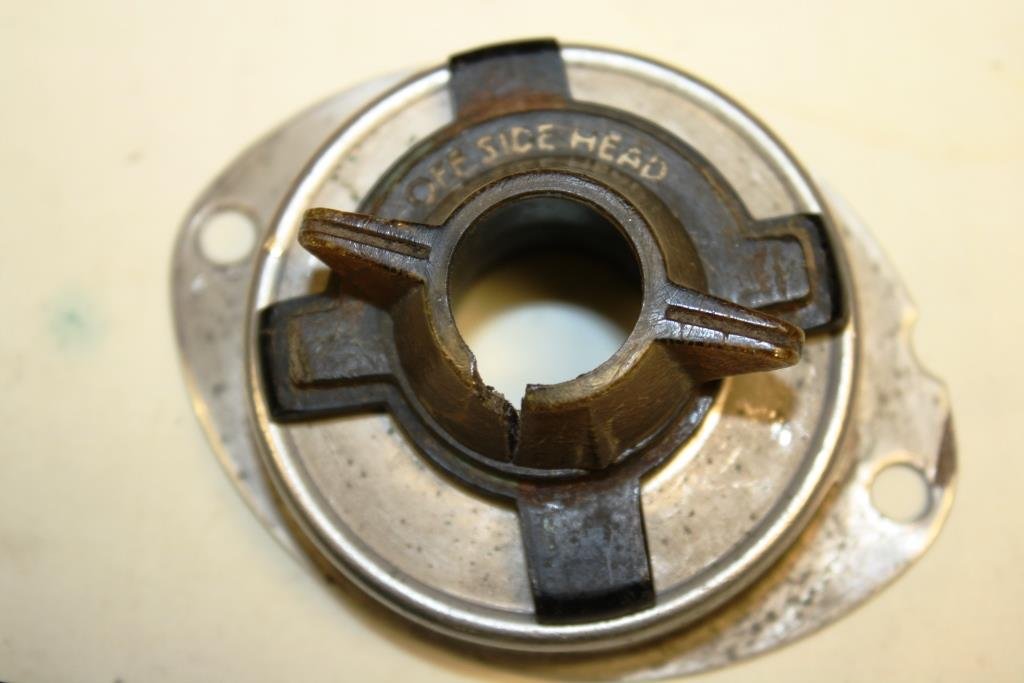
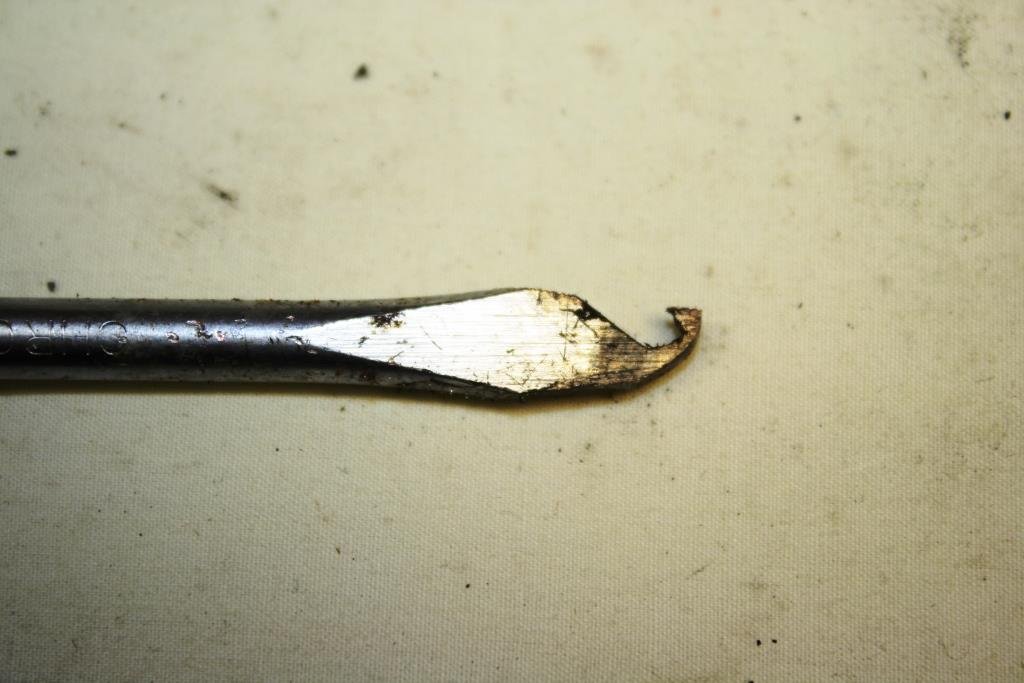
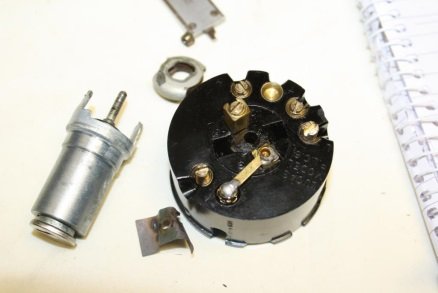
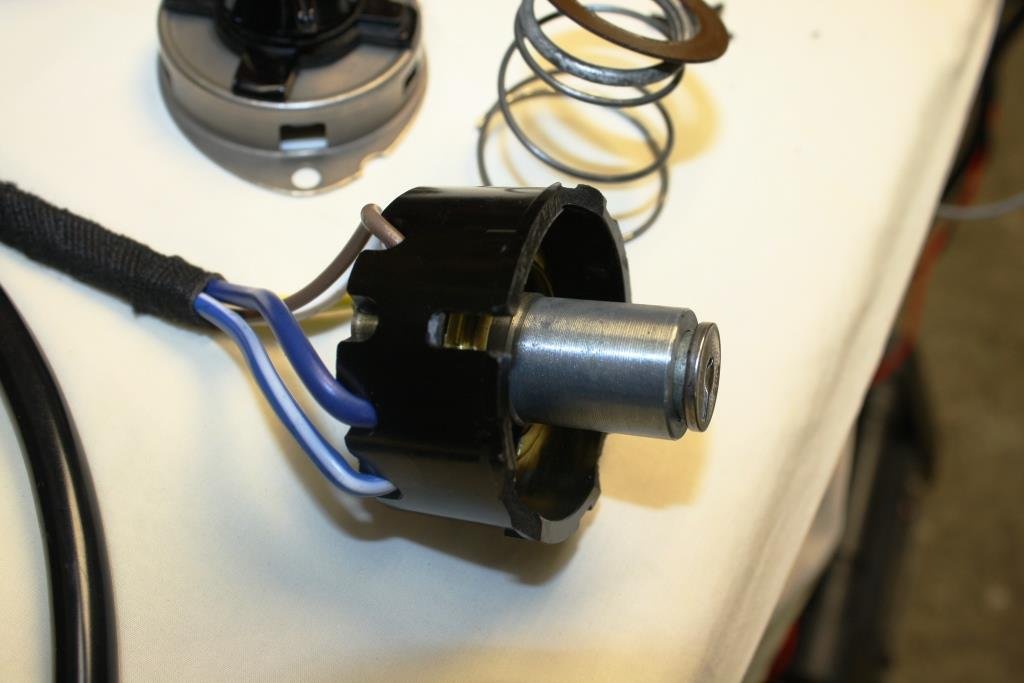
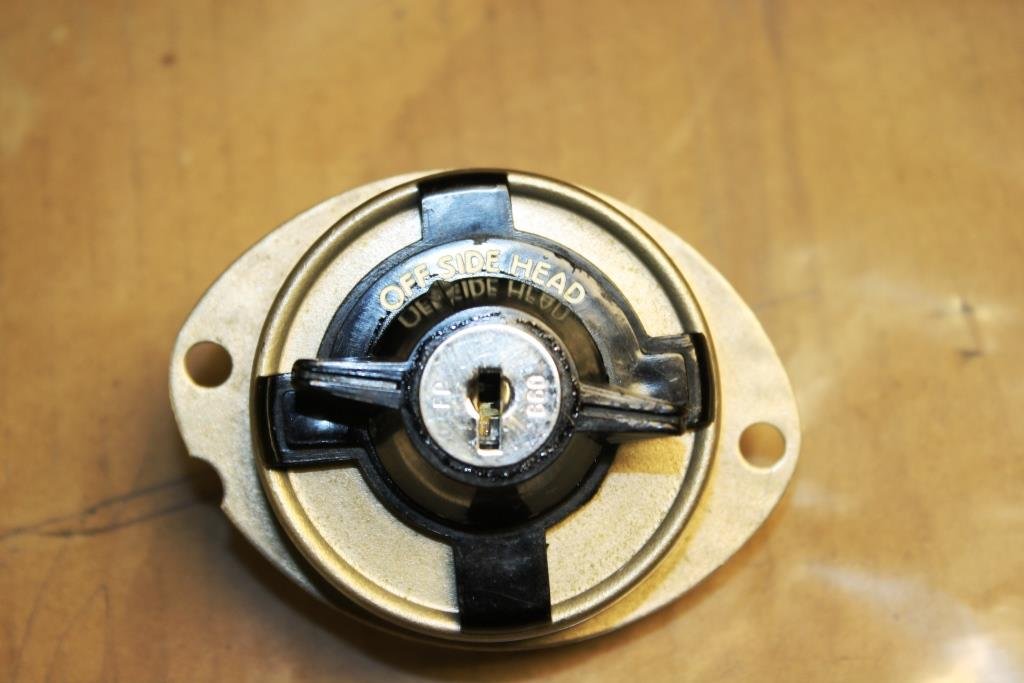
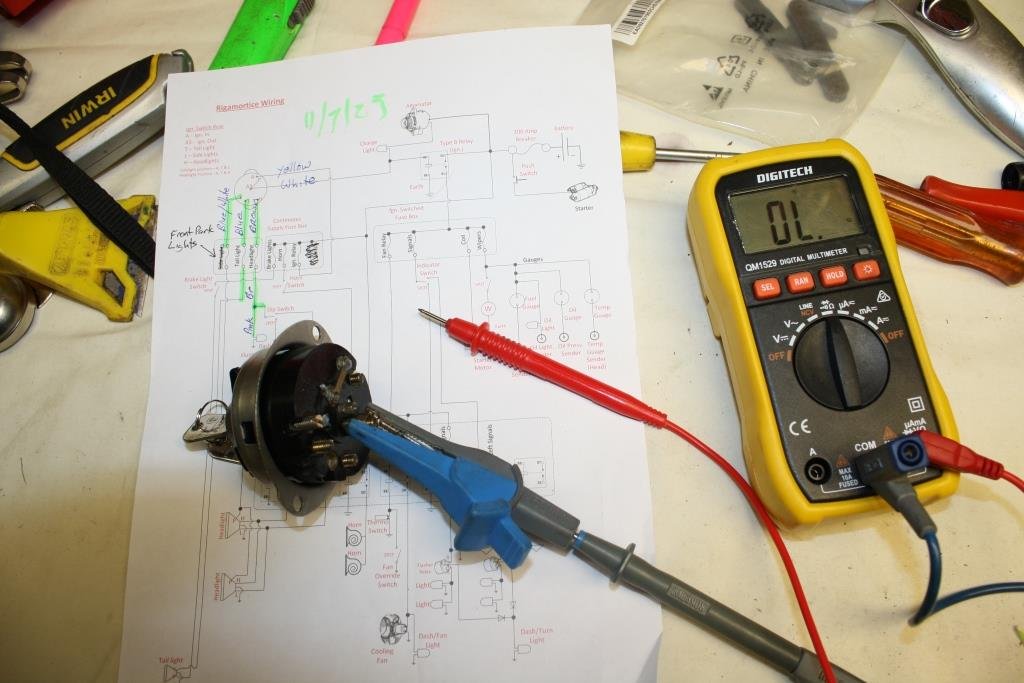
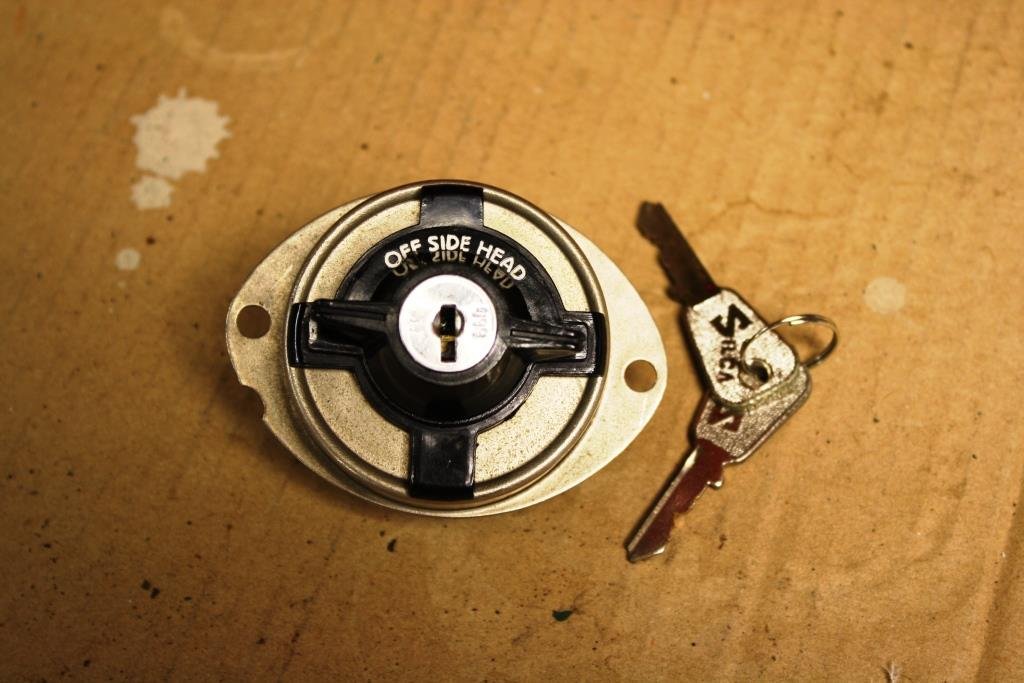
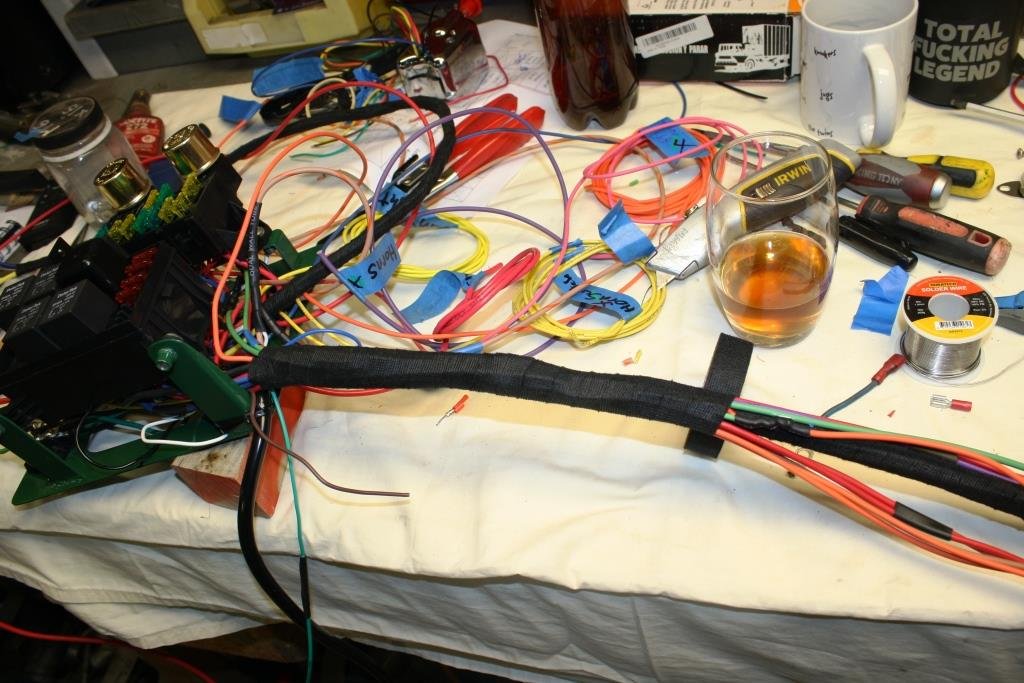
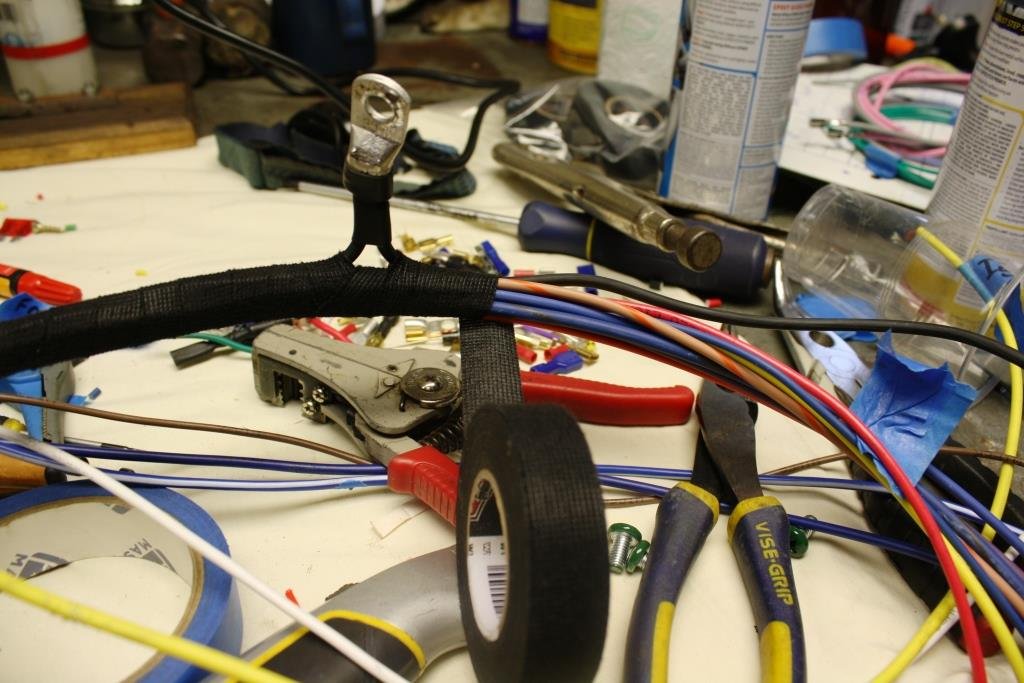
I was bench testing Rigamortice’s flash new wiring loom while admiring the cool ignition/headlight switch….. ….everything was looking good when the entire switch assembly blew into pieces in front of me. The locking tabs on the Bakelite body had disintegrated allowing the spring to do one very quick disassembly job! I had a big hunt through my spares and found I had another one. The front was a mess but the main body looked in much better shape. (Sometimes you get lucky). I had to sacrifice an old screwdriver to make an assembly tool. Everything cleaned up well….. And I managed to fit the original ignition barrel. The assembly procedure obviously required six hands …….when I got it wrong the spring blew pieces all over the esteemed sr2 man-cave! Three attempts later I finally managed the job with only two hands, gaff tape, copious shots of Wild Turkey, some nasty horrible expletives, and old-school perseverance. And it even tested OK
 12 points
 -
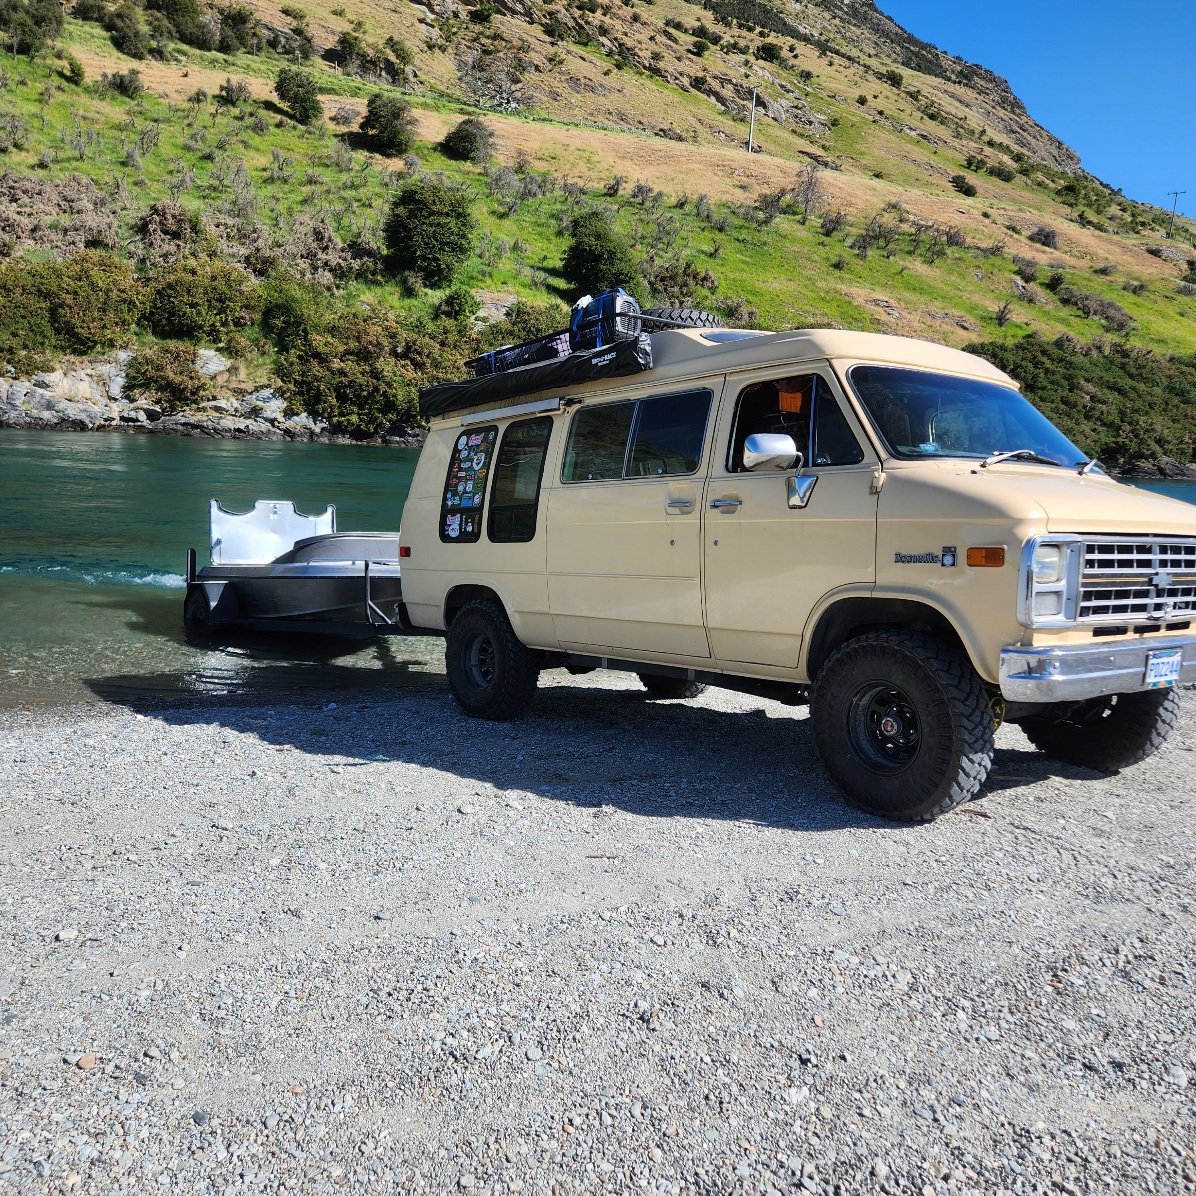
I got the trans back In yesterday, pump seal has chewed out when flexplate came loose which I should have checked. I torque checked the flexplate bolts again too, no movement and no leaks. I also got the high / low lever rigged up and got to launch the boat today on a shitty gravel beach in 4 low, monumental moment. I got permit to go up the shotover canyon to the pub up there with the misso and a couple of mates, van rules, especially amongst a row of hiluxes at the launch. Ceritifier has vapourised and has missed a few appointments last week so not sure when I'll be able to get it looked at but there's a few that need doing in town so might try and pool together and get someone in
10 points
-
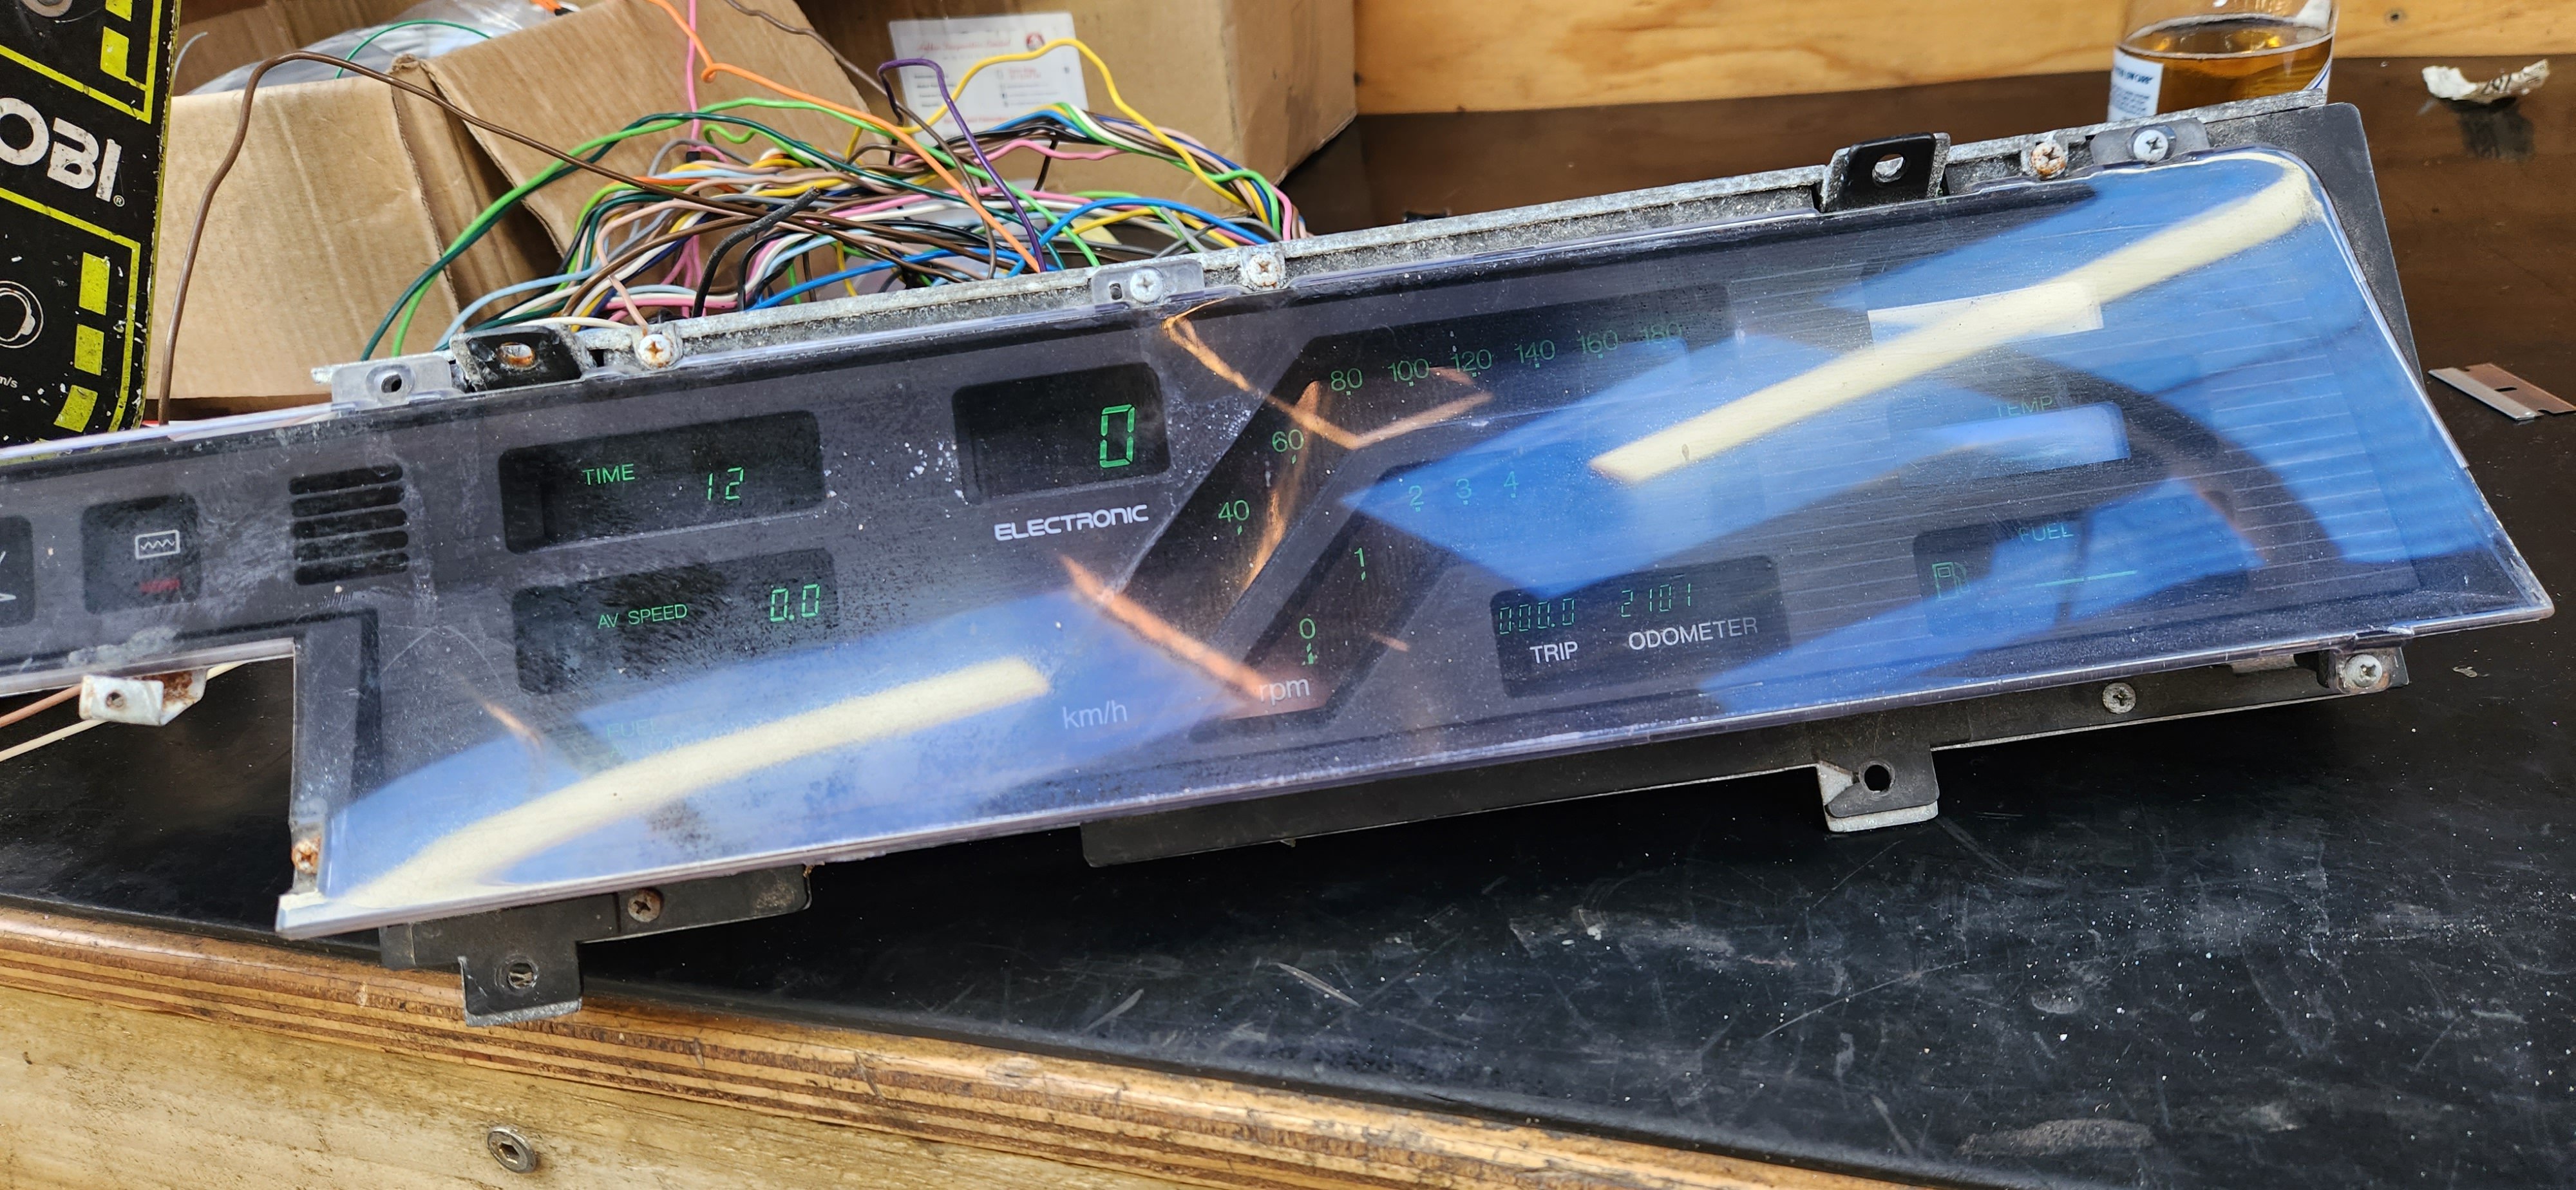
Replacement block heading off to Marsh motorsport this week for machining and rotating assembly balancing, gone to a new clutch with a sprung plate to make it nicer on the street. Got distracted on a side quest, vk calais digital dash popped up on market place. Not cheap but so much 80s cool. Gonna set it up all running off ecu outputs maybe a canbus io module, so it will be fully functional including fuel used & distance to empty and can calibrate it so it reads right
7 points
-
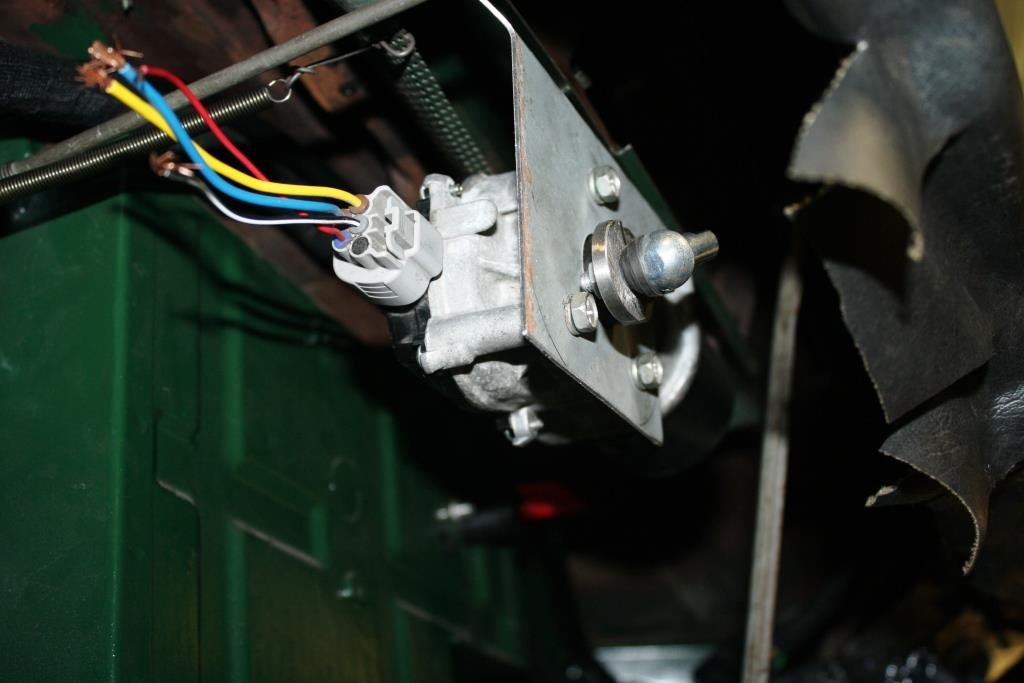
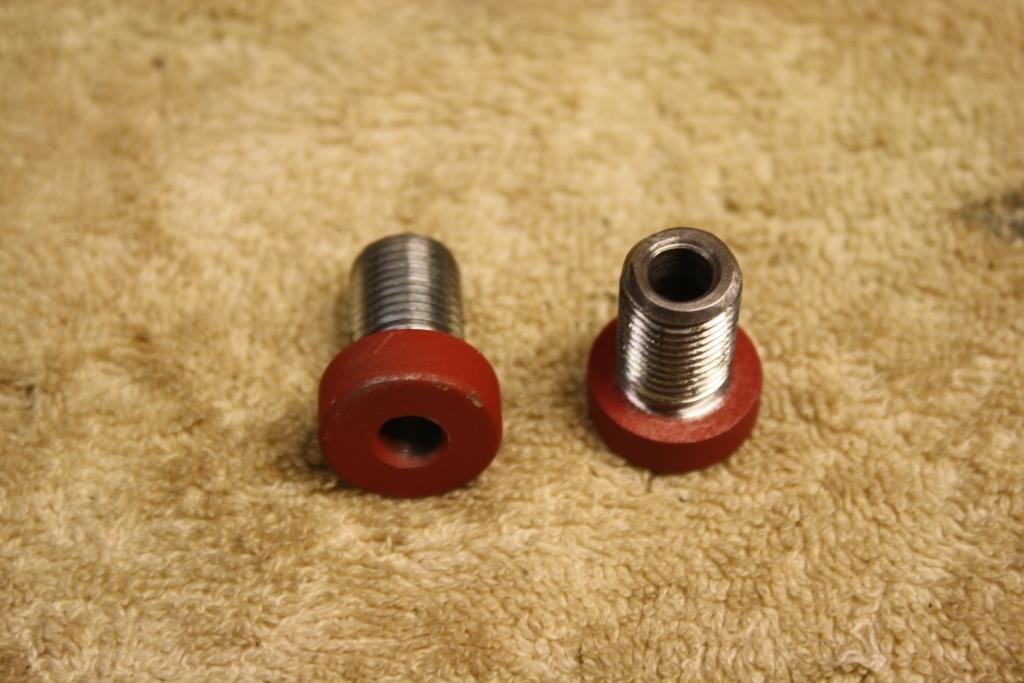
Okay maybe not entirely done. Since the previous hoses leaked everywhere I really wanted to get the high pressure EFI ones redone professionally, so I took them to the same place I went to last time for the ruptured hose in the engine bay. They presented me with two lovely EFI rated hoses <3 The one on the right is the one I care about for now, it goes from the fuel pump to the hard line. The banjo fitting needs copper crush washers and I decided to re-use the ones from the red starion. I gave them a quick go on some sandpaper on each side, heated them up to a stupid degree with a propane torch and quenched in water to anneal them. There's a chance I melted one of them a bit and used the black car's washer. A chance. Then, with difficulty, jammed everything together as hard as I could. The manual I have explains every detail of the fuel system EXCEPT for the fuel pump, which is quite both surprising and annoying. I thought for a lil bit over the next day about testing this. The last time I did this up, it leaked everywhere - mind you I was told bad info on how tight to make it, but still. It was also super easy to access at the time, thanks to it sitting in its L&P bracket instead of sandwiched between a fuel tank and a car. I could have hooked up the loom to a 12v battery and fed the hose into some isopropyl or something, but I don't have anything handy on me to block the other end of the line and create pressure, so in the end I just sent it. The tank's bolts were all underbody coated so I chased them, Then began the arduous task of lifting this asshole into place. It's not that heavy, but "not that heavy" is still too heavy when trying to connect the hard lines up to it without actually bolting the tank in. There's a lot of space for activities when the tank is dropped and I wanted to try and make things easier on myself. However, I couldn't quite get the right angle. The jack was in the way, boxes I used for additional support were in the way, and the EFI line had decent flex but didn't exactly meet perfectly so was a biatch to try and wrangle whilst also wrangling a large unbalanced tank on a jack. In the end I just jacked it all the way up, put some nuts on and dealt with the shitty access. This image does not adequately convey the amount of bullshit it took to get those lines on. Then I used new nylock nuts and washers to get the tank into its new forever home. I really hope I don't have any leaks or I get to do all this in reverse, then forwards again. I'll leave the rubber boot etc for the fuel filler until the body is properly zhuzhed.7 points
-
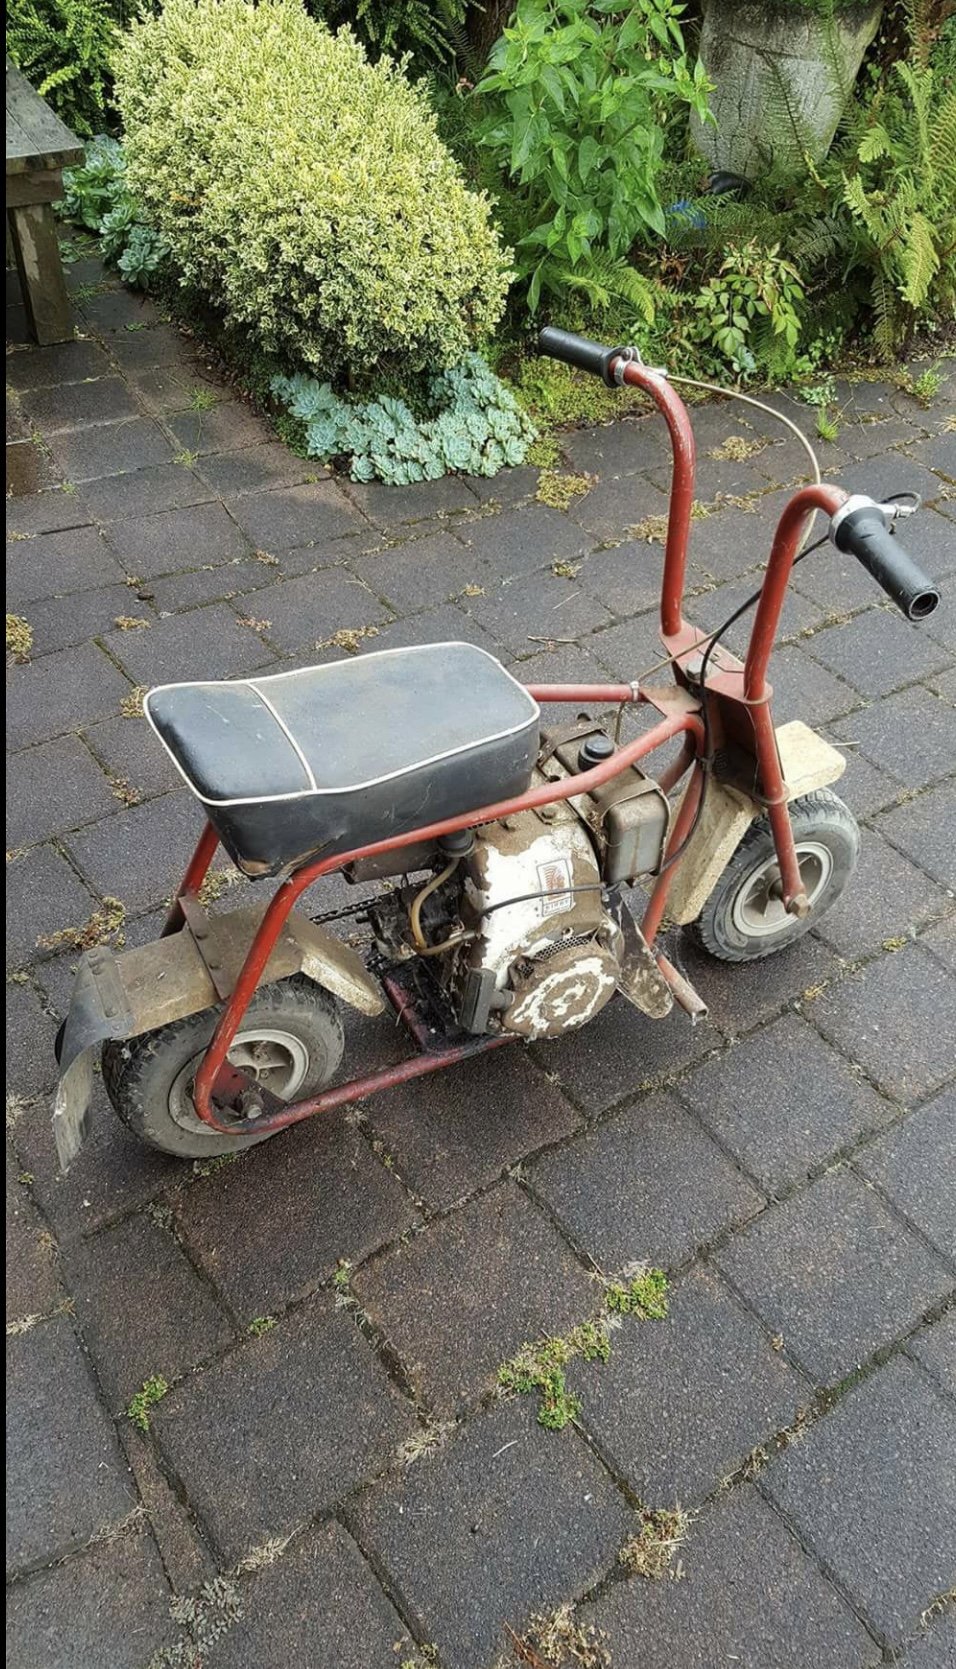
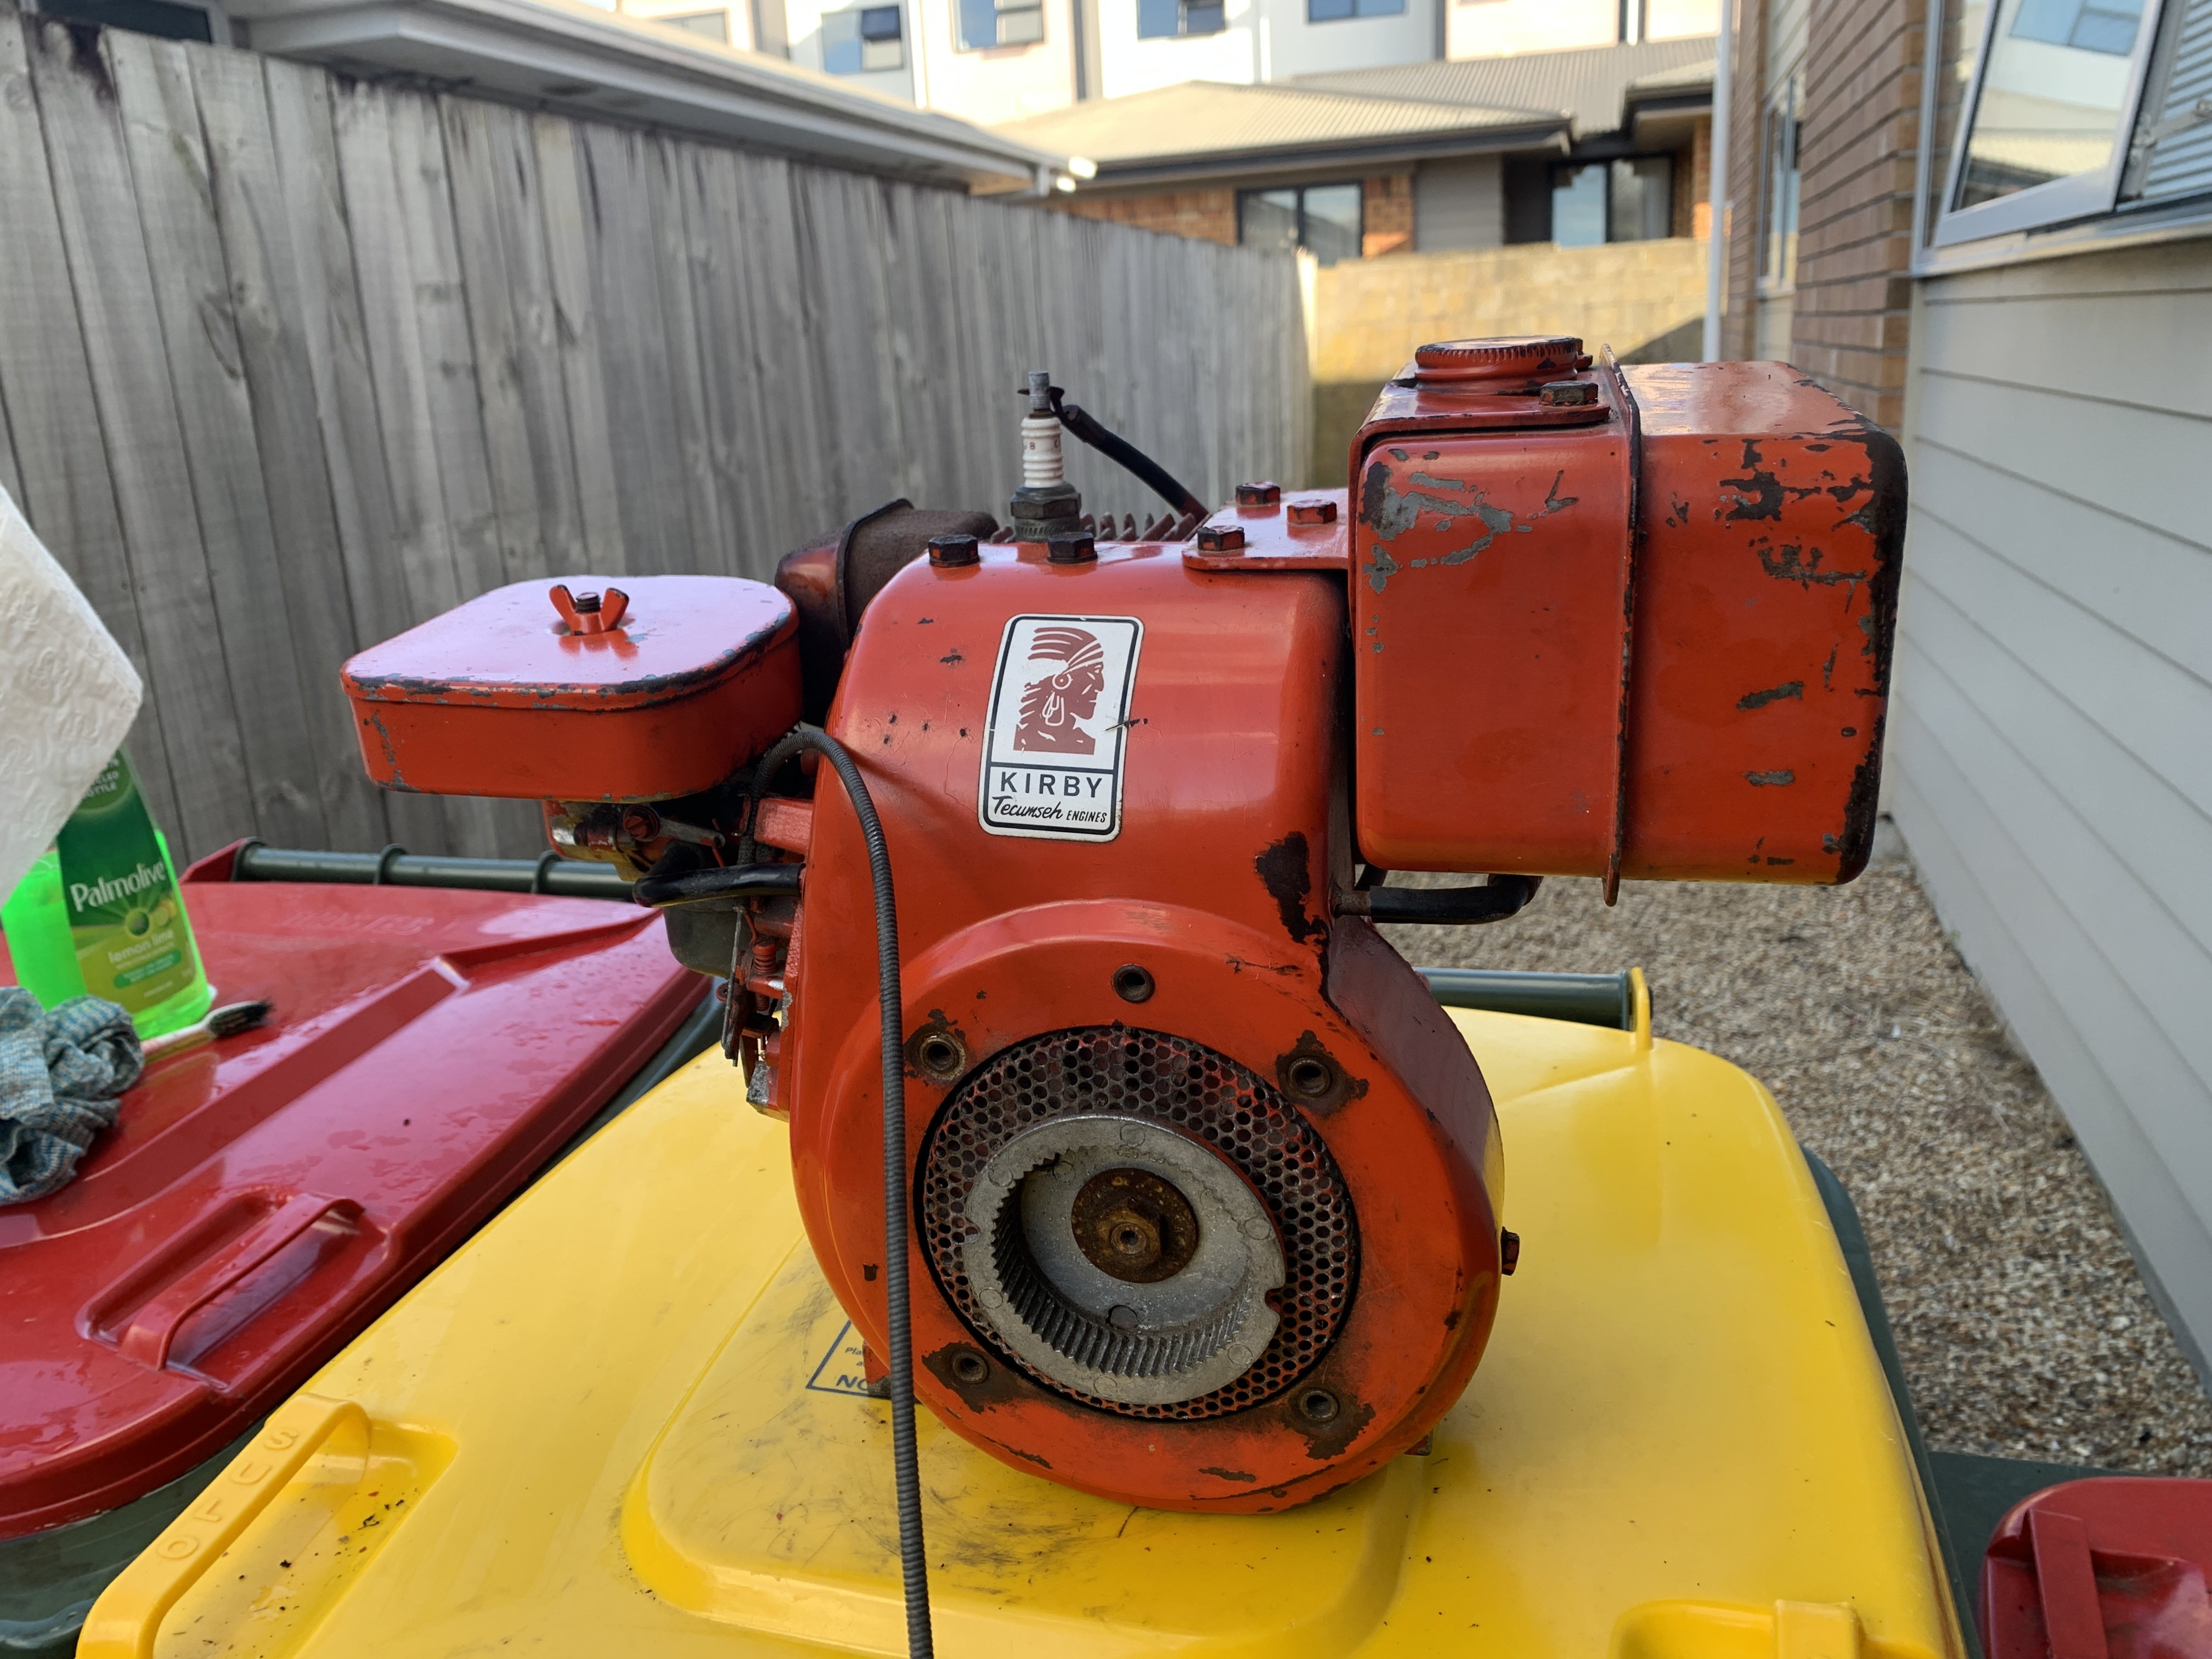
Hey everyone this is my first post so I thought I would start fairly strong. My name is Will, I’m 22 years old and absolutely love Mini Bikes. My current project is a tru test mini bike which I purchased back in 2017 in a very original state, as far as I can tell it was essentially a complete bike as they would have come from the manufacturer albeit worn down as a 40 year old bike would be. It ran a Kirby-Tecumseh HK35 and had custom mudguards which I believe were produced by tru test themselves. I had the frame acid dipped and then powder coated, original new old stock grips I sourced from eBay and recently after a 4 year hiatus I managed to track down another Kirby engine which I’ll be putting on as it’s more complete and in better condition than the original was. I have a tiny bit of regret for not just cleaning the bike and leaving it in its original state but I know I’ll be very happy once my restoration is complete, Also if anyone is able to date the Kirby engine tag I’d love to have a rough estimate of what year this engine was as I have no clue what exact years these bikes were made and that could help, the tag number is “F1027” and “35093” I can’t seem to post all the photos so will try do some comments of how the frame currently is Cheers
6 points
-
Got the other side done over the weekend. Started by drilling a locating hole in each bar for the Kawasaki switchgear... Not sure what ink the wrecker used, but it's good stuff, hard to remove the writing... Took tank off to fettle the new accelerator cable. had to drill out the ferrule holder on the carb to accept the new cable, and toyed with installing the return pull cable as well, but decided againt it, maybe in the future. Cut cable inner to length and soldered in a new brass lug, all works well... And installed new master cylinder, no dramas, bled things with m/c below the caliper and nice easy job, bleed screw wasn't stuck and the cheap SCA green Dot 4 fluid made it easy to see when new stuff came through... And I wasn't certain what size the new bore size was, but it was cast in as 5/8" on the Nissin m/c... And all in apart from wiring, fitted new Biltwell 7/8 Kung Fu grips, think it looks pretty good... I was going to wait for the connector plugs to arrive but it was a beautiful day so I made some temporary connections with strip connectors to check things work... And it works well, nice not having to worry when the switches will let me down next, and I find them easier to use. Took her for a few rides over the weekend, clutch is still too hard to use easily, but brakes feel better with a slightly different ratio. There is a slight oil leak that is nothing compared to the Exxon Valdez of old, but I'll wait till I've replaced the clutch springs and primary cover to look at that... Pretty pleased how things turned out though...6 points
-
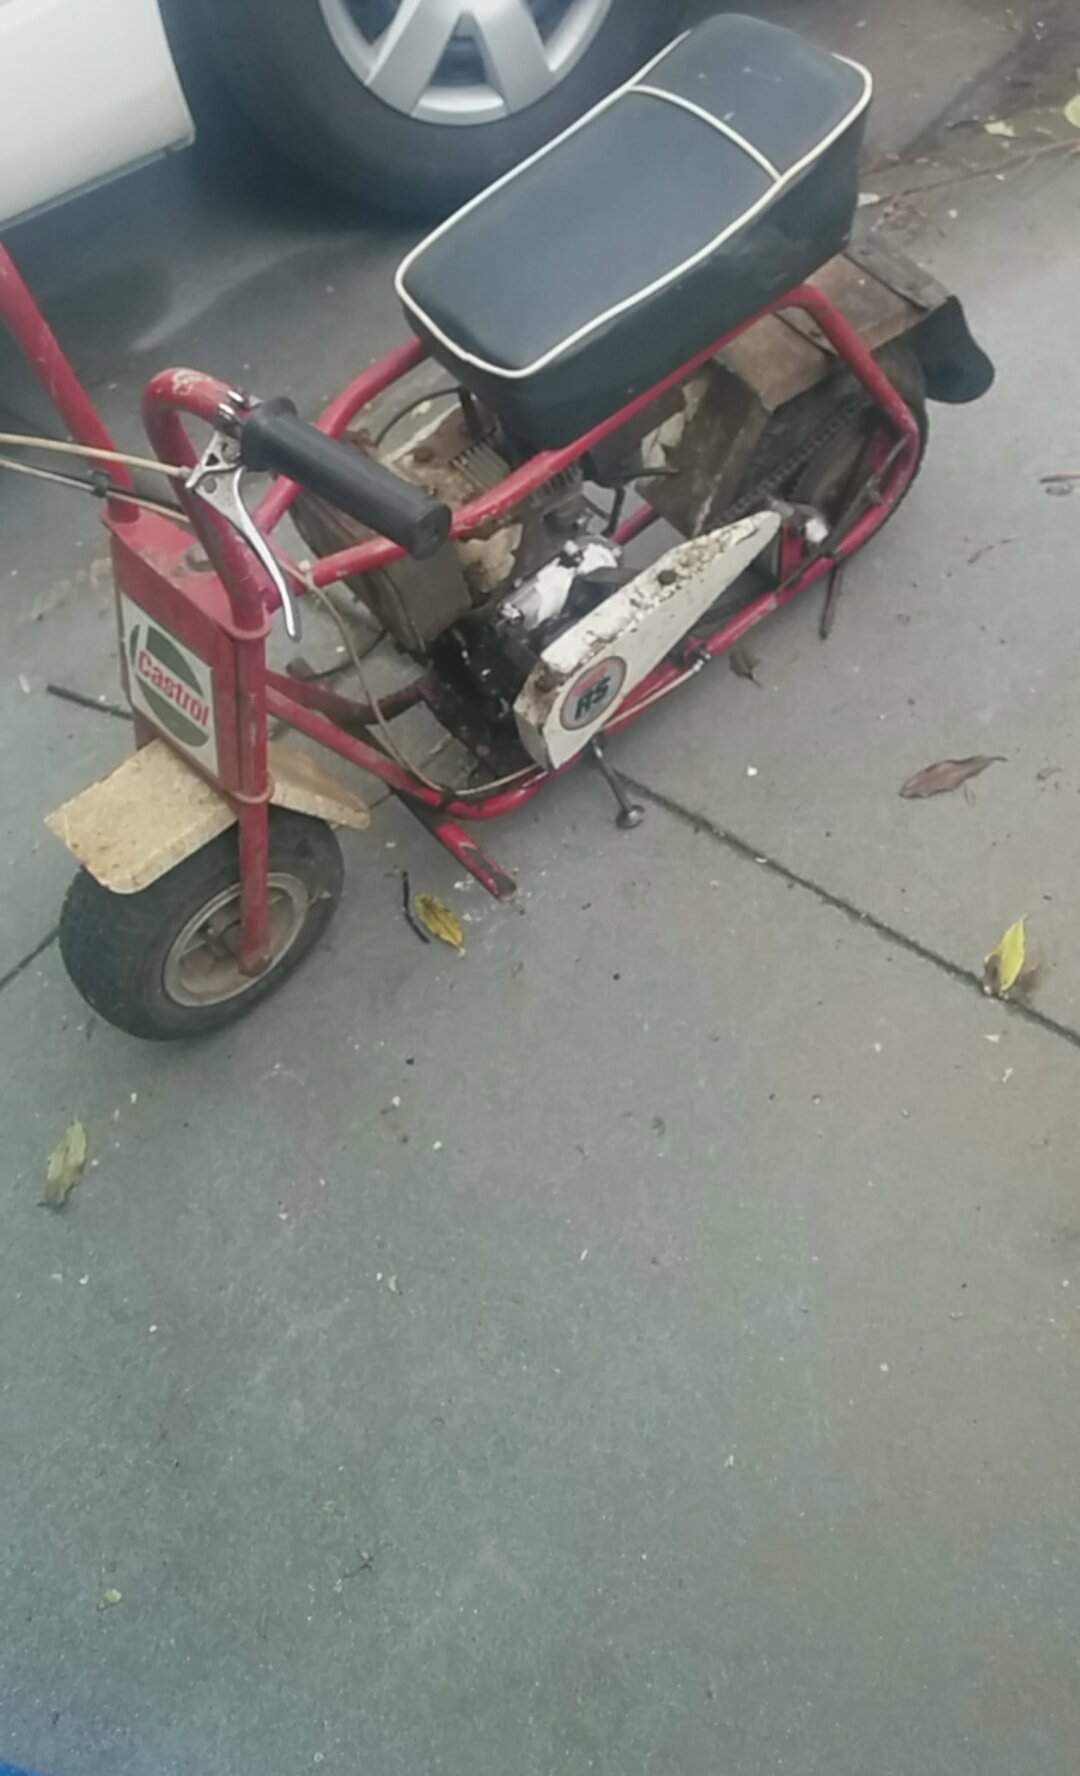
This is how the frame currently sits I also forgot to mention I had a new seat made which I may end up getting another as this one’s a bit thin and I’m trying to be as close to original as possible but I’ll see
6 points
-
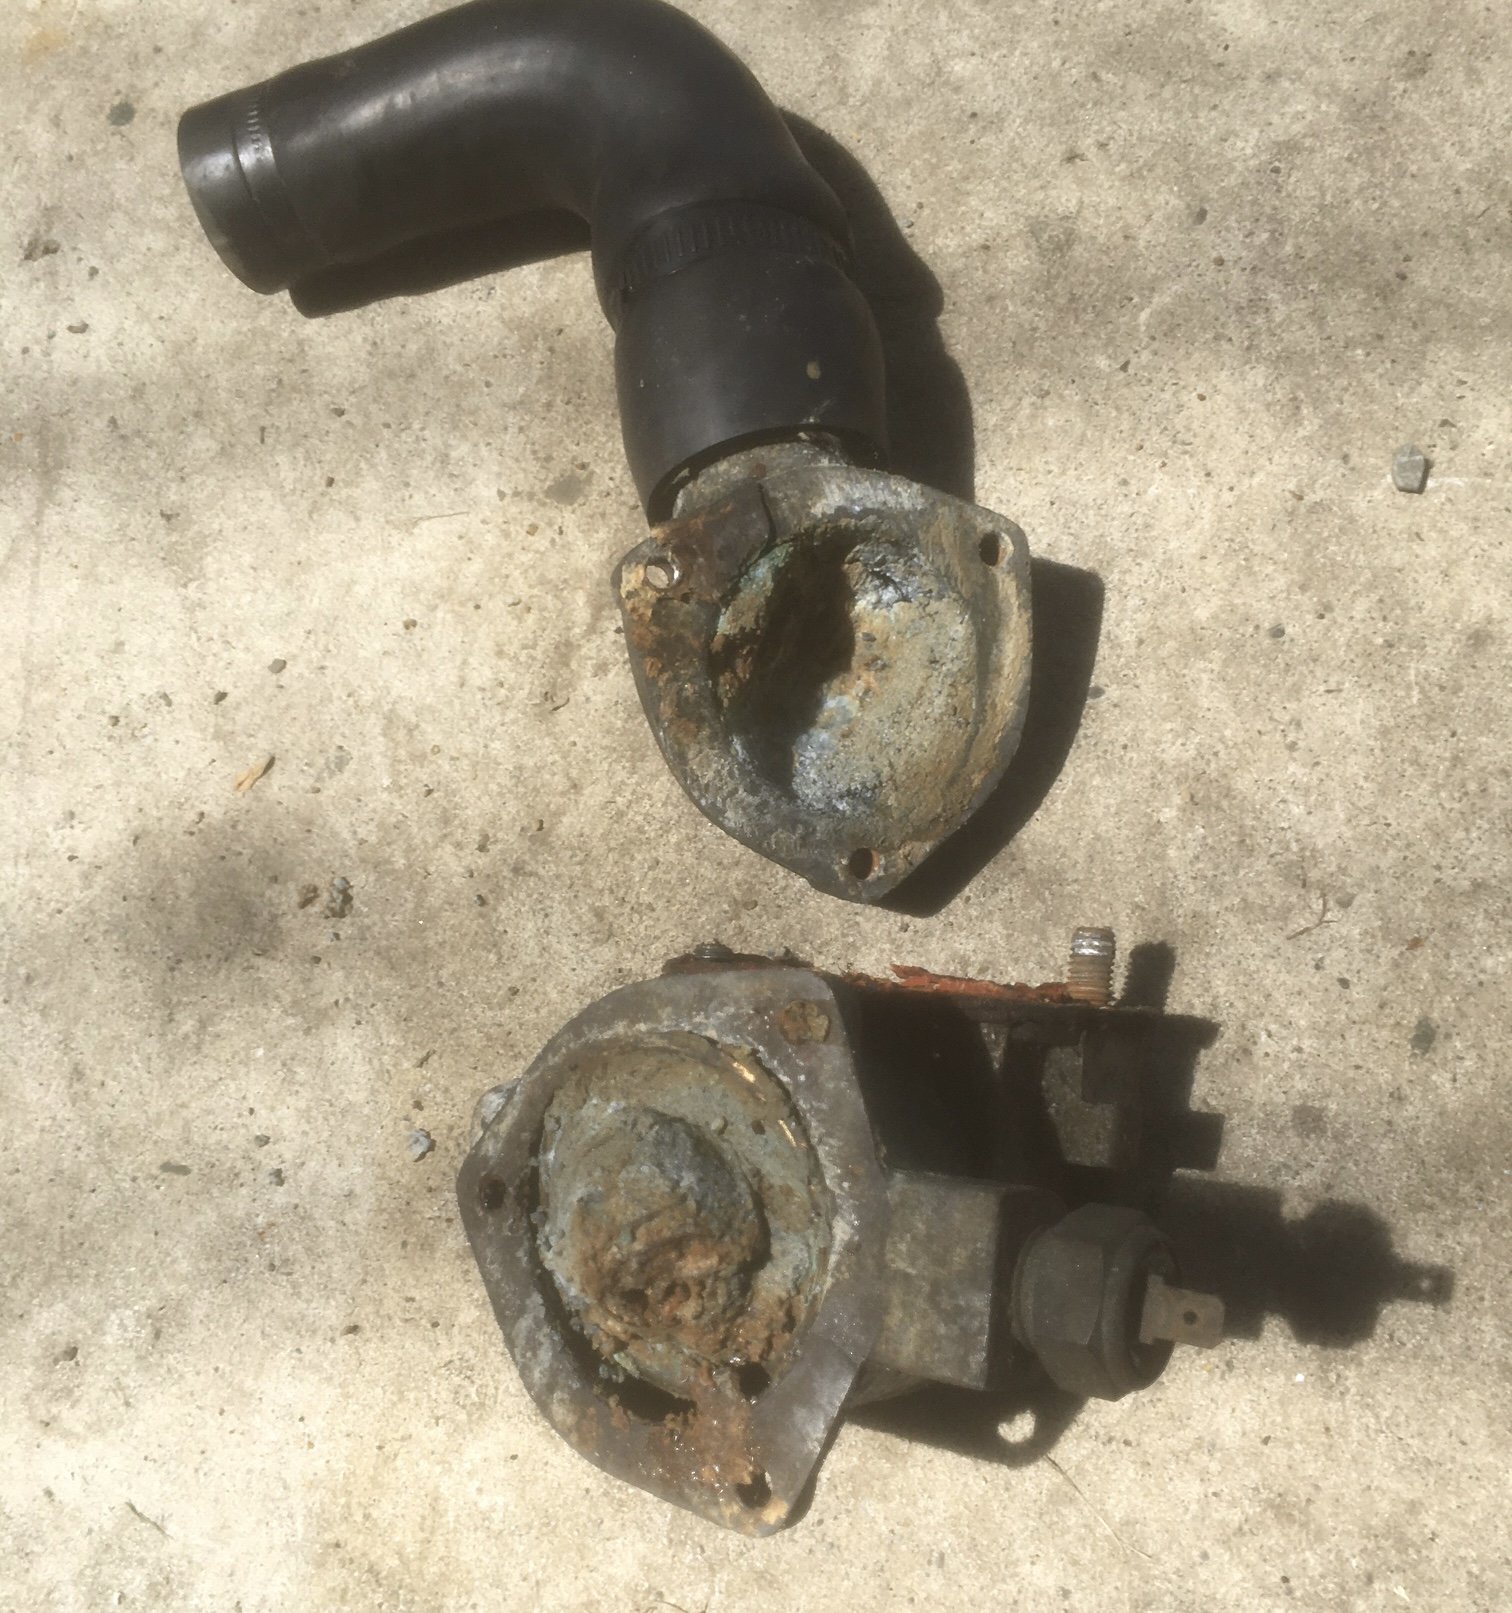
It boils after 3 minutes of running. Let’s check the thermostat. Yeah, that’ll do it I guess.
4 points
-
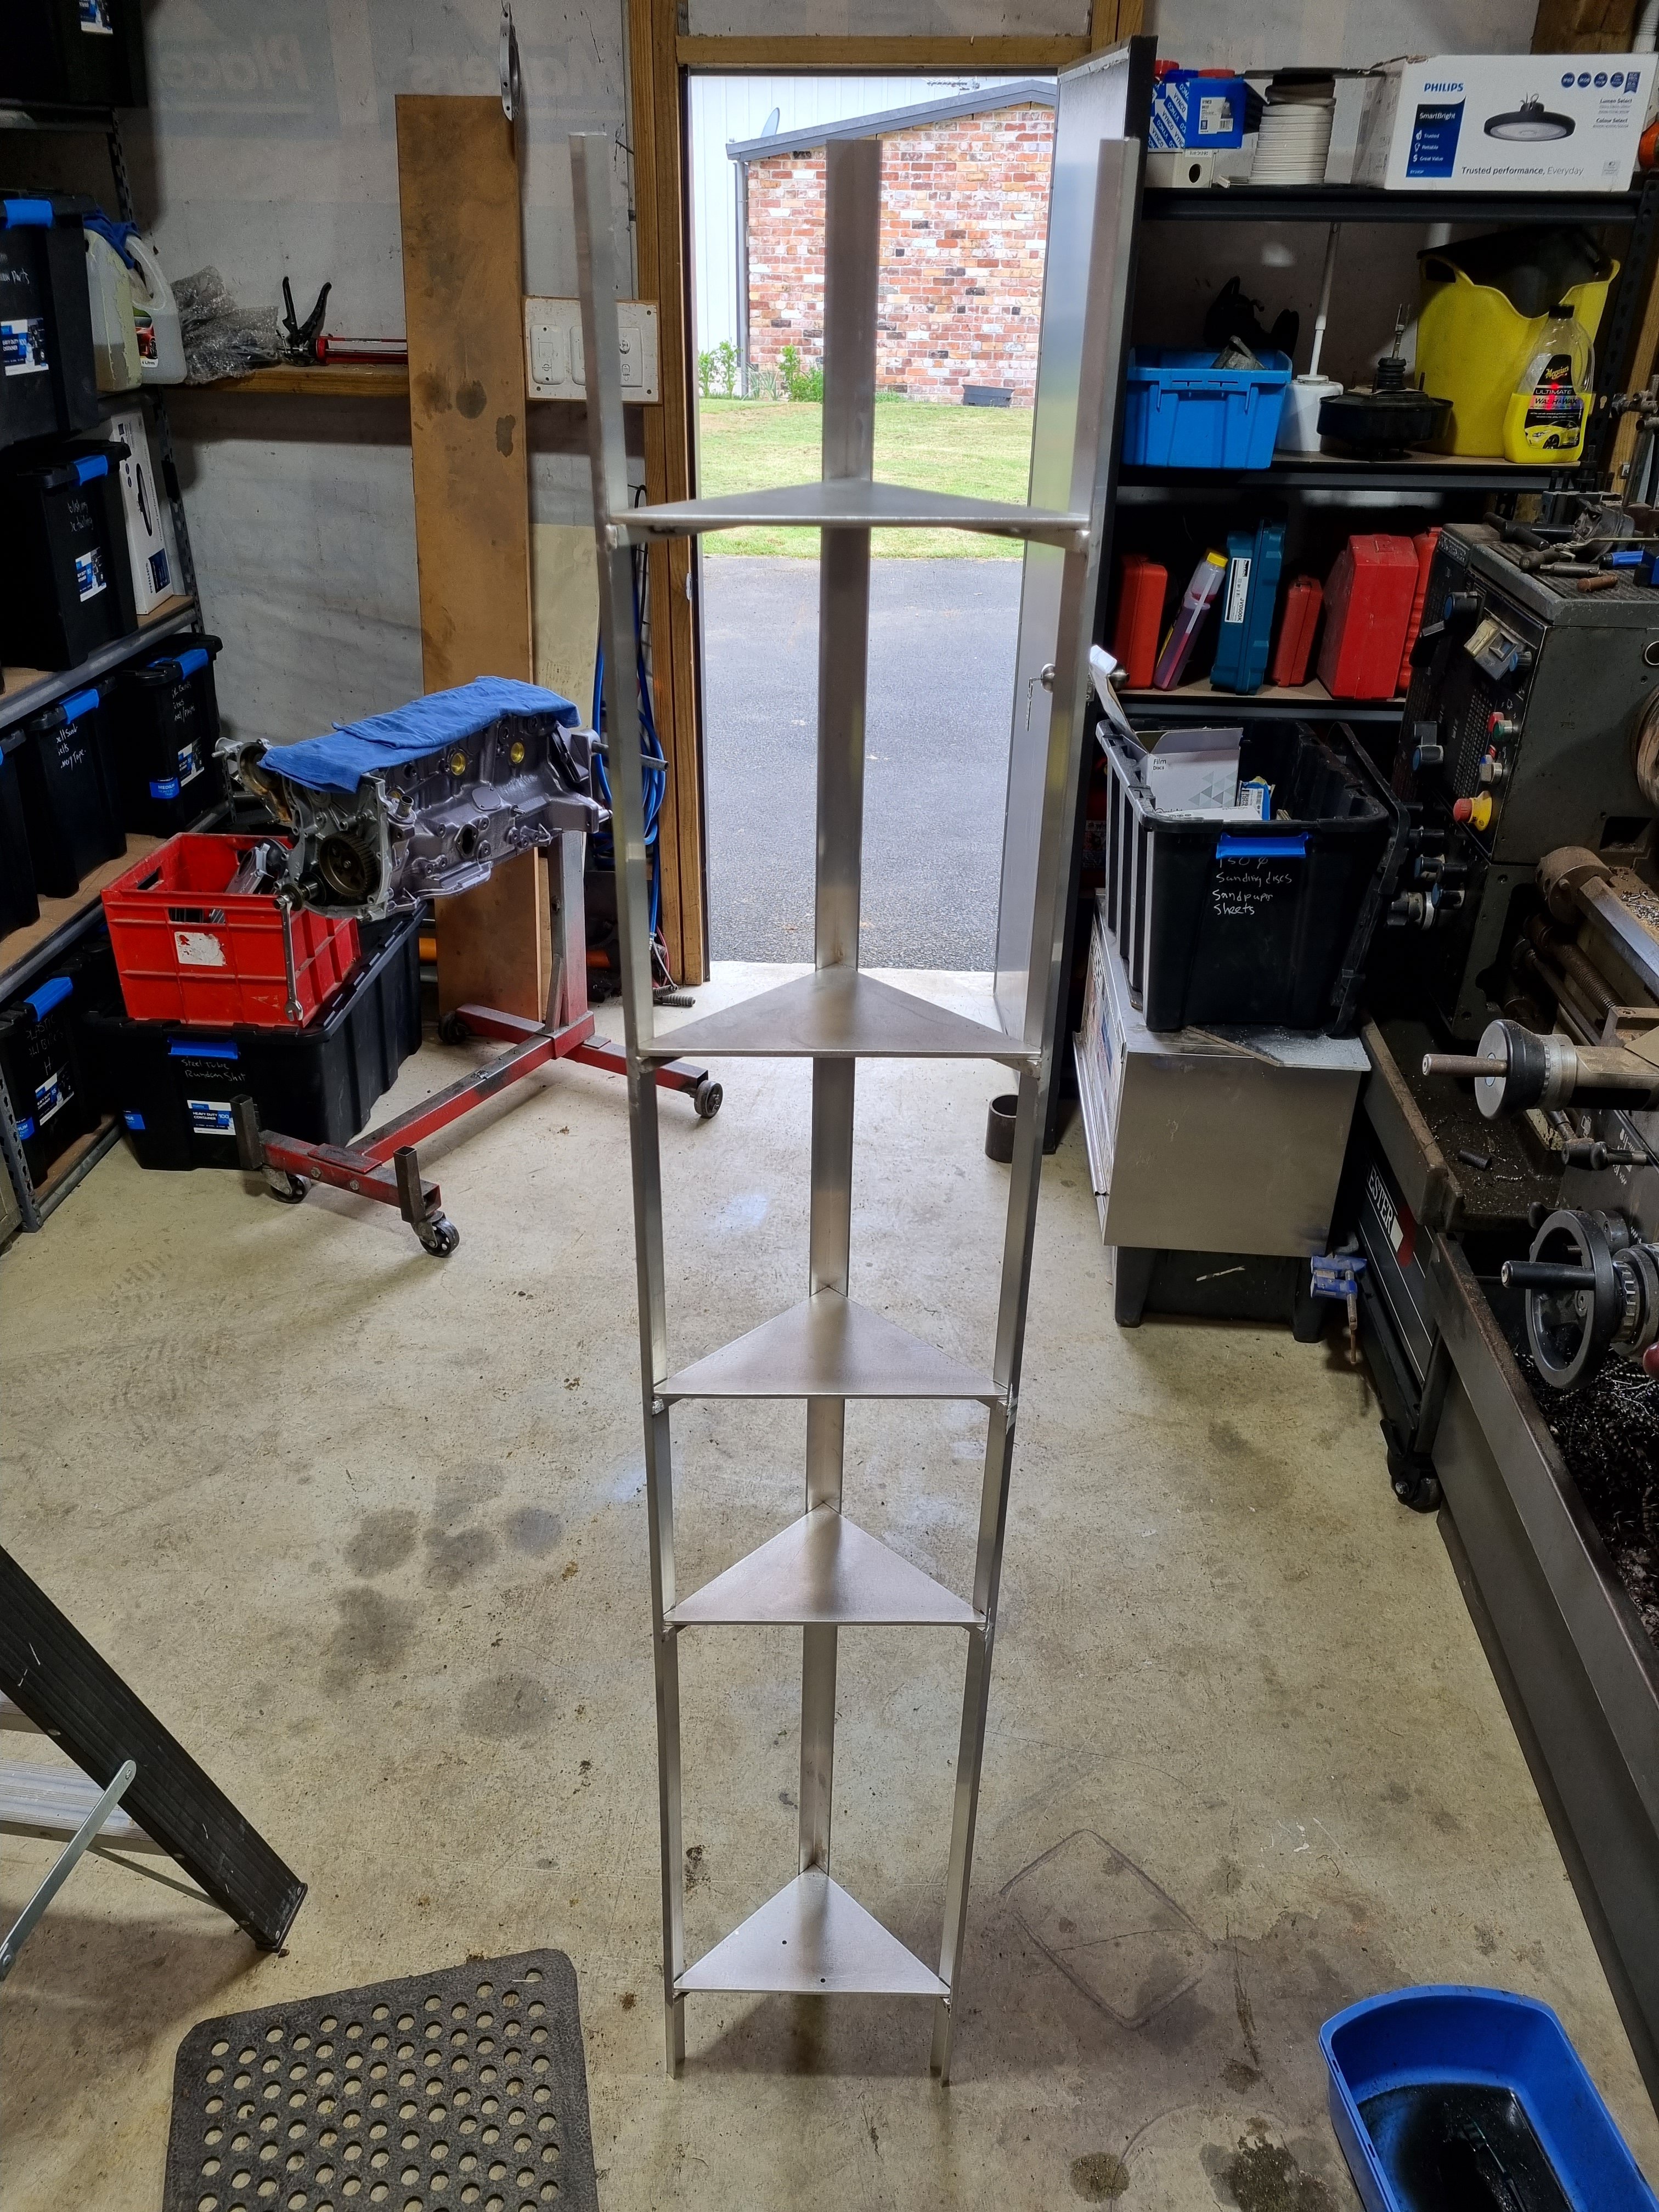
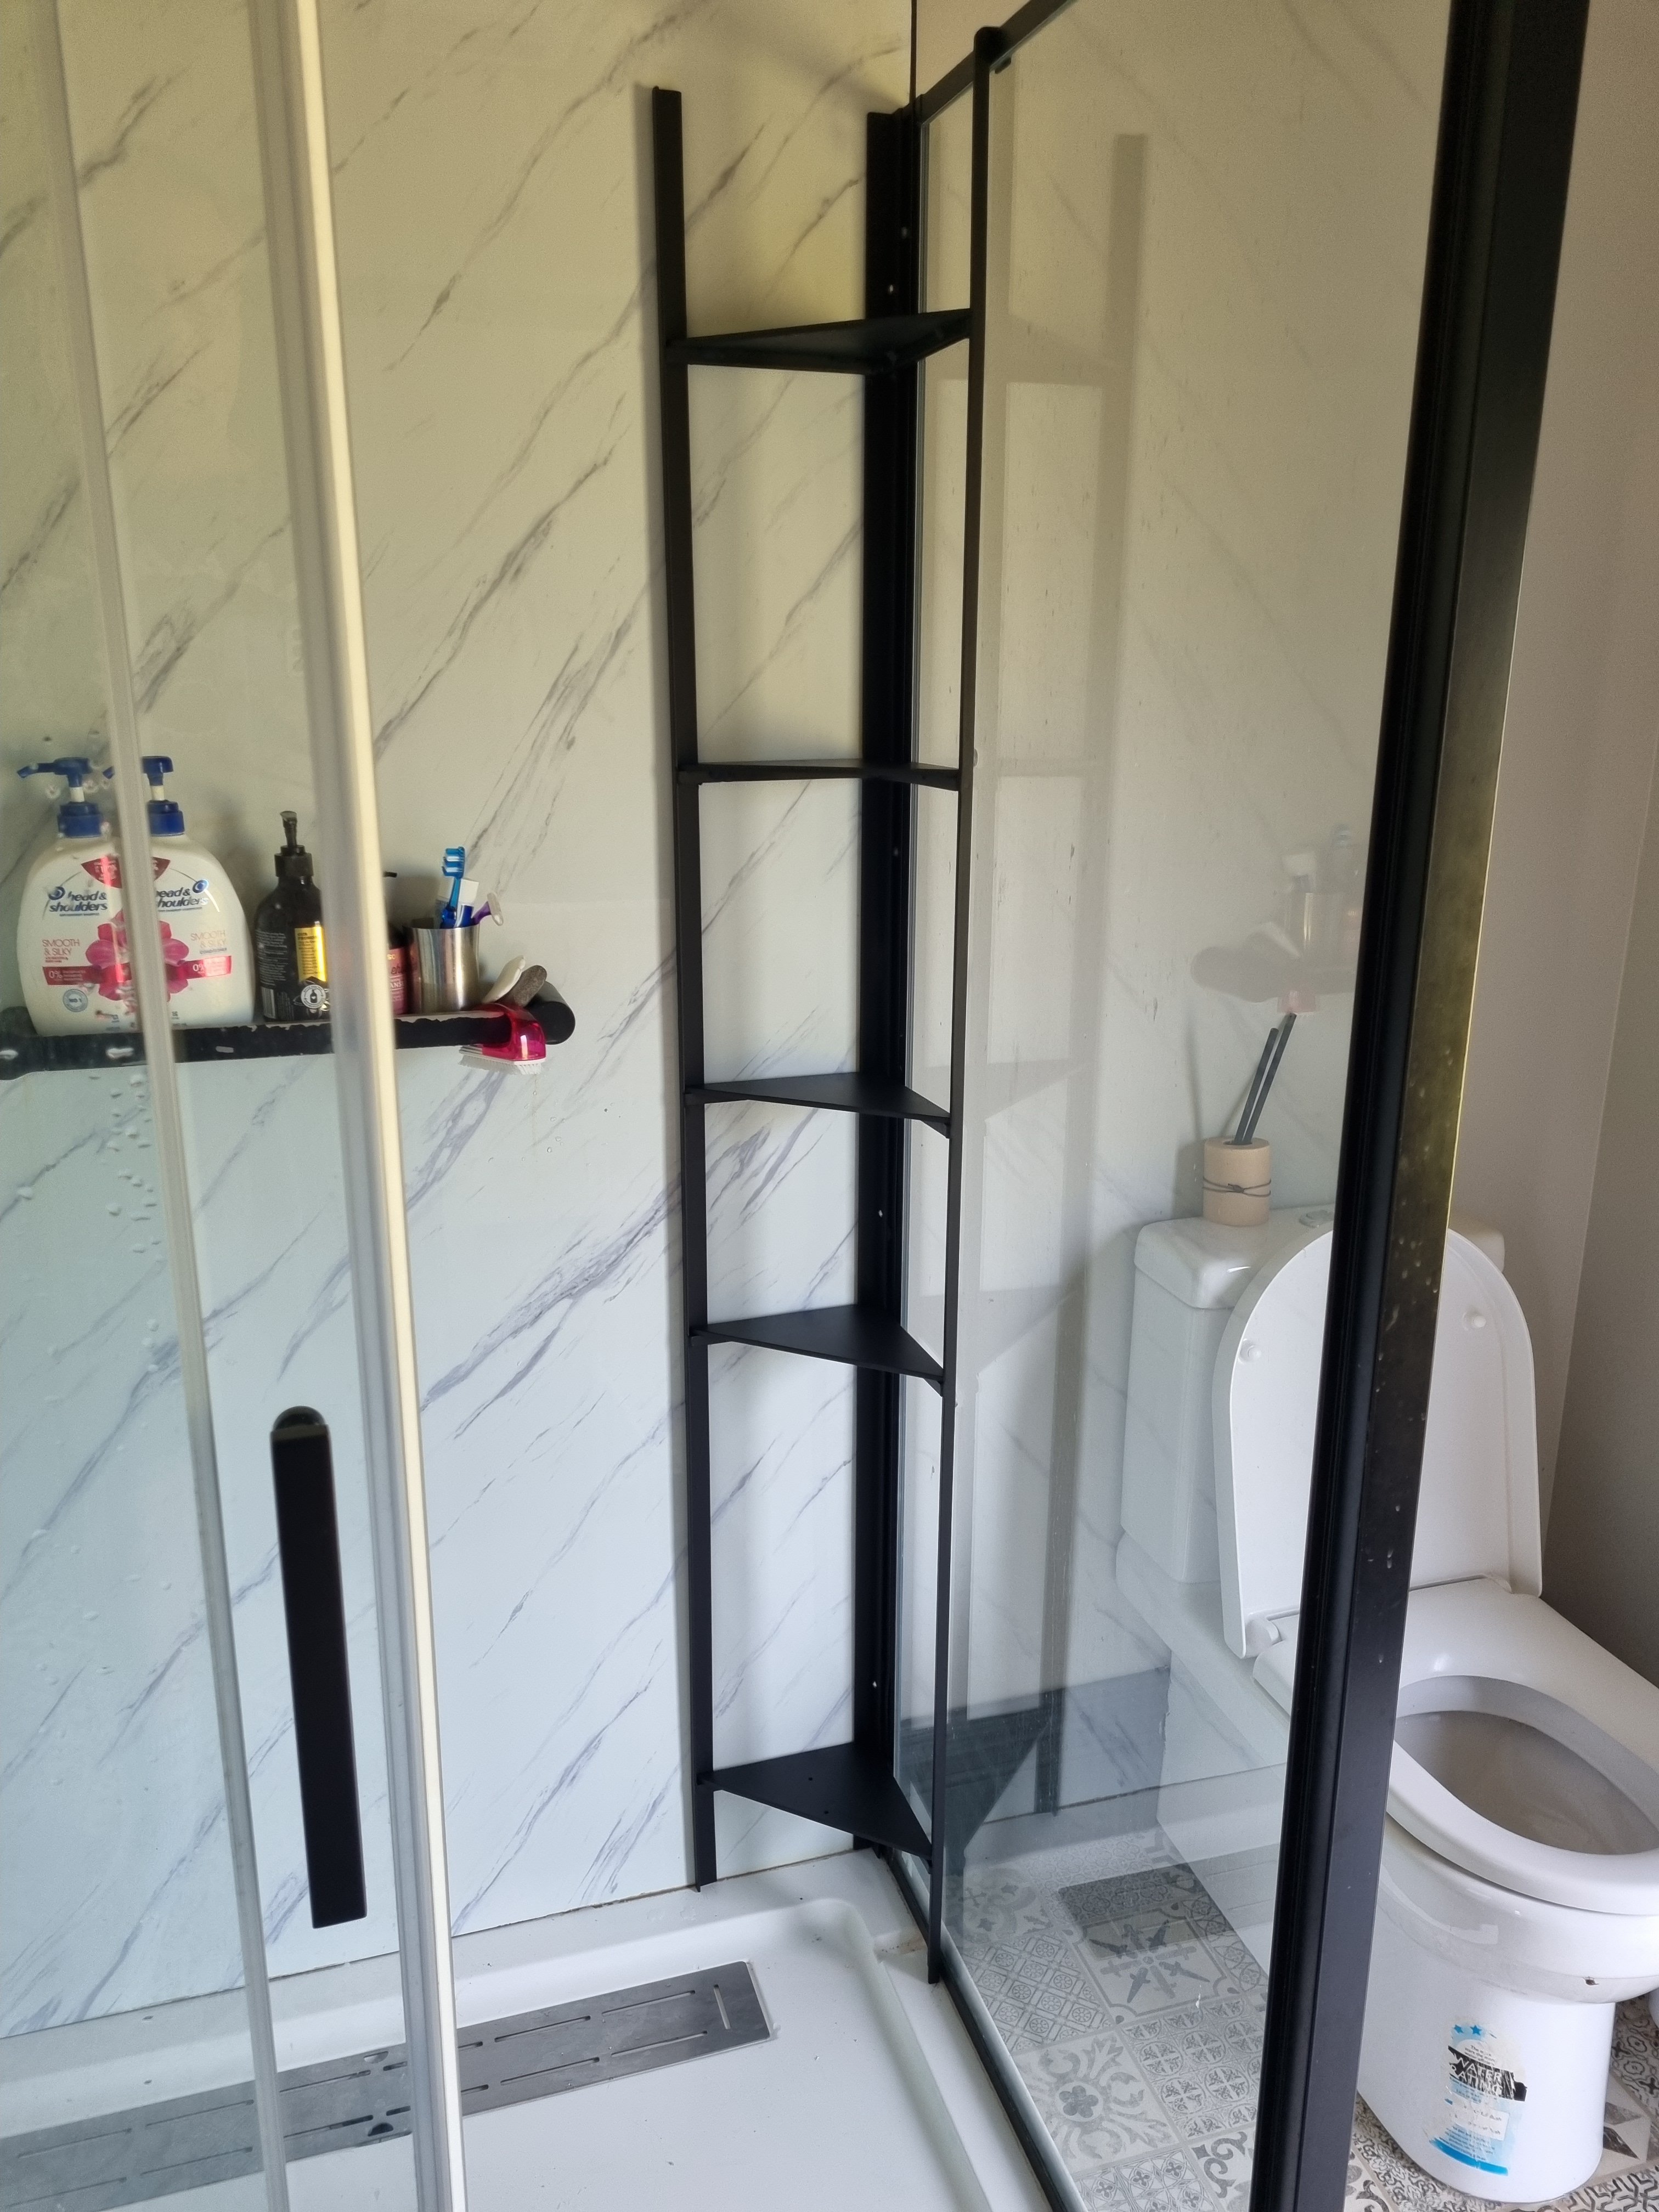
Also I made this. It's a corner shelf for the shower. Currently there is a tiny shelf thing which is worse than useless and gets drenched whenever the shower gets used to soap gets turned to mush very quickly. It's made it is some bits of ali angle and chanel I had.
4 points
-
Be getting this thing ready for OS drags soon.
3 points
-
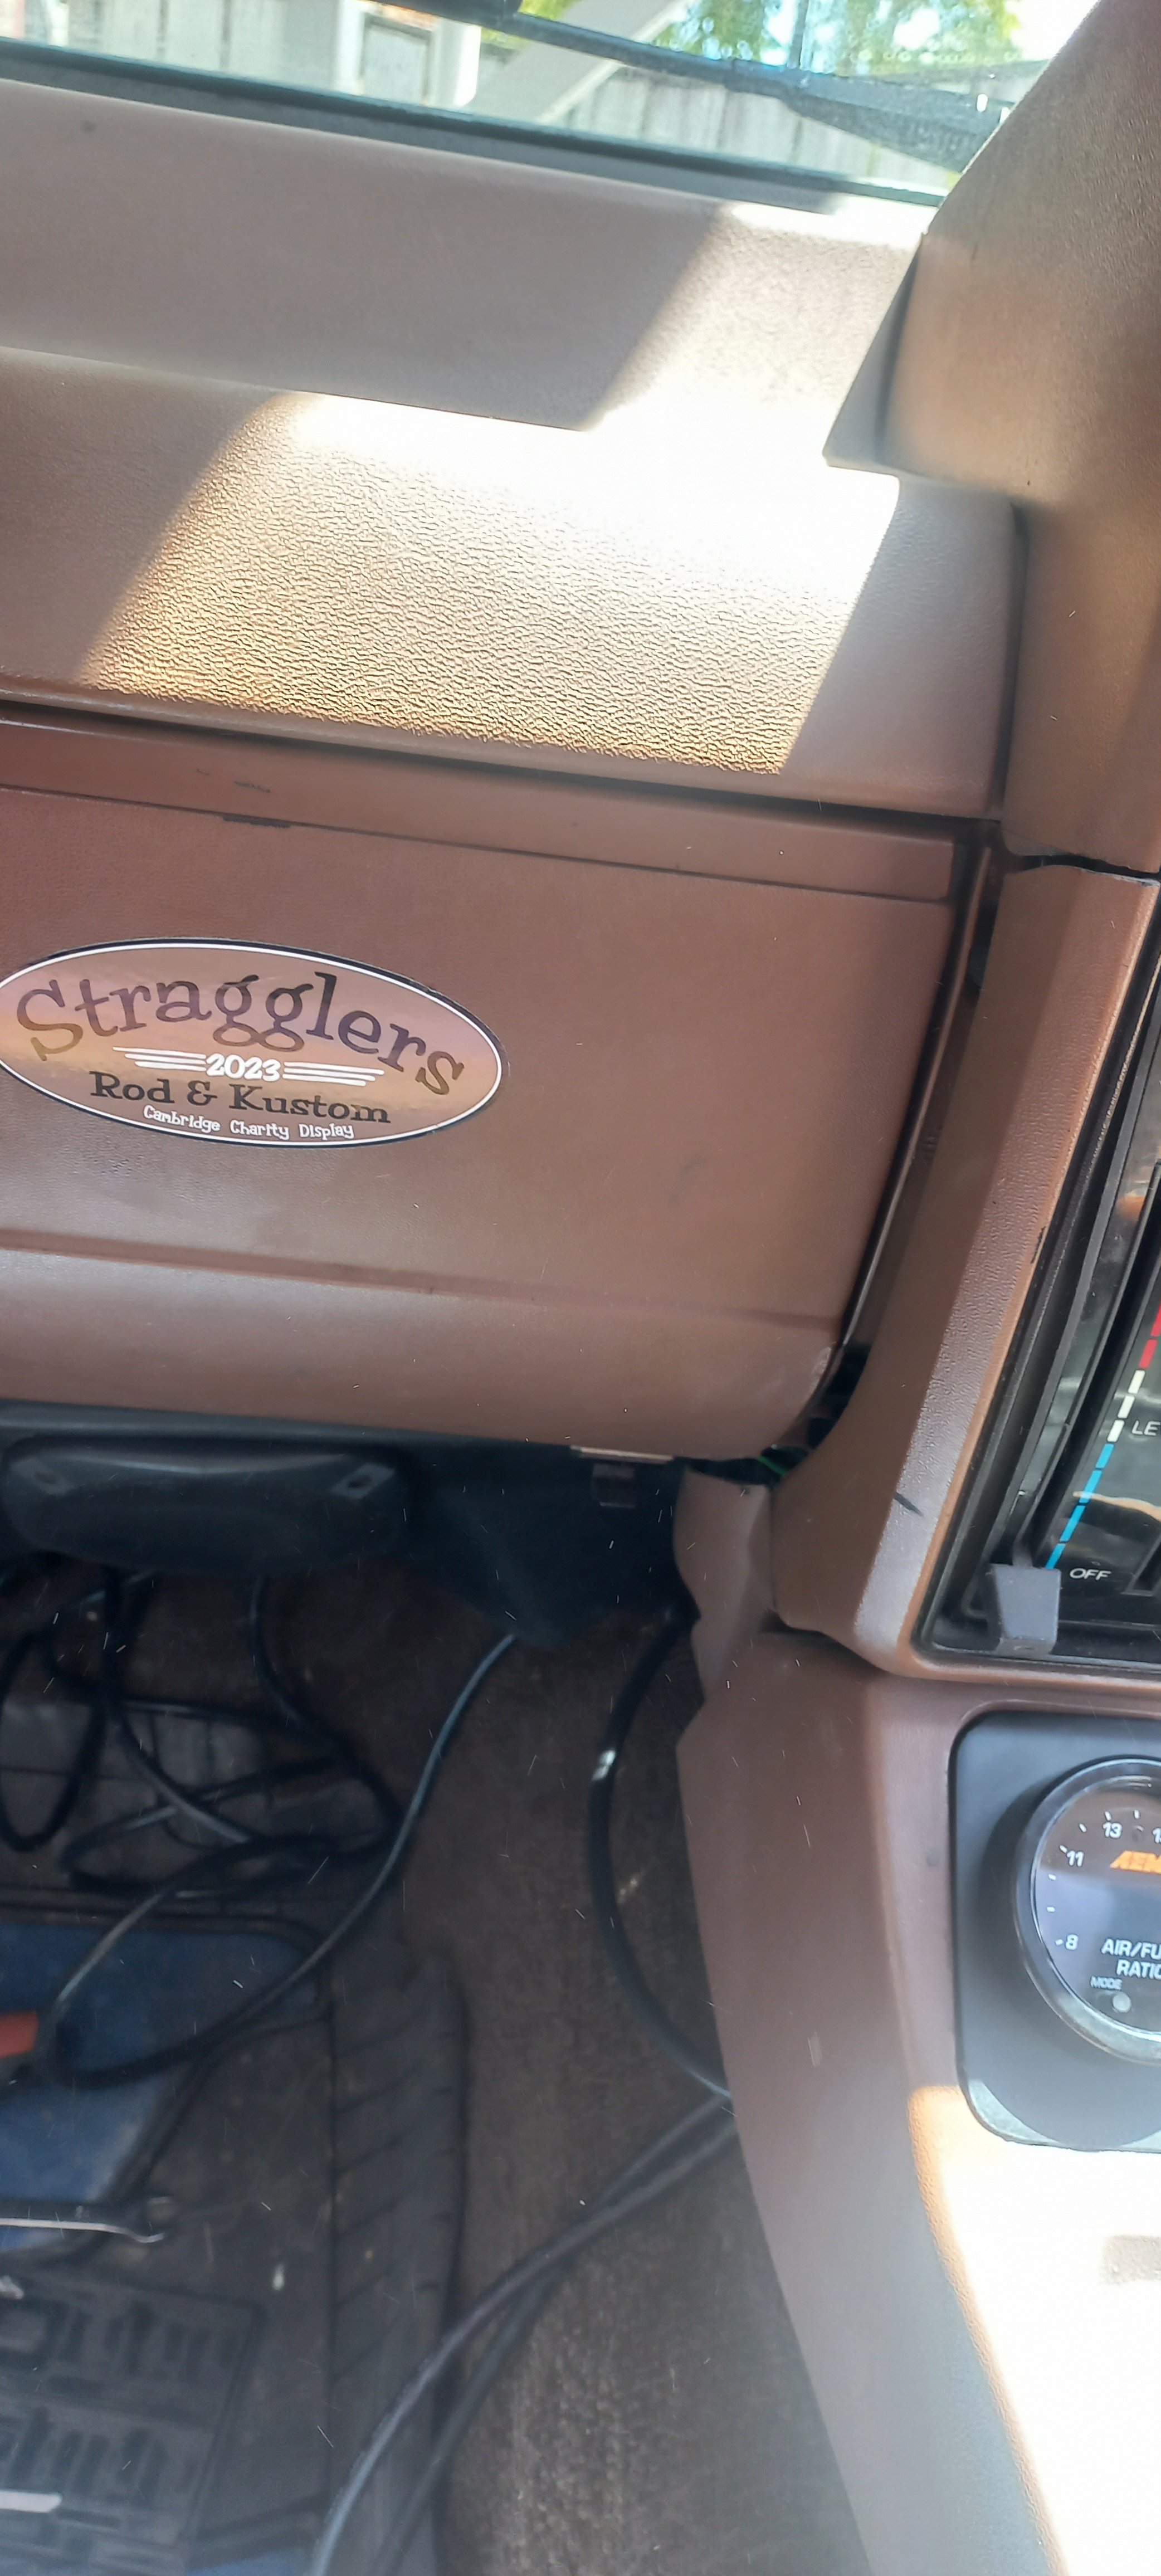
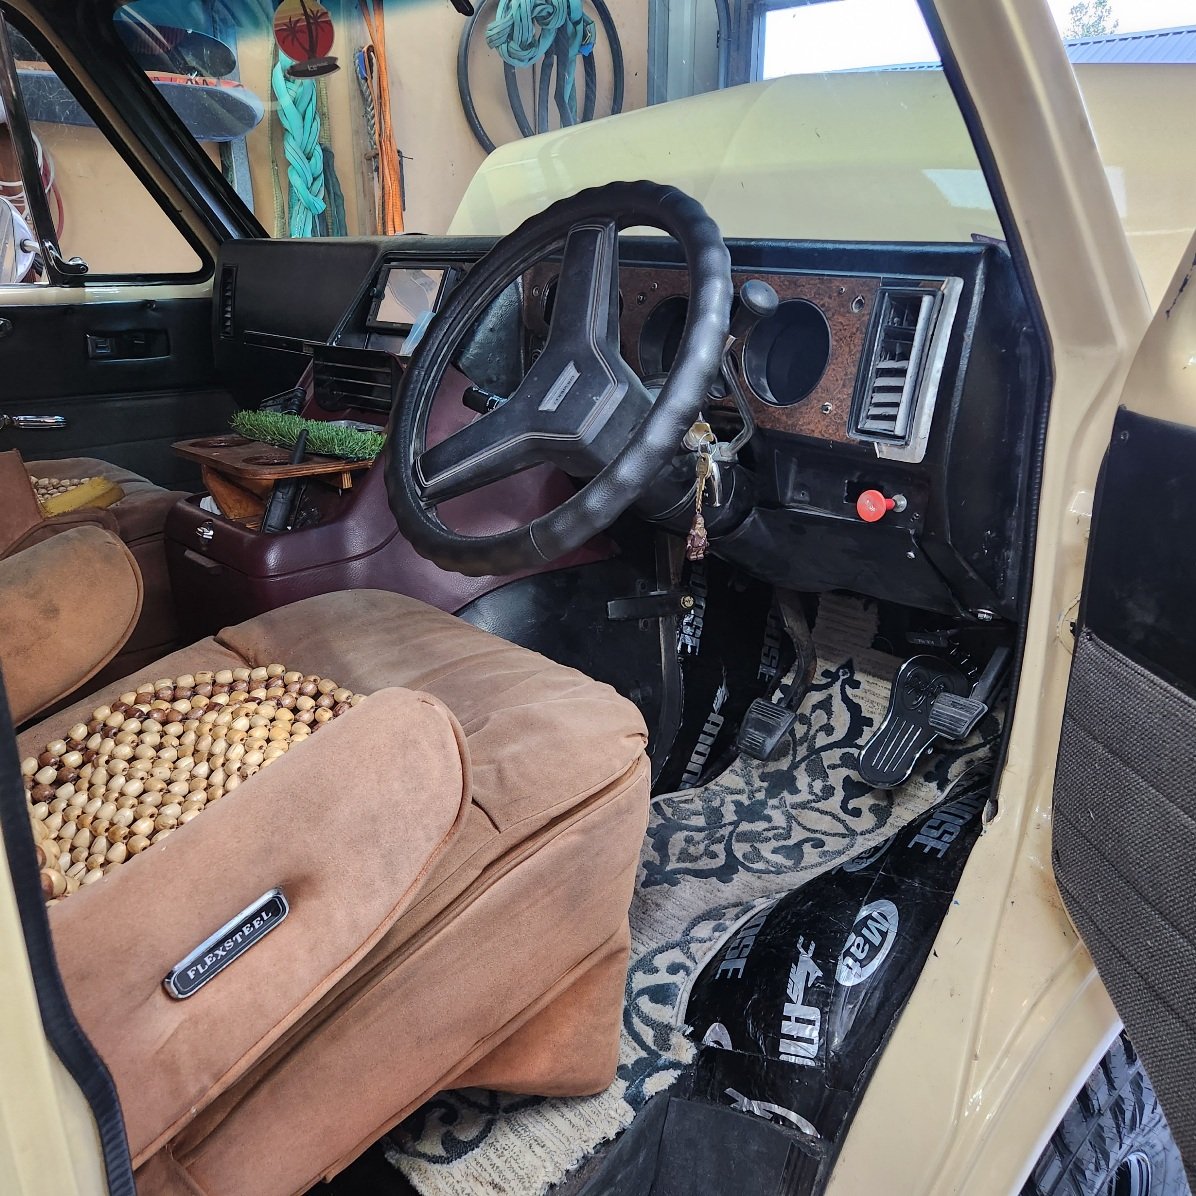
The sticker covering a scratch on my glove box fell off a while ago so i got a colour match one at a car show haha, awesome day though heaps of cool cars out karapiro...The car behaved well with the cam, did another oil change because, well, turns out if you dump a bunch of diesel through the engine, even if you flush it all out.... it will clean the sht out of everything and put it all in your oil and filter, then change filter and oil twice it still takes a good 100km to get rid of the crankcase fumes and residue burning off.. i would not recommend using diesel but i had mixed it with atf and initially thought it a ok method to flush out some small particles of gasket and crap i dropped in the valley from the heads... I was a bit confused about the smoky exhaust and fumes when i first drove it... But it runs great and sounds great now and i bet its clean inside now hahaha
3 points
-
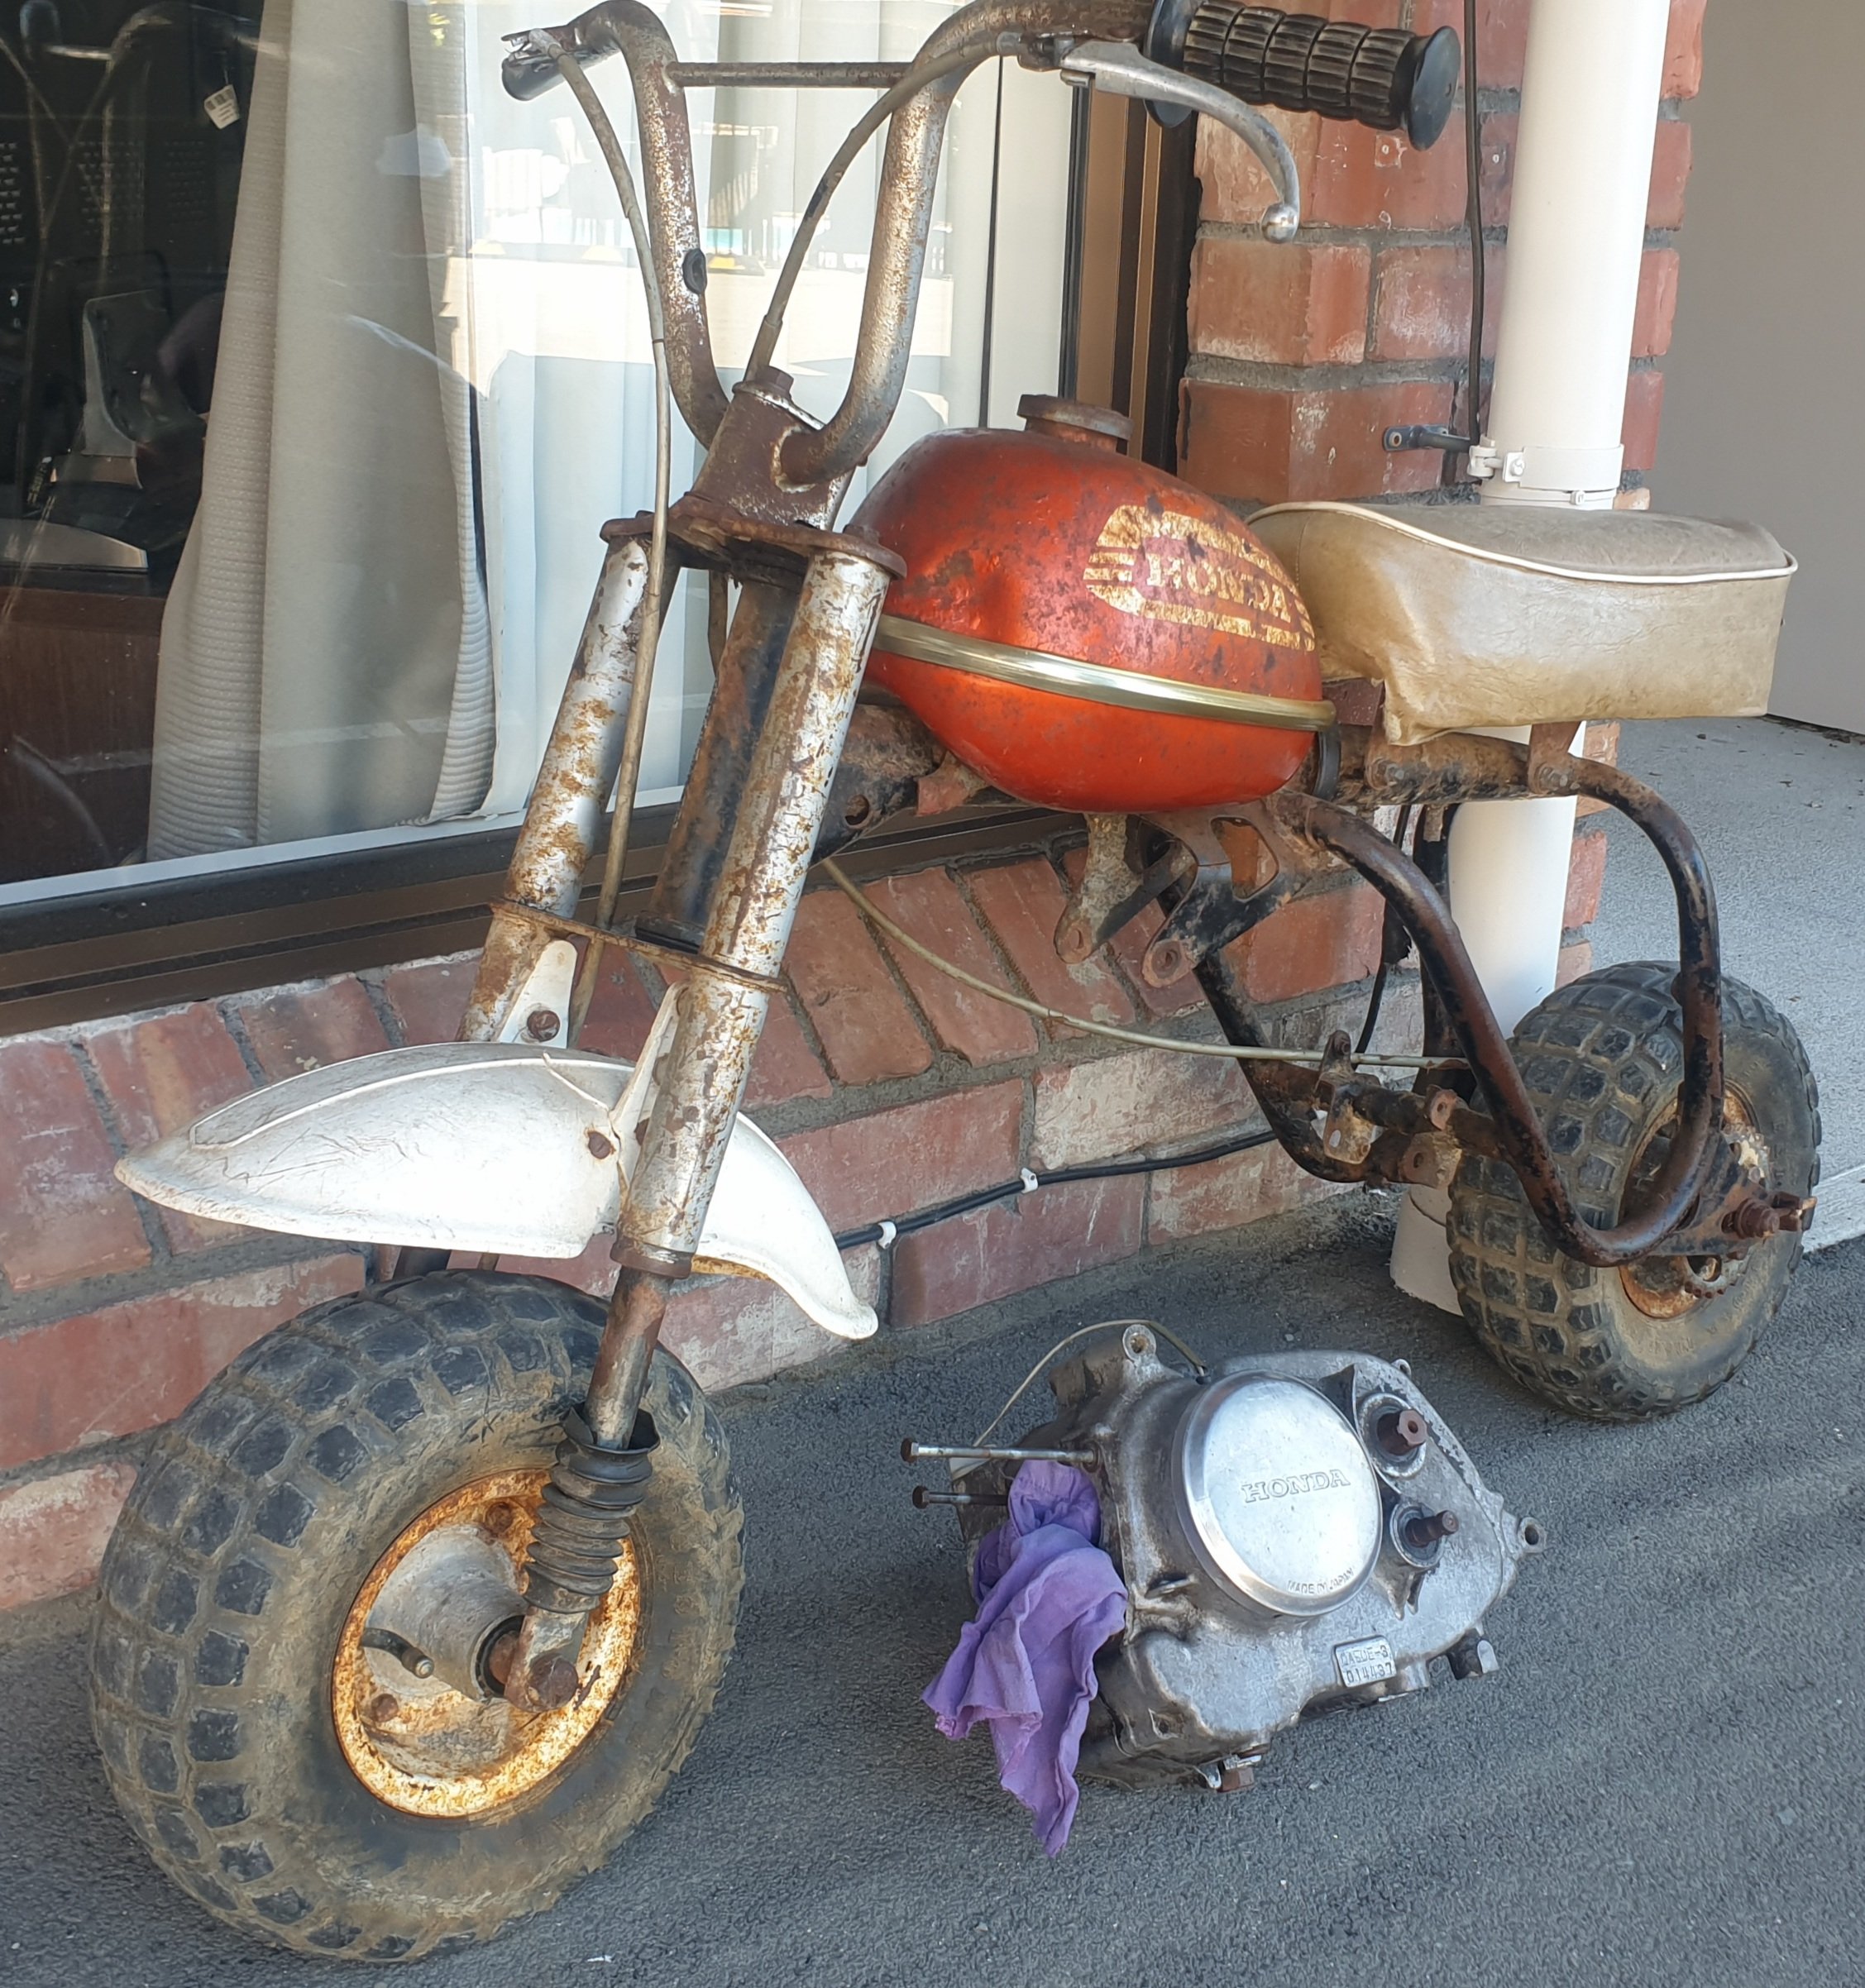
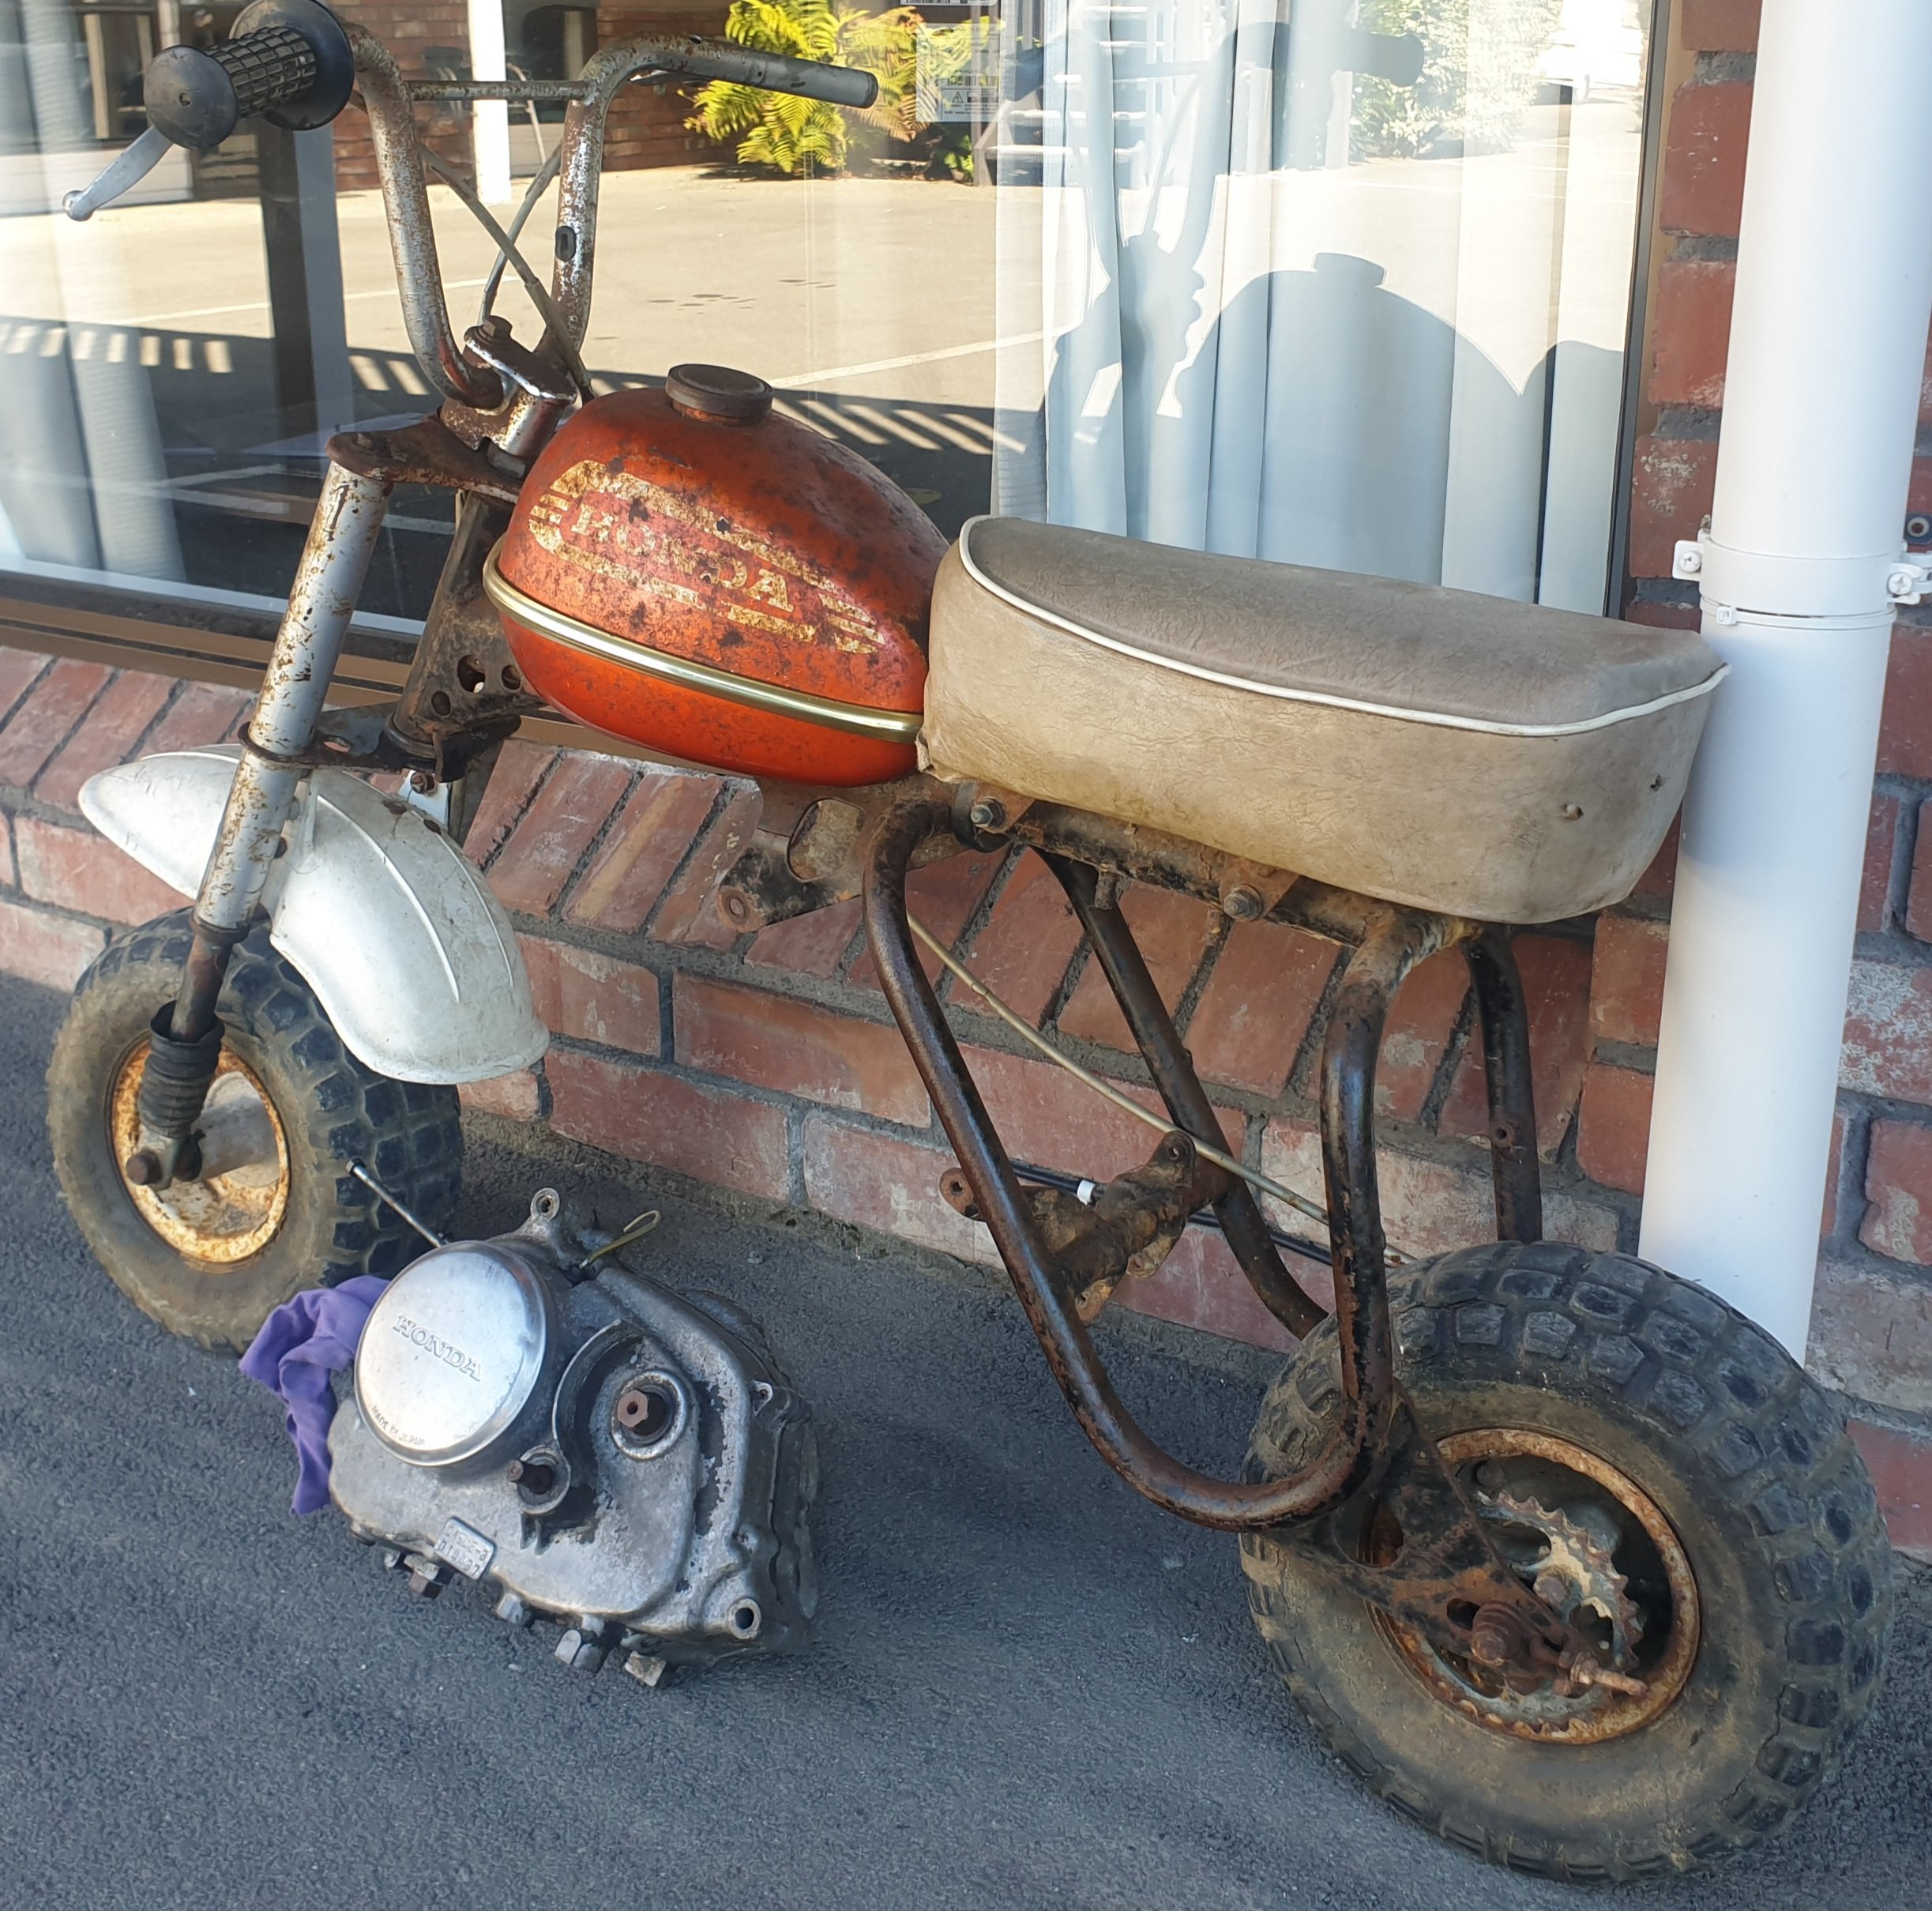
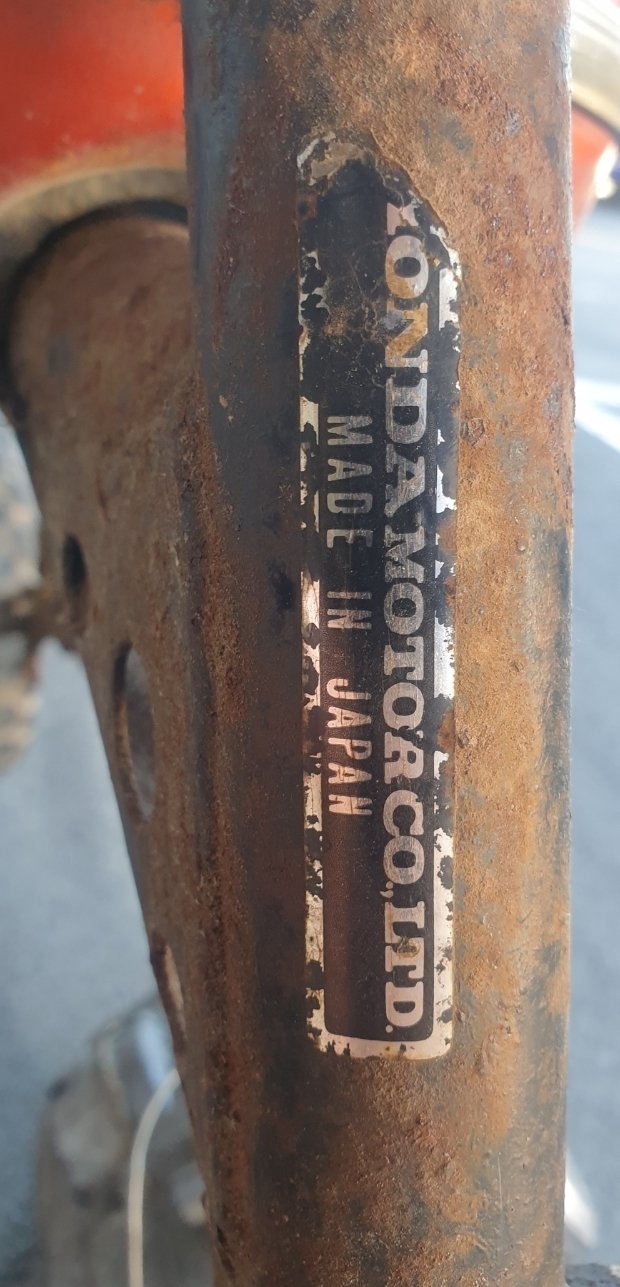
Got this today prety cool verry solid needs a strip down rust kill zinc and some paint. Ive alredy sorced a honda qr50 motor a legit honda nota lifan Gona b a big build i look forward to tinkering with it at some point soon
2 points
-
While sharning about piston speeds. The StanceWorks K24A powered Ferrari blew its motor recently which is a pity. However it was running to 9500rpm with 99mm stroke. That's 6100 ft/min piston speed. Whether or not they were running on low boost, thats some crazy shit. That motor was not long for this world!2 points
-
The 2GR heads will be best, since they have huuuugggggeee valves because of the much bigger bore (94mm bore vs 83mm 4GR) So as a result the valves are 7-8mm bigger diameter which is crazy. If you put a 2MZ crank into a 2GR then you end up around 2.9 litre with a stroke that "should" allow 10 or 11k rpm. I guess the thing is, first I just need to get a motor together and see what happens when it runs. It is entirely possible that there is some insurmountable issue with the valvetrain (or whatever) so arguing semantics over which motor will do 11,000rpm is irrelevant when the whole thing explodes at 9000 anyway. Haha. God I love wildly speculating though2 points
-
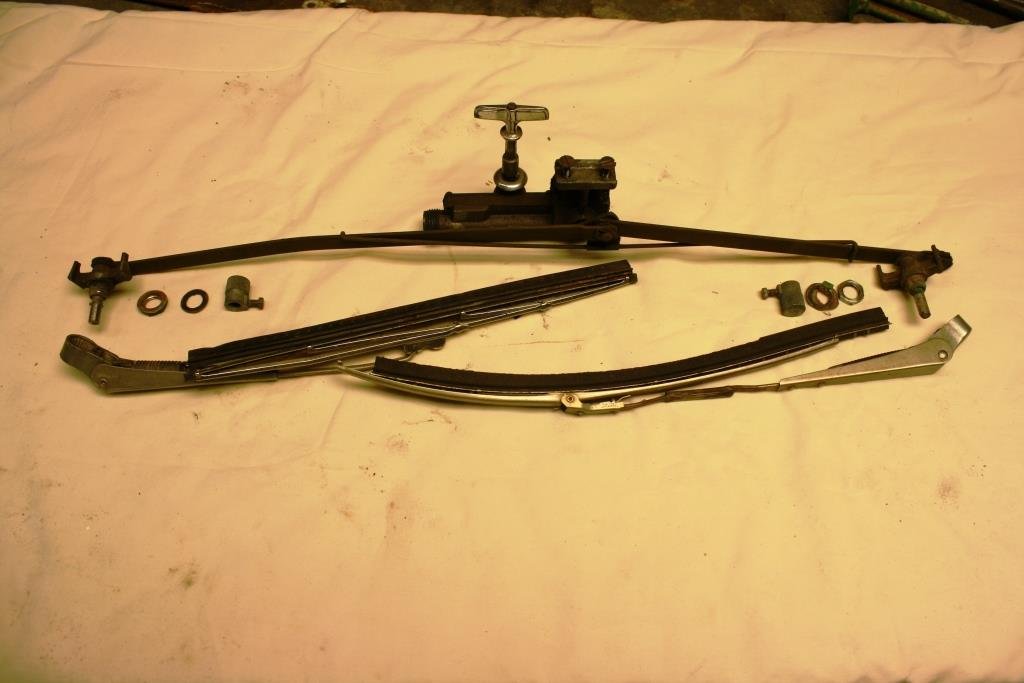
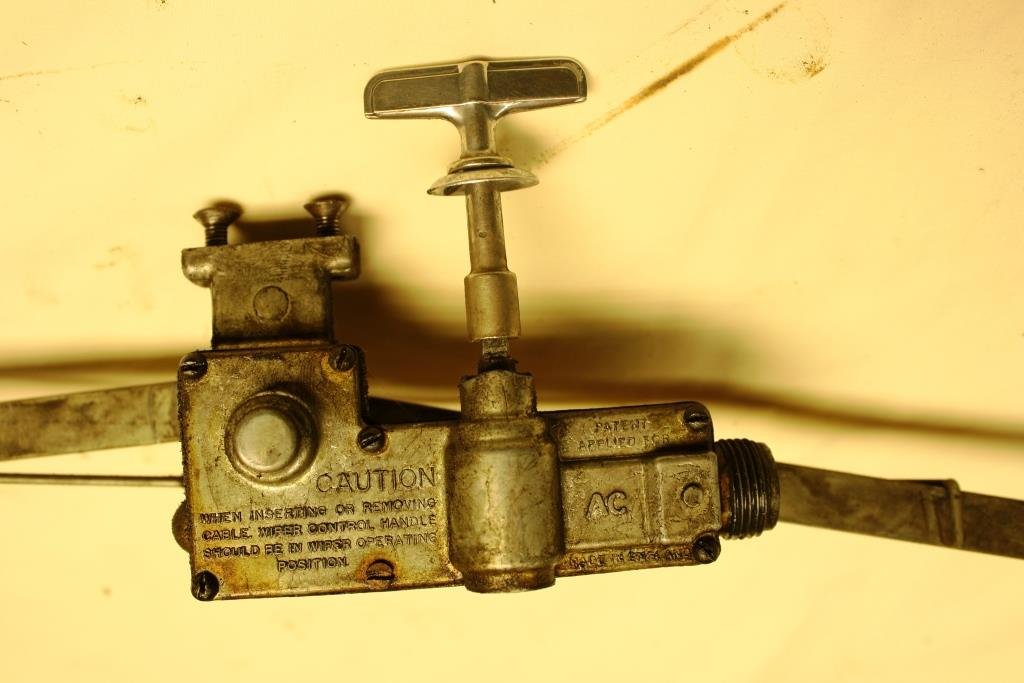
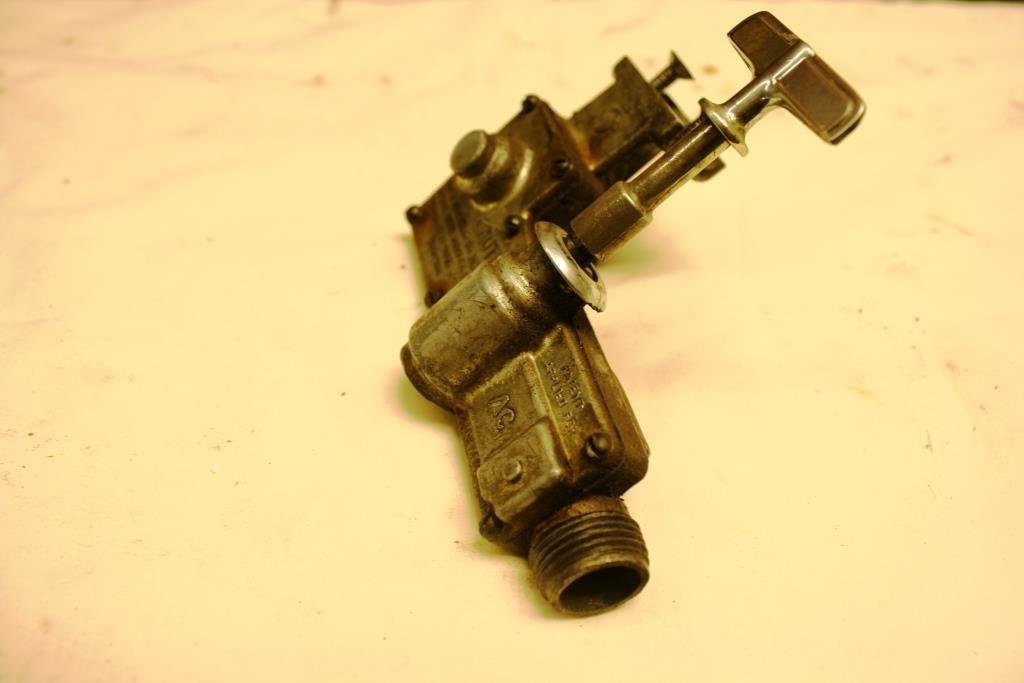
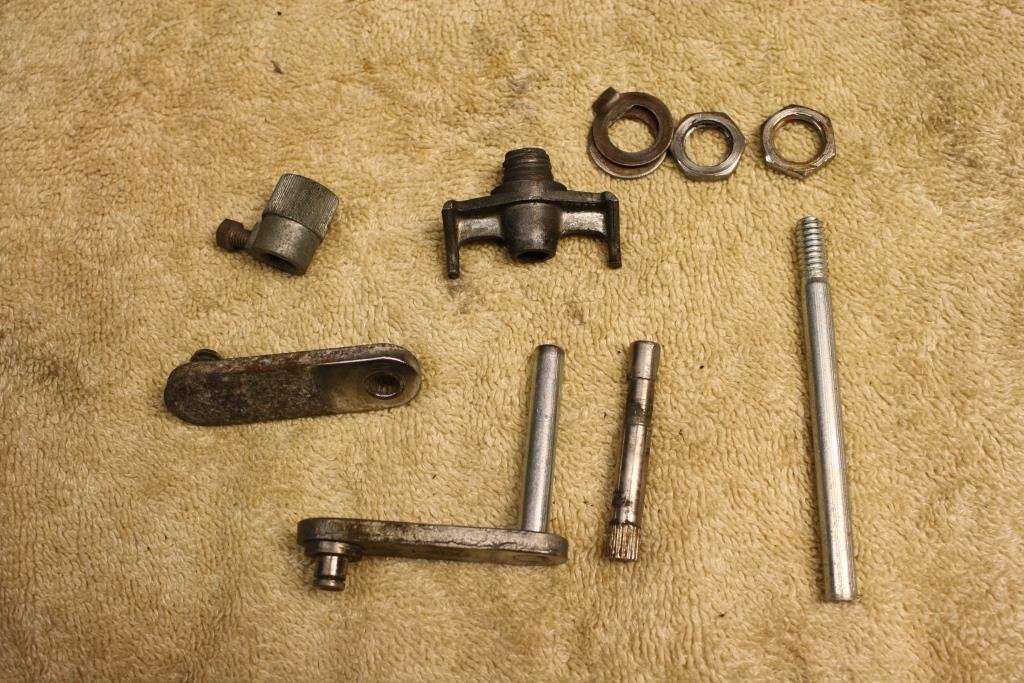
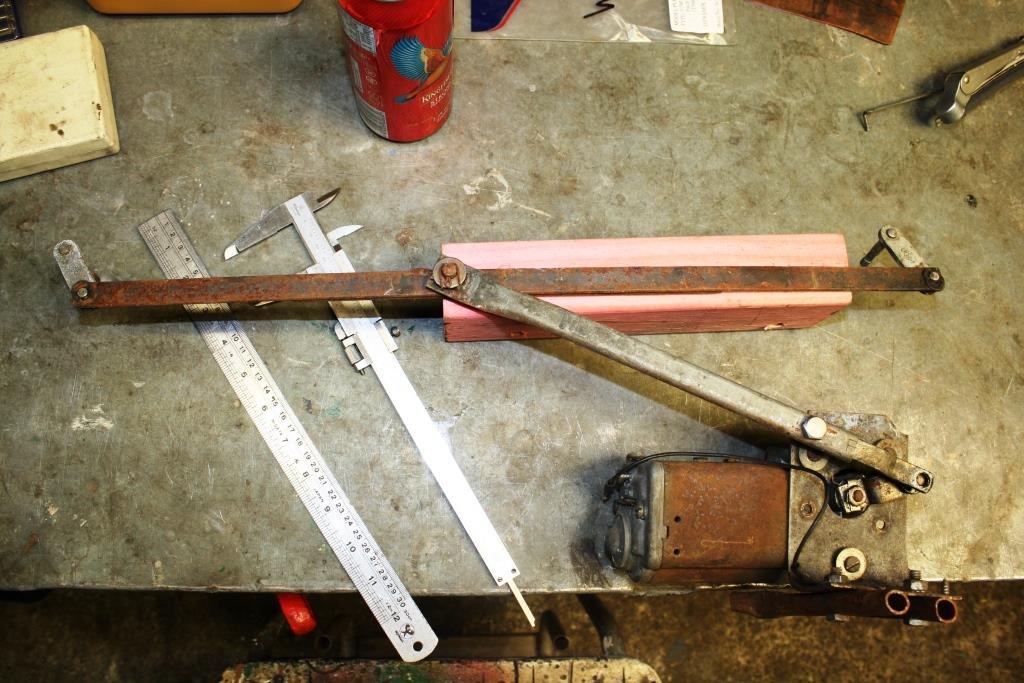
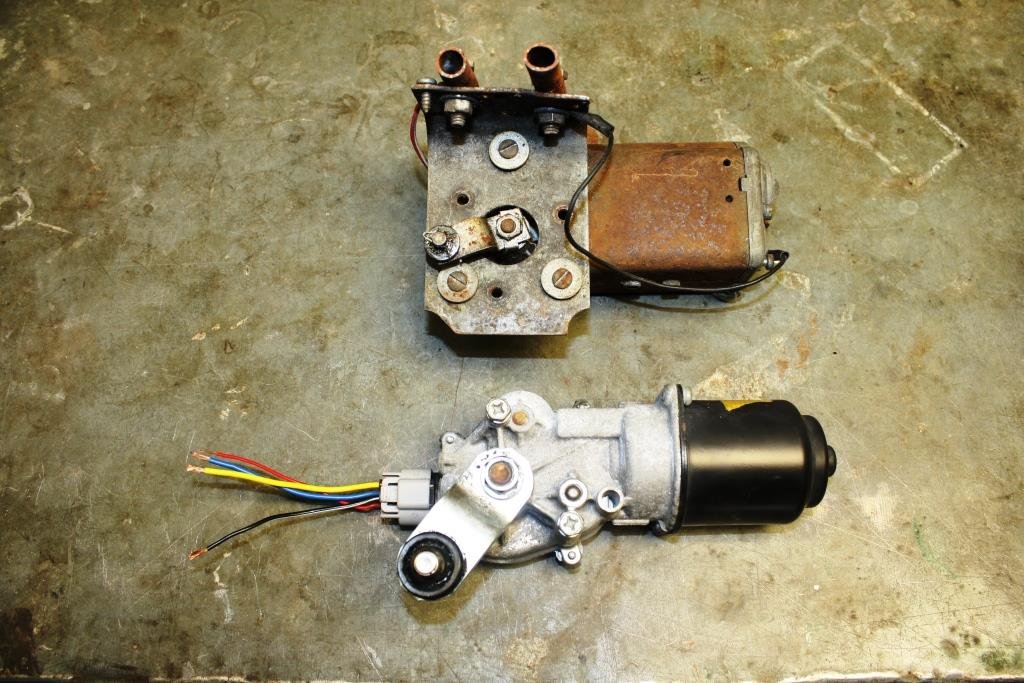
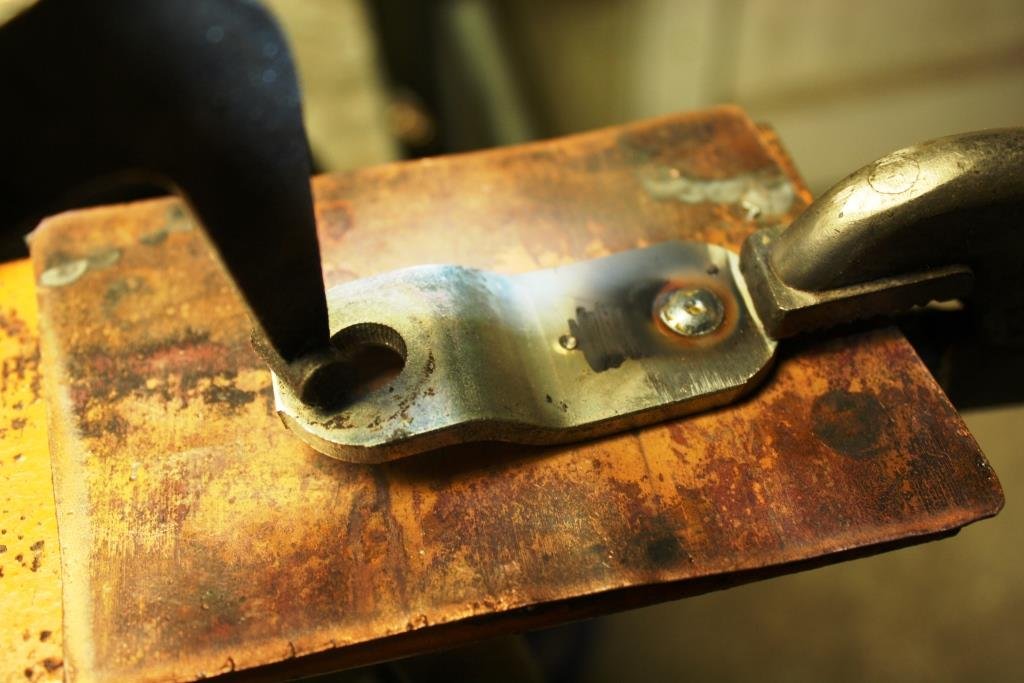
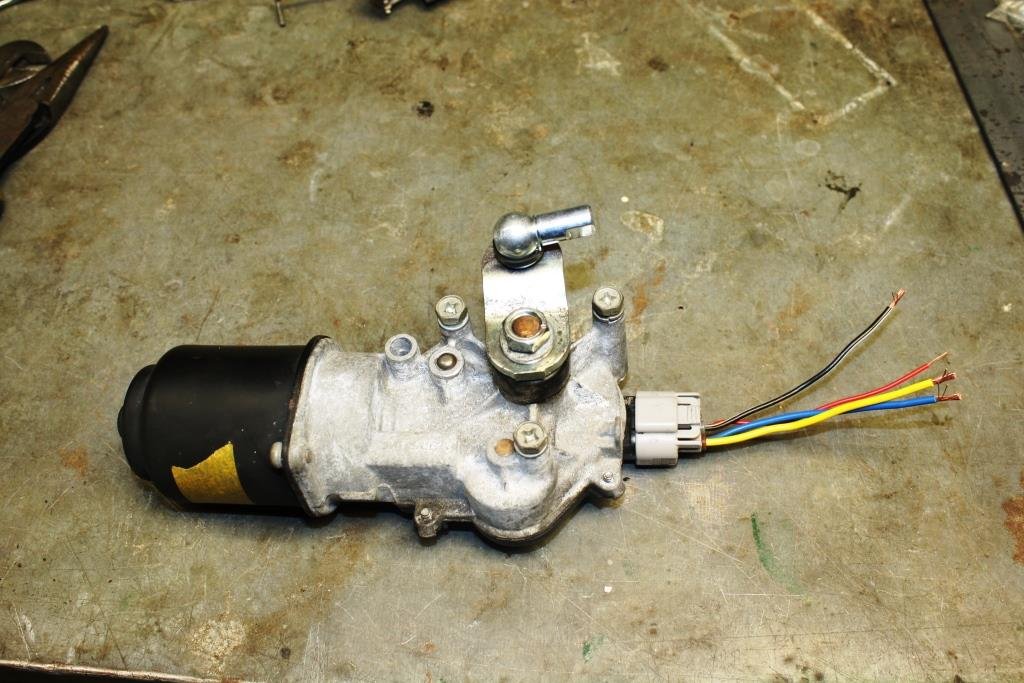
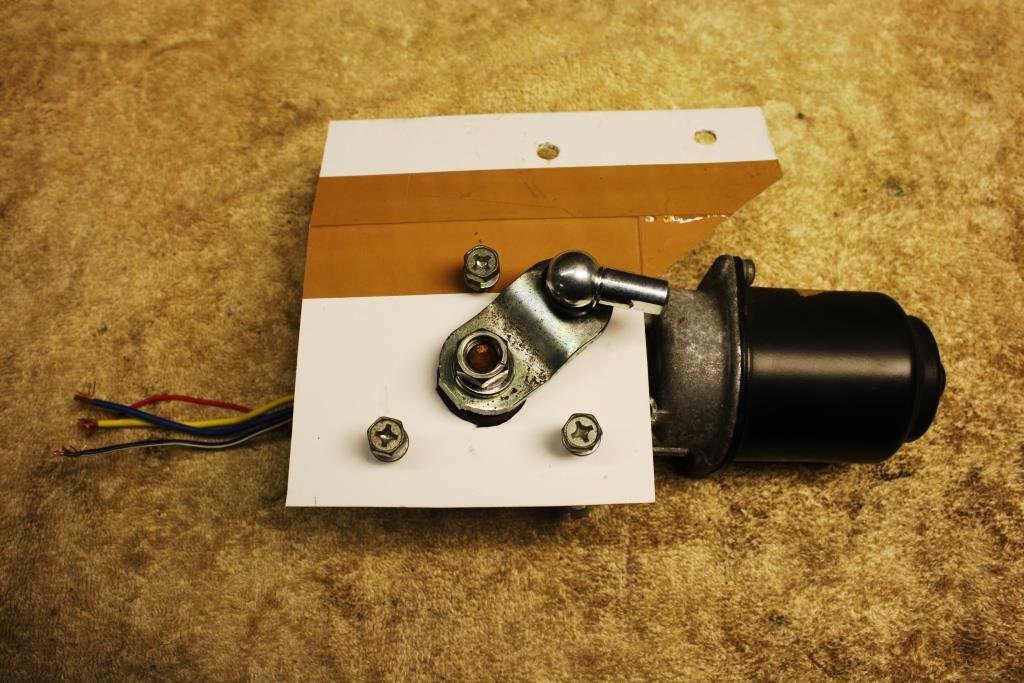
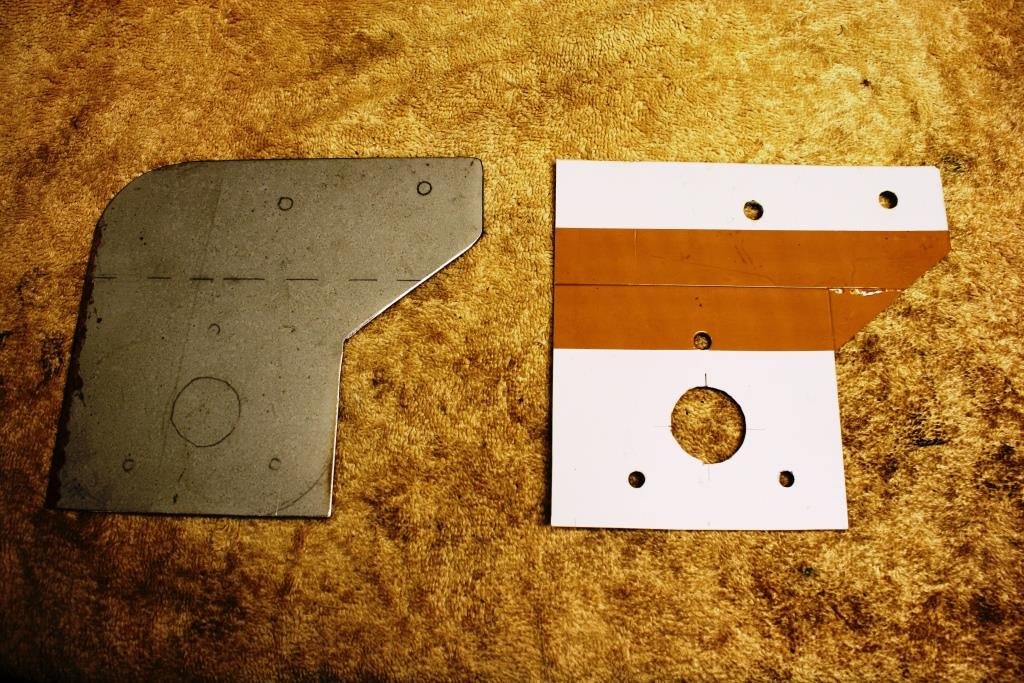
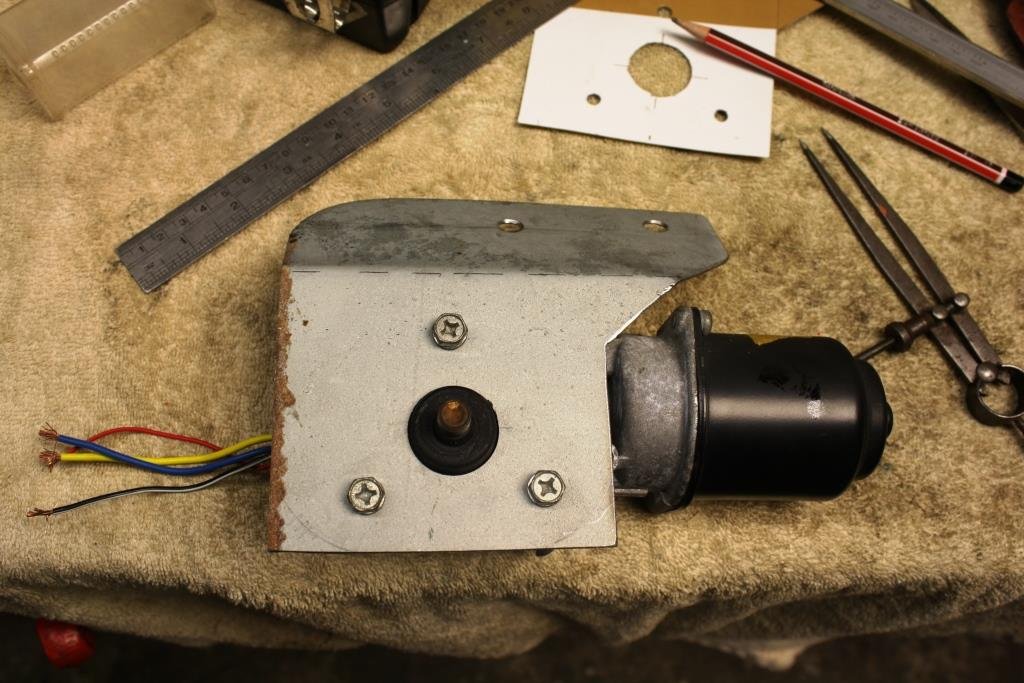
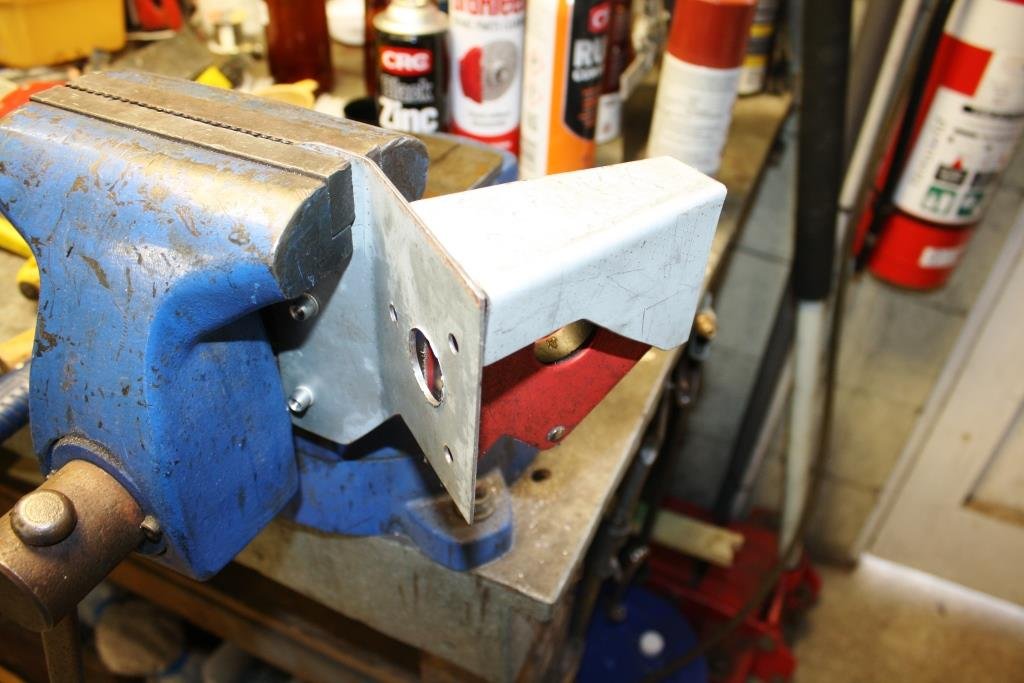
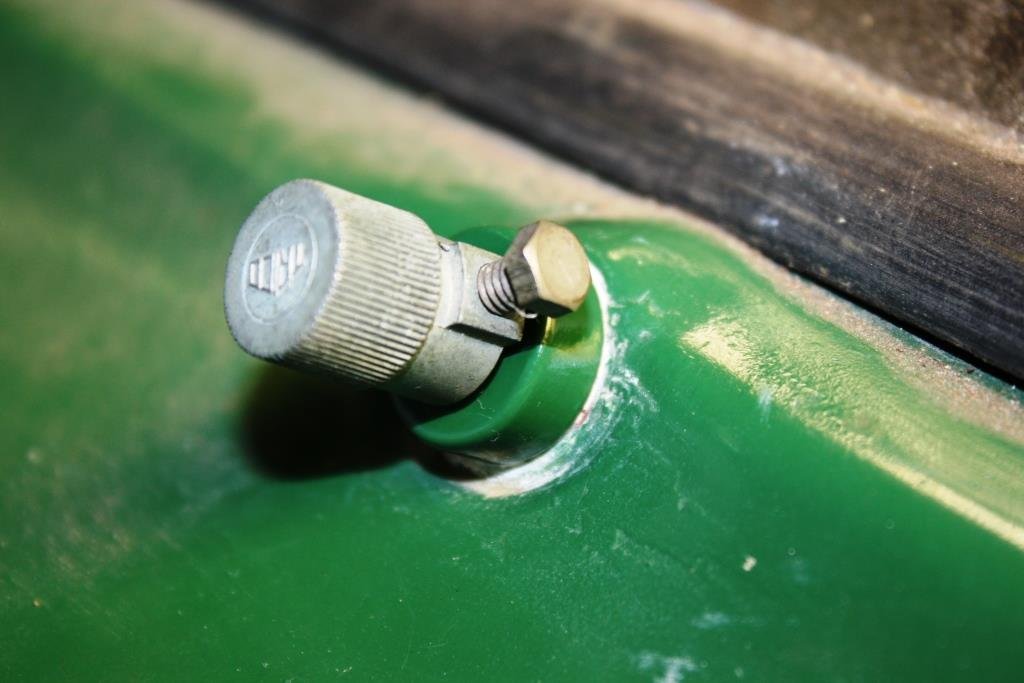
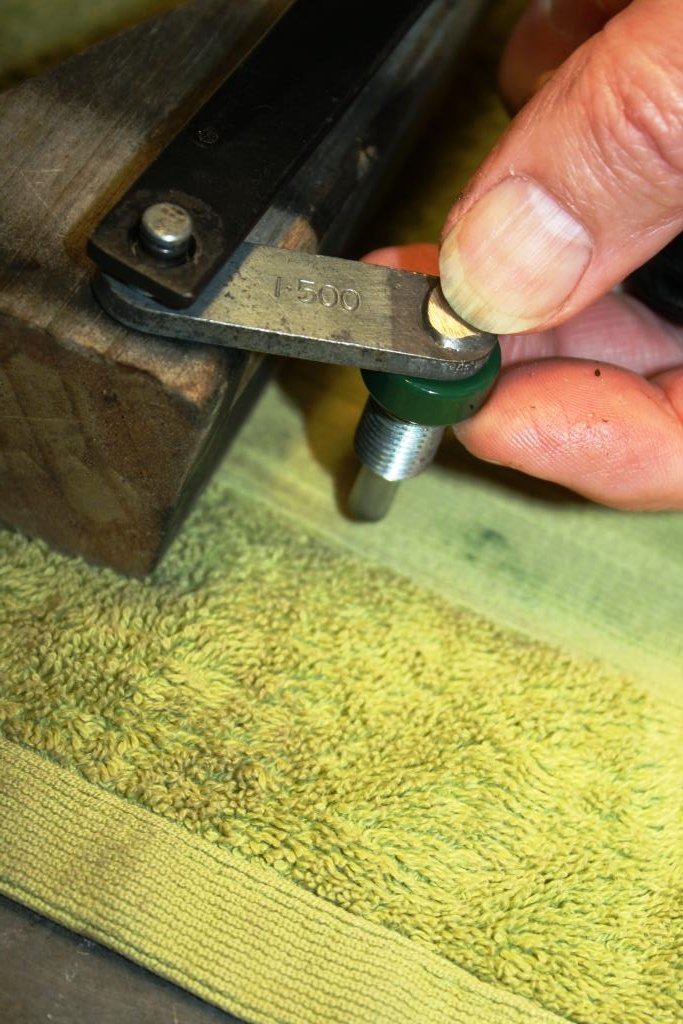
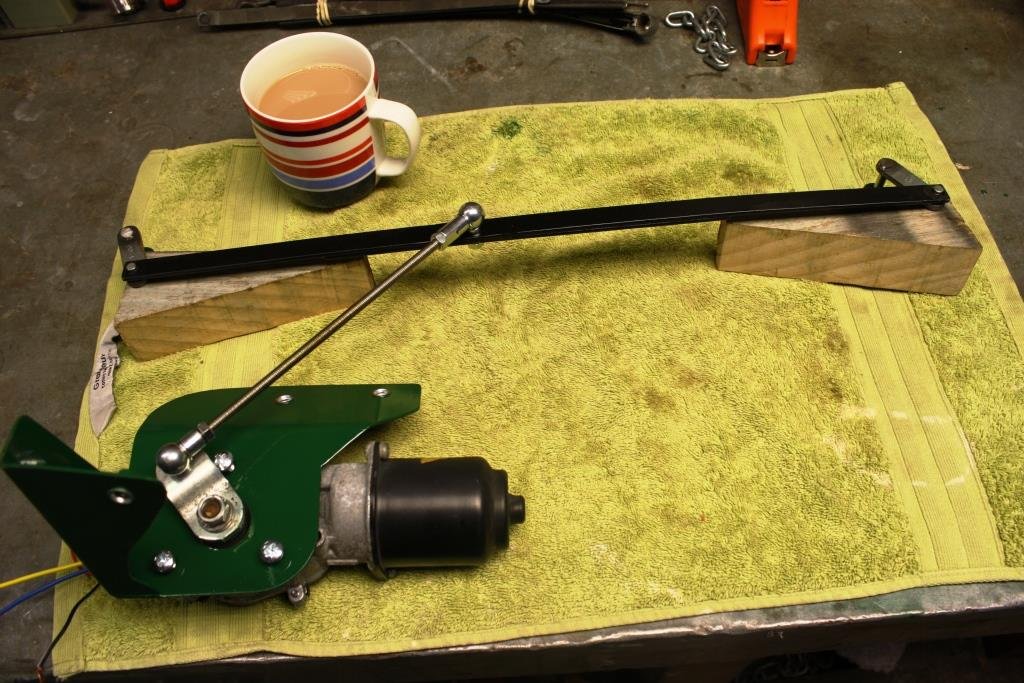
I’m at the stage where I need to make a call on the windscreen wiper setup as there is limited room under the dash and the wiring loom needs to clear the moving parts.. The original pre-war system was driven by a Bowden cable that believe it or not was in turn driven from the camshaft. If you think the old vacuum wipers were crazy, matching engine rpm to wiper speed added a whole new dimension to driving in the rain! It had a cool little AC Delco gearbox with a clutch. I toyed briefly with the idea of powering up the Bowden cable with a small electric motor but due to the overall condition of the system I made the call to start from scratch. I’d done an electric conversion in the early 80’s but it was pretty rough (to say the least) and the “Lucas prince of darkness” wiper motor was locked up solid. I found a Nissan rear window wiper motor that was small and compact……. Old vs new……. I modified the output arm to take an 8mm rose joint. \ And once again fired up the CAD… Some bending and welding….. ….and it tucks under the dash well out of the way of the instrument cluster. The alloy wiper pivots were badly corroded……. So I made up some new ones Some more “insipid green” paint………. A bit of mucking around to get the ratio’s right……… One last assembly on the bench……. And it all tucks away, out of sight behind the dash. Not only does it work it even has two speeds! (I’ll just have to hide the switch somewhere).
2 points
-
Mpw are highly regarded, there’s another guy a stones throw from there (malcolm) maclean metal spray who does the same sort of work who would be the more cost effective option for weld/spray/machine/assemble stuff1 point
-
Justin Neil Engineering might be a good option.1 point
-
The remaining pistons have proven to be high quality and free of defects, ideal for use in your next build1 point
-
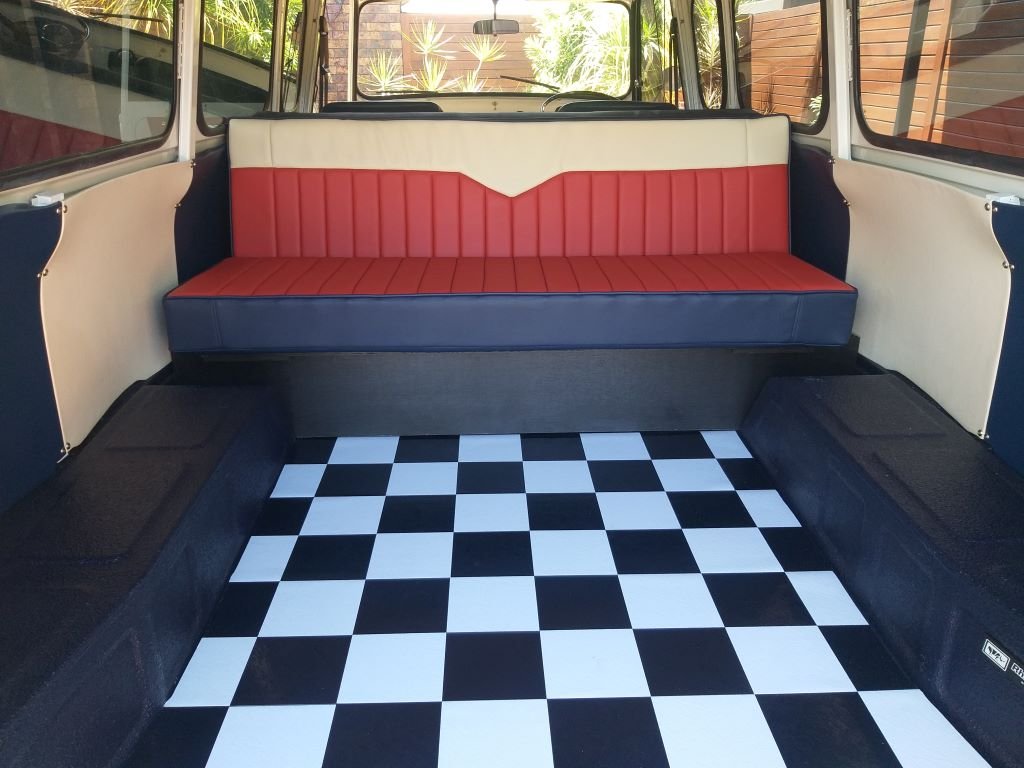
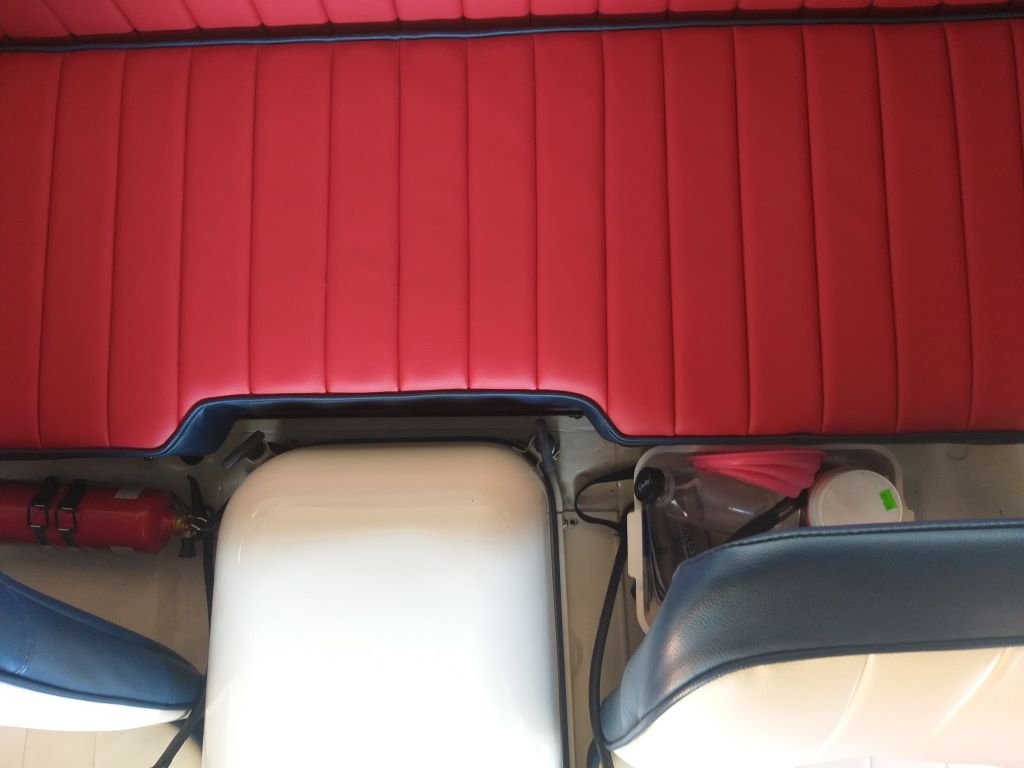
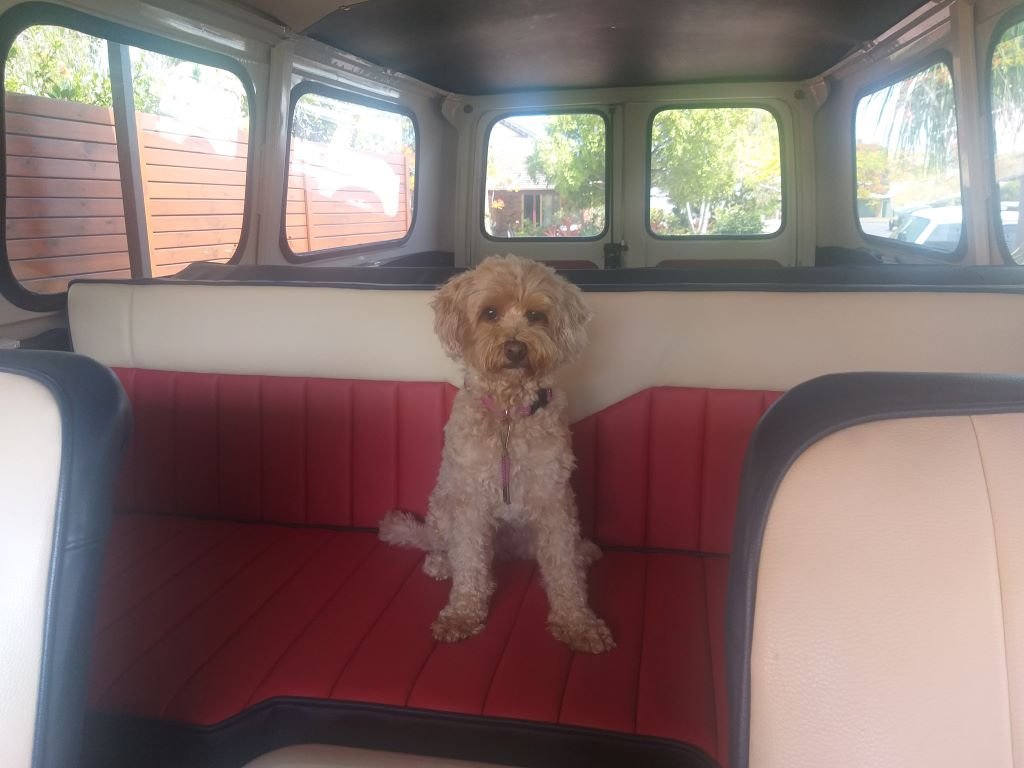
This year is one of those significant wedding anniversaries for Mrs Flash and I, so a few weeks back I asked my lady what she would like. Now most ladies would ask for some new jewellery or maybe a new outfit or two, or perhaps a romantic weekend away at some fancy resort. But that's just not how my girl rolls. Without even thinking about it she immediately asked if we could rather spend the money getting the upholstery work done for the back of the Thames. Jeez, no wonder I love this woman so much. So, with the decision made off I headed to town to visit two of our local upholstery places. The first stop was at the auto trimmers. Now I get that these guys do nothing but cars all day, but I was still expecting the chap to at least comment on the Thames, but not a peep. He noseyed around with a measuring tape and then proceeded to give me one of those loosey goosey "between this and this" verbal quotes where you immediately know that the final figure is going to be nowhere near the bottom figure quoted and you are likely to get very little change back from the upper figure quoted. Anyhoo, undaunted by his lack of enthusiasm I headed off to the next stop which is a place that mainly specialises in recovering furniture. Now as I pulled into their driveway, I spotted this guy scurrying across to greet me and we proceeded to yarn about the Thames for a good 10 minutes before we even started talking business. It turns out that Bill is originally from Masterton where his dad ran a motor trimming business back in the day. The minute that Bill was big enough to reach the pedals on the sewing machine he was put to work and by the age of eight he was already doing diamond stitching which was all the rage back then. We chatted a bit about what I was looking for style wise and Bill was already throwing in some really good suggestions, so I knew I was on to the right guy. We looked at some samples, Bill took some measurements and the next minute Caroline the owner handed me a written quote that was significantly less than the first quote I got. Winner! Roll forward a few weeks whilst Caroline sourced the marine grade vinyl material and some top-quality foam, and I then took the van around for final measurements. Because the cushions are loose, I didn't have to leave the van with them which was another plus. Roll forward another week and late yesterday I got a call from Caroline to say that the cushions were ready for final fitting, so we wheeled through first thing this morning and Bill laid down some velcro to keep everything in place and then proceeded to do the final fit up. To say that we are blown away with the results would be an understatement. The job has turned out absolutely amazing. Rear facing couch looks like so: Bill even shaped the base of the front facing "dog box" so that it clears the engine cover tie downs: And lastly even our doggo seems happy with her comfy wee seat. Thanks for looking.
1 point
-
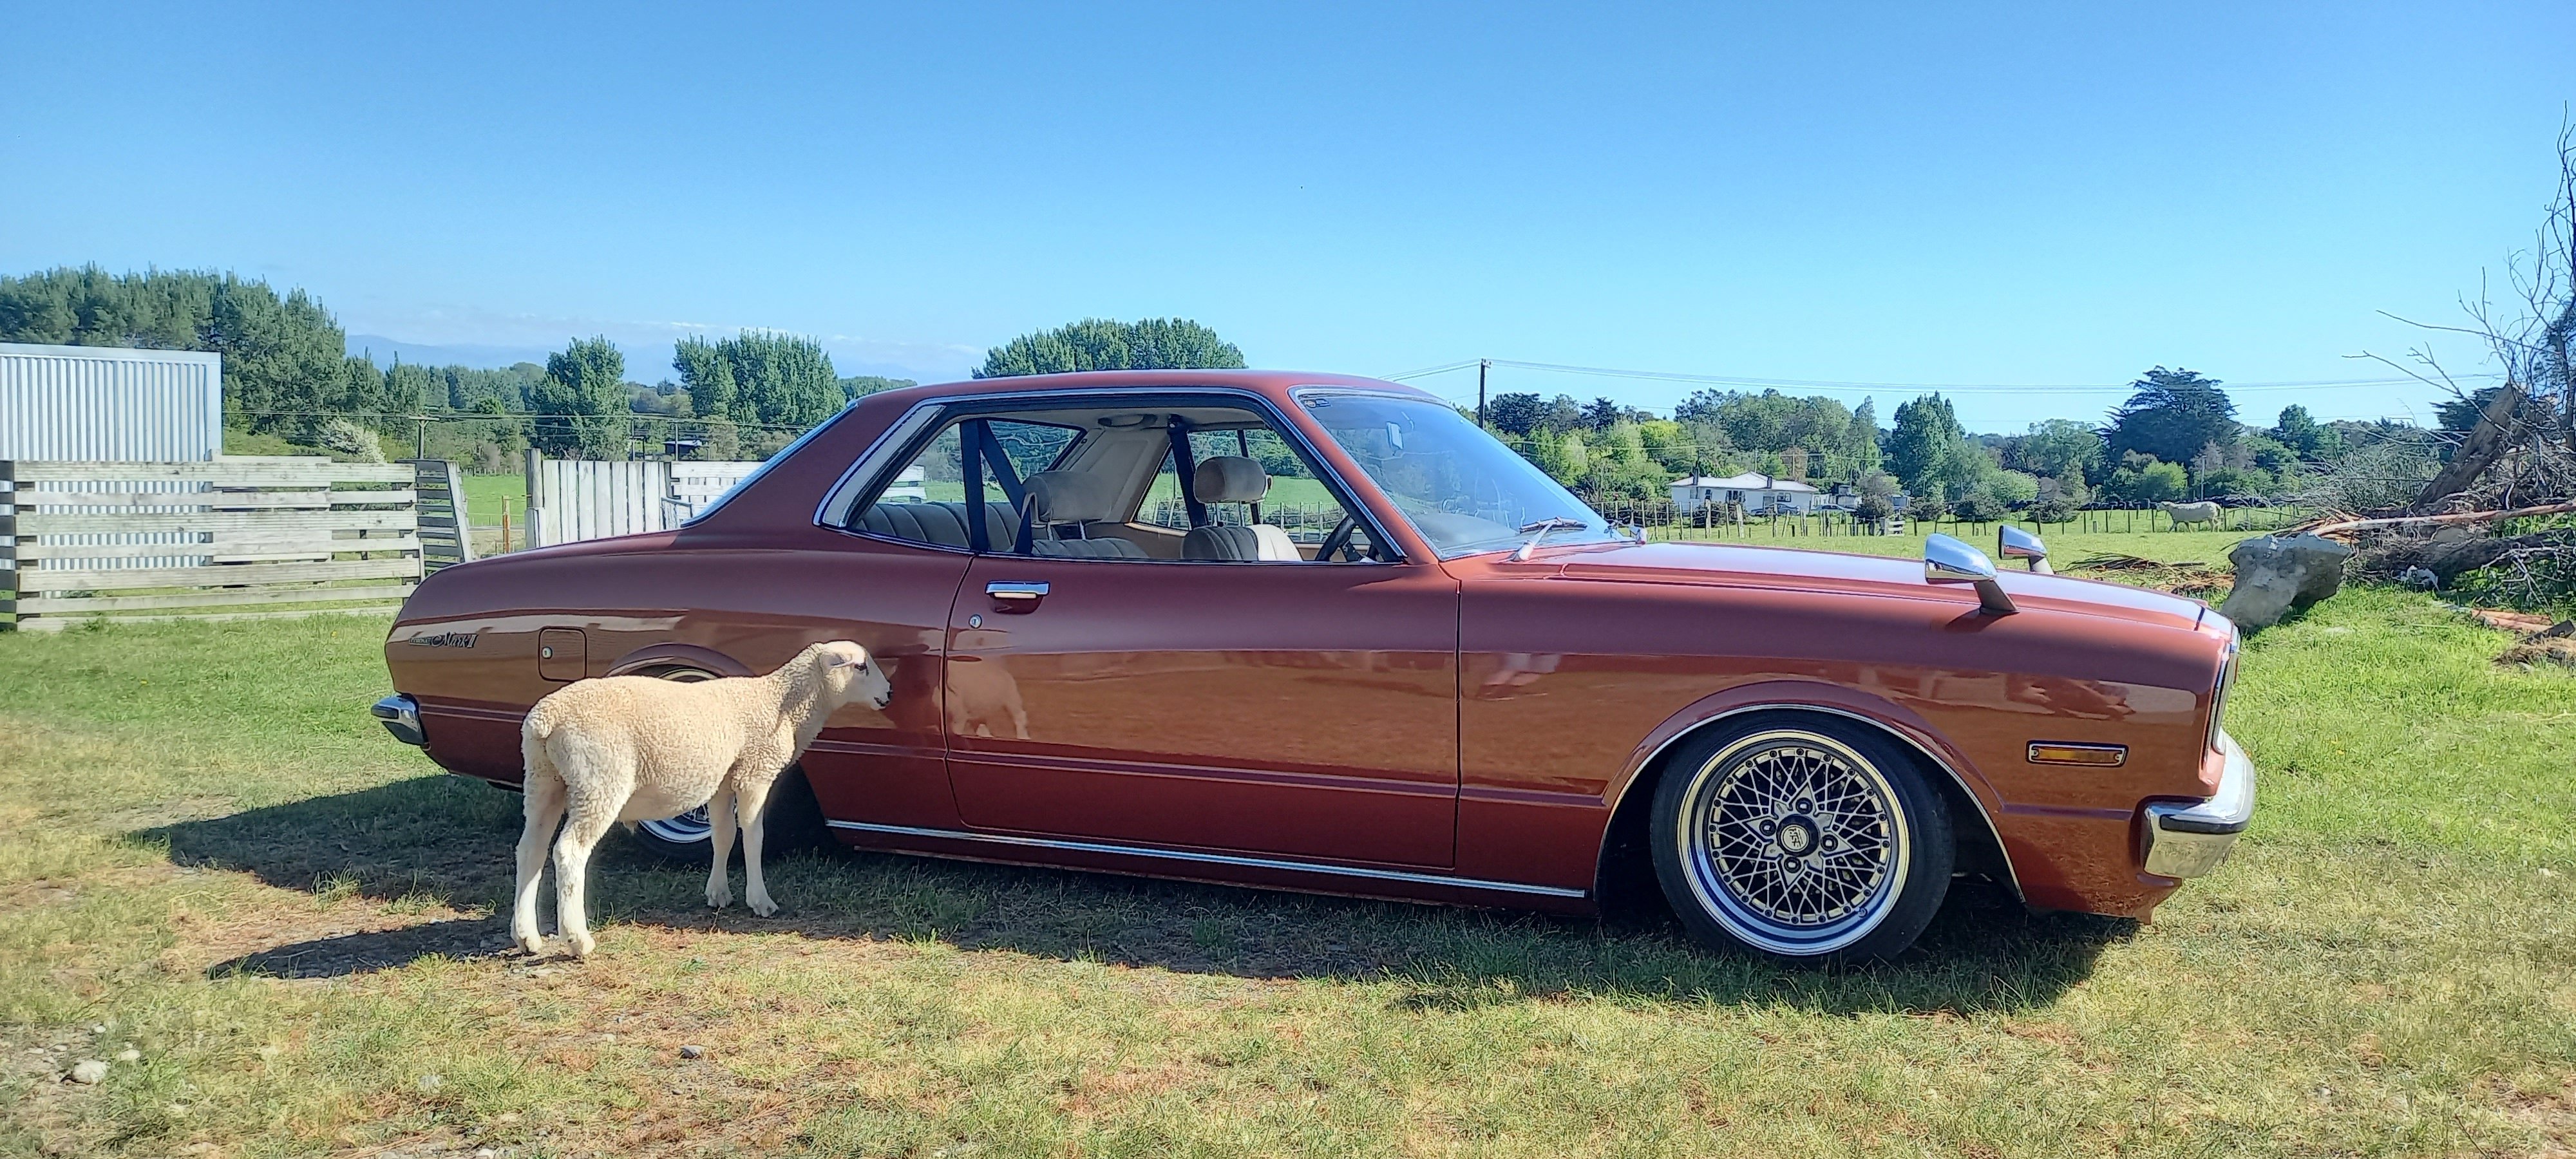
Went to Feilding and got to hang with me main man @Flauski Had a curry and some beers. Wanked him off while he was sleeping. Popped into the MG Classic and had a fizz over the cool cars. Drove the Toyota out to Apiti for a feed. Waved to the local cop, twice. Parked the car back in @Flauskished. Returned home to New Plymouth on Sunday. The only thing missing from a perfect weekend was someone/anyone wanking me off. Till next time @Flauski
1 point
-
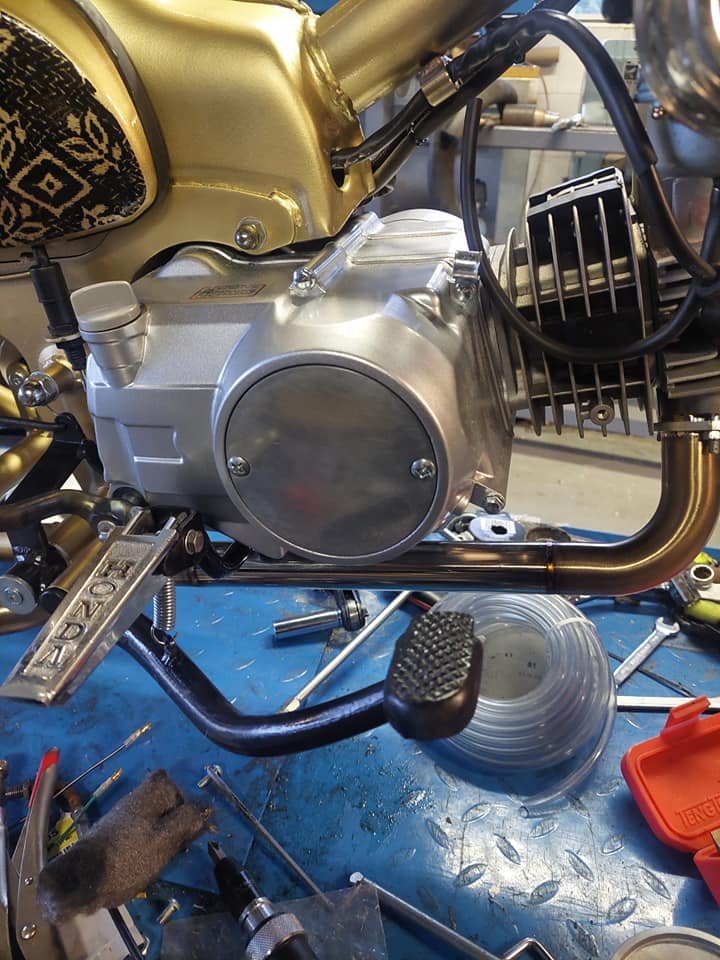
To get rid of the lifan badges I ground off the rib on the clutch cover and polished that up then mounted a ''honda'' side cover from mbike that i bought from a mate 2nd hand and gave that a minor polish to contrast the painted cases. This bikes had more small touches to it than Jimmy Saville did on top of the pops!
1 point
-
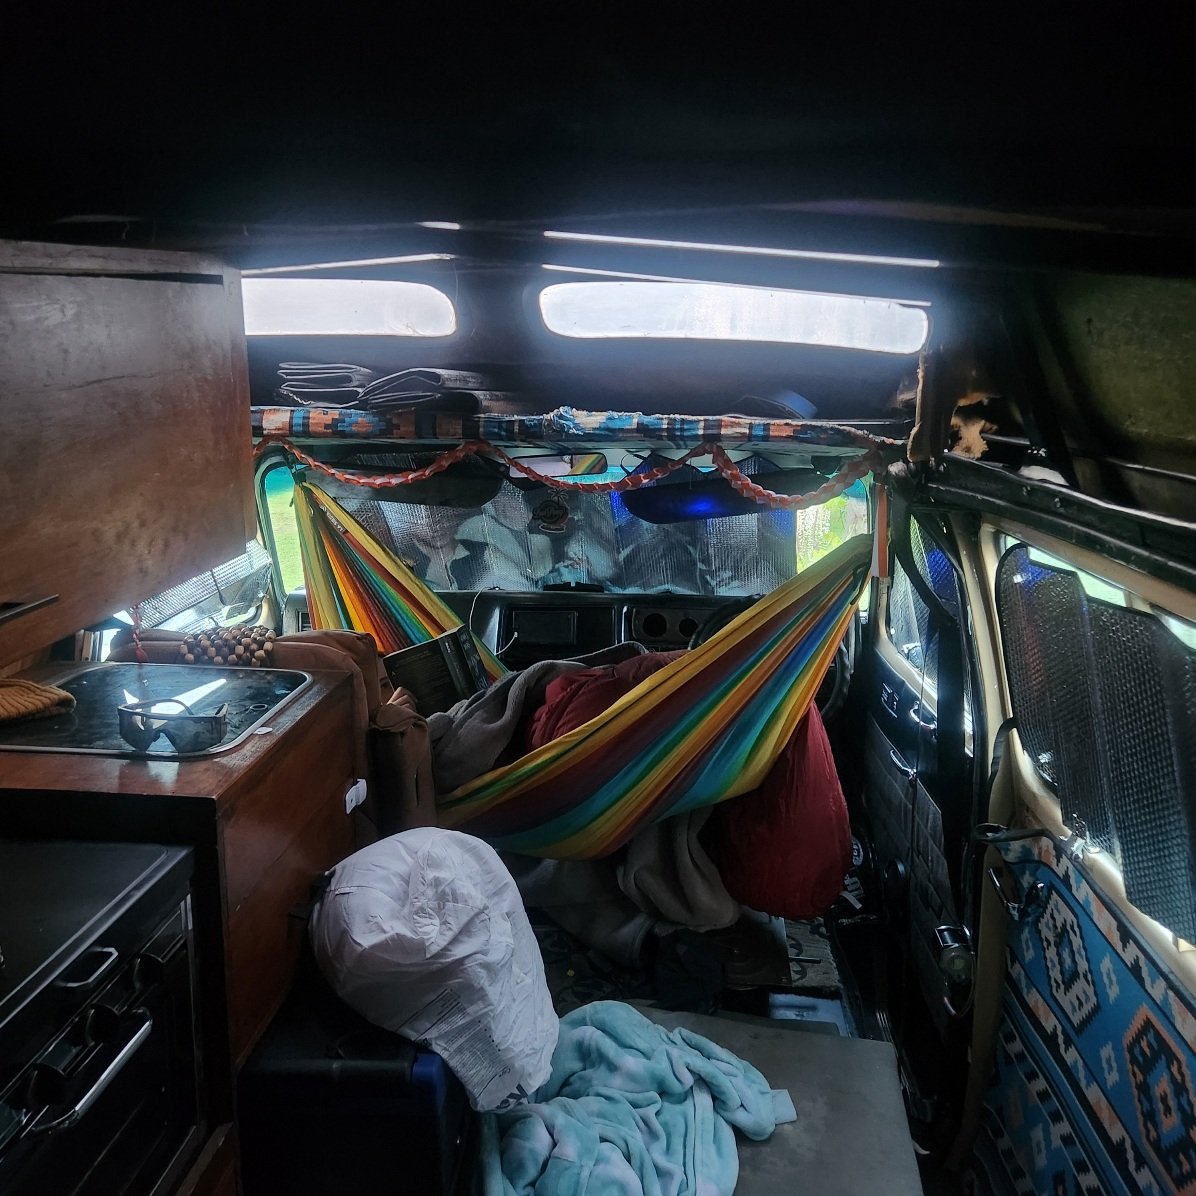
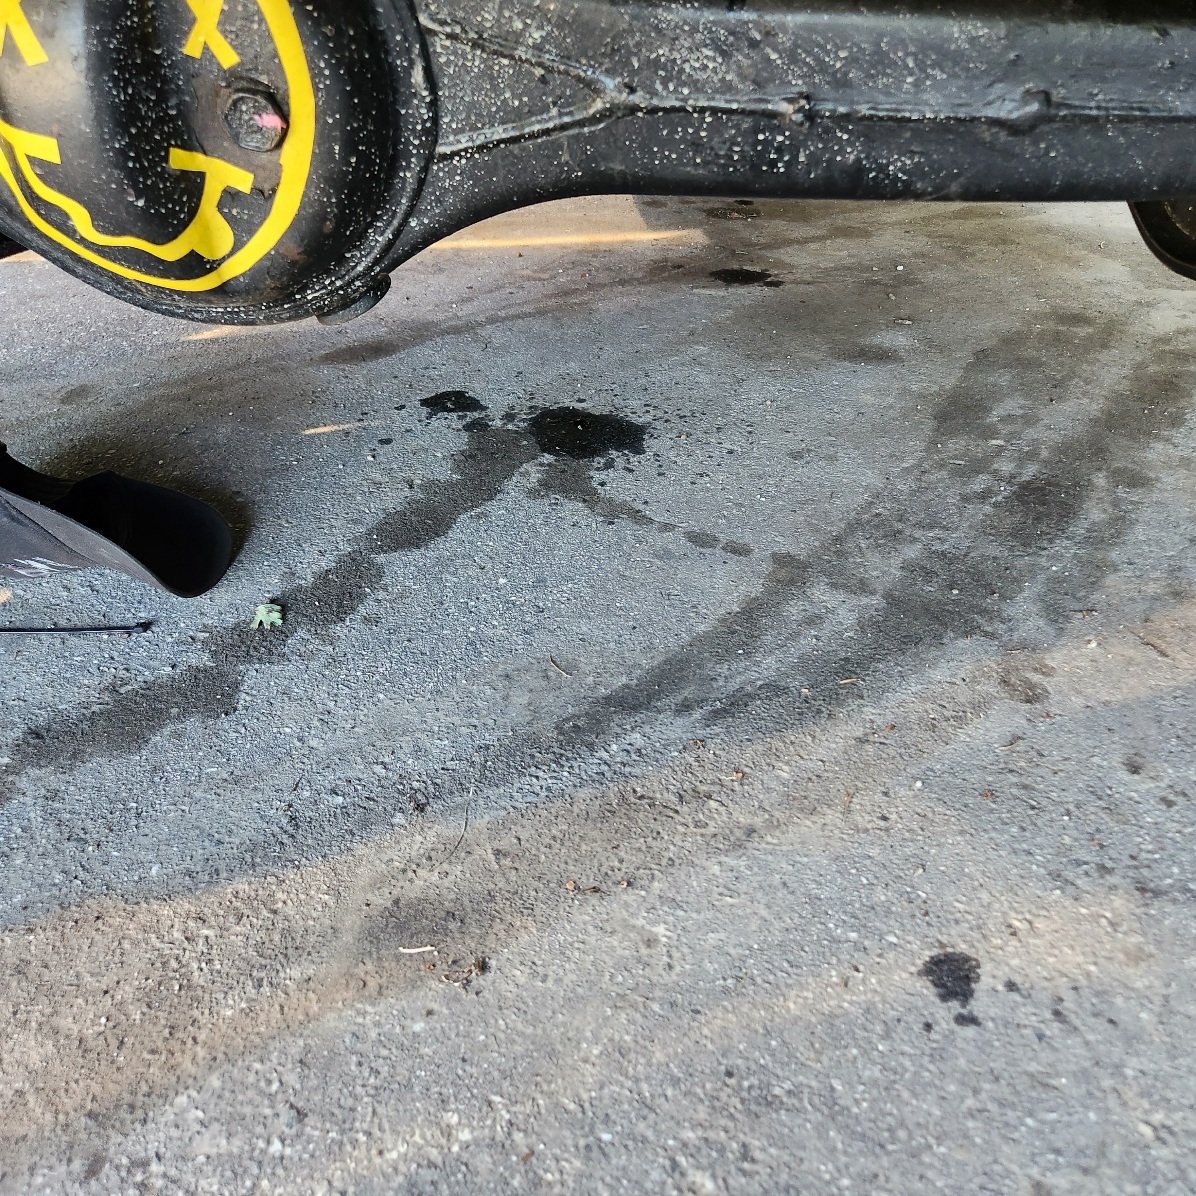
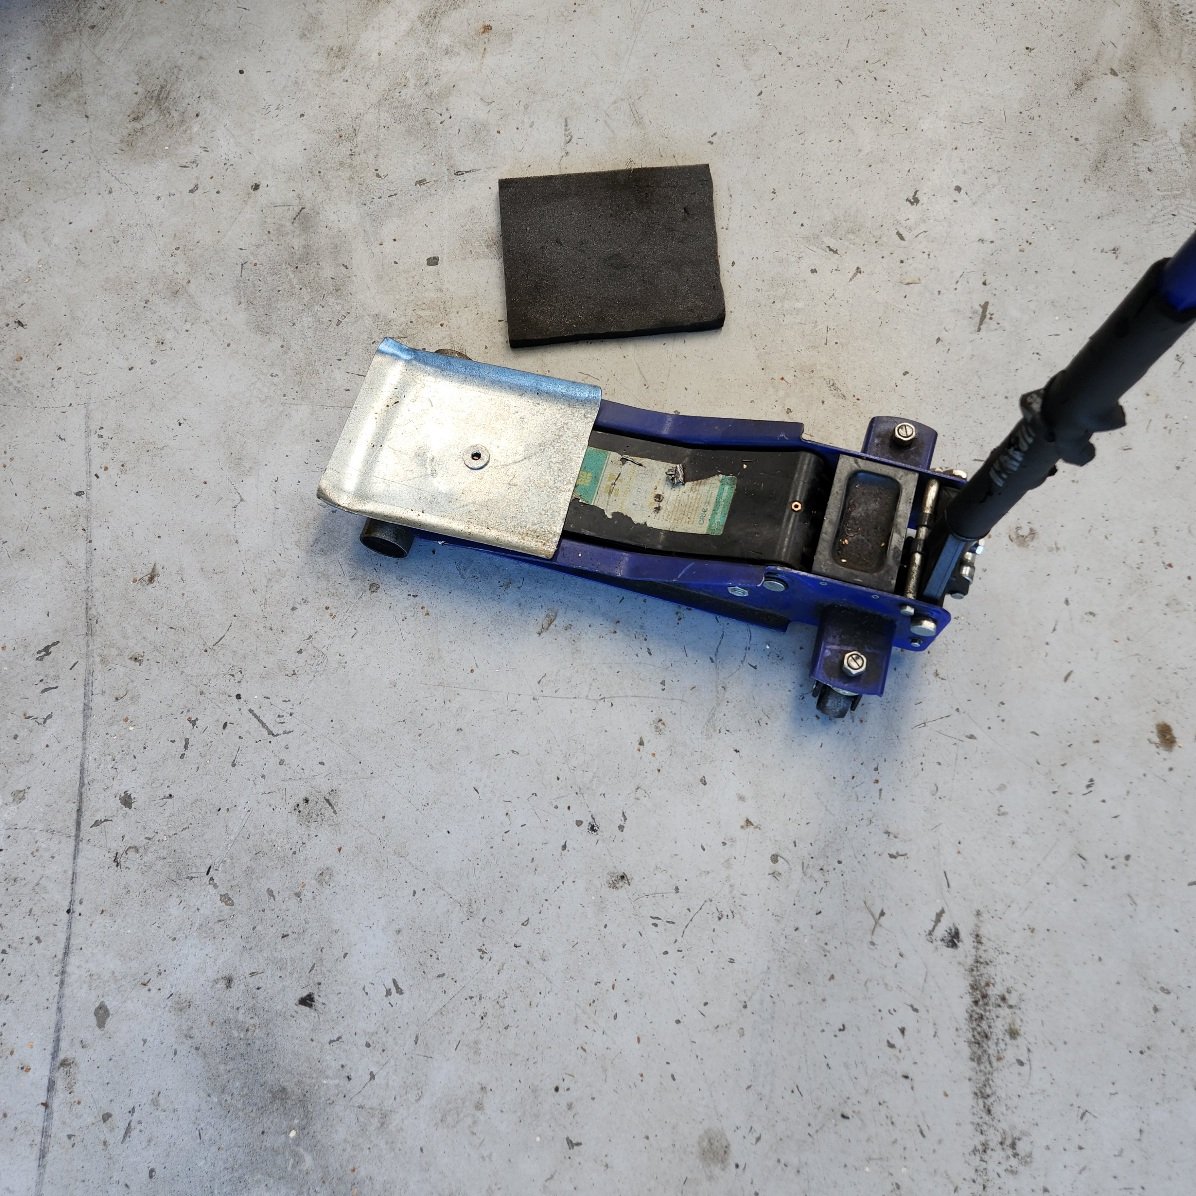
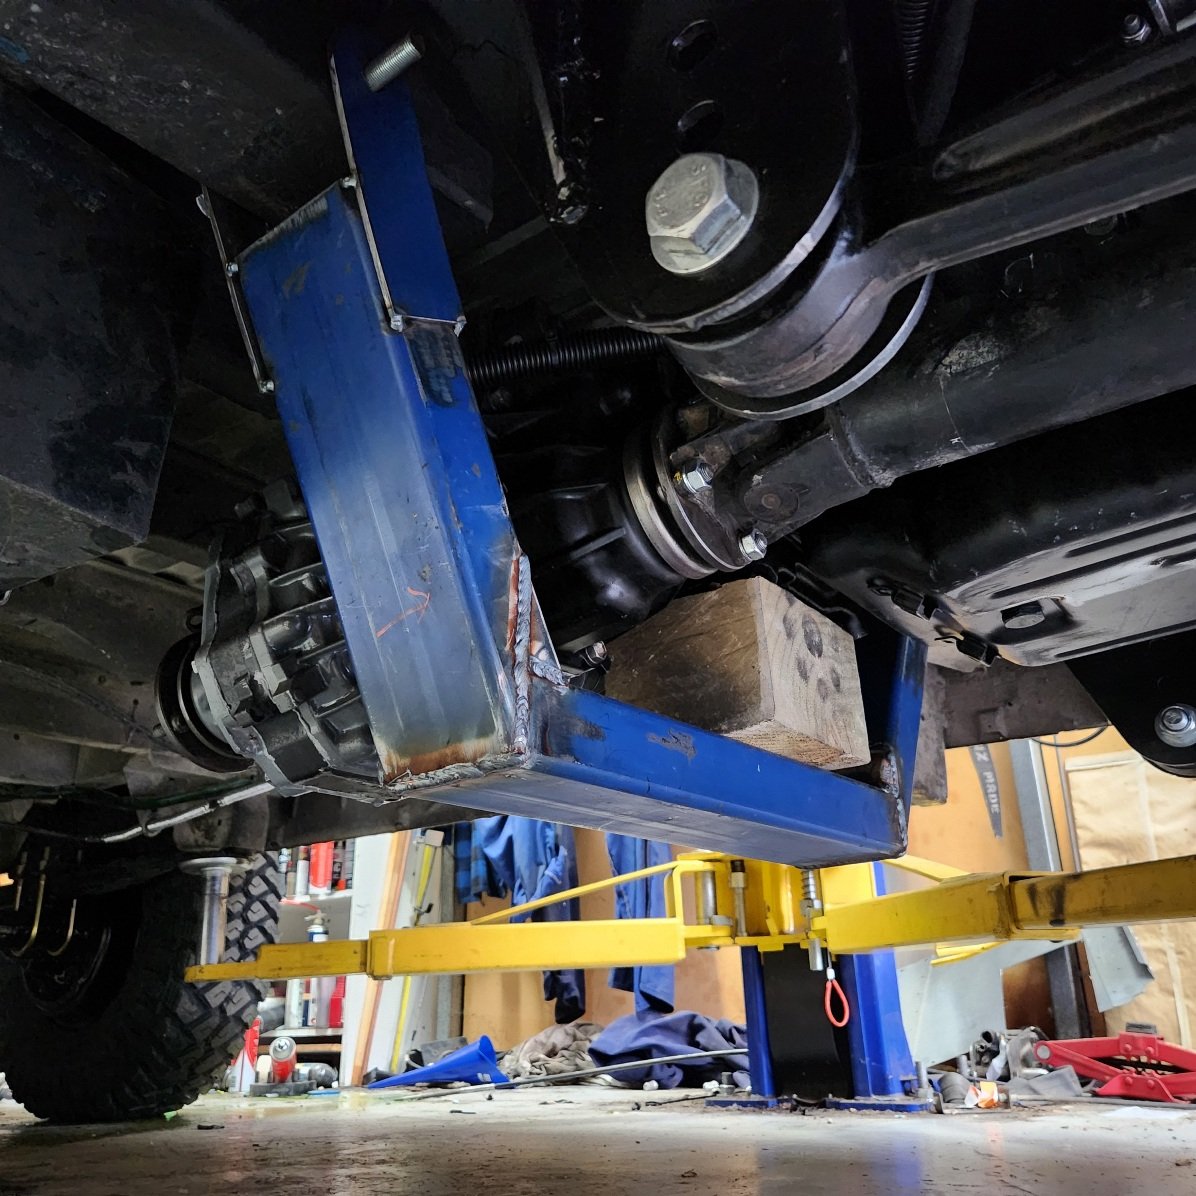
Welp, 3 steps forward and 1 backward up in here. I got the shits with the flexplate setup and changed it all. The only reason I can come up with is that the counterweight grabbed off centre when I put it on then wobbled loose once I'd driven it. The bolts weren't bottomed out in the crank and came out easy, the spacer I thought was missing isn't used in cruisers and I never checked flexplate runout once it was all installed which might have told a story. Anyway back together and it's going good. Did some at home camping past night, this is the groms hammock up front, she loves it, I wouldn't be able to get in or out of it. The reason for the at home bit was we went to leave and my seat hinge snapped and fell backwards, and I noticed this on driveway It's trans oil and looks to me like pump seal has ruptured, I'm assuming I tore it messing with torque converter, fuck it all. I'll pull it again this week once new seal shows. I bolted and old chunk of trailer wheel arch to the jack to drop the trans in and out, works a treat It still looks cool buttfuck. Cert next week hopefully.
1 point
-
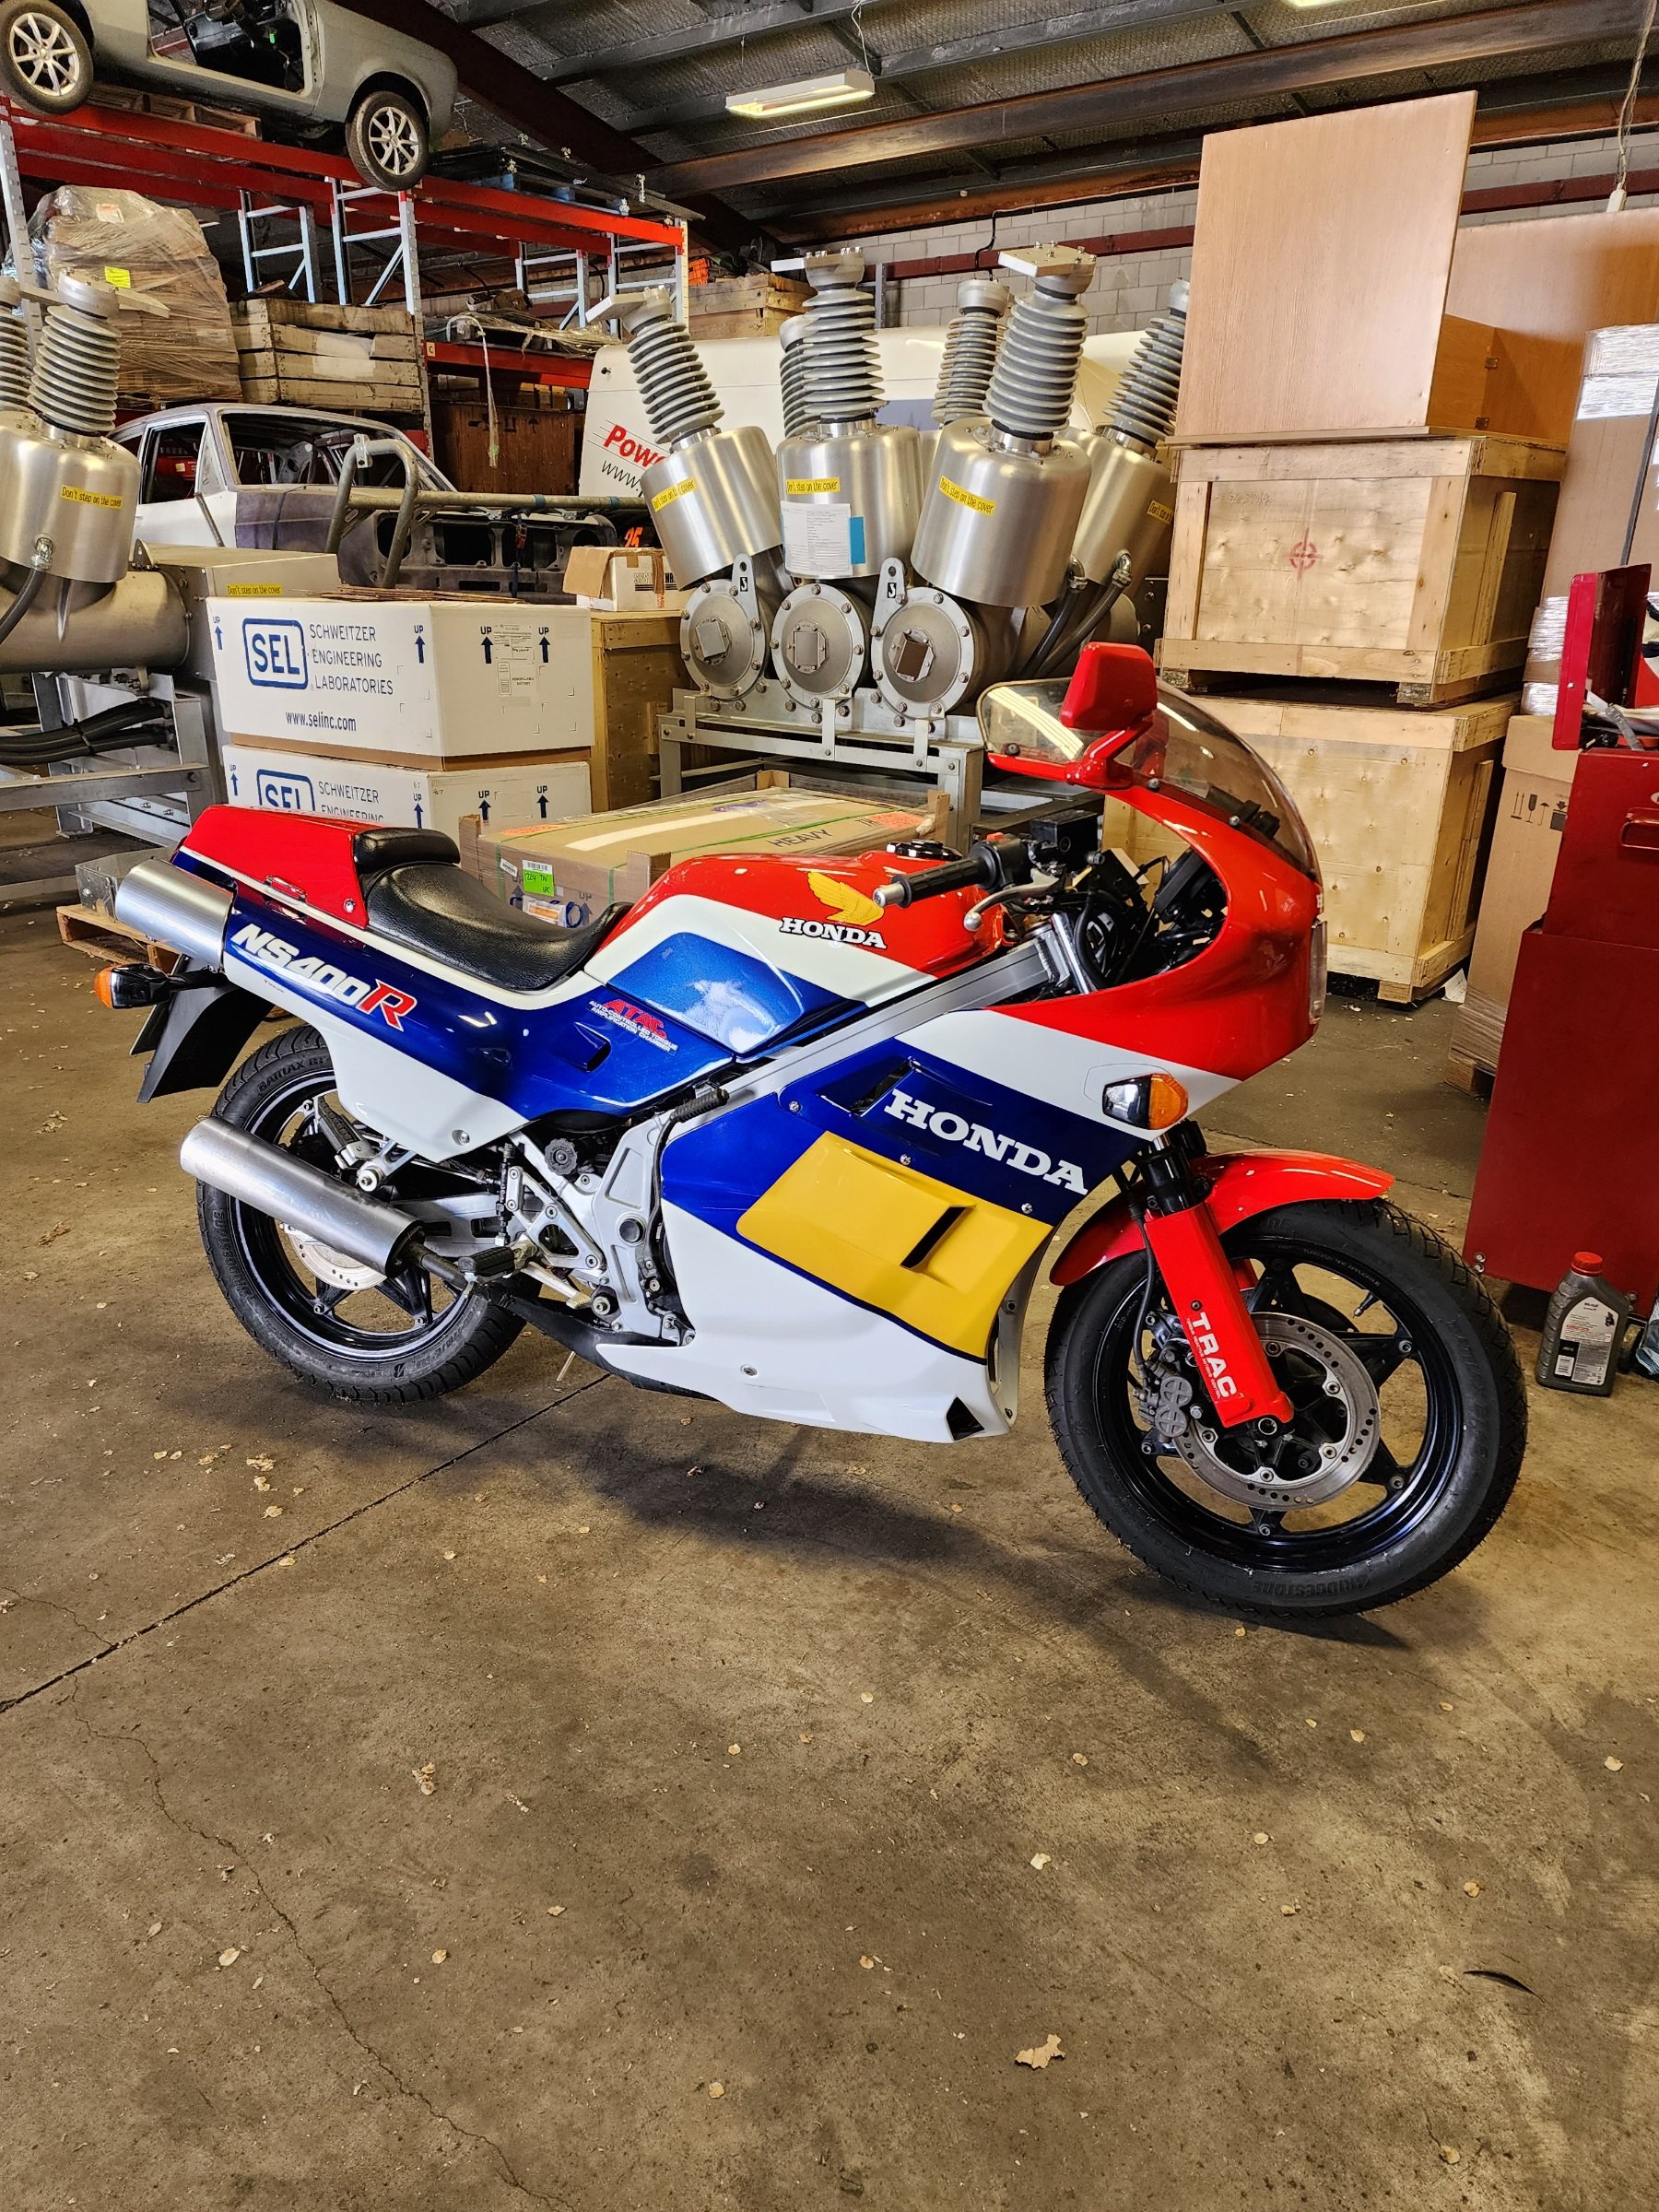
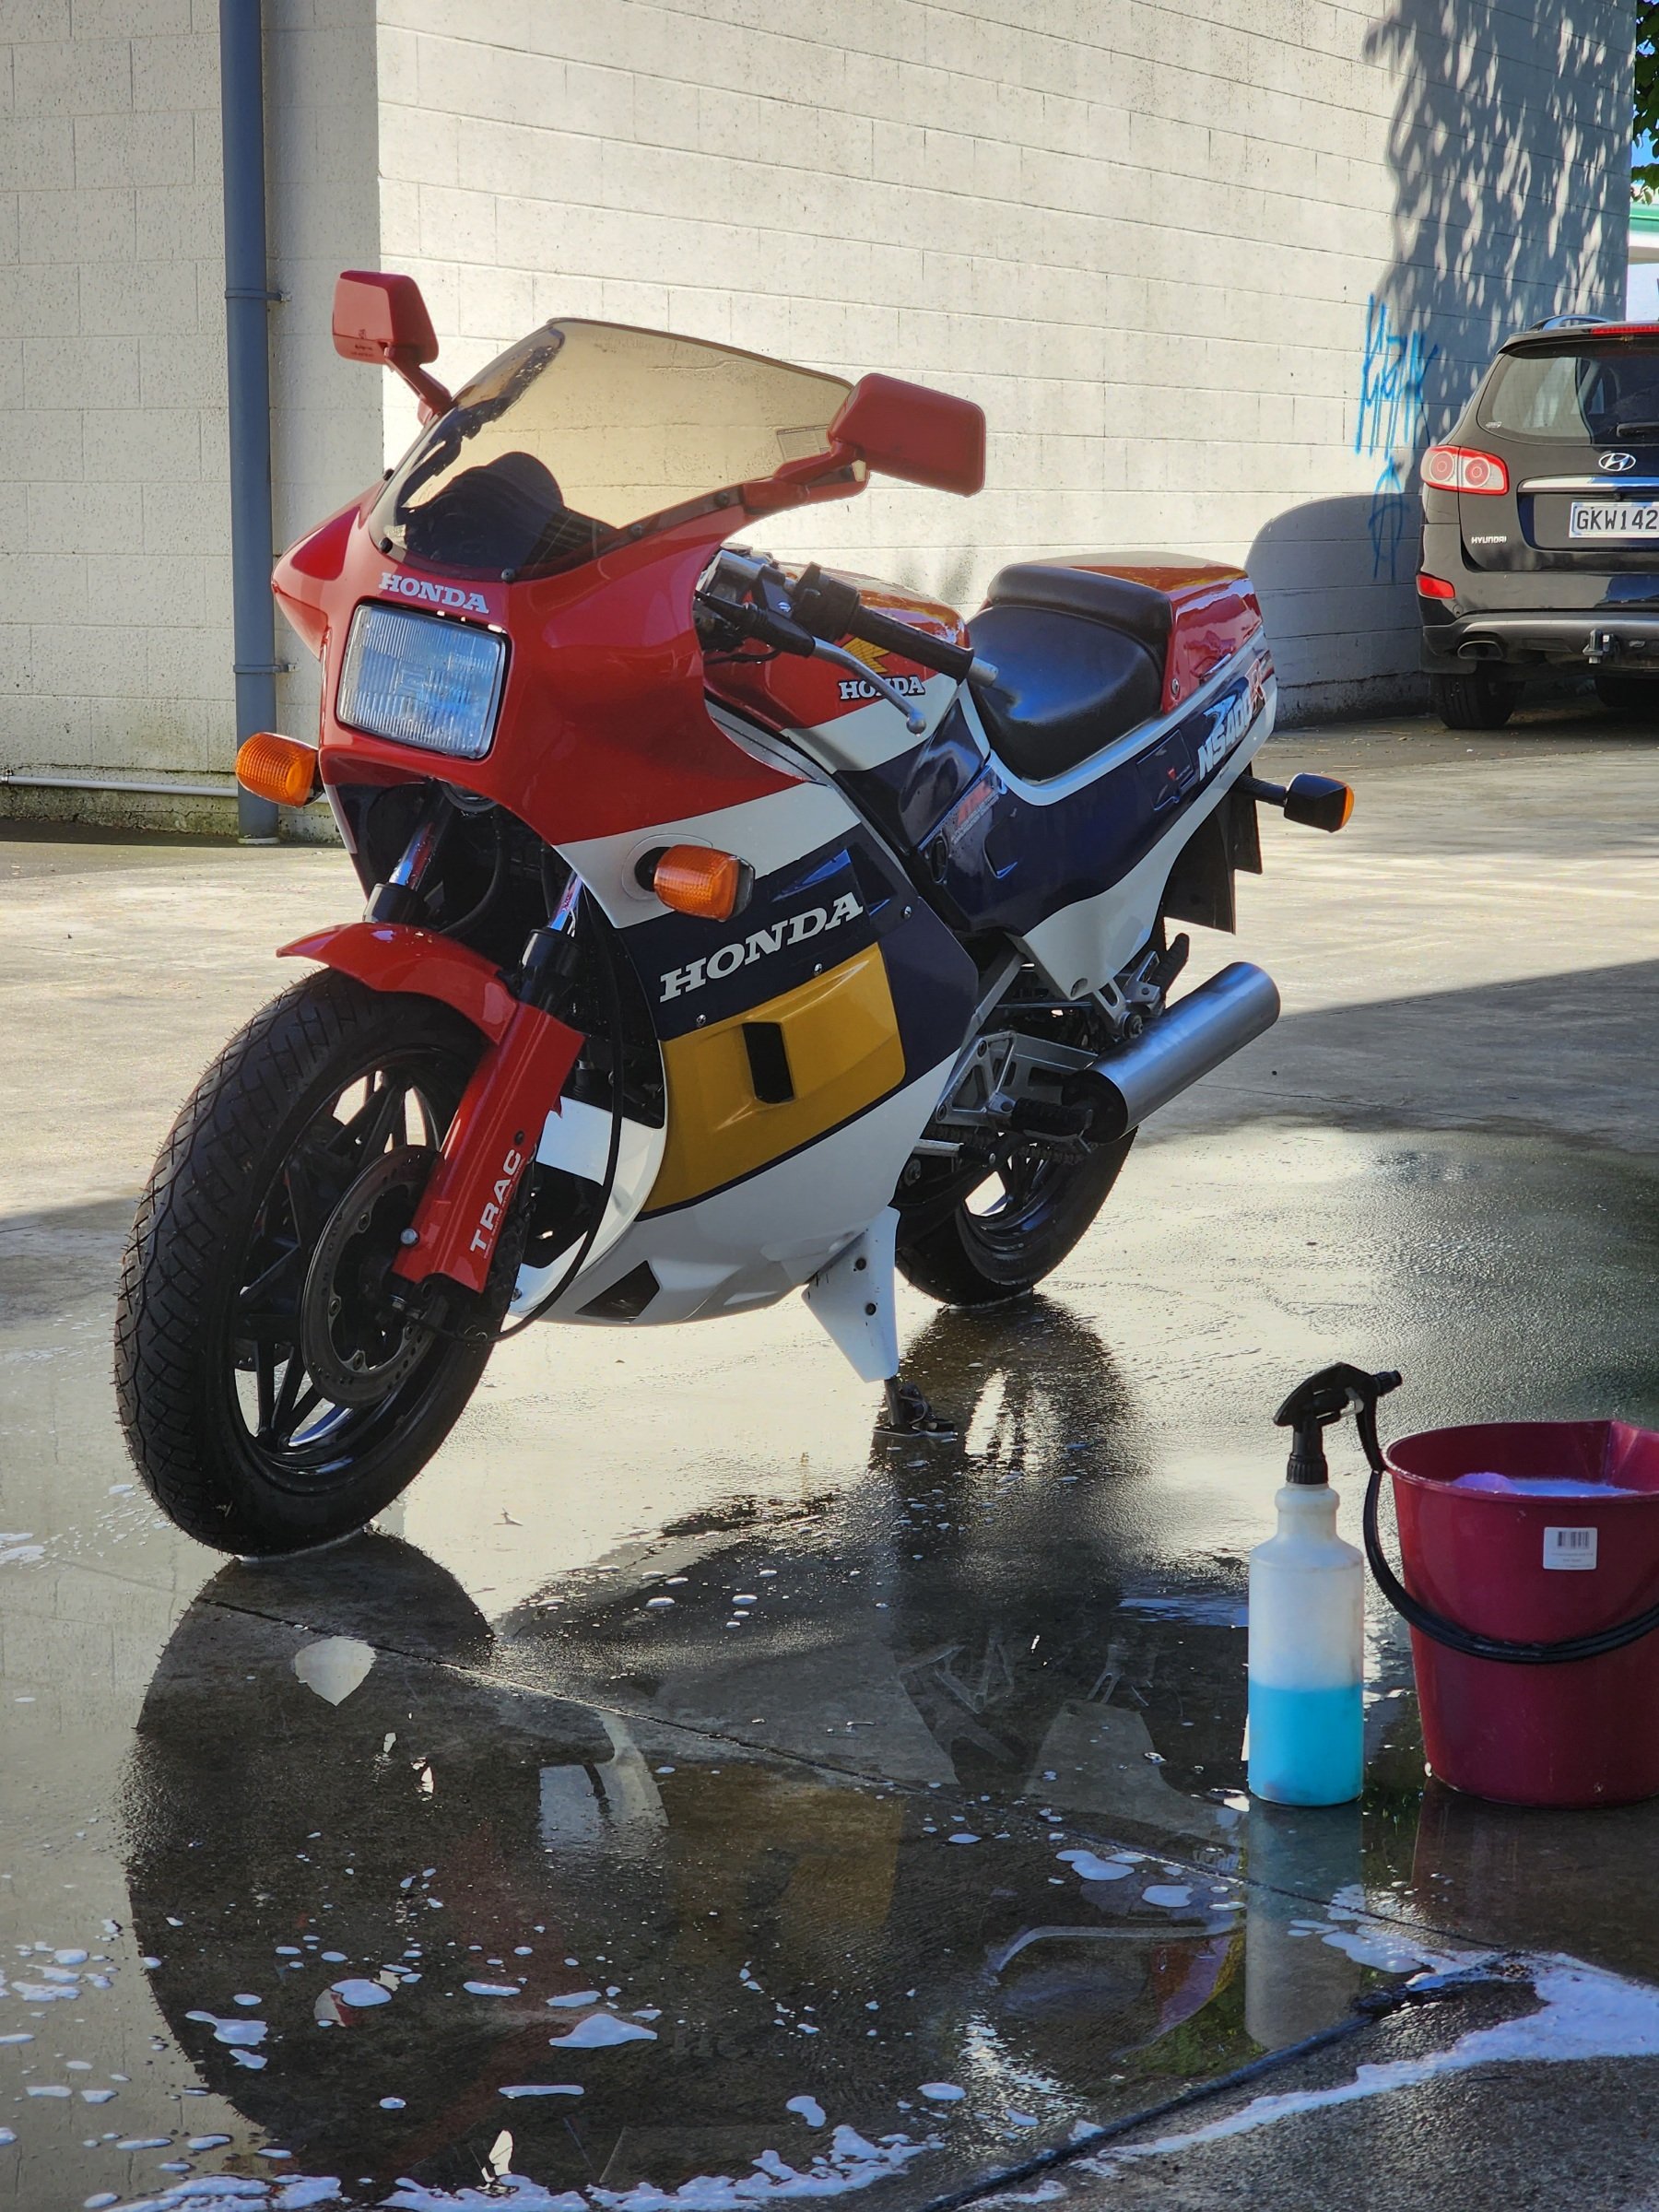
Just finished resto on this neat toy. Belongs to the boss' wife. She had one many moons ago and it was a nostalgic birthday present. Wasn't meant to be a resto, but due to it being a bit of a shed queen it needed a complete strip down. Turns out it had a cracked frame, because early Honda alloy frame stuff. Local bike shop was meant to put it on the road on behalf of the seller, it was legal to ride but was a pile of shit on the road, forks were "rebuilt" wrong, carbs were rebuilt wrong and way out of sync etcetc
1 point
-
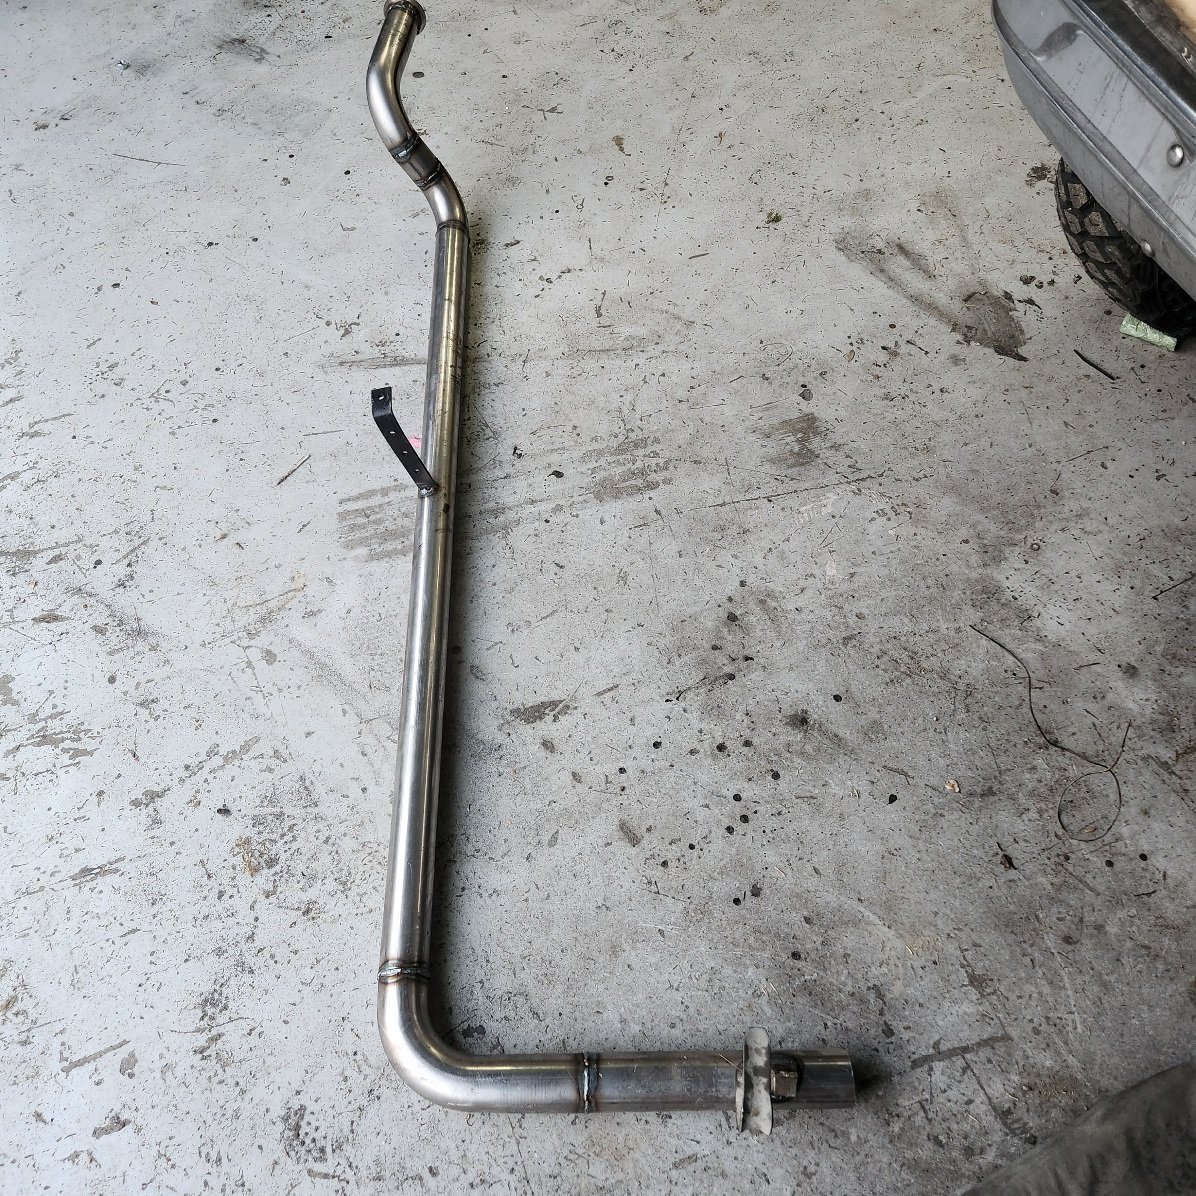
Tigged it up, I'm fairly rusty with a tig but hopefully it'll hold. Didn't end up taking much length out of the pipe in the end, only about 15 mm where the old weld was. I'll steal the flexi and flange off the other headers when it's time to fit everything. Will have to try figure out a support bracket as well1 point
-
Ended up cutting the weld and at the flange Couple of cuts and ugly tacks It's super close but clears stuff1 point
-
It's been 6 measly years. Progress has been slow. I prioritised the AE86 for a few years which is now a rocket so time to get back in to this. I've also moved to Canada but will be back in a few years, nice to collect parts until then. The rust is probably what terrifies me the most, lots to do. Lots to pay for. As i've been going for a KE20 Sprinter, more than a TE27 Sprinter, the parts are a little different. For e.g The guards I have are KE20 Sprinter, not TE27 sprinter hence the lack of stock fender flares. The lower trim which runs from the fender to the rear quarter is 2x as thick as the normal corolla ones (only came on the KE25 Sprinter). I managed to track down a full set of these trims and probably paid something stoopid but in the 6 years i've been collecting additional parts I've only come across these particular trims this one time The TE2X Sedan and Coupe have different grills, i've got a NOS sedan TE20 Grill as well as the TE27 Coupe one however am still unsure which i'll run Anyway, some photos: 10/10 center wood grain dash unit with functional radio center by phillipbaines, on Flickr 10/10 Center console console by phillipbaines, on Flickr Some center console additional pieces - I have no idea where they go but hopefully is easy to work out once assembly time comes console by phillipbaines, on Flickr NOS TE20 Sedan grill - Again, unsure if i'll run this. the TE27 one does look better grill by phillipbaines, on Flickr Non rusted out TE2X grill support panel grill_2 by phillipbaines, on Flickr TE27 right light, as well as the Sprinter center trim between lights (can't find a pic but it's in the hoard somewhere) light by phillipbaines, on Flickr TE27 LCA's and knuckles to allow bolt on AE86 struts 20231114_120517 by phillipbaines, on Flickr A badge I thought was cool - SL, 5 speed, 1600 boot_badge by phillipbaines, on Flickr a pair of fender mirrors. 368365377_305562675646217_4171977721123825346_n by phillipbaines, on Flickr These were just cool. they may or may not be fitted to the coupe mud_flaps by phillipbaines, on Flickr A sprinter steering wheel center horn button to replace the corolla one horn by phillipbaines, on Flickr For the fuel upgrade i've found a retrofit drop in setup, which allows for 16" deep fuel tanks and luckily enough the KE25 fuel tank is there or there abouts, atleast deep enough for this to work. Here's an install vid if anyone is interested: https://www.youtube.com/watch?v=H-ZrisobLYs And if you want to purchase one, here's a link too: https://fitechefi.com/product/50014-go-fuel-in-tank-fuel-pump-600-hp-module/ fuel_pump by phillipbaines, on Flickr Because the T50 from an AE86 uses a rear position shifter, it won't be correct once installed to work nicely with the center console. I've purchased a forward position T50 to steal the insides out of, and hopefully swap bits over to make the AE86 T50 accept the forward position shifter (fyi not using this forward position one because it's seized. only got it for the shifting components) T50 by phillipbaines, on Flickr Brake time. Acquired a TE27 pedal box which has the additional hydraulic clutch mount so all nice and easy pedal_box by phillipbaines, on Flickr After some research bolt in upgrade parts were available. small AE86 booster booster by phillipbaines, on Flickr Rip the ST205 WRC GT4 Celica master cylinder off this, slap it on above booster master by phillipbaines, on Flickr Use proportioning valve from ST202 celica suitable for twin pot front brakes, single pot rear breaks prop_valve by phillipbaines, on Flickr And it should look something like this 252170_4708_0002 by phillipbaines, on Flickr Discussion:1 point
-
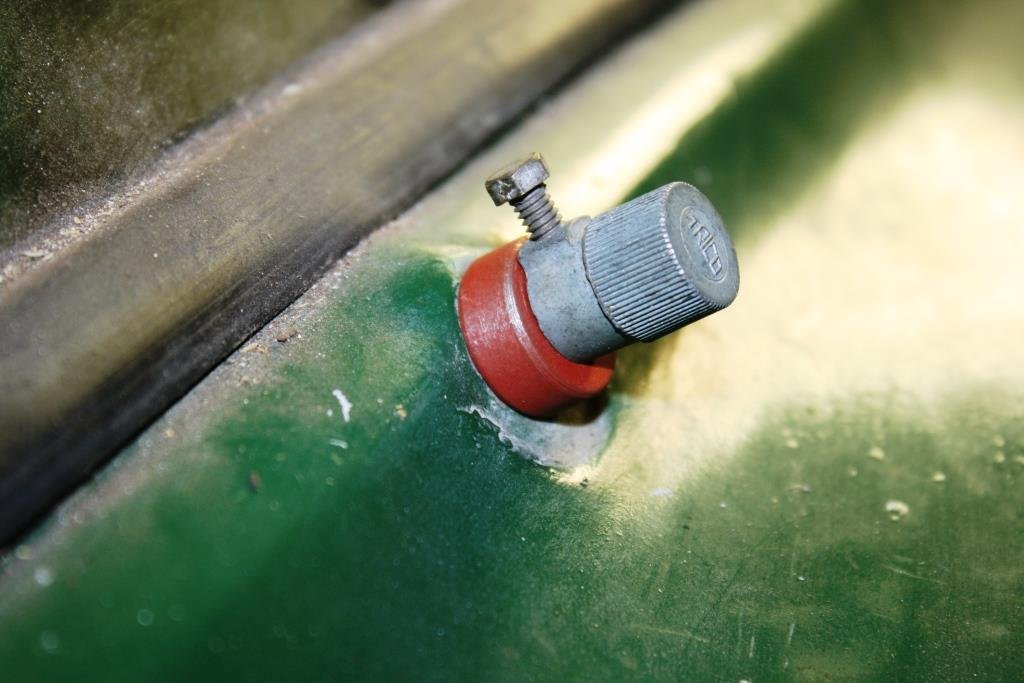
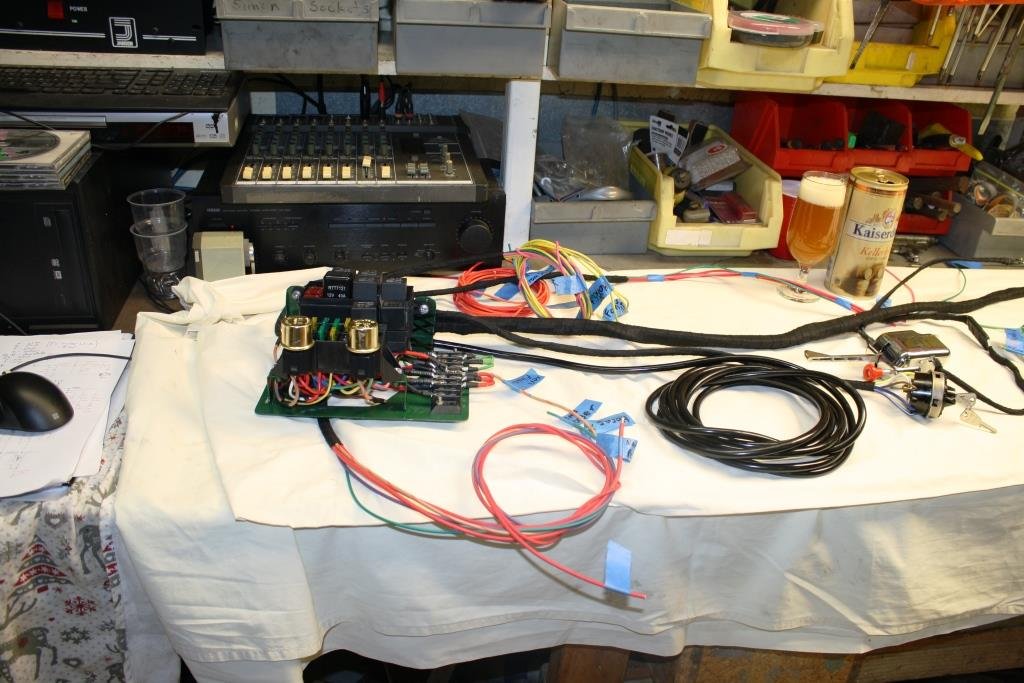
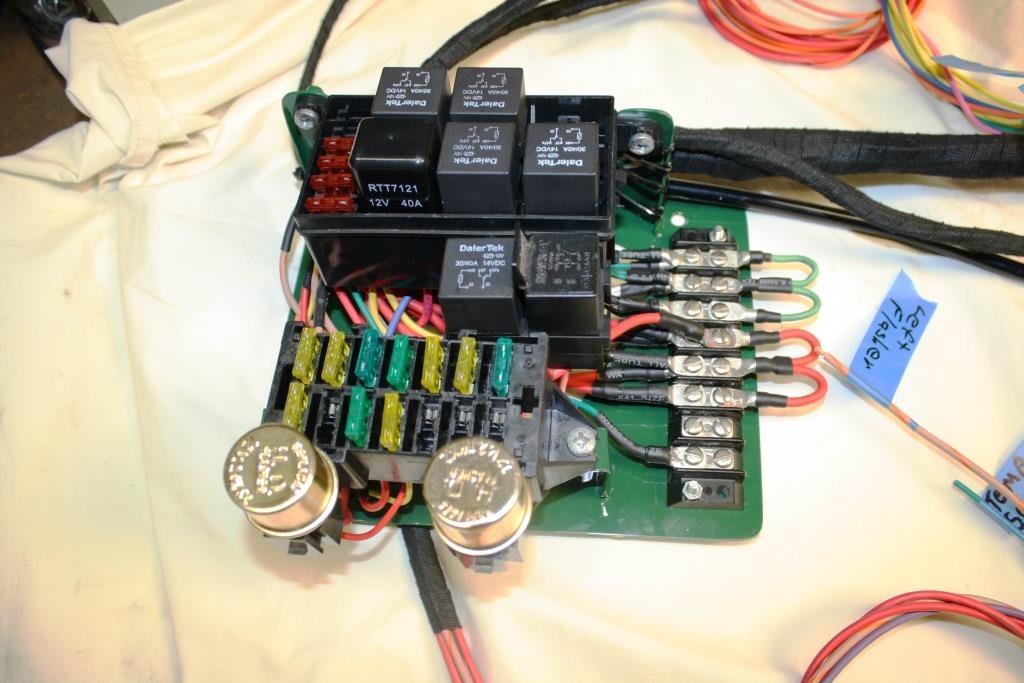
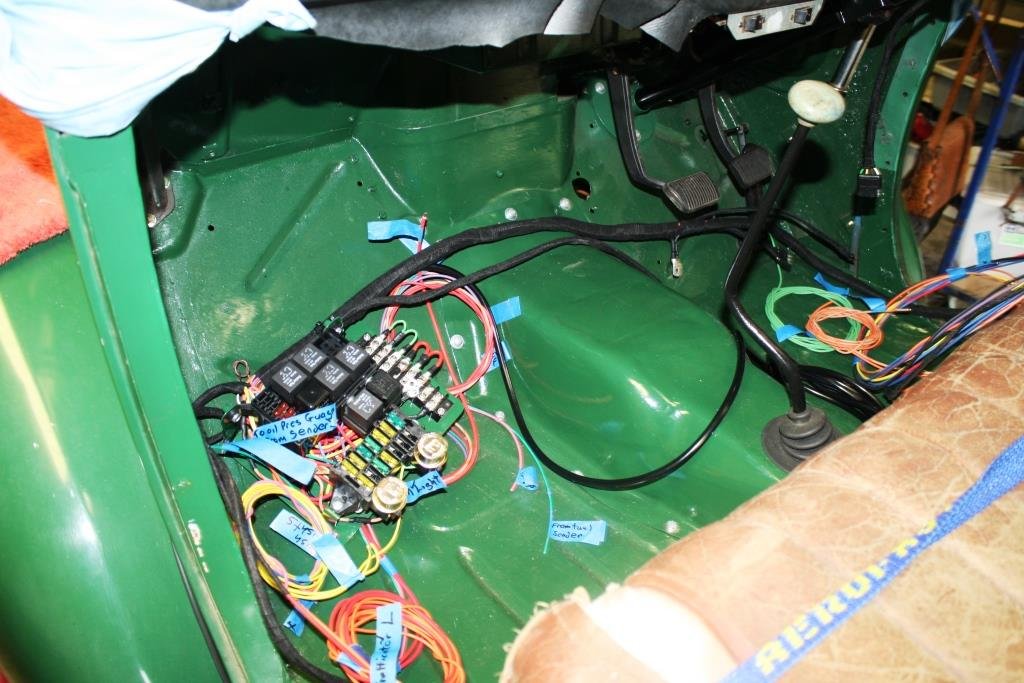
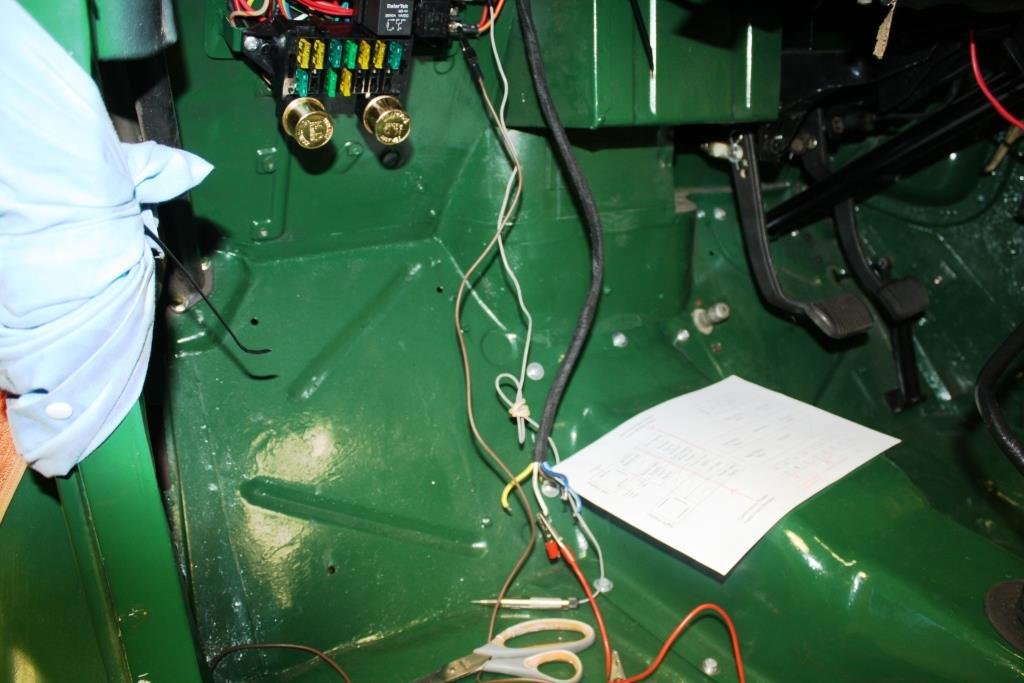
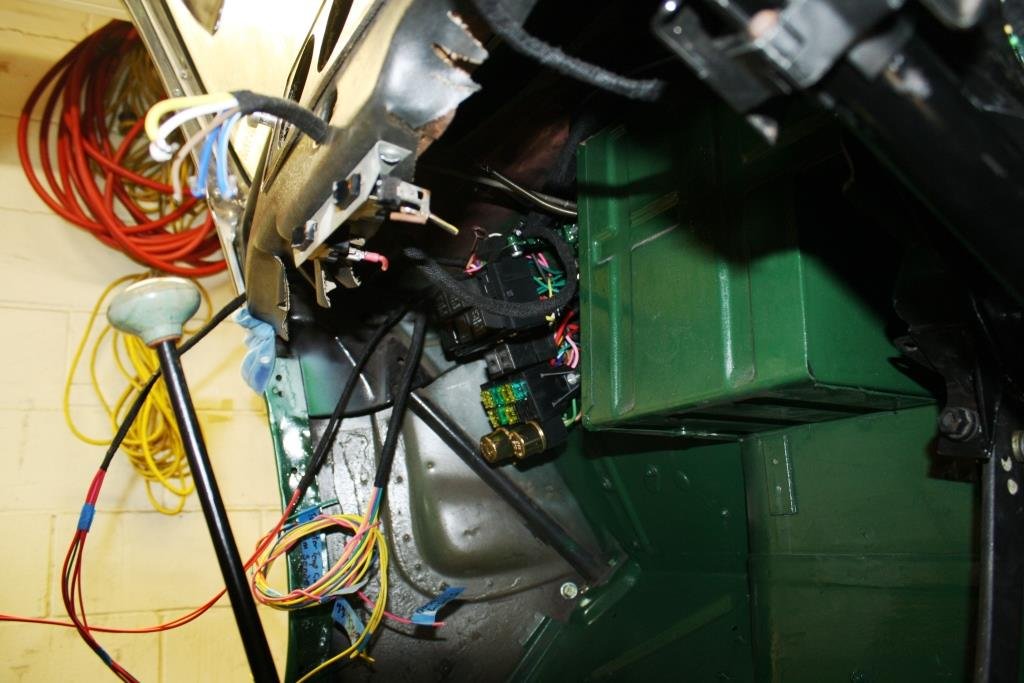
I managed to source some old style fabric tape and began wrapping the loom. The main earth supply will be bolted to the earth strap bolt as it protrudes through the fire wall under the dash. (I’m running separate earths to the big current draining components. One more testing session and it’s all ready to fit to the car…. Looks messy at this stage…… ….but it fits where it’s intended. Hard to get a good photo of it sitting on the firewall on the passengers side. (I’ve got covers for the main components).
1 point
-
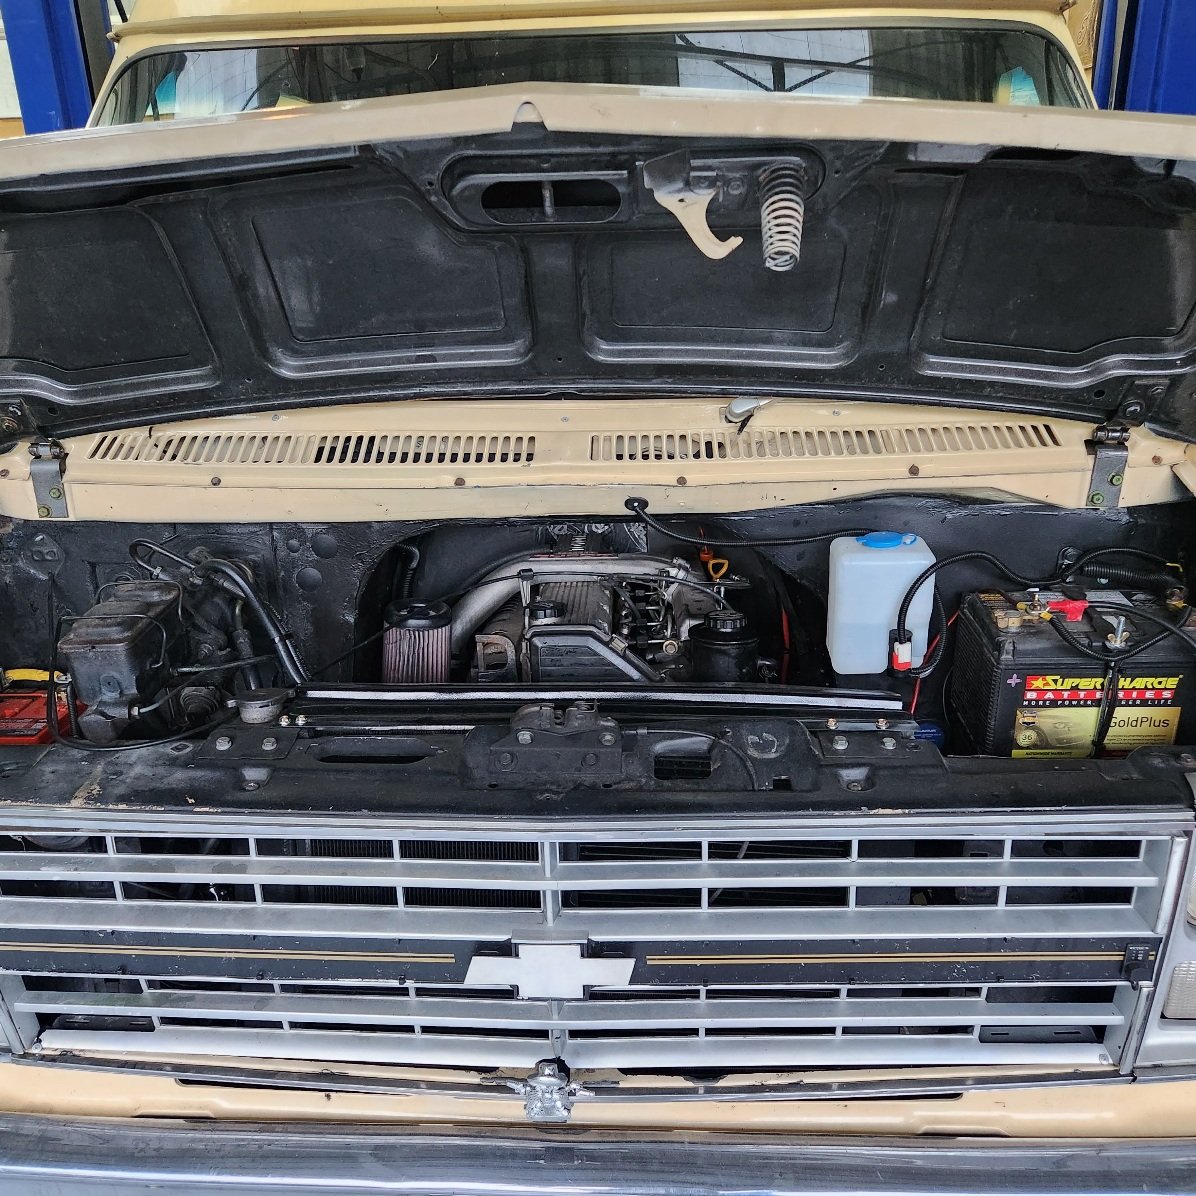
Well she runs, it needs a shot of ether to fire for some reason, I think either fuel is bleeding back and I'm losing prime and it needs a lift pump or theres a big hole in vacuum system maybe ? I also need to read up on how auto choke works. Glow plugs seem to be working fine It runs fine once it's fired and restarts like it should. I got the front shaft in and went for a circle round the lawn, happy days My relay box for 4wd didn't work straight away so I packed a shit and tore it out, and have just put a momentary rocker switch putting power straight onto the transfer case actuator for now, I'm sure thisll screw the motor long term but it works. I got a basic exhaust built, it's not loud with no muffler so will.try it and see, I didn't have enough bends to get over the diff and also couldn't be bothered so out the side she goes I also made a new trans crossmember,.Ive left the mounts mocked up for now until the new rubber centre mount shows,. hopefully Monday Also got most of interior back in and engine bay tidied up it just needs rear driveshaft and gearbox crossmember finishing now.
1 point
-
The rear brakes are more complicated due to the extra hand brake stuffs. The handle pulls a lever which pushes a pin down through the caliper and into a little freely-rotating bracket on the underside of the piston, forcing it down. No idea how common this method is. Bleh. Let's clean that up. Here's what it looks like all disassembled... not pictured is an extra retaining ring and a forgotten seal which is still inside the bore. The pin bearings also haven't been pressed out in this picture - one side's bearings were all rusted up and they cost $$$ for some reason so I hacked apart red's brakes. I fortunately was rewarded with another pair of good ones (and a pair of shit ones) for a total of four good bearings. Phew. As mentioned with the fronts, the rear pistons from the black car are fortunately in good condition and can be re-used So once again I went through the motions - except spread out over a month~: derusting solution overnight, a good scrub, let dry in the sun... ... fix the sandblaster, sandblast it all, rust preventative, caliper paint. We painted our house recently (still need to paint the garage) and I'm really over brushing things. But it's done - for now. Not pictured: I scrubbed all of the parts I was re-using in the parts cleaner, left in evaporust overnight, scrubbed again and they came out great. The aforementioned starion angel who gave me a bunch of rebuild link and advice pointed at these washers to replace the old crappy ones. They're slightly conical washers that provide resistance and springage for the brake lever. They're cheap so I grabbed a set (14 required to do both sides). Unfortunately they're a little chonkier than the originals Five will fit. Angelman went down this road and says he has no problems. However half of my original washers were perfect and after the evaporust the other half looked pretty good (red's ones were all trash), and should survive for a while covered in grease, so I decided to re-use them. Here's after the evaporust and before wire wheeling and greasing. Reassembly time! You can see the post-brush washers front and centre. Everything here has been slightly greased with brake grease. First I put the bore seals and pistons in with their boots. The rear boots have locking rings in place which I found extra scary. After a bunch of fiddling I got them in place and I think they seem to be operating fine - I tested with some compressed air. We'll see! For the hand brake stuff I will be following this guide by kev from the star quest forums as the manual calls for a special tool and press to squish the washers down for re-assembly, so there's a knack to it if you don't have it. The idea is to re-install the bearings in a particular order so that you have extra room to fiddle the arm into place. First bearing in on one side... The rebuild kit came with a new o-ring for the plunger so I put that on after greasing and placing all seven washers, then screwed it down into the piston and aligned it like thus: The key and spring then go into place. Now the bullshit starts. Put the other bearing on the lever arm and push it through, and use a screwdriver to push the key back. The problem we're overcoming is that the washers need to be pressed down to get the arm all the way through,. The idea is that with only one bearing in play, there should be plenty of angle to feed the arm through to it. In reality this is a massive pain in the arse; the arm still won't go in without pressing down somewhat on the washers and there's a lot of force required to do so. I'm not sure how but I managed to get it started with the first side. Then it's just a matter of pressing it home the rest of the way in the vise and locking it in place. However, the other side did not want to co-operate... so I found a much easier alternative. 1. Place the caliper in the vise such that the hand brake assembly is pressed up against one end. 2. Use your favourite chonkdriver to lever down on the arm; this is supremely easy to do thanks to l e v e r a g e. 3. With the arm lined up, give it a few taps with a mallet to get it started. Then pick up where you left off and press it home per above. Now I find myself in a greasy situation. A tiny sachet of brake grease is $20. I'd need many many sachets to fill up each caliper assembly per factory standard. The manual states which types of grease to use, but in an unhelpful way. "Orange" grease for much of the reassembly, and the hand brake area, and "pink" for some key spots. I couldn't find a translation for these on the net* but I'm guessing it's a combo of brake grease and then some kind of generic high temperature grease. (* something I'm picking up in the auto world is that everyone has an opinion on how something should be done right, and they get angry at the way other people do things and call them clueless muppets. However all of these people have functioning working cars so clearly it doesn't matter as much as these commenters wish it did) My compromise is to use a combo of a $20 sachet and the sachet the rebuild kit came with to fill the bearings and the cavity with the washers in it... ... and high temperature wheel bearing grease for the remainder of the space under the hat. This feels okay to me. The only mechanical action this area gets is when the hand brake lever is actuated. The part of the pin going into the piston is on the brake fluid side, no grease in that equation. And the wheel bearing grease is high temp so should be able to deal with the high brake caliper temps that make it to it. Then the hats get filled with more grease and snugged into place with the old retaining rings. I had some dramas with paint sneaking its way into the pin holes on the brackets but nothing a dremel couldn't clean out. Boom, rebuilt rear brake calipers! Nice to (a) tick these off, (b) clear my work bench and (c) delete this info from my brain ready for the next thing. There might be some more paint cleaning to do to fit little brackets and what not but calling this done for now.1 point
-
tonight i made a shield to go over the digital dash so it doesn't reflect off the inside of the window at night. fairly simple thing, just held on with double sided foam tape. ill see tomorrow how well it functions. 2021-05-24_06-54-34 by sheepers, on Flickr 2021-05-24_06-54-28 by sheepers, on Flickr 2021-05-24_06-54-18 by sheepers, on Flickr 2021-05-24_06-53-58 by sheepers, on Flickr 2021-05-24_06-53-44 by sheepers, on Flickr1 point
-
remember a thousand years ago when i bought a link dash for this? well, the instructions for a link dash are fucking shit, if you ever buy one know that the indicator icons are referred to as "warning lights" and the indicator icons that are described in the instruction manual, badly, are just icons that don't work on every display skin. anywho whilst trying to figure this out i powered the wrong pin on the plug and something went bang. it took them two and a half months to fix it but its fixed now so i got on with the job of installing it. its now mounted up and working so now i need to configure the thousands of user definable display options and also get a few parameters that currently dont work, working. 2021-04-04_04-14-47 by sheepers, on Flickr 2021-04-04_05-18-02 by sheepers, on Flickr1 point
-
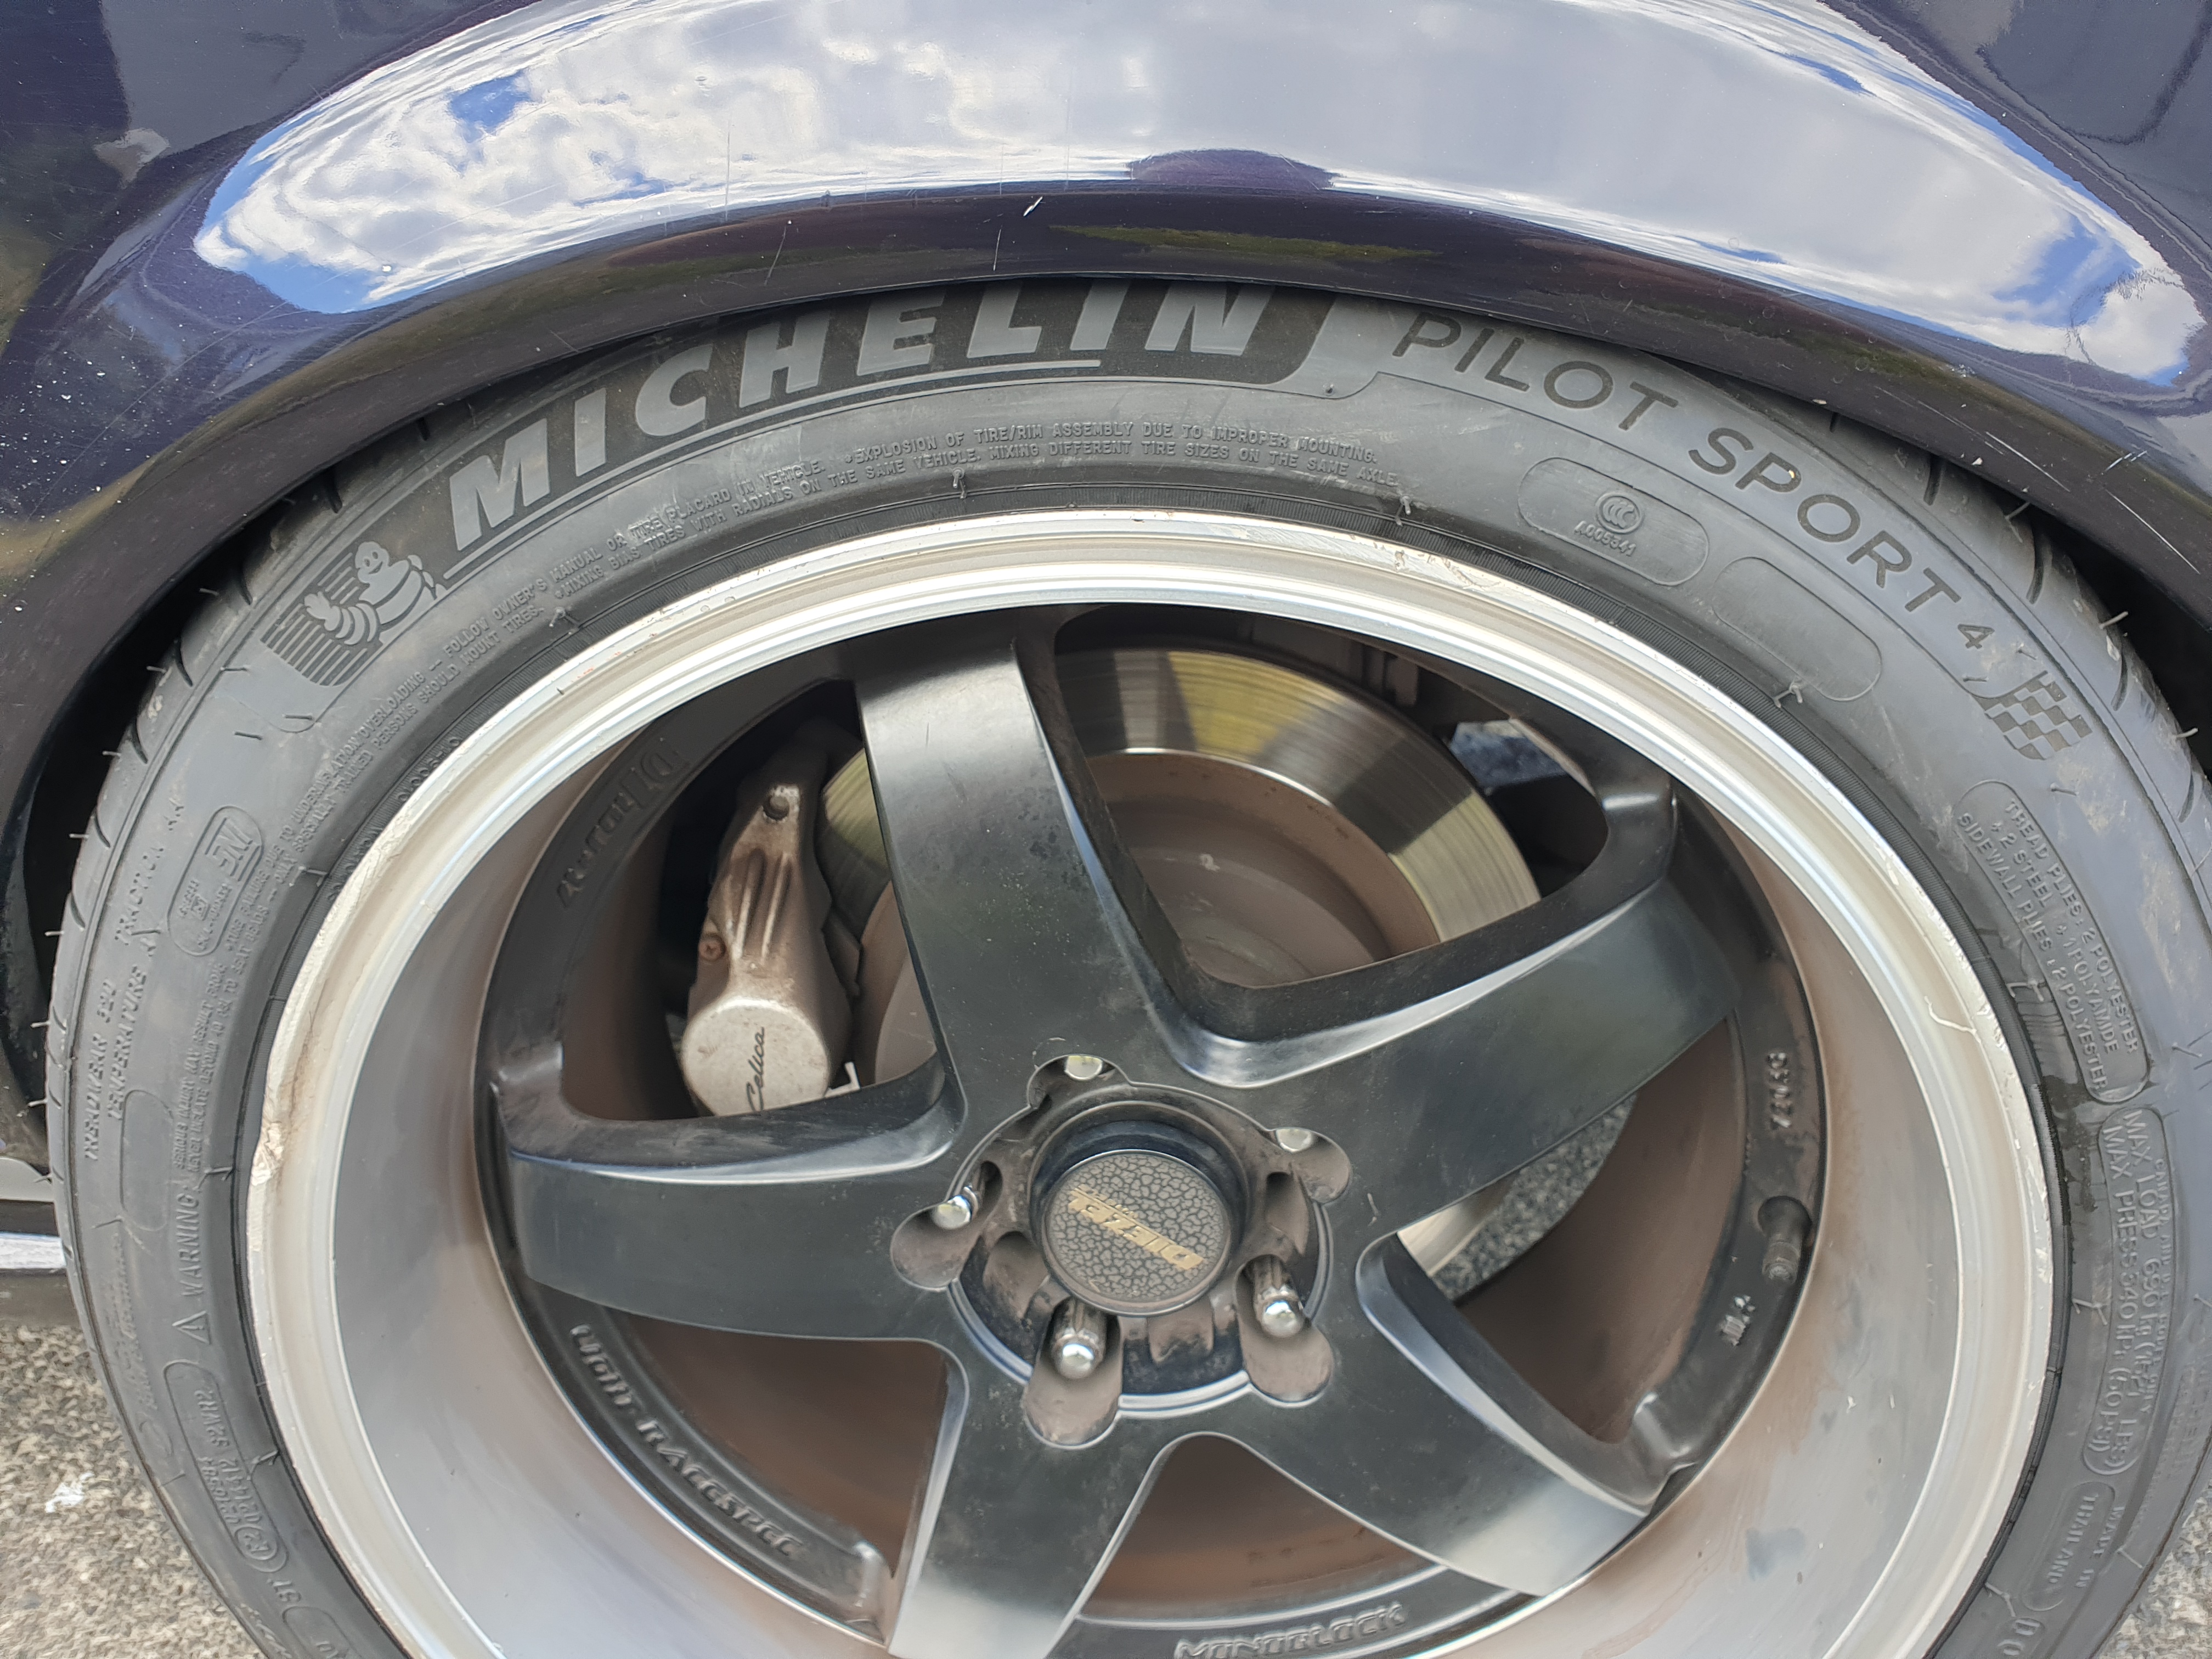
Turned out the vibration was tyres. I took the fronts off and chucked them on the balancer to check the balance and straight away you could see they both had big lumps in them. Weird. Because all 4 tyres did it at pretty much the same time. Fuck knows. Anyway it's fixed and here's a picture of a tyre so you've got a picture to look at.
1 point
-
drag day went super well. had a great day. struggling for traction as normal but managed to put one good run together and ran a PB of 12.93@110mph. i cant tell you how stoked i am to make it into the 12s. 2020-12-13_07-05-28 by sheepers, on Flickr1 point
-
forgot to mention, a supercharged 1UZ pulling hard at 7200RPM sounds pretty ace.1 point
-
tidying a few things up with the tune. i had no speed signal so the ECU didn't know if we were moving or not. with an E throttle that makes quite the difference. so i put a wheel speed sensor in the back so now it knows we are moving. the other major thing that needed sorting was the rev limit, it was set too low (6500) and it was pretty harsh. so now th rev limit is a more excellent 7500 with a really nice cut that just works. lots of little things were made better in regards to coasting to a stop, the fan coming on, part throttle curse, just more drivability. the other thing that we did was add a bit of timing up top which coupled with the higher rev limit it made 275 killer wasps at the tyres. keen for drag day TBH.1 point
-
i left this thing sitting in the corner whilst i painted the engine bay on the crown. now thats done i dredged up some enthusiasm from somewhere and got back into this thing. couple of weeks ago i drew up a fan shroud and got it cut and folded. yesterday i got it to fit (had to massage a scallop into it to to clear the radiator hose) and put it all back together. today i drove 450Ks in it up and down the morotways of acukland. was a beautiful day with clear free running tarmac the whole day. quite enjoyed it tbh. temps were fine but i never got into any type of traffic really to test it, i was just sitting on the hundy for hours at a time. when i got home i sat at the lights and it seemed to be coping but ill do more traffic based testing over the next few days. its worth noting that the ambient temps are at least 10 degrees lower than they were last time i drove it so youd think it would be better. anyway after today the engine seems happier to rev and feels a bit more free. ill put another 500 odd Ks on it and see what happens next. also took it through a carwash in bombay (water restrictions in auckland have shut down all car washing both private and public) because it was fucking filthy as you can see. 2020-05-20_05-20-08 by sheepers, on Flickr 2020-05-20_05-20-00 by sheepers, on Flickr 2020-05-21_03-43-38 by sheepers, on Flickr1 point
-
and back in the hole. ive only run it for about 10 minutes but it seems much better than before. ill get a better idea tomorrow. 2020-03-10_06-16-02 by sheepers, on Flickr1 point
-
put a headlight relay in to take the load off the wiring in the headlight switch. Toyotas switch the negative at full current through the headlight switch and after a while they like to set themselves on fire. so Nick the sparkey wired in the relay. put the front back on and did more tidying of the wiring inside the car. which was such a mess that im to embarrassed to show a picture of how it was. ill put the headlight back in the drivers side too. so its better now, still not finished but there's not much left to do then the wiring is finished and i can have a go at starting it. oh, its got oil pressure and fuel pressure without leaking anywhere. 2020-02-02_01-43-52 by sheepers, on Flickr 2020-02-02_01-44-14 by sheepers, on Flickr1 point
-
putting it back together. i put the new center bearing on the driveshaft and put the driveshaft back in. this took most of the day because i had to repair the floor where the handbrake bolts in because all celicas rip the handbrake bolts out of the floor. the actual bolting back in of the driveshaft and the driveshaft loop took about 10 minutes, the rest of the day was doing crown brake upgrades and repairing the floor. 2020-01-27_04-54-18 by sheepers, on Flickr1 point
-
been doing some wiring. i found it pretty hard to take a photo that showed what ive done so the pix are a bit shit really. just imagine i had no loom at all, then i did. its a whole new world having new plugs and looms to make everything. i learned a whole bunch making this and im really happy with how its come out. i now have the body interface to sort out which will be a cool process and ill be able to fix heaps of stuff. bit of fucking around and then i can put the motor back in the car. 2020-01-23_07-16-12 by sheepers, on Flickr 2020-01-23_07-15-57 by sheepers, on Flickr1 point
-
painted some things black. booster, hood stay, windscreen wiper motor housing and hood latch. just the normal shit really. now thats done i will probably start working on the new engine loom. ive got new plugs for everything and new link looms so the motor will get a full rewire. 2020-01-17_05-53-42 by sheepers, on Flickr1 point
-
and all finished. im super stoked with how it all came out. the shape is really good and the passengers side wont need any bog i reckon, just some high build and it should come right. the drivers side needs a tiny bit of filler where a piece of the origional car is really badly fucked from previous welding. apart from that shes ready for paint. 2020-01-06_01-15-03 by sheepers, on Flickr 2020-01-06_01-15-12 by sheepers, on Flickr 2020-01-06_02-52-14 by sheepers, on Flickr 2020-01-06_02-52-22 by sheepers, on Flickr1 point
-
started cleaning/stripping the engine bay ready for paint. also started tidying up the wiring so its not in the engine bay. got a good chunk of it done, just need to extend the wires for the passengers side headlights etc and its done. ill probably start sanding today 2019-12-22_10-19-17 by sheepers, on Flickr1 point
-
painted engine bits. not sure if ive mentioned before but im going to repaint the RA28 to a modern mazda red. i have the paint code written done somewhere but its a 2017-18 mazda red that i really like. anywho, the silver/black combo of the engine is meant to work with that red, not the shit dirt black/purple it is now. now that the engine is getting close to finished ill start painting the engine bay. as always i want ot change a few things around and do a few things etter thatn before so ill be doing that soon. but first here's the engine in paint. 2019-12-19_05-31-21 by sheepers, on Flickr 2019-12-19_05-30-55 by sheepers, on Flickr 2019-12-19_05-30-46 by sheepers, on Flickr 2019-12-19_05-31-04 by sheepers, on Flickr1 point
-
got the bolts all sorted for the superdupercharger drive. So far ive tried two belts and they were both to short. tomorrow im going to try the longest one available off the shelf in NZ and hope like fuck i can get it to fit. the other thing i did was make the new water neck to go round the drive belt. its probably a bit long but i wont know that until the motor and radiator are back in the car. 2019-12-16_05-54-42 by sheepers, on Flickr 2019-12-16_05-54-33 by sheepers, on Flickr1 point
-
i finished the spacer by drilling the through holes then i put a very light coat of etch on it. that was enough to make it not fit so it needed a little polish. then i shrank the hub onto the superdupercharger shaft. it had to be pretty hot to grow enough to put on, as soon as it was on i suddenly realised that the heat might fuck the front seal so i wet it to try and cool it down. i hope like fuck i haven't coozed the front seal, will find out later i suppose. ill go buy the right bolts for it tomorrow and its all done. 2019-12-15_03-37-05 by sheepers, on Flickr 2019-12-15_03-36-55 by sheepers, on Flickr 2019-12-15_03-36-47 by sheepers, on Flickr 2019-12-15_03-36-39 by sheepers, on Flickr1 point
-
superdupercharger pulley. i needed to space the pulley out somehow to line up with the rest of the belt drive. the pulley had a redundant boss at the front so i made use of that bit by machining more belt drive grooves into it. simple process of grinding up a tool steel tip with the right profile, matching as best as you can to the existing using the eyecrometer then touch cutting an existing groove to get your depth and spacing correct then away you go. 2019-12-14_01-10-57 by sheepers, on Flickr 2019-12-14_01-10-49 by sheepers, on Flickr 2019-12-14_01-10-41 by sheepers, on Flickr 2019-12-14_01-10-33 by sheepers, on Flickr 2019-12-14_01-10-25 by sheepers, on Flickr with that done i needed to make a spacer to move the pulley forward on the existing boss. i haven't shrunk the boss onto the superdupercharger shaft yet so i was able to use it to check the fits of the spacer i made. i used a piece of 4340 i had which was way to big for the job but its all i had. i back turned the spacer so i could part it off finished, that way all bores and all faces would be concentric, parallel and true to each other. the only piece of material i had was 110 OD which i had to turn down to 56 odd so there was a bit of mess and a few burns on my arms. all i gotta do now is drill the bolt holes and its done. the fit is exactly right, the two spigots fit with about 5 microns clearance so it just slides on perfectly. i didnt want the bolts to be taking any shear loading at all so its exactly how i wanted it. 2019-12-14_07-08-00 by sheepers, on Flickr 2019-12-14_07-08-18 by sheepers, on Flickr 2019-12-14_07-08-09 by sheepers, on Flickr 2019-12-14_06-33-17 by sheepers, on Flickr1 point
-
superdupercharger belt drive. i fucked around with a few different pulleys and whatnot but in the end it i realised it would be just as easy to use UZ cam belt tensioners so i did that. made a little spacer for the factory mounting and used the factory bolt for one and the other o just made a pedestal and welded it to the plate id already made. jobs a goodin. now i get to drive to the parts store eleven billion times trying to get the right length belt. 2019-12-13_04-15-57 by sheepers, on Flickr 2019-12-13_04-15-49 by sheepers, on Flickr 2019-12-13_04-15-39 by sheepers, on Flickr 2019-12-13_04-16-06 by sheepers, on Flickr1 point
-
in other news the alternator was fucked. surprisingly enough it was full of power steering fluid and dirt and fucked. so Nick the sparky got me a new one and i was able to finish up all the accessories on the front. ill move on to sorting the superdupercharger drive next. 2019-12-03_07-13-43 by sheepers, on Flickr 2019-12-03_07-13-51 by sheepers, on Flickr1 point
-
today i made the other two brackets. i forgot to mention i use my 50mm DA sander/polisher to finish these types of parts. i use 150 grit sandpaper to clean up the belt sander marks and get them smooth then i used scotch brite on the velcro pad to polish them up and they come u mint. i thoroughly recommend getting yourself a small pad DA sander/polisher. they are so handy for things. 2019-11-28_03-21-45 by sheepers, on Flickr 2019-11-28_03-21-54 by sheepers, on Flickr after that i started making a mounting plate for the extra serpentine belt pulley ill need for the superdupercharger drive. once i know where abouts the extra pulley will go ill make a mounting boss and weld it on. 2019-11-28_03-21-35 by sheepers, on Flickr 2019-11-28_03-23-48 by sheepers, on Flickr1 point


This leaderboard is set to Auckland/GMT+12:00