
Leaderboard


Popular Content
Showing content with the highest reputation on 10/01/23 in all areas
-
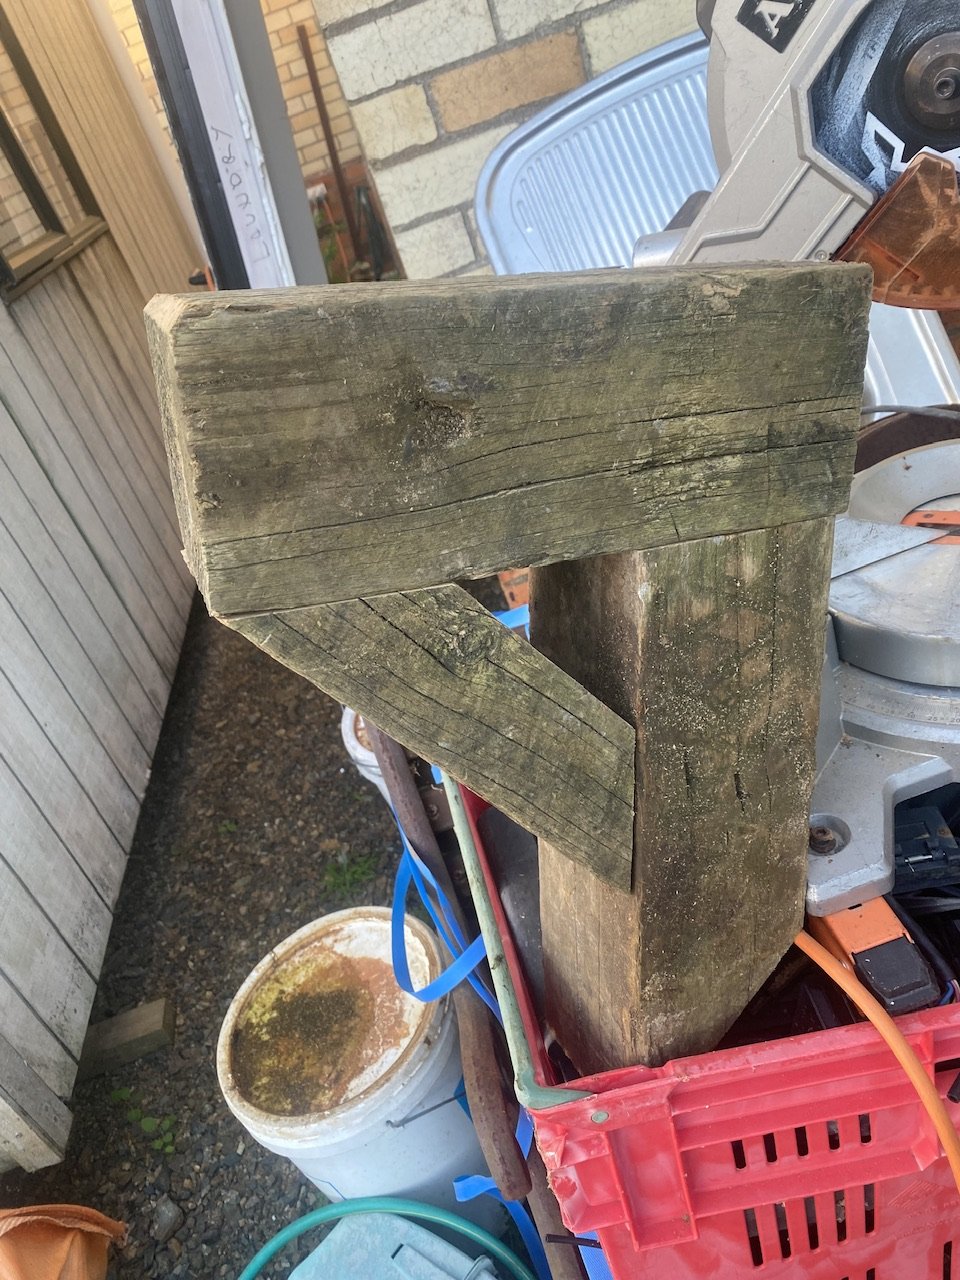
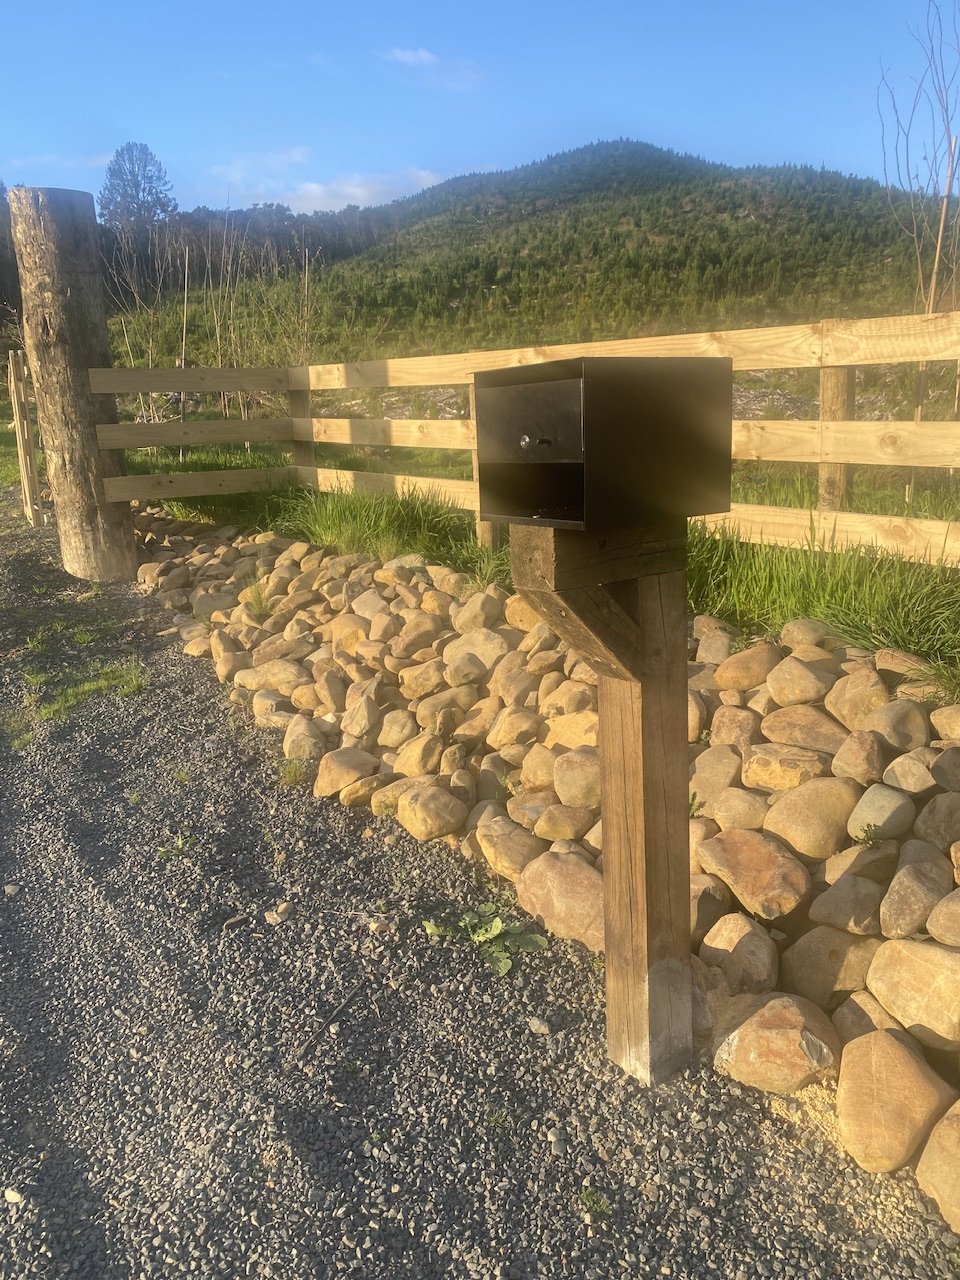
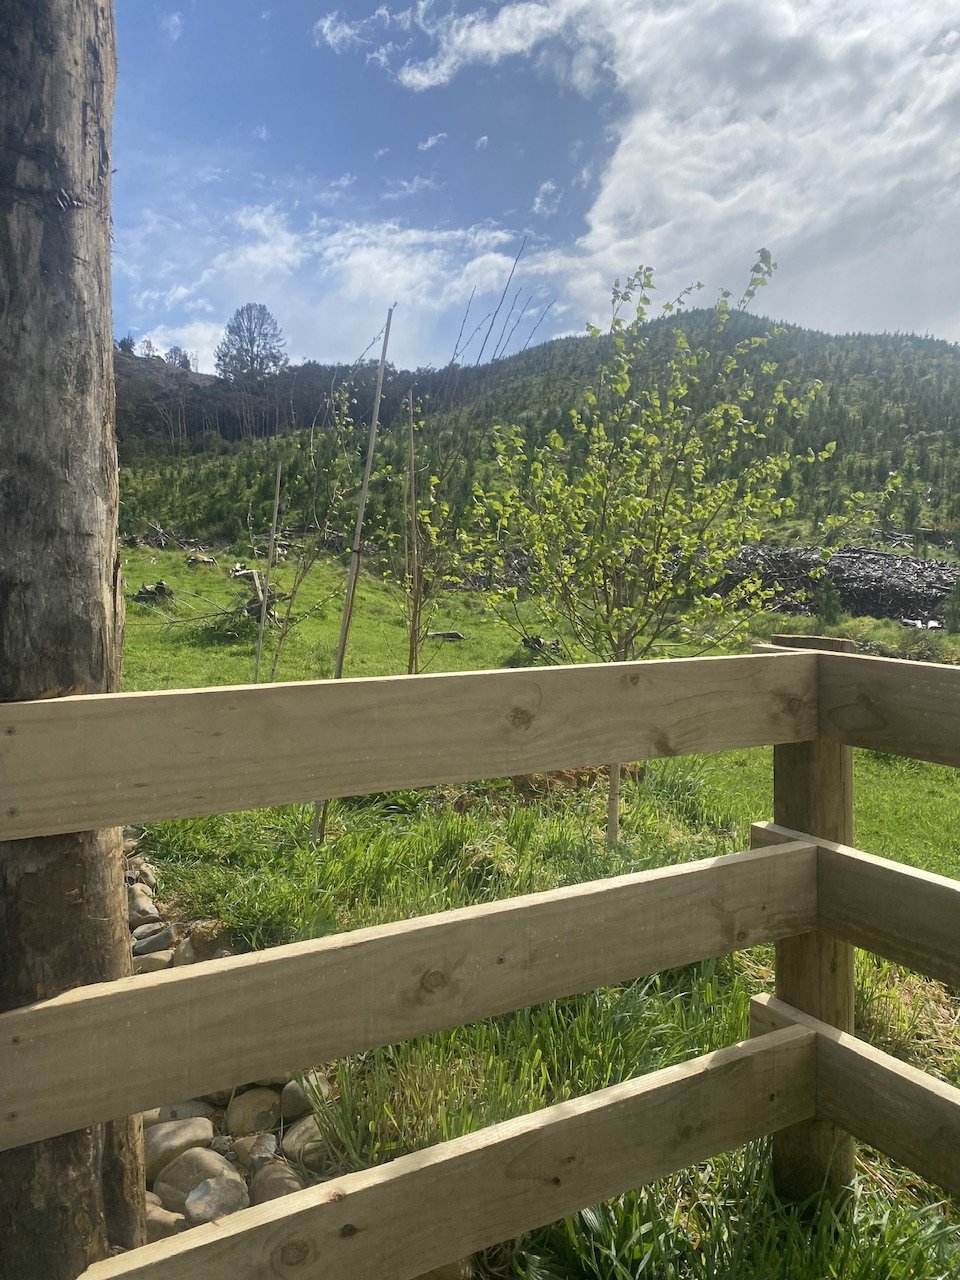
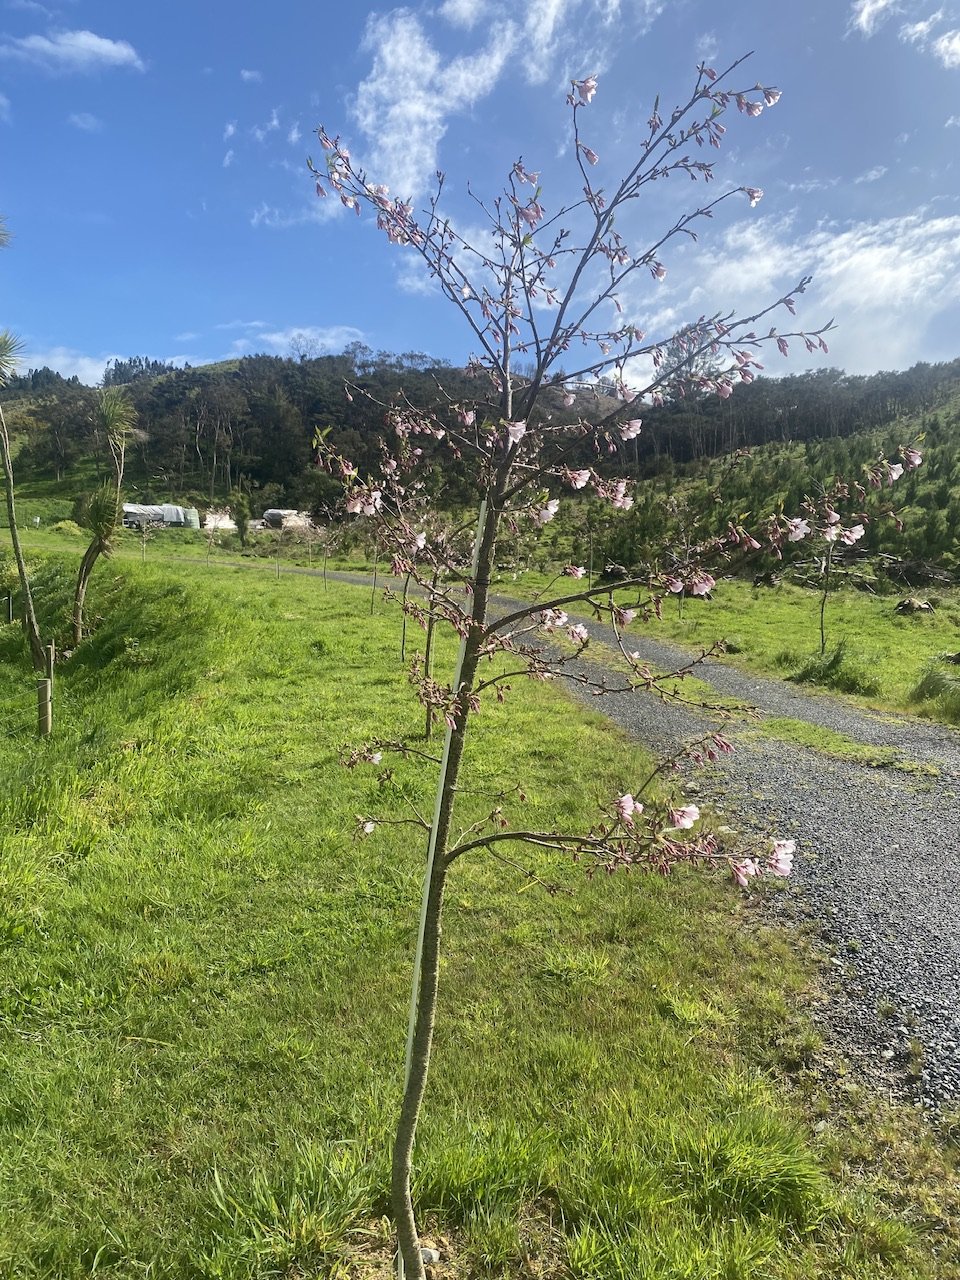
Minor work done, but it is getting slightly warmer albeit raining quite a bit still up here. Daylight savings is gonna help a lot in the next few weeks I feel. Borrowed my mates drop saw to help cut things straighter and did a little job making the top of the letterbox support. Measured the height of the post by parking the ute beside it and eying it up for perfect reach out height. No tape measures were harmed in the making of this structure. Cut the top and angle brace out of the same 125sq senton pile, then decided the brace needed to be ripped down to about two thirds to look better balanced. Sitting on an offcut to see what it looked like.. And now fixed in place. Not sure how useful the box is as it lets in a lot of rain, but it’s just for show really. Locally made by an old fella from Galv sheeting then powder coated.. I like it a lot. Nice to see the trees in bloom and leaves coming out.. spring is here.
 16 points
 -
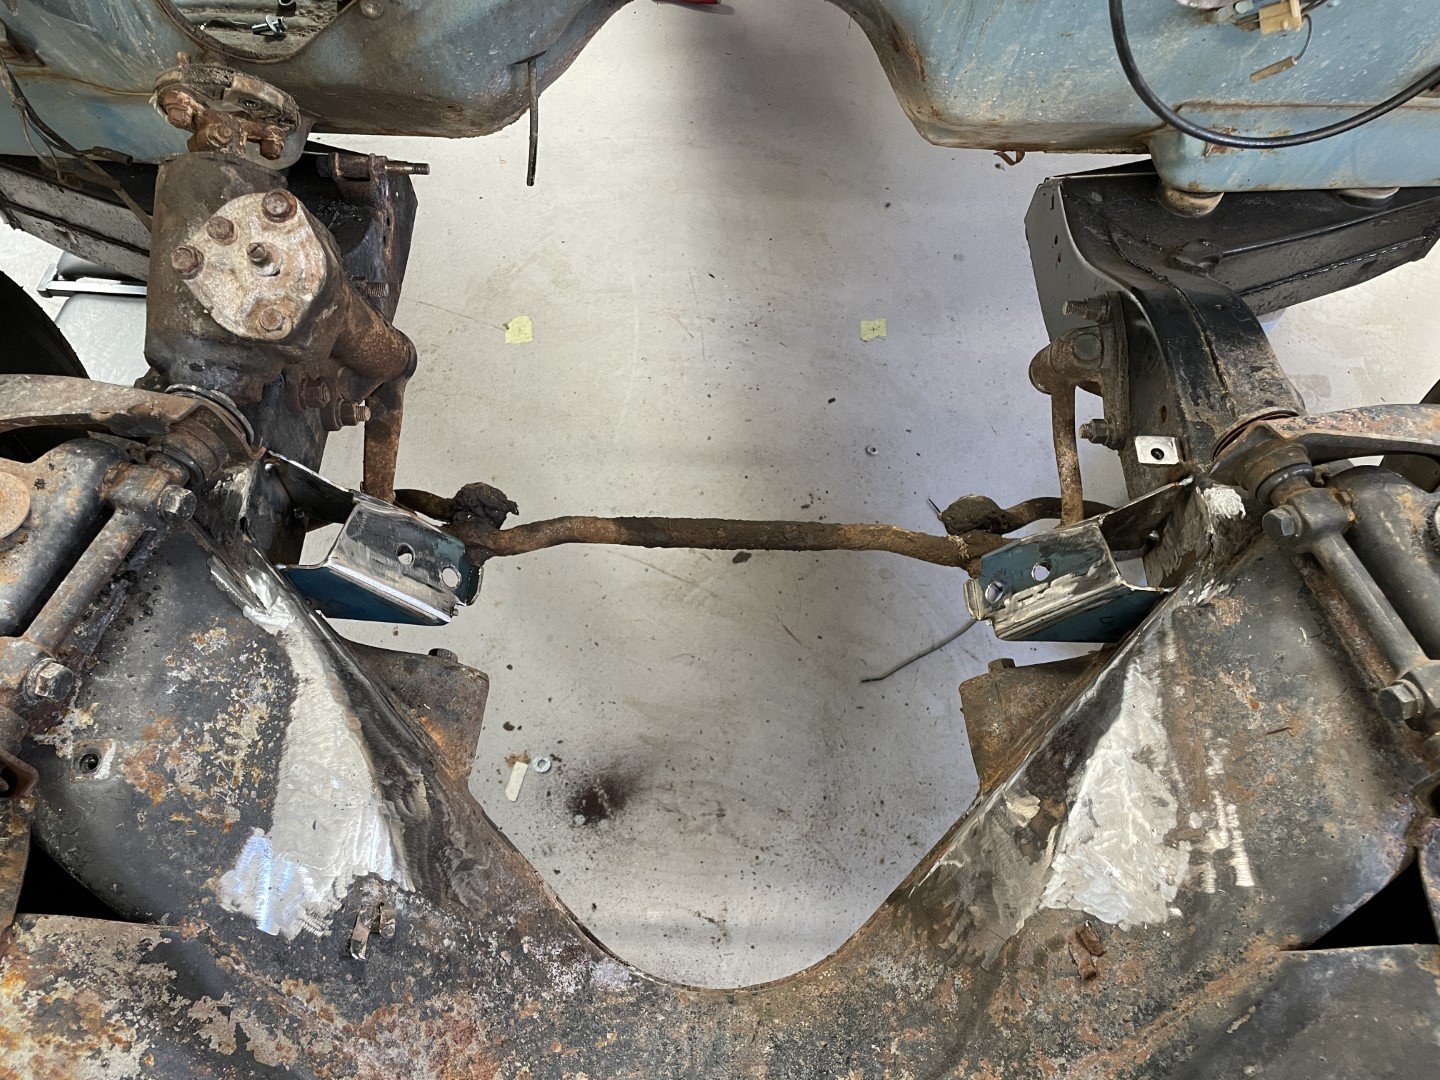
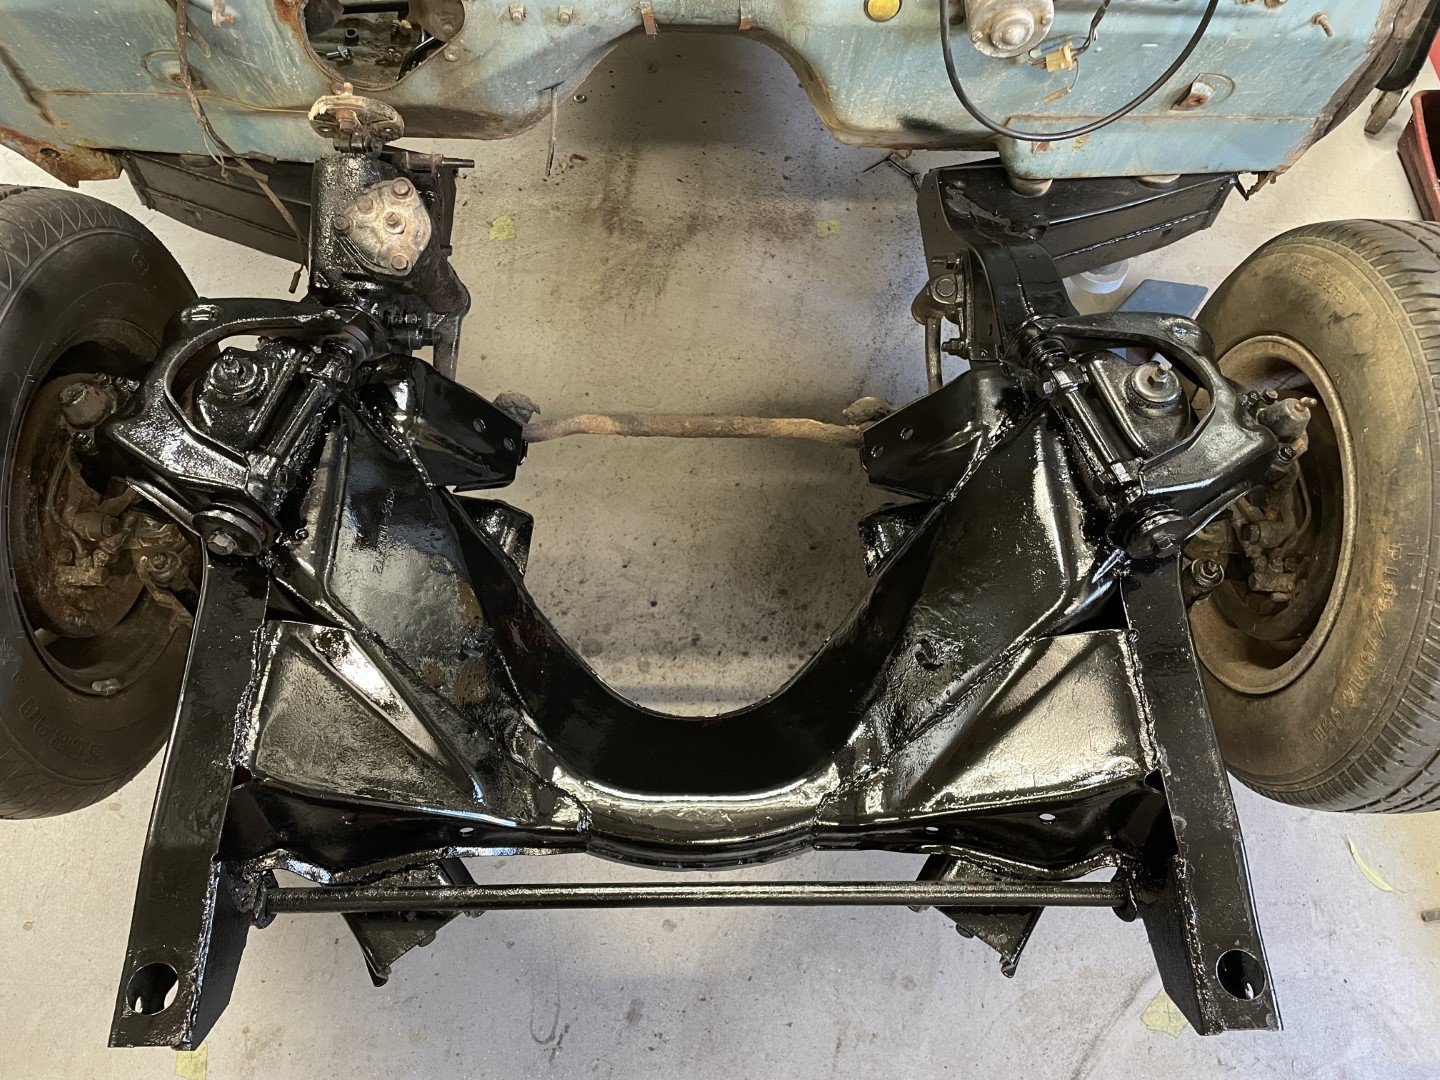
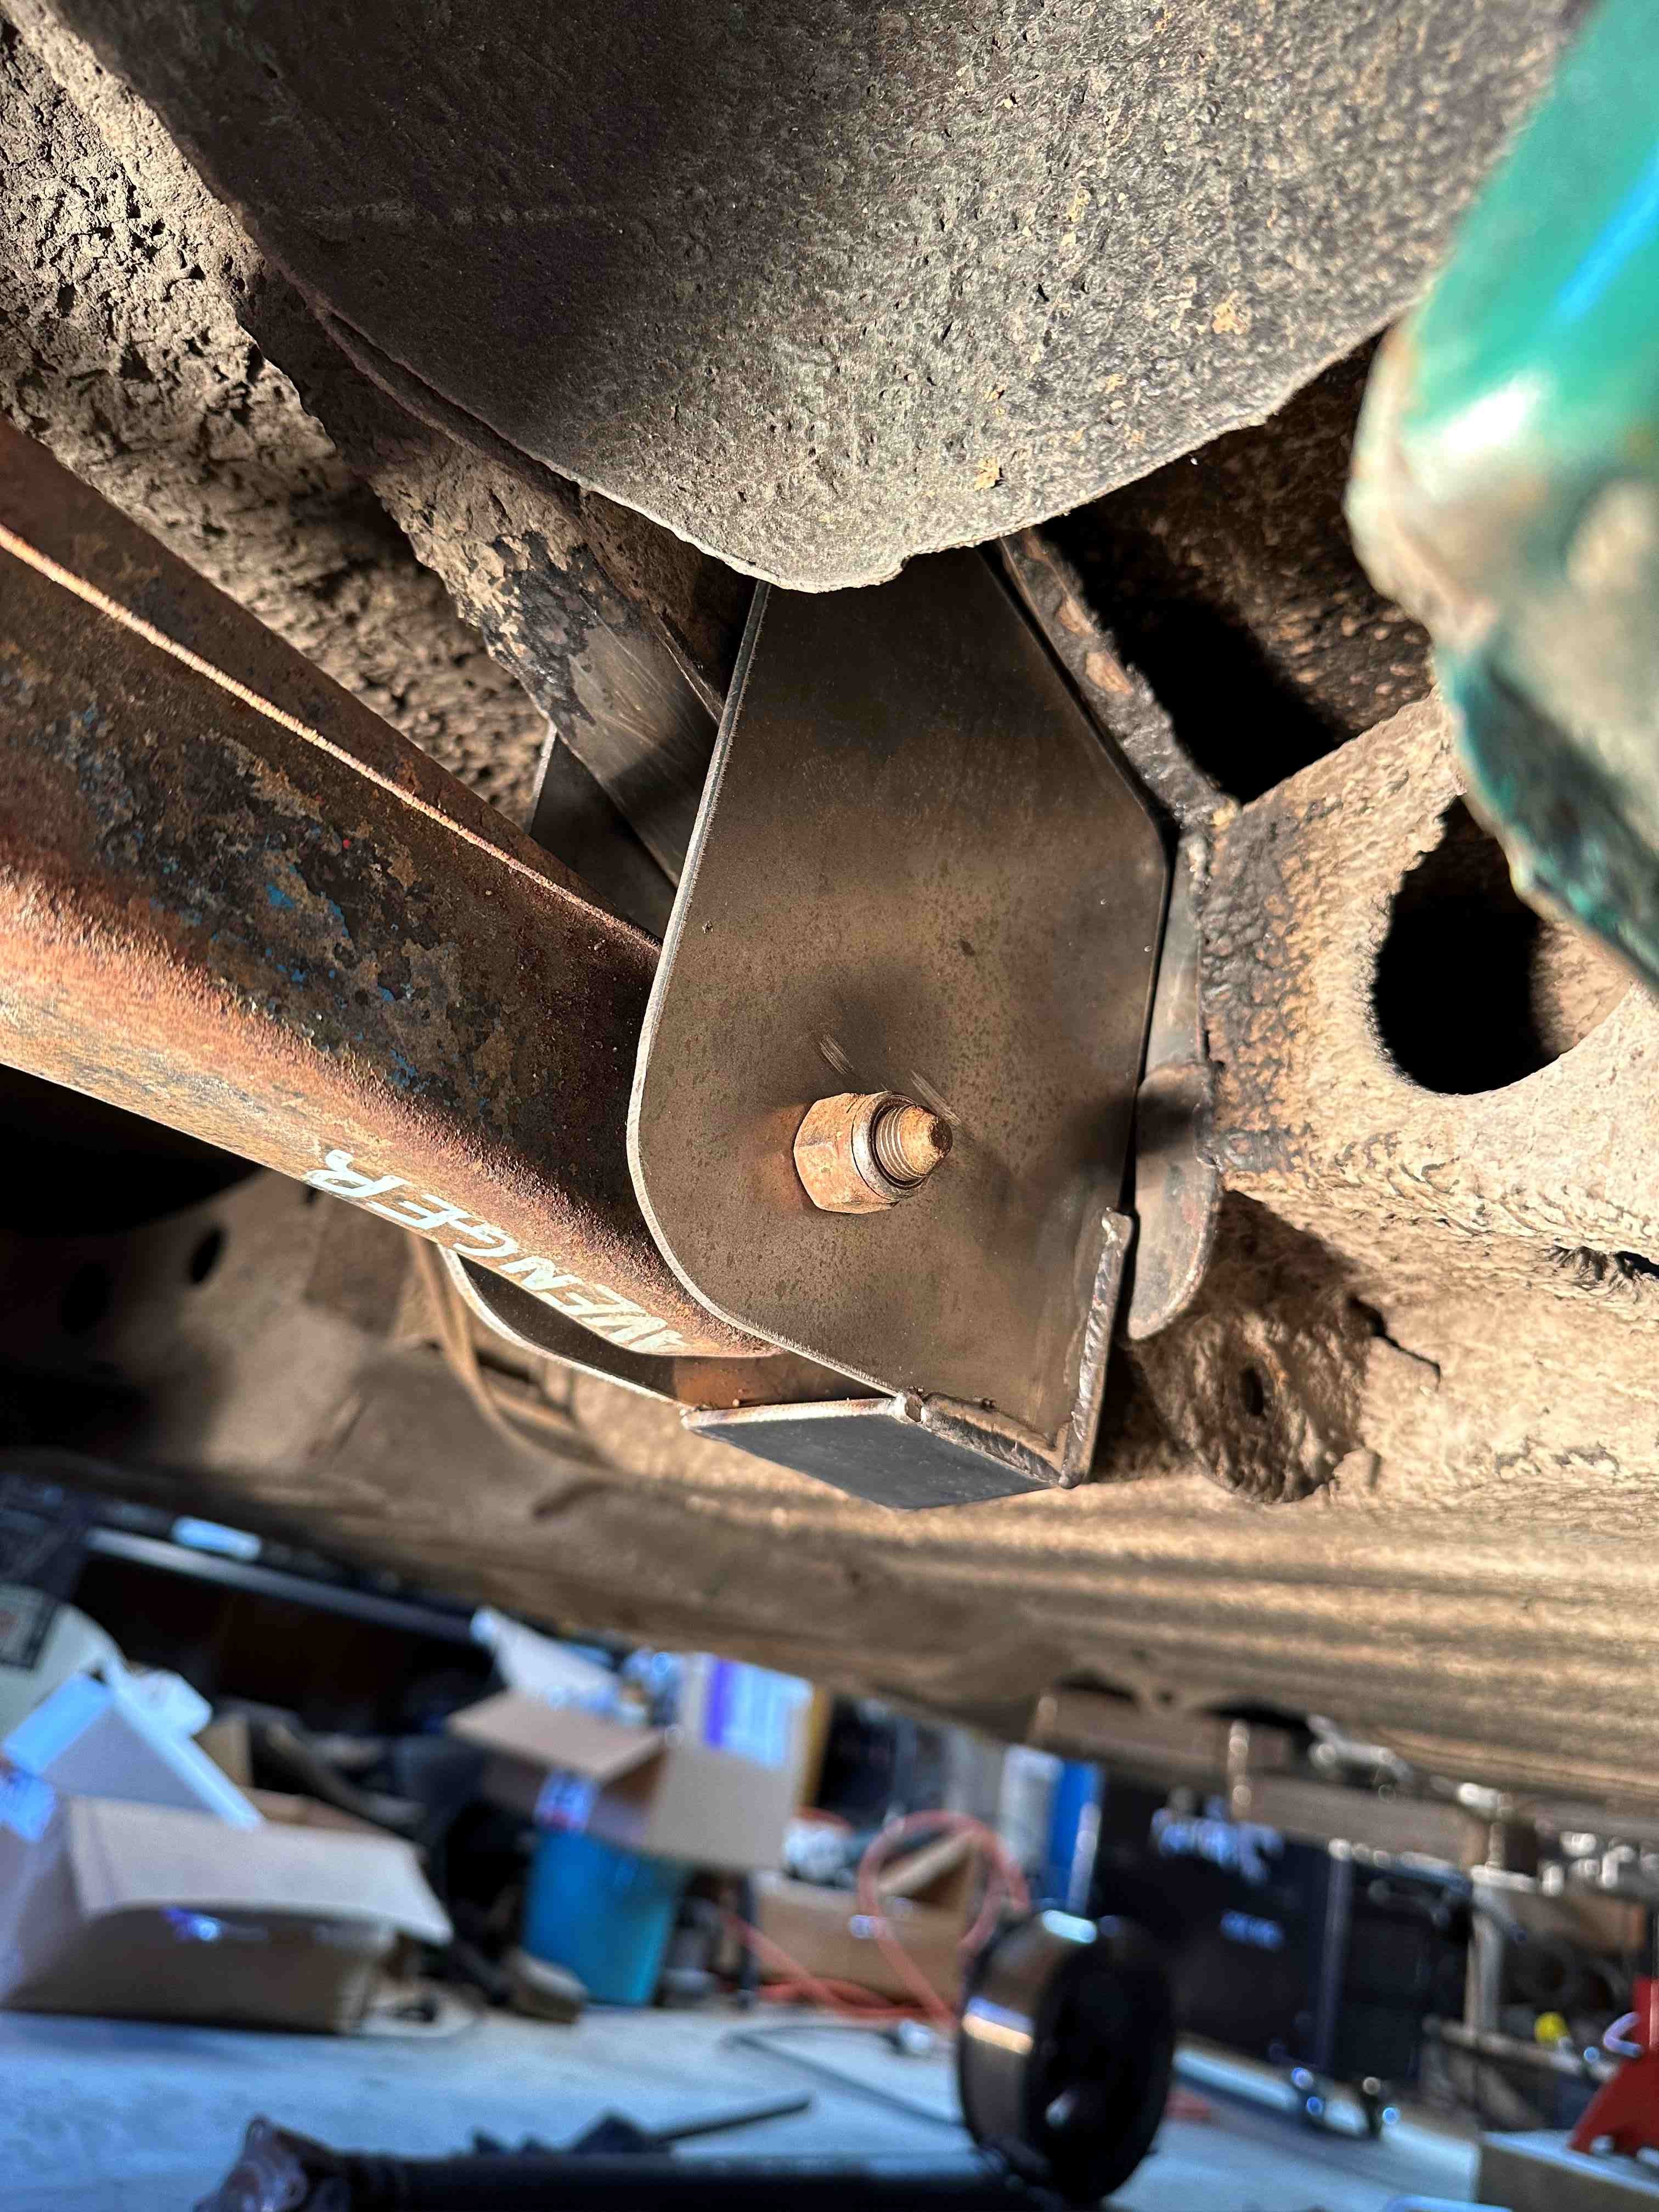
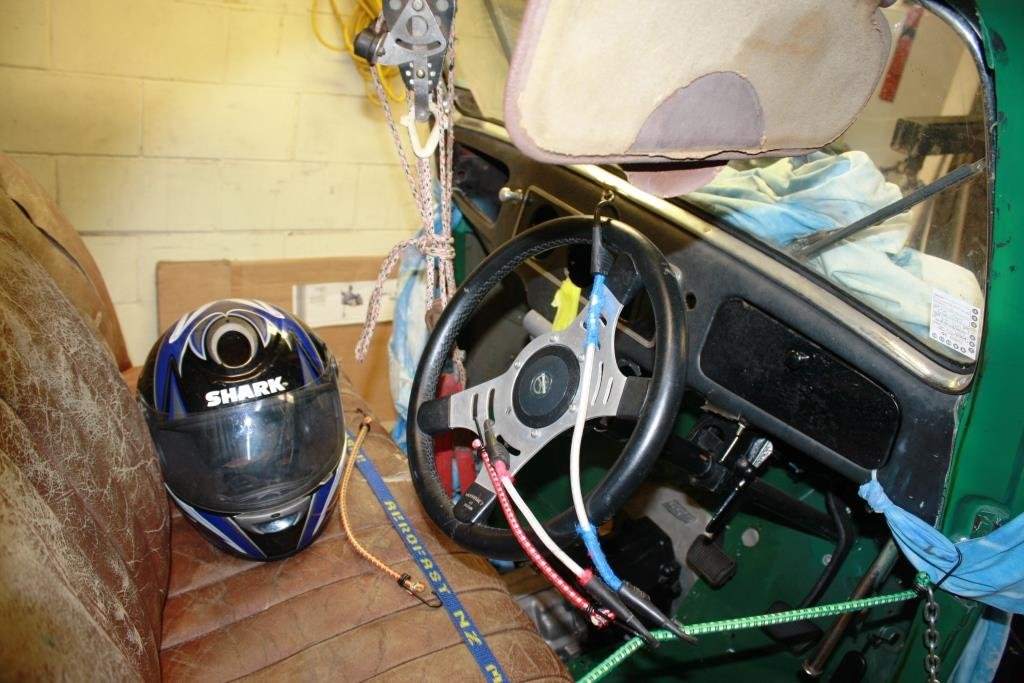
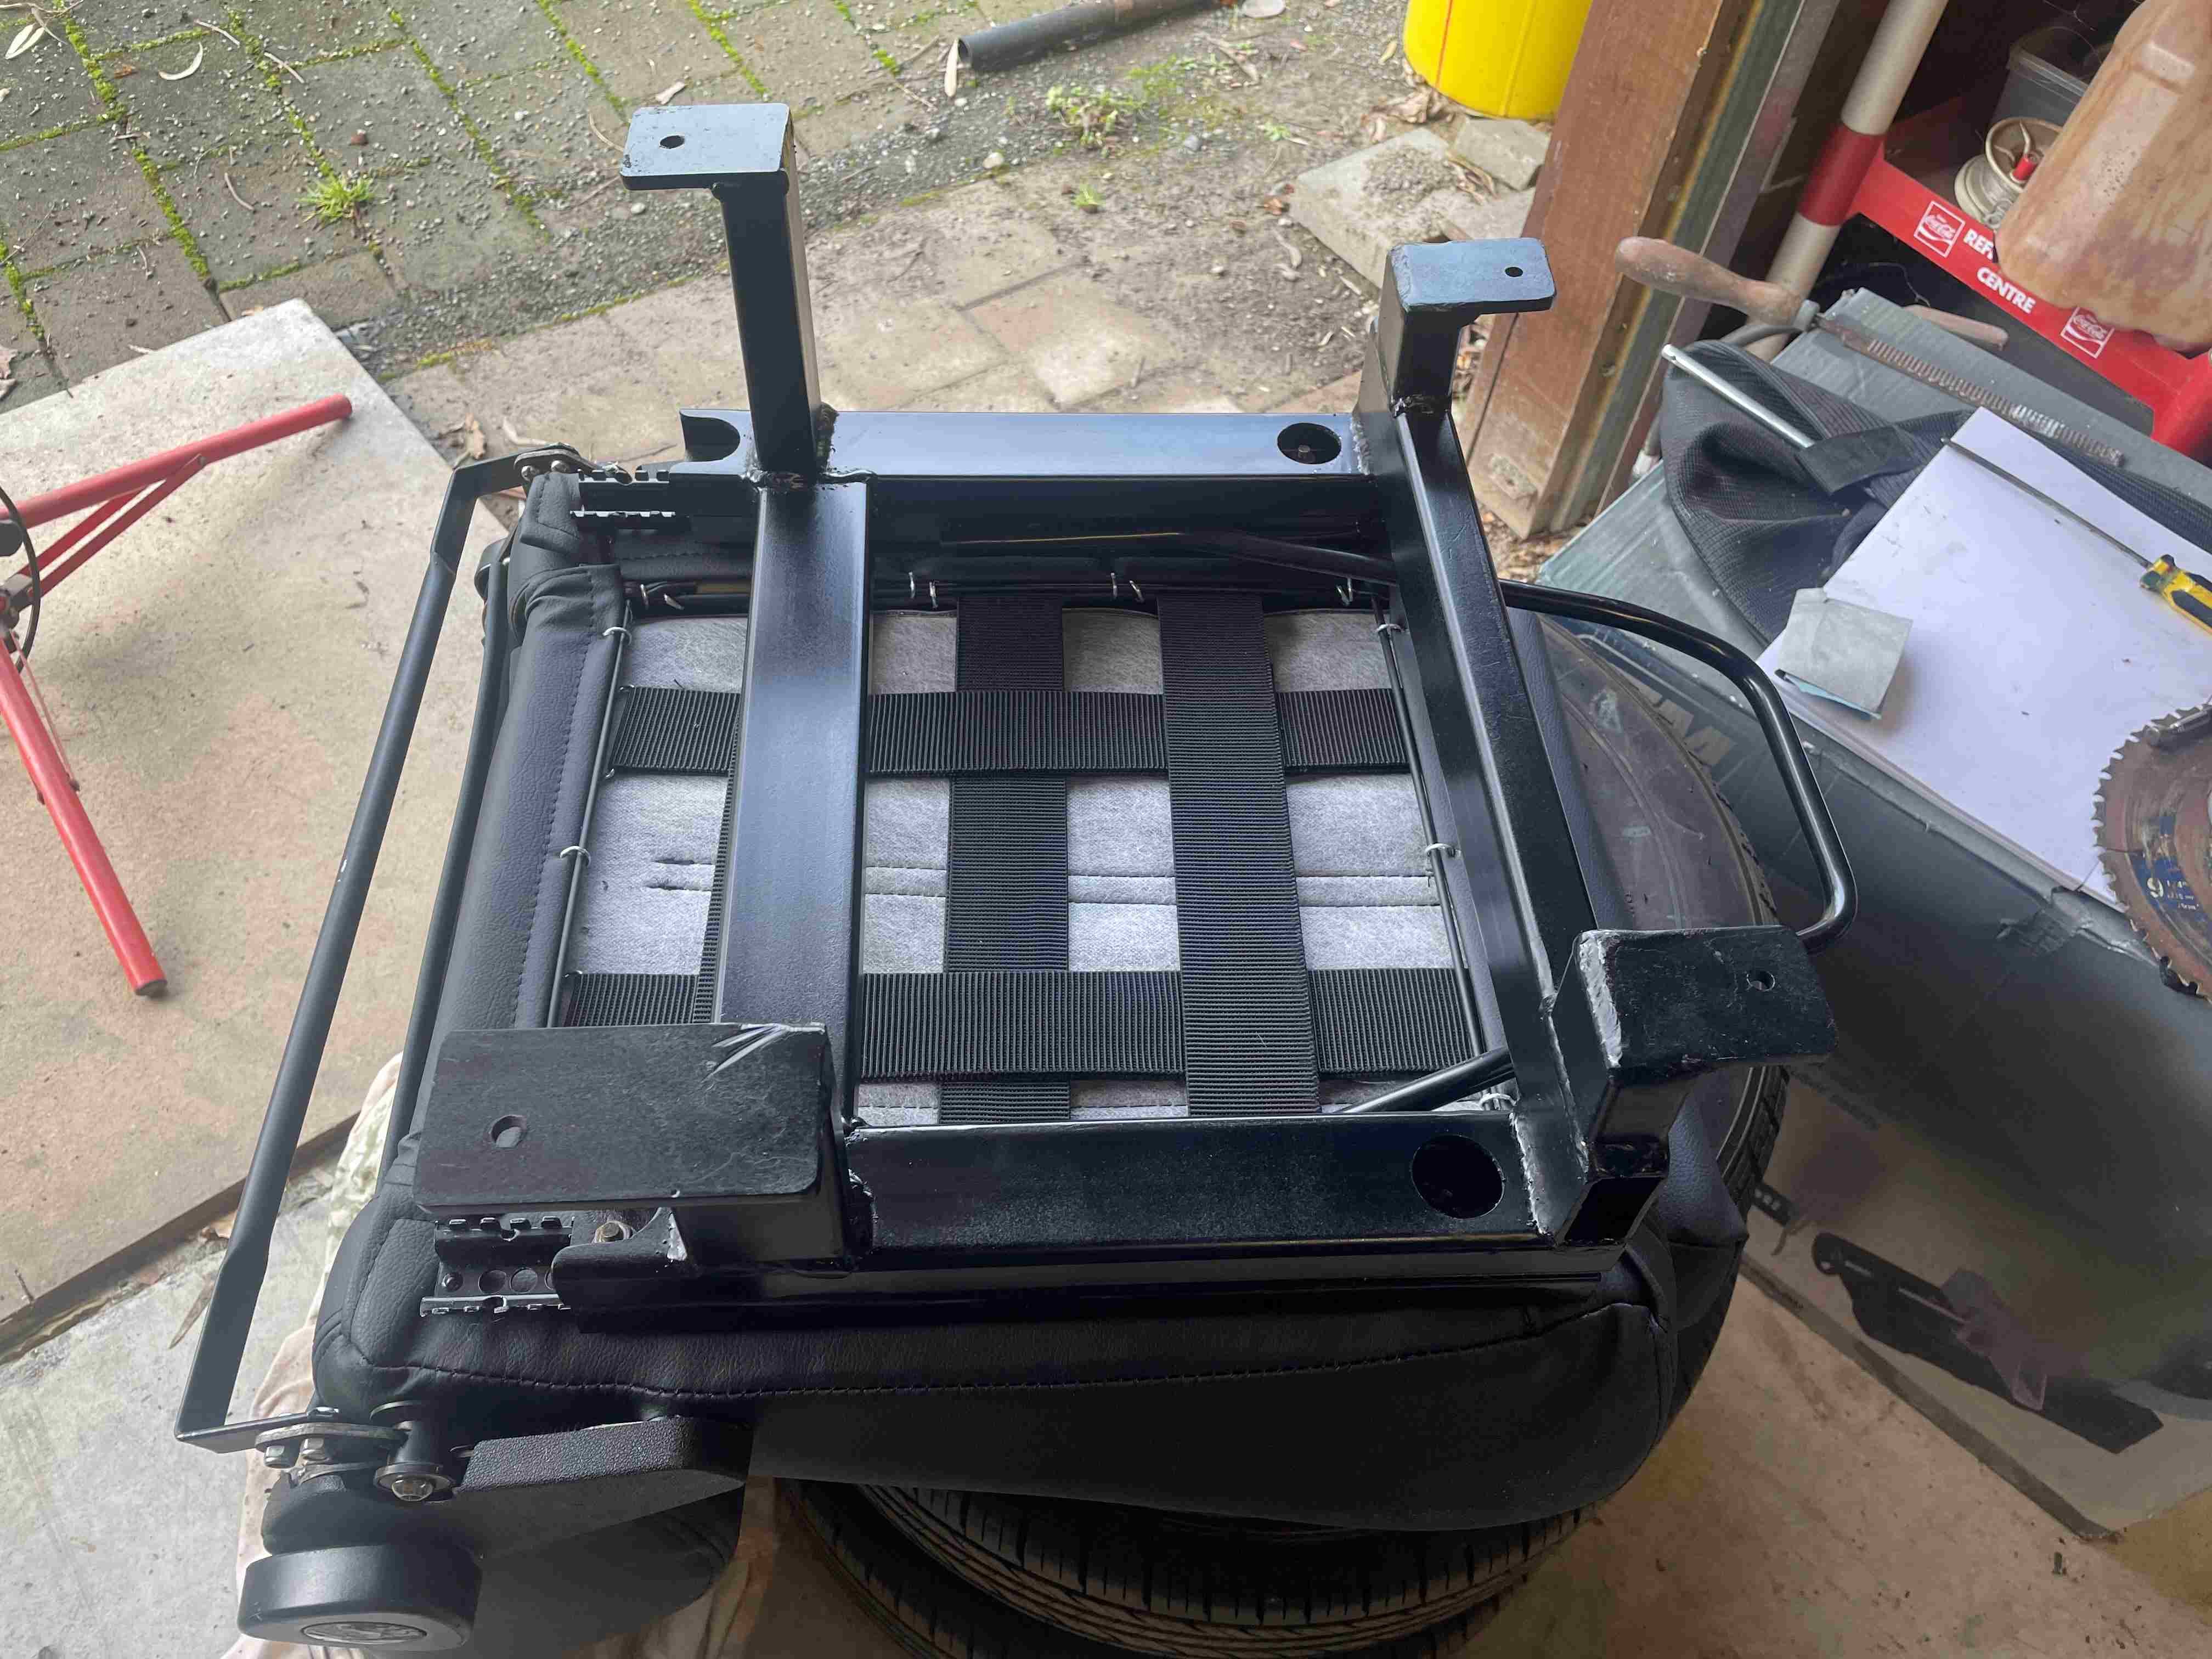
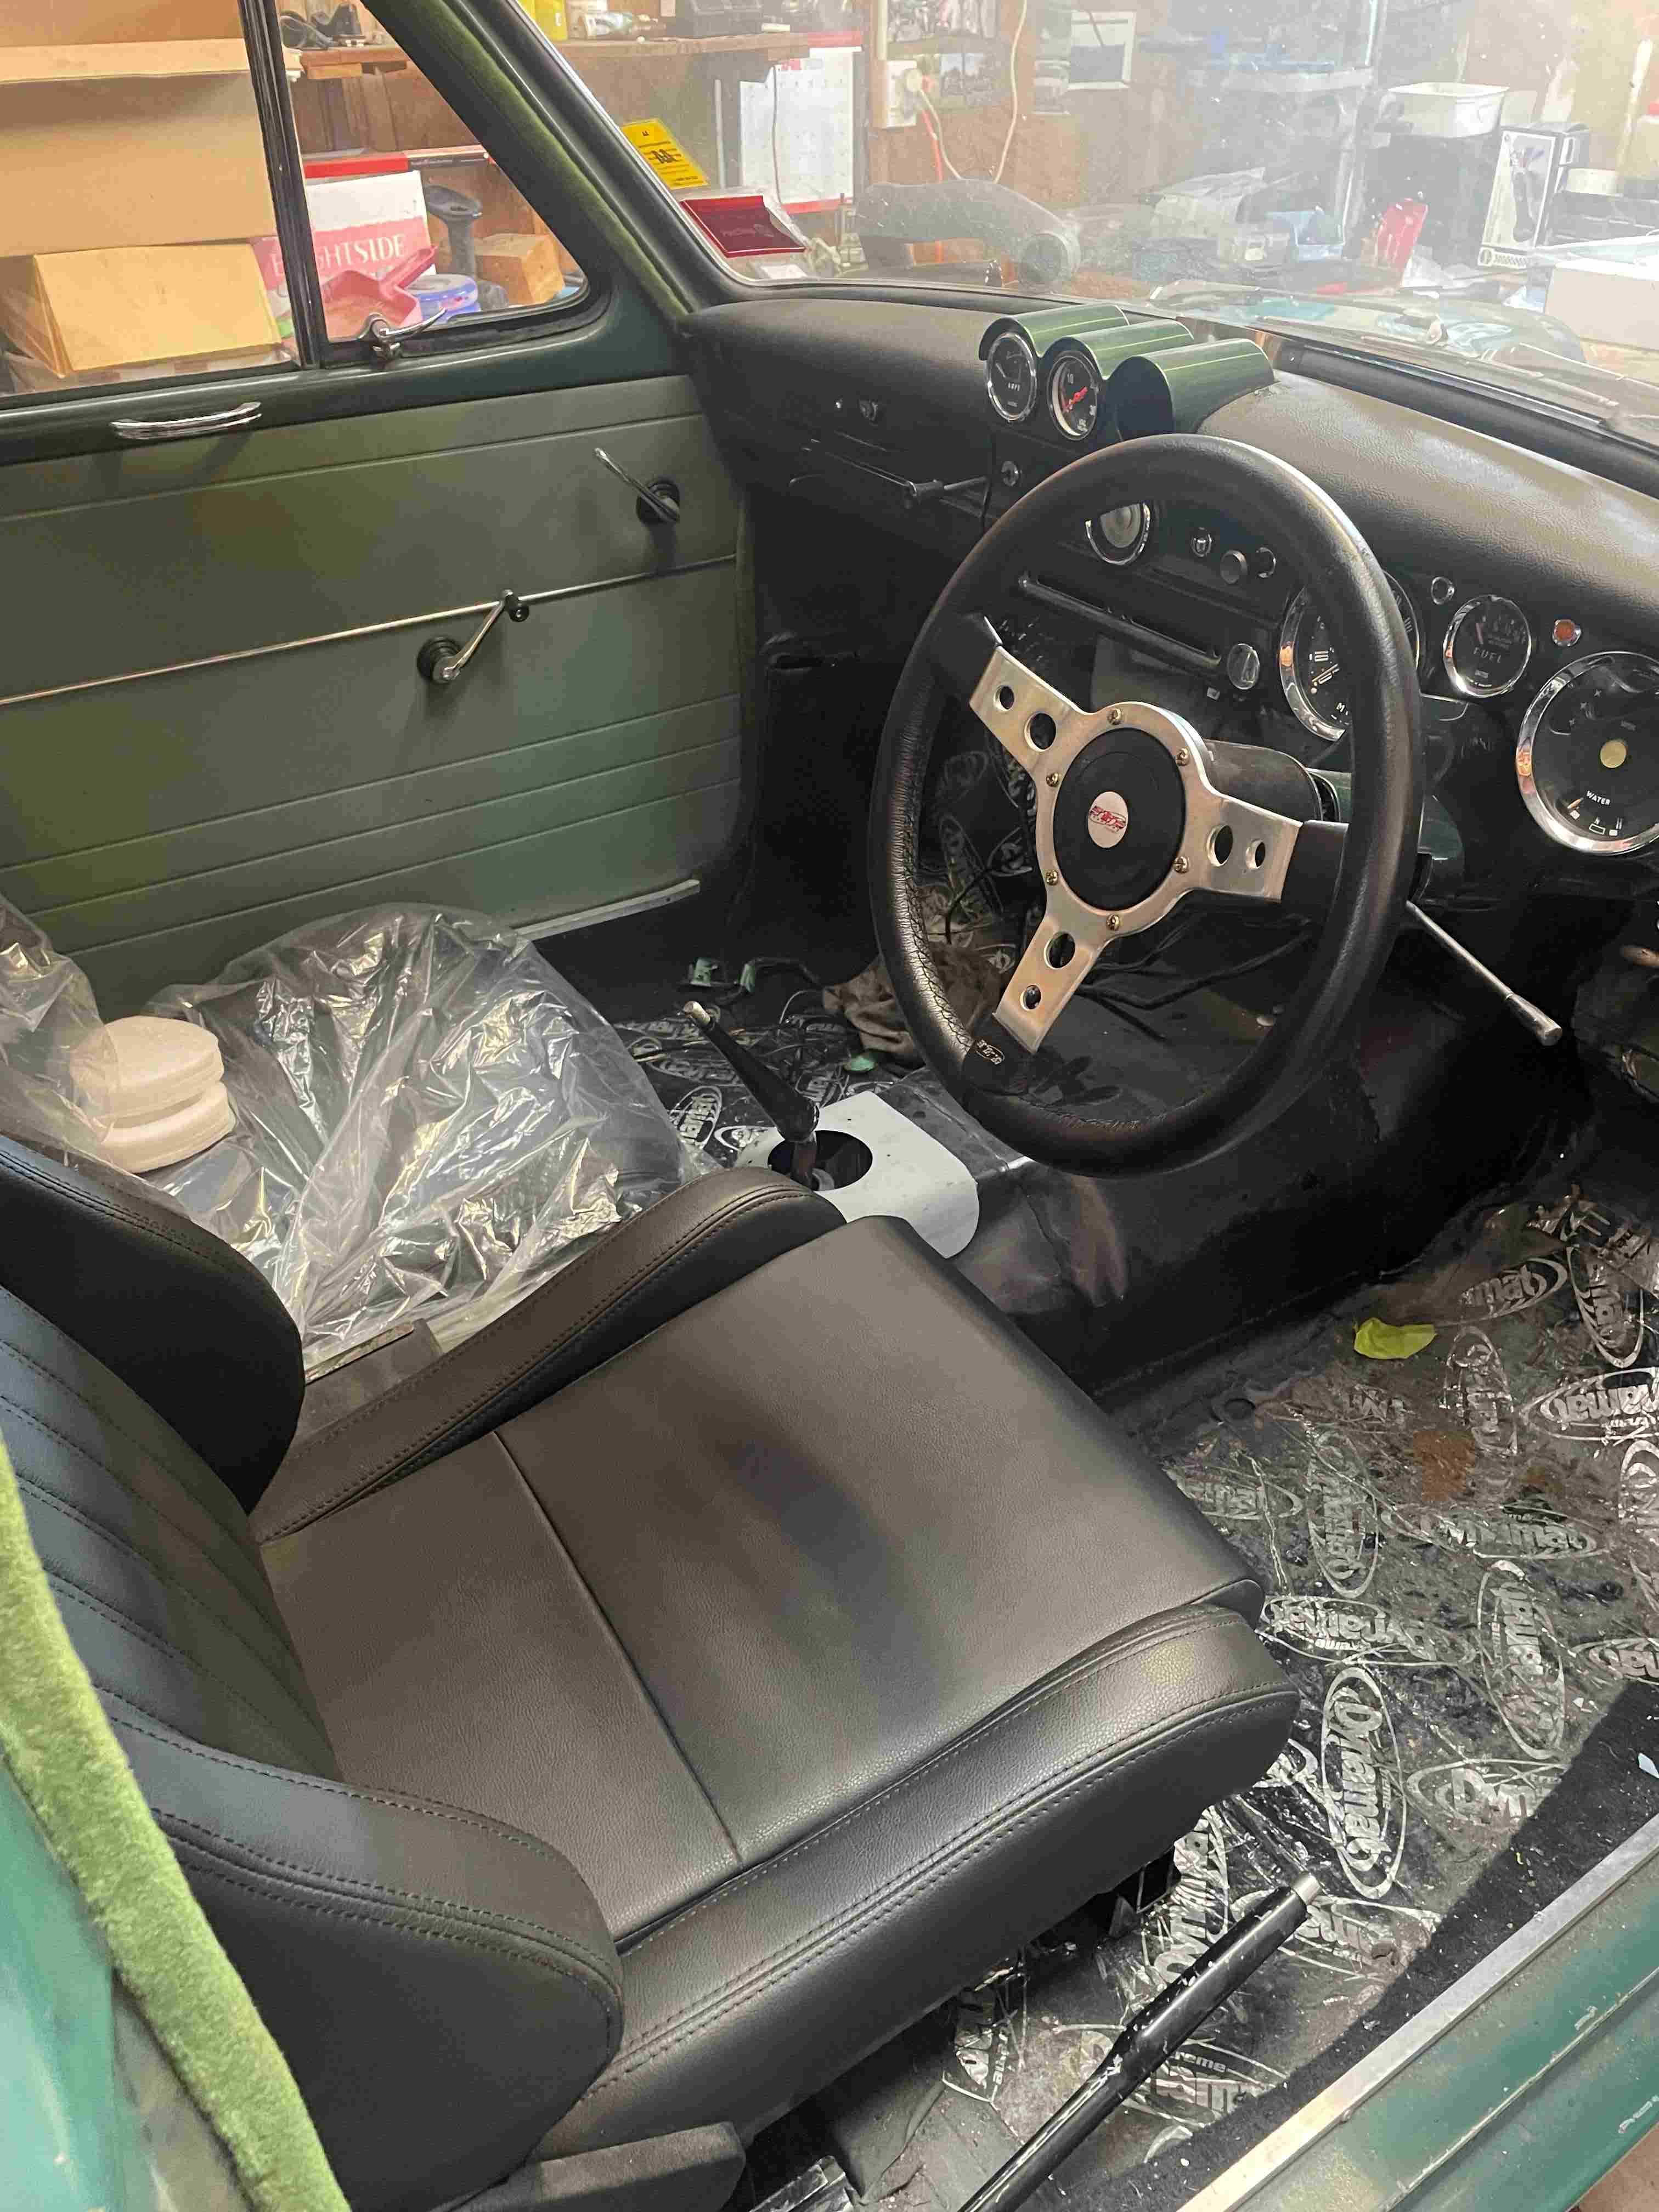
Haven’t done a heap, still waiting on structural repair report then we’ll be very swiftly into compliance. My warrant guy has a Val and a Charger street stock so had lots of parts, he hooked me up with a sway bar to test fit. (A sway bar was a tick-the-box option for these) The main mount brackets suit the K member profile great but the length wasn’t quite there. I work at Mount Shop, so had endless possibilities. I ended up with a Mitsi Challenger drop-link that I used a universal whiteline saddle clamp and D bush to clamp on the Radius rods.. they are bushed at the front and rigid at rear so plenty of support. Will drill holes and attach after compliance. Has since been blasted and painted, ignore my bundy long mock-up bolts. The seat upholstery kit finally arrived from Canada on Tuesday so got straight into that this weekend. Everywhere in the states is backorder only and could be years, one place had a front set but no promise of me finding a matching rear so I found PG classics in Canada..they were the k my company to list a SET and only in one style. I just had to jump on it and I’m glad I did. It’s very well made with heavy vinyl and foam padded ‘inserts’. The rear seat base was real legit,the only one.. but green. Easy strip down.. dad was going to send his hog ring pliers up but hasnt so far, so I pulled all the originals out, straightened and re-used with a series of different pliers. Was a tiny bit baggy but I’ll live with it, can always re-visit down the line.. I also used up all my padding so.. The back was wasted, filled with vermin nests and wasn’t going to cut it. Ended up binning all the padding and making my own from foam sheet and a douvet cover folded in 3rds. The front covers slipped on great but the edges were baggy and the whole feel was off so I dug out a big chunk of Auto carpet underlay I was saving and went to it. Worked so well! The foam wasn’t too bad but I added material to some low spots, made some 80’s ‘shoulder pads’ and glued underlay over the whole surface. Then today the sun came out so reversed out the shed and wound the windows up and let ‘er cook so it can ease out creases and such, worked well but needs more time. I’m super stoked, they are comfy AF and look so much better as-is and I know it will improve after a few heat cycles and some use!14 points
-
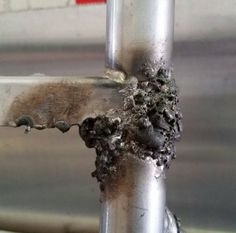
Nick the sparky came and had a look. My wiring from the alternator is a bit on the small side and not the right type of wire. He made a test wire to bypass that, alternator was charging but it still wasn't charging at the battery there was a large voltage drop in one section of the battery cable that runs from front to back He said that was very uncommon and likely would have been why the original alternator shit itself Whipped the cable out and he's going to make a new one with the right stuff Pretty pleased to know what is wrong, I never would have figured that out myself6 points
-
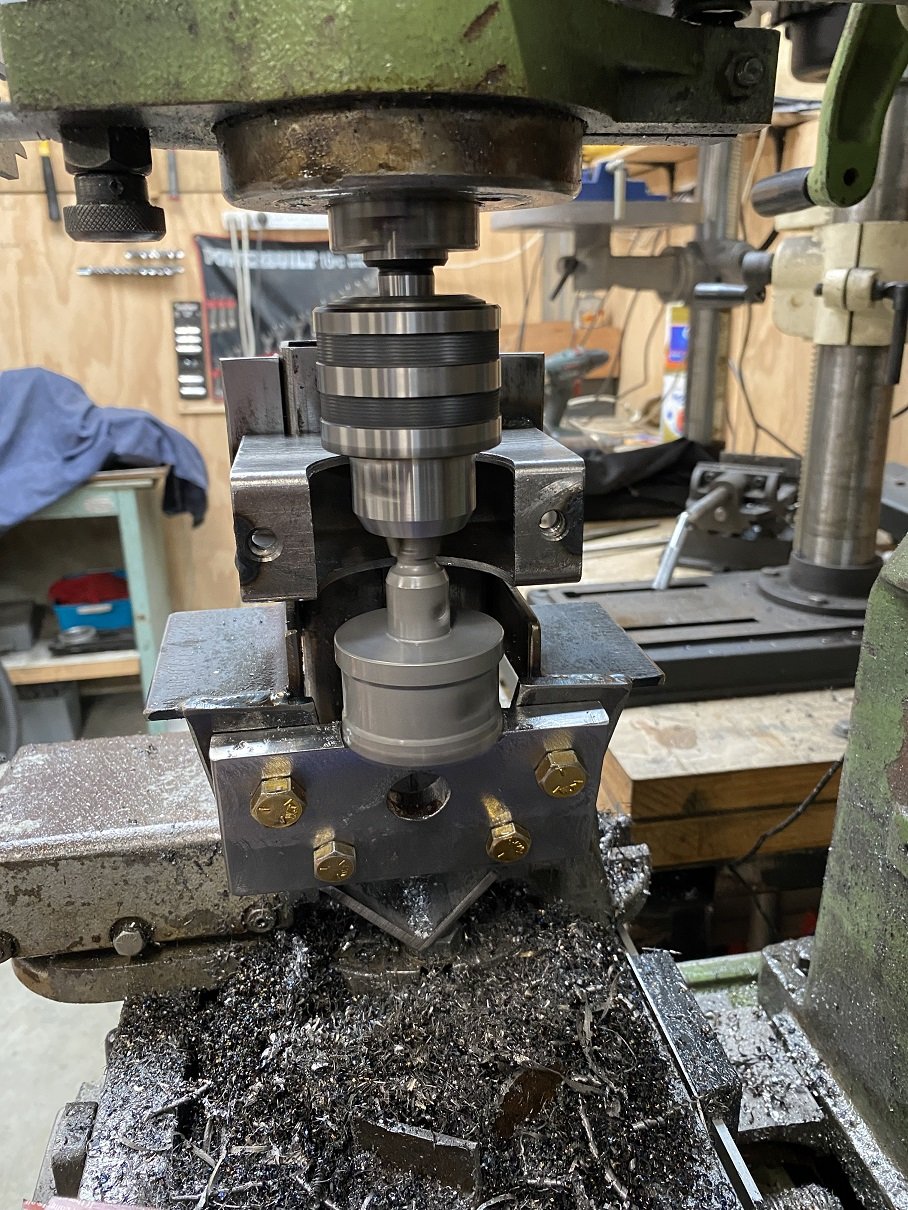
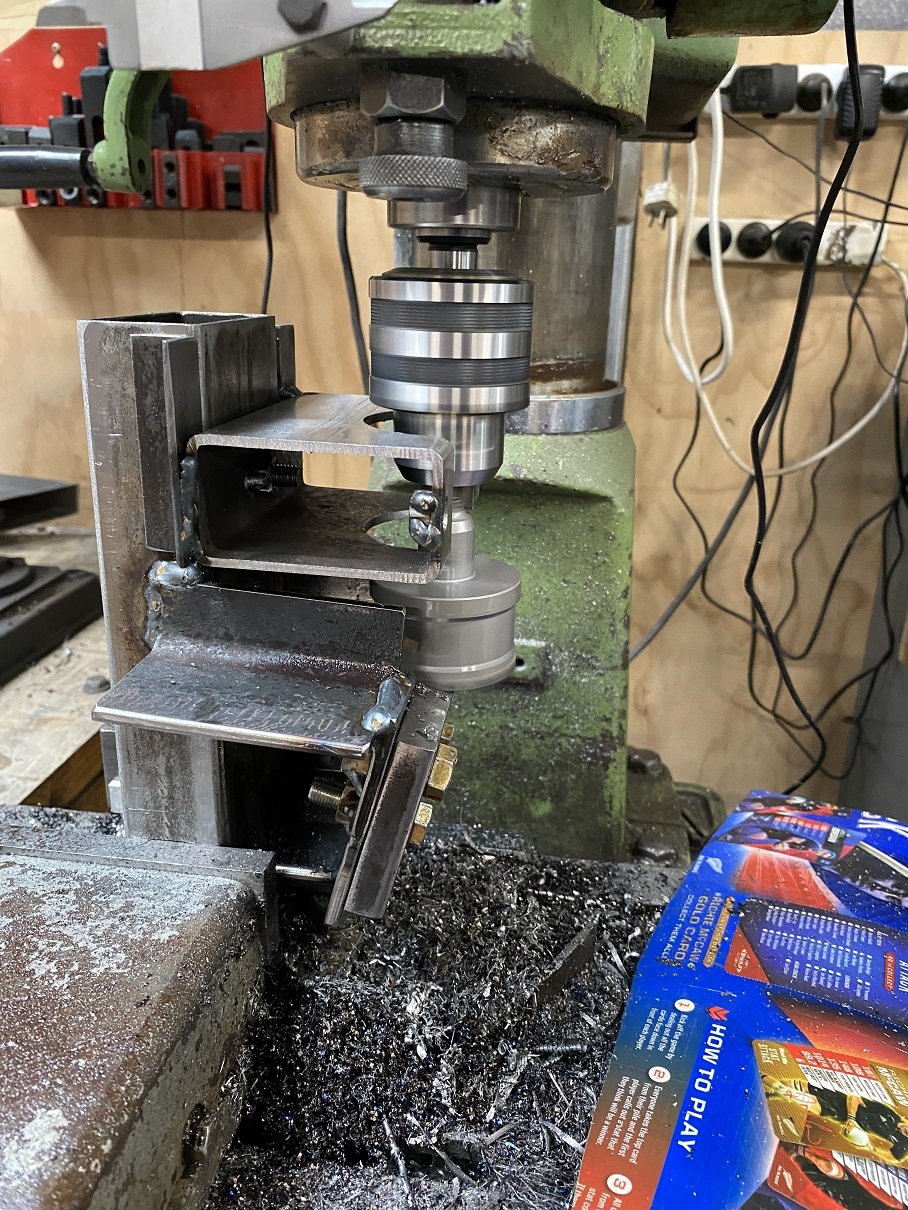
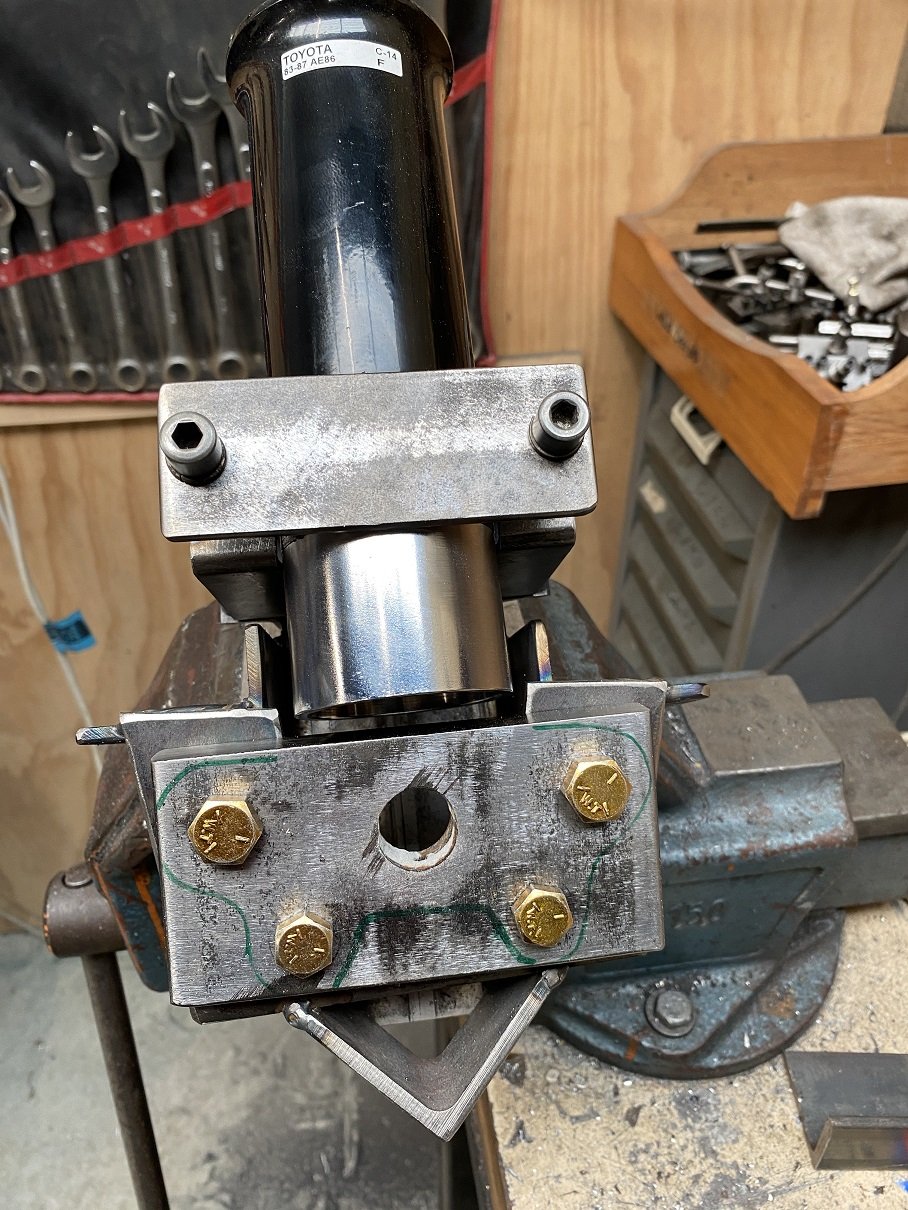
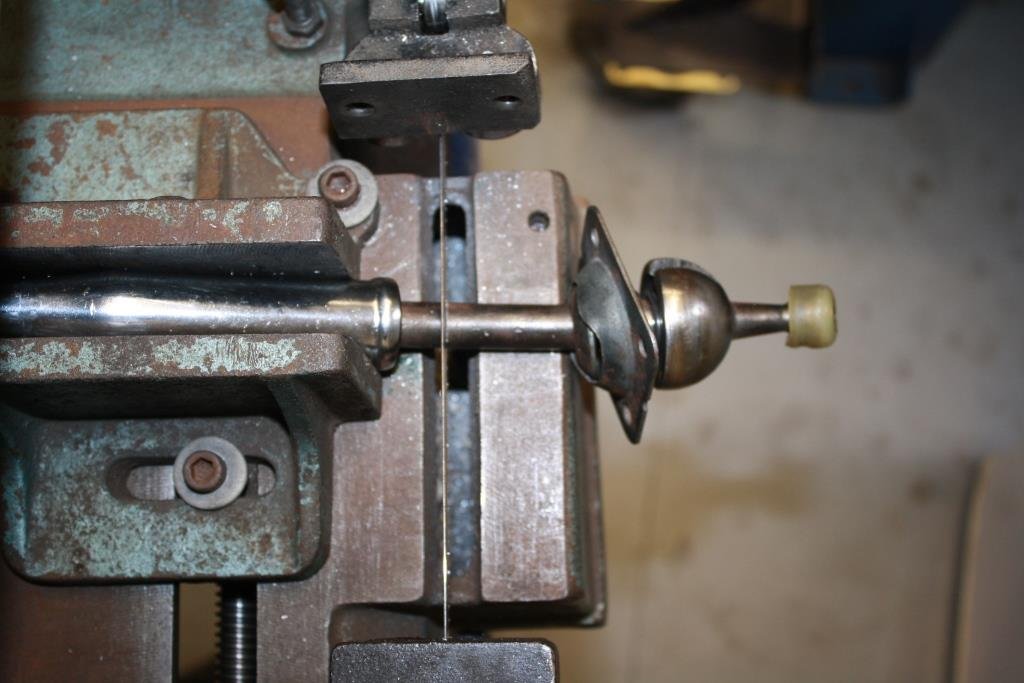
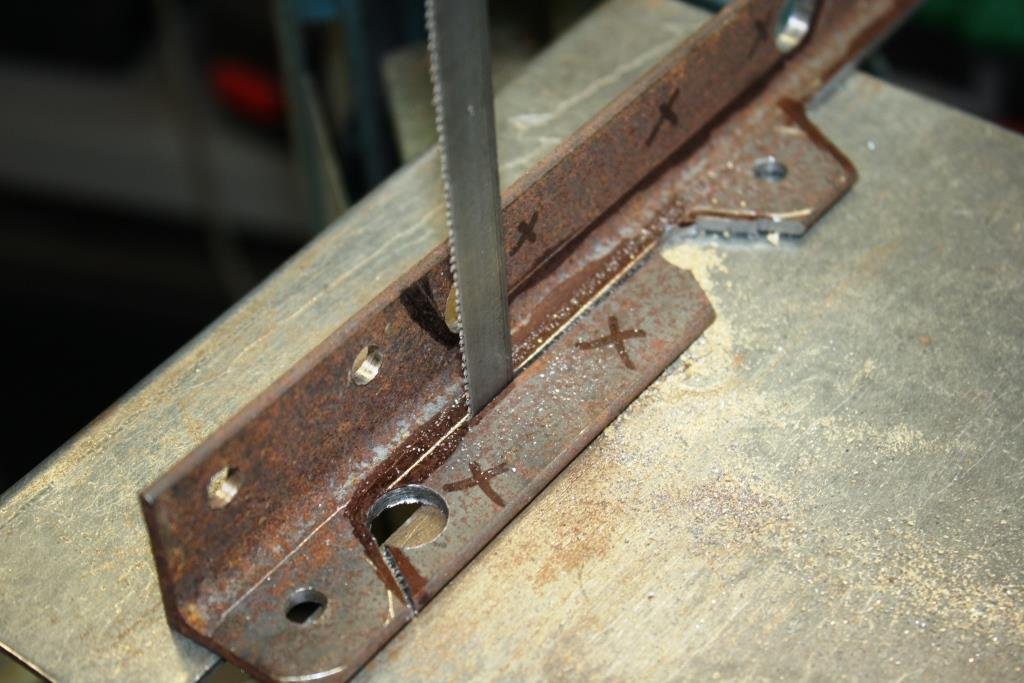
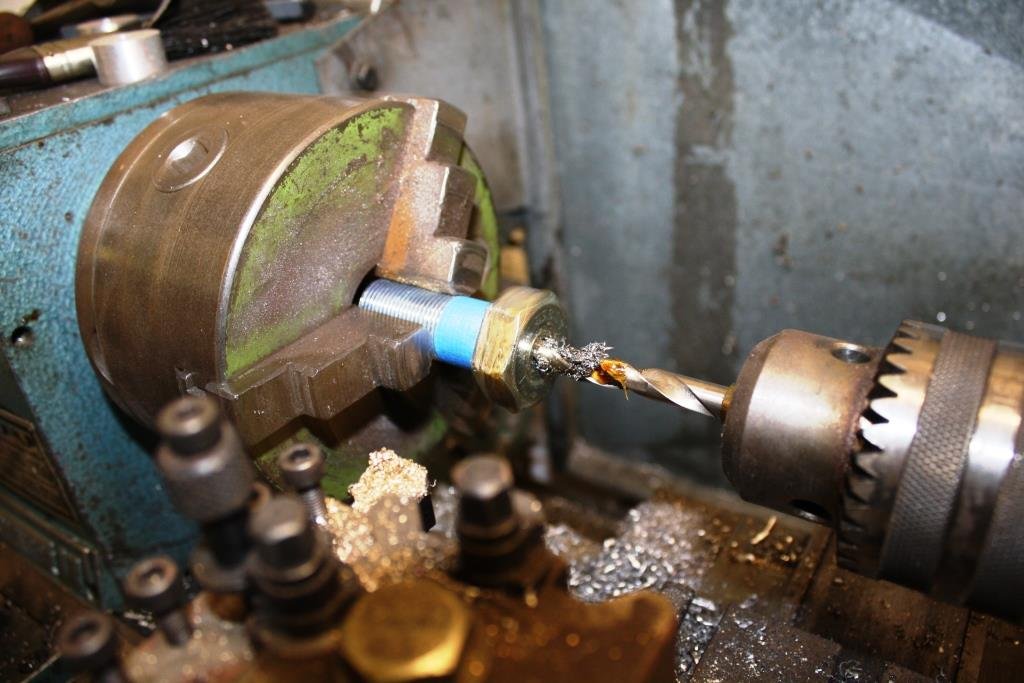
Well, the holesaw in the mill kind of worked, right up until I tried to push it too far and it jammed, chipped a tooth and bent the holesaw shaft. I finished it off with the vertical bandsaw and powerfile.
5 points
-
Yeah wishful thinking with the EFI fuel tank, no way its going to fit. Too long for the chassis and too tall to fit under the wellside. Could space it down but then it will hang lower then the chassis rail and the thin steel holding lots of flammable juice is not the first thing I want to hit the ground Back to using the factory tank with an external pump, not the best for fuel surge but if I keep it above 1/4 tank then it wont be an issue. Fizzed the exhaust together4 points
-
All bolted in and working smoothly. The next time I drop it out will be for a final cleanup and a coat of paint. I can now start back on the diff install again.
4 points
-
Wof time again, gave the chassis a preemptive dousing with lanolin crc spray stuff. No , it does not like going out of this driveway. I put some wood down for the chassis to skid along
3 points
-
Report him anyway. Being burned is no excuse to be over zealous. How many other cars has he condemned that are more than likely ok?3 points
-
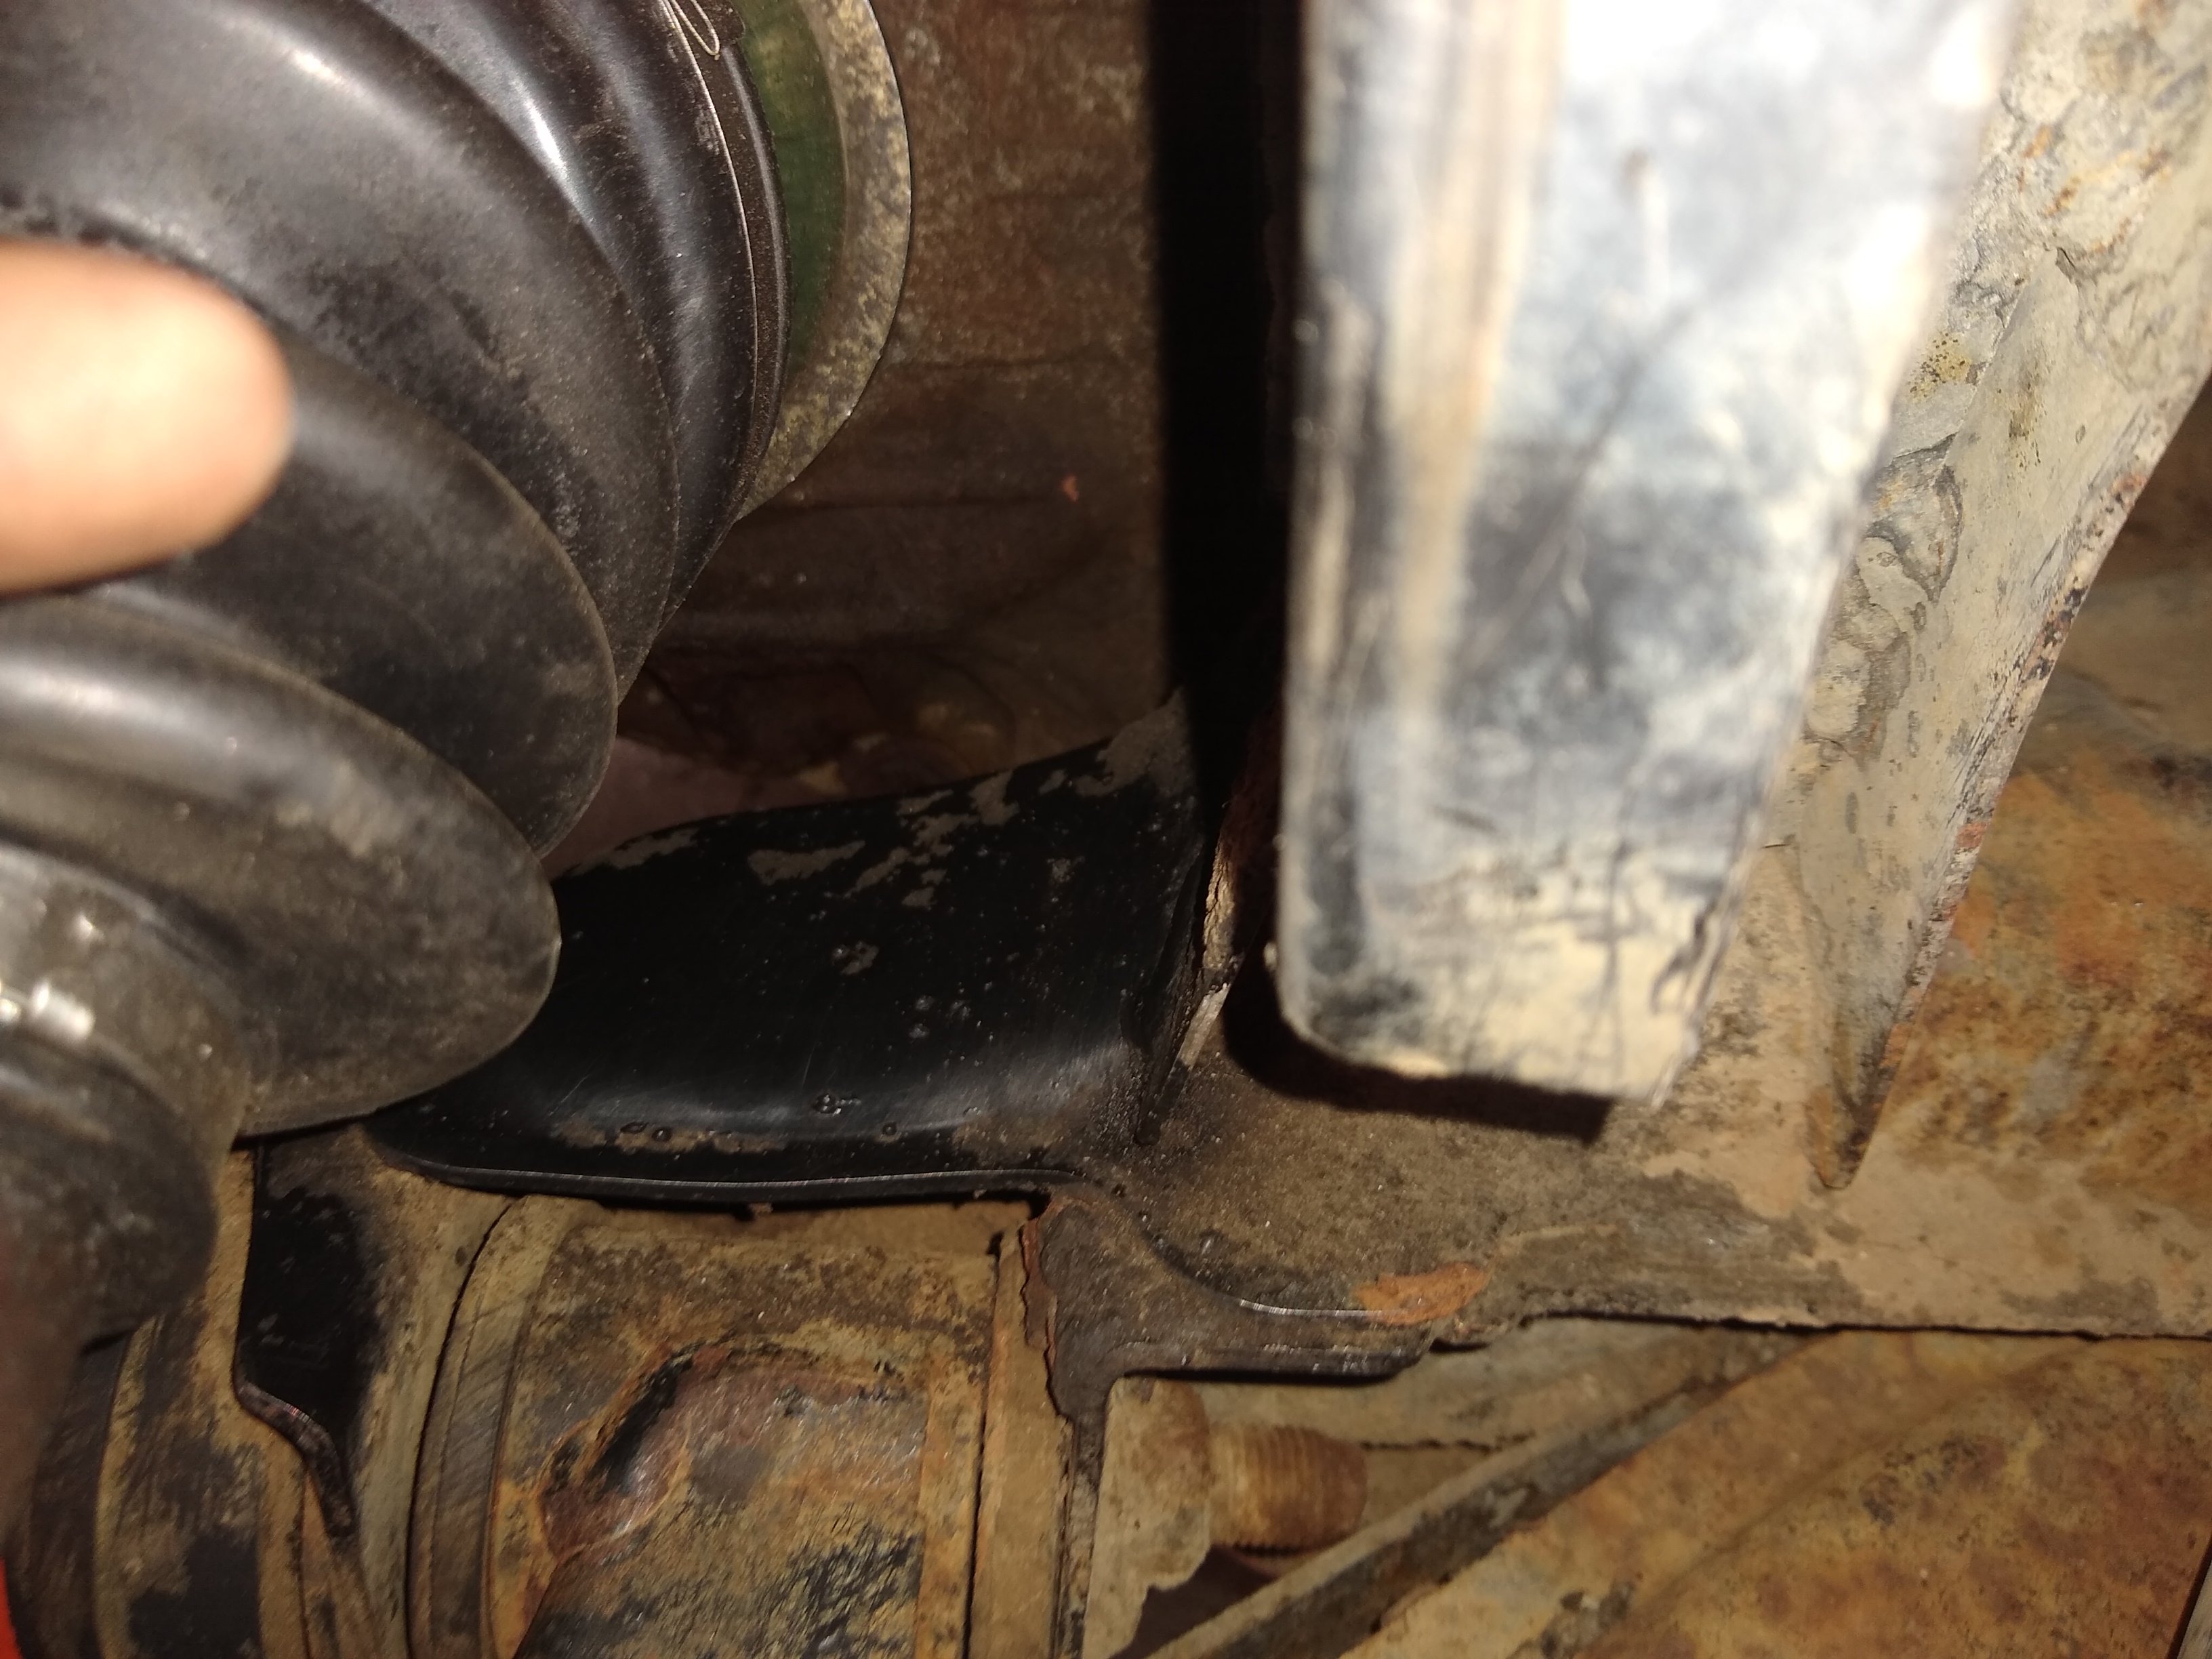
The black area under the cv boot is supposedly so rusty that the suspension will fall apart
3 points
-
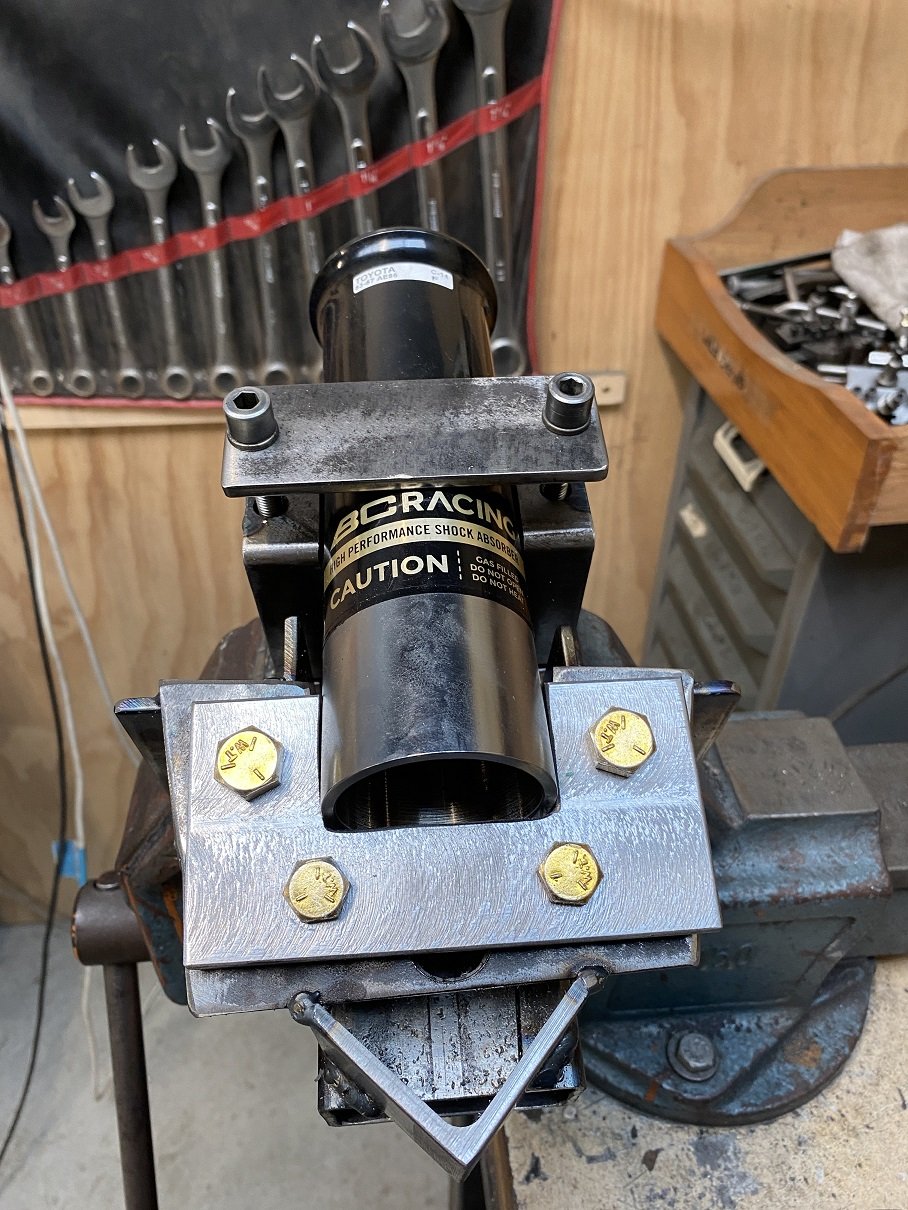
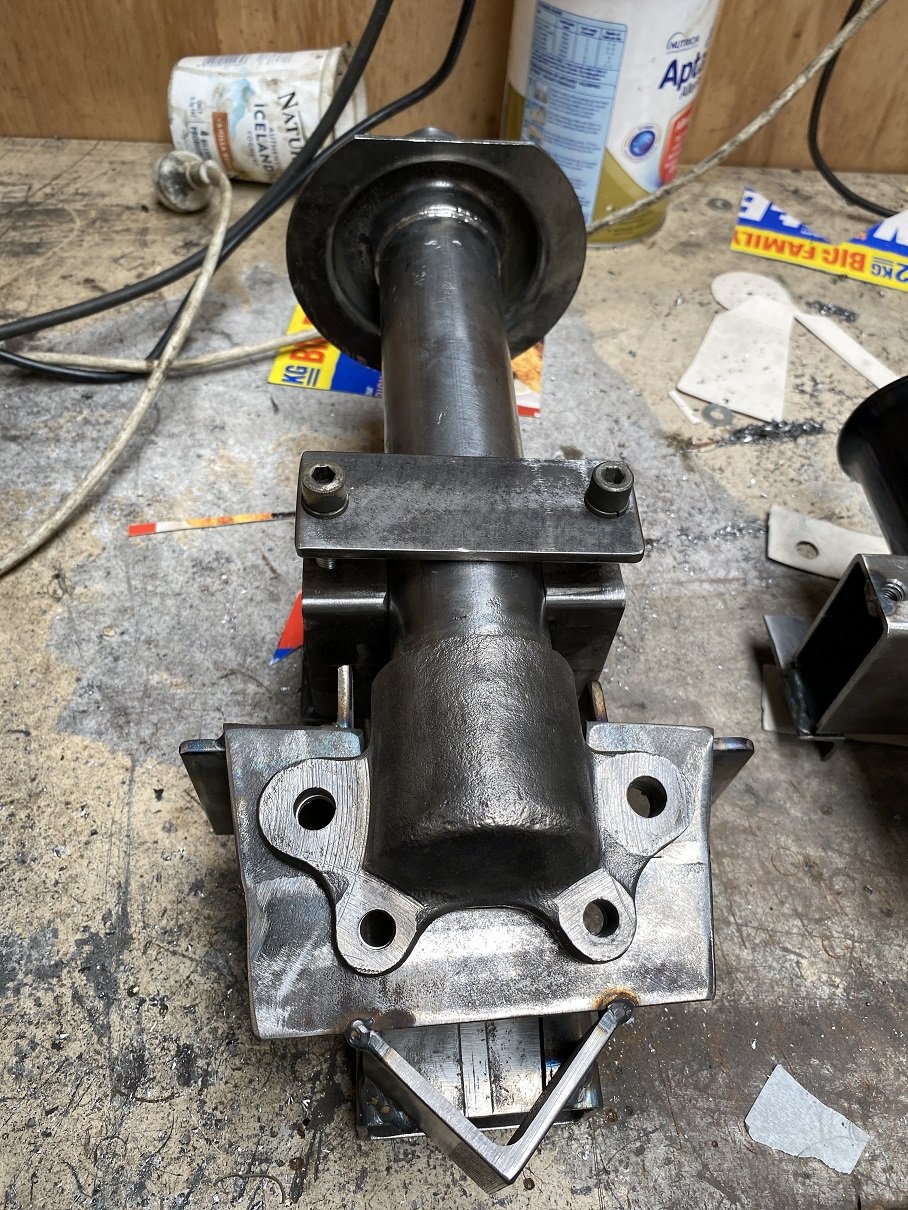
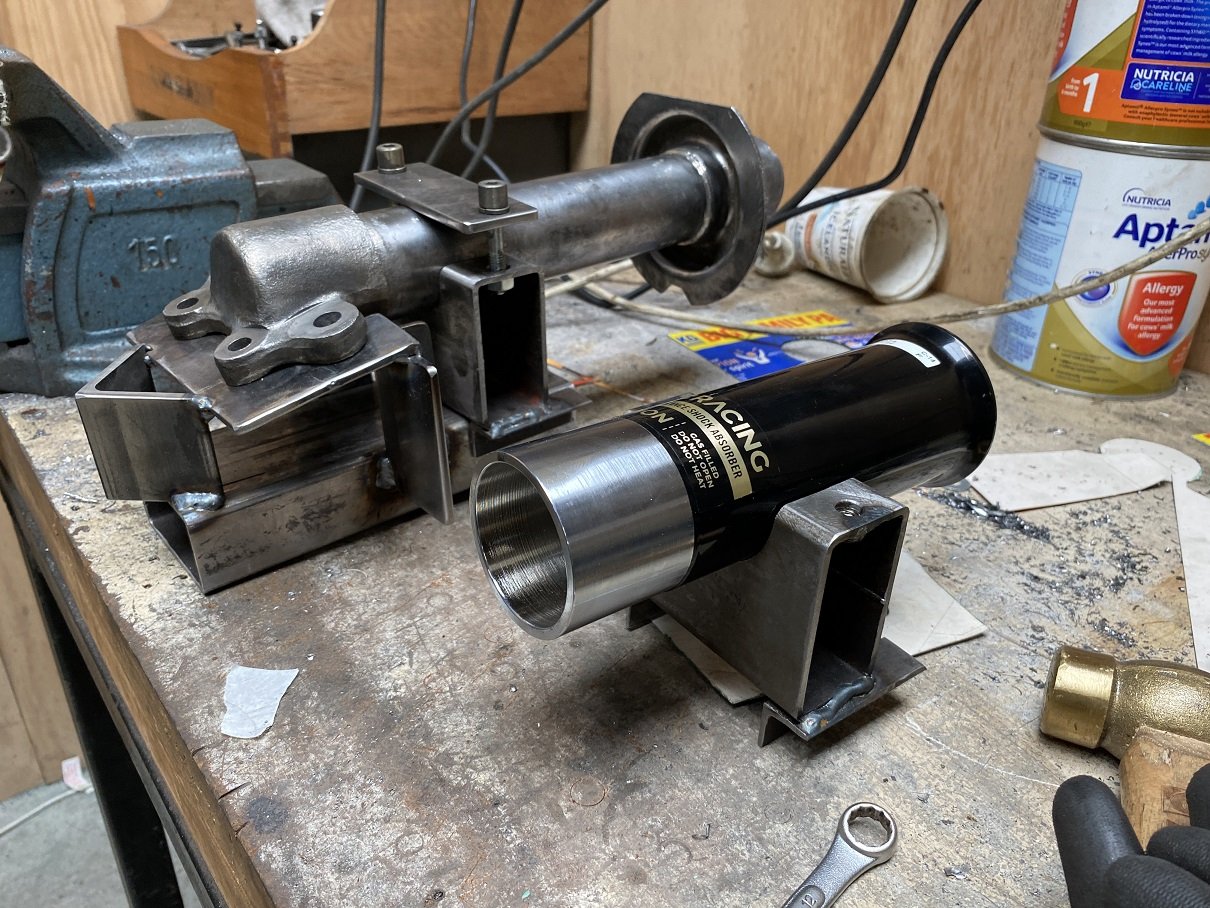
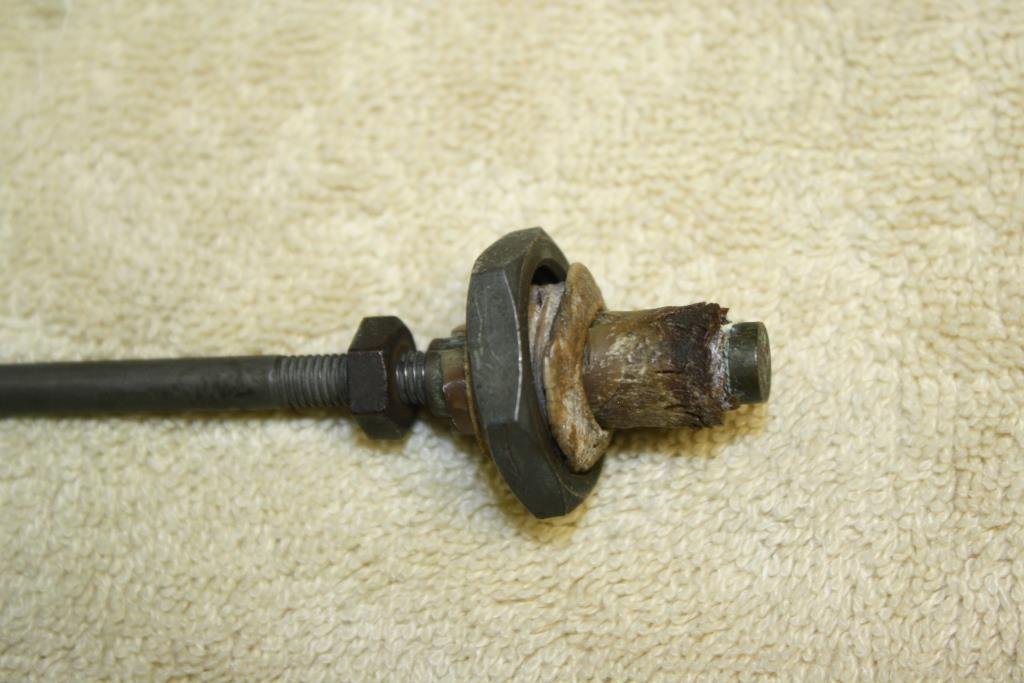
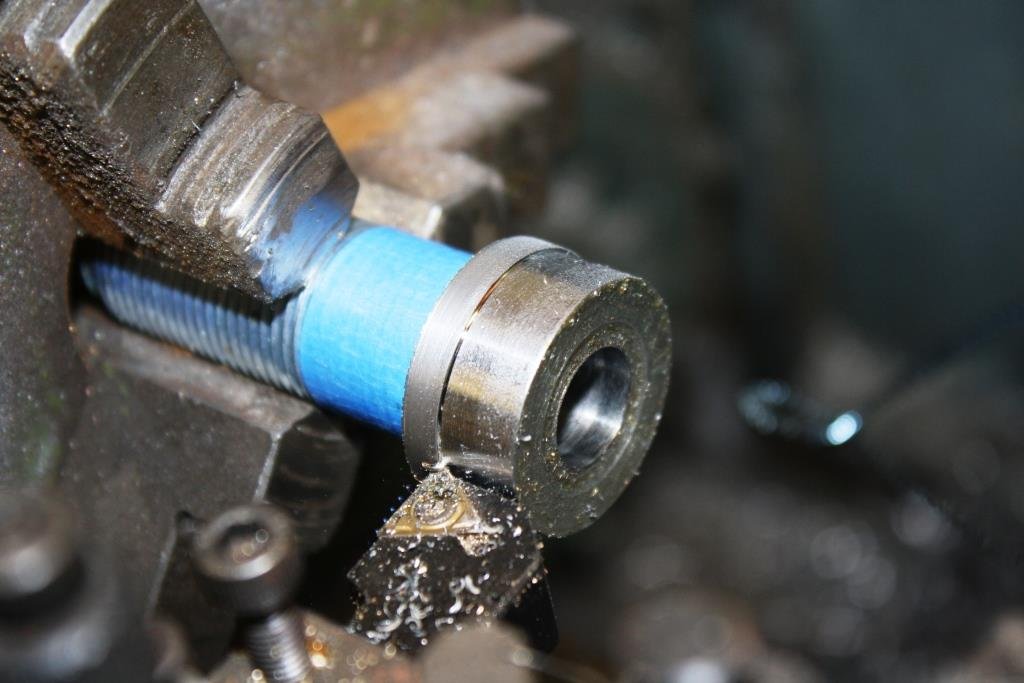
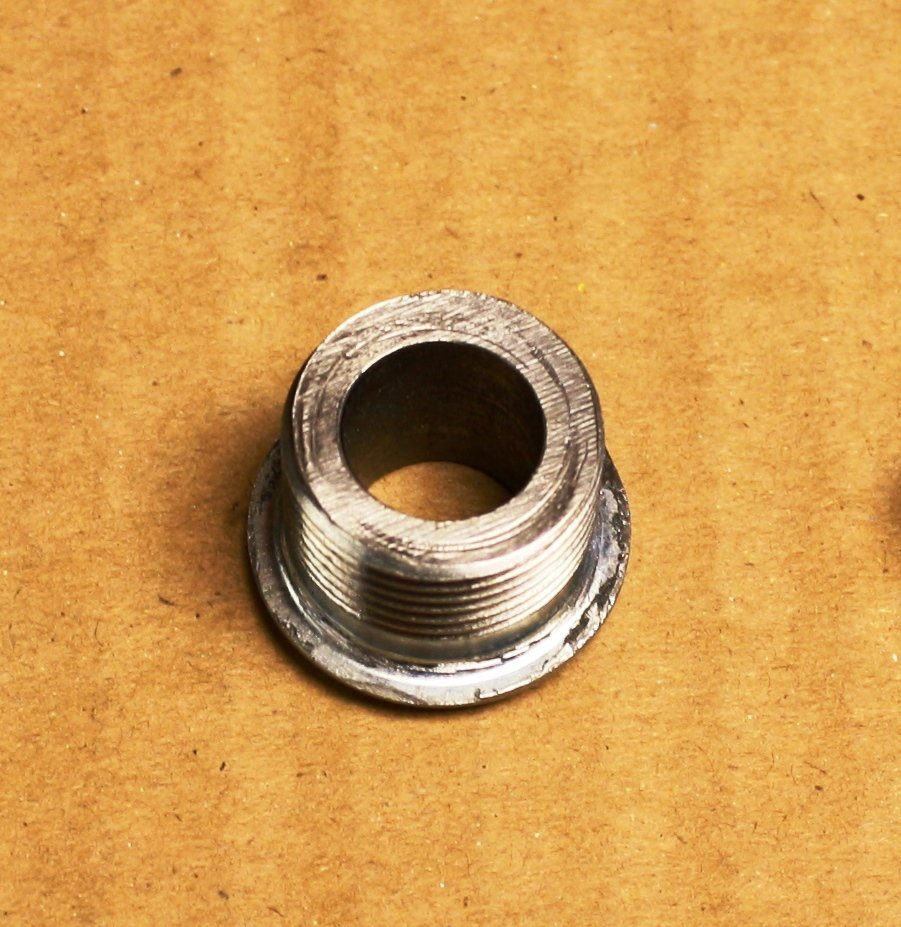
Making a jig to align the flange on the coil over tube. Fortunately the left and right sides are the same, so I only need one jig. I'm hoping I can stand the jig on it's end in the mill and use a hole saw that is the same diameter as the tube to cut the middle out of the flange. The flange still needs milling flat, and it's 2mm too thick.
3 points
-
Just doing Dynafari things
3 points
-
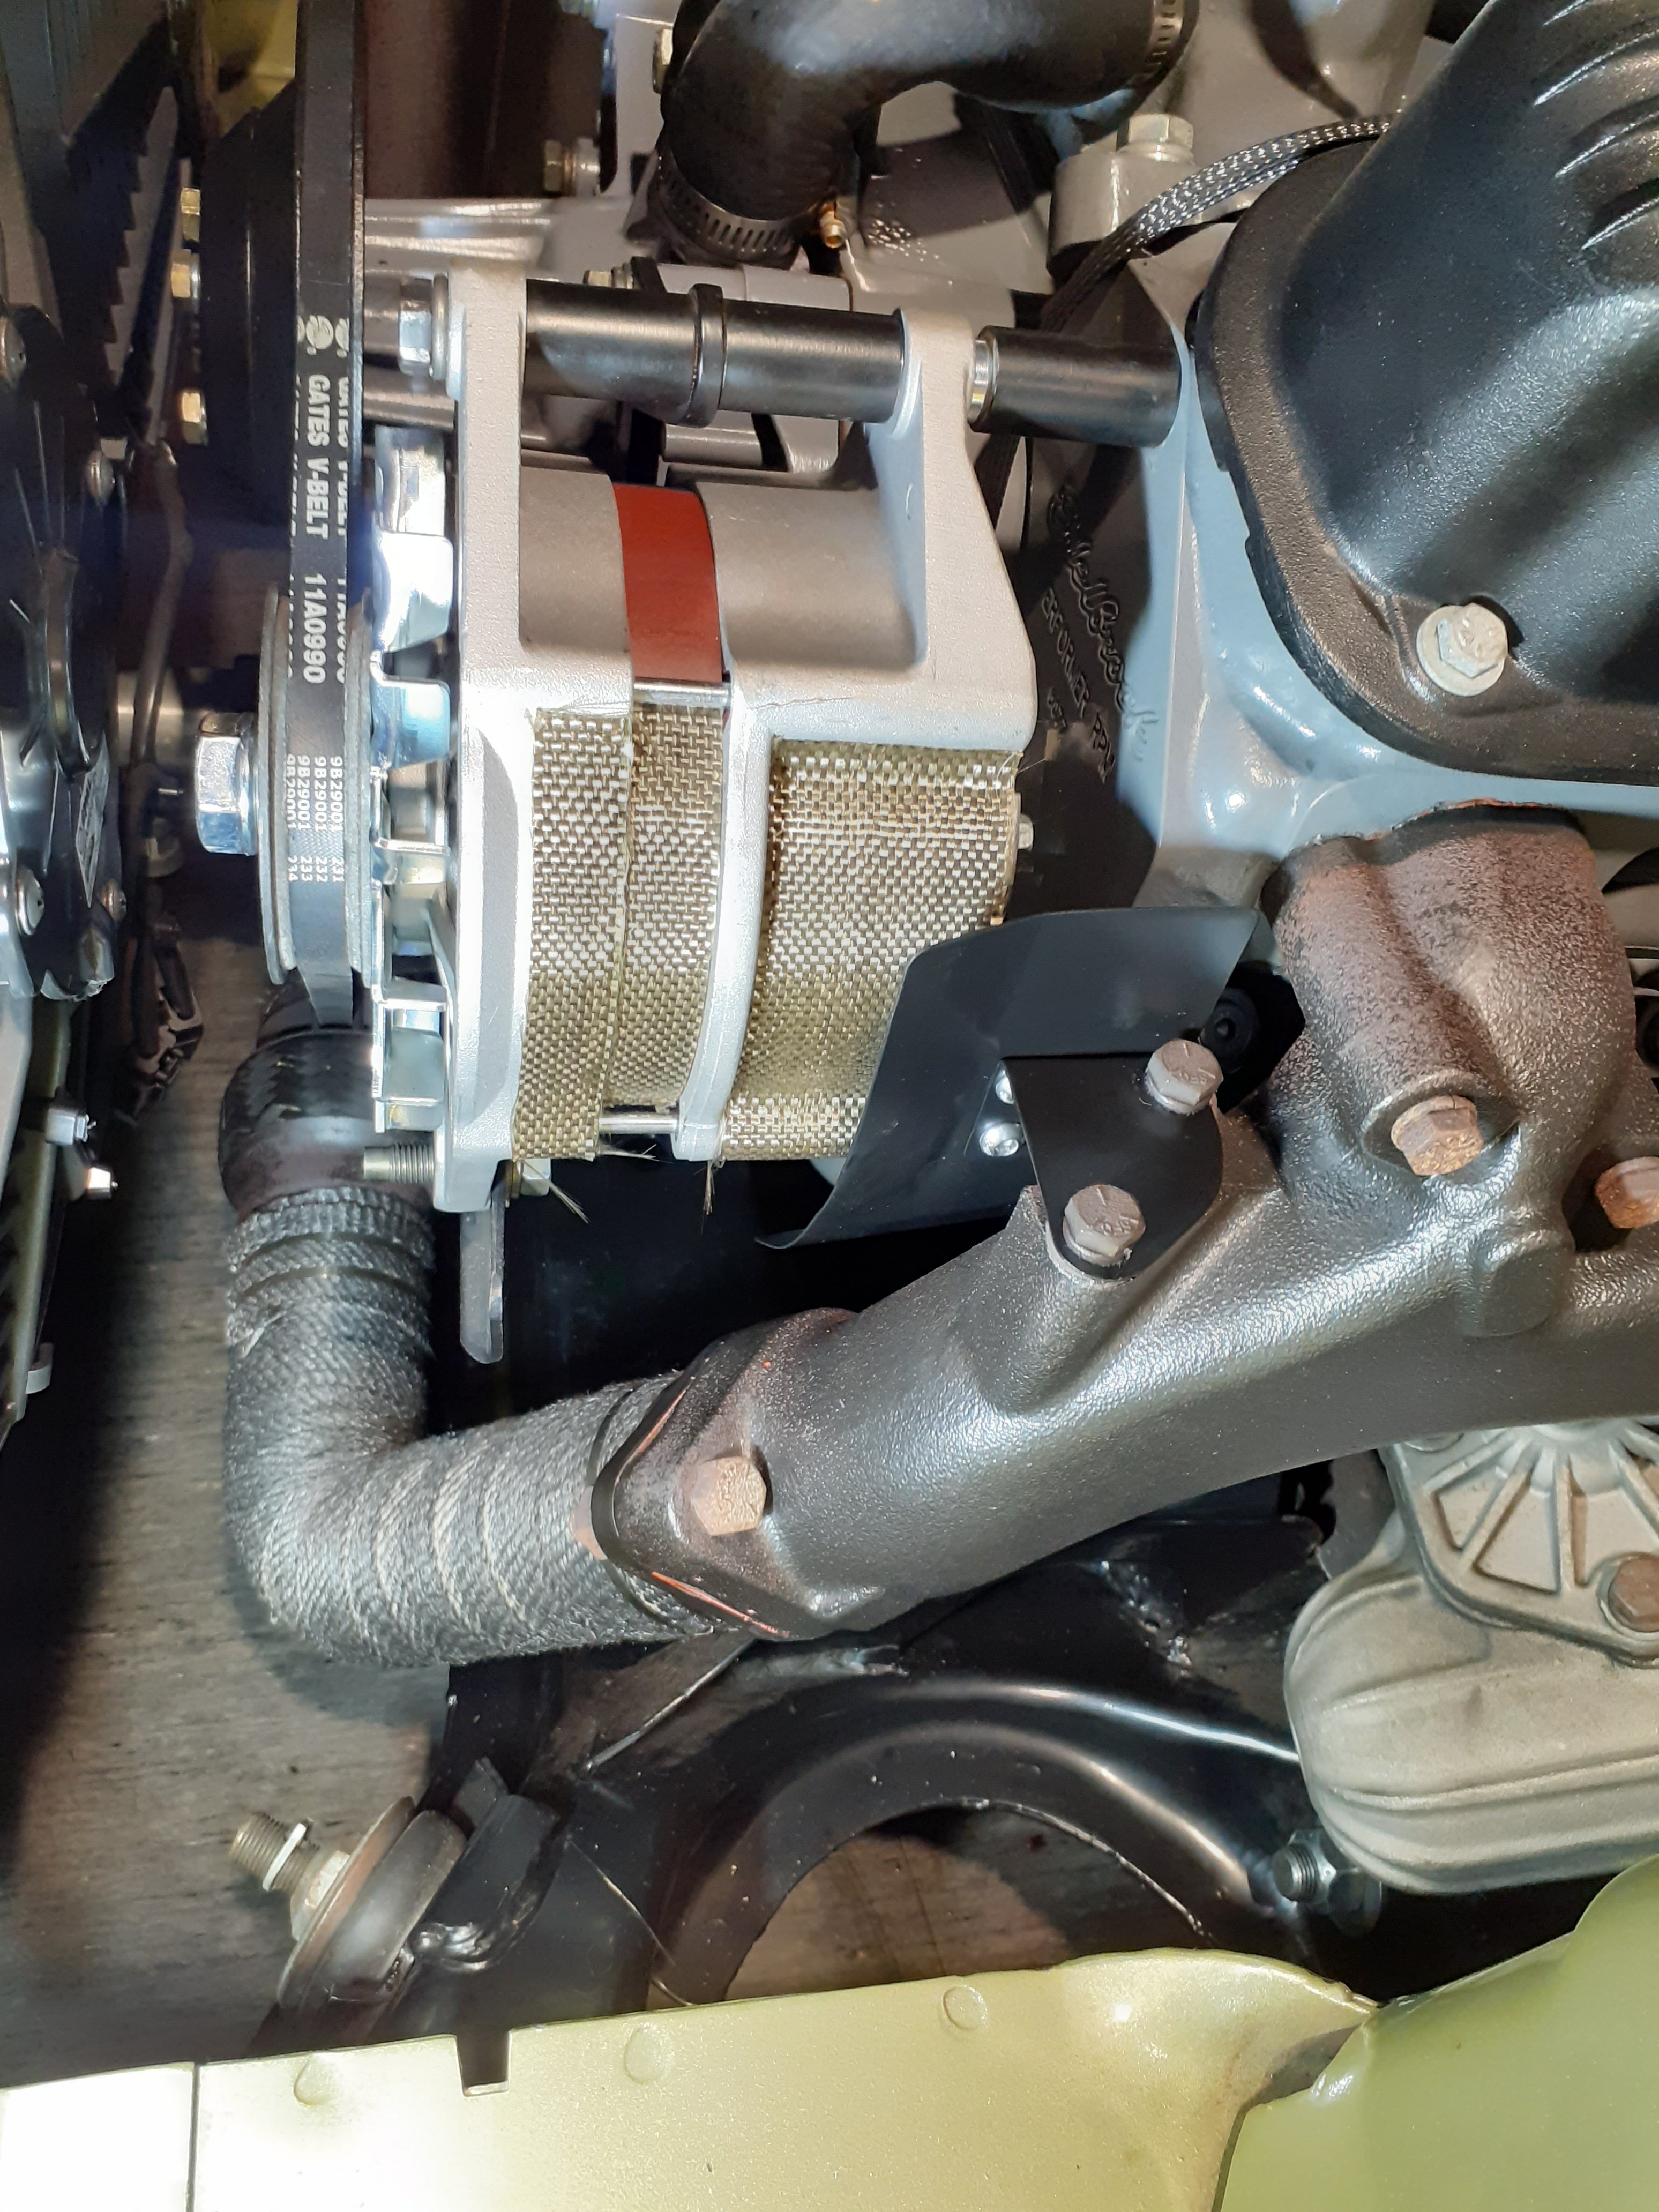
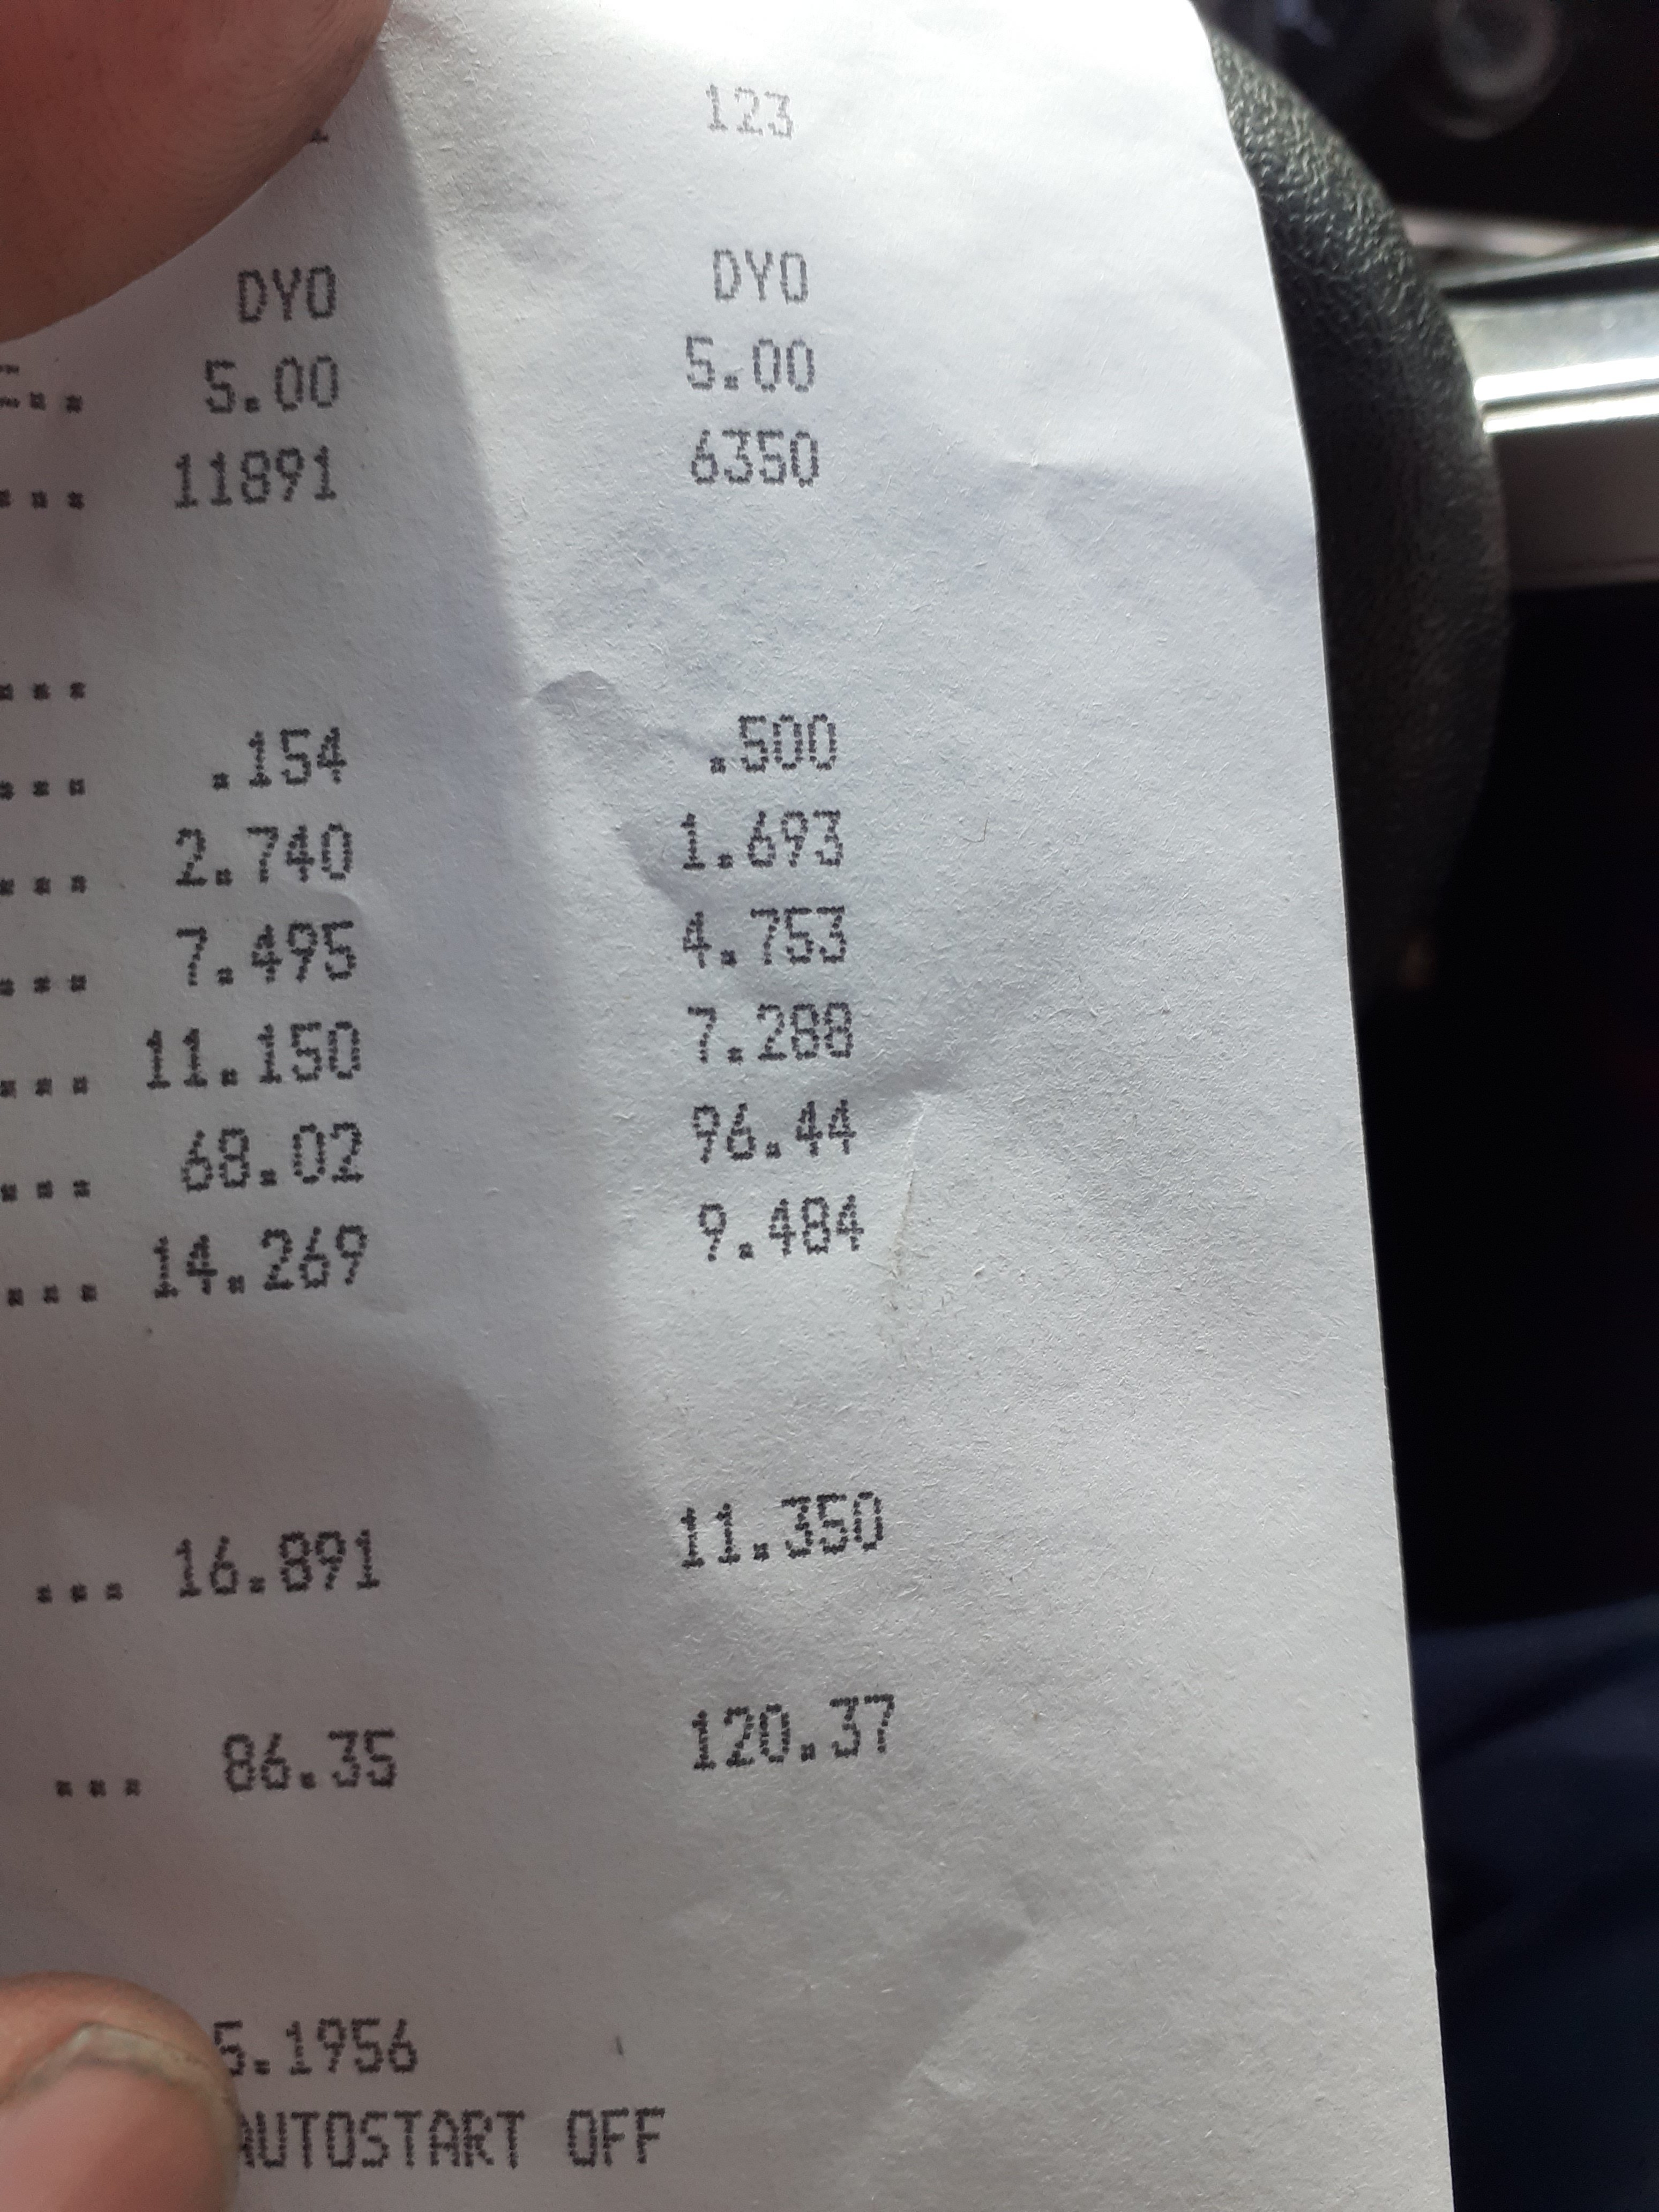
Went to father's day drags. Improved PB slightly to 11.35@120 which was good Missed second round of DYO because it wouldn't start, flat battery. Jump started it and managed to get home and it had charged the batt again.. checked charge voltage and it was low. Took alternator to sparky mate, he put it on testing machine, was low on output, changed reg, still poor , had blown diode. Turns out the guy who I'd asked to get a decent alternator when I put the car together had supplied me a China copy bosch Got a genuine bosch one, fitted it and improved the heat shielding a bit as it's close to the exhaust. Now doesn't charge at all. Checked connections, checked ergs at correct spots etc, zip. Took it off again, had it tested on testing machine, it works fine . Put back on car, nothing . Checked everything 5 times, it's got me stumped . Everything that should make it work, does what it should, and it's wired exactly the same as before Sparky is going to come have a look this weekend as I'm all out of ideas
3 points
-
Yuriys WoF - he was saying he was burnt by rust last year. Andrew is currently going over the whole bottom half of the car with a wire brush and will give it some black zinc paint afterwards. Literally only surface rust, looks a whole lot better after a quick brushing off. /It will be good for Andrew to learn some more practical skills and protect the car at the same time. Who does brake rotor skimming around here? The front rotors are pretty bad but still have 95% wear available so should get away with a skim and new pads. Alternatively he can just spend a few buck and use my trade account to get new rotors2 points
-
Report with pics to nzta. Don't need people like that doing shit like that.2 points
-
Get him to watch his training video, kia kaha road to zero 4.38 is the bit Rust is not corrosion damage. Corrosion damage is pitting, heave, bleed, a hole. Minor surface rust like a stone chip is just rust. Best to send his inspector number off to ensure he is up to date with his training2 points
-
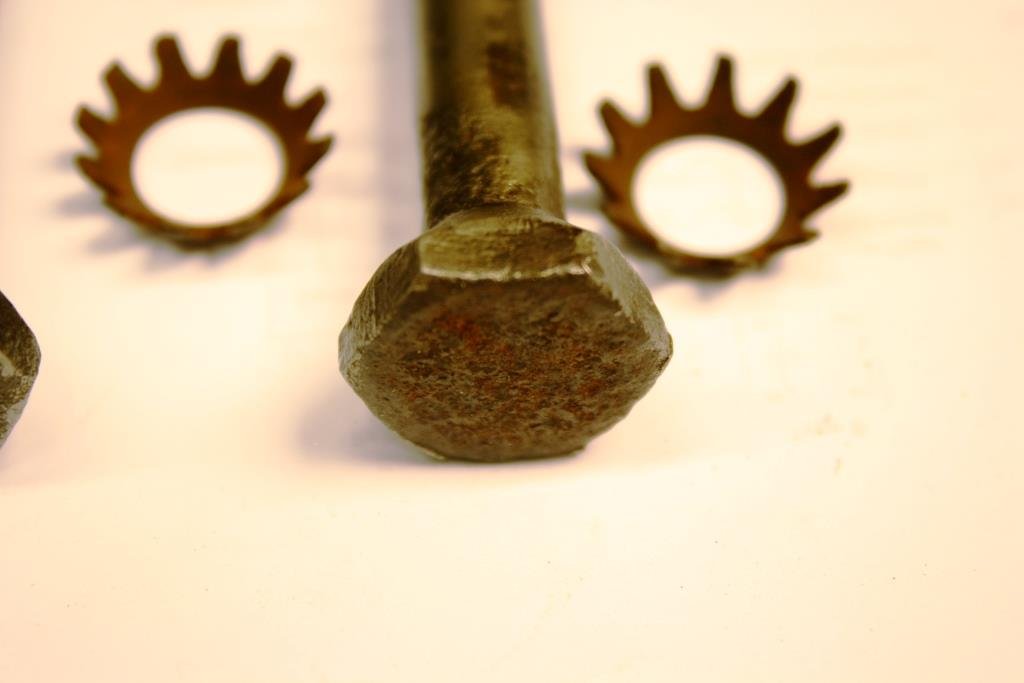
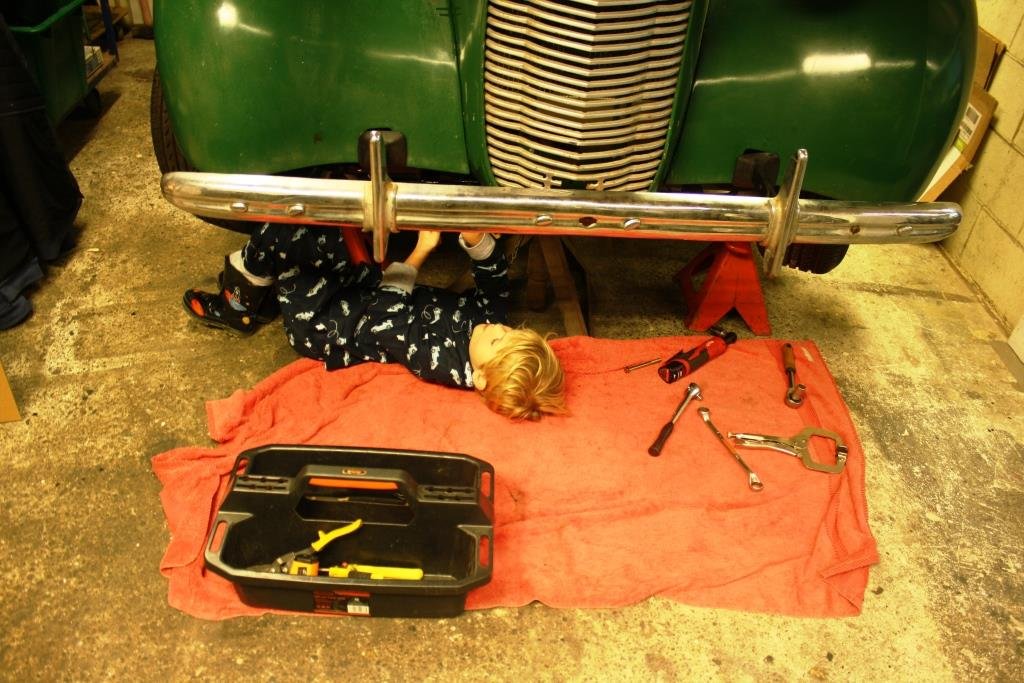
Time to pull the front bumper out of the shed… I’m not that keen on where the number plate was mounted, I think it’ll end up in the middle under the bumper. Stripped it all down…. It’s mounted on bumper irons made out of spring steel, looks like the port side was in the wars at some stage….. Spent an evening cleaning parts up on the wire buff… Love the old bolts and countersunk star washers….. Once again everywhere you look in the world acclaimed (in Milford) Sr2 Man cave there painted car parts hung out to dry….. I managed to score some new bumper rubbers from Basis, what a great source of old style rubber trims and fittings they’ve recently moved from Christchurch to Auckland. Our professional racing driver sneaked out after bedtime in his racing car jarmys and new gumboots to give “Gramps” a hand - you’ve got start them off young. Looks like’s he parked up his tools, Police helicopter, crash helmet, life jacket and a couple of trucks where the back seat needs to go! Made up some brackets using the cut, bend and weld method my Dad taught me when I was a kid. Front number plate now mounted nice and low in the middle.
2 points
-
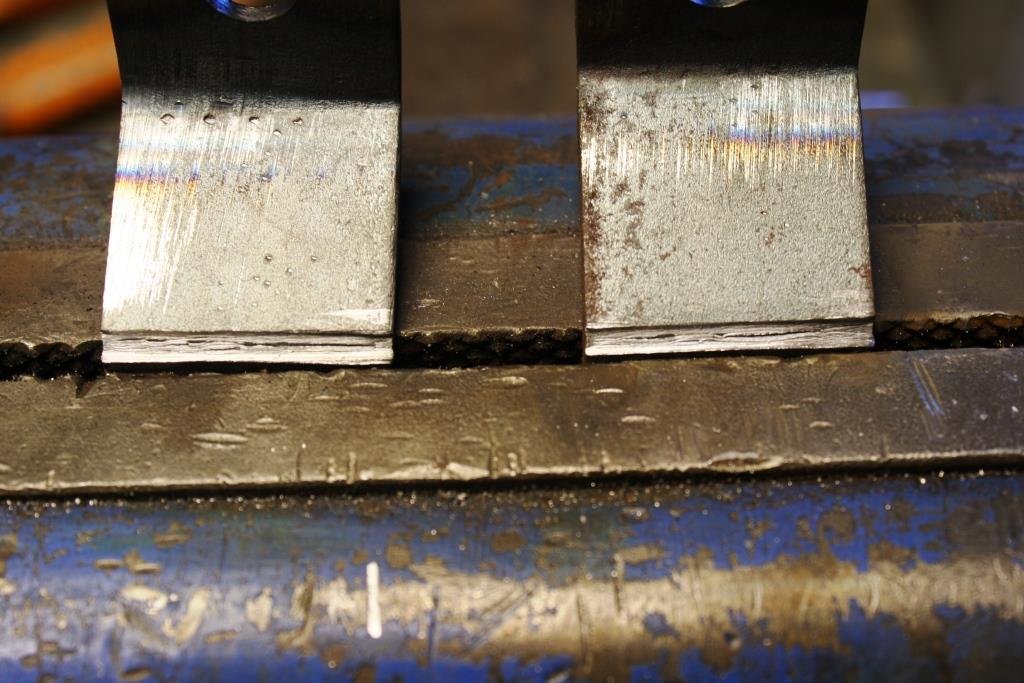
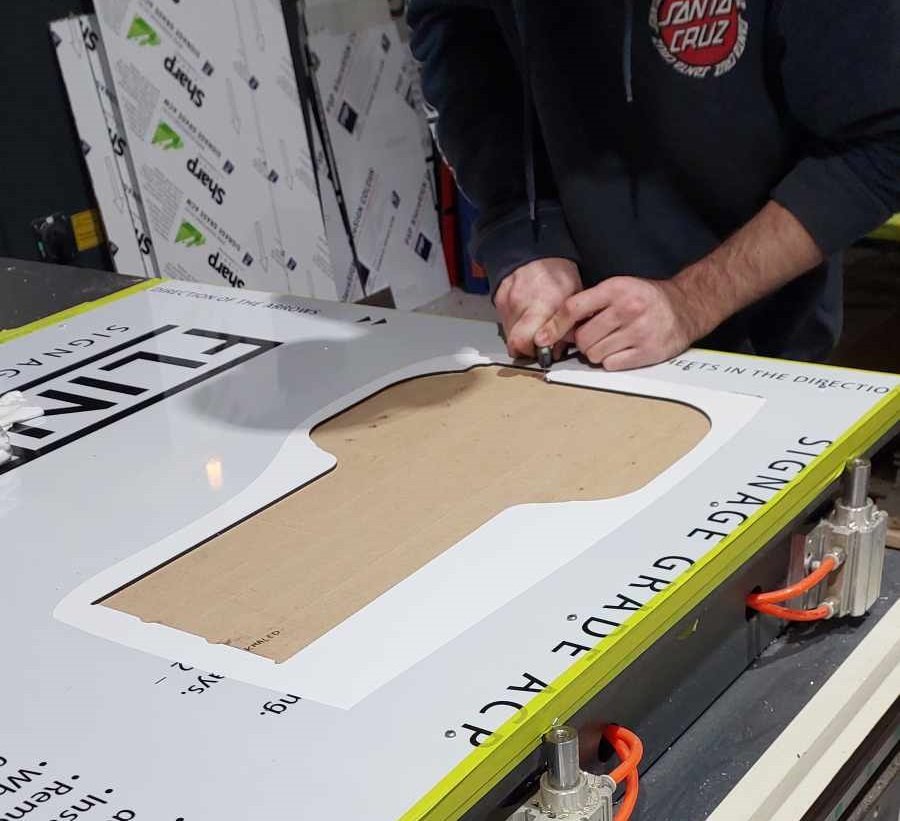
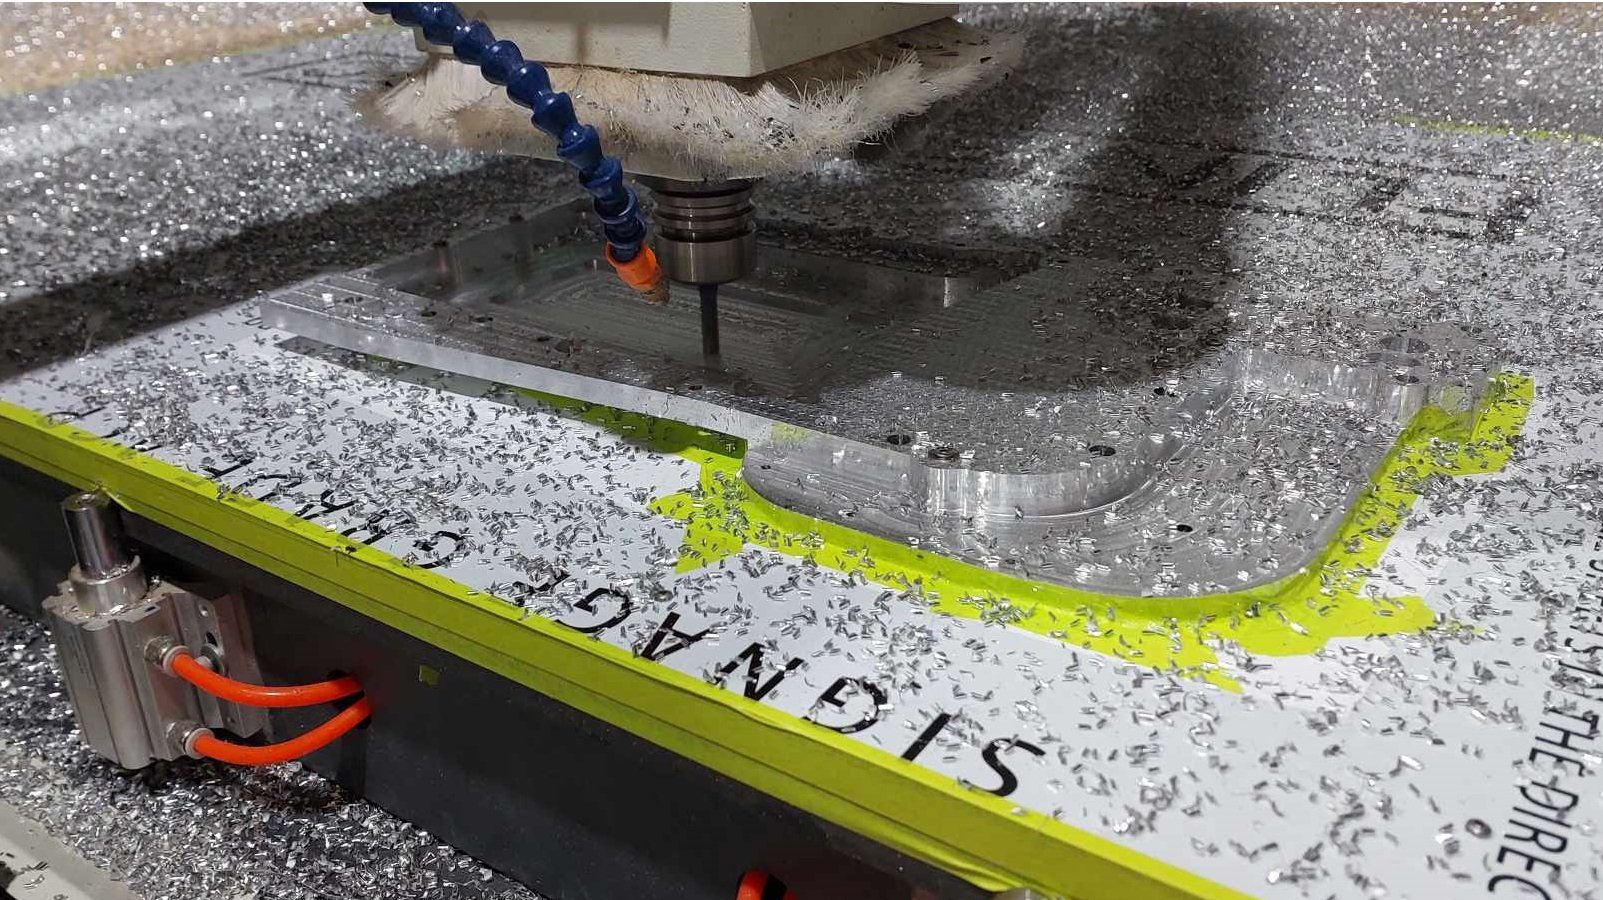
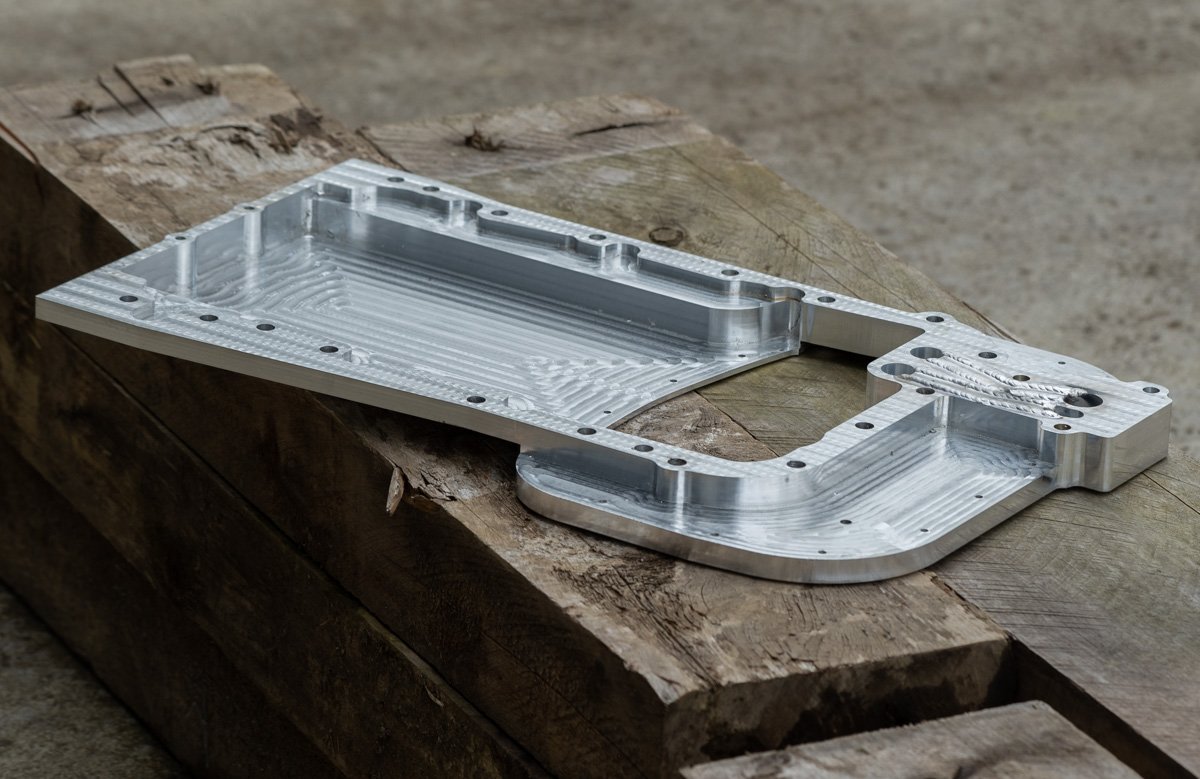
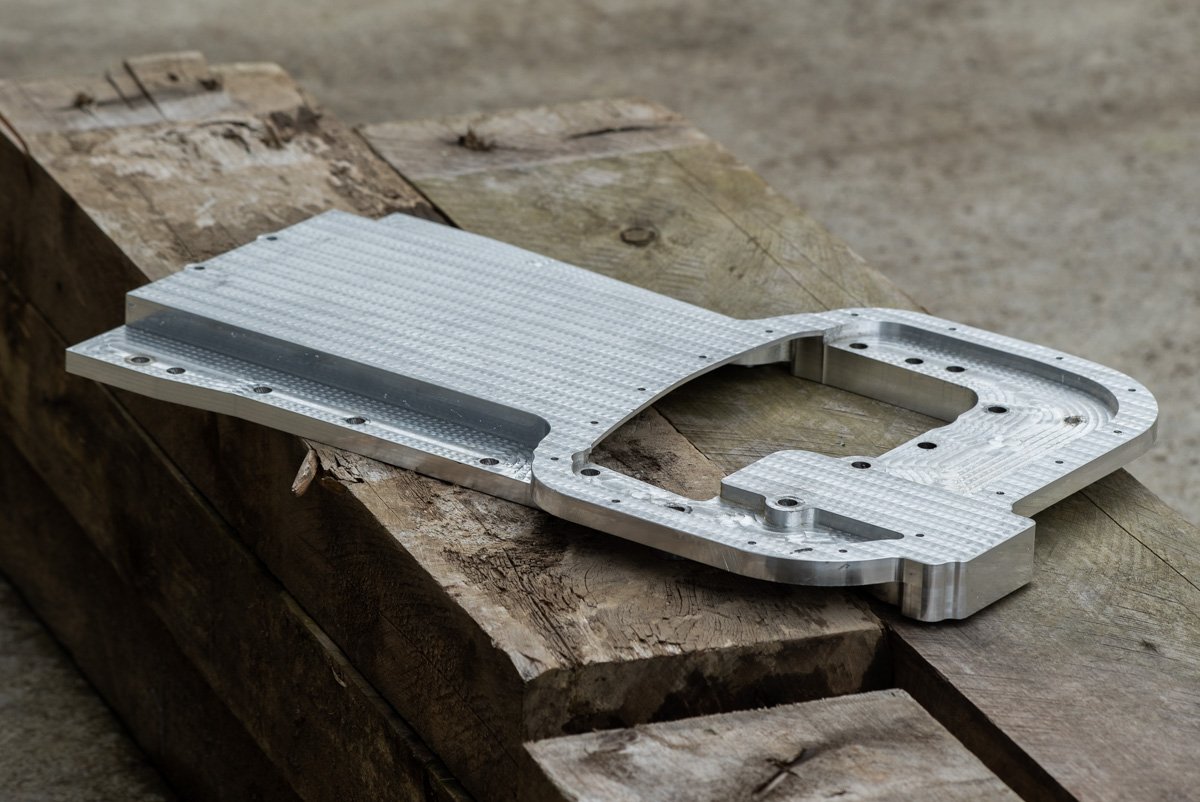
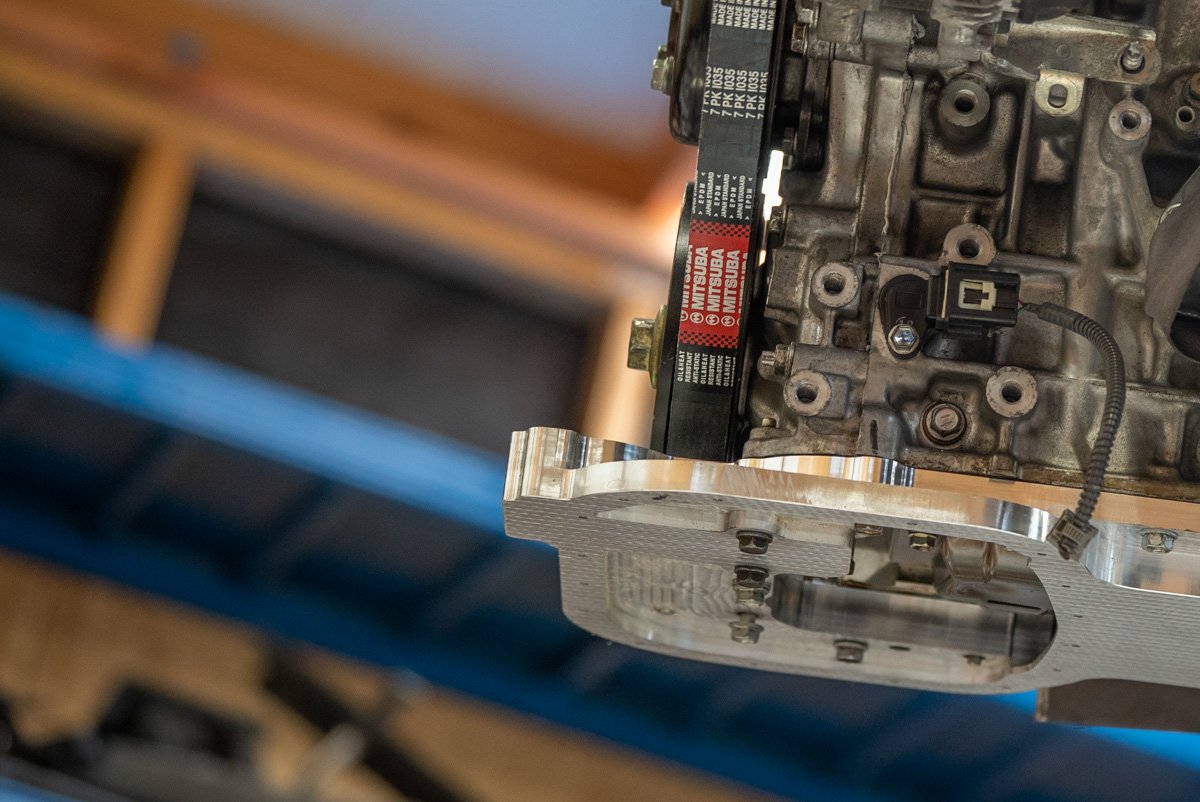
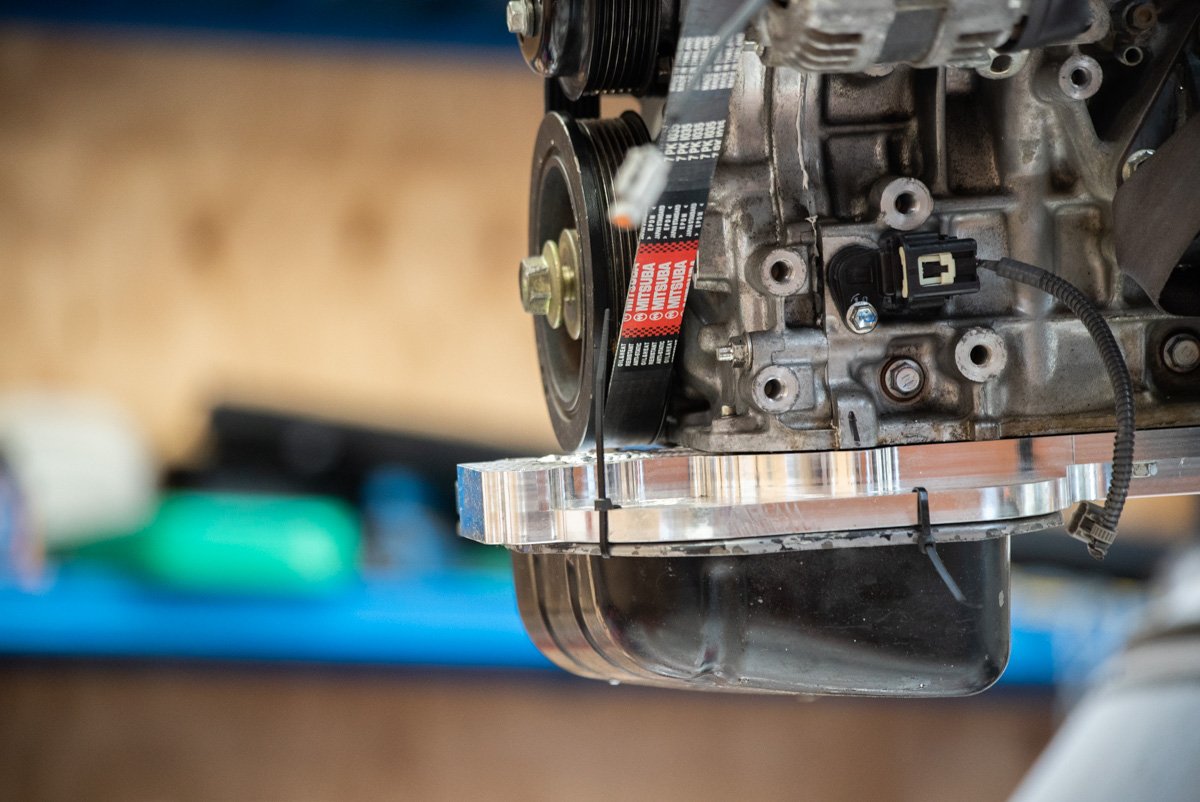
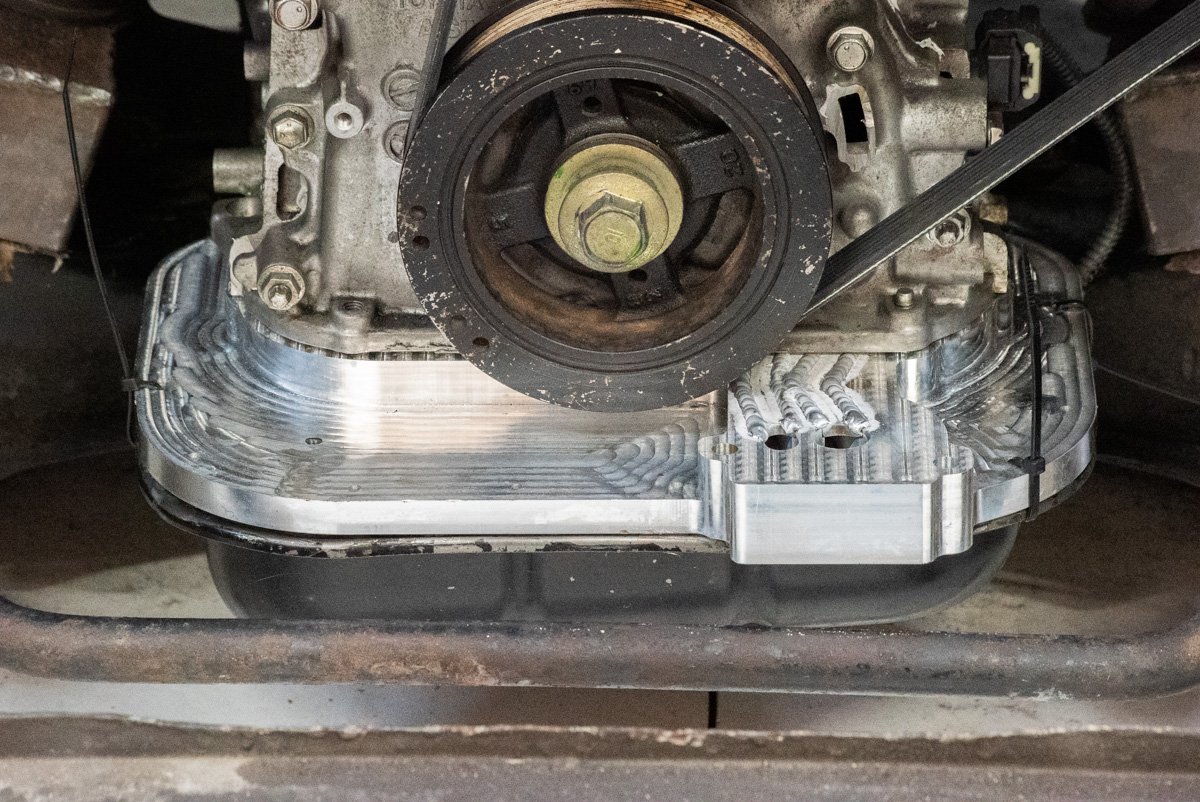
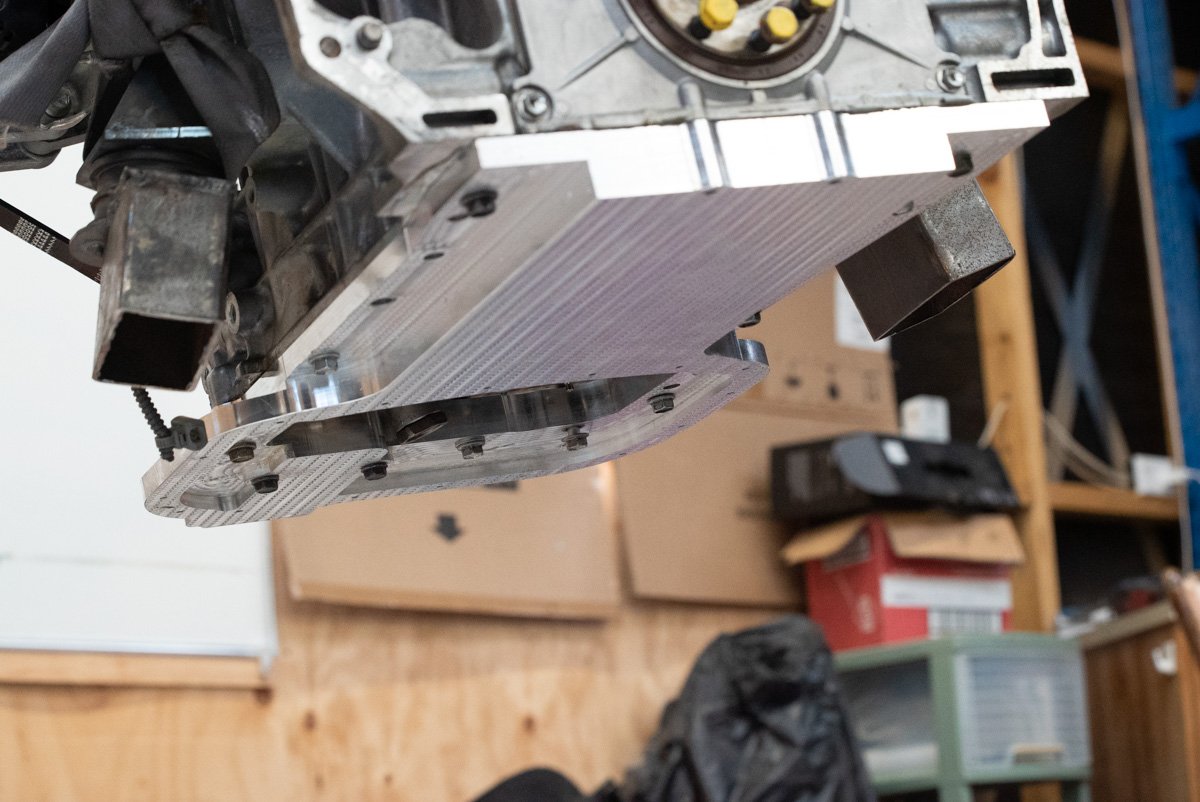
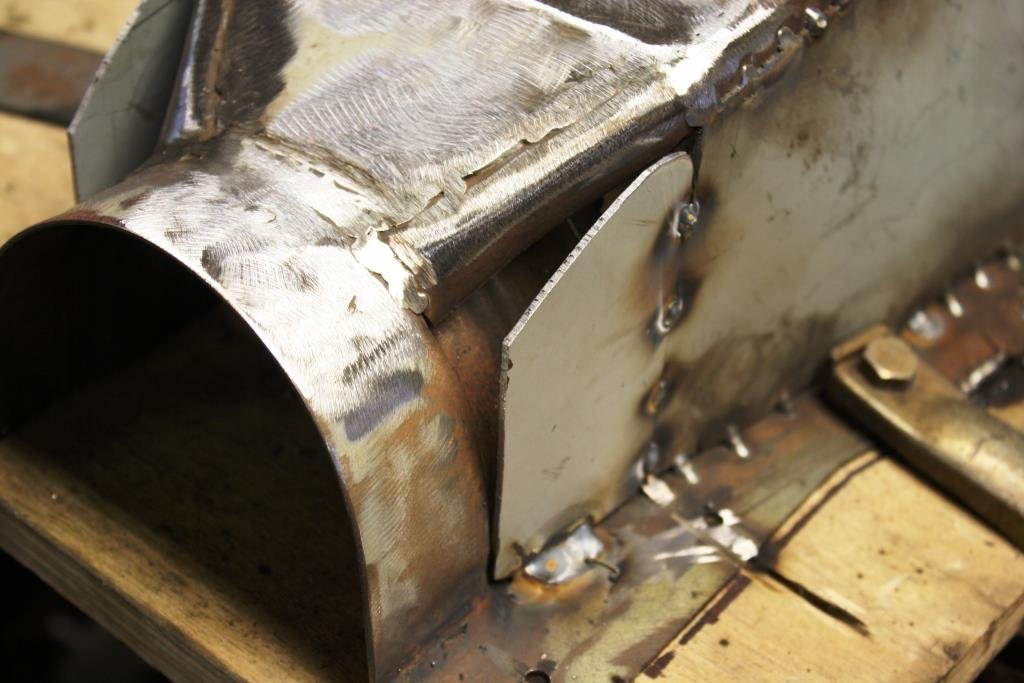
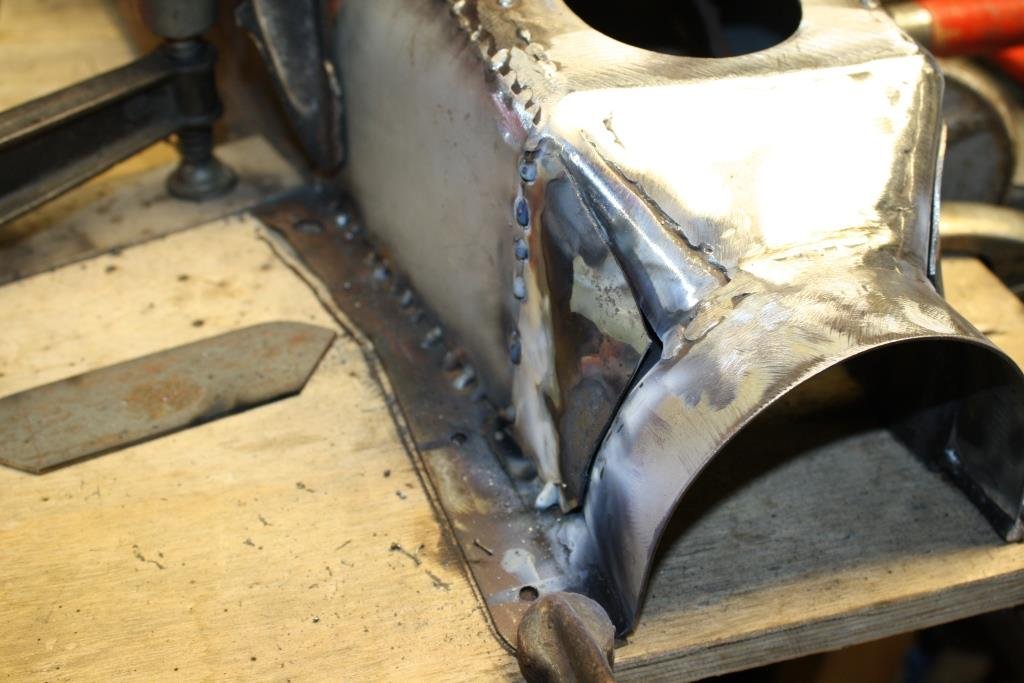
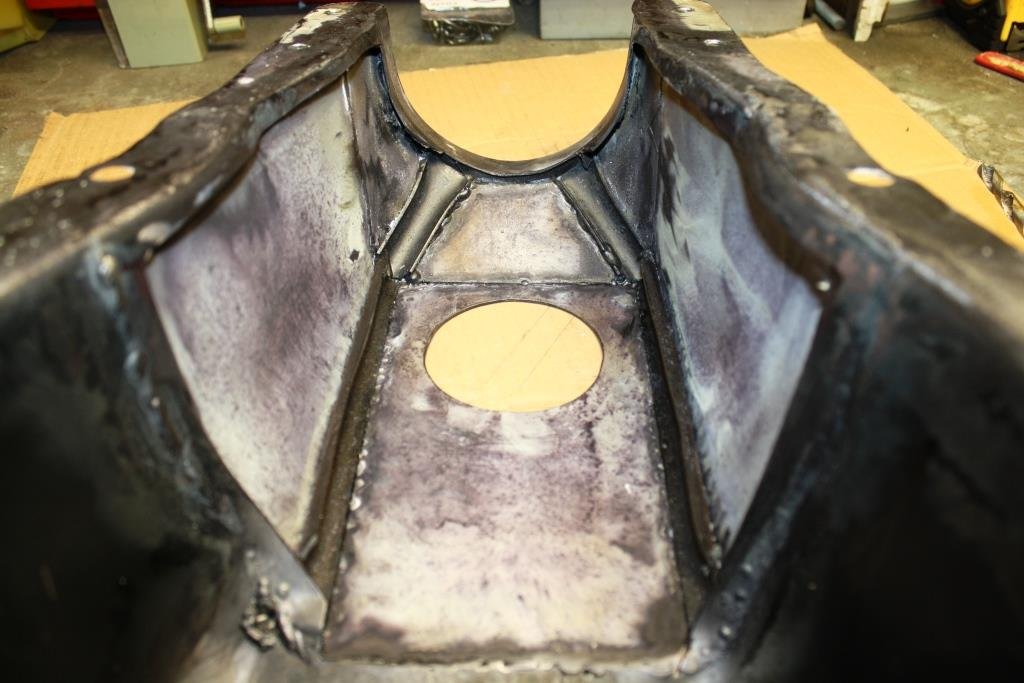
Oil pan activities! Absolute GCs @Stu and his workmate Sam found some time in their incredibly busy schedule. To spend a night programming some cutting paths and cutting a big slab of alloy down into an oil pan. I went along to watch and learn some things and it was awesome. Firstly, start out with a 22kg block of 32mm thick alloy plate. Then align this onto the bed of the router, and the it gets sorta vacuum sealed against the bed. Then one side was machined, making an absolutely hectic amount of mess. Then it was flipped over, and a a template was cut to align it onto the bed again. Making zillions of glitter carving out the other side. Then once it was all cut, we are down to around 1.8kg from 22. So there were plenty of chips for me to sweep up, haha. we needed to look at drilling the oil galleries for the filter, that I mentioned a few posts ago. Problem - the depth needed was too long for any available tooling and the height of the machines etc. So we decided to mill two slots in, and then weld a cover plate over the top. We made the slots do a bit of a zig zag, so that they would avoid one of the threaded holes for the oil filter housing. Which previously penetrated through into the oil gallery as there was no other way. Then Stu on the tig to zip it all back up: Then ready for a test fit. How good! (It still needs the welds flattened off and some threads tapped, havent done this yet) Much to my relief, it fits up great. Just zip tieing the oil pan on for now, until I can tap the holes. and back in the car... everything good! So that's one of the last remaining big tasks mostly sorted. And a big relief that it looks like everything is going to work as expected. Hugely grateful for the time spent by Stu and Sam to help get this done. I think its the most complex and coolest car related thing I've ever drawn up. Next steps are to thread a few holes for the oil pan and oil filter, flatten off the welds, and make an oil pickup. then I can fit it on for good, and fill the motor up with oil. Getting closer! Exciting.
2 points
-
I kind of took a guess where the wastegate would end up against the plenum surprisingly I hit the mark looks good. Enough clearance to pop the v bands and slip it out for spring changes.
2 points
-
Good thing ive been practicing. dialed in
2 points
-
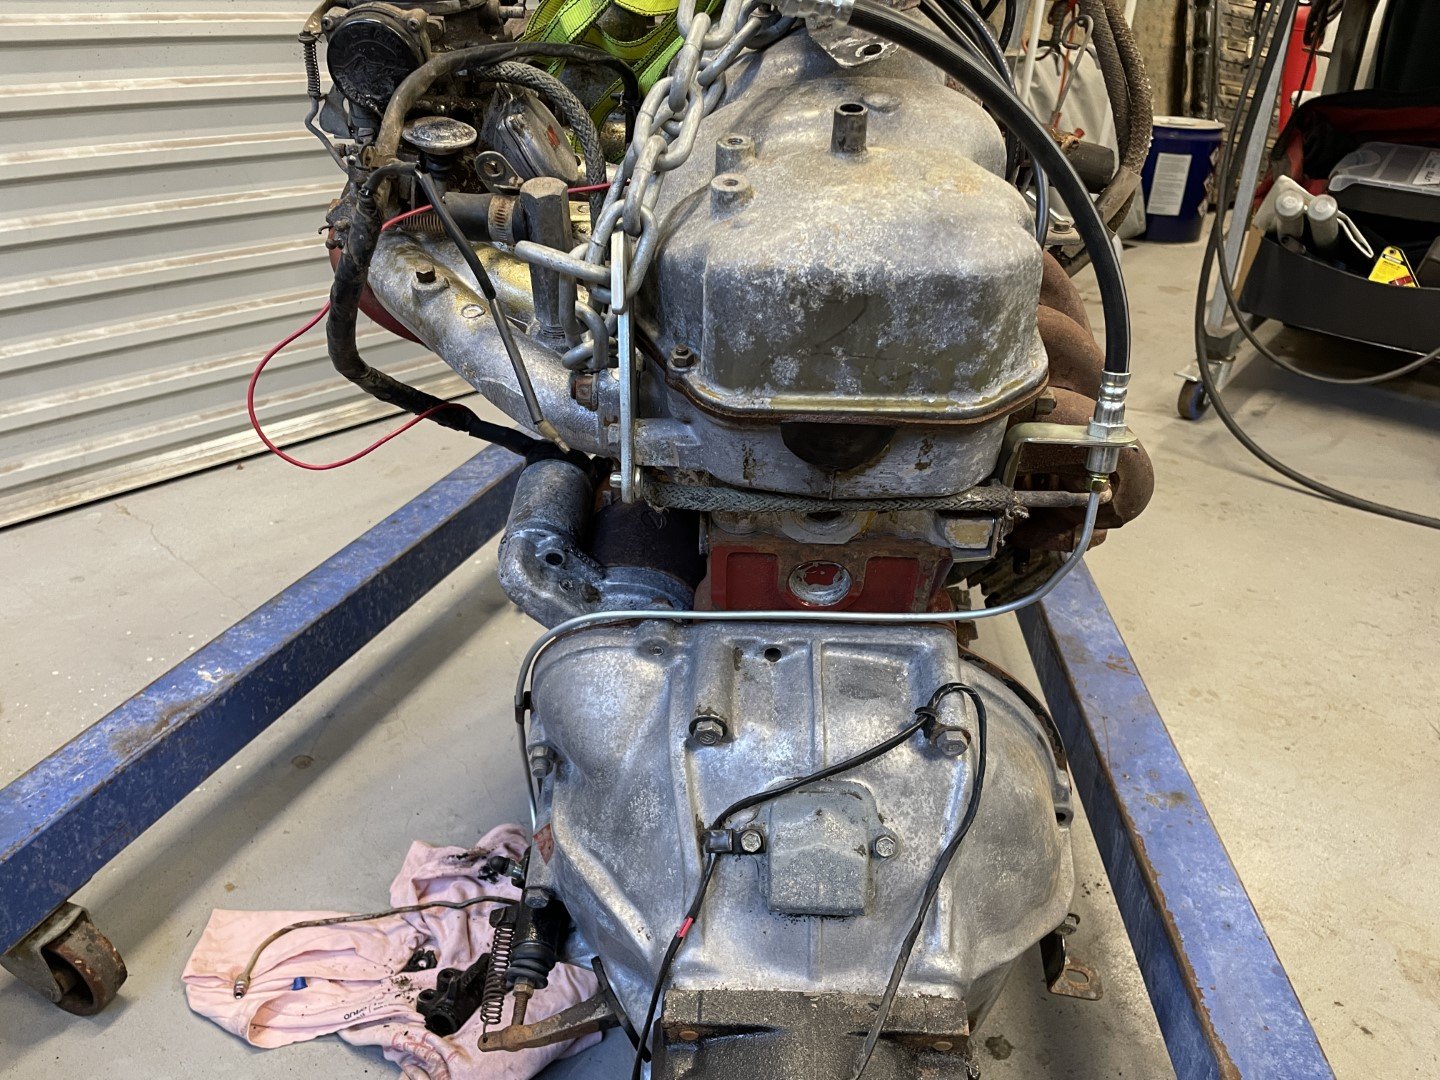
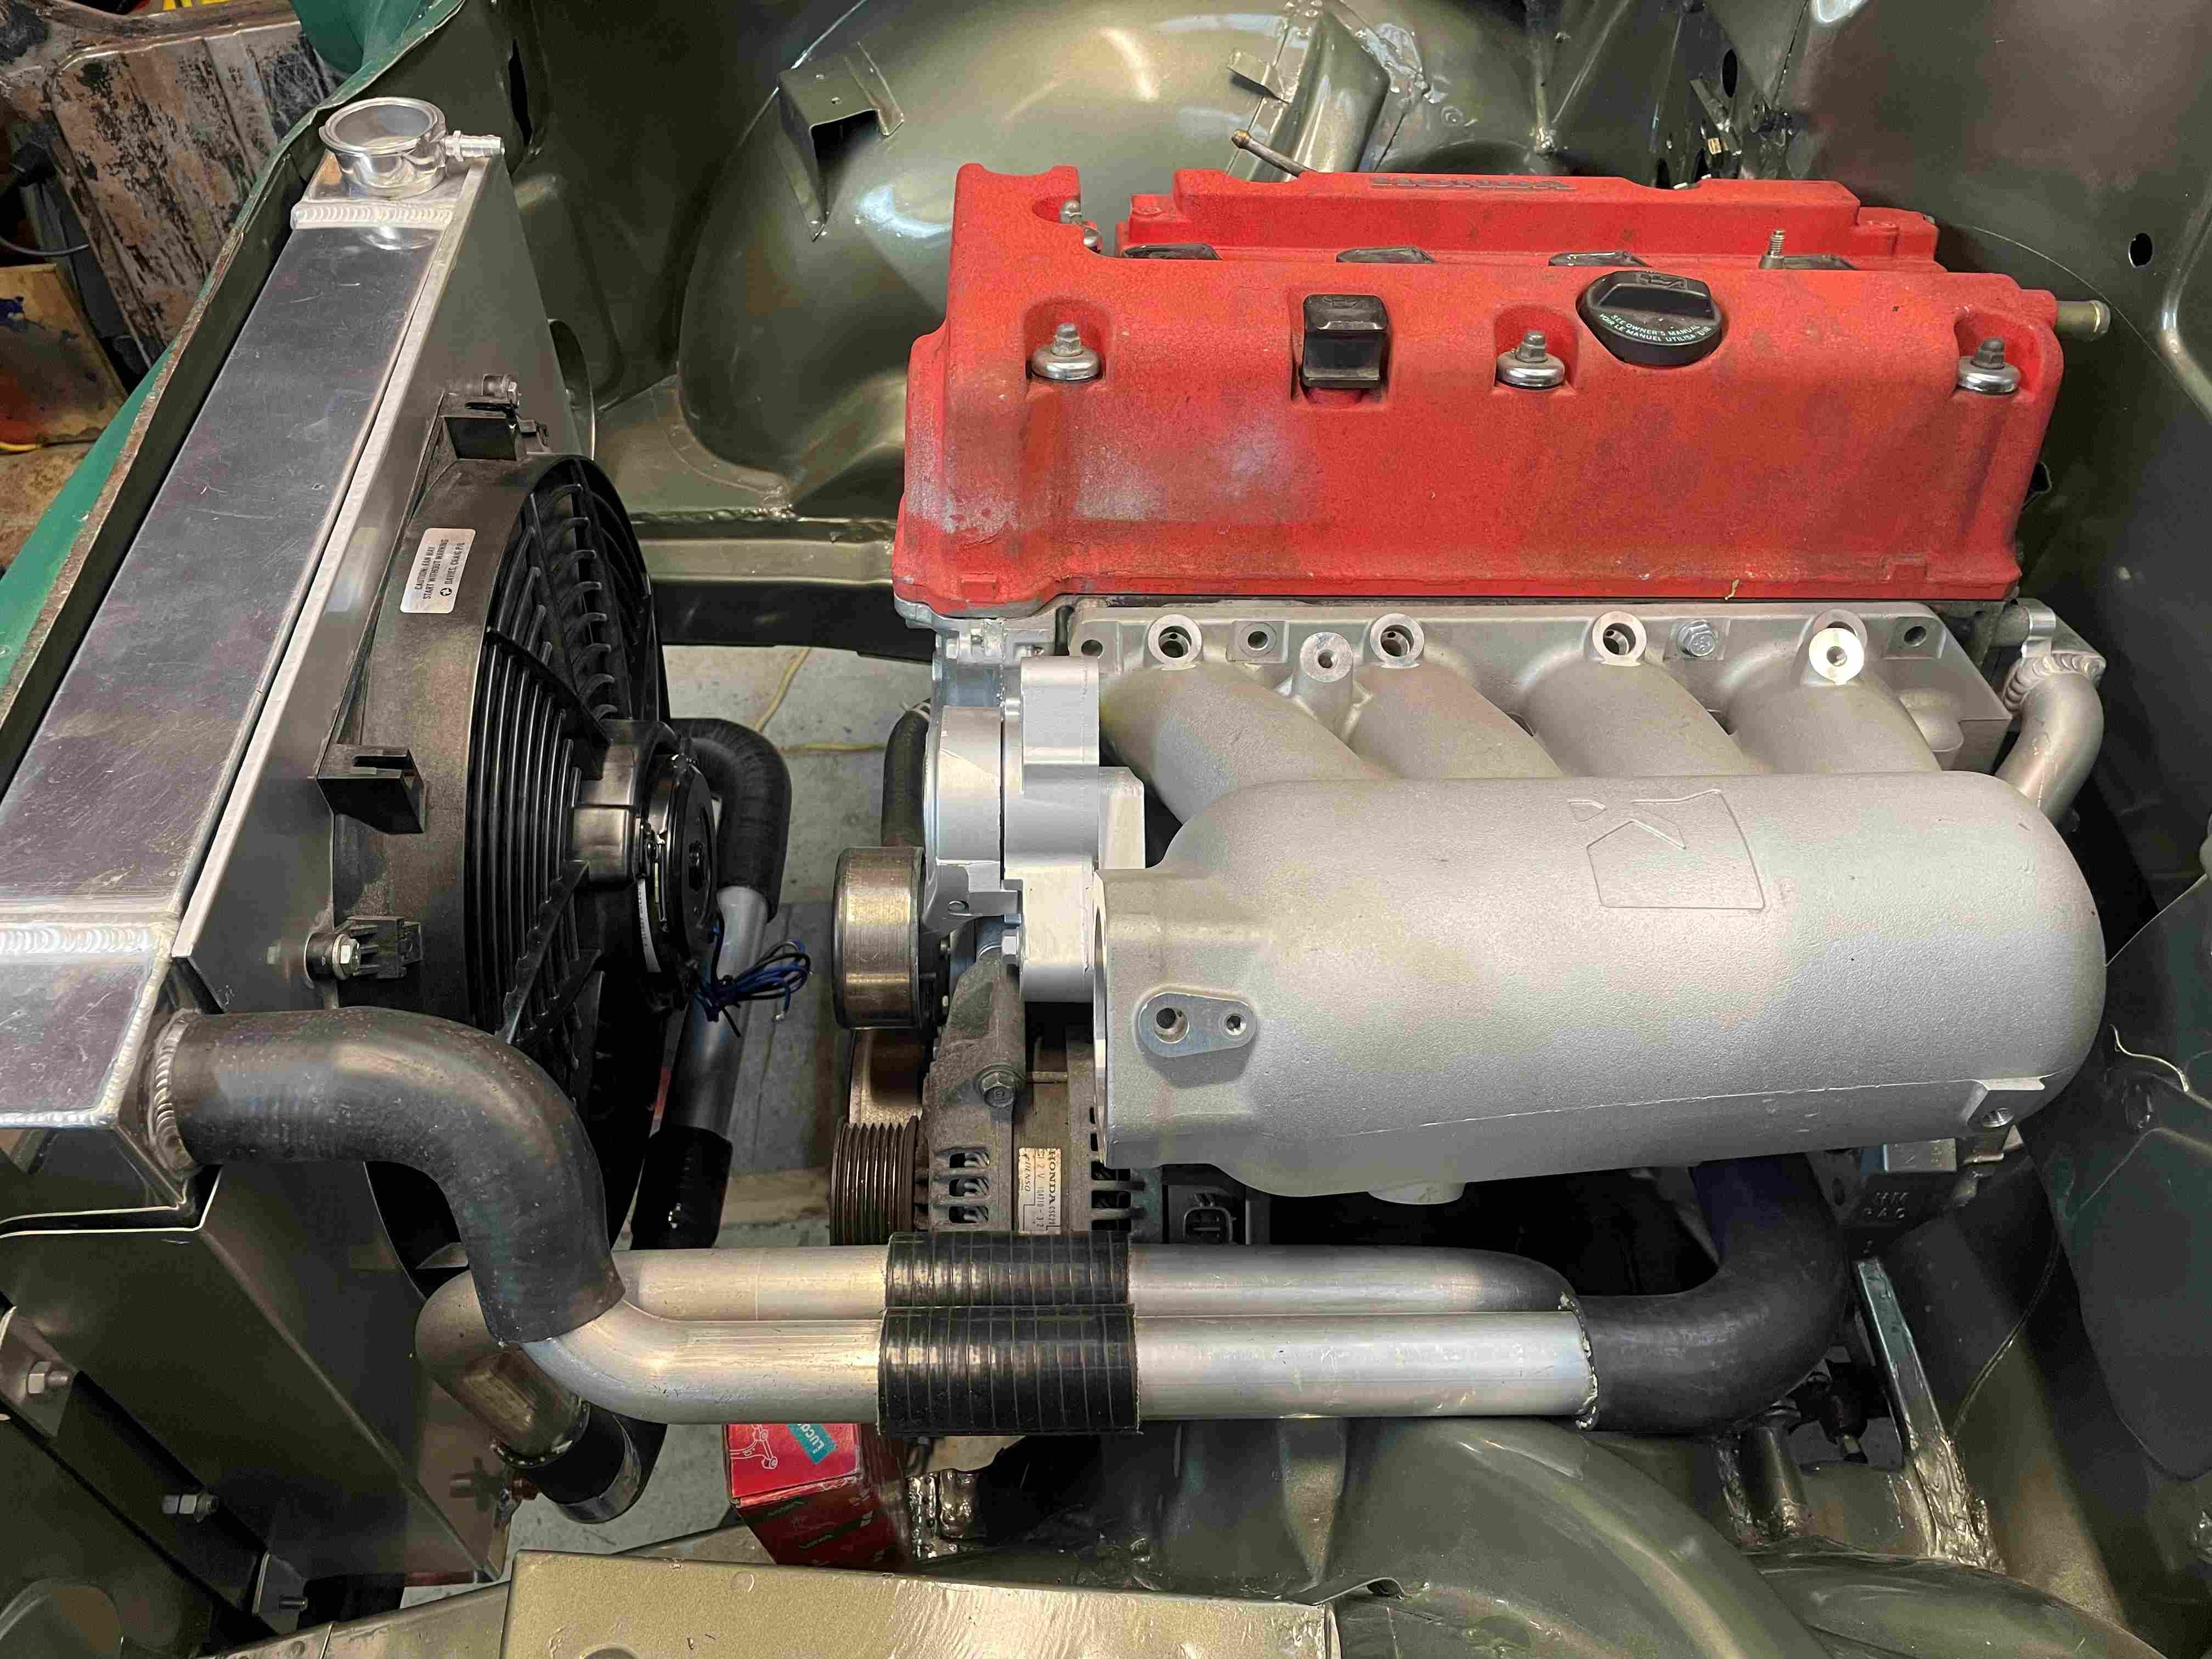
Heater hoses ticked off the list today. Drivers side was easy with a hose off a 90s hilux going straight on with a slight bit of trimming. Hot water feed from back of the head to the thermostat housing needed shortening down and a longer length of rubber hose added too. All the hard to get to stuff is done and the motor is back on the mounts and bolted in its final position so hopefully it can stay there now while I finish off other bits and pieces. Passengers side was tighter so required shortening down the hardline off the back of the block and a bit of a jigsaw of 2 different hoses with a brass connector that @MaxPower cobbled up on the lathe but the result looks factory which is what im going for. No pics but started on the exhaust too. The factory crown downpipe wasnt going to work it fouled on the torsion bar so cut the manifold flange off it and tacked it to the 3RZ Y pipe which by luck had the same size primaries with the same spacing as the 1G flange then started hacking the aftermarket exhaust from the 3RZ hilux up to make it fit down past the bellhousing while tucking up between the torsion bar and cab floor so the chassis rail will still be the lowest point. It will be a bit of a snake til it gets back past the gearbox x member then there is plenty of room for it to go wherever it like2 points
-
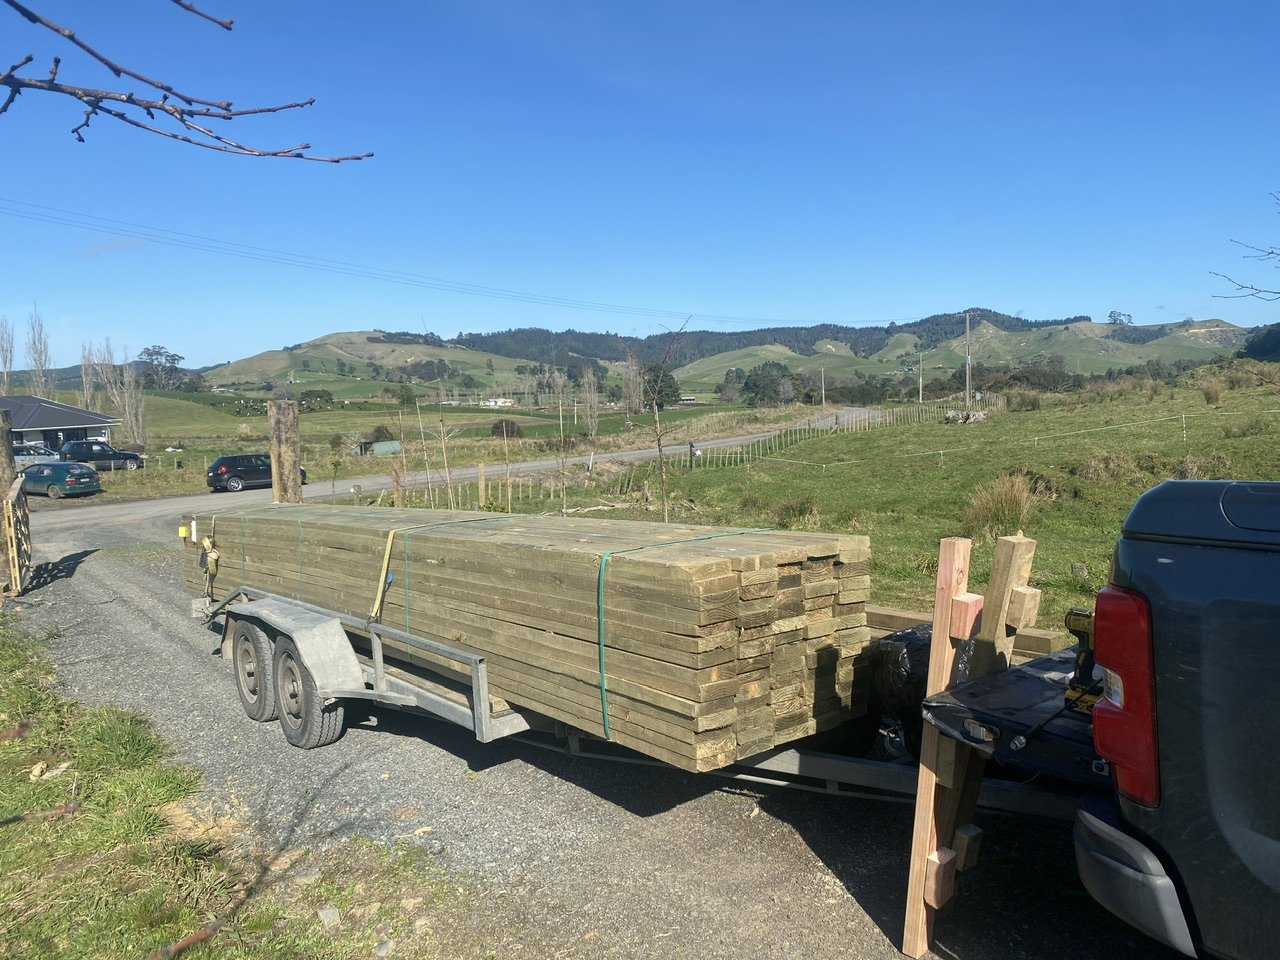
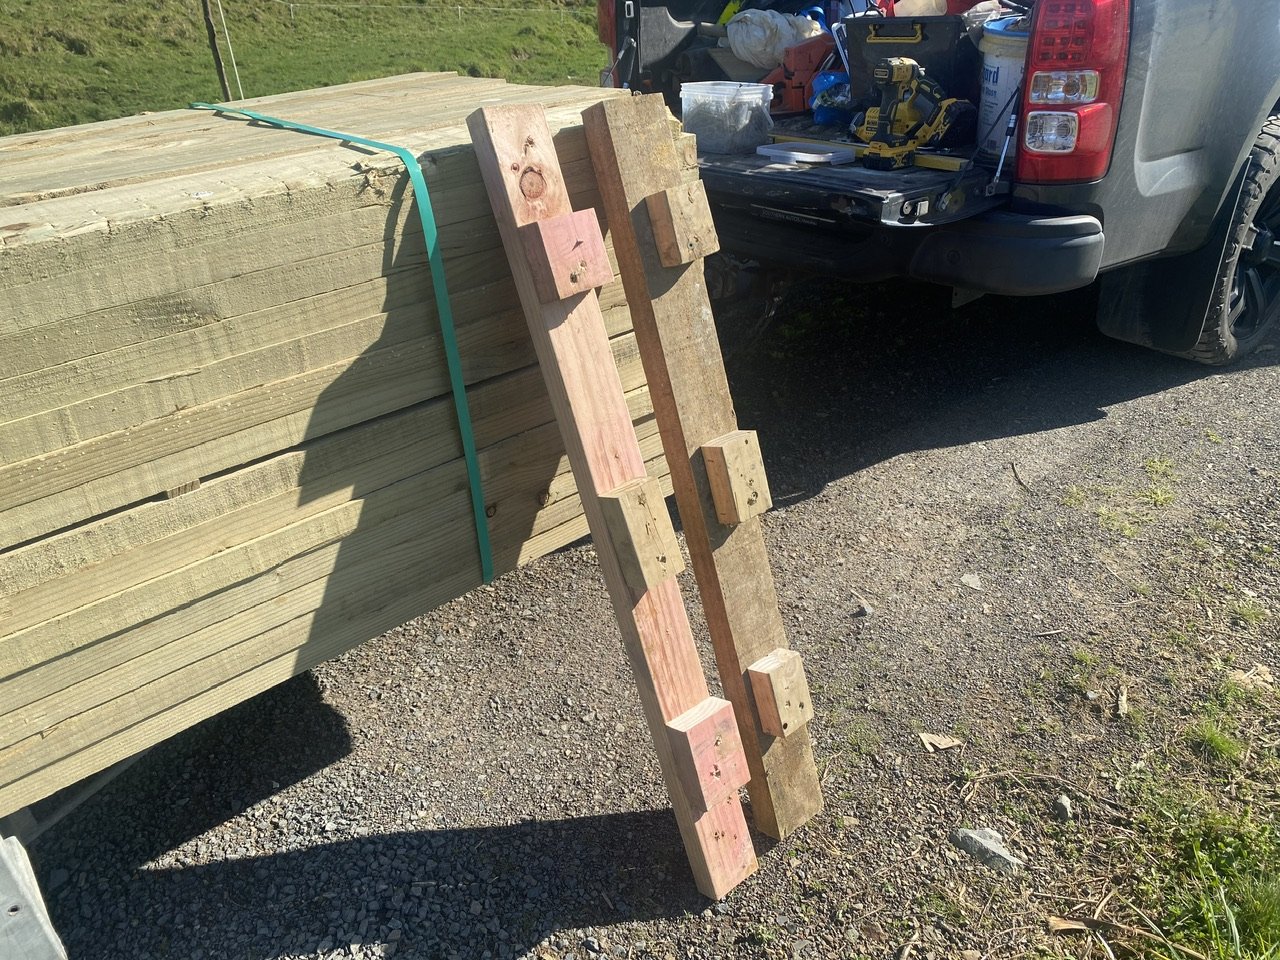
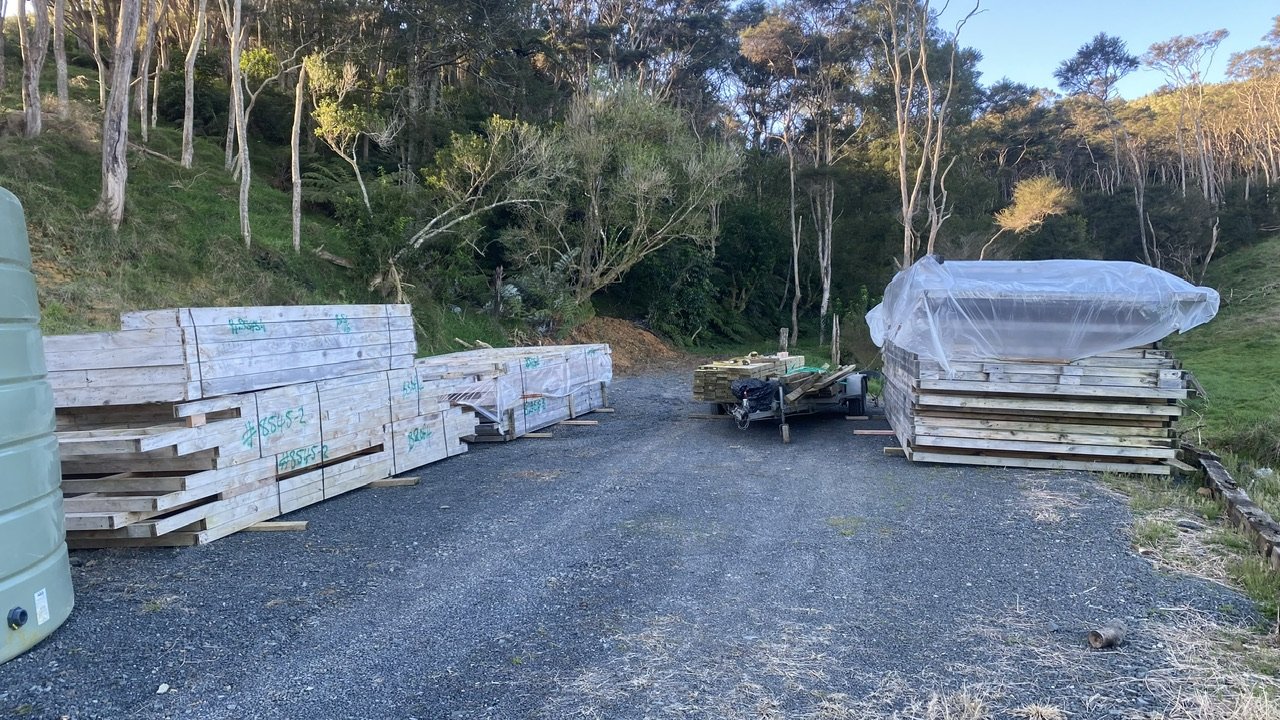
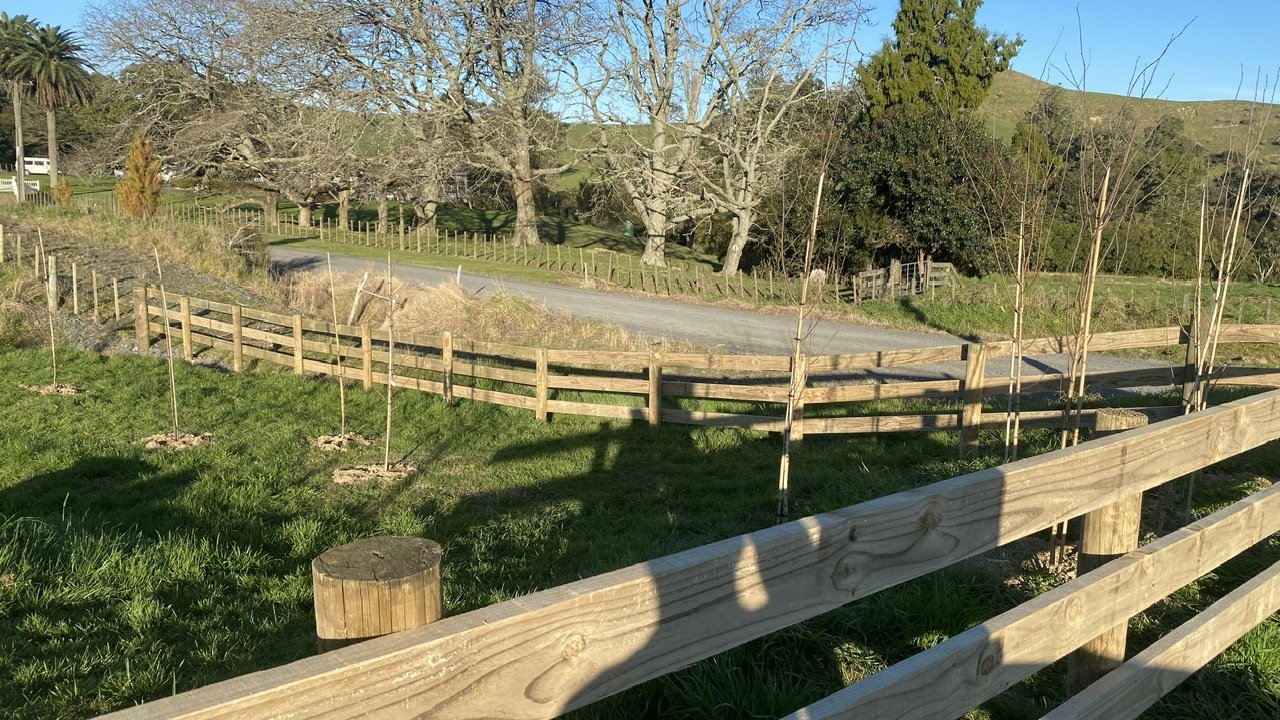
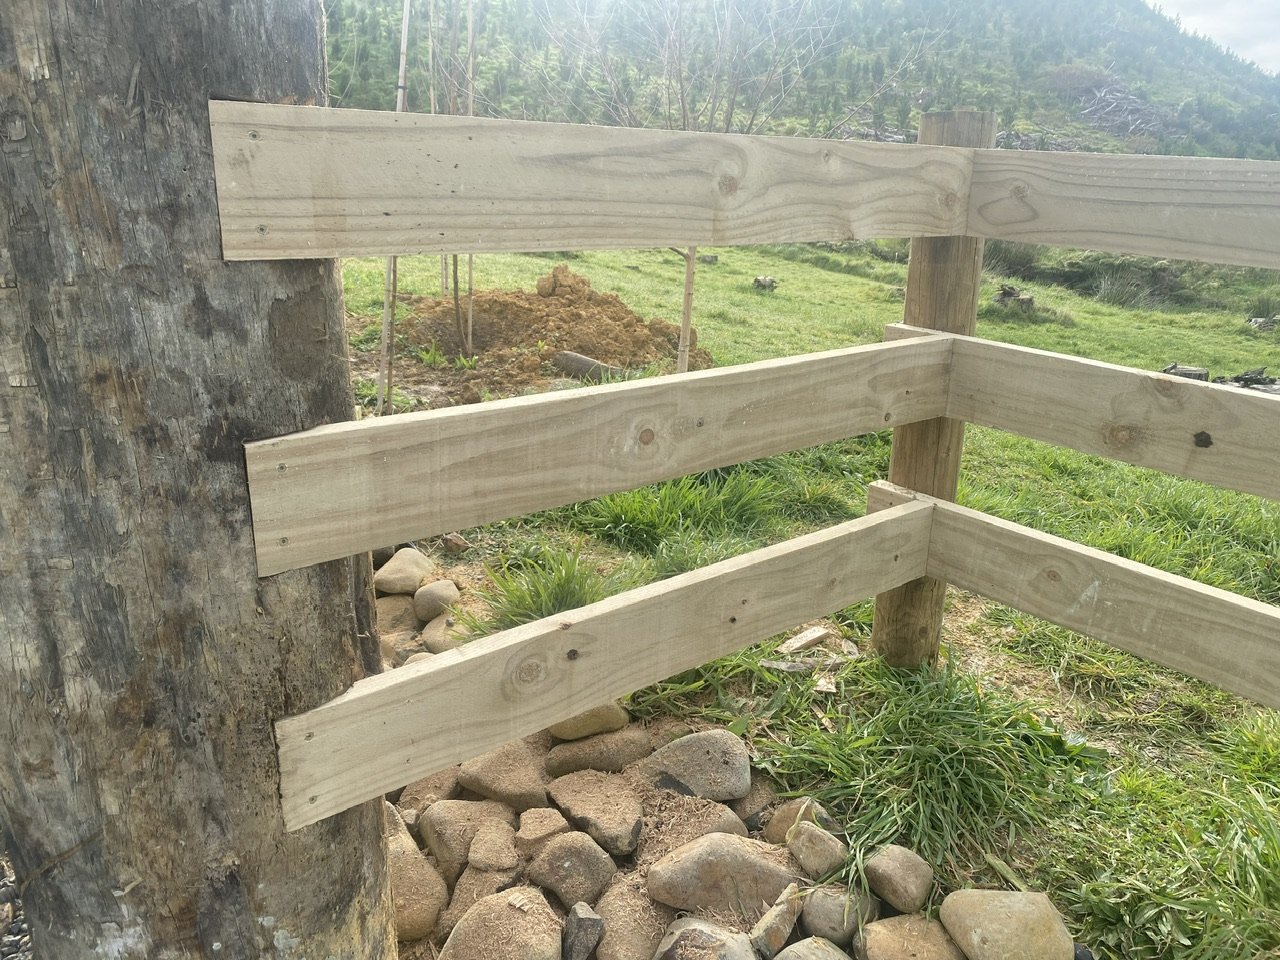
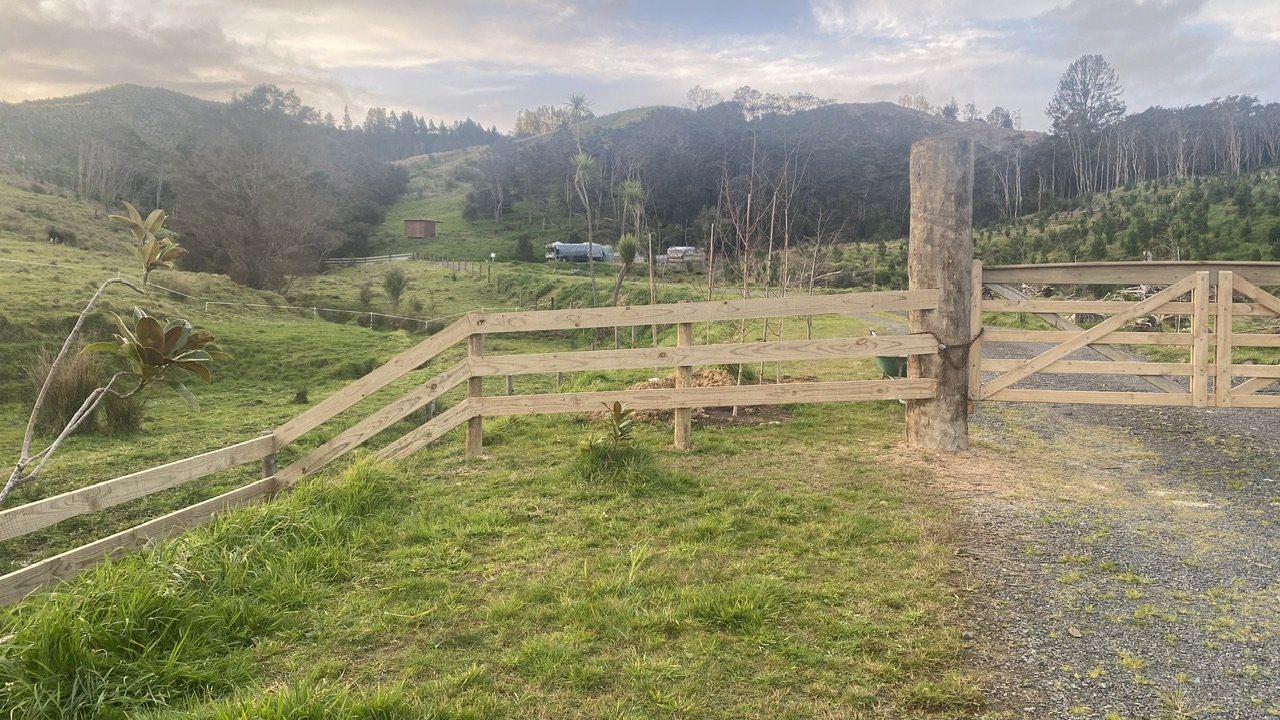
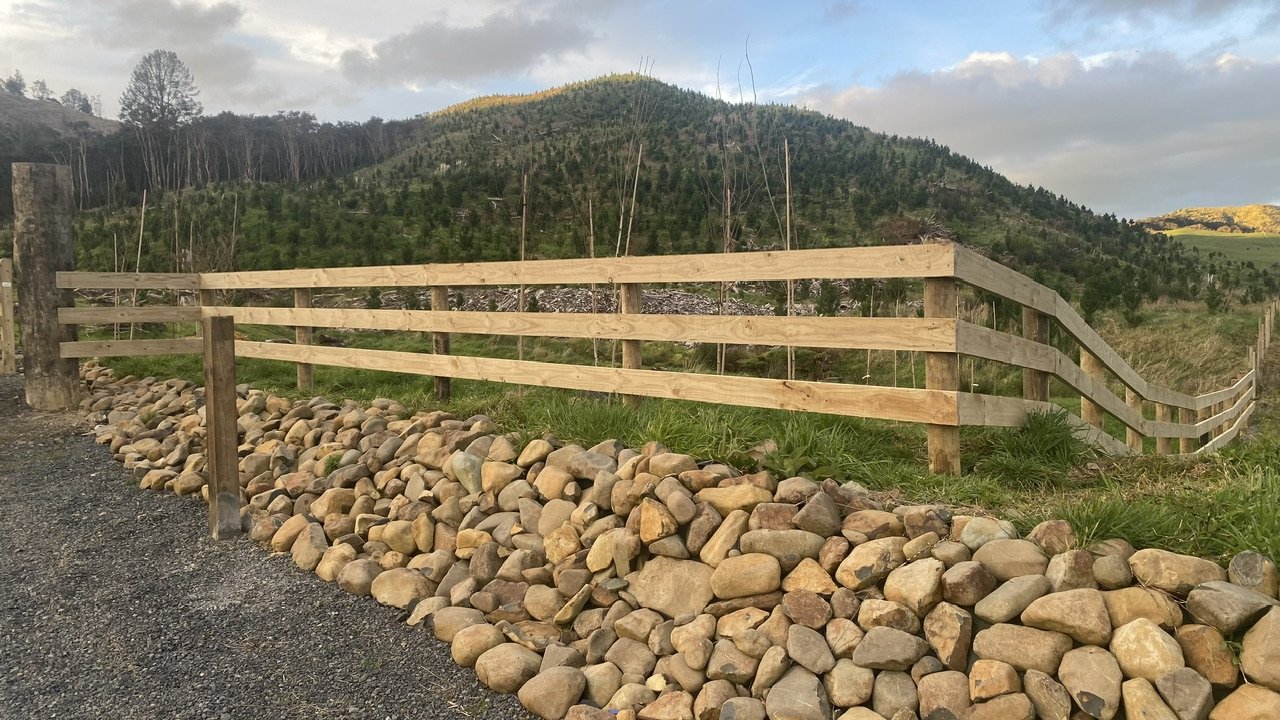
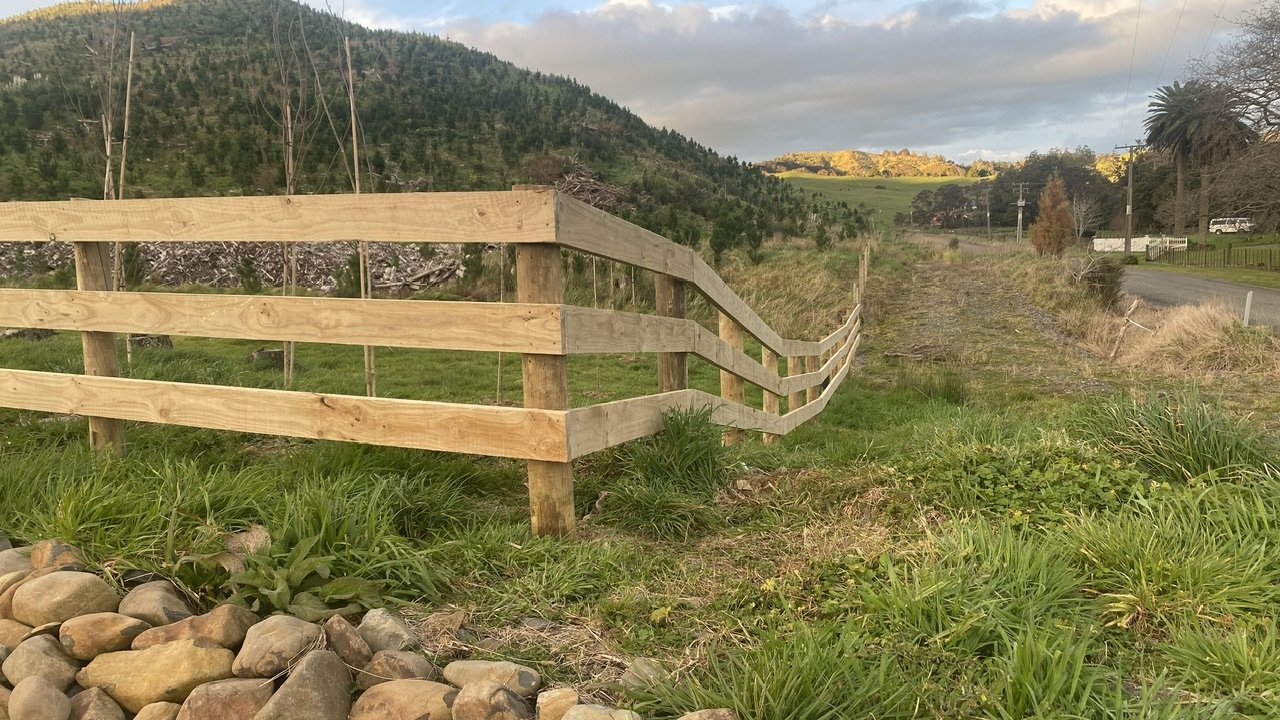
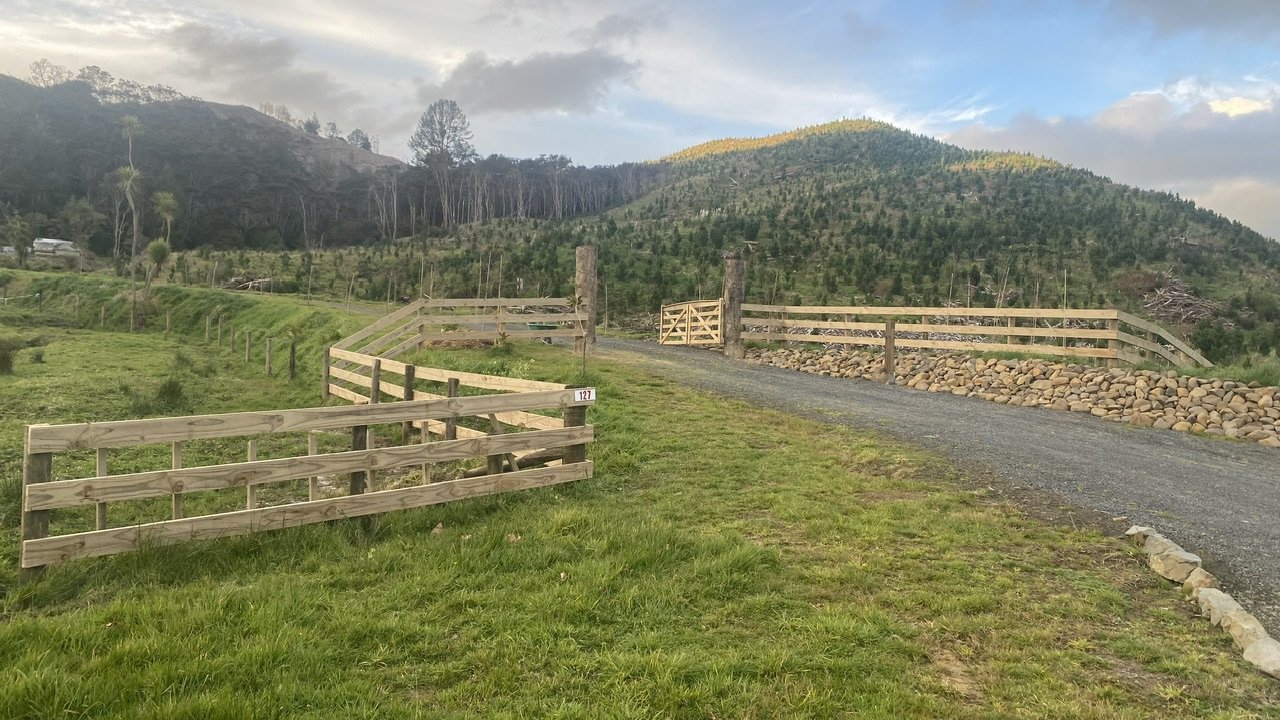
Finally managed to pick up the fence rails from a mates yard. Got a whole packet in the end cos my boss gets a good rate directly from the mill down in Nelson. Was waiting for a while as my boss said I couldn’t pick it up due to the weight of the pack being near on 3 ton, so the initial talk was to split the pack so I could. Turned up expecting to get half the pack only to discover said mate has a she’ll be right attitude like me and said ahh that pack is only about 2.5 ton so should be fine.. hmm.. 50 PSi in the tyres and I was away. Got there in the end with a few more grey hairs on the head. Made a couple of jigs which proved to be a game changer when you’re doing it all yourself. Got the easy part done last weekend. Also had my free frames from work turn up that I’ll be building my shed out of. This weekend I finished up the front fence and I’m pretty rapt how it’s all turned out. I checked the rails into the gate posts. Ran the rails down the left side and trimmed all the long post tops down. This is my favourite pic of the day..
2 points
-
Since the last update she’s been for a few mile drive to the Sergio to fuel up and test fuel gauge which went well, the oil pressure sender changed from the gauge type can that was on the motor, to factory idiot light type - which works. Dropped it down the road for a wheel alignment as per the structural repair and compliance process - paperwork squires and dropped off to the guy in charge. Painted the exhaust manifolds - had planned for them to be only temporary and get some headers in the near future but the more I looked the harder it got. Wanted hooker headers but they dont suit P/S models, others run a pipe down under the drag link and compromise ground clearance etc etc. Rigged up a spare wheel and a wee tool kit, will pick up a scissor Jack too. And a thing I didn’t know I needed until I saw it last week2 points
-
Wofs out in a week or 2 undecided if I strip engine bay out get existing engine turbo'd and and learn to tune without risk of killing something expensive. Will see how it goes through a wof make my mind up from there. #roughdavescience.1 point
-
Played around with this reversed manifold today. No pics of cleanup because boring basically hit the epoxy shit with a blow torch and it fell off easily with flathead screwdriver prodding. Hit it with a grinder was really dirty welds so ground it all out and started learning how to set up my welder (and learn how to weld aluminium) watched a few YouTube videos...... this is what I managed was a few shitty casting voids which took some time to burn out and fill in. Solid as fuck im happy enough. Used all my gas up so off for first re-fill.
1 point
-
Wof fails for surface rust on suspension arms and subframe. Is this a thing these days? Not even pitting, bubbling or scabs. Just surface rust. The mechanic told Andrew he would have to scrap the car as it is not worth fixing. I went back with him and they put the car on the hoist to show me the rust. What they claimed was rust on the firewall was just cavity wax. What they claimed was insane rust on the subframe was just a buildup of oil leaks and stones over years. They said the wheel was about to fall off - no way in hell at all. A quick buff and coat of paint and it would be literally as new. /They should really have failed the car on rust around the windscreen though but they didn't even mention it.1 point
-
Must be. It's not new cable, I got given a lot of welding cable many years ago, I think this is the third car I've done with it The cable isn't damaged or squashed or anything so it must just be bung inside1 point
-
If you fit a thread to the crank somehow and then use a nut welded to a socket. When the engine starts, the thread unwinds the starter nut. Or do what Martin jetpack did. 12v 1kz-te starter motor with a 24mm socket welded to the bendix. Bolt it to a meter length of steel and feed it 24v. Crouch right under the motor, hold the starter motor onto the starter dog and hit the button, with your arms braced. the throw out bendix ensures engament untill you let off the button, where it jumps back disengaged, after the 200hp 2stroke v4 hand grenade screams to life with the muffler at head height. Scary every time1 point
-
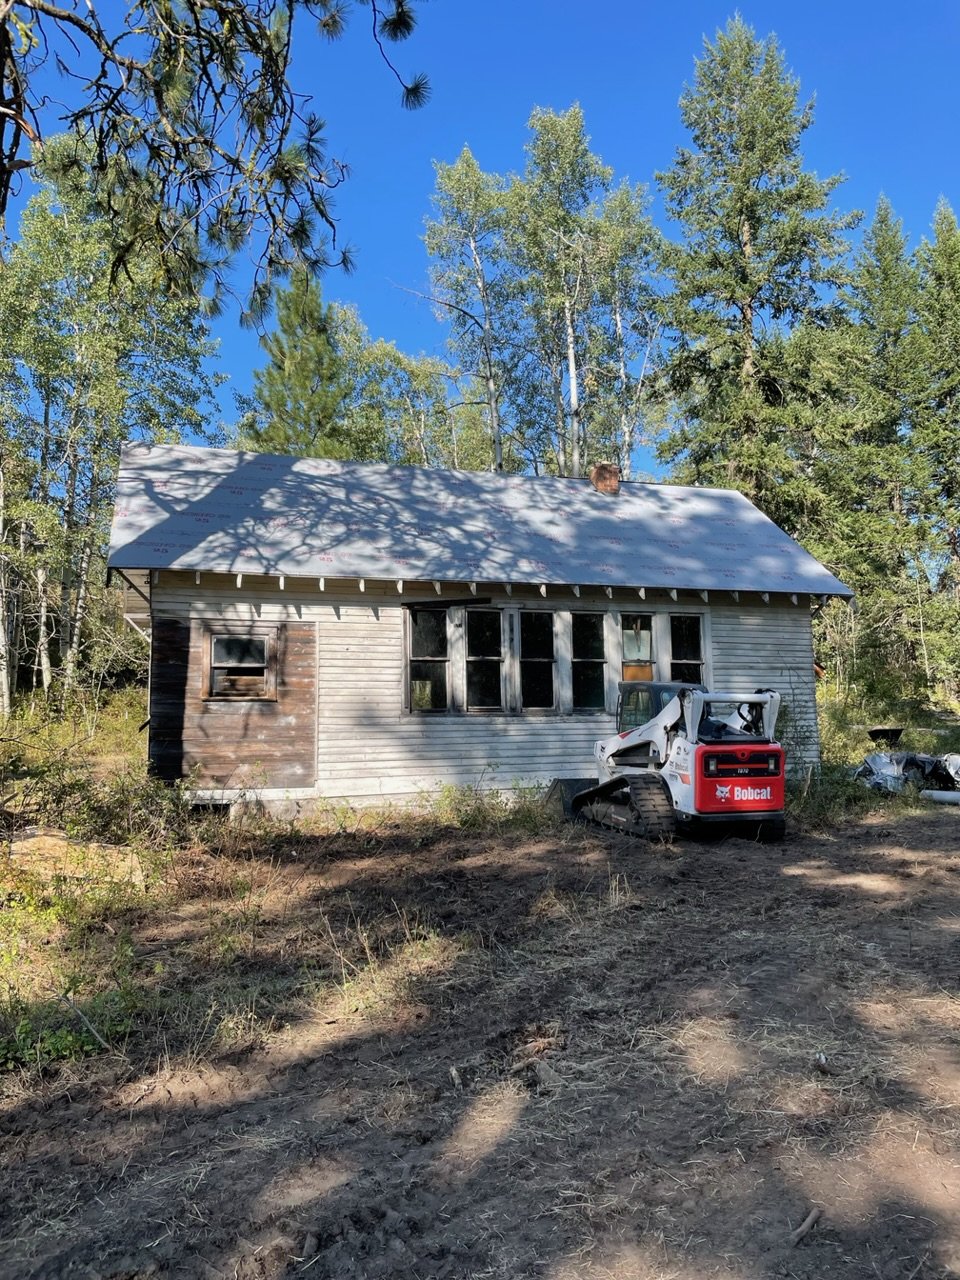
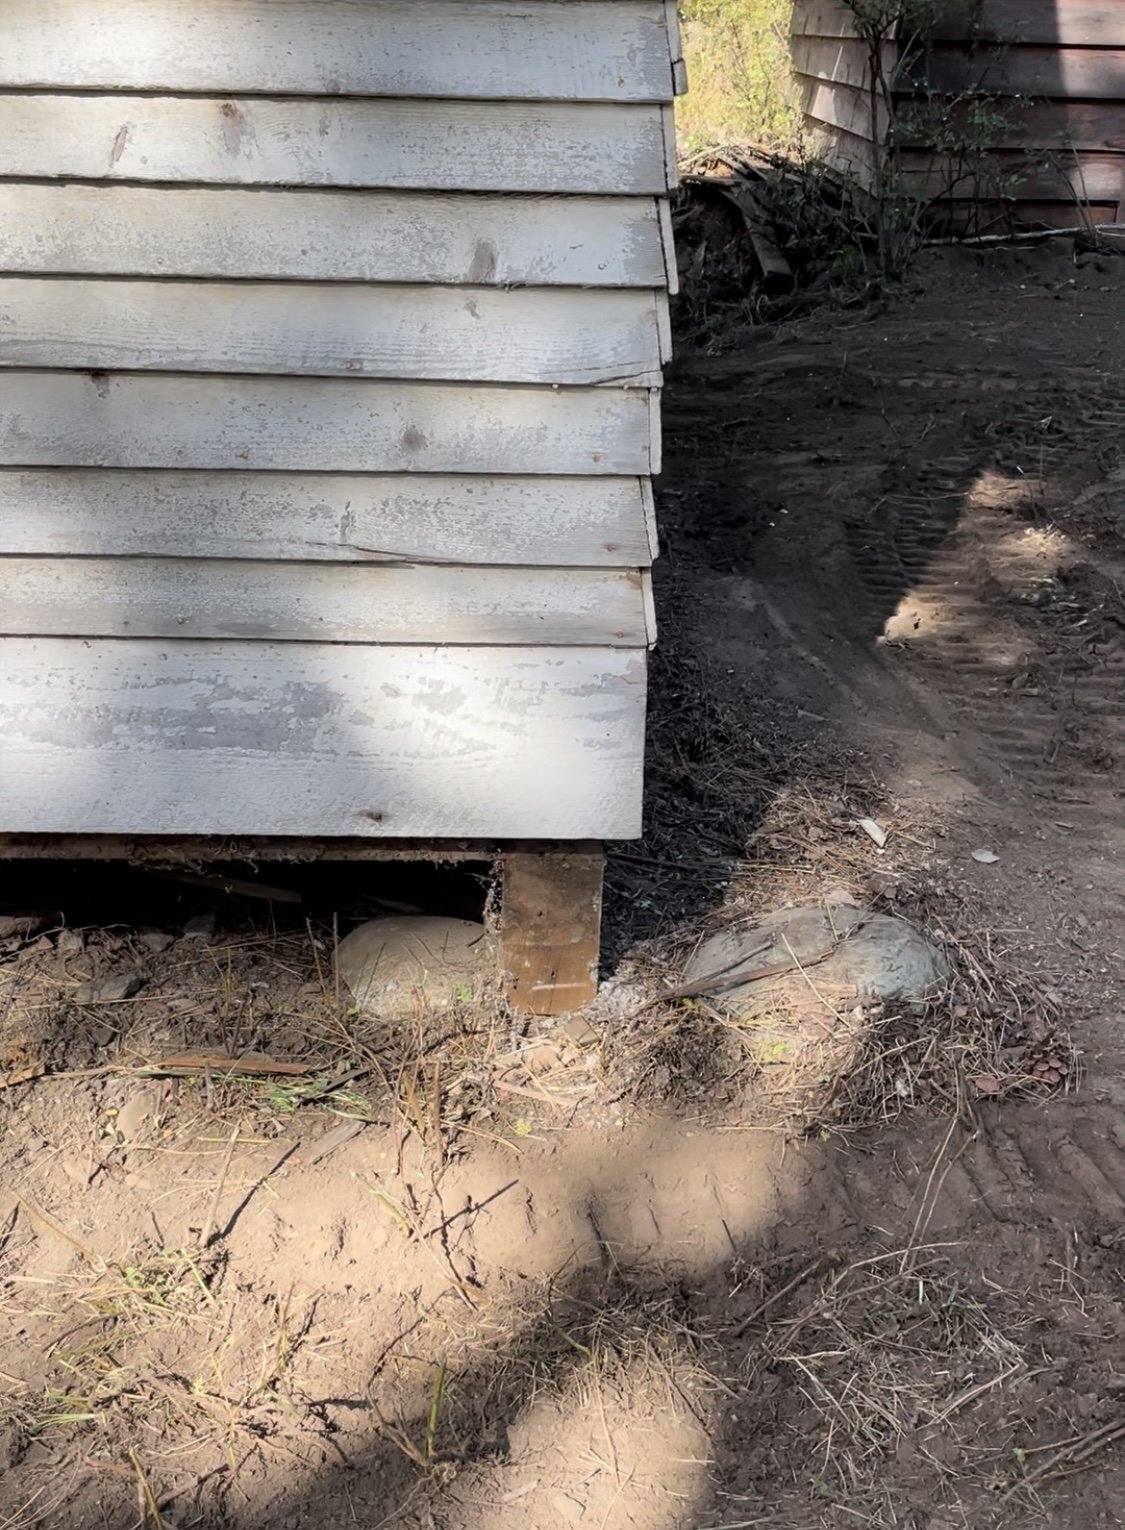
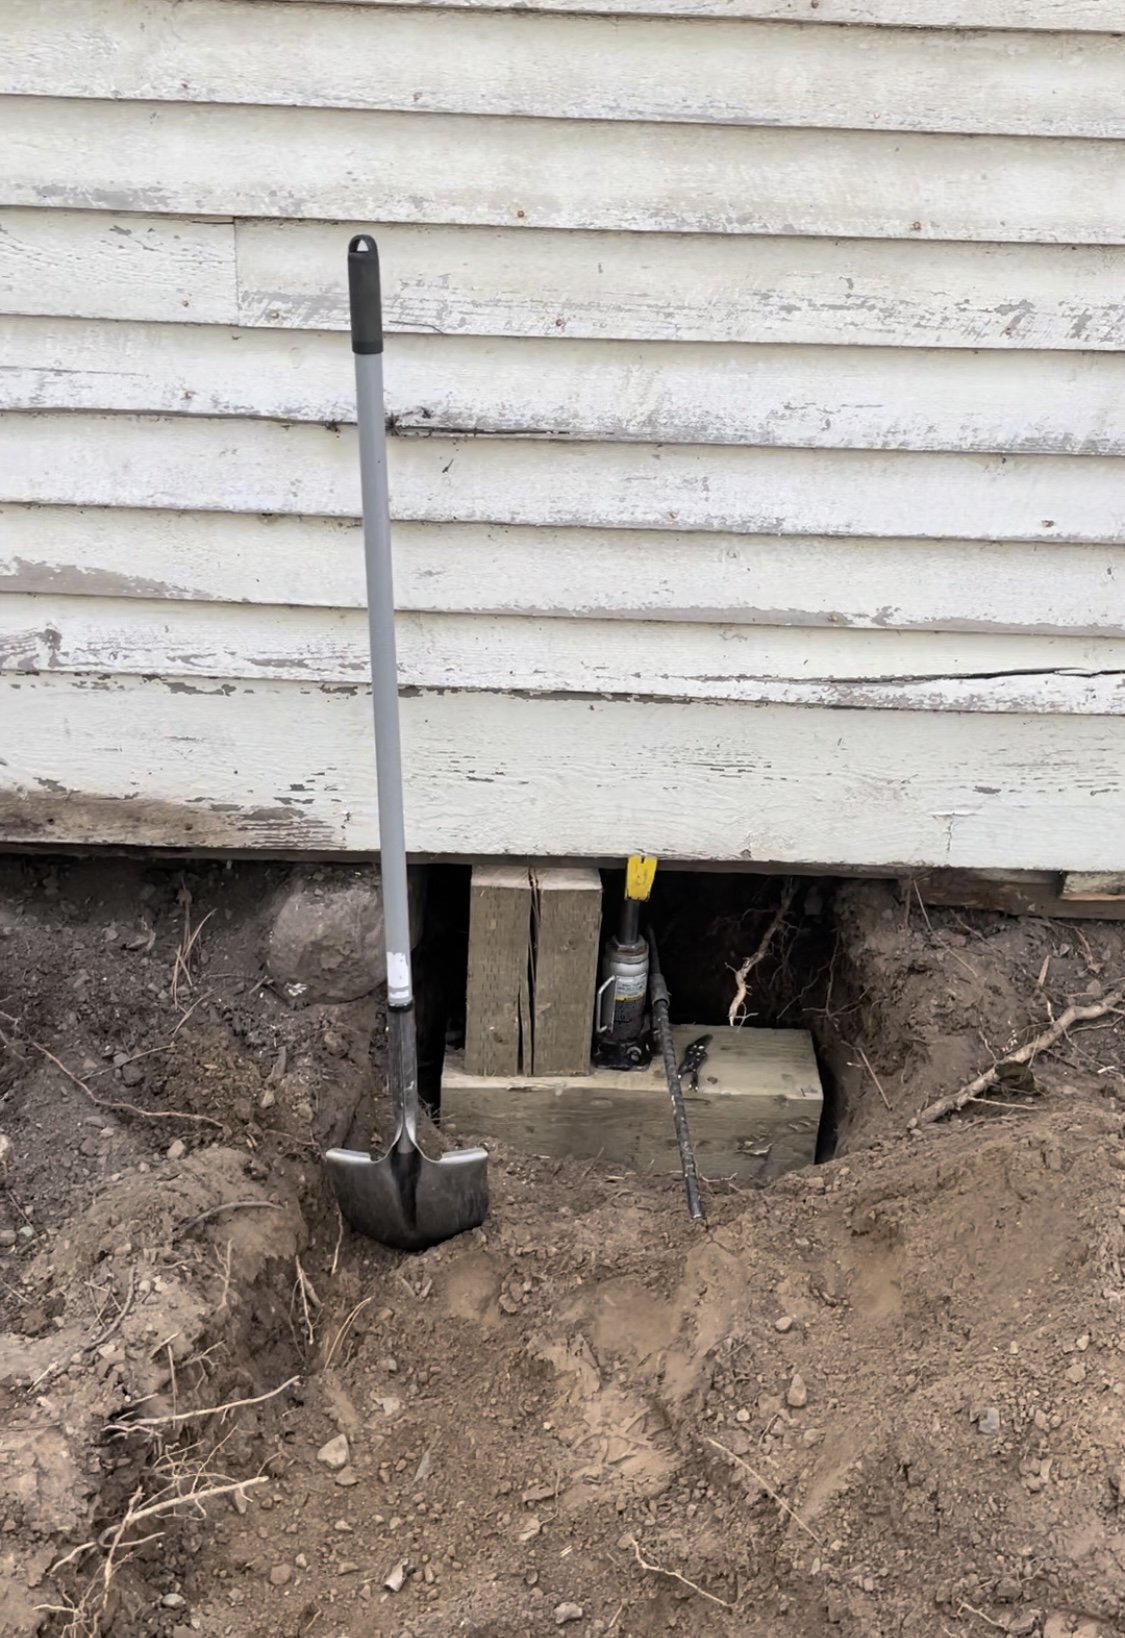
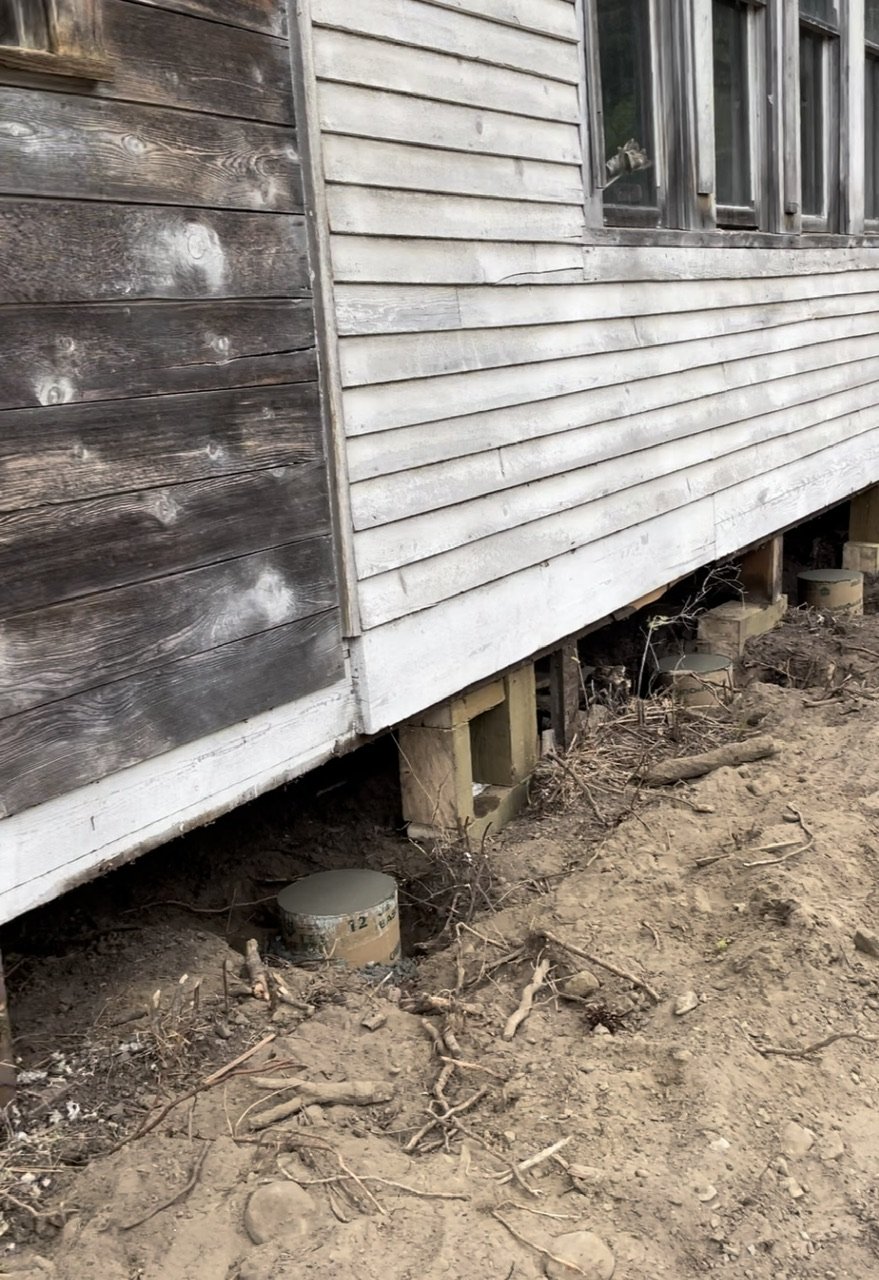
Of course after months of no rain all it took was opening up a roof to scare up a shower. Sheeted the roof with 7/16 osb as is standard practice on new builds. I left the original soffit boards intact and trapped them under the new sheeting, something I now regret…….. And covered with synthetic roof underlayment. Stuff is amazing and would probably last at least a year without being covered So this side was fairly straight but the other eave (the north side) had quite a dip. In fact a level on the floor inside showed most of it needed to come up about 3”. So we looked at the foundation…….. Hmm fir posts and large rocks. Well actually medium size rocks. So I jacked up and supported the building on some temporary posts so we could excavate and pour concrete under the existing post areas. And ready for some mud. These sonotubes are about 3’ deep and sit on some very hard and rocky soil To be continued
1 point
-
Tacked the lower mounts in and confirmed for the final time that they were in the right spots. Fully glued them in. Gave the frame a wire wheel and threw some primer at it. Then got the 'used car overhaul' spray gun out and blended it all in. Happy with that. While the paint was drying I fitted a new clutch slave cylinder and made up a fluid hard line that located the flexible line on the RH side of the cylinder head as per MS55. Weekend done - hopefully I'll get a change to sling the engine in during the week so I can feel a little more accomplished.
1 point
-
Got fuel lines in this morning just need to get a couple of longer brackets from pickapart for holding them to the floor. Good ol Toyota has studs in the right place for fuel lines to suit diesel or petrol so was easy once I figured out how to shoehorn them around the driveshaft and gearbag xmember. Got the wellside off and went to put in EFI tank for a mockup on how things were going to fit. Balls The EFI tank is slightly longer so doesn't slot into the brackets on the chassis, also its bigger/a different shape on top which hopefully wont be an issue as theres plenty of gap under the wellside but yeah I gave up for the day after that because wasnt in the mood for making a new back bracket which should mean the EFI tank can fit but thats a problem for another day1 point
-
Did mcm in January Got another wof on this the other week. Also got some color mixed up to go over the primer. Ended up blowing the roof and bootlid to get the water marks out of it . Then put all the sil trims back on to make it look a bit tidyer . Had to use some urethane to hold some ends on where clips where missing Another pic lso surfaced of dad racing it at Littleton in the late 80s
1 point
-
I managed to cut some fancy angles on the band saw without losing any fingers… Tacked the ‘fancy angle’ bits in place…. And plated the top. I often use damp rags to keep the heat under control, harking back to my days of welding sheet metal with gas. Have to say making all these little tack welds and grinding afterwards doesn’t sit well with me (I like big, grunty welds) but it does keep the distortion under control, it’s just not very elegant. Maybe I need a Tig? Tacked more metal on the sides… Gave it a tickle with the gas….. And started stitching it all up. With everything welded up and still nice and straight it’s time to cut the unused steel out. Before… After…… I left the ribs in there for extra strength, looks a bit clunky but only you guys will see it. Lots of grinding on the floor, on my knees. (No comments about Mecca being in the other bloody direction please!). Out with the old standby - CRC rust converter….. A quick test fit before paint… Regrettably, and much to Rigamortice’s disgust I stooped to using poo for the first time in this build. Just a little bit of Newtech to smooth things out (I didn’t want to grind the welds down too far). Some primer and two coats of ‘insipid green’…….. And it still fits….(phew)……!
1 point
-
Derp Heater hoses looked good but forgot the tap so got that in today with some more parts bin heater hose Front half of the exhaust done just need a pair of 2.5in flanges to join it to the back half Gotta get the wellside off next to fit new fuel lines and the EFI tank then its only finding a radiator to fit and get the engine wiring done and I can attempt firing the engine up1 point
-
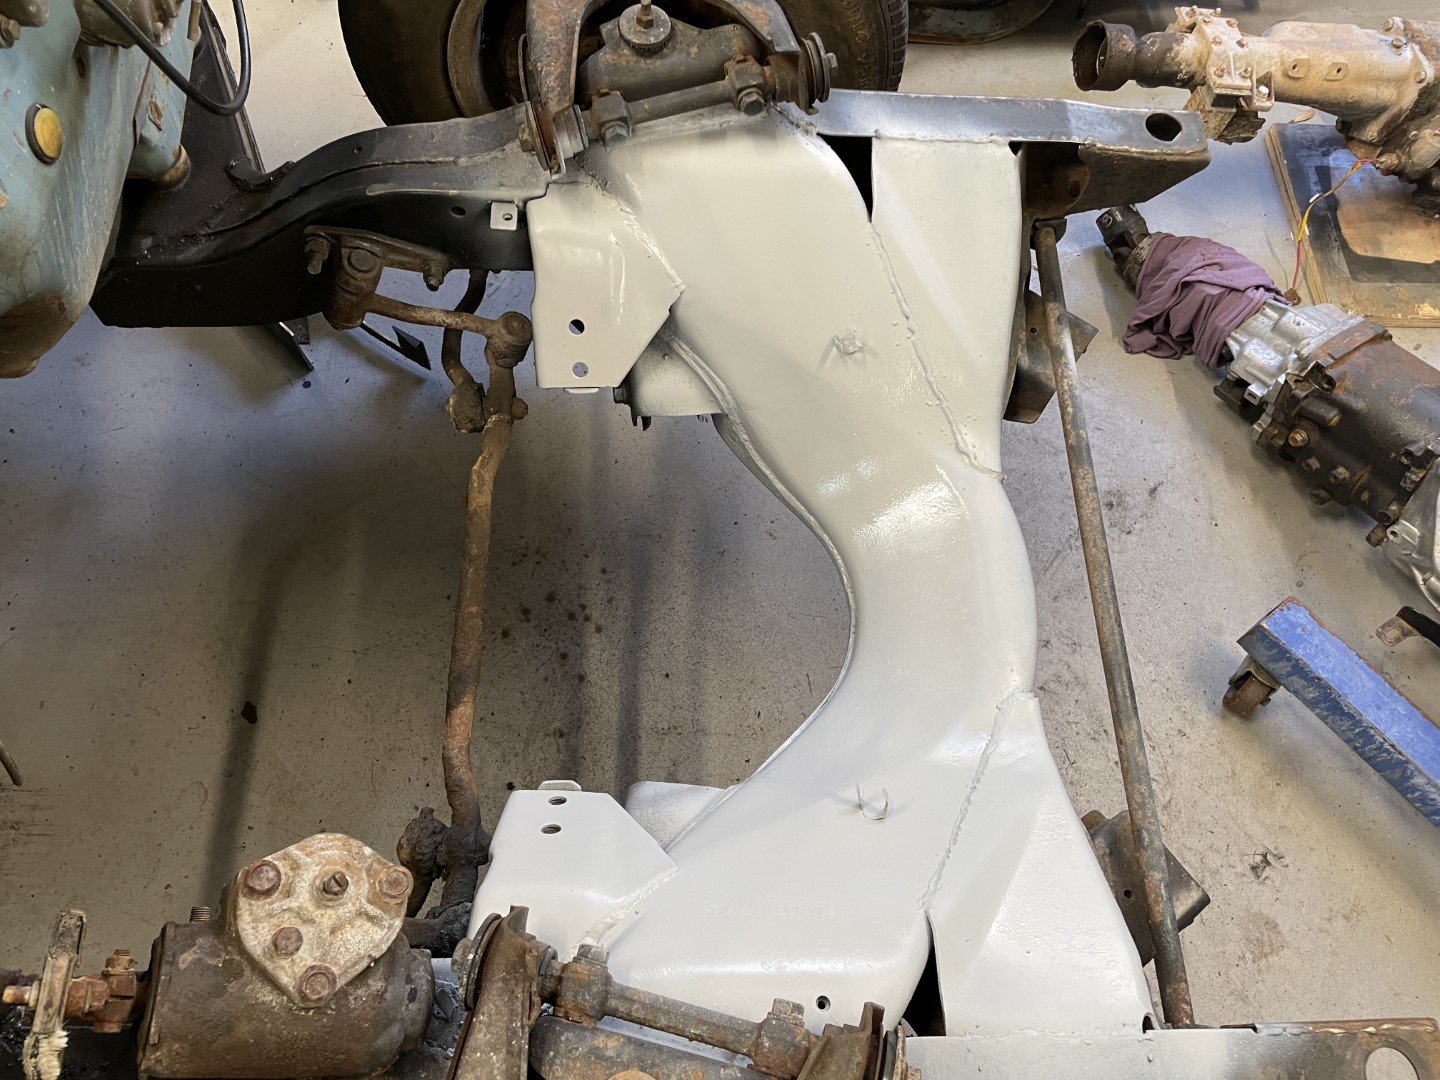
I have made up a bracket out of 3mm plate for the front mount. The leaf spring mount is only out of approx 1.5mm. I will make up the shock mount for this side and have a chat with the certifier. The hobby car technical manual doesn't say that much about fitting a 4 Link from a donar car.
1 point
-
Today I finally sprayed the trunk inner! Also more time spent on ignition timing and kickdown cable adjusting..trans works fine but nothing I do changes much so it must need adjustment elsewhere. Fine for now! New Timing makes it seem less prone to stalling and has unleashed a nice lope of unknown-spec cam. Just dotting i’s on a carpet set, seat upholstery kits and maybe wheel arch trim set in U.S.A. and Canada. no reply from repair certifier; week 2.
1 point
-
The Minx diff is out, YAY. I will offer up the Avenger diff tomorrow and see how it looks. The lower arms are about 140mm short of the Minx leaf spring front mounts, and because the upper arms mount to the top of the diff head, means they would need to pass through the rear seat. The Avenger diff I bought is a rusty mess really. It has been sitting on the ground for some time, though it does turn smoothly by hand. Much better than the minx diff.
1 point
-
The following day I awoke filled with remorse and contriteness for my display of non-woke, non-PC vitriol the previous evening. (I.e. spitting the dummy). So for the umpteenth time it was radiator & front shell, off… Inlet and exhaust off… And engine & box out…….. (I enlisted the help of our professional racing driver - he lives next door to his “Gramps”). (He also helped out with some creative steering wheel mods…………). With the rear gearbox housing off it was a good chance to check 5th gear - all looked ok. Cut out a new gasket…. Re-assembled with the new parts….. Poked it all back in the hole it came out of and it looks like the gear lever is finally in the right place. Decided I didn’t want to use the Toyota gear lever so I cut the bottom off it….. I then cut the bottom off the 70 year old original lever…… And did a bit of welding, bending and painting. Although it took far too much of my spare time the gear lever is finally where I want it - I love the result.
1 point
-
Fab'd up and fizzed on some mounts today with @MaxPowers help with the flash welding1 point
-
I cut back the old metal ducts and welded in a 3mm plate with another small piece of 3mm welded in behind and drilled and tapped it for the bottom mounting holes. Bolted it into the bottom mounts. Next the top mounts which will need to go through the firewall. They will be in full view above the engine so I need to find a fixture a little more aesthetic than just a normal old bolt head. I also need to remove the dash pad and reglue the vinyl down. The dash pad was badly cracked so I removed the old disintegrating foam and shaped up a piece of Paulownia timber. Put a layer of glass over it and used the spray on contact adhesive to glue the vinyl down. I just needed to use more glue and it would have been a good result. Easily remedied now it's all apart again.
1 point
-
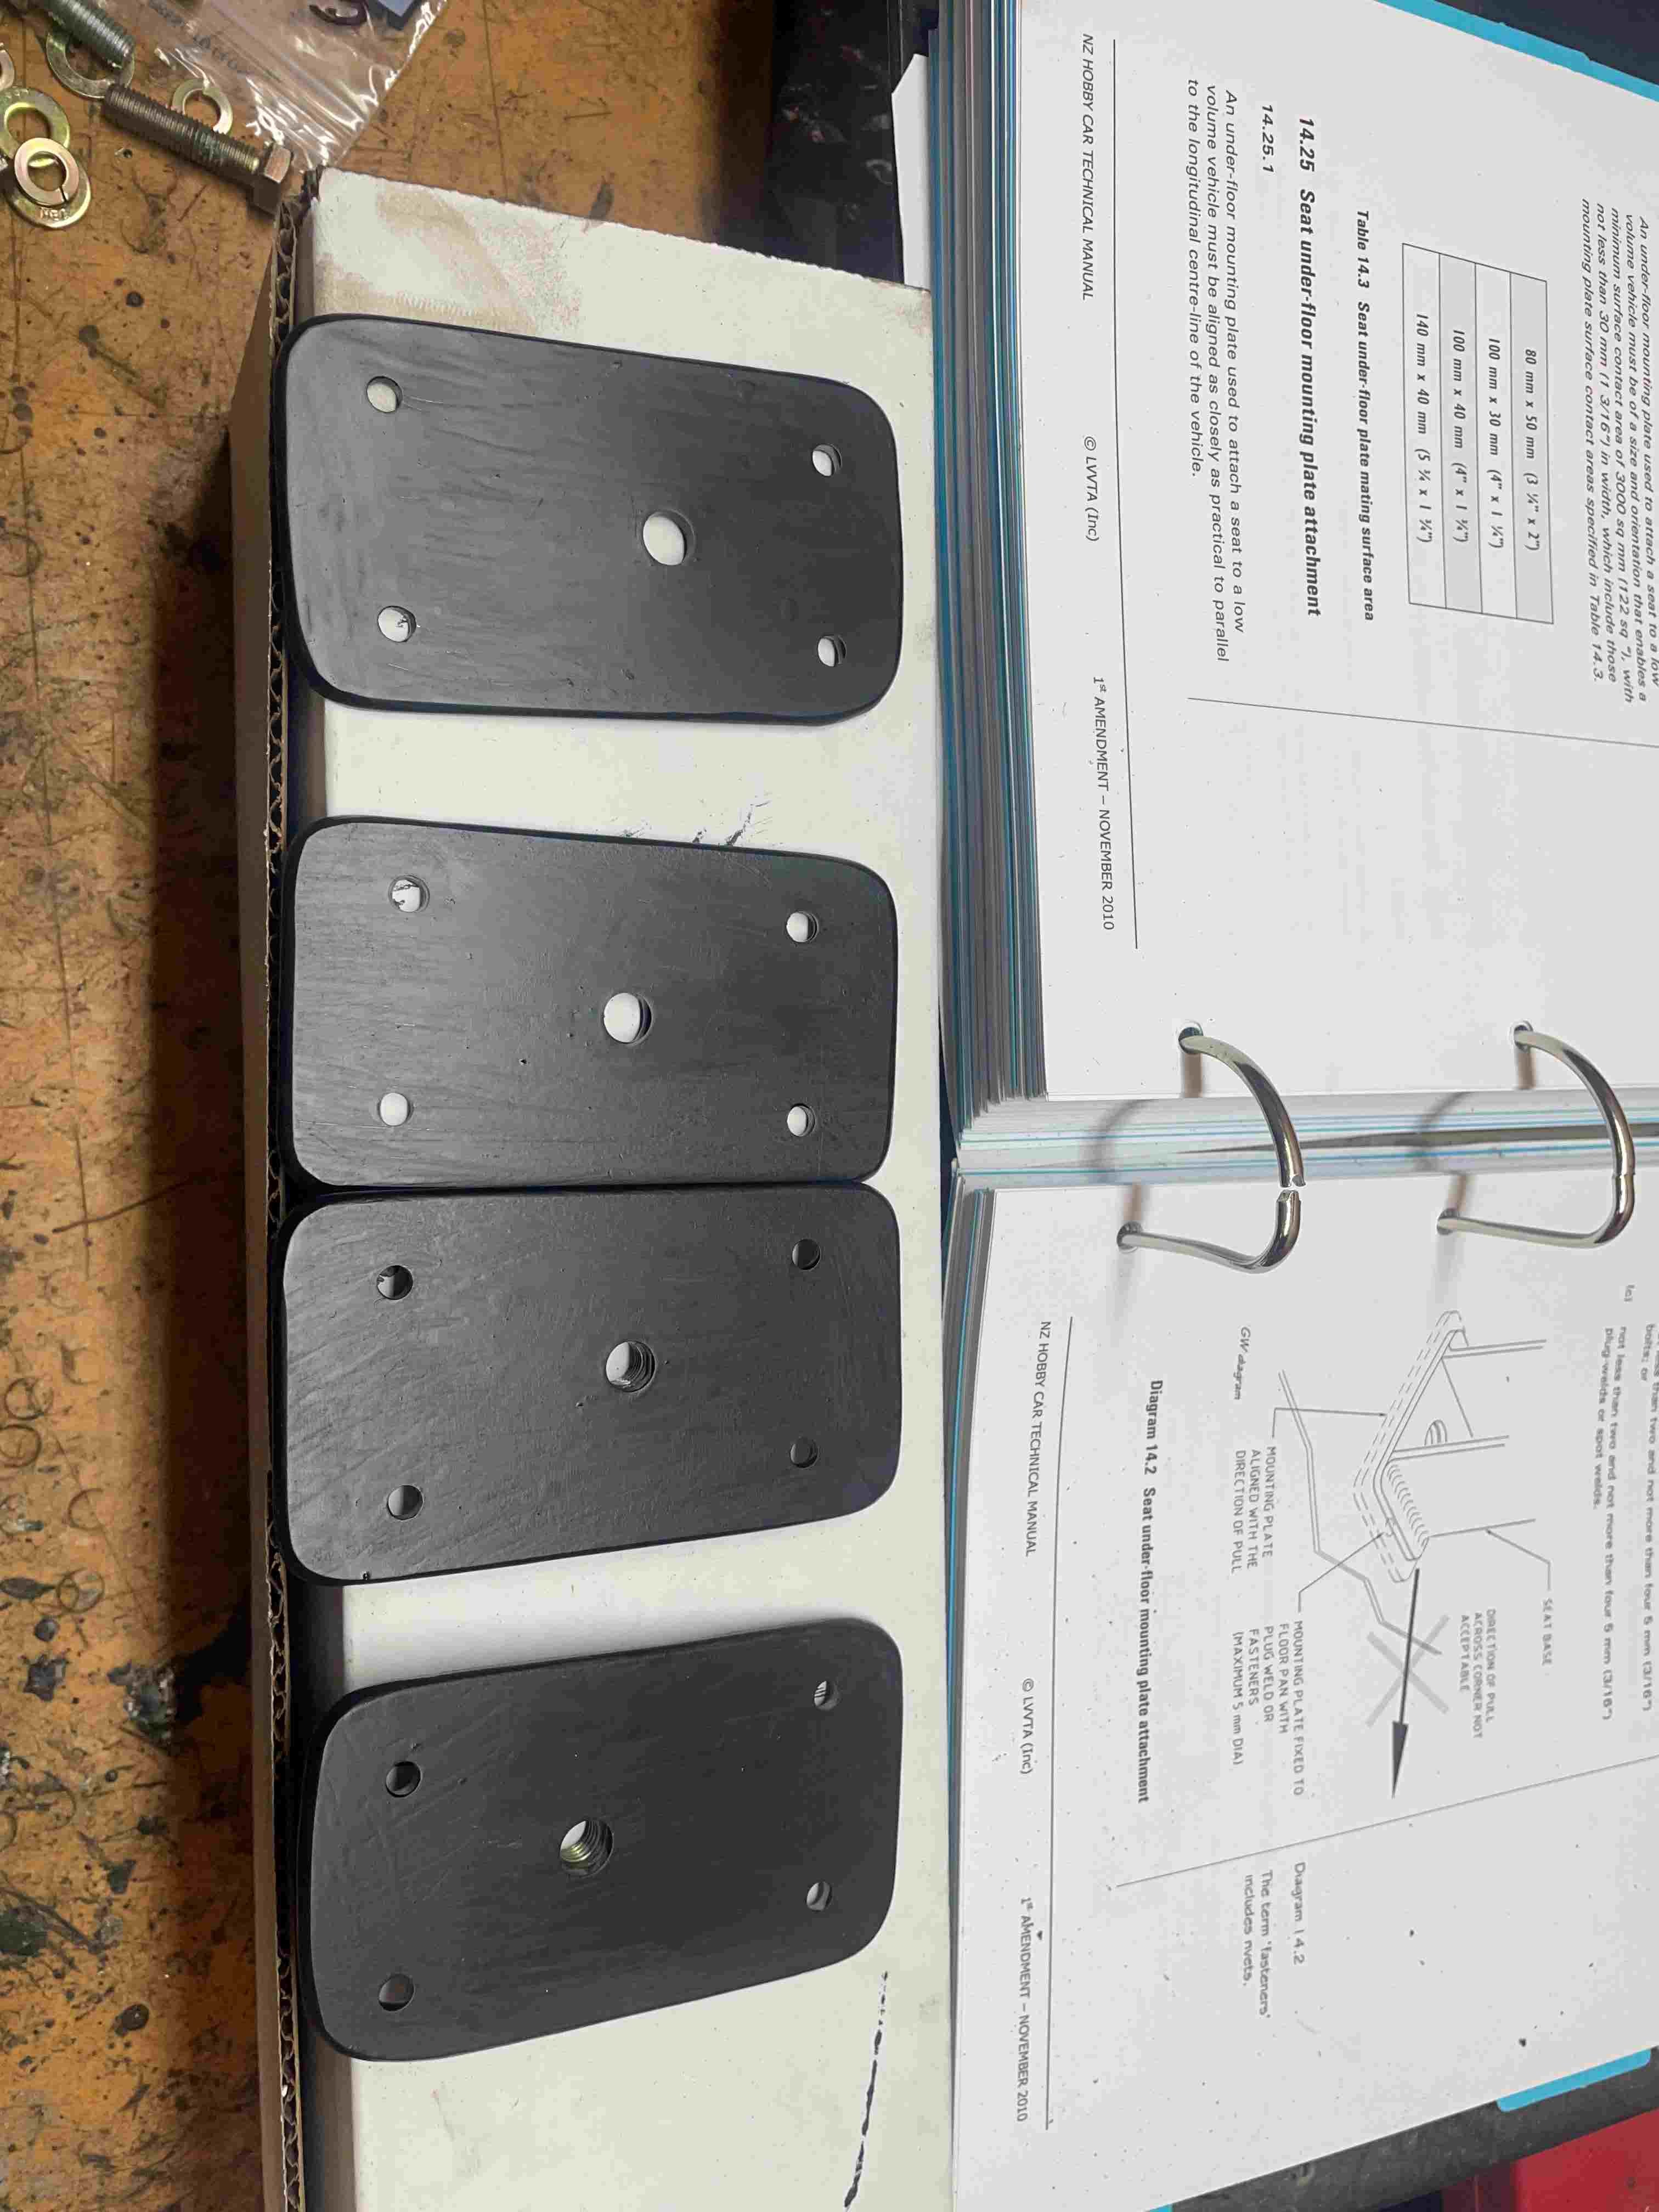
After a quick Google and watching a u tube video, all I needed to do was use a bit of penetrating oil and use a fit of force and the injectors came out. I will give them a clean before they go into the new intake. Today I decided to get one of the seat frames finished. I had to make up some sandwich plates to go either side of the floor. I had two nice flat areas in the right places for the seat to mount too so I made them nearly twice the minimum size of 3000 sq mm. I sent a pic to the certifier of the seat frame mounted to the seat. He just said to make sure I used mounting plates in accordance with the regulations so I will make the passenger seat frame the same. I gave it a quick coat of paint and mounted the seat back on and bolted it in. Also the gear lever was way to long, so I cut about 75mm out of it. Feels about right now at that height. I need to find a gear knob for it now.
1 point
-
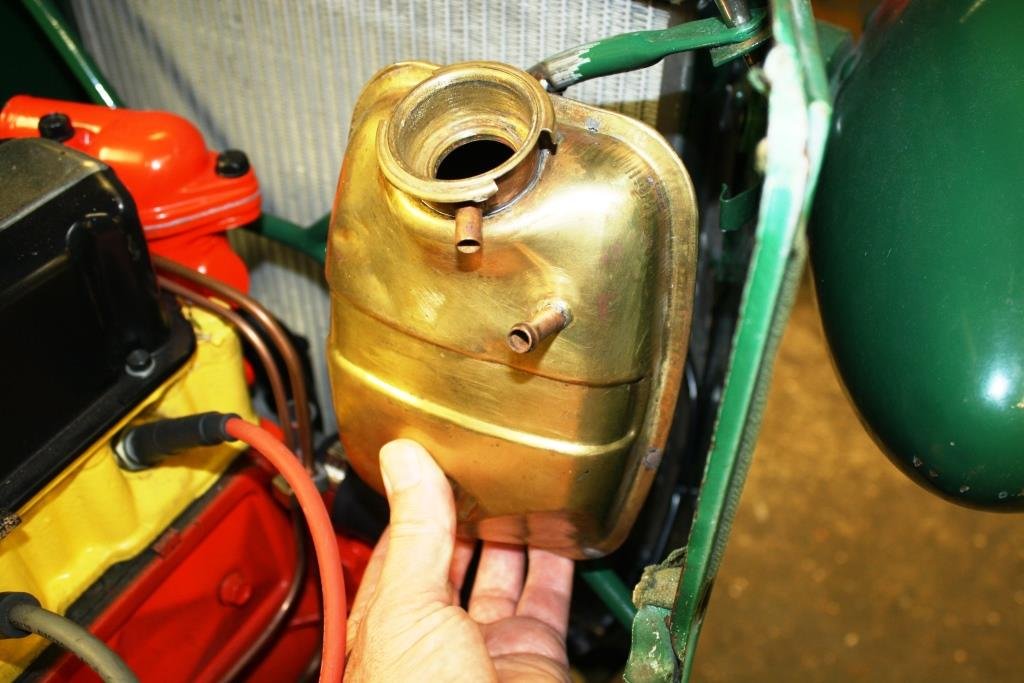
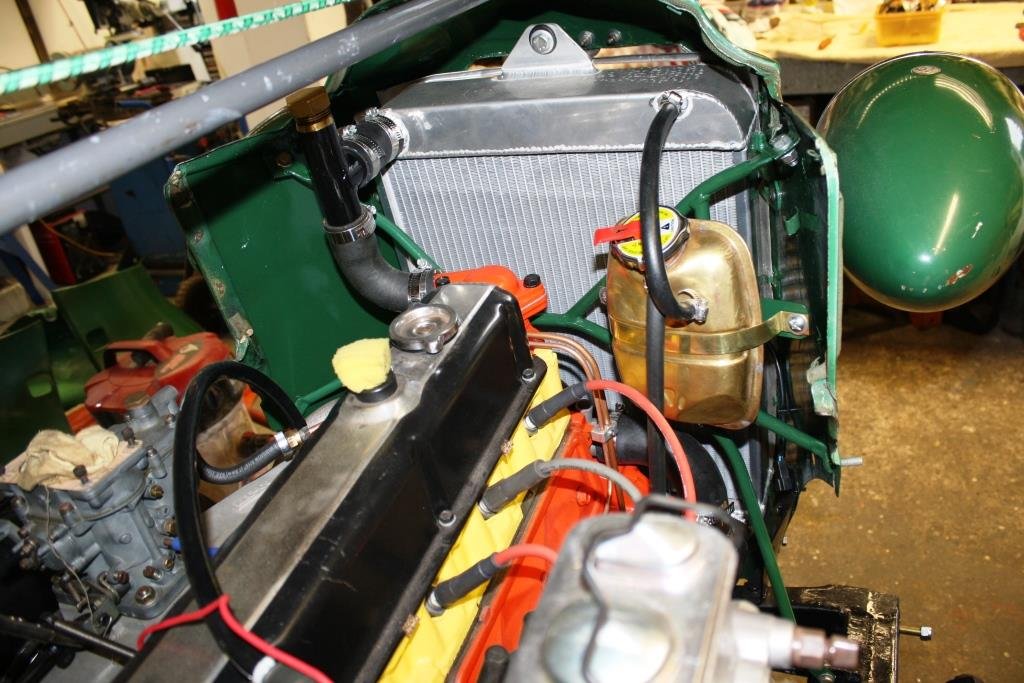
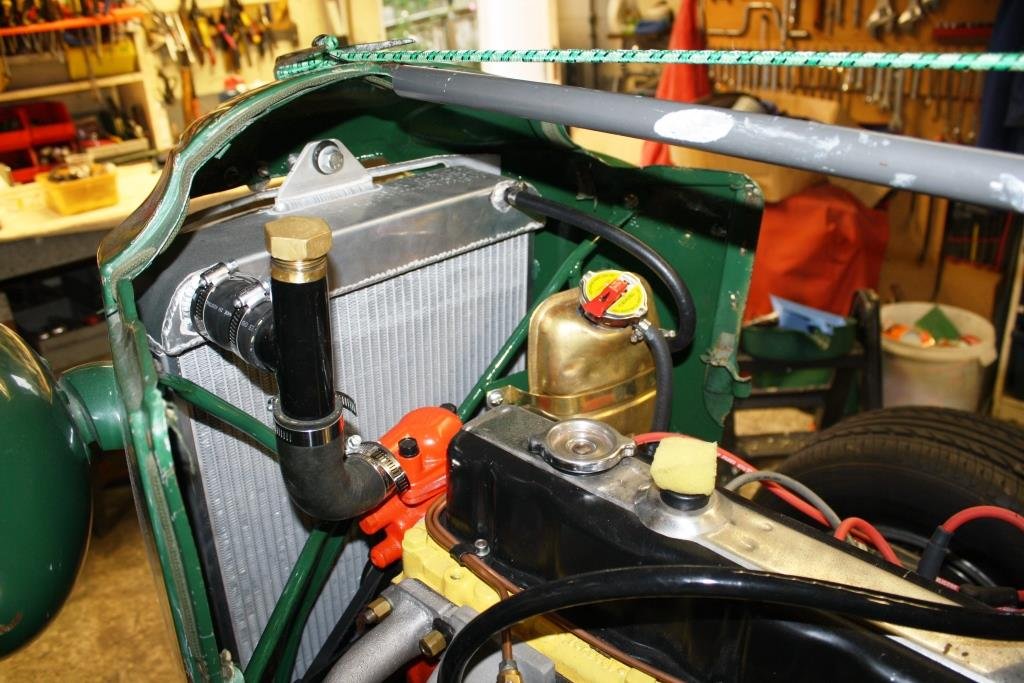
Time to mount my brass overflow bottle, I still haven’t a clue what it came from! Should fit in here nicely….. Tacked in some round EWS. Then a piece of flat with a couple of Rivnuts… Found some brass strip to keep things in character… Found a cap to fit, I’m a big fan of the type with a pressure release lever. All plumbed in and looking good. Finally filled and bled the coolant system. As always I added a big dose of glycol and a can of Bars Bugs. As much as they are my passion in life these old Holden 6’s are nothing short of a plumber’s nightmare with every 2nd head bolt ending up in the water jacket. I finally found the air filter base I’d made for Rigamortice some 40 plus years ago; I cleaned it up and added some paint. …..yes I’d gas welded it because no one had a mig in those days and none of us had even heard of fringing tig! Flipped it over, cut out a gasket; it all still fitted, so bolted it up. A Weber carb disguised with an HR Holden air-cleaner…looking good. Slapped on a filter… And fantasised about running with no bonnet and the intake poking out the side. Time to spark the X2 up. I kicked the old girl in the guts and ran her up to temperature at a fast idle for 30 minutes or so. Yes she could do with a more aggressive cam but what a gloriously responsive little 3 litre six; we’ll get all the legals in place before we finish building and fitting the 208 Motor. https://www.youtube.com/watch?v=L0A8eSZyu2A
1 point
-
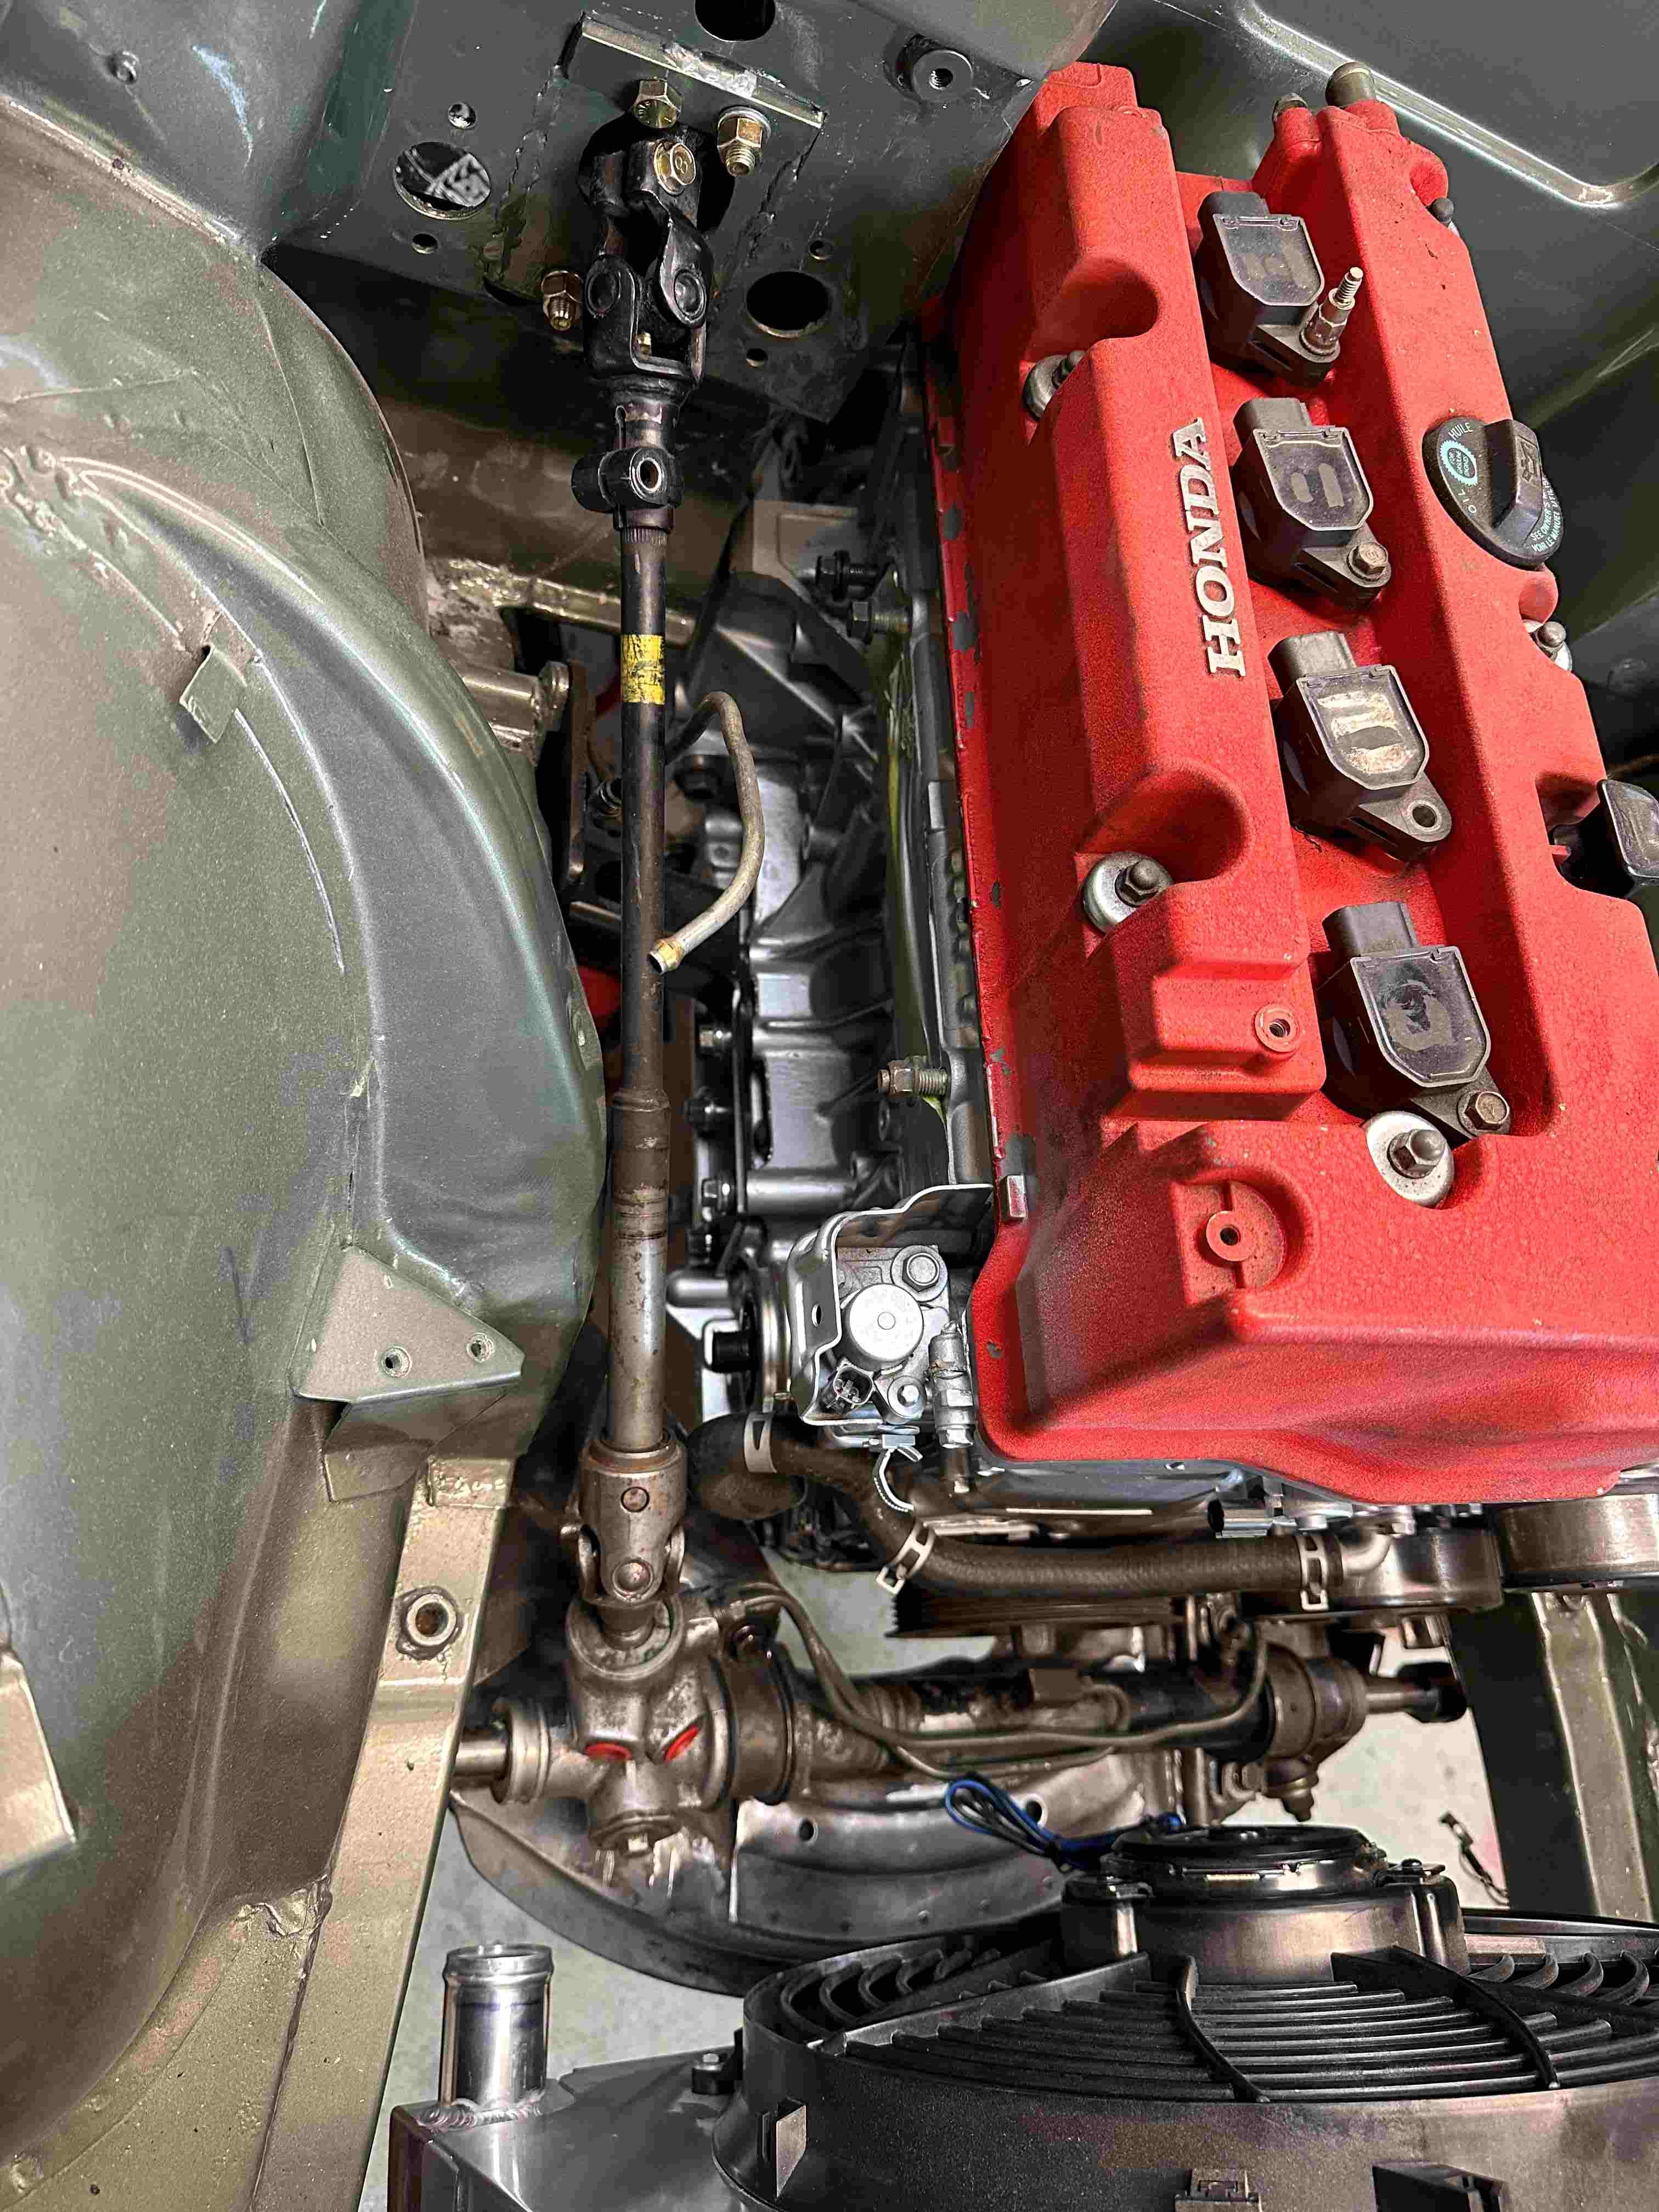
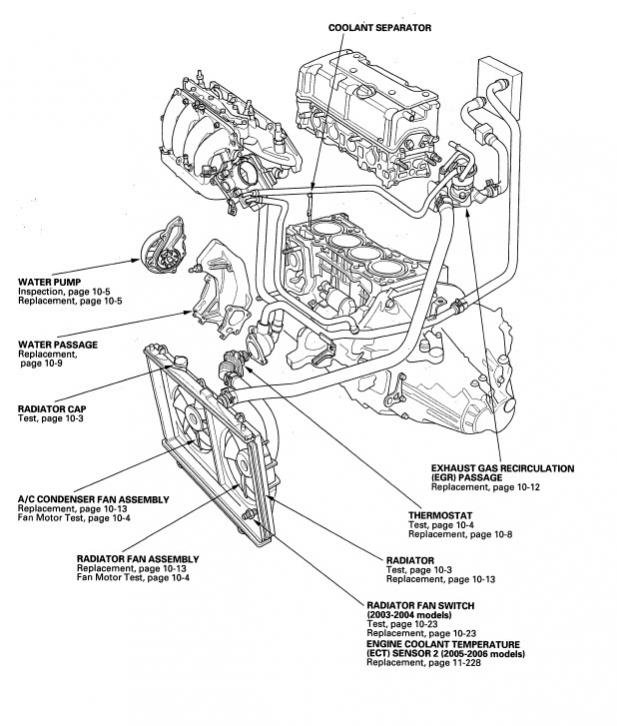
I bought a few aluminum tube straights and bends. Also so some elbows, reducers and straight silicon connecters. Then of to supercheap to grab a couple of long radiator houses the correct dia to fill in the missing links. I spent most of this afternoon working out how to make it work around everything else and piecing it together. I think I am good with this layout. I also found a few diagrams of a Honda K20a cooling system layout to make sure I was plumbing to the correct outlets on the radiator.
1 point
-
Looking like a barn find but atleast the sheds tidy. Found all the bits I need for the engine swap and its ready to get trailered off the fab mans house1 point
-
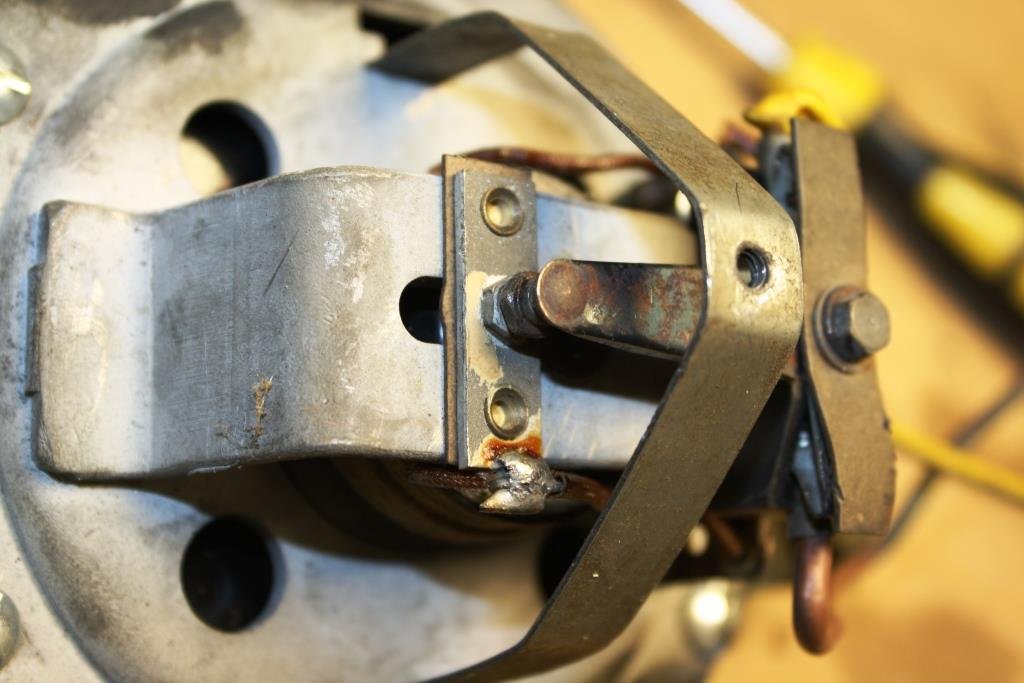
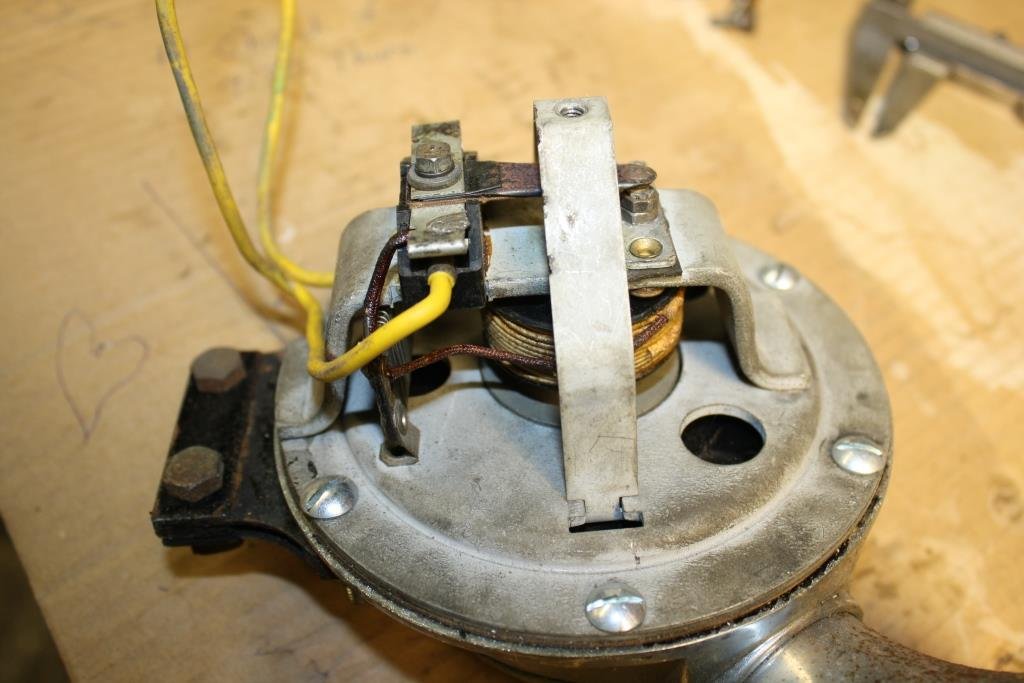
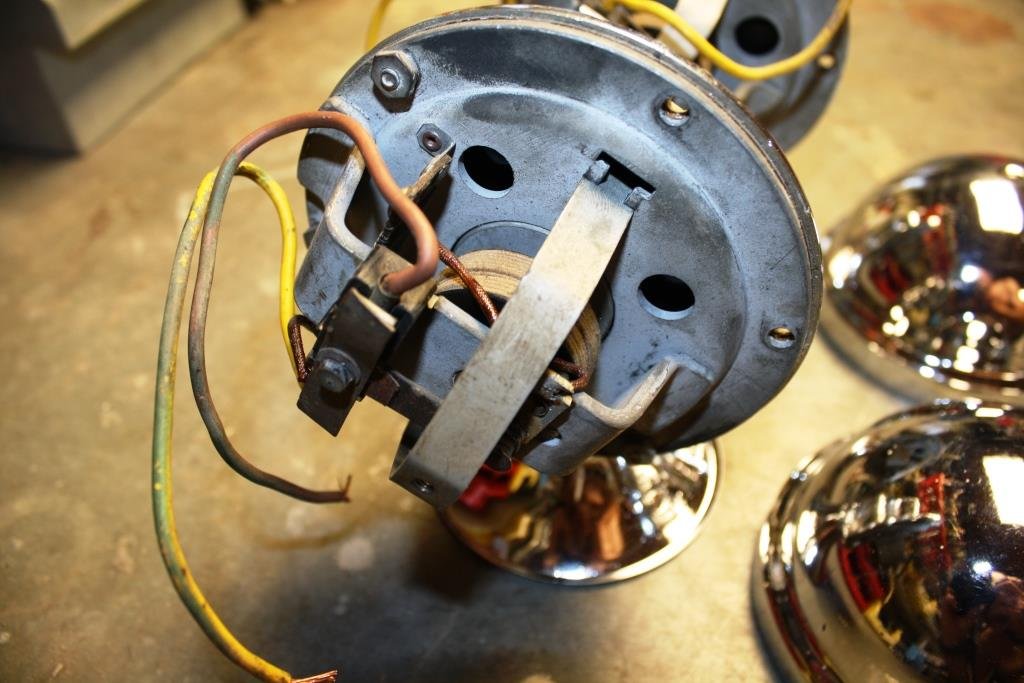
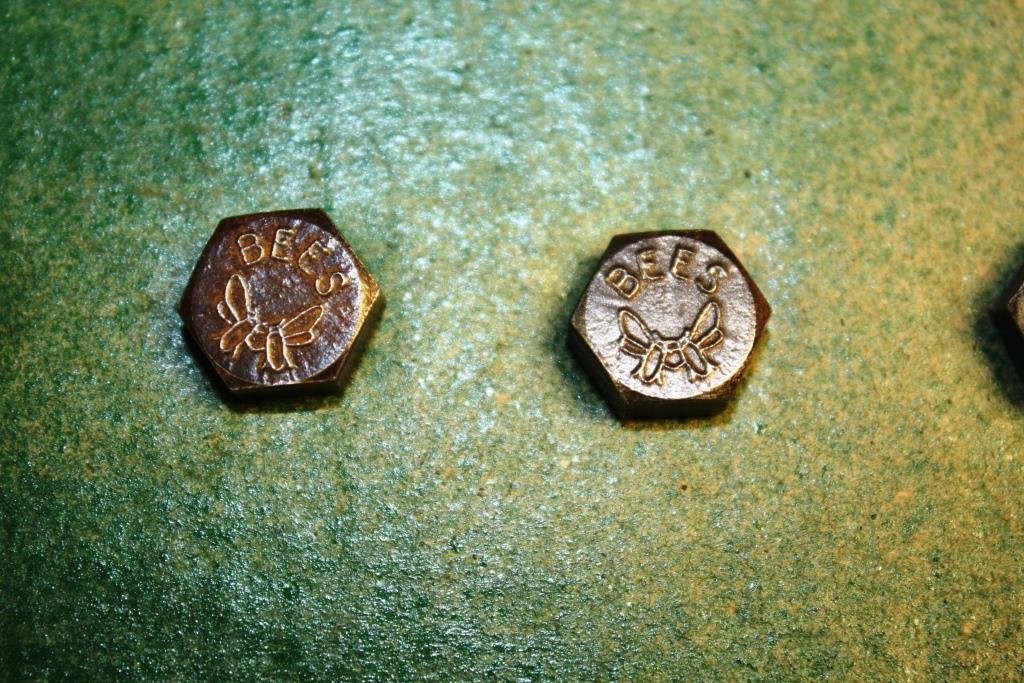
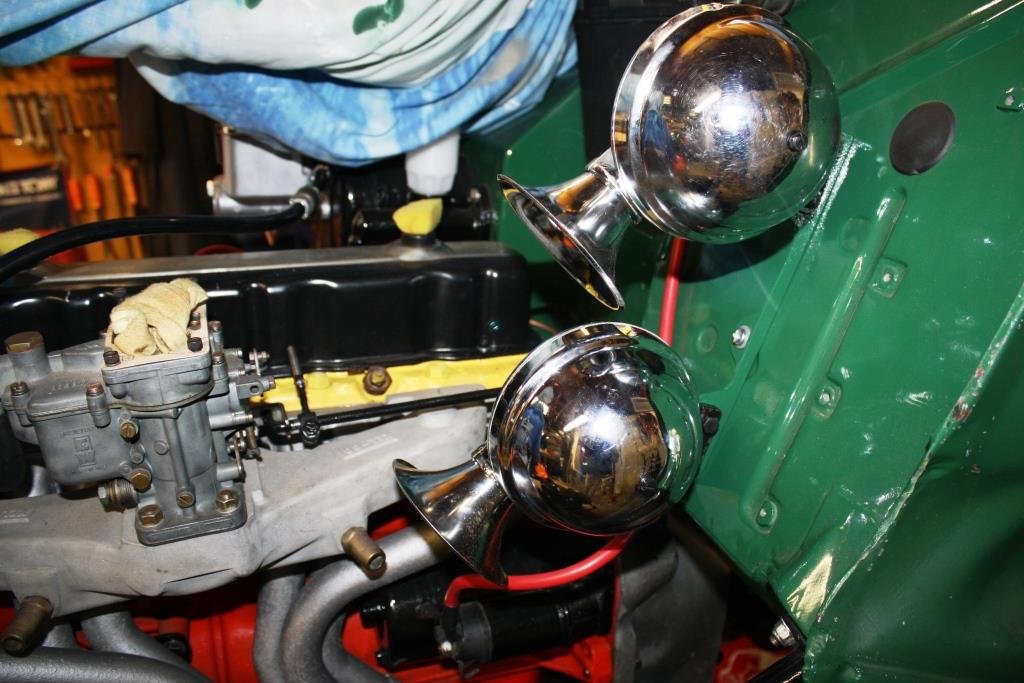
Time to see if Rigamortice’s horns have any life left in them. I pulled the covers off and the insides looked a lot better than expected. I dressed up the contacts with 2500 sandpaper …..hooked them up to the battery… holey sh**, I’d forgotten how loud they were! I added “much flashness” with a bit of polishing. As per usual I’m re-using as many of the old fasteners as I can. love the heads on some of these old bolts. Made up a bracket…… Trimmed it down a bit….. Painted it with the now famous “insipid green” And I’m happy with the horny looking result.
1 point
-
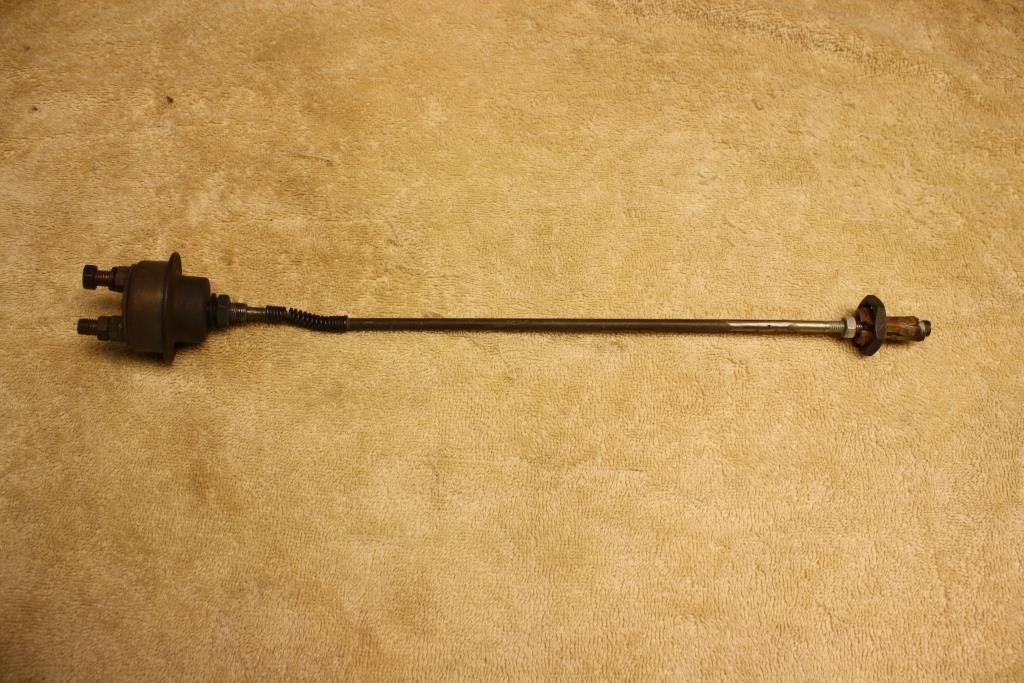
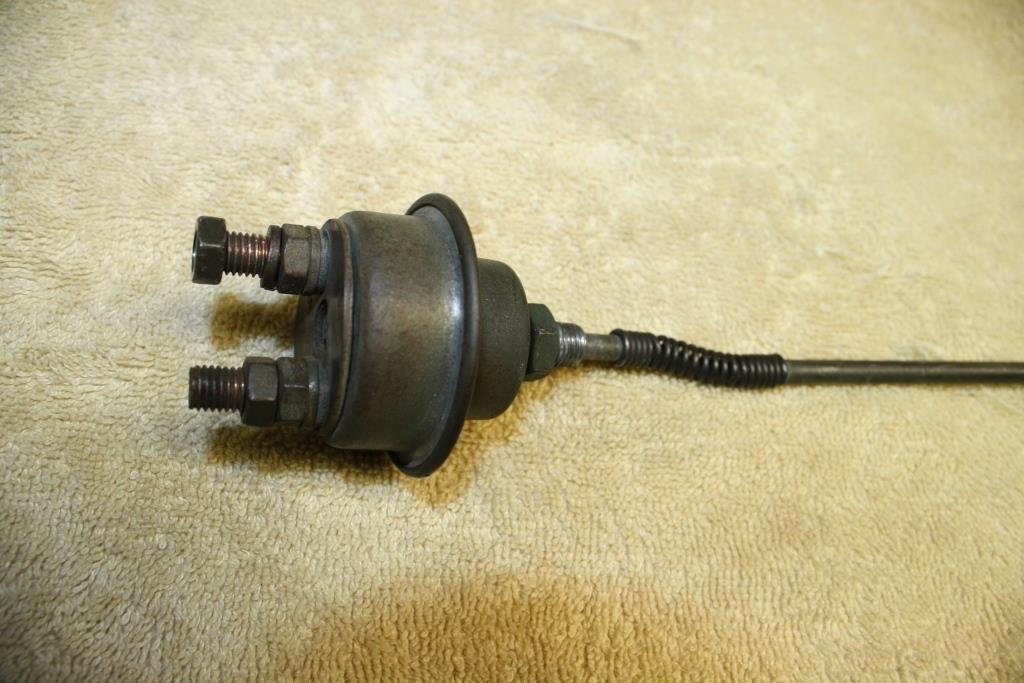
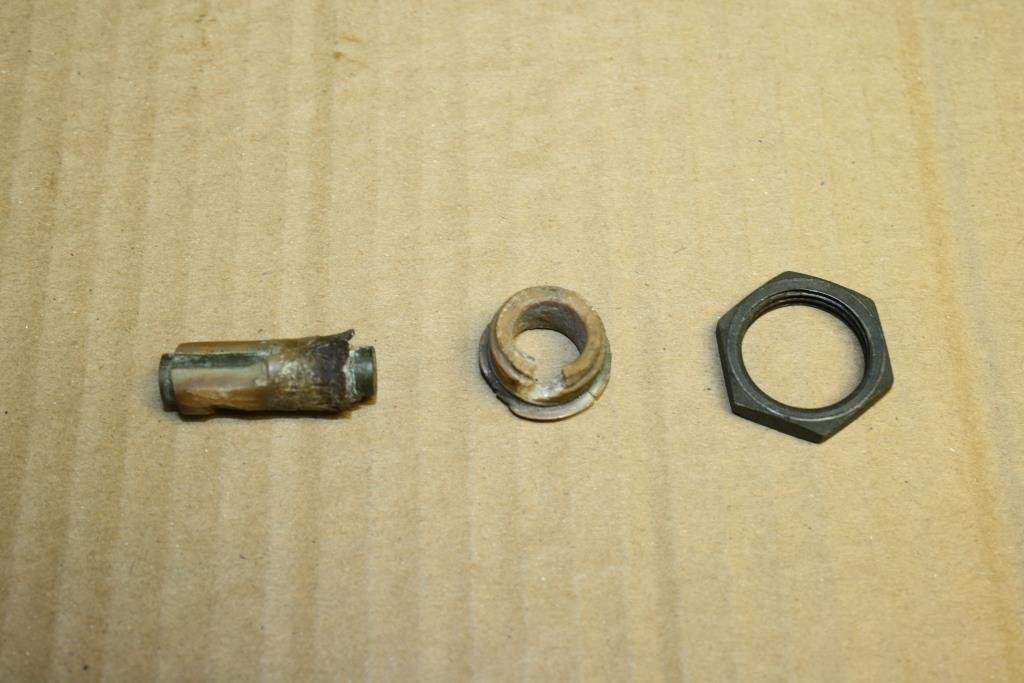
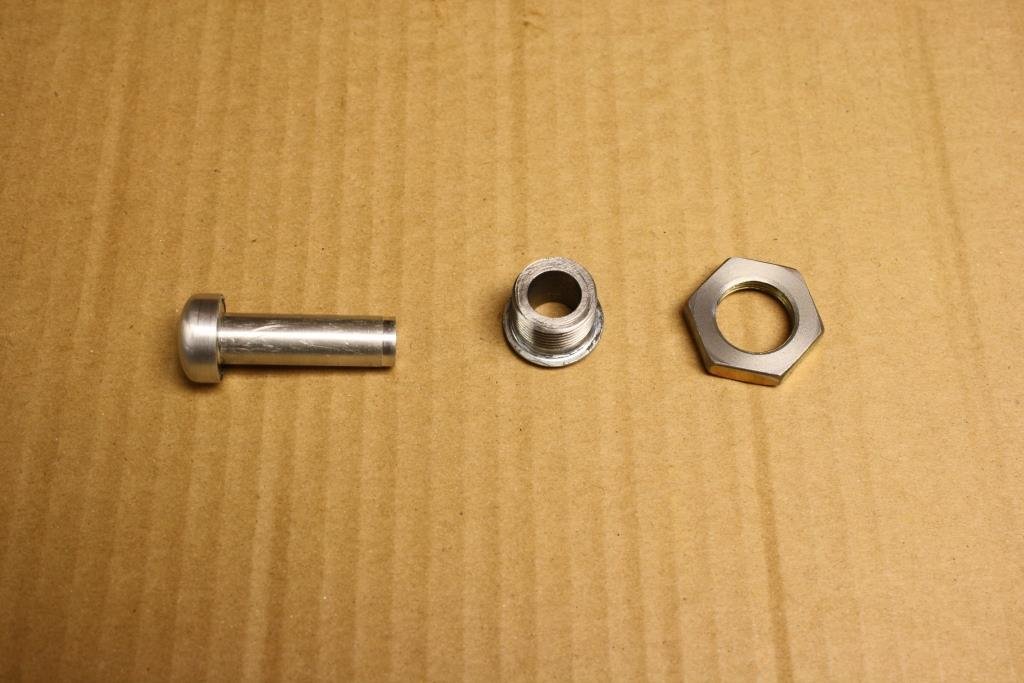
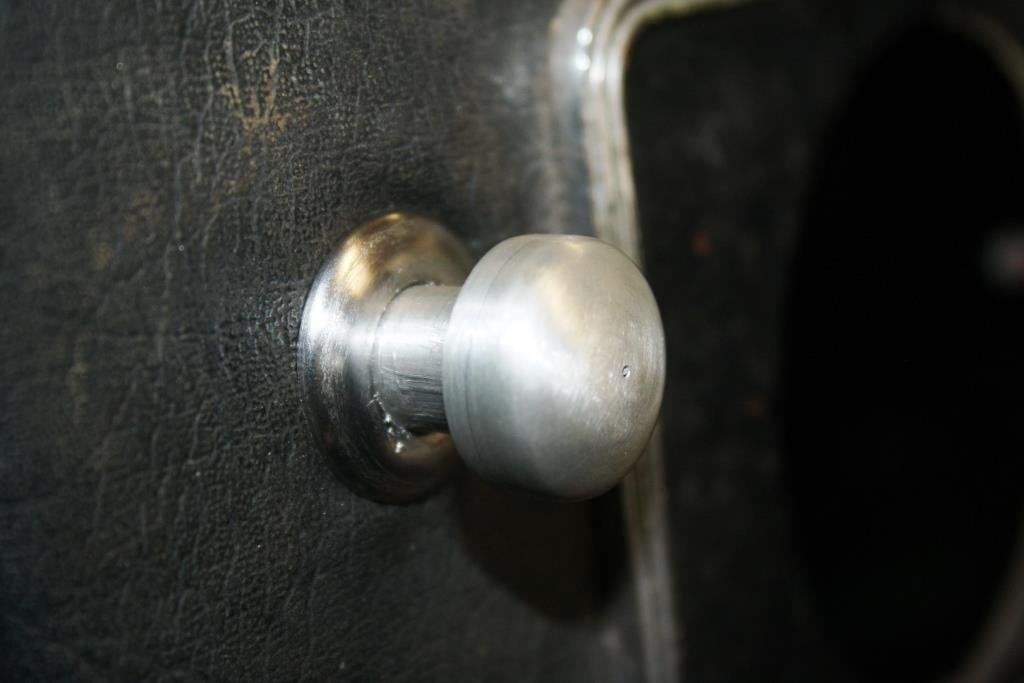
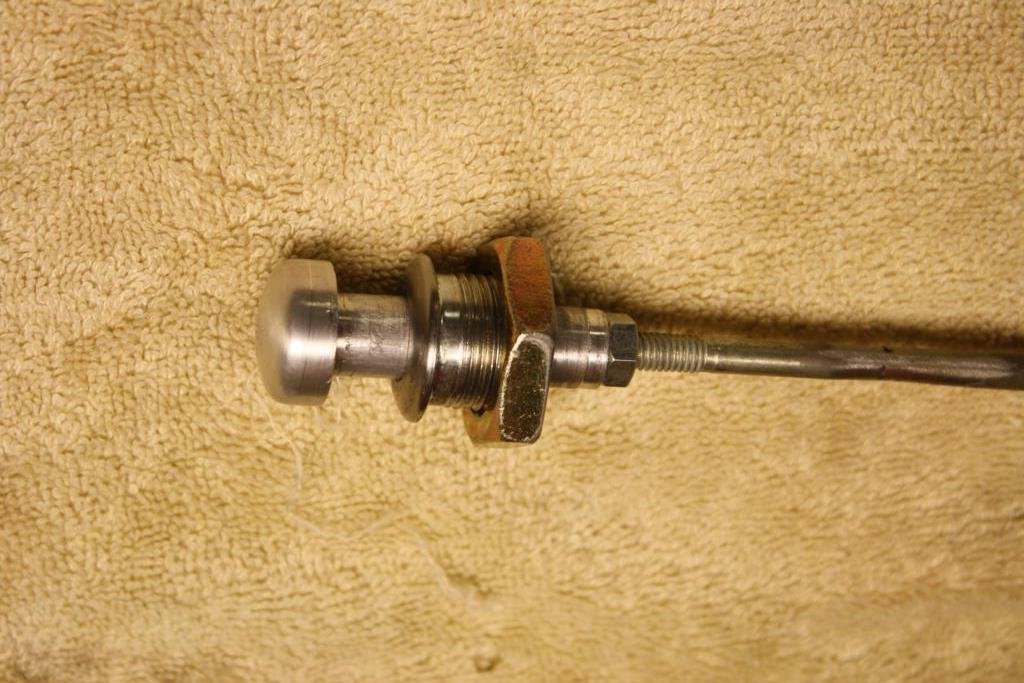
In the interest of being kind to 70 year old switchgear I decided I’d use the original firewall mounted starter switch to power up the starter relay rather than the starter itself. This end poked through the firewall While this end poked through the dashboard with the remnants of a starter button on it. I needed to make a suitable replacement so I bought a 20mm bolt and bored a hole through the middle… Turned most of the head off… And ended up with a “one of these”……. Cut off a bit of round ally stock… Turned it down a bit and drilled and tapped one end… Hit it with some emery tape until the “one of these” was a nice sliding fit. I then flipped it around and made it into an old-school push button. Started with this… And ended with this…. Looks the part to me & as an added bonus it even works!
1 point
-
I rekon you should rebody the plymouth with the lillput body.
1 point
-
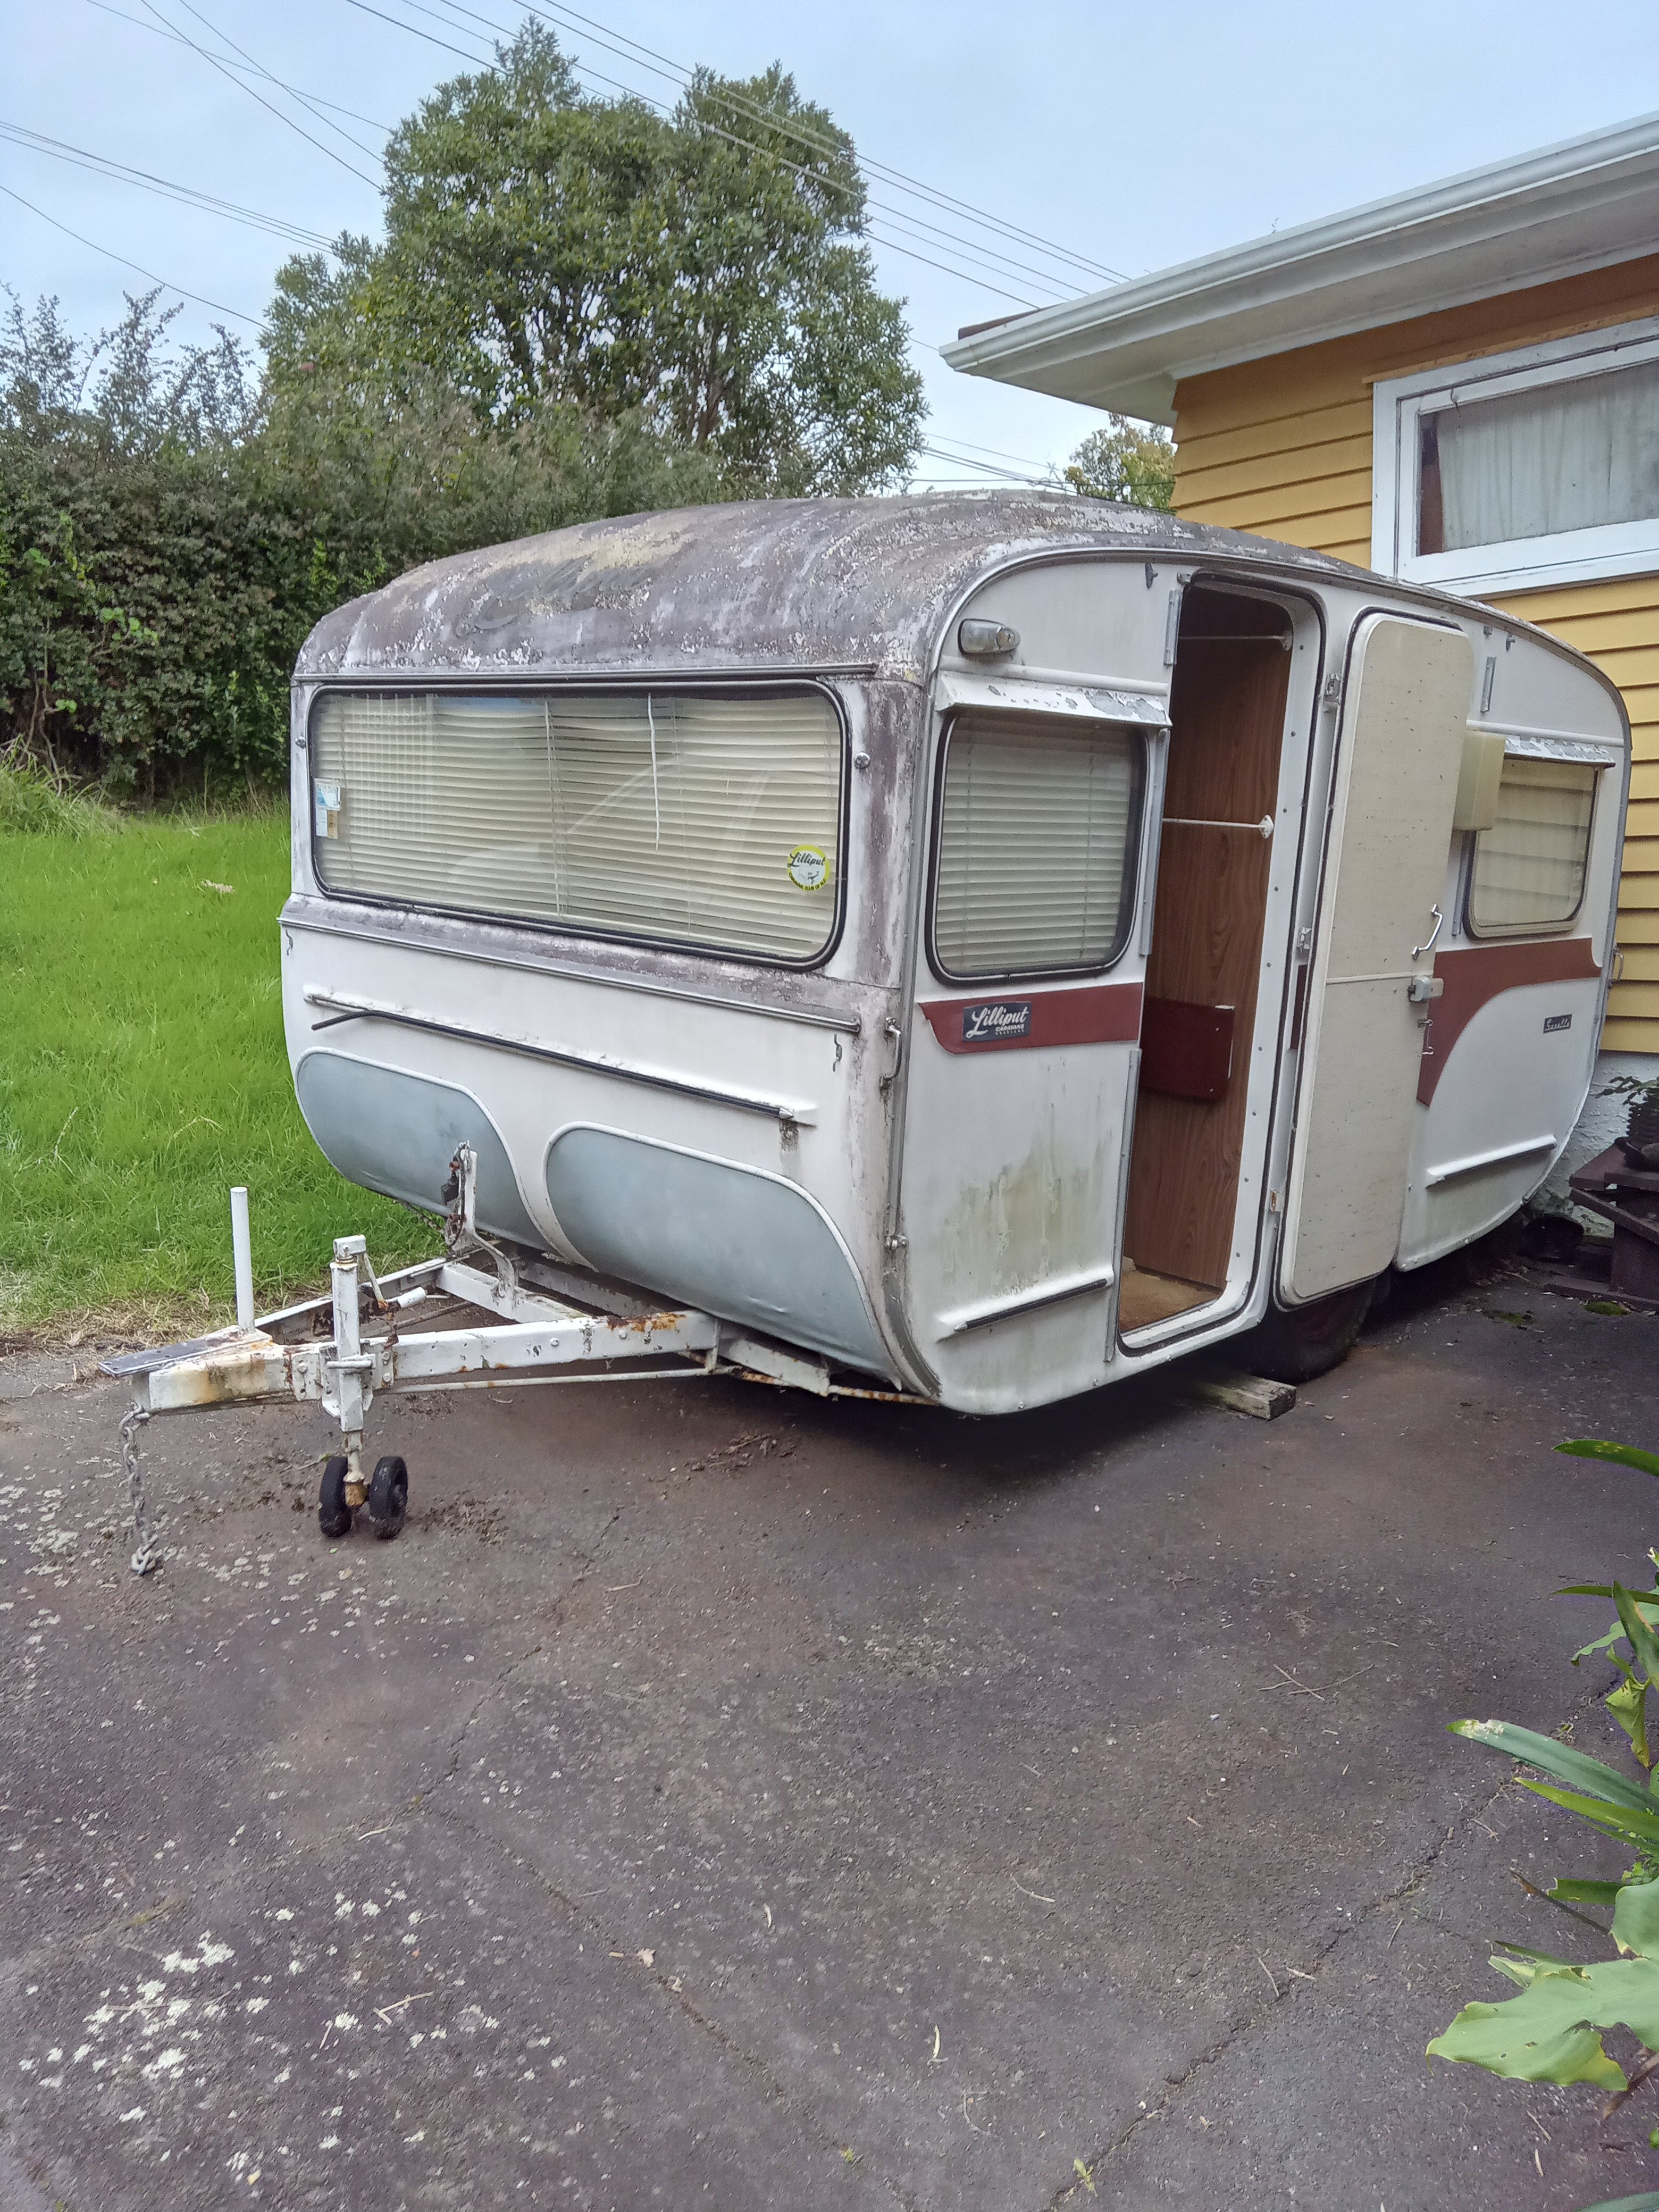
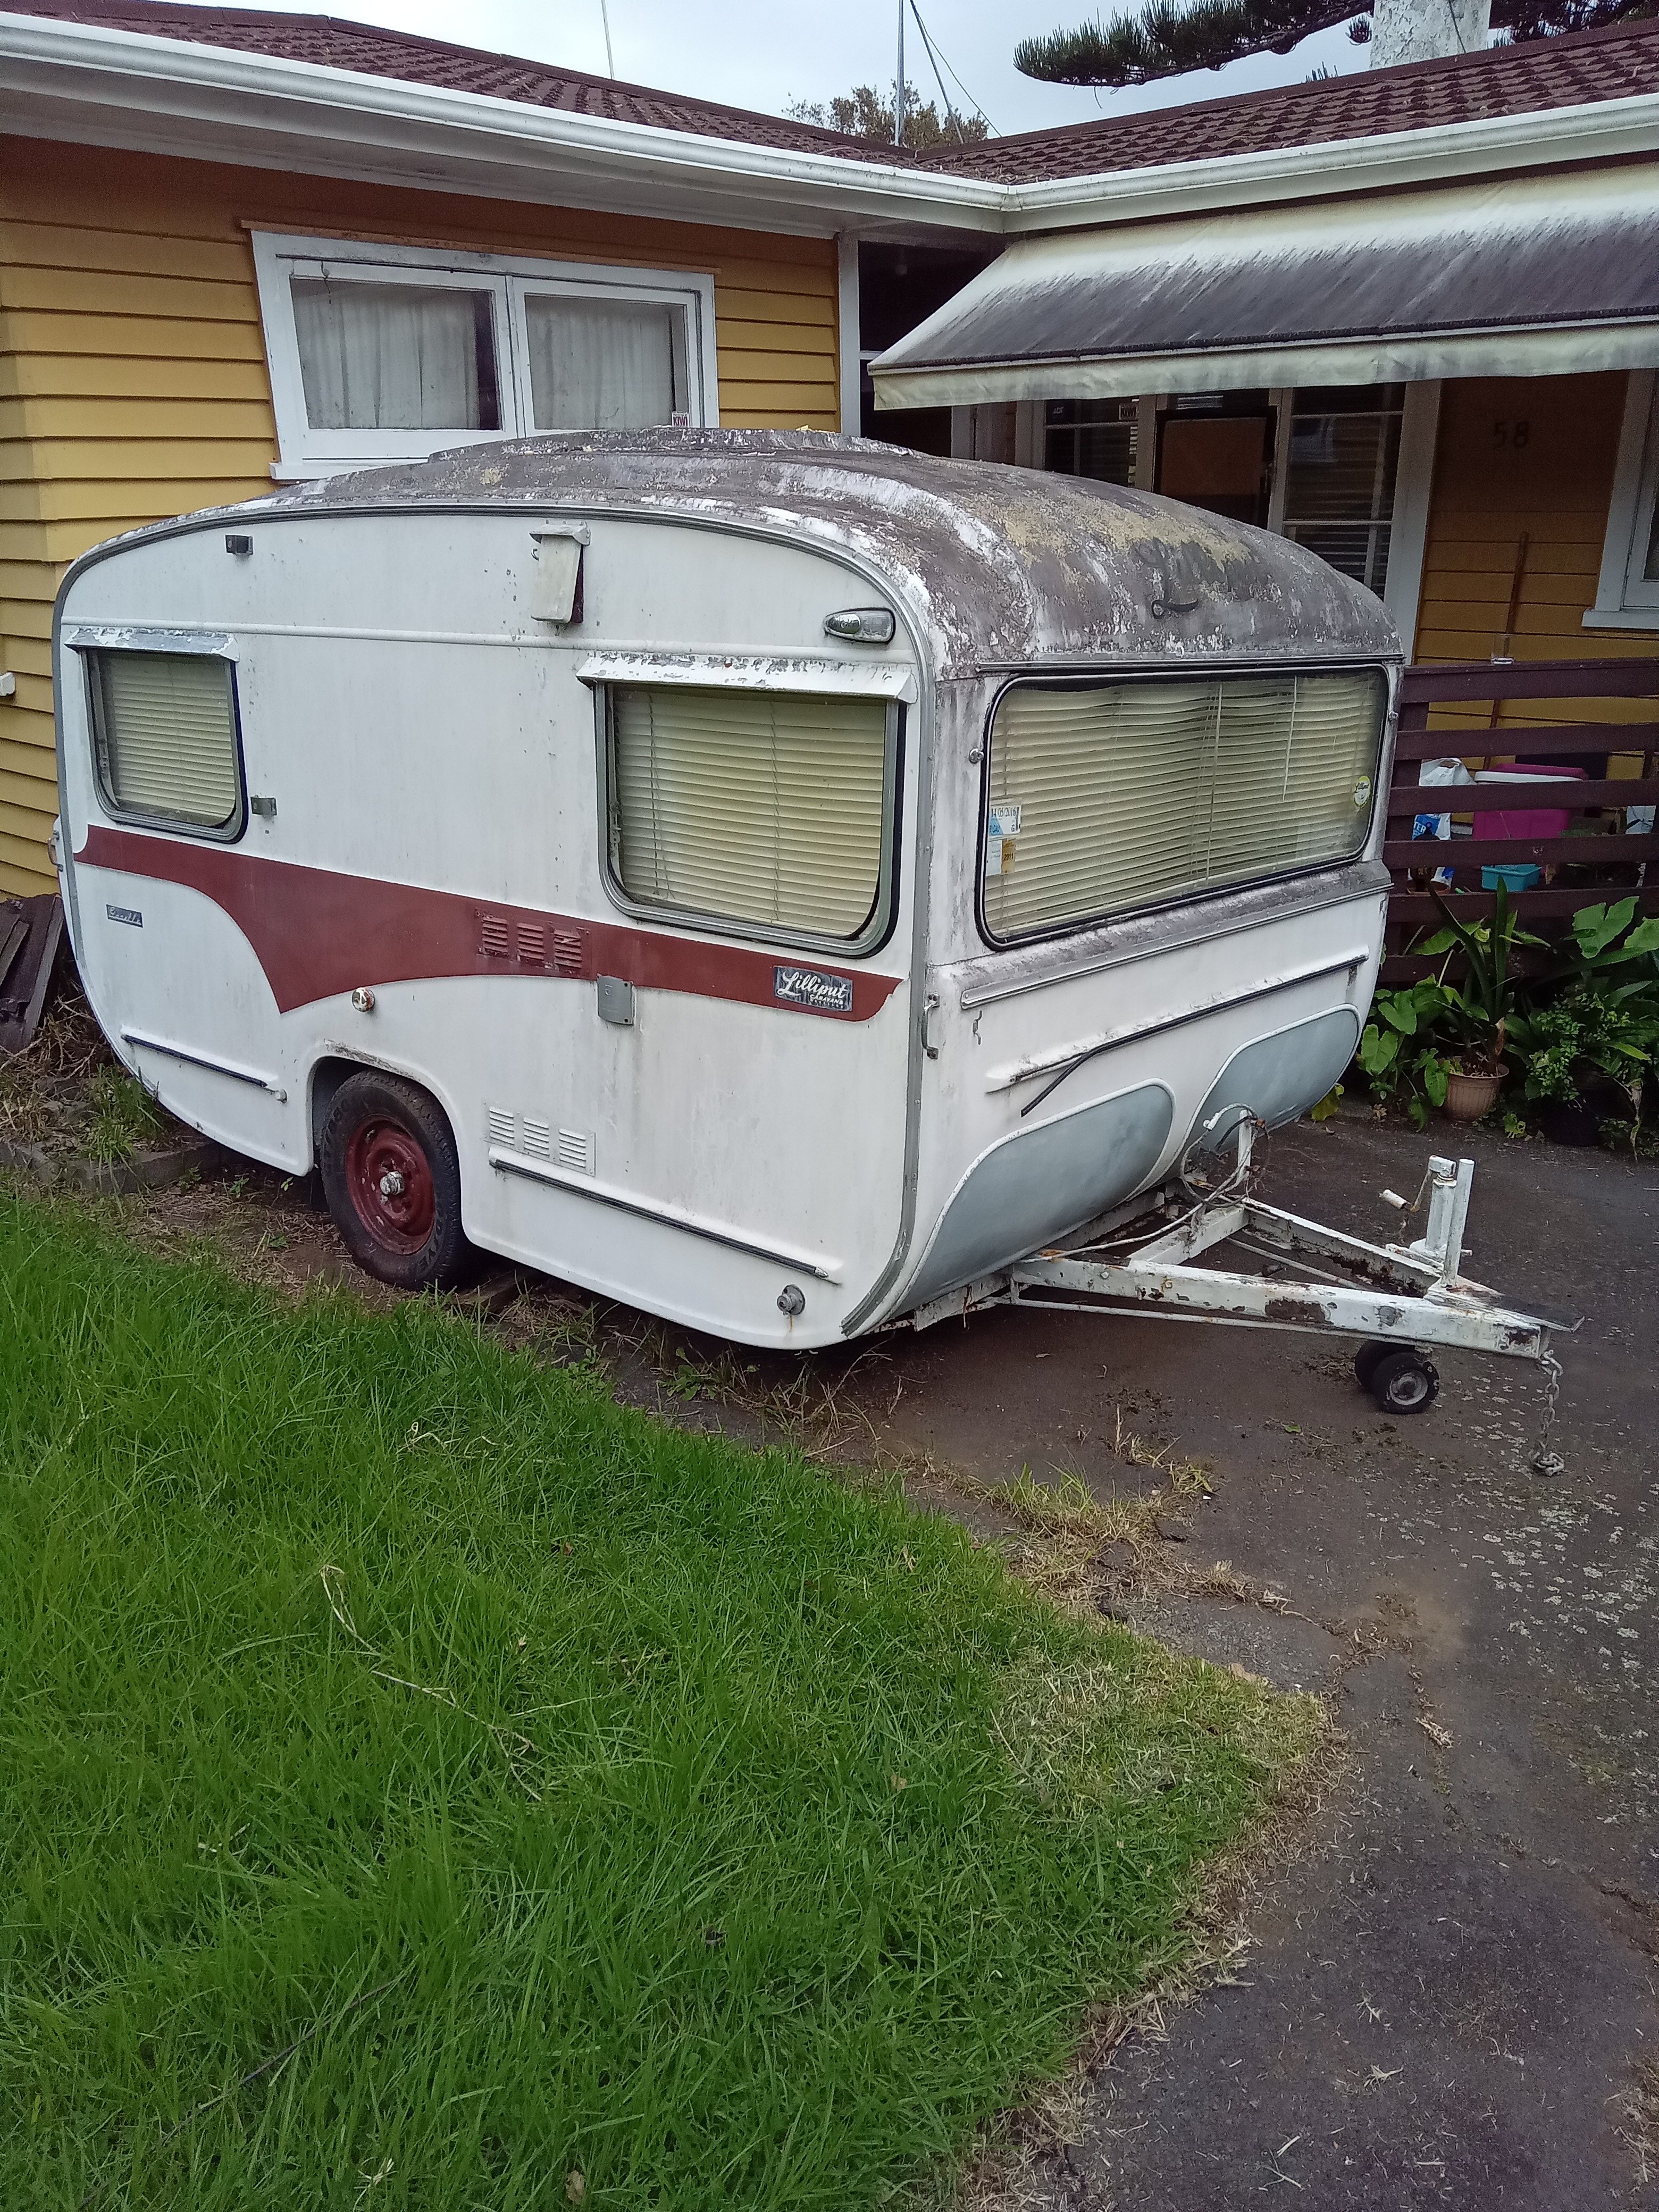
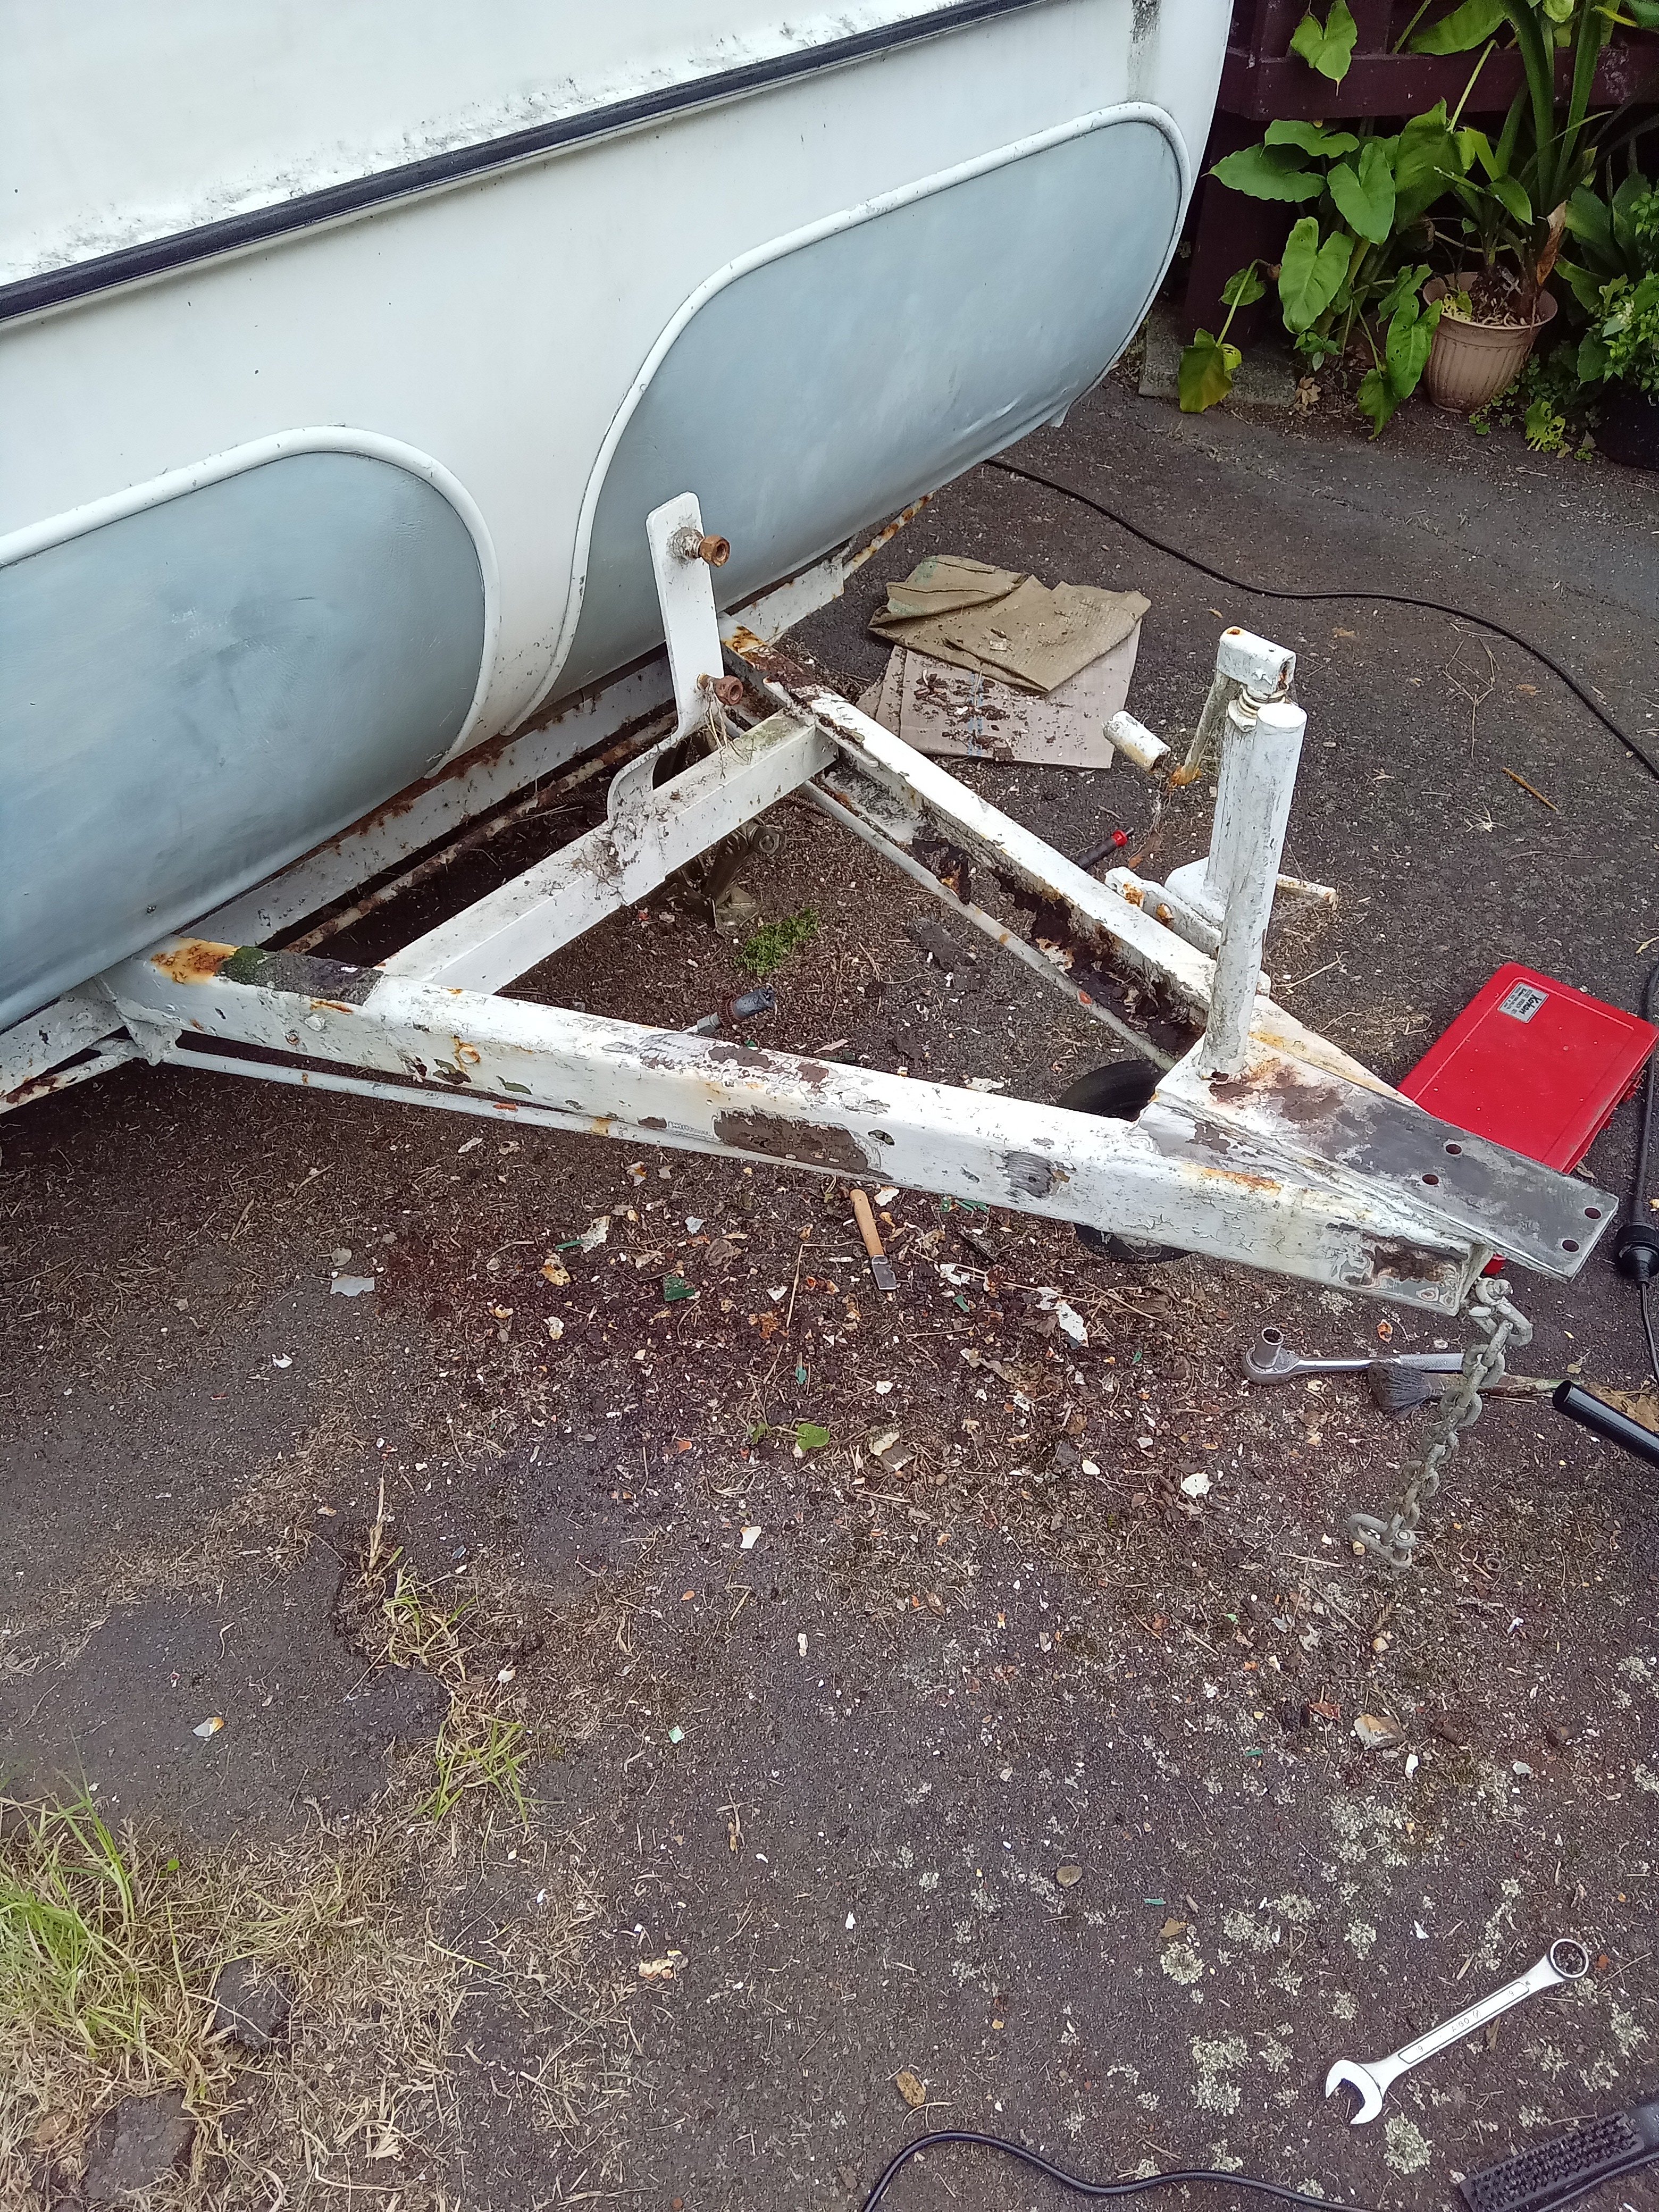
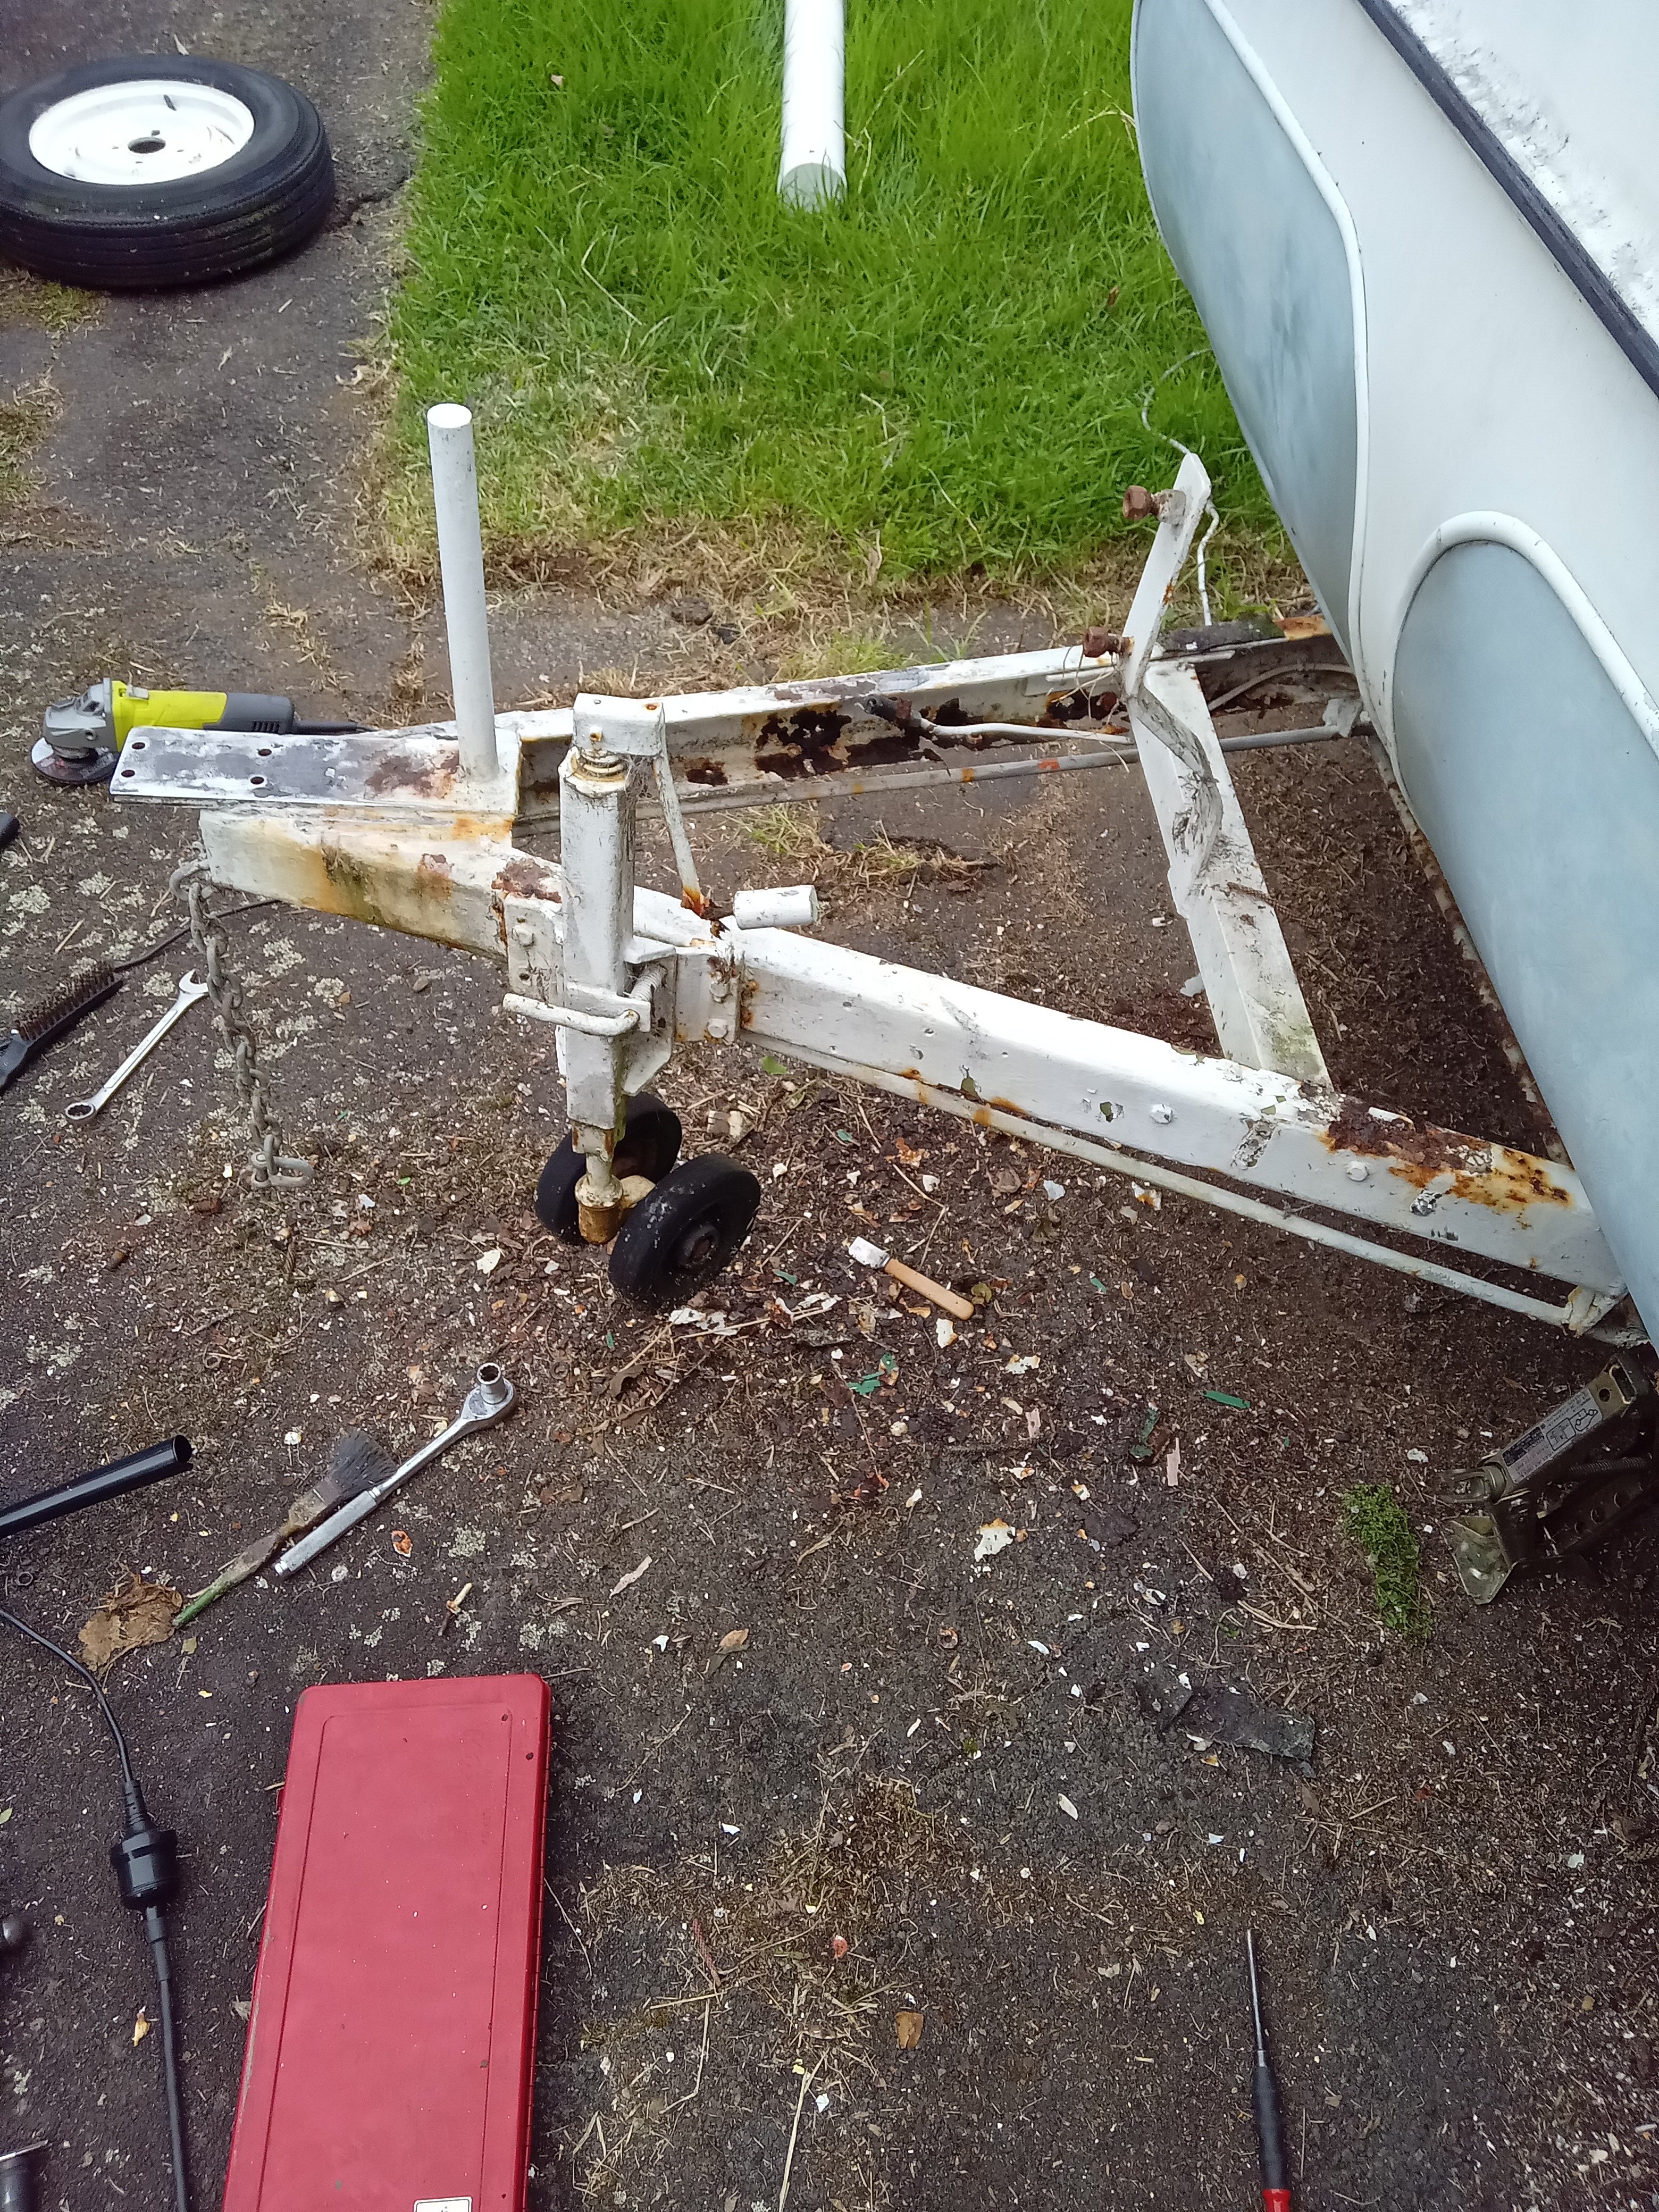
Next project 1975 lilliput caravan. Was my grandparents, they did a lot of touring around the country in it. Its been sitting for a while now. I thought it would be pretty bad but its not, it doesnt appear to have any leaks My plan was to cut off the rusty coupling and chuck a new one on, the drawbar is toast though which i was going to replace anyway Stripped a bit of stuff off so i can measure up what i need to get it mobile,then i can get it onto the hoist at work to give the undersides a bit of a tidy up I think ill just get it useable and worry about paint later
1 point
-
Hope Bob is still....The RX3 was inspected by him prior to repairs and checked post repairs (before i bought) and had to take back to him once its back together for final sign off......Talked to him August 2020 when i bought the car and he was ok then but that was 2.5 years ago...1 point
-
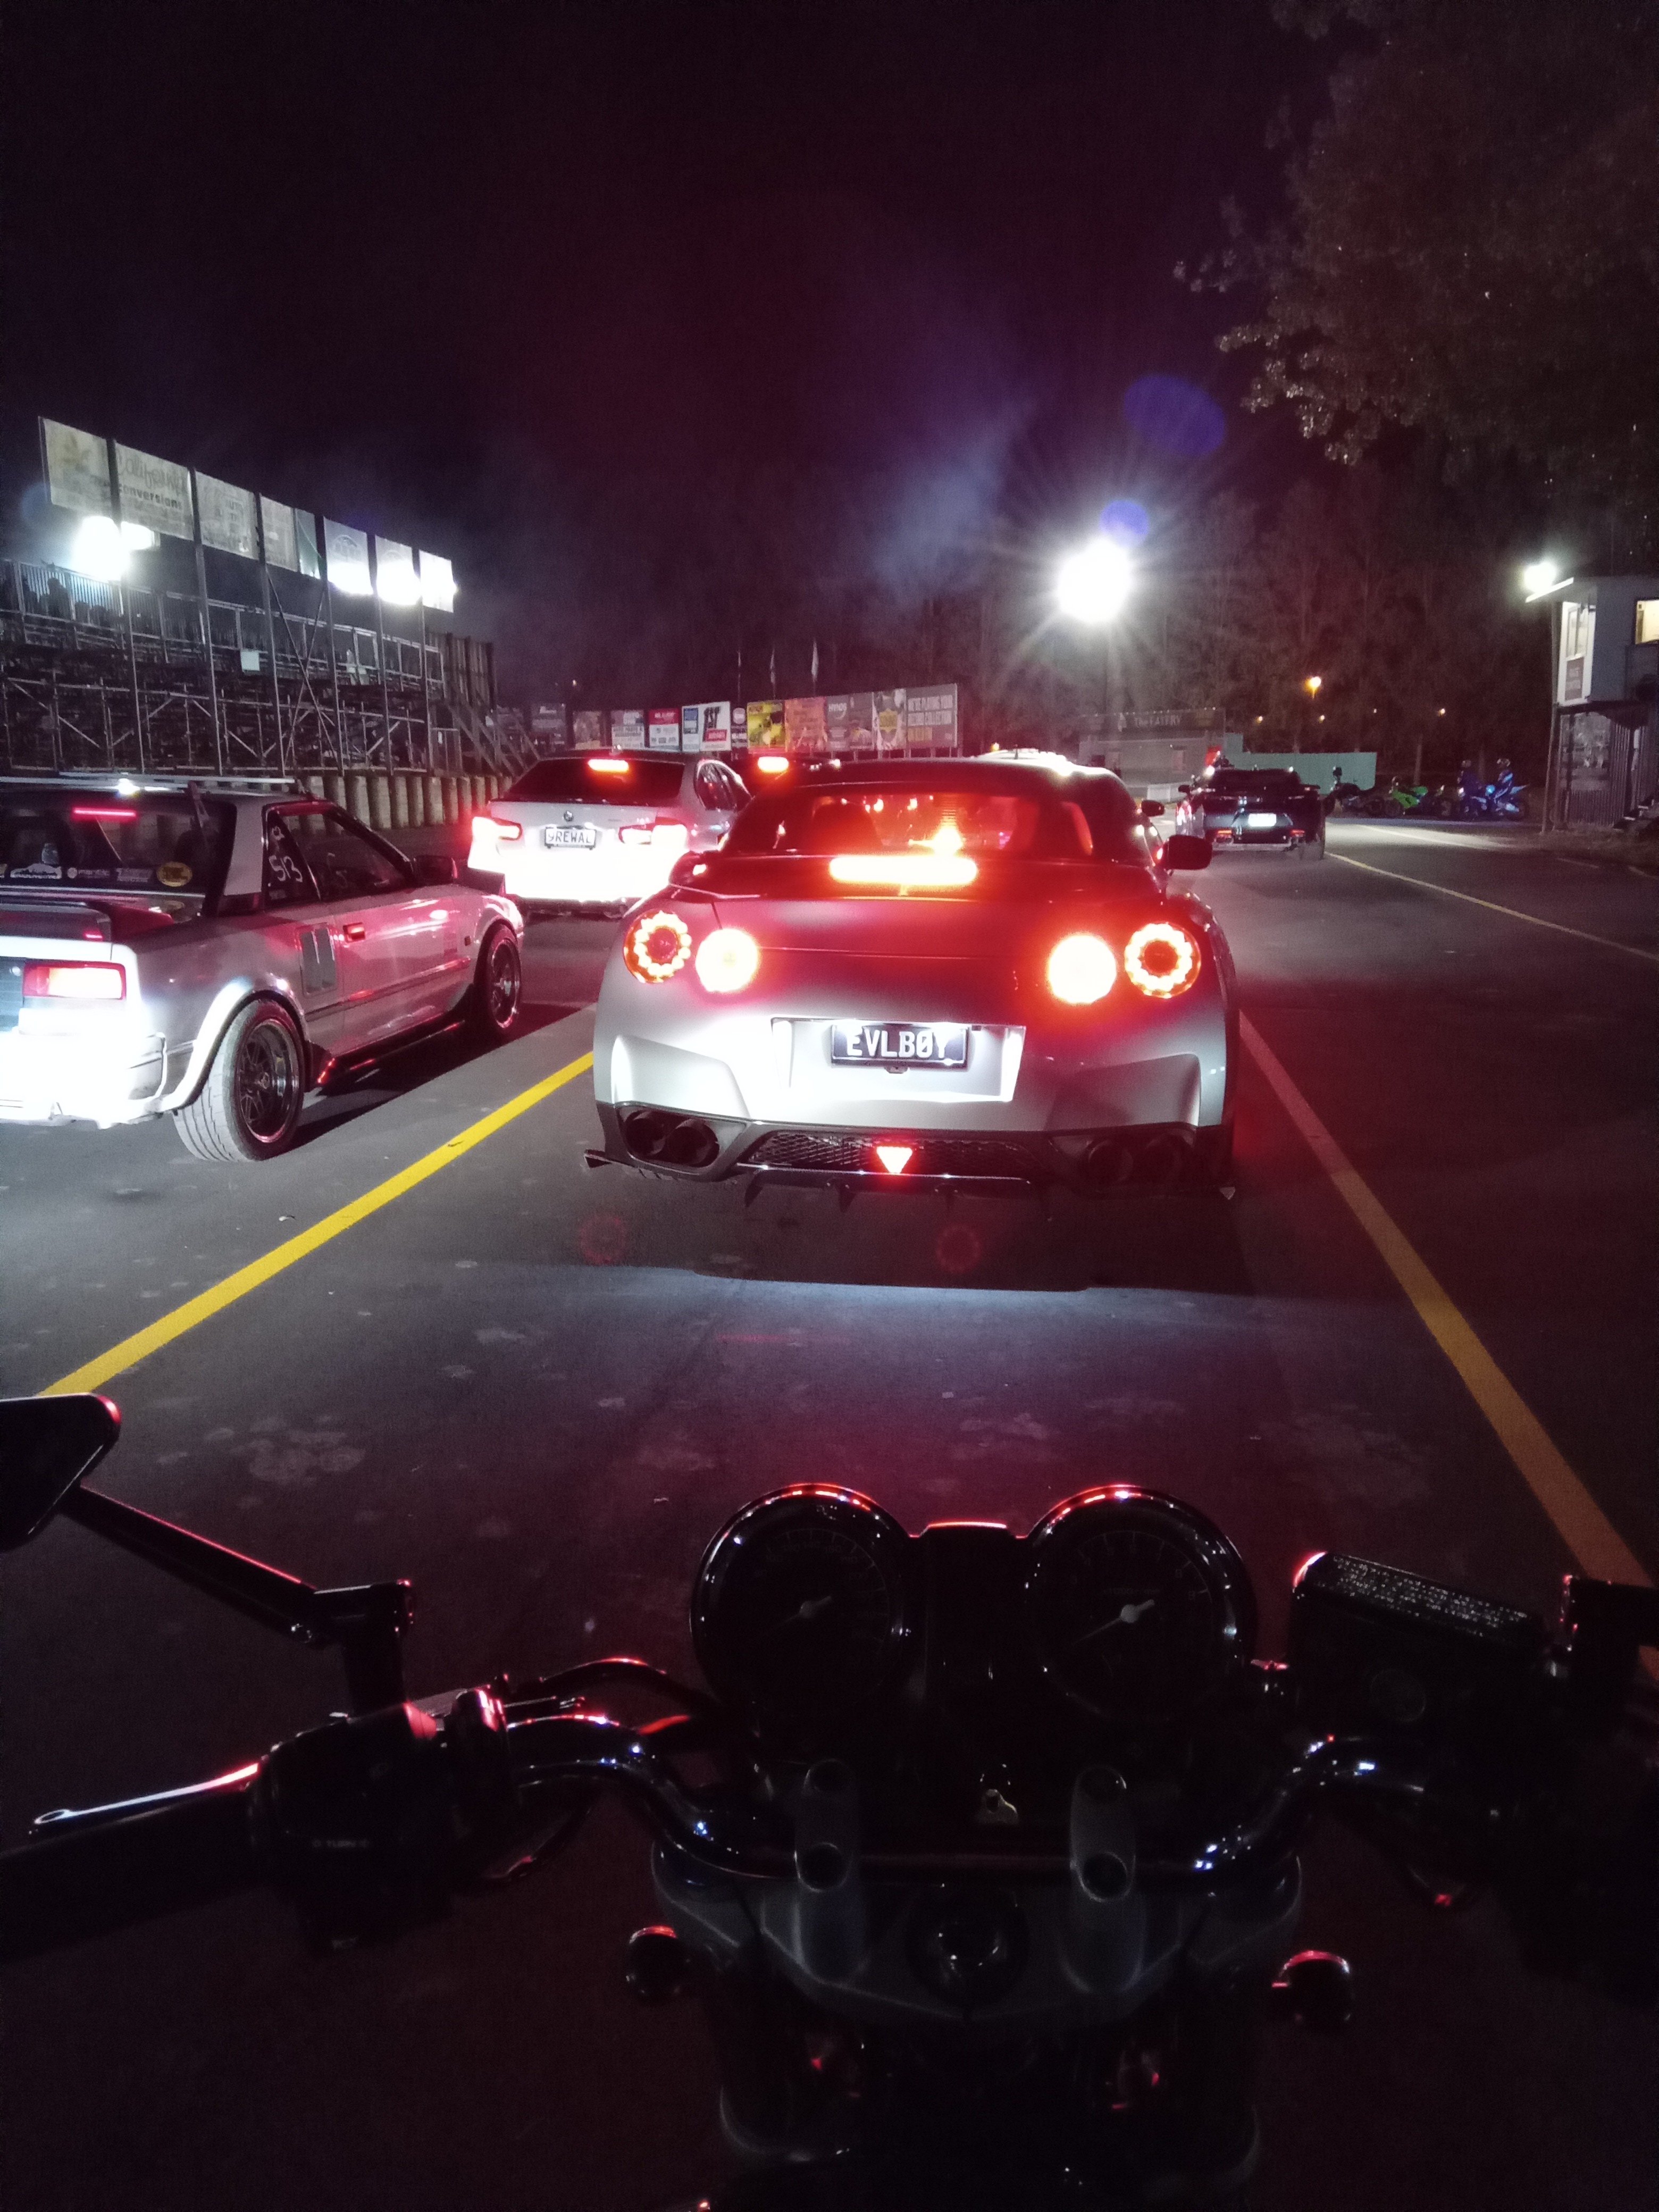
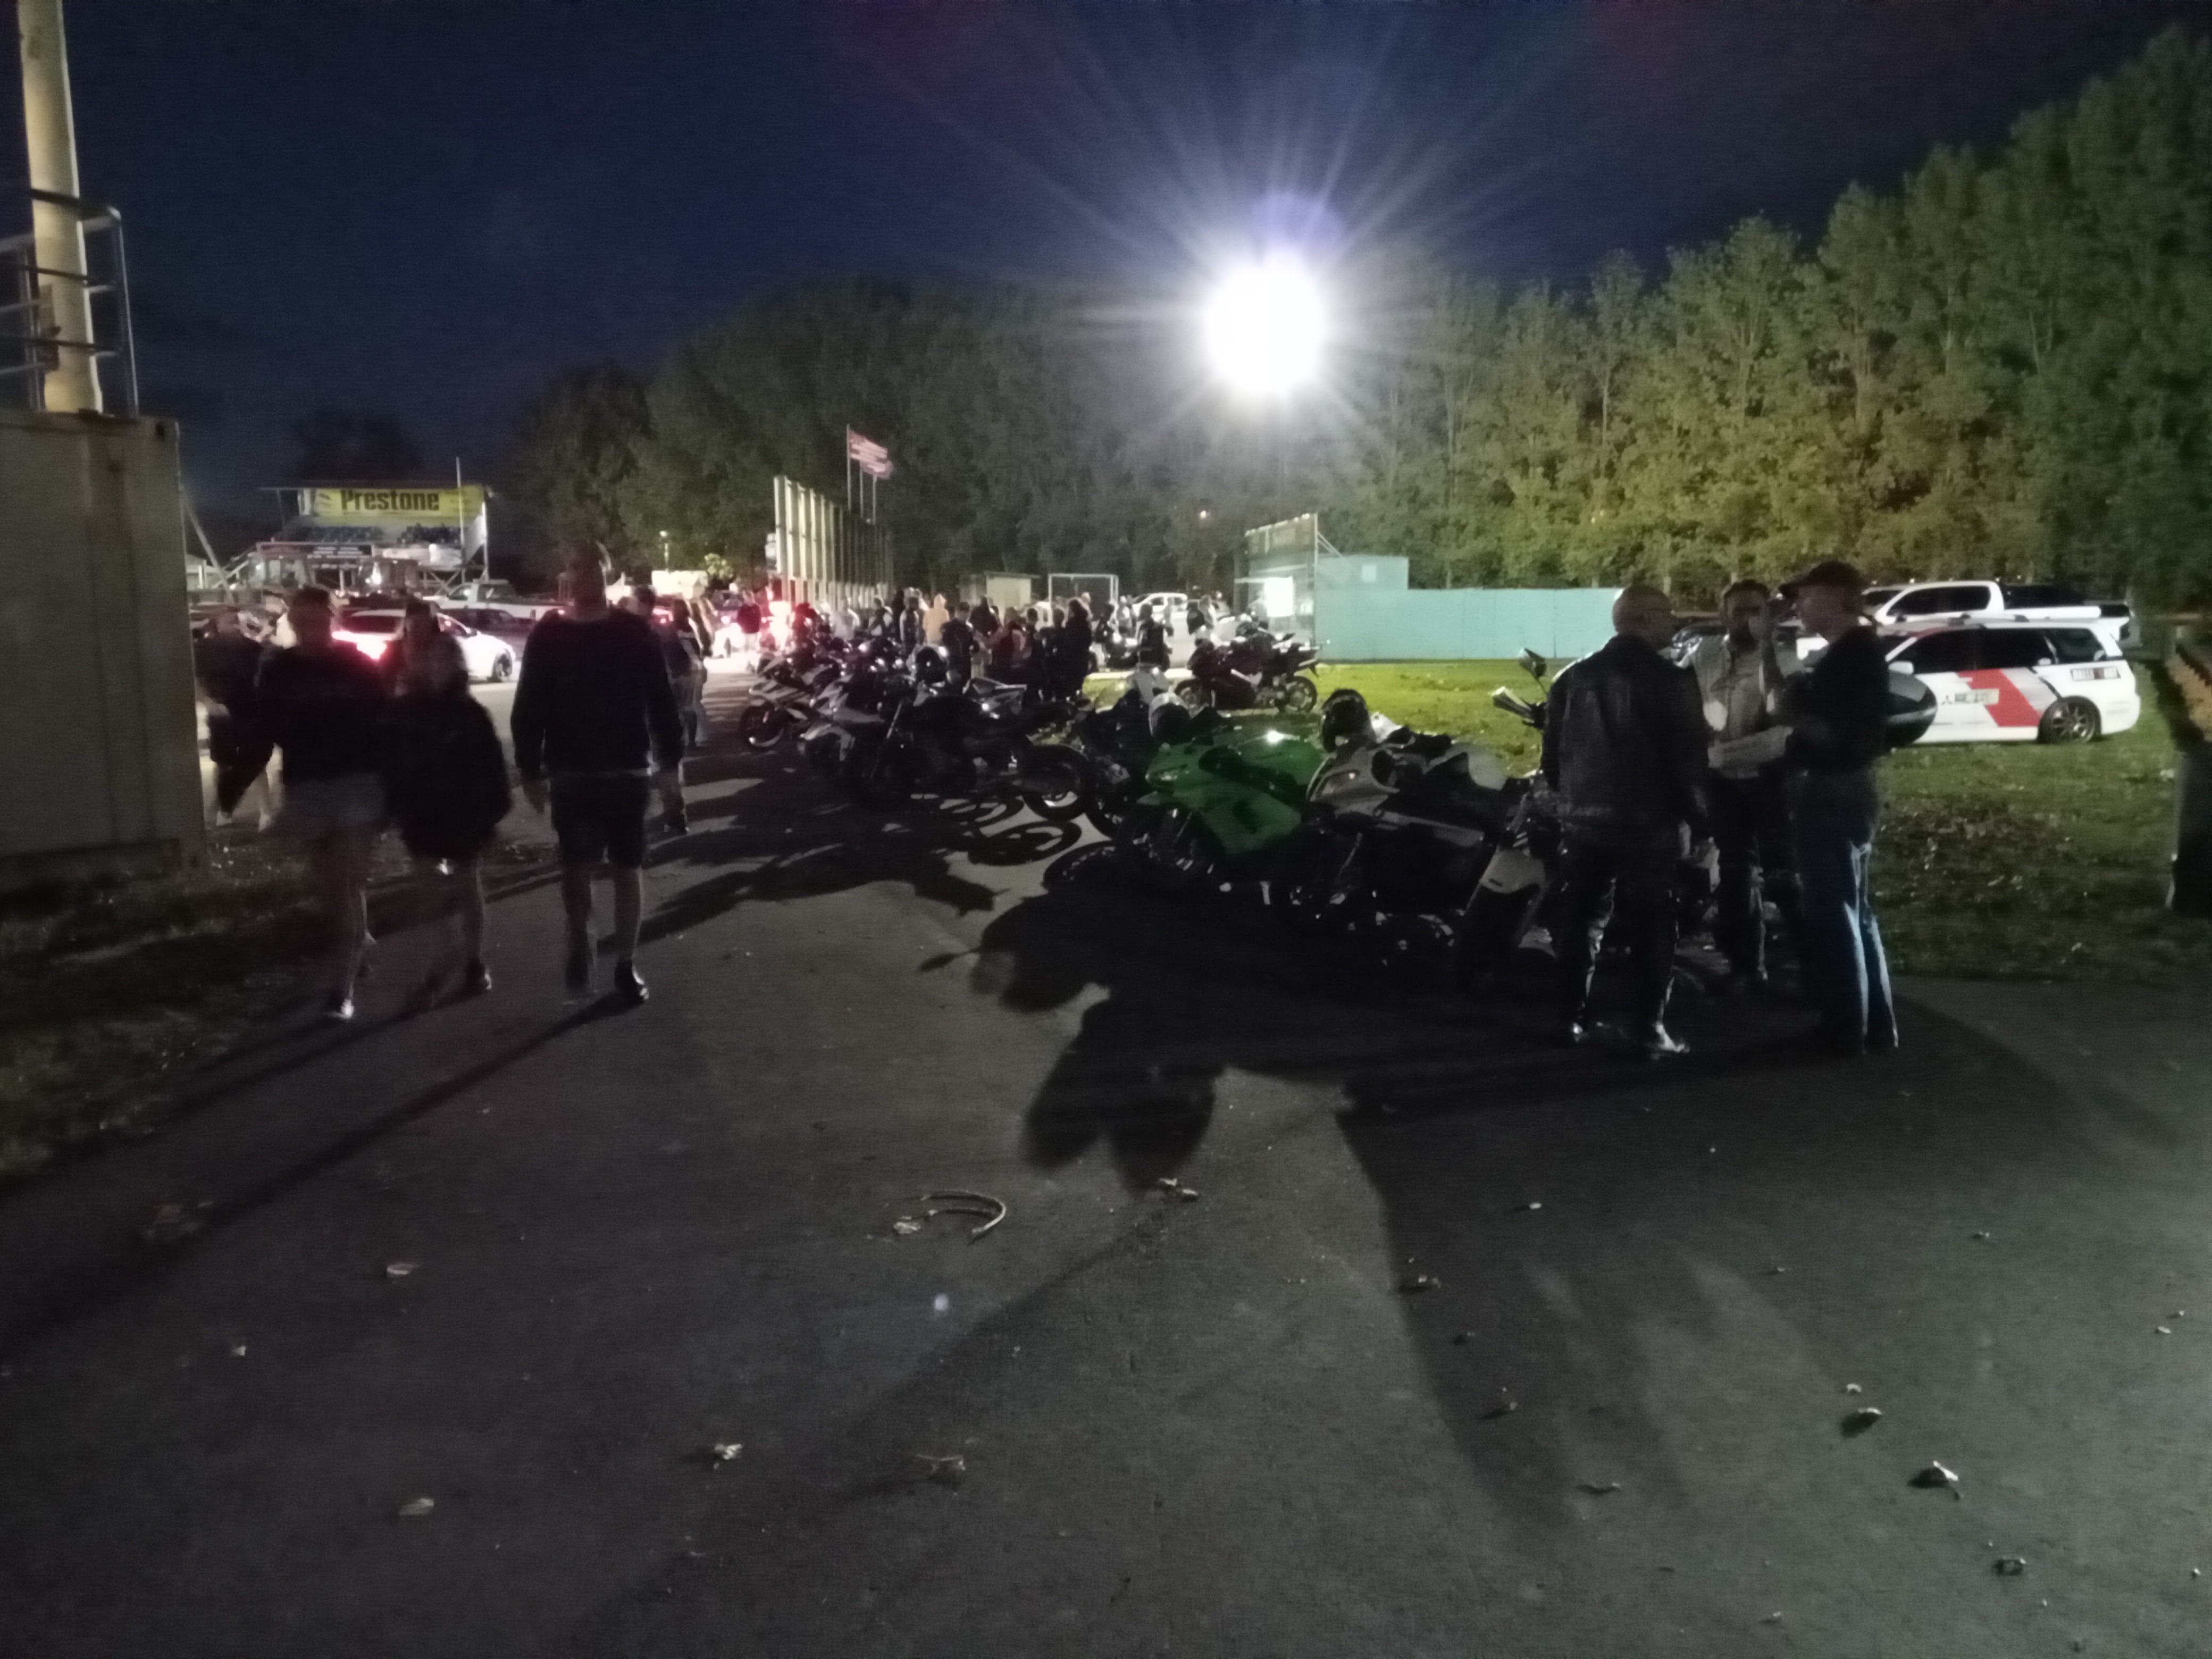
I havent been to the night drags for aaaages , last minute i decided to go. Cbf with friday traffic in the plymouth,and ive wanted to see what the bike is capable of since i got it Best i did was 12.3@110 I was yarning to a guy who has the same bike but his has done a heap of hard kms He was interested to see what mine was like compared to his, so he did a pass on my bike, 11.8@116 The difference was,hes not a fatty, ha
1 point
-
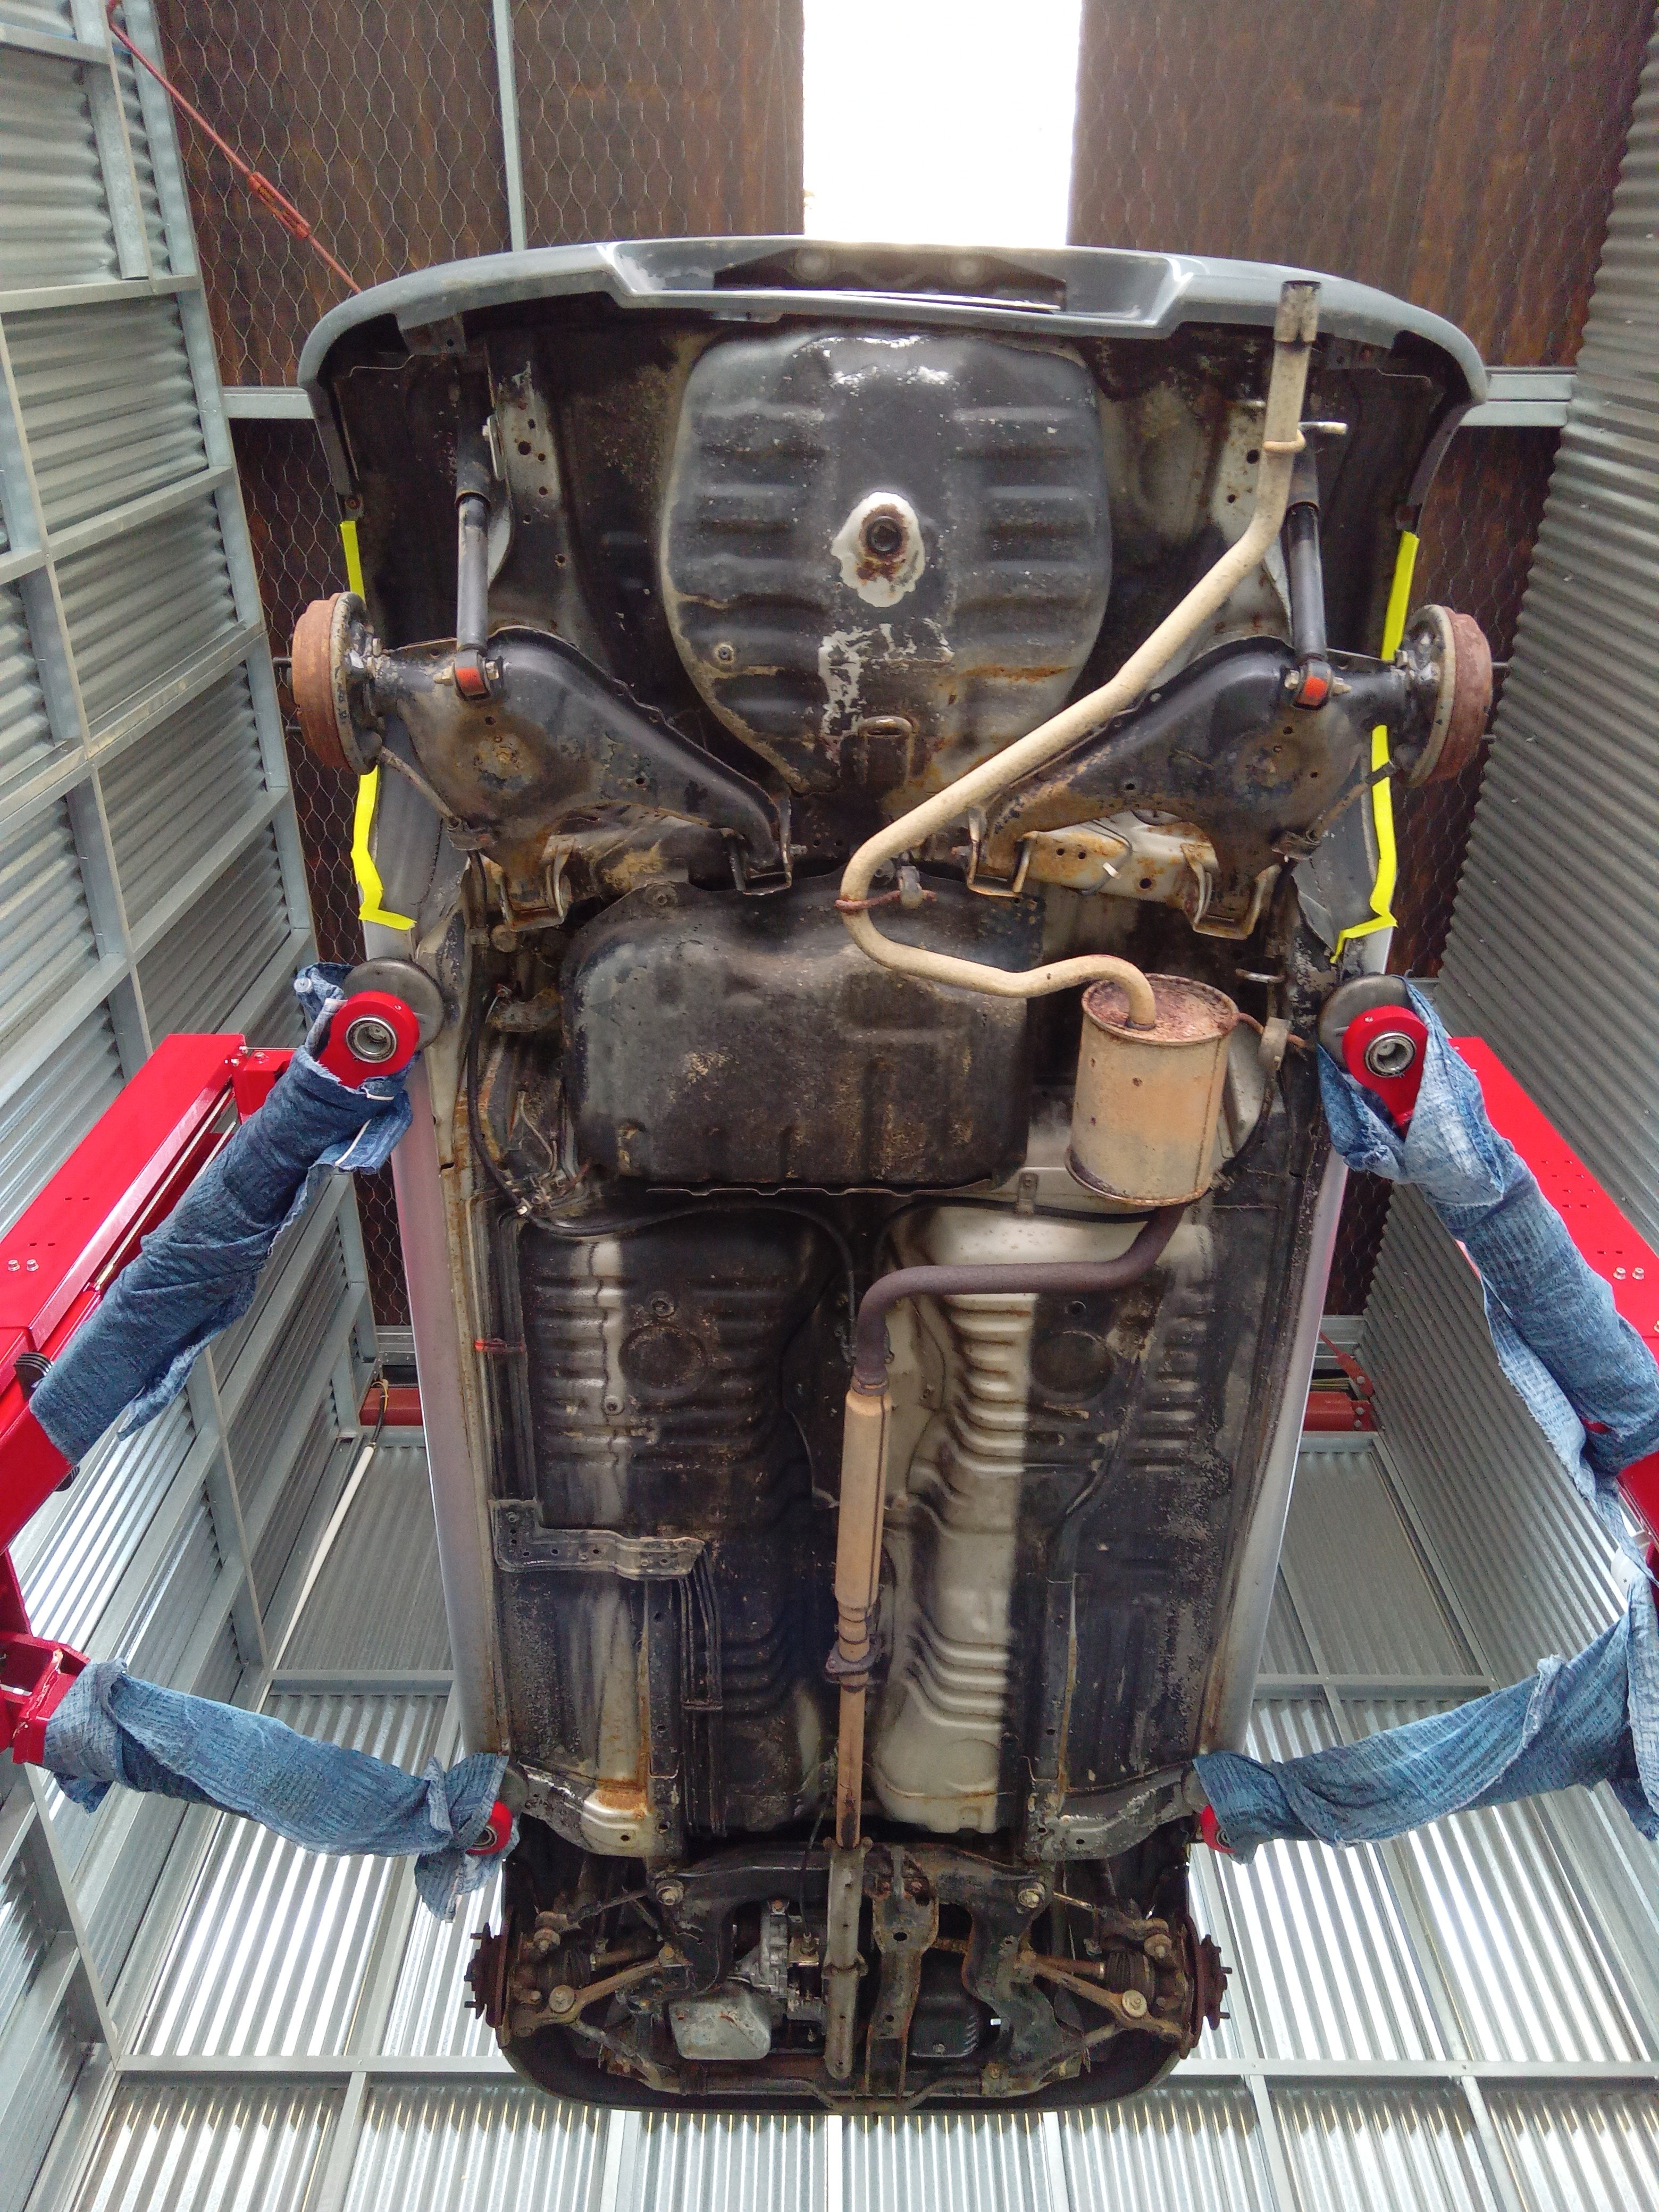
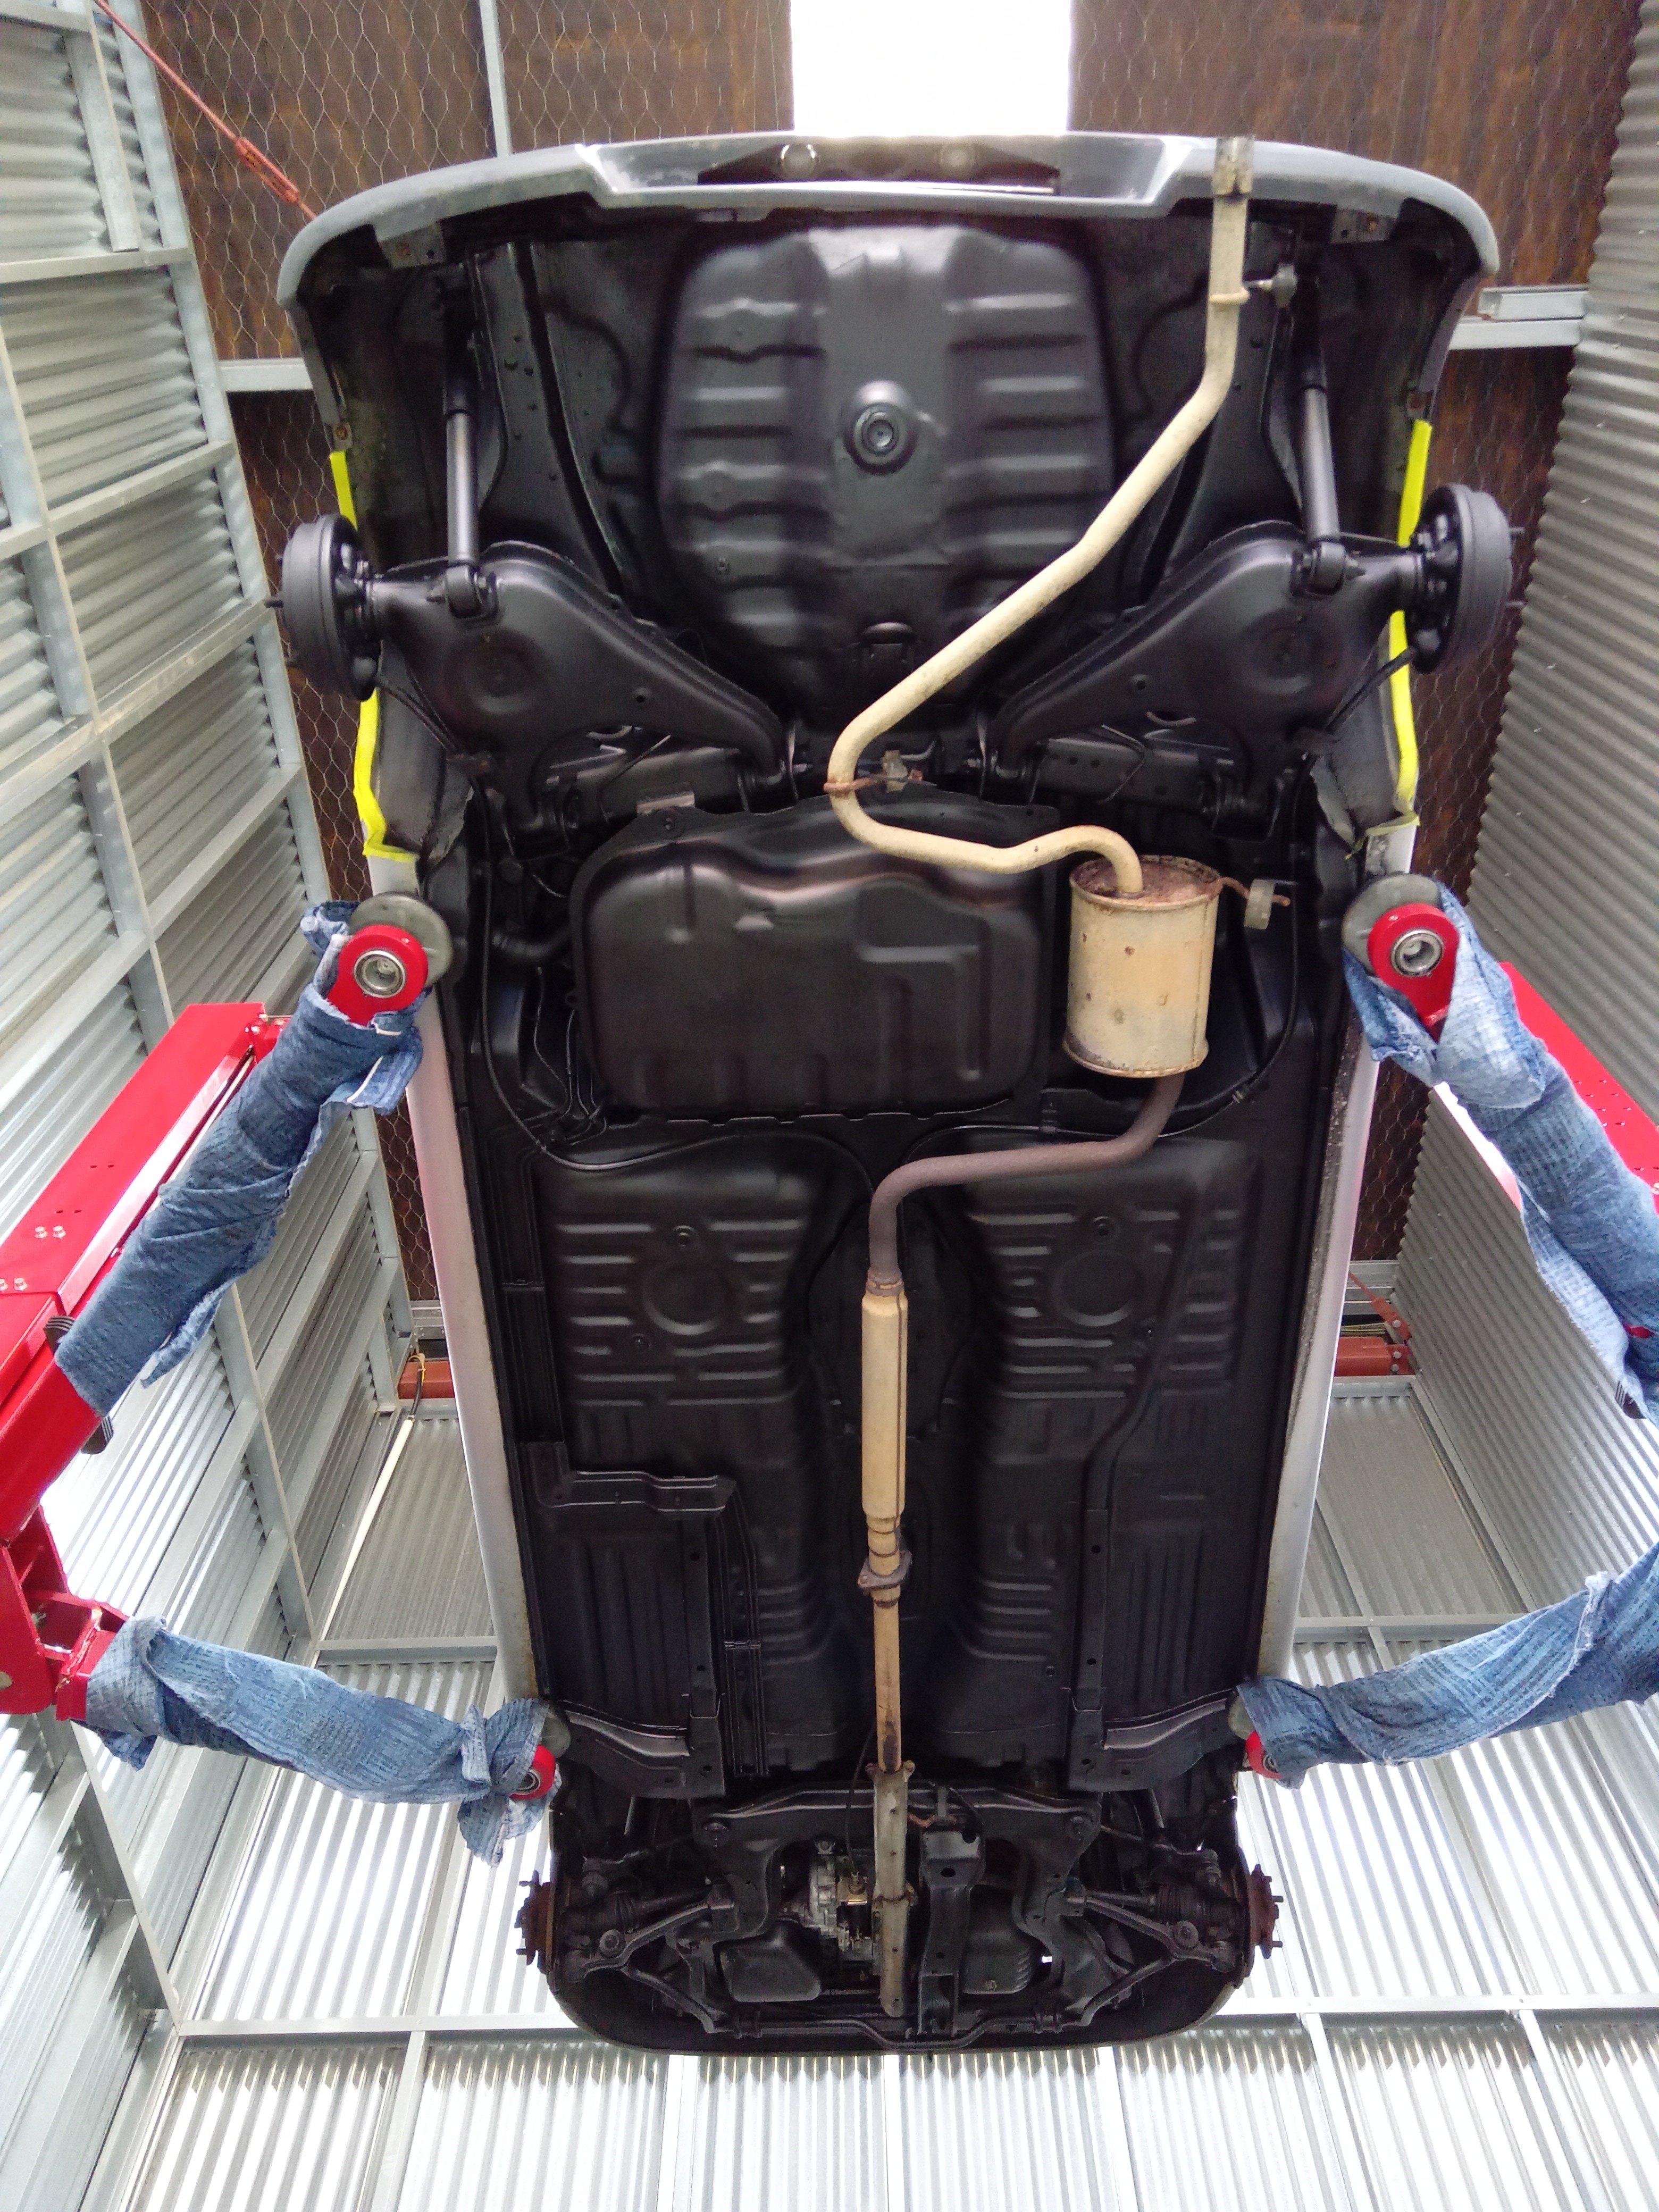
Fully restored underbody with some rejuvenation spray Got some small car barrying this morning,stopped to get a coffee and parked next to a k11 which looked ginormous next to this thing I walked out and a dude sitting outside started sharning about; how his k11 looked big it had a 1000cc motor , and i had 12 inch tyres so that must be cheap,his has 13s is it a 800cc? Whoa 660cc that must be good on fuel, oh its an auto? My brother has a manual one cool
1 point


.thumb.jpg.570970b401ac8d26ce9af7c1bf2bd8cd.jpg)


.thumb.jpeg.e0a4bff61111e0c8c7396950fcc94da1.jpeg)


sm.jpg.1484a60c2a73cdb3e84c3e416f9a6e81.jpg)


This leaderboard is set to Auckland/GMT+12:00