
Leaderboard


Popular Content
Showing content with the highest reputation on 07/08/23 in all areas
-
I'm still chipping away at the small jobs. Like most of NZ its been pretty wet outside recently which makes being stuck in the workshop even more cosy. I took this pic the other day. My cosy setup. Drilling and milling jobs are the warmest right now Hence I spent a bit of time staying warm and making some of the big chunks of alloy lighter where I can. Starting with the rear plate.. Then the sump plate... To aid the retention of the sealant I machined in some grooves between the bolt holes on both the plates. I'll be using good quality 3 bond sealant but everything helps. So apart from drilling and tapping a drain hole (suitable plug ordered) and making some anti-windage sheet metal bits the bottom end is finished. Oh I also lopped off the remaining unused original engine mounts - bit more weight lost Heat management time. To keep the cam cover seals from the radiant heat off the manifolds I needed some shields. I have had a basic design in my mind for ages but keep ignoring the fact it had to be done because not the most exciting job. First off was to make some brackets to mount the shields to. A bit of 1.5mm stainless and some marking out. drilling and shaping.. A fold.. Now I had to do a second fold to form a tight Z shape. But my folder won't allow such close folds and I really want these to be neat, one piece items. So I made a teeny tiny press brake. Milled a block of steel out... Milled a bit of plate to suit... Welded it to another bit of plate and welded a bit of pipe atop that and pressed away. (I really am super happy I built this press !! ) Now I had the tight folded Z shaped brackets I wanted.. Tidied up.. Fitted in place... I then cut some 0.9mm thick stainless shields to suit. I think I can go thinner. Not happy with the weight of them... Remembered I have had a bit of titanium sheet kicking about since I was a teenager - my sisters old airforce boyfriend obtained it from from the airbase and i was going to use it to make a cycle bottle cage or something - when titanium anything on a bike was super cool. But I never used it. Its lighter, but not by much and too small in size anyway. But now I'll just have to think of something silly I can utilise it on in this build - just for laughs/bragging rights So I'll probably get a bit of 0.5mm SS at some point for the shields. But for now I have at least got something to deflect the heat. They bolt to the brackets and will have some sort of heat resistant phenolic spacers to help prevent heat soak. Bolts were tigged in place.. Shield in place... Next up was the pipework as mentioned in the last post. I cut the old one up and carefully welded its shaped end to some stainless pipe. Not super pretty but happy as the OE pipe was less than a 1mm thick so it tested my skills. Then I started building the pipework in bits... I got as far as there and had to stop because not enough bends to complete the path I wanted the pipes to go in - I had used two bends for the exit from the other head. More bends are on their way from China as I type. Moving on to the next job I'd been putting off which was to make a half moon trigger/phase wheel for the cam angle sensor. I had already made a bracket to suit the Peugeot 307 hall sensor and knew the diameter I needed to start with. I rummaged about the steel racks and found a suitable piece of 3mm thick plate. Plasma cut a disc from it... Then into the lathe where it got a big hole sawed out from its middle. Much quicker than drilling and boring... Then bored out to final size - the process of which created a nice pretty lathe snake which came out of the lathes spindle... I carefully marked things out, drilled some holes and mounted the plate to the cam wheel. Note my lovely warm workshop/homeless person gloves. The bolts will be changed for countersunk items - the dome headed ones protruding just touched the reinforcing ribs within the cambelt cover.. The camcovers are well overbuilt and wont be in danger of getting hit in the back of a car like they could on a motorbike anyway so in an effort to make sure there's plenty of clearance I milled the ribs down.. I'll mill the slots out to suit on the trigger wheel and will add the remaining bolts (just in case 3 wasn't enough). It'll have half of its circumference machined down, with a corresponding amount in weight removed from the other side just to make some sort of effort to keep it fairly balanced. I bench tested the Peugeot sensor I had picked up from the wreckers - its a dud. Probably what sent the car to the graveyard considering the prices that the local NZ suppliers want for them. A new one is on its way from overseas. I have also ordered quite a few other little bits. New terminals for my injector plugs and a crimping tool. I'll be ordering other terminals to suit the various plugs that will be adorning the engines injection and ignition system. I want to create a loom without any unnecessary extra joints. I have never used a proper crimping tool as such. I got a set of little stainless tools for dismantling various connectors. Already used them and quite a breeze compared to my old screwdrivers, nails, pliers methods. I need to suss out a suitable idle control valve. On the Mazda V6 engined Viva I gutted the original Mazda throttle body mounted ICV and machined up a nice little alloy housing to suit its PWM solenoid, so creating a remotely mounted ICV. I'd like to do the same but I don't have any Mazda TBs kicking about and there's also an abundance of cheaply available copies of Bosch remote ICVs available online (with good reviews) so I'll think some more about this bit. My ignition setup is coming along - big thanks to @fletch who is posting me a Mitsubishi GTO ignitor module. I'll most likely get a Mondeo/Jaguar v6 coilpack for the ignitor to..ignite.. So many different brands The sticker list on the side of the completed car will be long. 'This car has been brought to you courtesy of the following' .. Hillman cars Honda Goldwing motor Subaru transmission Honda civic clutch plate Subaru clutch disc Honda civic alternator Subaru starter motor Ford Mondeo clutch release Honda crx(?) throttle body (thanks Chris ) Nissan Micra injectors Mitsubishi ignitor Jaguar ignition coils KMC bmx oil pump chain Lego Mandolorian inlet manifold plenum guardians25 points
-
After all that the wedding went without any issues. We covered about 50 miles in total that day, running around for photos etc. At the end of the day I parked her up at the reception and collected many Barry's, all eager to tell me their Austin stories and lamenting that they ever got rid of theirs. Luckily this Austin's previous Barry had the forethought to not throw her away.
 15 points
 -
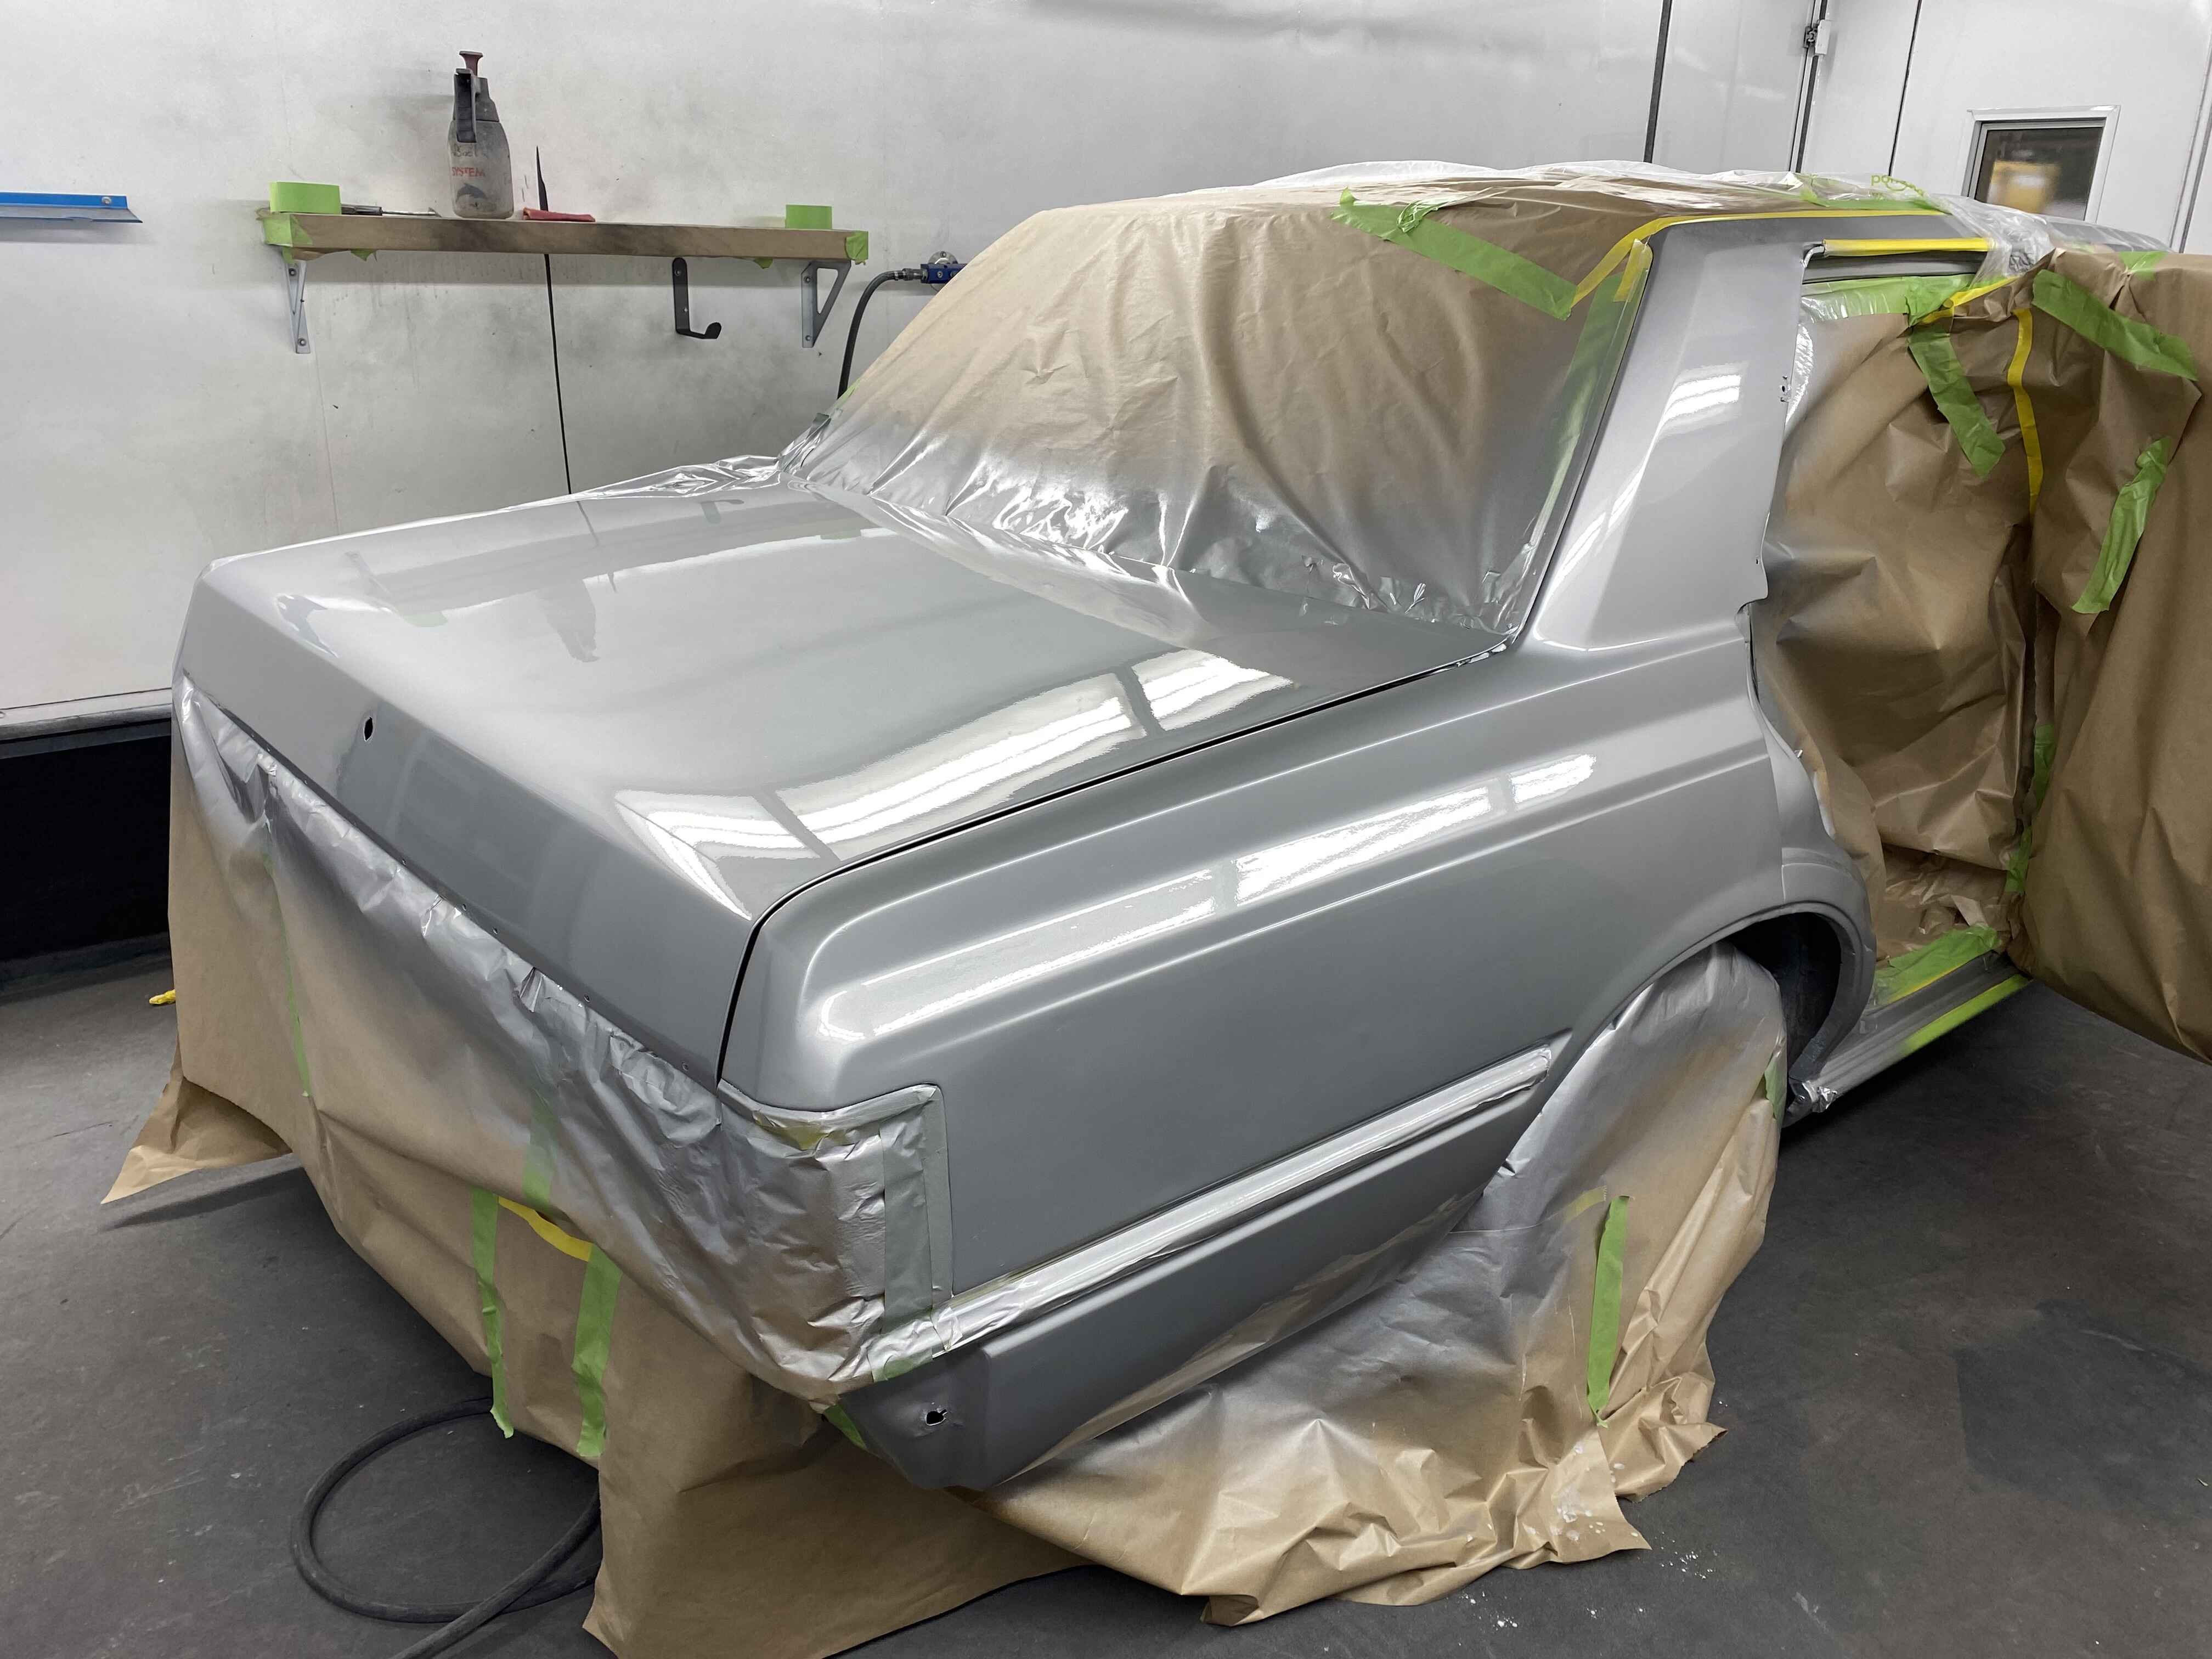
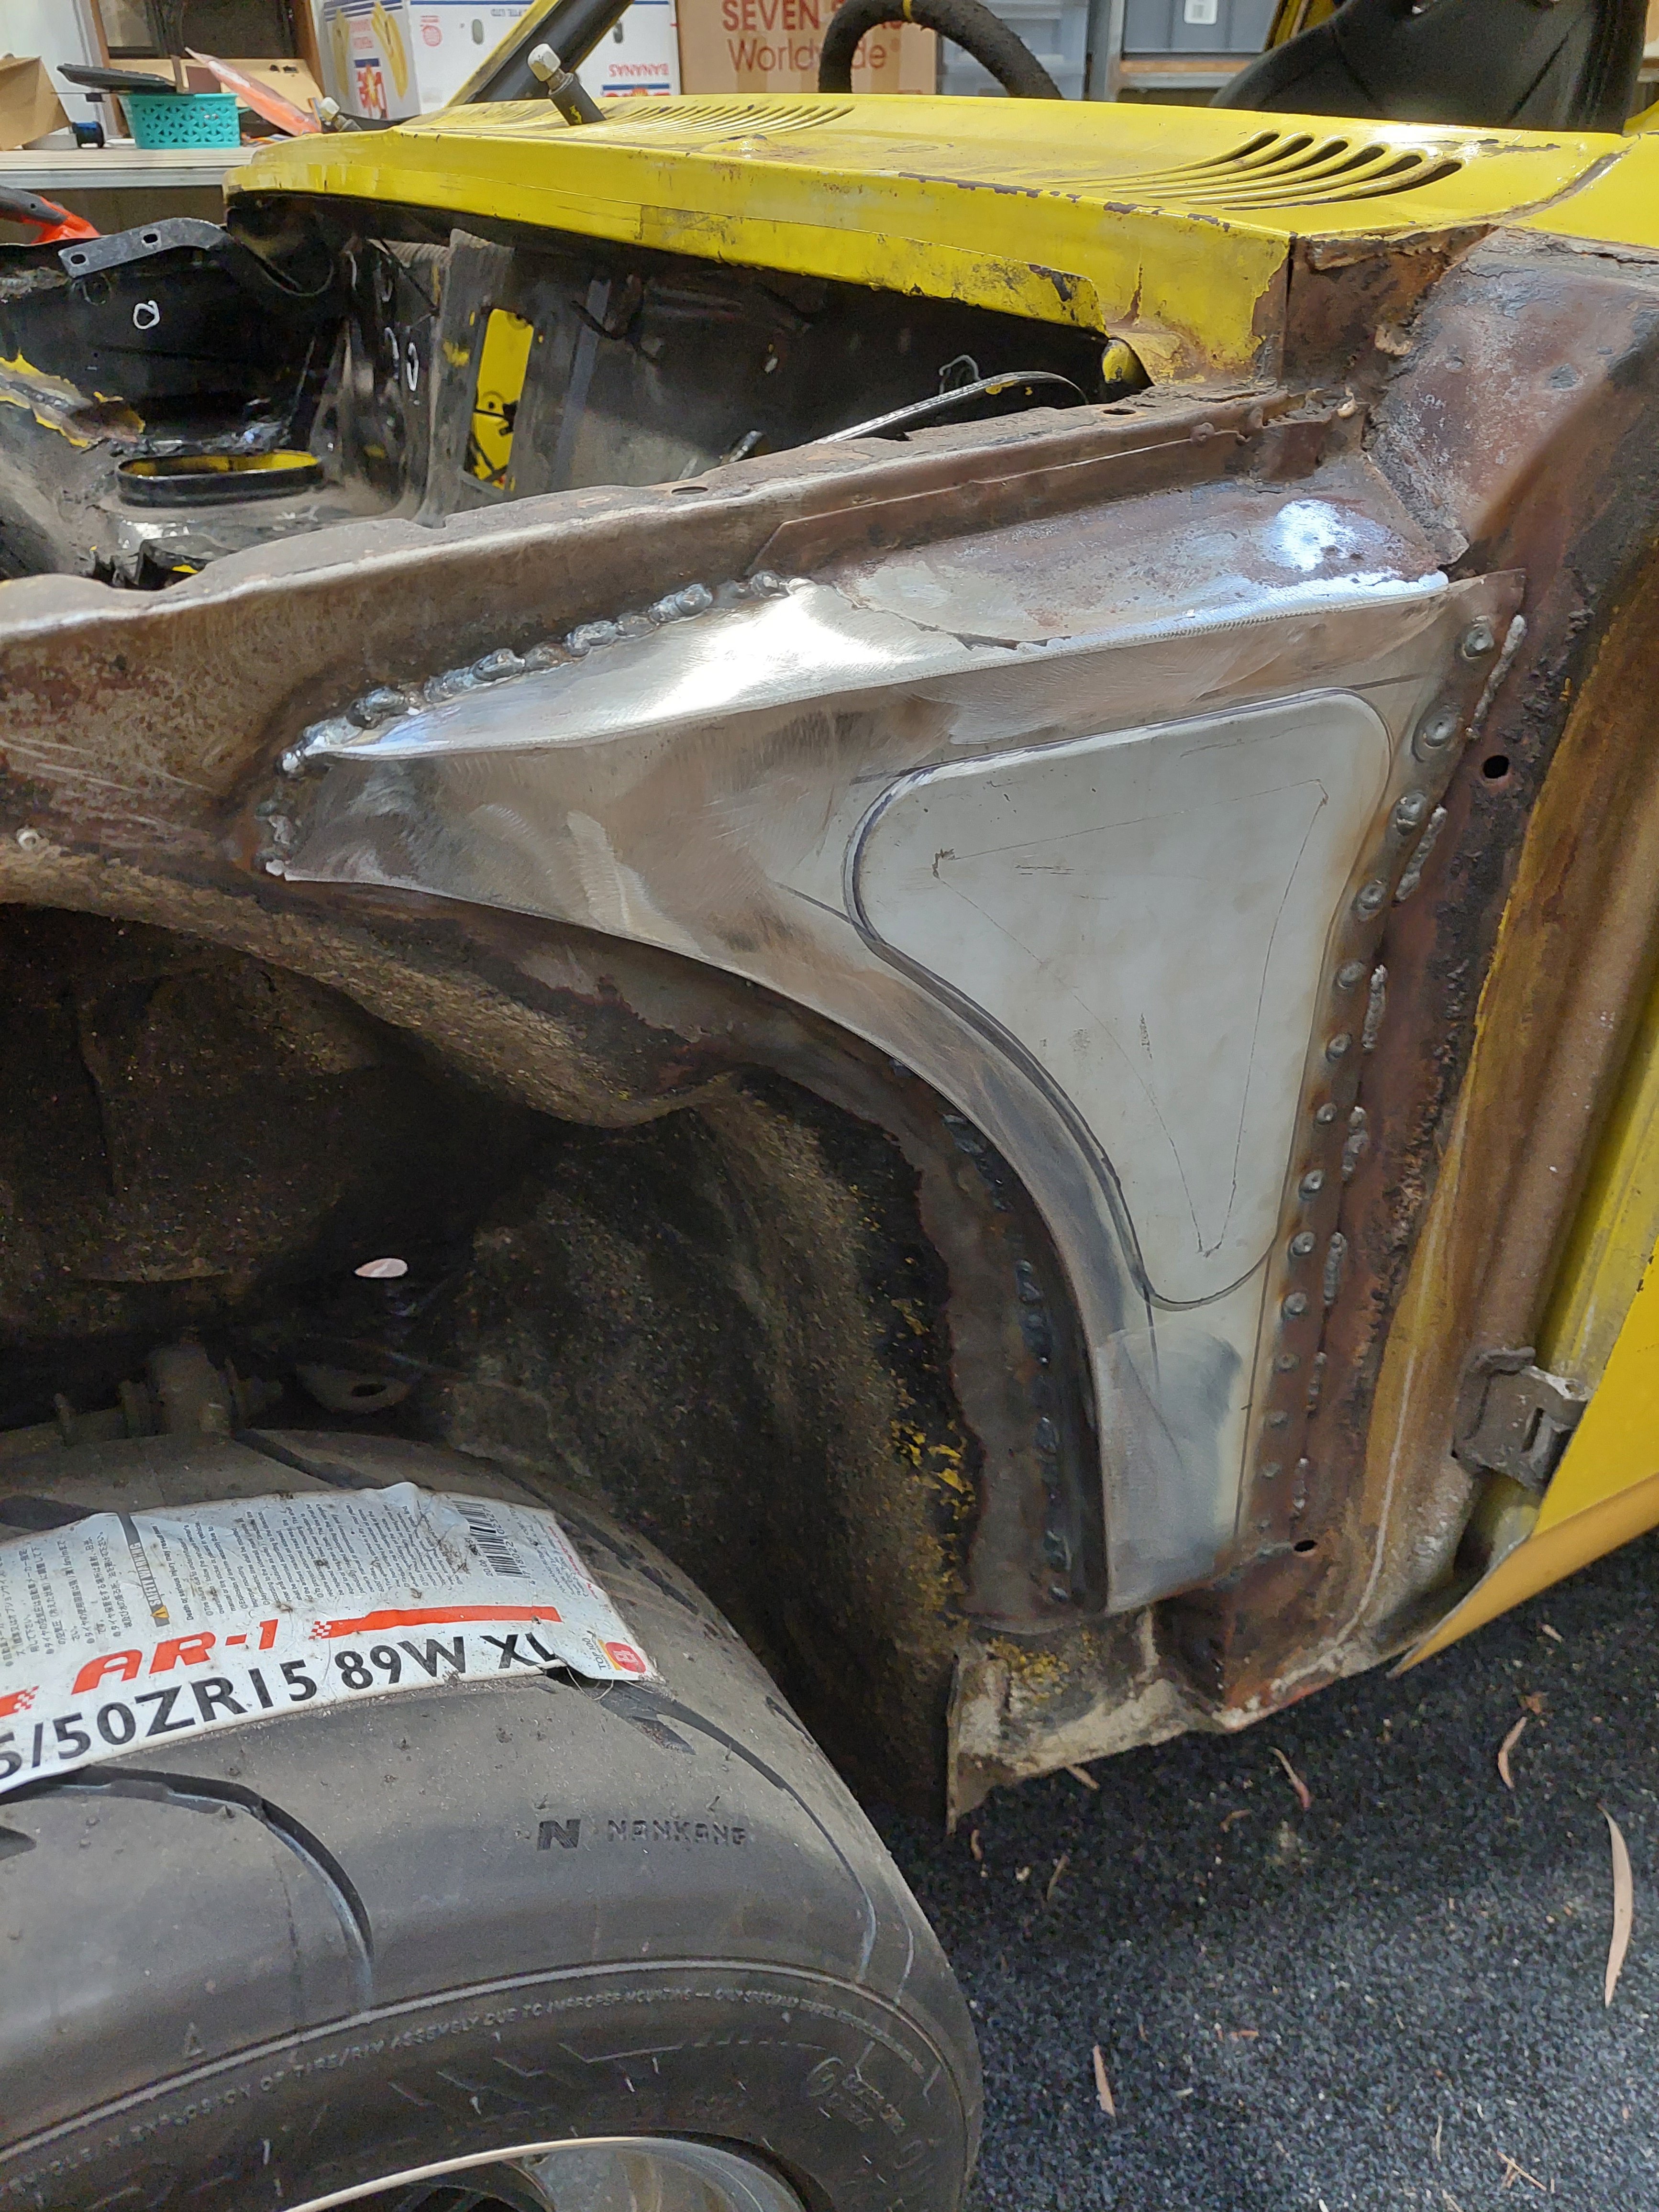
While that's going on a work colleague has tidied up the right rear wheel arch and flicked some silver over the boot and rear corner. I took this opportunity to fill the trim badge holes. I'm not sure what I'll put back there yet but I've always felt the factory setup is very busy, with "SuperSaloon" "Toyota" "Crown" and "2.8" all jammed in there. Once the rear doors are done we'll flick some paint up both sides to blend it a bit, and perhaps touch up the roof where the clear is coming off. I'd like to strip it back and do a proper job one day but I know I'd probably end up with the car off the road for years.
12 points
-
Finally, now she was mechanically reliable again (for now) it was time to focus on the paint. After a few evenings buffing all the panels, running steel wool over the chrome and waxing it all for the first time in probably 50 years it came up really good! Better than I'd hoped to be honest. And most importantly the view from the drivers seat was restored to the best it has ever been.
8 points
-
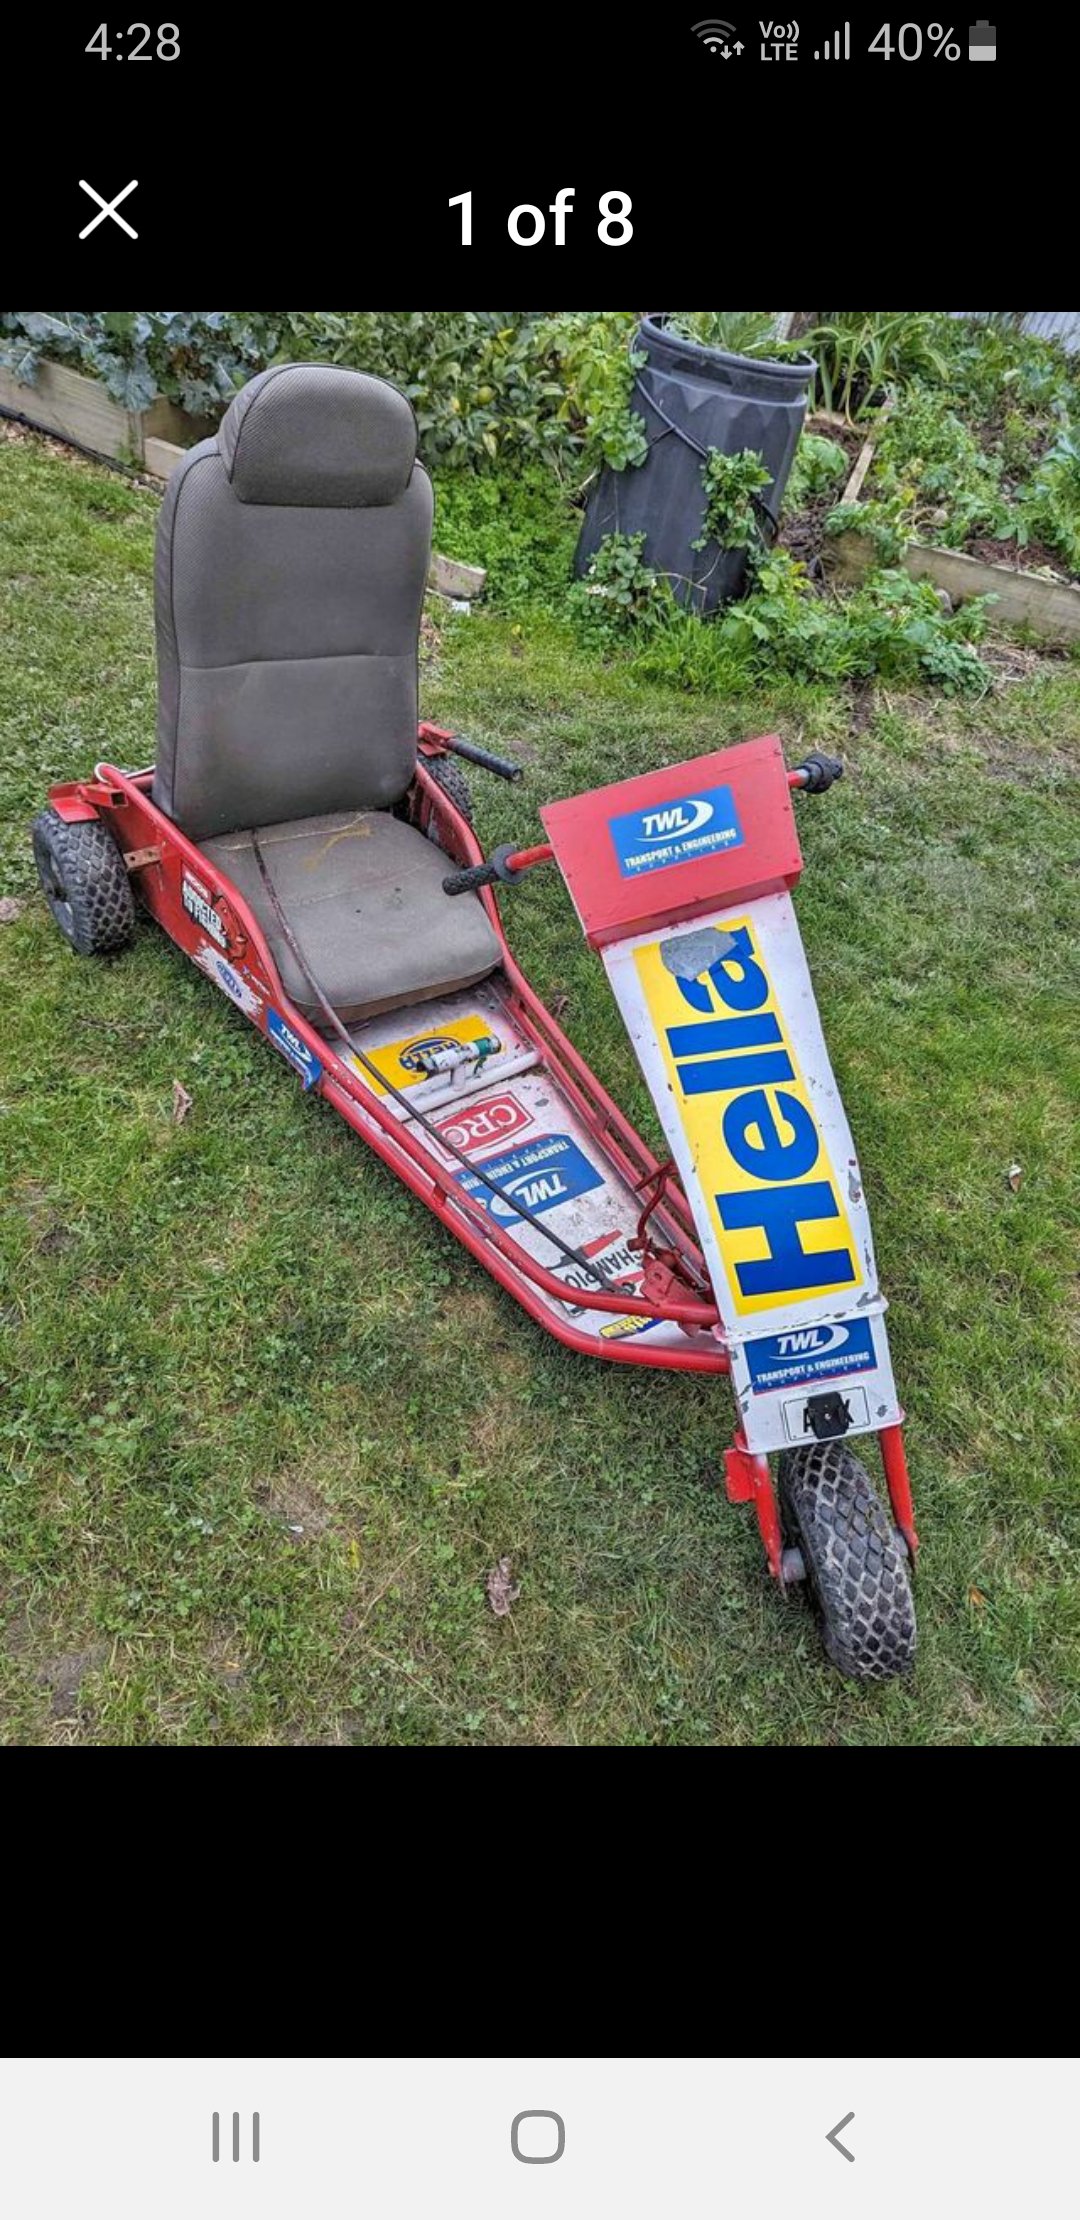
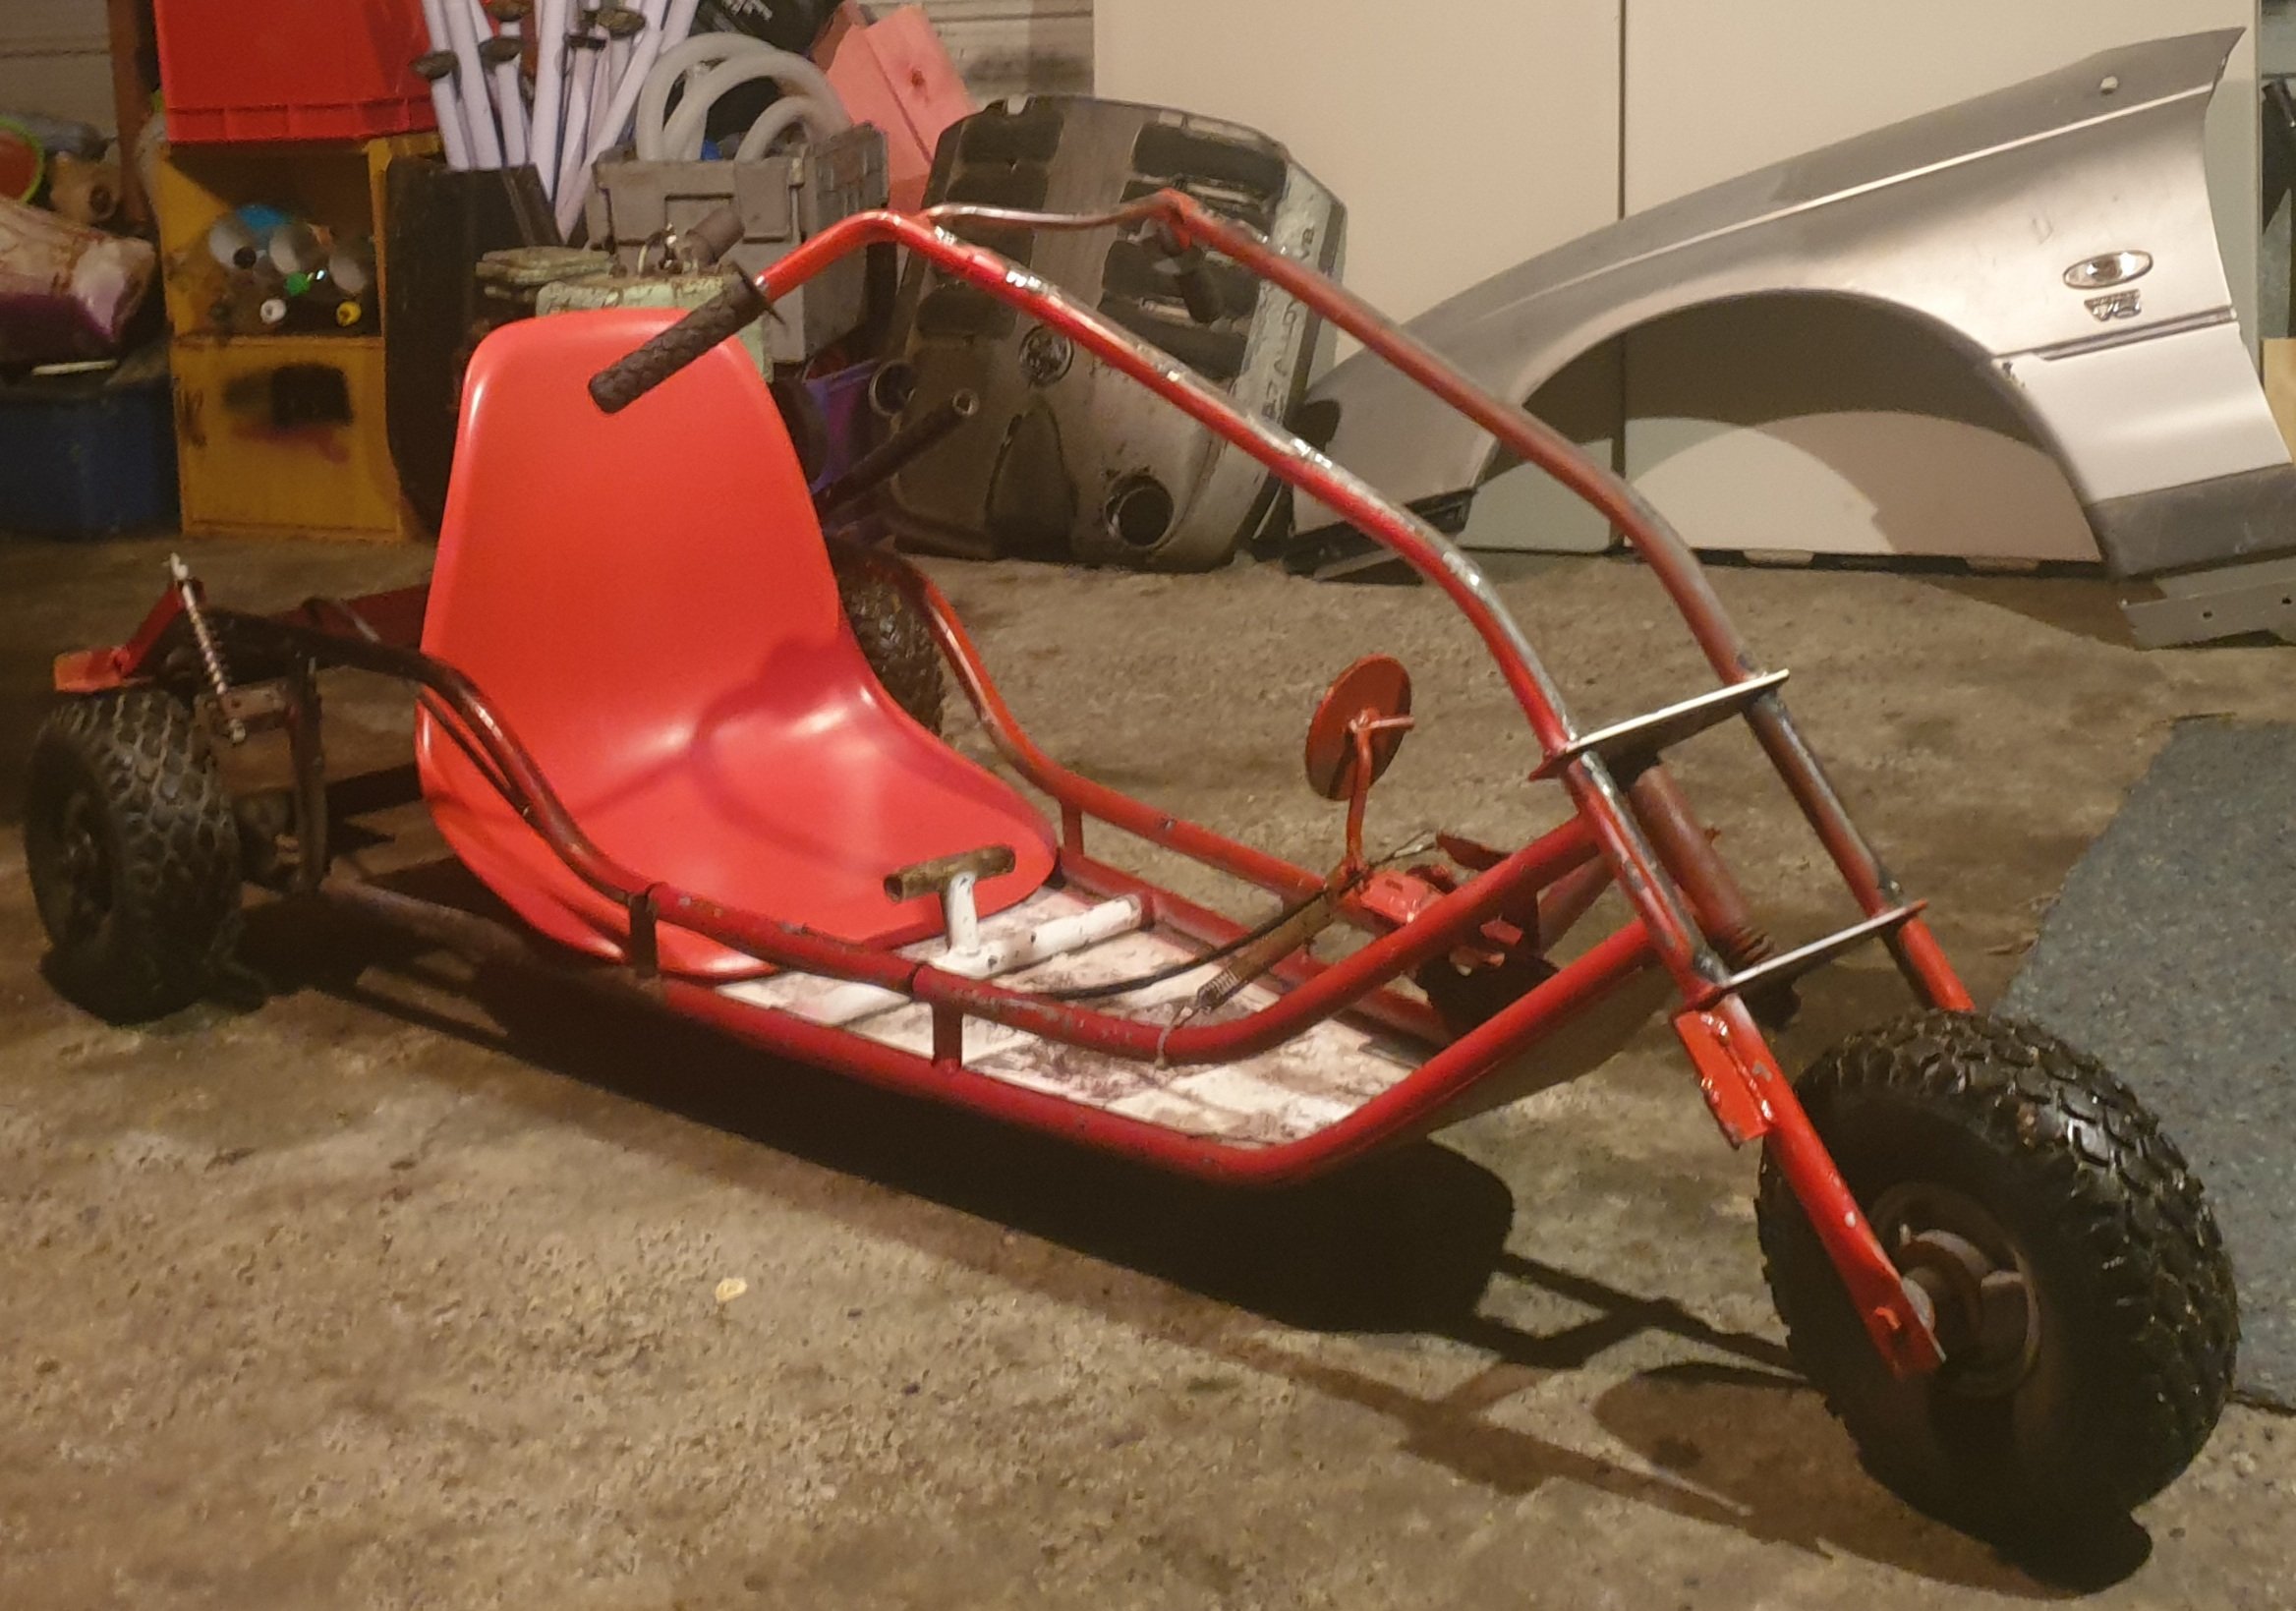
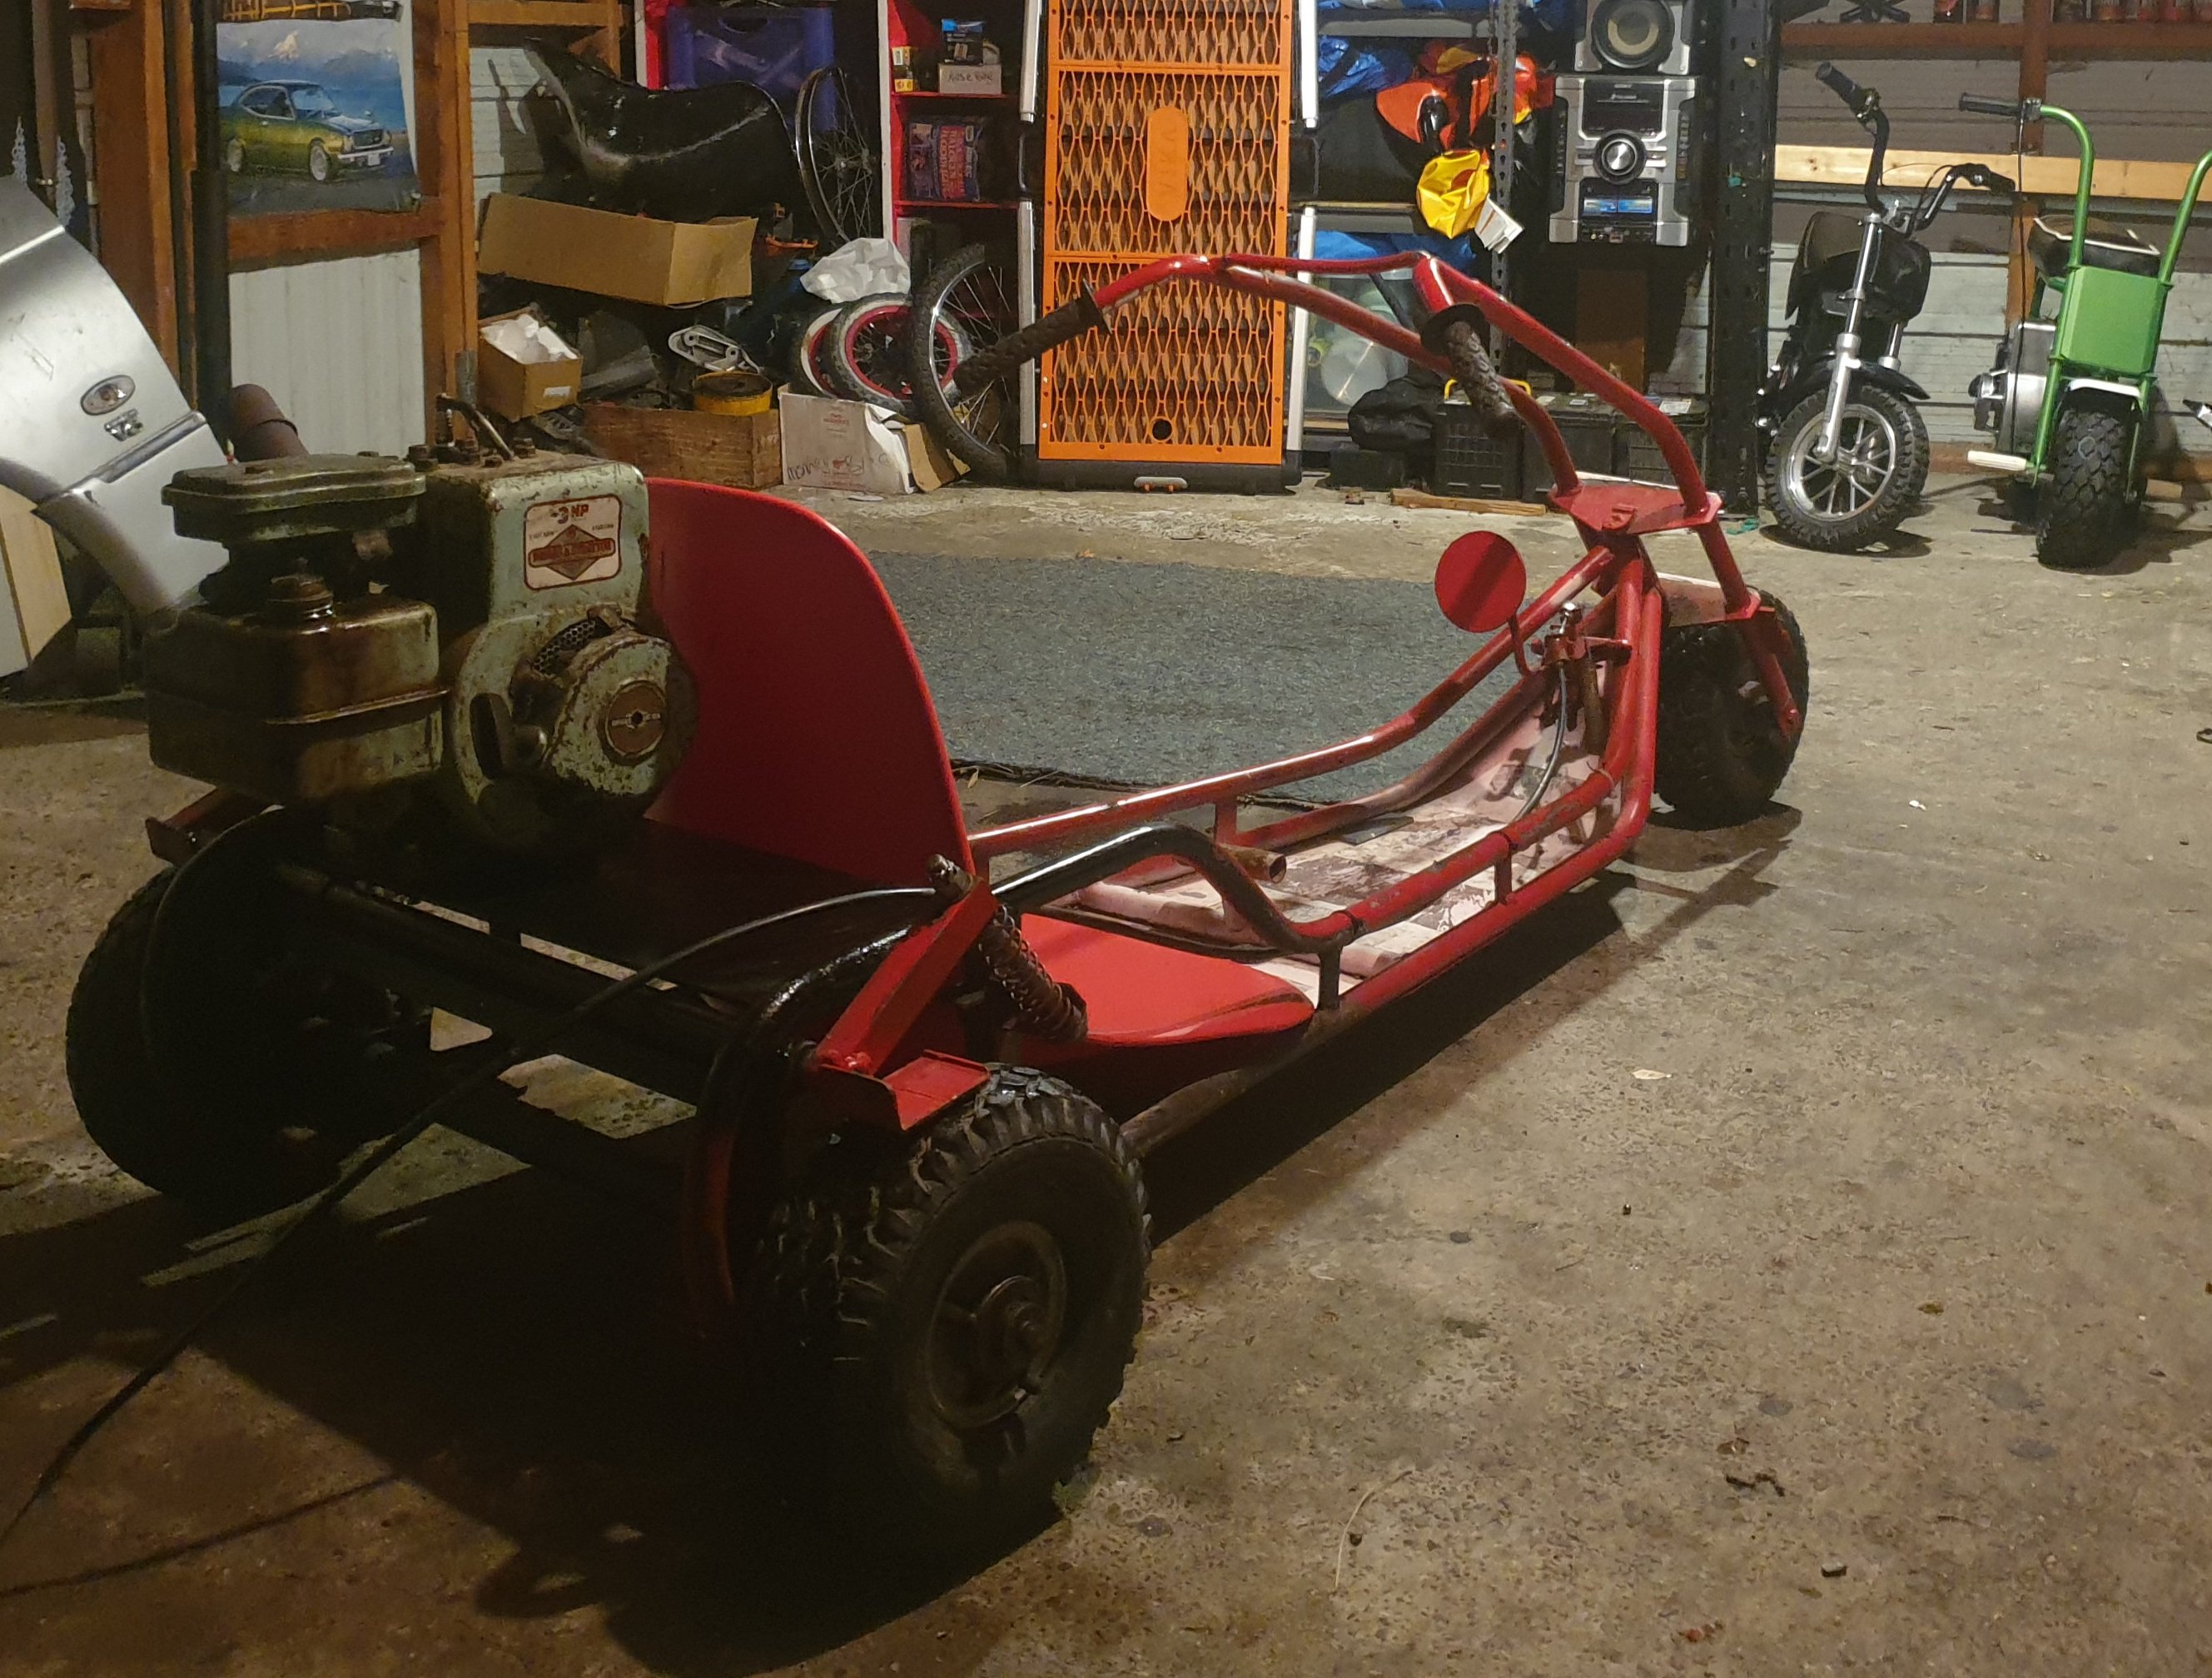
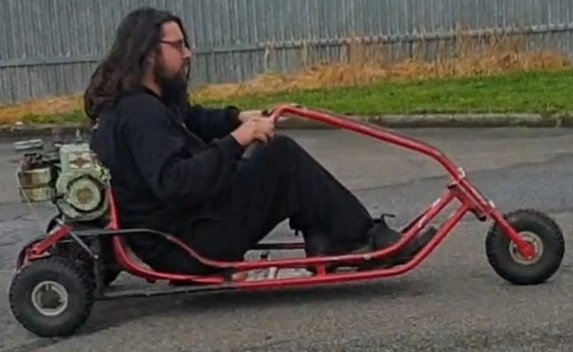
I dont have a problem i dont have a problem. Ohhhh yea now heres one ive had alil while ago. A trutest fun kart got as a frame no motor mounts nothing was in prety sad state. Now has a briggs 3hp with a generic gokart clutch n chain Shes now a rider did her 1st ride today goes ok dose 50kph but all over the place 40 45k not too bad cool trike Not really sure where this builds gona go. Gona finish tidying up and paint. Get rid of some random add ons shes got. 1st pick was how i got it 2nd 3rd last week Last pic me riding down the street
7 points
-
The last issues in the drive line were the driveshaft and the torque tube support bush. The driveshaft UJ's were out of phase which was probably not helping with the "high" speed vibrations. Easy enough to line them up. The bush takes the full load of rear diff twist on take off, so it's no surprise it had collapsed with all that clutch shudder. New bush cut down to size and fitted means it's now running way better and is super smooth on take off again!
7 points
-
The input seal on the box is a scroll seal, and a pretty worn one at that. The female input shaft is capped with a welch plug which is also letting oil out along the splines and flicking through the lining. It was a pretty easy job to lathe out the nose to accept a modern lip seal, and for the shaft & cleaned it right out and made a plug of RTV in the end to seal it up. Gearbox went back in and tested great! Before I removed it I was able to simulate the shudder on take off by releasing the clutch very slightly and holding resistance on the output flange with the driveshaft off. It had a steady pulse that is now completely gone.
7 points
-
Next job was sorting the paint. The view over the bonnet has been getting pretty sad, the paint has been coming off in sheets! The rest of the paint seems to be ok but it has oxidized quite badly and needs to be cut back. So bonnet off, repaint the top and flick some paint onto the scuttle to help it blend in. Now the challenge will be buffing the old paint to hopefully match the new! But before I could get to that stage she had another mechanical disaster...
7 points
-
After (can’t load photos anymore than 1 at a time
6 points
-
Thanks Dave. I'm glad you like the workshop photo. It took me 11 hours to carefully clean it all up before I took the pic.5 points
-
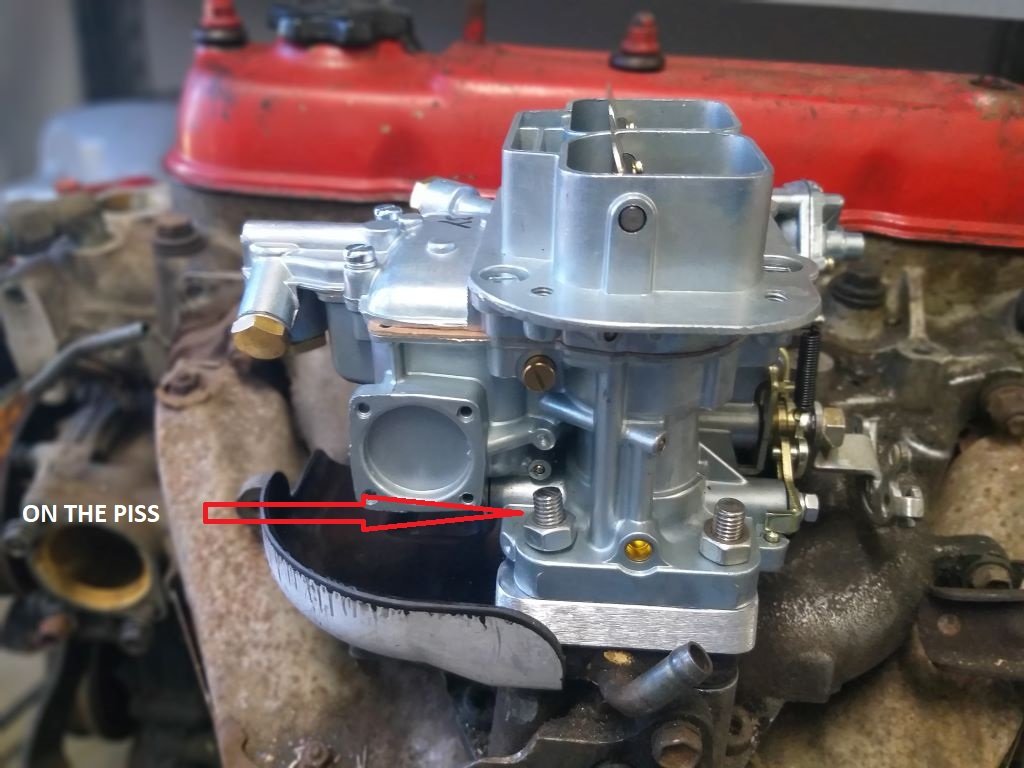
Carby Replacement - Chapter 6 It only took me two goes to fabricate a functional offset bracket to sort out my accelerator cable alignment issue. Gave it a lick of paint yesterday and let it dry overnight before bolting it on. Photo of the successful candidate in situ:
5 points
-
So me and my boy wipped out the floor and removed the gearbox. It's super easy to work on this thing! Almost like a model car. The clutch was covered in oil and the clutch fingers were badly worn. The clutch lining was new however and not buckled, so I used a heat gun and plenty of break clean to draw out the oil till it was nice and dry. Then I went ahead & replaced the pressure plate fingers, giving them a few adjustments to make them sit at the same height. The oil in the clutch was gear oil, so even thought the engine is leaking a heap I focused on getting the gearbox front seal dry.
5 points
-
It's had a nasty shudder on take off for a while now. I'd been driving around the problem thinking it must be a clutch issue and I'll sort it after the wedding. On the way to work however it decided to sudenly loose almost all drive! I managed to limp home and after a quick look figured I'd broken an axle. On closer inspection the rear hub had fractured clean in half. It looks like the wheel bearing had walked off a fraction, loading up the hub until it gave up. Luckily it happened now and not on the wedding day! My boss is into his Austins himself and came to the rescue with another hub. After replacing and securing the wheel bearing, and closely inspecting the other side we had drive again. I now thought it might be best if I go through the whole drive line & get rid of that shudder to try and reduce the chances of another issue.
5 points
-
I had a mate request the Austin for a wedding recently, what an honor! It was also a really good excuse to sort out the growing list of needed repairs. First up was the ignition coil. The old Lucas sports coil had failed a while ago but I love the look! so I carefully gutted it and managed to fit a modern coil inside quite nicely. After doing that and fitting some NOS points the ignition system seems to finally be reliable. For some reason the new "Lucas" points were only lasting maybe 200 miles before burning out.
5 points
-
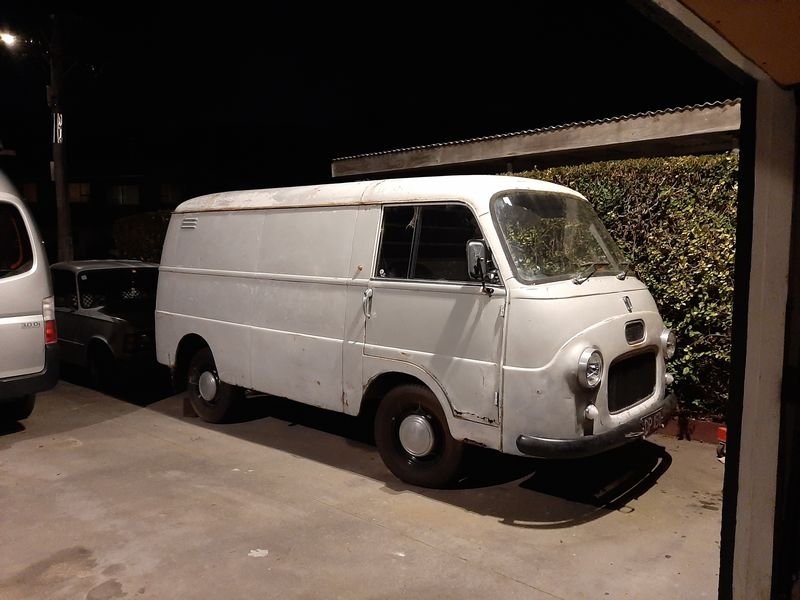
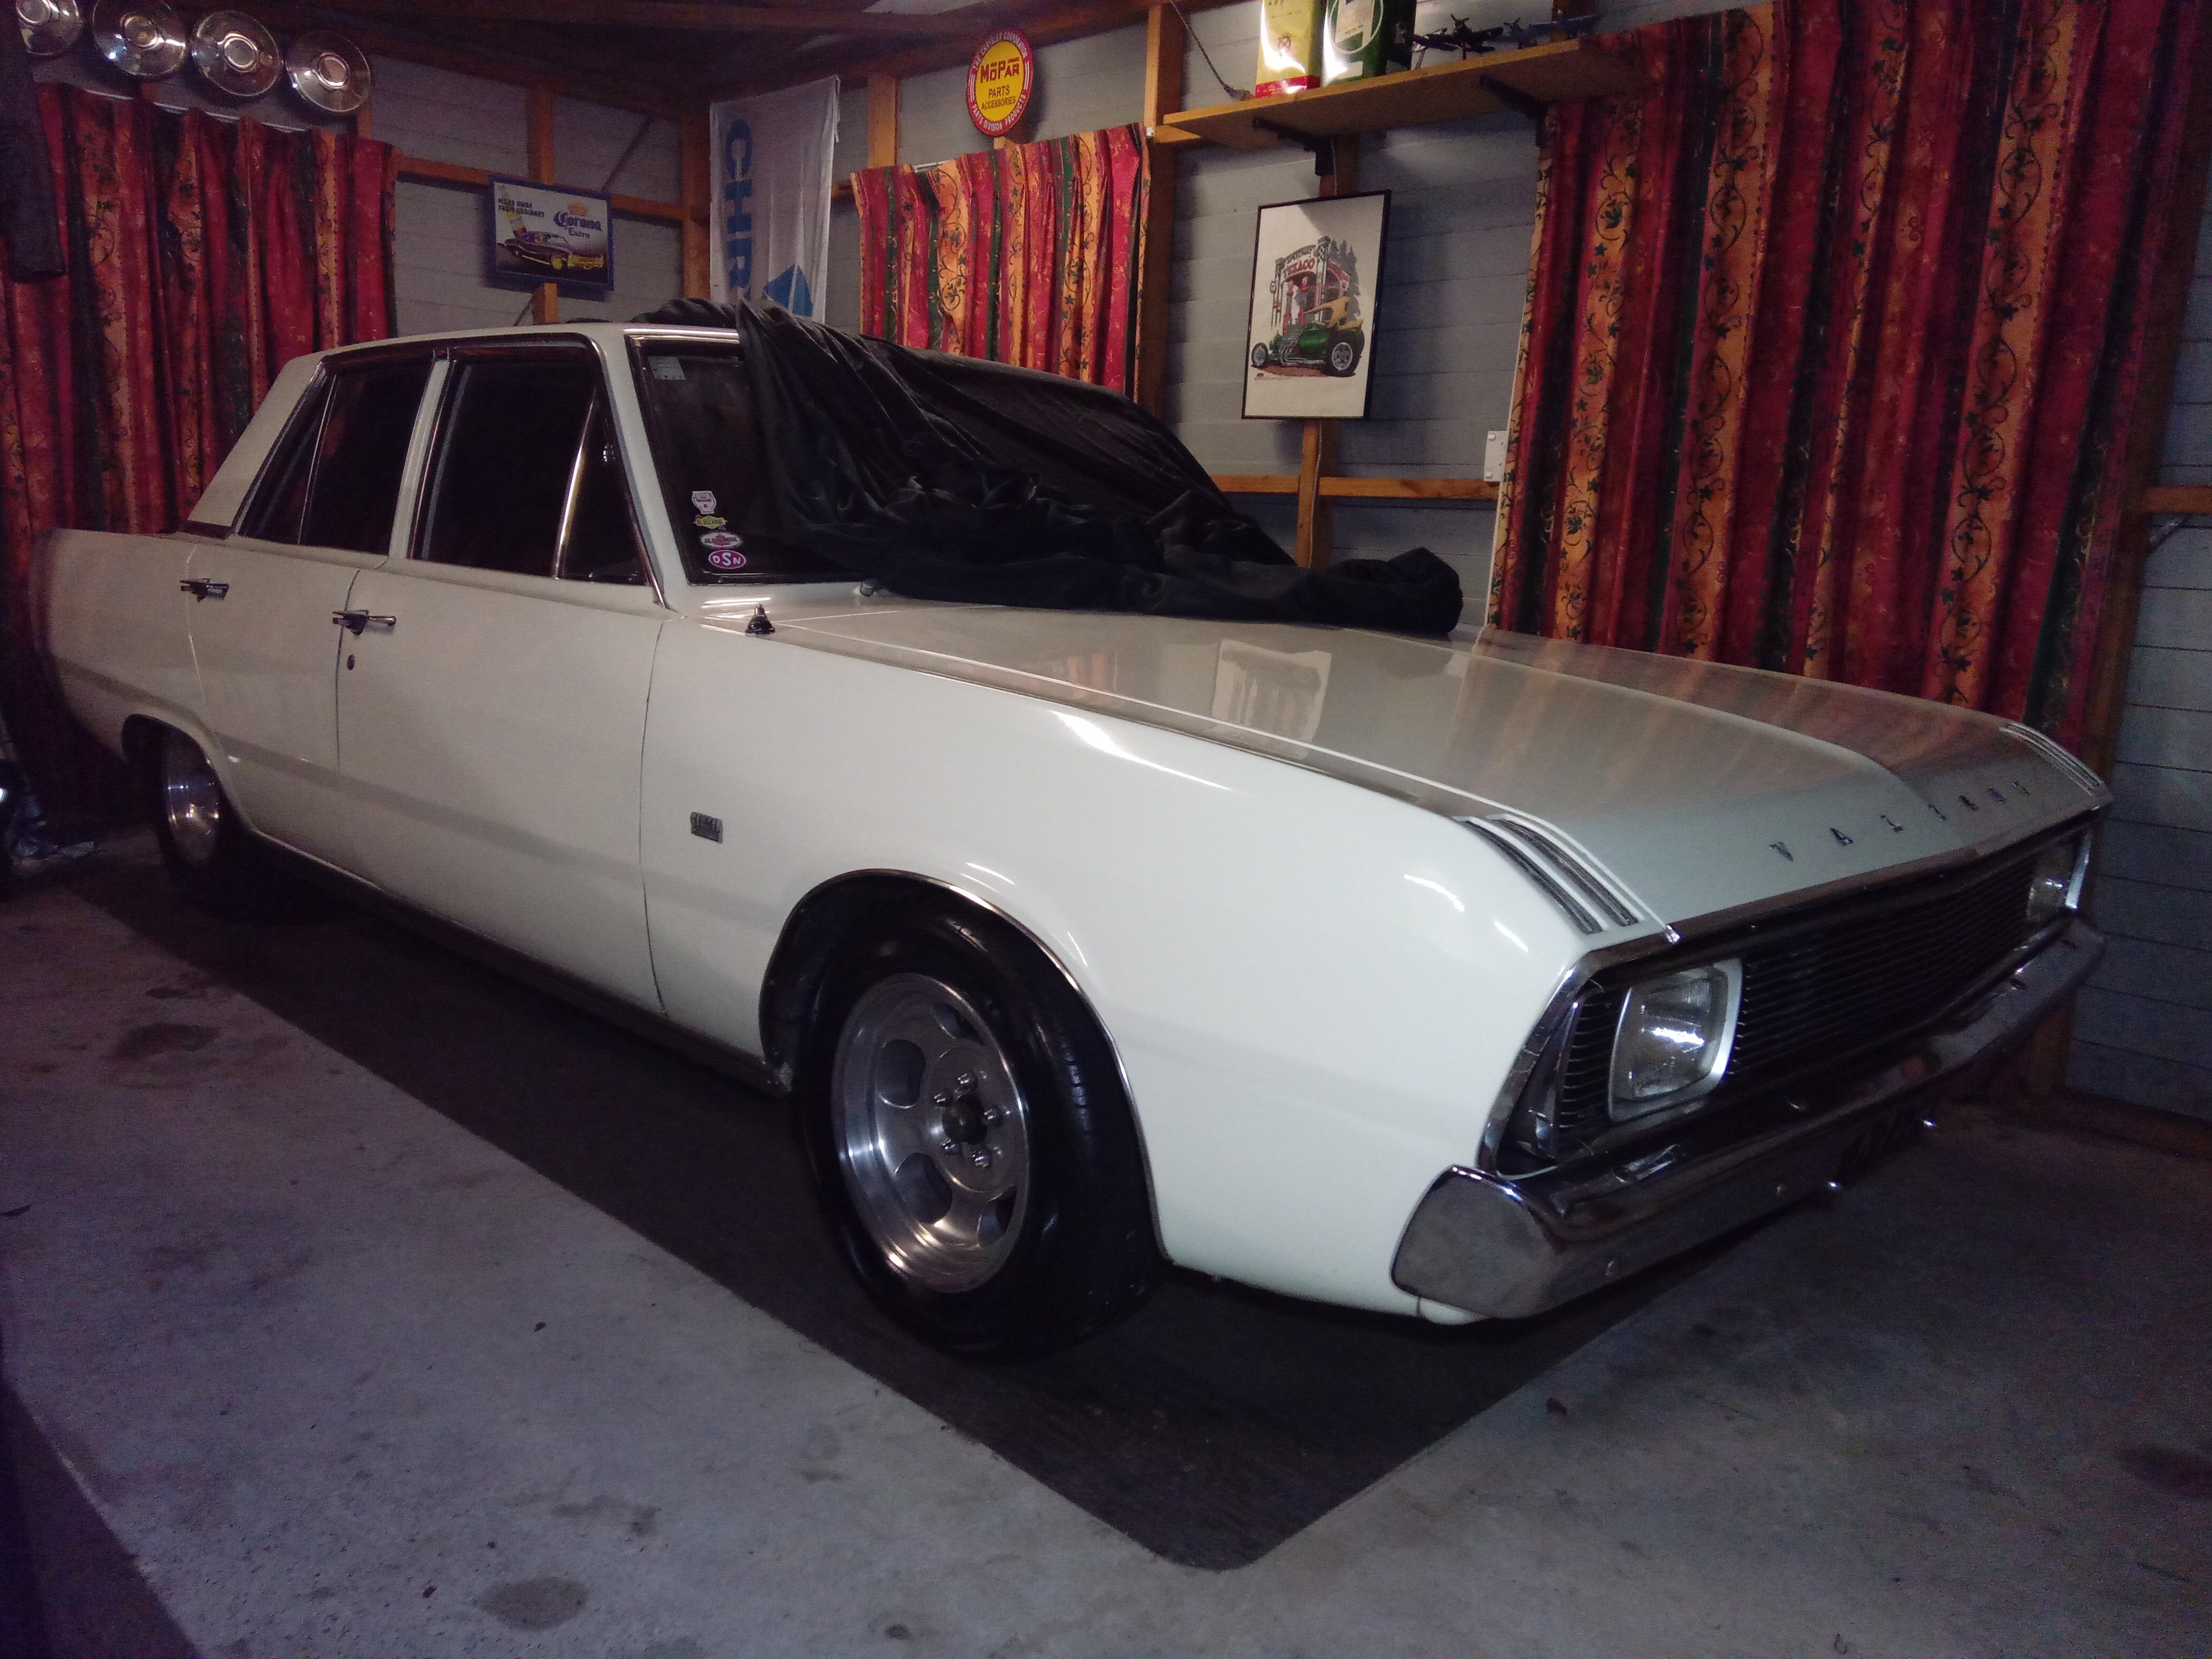
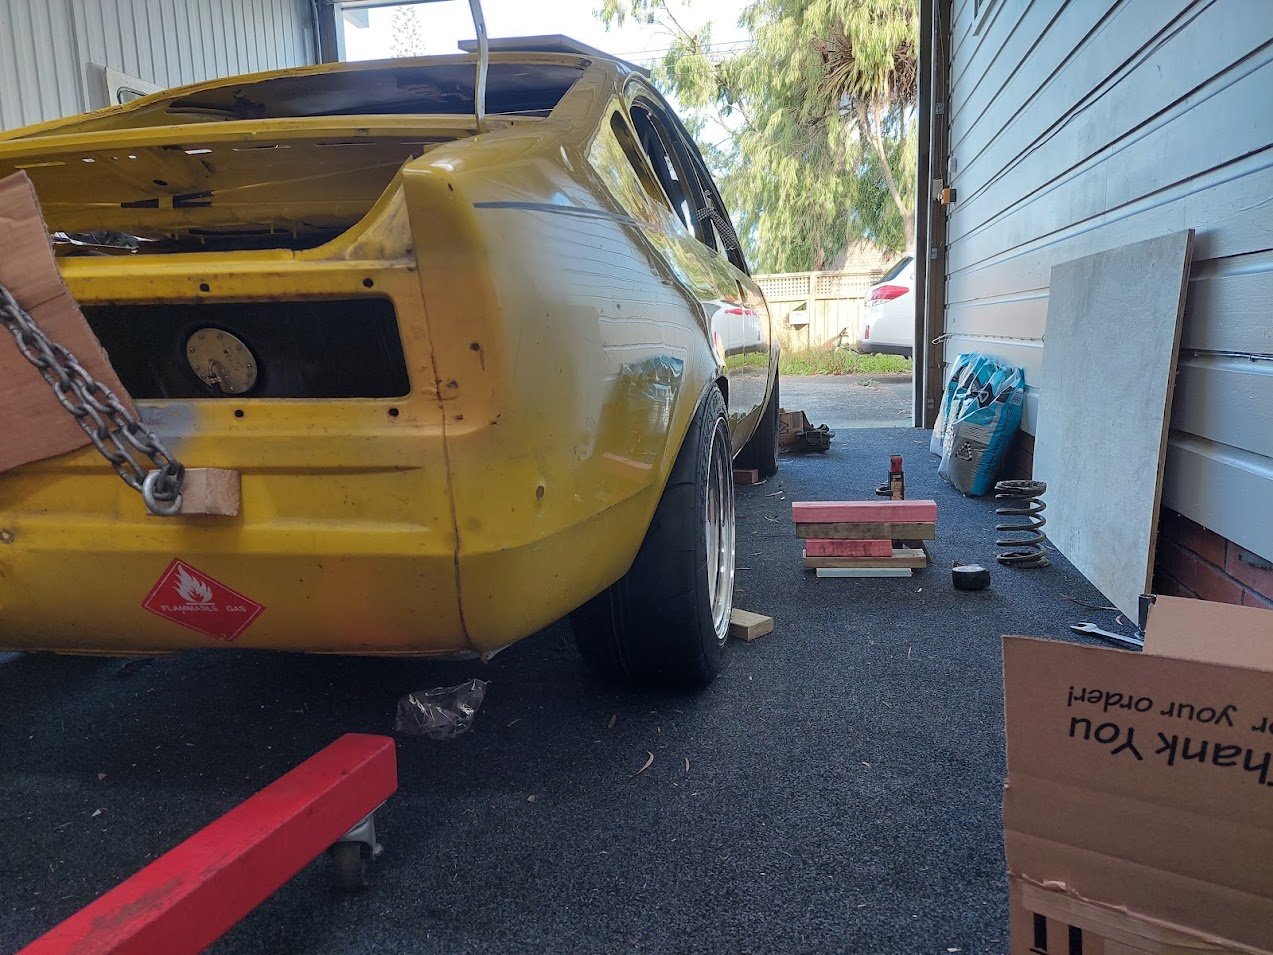
Remember me? Not surprised if you don't. I forgot for a while too. First time Hako has left the storage in years! Off to it's next money draining adventure as we try to restart the restoration
5 points
-
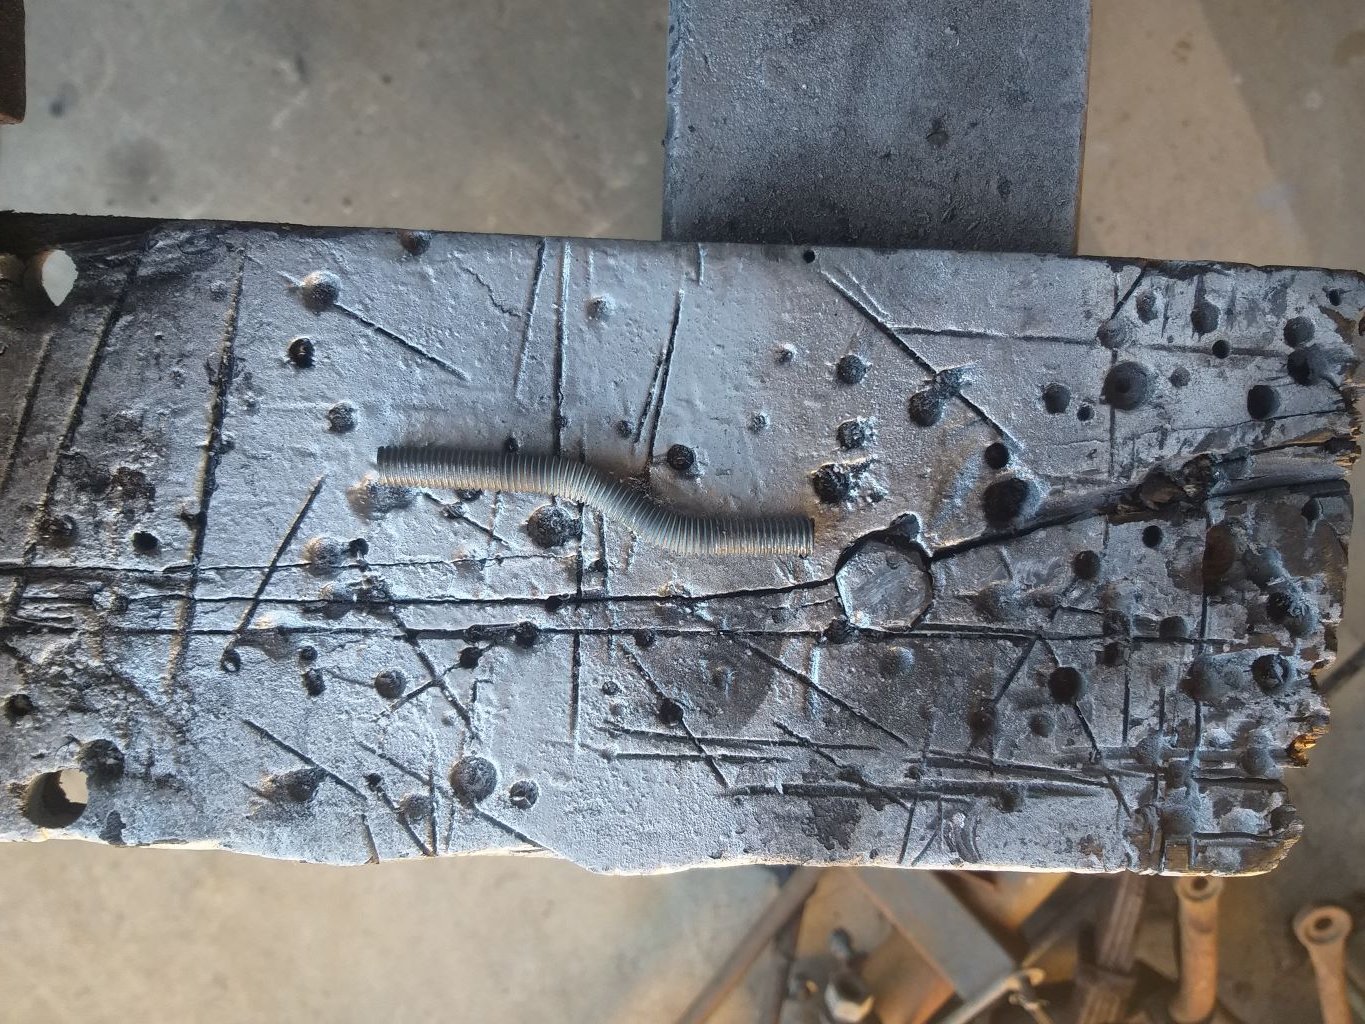
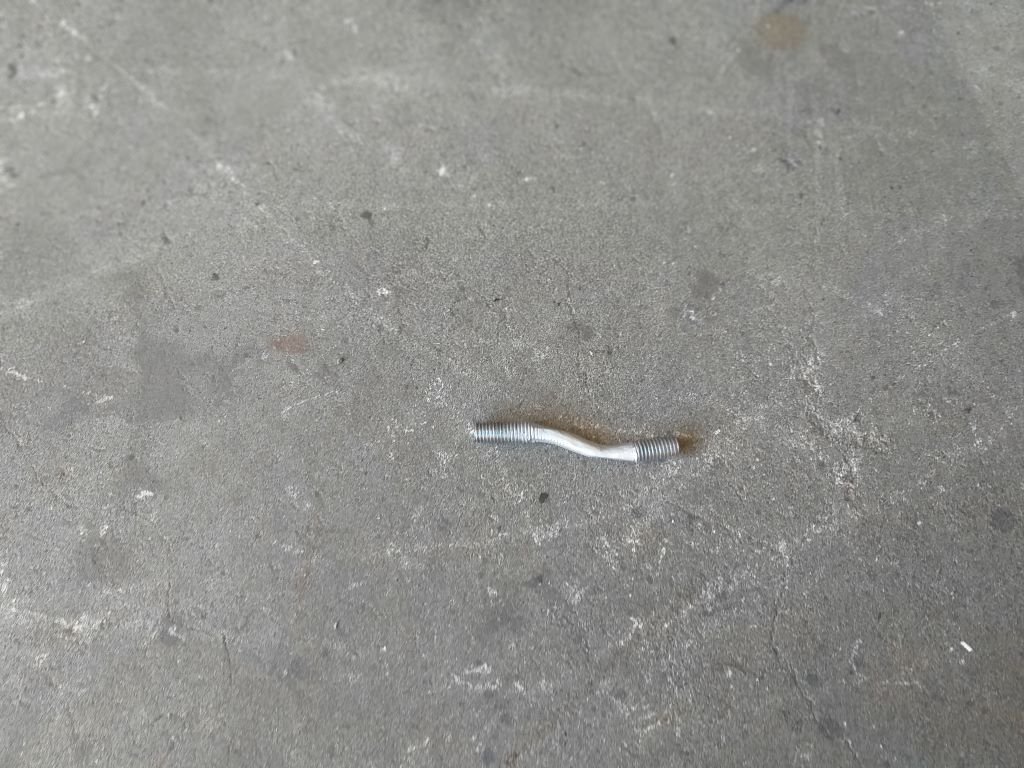
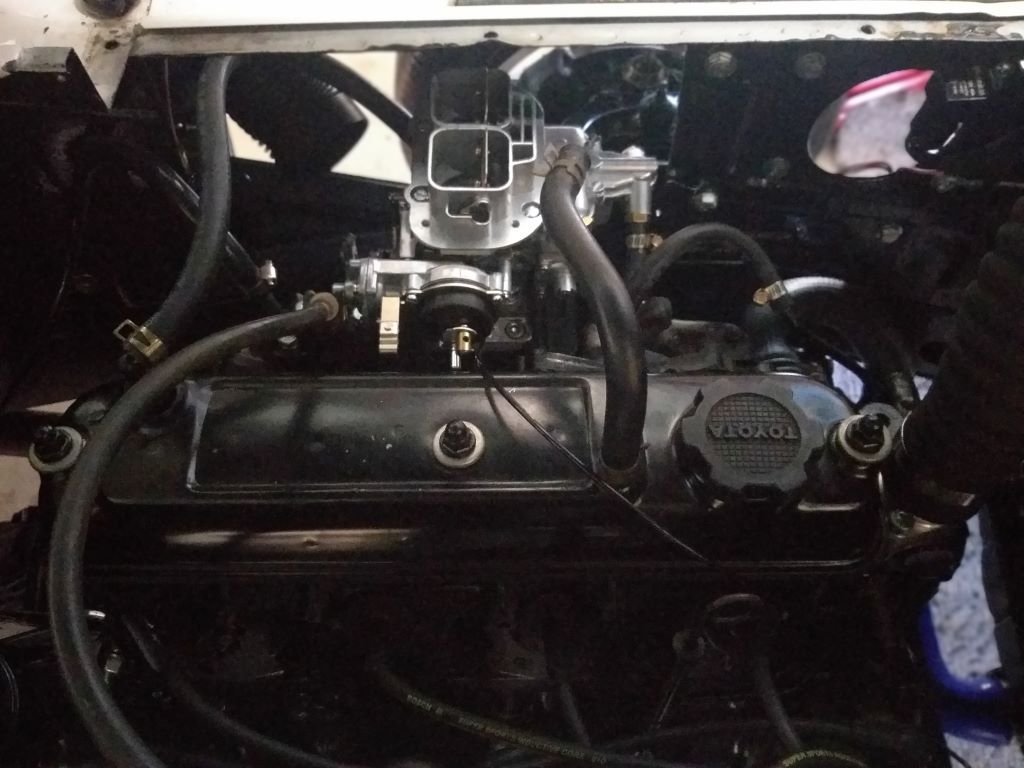
Carby Replacement - Chapter 7 Time for me to put on my big boy pants and tackle that offset mounting stud. Rummaged through my box of spare bolts and found a nice long fella with the correct thread. Snipped the head off, chucked two nuts on either end and locked them up. With one end fixed in my vice I then applied a bit of heat to the centre of the thread. When it got nice and toasty, I put a socket on the pair of nuts at the loose end and gave my breaker bar a bit of a shove until I ended up with a bit of spaghetti that looked something like the original offset stud. Let everything cool off and then took to the squiggly bit of thread with my angle grinder as it wouldn't fit through the adapter plate as is. Took a few goes till I got it right. Not the prettiest looking thing, but it is functional, and all of the ugliness gets hidden away. Final test fit showed the fixing nut slightly on the piss, but thankfully I was able to tweak that without breaking the thing. Gave it a spritz of galv paint and then transferred the whole setup across to the Thames. With everything connected up I gave her a crank to suck through some juice and after a few cycles she fired straight up. Idles nicely and no longer smells of unburnt fuel, so I'm a very happy chappy. I'll chuck in the choke cable first thing tomorrow and then the next job on the list is to fabricate a top hat so I can plumb in my remote air filter. Thanks for looking.
4 points
-
Just got a message saying shes done.....and here I am in the 04 for another week....4 points
-
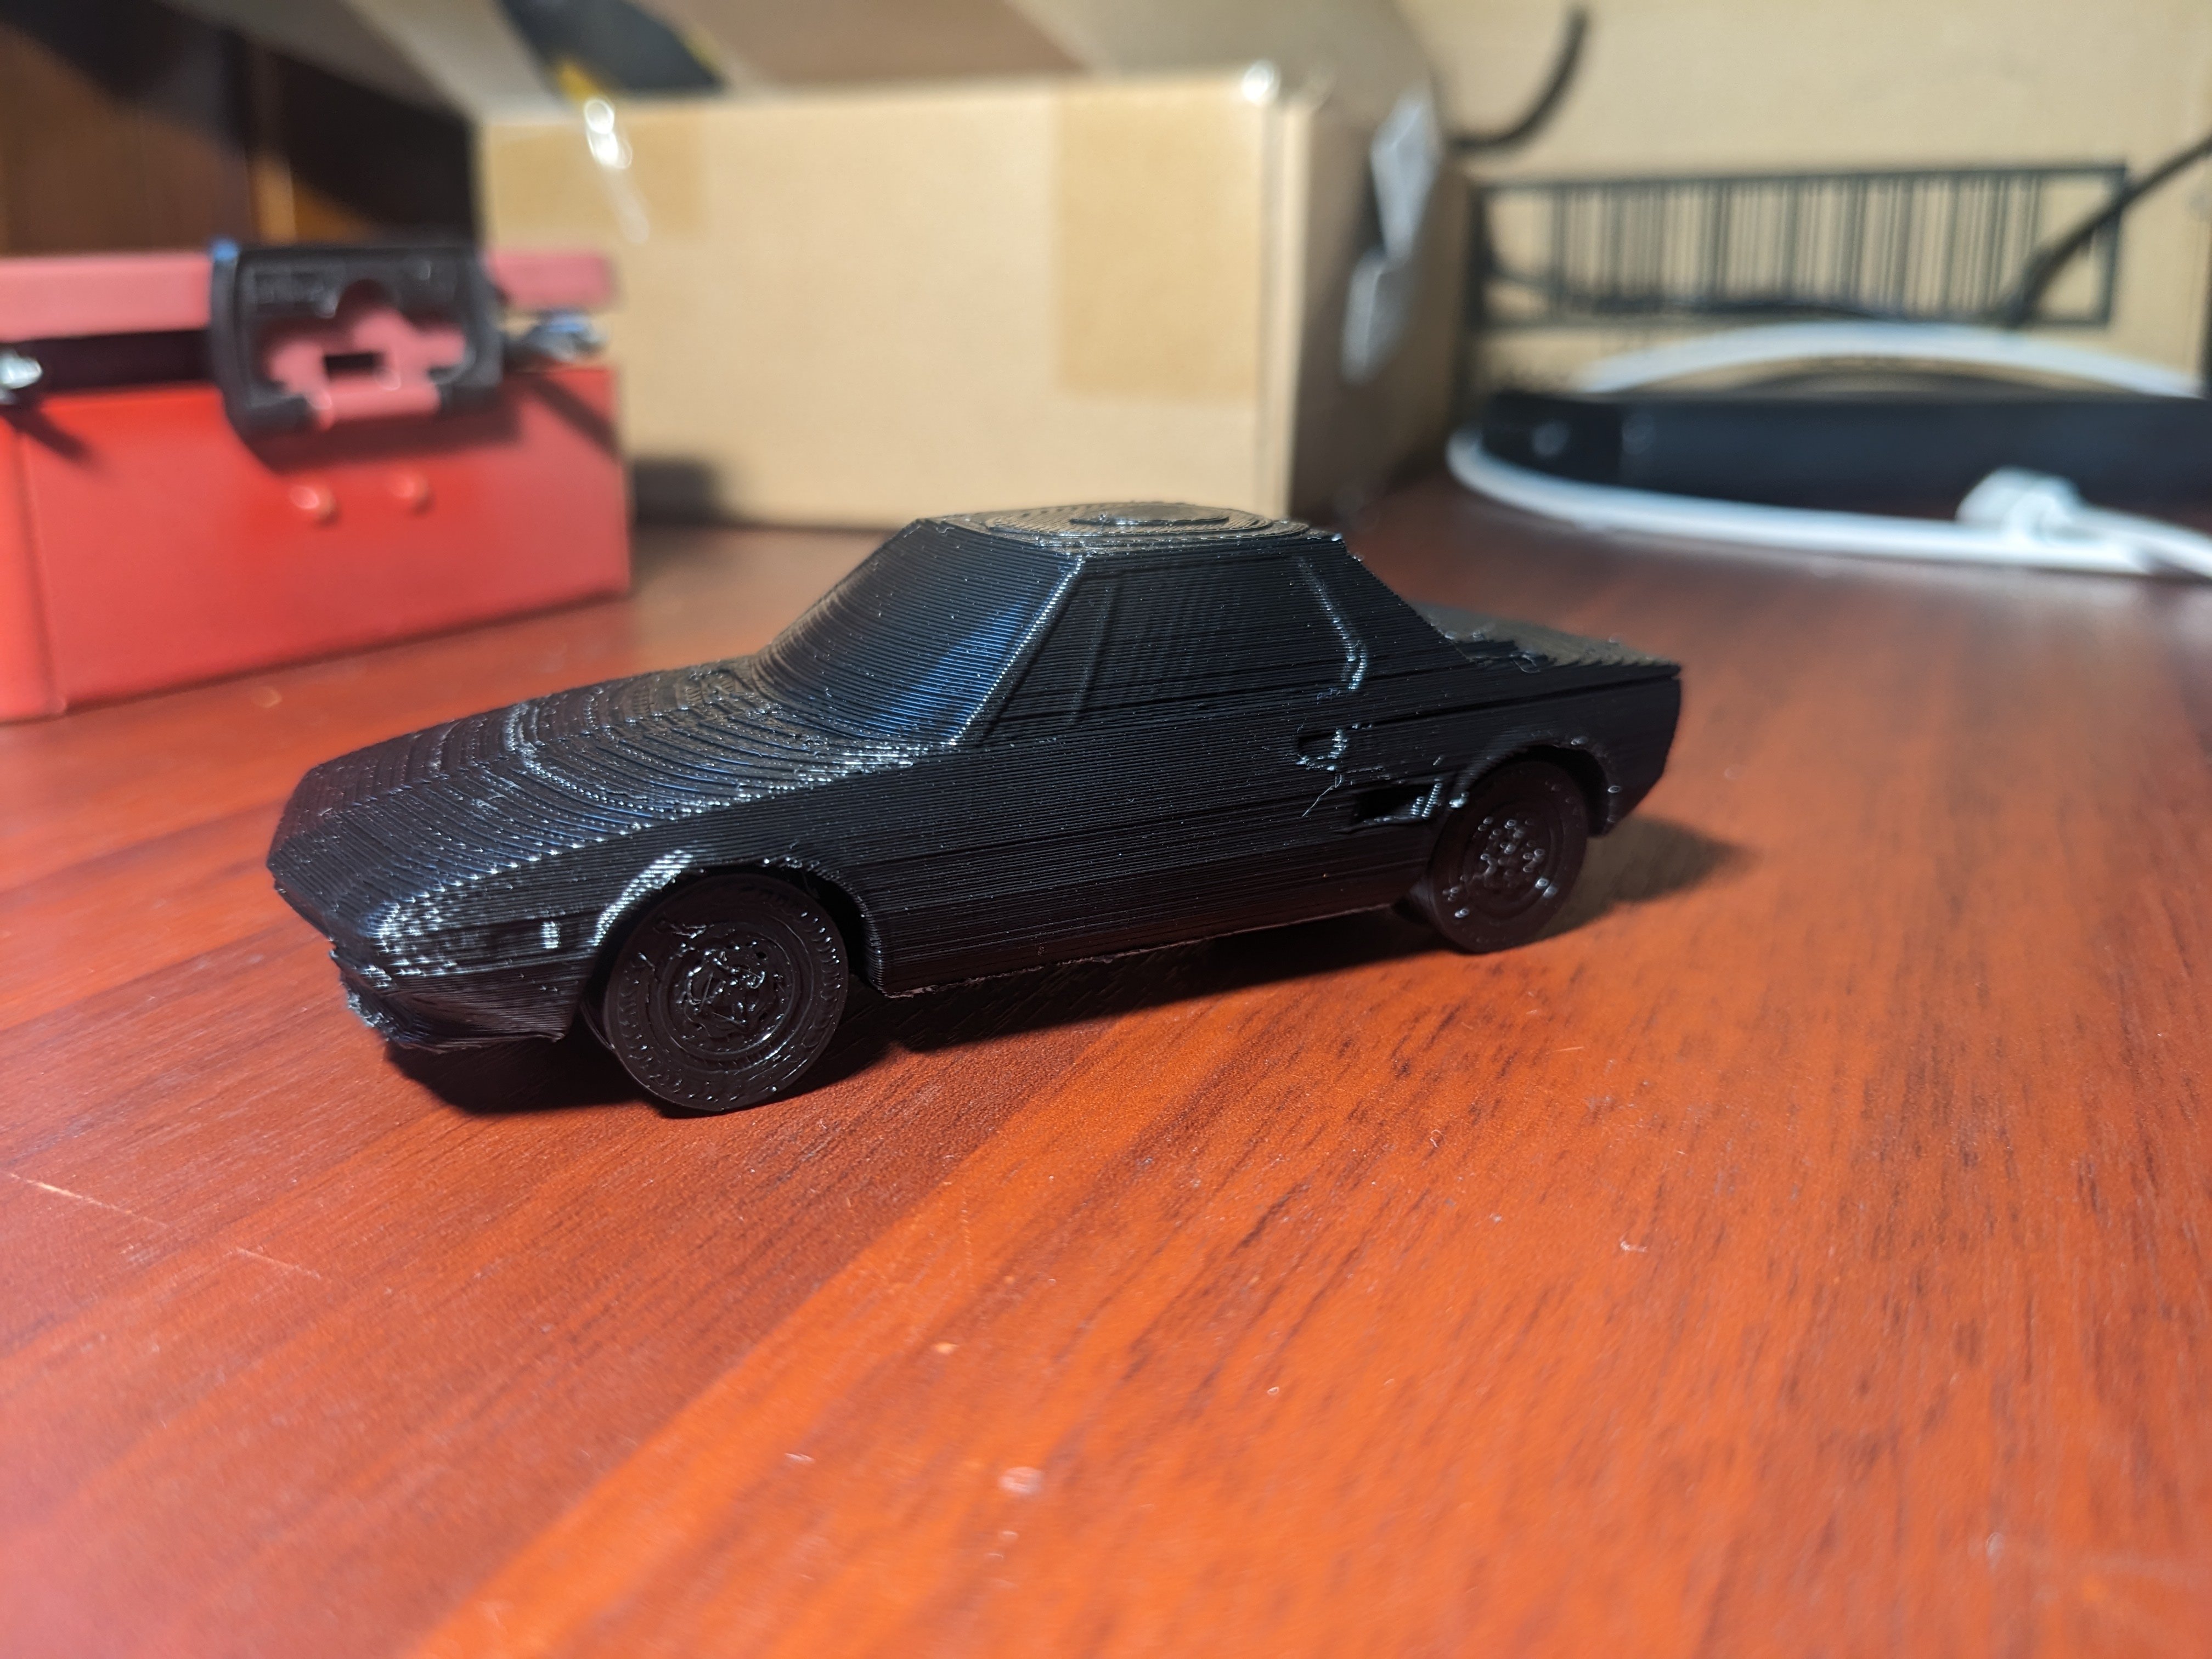
I printed some motivation Also I dreamt last night I was in the X chasing a bright yellow countach down some windy roads, I woke up when I made a desperate passing manoeuvre, pushed them off the road and spun out trying to avoid an oncoming truck. Shits super exciting already. In actual project news I had a look at the wiring situation and it looks a bit of a shitfight. Enough that I might get a wiring kit and redo it. Someone has spliced a new front half loom in but i am not sure it can be trusted. Its all 40+ years old at this point anyway.
4 points
-
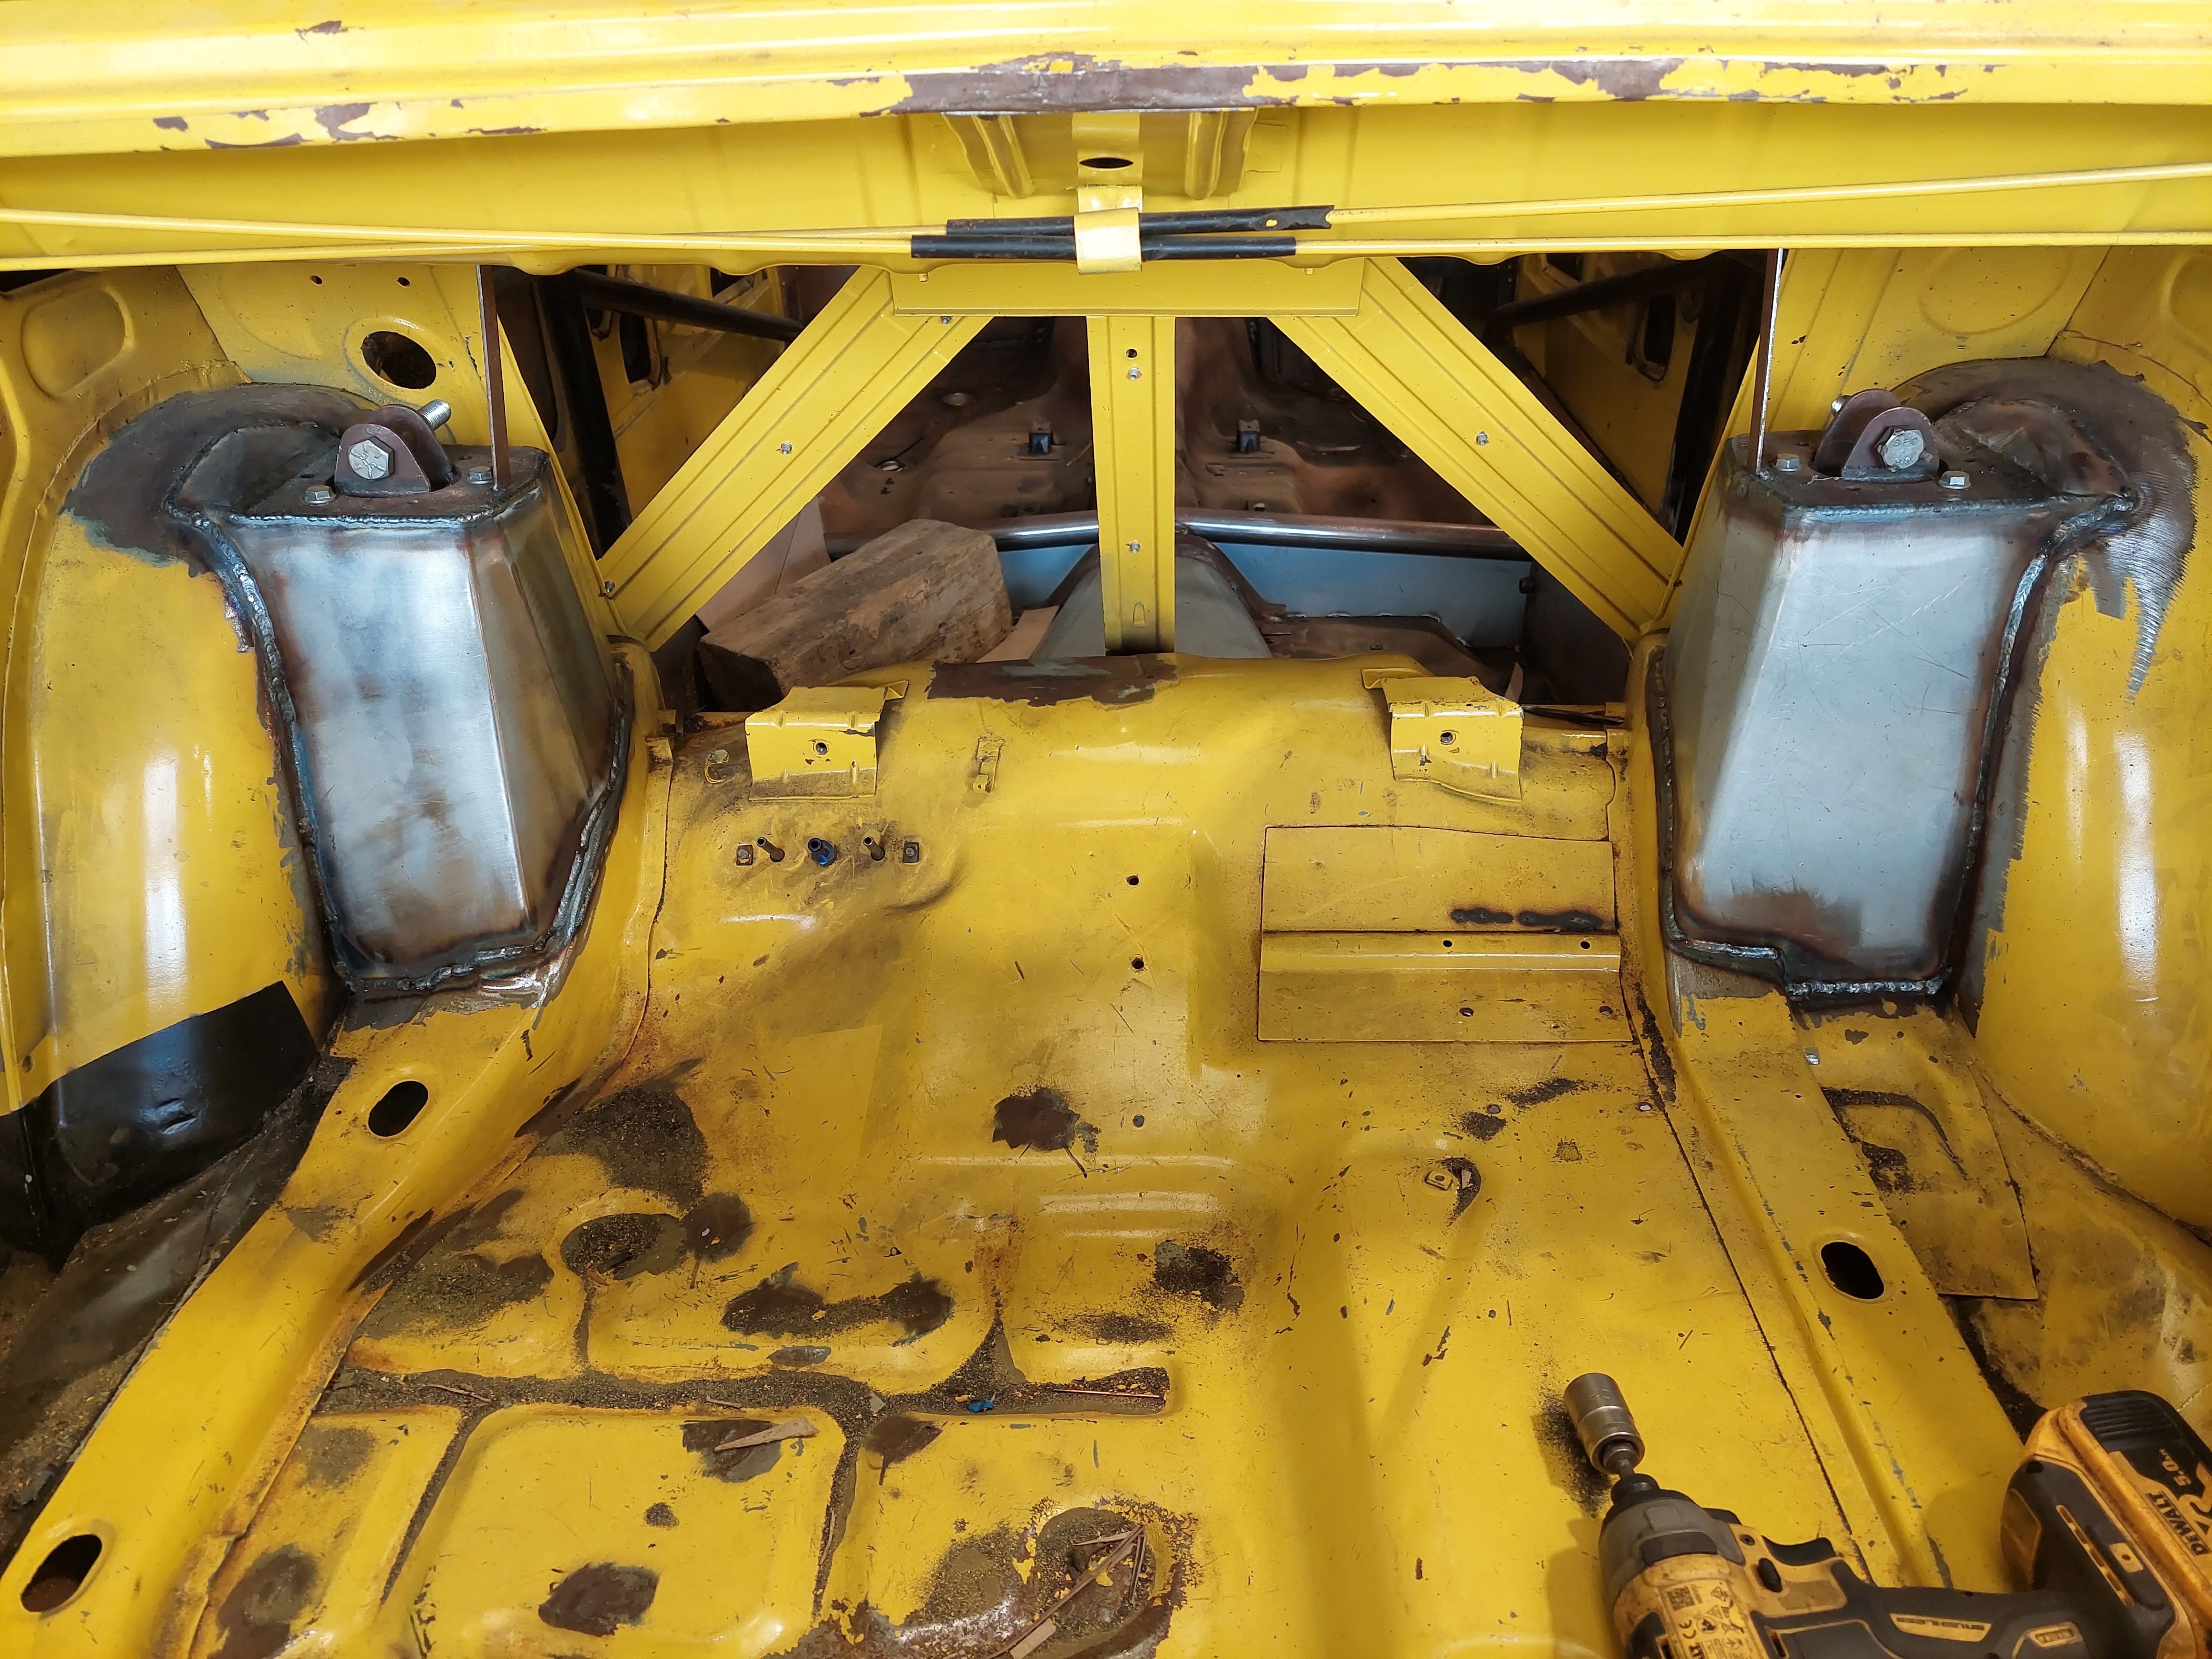
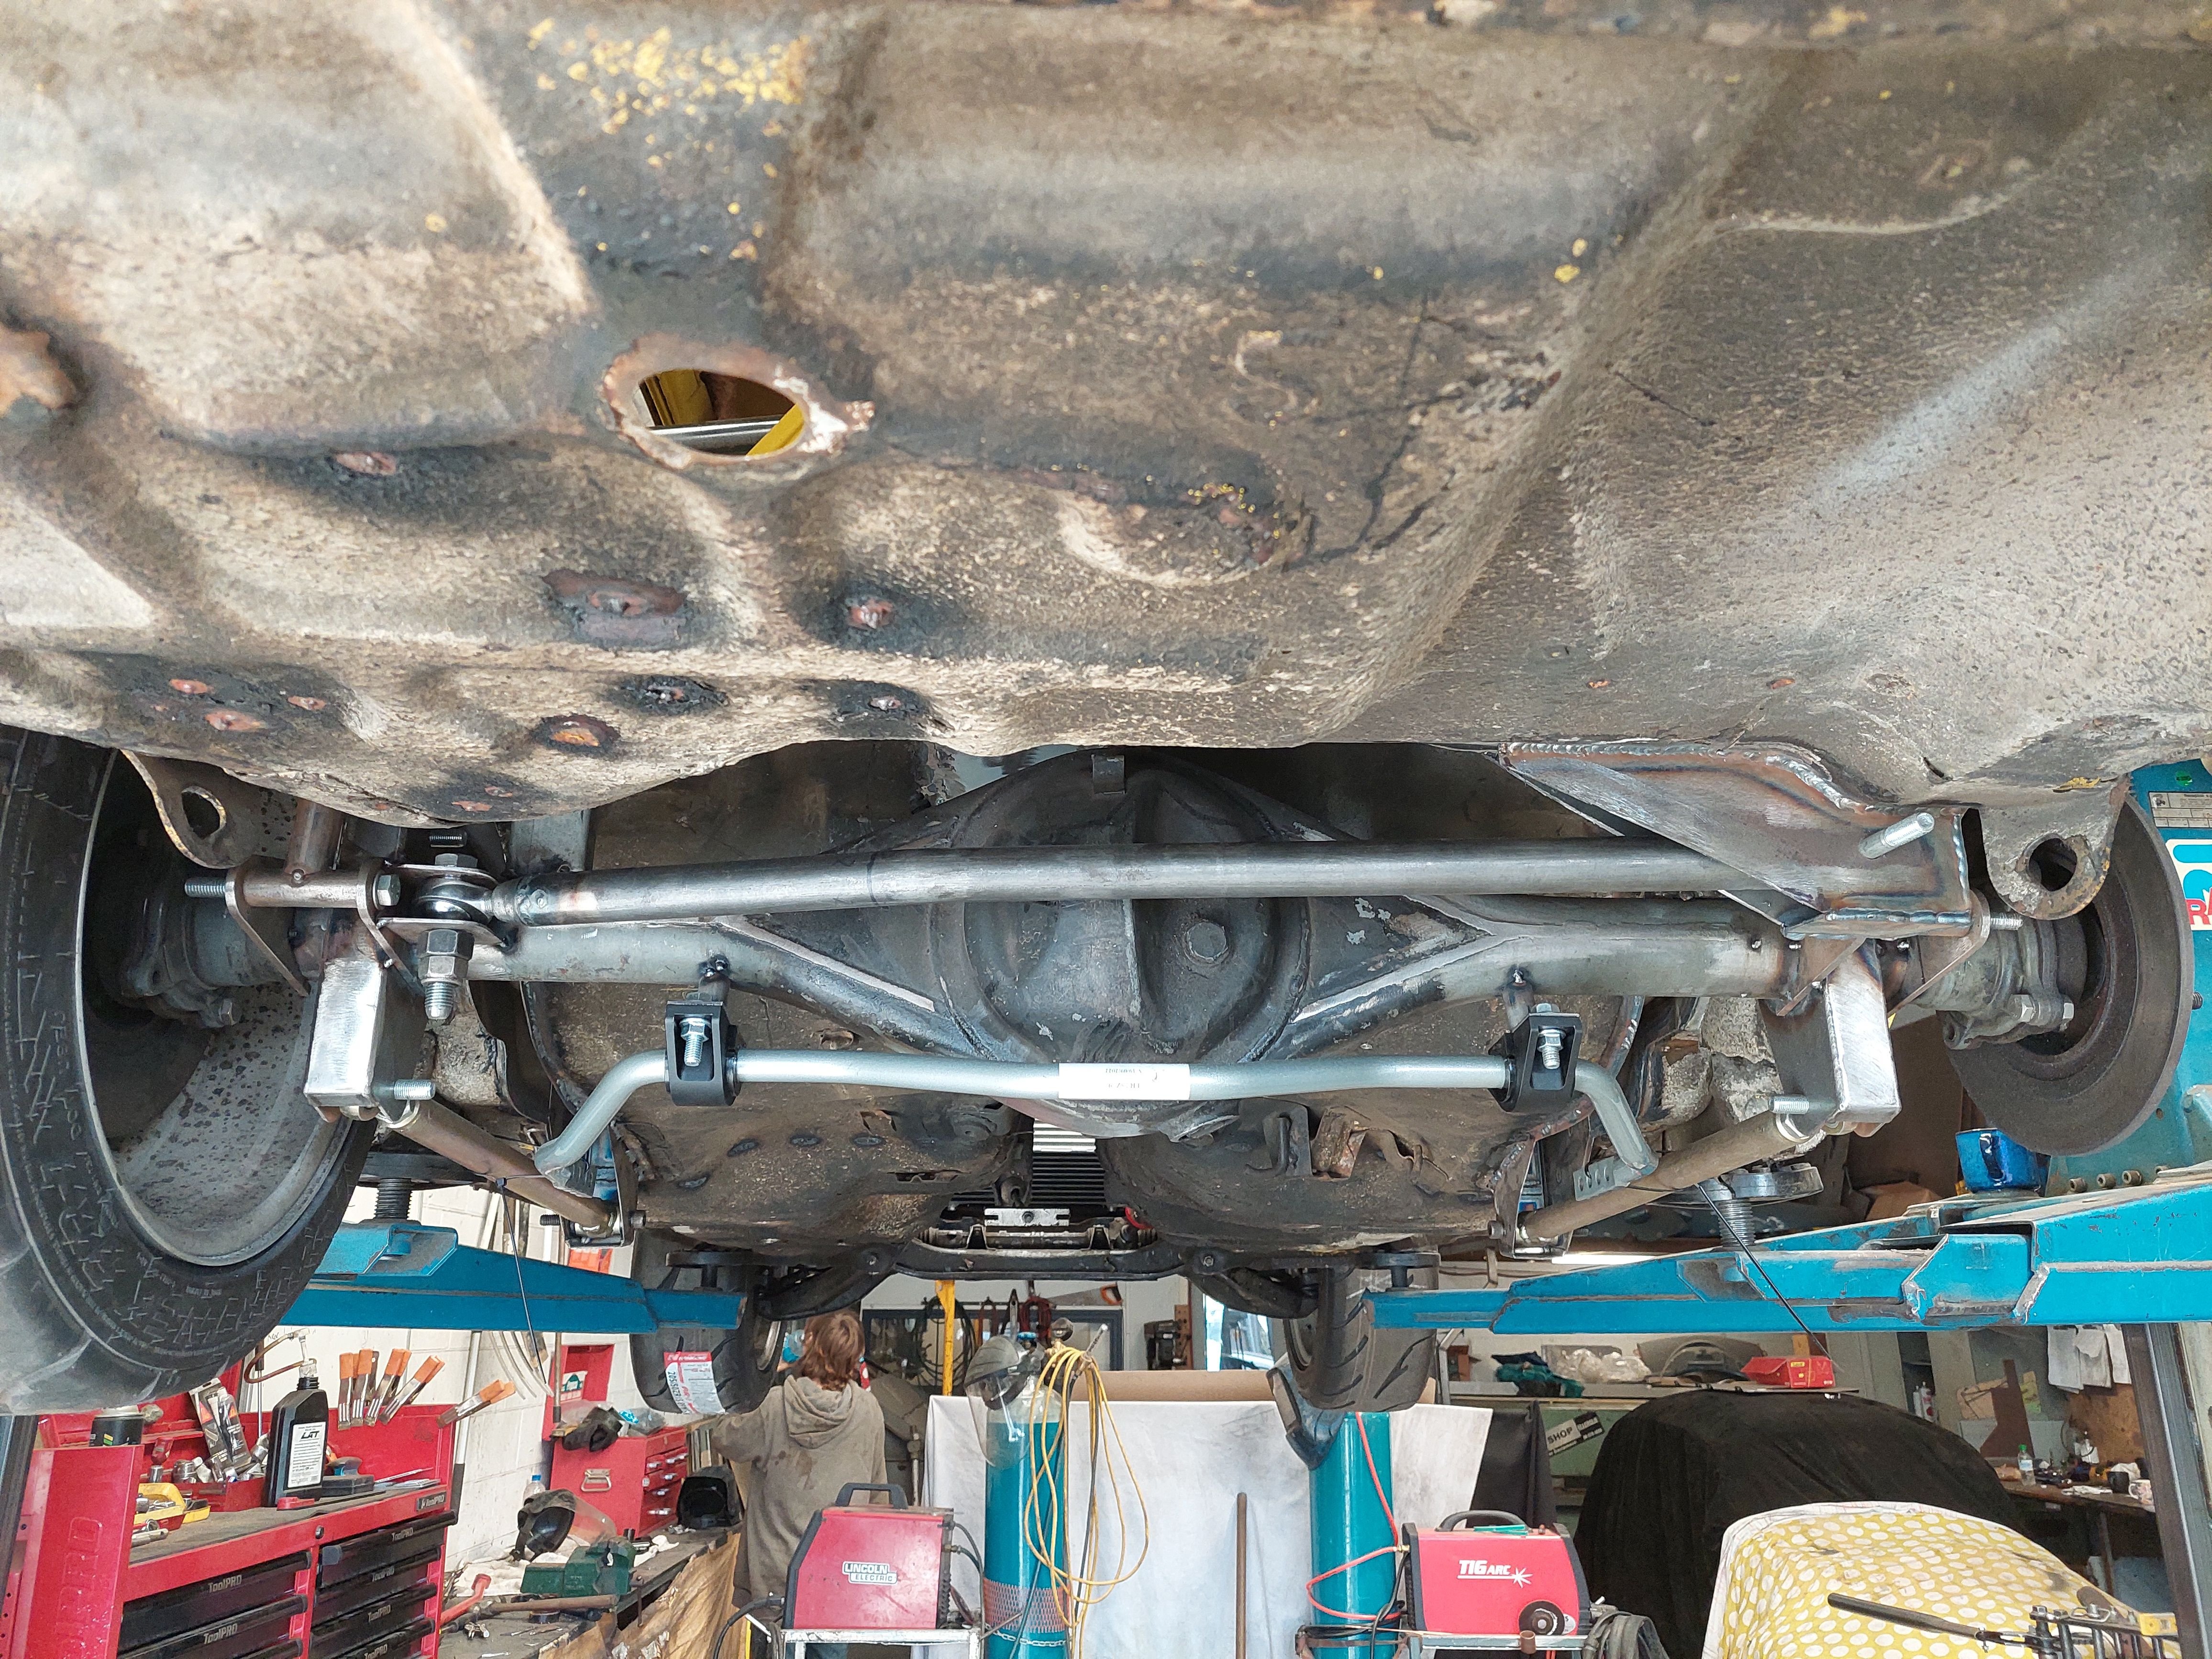
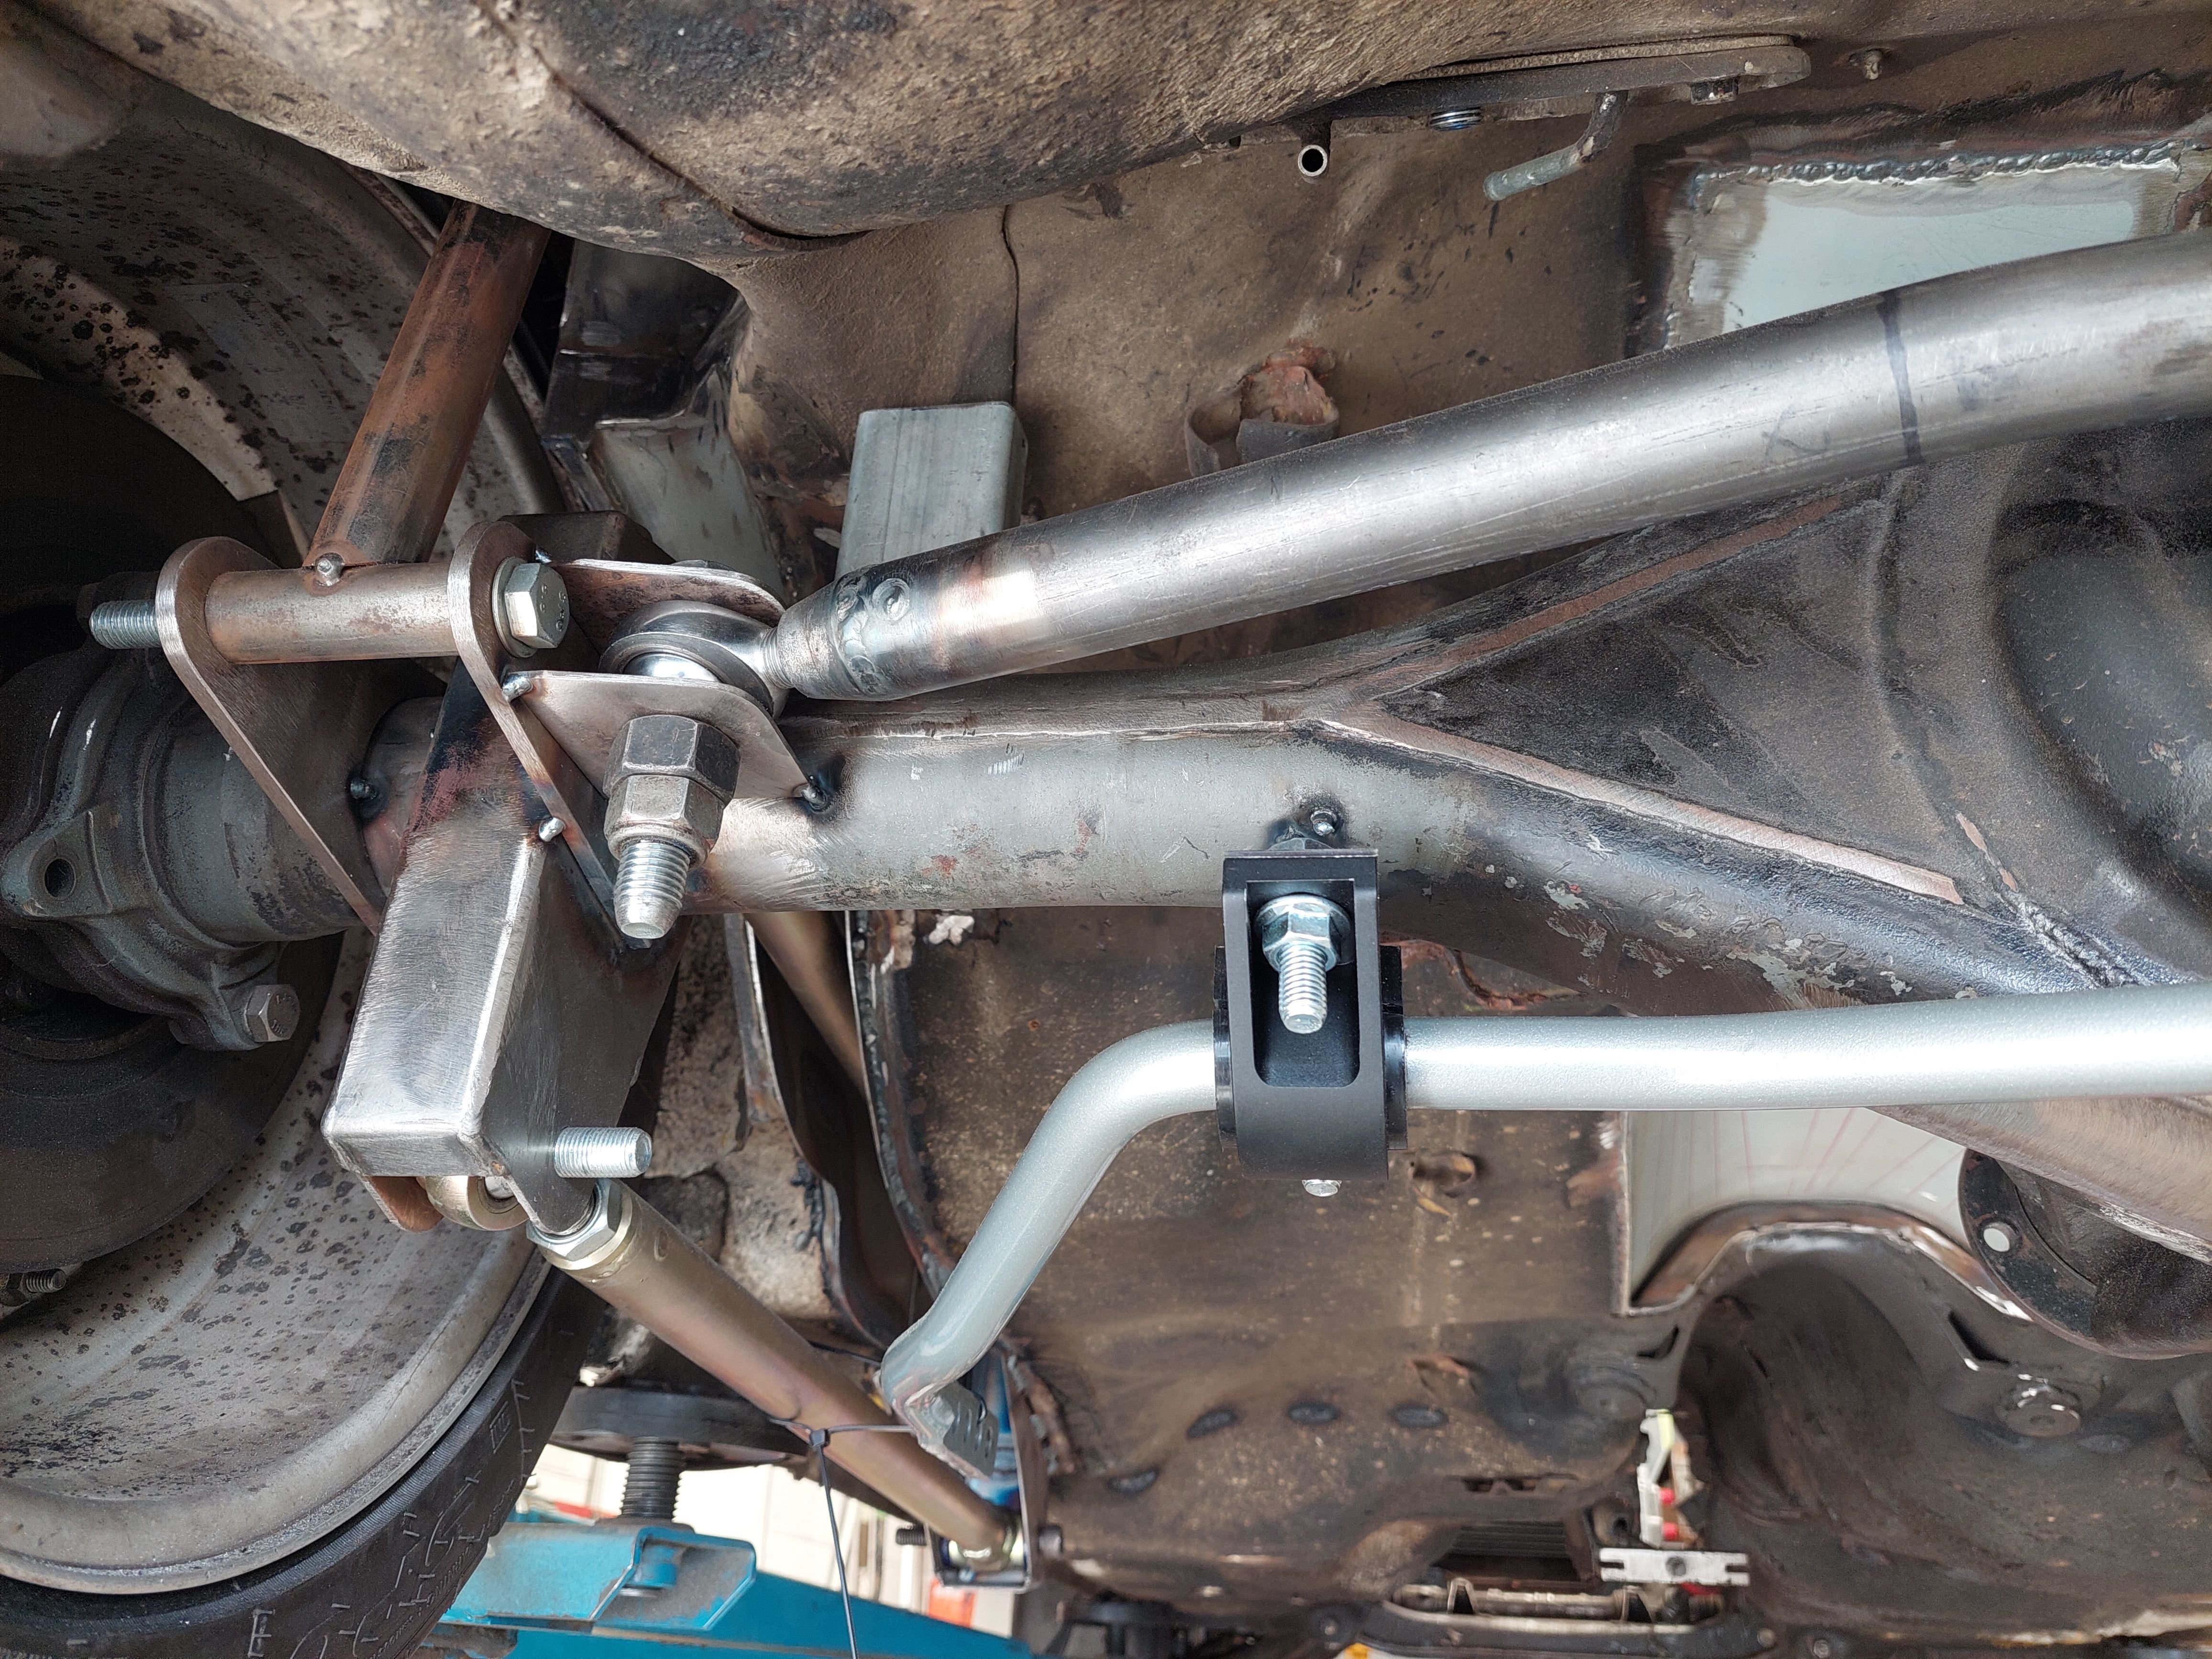
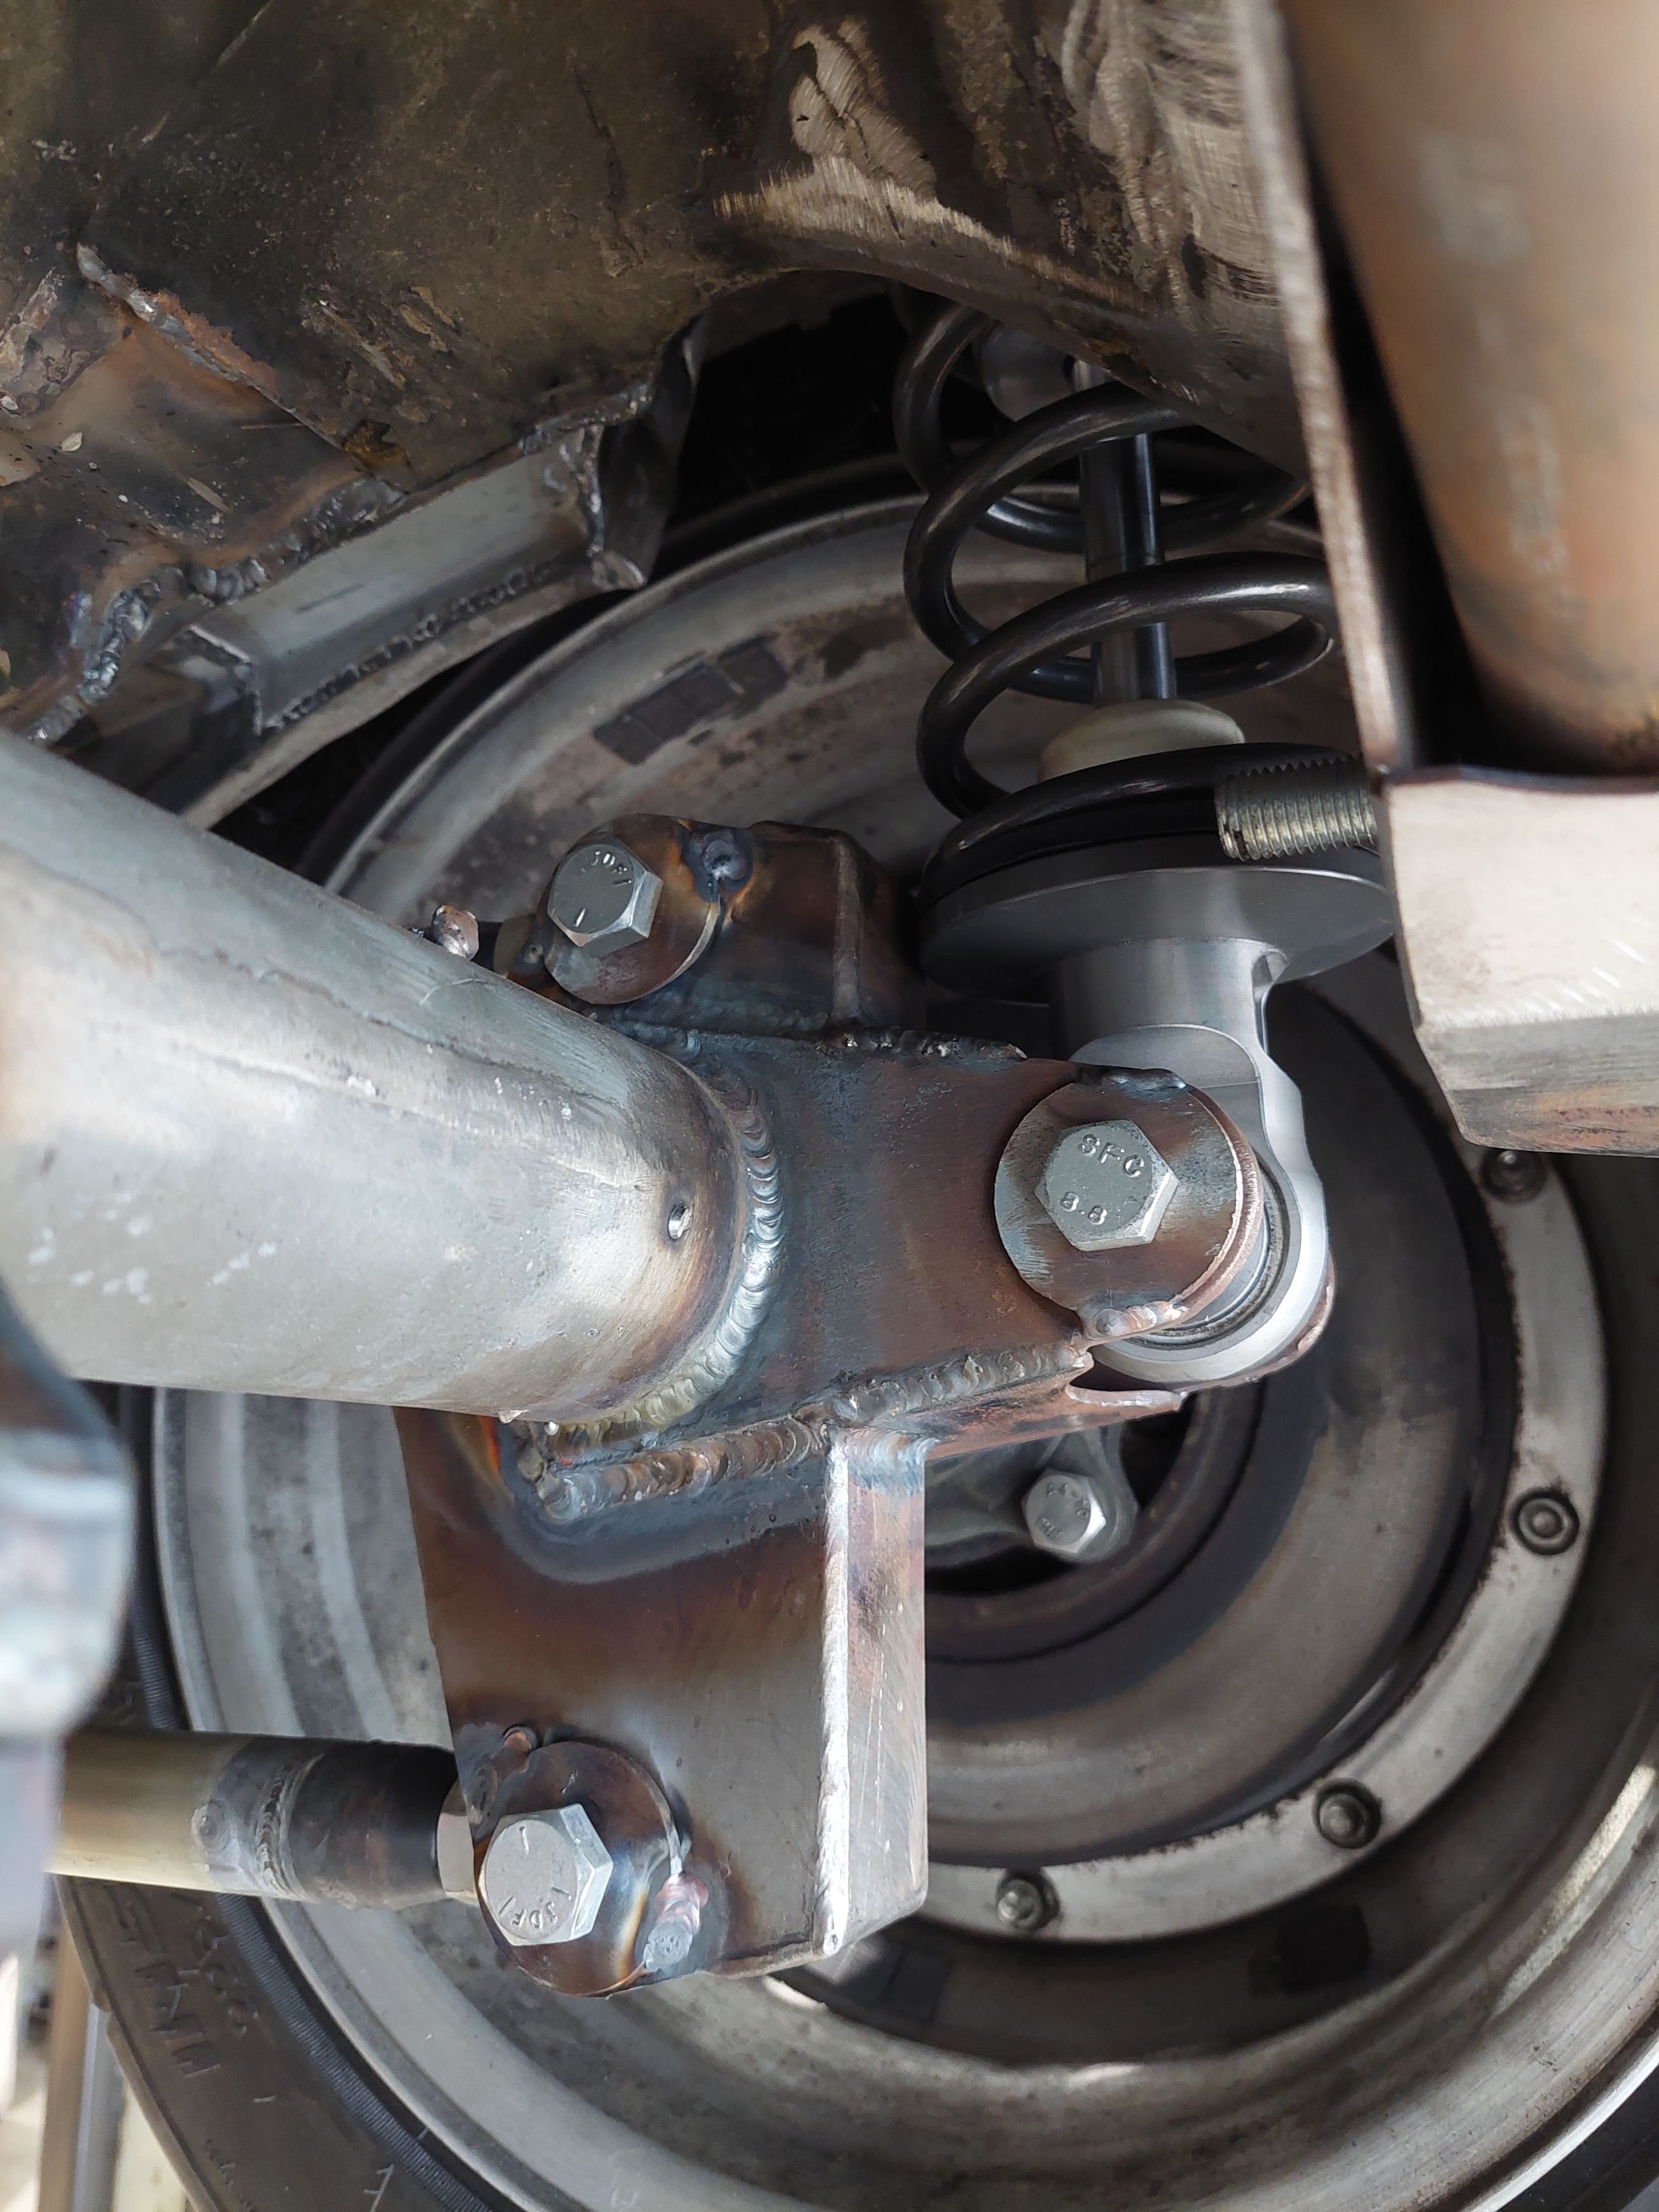
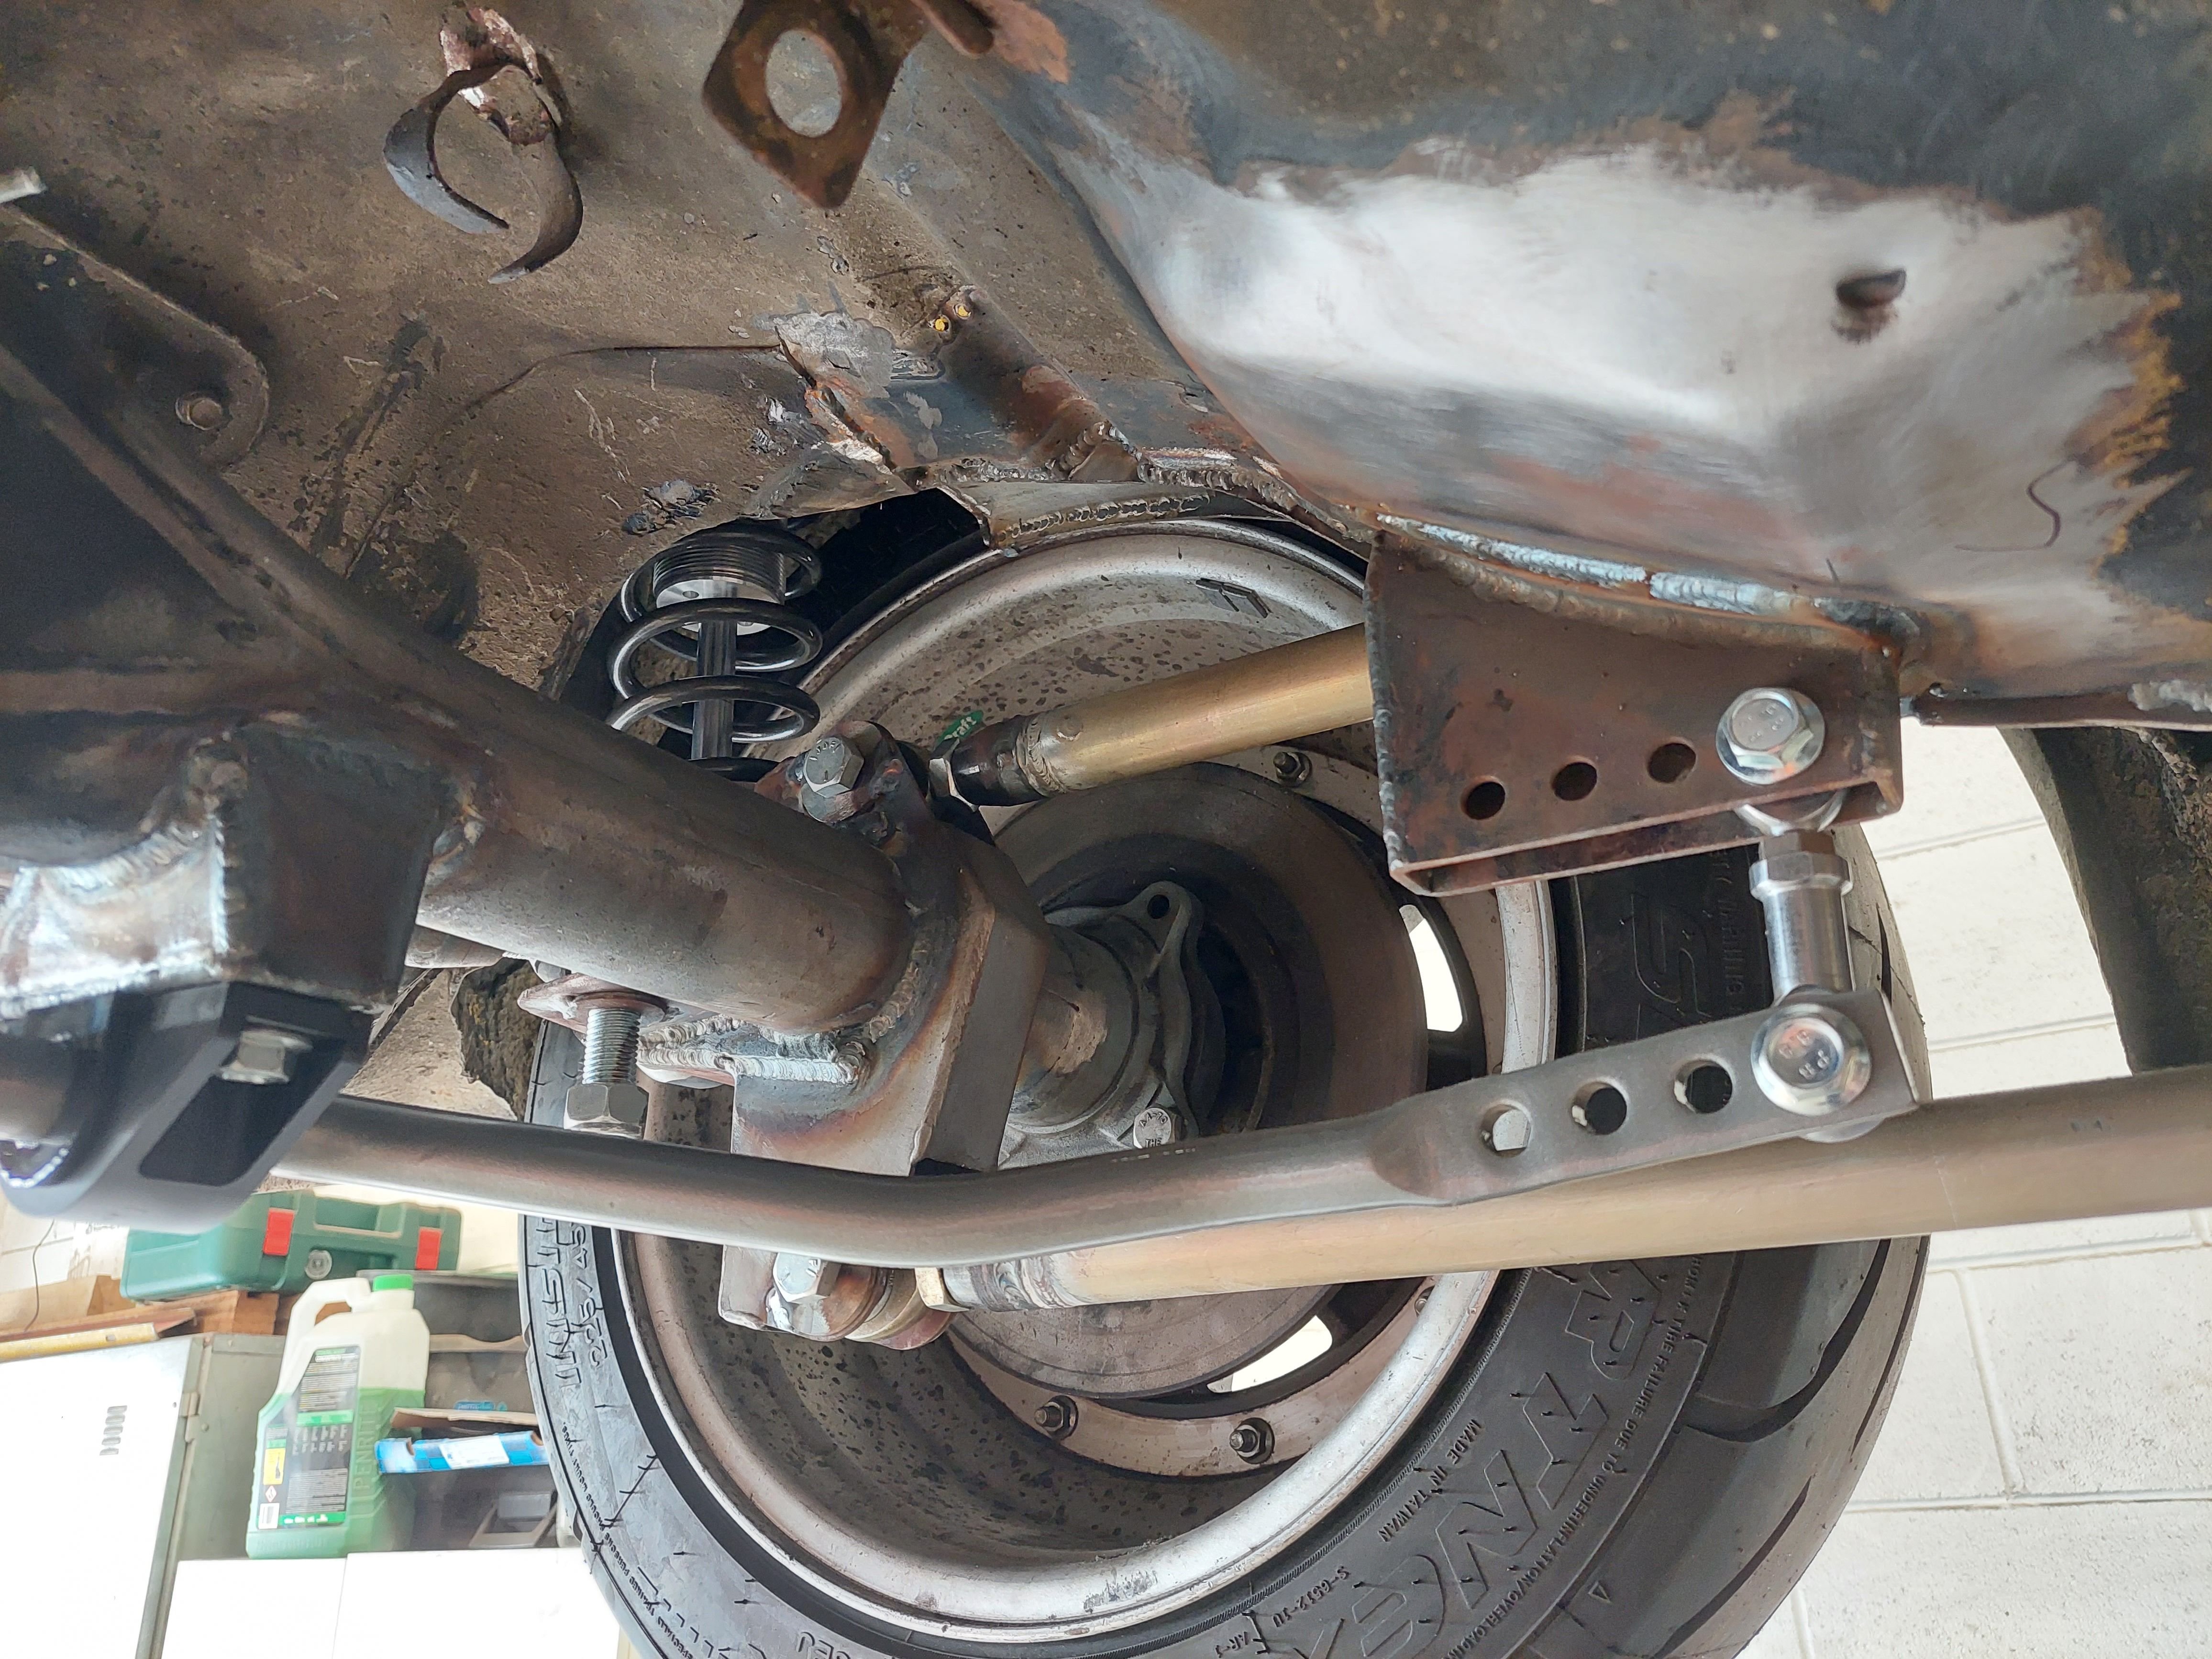
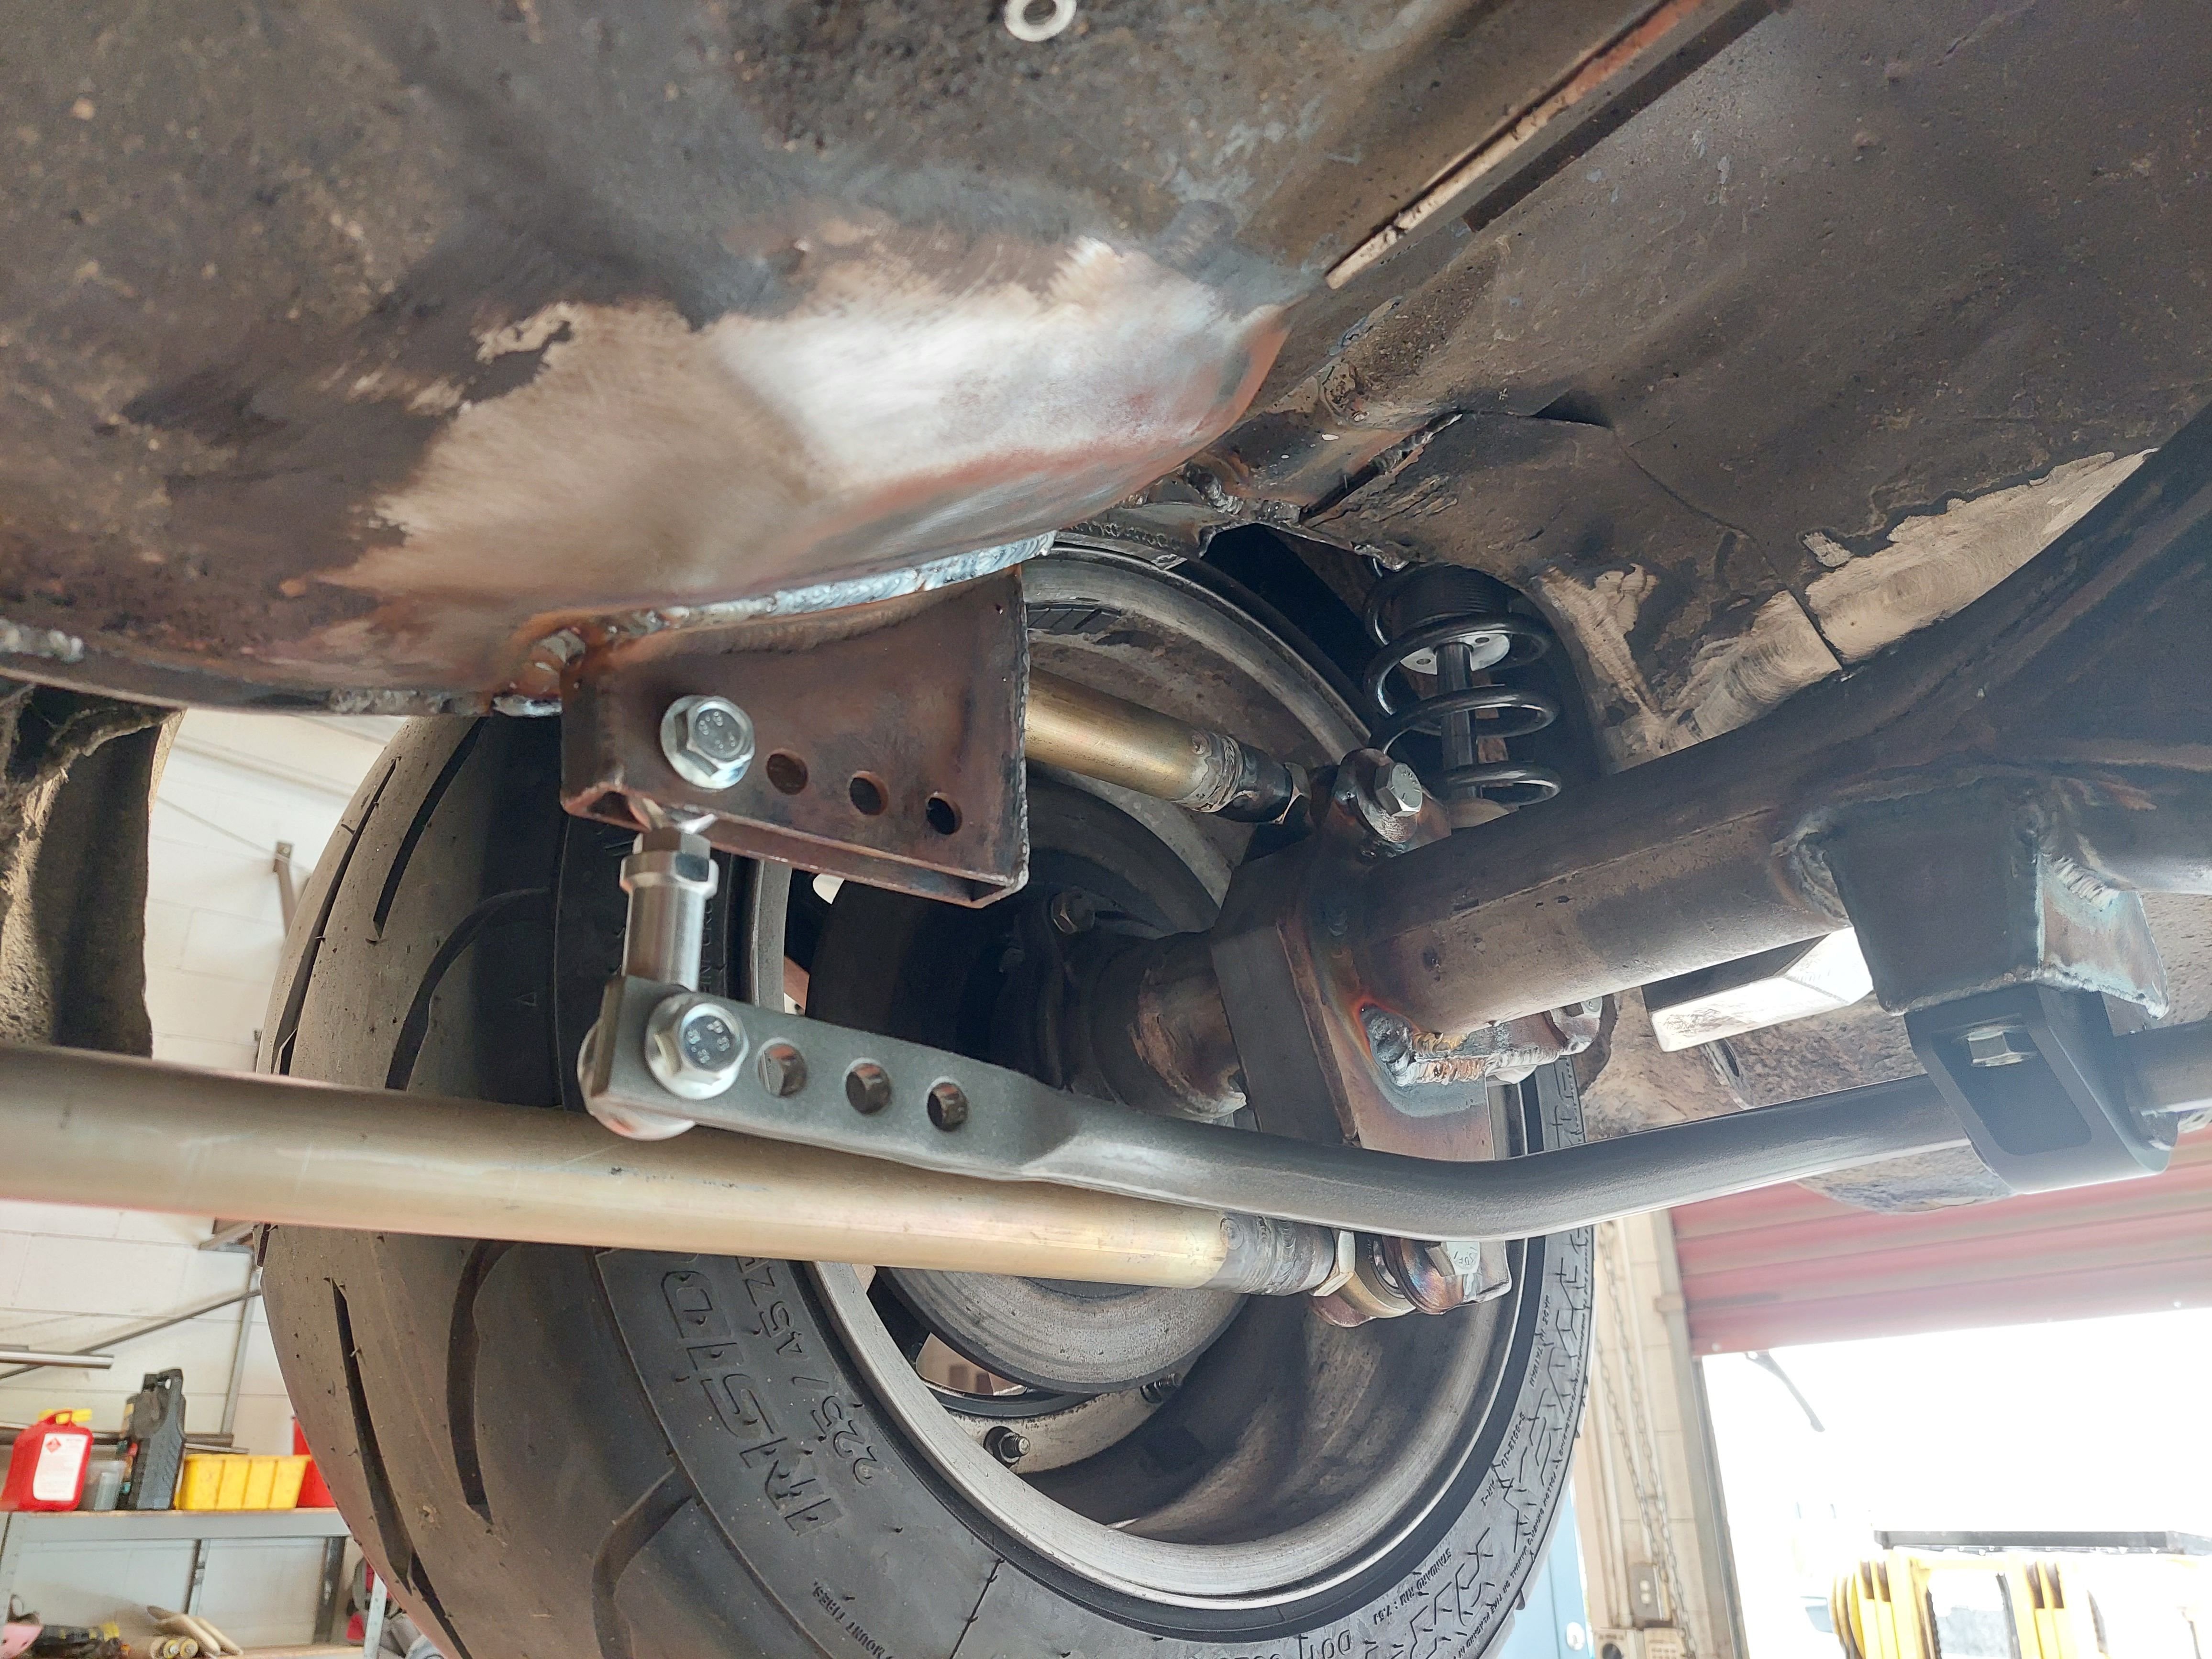
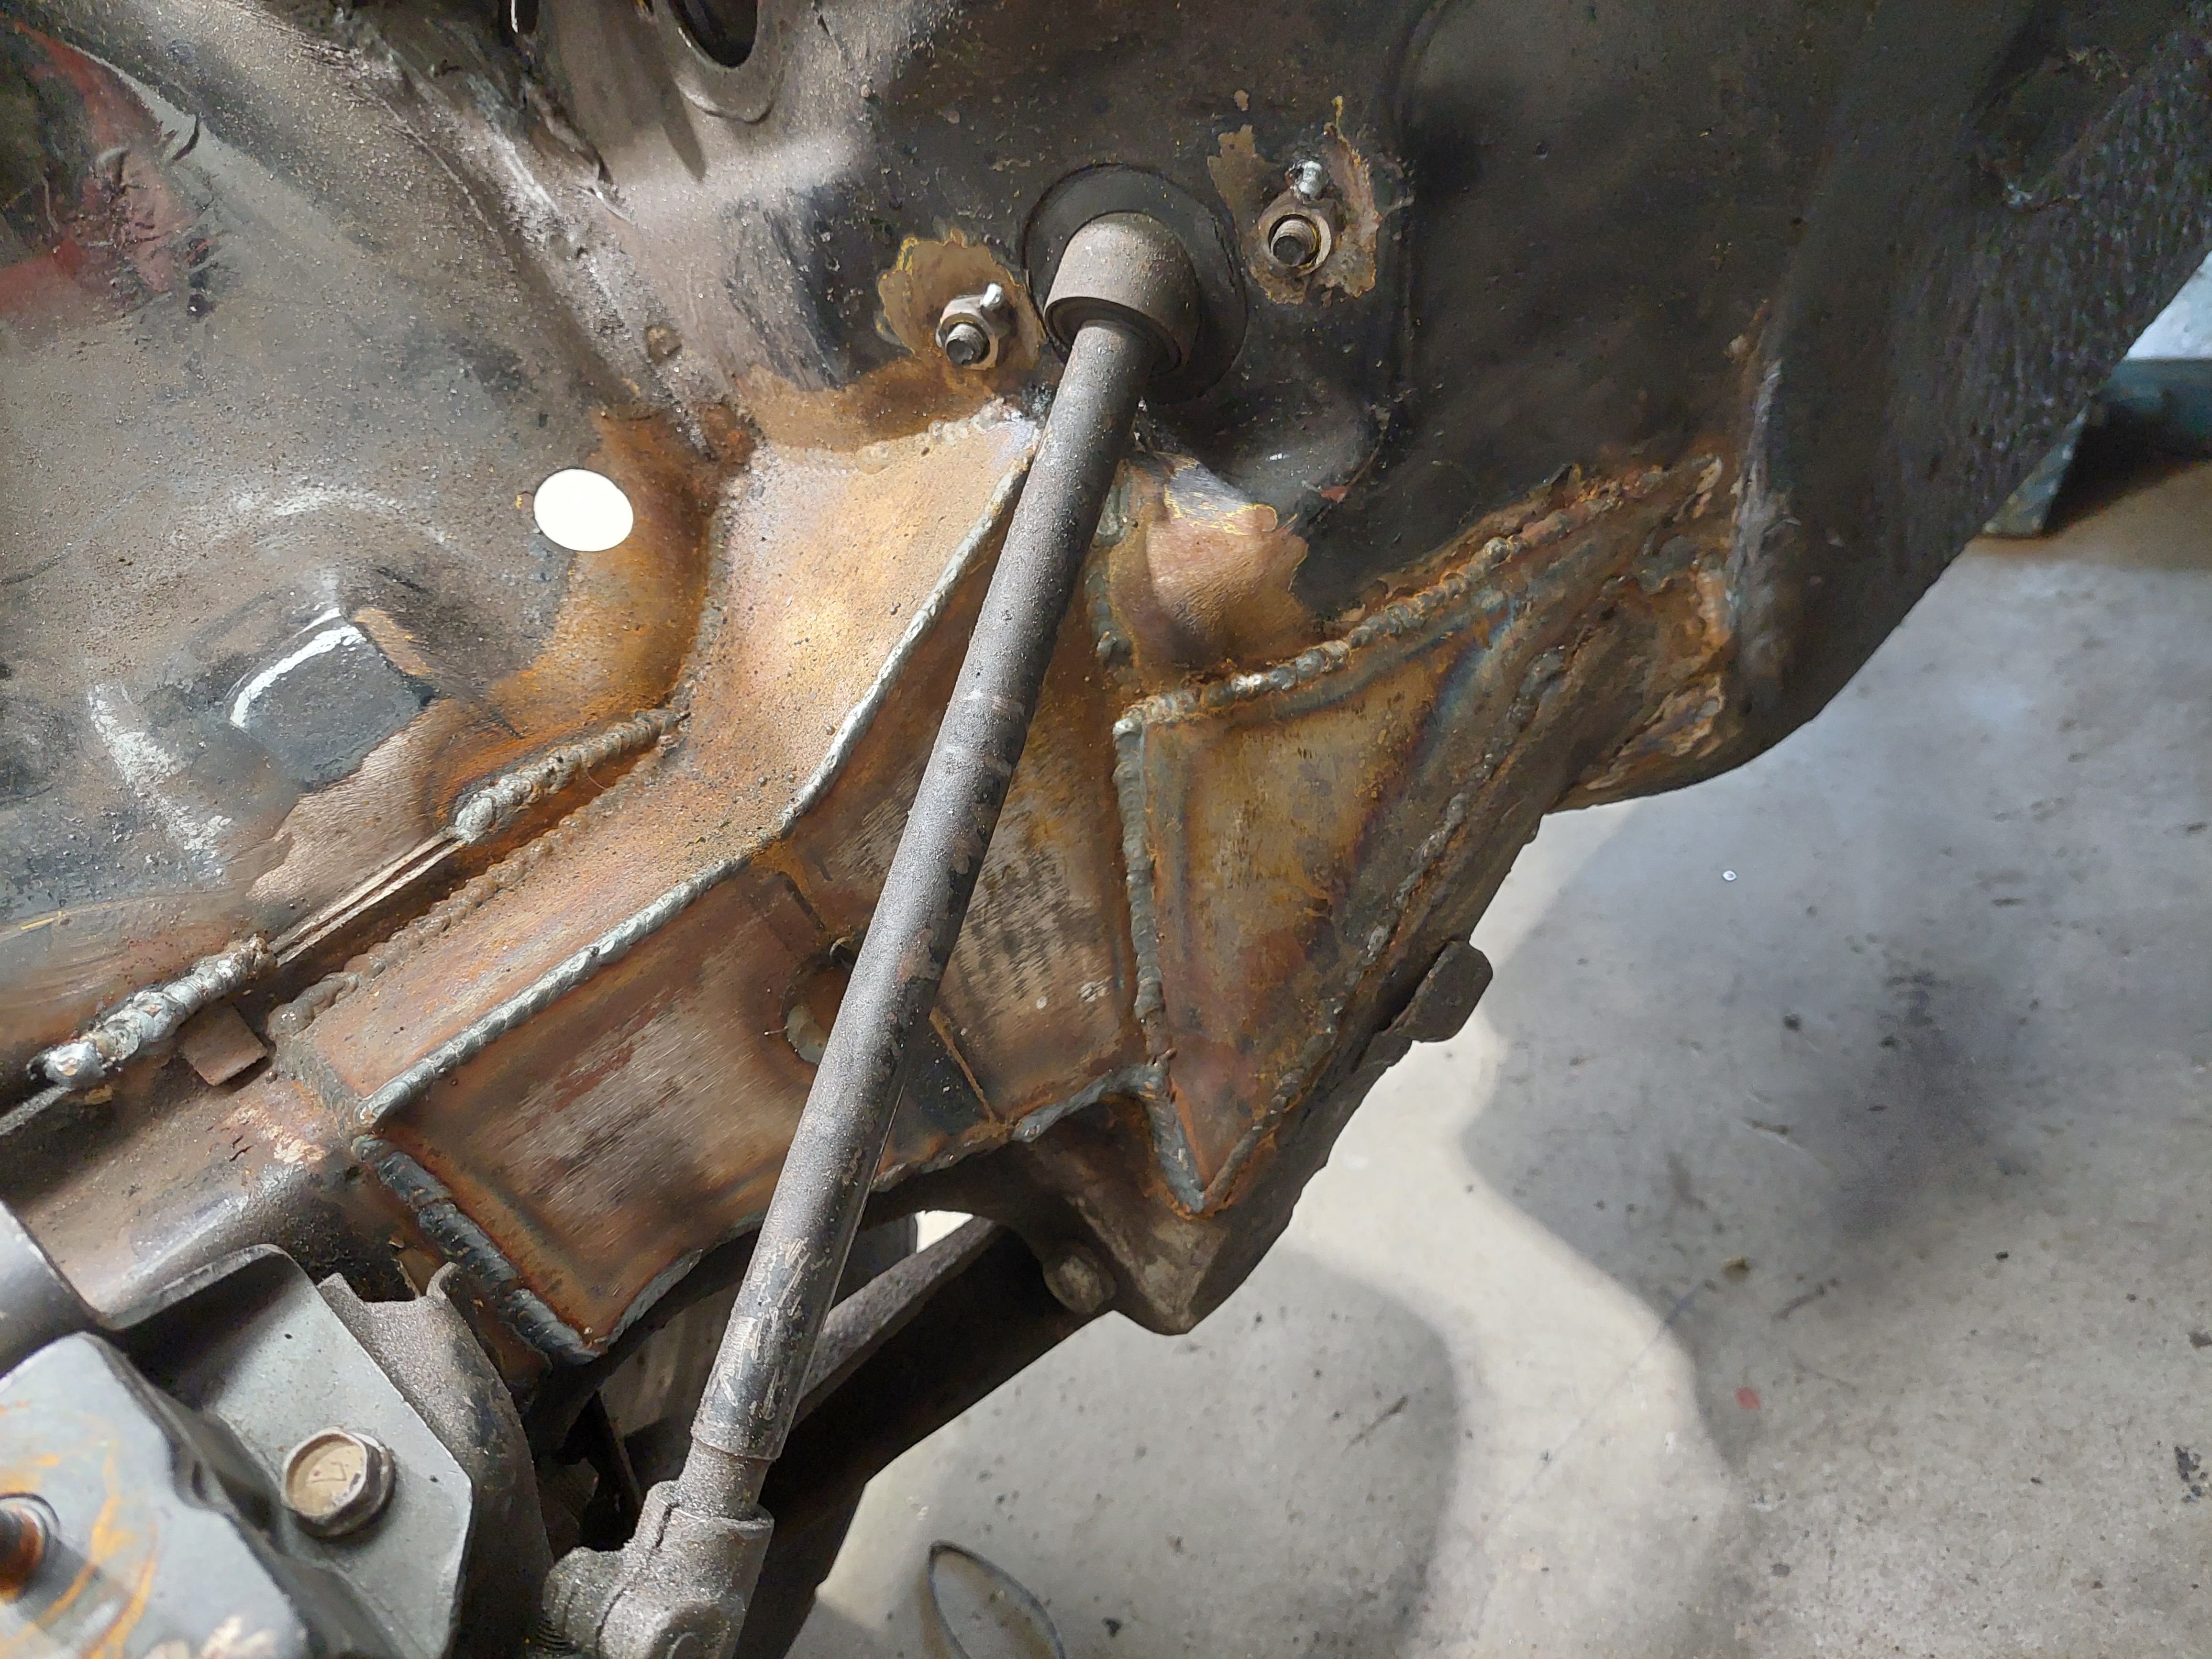
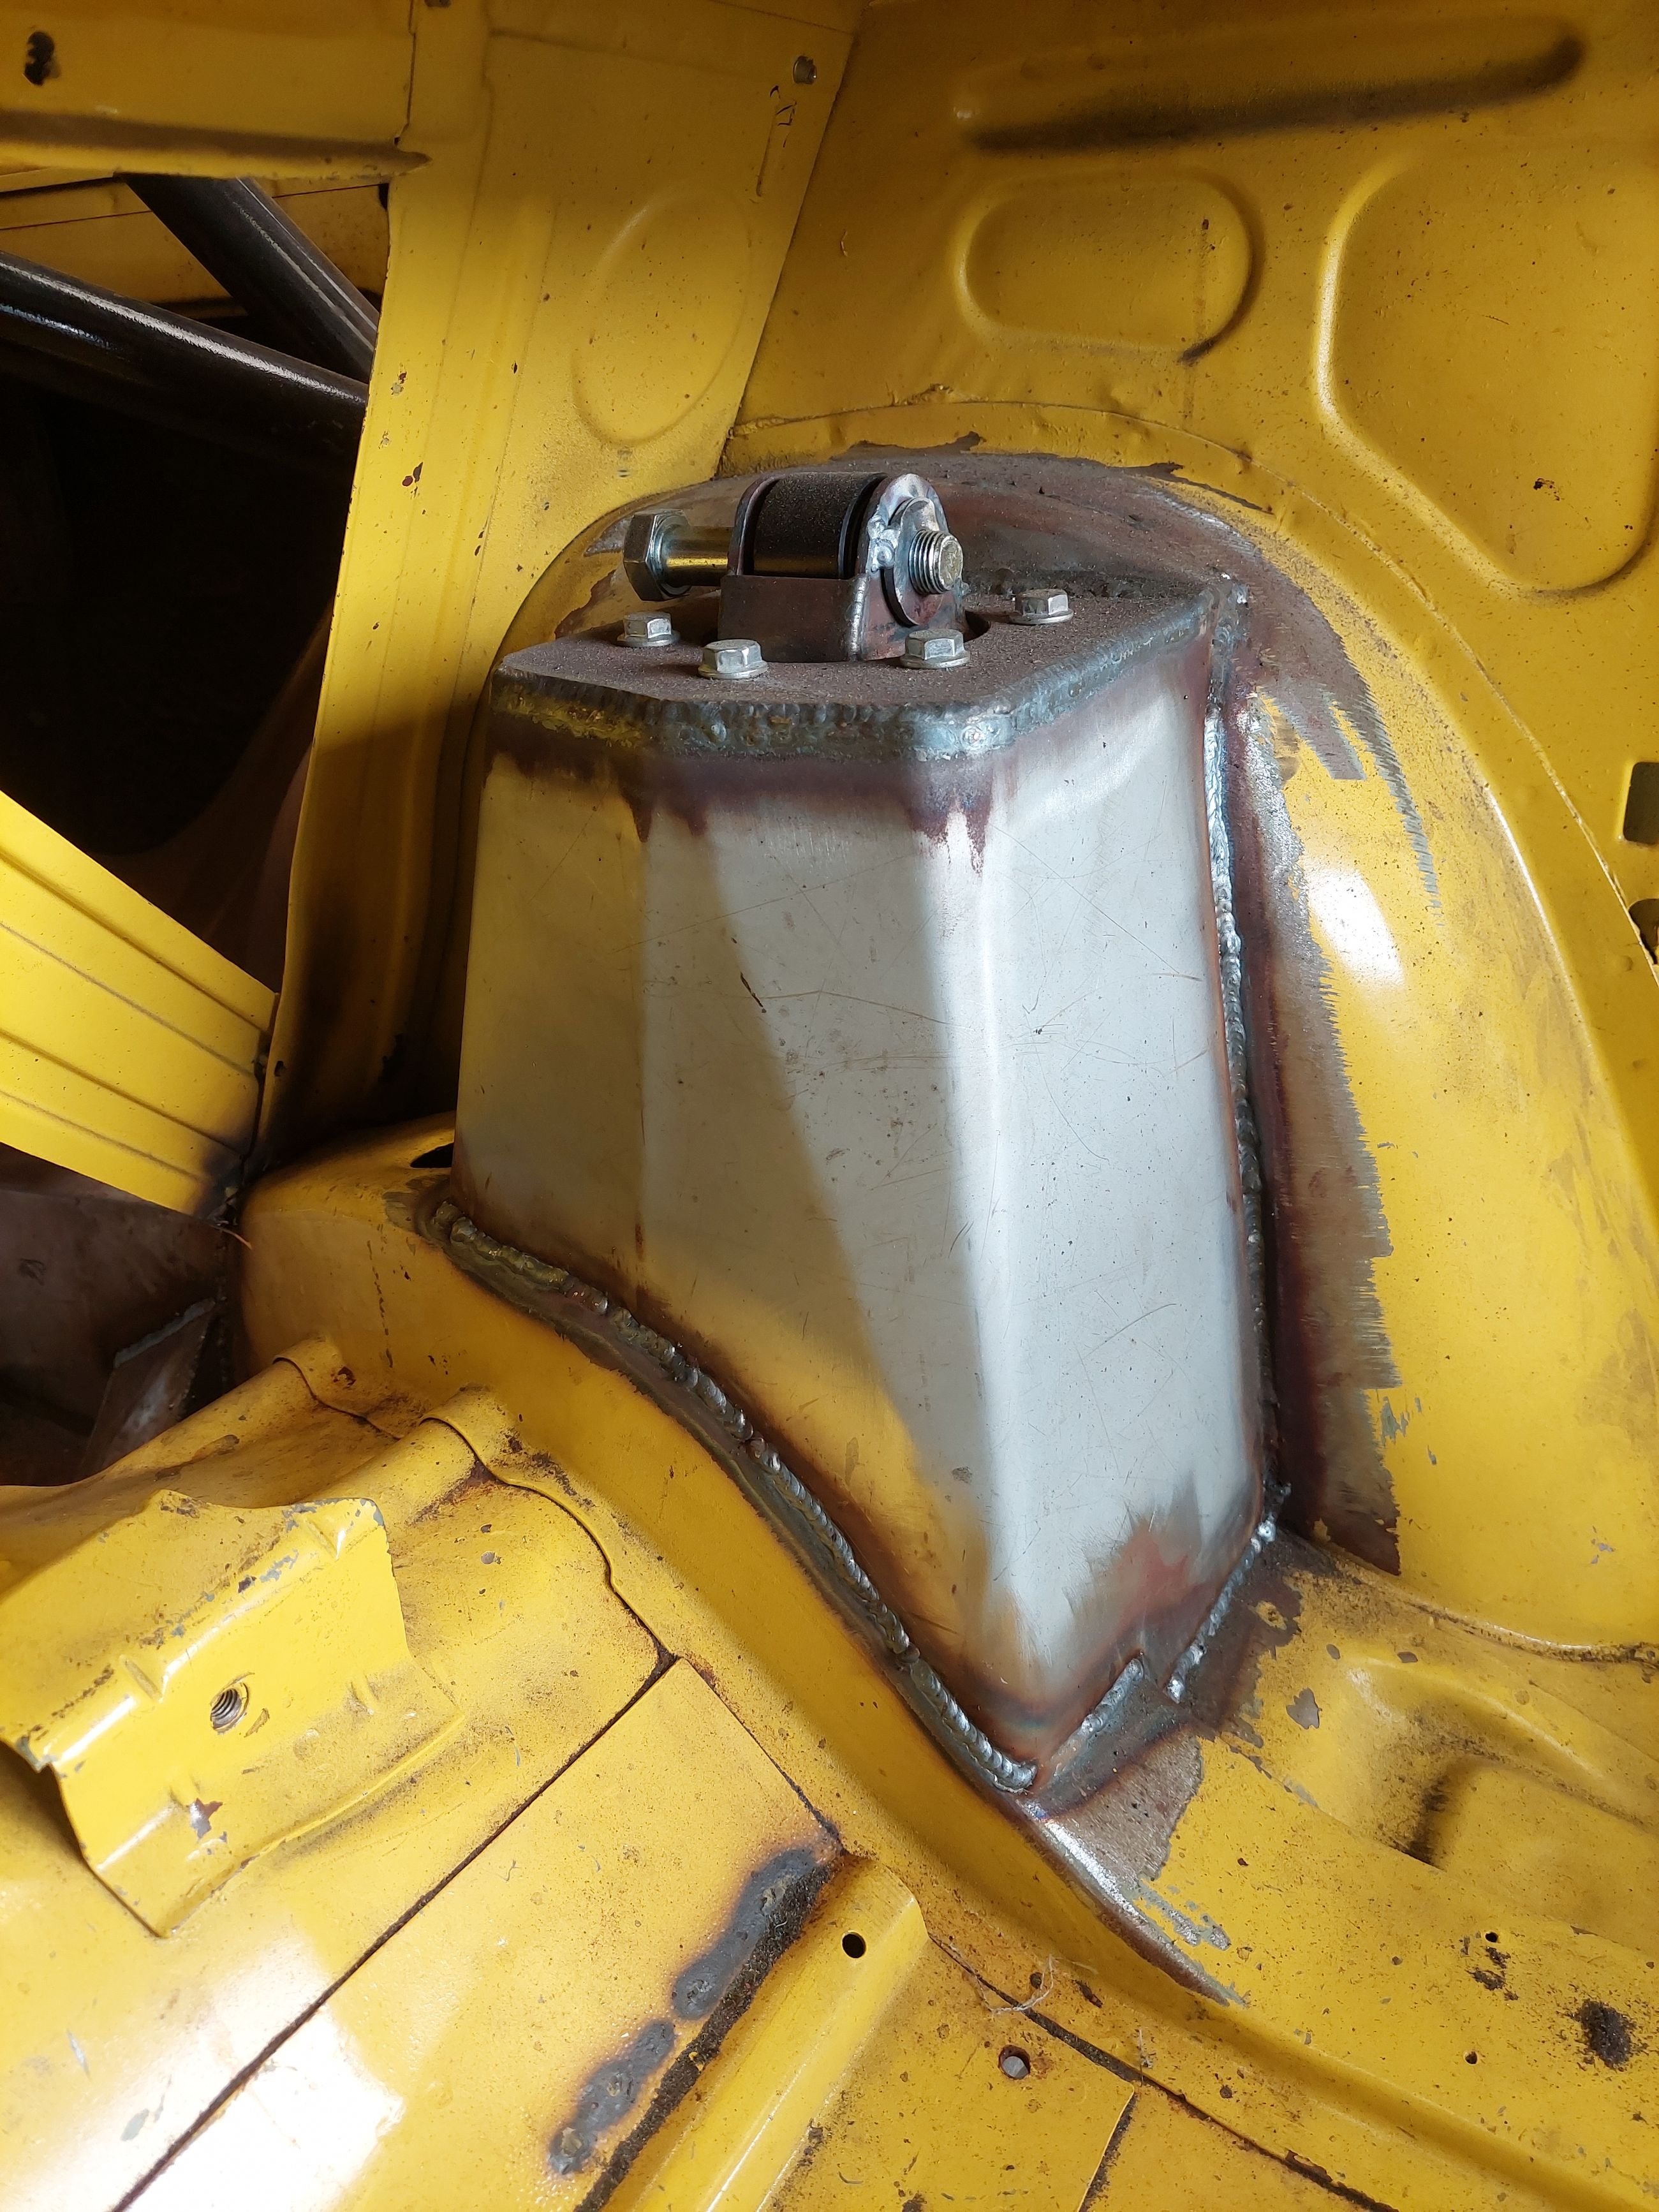
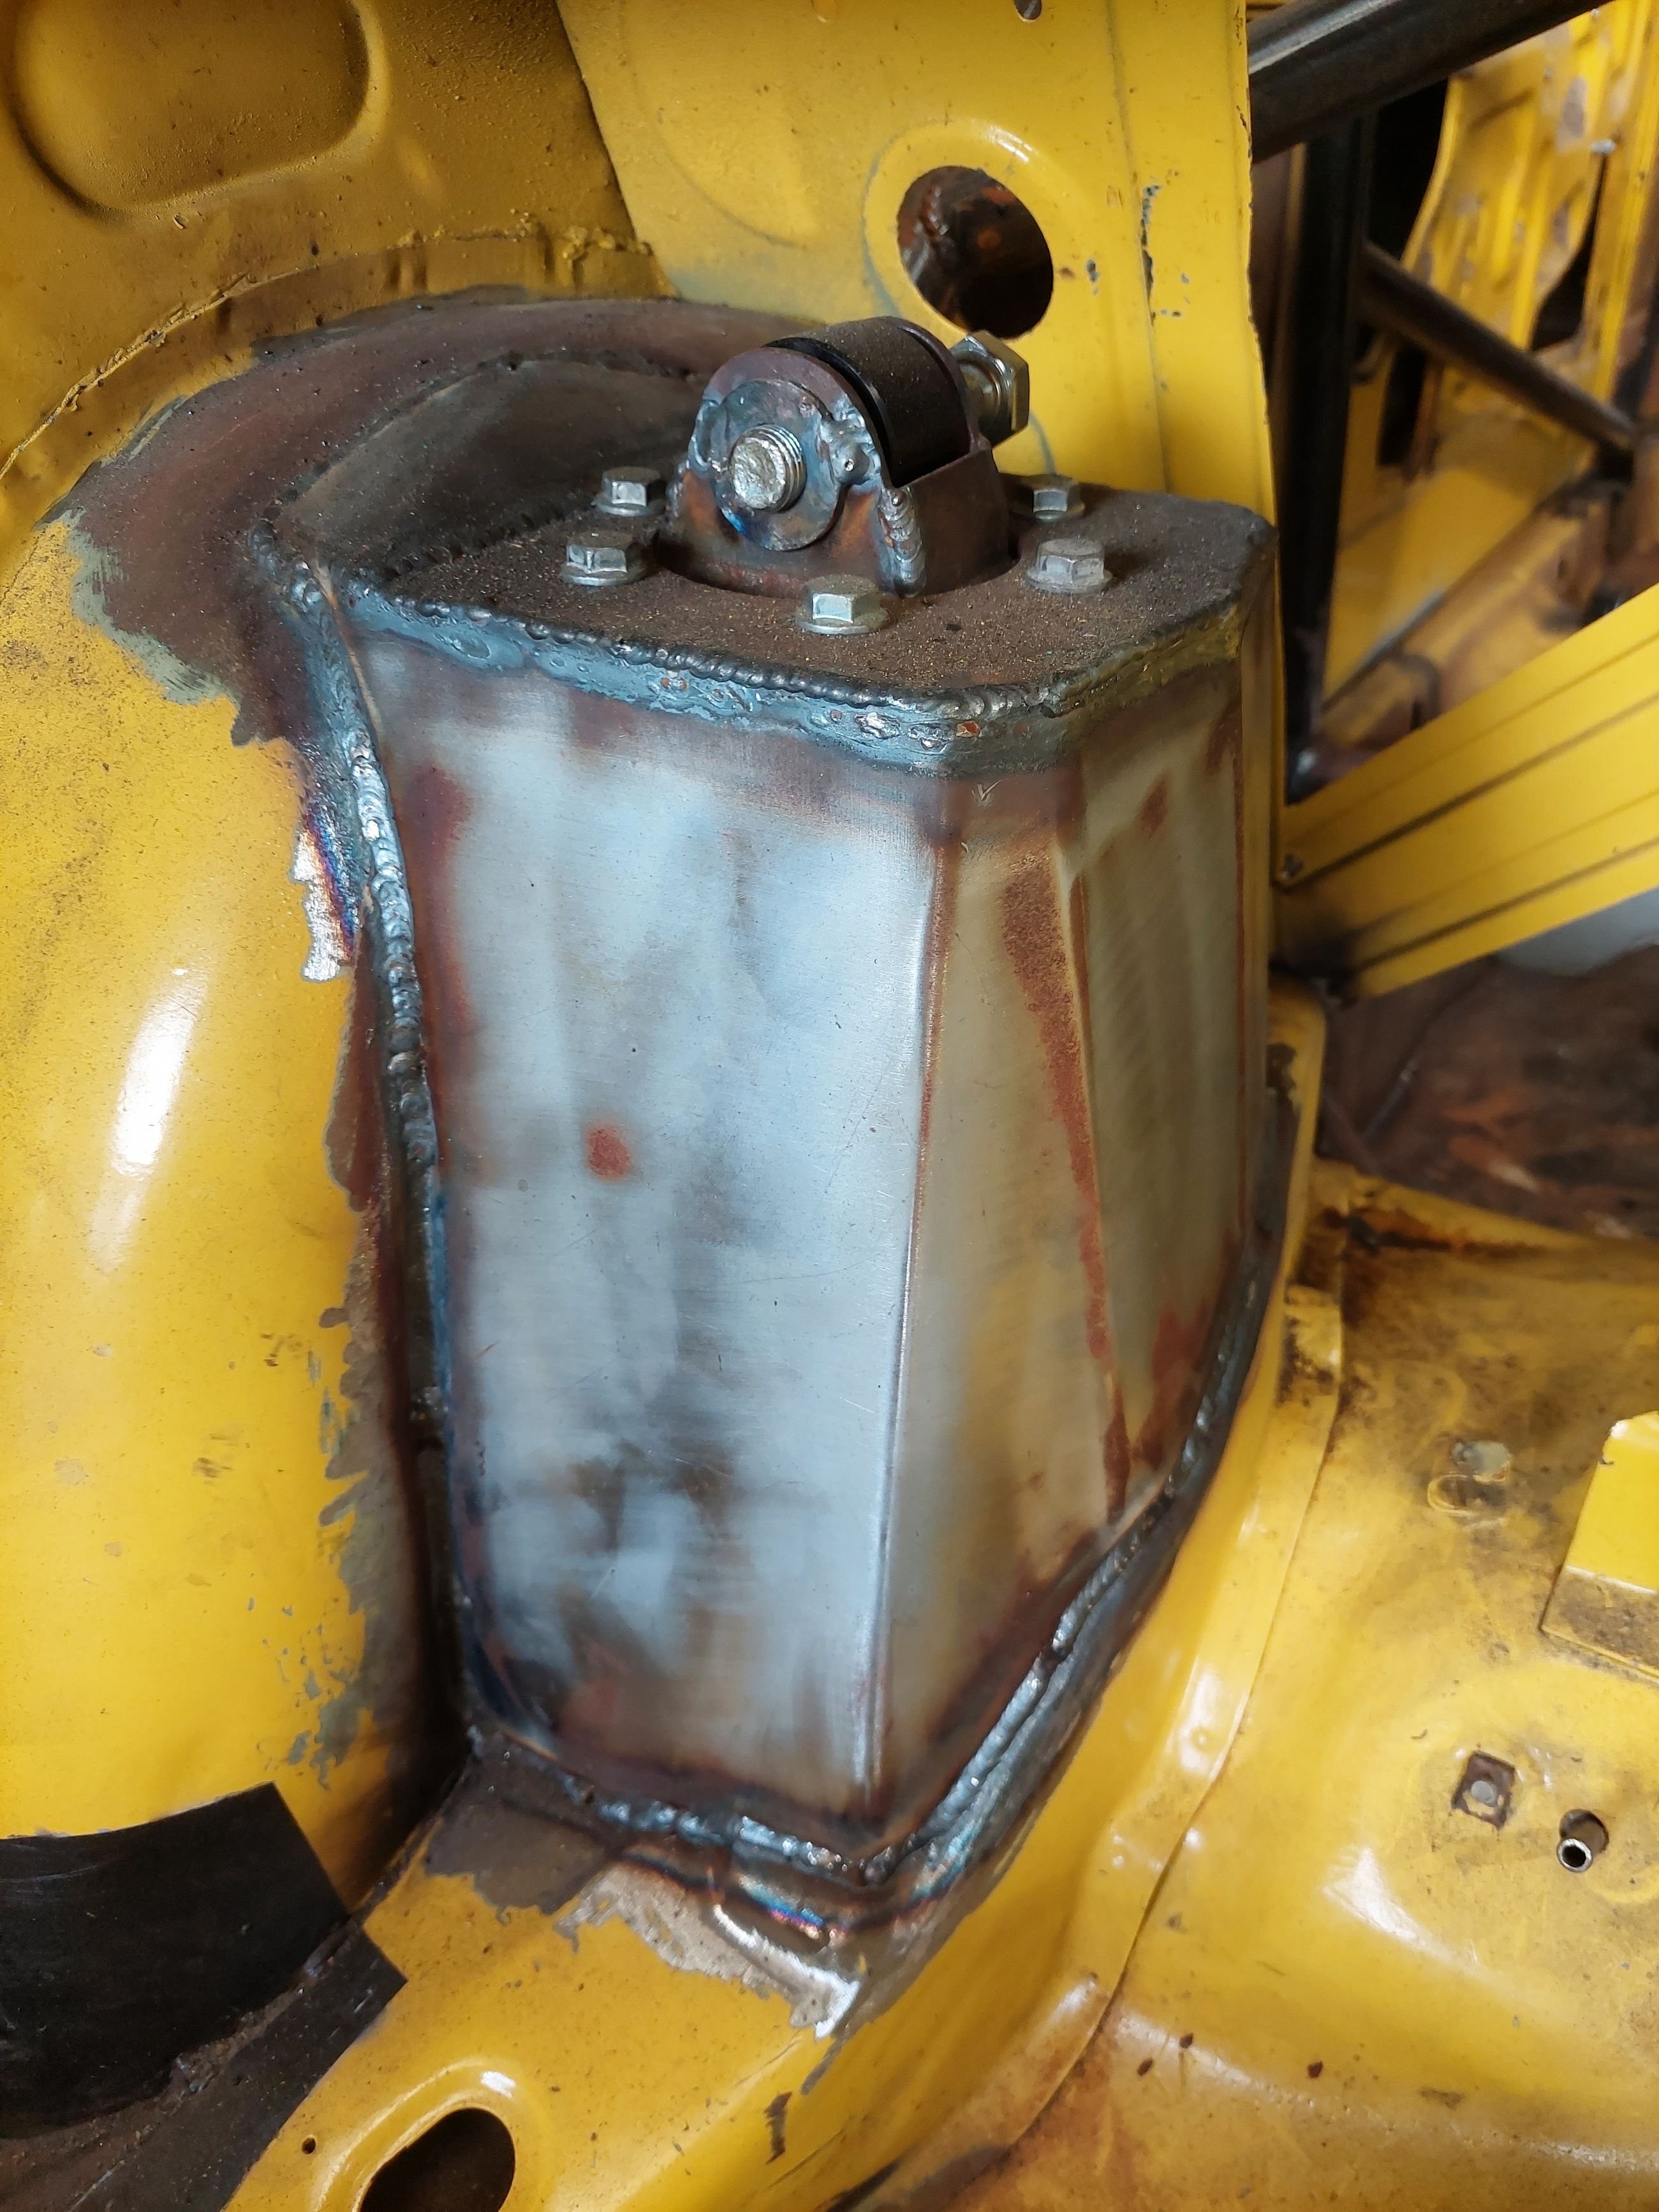
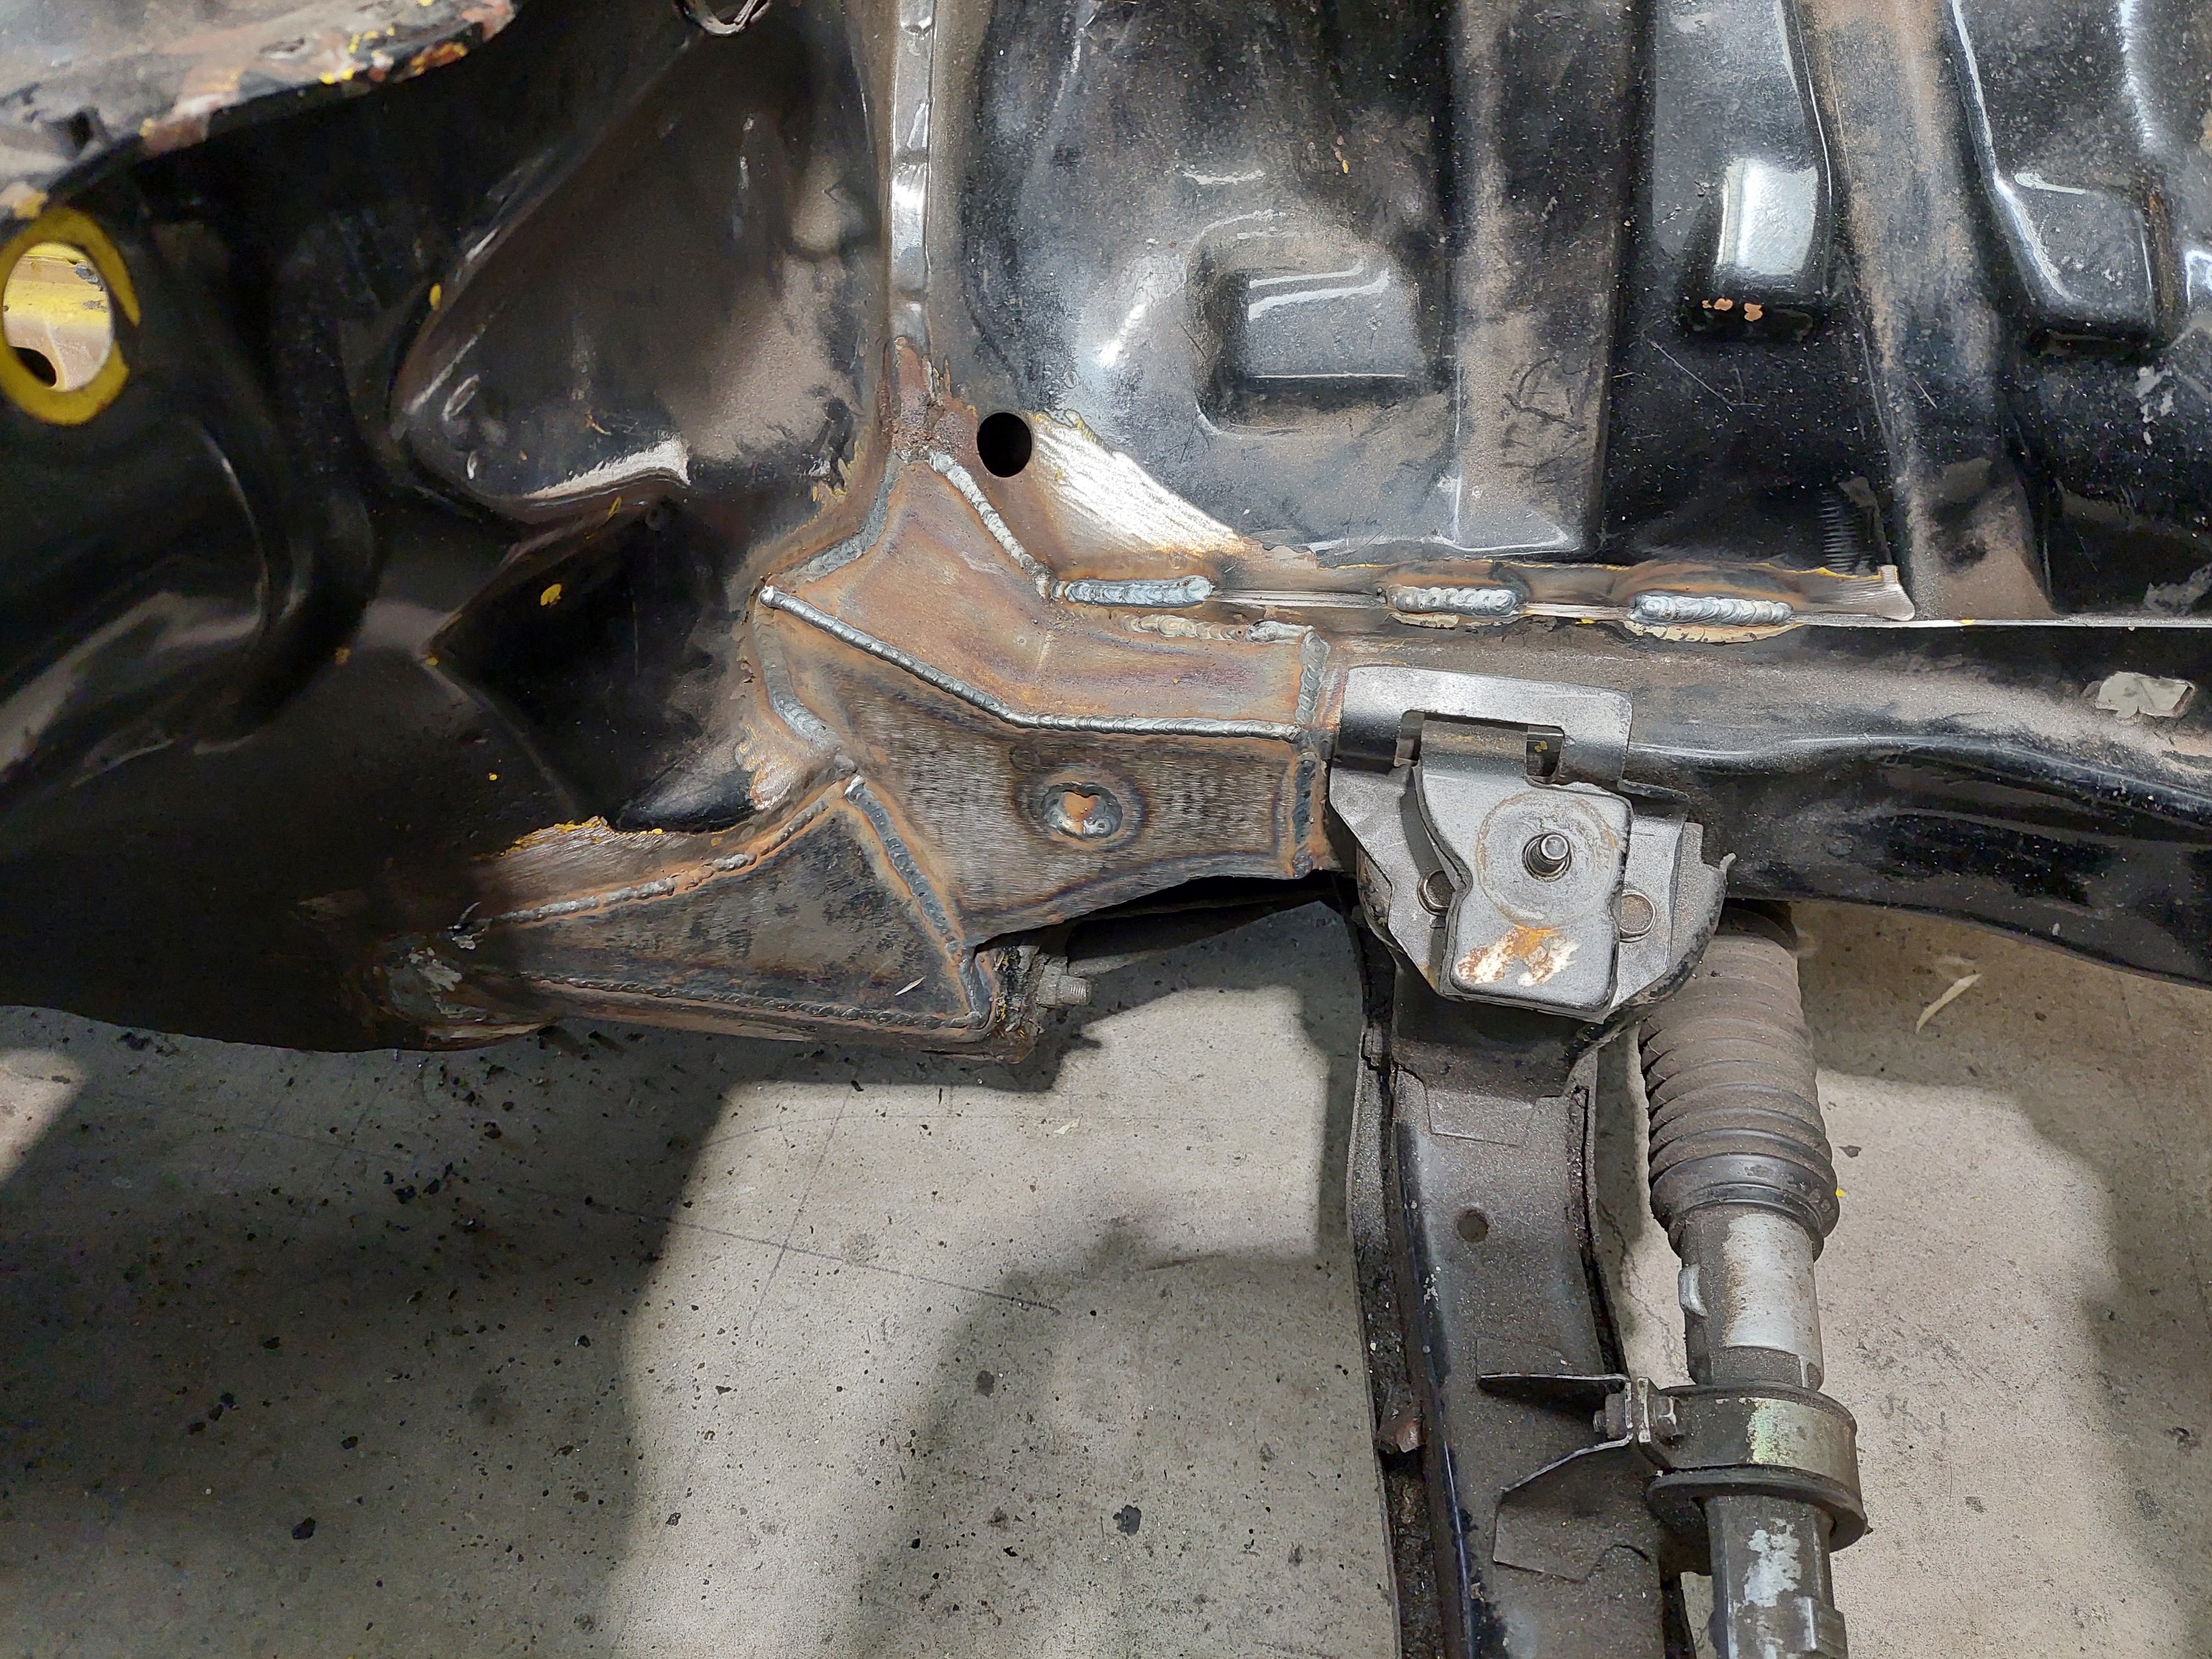
Ooooookay. So the next milestone is done: 4-linking and rear coilovers sorted and some strengthening up front. Continuing on from my post last August (!!! what?!), now that I have got the suspension parts from ShockWorks, I took the car back to Tim at ShoresNZ to finish off the 4-linking and coilover conversion. It started off with cutting out the old rear turrets and building some butty new ones that are able to hold the weight of the car. Tim builds these as a bolt in mount: The rest of the rear end included welding up all the link mounts, building new ones for the shocks, swaybar and panhard rod. Tim also made a new panhard to suit the new setup. I also had Tim build some gussetting around the chassis to firewall interface, as having the side intrusion bars as part of the half cage tends to stiffen the rear up to the bottom of the A-pillar and leave it all flexy up the front. Ideally you'd just have a full cage but I don't really want to do that. So this should hopefully add some strength and stiffening to the front of the car. Next thing is to get the rear end properly rebuilt and coated. And obviously continue with the other million things I'm working on!
4 points
-
Bottom bracket sorted. Needs a tidy up, but its functional now.
3 points
-
those bolts holding headers on that alfa thing look like they would ruin your life Yeah unsure if the sudden change in cross section is a good thing or bad thing. but can say the cobys i tested with the ugly big open collector made less power everywhere. other being not very even, primary lengths were similar to my headers. so the the collector was the main difference. soo seems like at least cutting down that space maybe a good thing. or possible just the shape? If it was some way possible to eliminate said change in area would primary length be irrelevant. Also any sudden change in cross sectional area i have tested in various places in exhaust, has always given negative or at least no gains. where as changing the same transition to a diverging cone has given some power gain.3 points
-
Water is roughly 0.5psi/foot of depth, if you ran a compressed air line to the tank on a warm day, an outlet into a suitable column of water will give you a very accurate pressure. A rubber glove taped over a pipe also makes a suitable low pressure relief valve just don't ask for ASME certification. In all seriousness, large pressurised volumes are why certain regulations exist, tread carefully (or go full Wile E Coyote)3 points
-
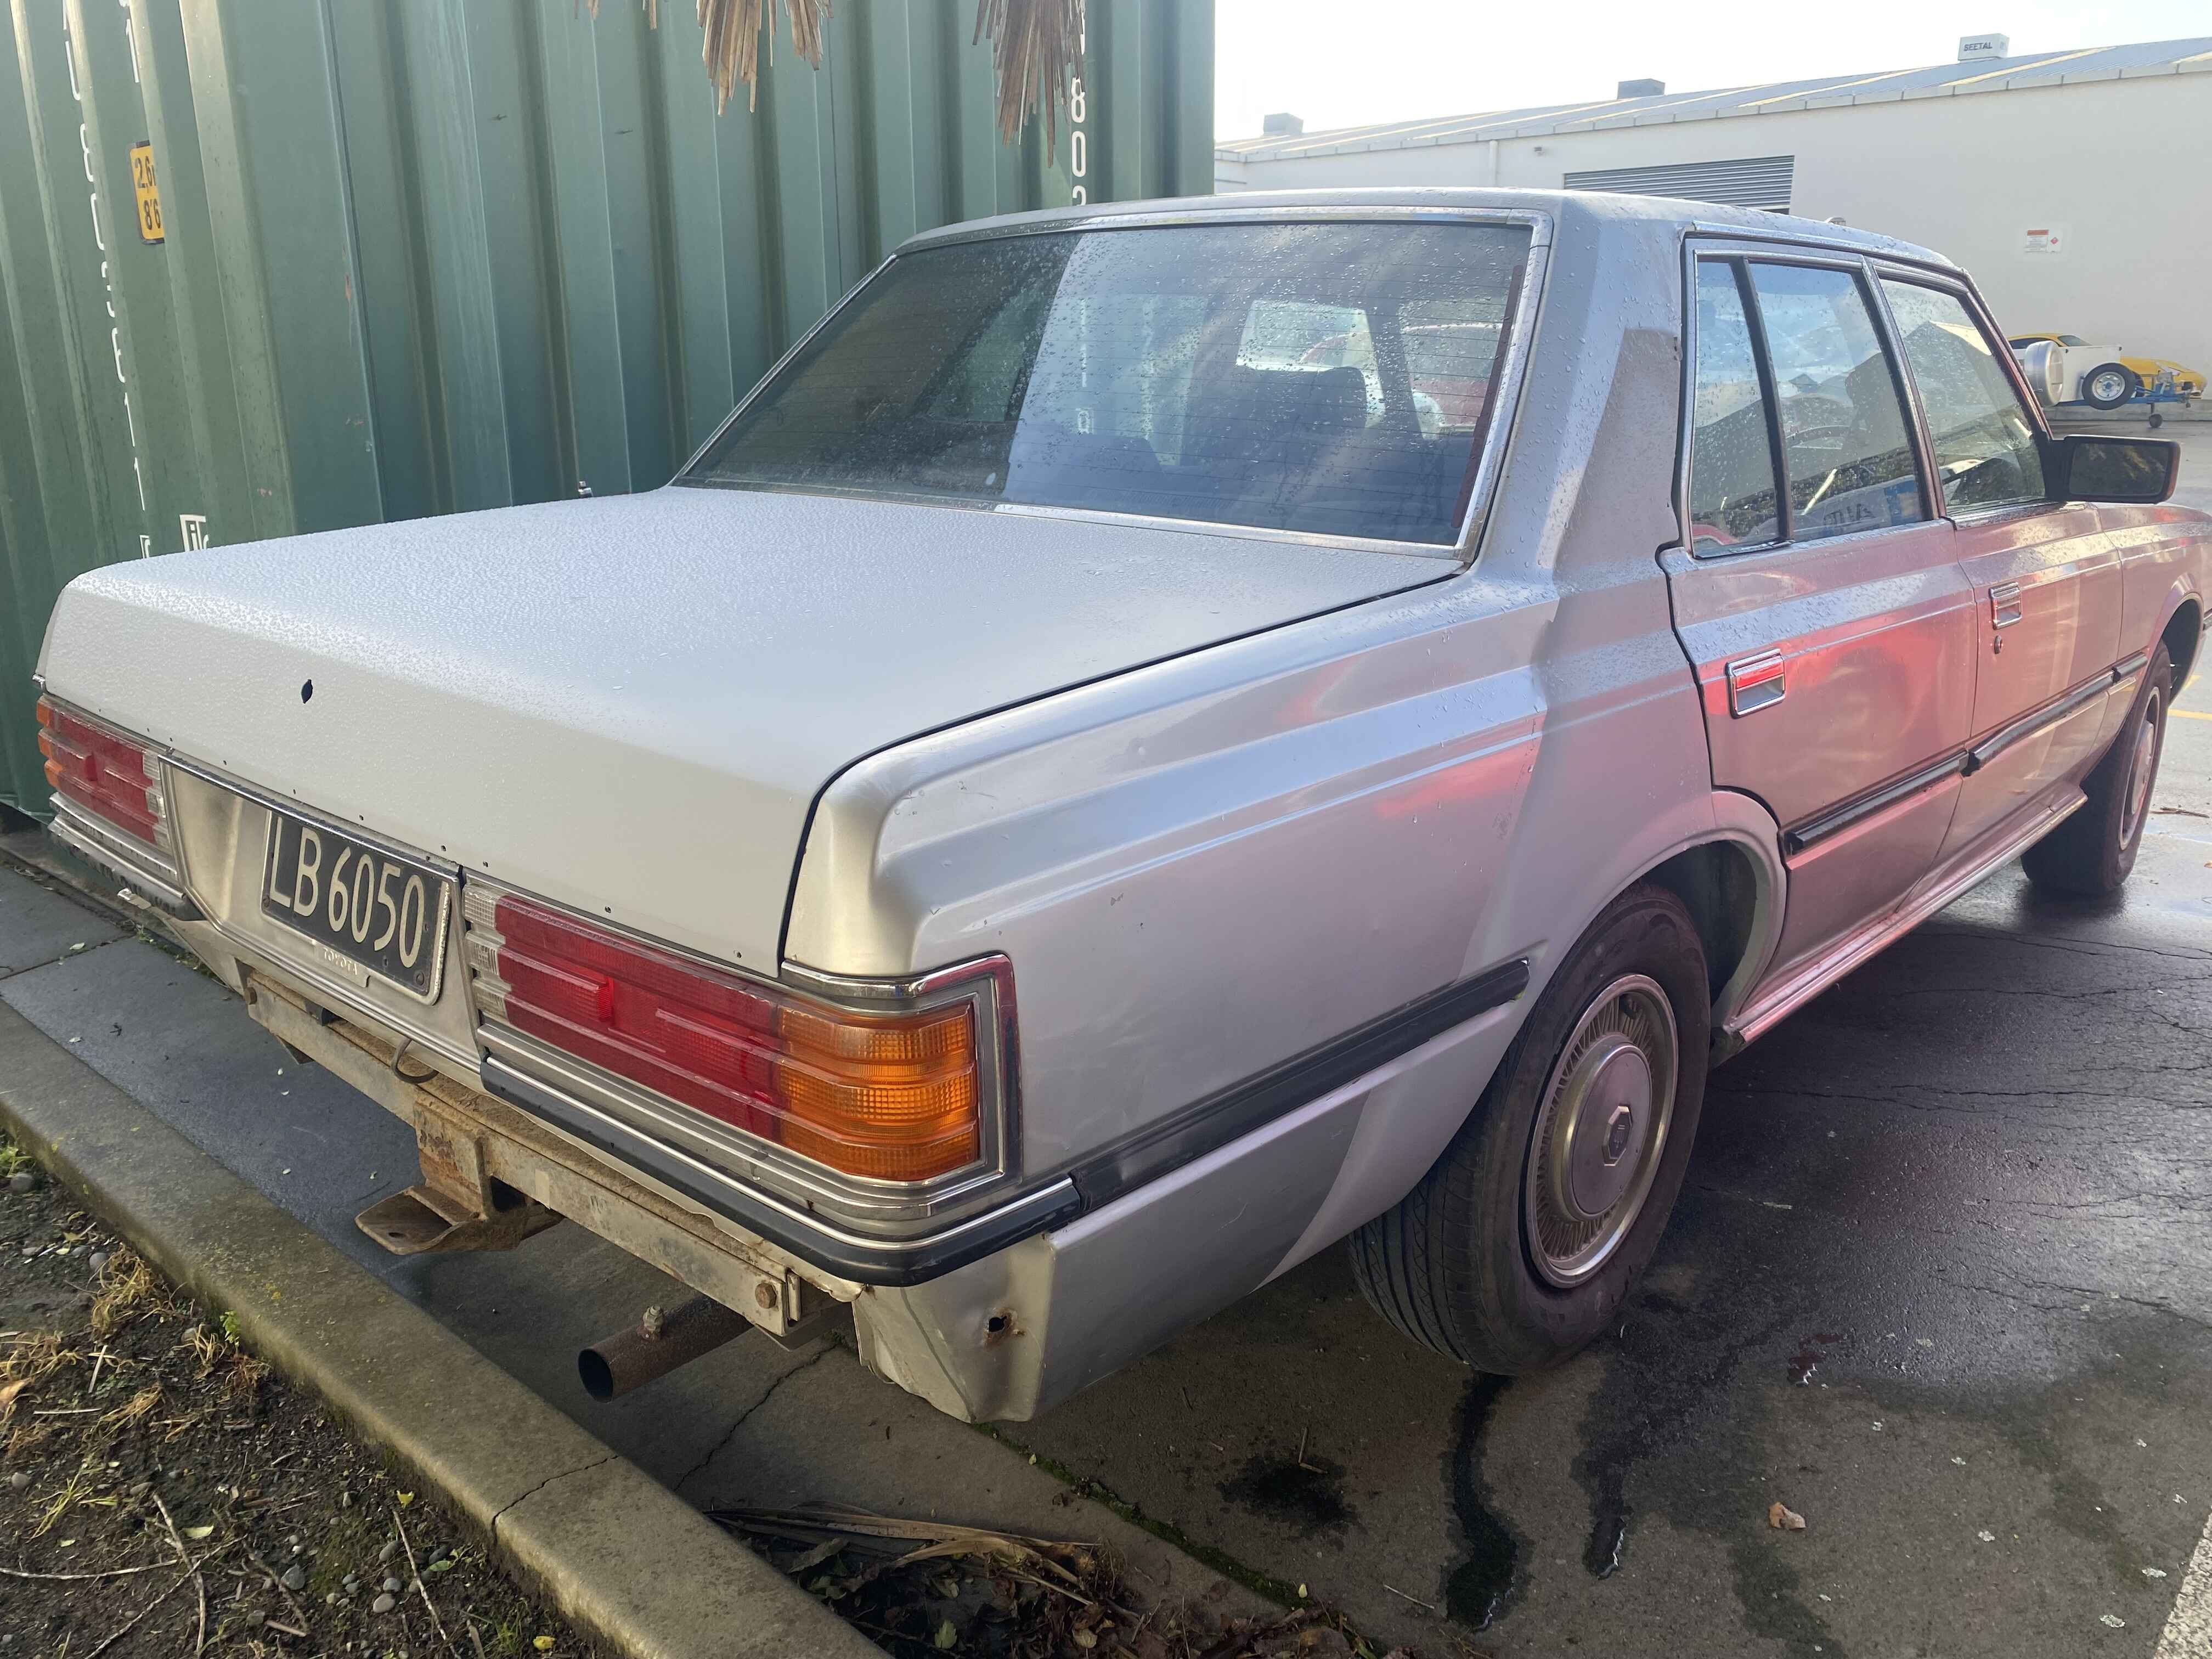
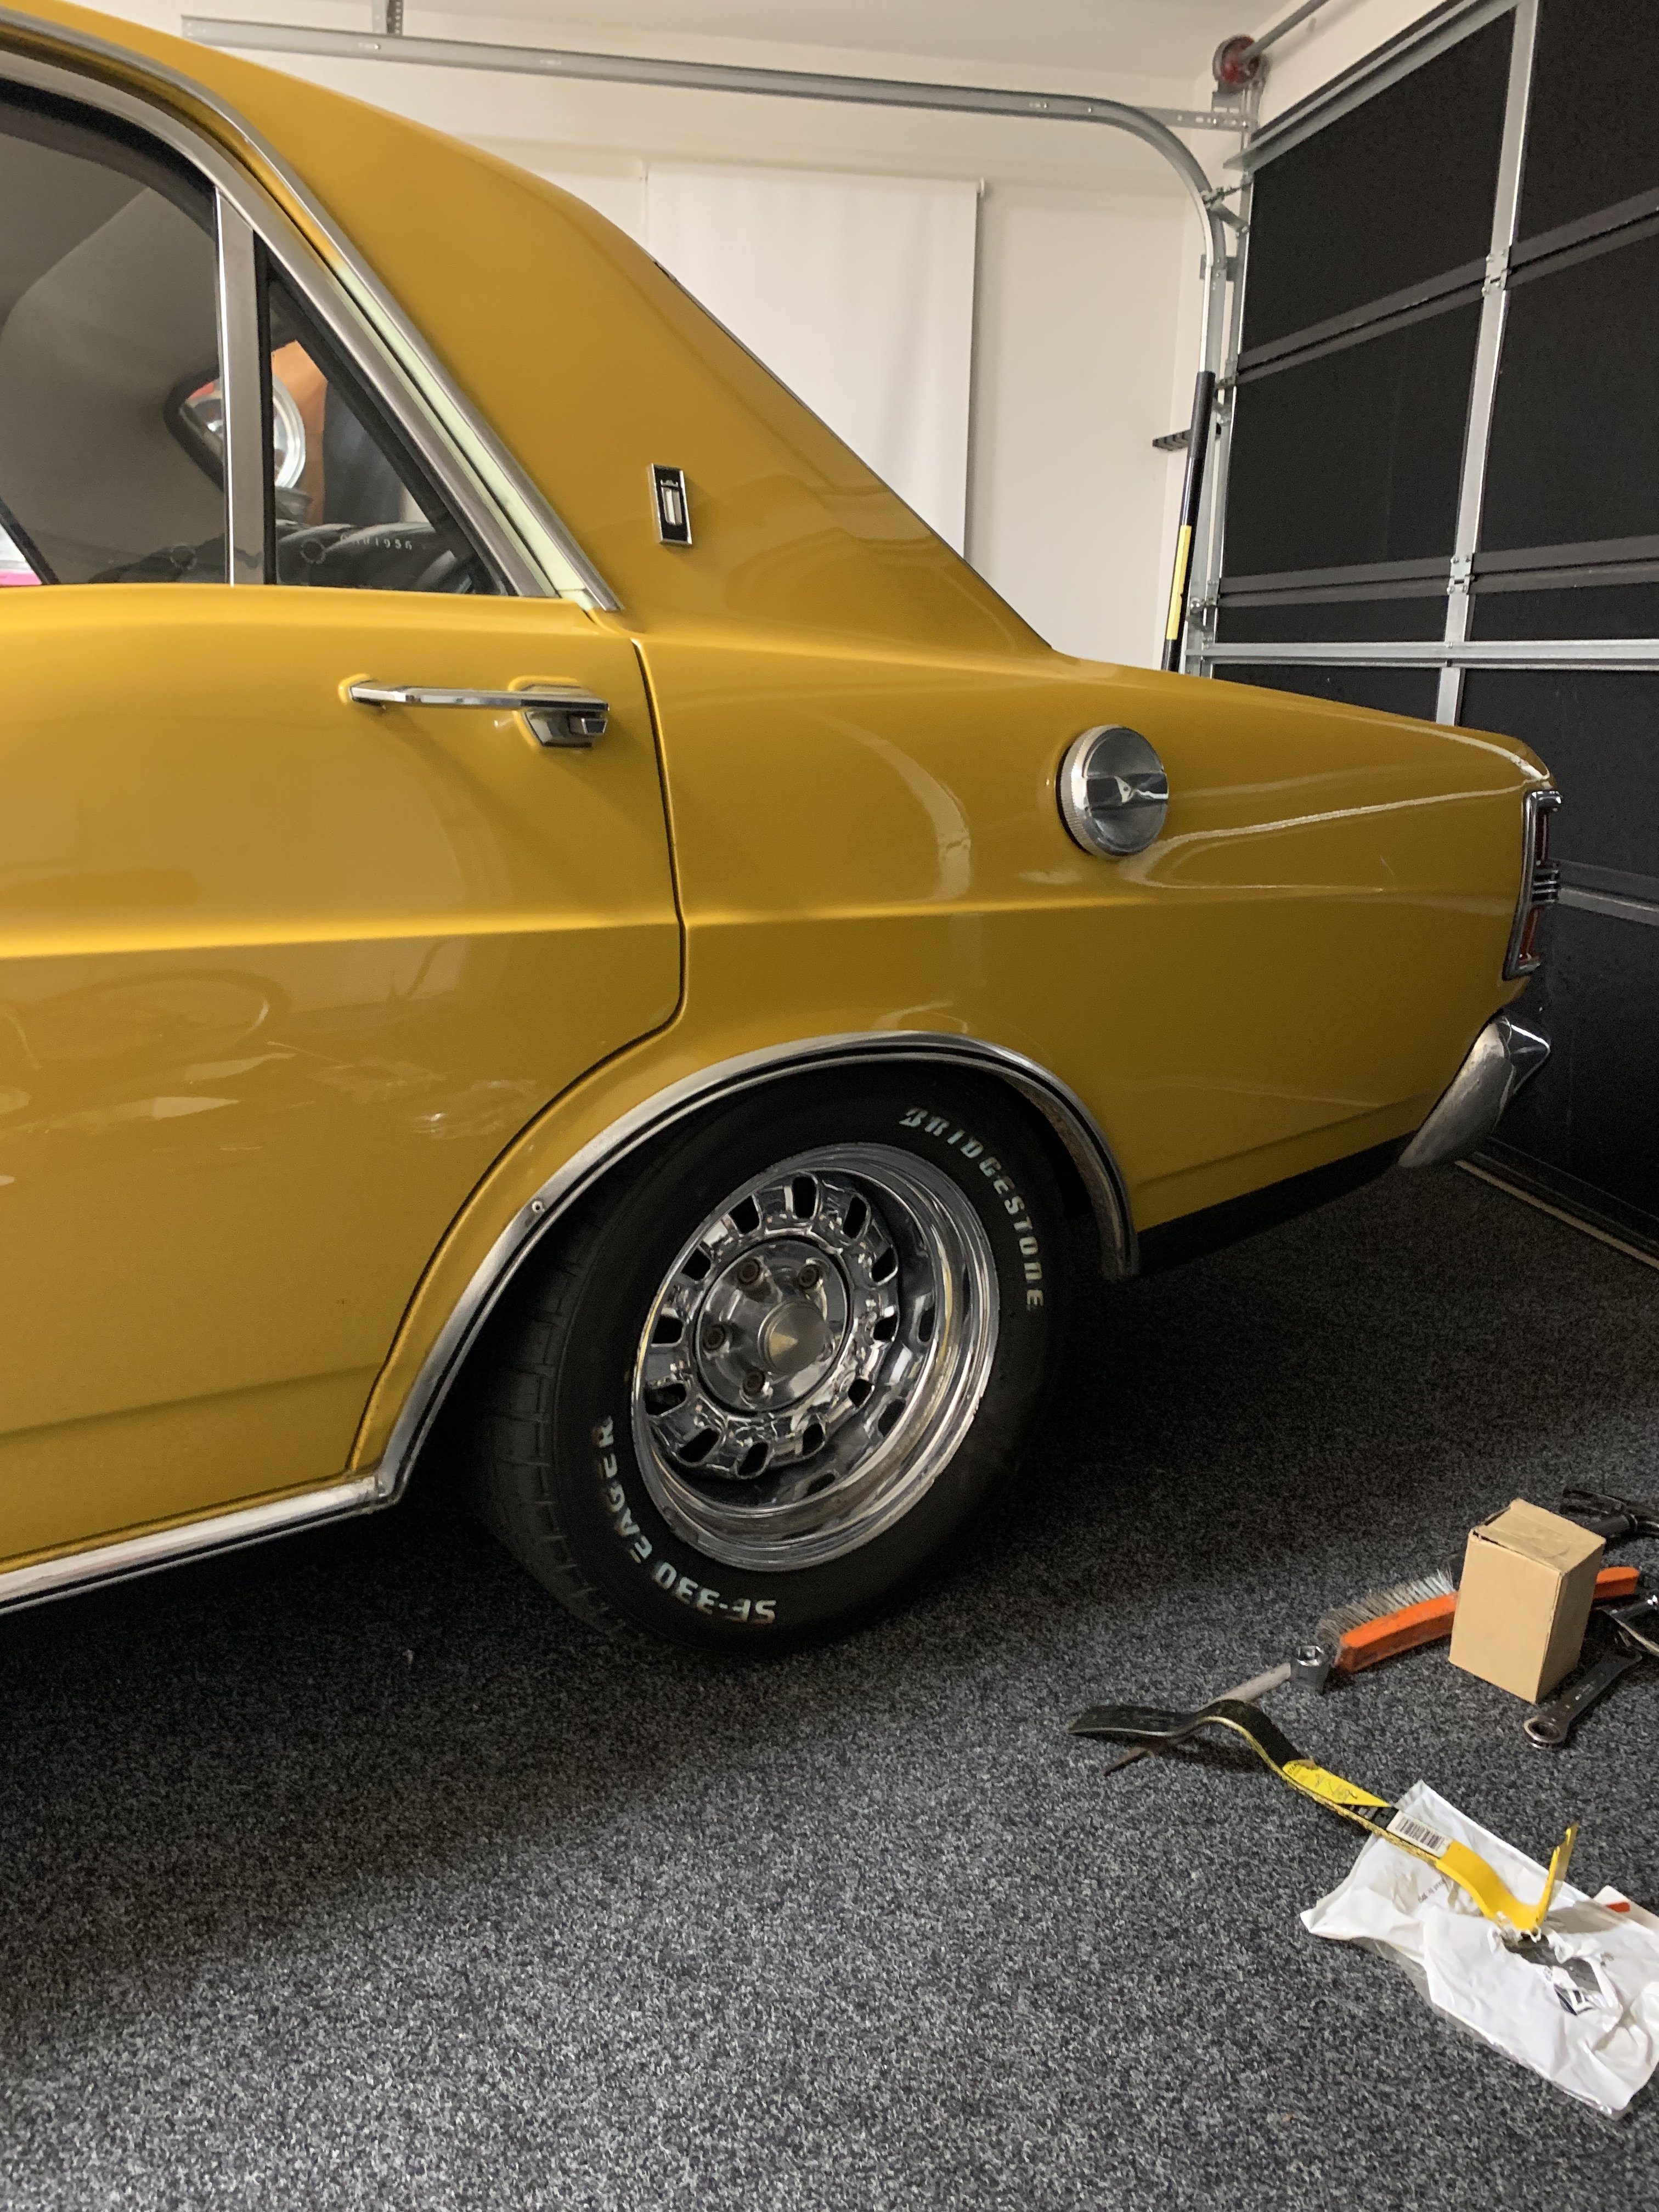
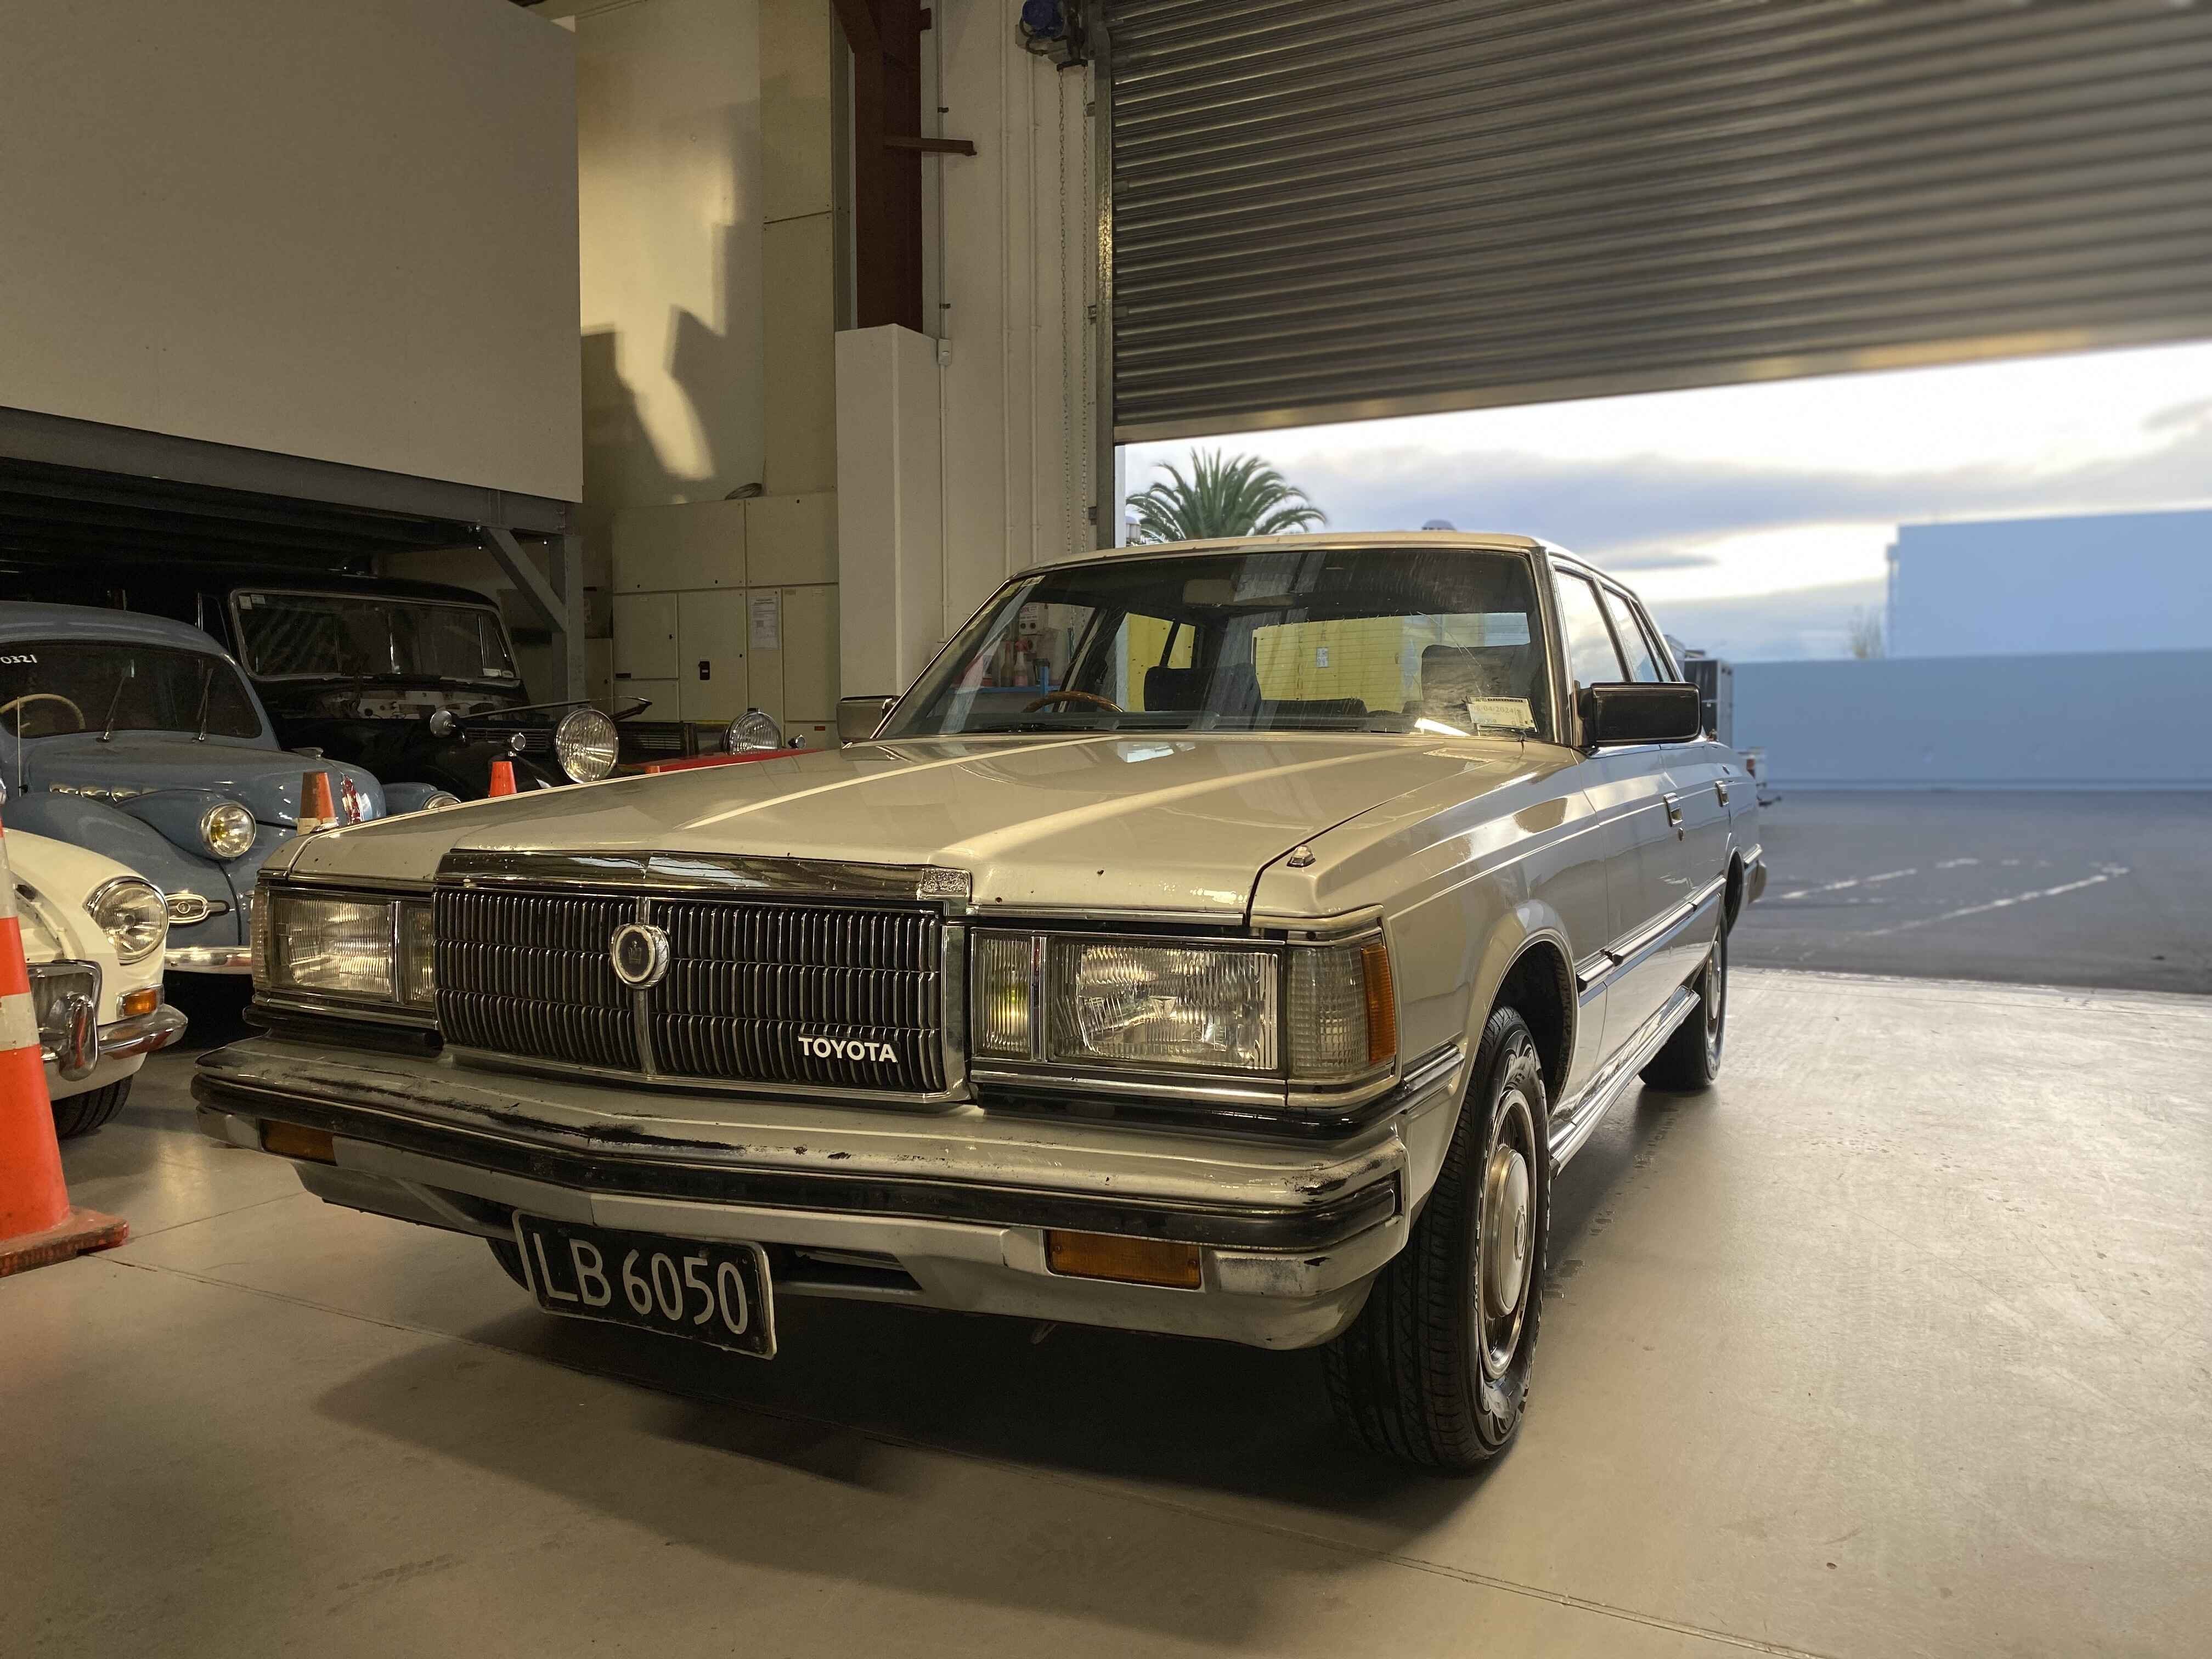
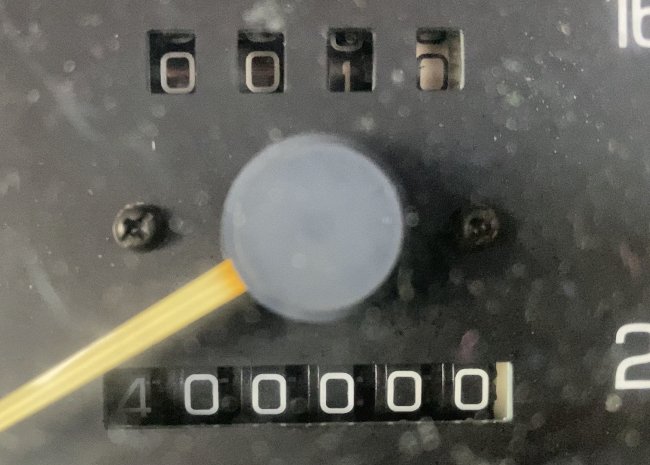
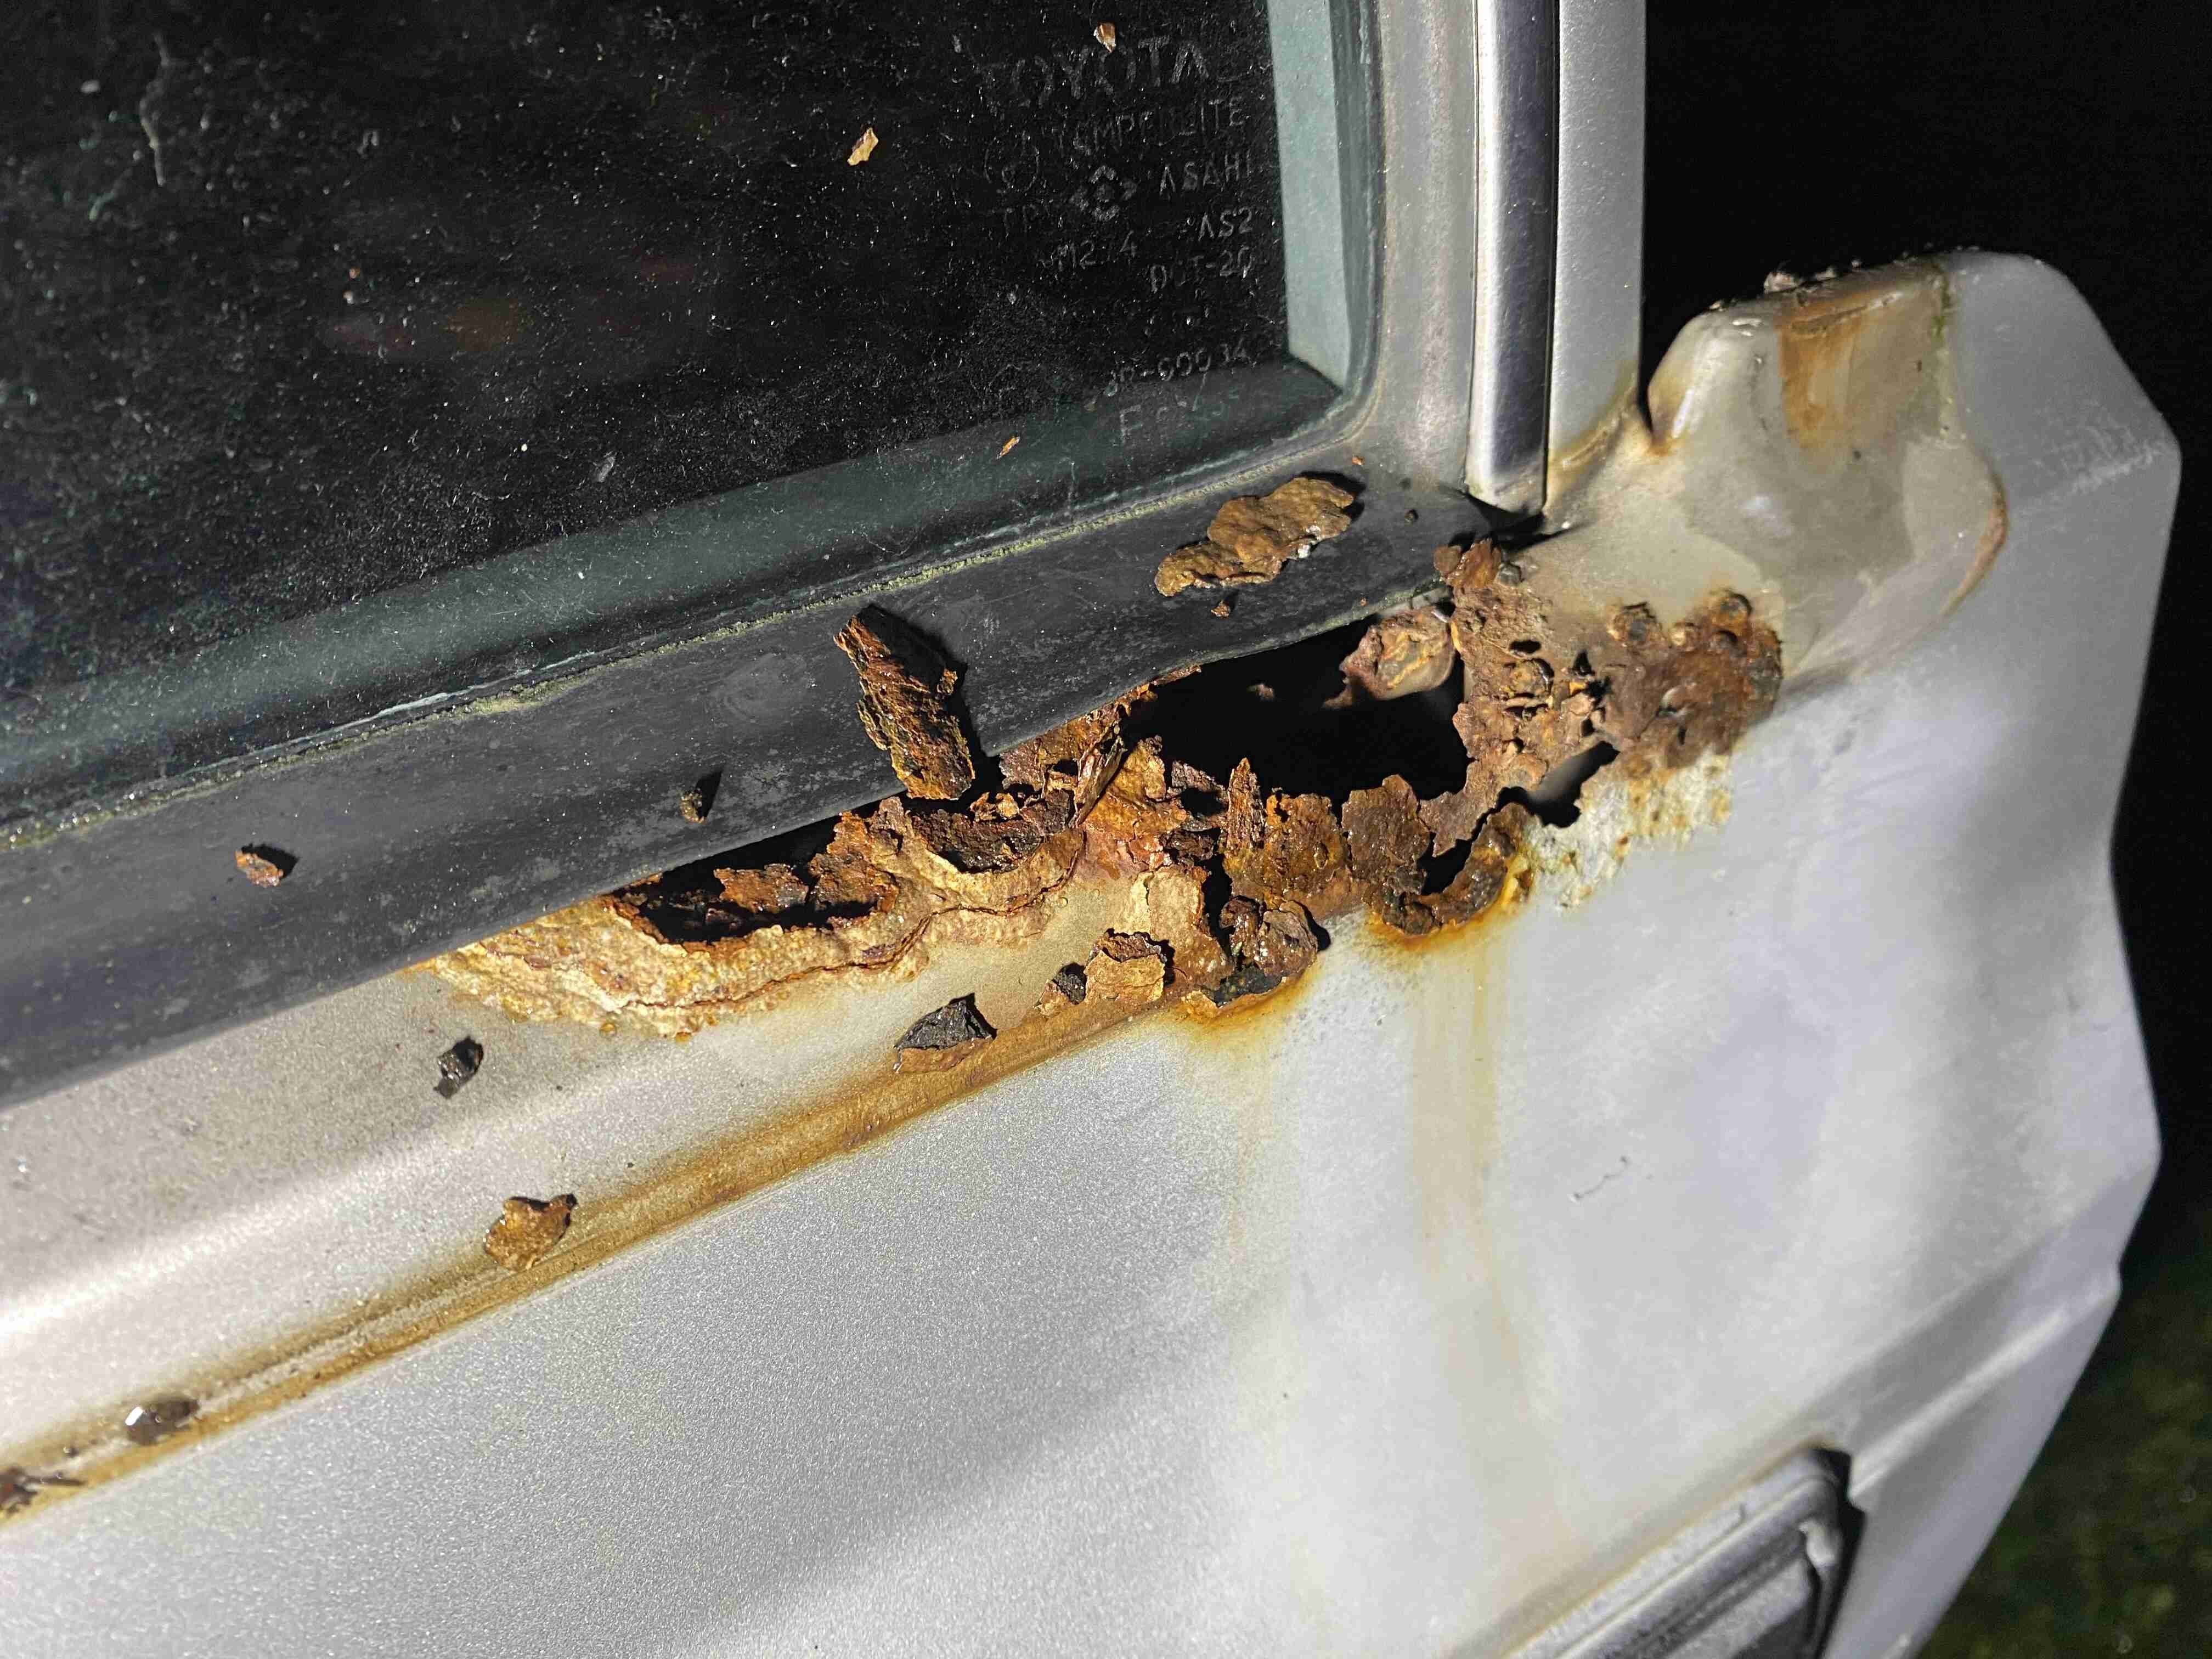
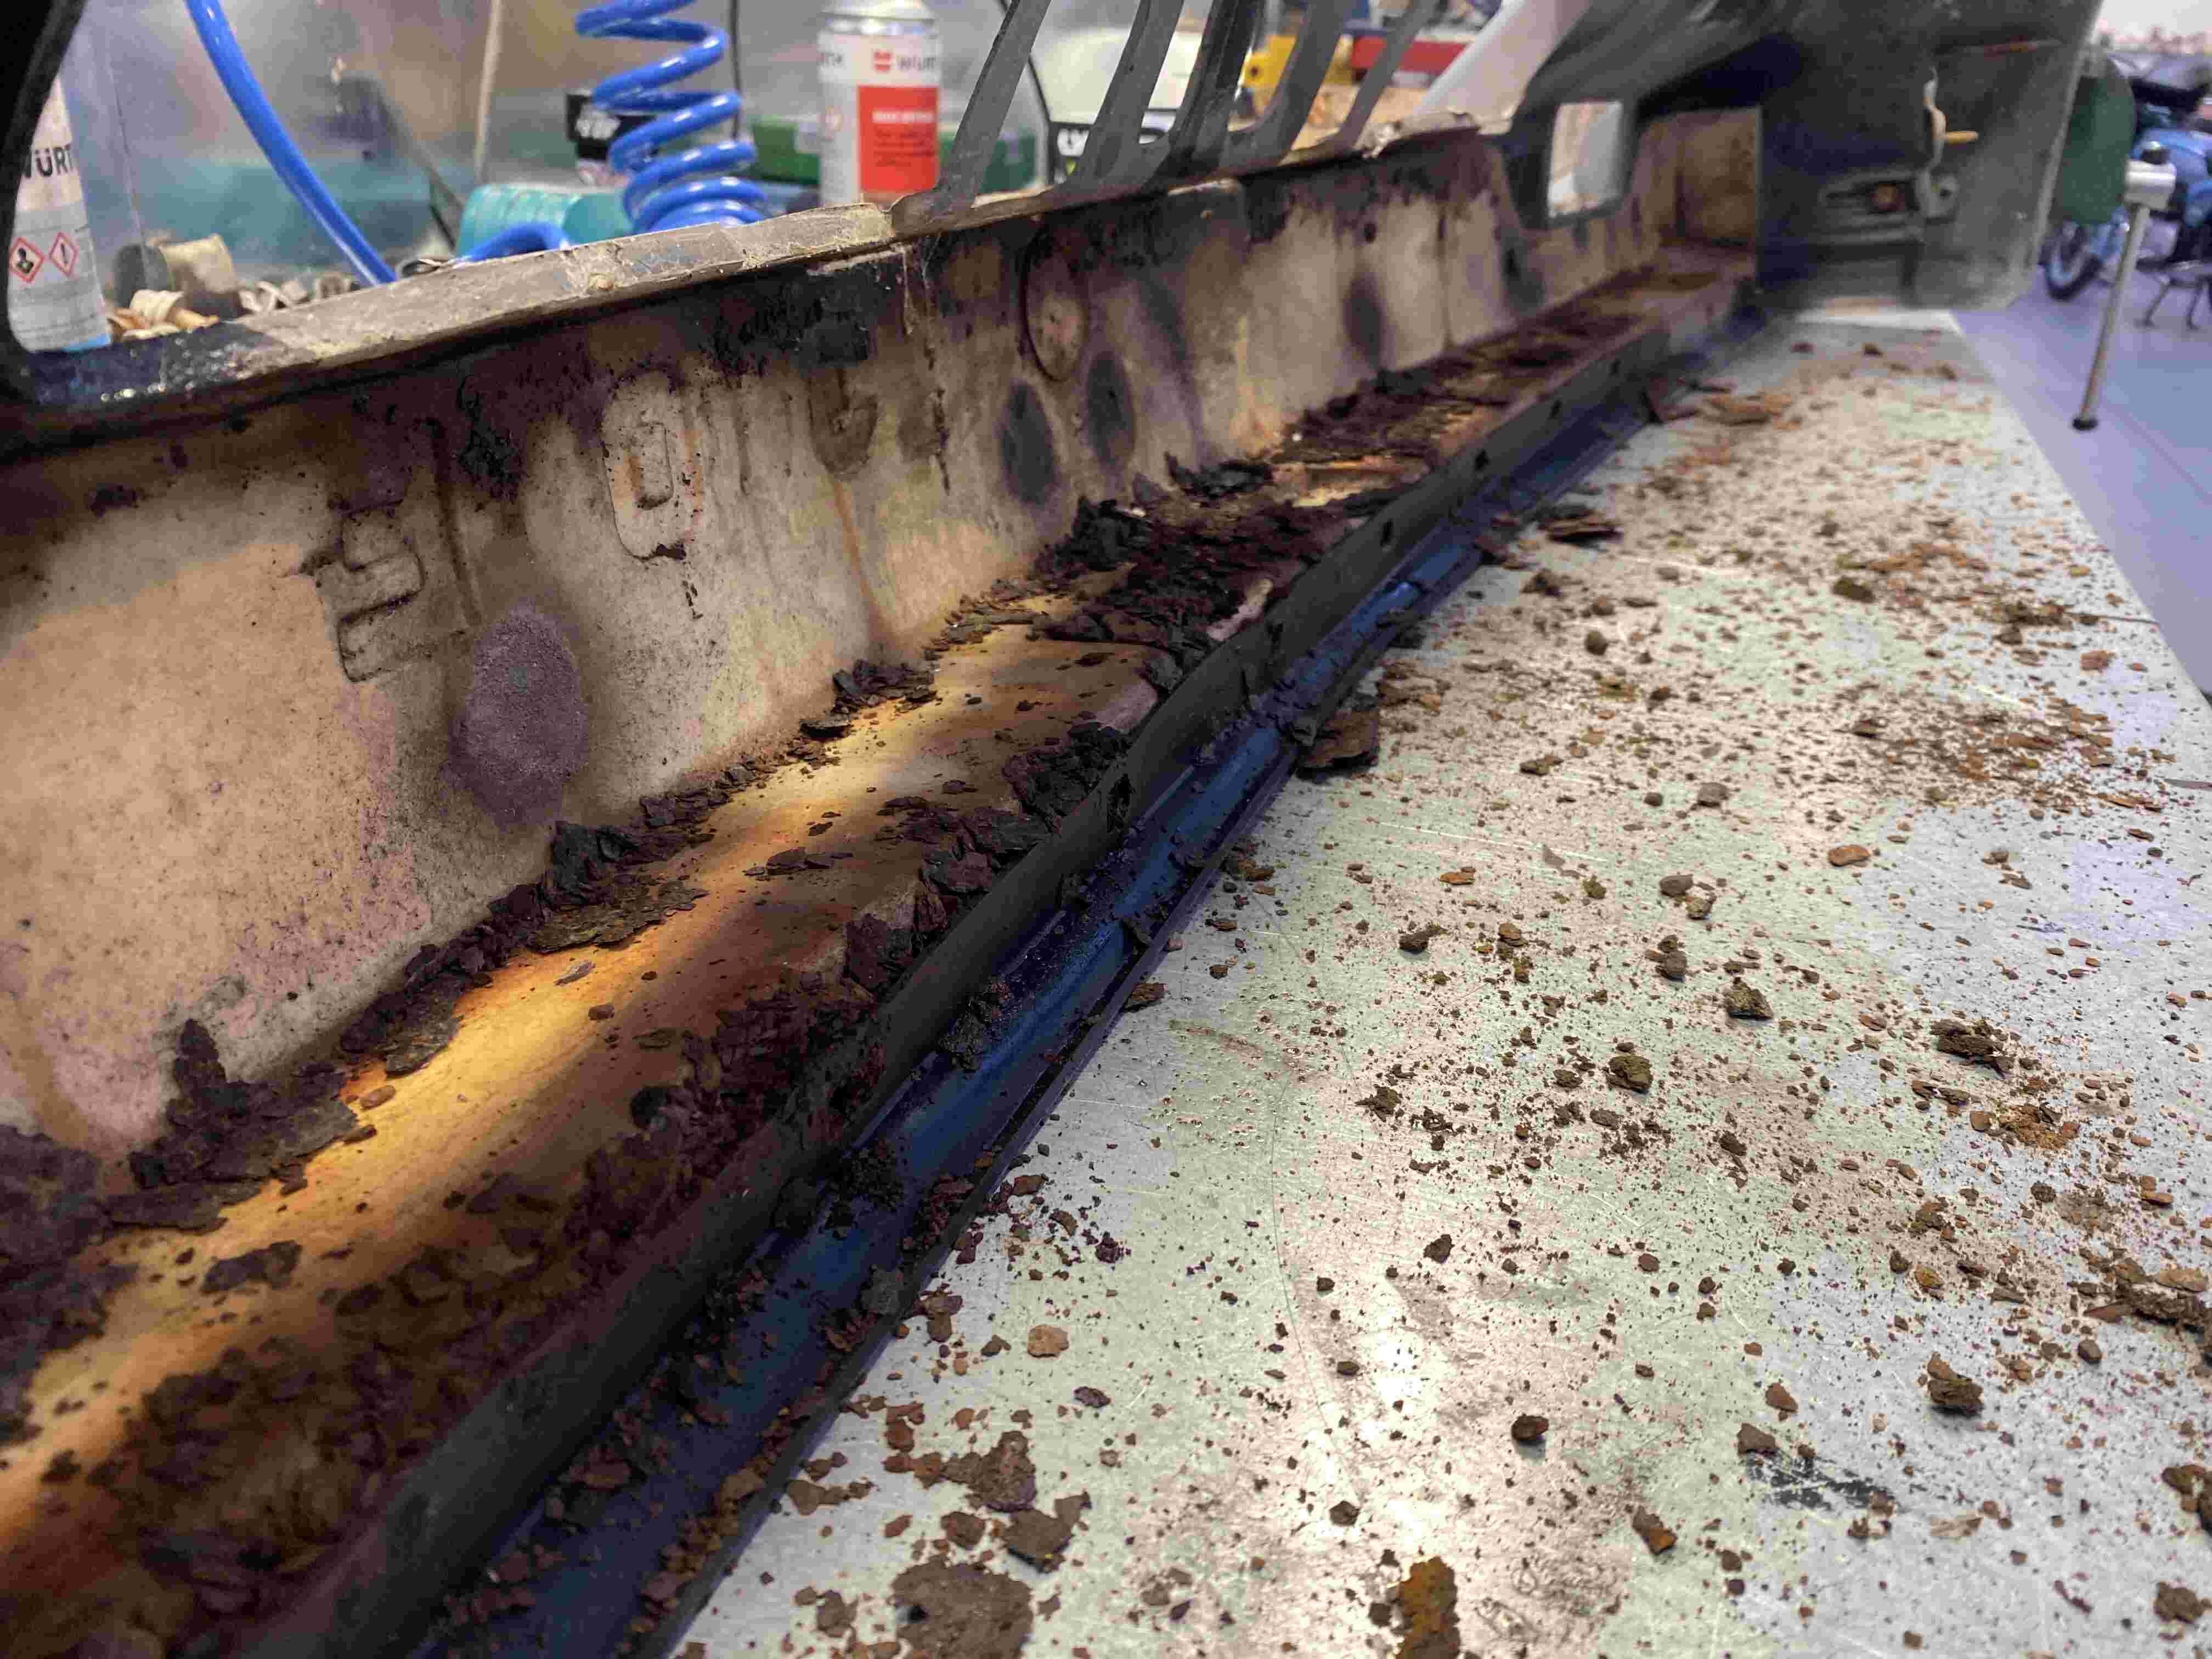
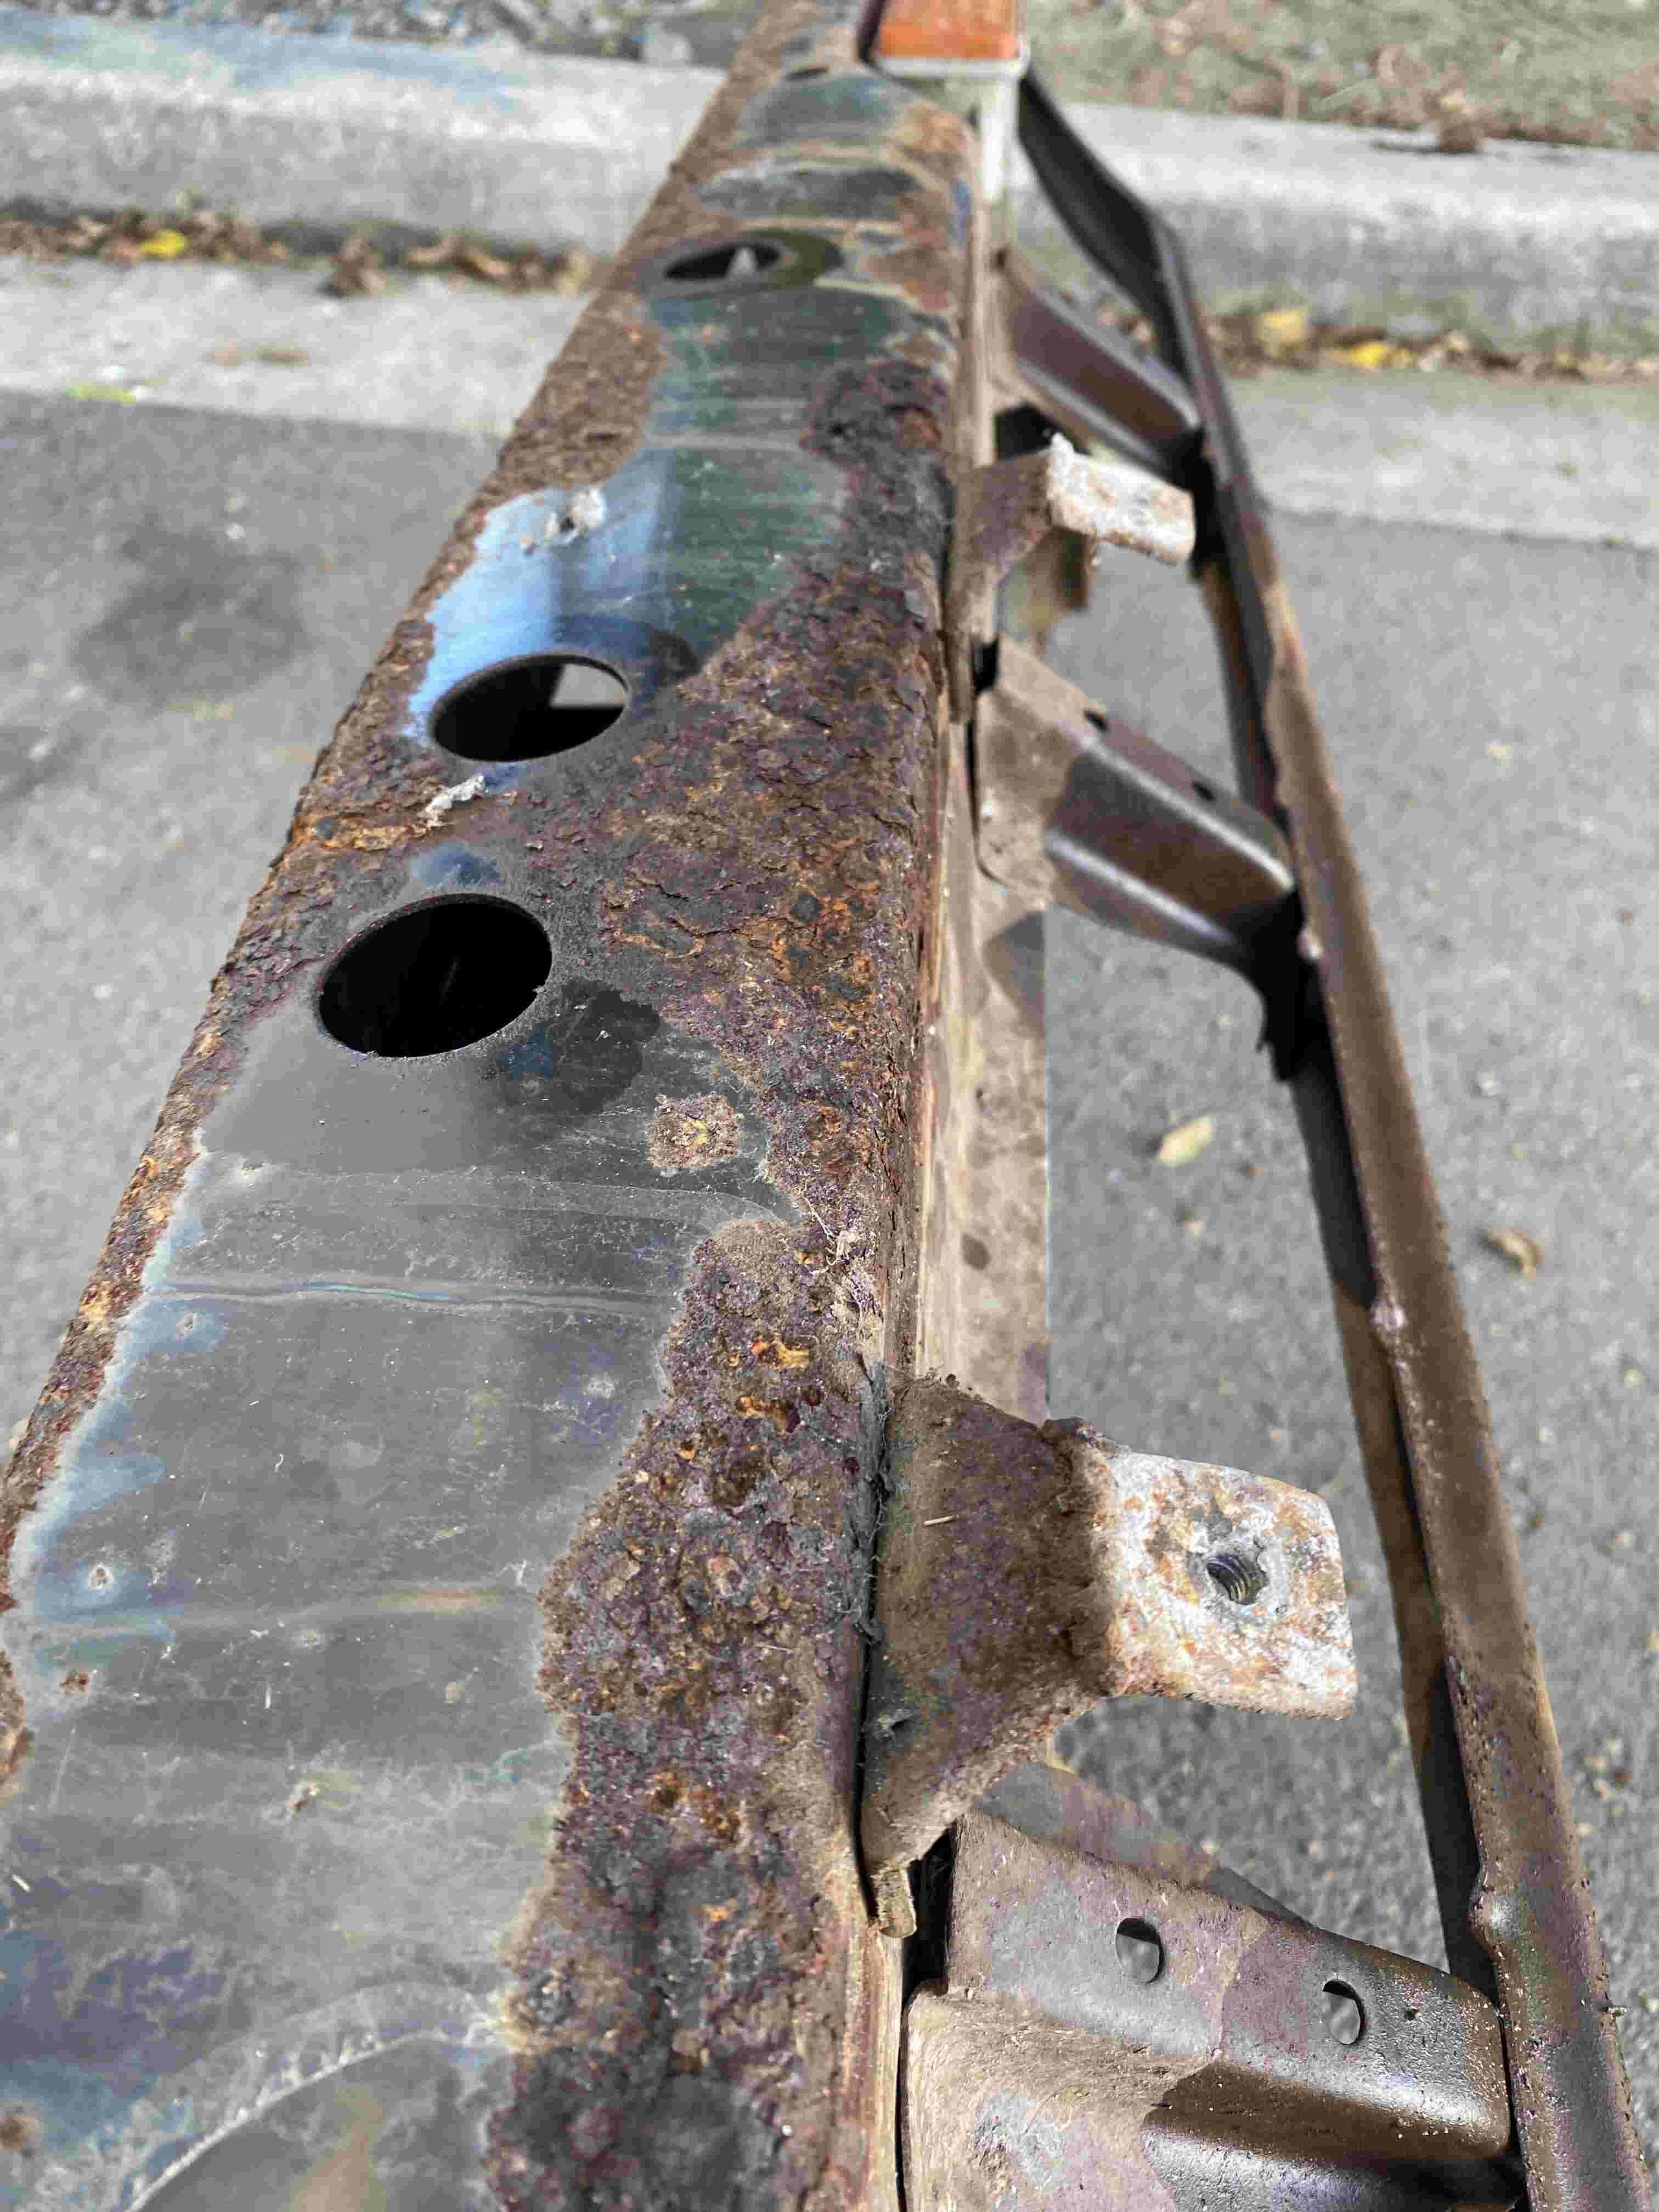
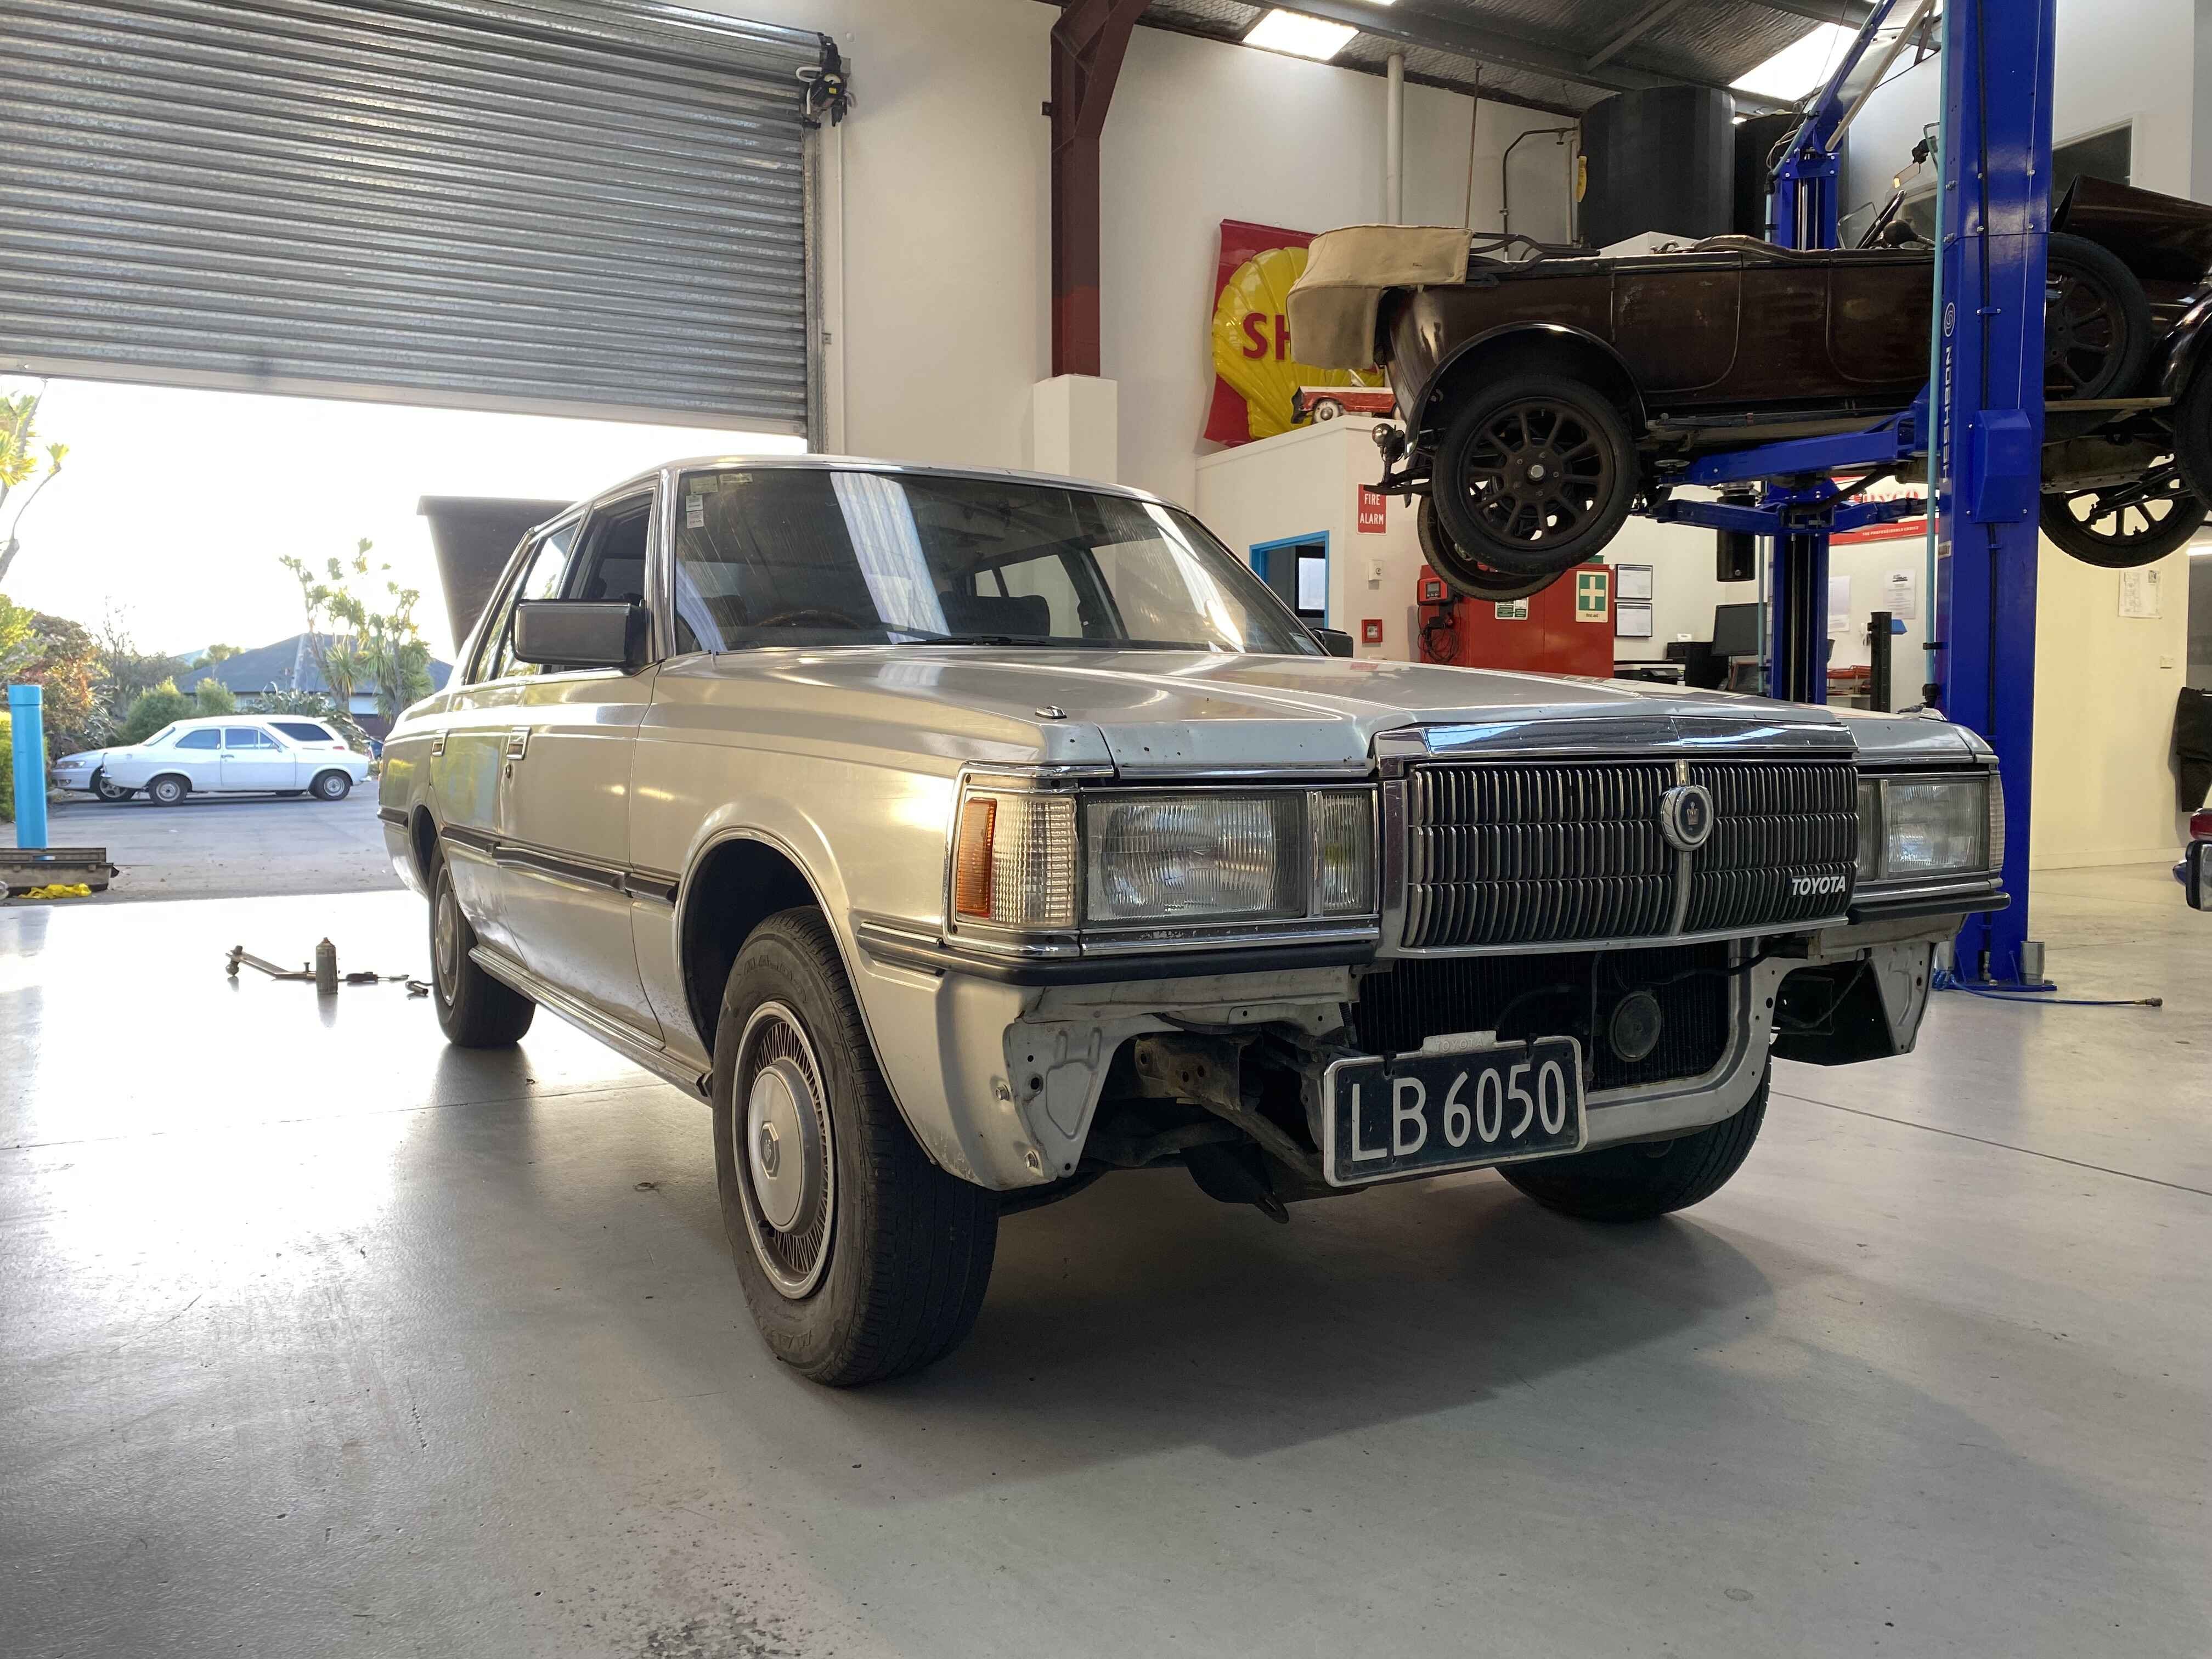
It's been a while since I've shown the Crown any love, but we have put 20,000km on it since the motor swap. It hit the 400,000km mark the other day! I stopped for a pic at the exact spot it clocked over. Mechanically its been going like a champ, but the rust has been creeping up on me. Keen eyed viewers may notice the black boot, courtesy of @JustHarry. He's been helping me out with some relatively rust free panels from a decent donor car. The boot lower lip was gone and both back doors have some issues. The left rear is the worst with some big holes hiding behind the trim! Time to stop ignoring it I think. I've also got to clean up the right rear panel which has been in primer since I welded in some new metal 2 years ago, and the bumpers need a respray also.
3 points
-
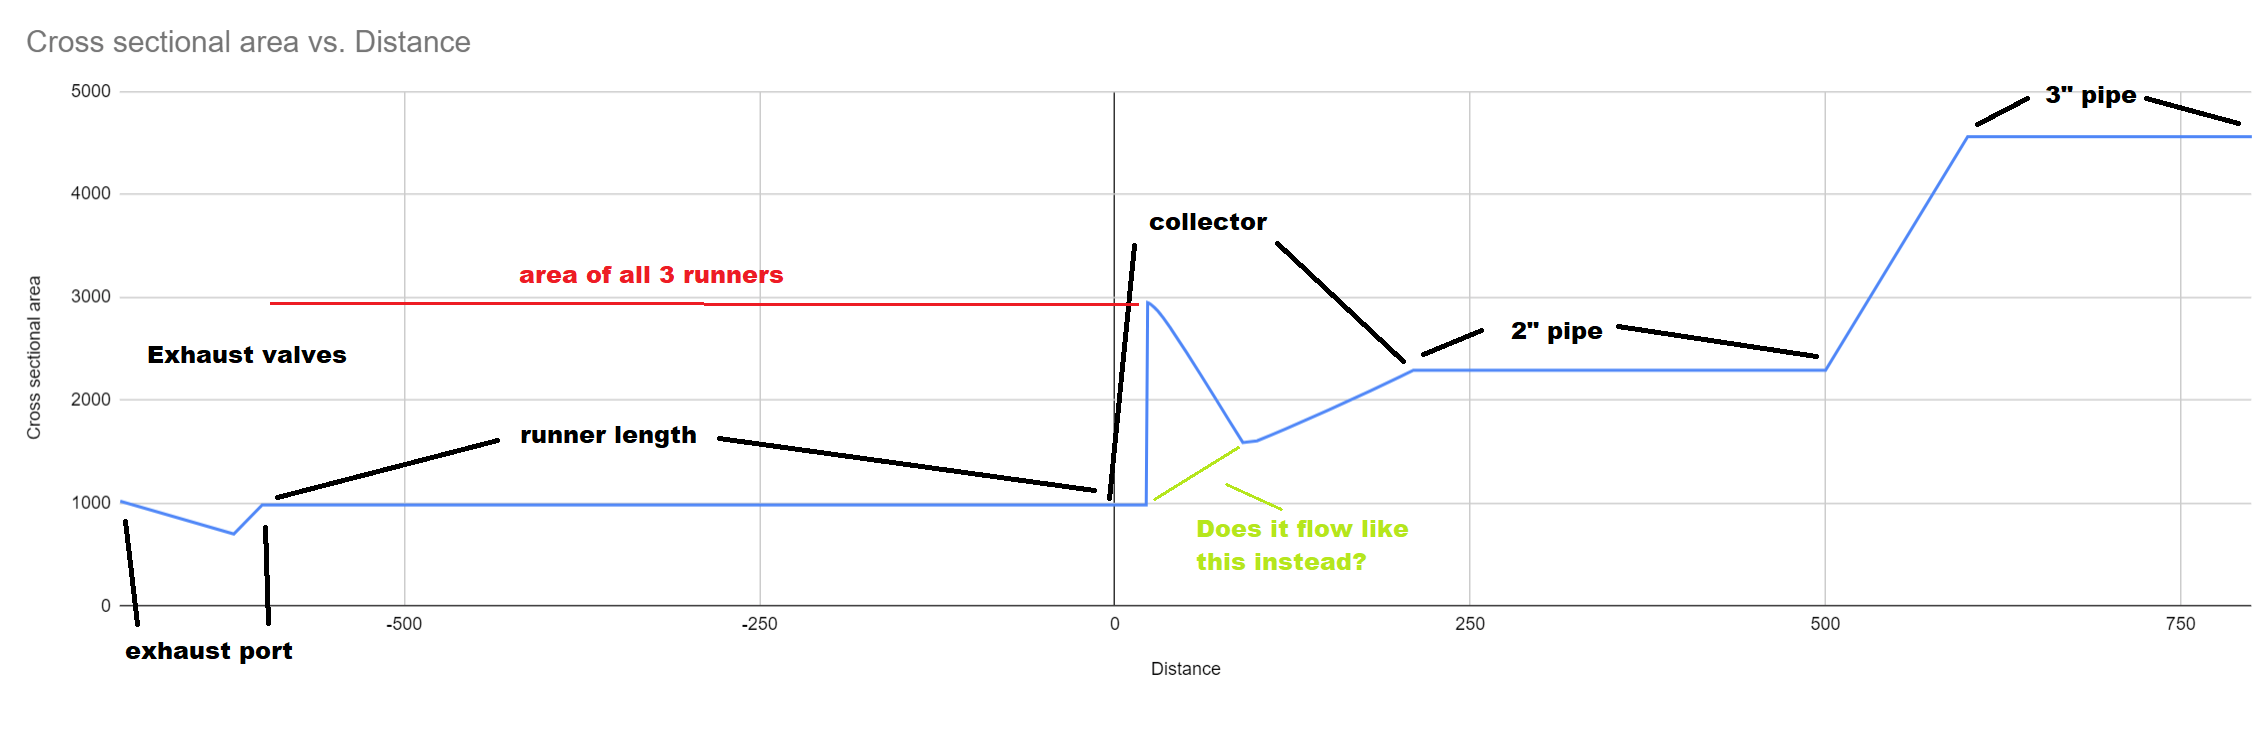
Completely off topic to anything and possibly not useful information. (Since when has that ever stopped me) I measured the cross sectional area of the collector at a whole lot of points through it. Then added cross sectional area of other known bits to show a map of whole exhaust. The cross sectional area stays exactly the same as the runner until a point where it near instantly blows up to the cross section of all 3 pipes. Then tapers down from there, then flares up again. The point in the collector where there's the big spike upwards, is here. It seems you cant do much to change how big or quick that spike is, except for by merging more cyls together or vice versa. However changing the collector angle changes how quickly it ramps back down to normal cross sectional area. I found a picture of the Alfa 155 DTM engine / it's exhaust manifolds. Doesnt look like anything especially magical going on there. Beefy diameter runners though Runner lengths seem fairly long considering it's a 14,000rpm motor. Meaning way longer than that is probably good for mine.
3 points
-
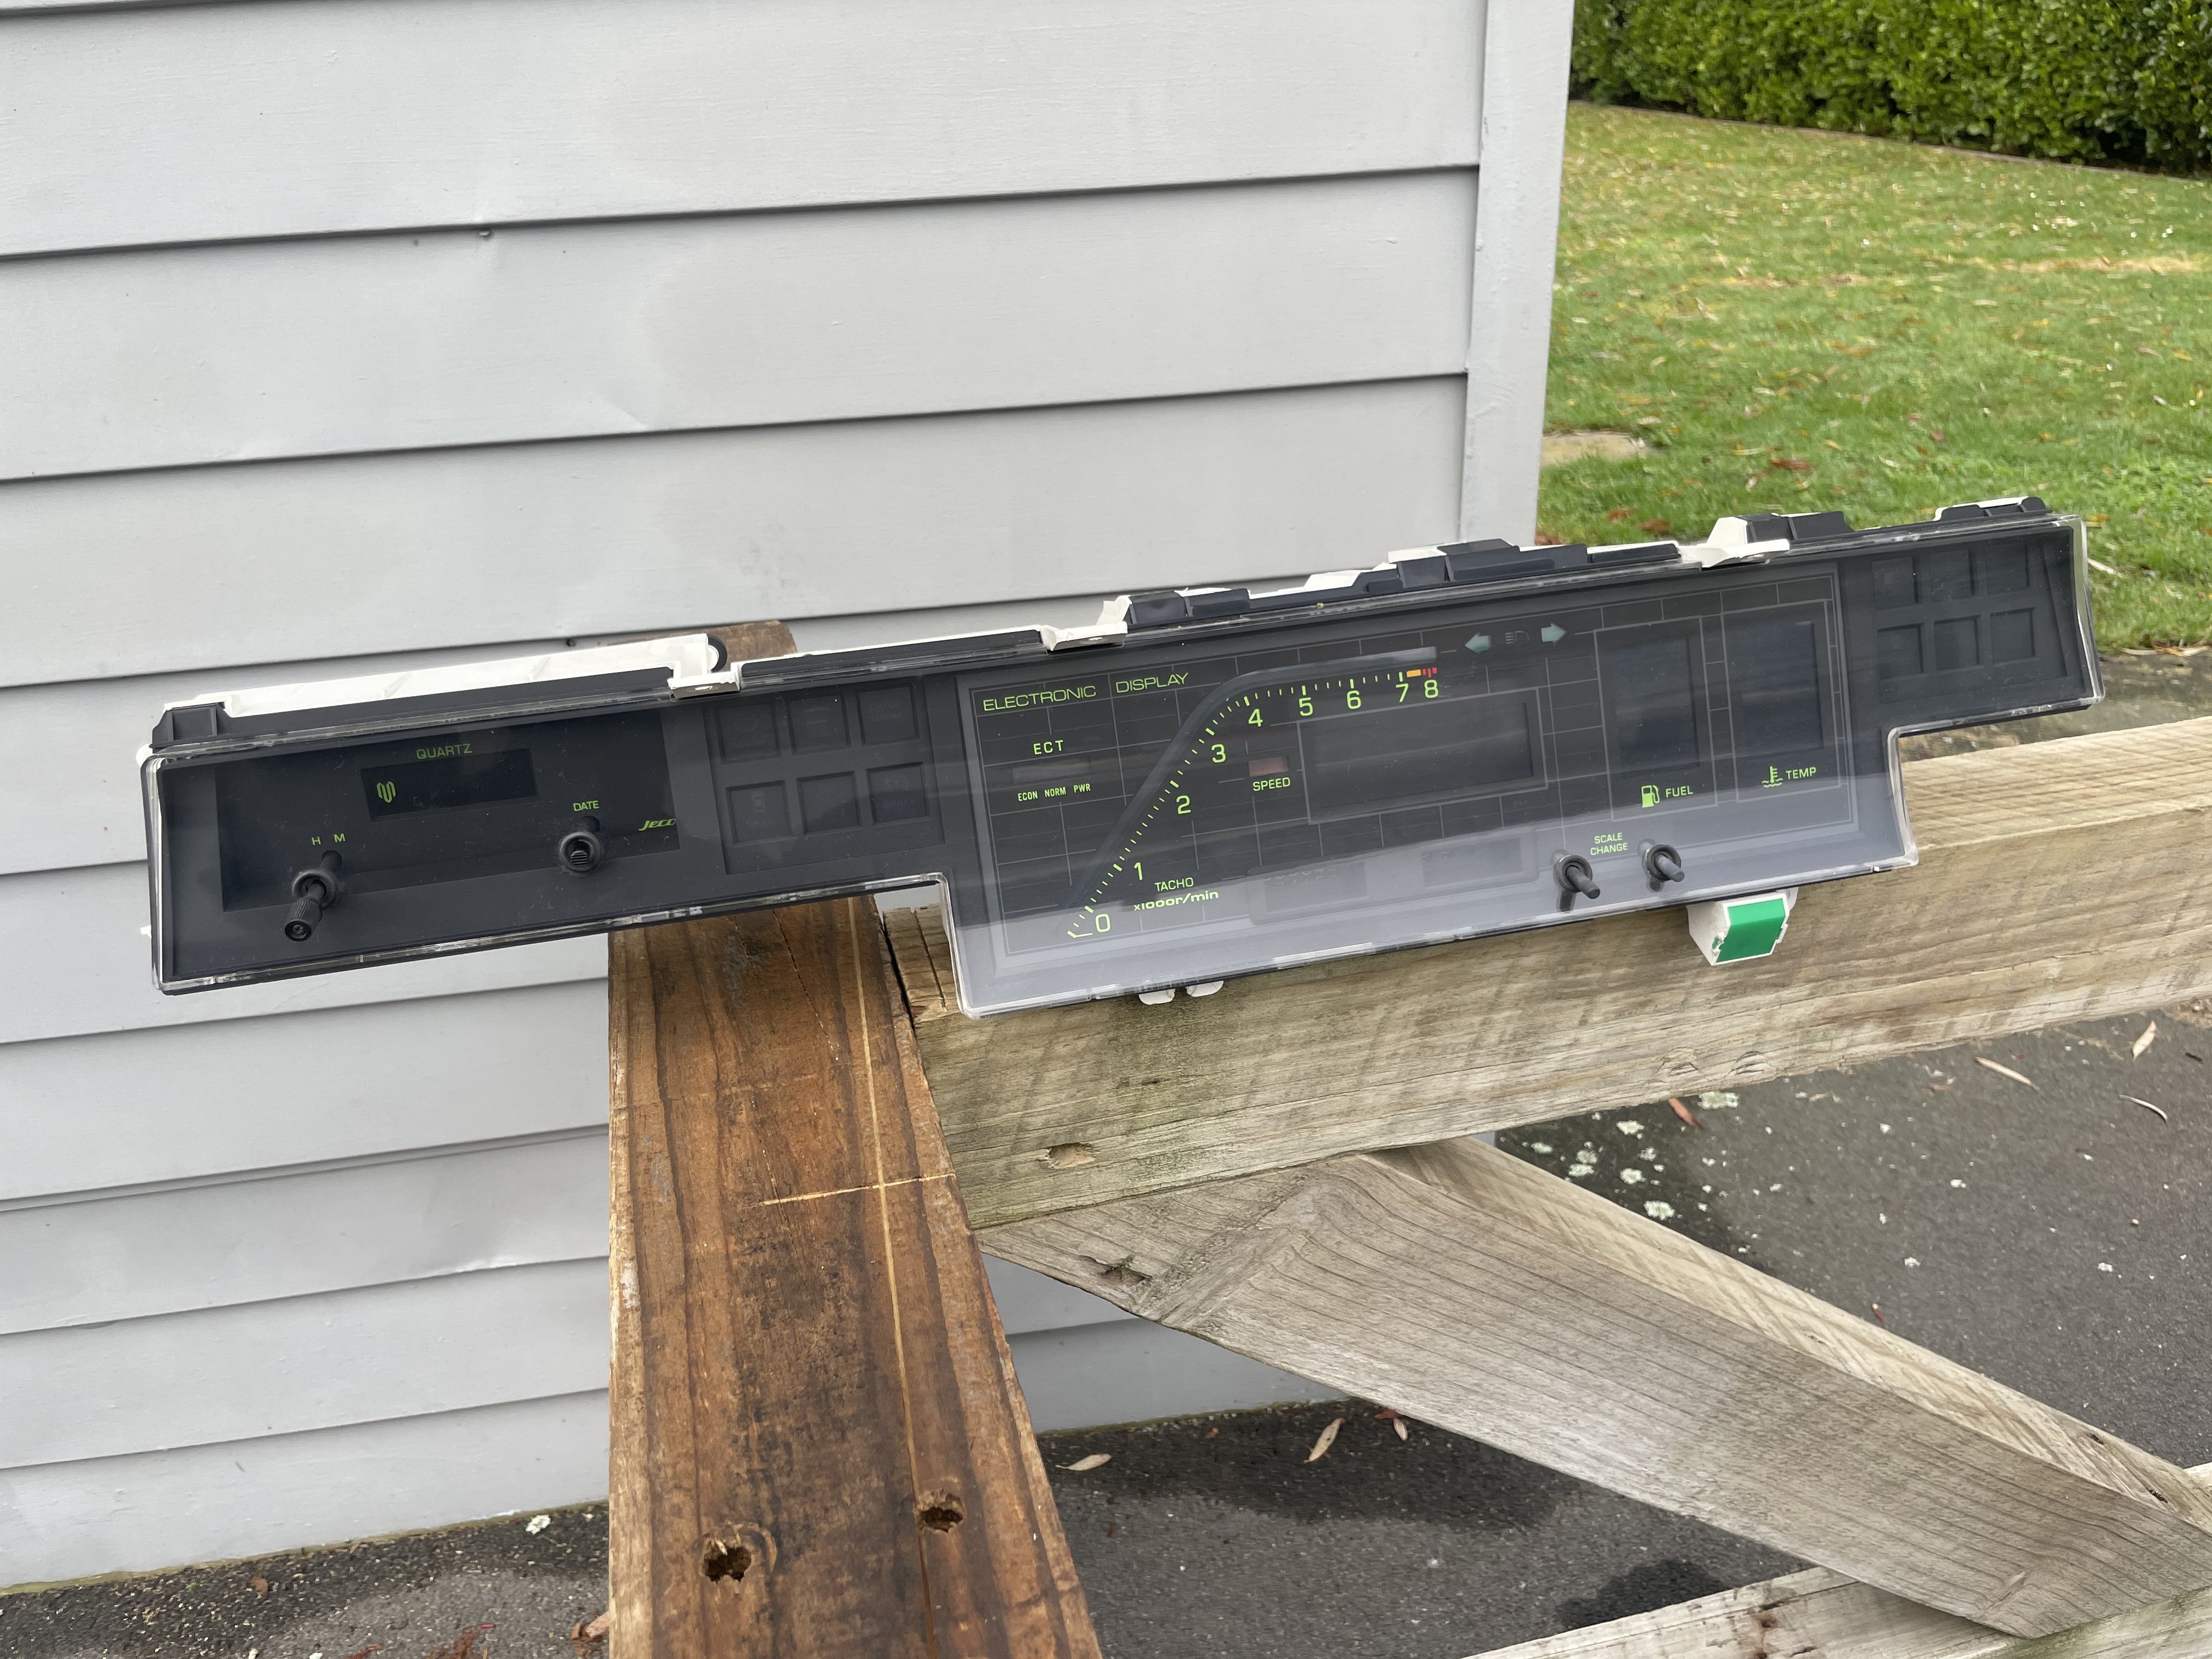
Can't ever remember them having a soldering station attached though? Yours must have come from a better specced car.2 points
-
Discussion here... As mentioned on another thread, I picked this up the other day. It was restored by a character by the name of Burt Williamson some time in the early 70's. He loved the thing and made a very detailed diary of all the little modifications and repairs he did on it. He then had the diary copied and bound for the other Austin boys to reference for their repairs, a true Barry. When he passed in the 80's my wife's Grandfather took it on and got a few thousand miles on it. When he passed in 2001 the family weren't sure what to do with it so it was parked up. That's when I said it's about time it was enjoyed, so I got the job of getting it back on the road. So 20 years after it was parked up, with air in the tyres from last century, I hooked up its little a-frame and dragged it across town. First was to give it a good clean. It was in really good condition from its dry storage, no real rust to speak of. The right side of the car took a little bit of UV so the rubber is a bit sad. The paint came up nicely after getting rid of the priceless barn find dust. So I'm slowly finding out more about these things. It's a '38 Austin 7 Ruby with the stronger 3 bearing crank & a 4 speed box. It even has syncros on 3 gears! The brakes are mechanical cable so no pesky hydraulics to overhaul. As you can see old Bert had thrown a few extras at her with indicators, a reverse light and an optimistic tow ball! Thankfully they had the presence of mind to keep the rego on hold all this time, so it's just a case of getting it running and get a WOF...2 points
-
Bumpers off completes the bogan look! I kind of knew the bumper bars had a bit of rust on them, but man the front was bad! It's been holding moisture between the foam and the steel, pitting it badly and completely rotting away the clamping brackets. I've had the bumper bars blasted and gone and welded up the holes in the front one, next will be a bit of epoxy and making up some new brackets to put the skins on securely.
2 points
-
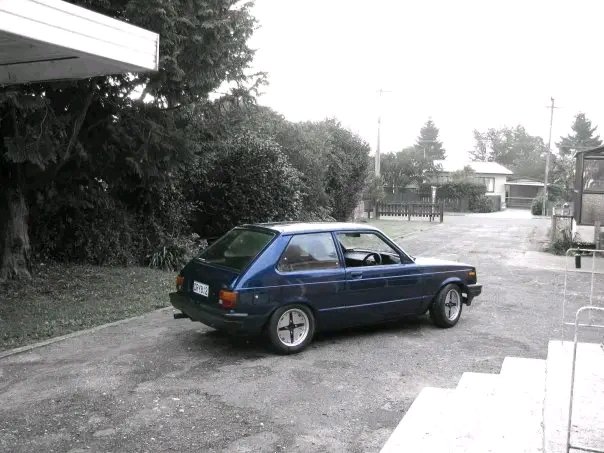
Here's another. It's a KP60 as it originally had a 2k and x code diff. And it's a drophatch with flat front conversion as has been established. Happy to share more pics if I can boot up my old laptop and answer any questions but I can imagine it's had a whole string of different engines etc since my ownership. Fond memories of this car for sure!
2 points
-
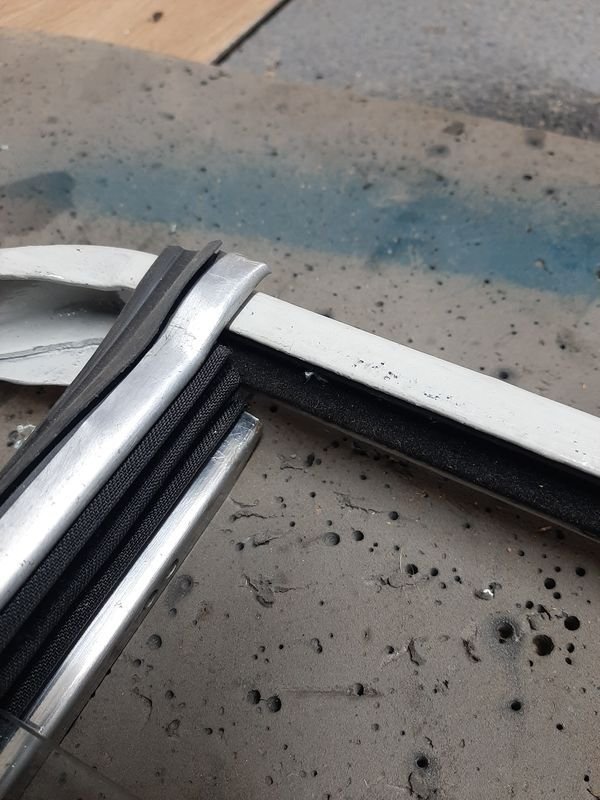
Sure. They're different left to right. This is the drivers side of the block, looking at the face that bolts to the block. Then this is the passenger side, looking at the face that bolts to the block.
2 points
-
Before
2 points
-
2 points
-
2 points
-
We have rear slammage 4” reset leaves no 2” blocks anymore. And short Koni struts. as per the photos suck to load so they might come through as singles. Im so needing to roll the guards now haha
2 points
-
Man seeing that snippet of the numberplate, I am almost certain this is @Toucan's old KP61, can't be many other KP's 4AG swapped with those same plate letters.... Any signs of it having been a dark blue colour?2 points
-
I got the front axle rebuilt and ready to sling in. All new bearings and seals etc, just waiting on the brake hoses. One thing I didn't know that I didn't know was that 80s are full time 4wd, but some clever dingo sausage figured a mod to lock the centre diff gear and use it to throw the front driving gear and make it 2wd / 4wd so I got the kit and put manual hubs on the front. I made so some radius arm mounts too, plan is to use them for mock up / alignment then maybe get some snazzy triangular ones profile cut, or add triangles and black paint to these ones Wiring harness and a few other bits showed up, also ordered a super cheesy LCD instrument cluster which I'm pretty excited about, sort of like the nasty old Dakota digital ones that tried to look modern but ended up quite the opposite.
2 points
-
Yea so two things you'll need to know if you're going to put air pressure into it. 2 psi will be enough to turn that tank into a sphere. regulators and pressure relief valves that are accurate at that low of a pressure will cost more than you payed for the tank.2 points
-
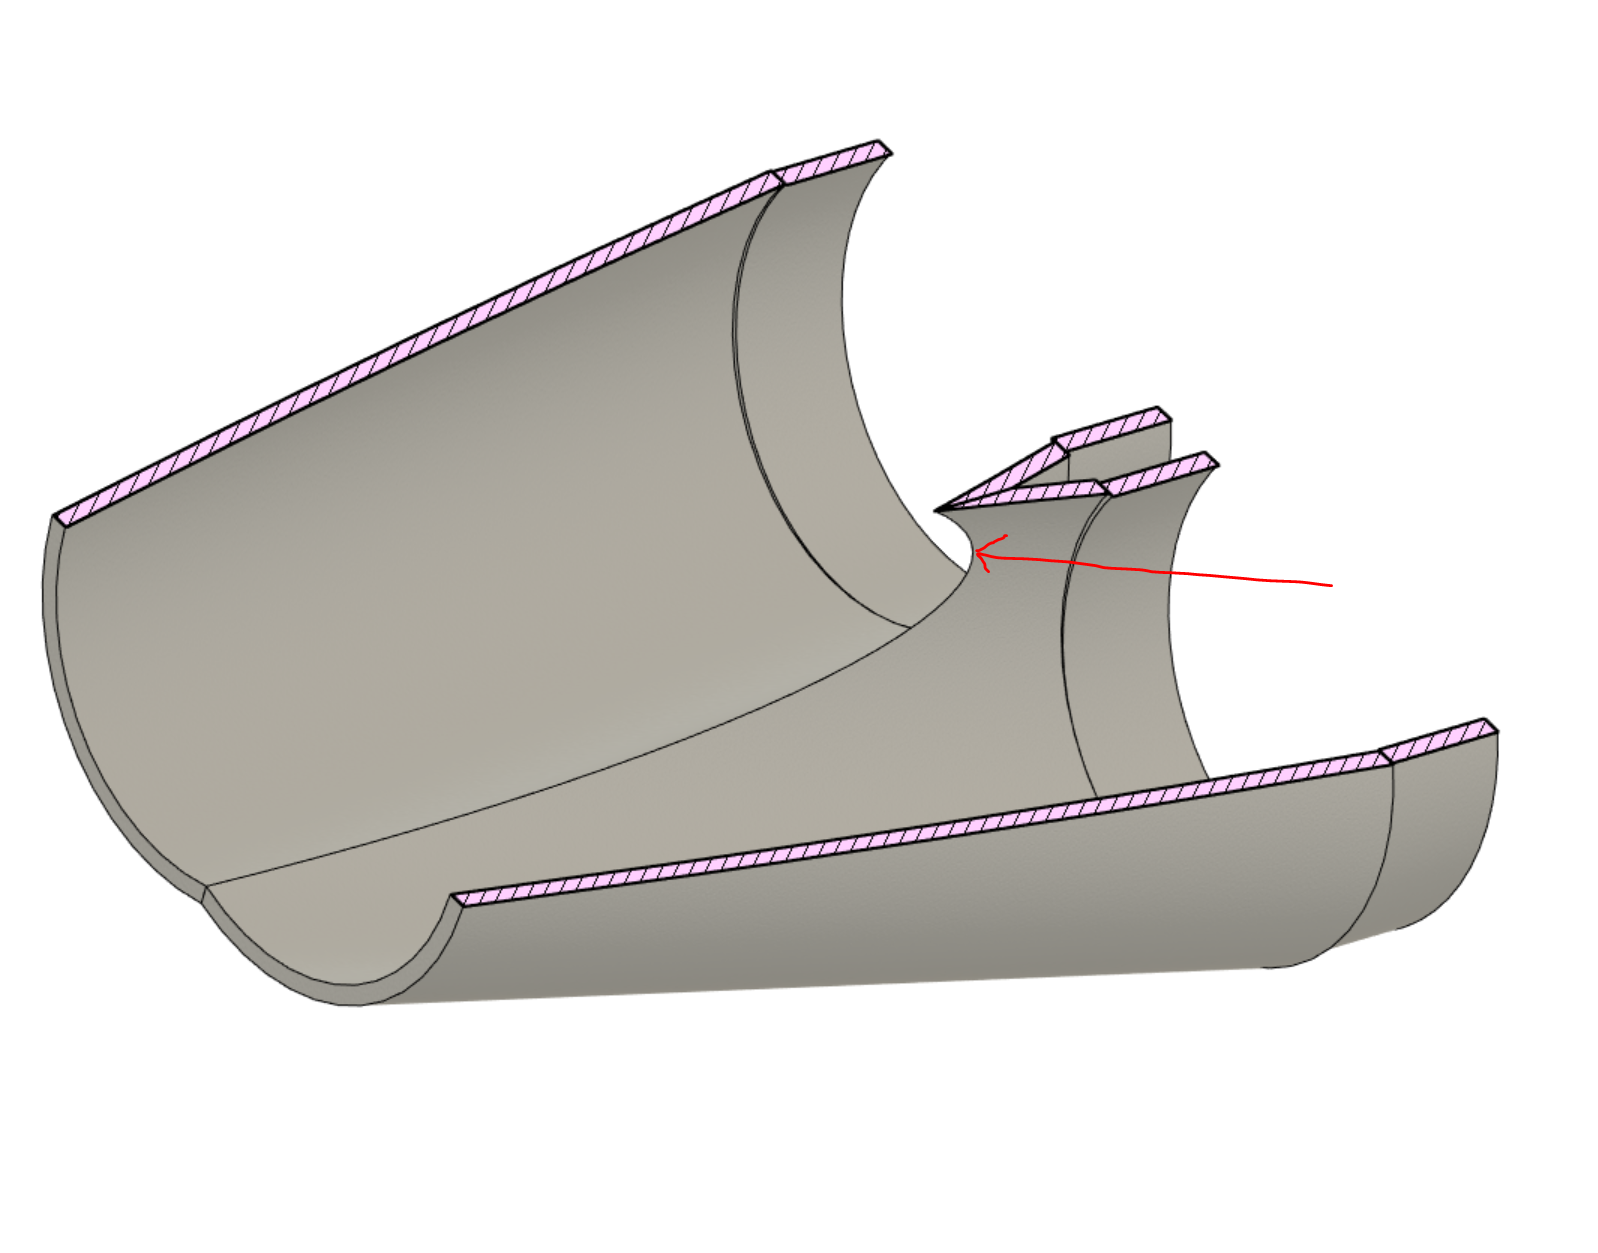
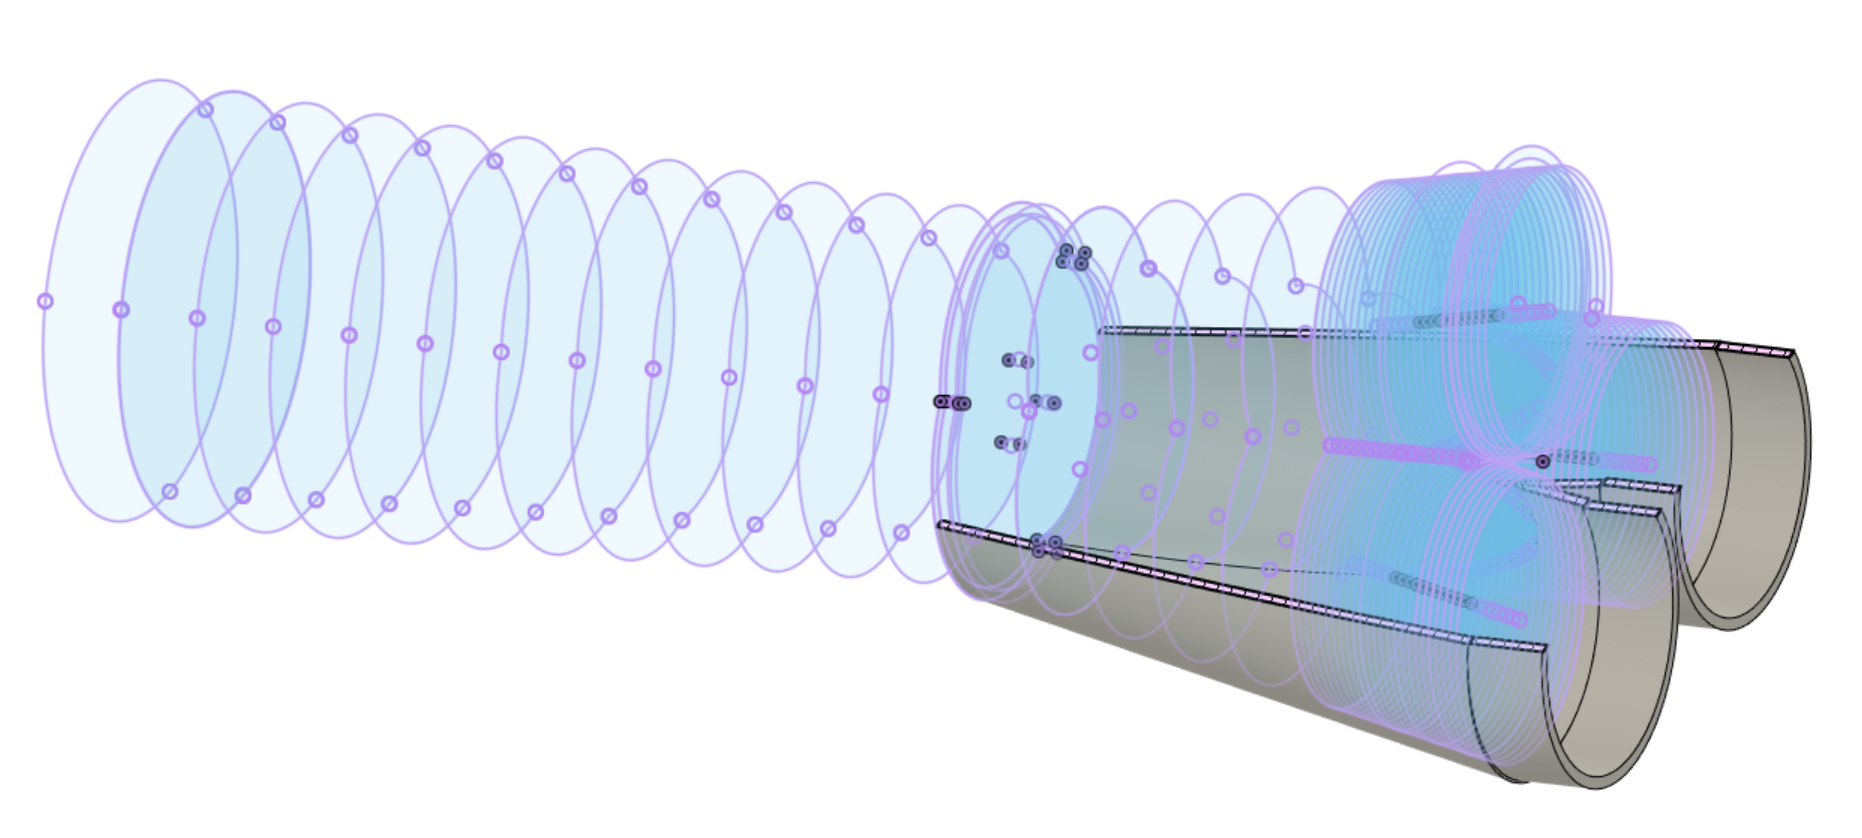
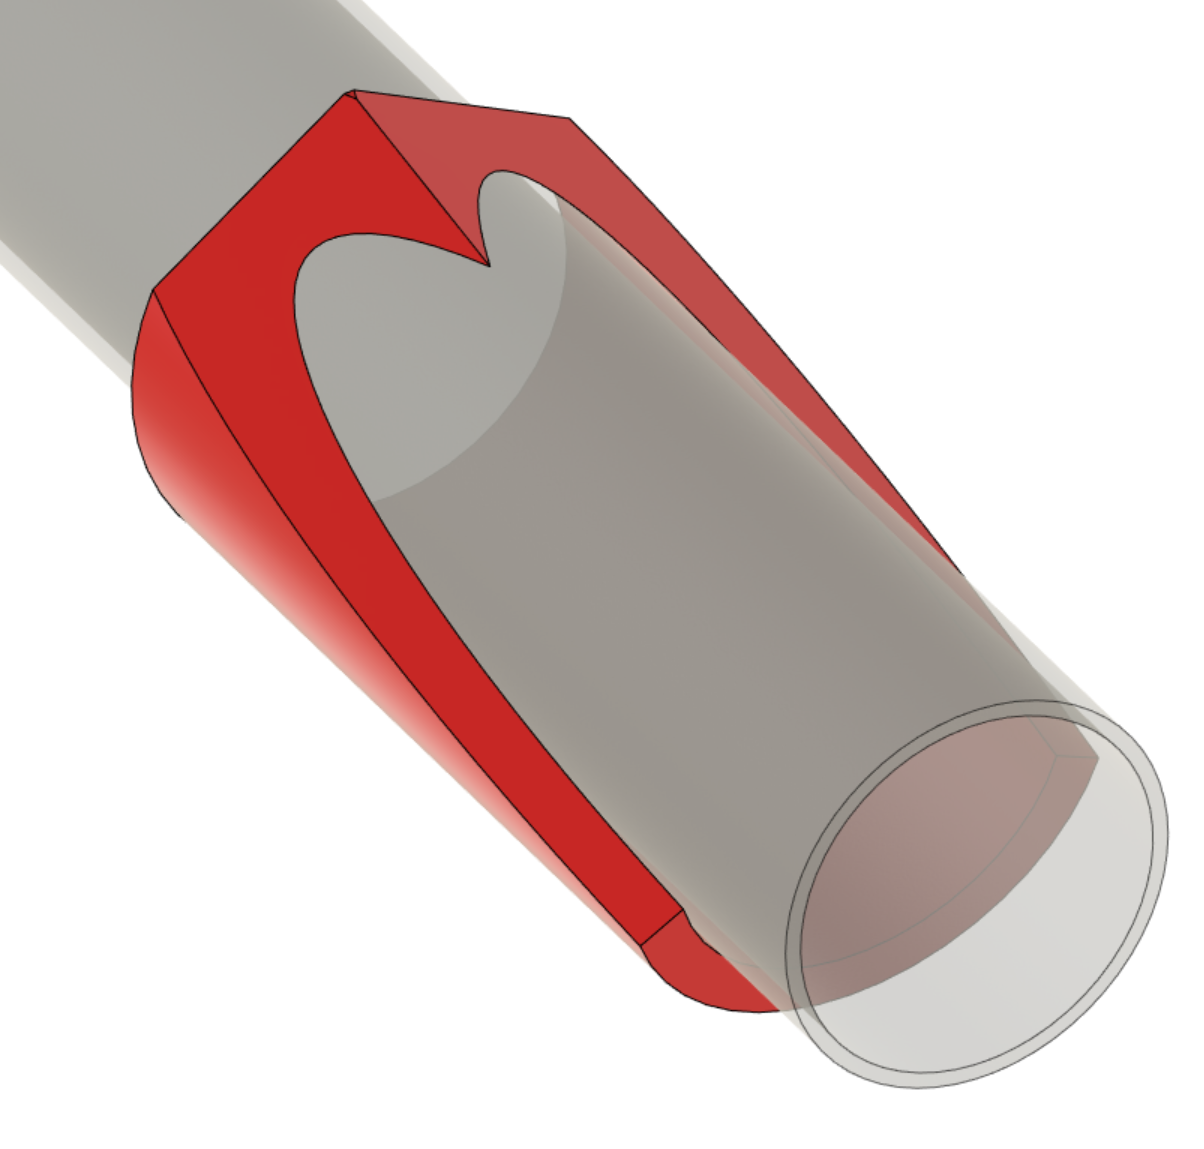
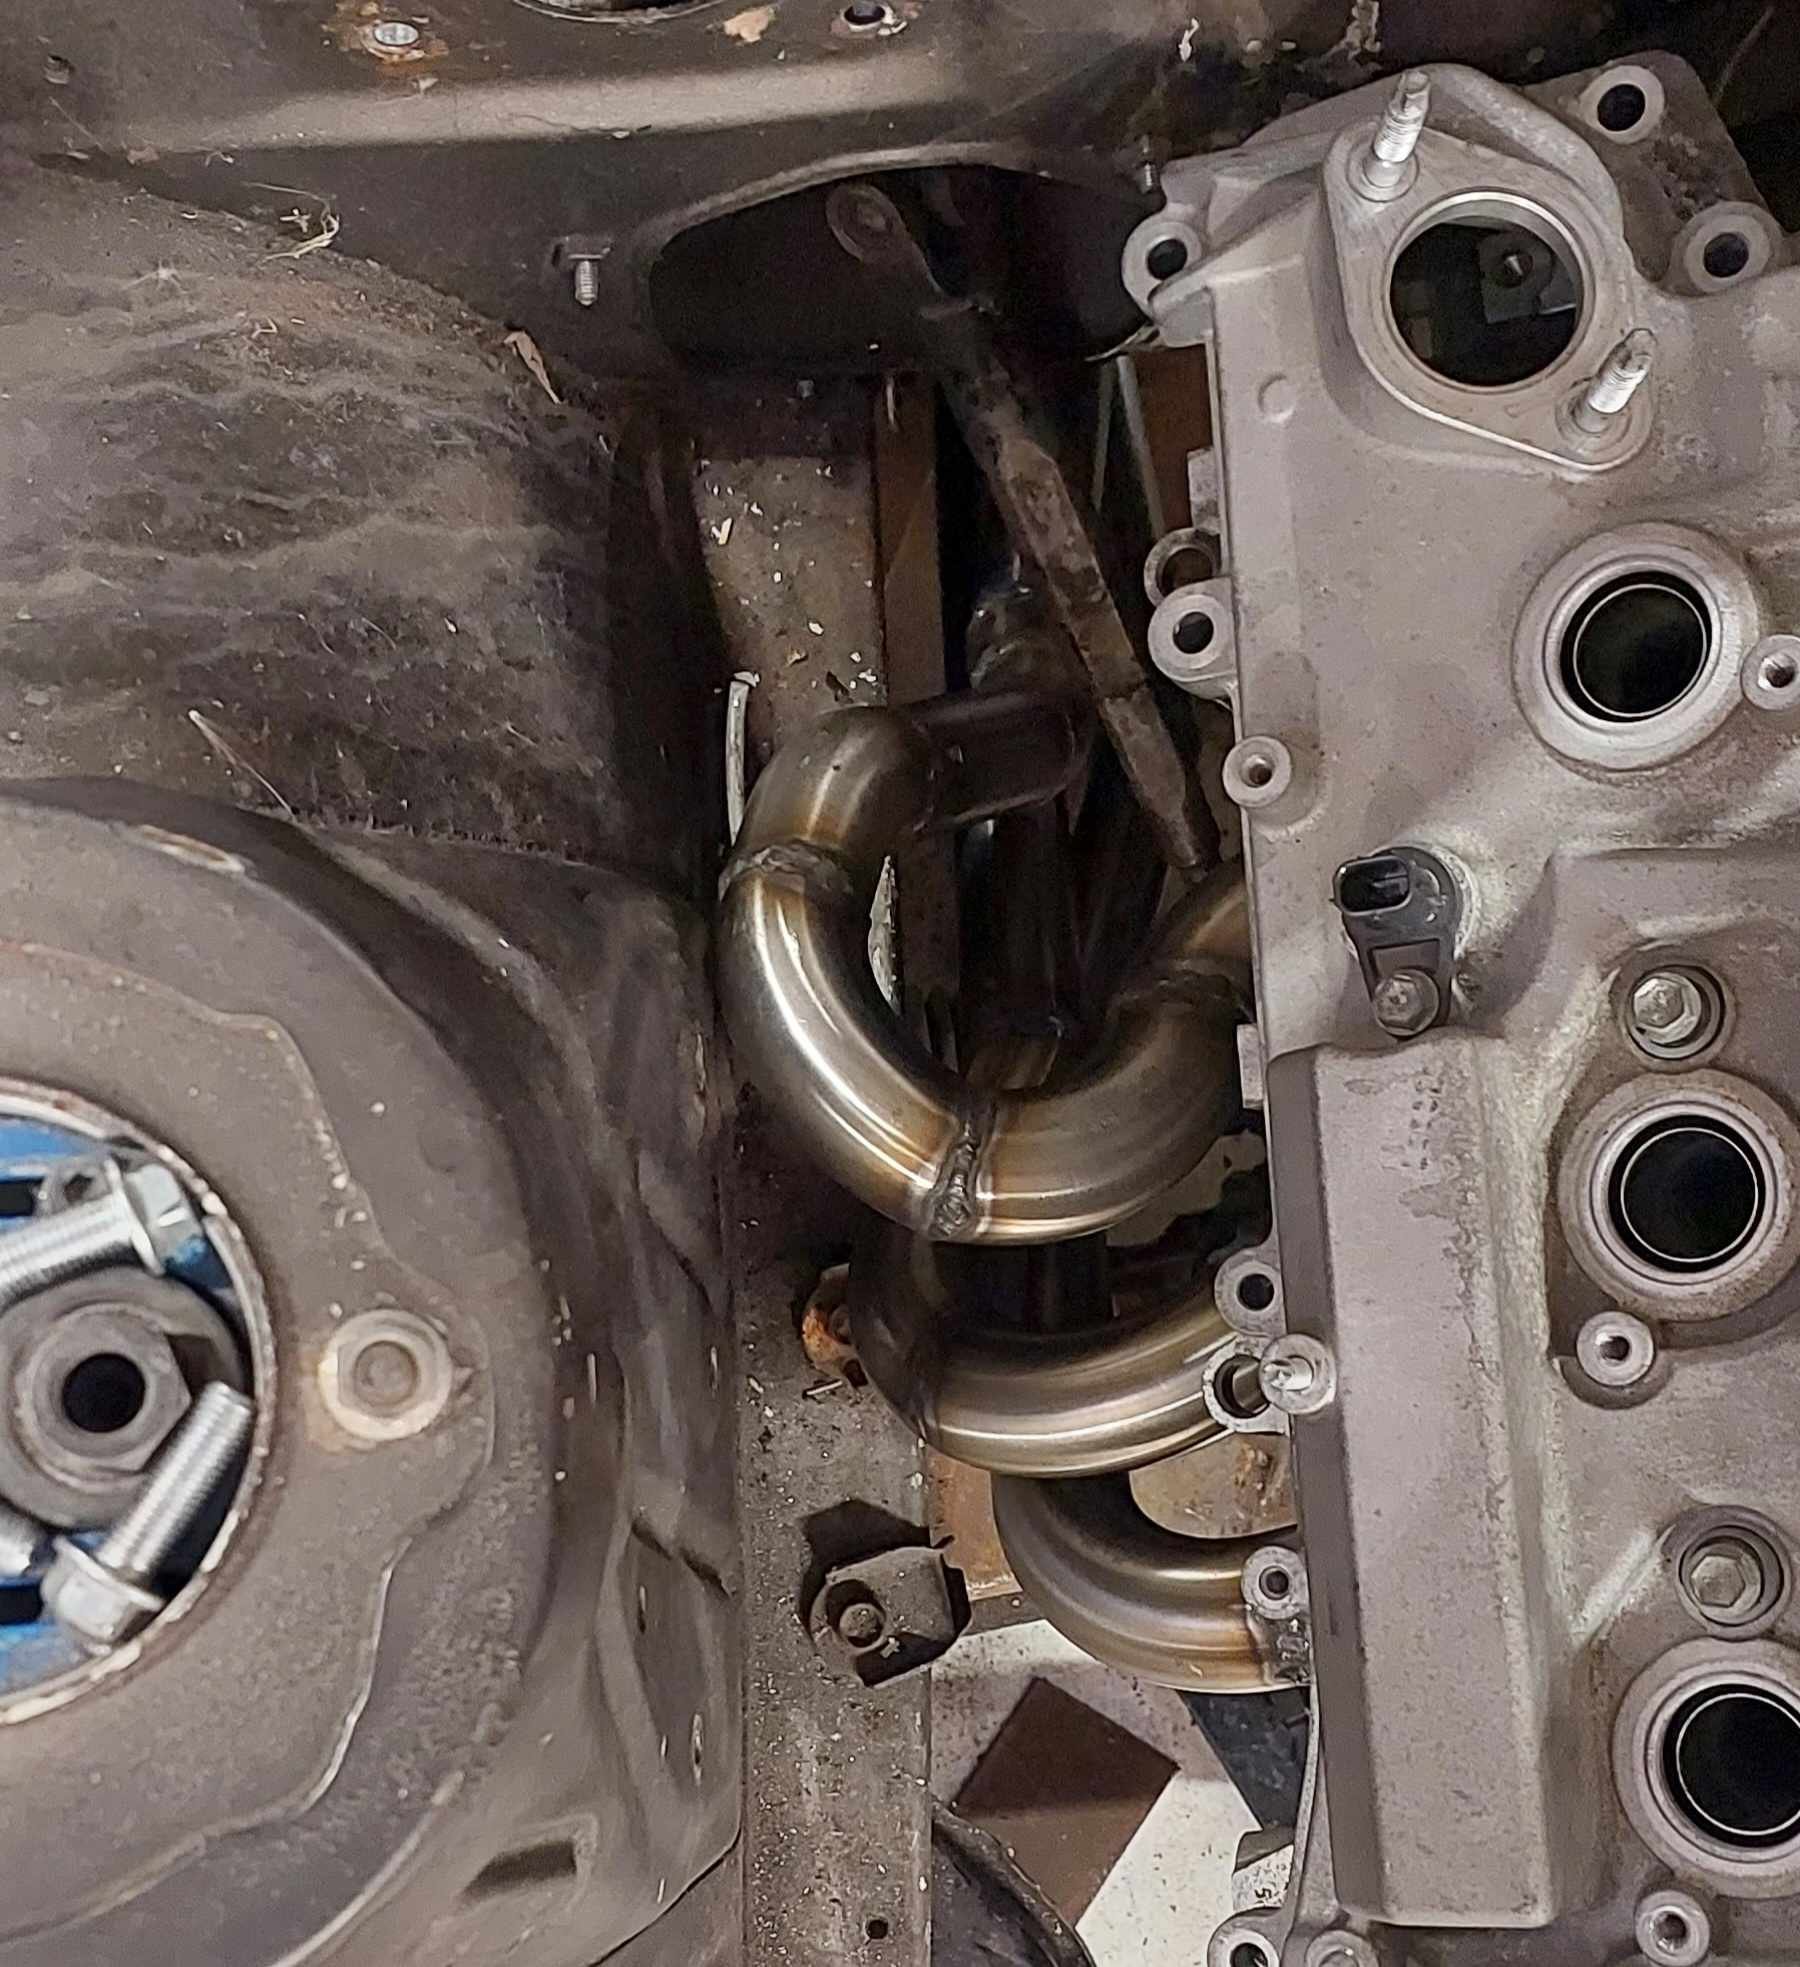
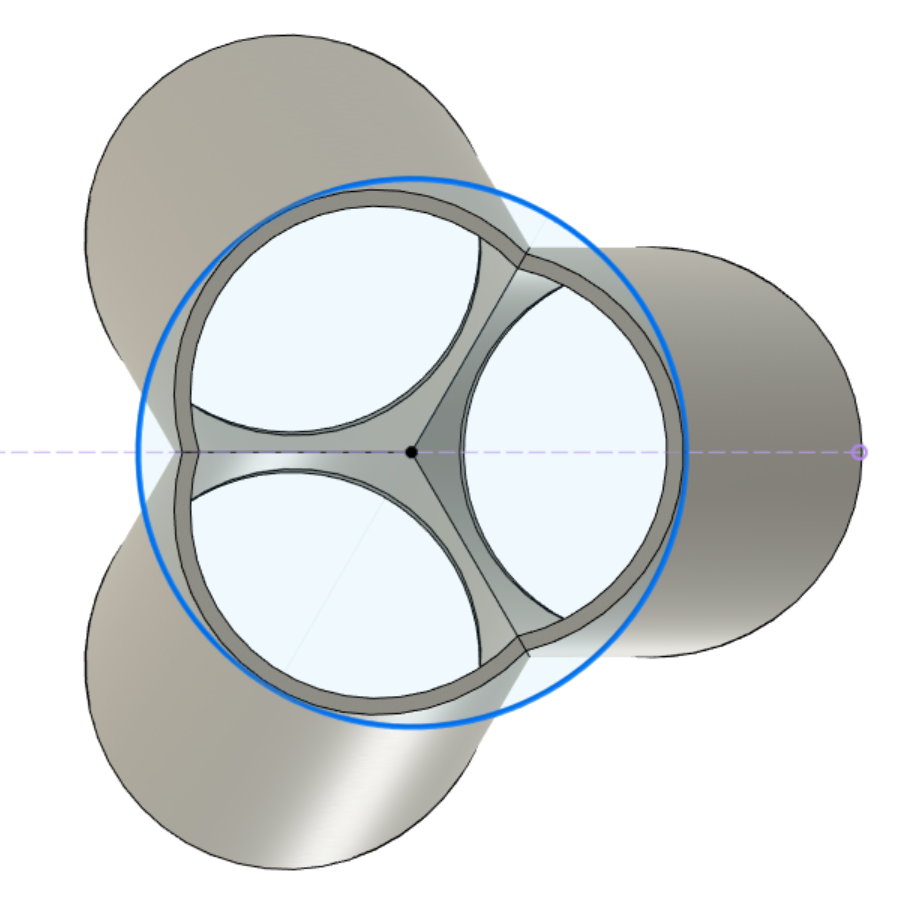
Alright sooooo. It's been a case of: tack pipes. test fit. cut pipes back off. test fit. tack pipes again. scratch head. And so on, for about 30 iterations until I've run out of bends and argon. However I've now got something that clears everything. Doing some checks on lengths, they're within about 40mm of each other. Which is about 5% variation - happy with that. However, a few problems. Firstly, I've chopped and changed everything so much that it's a bit of a mess. Partially due to being short on patience from redoing everything a lot, and not having totally flush surfaces. So welds turned out more pooey than needed. I should invest in a linisher I think. Secondly, This is all great that everything's past the steering column, and 10+ mm clearance to everything. However everything is on some tricky angles to try stuff into a collector. I havent made a collector, because it seems hard. Or I need to buy some. The only purchasable collectors that fit my budget look like baked bean tins that have been stood on. So I will try make something instead. As I think what I really need to do. Is to start the pipes from the collector, then work back towards the head from there. Welding a collector is tricky, because you end up with a bit in the middle that you cant reach to weld when it's together. One way is to cluster the pipes together tight. Then weld a little triangle piece in the middle before it goes together, on the collector and 3 pipes. Then weld the remaining perimeter to finish it. (Idea stolen from @kpr - thank you) So hopefully something like this. To choose where to slice the bottom part, I've drawn a circle the size of a 2" pipe, then just cut it shorter till it roughly matches this. I could go bigger or smaller though I guess? Currently has inside area equivilent to a 1.75" circle. My plan is to print some cutting templates like this. If I had a band saw I'd do it a little differently so the outsides are flat so it sits on the right angle on the table. Actually - yeah might do this and see if I can use bandsaw at dads. Assuming it's happy cutting stainless. Fingers crossed it works out alright. Something else to think about. As per oldschool.co.ng project tradition, 3" exhaust pipe. However - I've got two banks that need to eventually merge into a single 3" pipe. I'm not sure if there's any useful tuned stuff happening in the 2-1 part of a 6-2-1 setup. If I was trying to keep the "secondary" pipes to half the cross sectional area of a 3" pipe, then it's about 2.1" per side. I definitely want to merge all 6 pipes, because otherwise it'll sound like I've got a pair of triumph motorbikes in the engine bay rather than a 6 cyl.
2 points
-
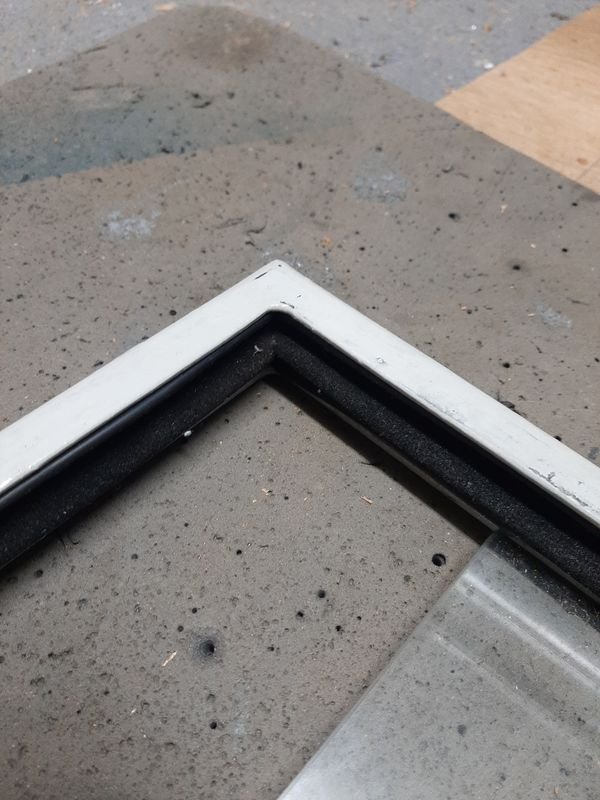
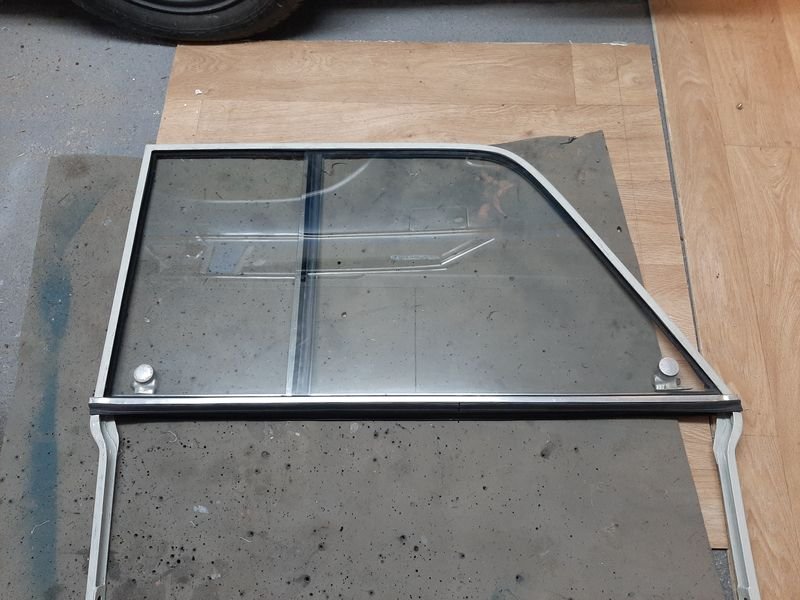
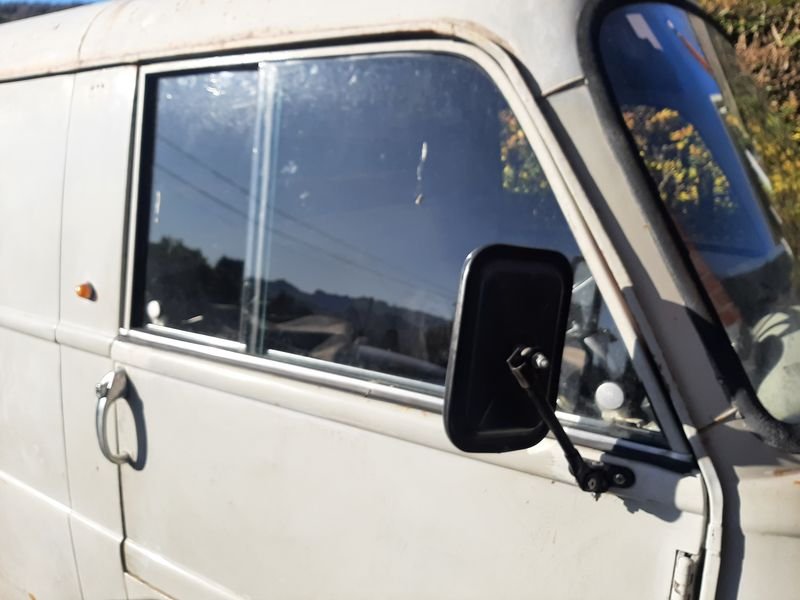
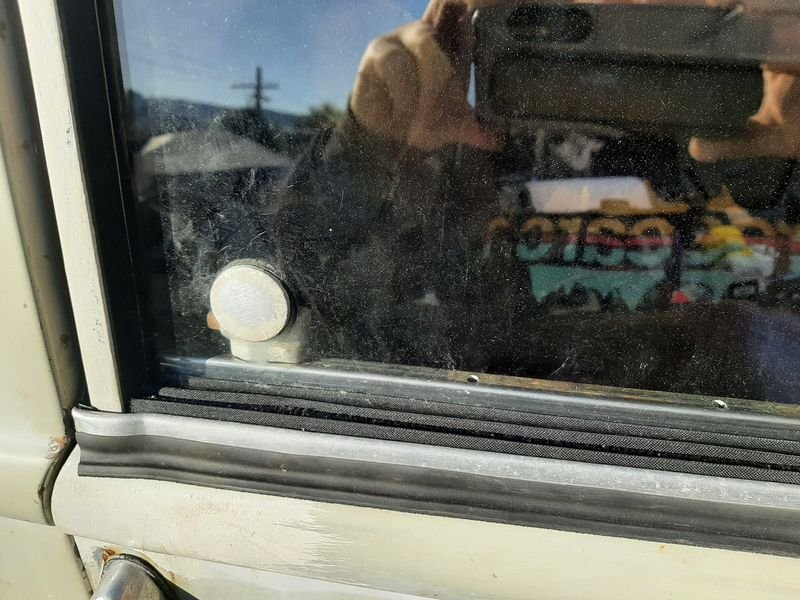
So long time no update on this. After my last post I fitted up the refreshed door frame Looks really good especially compared to the other side, which ive still to do, because it would be easier with the van turned around facing the road Which is cool, because the van now has a running engine, selectable gears, brakes and all the electrics work... I could drive it out the driveway, maybe an accidental quick bimble around the crescent and then back it in to its spot. Foreshadowed above tho is needing a new oil pressure switch causing the oil light to not go out. I had ordered a cheap set of aliexpress gauges (volts, water temp, oil pressure) and wired them in too - i like being able to see whats going on in more detail than the very basic dash lets on - swapped the oil pressure one out for an old mechanical one i had, because i trust them more than the cheap electronic sender/gauge and i had some adaptors that fit the block. Anyway, hooked the gauge up, and cracked the line to let the oil fill the line and push the air out, and fired up the engine (which runs great), but oil didnt fill the line So I did the right thing and took the fitting off and gave the jandal for a bit (nothing i hadnt done before) and some sort of dribbled out. Took the sump off and pulled the oil pump out, cleaned and checked it including running it witht eh drill in the drained oil - seems fine given how much oil it splurted over the driveway. Ill probably order a new pressure relief valve to be sure even tho the other one seems fine - the spring is stiff and it seals. Tried a couple other things to see if i could trace how far from teh pump the oil was getting to but its pretty hard to tell without being an oil molecule. The oil pressure sensor is near teh end of the line in terms of oil supply, but seems it is getting to the centrifugal filter (which just upstream of the pump) so it will be at least partially in the crankshaft bearings, but it isnt really pushing up to the tappets/head at all (which still have moly grease on them from assembly) So i assume i either put a bearing shell in wrong way round at some point or the crankshaft is full of crud. Either way the engine will have to come back out to be torn down again to find out what the fuck. So yeah, its been sitting untouched for about exactly a year. And then the other day it was just sitting there looking kinda cool, so I might start the process of pulling everything out of the engine bay, again, in preparation to drop the engine out, again
2 points
-
Last bit of the recent puzzle is the suspension, which started probably a year ago. I always had custom springs and a nice uprated Whiteline swaybay up front, but never really got around to doing anything with the dampers. Now that I've gone 4 link, I decided to coilover the rear and find some suitably good front shocks to match. I spent countless nights measuring and making spreadsheets. I looked into rear coilovers from T3, Fortune Auto and others, and fronts from GAZ, Bilstein, Koni, Avo, Spax, etc. Nothing really seemed to be exactly as I wanted it. So I figured fuck it and decided to go custom. Looking around, I first called MCA but I didn't get the feeling that they would really put in the effort I needed for my setup. Then, while asking @Truenotch what he'd done for his race car, he mentioned Shockworks over in Aussie. I gave them a call and got a real good vibe from them. They were stoked on my project and keen to help, so I got together all the details they needed, including the corner weights of a stock Gemini as seen a few posts above and waited. And waited. And waited. And waited... I'm still waiting. But now I'm in Melbourne waiting for the Grand Prix to start. So I figure I'm close enough to go out to their shop and give them a kick up the bum. I coax my sister into borrowing a friend's car and driving me out into the Dandenong ranges which is where they are located. I'm glad I did this, because it really lit the fire and not long later, here we are: Looking damn fine. And now I can finally set off the next season of my Rube Goldberg machine which should see the car back in with Tim at ShoresNZ to finish the diff and coilover conversion and then hopefully off to the paint shop! The last new bit for the suspension is a Whiteline swaybar for the rear. The car never came with a rear bar so this should be a good upgrade. I borrowed an AE86 one from @slacker.cam to mock it up and it fit good, so I bought one:
2 points
-
I've found this thing great as a daily! It's easy to drive through town, gets parks easy, uses almost no fuel, seats 4 adults and is also good for runs to Bunnings. The problem with driving it daily is you have to watch out for the other muppets out there. I had a Tiida give me a little nudge in the rear in town. He must have known I couldn't catch him because he took off the other way never to be seen again. Fortunately Classic Cover were great and it was all sorted through work without any probs. It was also a good excuse to cut and polish the paint to see how good it could get. It came up better than I was expecting! Although I'm aware I'd better not get the car looking too nice, this thing is too much fun to park up in a shed again. Next winter the engine may come out for some oil leaks, a shuddering clutch and refit that crank handle, but for now we are just going to drive it and keep fixing any issues that pop up.2 points
-
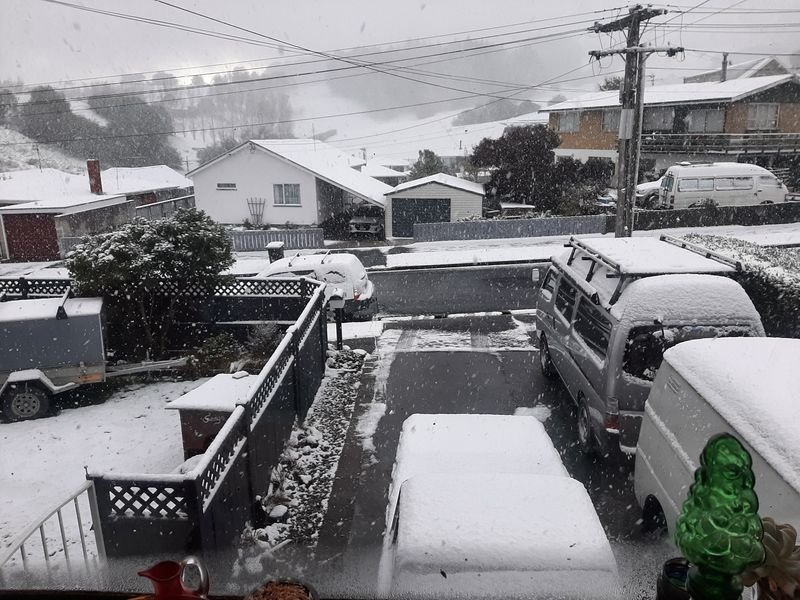
After getting the WOF and the bloody cheap rego we took it all over the place, slowly increasing the distance from home as breakdowns became less frequent. Over the last 6 months I've had to replace the intake gasket and carb needle & seat. The points burn out regularly, I think the New Old Stock condenser is too Old. The front dampener fell off and the crank handle fell out. Various other components have come loose so a regular tightening of everything was needed for the first wee while. The fuel sender float would slowly fill up with fuel, that took a few goes to plug up. Other than that i changed out all the fluids & adjusted the brakes a few times as they settled down. After all that we took it out to Oxford for the big snow they had. It did pretty well with the wife, 2 kids and the dog! It clapped out at 50mph with no issues. It was a bit sketchy coming home in the dark though, the 6 volt headlights don't do much. We took it out to Oxford a few times after that, and also dragged it up to Godley head. That one did stretch the thermo-syphon cooling system! The biggest cost came when the front tyres wore down. Turns out they were retreads from 1978, so they did pretty well. A pair set me back $400!2 points
-
The engine had a bit of work done 40 years ago, but only around 4000miles ago. After winding over on the crank handle it was obvious it only had compression on 3 cylinders. Luckily it was only down to a stuck valve. Next was fuel. The tank had a quarter of rotten gas so it came out and I gave it a thorough steam clean. The fuel pump diaphragm was stuffed so a new one went in. Then no spark due to stuffed points and condenser was sorted. After that and a new battery and she flicked into life pretty easily. After that it was just a case of cleaning some switch contacts, getting new keys cut, wiring up the generator correctly and getting a WOF sticker on.2 points
-
If all else fails it will make a nice dog kennel1 point
-
Yeah i will definitely have the pipes merge before any mufflers etc. Try get the higher pitched sound from it. Im not really sure what length to aim for, for the 3-1s. Can go as long as I like really. Current length with no collector was 640mm give or take. Ive got heaps of room once im past the steering column. Since theres only 3 exhaust events instead of 4, id expect a longer pipe needed for same tuned length compared to a 4 cyl. Unless the scavenging effect is each runner scavenging itself. In which case the same length. That noise from the car above does absolutely nothing for me. Ive never been huge on v6s. Buuutttt throw some doorty intake noises into the mix and its acceptable, even with pooey rpm limit: https://youtu.be/1zQAPDmGZrg With a few thousand more rpm than that, now were getting somewhere!1 point
-
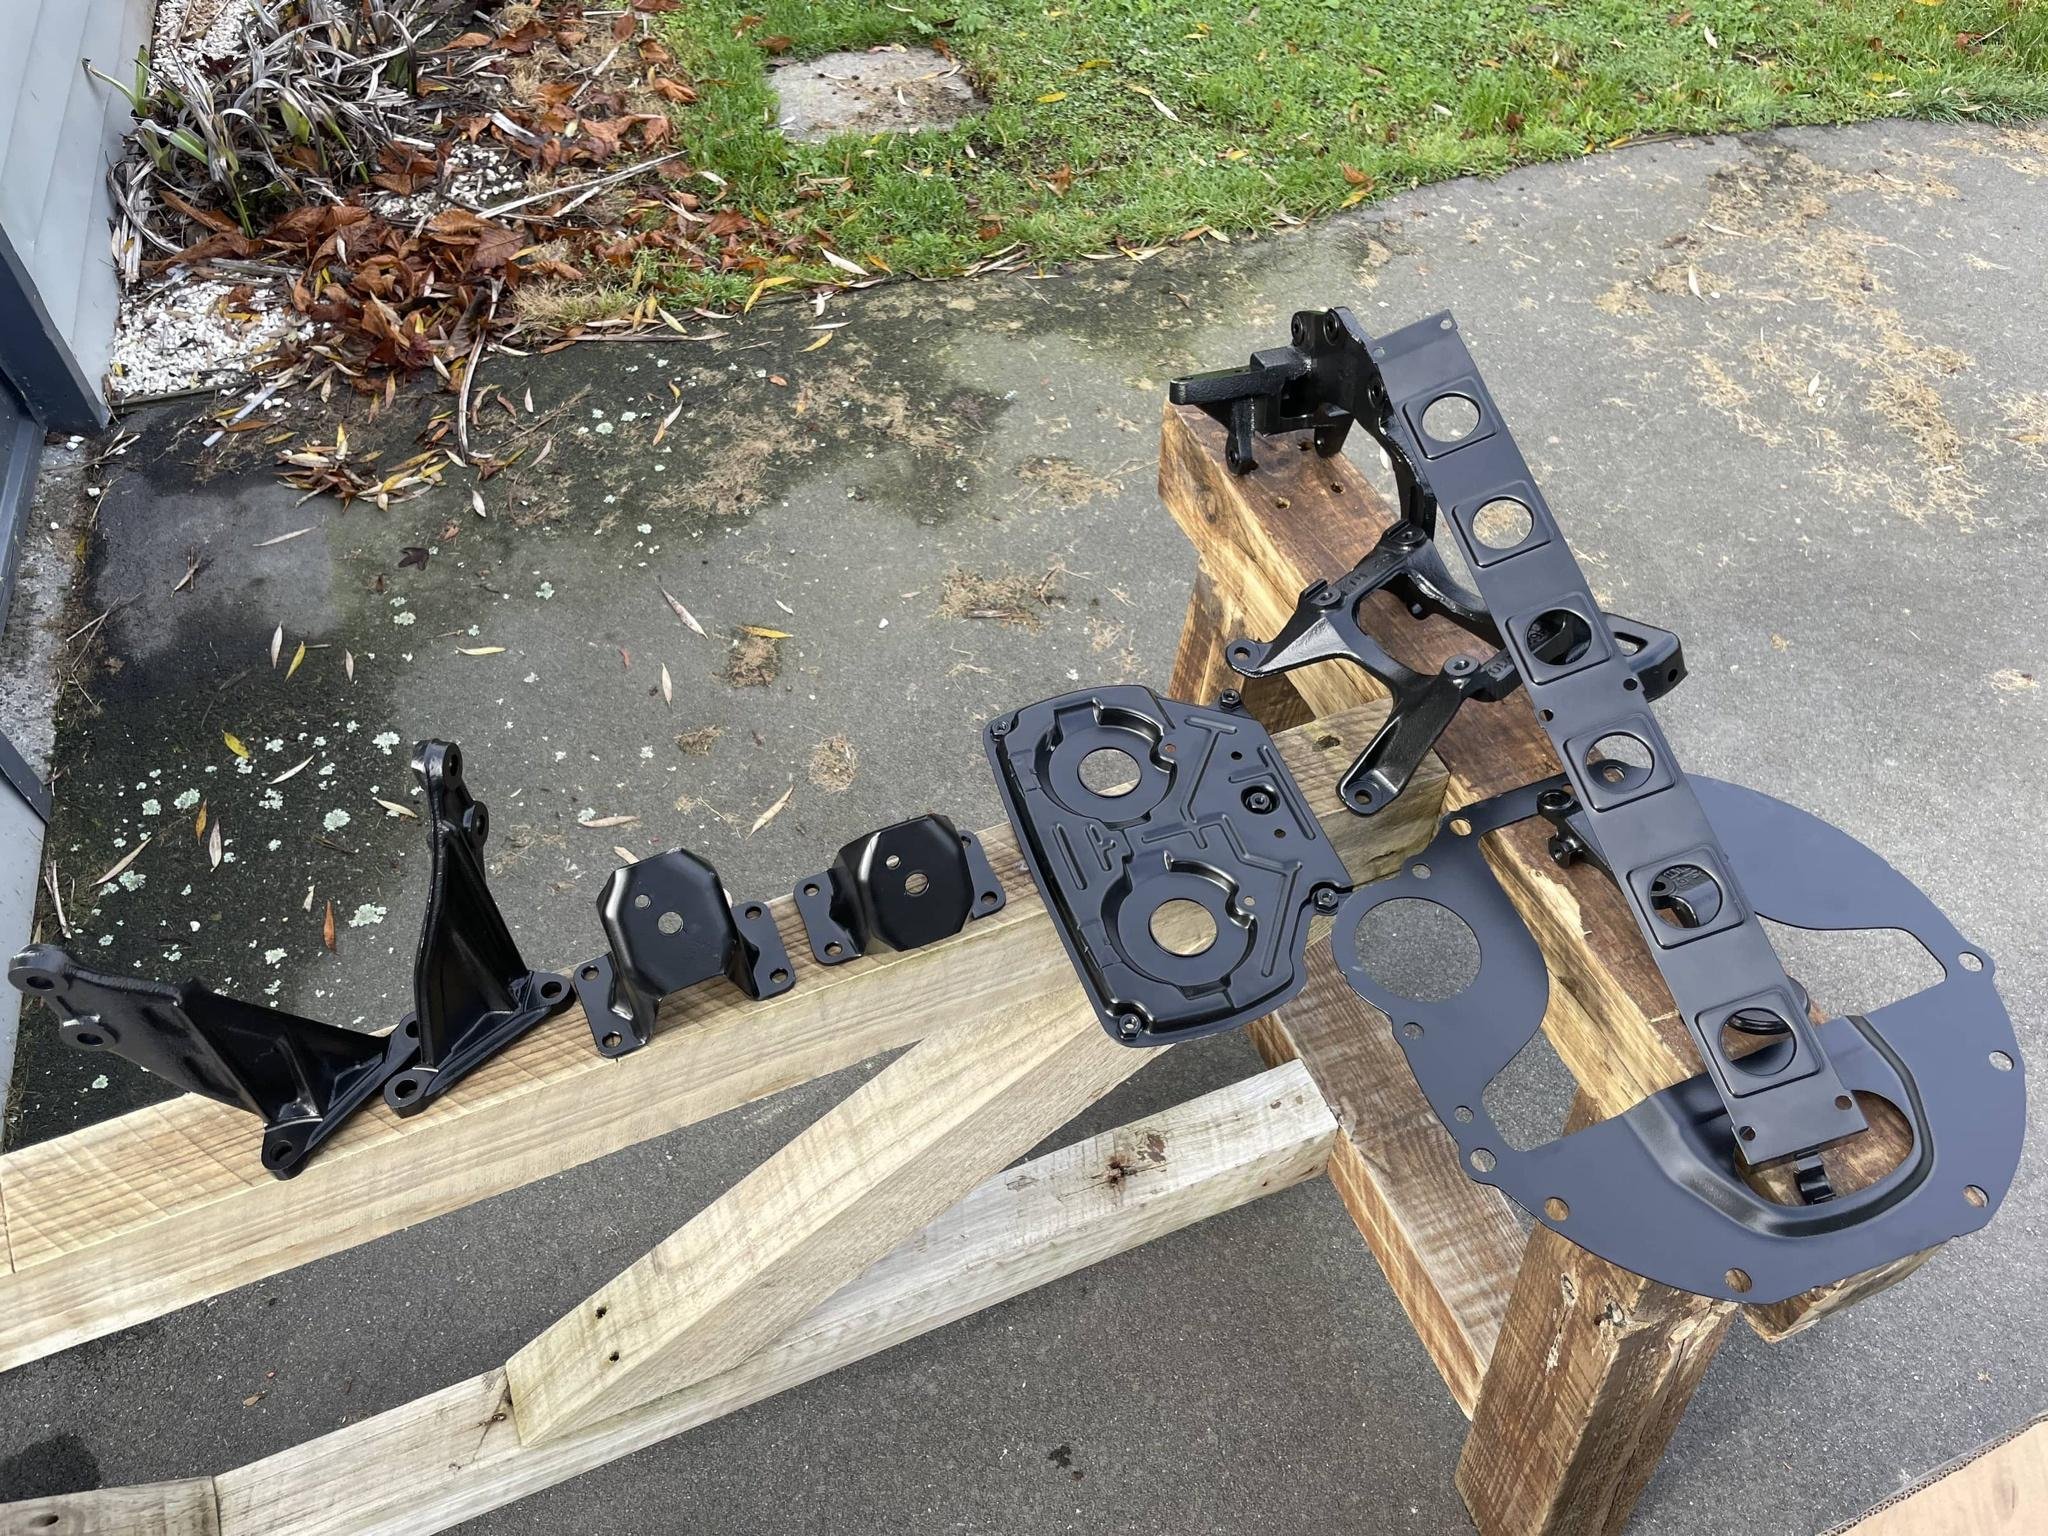
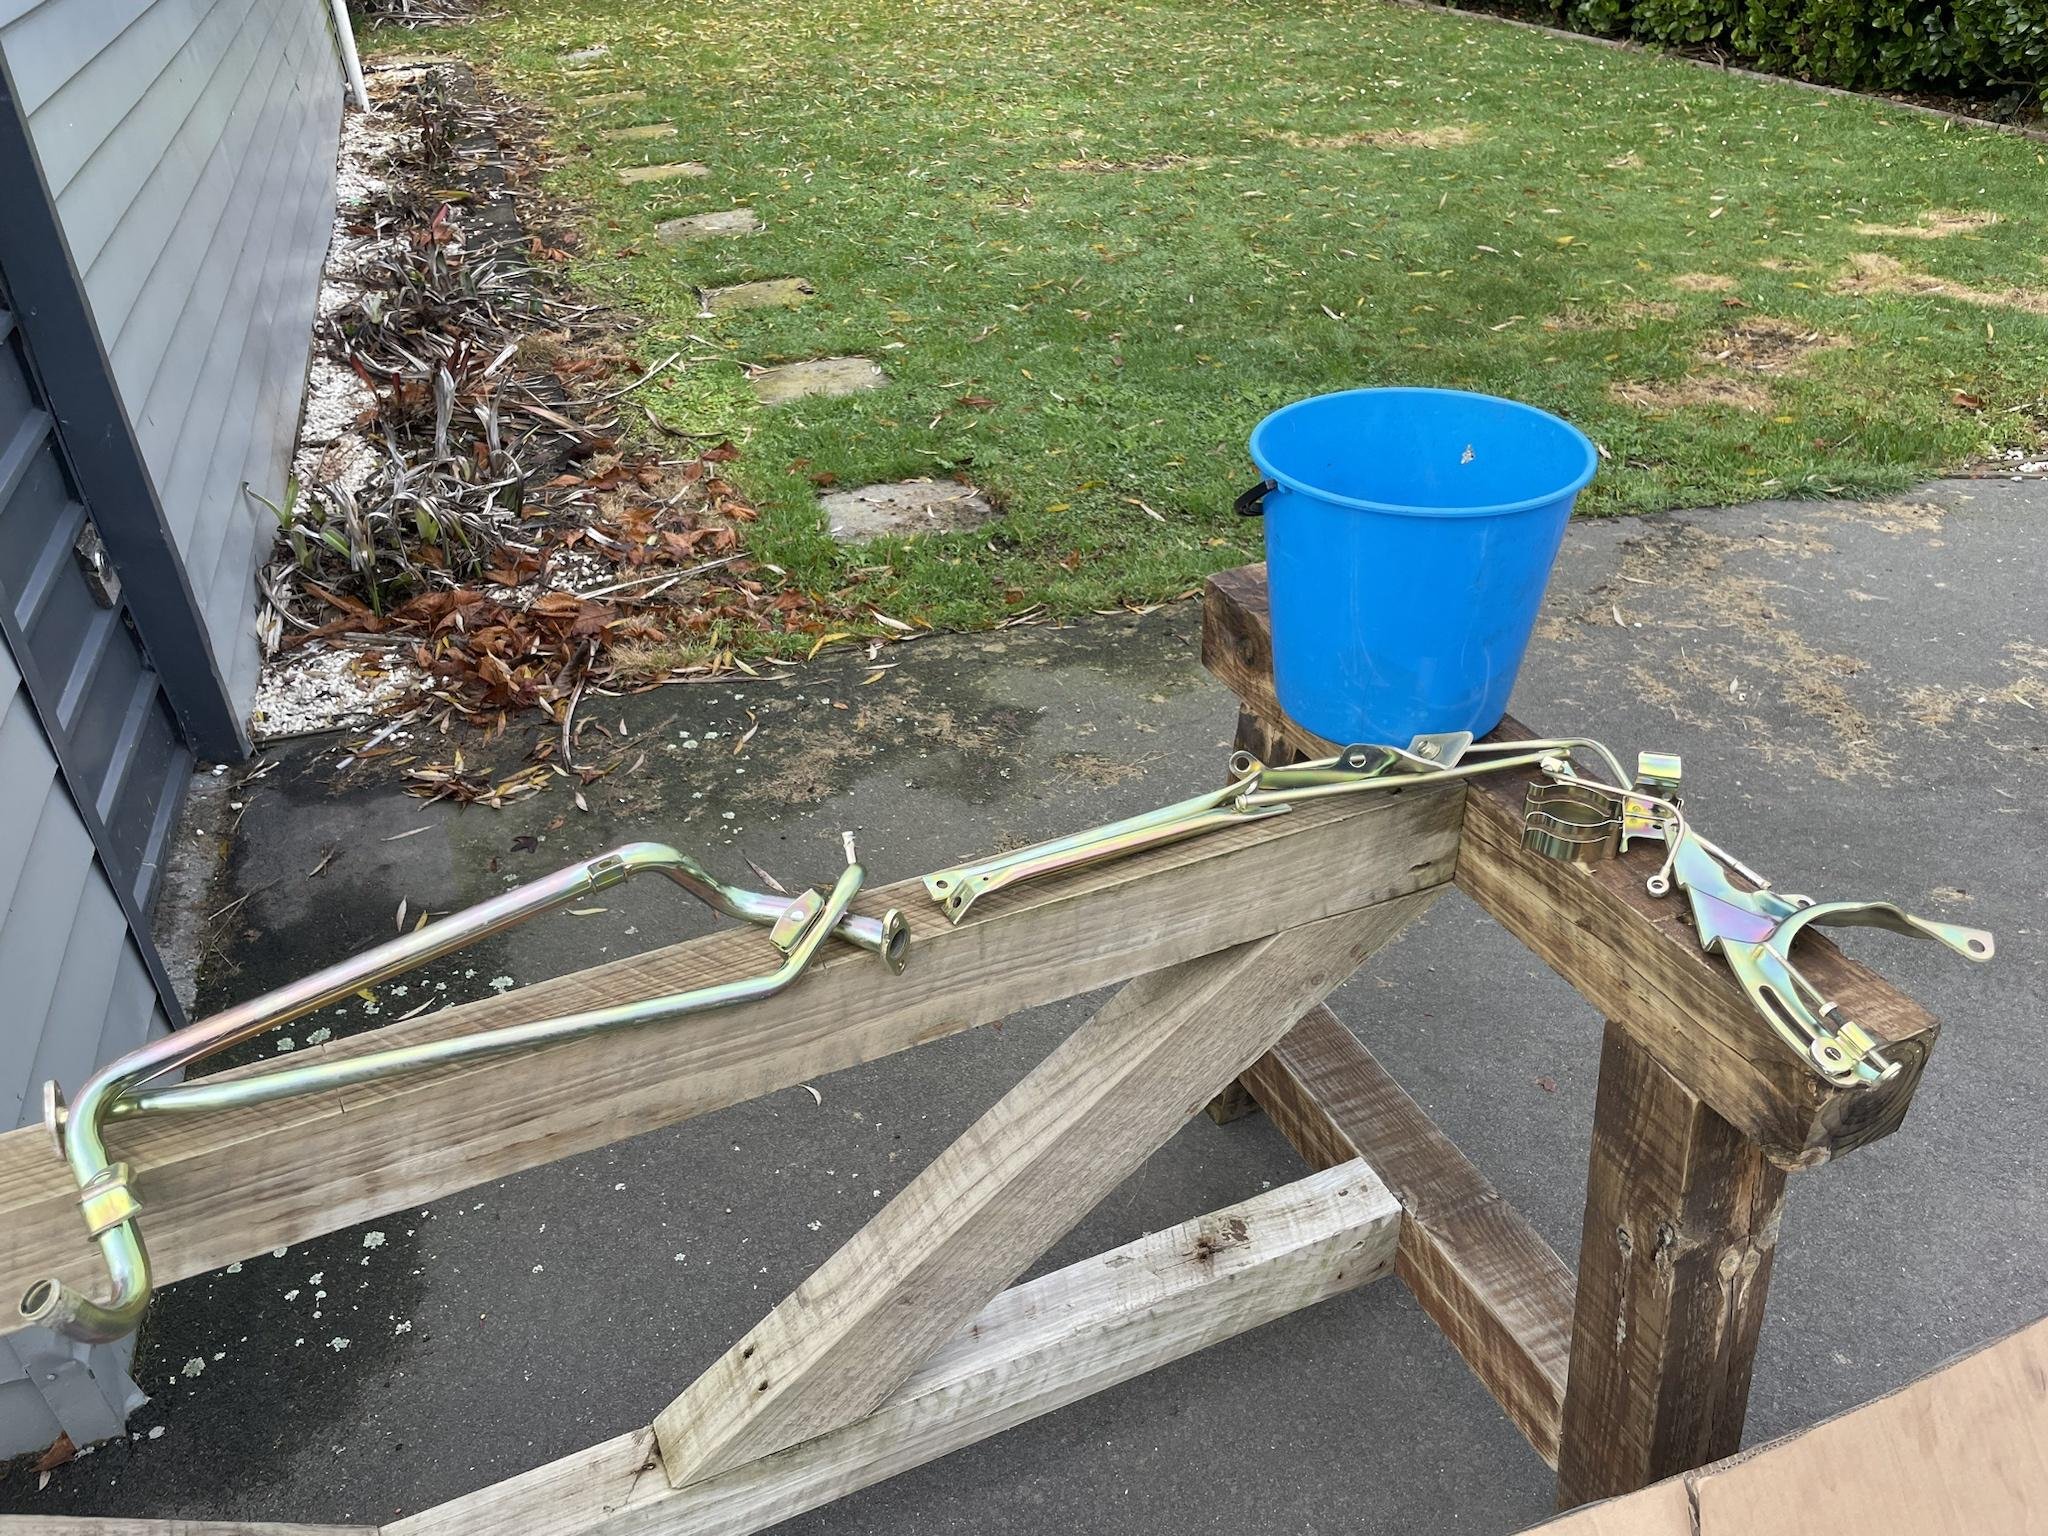
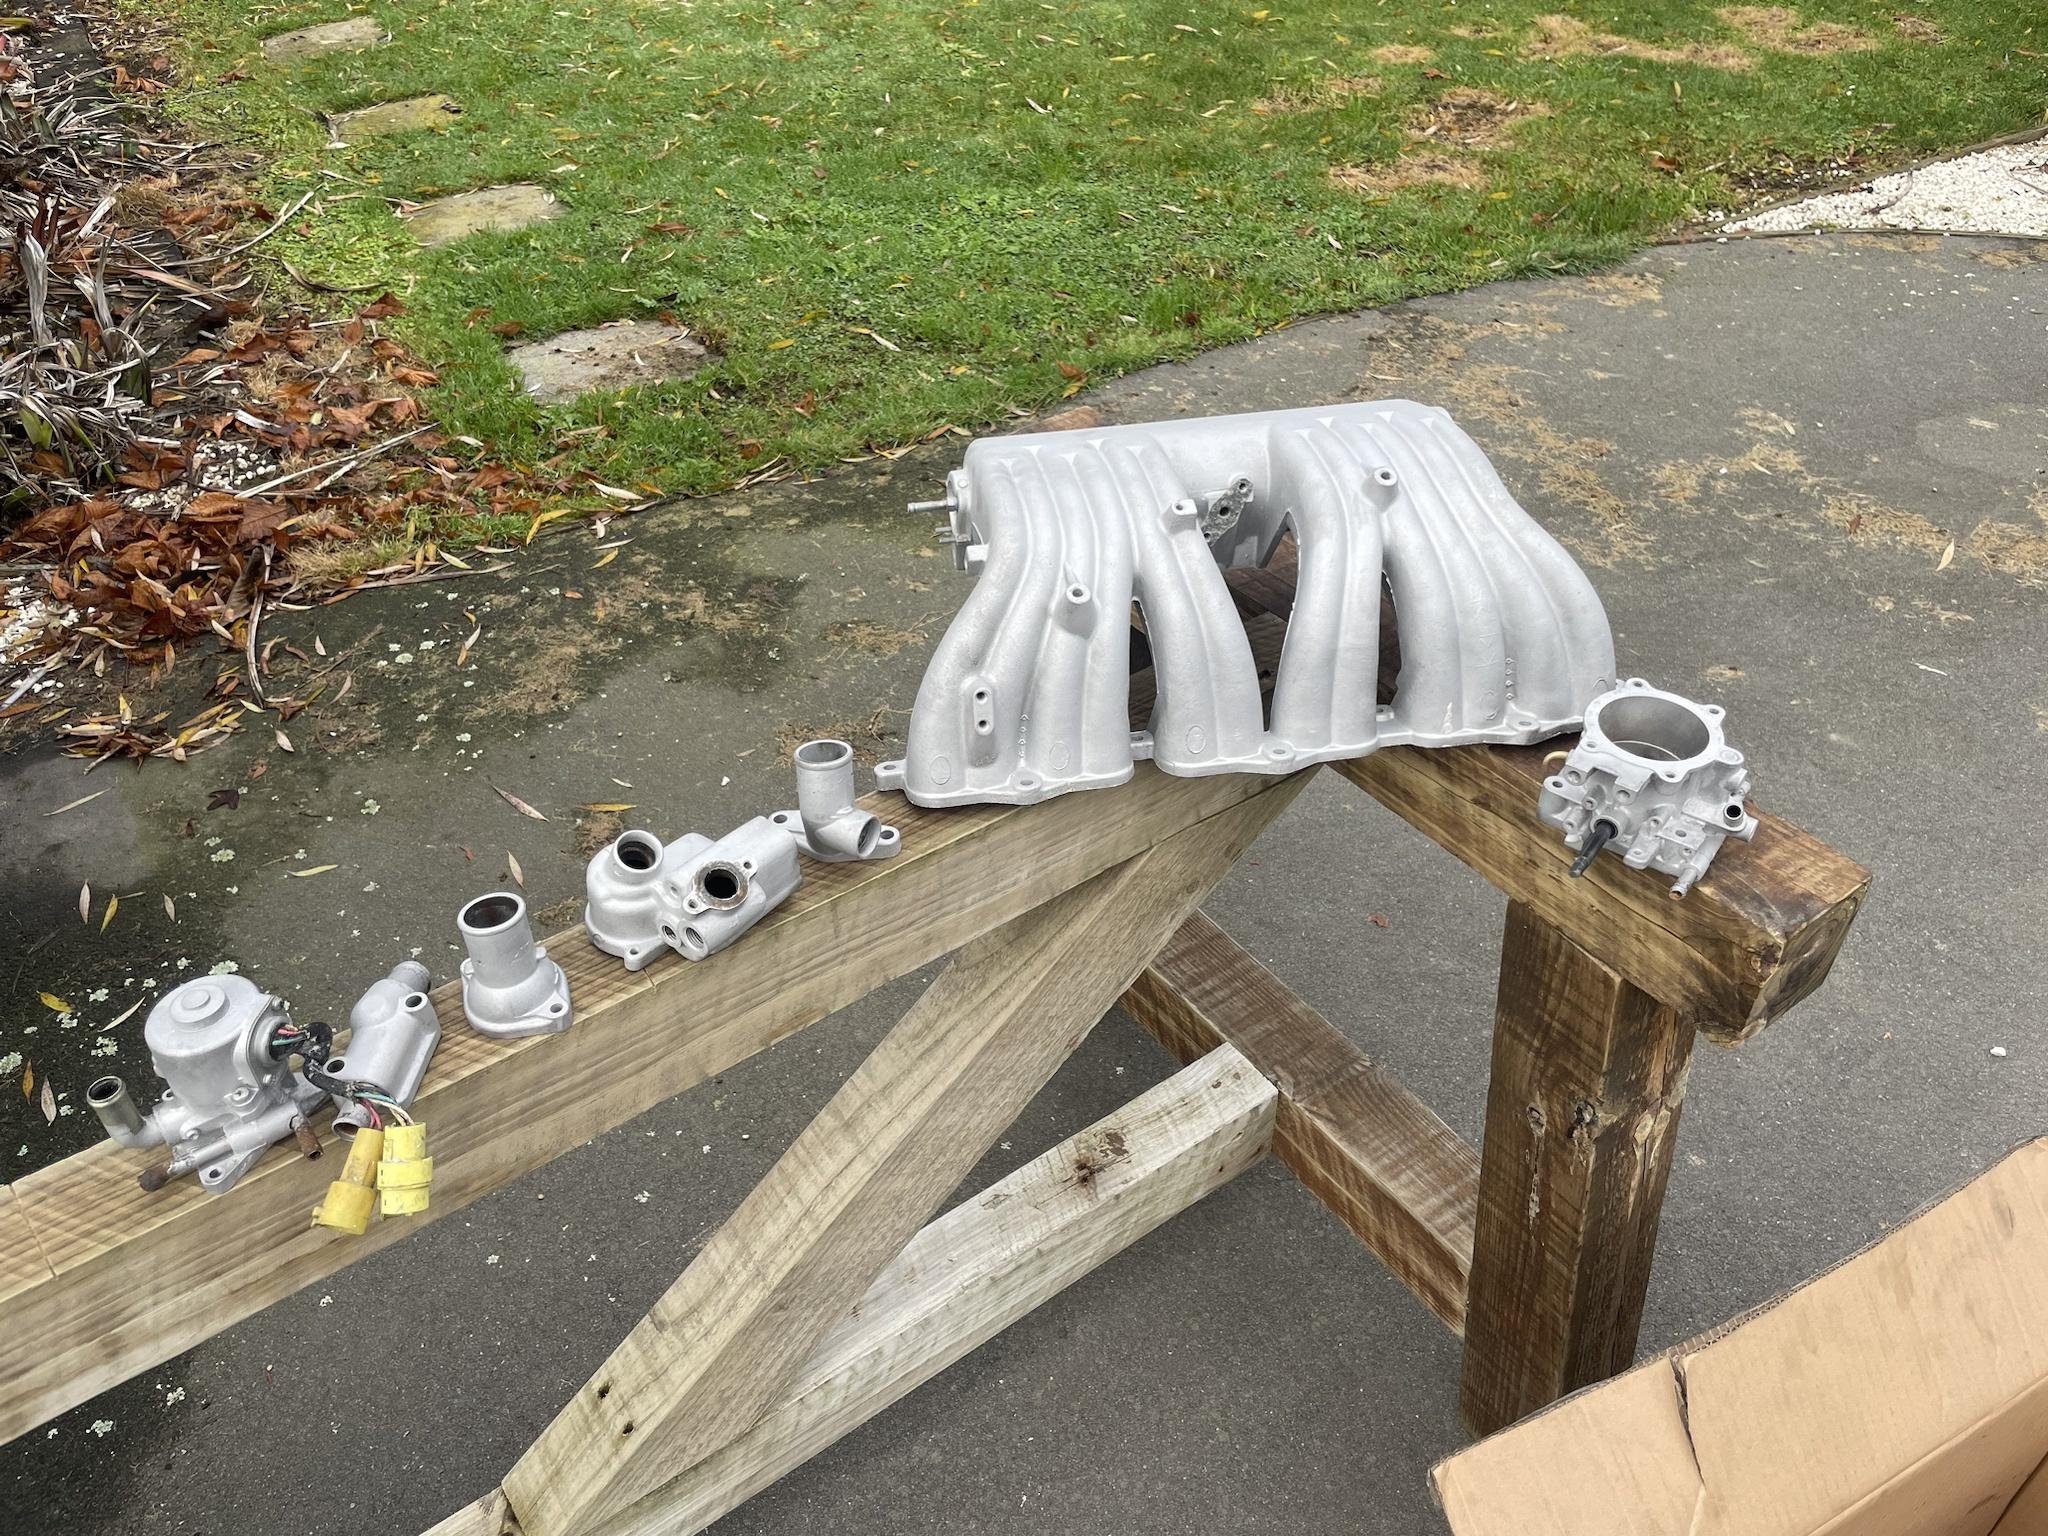
So after stripping the motor down everything got sent to powder coat/zinc plating/vapour blasting. Ordered all new timing gear and a full gasket kit to freshen the motor. also managed to score a digital dash from japan, the dash is the easy part. Finding a digital fuel sender and repinning my loom to suit is the harder part. now the puzzle of finding where everything on the motor goes and i can think about swapping it, maybe paint the engine bay first?
1 point
-
Nope. Could not get used to balloon spec tyres, thought it looked yuck every time i pull the cover off so put 205/60/14 back on the front. Wof time again too,should be ok ive only driven it 3 or 4 times since the last one
1 point
-
1 point
-
Eh? Another update so soon?! Yep. I thought I'd better add some general 'classic car actually getting used' photos because it does actually get hooned about quite a lot. For example - I hooned all the way to the oldschool '23 Nats. A huge distance for this little car @ around 5km this year Quite handy having the Nats on our doorstep this year. A great weekend of catching up with loads of good mates and checking out some cool cars/eating food/fine ales etc. I didn't actually take many pics of the event full stop let alone the Imp so here's a smattering.. A sports car and a Jag... Had a good time racing over the Takaka hill on the way back from the Saturdays cruise to Golden bay with that Jag. I don't think the Jag Six was needing to put in as much effort as my little Datsun 1200 was up the hill Good solid fun trashing little engines. Other O.S cars at the lunchtime stop in the bay... On the way back, stopping for the most unlikely car to breakdown, a Corolla - did just that again... As well as going to Nats this summer has seen the Imp doing many trips to various beaches in our bay. It makes for a pretty fun and cheap way to get around all the little roads here. general lurking... Spotted the Bedford CF I played a major part in building a few years ago - the van sits atop a full Falcon running gear and suspension. I never realised quite how similar the paint colour is to my Imp... A big change this past year that's been just so good for the car is it having its own garage to reside in. Throughout the hottest days this summer its been out of the sun and kept clean - free of the usual pine pollen we get, then the dust from the yard. Its super dry in there and makes it more of an event to 'take the Imp'. Plus it just looks so perfect in there .... The bikes are safe and dry too. Wonderful not having all of that car, bikes and other stuff in the main engineering workshop! Oh also this summer I spotted the perfect picnic set for the Imp (although possibly a tad too heavy/bulky..) So yeah - the car has been used plenty over the summer even though I've not done so much on the flat six and I think this helps me keep enthused about the Imp in general. Its well worthy of a better heart. So back to that heart. Continuing on from the last post I had the collectors in the shape I wanted and after a bit of careful trimming with the flapdisc I had them fitting close enough that I wasn't going to have to fill any large gaps with filler rod. I took my time welding them, trying to not blow through and they turned out fine... With those in place I was able to weld the engine side of V clamps in place. I bolted the engine cross member in place and double checked the clearances. It was still lining up good so on with the weldiing. Very carefully too, with lots of tacks first because I had read that V clamps can easily warp if the welding is too hot, slow, uneven etc. Luckily I must have been careful enough because they stayed flat and true Next up is the oil filler placement. I really want to get this in the right spot, not just for the function but the looks. It'll be right there on display, doing its best to upset the symmetry of the horizontally opposed engine. I decided I needed to get another idea of what's on display when the lower half of the engine is 'hidden' behind the rear valance. The top bit of this alloy box section is pretty much where the top of the valance will be (slam panel?) The filler will have to come up to the left at a slight angle because there's no way its going to sit in front of the main pulley. I'm not yet set on the height of the filler cap but for now that can wait. There will be plenty of room in that area. I'm still going to use the extra pair of flanges I machined up when I made the filler plug. These will allow me to unbolt the vertical part of the filler tube so I can easily remove the cam belt cover. I also don't really want the tube poking up in the way, waiting to get knocked while I move the engine about the workshop or while fitting it etc So yeah- I think I'll machine the front plate to suit the base flange, mount that, weld the lower bits of tube to suit and leave deciding the final height of the top half of the filler tube till later on when the engine is in place1 point
-
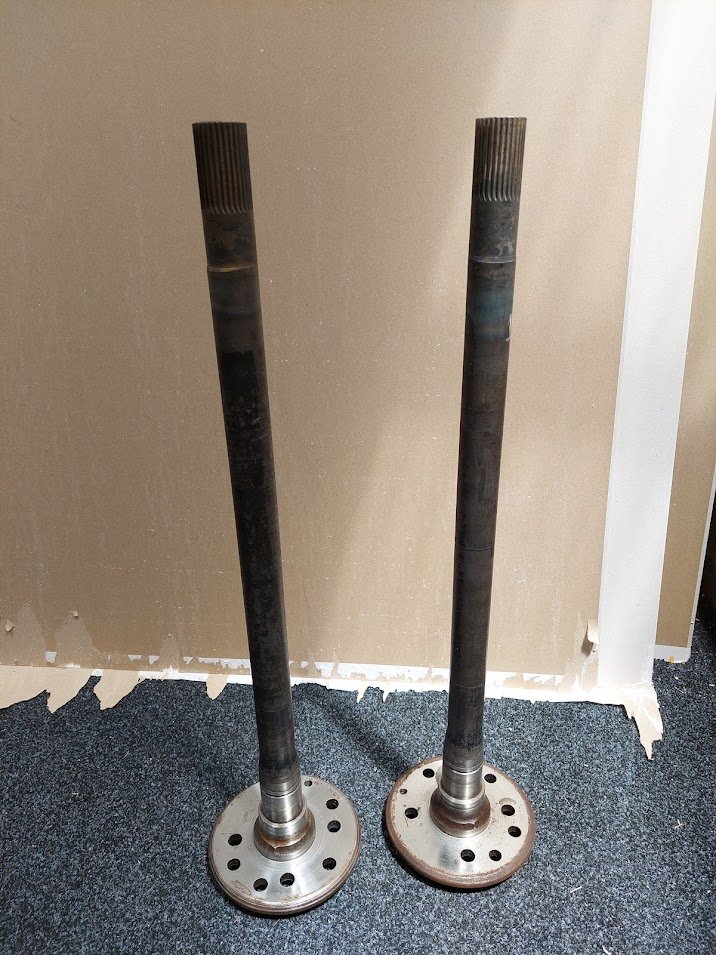
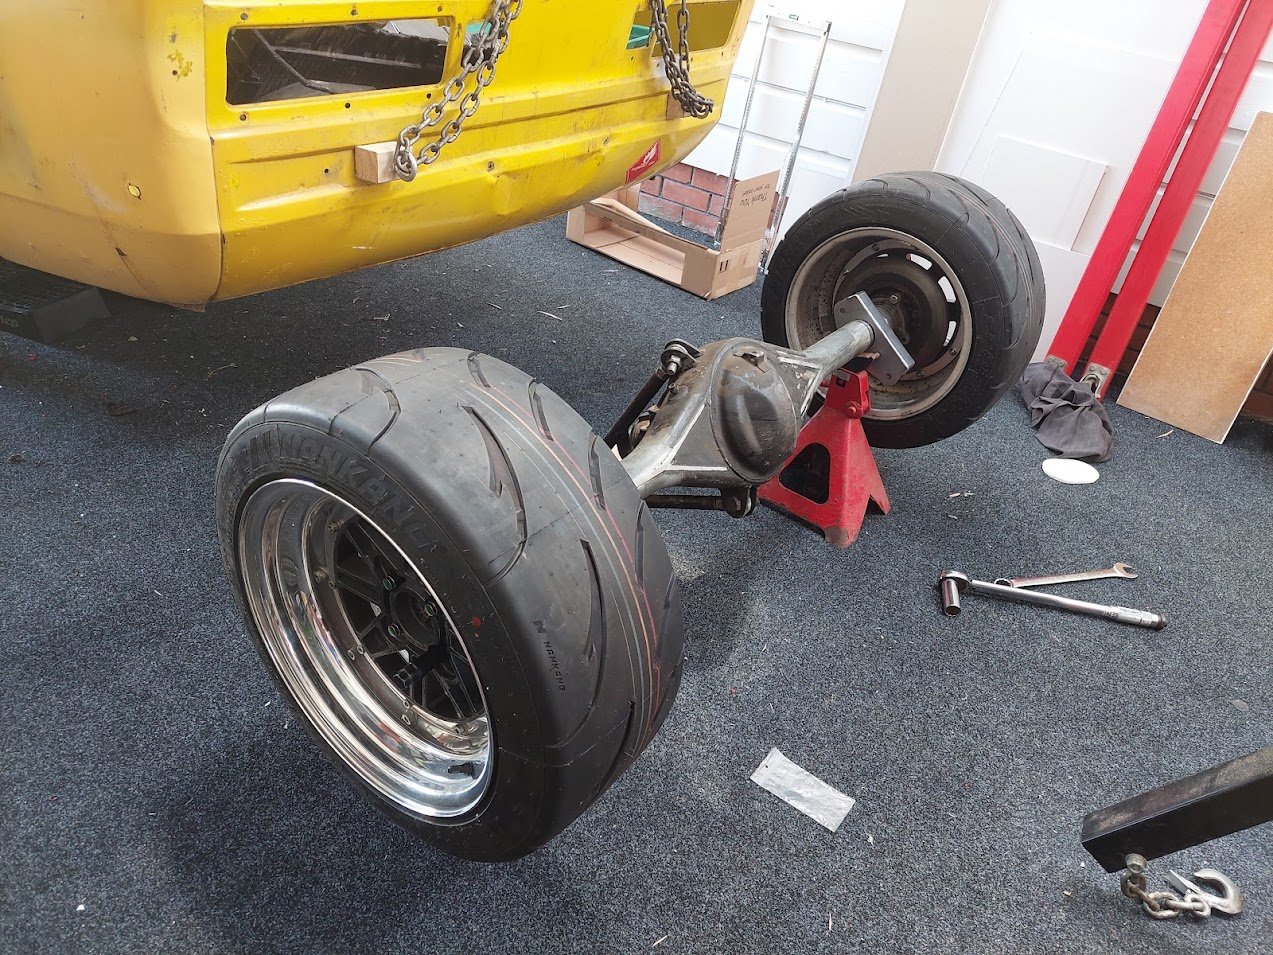
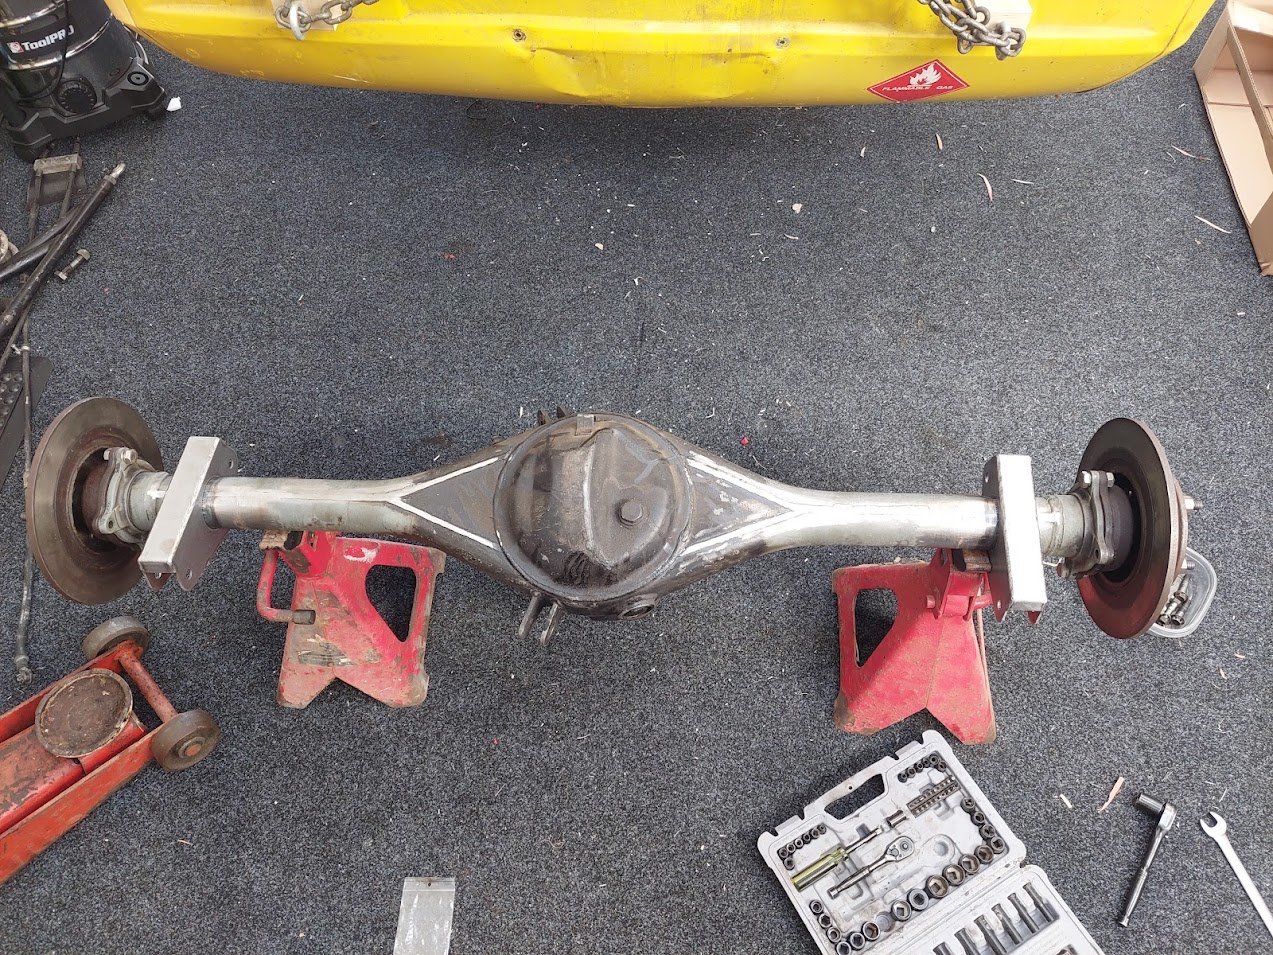
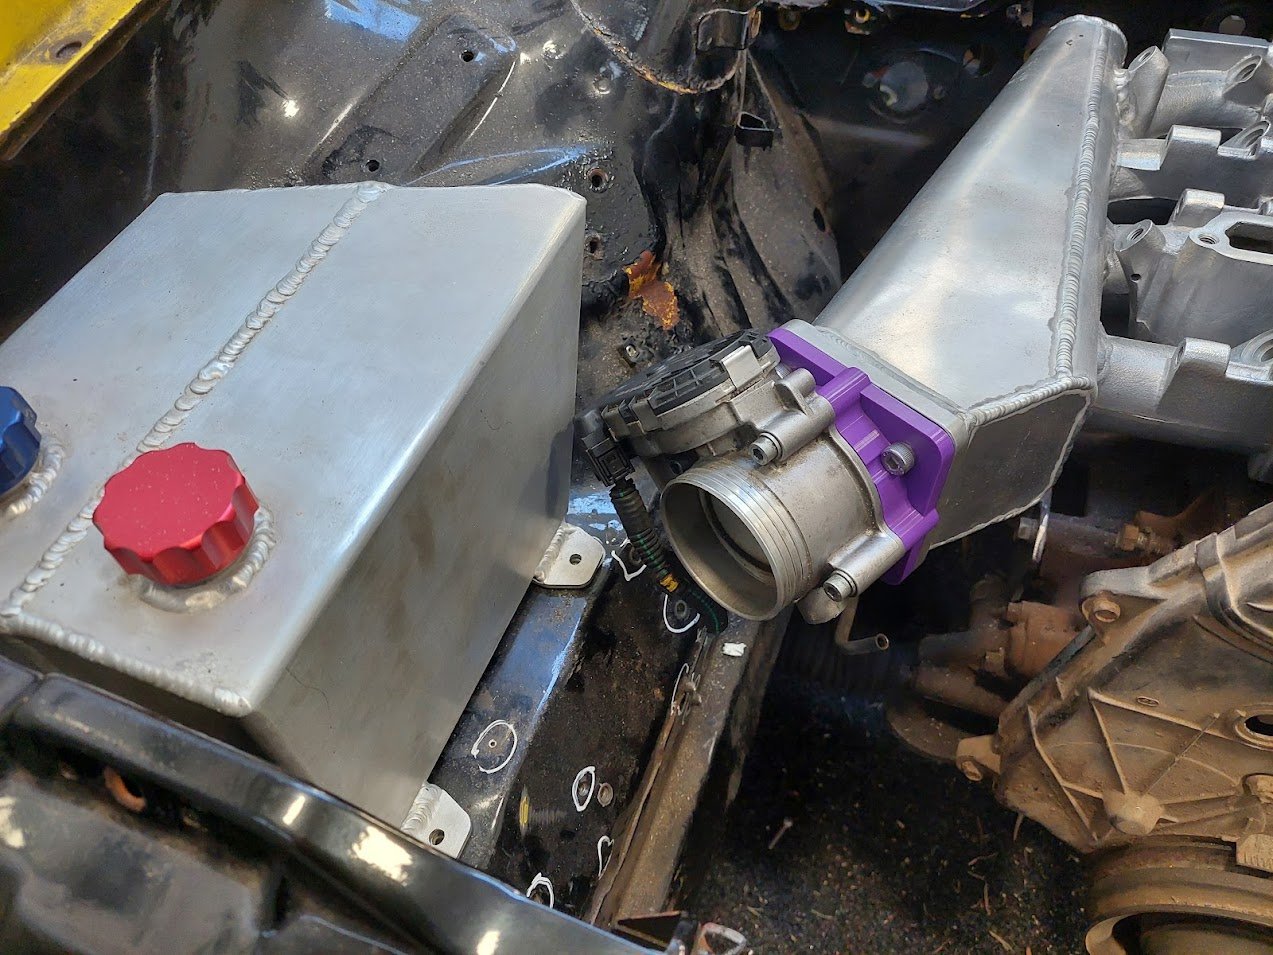
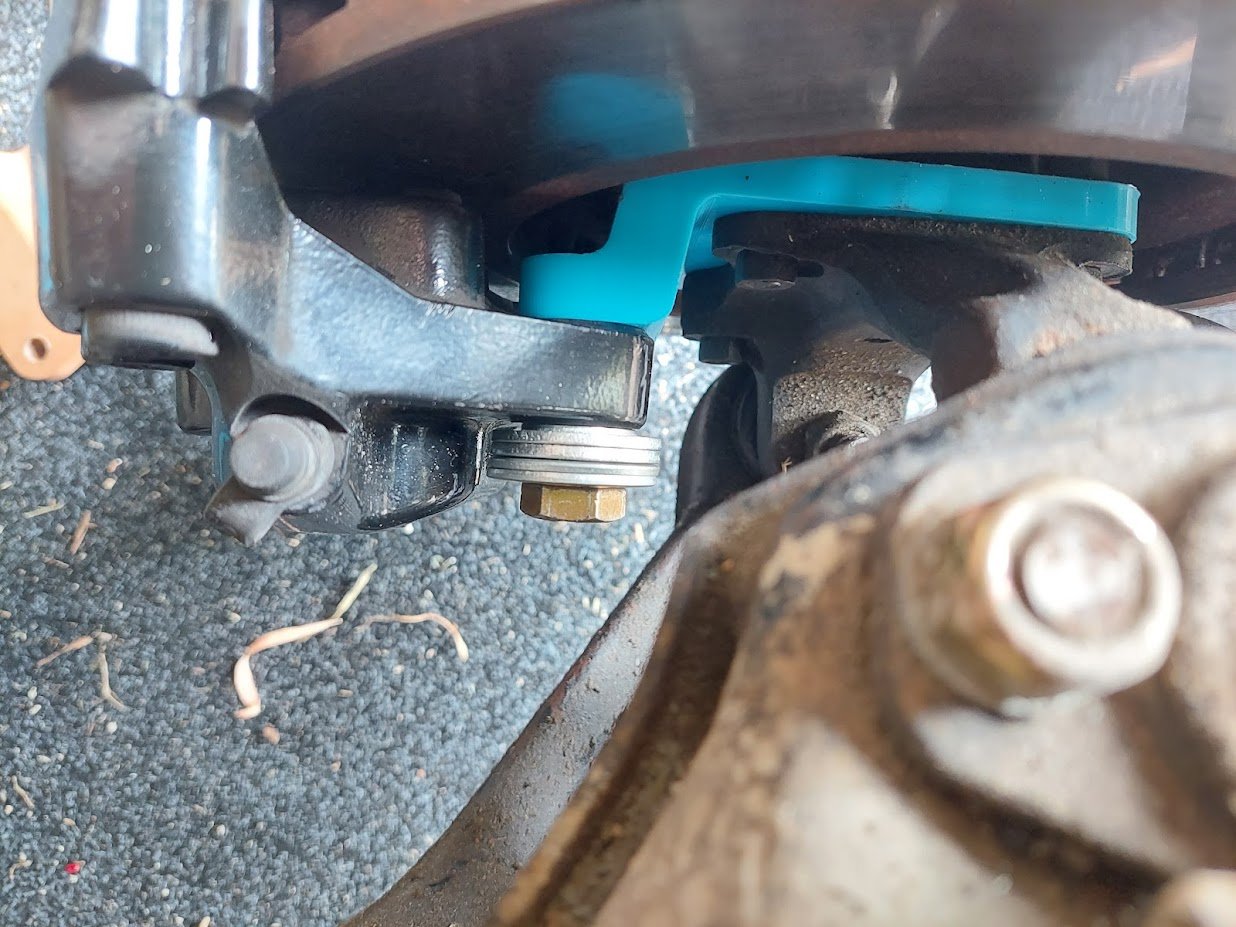
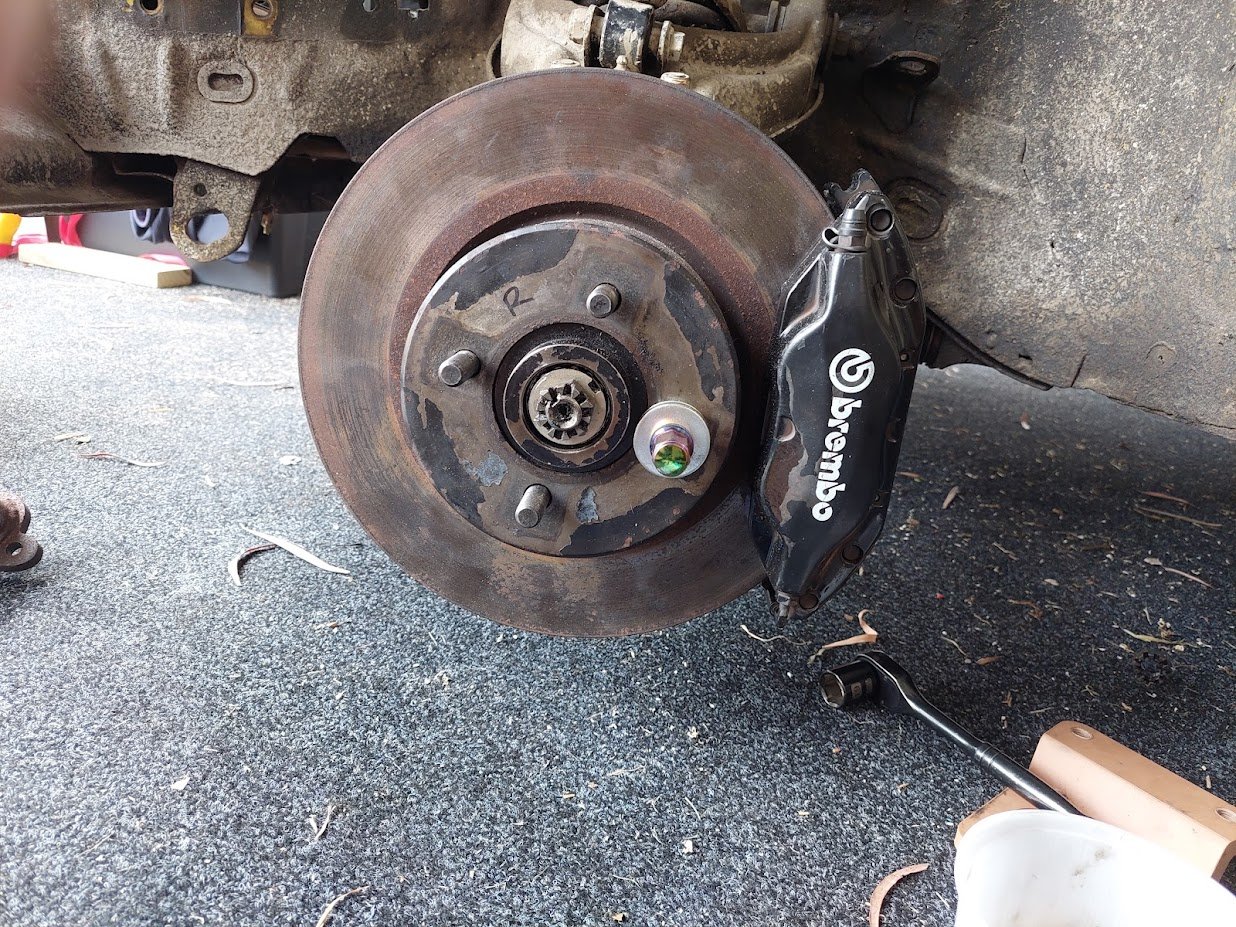
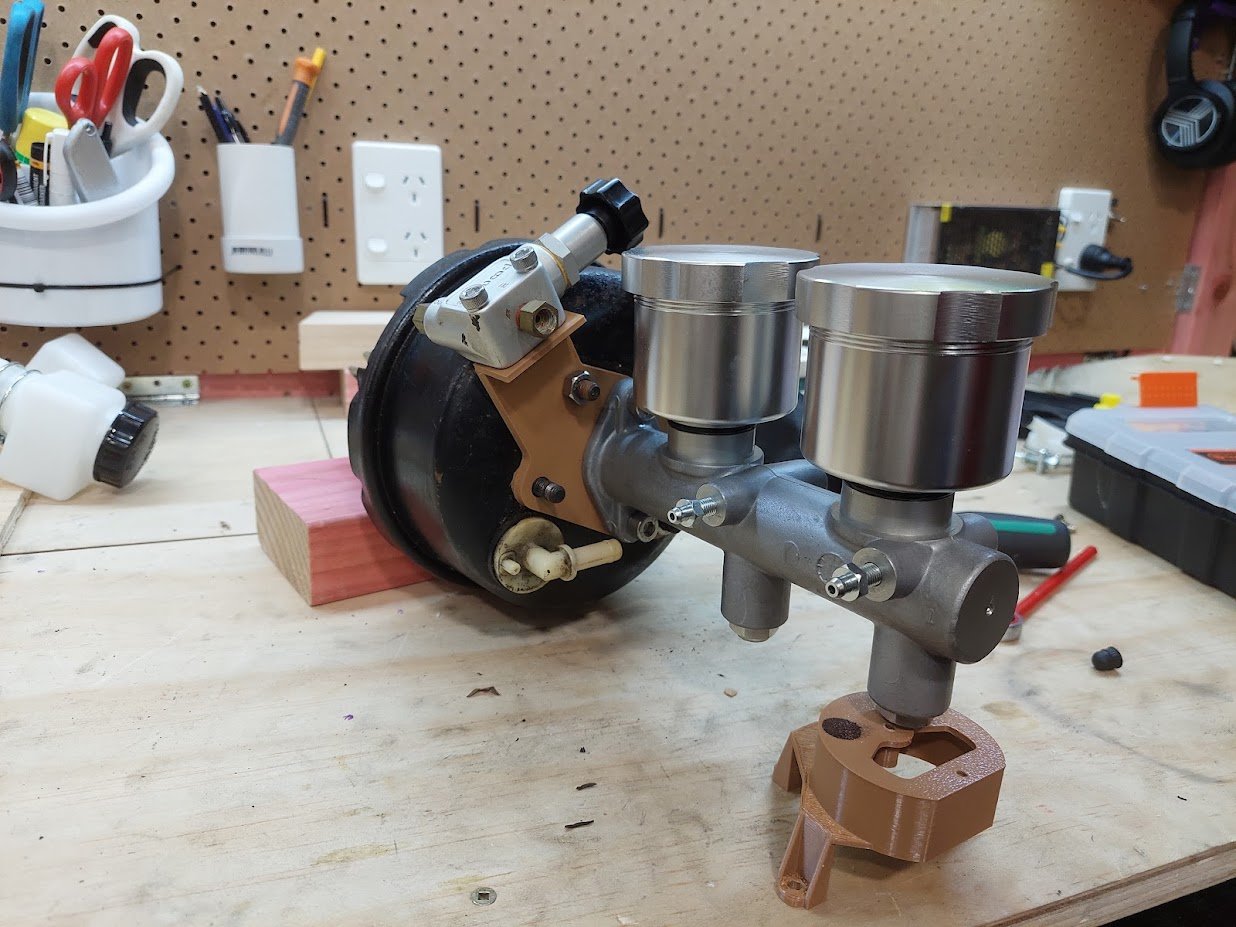
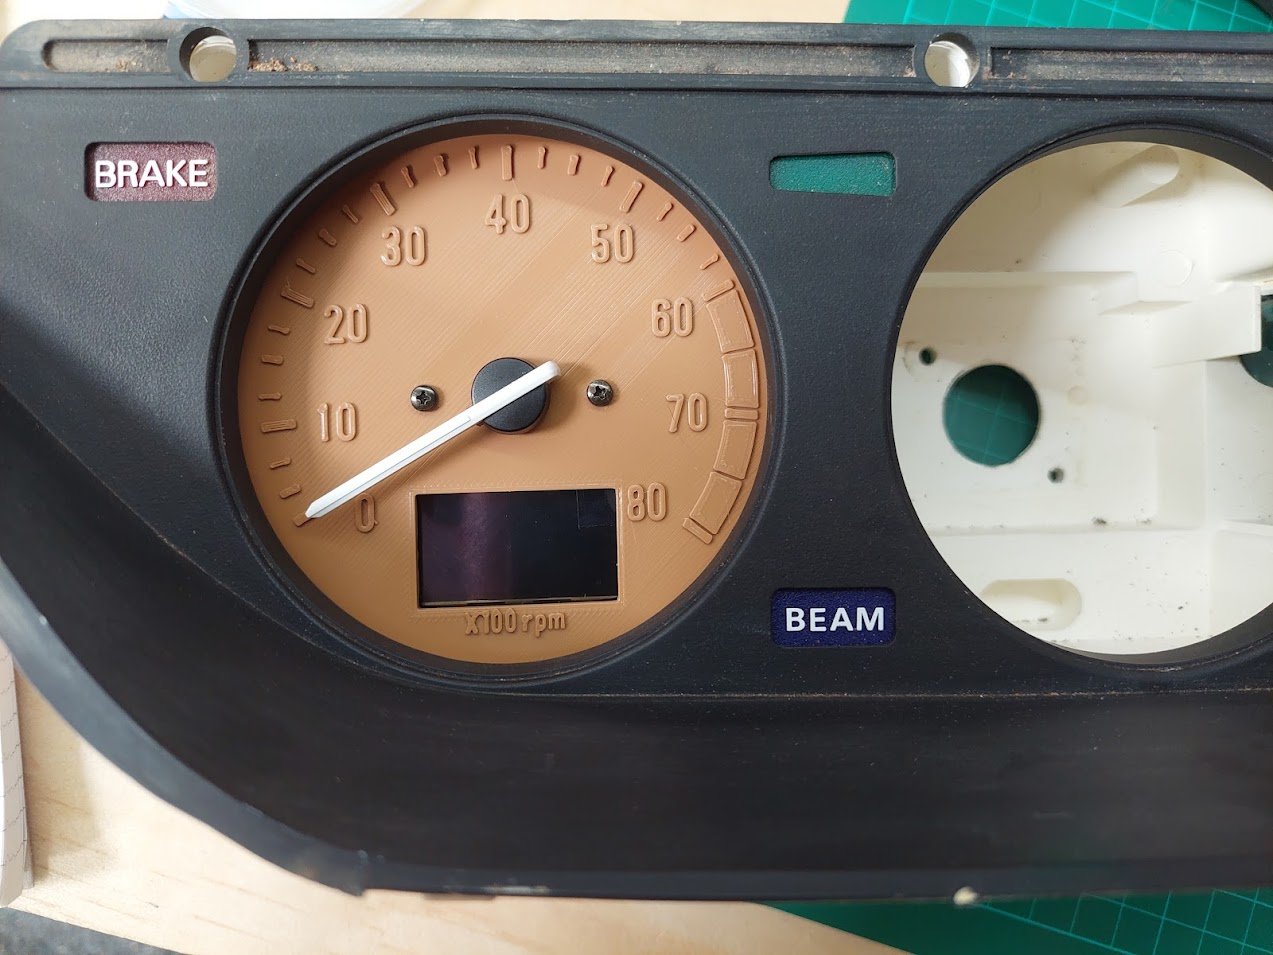
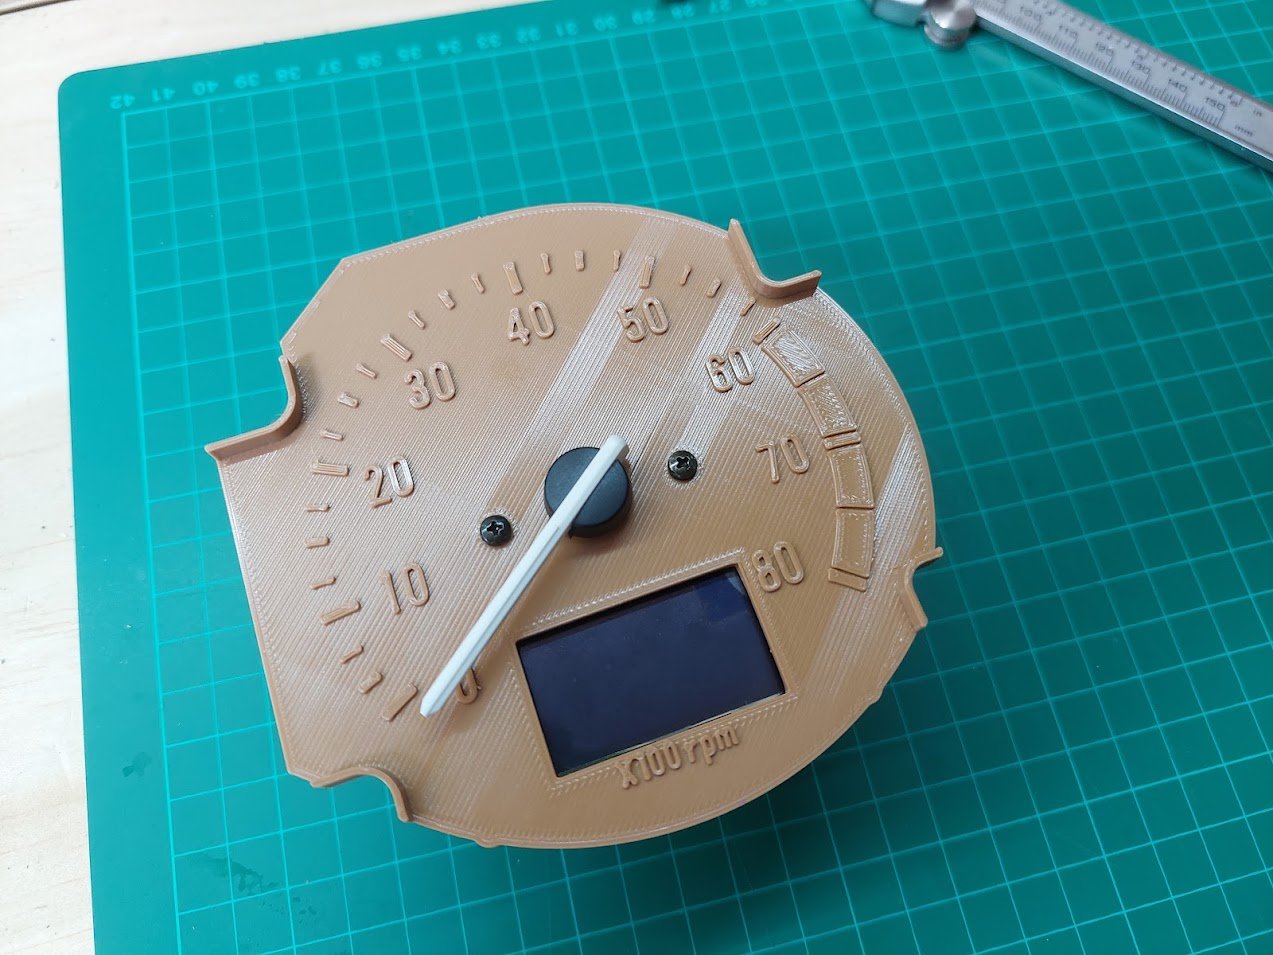
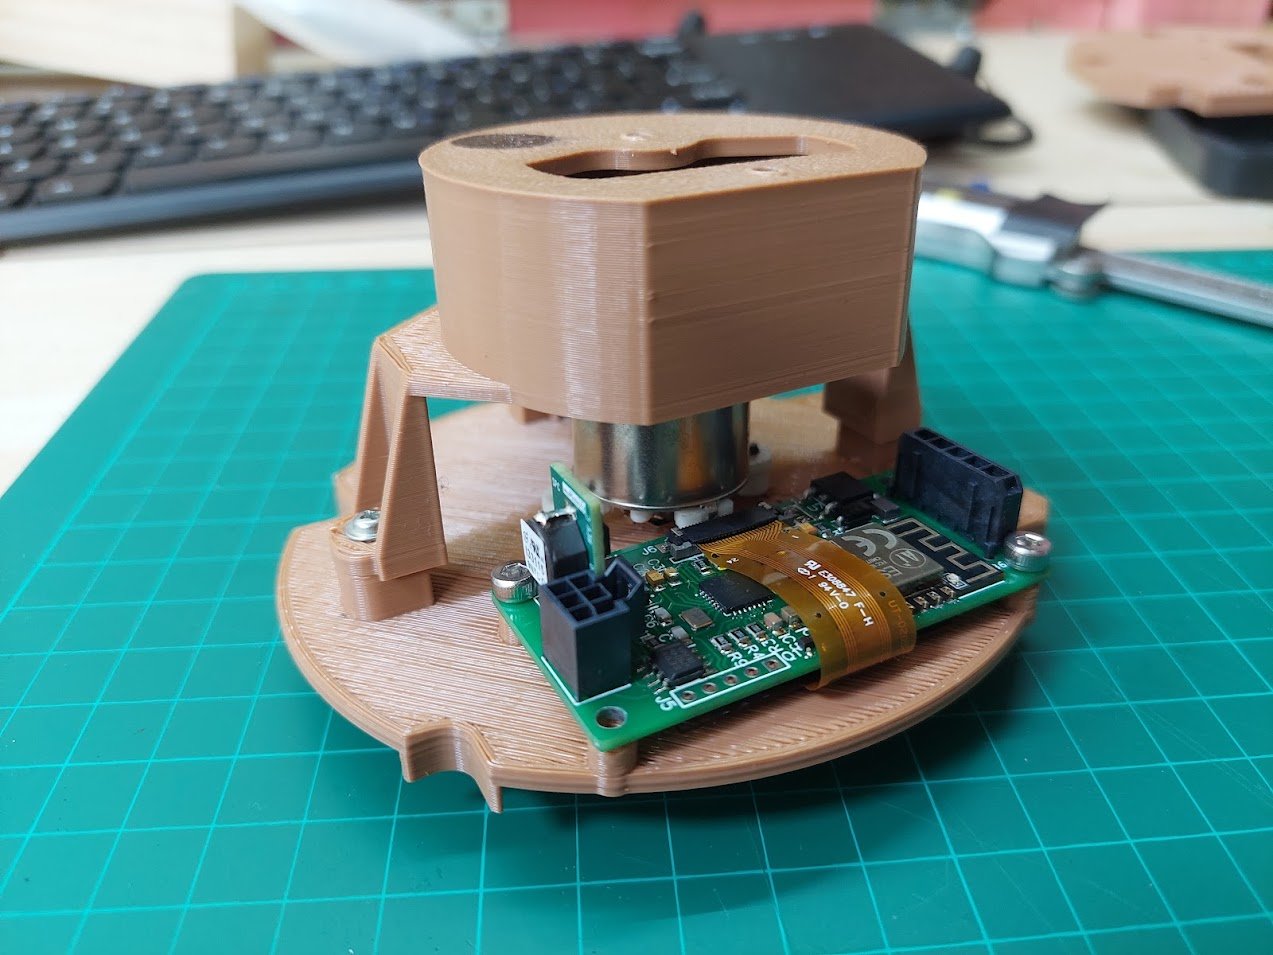
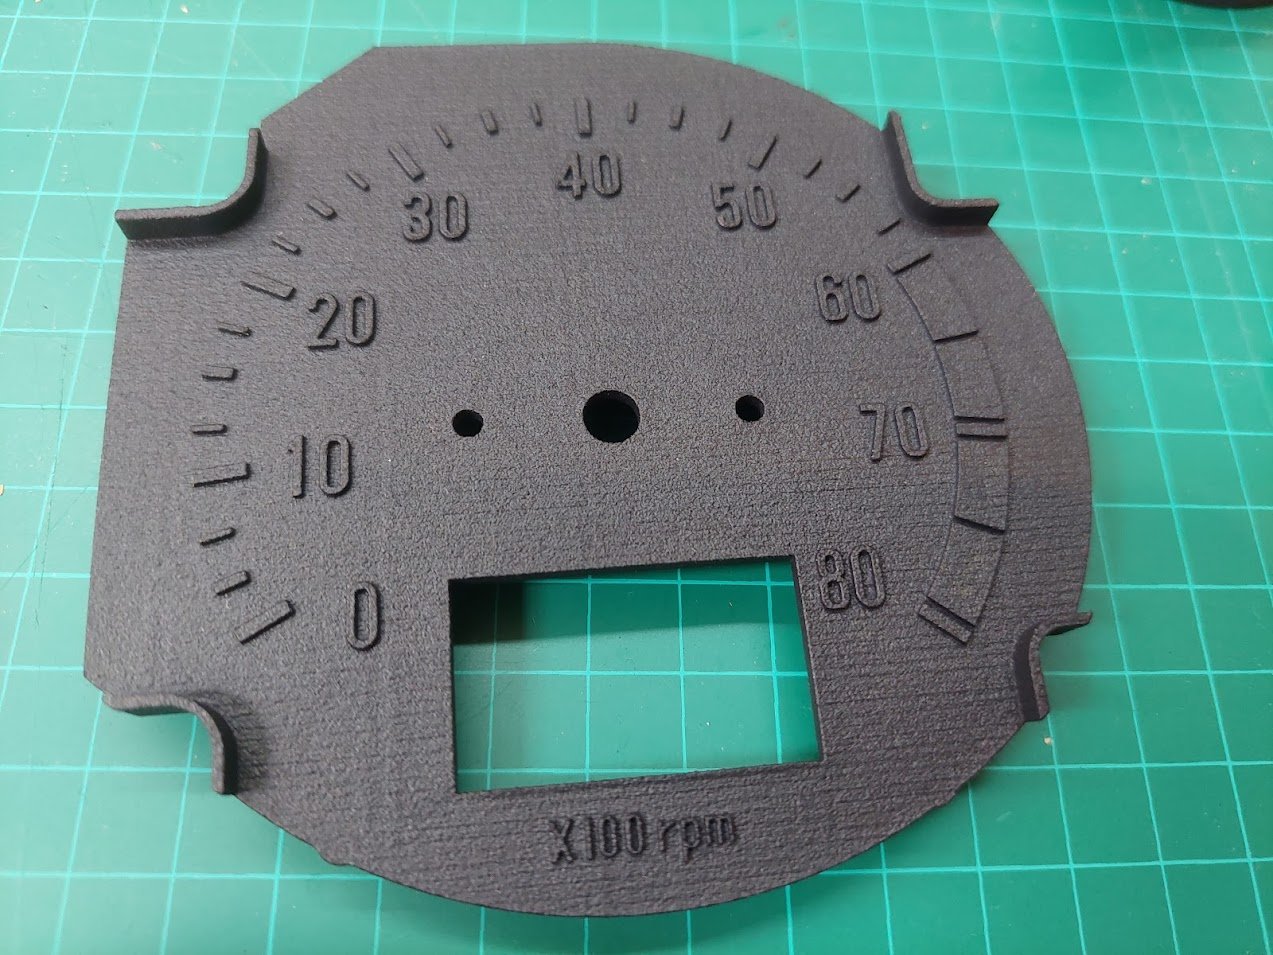
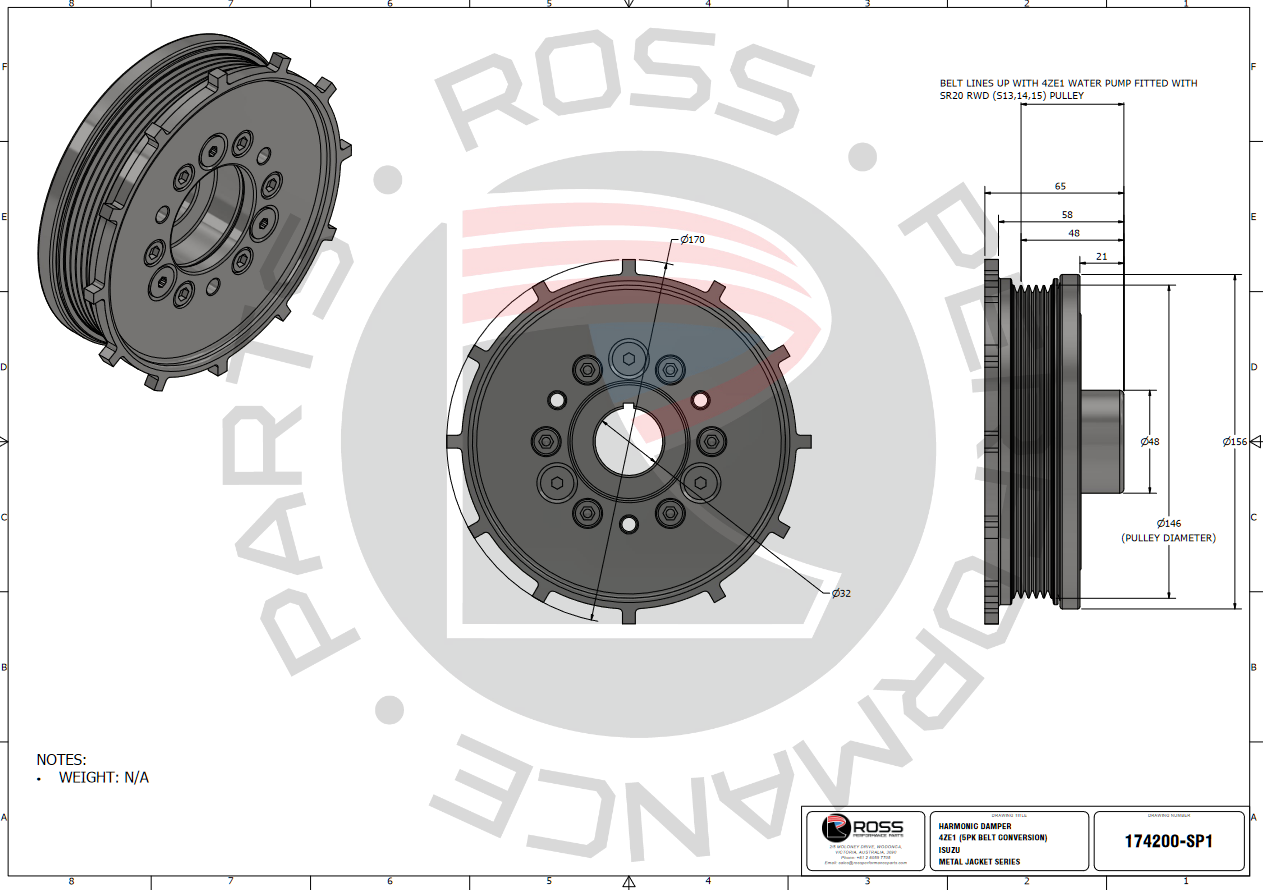
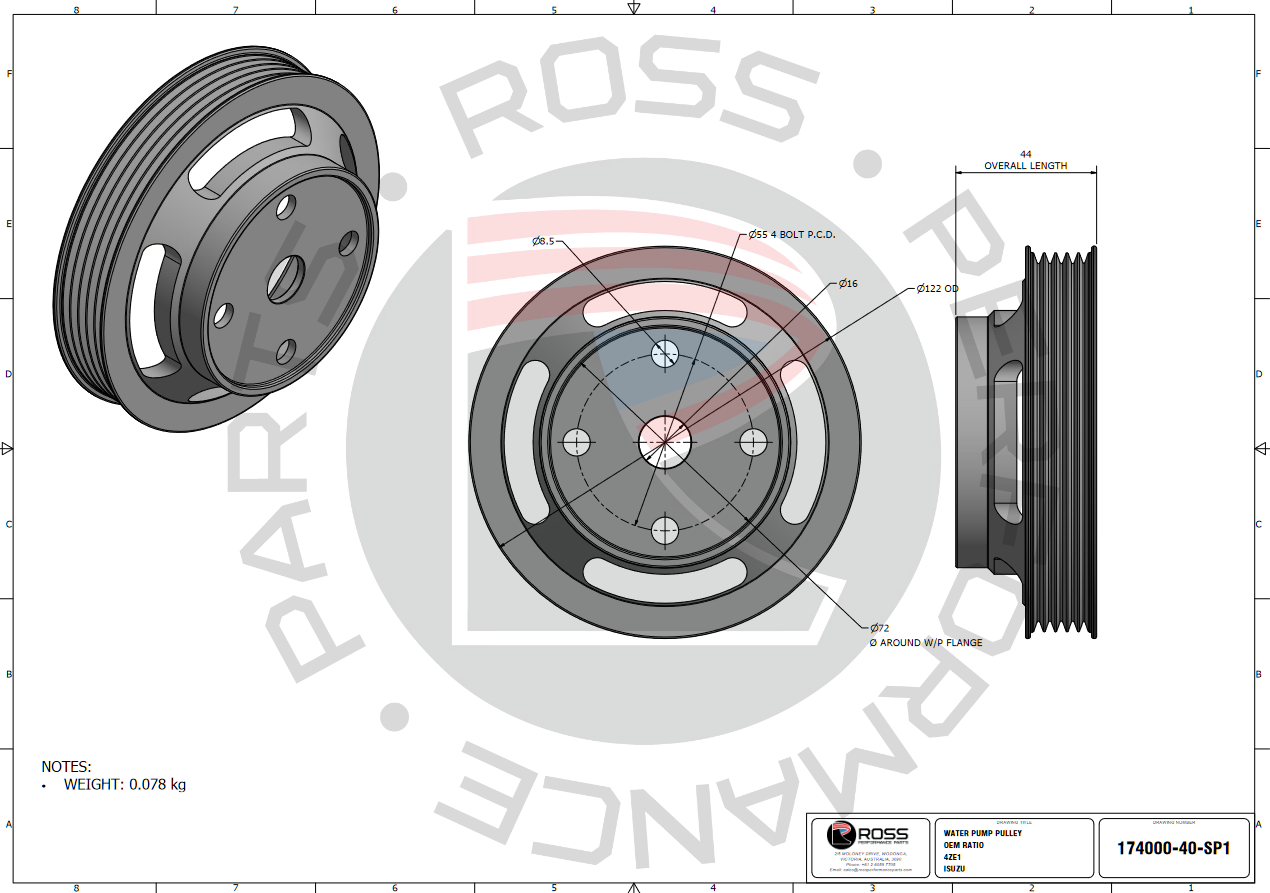
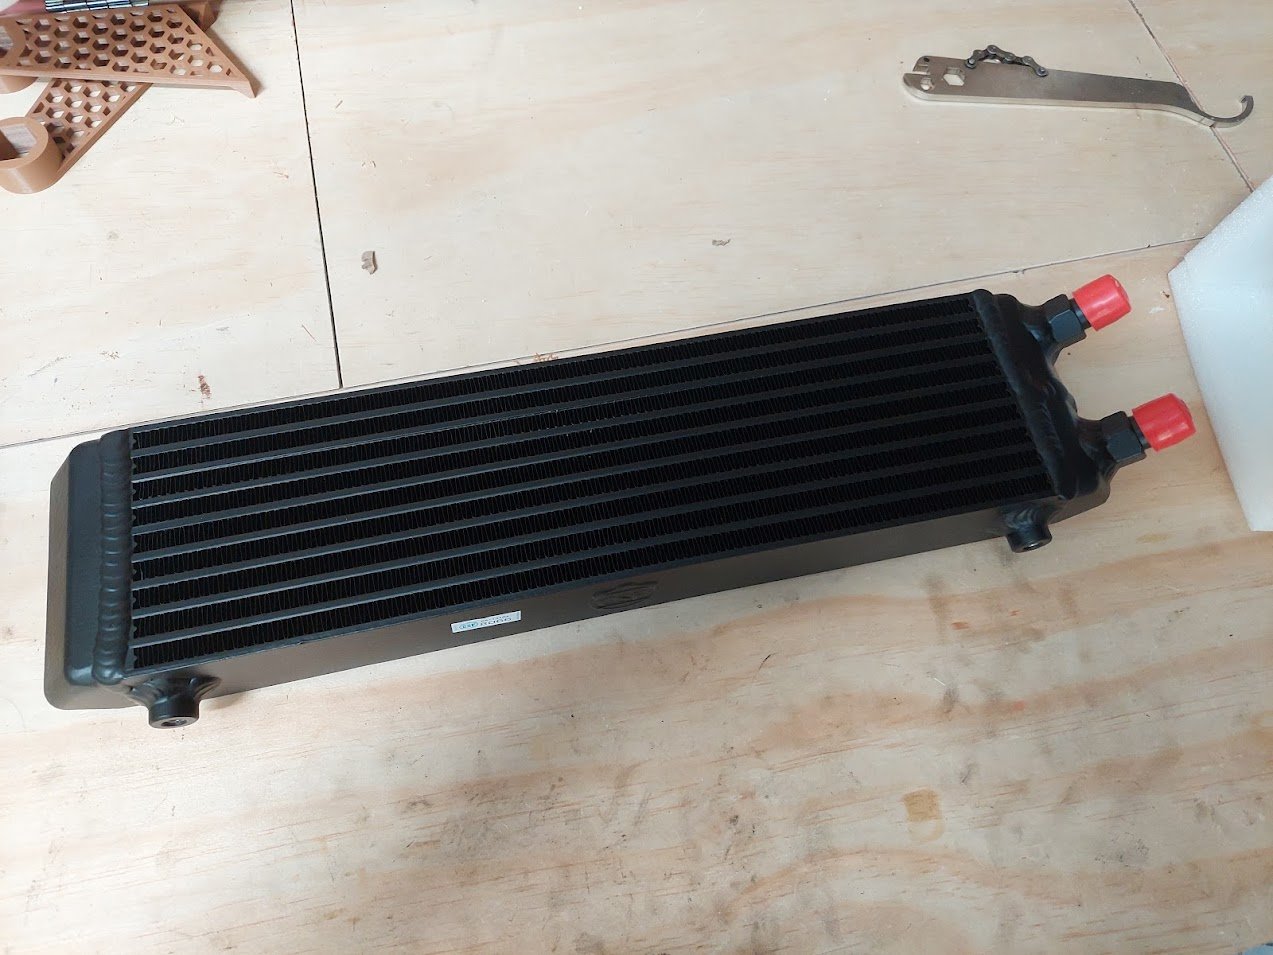
Wow! I really haven't updated this in a while. There's been a bit of progress in the last 7 months, but not a heck of a lot. I've been mucking around with brakes, dashes, diffs and cooling. In the end, I decided that shortening my axles the "build up and machine down" way was going to be okay, so I sent them to Howat Engineering and had 35mm lopped off and the splines cut back on. I then took the housing to Tin Tricks where it had the Gemini mounts cut off, was shortened and had the 4-link brackets slid on. I left the ladder bar mounts on so it still had a way to mount to the car when I had to move it. Turns out I was spot on with my measurements. The wheels just sit inside the arches - will need some work done to get unobstructed bump - and I have about 15-20mm clearance on the inside. So pretty happy. I've also spent a bunch of time prototyping up some parts with the 3D printer. Throttle body adapter: Brake caliper adapter: Master cylinder adapter: And for those of you who recall ages ago I was trying to make a new tacho face for my dash, I've gone in too deep. I've designed and printed up an adapter which uses all the stock mounting points and screws, as well as a new face which has the cutout for my CAN screen: I then had it MJF printed in PA20 nylon. Unfortunately it warped so I need to have another go and add some ribs in to strengthen it. I was planning to paint it myself using modelling paints, but I'm not sure that I have the ability. I spoke with Charlie's Pinstriping out west who said they could do it. When I get around to fixing up and printing a new version I'll take it up. Last thing that I've been doing for quite a while is working with Ross Performance in Australia to develop a harmonic damper and water pulley for the Isuzu 4Z engines. They have pretty much finished, I'm just waiting on one or two people to test some 3D printed templates to make sure everything lines up. And lastly I have been talking with Skeleton Welding down south to build me a new radiator. It's been a bit of a packaging saga to try and fit the radiator, intercooler and oil cooler up front. But I think with a bit of ingenuity I'll be able to make it work. Speaking of the oil cooler, I got this "cool" one from CSF: The car is now in at Shores NZ having the 4-link boxes welded in and the rear turrets strengthened for coilovers. So progress is happening!
1 point
-
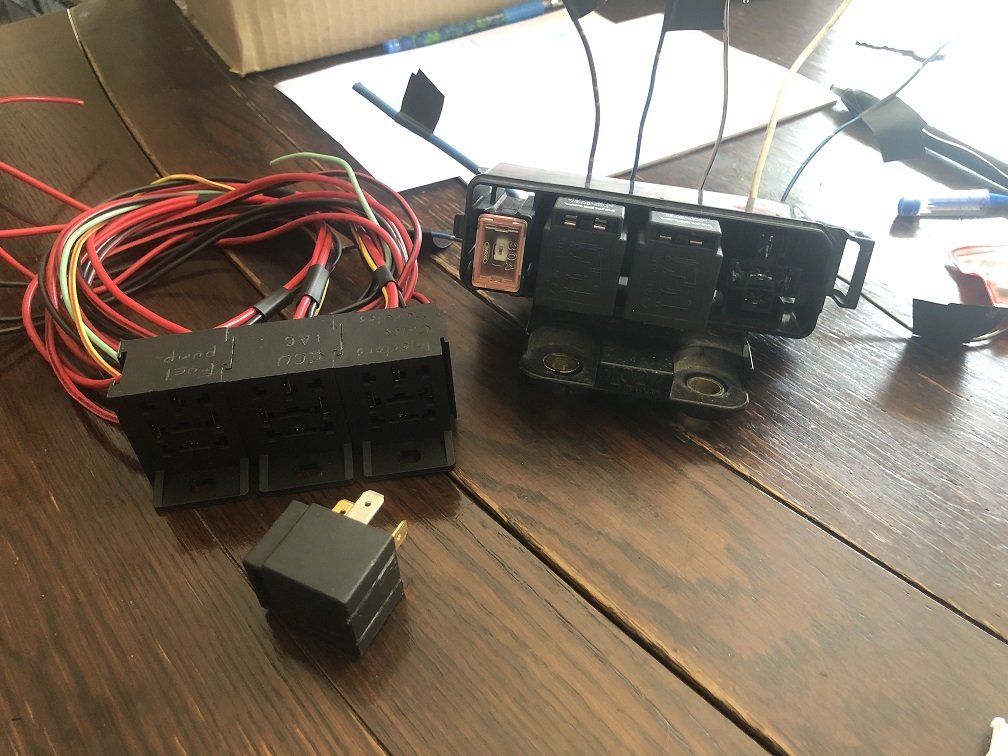
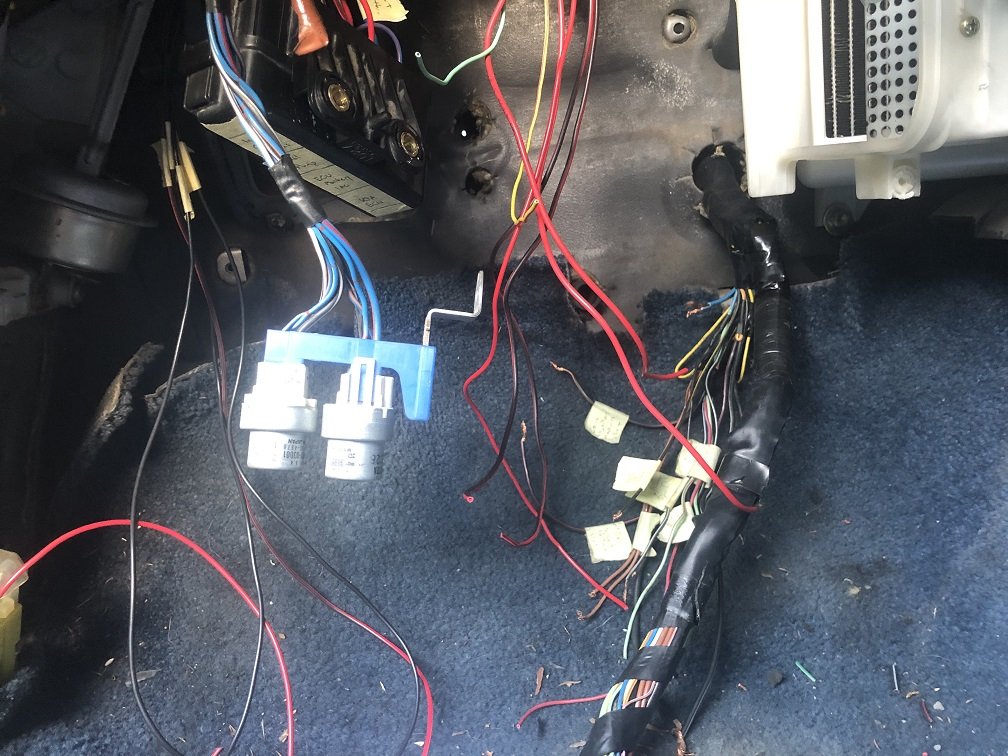
Yikes, what a mad rush the end of that year was! I only got the smallest of windows to plug away at this, starting with finalising the wiring. I'm trying to wire this as close to the factory 1uz diagram as I can, while keeping it looking like Mr Toyota did the work back in 1983. I tried the Narva fuse blocks, but they have a really nasty loose feel to them. I grabbed a fuse box from a diesel Corona which carries 3 relays & a fuse which is perfect. It feels & looks better, not that anyone else will ever see it mind you. I've finished a test fit of all the relays, it runs well now with the idle speed controller receiving power 5 seconds after shutdown for reset and the fuel pump relay running from the ECU. Next I'll tidy it all up & test the air flometer, it seems to be running a bit rich. The TPS might need an adjustment to, there is a hunting issue around 1500rpm.
1 point
.jpg.f3ec0ccab5bdfe9ae511ff27222a1e57.jpg)
.jpg.d0c695ea8473ead9ea056852a1fec303.jpg)
.jpg.8cf8c07fc73dd20697809dc815f87860.jpg)
.jpg.d4b3faea582220898d56b9345ccfaa98.jpg)
.jpg.a76830422dddfbb29270756cf54779dd.jpg)

.jpg.420deb7c90a3e03932553ddd385ab69a.jpg)
.jpg.315d22c8ccb545bc7b71de3e69e7b39d.jpg)
.jpg.14c6330988729a3f4468099267b61bed.jpg)
.jpg.5abbd76da1b07ea44b8a667513378095.jpg)
.jpg.ba8751315cfb886b332fbc21be1631d8.jpg)
.jpg.b82ffc27f4332d502b9b21e599c2ffdb.jpg)
.jpg.0d1d0bada155571651a74019a2330edd.jpg)
.jpg.7564ac48725a6ac7eb8bf57cff6488e8.jpg)
.jpg.fd43d23158ca200c6d87d98226397870.jpg)
.jpg.f6c2b82061f273d5cc7a4893a7fce317.jpg)
.jpg.809191c10e93108491d59f56532ad06d.jpg)
.jpg.31b1ac3d498277b30ee8eb2d62b1953e.jpg)


.jpg.d5248bebd17adb6c032db7f69b4b1b3b.jpg)
.jpg.4e373badbd9140e255fe32abb7977c6c.jpg)
.jpg.b30032c90cbbfb6eafb3a18e60c5026d.jpg)
.jpg.c7d771beb47fd644d979211915a6da11.jpg)
.jpg.93eb0e1246a84932faccce31269082ec.jpg)
.jpg.815367b229fb8405b0dcbd9792799b53.jpg)
.jpg.ea7dedc0bef5799a39aef957ebbbcdf8.jpg)
.jpg.45eb3d6c5c42a18351b967f40943a3e5.jpg)
.jpg.8873c0ef7977892e7550d28fdc7bcb42.jpg)
.jpg.e5472208cfcf2e5edb60c580a89573cb.jpg)
.jpg.87801df4a21f0638b8dbad4787ad3d9a.jpg)


.jpg.10ac1528cdaef611fdc163973a2a5bb4.jpg)


This leaderboard is set to Auckland/GMT+12:00