
Leaderboard


Popular Content
Showing content with the highest reputation on 04/10/22 in Posts
-
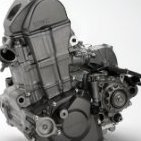
The engine is a Suzuki GSF1250, so not a big hp R1, Busa type but the price was about a third the cost of a sport bike engine and it has a stacked gearbox which was gonna be useful. It still puts out 110-120hp with some easy mods but its main feature is torque, about 110NM which is all in by 4000rpm. Space was a big concern as these cars are tiny, 3m front to back, 1.295m side to side. From the rear axle to the back of the car is 50cm or something silly so I needed a compact engine to allow enough room for a diff, that's where the stacked gearbox helps as it makes the engine shorter front to back. I spent a while considering different configurations, putting it in front of the axle would make it easier to sort the drivetrain but there is still minimal room in that direction and I really didn't want to chop up the interior. This way around had some benefits but still not enough room. White tube at the bottom is the axle centre. Then I noticed the bumper sized space behind the headers.24 points
-
Trans cooler mounted, shifter cable set up. Underneath looks pretty busy now but there's no other way of getting everything to work so meh. Ordered some sound deadner stuff for the floor before carpet goes in
 21 points
 -
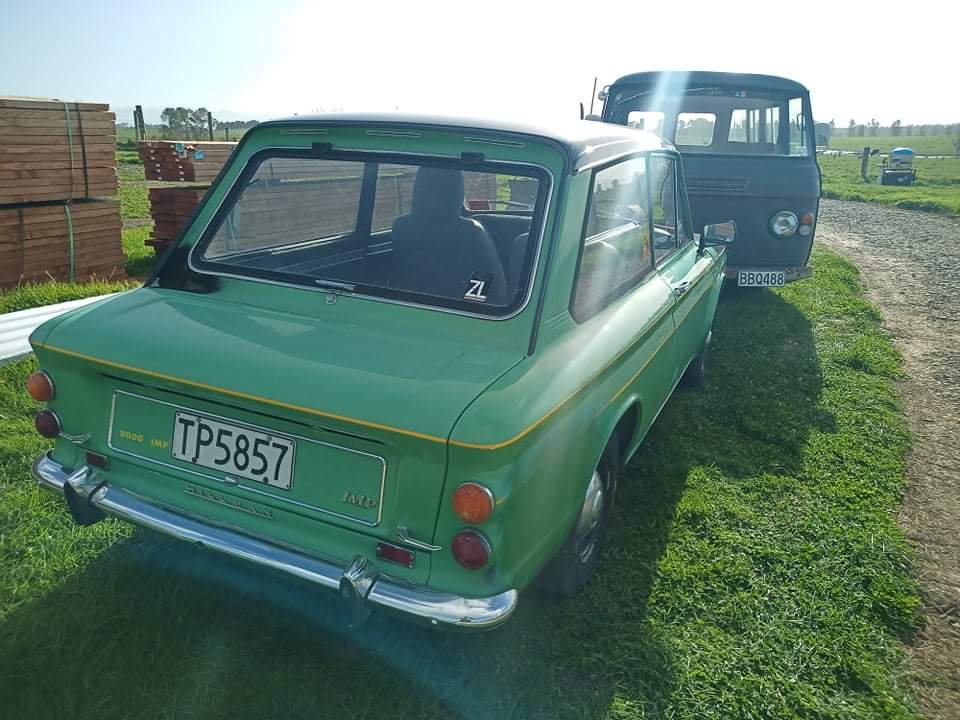
I picked this little thing up ages ago from Fronte fiend @Goat, good things take time but I just fuck around heaps so I'm only now making some progress worth posting up. Hopefully some peer pressure will give extra motivation.16 points
-
So I kind of went too full on with the throwbacks this year. not only acquiring a set of recaro fishnets and a stainless dumpy for the rotor conversion. I seemed to have impulse purchased myself a 89 bg8 Mazda gtx hatch, but in Rallycar steez. the body is immaculate condition, with a very well built cage, terratrip and terraphone already set up. 3 sets of rims and tyres and 2 spare motors and a host of other bits. score right???? well the car was sold with some “ lifter noise”. ok sure, that’s fine. I decided to pull the spare motors apart. motor 1 “run bottom end”… missing all lifters, hmmm. Head off for a look. Oh boy, pistons are umm smoked, ring lands are awol. bottom end however is mint. Block could be saved with a light hone, head has some heavy combustion chamber damage. To the parts shelf it goes. motor 2 “rebuilt motor but has lifter noise”…. missing lifters also, Dafuq. head off, wow looks like shit has gone through the motor aswell. Bottom end also mint. Could actually use these bearings aswell. motor 3 “ in the car, runs but lifter noise”. hla’s have lots of play. Pulled the sump to inspect. Bottom end is tight and super clean. No crap in the pan bar a small amount of sludge build up. turbo exhaust side has a fair amount of oil residue in there. I will replace all lifters in this motor and test it out. It starts so good, does die out because some numpty has cut the intake pipe too short to fit the restrictor, and isn’t sealing. False afm reading I guess. car has new discs and pads fitted. savage gauges, yup they’ll go straight to the bin. new alloy radiator too, full width dealio. new Silverster Hans spec belts and some sick stickers bro. Love the fit of the Racetech seats too. plans: sort the lifters etc, get it running like a boss. gain by msnz license finally and get an authority card. hopefully find a spare gearbox for it. go full send on some club stuff.
16 points
-
15 points
-
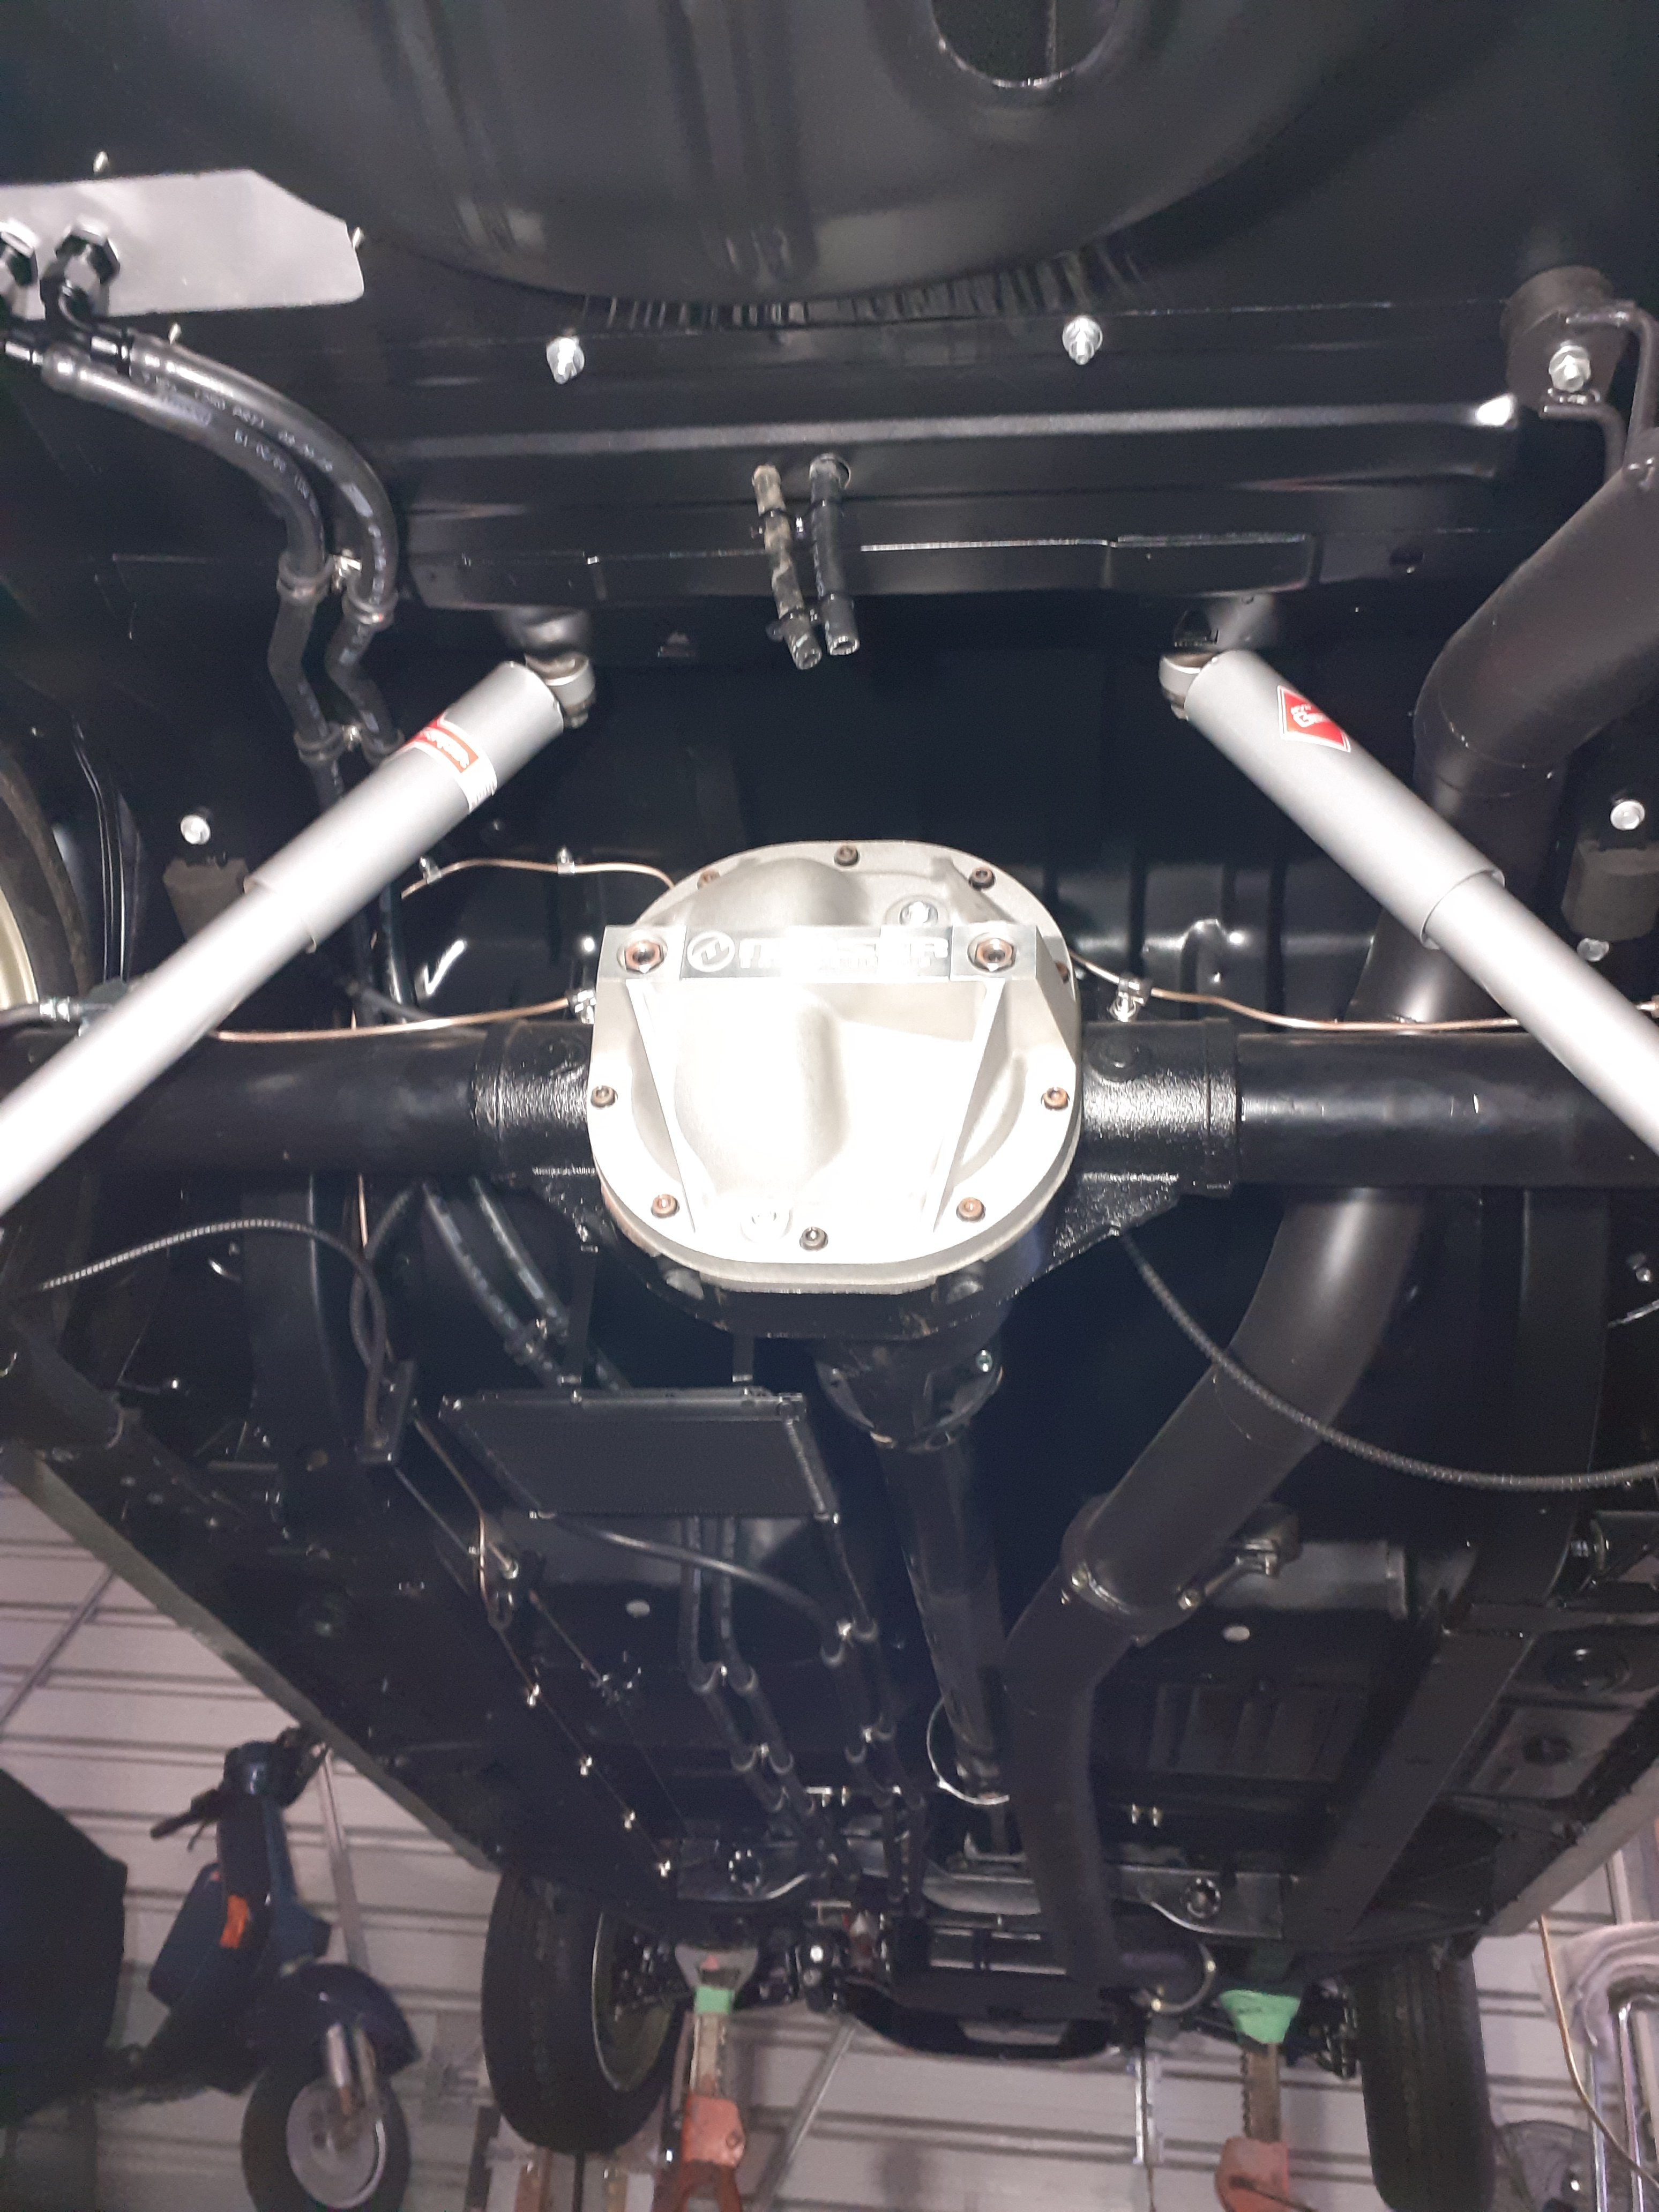
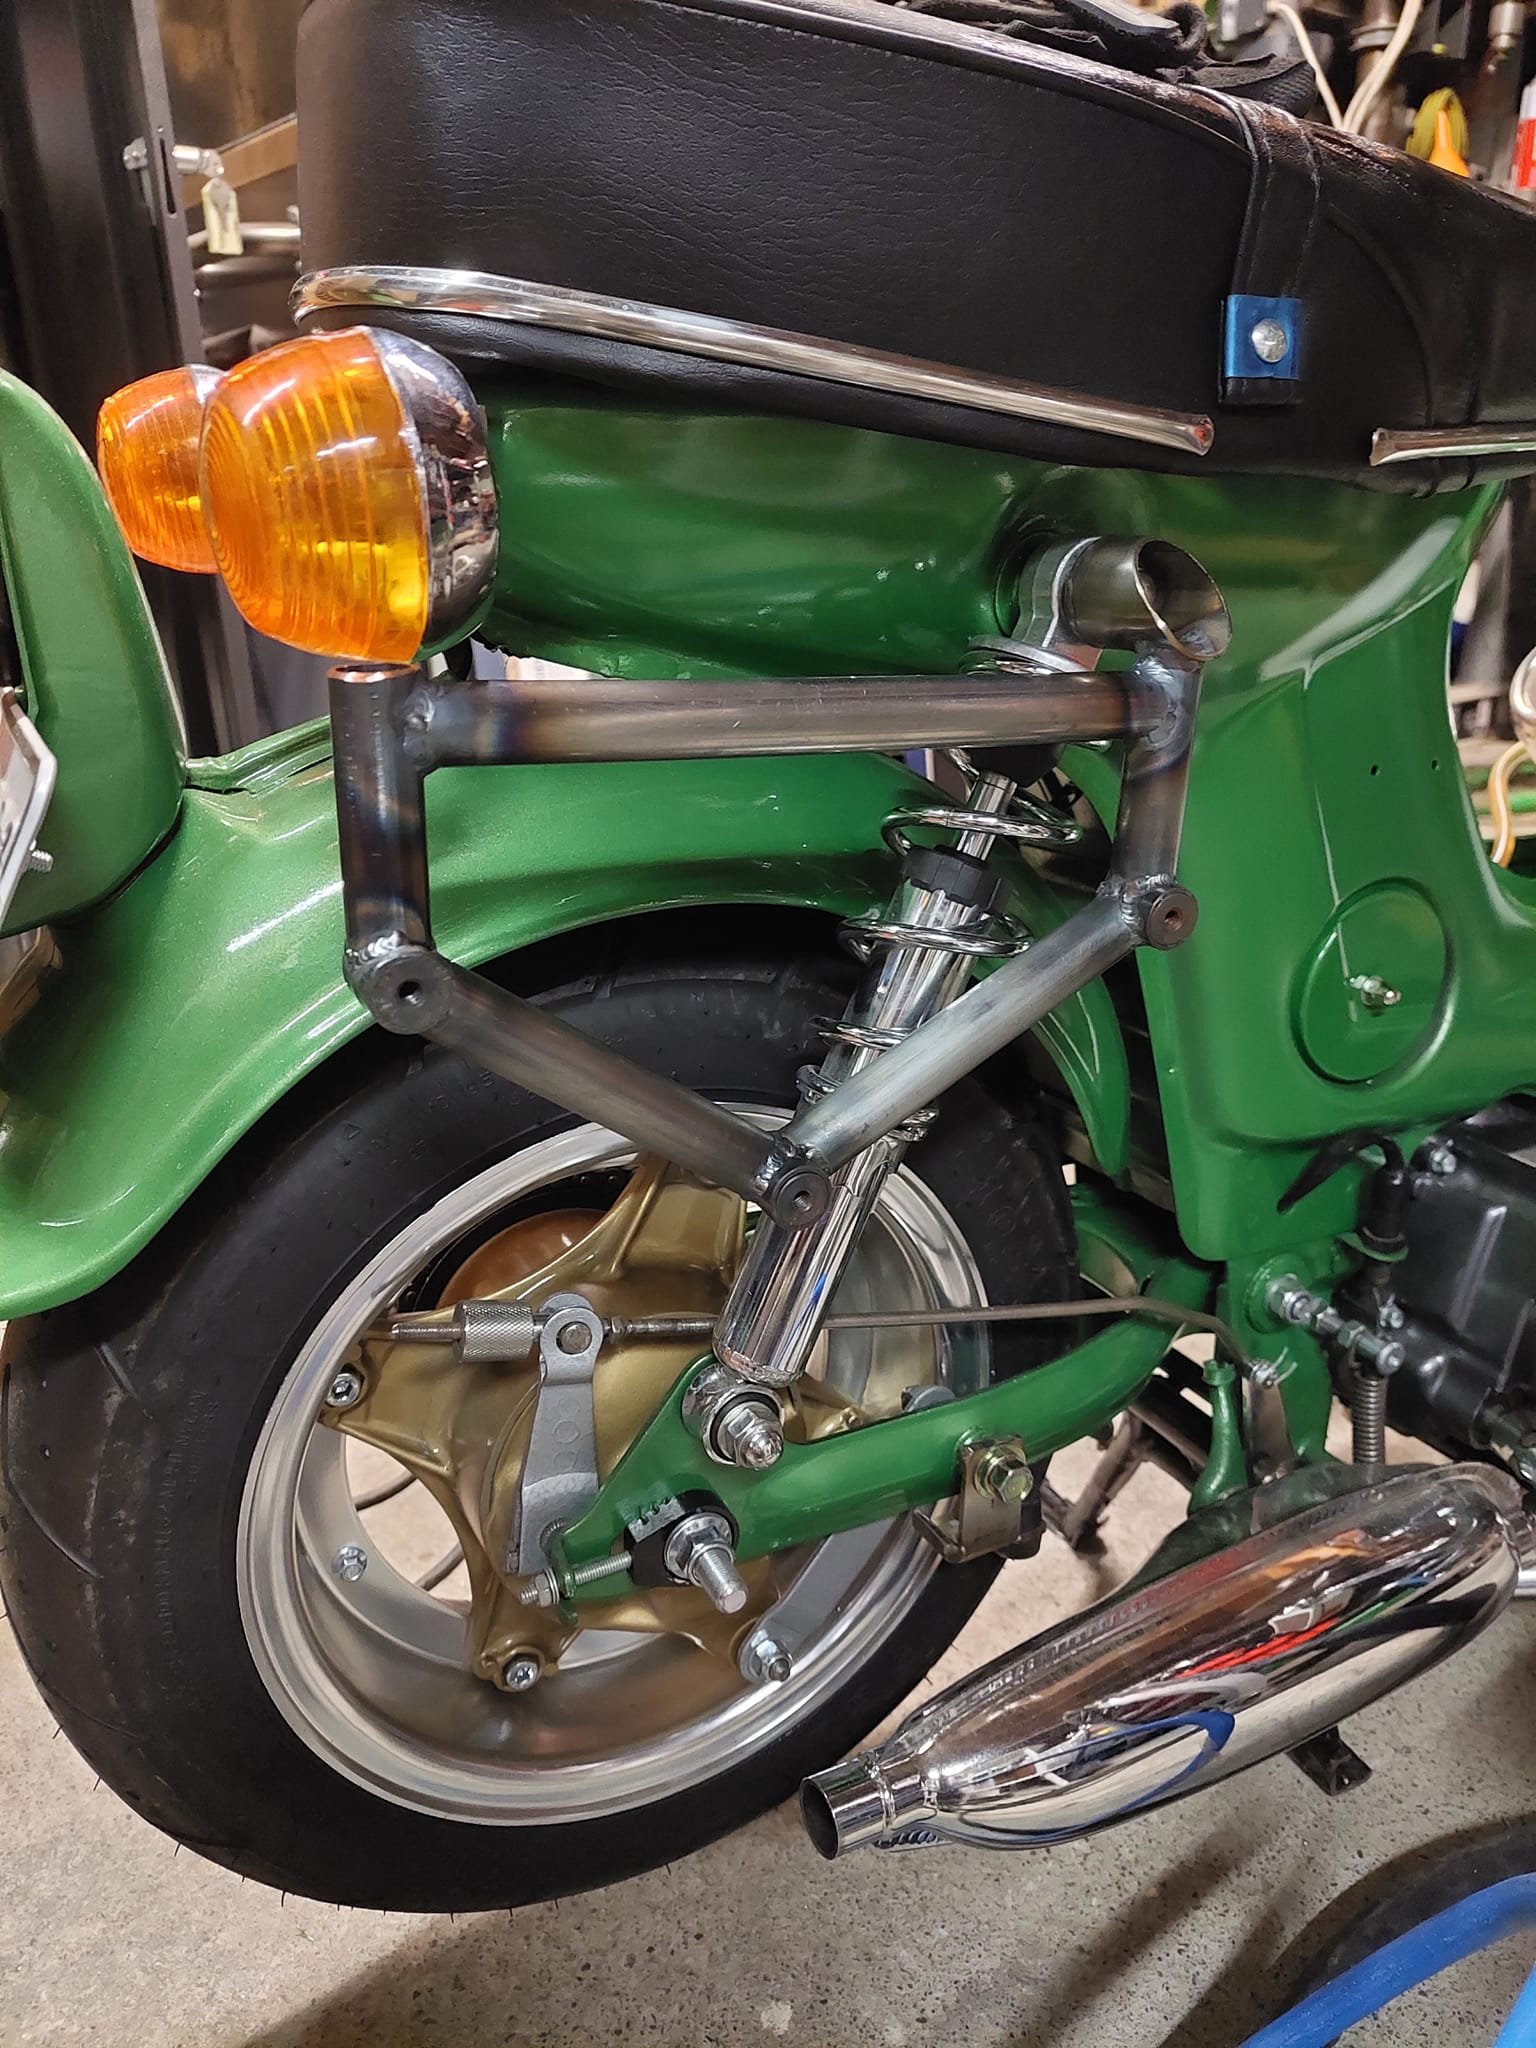
I have been keeping an eye on the lvvta docs but if you see anything whack let me know. Crush tubes for the engine subframe mounts Put the rear ones where the original engine subframe mounted Bending tube to fit The subframe isn't finished, I still have another engine mount I want to pick up and maybe tie it into the shock towers but for now it's enough to get it in.14 points
-
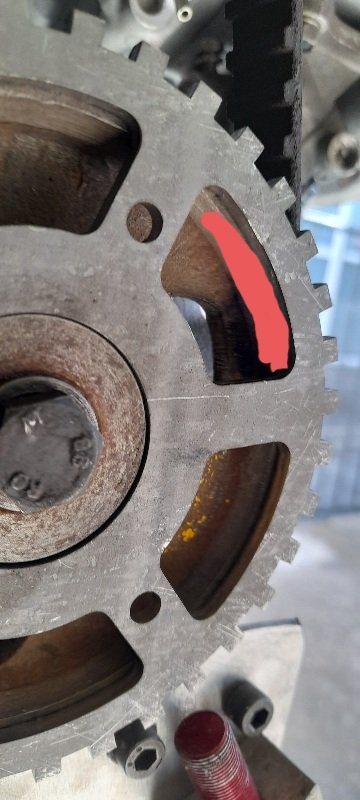
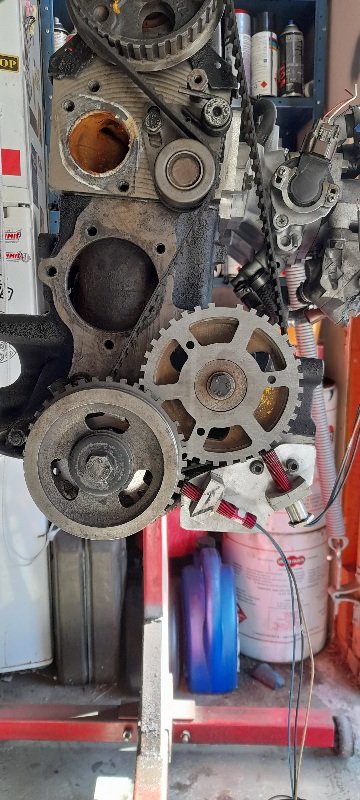
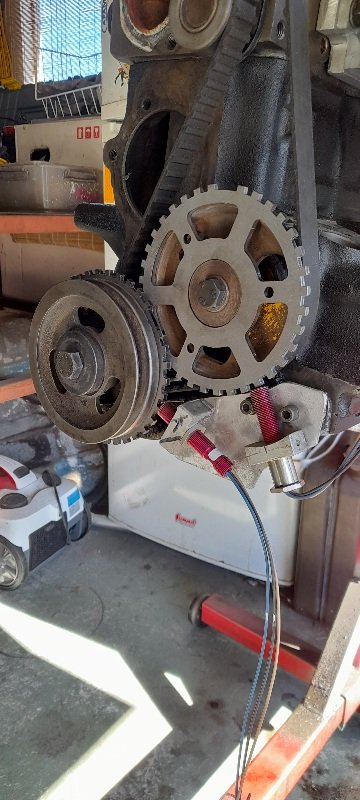
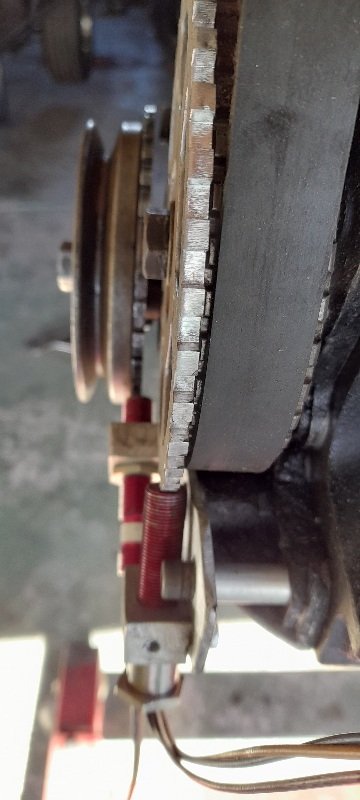
Ive been continuing to pick away at the 7M motor. @Roman dave made me some prototype pistons to try out some things. with my big cams and increased lift there is still a million rooms between the valves and the pistons. im never going to keep this a non interference engine if im aiming for 11 to 1 so i might as well re-think the whole piston dome situation. all those years building stupid two stroke engines might just pay off after all........ upshot is that i can run bigger valves without any clearance issues - only thing limiting this really is the 5M head's fondness for cracking between the valves and the spark plug hole. the other thing ive done is to sort out the cambelt/front pulley drive on the front of the crank. 5Ms have a stepped crank at the front and the cam pulley has a larger internal diameter than the crank pulley, 7Ms do not, the 7M crank pulley is larger internal bore than the 5M. so i machined the front of the crank and cut a new keyway in the crank so i can run the 5M pulleys on the 7M crank. i did spend 2 hours machining the crank only to find that it was bent and the middle journal was running out by half a millimeter. i had a spare crank so i just used that in the end. 2022-04-10_04-22-50 by sheepers, on Flickr 2022-04-10_04-23-10 by sheepers, on Flickr 2022-04-10_04-22-58 by sheepers, on Flickr 2022-04-10_04-22-44 by sheepers, on Flickr 2022-04-10_04-22-30 by sheepers, on Flickr 2022-04-10_04-22-37 by sheepers, on Flickr 2022-04-10_04-22-22 by sheepers, on Flickr 2022-04-10_04-22-14 by sheepers, on Flickr14 points
-
What an idiot, he could have probably made it that light just by swapping a 1NZ in
12 points
-
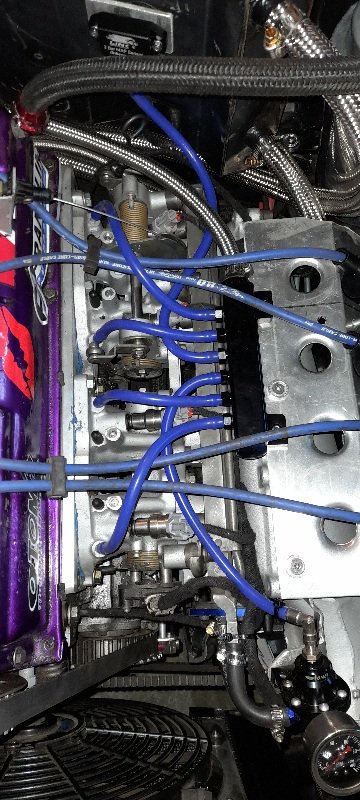
so that the engine side of the ecu all wired up and plugged in .. relays done for ecu main and coil packs... on advice from a mate I ran all 4 ITB runners to 1 vacuum manifold and ran FPR and MAP of that and I also ran brake booster aswell... so thats all vacume hoses done aswell.. still need to run wire to boost switch, boost solenoid , wideband o2 ,.. put a relay in the boot and wire fuel pump...and put ends on spark plug leads.... oh and get spark plugs... but then it might be time to try and fire the old girl up..
12 points
-
I got distracted with engine stuff. Pulling apart the sweet 3 cyl 2 stroke engine I found a blown bigend. I still intend on rebuilding it but after reading some cool builds on the net I bought one of these to go in first.11 points
-
Mate I am only too happy to post extra graphs in this thread
9 points
-
Alright people, I have a strict Tuesday/Saturday upload schedule. So this video won't be searchable and public till Tuesday - I'd appreciate the link not being shared around till Tuesday. BUT for oldschool.co.ng members, I shall post it below. Mainly because @Roman and I have already watched it and are impatient. Please interact with the video if ya like it. Was very very very very fun to come and check out a car in it's natural? habitat. Okay, enough advertising my own film project in someones build thread. Here's the link:9 points
-
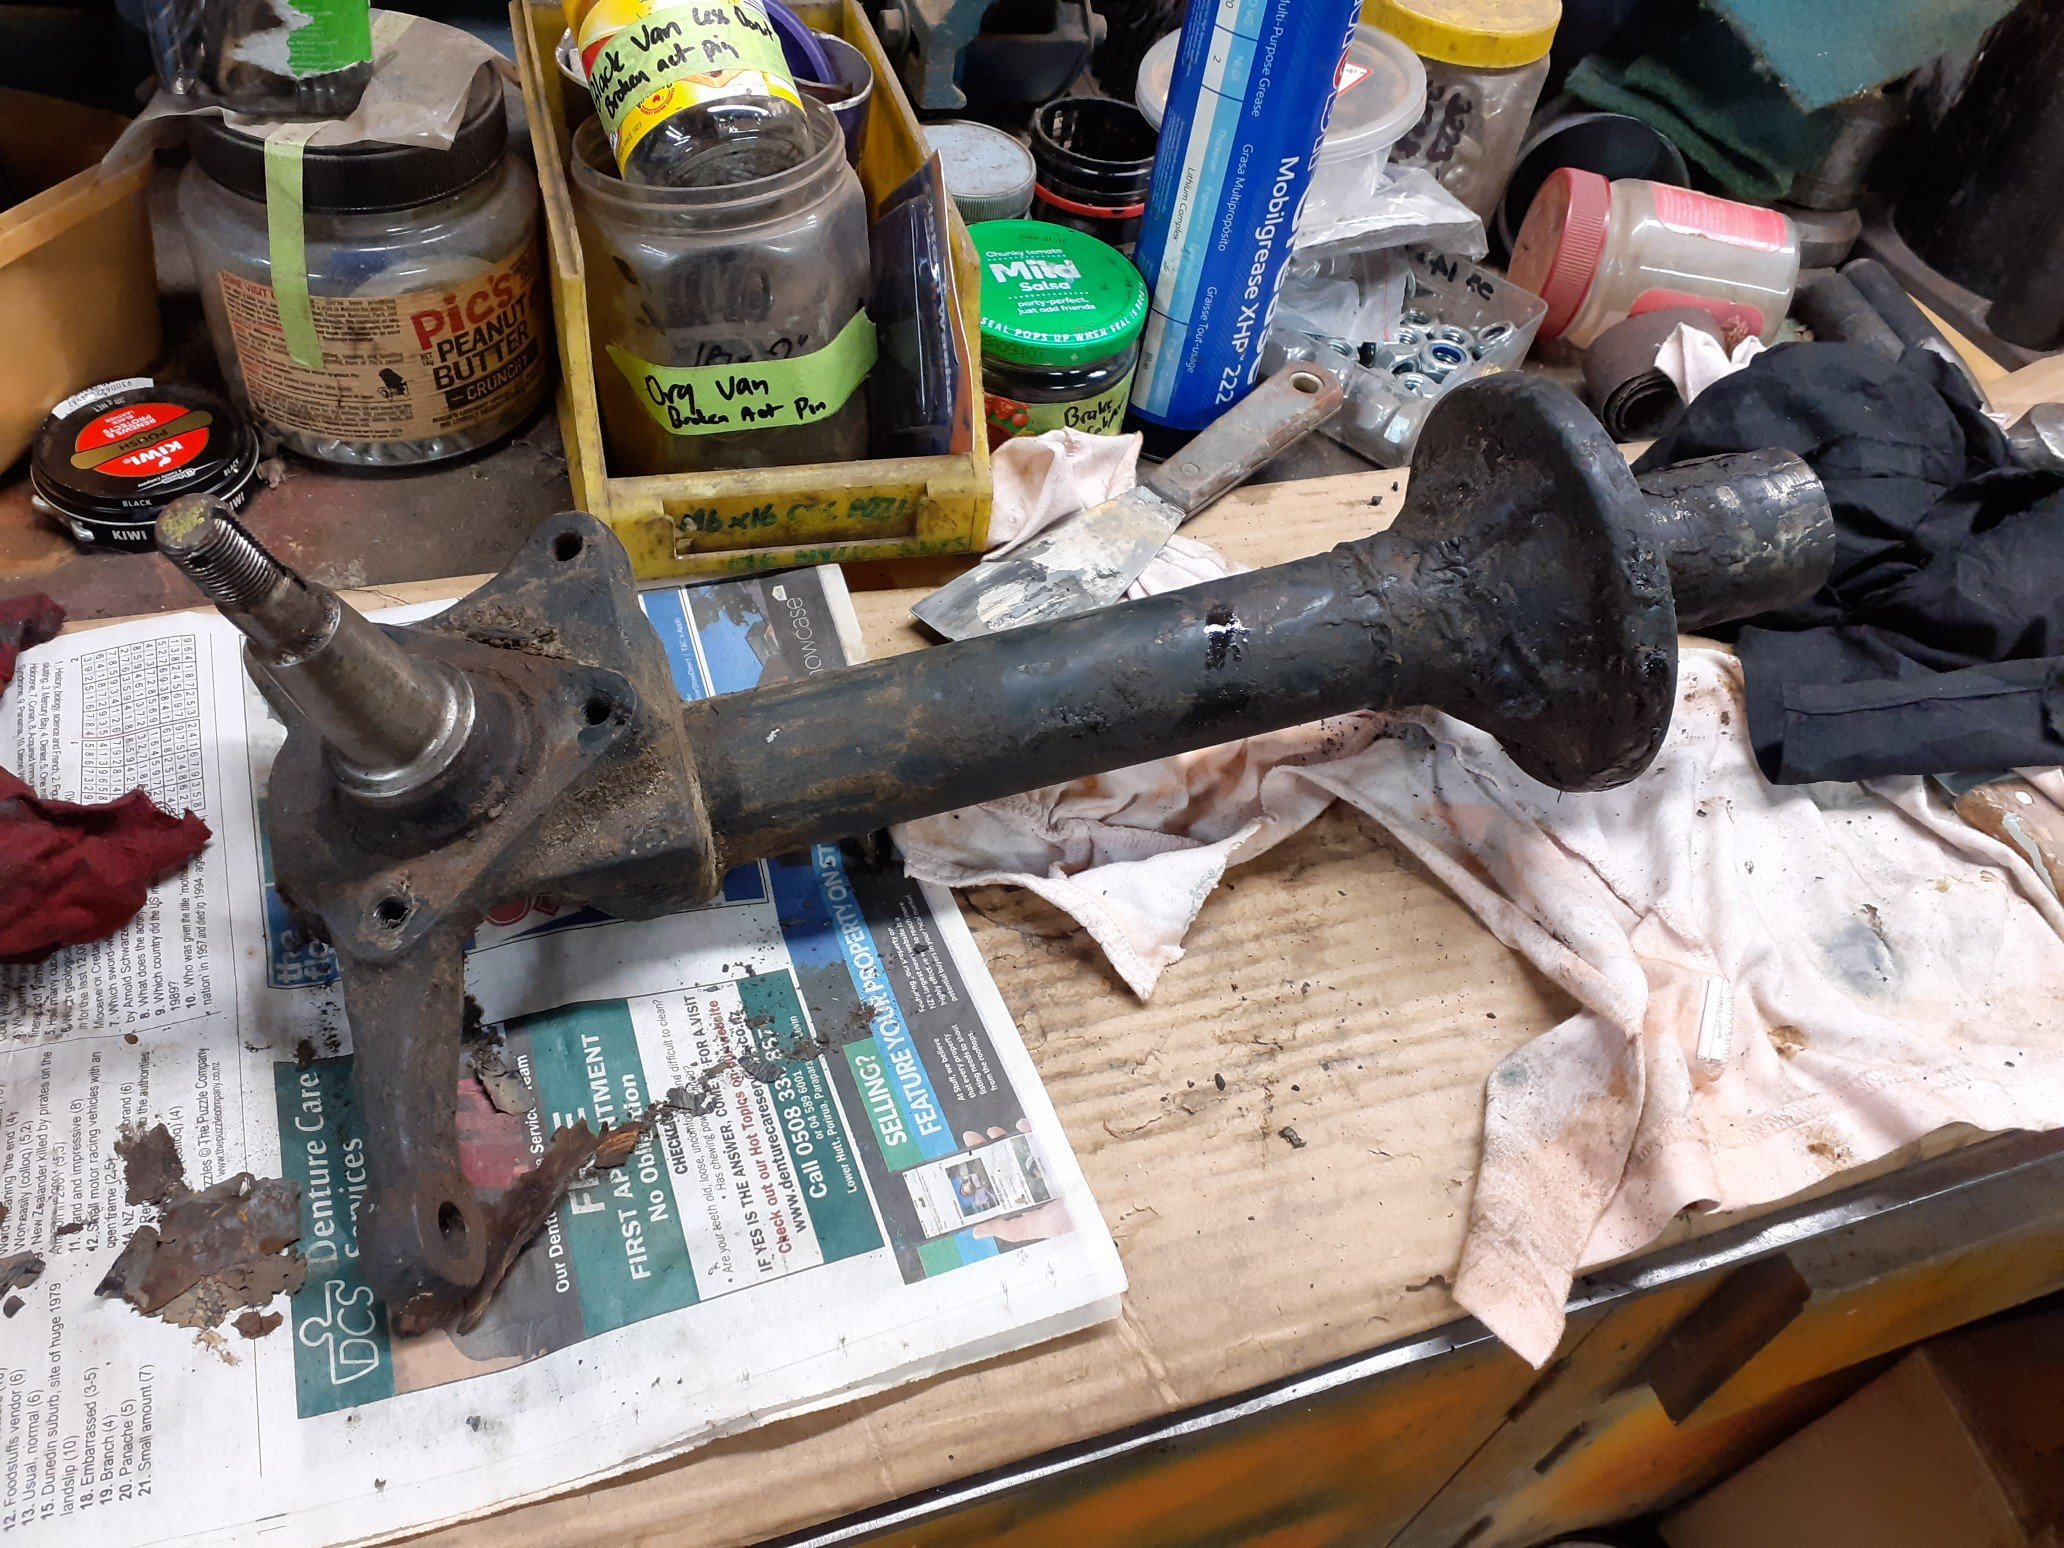
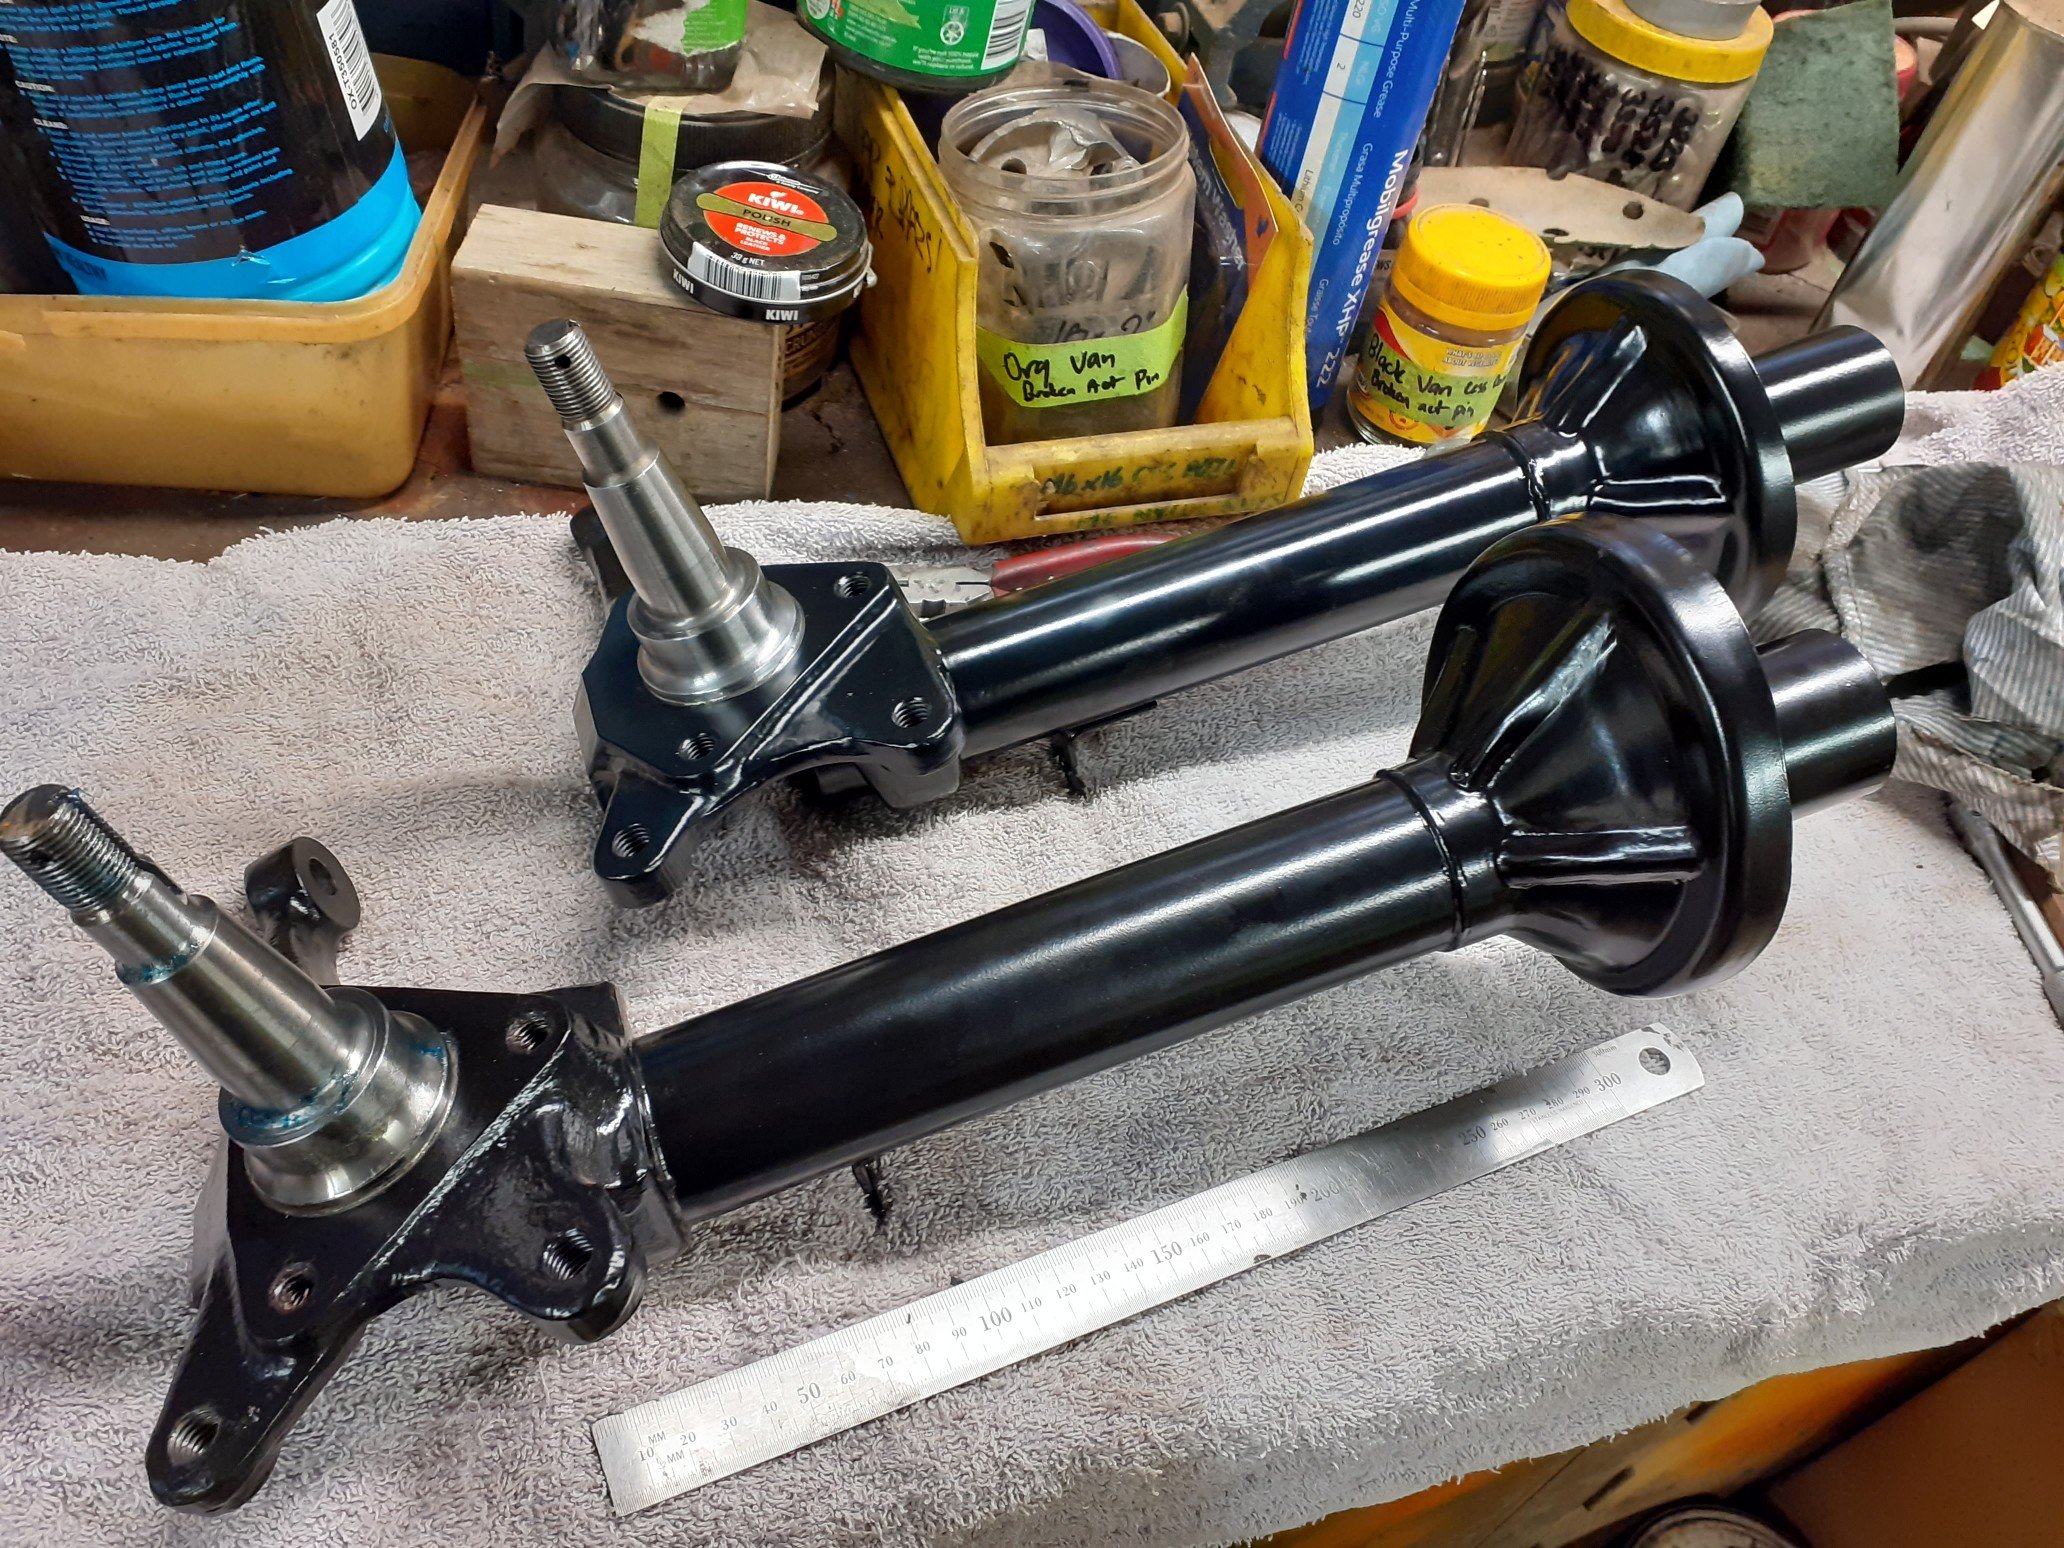
V2. Find an unbent pair of the correct struts, strip, paint and reassemble. New shocks and fittings. The original rubber from the strut tops have been removed and replaced with poly. The 2 different strut bodies but look very similar. The correct mk2 escort in the foreground and the unknown in front. The tube diameter, caliper spacing, disk shield spacing, stub axles and heights all measures exactly the same.
9 points
-
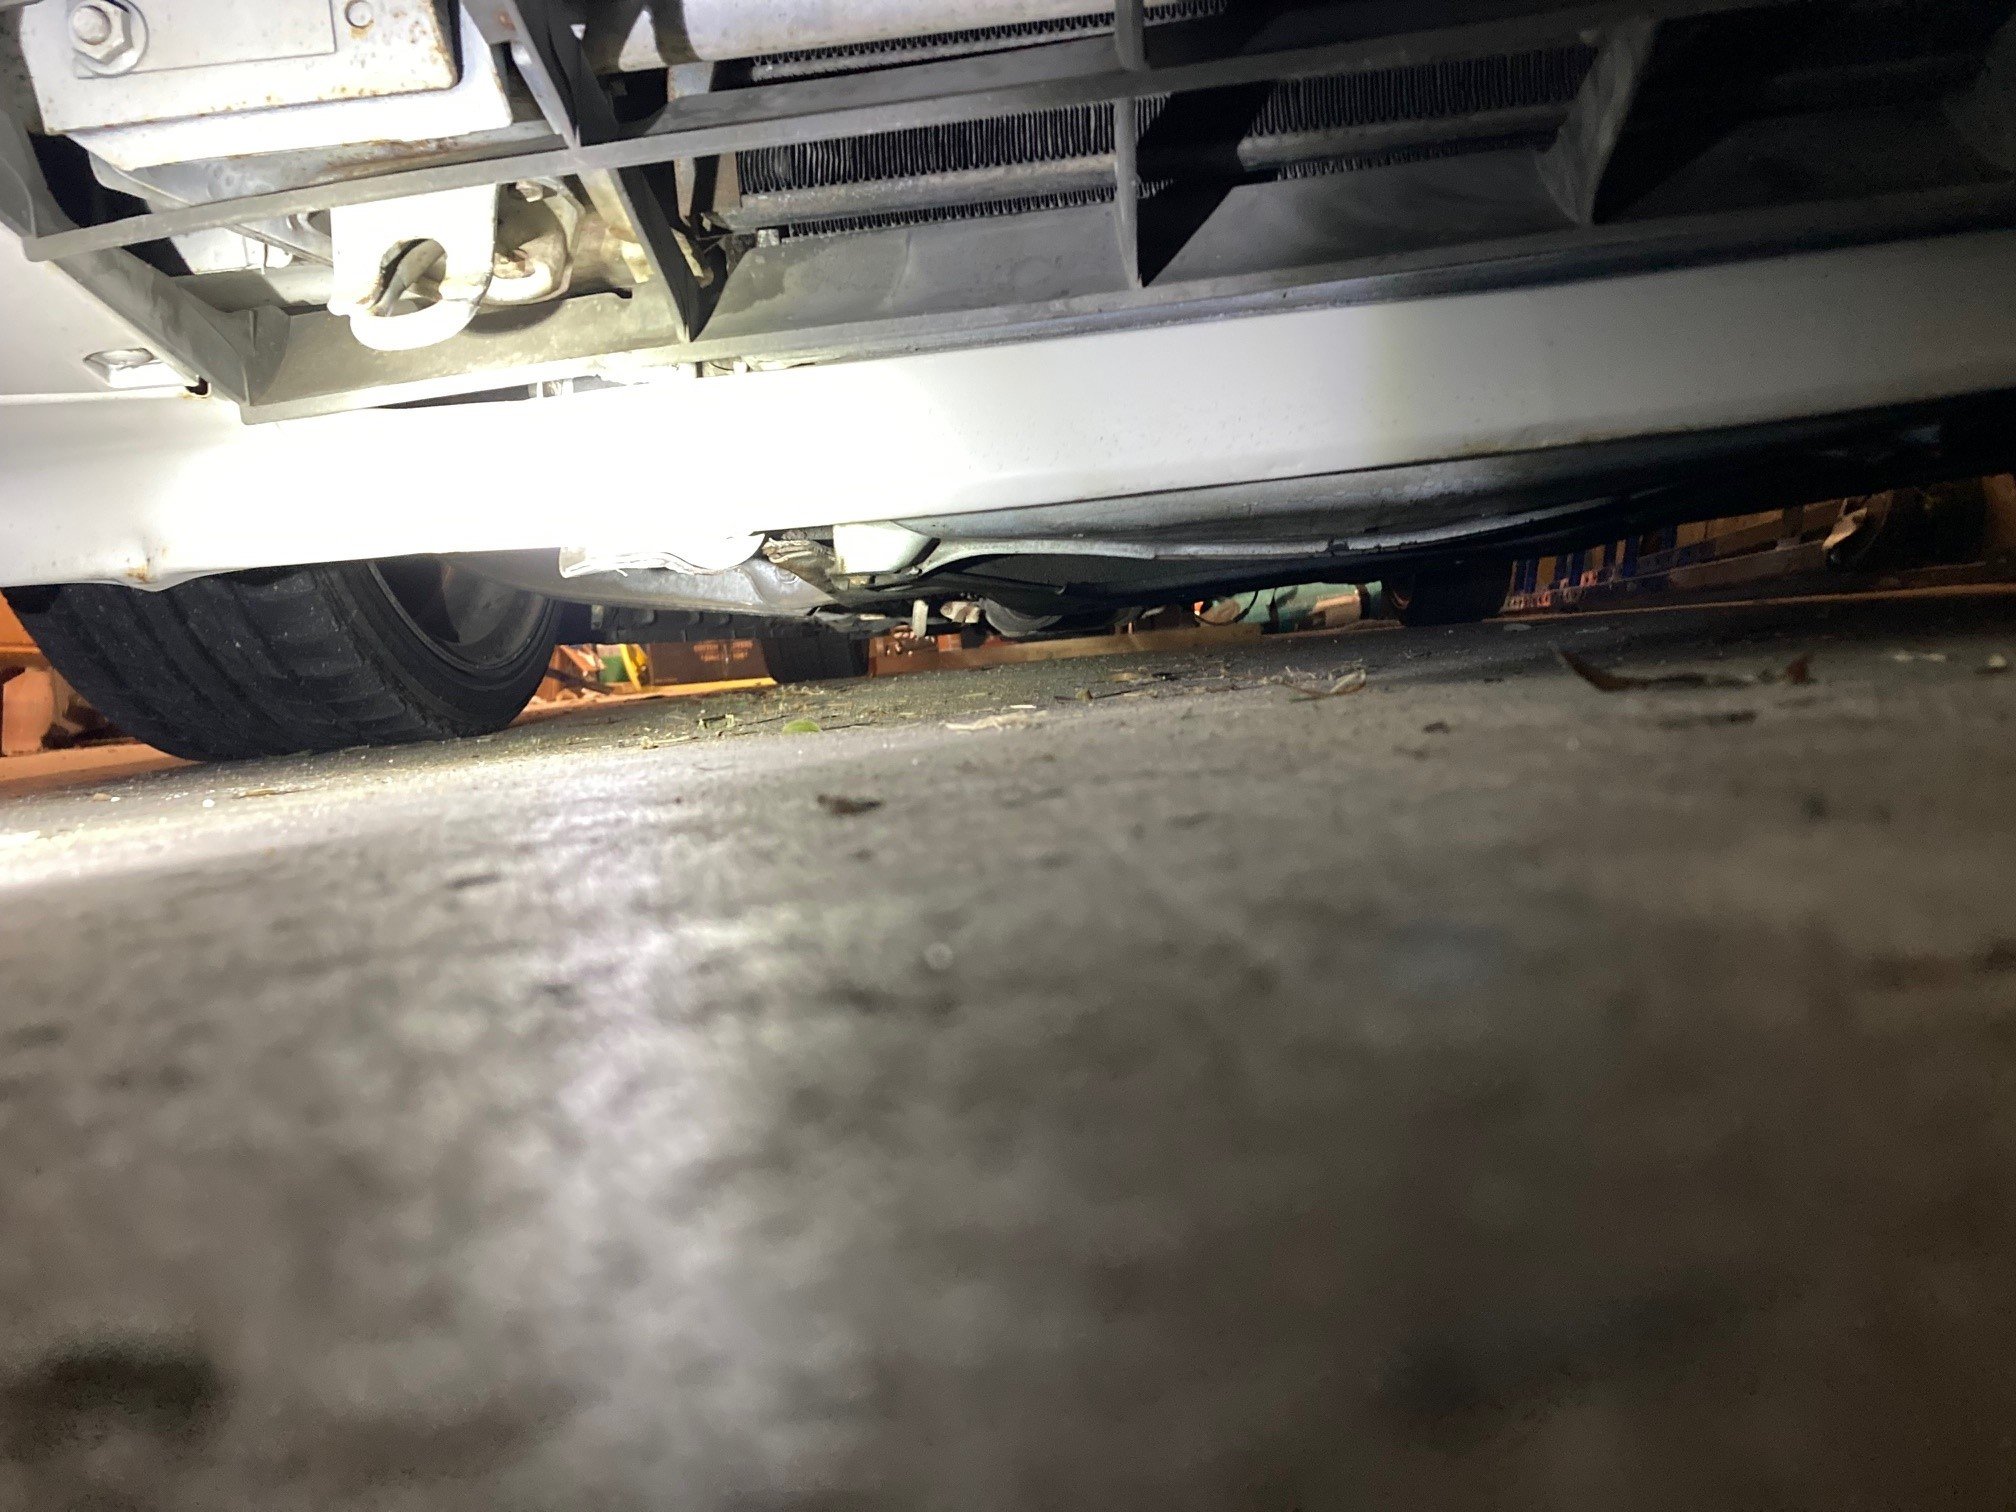
There was a bit of rust in the plenum that needed sorting so I started poking around. View from the inside I cut it all out about 2 years ago and it's still in the same state.8 points
-
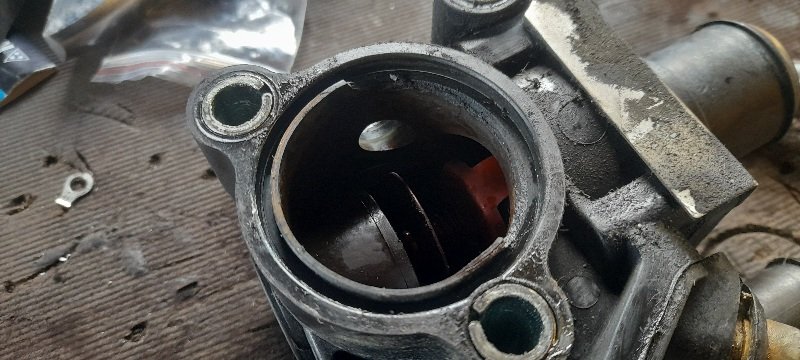
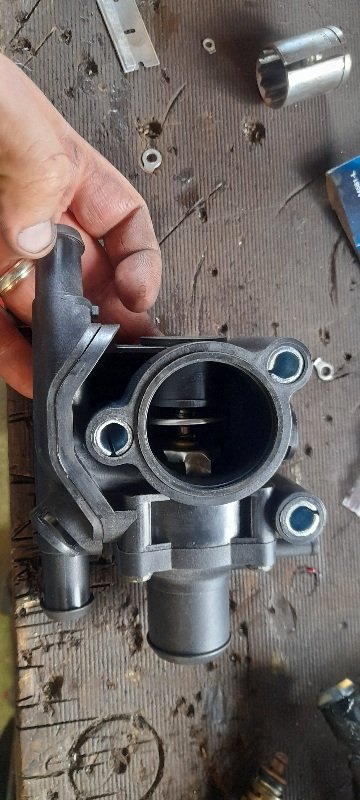
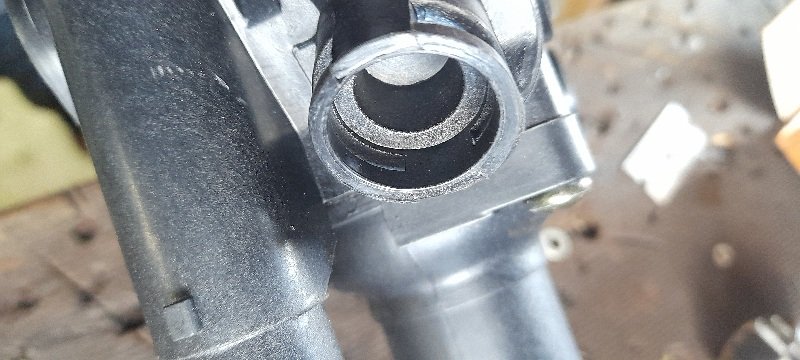
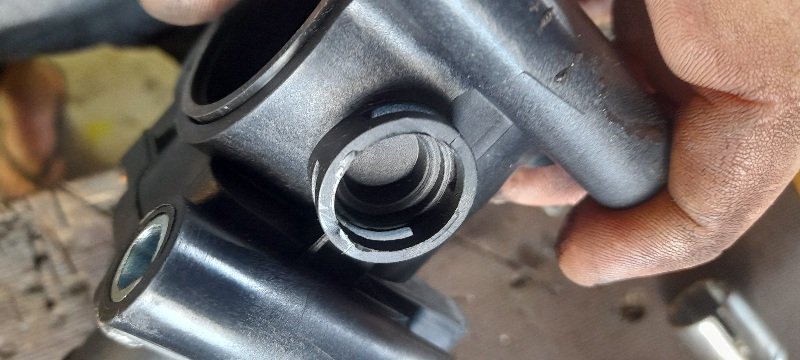
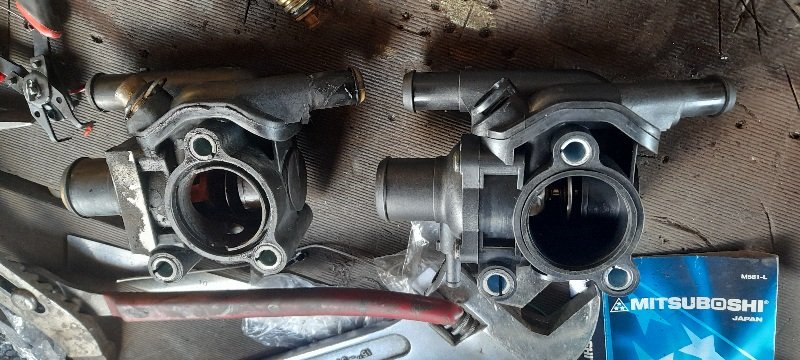
needed to do som maintenance on the focus ... one of the rear wheel bearings was making a hell of a noise so thought I would just do both. you can but a complete hub with studs an all from any focus fiesta with 4 studs.... but replacment bearings where just Over 50bucks to my door..(I've git other projects draining my wallet). next was the thermostat housing..I thought it was leaking from the bung on the bottom (think it's for turbo coolant times on the rs) but turns out that the side of the seal place as gone the new one bought didn't have any of the holes drilled for temp sensor or bottom bung ...so figured it can't leak from there then. I doubled up on the temp sensor o ring then put the clip in ... and no leaks. gets up to temp quicker and the heater is amazing... think the old one was stuck open (191 odd thousand ks) as this is the 1st time the temp Gaughan gone to half way and stayed there ... use to hover around 1/4..
8 points
-
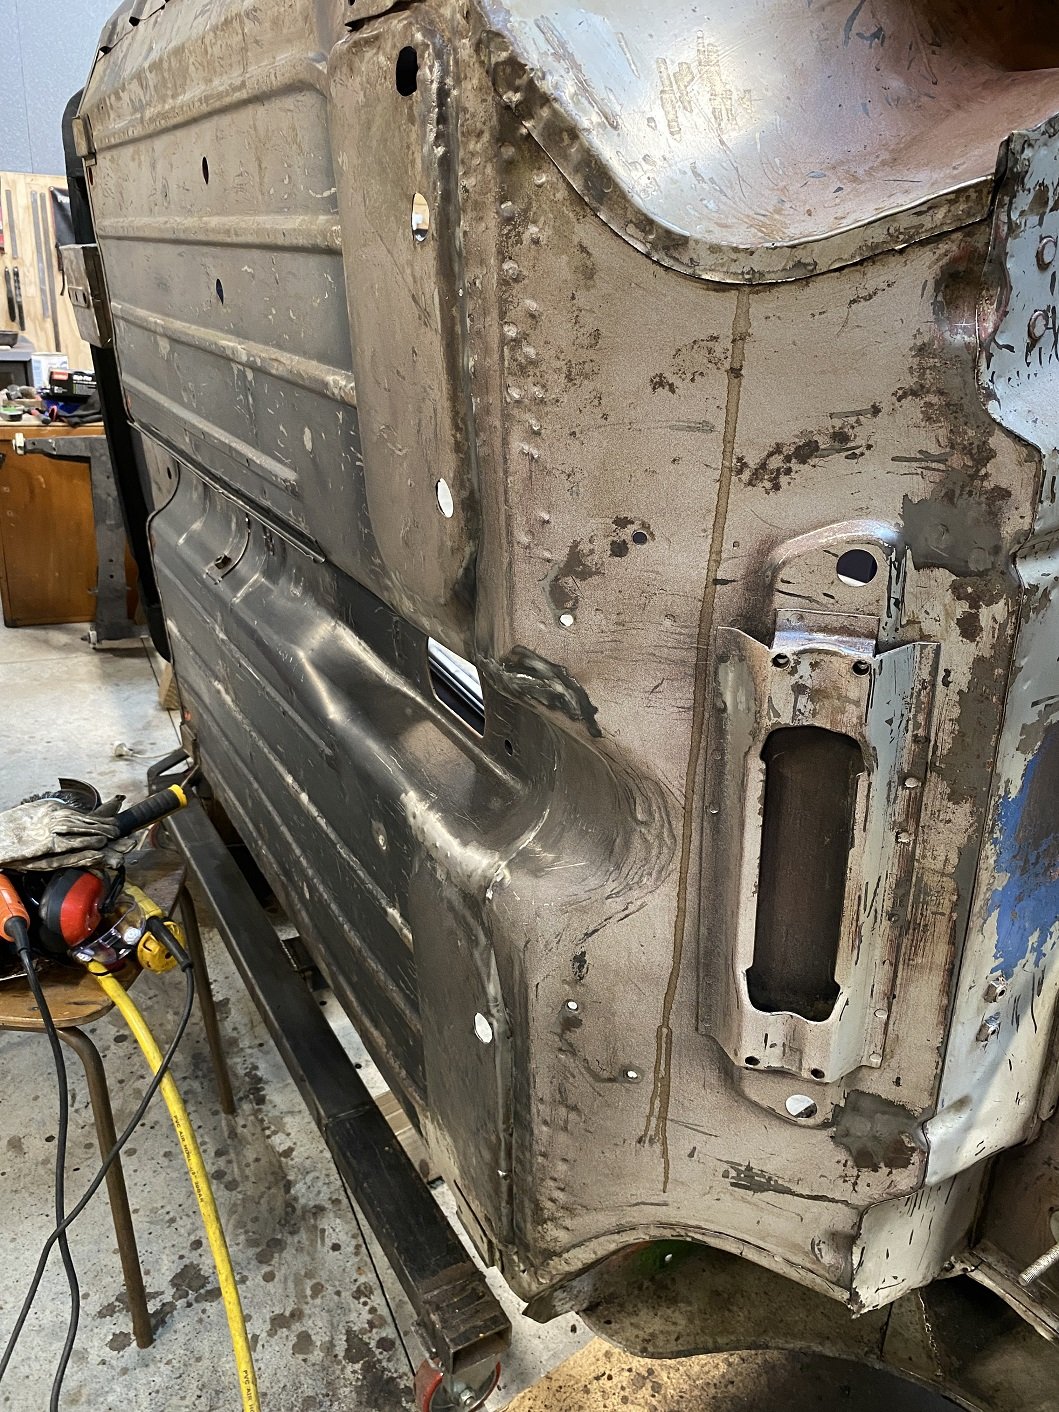
I've got most of the underseal off the underside. Starting off with the heat gun and some narrow paint scrapers with the corners ground off. Then wet it down with turps. I started off with kerosene, but it takes ages to evaporate. The turps seems to work better, it's the cheapest solvent I could find. $5 per L when you get it in 4L. It evaporates, but not as fast as thinners(which is super spendy from Mitre10). Agitate the wet turps with a brush and steel wool to dislodge/dissolve the underseal. Wet it down some more with the brush. Make a big mess on the floor. Then use a rag to wipe up all the dissolved underseal. Change the rag when you run out of clean sections. Repeat until no more underseal. I decided to remove all the bent strips of metal they use to hold the brake and fuel lines, etc... down. I'll put rivnuts in and use p-clips instead. I also did some panel beating along the bulkhead seams to tidy up the edges and make them sit flush. The spinning death wheel uncovered some pin holes around the front end of the drives side sill. So I went exploring. Looks like a really straightforward repair. I'll replace that section of inner sill and the little bit of floor. And I'll have to re-use the vent thingy and make a new outer sill section. Looks like 1.2mm... I'll have to get some. The 1.6mm I have is a bit overkill. The front end has kissed something once upon a time and the area below the headlight has been pushed in about 10mm. I've had a go bashing it out but it's not keen to move. The front panel is rusty all the way across behind the bumper lip and the bonnet slam panel doesn't look so good either. I can get the whole front panel for $300, it's not worth the effort trying to repair what's there. The small panel below the headlight also needs replacing, but it's not available separately. Hopefully I can get it cut from another one. It's all curvy so I'd rather not have to make one.
7 points
-
It's interesting to see the difference it makes, being less of a weiner with launch rpm. On my fastest run, launched at 7500 and then rpm dropped to about 6300 at minimum. (pink line) The last time I was launching at 4500ish, and engine speed dropped to 2300 haha. This probably wasnt my fastest last run, but yeah really need to keep that rpm up and allow for that it's going to bog a bit. These tyres are more happy to just keep spinning for a bit than bogging.
7 points
-
Yeah but I cant even take a photo of it, because the printing on it is super shit Type it out for you though. In brackets next to it, is my PB from last time R/T: .531 (.411) 60: 2.096 (2.182) 330': 5.689 (blank) 1/8: 8.682 (8.928) MPH: 81.12 (80.17) 1000': 11.276 (11.583) 1/4: 13.496 (13.832) MPH: 99.51 (99.65) I thought my 60ft was heaps better being "2.0" but 2.096 is pretty damn close to a 2.1 haha Only 0.086 seconds better! So maybe it is/was actually a power improvement, or the smaller tyre diameter helping out rather than an epic launch. It looks like most of the gains were actually in the 1/8th mile region
6 points
-
So now I had a spot for the engine I had to work out if I could get drive from it to the axles that goes in the right direction. I spent more time thinking, looking at pictures, measuring, reading forums, asking @yoeddynz questions, doing nothing, buying parcel shelf speakers, looking at rims, starting other projects. I started to cad (poorly) up my own diff with countershaft unit when I found an outfit in the UK who do R1 conversions for Minis and they have their engines facing the same way, a quick email confirmed they would sell one of their diffs separately if I wanted one. This Or this So now I had a solution I started to fit the engine.5 points
-
So woke up this morning and it indeed needed an overnight burp. It took around half a litre to top up and good to go. What a difference it makes. It can now easily sit on 60mph without stinking of burning oil and smoking on cool down. Fixing the oil leak helped too. I'm genuinely shocked at what a difference it makes. Random pic of it with it's bigger brother outside the new shed I need to build for it.
5 points
-
Last night was wild! I've had this on my mind all week but made sure everything was going to be 100% and didnt forget anything etc. So I leave super early so I could get through scruitineering early, and get some runs early. I stop in at morrinsville on the way to get some food. Start the car back up - and my electric waterpump isnt working! Fucks sake! So I checked over everything and nothing obvious causing the issue. Was pretty disheartened and so I messaged @MopedNZ and @GuyWithAviators to say that I probably wont be able to make it. As they were coming from Tauranga to see it. They insisted that at the least they'd meet me where I was. The previous times the pump has failed, it's been that it just wont hot restart. Because the big starter capacitor cracks or something. So sure enough, once it cooled down enough it started again. This gave me the confidence to take a gamble on that it'll be the same issue, and I'll be able to get there and back home so long as I just let it cool if needed. So, yeah! Second run of the night. 13.49 @ 99.5mph and 2.09 60ft. It was awesome! I experimented with some other launch settings and tyre pressures, my "bad" runs were generally around 13.7. Hard not to be happy with that. I was eliminated on the first racing round by a real quick rotary, but I was real happy to get 4 runs in. This time there were heeeaaaappppsss of people coming over to see what's in the engine bay, or yarns about it. One young lady asked me if I'd sell it to her. Was lots of fun, and a real cool atmosphere at nightspeed again. I rounded out the evening by cruise control smug facing back home in luxury. A++ would drag race an Echo again Big thanks to Andrew and Cullam for coming along and helping / support5 points
-
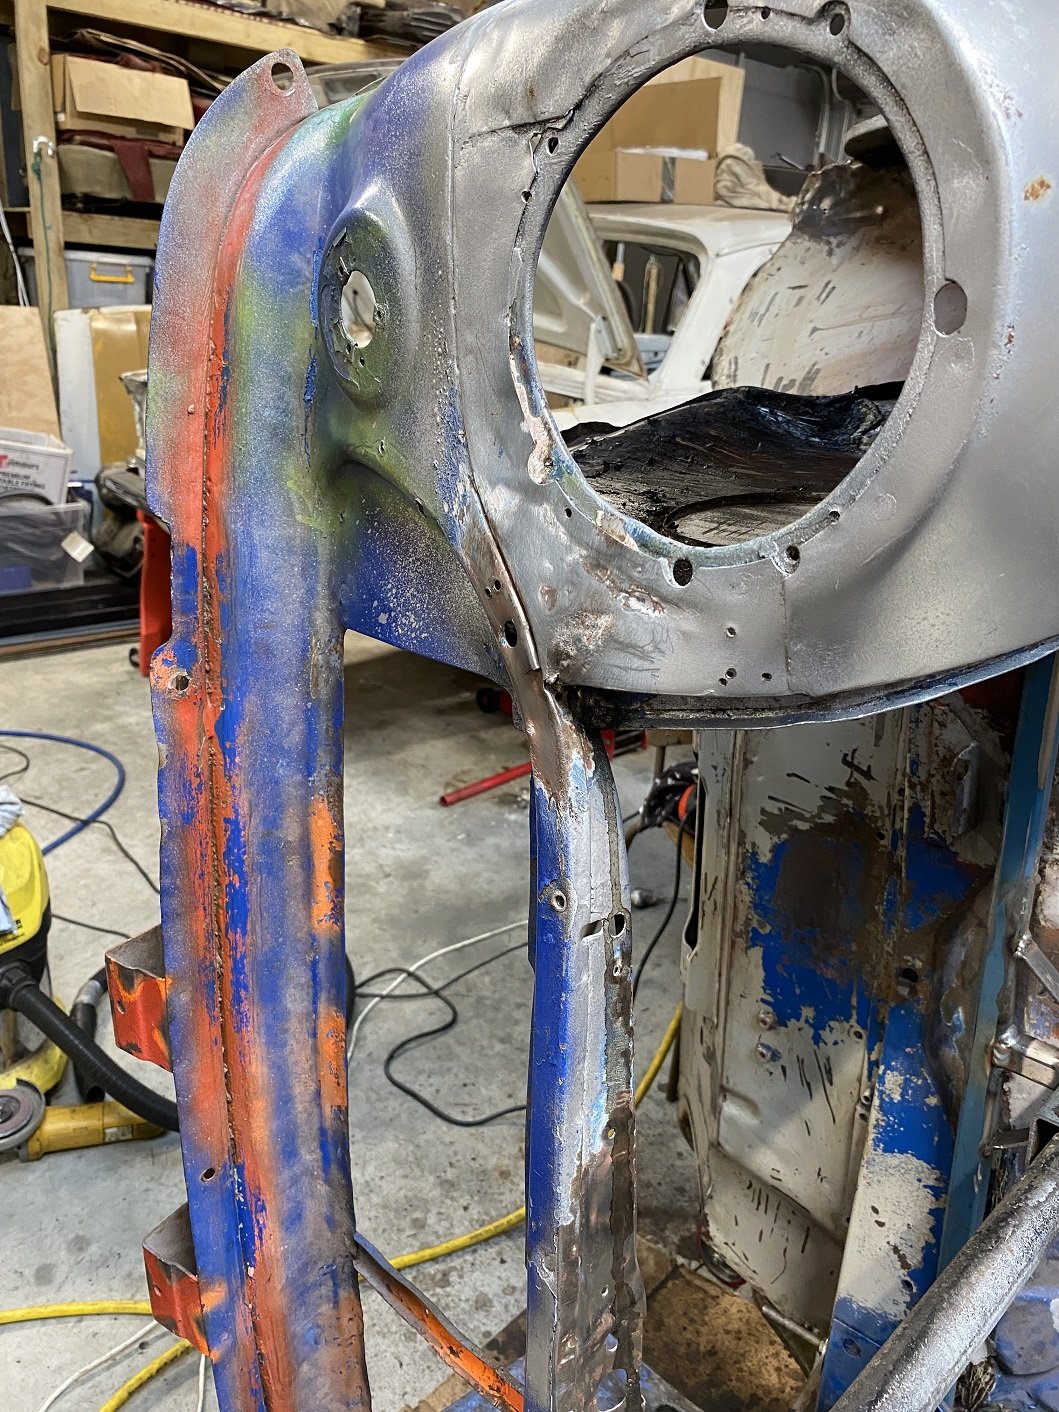
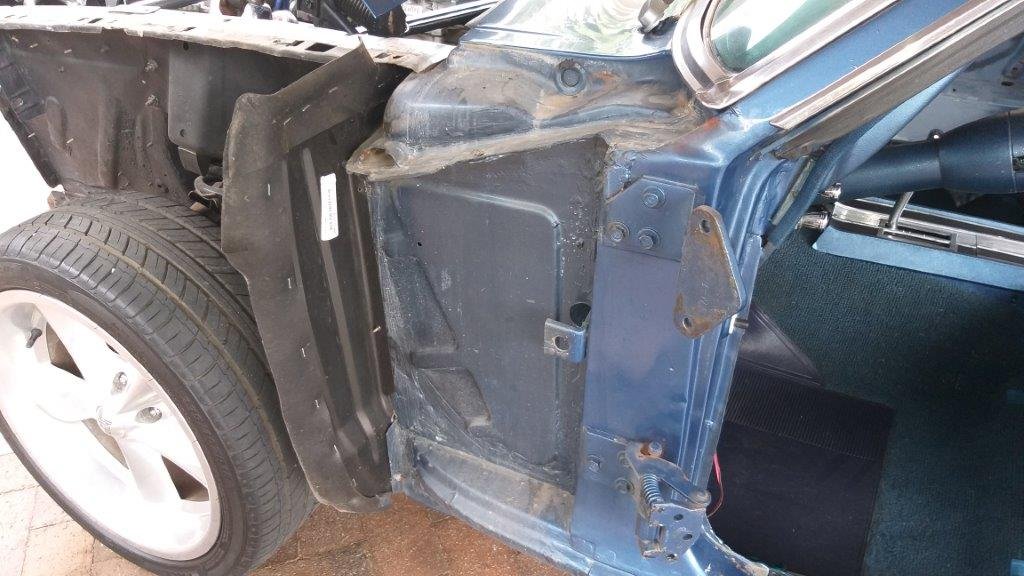
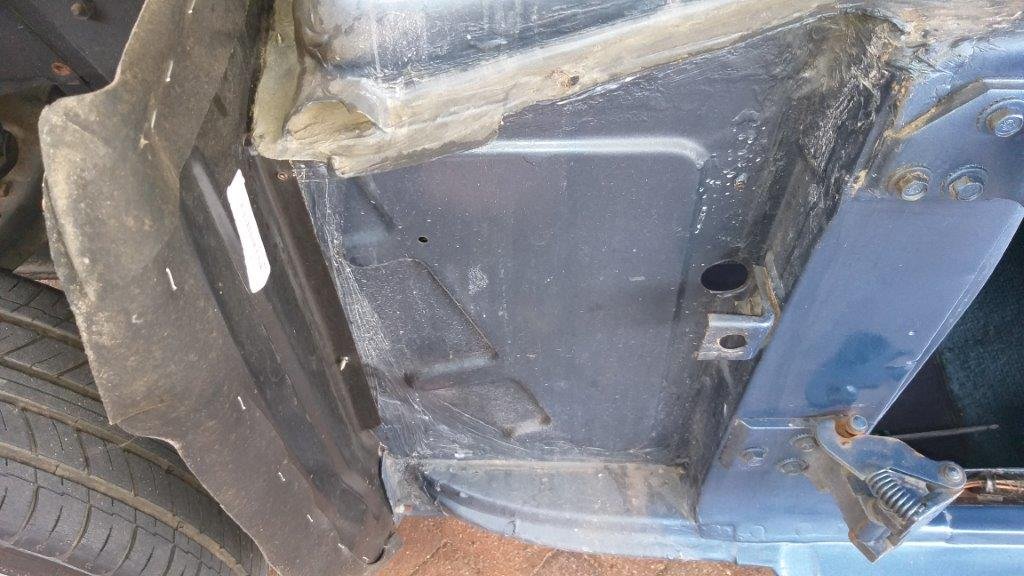
Chucked some primer on and then it was time for a quick test fit to check gaps and alignment. Uncle Google told me that the easiest way to line the doors up is to start off by getting the bottom and back gaps uniform with the fixed rear quarter and rocker panel and then to tweak the front fender to suit. So off came both front fenders which left the poor old Muzzy looking decidedly bare. Looks like someone has been here before as both splash panels have been replaced with Scott Drake replicas still sporting their labels. Date stamps say 2013 so must have been fitted two owners back. The chassis legs and inner panels look nice and solid with signs of the original Nightmist Blue factory paint.
4 points
-
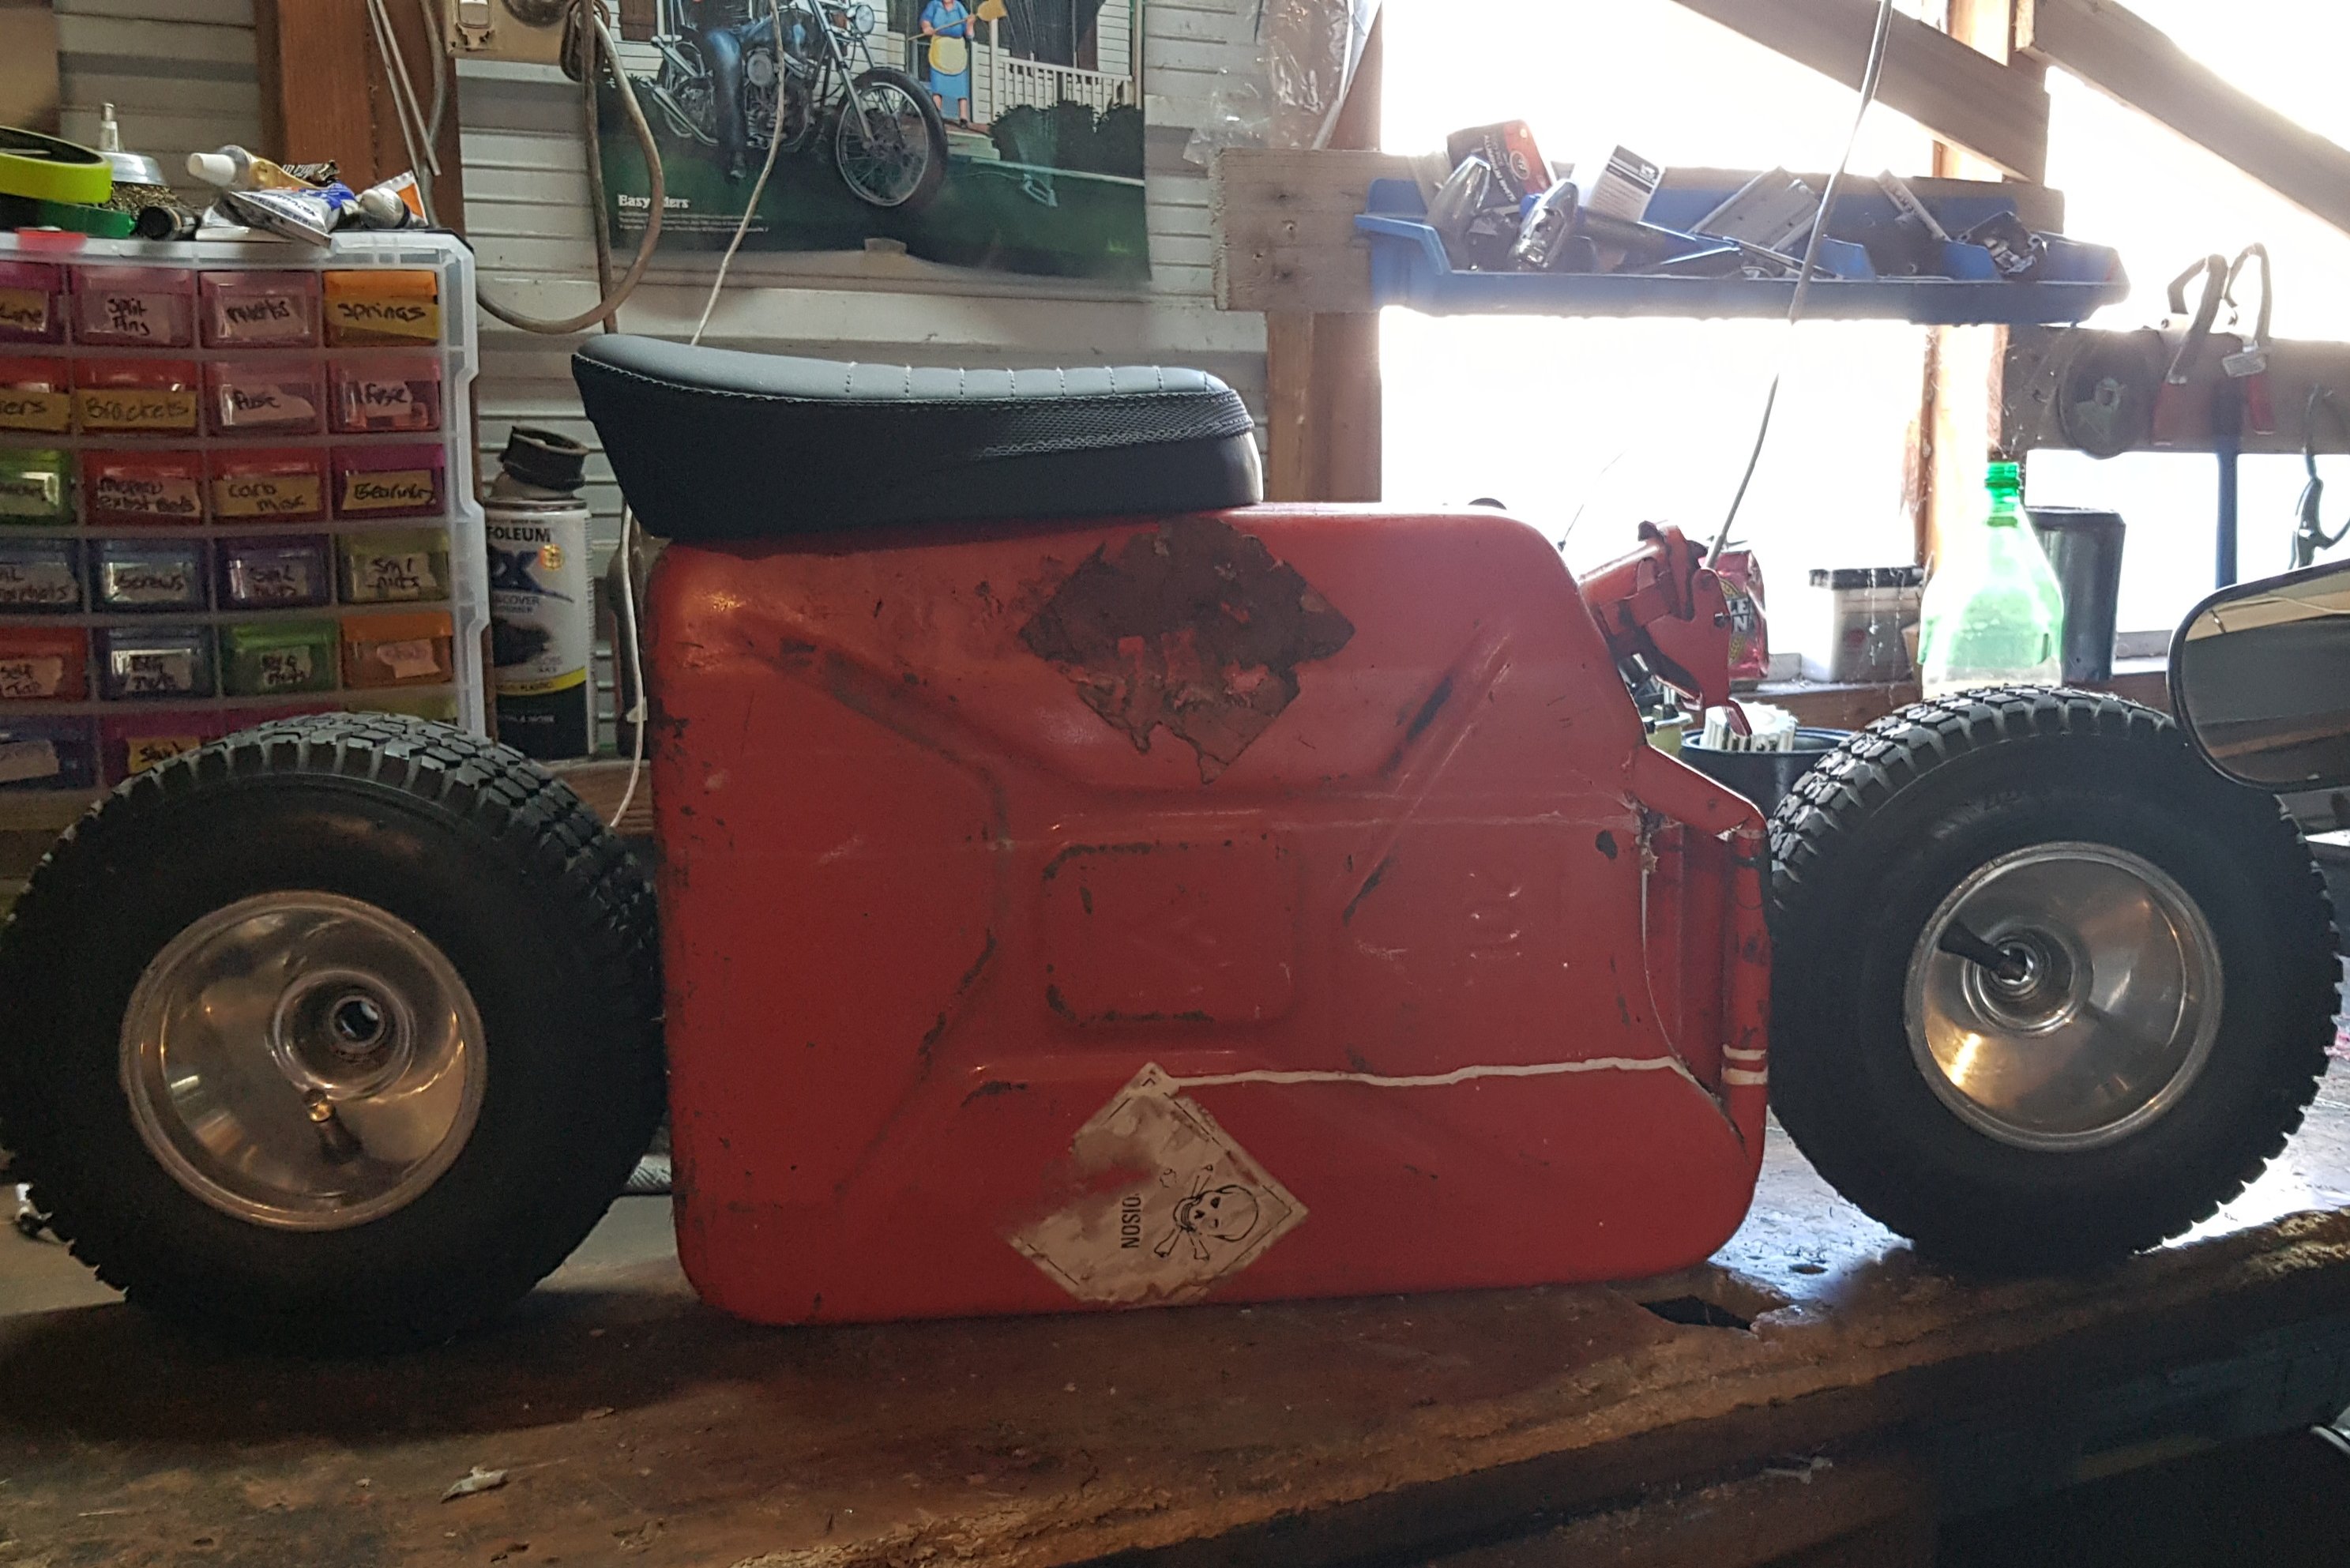
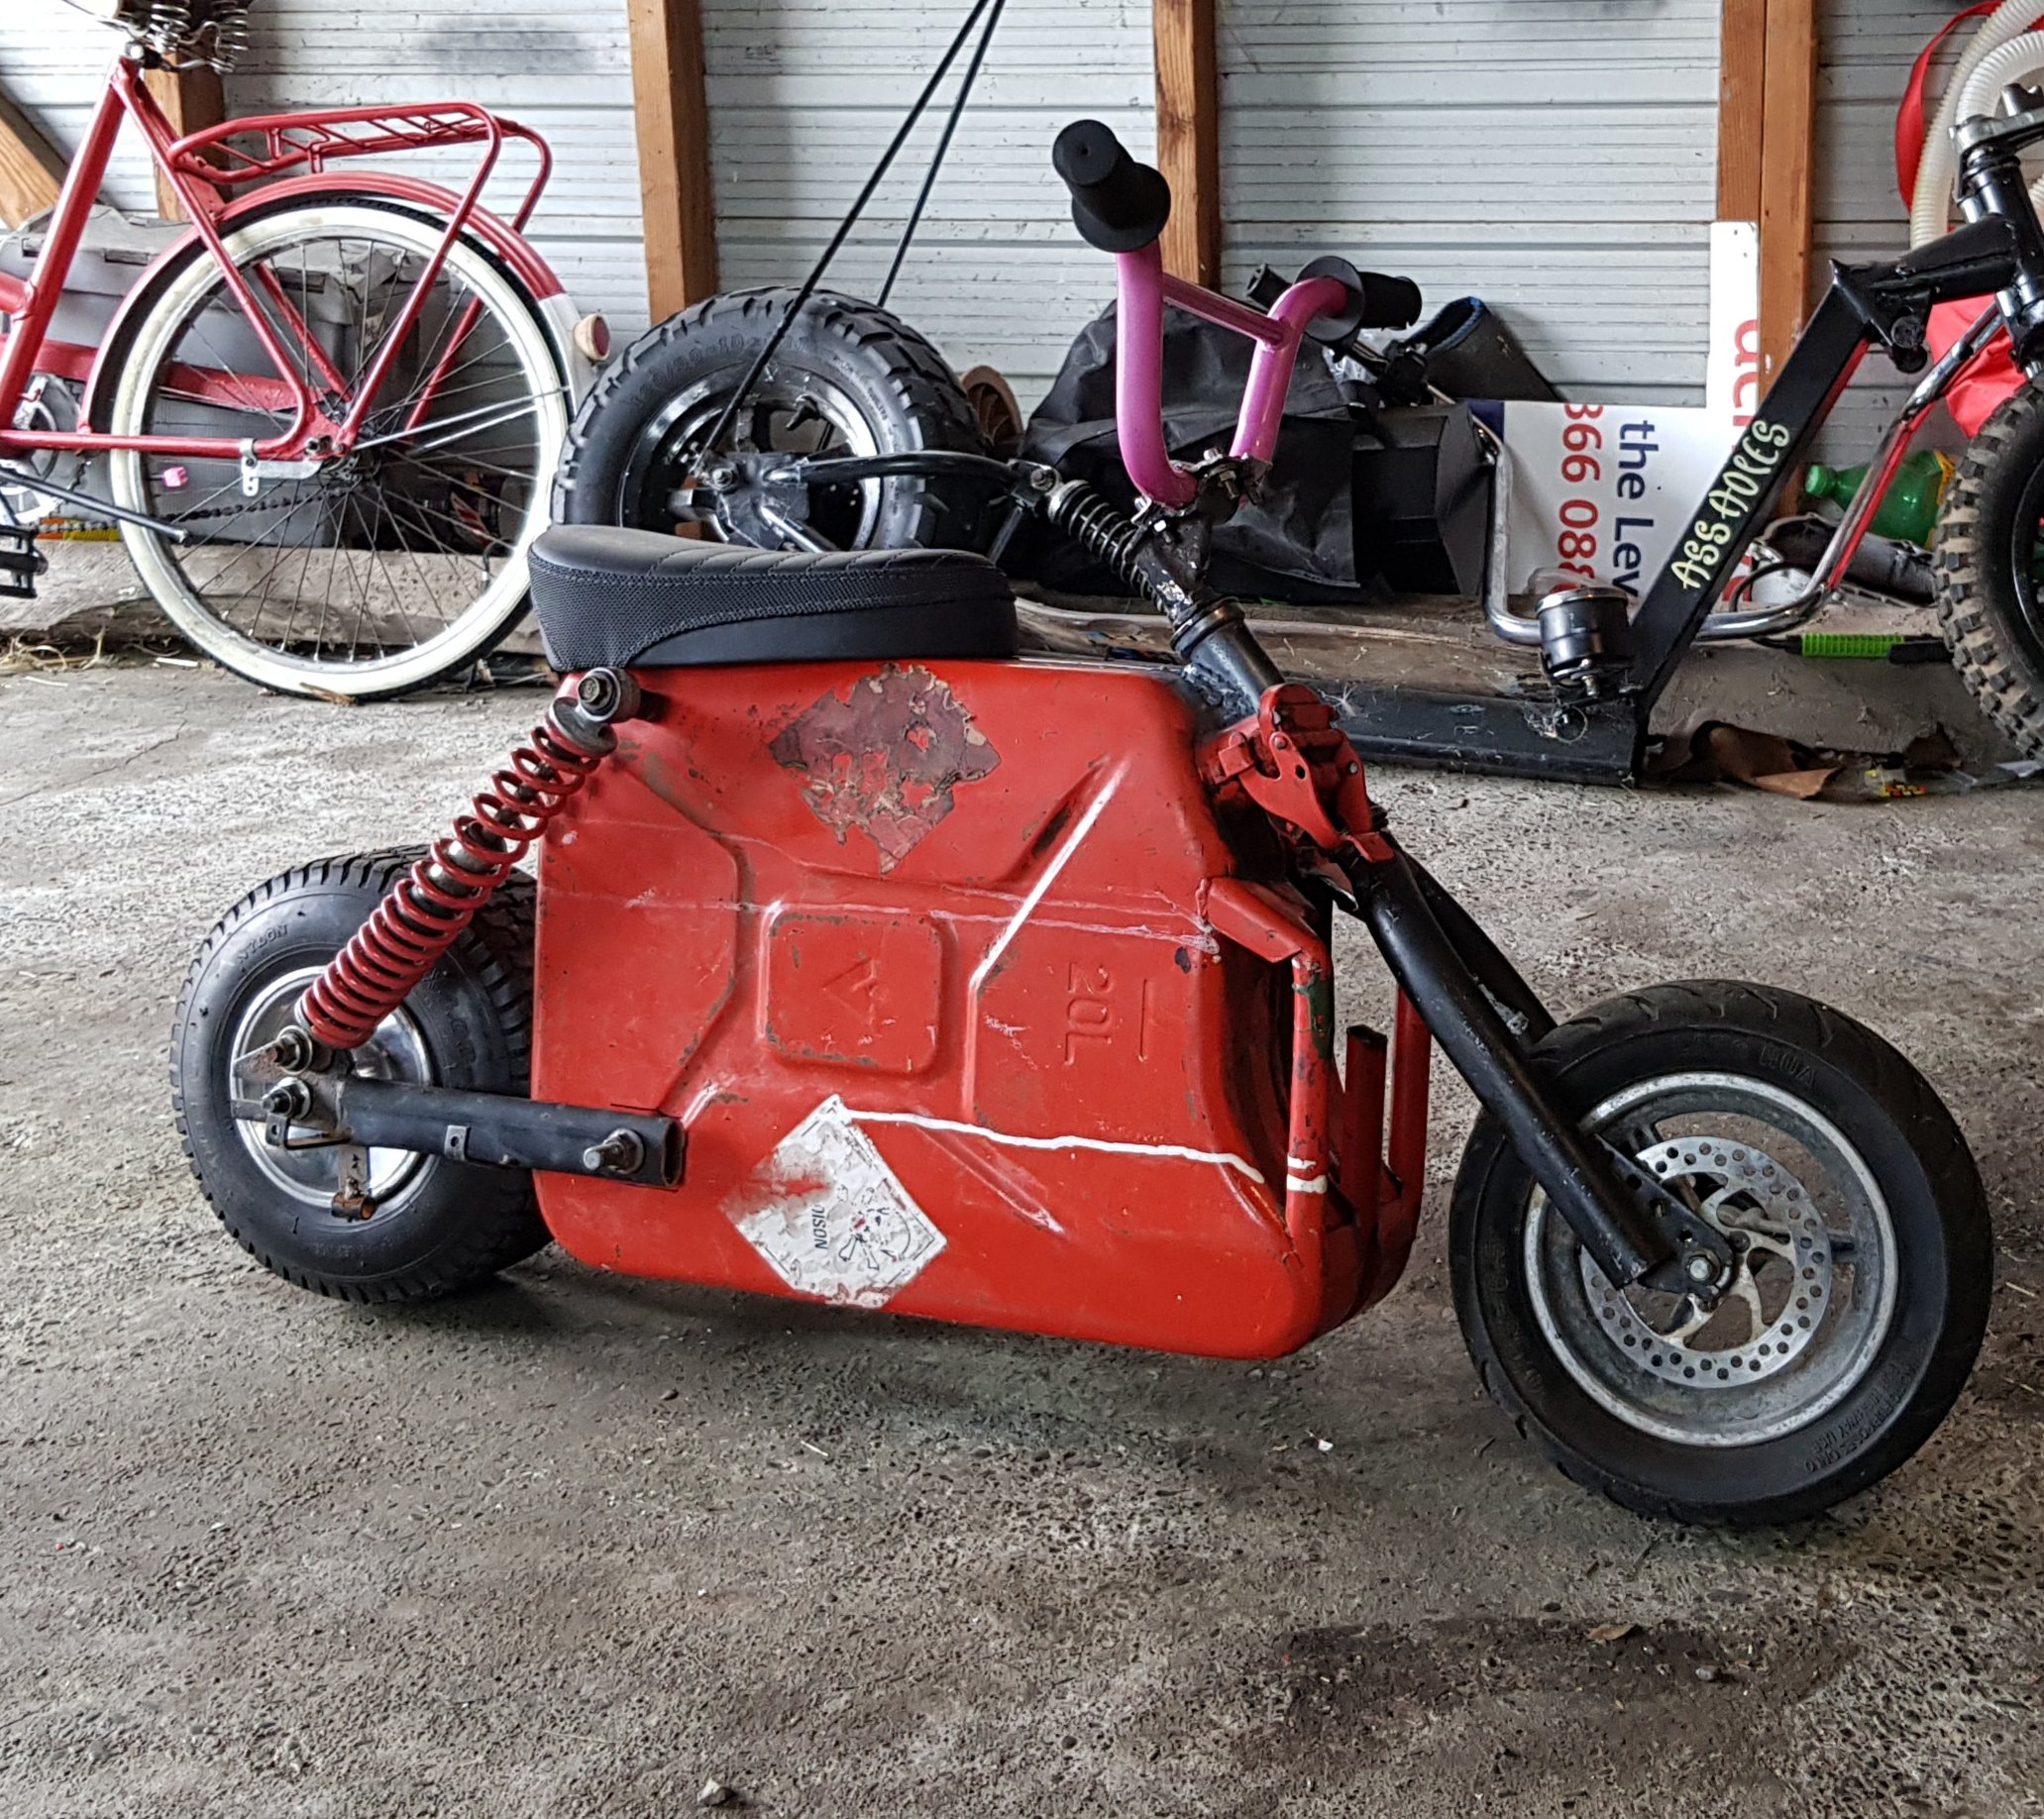
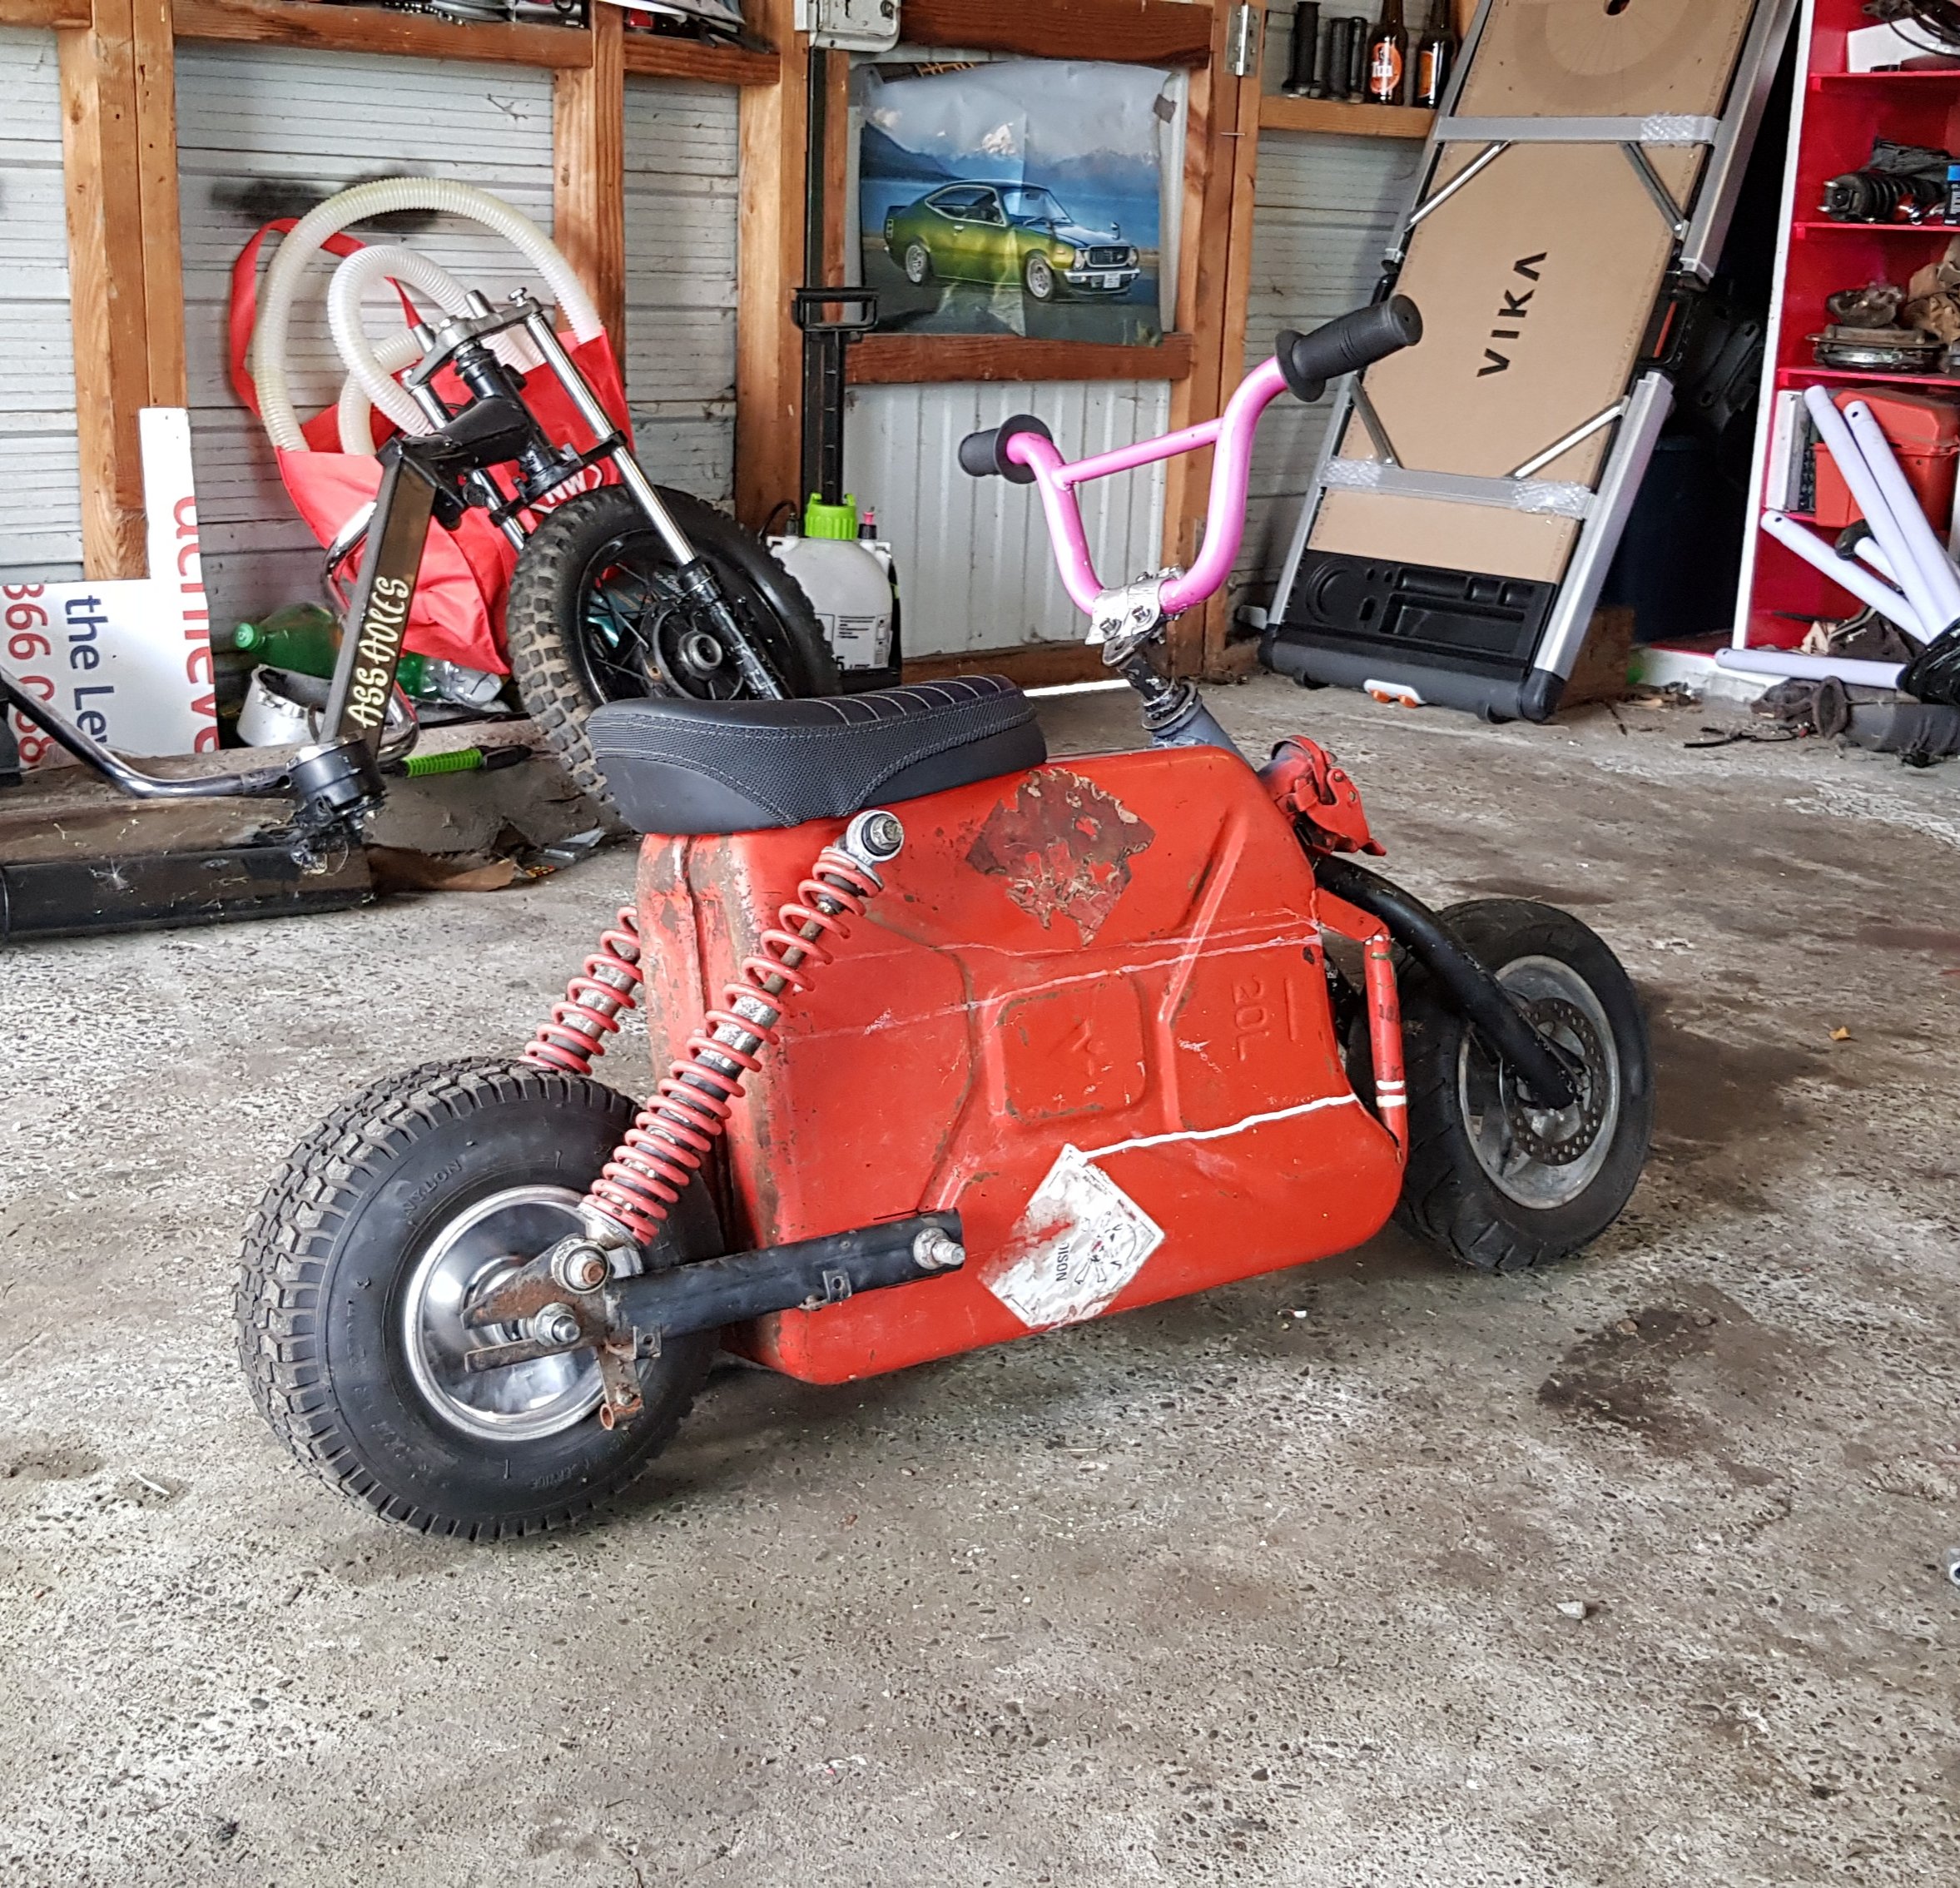
So heres my idea. Thinking the irony of a electric petorl can is too funny Outta random bits and bobs laying around. So far ive done. •chopped floor outta jerry can •chopped up a swing arm to work on the can •chopped up a small bmx welderd on a front •Also have a cool little seat I have a electric motor here that ill mount up and see how well it goes other wise ill go to a petrol motor but thought for shigs and gigs ill try the electric 1st
3 points
-
Sooooooo, I purchased a running and legal burgman from a chap in Te Puke, as that seemed easier than fixing the first one. The Te Puke one runs well, and rides ok, but is a bit rough around the edges. It's been dropped a few times, so the front plastics were pretty haggard, and had been repaired with cable ties/fiberglass/bog/screws and steel brackets etc. The plan was to put all the good plastics from bike no1 onto bike no2, and have one running tidy-ish bike, and sell off what I don't need/use to recoup some cash. But bike no1 is a much lower k bike, so I've decided to do an engine swap rather than a body swap. Some of the features of bike no2, Barry spec back rest, The ruff-as-guts plastic repairs, The sanded windscreen, apparently he was trying to polish it? And for whatever reason it has a later model rear wheel, and muffler from the skywave (I also got a 2004 EFI skywave with bike no2, more on that later) I rode this thing back from Te Puke, and to work once, and it goes pretty well. The 0-80ish acceleration is crazy good, and it tops out at 130, but gets there pretty quickly. The only problems I have is my height, I need to get my bum back a bit, and the windshield is exactly the right hight to direct all the air into my helmet, so it sounds like you're going 300kmh at 100kmh. Duck down behind the shield, and it's crazy quite, so I'll get an extension for it. Having not had a big scoots before, I thought the rear wheel set up is slightly interesting, and different between the burgman and the later model skywave. Burgman has splined disc and wheel, skywave spec is splined hub with bolt on disc and wheel. Anyways, I ripped the motors out of both, cleaned up the good bike and motor, and will soon slap them back together. I will whip the rocket cover off the new motor and just make sure it's not about to have a cam-tastrophe like the dead engine. Also, note wrecker writing on engine, this is not the first time this bad boy has played around. Regards, V-AN250s are my life now-G. Edit: I just clicked, the rear wheel will have come on the wrecker engine, hence it being different/from a later bike.2 points
-
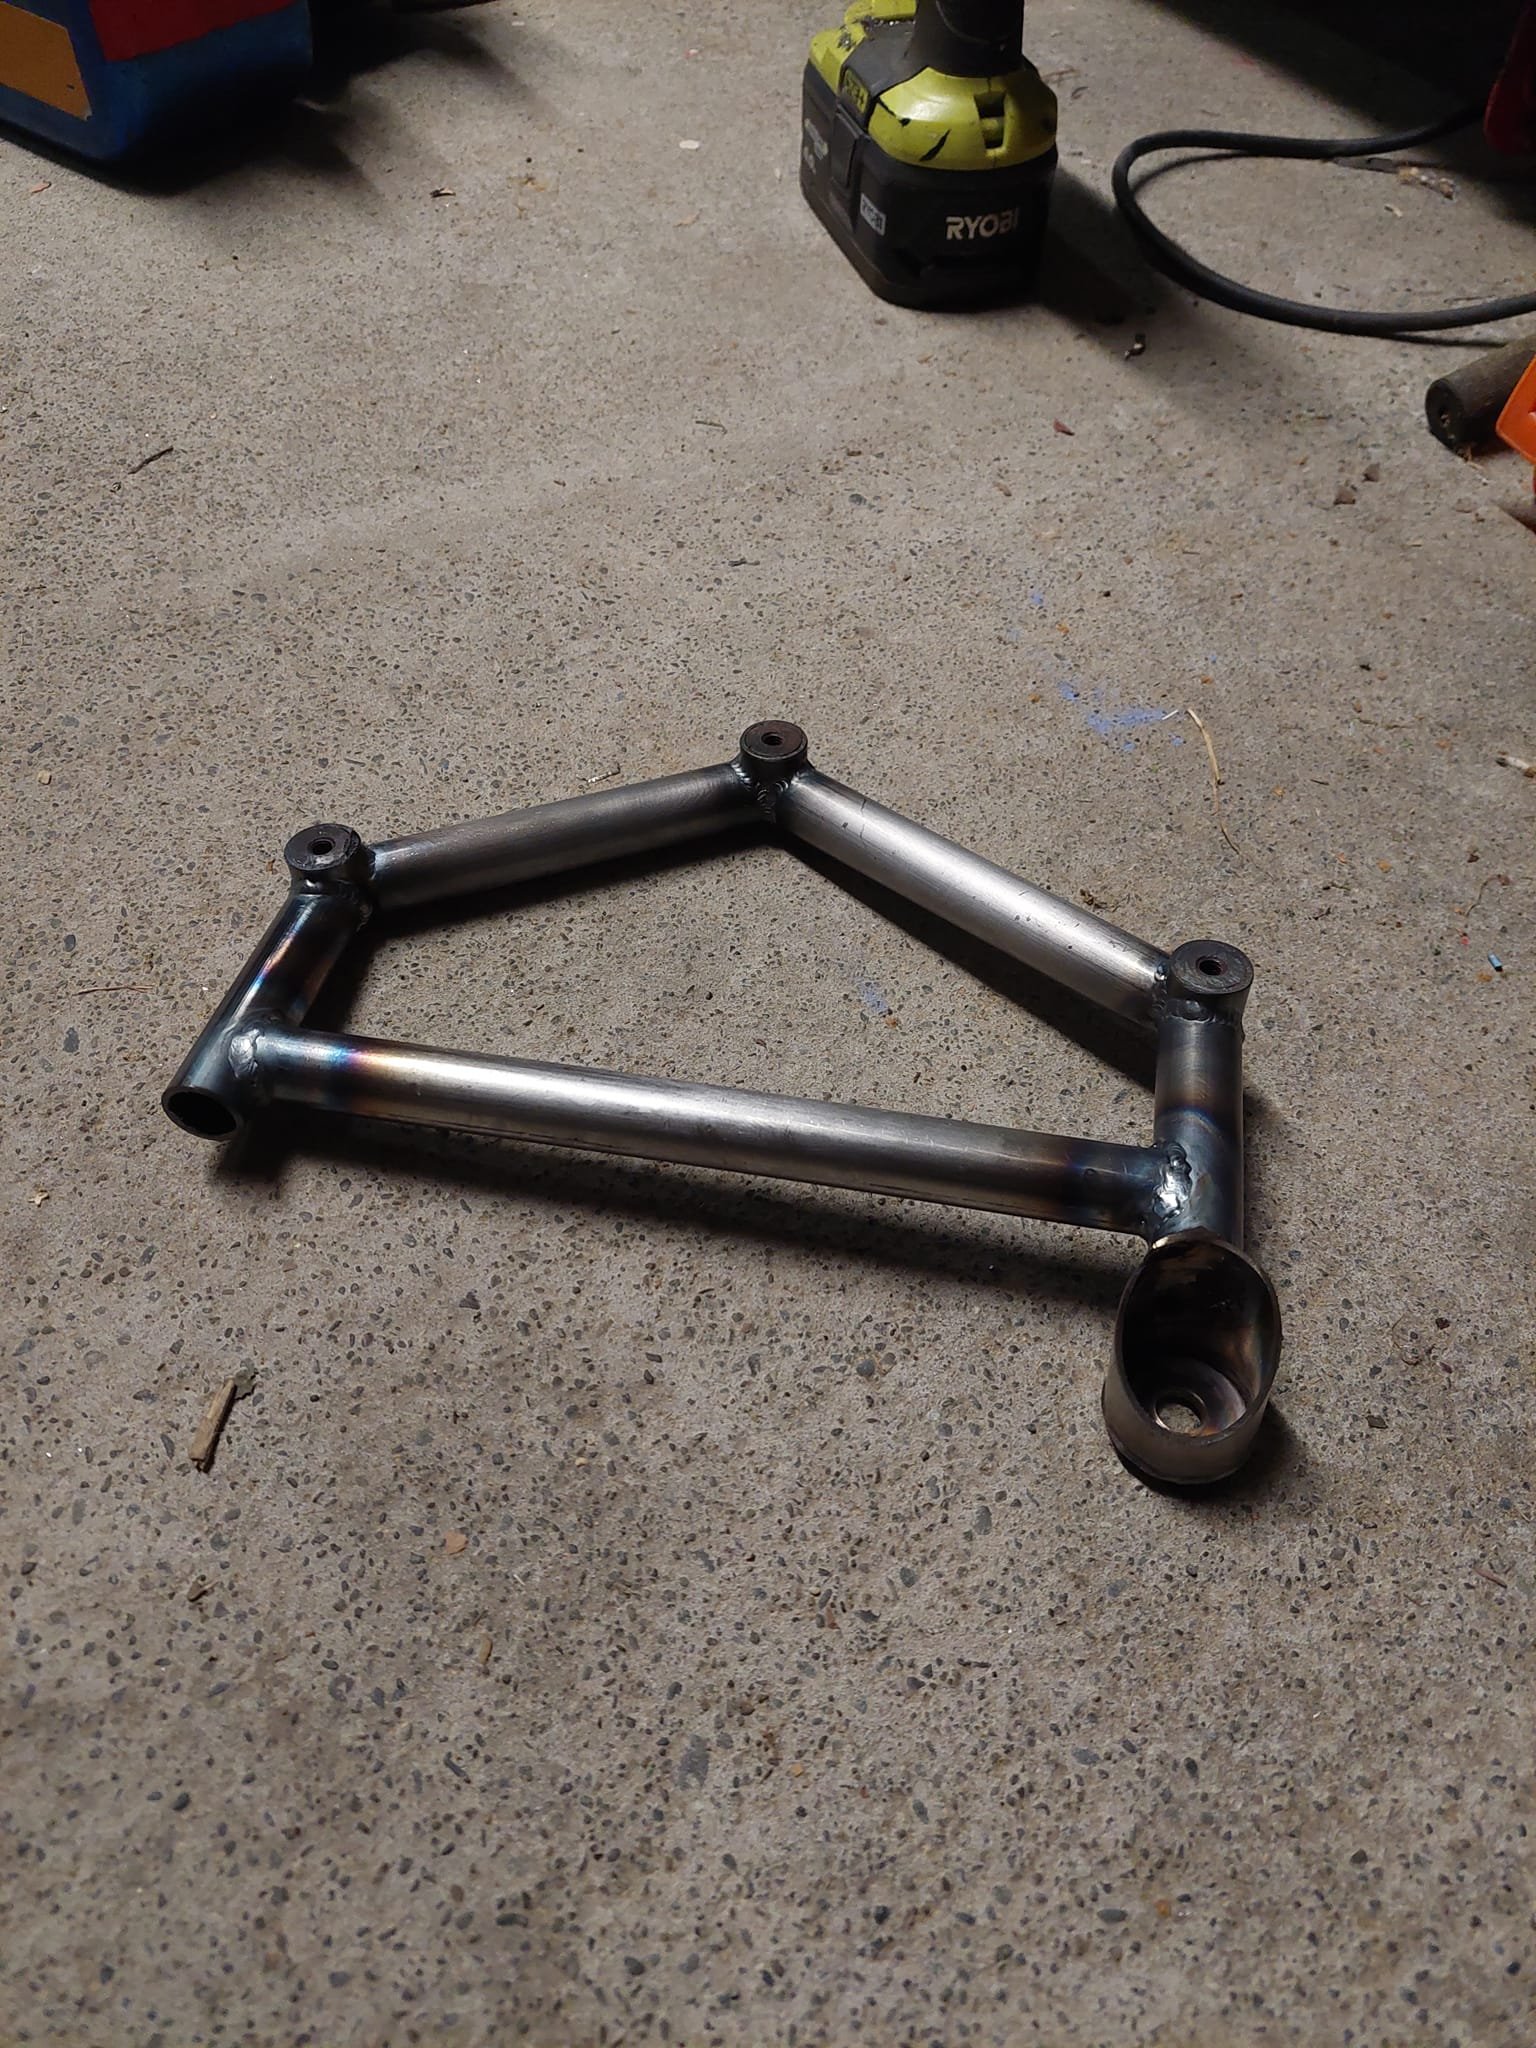
@Roman More lightness inspiration, surprised no dimple dies used however2 points
-
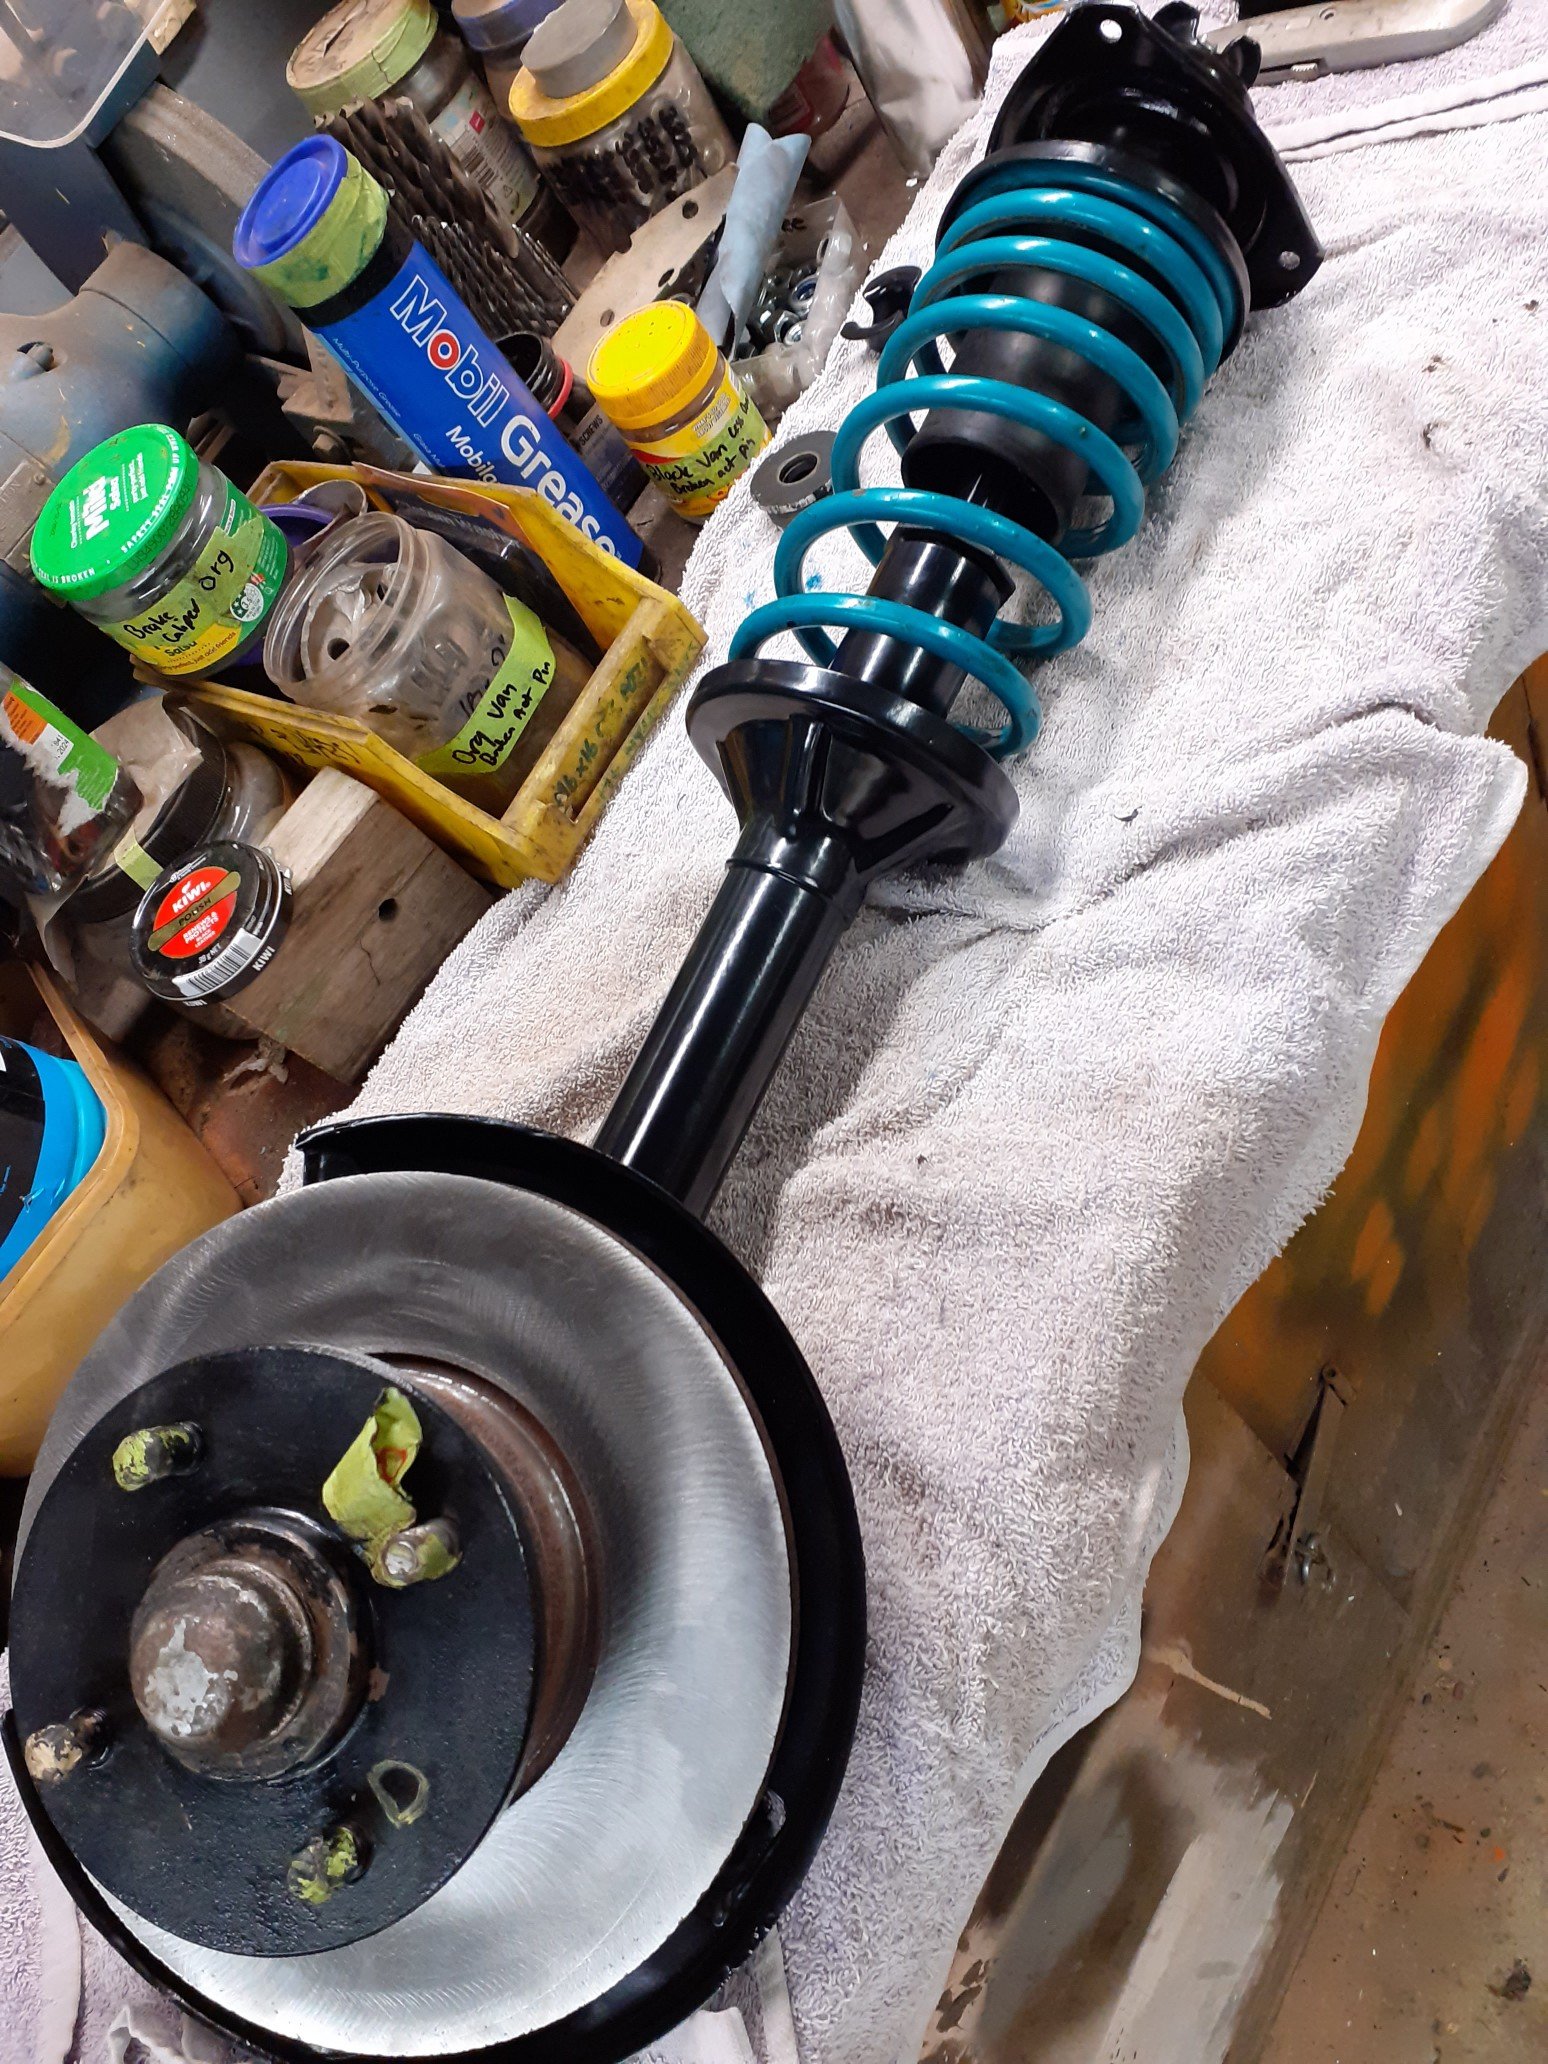
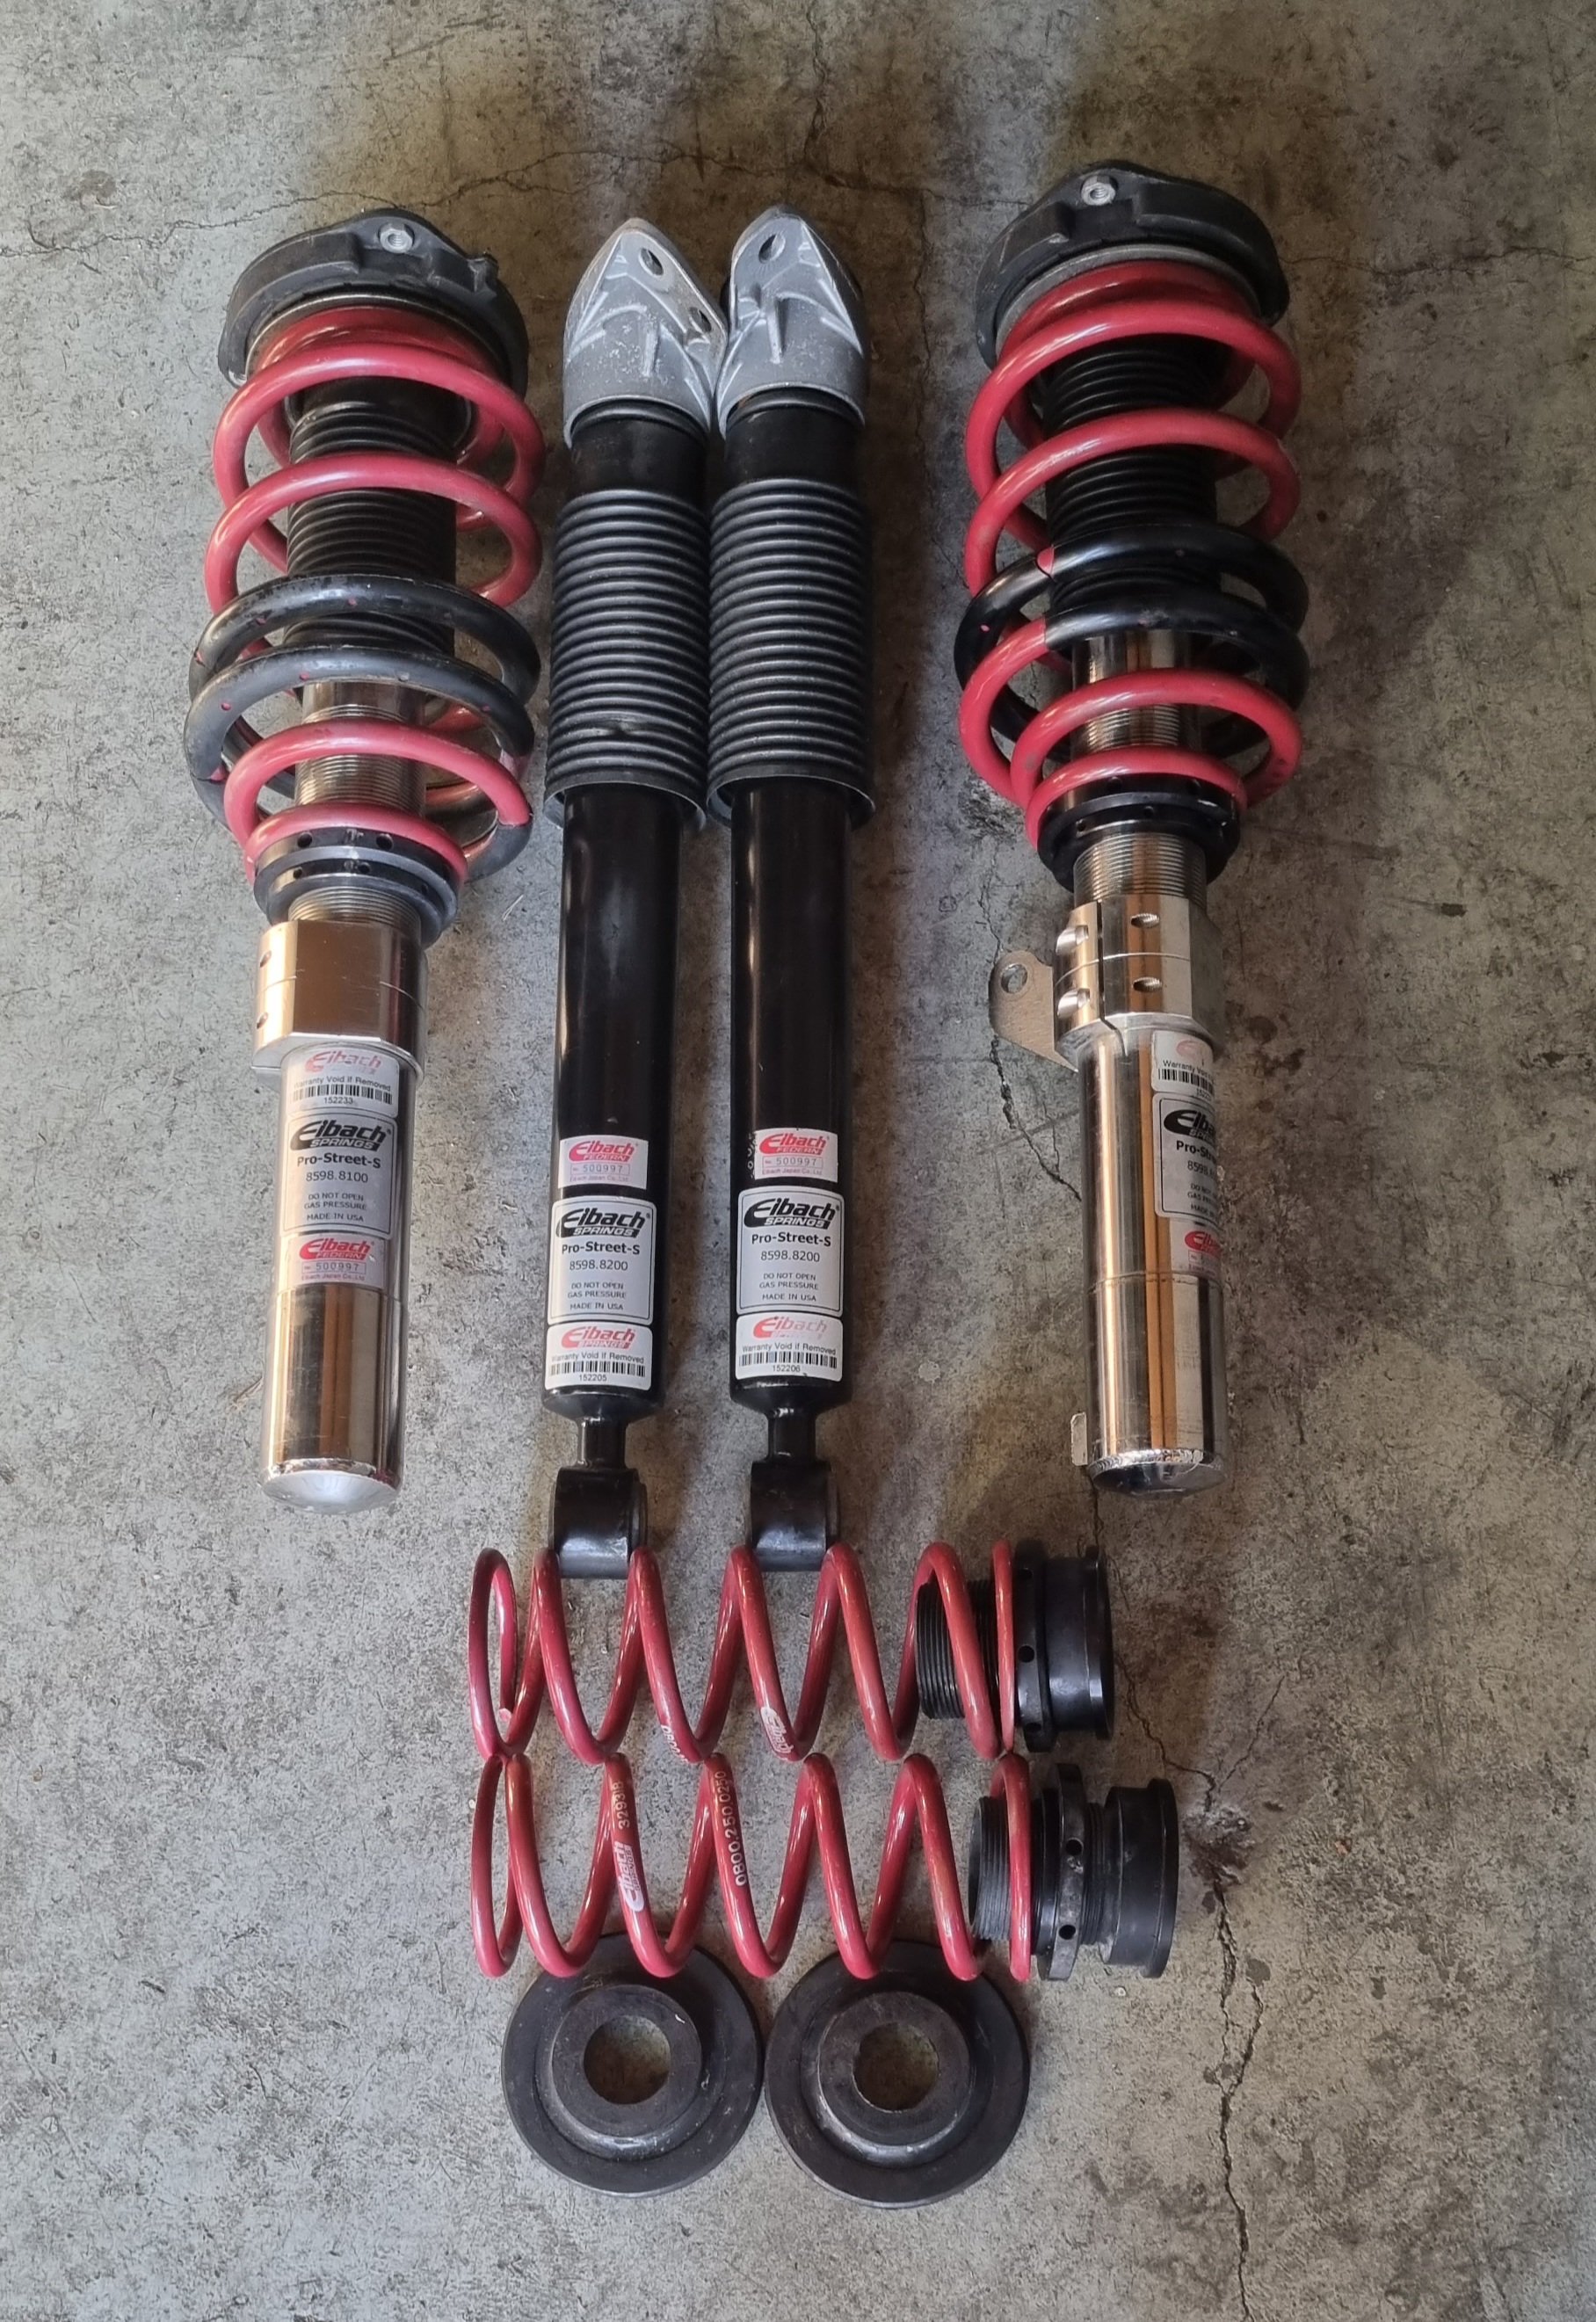
These come up on trademe for reasonable price couldn't resist It's eibach street series so not fully adjustable just height adjustable,still ment to be semi compliant on road too. Should help the semi slicks dig in
2 points
-
2 points
-
2 points
-
Still getting lots of wheel spin off the line, so a lower launch rpm might be beneficial. However it's amazing compared to street tyres how these just hook up and go anyway!2 points
-
2 points
-
2 points
-
So I'm basically set on using a 1.8L. The 4g93 is known to be able to make good power, but it also has weak rods. So my thinking is to find a 4g93 block for bugger all, then put some put H-beam rods in it. Apparently Ca18Det rods are an upgrade and you can also using 4agze pistons since they are both 81mm bore, but you have to heavily shave the skirts. Then for the head, I want to find a 4g92 1.6 dohc Mivec head so it flows like a mofo. That way it kind of justifies not just using a 4g63 and sticking with the 1.8 block. Apparently some Mitsi ECU's are programable, I wonder what the limitations are versus using a link or even Speeduino? Should be fun and I've never owned an AWD turbo performance thing. The question is, do I make it look like an Evo 5 when it isn't one? Technically it could easily be faster than one with more power or what ever. Or do I keep it looking like a boring Lancer? Problem there is if I change my mind later, I'd need a cert to cut the rear arches etc.2 points
-
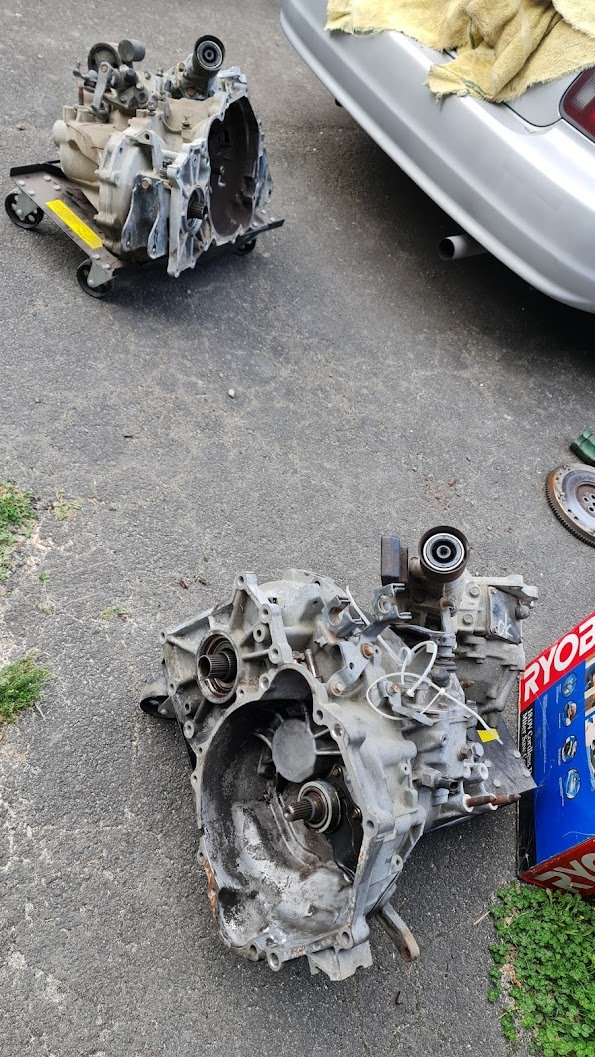
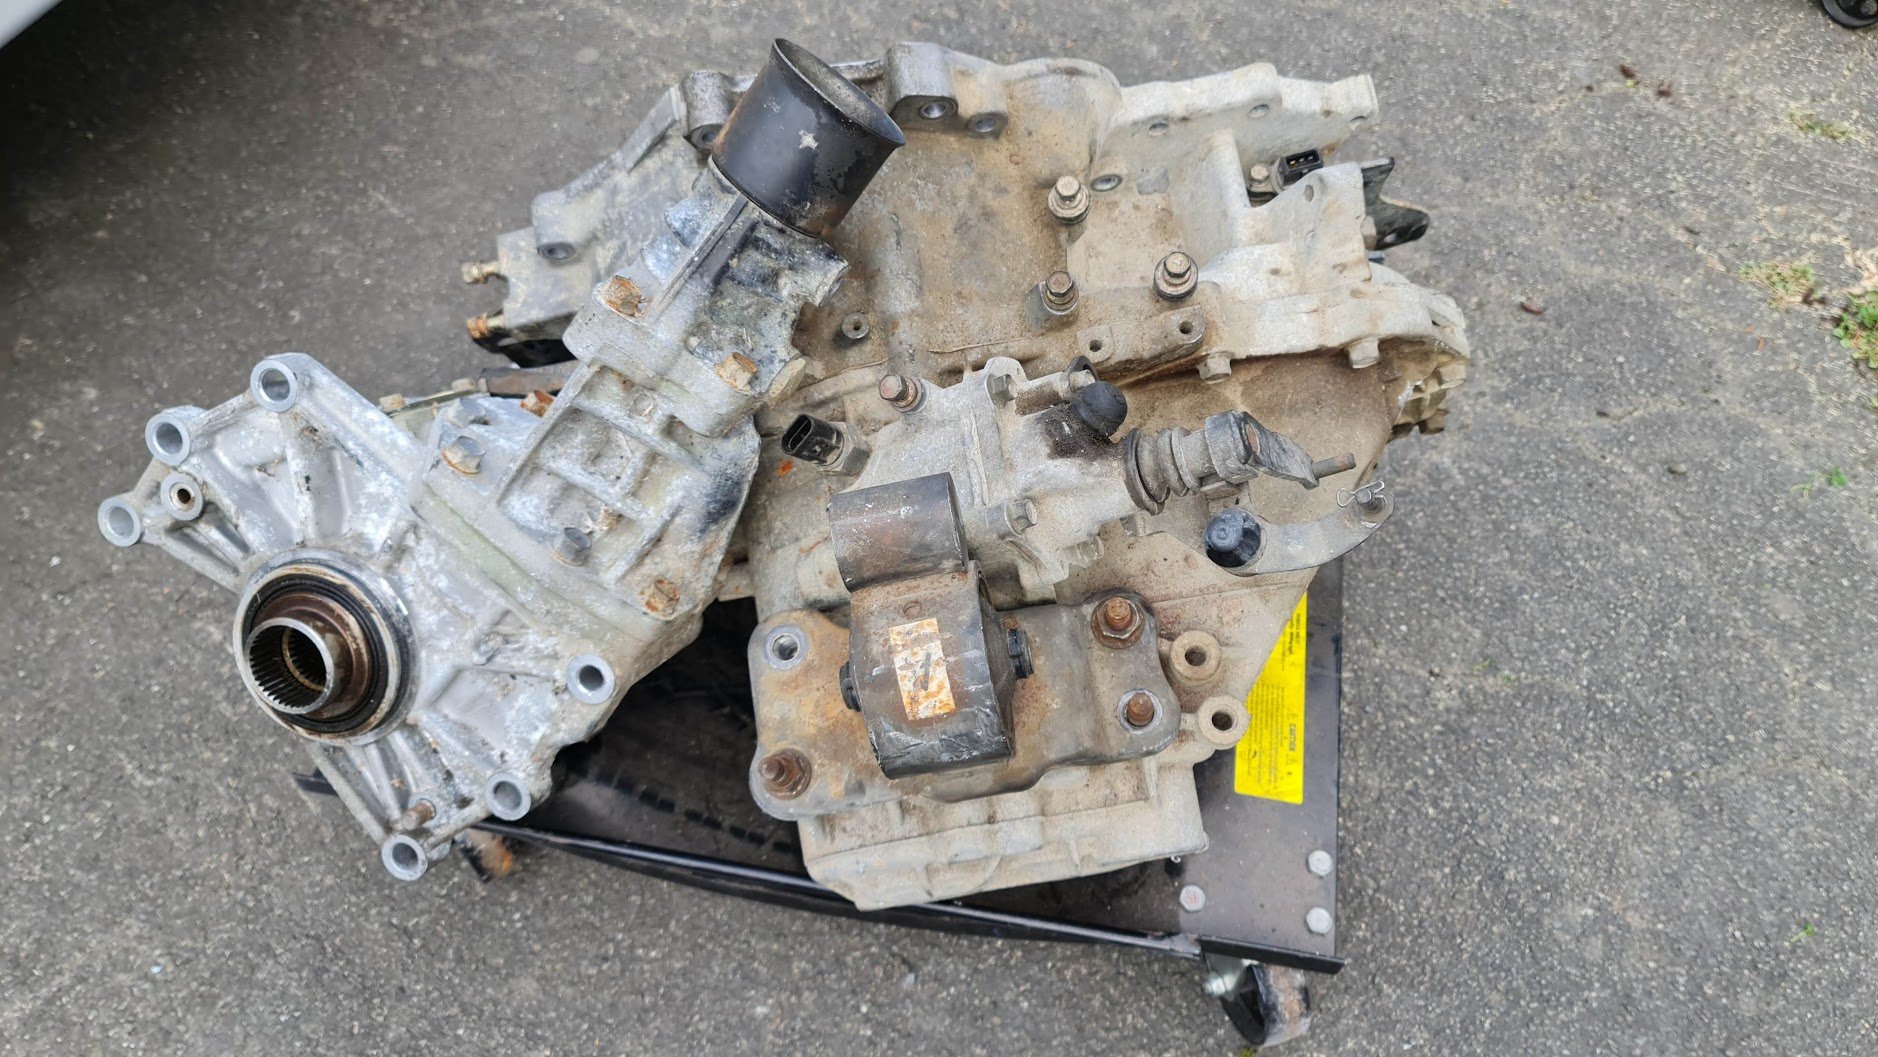
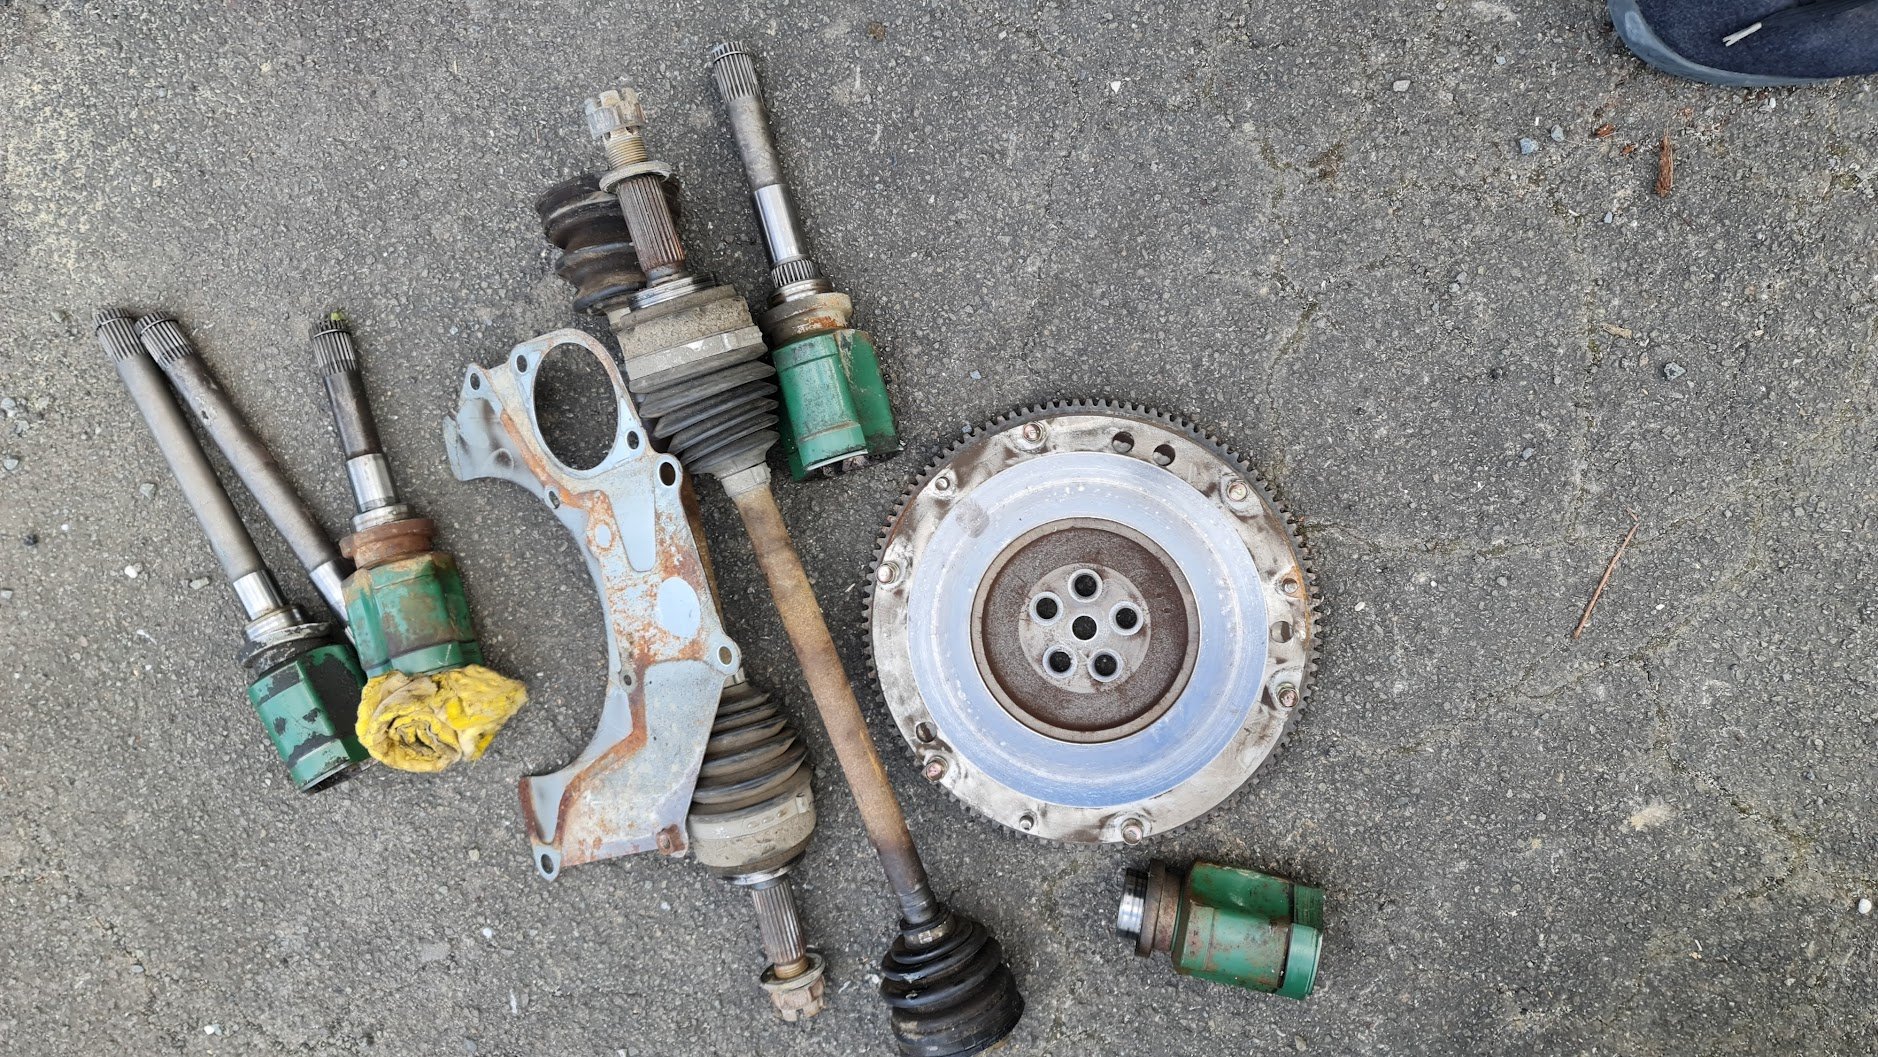
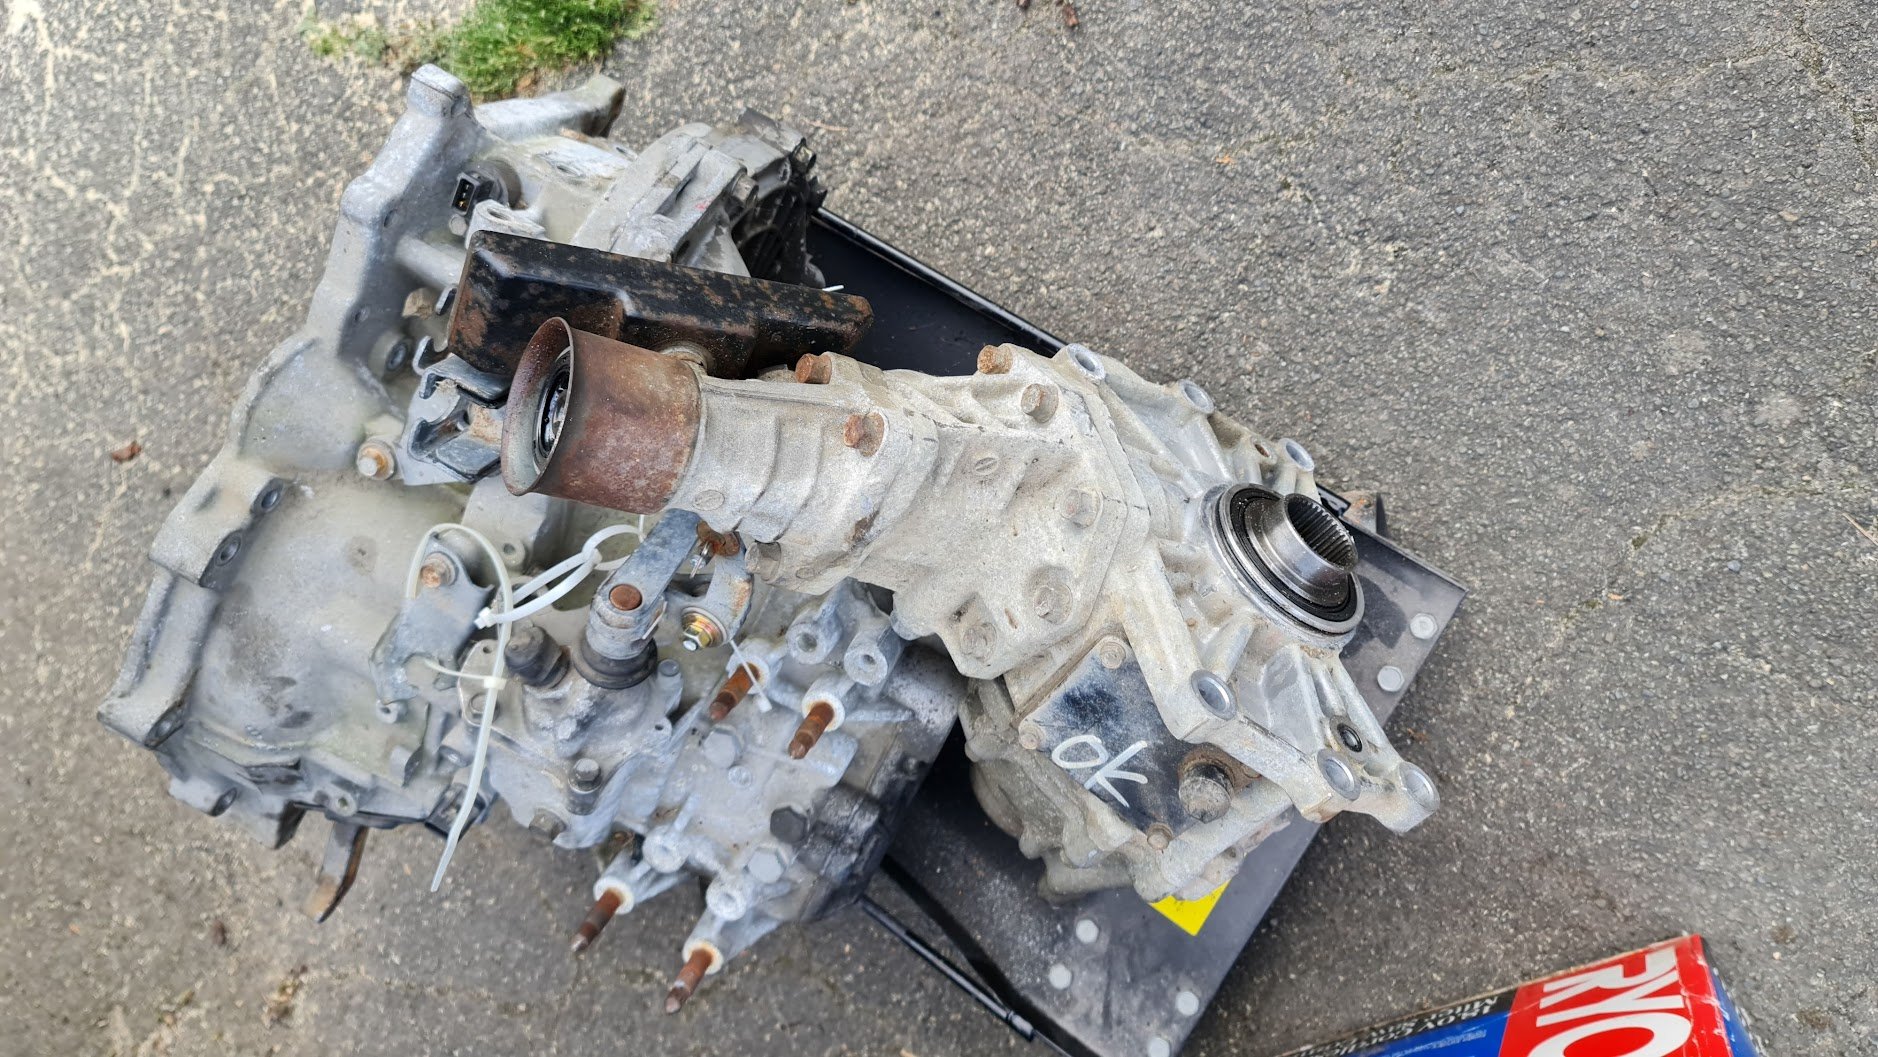
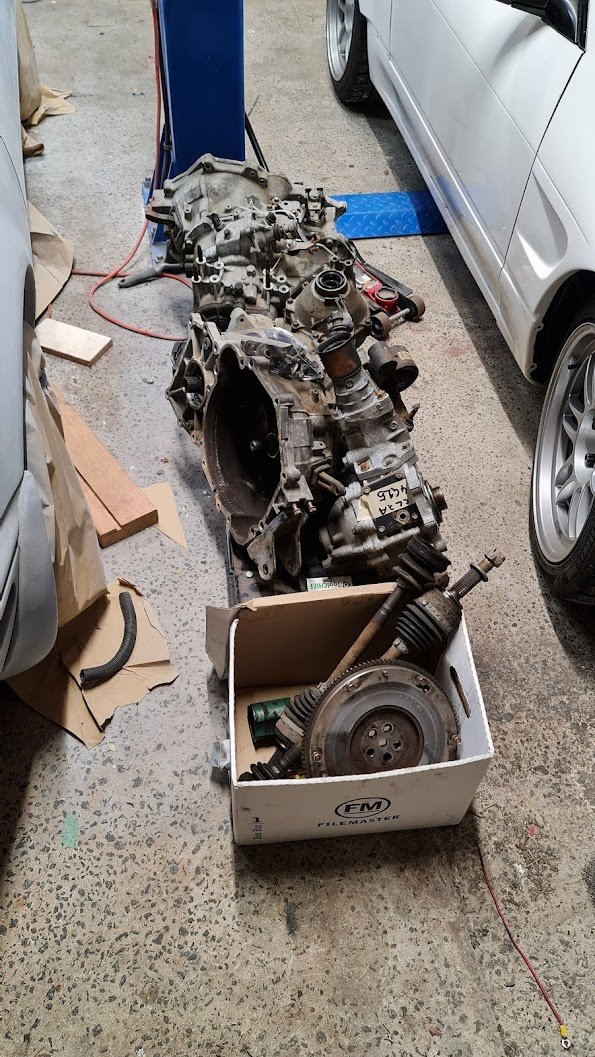
I then decided bugger it I'll go get this gearbox anyway and had a nice Sunday 4hr round trip with my 7 year old boy. Ice cream, BP pie and all. Took the runaround Celica and hoped it would be happy with a gearbox in the back. Arrived and bought two identical gearboxs and two matching transfer cases, some driveshafts and a flywheel for a 4g15. Back home and wife helps me lift them onto a couple of wheel dolly's
2 points
-
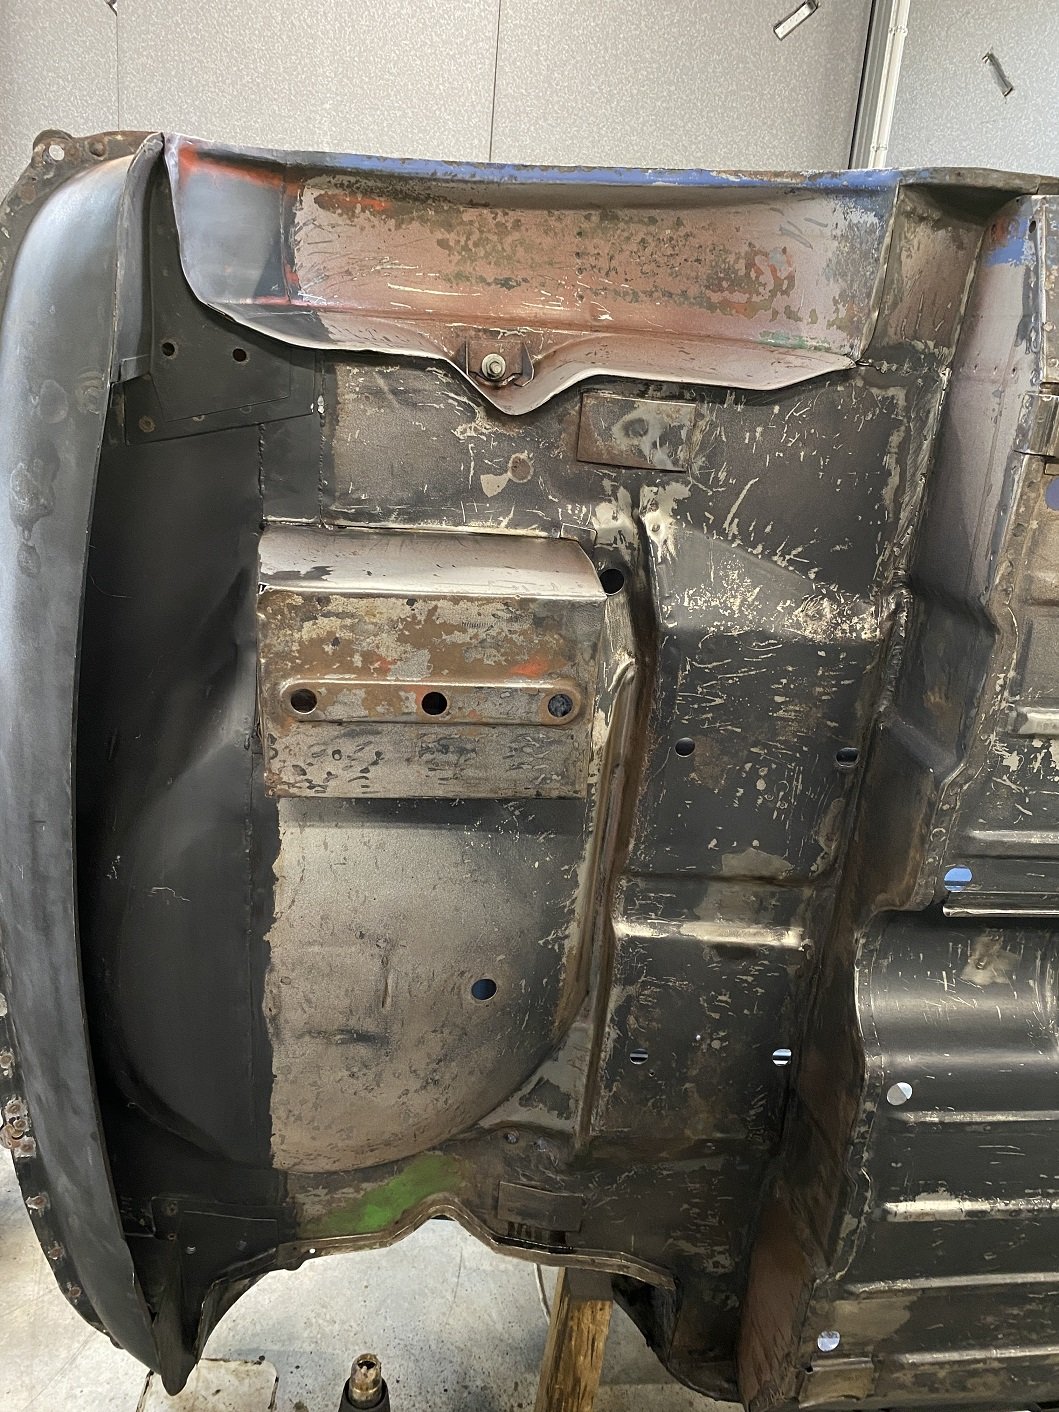
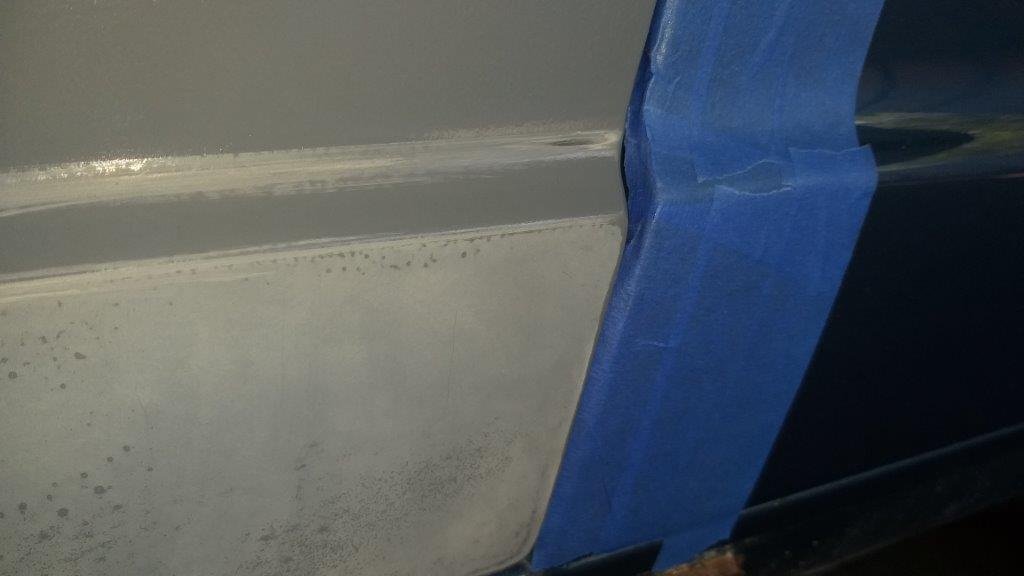
With the front corner looking way better I moved onto the back corner. The door has two body lines plus the top of the door that lines up with the back quarter panel. My adjustments had managed to get the upper body line and the top of the door to match the quarter, but the bottom line is well out of alignment. I suspect that this is due to a poor quality repair, probably the handy work of the same blind panel beater who got the colour match wrong. First photo shows the parts that line up pretty well. The rest of the photos show the ugly bit prior to me slopping a bit of bog about the place. With a bit of luck I'll get to post some updated pics once I've done a bit of sculpting. Thanks for looking.
1 point
-
Ahh not really necessary for an NA motor. I've been watching one of the videos of the launch, and I can see my rear suspension is punishing me a bit. The rear shocks are completely flogged, if I push the car down it bounces about 3 times before coming still. So it's squatting heaps and unloading the front. So maybe some 60ft improvements with some stiffer / solid rear
1 point
-
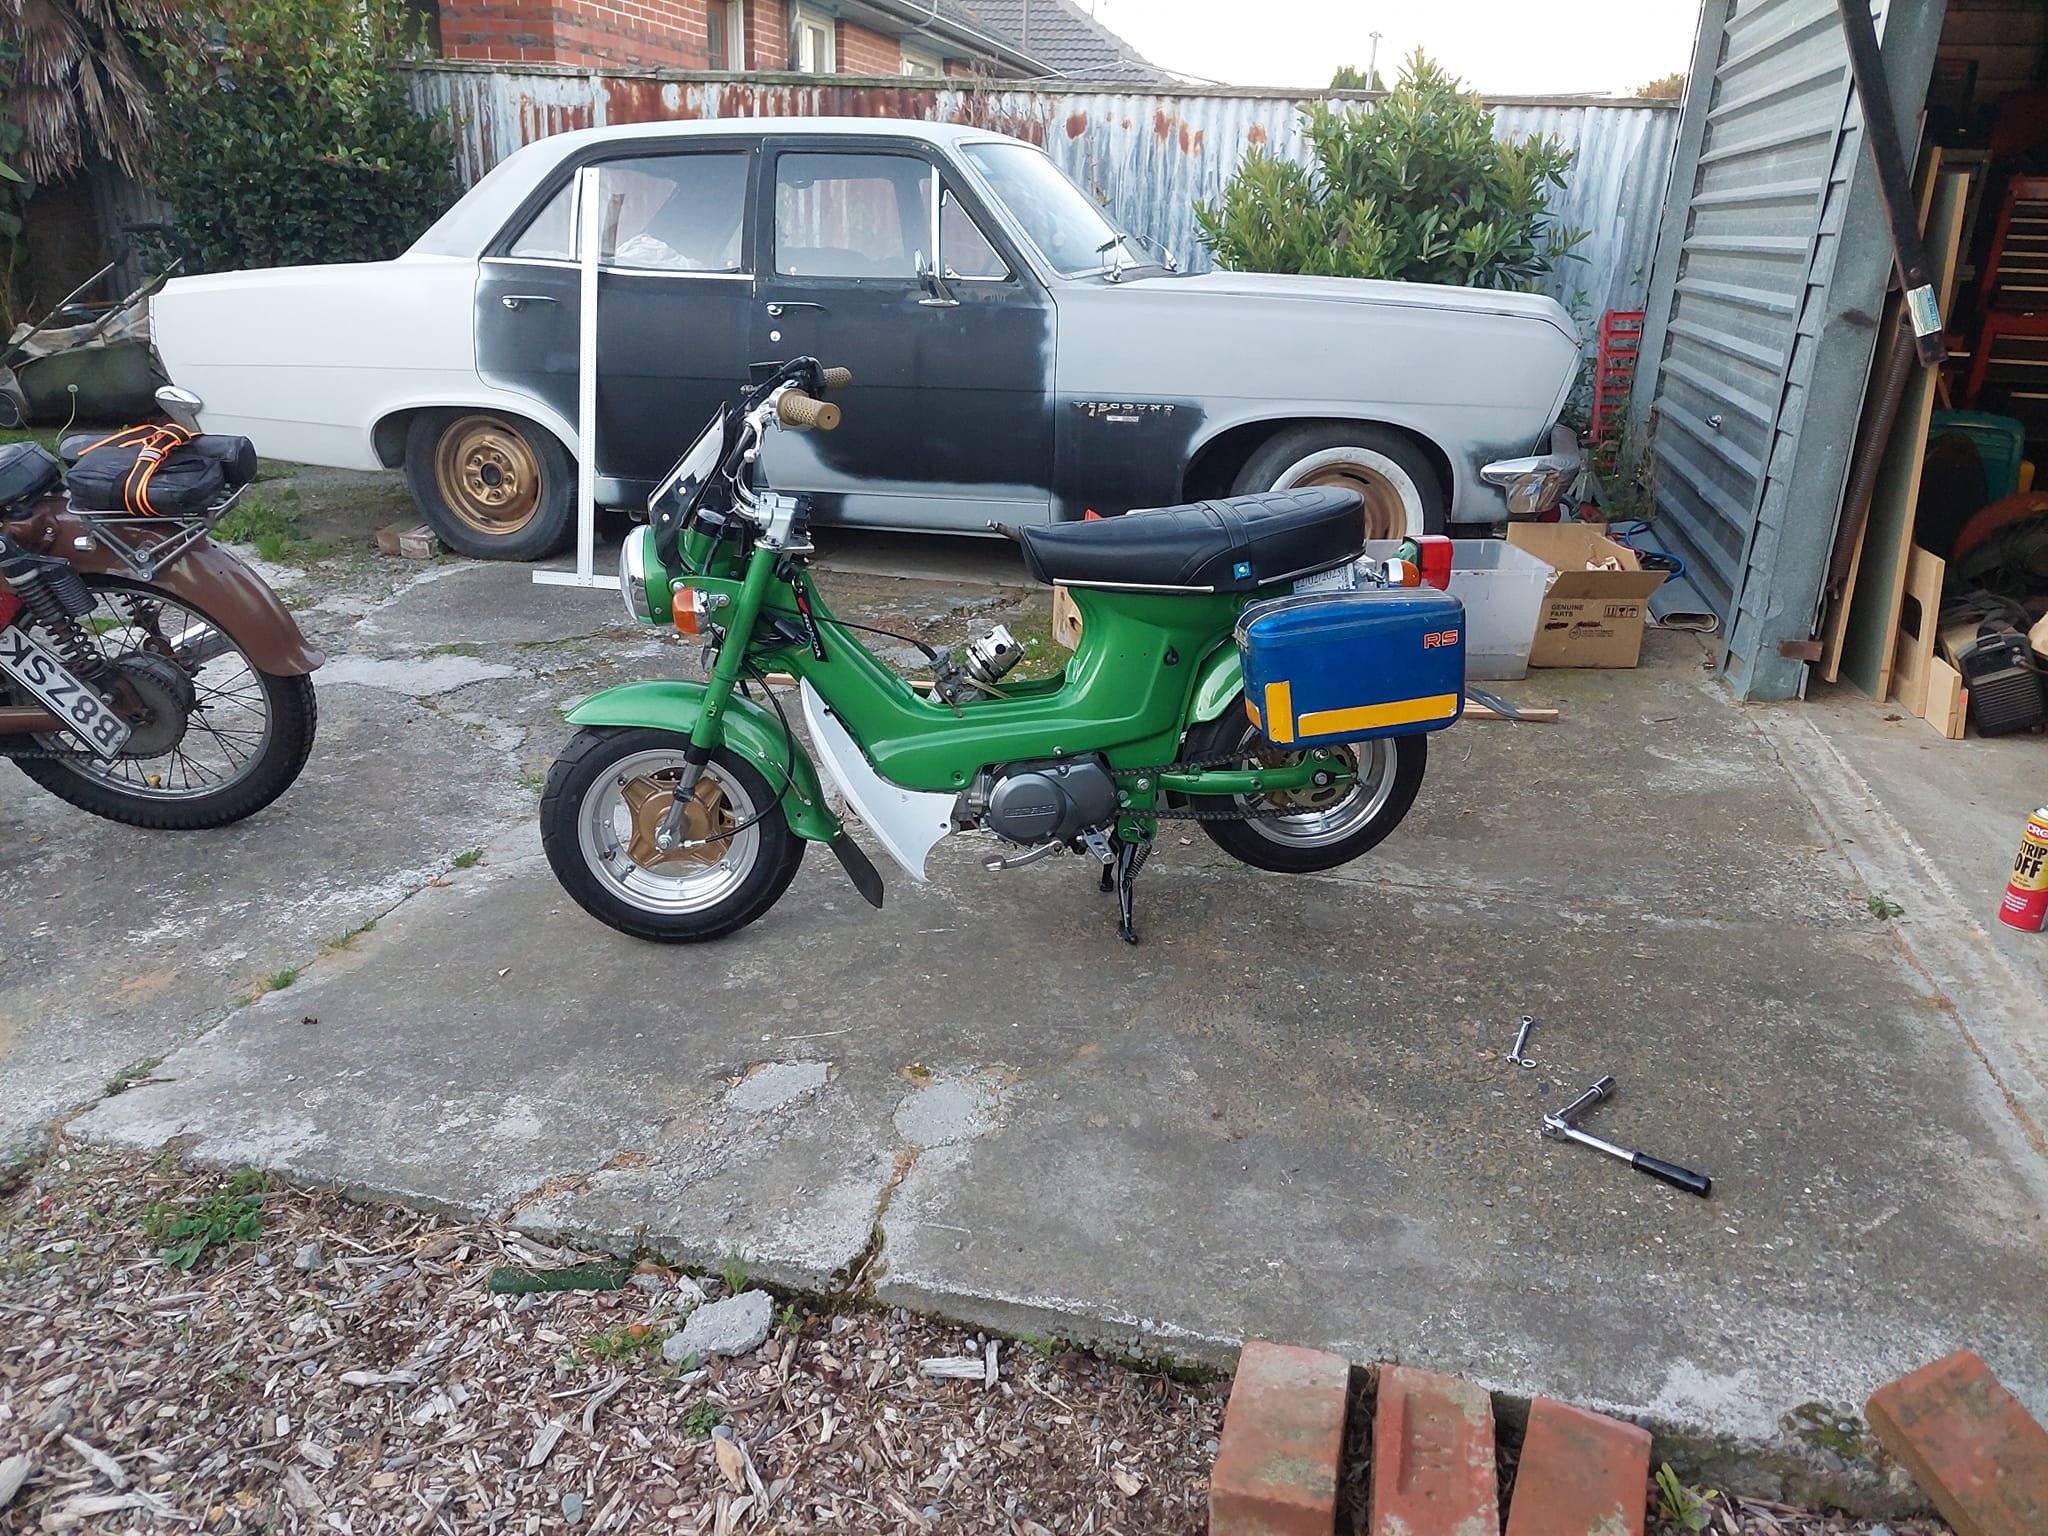
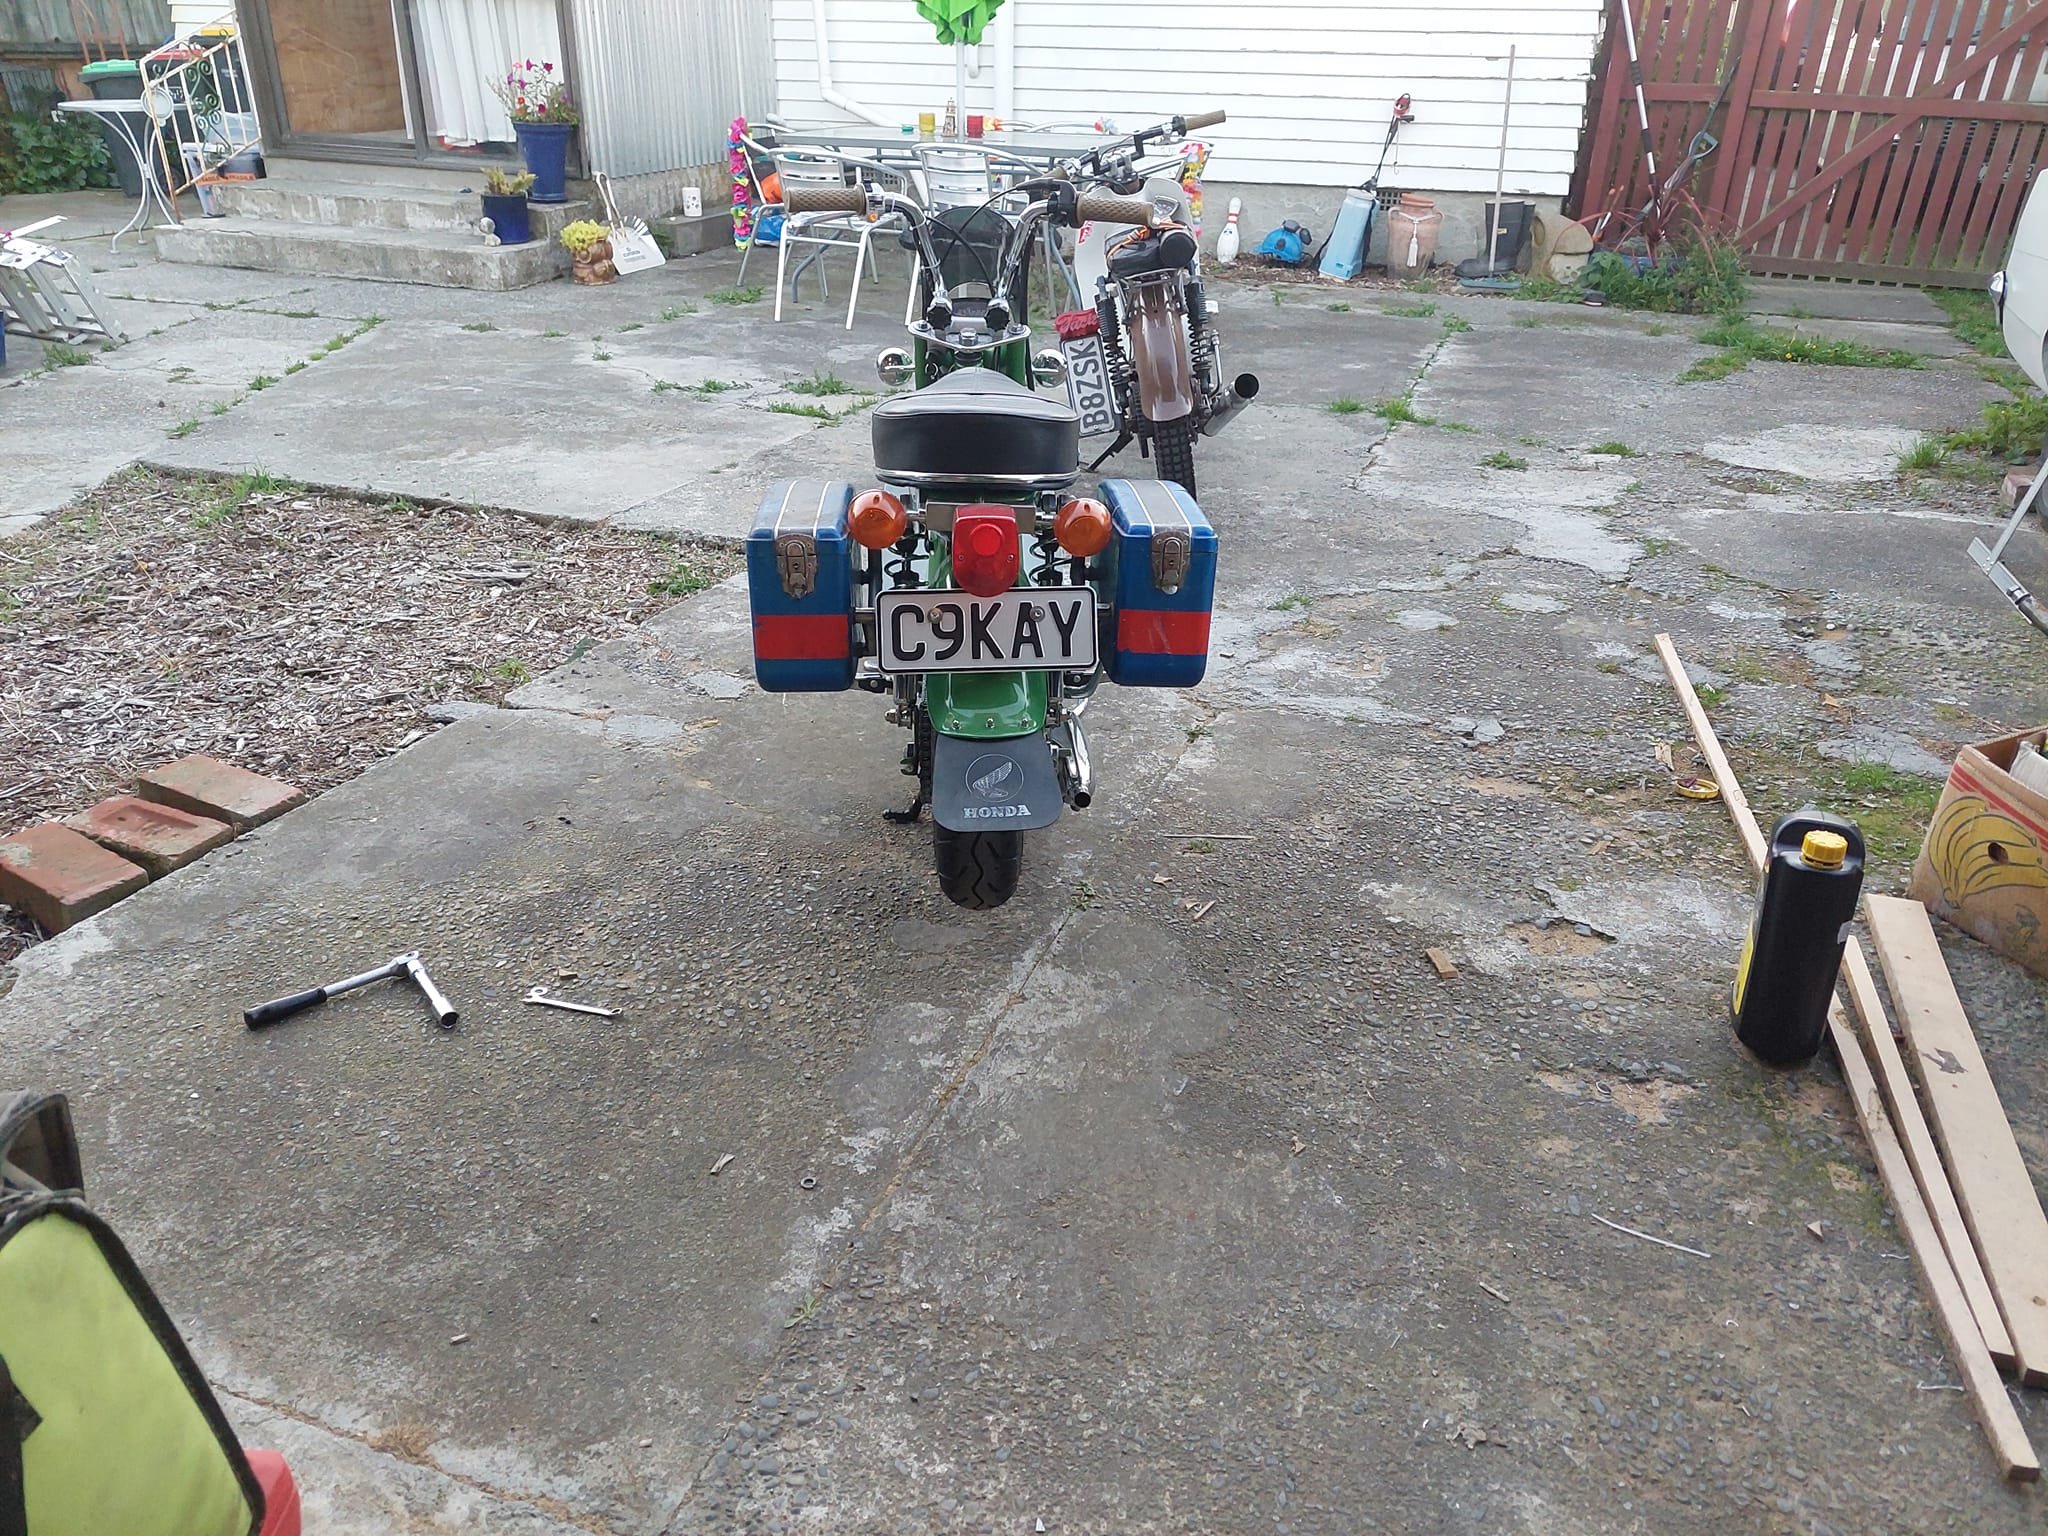
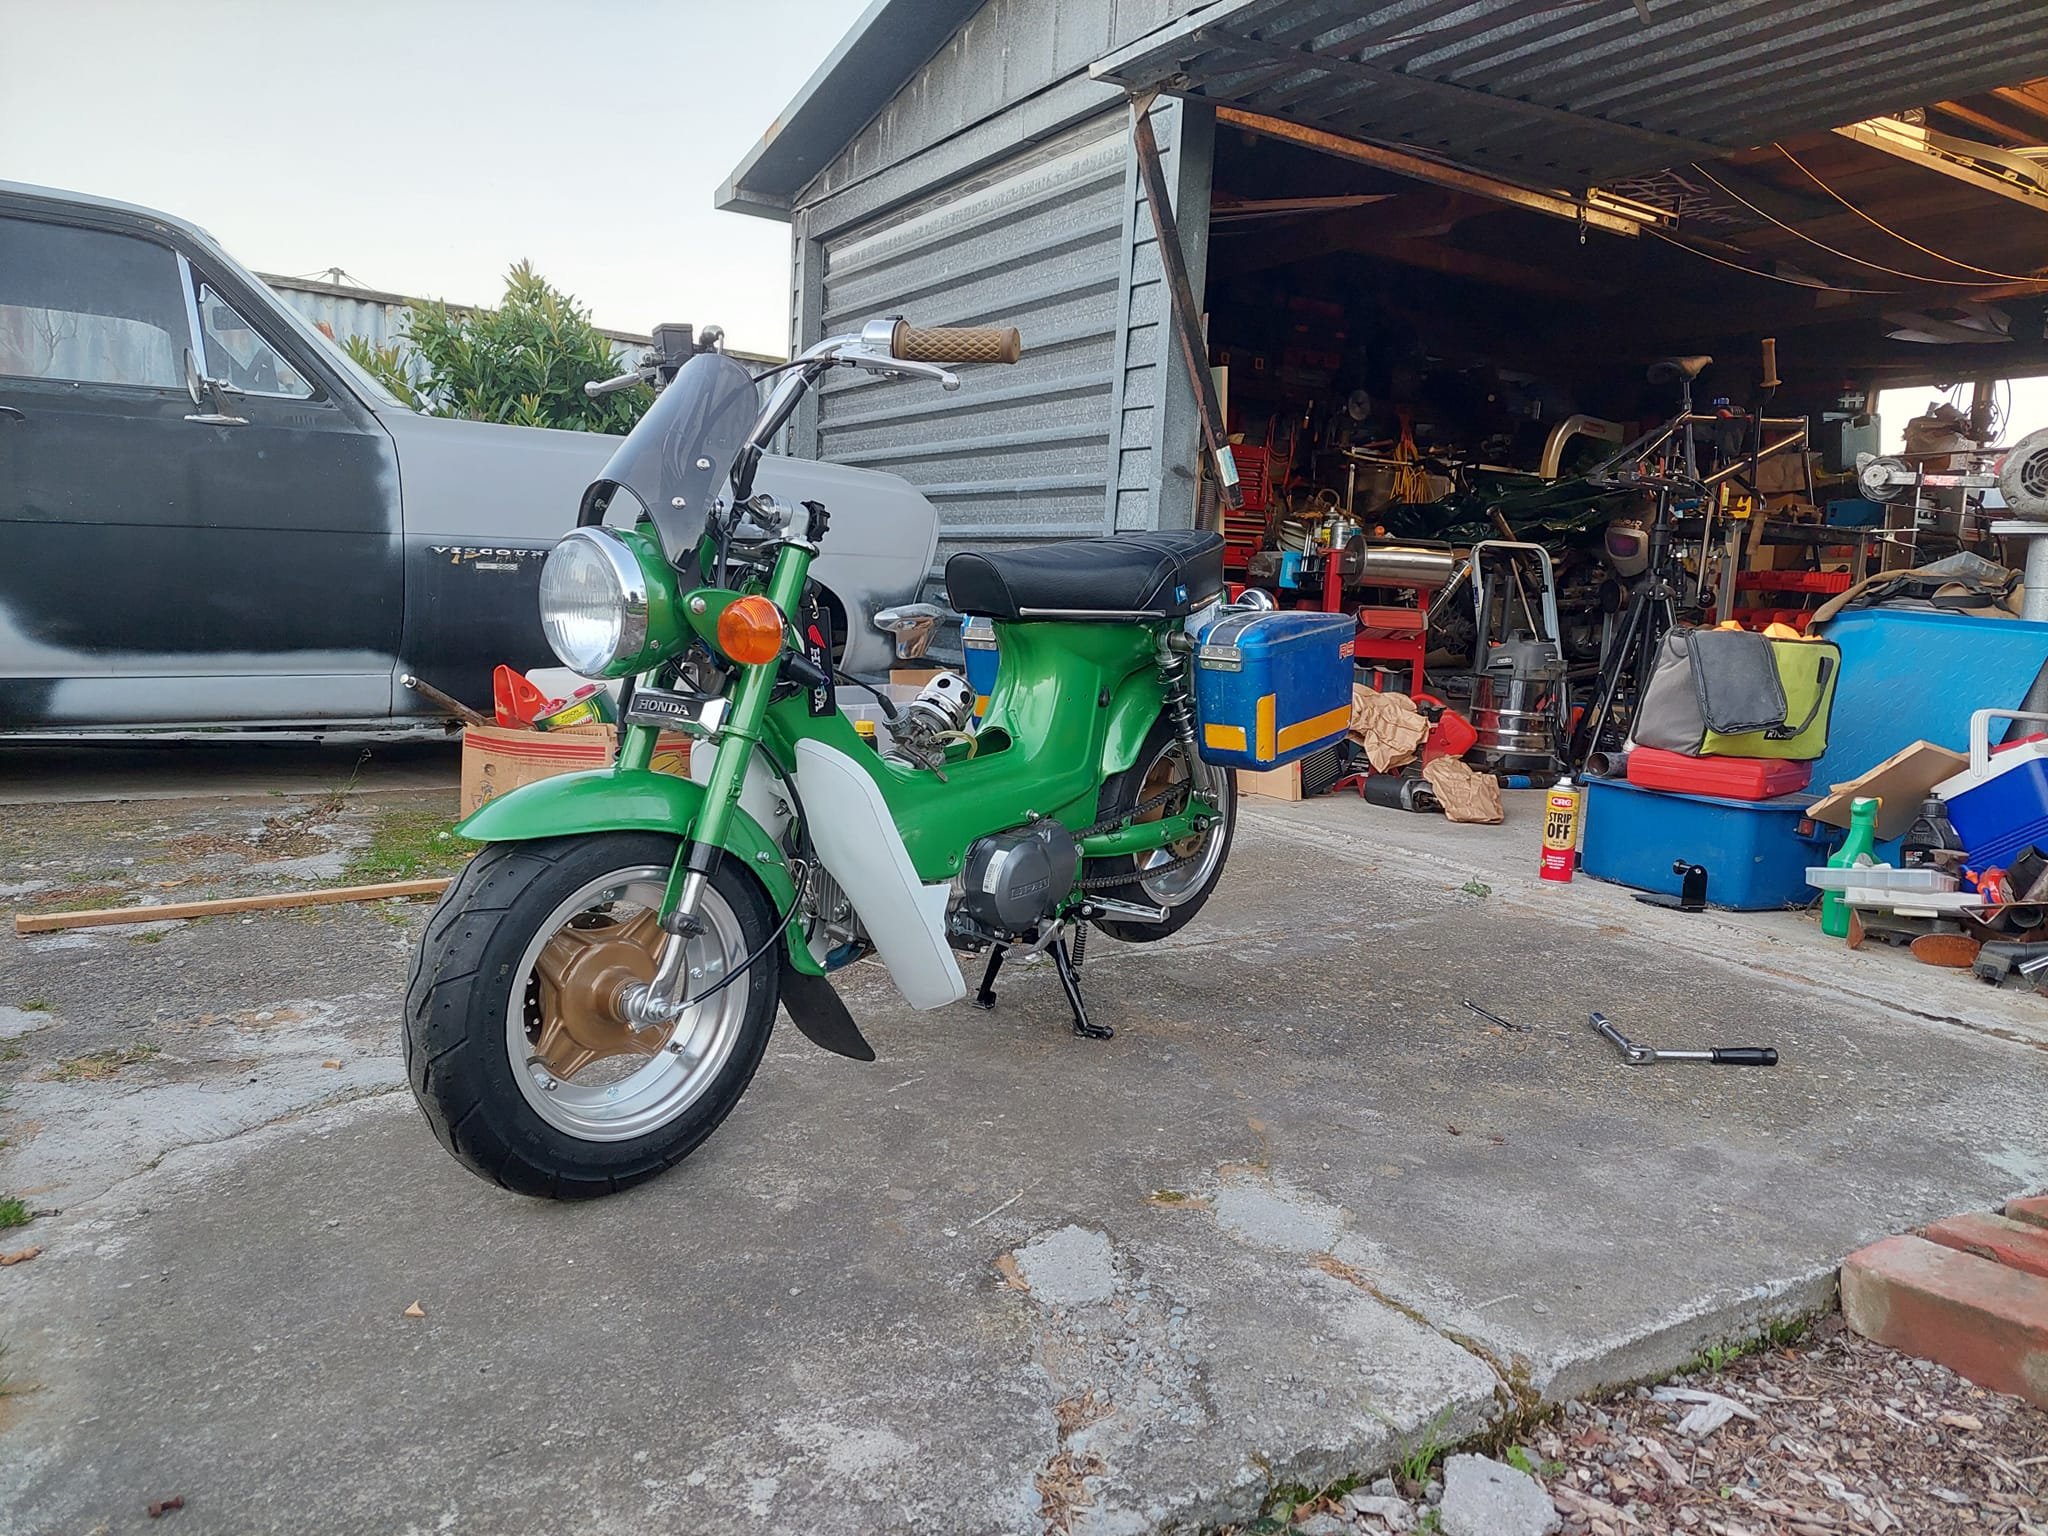
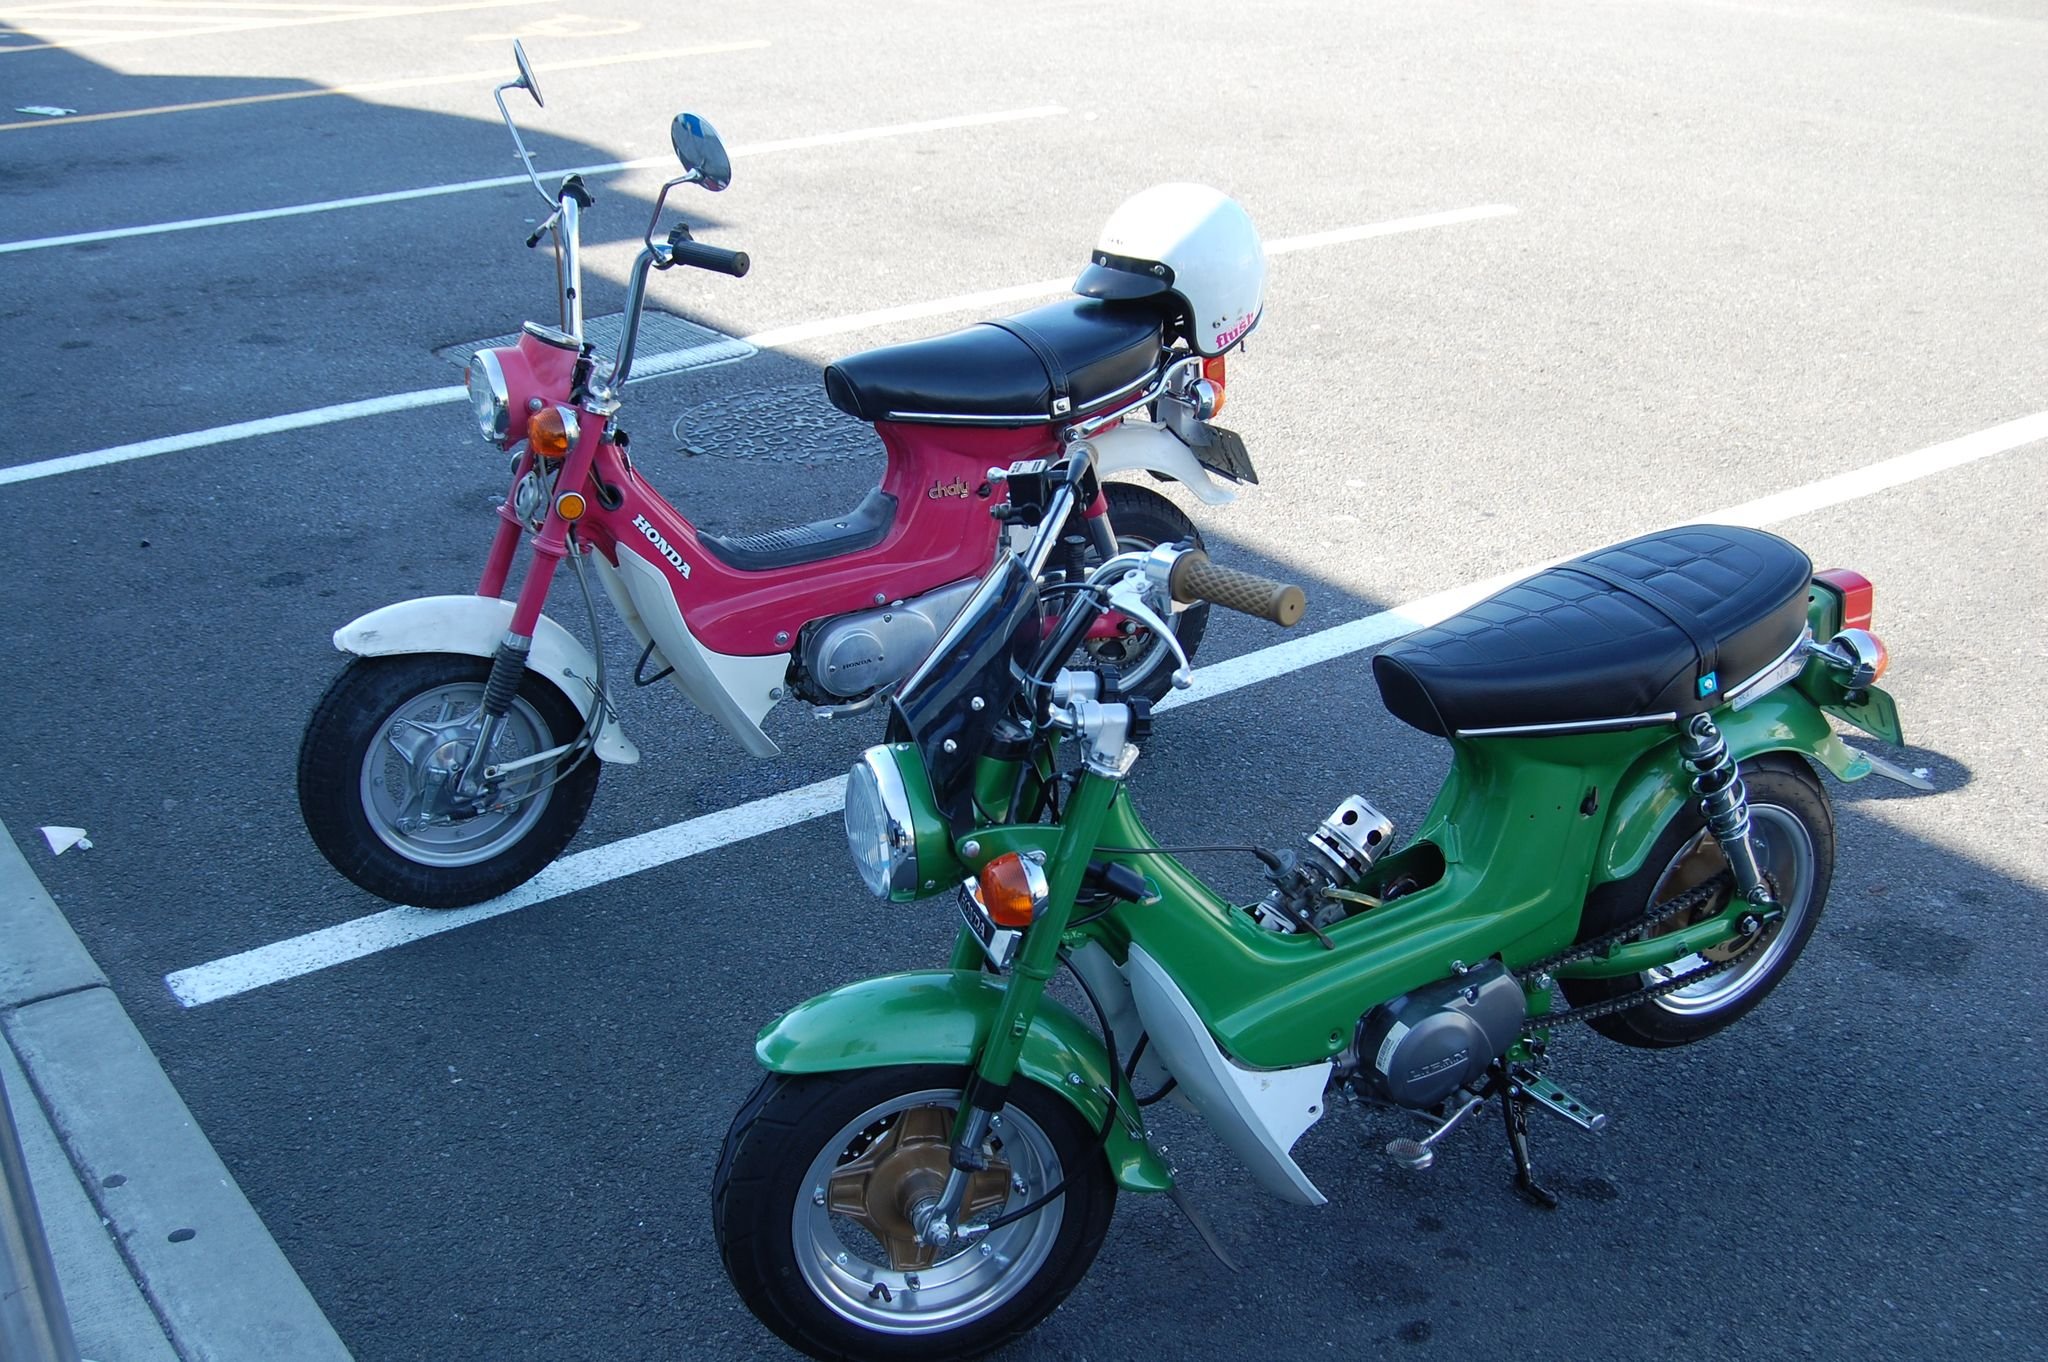
I got the chaly registered and road legal and took it out for its first shakedown run a few weeks back around the hills and through Lytellton to Wunderbar. Those side boxes I got from the swapmeet last year were on the back of my mind so I pulled the pin and started making some brackets for them The boxes themselves are pretty rough and have a few cracks and pieces missing, so I'll address them, paint them and maybe add some gas struts.
1 point
-
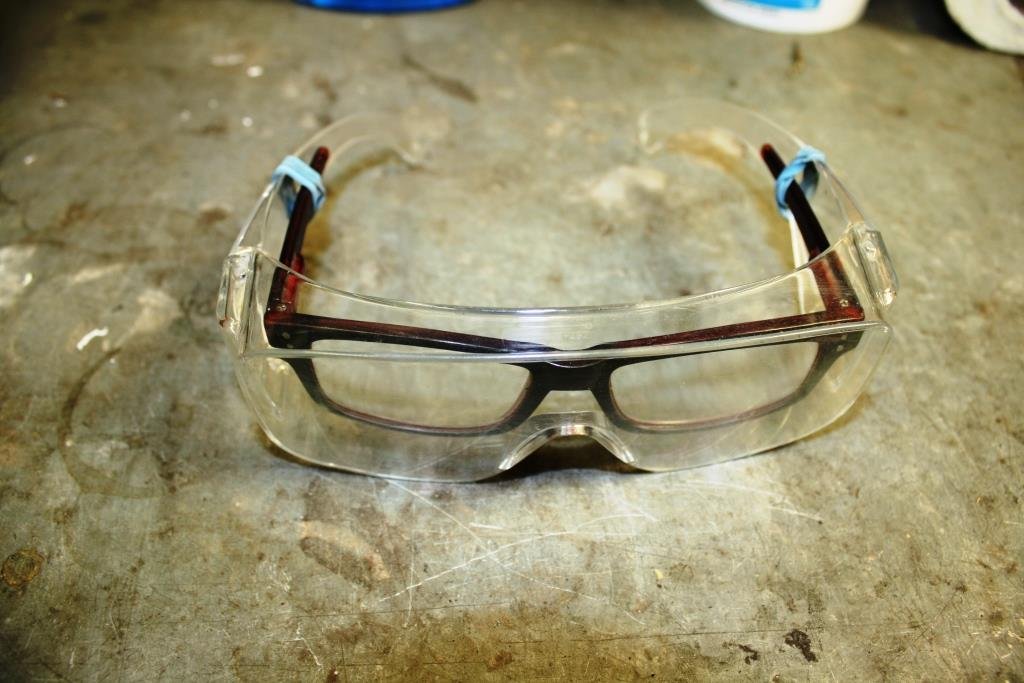
GRINDING 101 FOR OLD BLIND BASTARDS! Ouch! - While waiting at the local Shorecare A&E (don’t ask!) to have yet another chunk of metal dug out of my eye I came up with a solution for the “reading or safety glasses” dilemma. Spend ten Bucks at the local Warehouse on a pair of plastic reading glasses, cut the arms down and attach them inside a pair of safety glasses. As an added bonus you can comfortably wear ear muffs over them without developing front row forward cauliflower ears! Lastly hang them somewhere handy, in this case the grinding bench in the universally renowned and revered (in NZ) “sr2 man cave”.
1 point
-
Naturally the spare pump was missing bits so I made one pump from two. It all runs now. In the meantime a deal is being struck for a new engine which should make it a little more fun when this one finally dies.
1 point
-
Yea some more tweaks, it's like itchy balls, gotta scratch them. An additional solar panel; A deep cycle 12v battery; This is charged by the panels, and is intended to run power to the camping cooler. I may have accidentally bought a winch as well so it is sized big enough to power that too. And whilst I was at it and had 12 volts on board, I did away with the dc-dc converters and wired it to run all the 12v stuff in the cab. This meant spending some time to understand what I had done previously, which wasn't a trivial exercise. I used the opportunity to clean up the 12v wiring for the stereo, cb, usb and the many other extras I have wired in by splicing on to splices. Rather a lot of those actually, but it is pretty well consolidated now. I think I will buy a dual input charger so that battery can be charged by the alternator as well, but the cheapest one I can find that will do a 24v alternator is still $400; https://www.trademe.co.nz/3535959061 Please god let it end. After I sort the sump leak.1 point
-
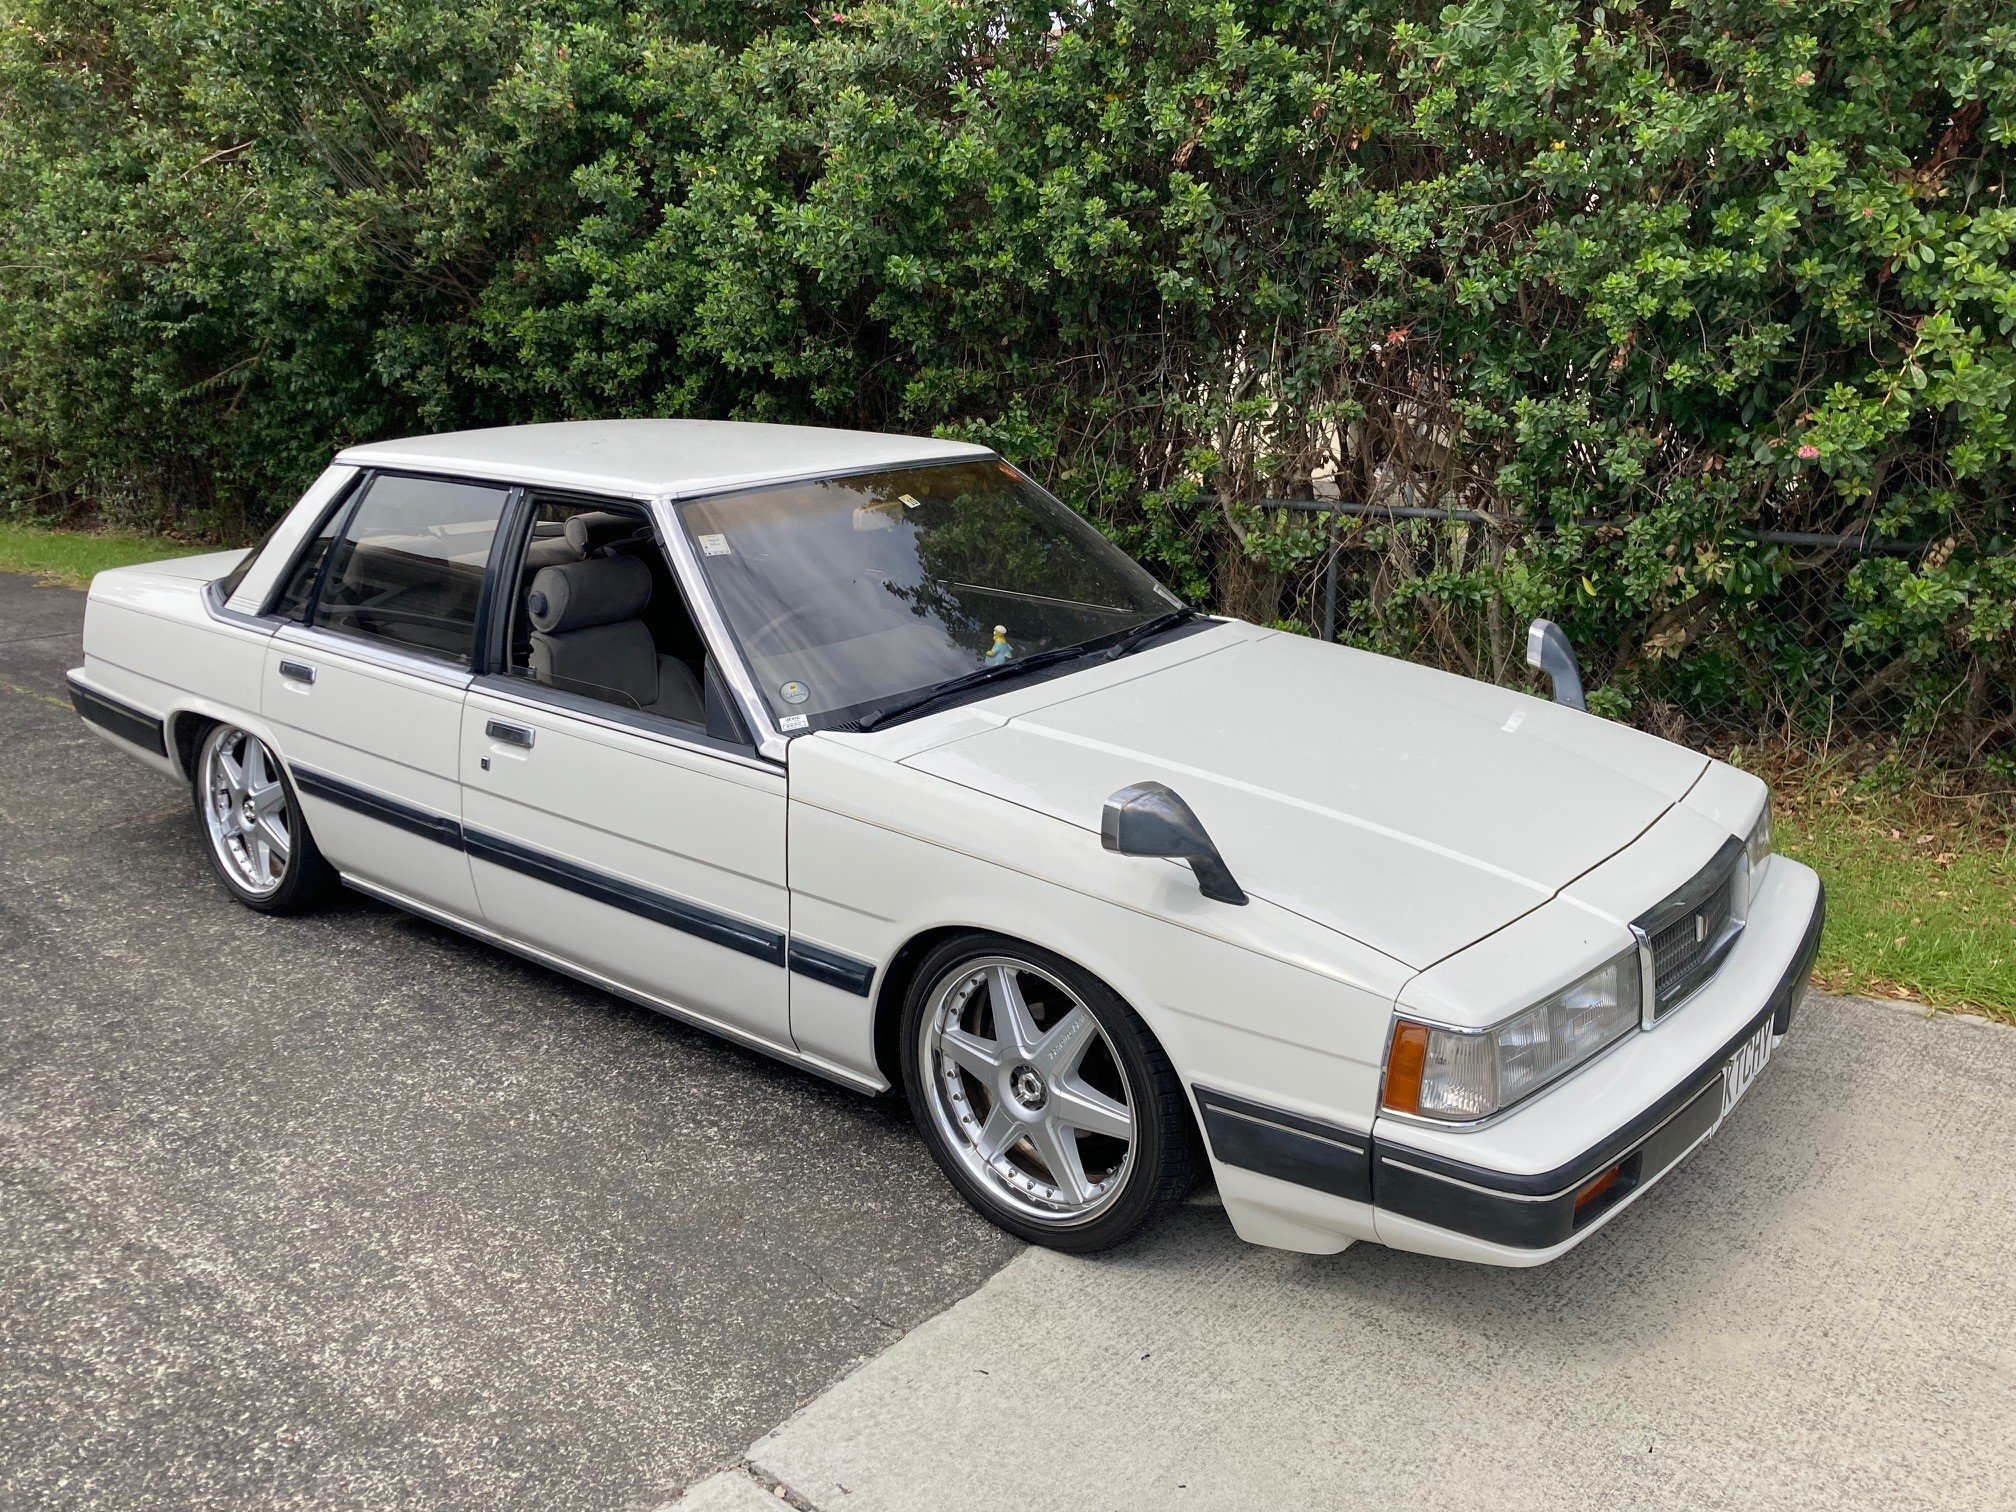
I had forgotten how bad cut springs ride, so didn't really drive the car much at all between December to March. Had a busy time with house stuff over most of the summer months and once the house sold I began hassling the Mrs for some $$$ to buy an adjustable set up. She caved and I picked up some BC adjustables, (took Clint's advice re quality in comparing similar priced adjustable set ups), they're the FC rx7 model, and they bolt right into the HB which is super cool. Out of the box they slammed the shitout of the front though, so I've been fine tuning the height I want. Cosmo's have a really low underbelly, whilst not actually looking that low. Guard lip rub, inner guard rub, and crossmember clearance of 40mm meant I had to raise it up quite a bit. (2nd pic is showing underbelly with out of the box height - could drop it quite a bit lower if I wanted to for shits n giggles). Have only fitted the front's thus far, and man it makes a hell of a difference to the drive, much nicer even with rusty old shocks and cuts still in the back. Did the drive from Auckland to Tauranga the other day with only one scrape in a silly hump in the road. I'm happy with how it's sitting now, and will chuck the rears in soon. It's the first car I've owned that's had adjustables and geez I'm sold, such a silly gimmick of being able to play around with ride height so easily, but I love it. 15ish mins each side and I can muck around with height.
1 point
-
Fogger nozzles.........1 point
-
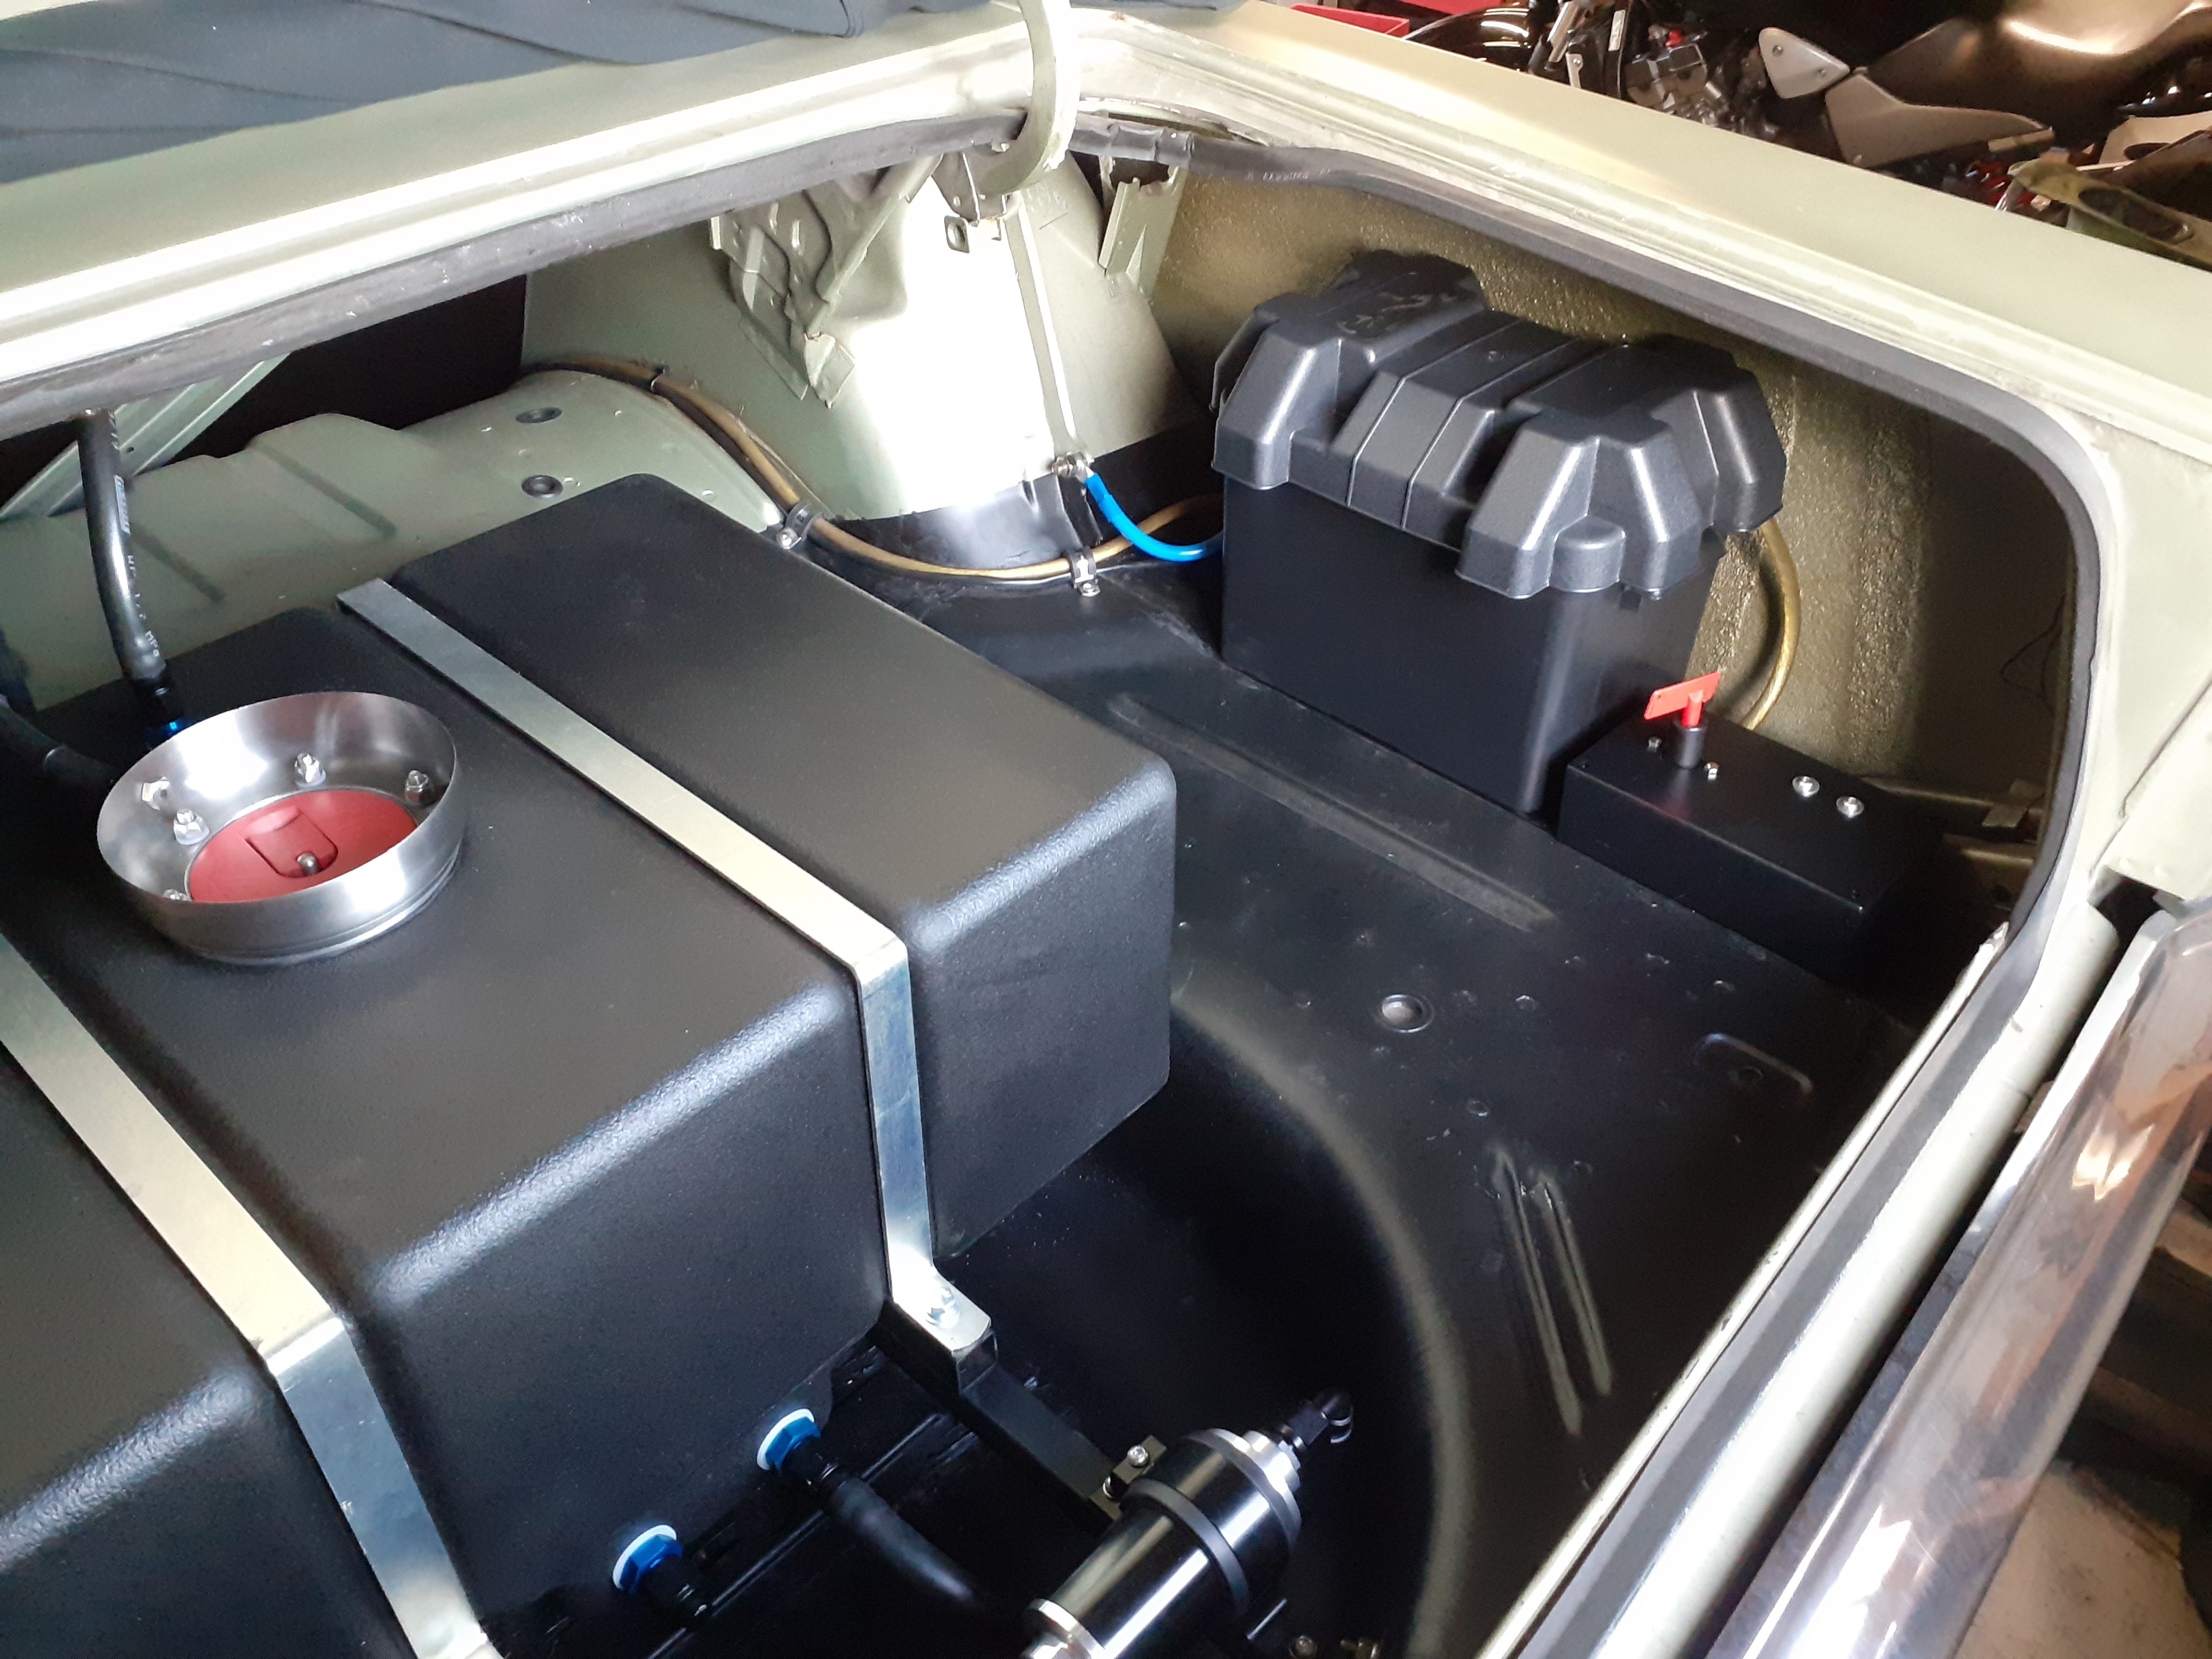
Battery mounted in a box, battery switch and fuel pump relay mounted inside an insulated box, main power wire to starter done, fuel pump wired up
1 point
-
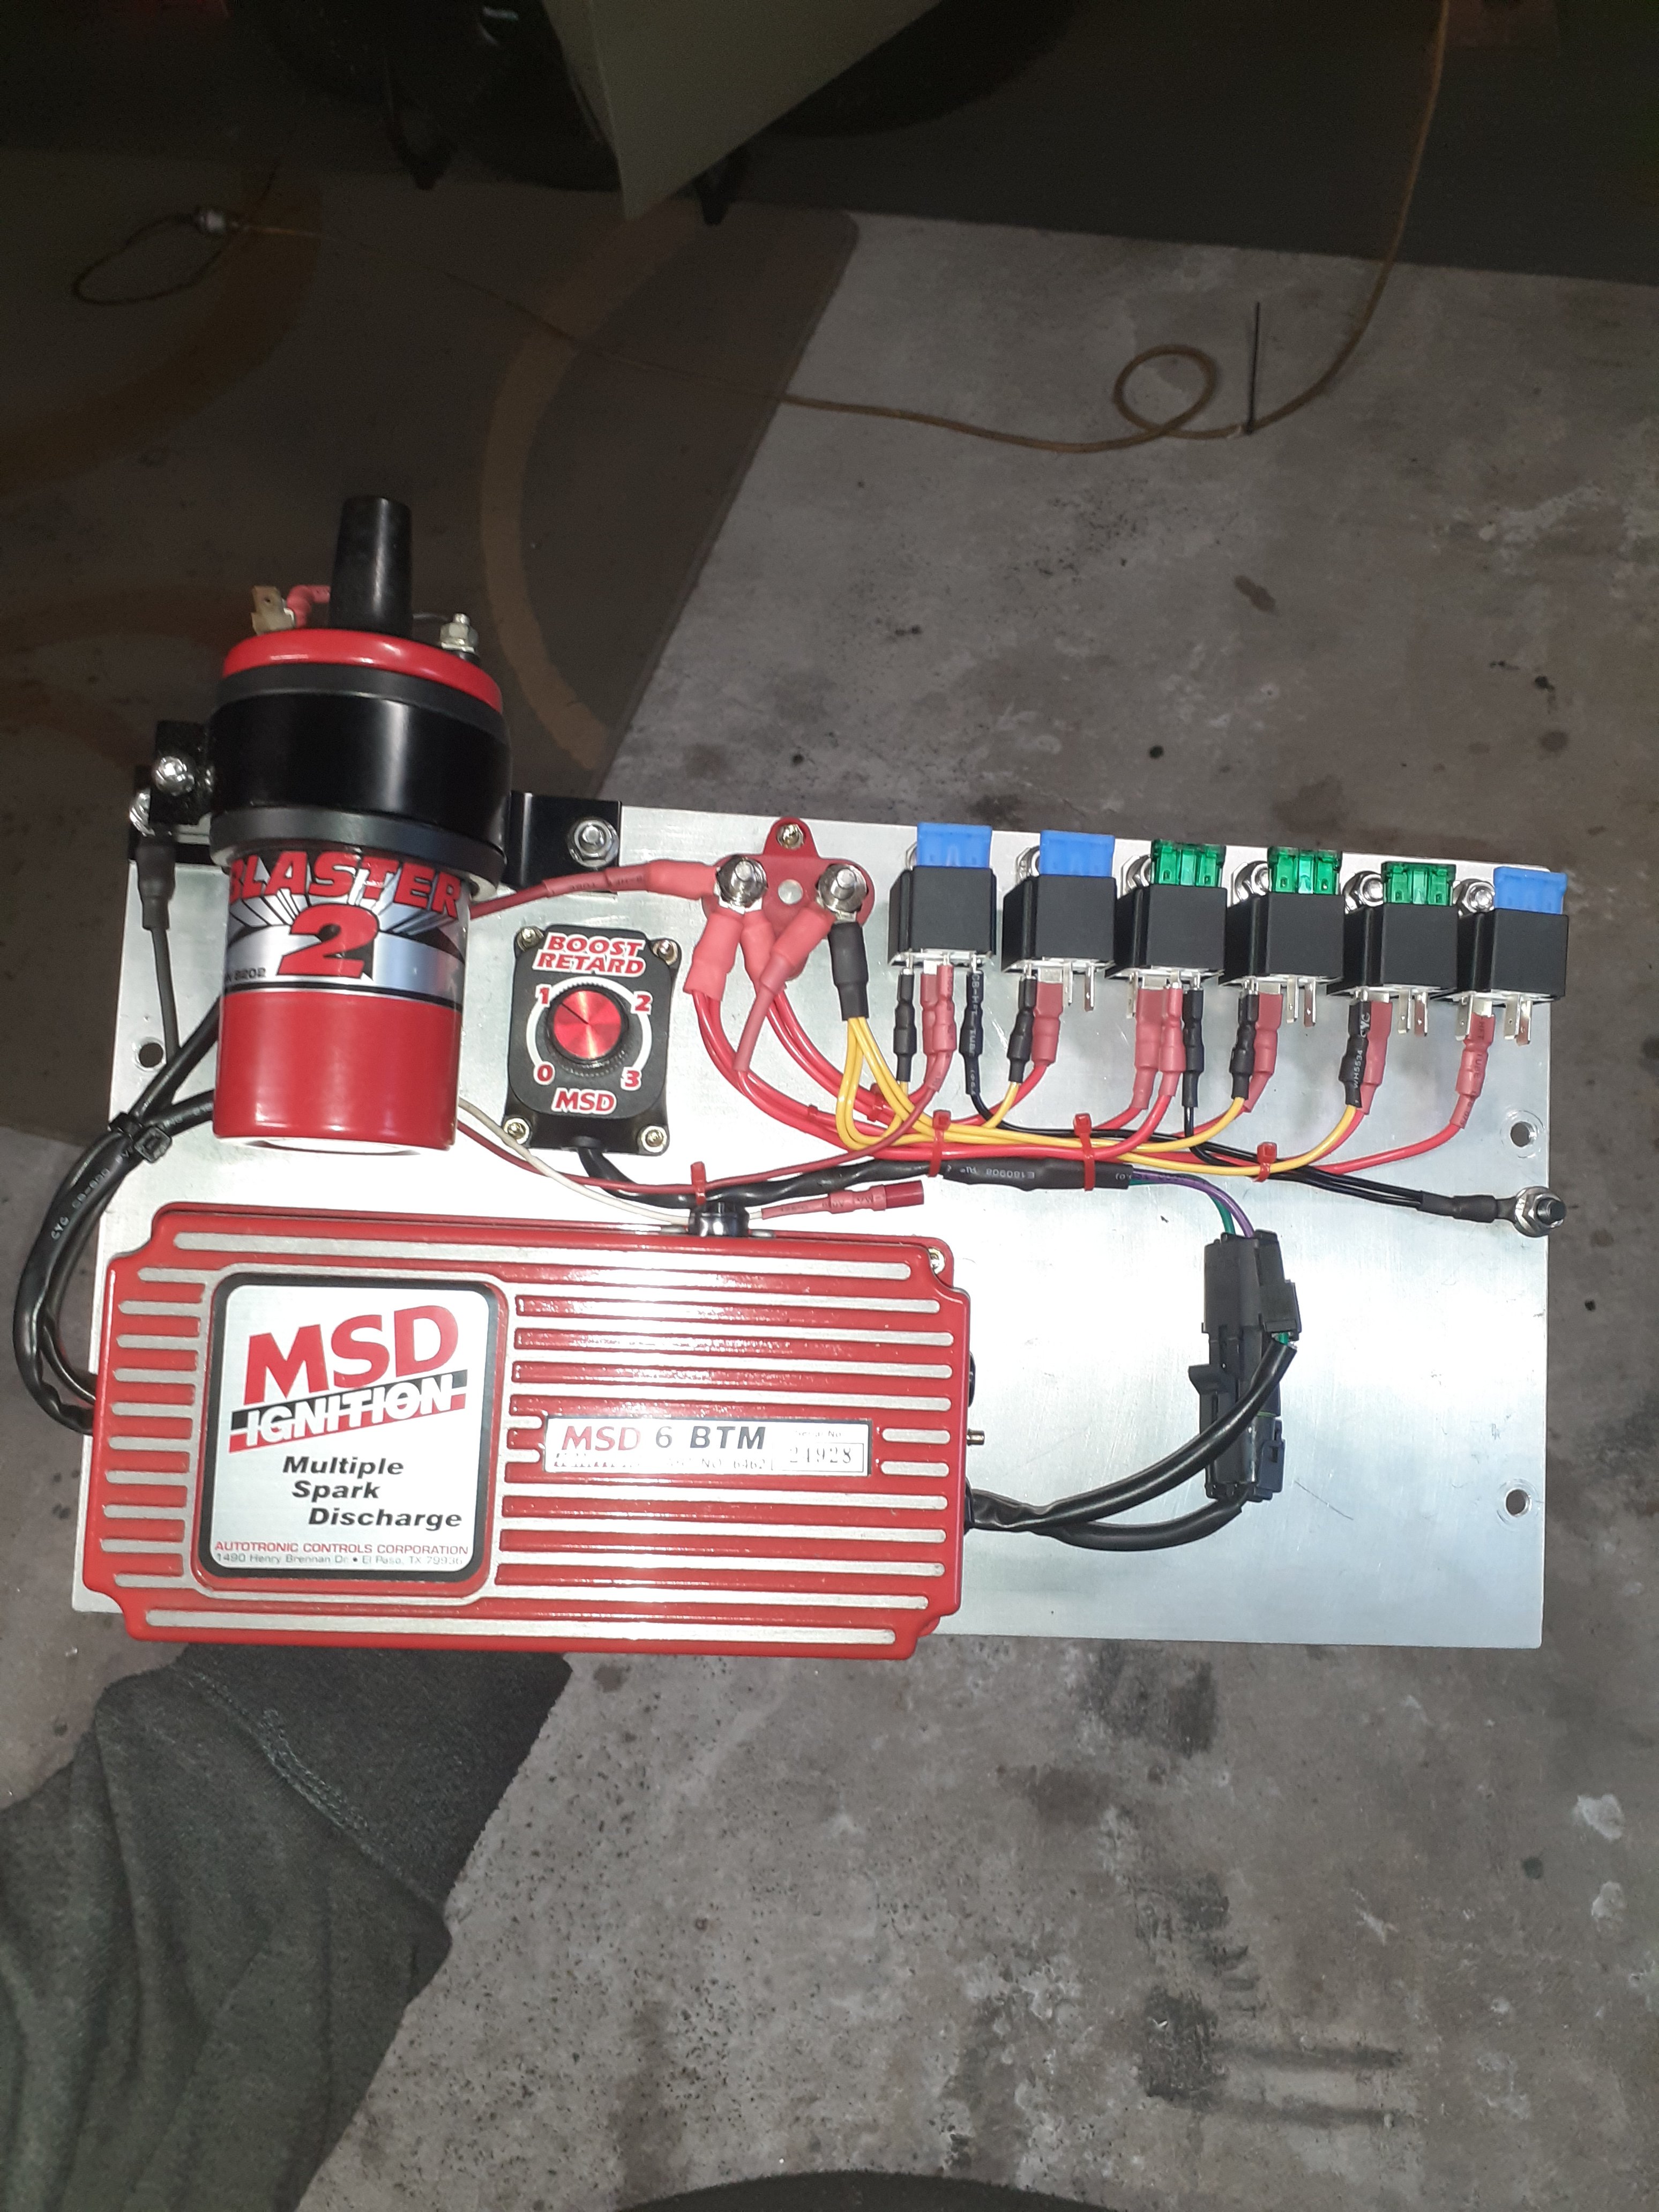
Relays done and half the wiring to them sorted
1 point
-
Bonus footage
1 point
-
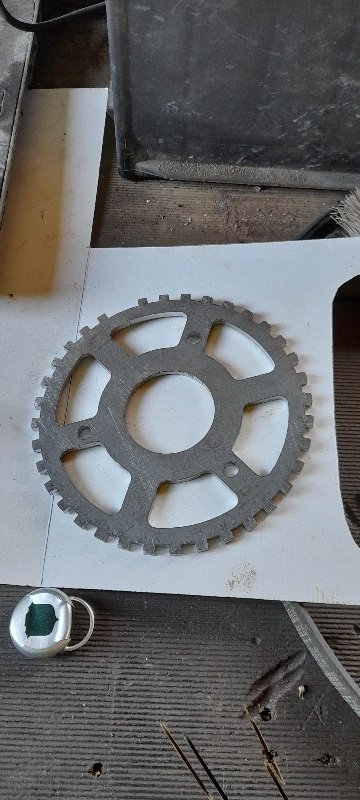
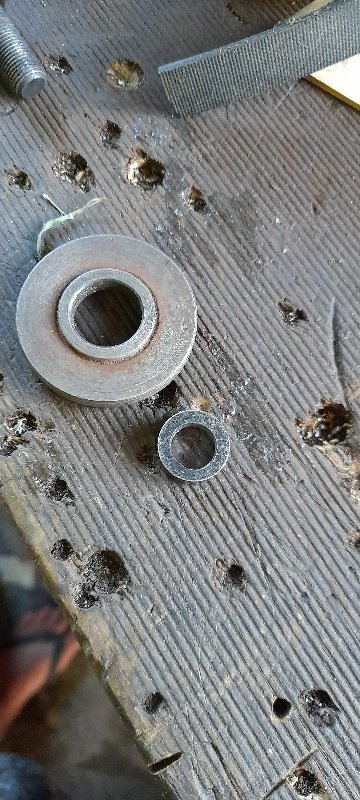
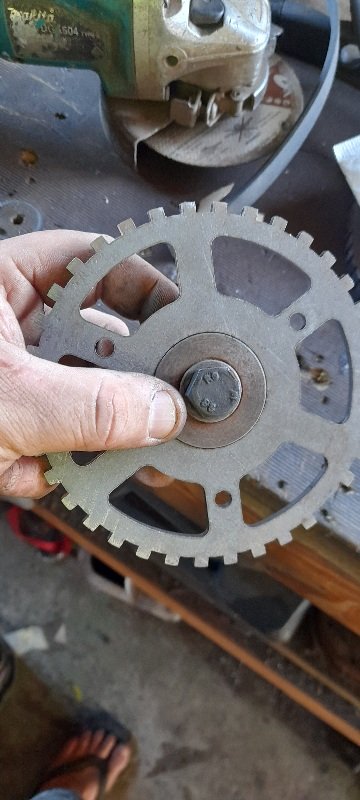
so after work today I got the fuel lines fixed to the shell and the fuel feed and return fubber hose parts done by the fuel tank.... I was about to start looking at making heat shelds ....... and then much like the sound of the ice cream van to my girls...... I heard the sliding door of a courier....and in her hands was the trigger wheel I've been waiting for ..... so I stopped what I was doing and had a look to see if it will fit and not hit on anything.......pretty fucking sweet. found some washers to center it on the idler pulley bolt.. had to move one sensor out... and one sensor in (that also needed the bracket to be cut out so I can use lock nut). I will be able to tack it on ....on the inside edge. but all in all I'm happy with that looks like it will work .... so I can look at getting it all tacked up and on the motor.
1 point
-
Done the engihe and dsg oil and filters then done dsg ecu reset Still waiting on my fan temp sensor then I'll service the cooling system After doing a bit of research while I've got the front off to upgrade intercooler and clean the intake ports,(it's a while your in there) I'll take the injectors out and get them serviced and flow tested for piece of mind with the extra ponys it will produce Also recommended is new spark plugs and coil packs before tune Alot of guys seem to buy r8 coil packs Ive got a invoice that says coil packs and spark plugs were replaced by vw 2 years ago,so I gona roll with that cause genuine coil packs + spark plugs ain't cheap.1 point
-
Since driving the car more, there has been one small but persistent issue; the valve cover is still haemorrhaging oil. A while back I fitted new valve cover gaskets, as they came with the car and they had obviously been leaking as there was just oil everywhere on the top of the engine. The rear gasket is a weird plate type, which is metal sandwiched between layers of a compressible material Putting a few KM on the car now, it was immediately clear that even with the new gasket it wasn't sealing. The pools of oil in the valley make that really obvious and there was a faint waft of oil smell when stopped. Removing the gasket, I could see that it had been leaking around the entirety of the gasket The sealing surface on the gasket was very wet with oil. Keep in mind this engine hadn't been started in a week or so... I enquired on the Rover Coupe Facebook group if leaking gaskets were normal, and one helpful chap told me to check the metal sleeves that the bolts pass through. Sure enough, this is what I found. That metal sleeve should be flush with the face. All of them were like this This is from a previous owner seeing the gasket was leaking (probably the one I originally replaced, instead of them replacing it themselves) and just cranking down on the bolts. The plastic cover cant squeeze down any further because of the metal in the gasket, so the metal sleeves get pushed out through the holes in the gasket. Not a chance it was ever going to seal as it was. I used a pair of big grips to gently squeeze all the sleeves back into place until they were flush. And after a thorough clean of both faces, refit the cover with a new gasket. I decided to fit the gasket dry this time, with no sealant on it. The front cover has been sealing perfectly since I replaced the gasket, so no need to touch that one. A decent drive shows that there is no more oil leaking down the cam carrier, and the valley is dry. Finally, after all the work I have done it appears I have stopped the valve covers leaking.1 point
-
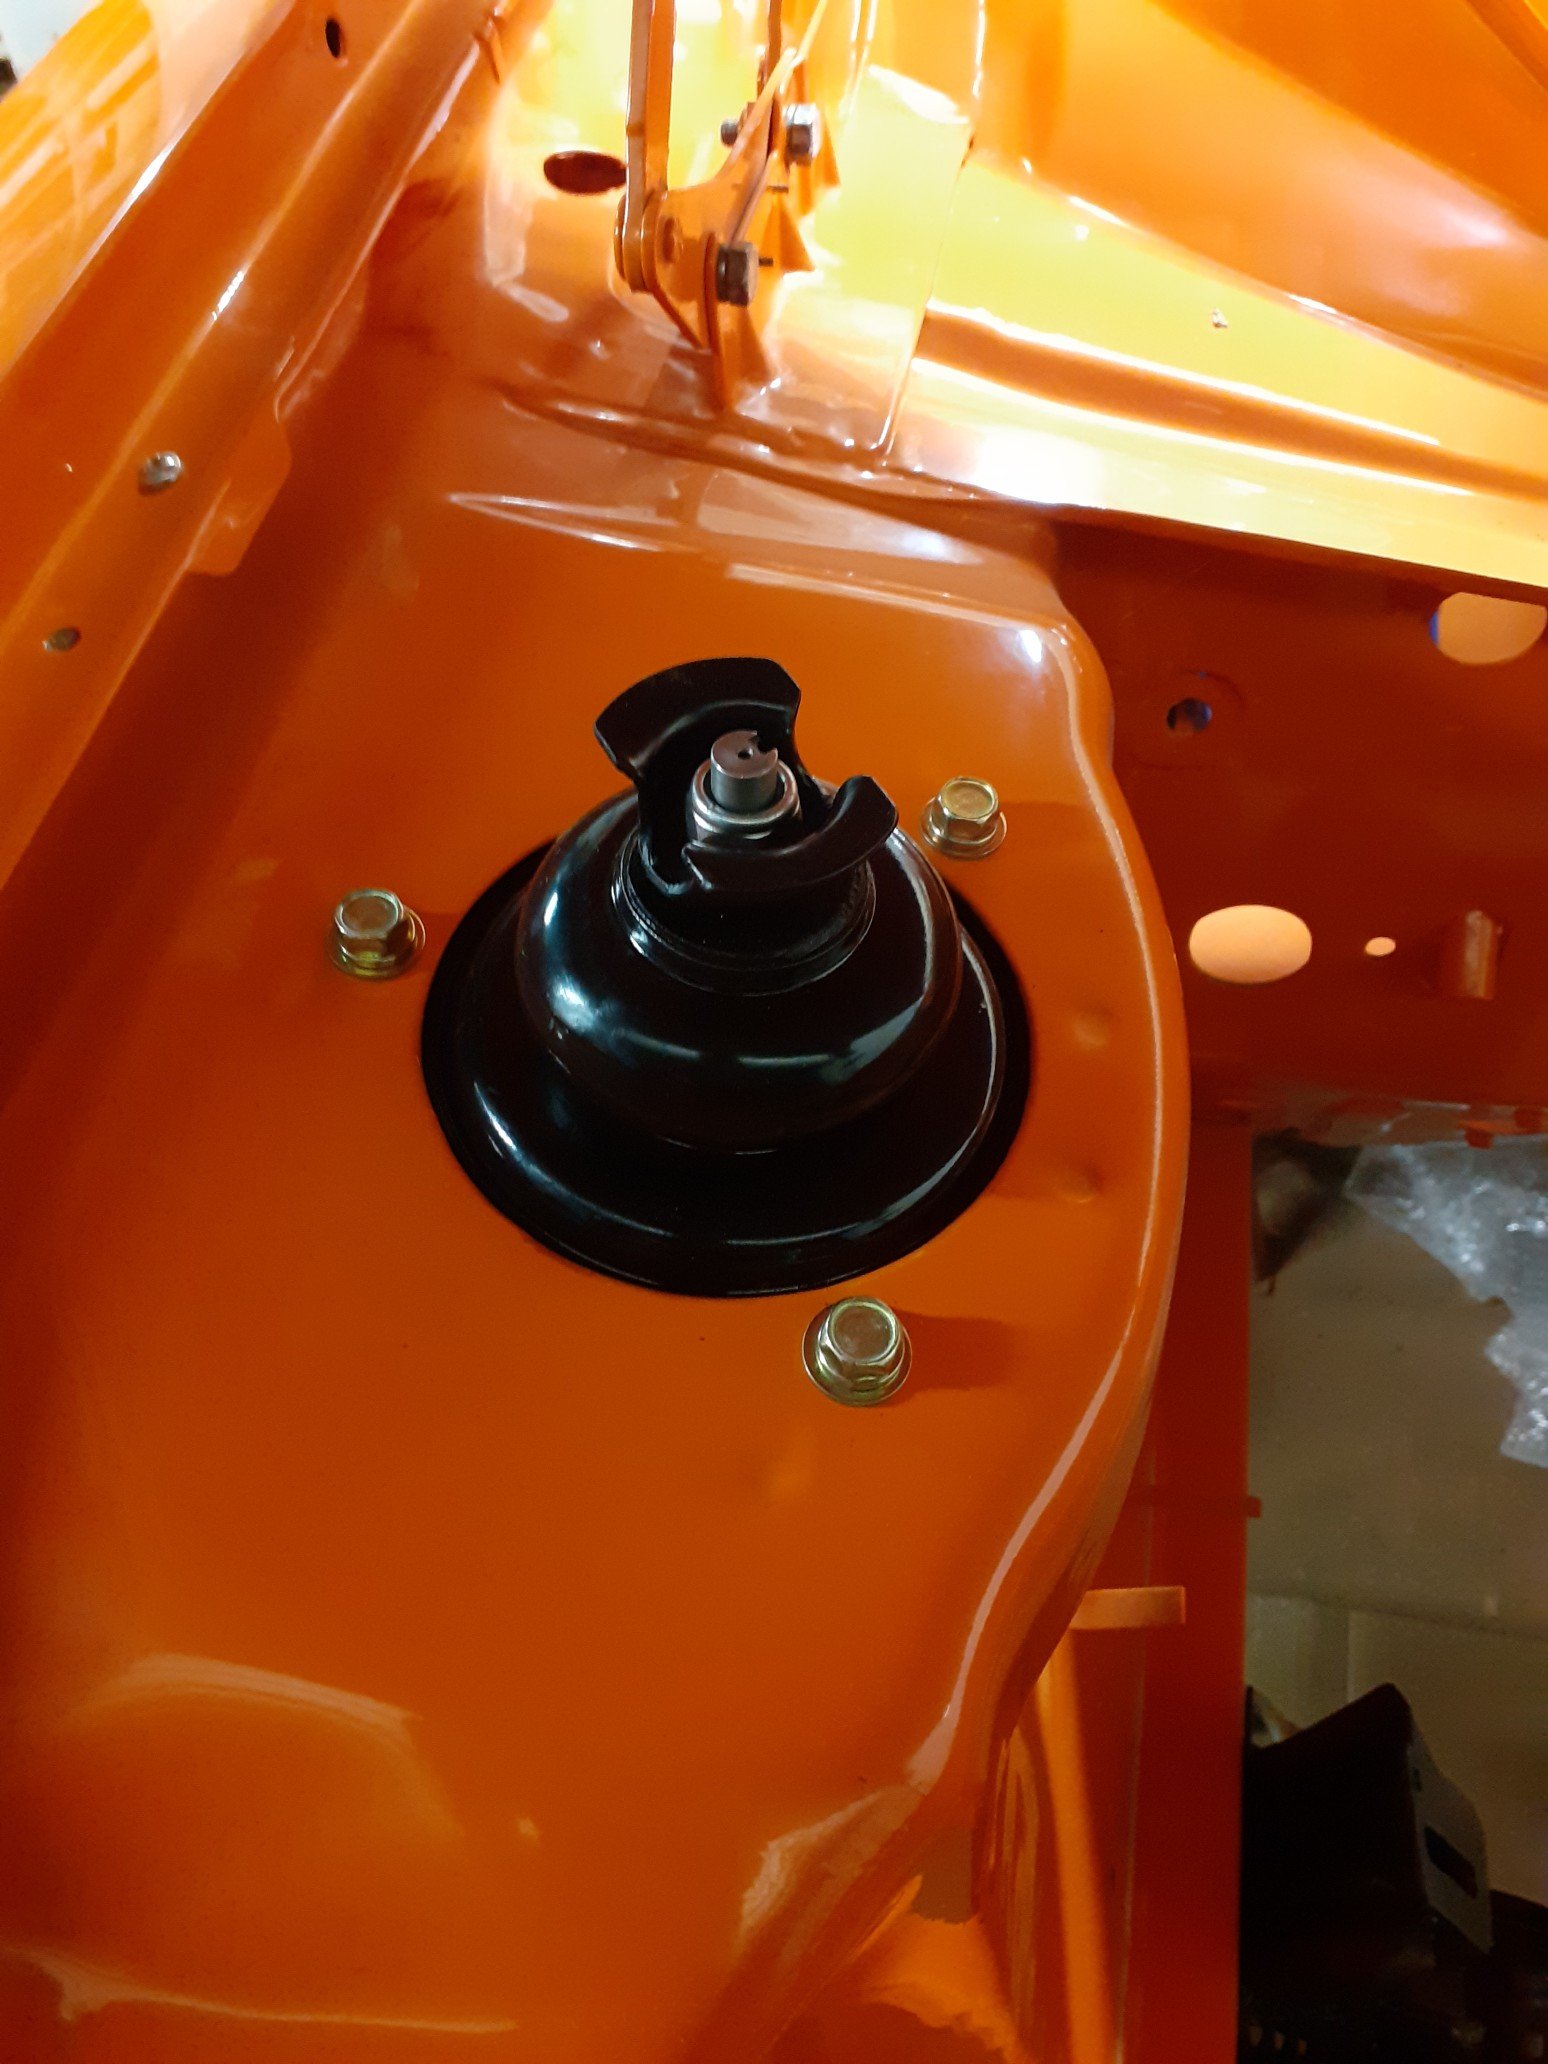
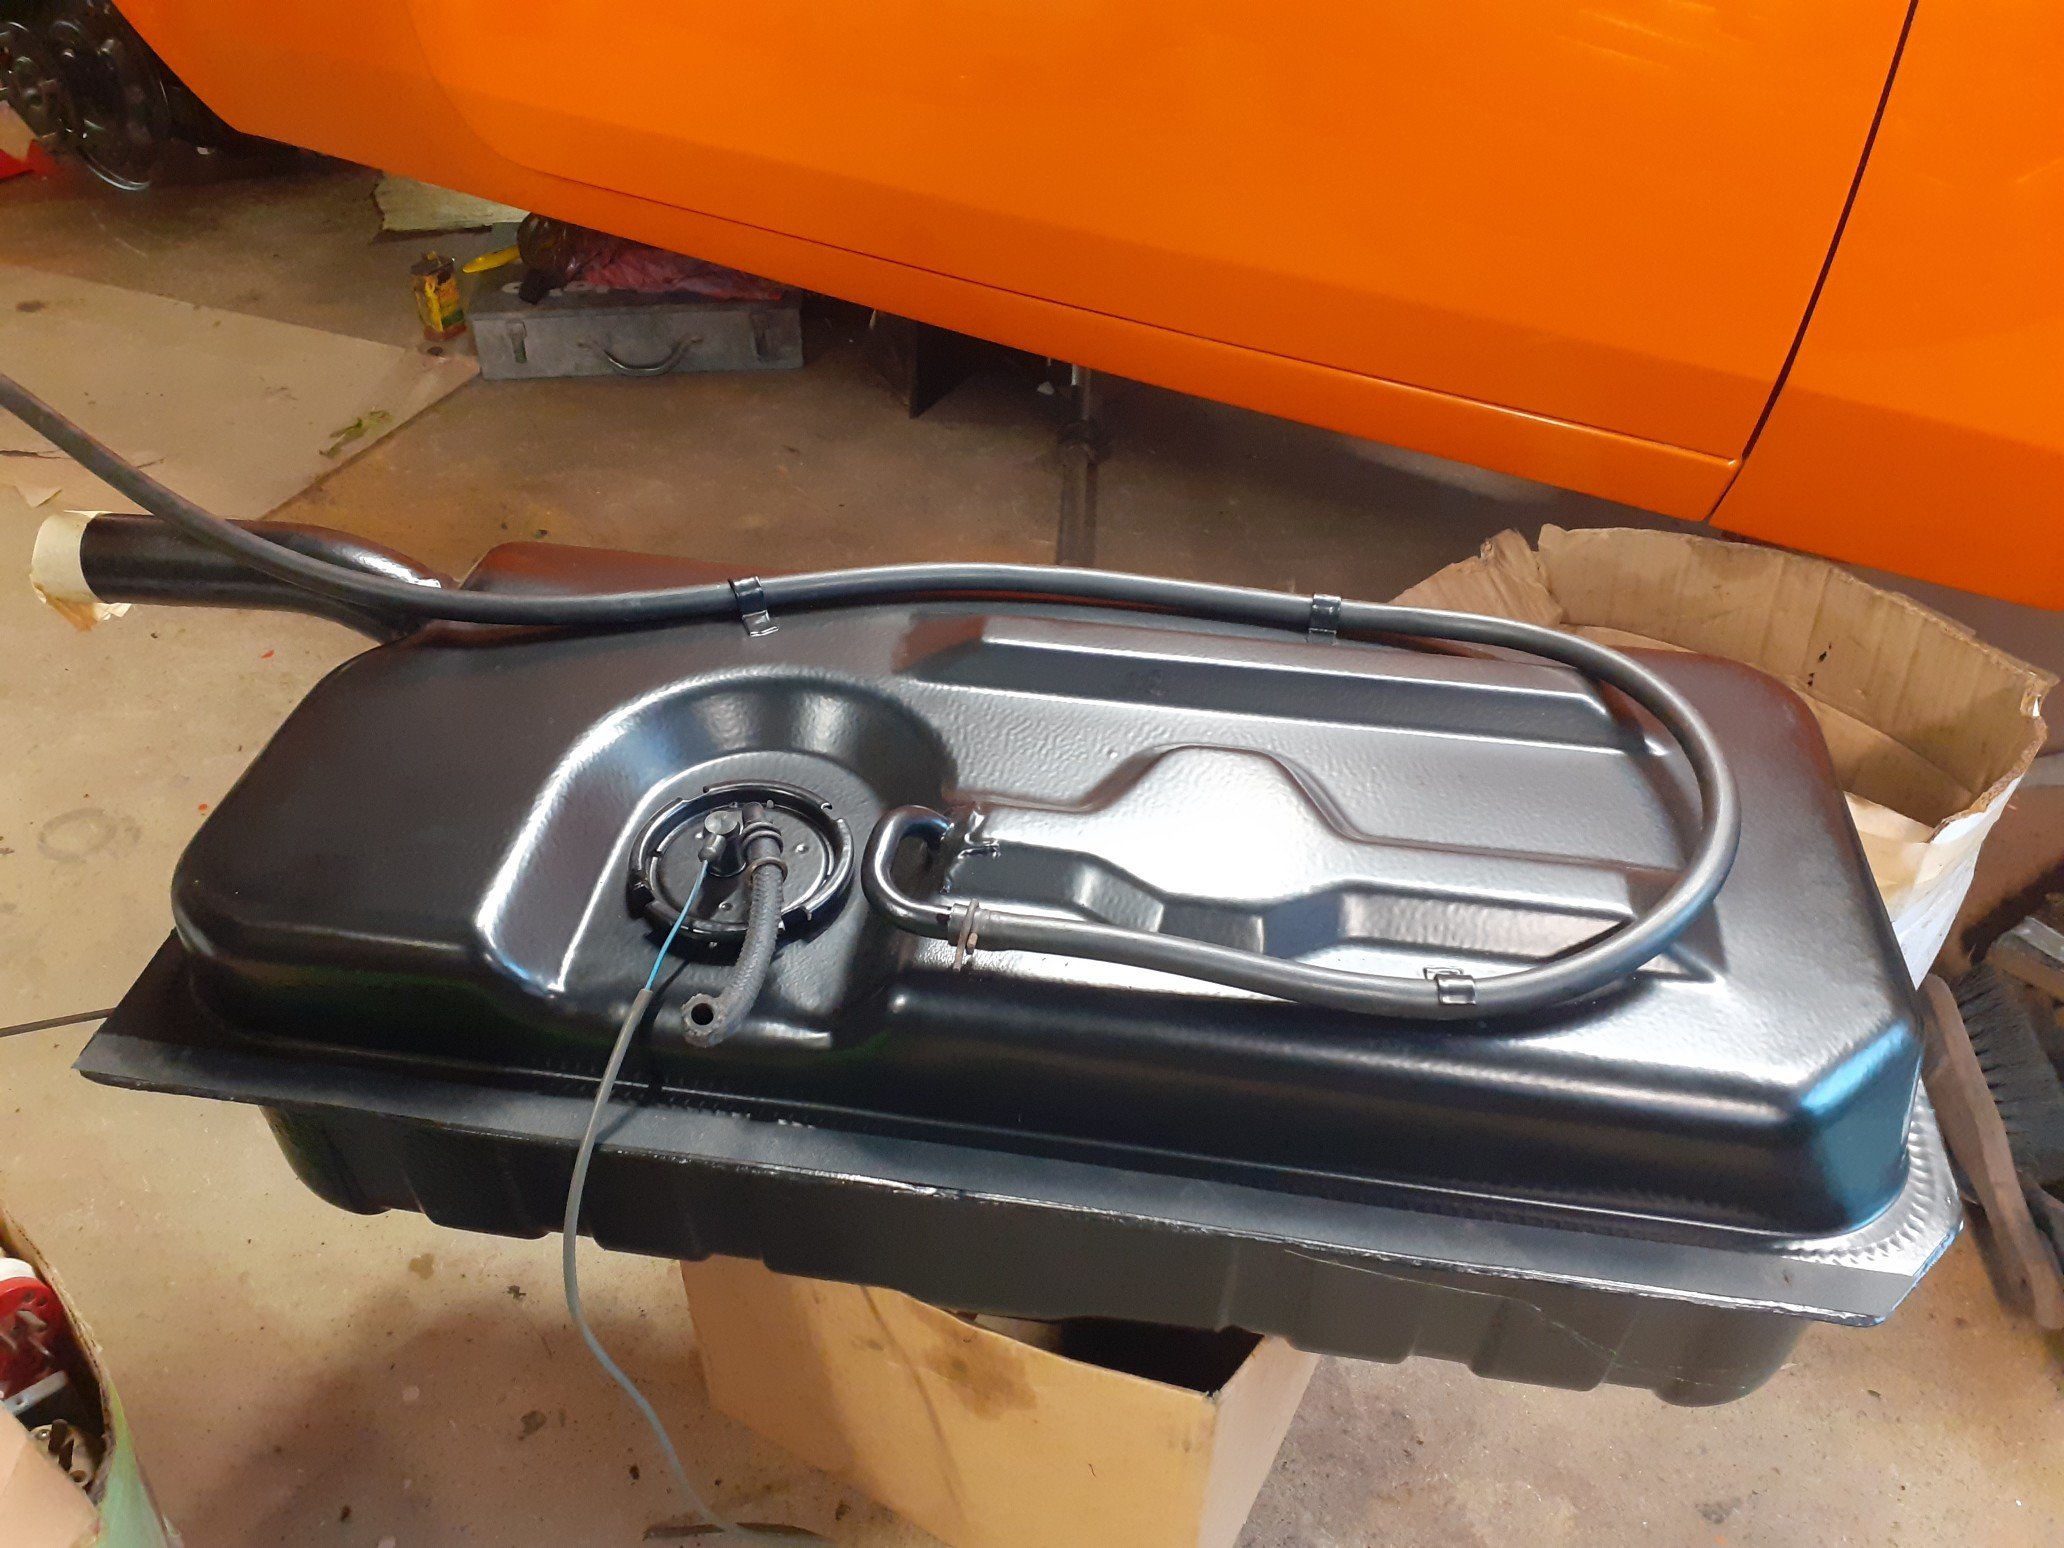
I opened up the petrol tank which has been sitting around for awhile. To my suprise it was like brand new inside. Cleaned it inside and out, and installed. The fuel filler neck was a bit odd. It didn't quite sit flush to the side of the van. I ended up removing some of the floor with a die grinder to lower the fuel filler and get it all lined up. Potentially it was this poor from factory. New gasket, a lick of paint and its done. From the outside, the fuel cap covers the entire filler neck face. I went so far as to even replace the fuel cap screws which hold the locking tongue on from self tappers to stainless caps.
1 point
-
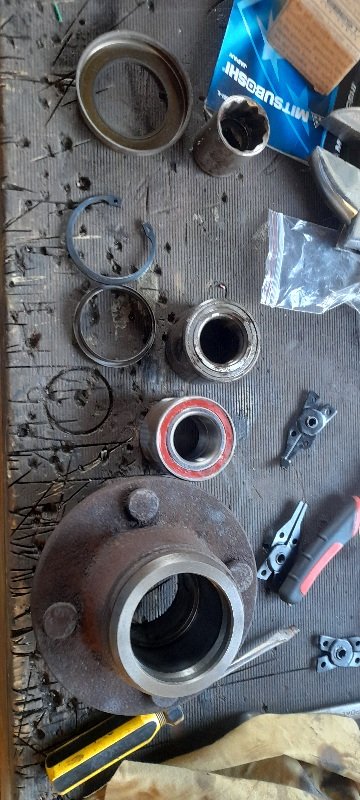
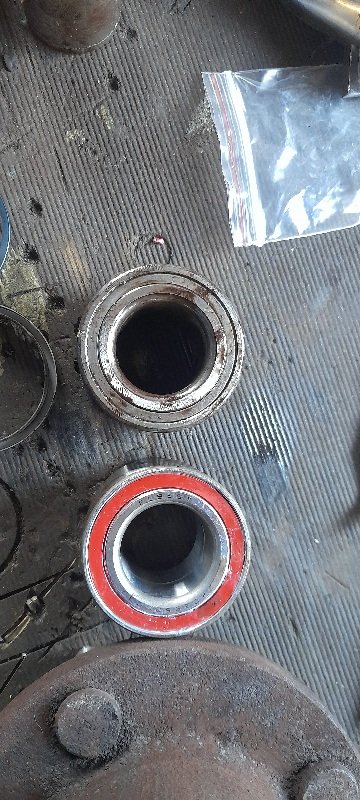
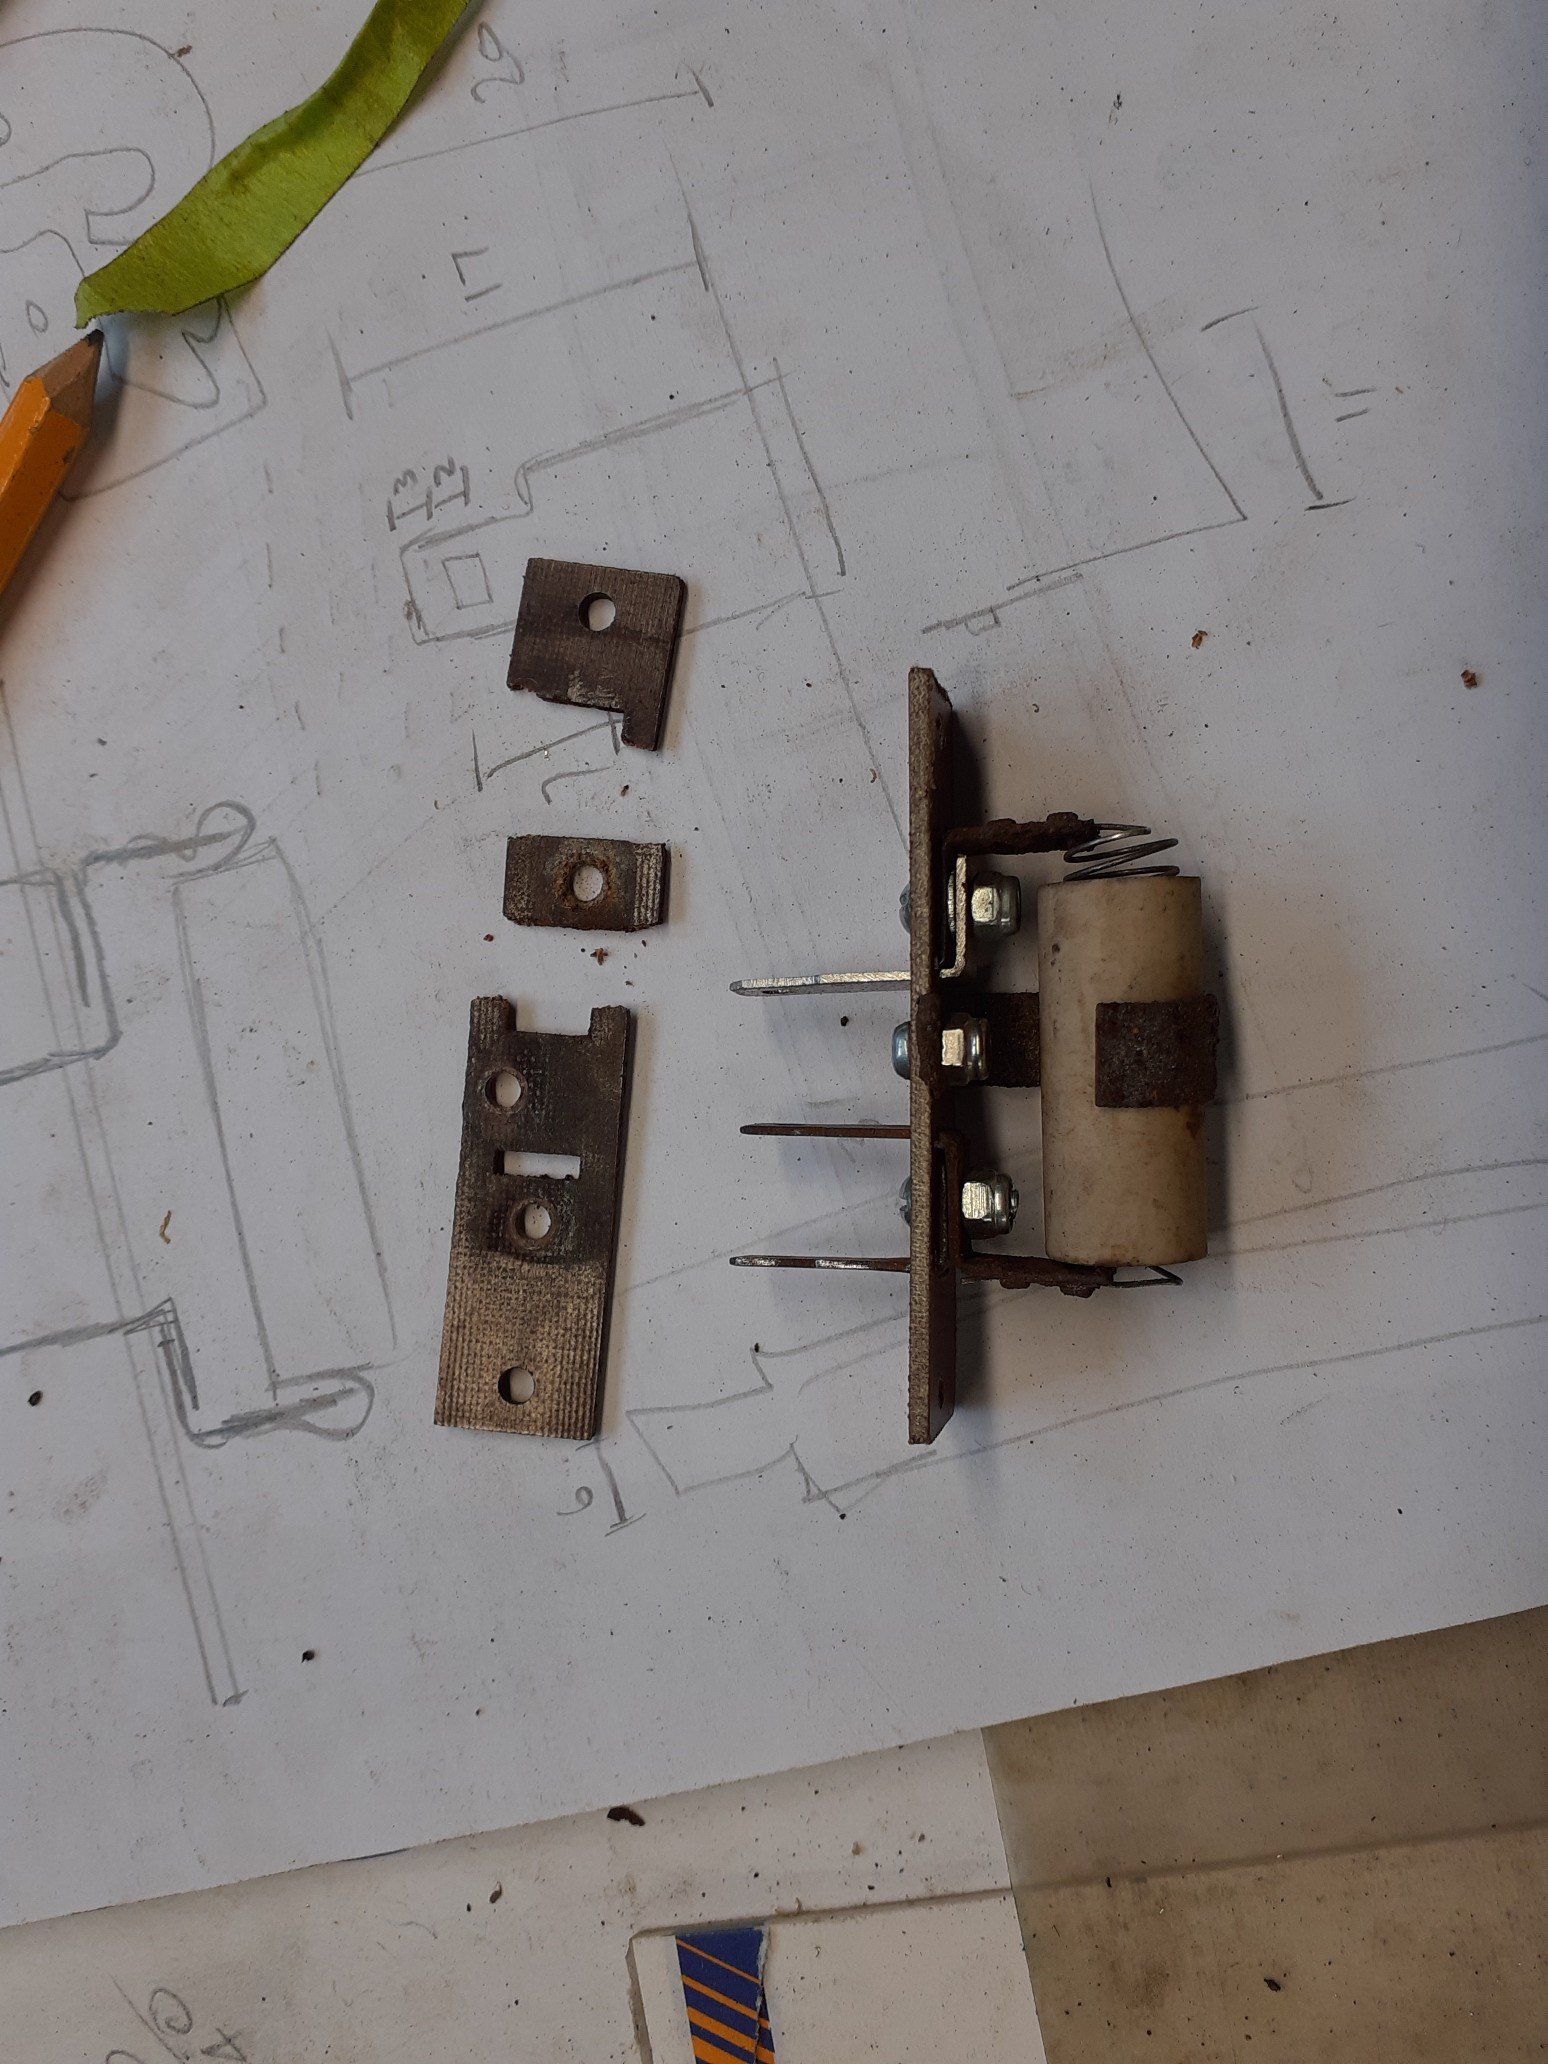
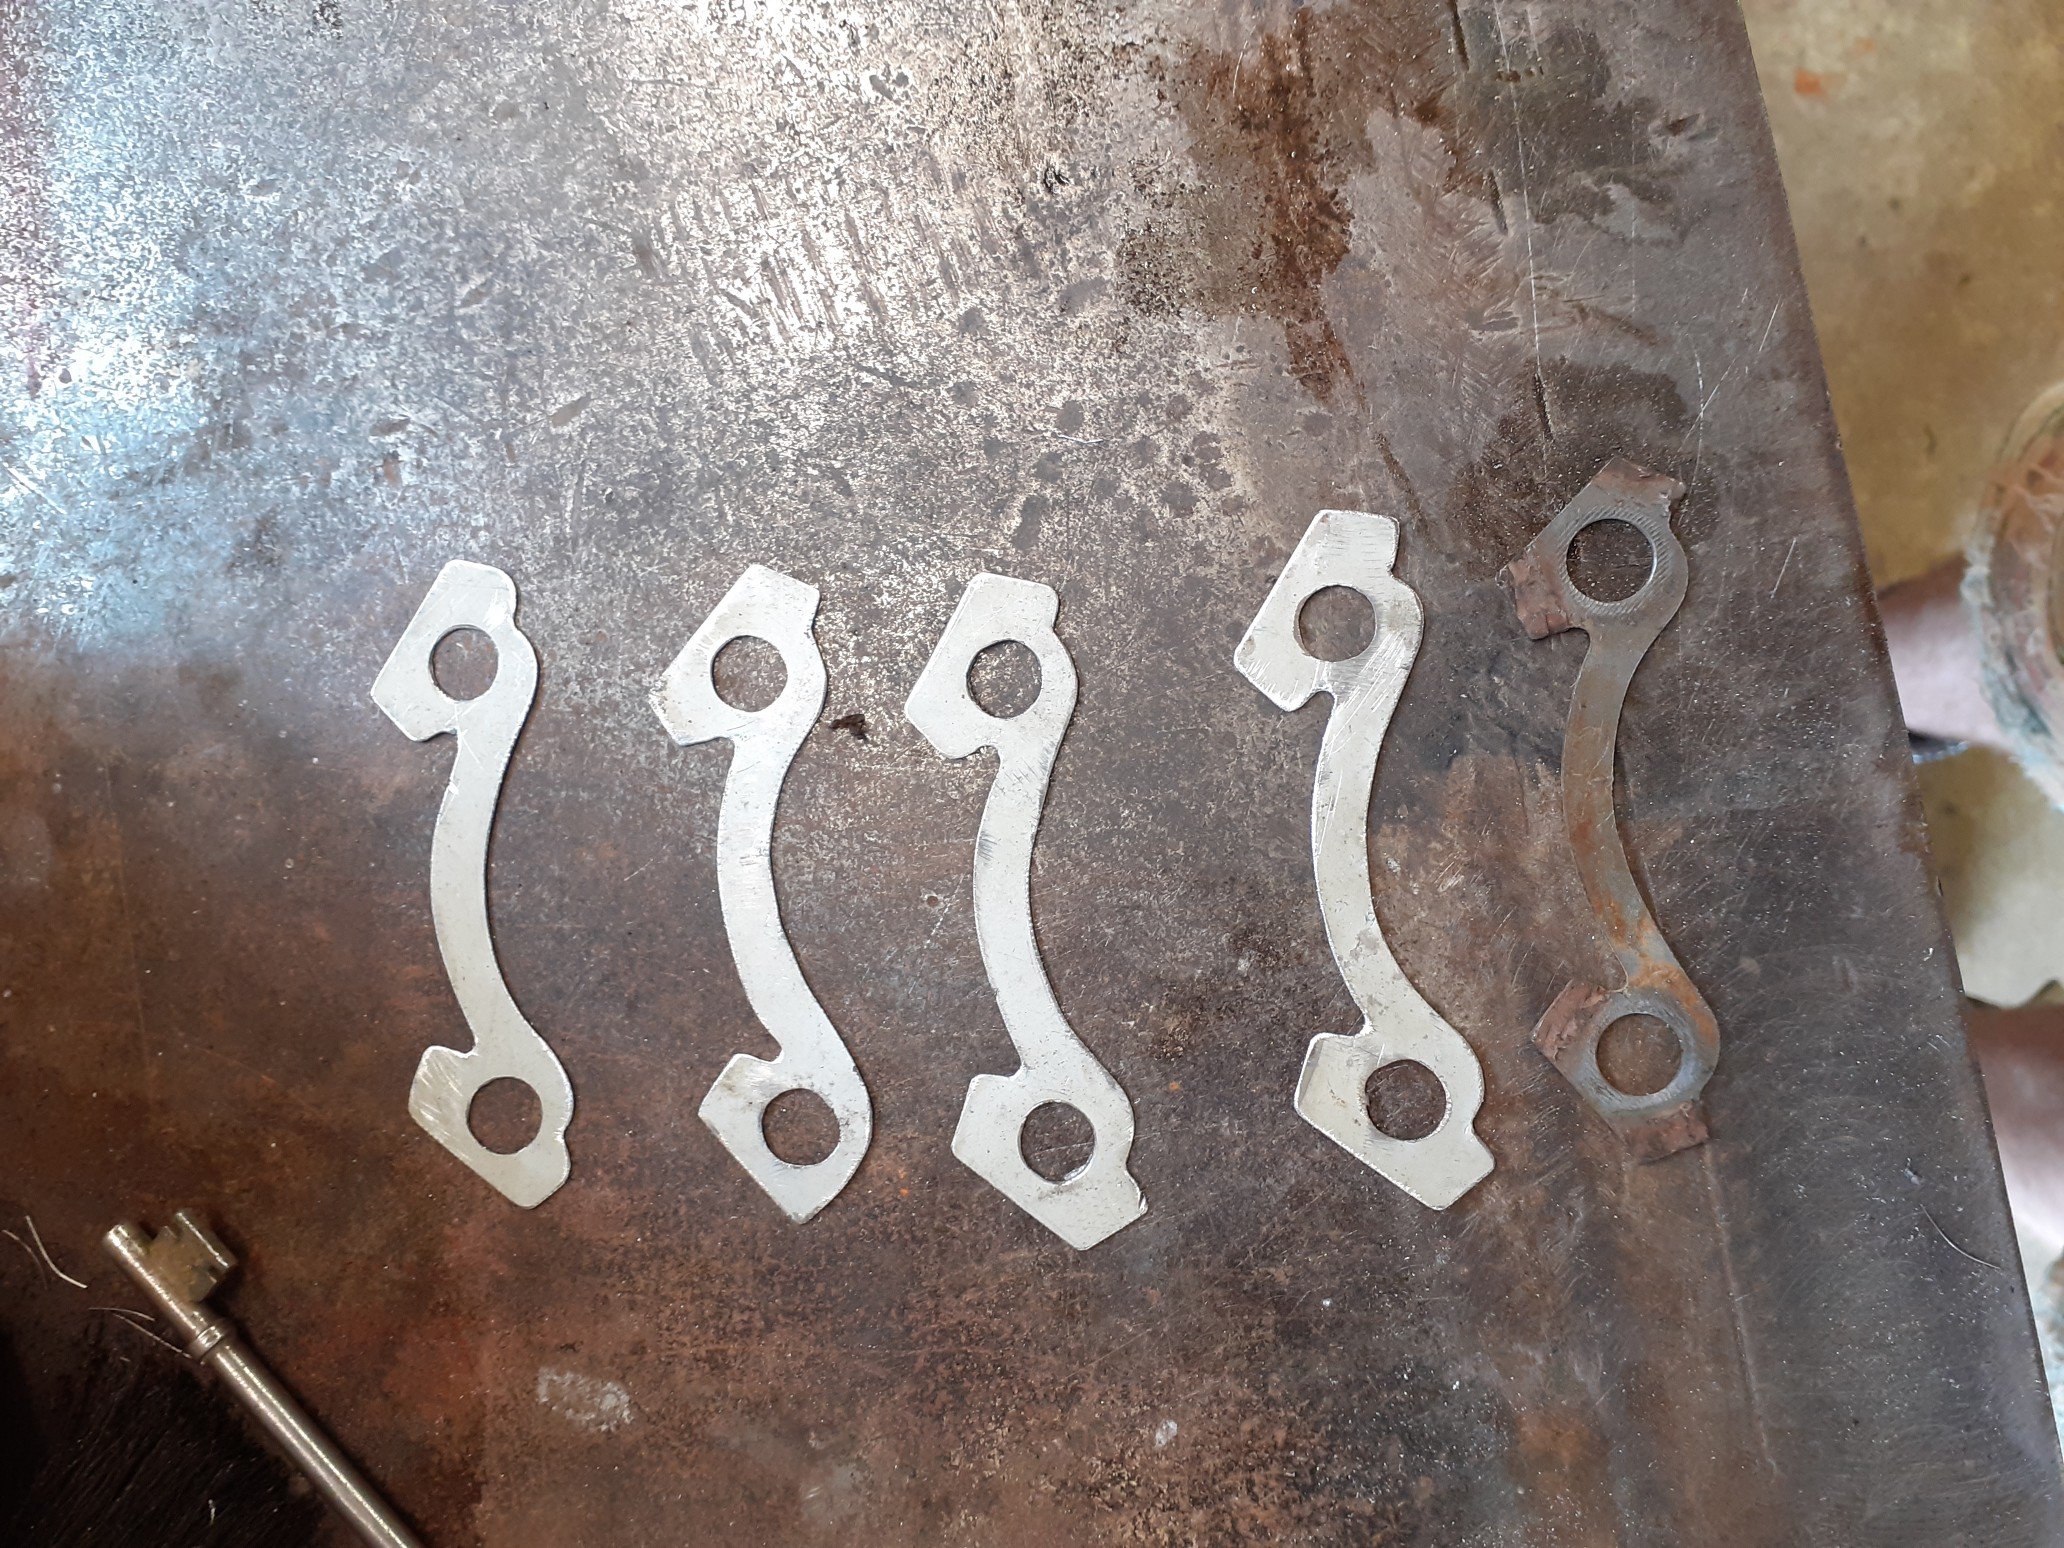
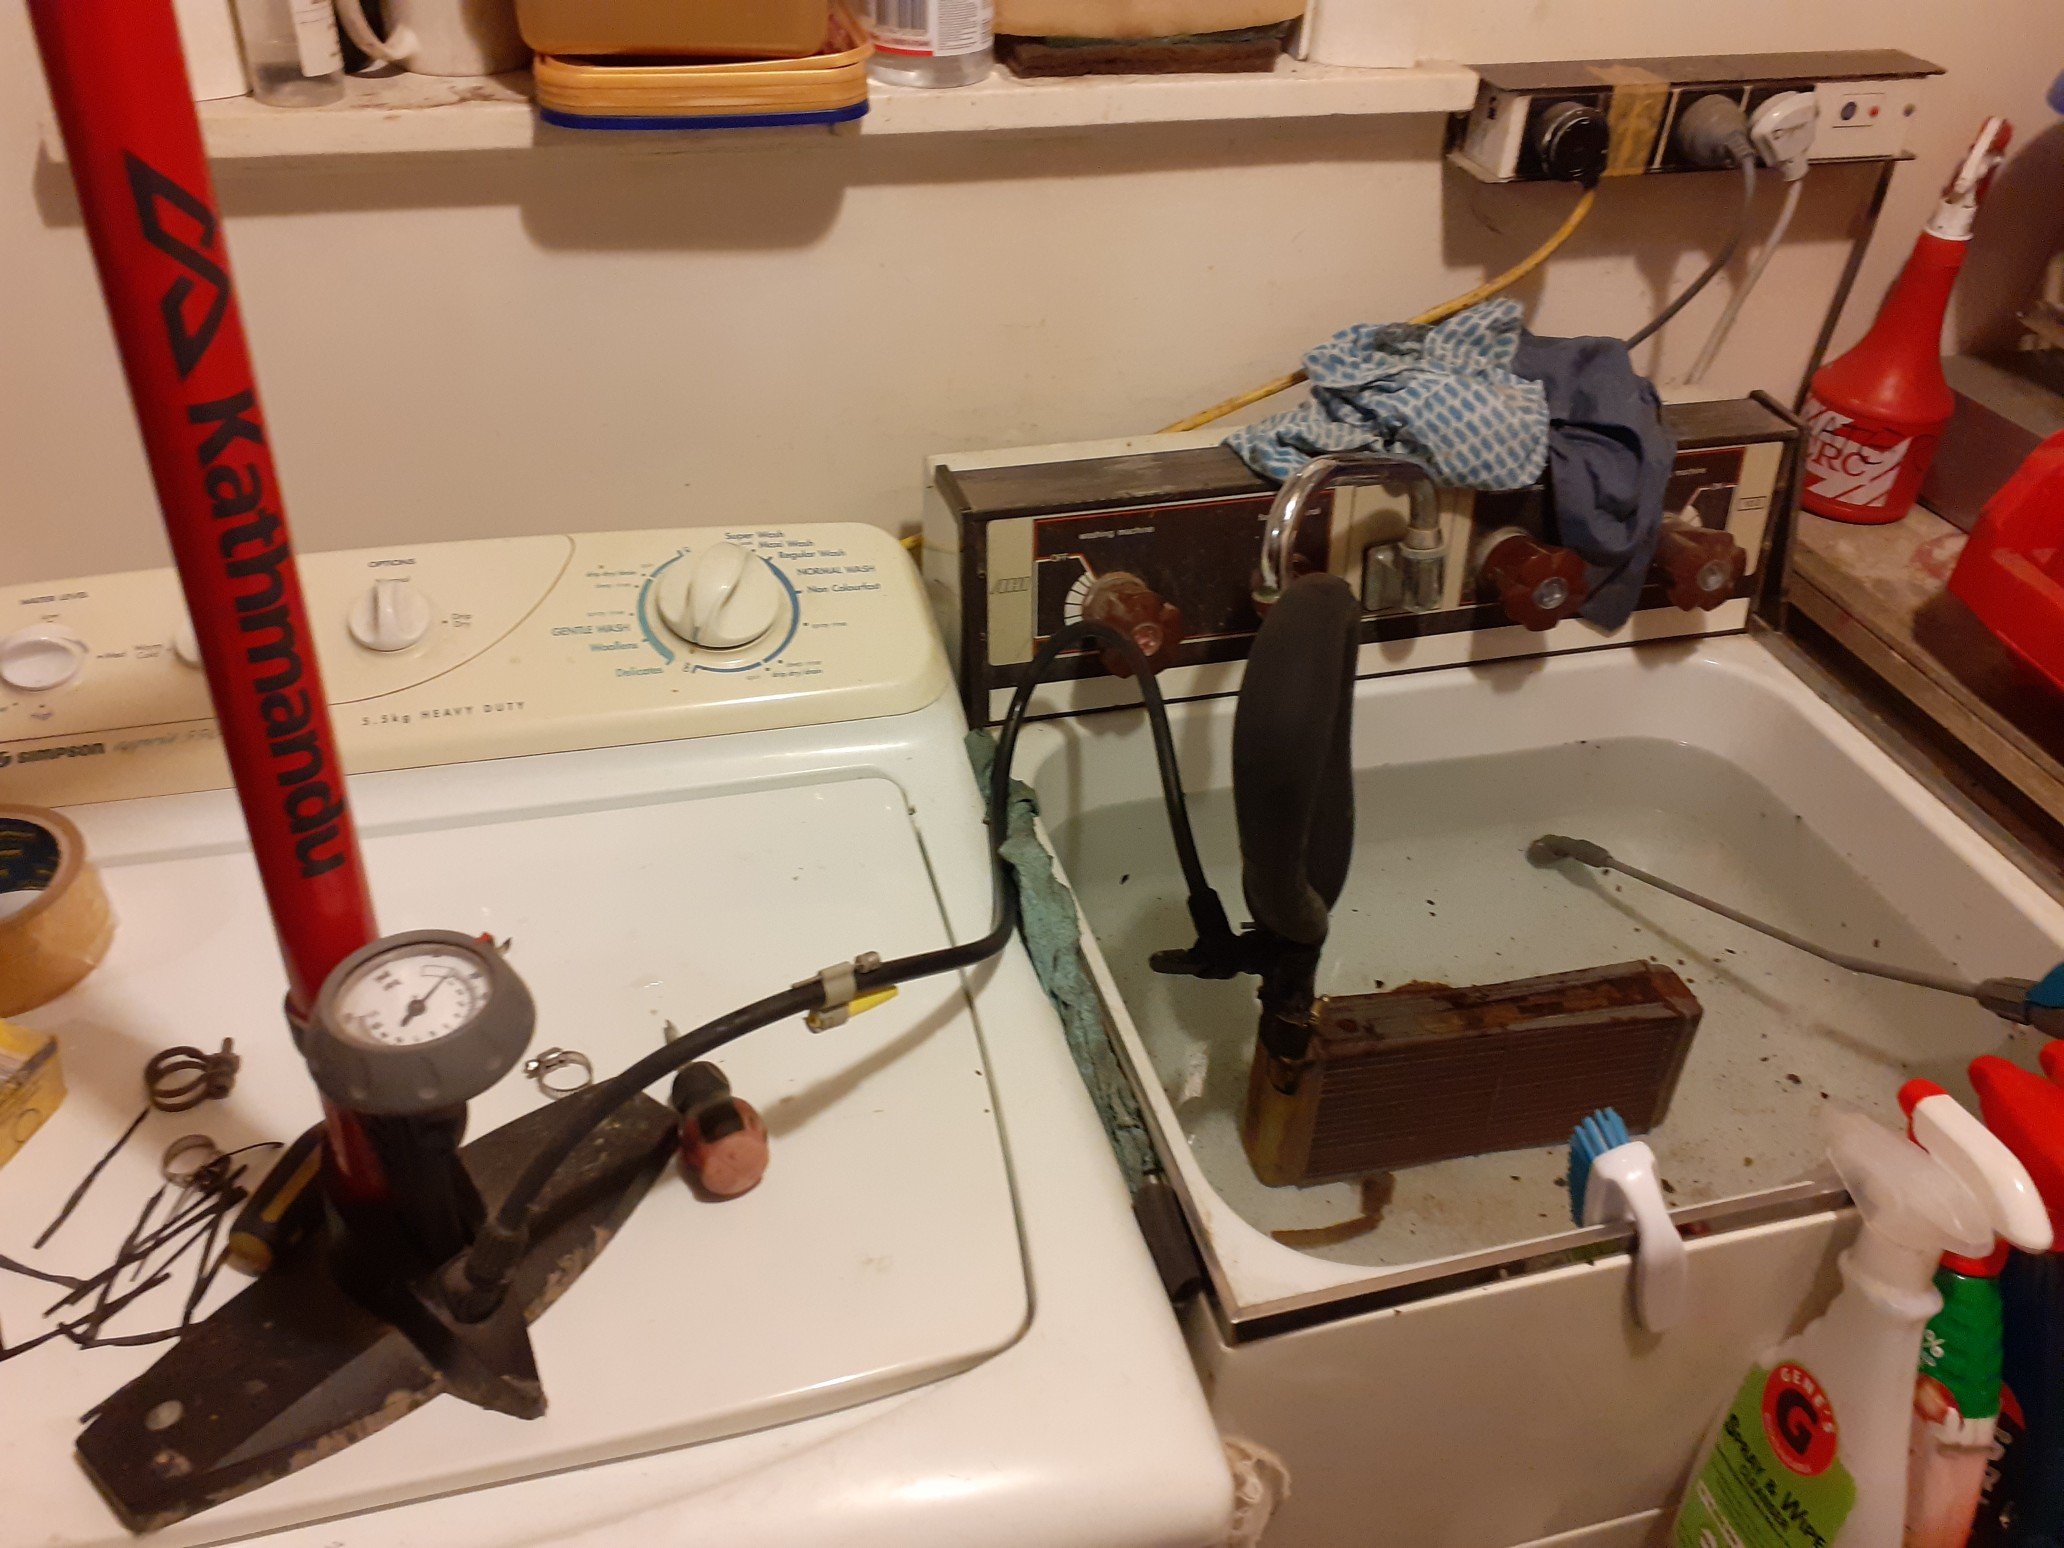
I ended up repairing the heater fan resister with a new board and 1 new pin. Tested the heater box core, had to straighten the pipe ends and fix 3 small holes. All reassembled. Have made a few odd parts as I go along such as new tab washers for the front hubs.
1 point
-
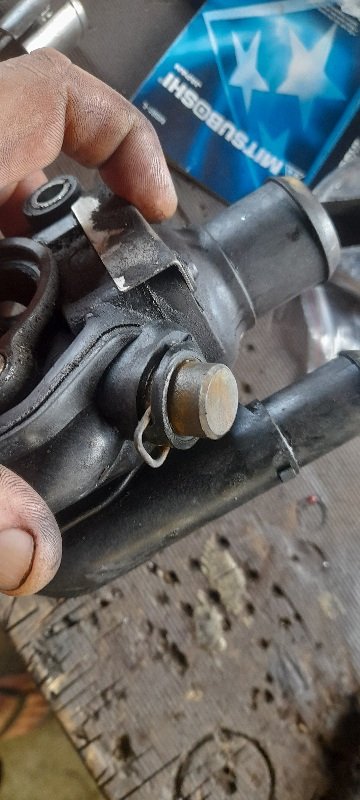
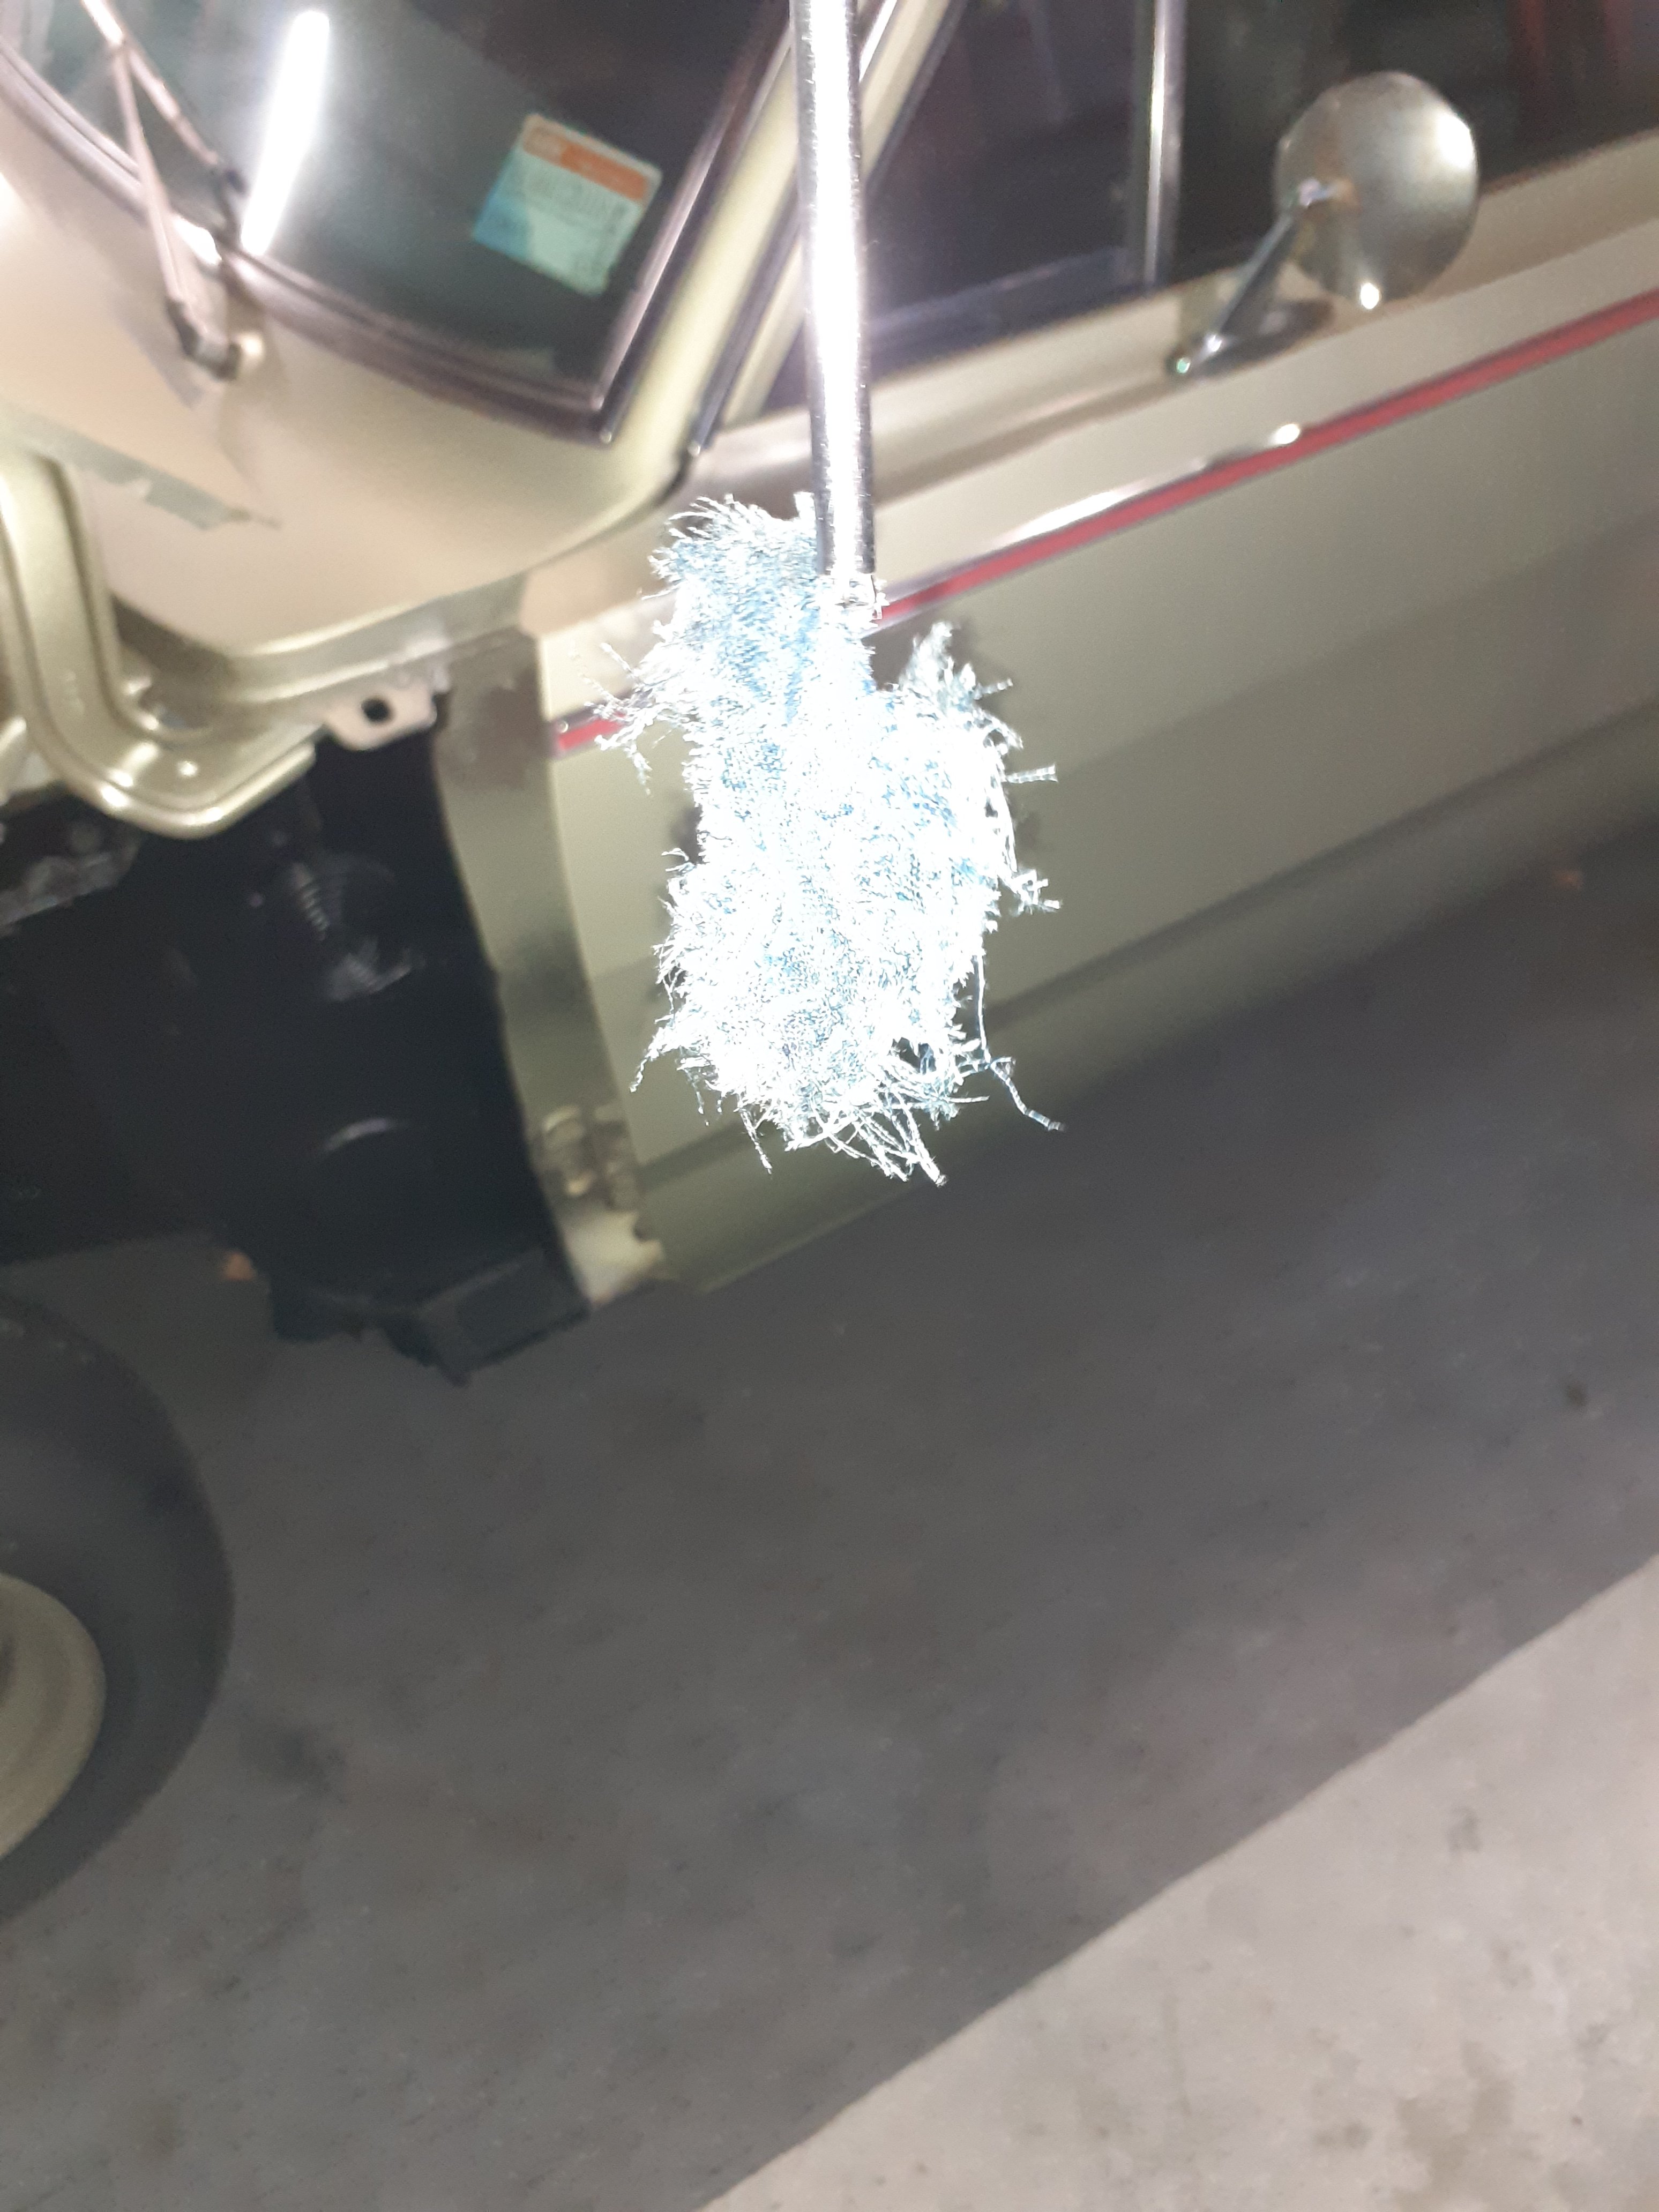
Had a bit of a cockup When I pulled the motor out of the white car and stored it, I put a rag in the dizzy hole to stop shit getting in there Being so long ago, I forgot how big it was I also forgot to remove it when I set the rockers It appears the oil pump drive went om nom nom on the rag . It was quite hard to get out and it was a bit chewed When I got it out there was one bit missing out of the rag that I could not find . I mucked around for ages with the vacuum down the dizzy hole and got a bit of fluff out I deemed getting the rag out to be an essential service so went to work and got my snake camera and grabby thing, found the offending bit of rag hiding in the sump next to the oil pump and did a doctor spec cottonectomy Phew
1 point


.thumb.jpeg.384ff72c8d2b0ee0d34a7bdedb55bdcf.jpeg)


This leaderboard is set to Auckland/GMT+12:00