
Leaderboard


Popular Content
Showing content with the highest reputation on 20/11/18 in all areas
-
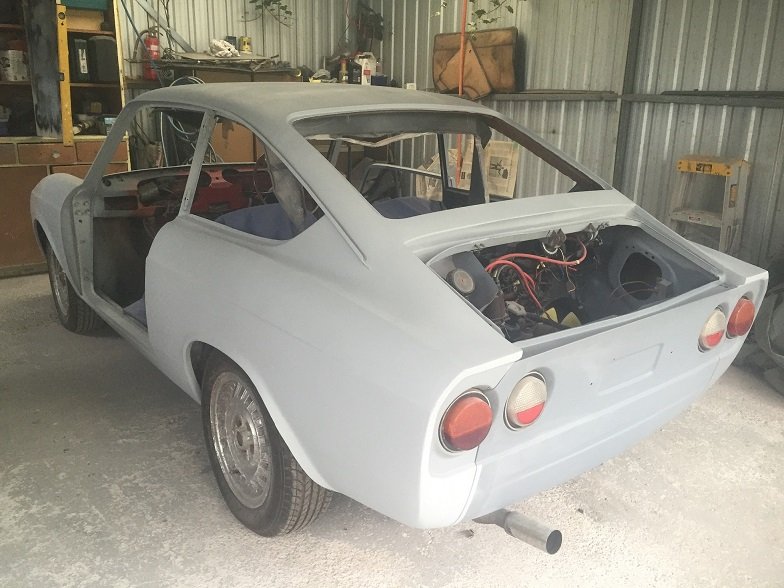
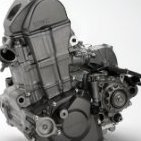
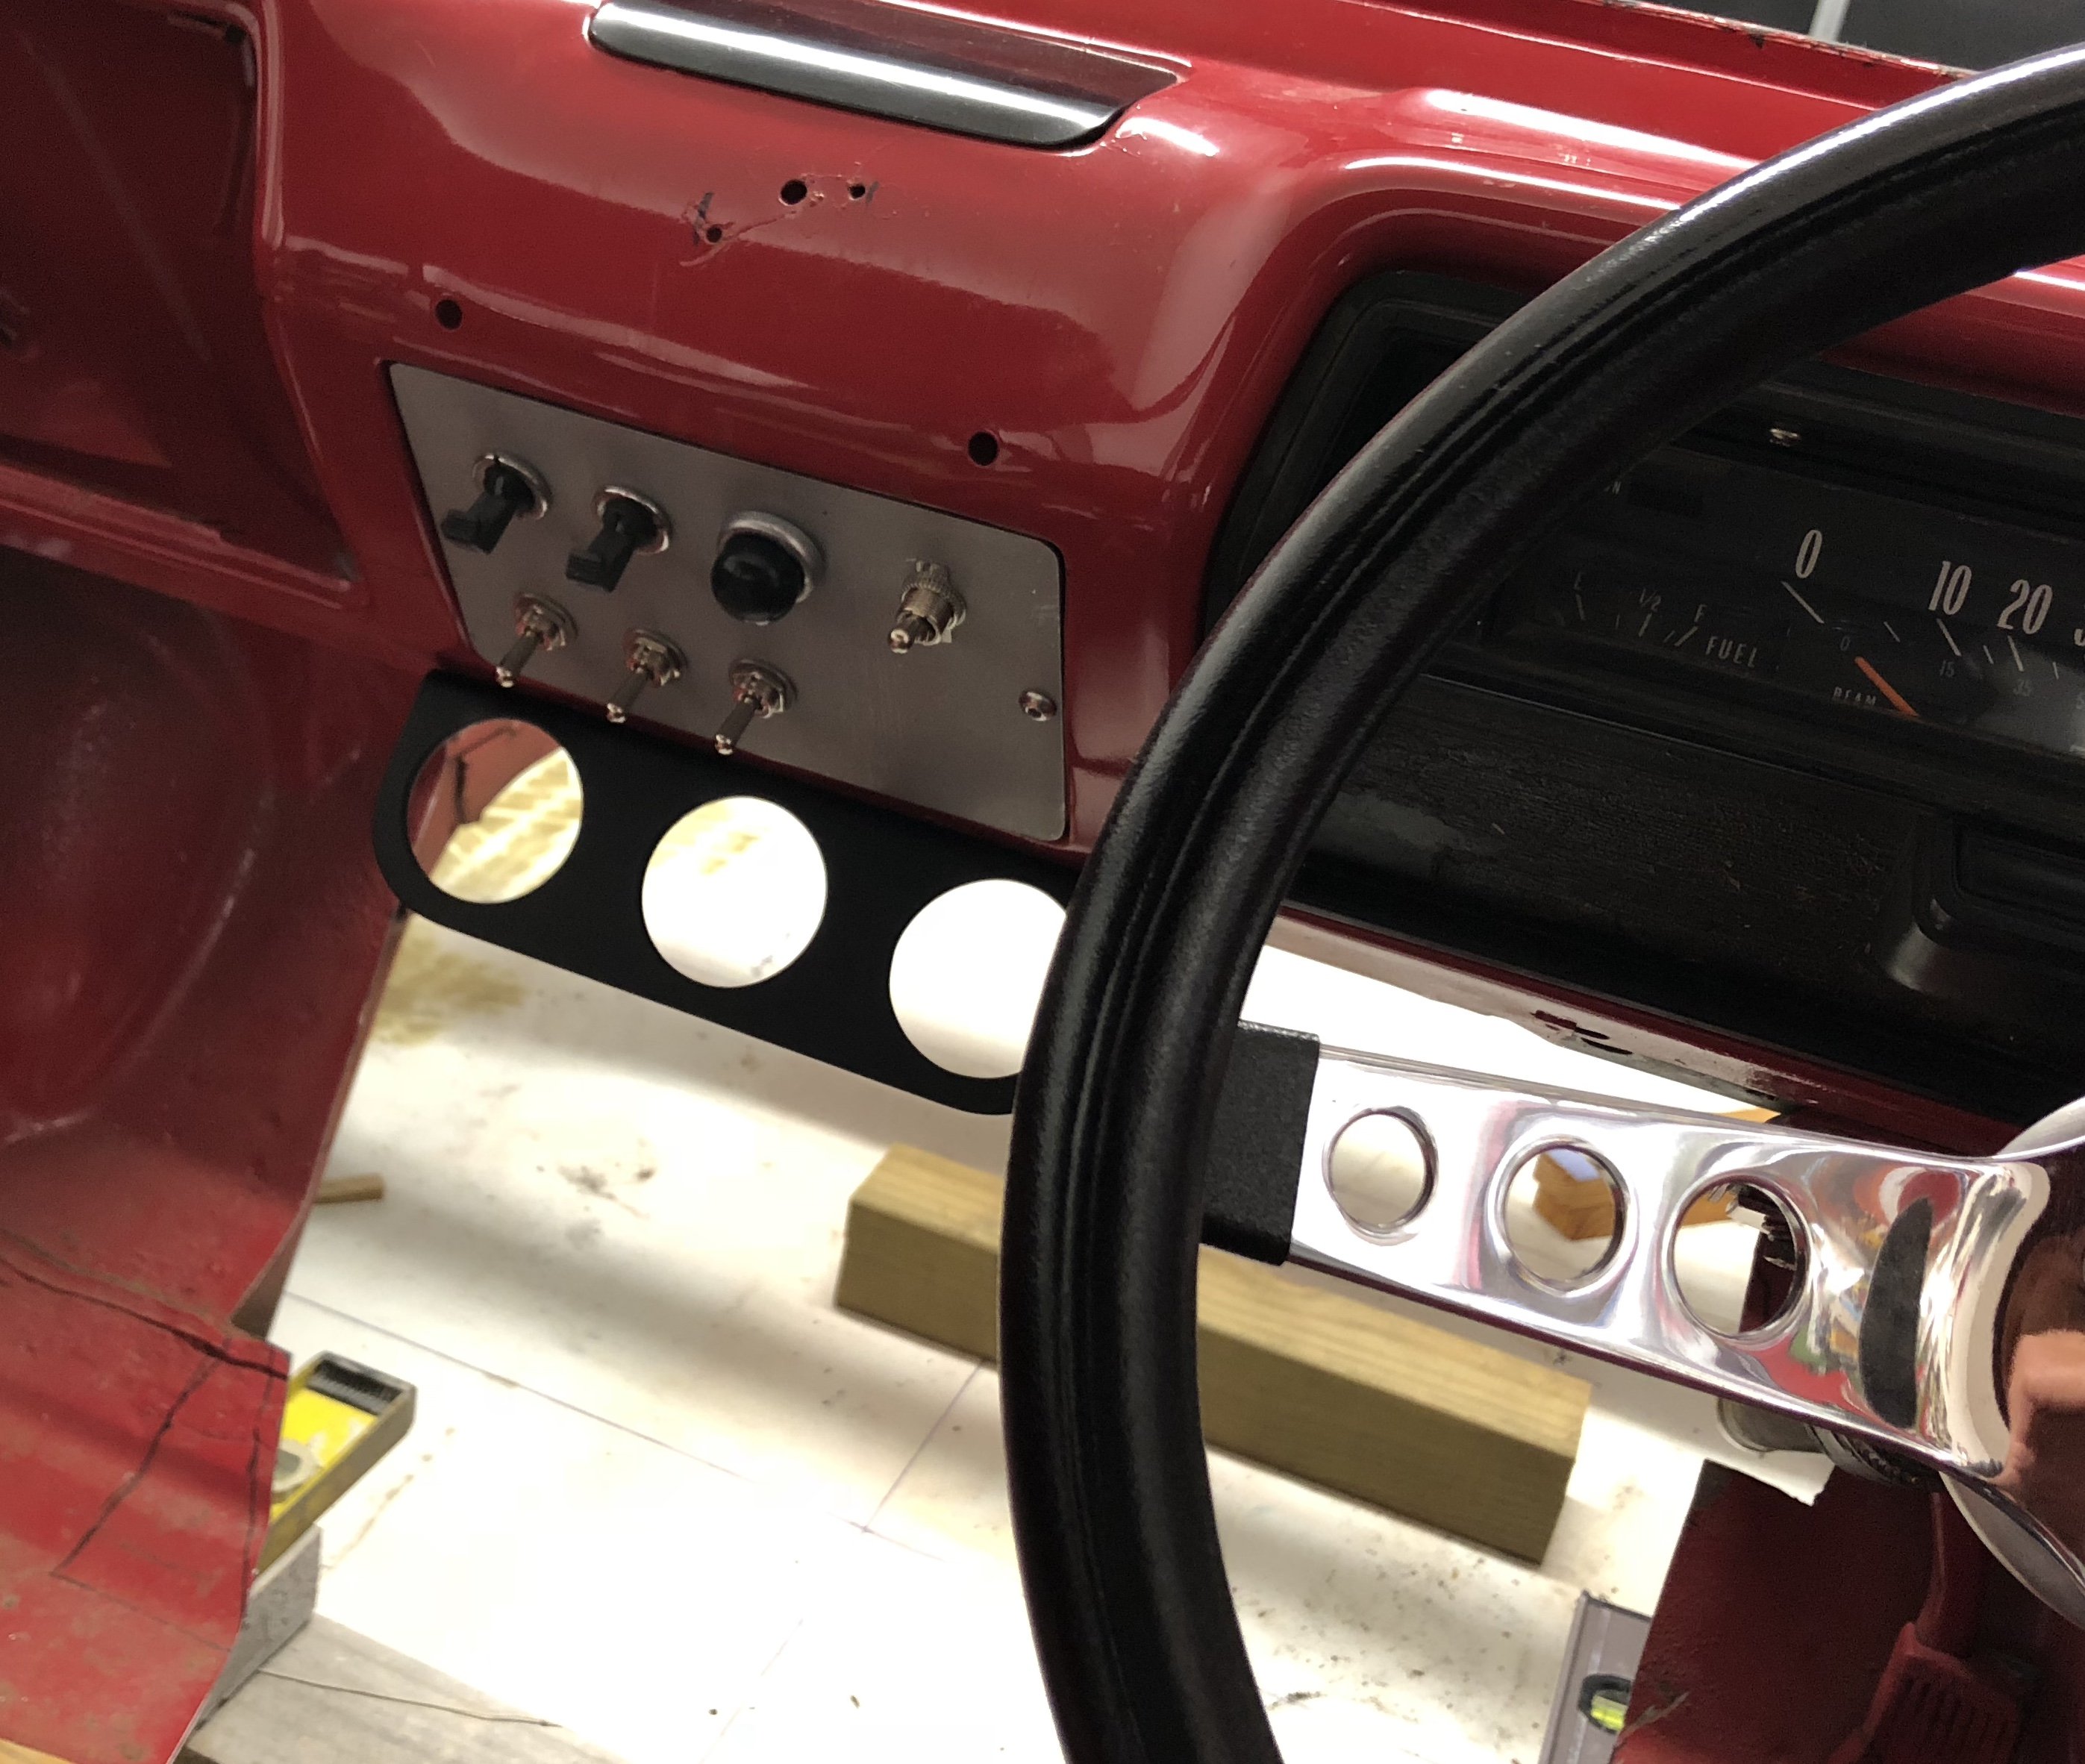
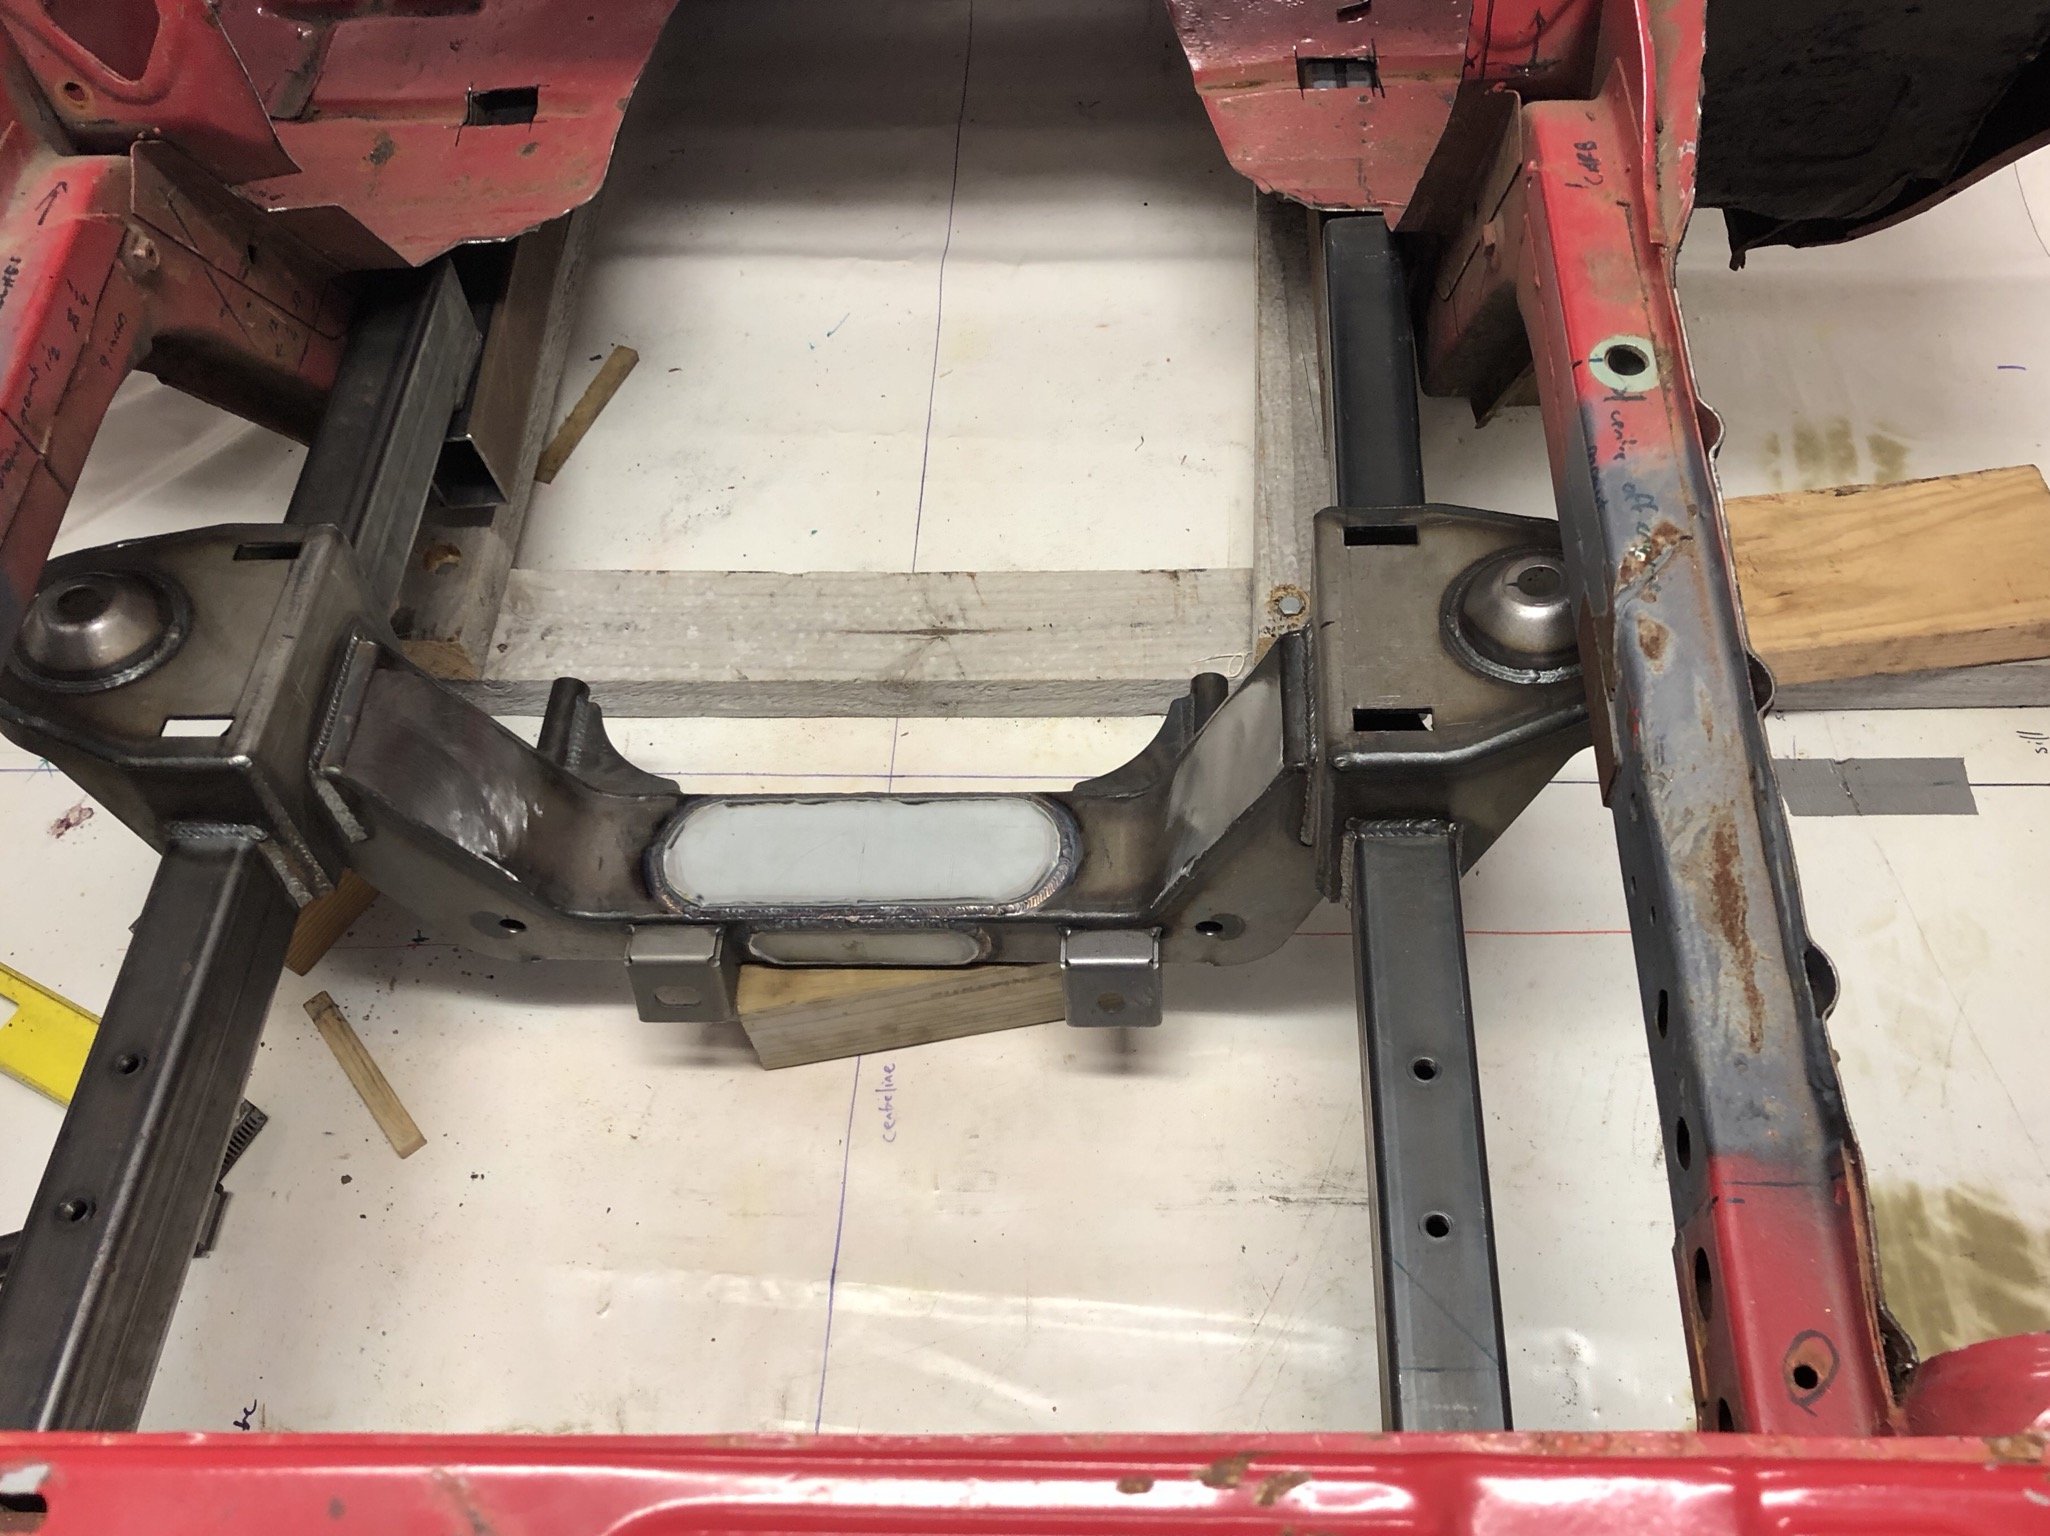
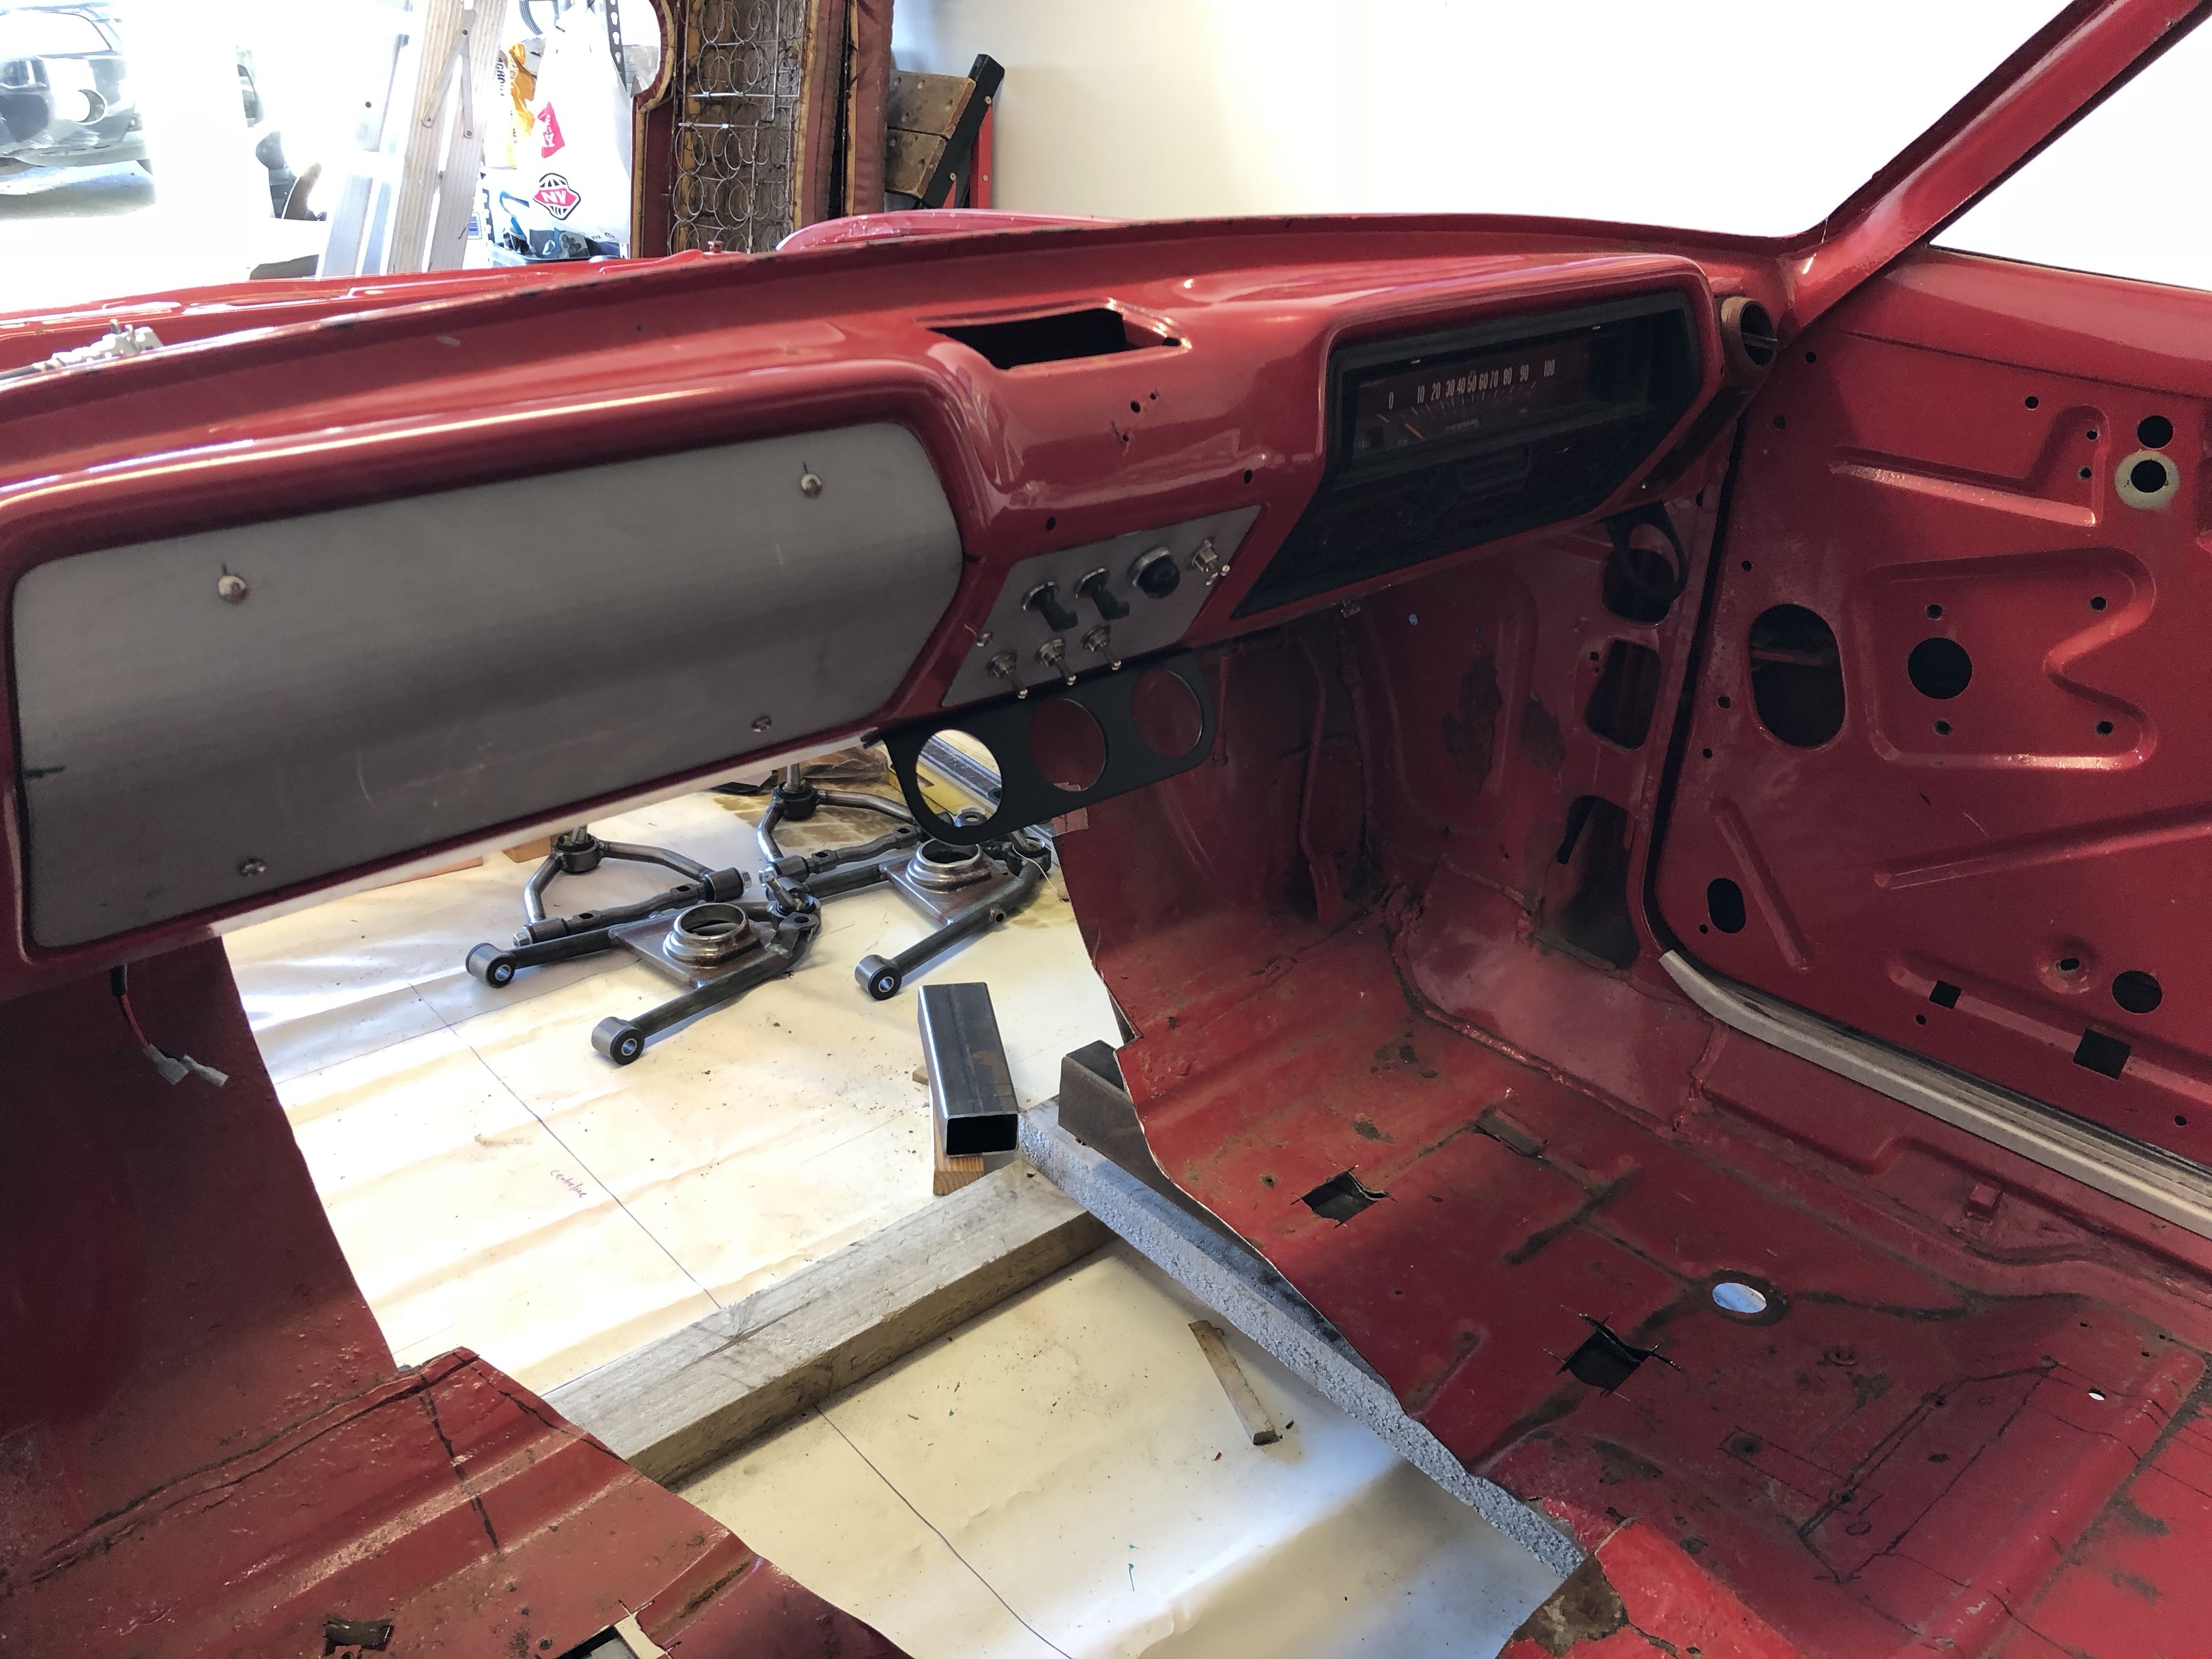
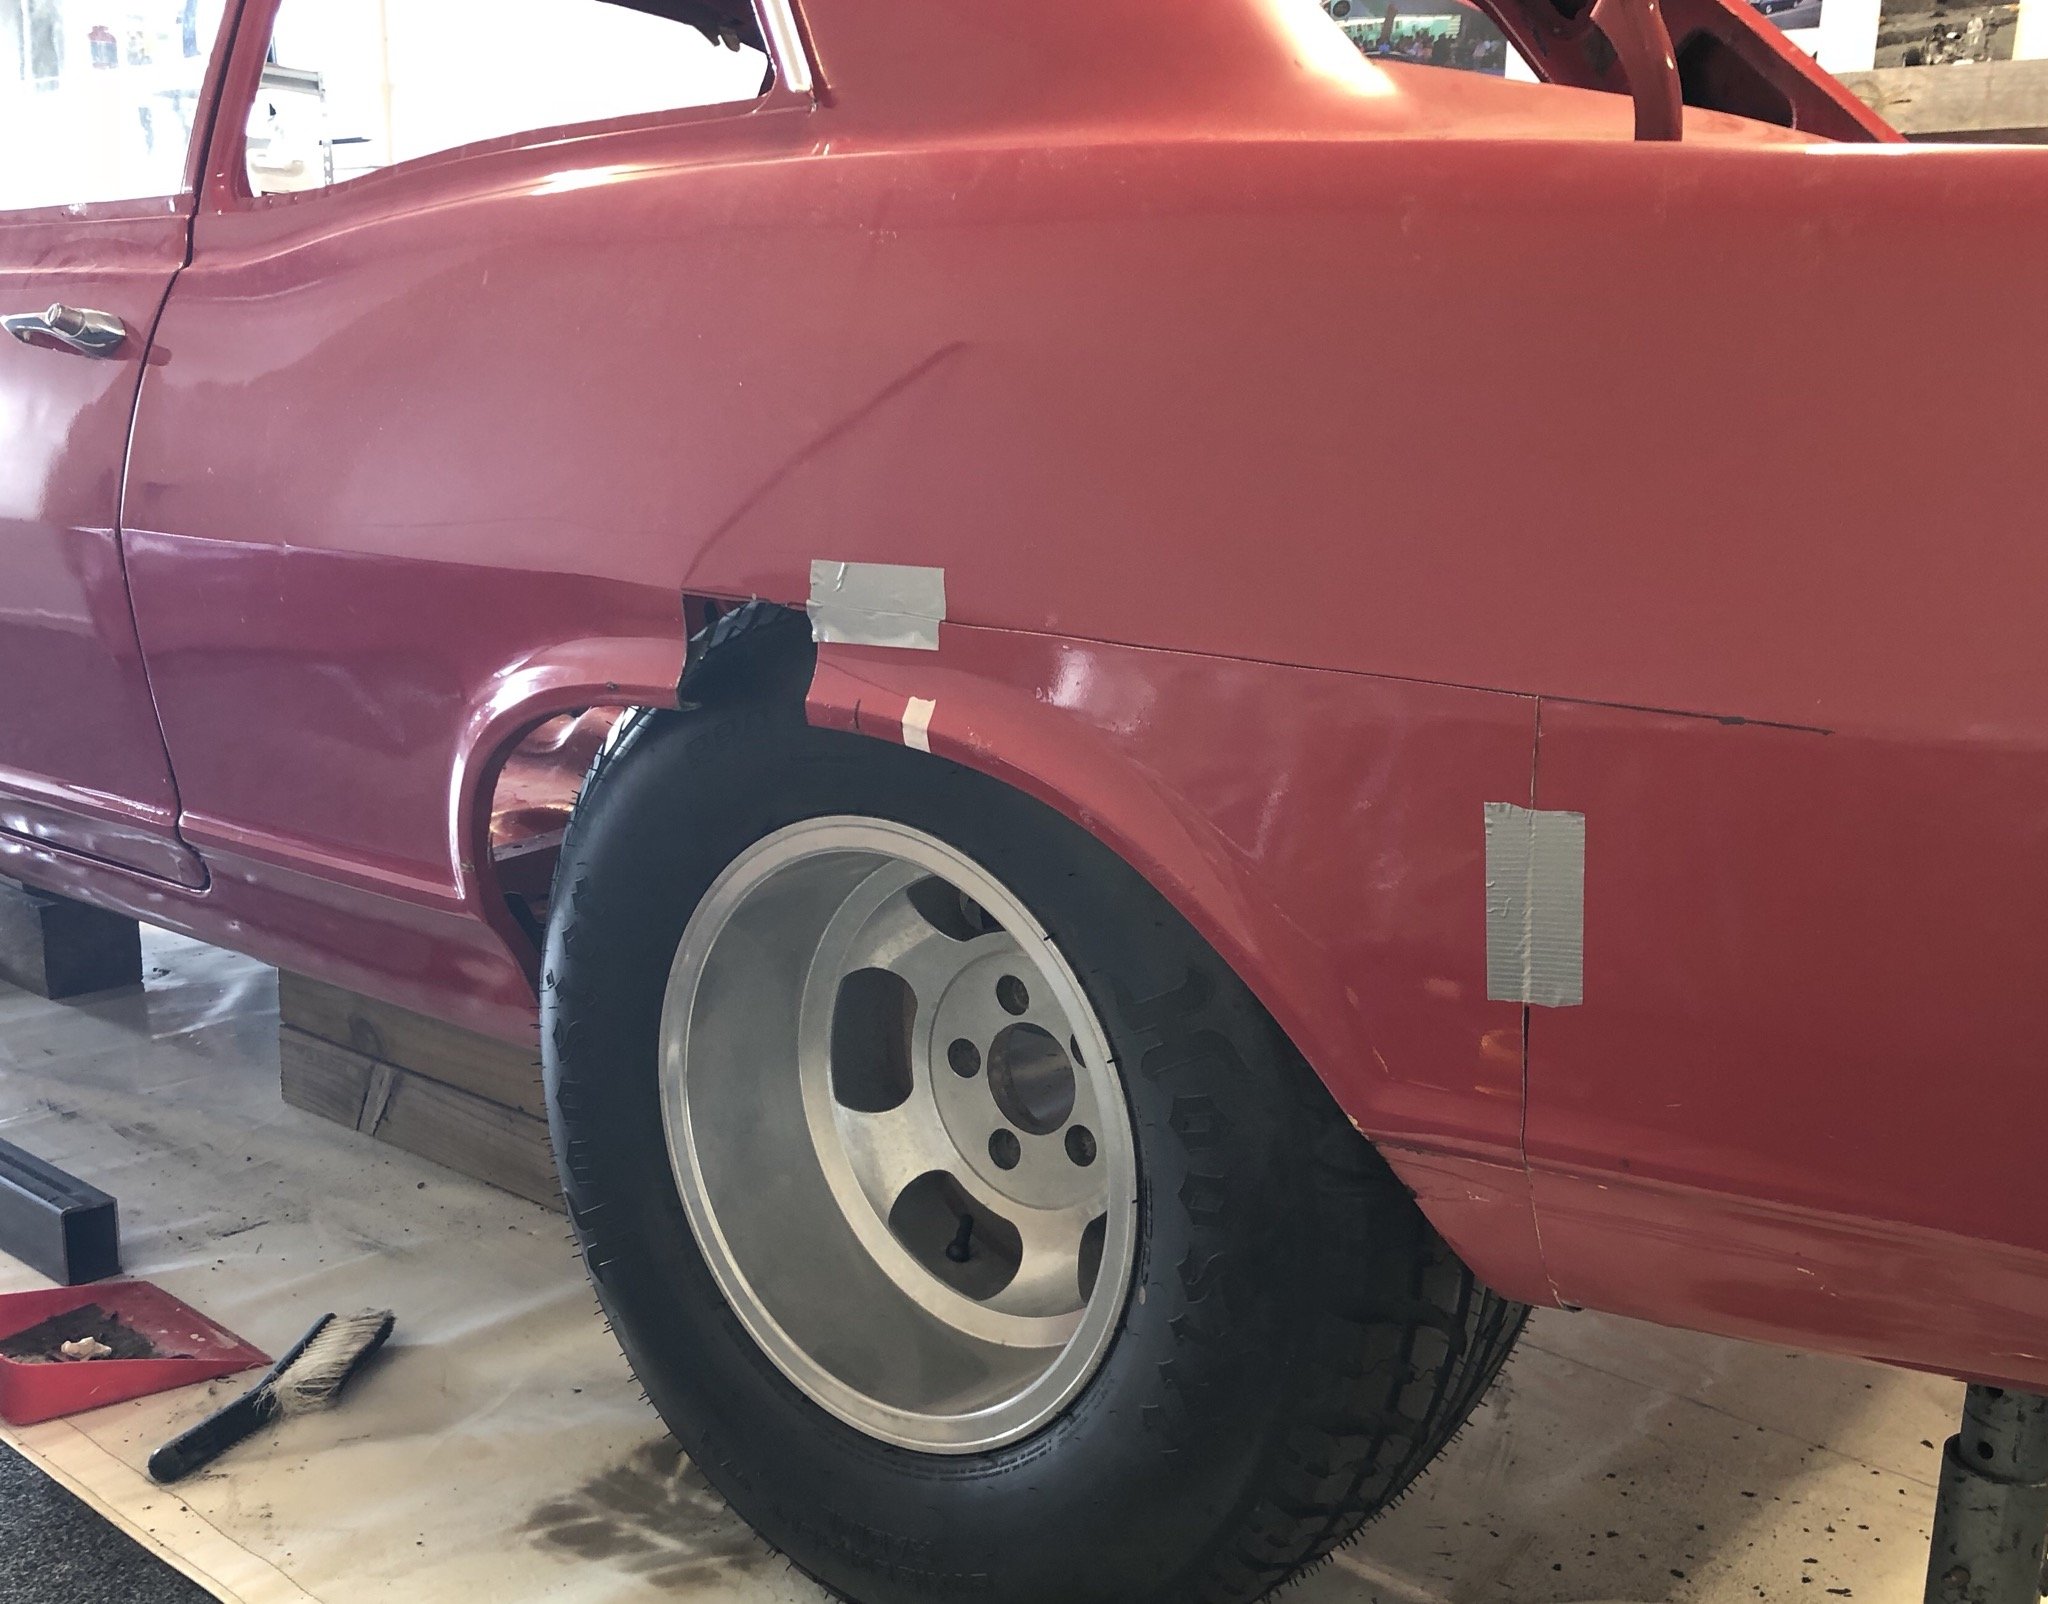
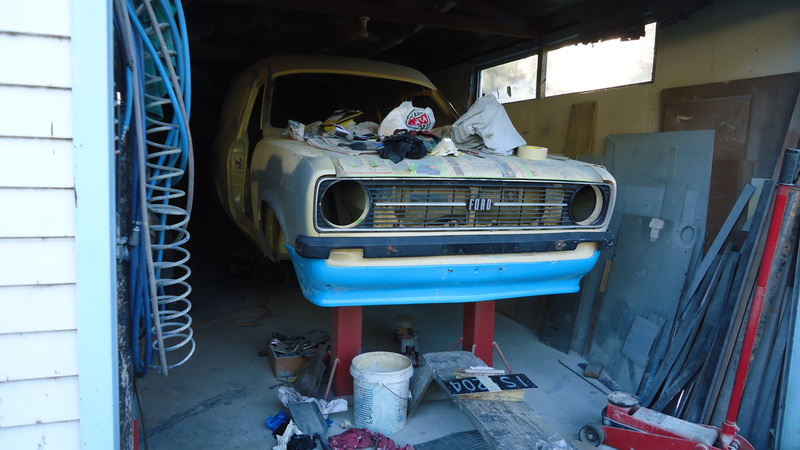
So time has finally come to find a place for my barely interesting, mildly entertaining diy thread. It is definitely old and I'm sure you have seen one dropping the kids off at school. Oldschool.co.nz it is. This car has slowly brought me back down to earth from my 'Big Plans' (What motorcycle engine?). Learning the basics outta my parents (now mine) garage and basically getting it back on the road. Born in 1968 she managed to escape the city grind and found her way to NZ shores, finally residing in Wellington and for many moons sitting in Continental Cars as a parts shelf, then up to find a comfy tarp to rest under plus get a healthy dose of fresh salt air in Waikanae. After convincing the elderly lady to relinquish it I began about slowly restoring it. (Learning as I went of course). Before I owned it anything further forward of the windscreen was chopped and shaped, suspension included. I'll post more about this further down the track. I'll post an original front so you get the idea. Annnd away we go.... Original front: Any Q's get at me
 13 points
 -
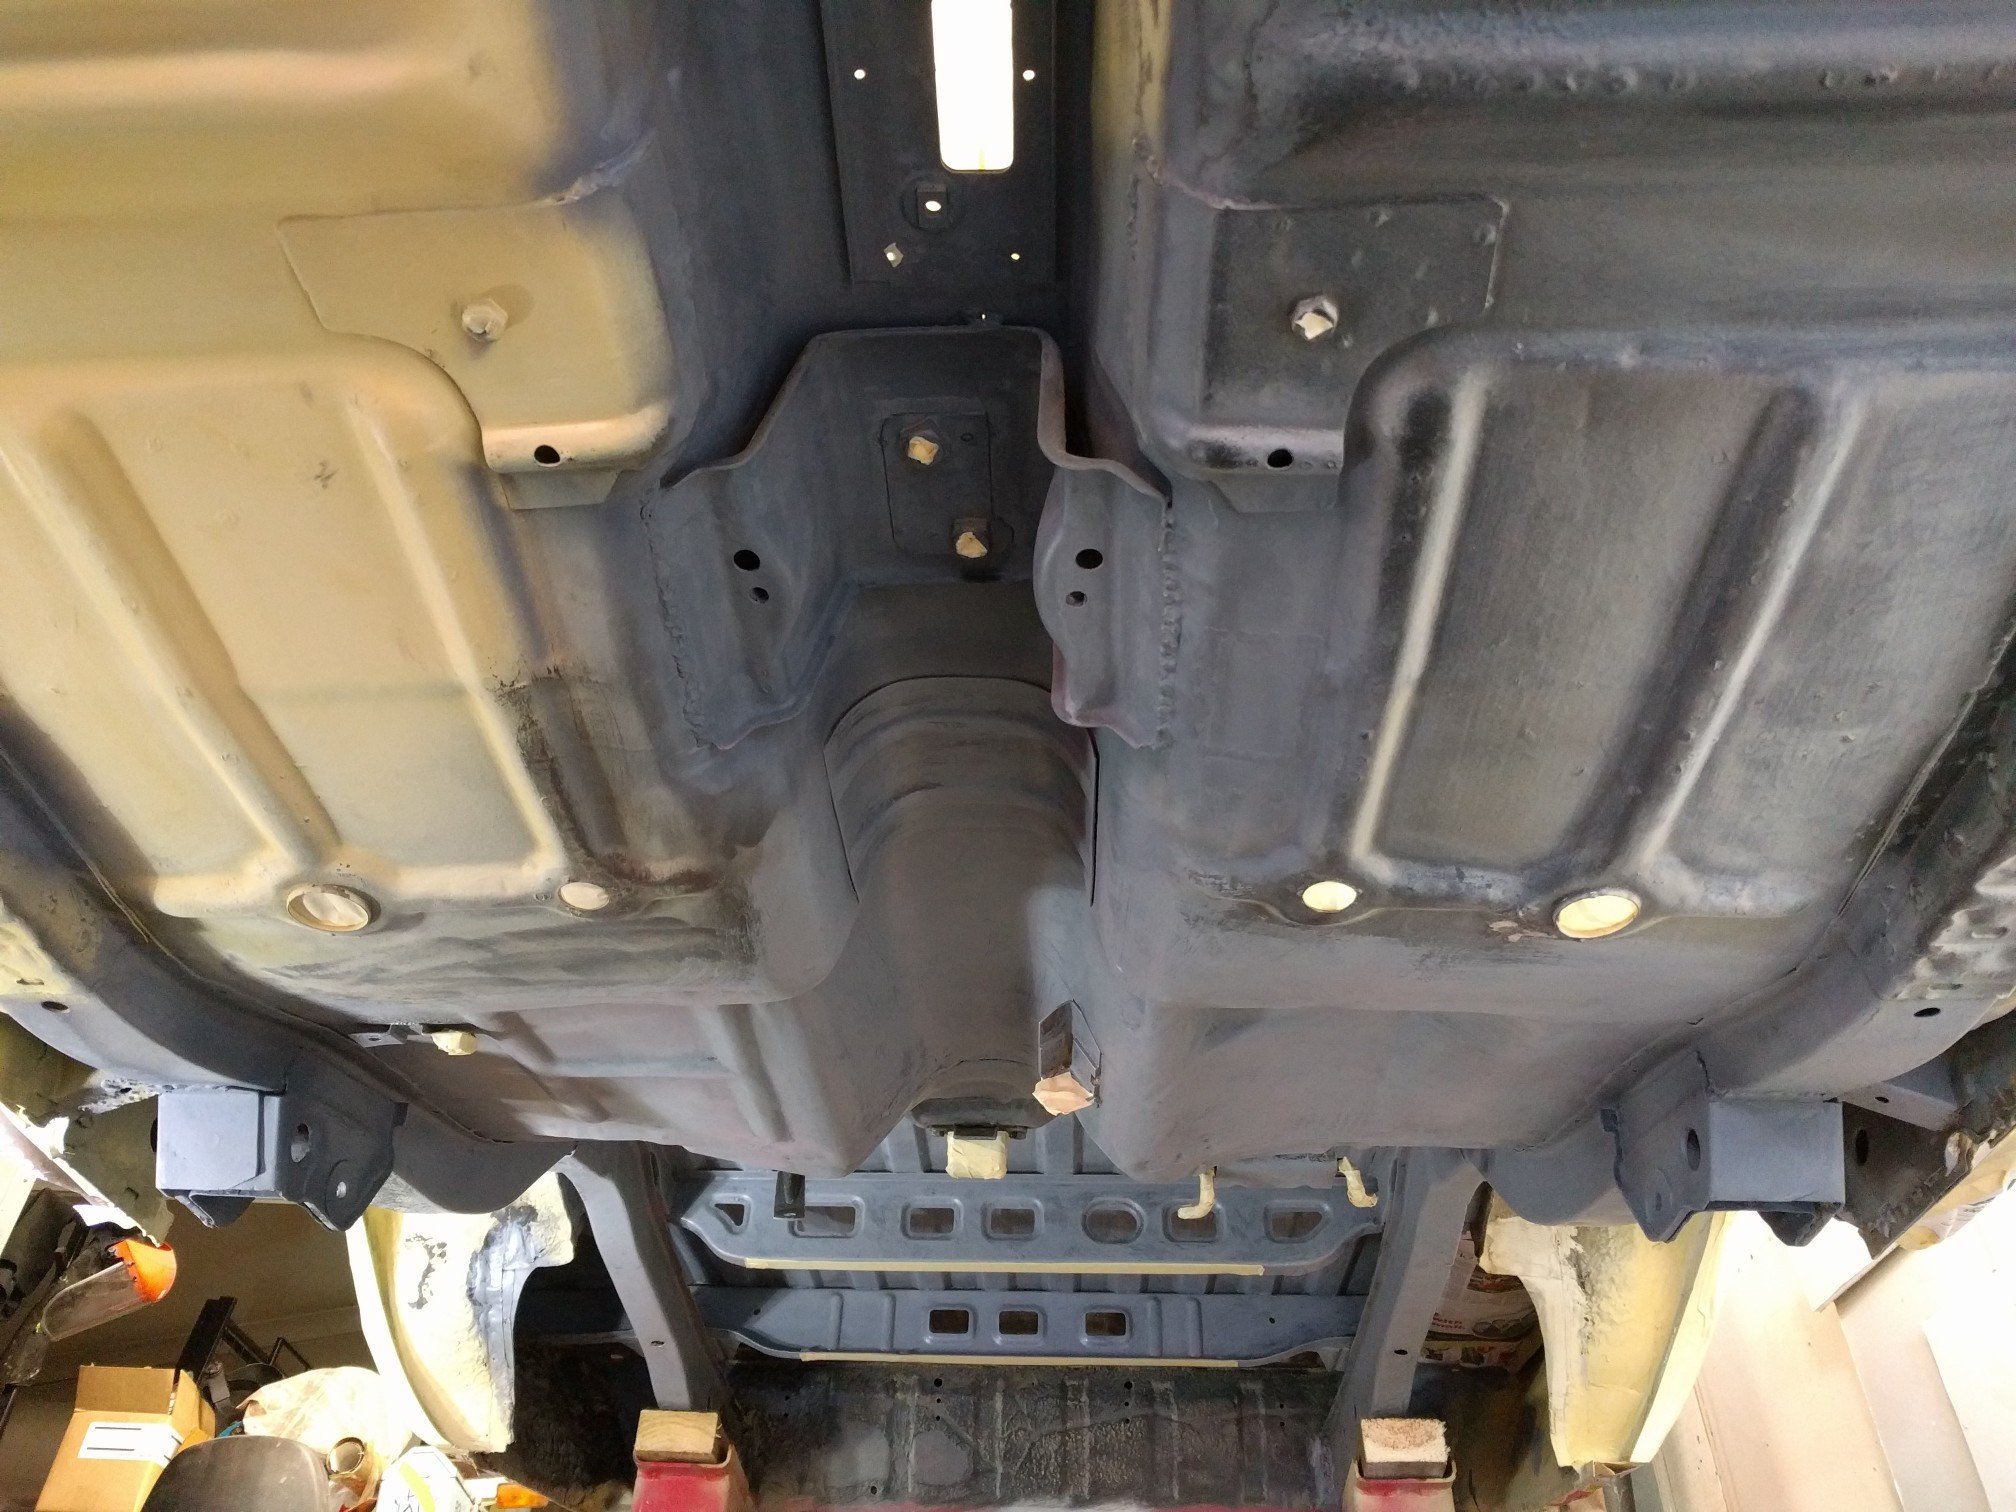
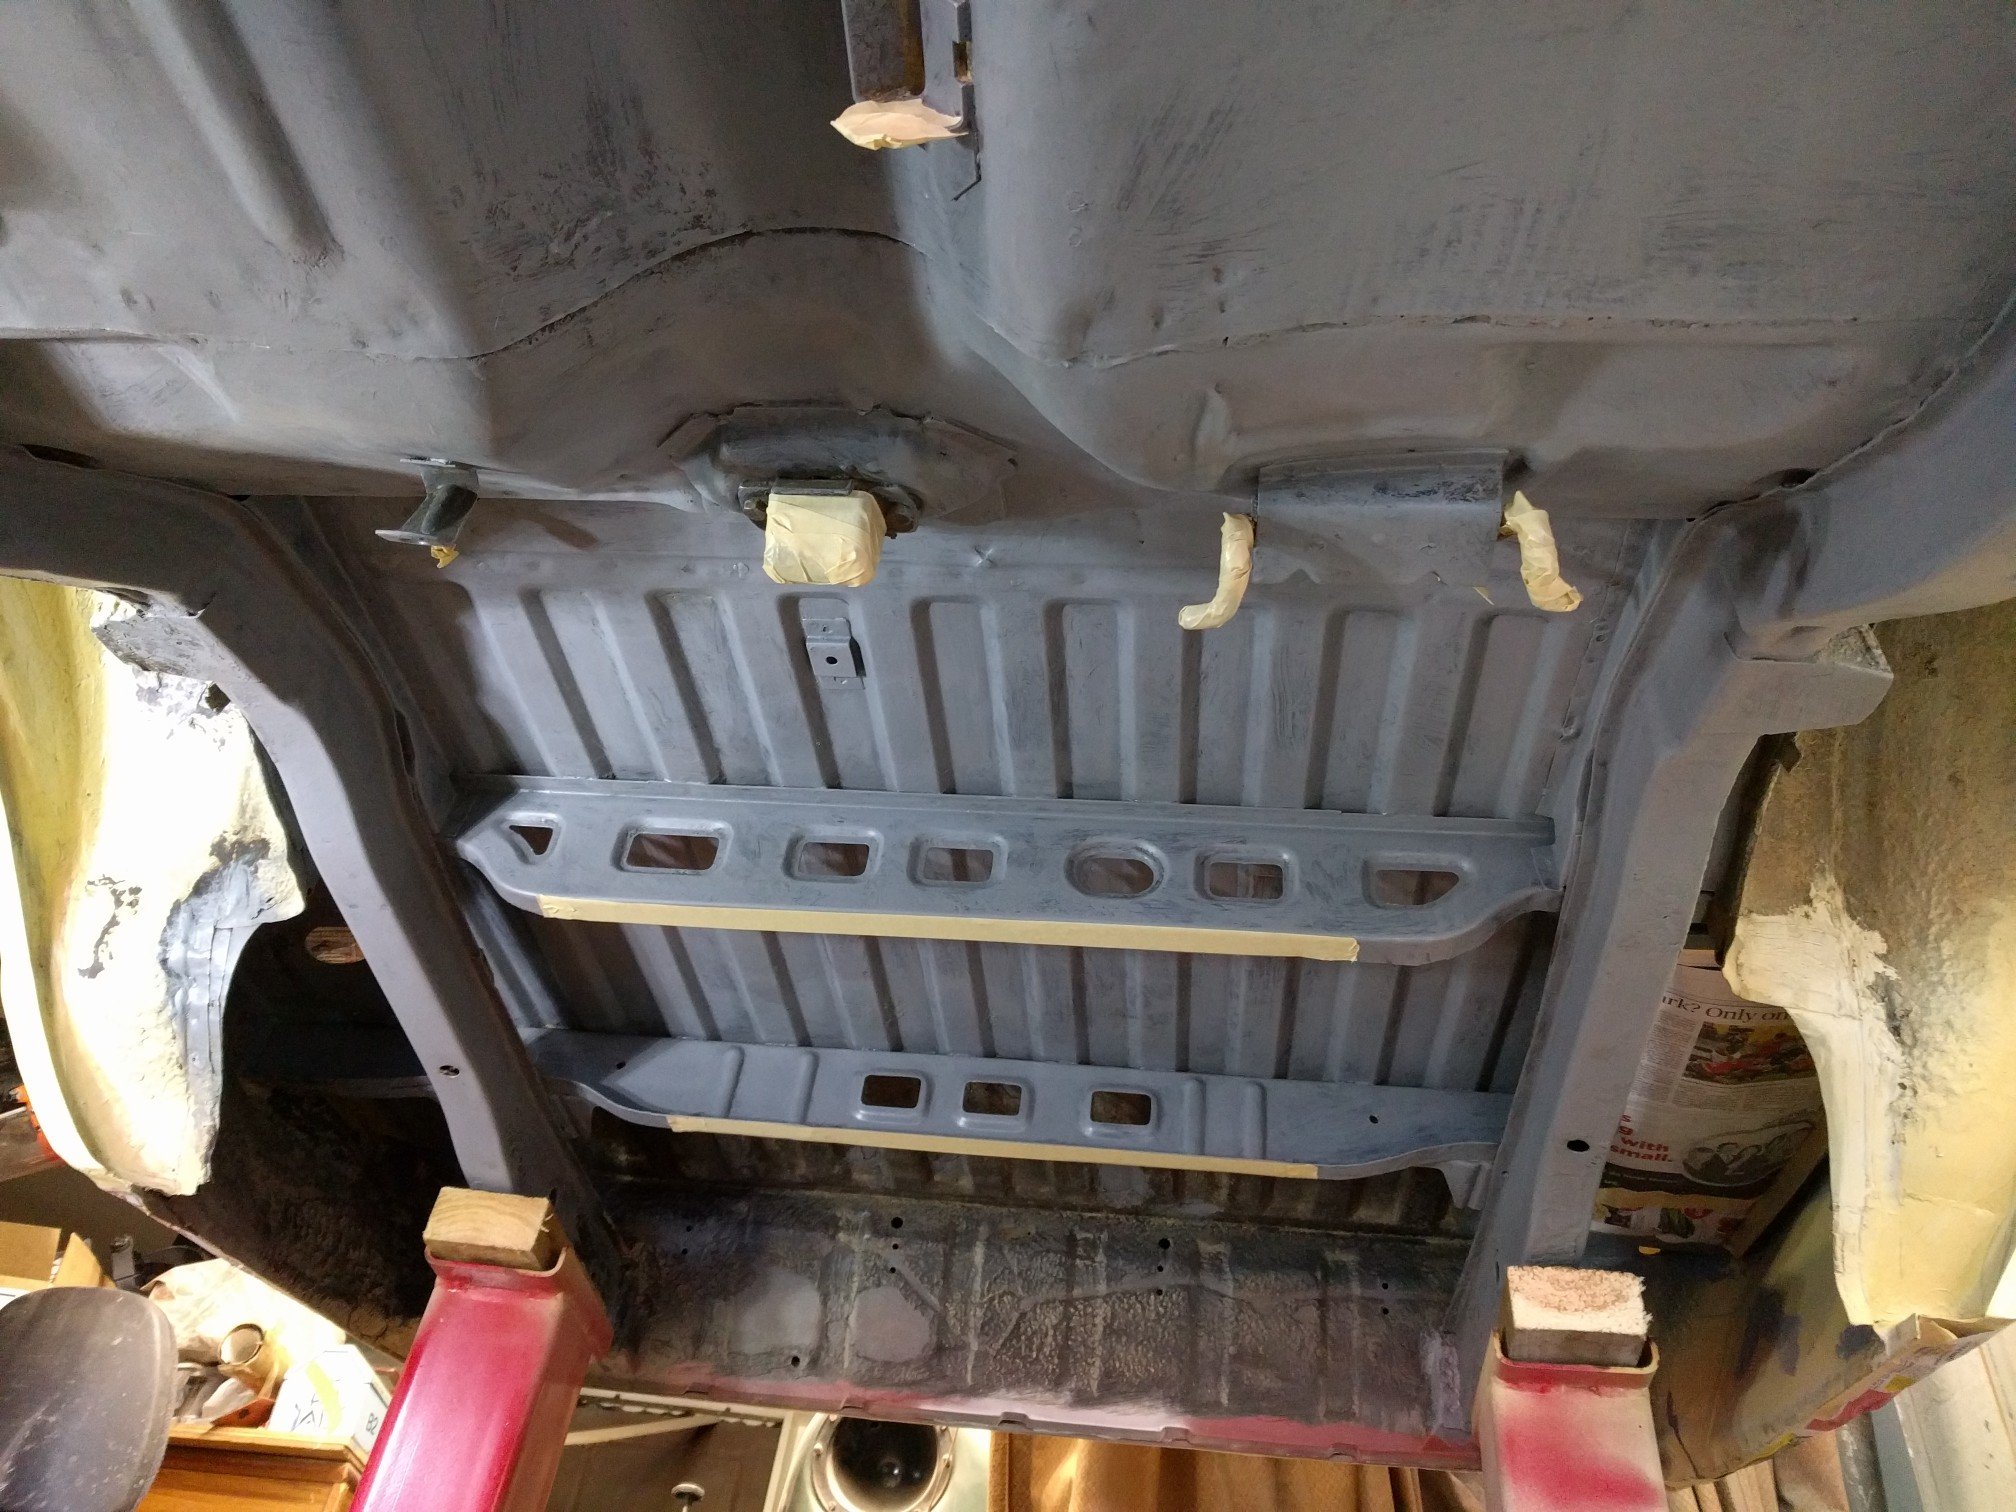
I scrubbed the underside, etched the bare metal and 2k primed the keyed areas a couple months ago. Managed to underseal 90% of it last night. Once I have finished making the appropriate alterations to the inner guard, I'll spray those and the front chassis. Not much fun with only axle stands for height. Mentally it's a good step towards getting finished. I'll fix up any bare areas later on though.
9 points
-
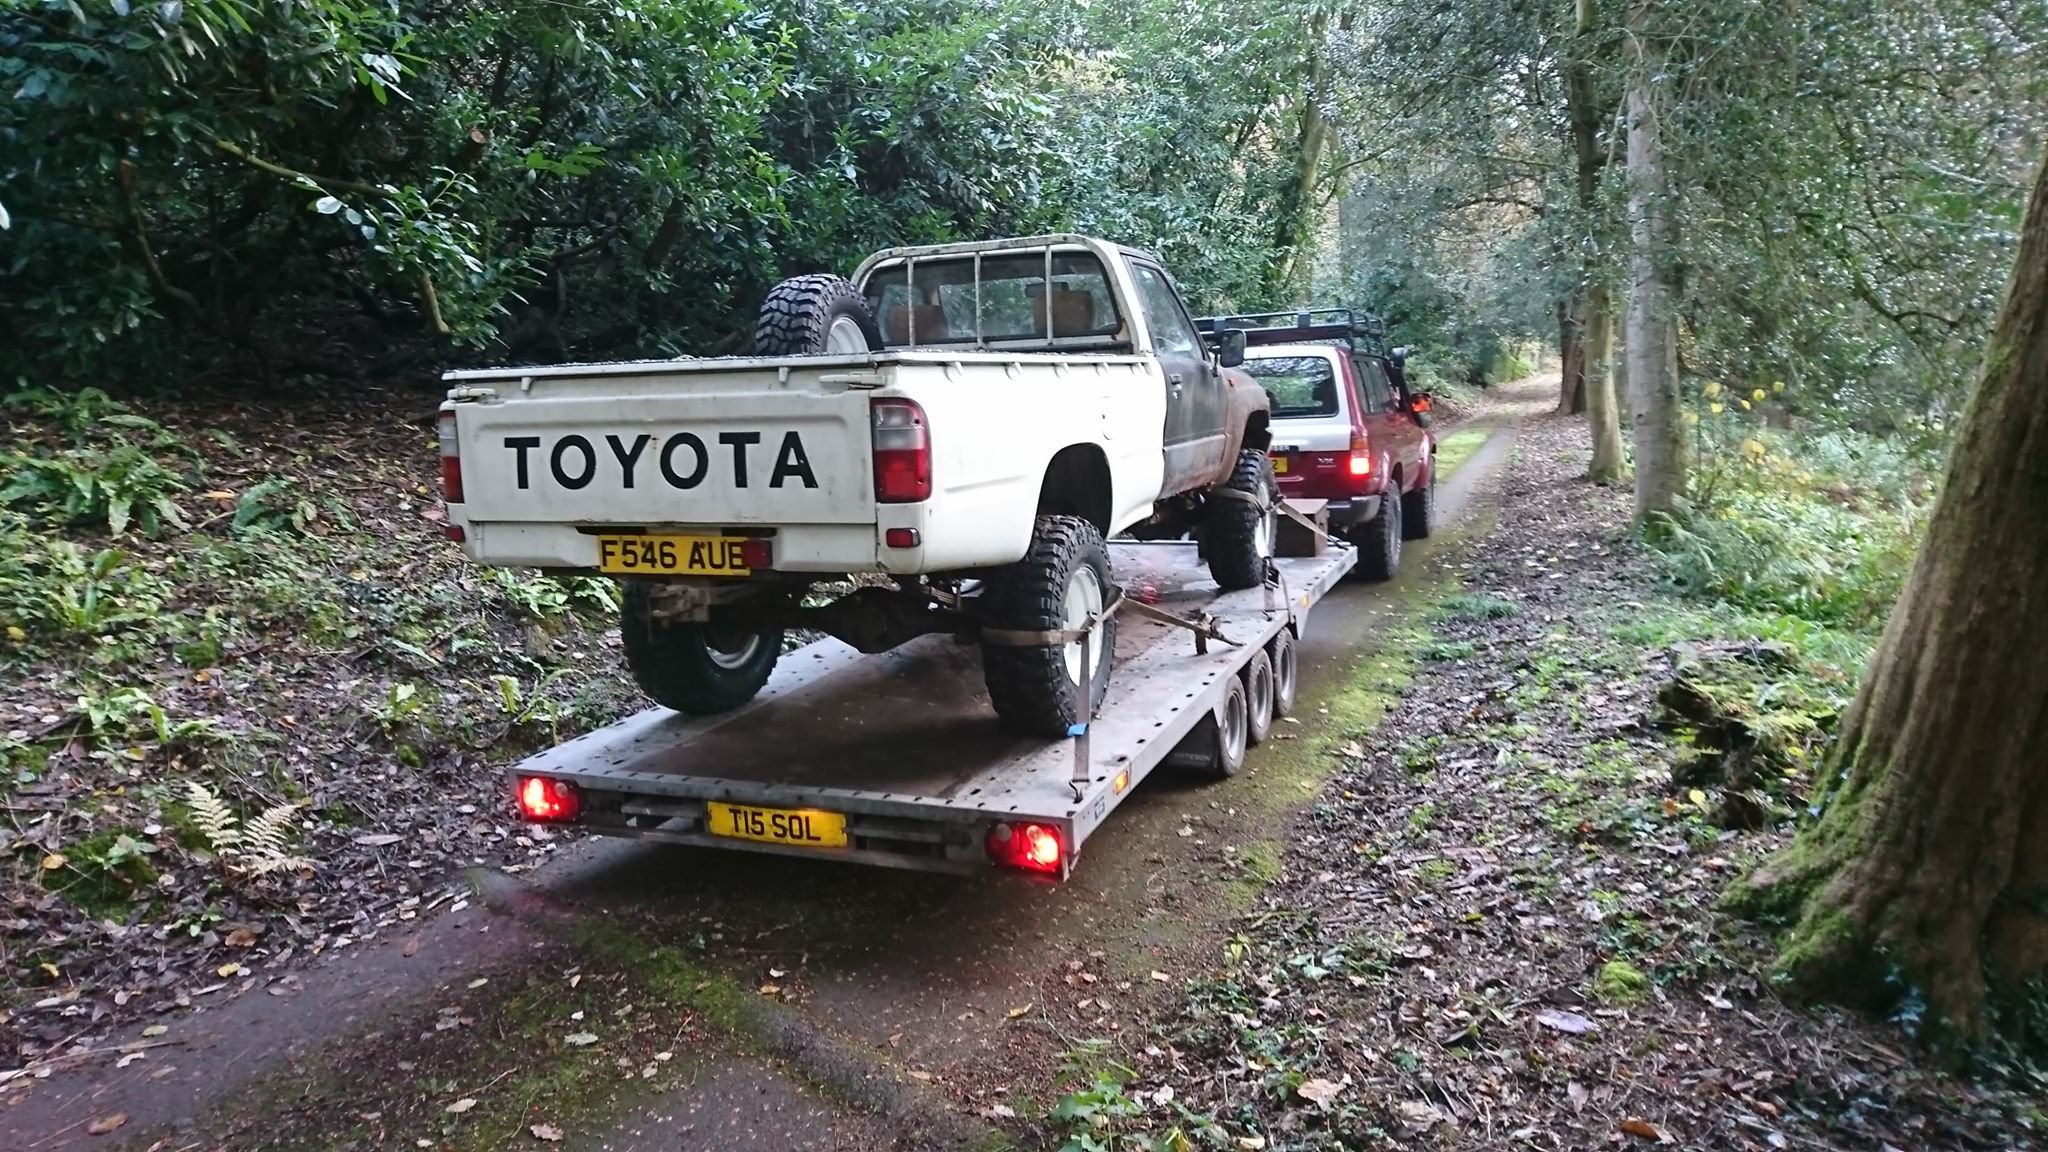
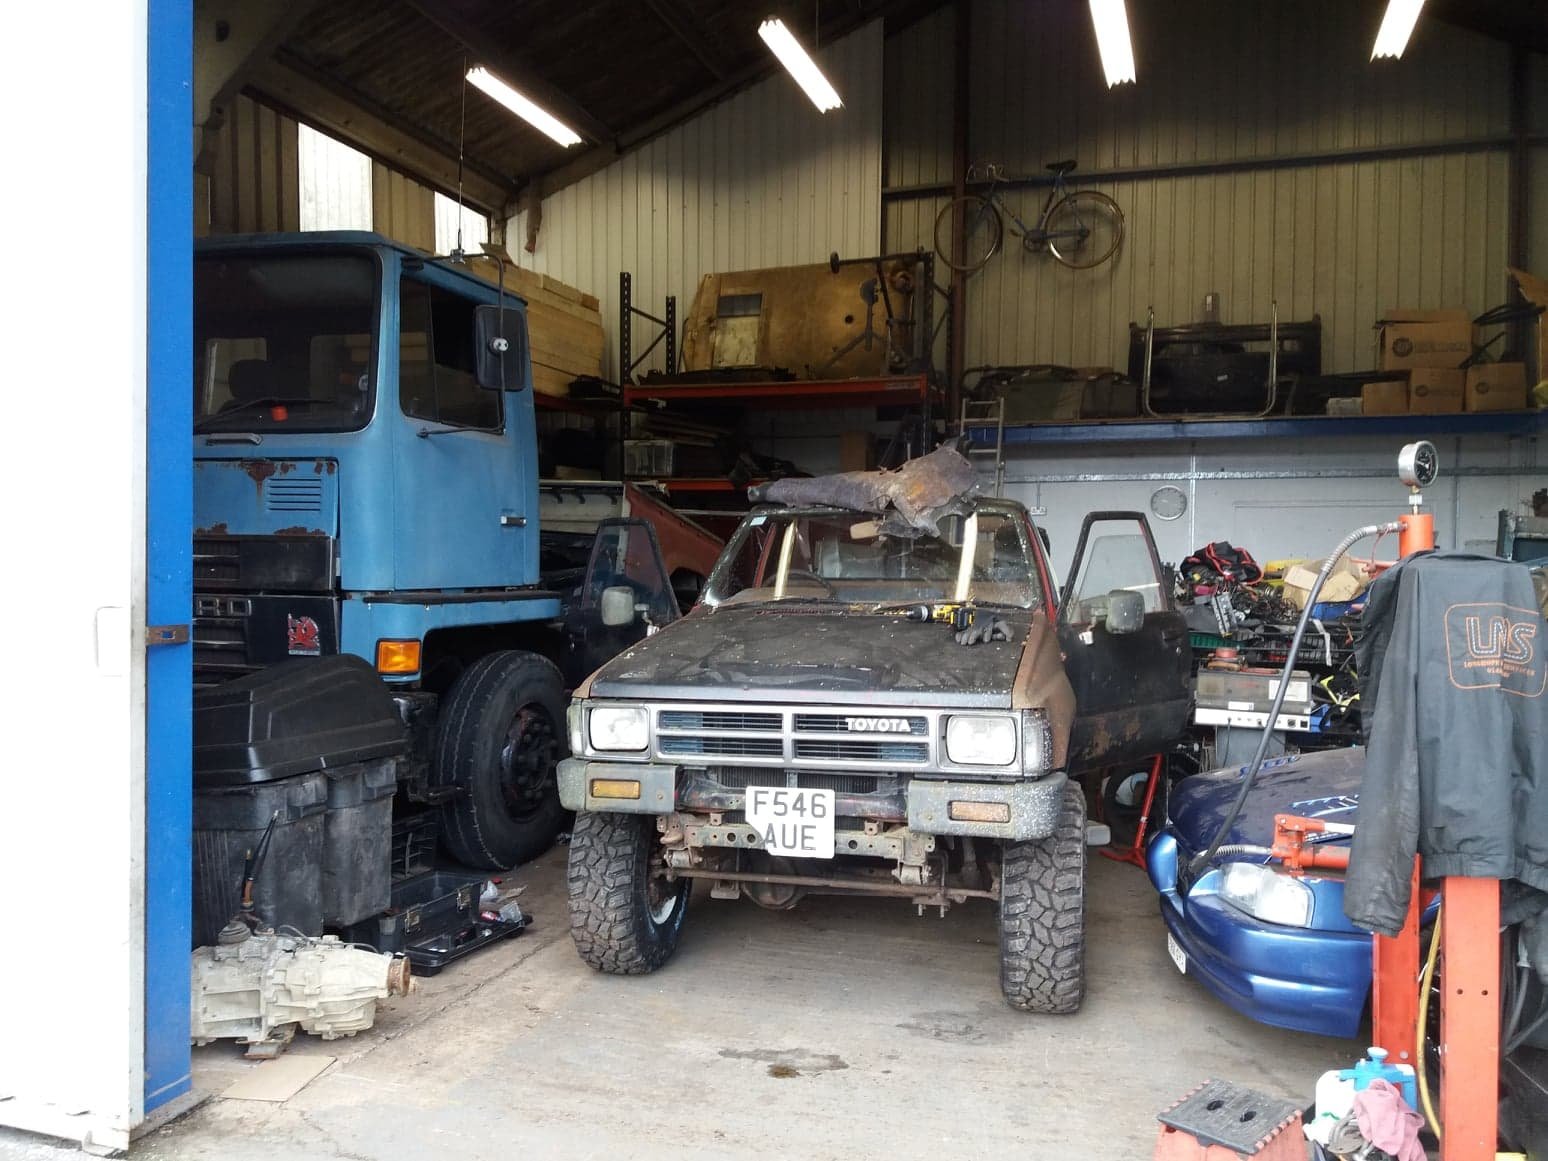
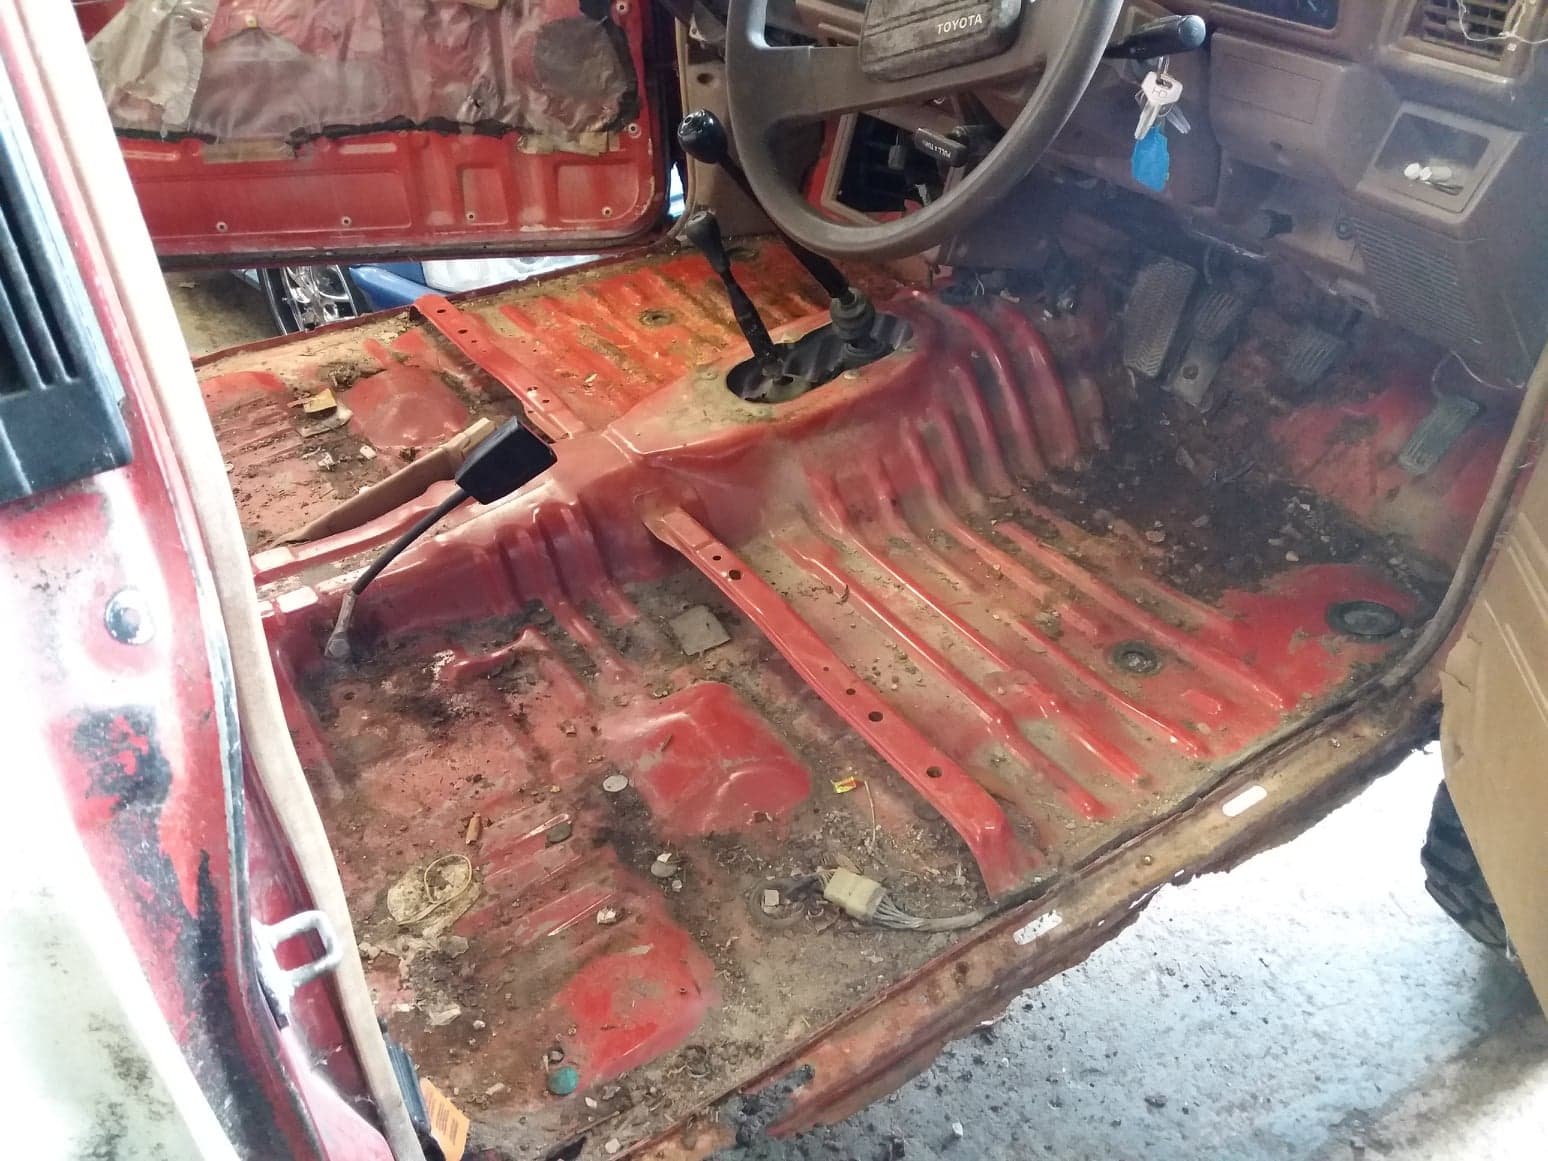
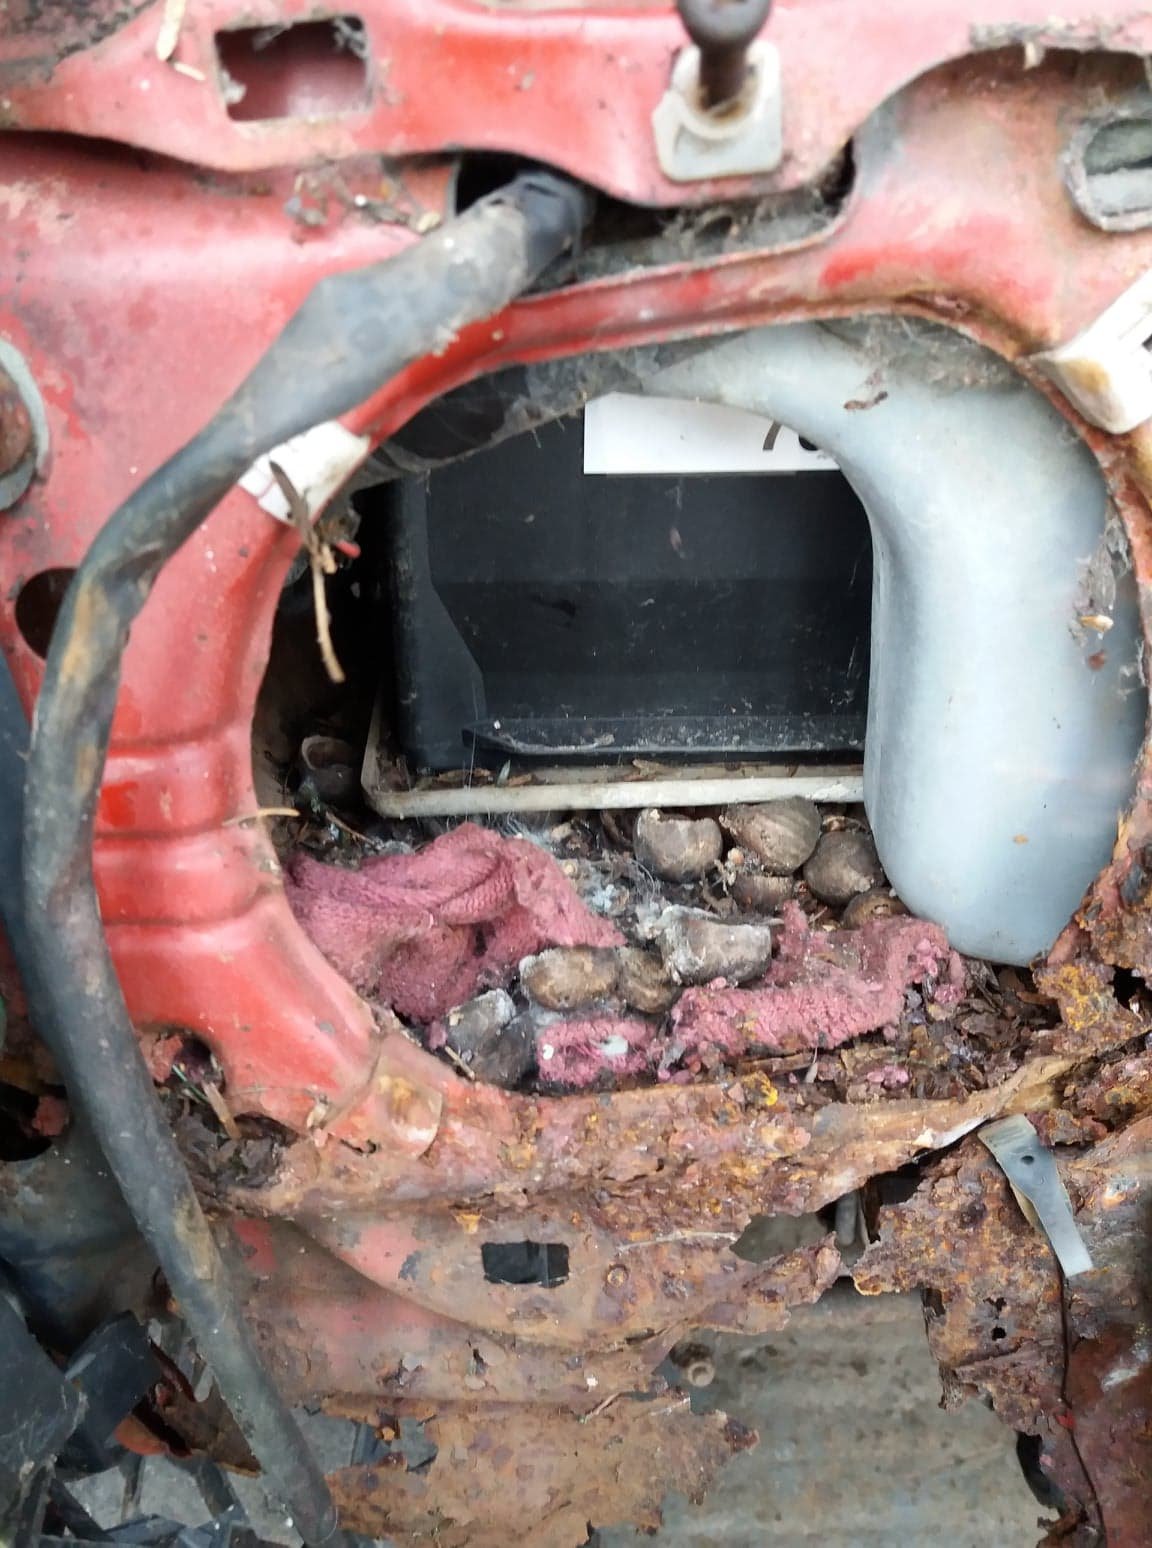
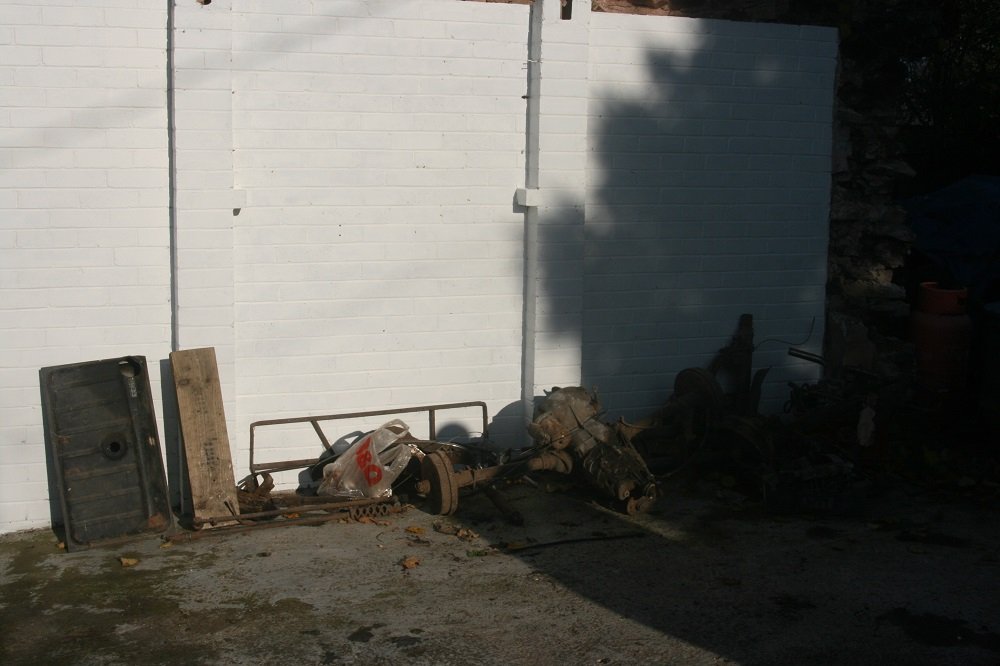
Finally I got my arse in gear and towed the old banger to my mates place. He's said I can take as long as I want but I'm aiming to get it done within 3 weeks. pics... Eastbound & down. Settled in nicely Slightly more holes than i first thought but still not too bad, Eviction notice served on headlamp bowl squatters. More updates on the way thick and fast, hopefully.
5 points
-
People can't even fit wheel nuts correctly. Requiring a cert for a pedal swap is completely justifiable IMO4 points
-
Im keen on this Ill hit up couple of mates with 50s and bring trailer load down.4 points
-
Couple of found items in support vehicle no.2. - 1 x can of monster energy drink, full - 2 x cans of diesel bourbon and cola, empty -1 x spring washer - 1 x nut (could possibly be paired with spring washer) - 1 x GN125h motorcycle, Red, slightly used. Pm me if you are missing any of the above.4 points
-
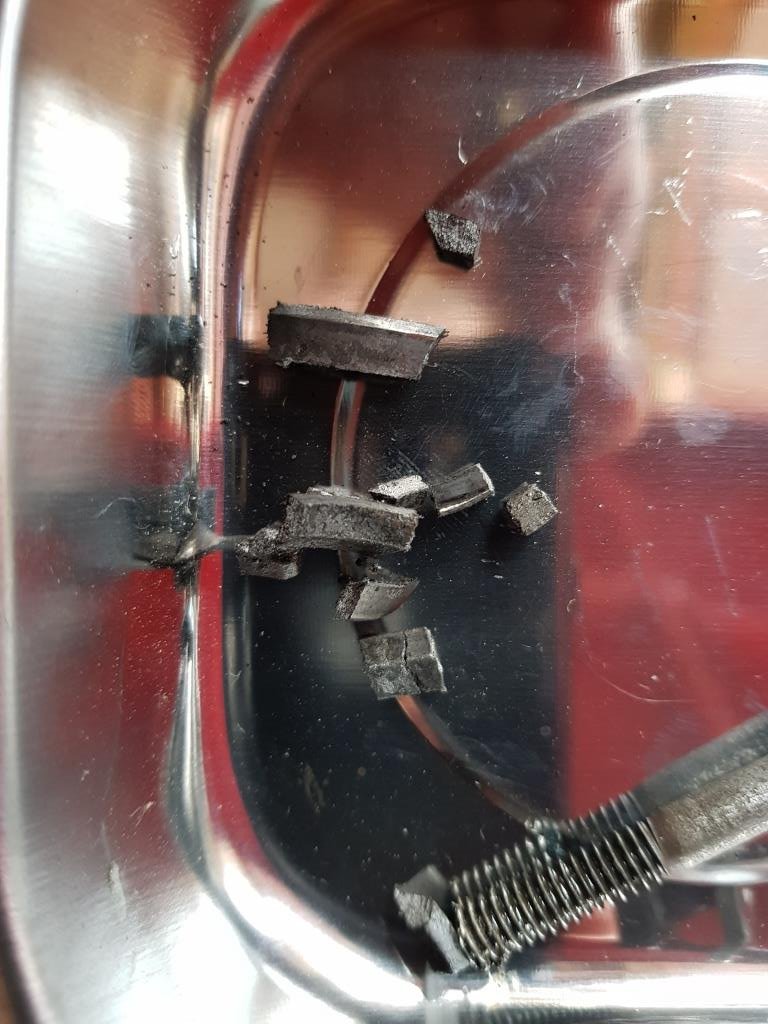
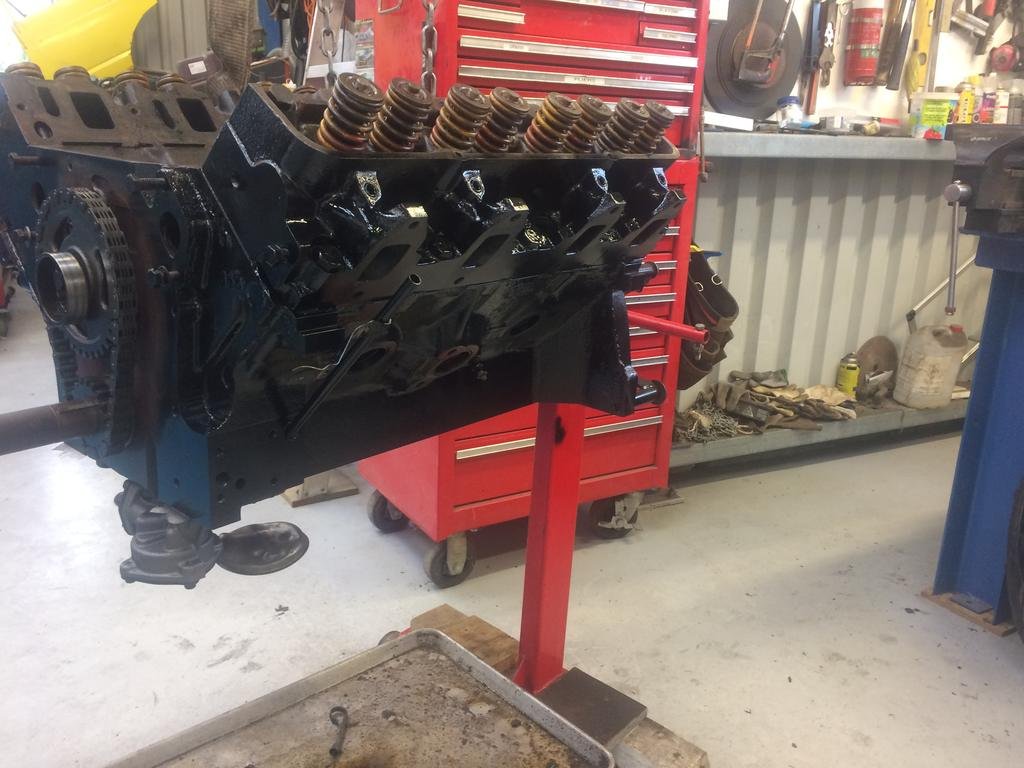
And then this happened. Engine started rattling at idle while I was working on tune. Found some metal on top of the piston. Pulled the head and found it had dropped a hardened valve seat. Damage was very minimal due to it happening at idle. The engine had always been a heavy breather since I bought it so decided to freshen it all up. Bore was worn and was already at .60thou so I had it sonic tested and got it taken out to .90 thou. Crank was ok so fitted new bearings. Reused the Kent 234 camshaft as that was all ok. Fitted a NOS dual row timing chain. Had my worked cylinder head overhauled with new guides and hardened seats. Plus he opened up the ports a bit more. Currently almost all back together and ready to put in. Engine came back at 1690cc and 10:7 to 1 compression. Should go much better.
4 points
-
Haha the zuk already hits the limiter on most streets in Auckland One mate text me back saying hes in So got the street magic and a zoomer on the trailer so far3 points
-
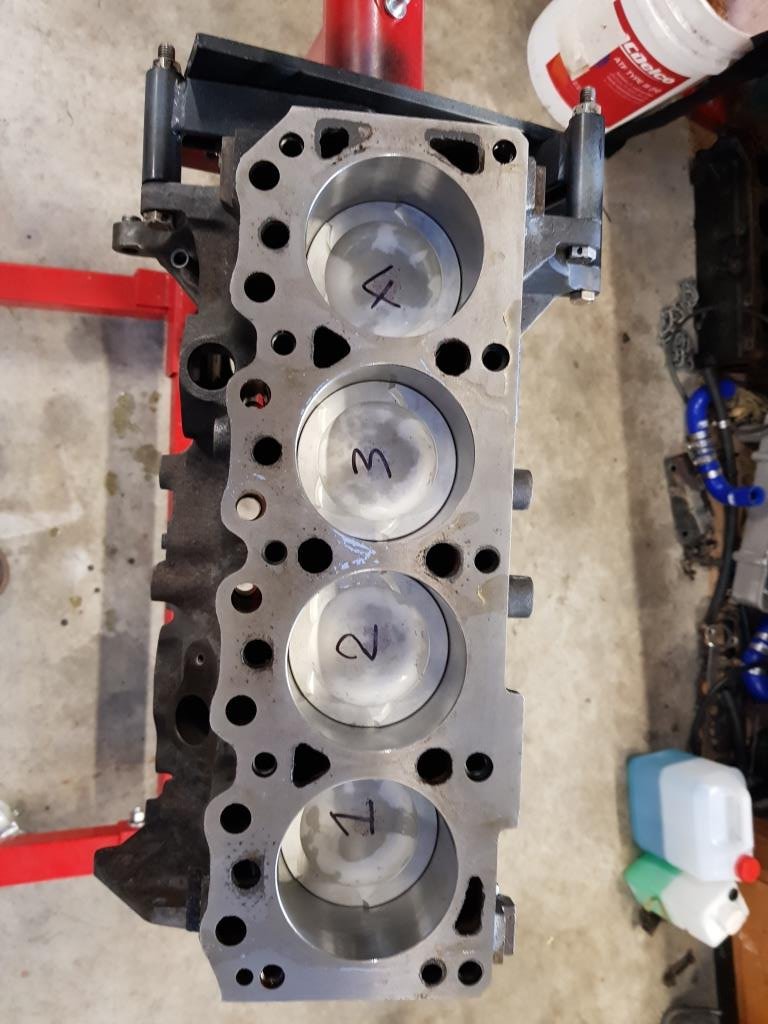
Nice. Proper 1592cc on top of a 1608cc gasket, cylinder 1 at left.$35 each so i ordered two 'just in case'. the fire rings on the front and rear cylinder were tapped by the pistons and the front coolant passage right above the water pump made the cylinder part of the cooling system Disconnected the things, lifted the head and swapped the gaskets, and soon enough back as per, but with lots of little things done tidier. Yeah looking good. No leaks no bubbles. Bit tappy but pretty sure its valve shims need doing and not rod knock based on my big screwdriver engine stethoscope Now the engine runs good (needs shims doing before going too far), lets check out the new clutch adjustment and feel the smooth action of that fresh low mileage gear box! Seriously, this thing. I dont even. All out AGAIN to swap the old gear box back on. Anyways, its all back together and back in the hole, (im getting pretty quick at this now!) but its gonna rain for the next few days (nearly out of tank water so thats good) so it can sit in the rain for a while, im pooped.3 points
-
3 points
-
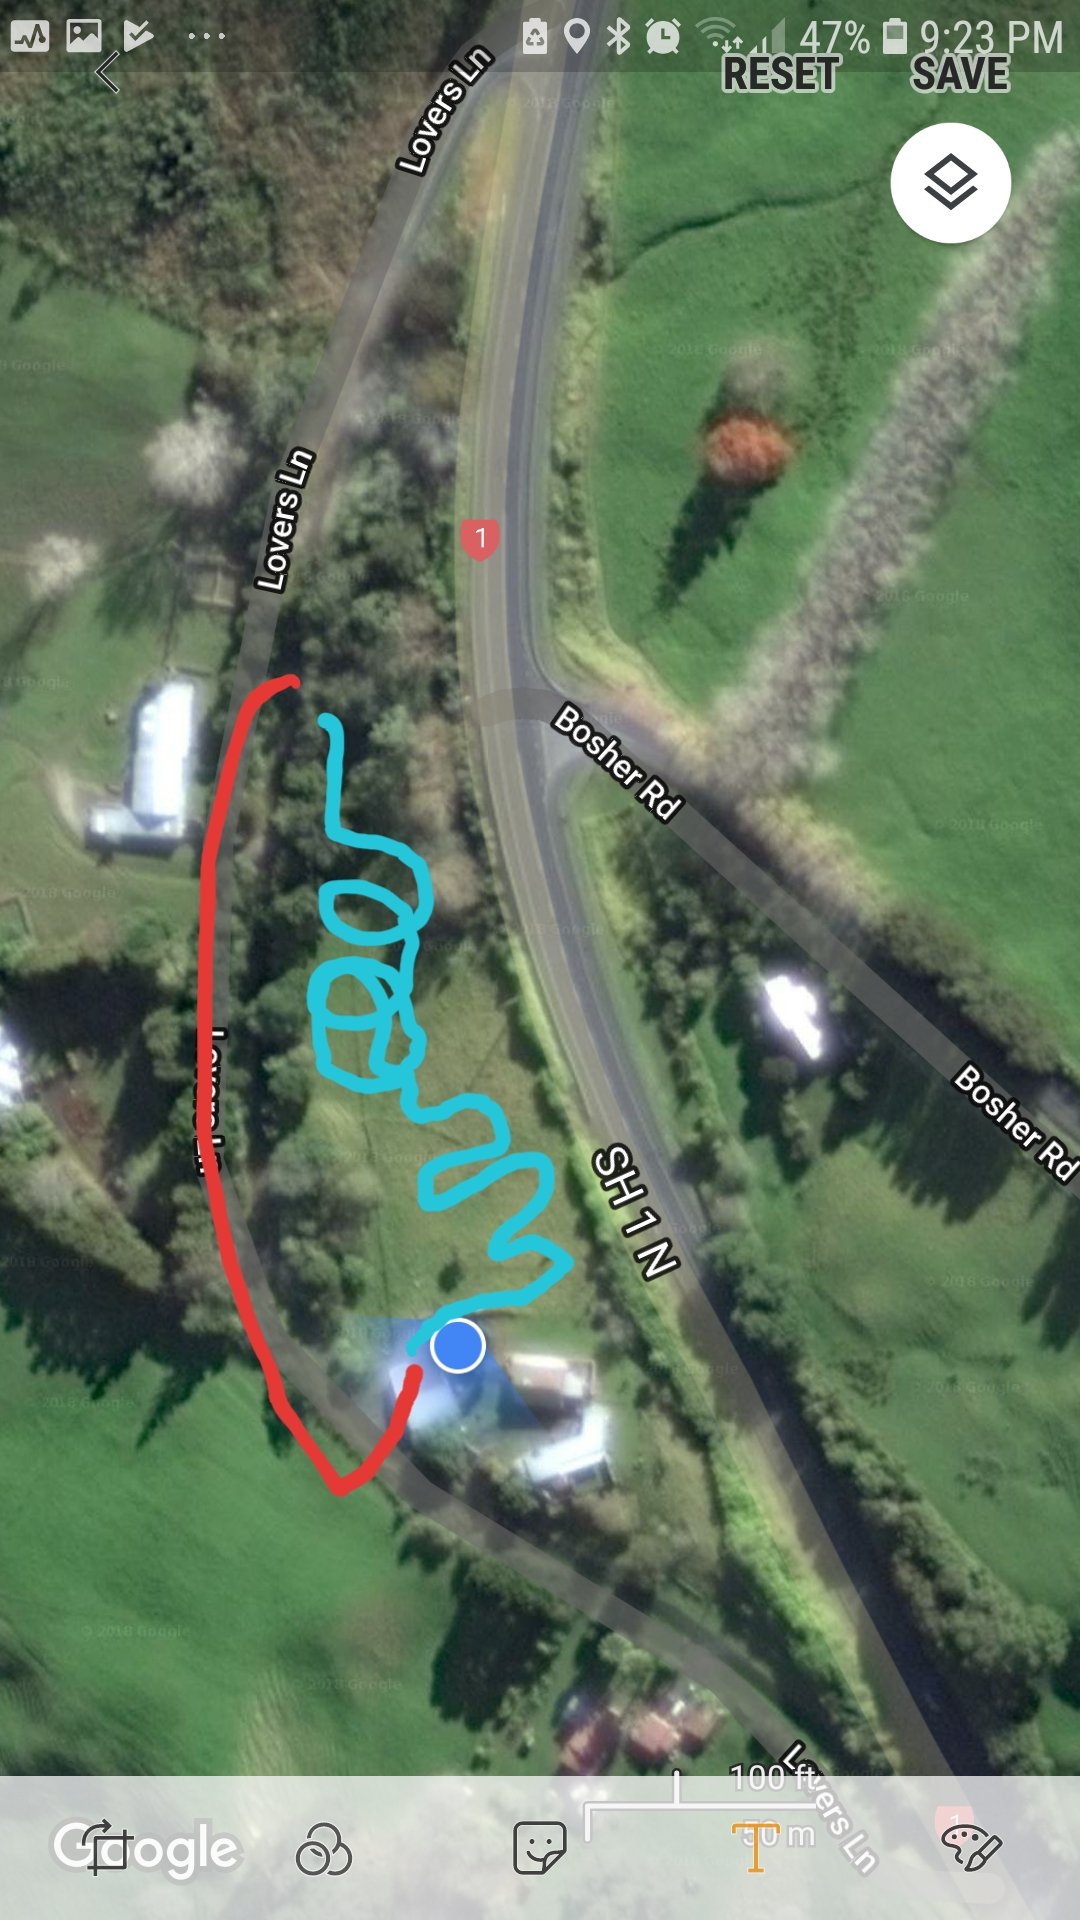
Also @sentra back up plan if slightly damp or certain cars cant make the upward part is to use the road to drive from lower gate back to top gate by garage indicated in red. Then slide down and around indicated in blue.
2 points
-
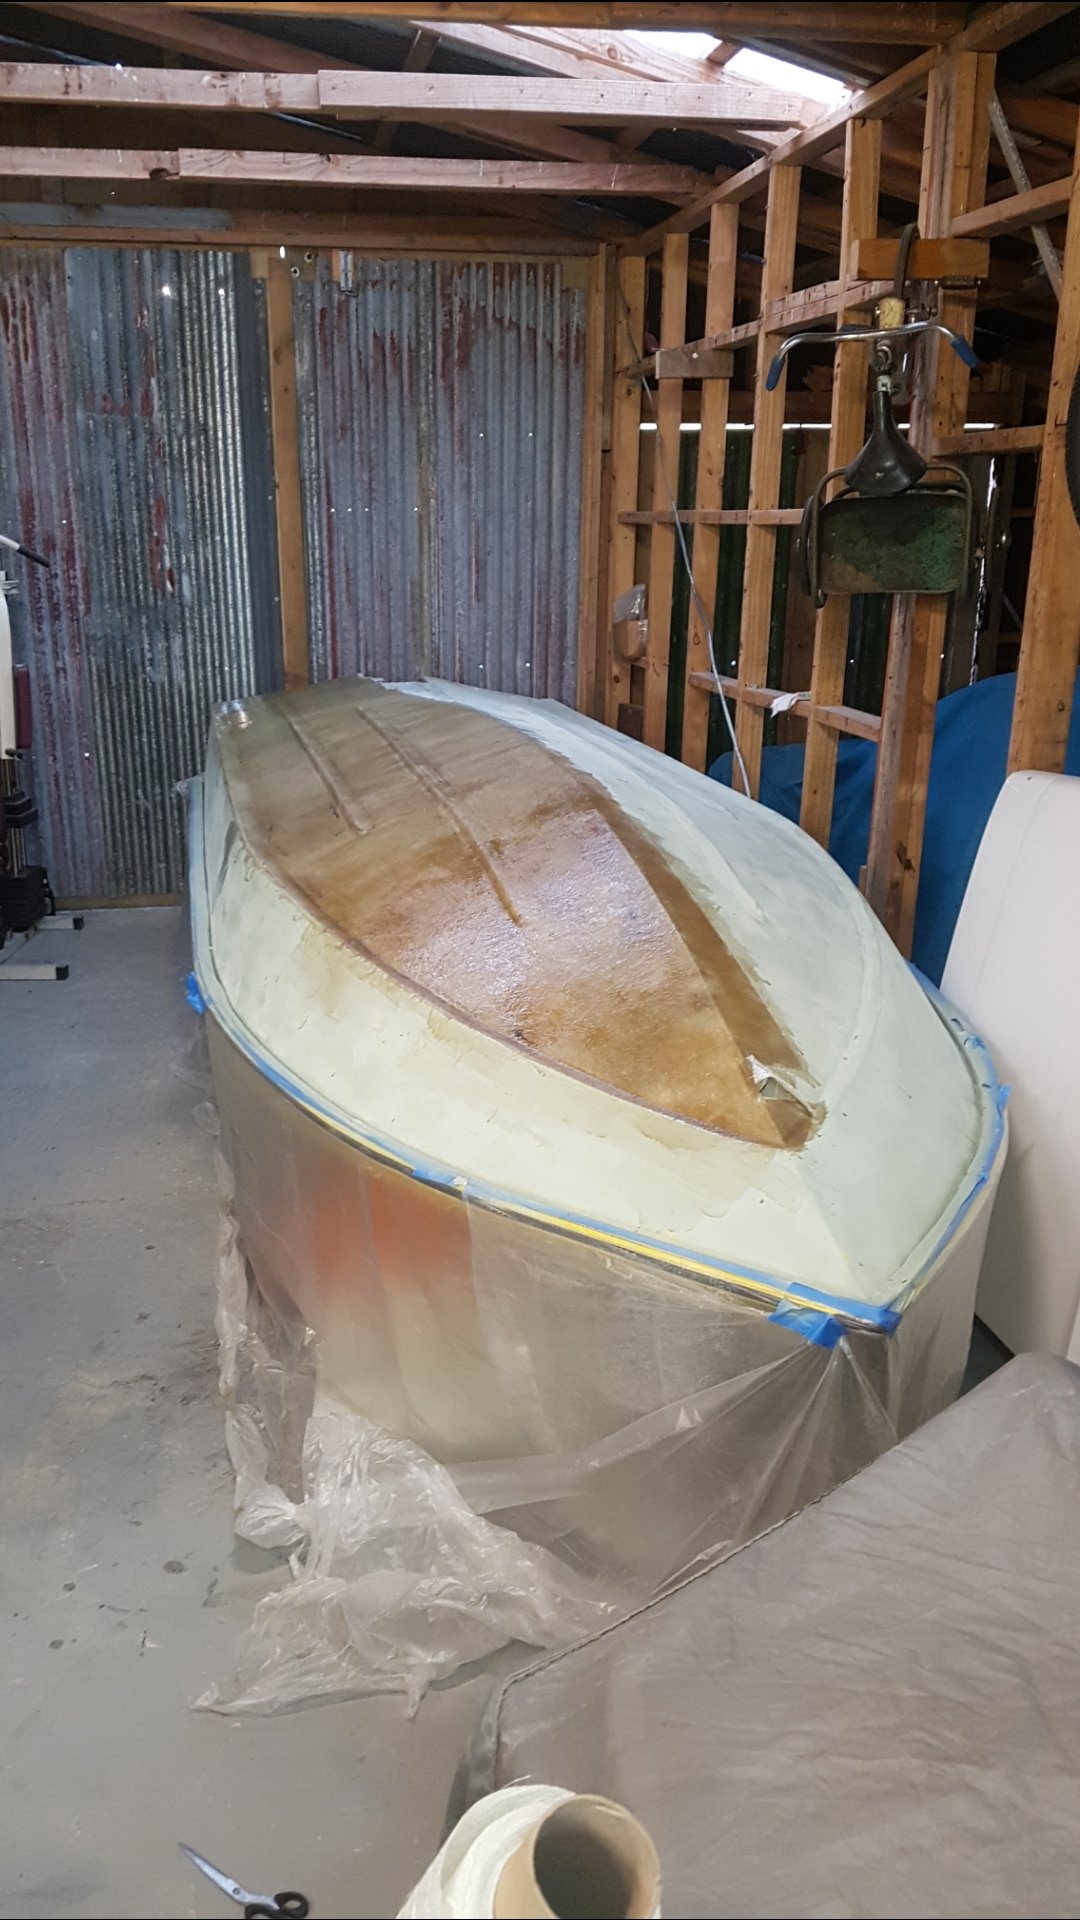
note to self, fibre glassing is a cunt of a job.
2 points
-
So lame needing a cert for fitting a factory brake pedal2 points
-
You haven't had much luck with dicks crashing into you lately! May I suggest
2 points
-
Well its been awhile since parked this up. going home for Christmas, looking forward to dragging this out and finishing off some of the odd jobs left to do on it. also managed to find a full set of NOS mazda chrome hubcaps have been keeping an eye out for a set of these for such a long time pretty stoked to have found some. hoping to tidy up the interior when get back, re-cover the door cards and dash and maybe clean or paint the hood lining or replace it. also want to weld up the hole someone cut to put a head unit in the dash and then put the original stereo blank back in.
2 points
-
Yeah, i figured something like that, i haven't looked inside it (and probably wont!), but it kinda felt and sounded like those gears were spinning on the shaft or something. i had a cursory look before i installed it and it seemed clean/nothing obviously broken, which is the full extent of my gearbox checking/testing/fixing skillz, but i will look at the diagrams and see if i can get my head around it. Im glad the engine seems ok too, im hoping the tapping is just valve clearances and not something more serious from hydrolocking or something, but the bottom ends of these engines are very stout and i checked that #1 piston wasnt sitting lower than #4 at TDC for the most part i was just getting it running before adding coolant, and once it was and i added it, the starter laboured and would nae start (i thought flat battery initially) so hopefully no harm no foul apart from wasting a lot of oil, coolant, money and time...2 points
-
Gimme gimme gimme. I'll do great things to it.2 points
-
Hah no one wants the gn. Can't say I blame them2 points
-
Great success on the water this weekend! Did a couple of laps around the bay, initially she was running rich so dropped the needle down in the carb. Power picked up a lot after leaning the mixture. Goes mint for a little engine, had three guys in the dinghy and towing two other guys in Kayaks, moved along ok. Went out to a fishing spot and caught a Kawai. Smoked it for dinner. Success.
2 points
-
Famous last words..... Was on my way 2 Ohope to kick off East Cape Ride when just before Edgecumbe it started to bog and die, clutched in and it stopped running. Whipped the exhaust off to be greeted with this sight again. (Interesting that it did almost 80kms of WOT before killing itself again which was the same kms it did when it killed the 1st BBK) AA roadside rescue/sharns thanks to @cletus and @RUNAMUCK got me to J5s place where I jumped on a loaner CT110 and delivered the post round the coast all weekend which was so sweet Whipped the head off at Johns to find a very chooched bore and piston plus a weird flame front burn mark on the combustion chamber, only getting complete burn on the front half of the head/same side as the exhaust port. 2T barry yarns have deducted that I cocked up the squish band when clearencing the head so the piston wouldnt hit it which is fucking with ignition turbulence so its not doing a complete burn- piston gets unevenly hot causing it to not be very round and digs itself into the bore causing the above. Cant do much except get myself in the dogbox by "spending more money on that bloody bike" so have a 3rd(and hopefully final) 70cc kit on the way from Germany plus found a 2nd hand un fucked with head in the UK which is also on its way via Youshop. Been going down the 2T rabbit hole on squish band setup so will actually measure it this time to get it right not just get a bit gungho on the dremel after a few Brianlownes and mexican cigarettes. In summary, 2 strokes are sweet when they are running but they dont like to run that much when I play with them
2 points
-
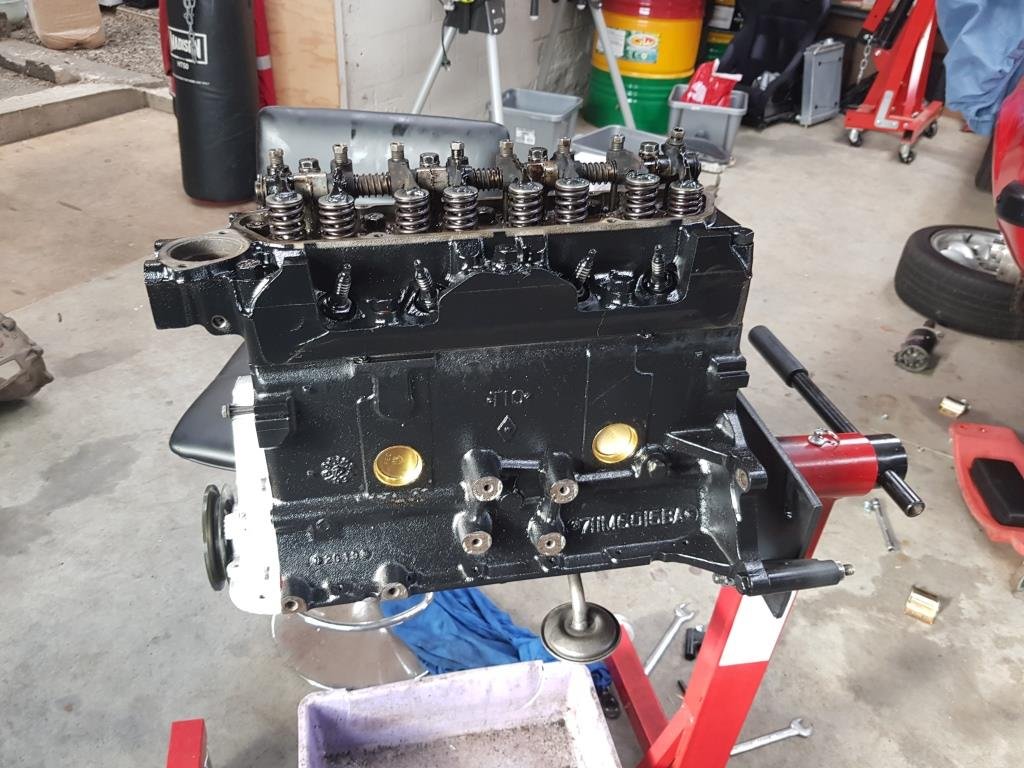
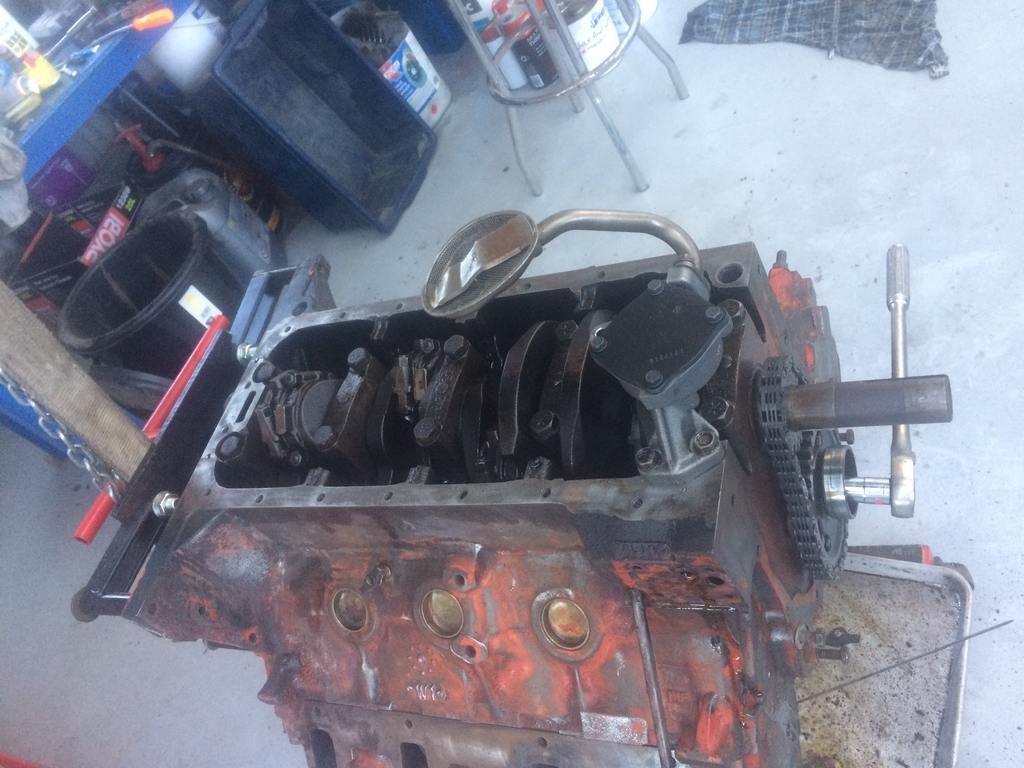
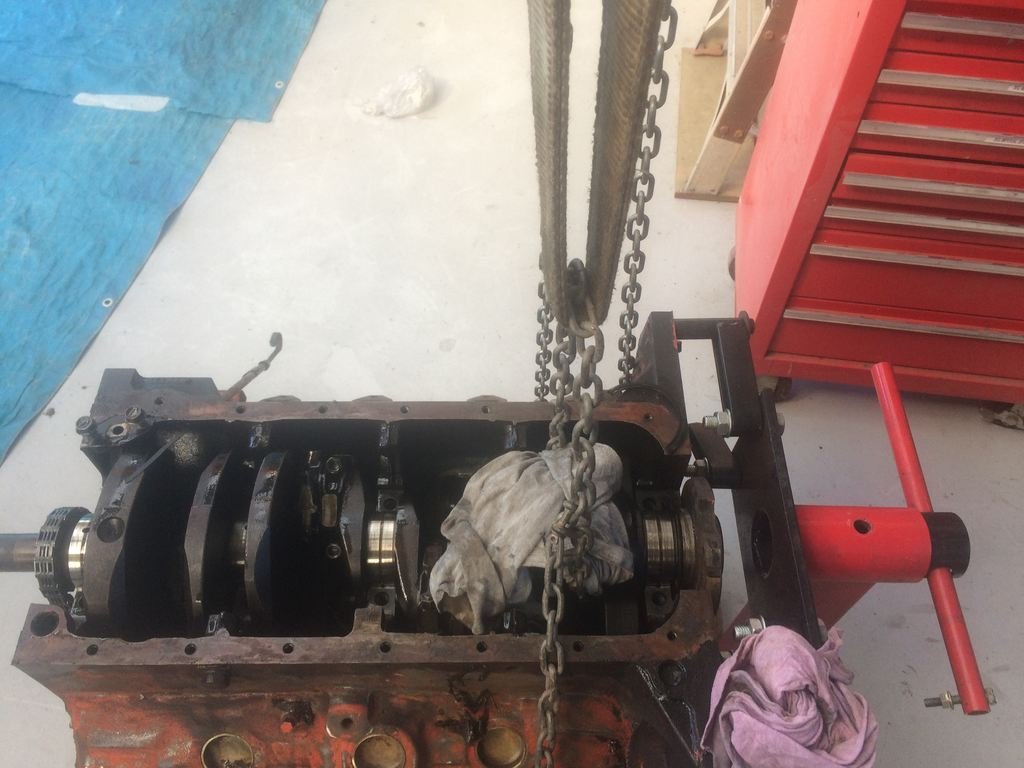
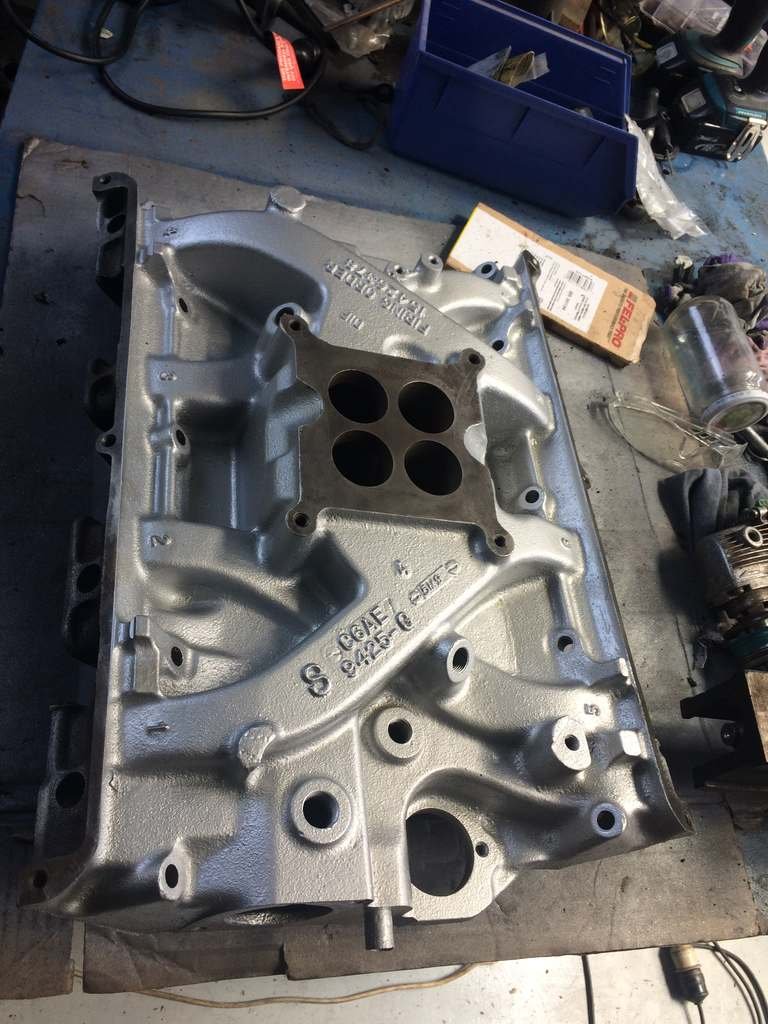
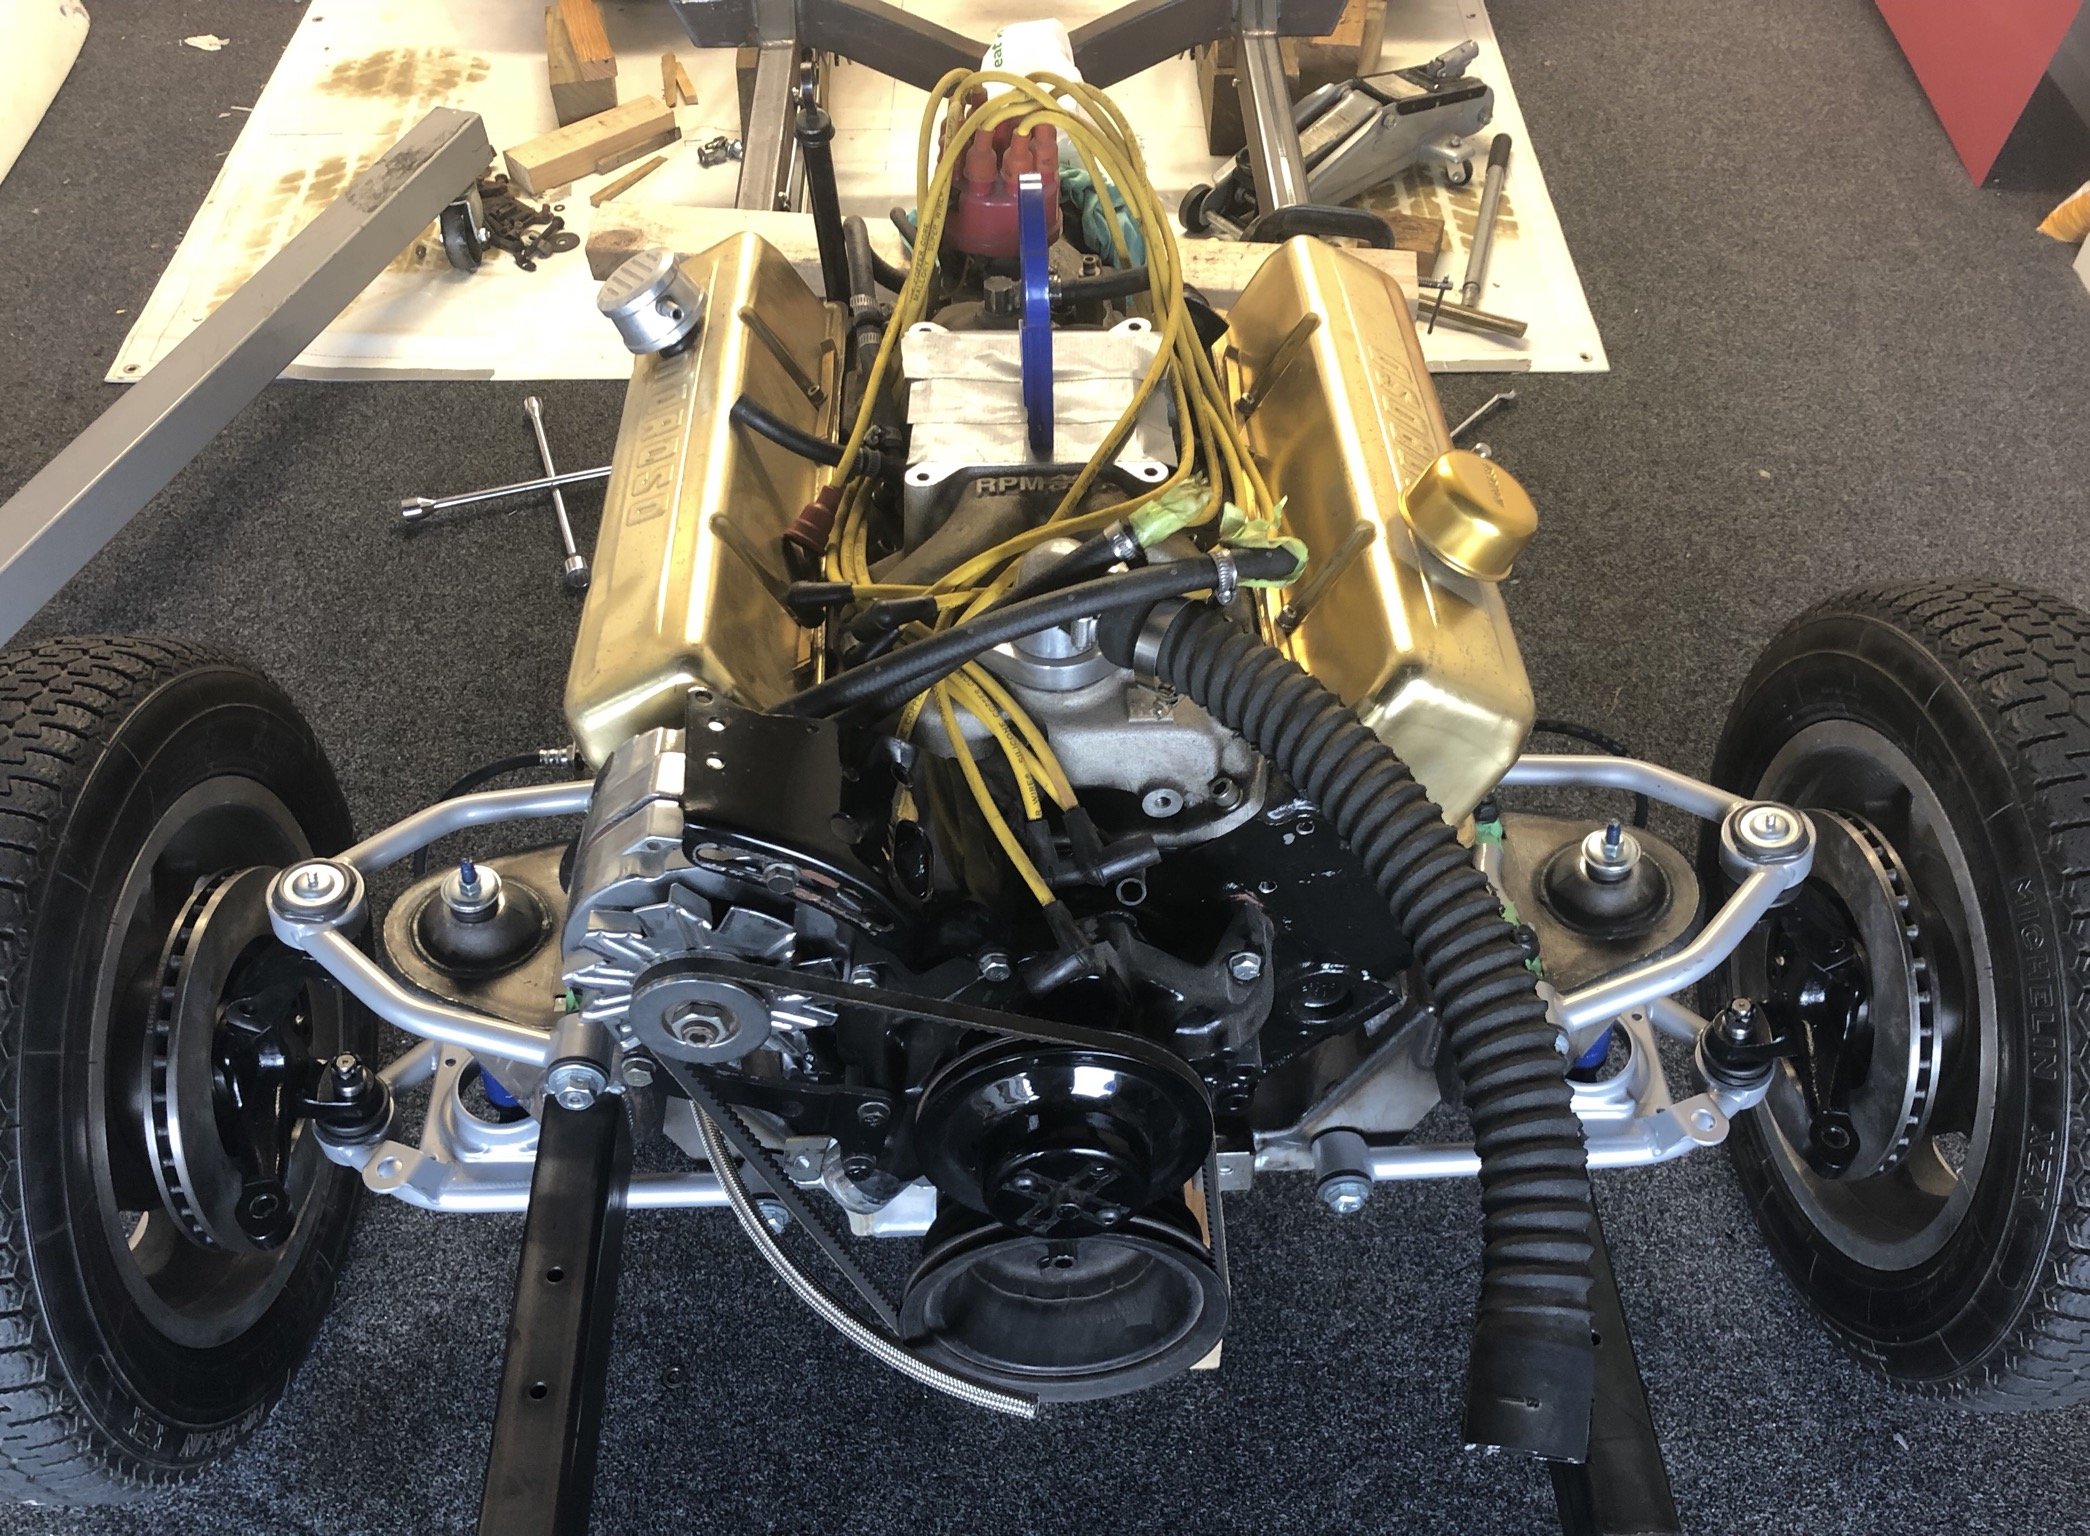
still progress is happening had a good look over the parts painted in primer and gave some bits a quick scuff then fired some gloss black on and painted the timing cover and oil filter housing And the same on the inlet manifold too also did the exhaust manifolds in high temp silver then gave the motor some loving Also when i stripped the motor i found this in the sump had to have a bit of a think to figure out where its from. but the sump also had plenty of rocks and dust collected in there too And the only reasoning why that was in the sump is that when the timing cover gasket was done in its past life that got put in along with rocks and dust as this part appears to be a small block chev rocker pivot ball for the valve train where as my motor factory run roller rockers so that part doesn't exist on my motor. so i also found a much easier way to do ford 2 piece rear main seals Remove all main caps but leave the conrod caps untouched then i used a gantry to slightly move the crank up which made sliding the bottom half of the seal around much easier. also placed some silicon where the two half's join as per seal manufacturers recommendation. and some on the top and bottom of the rear main cap side seals too. I then put a new oil pump on too seen as while im in there. then gave the motor a good wipe down and painted the motor. for this part i wanted the car to remain close to how it came from the factory and that has been pretty much for the whole car throughout the whole fix up process. plus that orange looked so shit so these fords of this era came out with black engines and either blue or gold rocker covers and air cleaner. cheers
2 points
-
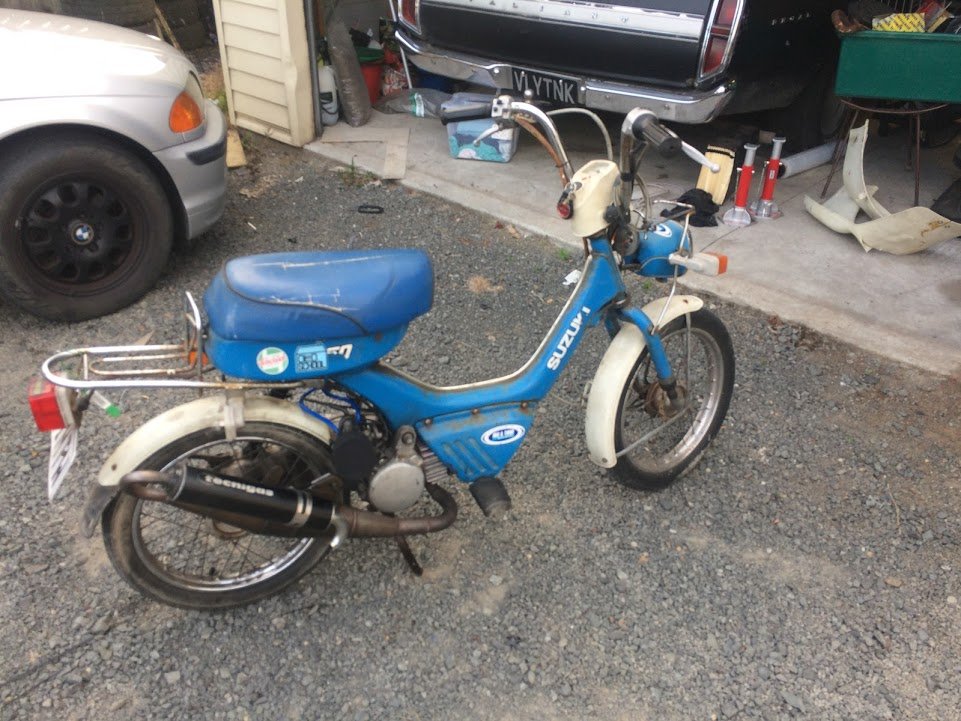
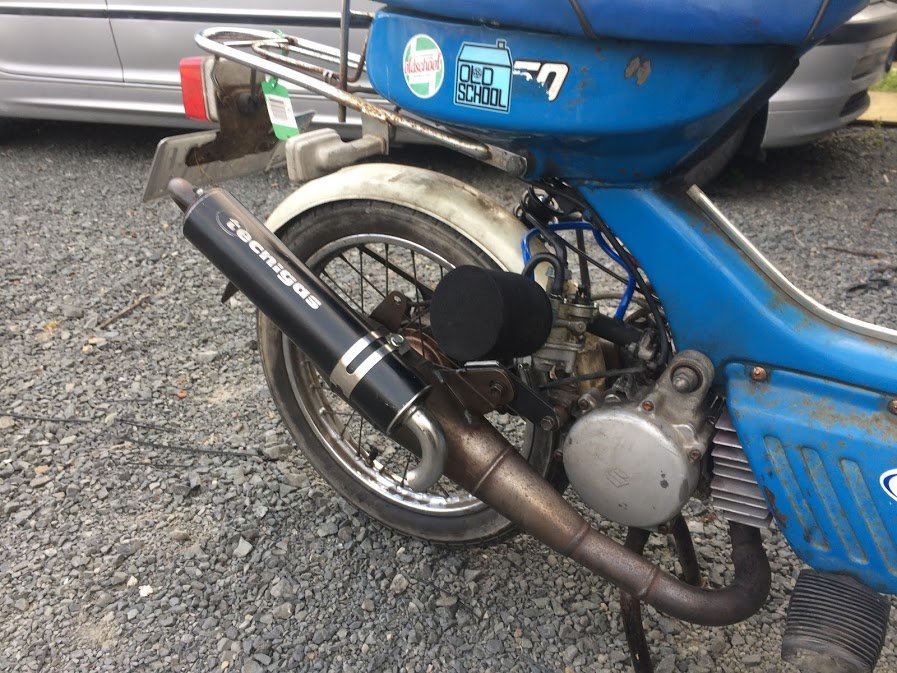
Got the FA back from @Raizer and have set about finishing the last few jobs. It's now got a Technigas Next R pipe from a Suzuki Lets and a Keihin carb on a 90° adaptor to sit the carb away from the rear wheel. I made up a bracket to hold the spanny in place and threw on a filter from a box of parts. I've been testing it today and the thing is hilarious to ride. The 2 speed FS50 trans has always been geared up massively (because I fitted a 14" FA50 wheel), so it takes quite a bit of speed before it gets on the pipe... At the moment it starts to make power above 60kph, and is pretty slow below that . I'll fit heavier springs to both clutches and hopefully solve those issues. At the moment it shifts into 2nd gear at about 35kph... I need that to be closer to 60kph so it'll get on pipe in both gears. Regardless, it's pulling pretty well up top:
2 points
-
2 points
-
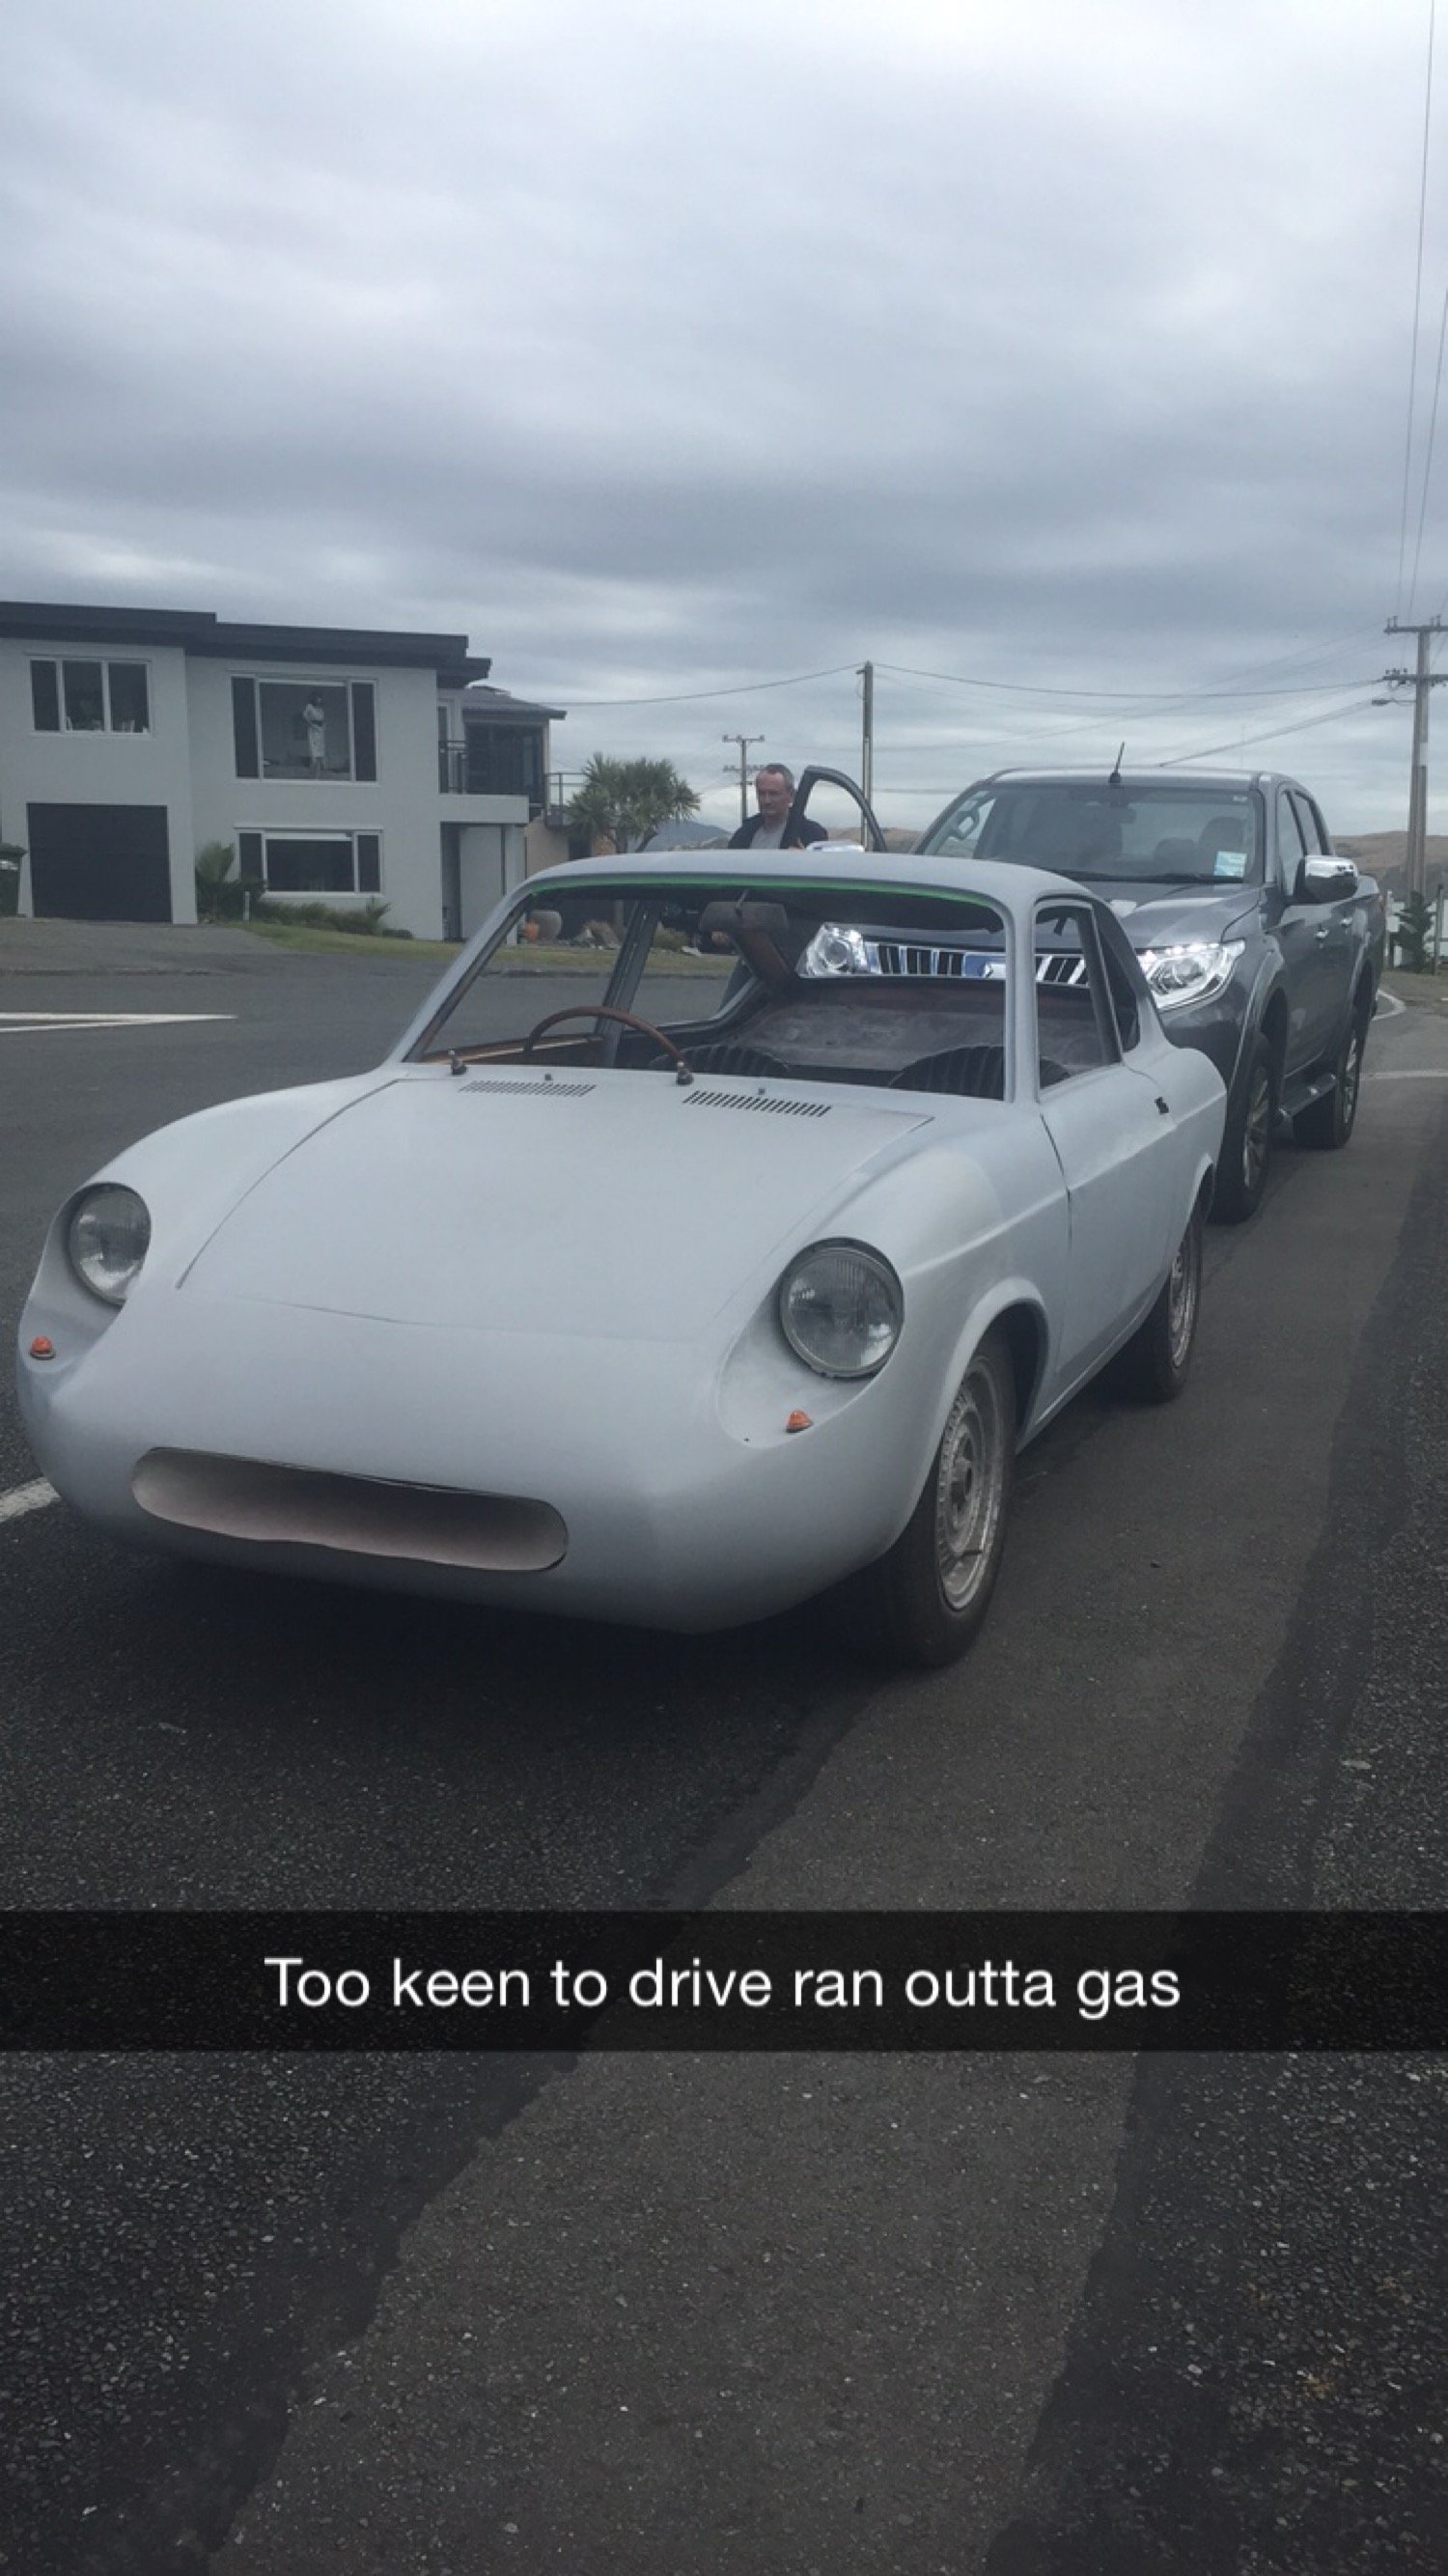
So....something awesome happened on Saturday. After more than 6yrs of ownership, I finally got to drive the coupe. I don’t think it’s moved under its own power since 1989... It’s super super super low, therefore the fronts need winding up a tad. a tune is needed too as it is clearly running rich. The clutch and brakes worked to plan and I can feel it has a load of grunt It’s nice to see it in the shed facing the other way for once and even nicer reversing it in like that. Now to button up the leaks and squeaks then I will look to book the cert inspection in at some stage. Cheers2 points
-
2 points
-
This is my hb viva will have 327 turbo 350 and 4.11 nine inch
1 point
-
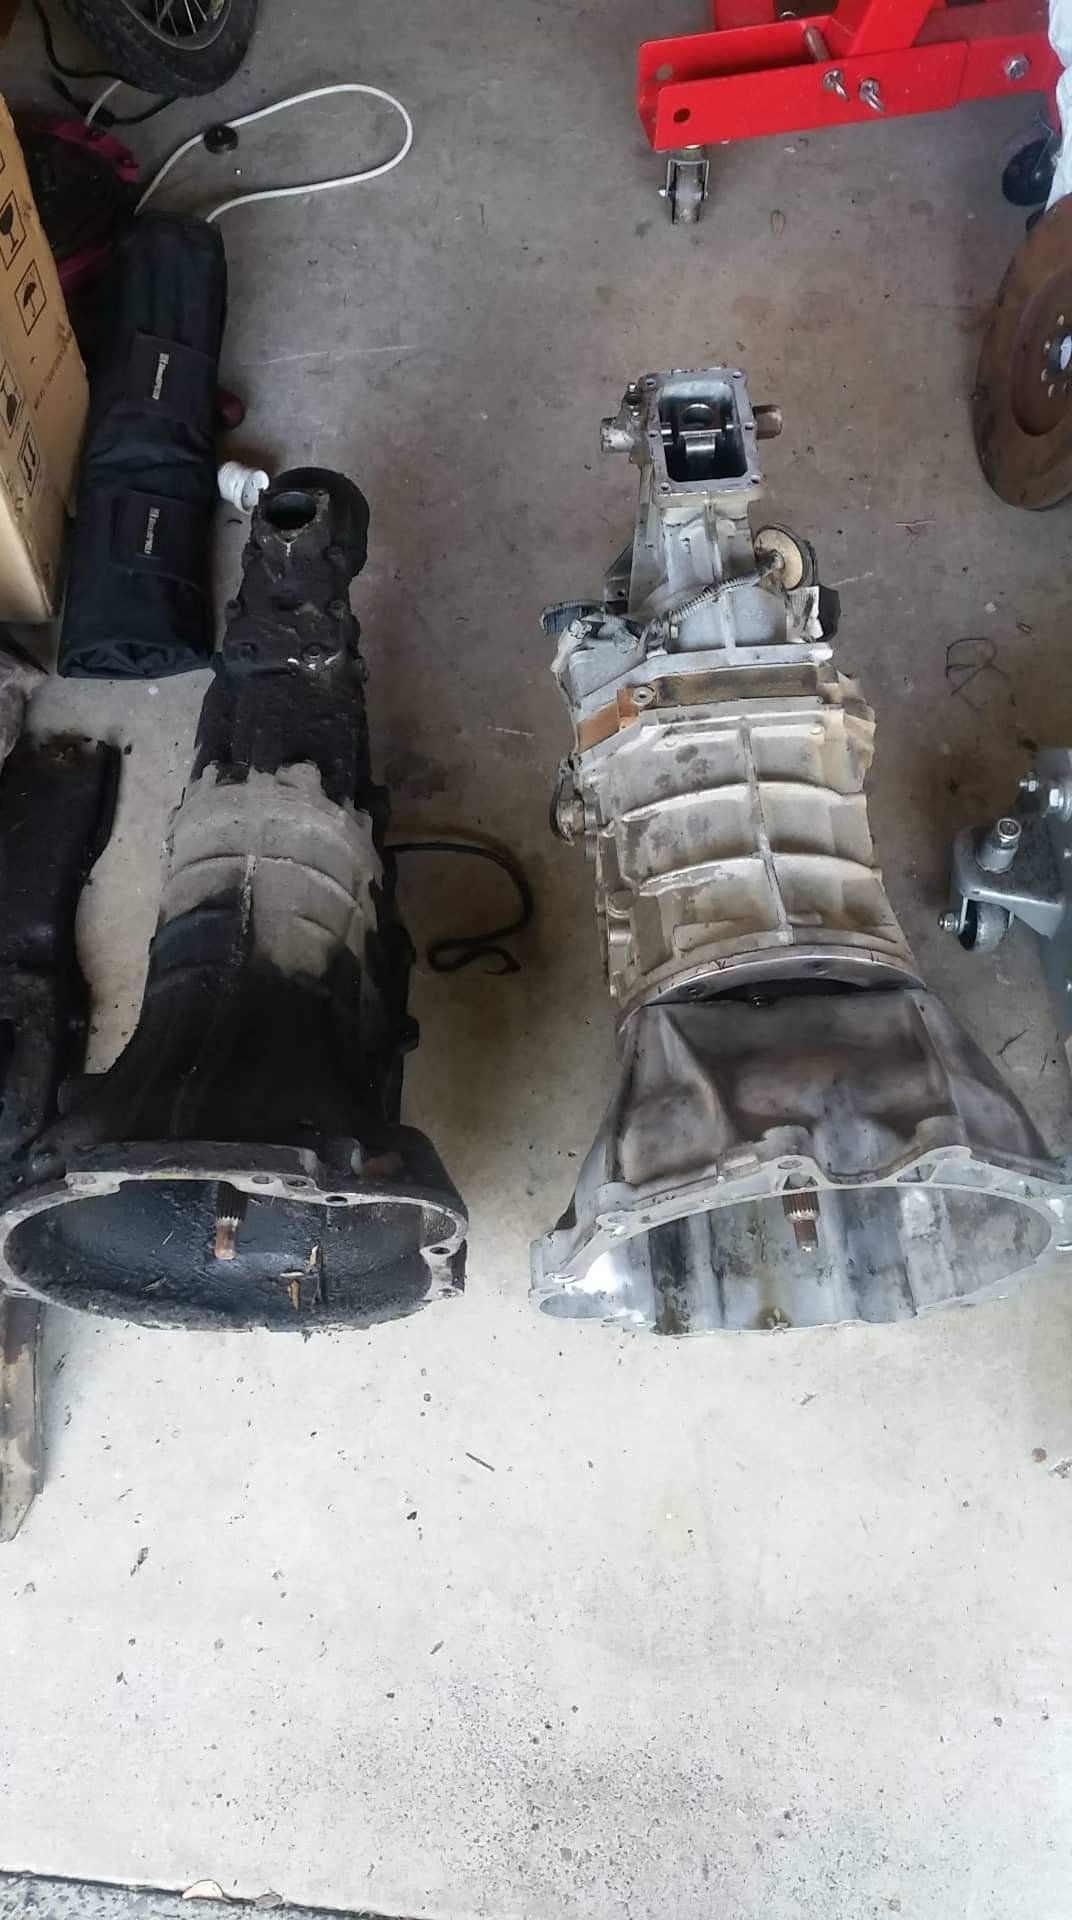
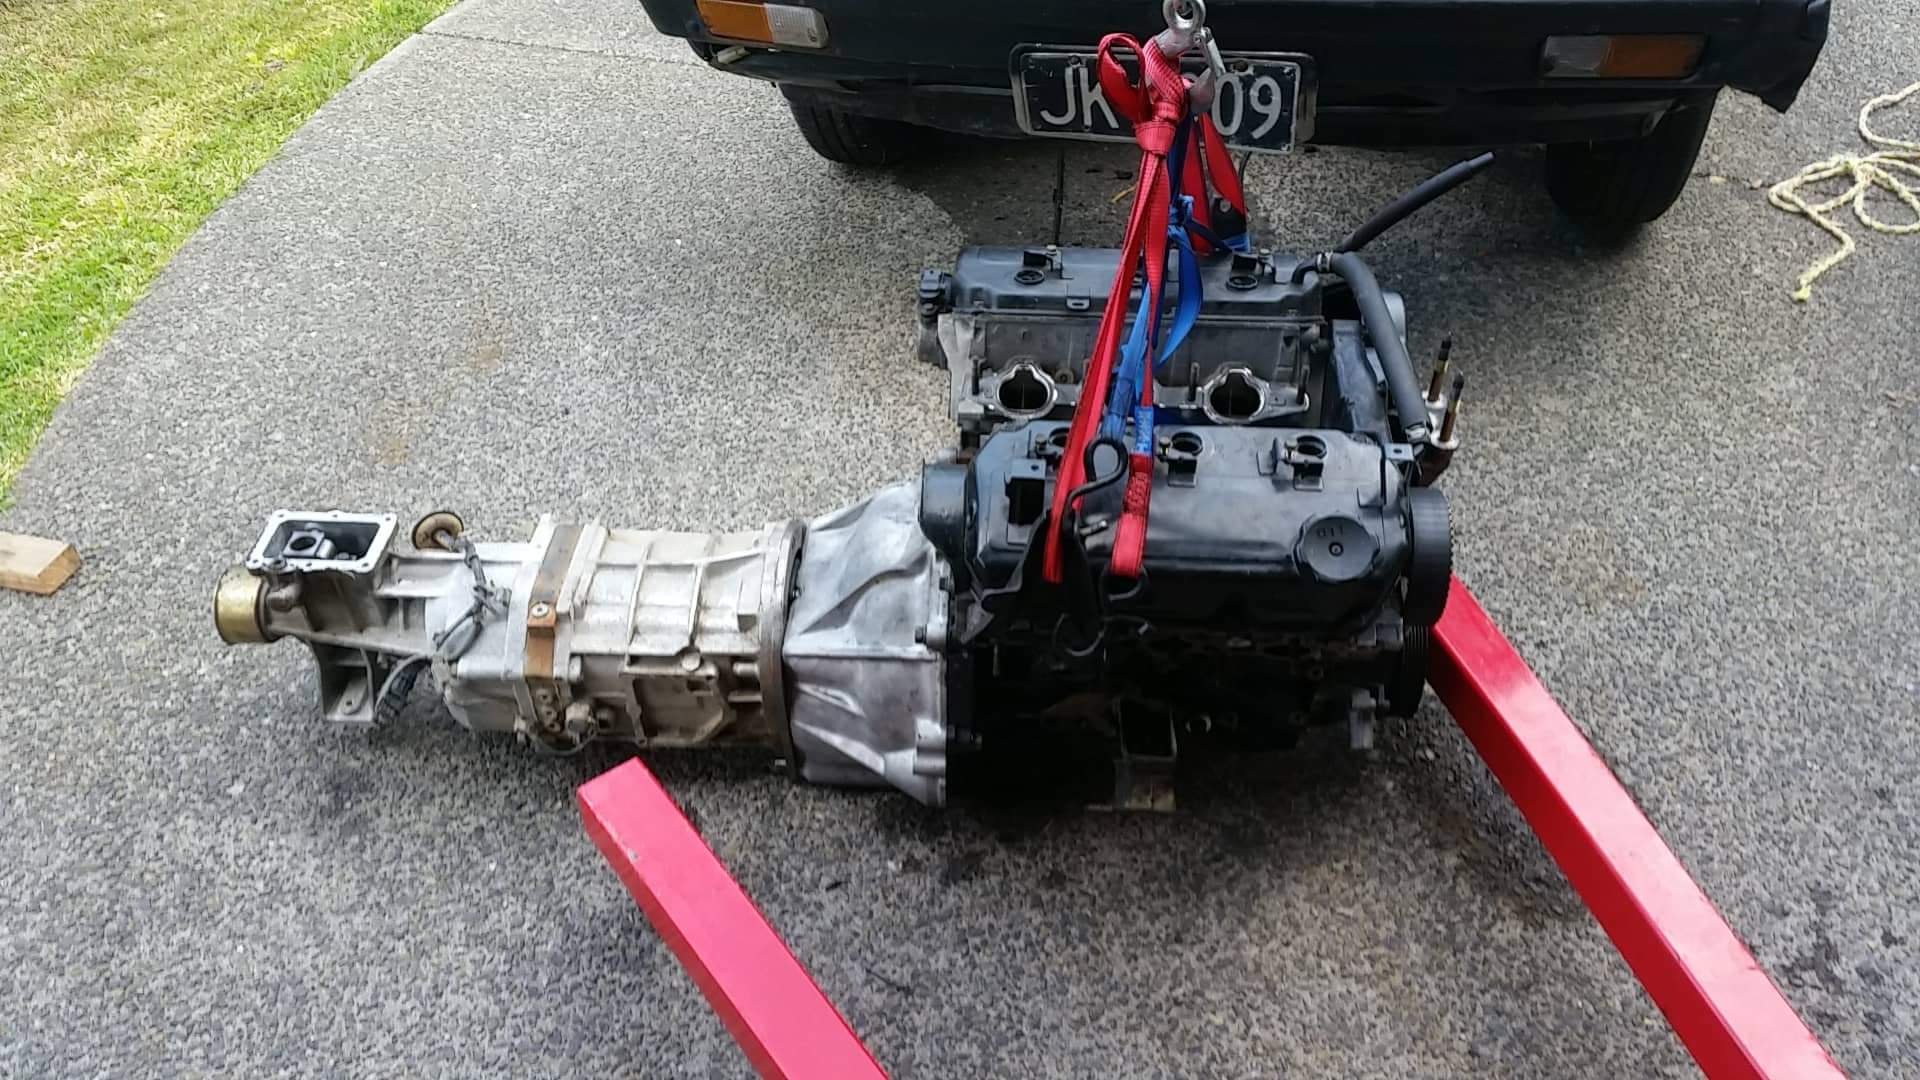
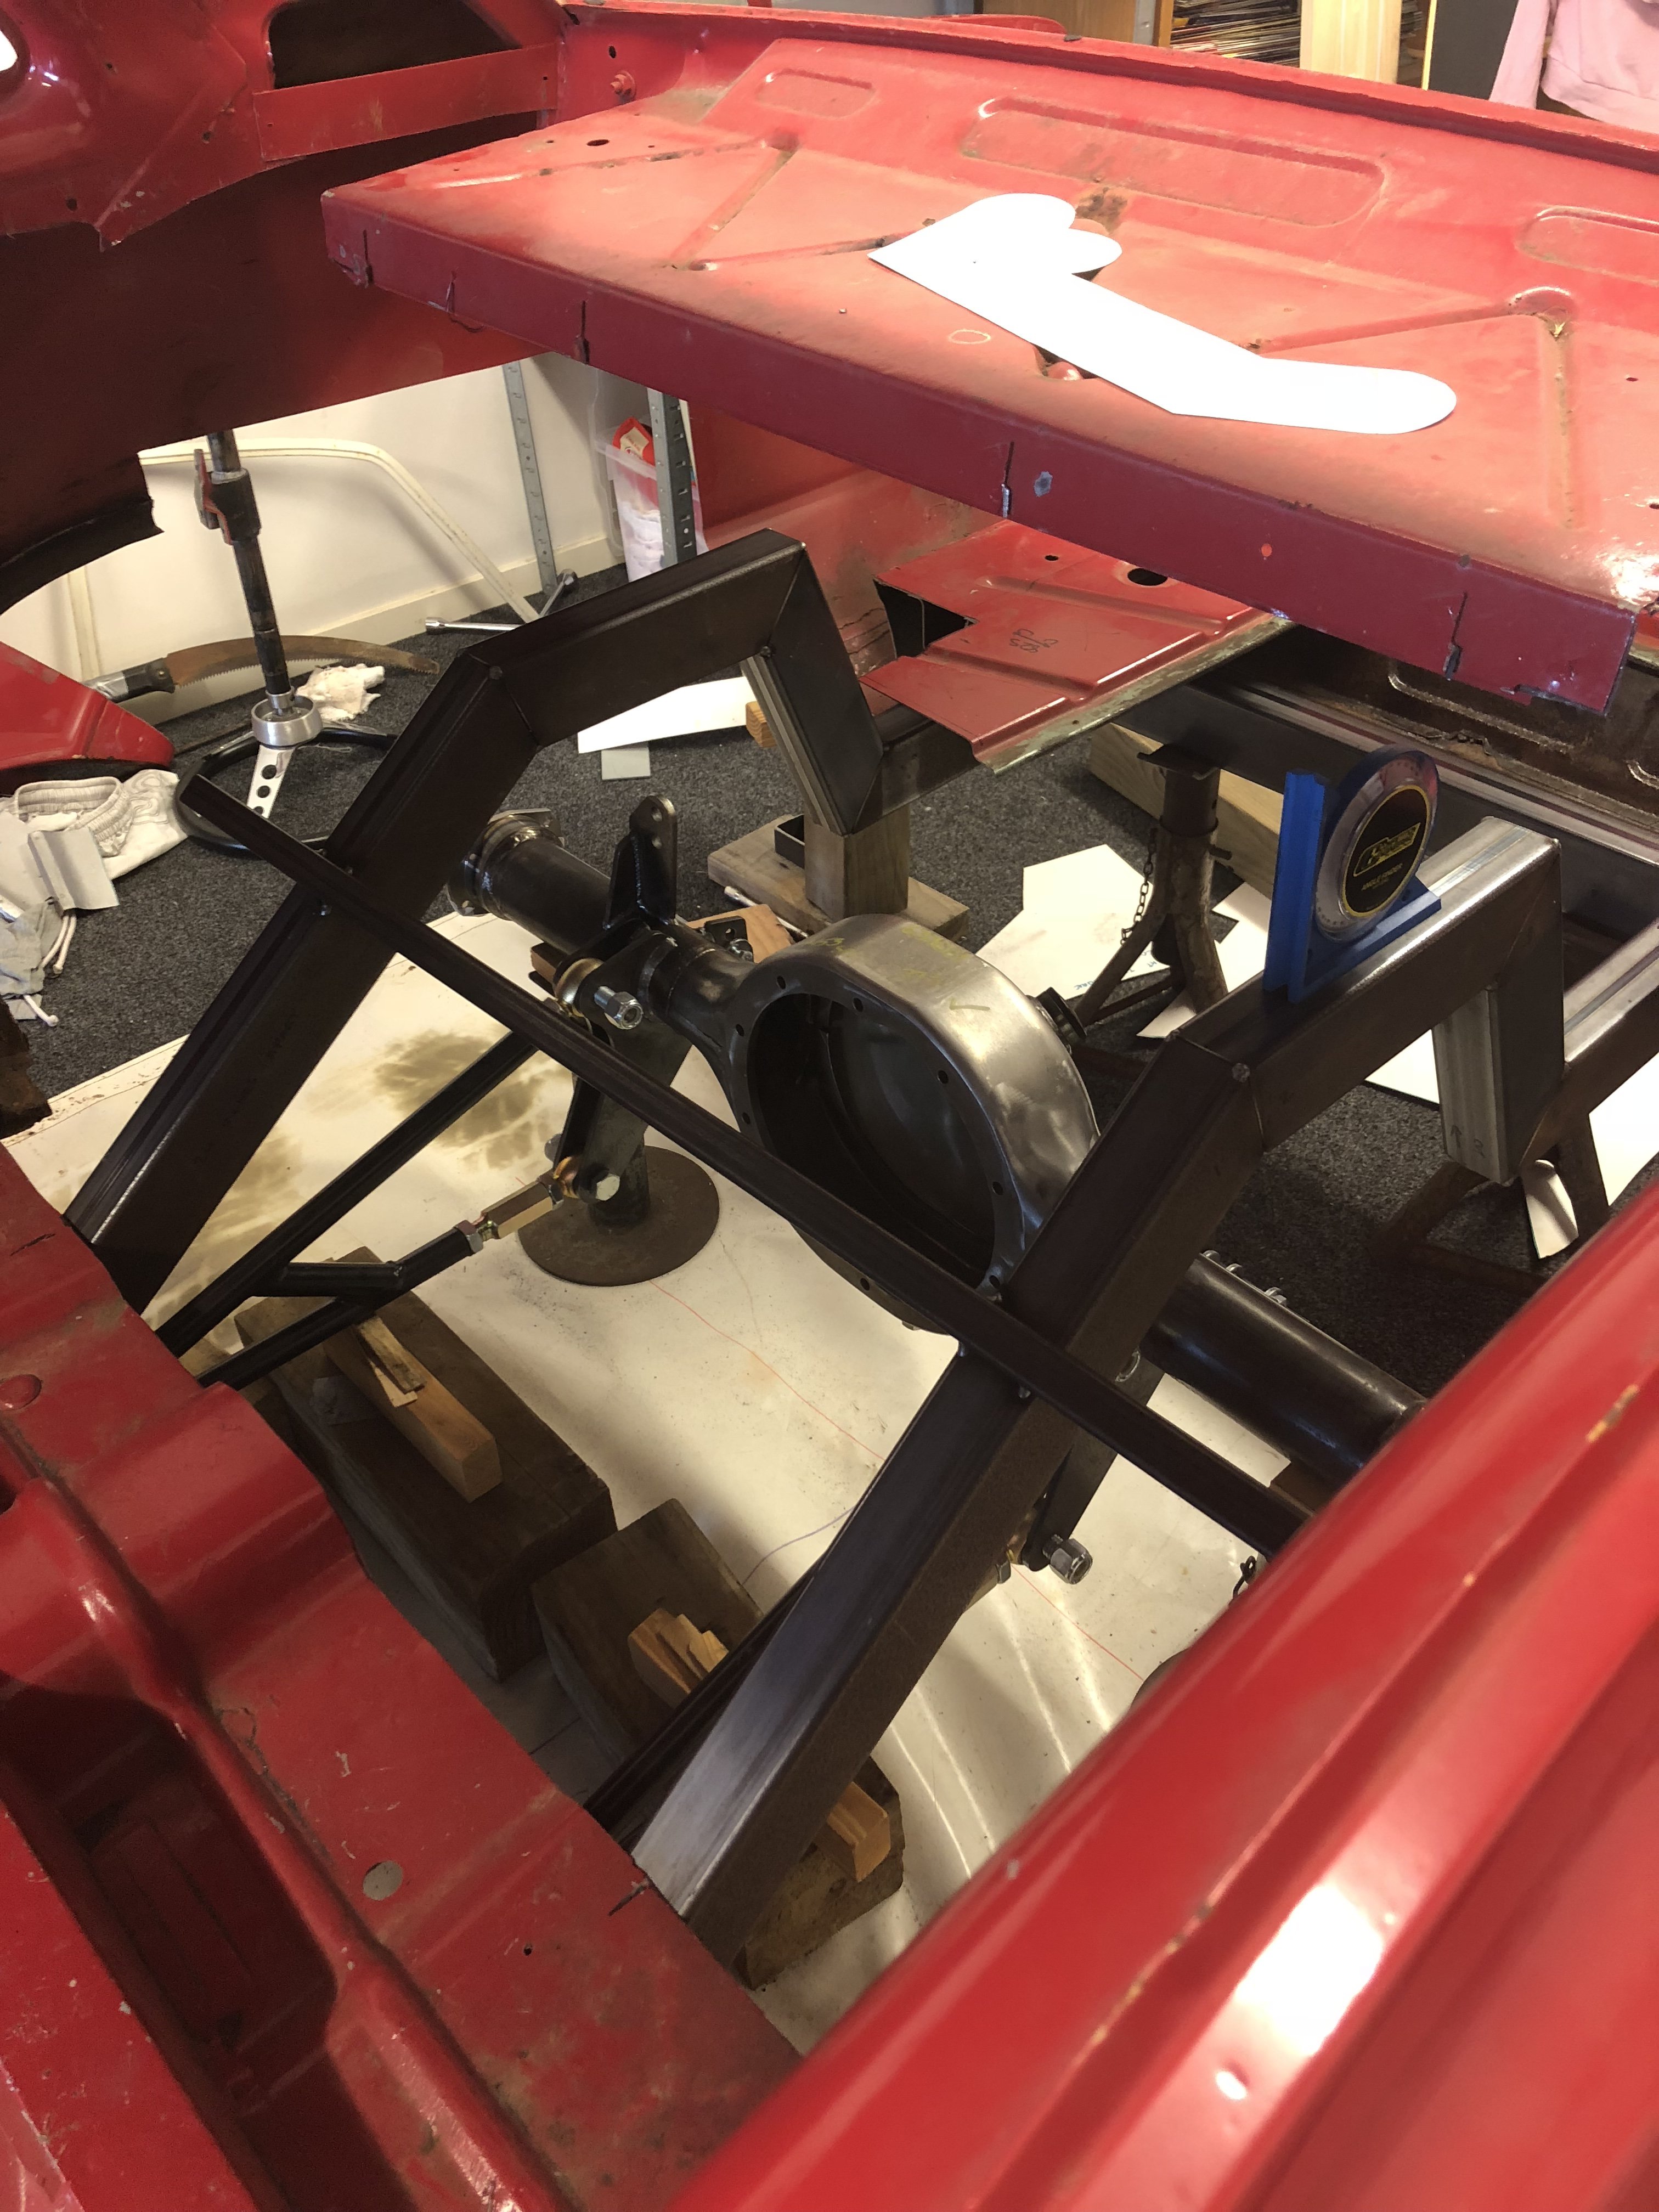
right long time no update but got some stuff sorted. firstly mounts, one side is done the other needs a new motor side plate making but will be done soon. secondly, the fueling system finaly showed up... need to make it fit now thirdly i did find a gearbox... I don't know if it will survive yet but its a 6 speed twin overdrive out of a Great wall v200 so i got it for a good price then found it takes a nissan clutch that is the same diameter as the original (if by original i mean pajero 3L) cover and matches the flywheel after that it was road trip to my good engineer friend with an old pajero bell housing and the gearbox to get the joined (this time it was not a 40mm spacer refer to rover page if you want to know). As a side note for anyone with the same forethought and planing as me.. put the gearbox next to the original just once before this much work.... yes its huge but i will make it fit (and yes, that really was said to my girlfriend). and this is what it looks like all bolted together
1 point
-
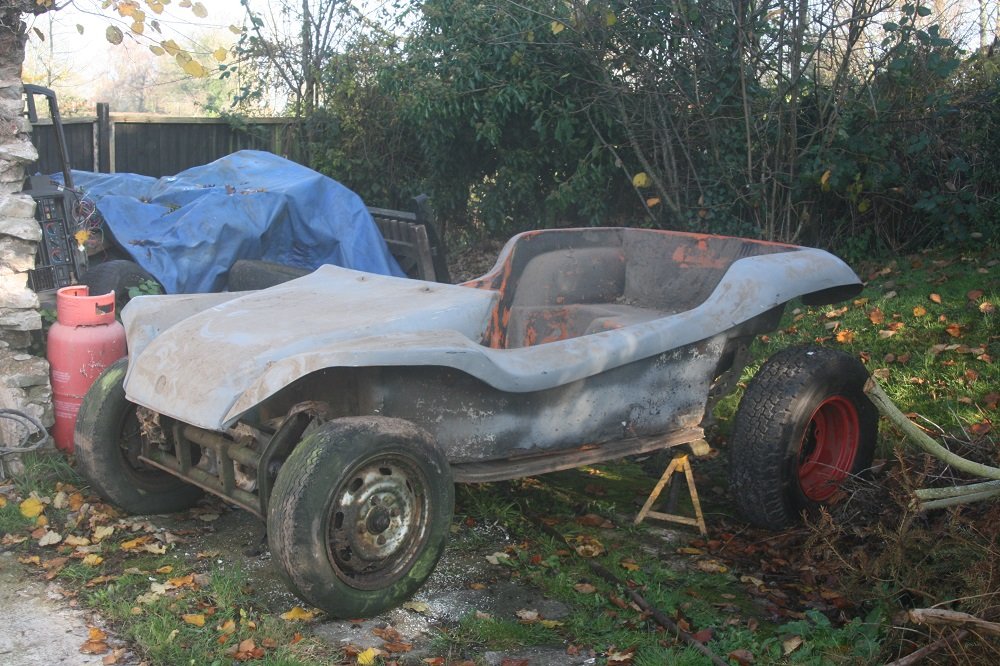
Monthly update thing... New starter fitted, much better now. Heating is now too hot which is brilliant, thank gawd for quarter-lights. Spent most of today insulating, paneling and carpeting where the back seat should be. Looks ok but more importantly much quieter and I can put stuff back there now. /useless pic for thread Also, as mentioned elsewhere, I bought a buggy. It's been sat in a barn for years but it's mostly there. Or most of the buggy parts anyhow. /pics here coz not really worth starting a thread yet.
1 point
-
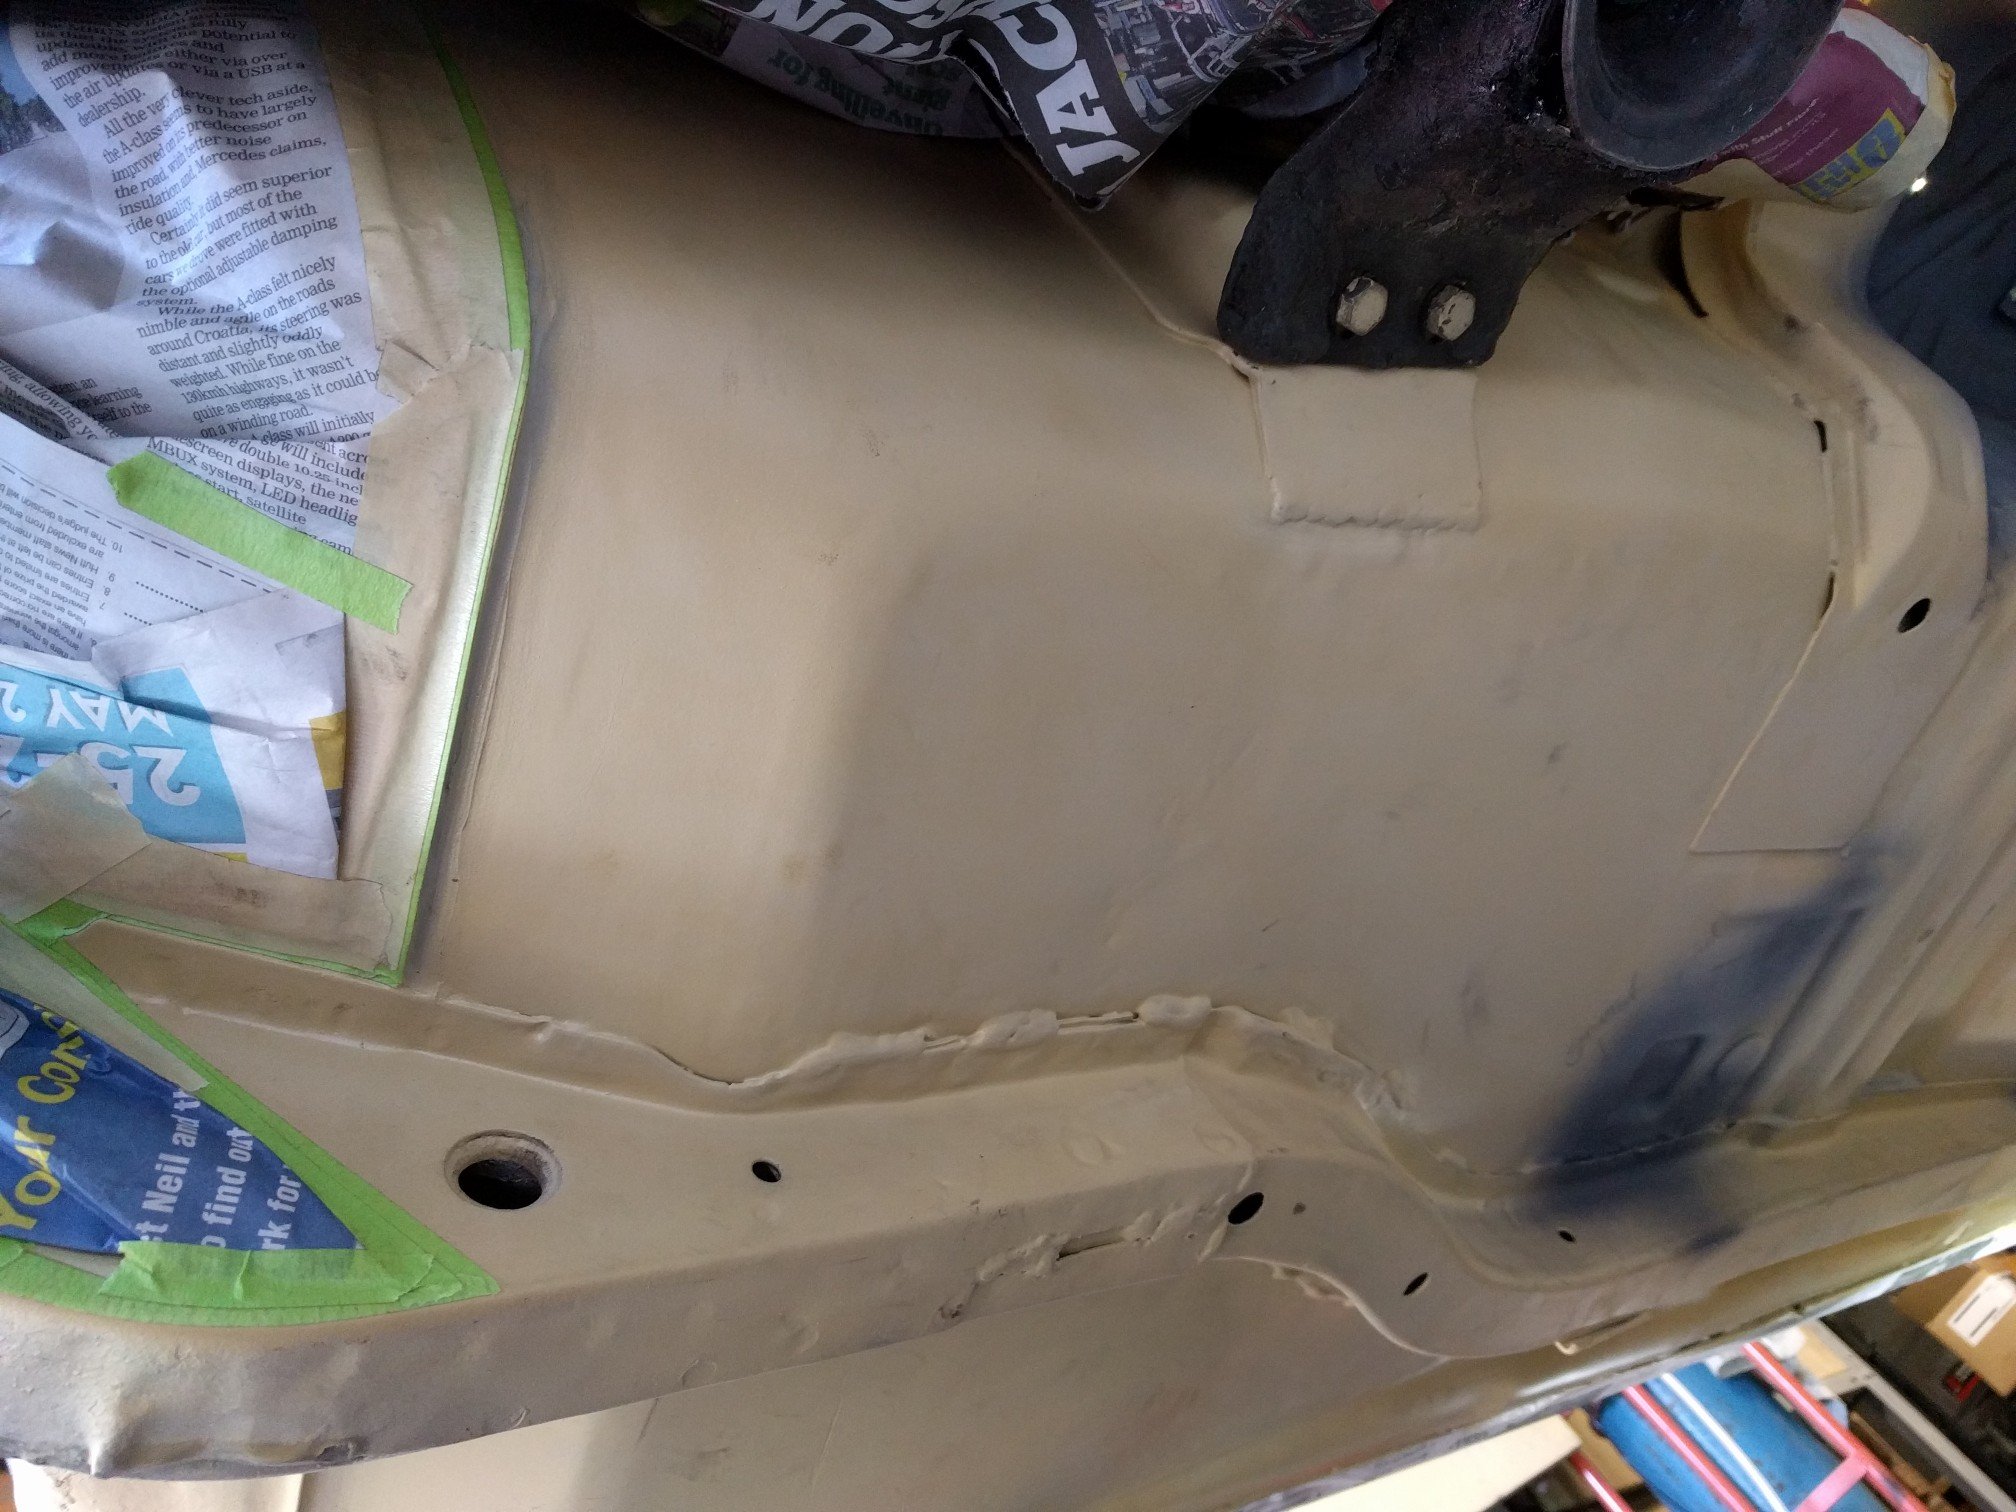
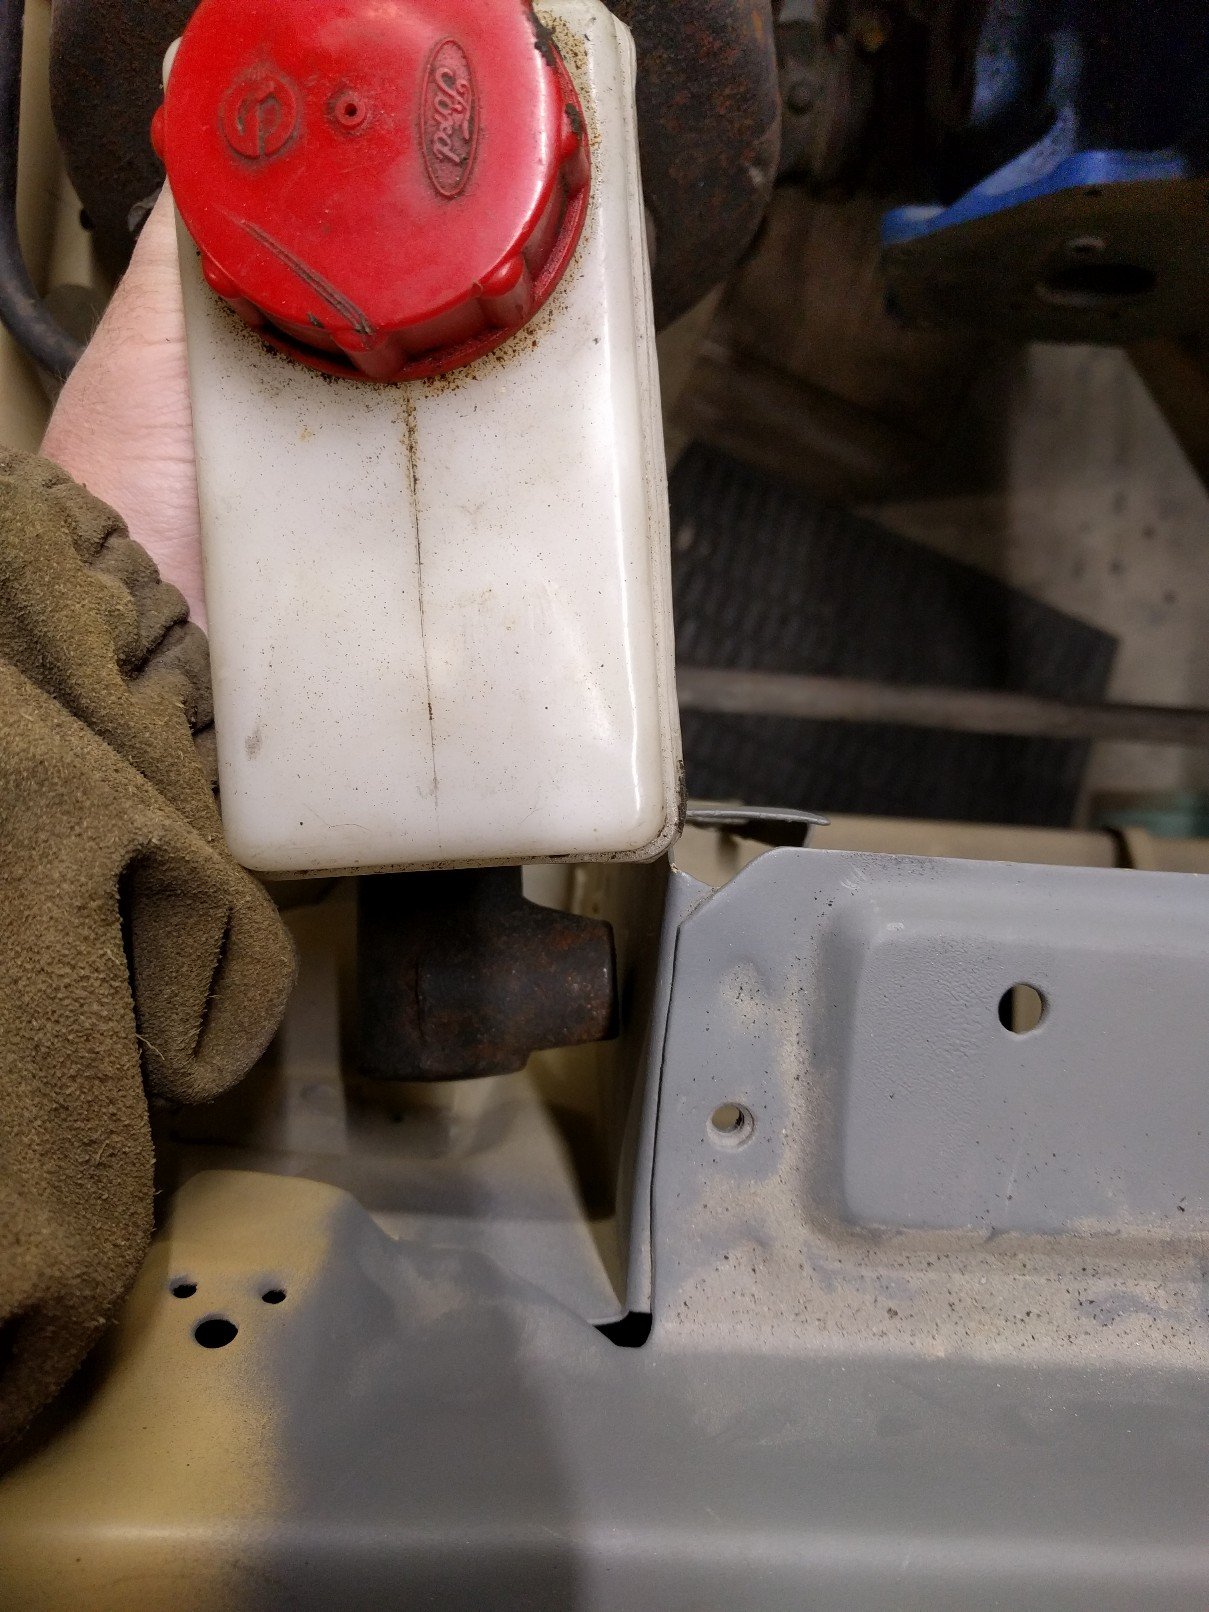
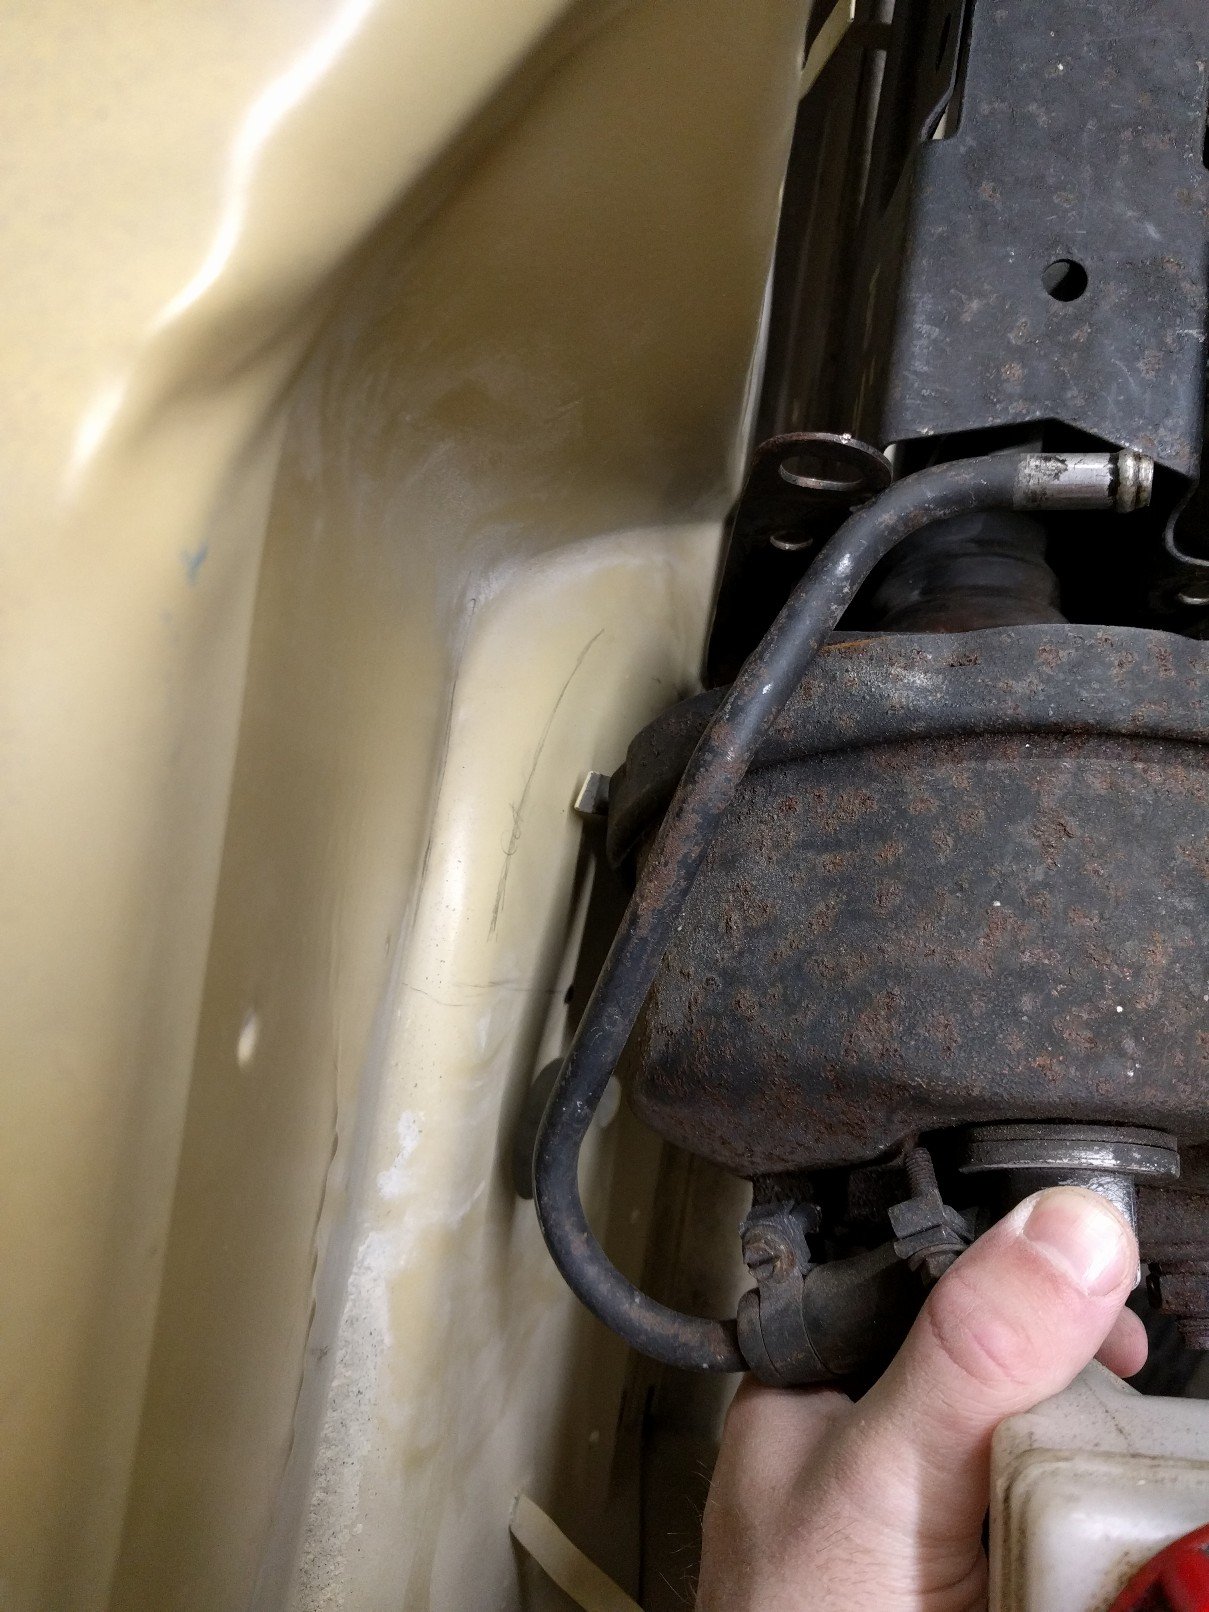
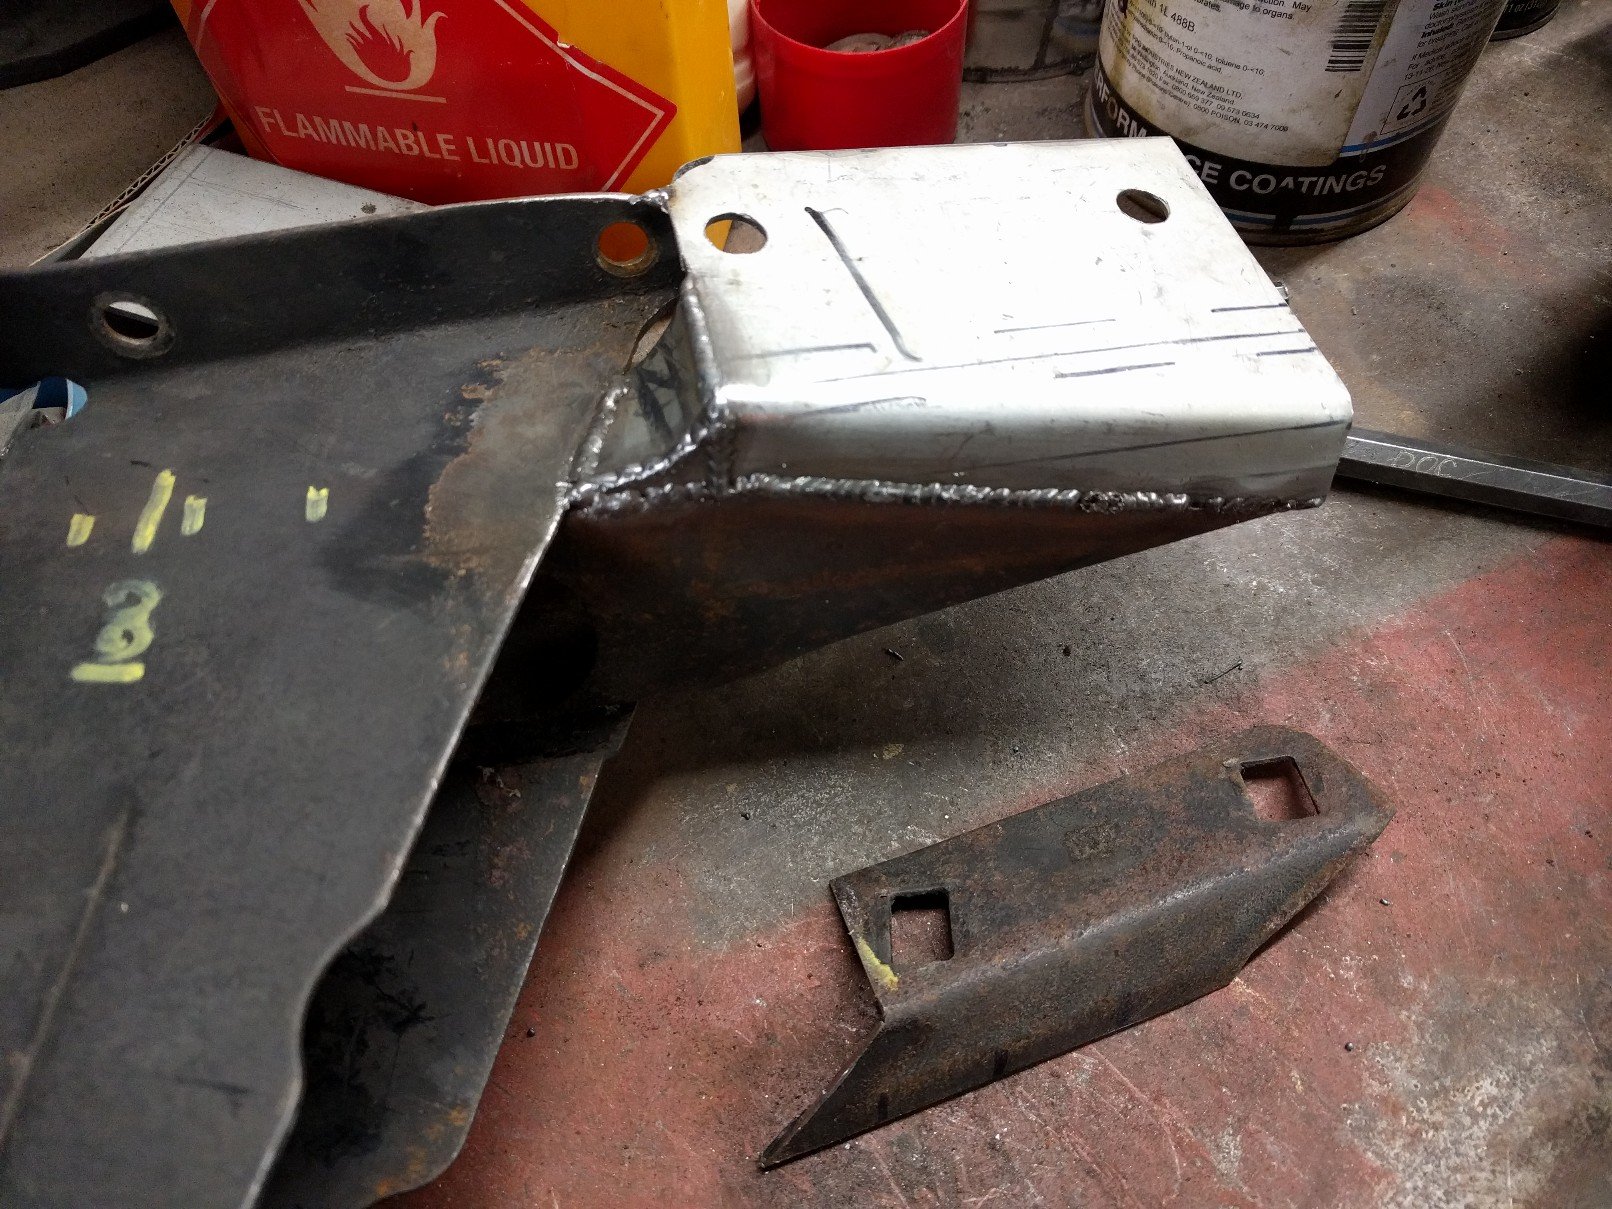
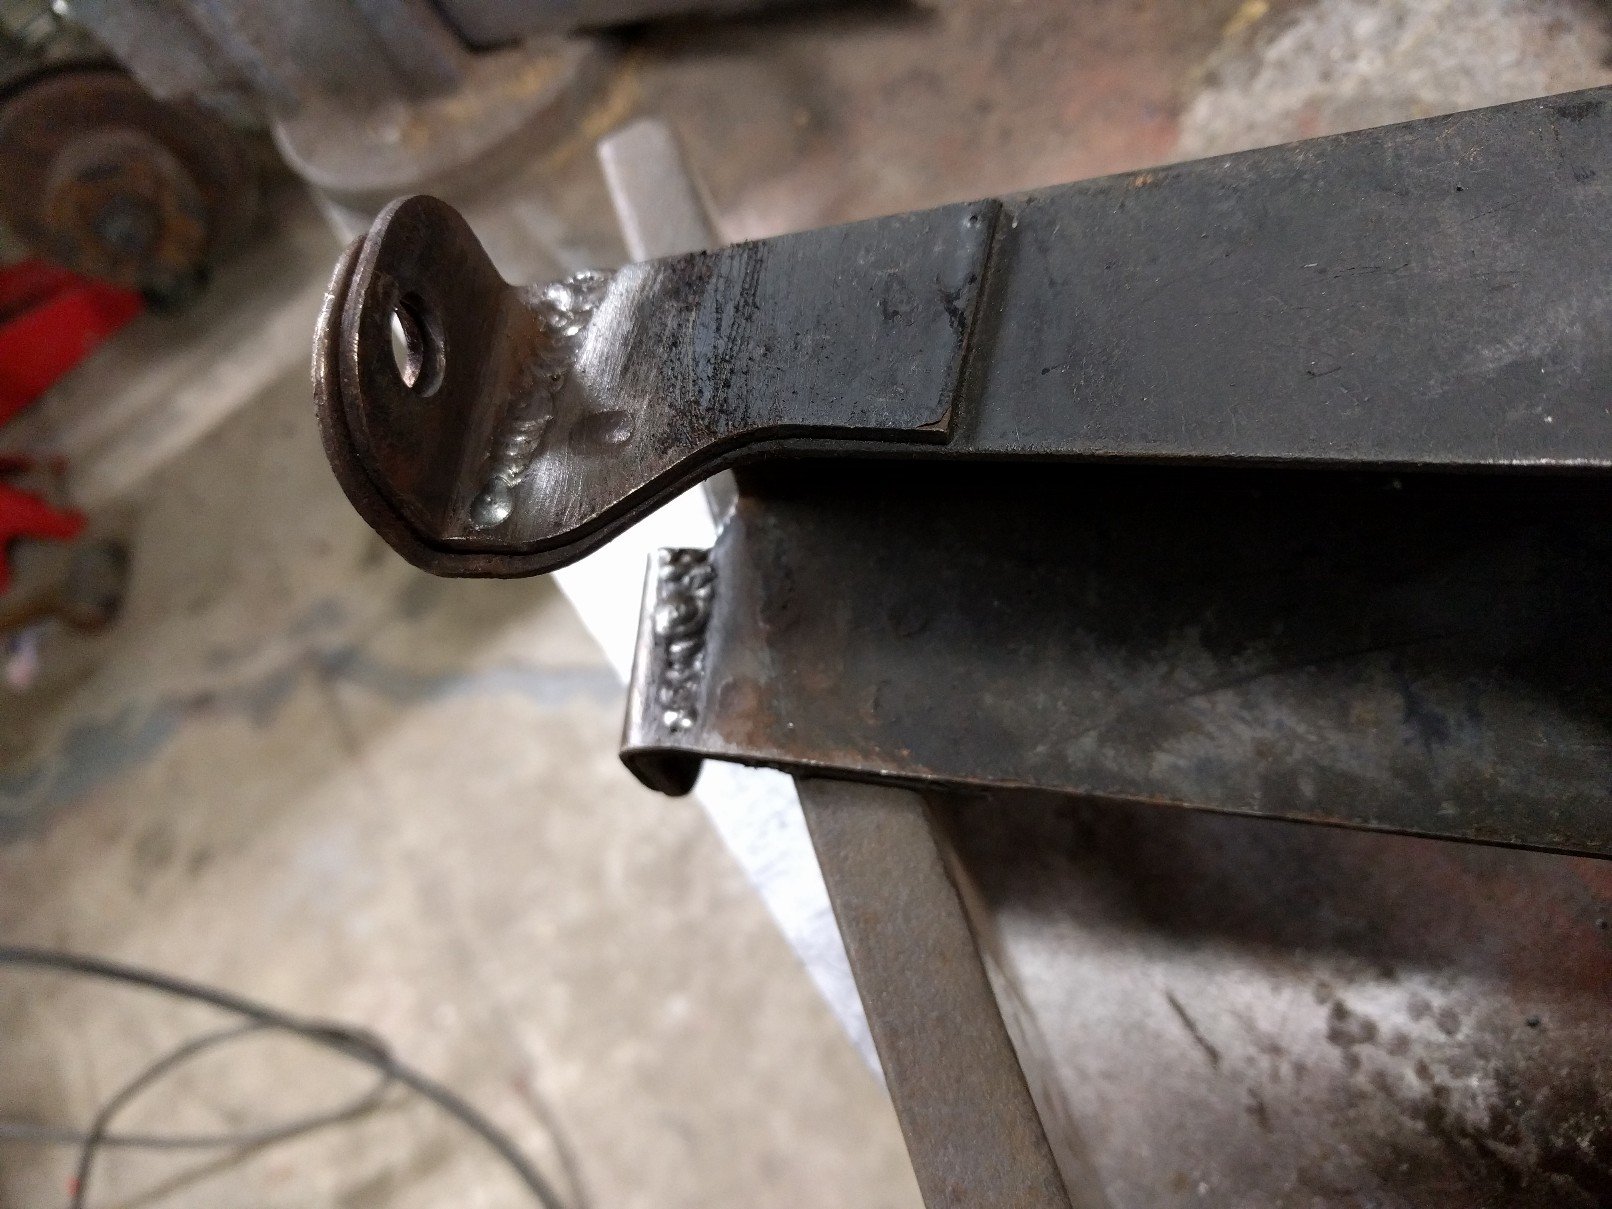
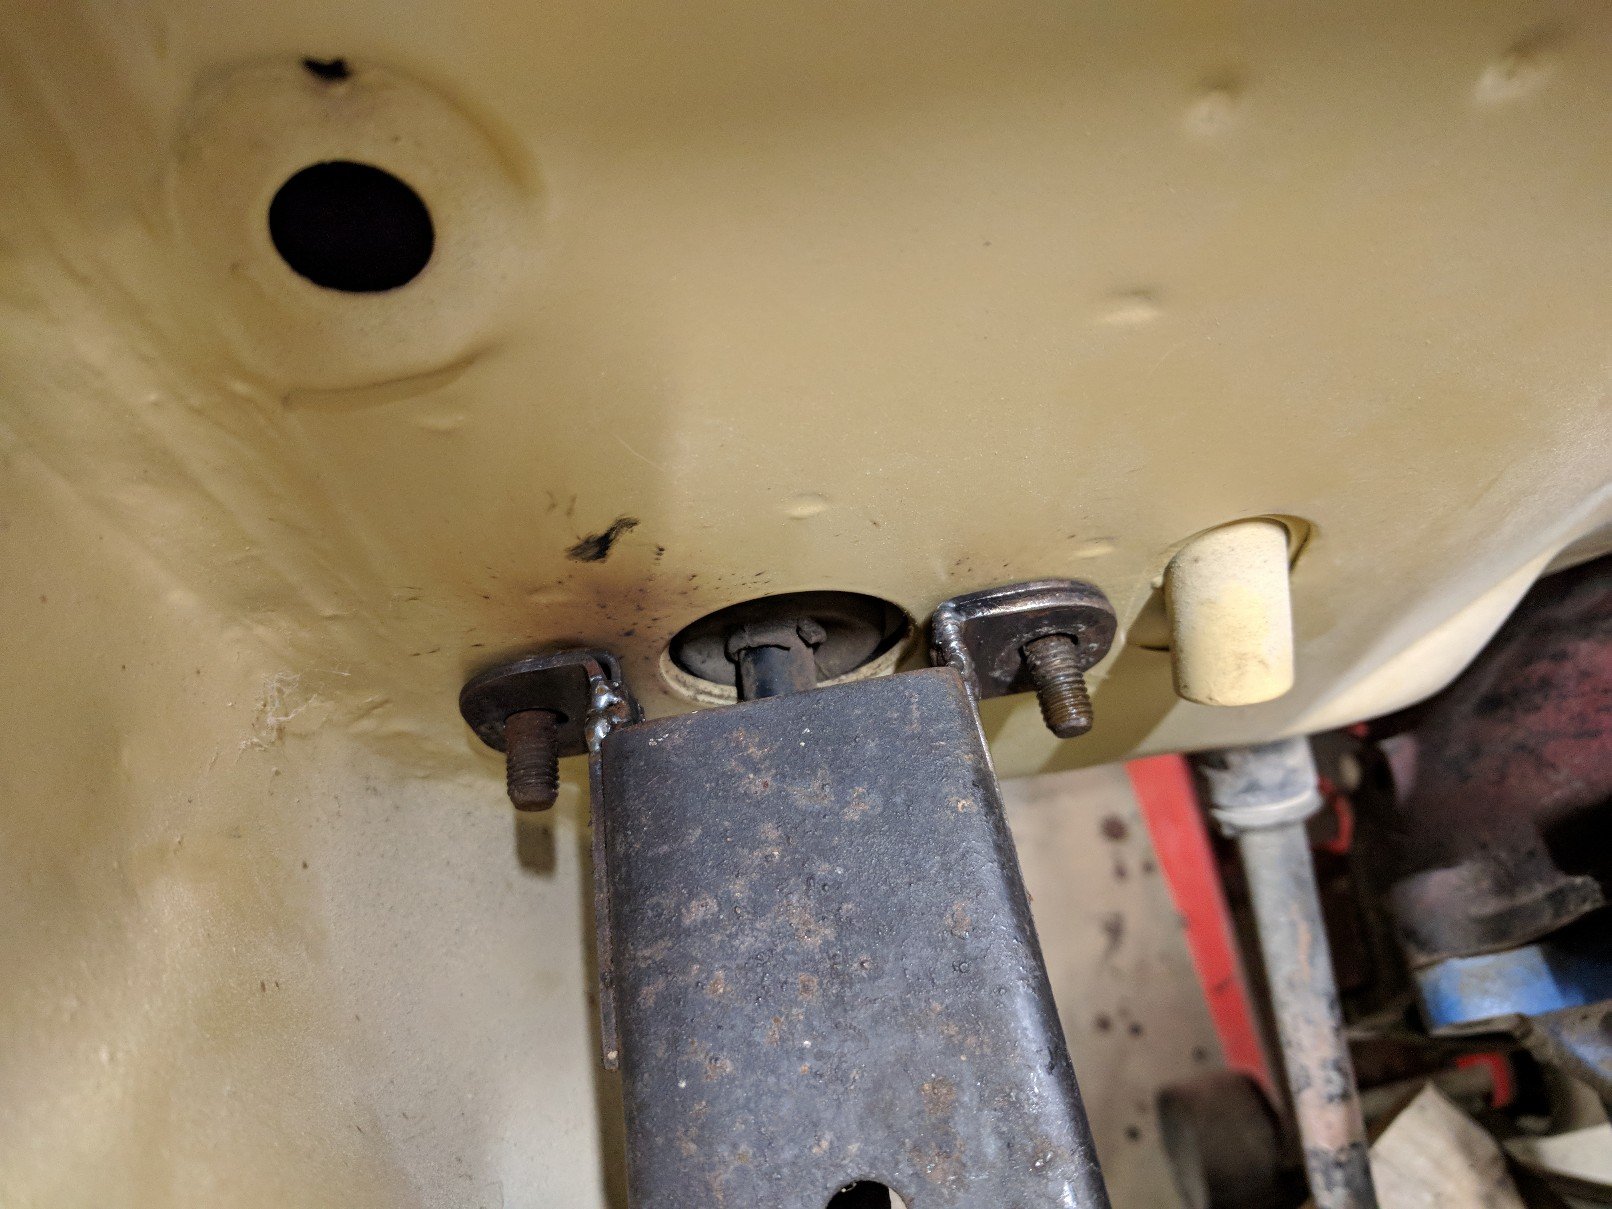
Where has the time gone. I finished cleaning the underside, primed it and redid one of the sill areas as I wasn't happy with my initial repair. Have still to underseal the van. Another of the jobs that needed doing before paint was to lower the brake booster for the side drafts clearance. I read and talked to a few people and everyone said to bend the rod and lower 50mm, redrill the holes. I couldn't work out how to lower the bracket without fouling on the inner fender or the area around the fan where the brake line is. I decided I wanted to keep the original holes and mounting points in case it all turns to shit. So instead I modified the booster bracket and made a new bottom section which is 50mm lower but uses the same holes. The other issue was the mounting tabs to the firewall. When the booster is lowered, the top pulls away from the firewall. I fixed this by slicing, bending and welding flat against the firewall. The next step is to push out the inner fender so the booster sits in nicely. Hopefully everything will look factory once it's done.
1 point
-
Been a busy two weeks of knick knacking and paddy whacking really. Had huge progress in the dismantling task, and now have it stripped back to a water blasted rolling body. This weekend I de-loomed it with various difficulties due to Japanese nimble fingers and Mexican wiring swept under holes, while Stephen dropped the fuel tank out which had 1 & 1/2 buckets worth of petrol still in… no auckland tax on that. The front windscreen didn't come out easy however as the rubber was baked more than a christmas pavlova made after a few breakfast rumballs. But with two rolls of $2 tape as support and bare fingers for guidance, we yanked the screen free and the began the painful process of smashing each little piece from the surrounding areas. Even dropped the engine out the bottom to check over if it's worth saving, and the exhaust which is definitely not worth saving. And finally on the progress, I spent a day last week softly caressing the old vinyl rear seats that crack into pieces in your fingers unless you find a 24 year old bottle of Johnsons baby oil at the back of a bathroom cabinet, and massage that into the fragile material until it's overwhelming in smell. Then I spent the remainder cleaning up plastics with thanks to rivalrx CRC suggestion, AKA the new best thing after Autosol. Note grubby handles. Got new door cards from Australia - $140 free shipping bloody impressed and awesome business card to match. Bonus items found hidden this week were a knife down the wheel arch in boot, an Escort window winder, and a monopoly house under the fuel tank. Kind regards, rotorhoe1 point
-
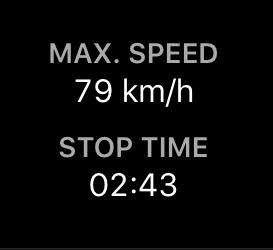
Just got back from a succesful 80km test ride, other than almost doing a shakotom and ending up in the native down a bank all is sweet. Bit doughy with the 15t sprocket on but its happy sitting on 70-75kph at 8000rpm on the flat so that better than being tapped at 70kph doing 10000rpm. Still got a weird issue where it sometimes cuts out when you close the throttle at high speed but thinking its too rich on the pilot/idle circuit. Pulled the spanny off to give the head bolts another retorque now Iv done 150kms, piston and bore still look good through the exhaust port so im confident its not going to destroy itself like the first big block kit.1 point
-
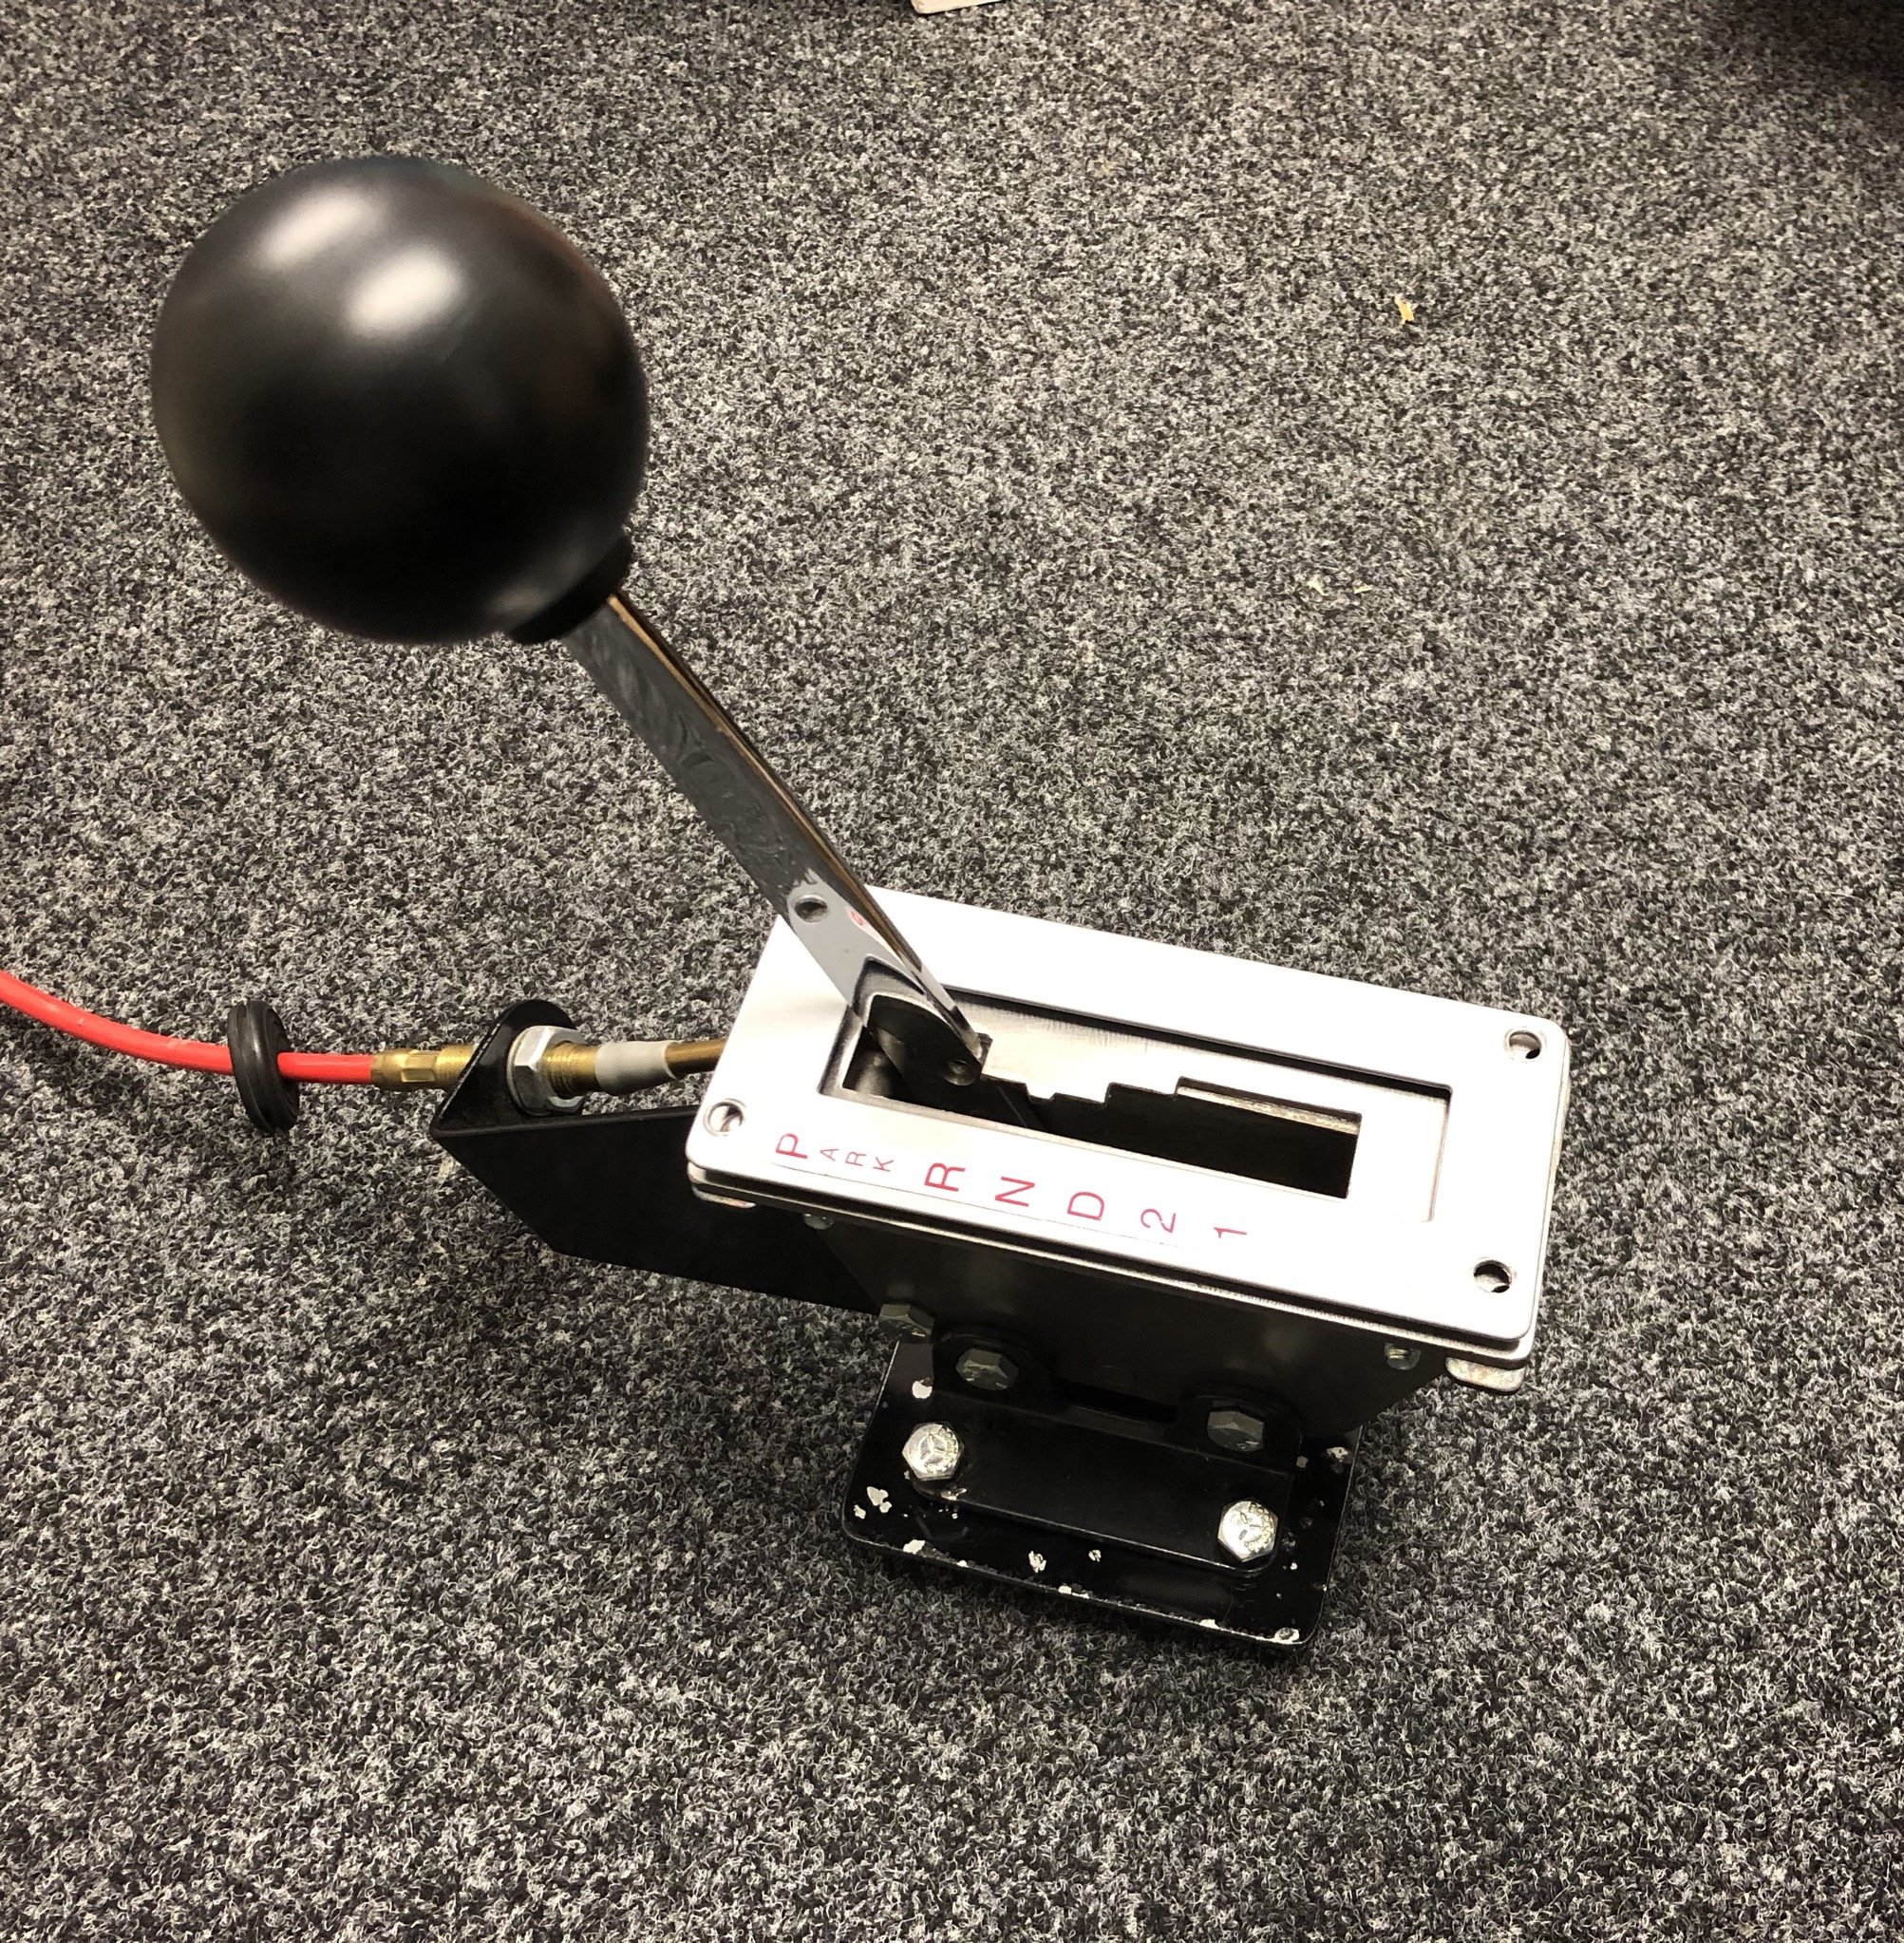
Here’s my shifter. its an early b&m 60 series. bought it off eBay for $90 us and restored it. these things are getting real expensive now because of the nostalgia gasser racing
1 point
-
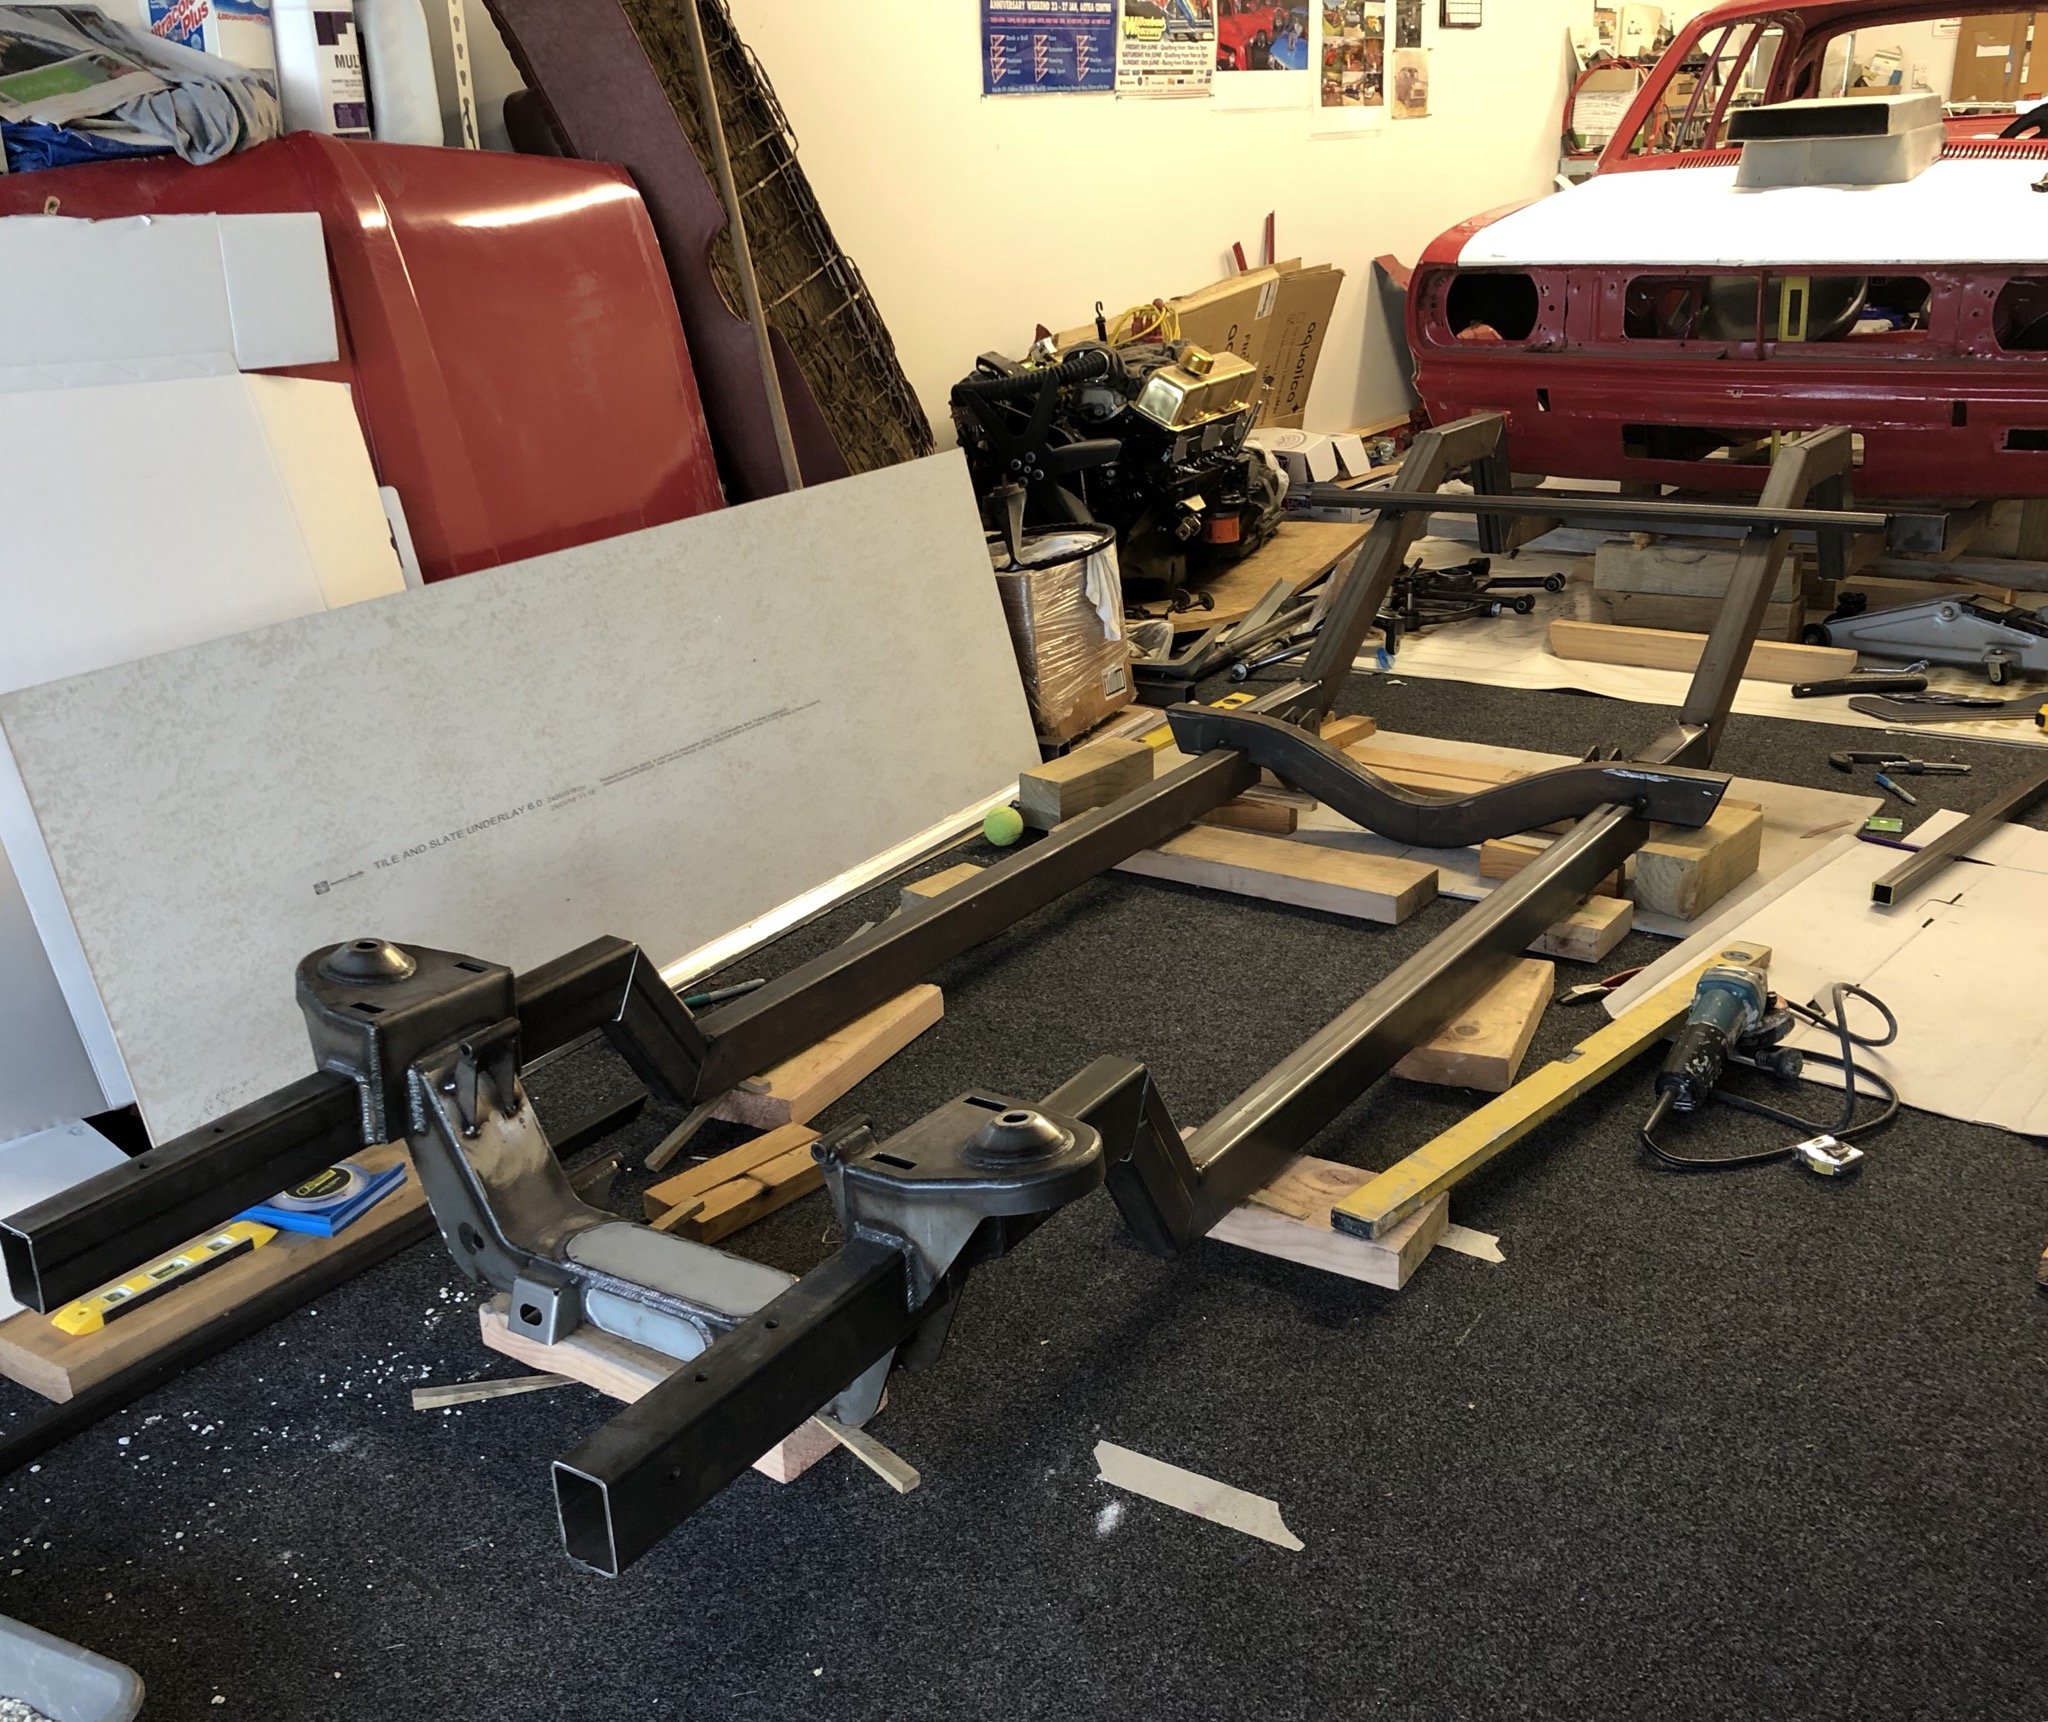
Chassis all tacked ready for tig welding and fish plates.
1 point
-
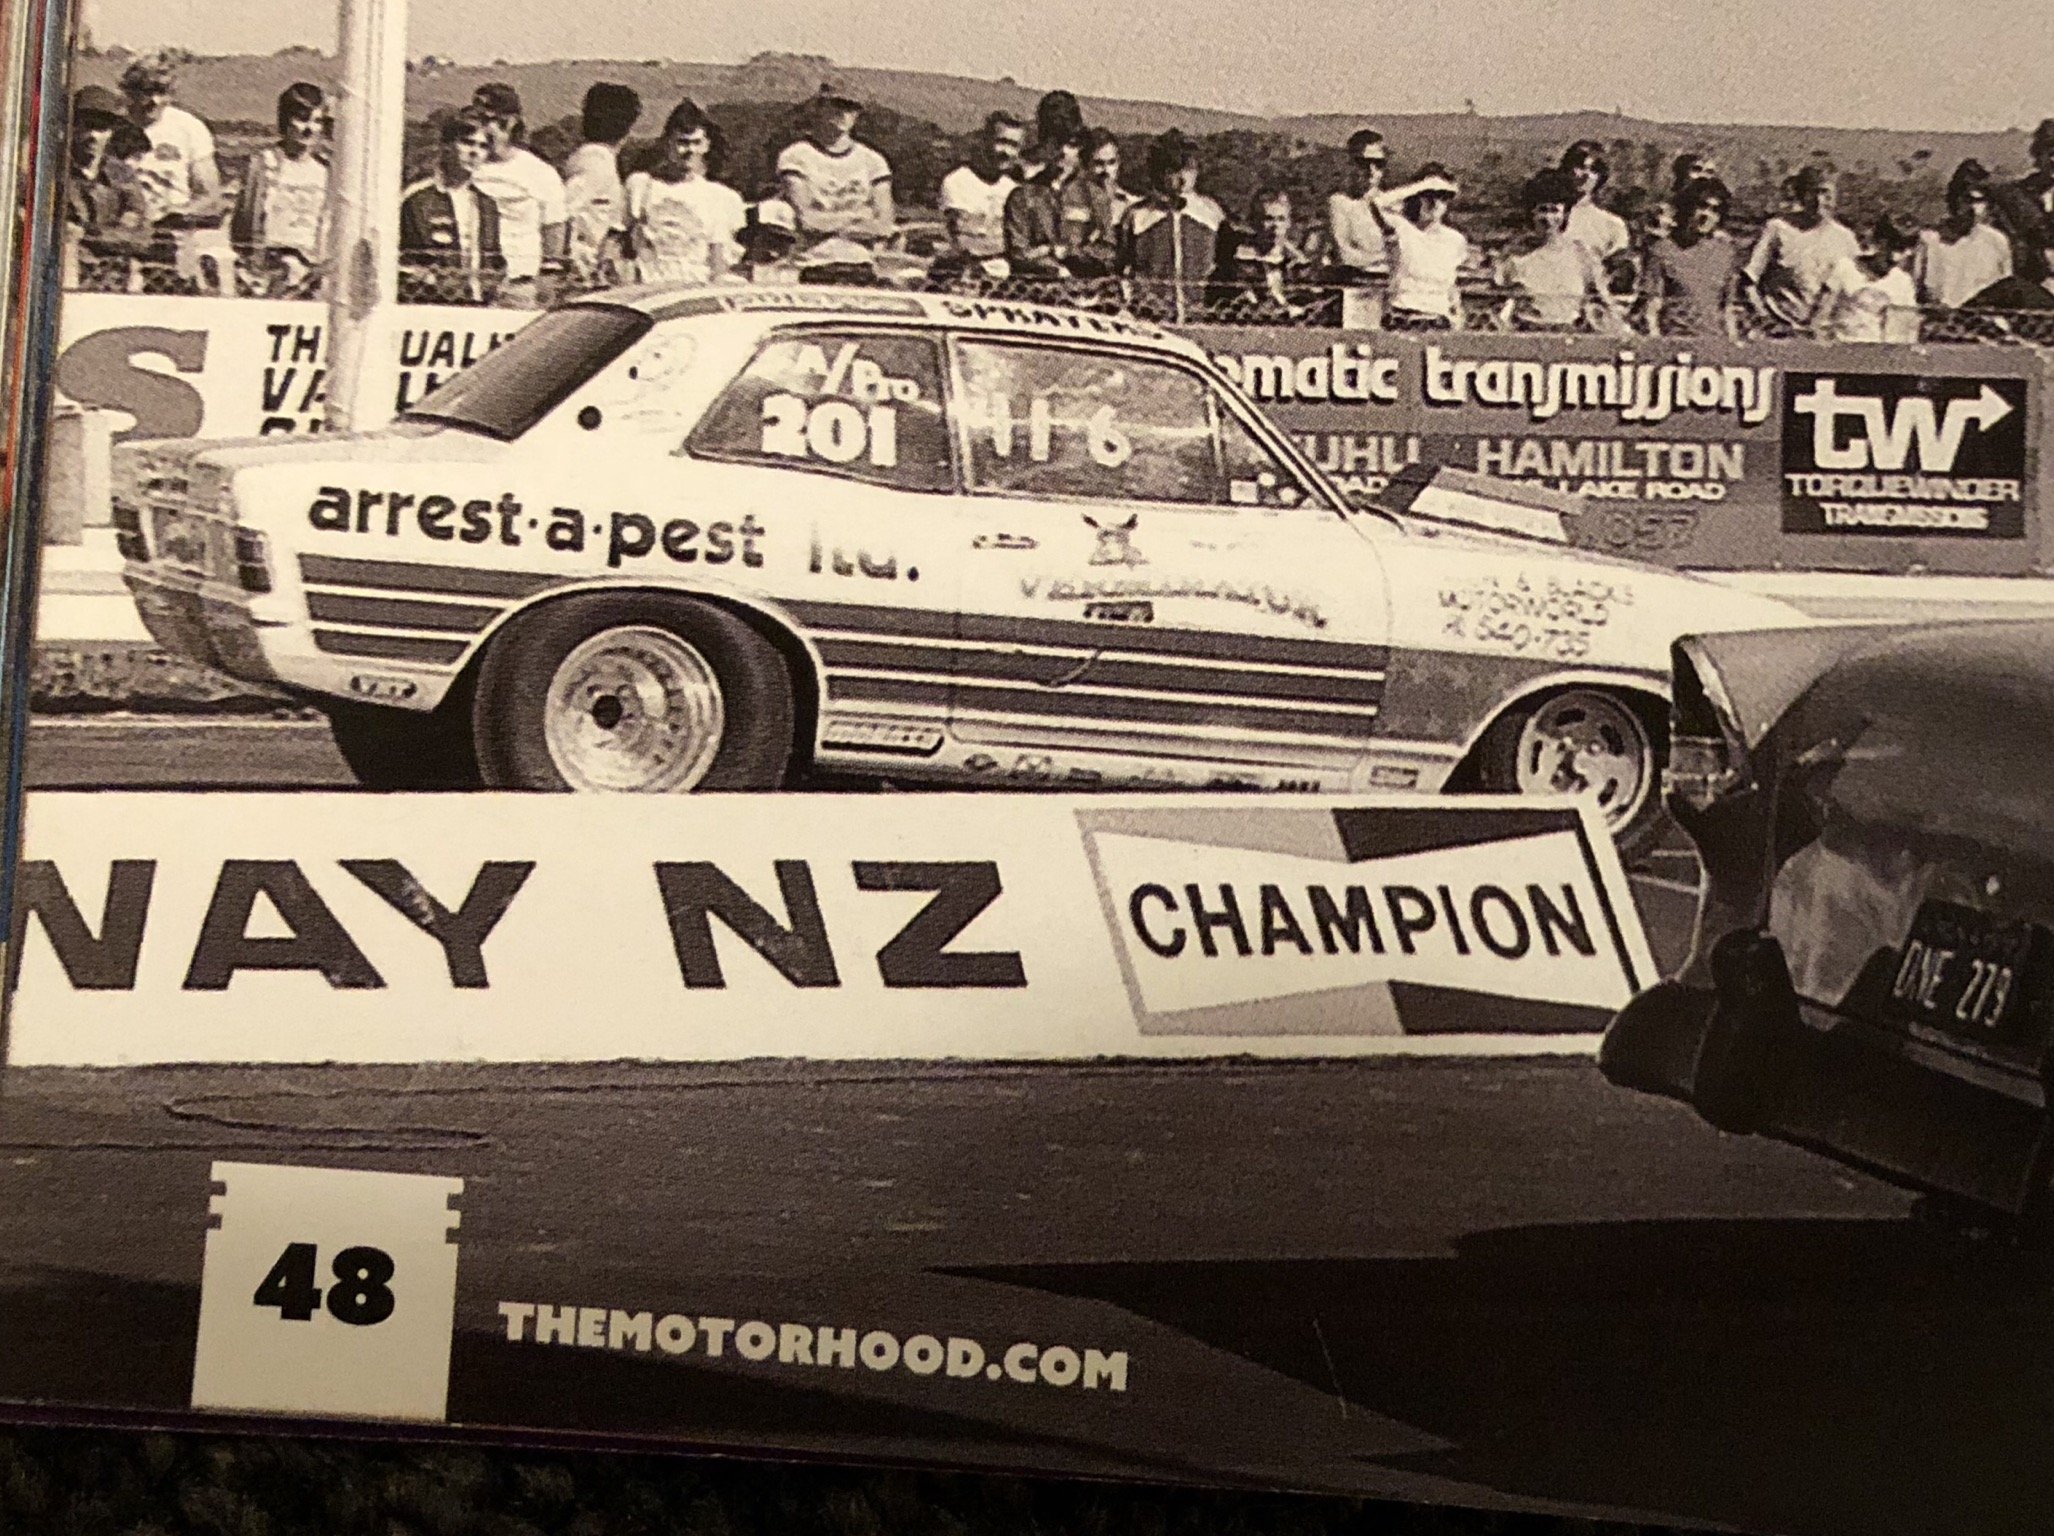
This was my starting point..one set off old ansen sprints.15 x 10 and 15 x 4 1/2 4.11 Tru Trac Moser diff head. 380 hp 327 chev turbo 350.
1 point
-
1 point
-
1 point
-
1 point
-
Me and Dad raced this one many moons ago wagon was Steve hildreds old drag car..we sold it and it got painted silver and black..if you look on YouTube under chris Wright meremere you will see it getting rolled about six times.
1 point
-
My inspiration..used to watch this car at the drags in the early eighties
1 point
-
1 point
-
1 point
-
1 point
-
1 point
-
1 point
-
1 point
-
1 point
-
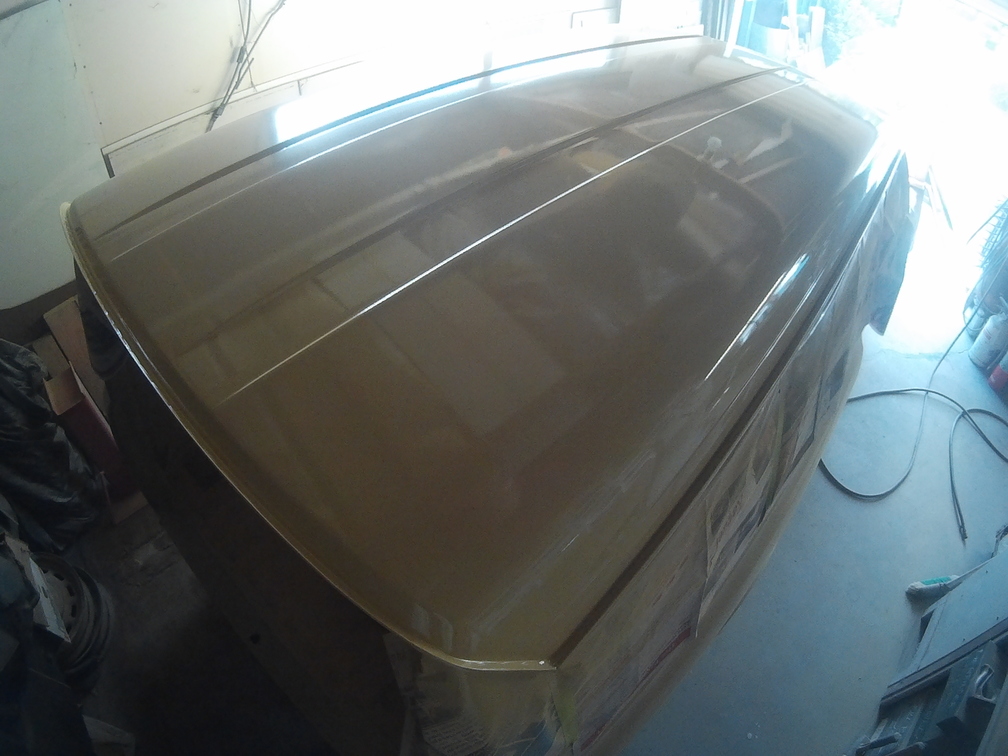
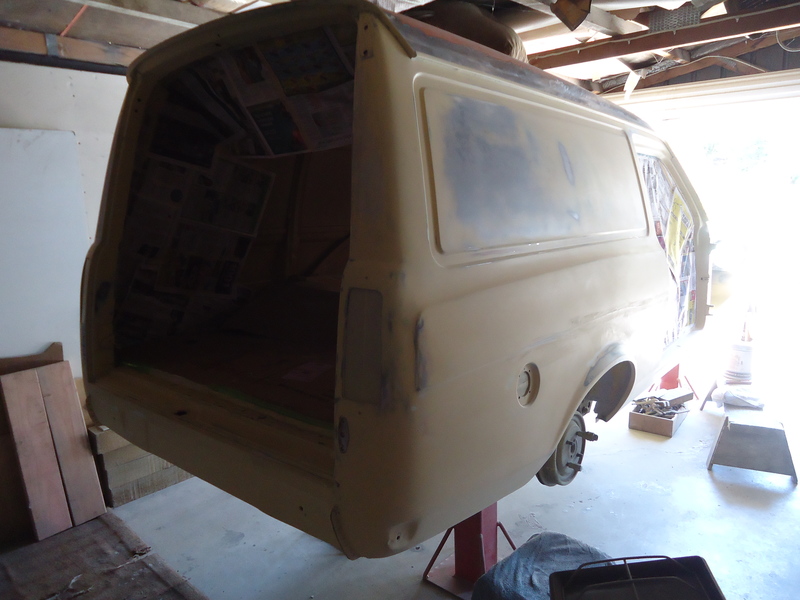
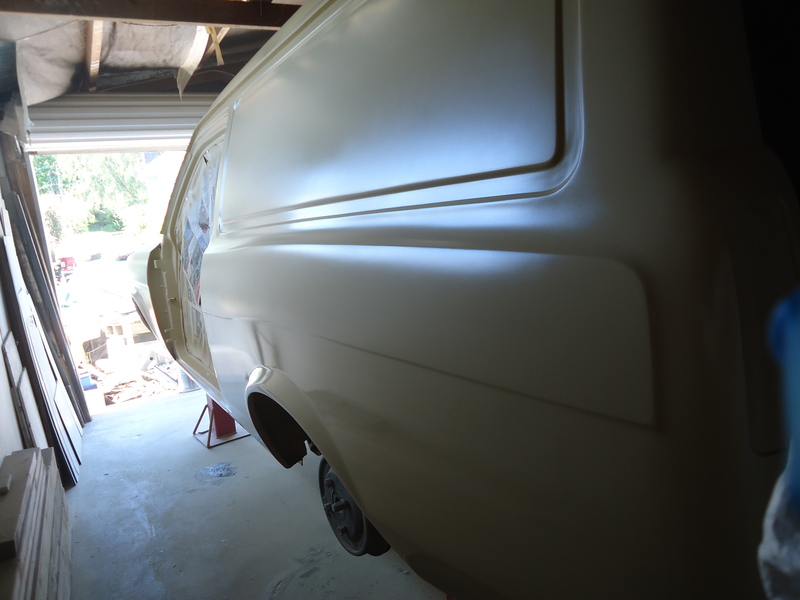
The roof was long boarded down and any imperfections were sorted out. Also seam sealed the two edges where the roof panel meets the sides. This is the rear corner looking over the roof. Sprayed on the final primer, dried very quickly but was able to keep it wet and glossy. Looking very straight now.
1 point
-
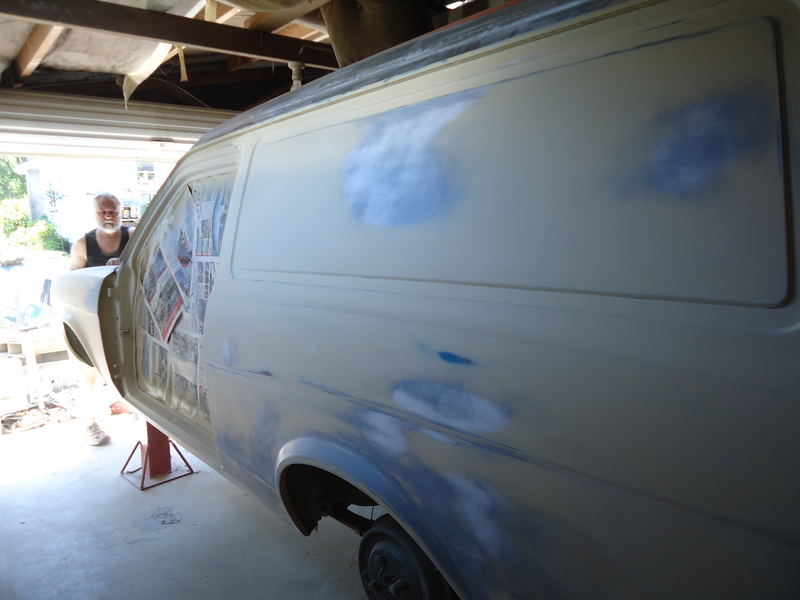
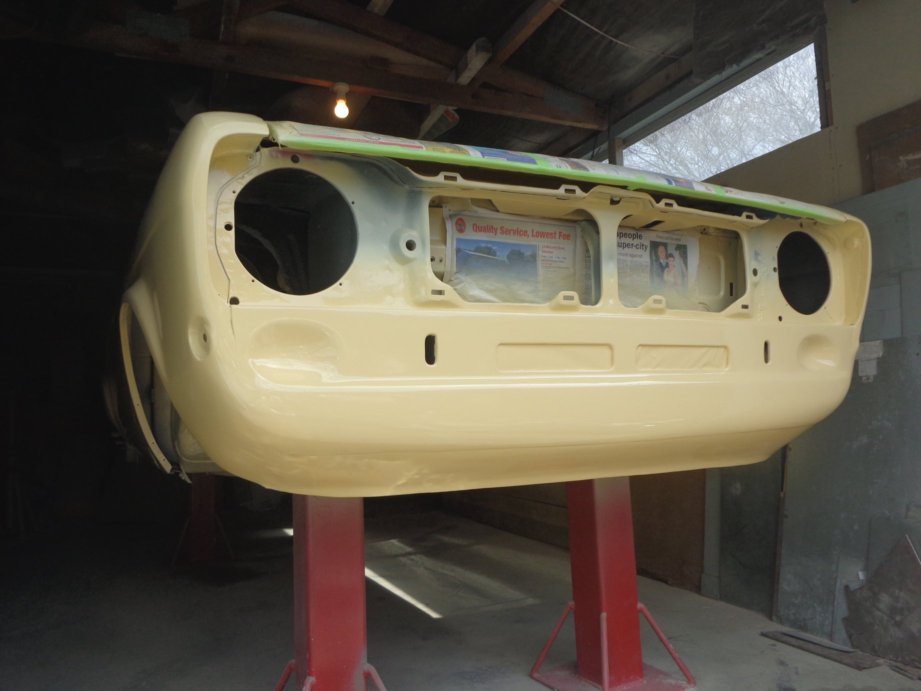
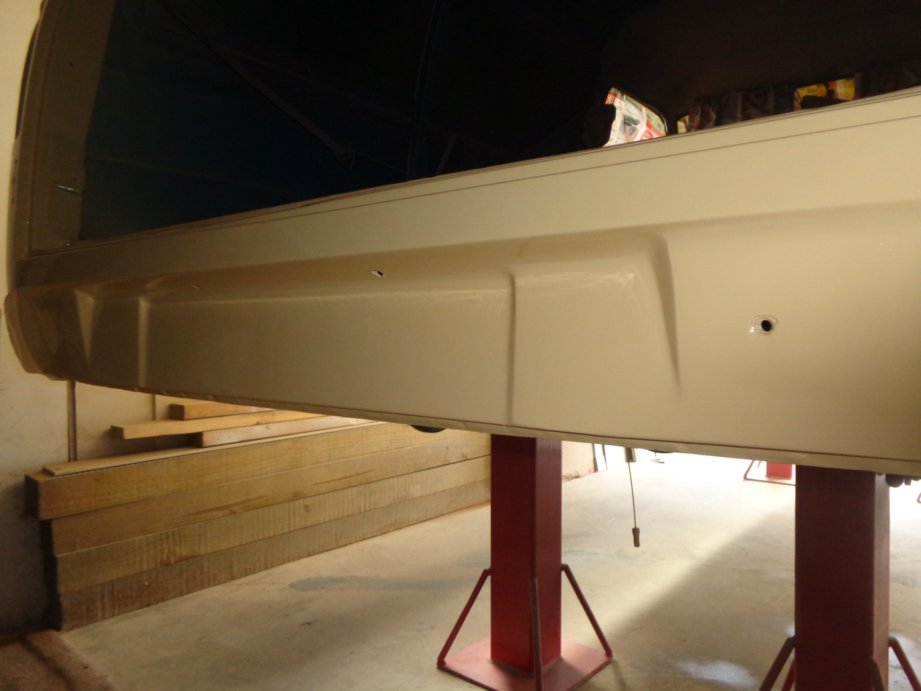
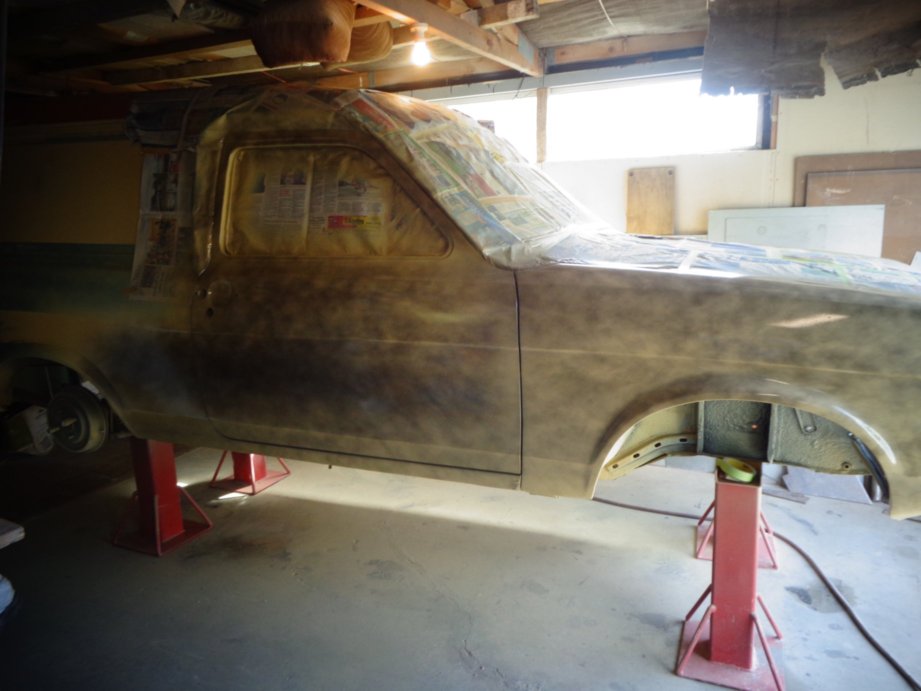
Final coat of primer was applied this morning to the outside. Very hot day, dried up pretty quick and made it difficult to keep glossy but i got the hang of it. Before After The front and back were also sprayed but the pictures were a bit shit. Looks exactly like the pictures futher back in this thread anyway. Next time these areas get sprayed, it'l be with color (Finally!). Should really pick one then. Hmm...
1 point
-
Also purchased this a while ago, an original rubber sport spoiler. Was trying to find where to put the number plate holes so it was time to get the spoiler out and try it. Thoughts? Obviously would be colour matched to the body. Also have the other type of grill, and chrome and sport bumpers to play with as well. //oldschool.co.nz/index.php?/topic/43995-bmxnz11s-mk2-escort-van/
1 point
-
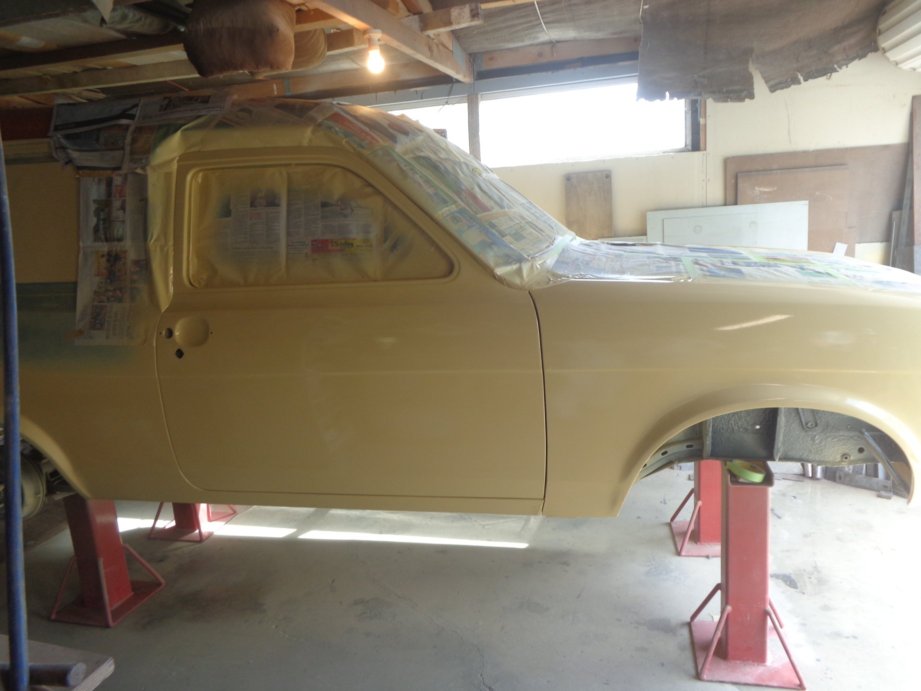
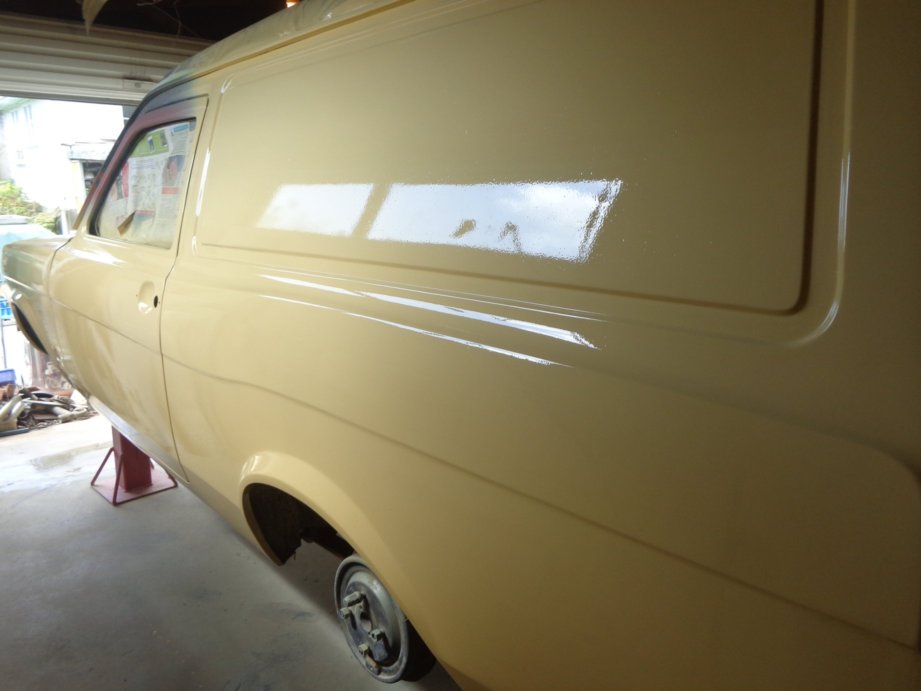
Have been going pretty hard the last month. Last panel to line up was the drivers guard. Once we were happy with this we were able to shape the drivers side, along with the passenger side, front valance and rear panel below the doors. A really long week finishing bits and pieces so i could splash some primer on it in the weekend. Started Sunday morning looking like so 3 or so coats of high build epoxy primer later Really happy with how it went, no runs or sags etc. Looks pretty straight. Few things to fix up but stoked with how it looks. Nice and glossy. Put some guide coat through the gun to finish it.
1 point


_sedan_(23230030334)(1).thumb.jpg.34d765361d66c78db614bae6ea2c156a.jpg)


.jpg.d001f53c027c97dd0f6b52cd86ea2222.jpg)


.jpeg.493fd14be1075939517b04b73062deca.jpeg)

.jpg.916c88dad226e800017c6b47bbb37c54.jpg)


This leaderboard is set to Auckland/GMT+12:00