
Leaderboard


Popular Content
Showing content with the highest reputation on 13/07/25 in Posts
-
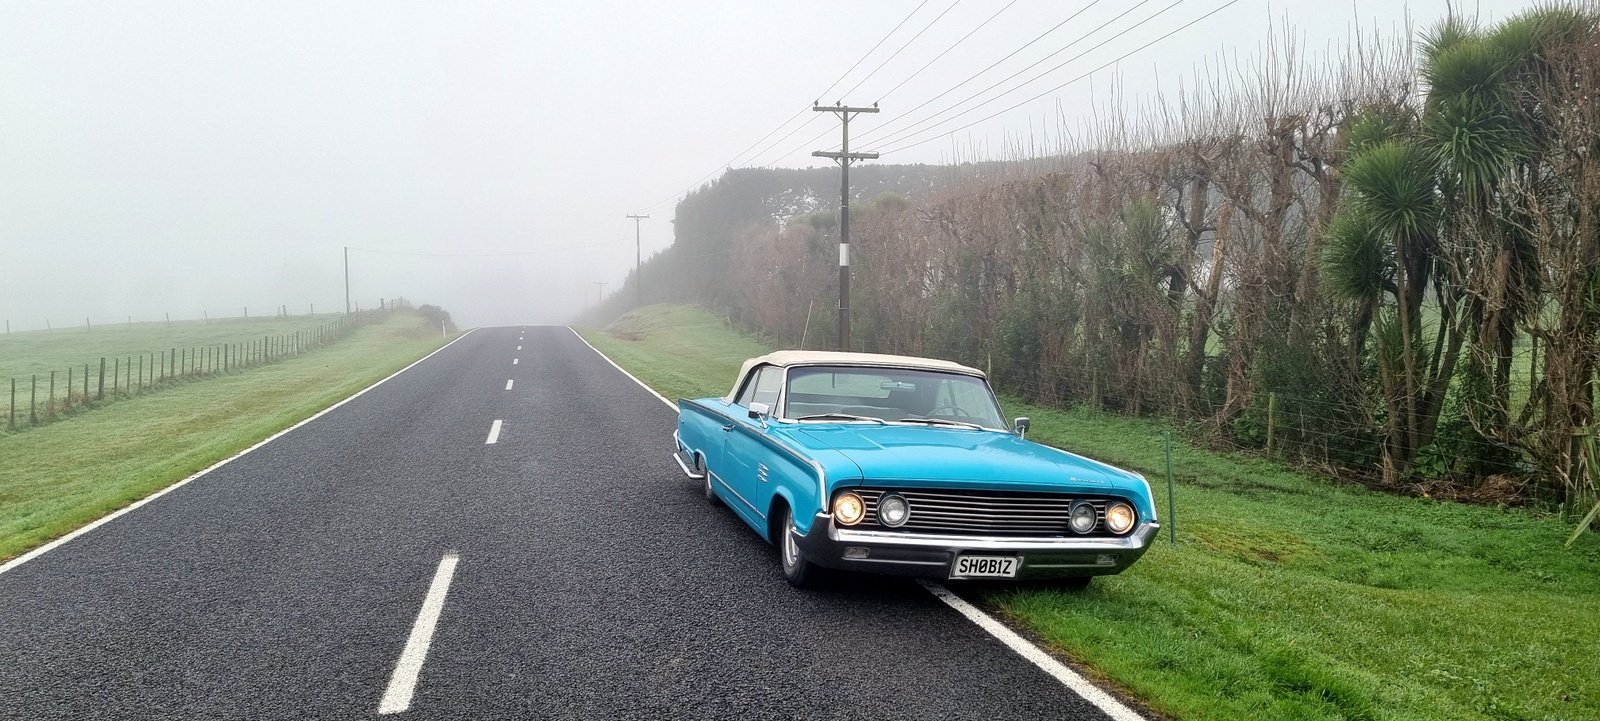
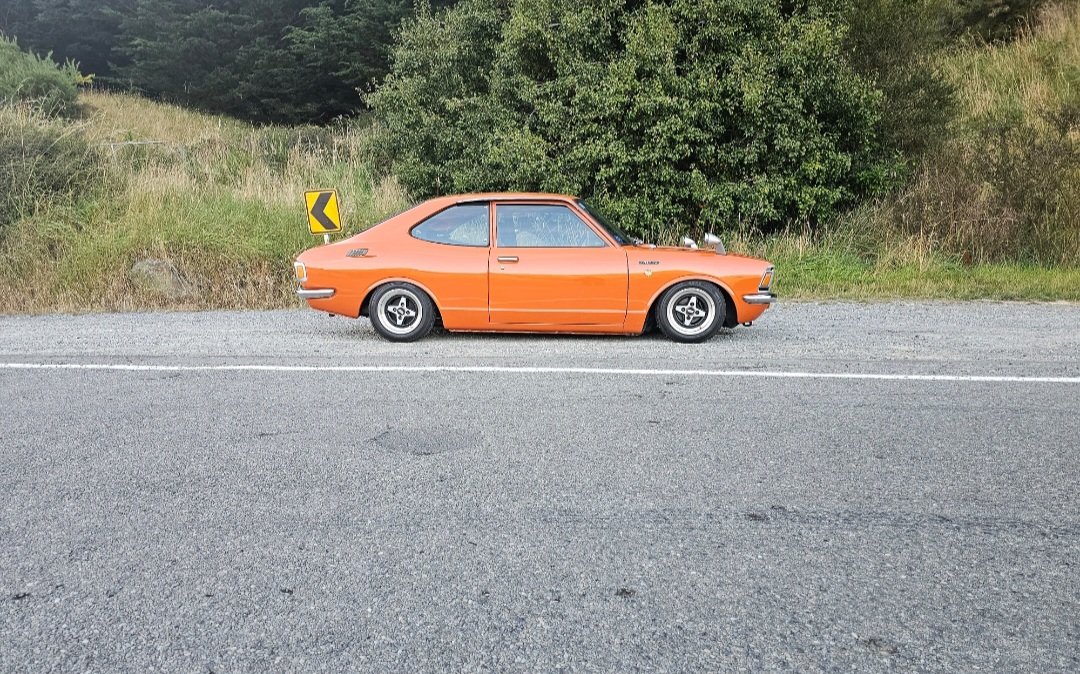
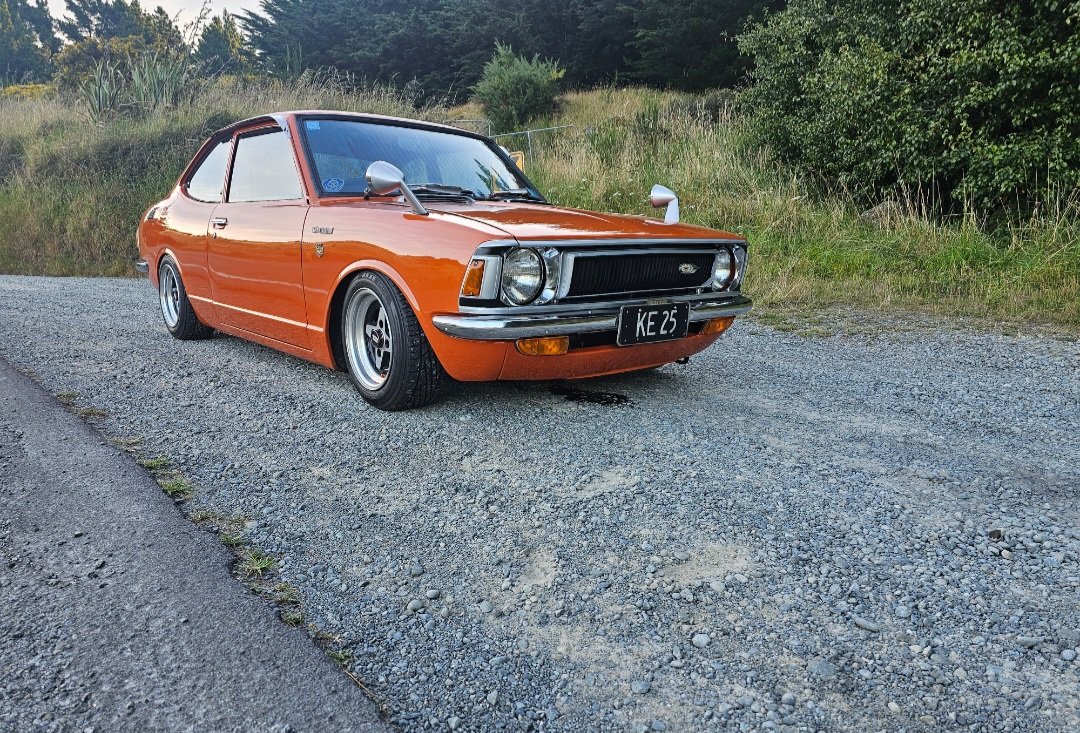
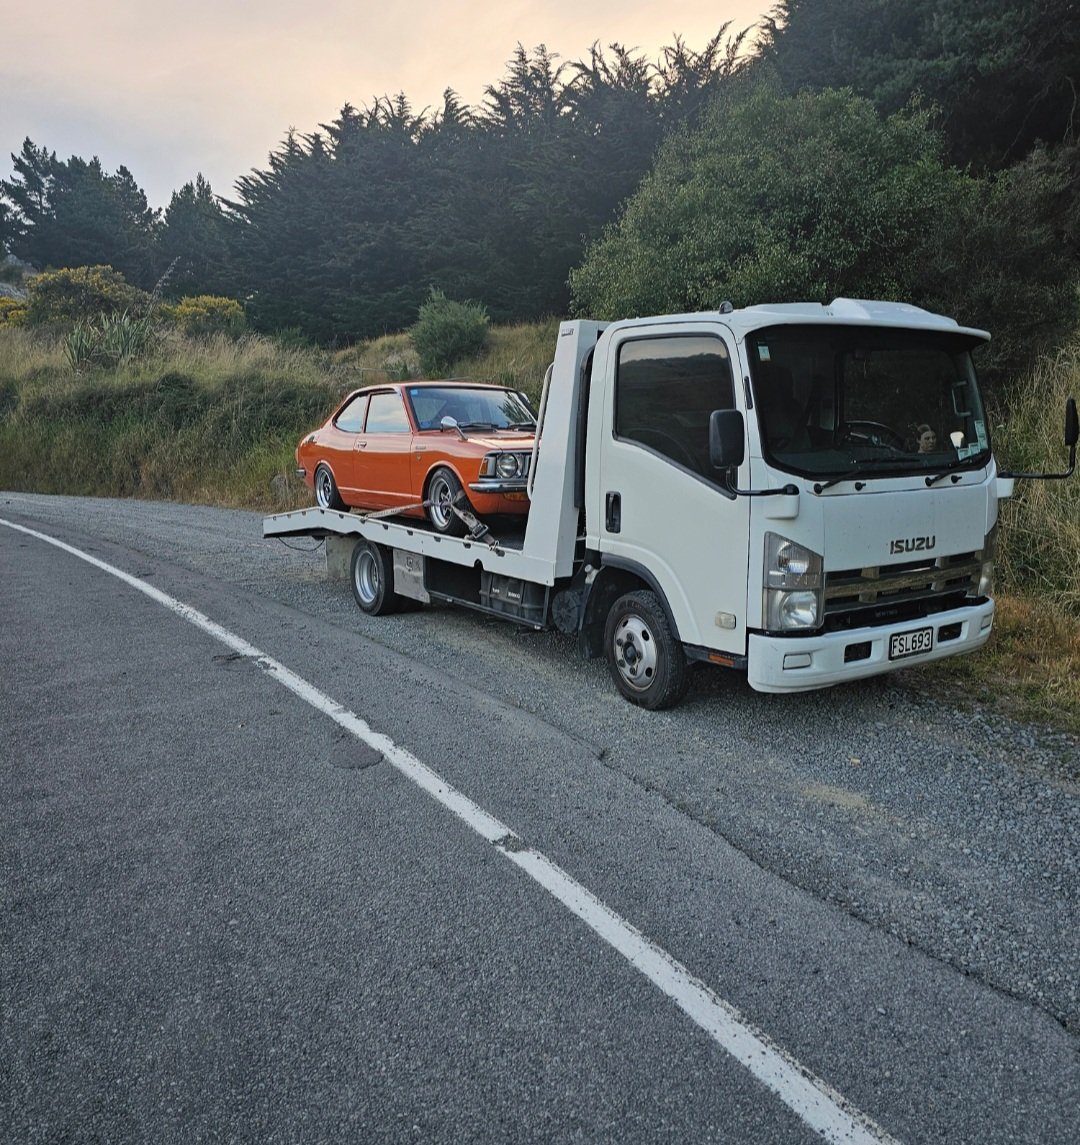
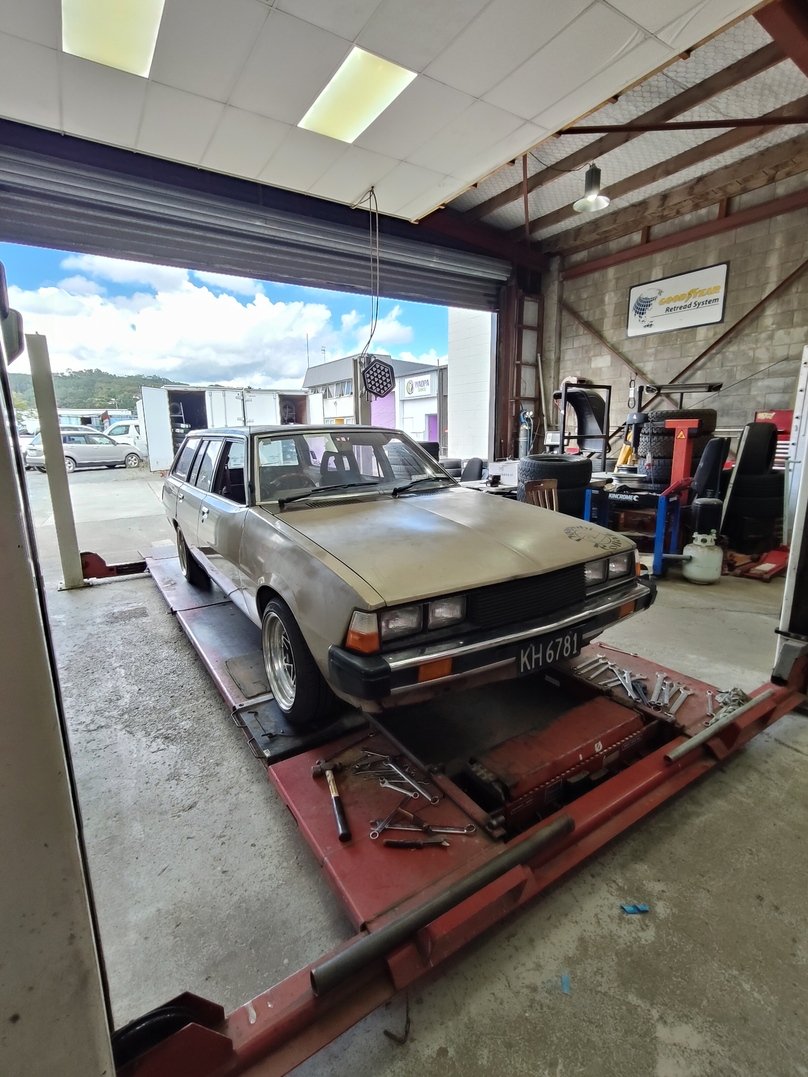
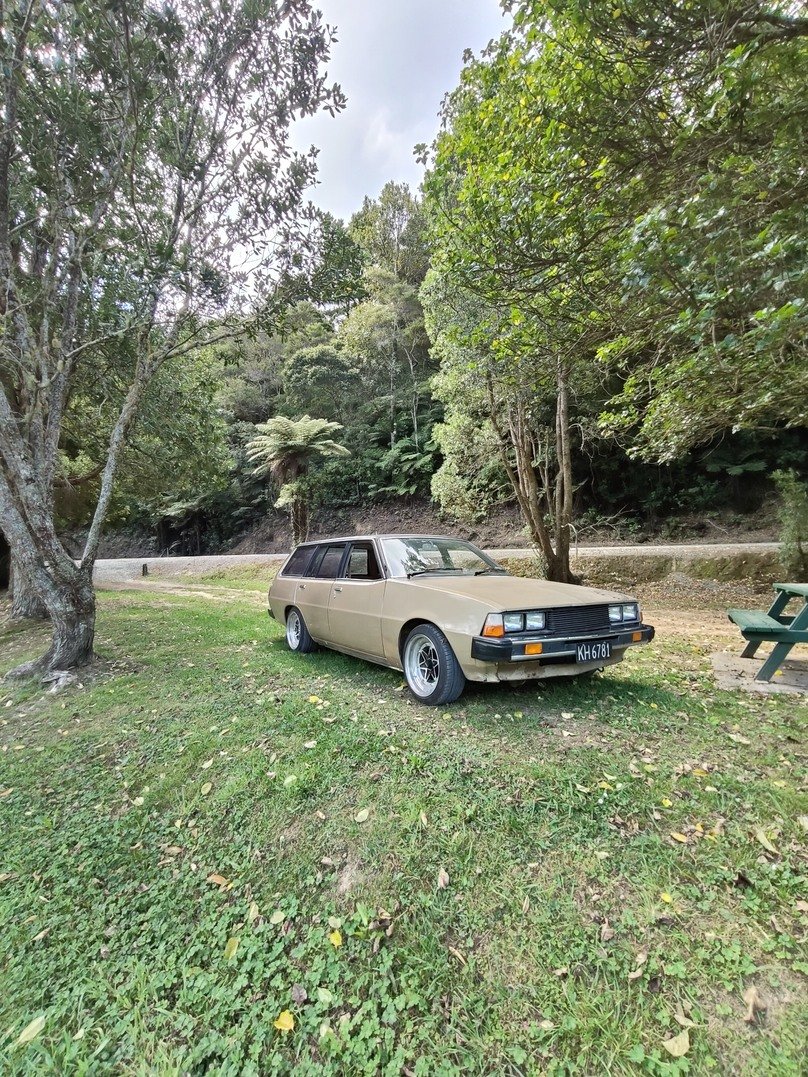
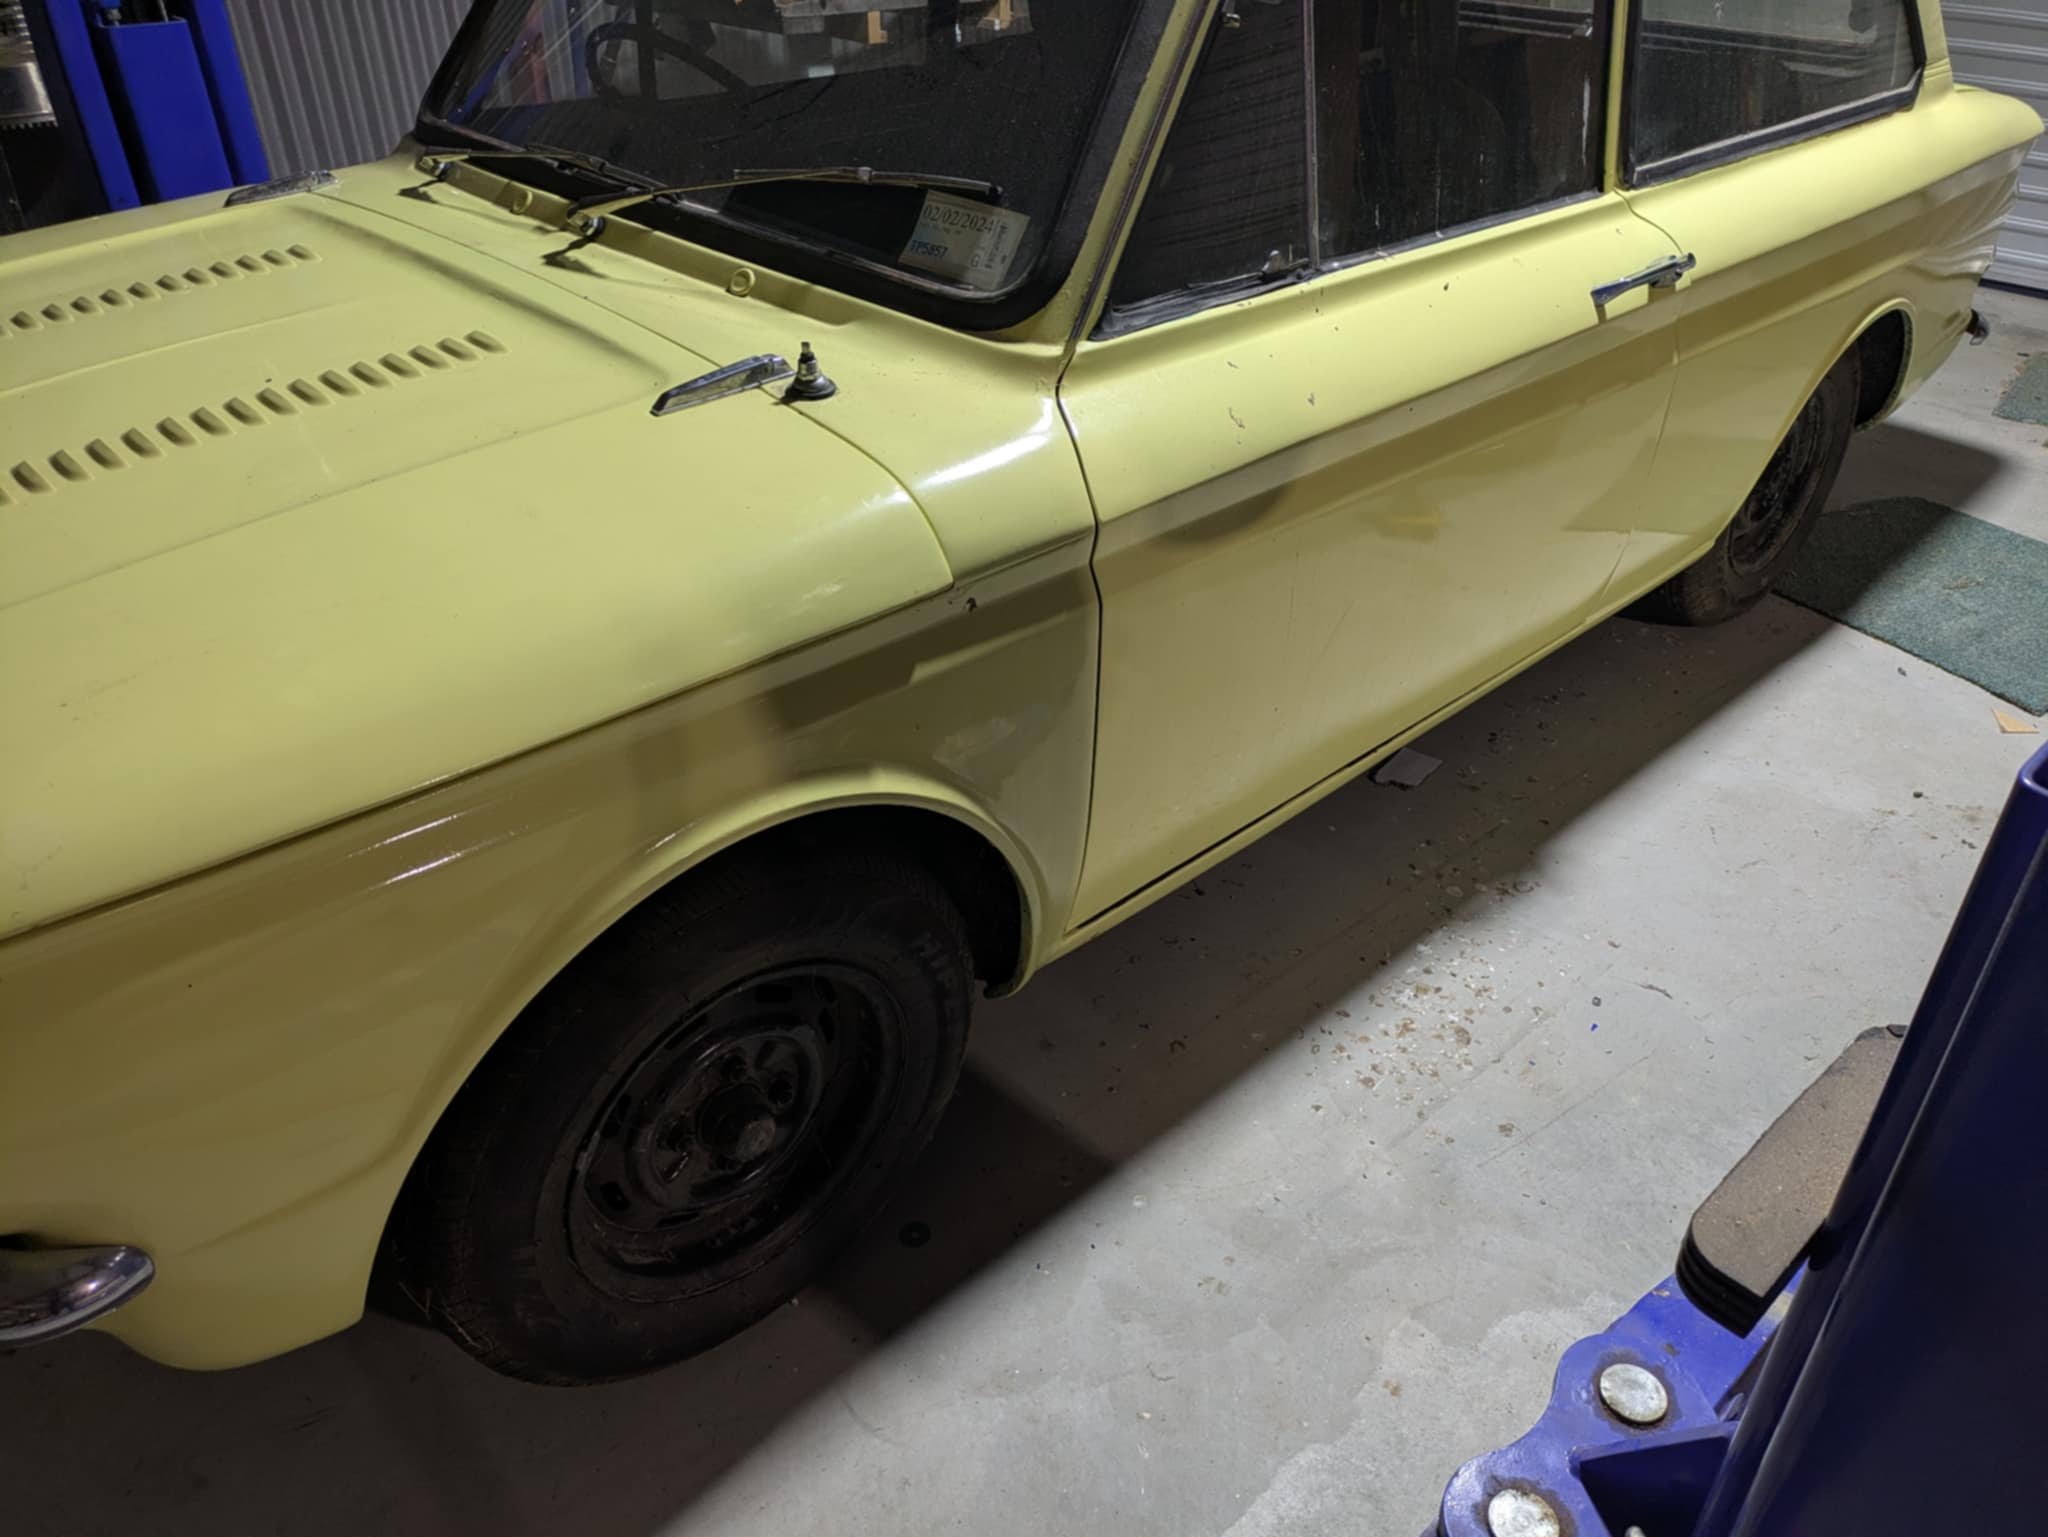
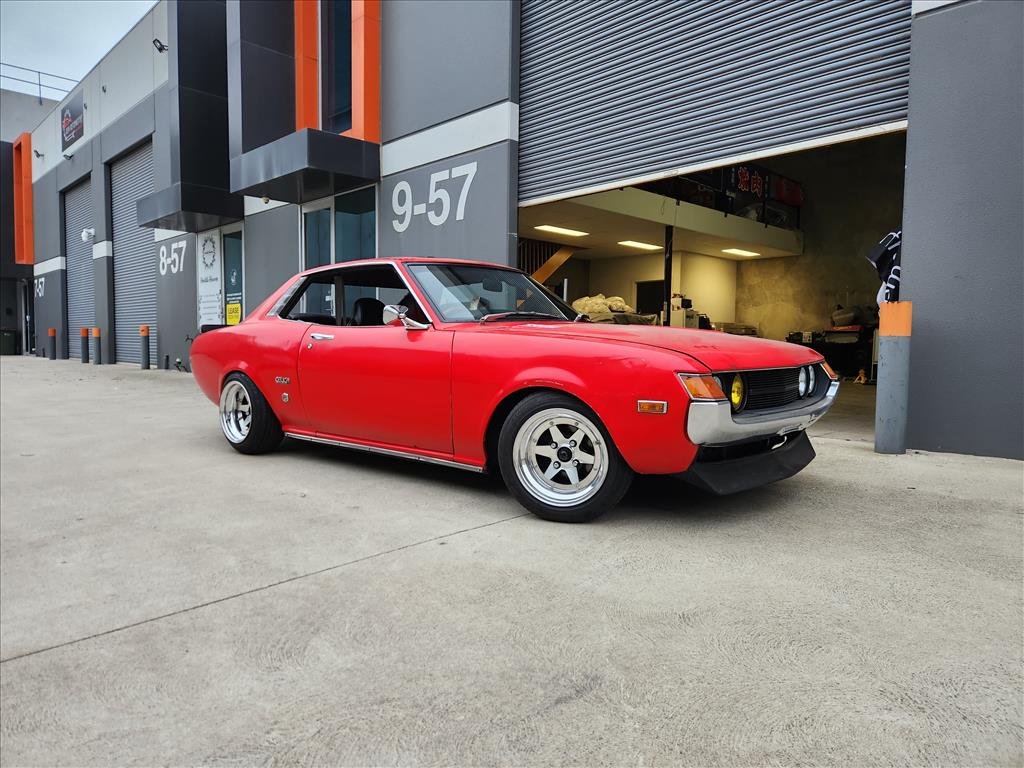
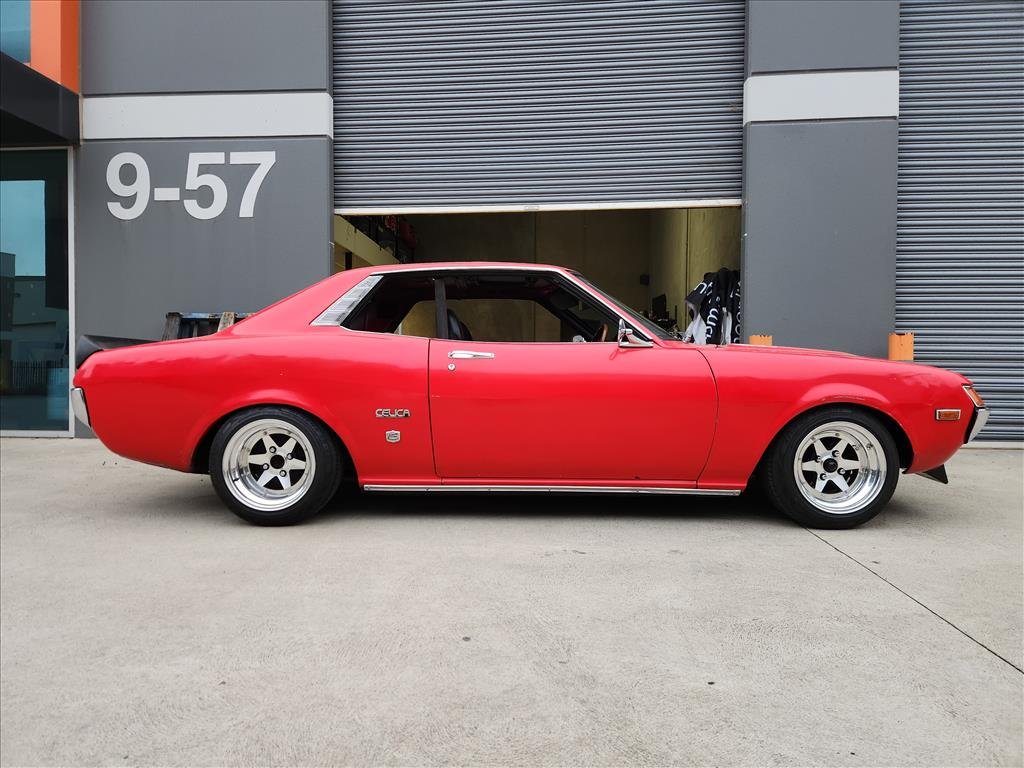
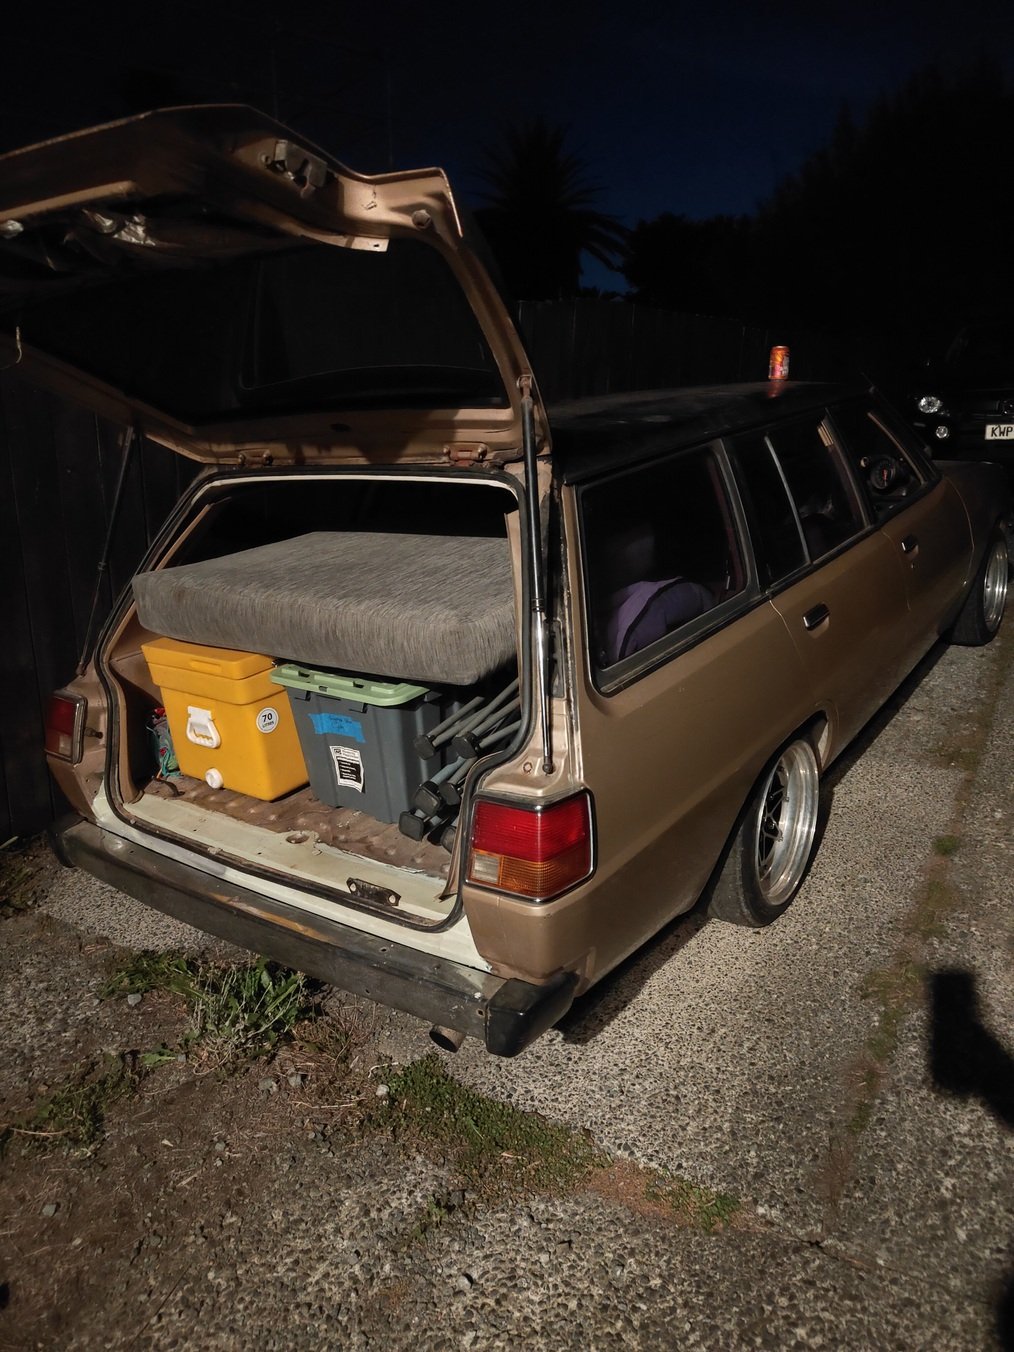
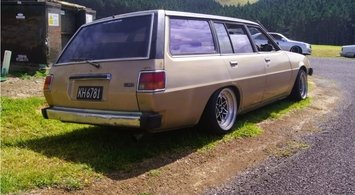
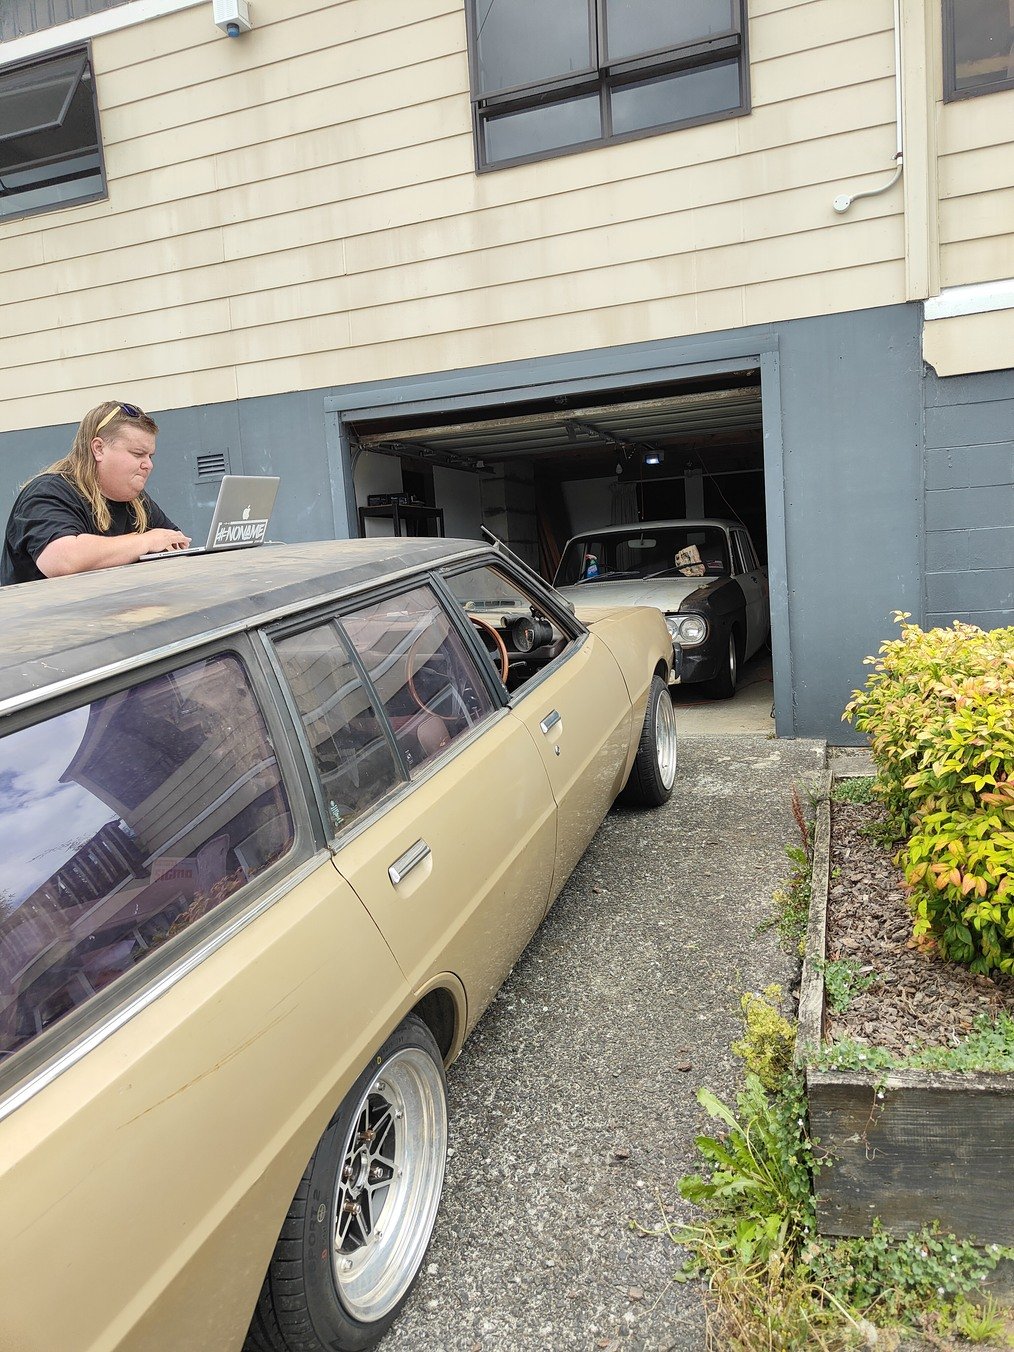
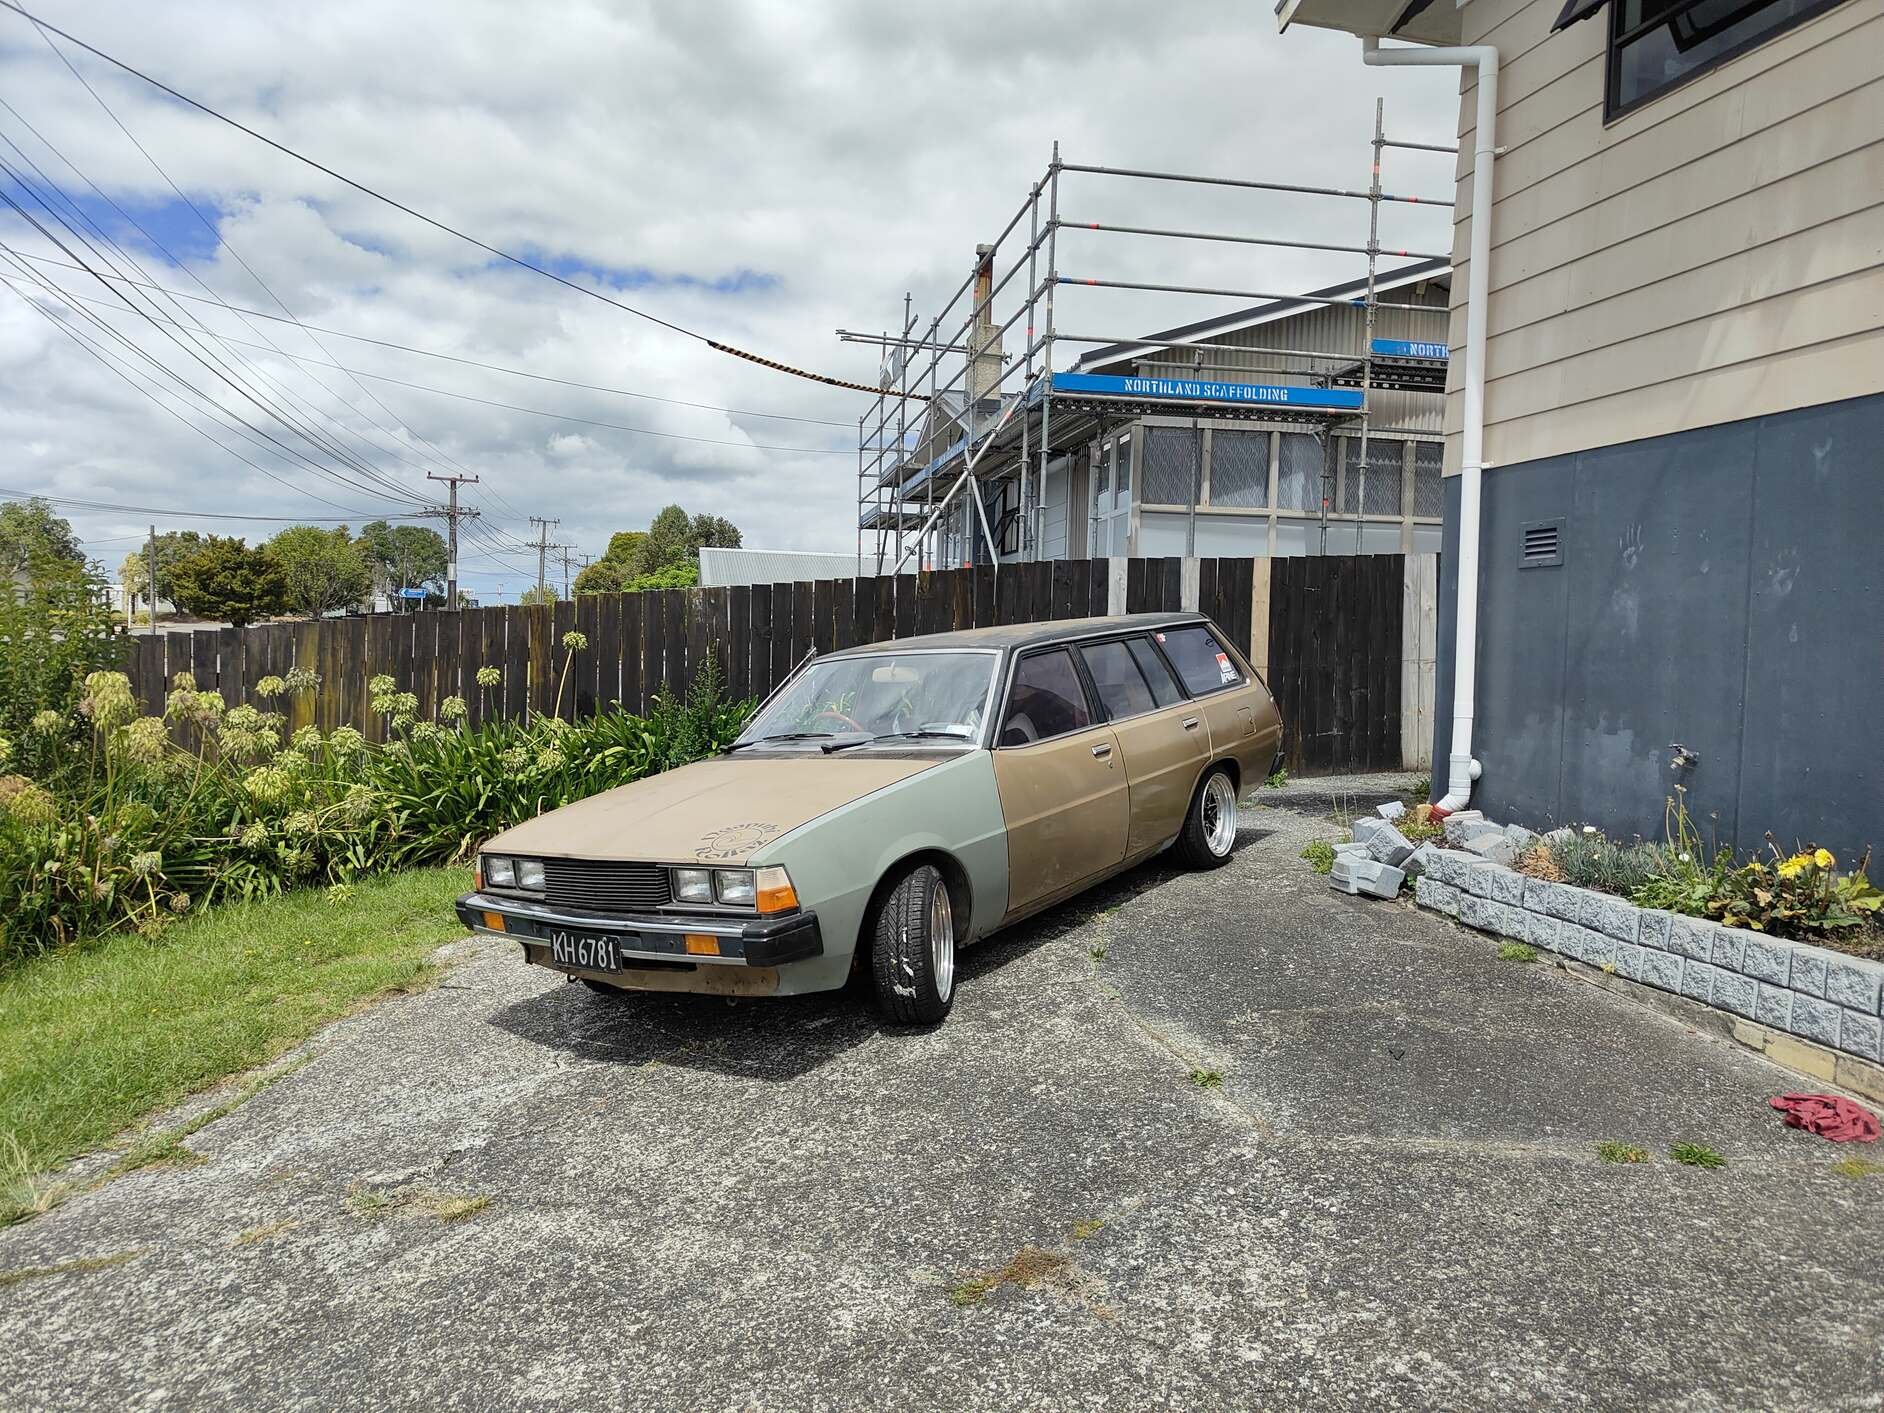
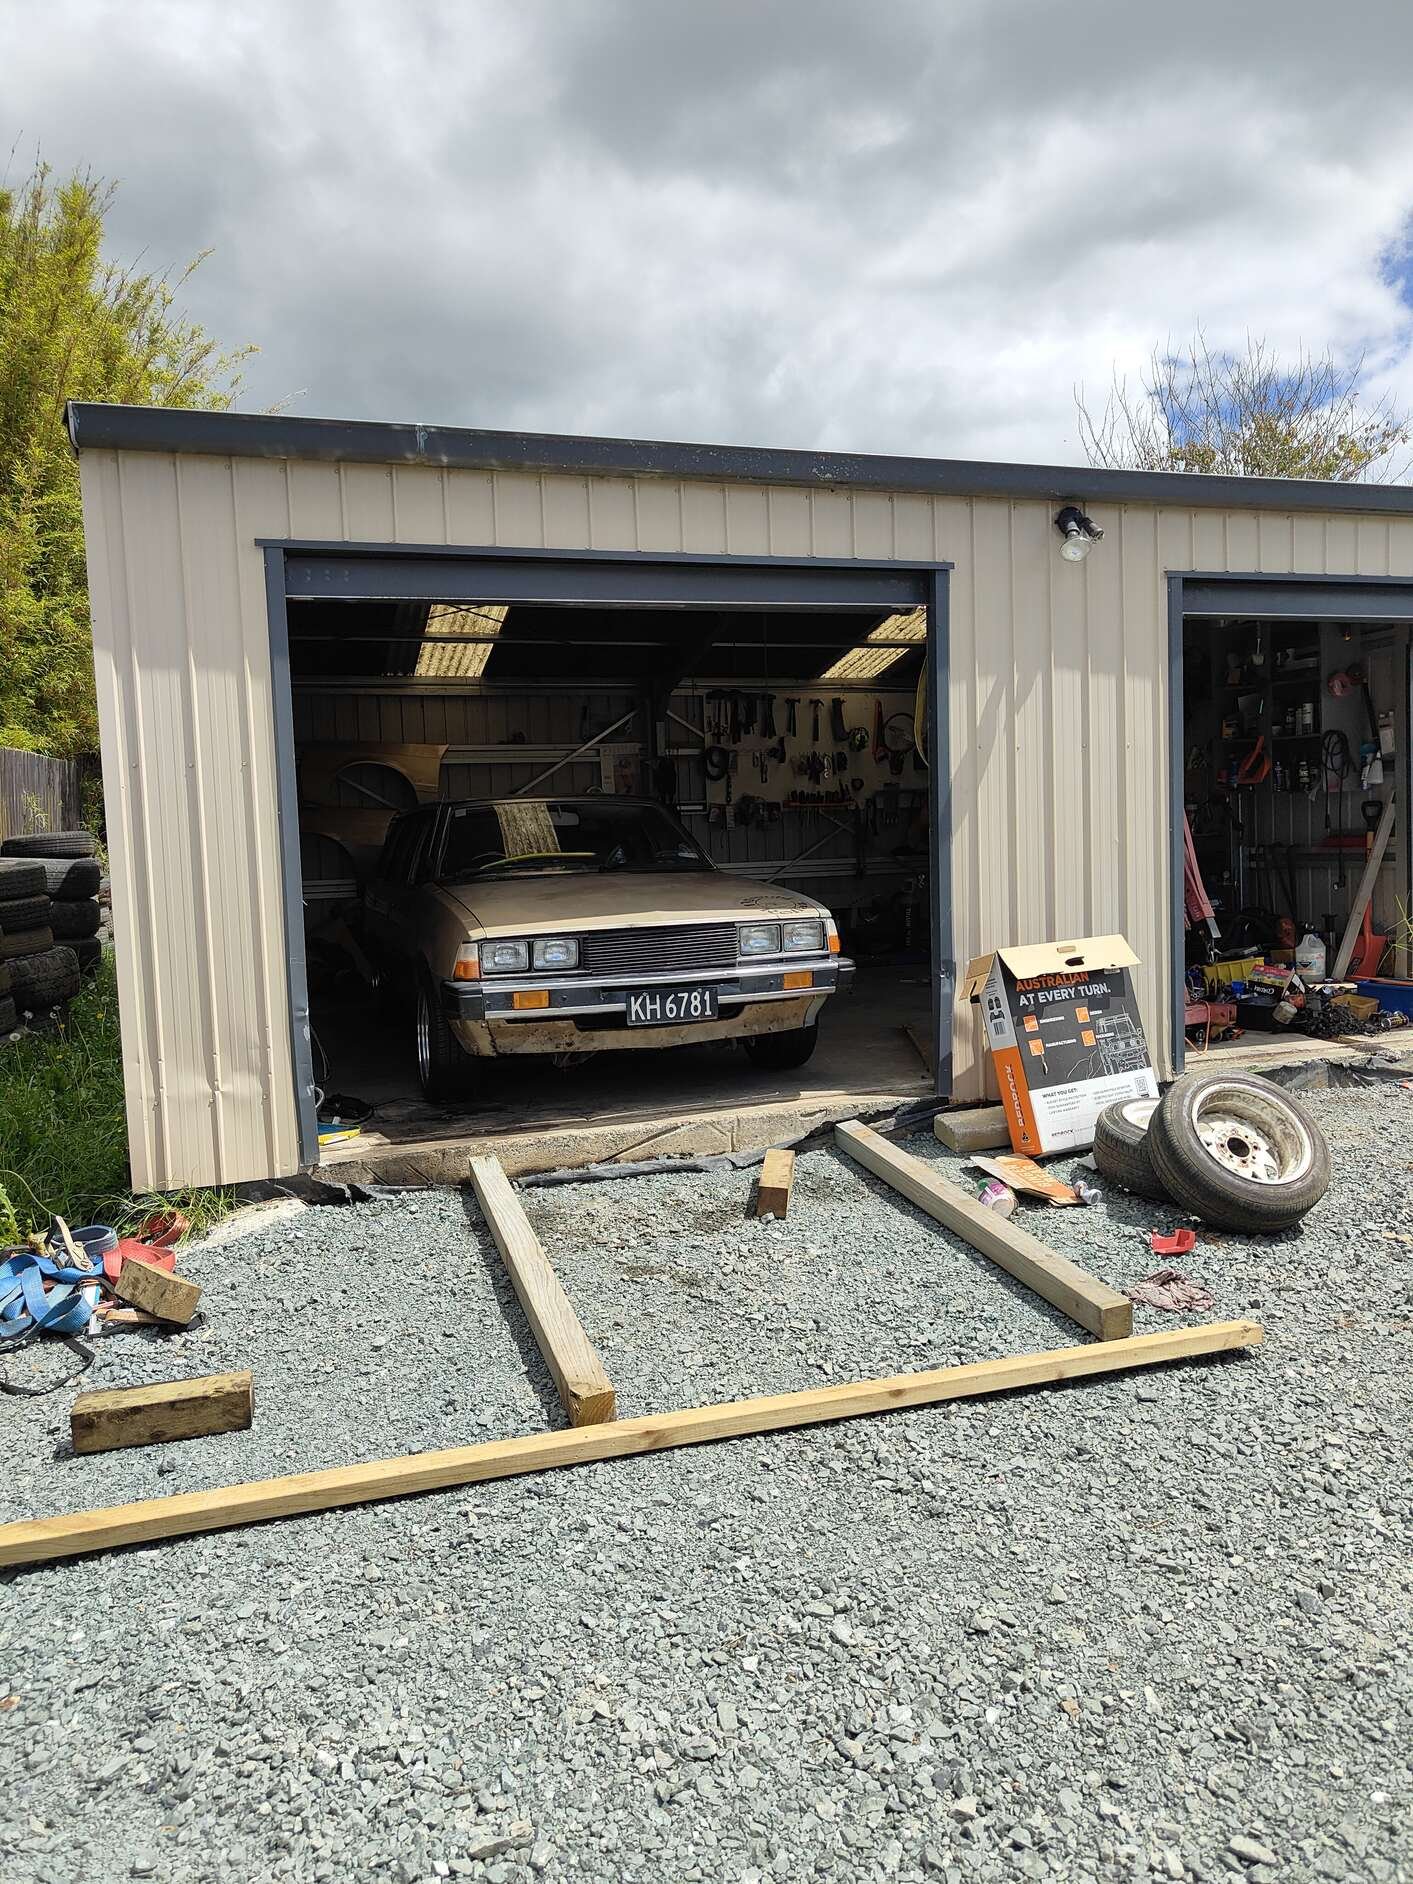
Beach Hop happened, mostly been a garage ornament since then a few local runs. WOF ran out too. Went out in the mist this morning to warm it up for an oil change. Would have been a better shot if I parked on the road.
 7 points
 -
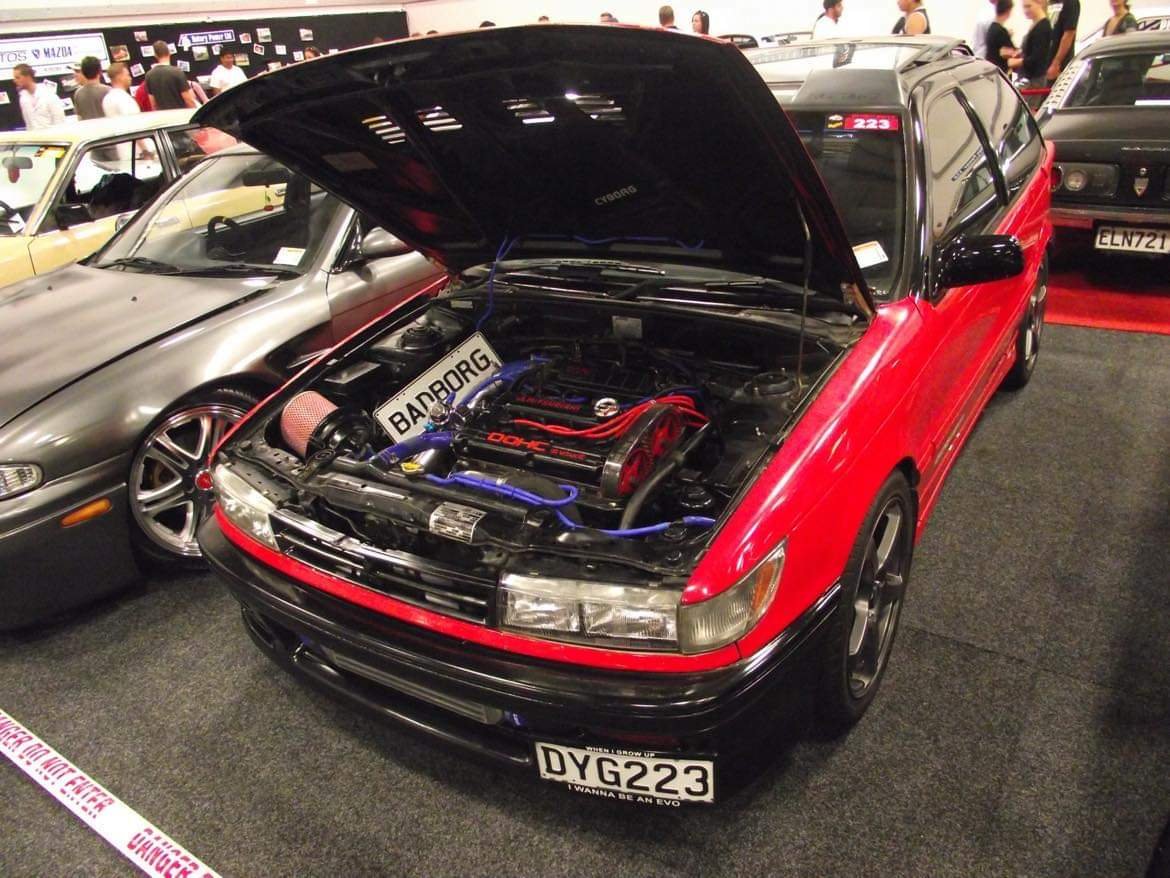
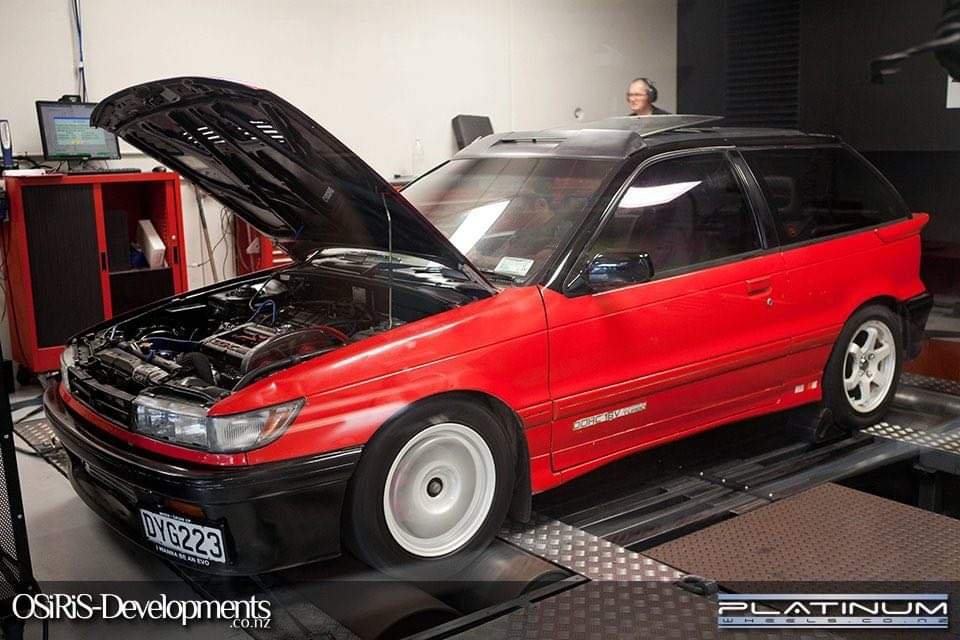
So as you do dragged out my spare block and realised my scored bores turned out to be schmuts that wipes off with CRC fan bloody tastic it's good to go let's whip the sump off check the bearings, even better they're mint no end float so I'm going to order some bits and get this ready to throw in. Even better it's a L67 so is boost friendly already. A list of abuse this old engine has tolerated Multiple 220kph runs down a airfield runway most mornings for 12 months 20,000k services while I was doing massive ks a week during Covid working in Auckland from Waikato. I ran it on waste kerosene for about 6 months Ignored 4mm of end float for 5years so much so it would lose crank sync occasionally and I'd have to push crank back with my foot for it to start. Fitted a turbo at 500000ks ran at 10psi for 6 months with basically stock timing (I pulled a little out but always ran 100octane) 40+ passes down the drag strip. And finally the 16psi of boost that killed it. I'm absolutely OK with how much this thing has tolerated what a trooper! Now I've had a taste of what it's capable of I'll get this new engine together and maybe fork out for some dyno time. 12's at drag day this year is the new goal.
7 points
-
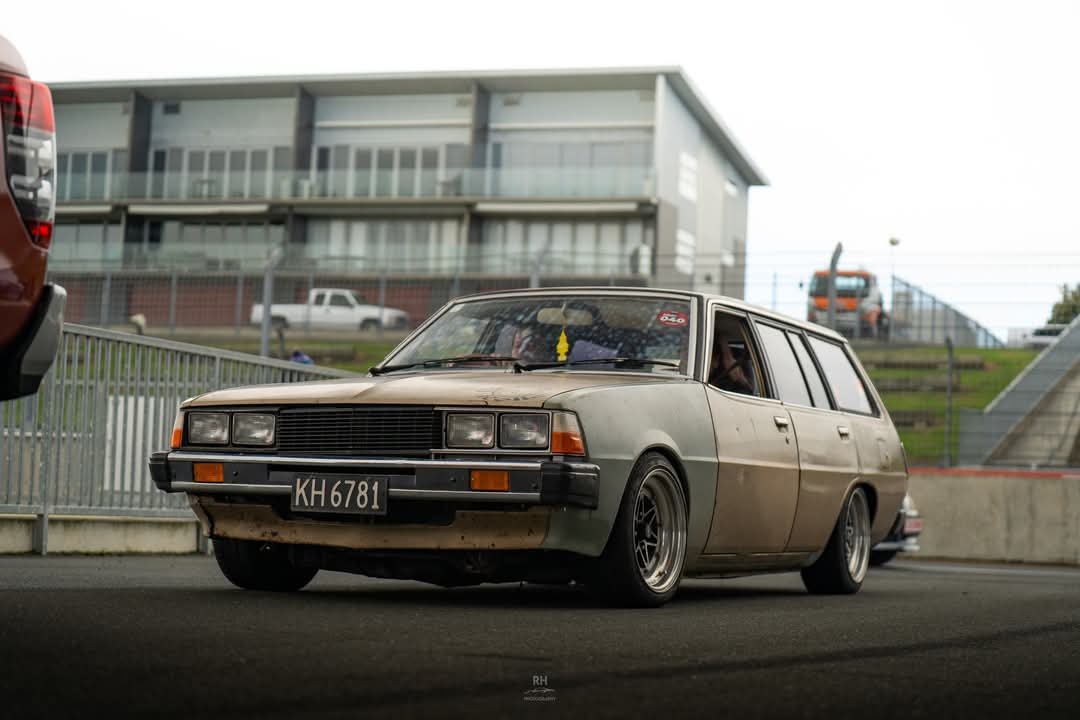
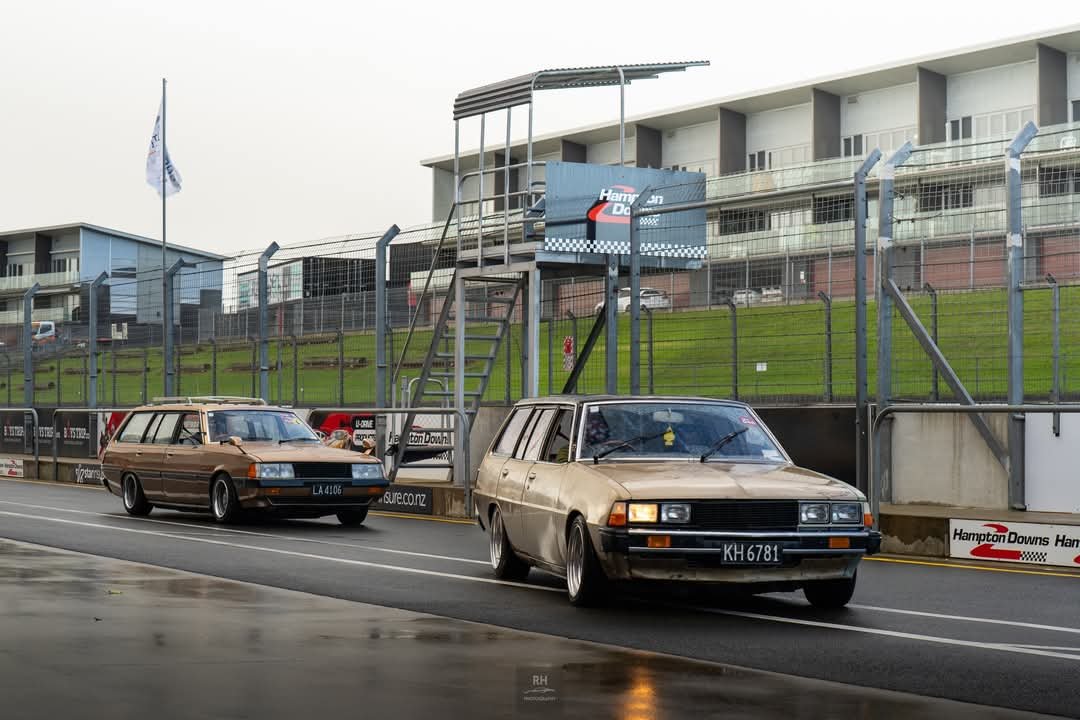
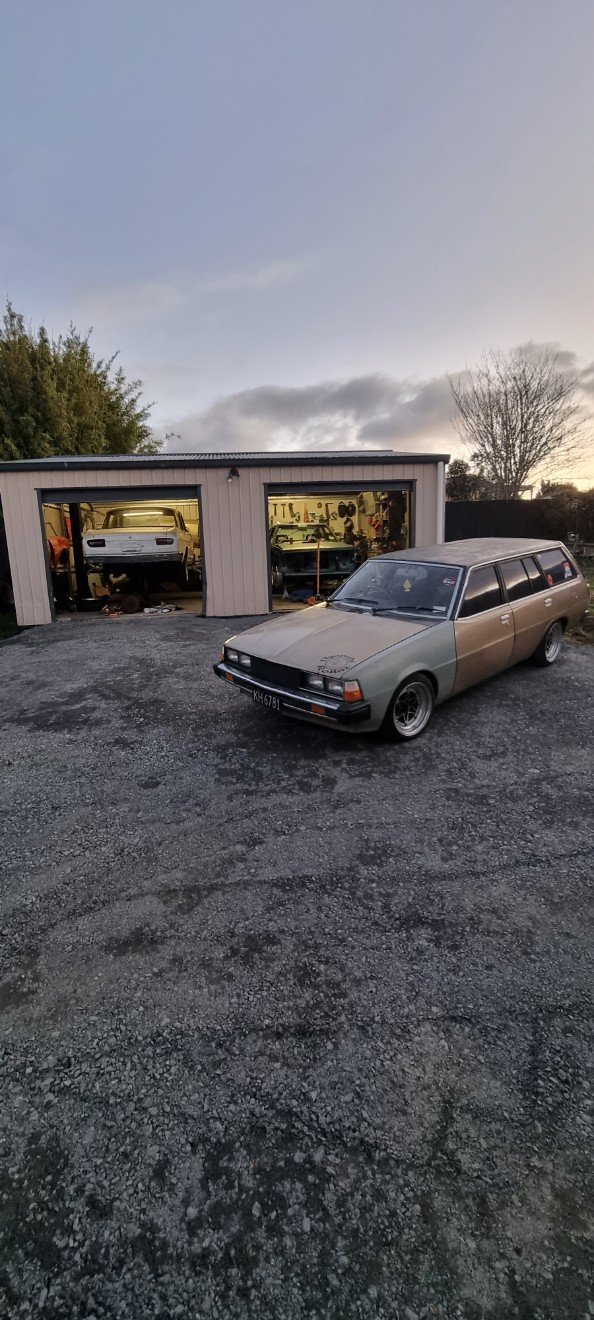
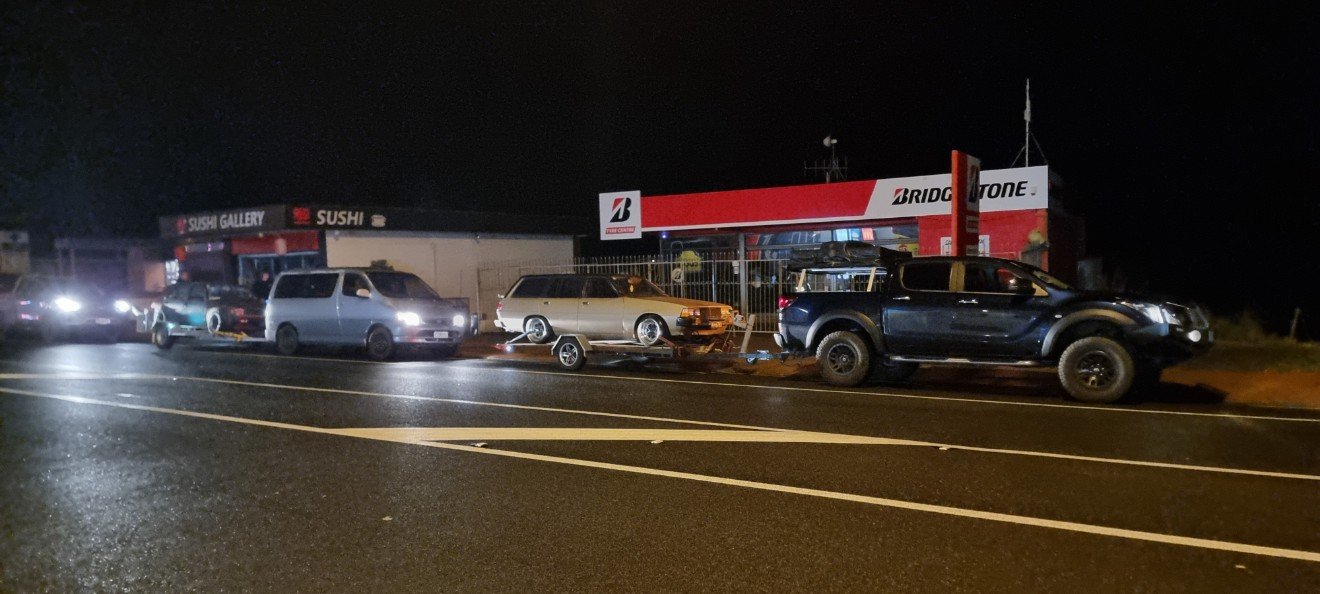
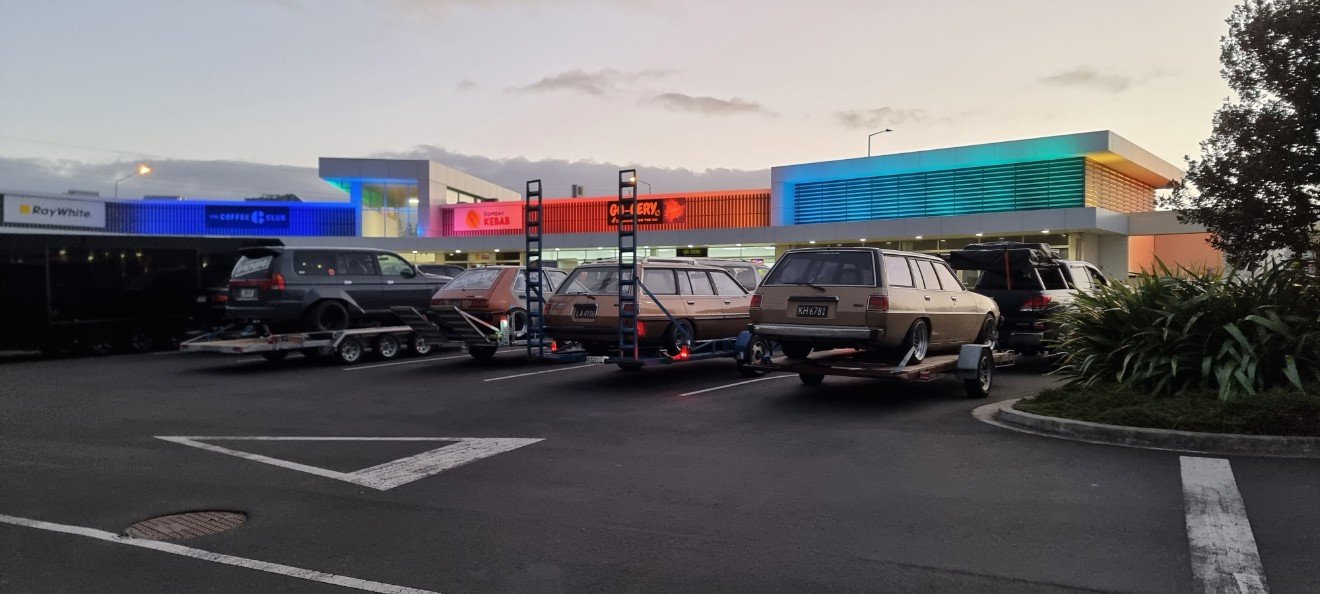
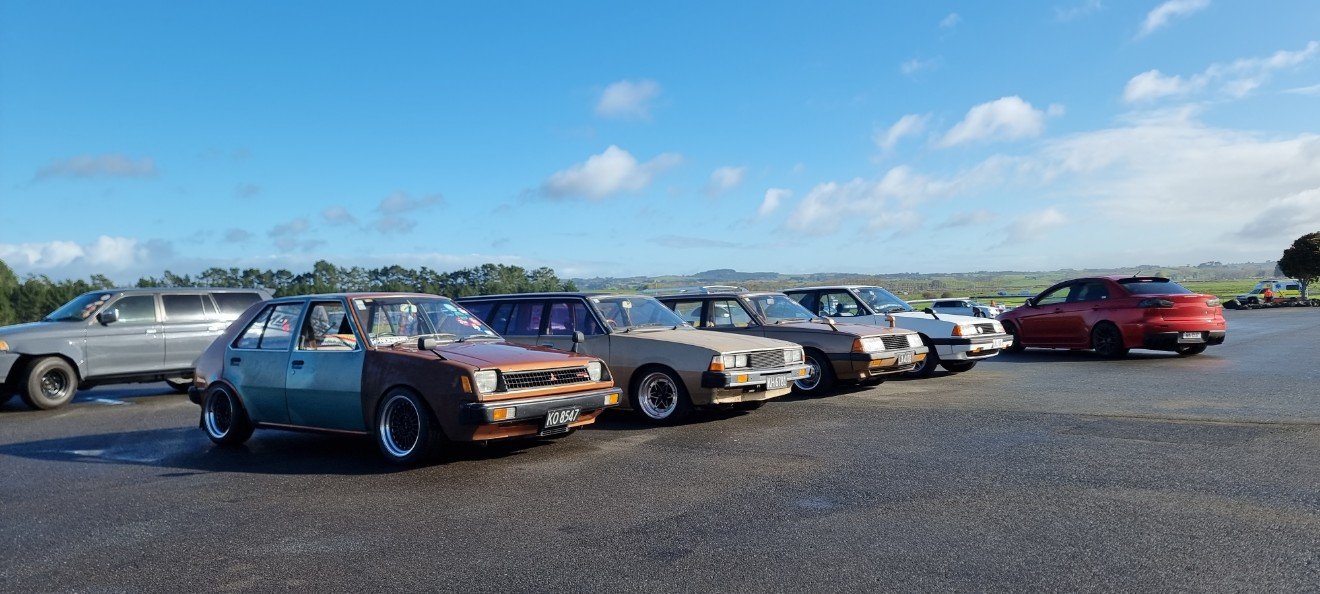
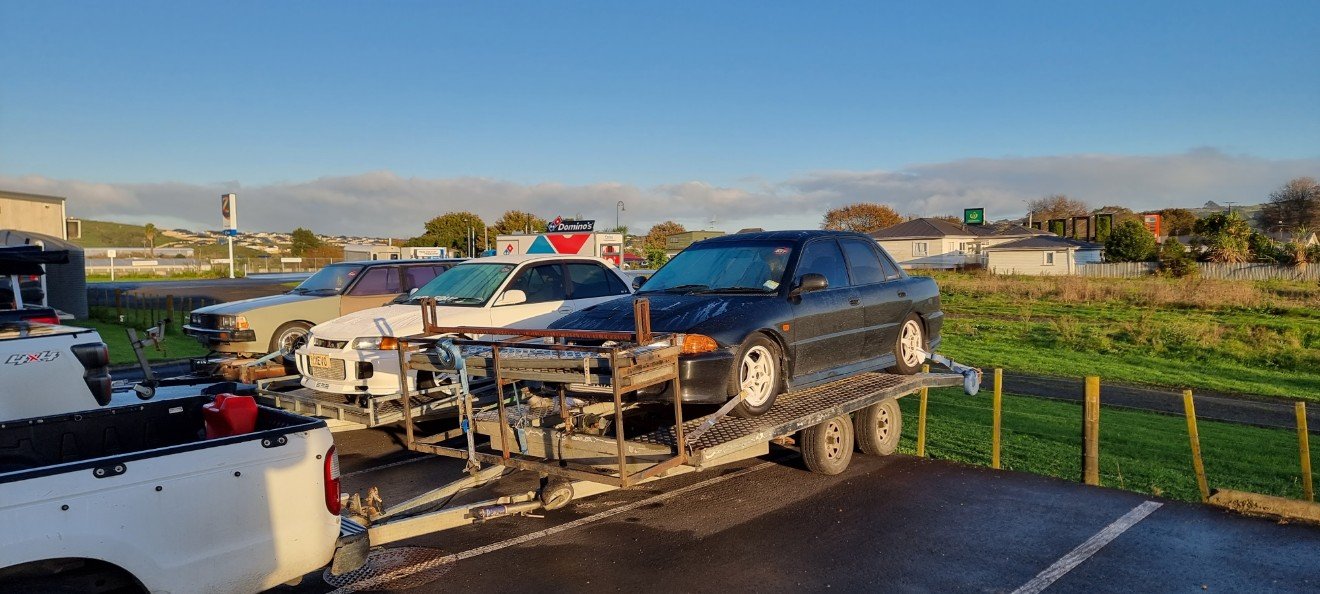
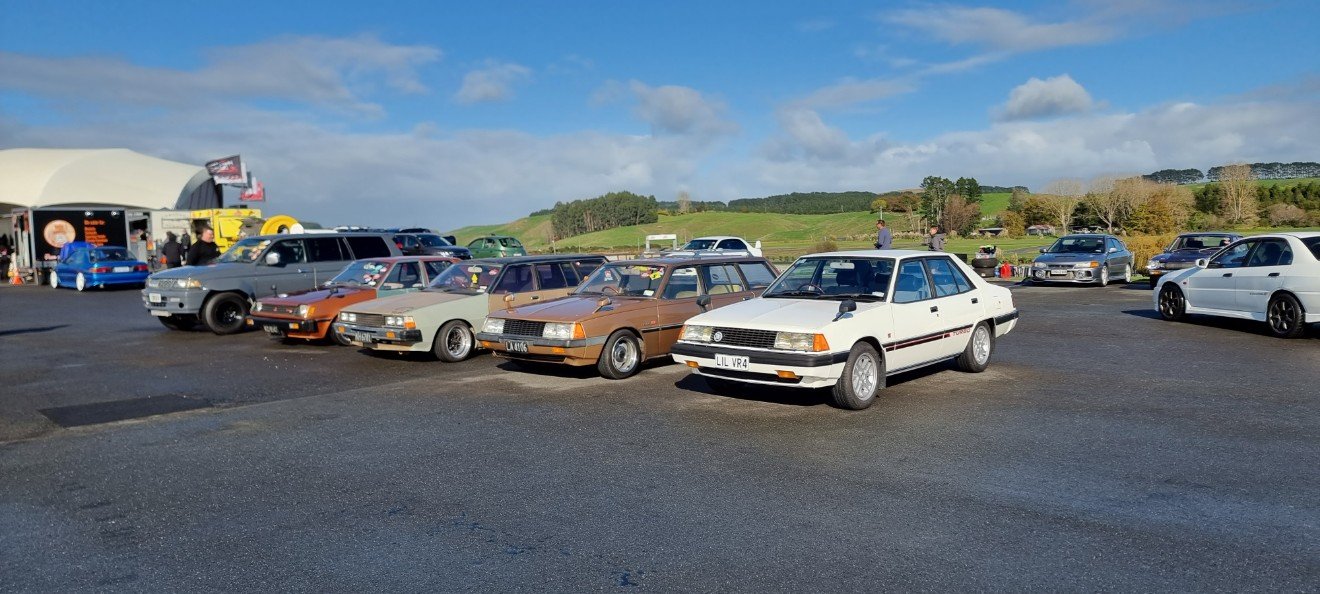
Took this heap along to mitsi owners day 2025, didn't win anything for ruffest car there but had a good day Left dubcity early early as for the trip, meeting the kaitaia boys and convoys our way down to Hamptons Then we met Damien at Bombay and onwards to the track The day went well, I welded the diff for the wet skid pan and bugger me that pad is bad for sledging, was hard with a handbrake that left the chat. Few hairy moments Even drove it off the trailer again. Unreal
5 points
-
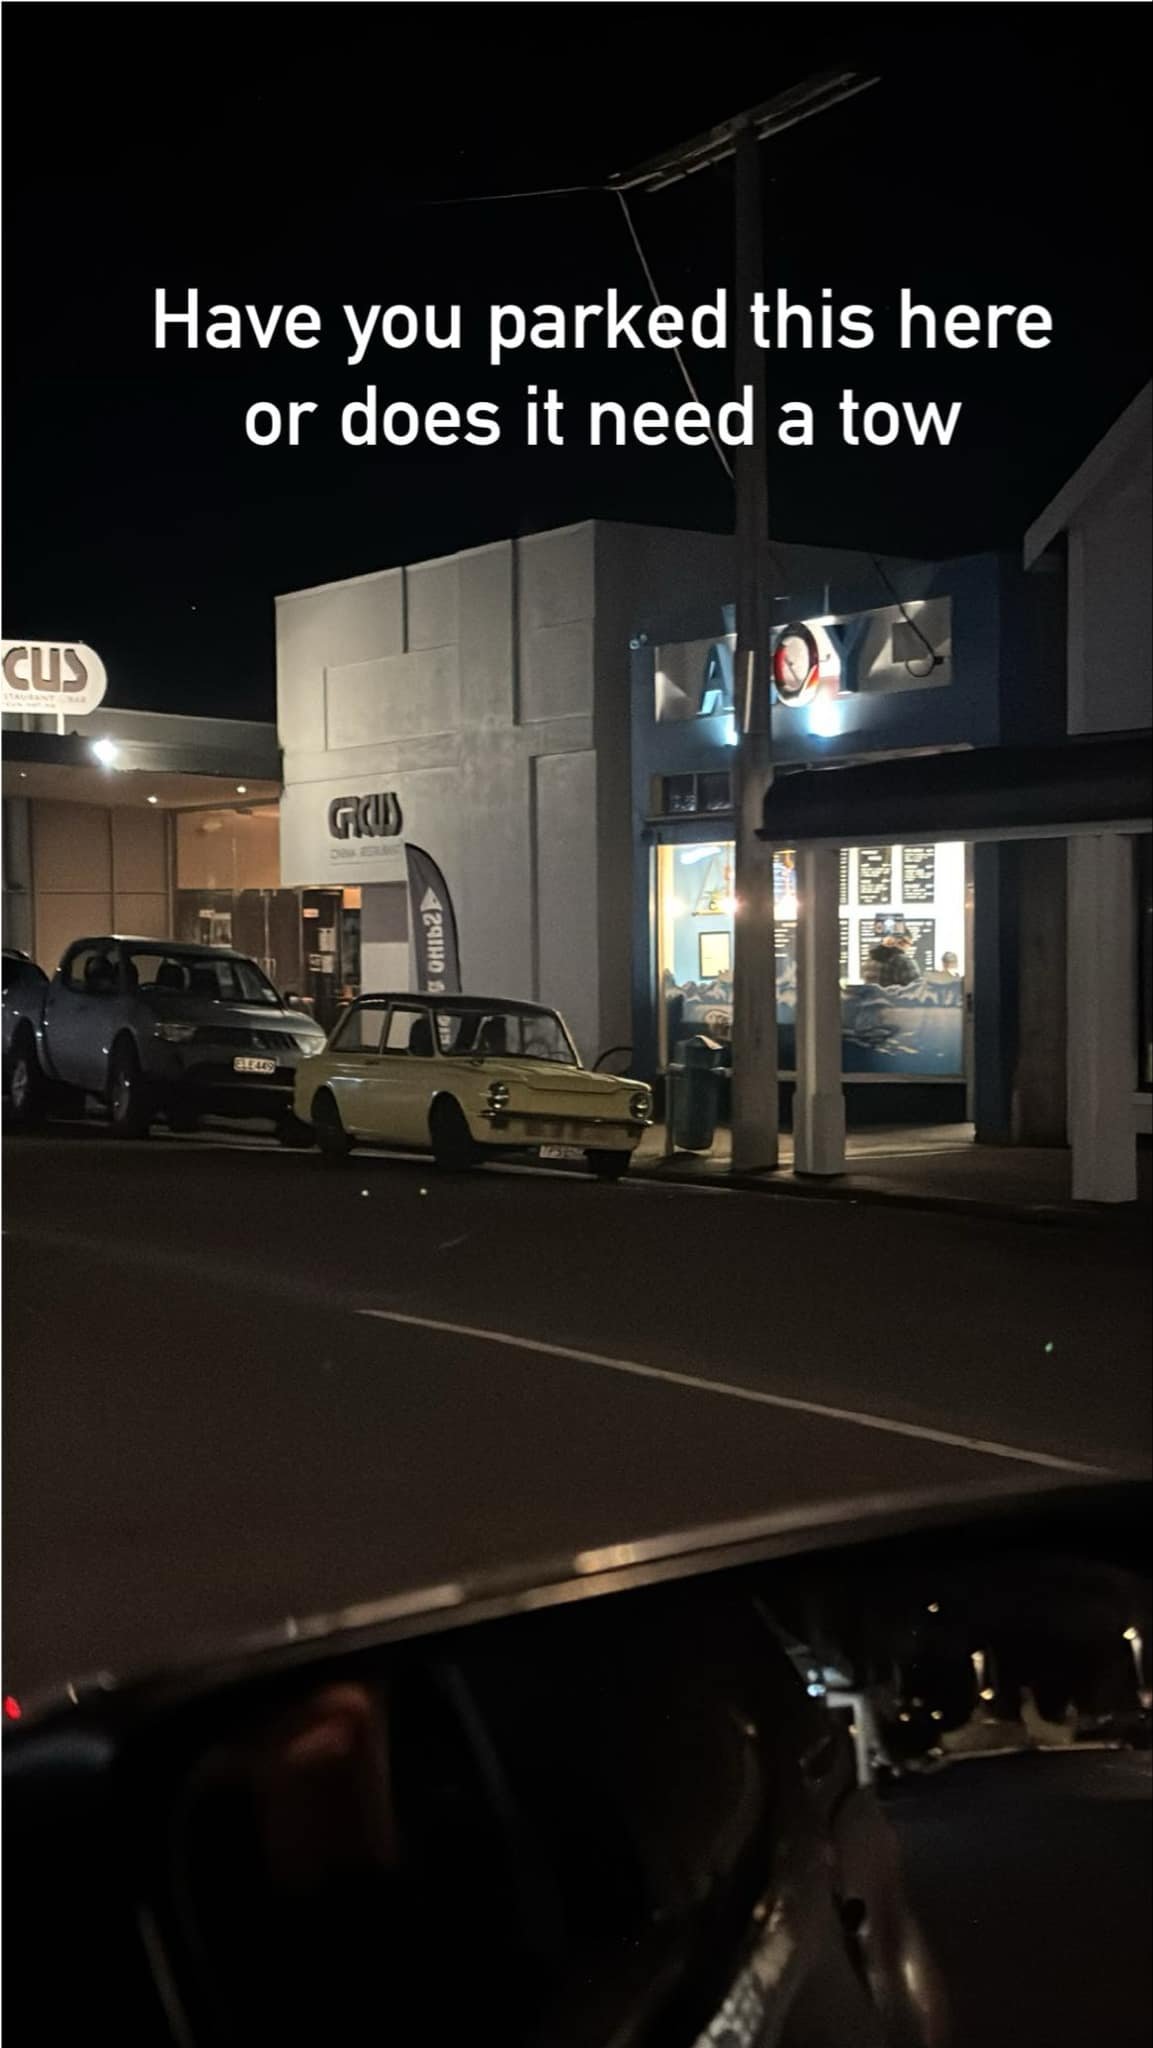
Maiden drive to the chip shop. The vibration comes and goes. I can feel it in the steering wheel rather than my bum so probably the front end. Booked in for first of many LVV checks next week. Got this from a neighbour:
4 points
-
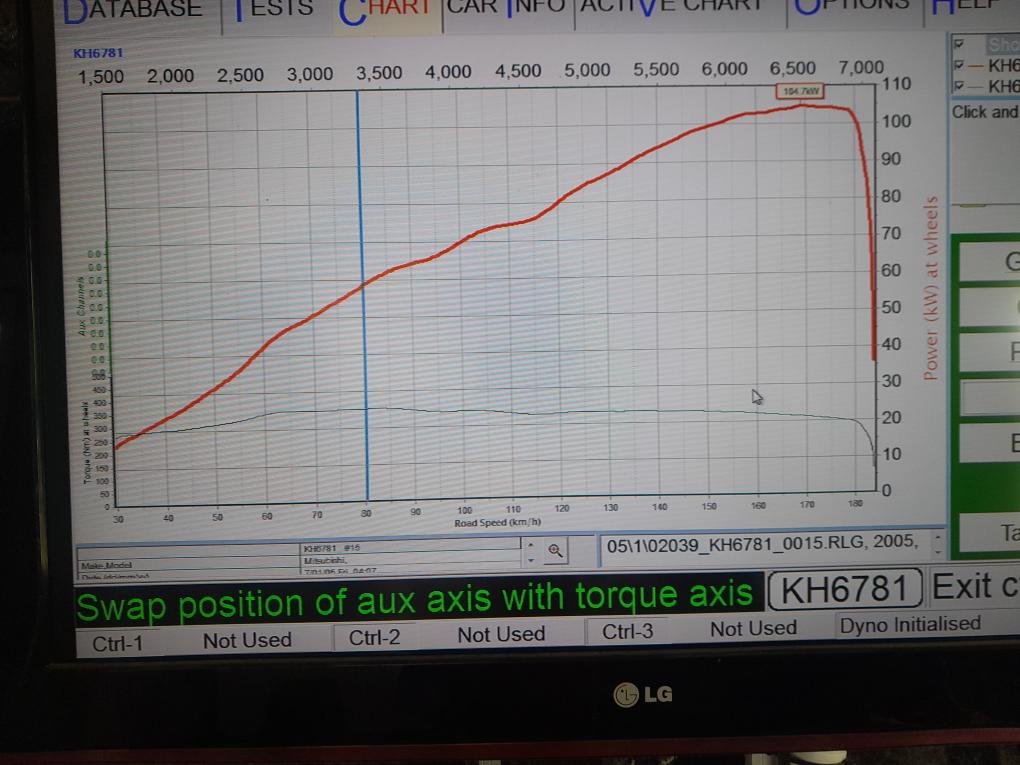
Well Flashed in the Big Beautiful Tune Today i've been working on took for a test drive, Ultra Peppy let it warm up a bit before leaning on it too hard 70% Throttle breaks traction at 80kph WOOHOOO! on same boost. took a log everything is happy gave it a full stab holy shit. checked logs again yup nothing to worry about lets stick 2 clicks in the boost controller........ WAAAAARP..........shit. so 2 clicks is too much.3 points
-
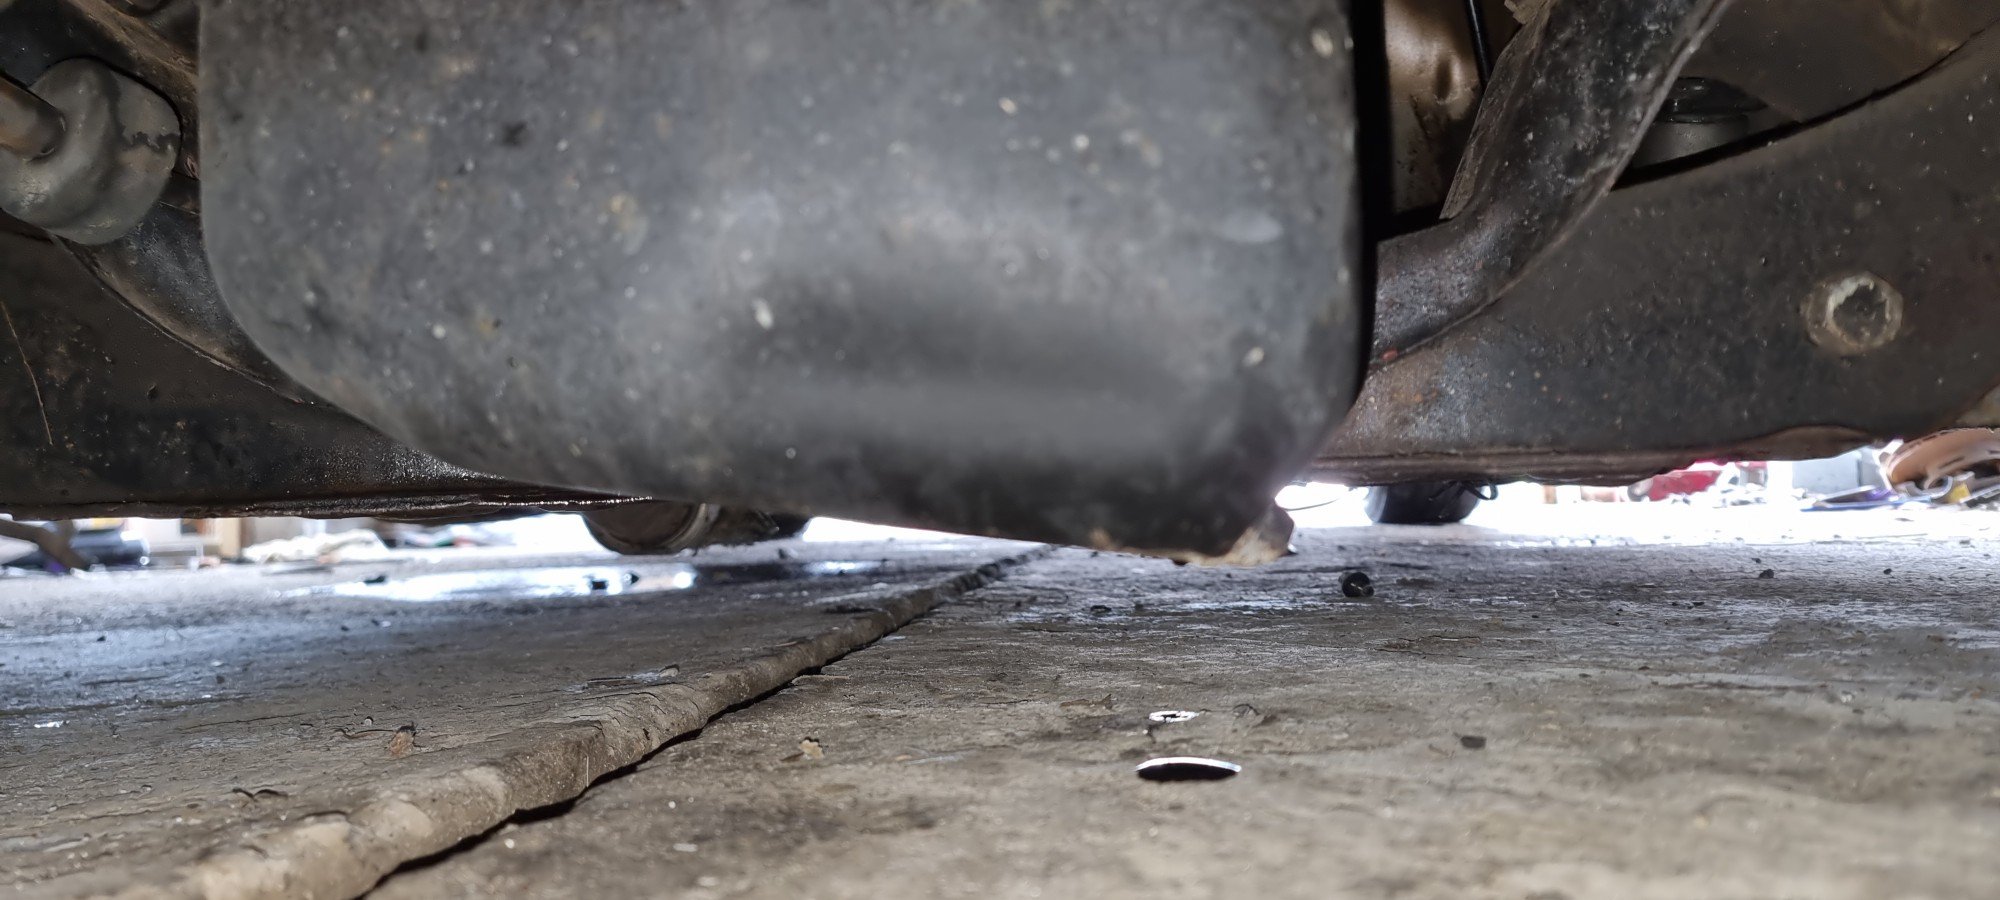
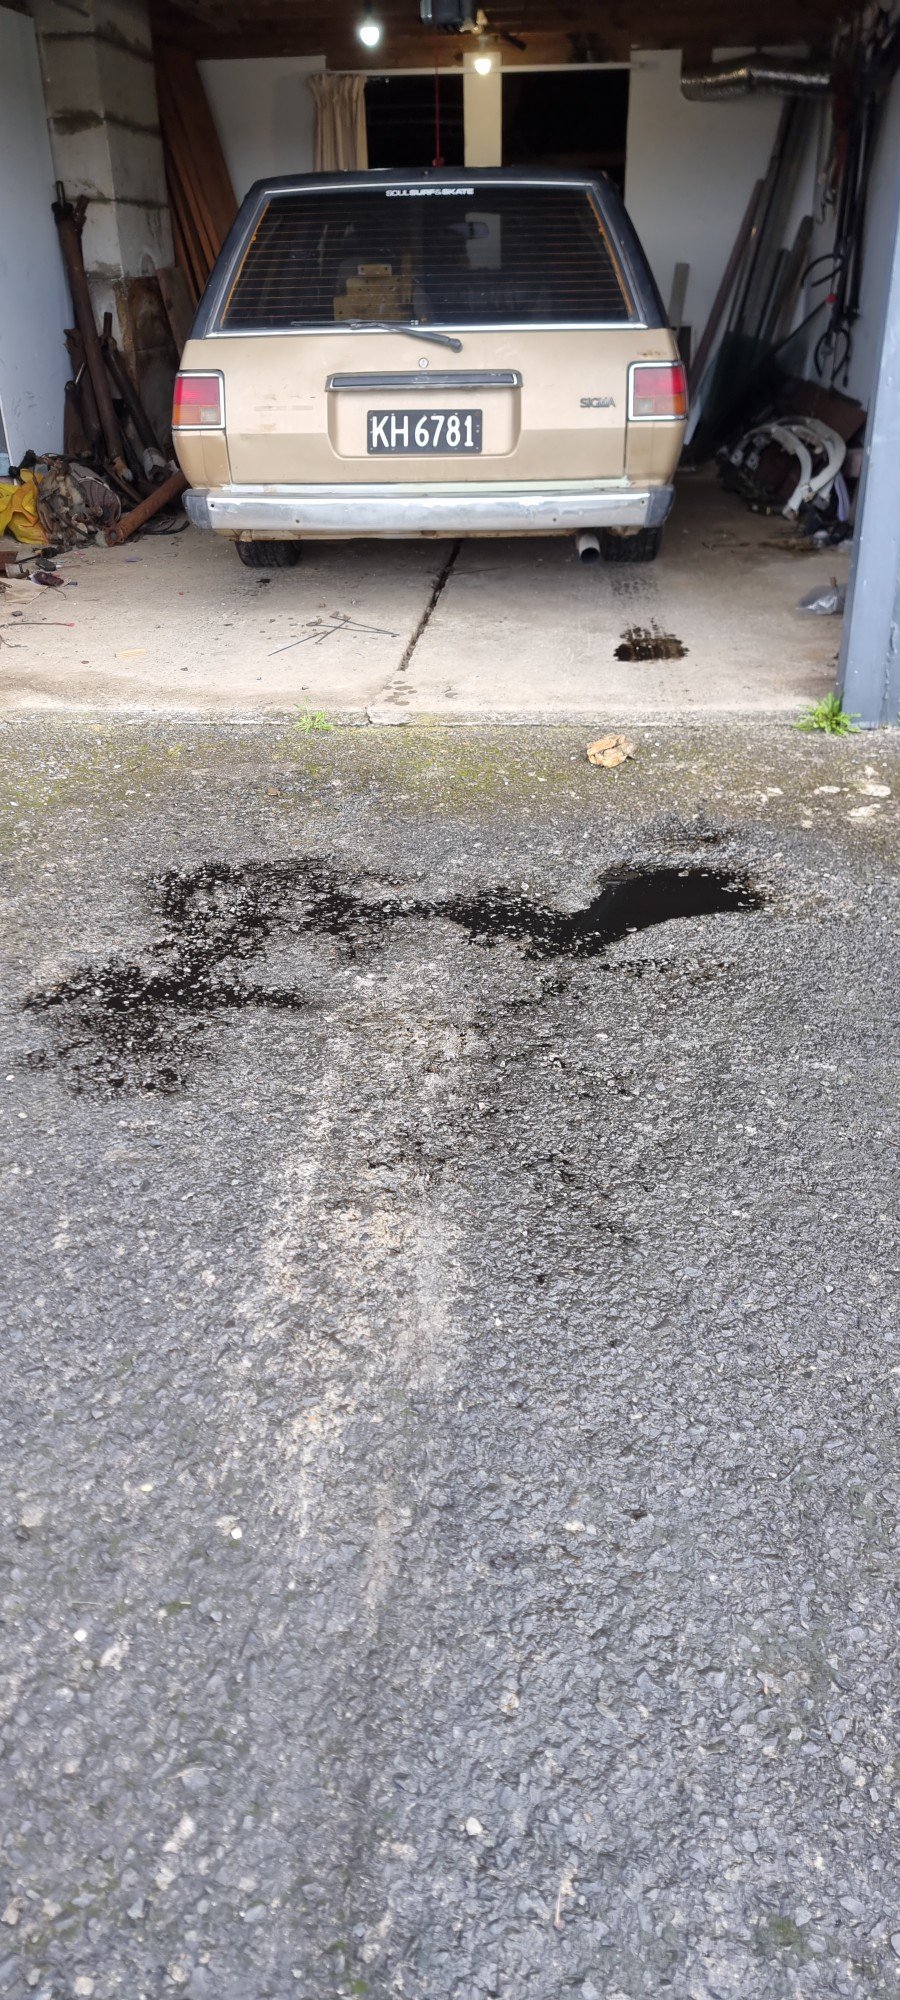
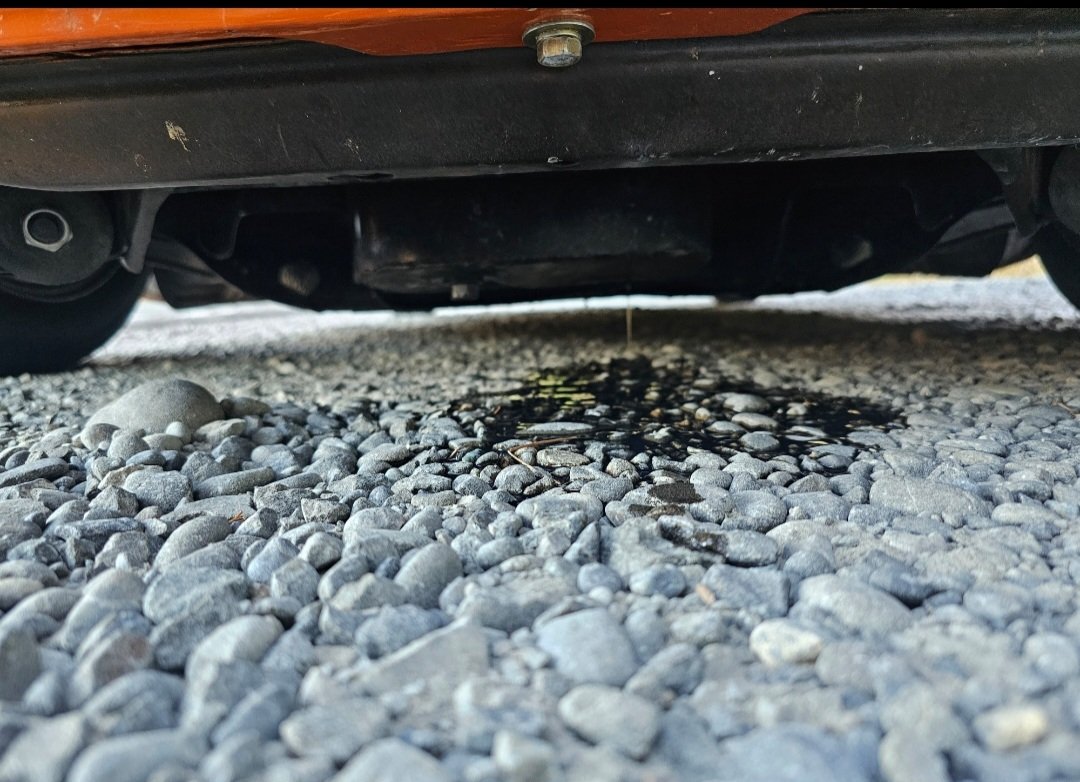
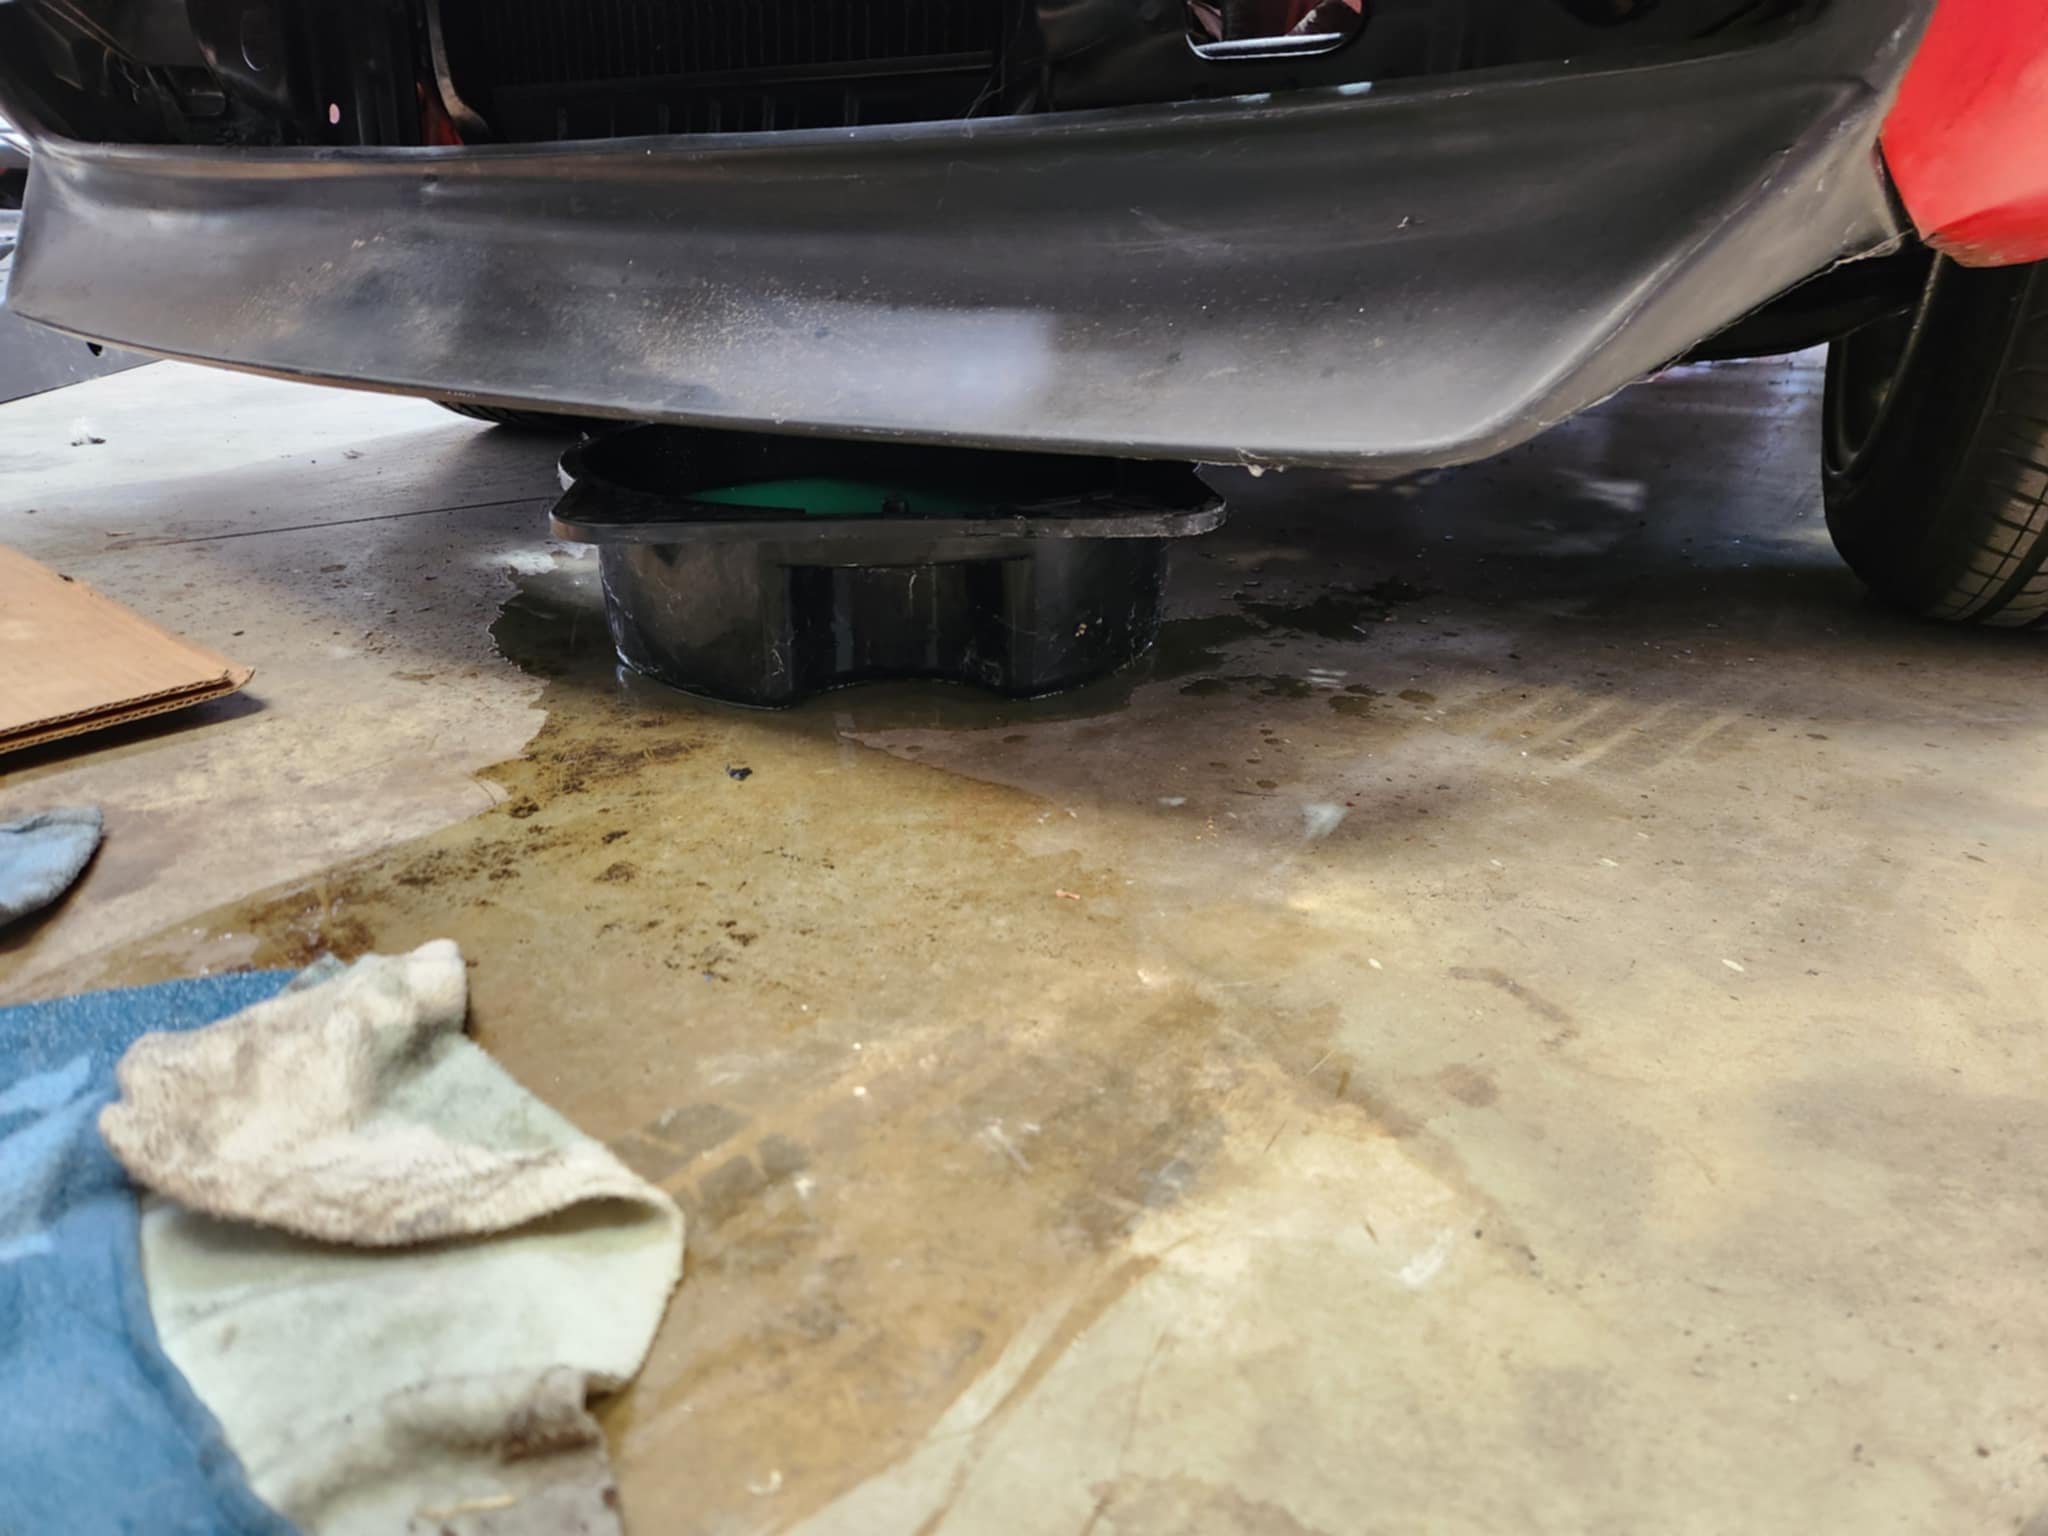
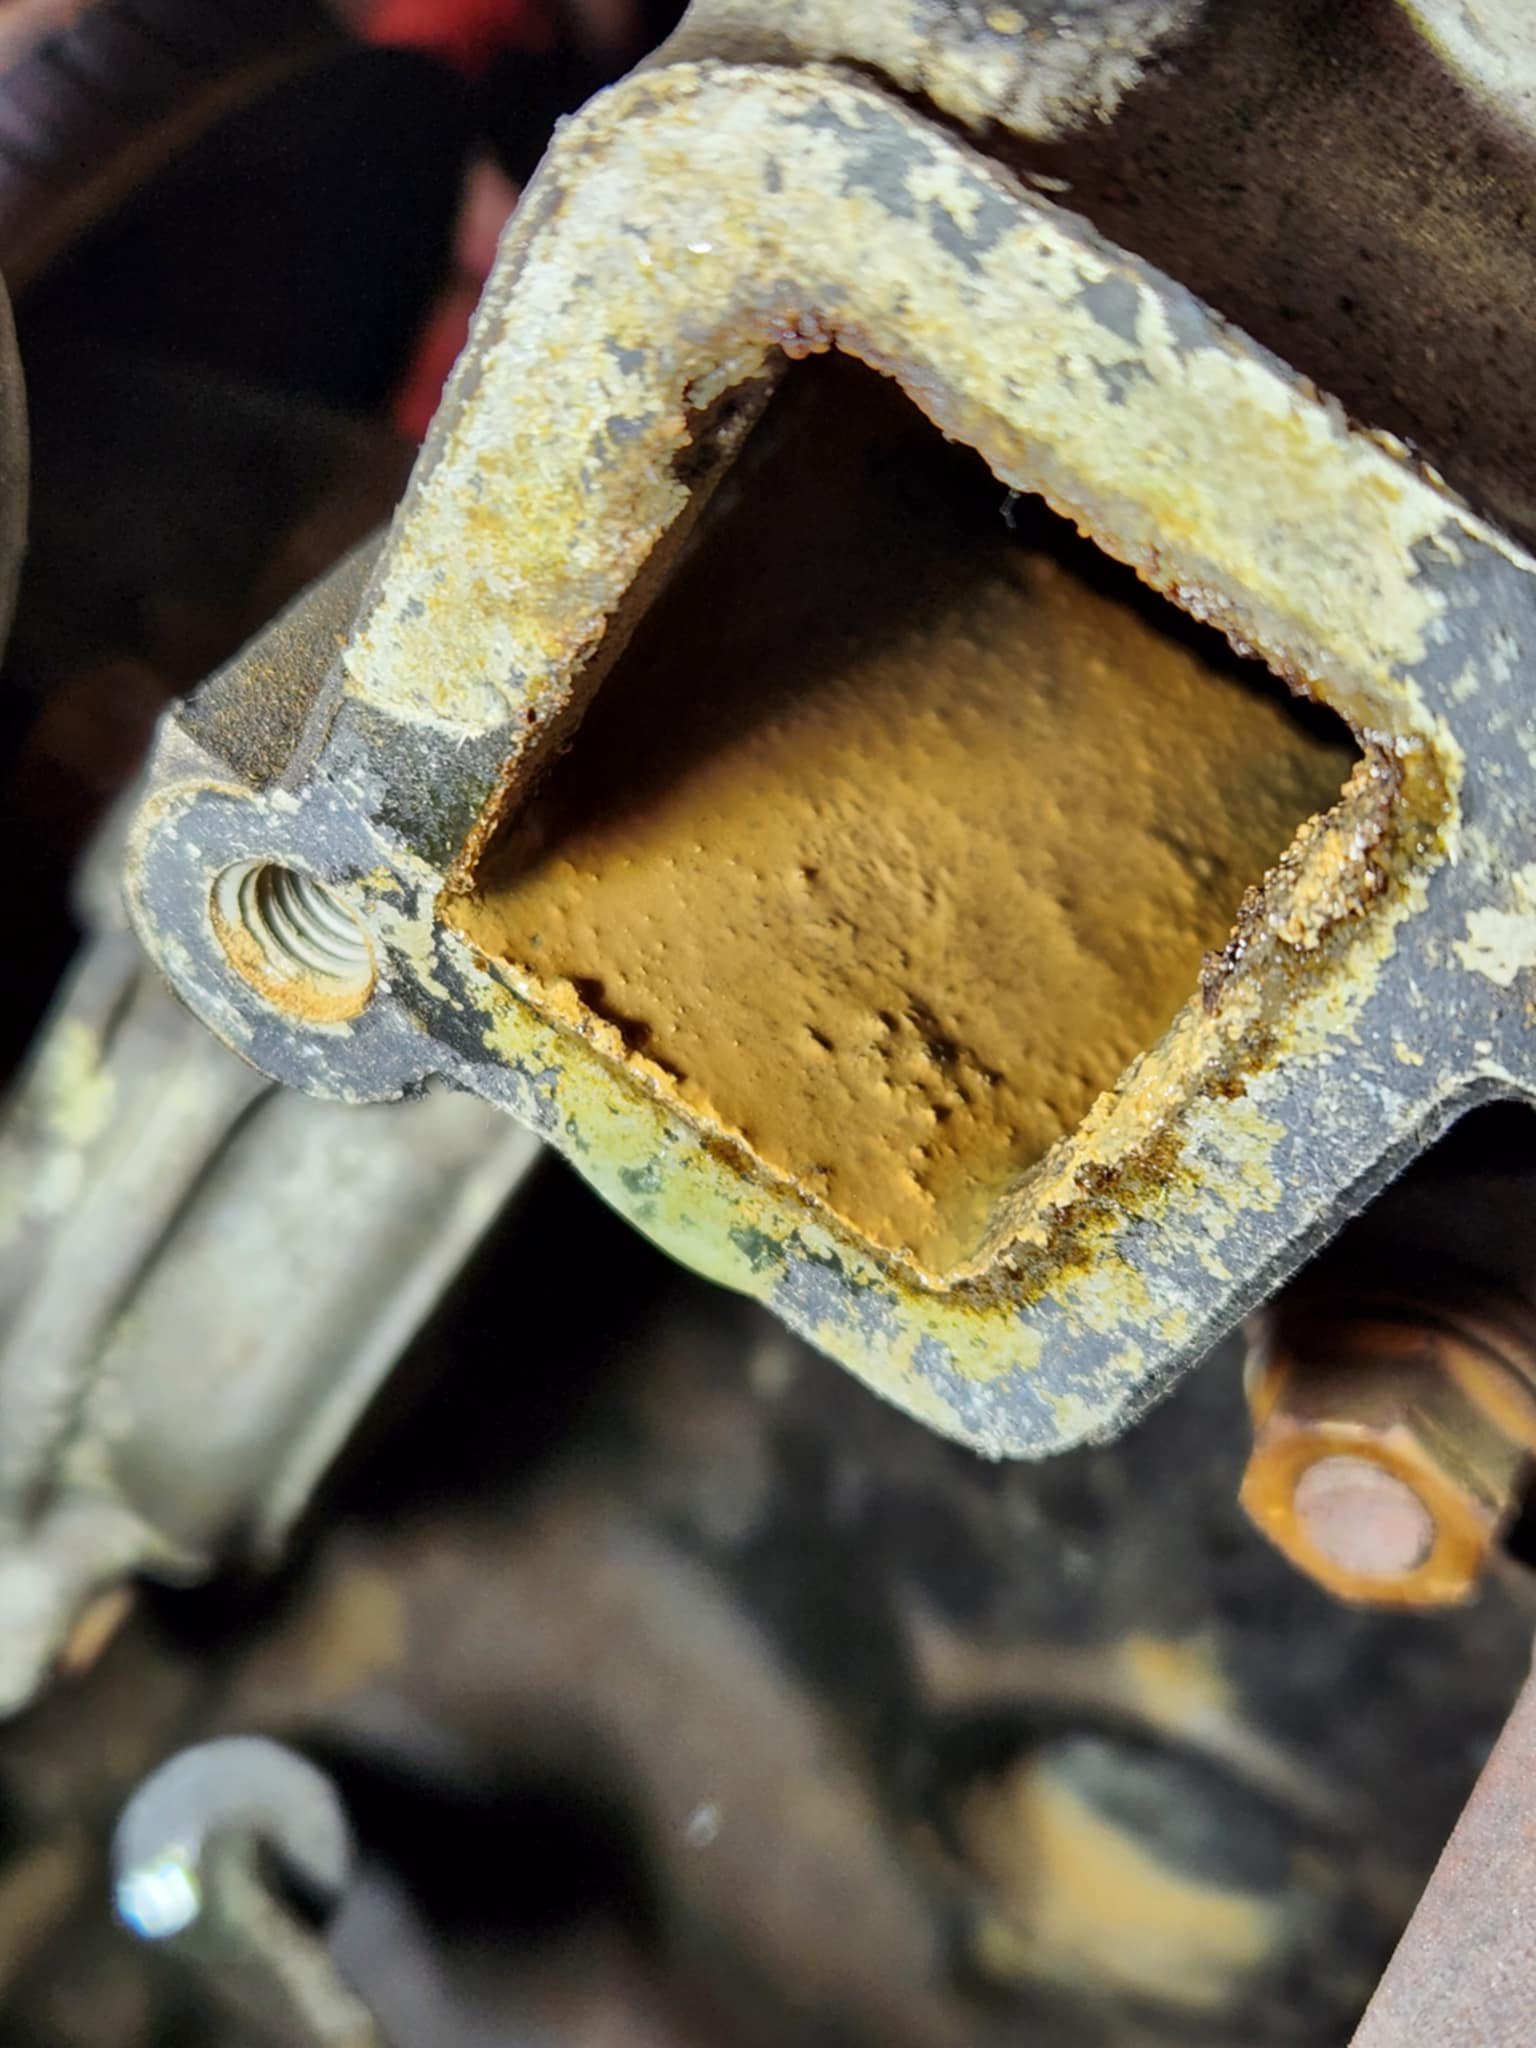
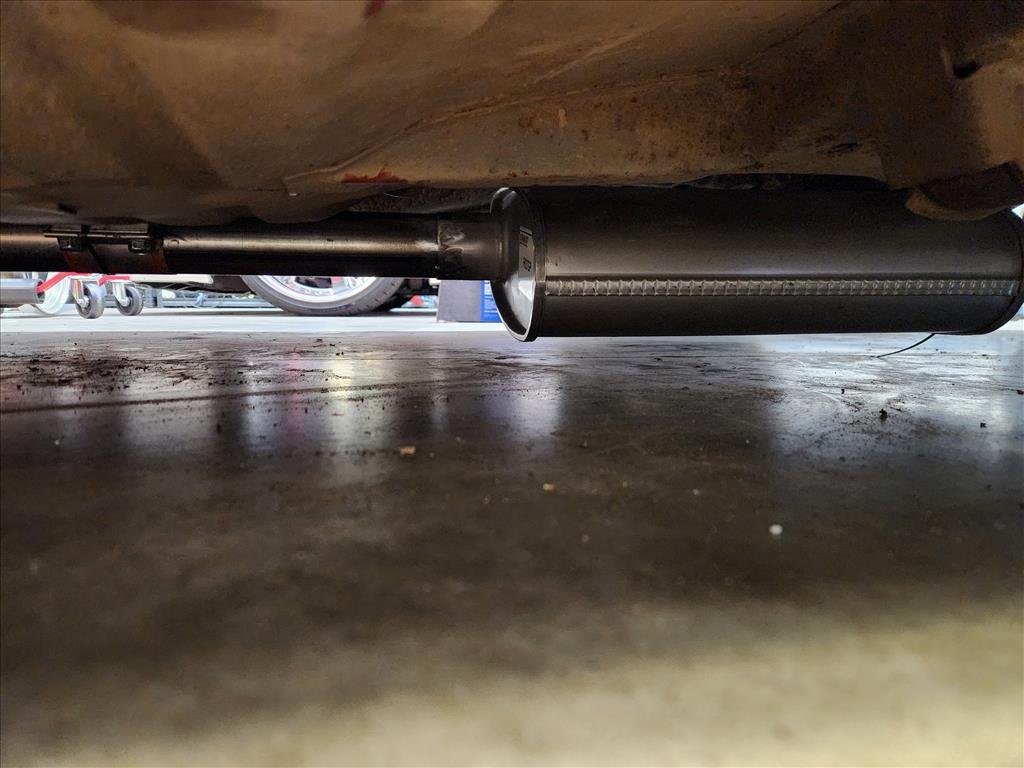
Gone and done it now, went for a drive this morning and parked in front of the shed. Then once putting it in the shed later I was greeted with a big puddle of oil. Luckily it wasn't run for long so I'm hoping for no damage As you can see it does hang low as it's a fwd sump. Option is either to try a rwd sump or just wing and baffle this one which might be better as I can alter capacity. Will see what I have in my stash
2 points
-
When you forget over 10 years what parts you already have and just keep buying more.
2 points
-
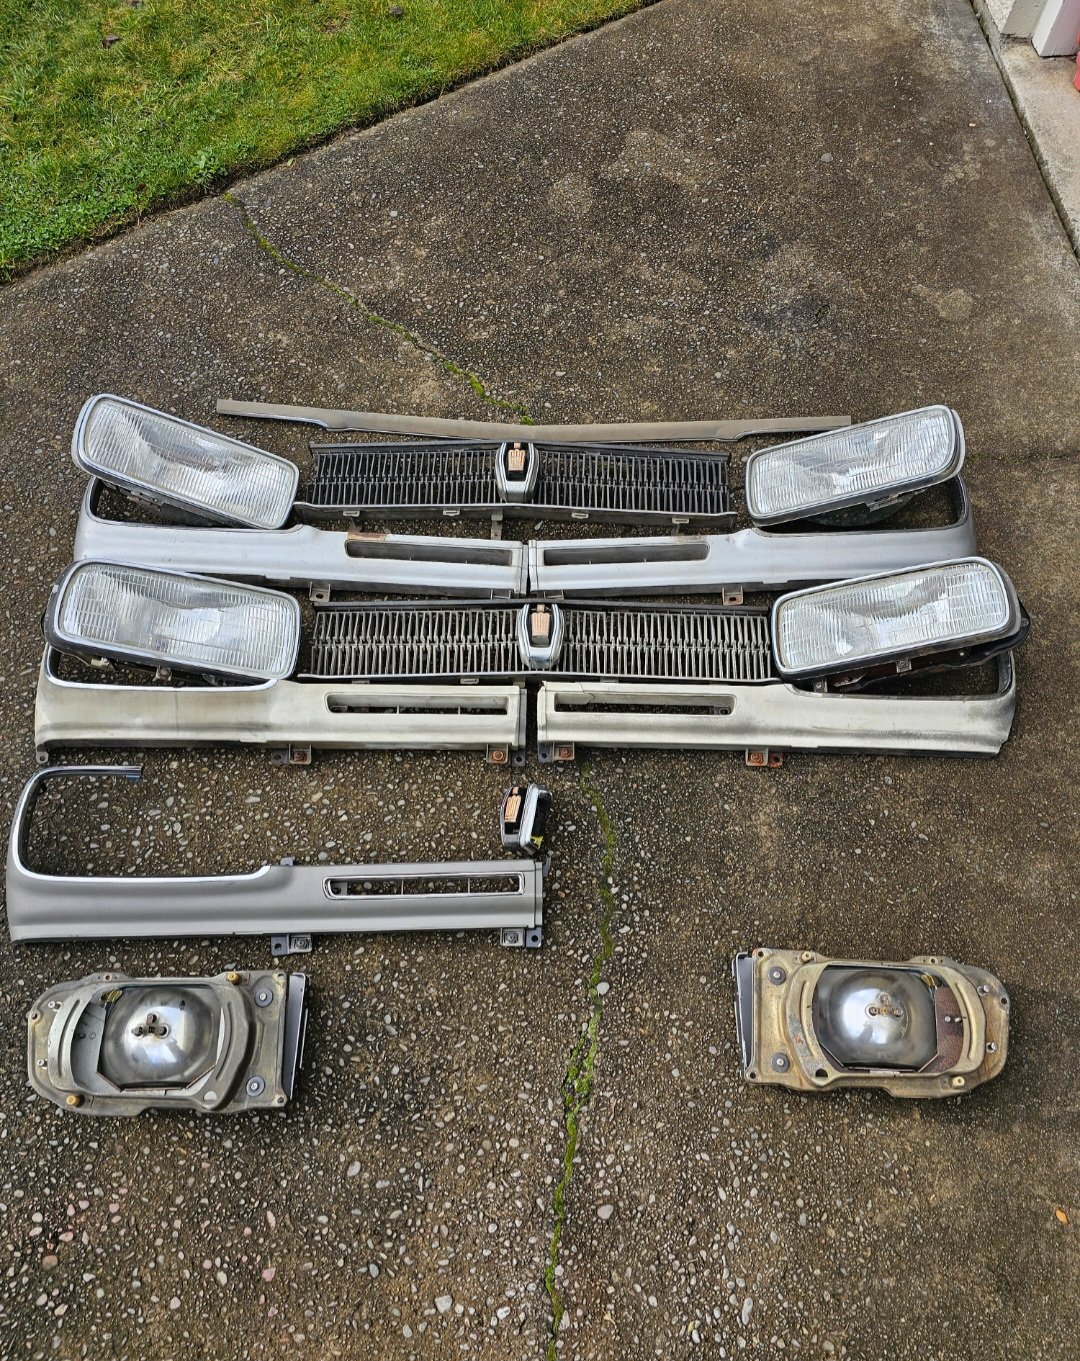
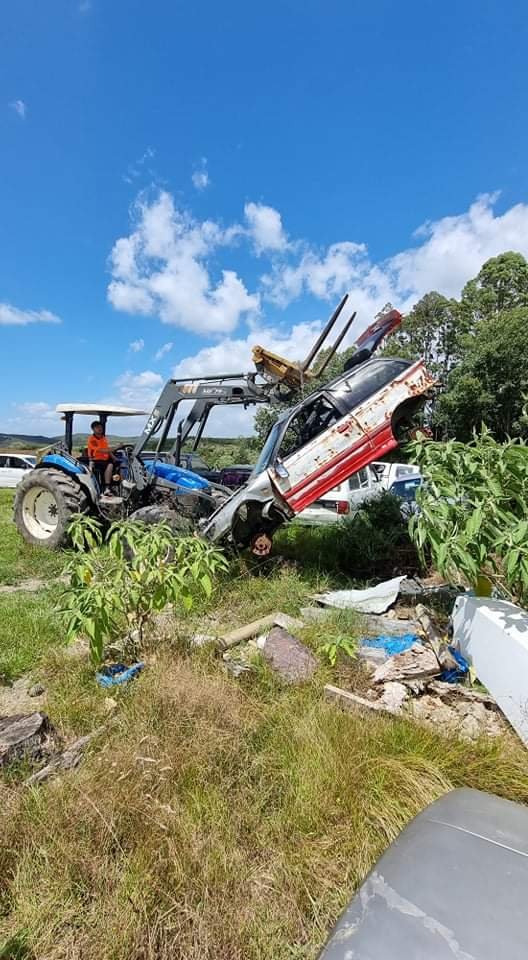
On one of its 1st test drives i put a hole in the sump on a pothole over a rise. Also have te27 sprinter trueno taillights and badges now
2 points
-
https://a.aliexpress.com/_mOoSo6B There's hundreds on there though, just search tungsten grinder.2 points
-
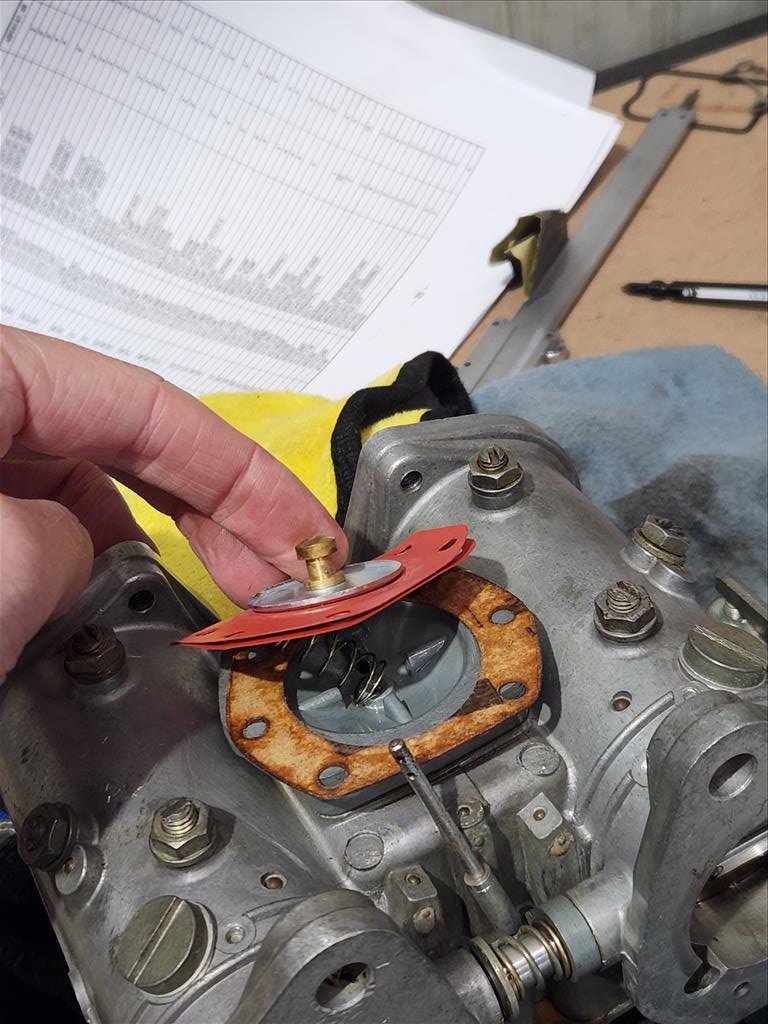
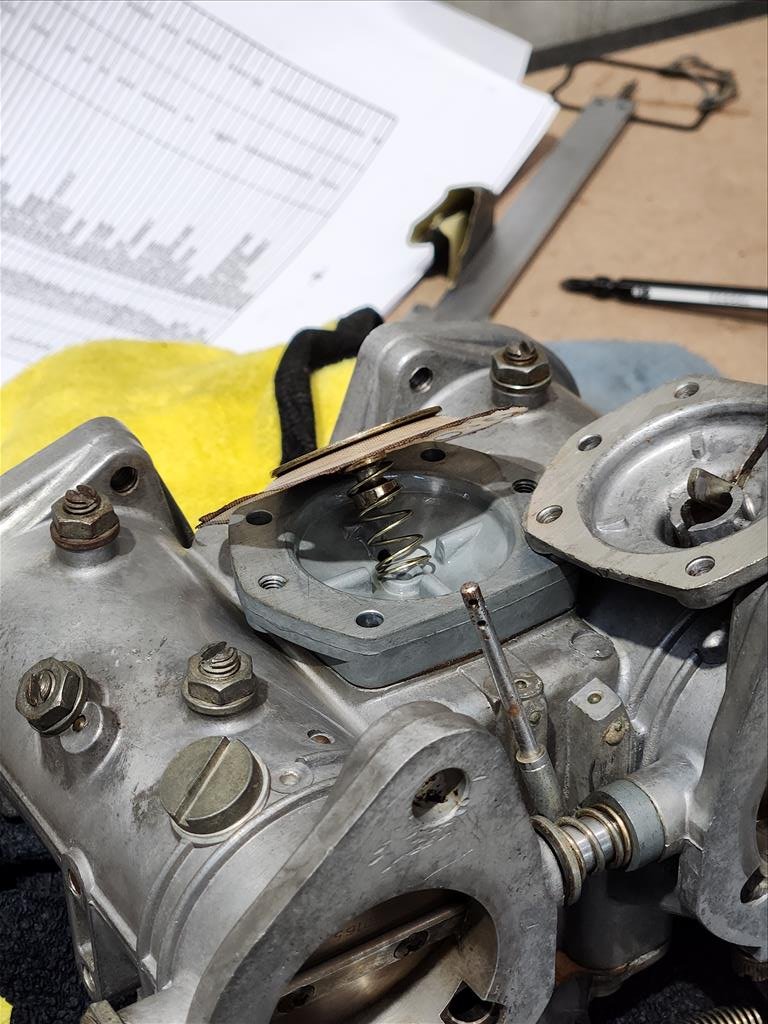
I'd like to introduce you to the smartest man alive, me. I believe I resolved the accelerator pump problem that (would you believe it) I caused. Apparently when I took the stuff apart and took photos I didn't actually take photos of the correct orientation of the diaphragm for the accelerator pump. I did think it was a little weird that the pump arm didn't really do anything. So this is how I had it.. And this is how it was meant to be. Obviously the spring is straight when it's screwed down. People smarter than me would have worked this out immediately but hey, live and learn. A free lesson that I'll remember. So yeah, I'm a dumbass but seems to be working again on the bench. Yet to run the car, still have that whole cooling thing to work through.
2 points
-
2 points
-
2 points
-
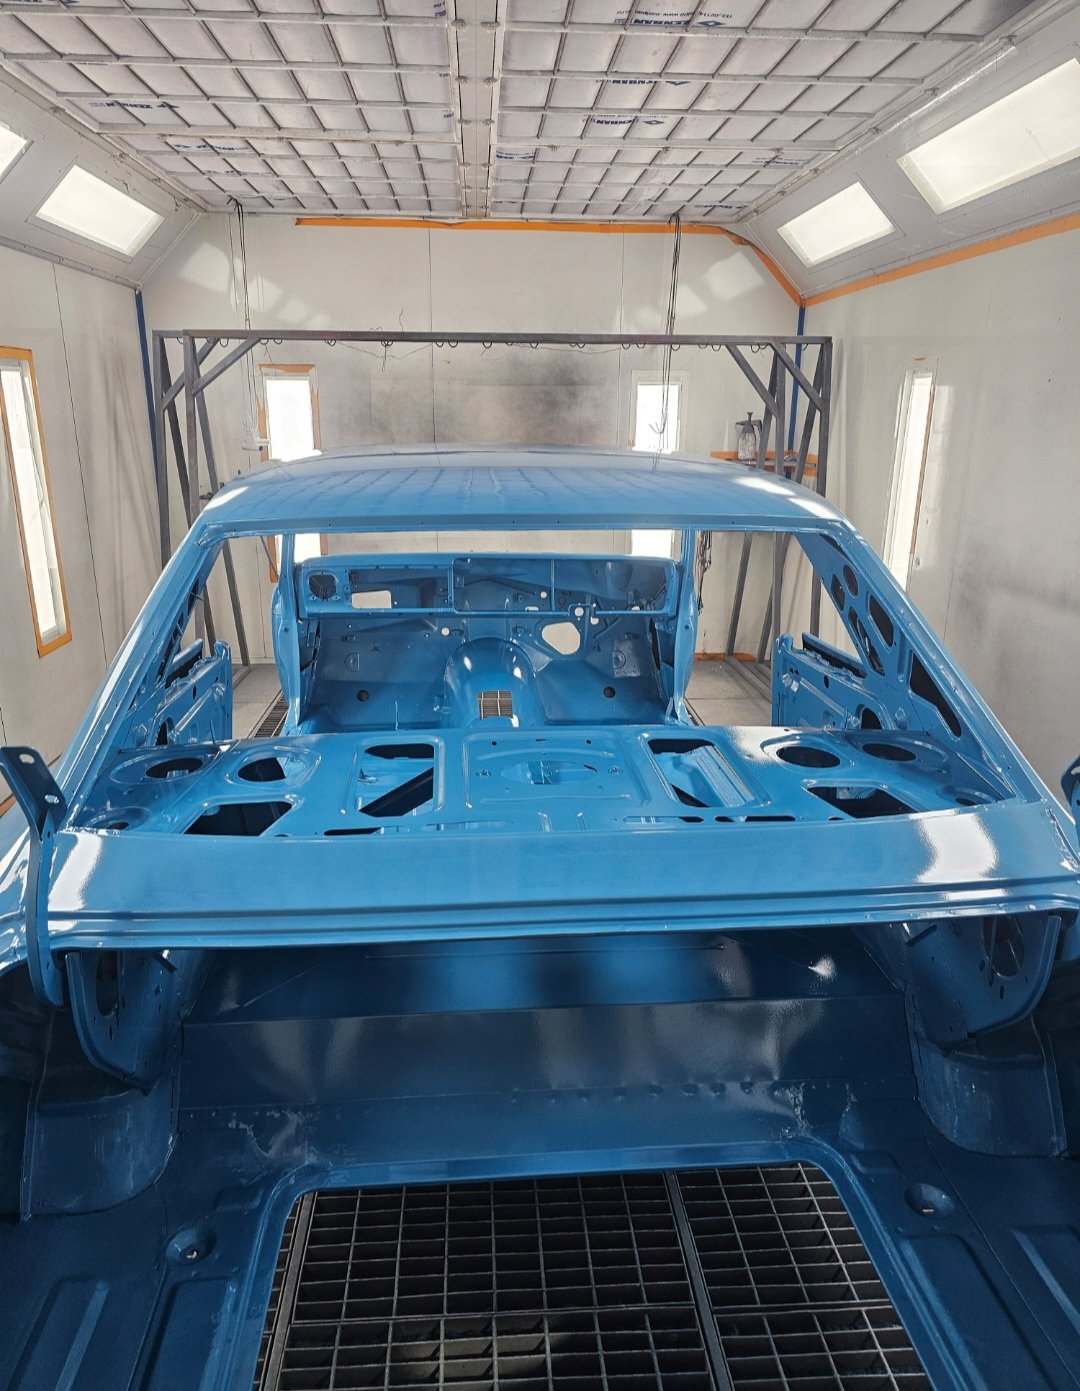
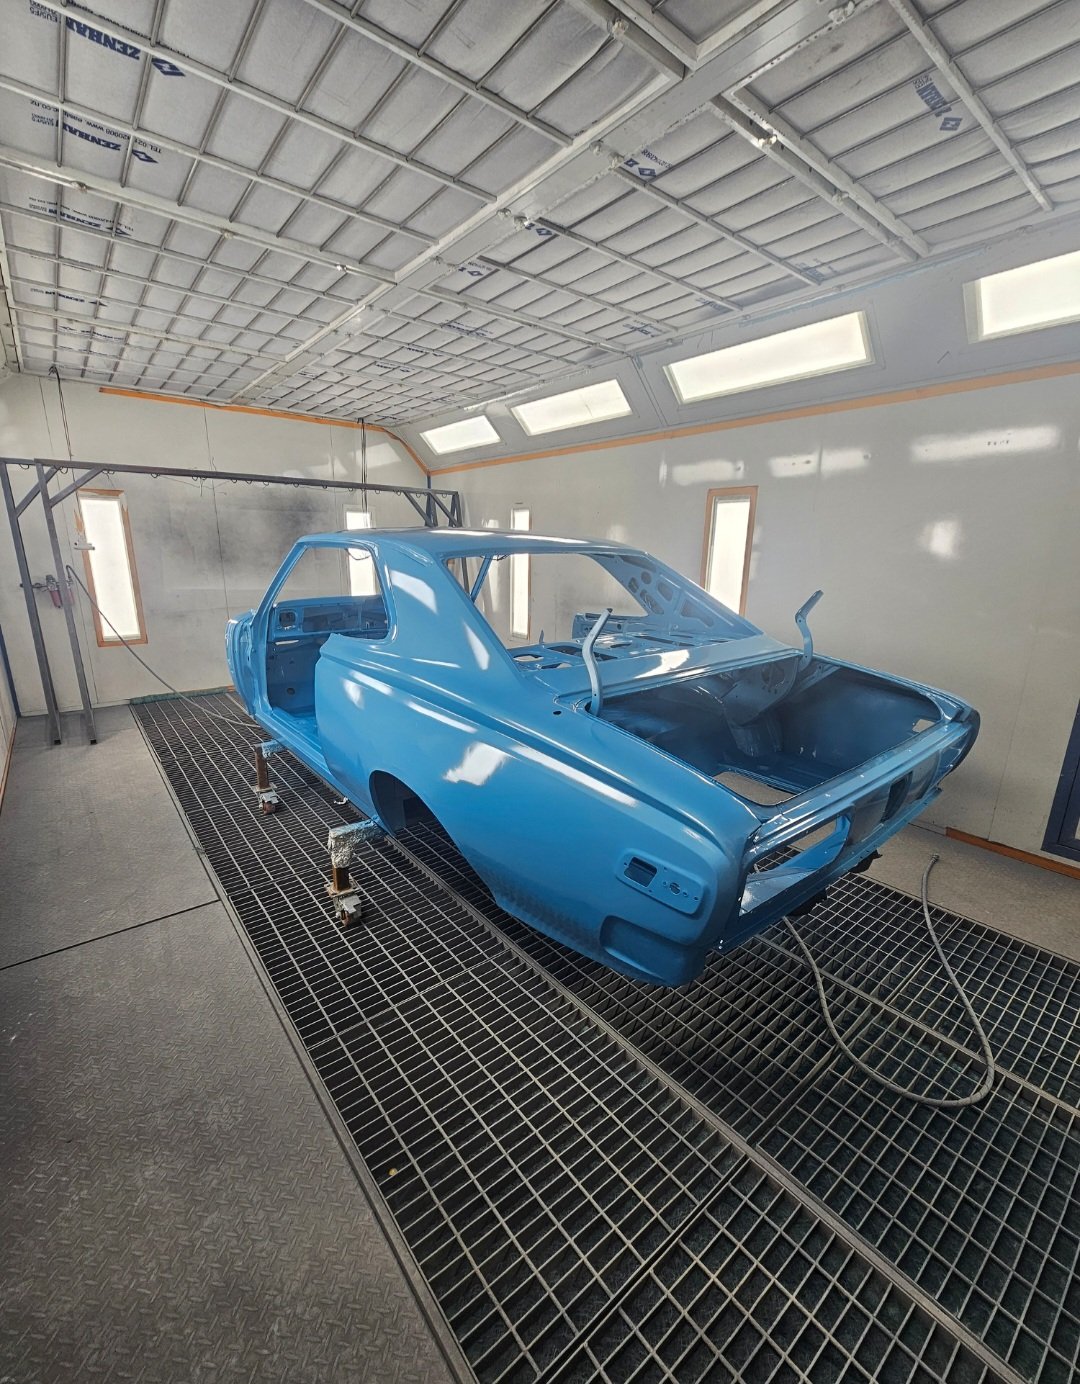
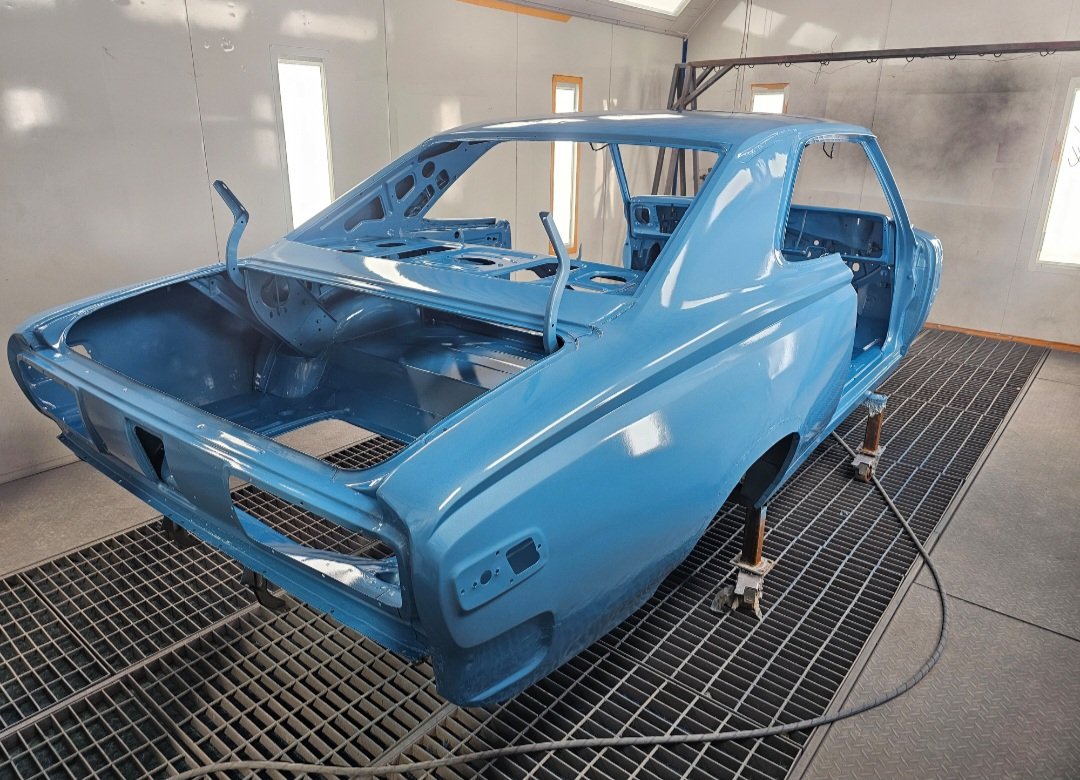
Feel like we have come so far in the last few days. Went with a #ppg direct to metal in Toyota 8v7 instead of an epoxy primer. Will get the car revined and on the road like this so they can see all repairs and modifications done. Then will pull back down and do filler work, primer and top coat. Once back on the road and certified. Thanks to the team and Canterbury auto fab Warrick, josh and josh
2 points
-
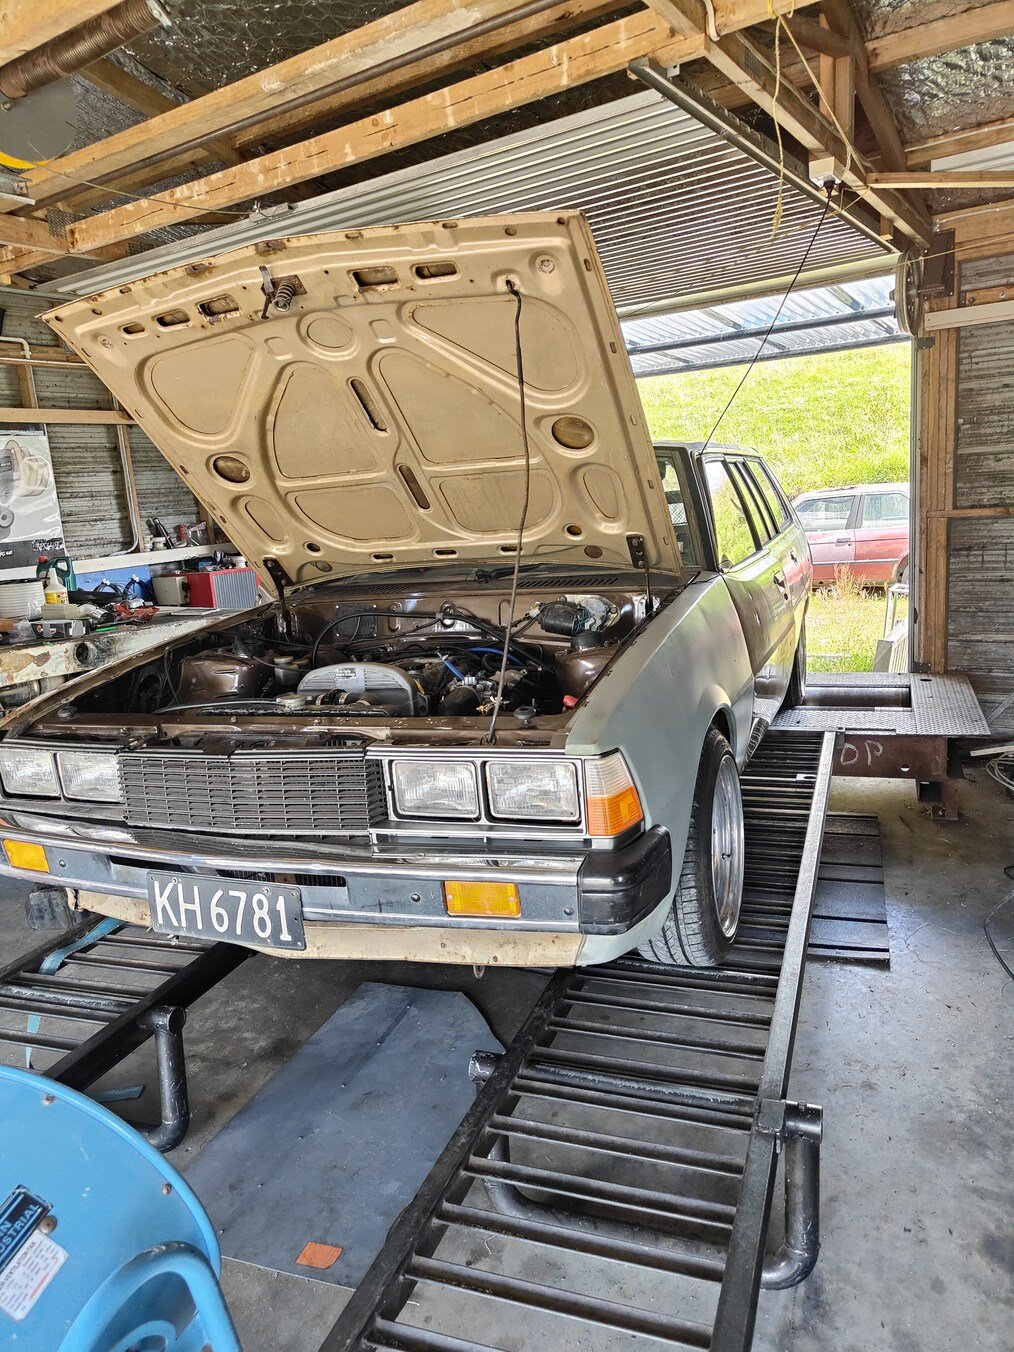
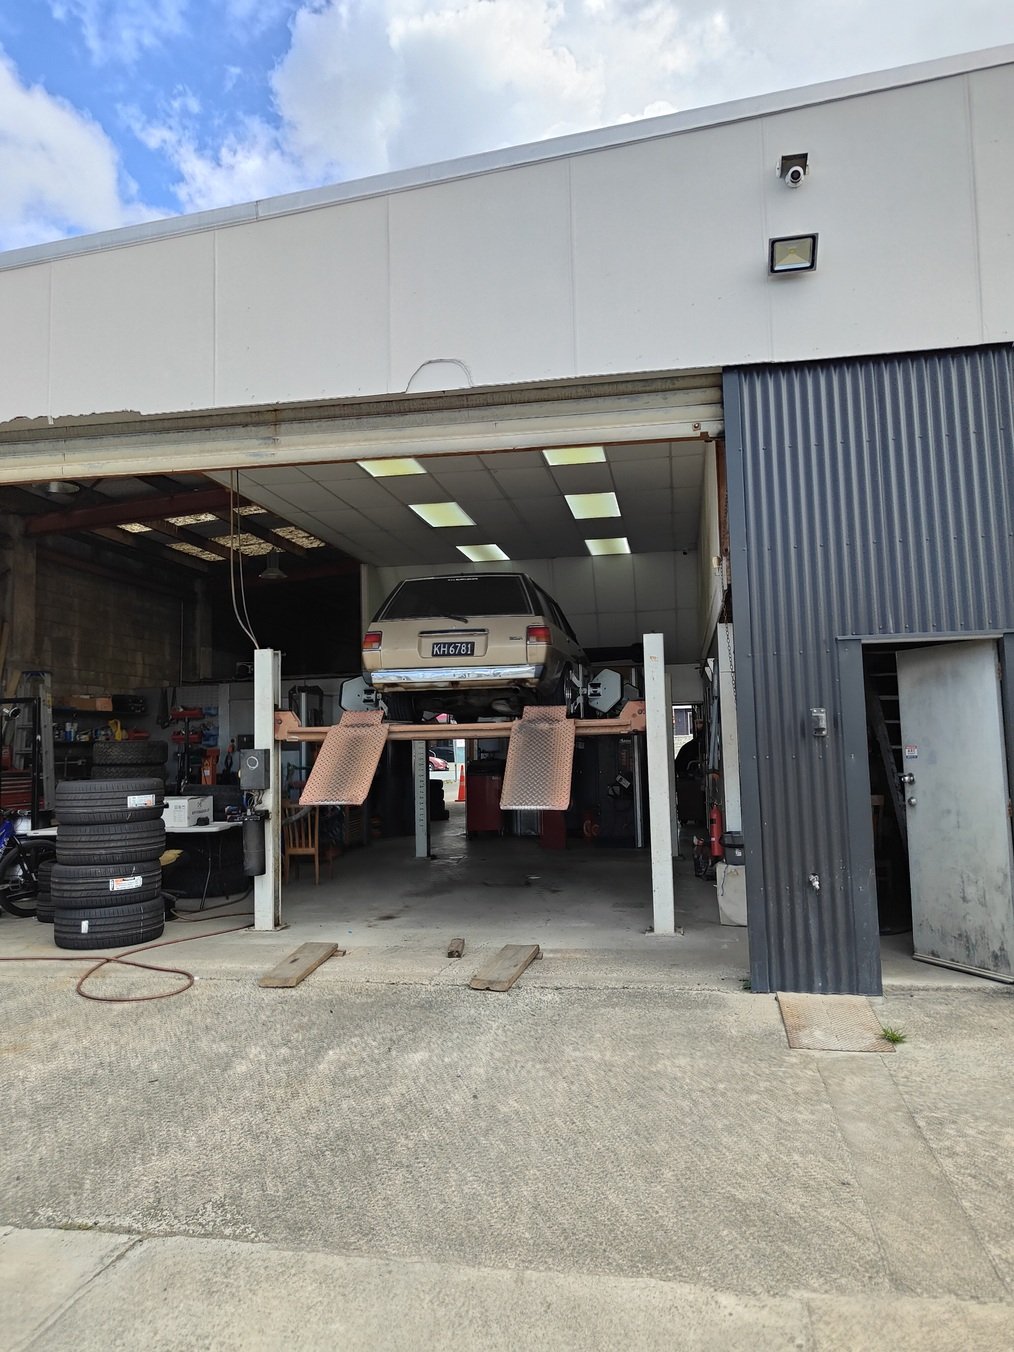
Next was a wheel alignment, thanks to the bro eclat again And then off to none other then Krispy Kreme @kpr 140 horse ponies which I believe is equivalent to 62,375 ducks And a quick test drive out the coast afterwards. The feeling was unreal This car has been off the road since 2013
2 points
-
Surely logging or watching live data on the PFC during the times where its faulting should show up if a sensor was reading wrong. Thats how I found on my old Link G1 when my MAP sensor was full of oil, the MAP reading went on the piss when the car stumbled, same when the IAT sensor wires were shorting on a different car.1 point
-
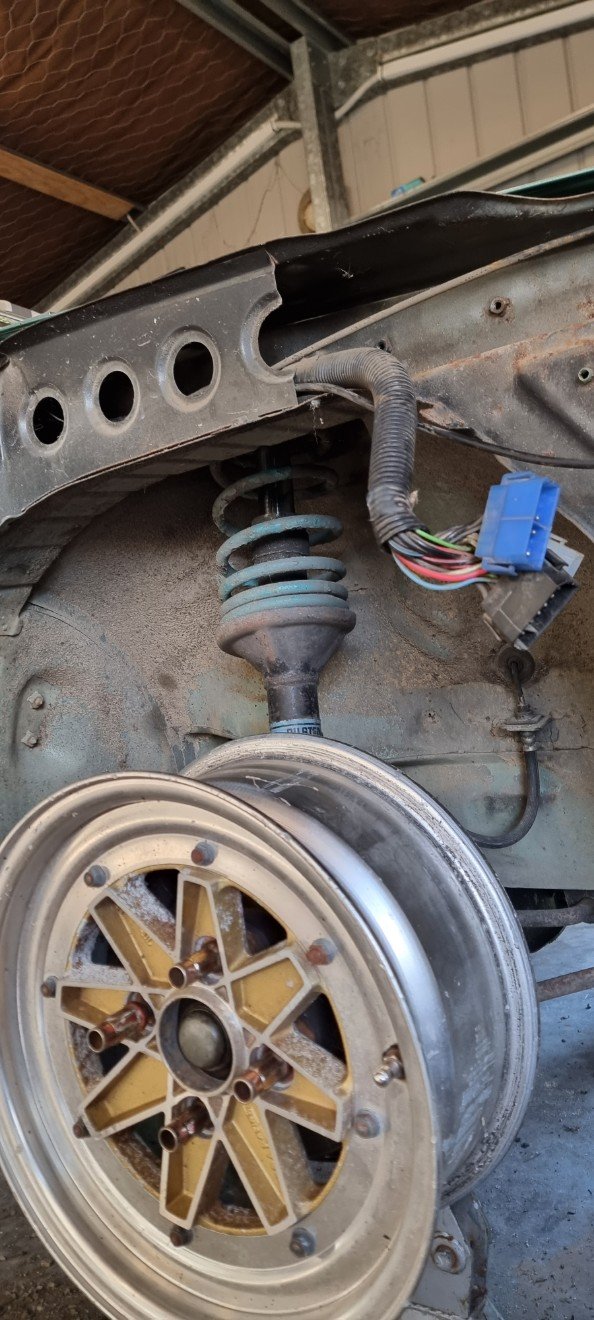
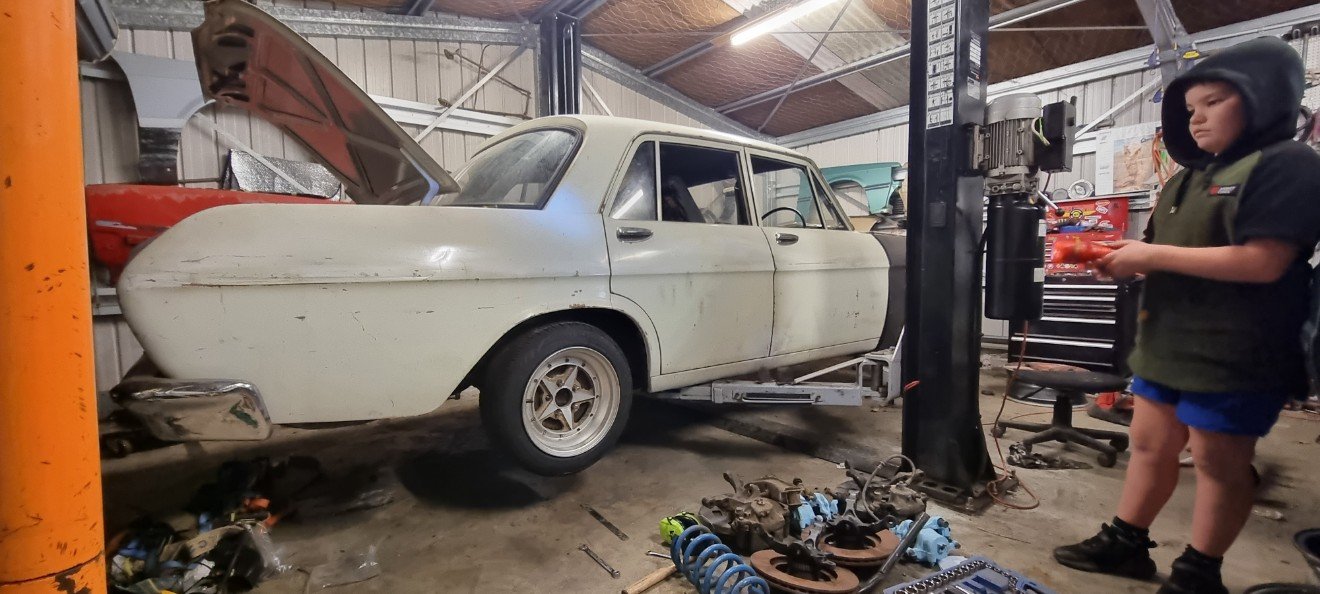
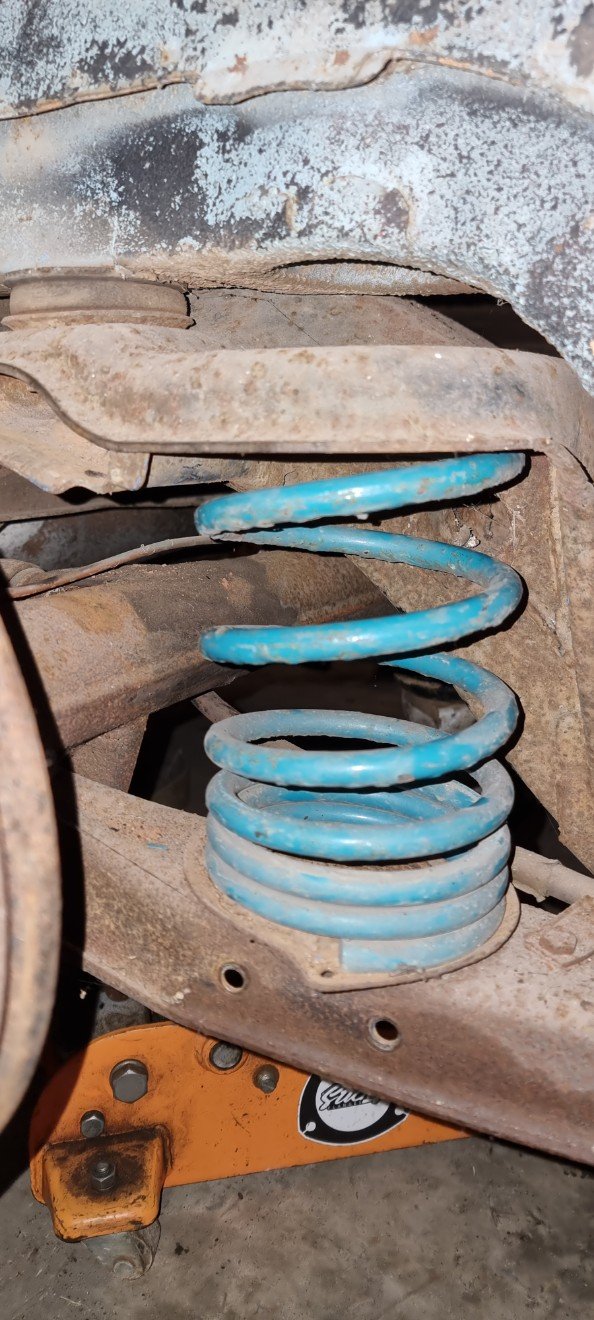
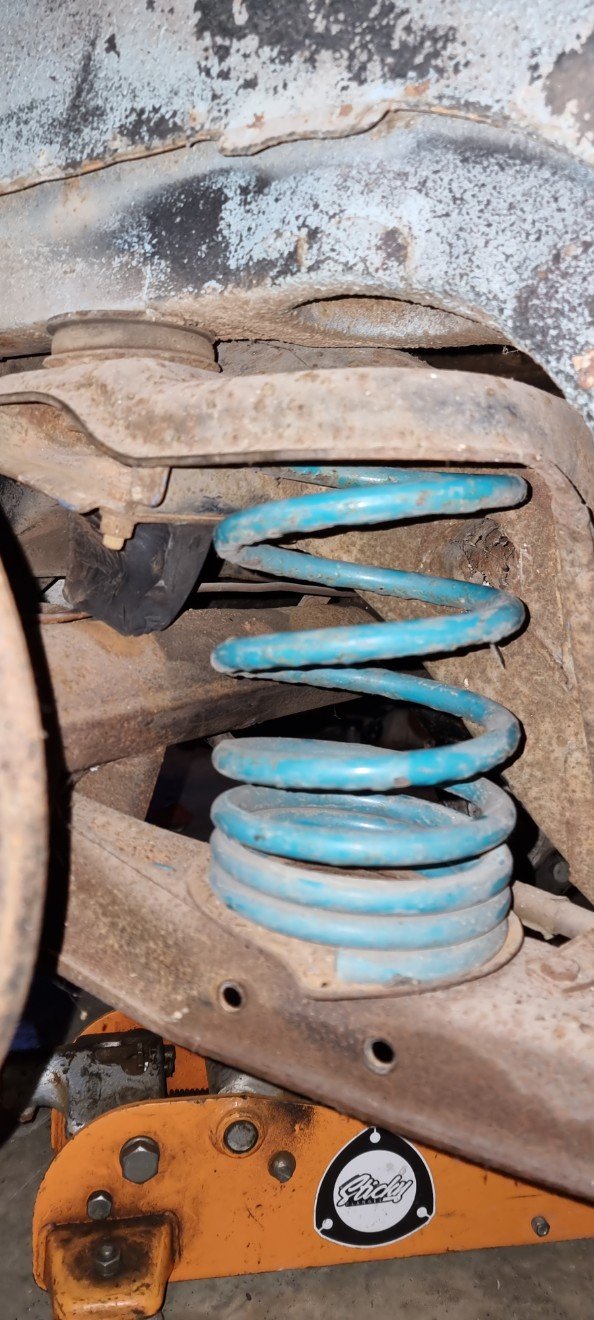
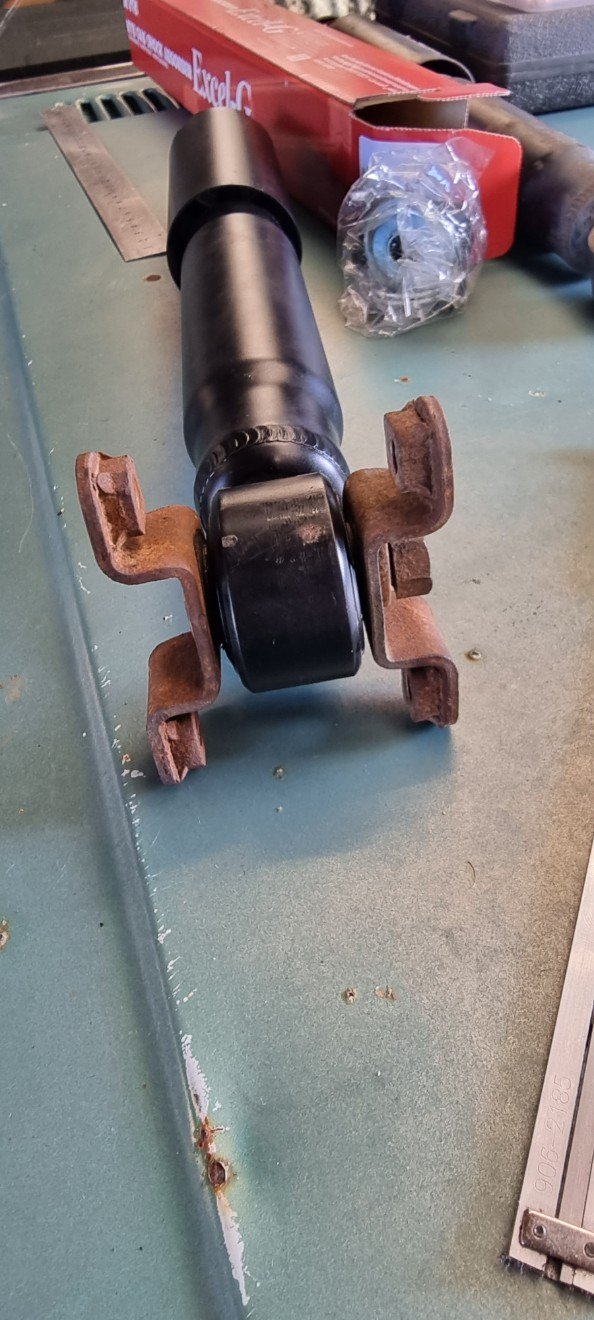
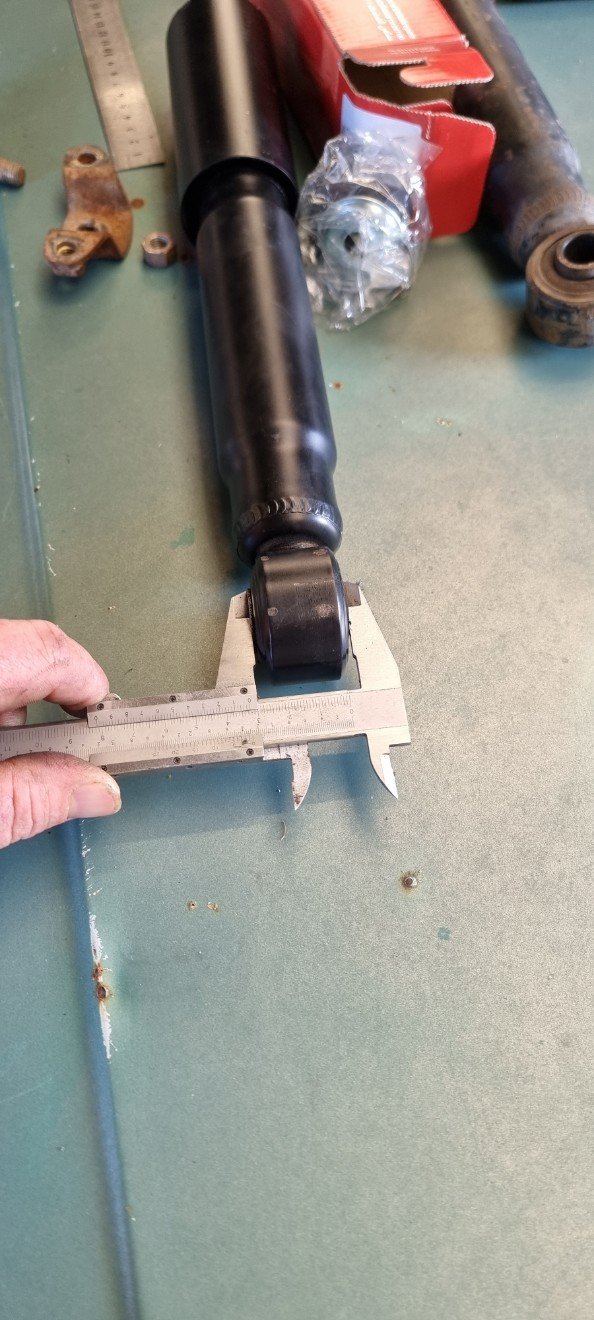
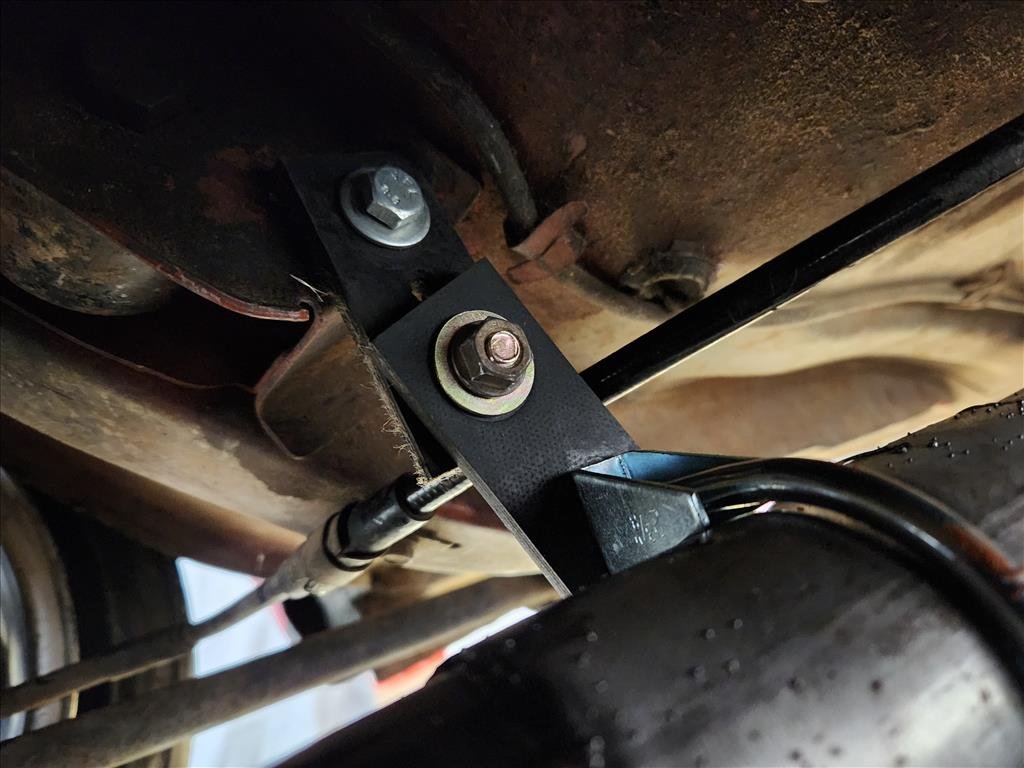
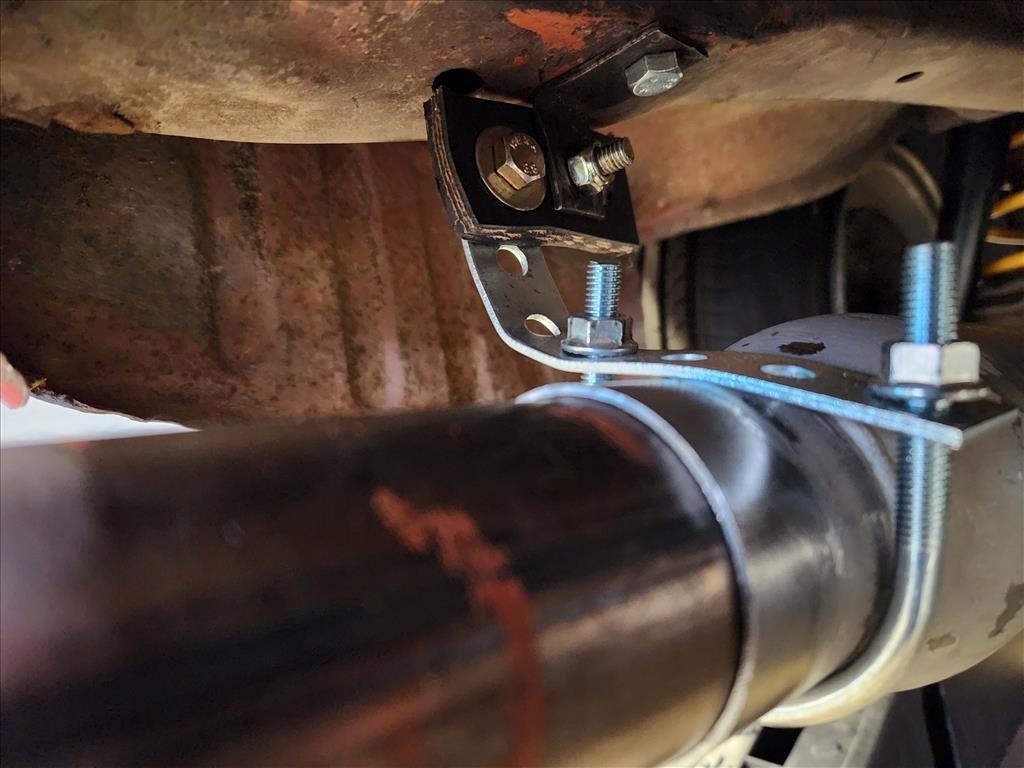
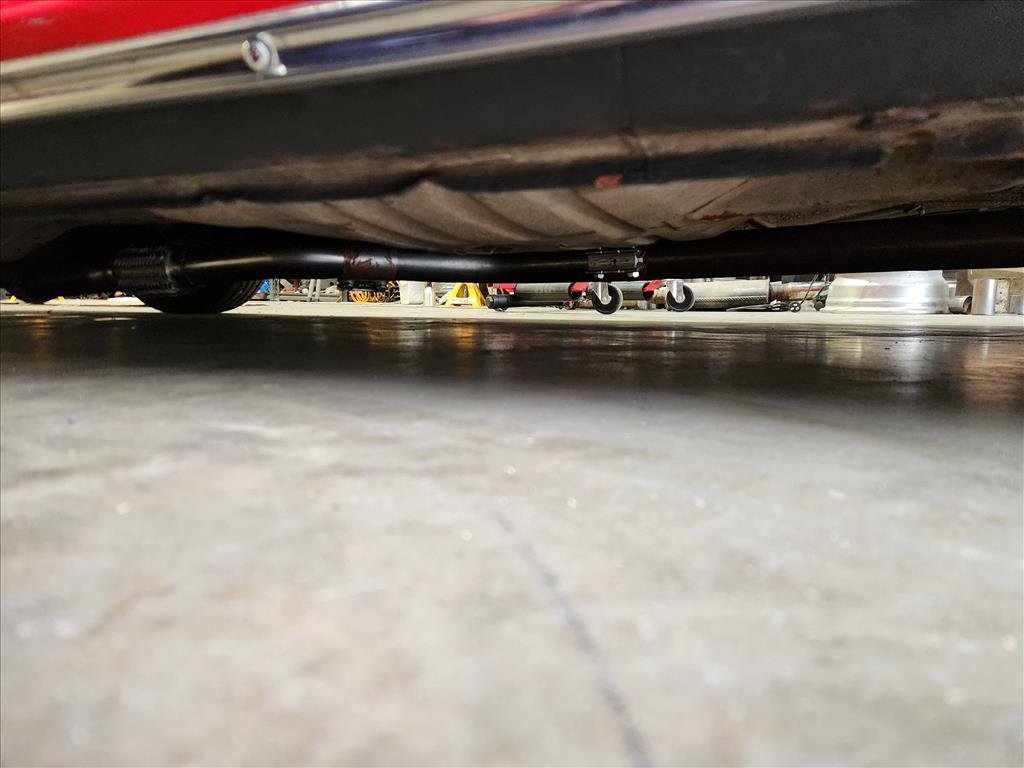
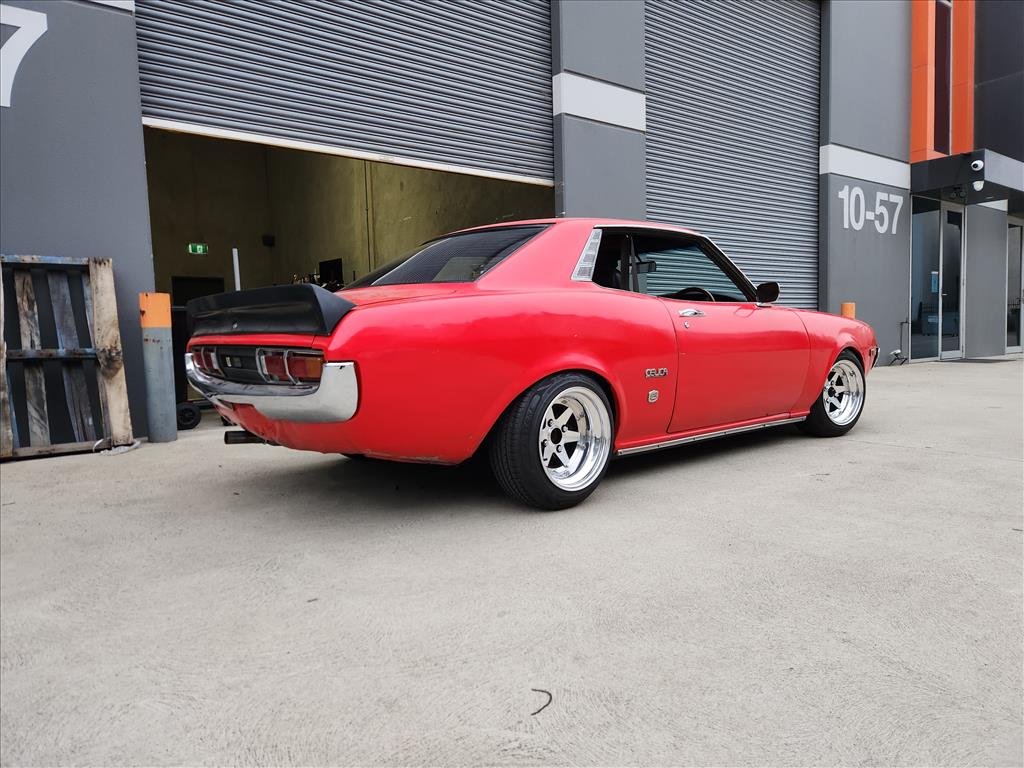
Was doing some spring measurements and my eye wondered towards the lancer..... ended up pulling the front springs out Right diameter, and around the length I was after Sat straight on bumpstops, so did what any reasonable bloke would do and deleted the bumpstops Had to shave down the tube on shock to fit crown brackets This is full droop, springs captive Peek the supervisor This is it on ground but exhaust is touching between diff and chassis so will remove and go under diff or change it somehow. wheres seedy al at?
1 point
-
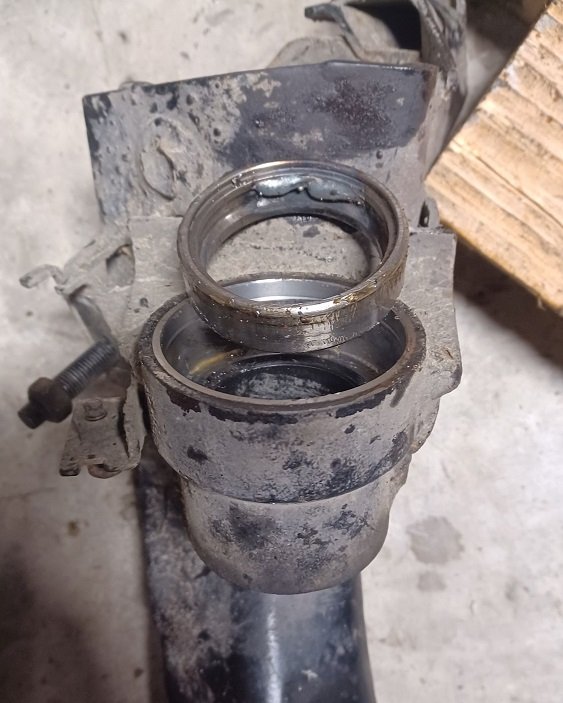
Alex had cut down a rusted out pipe for Rhonda, I rounded it out a bit and fitted it
1 point
-
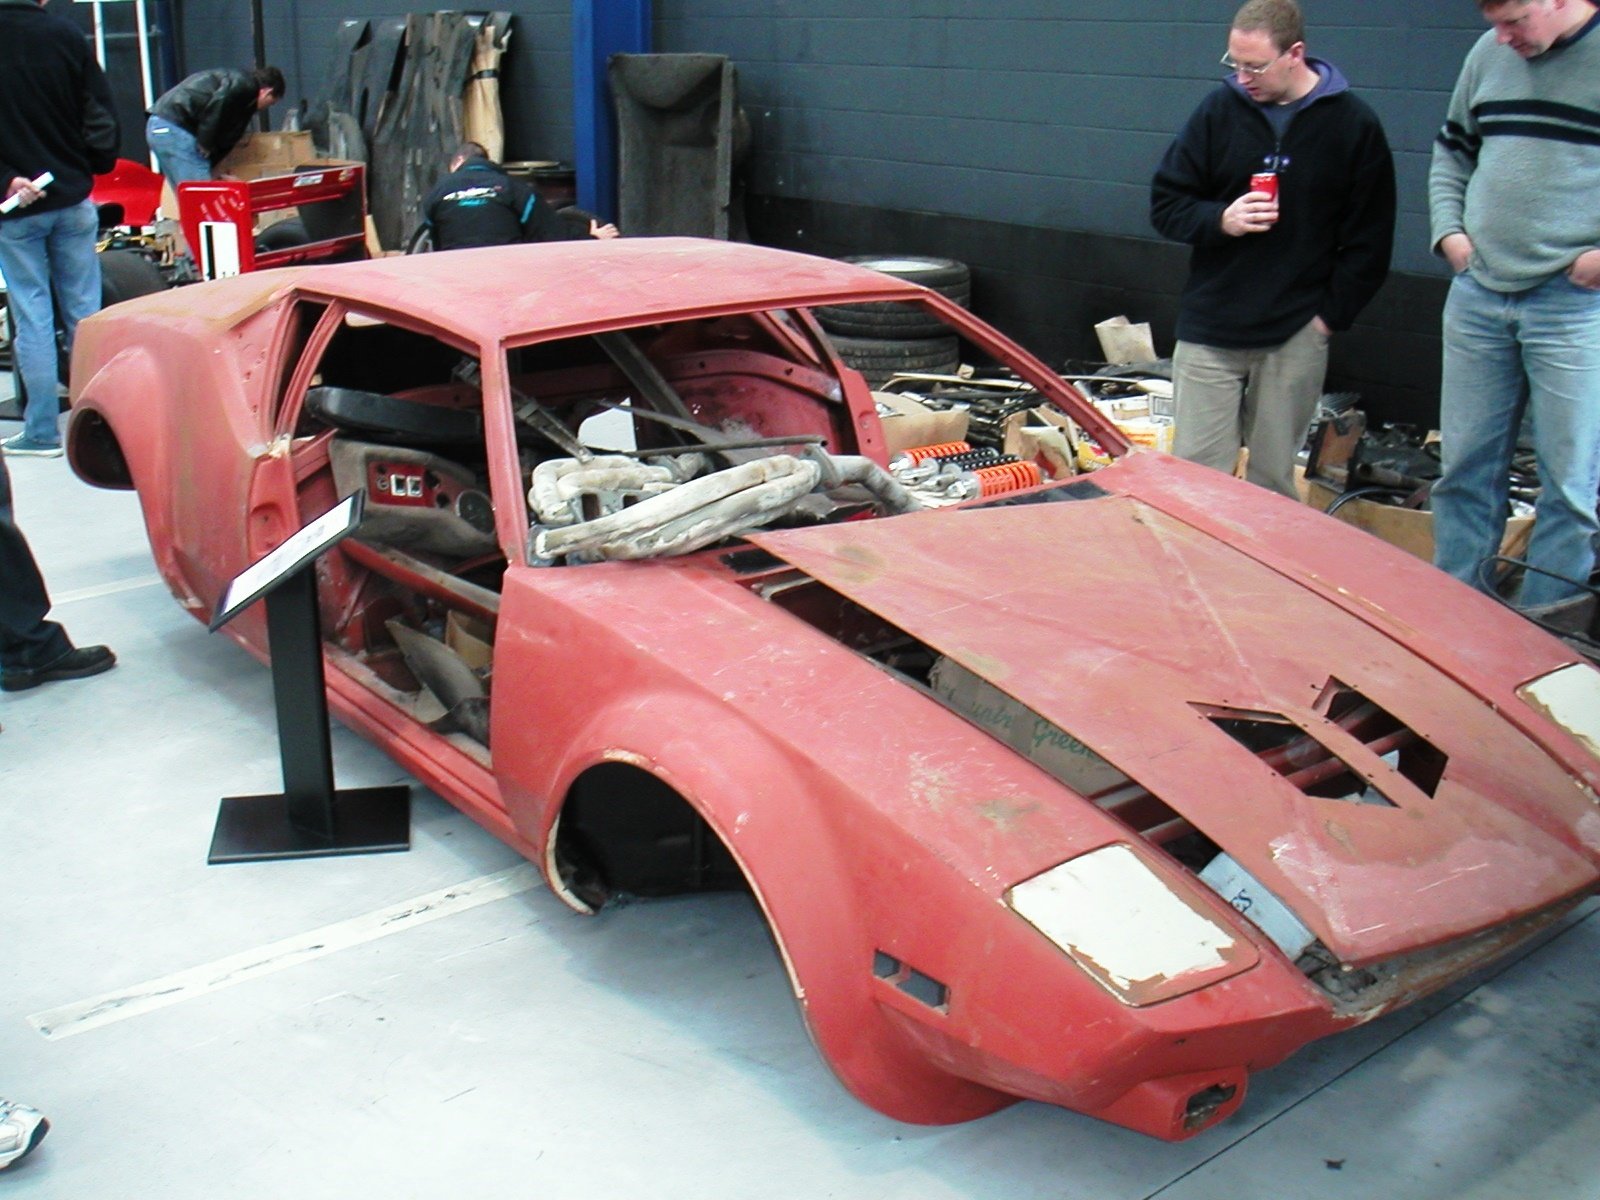
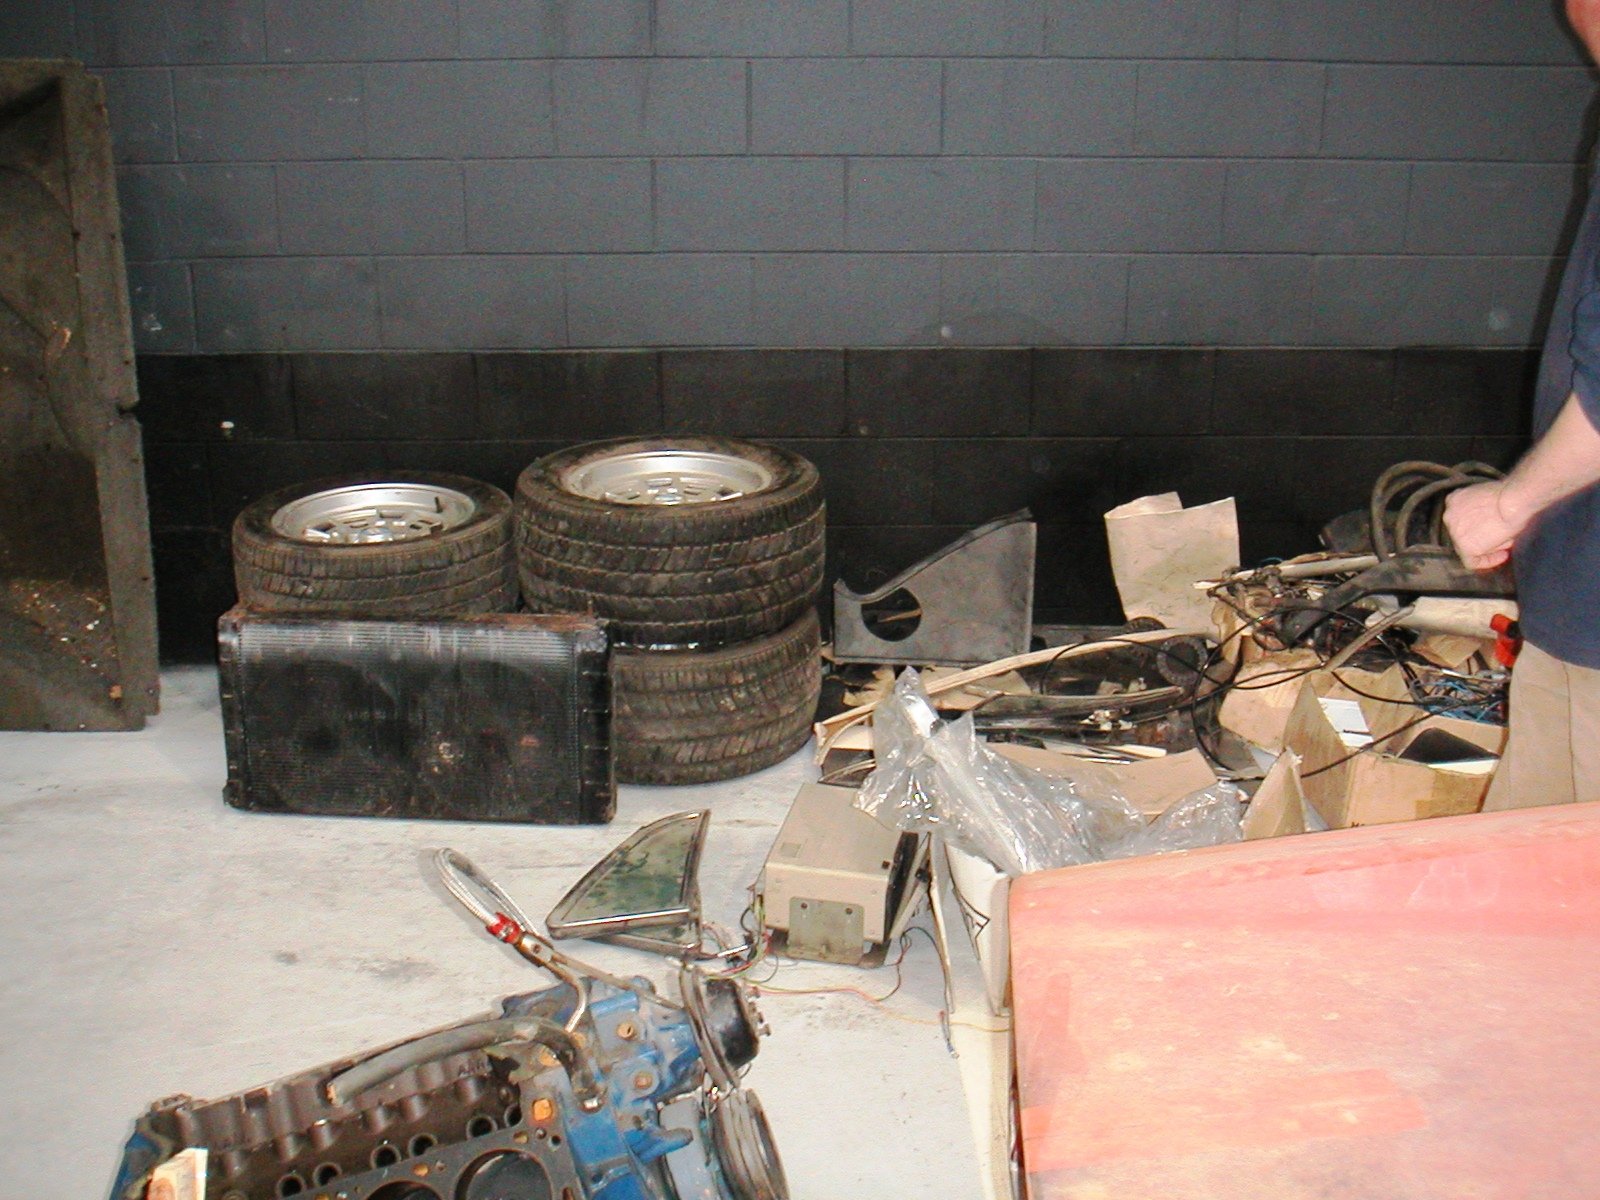
*it’s not mine missus uncle passed away and she was promised this when she was 17ish bittersweet moment finally getting to see it out of the shed where it’s been since somewhere around 1987 was apparently parked up due to perished tyres and rear shocks…. anyway pictures…. As found A trailer load to the dump some tugging with a ranger and slowly rolled it down the driveway with little to no brakes hired the longest trailer they had Old man did some demo work to my shed to turn it back into a double garage1 point
-
Quality thread dredge @kermet, thanks for fixing the pics
1 point
-
I just updated my pictures in these posts as ihug shut down, so sorry for lack of content.....1 point
-
That’s so random. Wonder if it was a parts car or some such to the one I used to seee or they were just the 2000s drug dealer car of choice either way great work bringing it back from that state!!1 point
-
It was black and white in the early 1970's When we bought it at the Turners Police auction in Aug 2000 it was completely stripped with primer on the body.
1 point
-
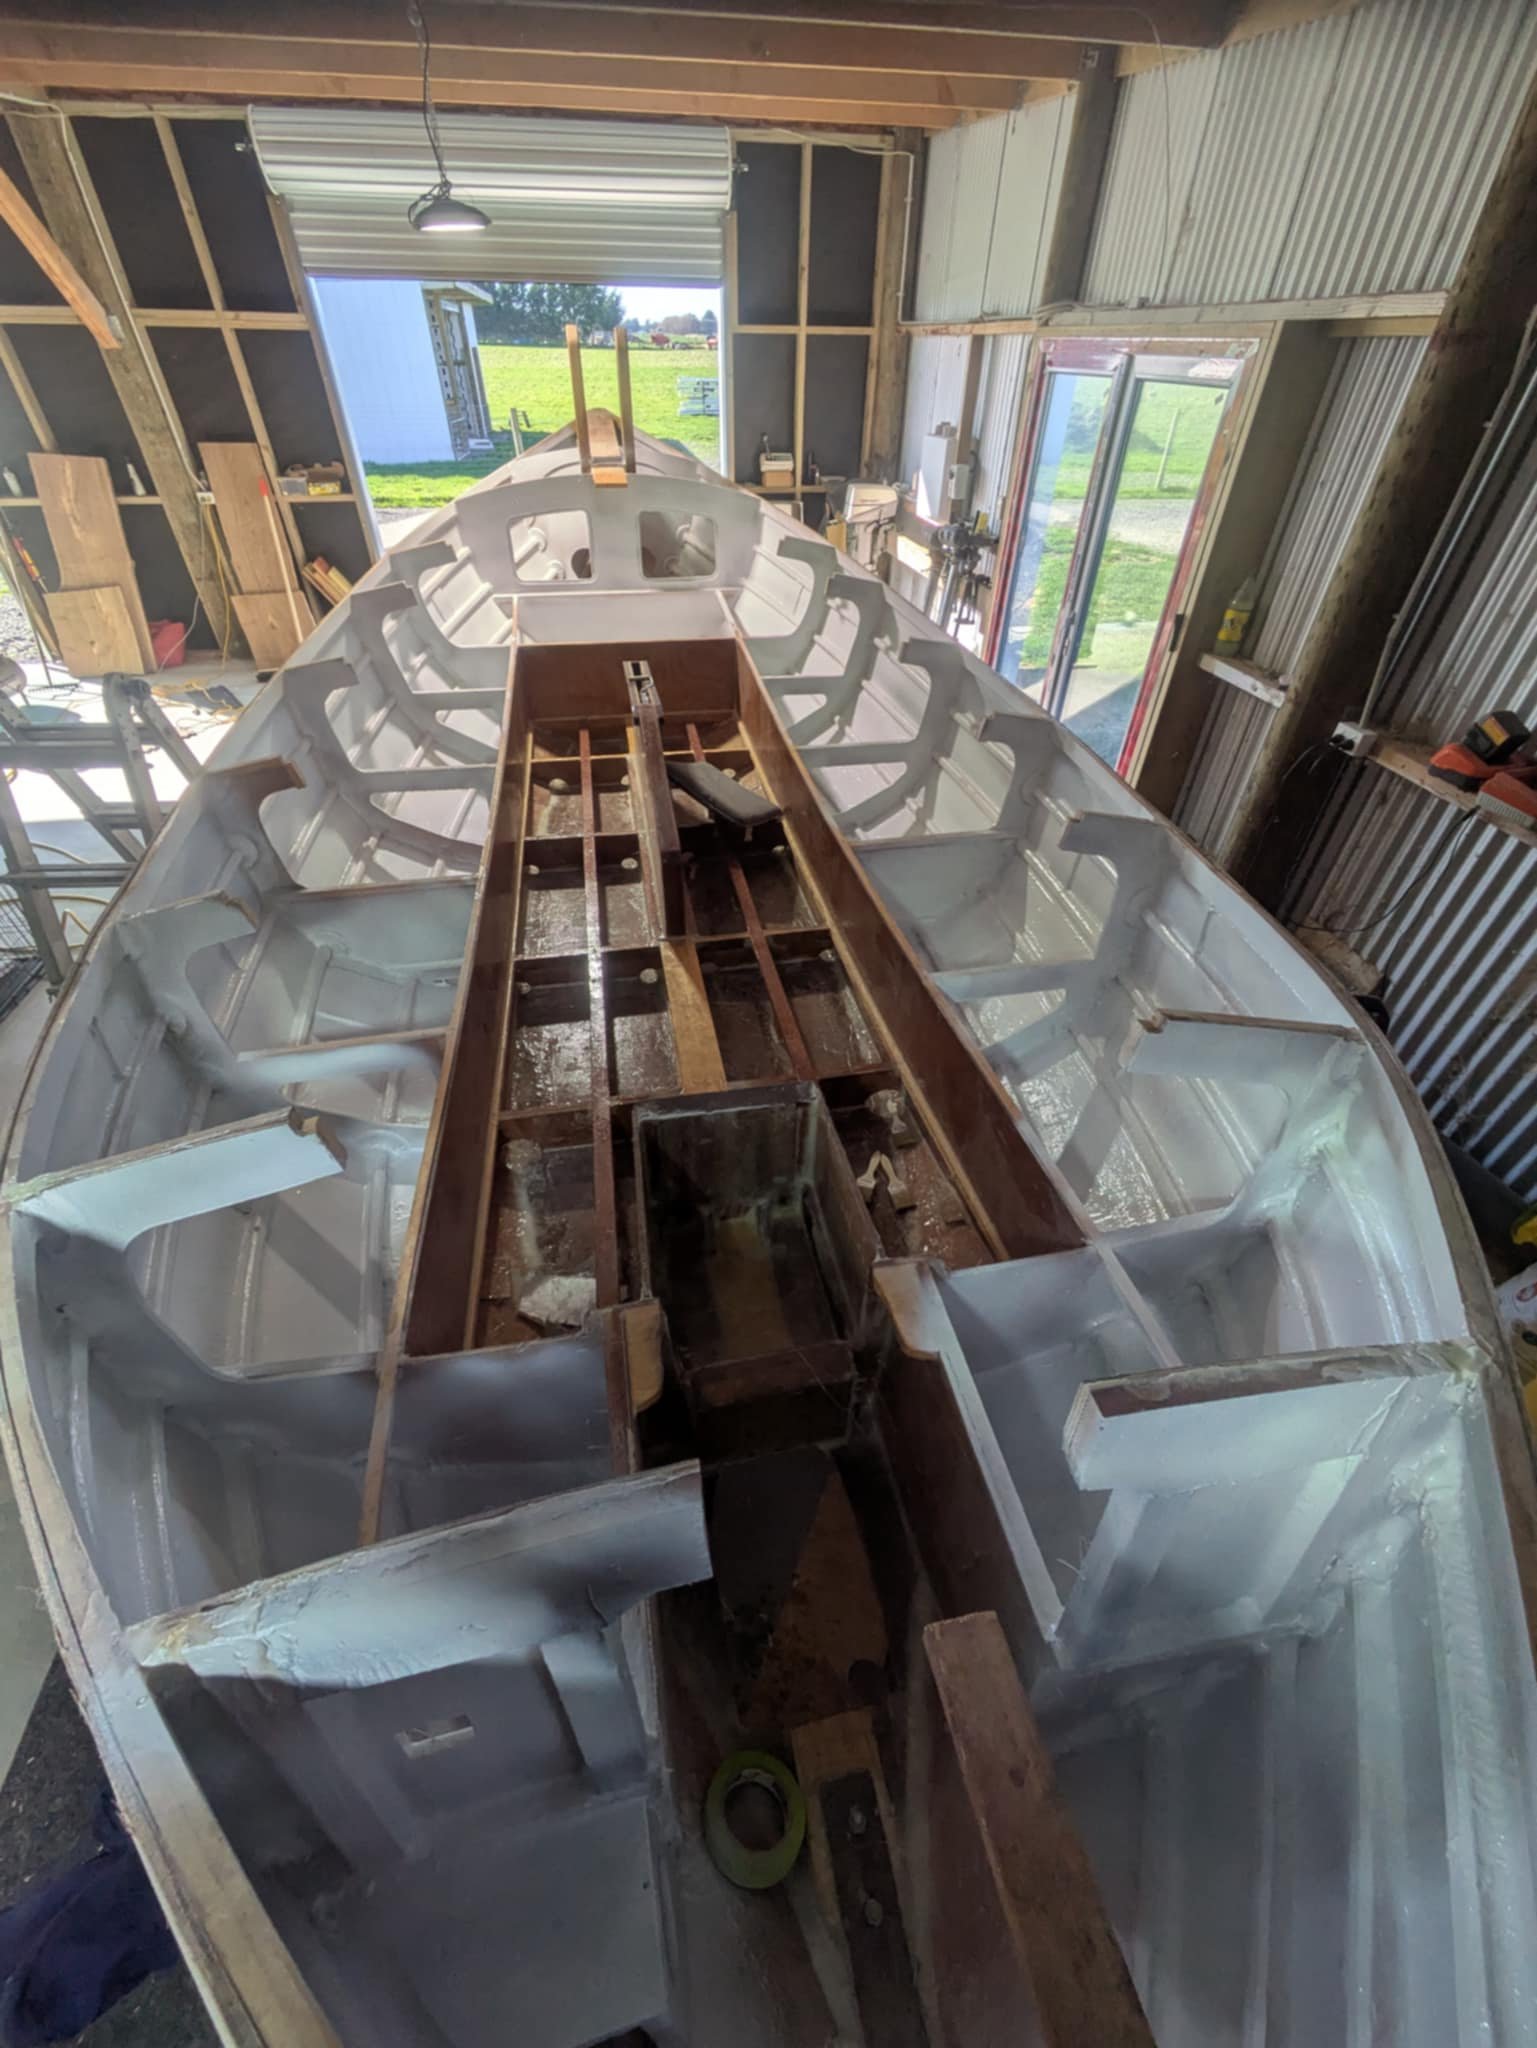
Slapped the first coat of primer on the lockers and had half a pot left over so rather than chuck it out I kept going. So many drips and runs from epoxy coating last weekend looks like this weekend will be spent entirely sanding. Standing back and having a look I think I have to agree for once with @cubastreet that it looks so much nicer open than with a cabin. Maybe I need to revisit to slide over/fold up bimini/tent.
1 point
-
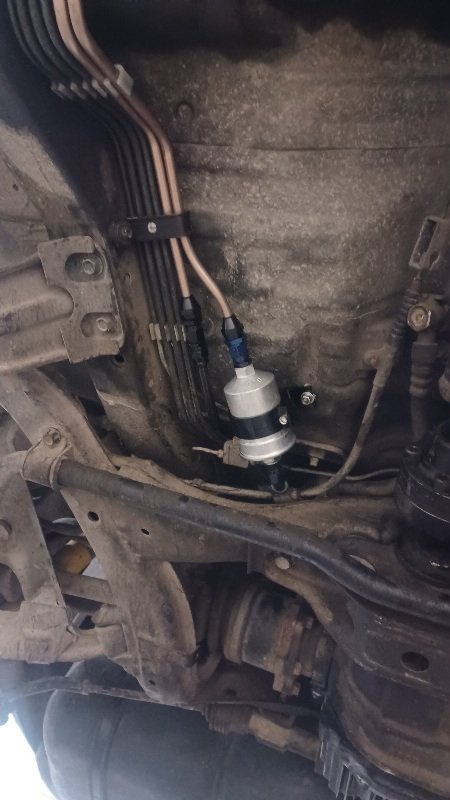
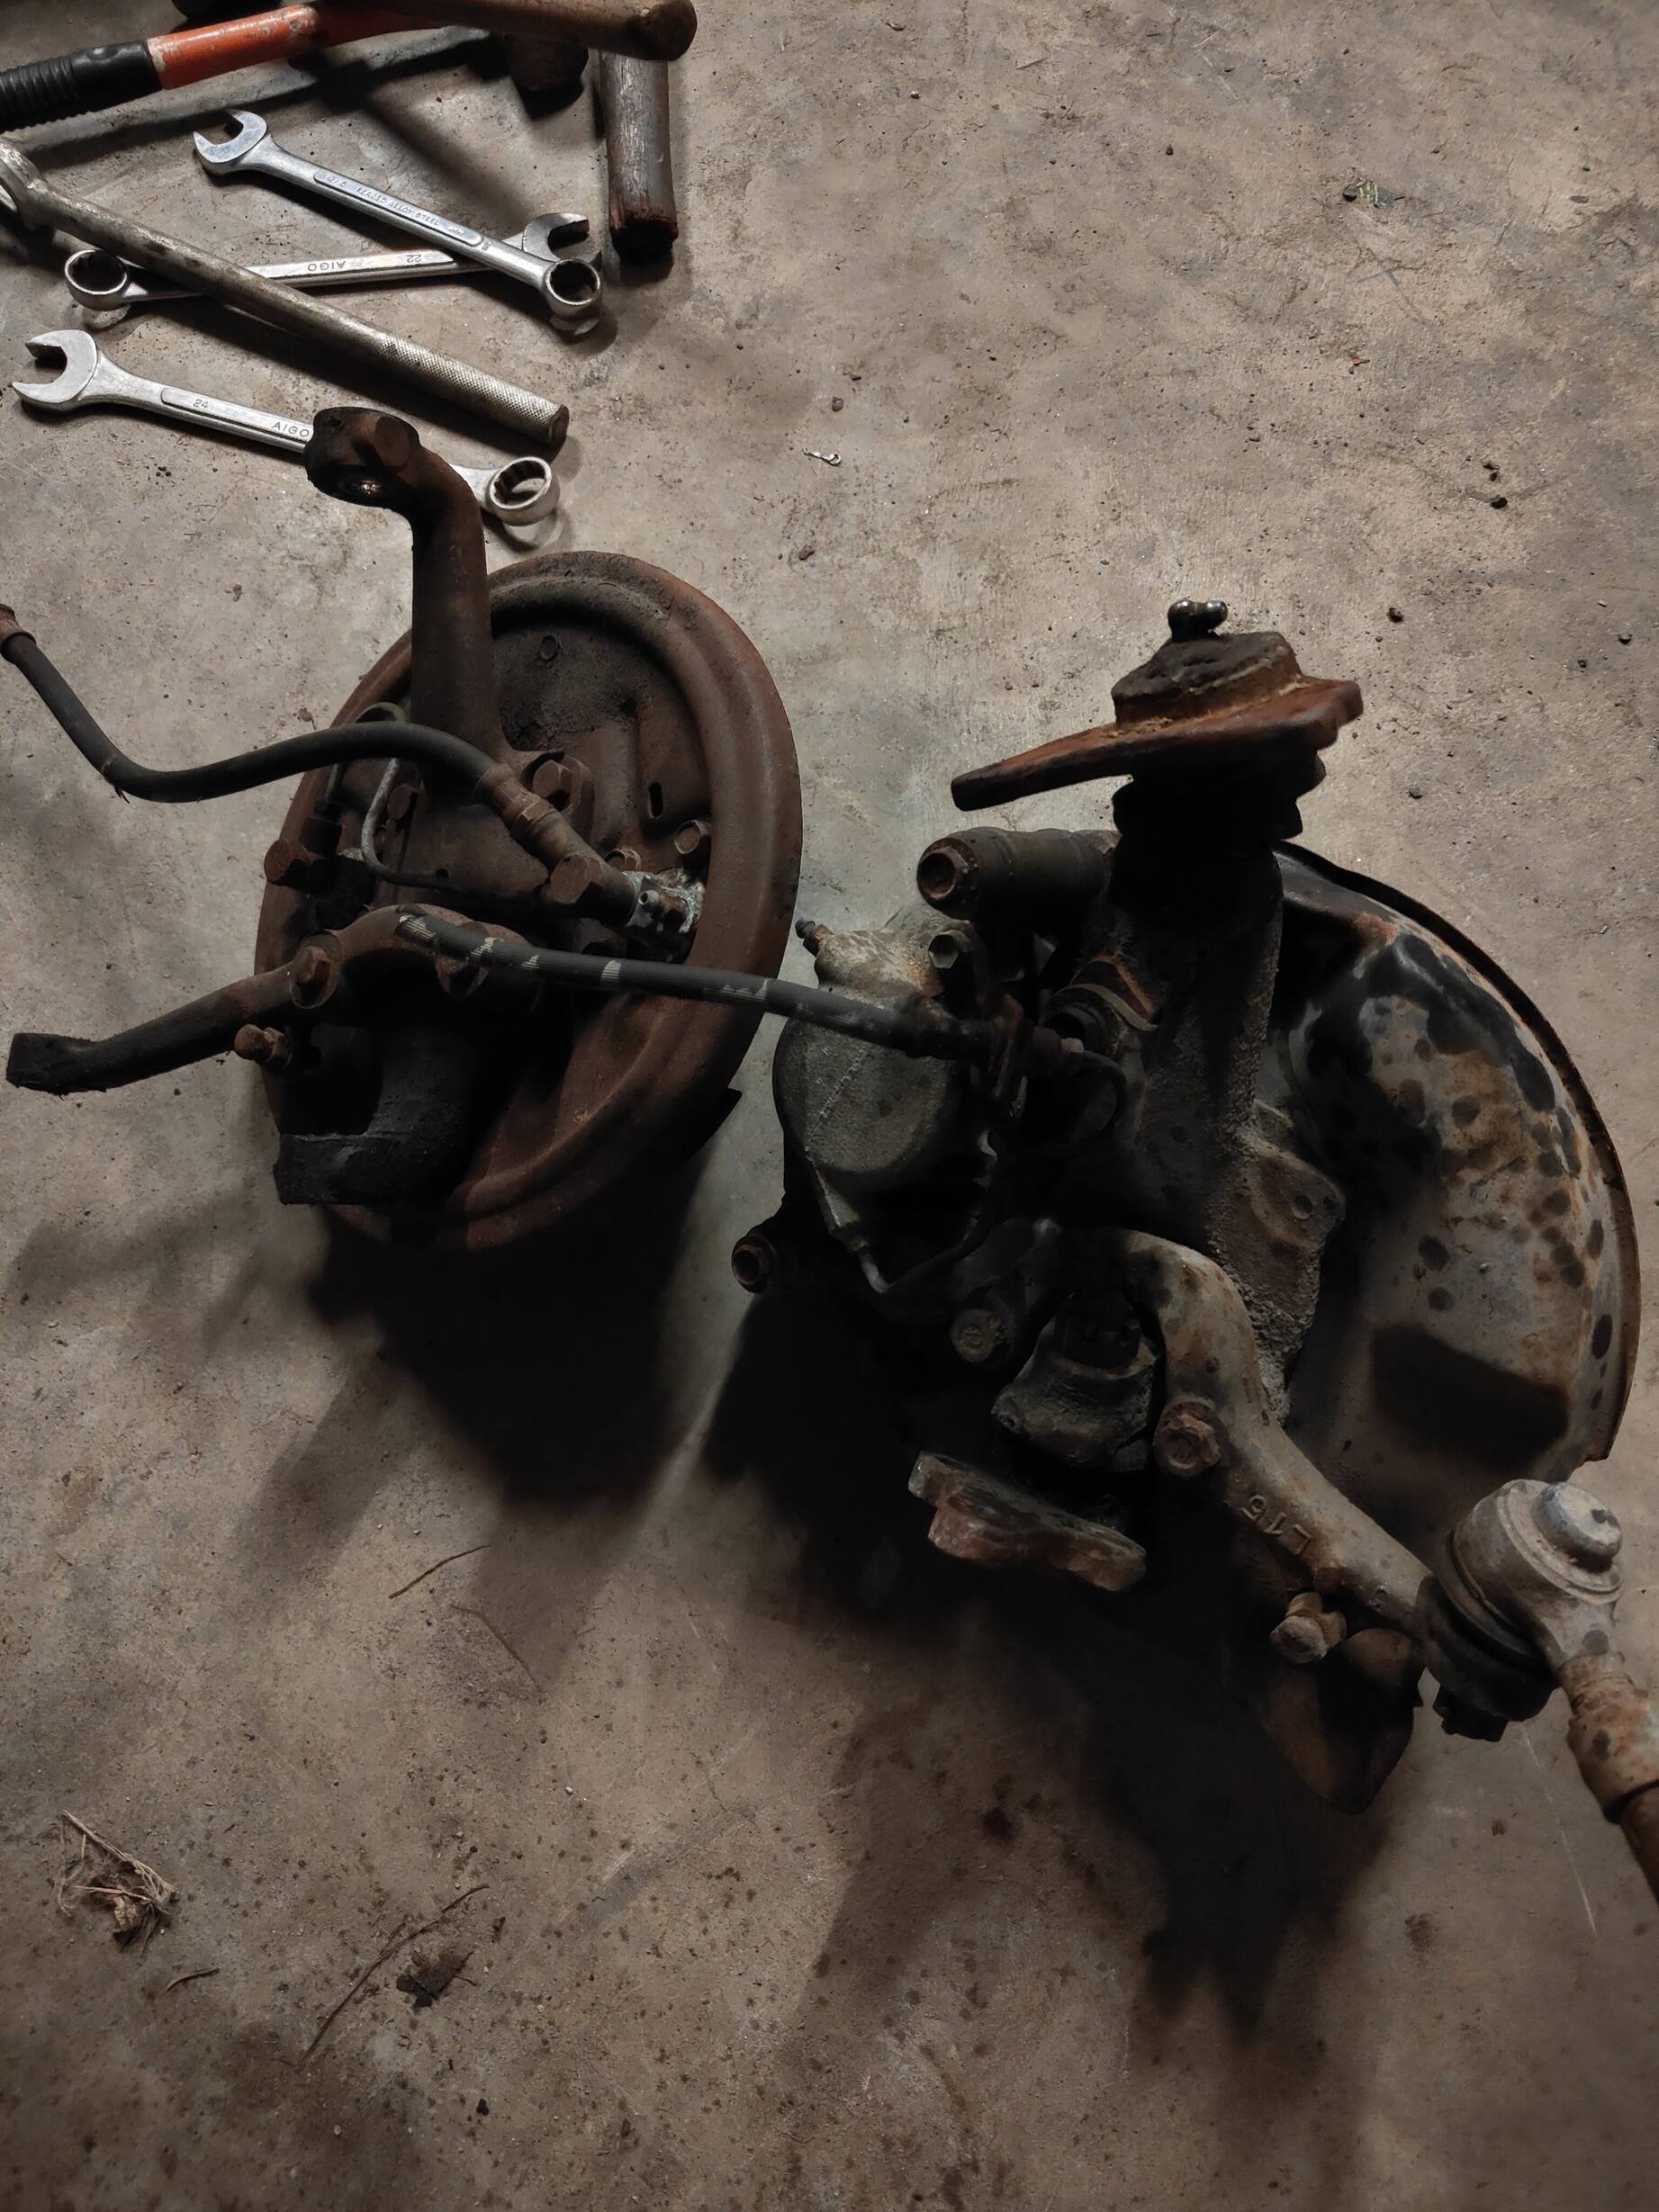
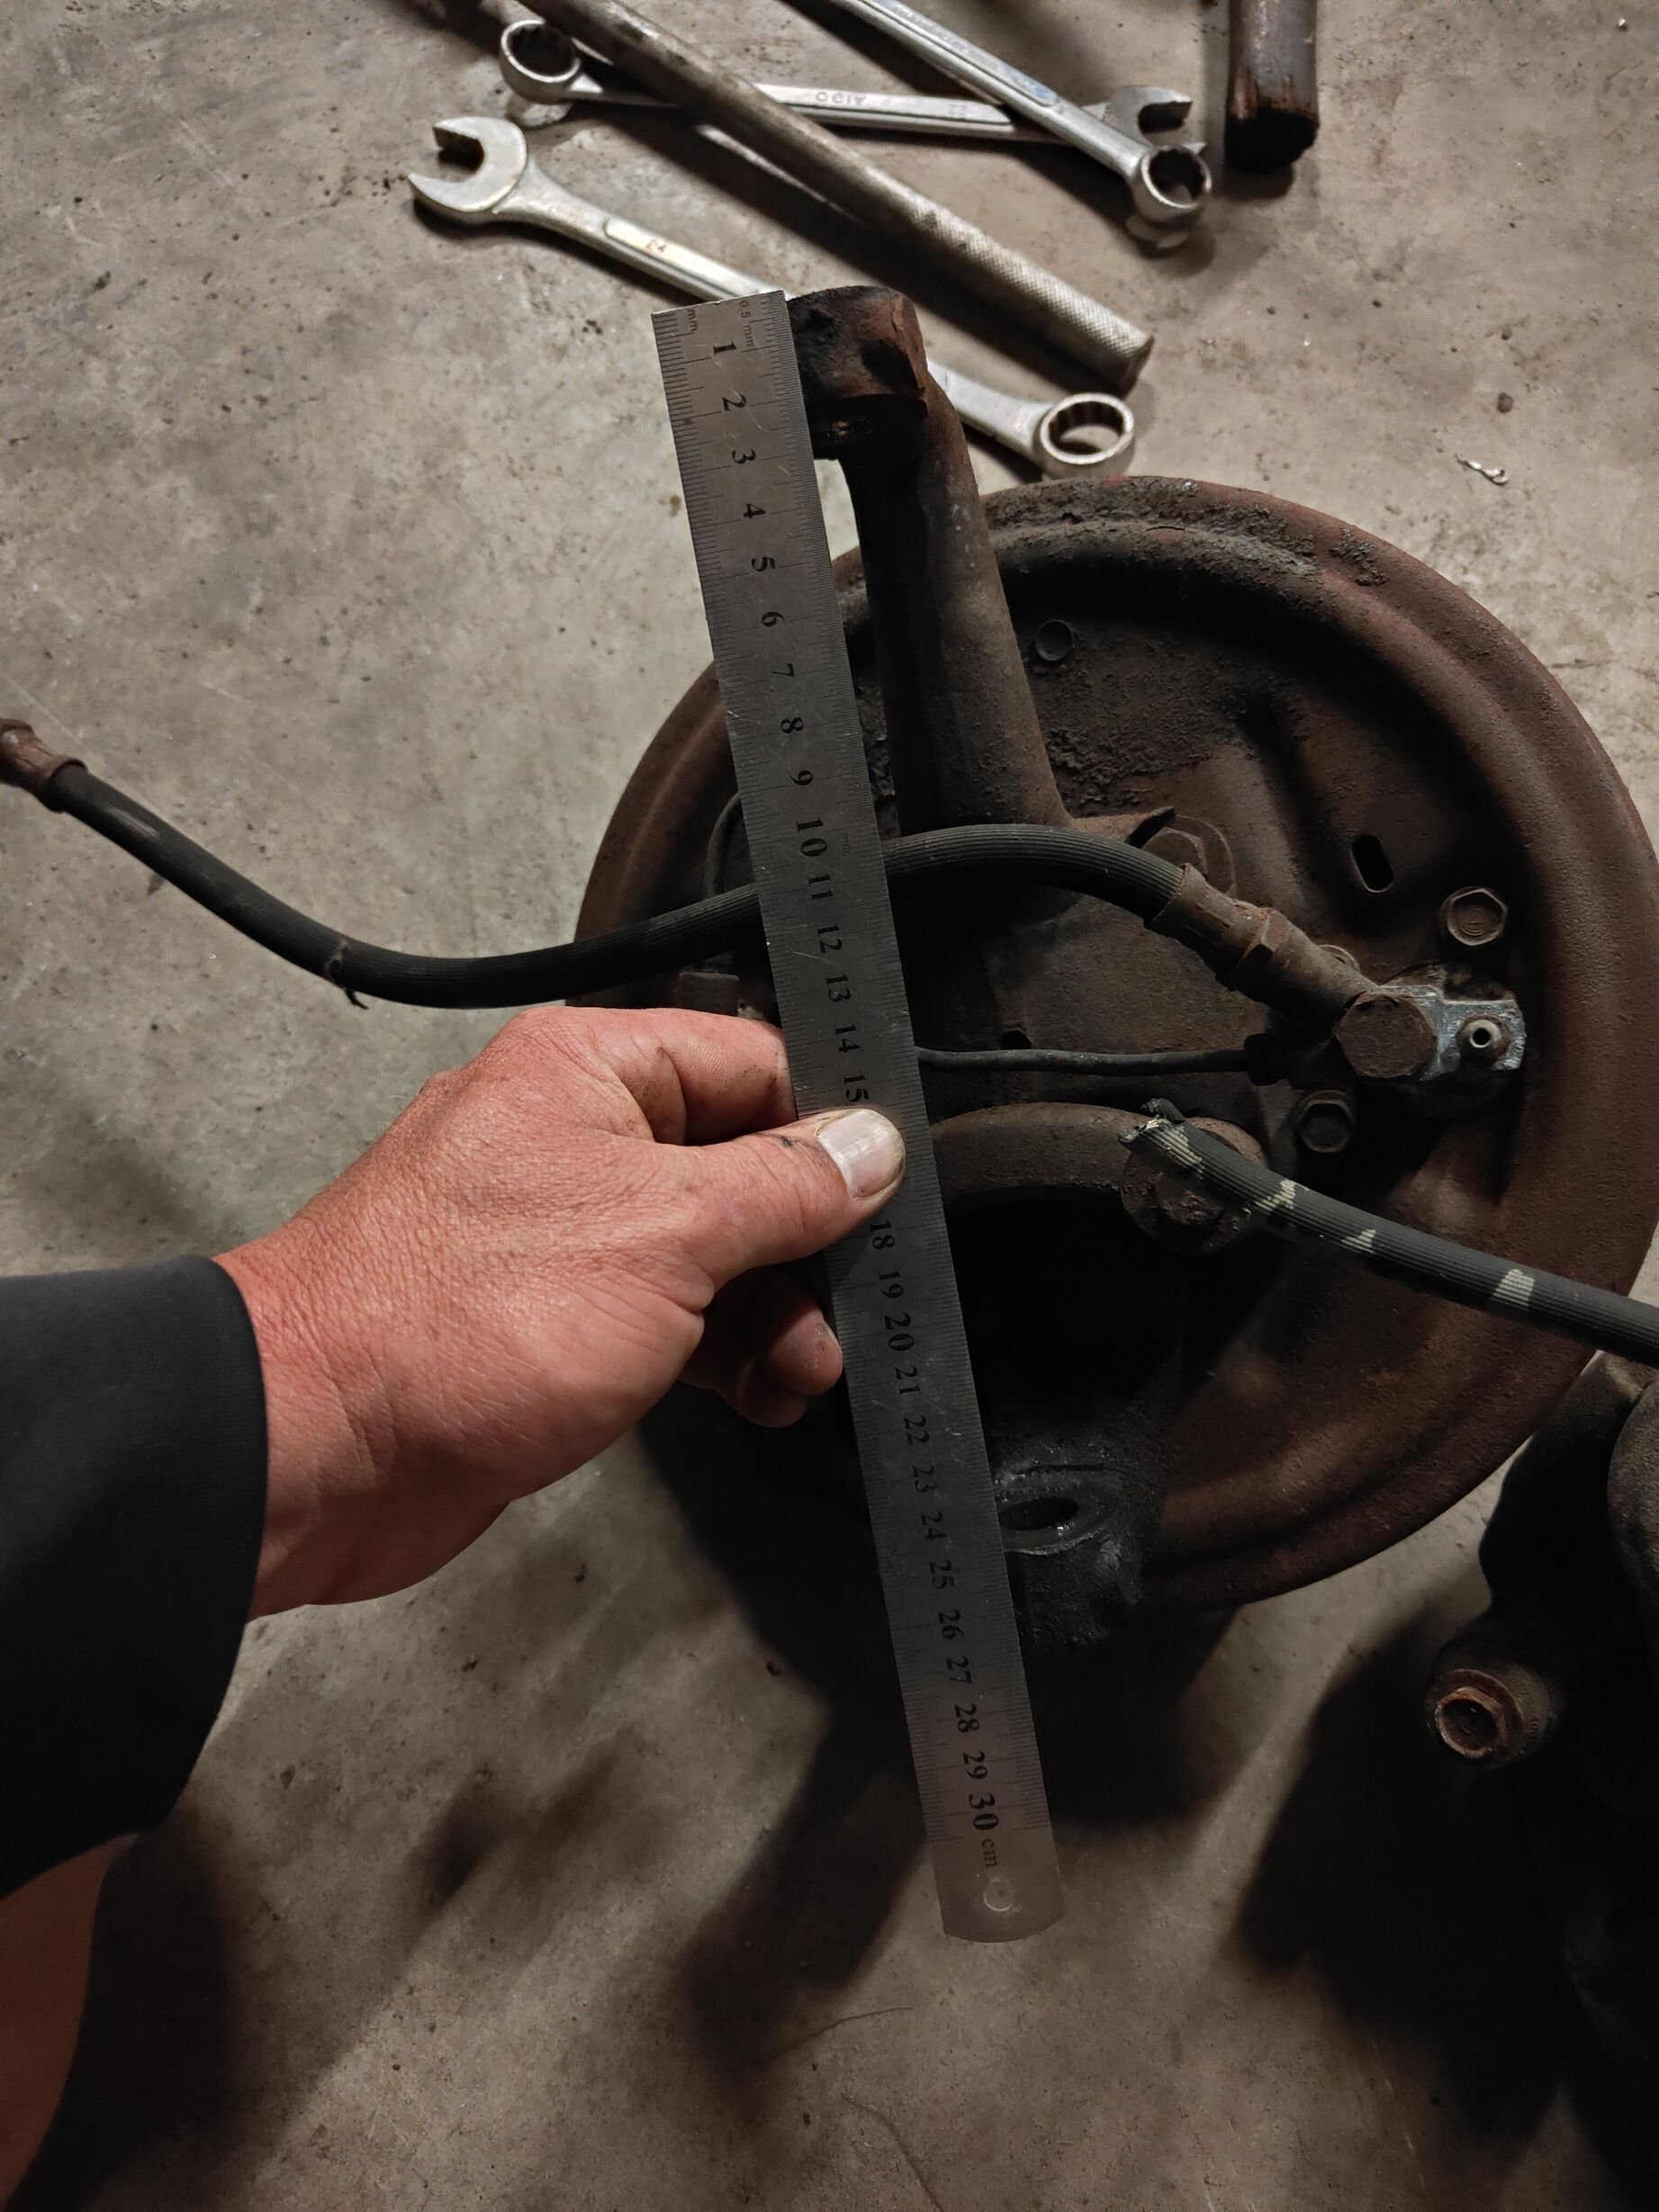
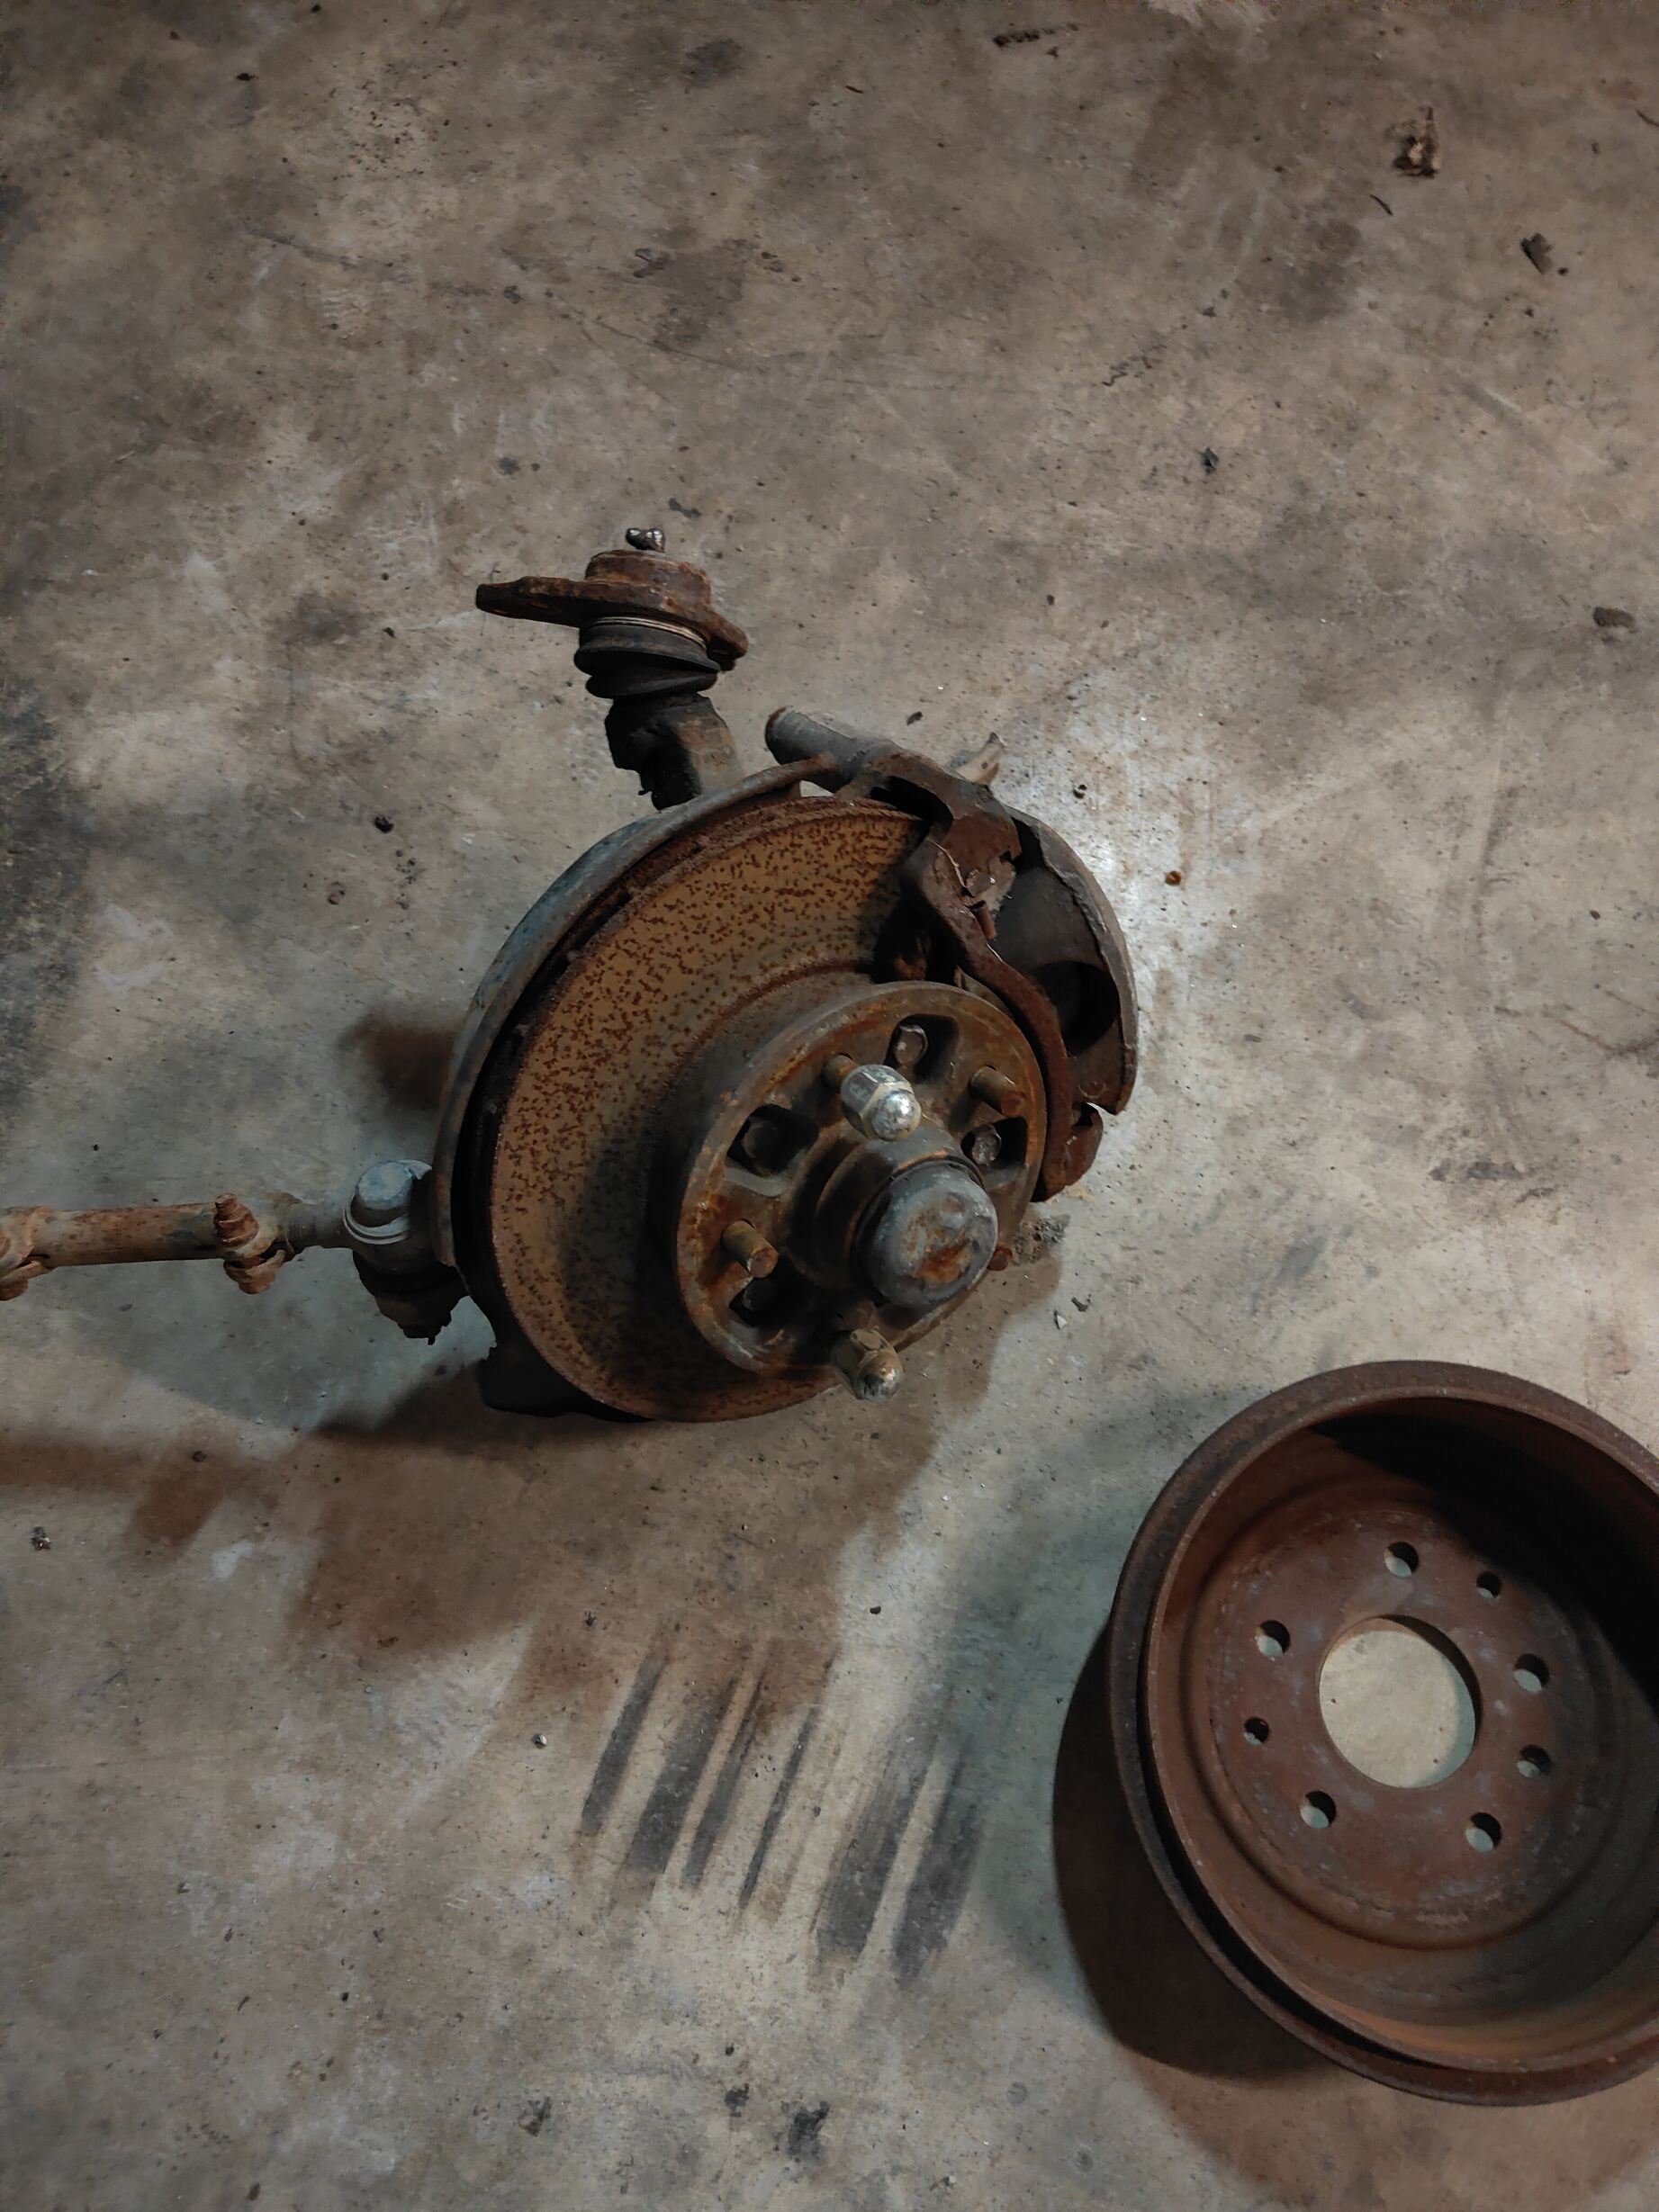
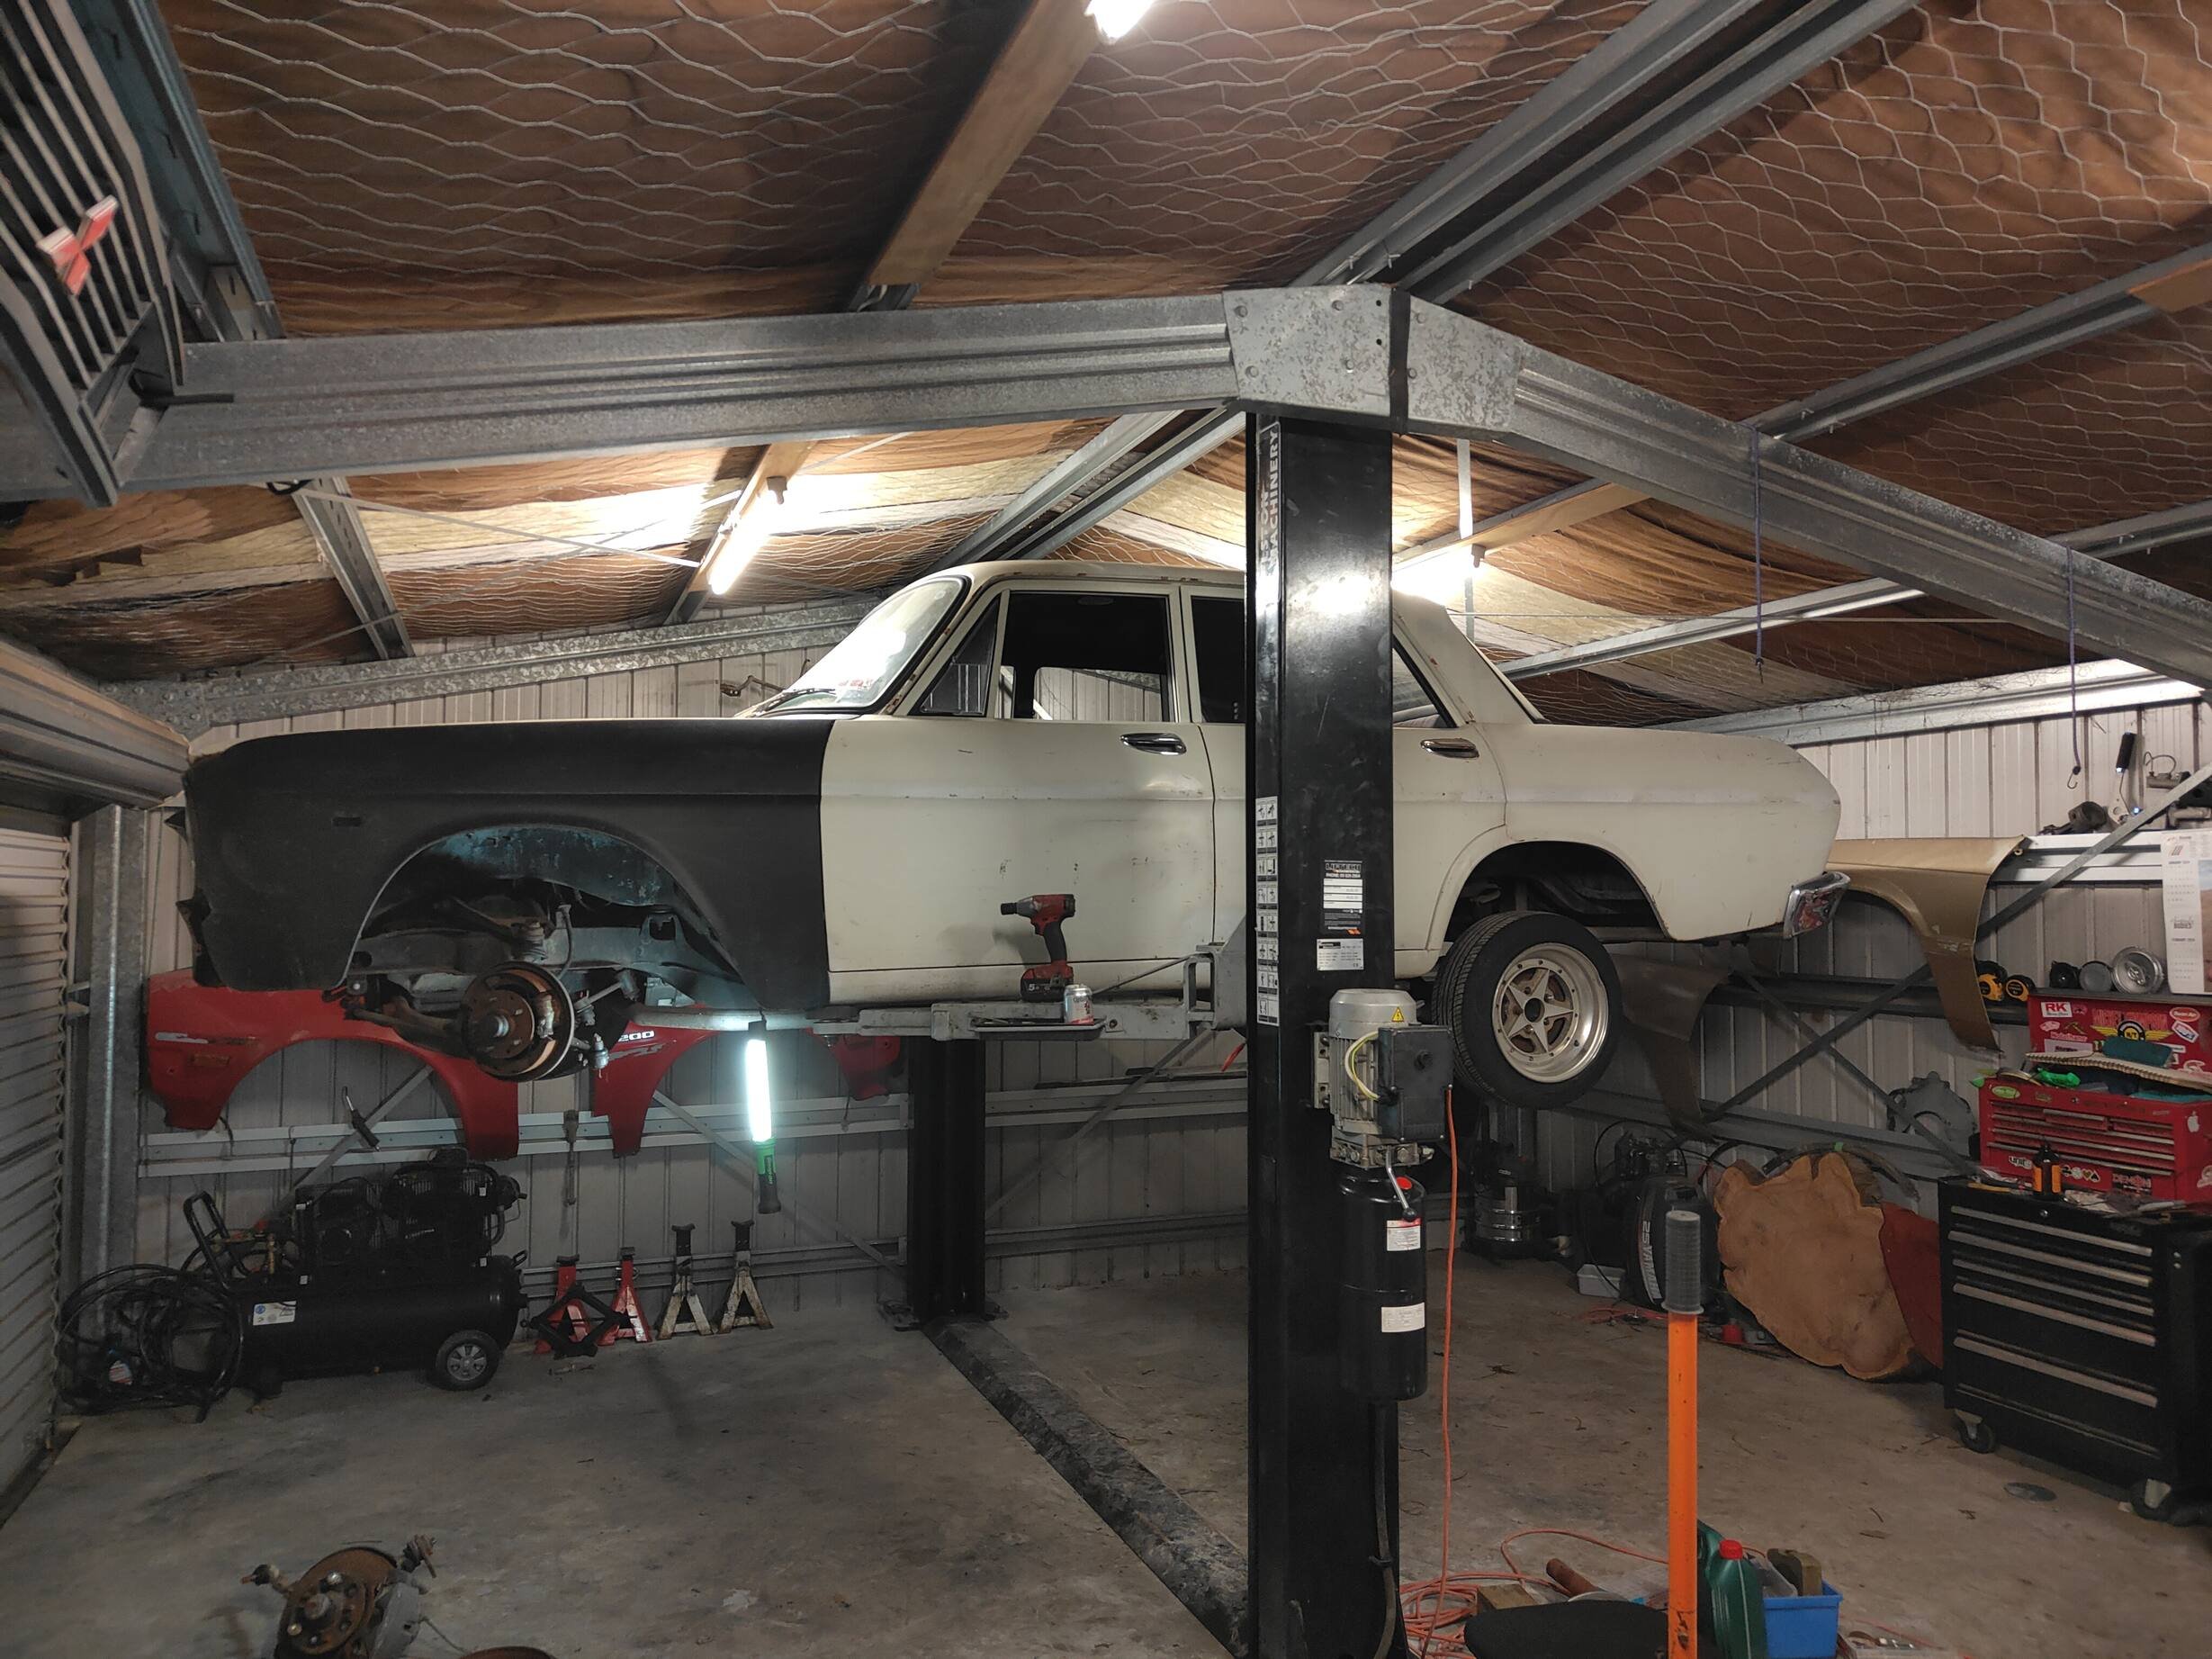
Some work, not many pics. New brake hoses all round. Got some new front brake rotors. Mounted fuel filter under the car. I kind of made my life hard here. I should have dropped the rear suspension when I made the fuel hard lines and ran them right back close to the tank and used some short hoses. But I didn't. I stuck the filter here to make some room in the engine bay Then I cut the power steering hose off that doesn't fit my pump and fitted a hydraulic compression fitting to the tube. Got some hose and fitted some ends. Well, 1 end anyway.... Fuck. So now I'll wait for the mailman to rectify that...
1 point
-
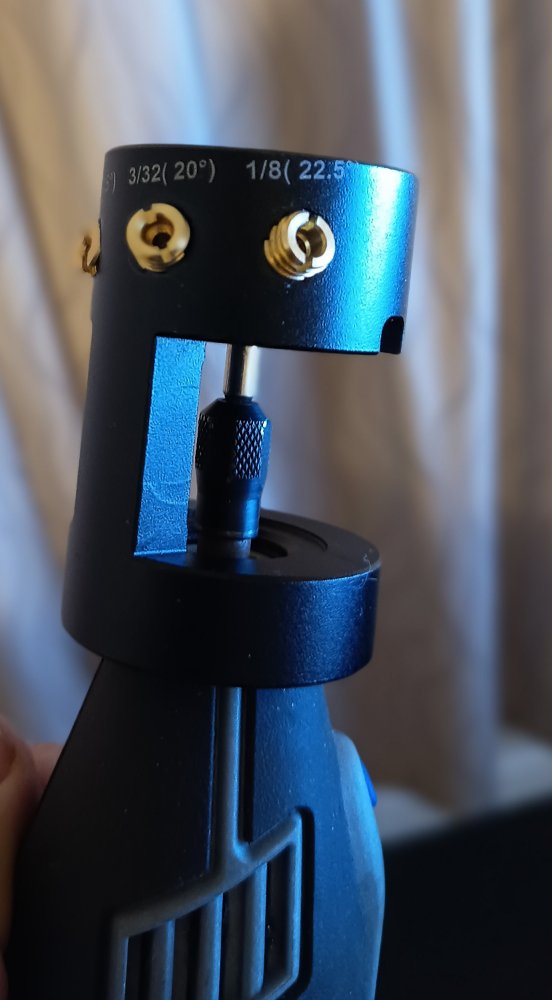
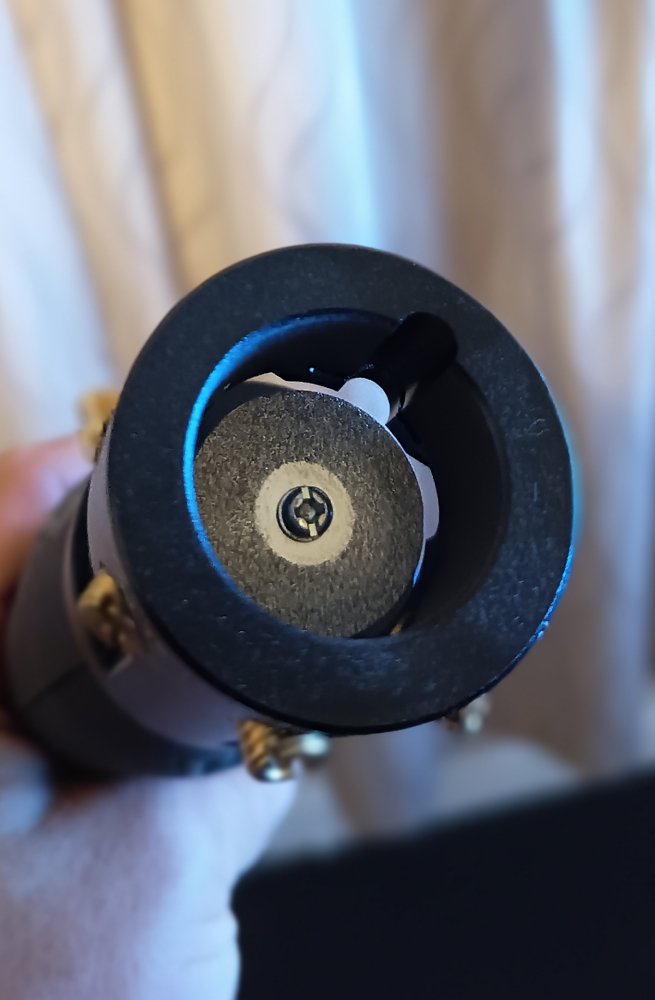
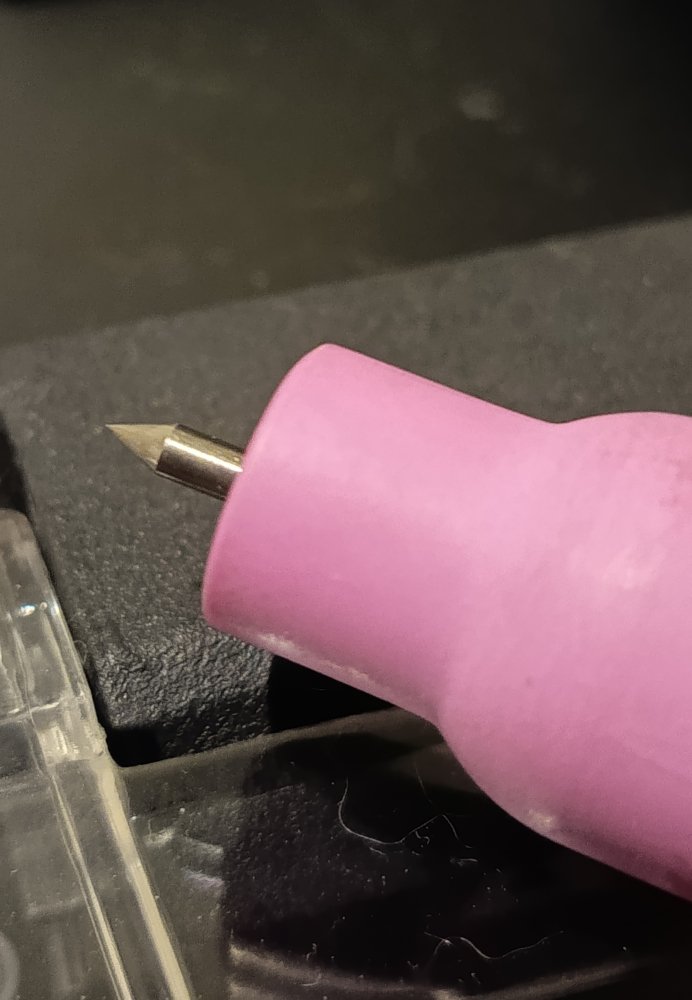
Picked up an AliExpress tungsten grinder Dremel attachment cheap, I'm rather impressed with it! Been using a silica carbide green wheel on my bench grinder for years, that's getting swapped out for a SS wire wheel now as I won't be going back to sharpening tungsten on it in any hurry!
1 point
-
Photoless updates are pointless *sigh* but she’s been at SprintRE for the last 8 weeks. the new engine looks epic, and is ready to fire up. stopped by today to catch up with them. exhaust is complete and looks so damn good. looking forward to hearing it on Friday . had many curveballs get thrown around so far, mainly with the faulty Wilwood master and the fact that StealthRide don’t seem to acknowledge emails or follow up with warranty stuff. Wankers1 point
-
So the vibration seems to have gone away so it was the wheels. I say seems to because it's a noisy old car and I'm deaf. Only problem is now I'm stuck with the crappy pizza cutter wheels. They look shit. THE CURE IS WORSE THAN THE DISEASE!
1 point
-
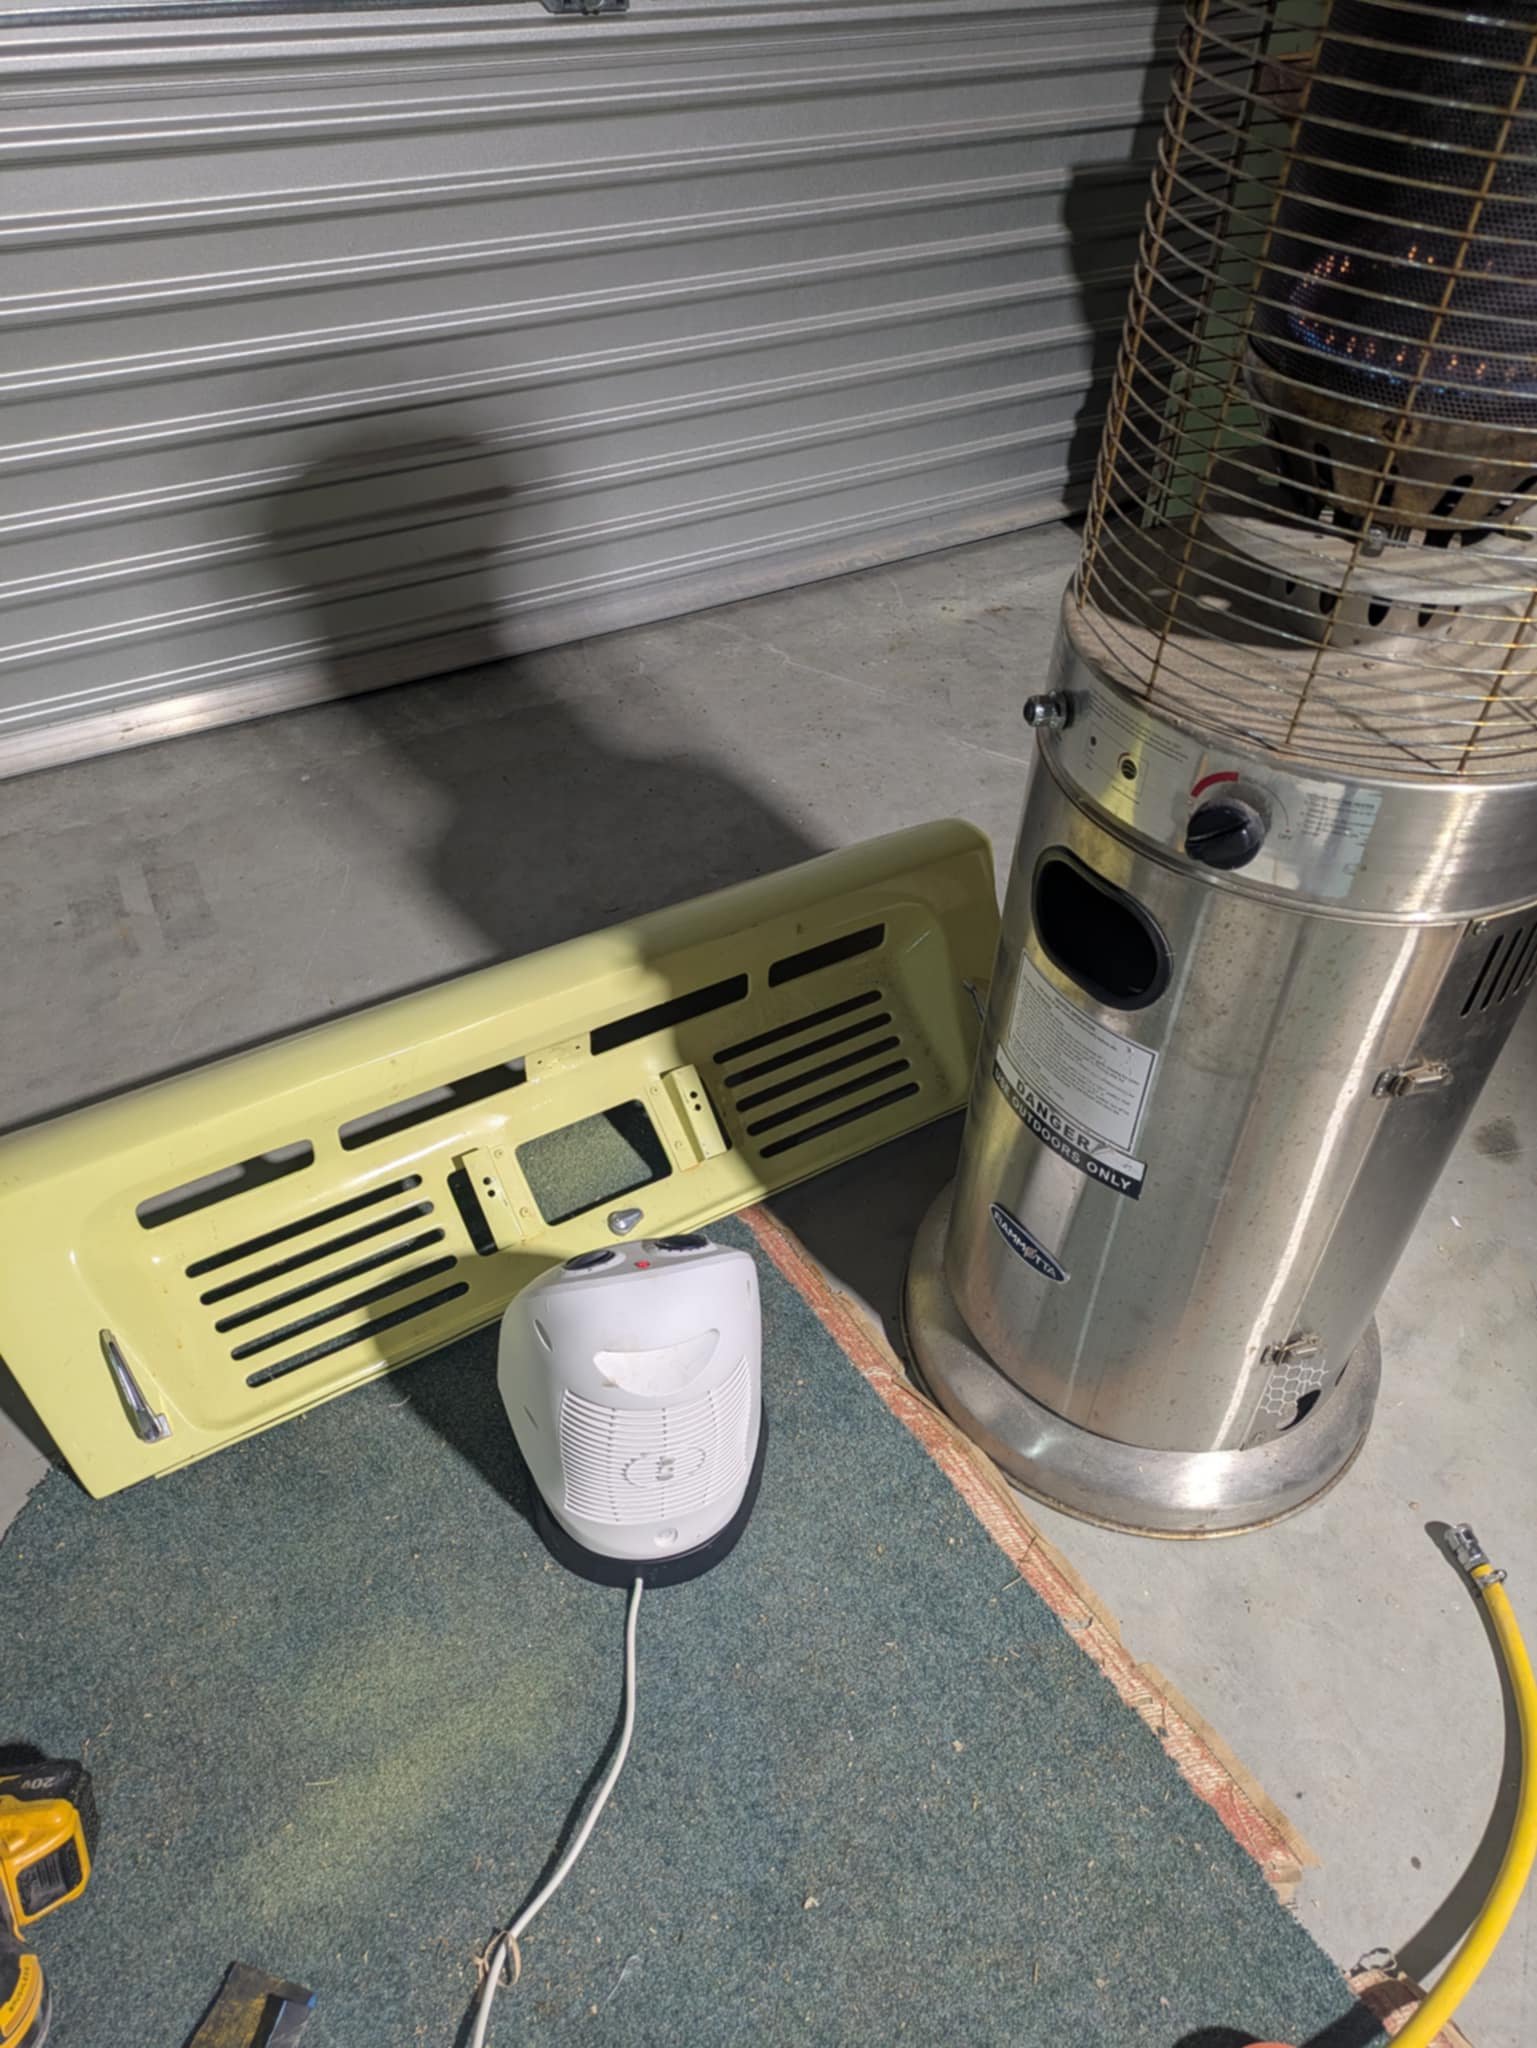
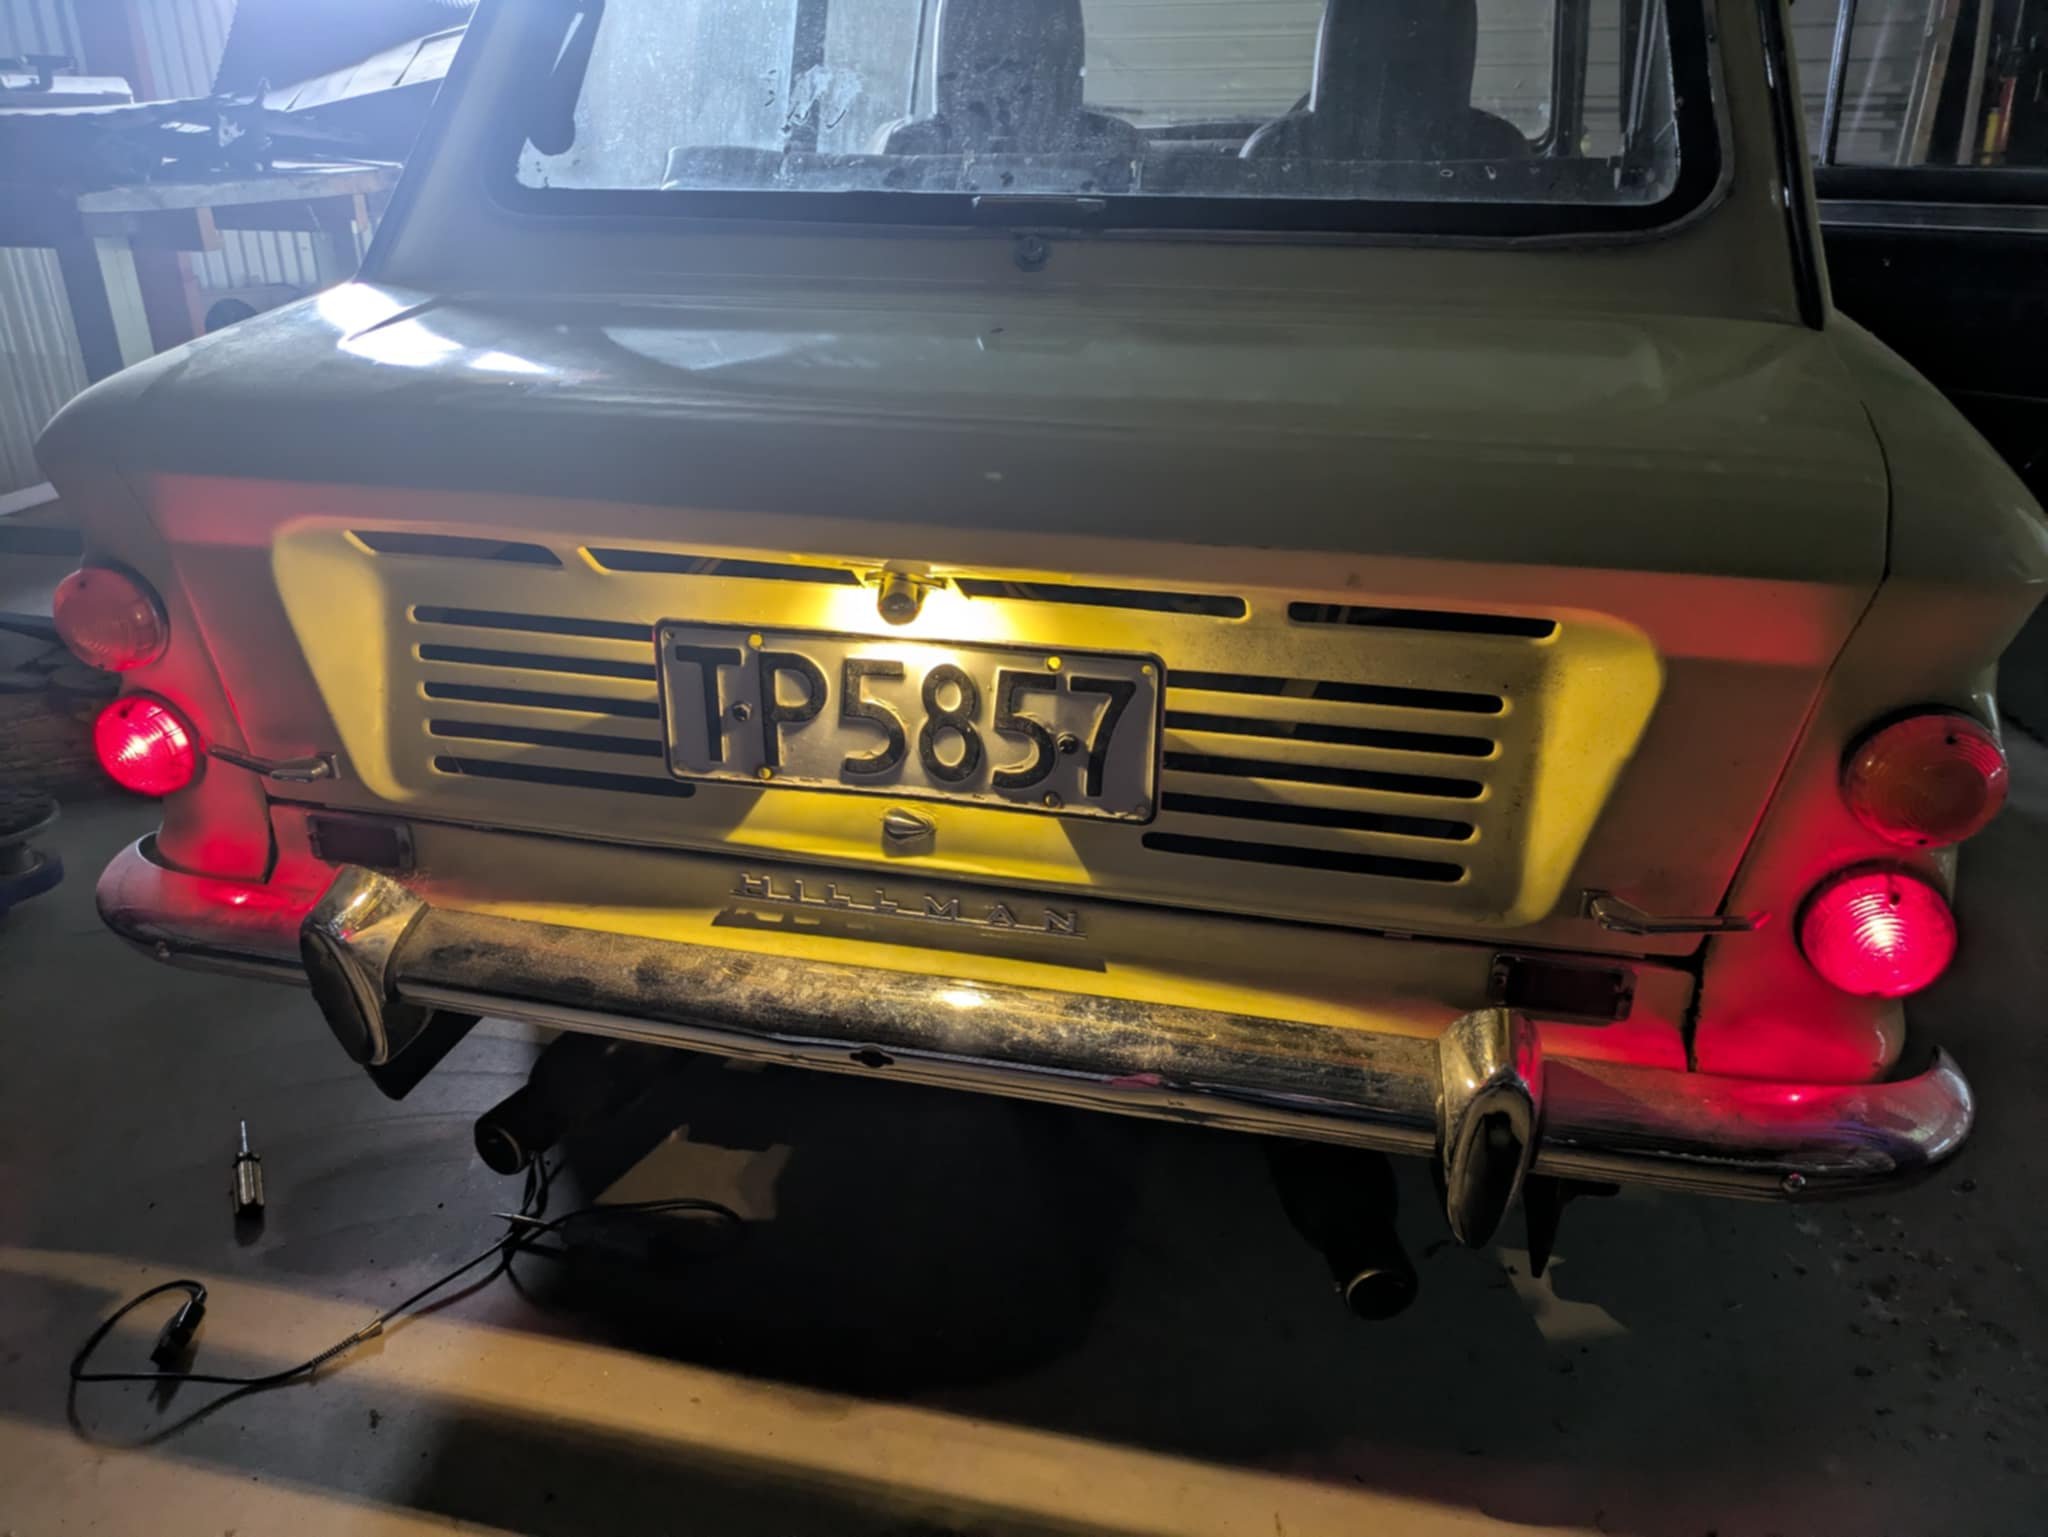
I was giving the car a bit of a once over and realised the GT lid didnt have a number plate light. That would have been embarrassing. So I found a spare one I had and welded on a small plate to attach it to. I have no idea what it had stock and couldn't see what else it had to attach to so it is what it is. The biggest problem I had/have is fighting the cold. The first coat of colour I slapped on just sagged. So I waited a day for it to harden to take off again and try again with backup. A little fan heater and an outdoor gas heater. It was touch dry in about a minute. All I had was an LED bulb so I may have to put some tape around it as it looks pretty bright. Next on the vagenda is to change the wide rims for the old pizza cutters. I still get a slight vibration at speed in and out of gear. I think possibly one of the wheels isn't balanced correctly which is an issue I have had with the local tire man a couple of times.
1 point
-
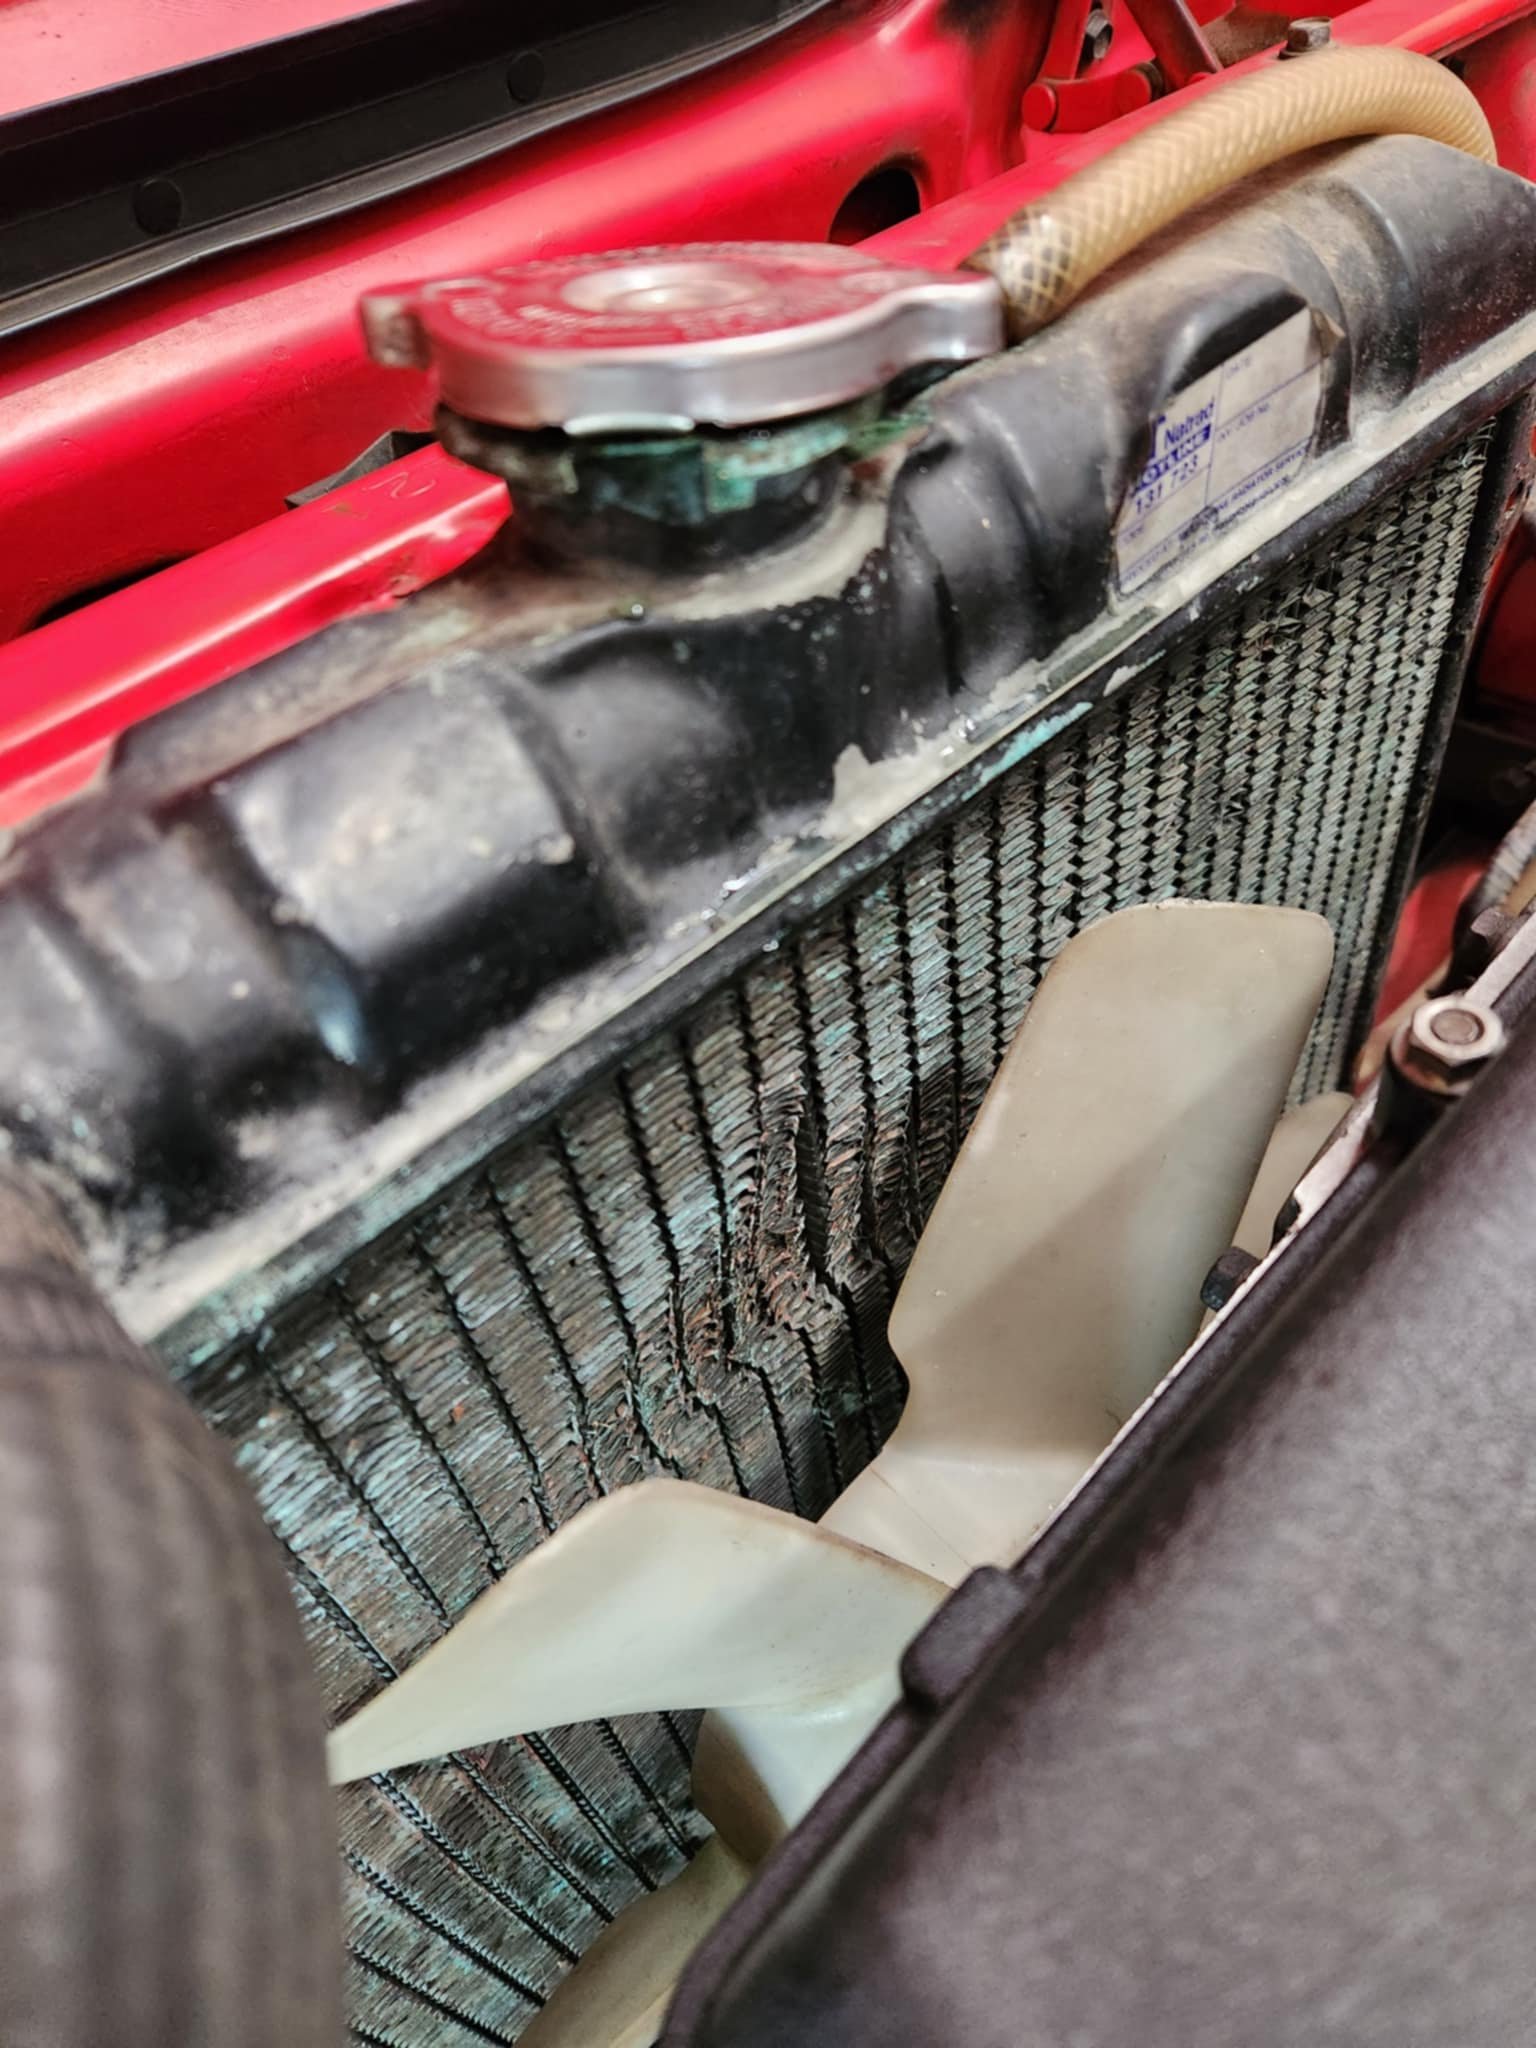
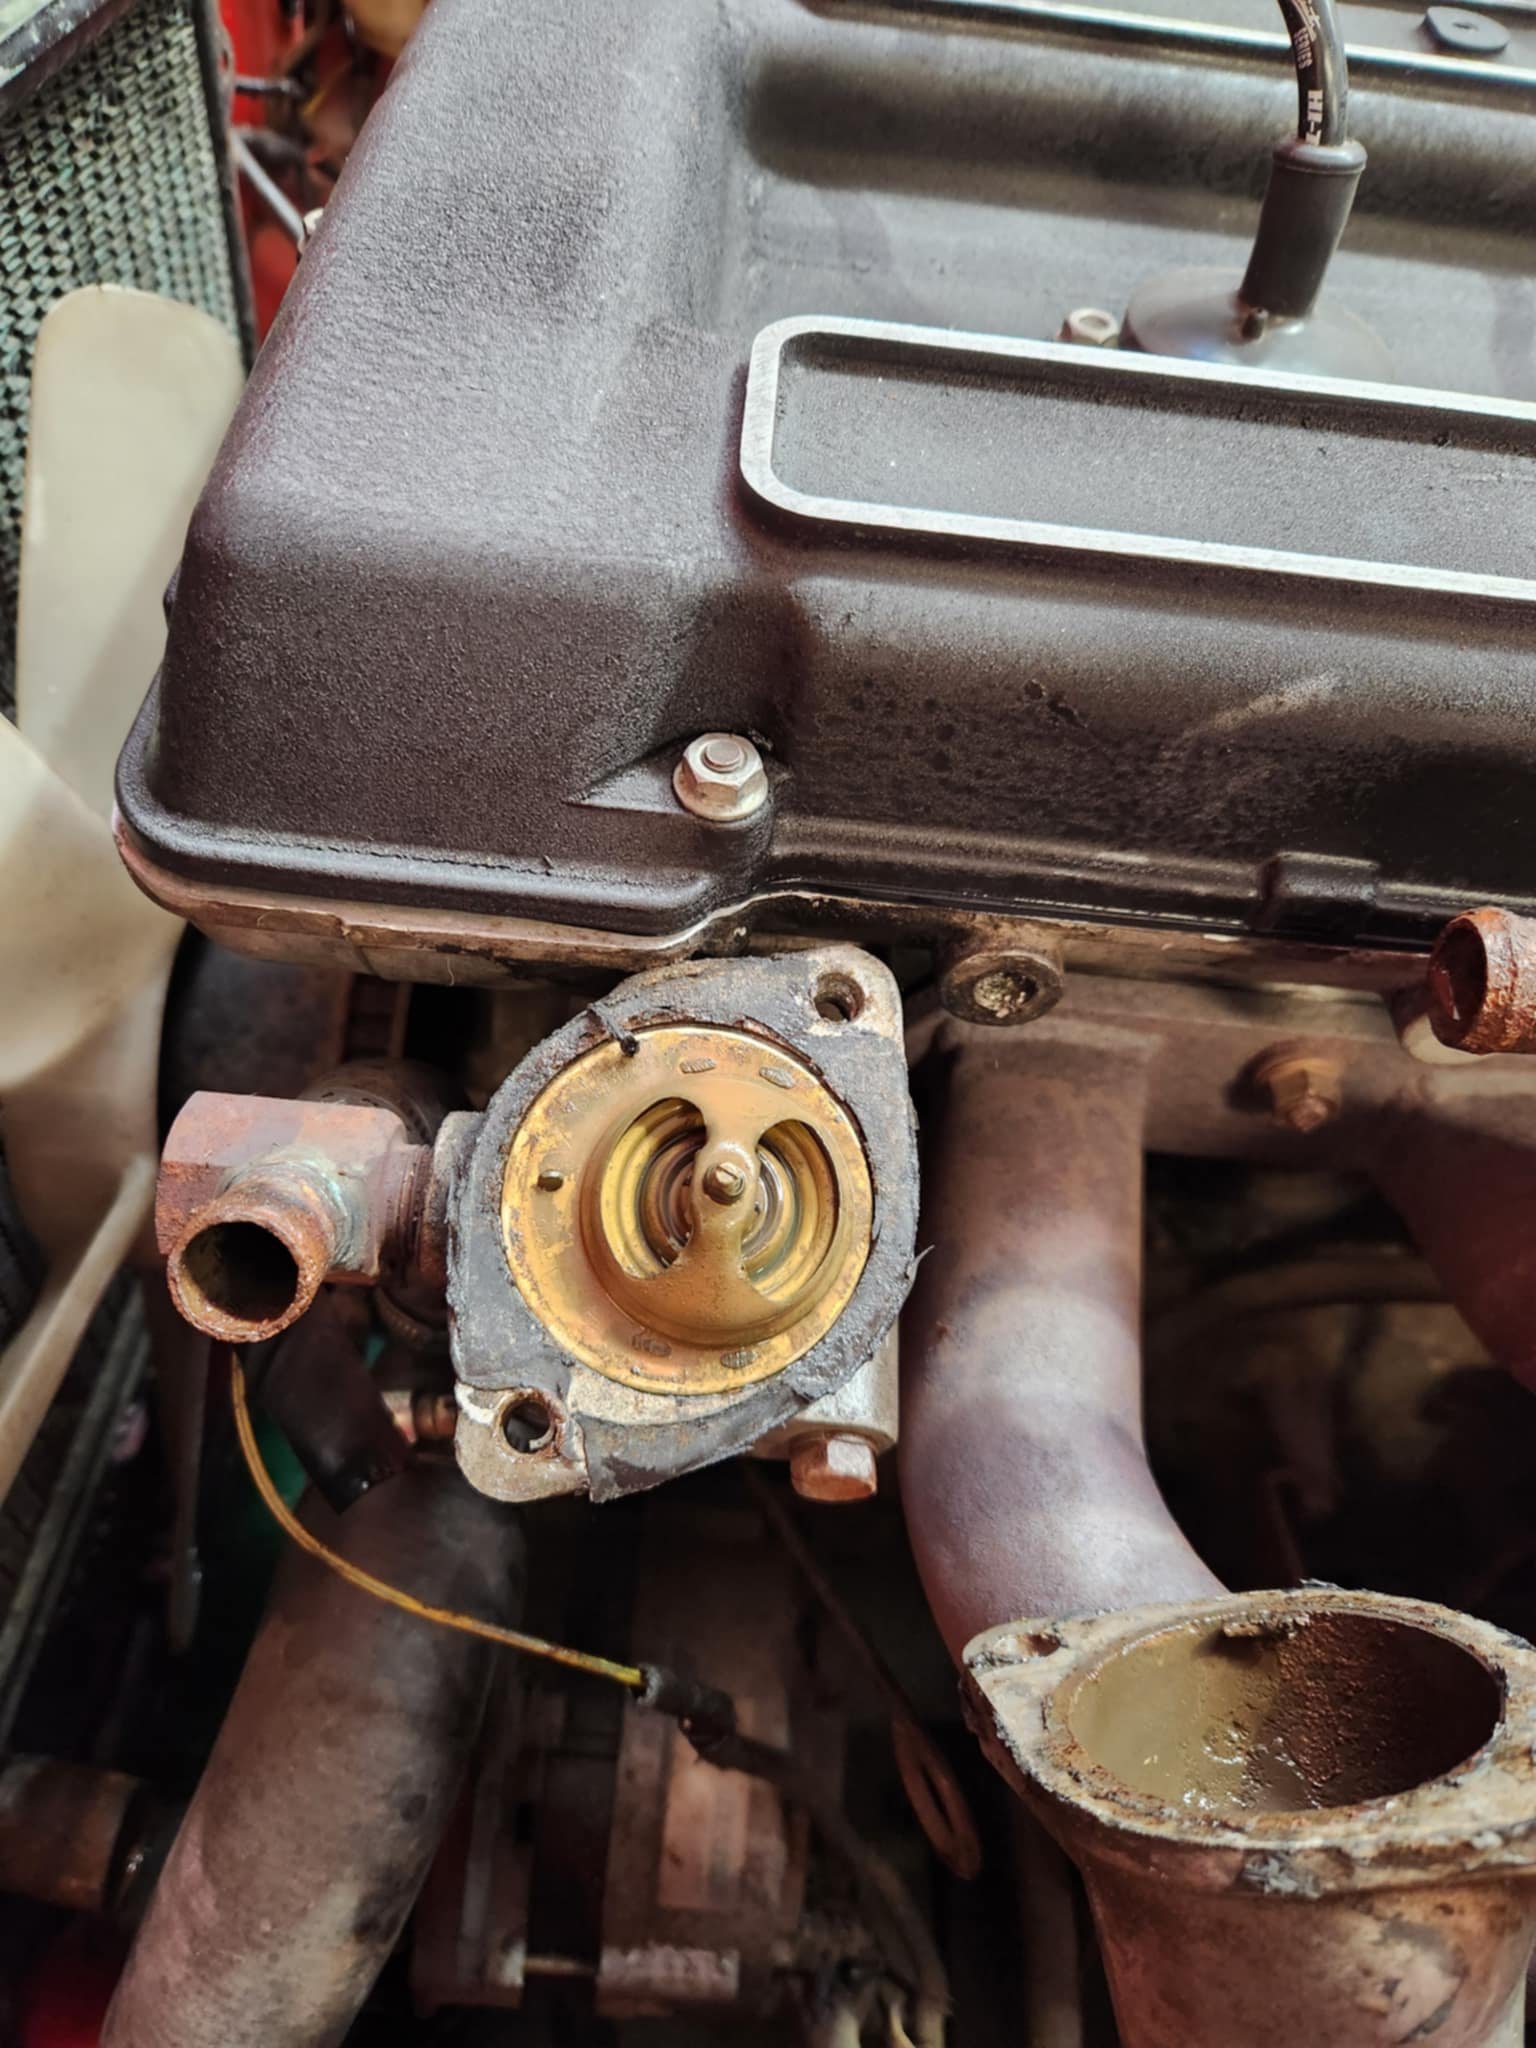
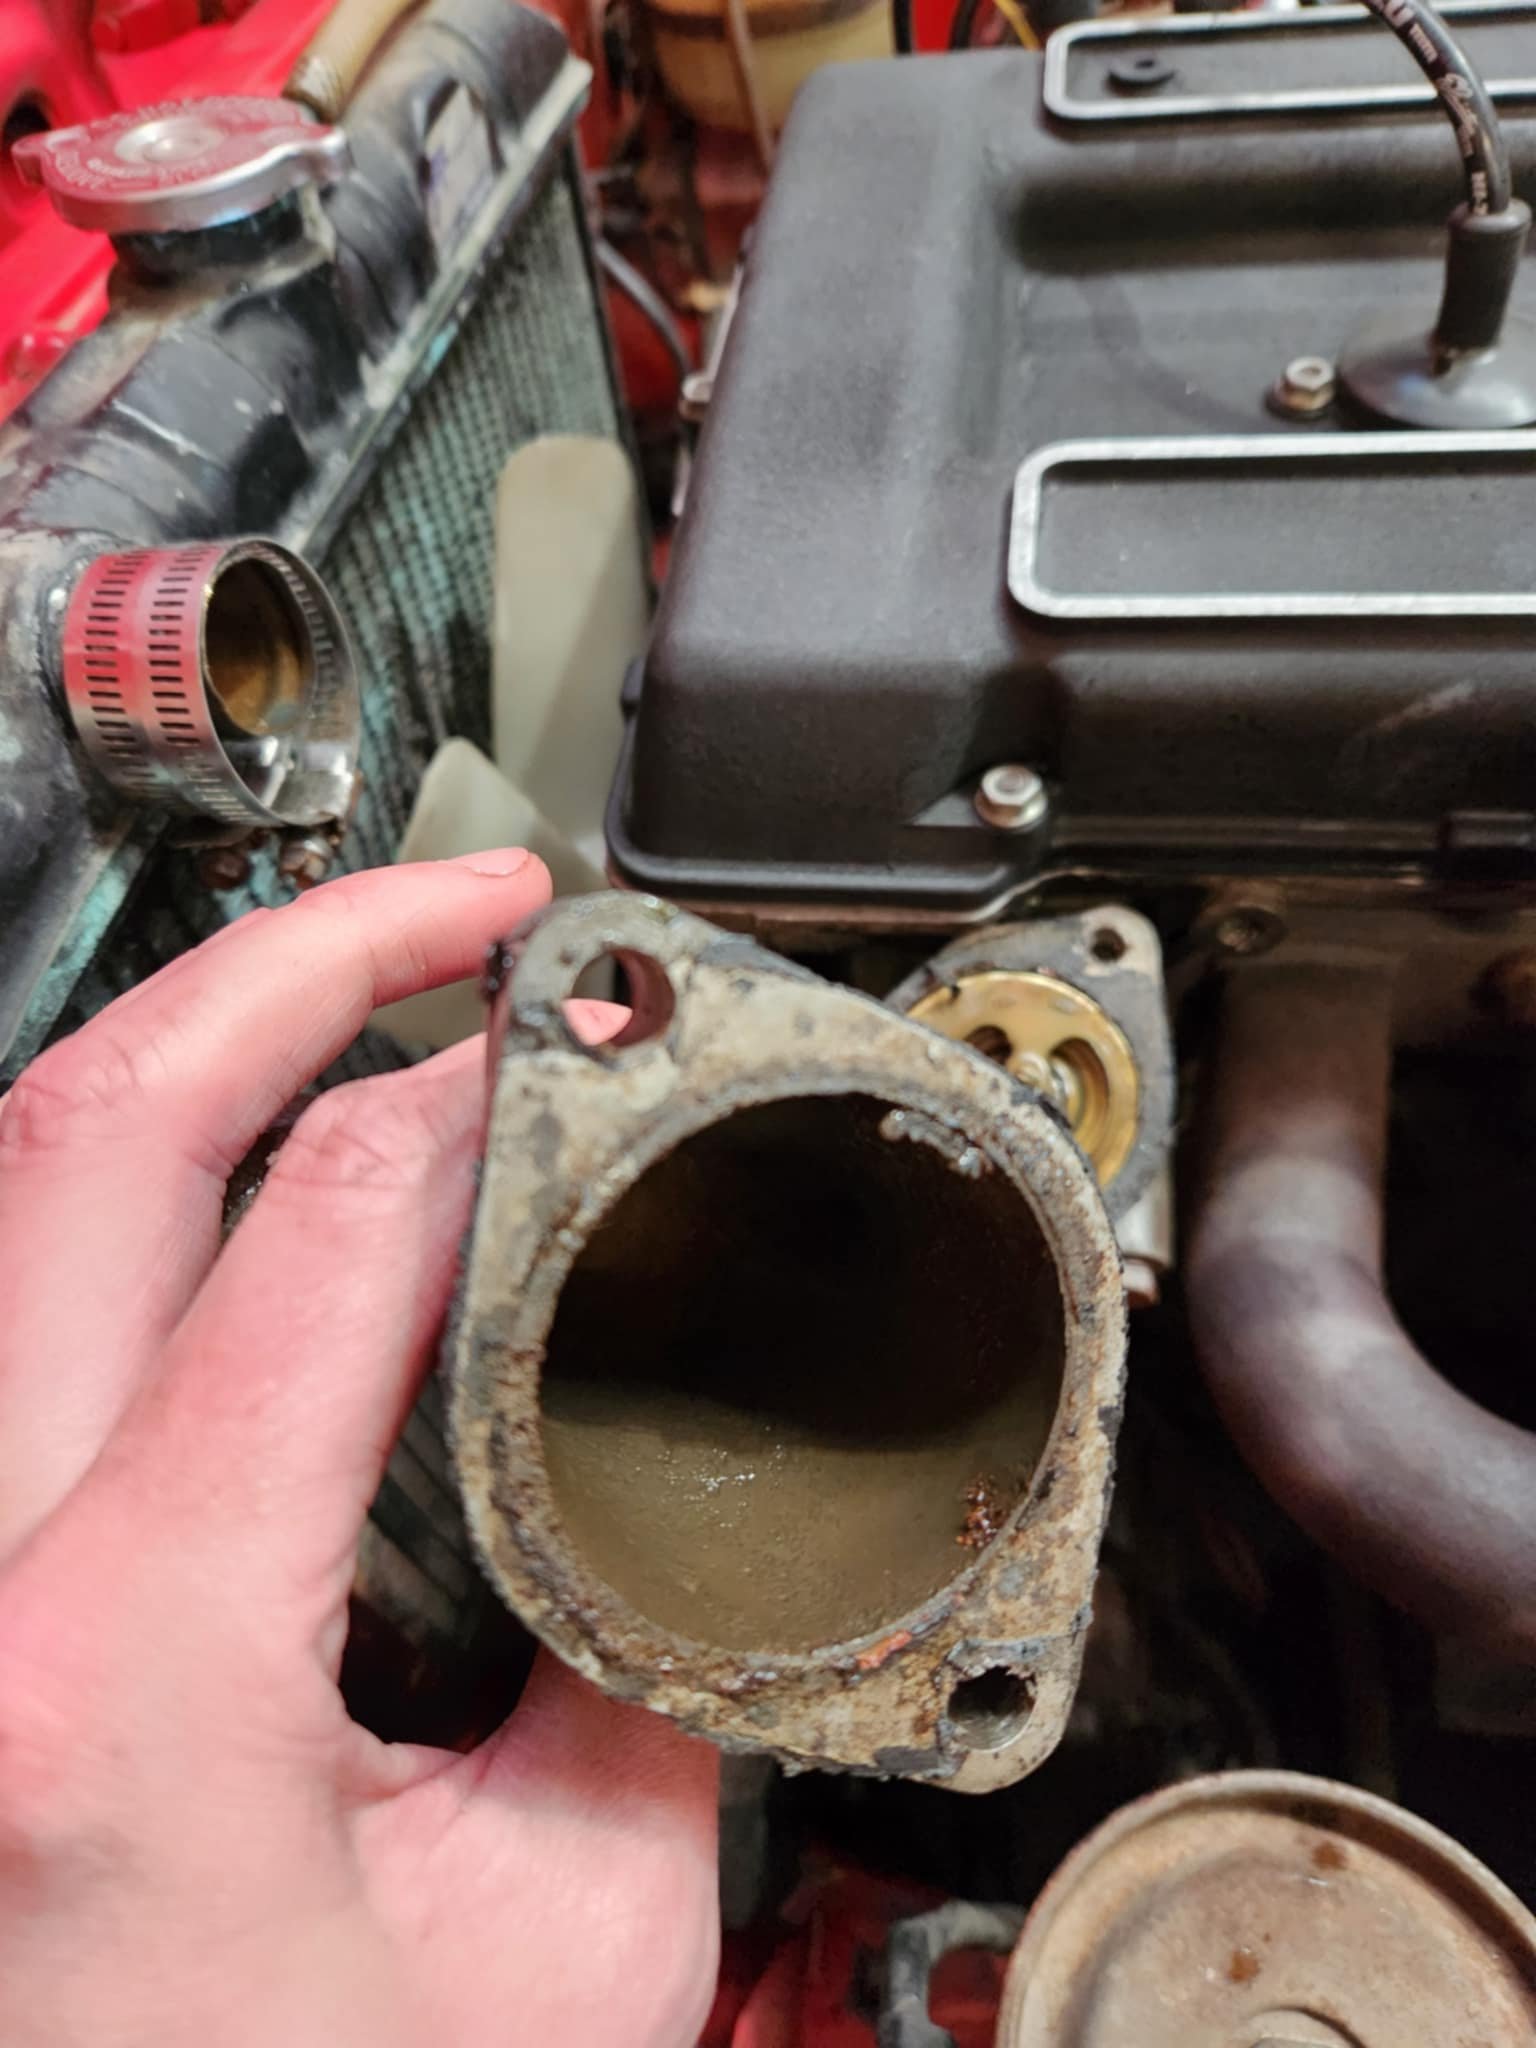
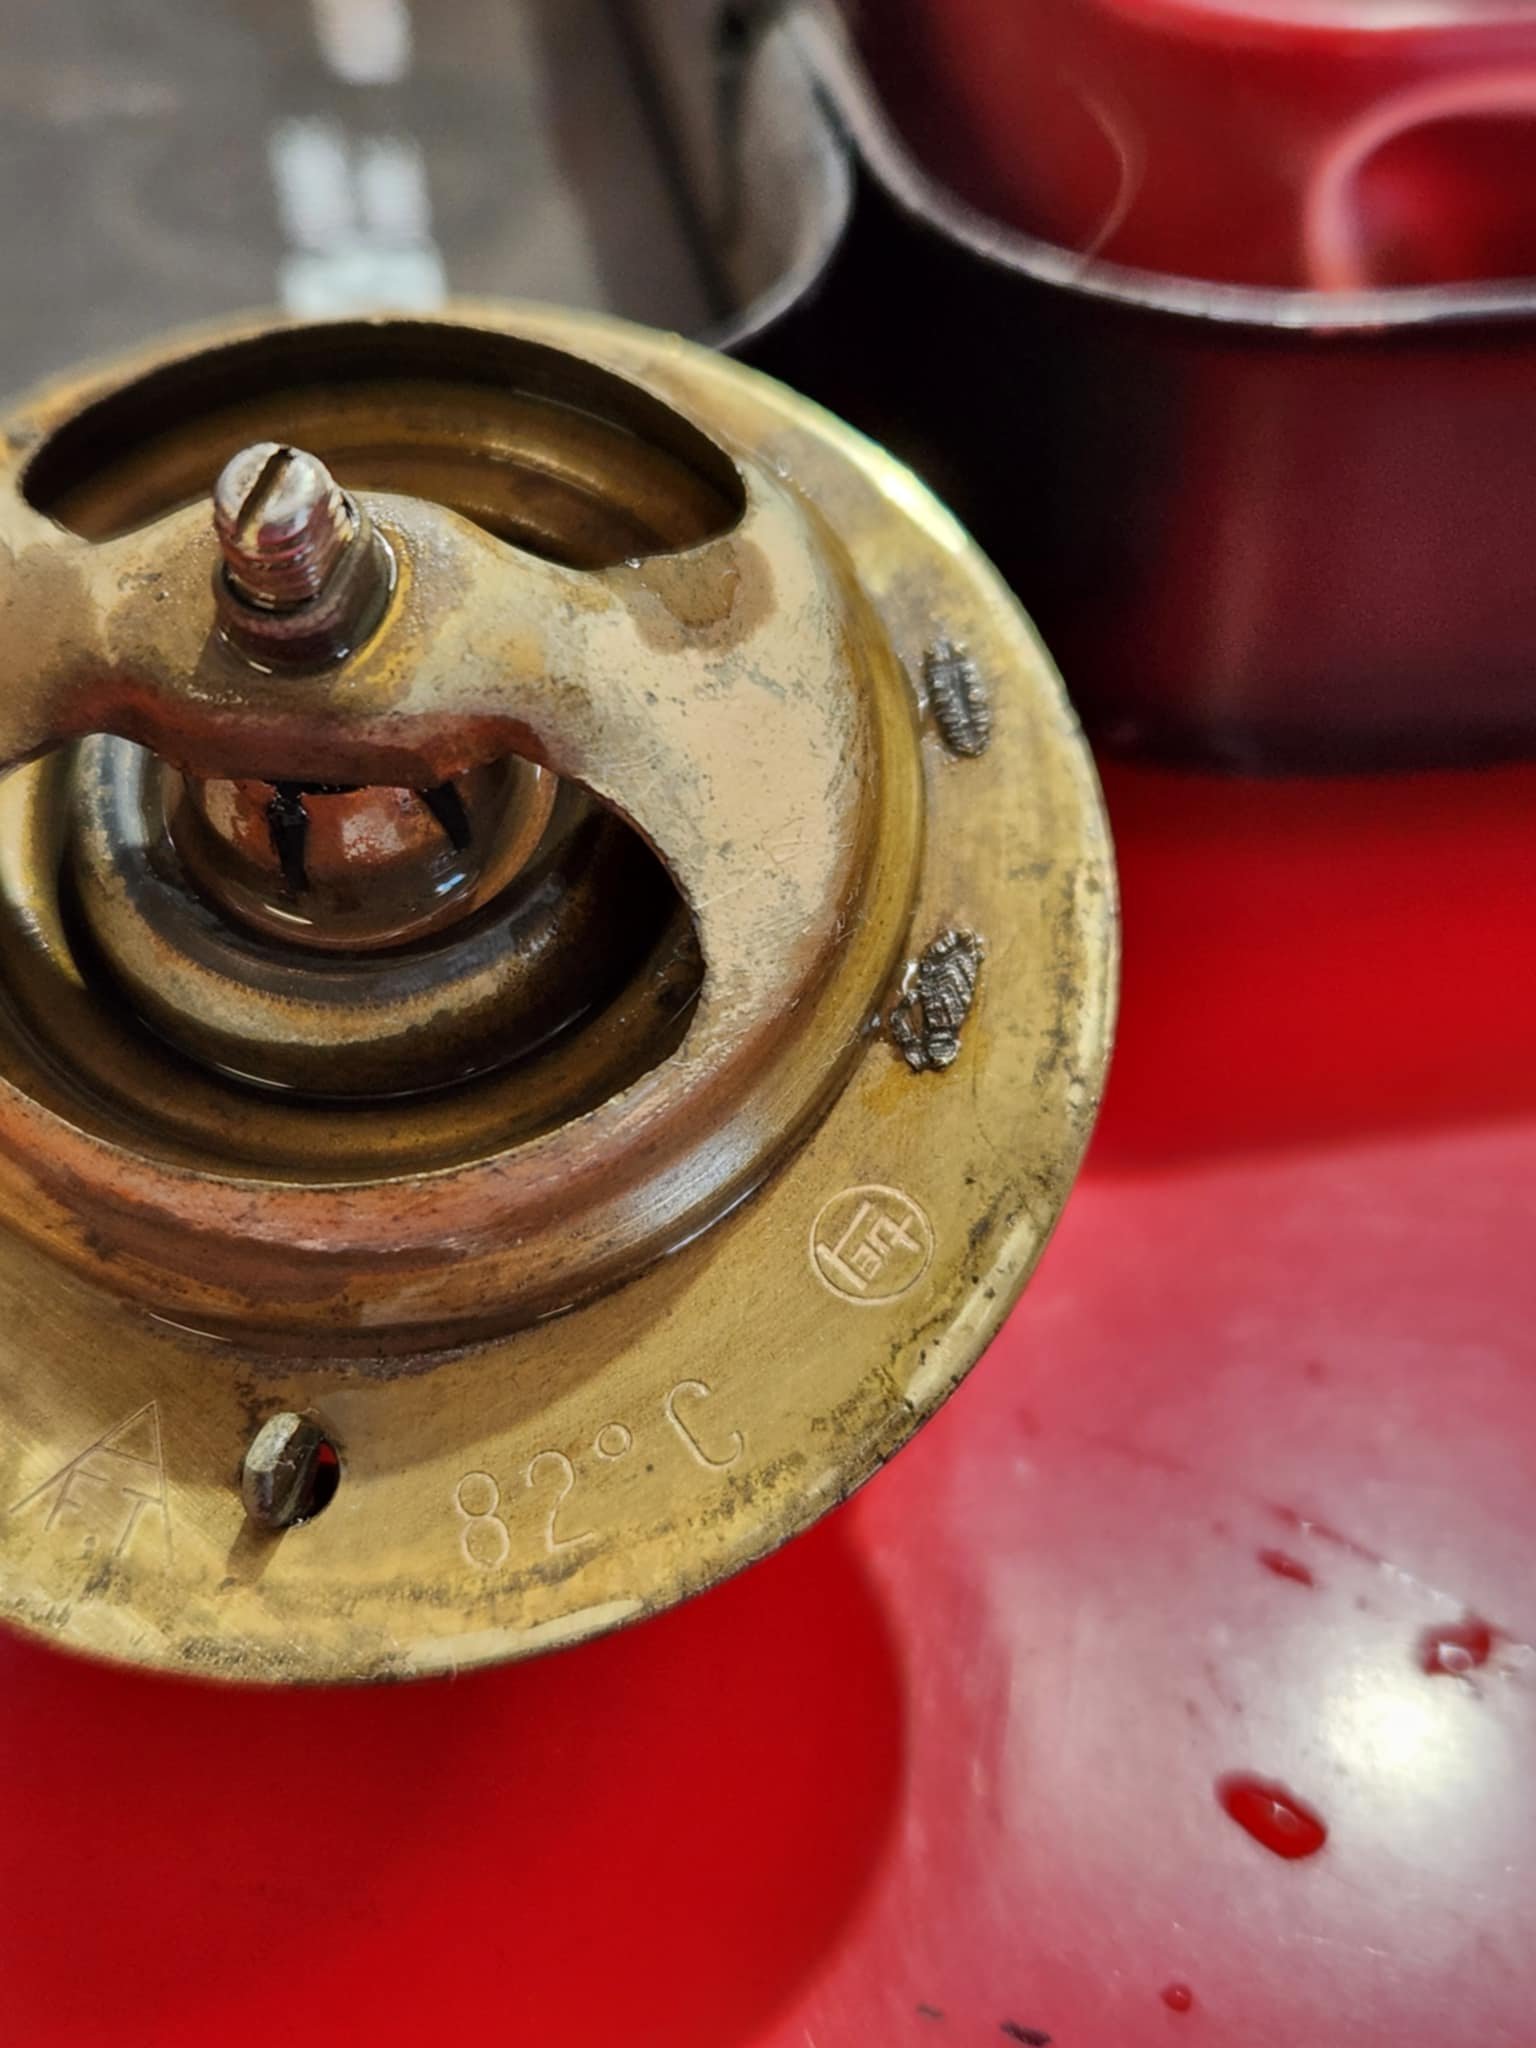
To distance my brain from carb life for a while I decided to look into another thing that's been bugging me. The weird thing about this car is it's never got up to temperature, well at least it never seemed to get past the first little line on the gauge. Because of this I've always wondered if the thermostat was working properly and today I took apart some of the system to check it all. Once I took the hoses off it became clear that there was a thermostat problem, however it was the opposite to what I was expecting. This thing is jammed shut. I was expecting one to either be jammed open or not there at all. This might be the original (or very old at any case) thermostat, so definitely due for replacement. Also abundantly clear that there's been no water circulating in the engine for some time as the coolant that came out of the radiator was green, not mud. This got me wondering.. has there ever been any in there since I've owned it? How long has there not been water circulating ? I have actually taken this car to some events in the not so distance past and the temperature never moved then either. Does this engine somehow have the power to never overheat? This radiator has seen better days but it never leaked from memory so I don't think it was blocked and stopping flow. That said I might get it reconditioned or replace it anyway for peace of mind. As well as replace the radiator hoses as they looked pretty second hand. I'll also be bypassing the heater core so the hoses along the top here are being removed. So now I'm thinking I need to get new thermostat, pipes, some block off caps, a few gaskets and perhaps I should check the water pump as well.. it's probably not been doing a whole lot.
1 point
-
Recently got a bit more done on the trailer. Made sure it was about the right size etc, and made the up rights/sides. For ease of use and simplicity, the front and back tailgate board things just slide into slots made from angle and flat off cuts, Then I figured out where the axle needs to be, then whipped up said axle on the BIL's lathe, made some mounts and welded it on, As you can see in the background of the pic posted above in the last update, the alloy wheels were very oxidized (they have been outside for years) so I gave them a water blast, spray painted them black, and then buffed the paint off the face of the wheel to make them all shiny again. Slapped some tyres on that match the cruisers, and good to go. Then I whipped up some mud guards. Decided just to make them out of 3mm thick steel and not bother with mounts, and just weld them directly to the frame. Found an off cut of steel, cut the desired shape out, removed the rust, and put them in my fancy press brake and bent them into shape. I don't know why, but I find the little mud guards soooo adorable! Now I just have to cut and mount the wood, paint everything, and its done. Regards VG. P.S. Say hi to your mum for me.1 point
-
So.. When you have too many projects..... An old mate has had a Mk1 Cortina since 1997. Started as a run about, turned into a project, then along came life, so it was parked for ??? years. The time has come to bring it out of hibernation and see if some life can be breathed into it. Disclaimer: This is not my car, this is not my project, but I'm involved and connected and figured some of your might enjoy the thing. Also disclaimer, the owner and chap who's restoring it are 100% happy for me to share the project here. Step 1: Unbury The light of day for the first time in ???? Load 'er up Delivered down to the (Hawkes) Bay and ready for revival. Since the car was imported pre 19?? it doesn't have a vin. Annoyingly the rego had lapsed with an address change, so it required a trip to VTNZ for us to tell them how to do their jobs and get the car a VIN. Tow vehicle activated. As we'd researched the process and let VTNZ know what to do we got through this pretty easily so the car was back to the workshop in good company. Some tidy up required. Throttle body was pretty well stuck, fuel tank has a leak, oil was ??? years old. Some remedial work and.. Gotta love that toyota reliability and a link ECU with an good link base map, albeit a bit rich. The body looks pretty straight, it's had some repair in the right rear at some point in the distant past. There's some re-work to do on some questionable mounting that was done in it's early mod life but nothing that can't be fixed etc. Other projects have been moving in the right direction so there will be some more movement on this coming soon. Further disclaimer, Projects are fun but take time and I have little of the latter. I'll try to keep the updates rolling as they come in but don't expect them weekly. P.P.P.S. I'll get an engine bay shot next time I'm there. LeftChevronThree.1 point
-
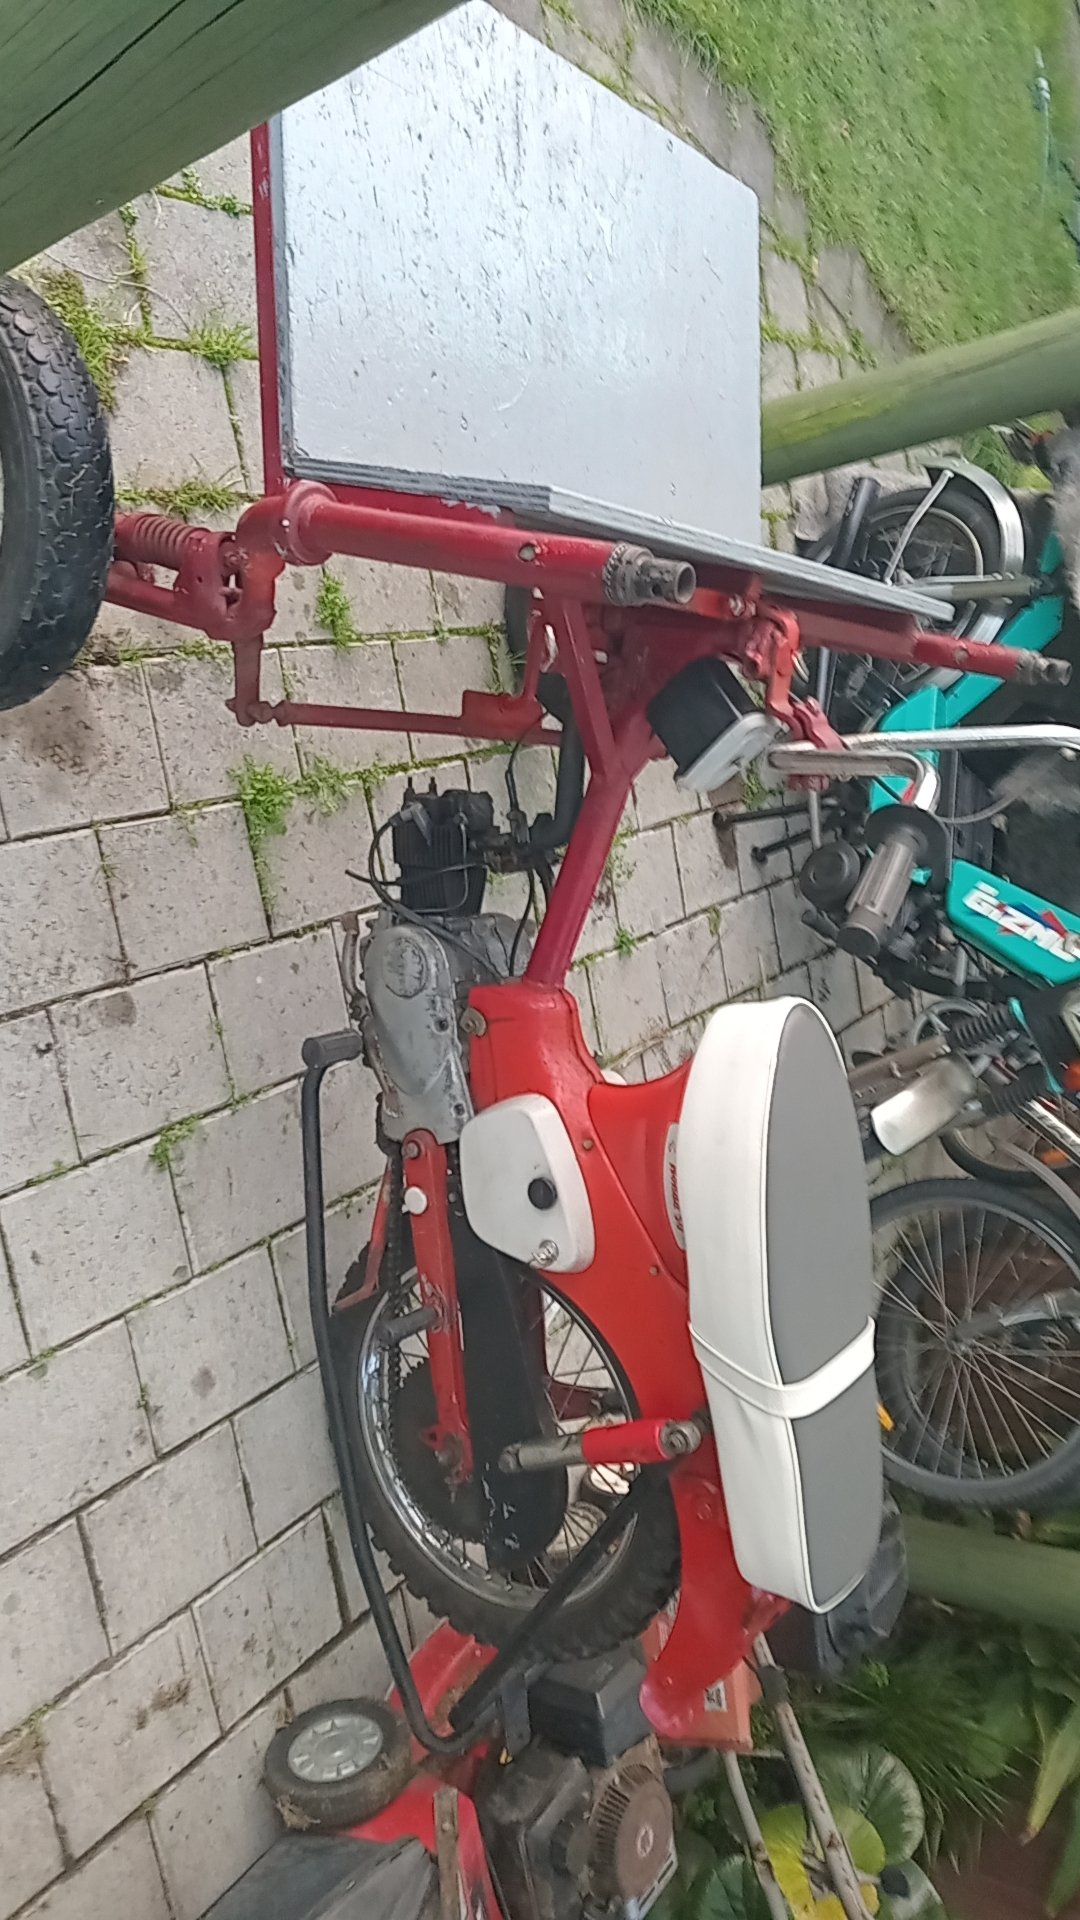
I bought a second one for the motor, it's got three wheels and and it's pretty cool. I'm taking the motor out to put in my original c100 and I'm going to rebuild and sell this to pay for my first car.
1 point
-
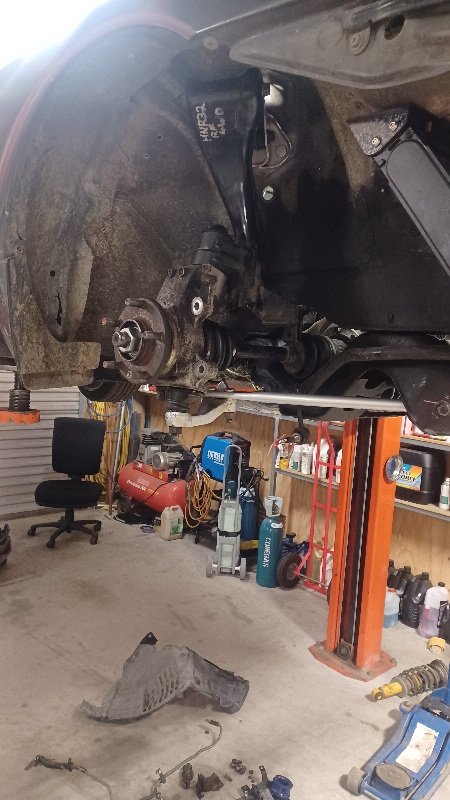
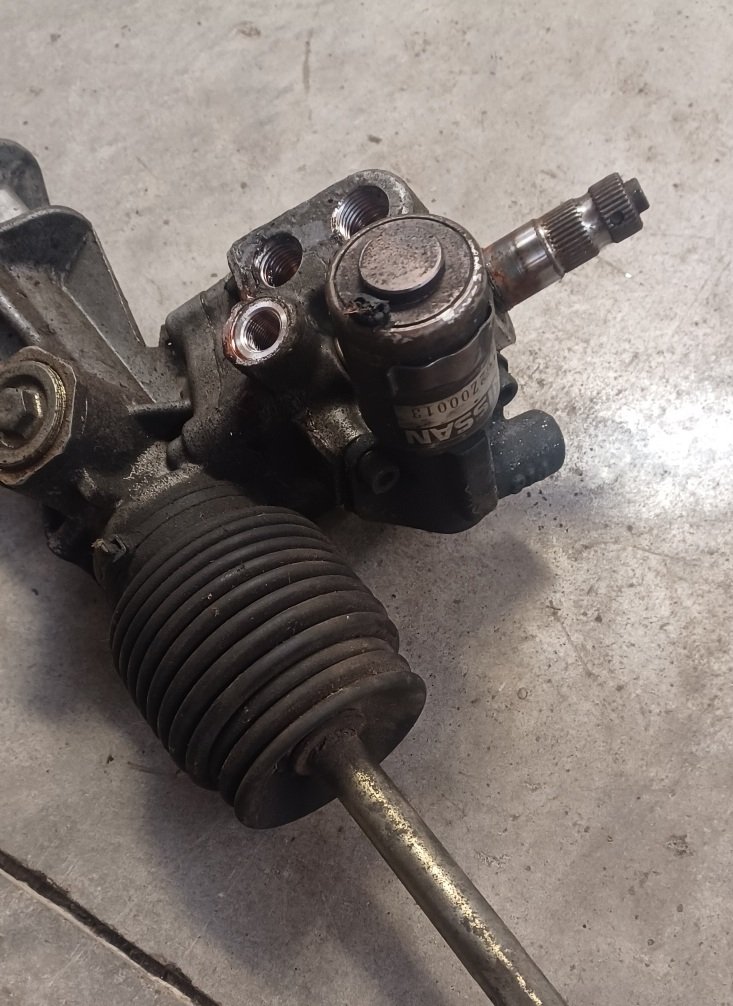
Suspension together. Wrecker mate has found me the bolt I need too. I'll chuck some stock gtr brakes on the front for now to get it running and driving. I had a set from ages ago so chucked a new seal kit in. Also wanted to solve the issue of having heavy steering. Hicas R32s have variable assist power steering. Mine was always heavy and I never bothered at the time to sort it, but it was the wires missing off the solenoid on the rack. So I found a spare rack in stock to make 1 out of 2. Unfortunately there are a few little bits I still need so start the 3 week timer for parts from Japan again...
1 point
-
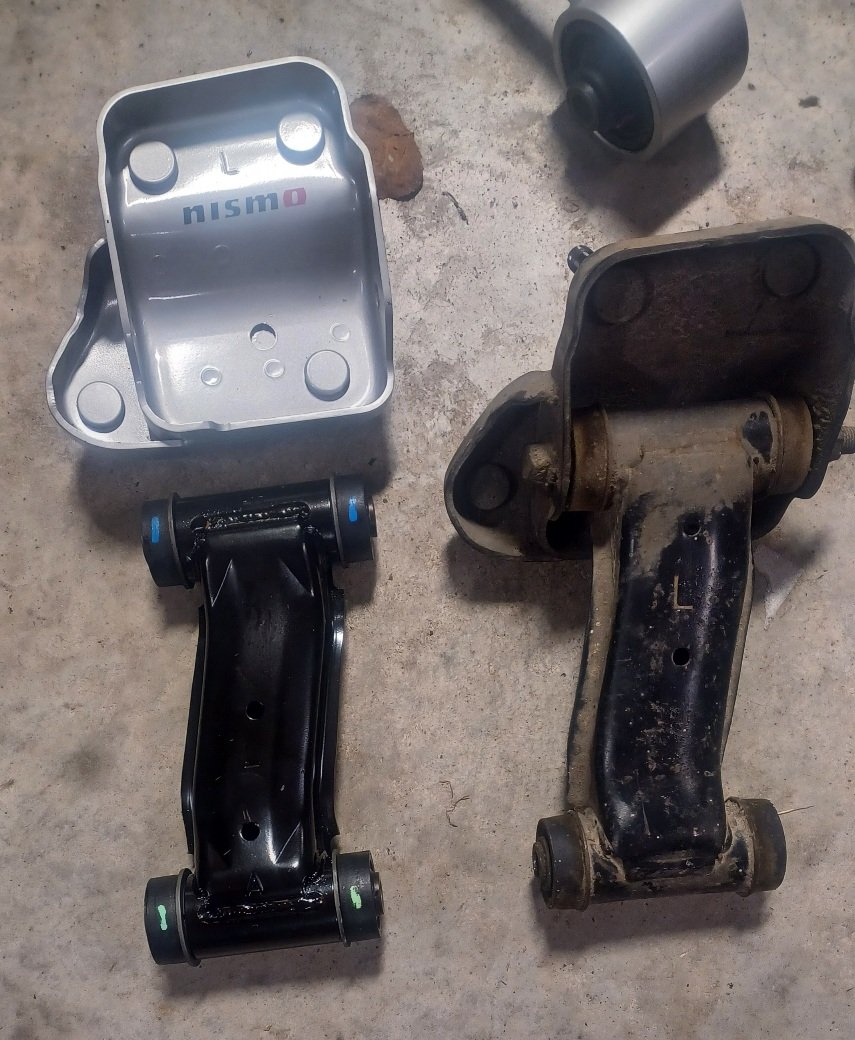
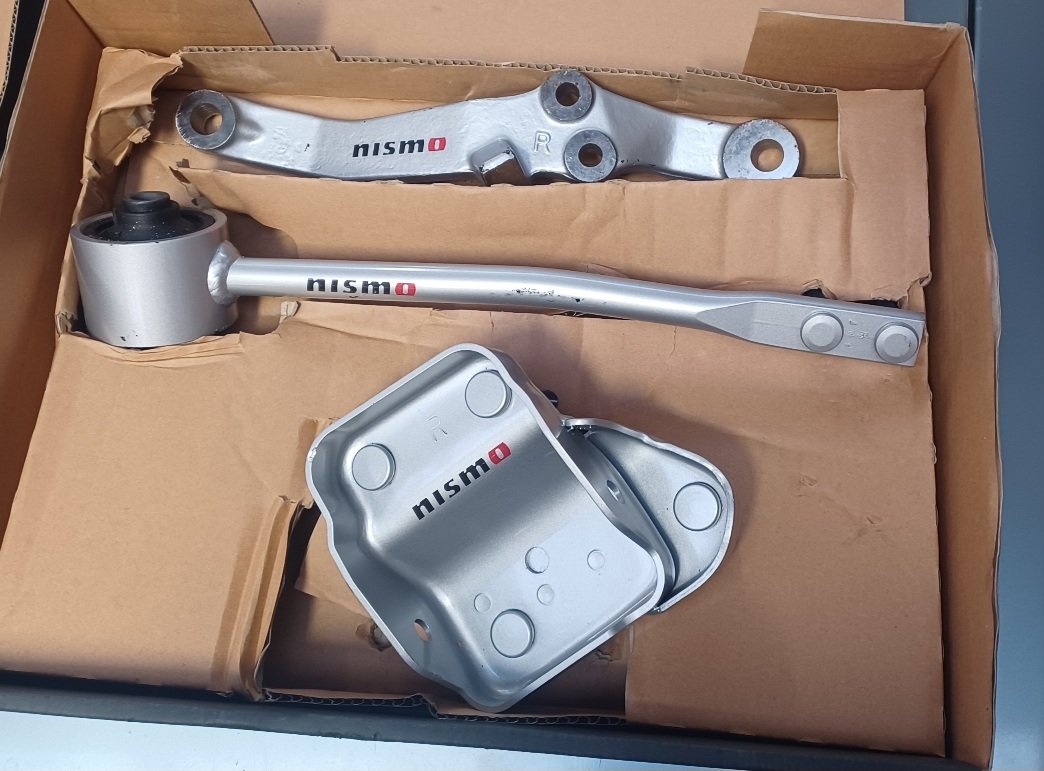
Pretty much all the front bushes and joints were stuffed so I am replacing as many as I can. Many years ago I got a good deal on some upgrade suspension parts. Nismo circuit link upgrade. The caster rod is a bit shorter than standard, the lower arm is 4mm longer for a bit more negative camber. The upper arm mount has the holes drilled slightly differently to try and reduce the misalignment in the arm so the bushes last longer. I also bought new upper arms. All of the ones I have are stuffed and it was similar money for a whole arm as it was for new bushes.
1 point
-
Regret is only temporary. Knowing that you've recreated the legend is forever1 point
-
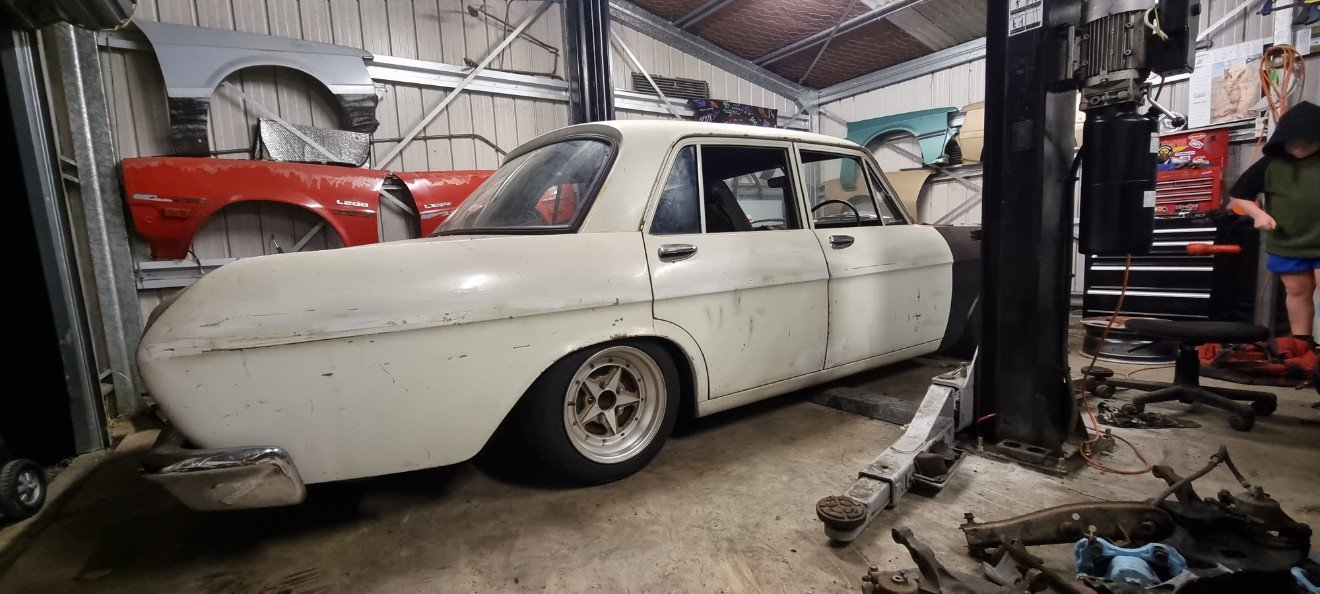
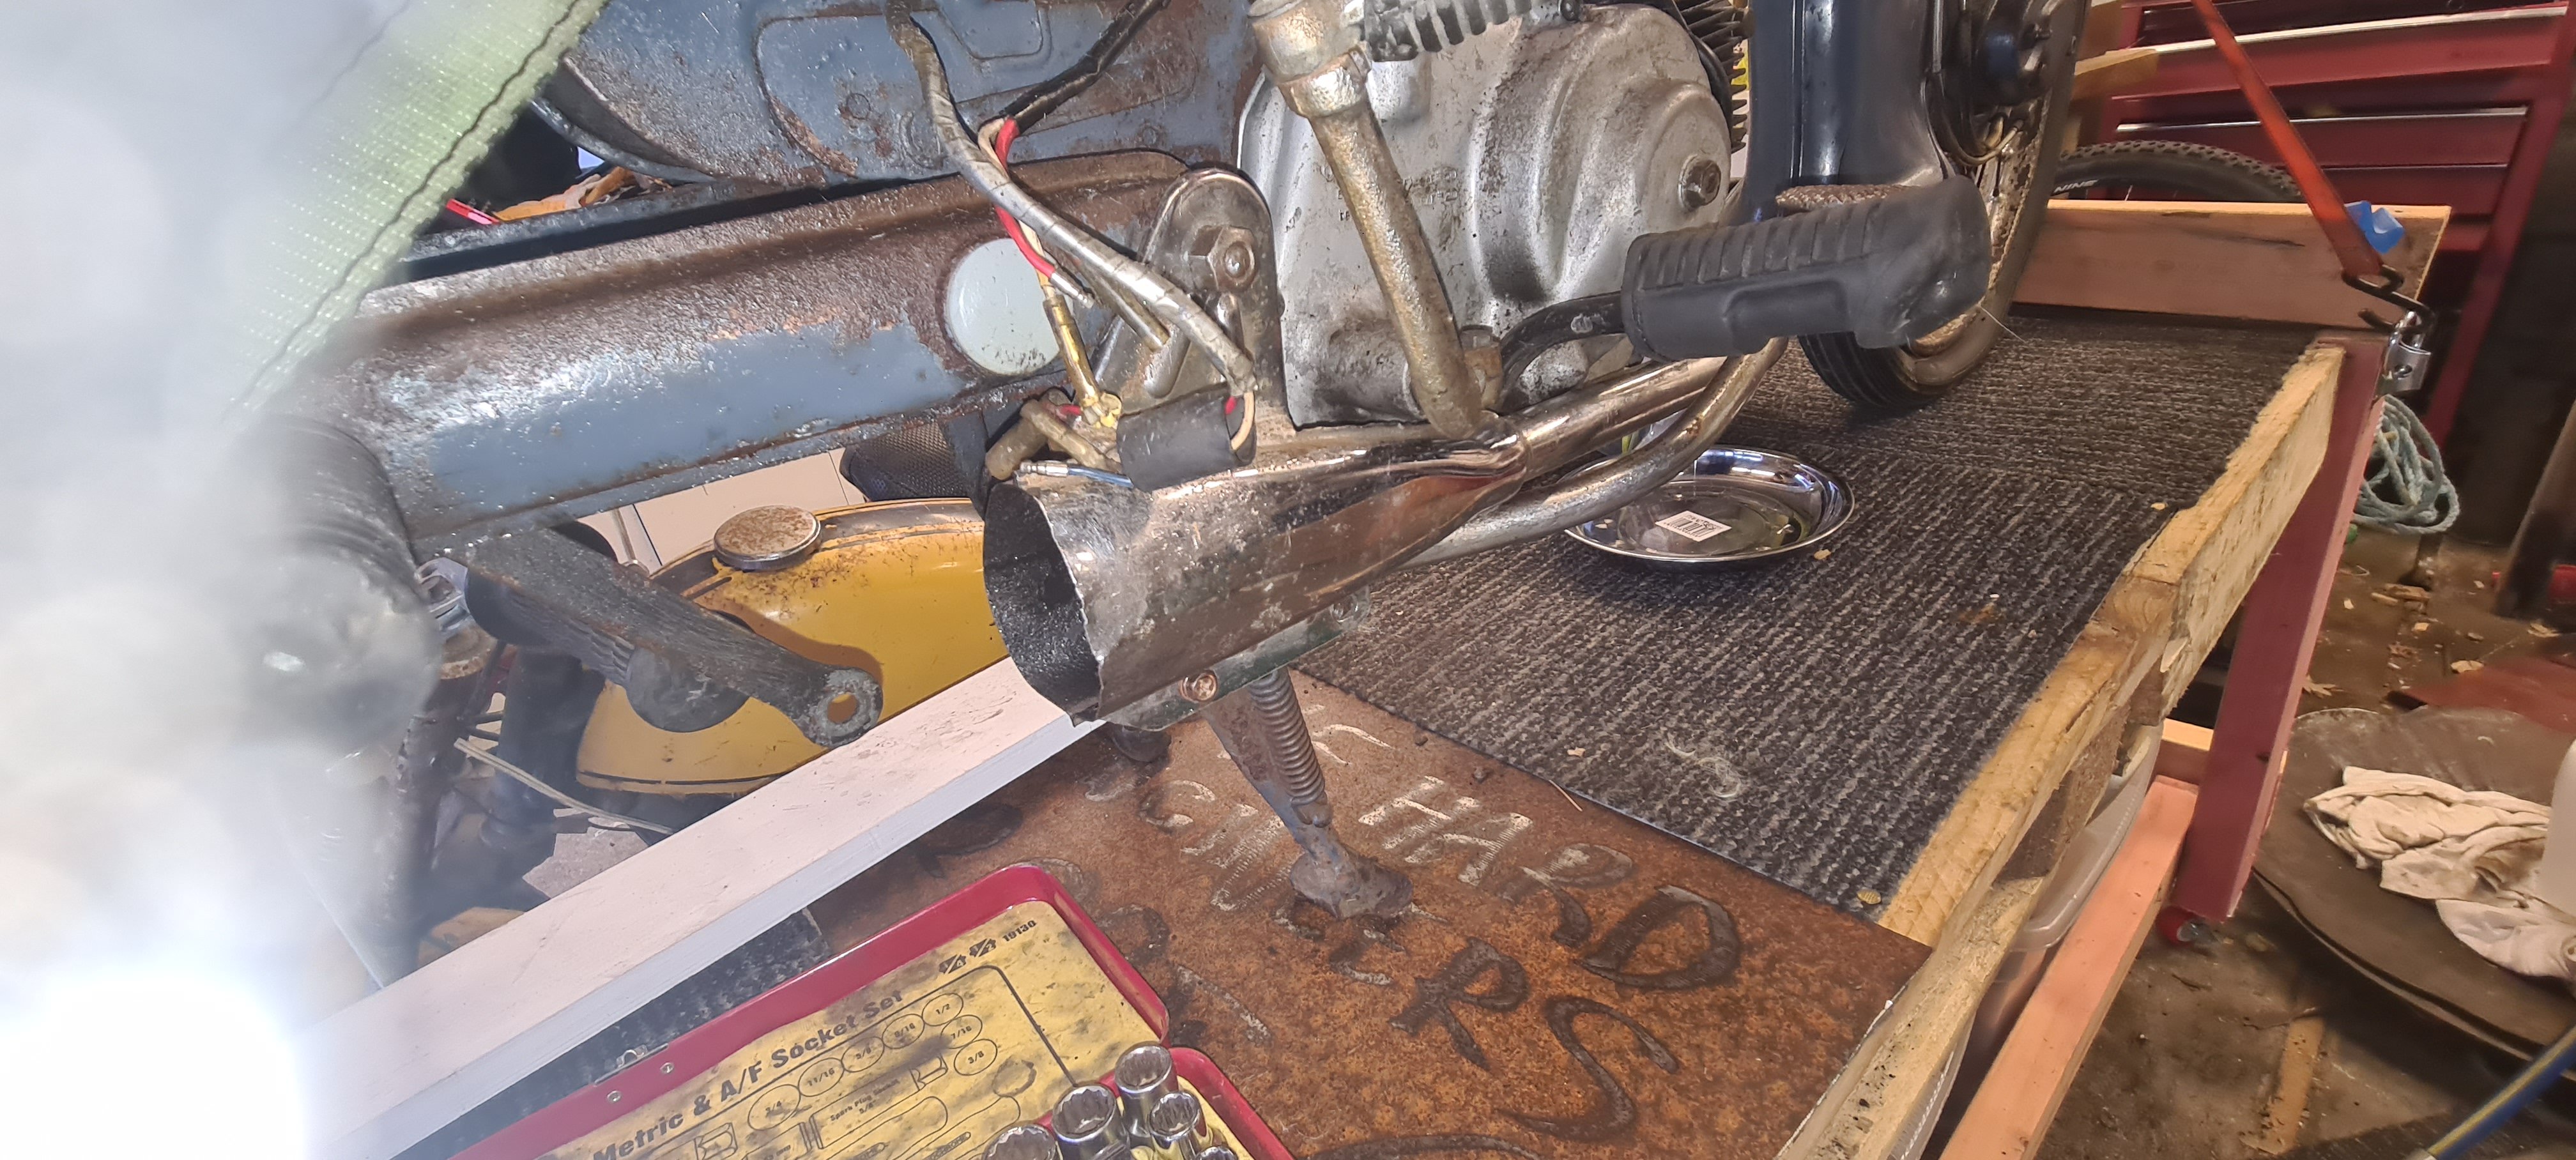
Finished up (pretty much) the exhaust today, ground clearance is much better. The front flange which was there from previous is still a bit low but seems to be a minimal issue. I might have to rotate one of my slip joins around but otherwise I'm most impressed because there are less leaks than I was expecting. I worked out a couple of questionable but working hangers and took it for a blast around the block. Does it look good? Not really. Does it sound good? Questionable. Quite raspy. I have a small cat converter I might put in to see if that does anything. Anyway, considering I'd never welded before this I'm happy with the result. This is also the first time I'd actually had the car on the road with the front "coilover" sleeves installed and while it's no Rolls Royce it could definitely be worse. Not sure I'm in love with the middle mount touching the handbrake cable but it's rubber on rubber so not super worried. It definitely looks the part now I've finally got the front pair of Longchamps widened and fitted. Could even run a small spacer on the front to get it sitting a bit more flush. I can run full lock to lock without rubbing though so maybe I'll leave it for now. Onto the next task - The carbs.
1 point
-
Tell me how having two weird project cars with limited info and parts is the dream1 point
-
Back to Celica coverage now with the ongoing self-inflicted exhaust program. I decided to drop it on the ground because there's no point welding it all up if it's no good right? Sort of to be expected.. the giant muffler is basically the exact same as it was before so that's gotta go! Onto the good news now, the front pair of longchamps are finished! They fit up great and I can probably even run a small slip on spacer to get them to sit out slightly more but I reckon they're not half bad. Once the exhaust is finished I'll be able to move it from it's corner location for better view.
1 point
-
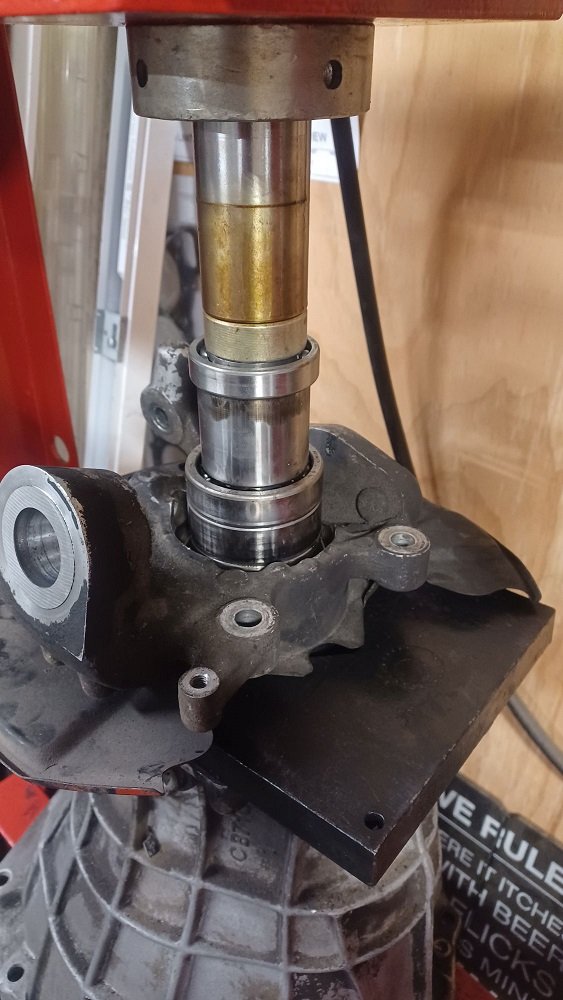
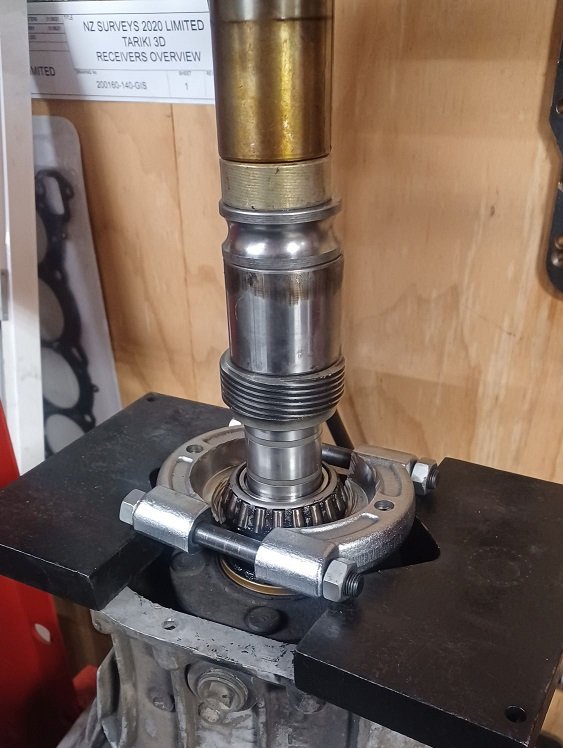
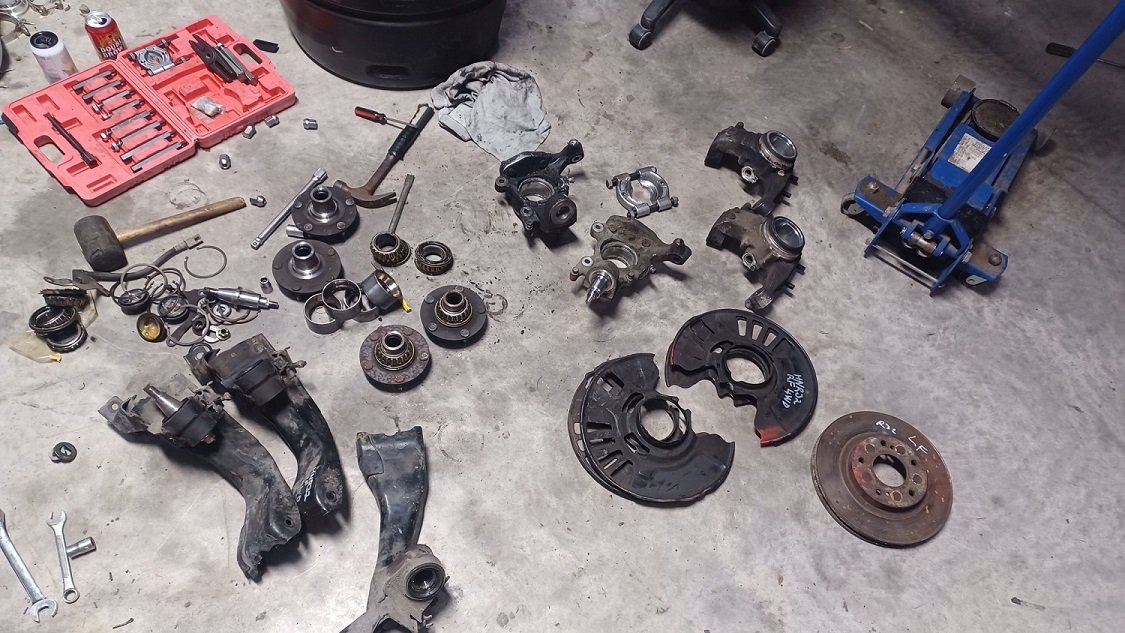
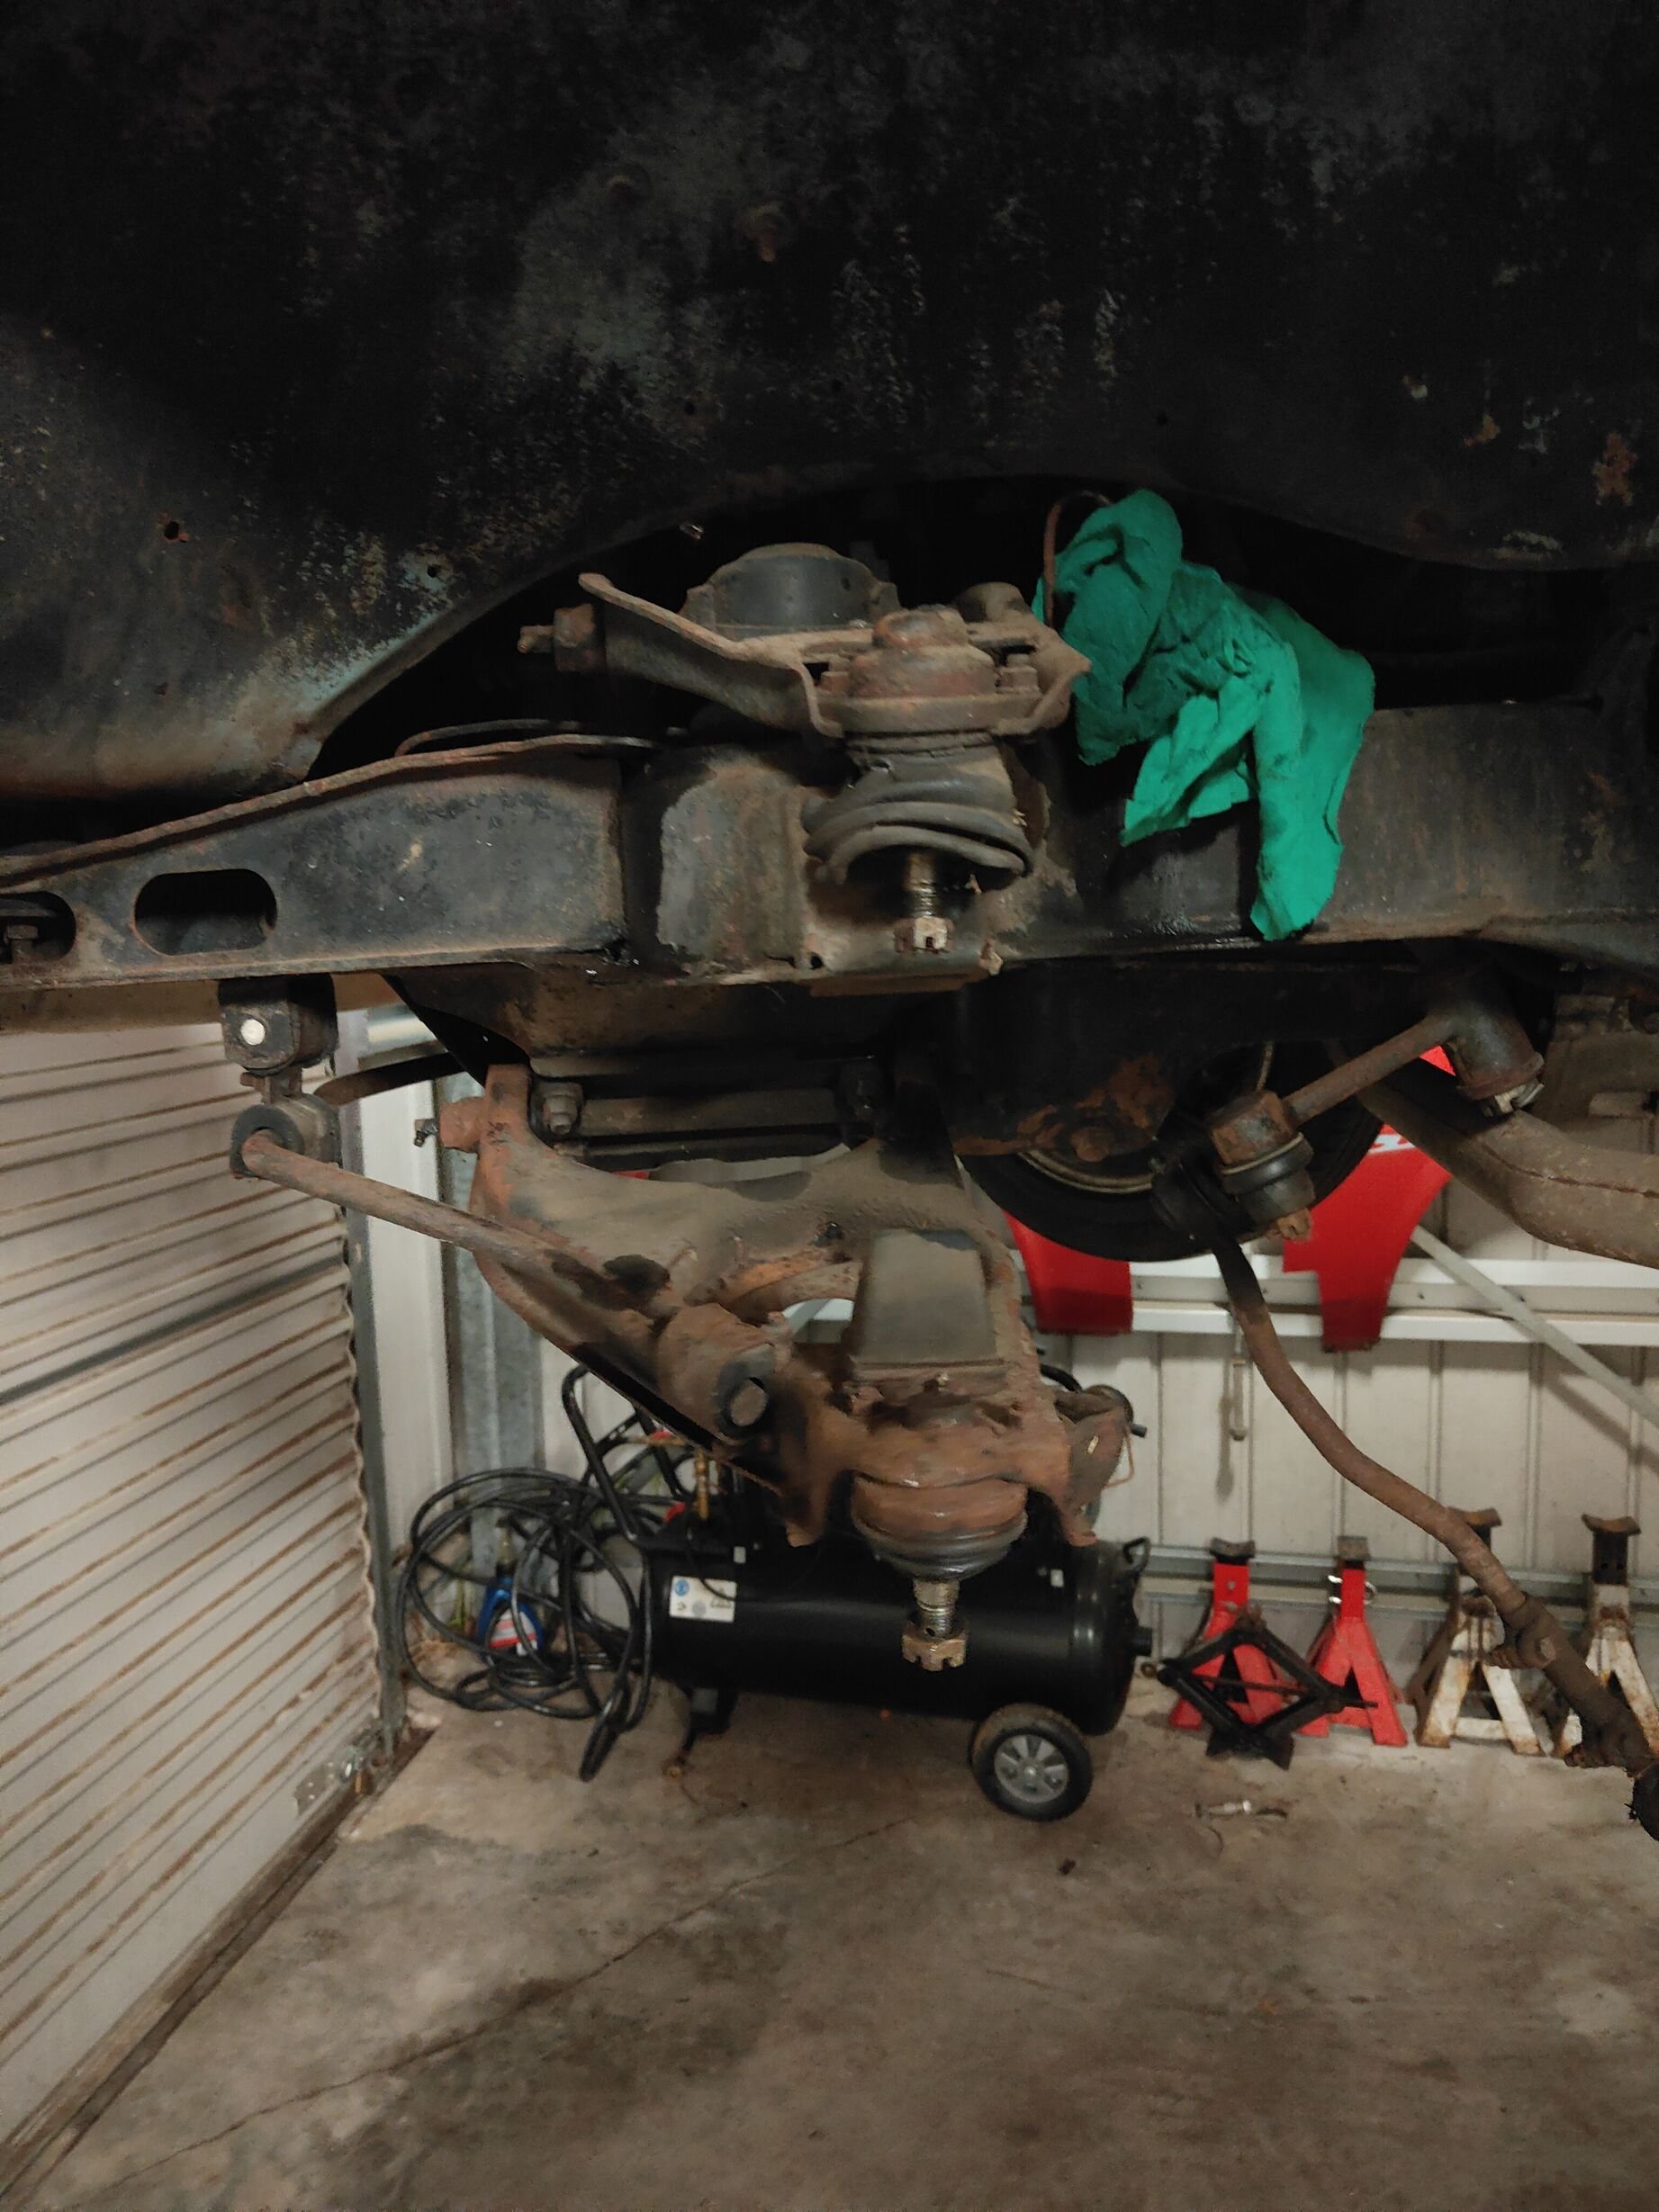
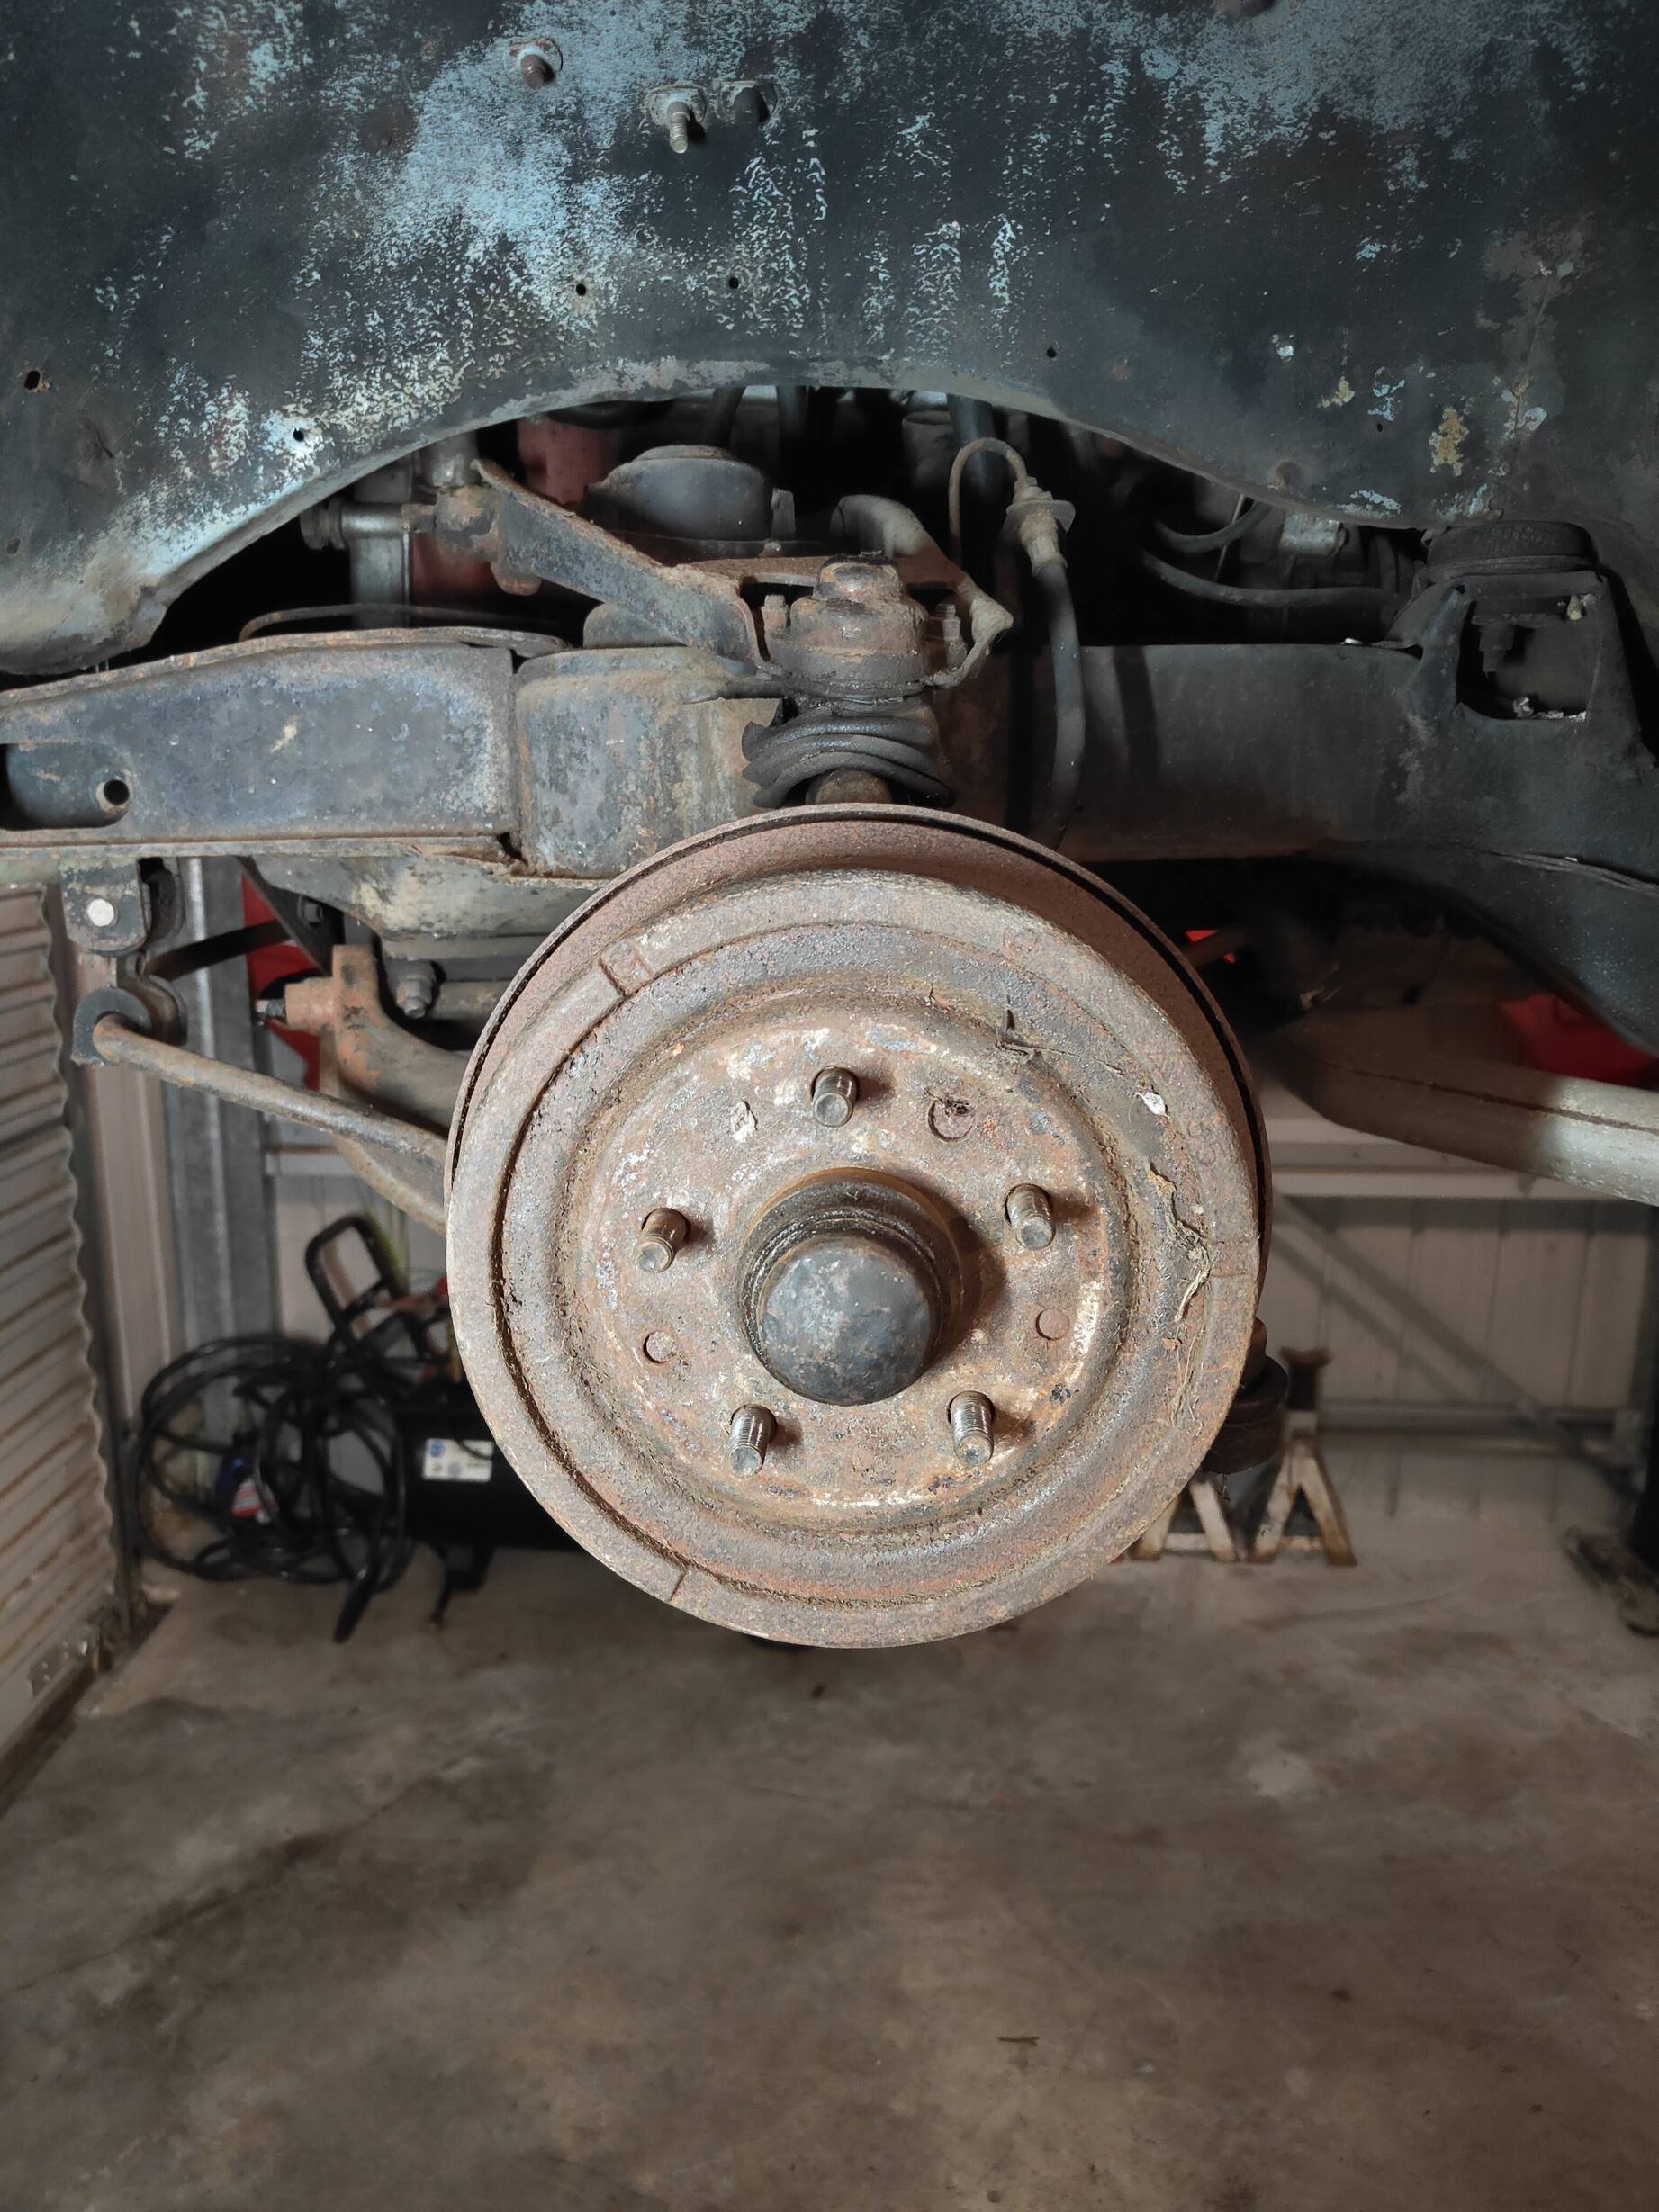
This week i have pulled apart the suspension. It started with wanting to change the wheel bearings and in the process of getting it apart, i discovered the front kingpin bearings were flogged. Lots of dubious pressing was involved. I only fired parts across the shed twice. Not bad. The kingpin lower bearings were well stuck. Im sure there is a correct tool for getting the lower ones out, but a squirt of mig was enough to shrink them a little and they tapped out. Progress
1 point
-
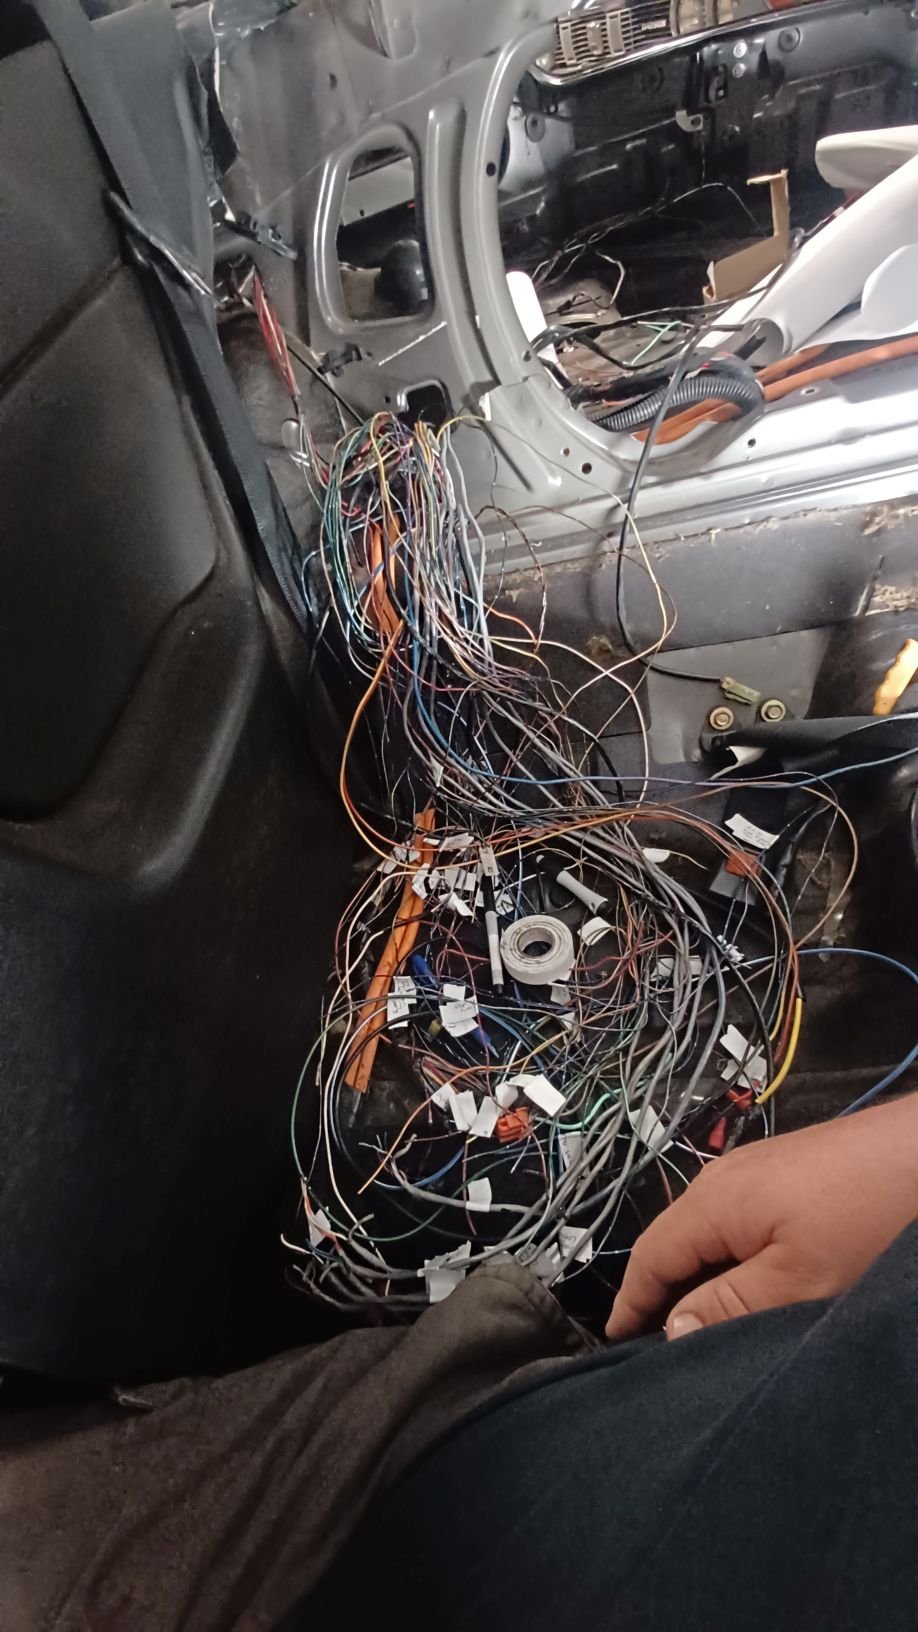
Some time has passed.. Started to tidy up the wiring. This loom goes to the 4wd/abs ecu, hicas ecu, stereo amp. The abs and hicas were deleted by a previous owner What have i done?? I have a new 4wd ecu im going to run and it requires less wiring, so stripping the loom back a bit. Also there are now a lot of spare wires that run to the front so ill use a few of them for the fuel pump controller and a possible CAN IO expander I also pulled out 13987243598m of wire that ran around the boot to the fuel pump relay, 4wd pump relay, 4wd solenoid relay and taped it up into this tiny loom. I got some of that cloth loom tape and it does a really tidy job. I have been procrastinating the rest of the wiring as i lost motivation. Waiting for a mate to come over with all the crimpers and gear to do the ecu wiring etc
1 point
-
Tried the swap to disk brakes but turns out LN106 2wd I think they're called isn't the ticket. I believe I need the earlier model stuff
1 point
-
So this was the big deadline to try meet, and so that we did. An epic event and good times cruising the back roads with the boys to get there Still a lot of work to do like interior, more low, swap to 14s as I'm not liking the 15s, change muffler the list goes on but I get to enjoy driving it now
1 point
-
First start up had only minor issues A water leak, easy fix A vacuum line I ran wrong Throttle body needed a blank plate for idle control valve as above The mission to get it out of the shed And @82Mirage back at it making adjustments to the base map.
1 point
-
Found pics of the car the 4g61t motor came from It's glory days And how I found it....
1 point
-
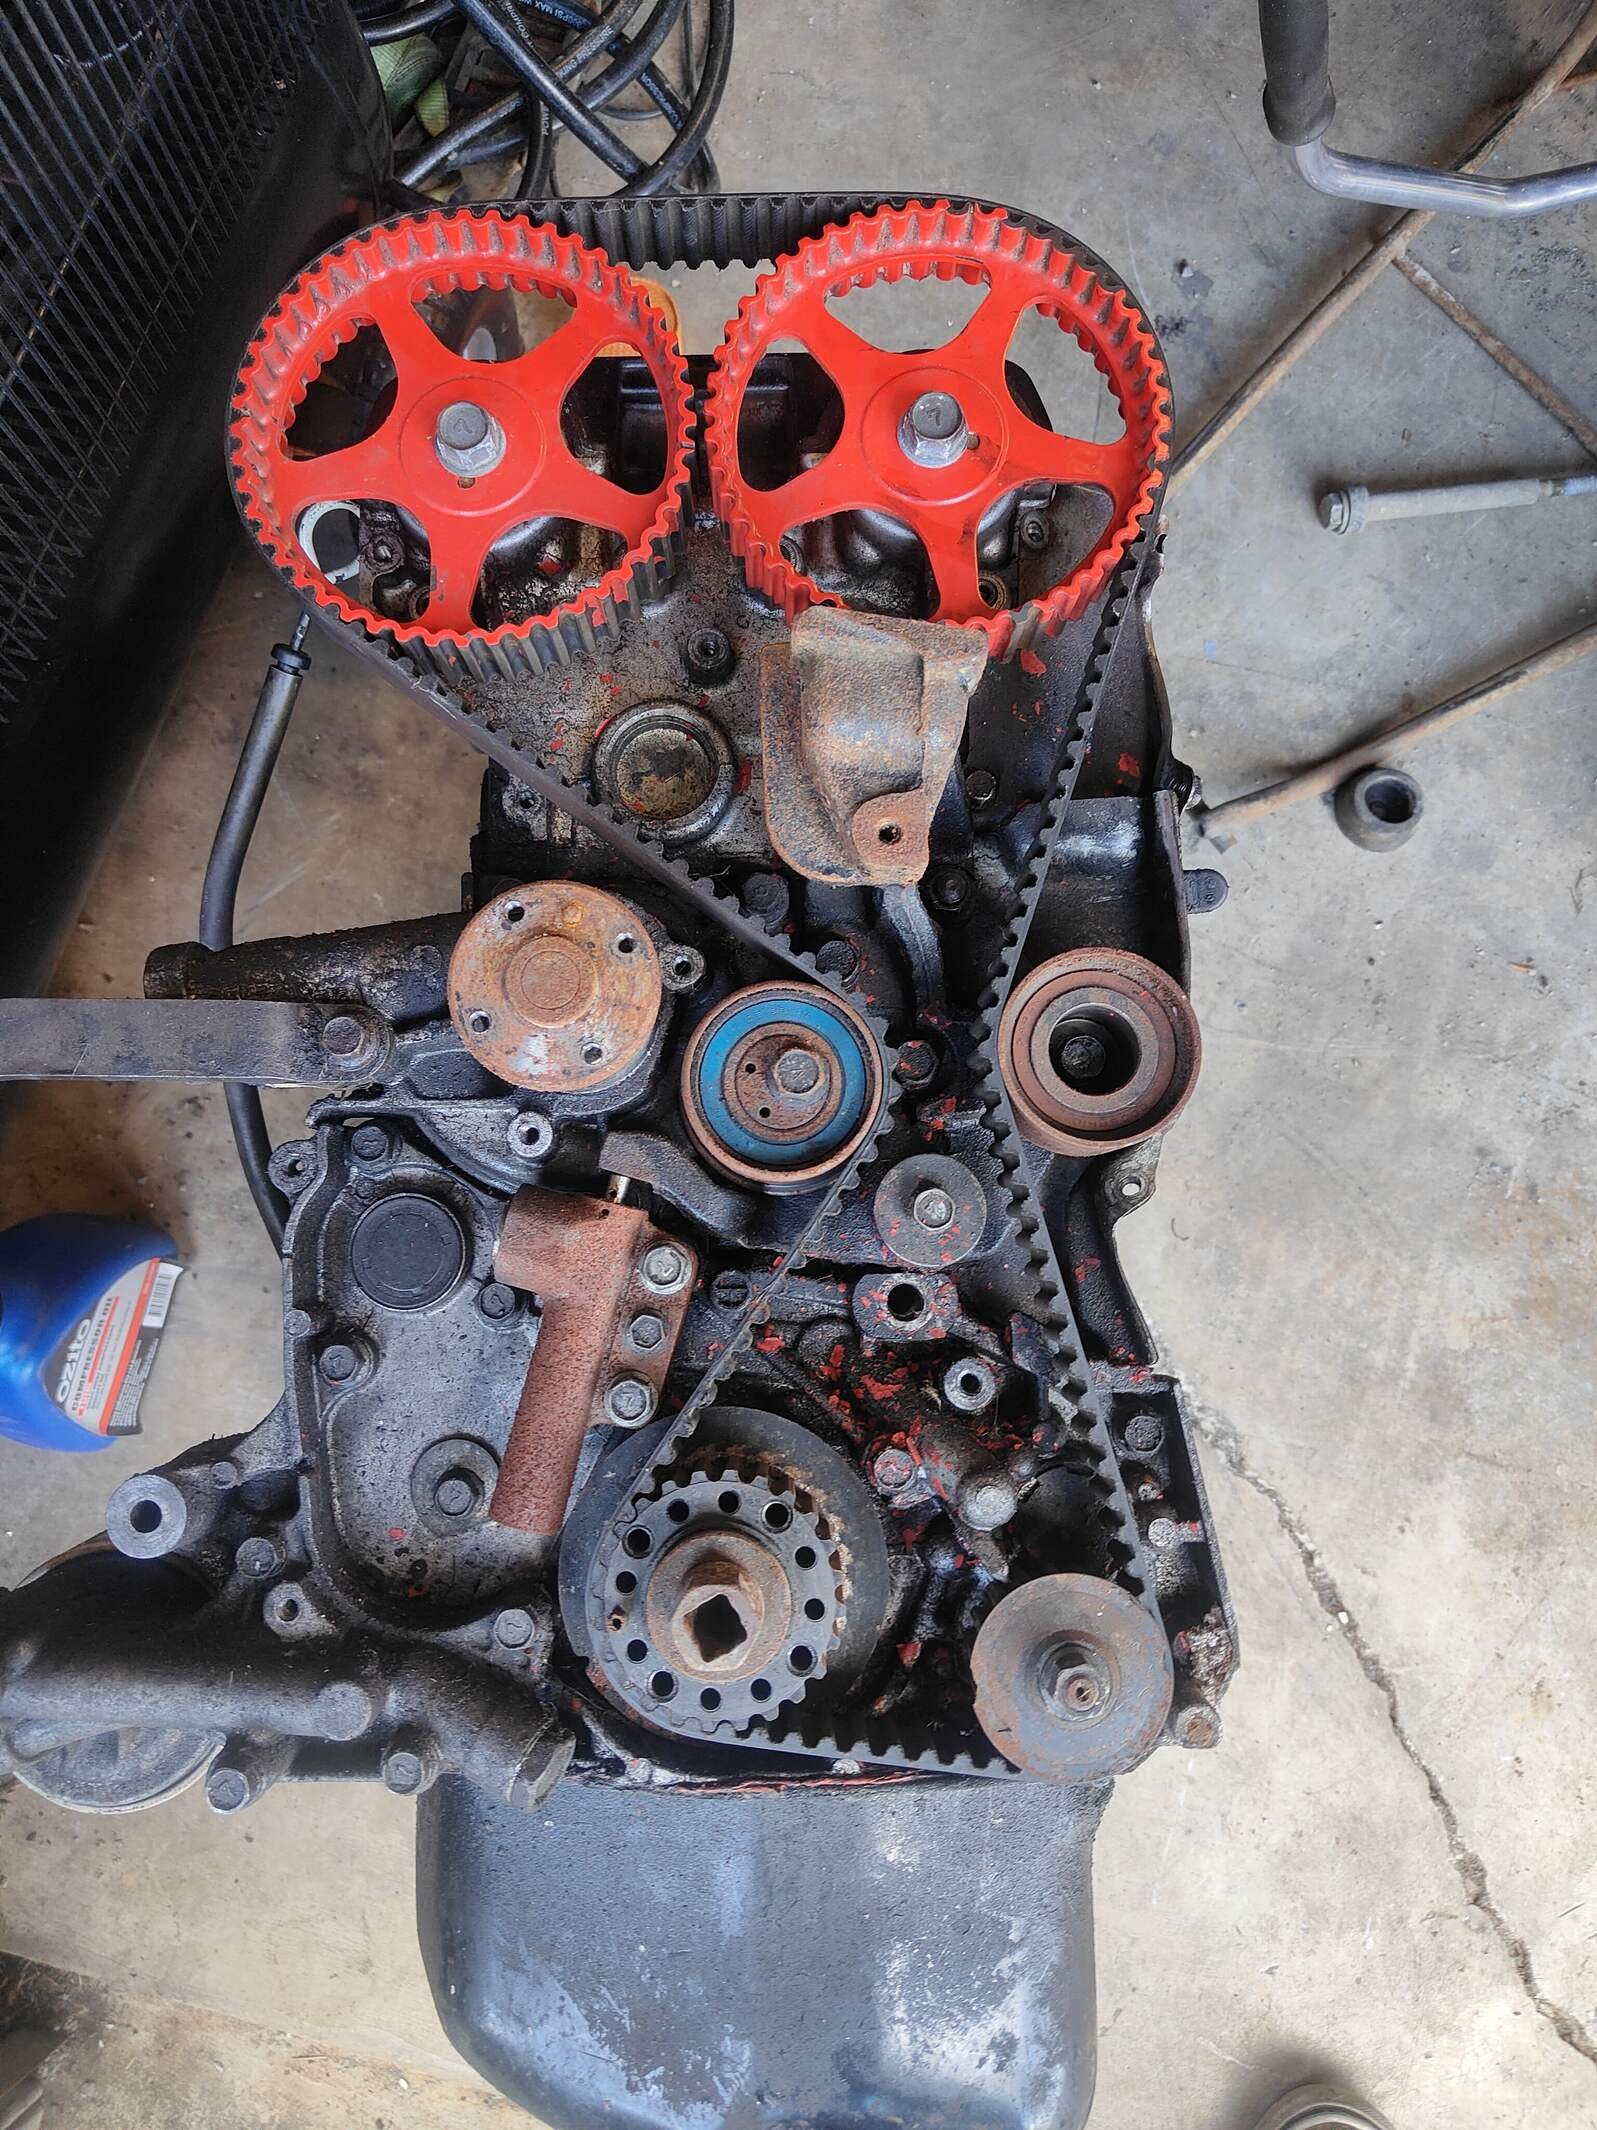
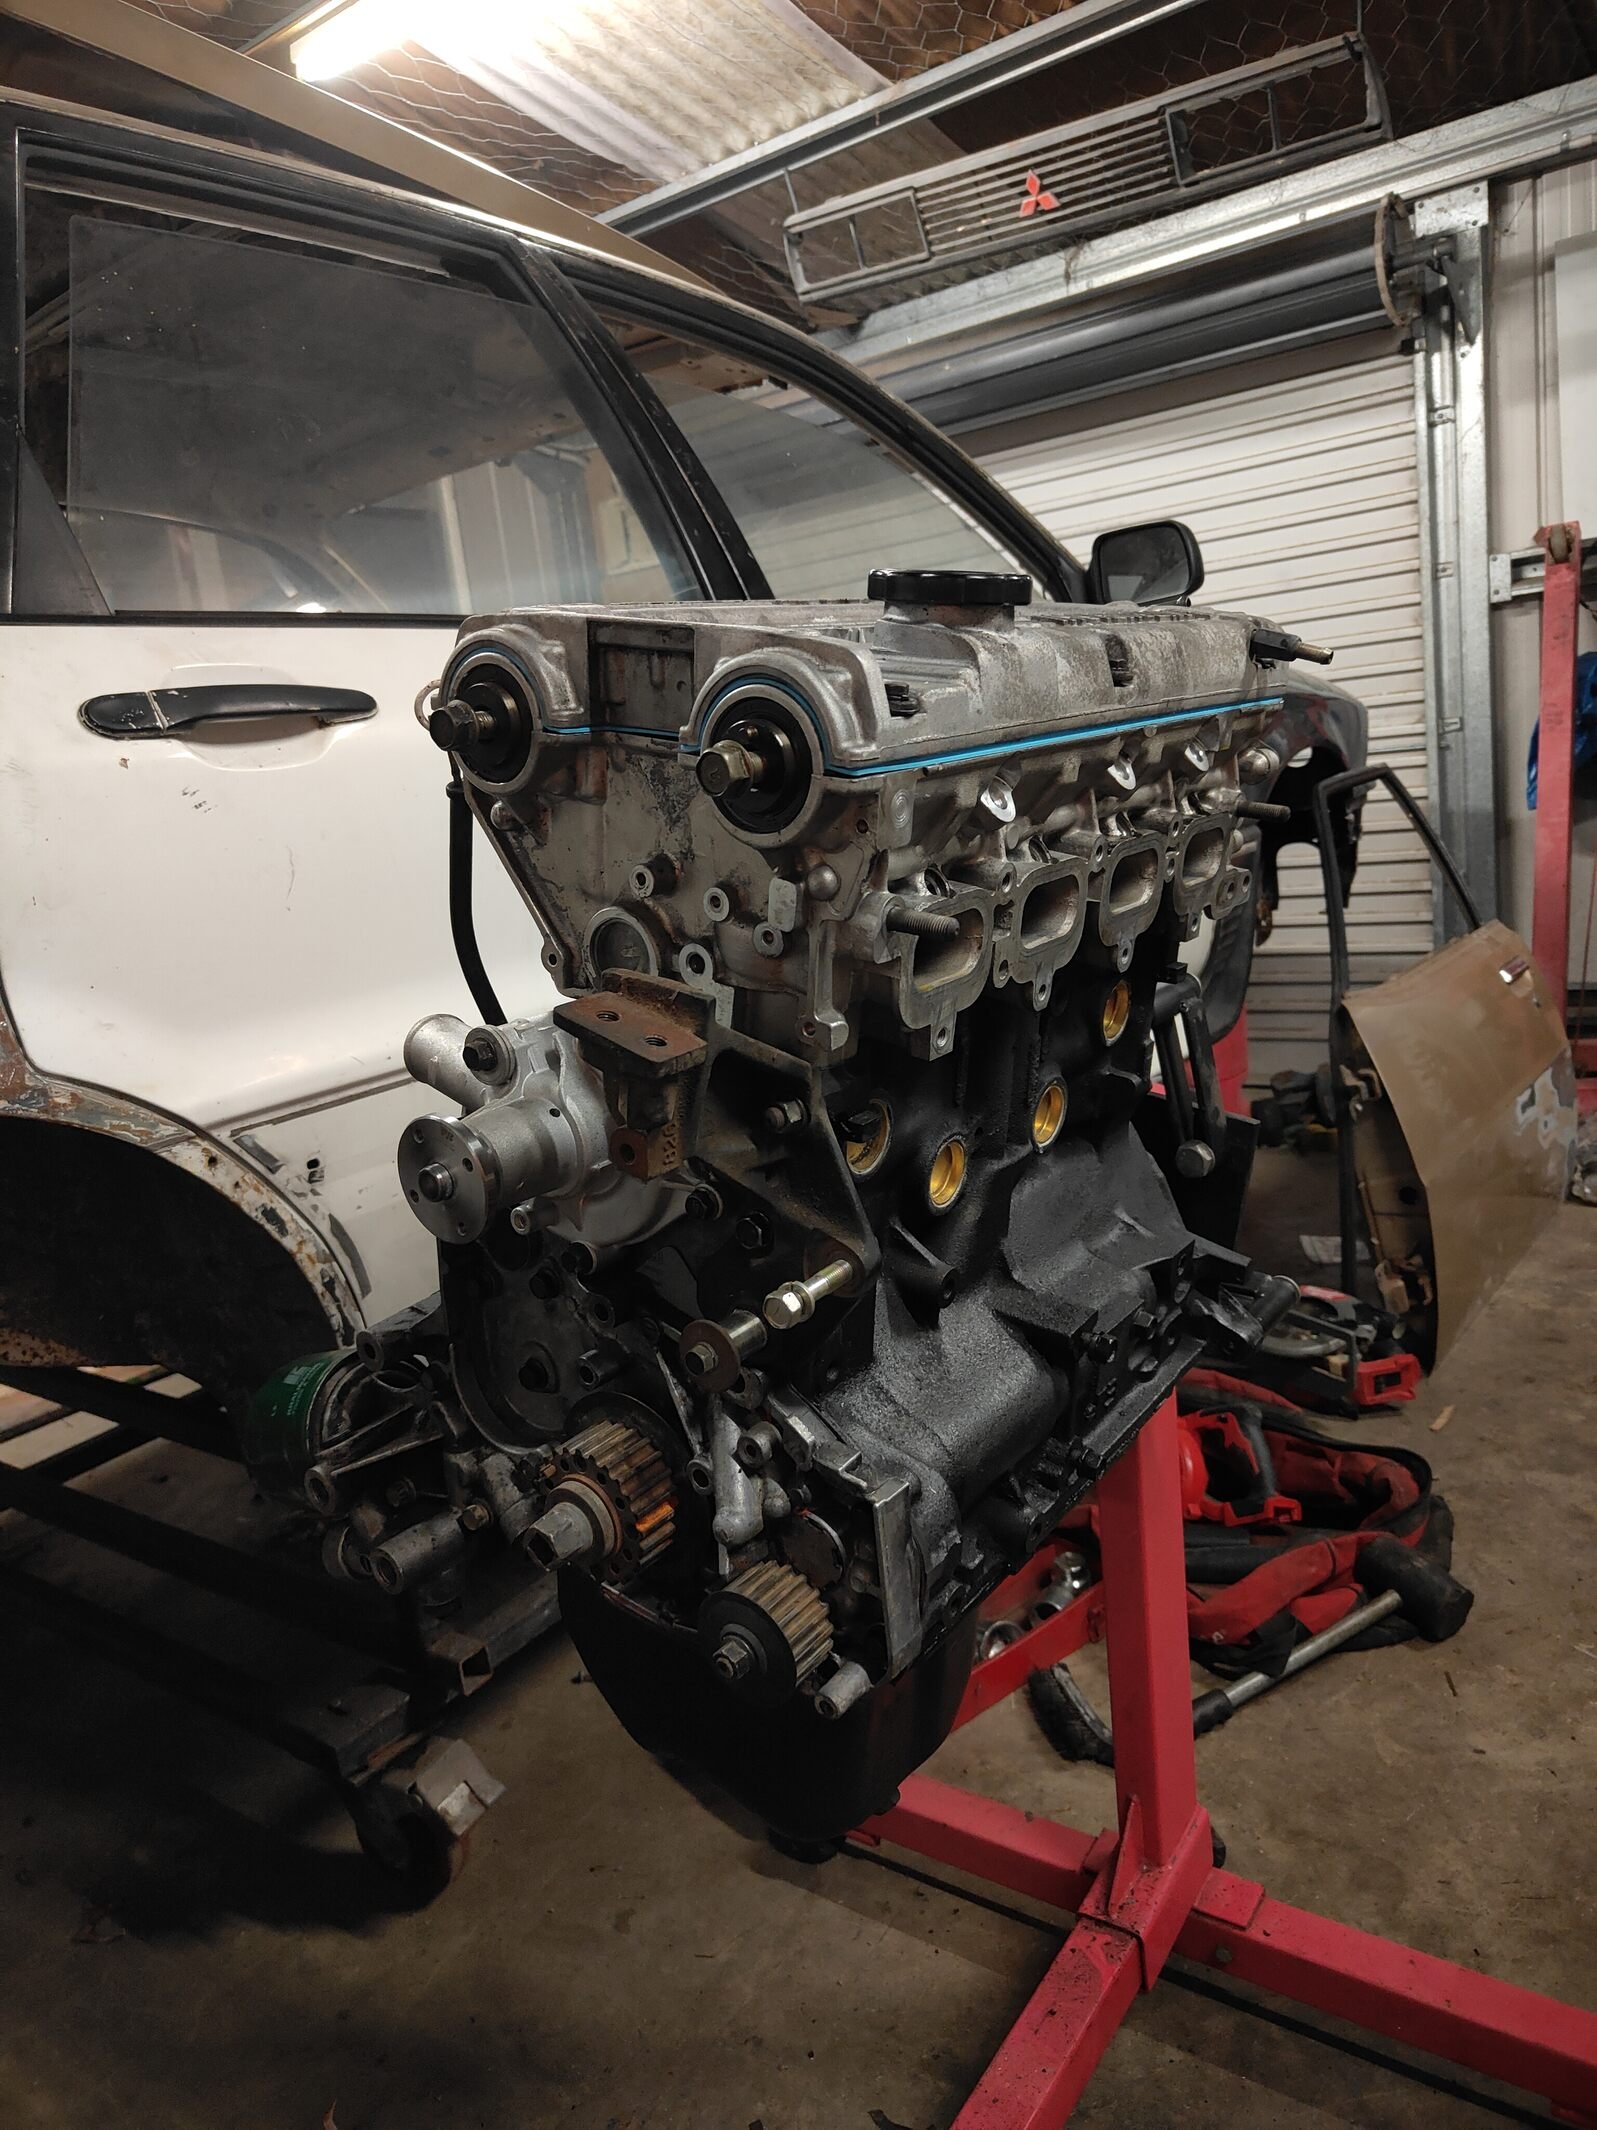
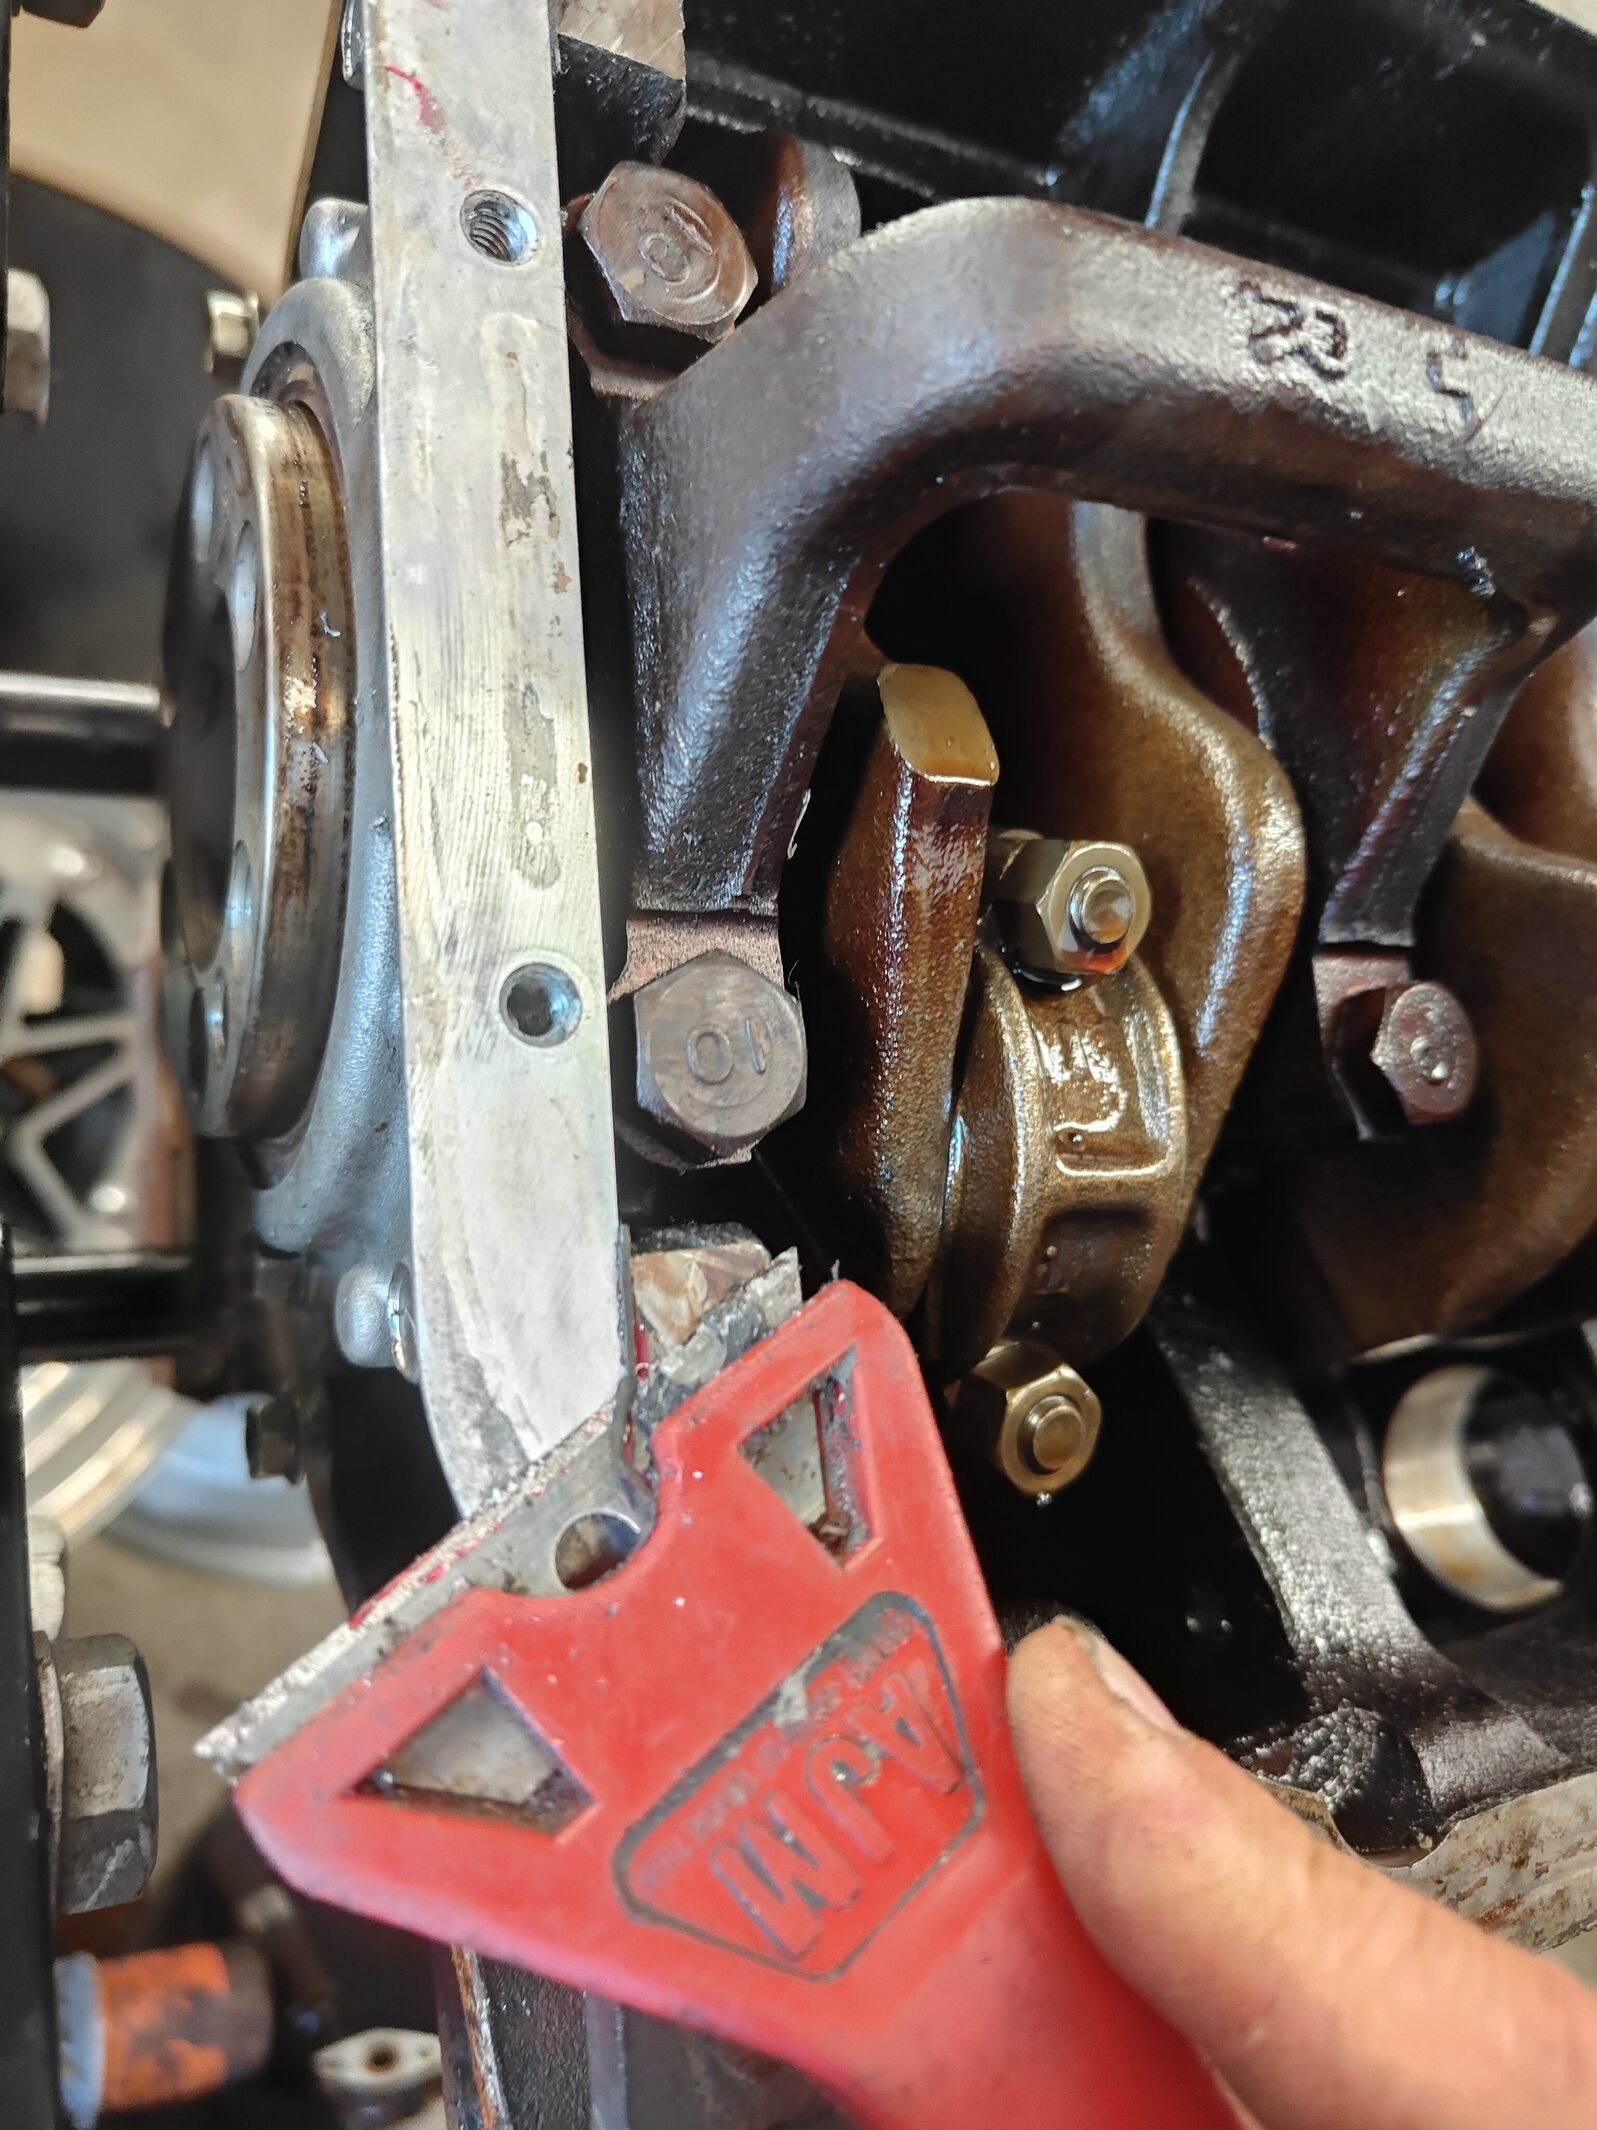
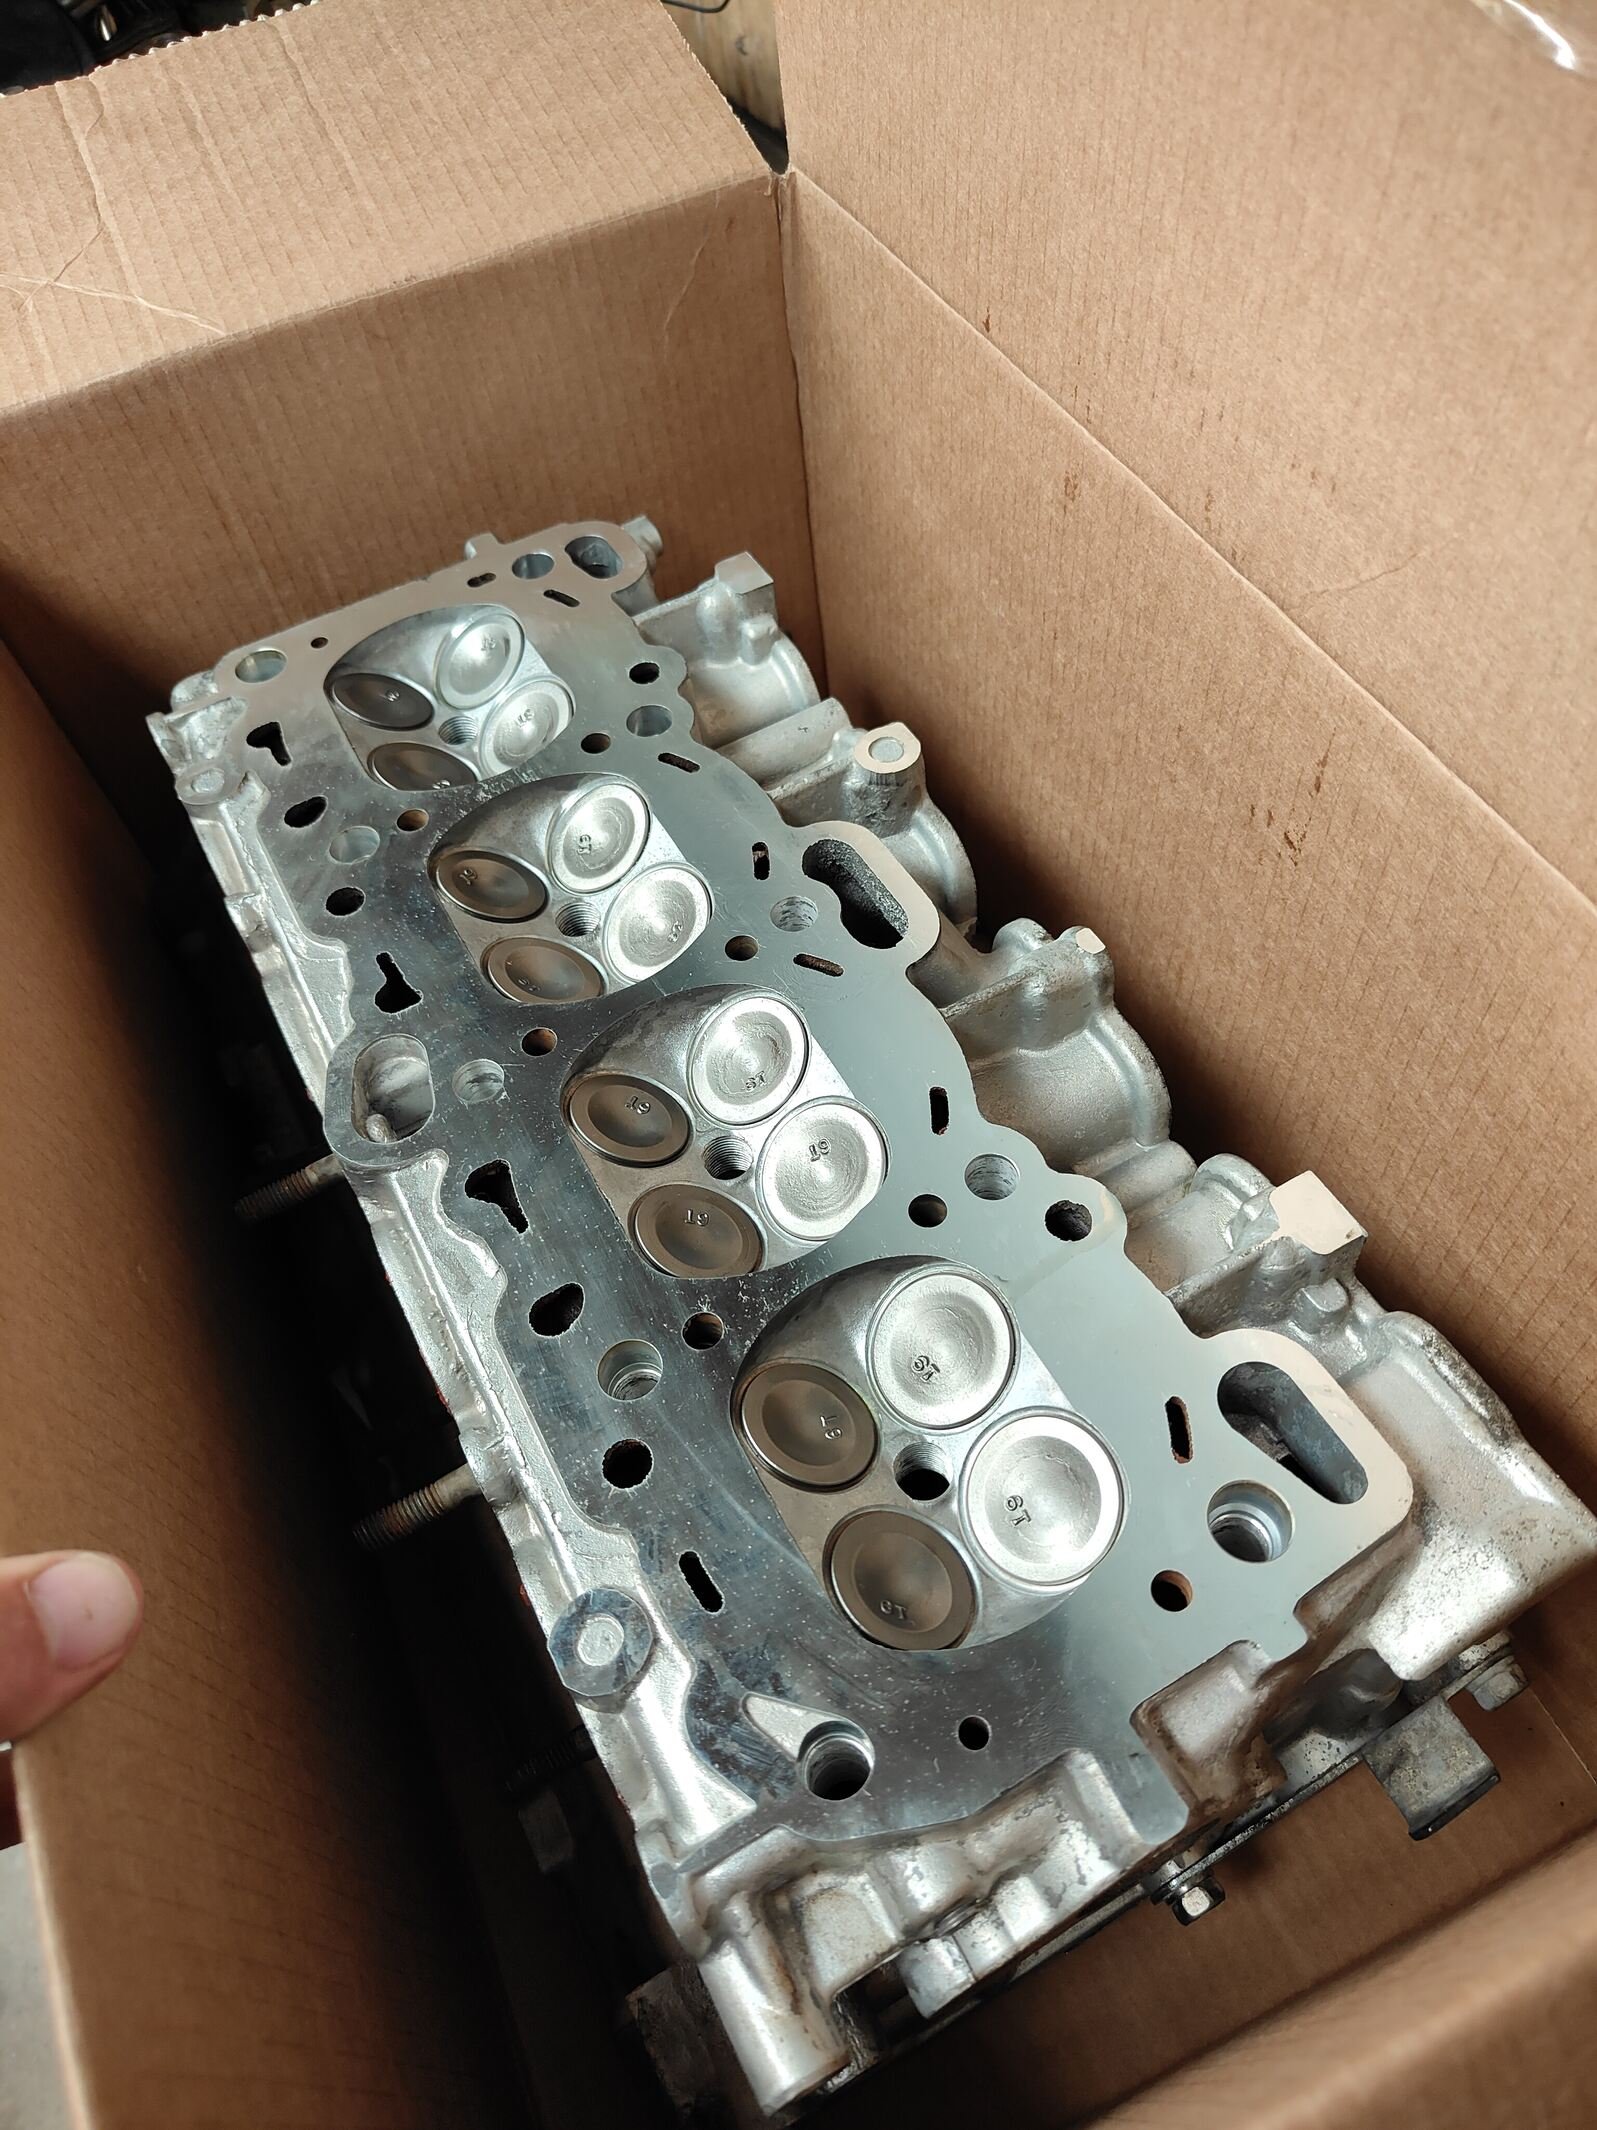
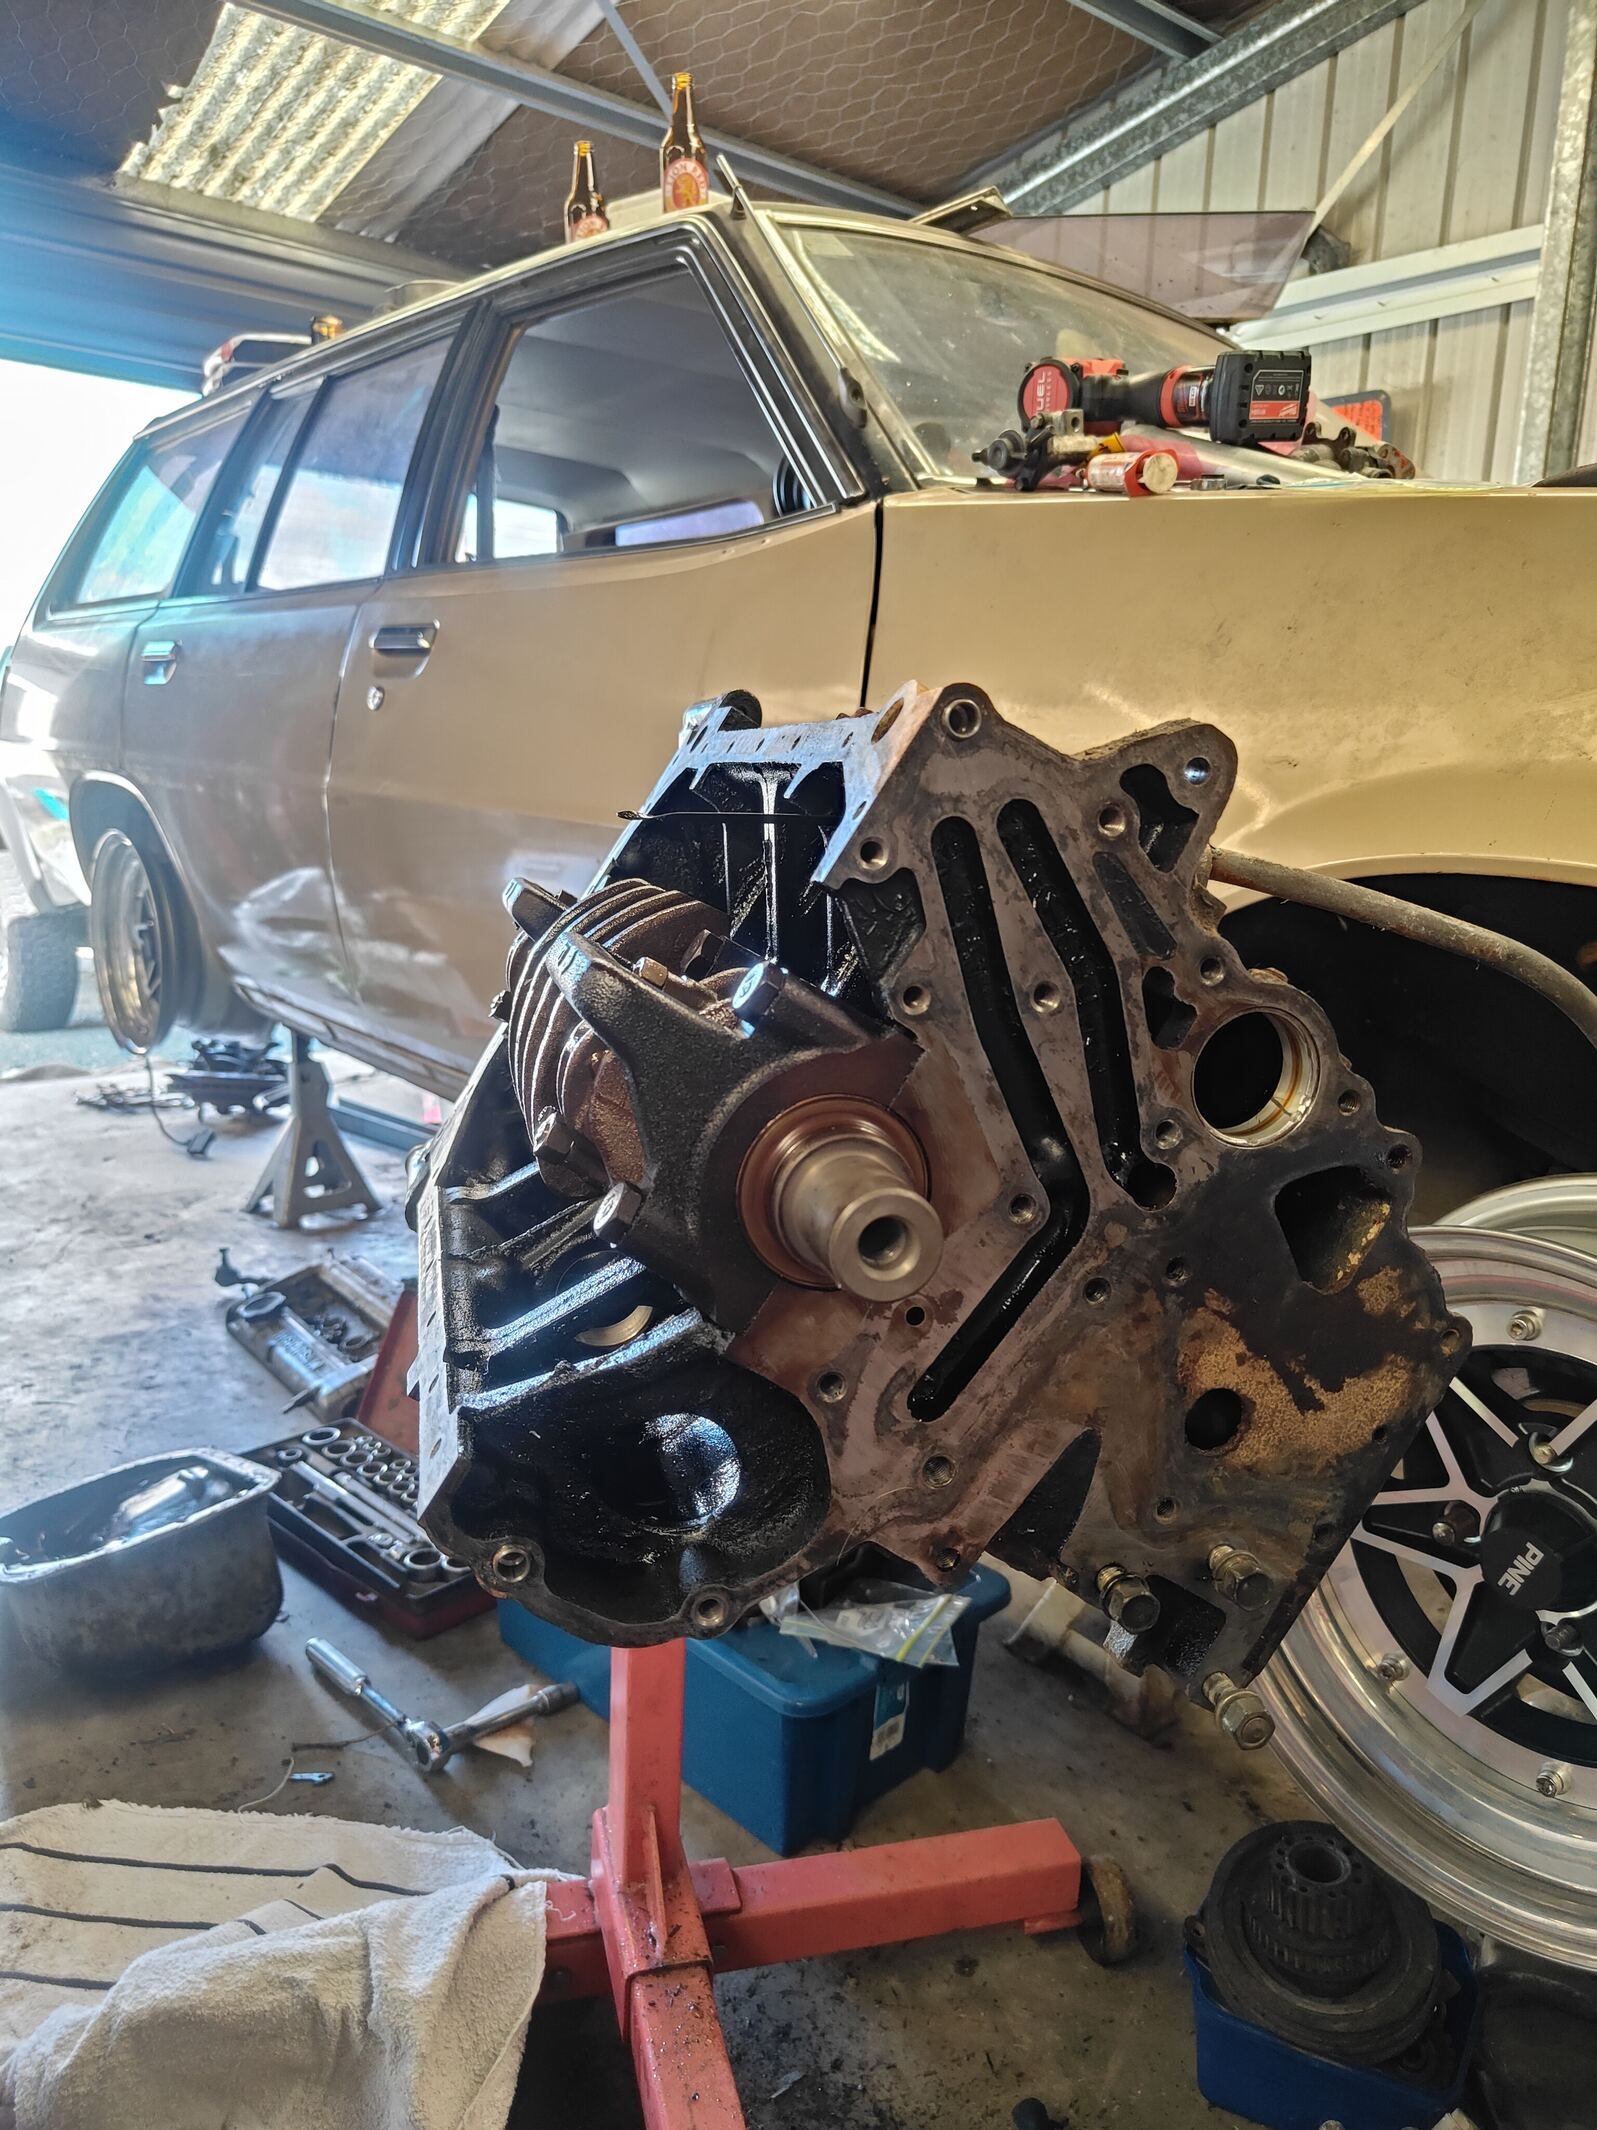
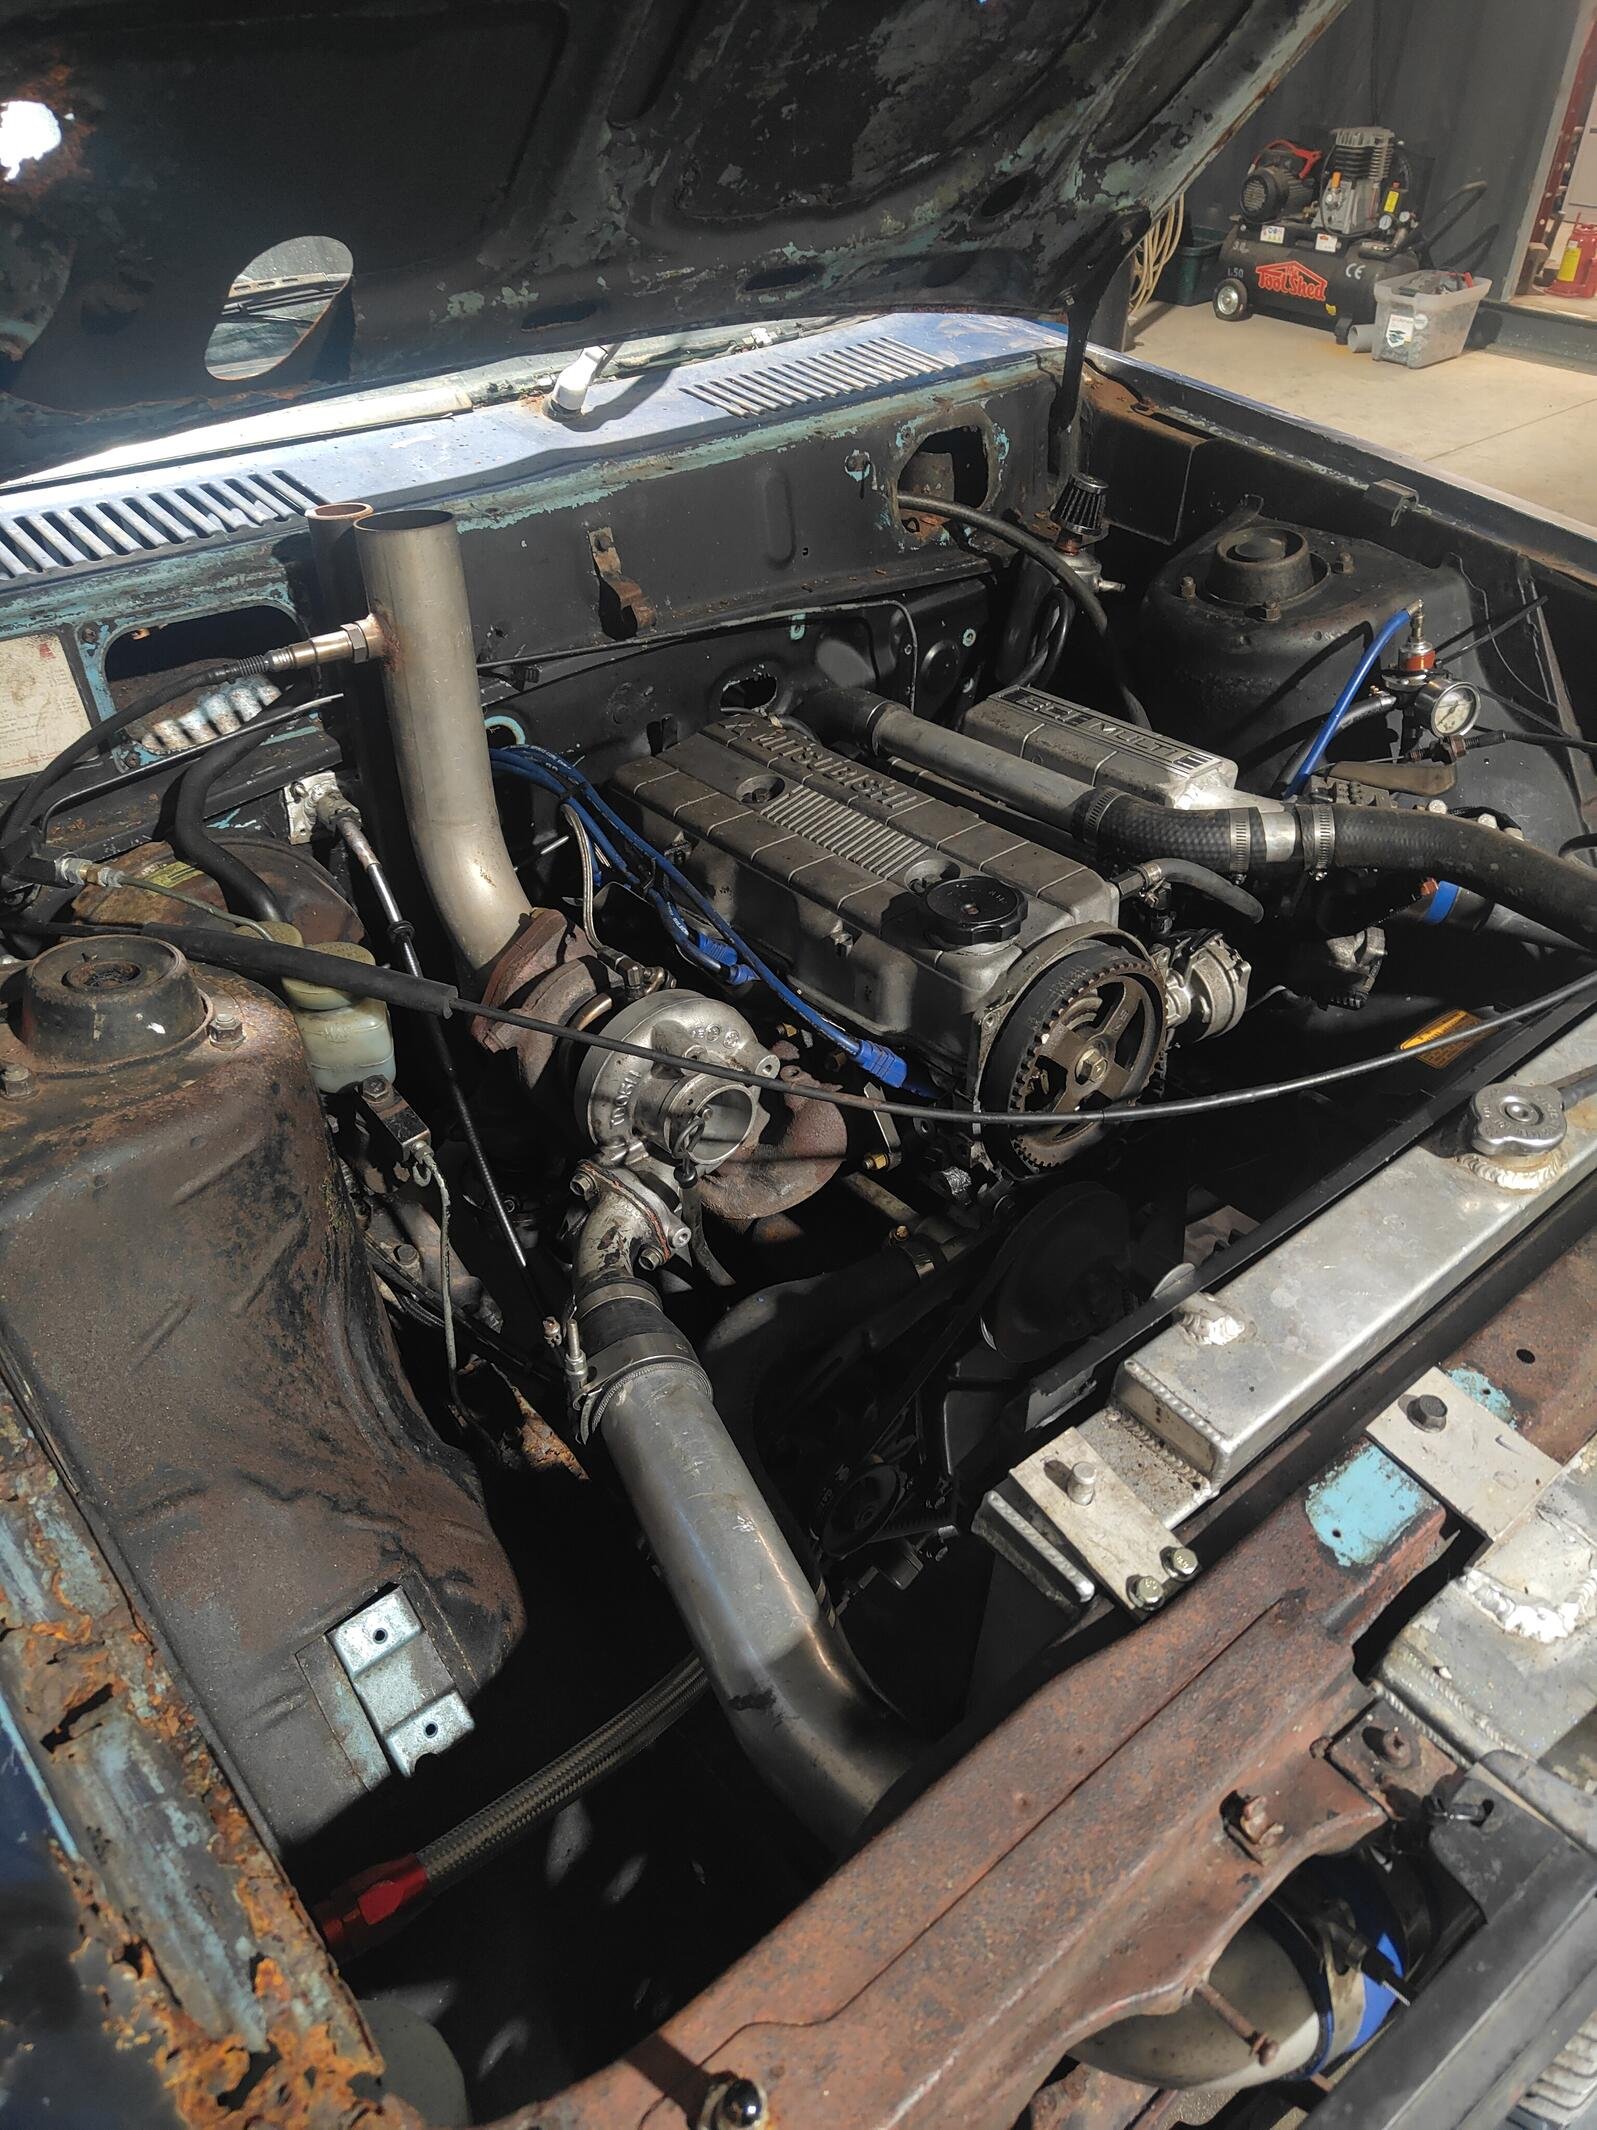
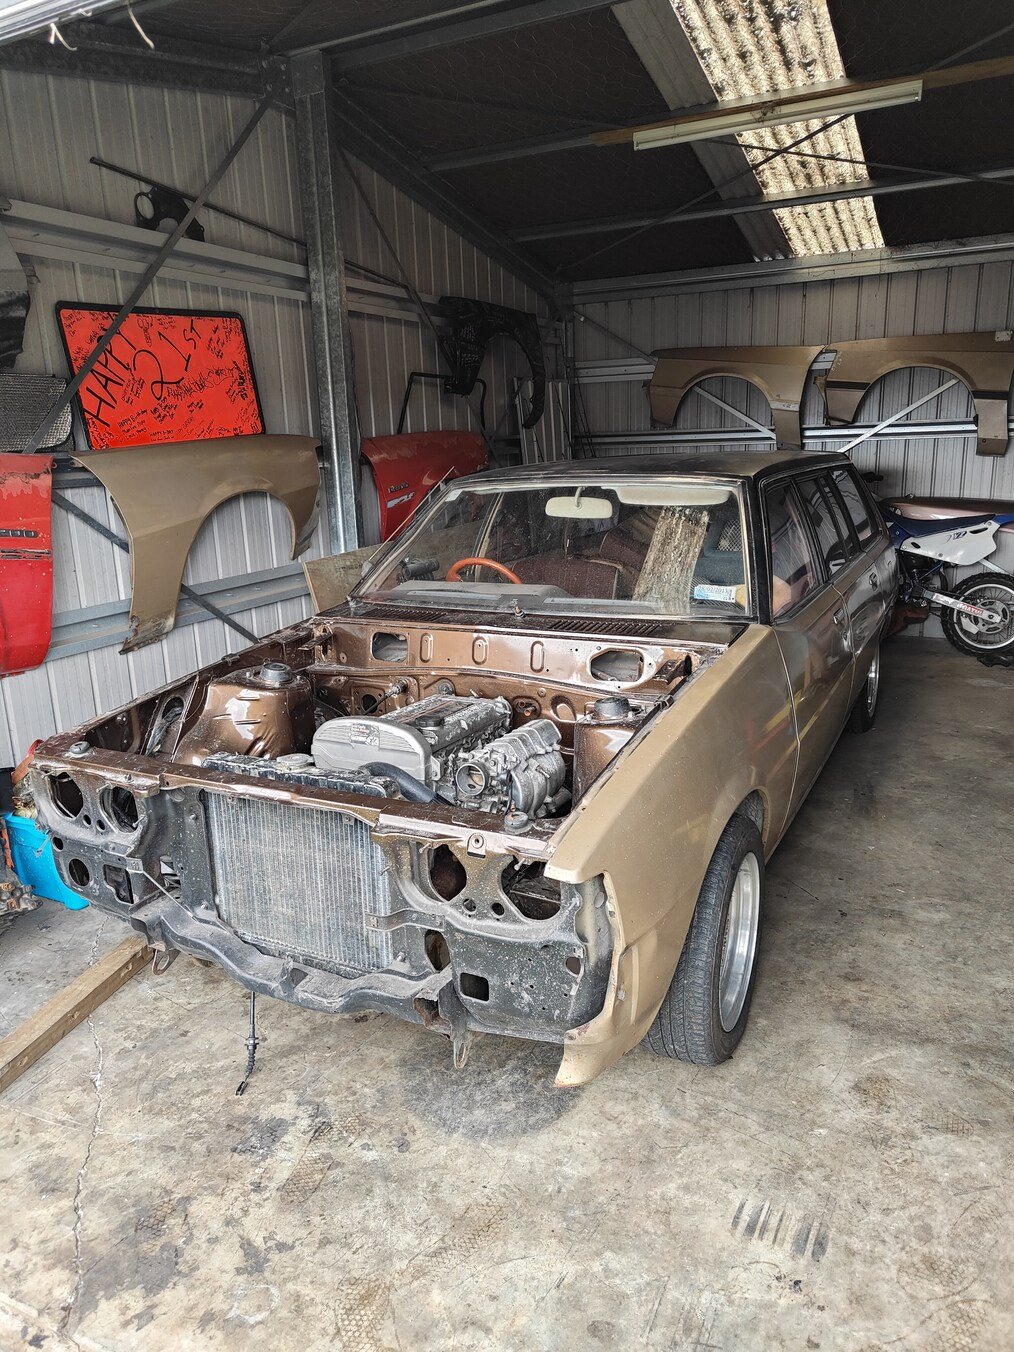
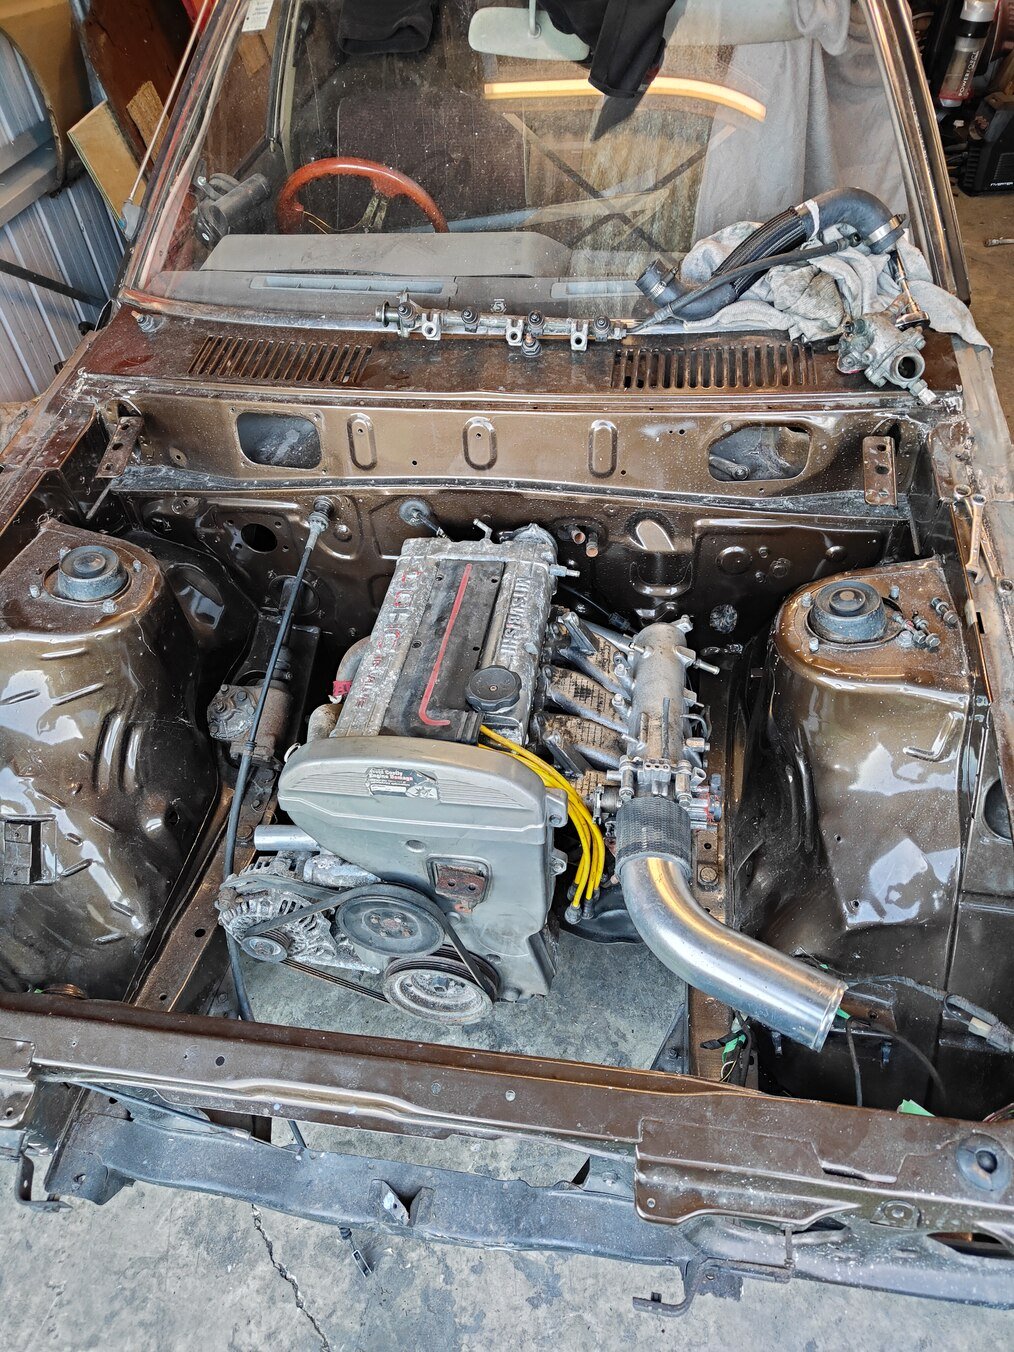
The temptations to just go sohc turbo 4g63t dwindled on me alot A 4g61t (1600cc of fury) went to the chopping block, this one had 50psi across all cylinders It sacrificed its front cover and oil pump to the greater cause For those unaware the 4g61t had no balance shafts and a short oil pump stub. So essentially a balance shaft delete kit for the 4g63 The rvr 4g63 head arrived back from engine shop Painted the block , new frost bungs, new water pump (rwd/sohc slightly shaved for dohc)
1 point
-
1 point
-
1 point
-
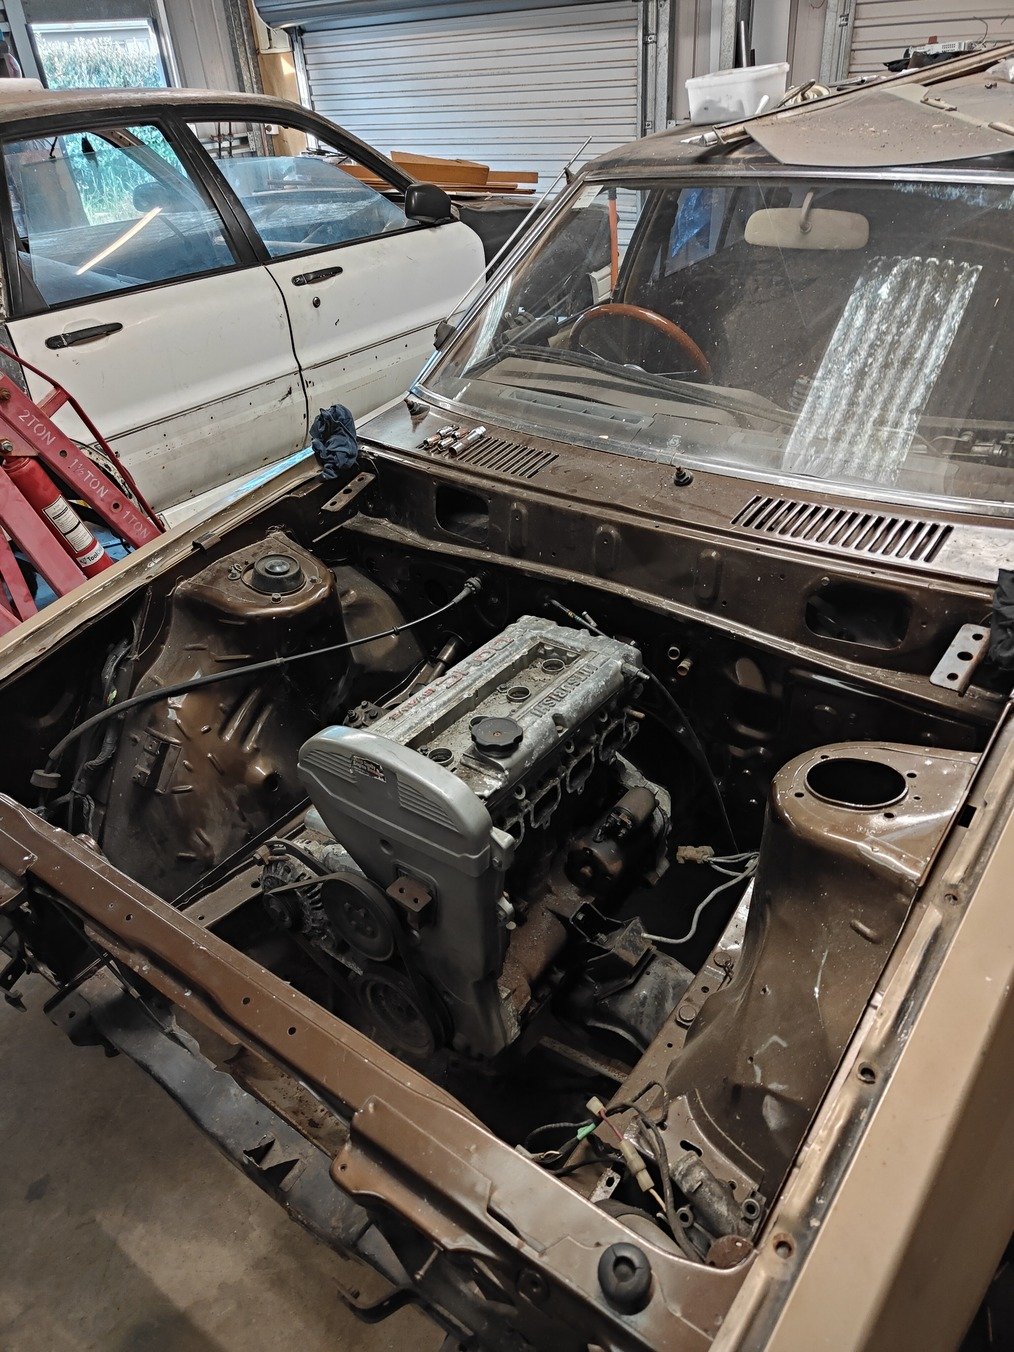
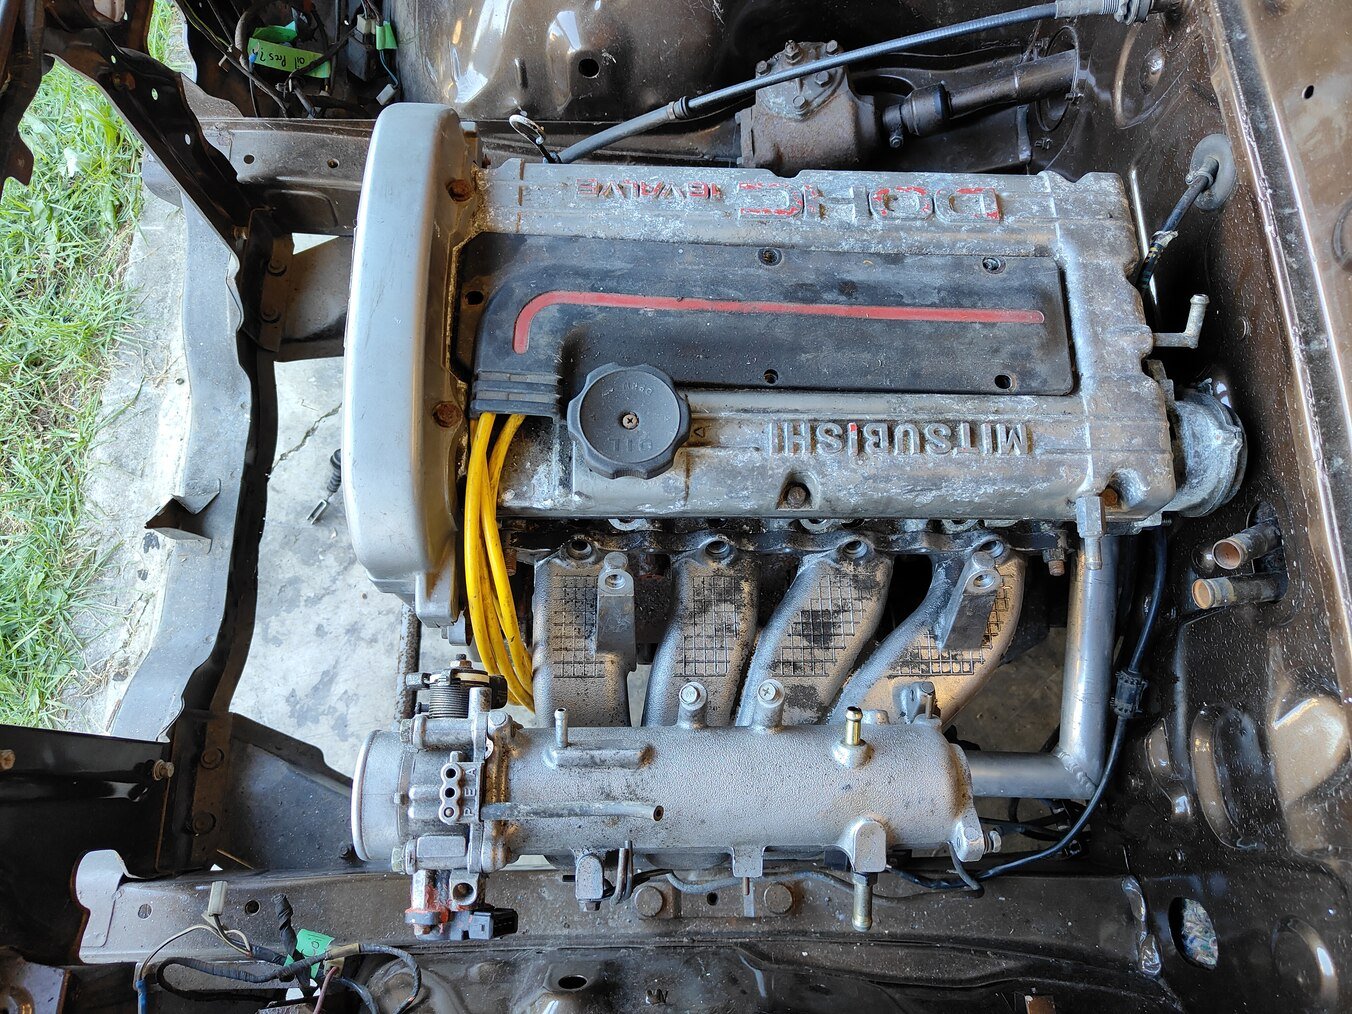
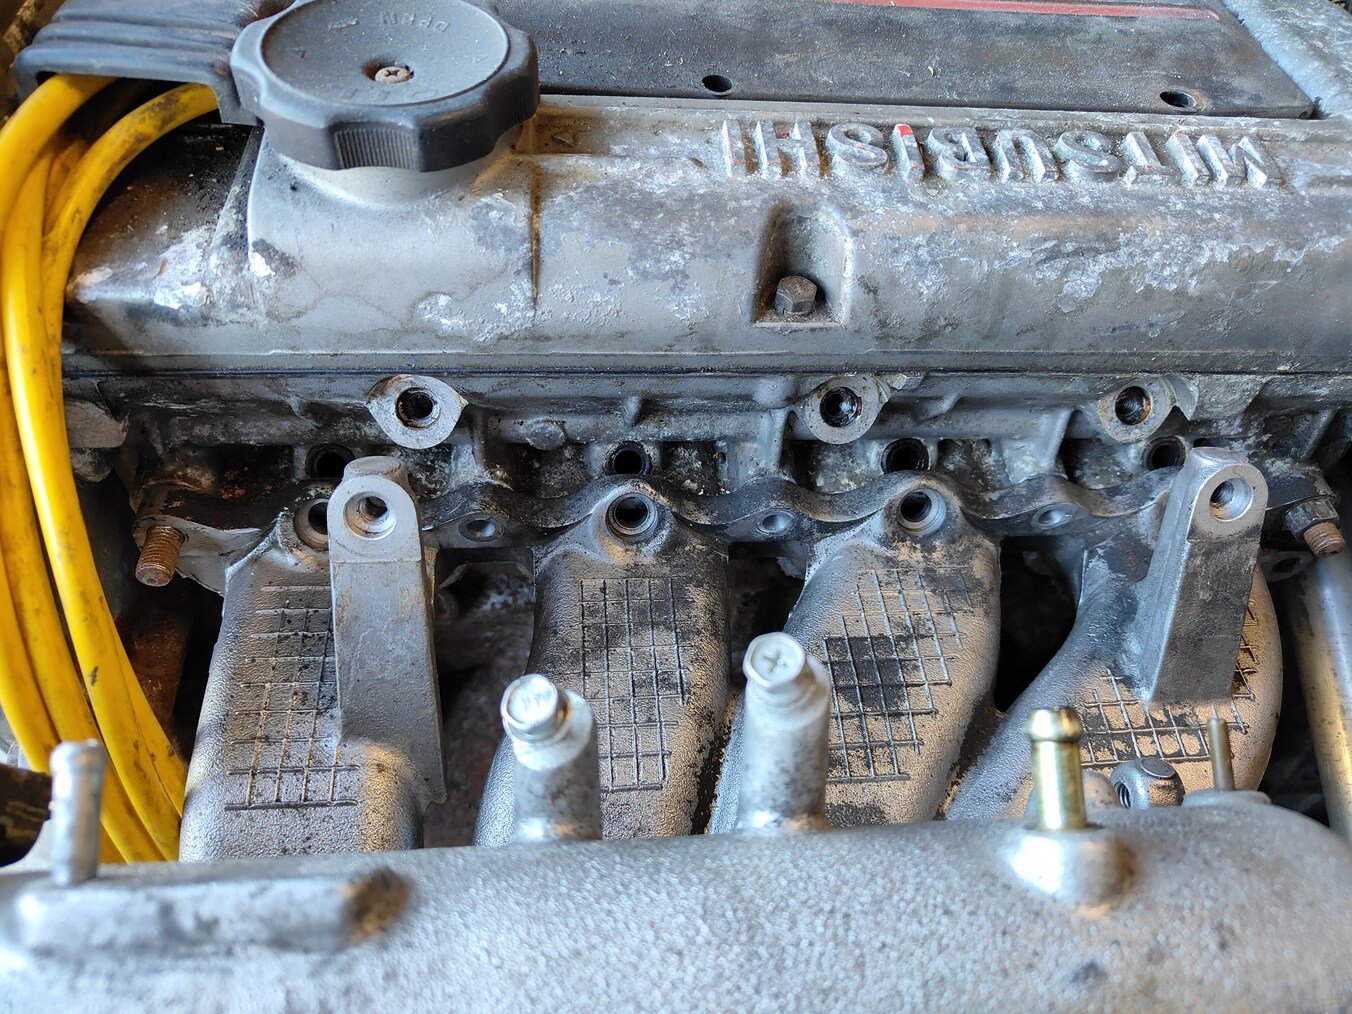
I modified the intake manifold to suit being rwd as obviously it was a fwd motor But I wasn't happy with it at all I wanted the motor to look as factory as possible like it belongs there So an Evo 4 intake manifold was test fitted The bolt holes are the same but there was difference as it's smallport vs motor is bigport And more importantly the Evo 4 intake has injector holes on manifold vs head has injector holes in head. But it definitely looks better so the decision was made Keep the 6 bolt galant bottom end but ditch the head and go to an rvr 7 bolt head that I have spare Reasons behind this decision were *Smallport so intake works * Cam sensor is on cam gear not back of head * I've always grown up with the yarn of smallport head was better on vr4 bottom end so yeah This requires drilling the head stud holes out to suit vr4 size head studs as 7 bolt run a smaller head stud to 6 bolt. Luckily a local shop did a trade deal for some vr4 parts they needed for my head work to be done.
1 point
-
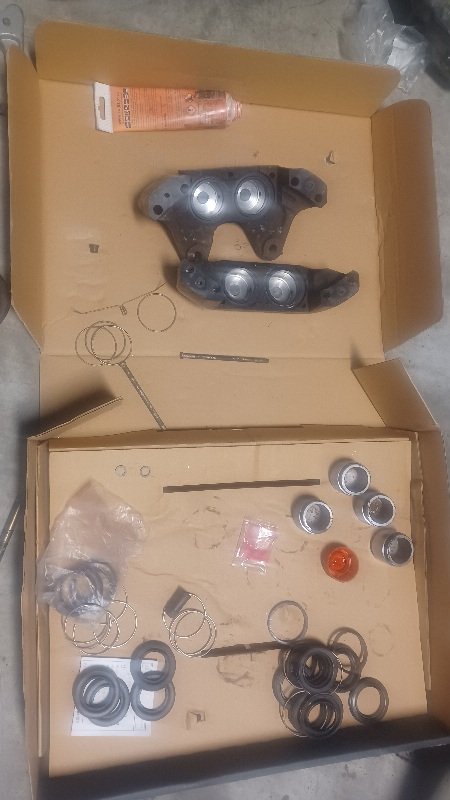
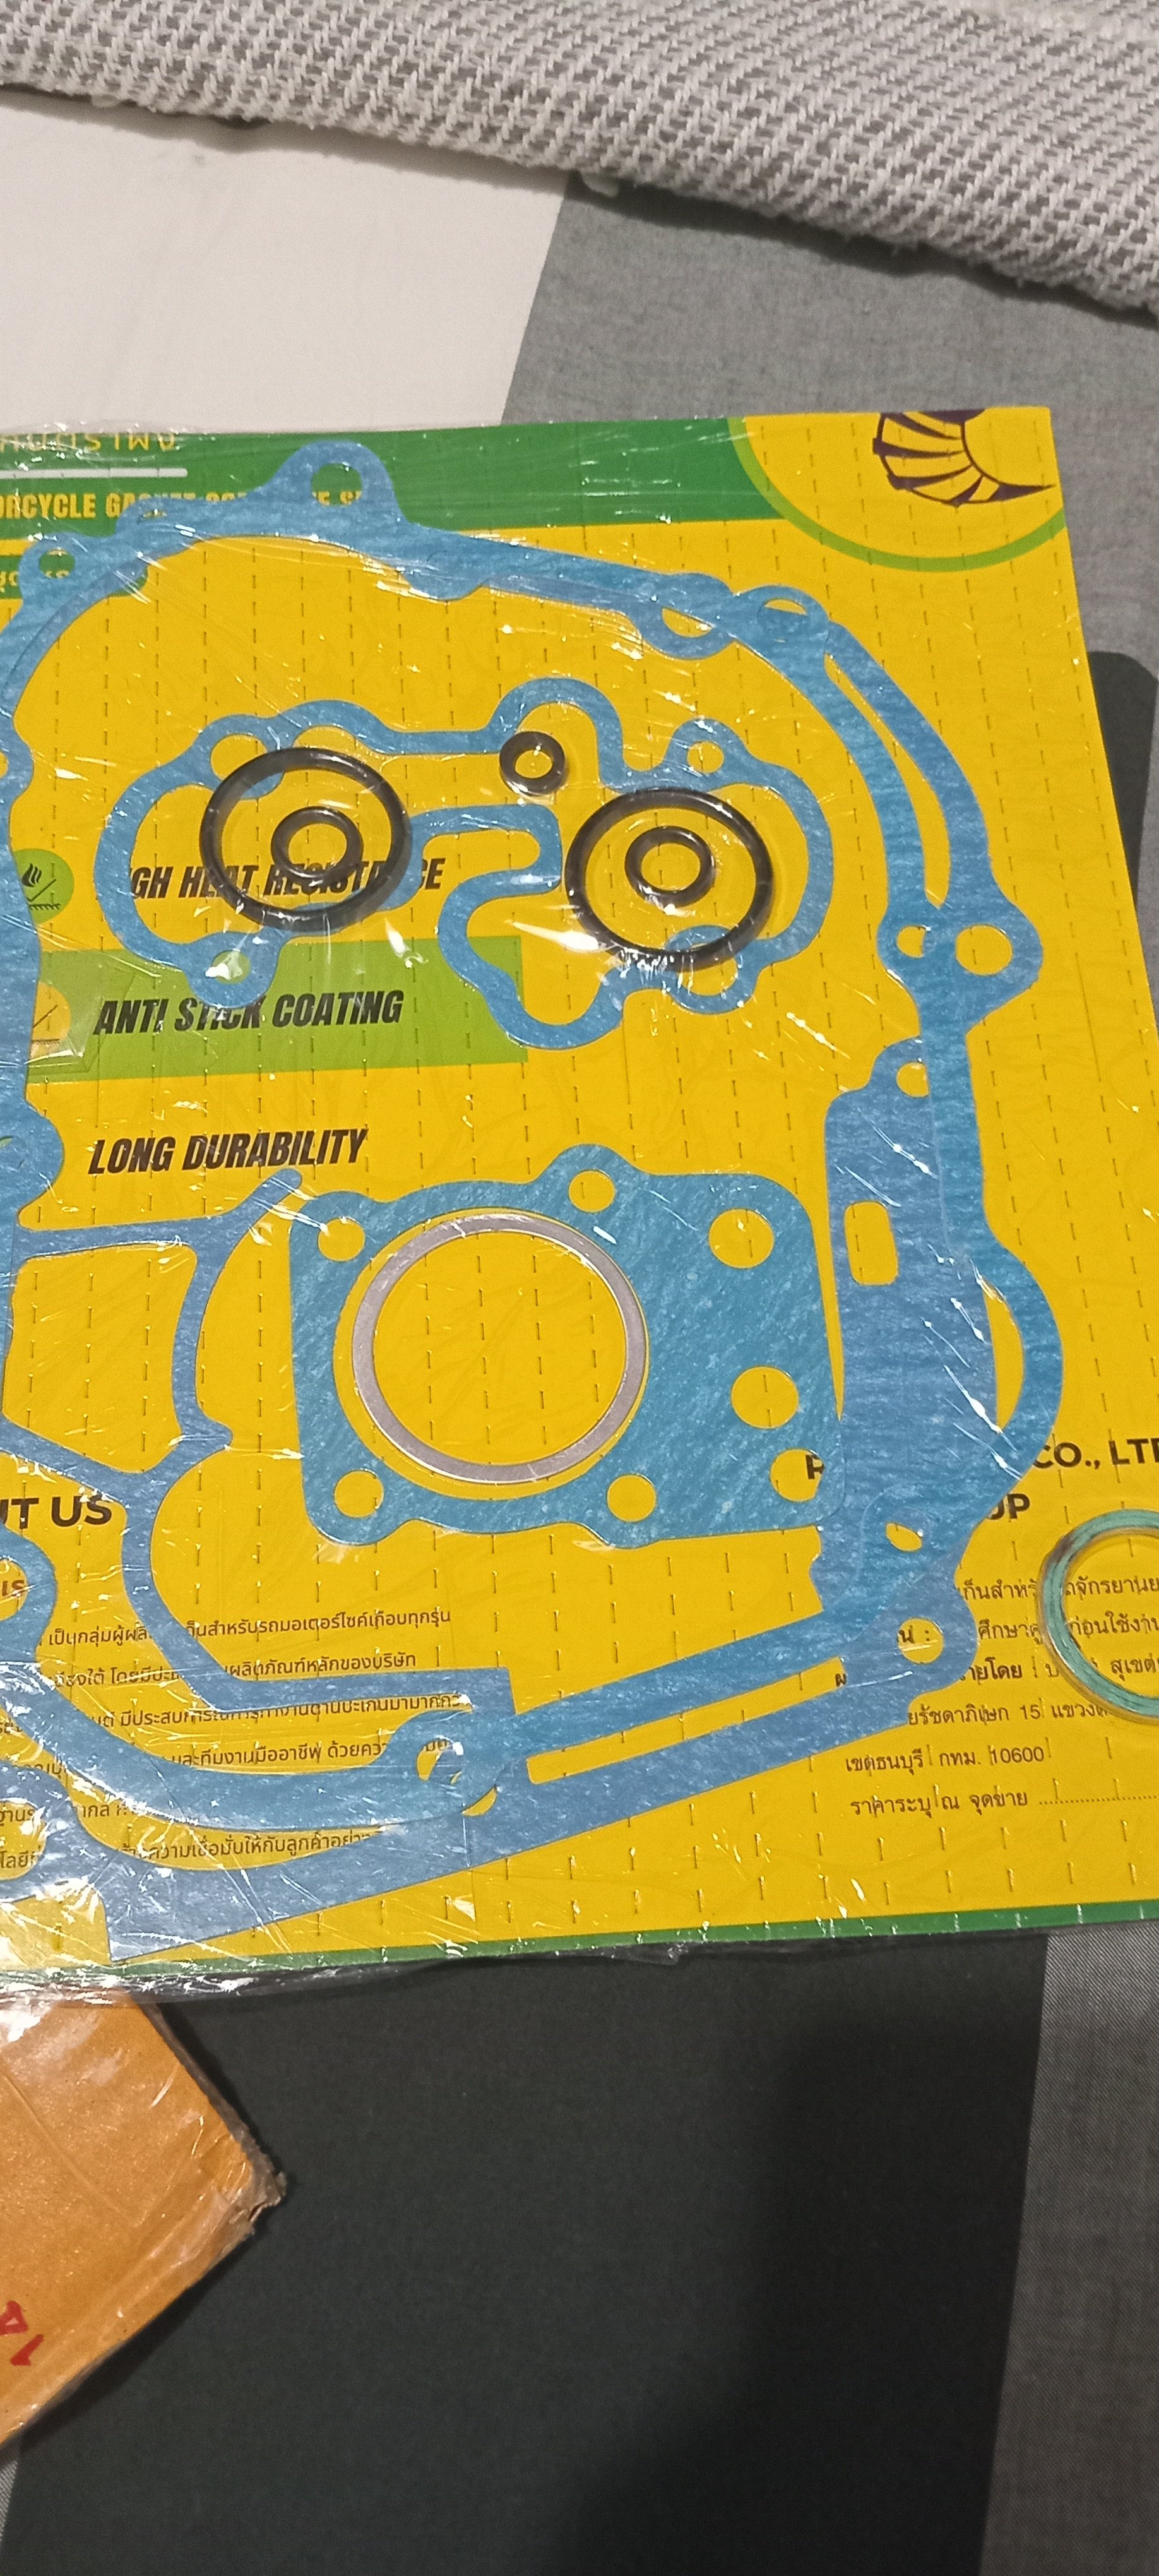
Just got a gasket kit
1 point
-
Good enough for government work.1 point


.thumb.png.5a526e0f2da8dfc8b3ddaa125773c302.png)


This leaderboard is set to Auckland/GMT+12:00