
Leaderboard


Popular Content
Showing content with the highest reputation on 03/19/24 in all areas
-
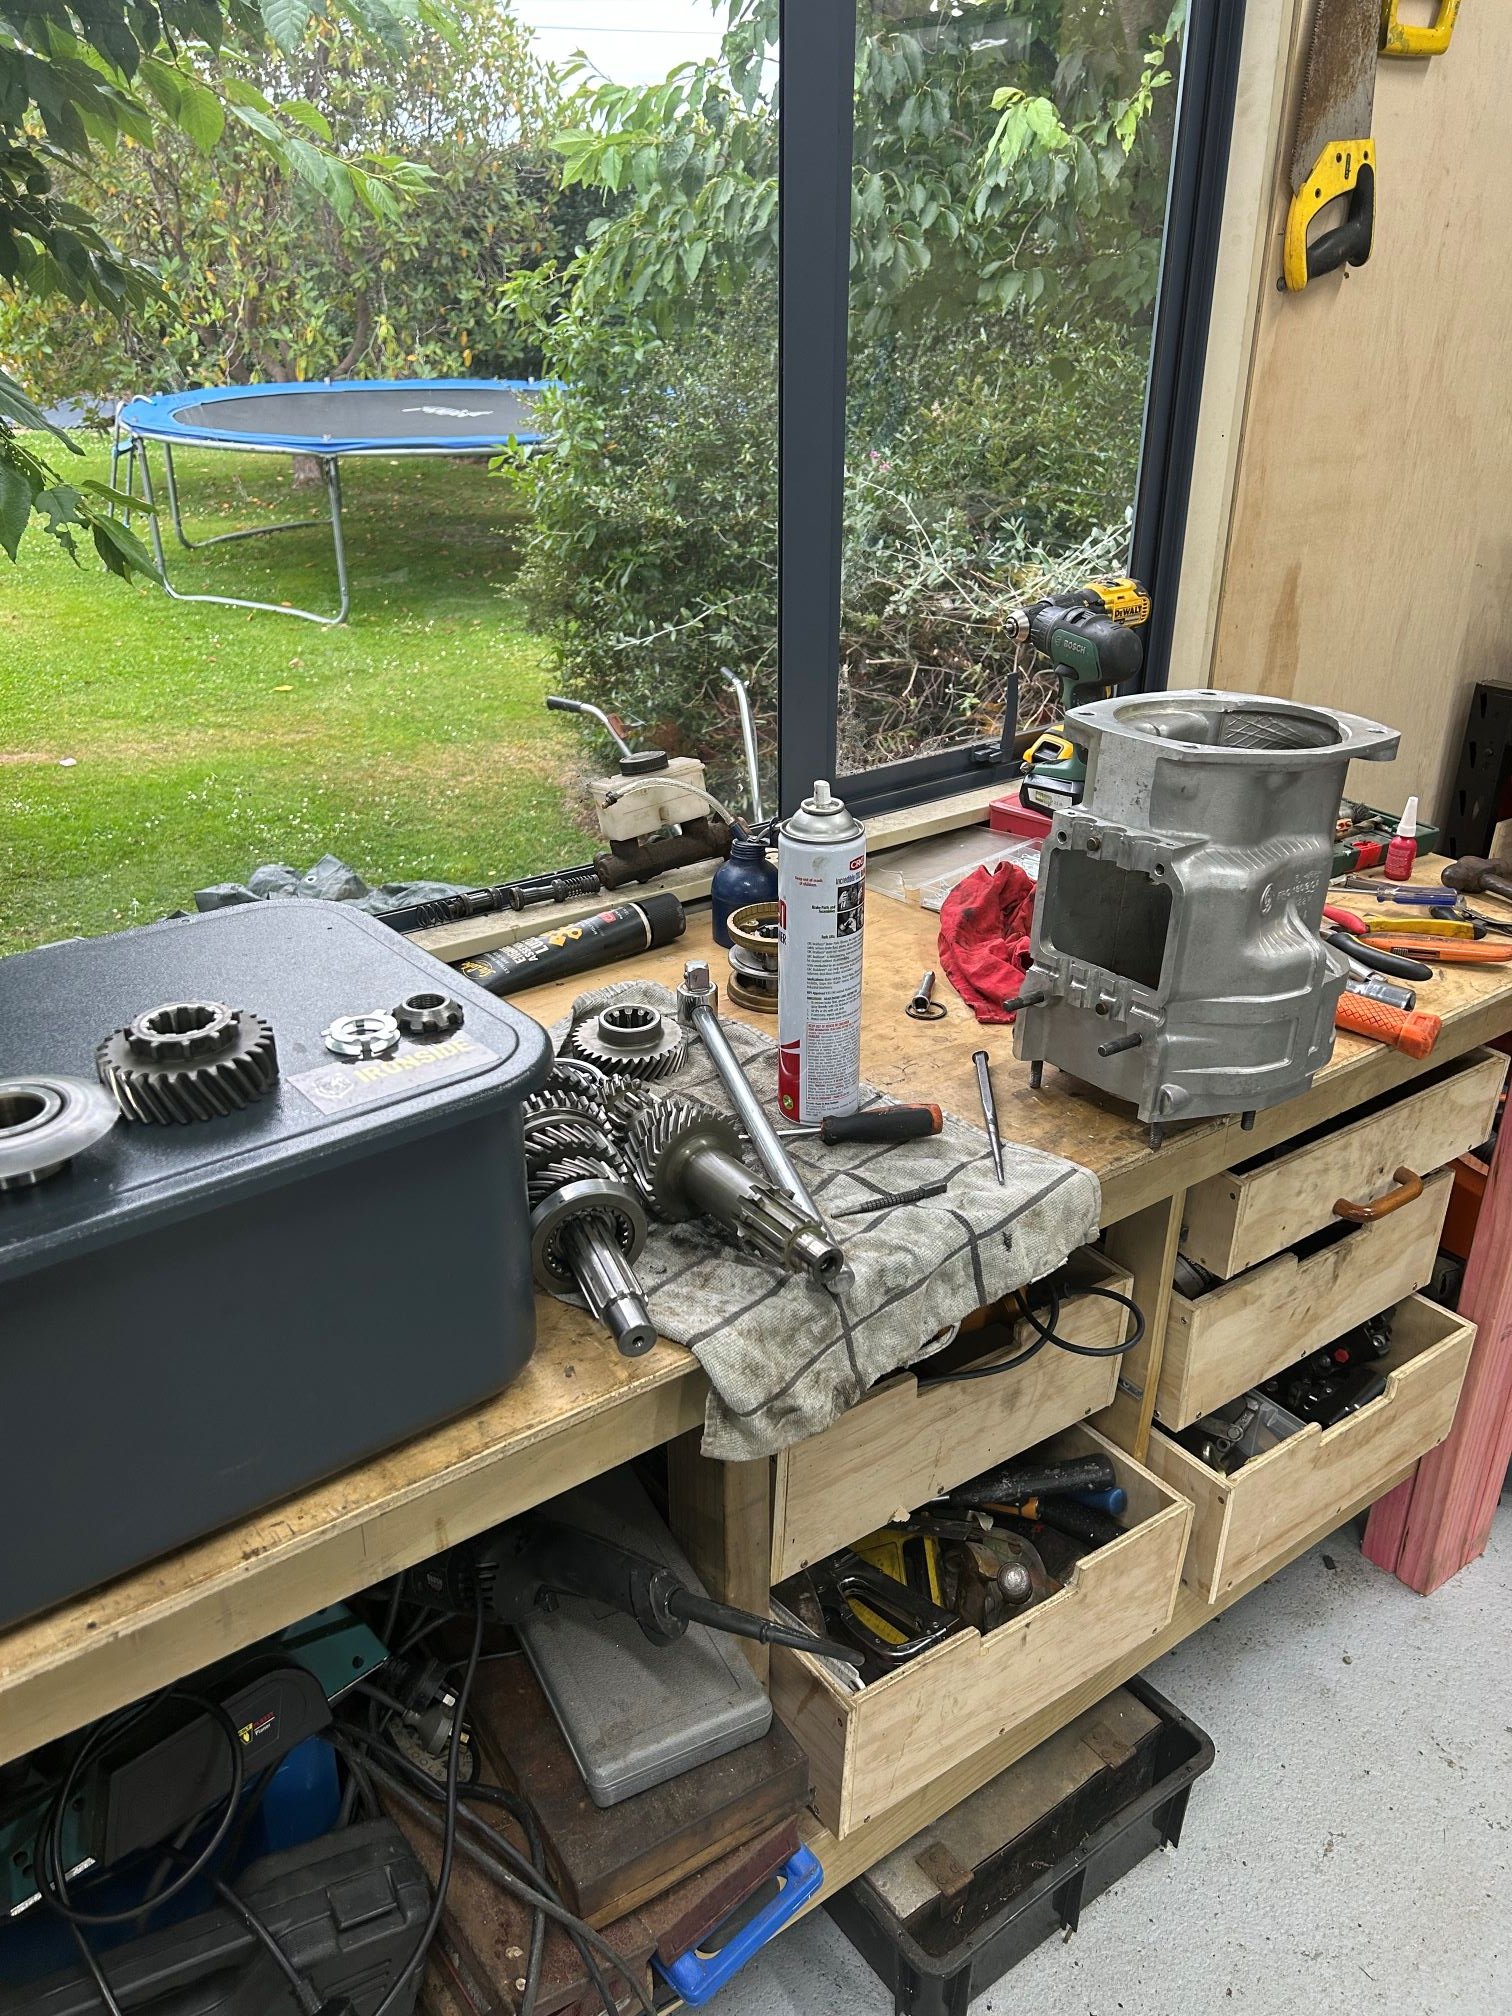
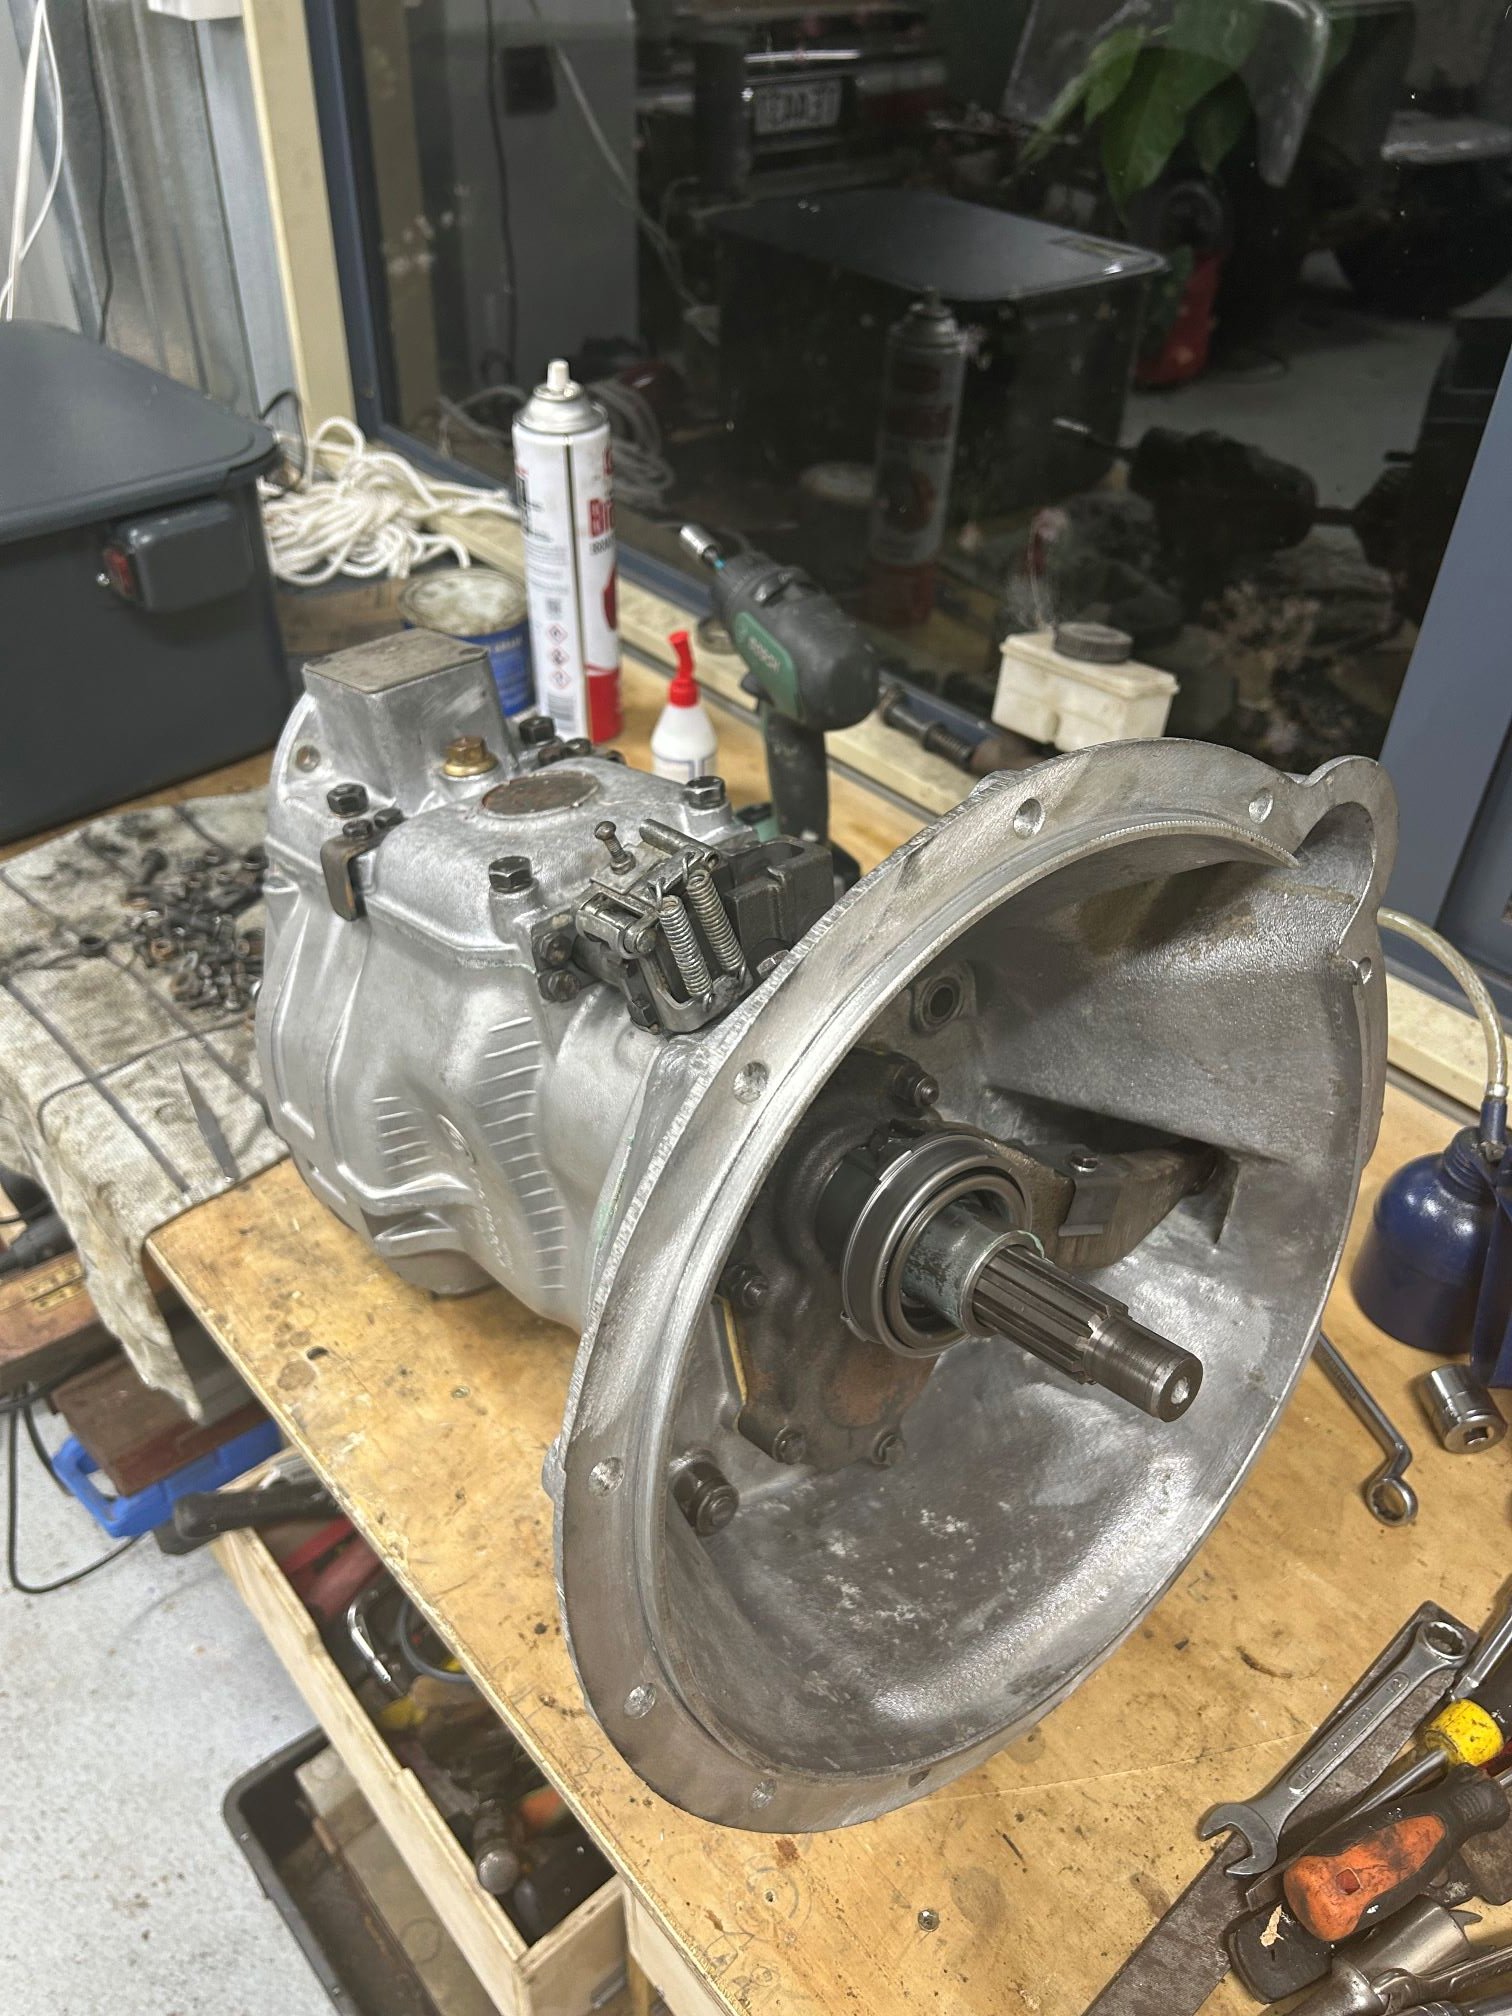
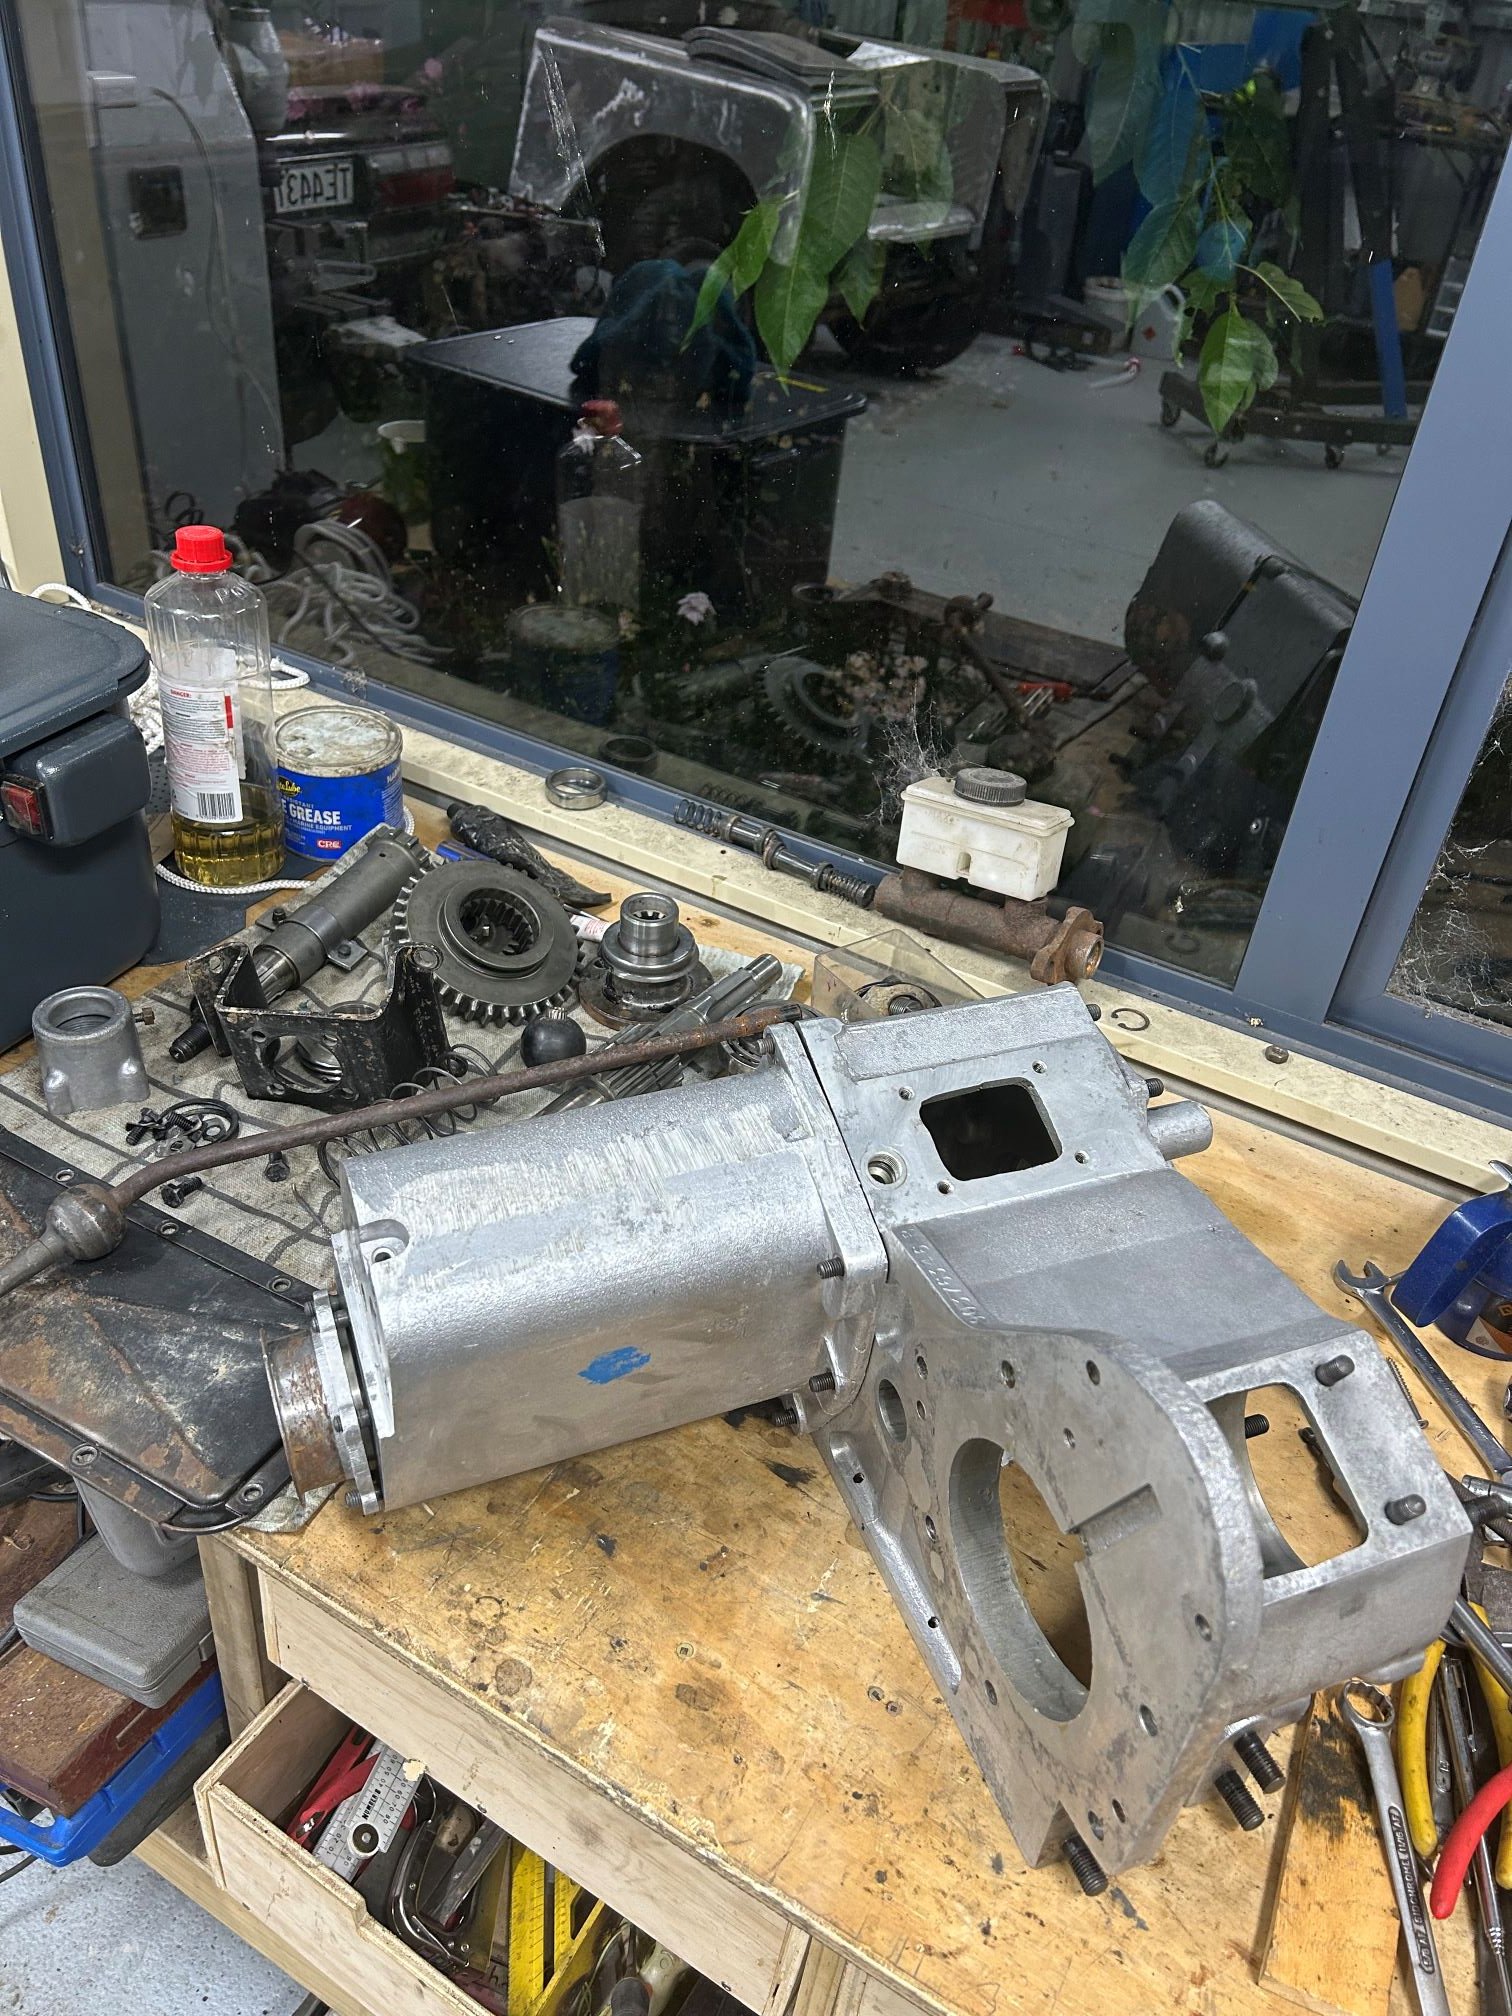
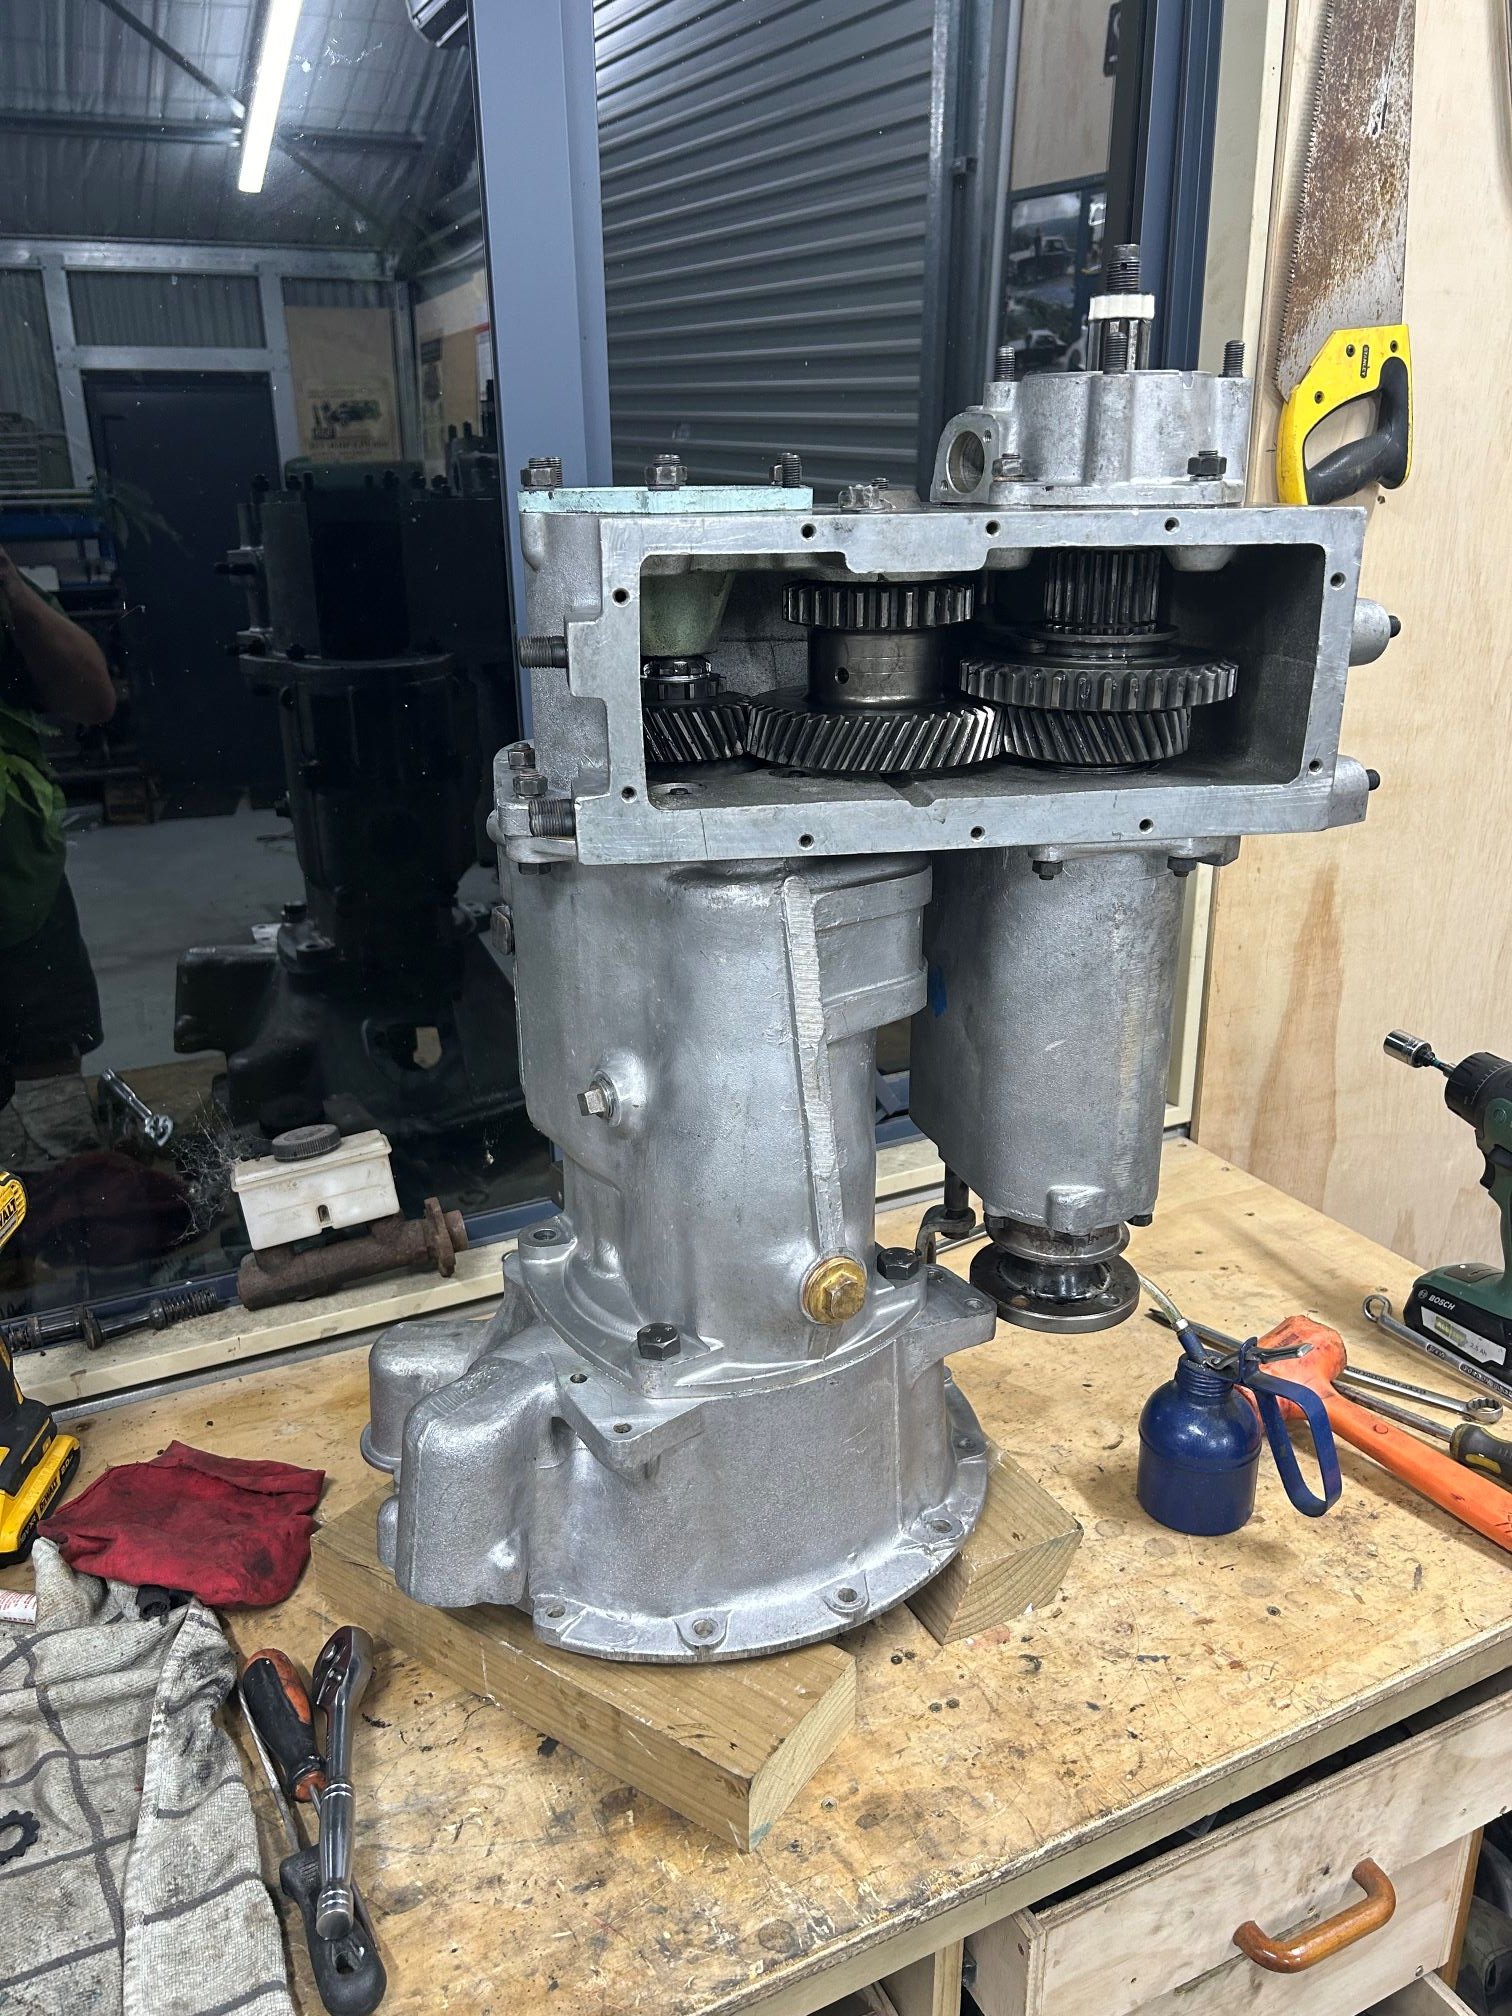
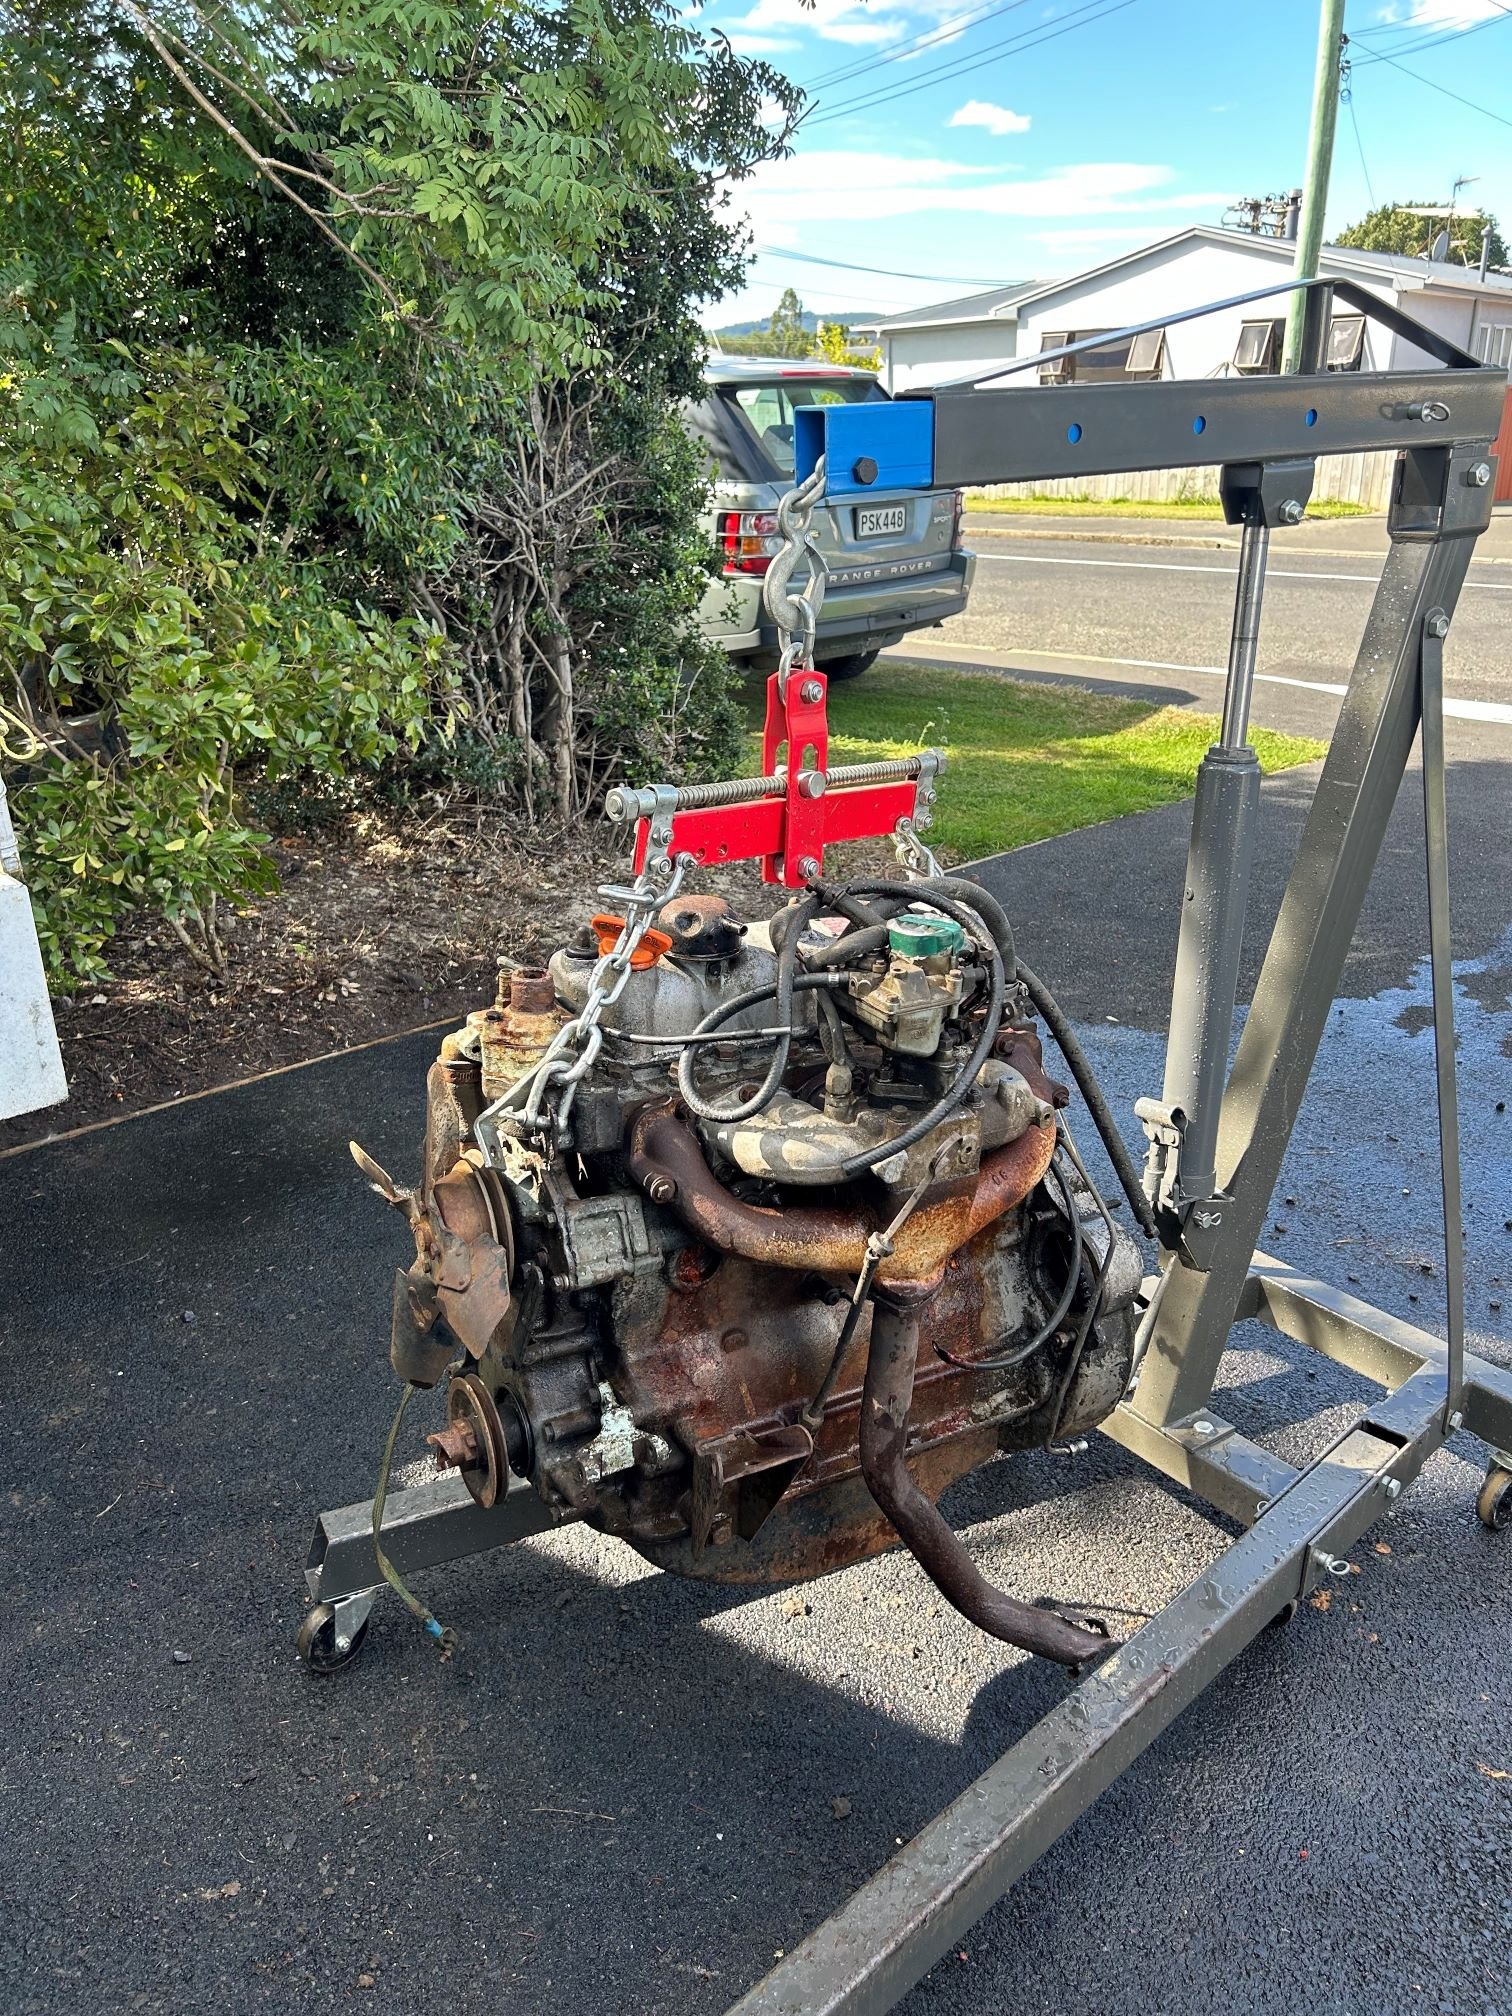
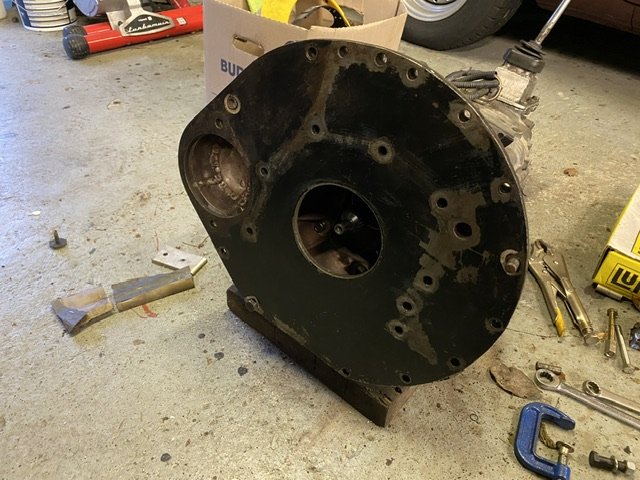
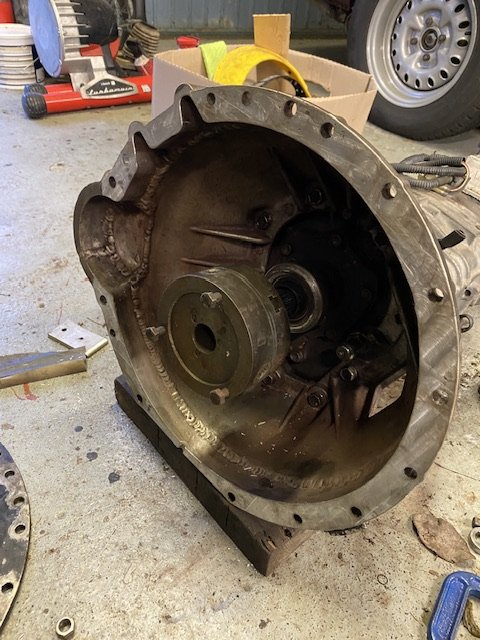
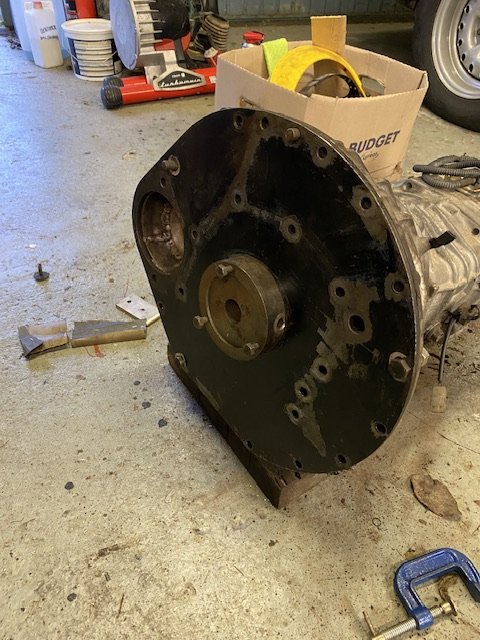
Better give this an update... Yes I did find some genuine replacement parts, and so back together it goes with new bearings/syncros etc.... While I have a transfer box I rebuilt for the back end of the conversion I thought it best to rebuild the one I had here. Needed a new set of main bearings (which cost a few $$$) but everything else was in fair condition. Its way easier to assemble vertically on the bench. Though I havent yet gone to the effort to move it off yet.... With that done I need to give the engine a good clean up and external refresh, more soon.
 15 points
 -
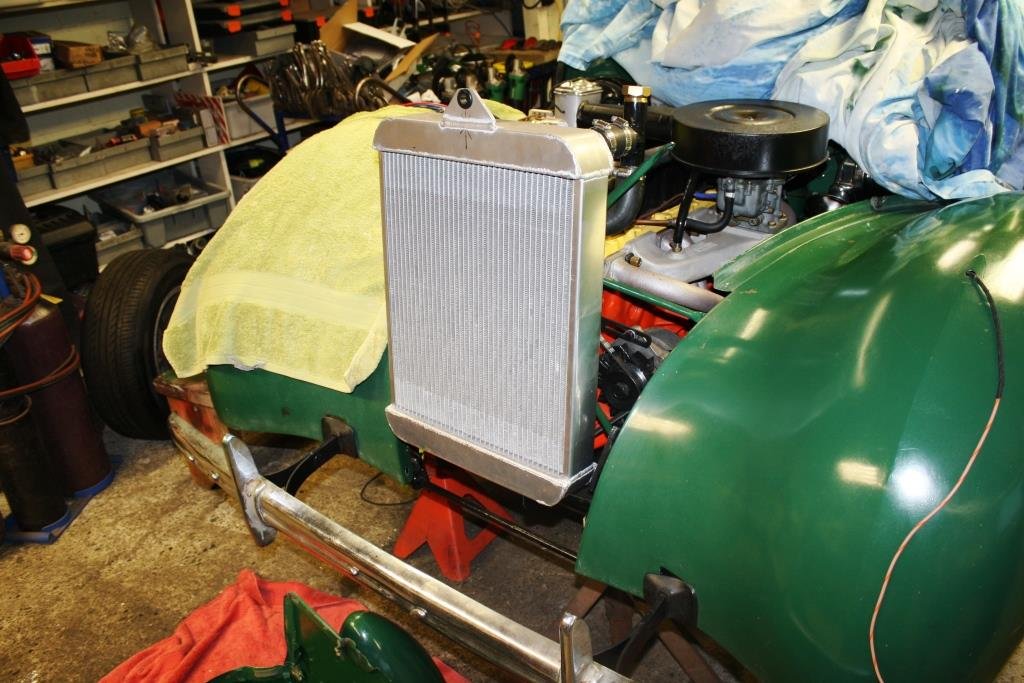
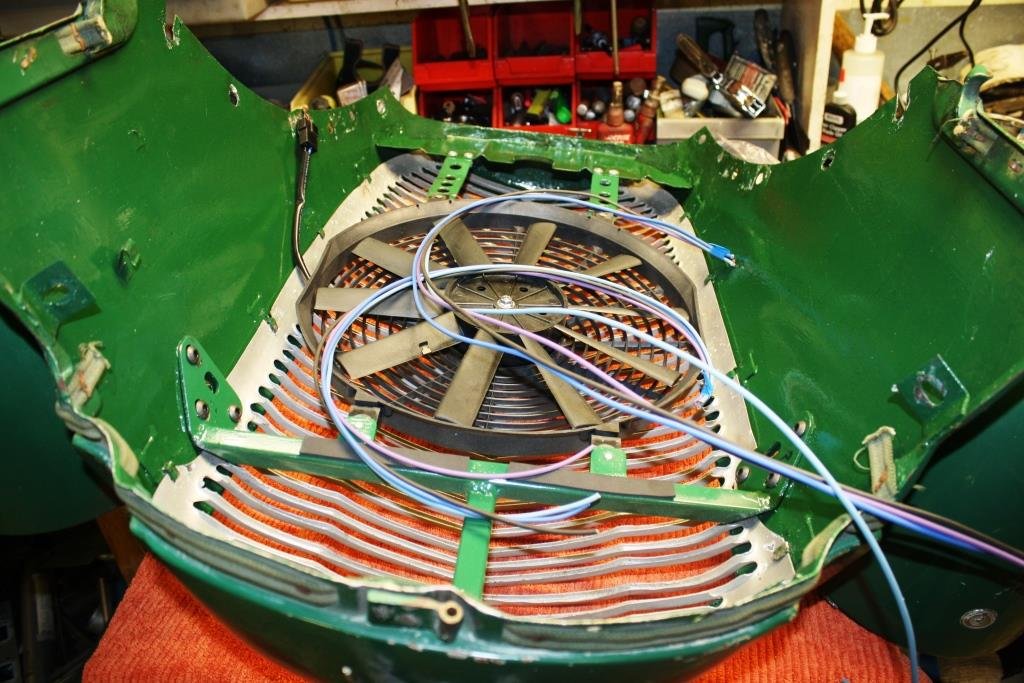
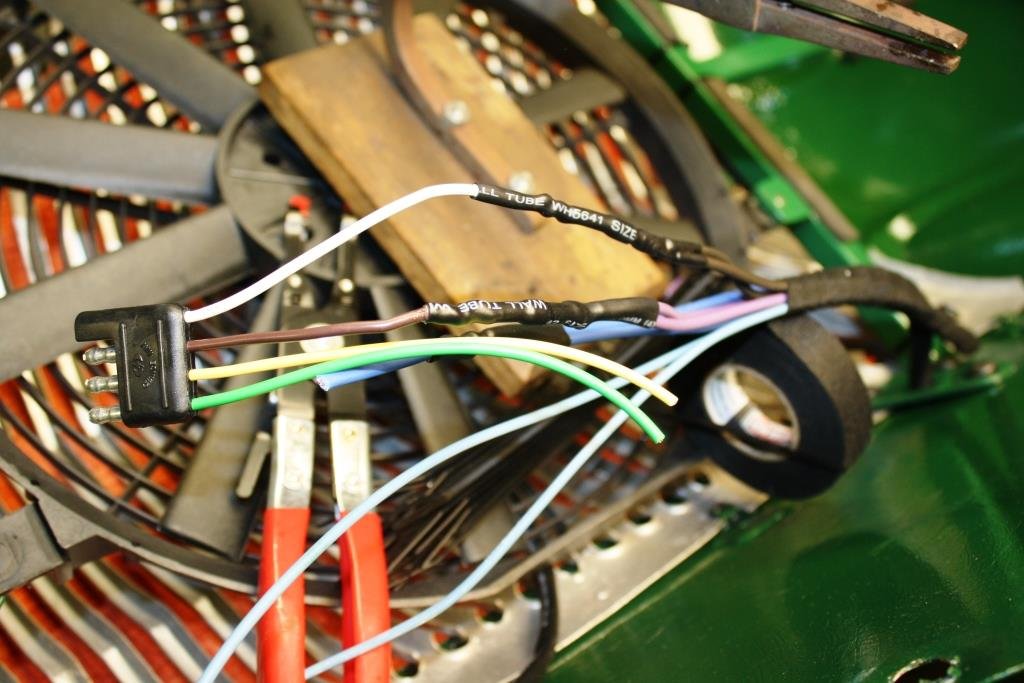
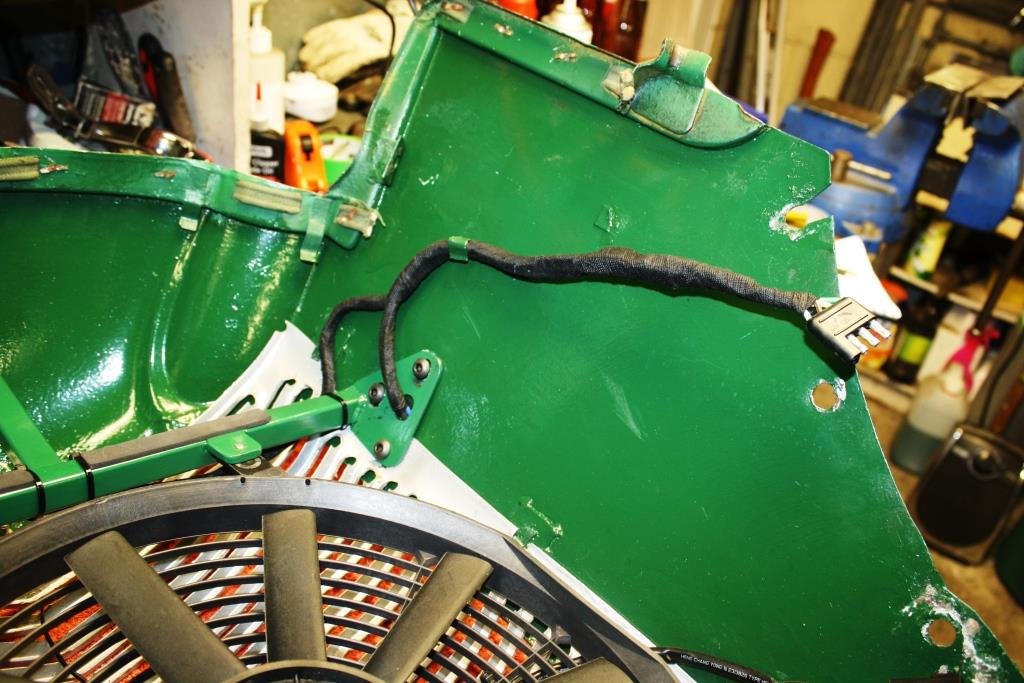
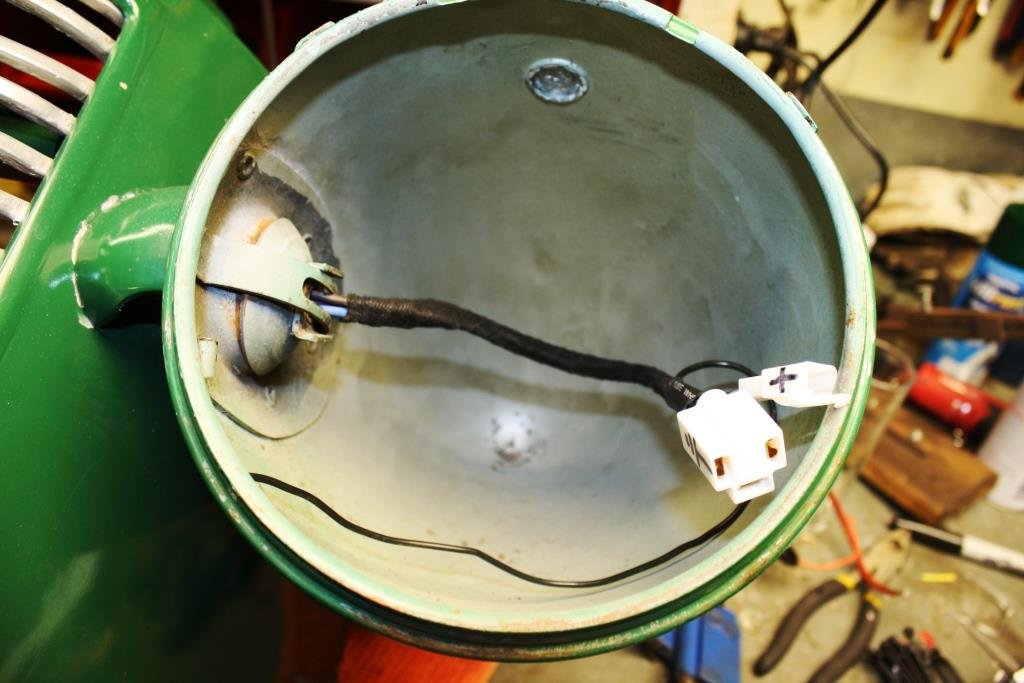
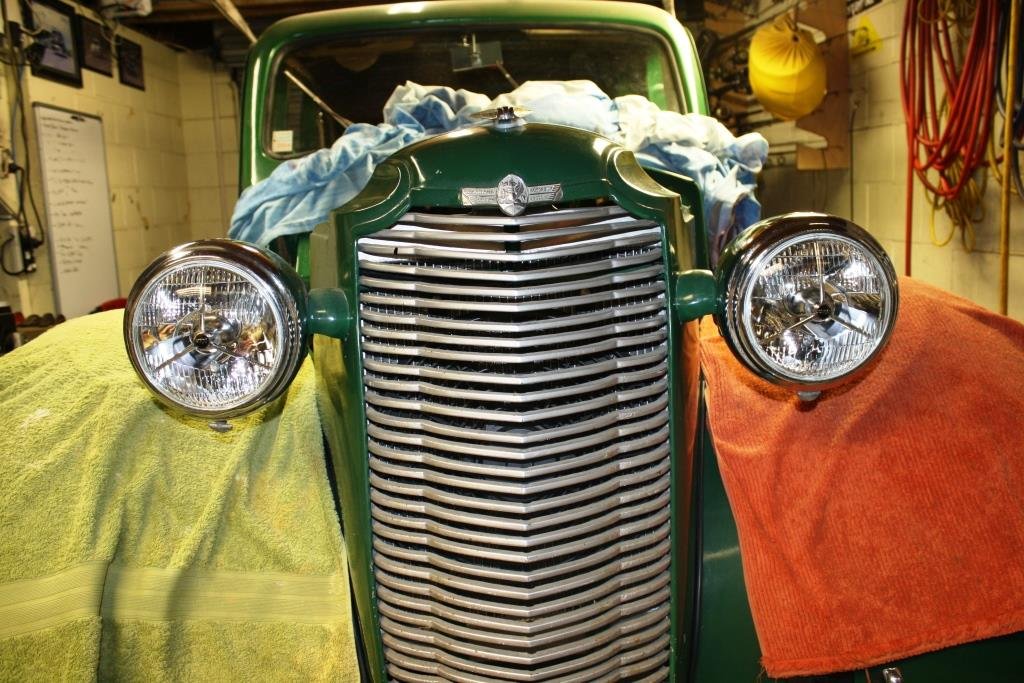
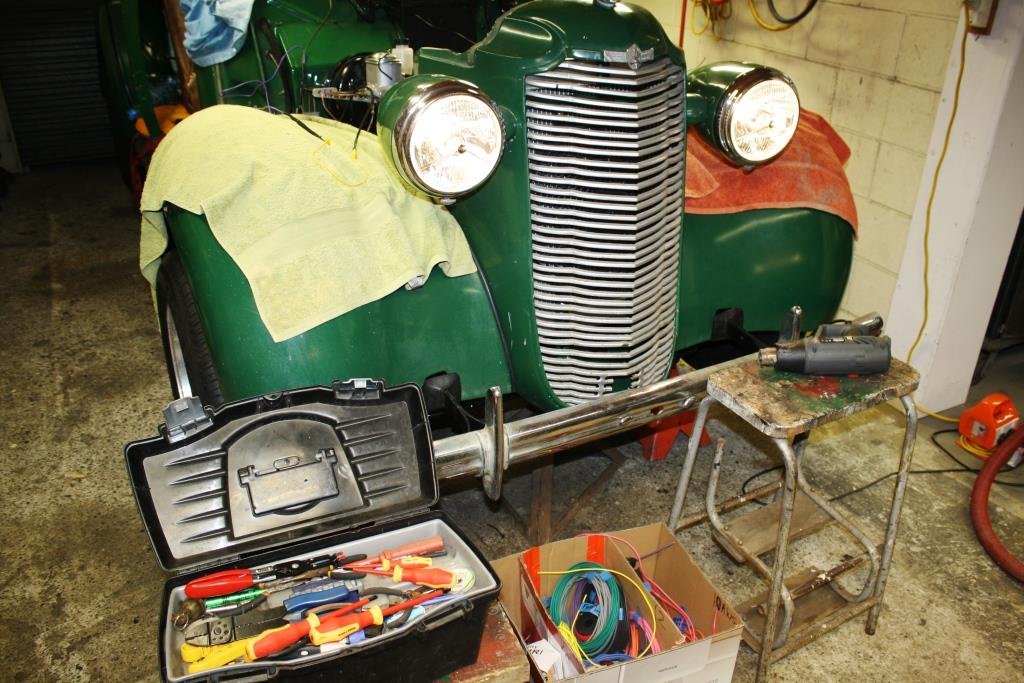
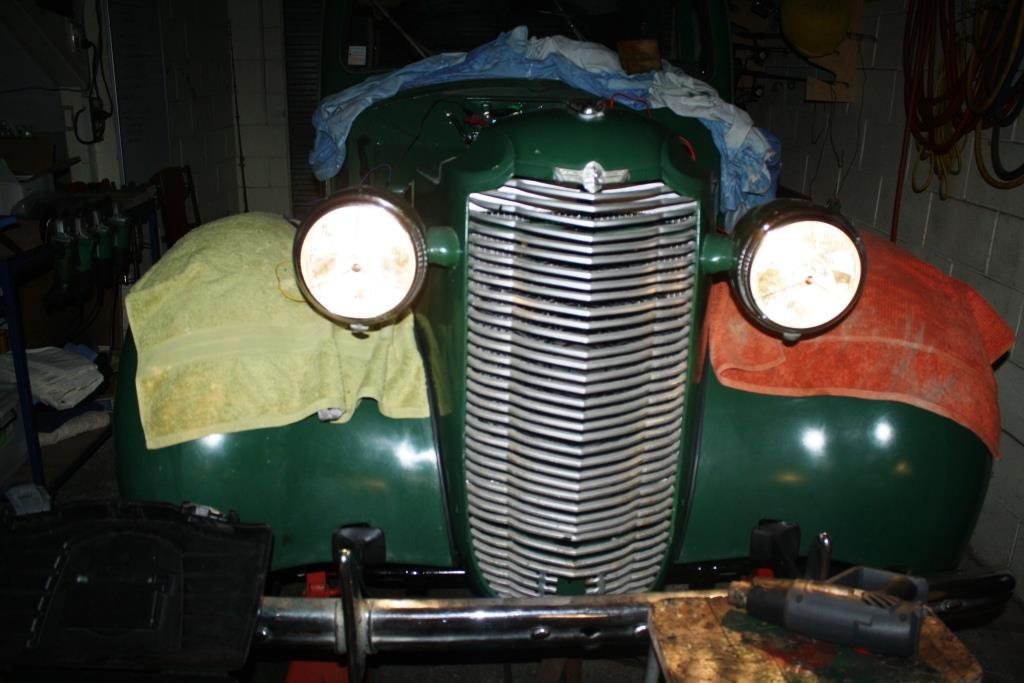
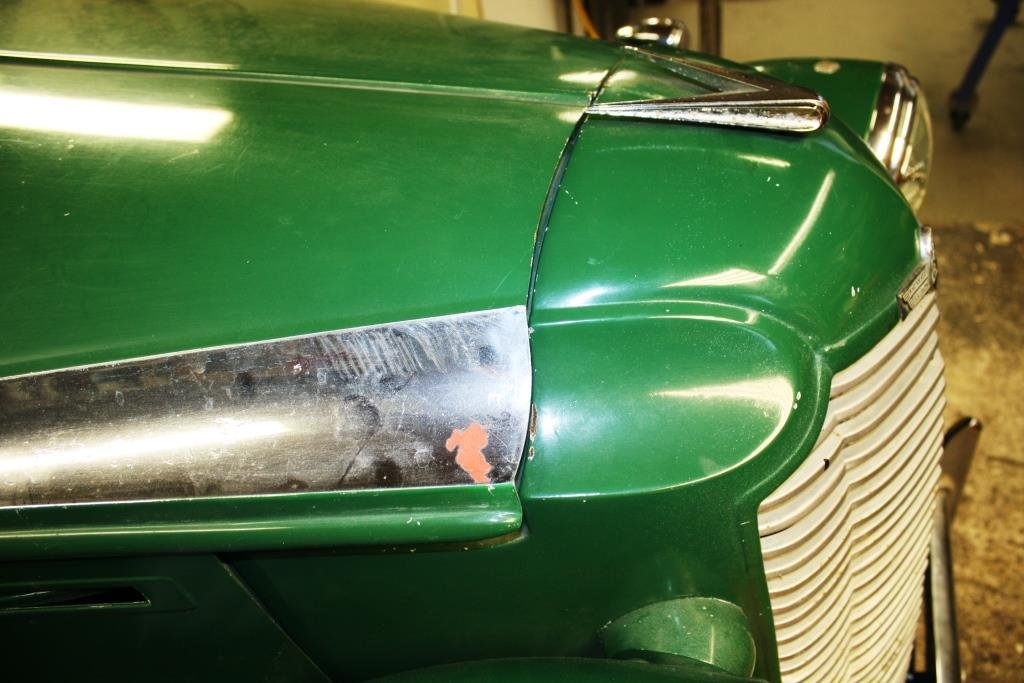
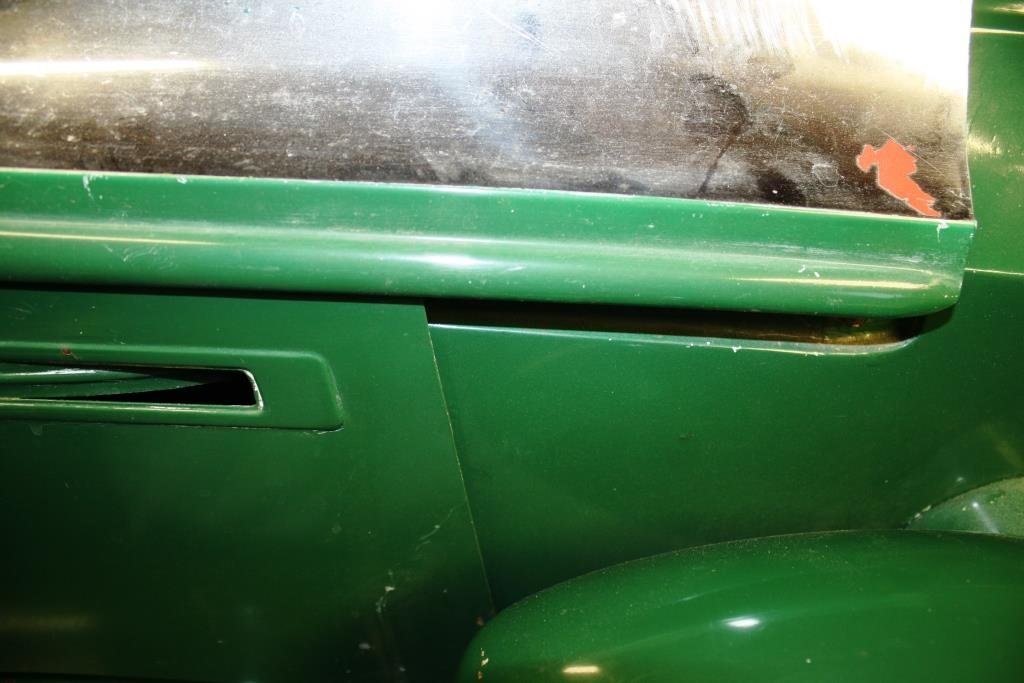
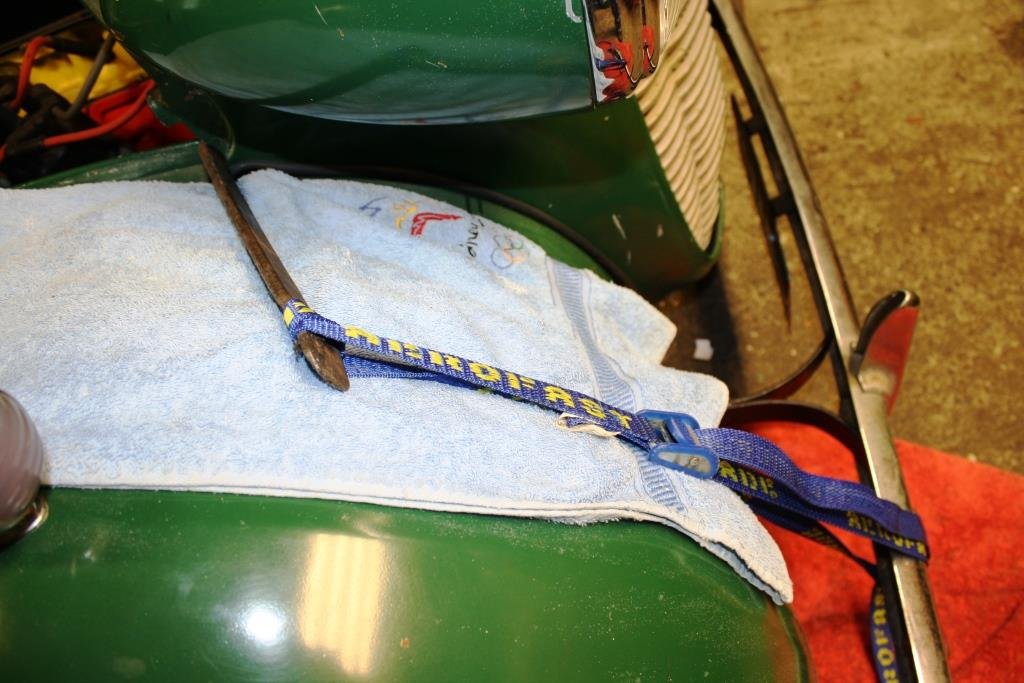
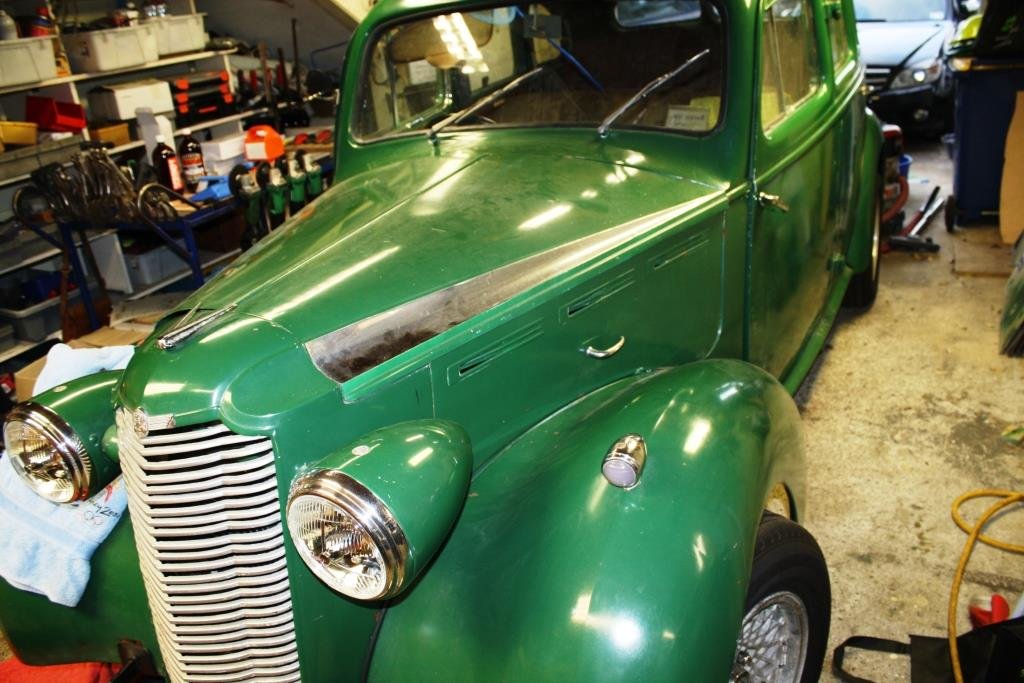
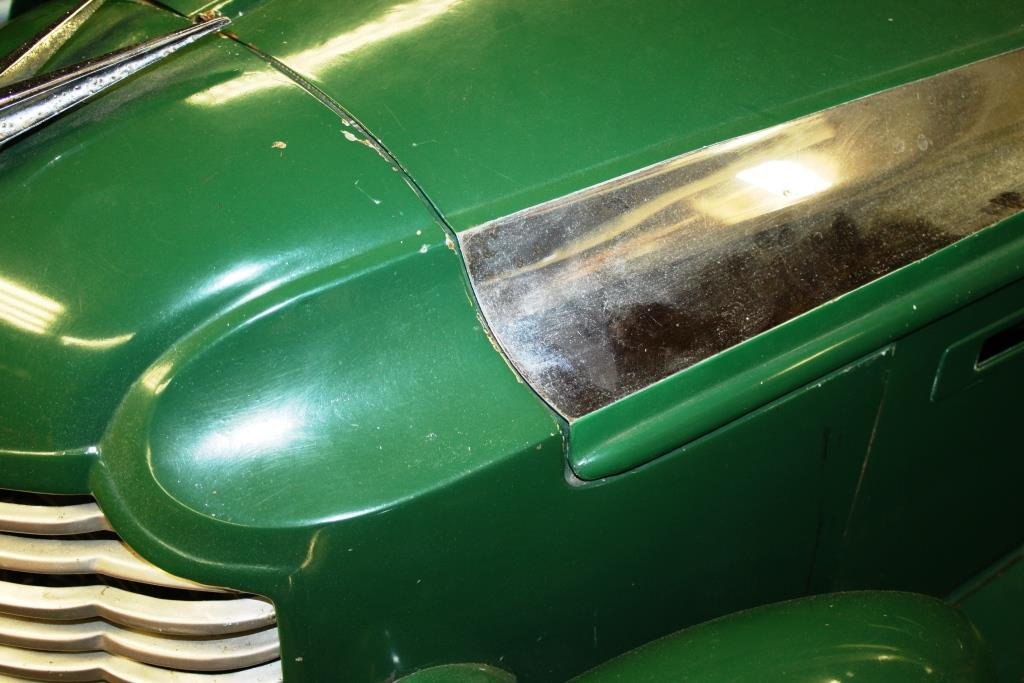
With space in the nose cone so tight the only way to wire the headlights and fan was to take the front off for the umpteenth bloody time….grrr….! So much easier to wire on the bench. Found some heavy connectors to make disassembly easier in the future. Love using the old school fabric wrap. I’d bought a big box of connectors off Banggood for a price that was too good to be true…….. … so I wired up the headlights. I refitted the front………. I installed the gorgeous over-priced P700 headlights…. ……..and started blowing fuses whenever I powered them up! After an evening of uttering nasty horrible words and throwing thinly veiled insults at Rigamortice re the marital status of her parents at her time of inception, while going round and round in circles with a variety of test lights, test probes and multi meters - I discovered the f****** “too good to be true” Bangood connectors were………. You guessed it ‘too good to be F****** true’! After a quick trip to Jaycar the following day, I paid through the nose for the right connectors…and we now have head lights. And as an added bonus they even worked in the dark! So I stuck the bonnet on and discovered it didn’t fit…. I loosened it off and started pulling things into line before re-tightening. Finally, it all fits, (sort of).
11 points
-
Well after the last novel length wall of text I'll try to keep this update shorter otherwise I'll never finish the thing. Lots of little jobs starting to pop up on my 'to do' list. Driveshafts. Connecting the scooby shafts to the imp axles. A job I wasn't sure which direction I'd take as there's so many different ideas out there on the nerdnet showing 'the best' way to join shafts. First thing I did was to double check the suspension travel allowed by the stock shock absorbers and then use those datum points to work out if there was any growth in the length of shaft required as the wheel moves through it path up and down. There was minimal amount, like maybe 5mm at the very most. I guessed as much because the stock Imp driveshaft doughnuts dont allow for much sideways travel. I then cut one of my 22mm scooby shafts down in length so I could work out the lengths required with the CV joint in place. This move I soon regretted. I was allowing for plenty of plunge into the CV joints to make sure the whole joint could be removed from the box stub axle with the box pushed sideways when removing the transmission. I was happy with the length and then decided to go visit a local hotrod builder friend for some advise. He's well known about for his many many full scratch builds and has done heaps of driveshafts in his time (a fellow machinist by trade too) I showed him the two ways I was considering doing the join. He showed me a better way. Shrink some bored out yokes cut off from some spare axles. Plenty of meat, will never let go and even if they somehow did loosen and spin they cant come out because there's not enough travel in the CV joint to allow them to. No welding needed. He's run axles done in the same way with some serious big block power and they never let go. Just has to be accurate and luckily its the sort of machining/fitting job I like. But i needed to start with almost full length scooby shafts to do it, of which I was now down on.. Roll eyes and back to the wreckers to see this beauty get pulled from the hedge... Hannah helped me remove the shafts. It was her birthday too so wow, what a treat. She got visit the wreckers and get oily. Got home and the shafts didn't fit my CVs. Bigger diameter end. Really weird because I checked online... ha. It lies. Turns out some late 4wd Leones had even bigger axle ends than the imprezzas. Also odd is that one shaft is 22mm and the other side 24mm, although both the same length. Back to the wreckers. This time I got larger 25mm shafts with the smaller ends from front wheel drive Imprezzas. I grabbed two pairs. Same again, 22mm on one side and 25 on the other. Now I had two of each. Got home and spent some time cleaning them up, outside because petrol fumes. Cleaned up the spare pair of axles in the lathe to make sure I had an accurate clamping spot for the later boring. Good quality steel! I turned them down to less than the 23mm bore size and chopped the yokes off. Made lots of swarf Bored out to bang on 23mm with nice radius. Double checked and triple checked I had my lengths required correct. Chopped the two 25mm scooby shafts down to length and turned a step down on one end of each, a radiused step to stop any stress risers. I went for .0015"~.002" interference. Go online and see the debates between all the barries about what a good shrink fit should be There's many variables as well. I consulted my old faithful machinery's handbook. I wanted it tight, but not stressed. Luckily the axle is of good steel. I also made a sample first, using one of the cut off bits of scooby shaft and some 4340 I machined to the same outer dimensions as the yoke. This way I was able to test how hot I needed to get it to expand enough to drop in place. I'll take this to a local engineers who have a press with a pressure gauge and see how much force it takes to wreck this thing Here's about a one hundredth of a millimetre (iirc) getting removed.. Then things got hot.. photos taken after it was done because I had to move bloody quick! Hannah would grab the torch and I would drop the yoke in place. It was a tense bit of time. If the yokes teetered and grab they'd pull the heat so quick and shrink in place before getting to the shoulder. No removing them without damage and I only had the one pair of spare axles. It went well. I was happy and relieved. The light rust flashing off on one is simply due to that one having been left nearer the front of the workshop to cool down and it was a chilly damp start to the morning. They wired brushed up neat as, got painted with black epoxy and when that was set they had new universal joints fitted. I cant try them on the car until I remove the existing axles from the hubs but it should be fine. Next up was to sort the fuel tank out to suit fuel injection. I brought the blue imp in and checked a few ideas out on what I could do. I don't really have room for a surge tank and I never liked the noise on my Viva from the external fuel pump anyway. Nor did I like the way the fuel in the surge tank heats up. Enter the humble Nissan Micra k11 intank fuel pump and surge container... It actually looked like it was just going to fit into the pressed depression at the bottom of the imp fuel tank.. With enough room to run the imp fuel float sender next to it. Cut a hole.. It fits. I'll cut the bracket off the side at bottom of pic and it'll move sideways a bit more.. Made some metal brackets Welded them in and now I have a cradle that takes two cable ties across the top to secure. I needed a flange.... Made this. Its designed to recess the lid about 10mm below the tank top. I want to keep the tank top as flat as possible. It'll have the usual layer of foam over top but I don't want things sticking up proud when the 'frunk' is being used (cant be tearing those bags of concrete now eh....) Many holes drilled and tapped.. Carefully welded in place. Was a tricky job. Thin steel on the tank that had some sort of (probably poisonous) coating. But happy with result. I made another hole... That takes the sender. Drilled and tapped more holes to suit. Now I needed to get fuel from the outside in and from the inside out. I machined up these in stainless.. Thought of a neat way to hold the little bits together for tacking. Blue tack. Or blue tack tack? welded up.. I made an angled recess into the hatch cover so the fuel hose goes even further below the tank line. Visible in that photo are the cable connections. Again - I needed to get power in. I machined some shouldered fittings in plastic.. Luckily the micra pump so handily just uses a simple connector with 6.3 spade terminals. Under the lid... Tank hard work done. I'll paint bits and cut some gaskets. Speaking of gaskets. One of mine between my oil filter pedestal and the block is weeping oil. Plus one of the bolt heads weeps. Typical. Put a Japanese engine in a British car and turn your back for a minute... I've already drained the oil cleaned it up and ran a smear of paintable sikaflex along it and around the bolt head. I didn't take photos because not really exciting. I'll paint it silver and no one will know. Except you the reader. Next up is the exhaust I think.9 points
-
Out with the old, In with the nucleus.
7 points
-
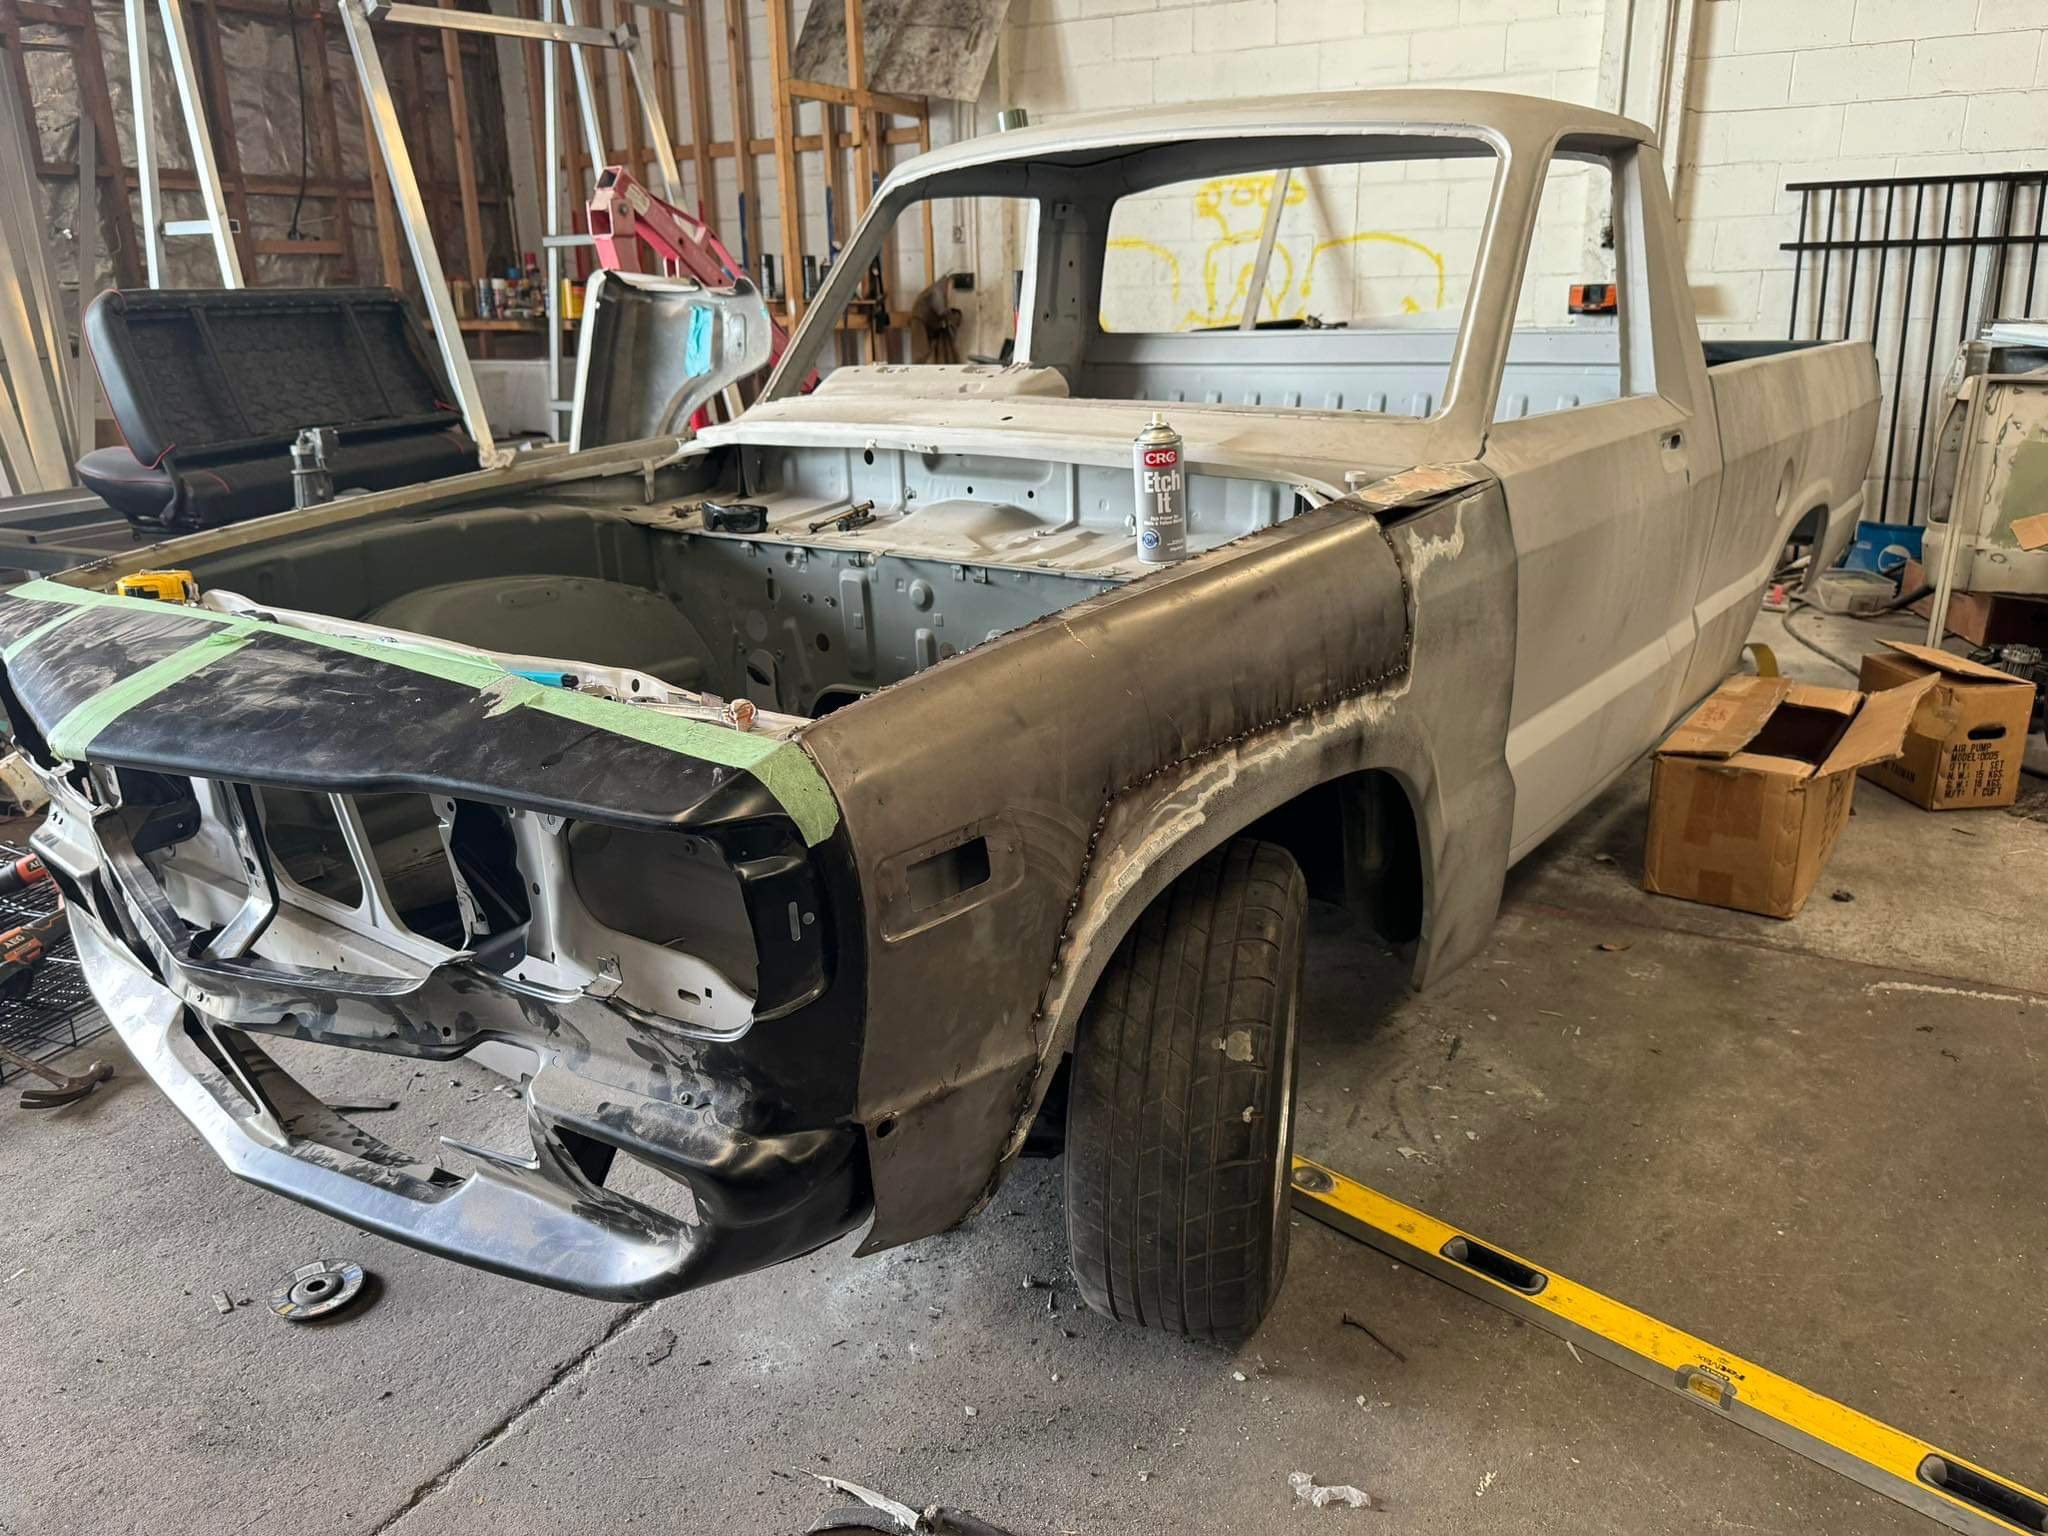
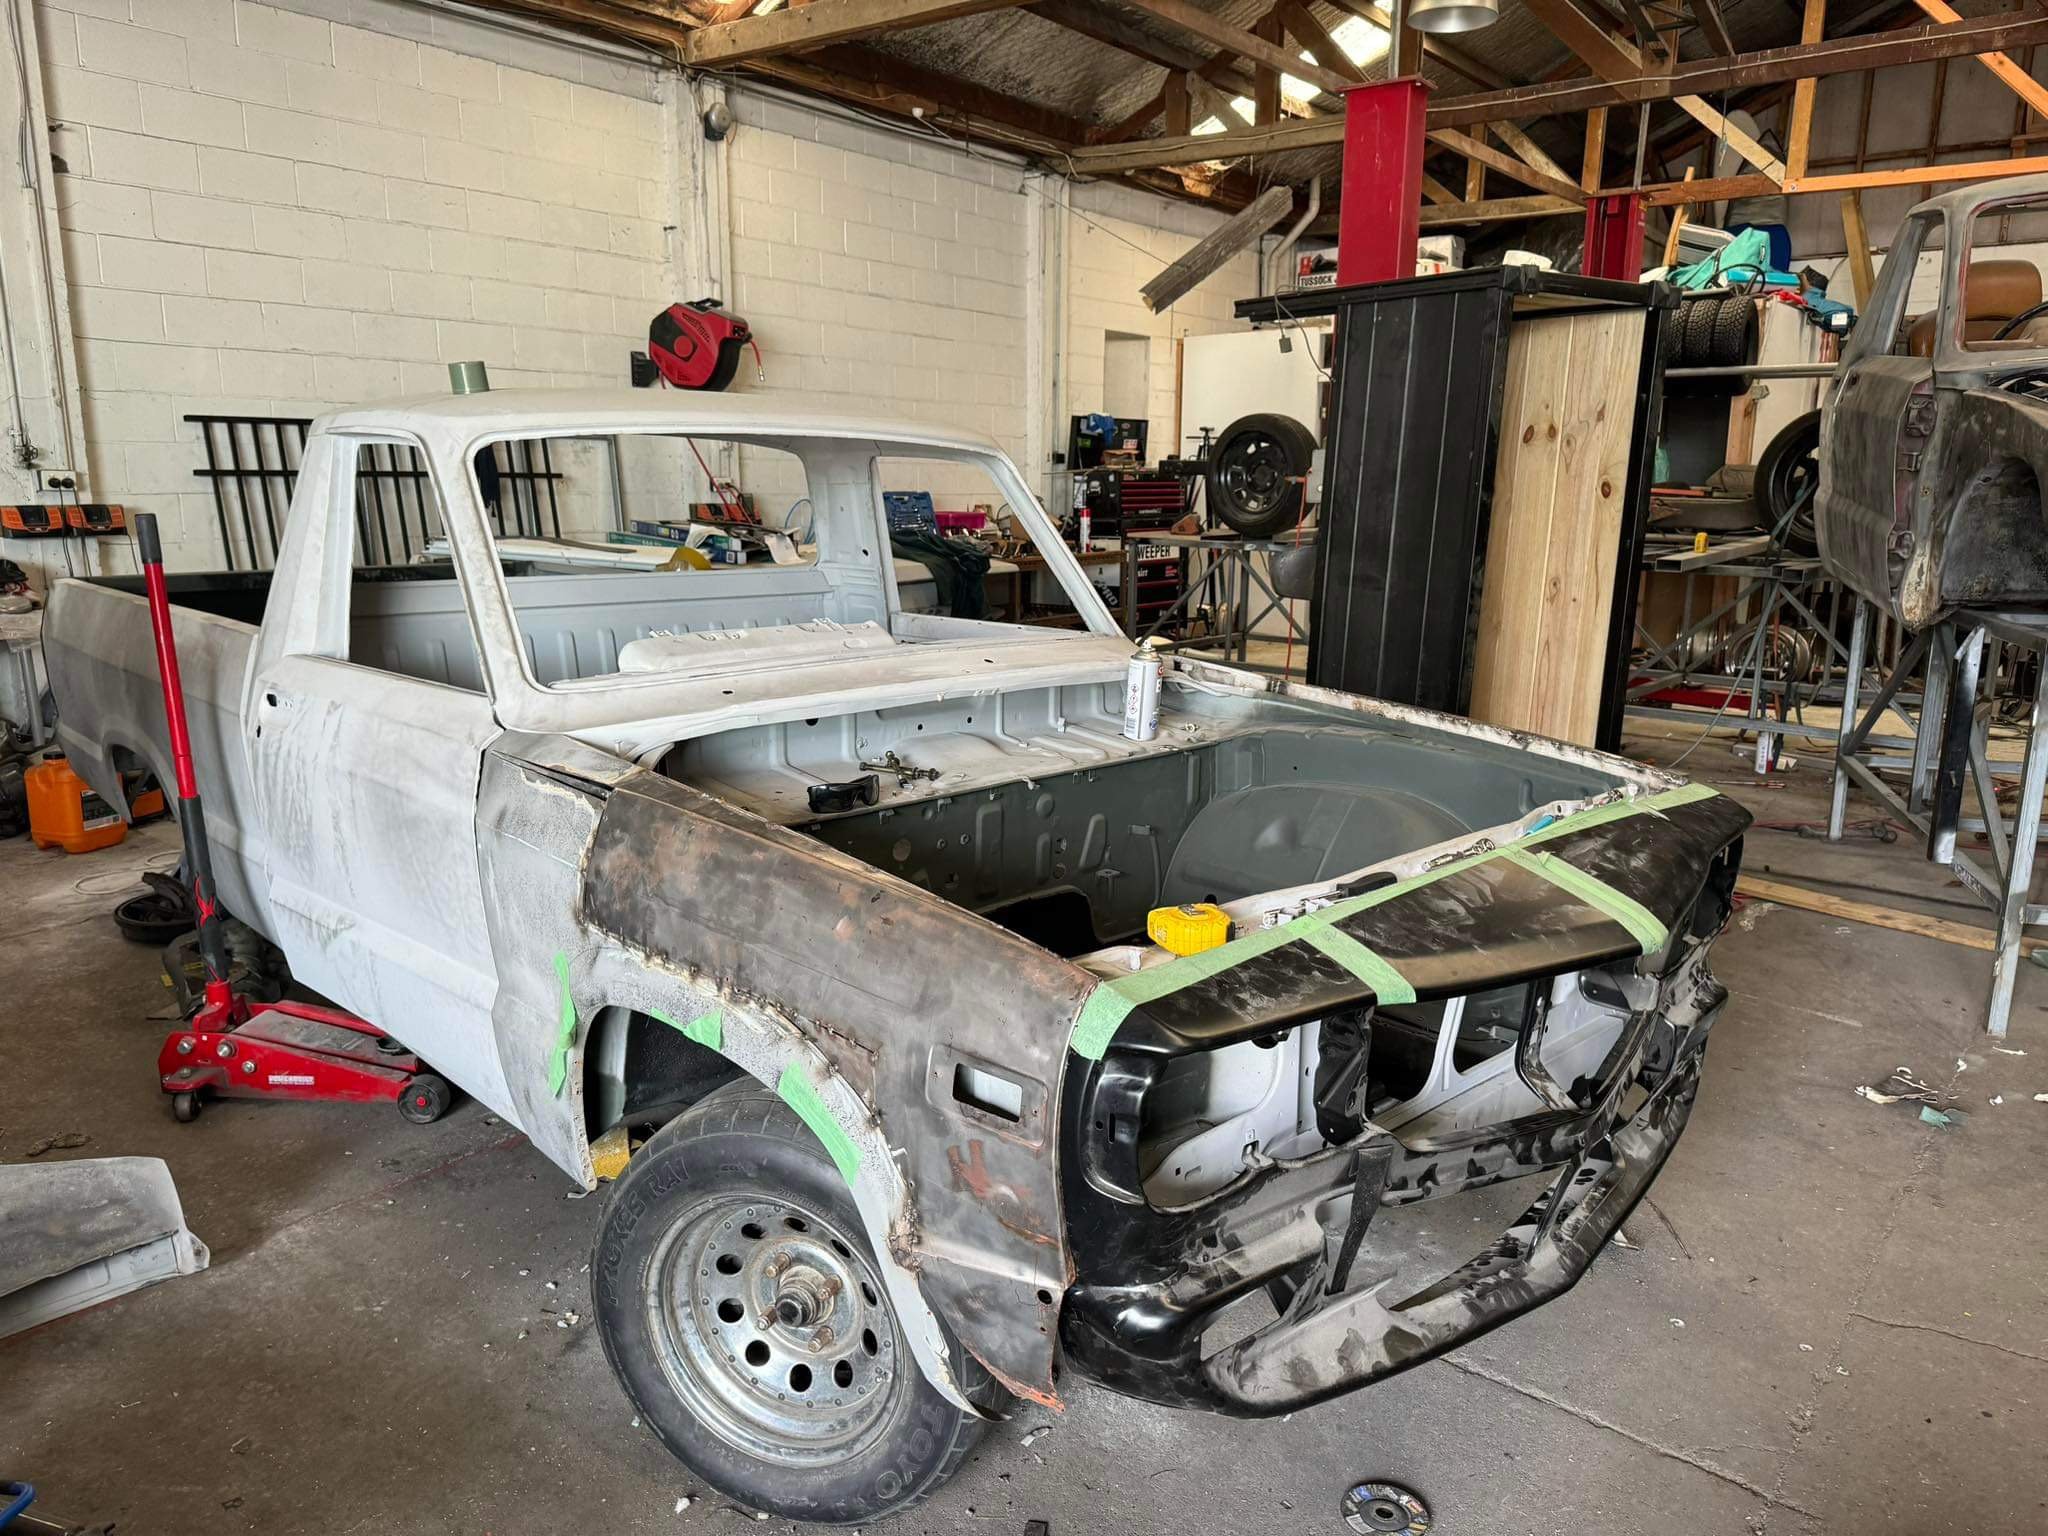
So it turns out when... your daily/operational fun car breaks down and you decide to take on a huge DIY job to fix it that you know eff all about you specifically lay out your mortgage repayment strategy in front of you and truly understand the ramifications of paying off even tiny amounts of principle early in the loan and decide to restructure to get every little spare cent going into it that you can scrounge up you pick up a second job the remaining work on your project car kind of hinges on either a stupid amount of unappealing and tricky skilled labour, or collar-tuggingly large amounts of money to pay for said tricky skilled labour ...things on your project car tend to slow down. But I figured I should post something because otherwise I'll totally forget everything that I've done and I don't want this project to fade away. Before I put all the fuel tank stuff back, I was messing with panels. One of the pre-reqs for the panel work is obviously that it needs to be all stripped back, and I decided (with panelboi's blessing) to do it myself rather than mess around with the local acid dipper or with transport to a more reputable one hours away. The idea is to just pick some reasonable panels, strip them, fit them, and then I've got a clean no-surprises job I can show around and get some better quotes and info on. I test-fit the rear bumper from the original black car and it didn't quite sit right - the panel gap was inconsistent no matter how I fudged the fastenings - no pix unfortunately, so I went with the red's bumper. It fits a whole lot better! Next up is all the front panellage. The two bonnets have their issues so it's really a toss-up, but I opted for the red one as it seemed to be a bit more contained in its damage. Both nose panels are totally fucked so... not sure what I'm doing there just yet. But fitting the nose panel reveals some fun. Uh-oh. Fitting the bonnet and popups makes the problem a bit more obvious. The black ones are just as bad - no pix soz - so it's not just a "different donor car" thing. The frame repairs were done with the fenders and bonnet available, though not the other panels. I need to get in contact with the panelbois to sort out a warranty claim, but the last couple times I tried they didn't pick up or reply. Hopefully this doesn't become a struggle :\ Anyway, forging on. Key and clean. Apply stripper and keep wet with plastic. Create murder scene. Scrape. I probably should have applied more stripper here but newb. The fenders are all pretty crap. The one I've already lightly beaten into shape and stripped and durepox'd is the one that had a minor collision, so you'd think it'd be the worst, but it's actually probably the best one. There's no rust and it's otherwise totally straight. All other fenders... well... So I decided to just keep the fender I've already epoxied, because it's probably easier to bang it into shape than any of the others. The red driver's side fender seemed marginally better than the black one so I went forward with stripping that. I busted out the paint stripping wheel for the grinder to finish it up. I'm not really sure this was a good move - it's nice and shiny, but possibly a bit tricky to spot the imperfections in the panel now? Then the nose panel and popups.. Everything back on. You can see here what I mean about the swirlies making it hard to gauge if things are okay. I'd already taken a sanding block to the driver's side fender in this pic to try and make the flat bits even. As you might be able to tell, there's a fair bit of damage to it... there was quite a bit of bog at the front and the rear of the fender. I think it worked, so I did the rest as well. As you can see, there's a few low spots and dents, but I think they'll hammer flatter without any major headaches, and even if they weren't, they could probably just be straight filler'd without failing. The chunky spot is the part I already knew about - the front corner which had a giant slab of filler applied and has subsequently received a lot of pitting. There's also a spot on the front edge of the bonnet that has numerous rust holes, hidden under a small but deep patch of bog. Honestly, it seems saveable - though I'm also far from an expert here! The pop-ups are fine, no dents. As expected, the nose panel is worse than the surface of the moon. It's probably not worth trying to save and I should just find another one. It's also super easy to dent these to begin with; they're the most natural place to push the car from, and there's almost no structure to them. If I do get a new one I'll try mod some gussets into the back of it. Side quest to put the very first thing I restored on this car back onto it: the fuel pump access panel, which a few years ago was extremely rusty. The CRC black zinc has held up strong . Spot the fasteners and grommets stolen from the red car... Speaking of the red car. It's door time. On both cars, passenger sides have a couple of dings but nothing crazy. Also on both cars, the driver's side is absolute dent and bog city. I have pix but they suck so just hold on till the strippy bit to see what I mean. All the doors also fucking suck at the bottom. So I just went with the black doors since they're both right there, already half-stripped, and the red car is currently sealed from the elements. There's a few holes at the top as well. Annoying, but the rust seems fixable. I completely stripped the doors - which was a massive PITA when it came to the door latch, only removable via black magic / the completely wrong method. The mirror blanking was just gooped in place to fix a broken bracket. Also there was a little protective metal edging strip along the open edge of... just one of the doors? The red doesn't have these. Japanese mod + replaced door? Anyway, it's strippytime. This time I put it on thicker, and did several passes. It made the job a bit easier. The starion makes for a decent workbench... <.< I haven't finished these yet, there's still some bog to remove and then get it all nice and flat. And that's where I'm at. If the panelbois are kind with their warrantying, and the lack of surprises makes the price right, then I might be able to eek something out in this space before we pay off the mortgage :P. If not, I'm buying a welder and the scope of the project shrinks from "like new" to "guy in a garage job but the engine bay looks sweet"...3 points
-
Peak Engineering textbook and probably one of the best books ever written Shrink fit the axles is a brilliant idea, love it!3 points
-
I tried removing separating the test sample at local engineers yesterday. Got to 12 ton pressure and it wasn't moving and the shaft we were using to push with started bending. We called it quits before it spat out (had put a shroud around the lot but still...) I'm going back with a beefier press tool. I want to see and hear the bang No way it's gonna shift in my setup that's for sure.2 points
-
Exhaust box....An empty tube - say 4inOD 1.6mm wall. Across the back of the car. Your two sides discharging into it straight in 90deg to CL. Discharge pipes from each end. 1 1/2in OD. Length inside box to be perf tube same 1 1/2in OD. Close/blank off the inner ends of this and make them overlap with a figure 8 support in the center of the box. 90 deg bends outside the main tube for the discharge pipes to point them out the back. This will work - and not be too noisy.2 points
-
Did some more suspension fettling @Snoozin put it in print via nzpc Now looking to sell and onto the next one in garage! Would like 35k on the tomcats 25k on CHEVIOT TURBOS
2 points
-
Some bits from the UK arrived surprisingly quickly, a sump and tappet cover gasket, a boot for the gearshift, suspension bushes etc; I made a battery bracket to suit the most likely battery I found in my stash of many; All those untidy wires are not part of the car you will be pleased to know. I also printed some things; Cos that link for the lock on the passenger side has gone walkies somewhere. And over the last couple of weeks I have been designing and iterating a set of heater controls that I think actually should work. Cool beans. Also I wired up the clock. It works all nice. The clutch couldnt get uprated cos they couldn't find the parts to do it and additionally the man said it looked like that cover springs had been over extended, this might mean it was slipping due to wrong adjustment, so I will order a new standard clutch and see what happens. Also I found another X1/9, and have spoken to the owner, so there might be a very small Nelson X1/9 owners club.2 points
-
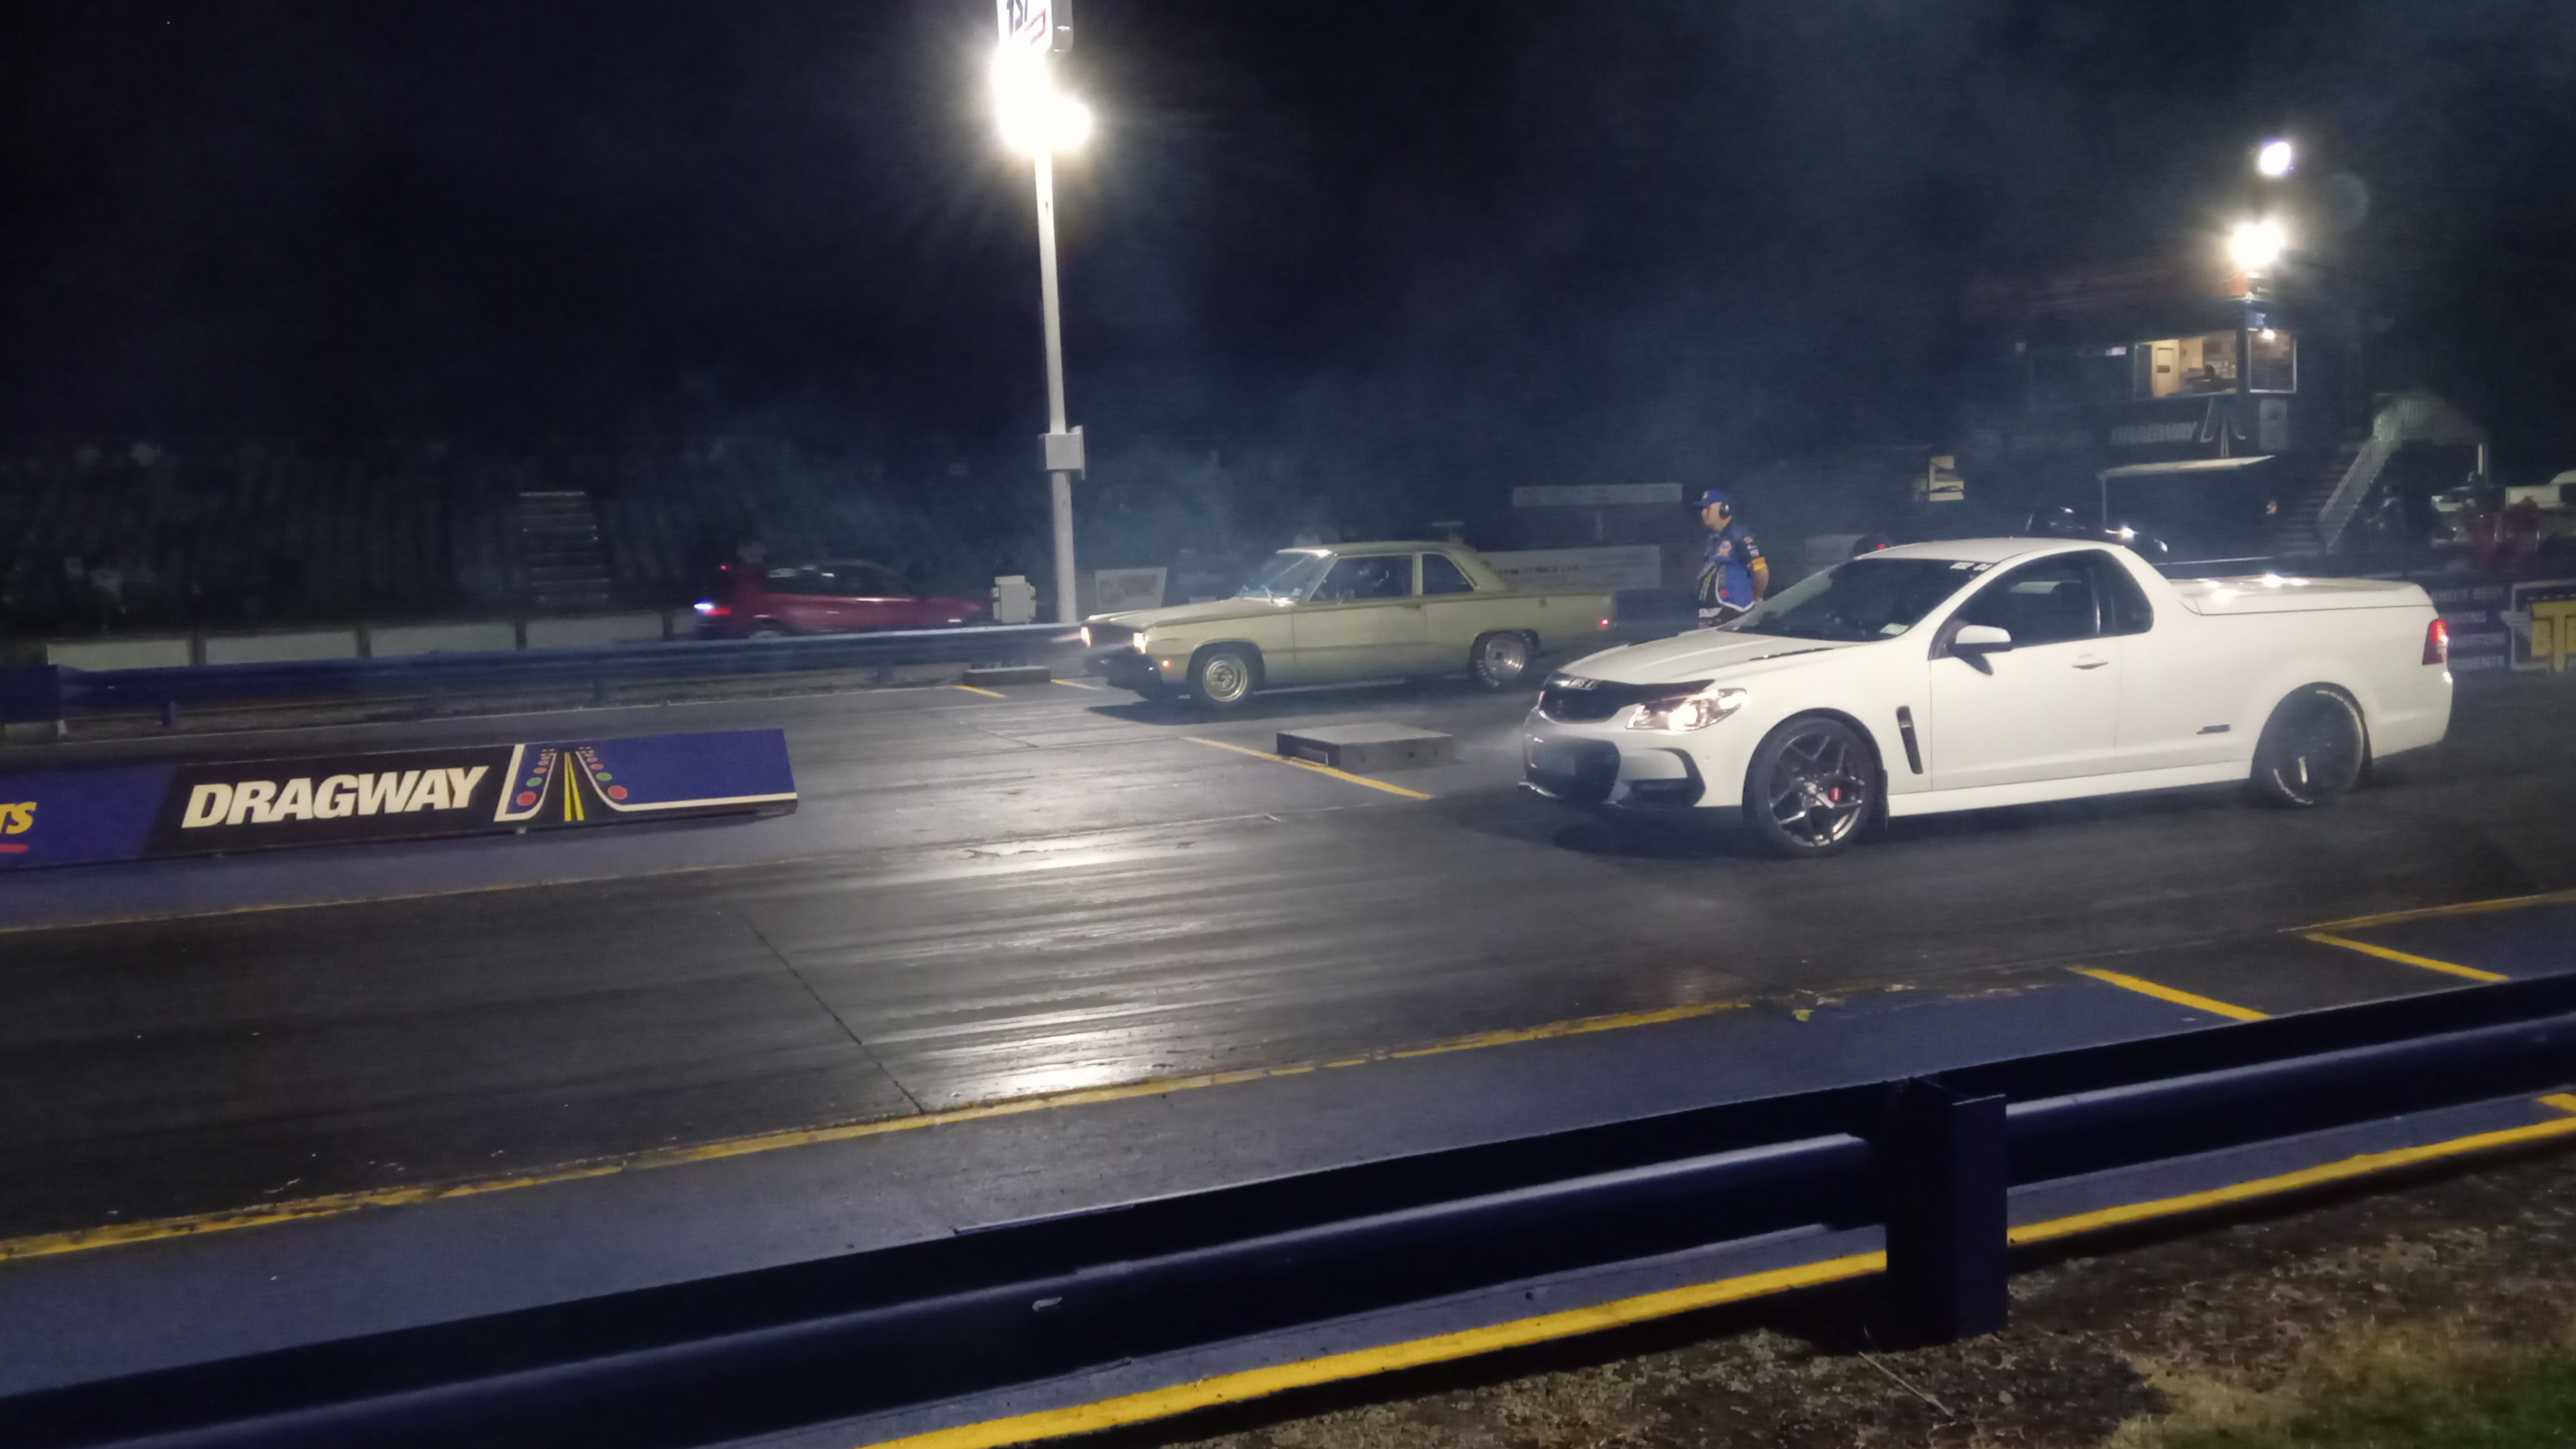
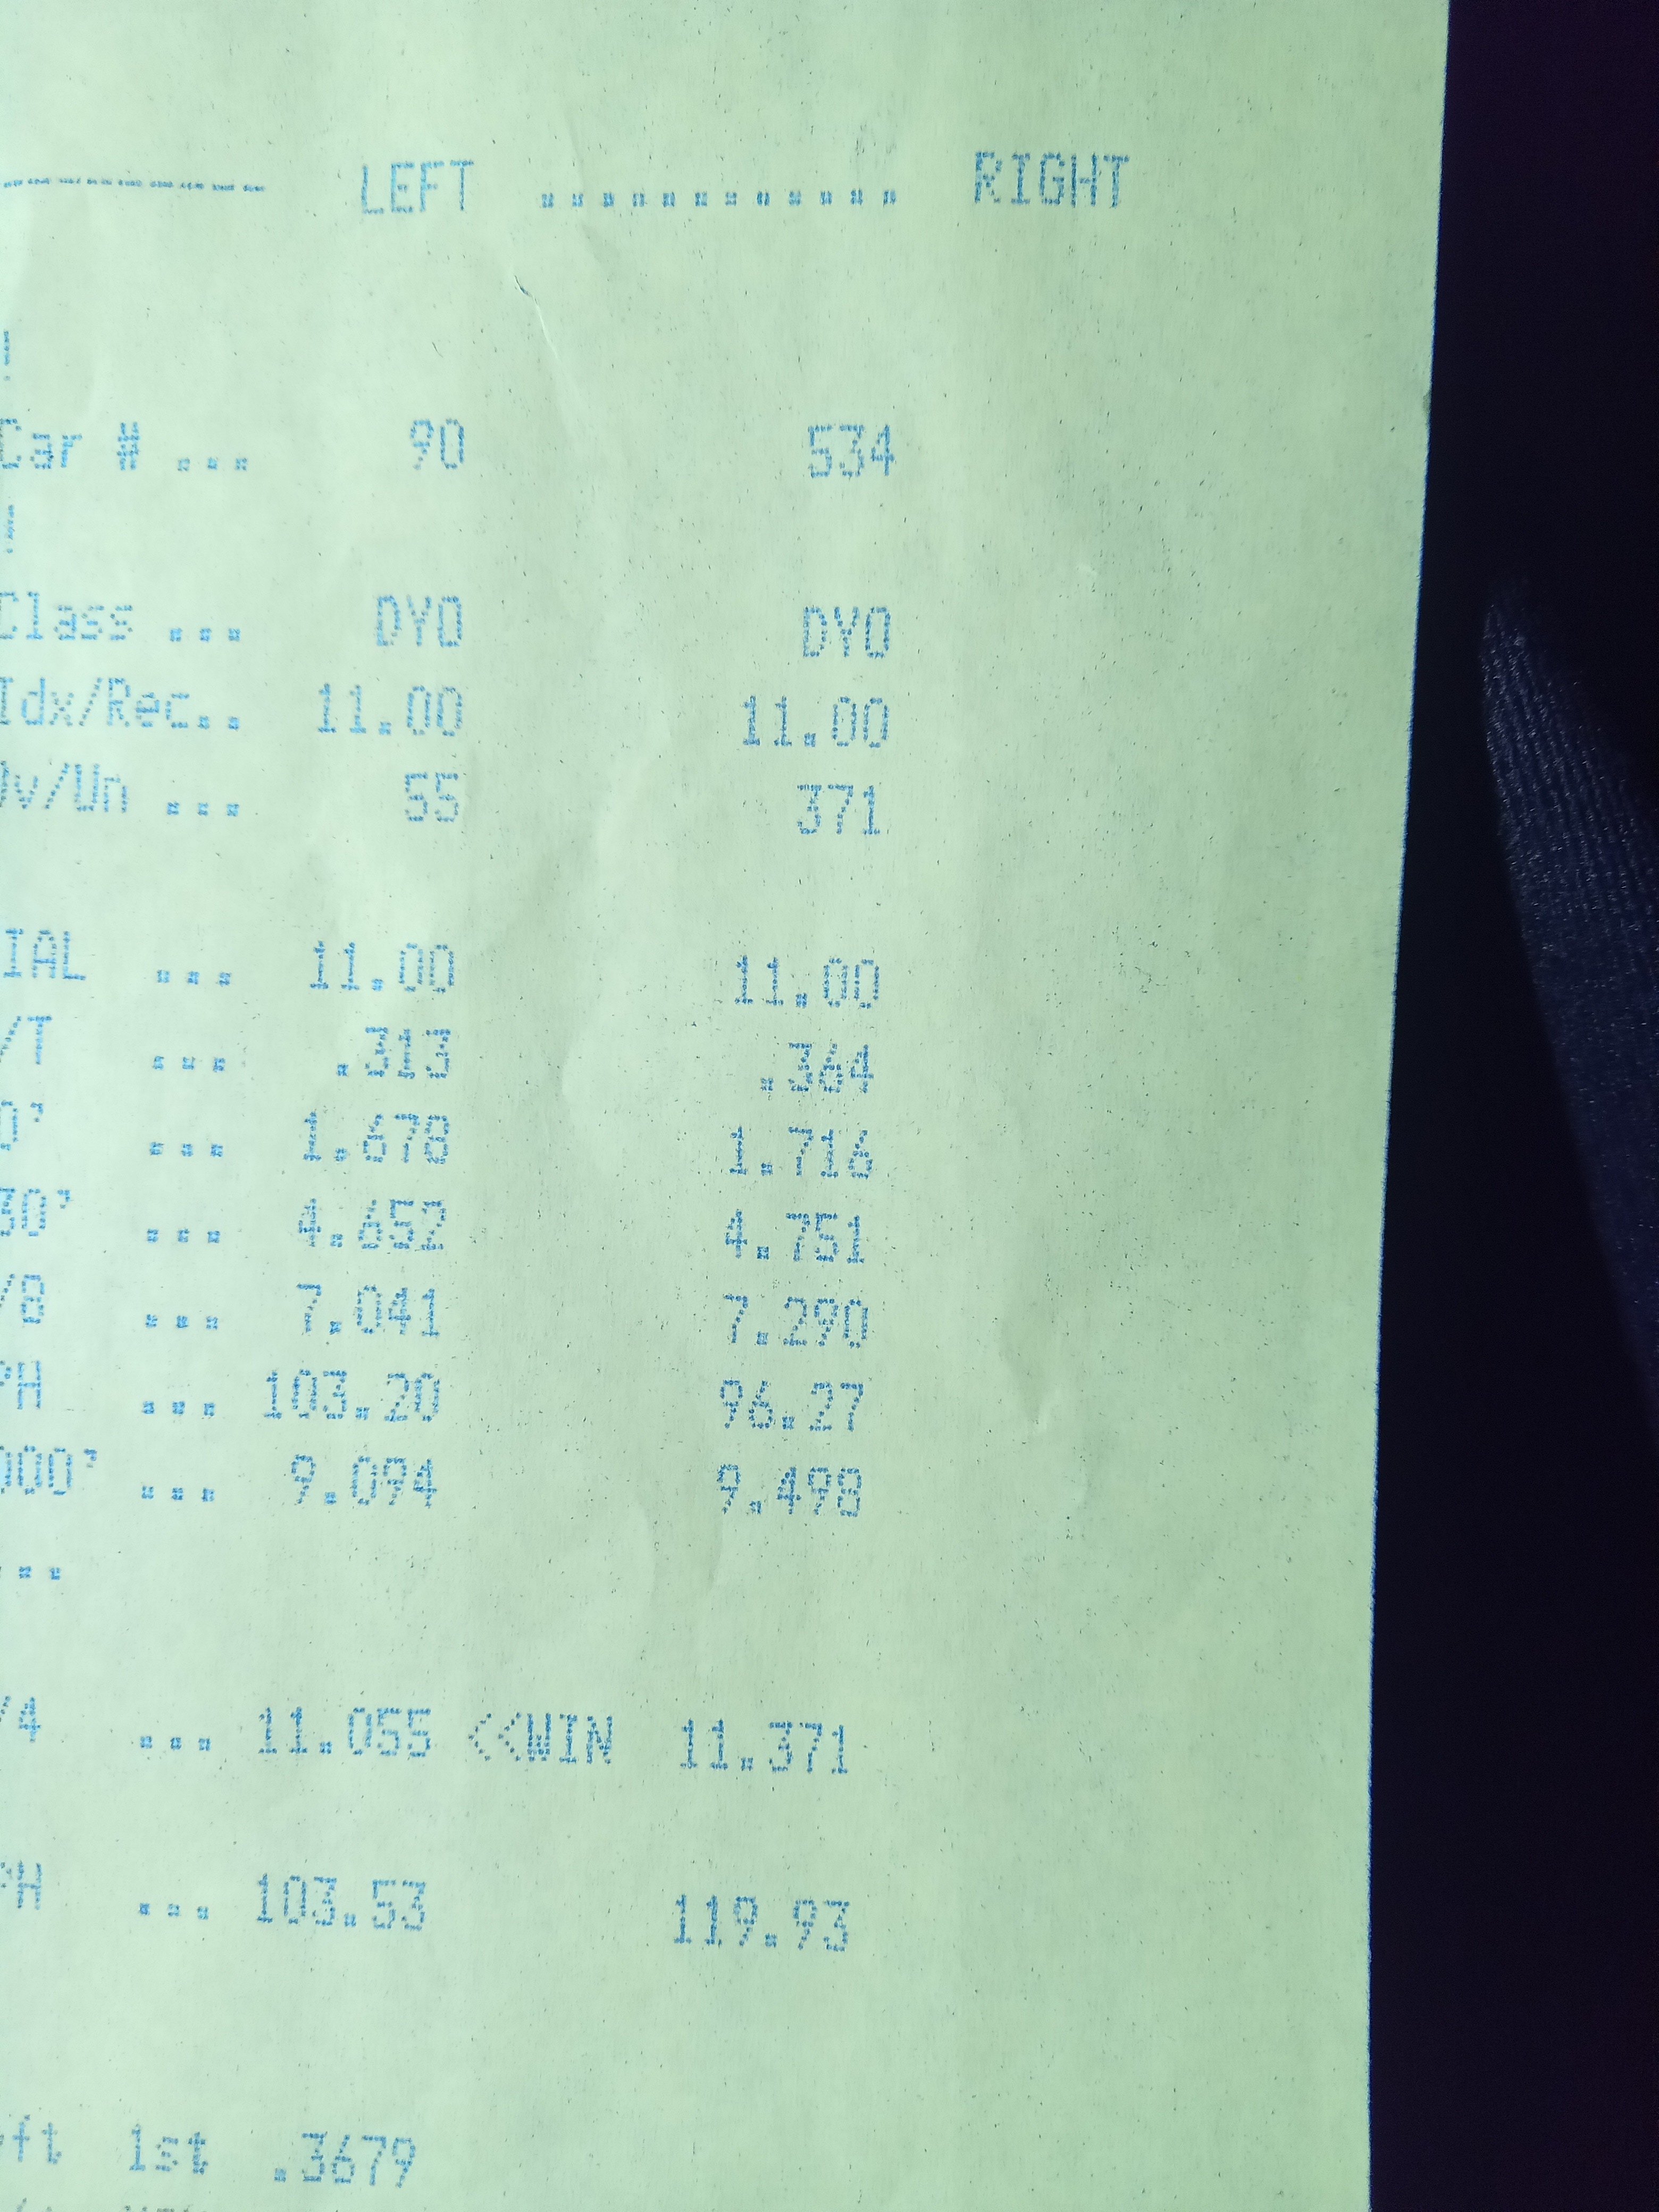
New springs made it more consistent,although slightly slower. Different wheels and muffler off when it did the 11.35 previously 11.5@118 every pass I have turned the 2 step rev limit down slightly as it was having trouble holding on the brake which I can probably fiddle with to improve I'd like to get it down to 11.0 so it's more competitive at the night drags https://m.youtube.com/watch?v=kdfGgT2pKHw&pp=ygUMVW5kZXJjYXJ2aWV3
2 points
-
Would I use a full size broom or a 1/35th scale one ?2 points
-
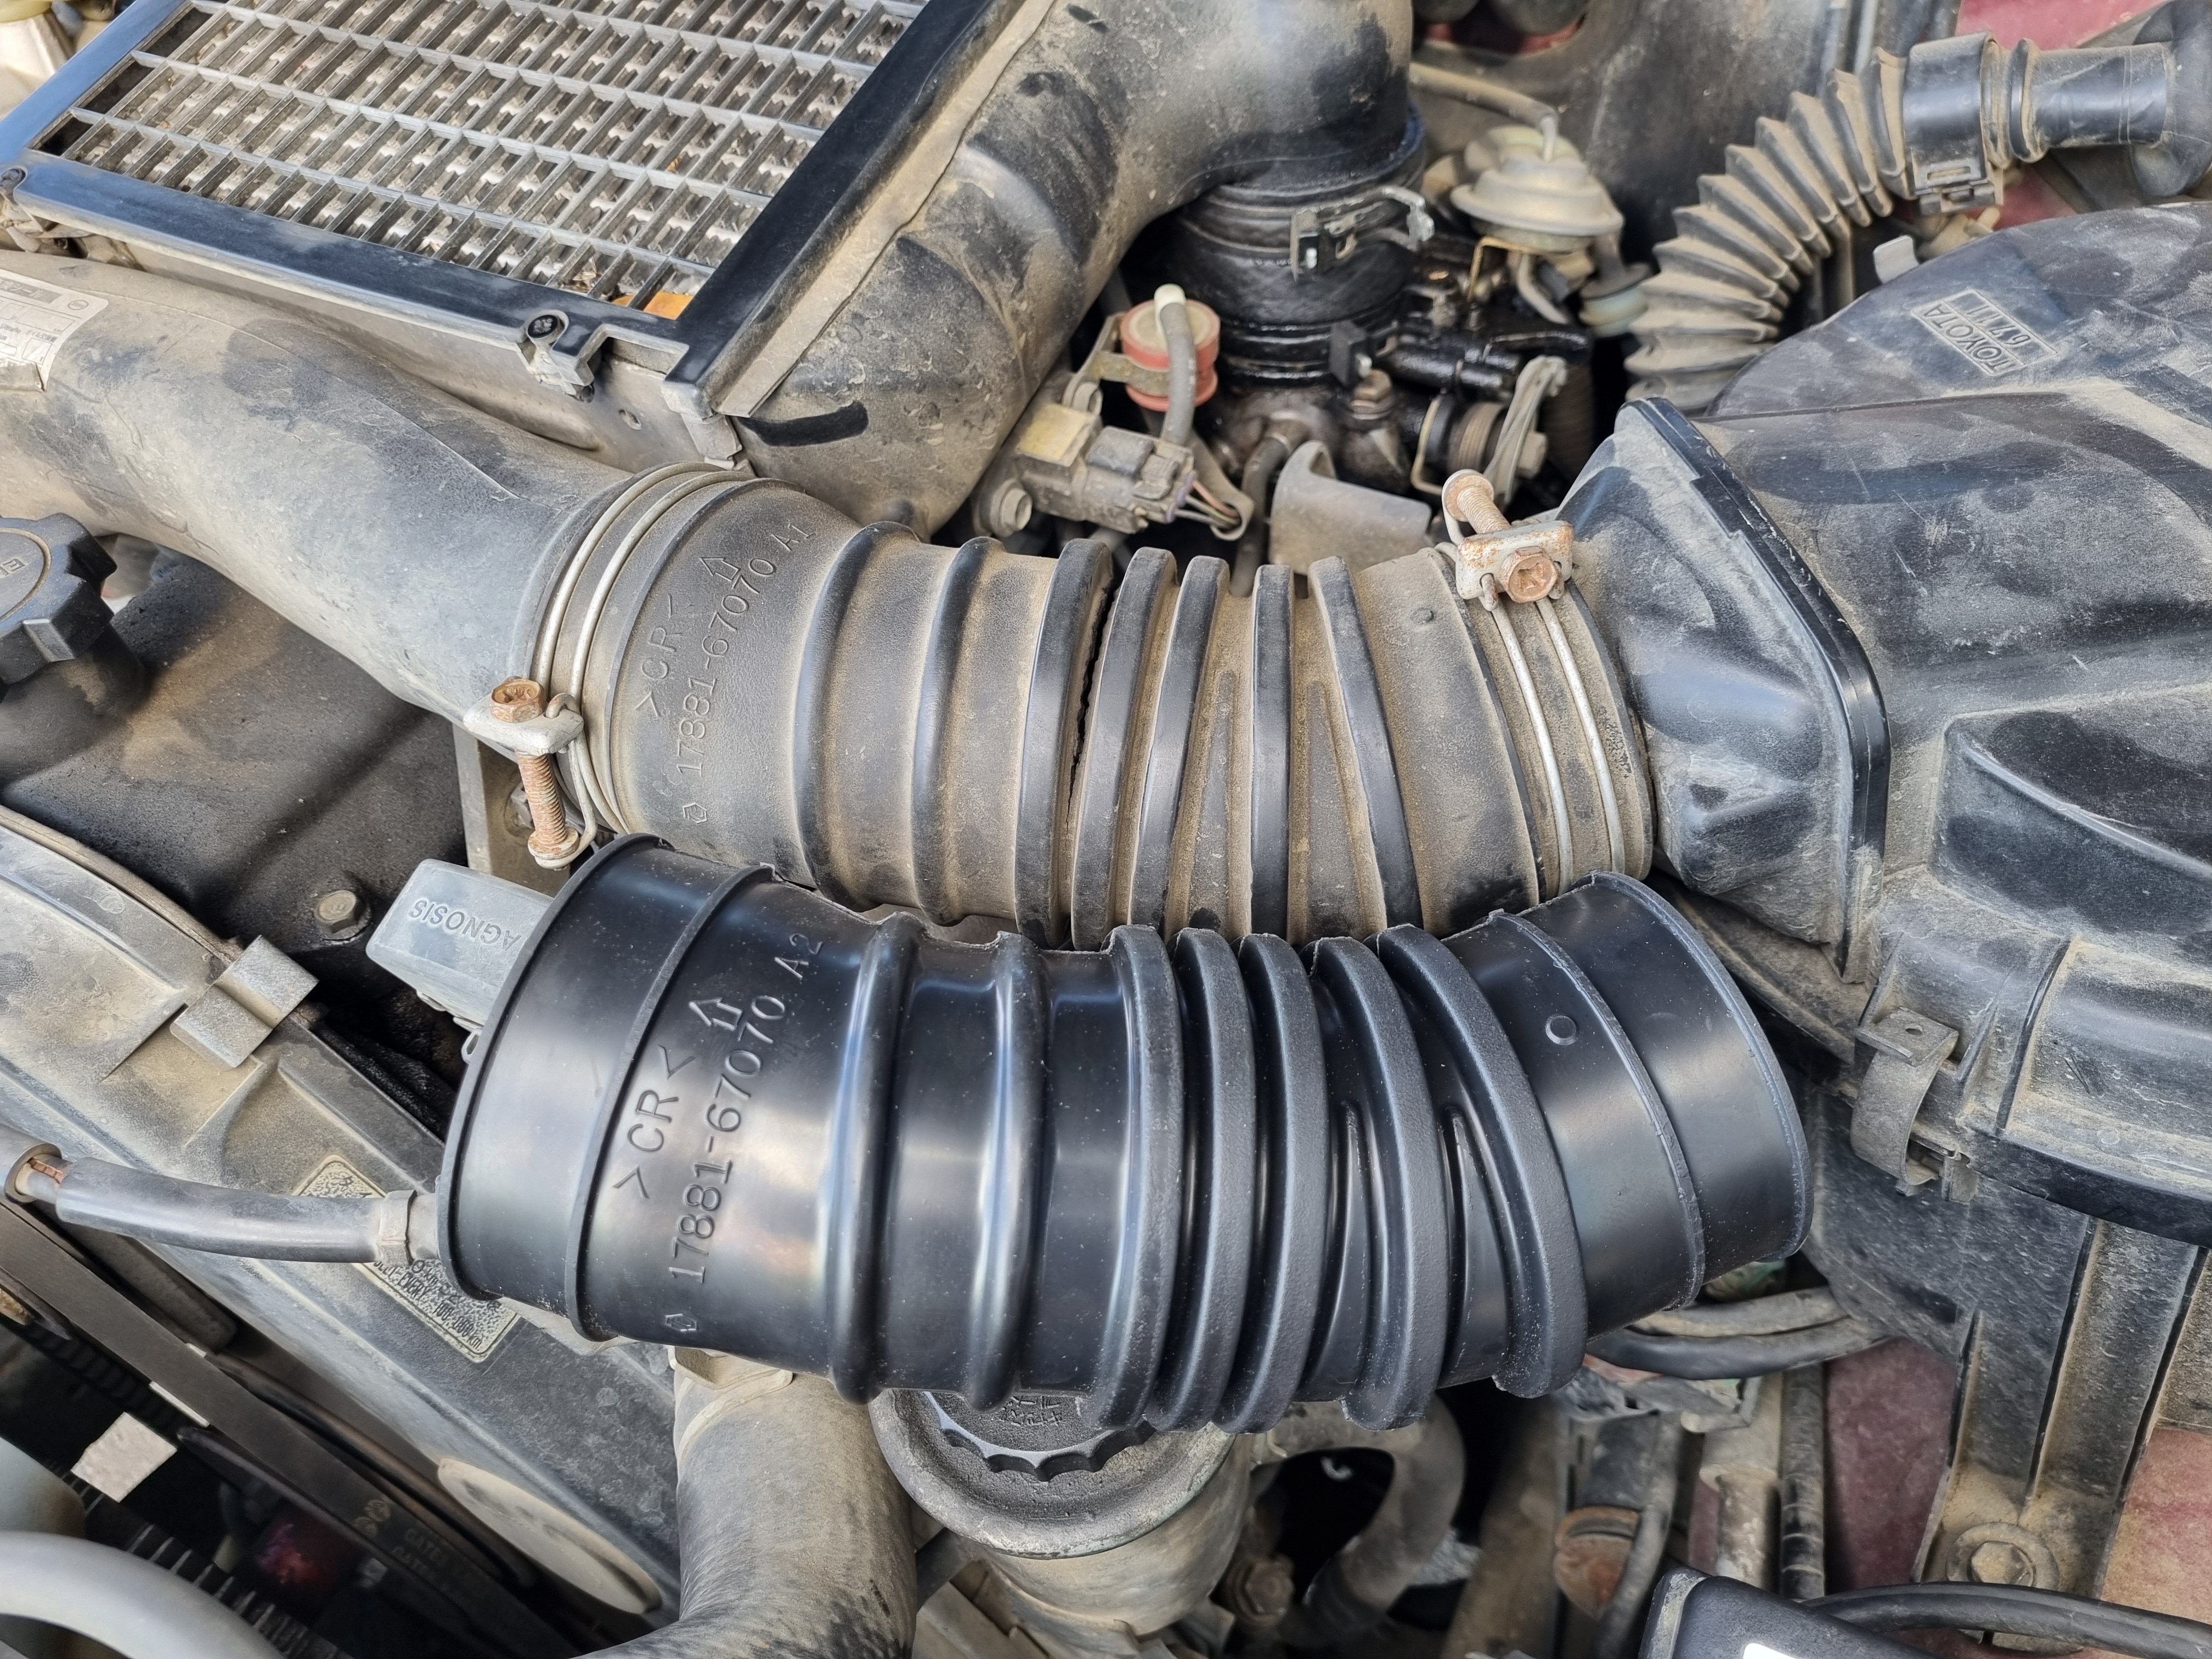
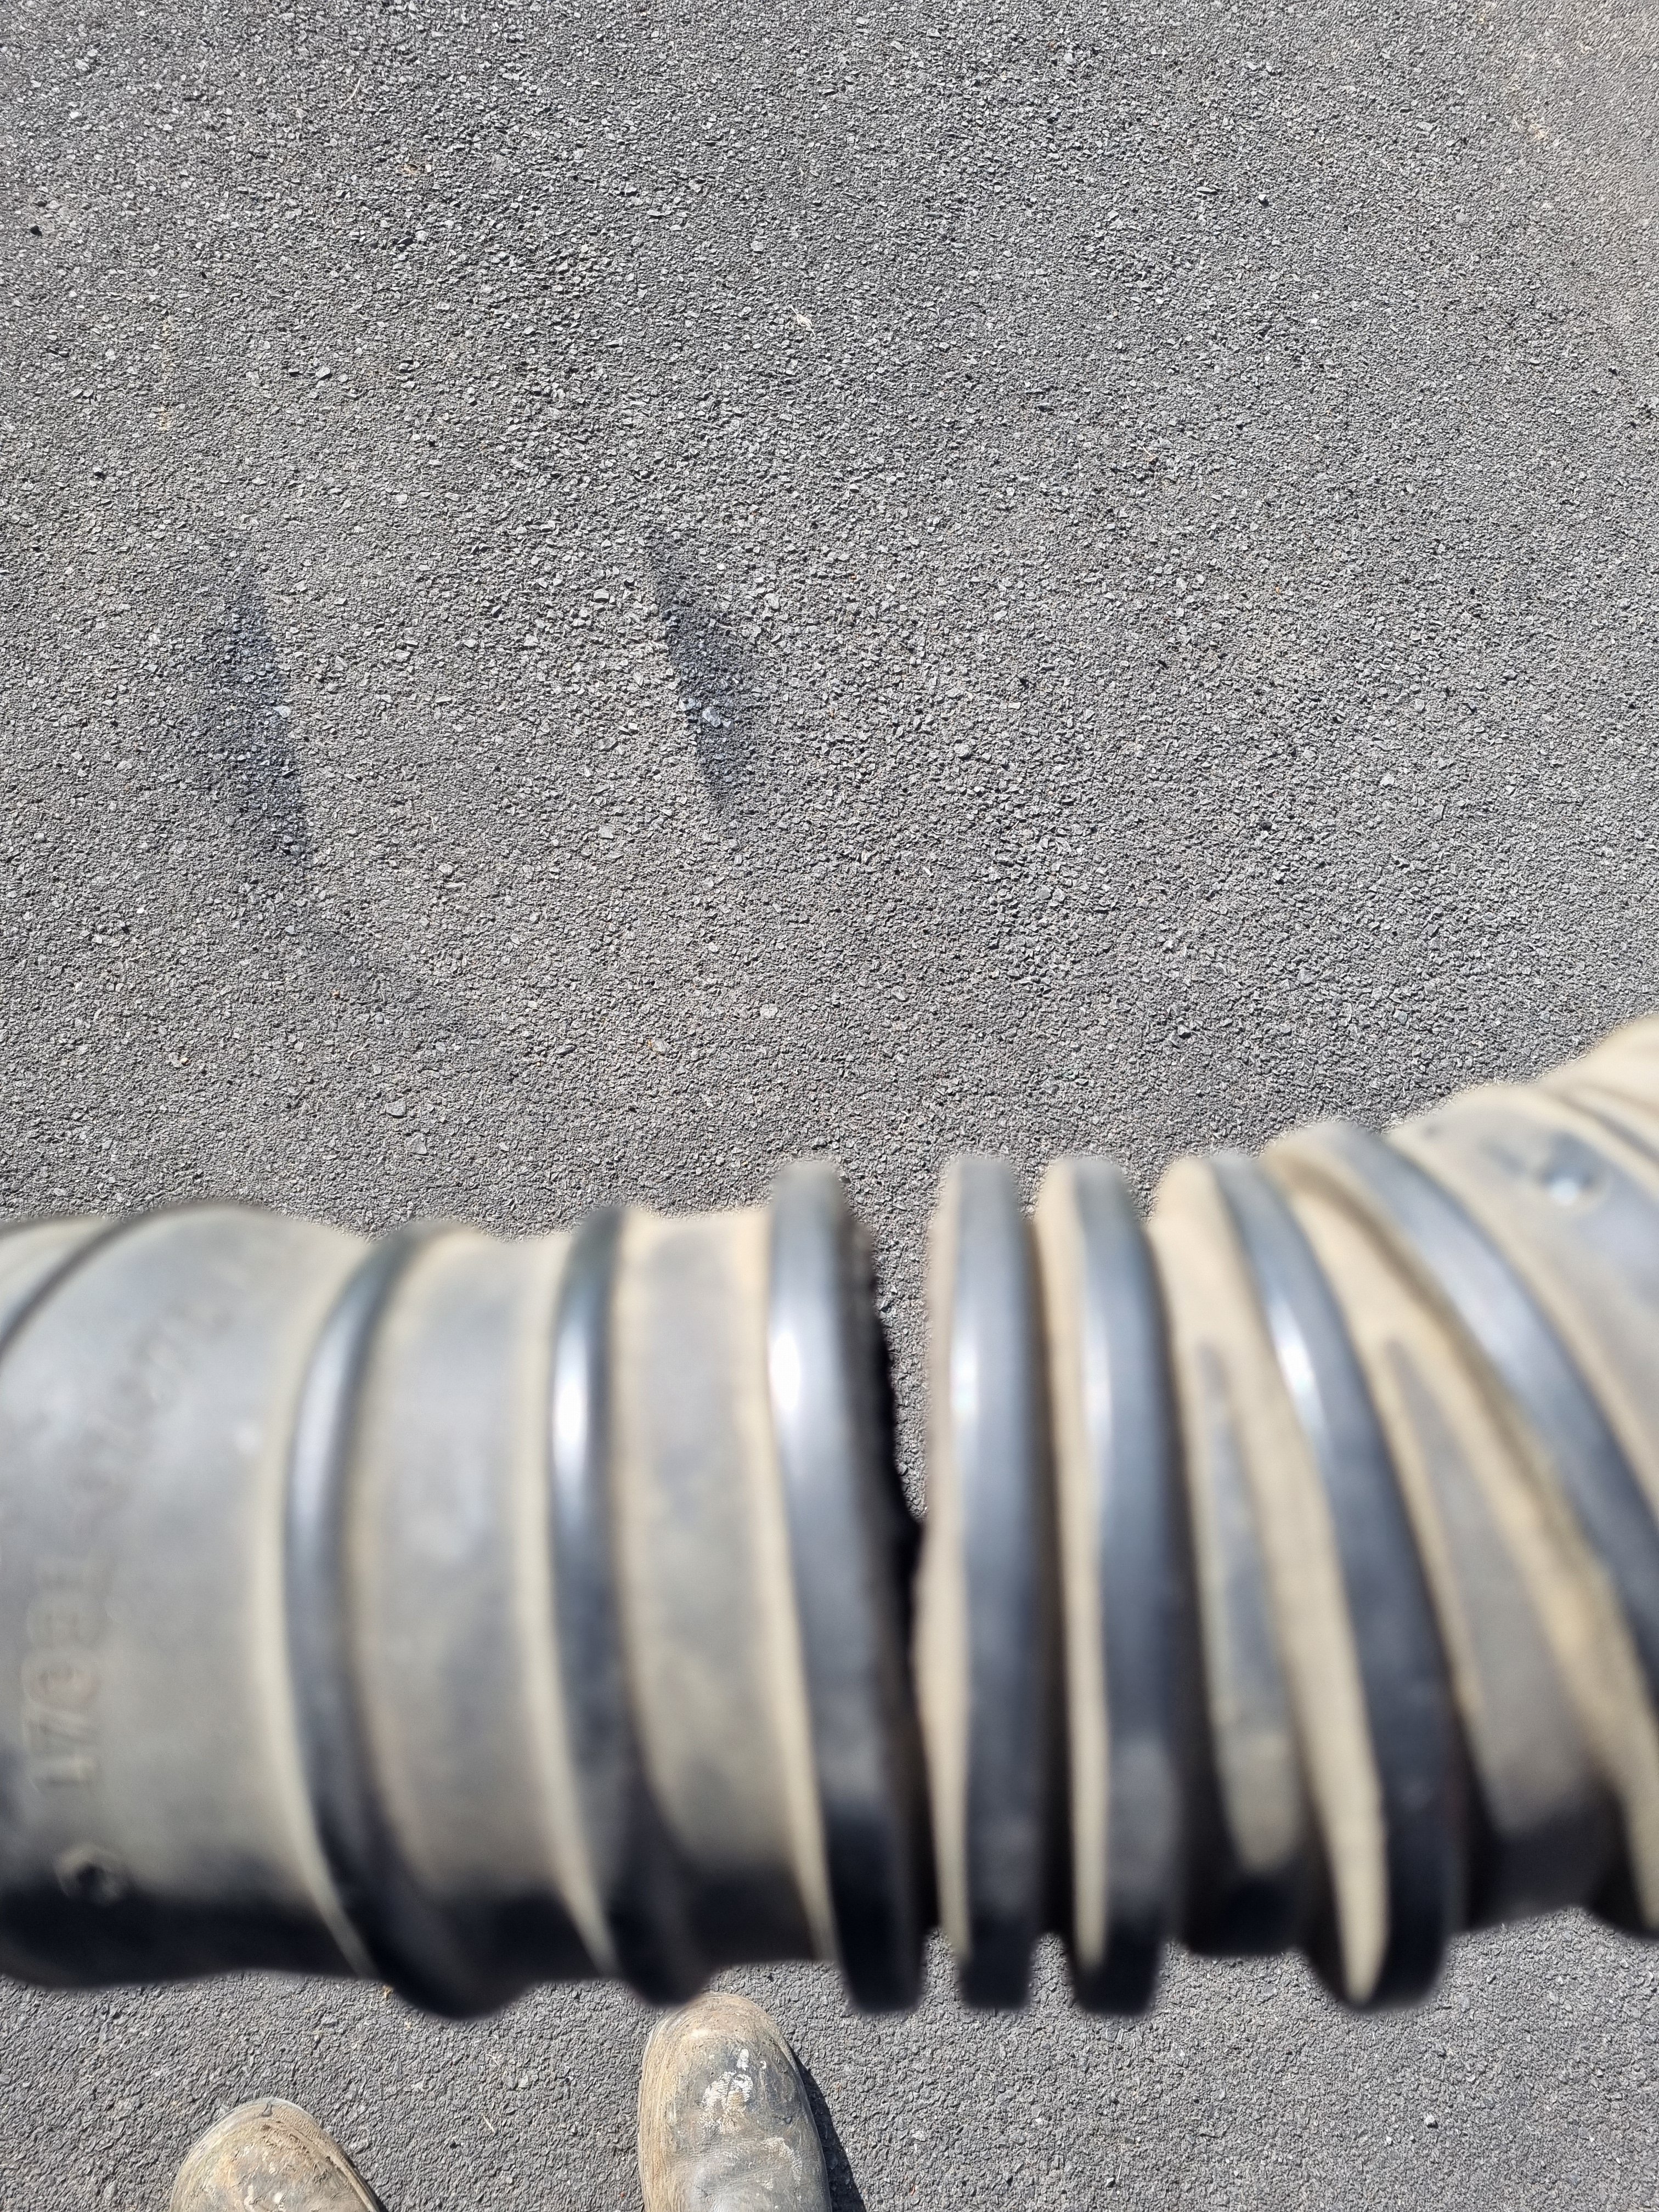
I went on a barry rabbit hole and found out pretty much all 92-2001 small hondas (b and d series motors) all have the same ac compressor. I noticed the orthia has a nicer shaped discharge (heh) hose, the crv has the same shaped hose so I grabed one from pick a part. It brings the line closer to the chassis rail and away from potential turbo stuff. Found a service port adapter and valve removal tool on rock auto for cheap so got them with some other stuff I had coming. Now low side has a R134 service port, it took me a few attempts to realise I needed to remove the old valve before screwing that fitting on I also grabbed a high pressure line off a ba Falcon so I can use the service port off that or just use the line as sleeve. I also figured out the self install or diy ac line kits use oetiker or double ear clamps on their lines. Once the condenser arrives I plan to chop the crv condenser end off and use the ear clamps on one of the fittings I got off AliExpress. If it doesn't work it was a $30 experiment and I can still use the crv alloy shaped hose and braze a mior fitting onto it1 point
-
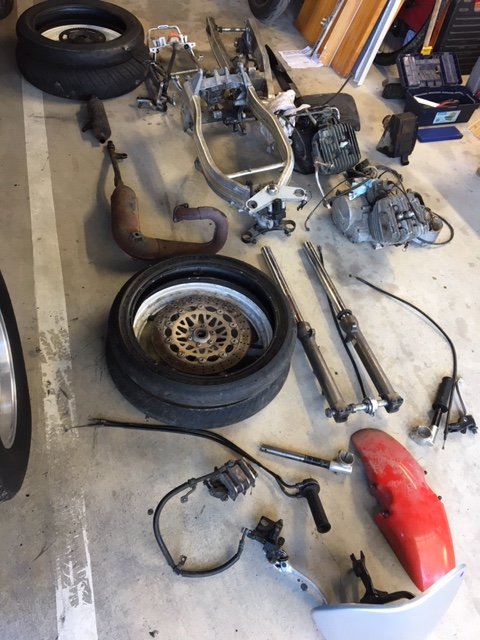
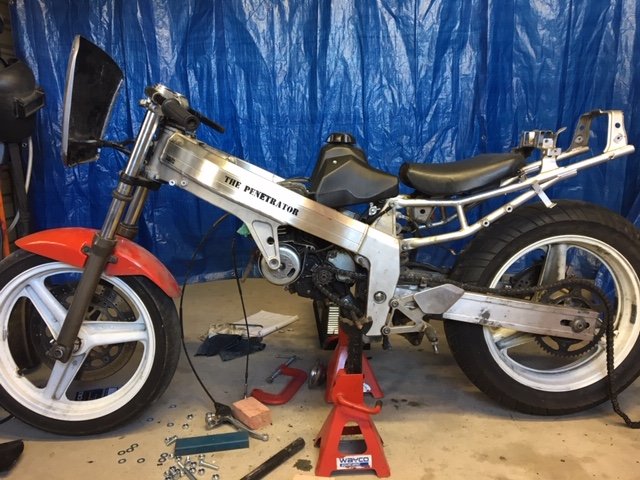
I've been meaning to start a build thread for this for ages. When we were living in Nelson I decided to get into Bucket Bike Racing. @Duke Blackwood was parting out a CBR250RR, and @Bellicose (I think) was selling a TF125, which seemed like it might be a good combination. So some deals were struck, Blackwood picked up the TF and stripped it down and put the lot on a pallet destined for Nelson. According to the timestamp on my photos it arrived on the 14th of September 2017. It didn't take me long to start mocking things up and get the motor mounted, it was a very easy fit in place of the 4 cylinder donk!
1 point
-
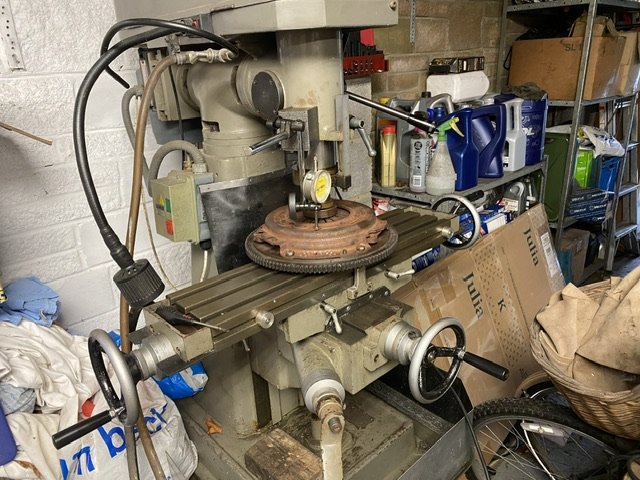
Update on this. Checked crank endfloat. 0.2mm. My build notes say it was 0.17mm when first assembled 28k miles ago. So that’s good. Did some testing using the mill That’s the combo that’s just come out. The friction plate is only about 1/2 worn at 7.35mm. It starts to release about 6.5mm but needs 8 to fully release as the spring has gone lopsided. That, with sticky splines will be the wide biting point I think. The same friction disc with my new Sachs cover starts to release at 3.5mm and is fully free at 4mm. I gathered up the wreckage and took it to my localish clutch shop. He was very polite, but I think he was telling me his competitors friction plate spline was made of cheese. No doubt on his thoughts on the QH cover…. Bin food (that was before I fitted it!). They made me a replacement friction plate in an hour…. And it was half the price of the last one. Top service! The new friction plate is 8mm thick and with the Sachs cover needs 5.5mm to start to release and is fully free by 6mm. Meanwhile, I put my hybrid bell housing on the mill. Engine side face was a little wobbly so I faced it. Took less than 1mm to clean. Fitted the backplate, flywheel and bell to my spare engine. Then posted the gear box in from behind. Spigot picks up in the pilot bearing first then the gearbox/bell dowels engage. Little bit of a wiggle and shove and on it pops. Alignment can’t be too bad. But to check another way…. pop the backplate on the bell and it’s very tempting to think that 4” (3.997” in fact) hole might be intended to be concentric….. but is it? Being both lazy and cheap I spent 10 minutes rummaging through my junk looking for a ready made tool…. Turns out I have this 3 jaw chuck which measures 3.993” and easy to nip onto the spigot. Pops right on, no wiggles needed. I think she’s good. Have also clocked the backplate on the mill. It’s a bit dished (0.5mm), but evenly so. Within 0.2mm. Better than my 2 spares…. Made an alignment tool Running out of excuses not to refit, except I tweaked my back a week ago and the refit is intensely physical…
1 point
-
Also, goals1 point
-
I have a spare set of cables, levers and key if anyone needs them1 point
-
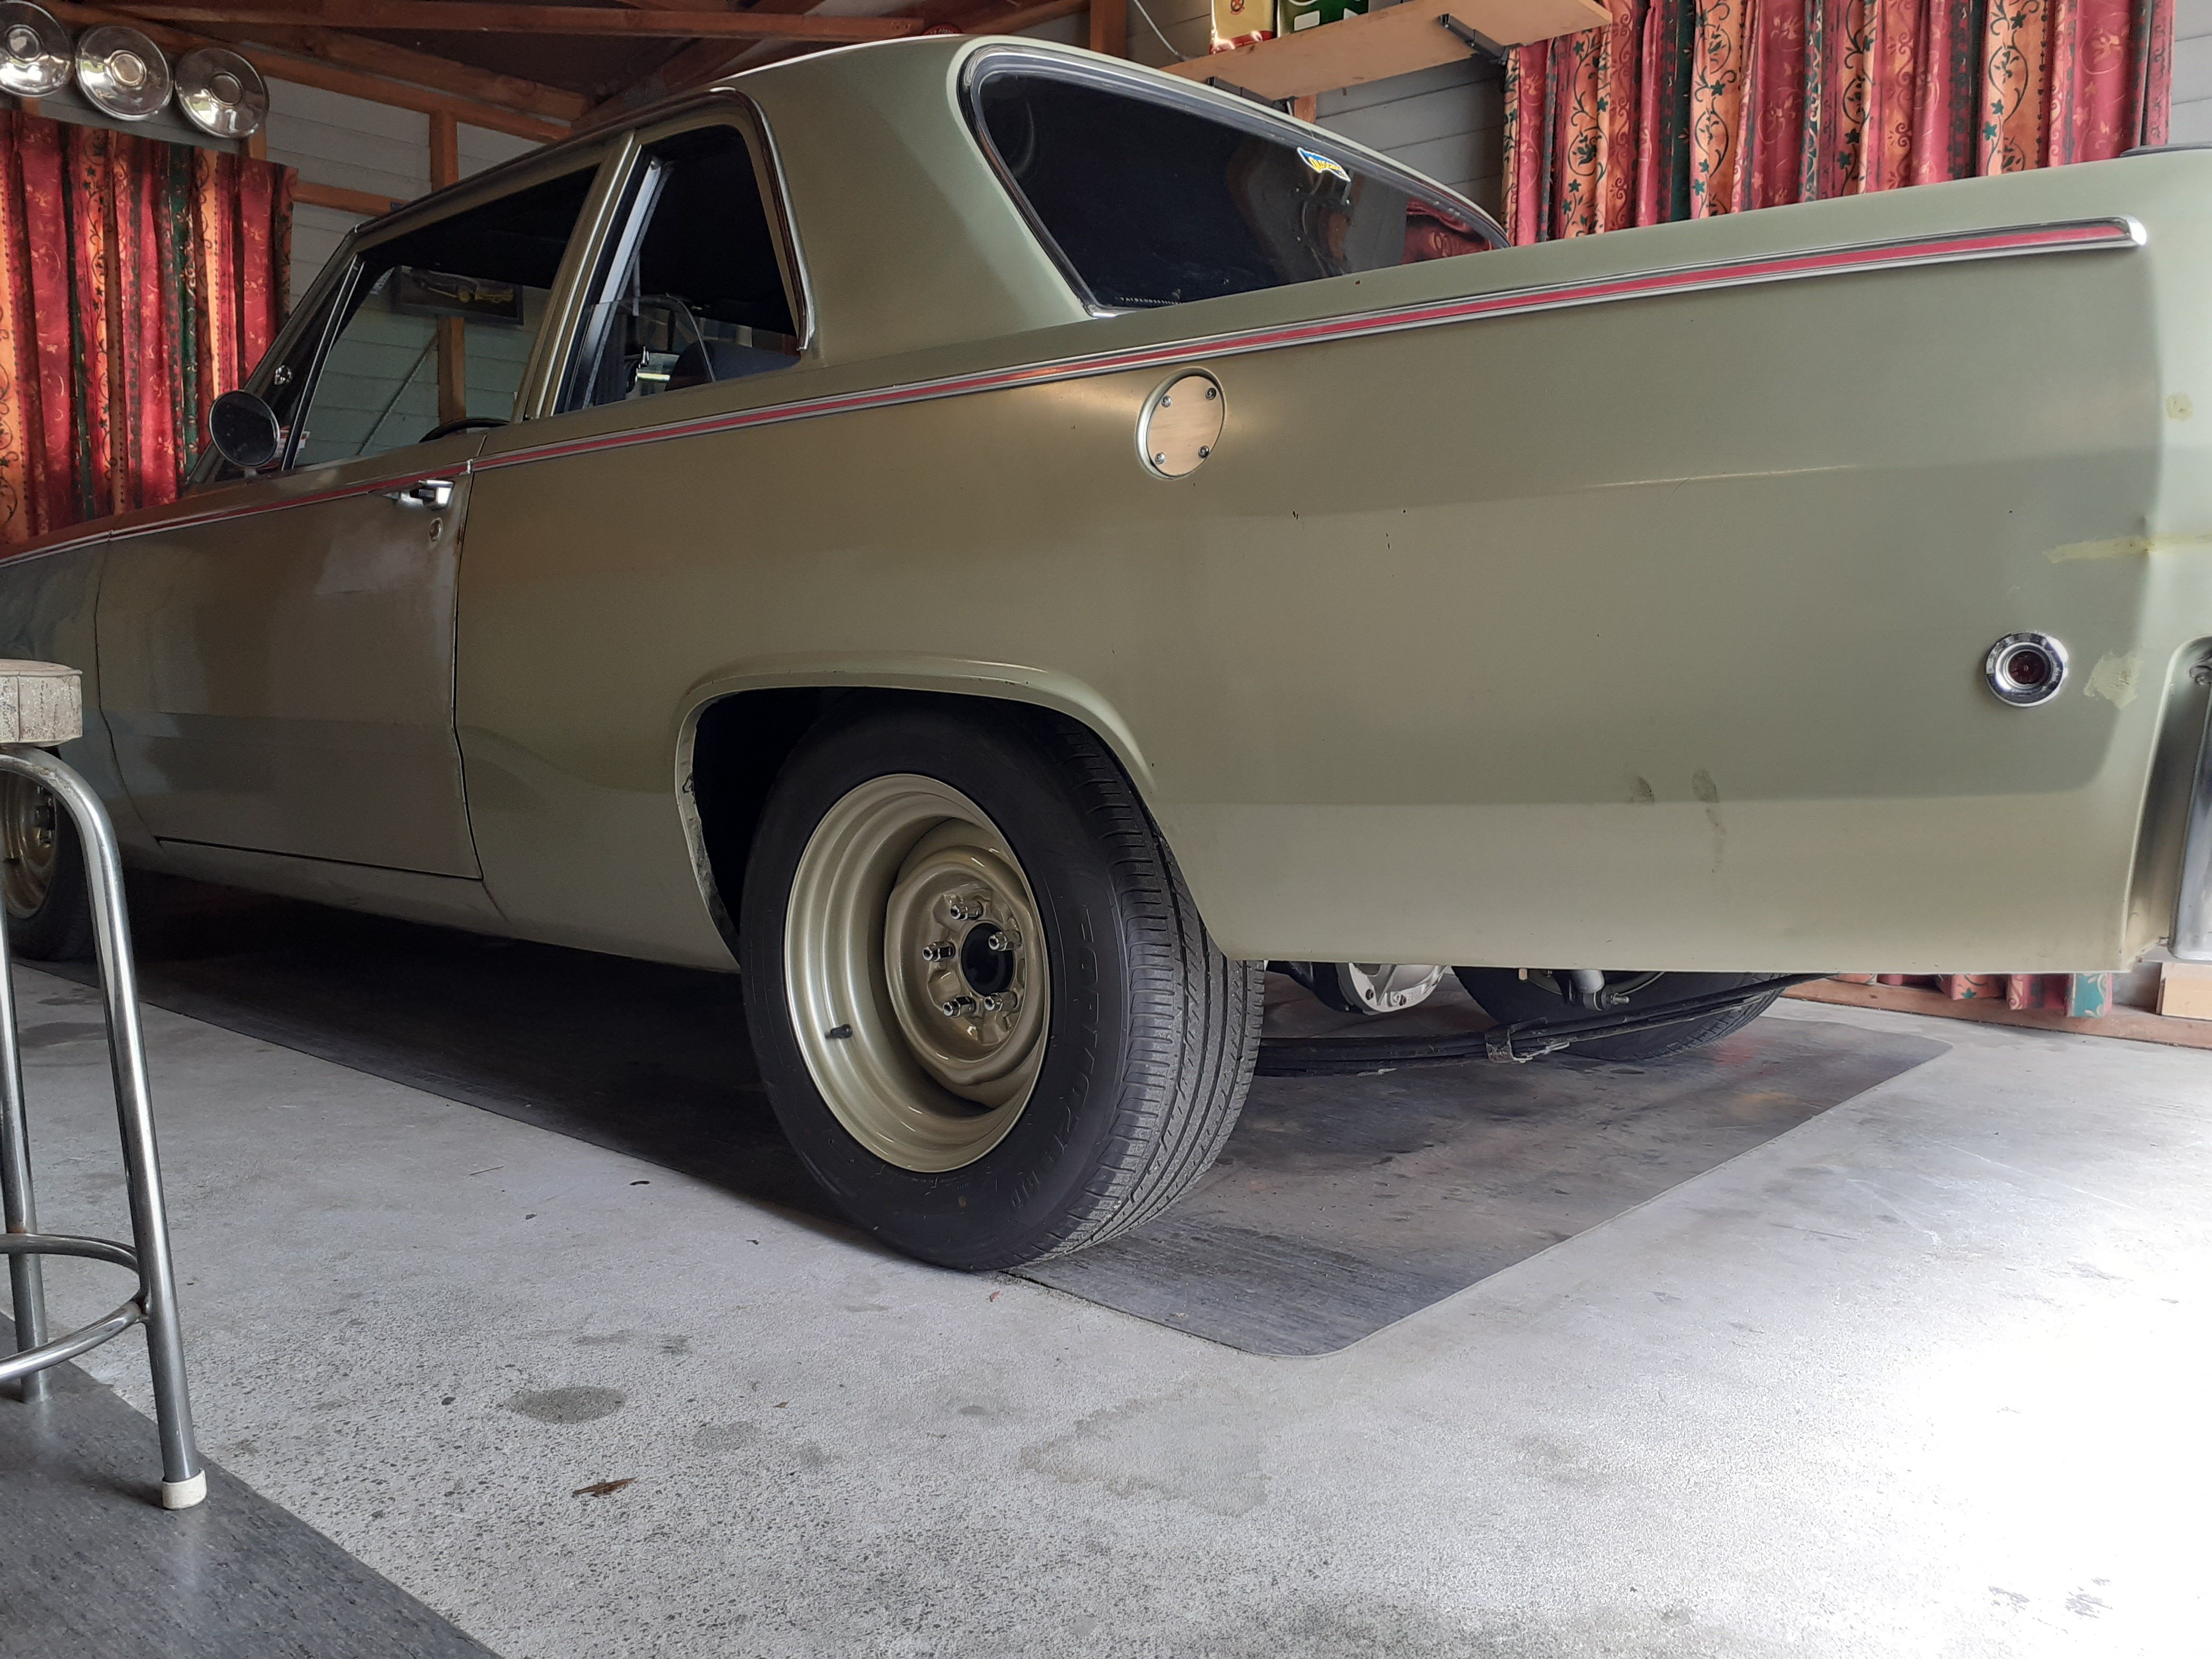
Nosecone is fully mounted, rough guards are on for mock up. this ute seems to be longer than the other ute. Probably built in a different factory as they are 4 years apart from memory.. im glad I chose to use this ute for RX3UTE, it is the same model and spec now.
1 point
-
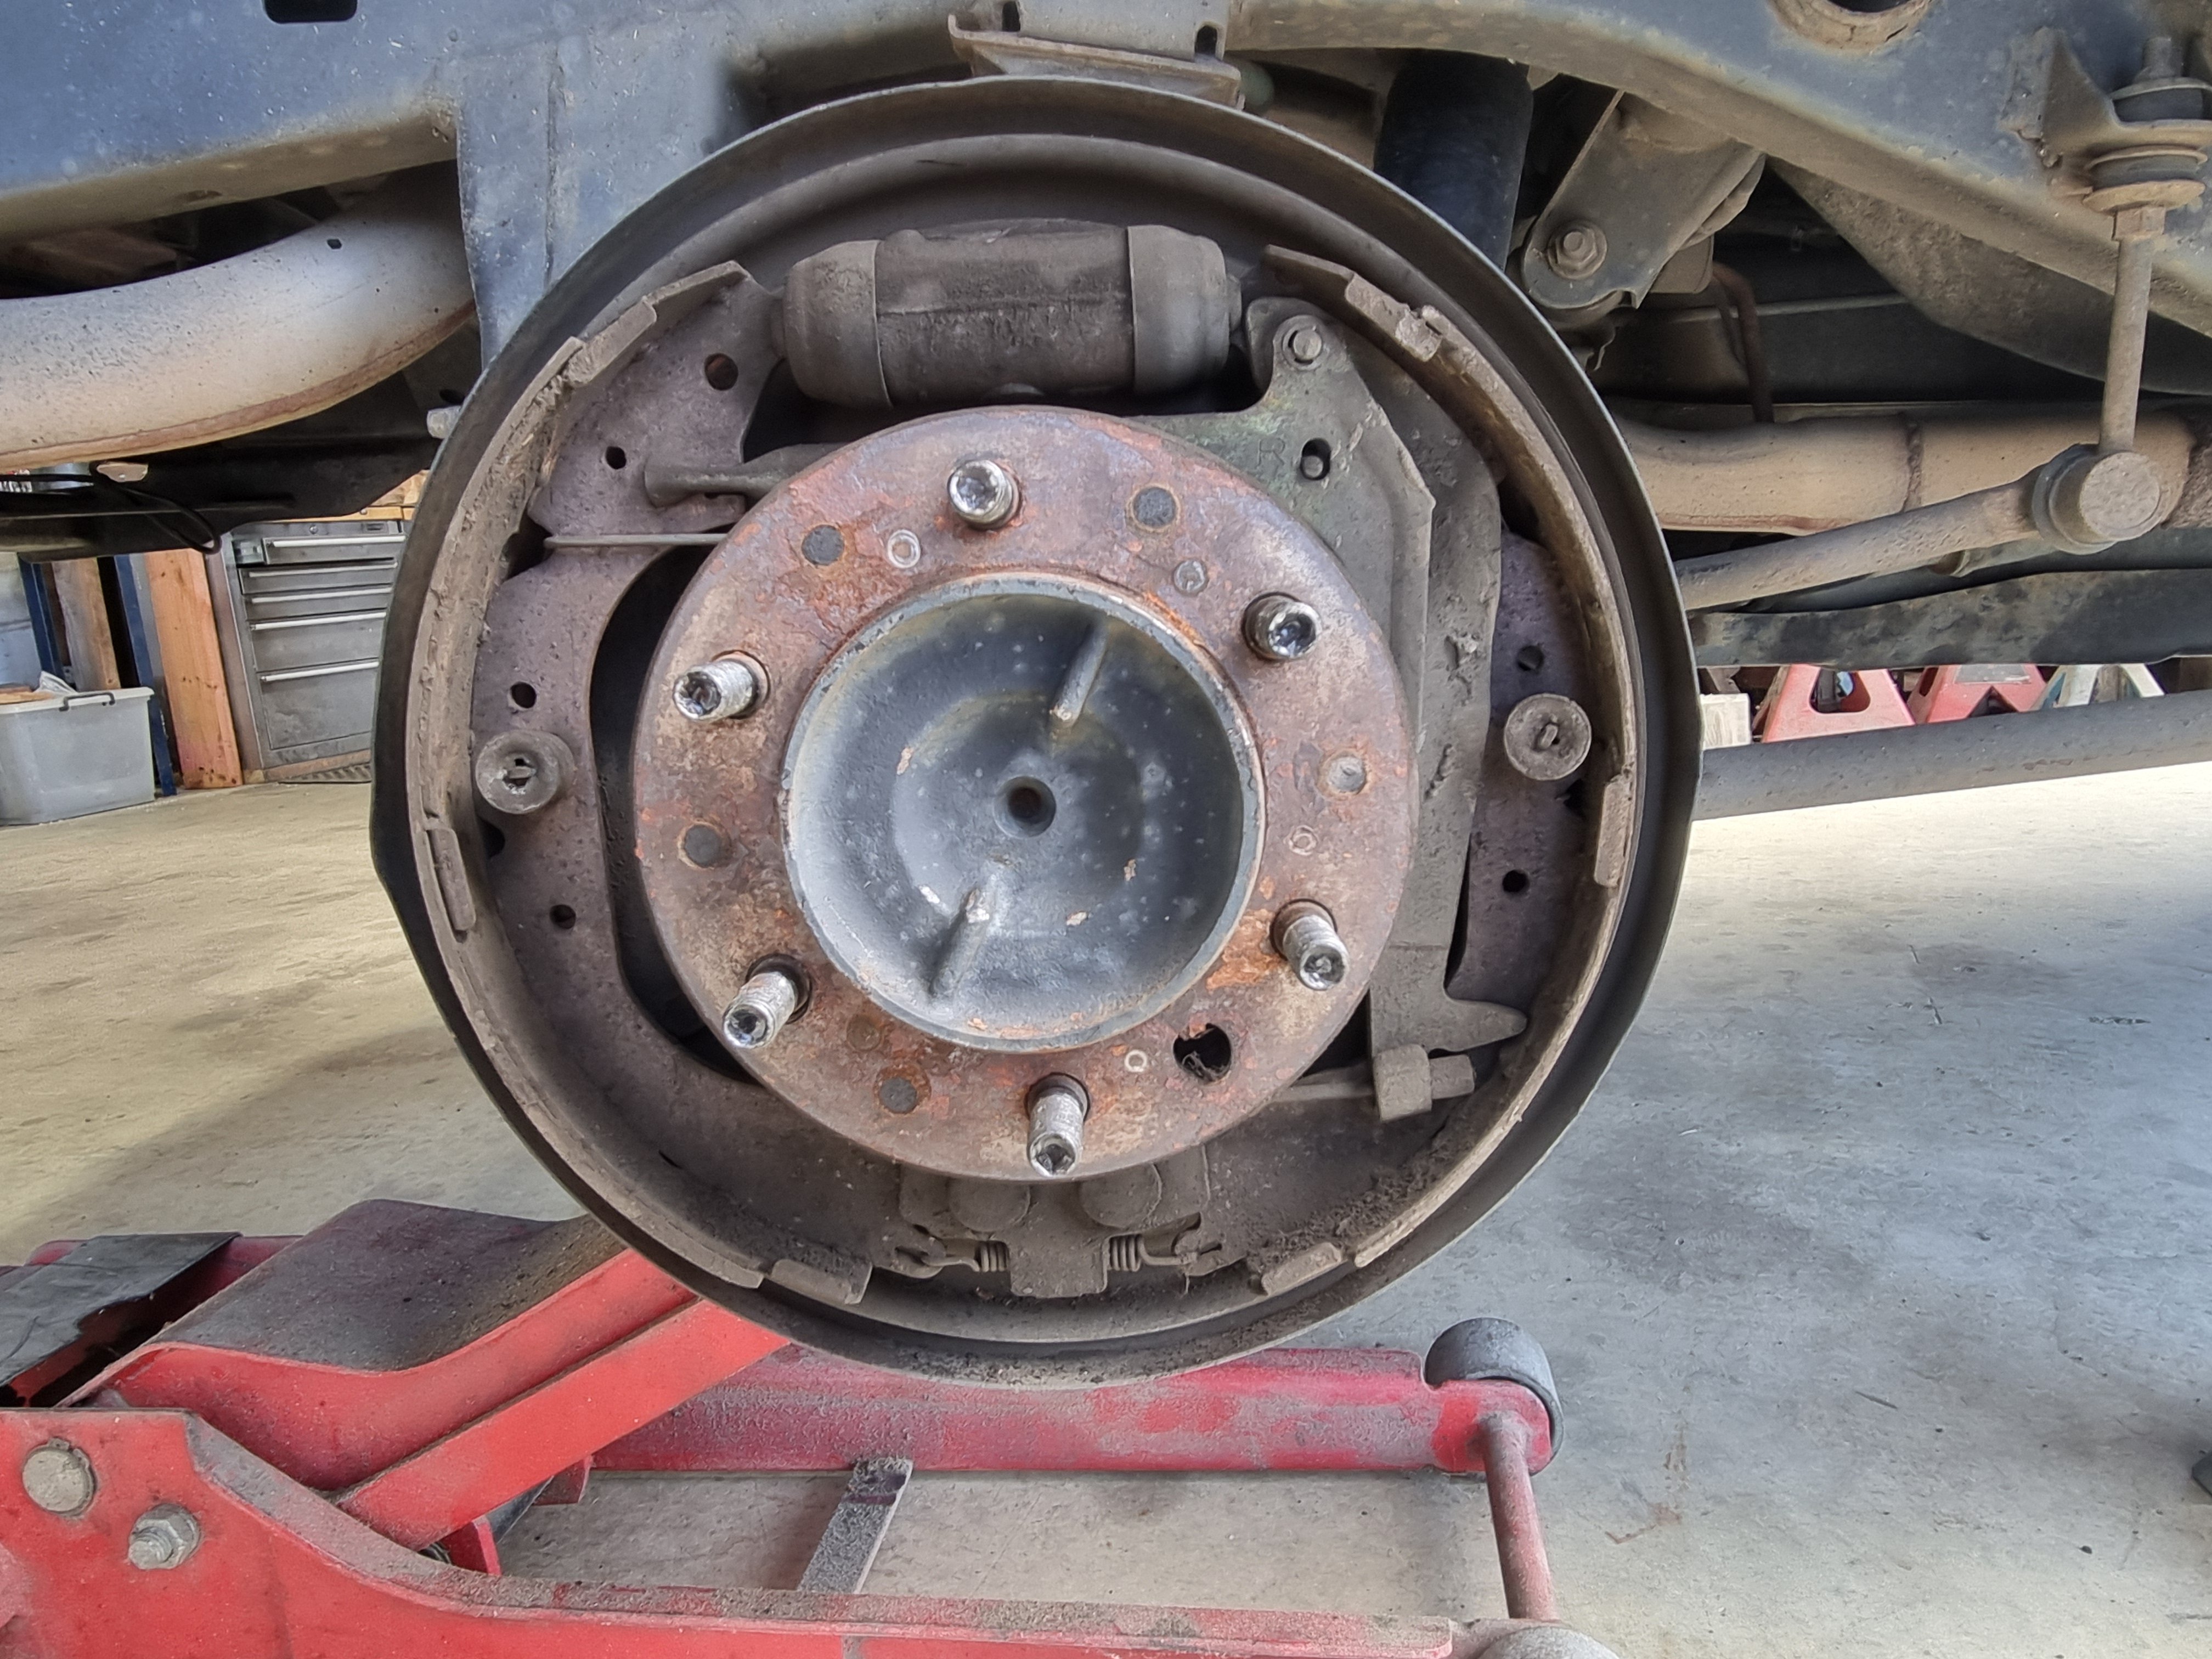
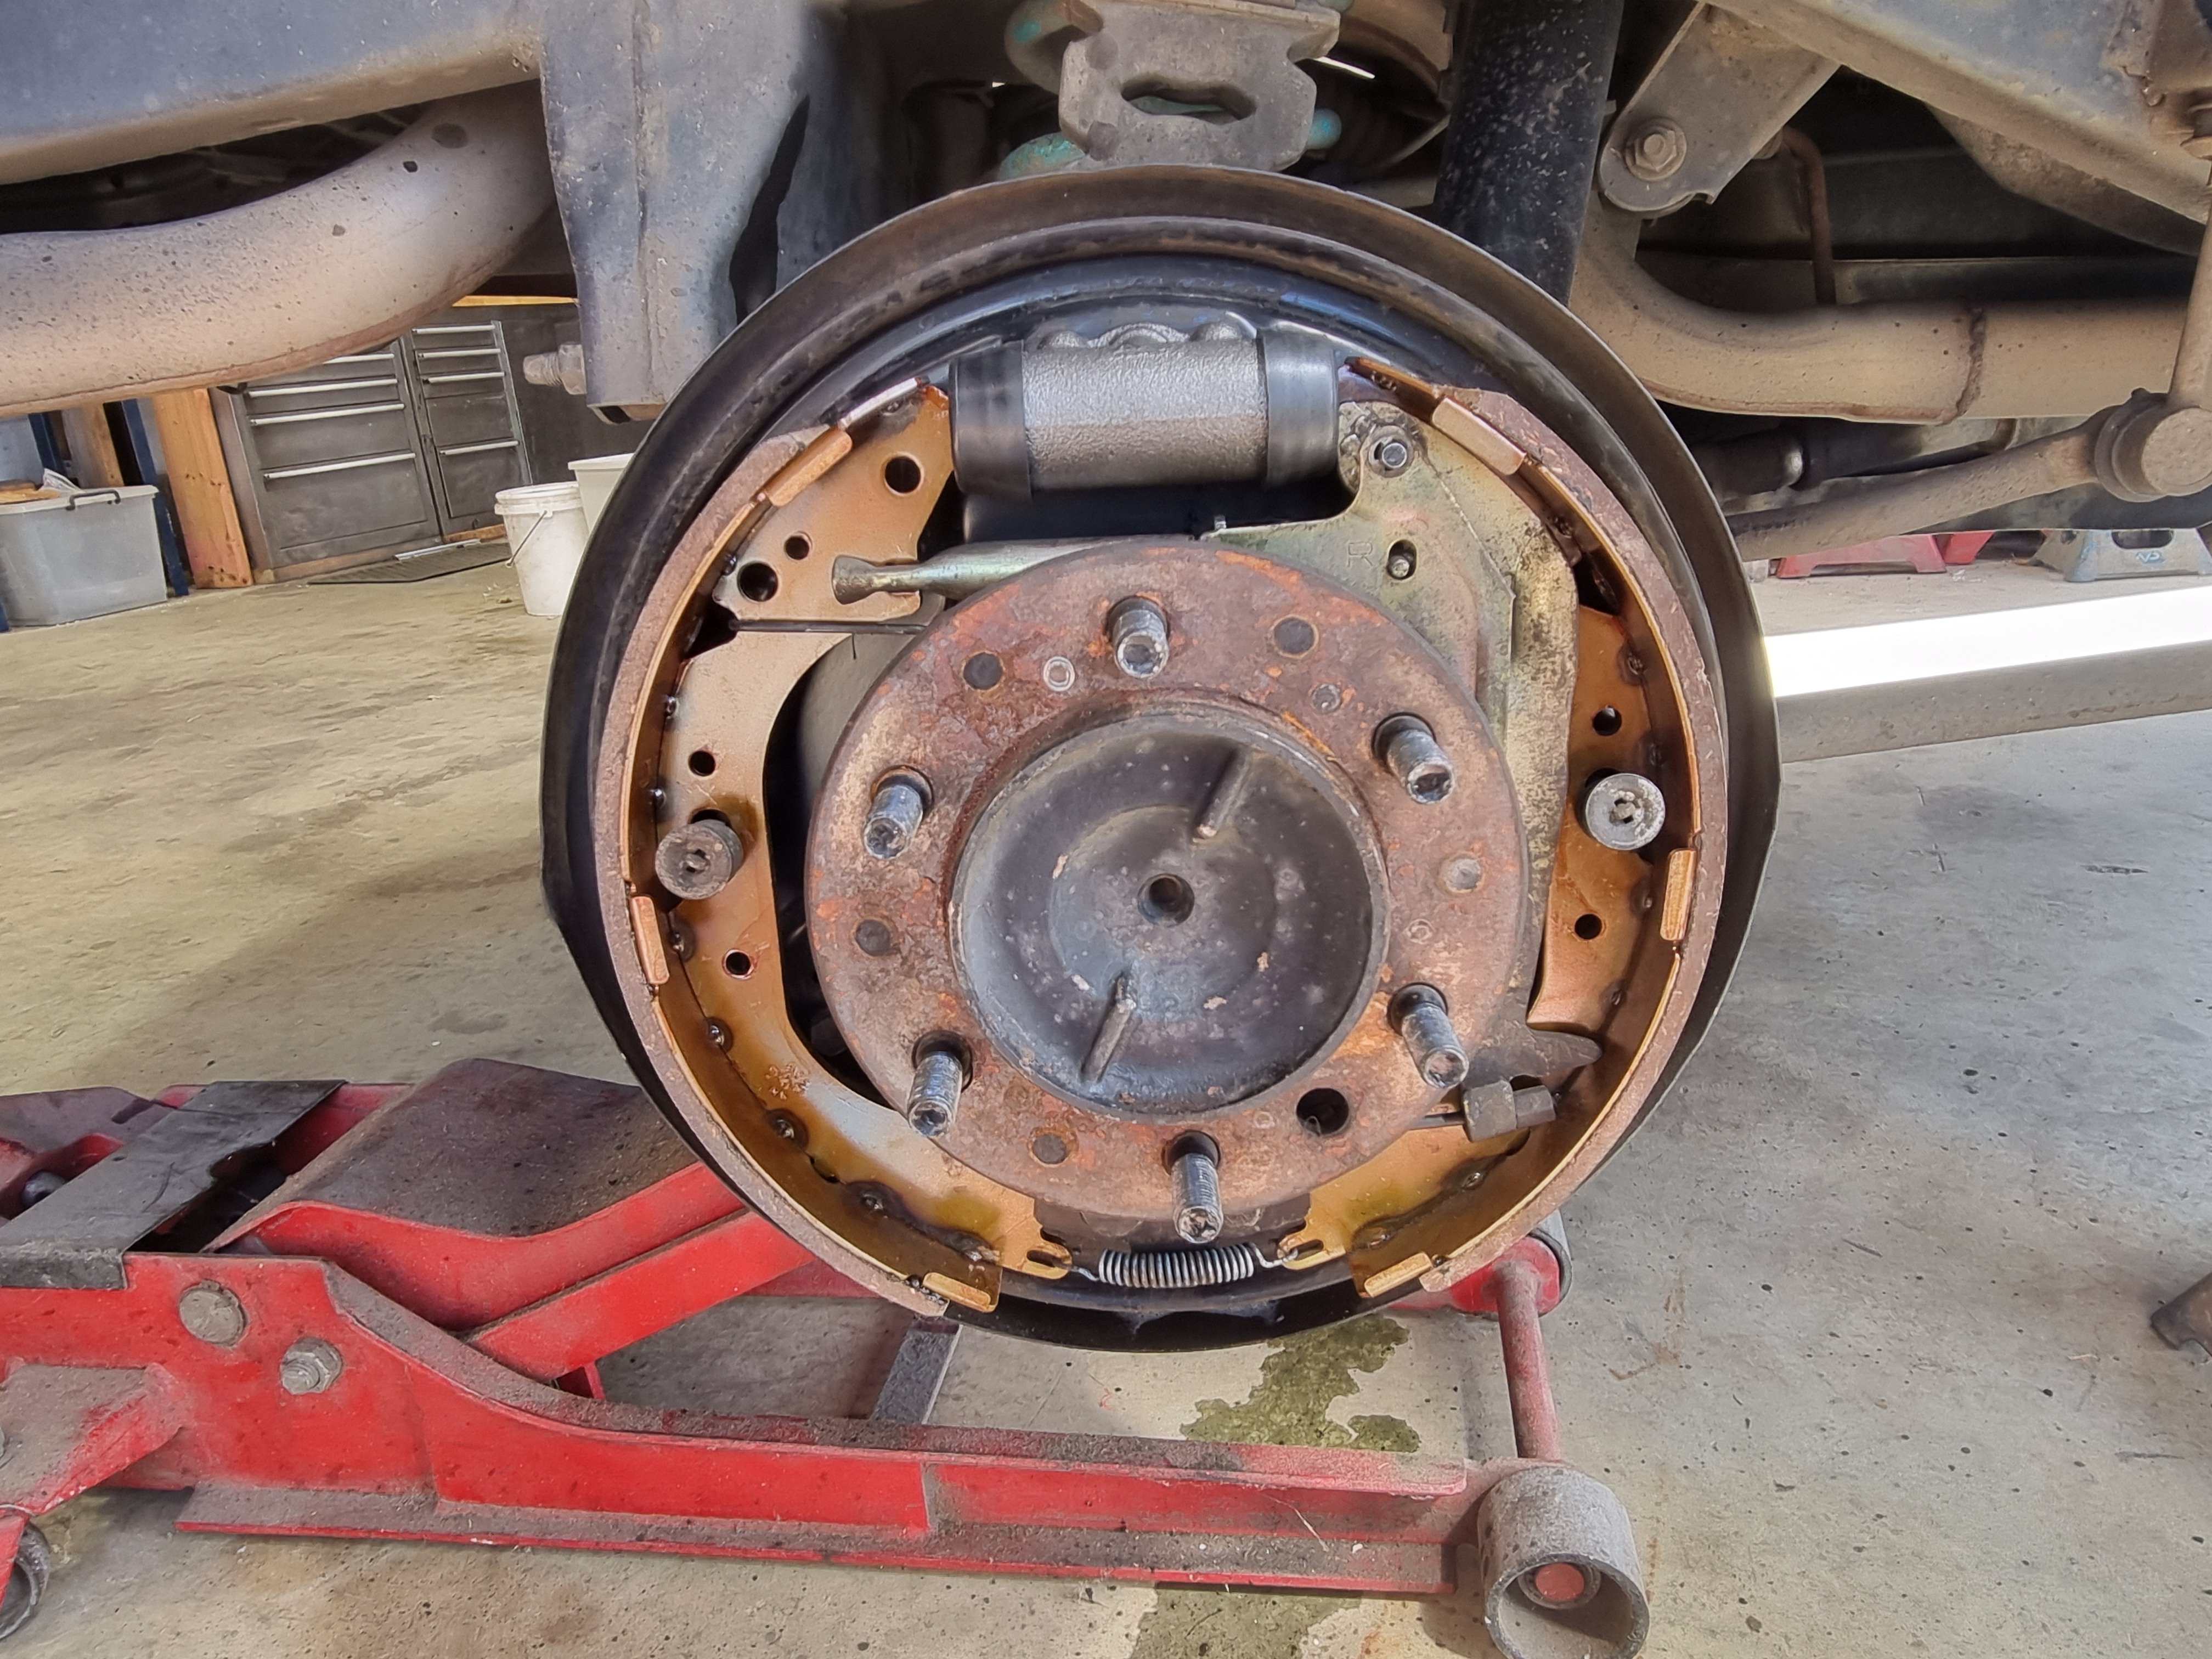
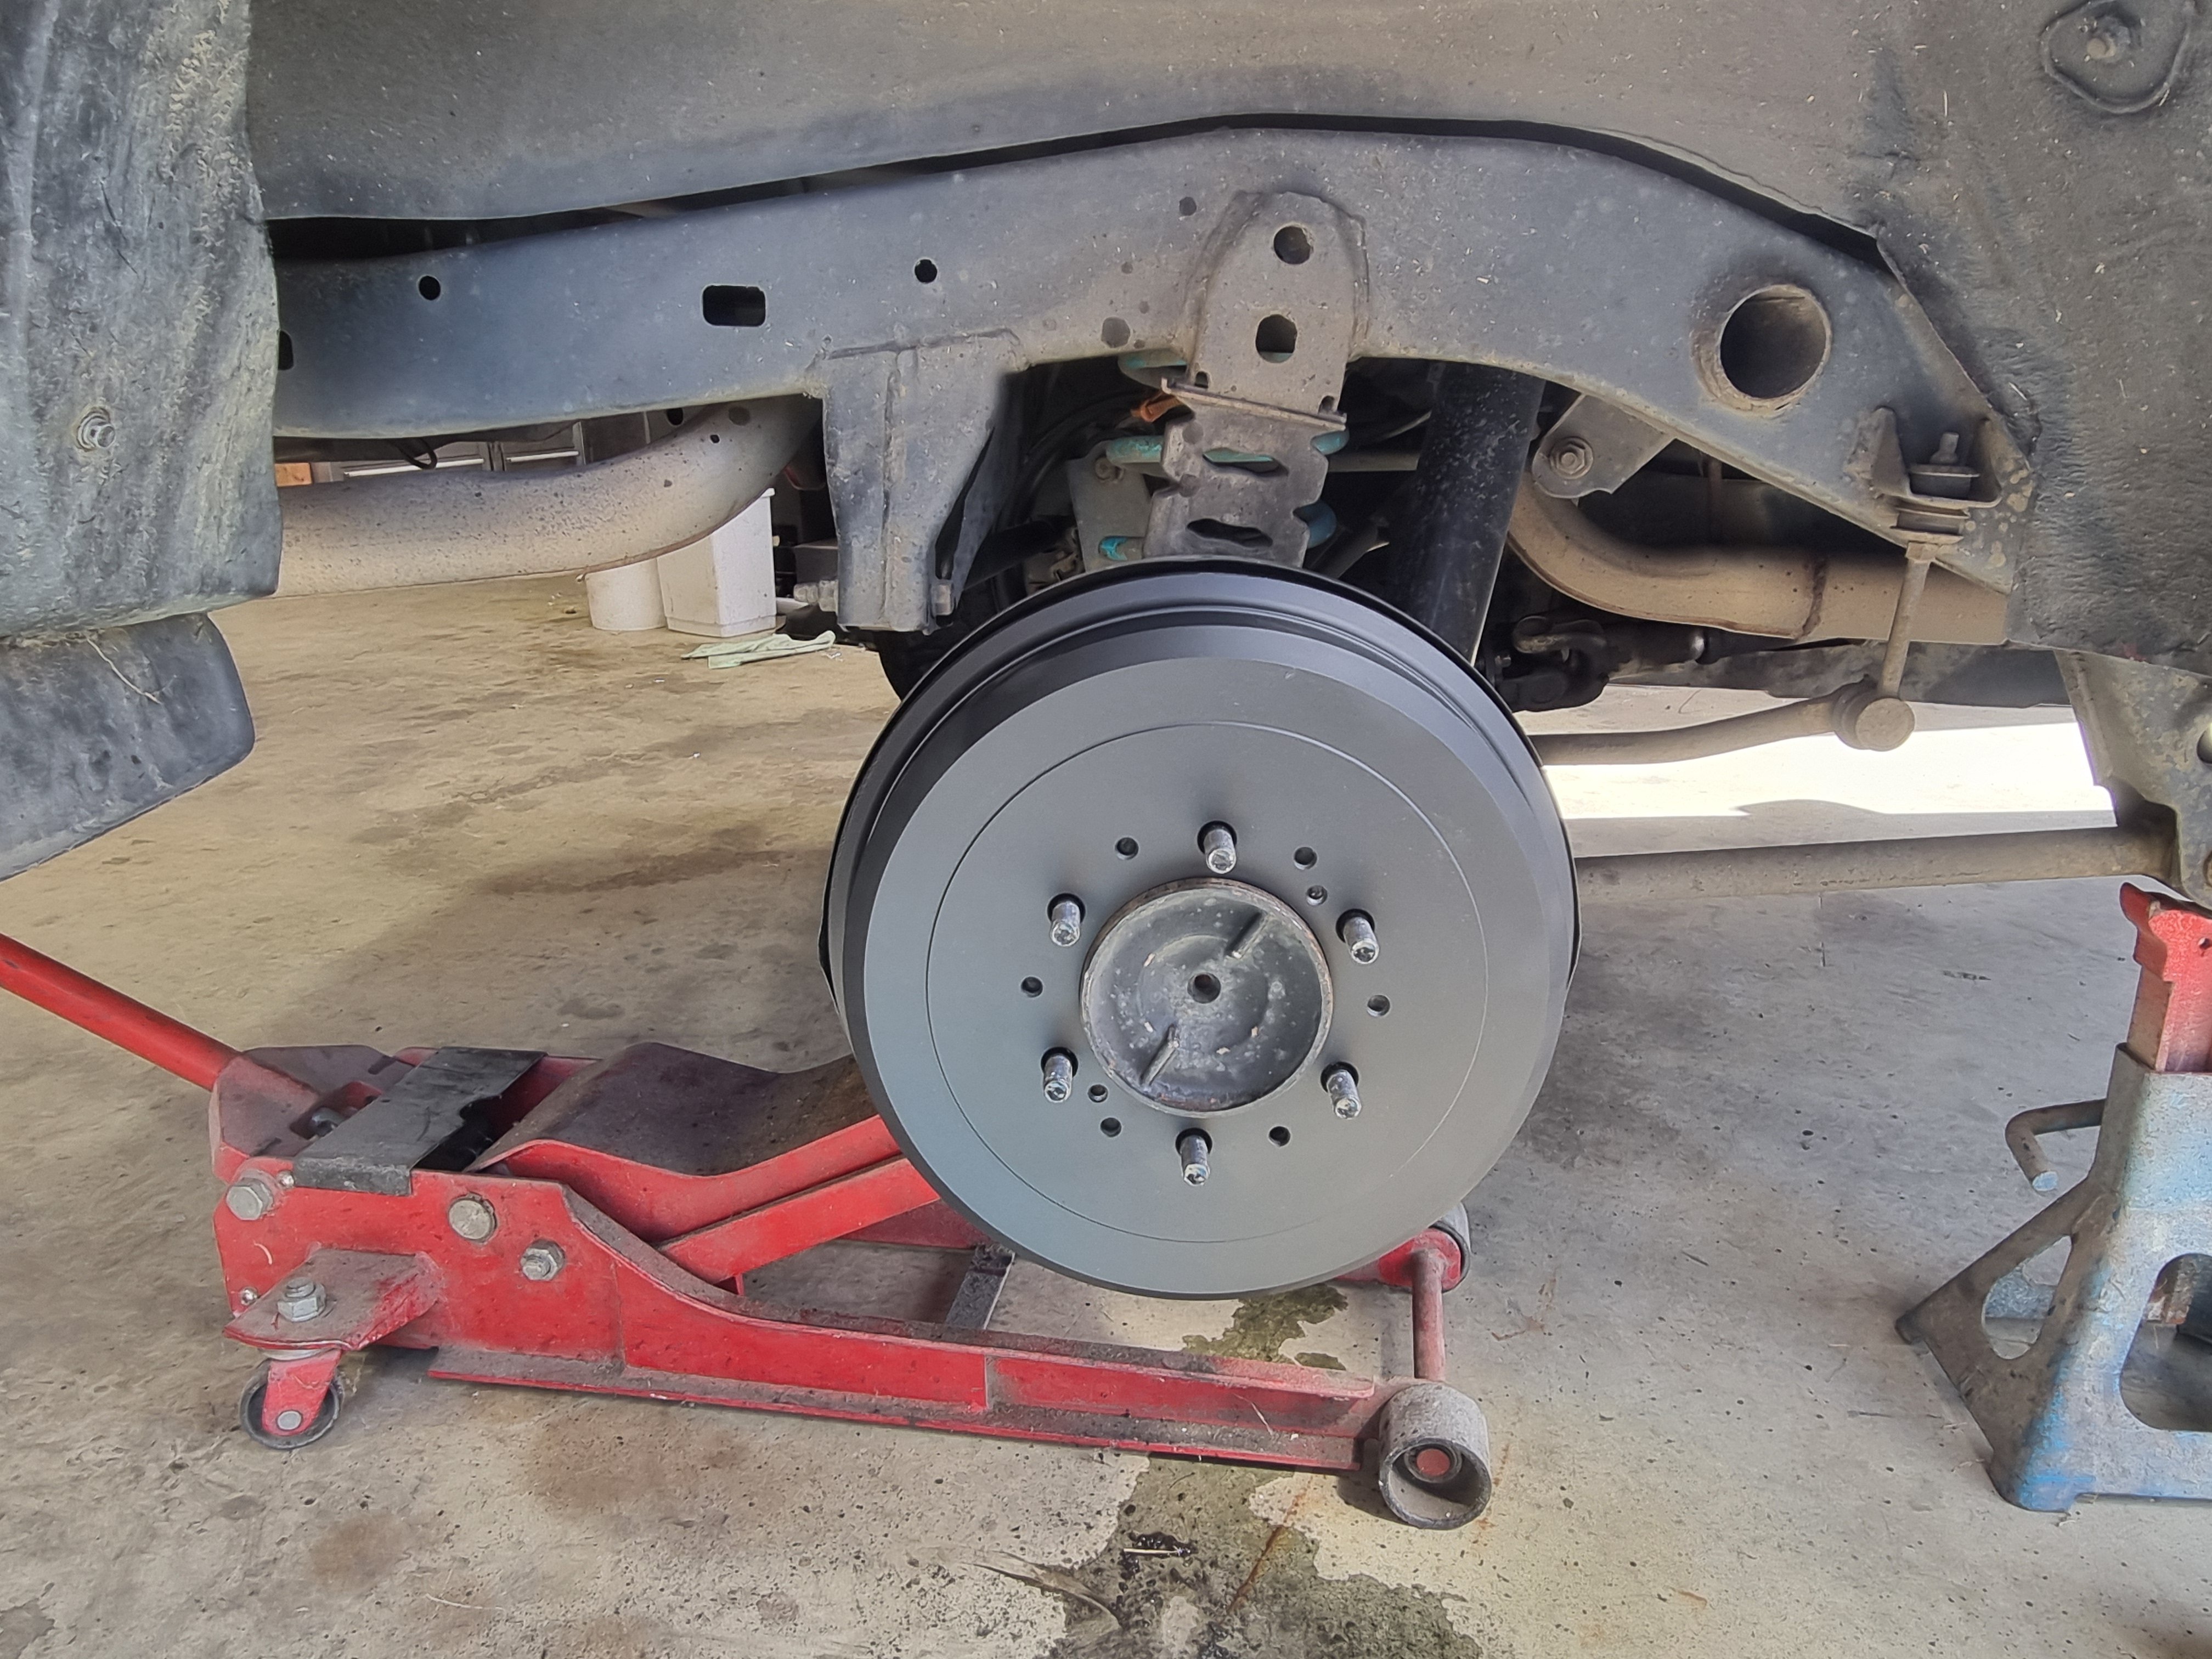
Finished up the new brake install. New shoes, new wheel cylinders and not pictured new front brake pads. To say that it stops better now is a bit of an understatement.
1 point
-
PM'd1 point
-
Replaced oil pump with other unit I have with the SQ Engineering additional relief valve spring setup to bump up the pressure, we seem to be good! If that still doesn't give me good pressure at all times i'll flick the cam caps off and have a measure up New Speedo drive is in so I've now got a work speedo Think that's it really, time for cert? Bumper is back and looking absolutely insane if you compare to what it was previously!1 point
-
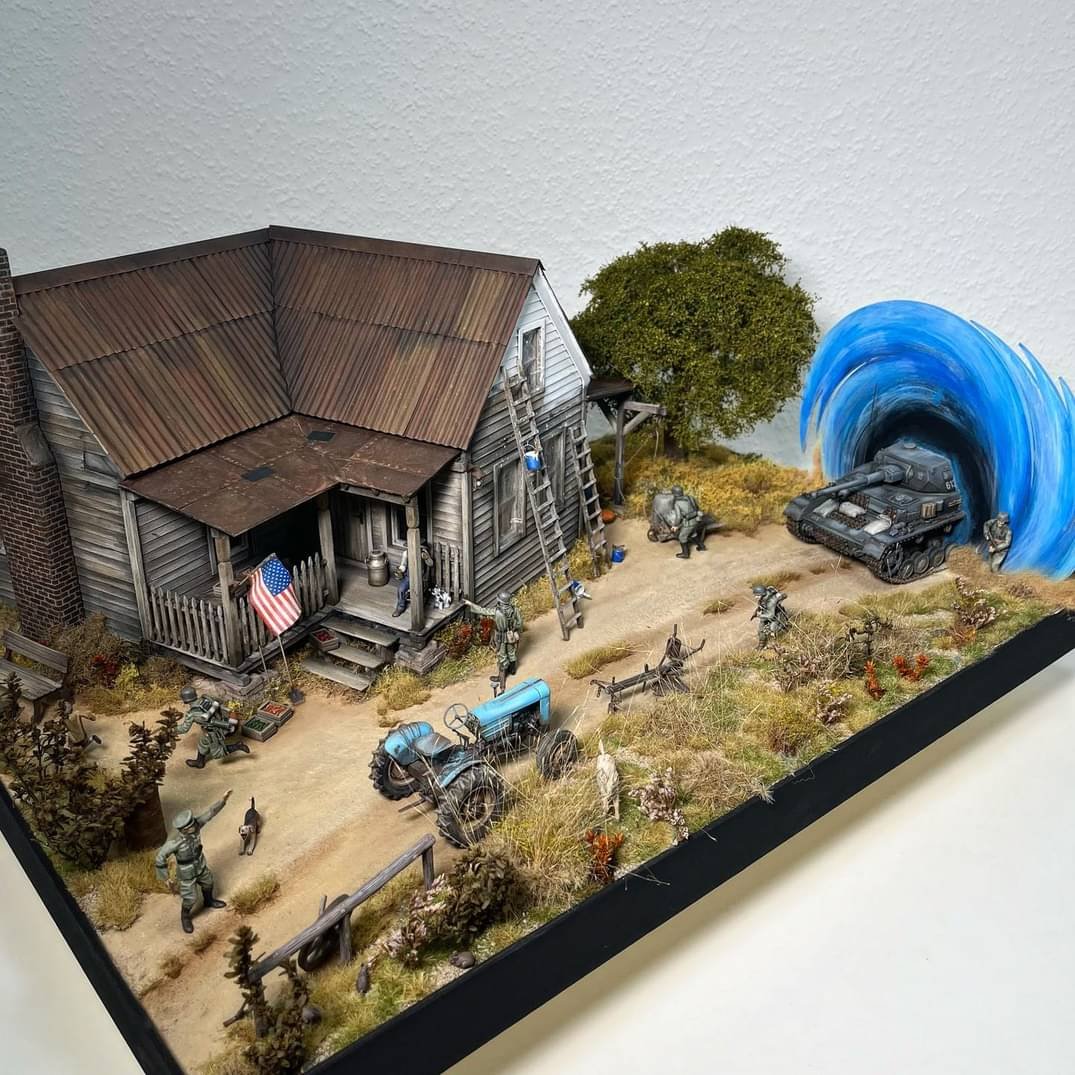
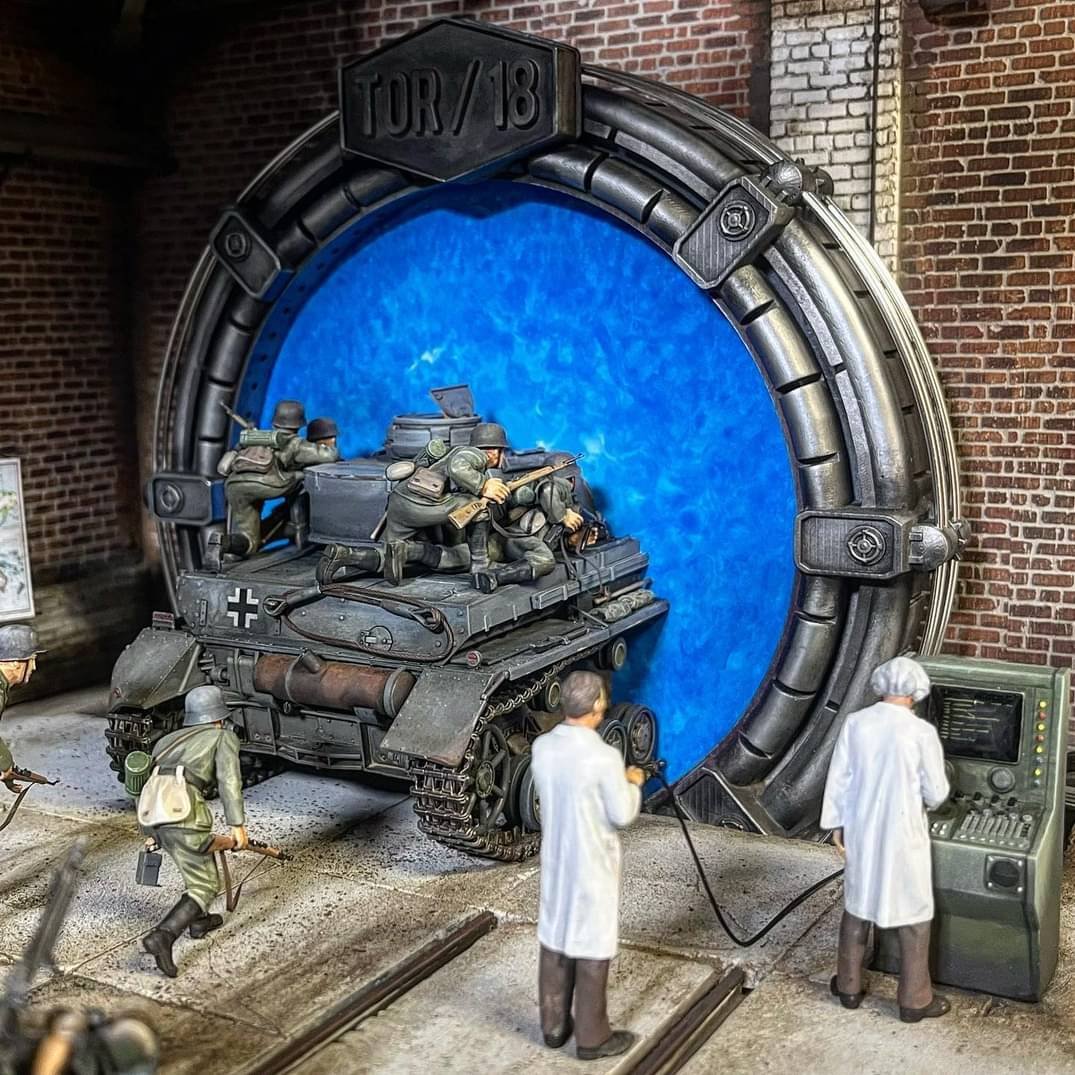
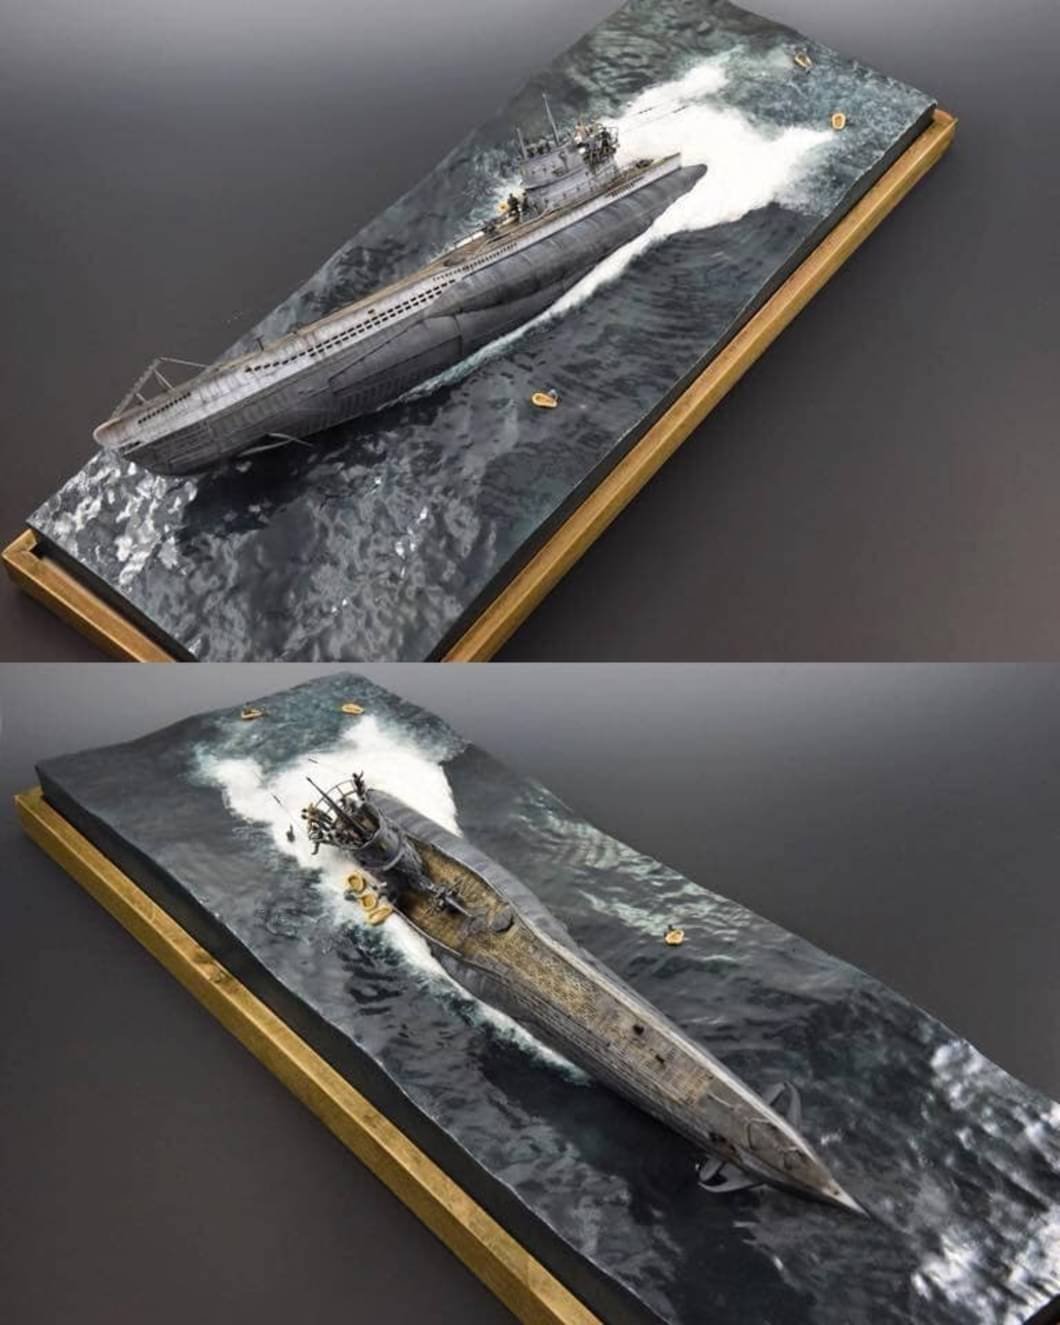
@a.craw4d, @yoeddynz , @locost_bryan, & @everyone. thank you for your appreciation. So buzzed up on it, started another. We're off to Italy in late '43. There may be some GC's about. / pic of 15 minutes in... Also, @Indiana_Jones, Stug ?1 point
-
Oooo.. I built a couple of model cars as a kid, and an aerosol of colour-matched paint came with my XJ-S.. But if I can't get around to working on my real car, what business do I have building a model of its V12 sibling? @fuel here's one for you: https://www.trademe.co.nz/a/marketplace/toys-models/models/cars-trucks/classic-cars/listing/45759440071 point
-
Finished ! Much enjoyed, will trade again. /pics Chur1 point
-
Pull them all the way out. Spray belt with 808 silicon spray. Repeat till win.1 point
-
And he's done part two:
1 point
-
Found online - The talent and creativity of people when it comes to kitsets is astounding.
1 point
-
Nearly finished it, messing about with details at the moment and then weathering to follow. Gonna sort blurry phone out as well. Really enjoyed the build though, I'm going to buy two more. / shit pic 4 Fred.1 point
-
Looking nice @Indiana_Jones. Got a little bit more done, though Cornish Winters are short & Spring has sprung so it my fizzle out...1 point
-
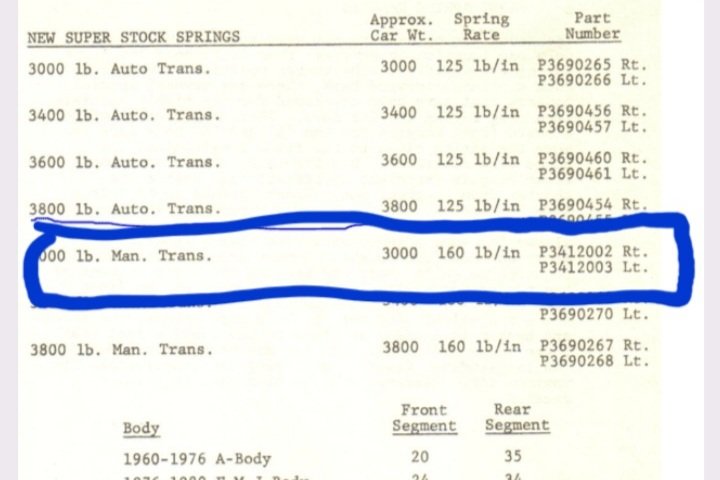
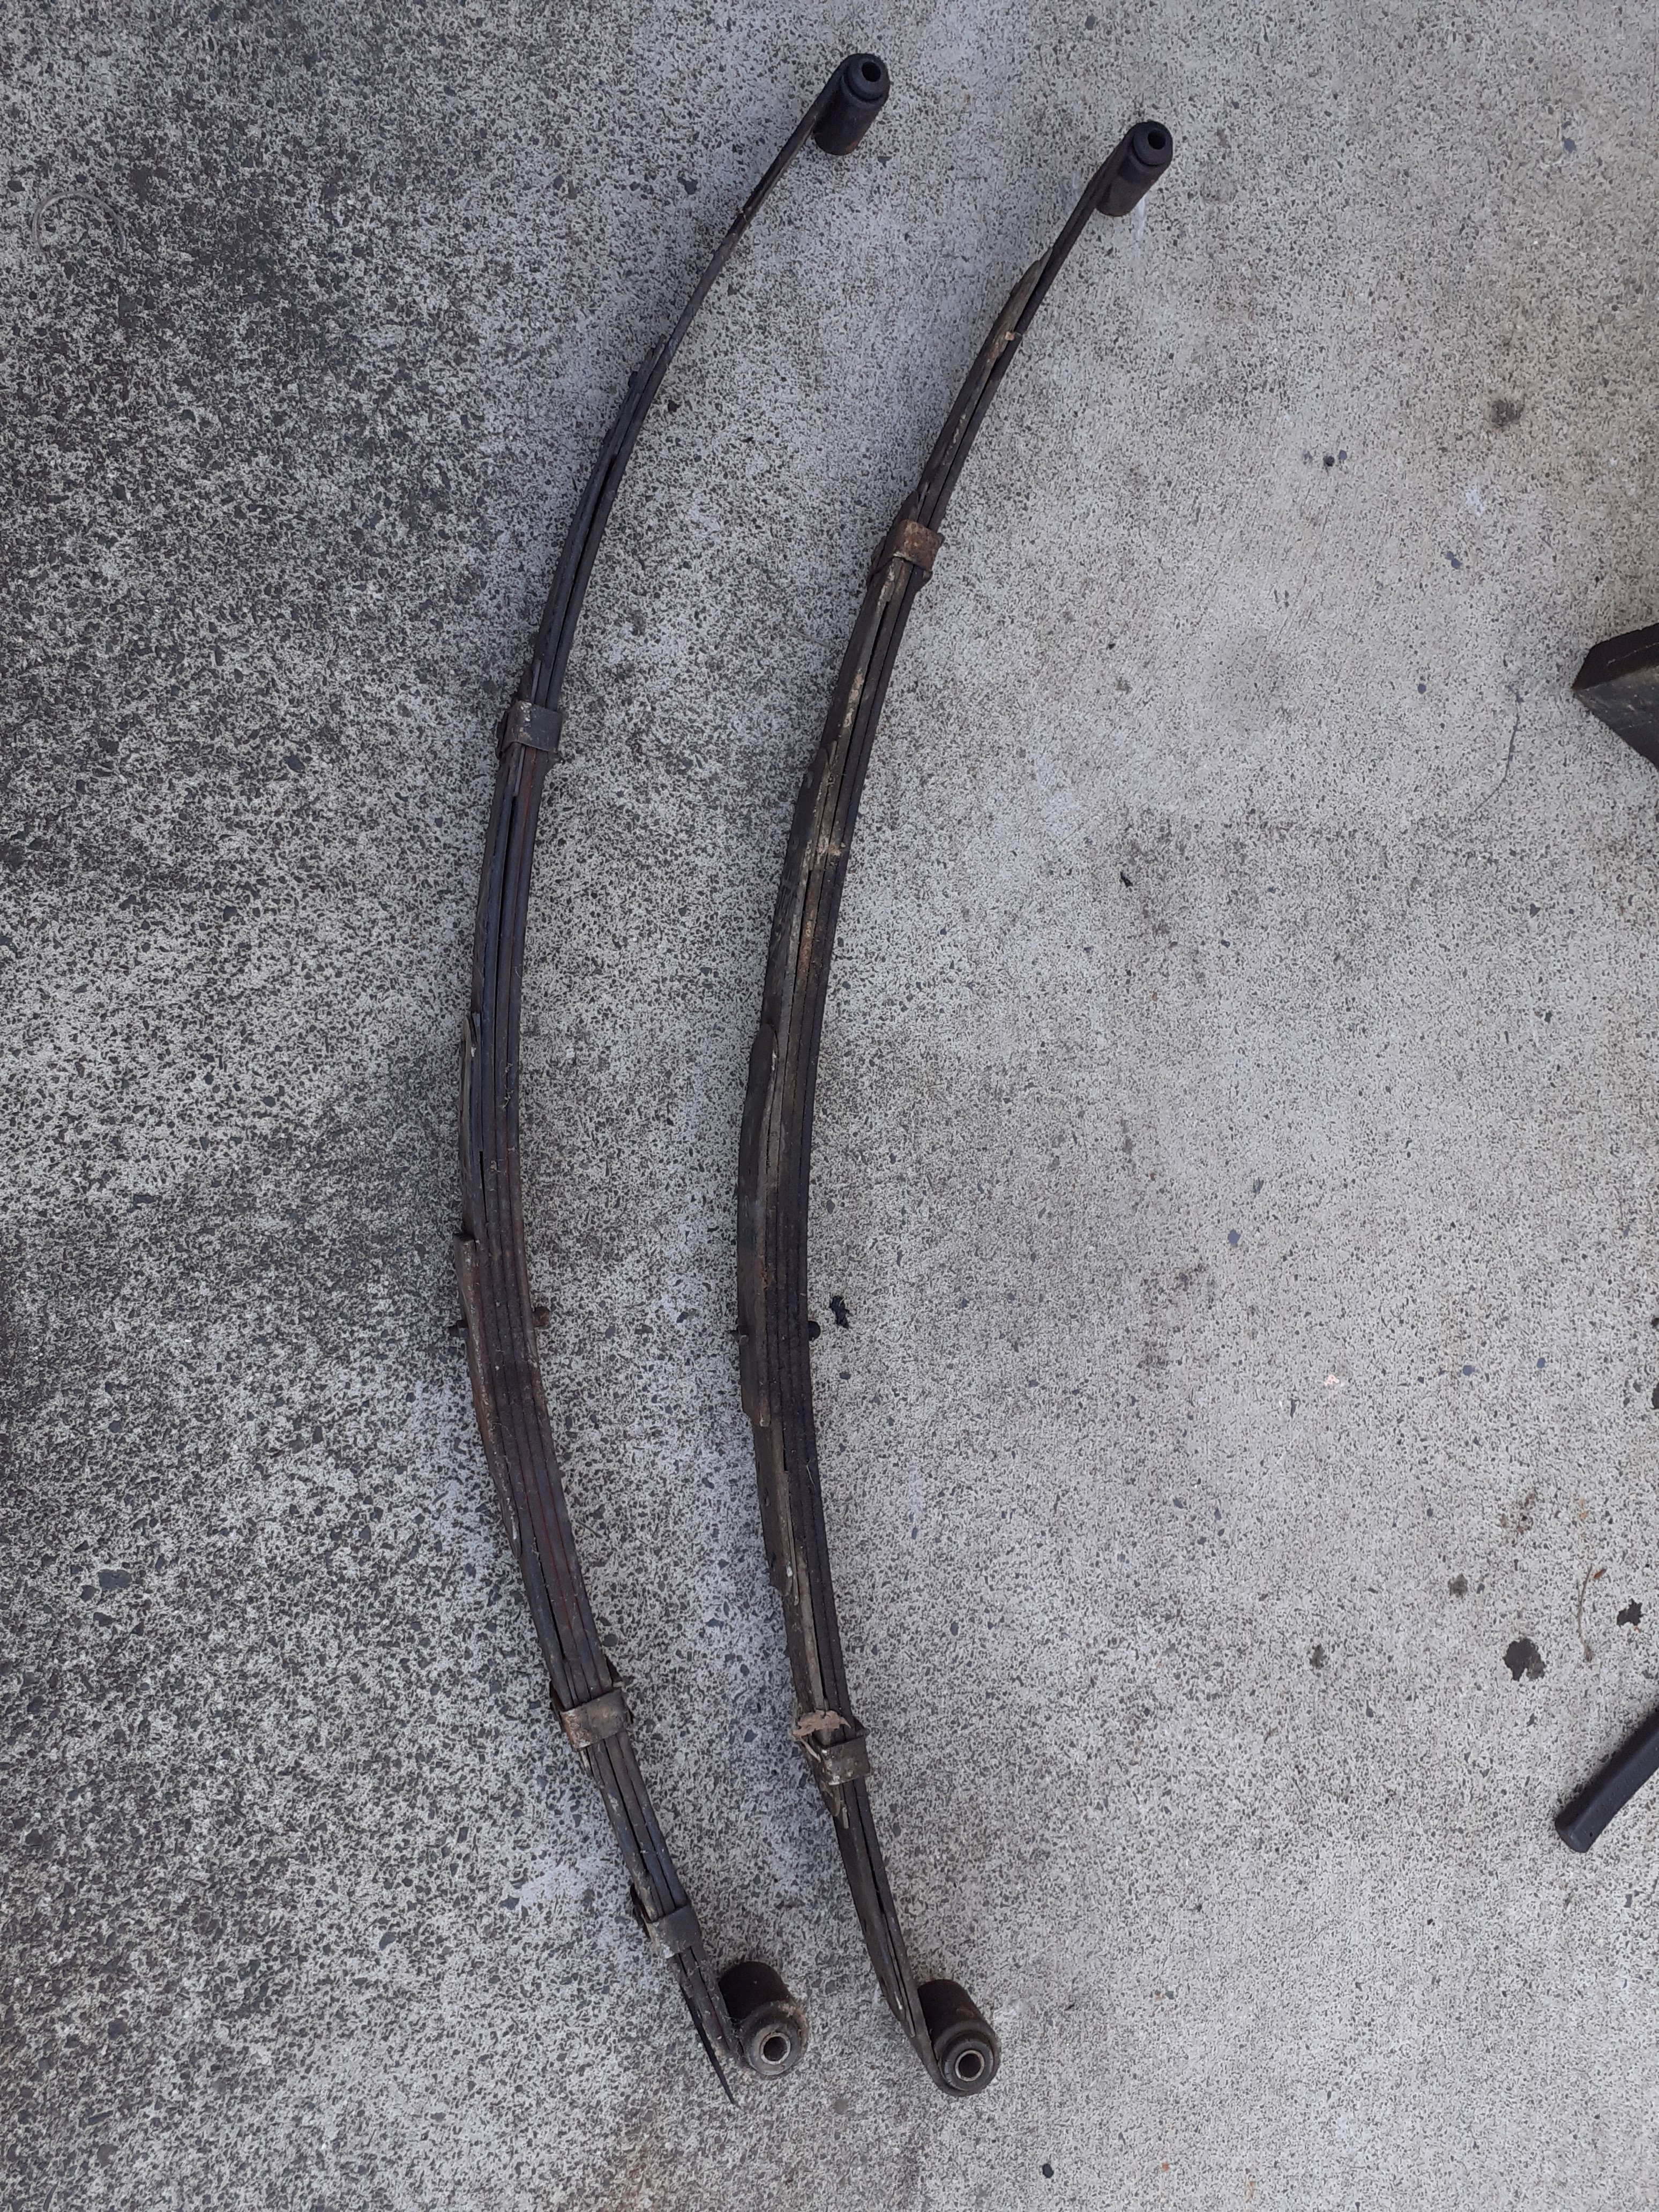
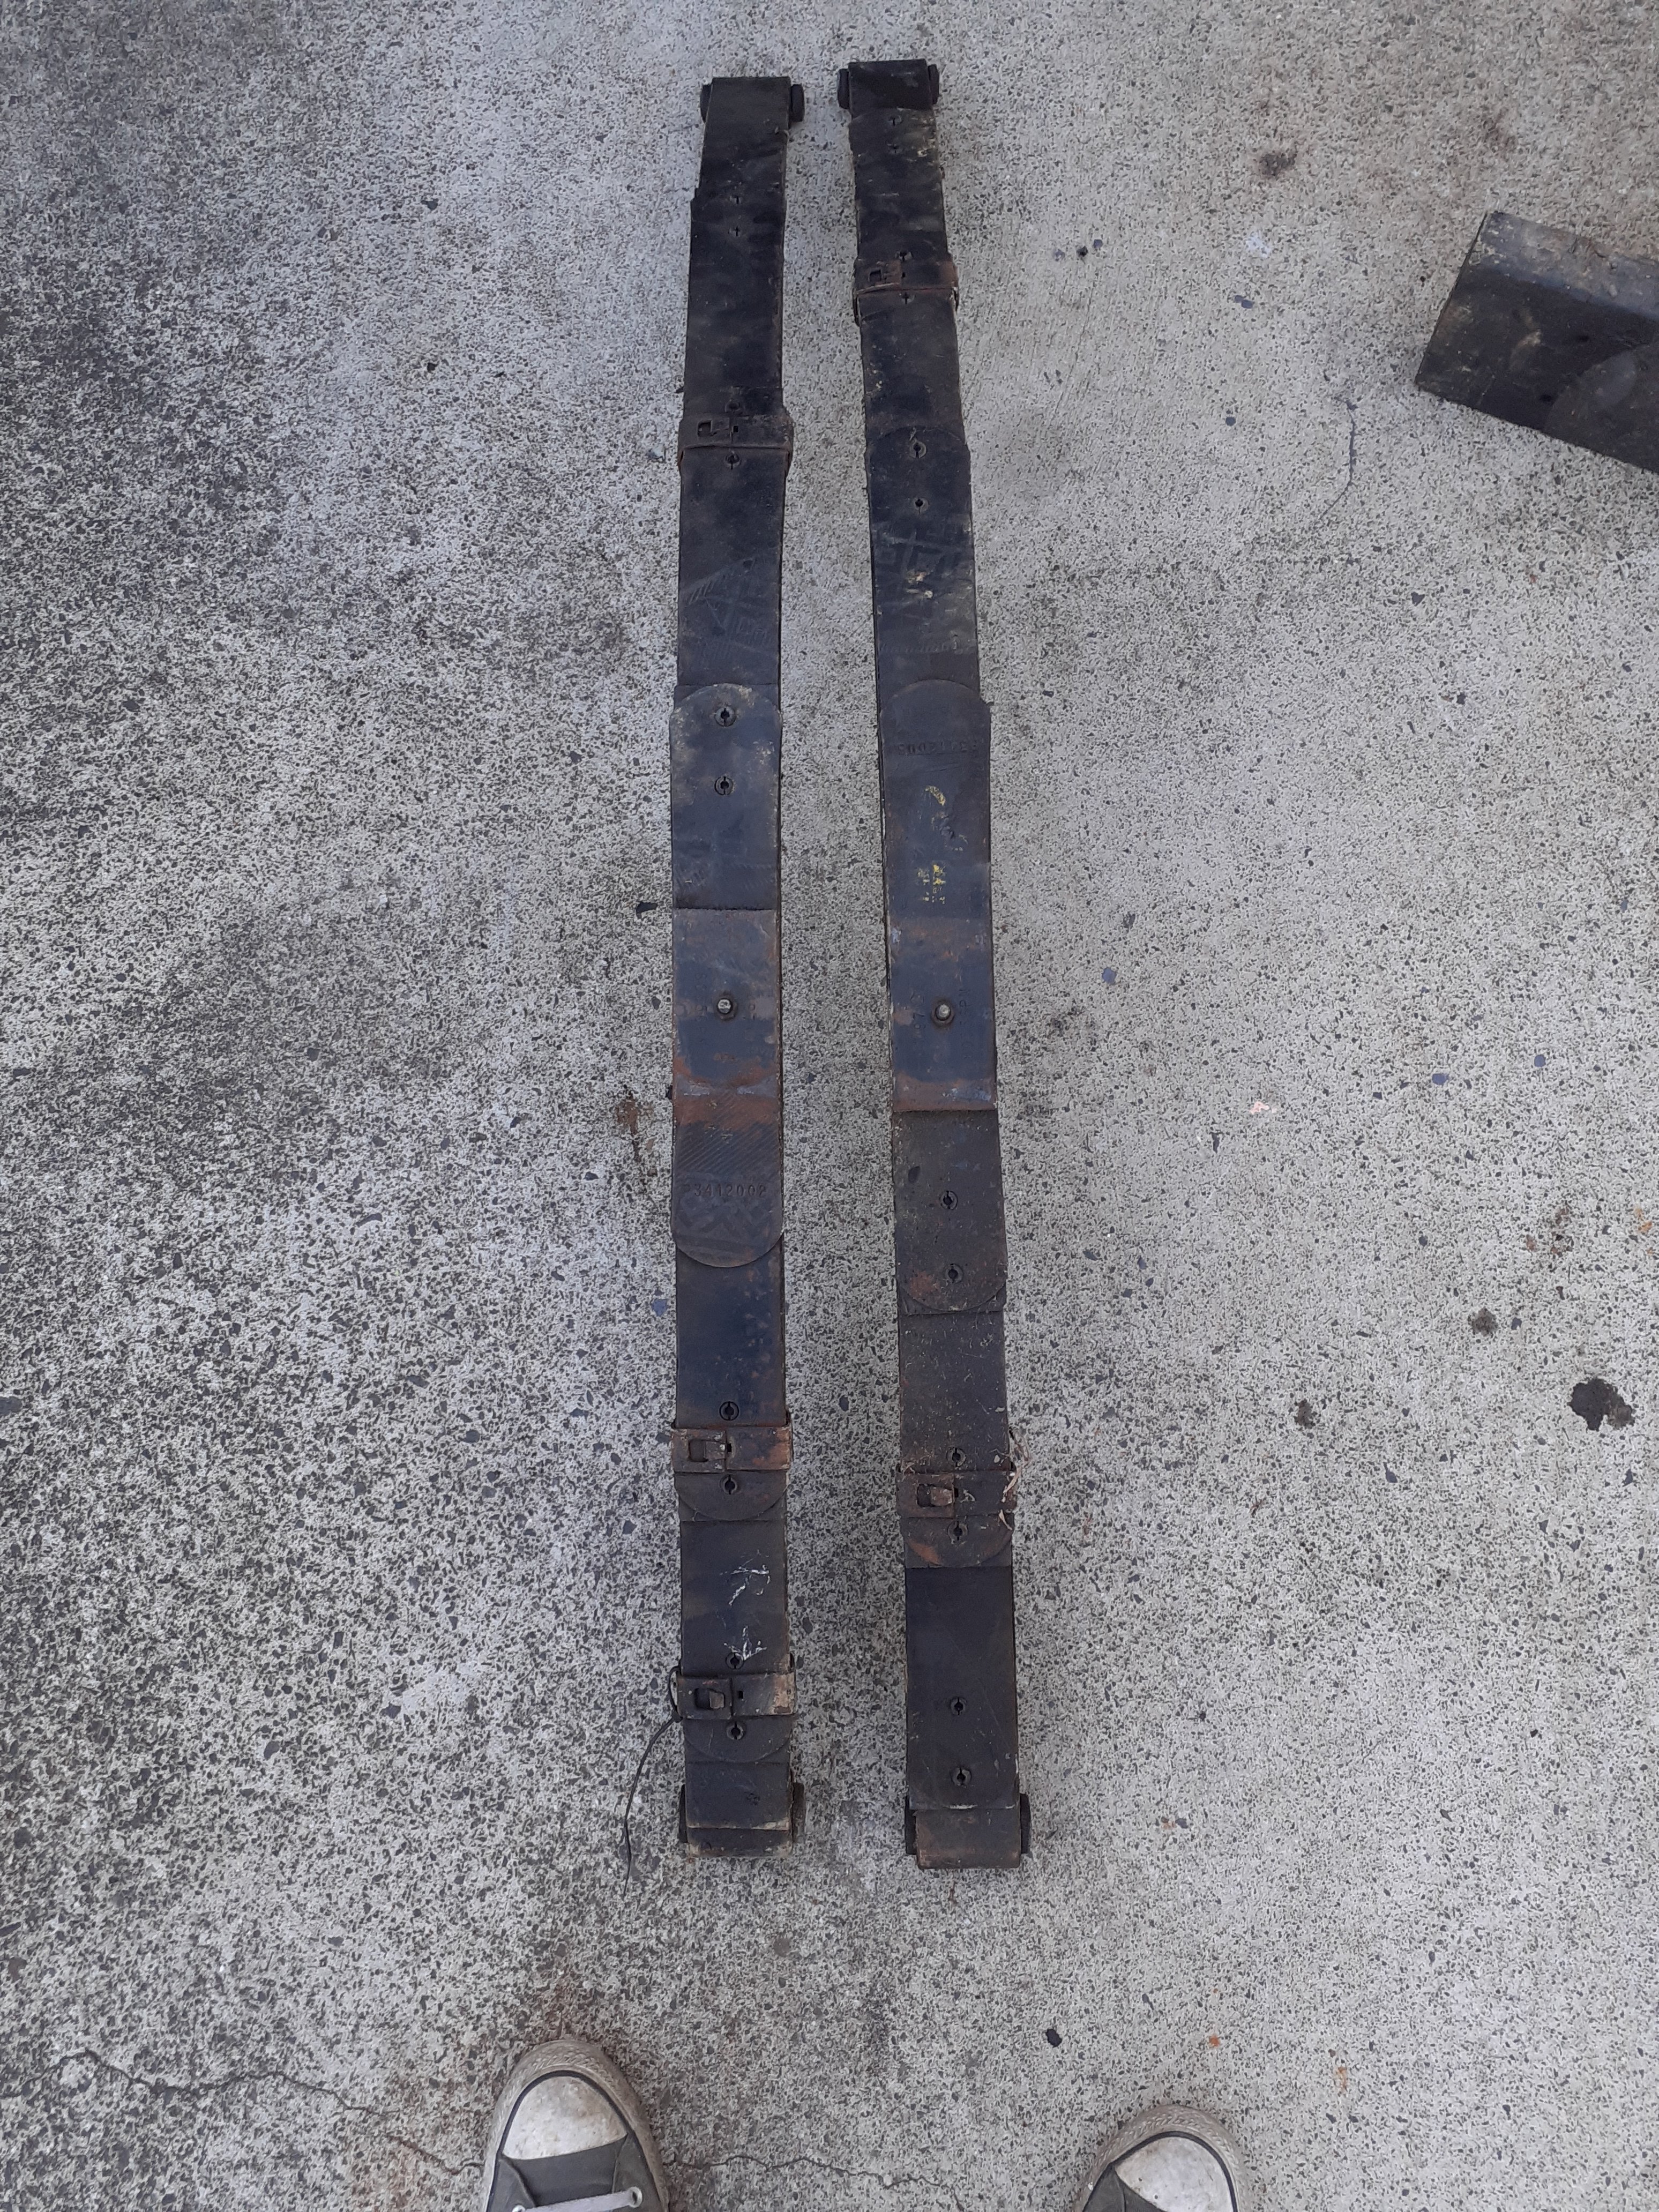
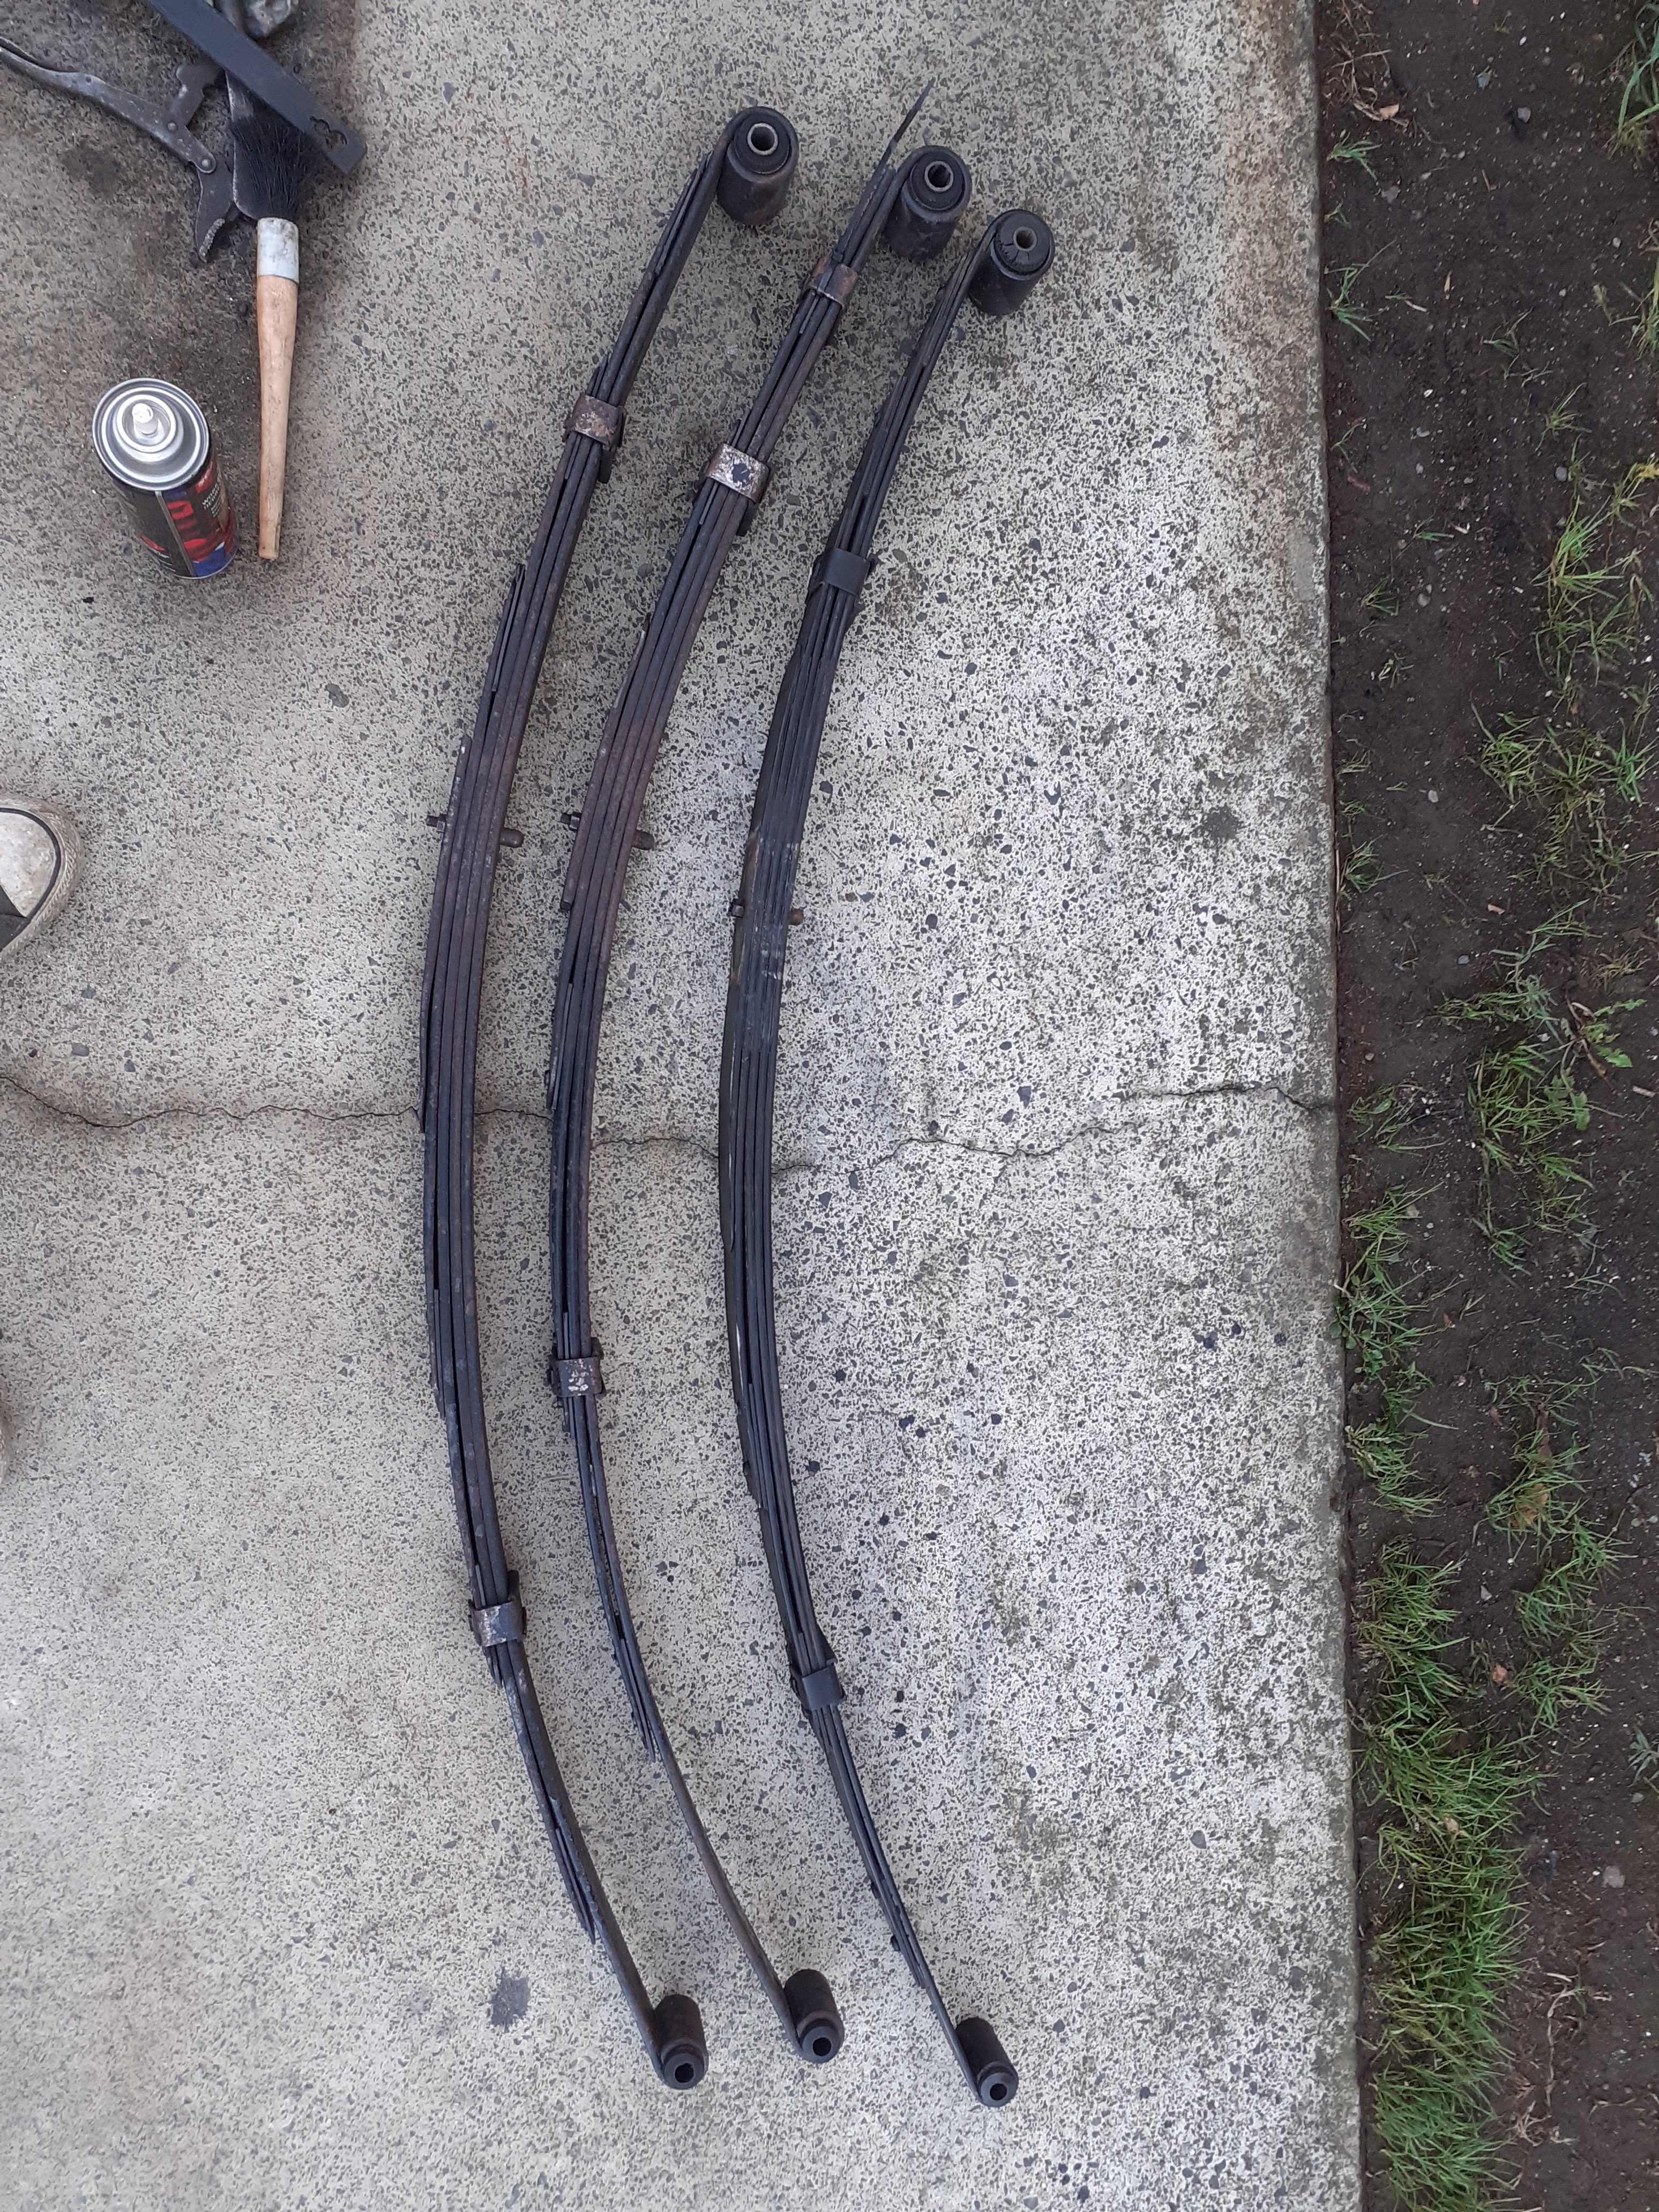
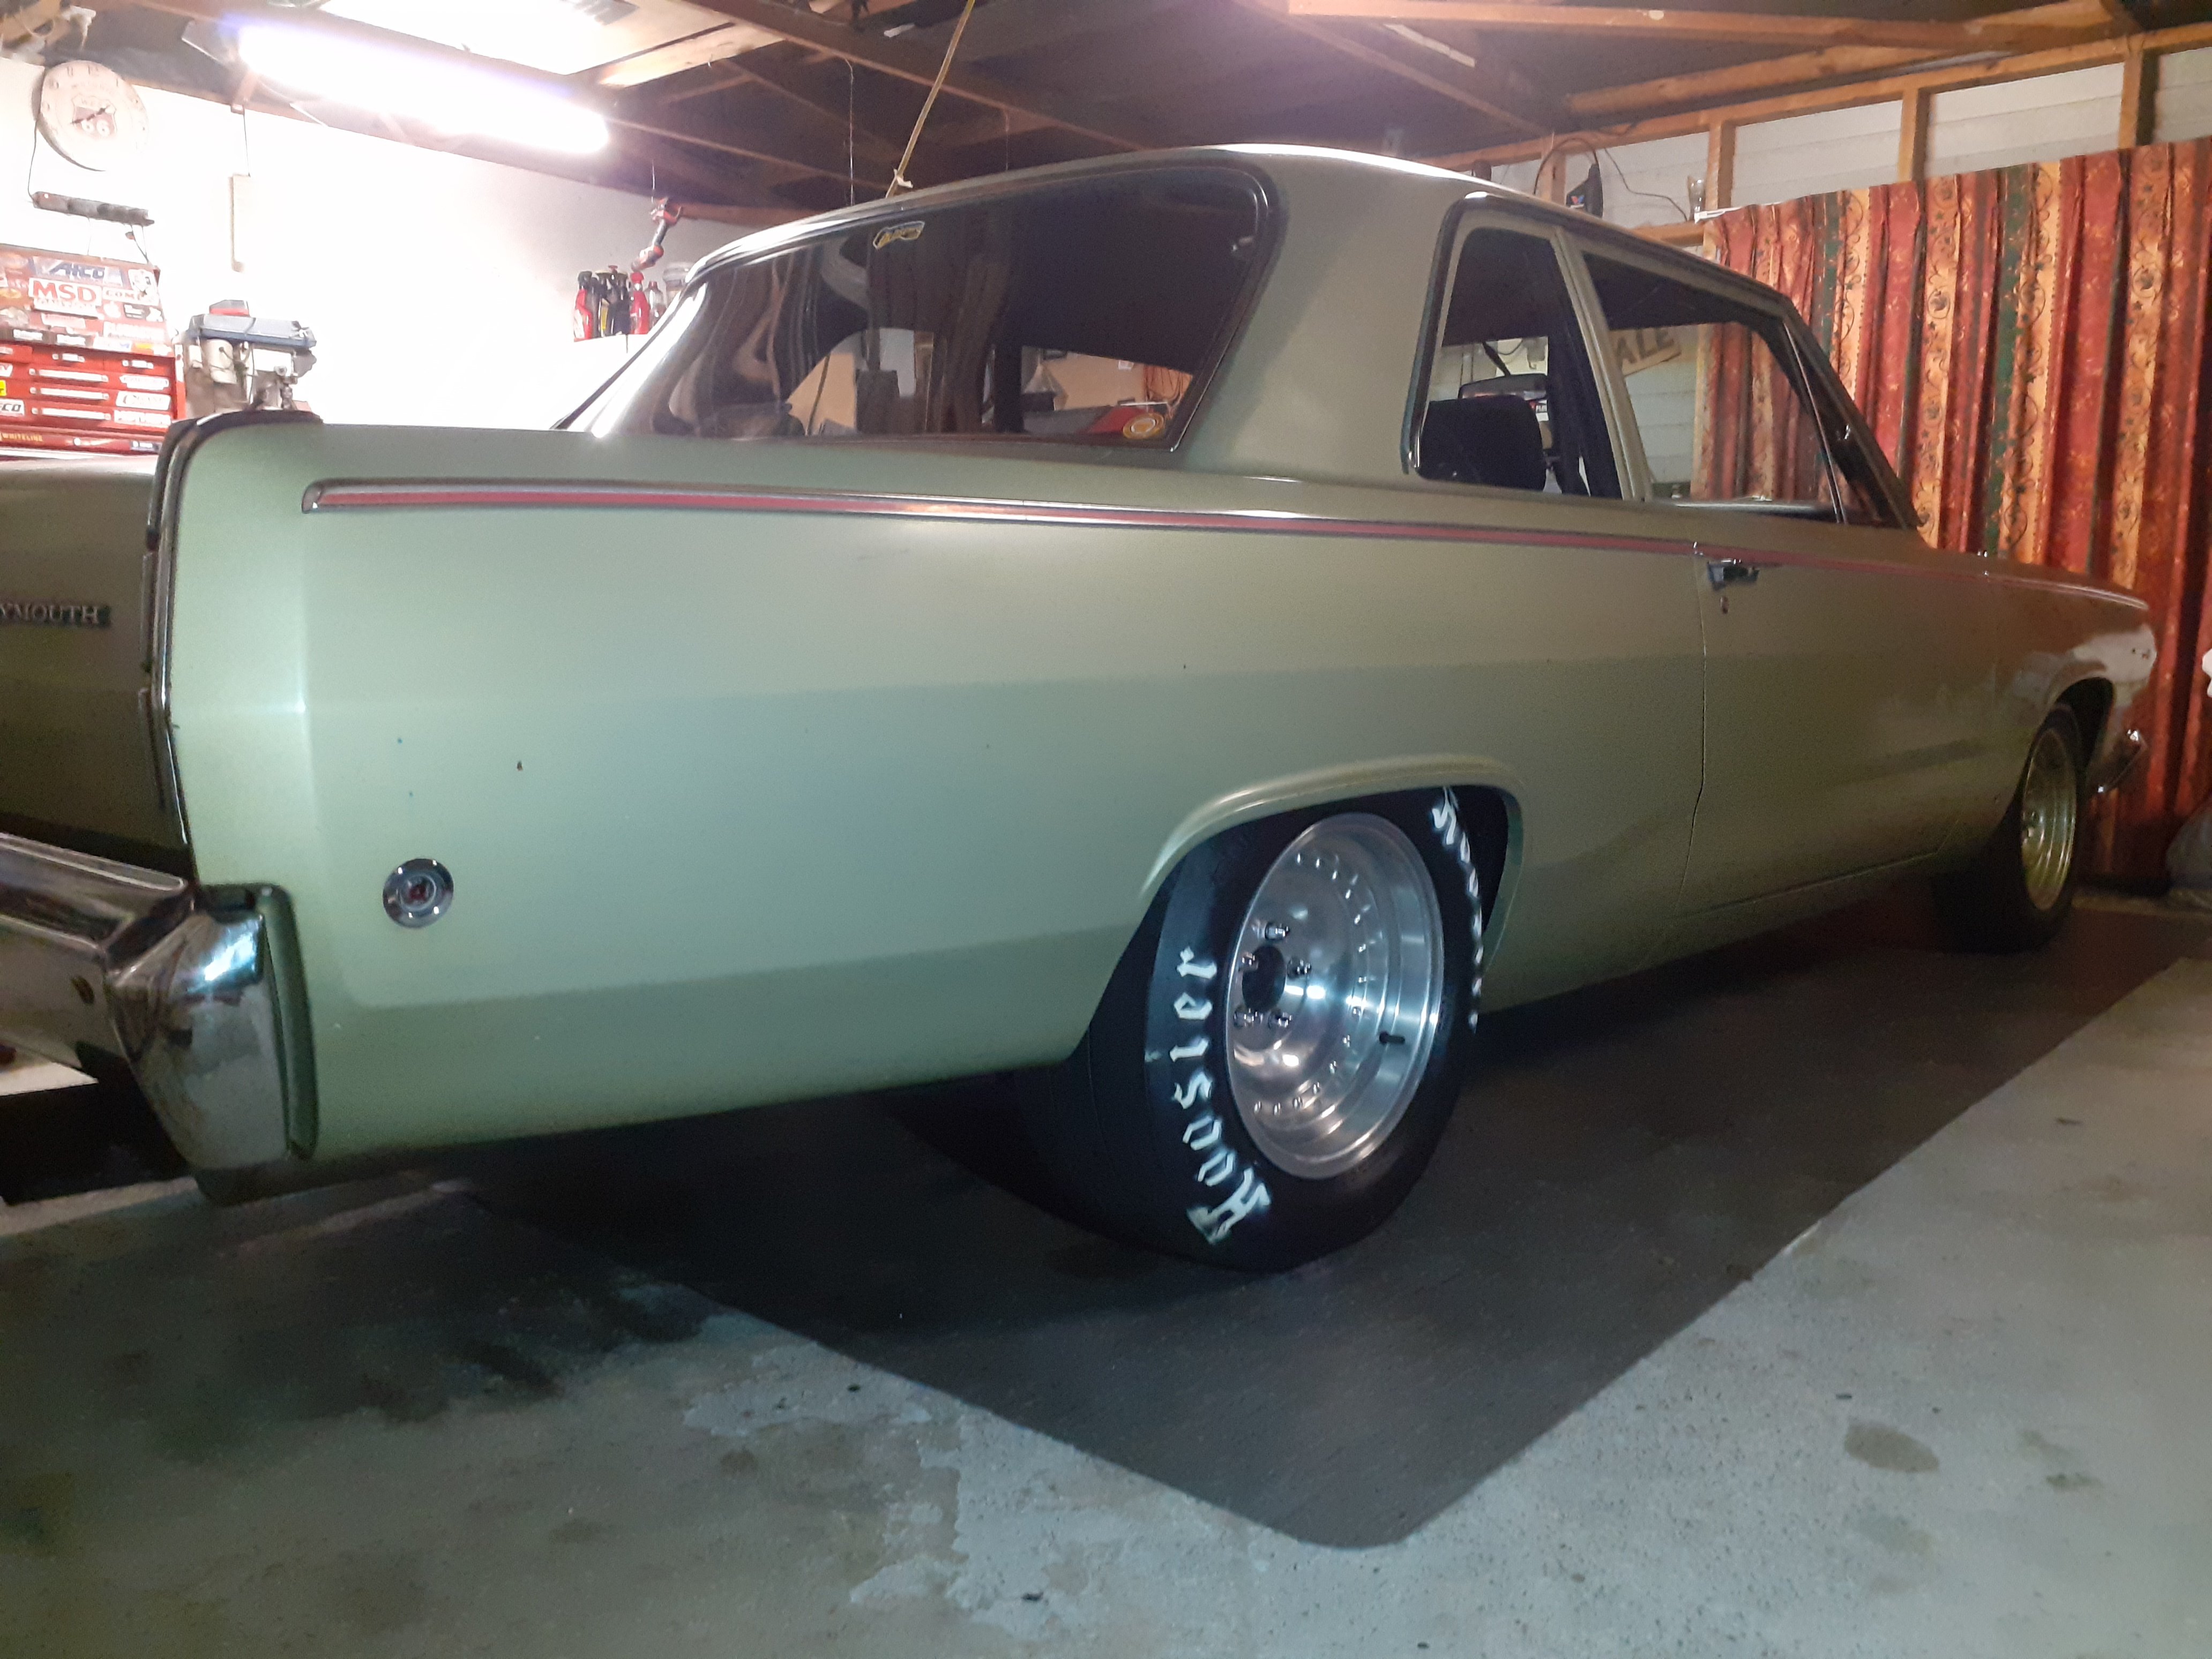
Ages ago someone gave me some mopar super stock springs which are meant to be pretty good for these things, I never really thought much about using them though because they are a bit wierd, they are different side to side with different shape and length leaves in the pack, apparently to counter the torque effect I thought I'd try them so put them in The leaves are considerably thicker (7.5mm vs 6mm originally)and the front eye bolt is bigger, plus they have a bigger arch so I knew it would raise it a bit, so I put them in and took it around the block. It is definitely stiffer, but not unpleasant, the height is now within 5mm per side, but looks dumb so I pulled them back out to get reset 50mm lower
1 point
-
Done a little bit more & started weathering the interior.1 point
-
I saw this thread heading to the bottom of the page, thought I'd step in. Making time to do this HST but it's a fighter. It's a nice kit, but the instructions are a bit vague here &there. As is the amount of parts & general design. I'm not enough of foamer to know which old molds were adapted for this kit from where or when, but they left some bits out I reckon. Suspension all went together a treat, except for the drive sprockets. Zero location points what so ever. just glue & hope I s'pose, but if I'd done that they'd have fallen off. WTF ? Bit of sprue & some stuff out of the spares box ( recoil dampers for the anti-aircraft version of the Flak 88 if I recall) & axles appear. Glued them in most carefully & won. Started building up the hull. For a change I'm going to paint it all when finished. Except for the engine. Gonna have another stab at the weekend Chur /@Indiana_Jones again, geht es dem Stug gut ?1 point
-
Seen this in my travels online - 1/72 Revell kit, cut in half.
1 point
-
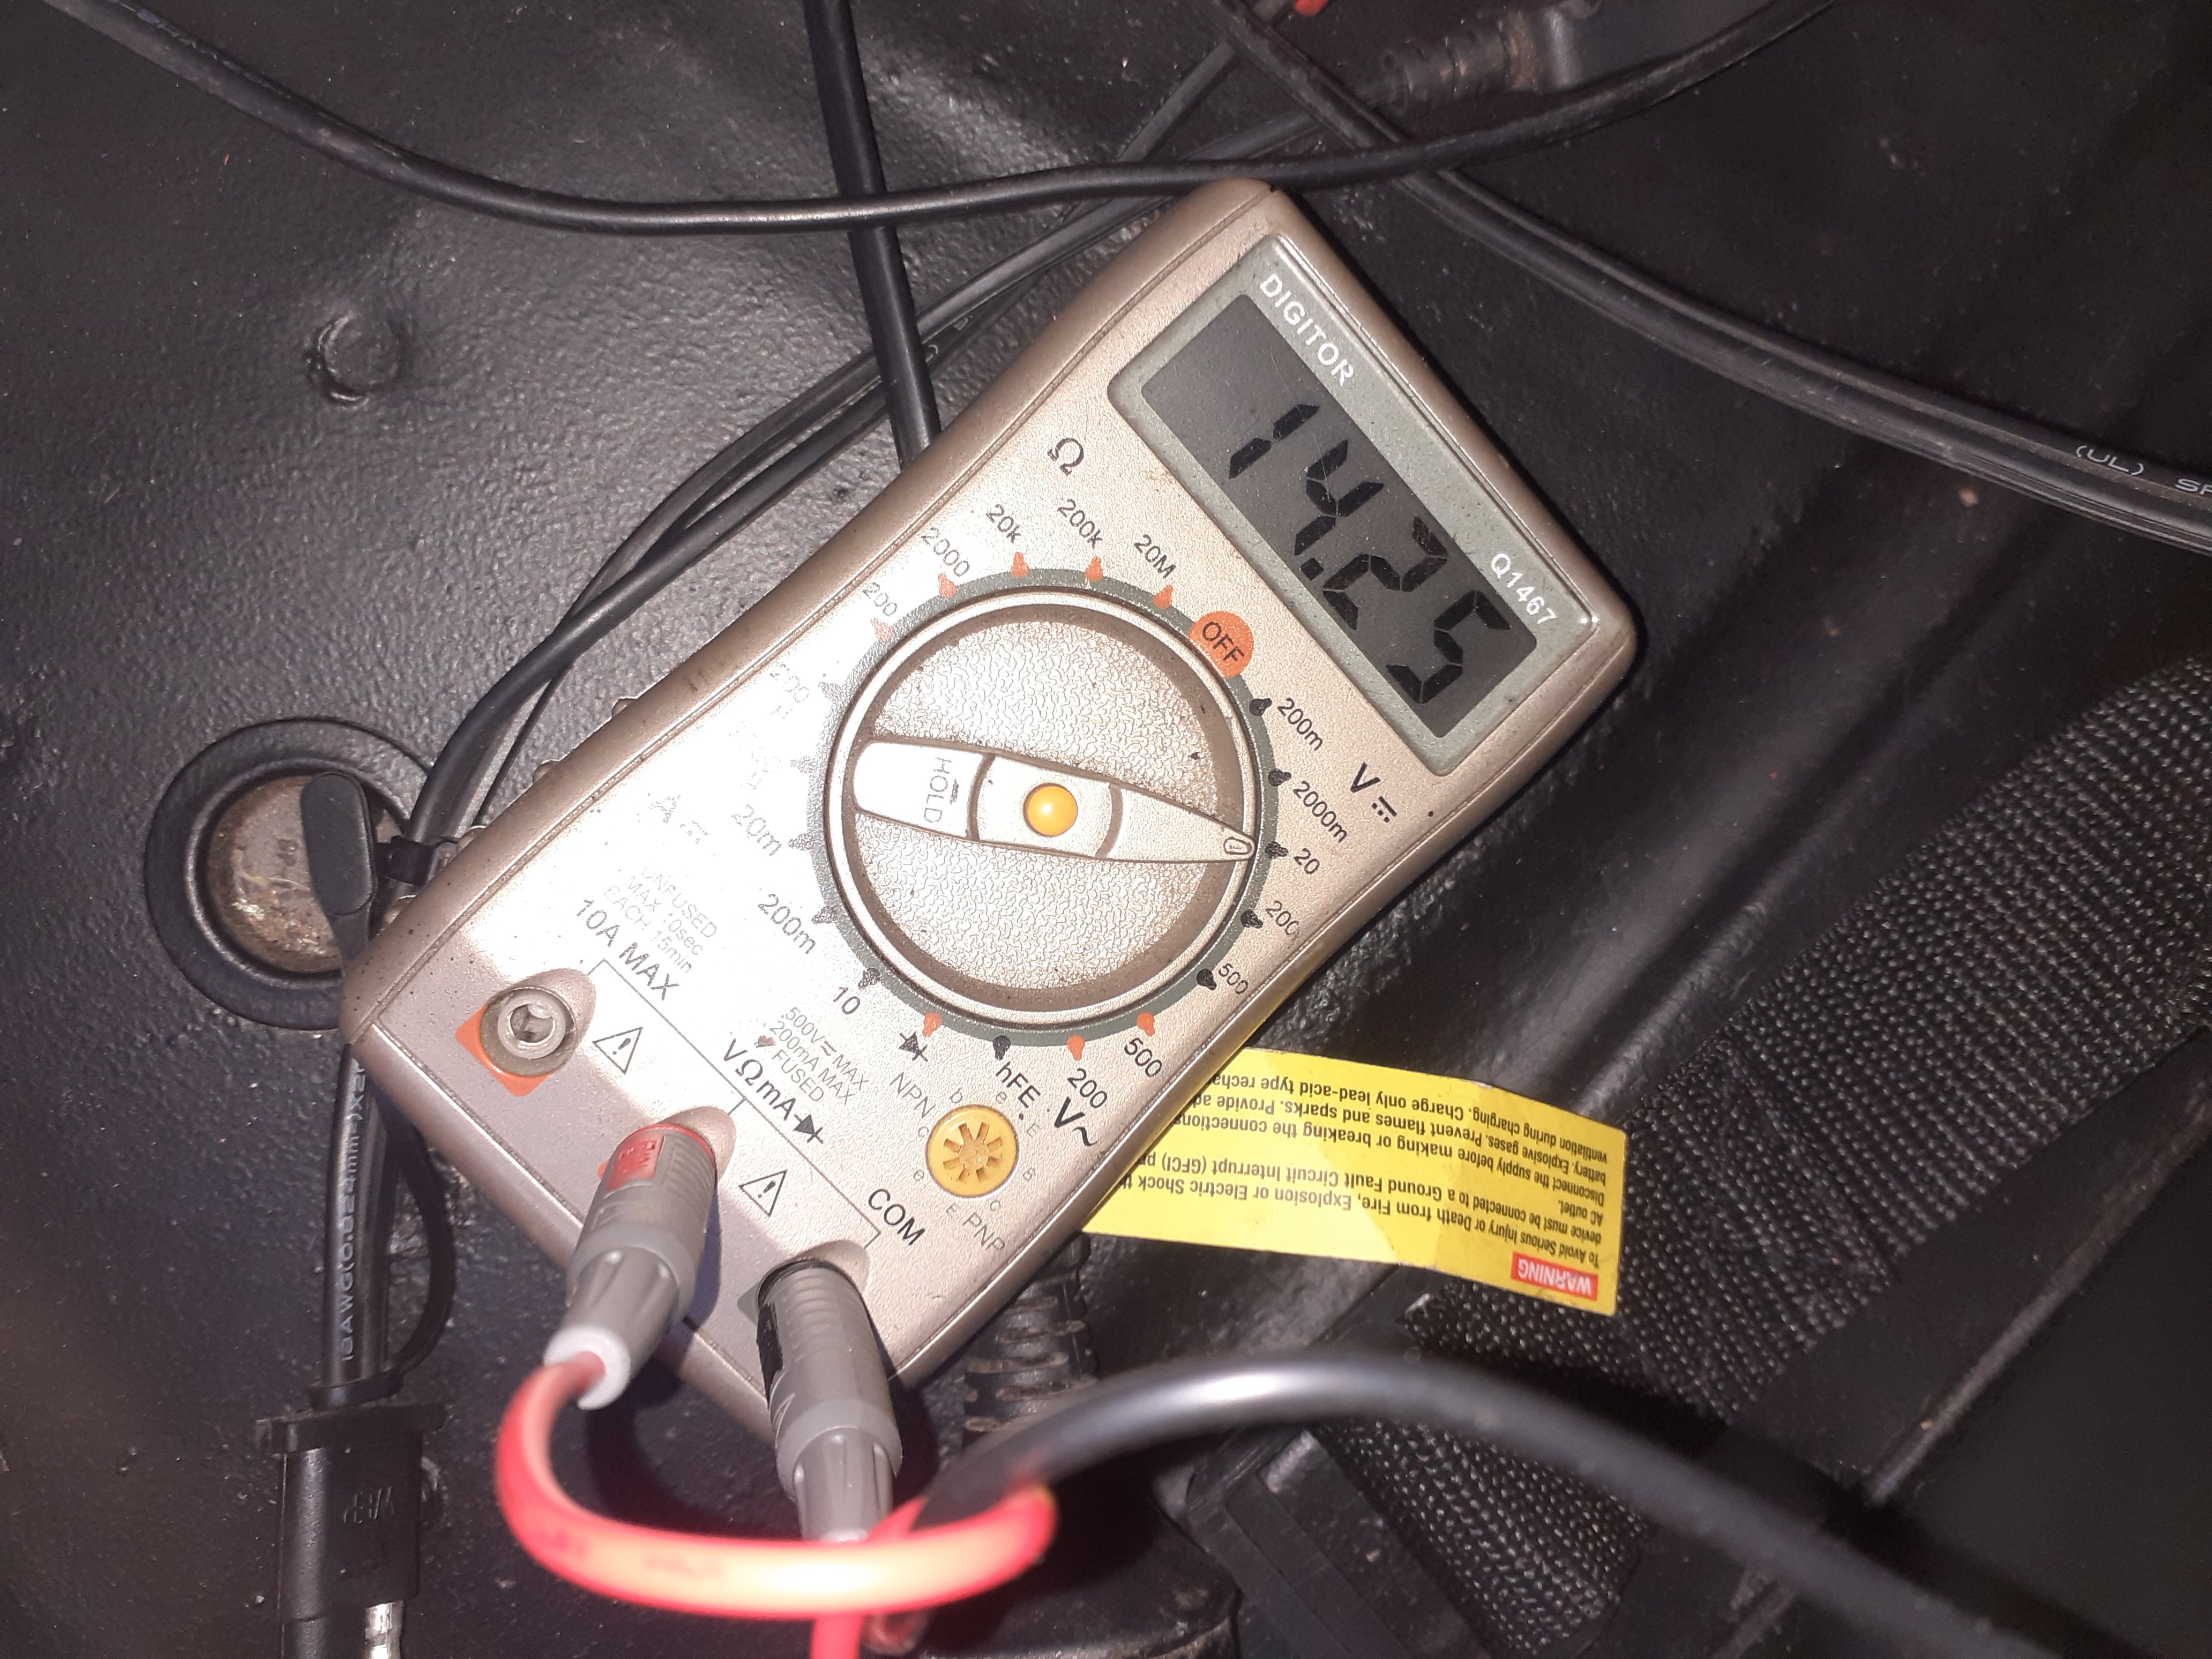
OK. Since that last post, Nick the sparky got a replacement, new alternator again, tried that, no go. Took it off again, put regulator from 300km alt in to new one, worked. So regulators are the issue, that's a total of three different new regs either in new alternators or from a bosch box that didn't work Nick spoke to the warranty guy at their supplier who said "oh yeah, we've had a few problems with those" Fffffssssss Nick found a new old stock reg which had bosch part number etc on it , put that in , he came around this evening and we bolted it back on. Warranty guy said the alternator light MUST be 2 watt as well so replaced that (it was 3watt) So now I'm back to 14.2v with an all new alternator . Huzzah I must say, Nick has been an absolute top level GC, I think we are up to 5 visits in his own time coming out to my house to sort this problem out Ron wood auto electrical is his business , in Western springs1 point
-
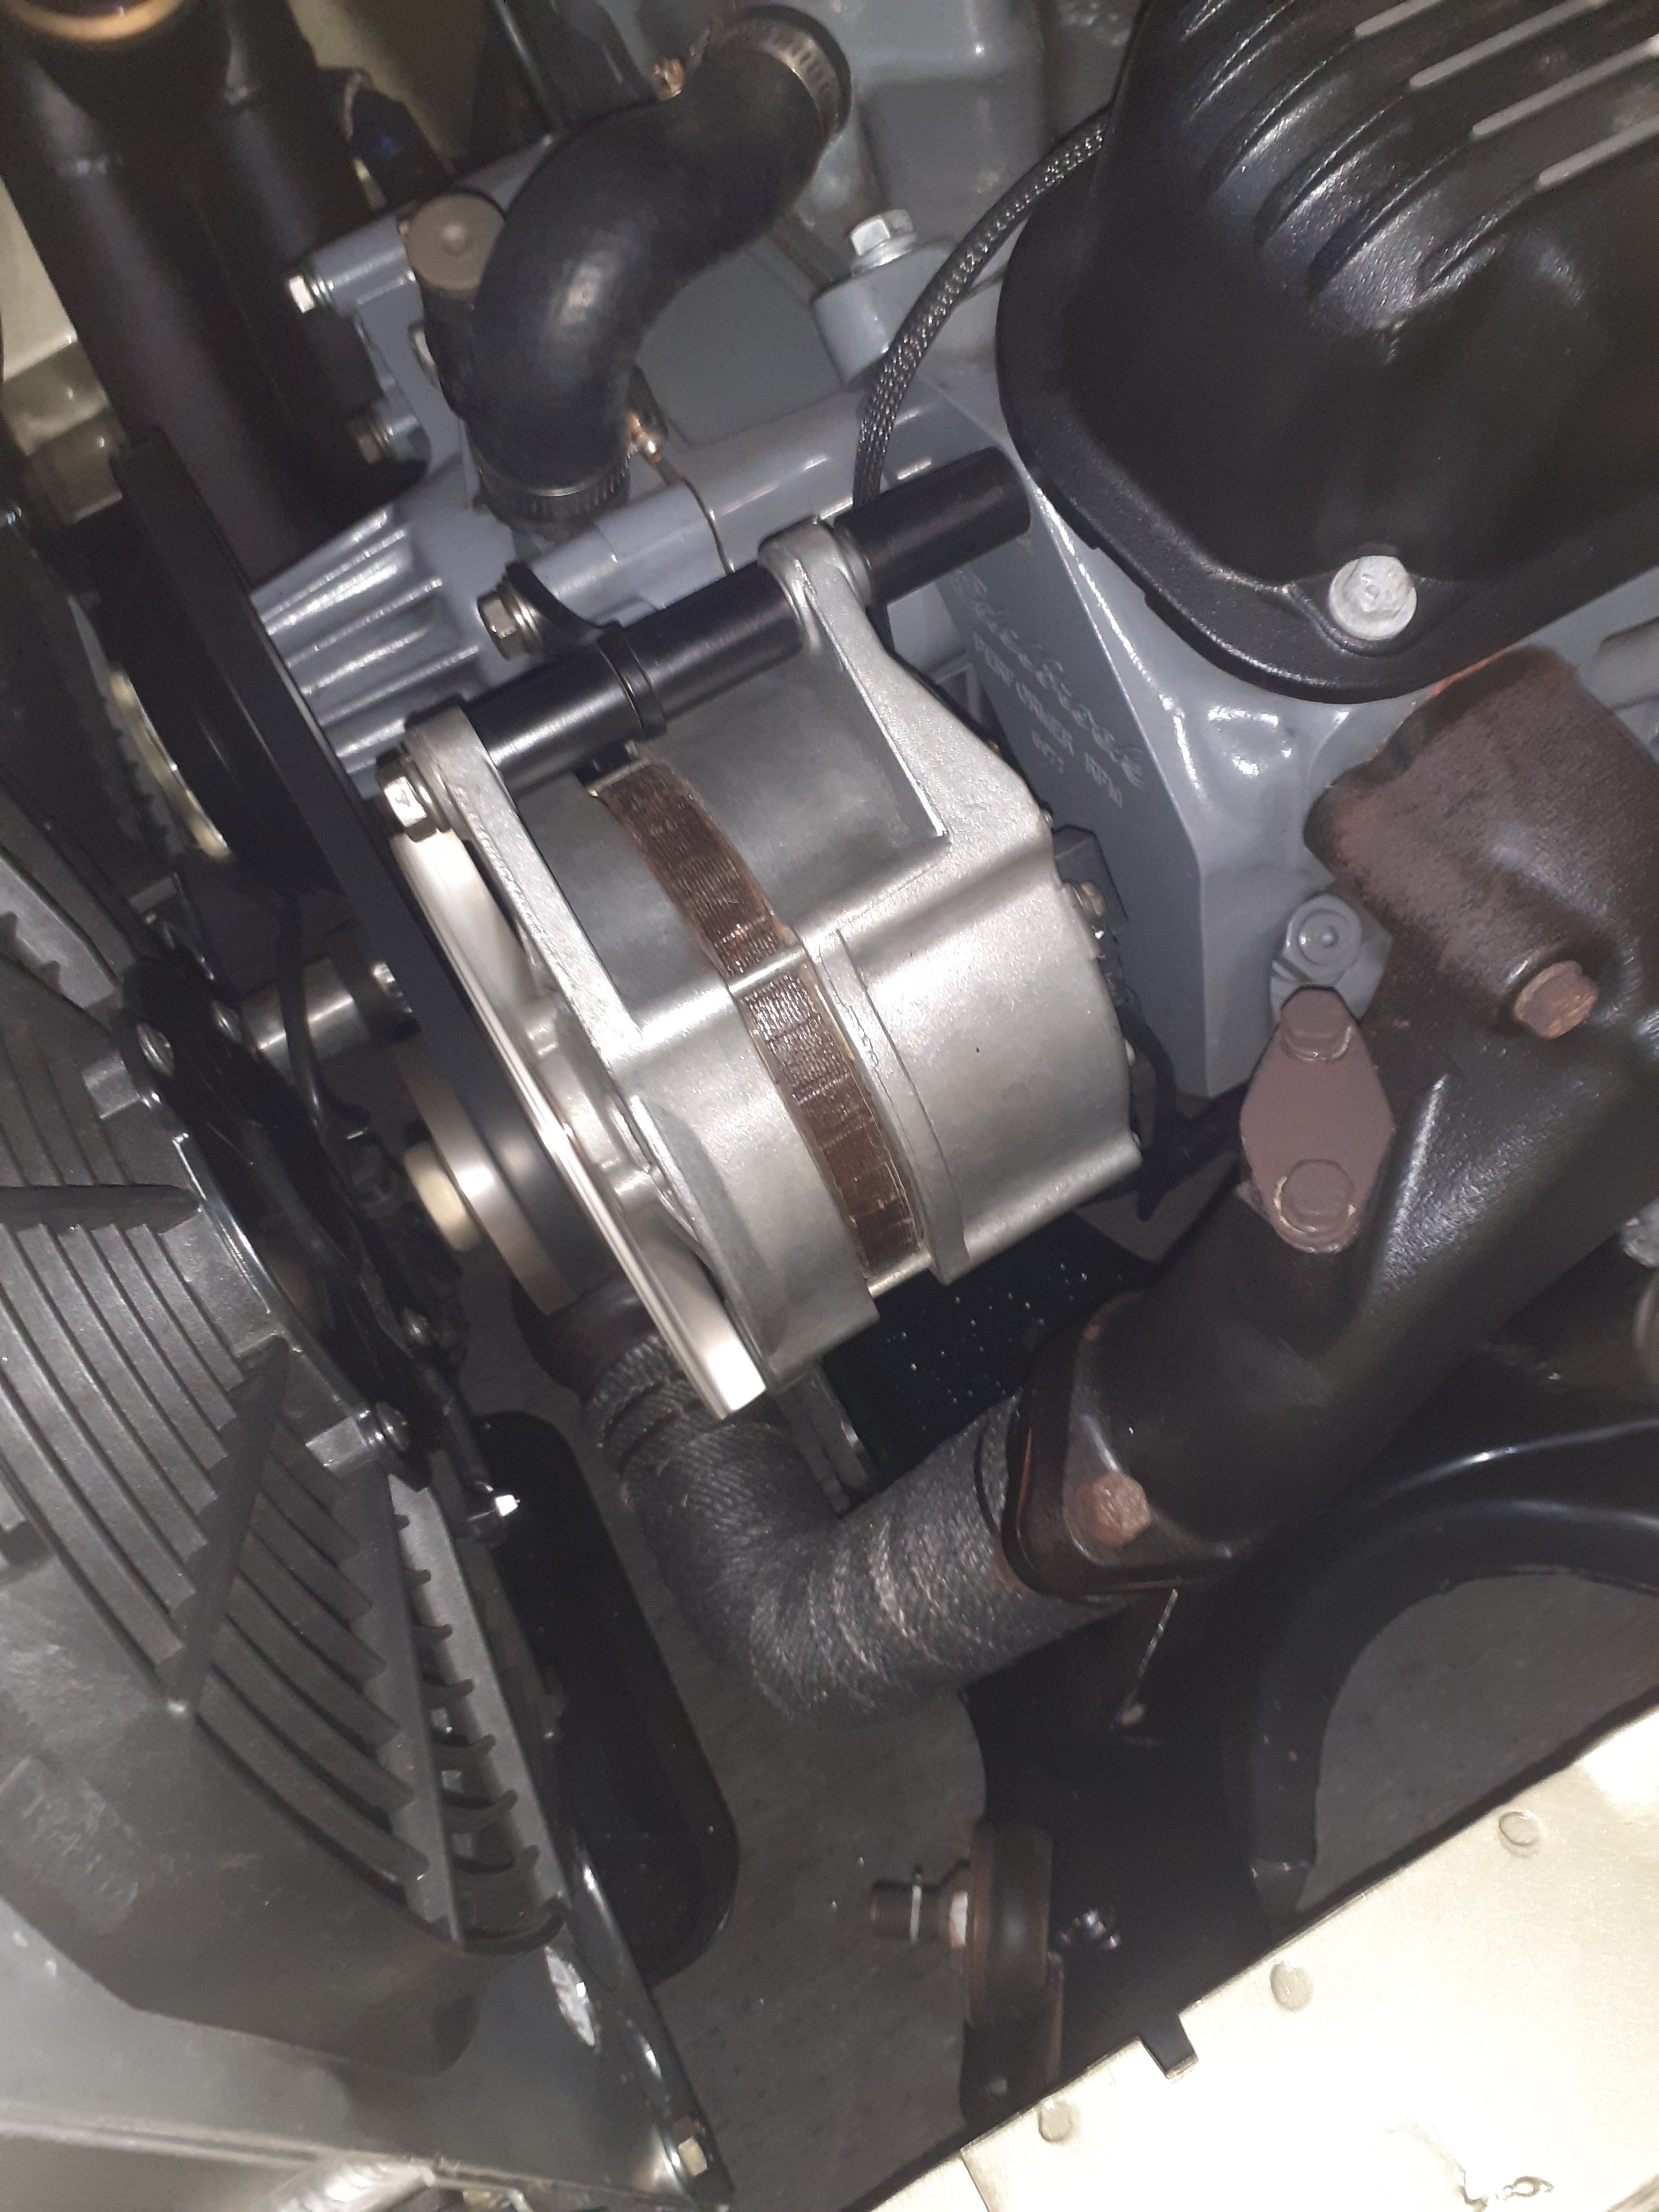
Progress Went to pick a part and found a very second hand alternator the same, on an aussie assembled mitsi magna with 300k on it Cleaned all the shit off and swapped pulley off some other one I had in stock And it works. So that rules the car side out of it, must be a problem in the new alternator
1 point
-
Nick the sparky came and had a look. My wiring from the alternator is a bit on the small side and not the right type of wire. He made a test wire to bypass that, alternator was charging but it still wasn't charging at the battery there was a large voltage drop in one section of the battery cable that runs from front to back He said that was very uncommon and likely would have been why the original alternator shit itself Whipped the cable out and he's going to make a new one with the right stuff Pretty pleased to know what is wrong, I never would have figured that out myself1 point
-
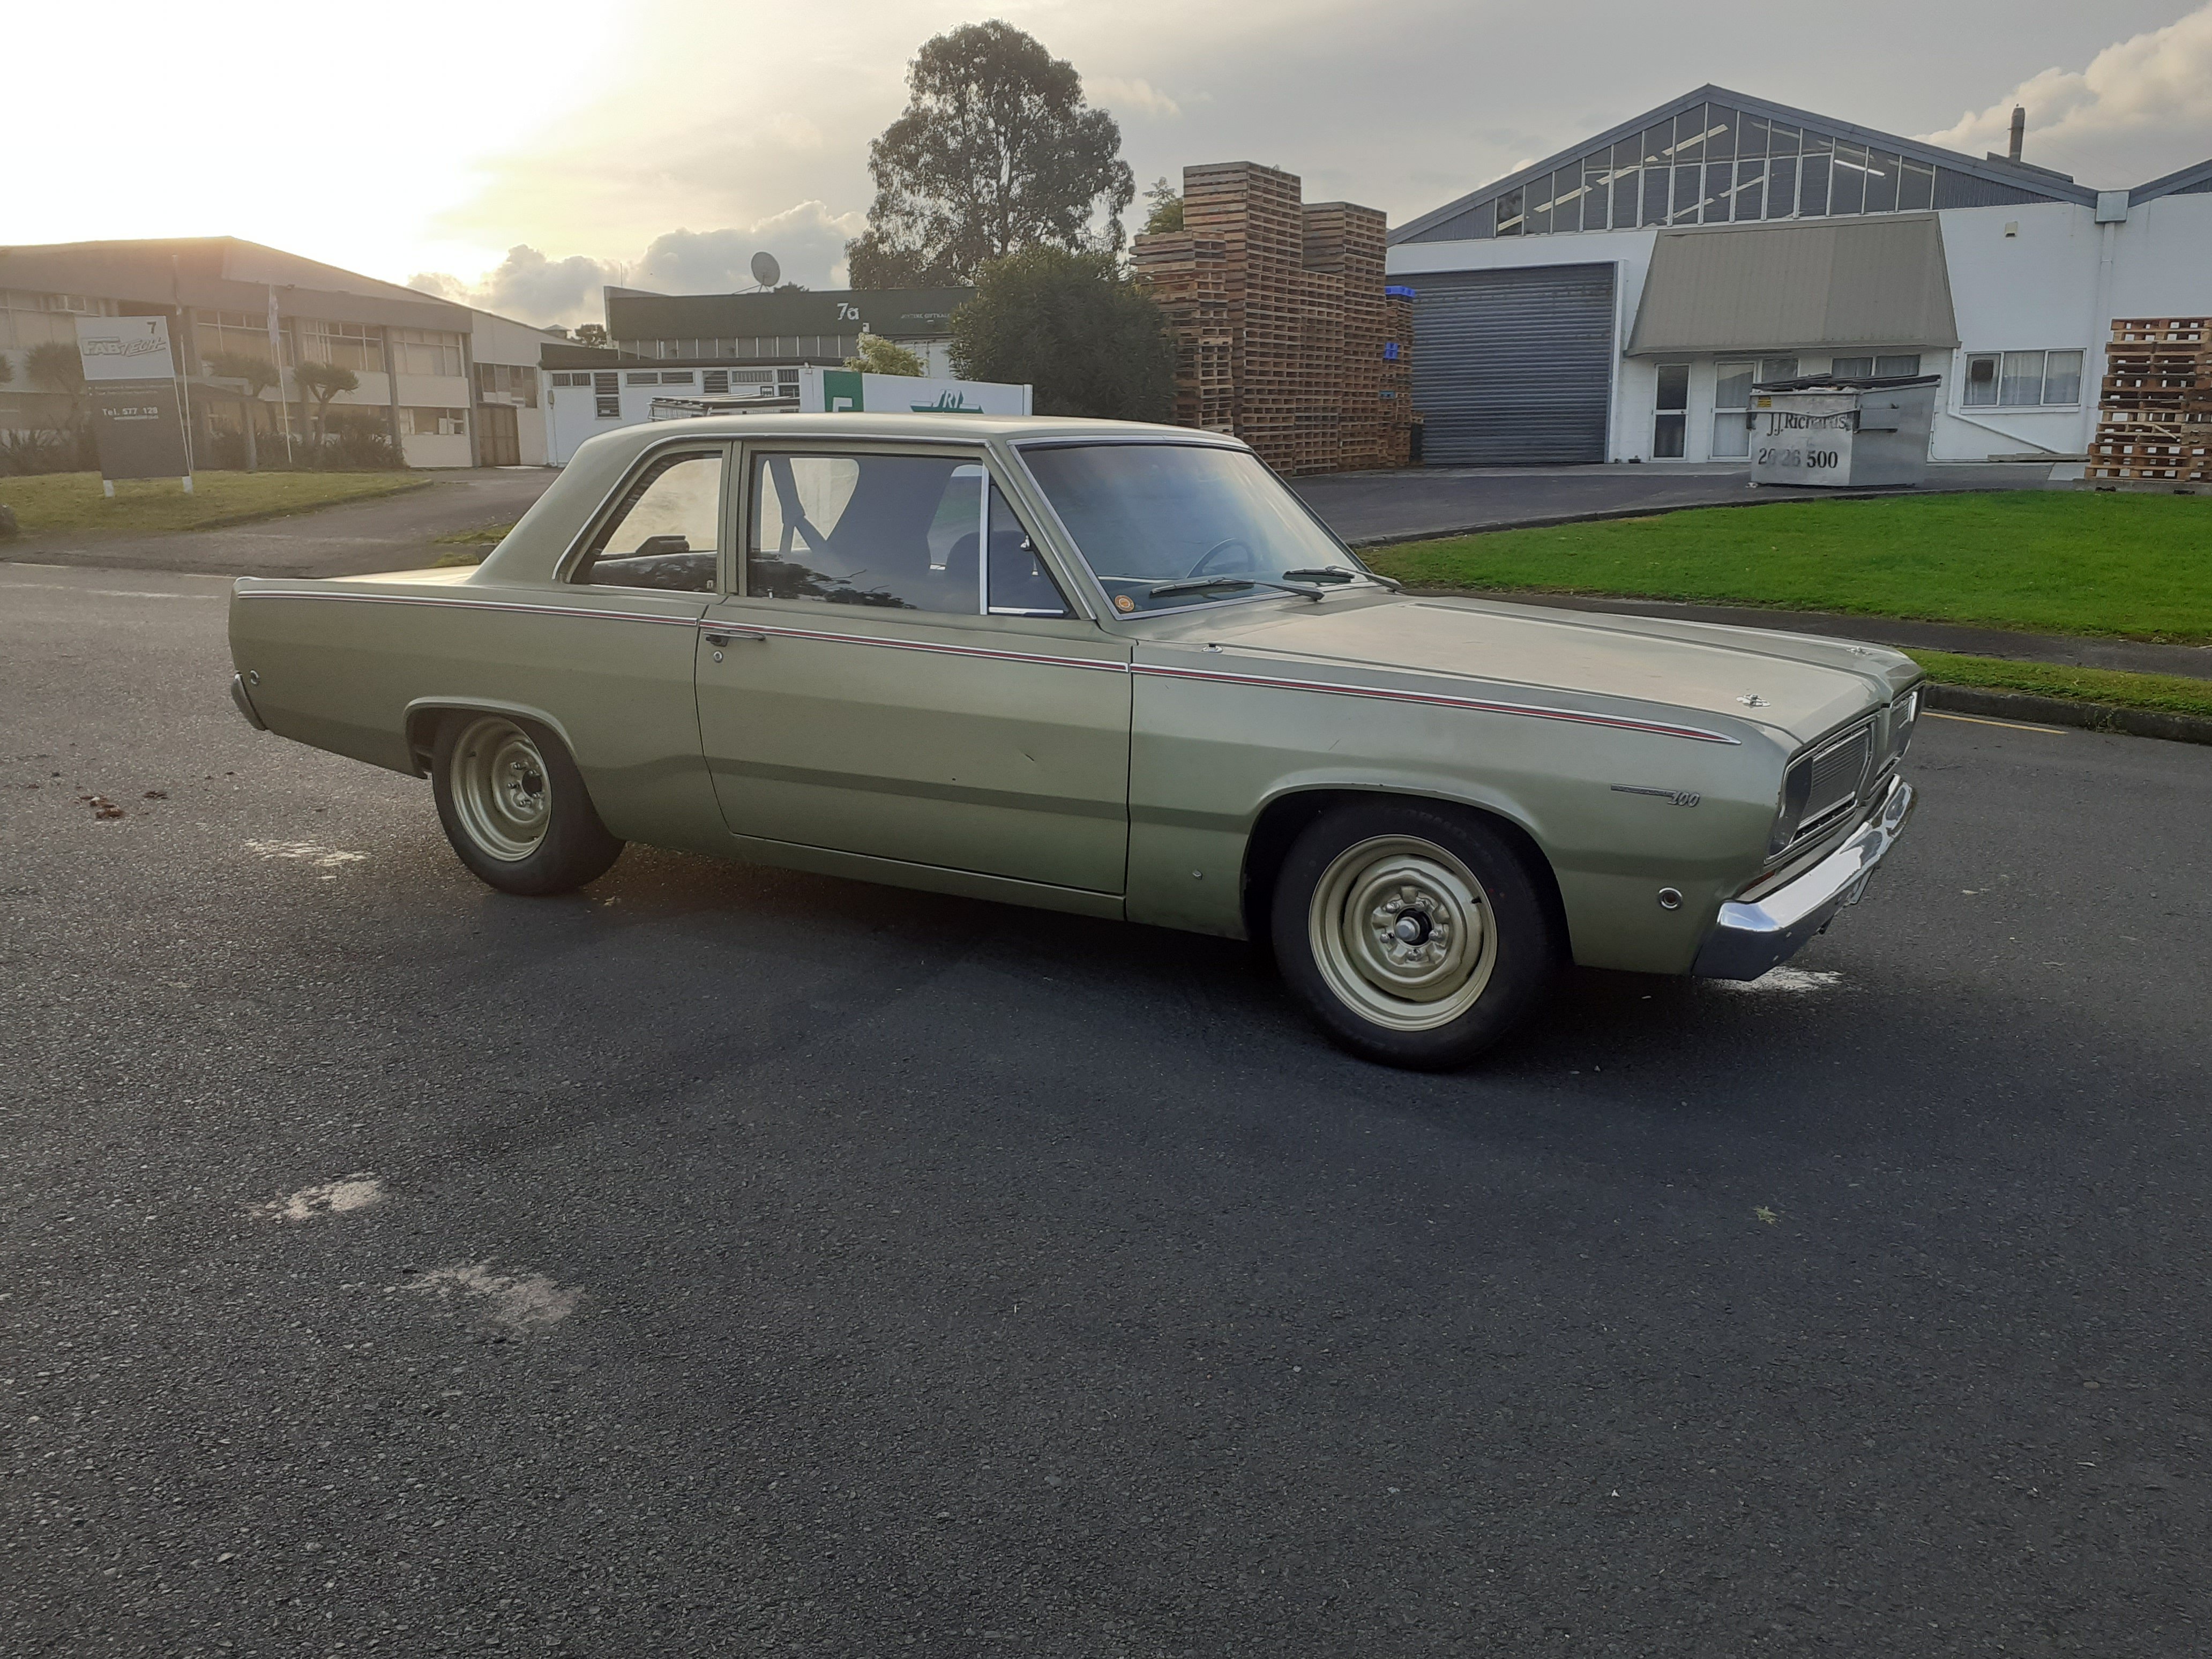
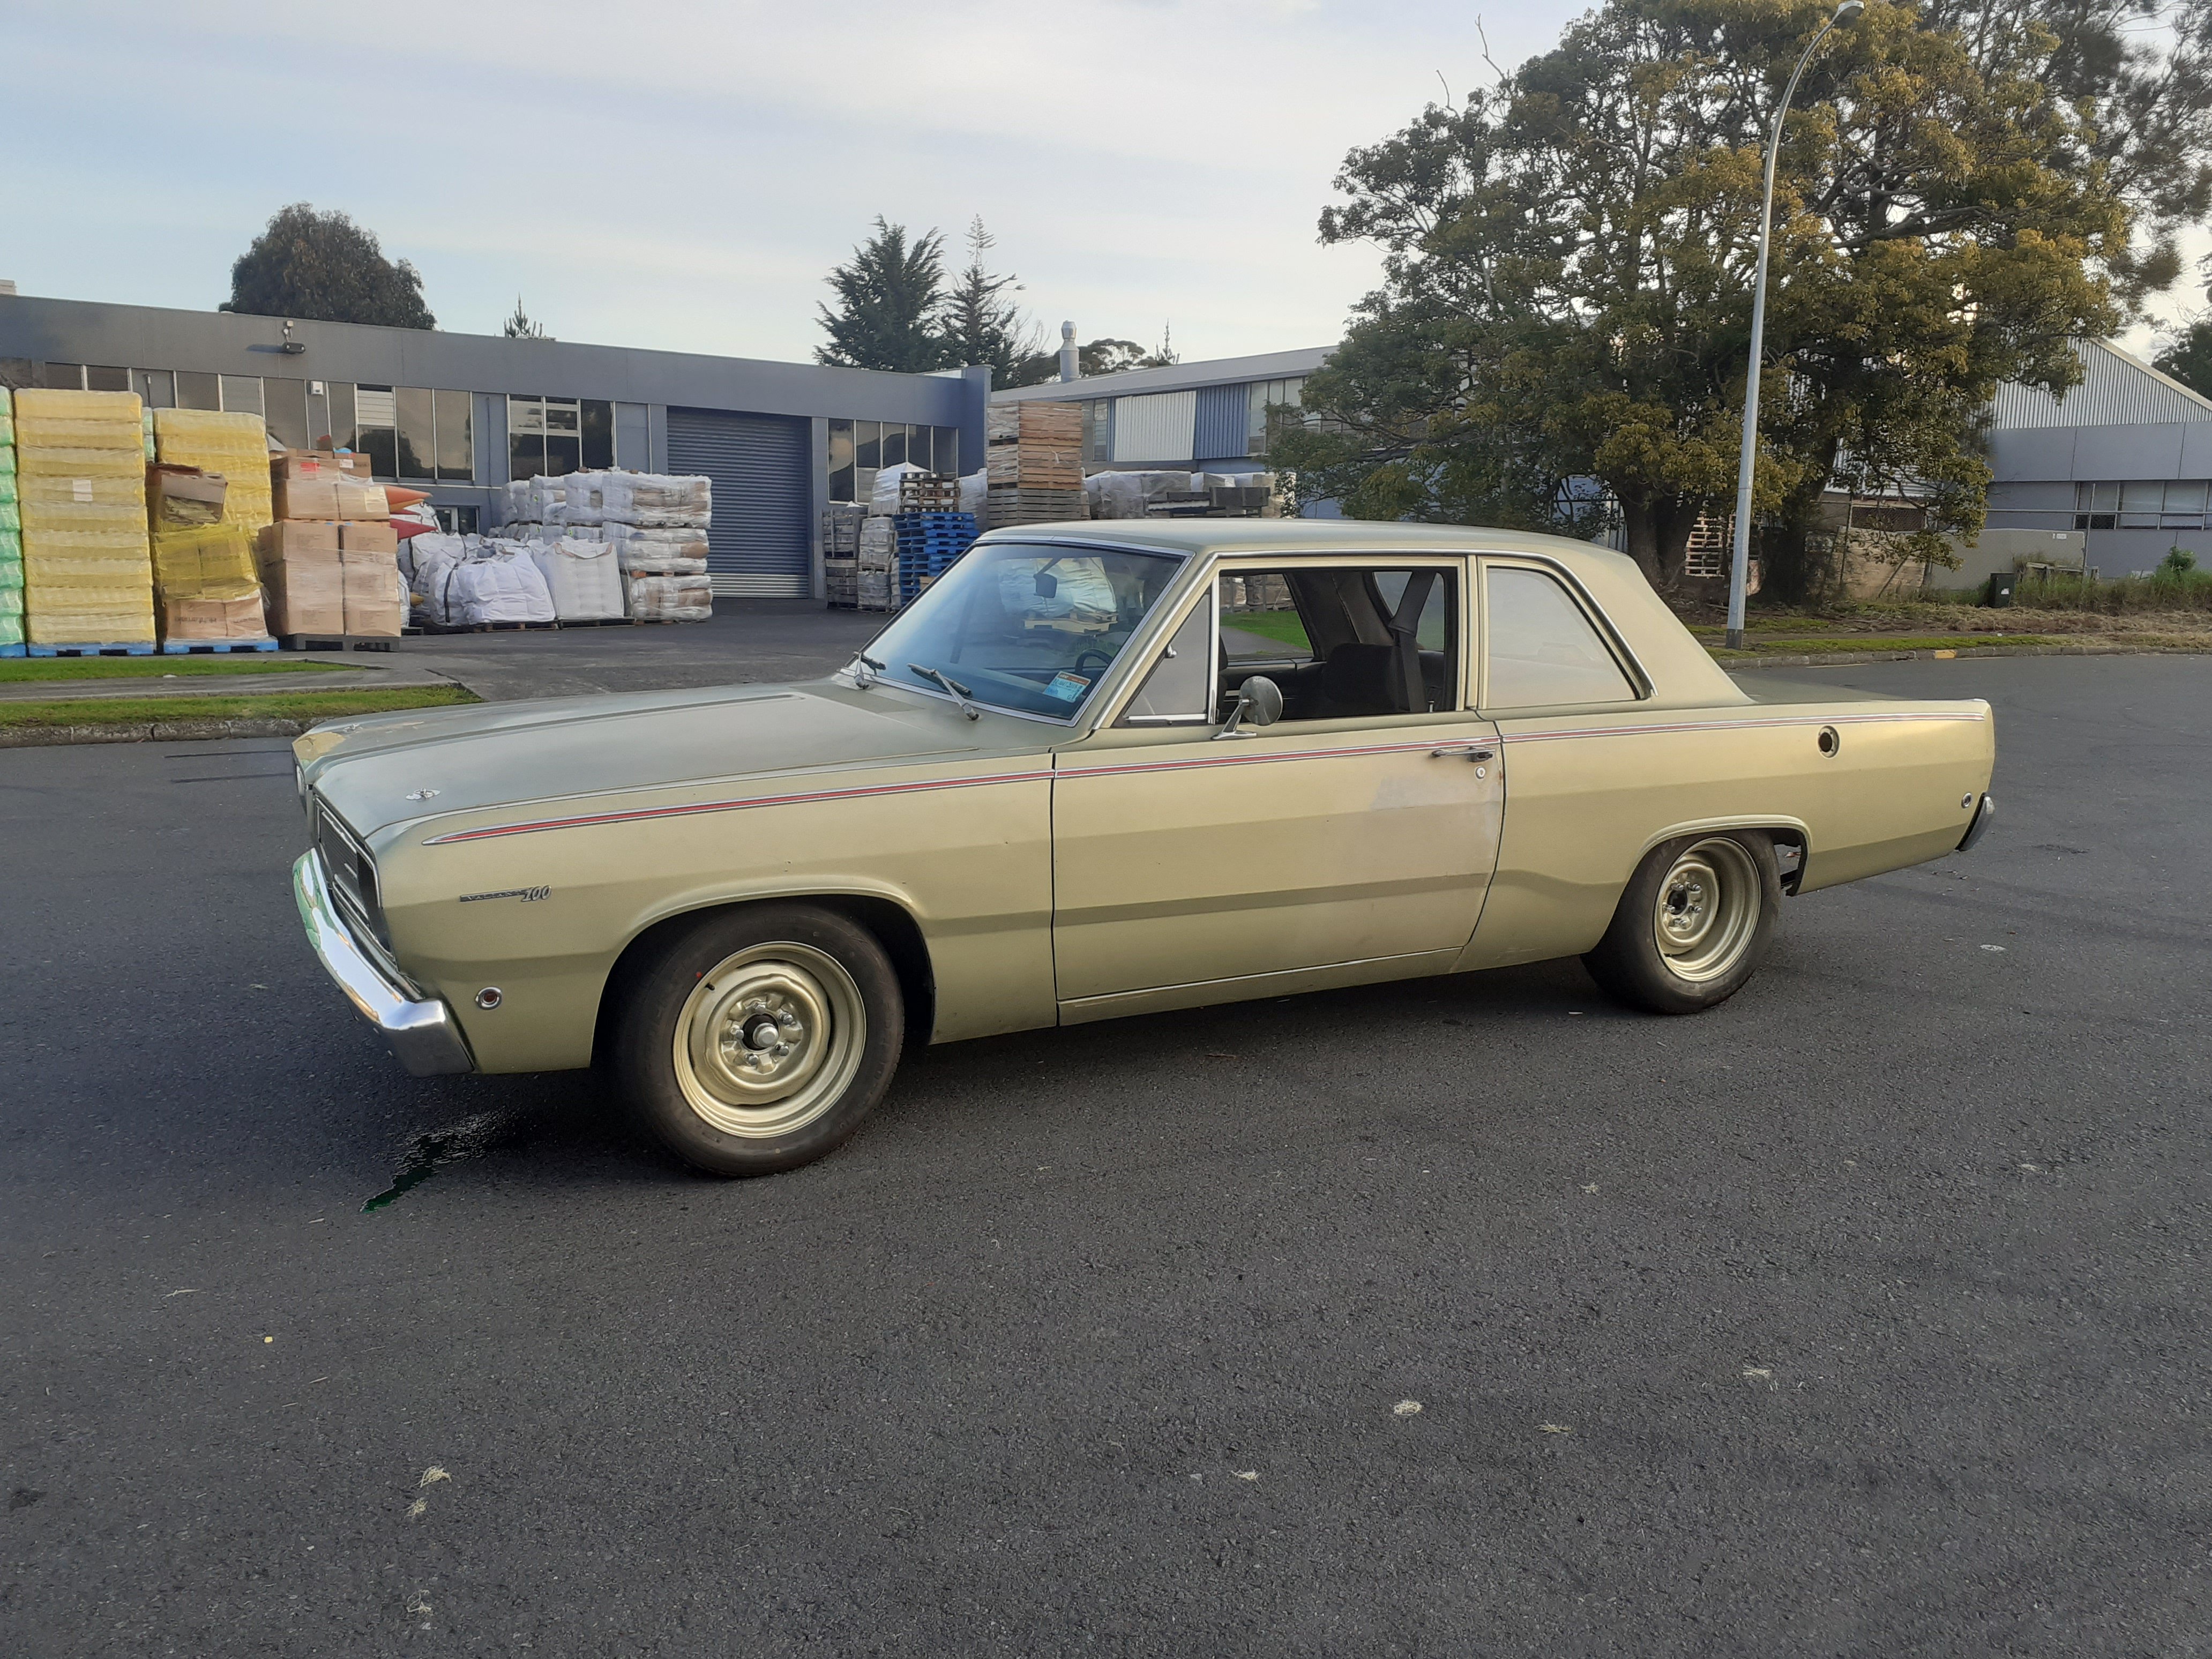
Went to Chrome at Hampton downs , gave it beans all day, used about $200 in fuel, took a few randoms then wife and kid out for some skids and everyone had fun.
1 point
-
1 point
-
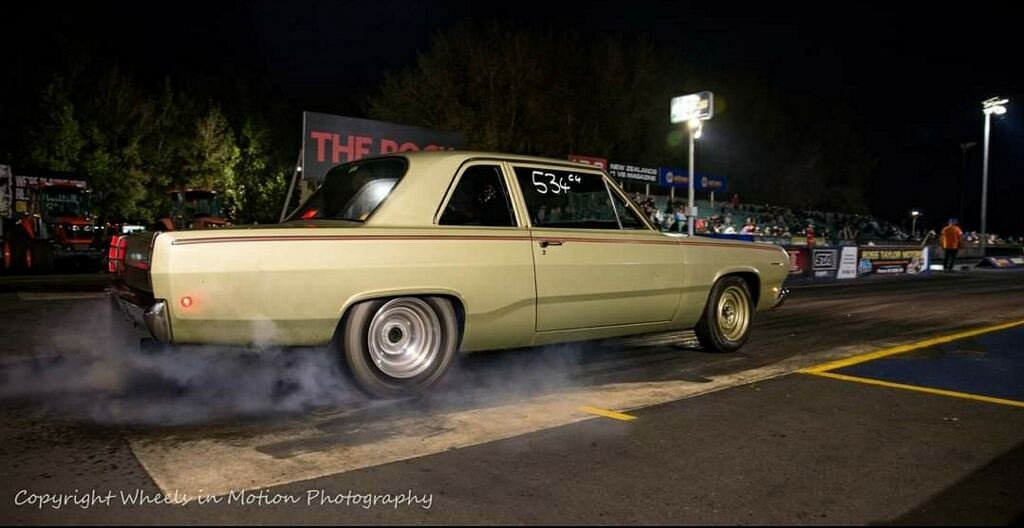
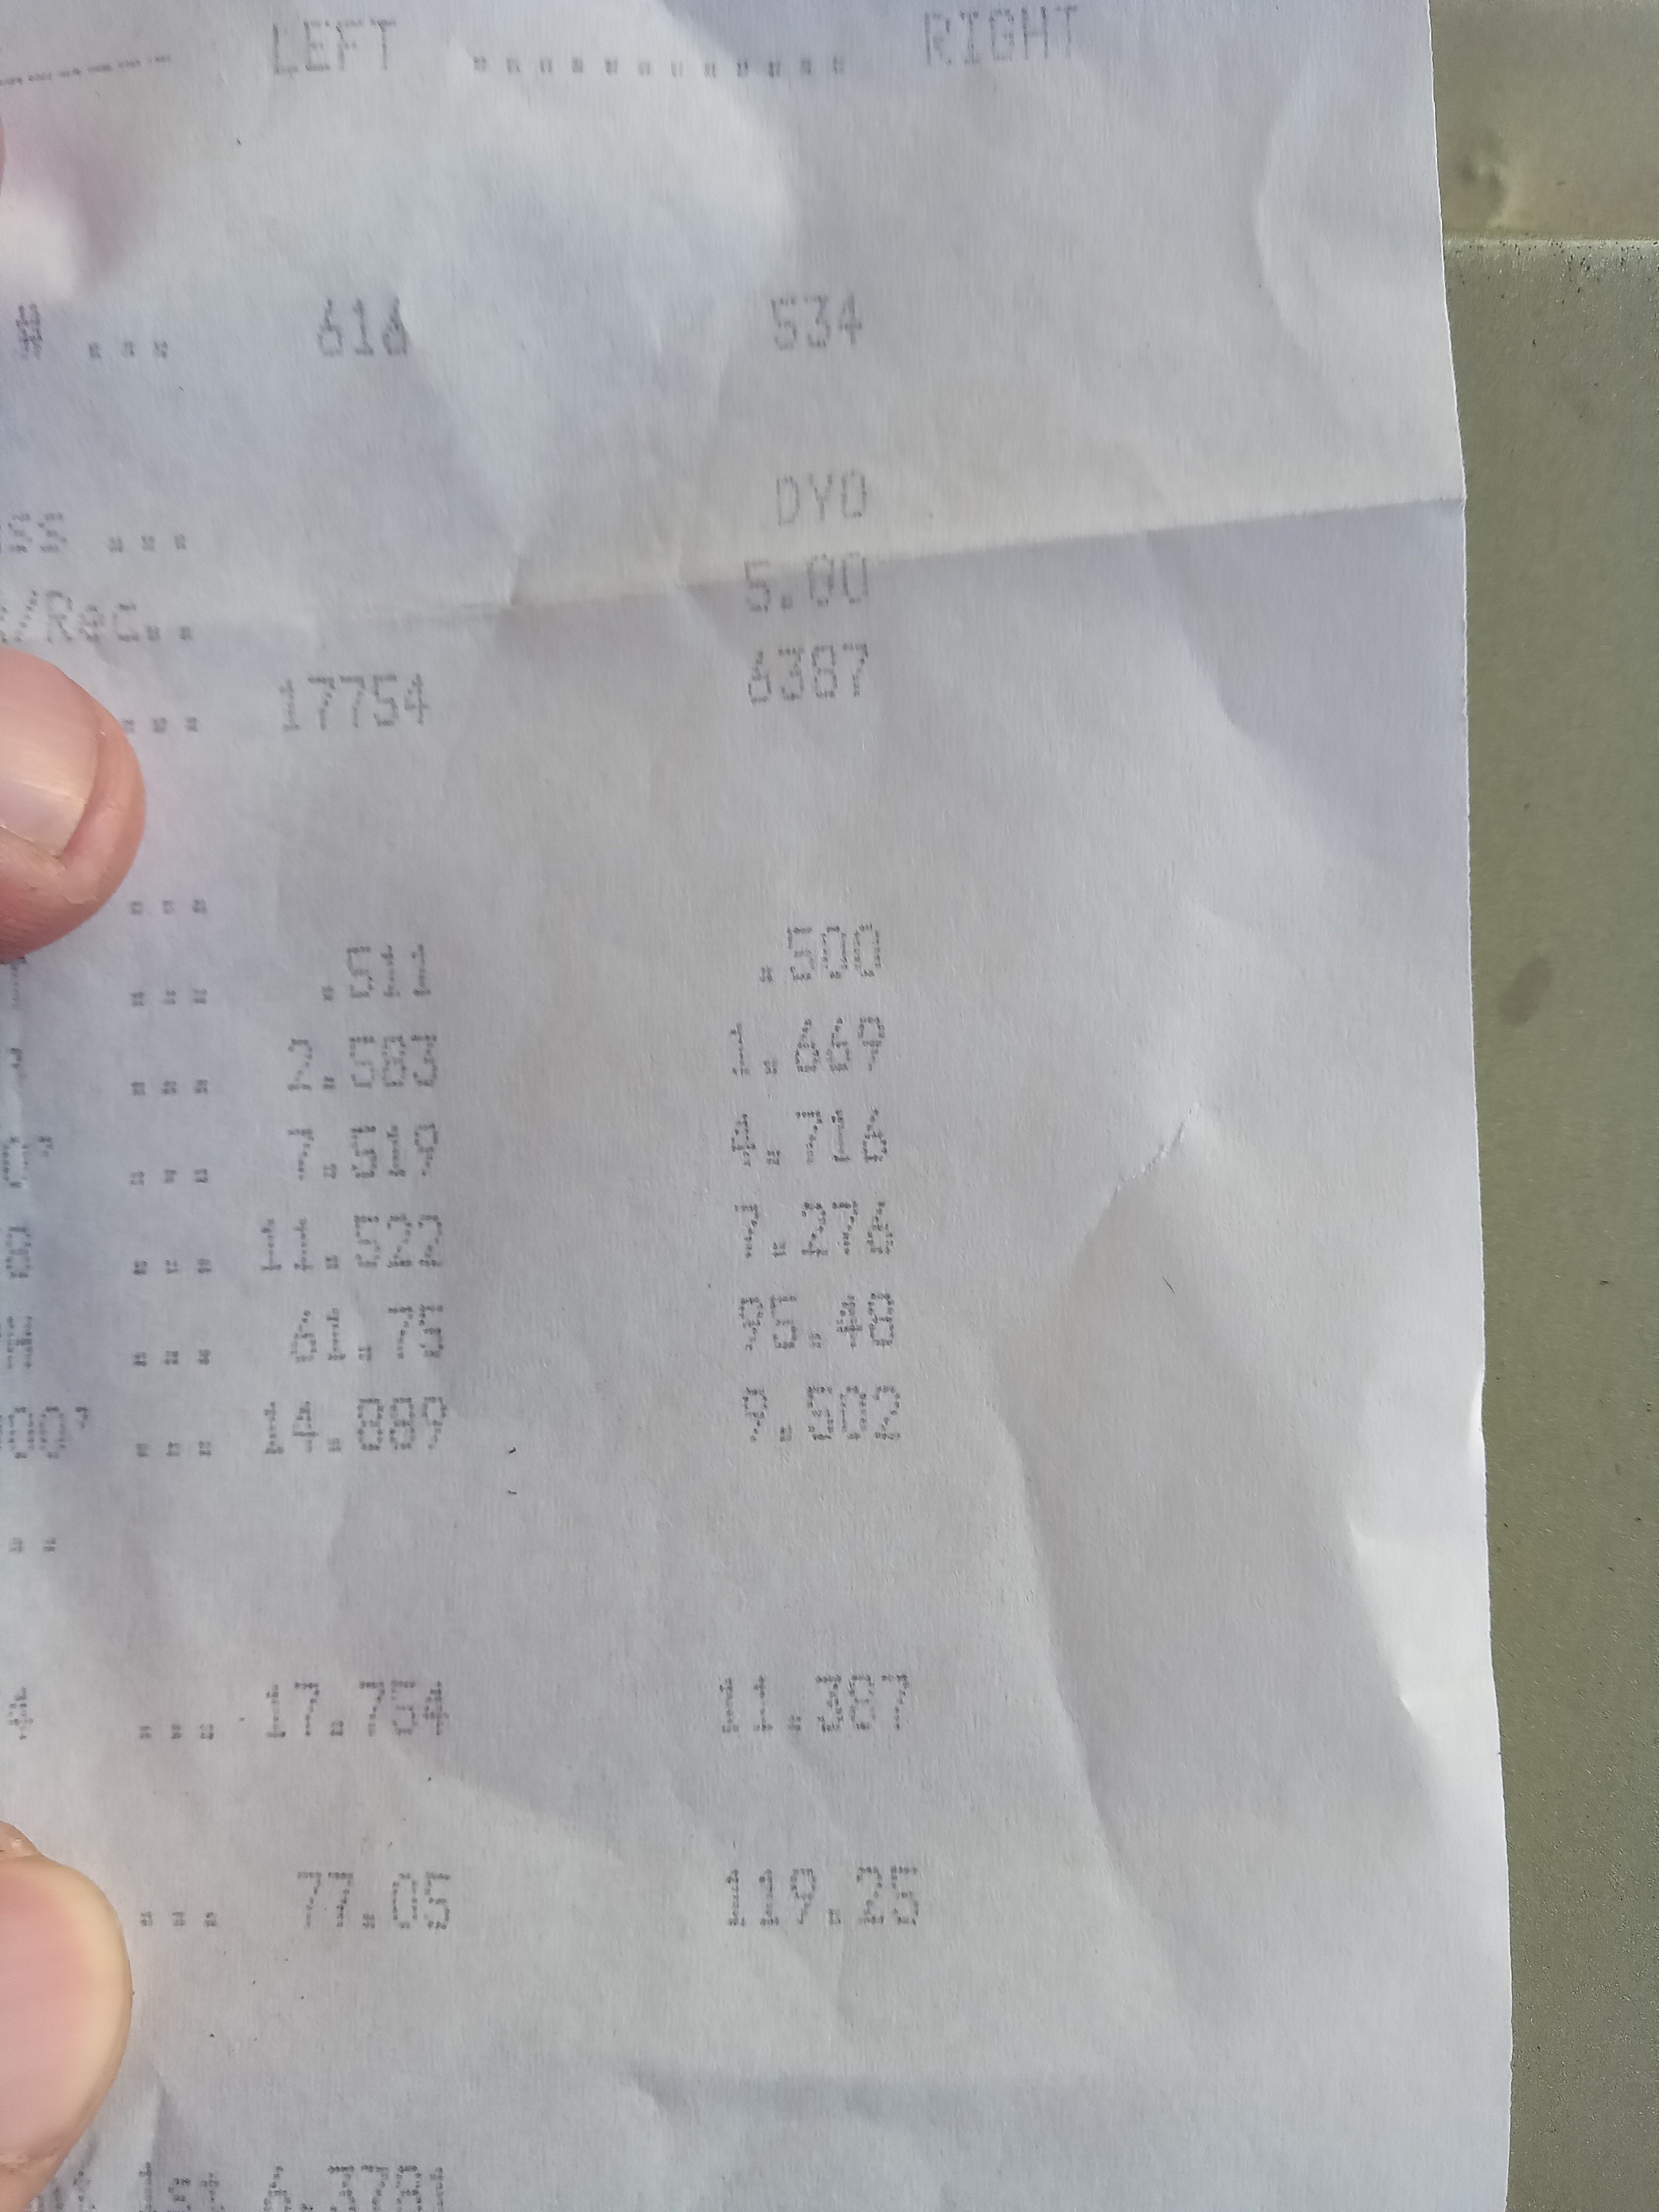
Well that worked better than i expected. Went to night drags. Cold night air and the 2 step worked great Forward until the first staging lights come on , hit the button and the brakes hard, floor it, creep it into the second beam, by the time the green comes on theres a good amount of boost,wheeee Result! (534)
1 point
-
I think the key to making this go better, is to build more boost at the start so it leaves harder, as that was the difference between 12.3 and 11.9 I had a yarn to the guy that built the trans about the possibility of putting a transbrake in it , as torqueflites are generally strong, but have a weak point that can lead to catastrophic failure In first gear, under certain conditions, (and I'm not sure exactly why, I'm not a transmission expert ) the sprag clutch can be damaged easily . Usually from things like A burnout in first gear, where the tyre gets traction suddenly Downshifting to first gear when moving On and off the throttle in first gear Breakages in first gear like an axle, diff etc If the sprag (a one way clutch, that works with rollers and ramps) gets damaged and doesn't work, the forward clutch drum gets to spin 3x engine rpm. They are made of cast iron and don't like that, and they explode . 727s have a bigger drum than 904s so they are more prone to it So anyway, trans guy said you can put a transbrake in a 727, but to get the benefit from it I'd need a looser converter as well which would likely be a custom built thing to suit my combo. For those who are interested, a transbrake works by putting the trans in first and reverse at the same time when you hold a button down- this allows rpm and boost to build by loading the engine against the converter. Turbo cars can also use a thing called a bump box which momentarily releases the transbrake to 'bump in' to the staging lights- this allows you to stay out of the beams until you build boost I dunno if I'll get that serious about it, as it's mostly a road car, and it drives well with the converter it has in it A easy thing to try is a 2 step rev limiter so I got one of those and an adjustable low rpm chip so I can see if that can build more boost mashing the brake pedal as hard as possible1 point
-
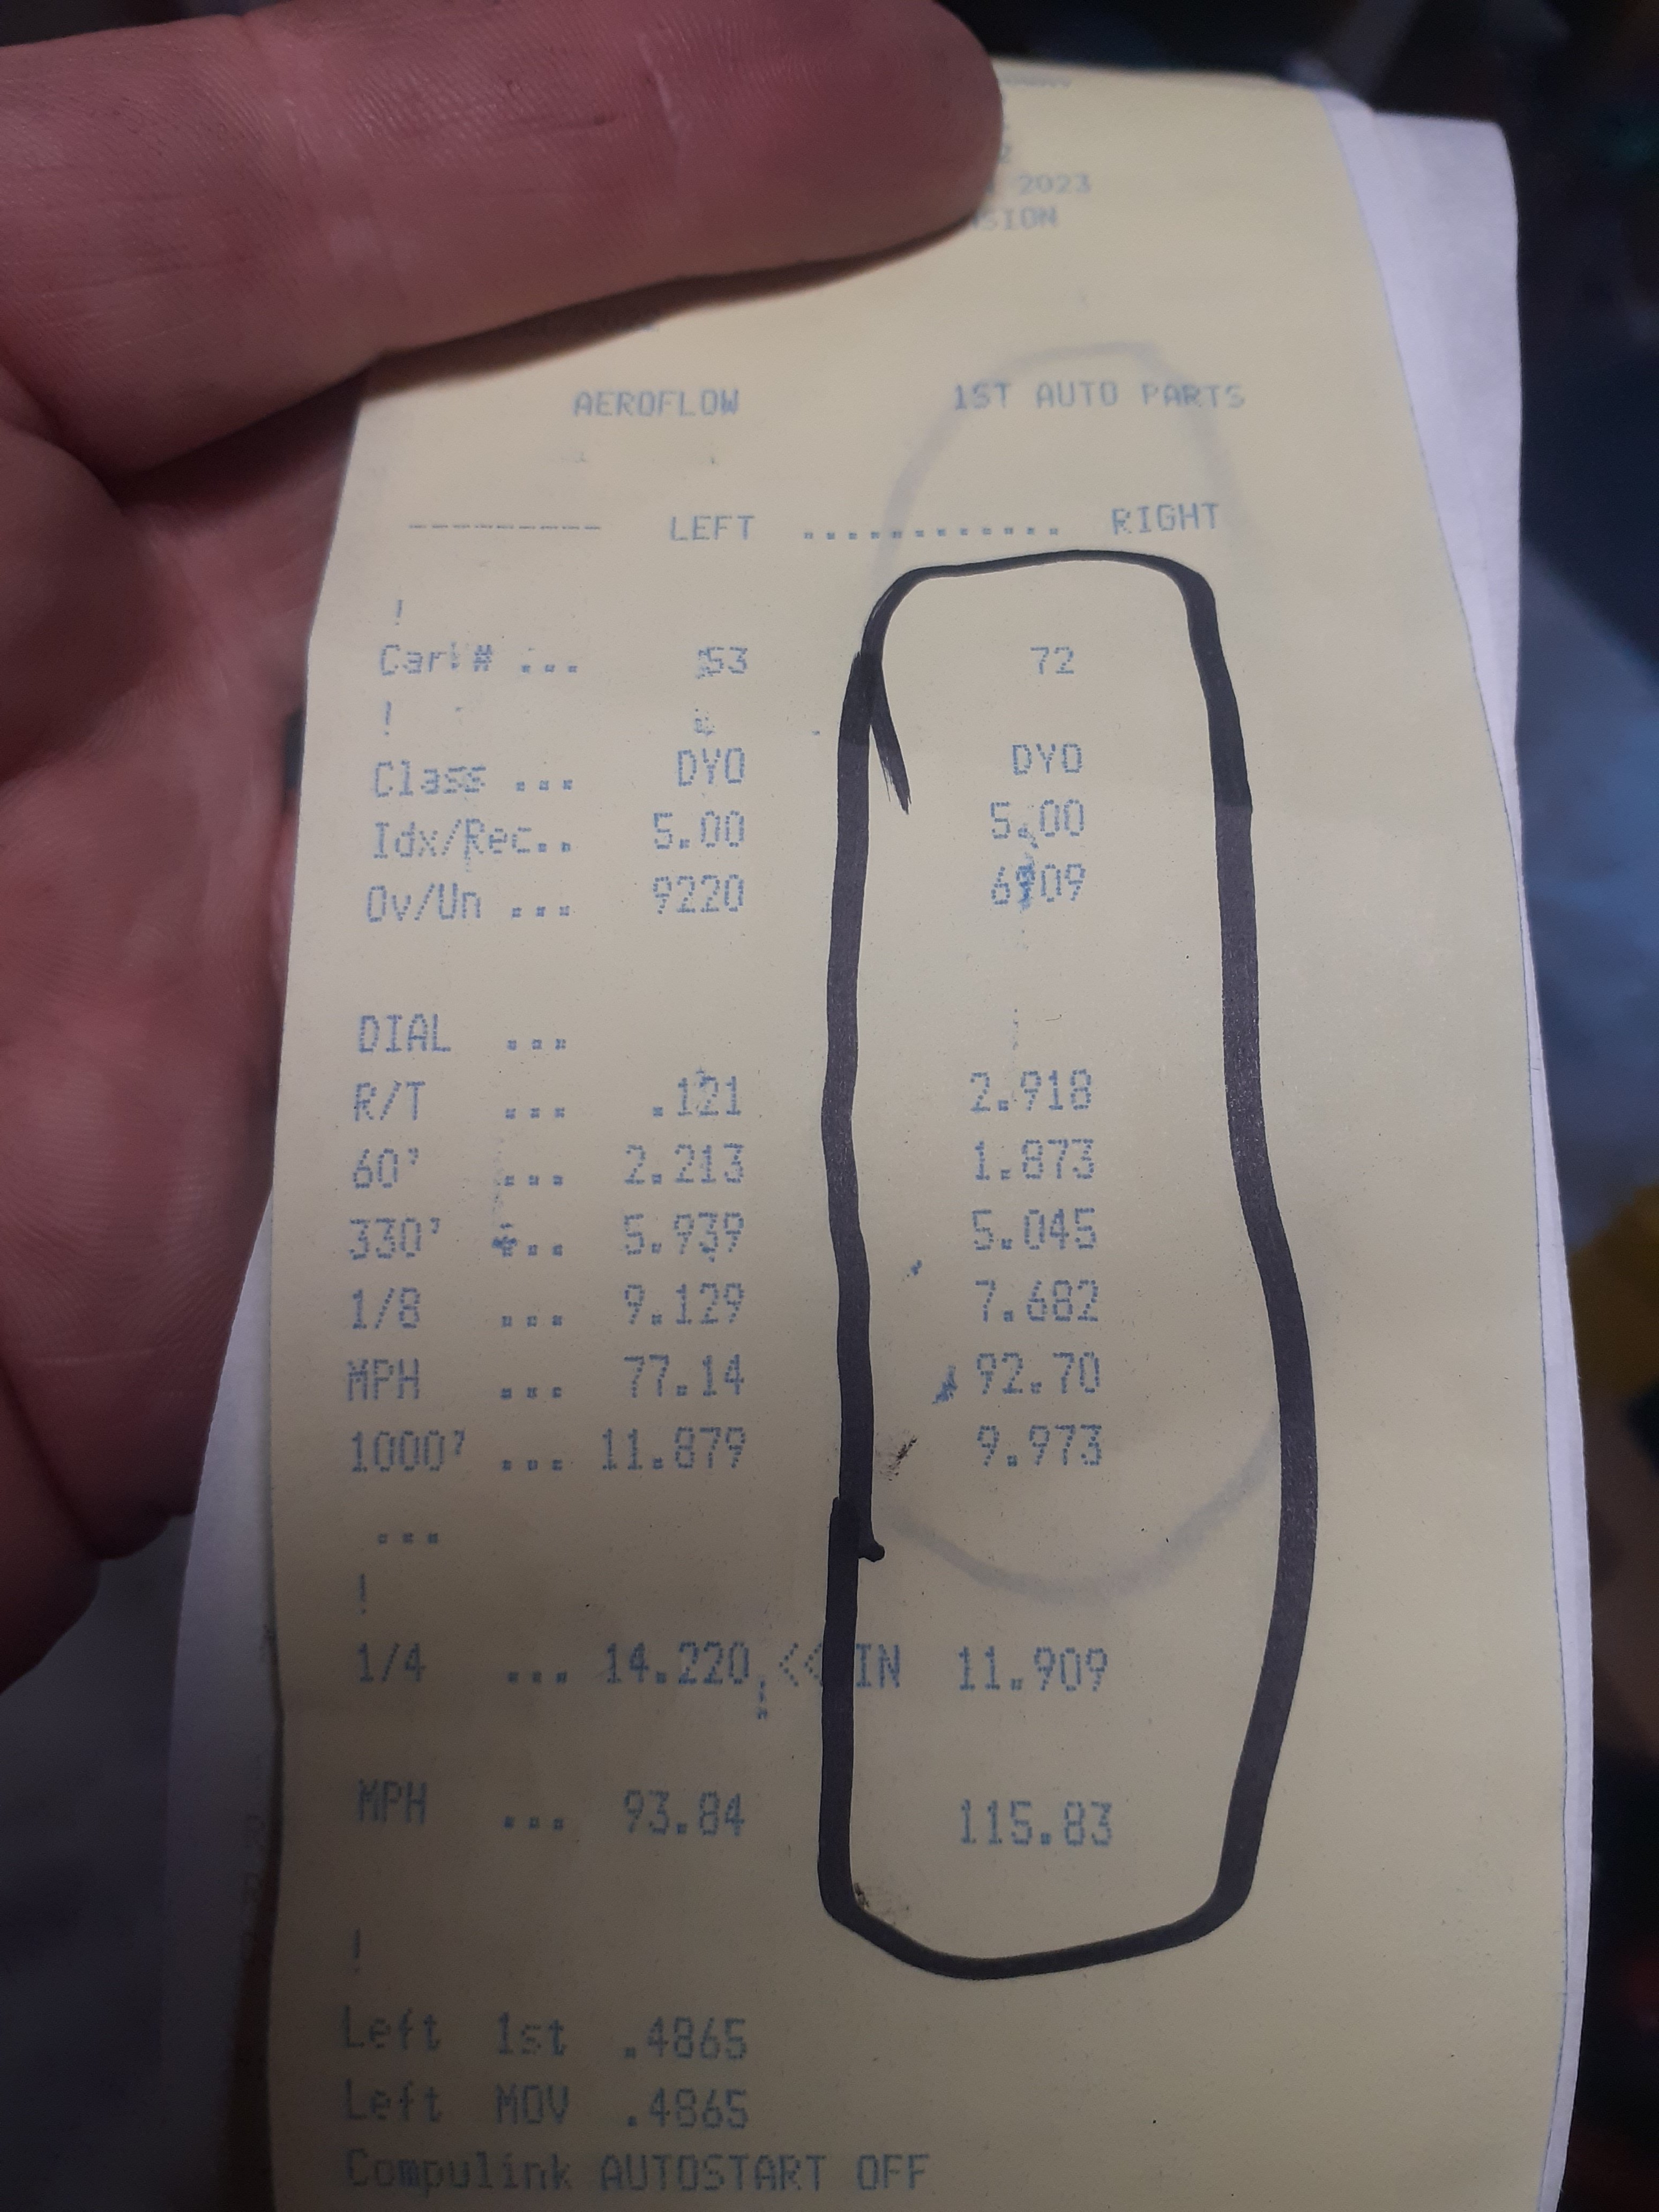
Oldschool drag day '22 edition Did 8 passes Interestingly, every single one was 115mph. Did a few 12.4, 12.3 etc then 3x 12.0 in a row Last pass was near the end of racing so not much time to cool down, I ignored the green and let it build boost with the brake pedal pushed as hard as I could , when I let the brake go it left harder than any other pass today, 11.90 massively stoked with that. I've never paid much attention to 60ft times but it appears that I should, as mentioned all passes were the same mph but the quickest was 1.87 vs 2.3something for the slowest
1 point
-
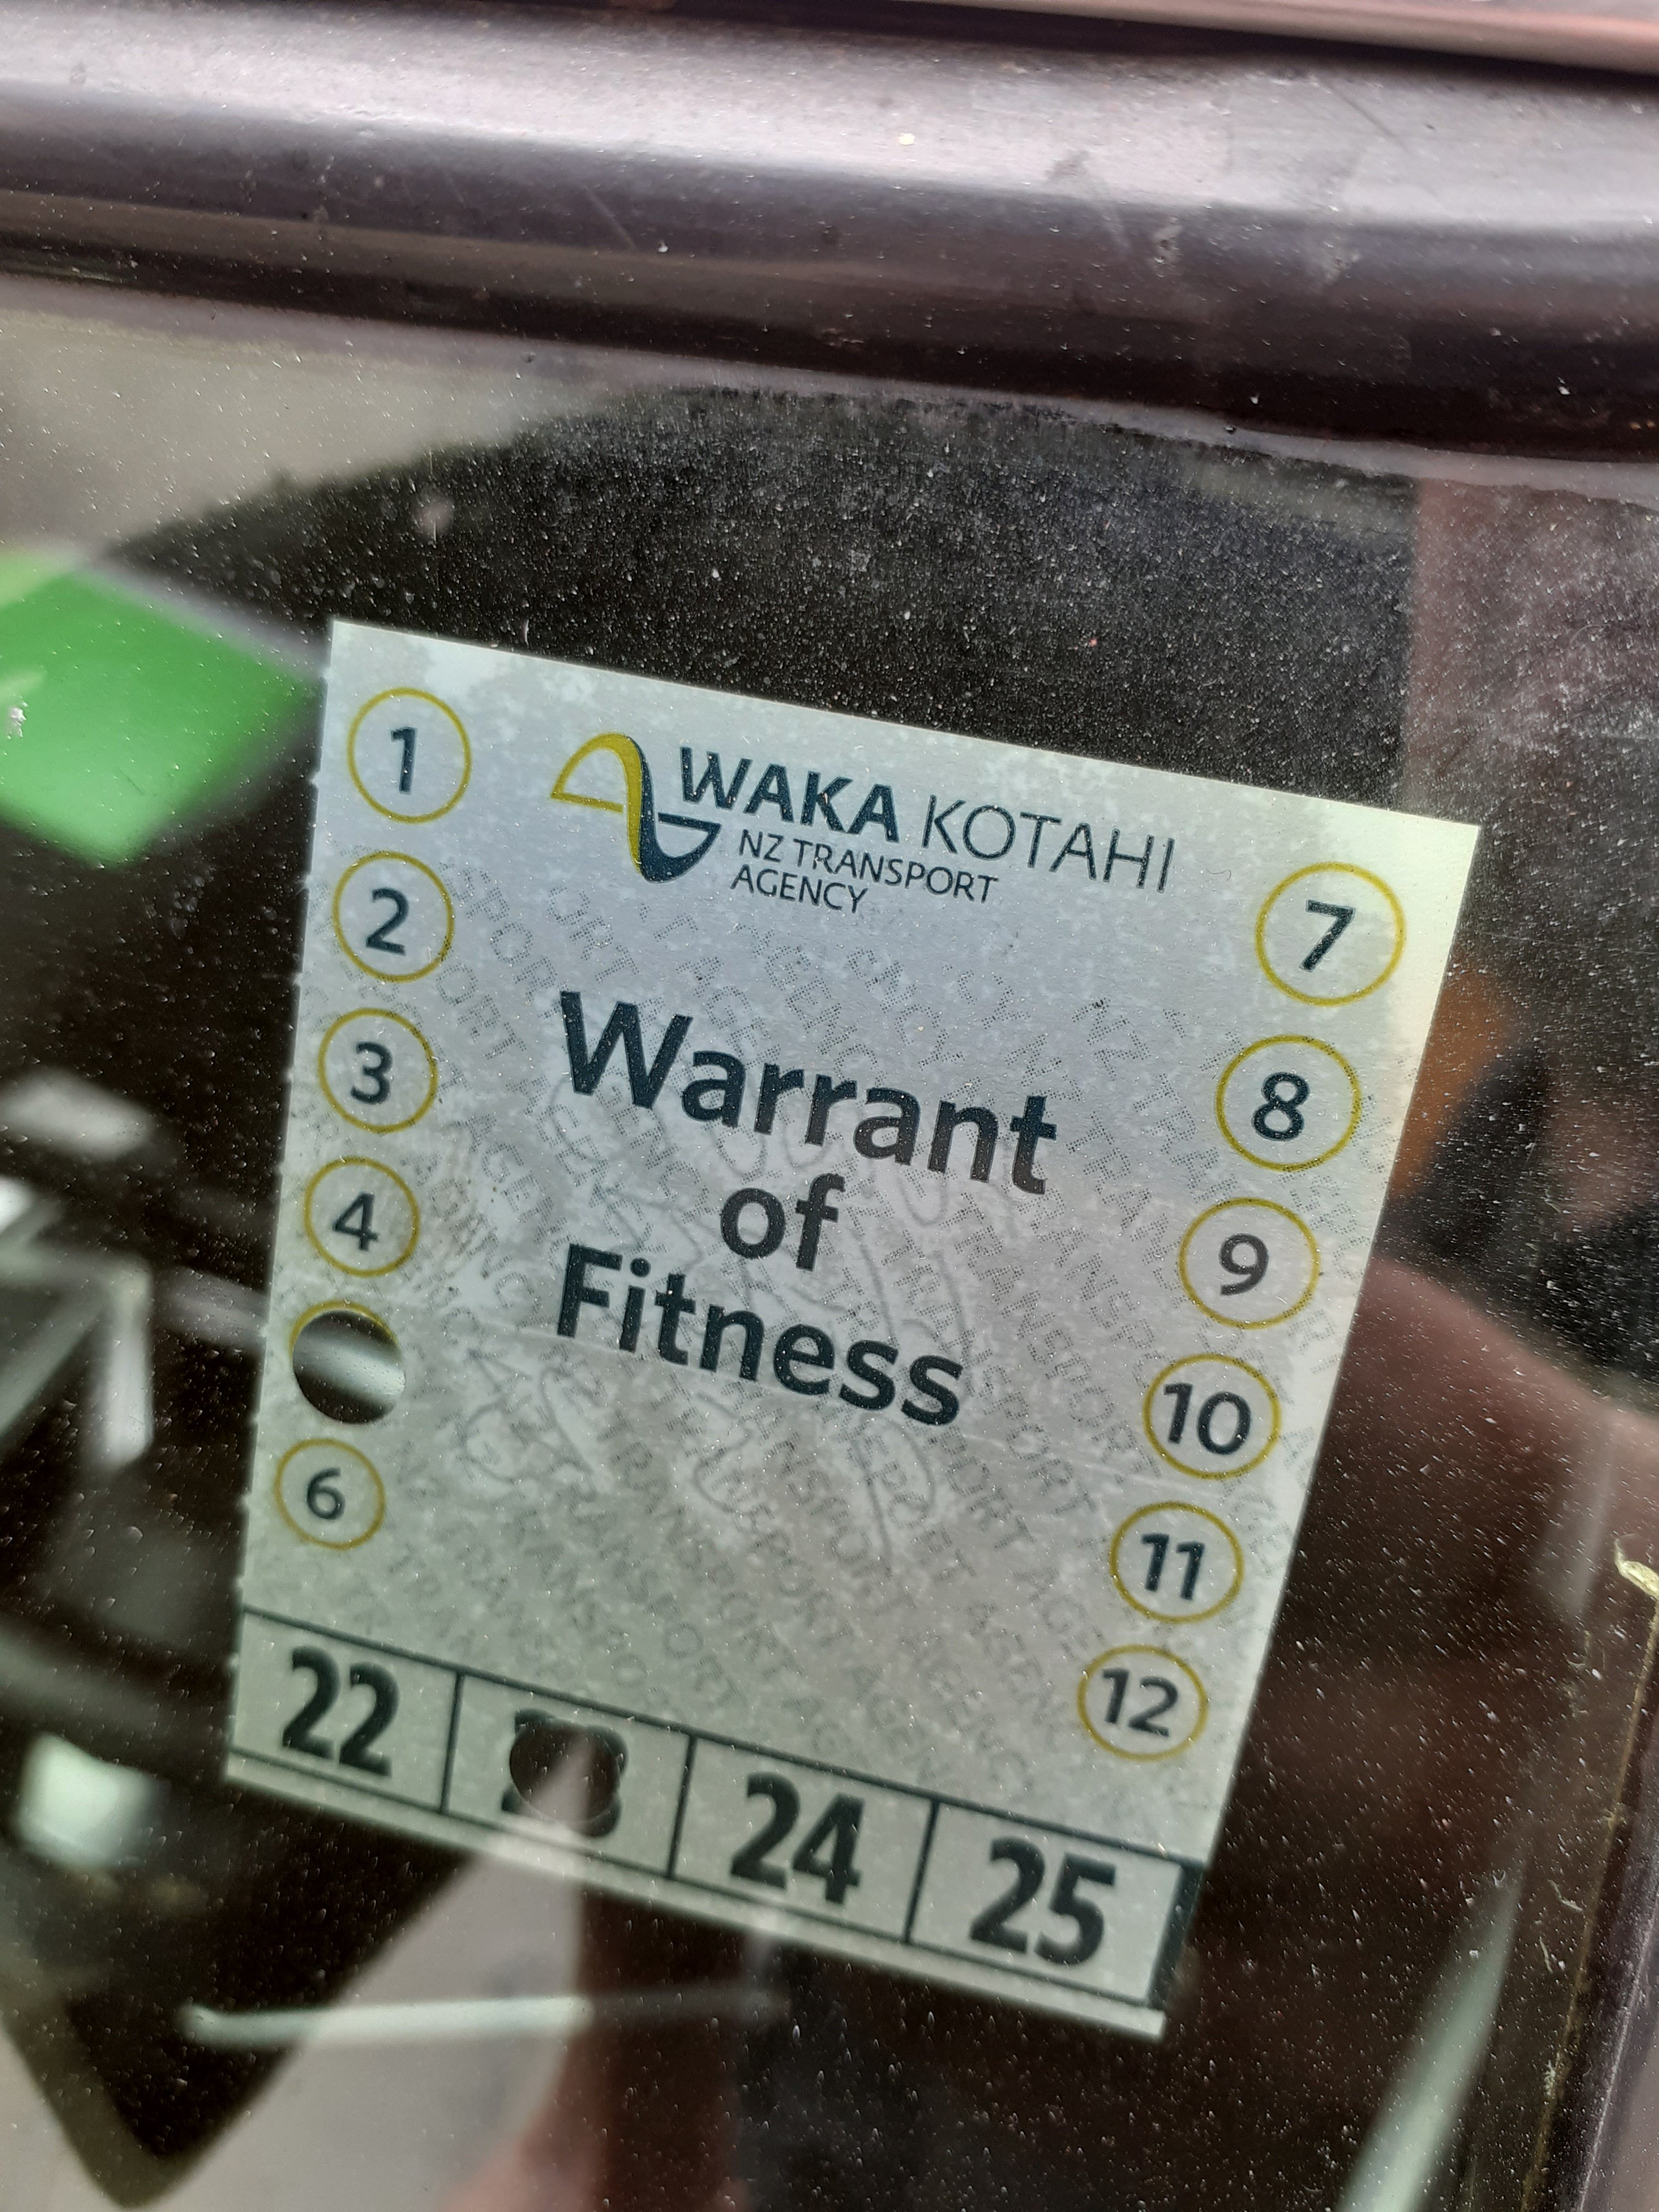
wof reg and cert done.
1 point
-
Don't forget, oldschooldotcodotenzed drag day is in December
1 point
-
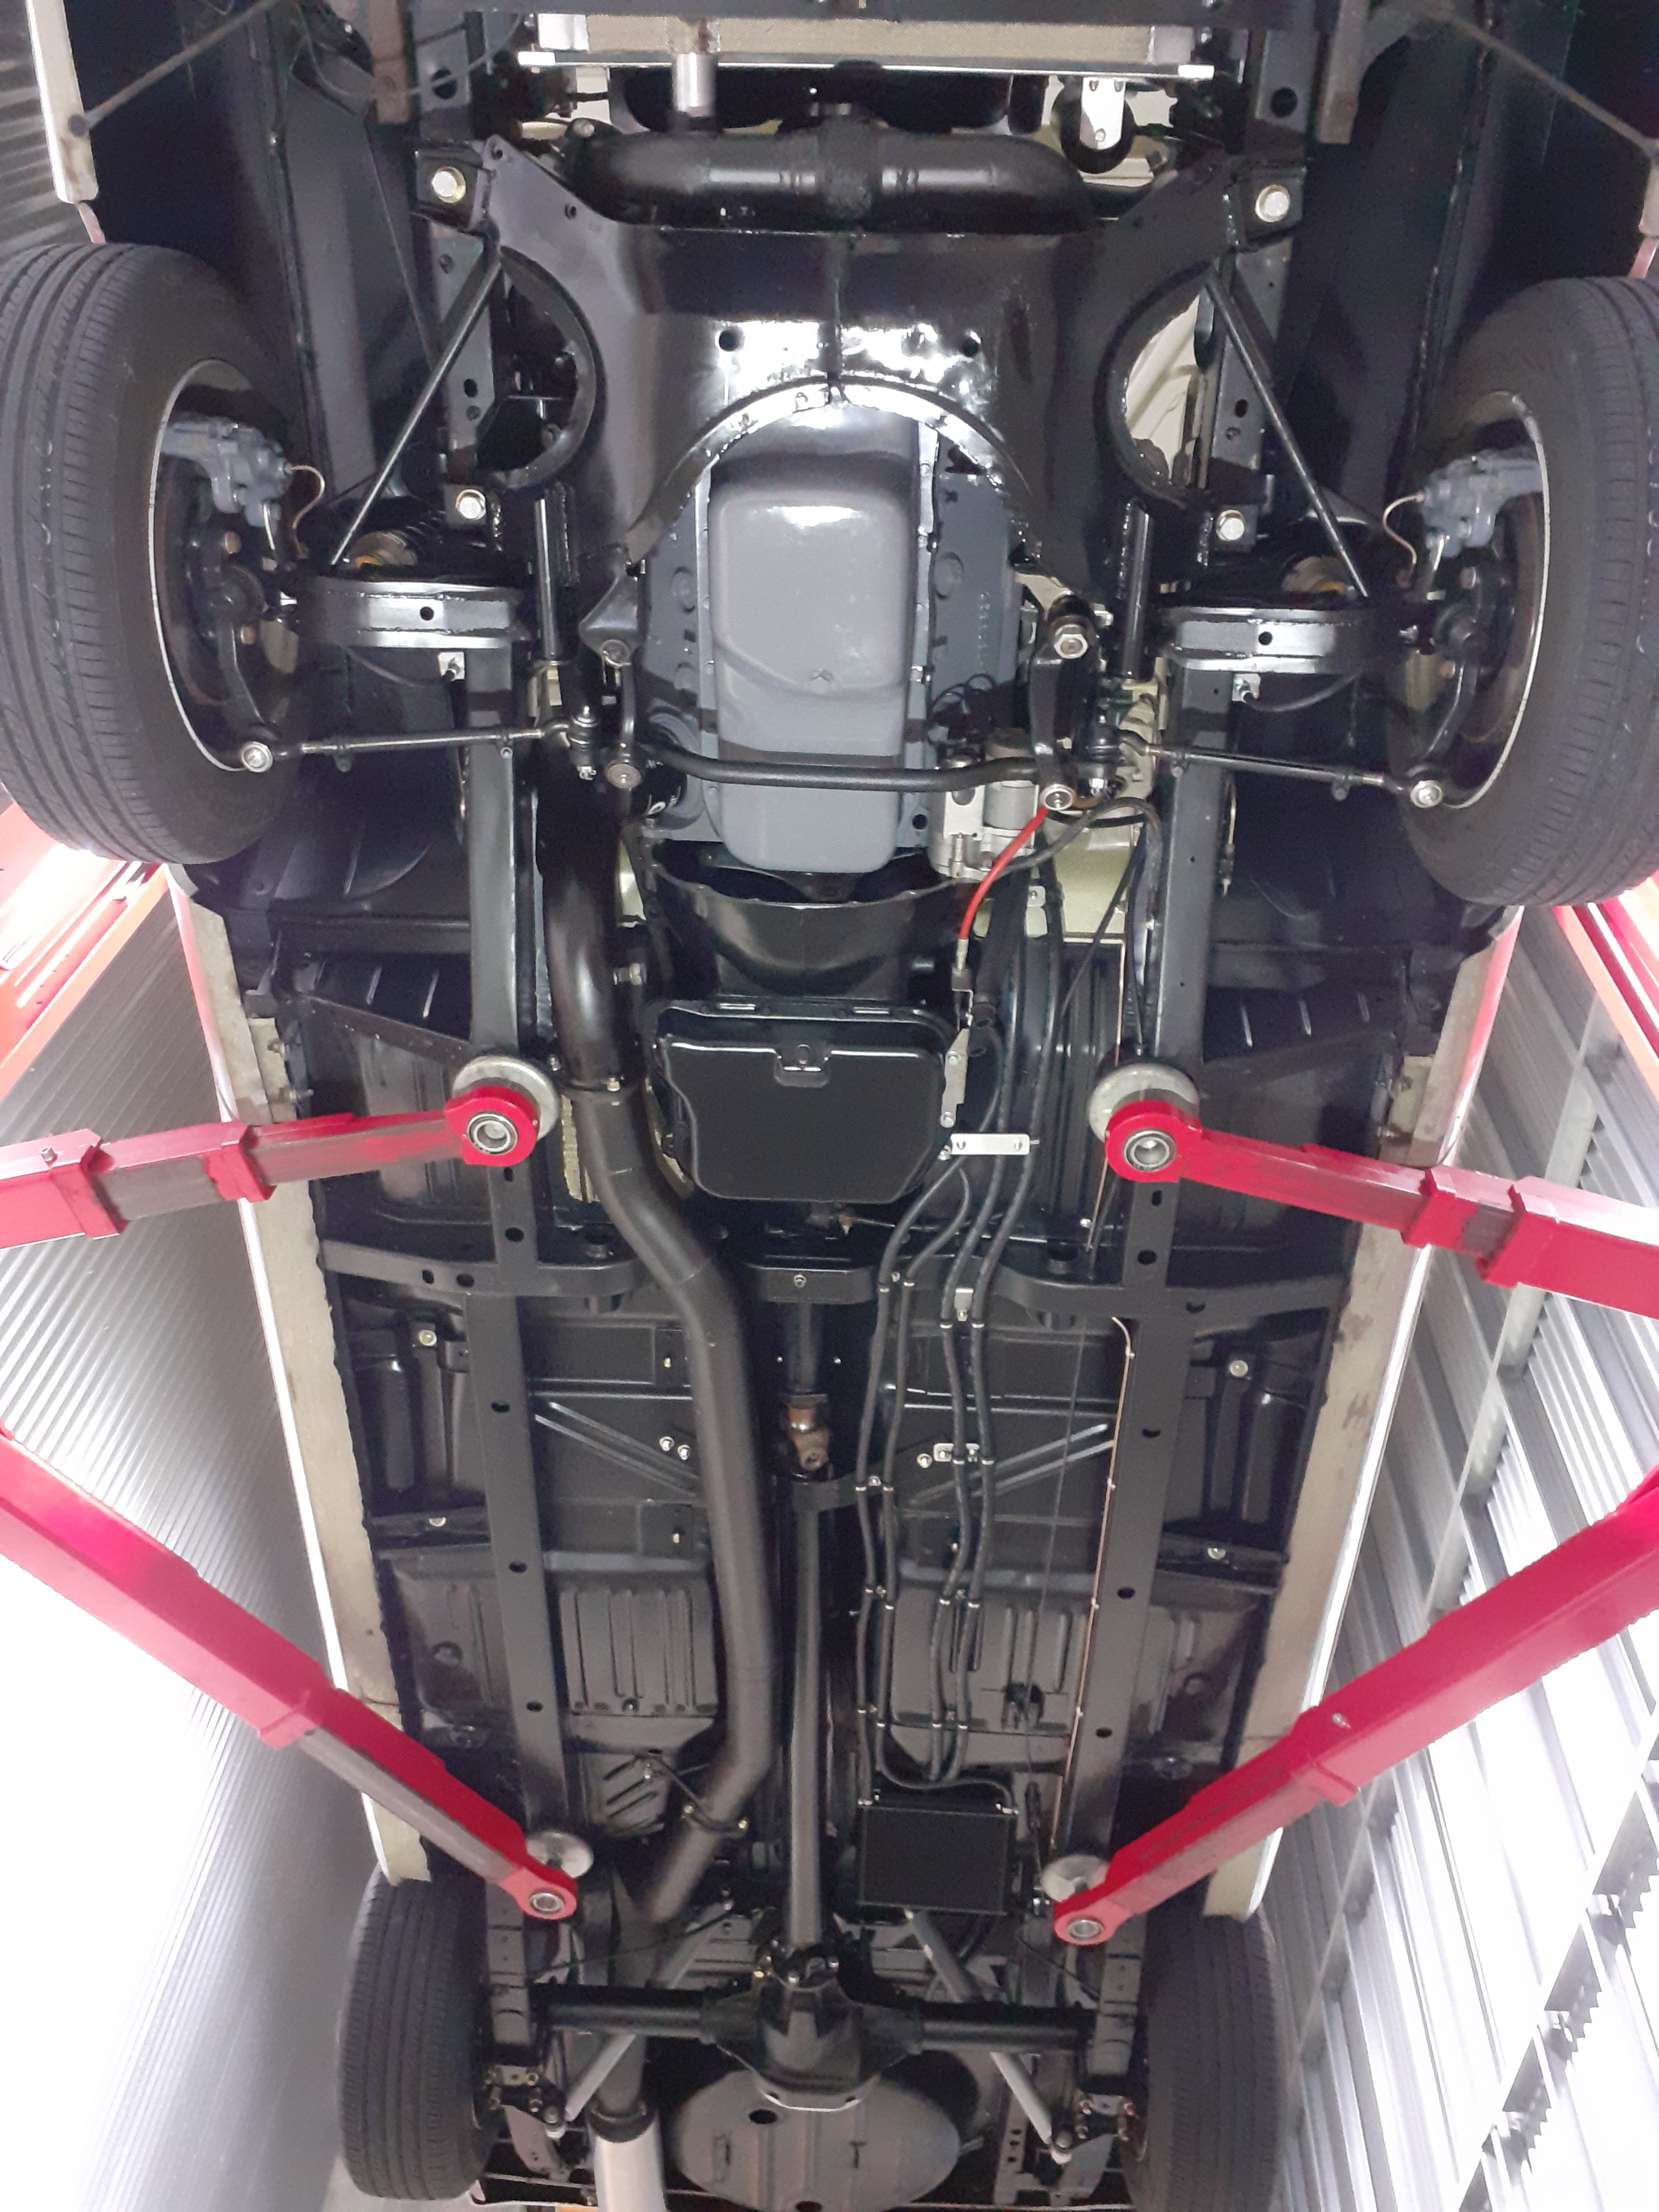
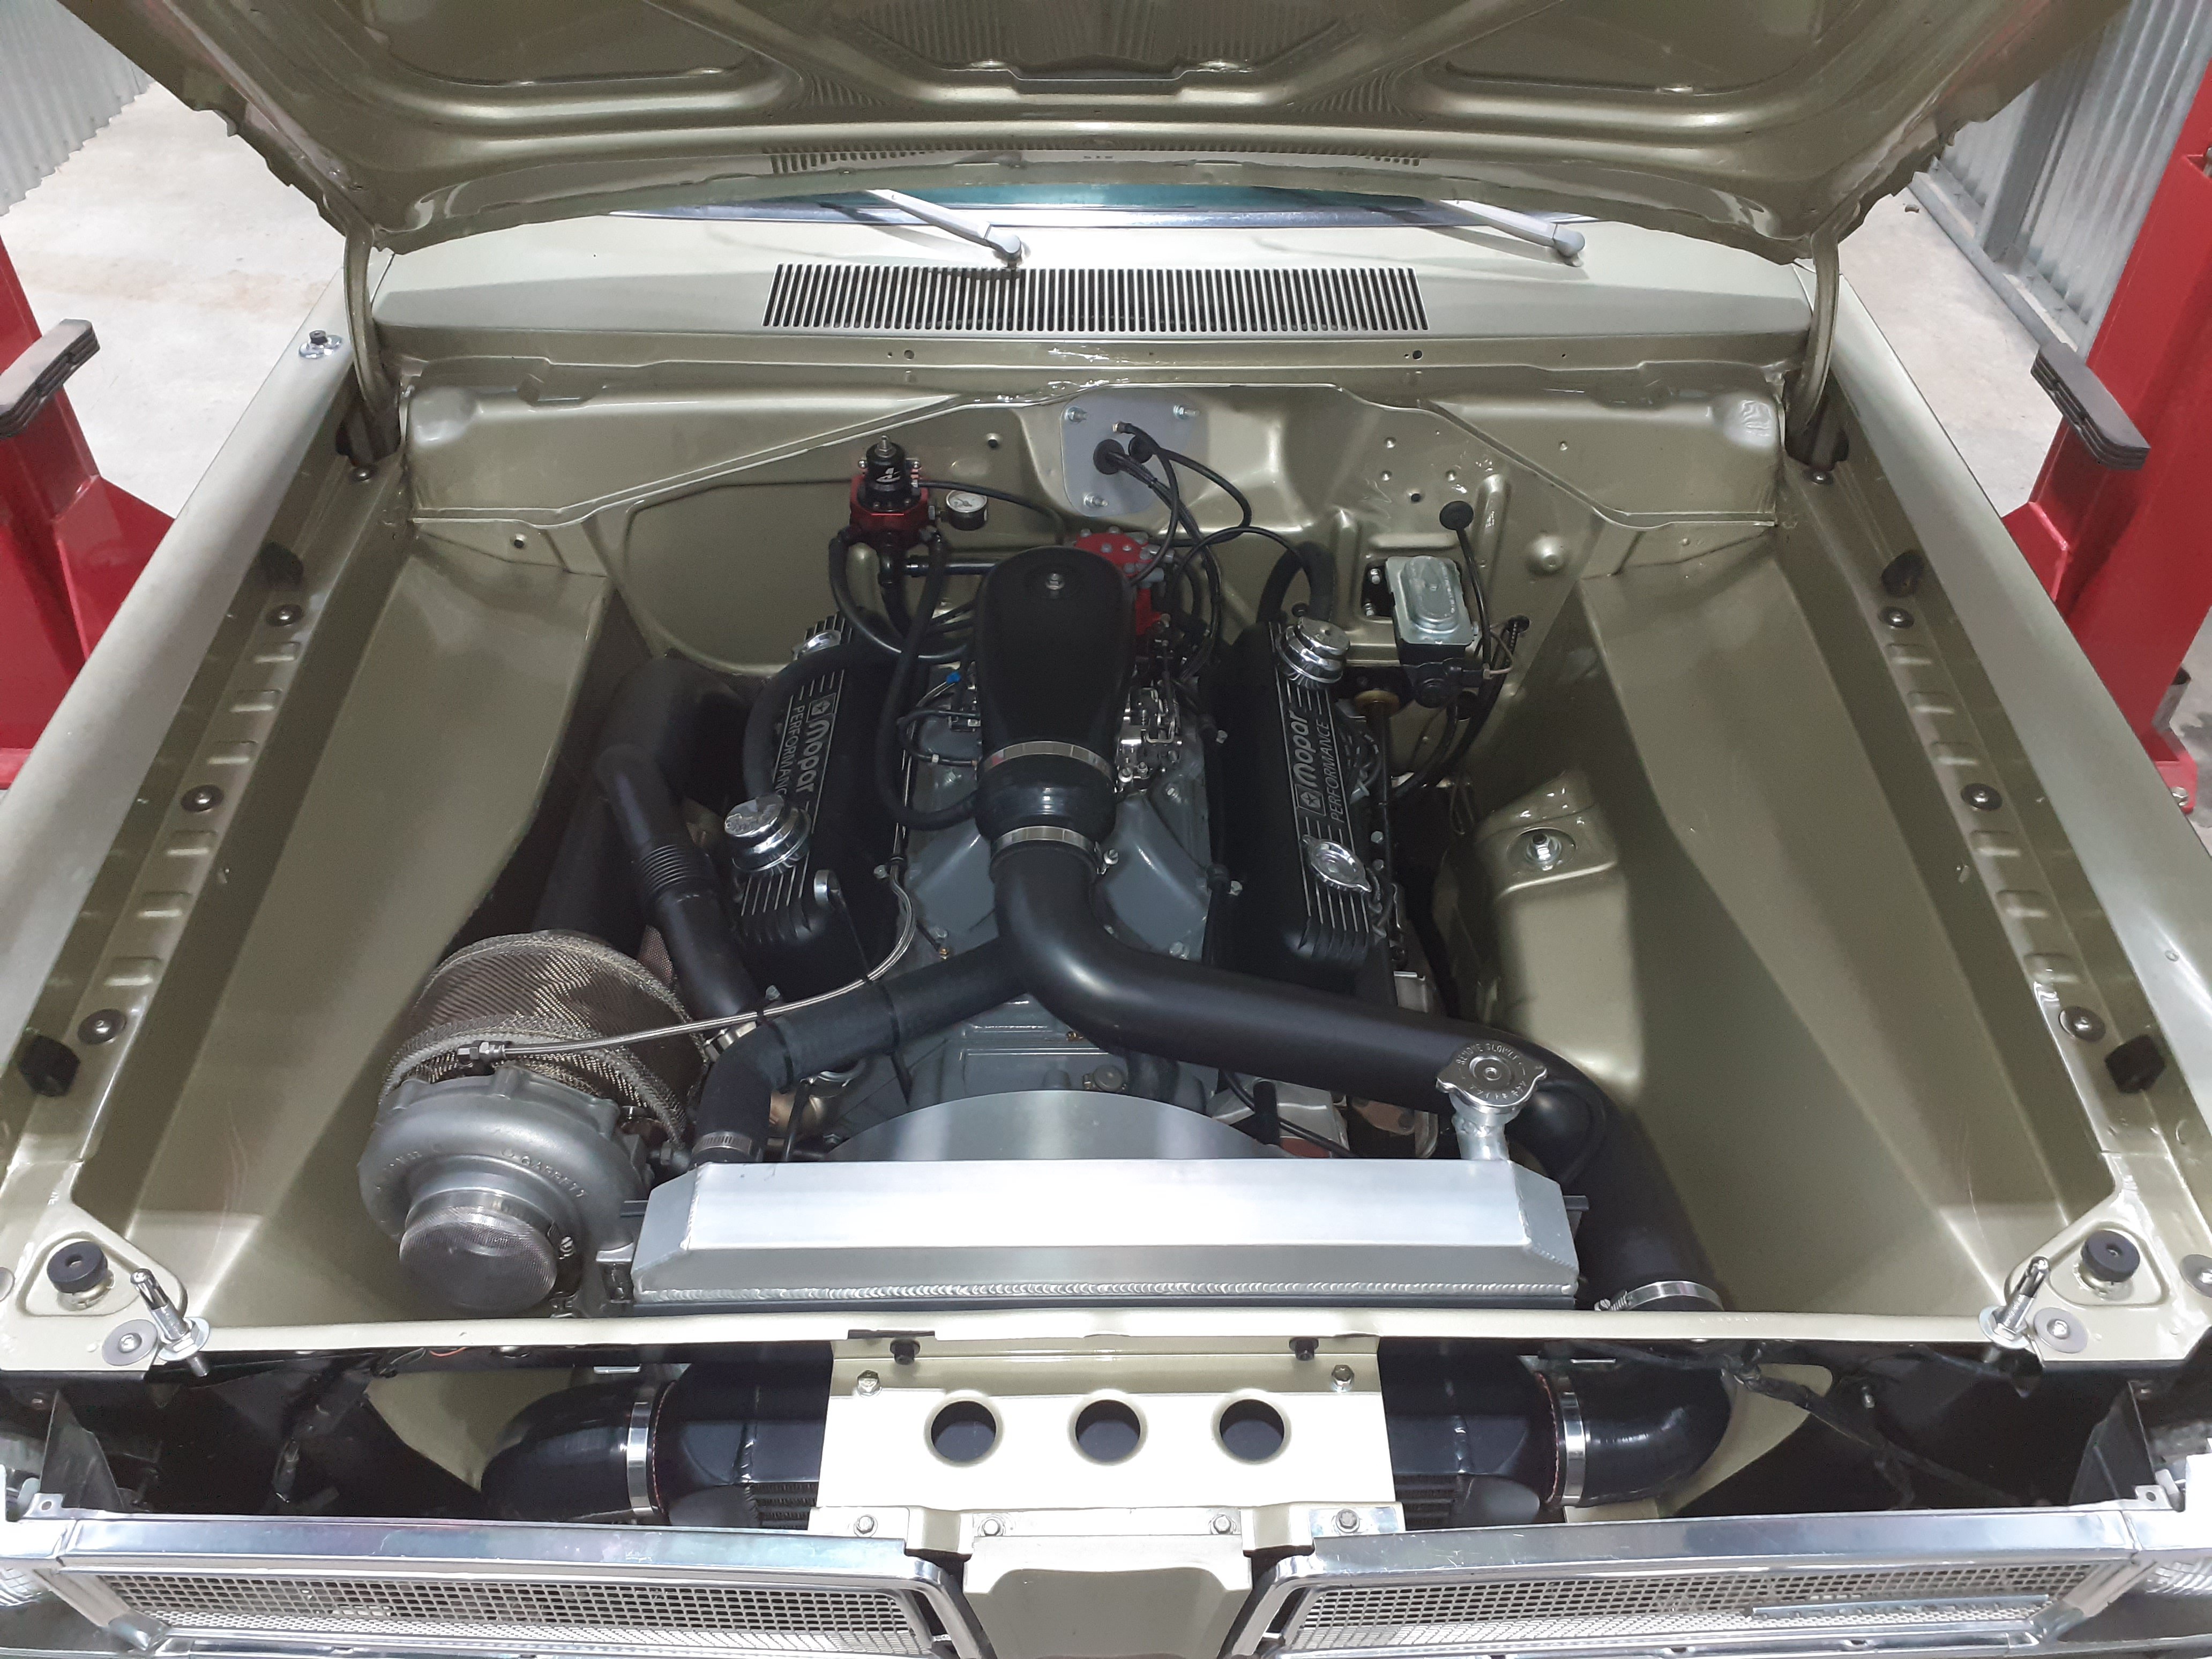
Next thing to sort out was tuning. I wanted to get this and the cooling sorted before I get it certed, because I didn't want to have to redo cert if the carb was going to be too hard to get right and I end up swapping to efi I rebuilt the carb when I swapped the motor in. When I had the whole setup in my VG I had a guy in Australia modify the carb to work better . From memory it was pretty good apart from a little flat spot at one point It's taken me a while to re learn about carbs and turbos again as there's a bit of mucking around getting them to work right I had some issues with lean backfires where it would pop back thru the carb at light throttle which was a lot worse than it was before . I swapped the old adjustable blow off valve back onto it as the one I put on it this time was a bit weak and would blow off early, with a carb turbo it's quite easy to have boost above the carb and vacuum below it, so the valve would open and leak boost which I think was doing wierd stuff to the carb So that made it a lot better Also put bowl vent extensions back on And had a fiddle with the boost referenced power valve. This seems to be where the solution is if I can adjust this a bit more finely
1 point
-
OK V8 fan and sealing around the edges of the shrouds made it better Good enough that I drove it in total over 100 miles over a couple of days and it was pretty good, doesnt go over 180, at open road speed it's mint Today I made a heat shield thing between the exhaust and radiator Still gets hot and boils at idle though. So I'm pretty sure air flow is the problem So next will be try it minus the intercooler, I'm picking that will make the radiator work better, plus then there's space for a big electric fan on the front That will mean I'll have to redo the piping and swap the rad hose to the other side of the top tank. Dumb. Anyway, have some pics.
1 point
-
an update to my cooling system woes I was convinced a fan shroud would fix my problems so I came up with an idea of what I wanted, and @RX FORD made me a nice tidy shroud and overflow bottle combo It made it better, thermostat opened at 180, I drove it around for 25min and it went up to 210 and stayed there. When I got home i opened the garage and left it idling for a minute to adjust idle, and it got hot and boiled I resisted the barry urge to remove the thermostat completely , I'd bought a 160f tstat so I put that in, and put a restriction in the bypass hose in case that was making the coolant do laps of the engine instead of the radiator Better again, tstat opens at 160, it went to 180 and stayed there for 10min driving around, I pulled over and it slowly crept up to 195 So it's better, but not fixed. Bearing in mind this is a cool night and just tootling around slowly, it's still too borderline I've got a stock 318 fan which has more aggressive angle on the blades which I might be able to fit if I remake the lower mounts on the radiator. Otherwise I'm running low on ideas. Maybe a small auxiliary radiator with an electric fan on it, or maybe I need to give the intercooler the heave ho as it's not helping airflow1 point
-
It drives. Got a few bugs to work out though. The main one is it gets hot, and can't cool itself down. This might be a bit of a prick to sort out as there's no room left I think it has more boost than it should do Brakes are a bit spongy, might need next size up master cyl, might improve once they bed in a bit Seats are a bit low Needs something to stop the pinion angle changing under accel, driveshaft just knocked the floor slightly
1 point
-
Yeah, there's one guy who built a "what if" rare German halftrack that had somehow got back to the US after the war and then was used as logging vehicle in Canada after being butchered & tiger striped. It looked mint but you could hear the gritted teeth in some of the comments. Hang on, I'll find a pic..... Think he must have striped it after.
1 point
-
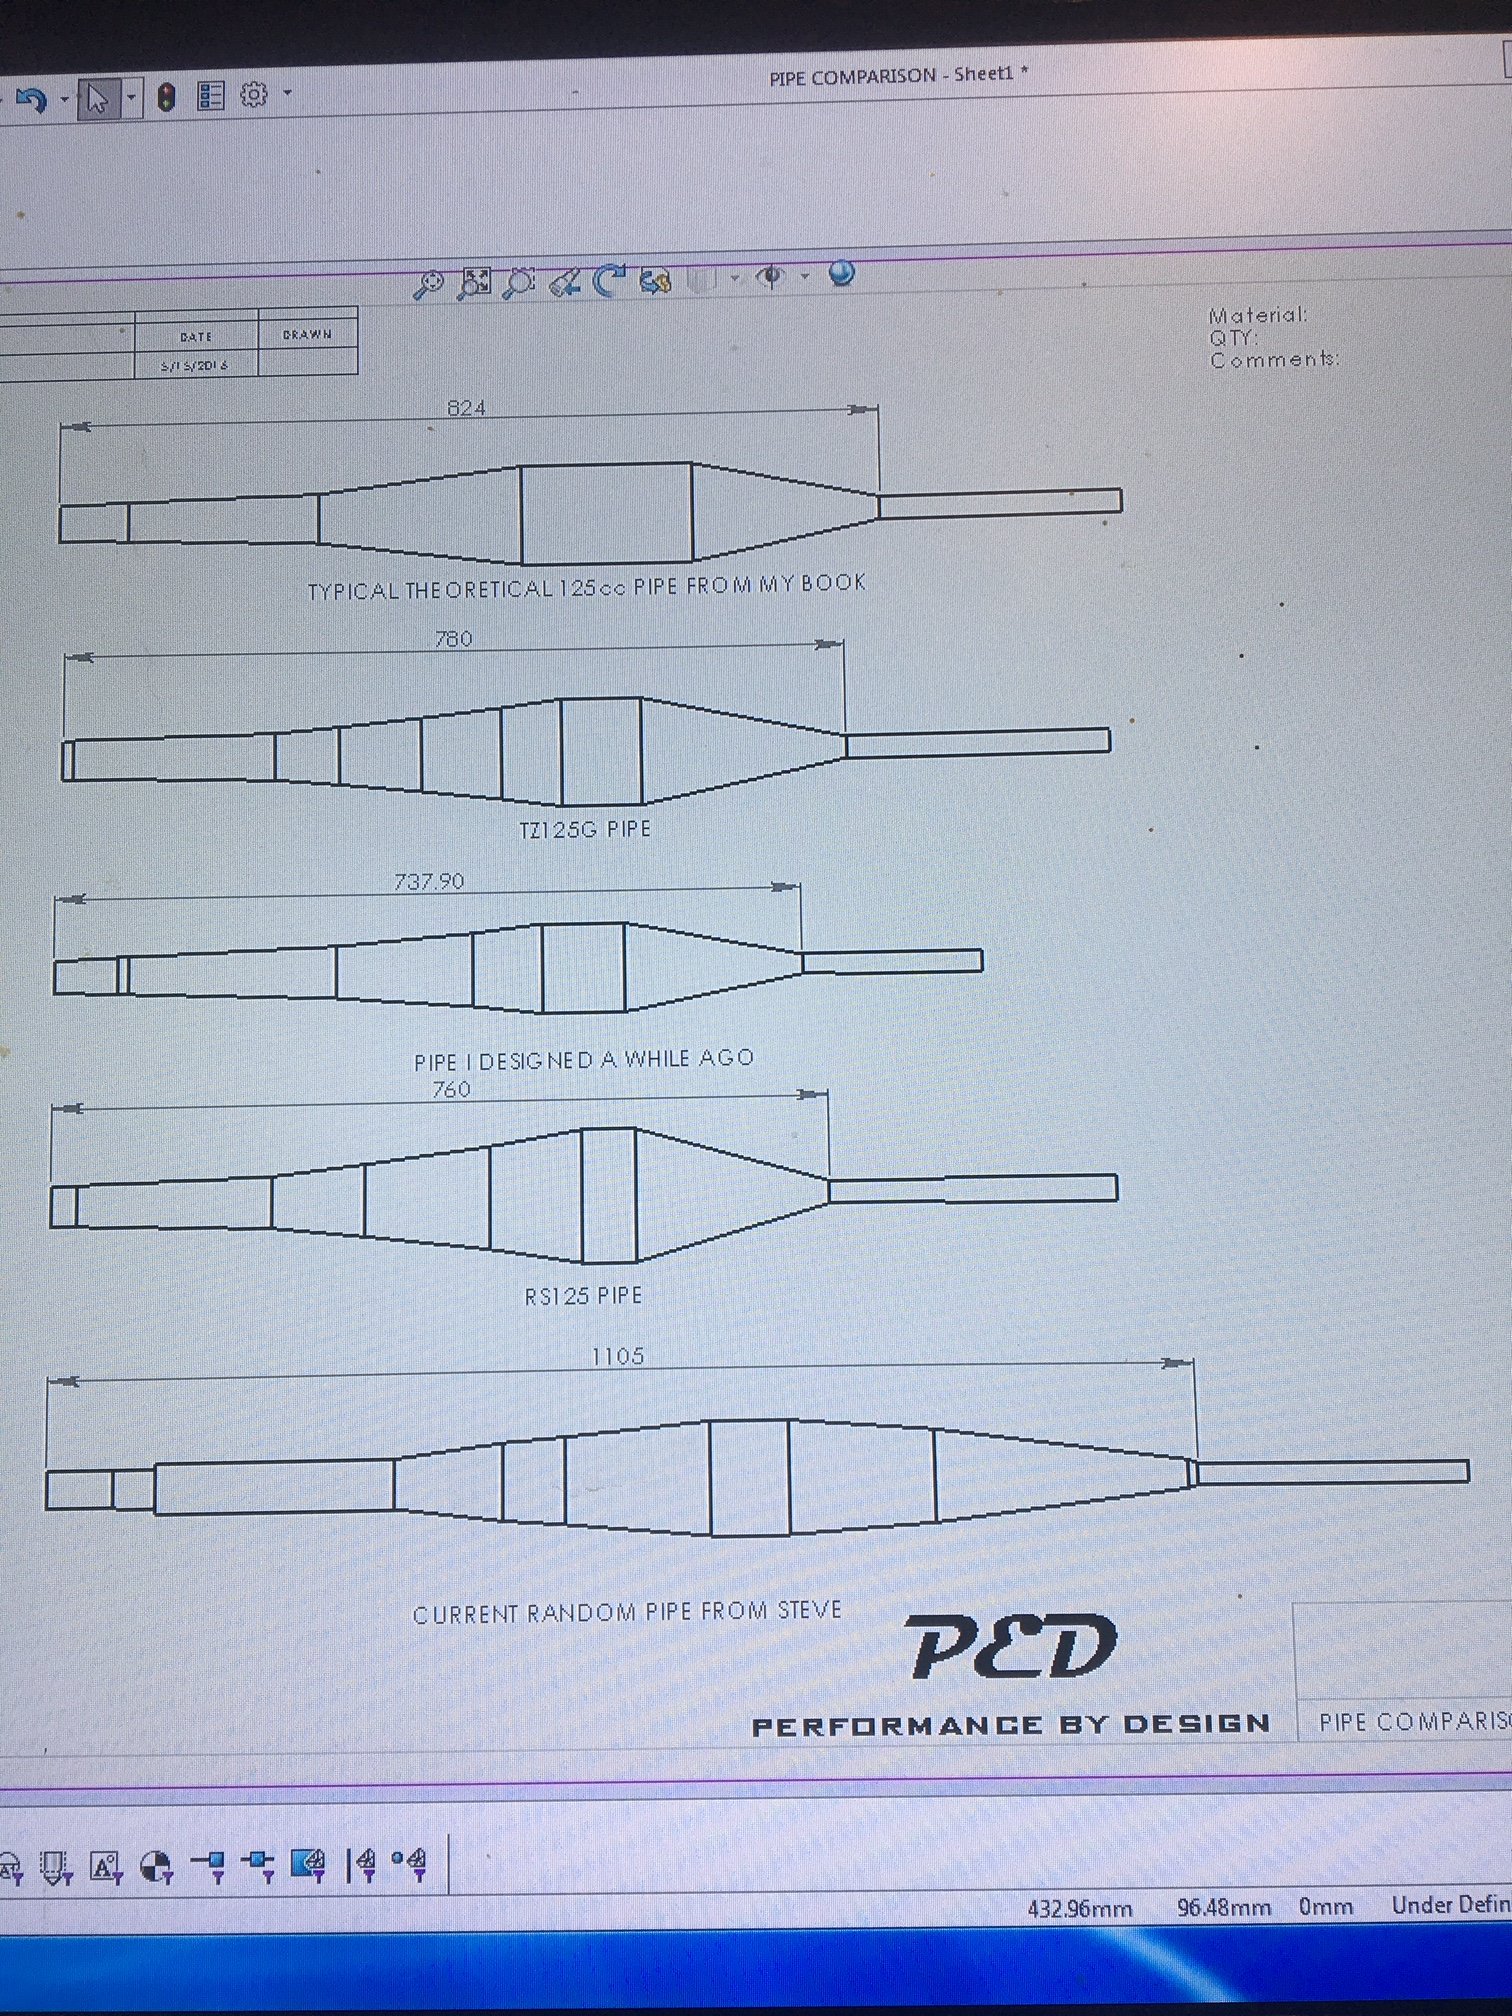
Pipe wise, initially i made the most bastardized hack and weld job of the original TF125 pipe just to get it going. I've read a bit on 2-stroke tuning in recent time and knowing what I know now, what I did to that pipe would genuinely have been quite an improvement over standard i think. Unfortunately though the bike has always been horrendously down on power compared to all the other F4 bucket bikes so I started playing. First up was a spare chamber that we had floating around in a box of parts. Completely unknown origin, looks home made. I made it fit, again using the bastardize technique. Its got a massive mid section diameter and was horrendously long with a looooong header. So it had wicked pull off the corners to about 4000rpm and then wouldn't rev past about 6000rpm... not exactly race winning stuff going on here... So I took some length out of the header and shortened it up by quite some margin. This made the bike rev to around 7000rpm, with little to no improvement otherwise, and I couldn't for the life of me get the carburetion to work. From the book I've read and some software that the internet gave me, I've applied some technology and started on building a pipe that is actually designed for this engine and application.
1 point
-
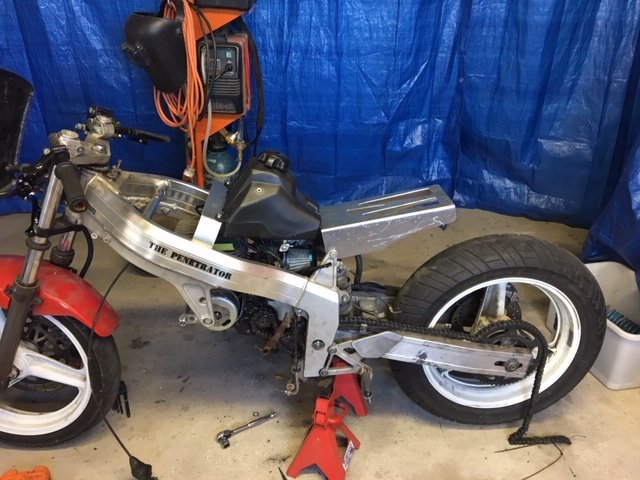
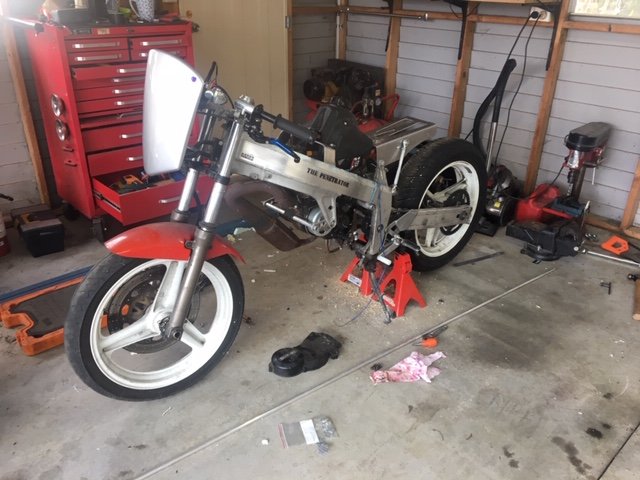
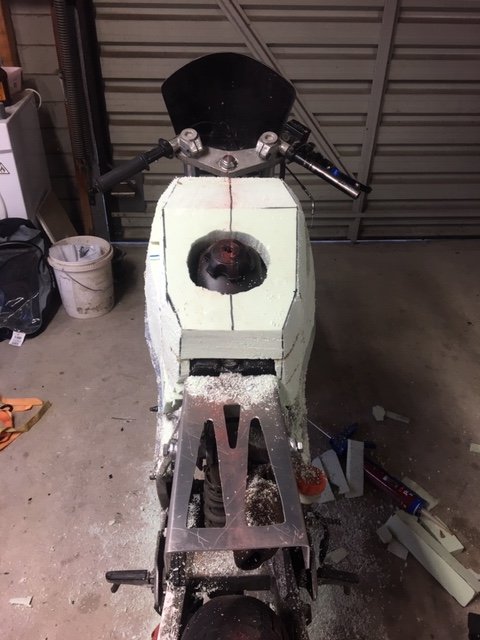
A bit more shed time had a racey light weight tail frame made and Ali-expresses finest pit bike tank mounted. I then started shaping some foam to make a tank cover as the Duke had other plans for the original CBR tank and it was on the northern island. This bike has been treated to only the finest of chinese components. Fork seals, levers, brake pads etc. The brake pads are actually bloody brilliant!
1 point


.JPG.5b2b953e5635cee5eba4df5dedd0dde4.JPG)
This leaderboard is set to Auckland/GMT+12:00