
Leaderboard

.thumb.jpg.570970b401ac8d26ce9af7c1bf2bd8cd.jpg)


Popular Content
Showing content with the highest reputation on 03/24/23 in all areas
-
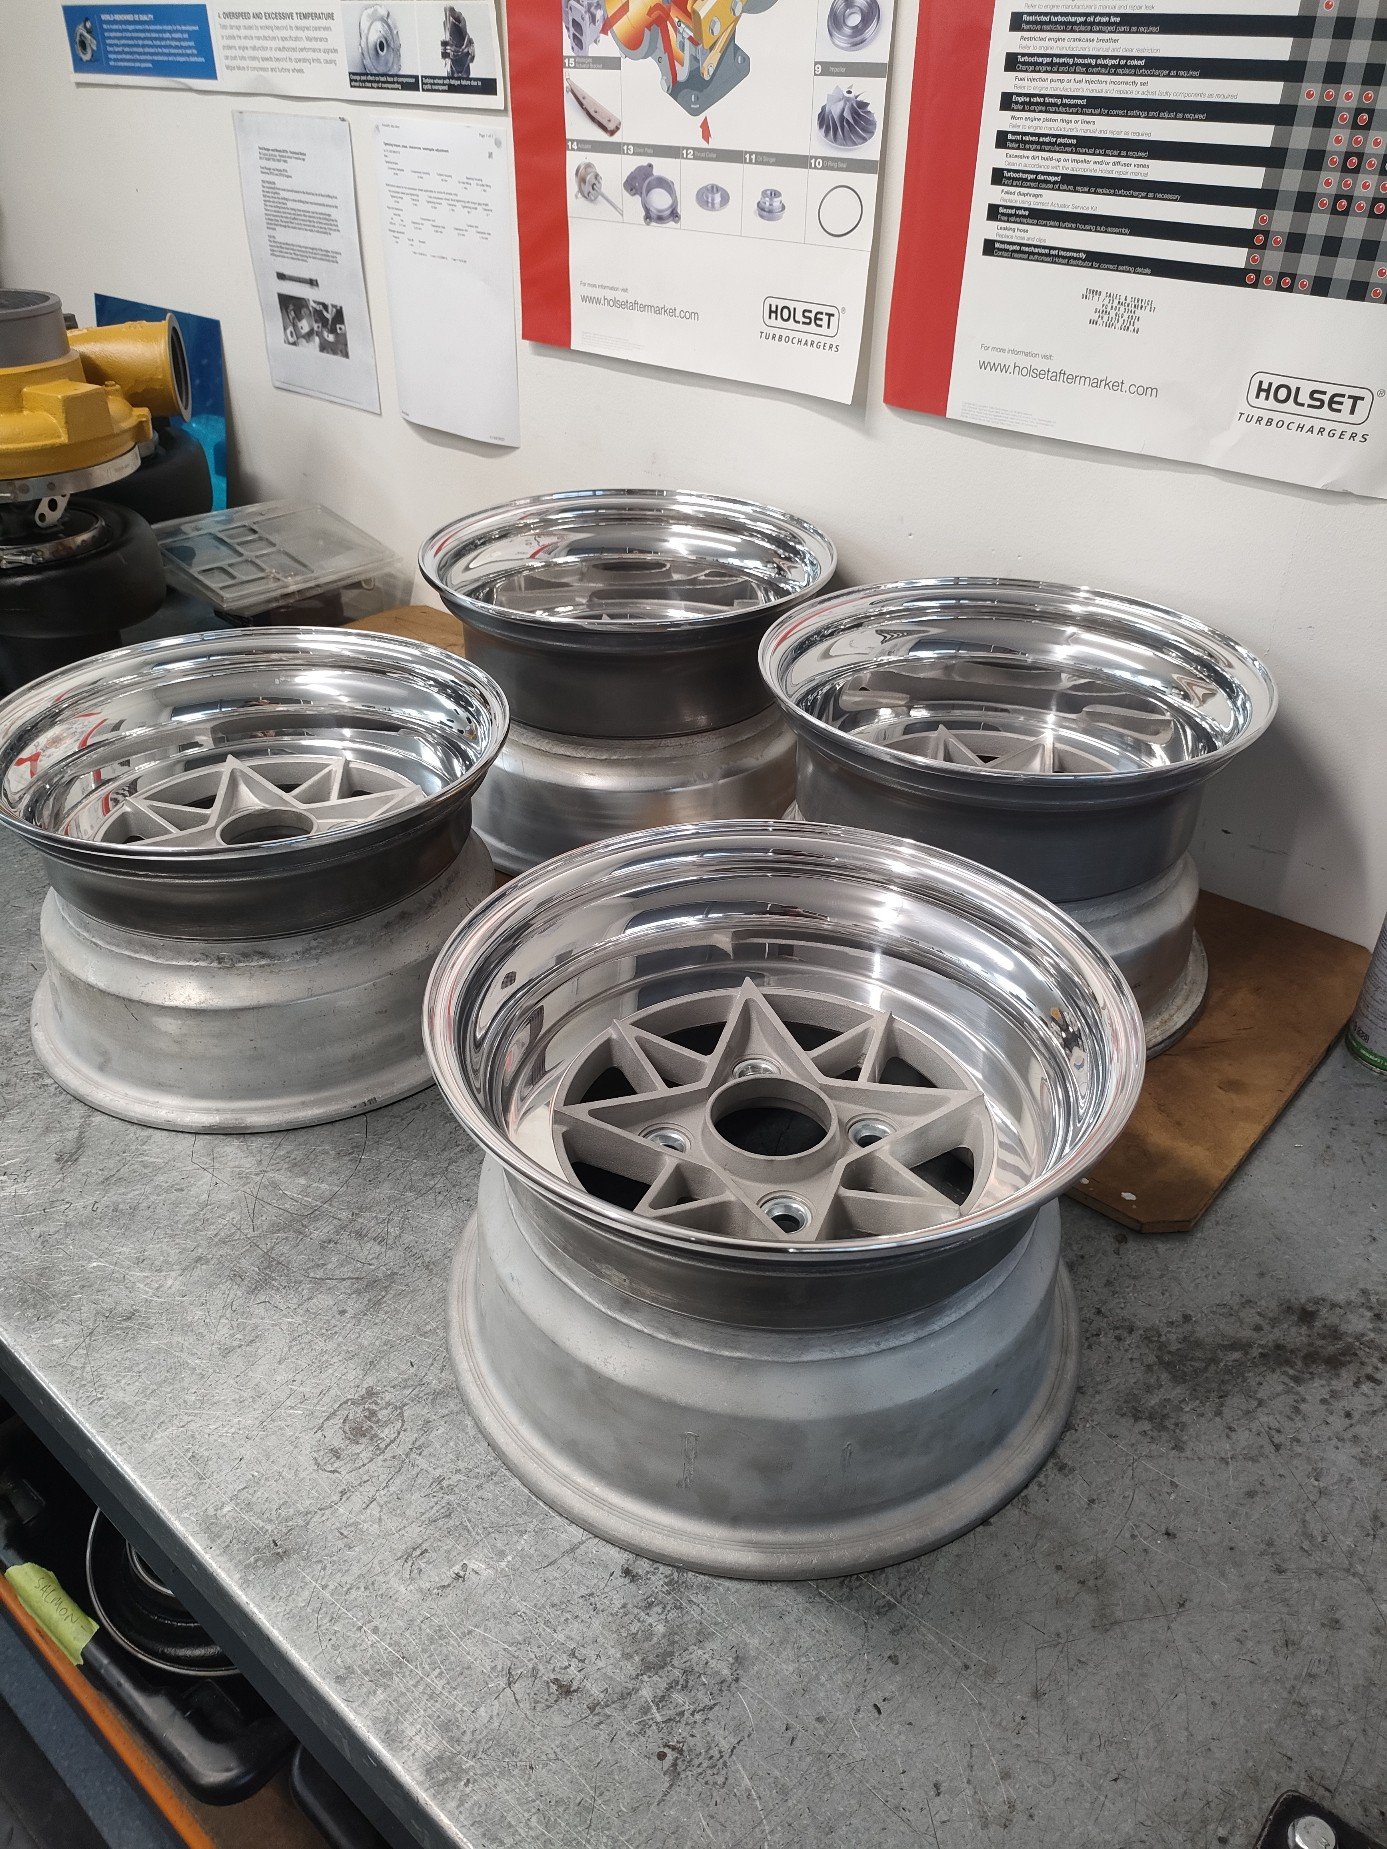
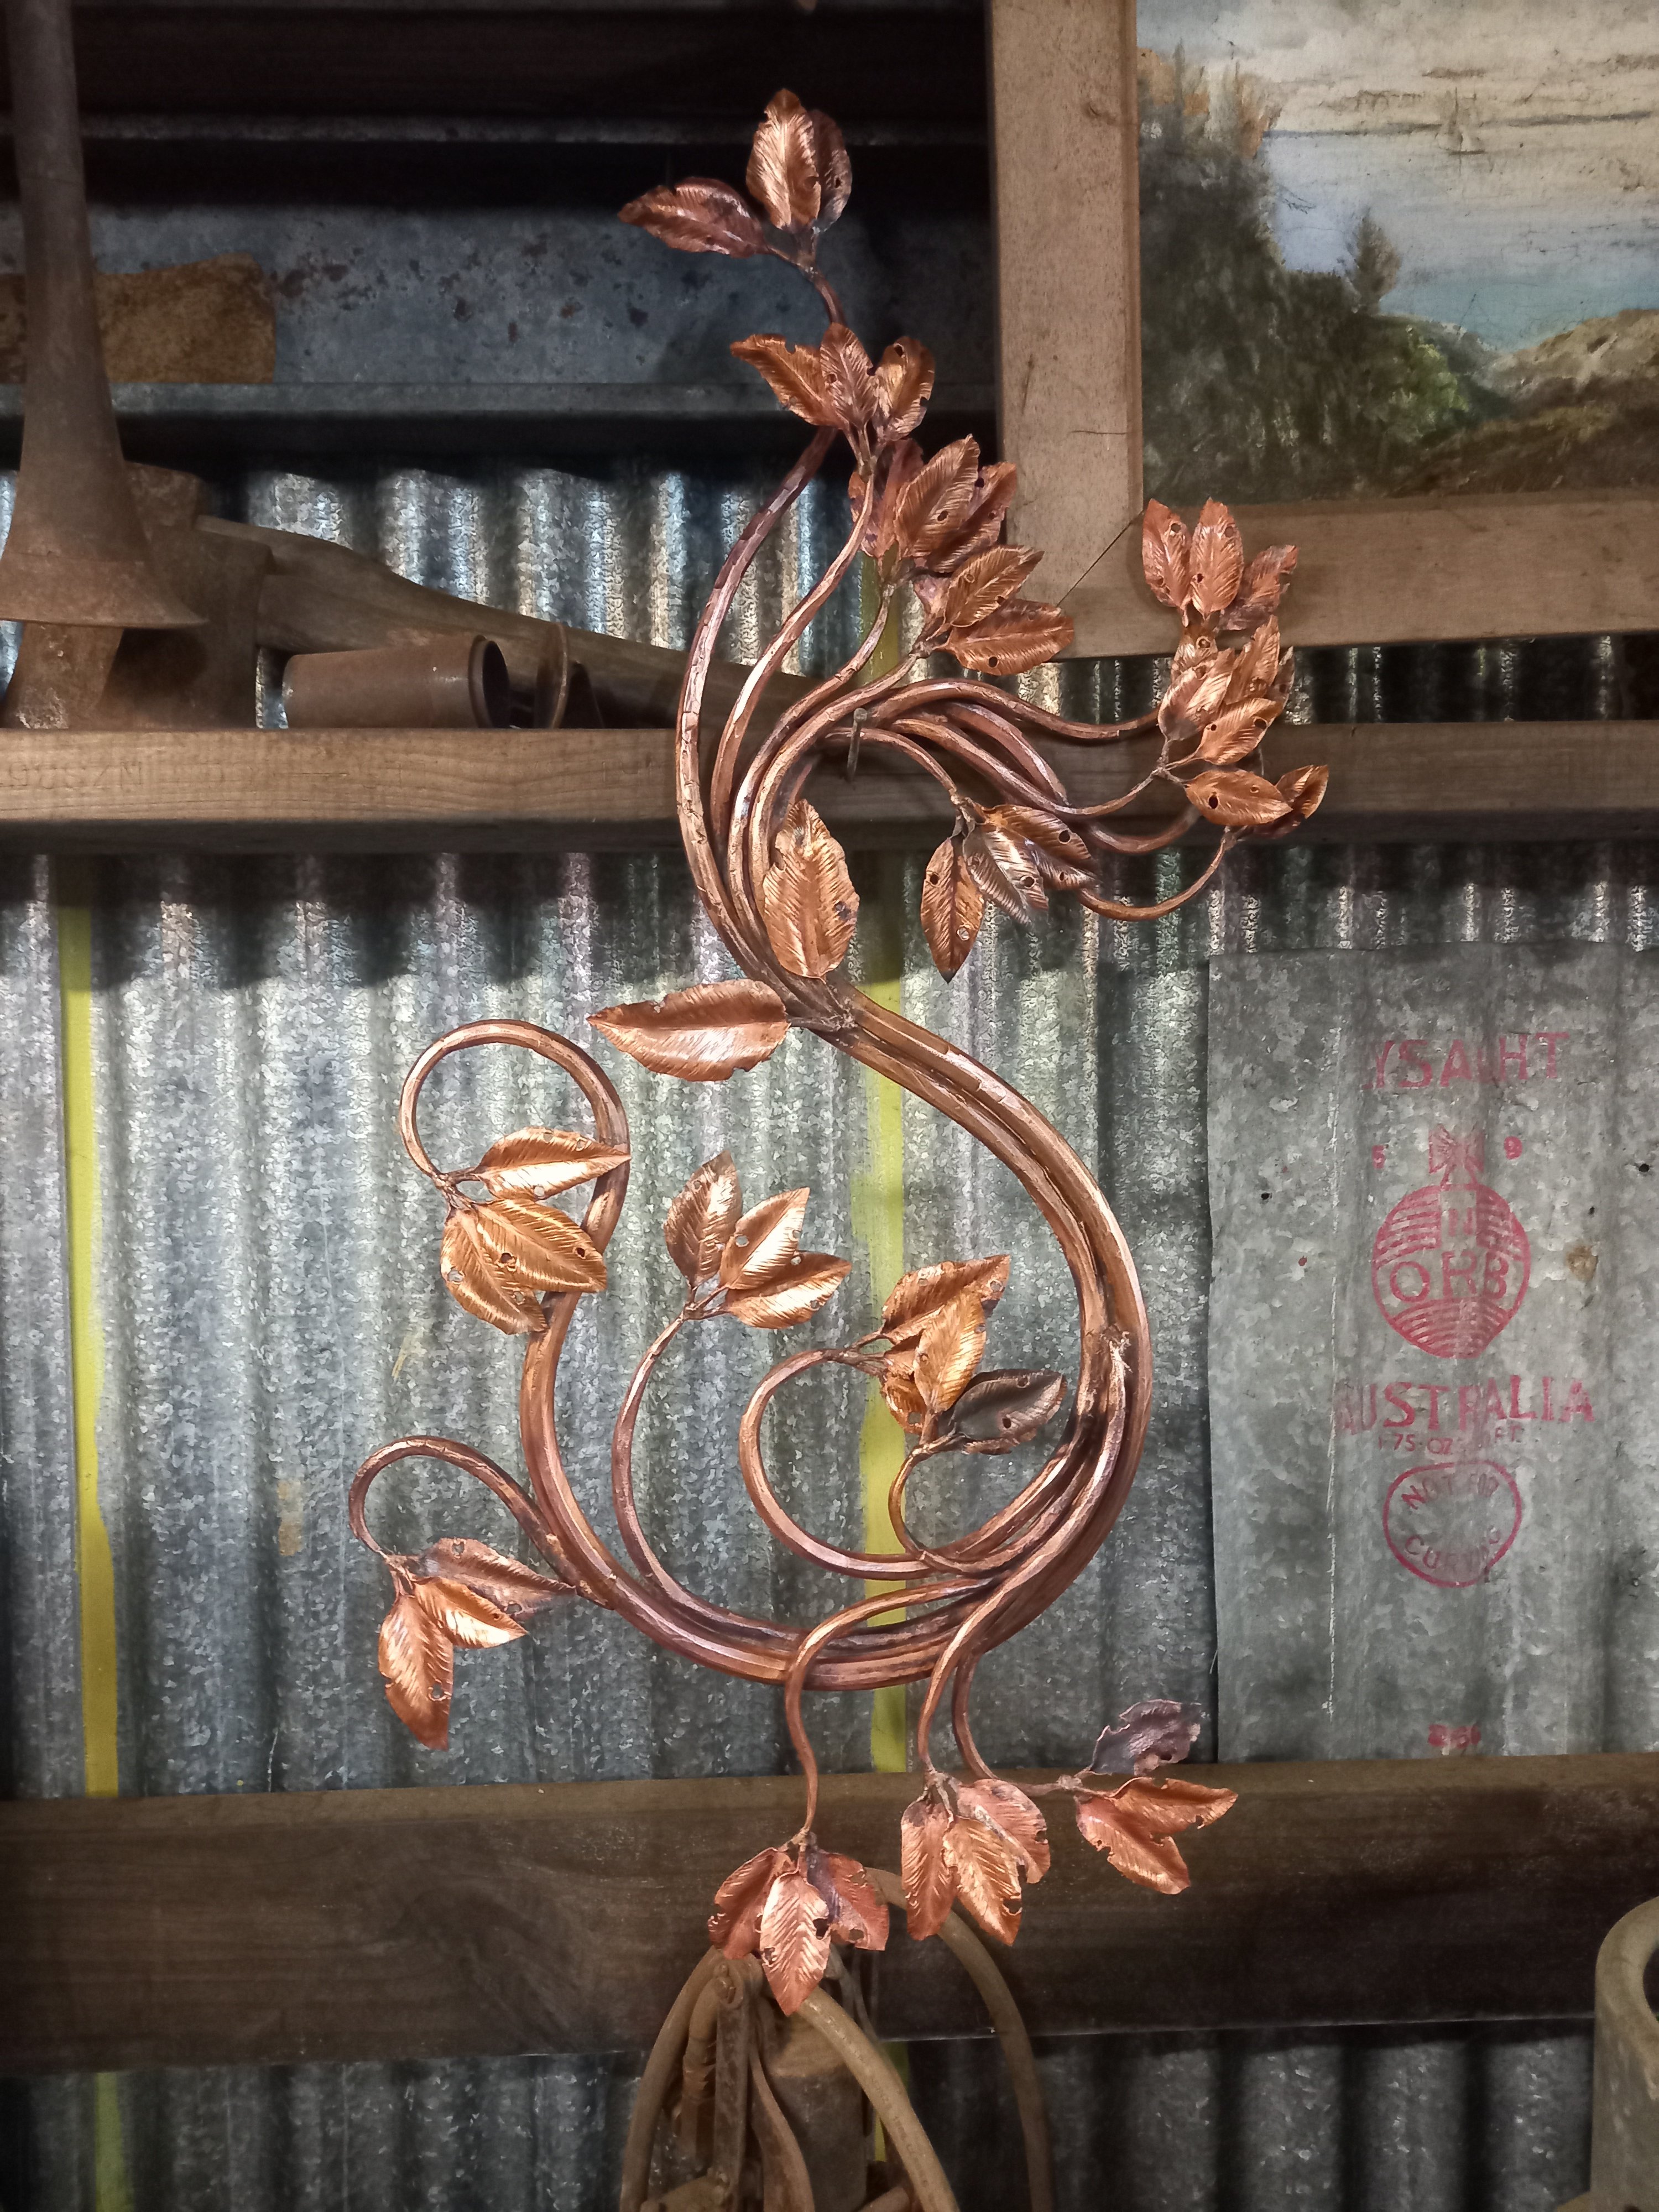
Got the barrels finished for my wheels. Very happy with them. Unfortunately he couldn't weld them, will so get them finished by someone in Brisbane. Also have nearly finished the rack and pinion conversion.
 15 points
 -
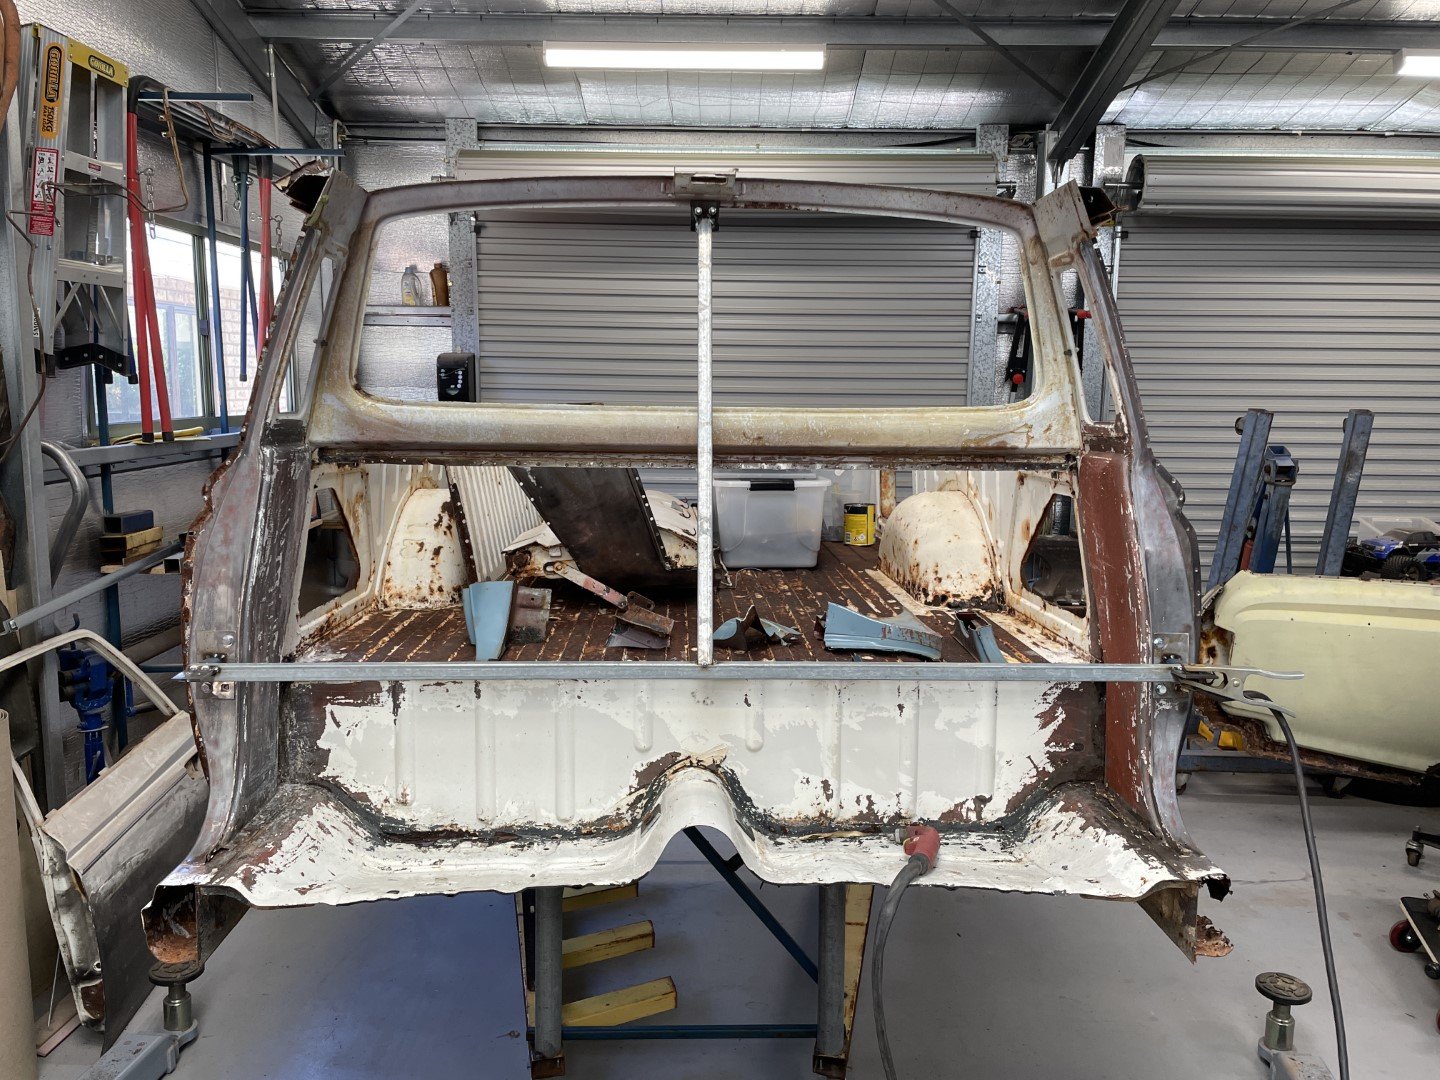
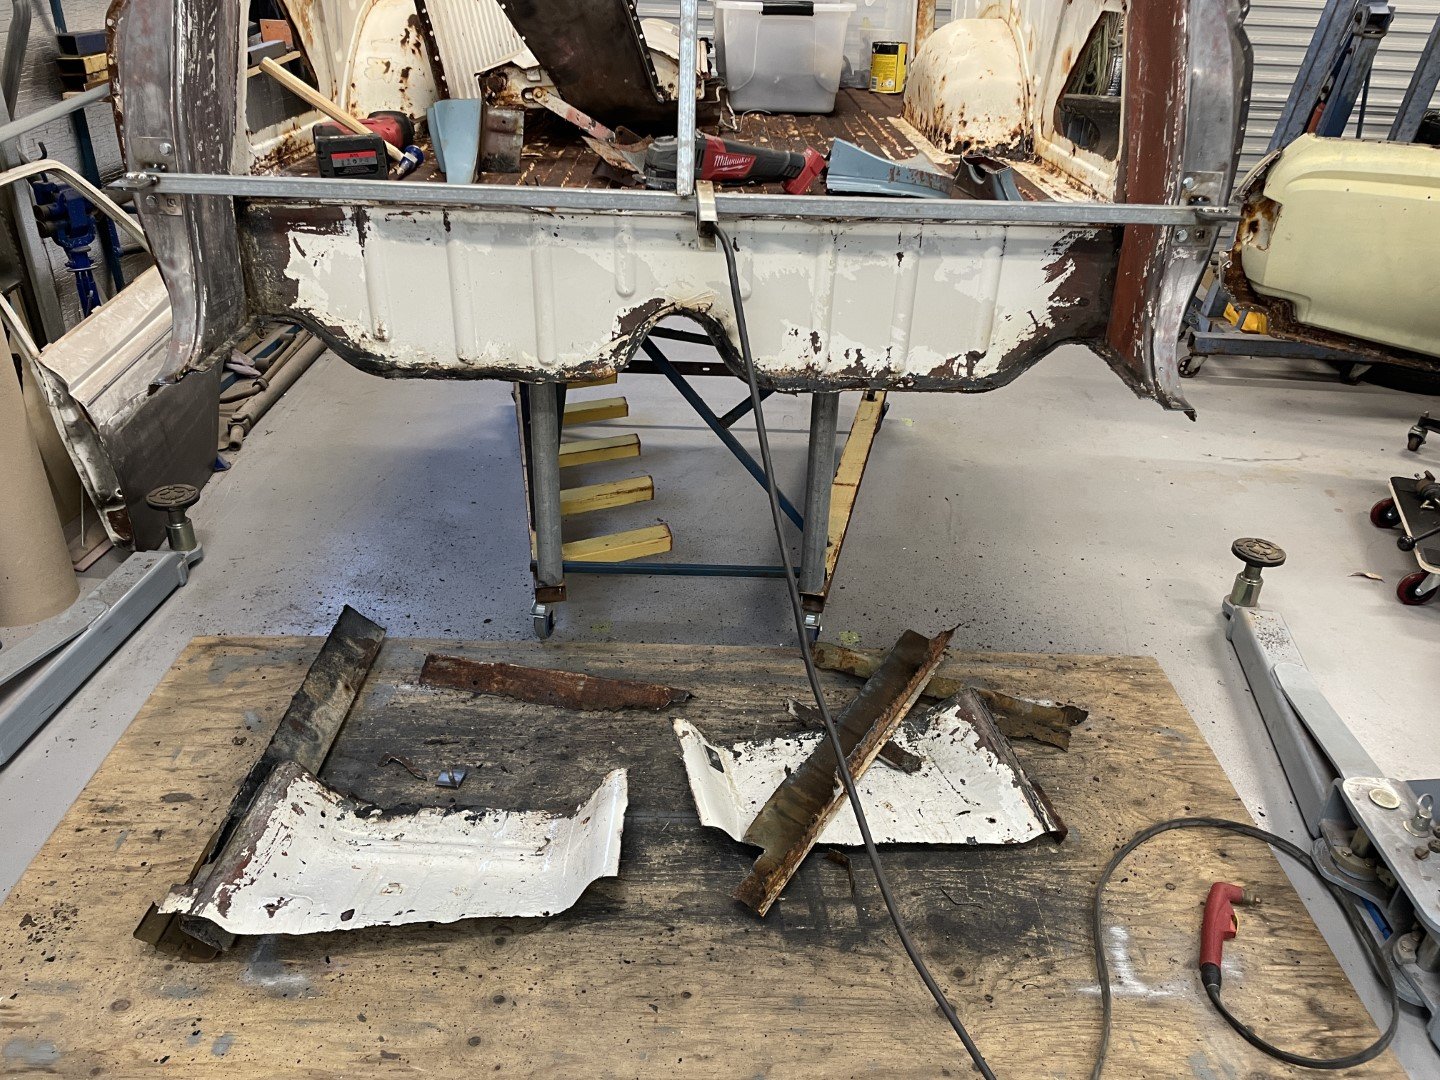
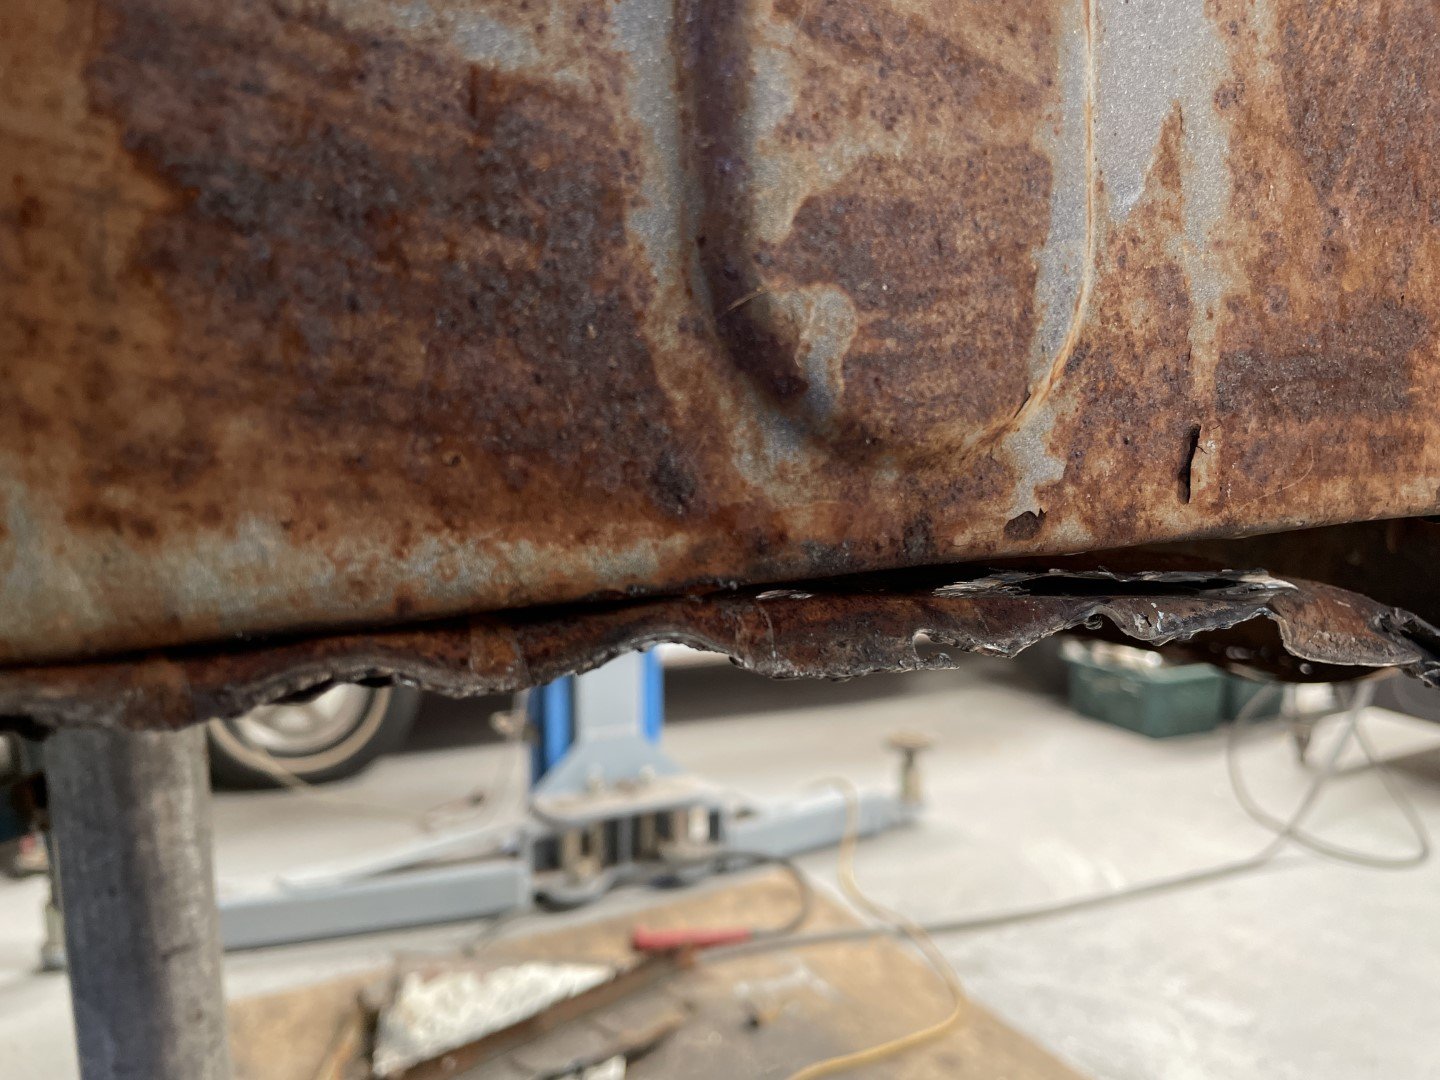
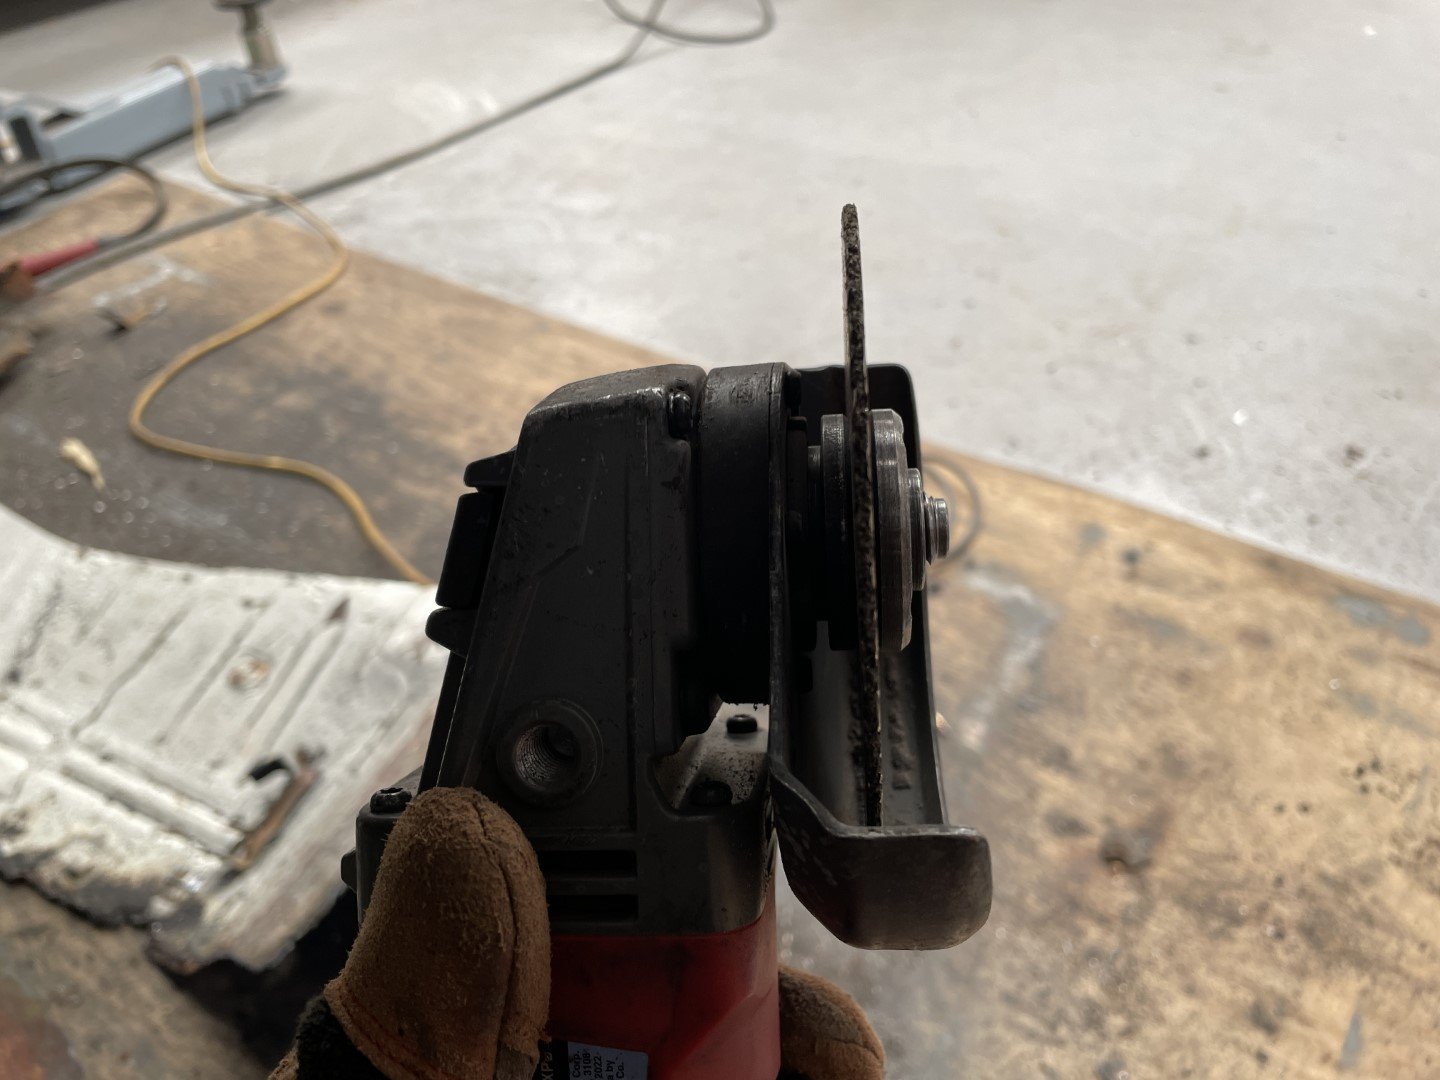
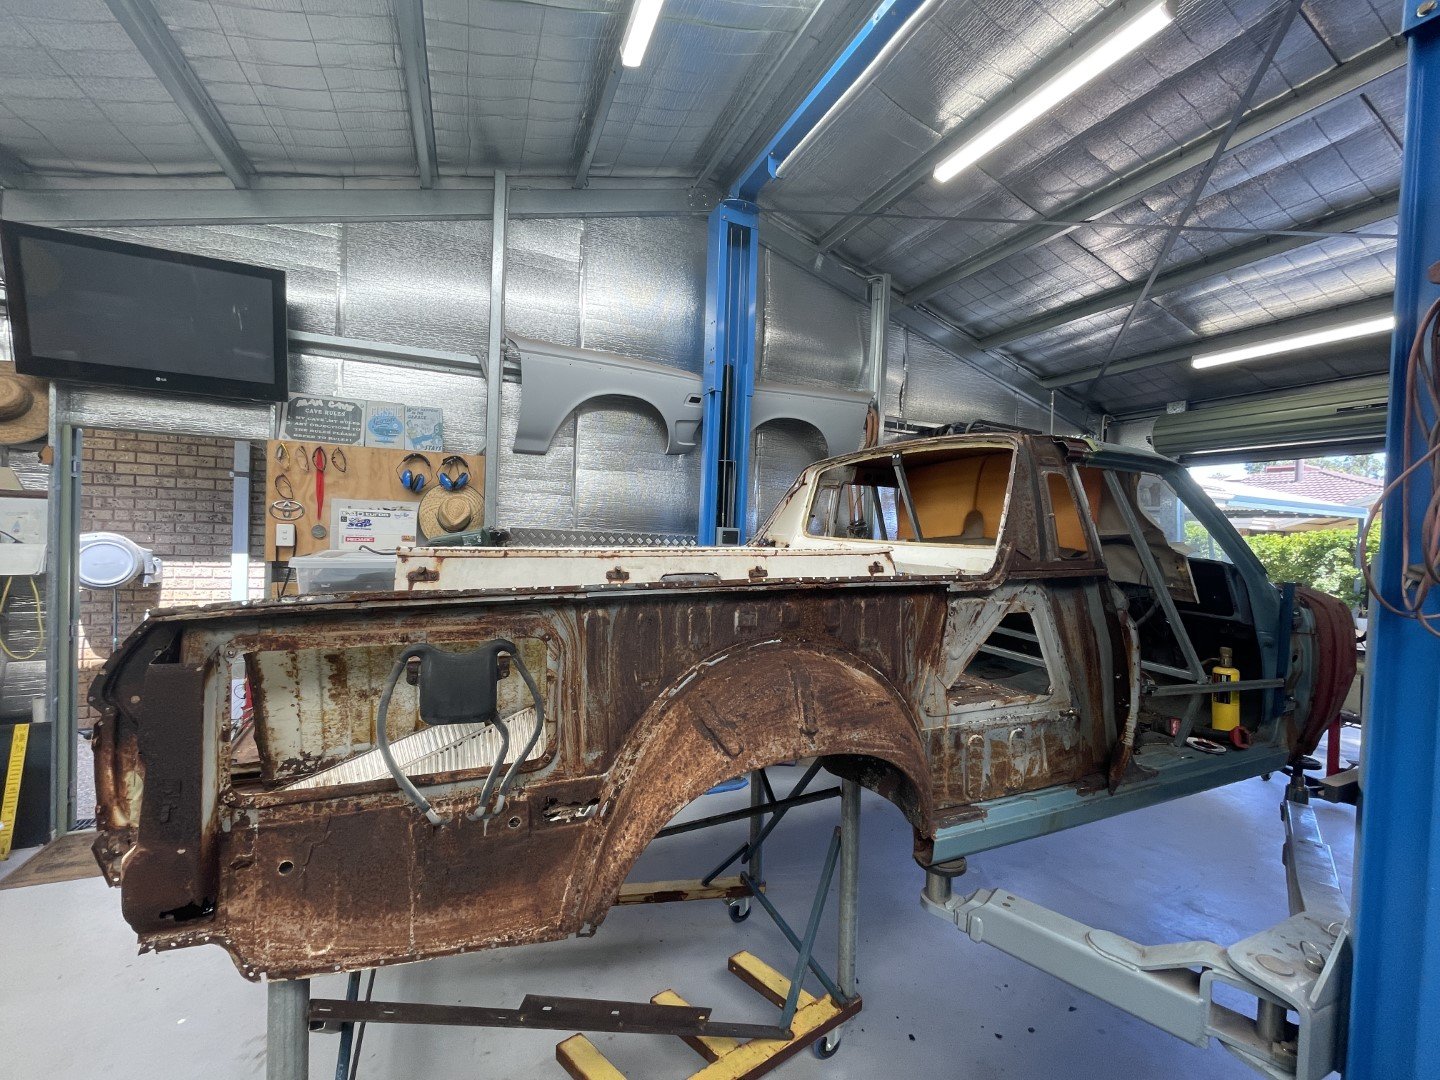
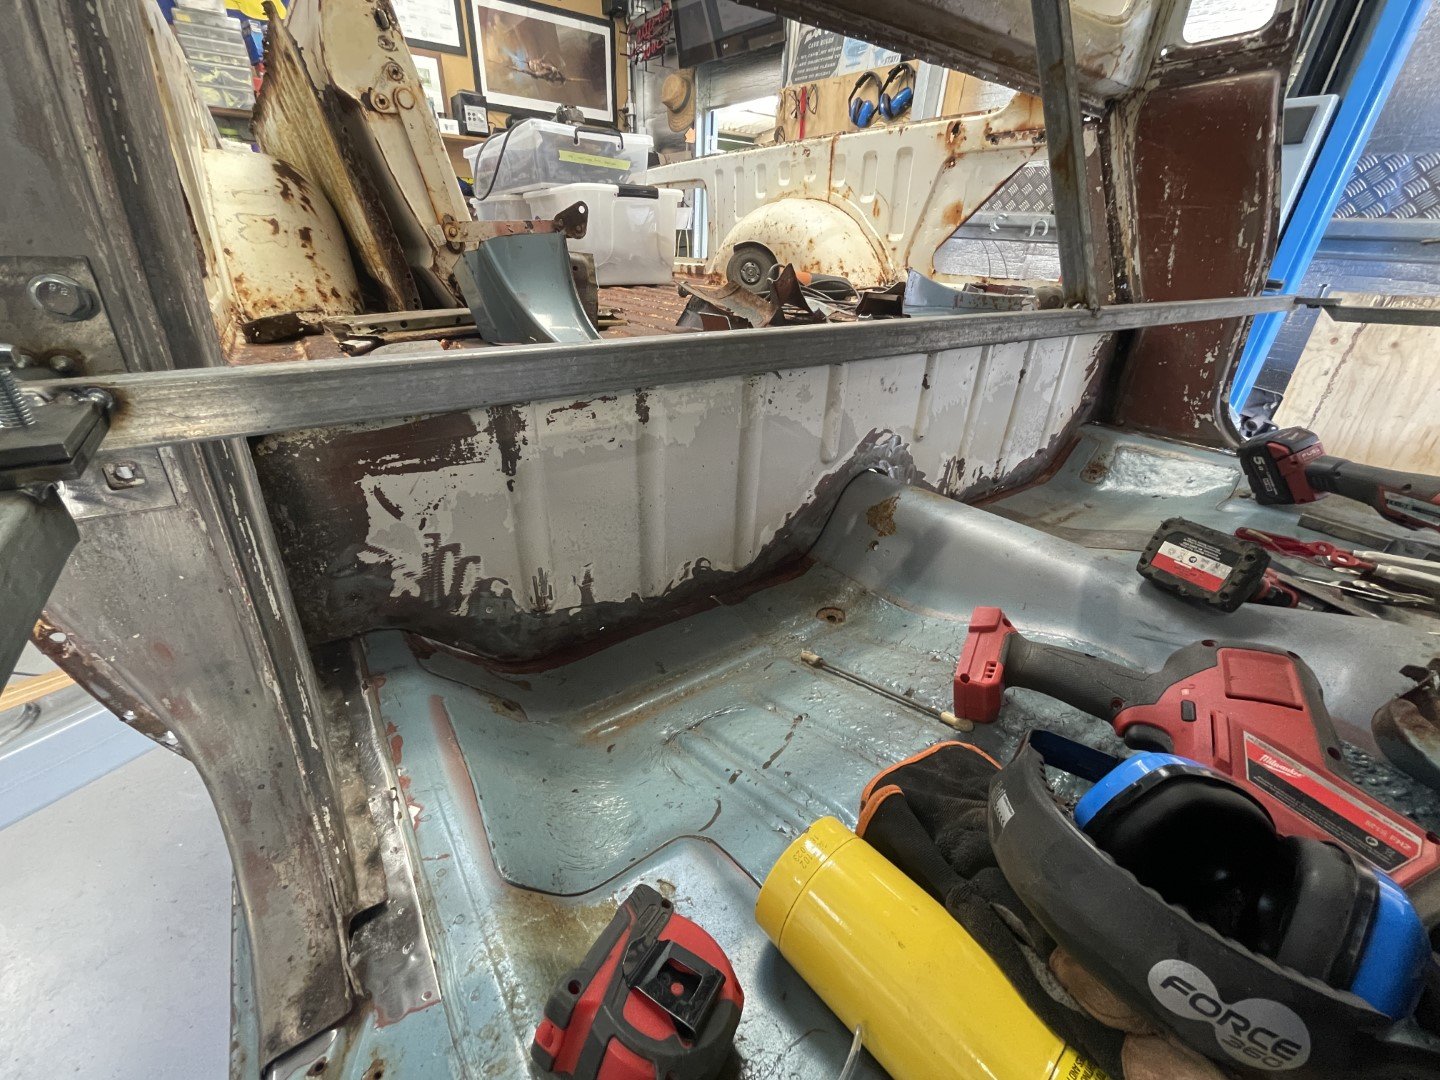
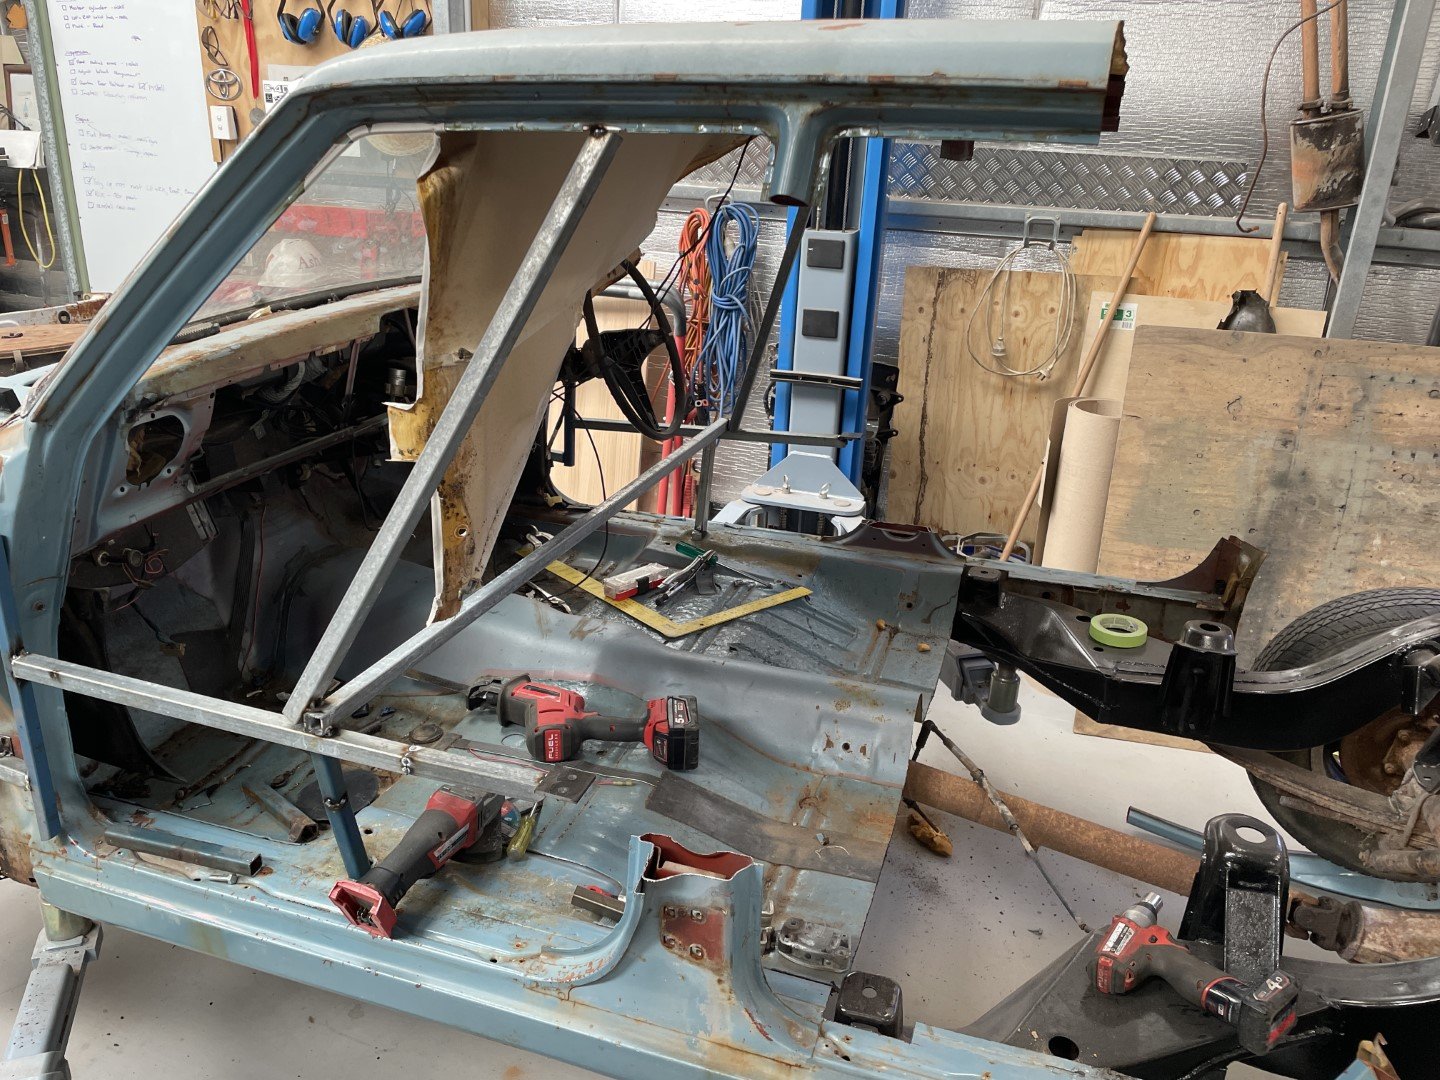
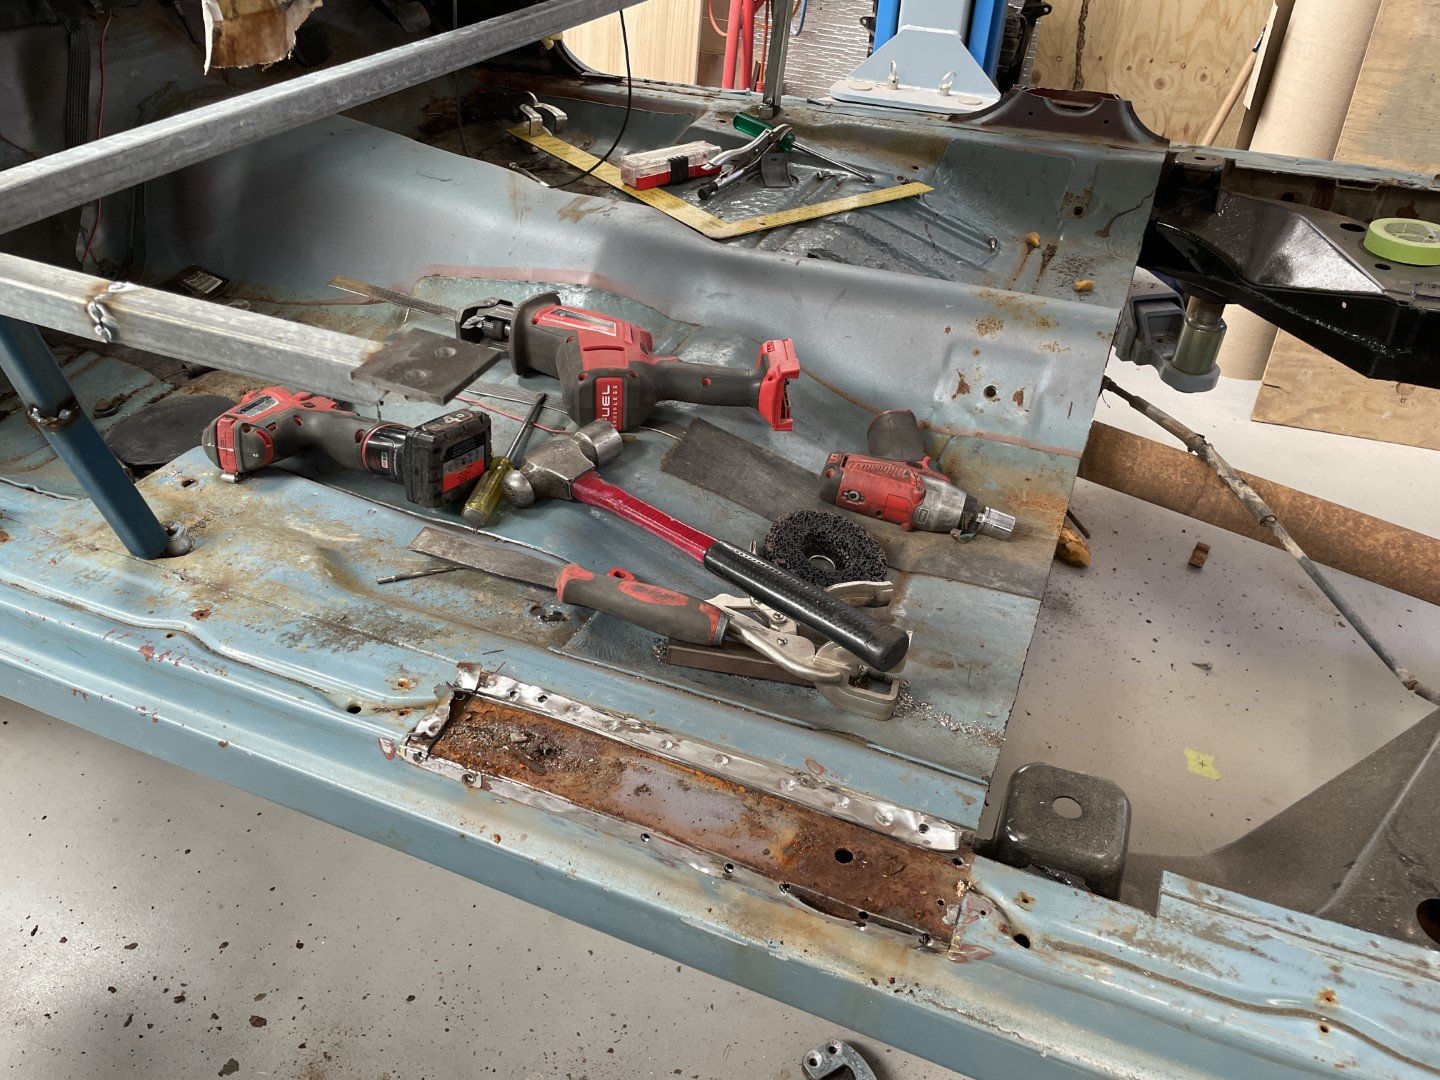
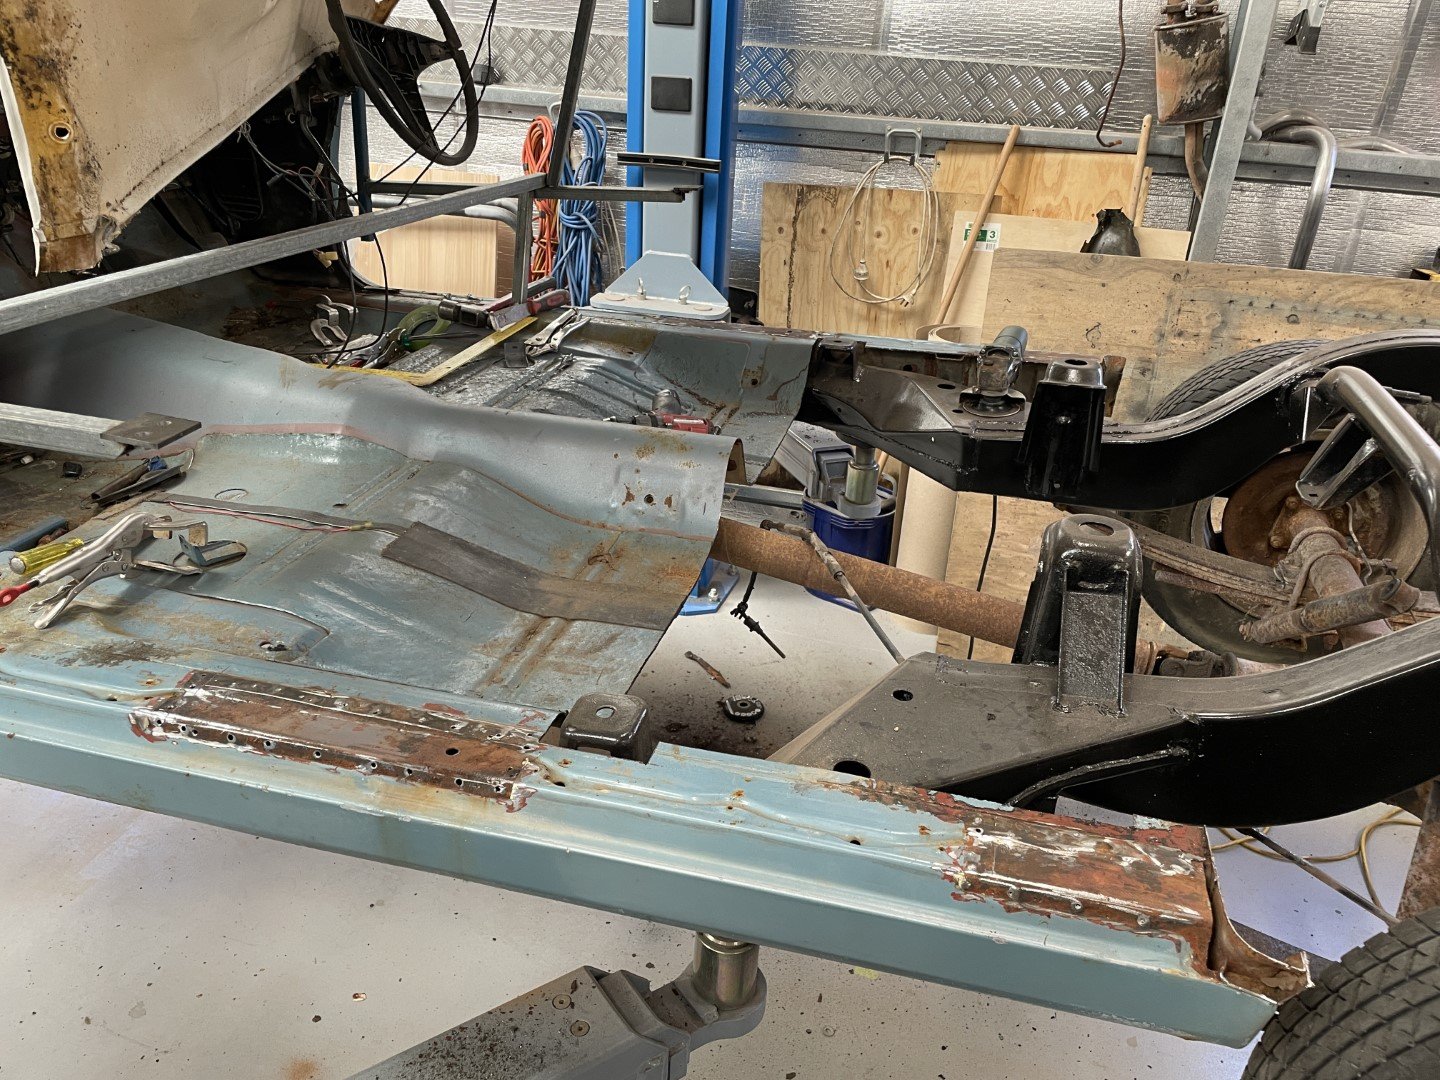
Now that the sedan parts were all cleaned up, it was time to move on to the ute part. Figured that since I had a plasma cutter laying around doing nothing that I should employ it to remove the shittier parts of the back half. After fucking around trying to get it to work (been too long since I used it) and additional side quest of fitting vibration dampening feet to the air compressor I managed to get rid of the less necessary steel. I wish that had been the hard bit. But it wasn't. A considerable amount of time then went into grinding the remains of what was once sheet steel that was spot welded to the back half. Just. Shitty. Grinding. Actually found a use for these stupid 'cutting' discs though. Spot weld grinders. Just. More. Grinding. So yeah. Hours of grinding. Didn't really look like much once I'd finished - so in a mad dash to source some dopamine before I had to pull up stumps, I moved things and stuff around in the shed to lift the ute body off it's trolley. Closest it's been to being one car in. Well, forever.
11 points
-
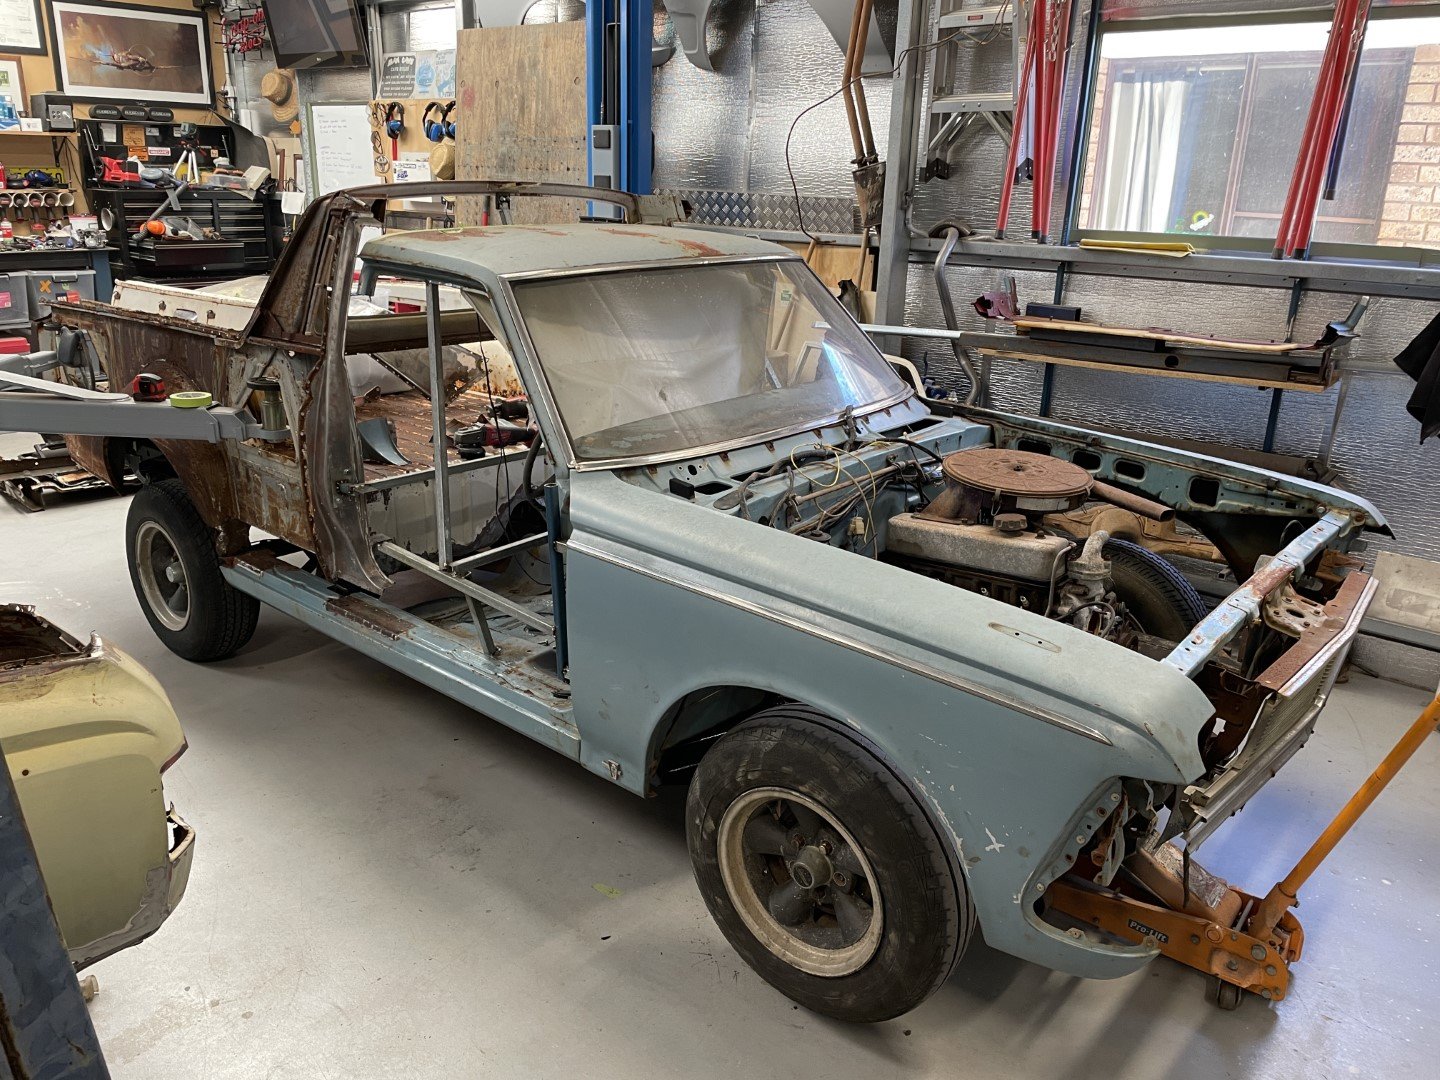
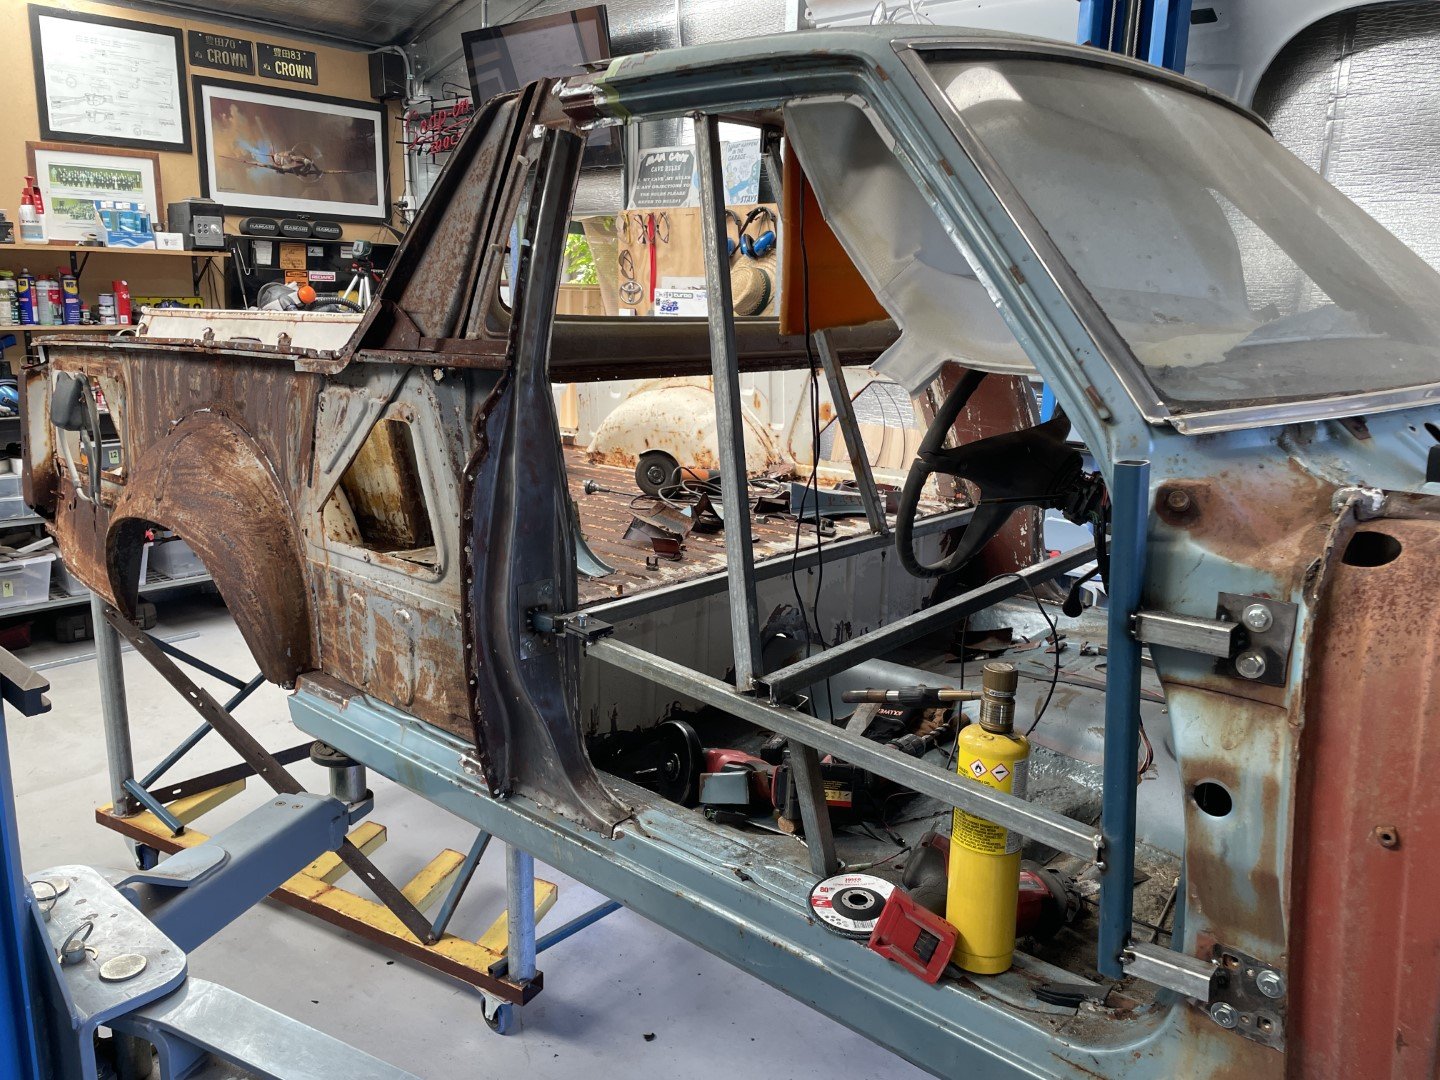
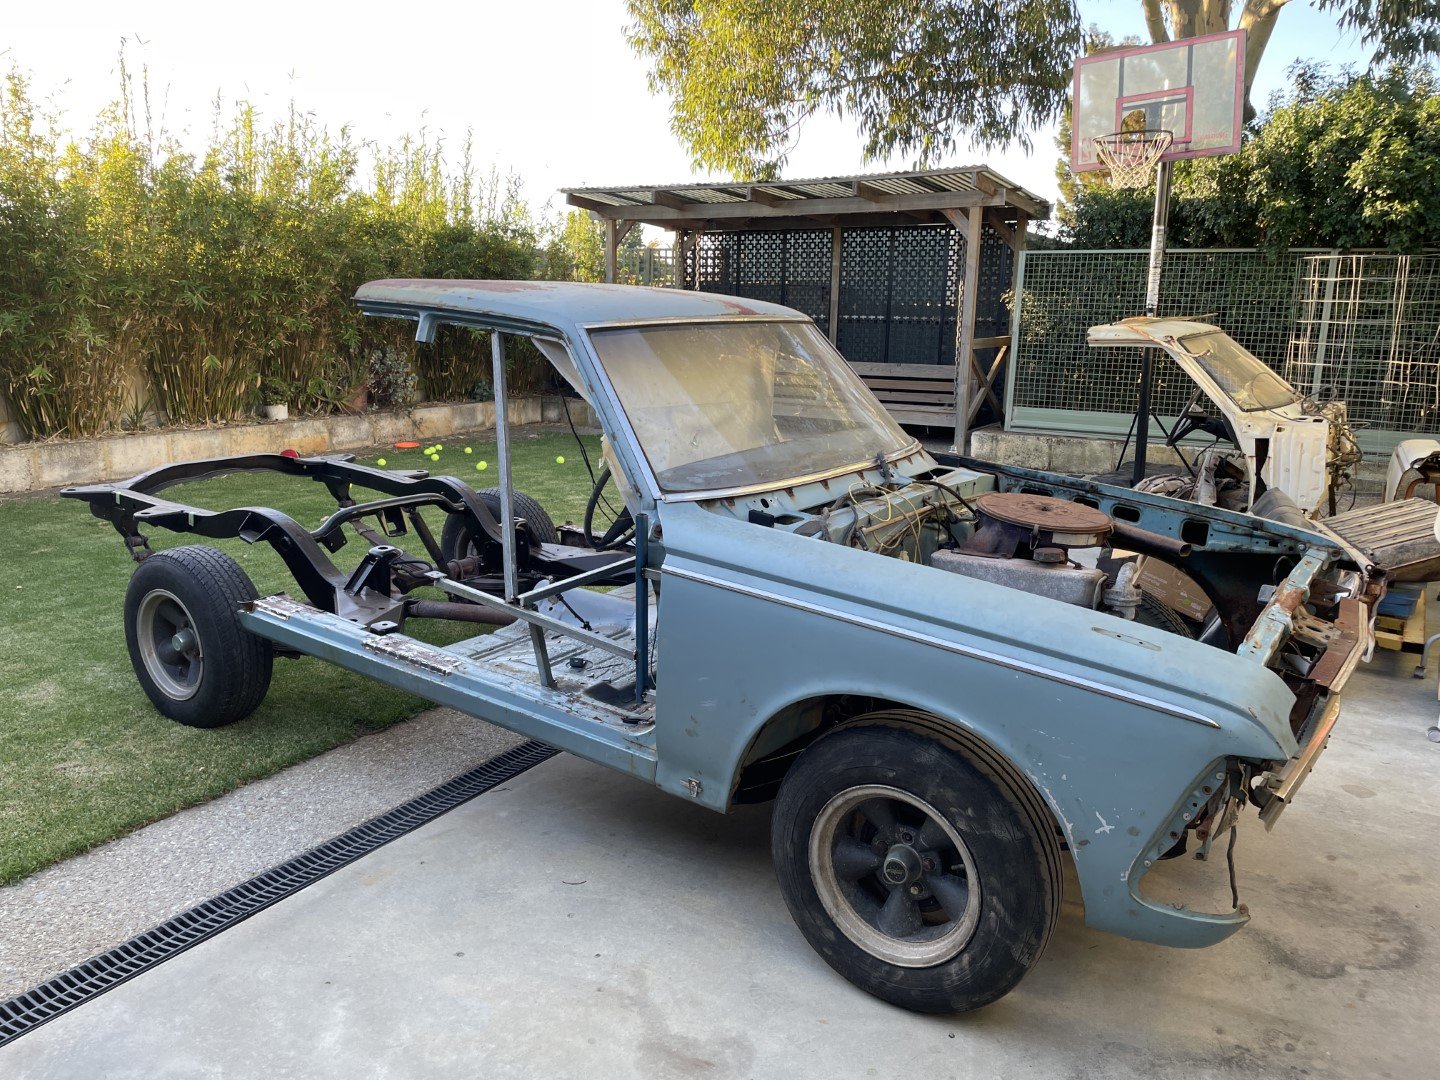
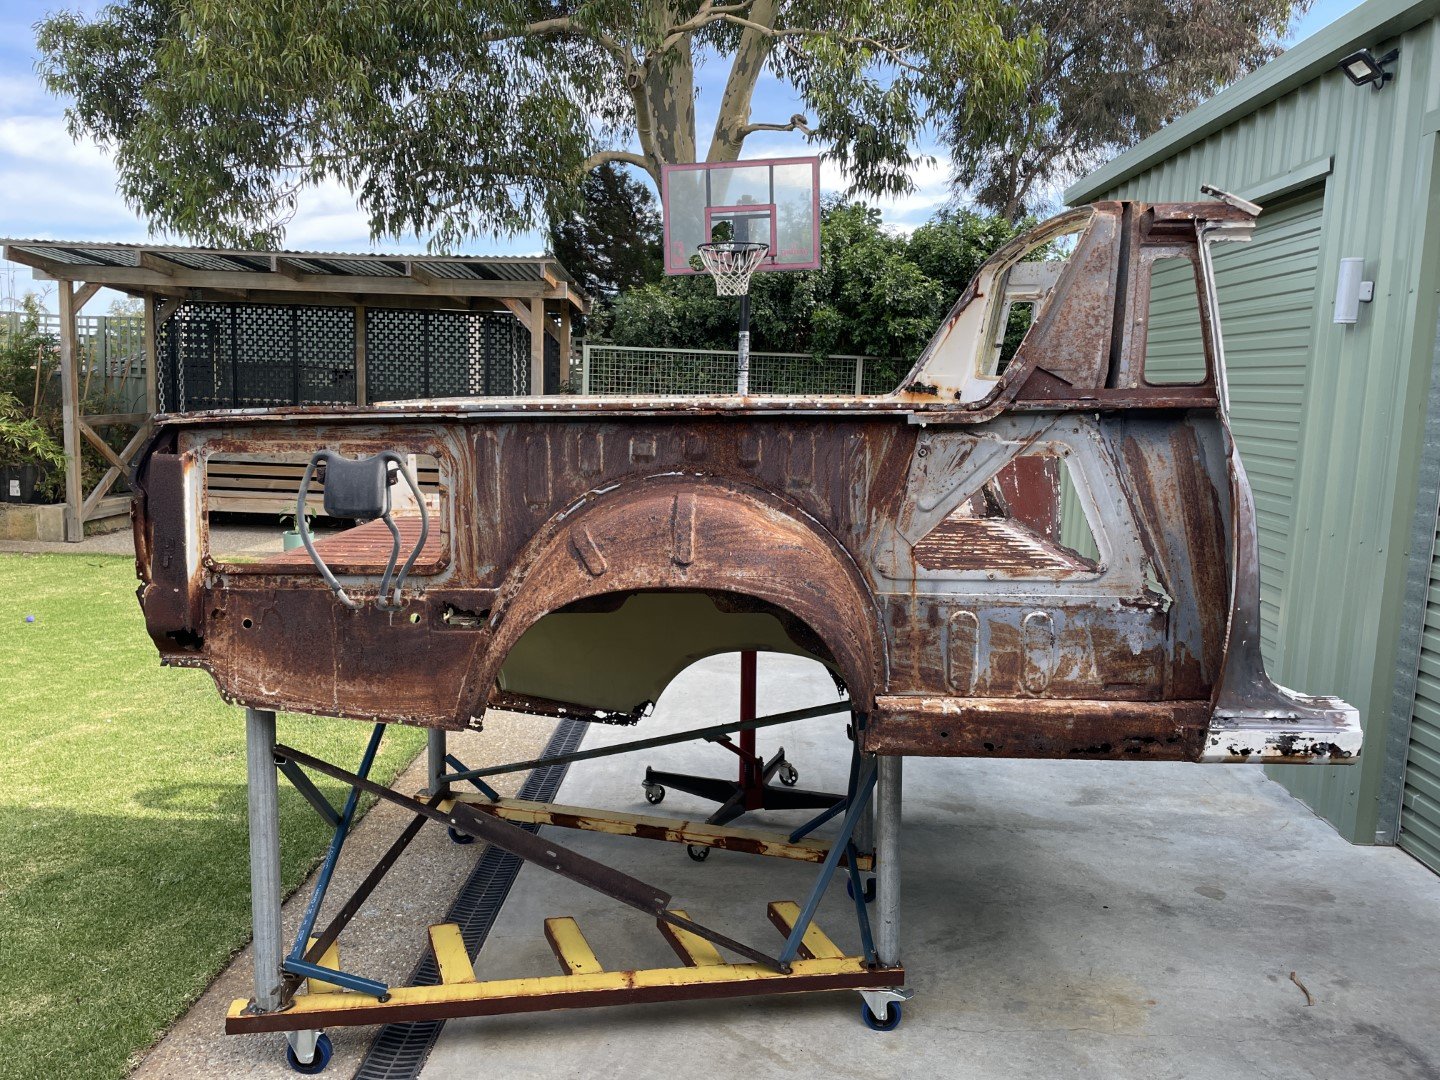
Forgot to add the glory shot of the two bodies sitting in the closest proximity ever. Had to fuck around as my plan of dropping the rear section onto the frame with the front section already in place fell apart due to come inconveniently placed chassis and body cross members. So back onto the trolley went the rear section - the hoist was then employed to lift the front section off the chassis. Chassis wheeled out of the way, heights adjusted and the two pieces were slotted together. I'm pretty fucking happy with that. Door aperture size is correct (measured against the closely available MS55 body parked right next door) Rear firewall alights with the floor pan well (which was cut however many months ago) Grabbed the rear roof panel from the ute and sat it on top to make sure everything was heading in the right direction. Stoked. Still plenty of working out, measuring, cutting and welding (rust repairs more so) prior to sticking these two parts together - but progress is progress.
10 points
-
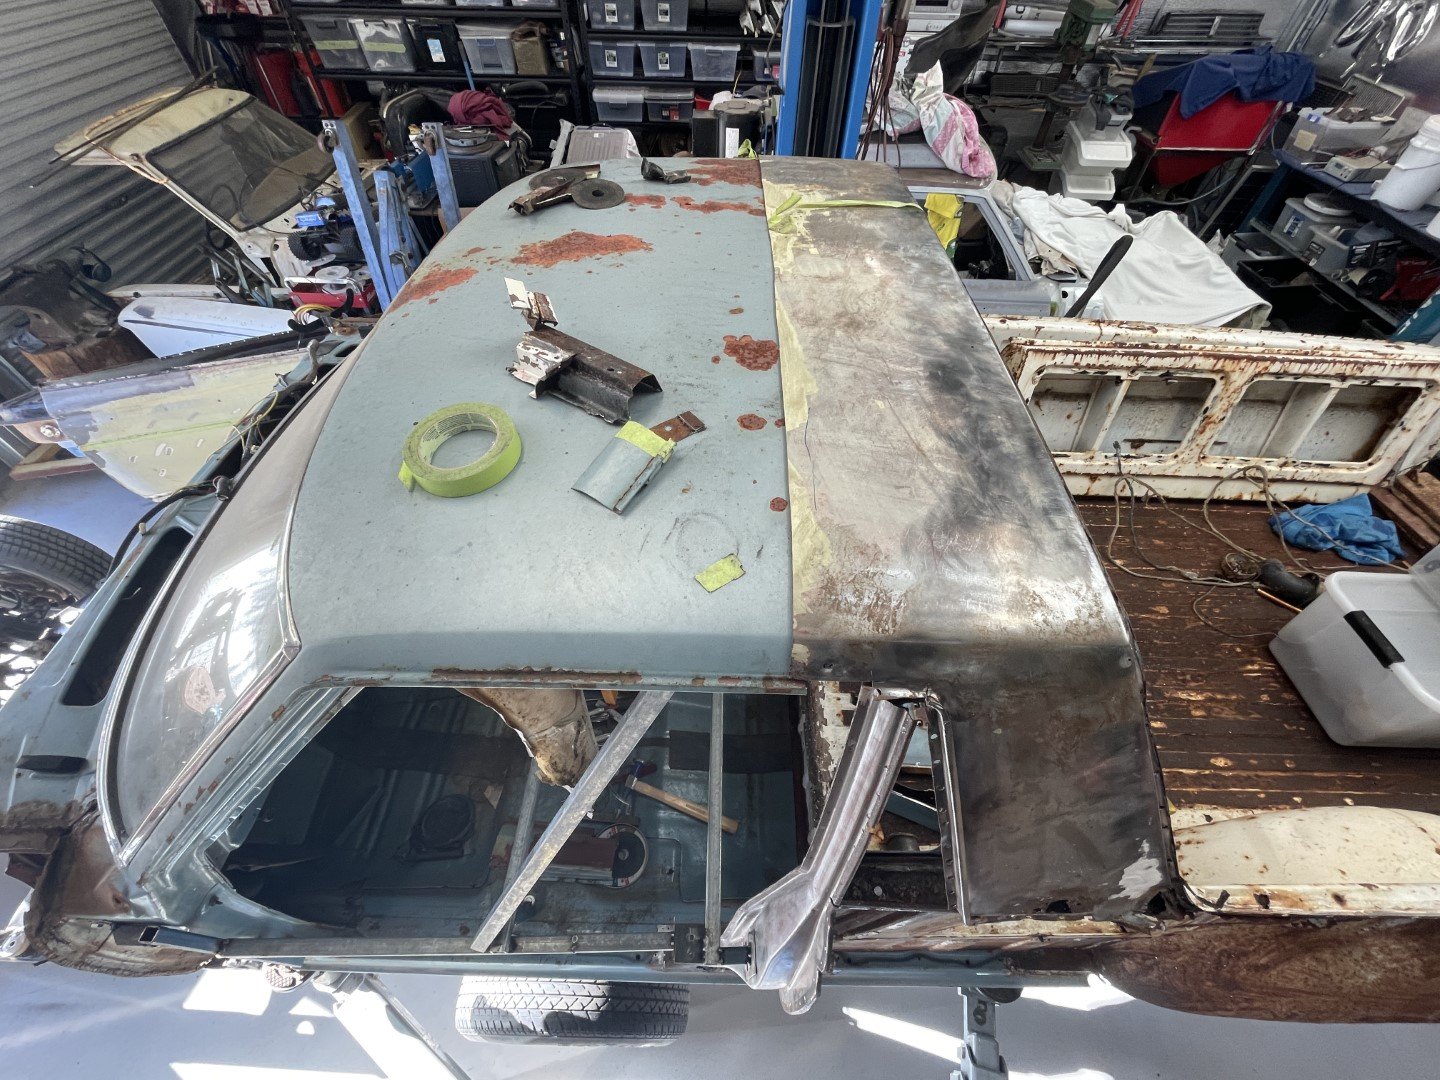
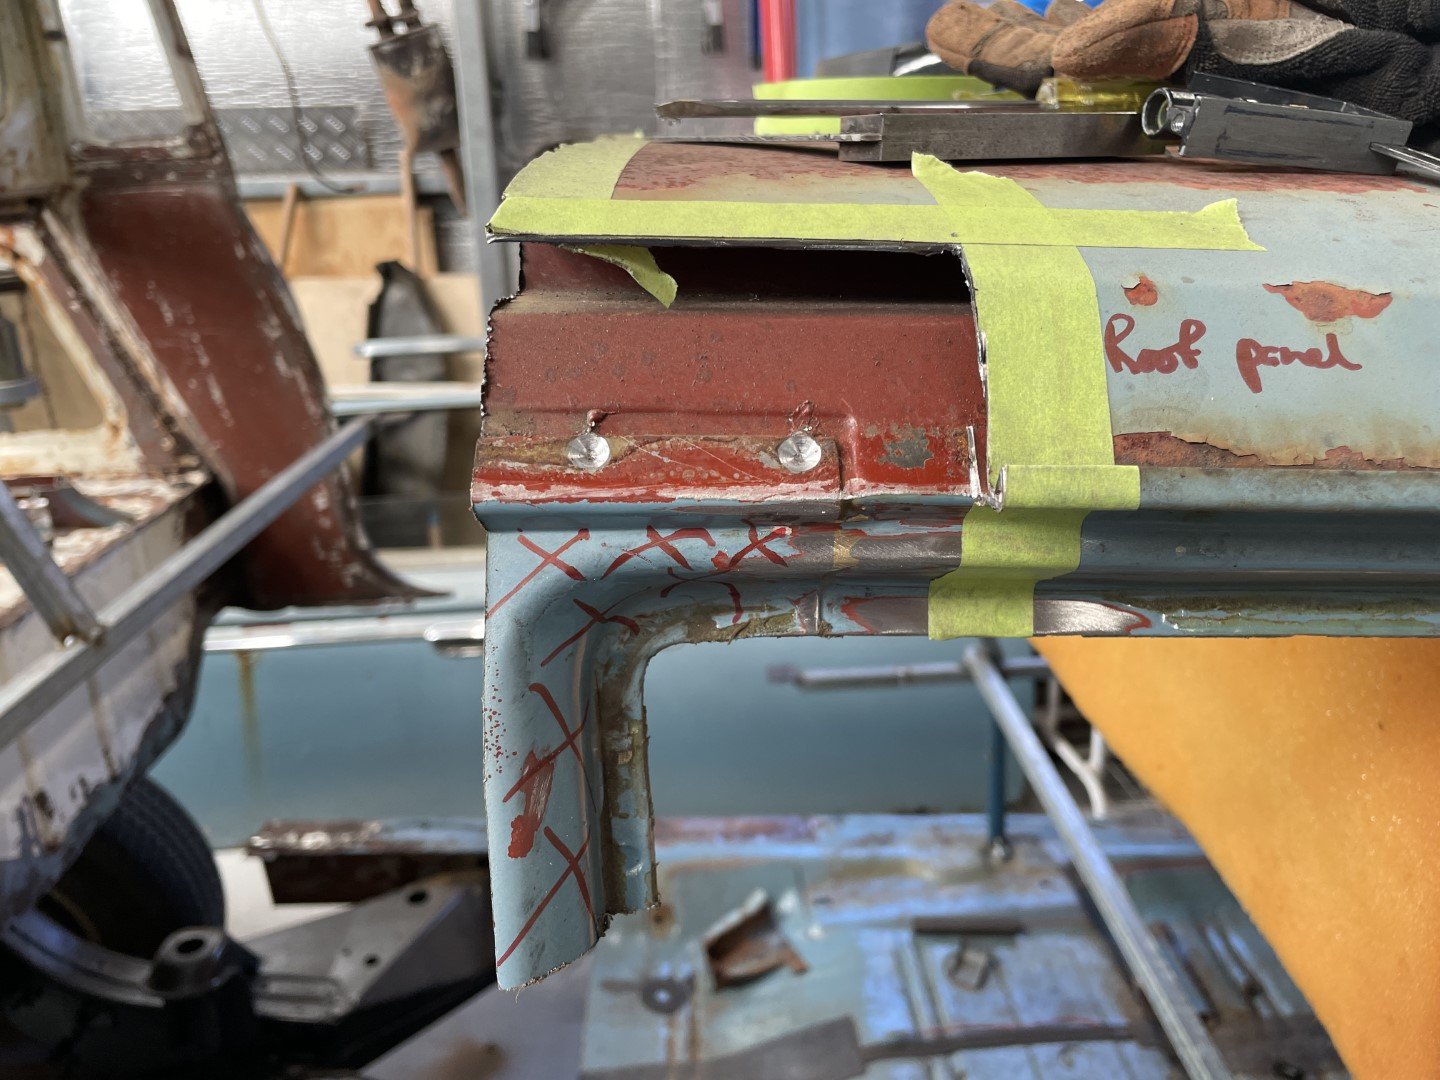
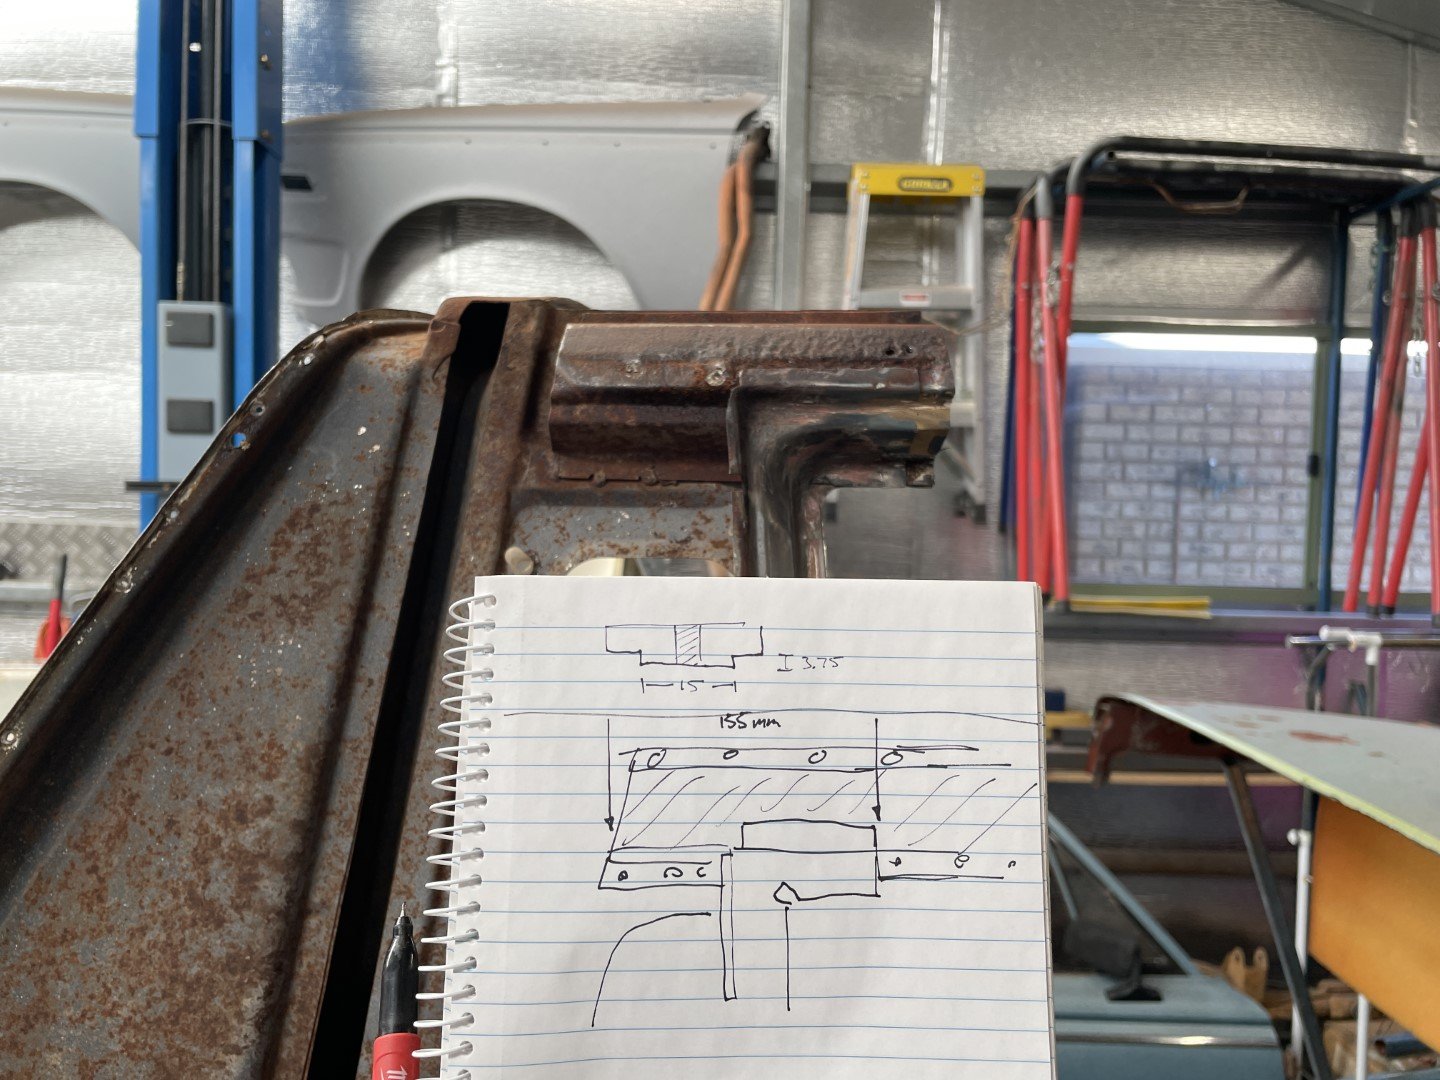
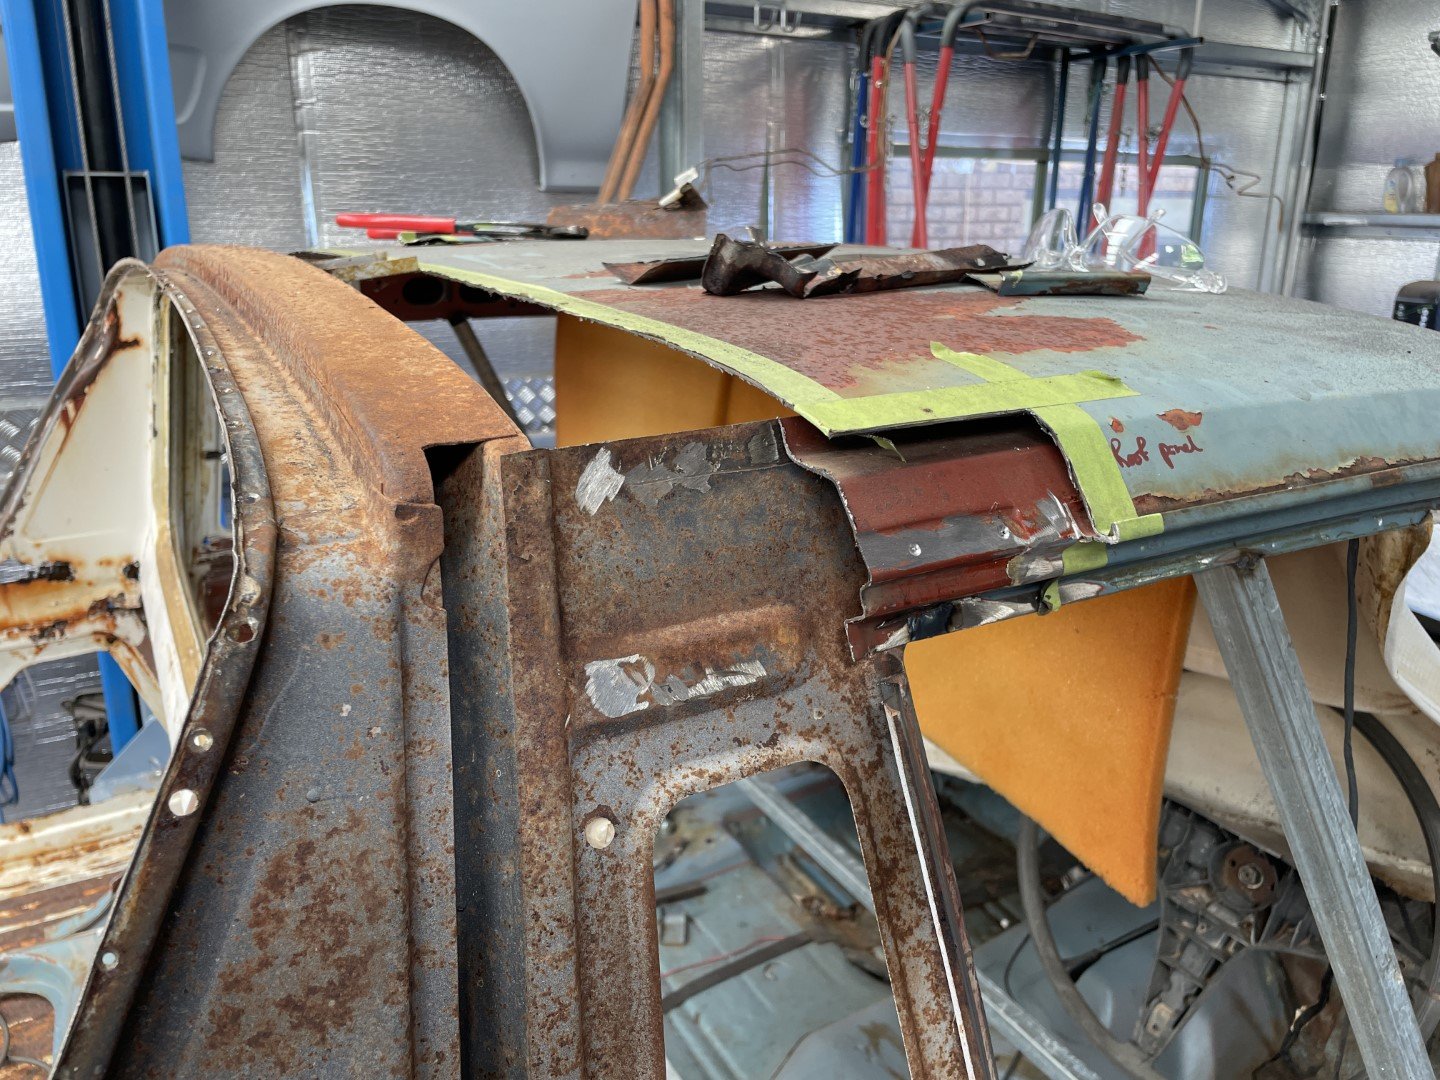
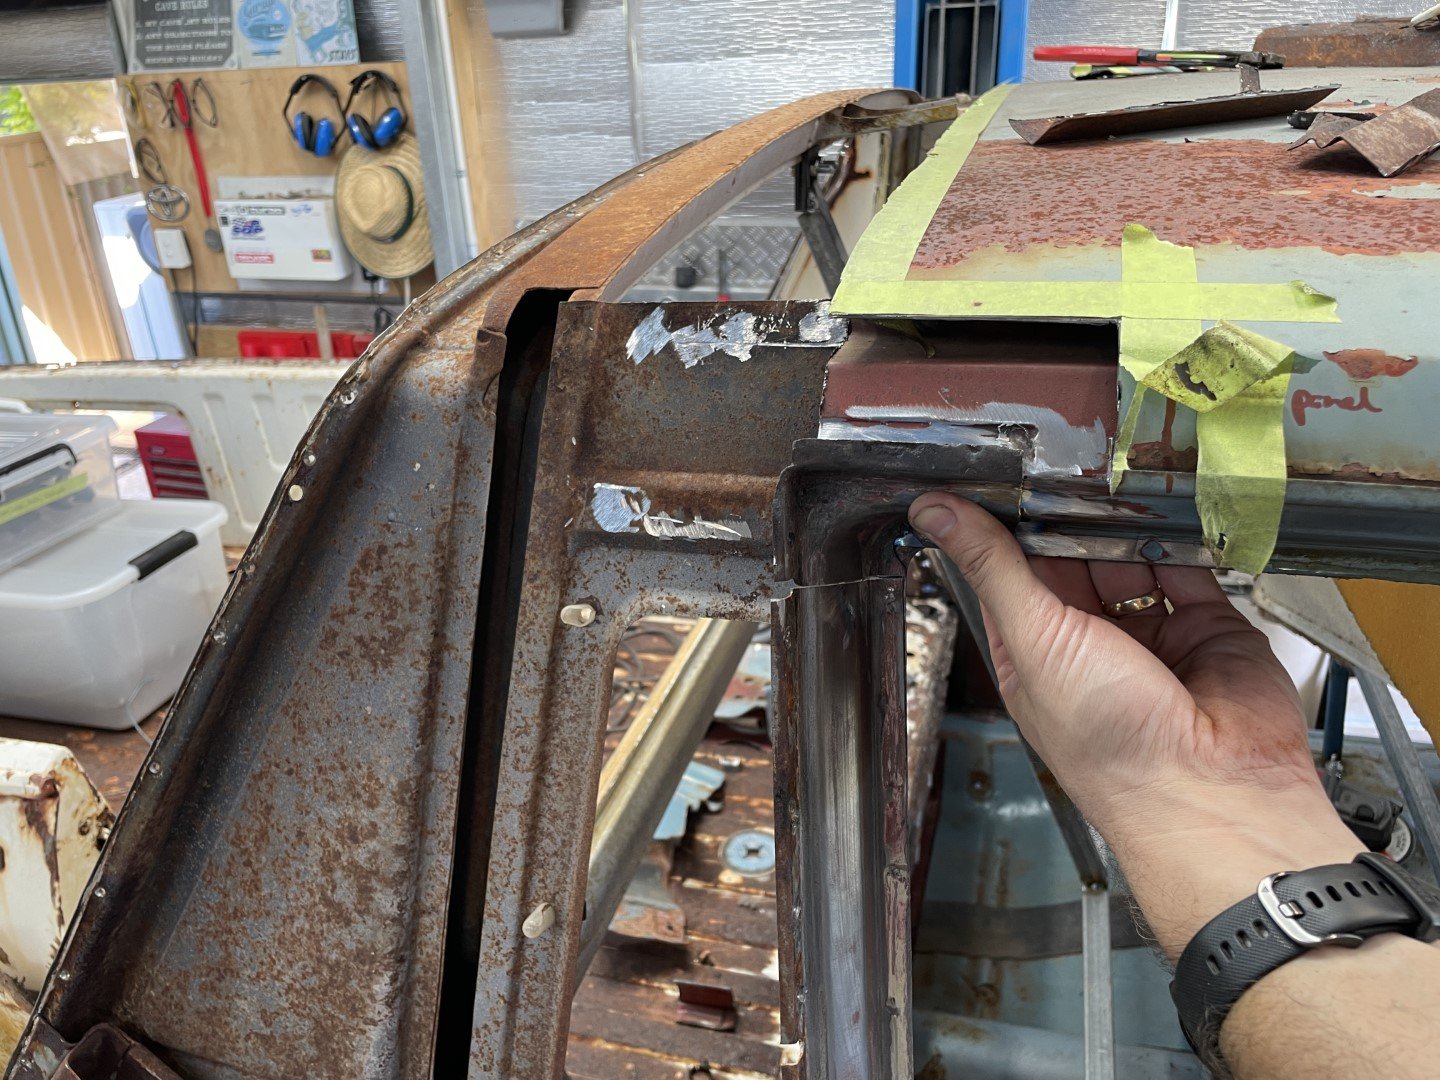
Spent quite a while staring at the intersecting parts to try and work out the best way of joining these things together. My main goal is to stick them together in such a way that all connection points are identical to how it would have come from the factory all those years ago. Not sure how many hours (or beers per hour) were spent staring at it - but it was quite a few. Obviously the B pillar will sit where it needs to sit - but the roof junction was the part that perplexed me the most. Stripped part of the roof panel off to get access to the inner structure. One thing that is clear to see is that this sedan has considerably better rust proofing / priming of panels prior to assembly. Made some detailed drawings of the B pillar structure / junction key dimensions on the ute for future reference; More hours of thinking and grinding saw the inner structure removed from the ute body. Had to cut the corner of the door aperture off to make life a little easier for myself. Resulted in achieving this; From the photo above the intersecting parts become a little clearer. The two pieces of the inner roof structure overlap. Just need to extend the outer part of the inner structure to match the engineering drawings I generated earlier in the day. Nice to find that the door aperture corner that I had to cut out earlier still fits (some fettling required, but close enough for me)
7 points
-
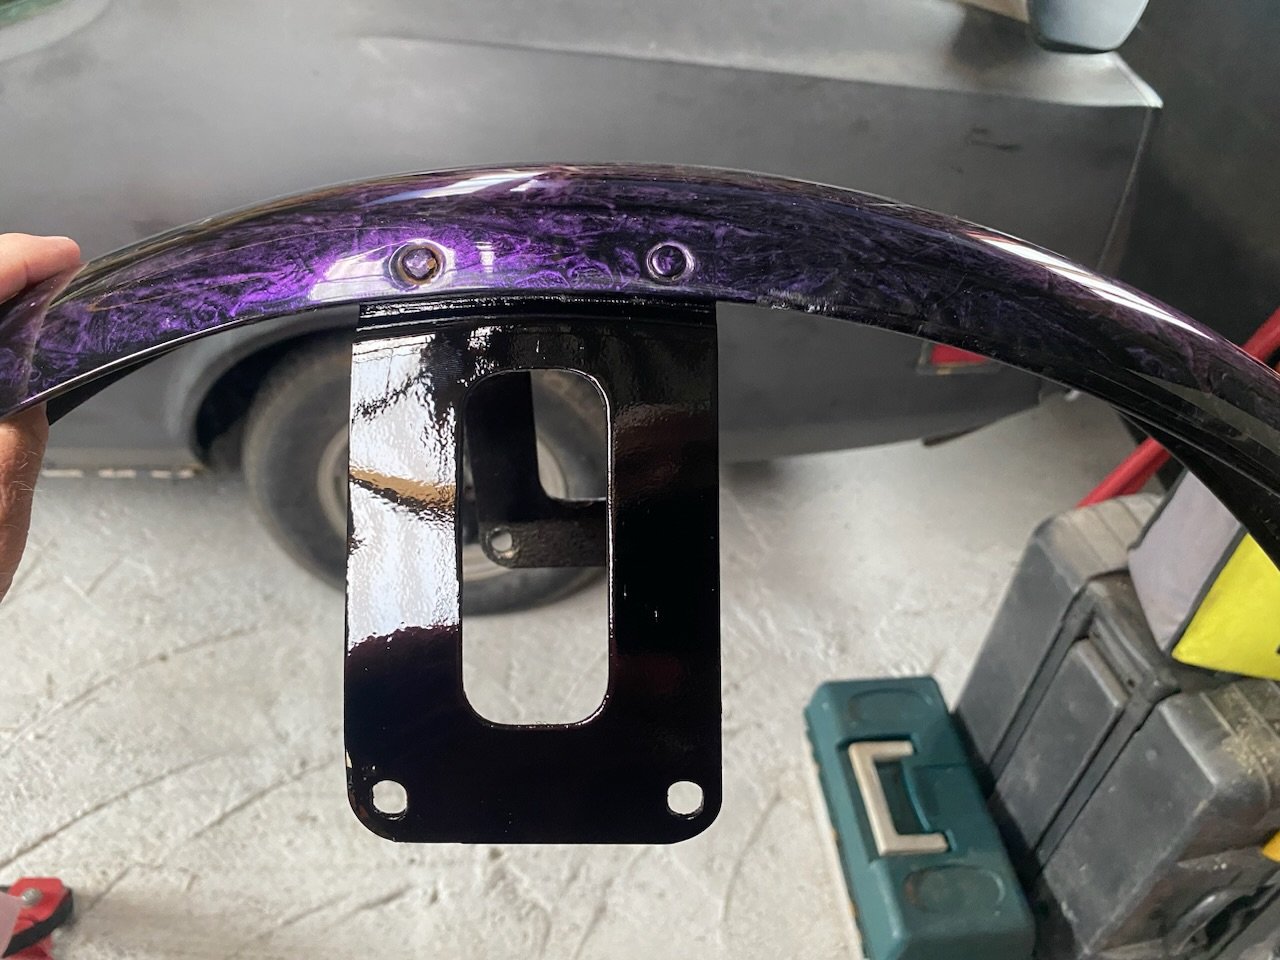
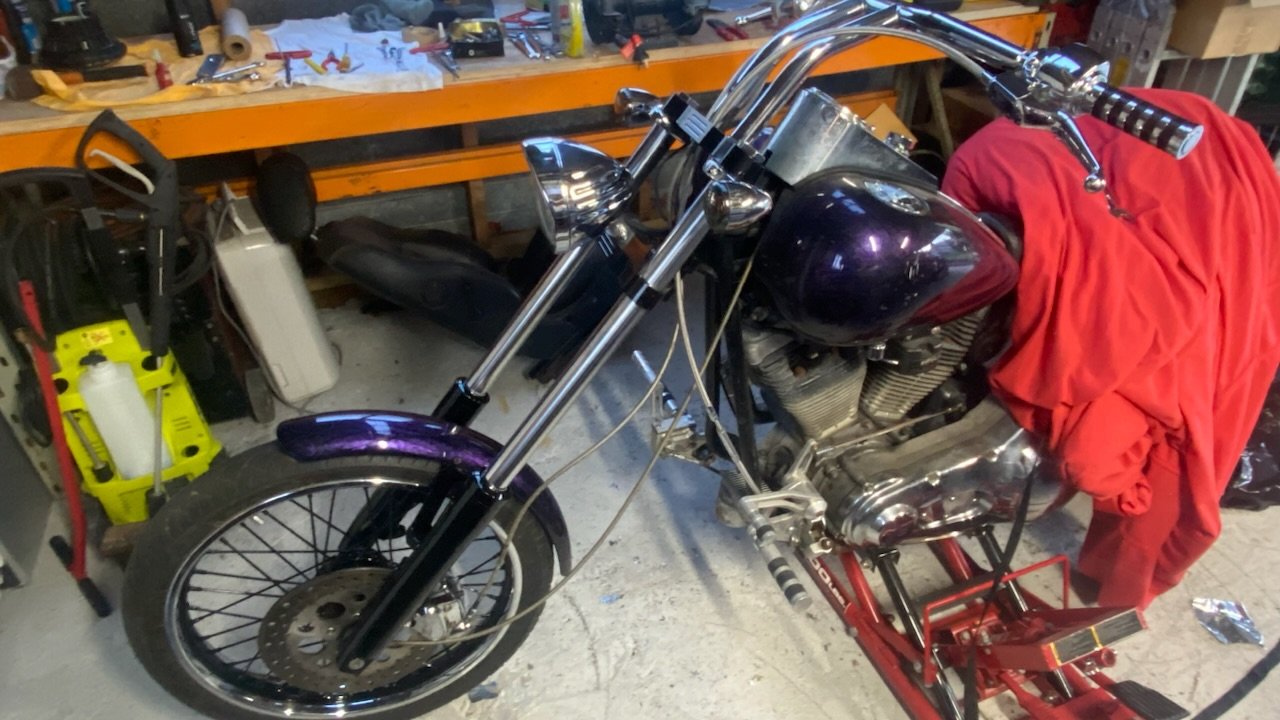
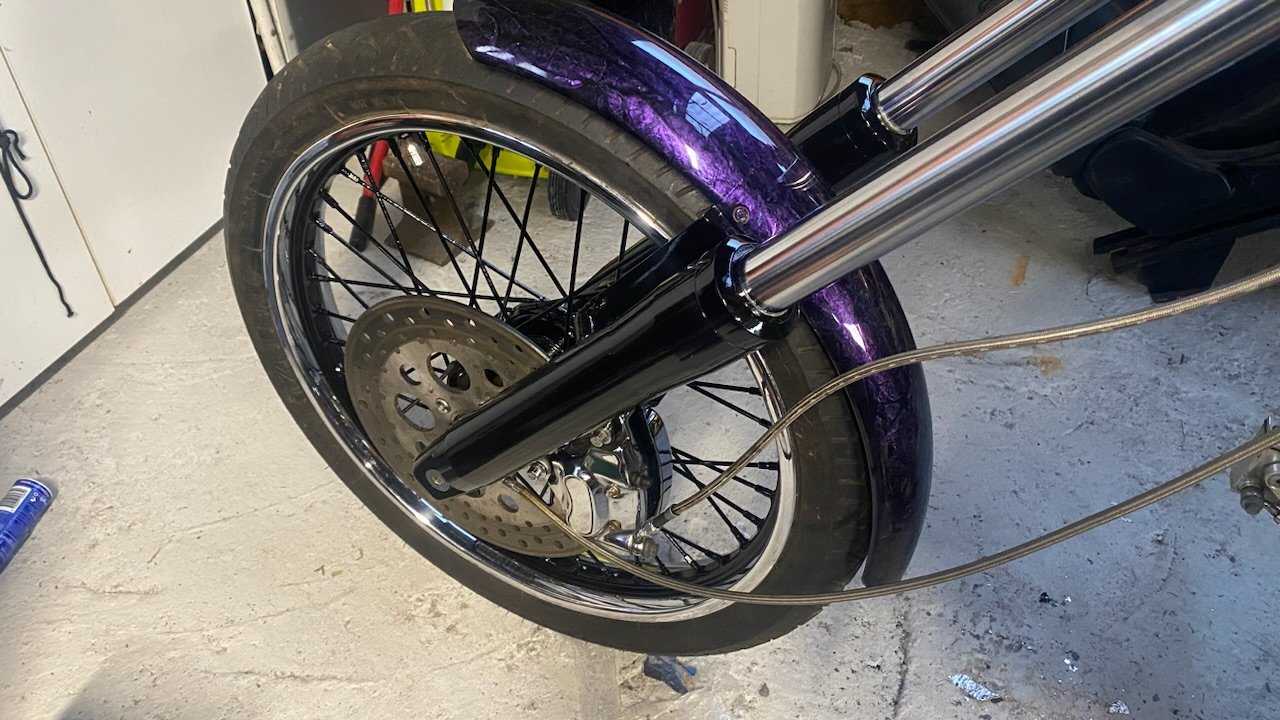
Painted some things Happy with how the rim came out.. may not last long/may rust from the inside out on the spokes, but it looks nice and tidy now. Starting to put the front end together now
6 points
-
5 points
-
Hi all, I'm a bit overloaded to get stuff out for end of month: I have some light fab, electrical needs doing for a couple of days. I'm making a (mostly 12V) control sets, and need it copied 2x. It's just 'copy this', find tools and have a go setup for the mo. Prefer someone who can do the self employed (pay own tax to IRD, it's easy to set up), but flexible. You need to be safe with tools, and reasonably handy with stuff. $30/h ish? Unlimited coffee. PM / TXT 0-- --- ---- Wayne / h4nd4 points
-
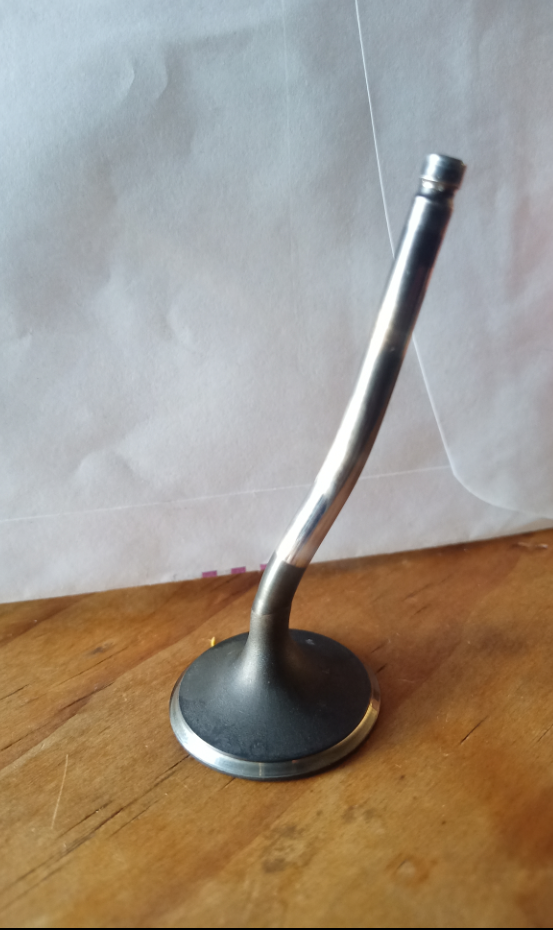
Found the Spacey's compression leak, dropped the inlet valve
4 points
-
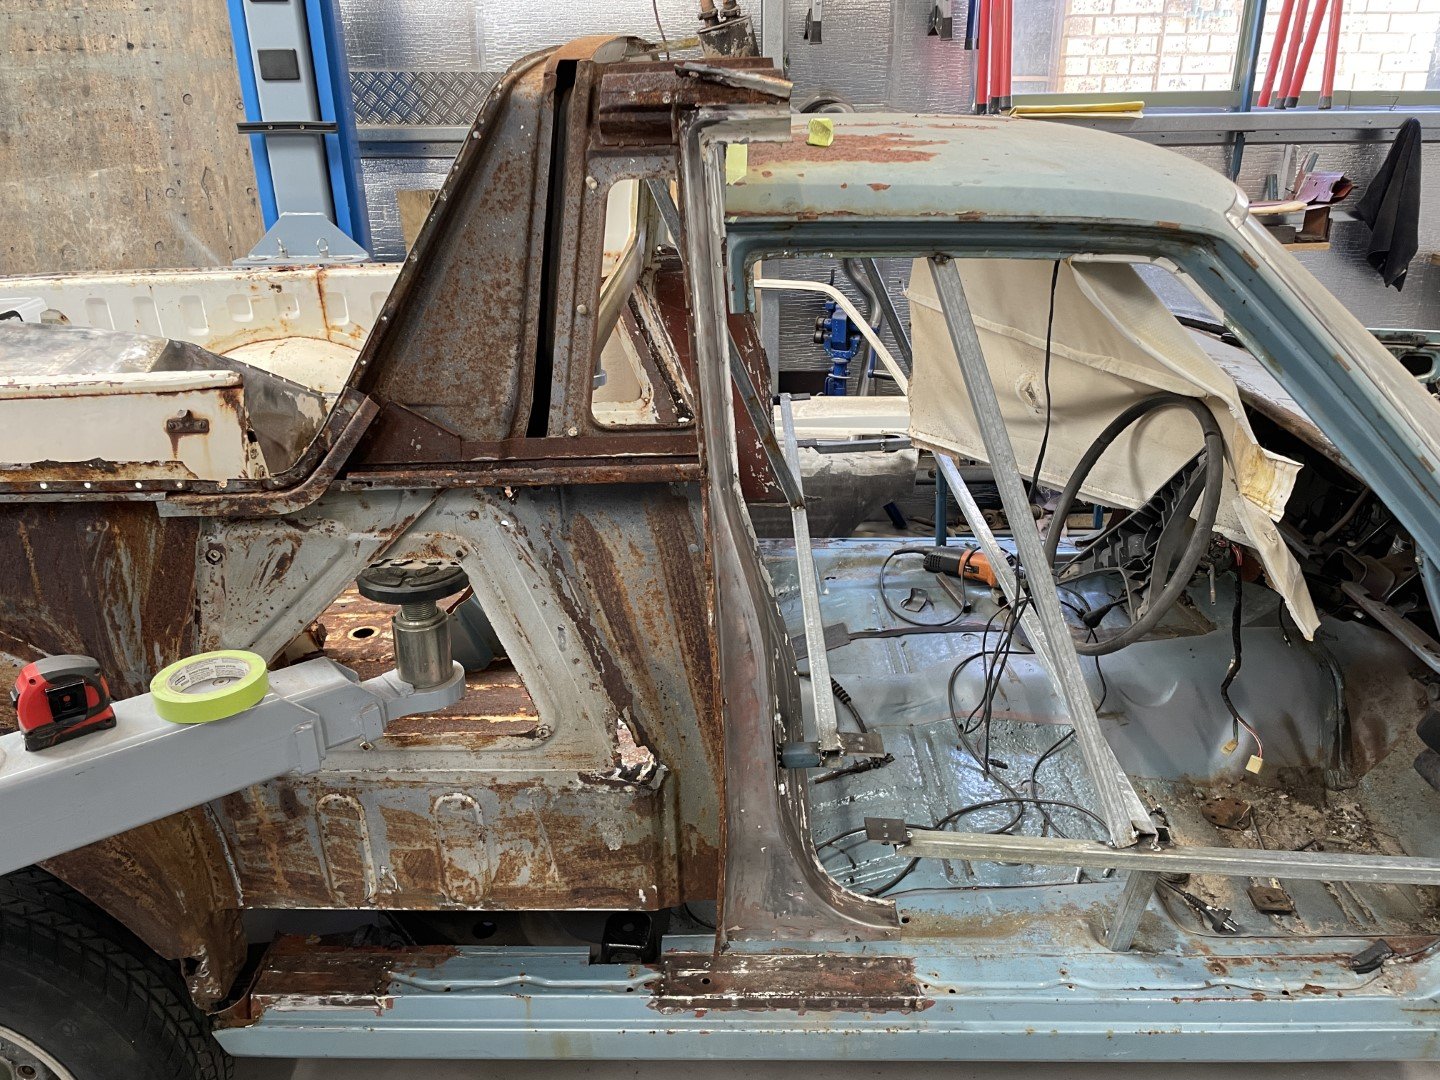
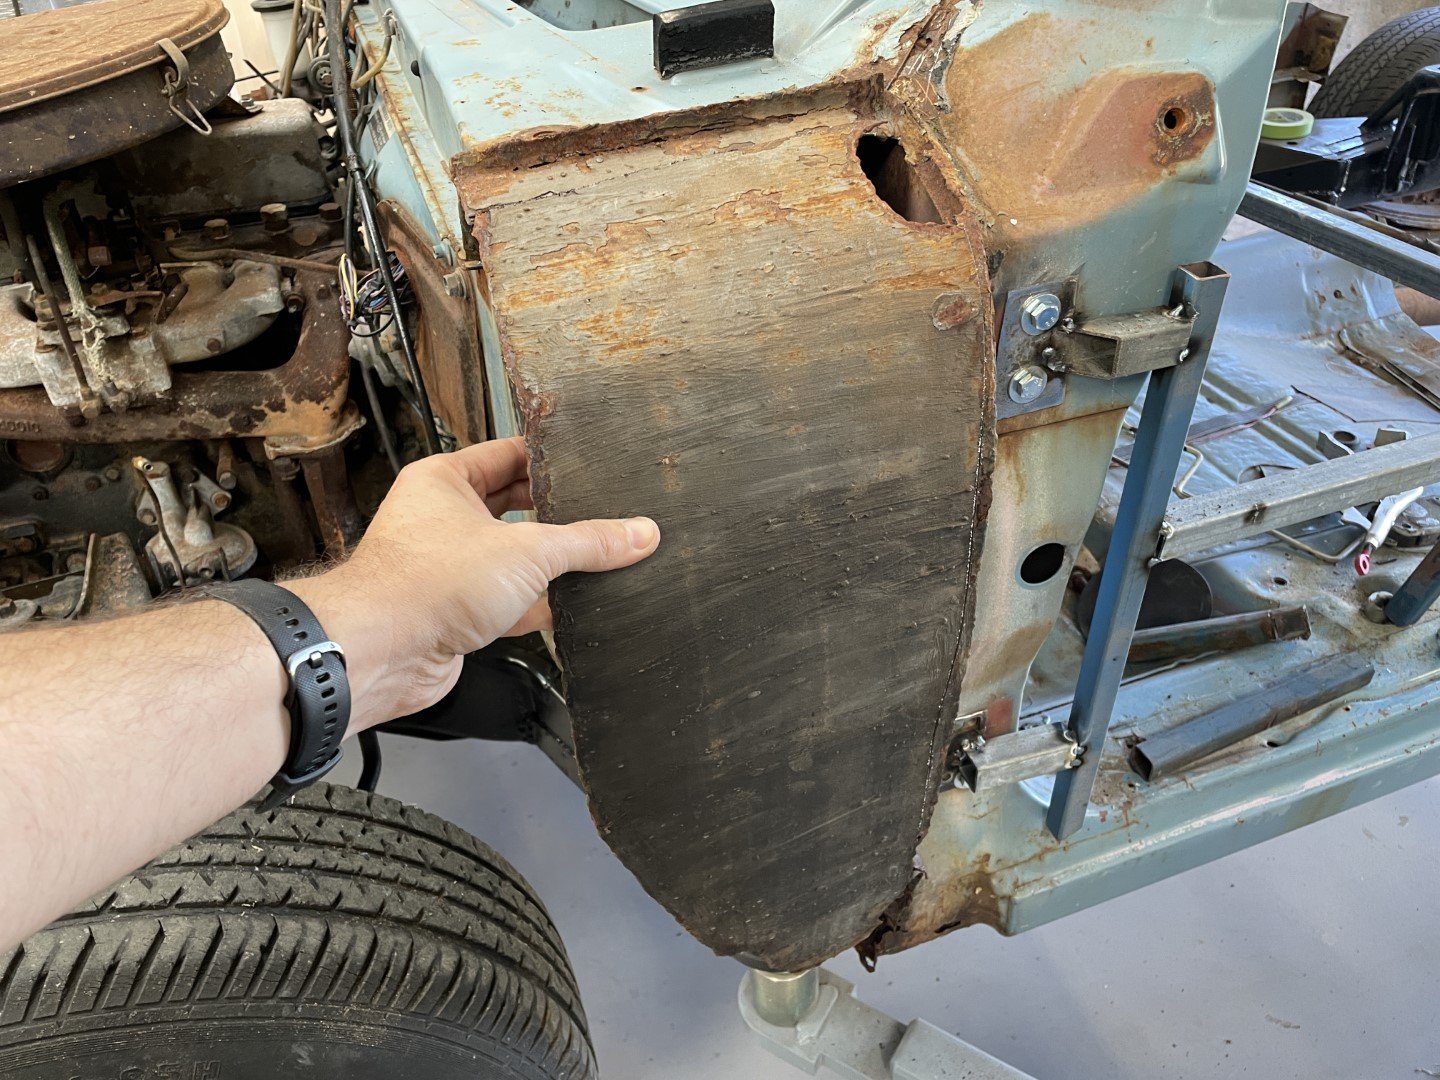
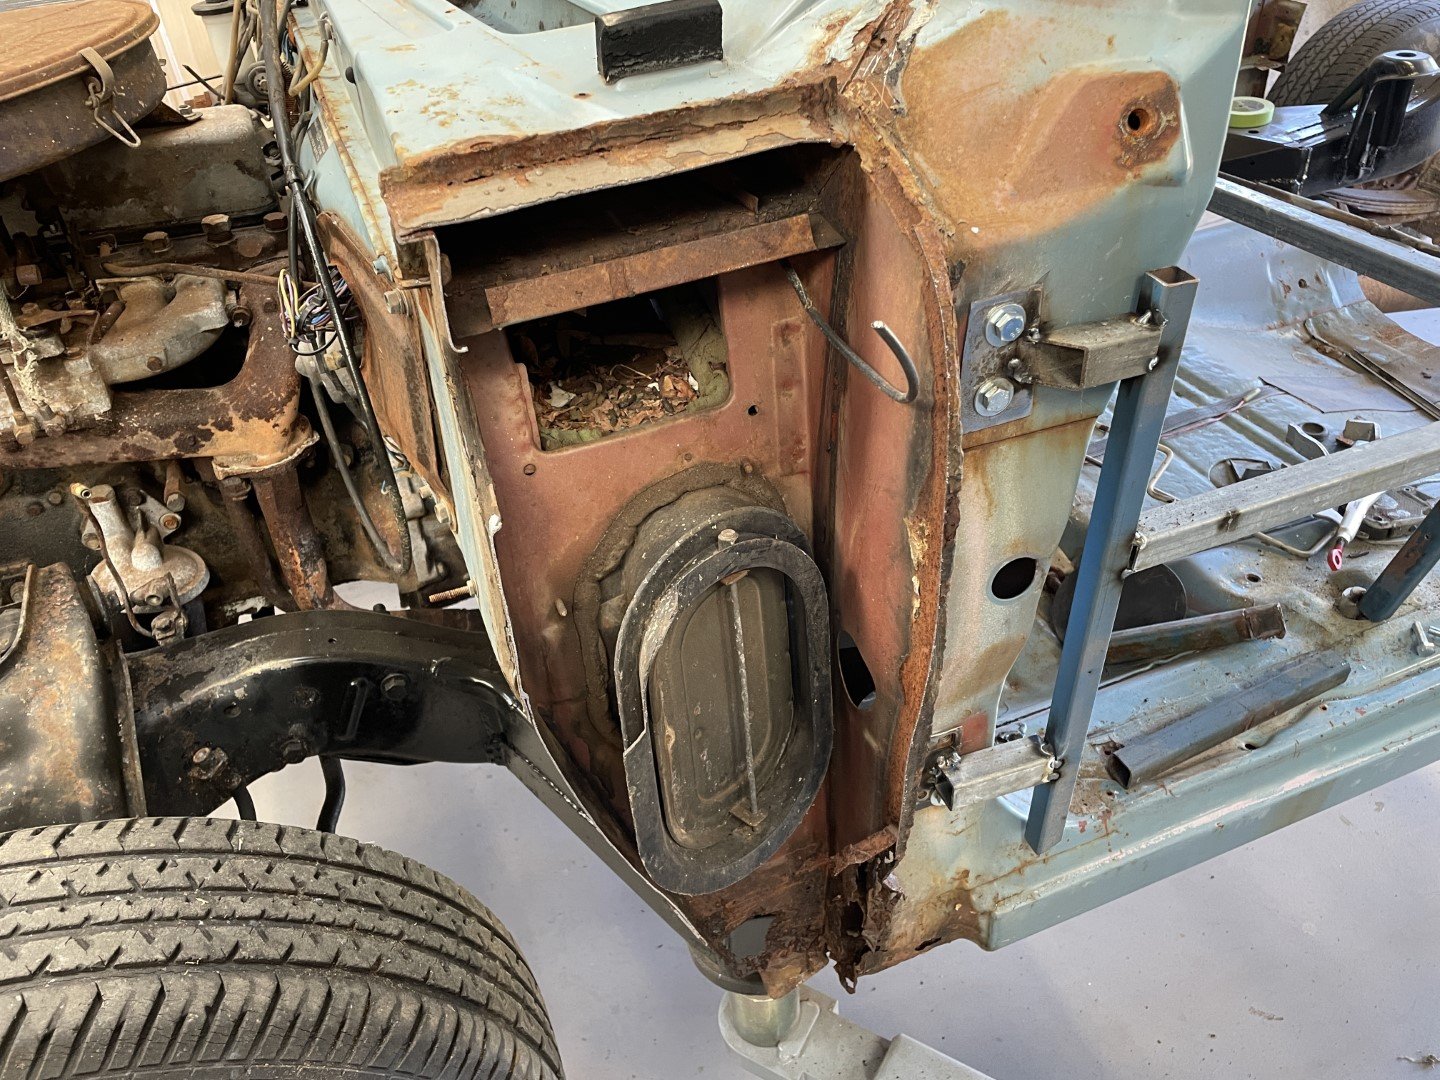
Sawzall employed, B pillars subtracted from the sedan; Then much cutting and grinding to remove B pillars down to the sills - so much crusty shit sitting down there. B and C pillar remnants removed; As a side quest, the original doors, fenders and rad support from the blue sedan became available - so I blew even more money and collected them. I'm selling it to myself as a 'you could get this thing finished so much sooner now that you don't have to paint fenders that blue colour!' Very much extra good side shown there. The other side is fucked though. Not badly fucked - but just enough for me to have to perform more surgery. Overall - the LH side of the sedan was the worst - would have to have something to do with it's collision history - see le shitty plenum end photo below. And then underneath. fucking blergh.
4 points
-
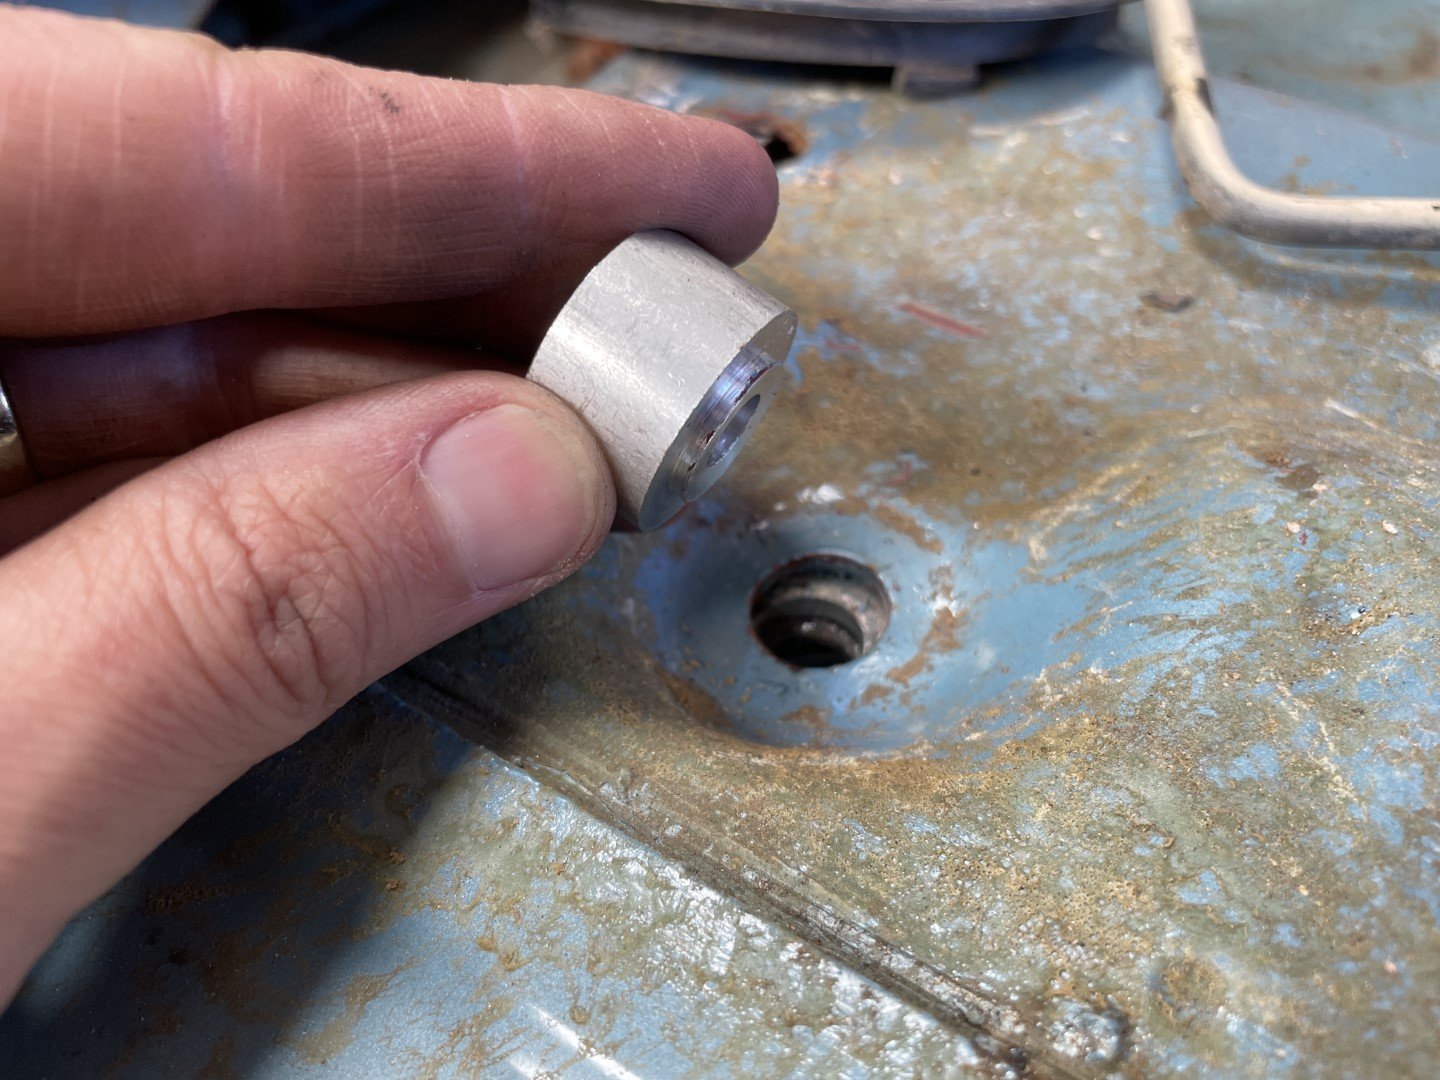
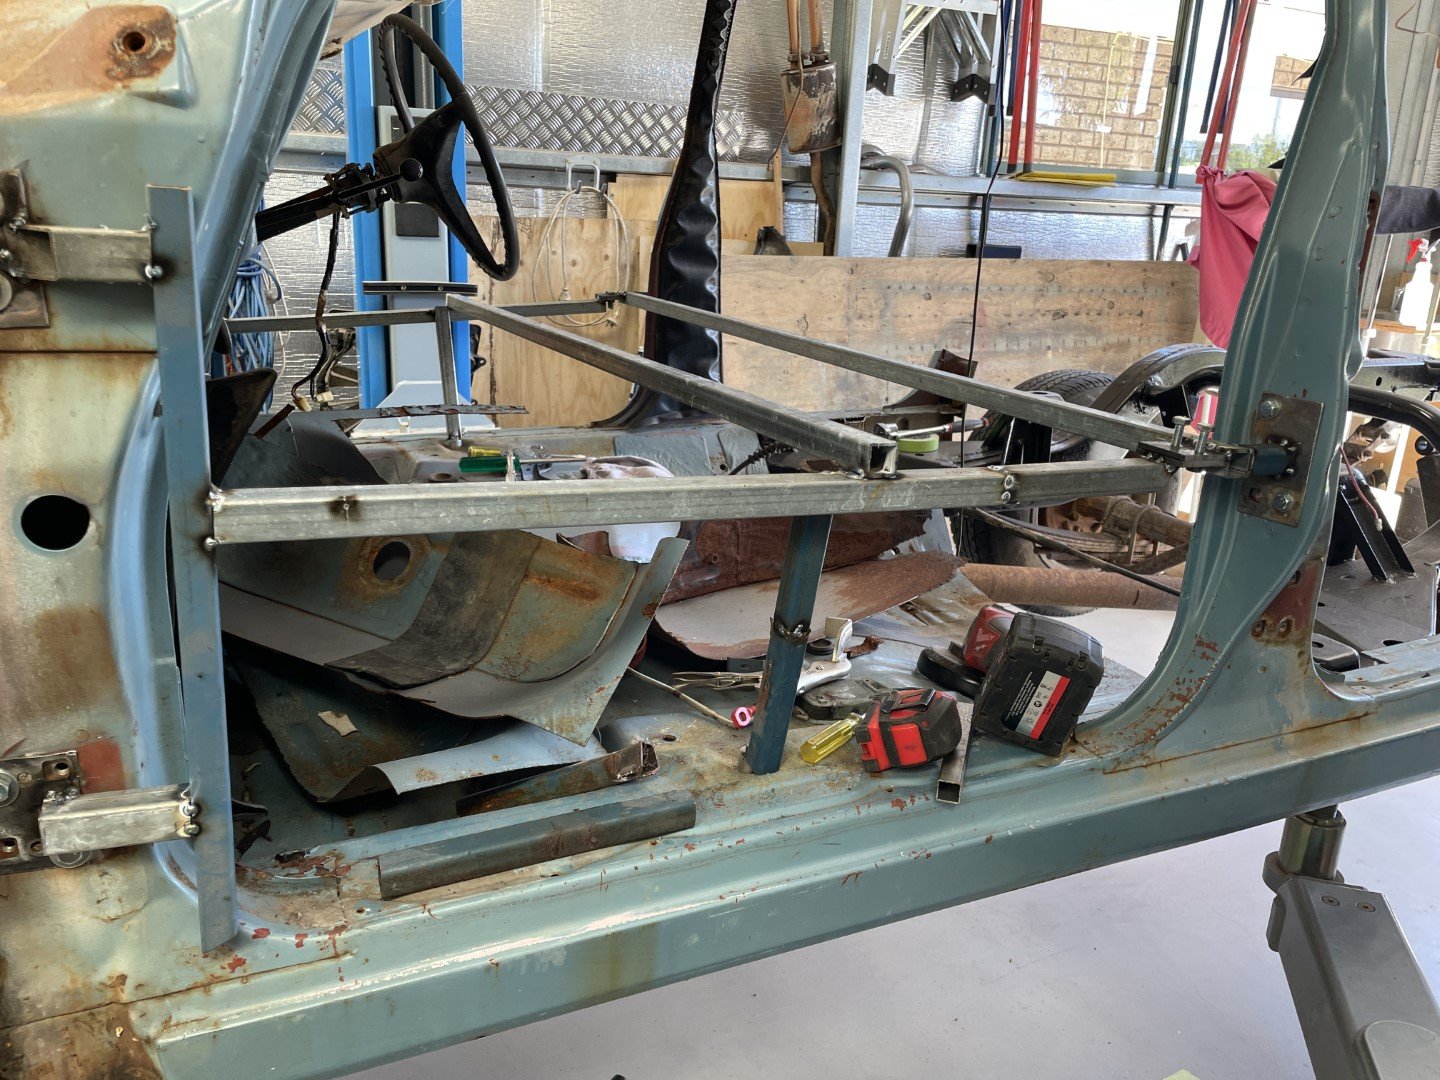
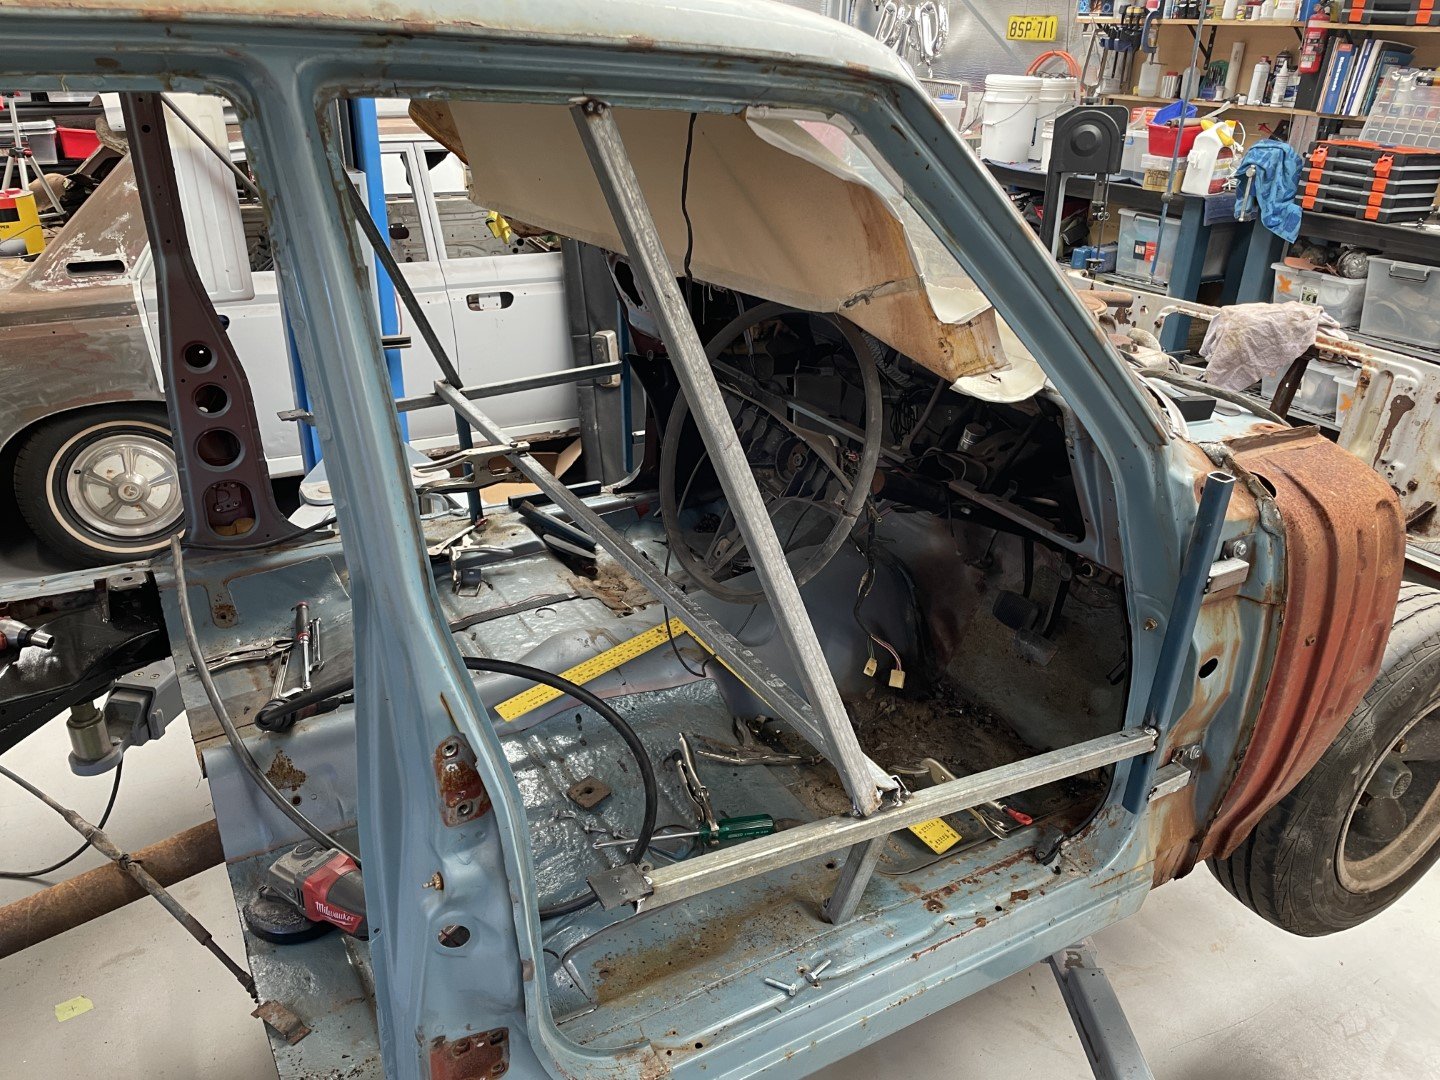
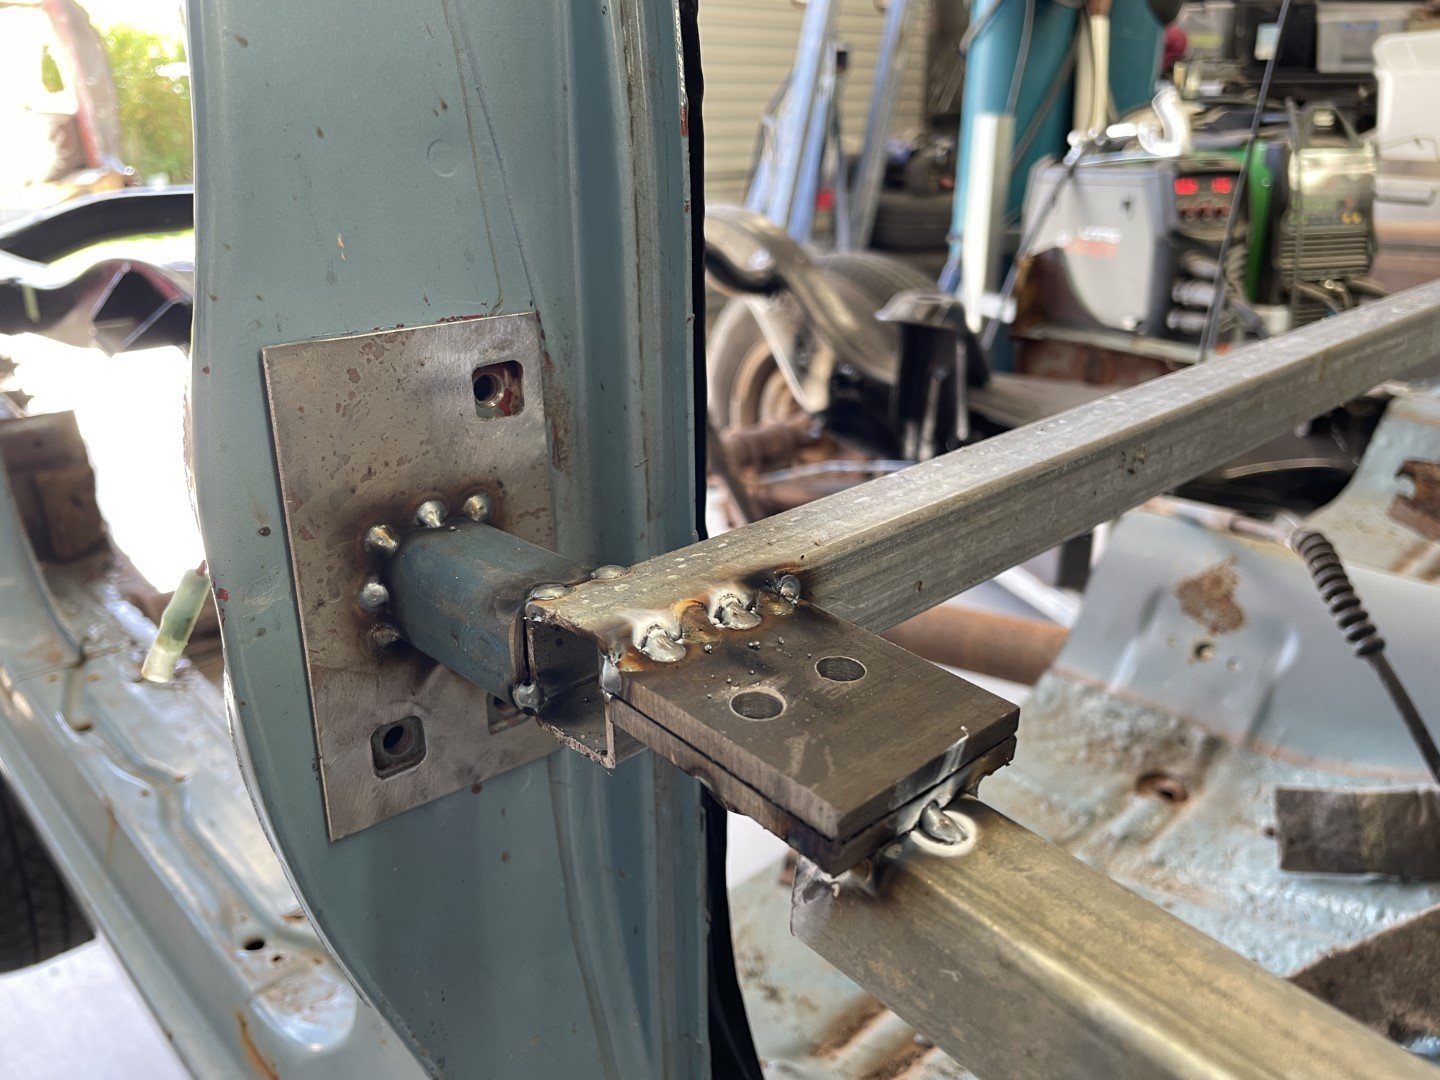
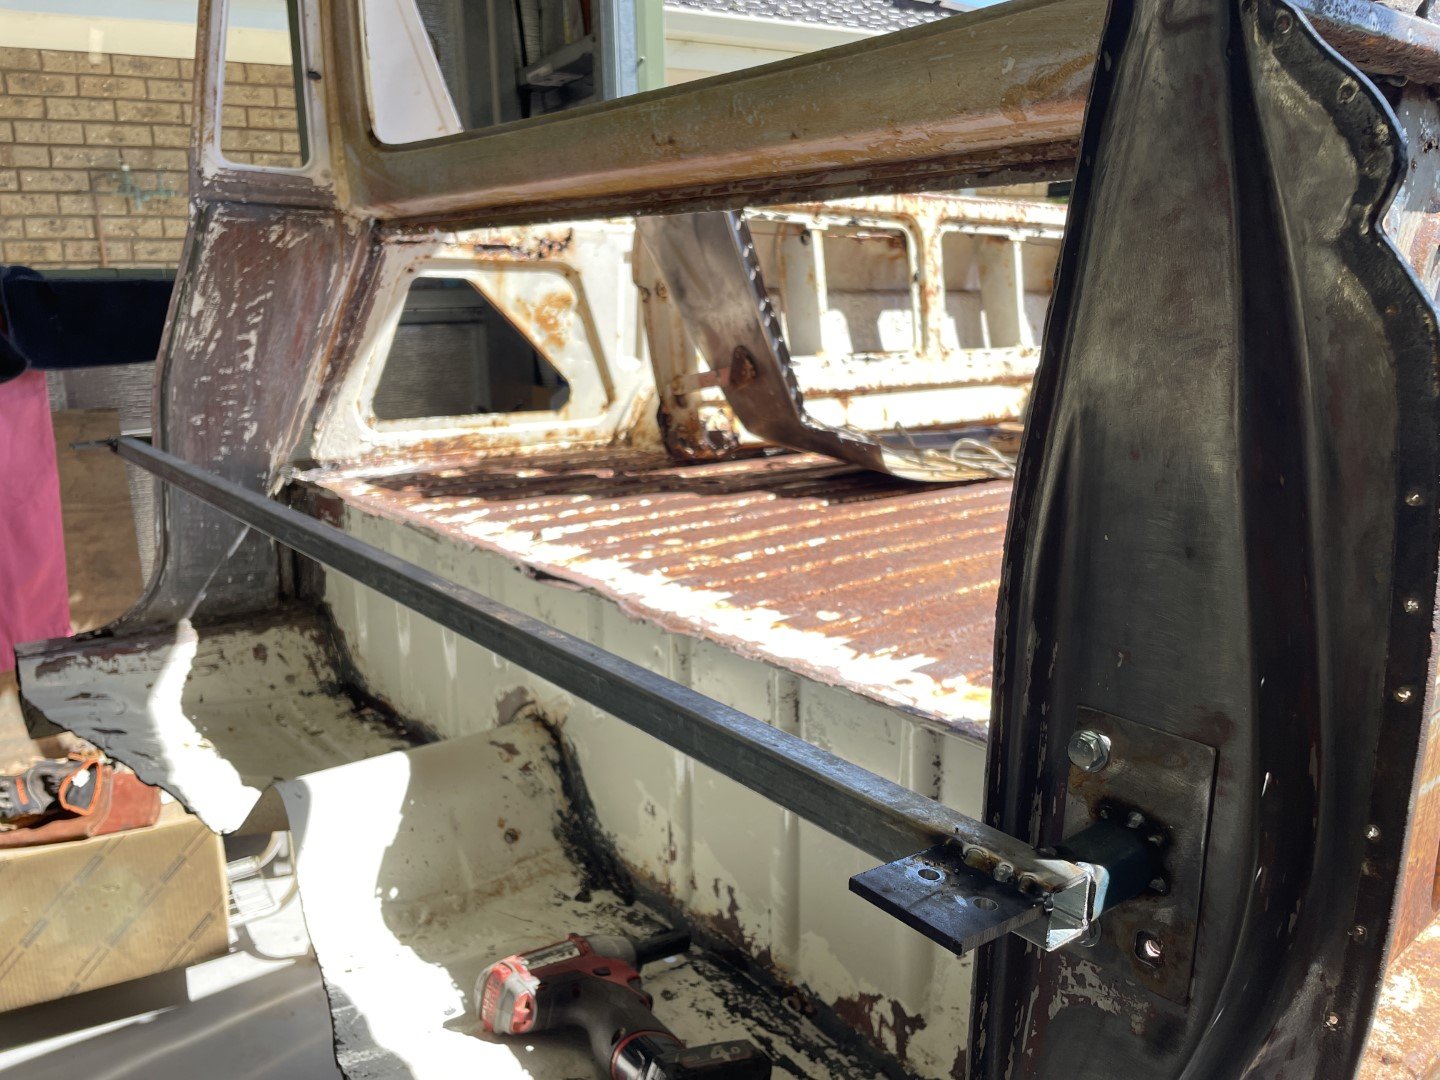
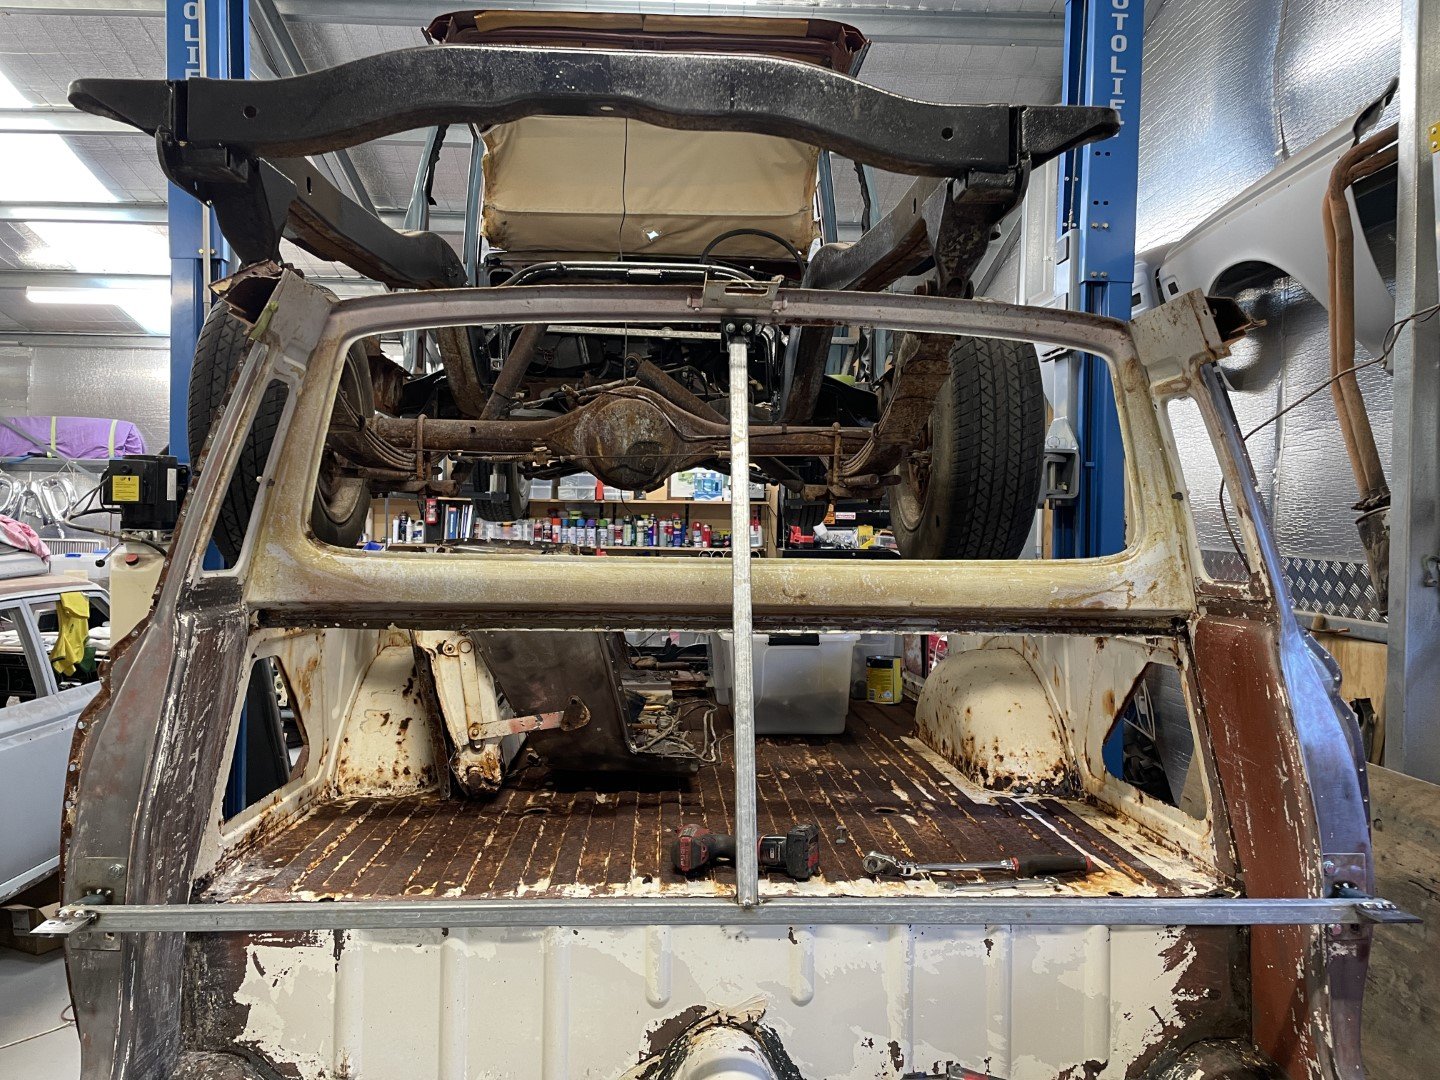
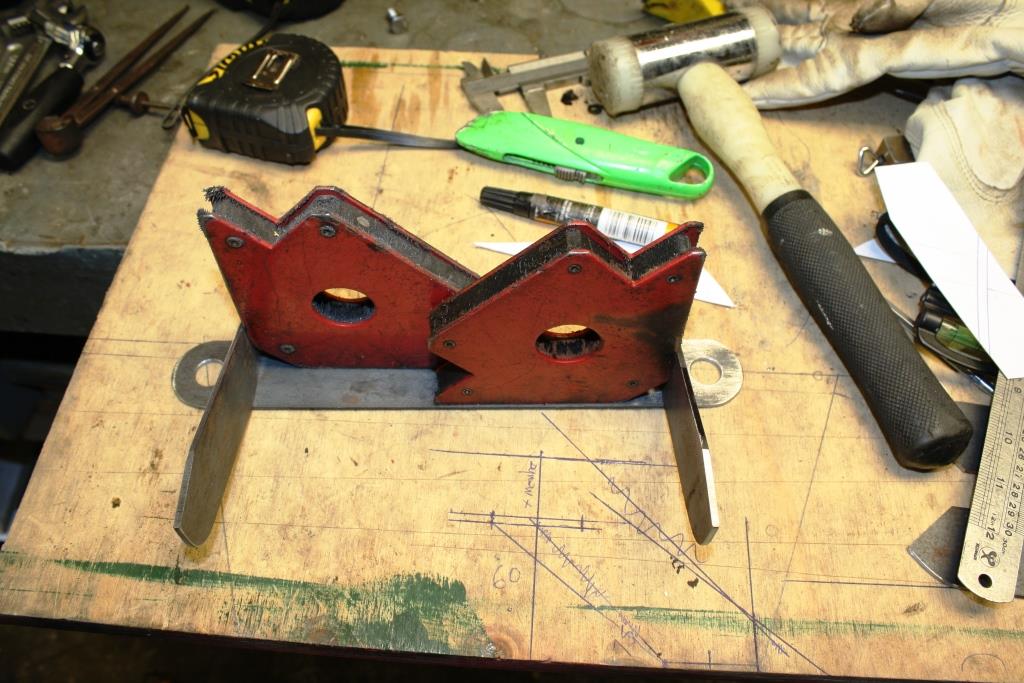
So somehow it's now the tail end of March - how the hell did that happen? Progress has been slow - but progress made none the less. Figured the best thing to do next was fashion some kind of jig that would allow me to throw these two cars together into, well... one car. A frame was considered and then built that would locate (what I feel) are key dimensions - the distance from the A pillar to the B pillar. So I spun up a couple of threaded plugs that would locate to the floor pan; Then proceeded to weld in bars to plates that I could locate on the door hinge and door striker bolt locations; I made the pieces that locate on the B pillars removable so that I could cut the pillars out. Added an extra brace from the middle bars to the roof and then one between both sides. Bolts out - nothing moved which told me it was sorta okay-ish. Then took the B pillar bar and checked it against the ute B pillar. Holes lined up which was nice. Added an extra brace from there up to the rear window aperture to make me feel more comfortable about its position in space;
4 points
-
Seems I forgot to update this over a year ago with some more cancer removal.. She loves a dump run, almost all I use it for lol!4 points
-
Nick has done a great job. I think we struck a good balance between strength and weight.
4 points
-
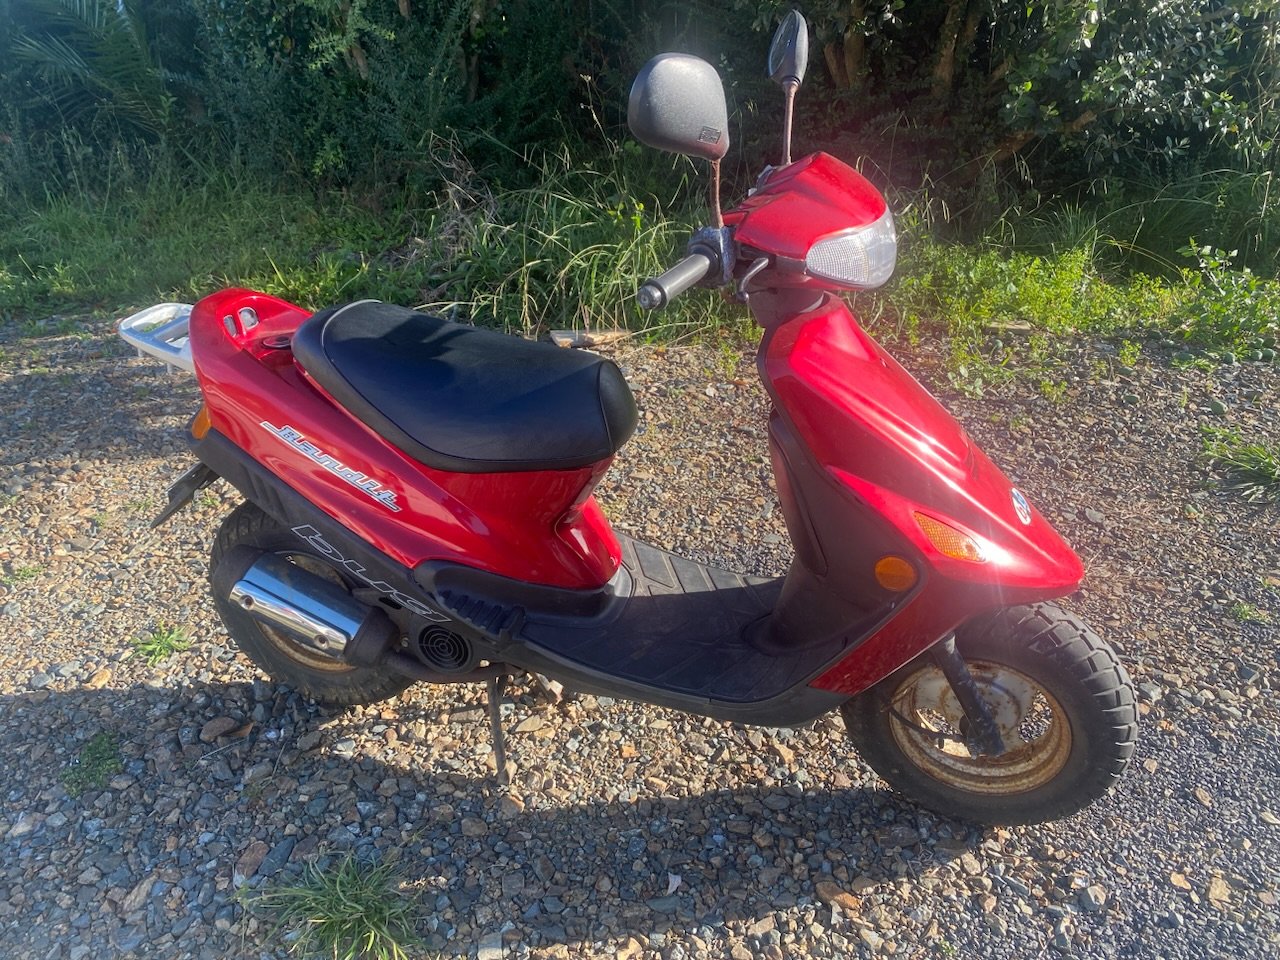
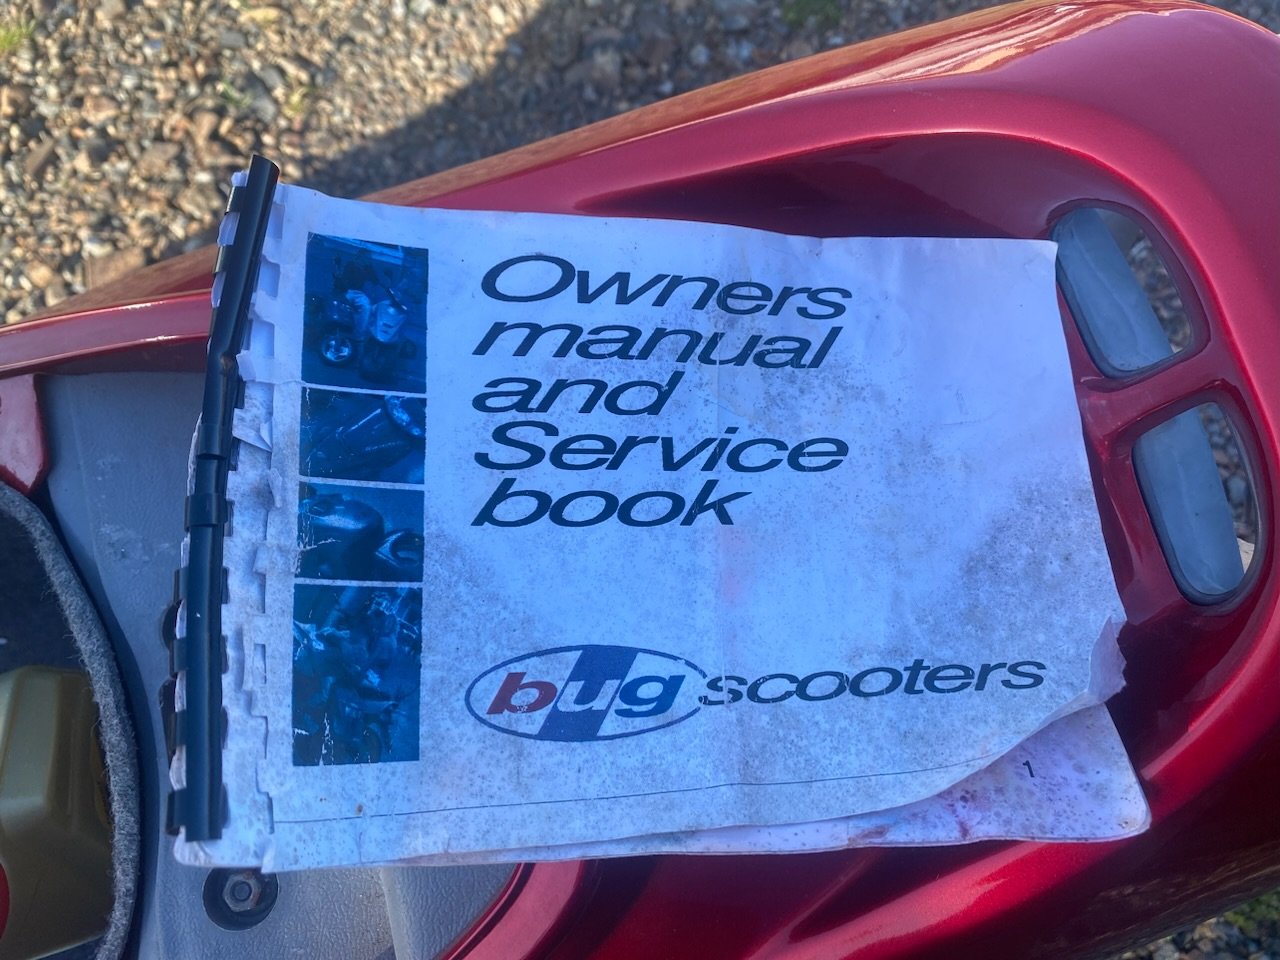
Got the front end together tonight.. probably hard to see what it looks like, but I’m happy so far.. everything is cleaning up good. then for something different, I picked up a scooter for my son who is showing an interest in riding a bike.. figured he should see if he actually enjoys riding on something simple.. it’s a 2003 Bug Bandit.. never heard of them before. Top speed of about 50km/h downhill apparently. Love the smell of a two stroke.
3 points
-
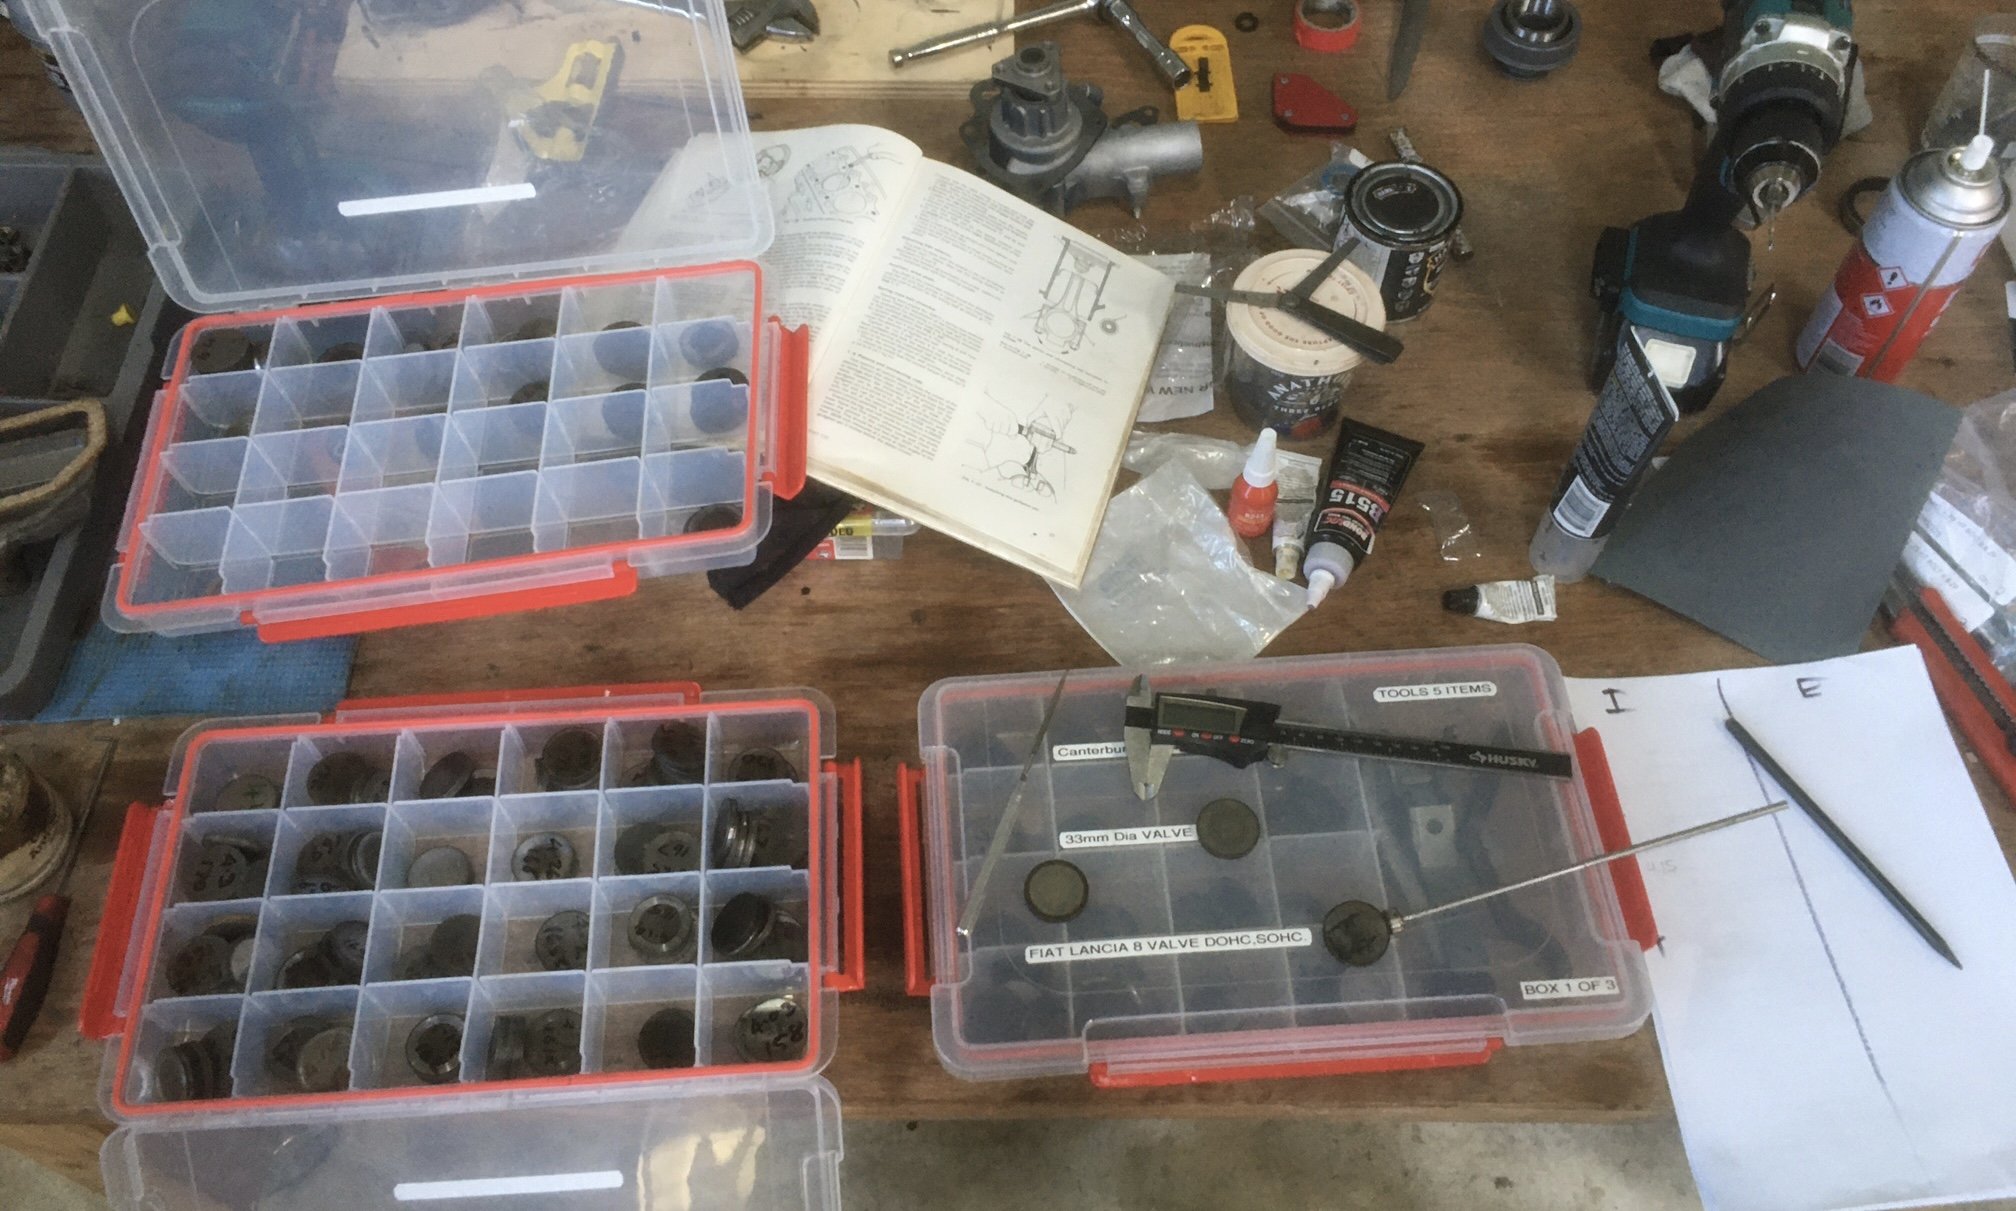
Shim time. A bit of trial and error since the initial clearances were so tight. I ended up having to do most of them twice.
2 points
-
Oh, and 2T nangs, because company policy.2 points
-
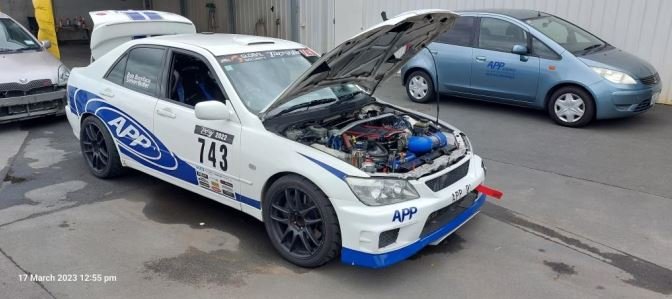
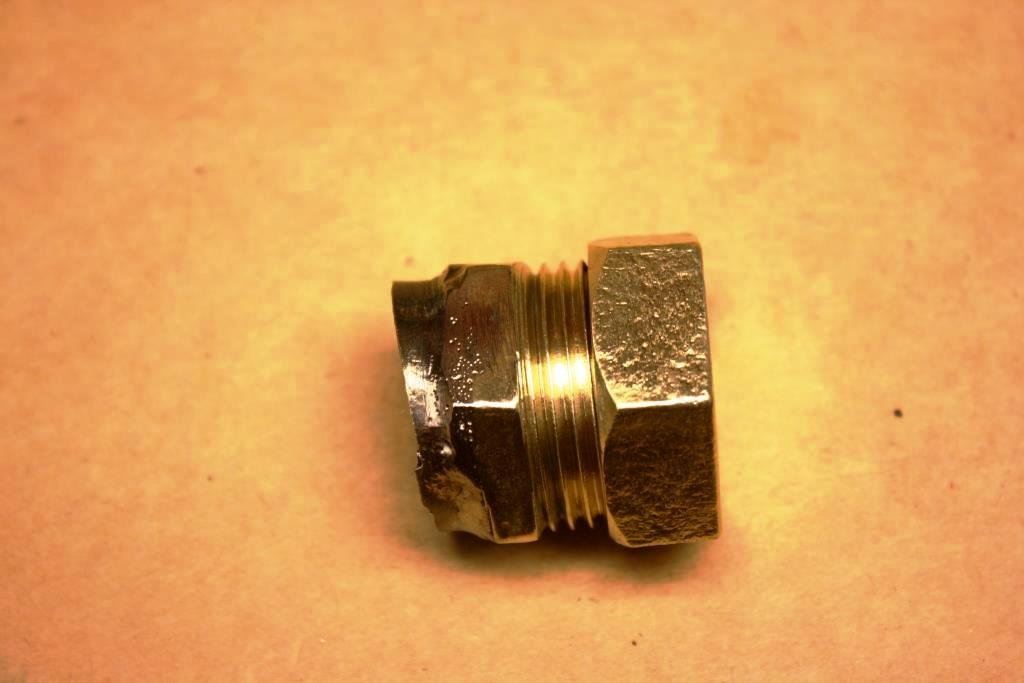
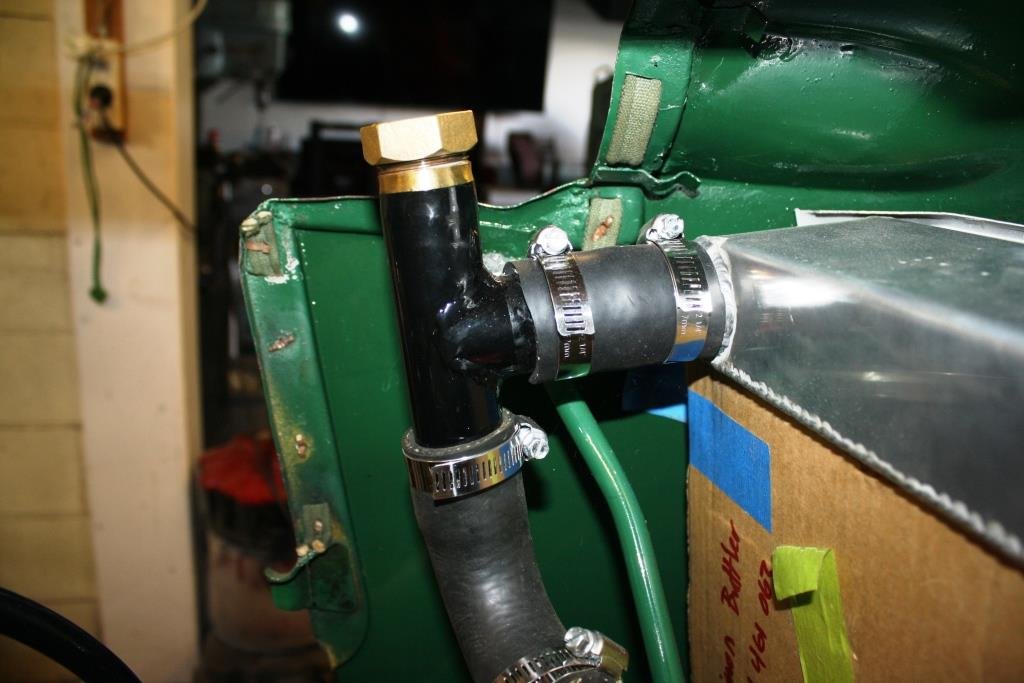
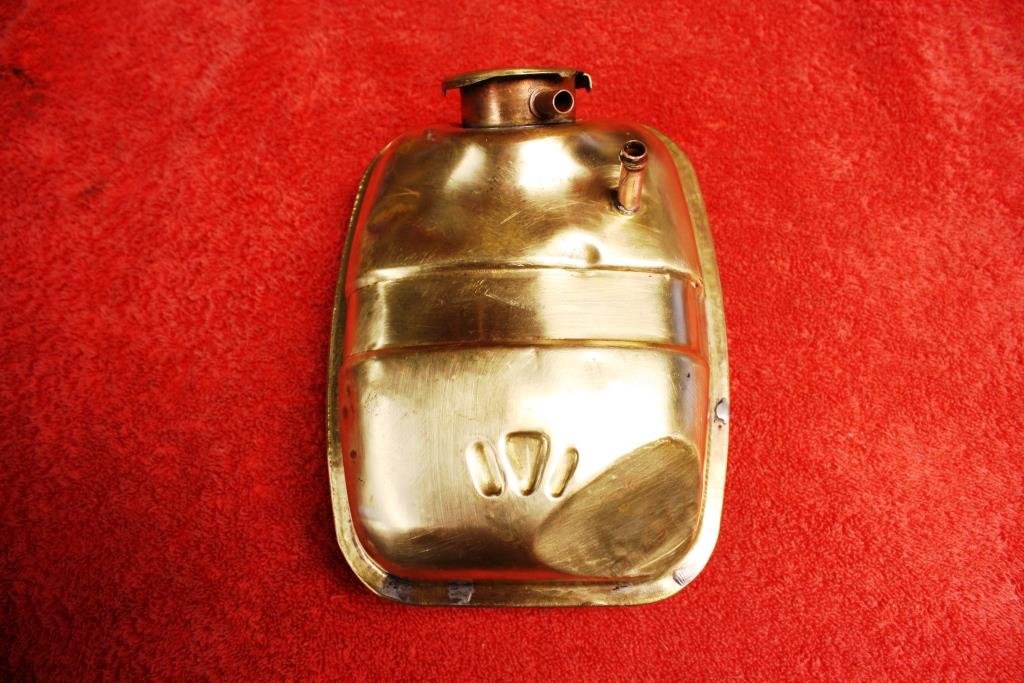
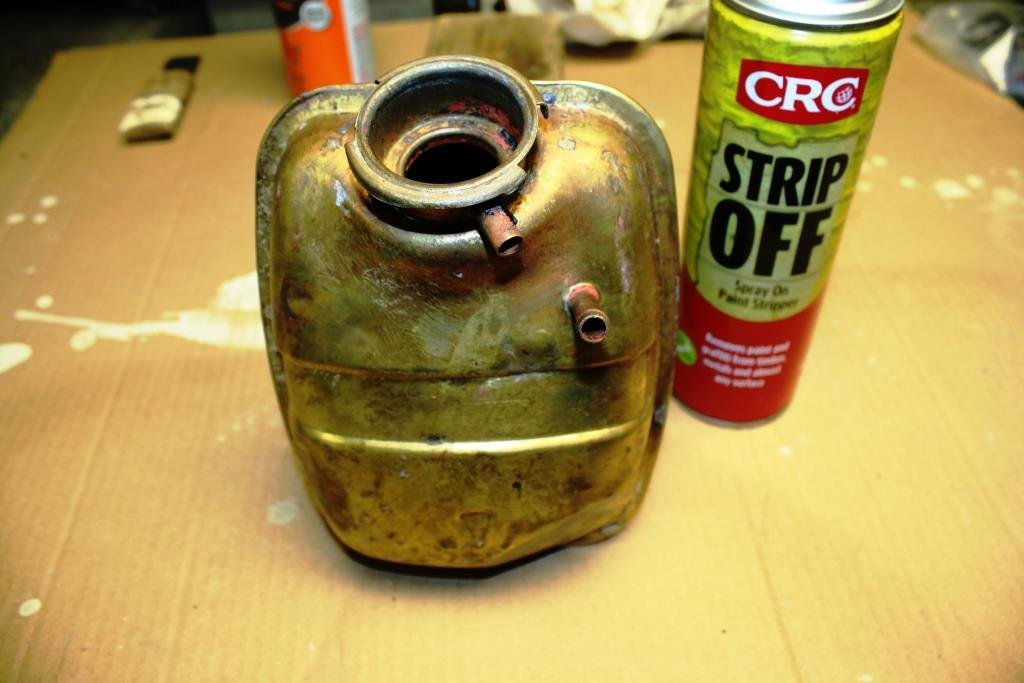
So I took a couple of weeks off for some R&R. Jumped the ditch to help my brother run a Grady White 326 from Mooloolaba to Bundarberg for 5 days of rum and fishing with some Aussie mates. 30 Km off the coast, no land in sight, 35 Knots with 700 hp hanging off the back of the boat. https://youtu.be/M81qba9EON0 Returned home to run the race car in the Targa Bambina, jeez life can be tough! Back home and back to reality. Time for some radiator plumbing. I found an interesting old brass pipe fitting… Cleaned it up a bit…. Did some pipe notching in the mill…. Some Ezyflo for the brass and this will be the radiator filler point. Threw on a bit of paint…. Looks OK to me… Hunted through Supercheap’s collection of radiator hosed for bends I could use… I bought an adaptor with a fitting that takes an electric fan sender and used it to make up a bottom hose with two 90 deg. bends. Final challenge was what to use for a header tank? I had this old tin tank that had been painted with many layers of paint over many years. I forgot to take a before picture but after a can of CRC paint stripper, ½ a bottle of Barossa Valley Pinot Noir, and an evening of elbow grease this really cool brass tank emerged. Talk about bloody stoked!
2 points
-
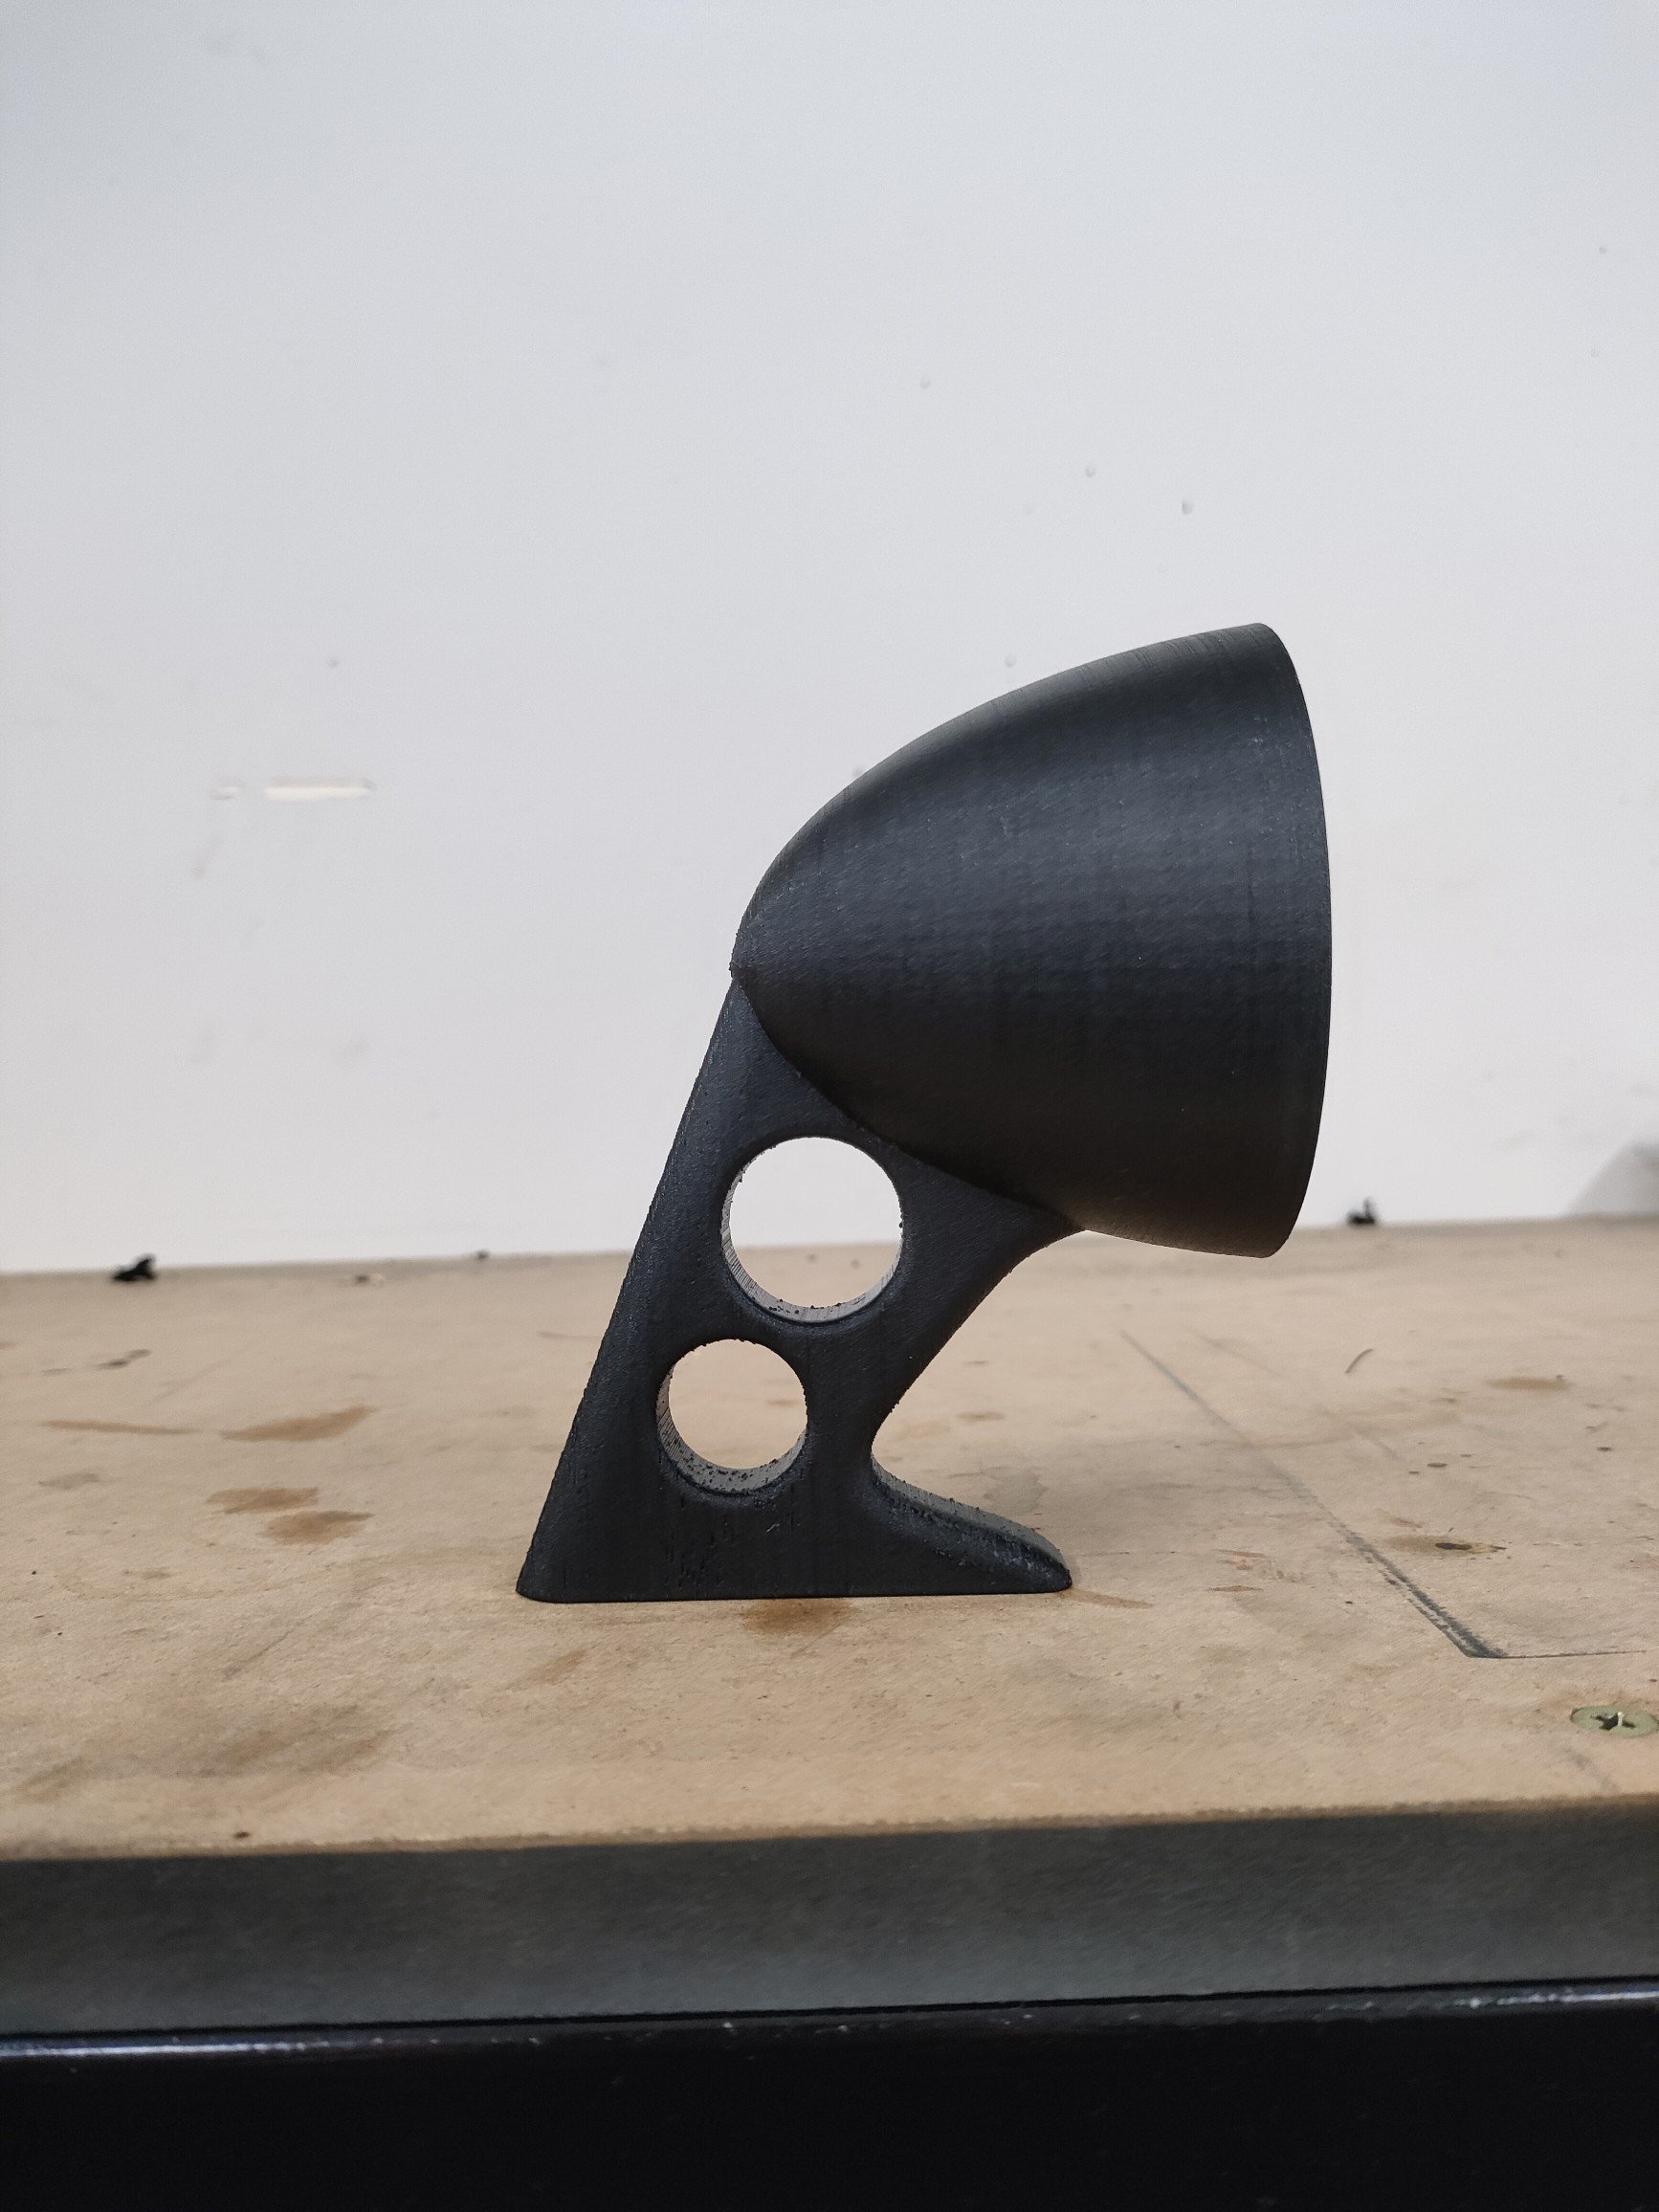
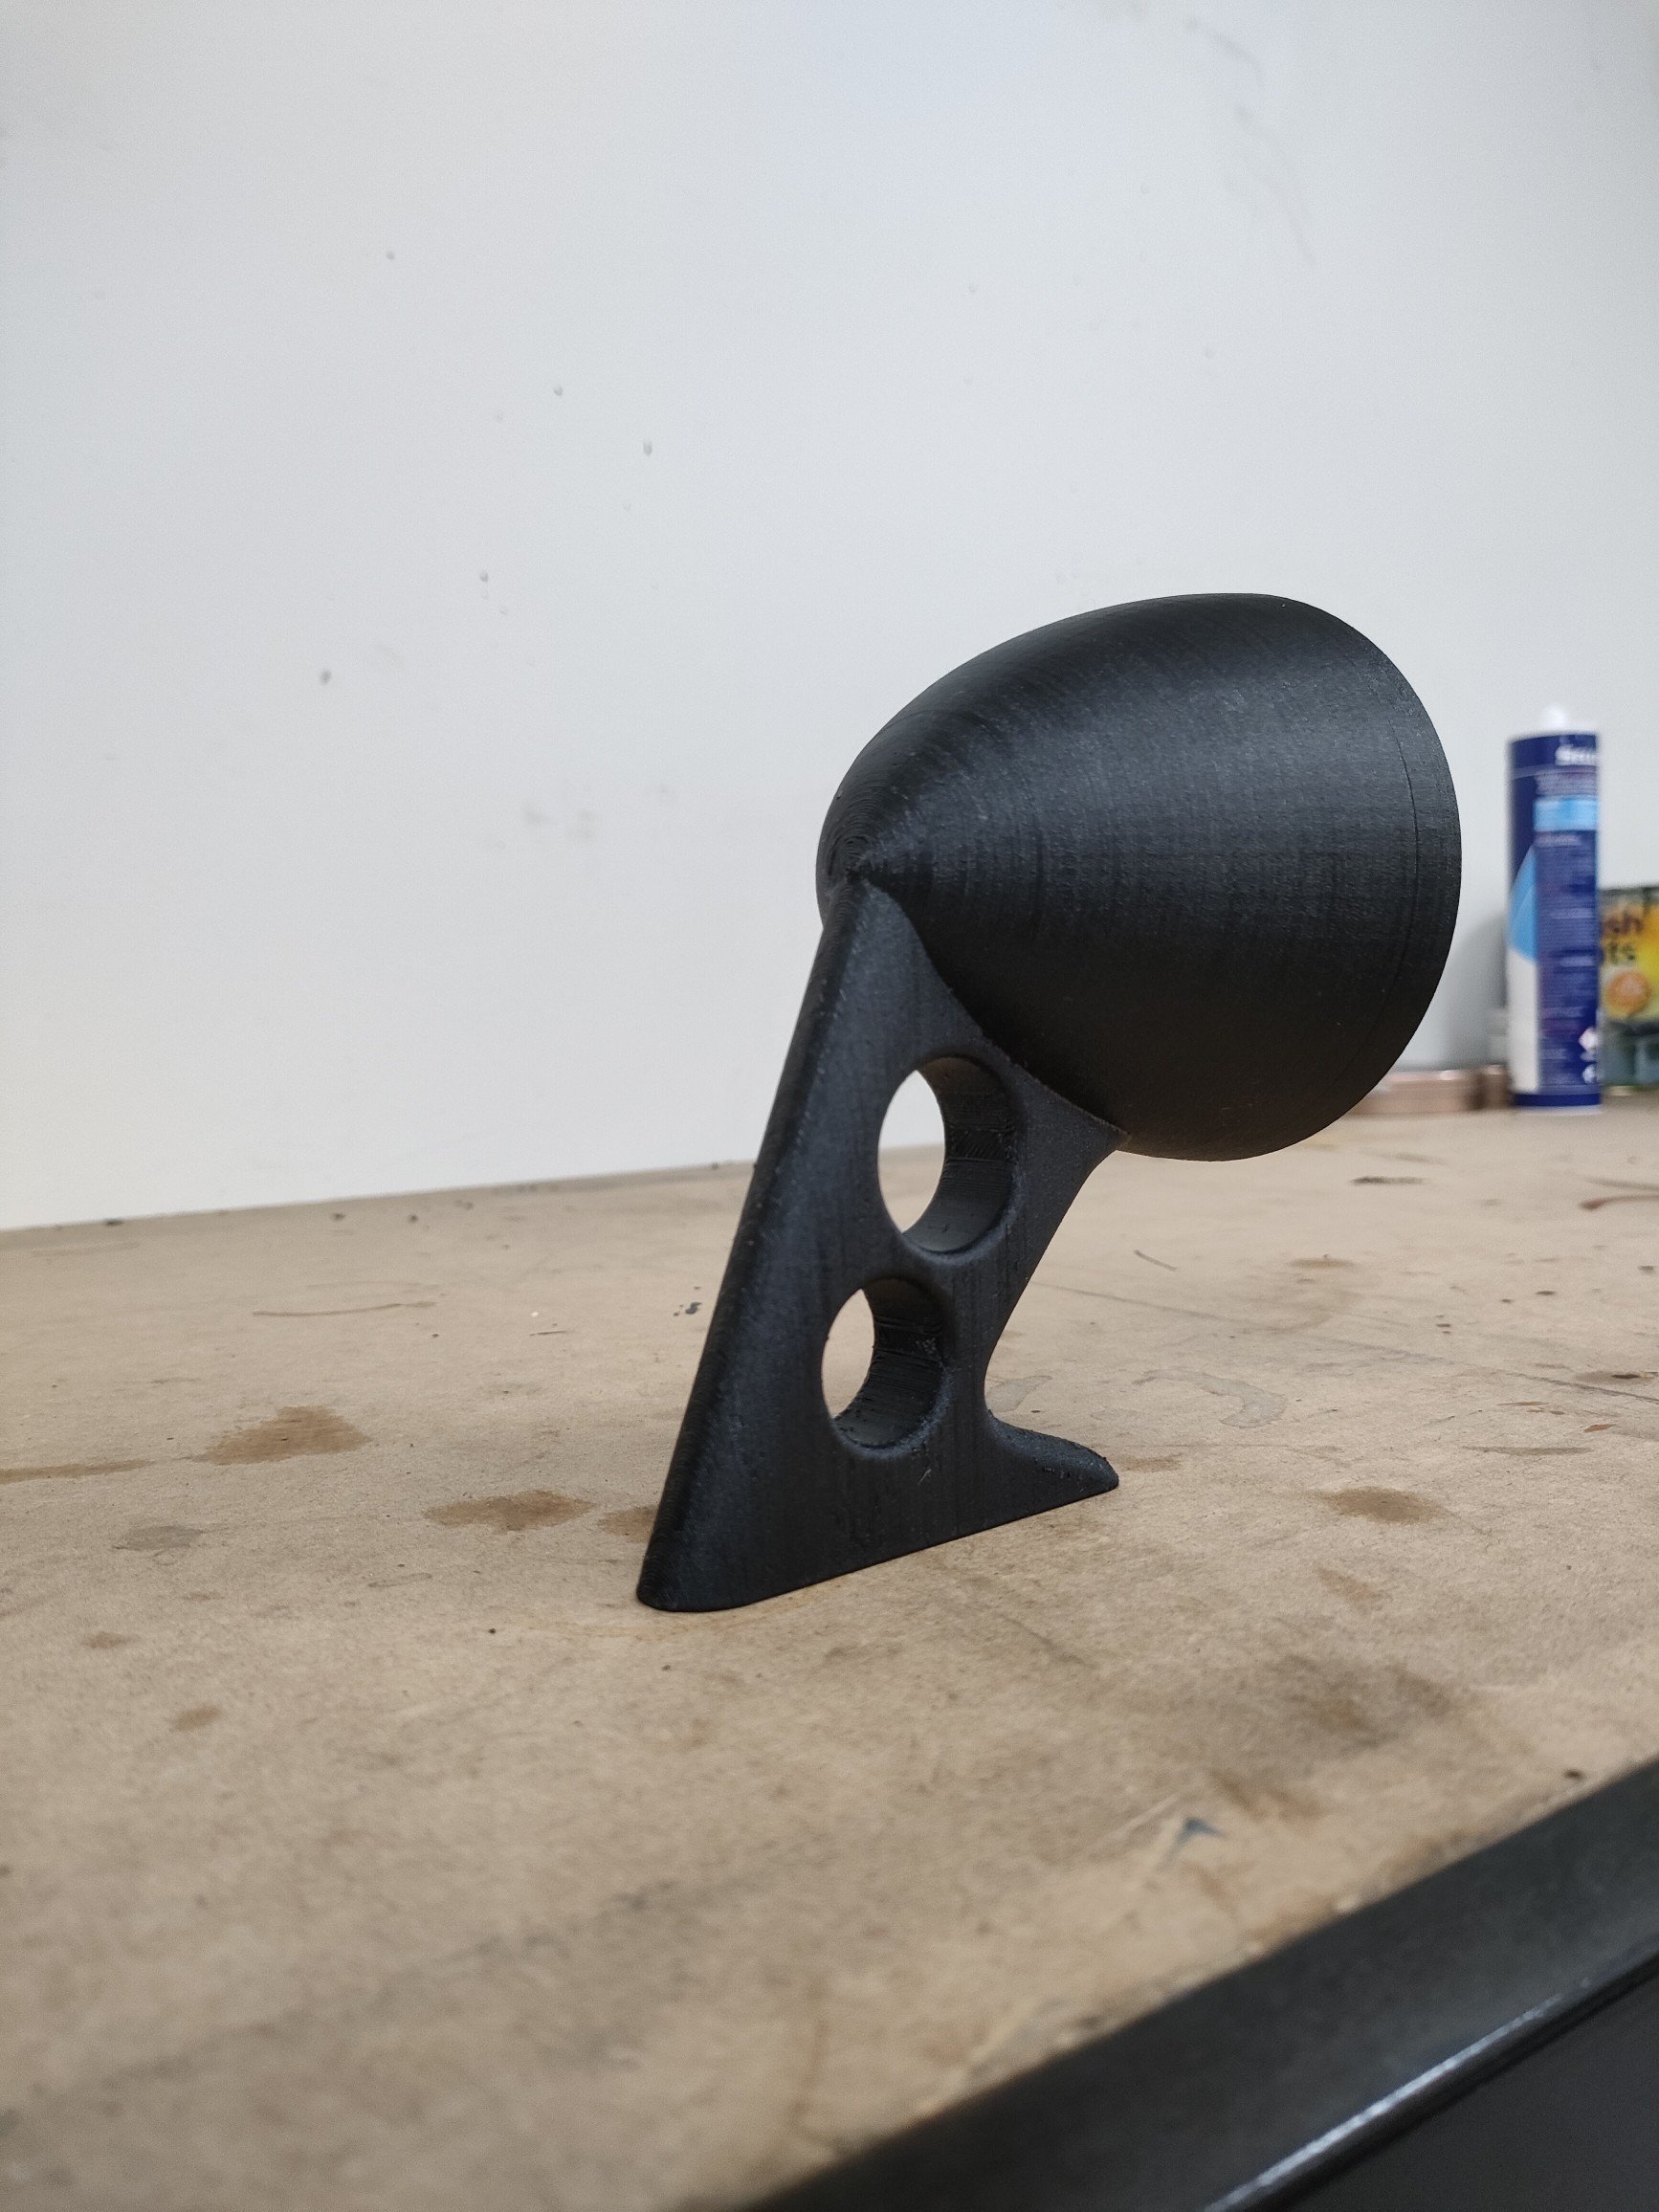
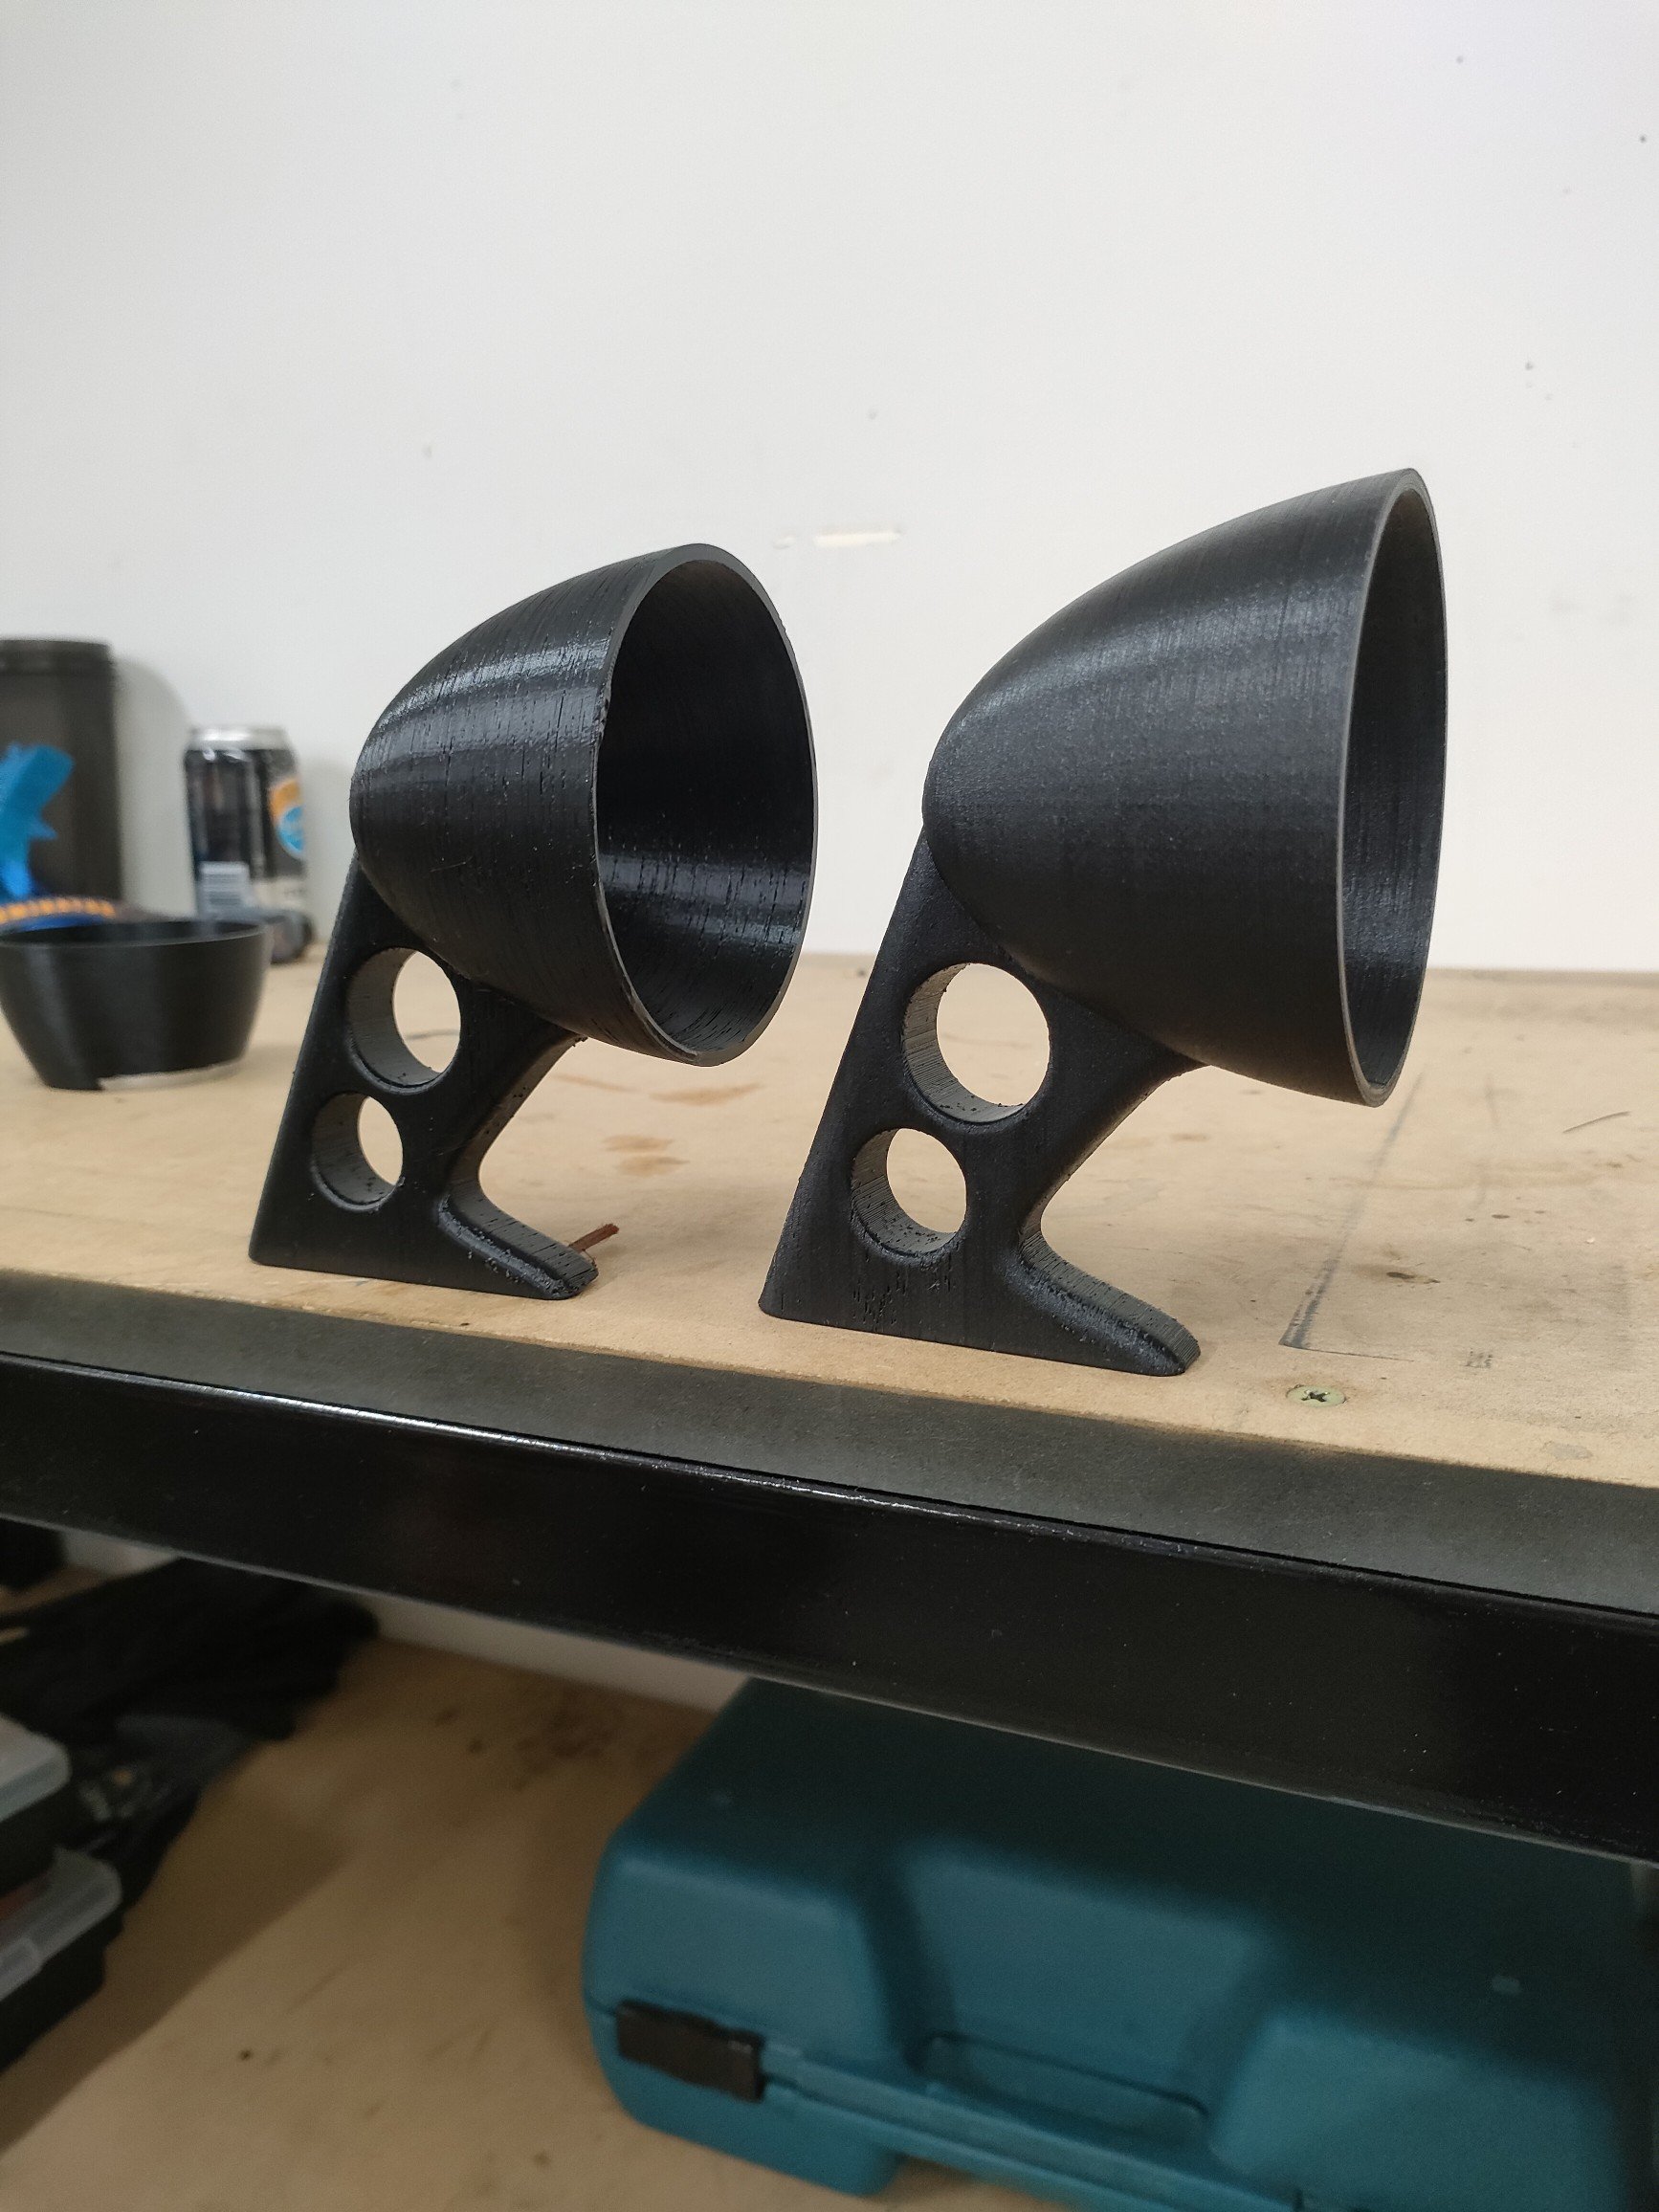
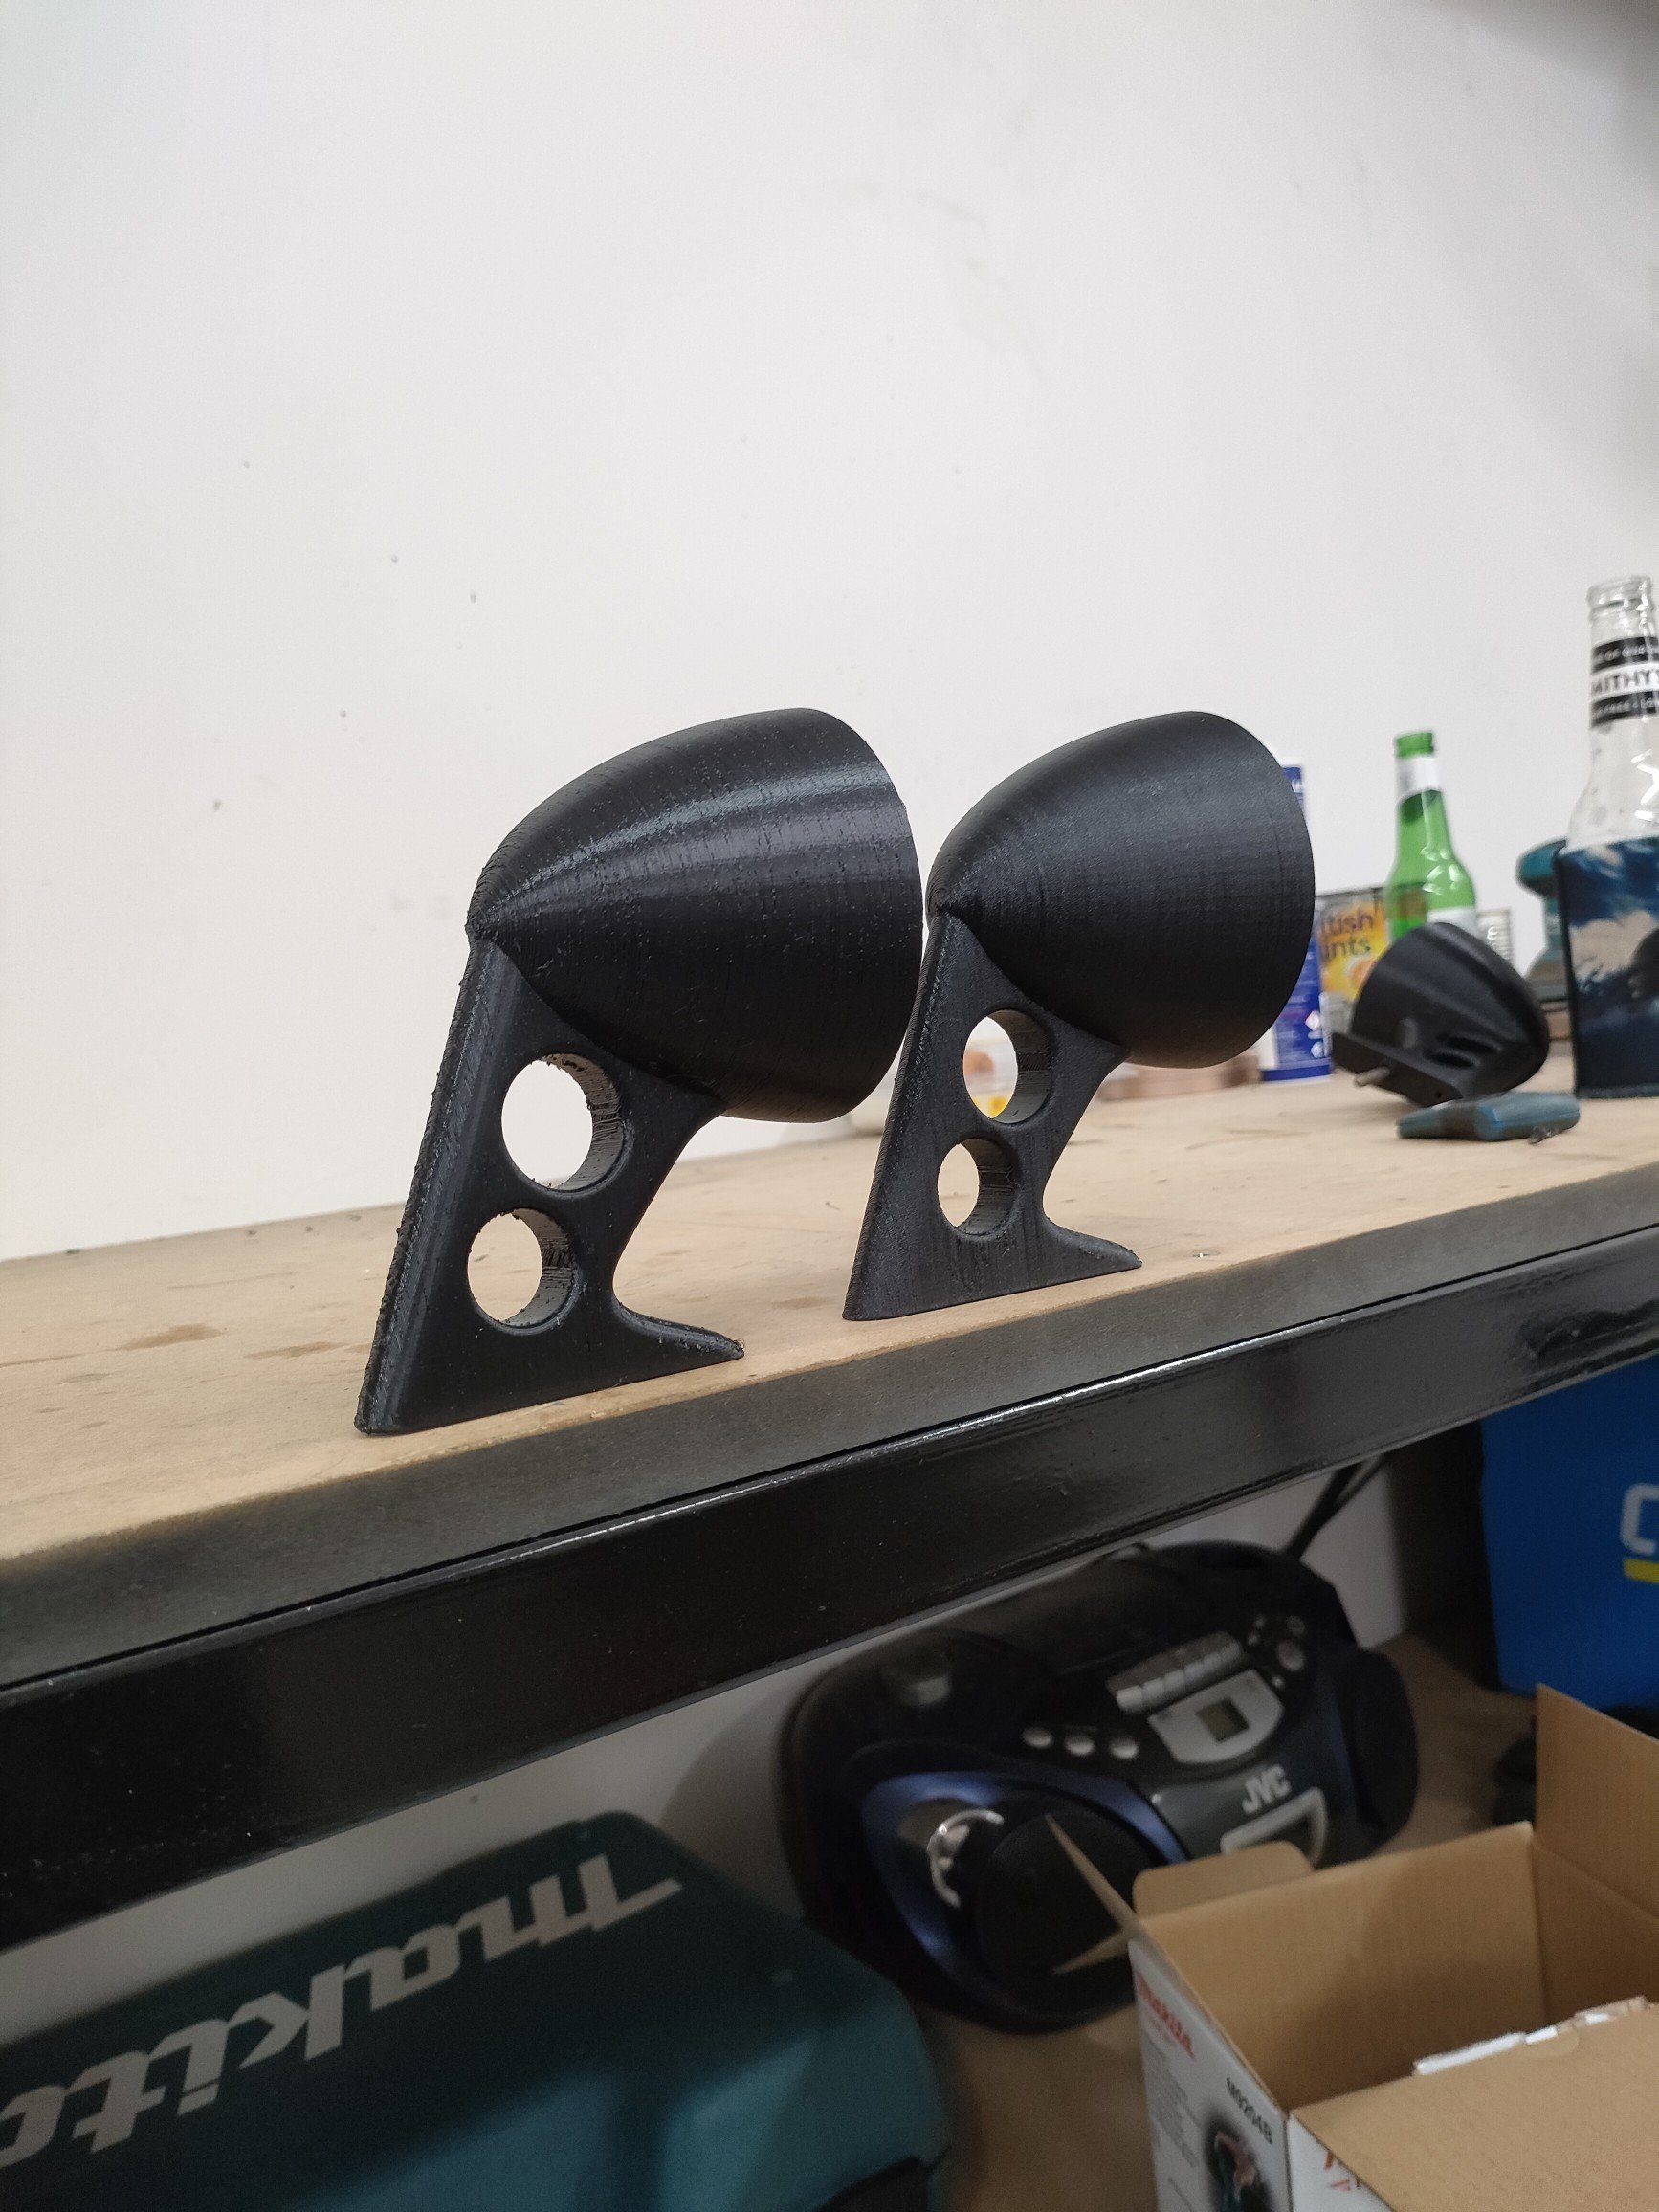
Printed some mirrors up. Pretty happy with how they turned out. Just need to design the mirror holder piece now. Will sand these back and paint them eventually. Probably stay black, possibly grey.
2 points
-
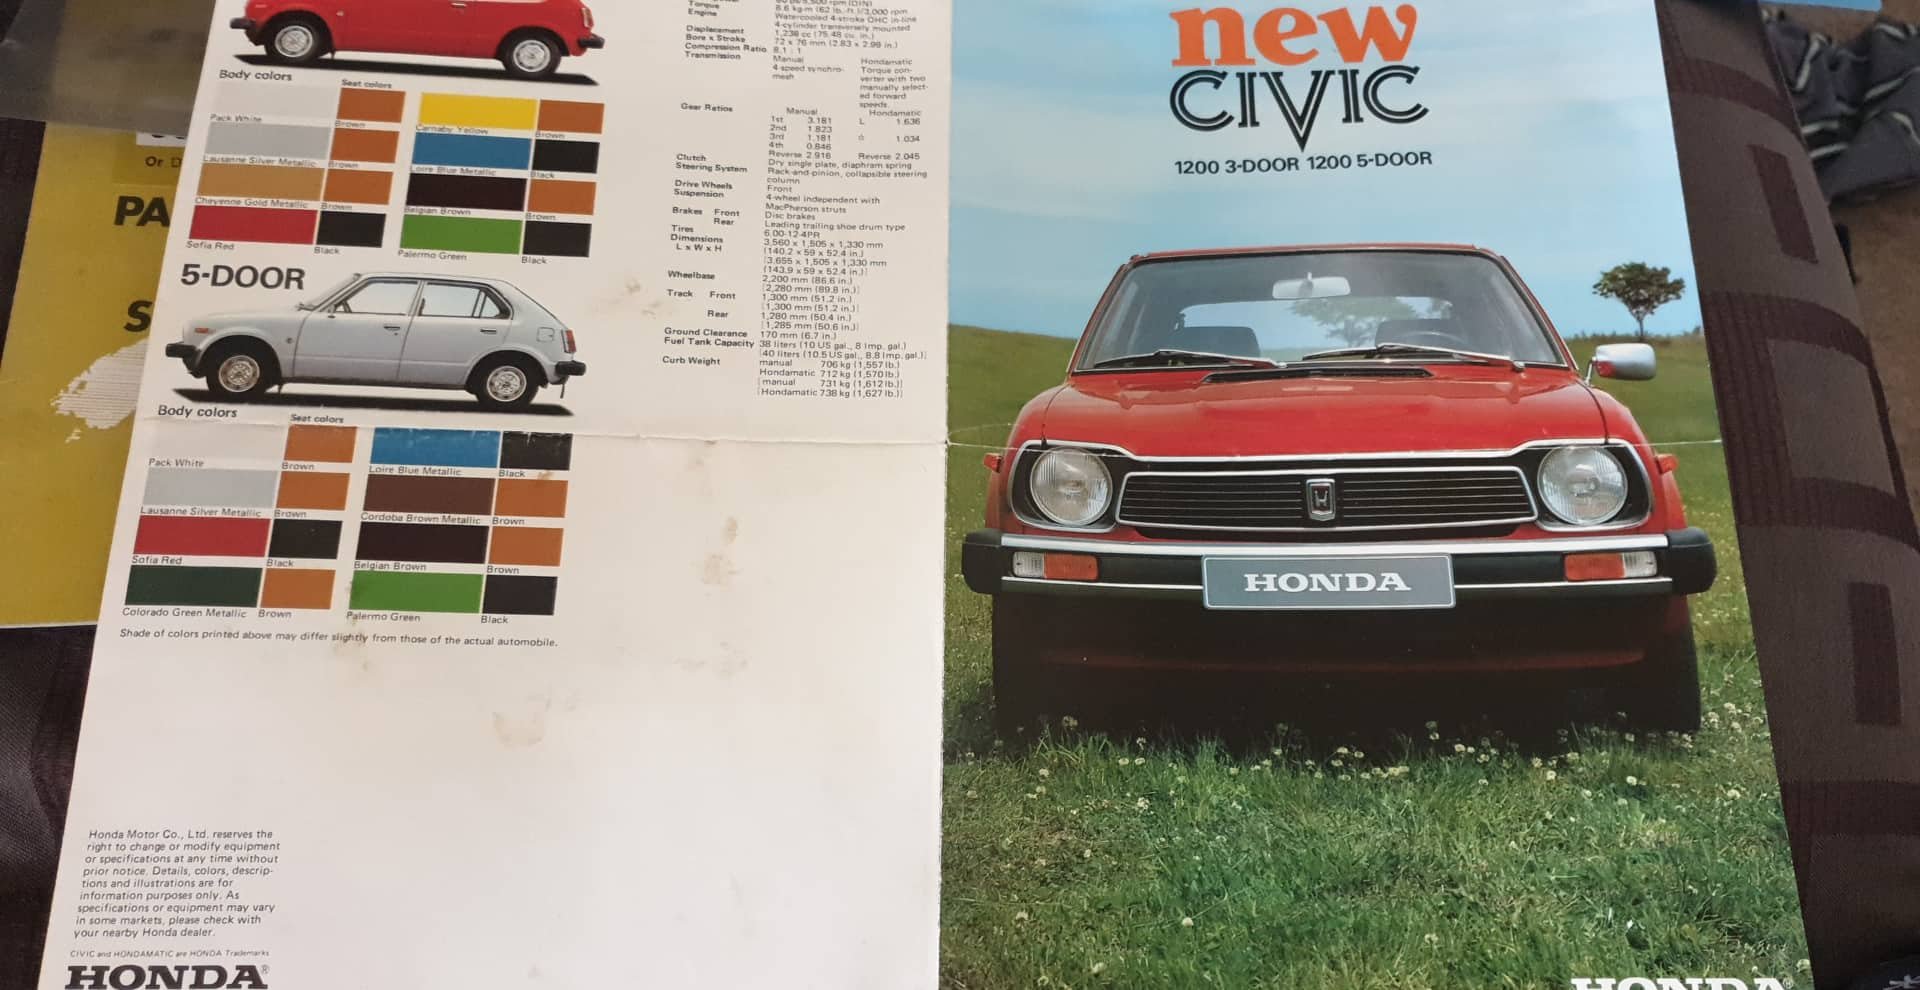
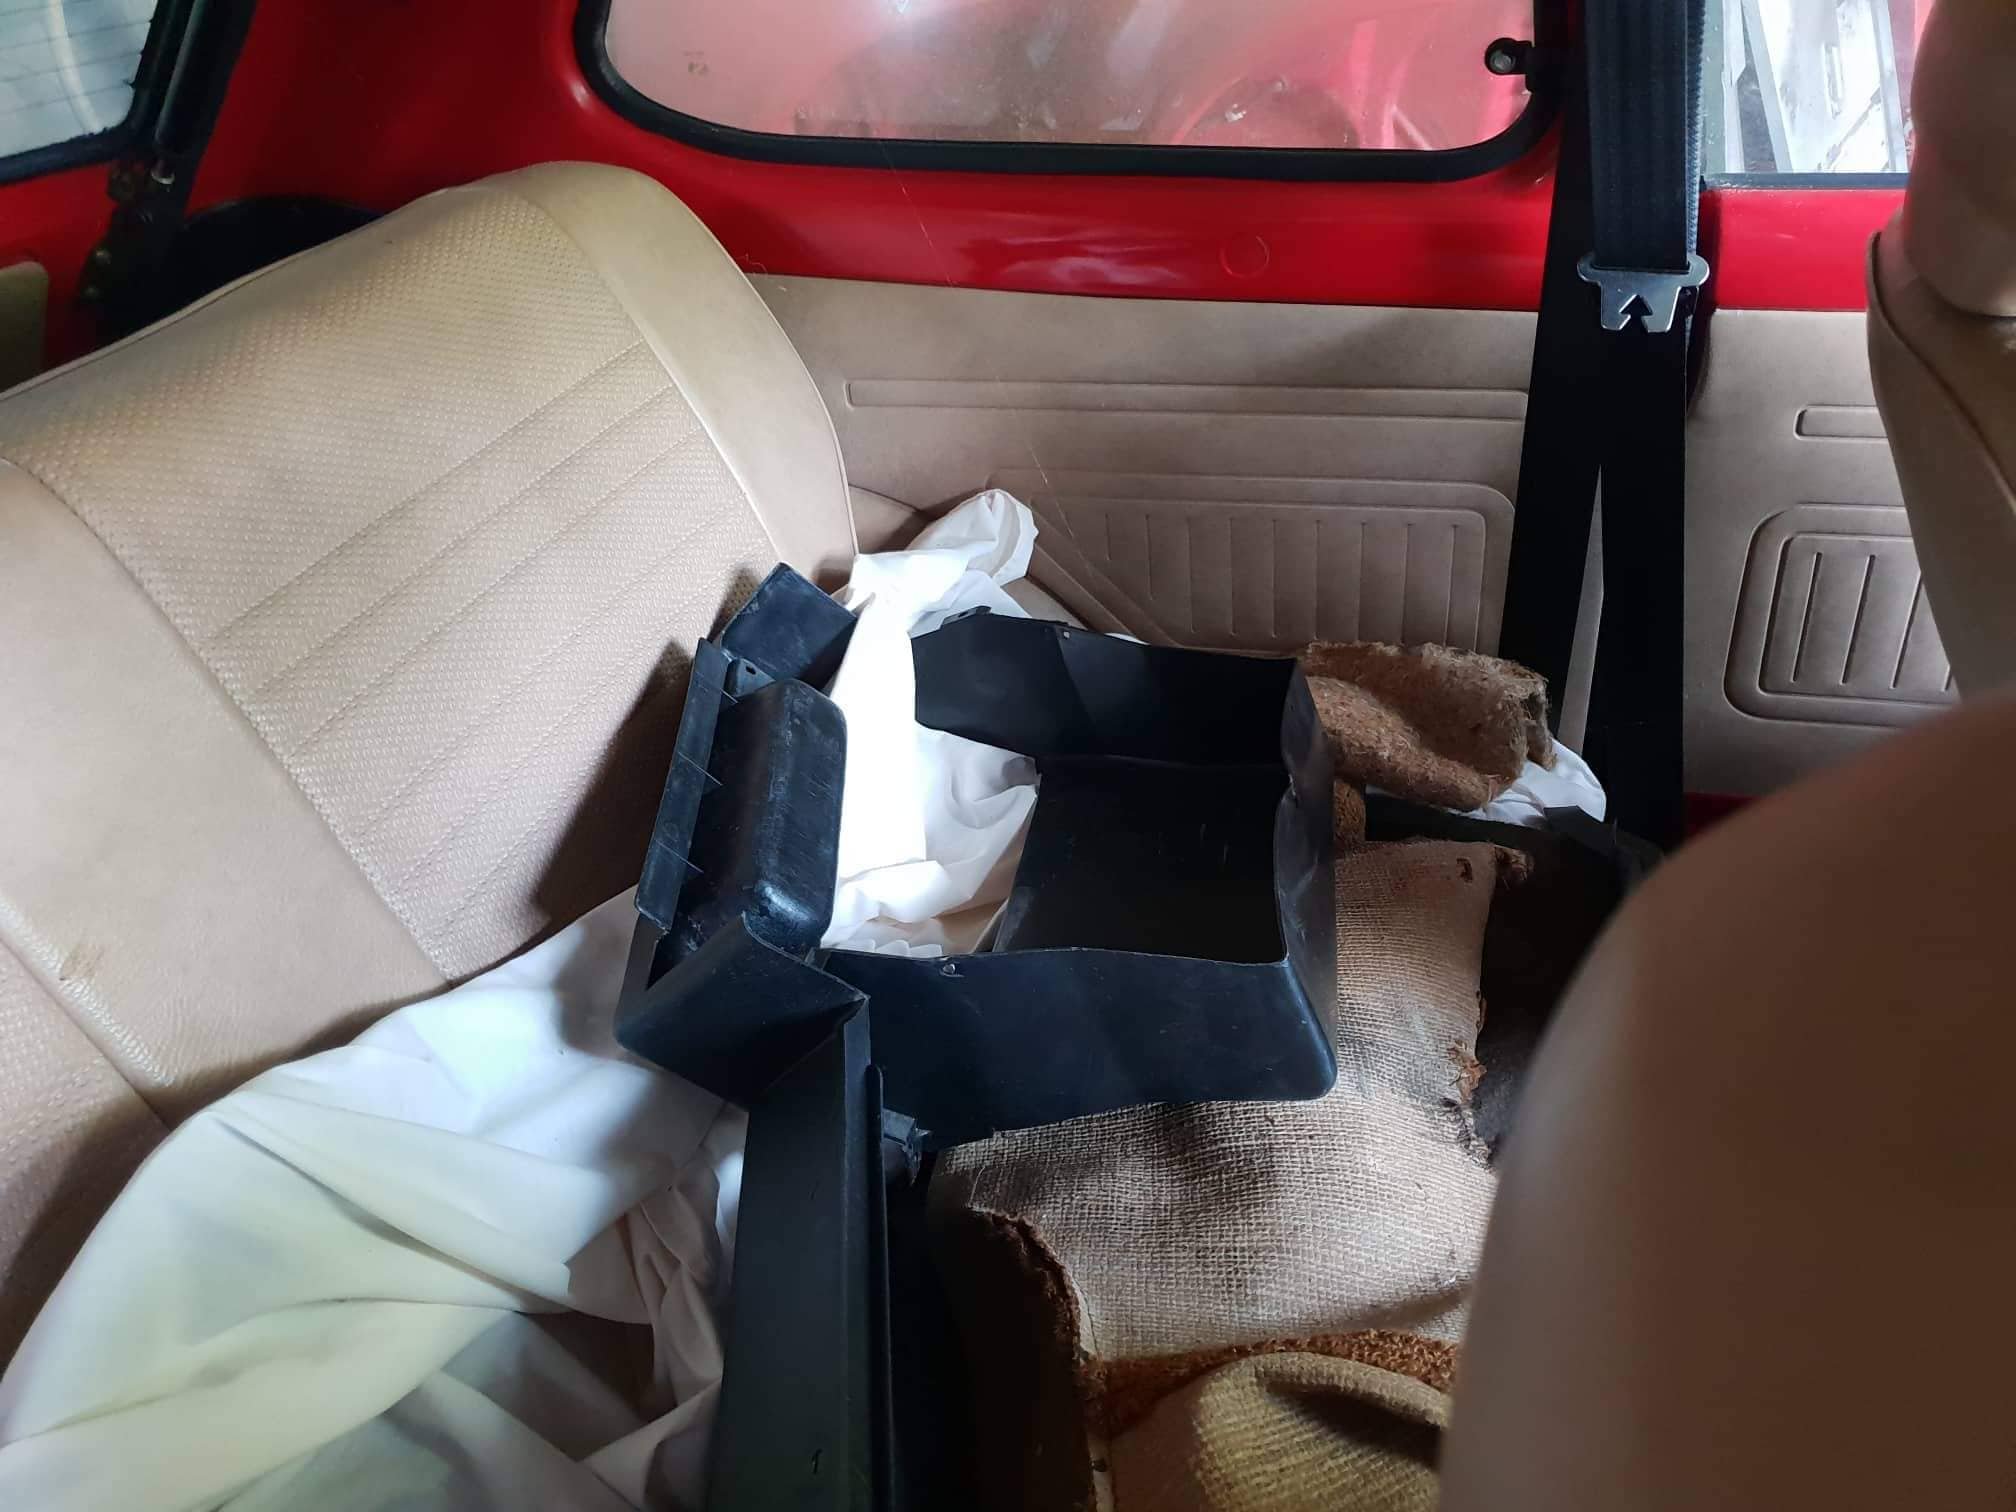
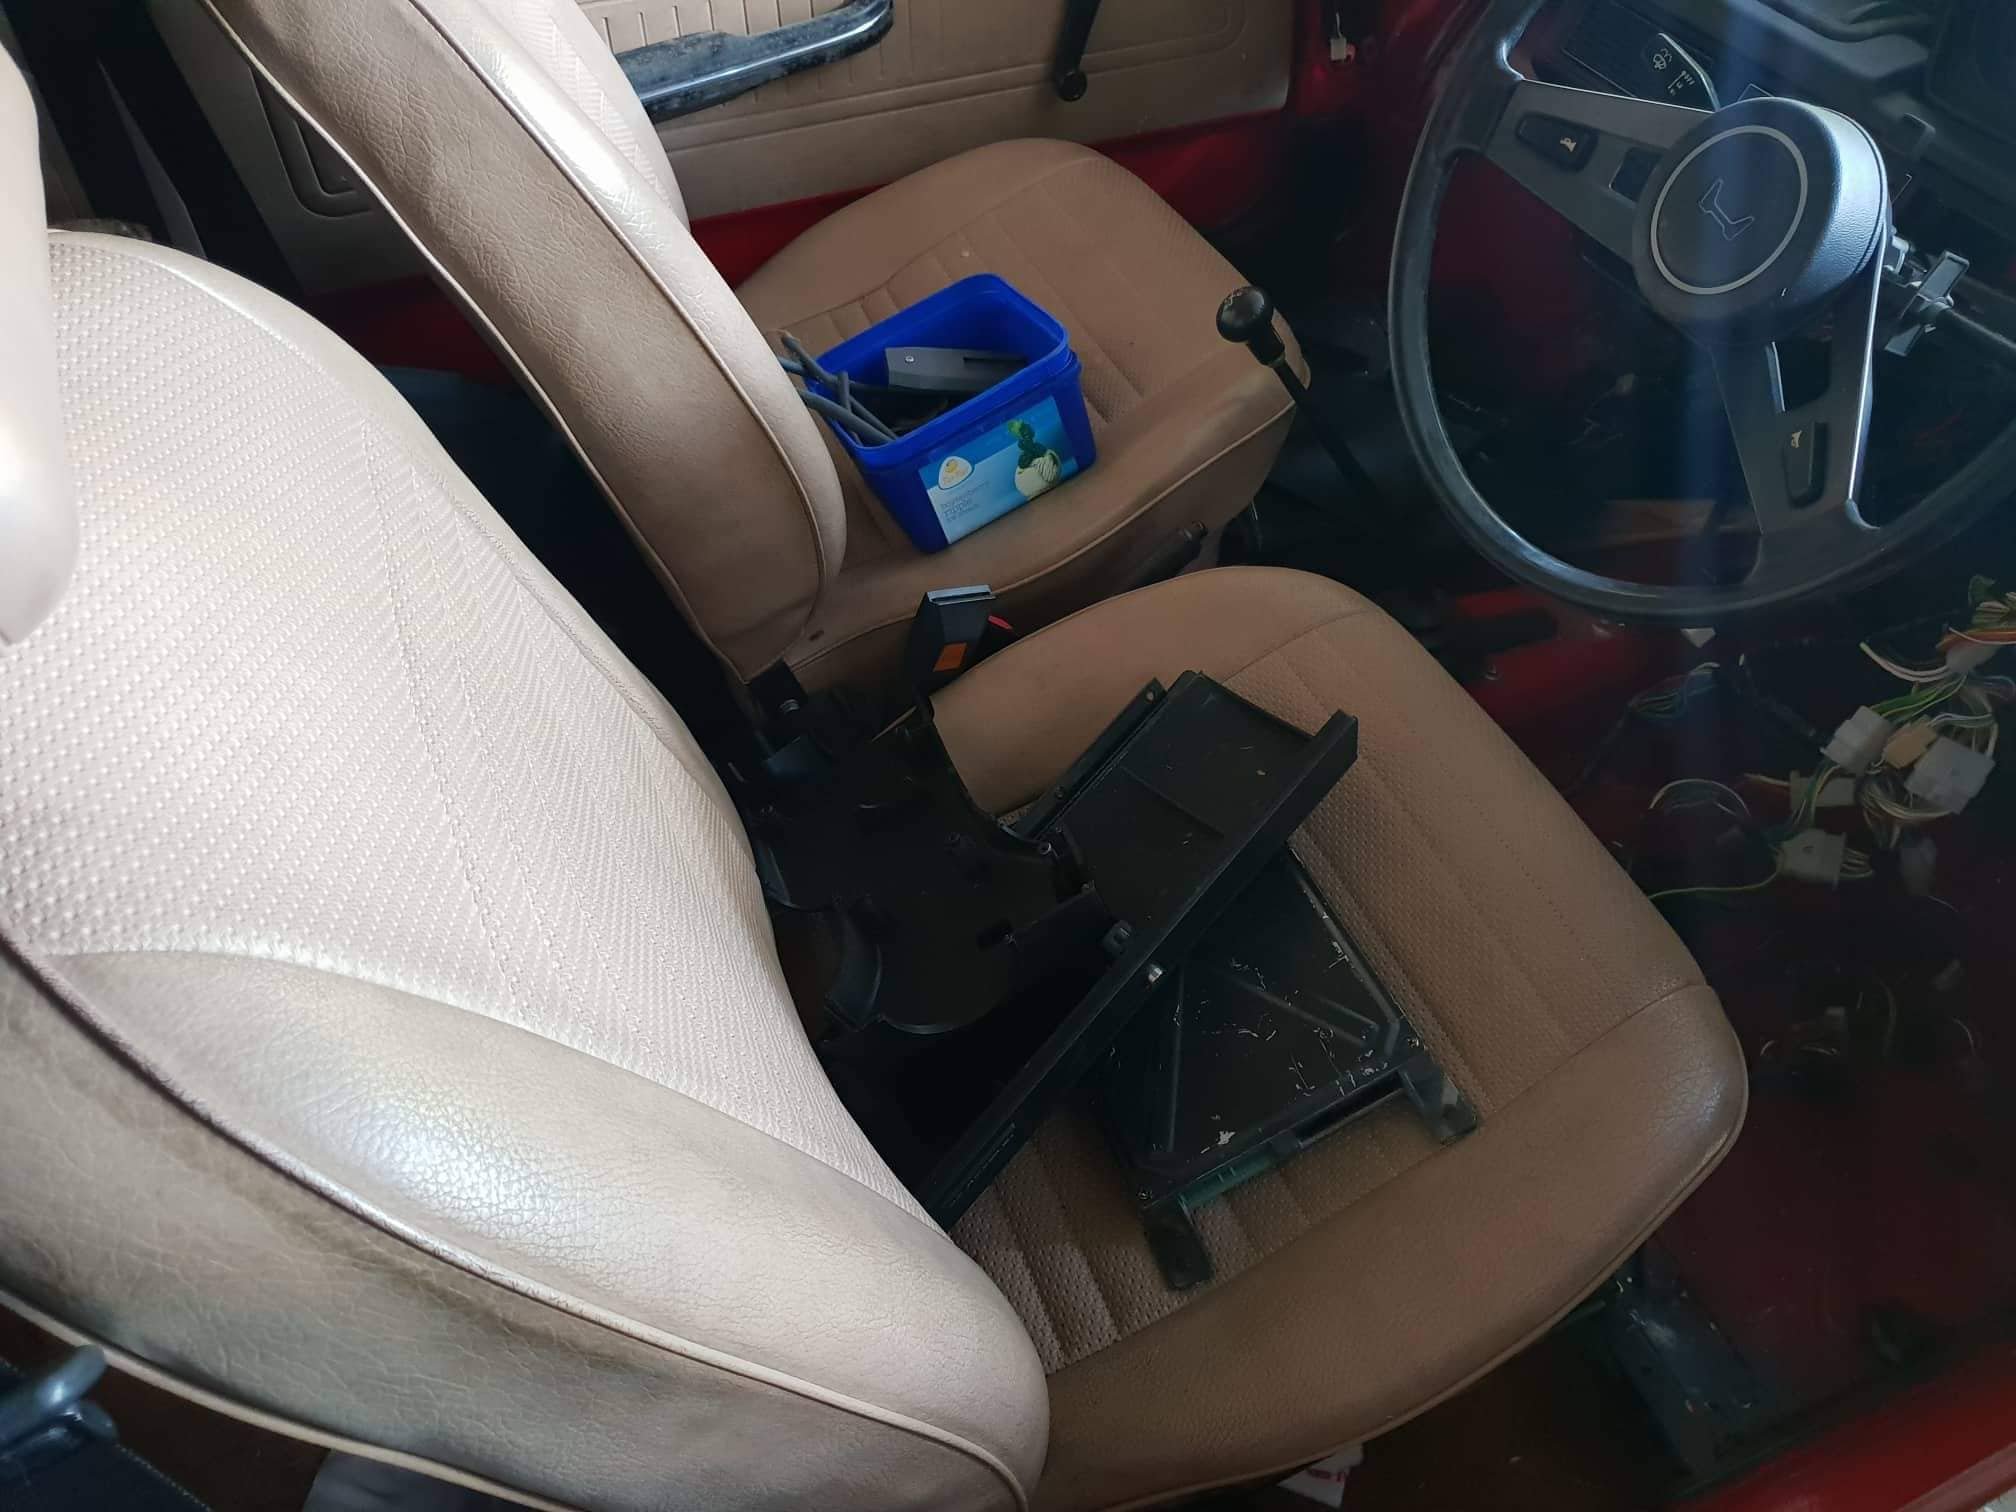
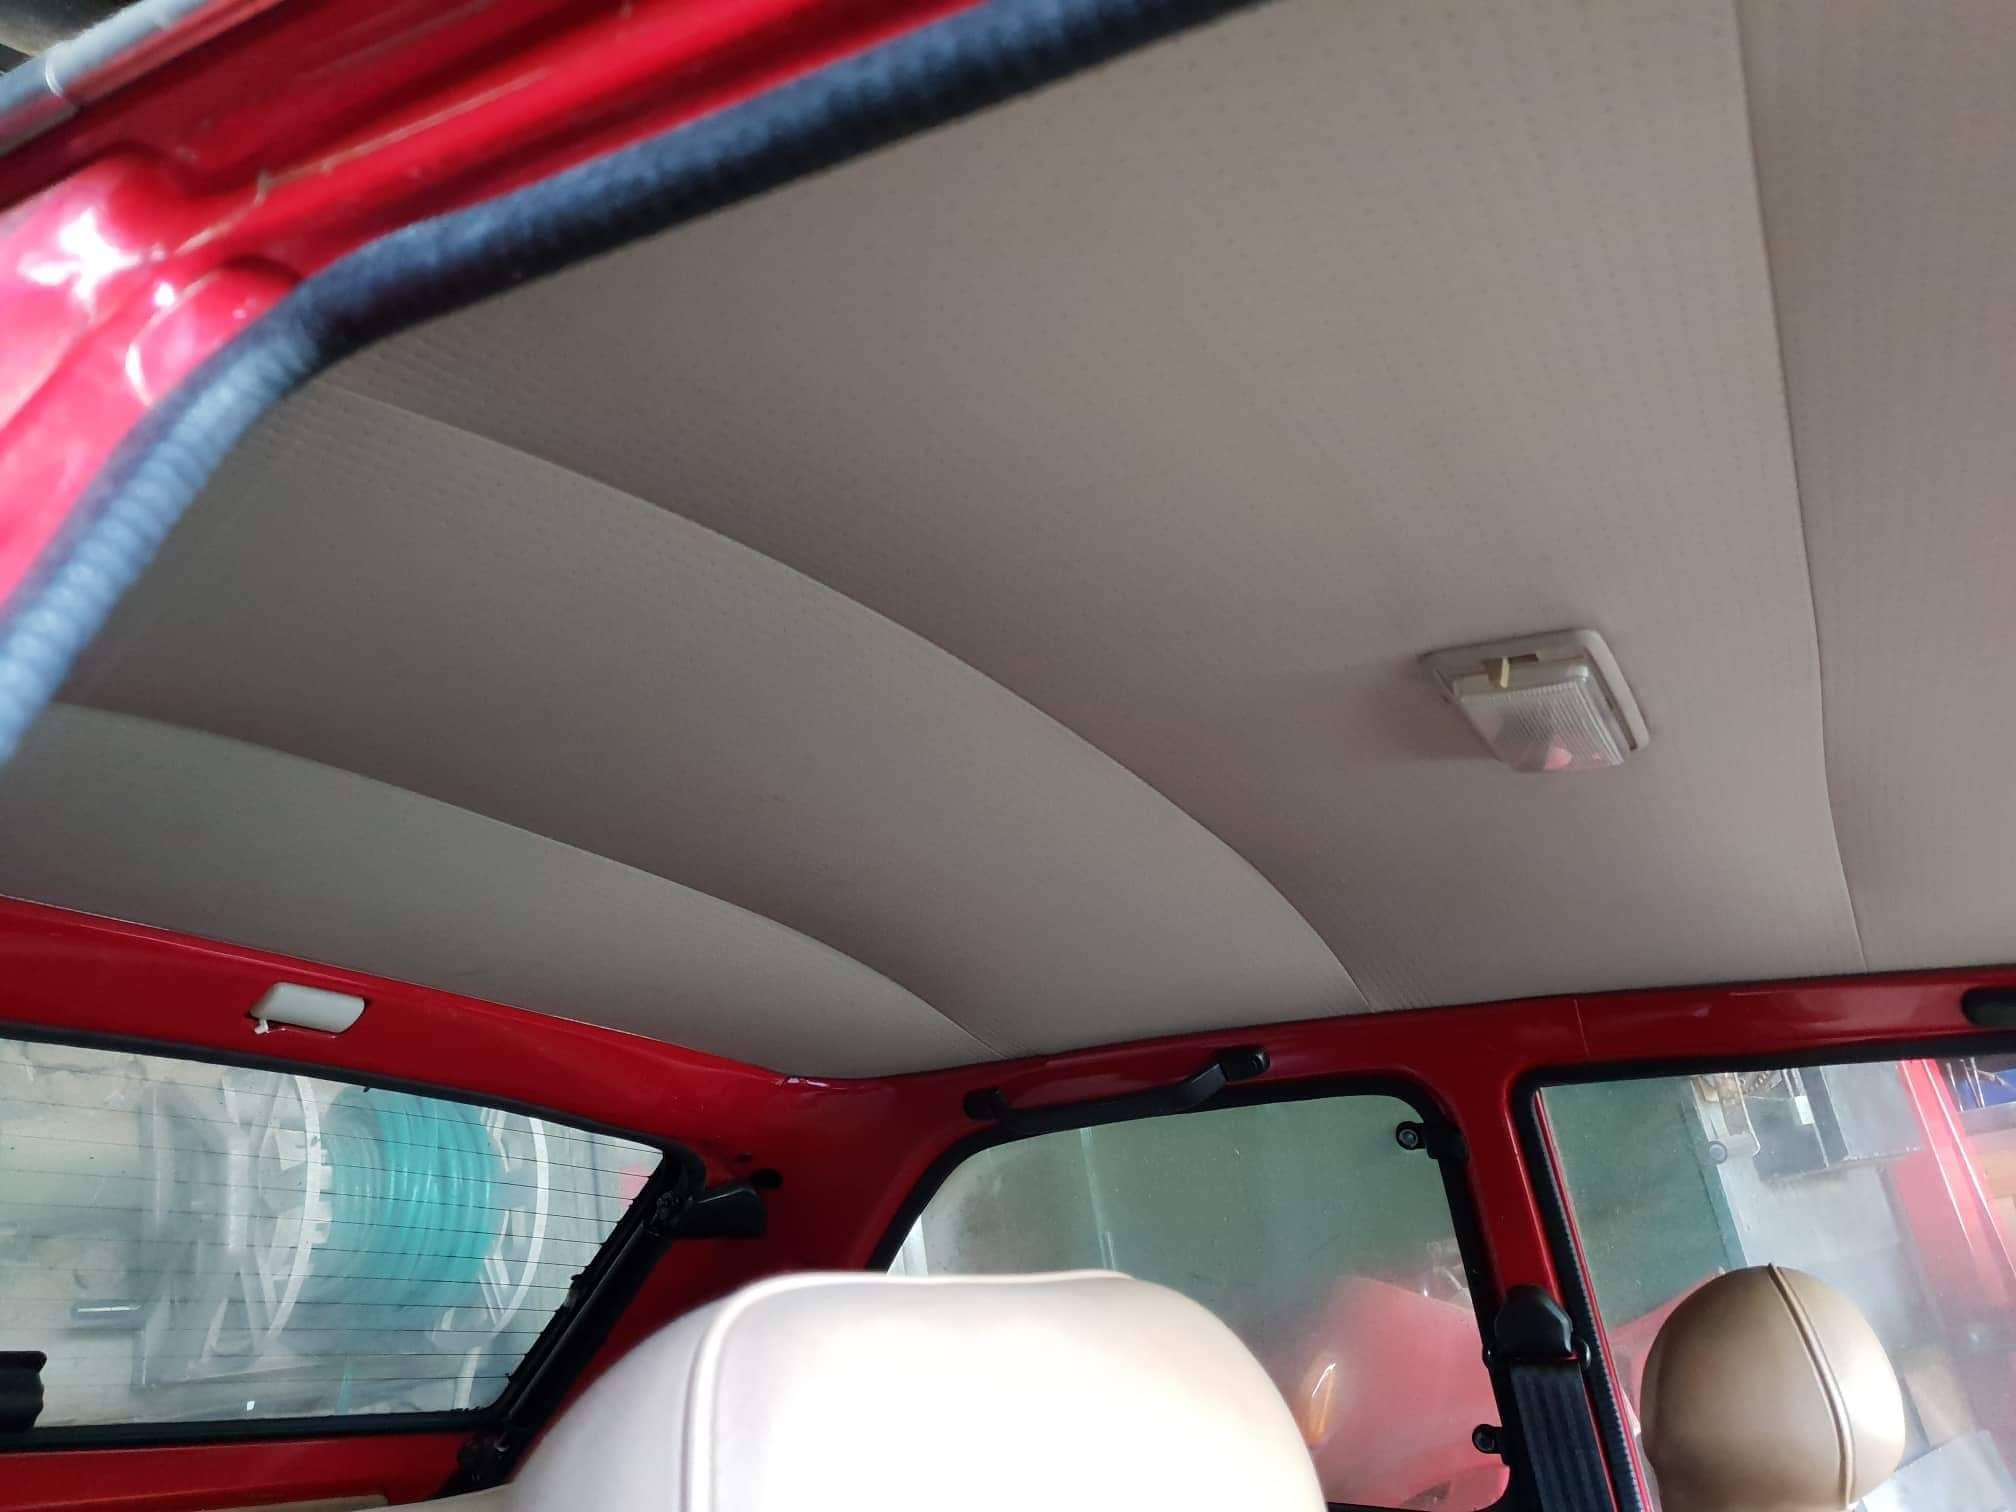
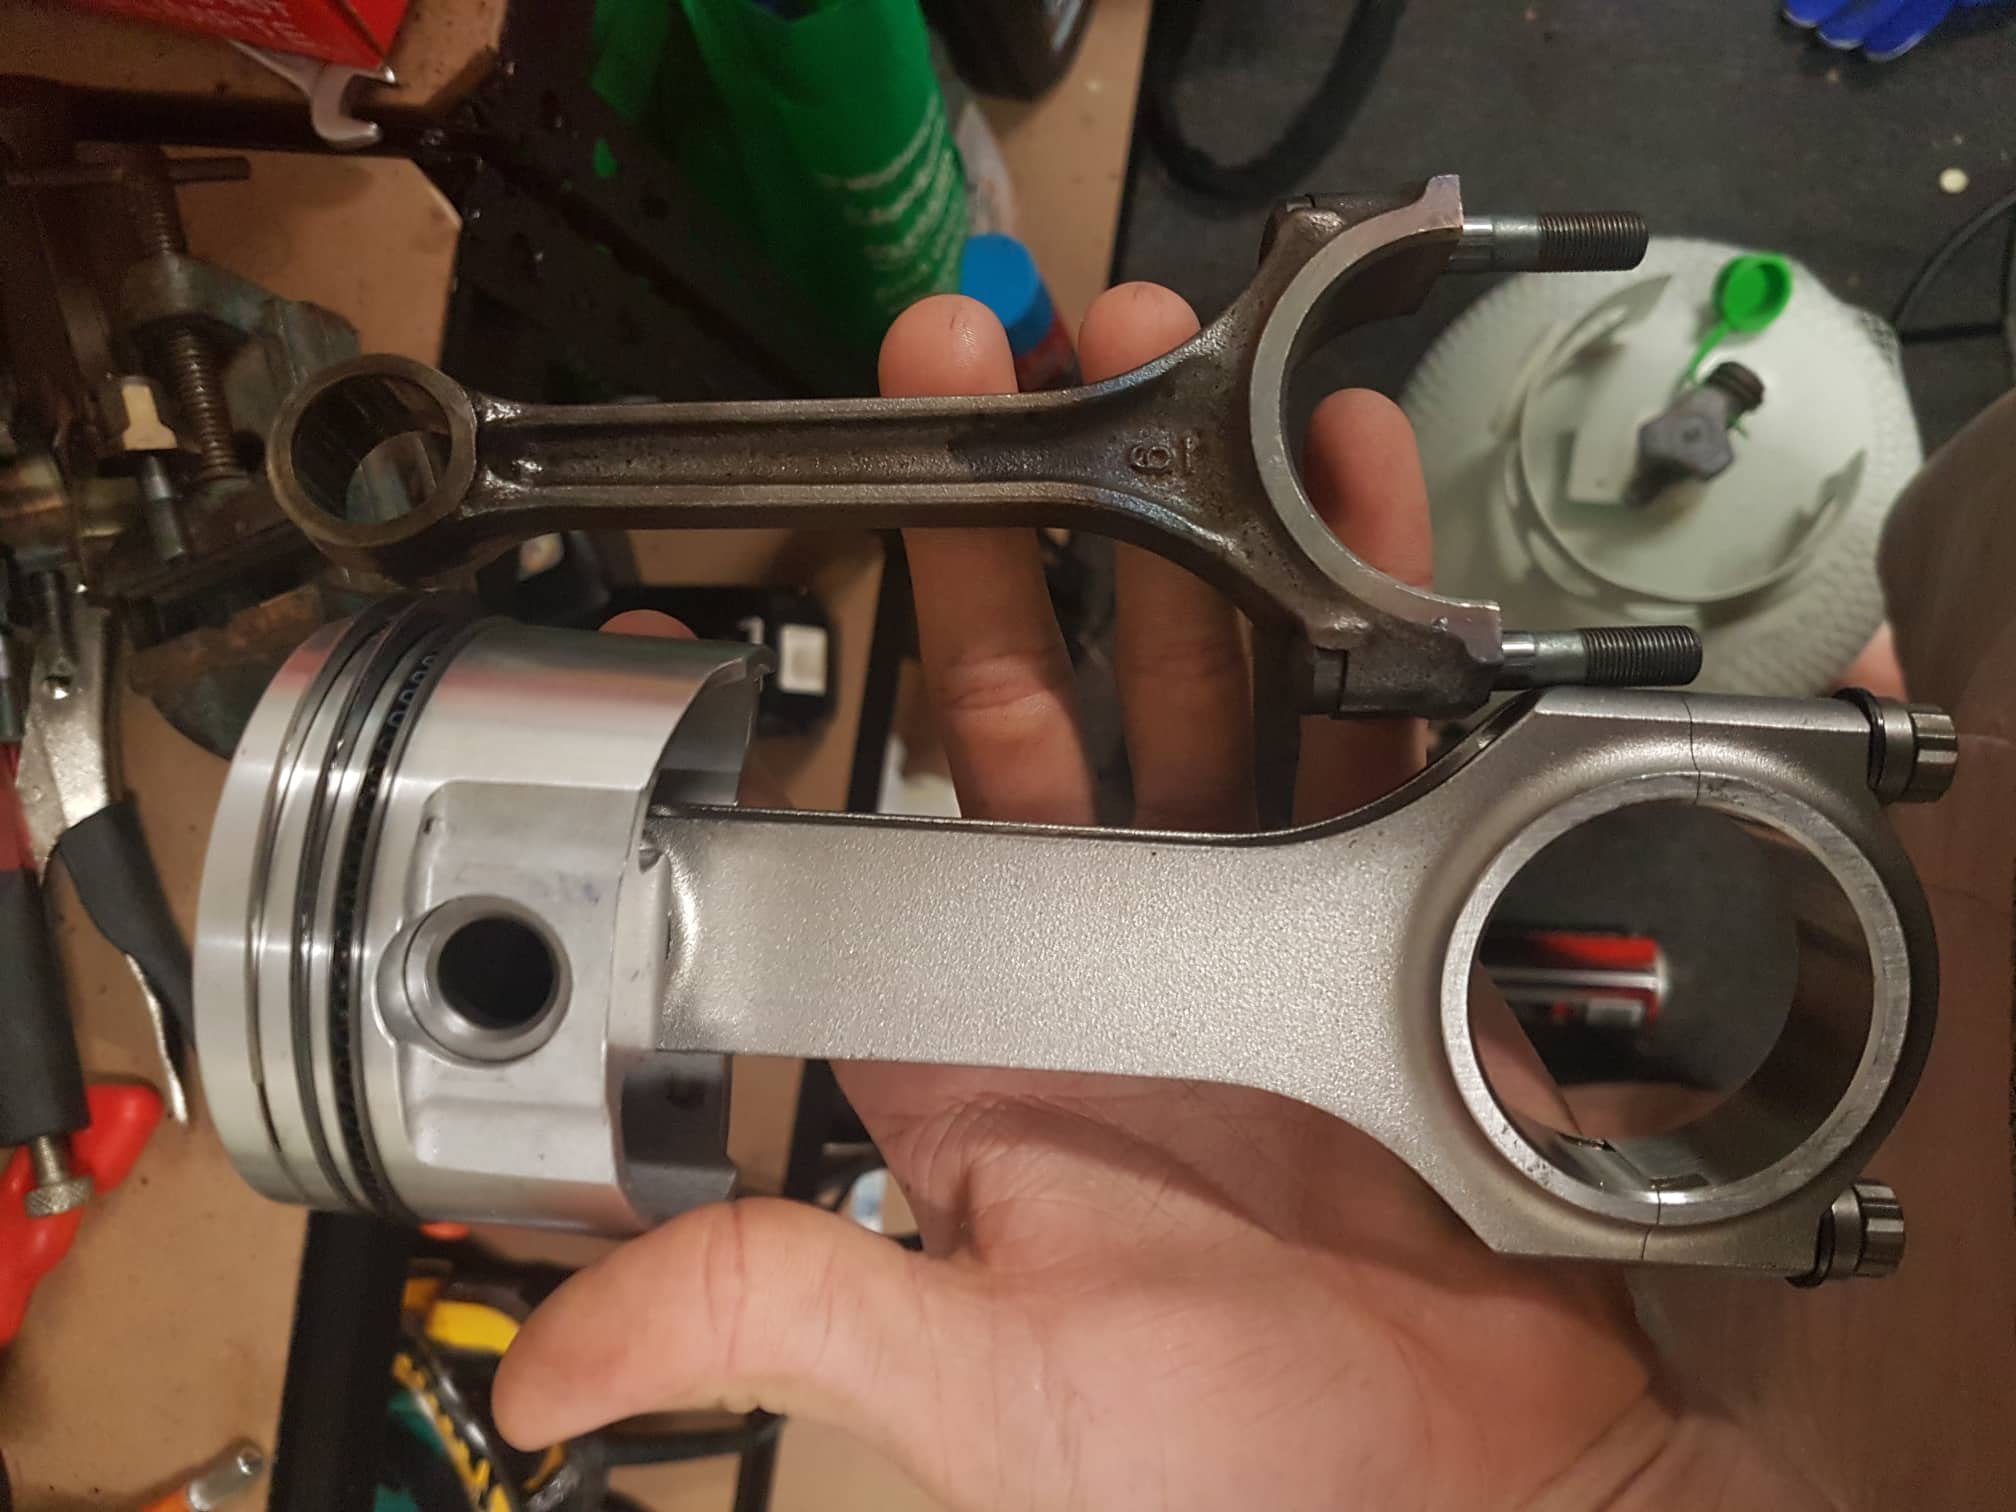
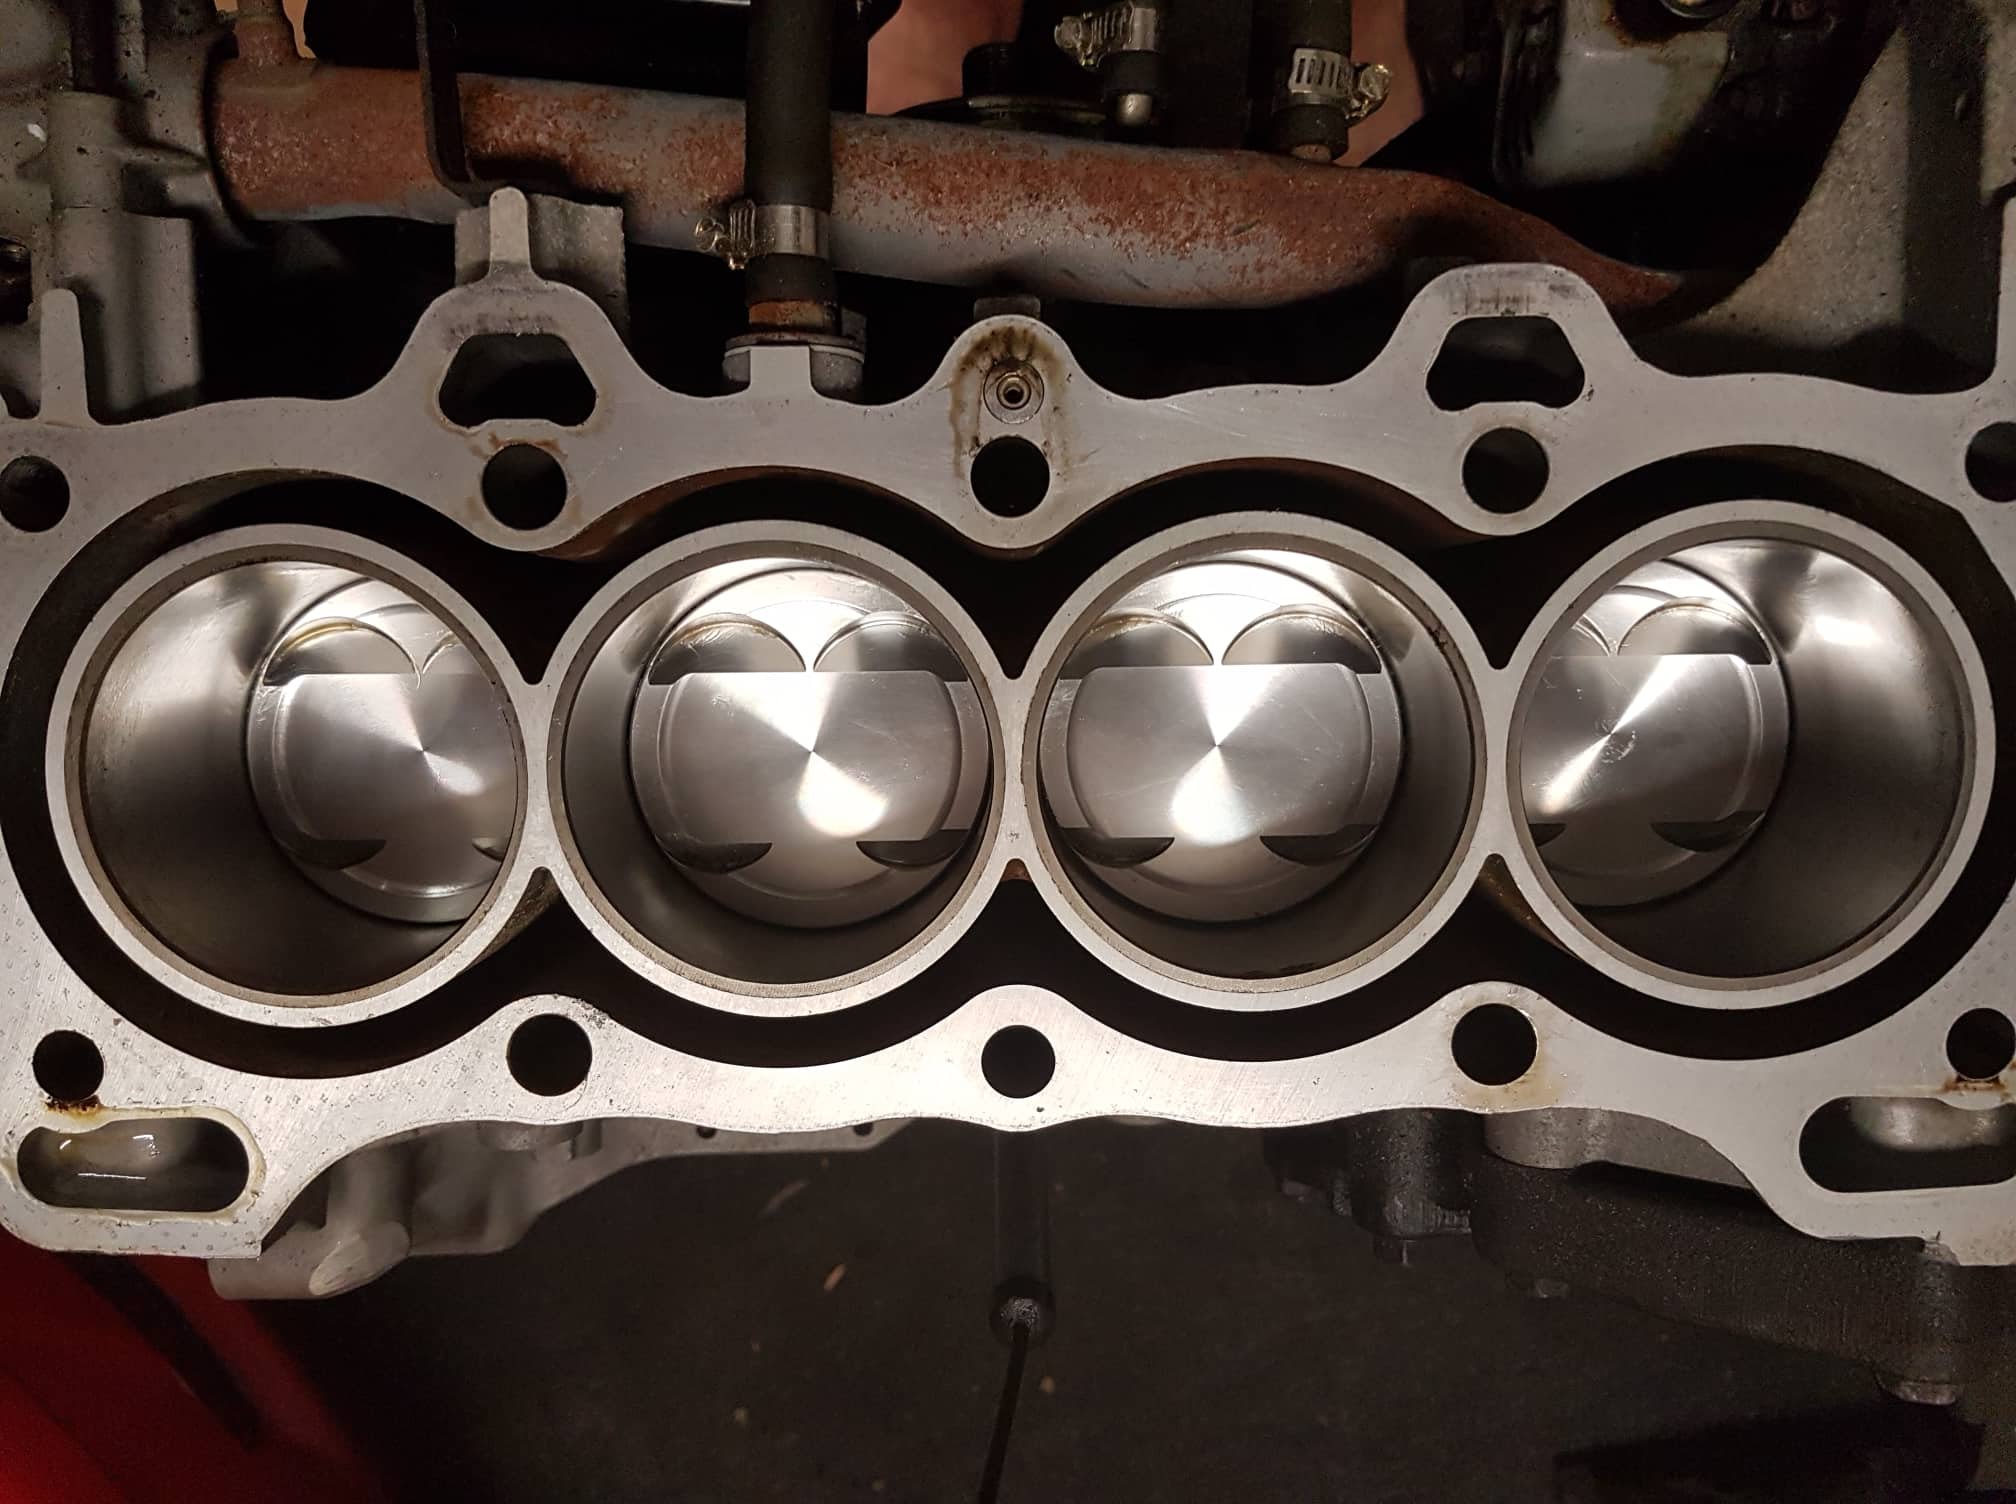
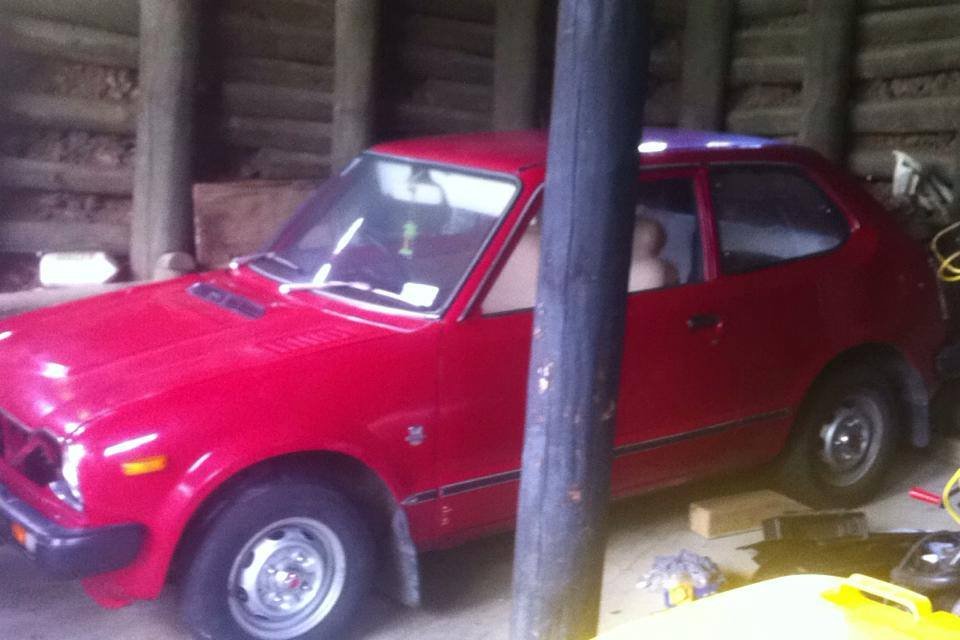
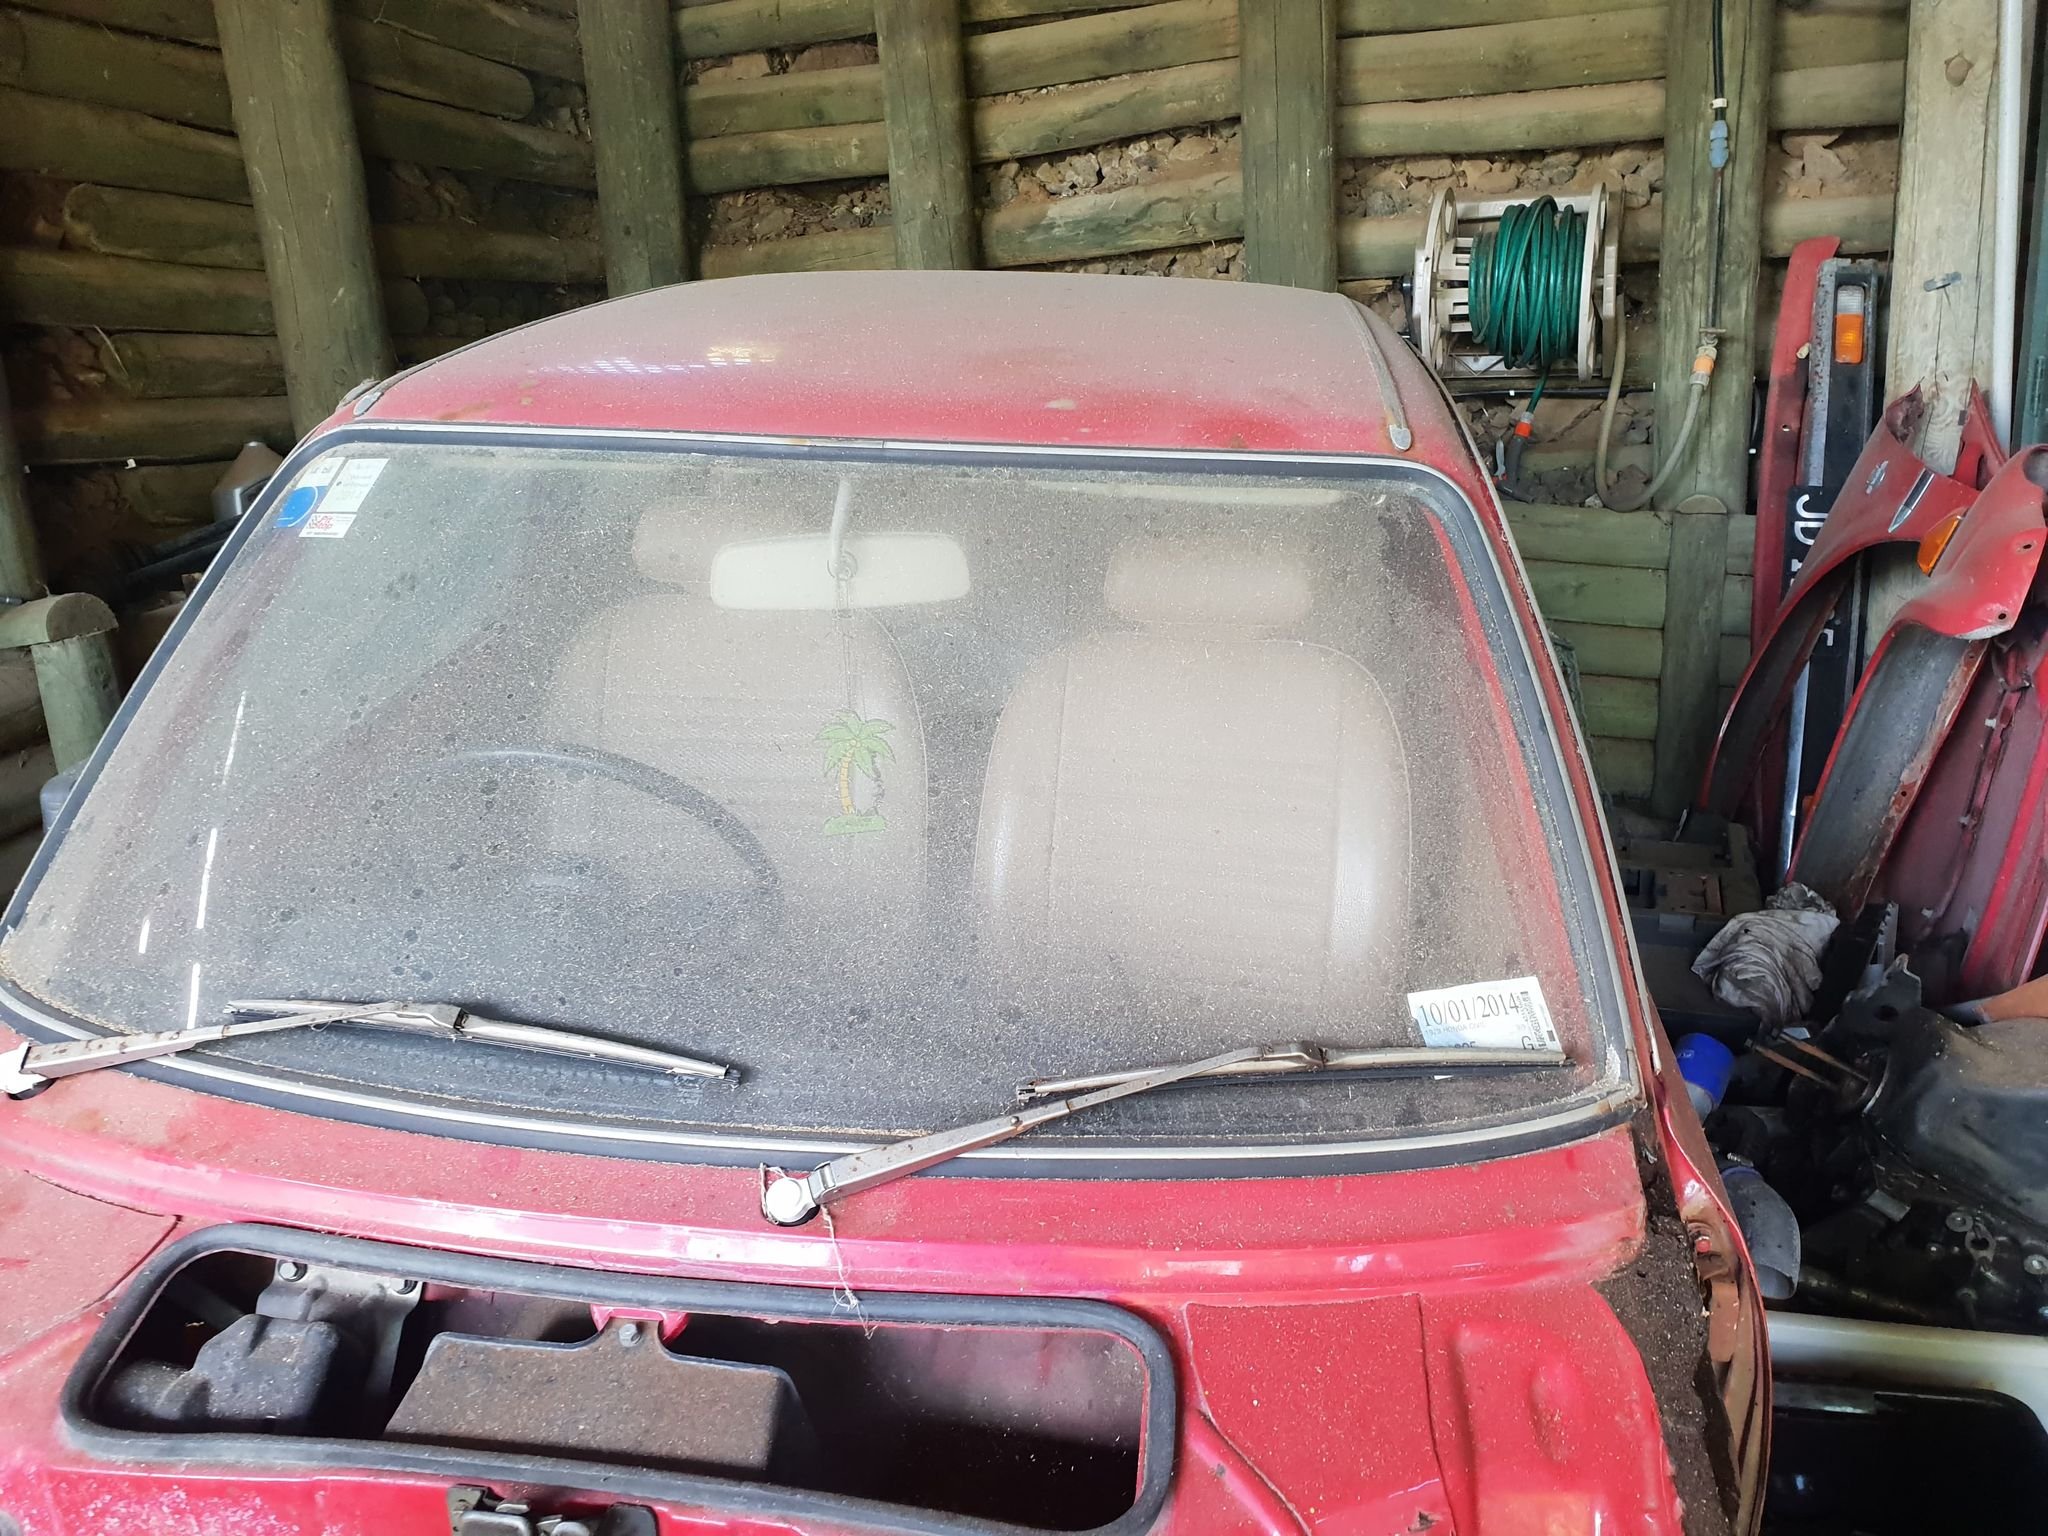
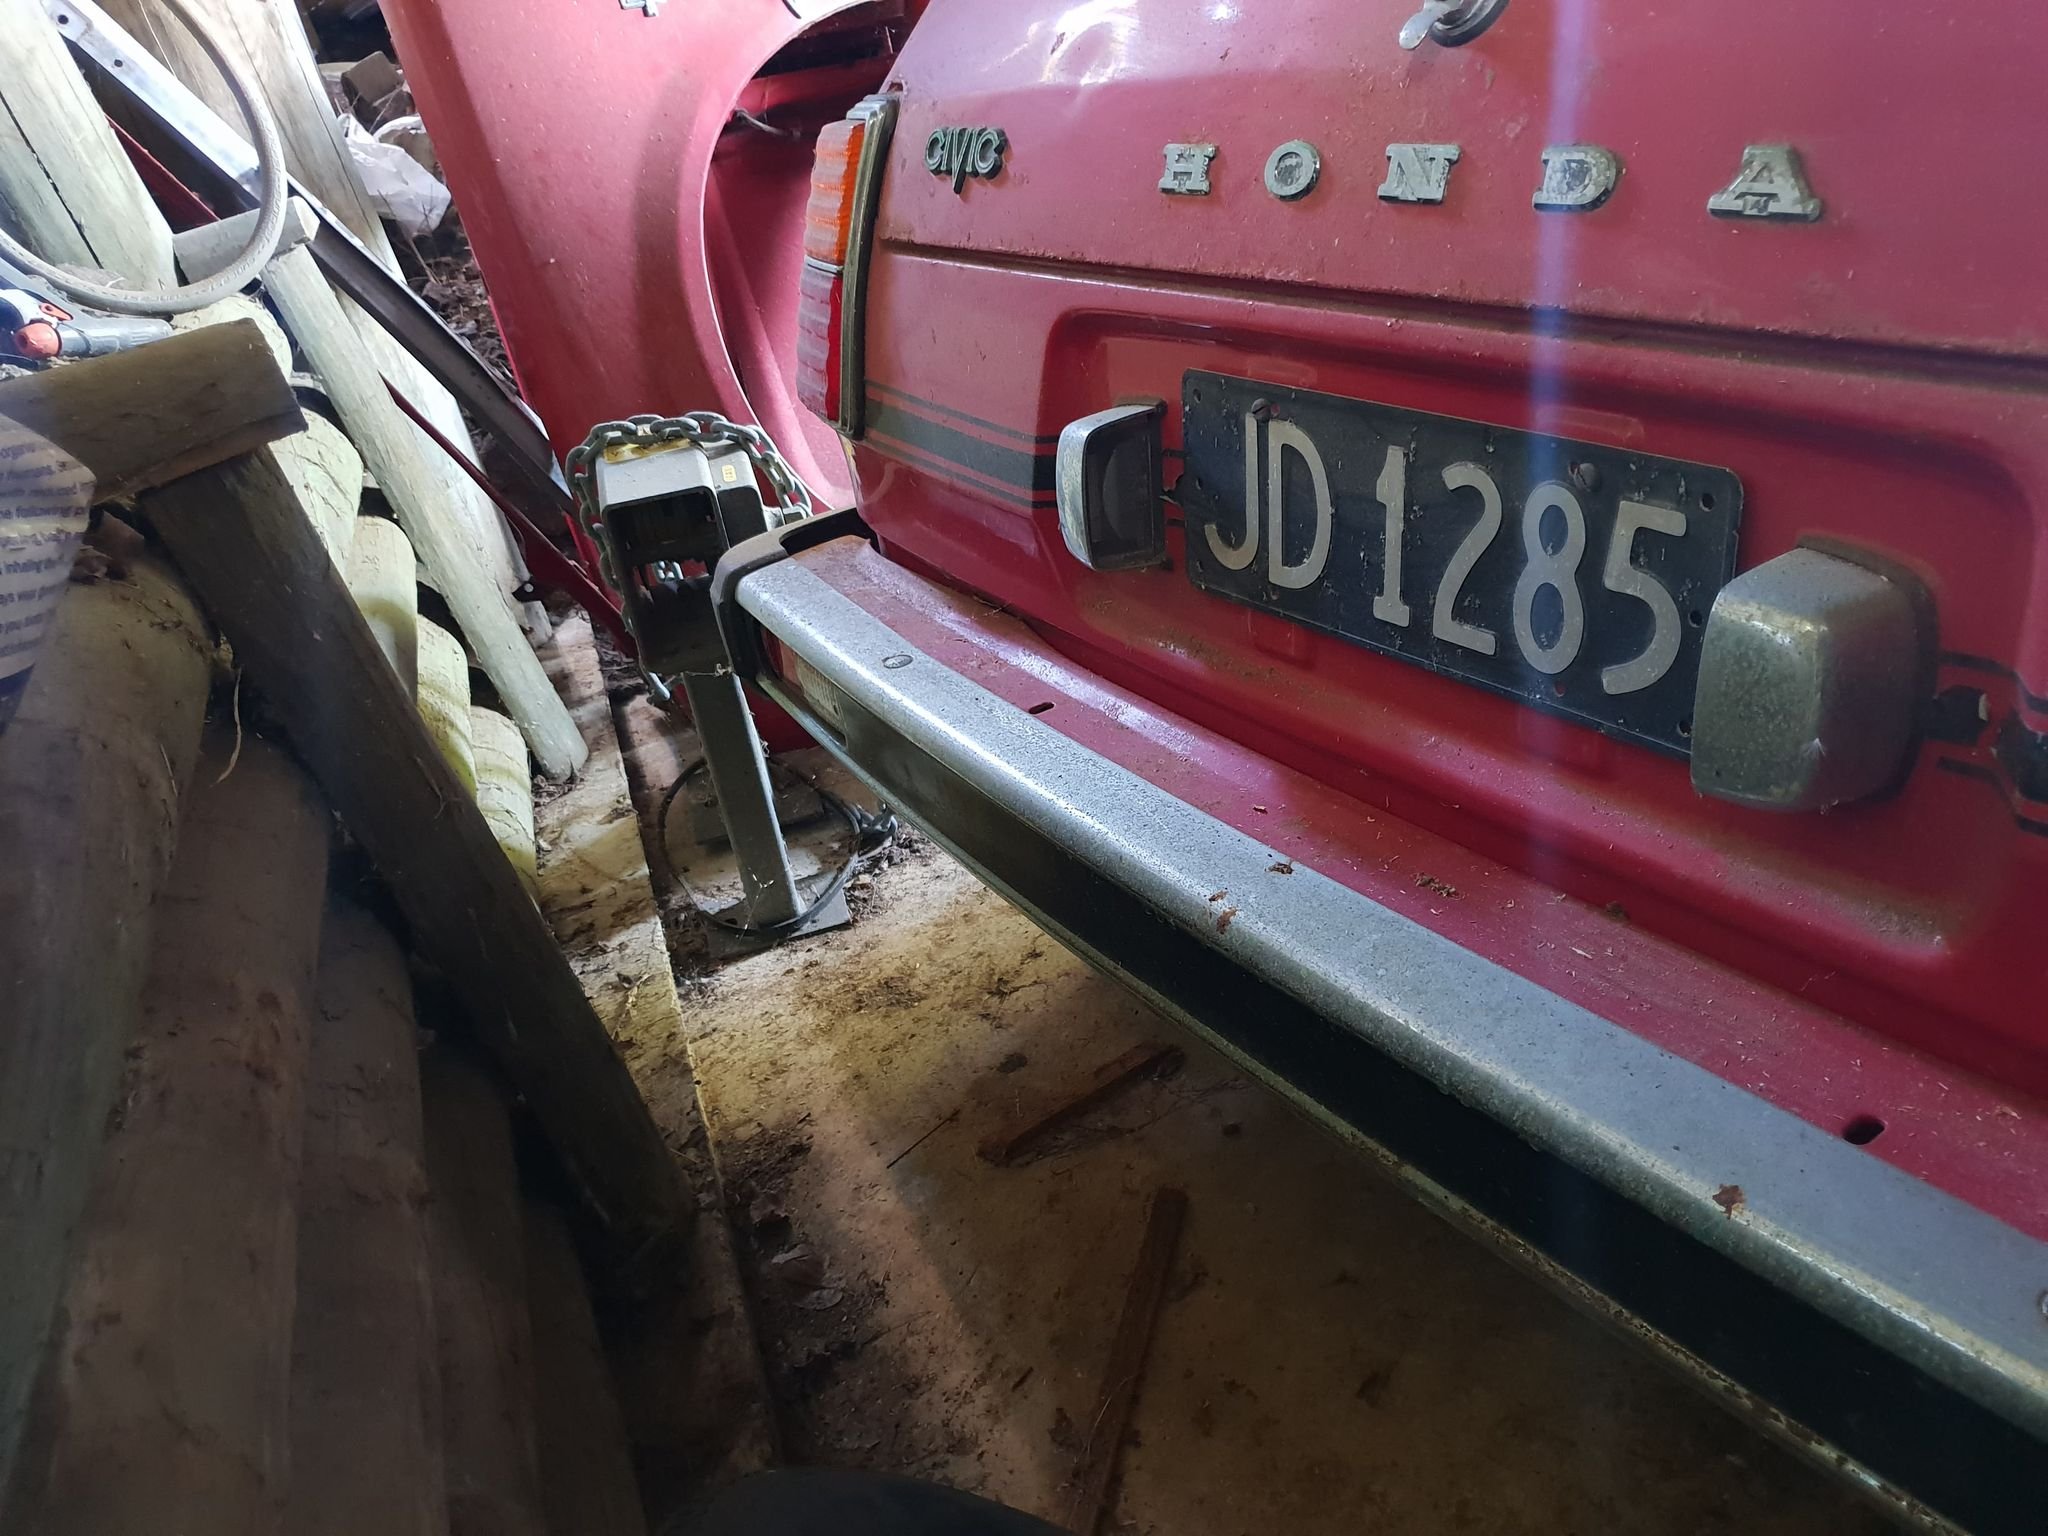
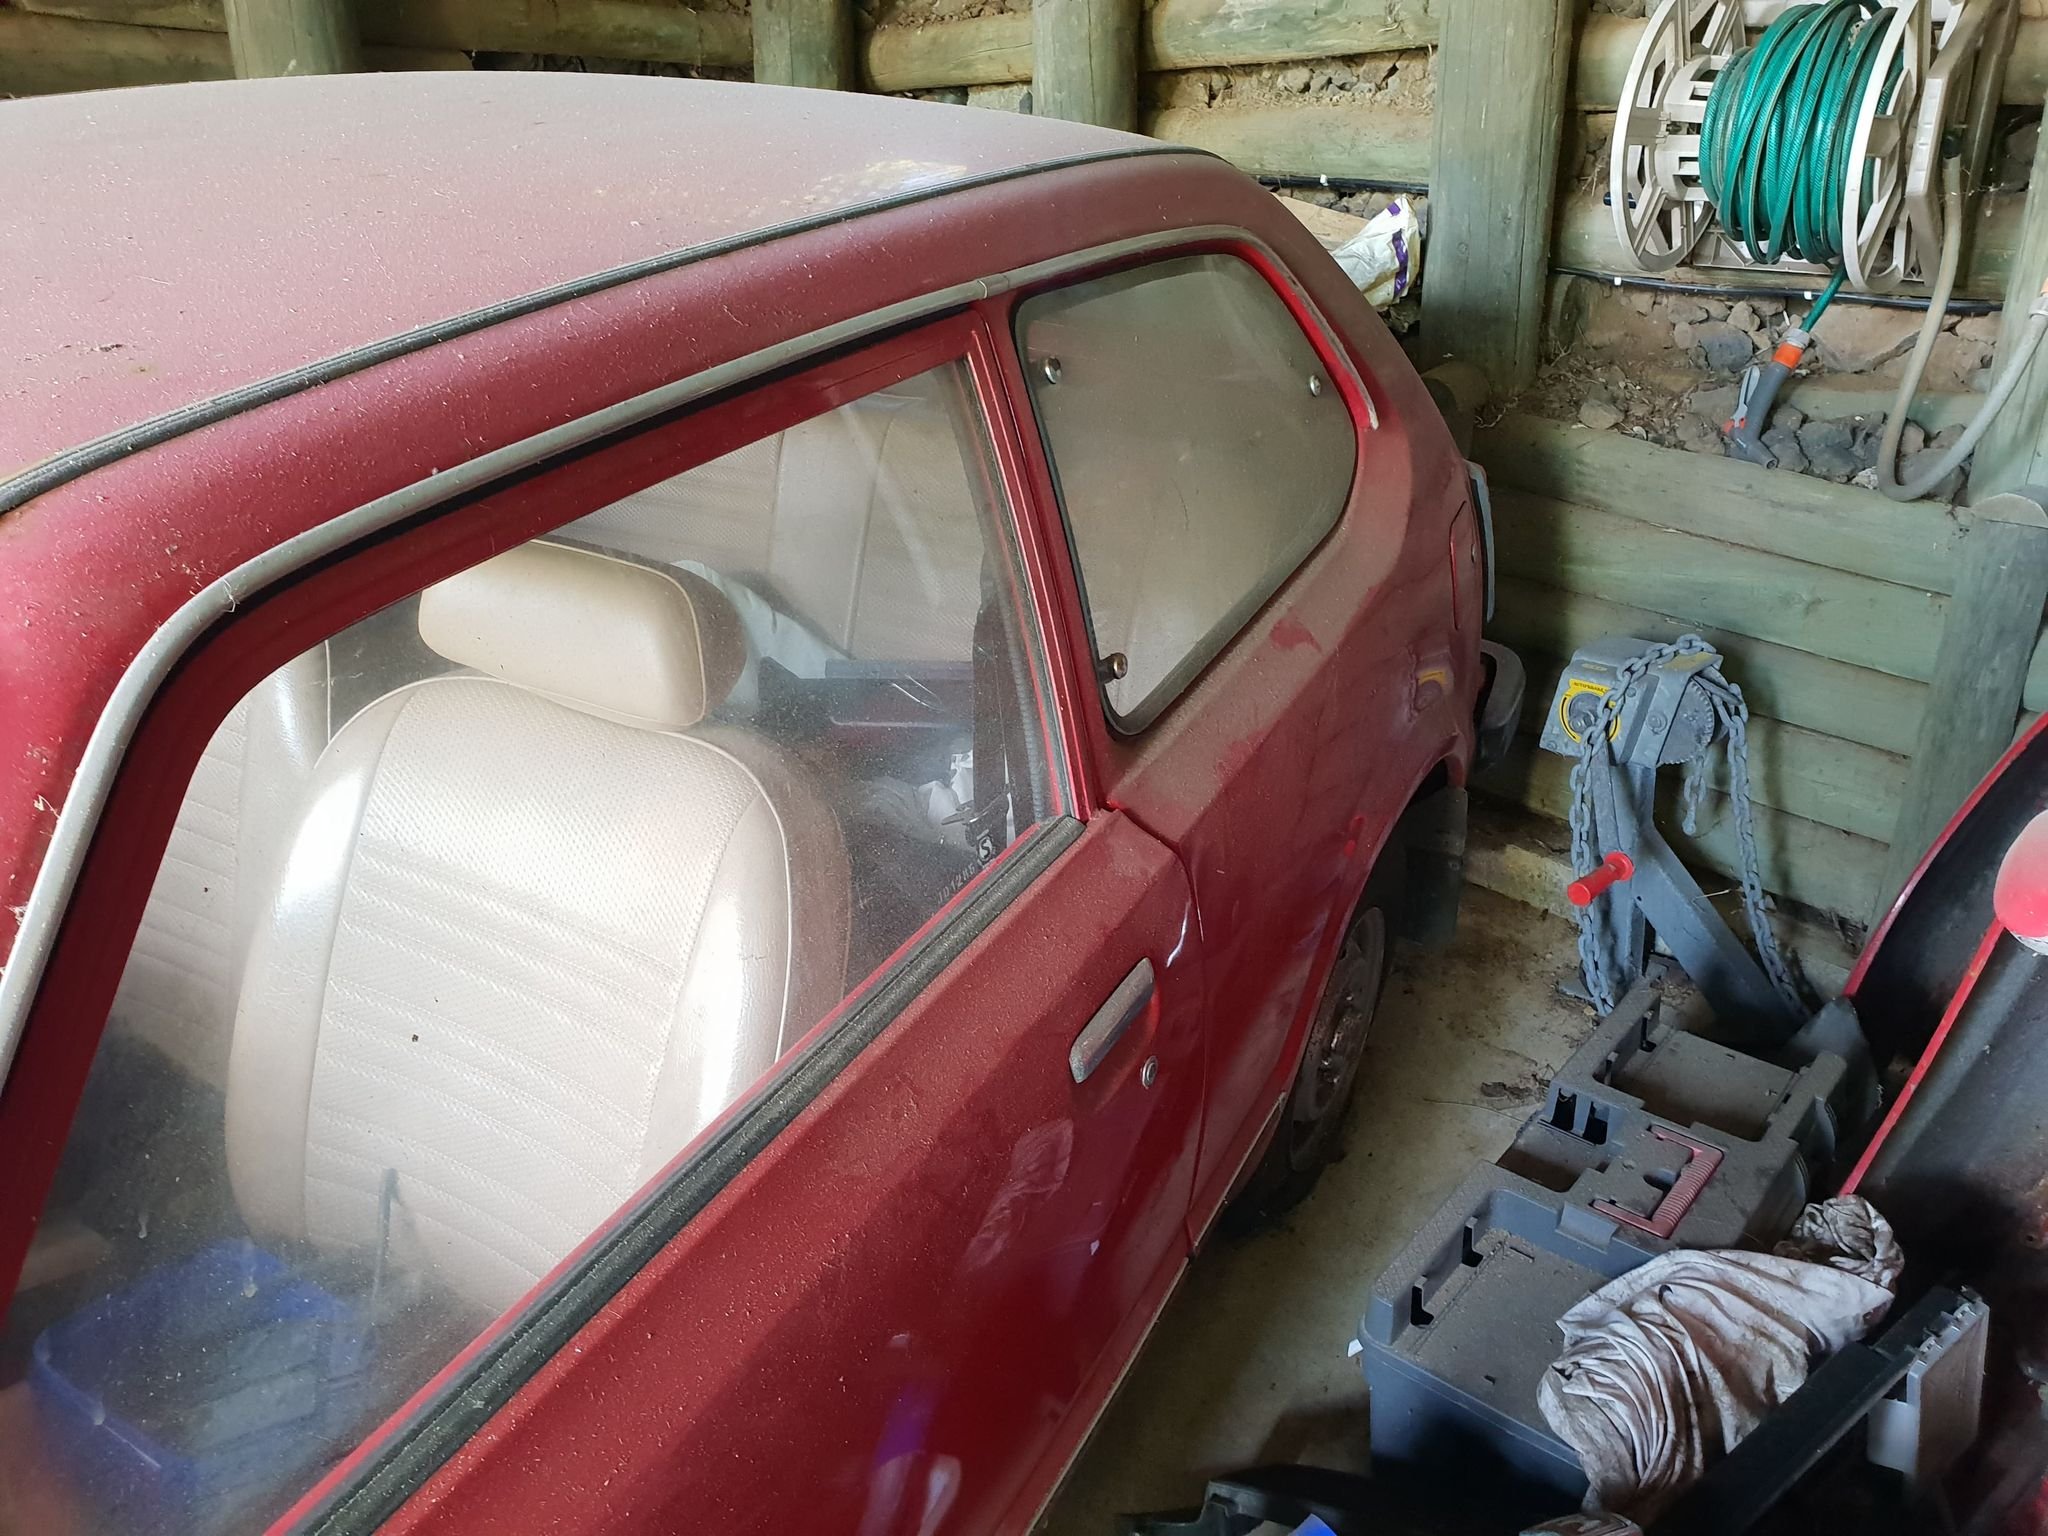
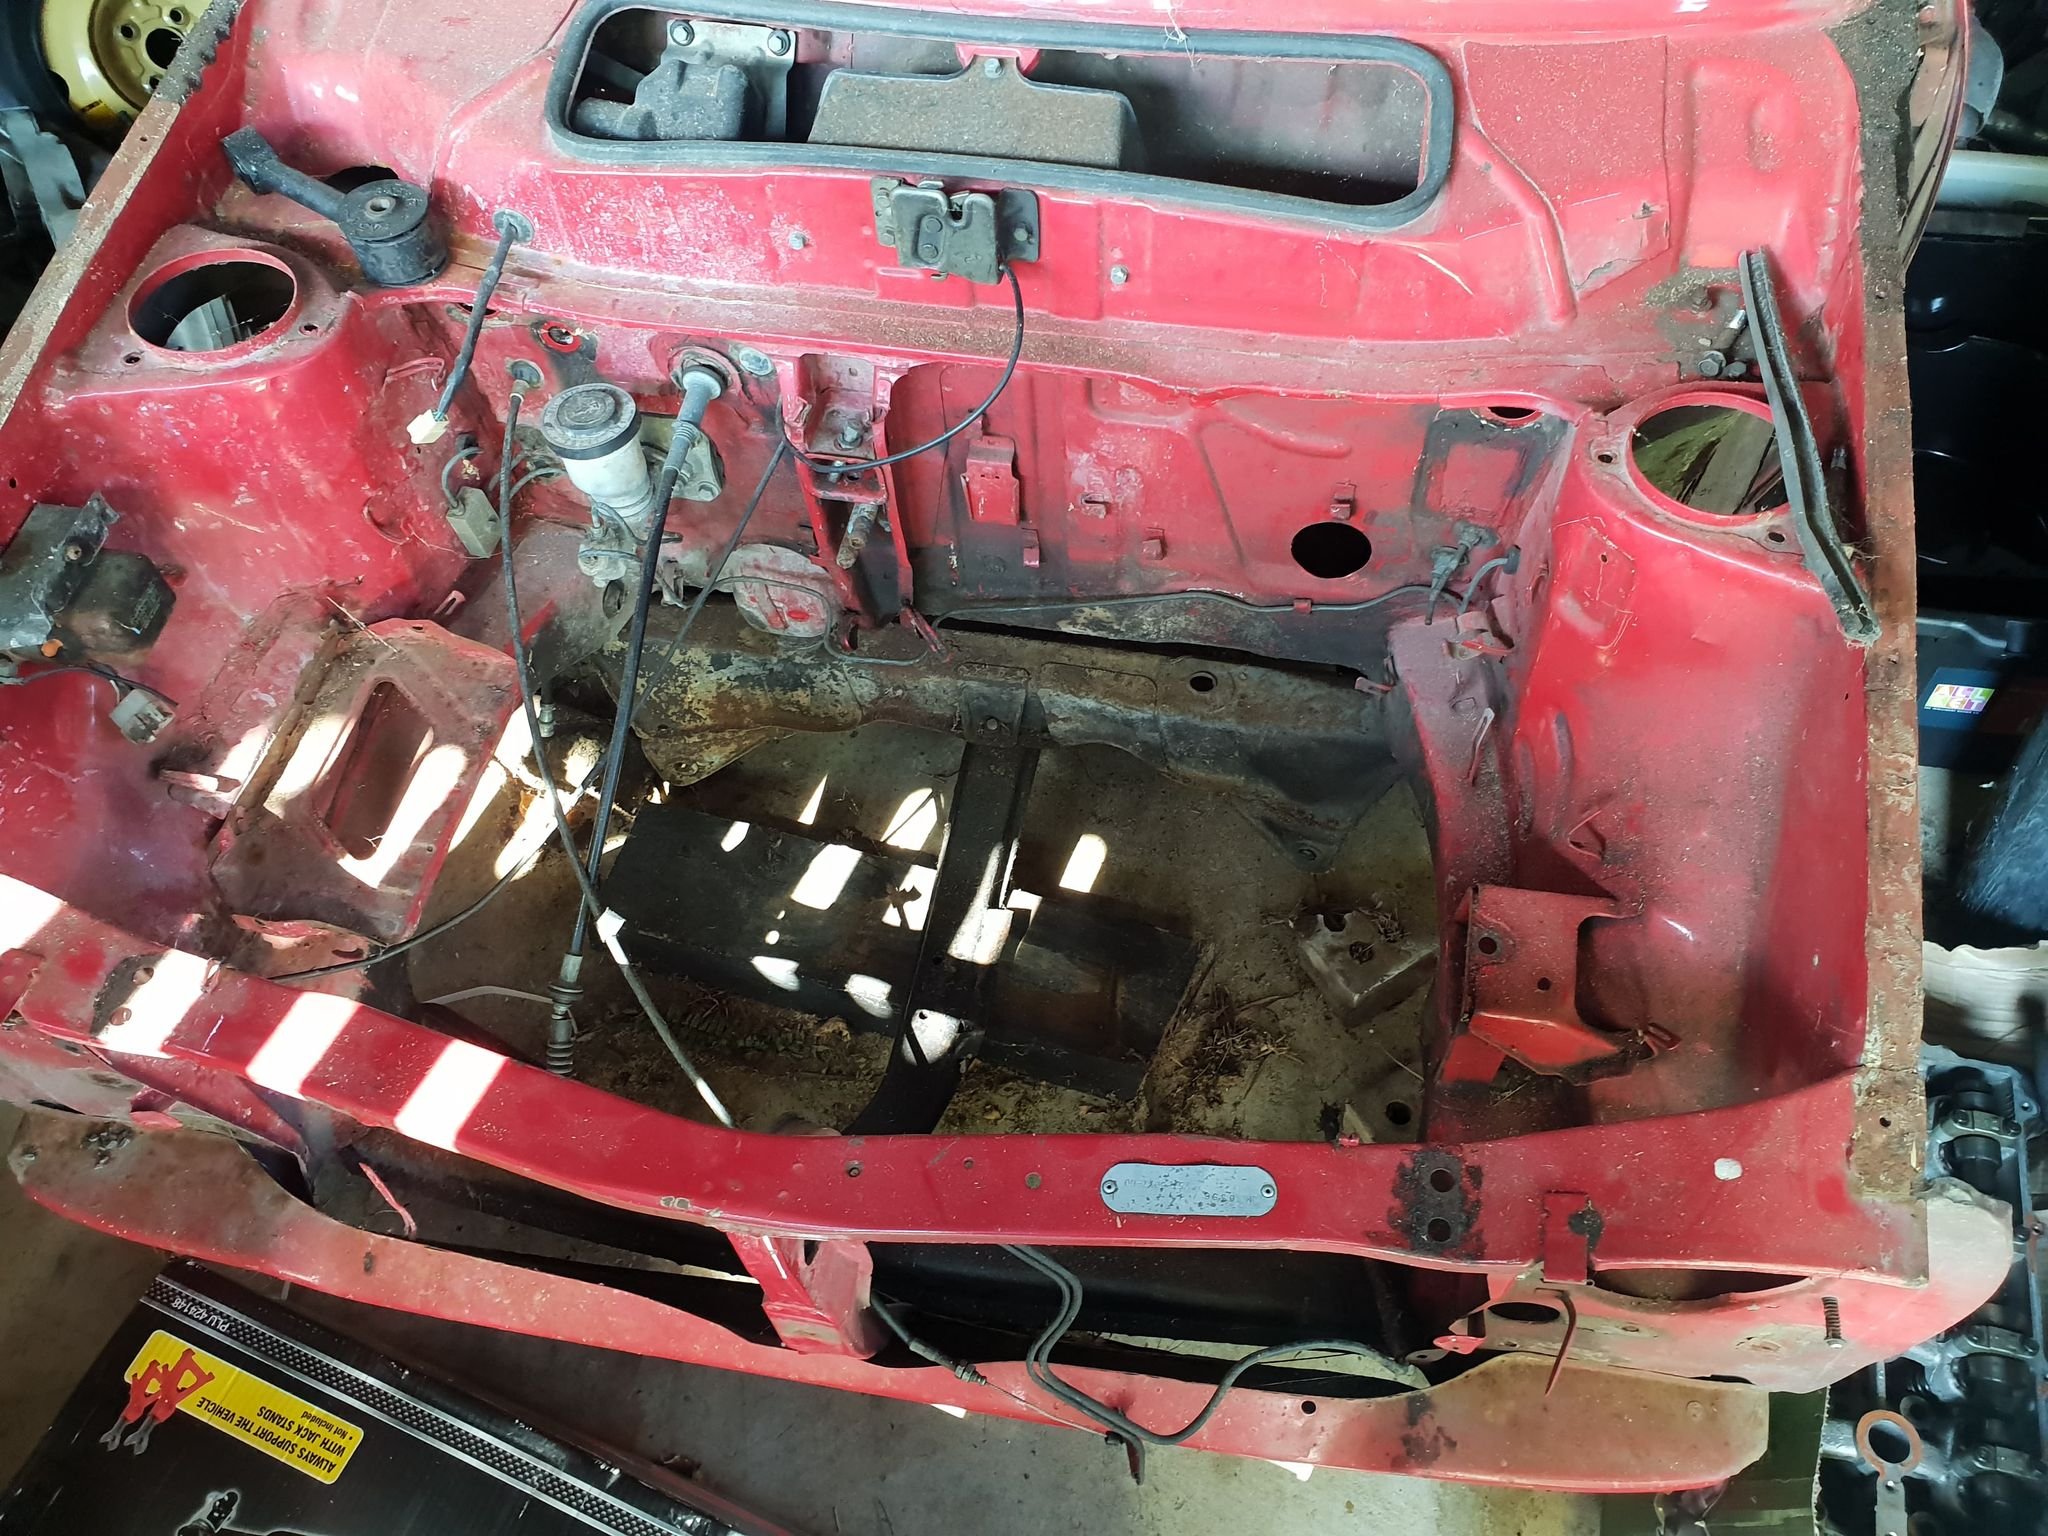
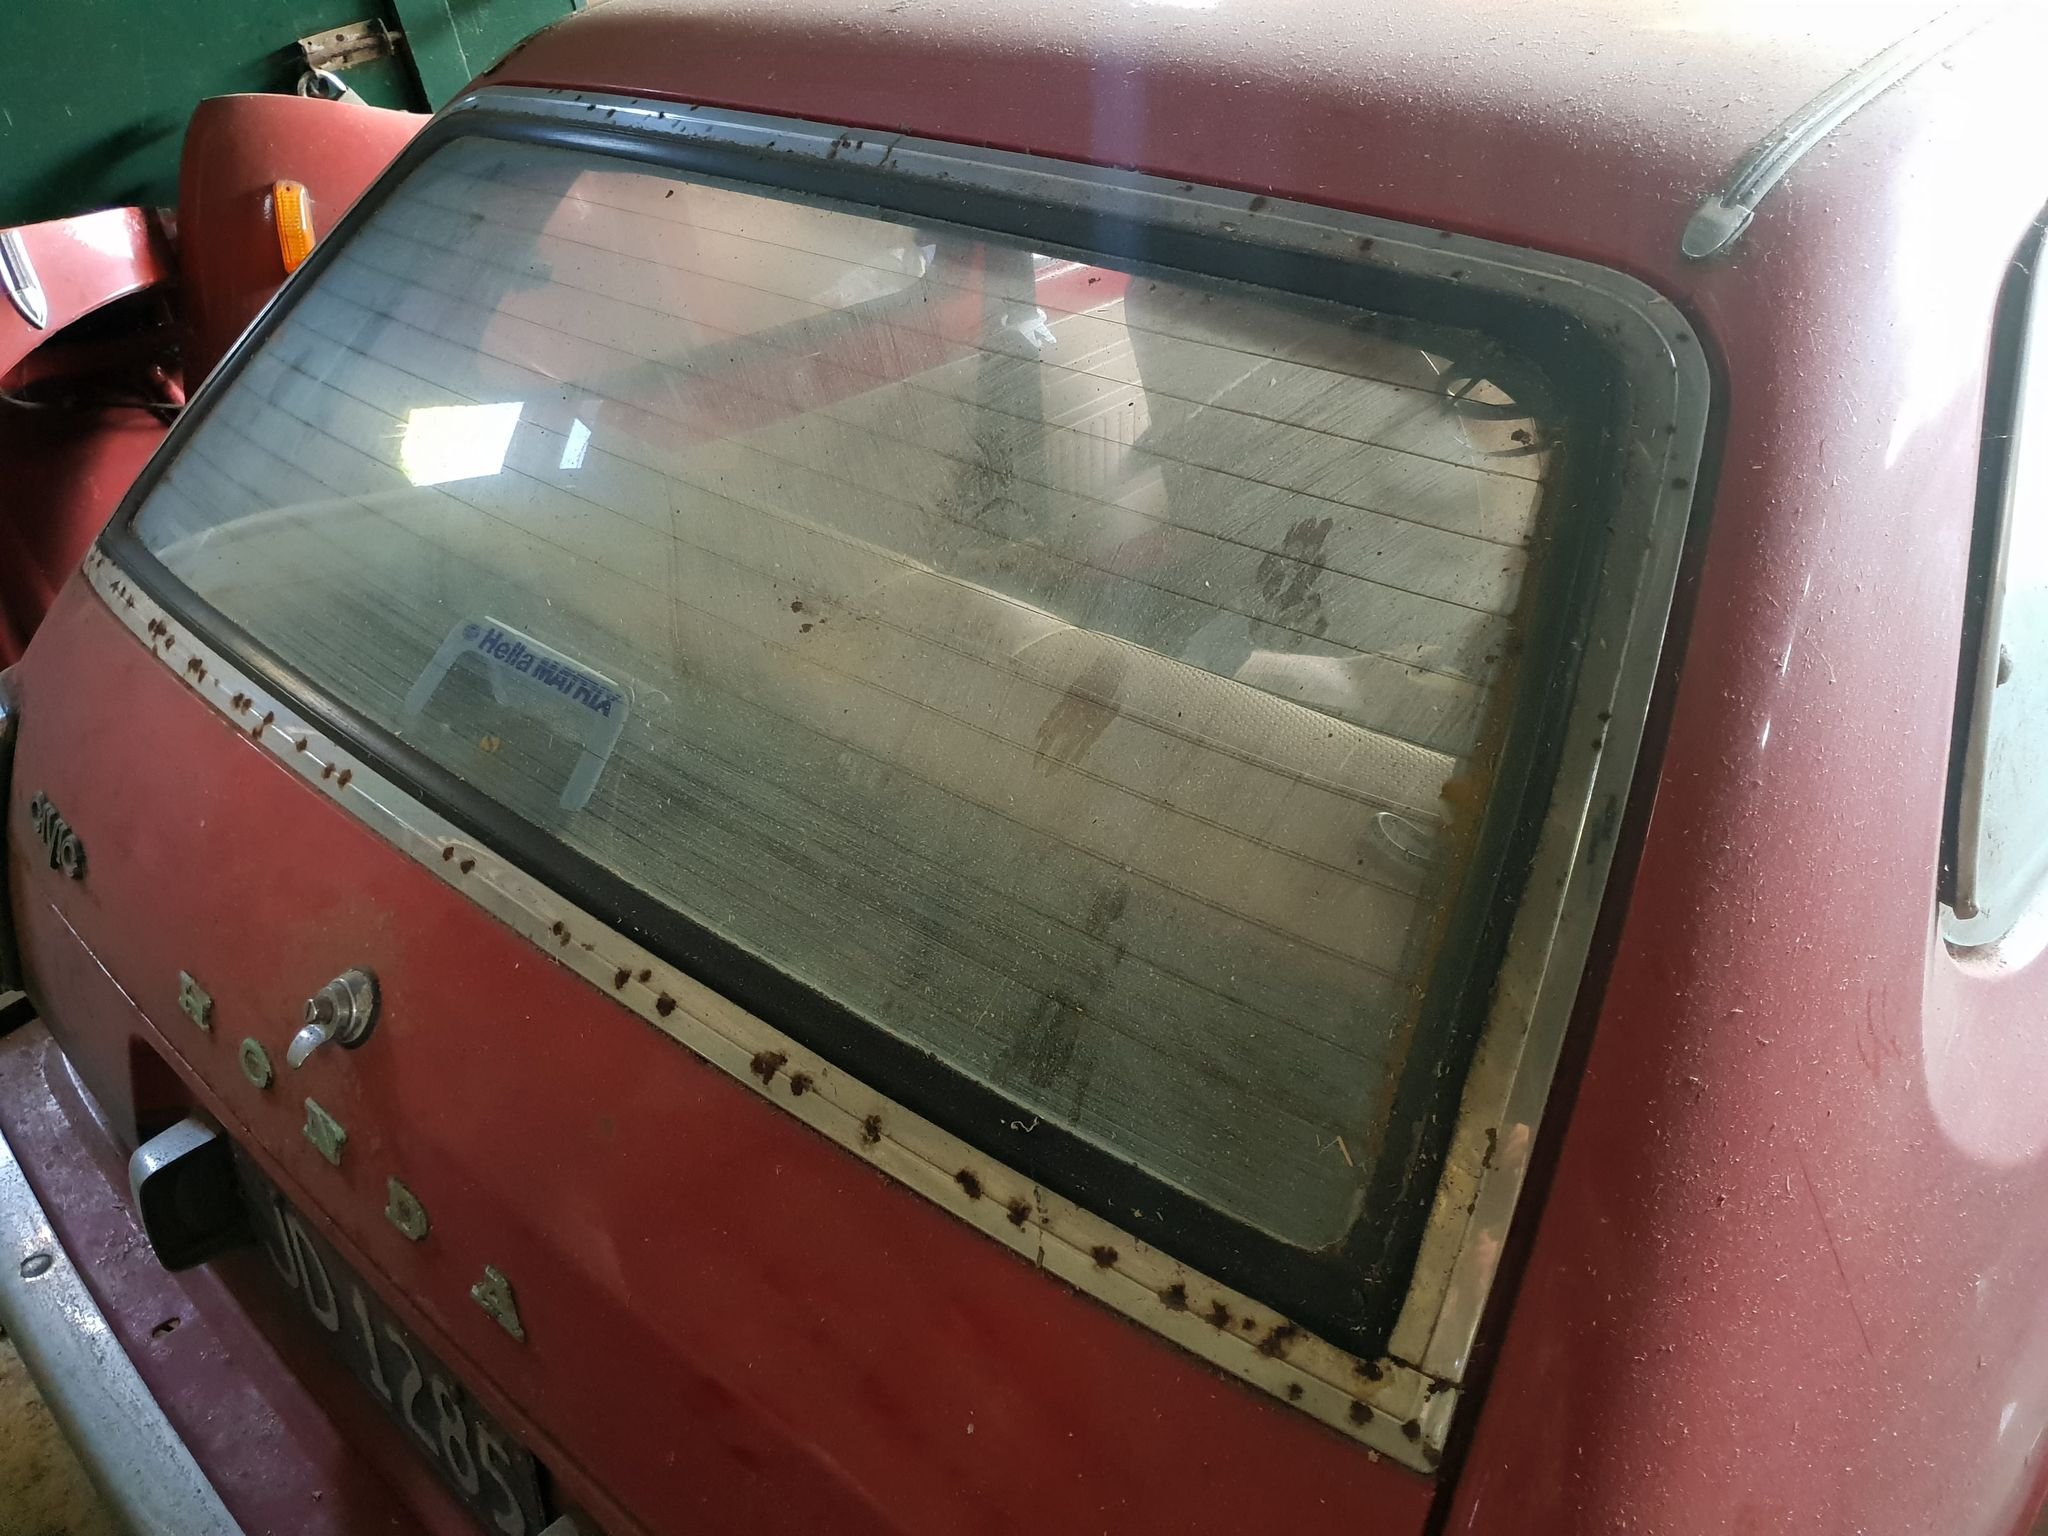
I guess this is just a placeholder first post for this car. It has been sitting under my dads house since maybe 2015, and last had a WOF in 2014. First pic is when it was first "parked". This is the only picture I can find from back then, when it actually looked like a car. It is a 1979 Honda Civic 1200, made in Nelson and originally purchased from Percy Motors Auckland on the 28th of March 1979, approximately 18 years before I was born. It has 8X,000km's on the clock, and service history for the majority of its life indicating it did not roll over. The original documentation said it was in "Signal Red" but I believe the actual colour (from the sales brochure) was Sofia Red, with the brown interior not black. This could have been swapped in, but the head lining matches brown so I'm not so sure. I purchased it with a half-complete City Turbo 2 engine swapped in, which was seized from sitting for too long so I gave up on it and pulled it out. I sold that with all of the (many!) city turbo bits that came with the car. The exterior of the car is now in pretty poor shape, with quite a bit of surface rust coming through under the paint, and some areas (like below the A-pillars) with really quite bad rust holes. I'm not sure what it is like under the car, but it was fine when I got it! The interior was pretty much immaculate, except for some minor damage to the wood veneer on the dashboard and the carpet had been stripped. I managed to acquire a DOHC ZC engine (d16a8/9) from a CRX, with forged pistons and H-beam rods. The details of the me purchasing this engine in ~2018/2019 are fuzzy, but I believe it was built for a turbo in a track car. Here you can see the new rods compared to the stock ones. The plan is to have the engine swapped in as soon as I get the car moved, with basically a hack-job of motor mounts just to get it in roughly the right place. Then I will worry about axles, suspension and chassis. I intend on using a GTX2860r Gen2 on a log-style manifold to suit the space restrictions, and modify either a 2zz-ge intake manifold or K24 RBB intake manifold to mate up to the ZC head. The intake manifold is about 1/2 the length of the engine bay in its stock form. While people have made this engine fit with a small-ish turbo, I don't want to modify the firewall at all just for an intake manifold. This will not be a fast project, I don't even have the car yet! But hopefully the end result will be a fast project. Link to discussion here:
1 point
-
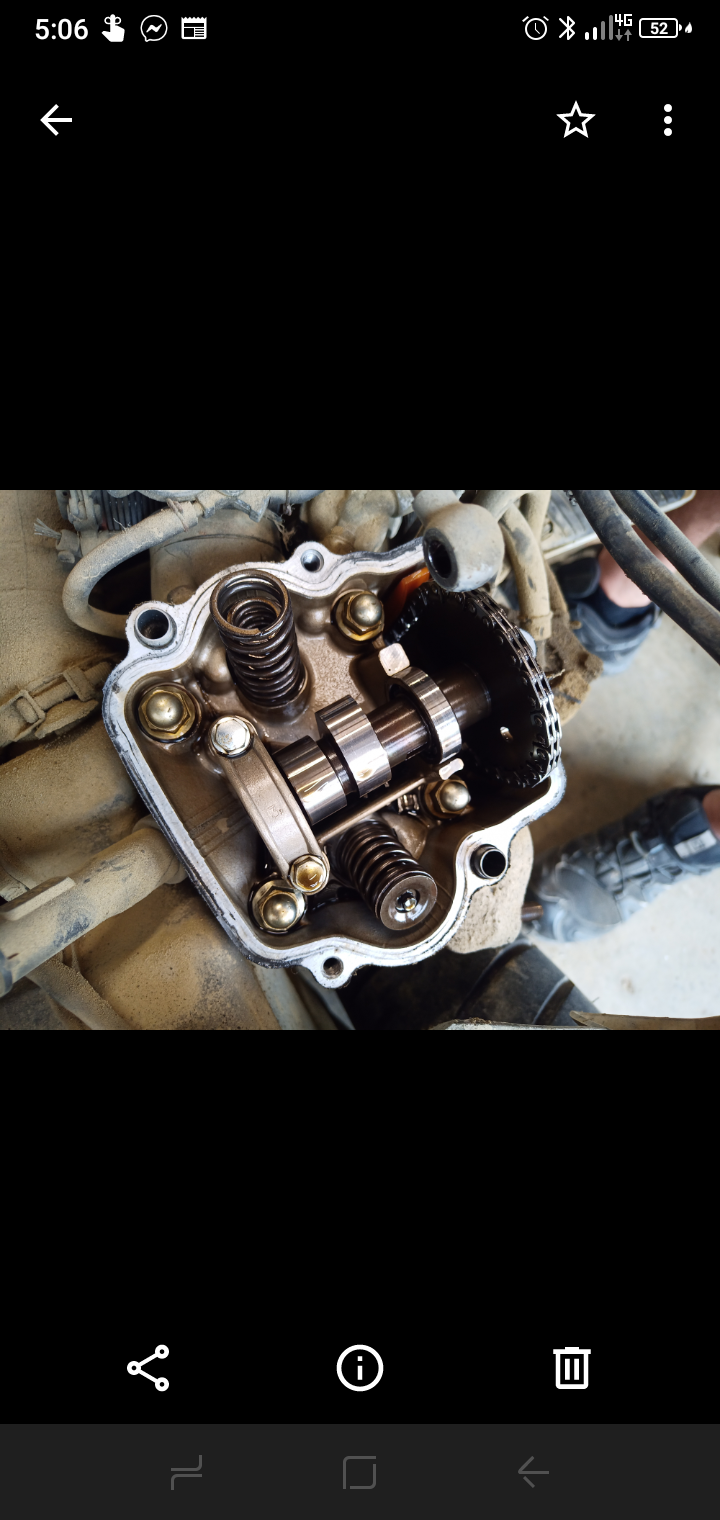
GN guide looked fine till I took the seal off it and it was actually broken off at the top and held by oil tension1 point
-
I'd go A series turbo, and spend the $ you were going to spend on the Stanza parts car on tune up parts. Stanza stuff does fit but there are some minor differences between bodyshells. The L16 is a stout engine and 150hp turbo is childs play for one, however 150hp from an A series is also childs play. A series is definitely more in character with a Sunny, Ls can be a bit slouchy to get humming along nicely unless they are worked properly. Ask @RUNAMUCK about that. I have a 310 manual pedal box here if you want one to convert. Actually a 56a as well. 56a and H150 will probably take 150hp if you are nice to it and don't run big tyres / launches. Do yourself a favour and use an A15. They aren't too hard to find in C20/C22 Vanettes still. Keep an eye on Pickapart. Should be able to get one for around $500. EDIT.. just noticed you are in Aus. Ignore the NZ spec comments1 point
-
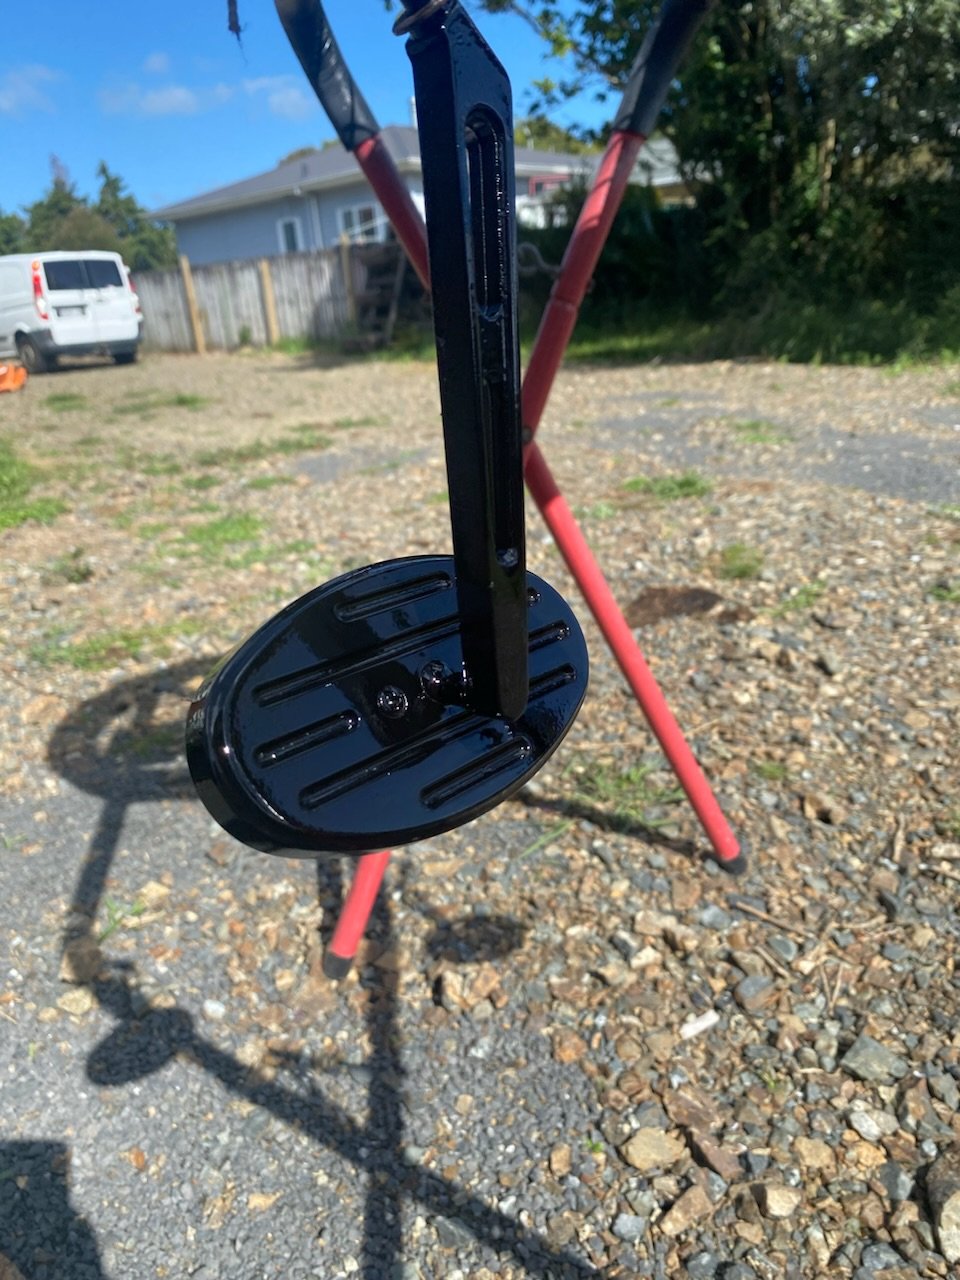
Ooh, that's right, I was supposed to get into shed and look at this thing. The foot lever and cable is missing, I assume everything inside the drum is still there, though I think it's missing it's outer water shield thingo. Will have a look!1 point
-
Maybe not that friendly yet.... This one is way smaller, lighter and lower profile for towing, but should have about the same usable floor area.1 point
-
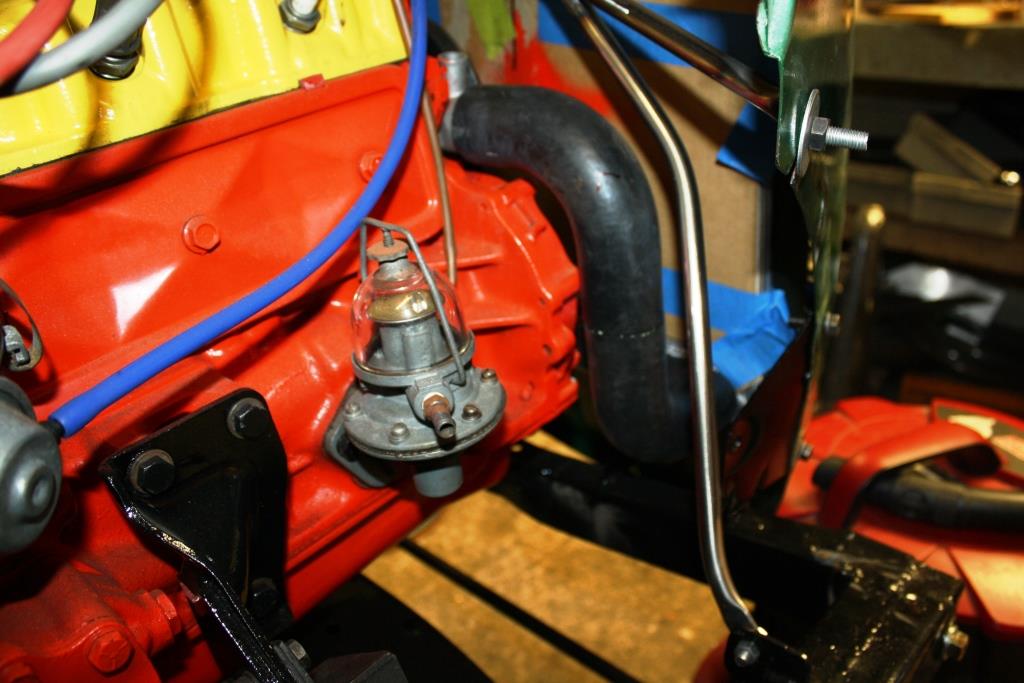
You are correct, not all 34ADM's have the 2-stage jet, only the ones that were equipped with emission control gear. The 34ADM has a very large secondary venturi and I think that is why it uses a very large secondary jet. Some small engines struggle with the Weber 34 because they simply can’t get enough airflow through the secondary venturi to make it work properly. For this reason, the 32/36 is often a better option for engines under 3.0L. I believe the secondary venturi is actually smaller on a 32/36. I have never actually worked out the fuel economy on the Holden, but I expect it is similar to the original Rochester carb (certainly no worse). I think the Weber is more responsive than the original carb but to be fair the original wasn’t working properly and that’s why I replaced it with the Weber. I simply couldn’t get a kit to overhaul the original carb so the Weber conversion was a good option. It’s been running trouble free with the Weber on for around 5 years now.1 point
-
So anyway, given this thing had been sitting for an age, I figured it was probably a solid idea to drain the tank and see what was going on, before attempting to kick it in the guts. So out with the tools, and lets tear this thing to bits, sorta. How easy are bikes to work on... 20230307_220313 by Richard Opie, on Flickr Exhibit A. Fuel. 20230307_222423 by Richard Opie, on Flickr Hmm, yeah that's not so flash. You can probably smell it from where you're viewing this, too. To drain the fuel, I had to remove the fuel pump also. This is what I found. 20230308_101611 by Richard Opie, on Flickr Yummo, sweet varnish, and crusty flaky shit in abundance. So I figured some internal inspection was probably necessary. 20230308_101634 by Richard Opie, on Flickr Shit yeah OK this isn't the best situation to find myself in. So I figured the best solution was to treat and re-line the tank properly, with a POR15 kit. On the shelf at City Honda too! So I was able to crack into this pretty promptly. This is the result after a clean, and a treat with the 'metal ready' stuff, and a thorough drying with heat and airflow to really get all the moisture out. 20230309_191253 by Richard Opie, on Flickr Actually not bad! I popped the liner in after this, swirled it round, mopped out the excess (it wasn't as simple as just draining it, as the fuel pump flange has a return on it internally, I guess to add stiffness, so it just creates a big dam for the liner spooge to flow around, and not out...). I didn't get any pics of this process, but it spent a solid 5 days curing, while I turned my attention to the pump. When I chucked 12v on it, the pump did NOTHING. Like, it was locked solid. Since I had the housing all apart, I popped it in a bath of white vinegar to soften up all the varnish, and left it for a while. Progress photos below of this process. 20230308_170524 by Richard Opie, on Flickr 20230308_170513 by Richard Opie, on Flickr 20230308_170516 by Richard Opie, on Flickr 20230308_164256 by Richard Opie, on Flickr Gross, right. I didn't get any pics of the new pump by itself. But after a soak, the plastic housing and so forth cleaned up pretty well with an easy scrub. 20230310_154941 by Richard Opie, on Flickr 20230310_184857 by Richard Opie, on Flickr 20230311_094124 by Richard Opie, on Flickr Anyway, I got this all installed, and hit the button. Well, firstly, the pump gasket leaked the proverbial. And secondly, the thing would fire, and just not run past that initial burst of throttle. It'd just peter out. And on the very rare occasion it did run for more than a few seconds, a little bit of throttle would kill it instantly. It was fairly apparent that it was a fuel issue, the ECU has a great feature where you can test relays, sensors etc via a diagnostic mode on the dash. With this, I was able to check spark, throttle position, MAP sensor, fuel pump relay, the injector was pulsing via ECU, as well as pretty much everything on the bike (fan, headlight, you name it... all triggered via the ECU). While it didn't immediately lead me to the cause, it made me confident that everything electrical/electronic was functioning, and that it was likely a physical/mechanical problem causing the drama. So... with consultation from some of PPSC's finest, I figured getting the injector cleaned would be the best next step. A few days later, and with a freshly cleaned injector in the bike and a non-leaking fuel pump gasket/seal.... it fired up on first hit of the button! A real eureka moment. Unfortunately the injector seal was leaking now, like a bloody garden hose. But Blizz saved the day and popped by with a "maybe it's nitrile, maybe it isn't" Aliexpress O-ring kit, so it now runs and its fluid tight! So a few pics of the reassembled bike to celebrate. 2007 Yamaha XT660R-1 by Richard Opie, on Flickr 2007 Yamaha XT660R-13 by Richard Opie, on Flickr 2007 Yamaha XT660R-20 by Richard Opie, on Flickr 2007 Yamaha XT660R-25 by Richard Opie, on Flickr 2007 Yamaha XT660R-28 by Richard Opie, on Flickr 2007 Yamaha XT660R-42 by Richard Opie, on Flickr 2007 Yamaha XT660R-44 by Richard Opie, on Flickr Yeah. It's not really a serious trail machine, but it should be a neat starter thing to get me enthused and focused on what I might prefer more, something with a more offroad bent, or perhaps a more road friendly bike. But it's first ride was the evening I fired it up, down to the servo for a bit of premium gasoline for a treat. 20230318_223212 by Richard Opie, on Flickr More to come...1 point
-
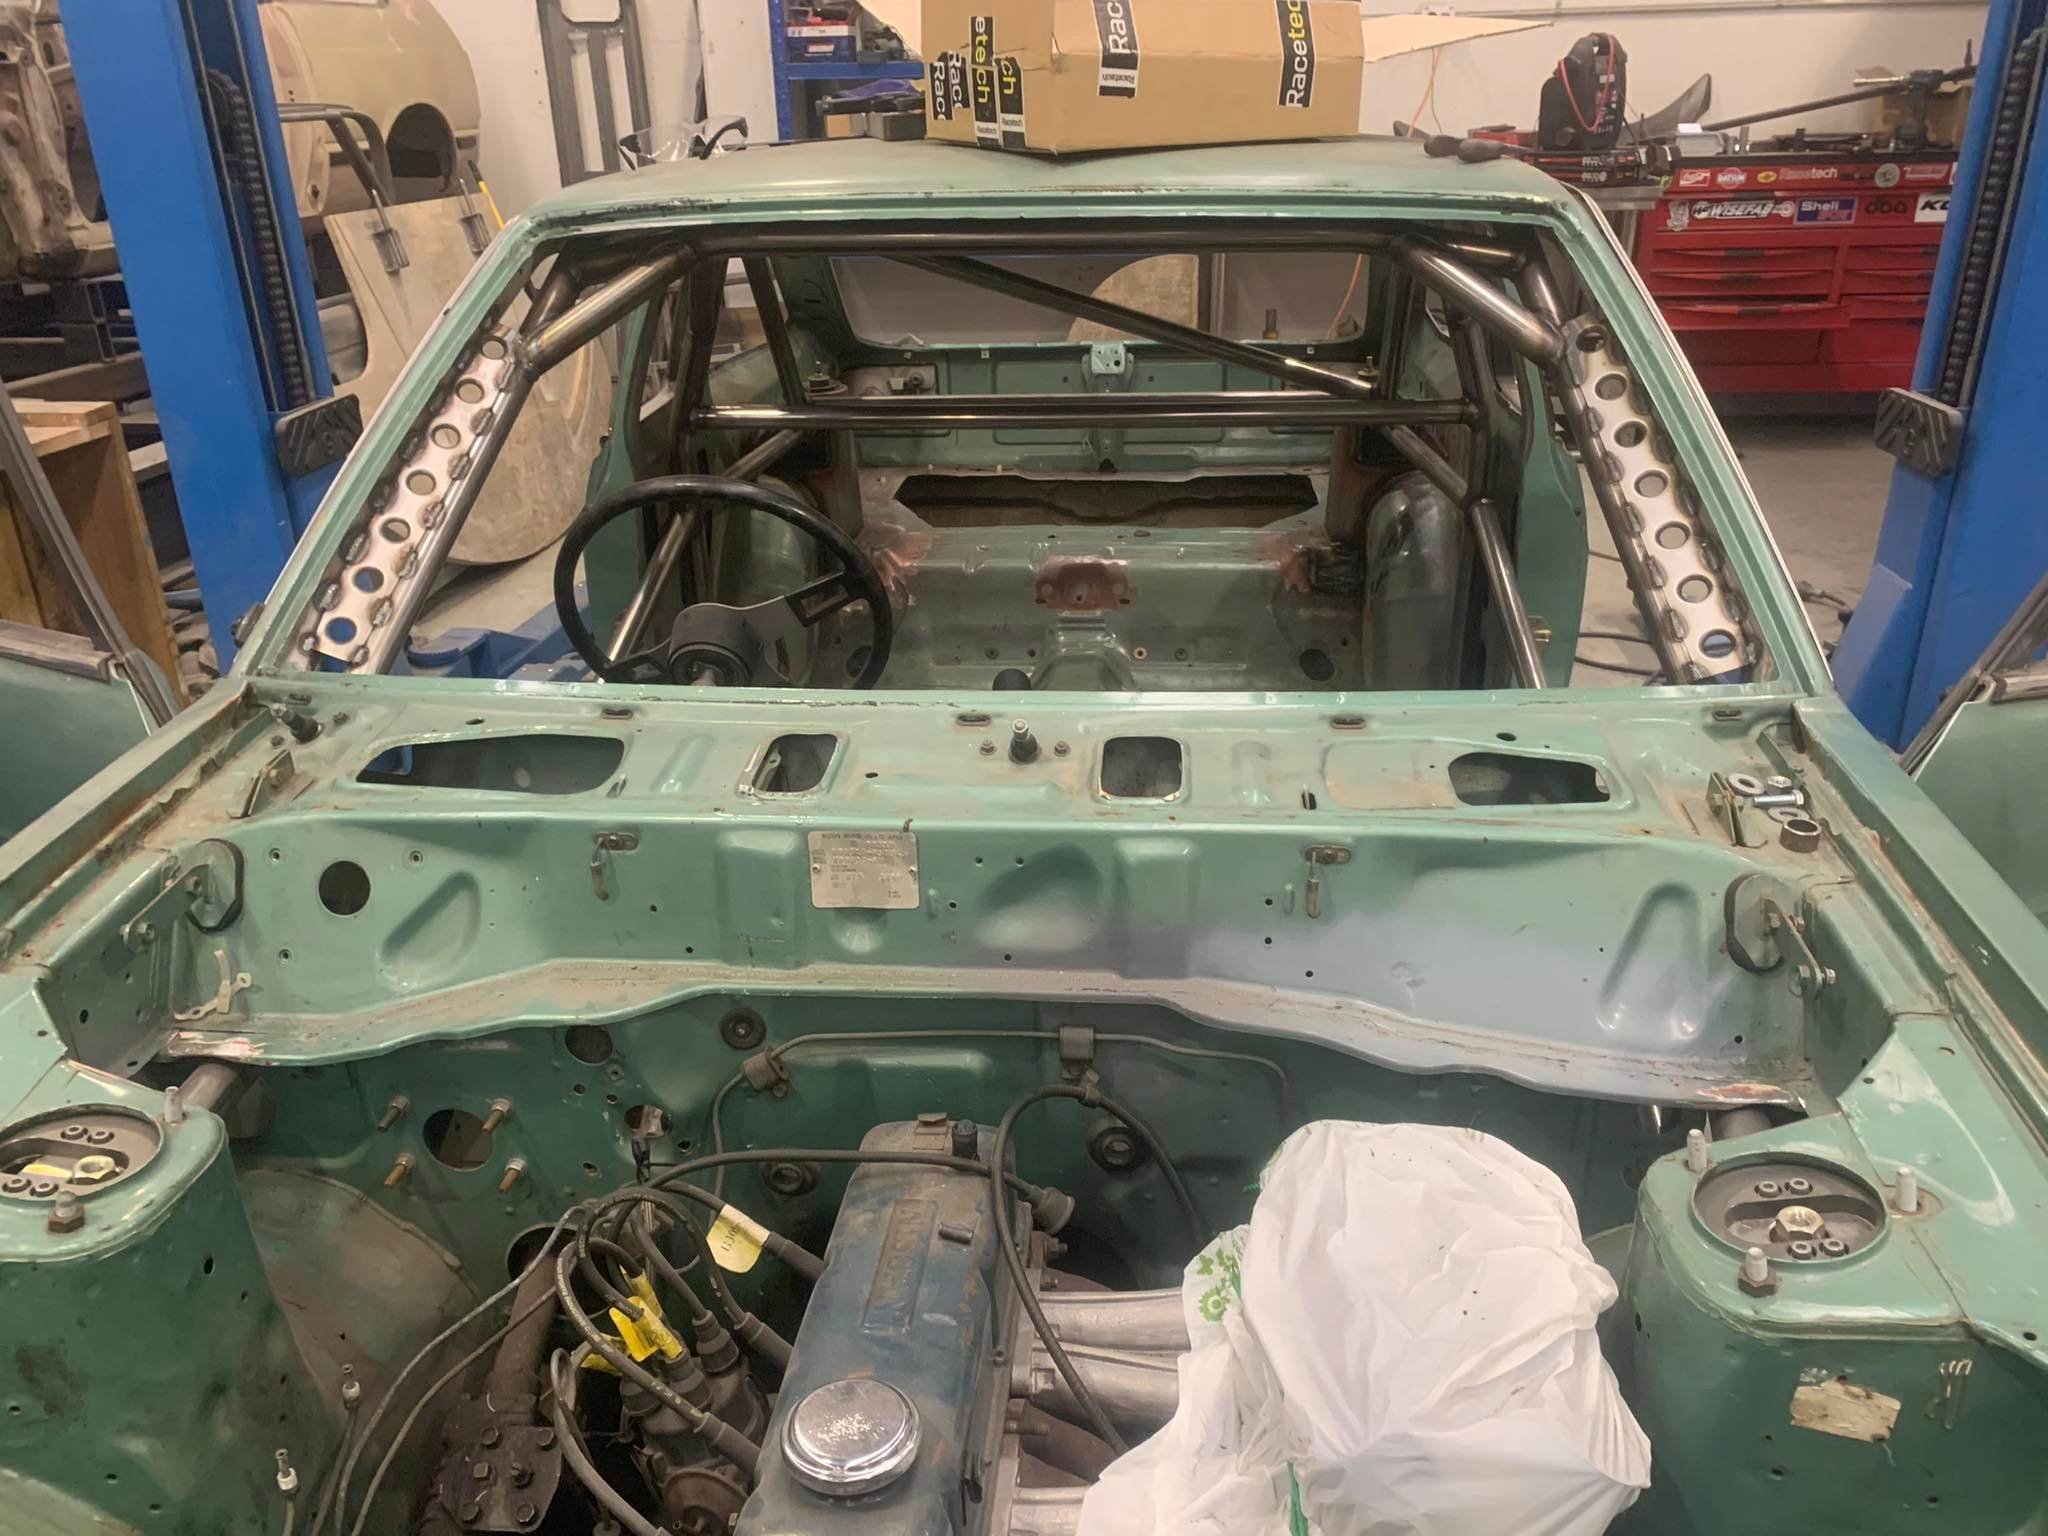
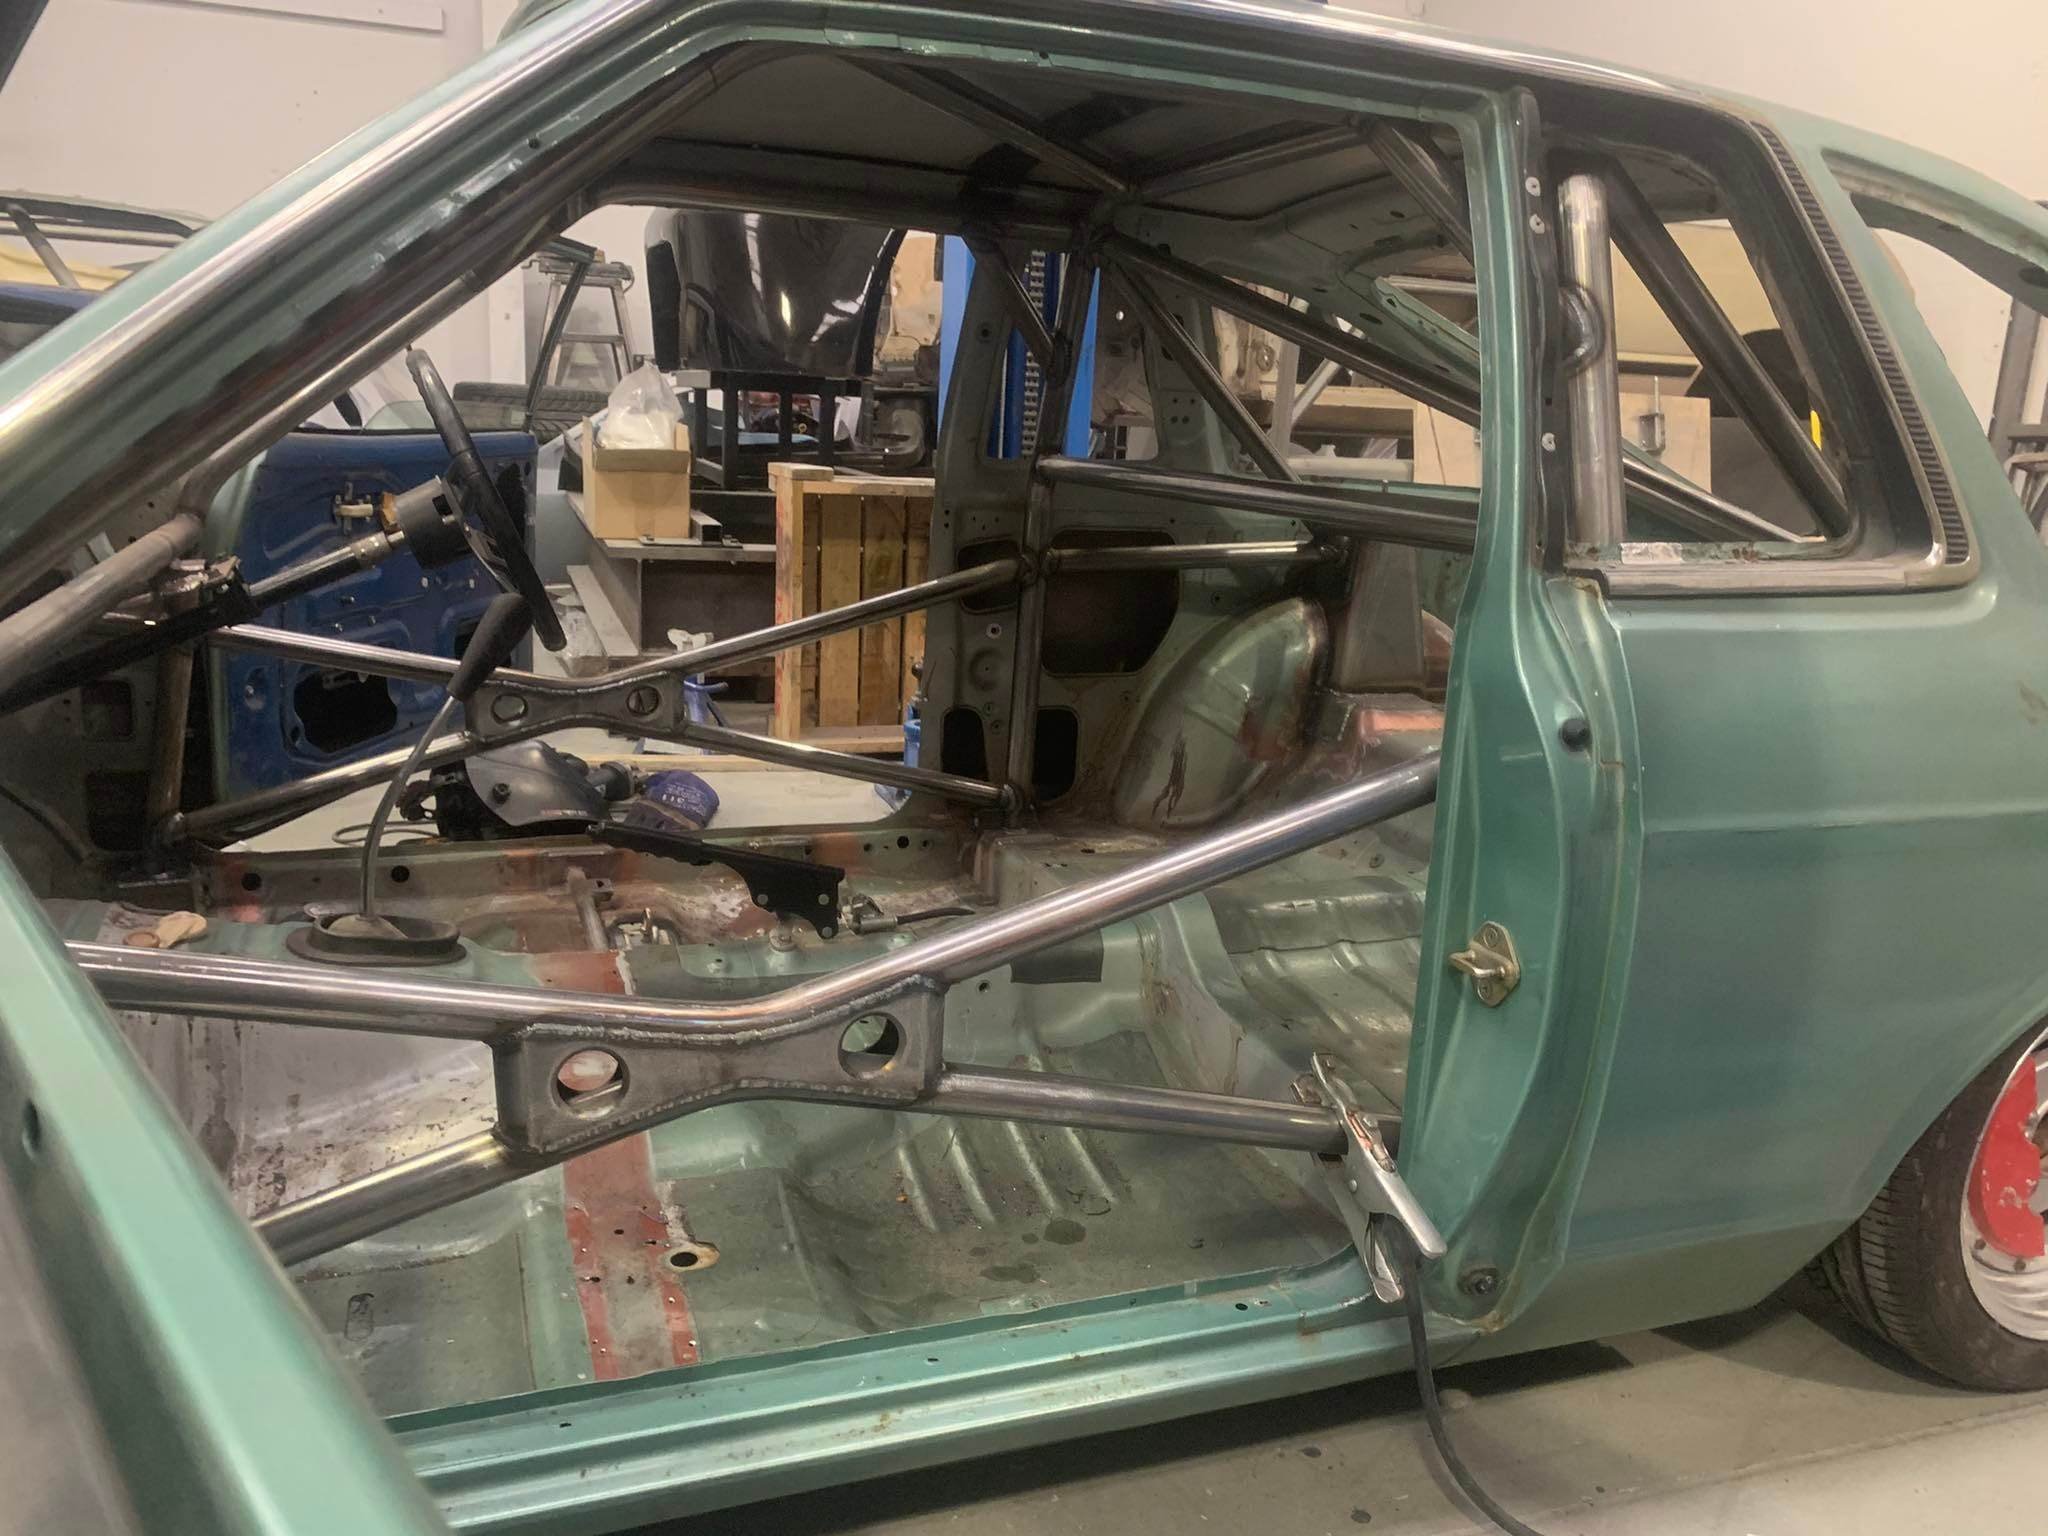
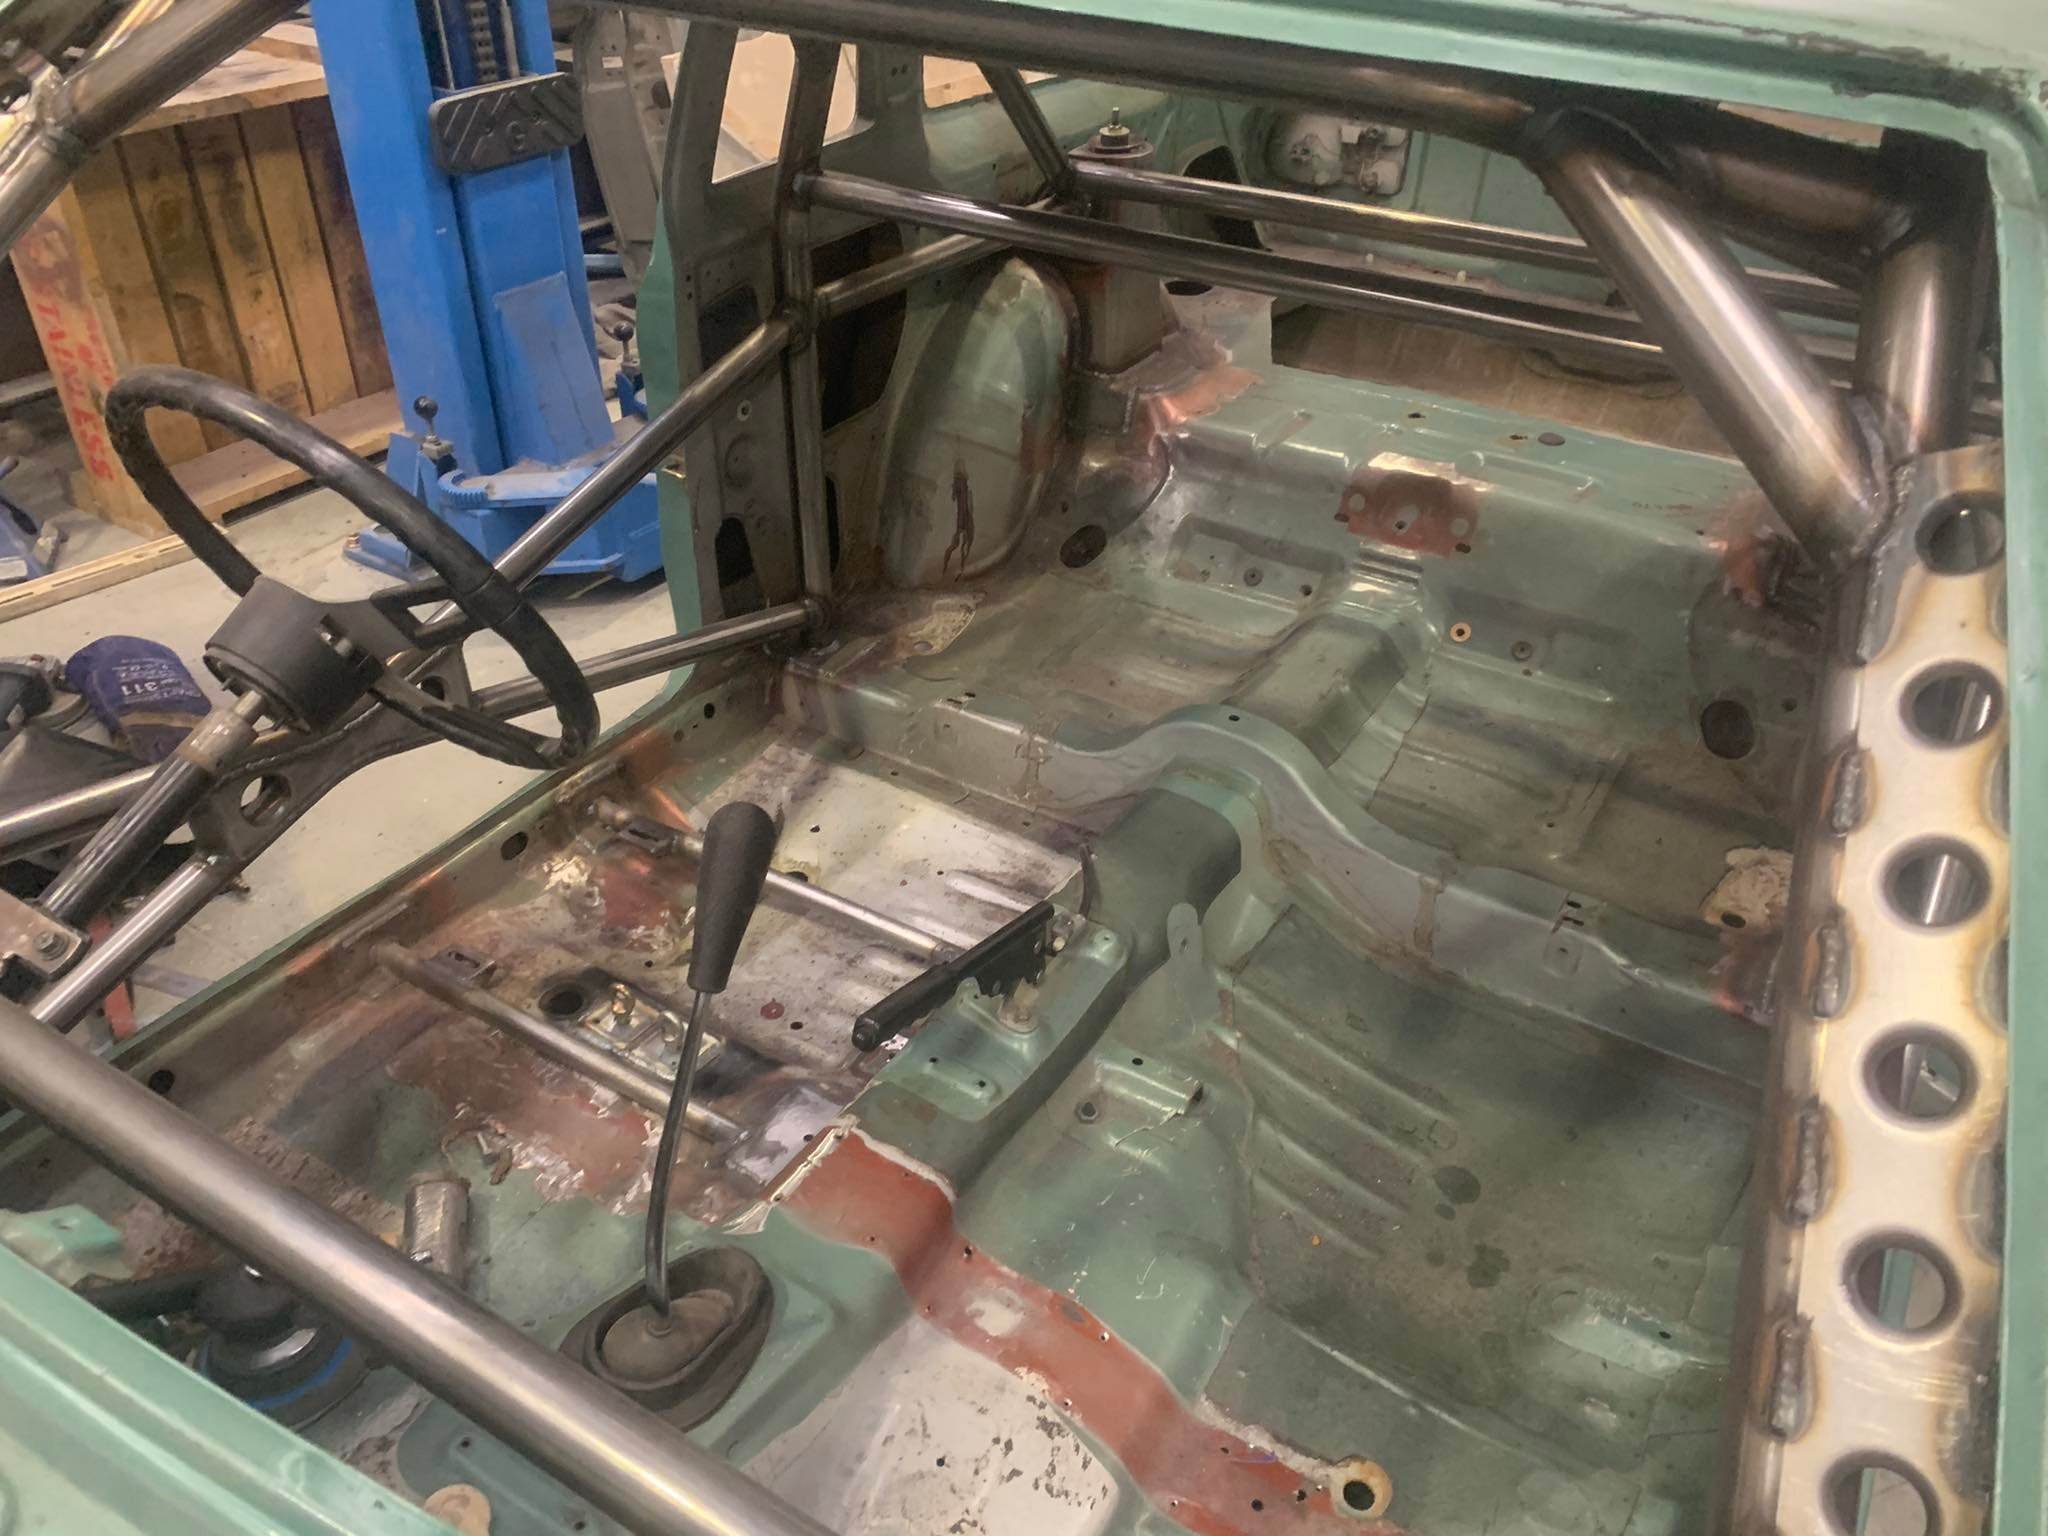
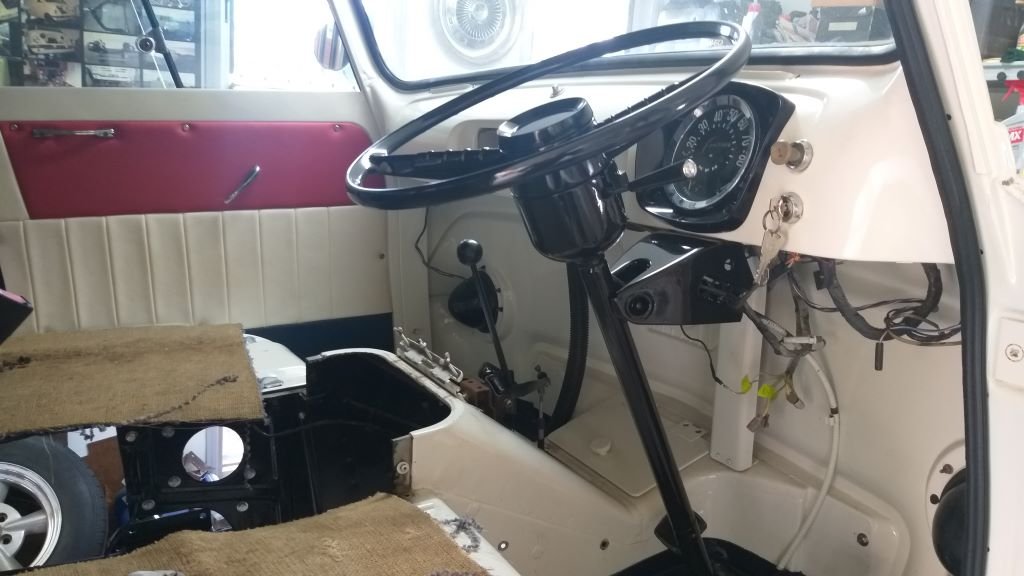
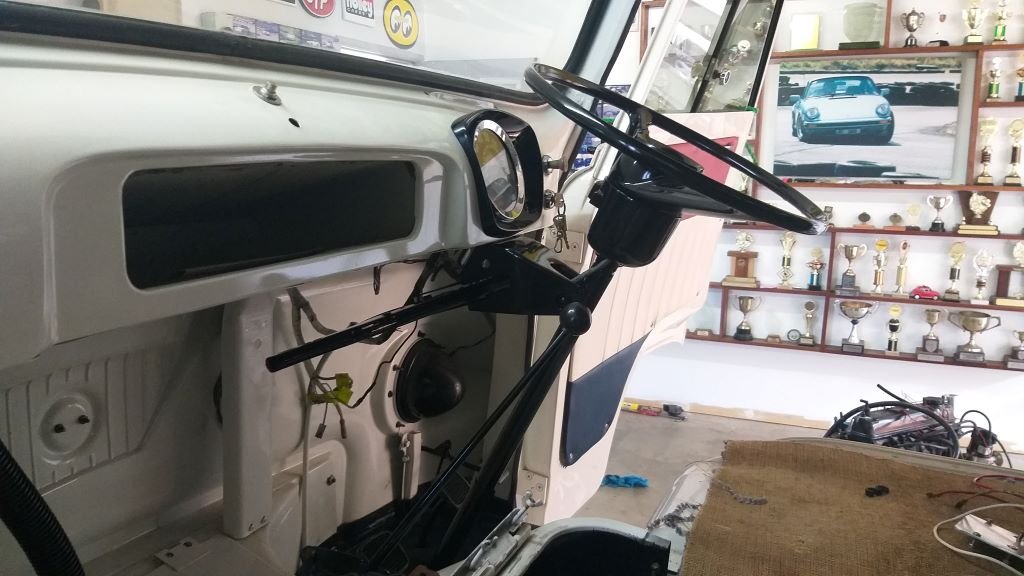
I spent the morning putting in the freshly painted steering column and wheel for the very last time. Fitted my NOS indicator mechanism at the same time so everything is nice and fresh. With the column firmly bolted in place I was finally able to connect up the handbrake mechanism and give it a go for the very first time. Works like an absolute charm which is a relief as it's a real mishmash of Thames and Toyota bits, so I had my doubts about it. Anyhoo, pictures of the fresh install looking rather bling:
1 point
-
She's been a while since ive updated this. Have been a bit busy playing with bikes that arent exactly oldschool. A few things have been added to the stable since the last post and a few sold off. The Dommie went to a good home and old mate was super stoked. I purchased this choice old CT125 thats currently in Hogans shed that i need to get further north if anyone is heading up with a ute or trailer. Even to blenhiem will do. I was meant to get it when down for the Dusty Butt, ferry cancellation ruined that. I grabbed an XR100 of @Chris.QCR which is super rad. few wee jobs to get it going and moving and used it at garlic masters which was hella fun. Last winter I added a new DRZ400 to the stable after thinking it was going to be my dream small adventure bike, which it kind of was at the time. Dropped about 5k doing heaps of mods to make it adventure friendly and used it on a 600km "one big day" adv ride in raglan and then appx 2500kms in 4 days for the Dusty Butt down south. Went great and I should be really happy with it but I rode a KTM exc for an hour or so on the ride, and was kinda converted. Oil change frequency goes out of your mind when something can slap a full ear to ear smile like the KTM did, and that was an older model 2013, the new ones are even better, so, when i got home the DRZ got cleaned and slapped onto trademe and I payed AFC motorcycles a vist and came home with this. 2023 500 exc-f. Have ordered bunch of bits to adventurise it, larger acerbis tank, seat concepts seat, fastway footpegs, new plastics to keep the OEM ones fresh, steel sprocket, XRC dampened bar mounts, stiffer fork and shock springs which i already biffed in. Should make a pretty sweet technical trail adventure rig. Already planning out some sweet west coast mining exploration routes which should be sweet.1 point
-
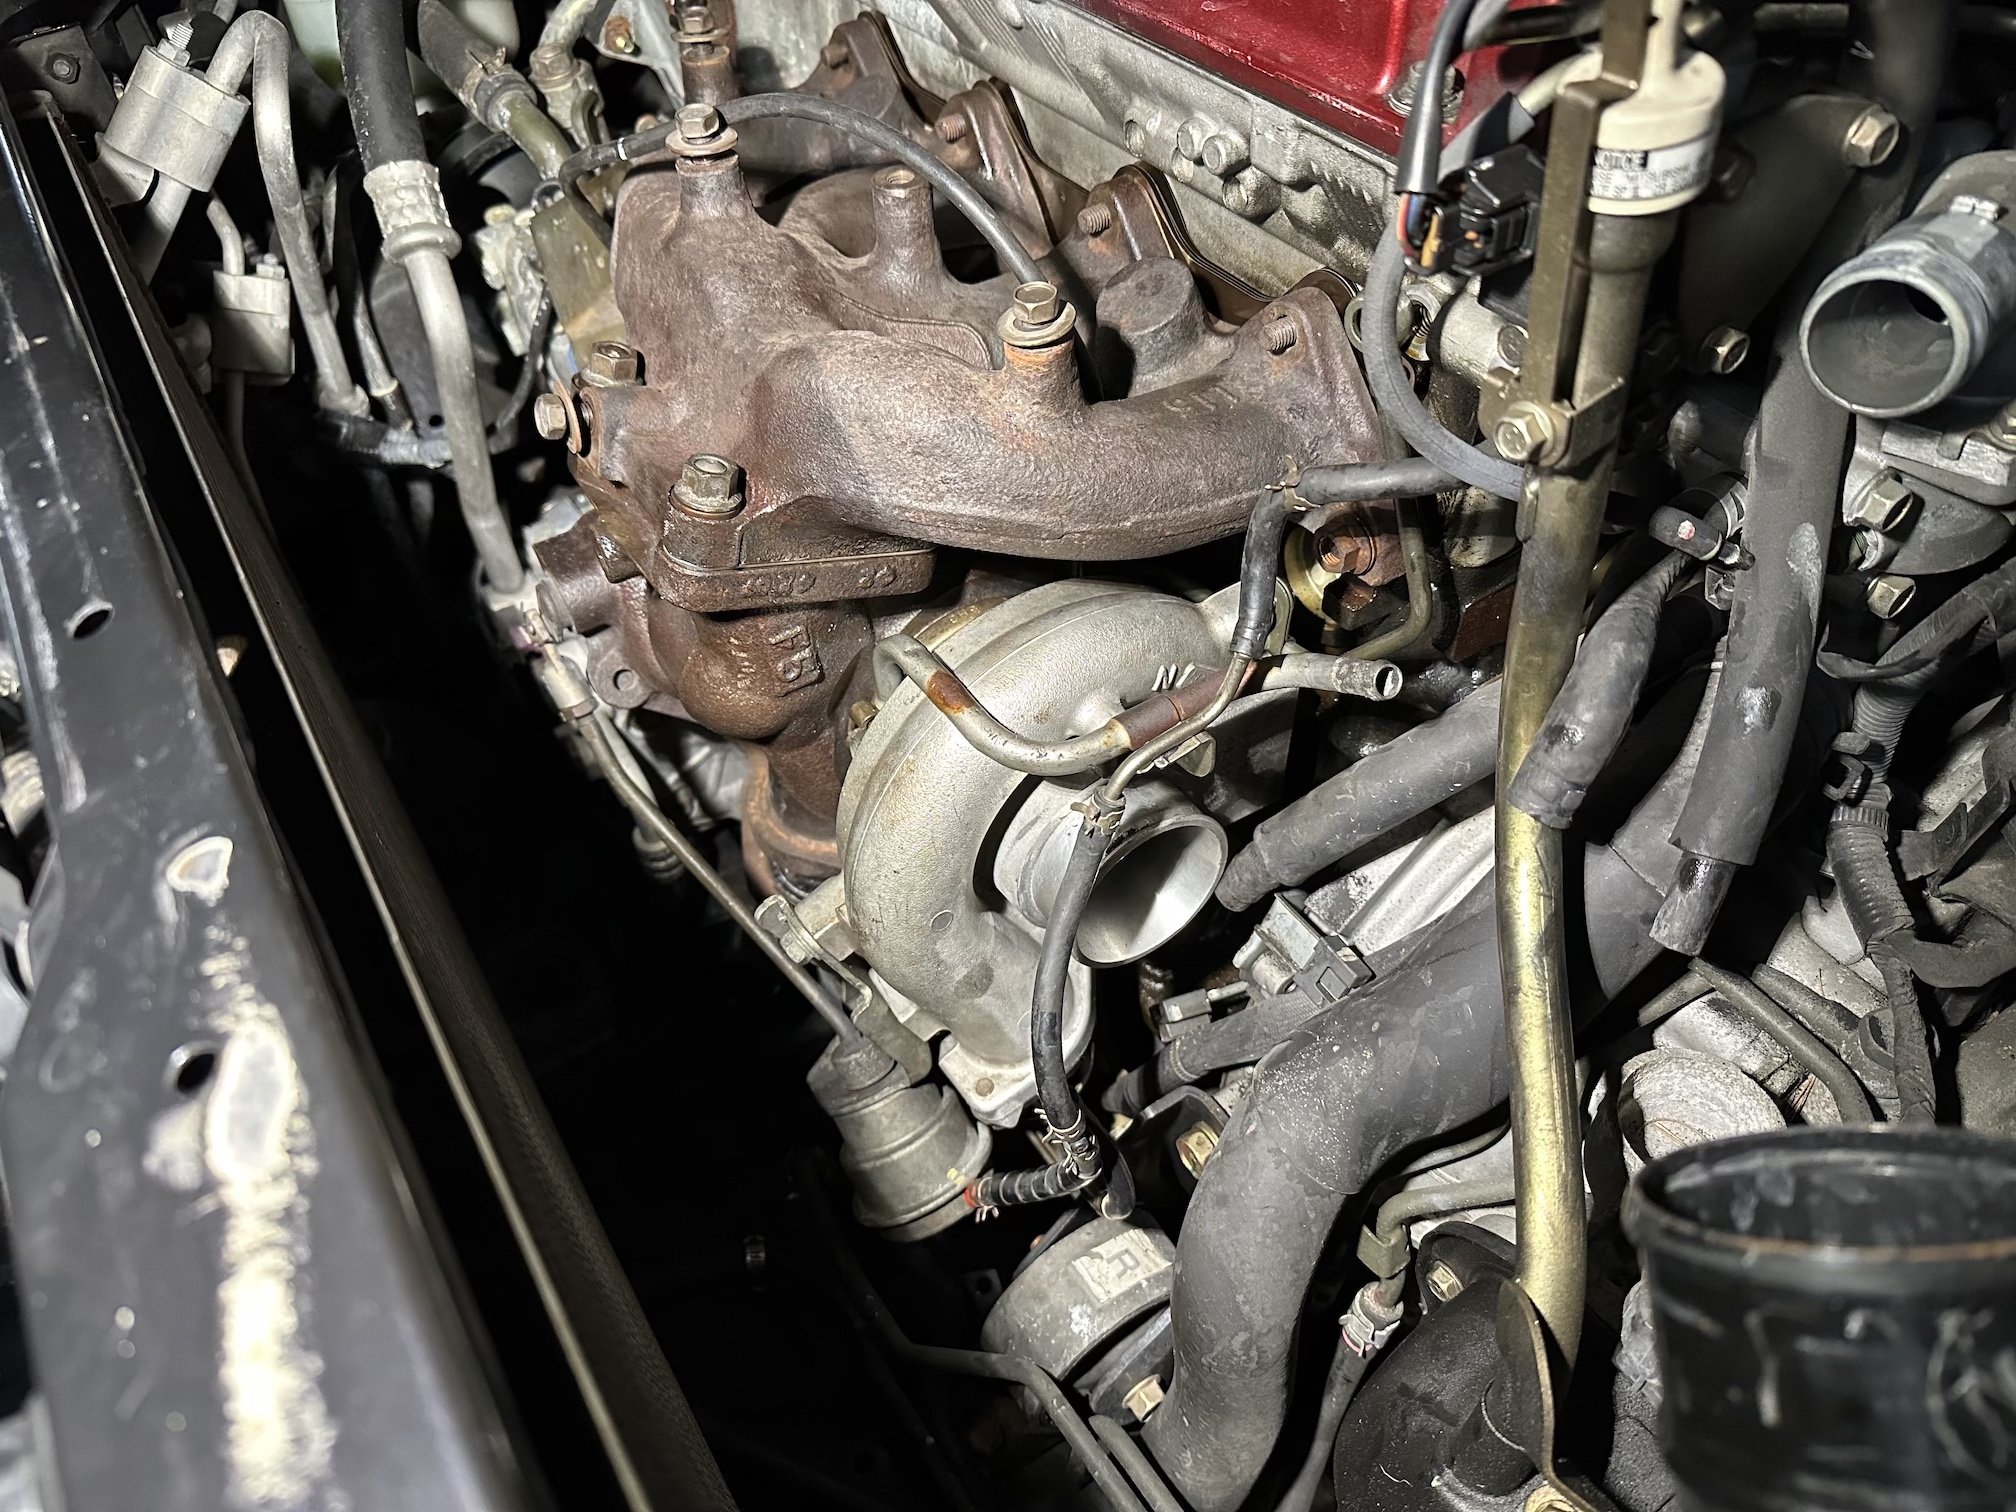
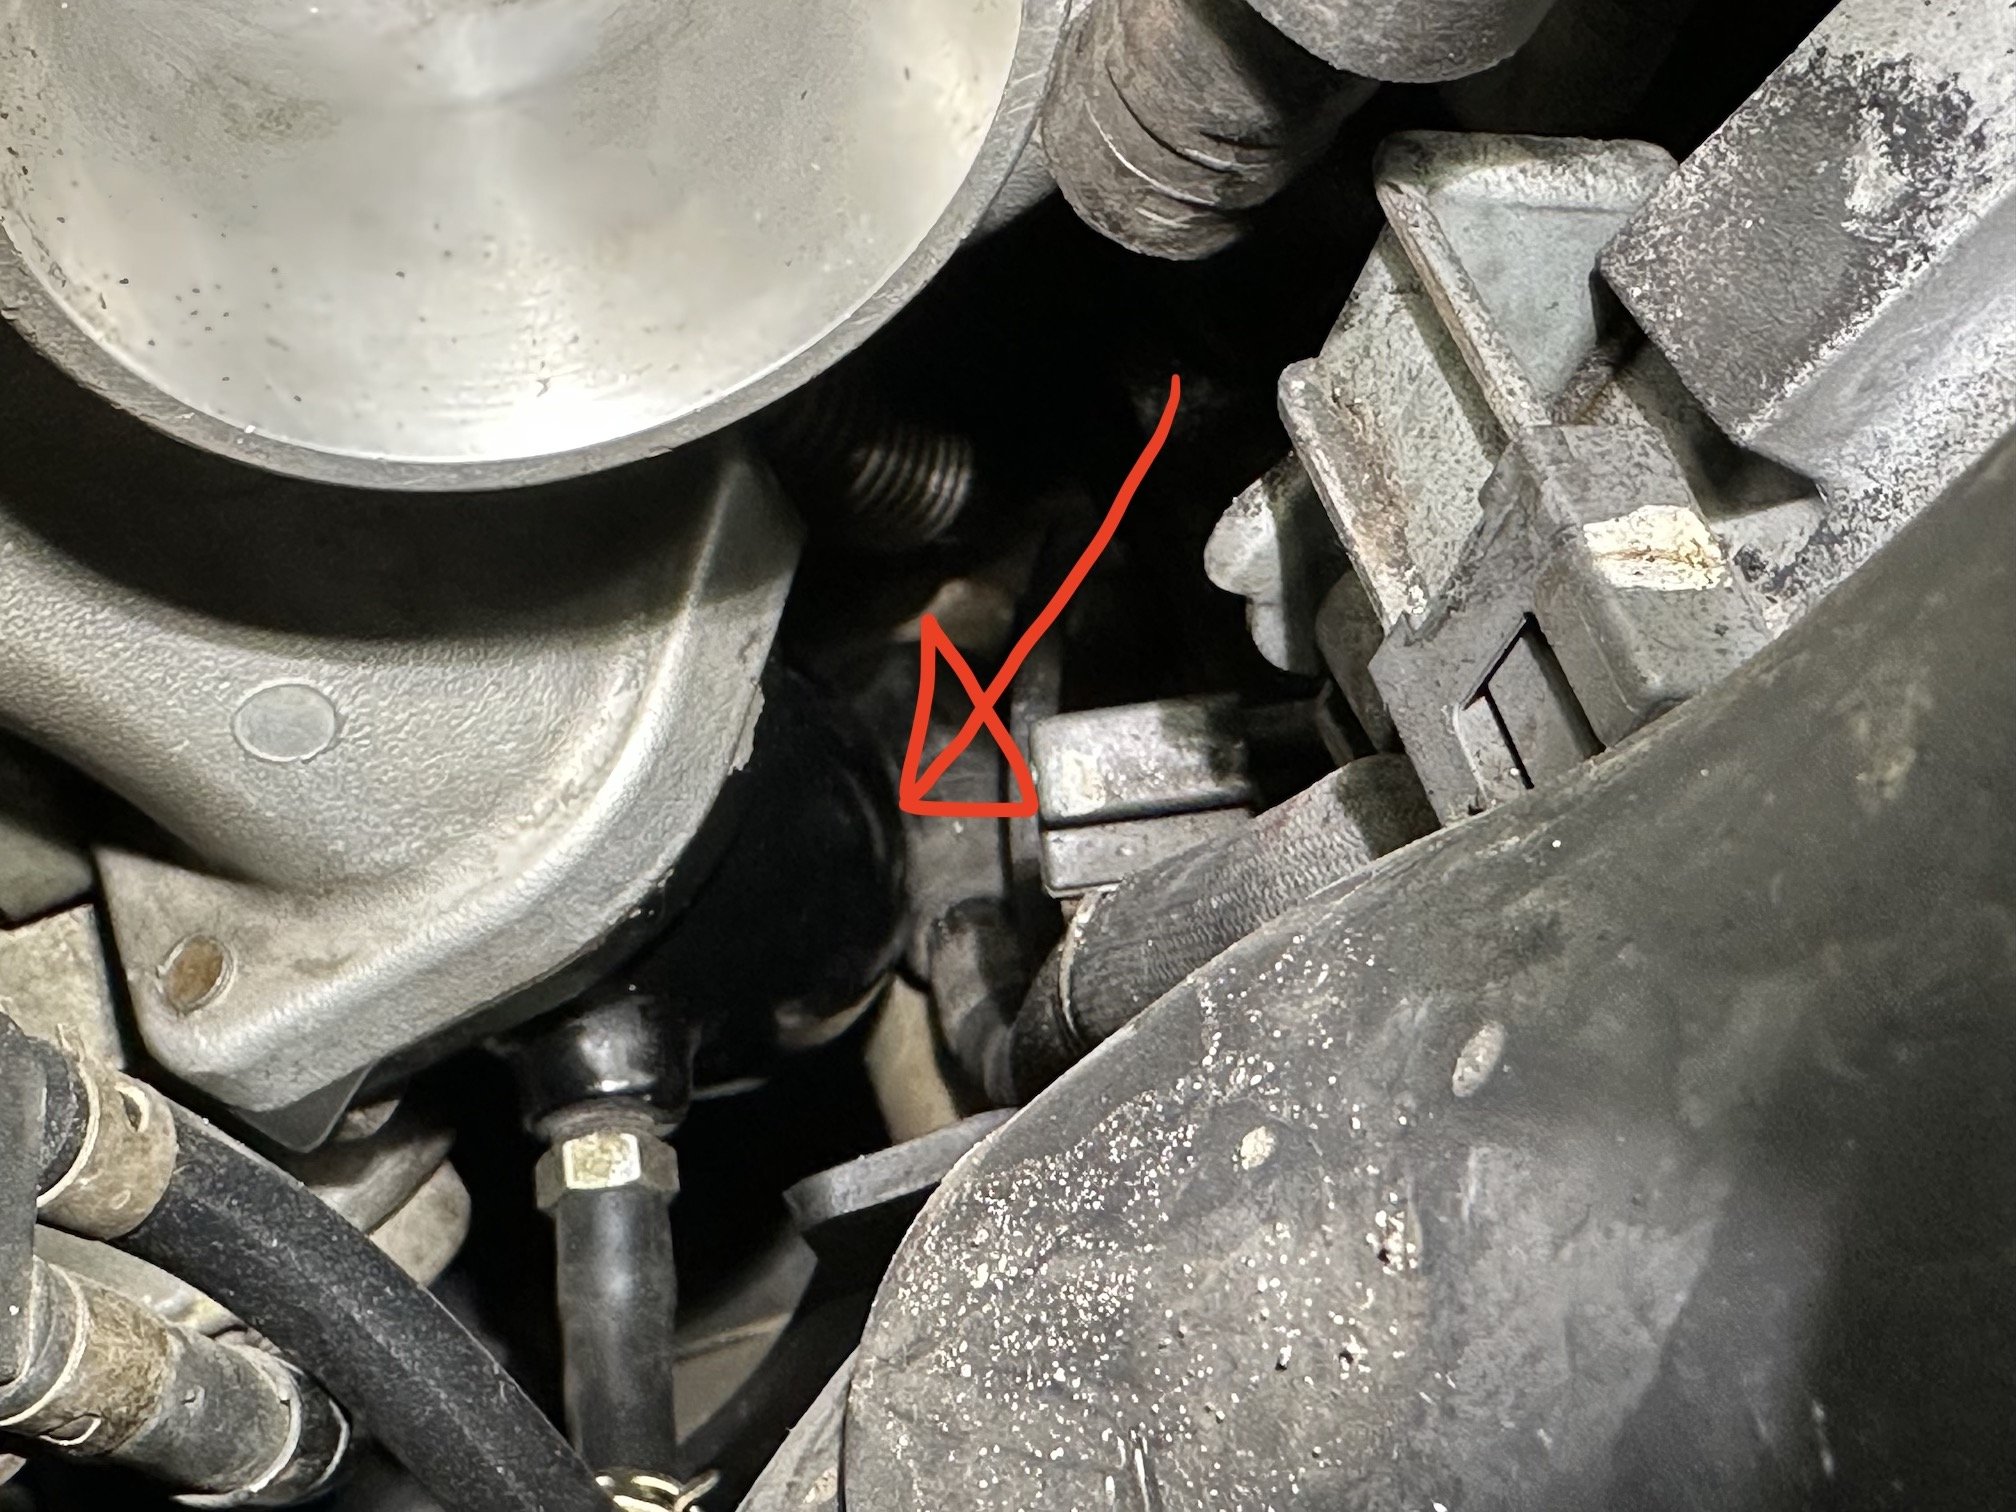
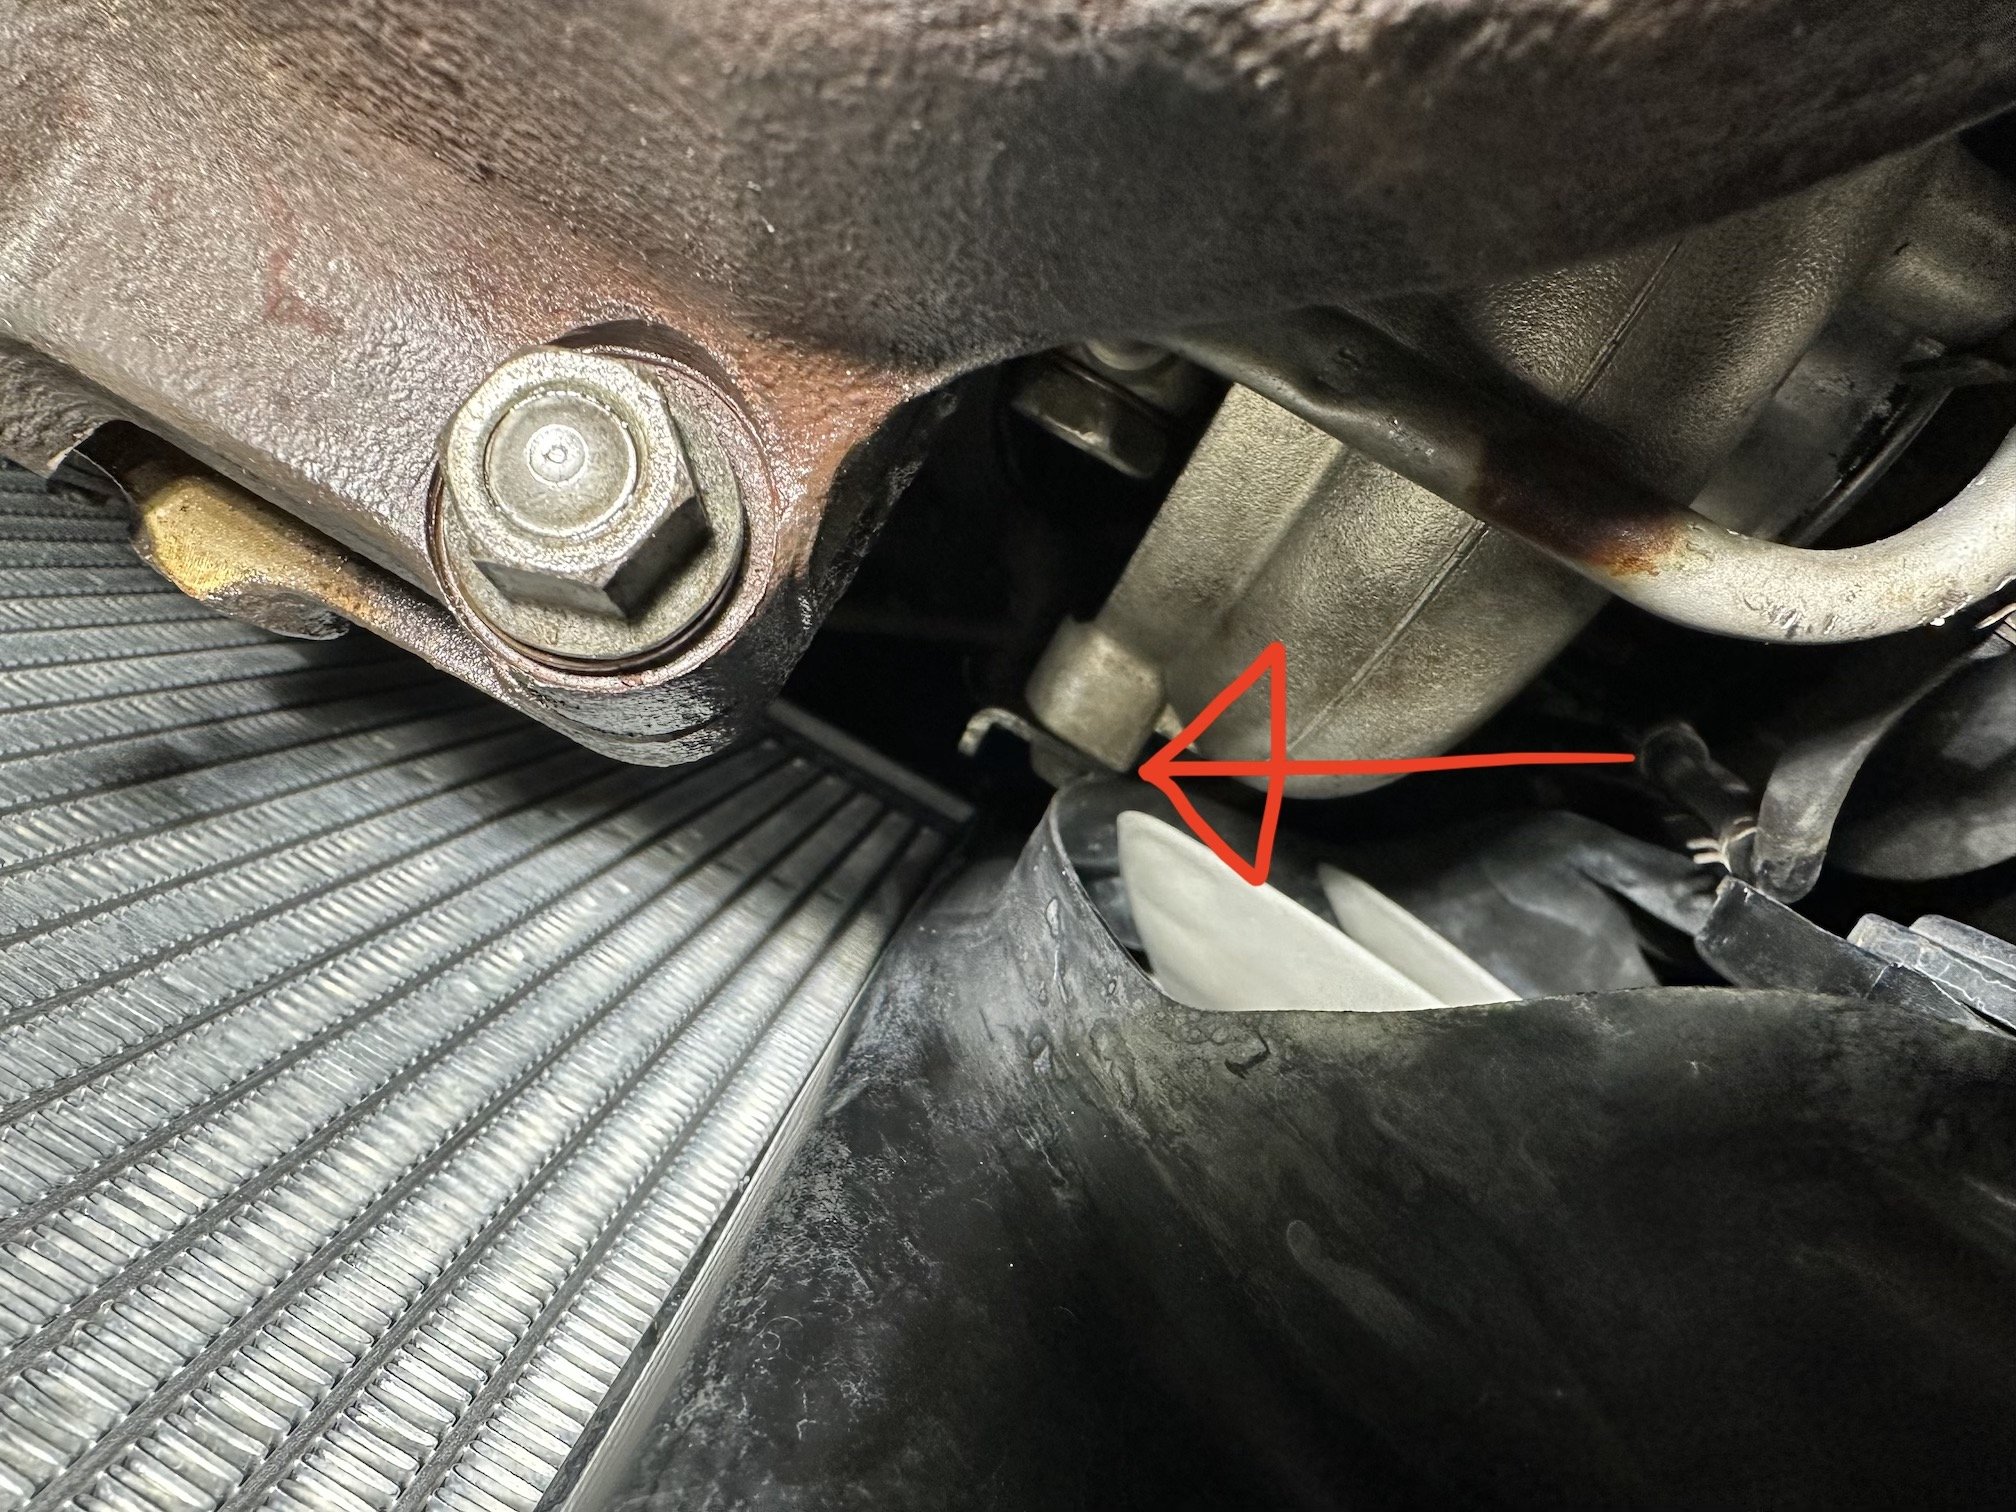
So ran into a snag right before leaving to come to NZ - the manifold to turbo flange bolt threads were trashed and one of the studs was damaged too so needed to find a M10x1.25 tap and some replacement bolts and studs - thankfully had plenty after rummaging through my bucket of nuts and bolts in NZ. Slapped the 16G onto the manifold with new gaskets ... and found that the Meek turbo outlet (J pipe) fouls on the starter motor. Hard to see in the pic but put an arrow where they touch. The problem is the IX compressor housing being larger requires its own specific outlet pipe which is different to the outlet pipe from the stock turbo and it seems while the Meek pipe is meant for both VIII & IX style compressor housings, it doesn't quite clear the starter. I'm going to try slot the mounting bolt holes so I can hopefully rotate the pipe further away from the starter (and exhaust). I want to use the Meek pipe if I can as it's a 2.25" outlet instead of the stock piddly 1.8". I have picked up some aftermarket intercooler piping too to suit the larger diameter of the Meek J pipe outlet. The turbo wastegate bracket is super close to the radiator fan too, but should get about 5mm of clearance once the J pipe to starter clearance is sorted as I can fully slide the turbo onto the exhaust studs.
1 point
-
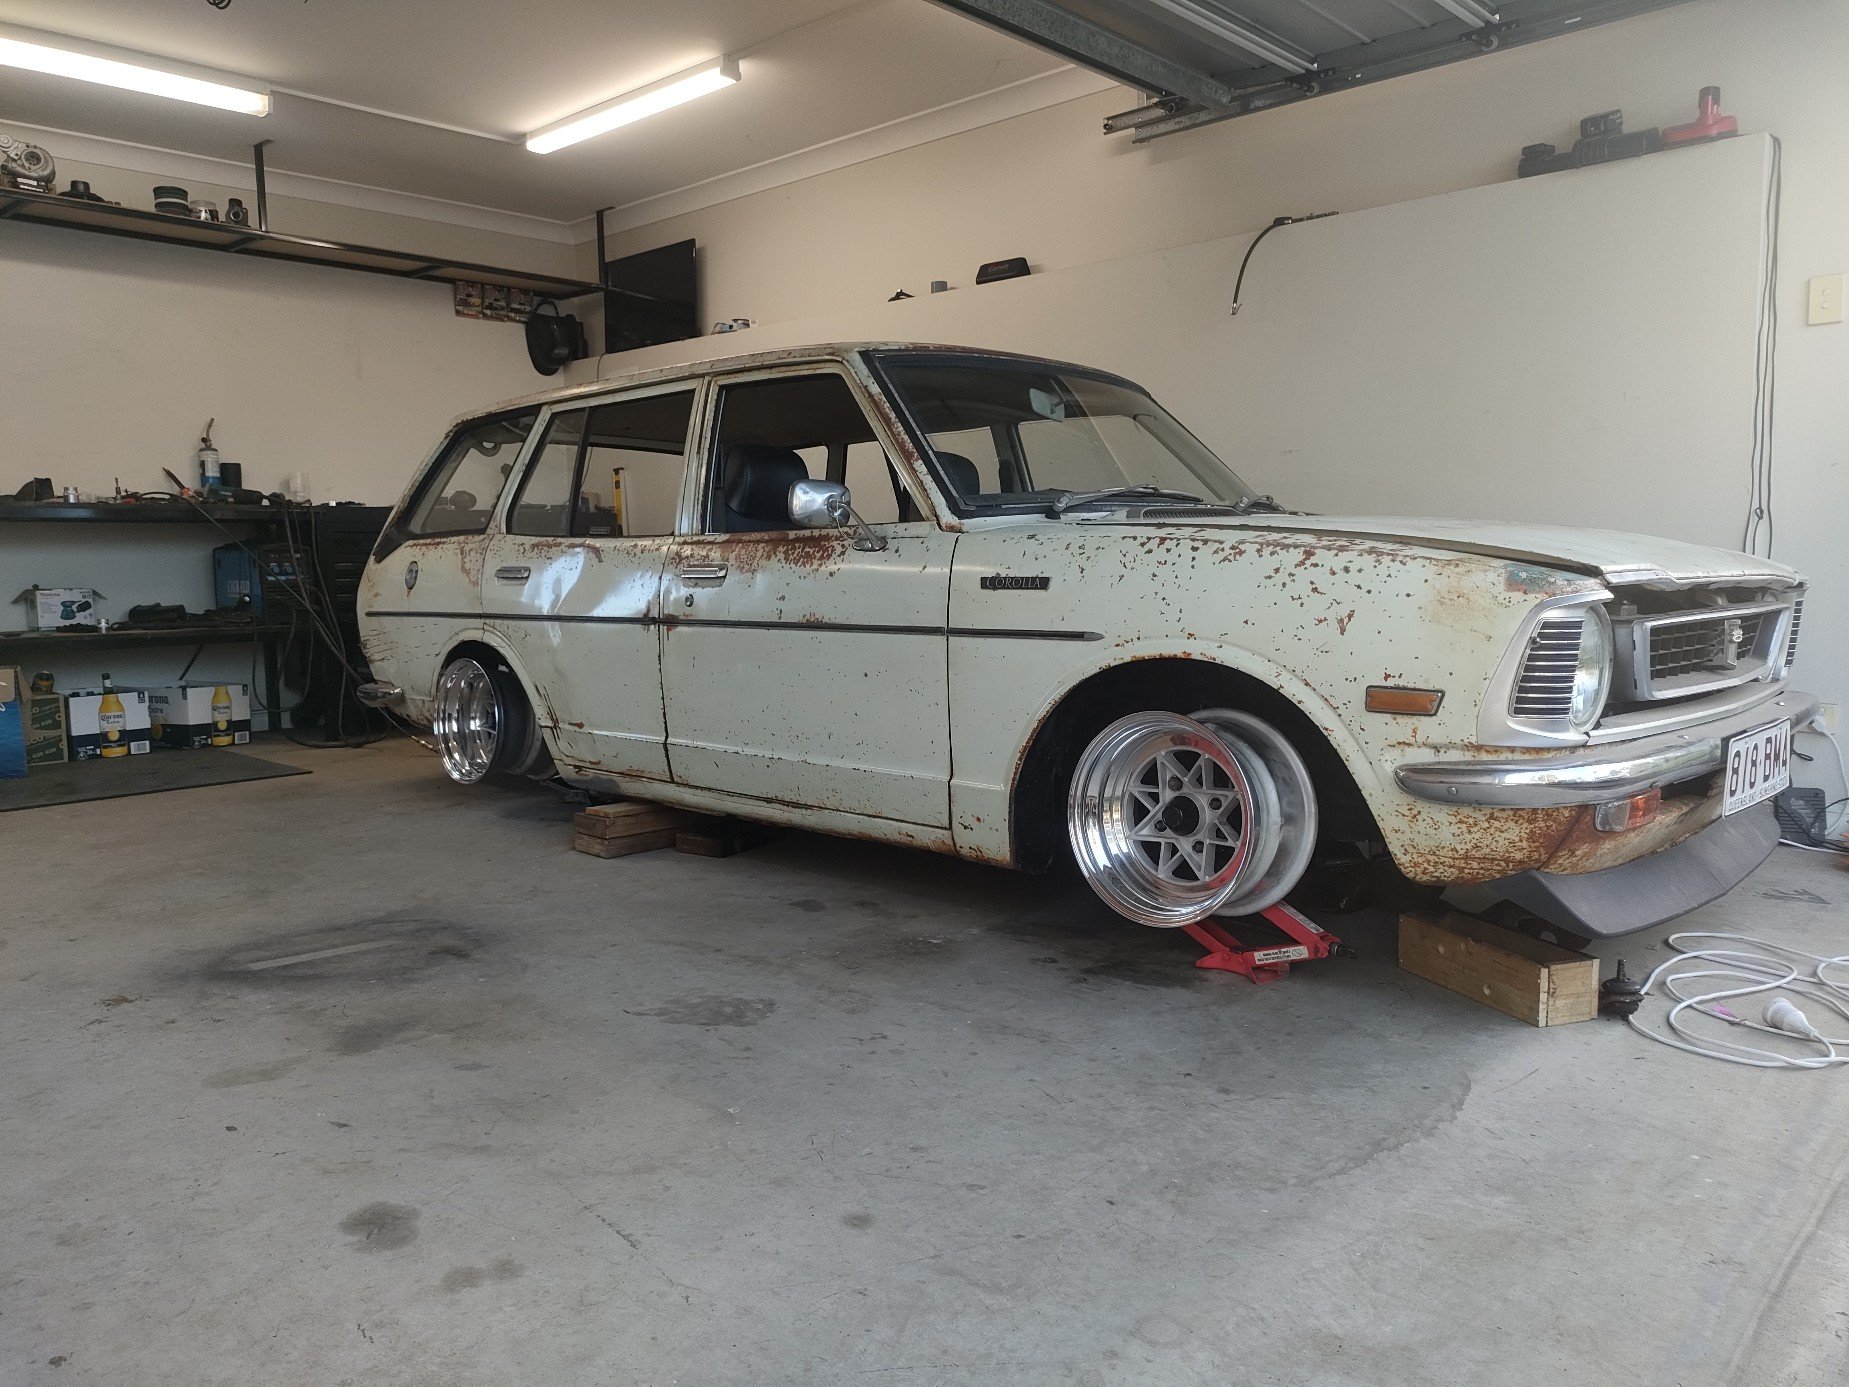
I got Elite wheels to move the centres 30mm outward, bringing the tyre in and away from the wheel arch. We now have clearance and a much better stance! Always a shame to lose max dish, but still plenty there. I’ll risk tangling with the guard if I put lowering blocks in..will let everything settle and re-assess the situation. Have not achieved much else to be fair, the electrical shit has me beaten. I did get some rubber to go between the guards and engine bay (it was dum-dum paste originally but it would stick like buggery and cause damage if I need to take it apart in the future) I haven’t been lazy though, I built a lean-to for the Escort and then tore the Falcon down to finally do a quick panel & more importantly, paint!1 point
-
I just checked my internet banking. My total Fuel bill for the whole trip came to $49.23. Not bad for 850 Kms.1 point
-
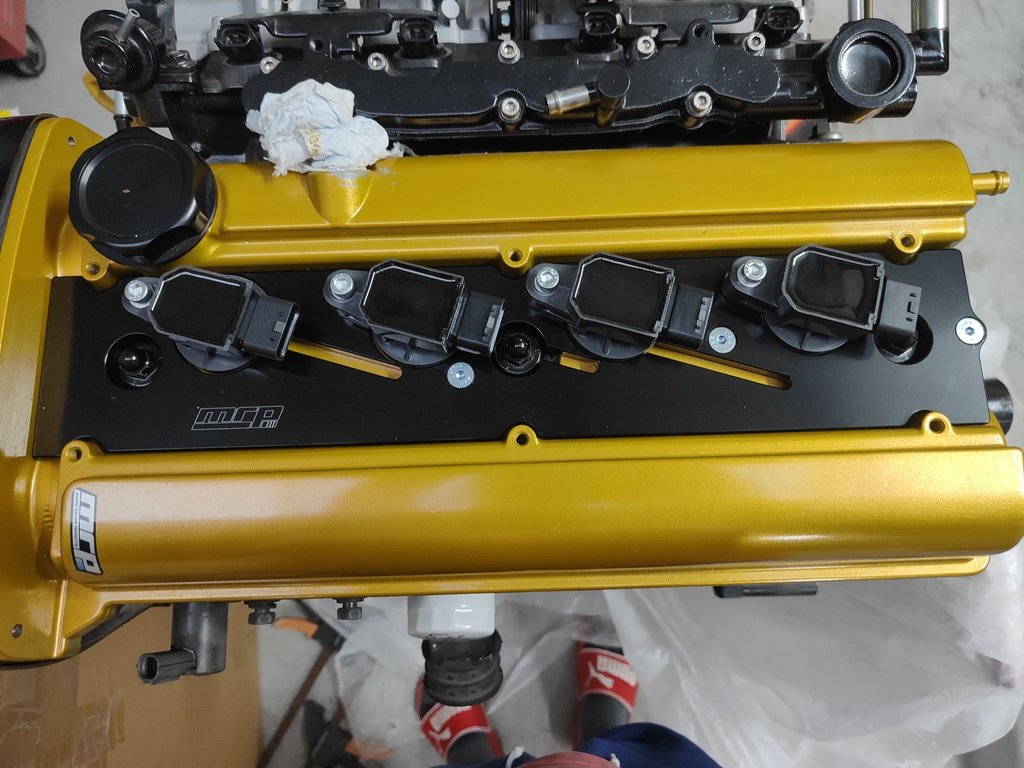
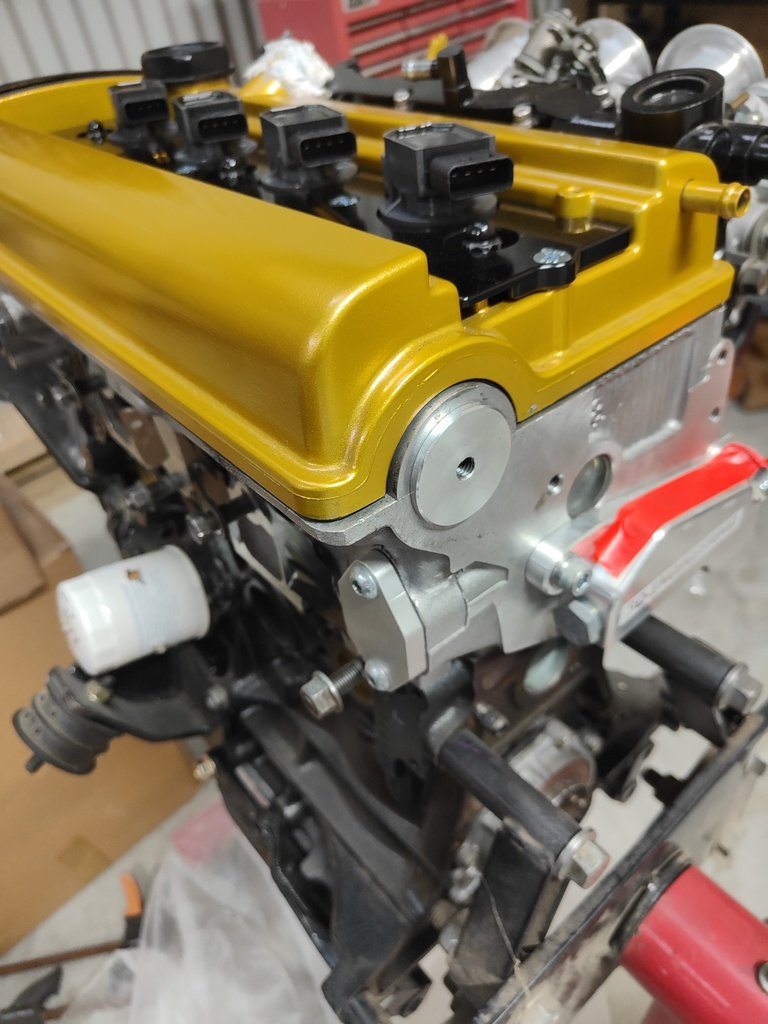
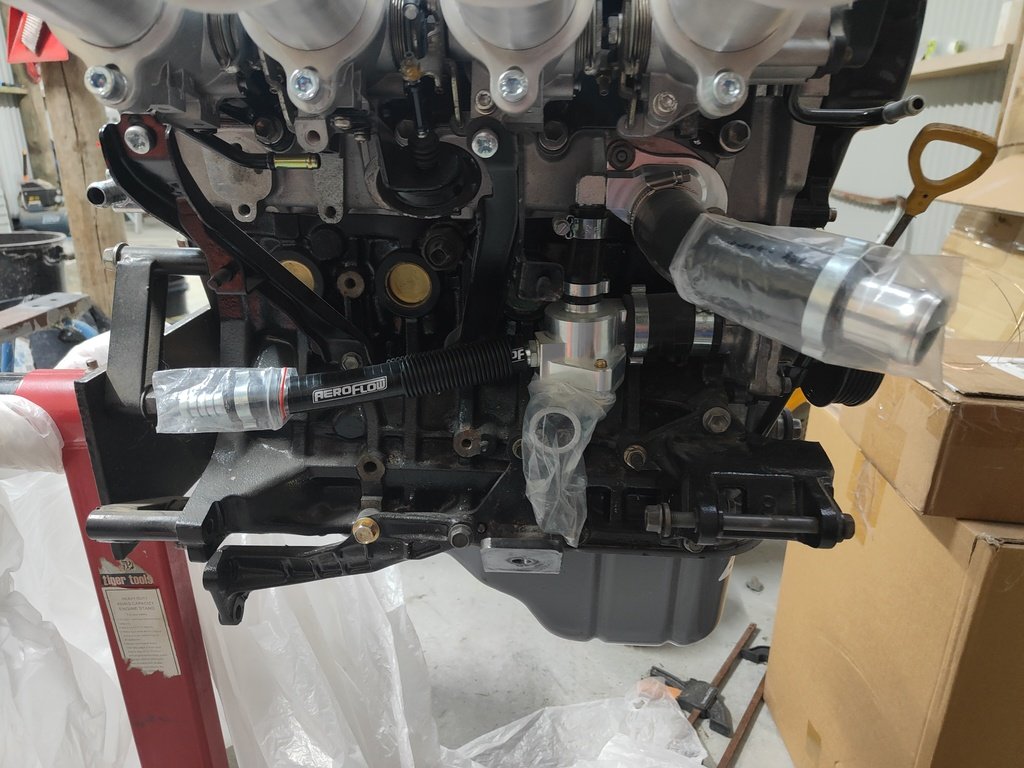
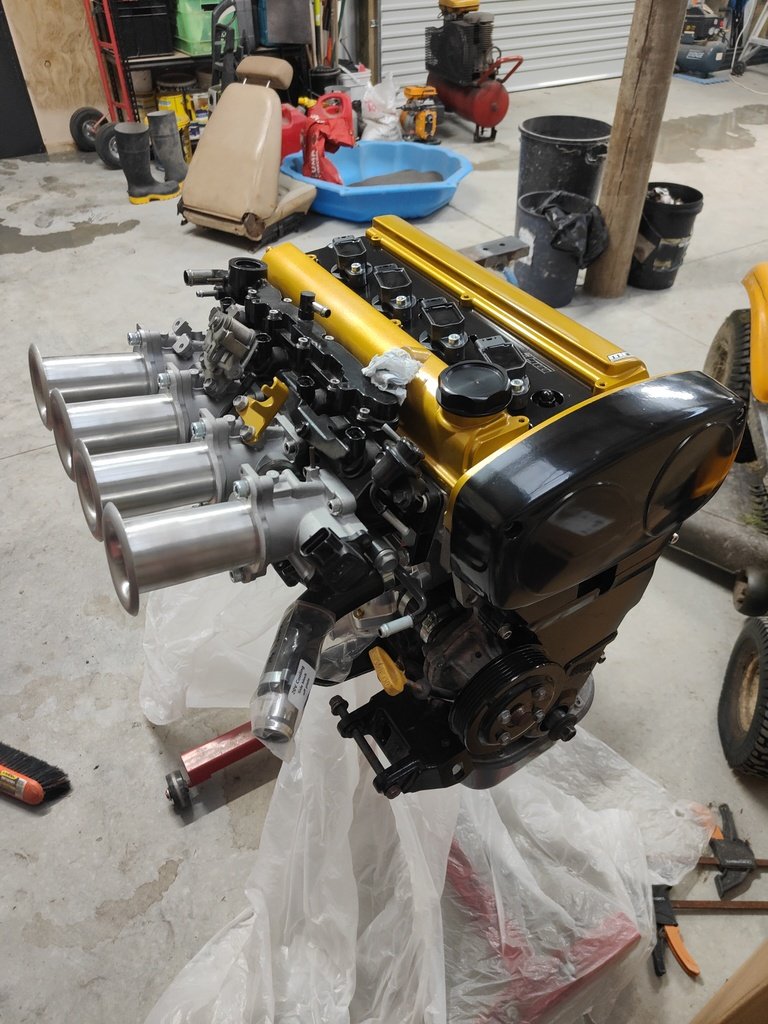
The 20v long block is now all done, with some extras from SQ engineering and MRP. I had a mate turn up a small pug for the dizzy block off as having the dizzy in place with the MRP cover would hit the firewall. The head got a light porting and some polishing which turned out pretty nice. I scored a 22 spline T50 for a good price with an S series bellhousing but scored a cheap T series bell housing for it. I got the trumpets from guy in Tauranga, they are hand spun and a really nice bit of kit. Next on the cards for the engine is a trigger wheel setup and single row pulley.
1 point
-
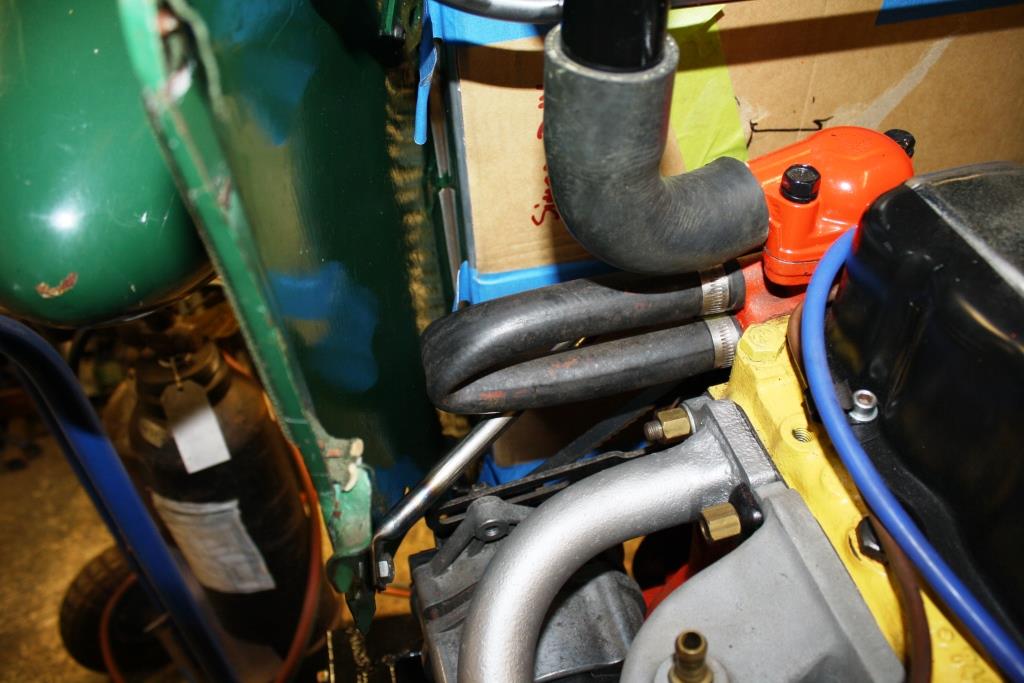
Yeah, I've got an update for this old crate too. Got some overnight parts from Japan. All new water hoses ( except the rad hoses coz I'm a dork) & new strut top mounts. I made up the rad hoses out of bends & also had the rad re-cored because leaky. And, it turned out, blocked solid. So all fitted & it now stays cool, doesn't leak & doesn't crash around at the front. I have plans for it though & I intend to implement them before a couple of local car shows in the spring. I've told Mrs Shuzz she's driving it coz I'm driving the Chevy. She looked worried. / pics of rad & Hako for Fred.1 point
-
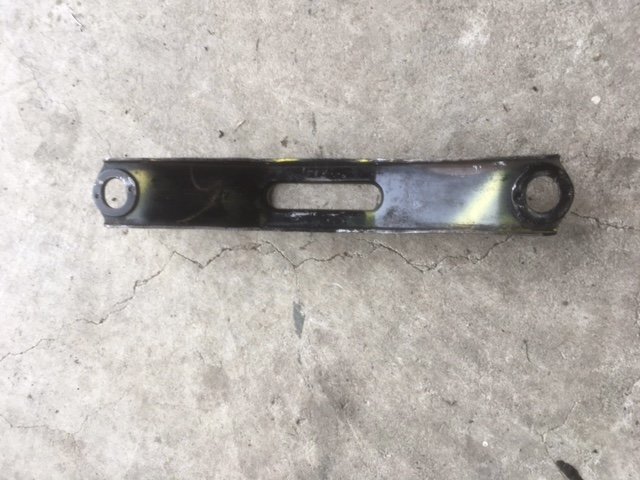
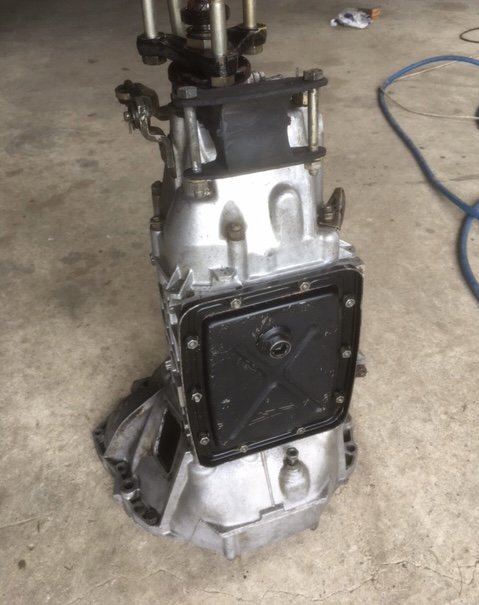
Today I thougt I might clean the gearbox so it’s ready to go when the time comes. This culminated in spending 3 hours with Exoff, various scrubbing tools and the water blaster. I guess I had forgotten how truly filthy it was, I mean it would have made a Land Rover blush… Readers may remember I had noticed the crossmember and corresponding point on the chassis were a bit bent. Er, more than a bit it turns out. It’s amazing what you can see when stuff isn’t covered in greasy filth. Yikes! Also check out the gearbox mount. It’s about the consistency of cheesecake. A combination of vice and large hammers got the crossmember straightened. It’s now in the acid bath for superduper cleaning. I made a tool for my slide hammer which in concert with my biggest ball pein carefully straightened the chassis rail. Great success. And check out my shiny box.
1 point
-
Useless update time. It’s on its wheels. What I discovered is that the Fiat 124 shocks are close but not close enough for the rear. The eye sleeve has a 10mm hole in it, not a 12 as I require. The sleeve itself has a wall thickness of just over 4mm, so I thought no problem, just drill it out. Well, even in a vice etc and stepping up in 0.5mm increments, the bush moves around enough that the hole in one side ended up not quite on centre. Close enough for government work though. Combing through kyb online catalogues though, I have found a couple of very close matches. FB RX7 rears would be perfect, but hardly anyone has any. A 1995 Kia Sportage is also bang on, but maybe too stiff for a light car? And lastly an NA4W Mitsubishi Grandis also fits the bill dimensionally. Leaning towards the Kia as they are readily available (cheap) from Rock Auto. 124 jobbies are in for now. Pointless edit: I rolled her outside and the last couple of years’ worth of shed dirt got washed off too. Now using an indoor cover. I’m still waiting on some new gallery plugs. That’s the only thing stopping me from slinging the engine in although I might do the valve clearances on the engine stand too to save my back. I can’t fit my thinnest feeler gauge under any of the tappets, so some big changes required.
1 point
-
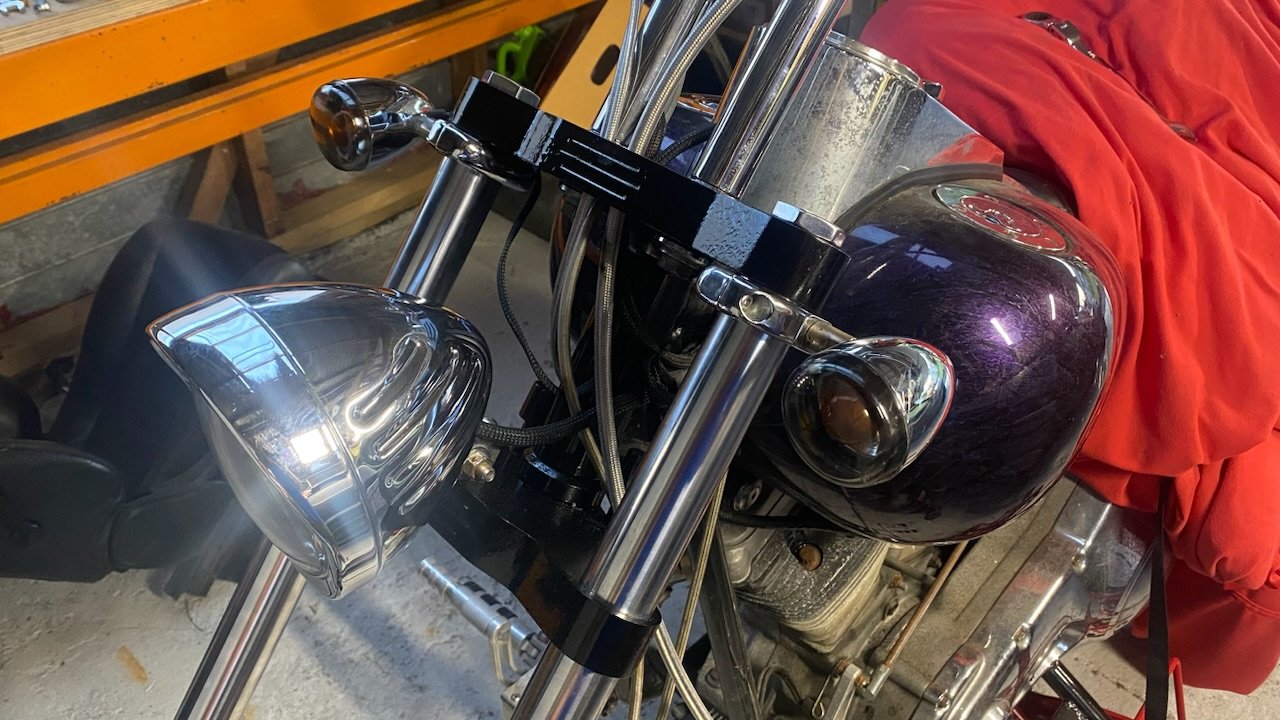
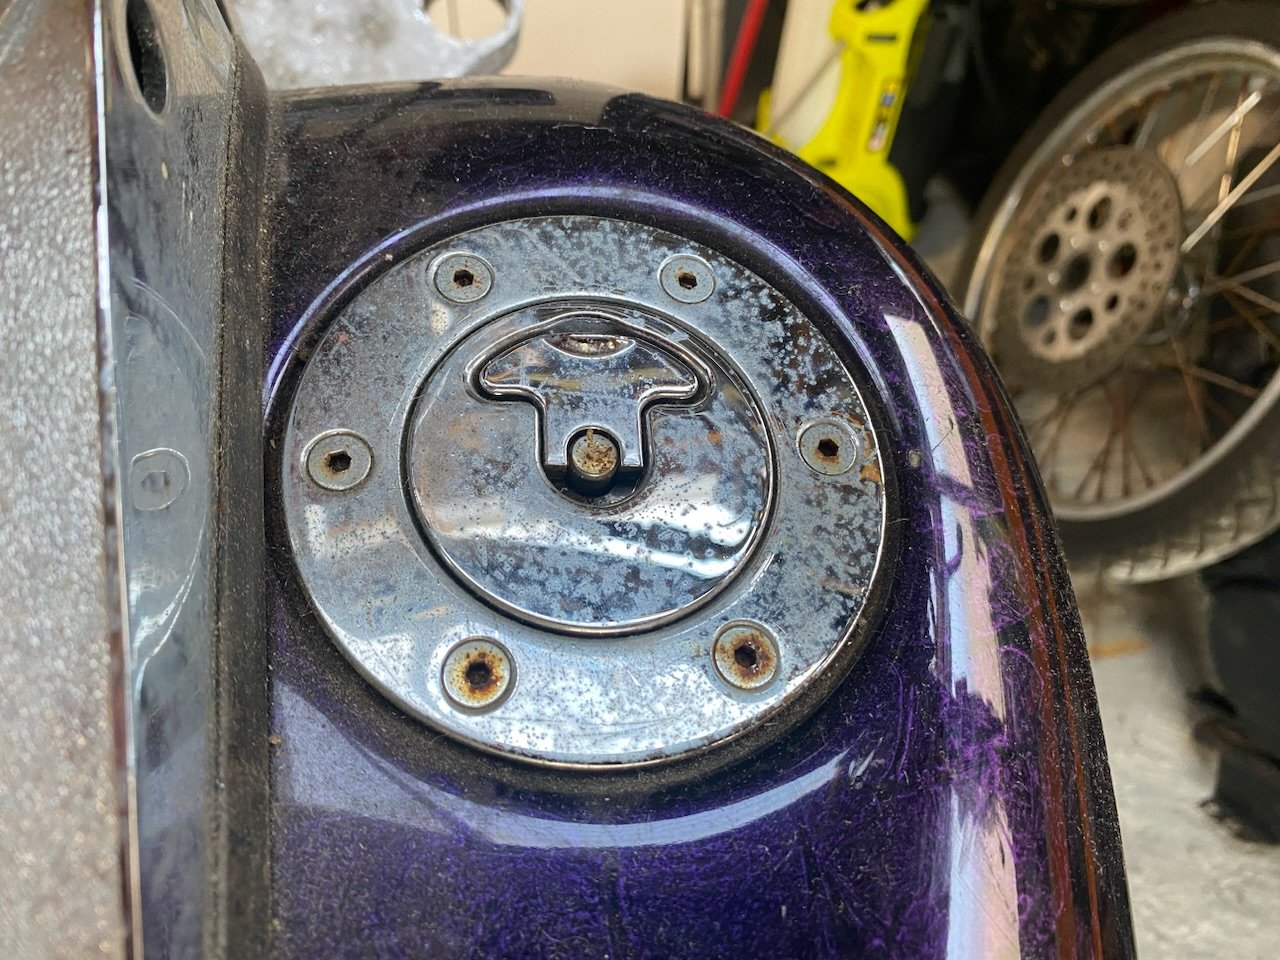
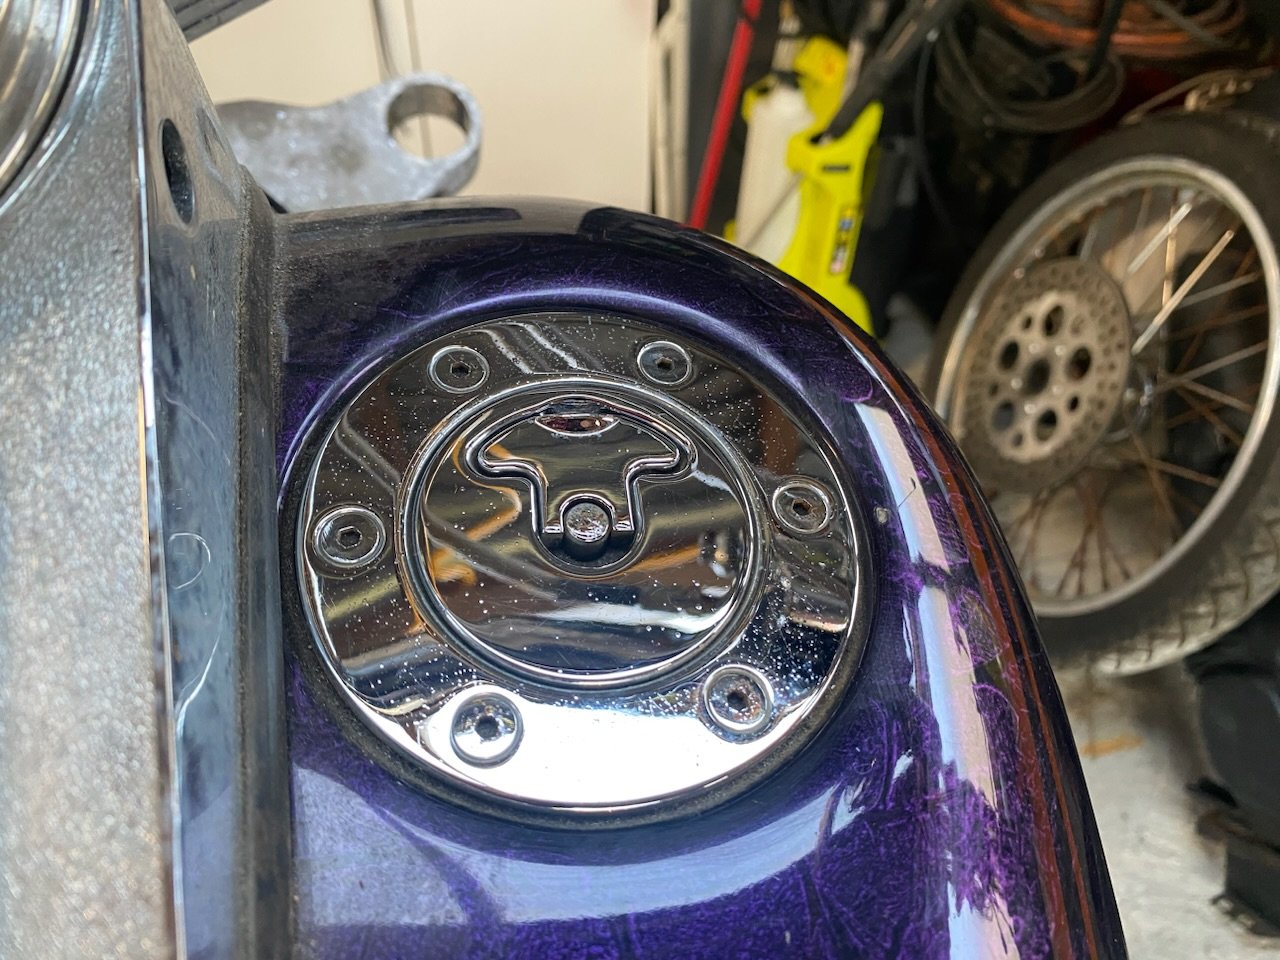
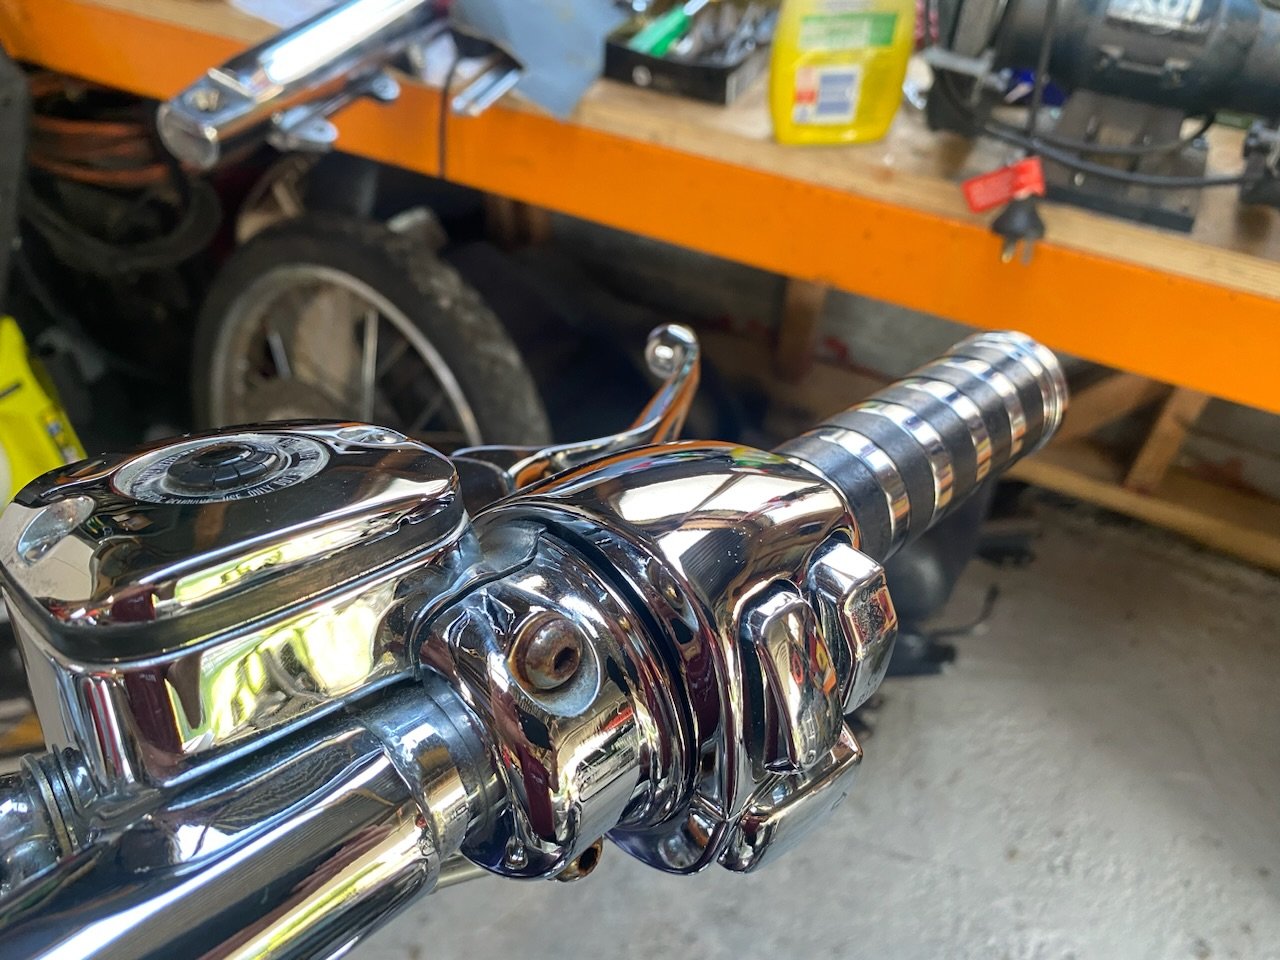
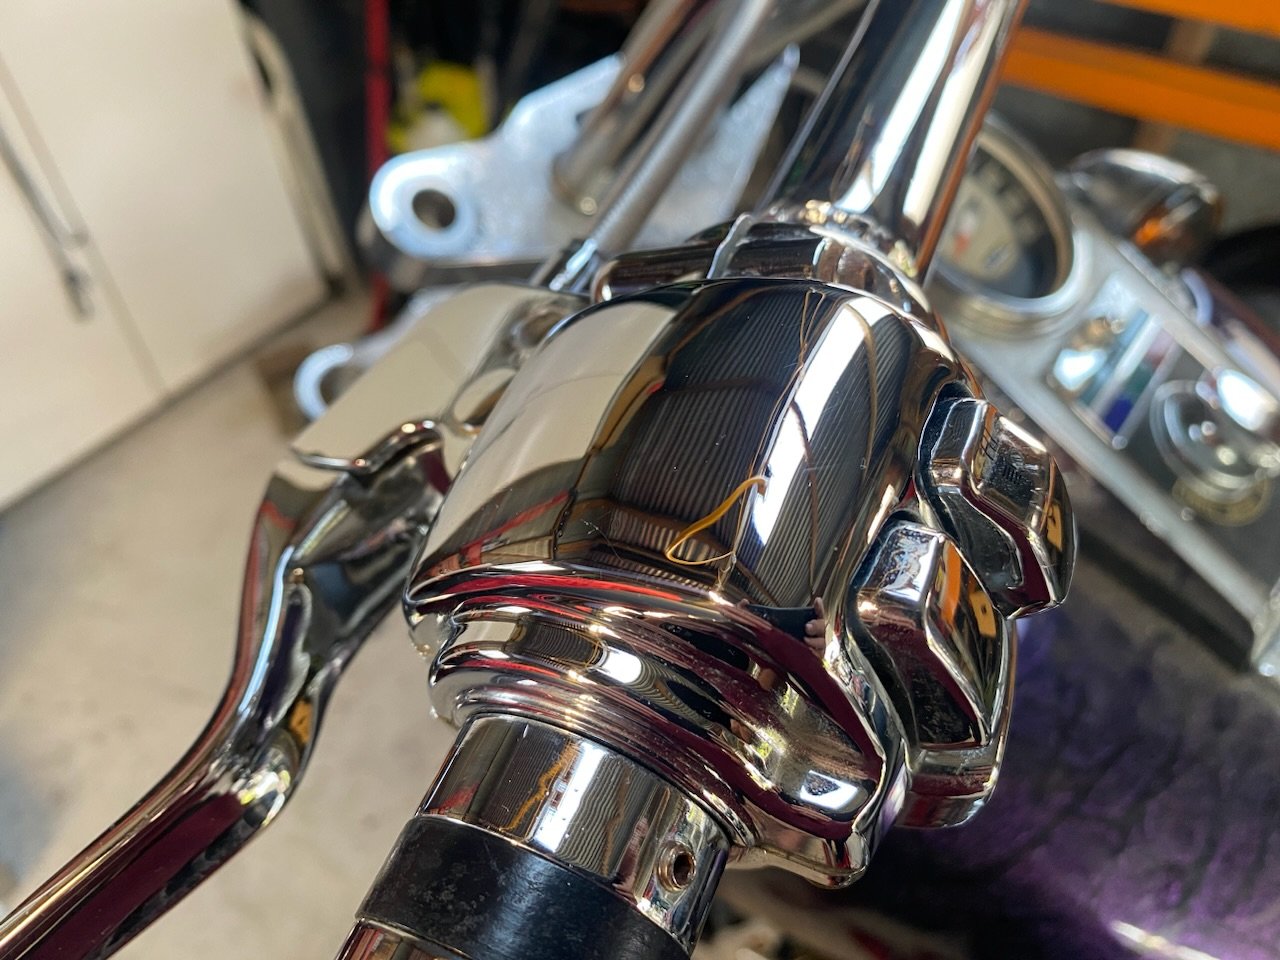
Shining old shiny things. Using some modellers steel wool works wonders cleaning up the old chrome bits. before: after: and some shiny controls.. I’m really happy how these have come back considering the finish looked like the fuel cap still a little bit of pitting if you look close, but I’m not too concerned.
1 point
-
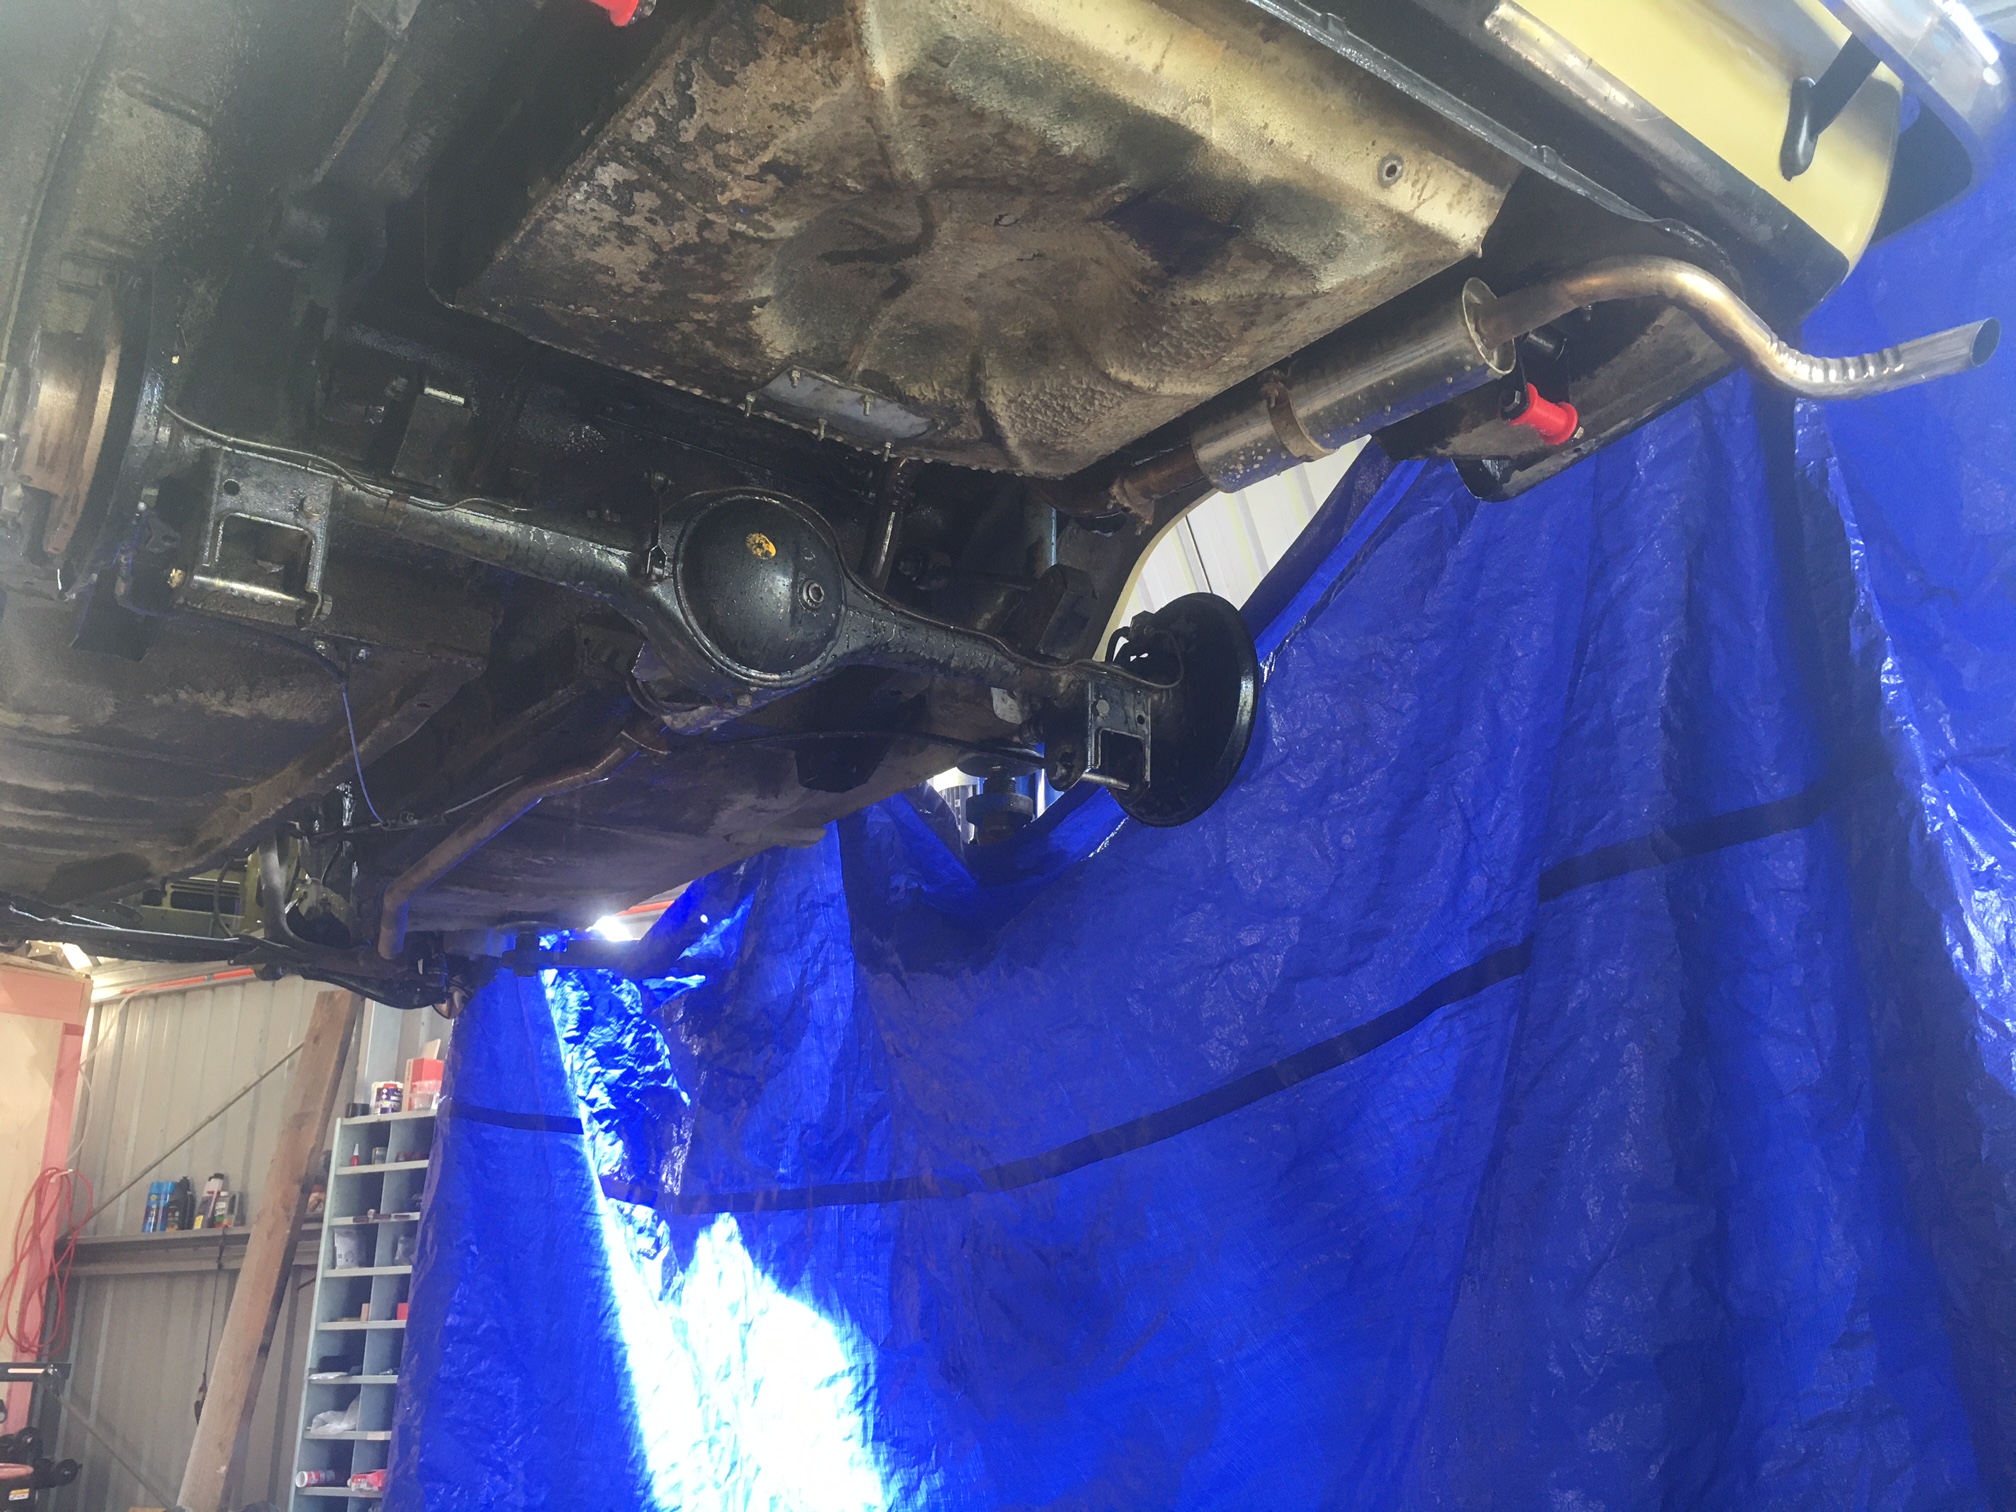
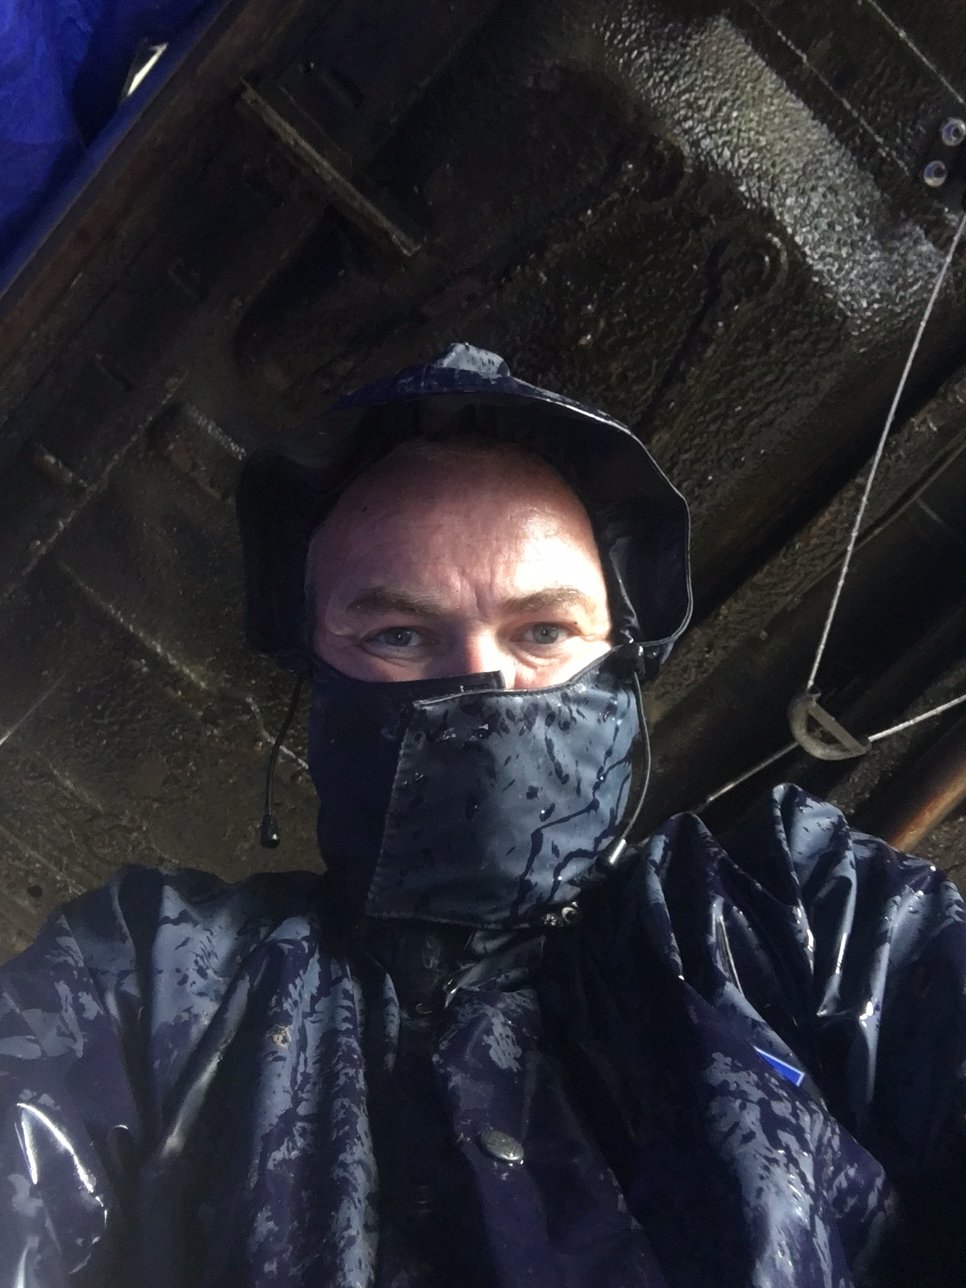
While it’s up in the air, I thought “why not give the underside a clean?” Because it would be a horrible job of course! So I did it anyway. The whole underside has a layer of gravel road dust on it for some reason. Now it does not. Btw, waterblasting inside the shed doesn’t make as big a mess as you think as long as you’re careful with your aim and you squeegie excess water out the door before it can flow under your workbench/tools/other treasure.
1 point
-
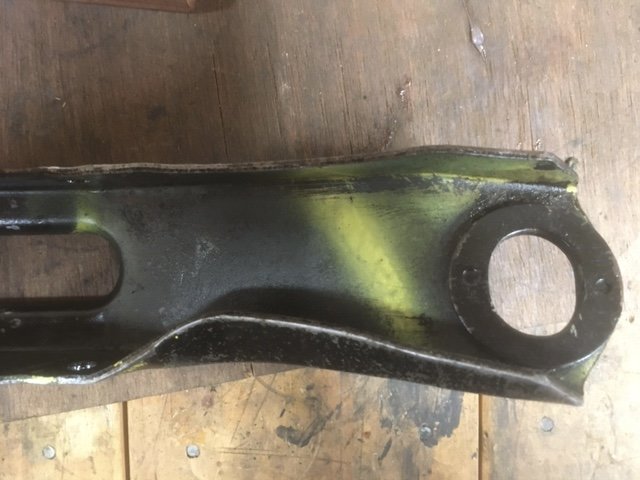
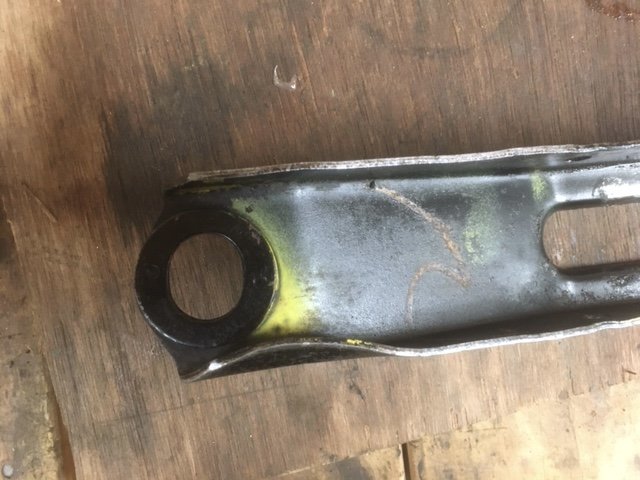
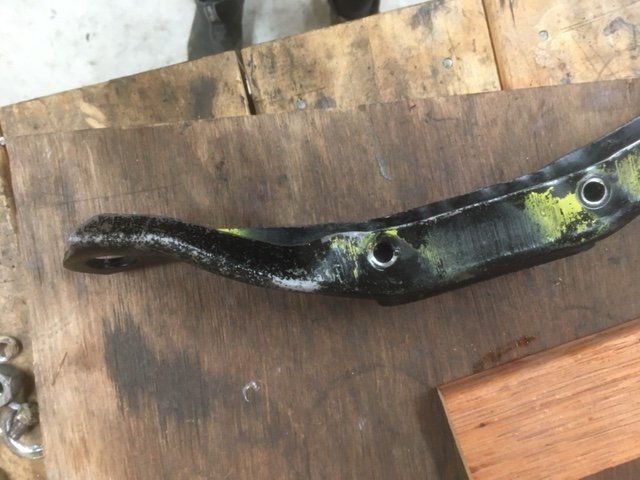
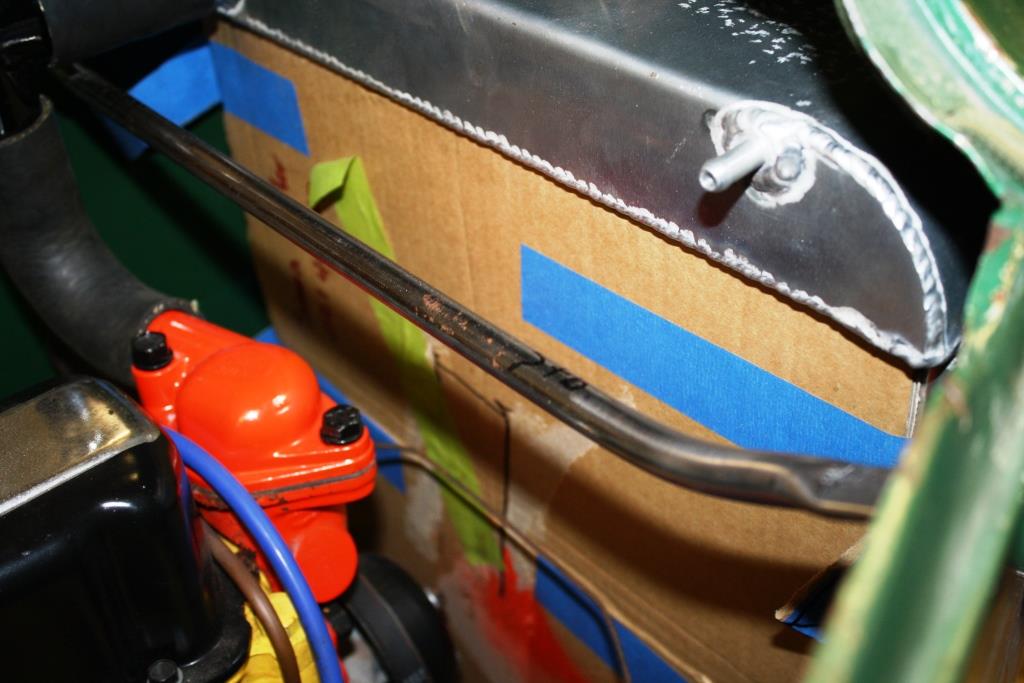
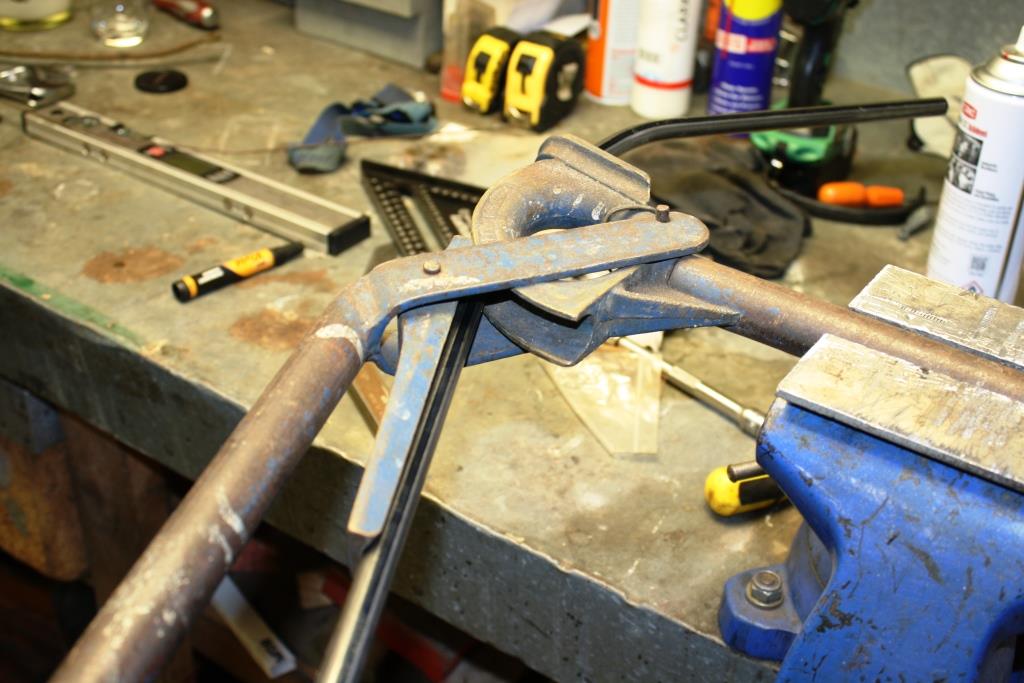
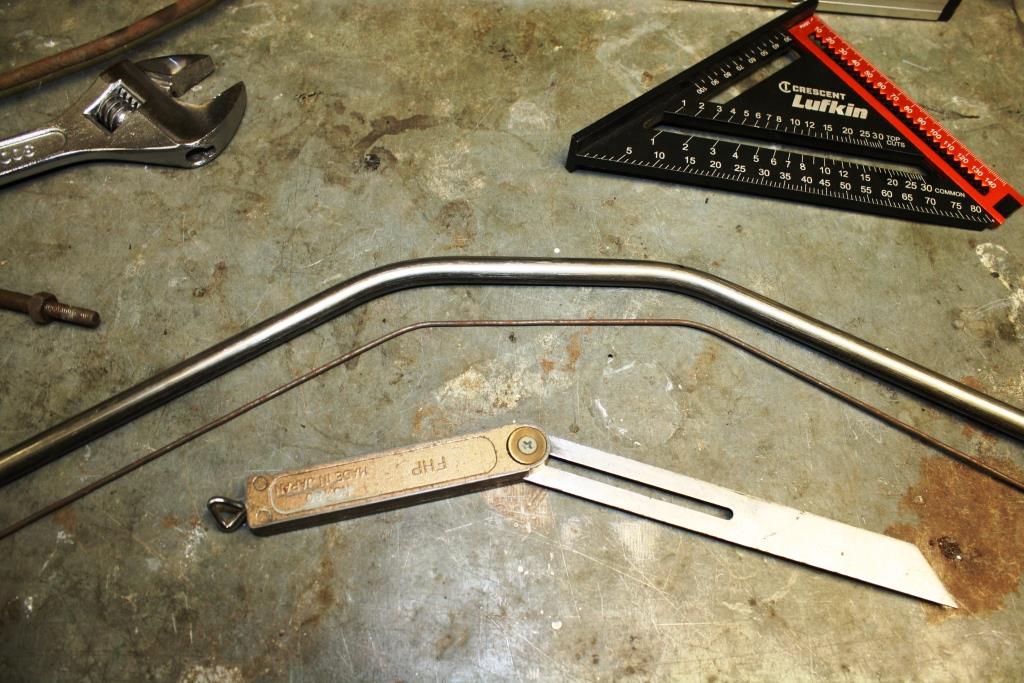
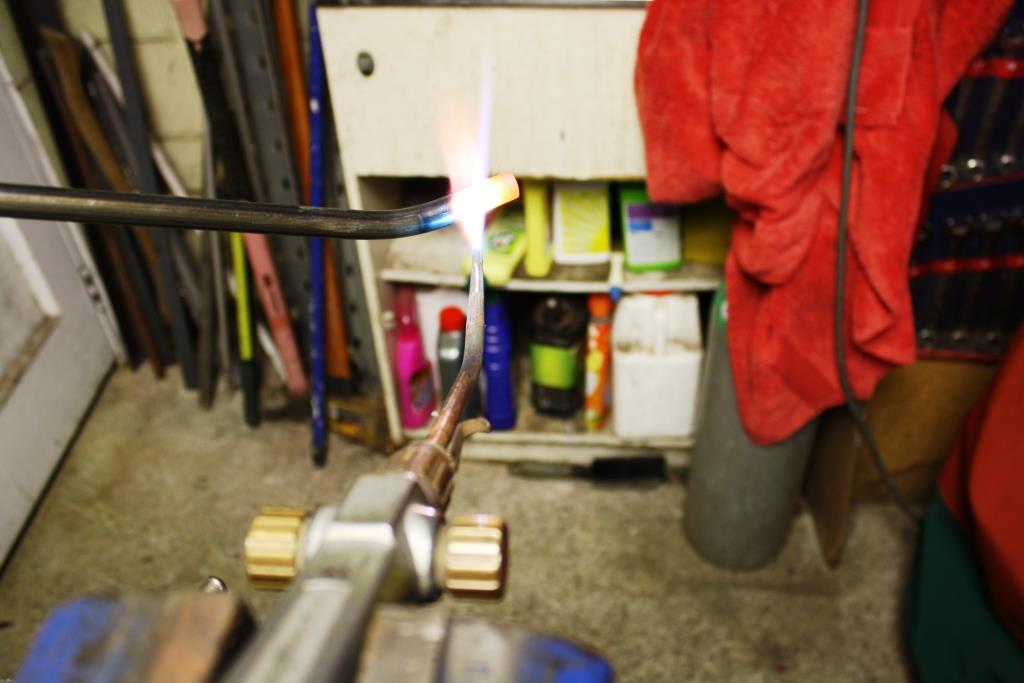
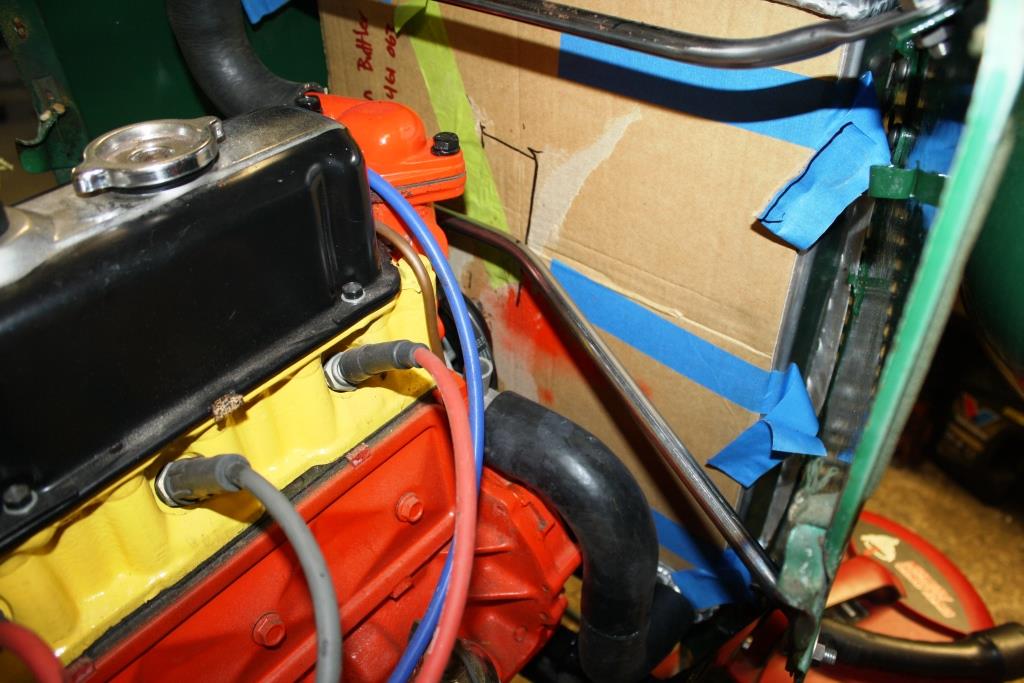
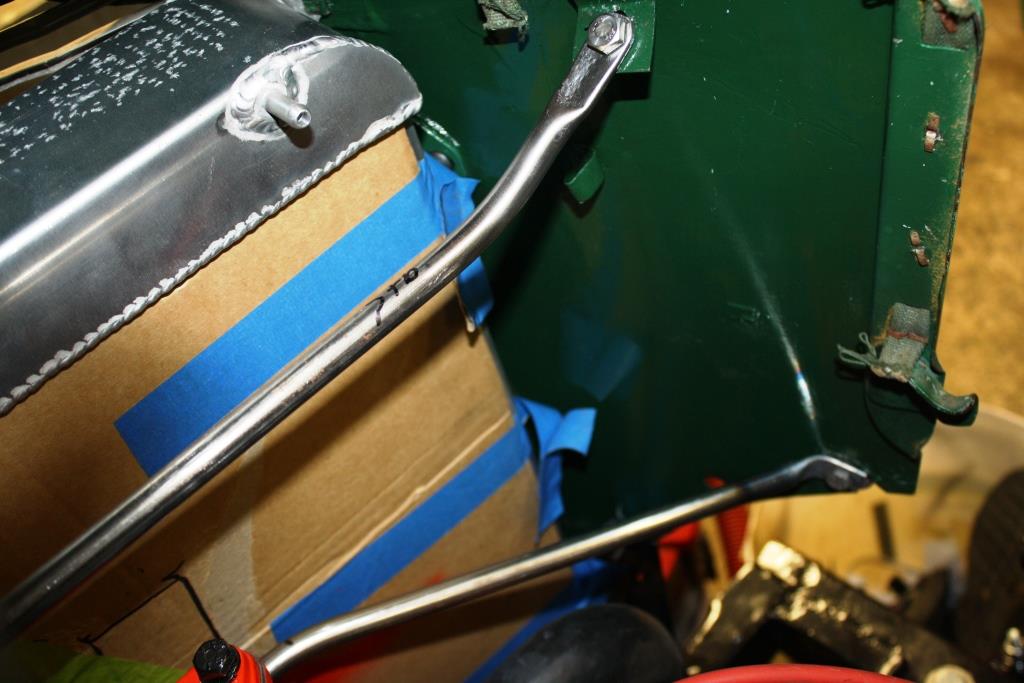
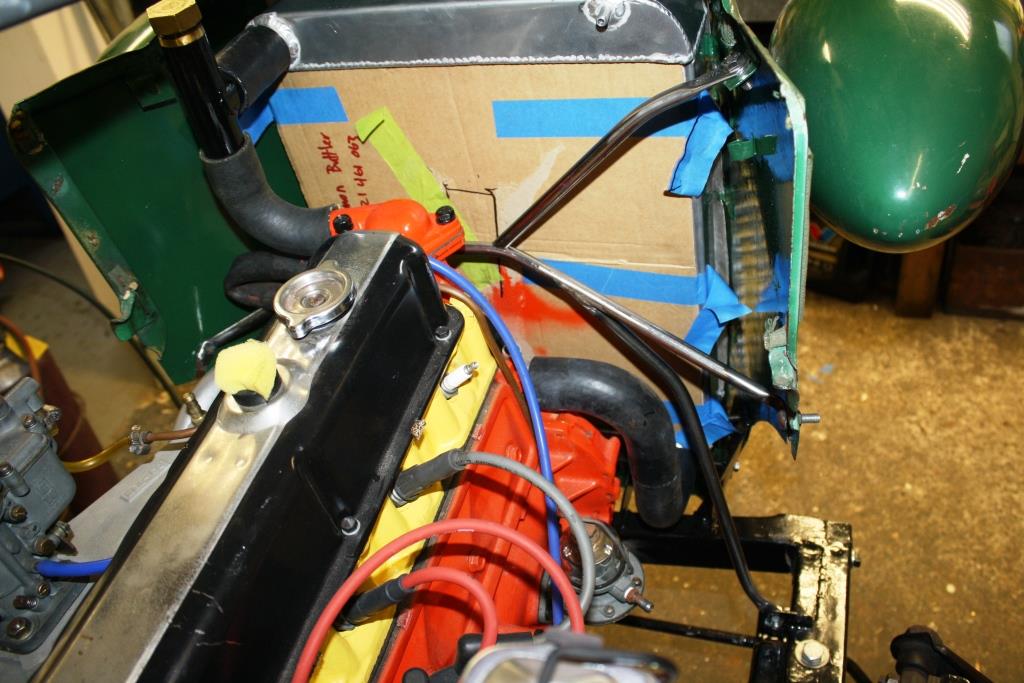
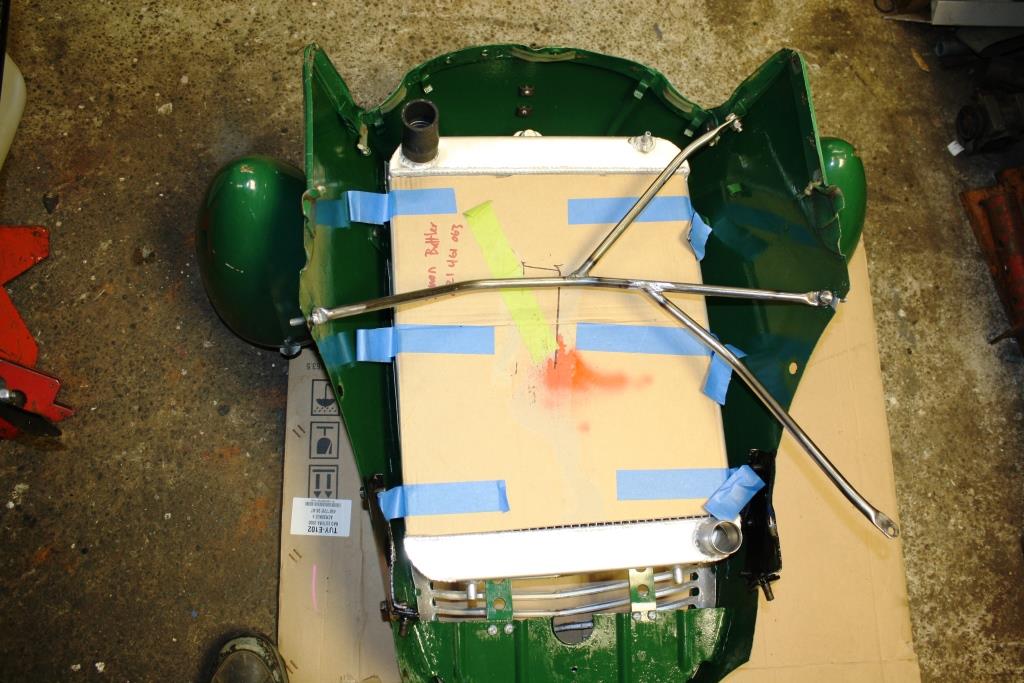
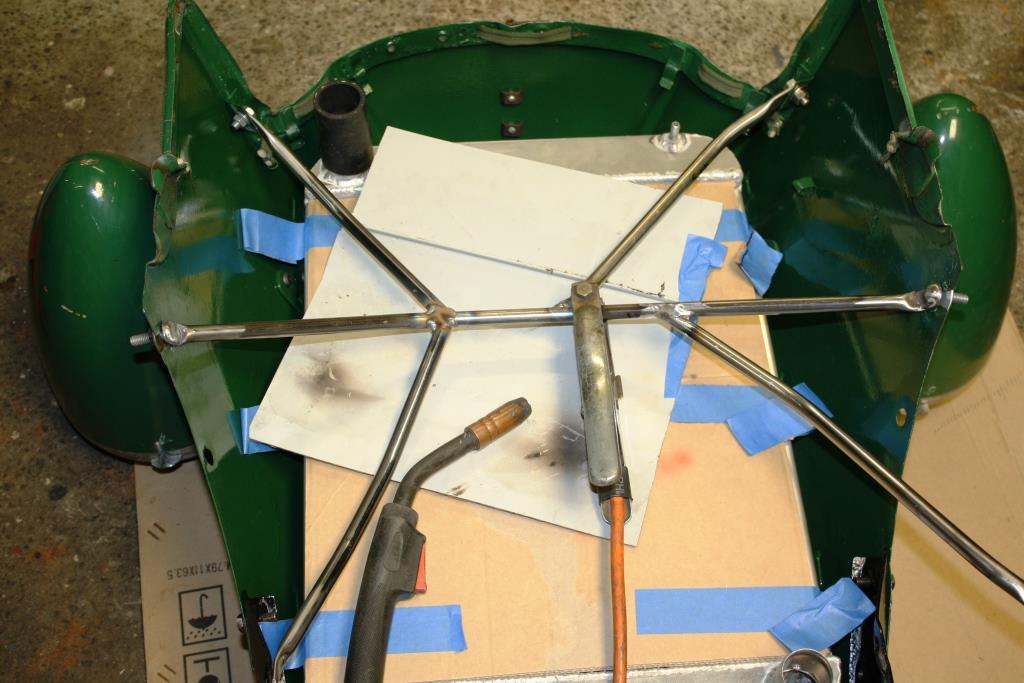
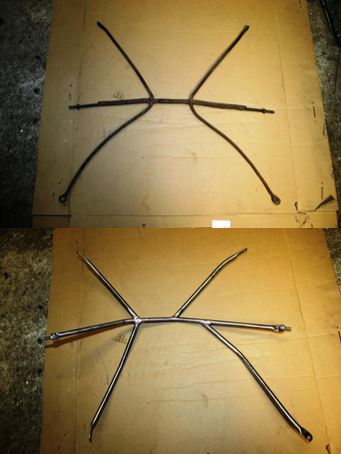
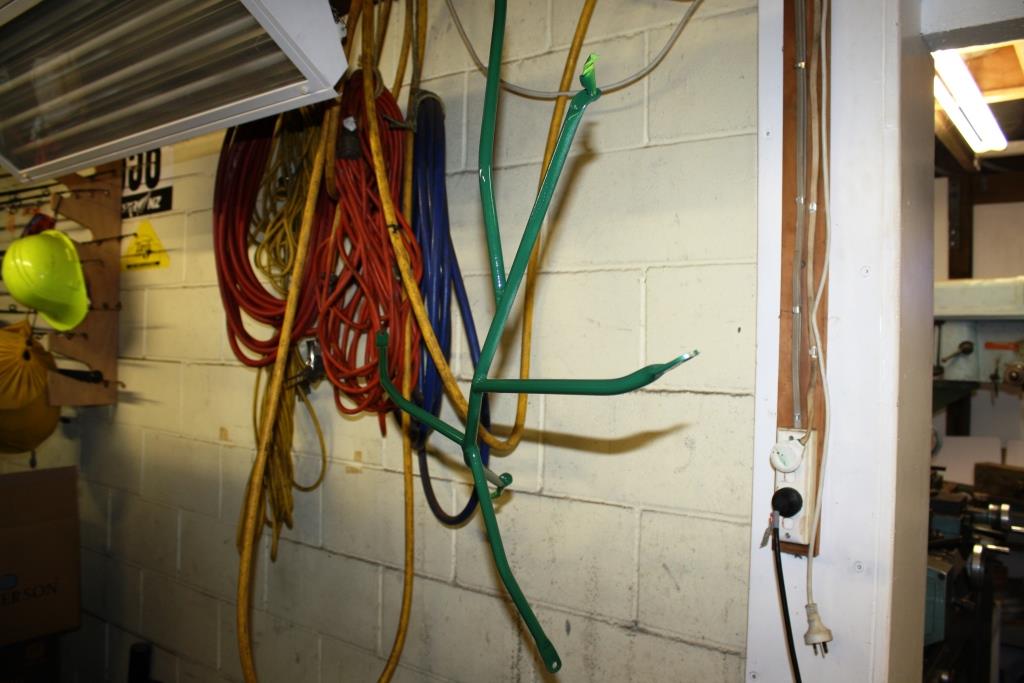
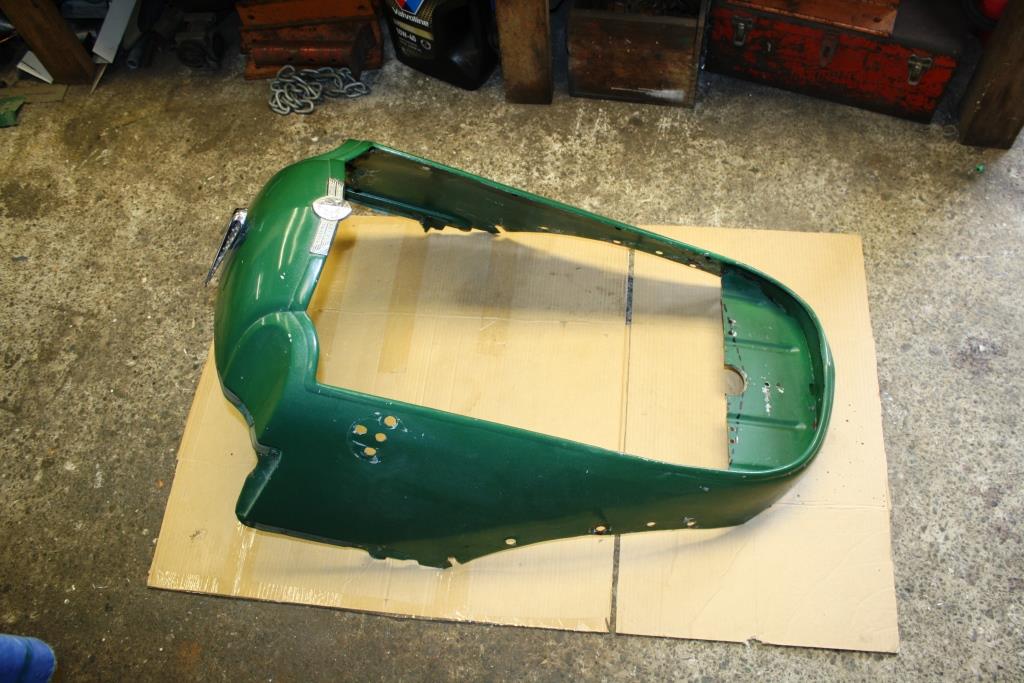
Time to figure out how to make a nose cone brace…… help - I’m running out of room! Started with some 12mm EWS tube. Welding wire templates….. Out with the world’s oldest pipe bender….. It still works…. Heated the ends up with the oxy and hit it with a very old hammer on a very old vise. For some perverse reason I love doing this shit! Decided the top brace was too high… I’m just cutting freehand and notching with a rat-tail file. Interesting challenge needing some interesting bends to make things fit. Dropped the nose cone off to tack it all together. The original support Vs the new apparition... Some ‘insipid green’ paint…… Does the job and looks neat and tidy…..
1 point
-
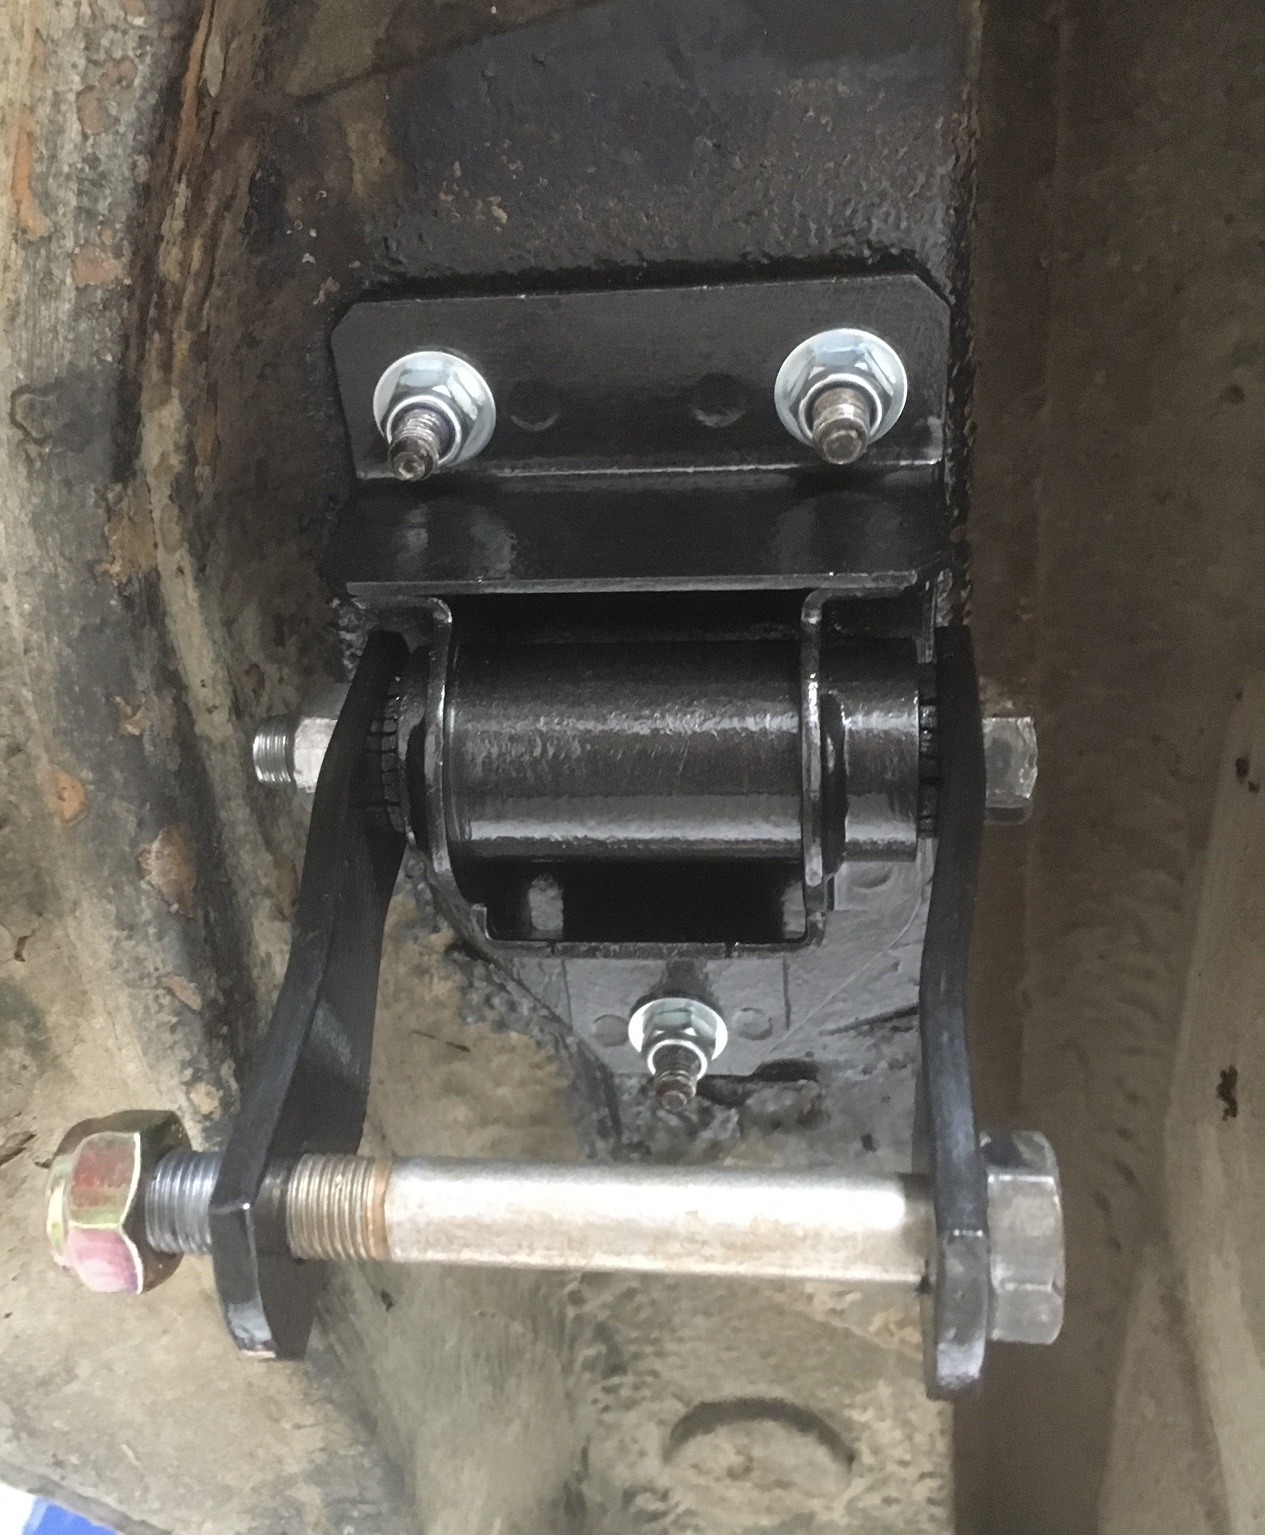
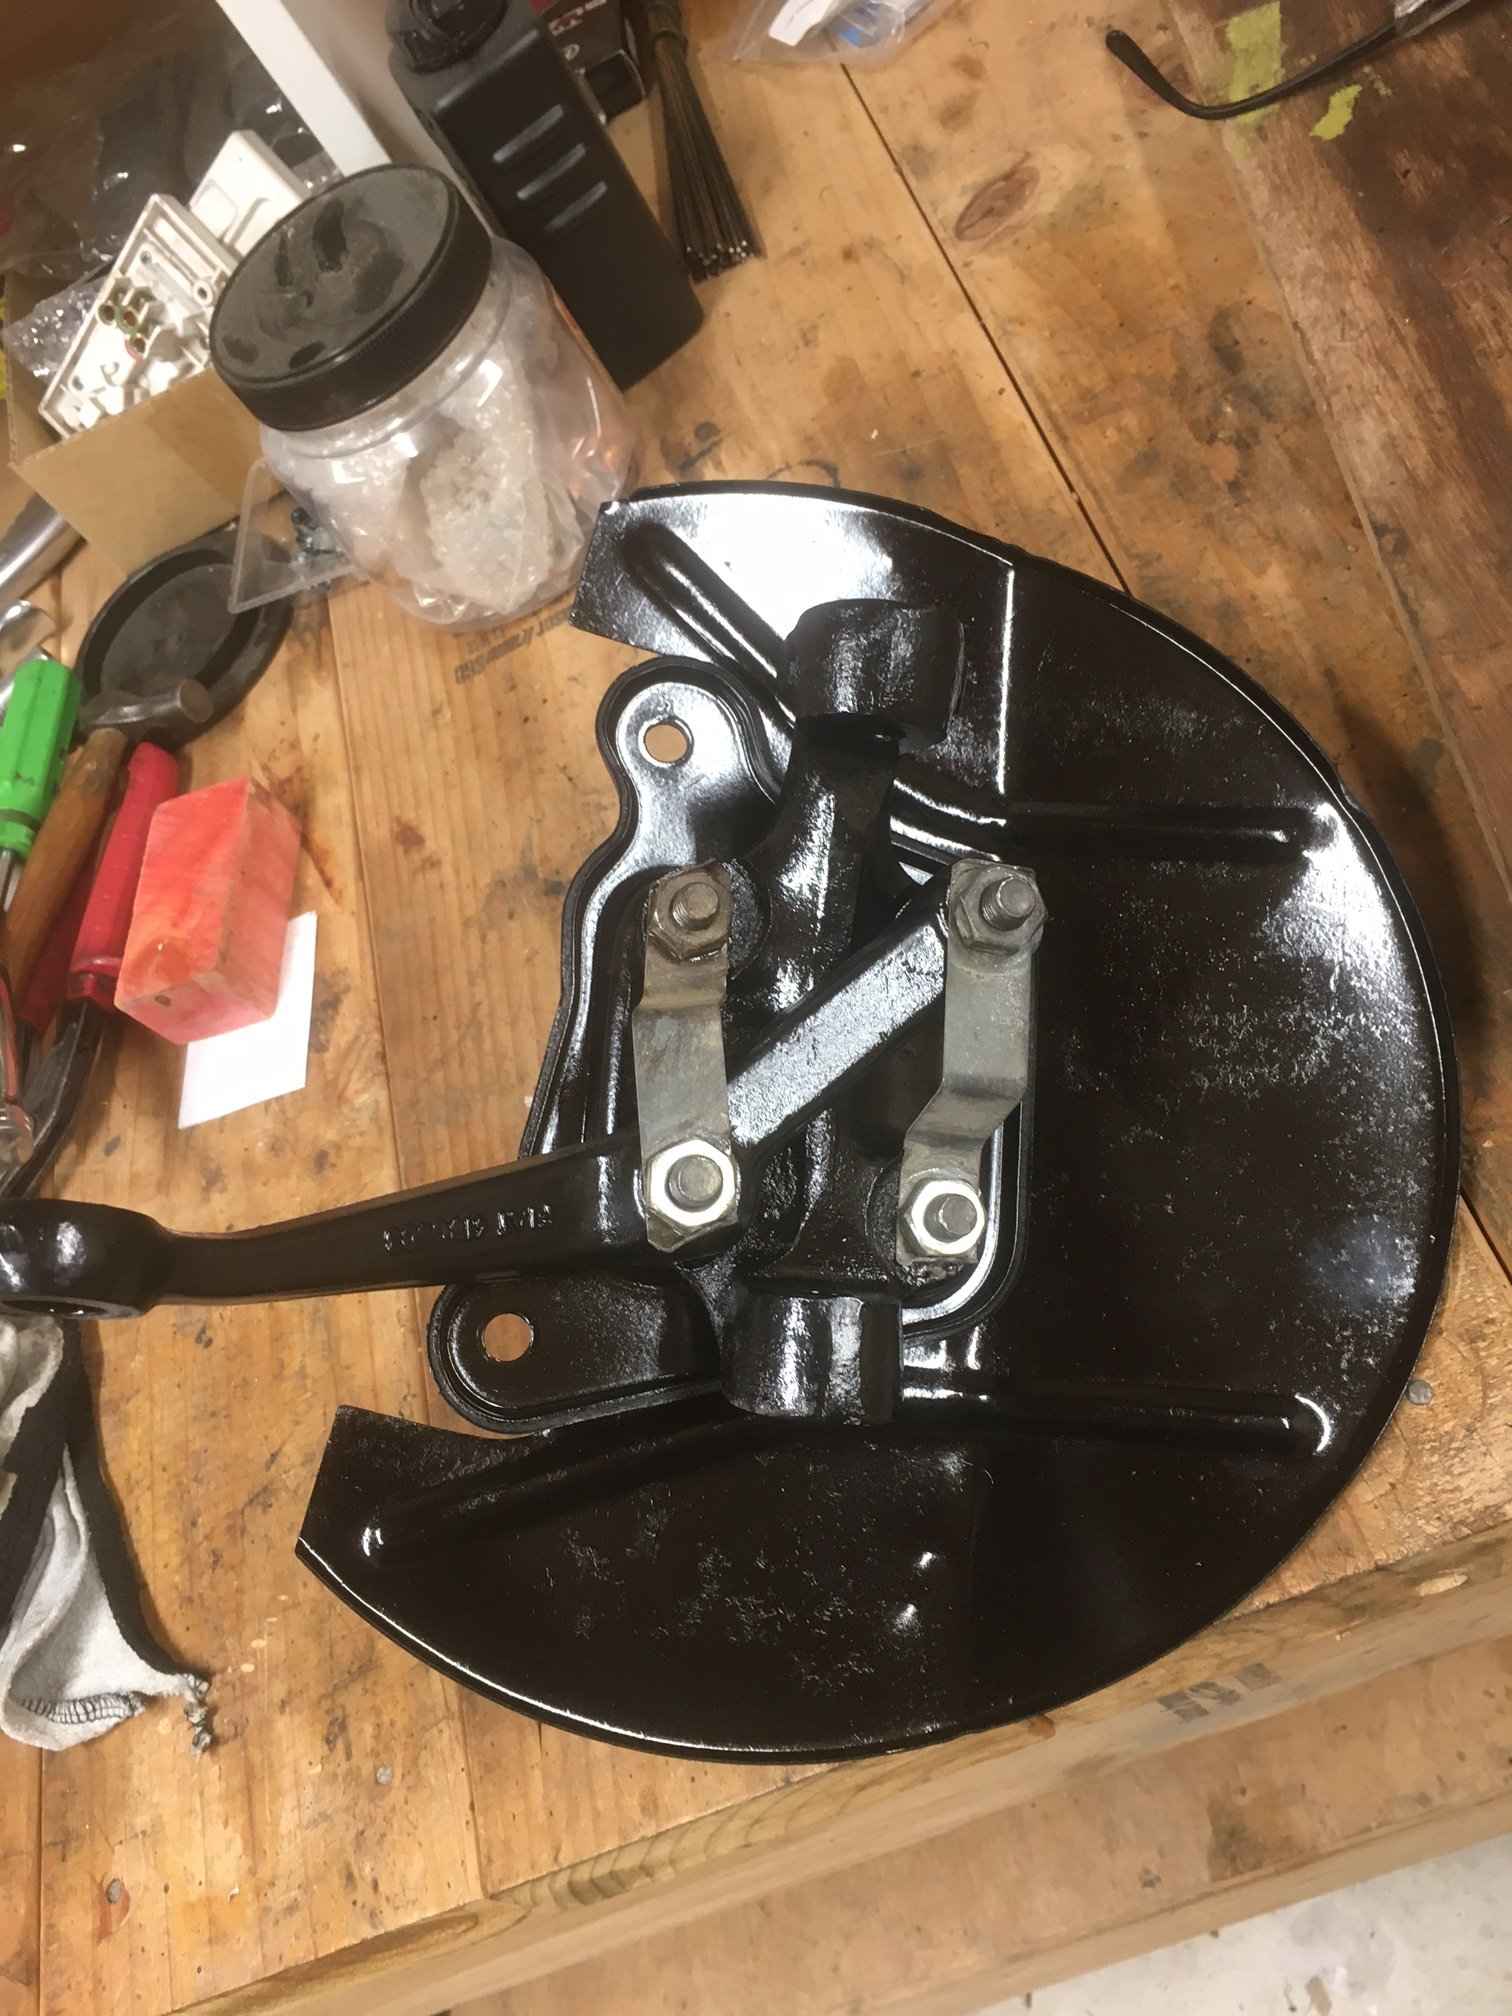
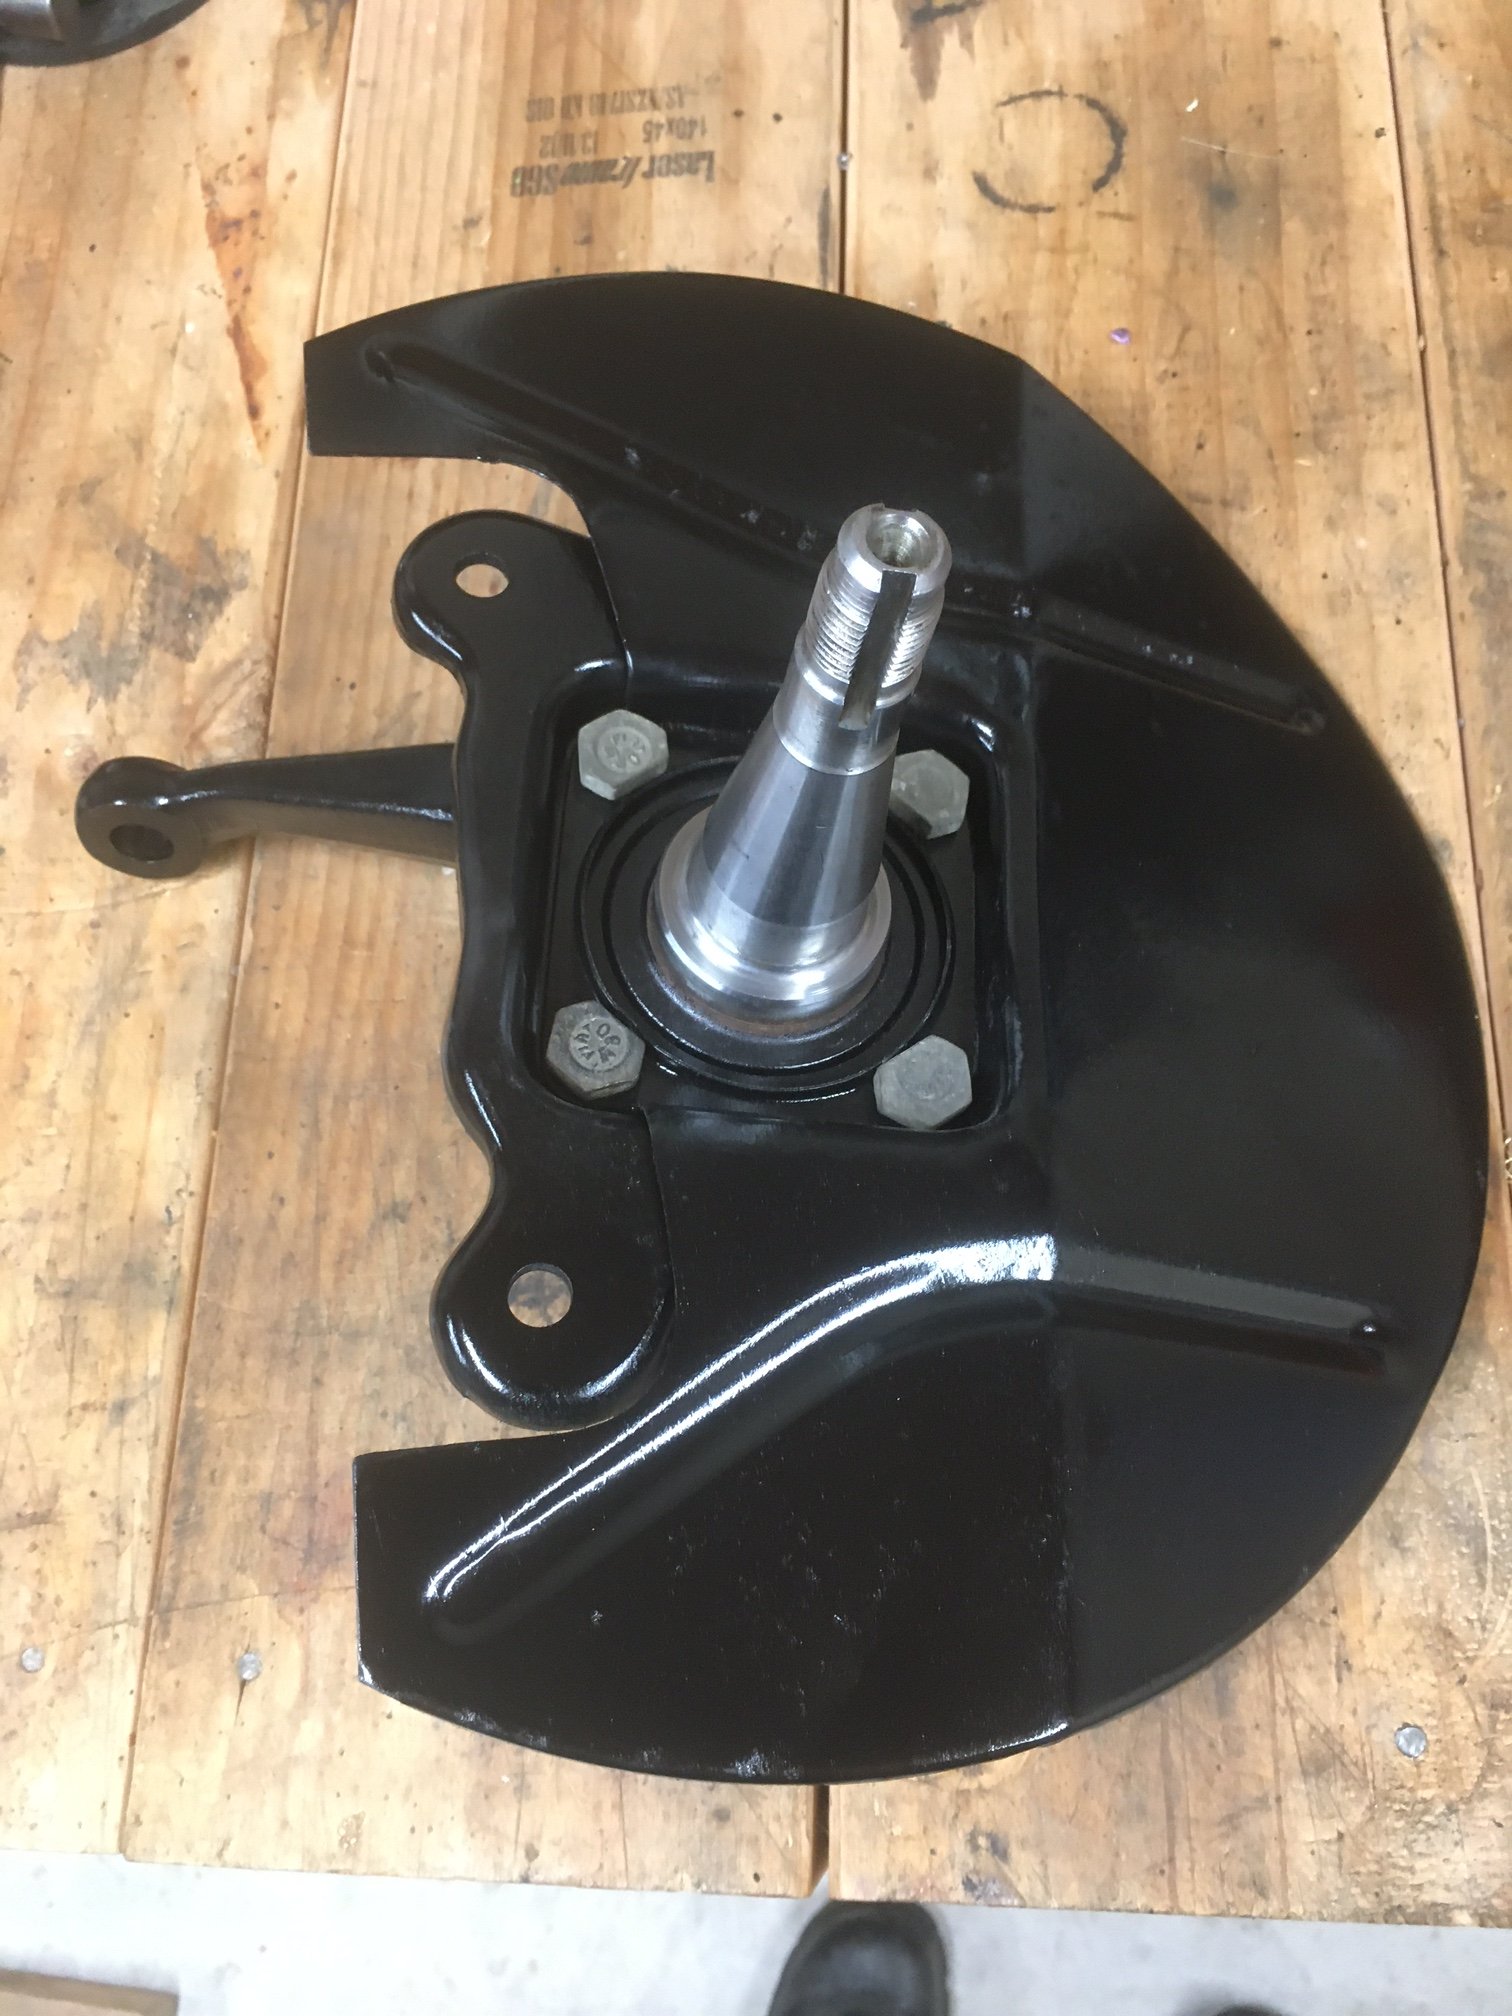
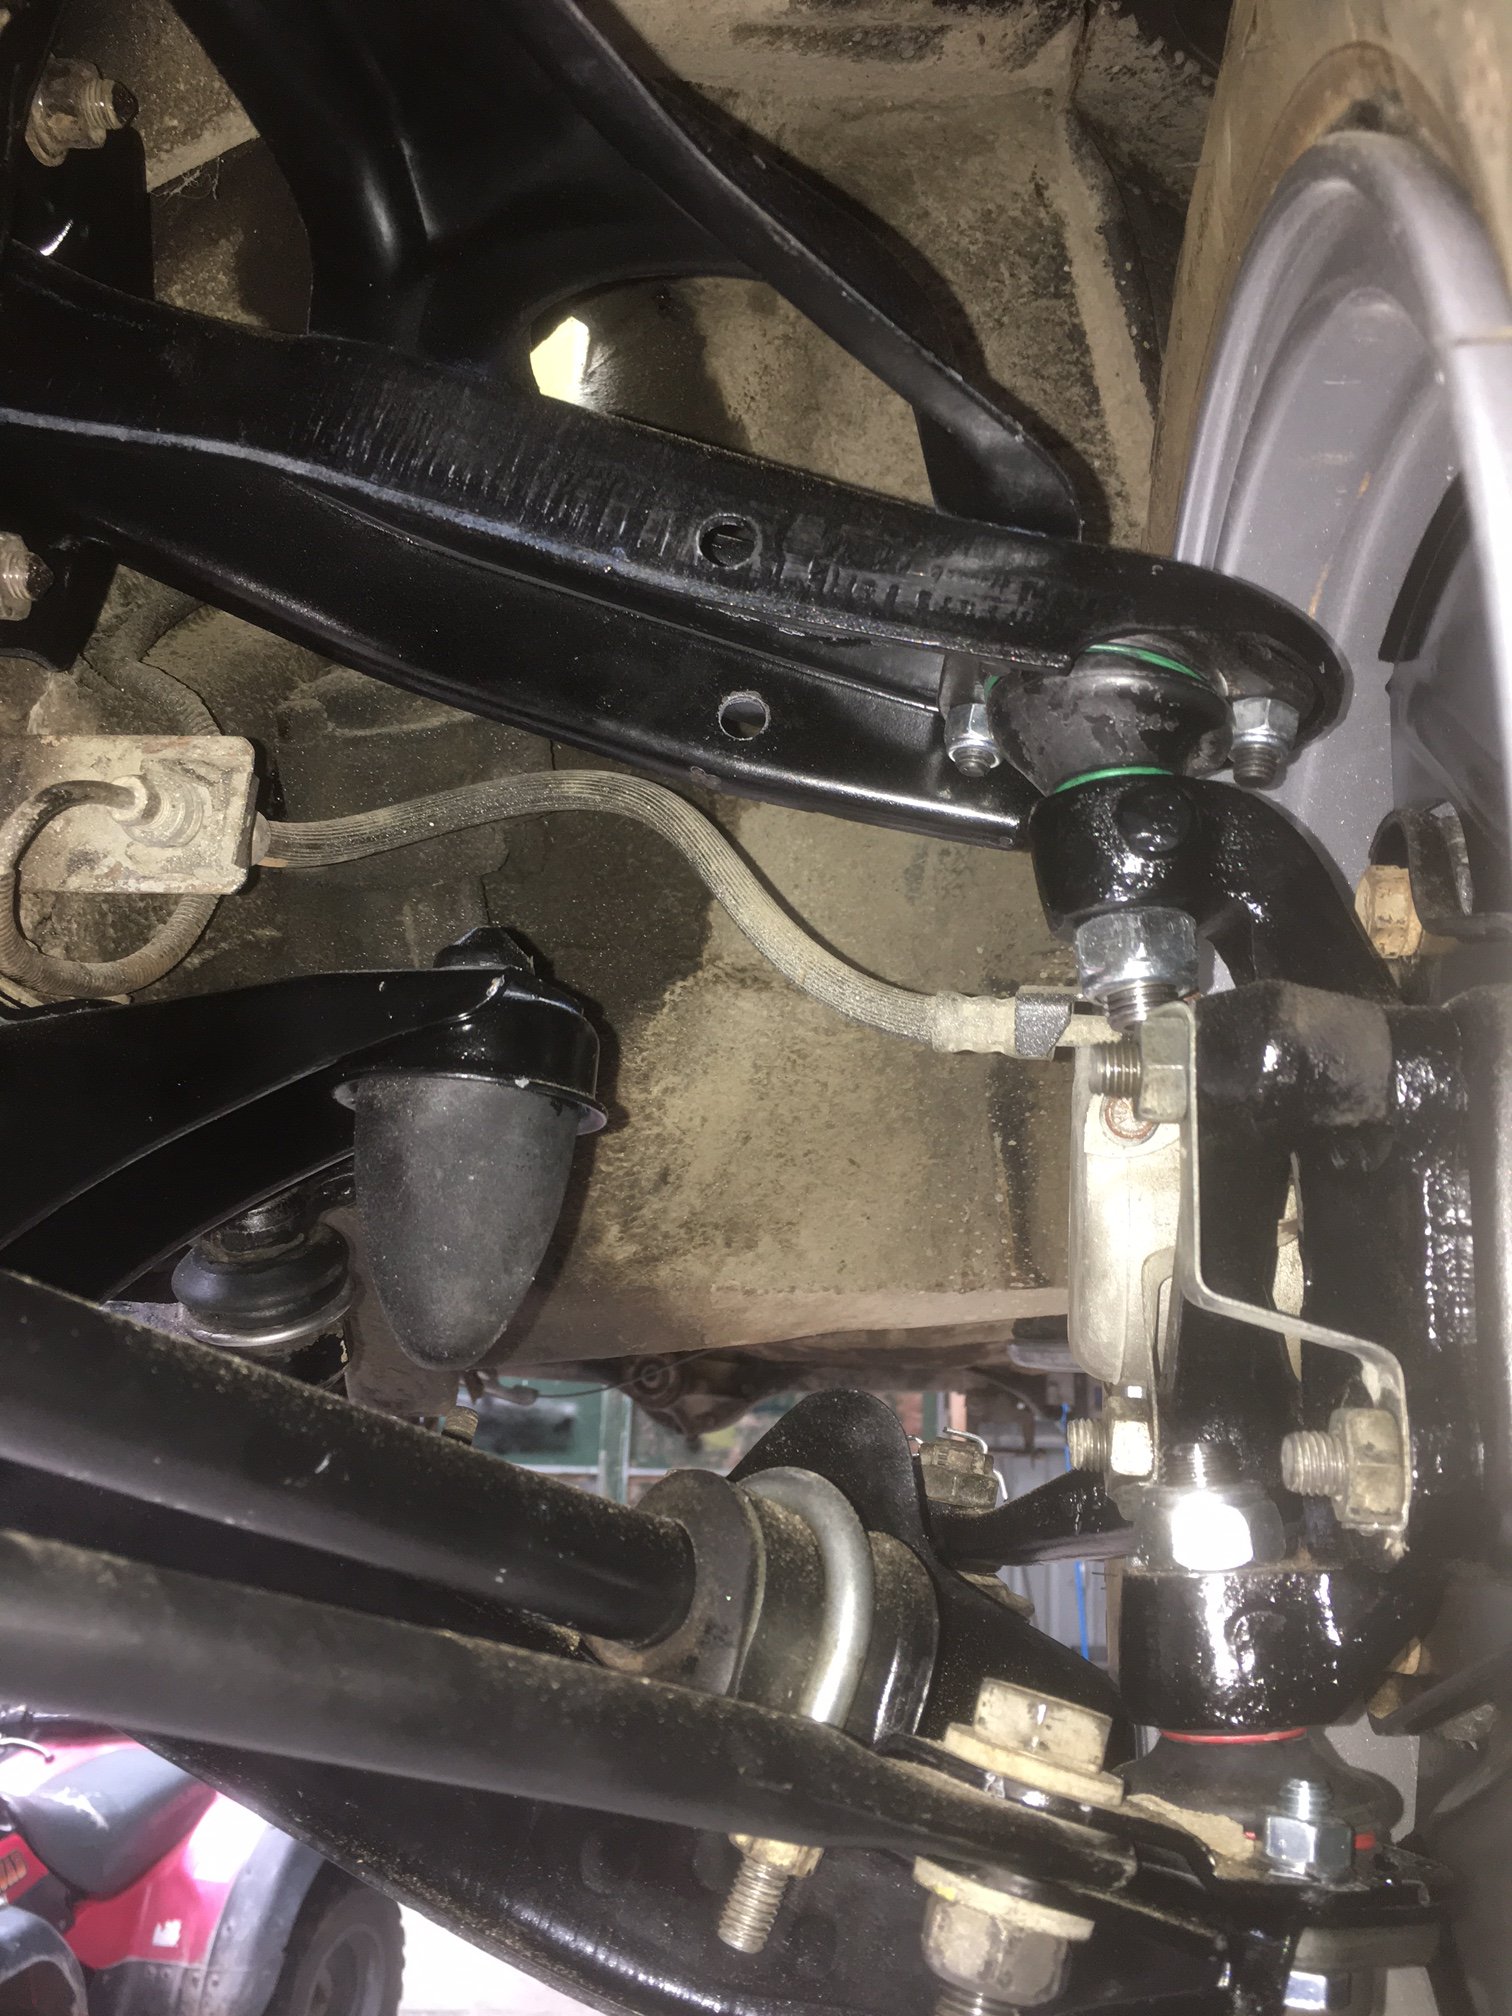
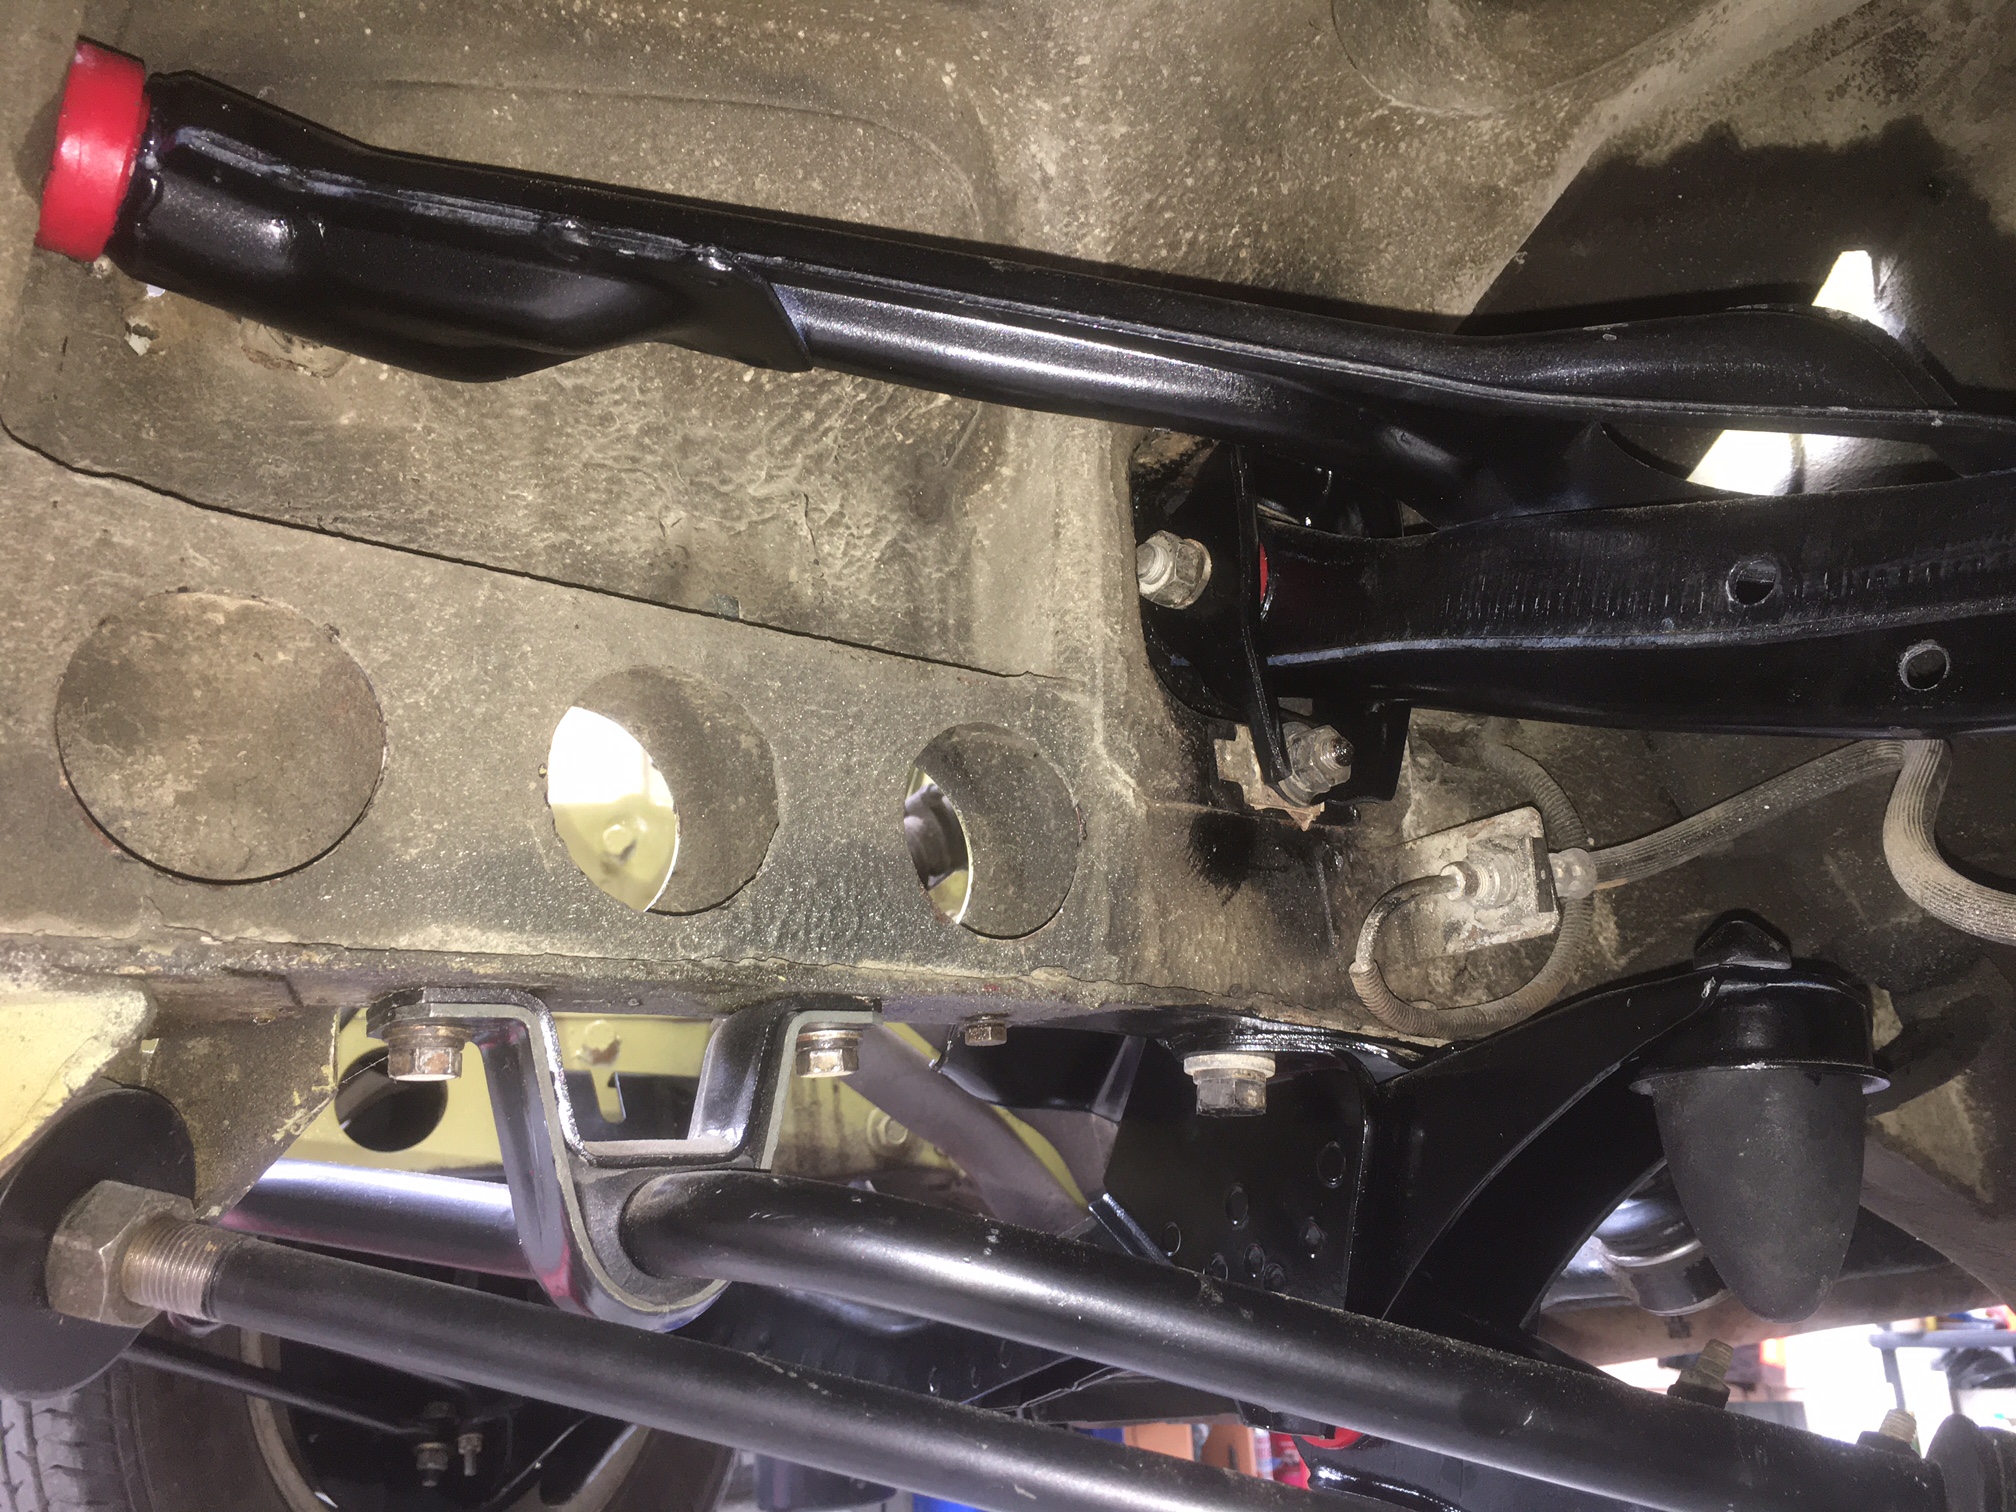
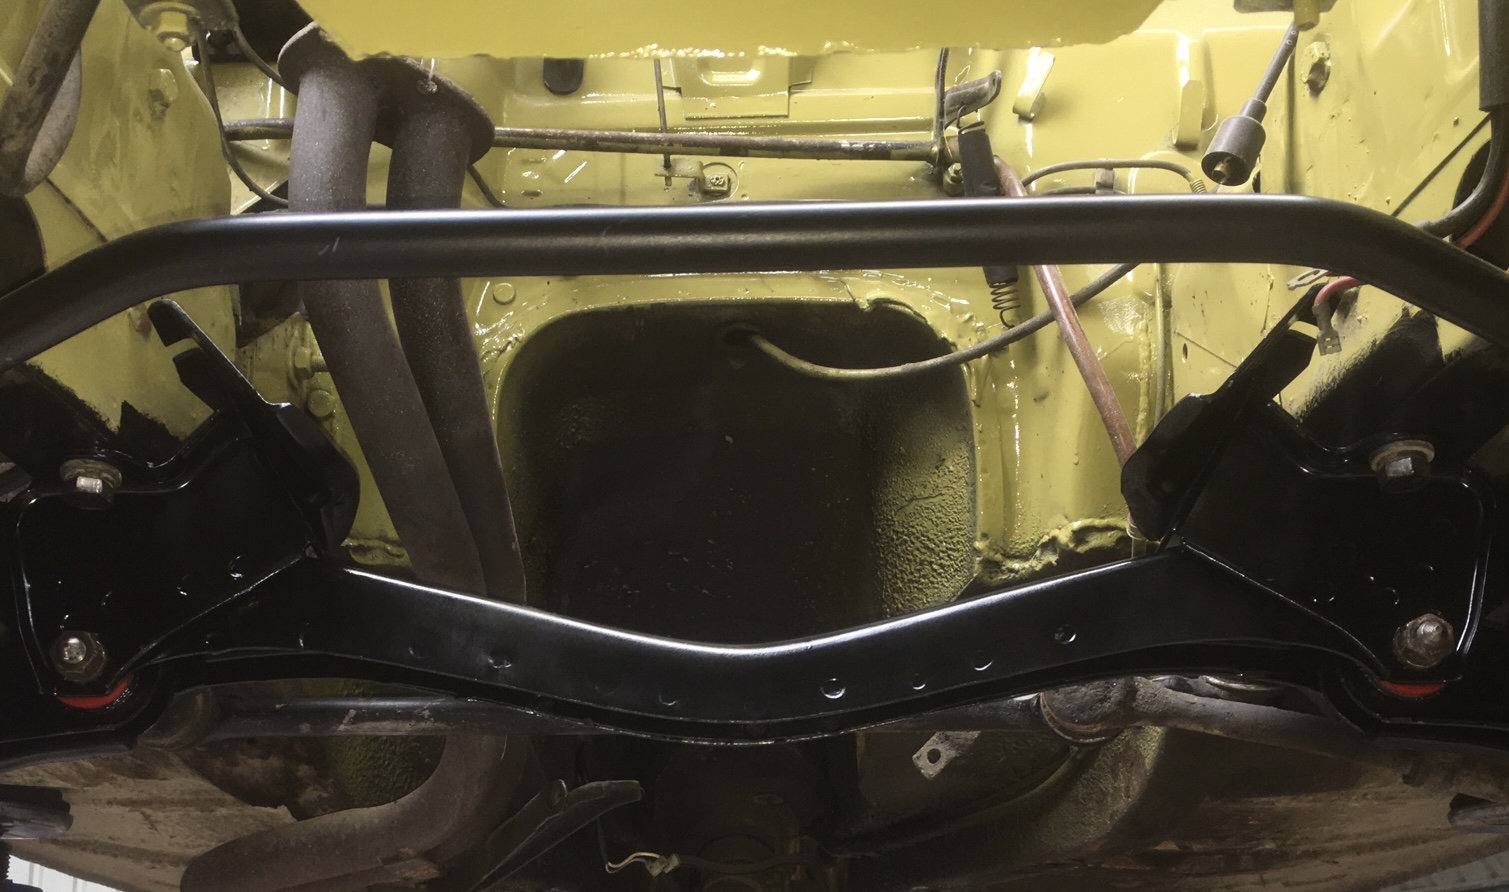
I’m not very good at taking photos of my process of cleaning things up and mostly I think folks might find them boring anyway. Here are some after pics. Uprights and stub axles front suspension arms New handbrake cable inner (thanks Digger) Leaf spring mounts And clean cross member. This hole is ready for an engine but the engine’s not quite ready for the hole! Summary: New ball joints, all new bushes (polyurethane) re-booted tie rod ends and thorough de-scuzzification of components.
1 point
-
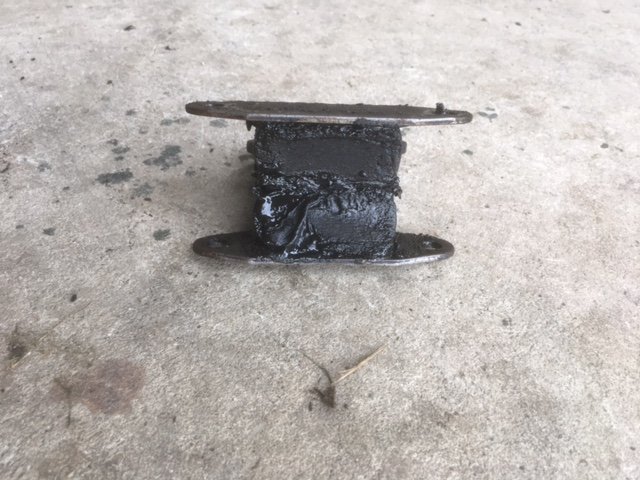
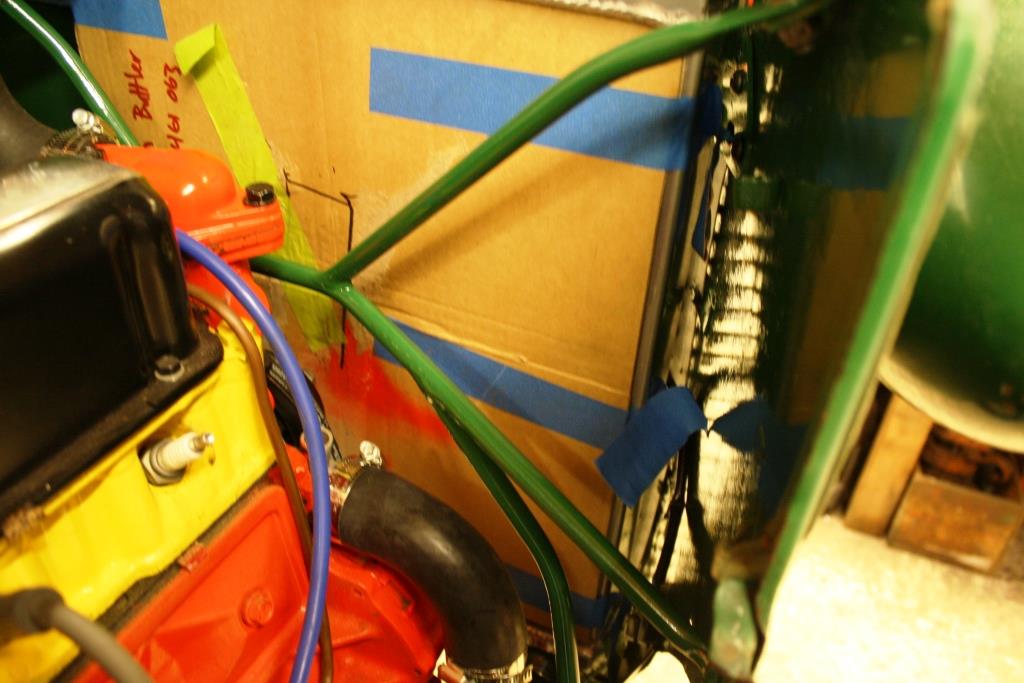
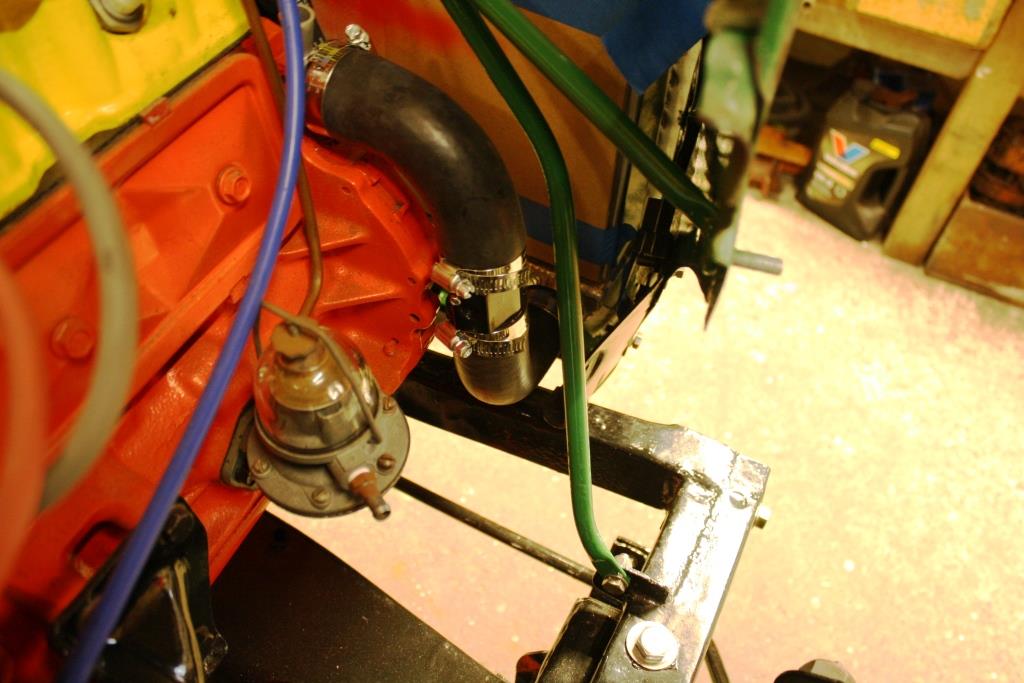
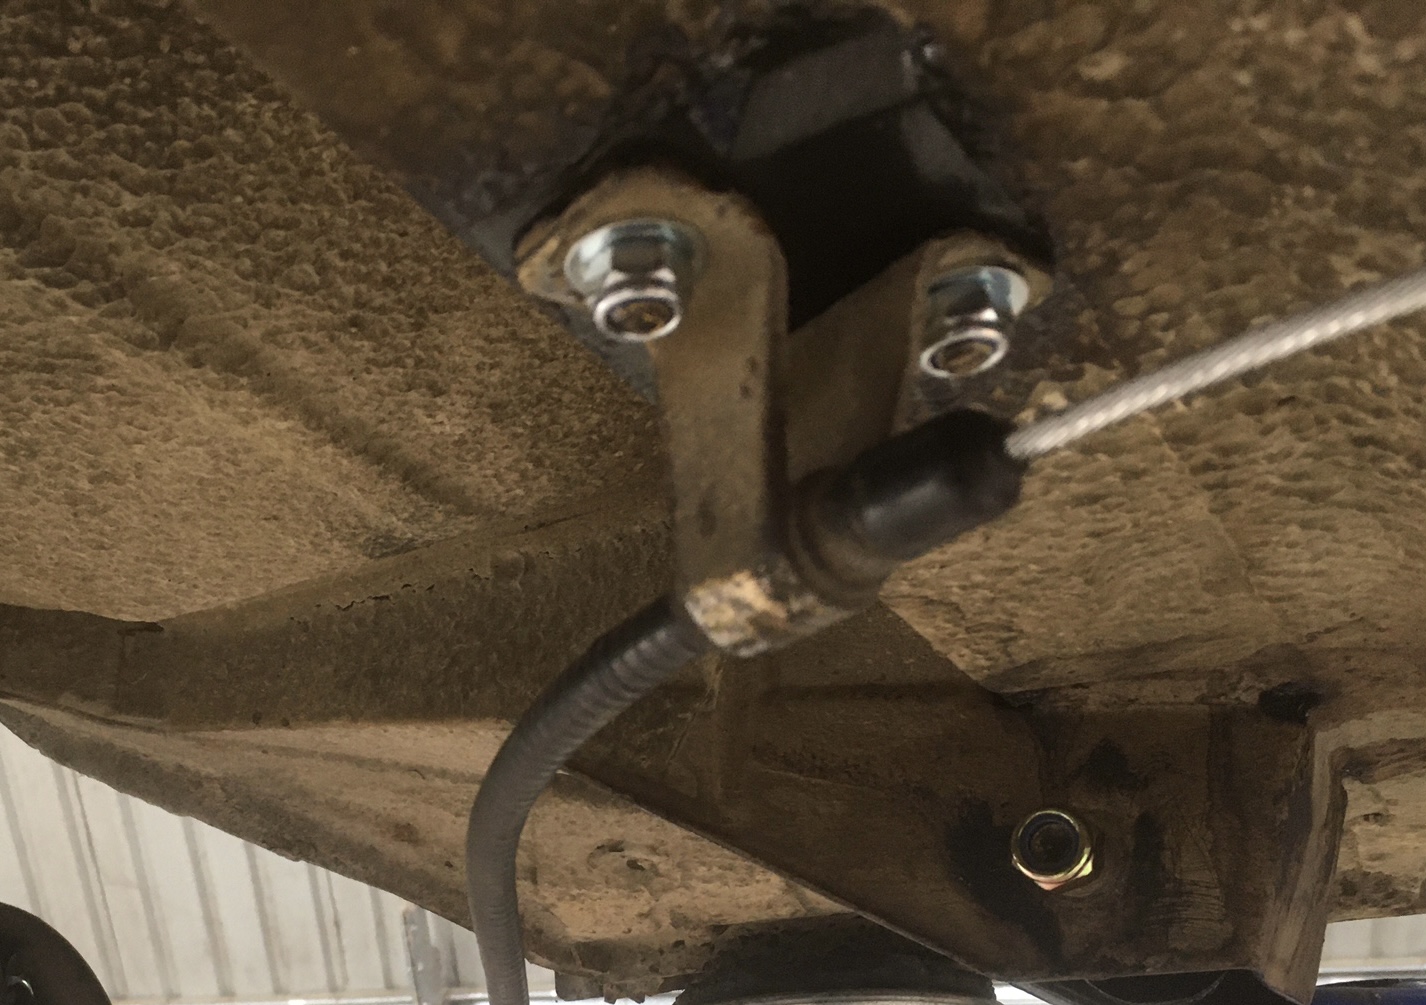
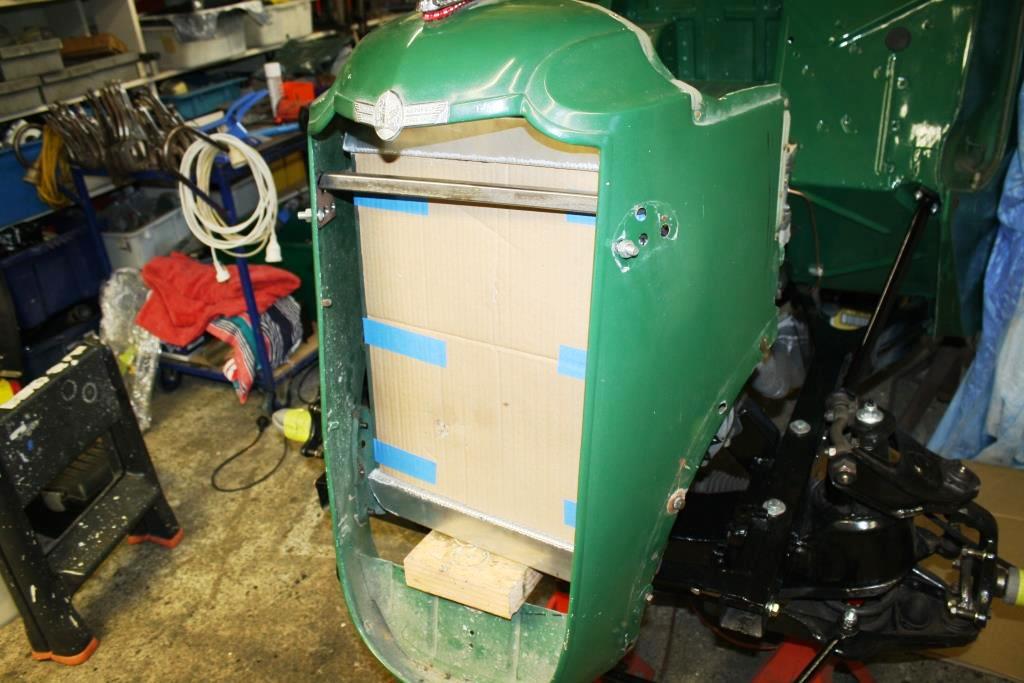
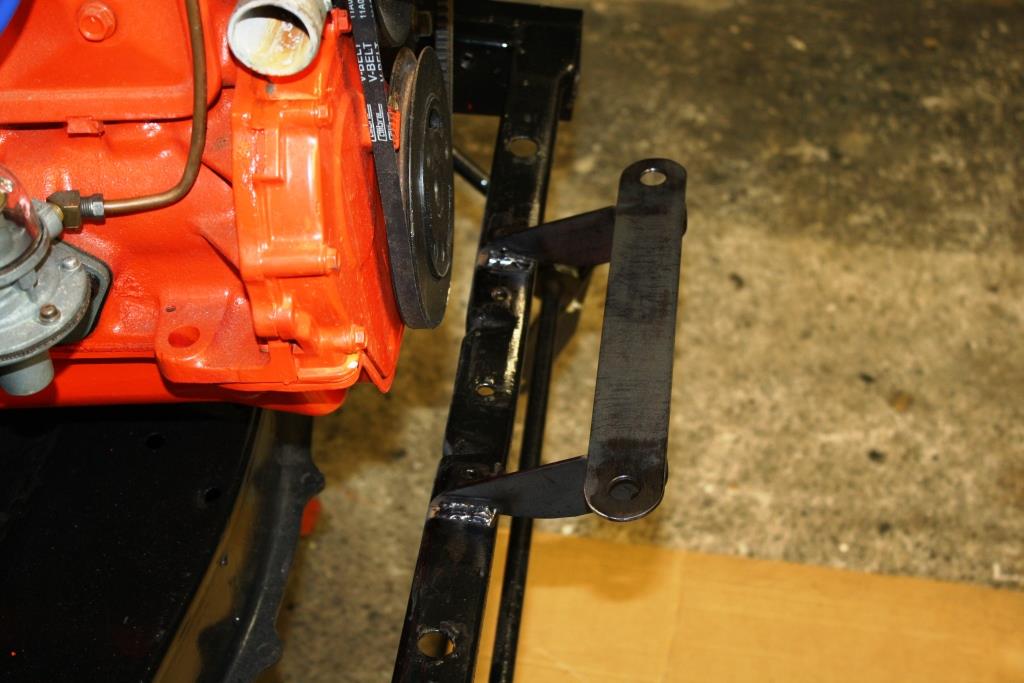
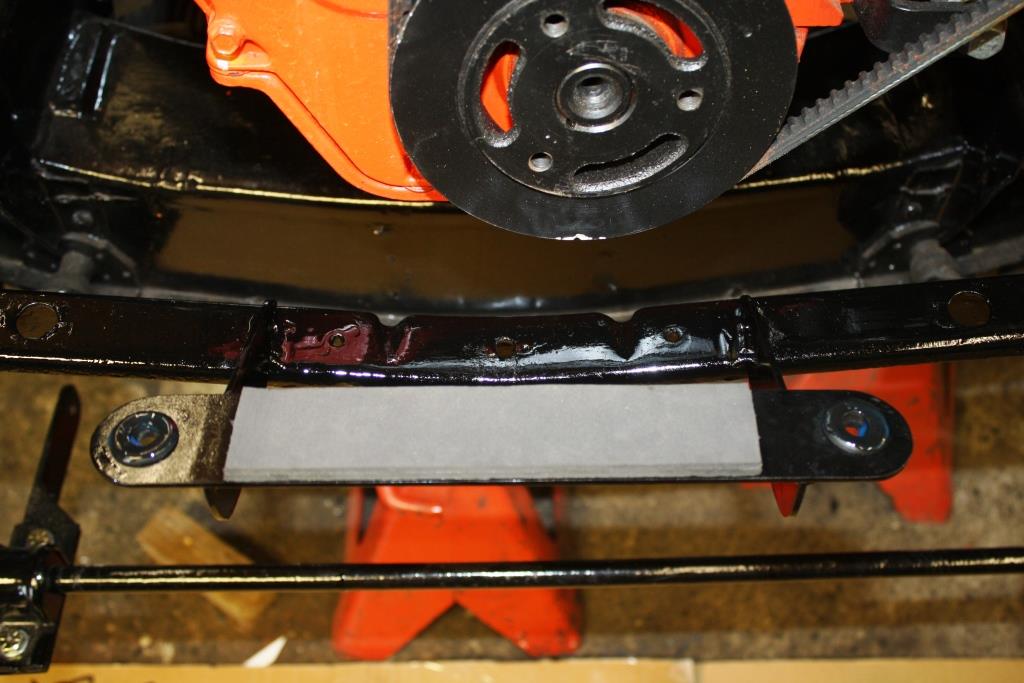
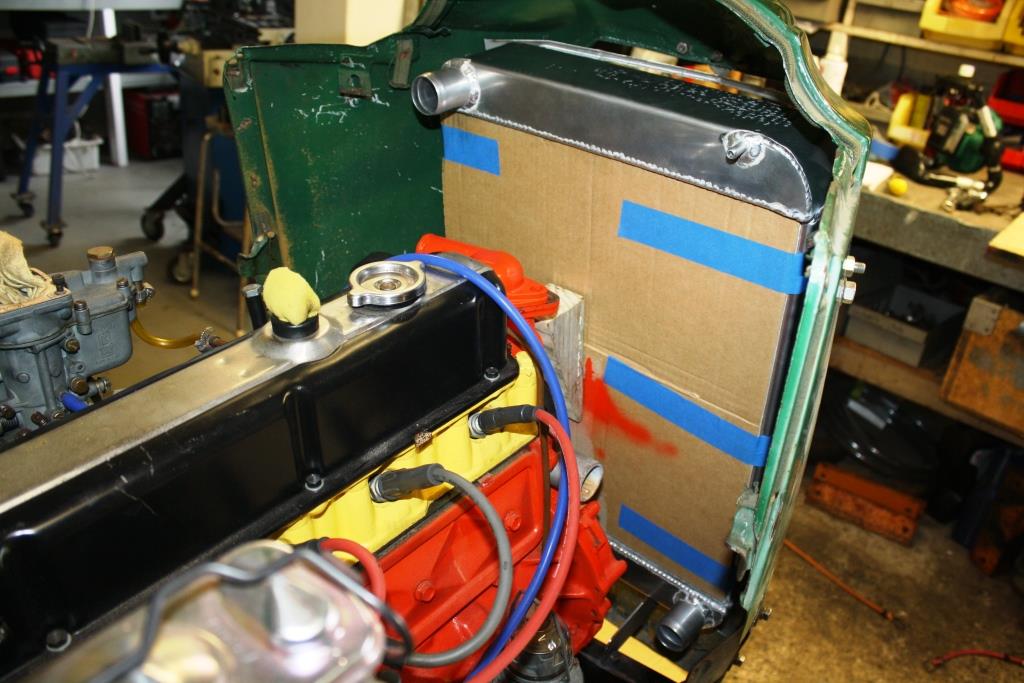
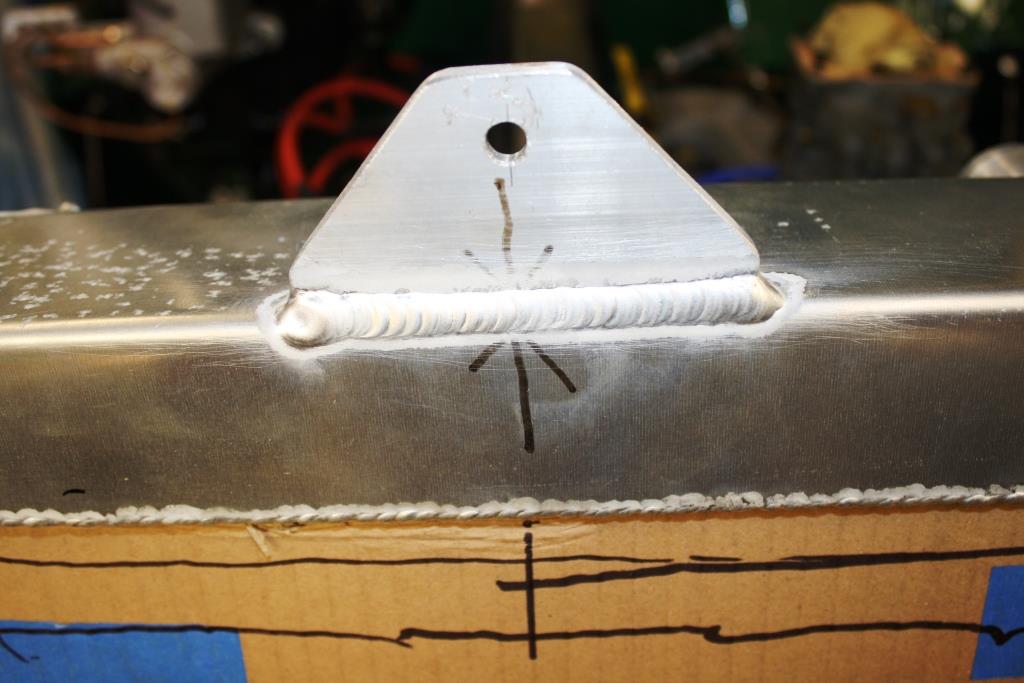
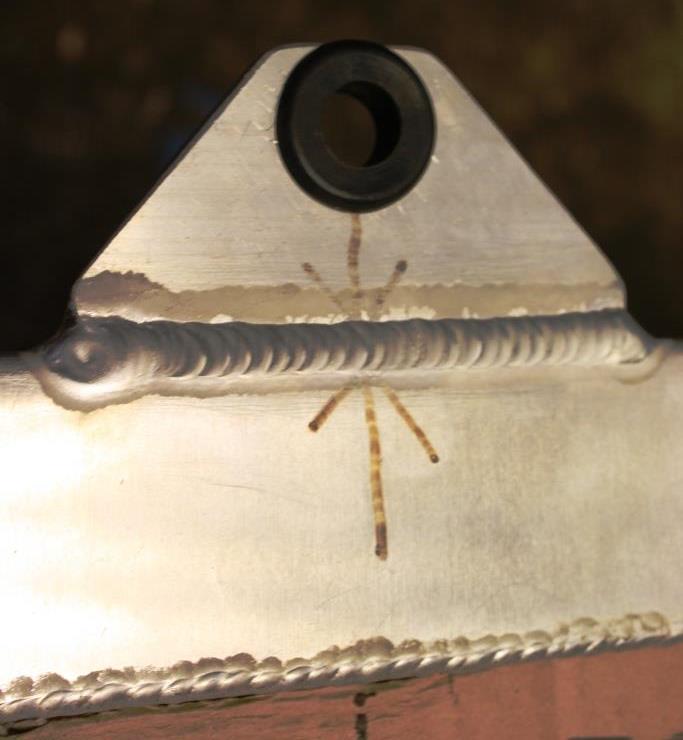
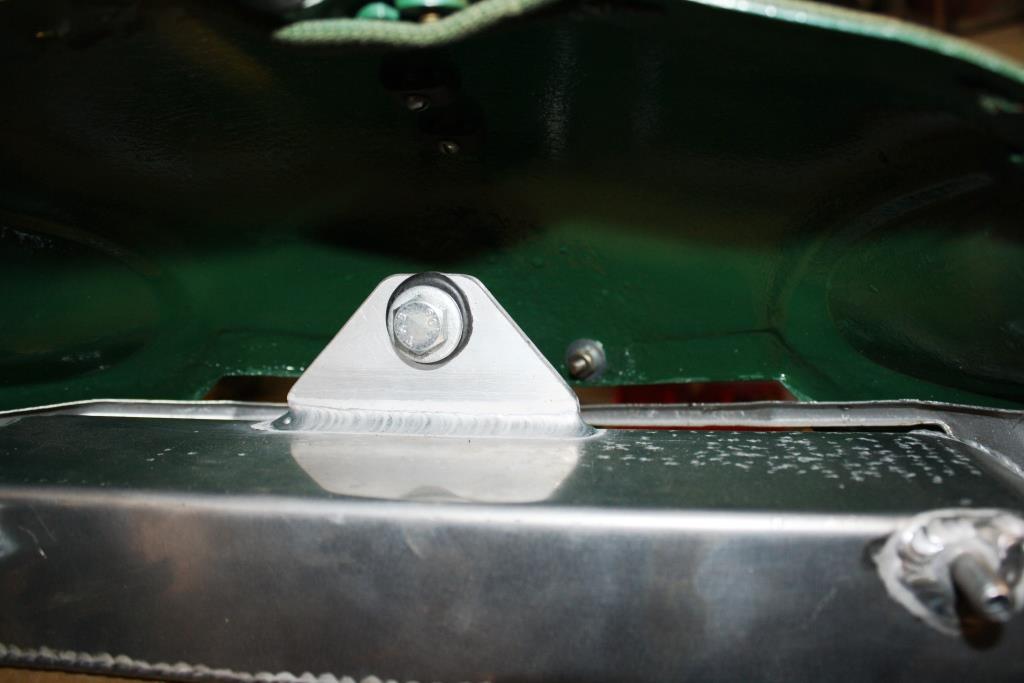
Time to make some clearance for a bottom mount bracket. The obligatory Trial fit with a bit of 6 x 2…….. Knocked up a lower mount…. And glued it to the front cross member…. A couple of grommets for the bottom mounting pins and some foam to stop the bottom rubbing…. It finally fits……… Got a local shop to Tig a top mount on…… And drilled it out to take a grommet.
1 point
-
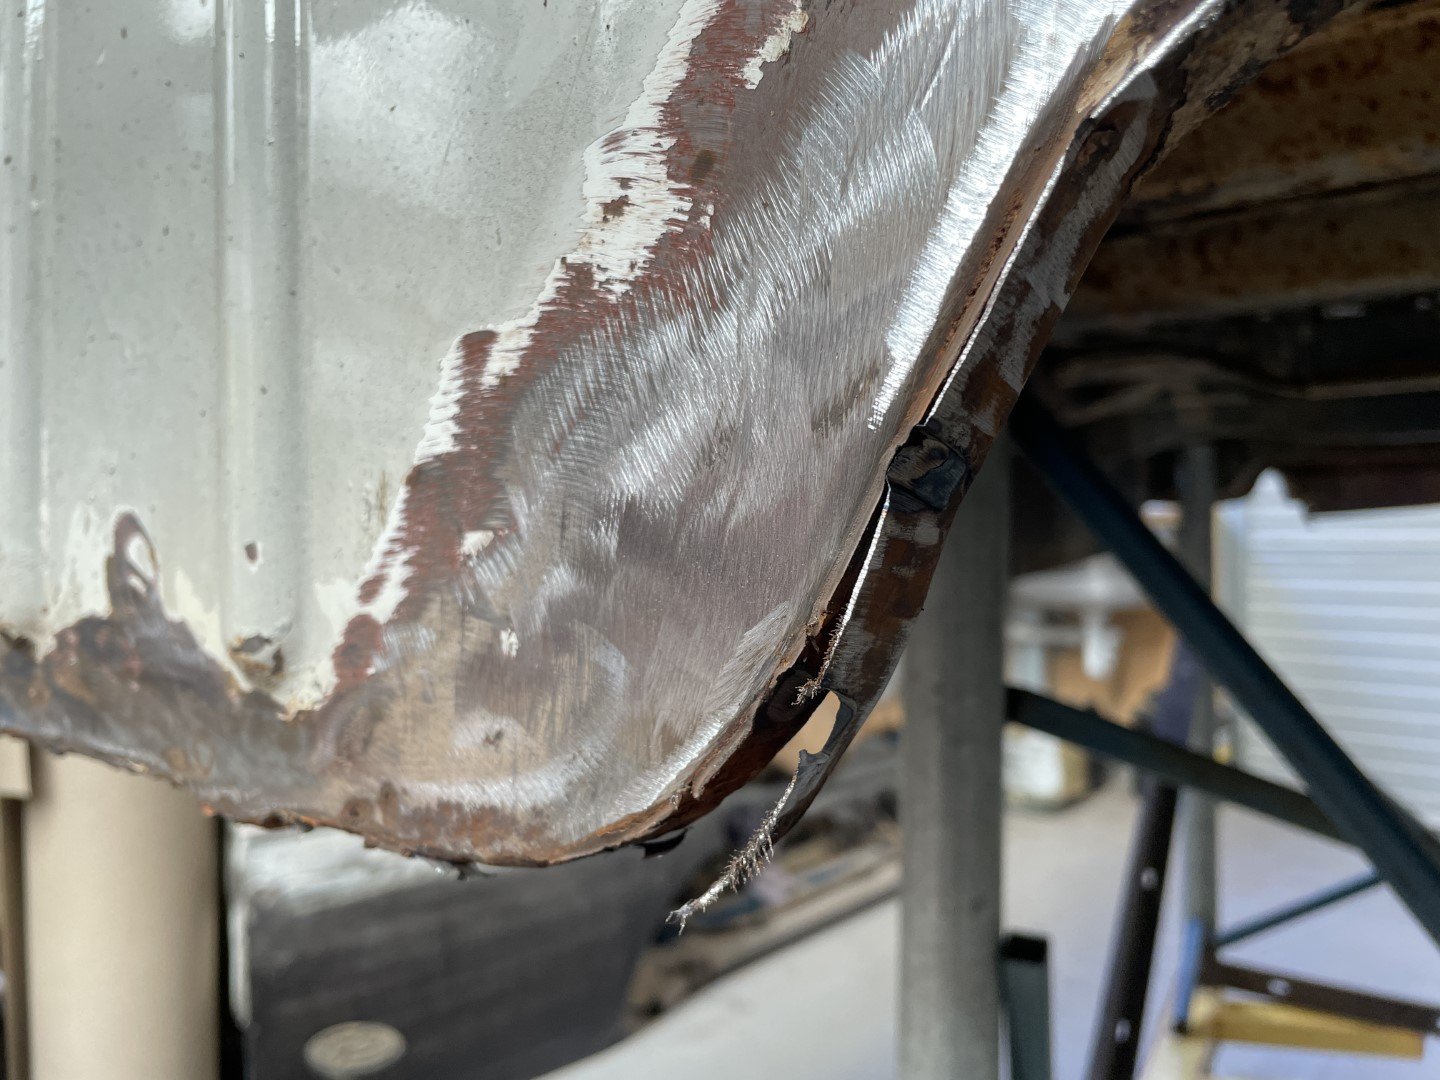
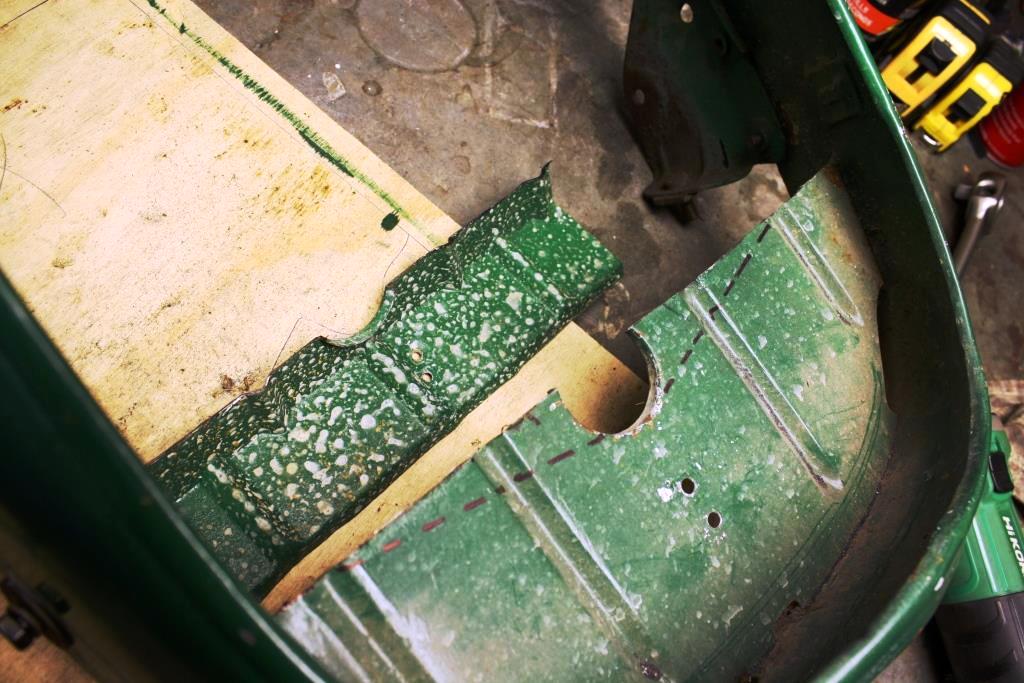
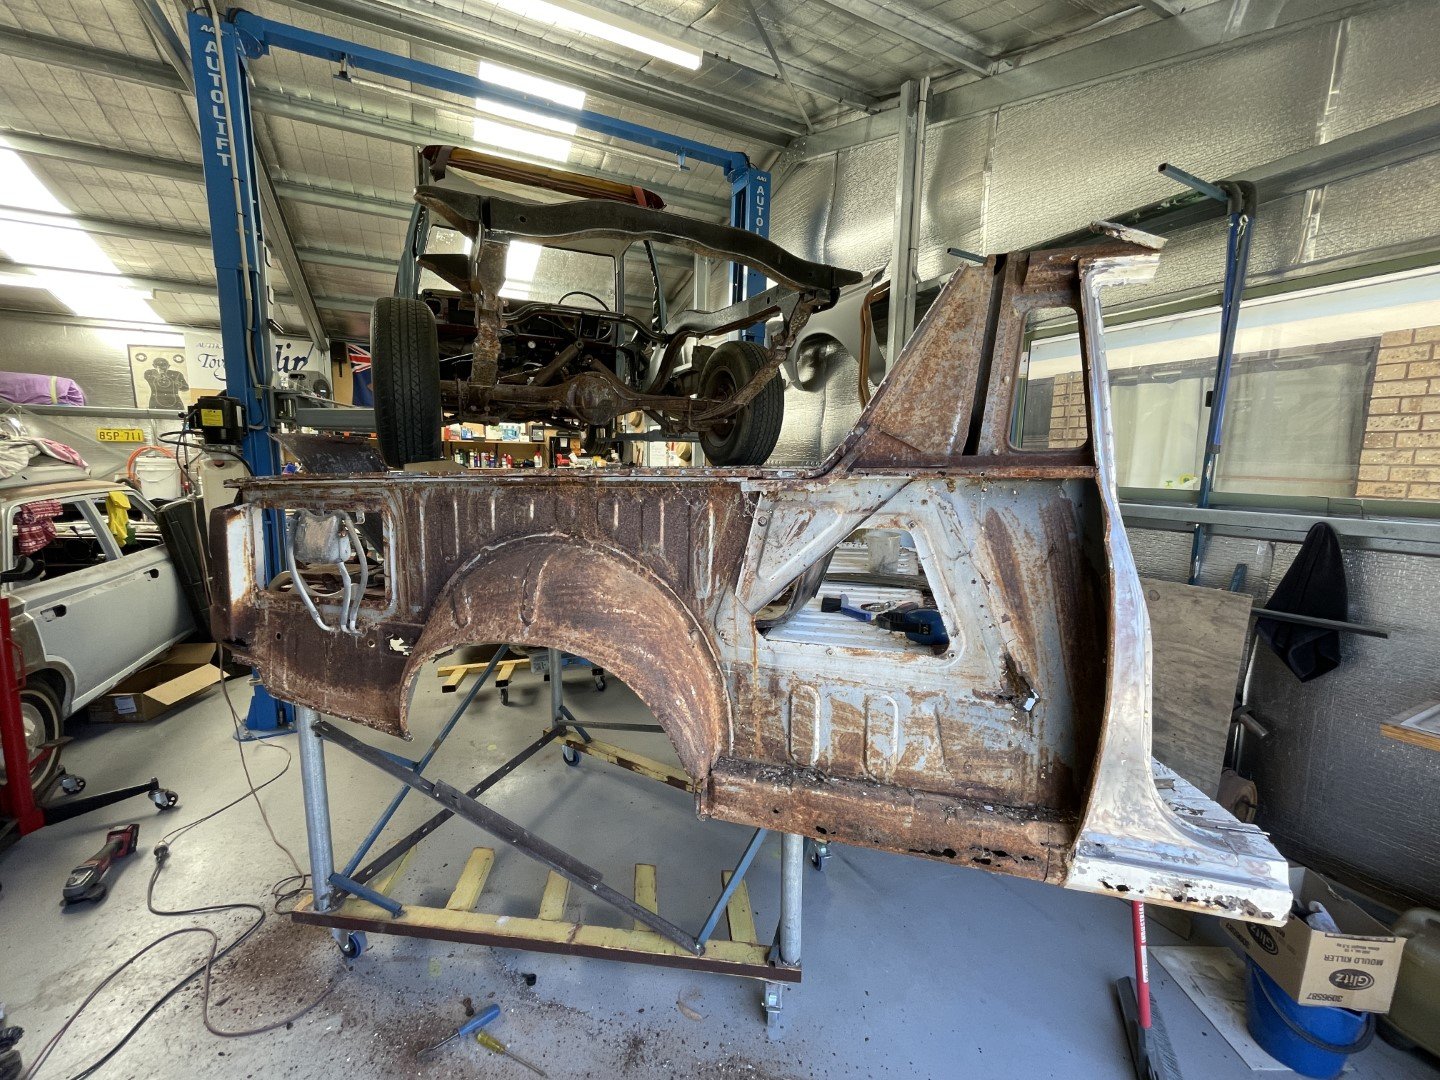
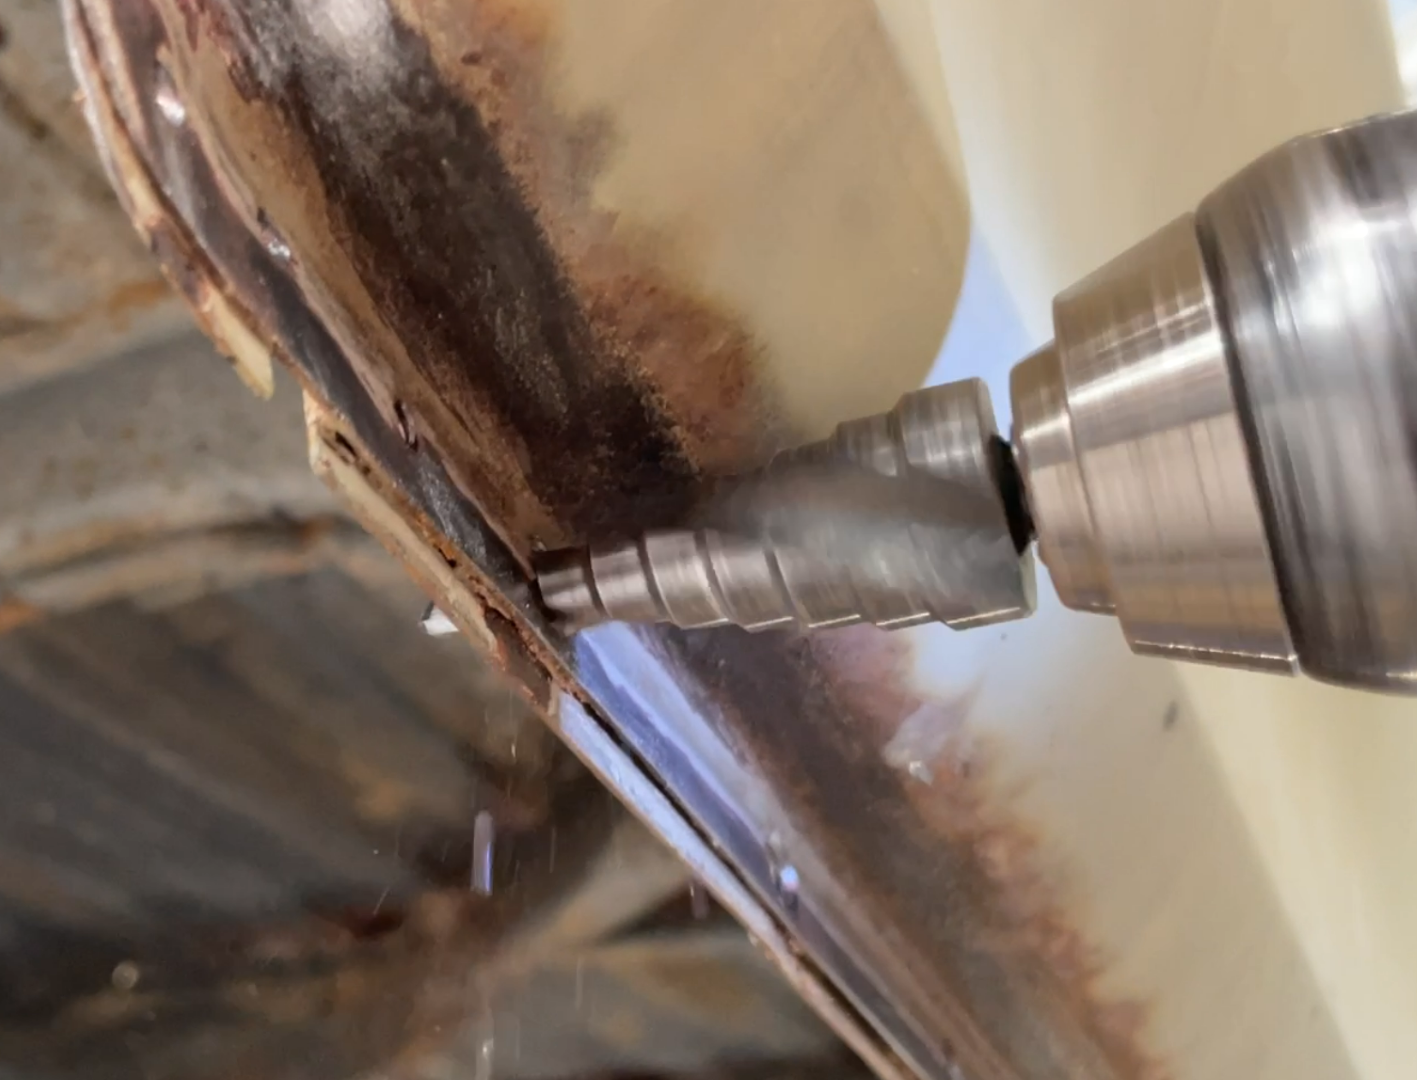
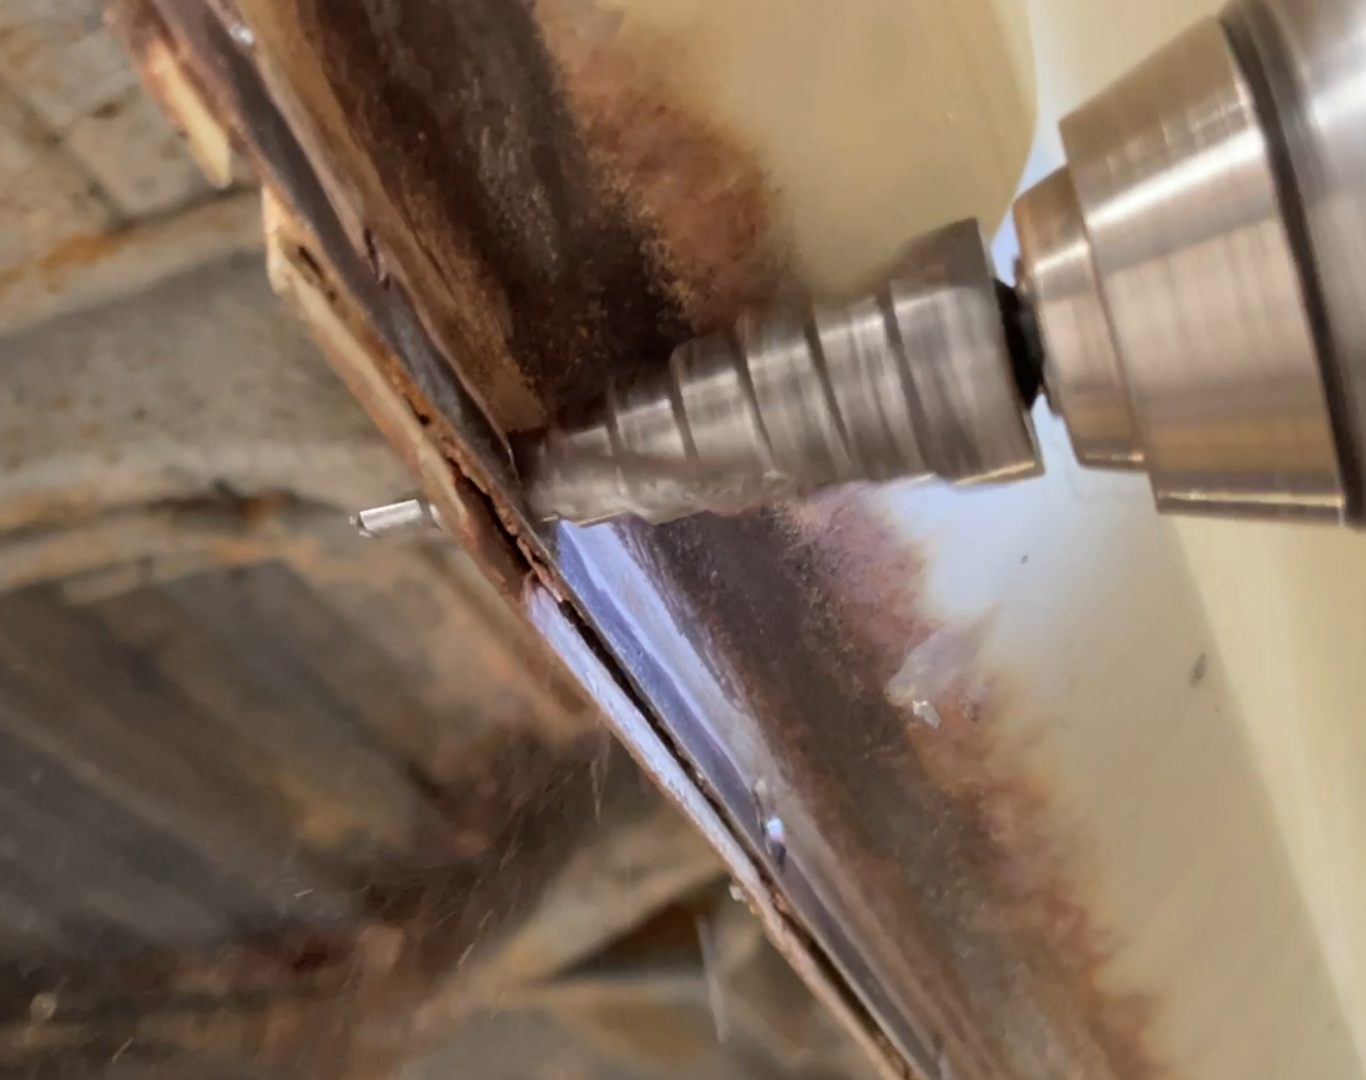
Basic update because very little has been achieved in the last month. Between family holidays, work and other commitments this thing has been no more than something to stare at in the couple of minutes spare i've had. Anyway - boo hoo for me. Ripped into the RH side 1/4 panel to see what scary things lurked behind. Much better than the LH side which is nice. Additionally, I take back all the nice things I said about the proper spot weld drill bit that I purchased. It was nice for a while, but after a while - not nice. Stupid think got all tuckered out after drilling 50+ spotwelds - and refused to drill any more. Tried to sharpen it with the angle grinder - and fucked it. Tried the next best thing - normal drill bits. Been here and played this stupid game before - and it wasn't fun. So, after going around with a 4mm drill bit to 'spot' the welds, I gave an old Uni-bit a try to see what would happen. It was much better. Considering that I was working within a short window of time, all give-a-fucks had gone right out the window and I wanted this panel off yesterday. Initial screenshot of a video shows the Uni-bit tearing this panel a new one - notice very little gap between panels. After clunking through a couple of steps - the panel gap opened up signaling victory! Happy days. Carried on with the remainders and got the panel off using considerably less finesse than that used getting the other side off. Wheeled it outside and pressure cleaned the snot off it and let it dry off. Then pushed it into the shed so that I could resume normal fatherly duties.
1 point


.thumb.jpeg.cba3dbd83fd850104bccdf9537a099b9.jpeg)


This leaderboard is set to Auckland/GMT+12:00