
Leaderboard


Popular Content
Showing content with the highest reputation on 01/07/20 in all areas
-
This is nearly working. Lots has been done since ^^17 points
-
Primer.
 14 points
 -
a wee while since the last Blizzshop update as i havent been up to too much other than work and painting the bloody house. Had great fun for a wee bit on the wee GP from above then promptly sold that on for some good coin. Have a new small bike project replacing it which i will put some info up about when i pick up the rest of the bits later this week. I have been getting over staring at one of my favorite bikes i own that is by far also the ugliest bike I own, so i have started de-uglyfying it. The grot rattle can canary yellow RD04 XRV750 Africa twin is yellow no more. previous photo for reference lawl So first up I stripped it down, paint stripped the Fuel tank, etch primed it and started bogging up some dents, still got some more work there to go. The only mechanical issue the bike had was being very hard to start from cold. When not used often these bikes have a notorious habit in which the choke plungers get jammed on (enriched). I dont know what happened to this one but one plunger was disconnected and some numpty had jizzed half a tube of RTV down the plunger hole to block it, after picking most of that out i found a partially drilled out and extraction attempt of a now mangled choke plunger. Unfortunately for me the idiot mangled the wall of the carb while drilling it out, so the carbs are now junk. $400 later i landed a new set from Austria. Fun fact, the rear carb runs a richer main jet than the front carb to compensate for the hotter running temps of the rear cylinder in the V formation, i wonder how potatoes get around this issue with only sucking from one carb, but then again they probably dont go fast enough to get airspeed to cool the front cylinder. Anyway, the replacement carb has slightly richer getting than my factory one (118/122 opposed to my one at 115/118) on doing research the richer jetting is stock for this model of bike. I will run it like that anyway as mine was a bit lean with the straight through muffler on it. so hopefully that all fixes the starting issue. Next on the agenda is to sort out the horrendous lack of side covers are i threw the even more horrendous checker plate in the trash. I borrowed some RD07 later model side panels but didnt like how they fit, especially once they will be painted white so am going to pick up some XPS foam and have a crack at making my own fibreglass plug / mould / glass side covers which will be a fun project as i haven't worked with glass before. i have a sweet little tail section on the way which will get rid of the big monstrosity thats on there are the moment and i also got some lush as frig but slightly damaged adventure spec soft cordura panniers for cheap. These are currently with @64valiant getting some repairs done, once thats sorted ill make up some racks to hand them from this thing. Plans at this stage is to finish this body work, repair the cracks in the front fairings and then paint it all white and get the lads a watermark to do some sweet rothmans livery. will re do the dash setup and make a few other small changes but wont dig too deep. once this is all done ill ride it for a year and then probs fully strip and powdercoat the frame and do all the bearings and shocks and stuff. oh also need to do a preventative mod to the fuel pump. These things have a small mitsi fuel pump to supply fuel when the level drops below carb level (about 1/4 tank) and the points are notorious for welding themselves together. There is a wee mod to add a diode into the pump which through electrical magic reduces this sparking and stops the pumps from clagging out all the time. Looking forward for some adventure times11 points
-
10 points
-
Intercooler pipes mostly done. Need to sort a bov and tidy/paint them Also sorted a water pump pulley and crank pulley combo- these I had bought ages ago as a box of parts off a marine engine which never fitted anything so had to modify a few things, now I can mount the alternator on the front of the lh head which is opposite to how they usually are8 points
-
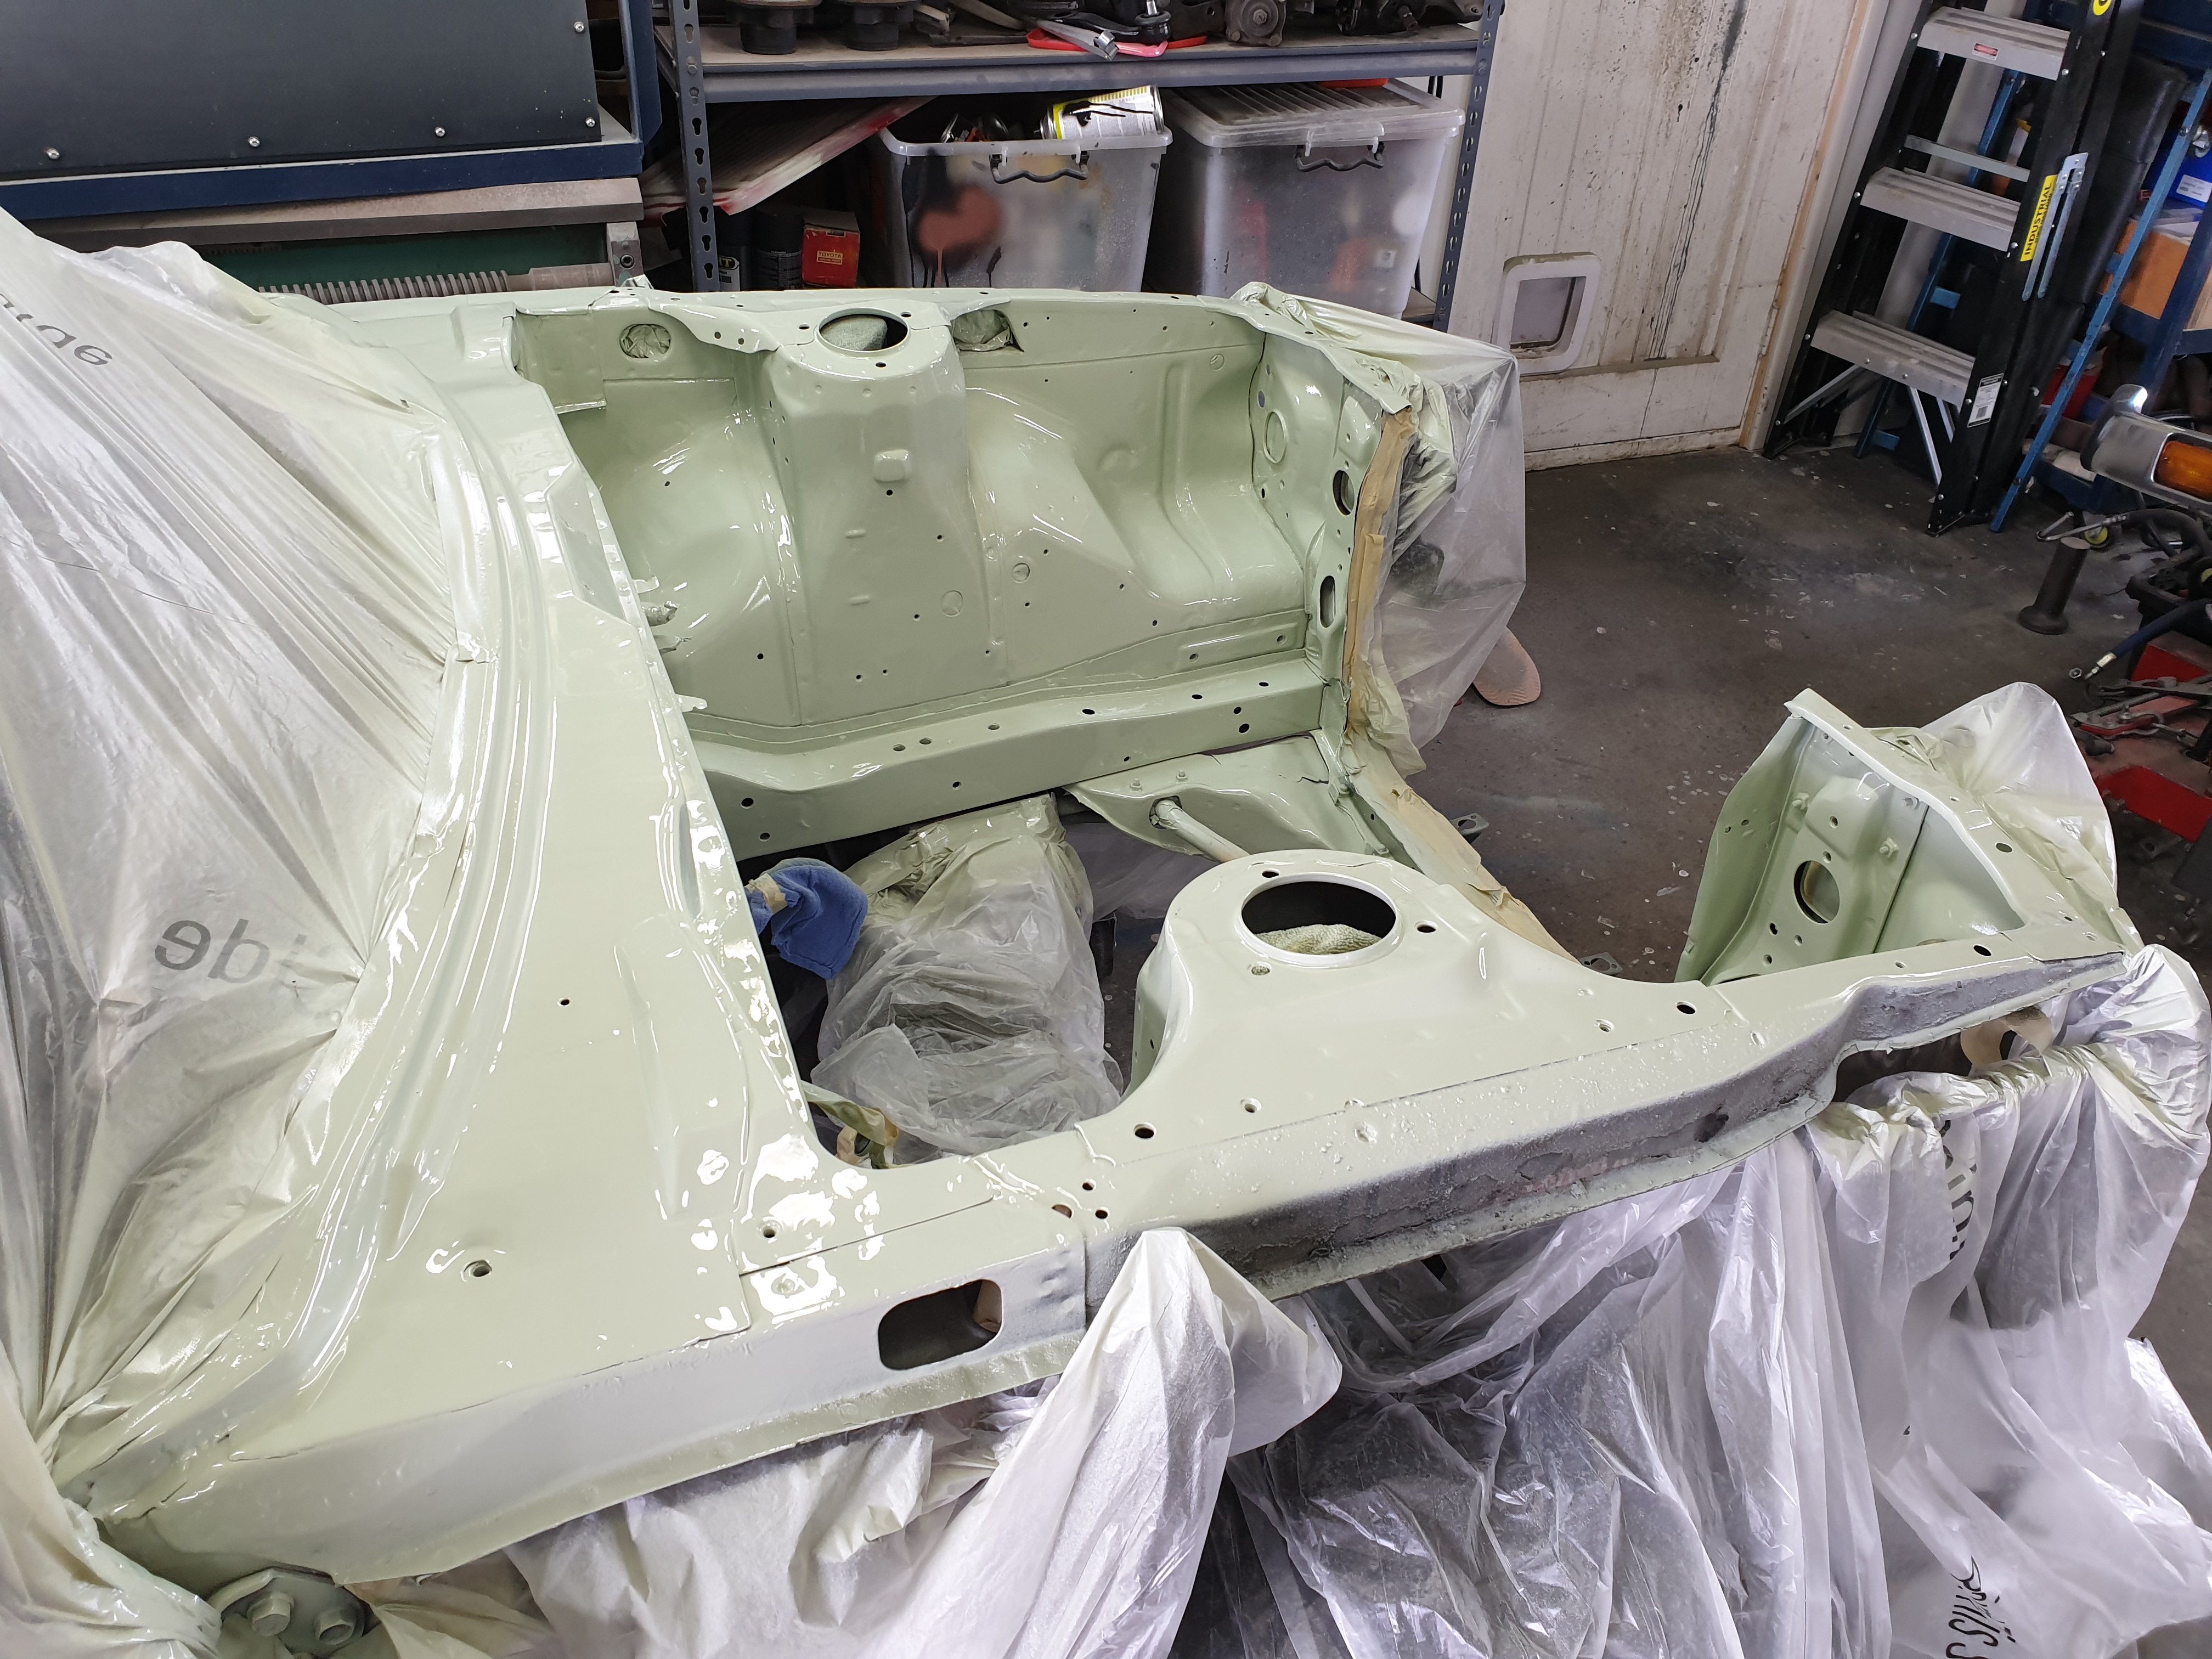
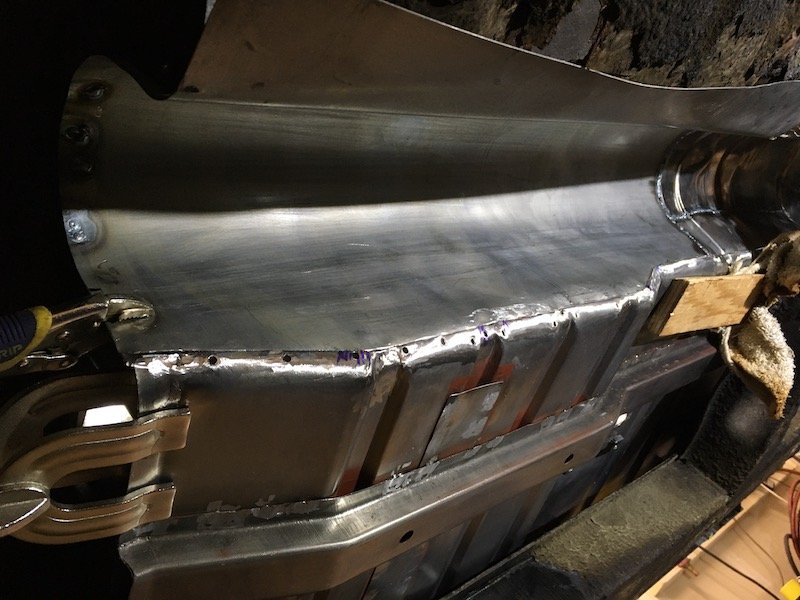
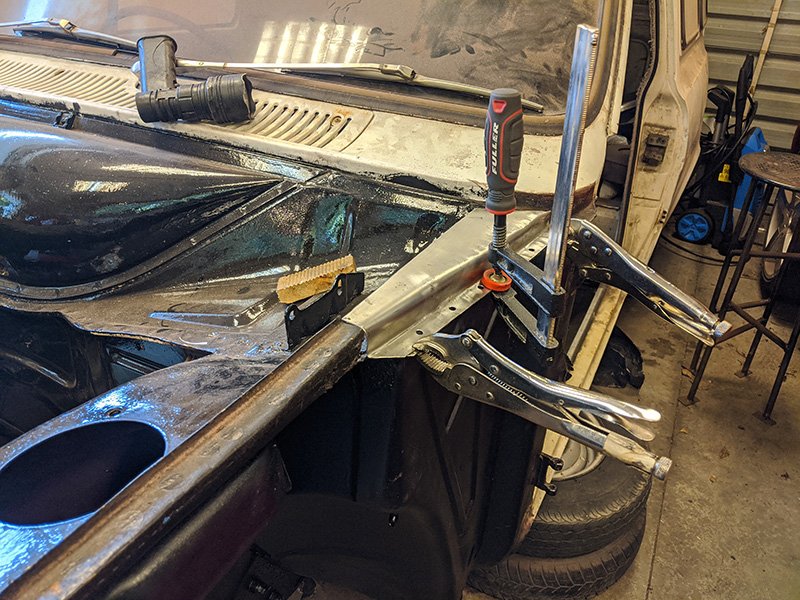
and all finished. im super stoked with how it all came out. the shape is really good and the passengers side wont need any bog i reckon, just some high build and it should come right. the drivers side needs a tiny bit of filler where a piece of the origional car is really badly fucked from previous welding. apart from that shes ready for paint. 2020-01-06_01-15-03 by sheepers, on Flickr 2020-01-06_01-15-12 by sheepers, on Flickr 2020-01-06_02-52-14 by sheepers, on Flickr 2020-01-06_02-52-22 by sheepers, on Flickr7 points
-
Supercharger done7 points
-
Building the 1961 Datsun 310 Bluebird Floorpan - Tunnel trim completed and floorpan edge conforms nicely! Trimmed and fitted. Trim was three steps. First a rough cut with an angle grinder cutting disk to within 1/4 inch of the scribe line, then manual cut with tin snips the rest of the way, finishing with hand filing to clean and de-burr the edges. It's very tempting to just start welding it now. Just need to paint the underside and weld it in - finally! Discussion: https://oldschool.co.nz/index.php?/topic/60267-marts-pl310-61-datsun-bluebird-sedan/
6 points
-
Still own it, still clean it. Took a photo with another cool Honda. 1996 Honda Accord Super Tourer HART001 (3)-Edit by Richard Opie, on Flickr Also did some more work/doing some more work so will update soon times.6 points
-
5 points
-
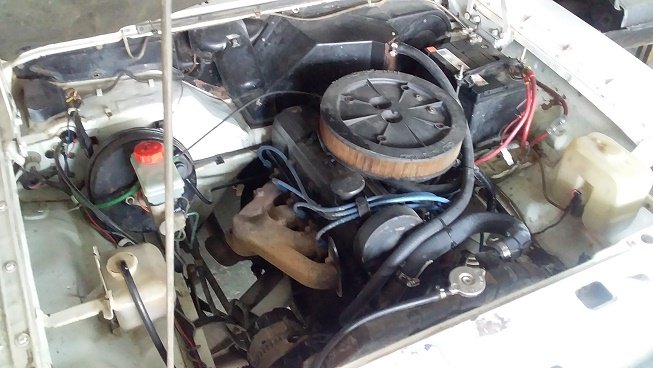
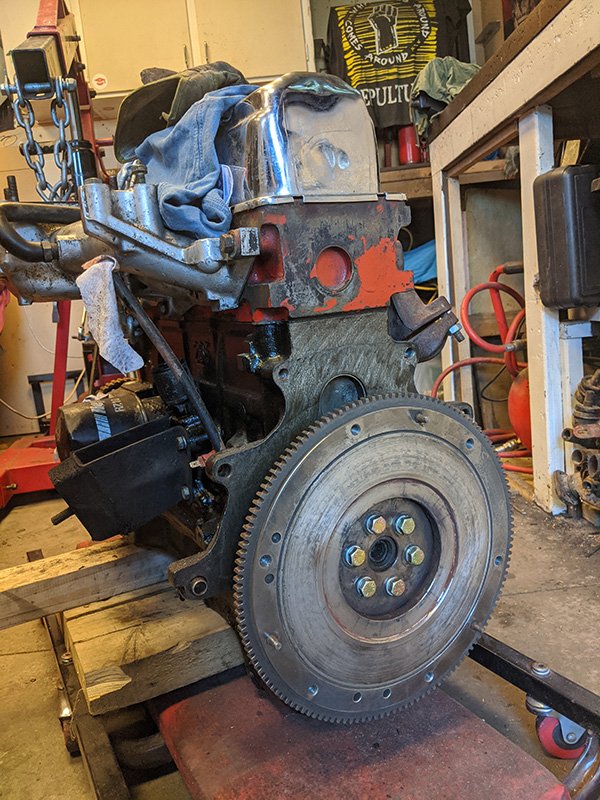
well i havnt build the new motor yet .....because i have other shit to play with.....but the old pinhoe has been getting worse......blows shit loads of smoke and sounds like a diesel... the mk3 parts car i bought had a mighty pinthoe in it... so i pulled it out pulled the clutch ,flywheel,pressure plate,inlet and carb , thermostat and water pump of mine and slapped it on to the other one.... reason being mine ran and i had done them last year. some new plugs and oil.....and man it starts first pop.....no smoke.....and so quiet . old pinthoe other old pinthoe blooody good
4 points
-
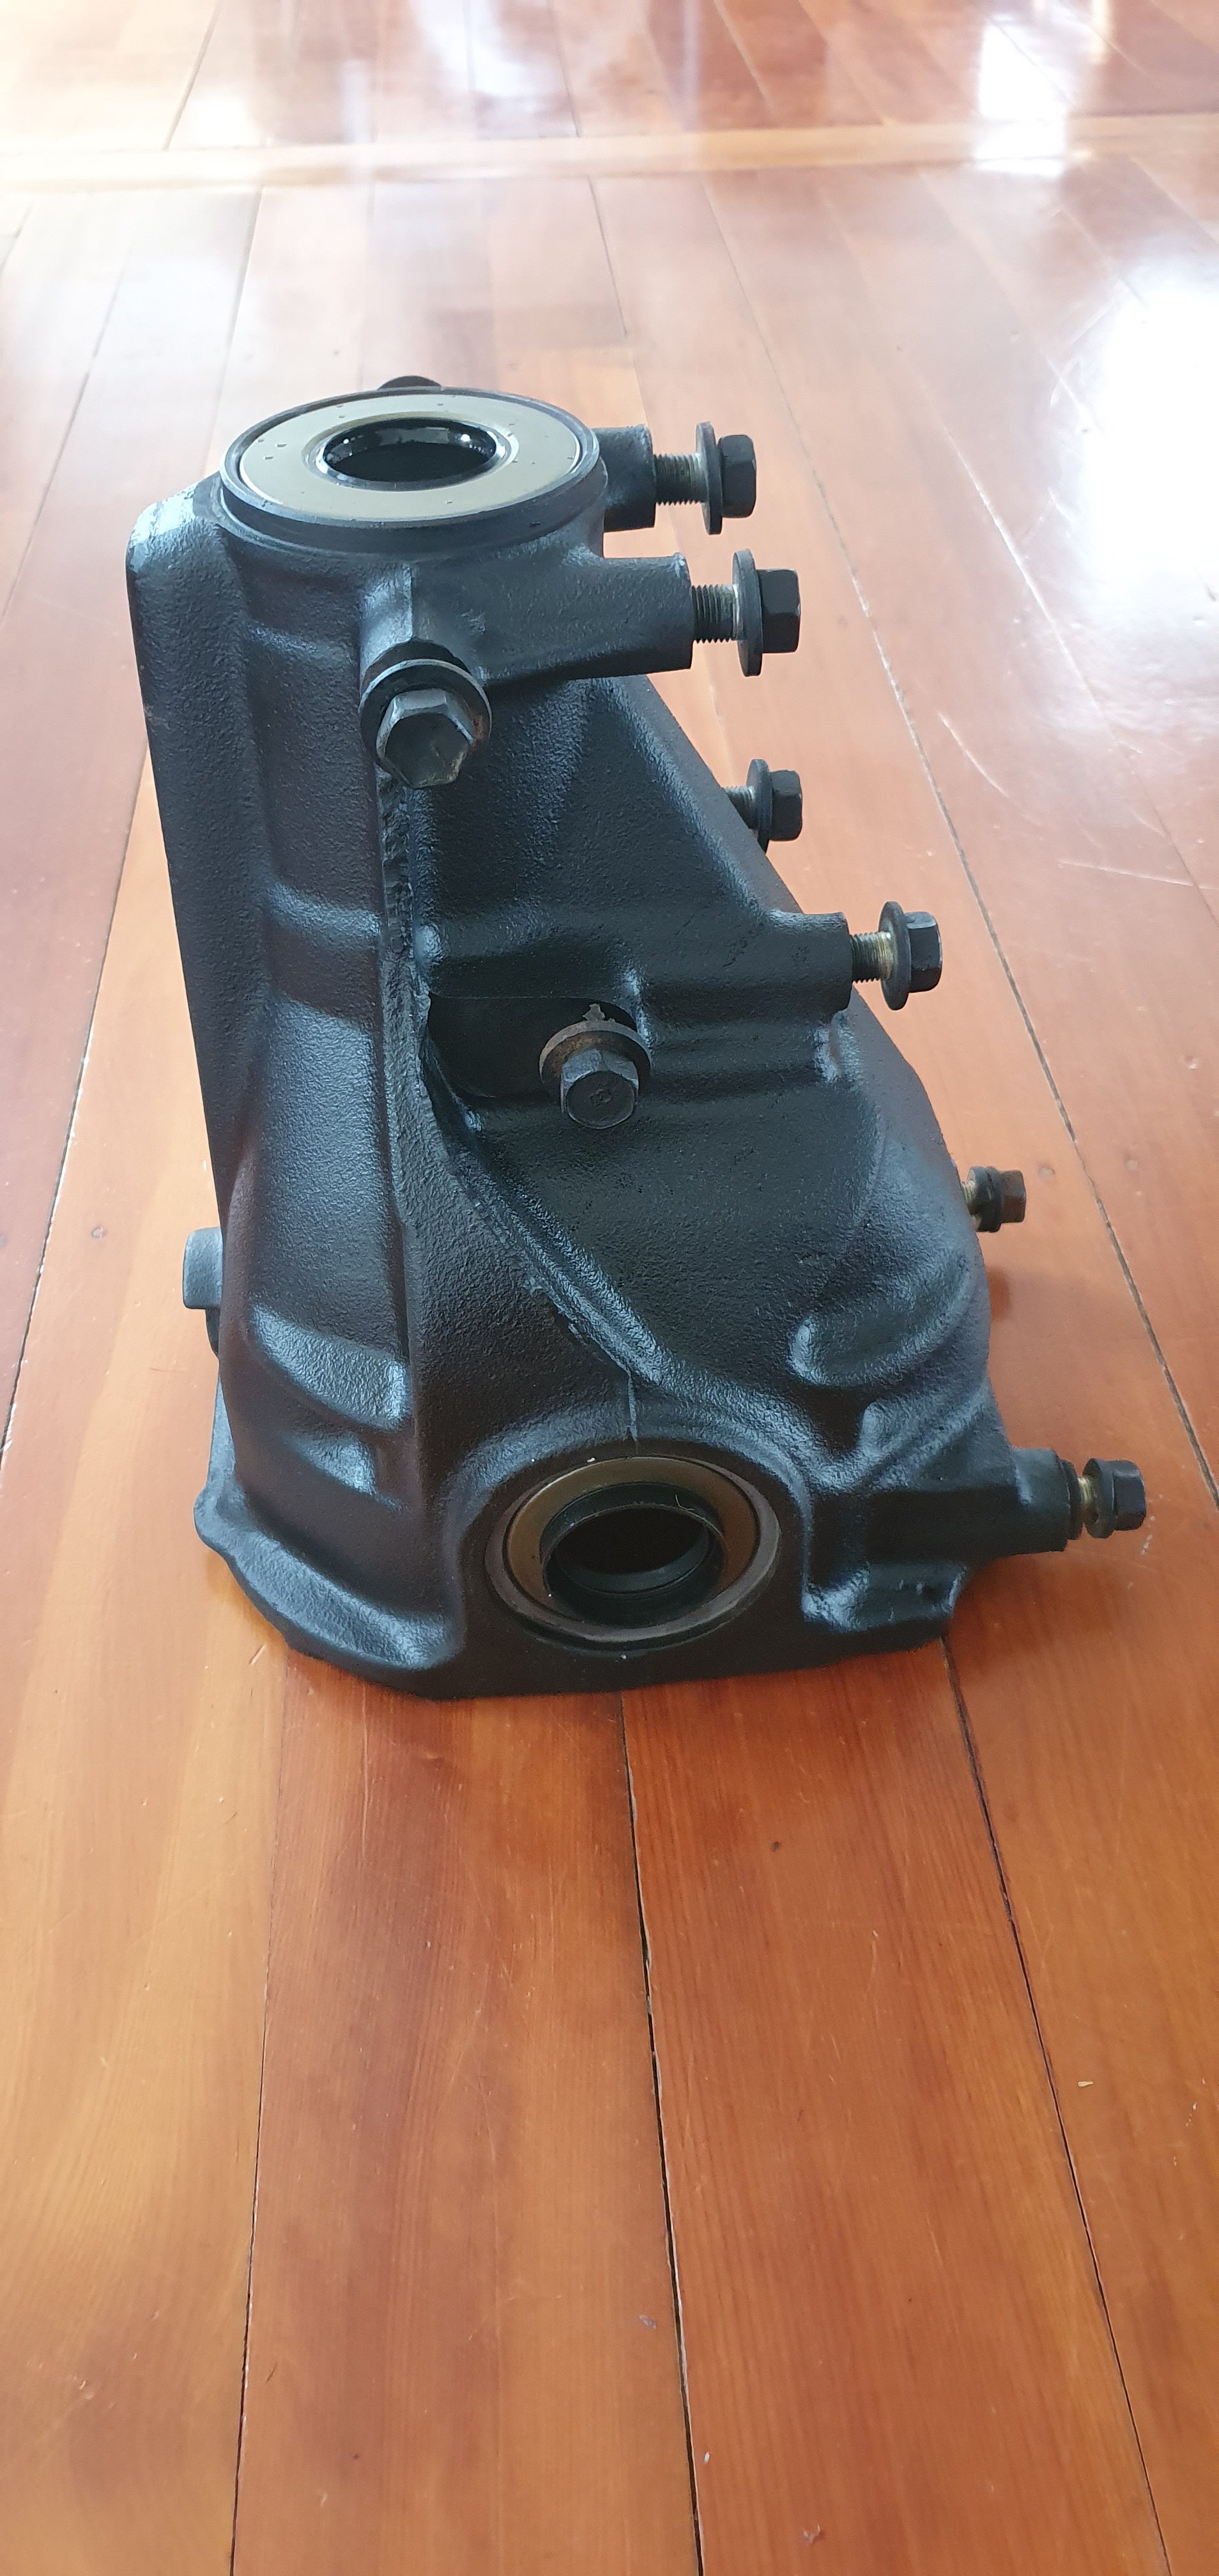
F series ma61/gx61 diff casing stripped and painted with new pinion and axle seals and bearings Pinion bearings: Koyo TRA0607RYR Koyo TR0708-1 Crush tube spacer: 41231-22010
3 points
-
Yeah I'm a fan too, not even a hard font to replicate. Get it laser cut out of acrylic at school.3 points
-
Big had been running rougher and rougher and I noticed it would chuff from the intake manifold as well. So pulled it apart and applied liberal amounts of goo. Runs better than ever and starts way nicer and idles straight away when cold etc. Boom. Also have aquired another frame for a side project, as seen below. Chucked my original v50 motor in. Plan is slam, hardtail, flat bars etc.
3 points
-
Put lower control arms back in with new ball joints and bushes and attached knuckles and castor arms
3 points
-
195/65/14 for the 7j up front
2 points
-
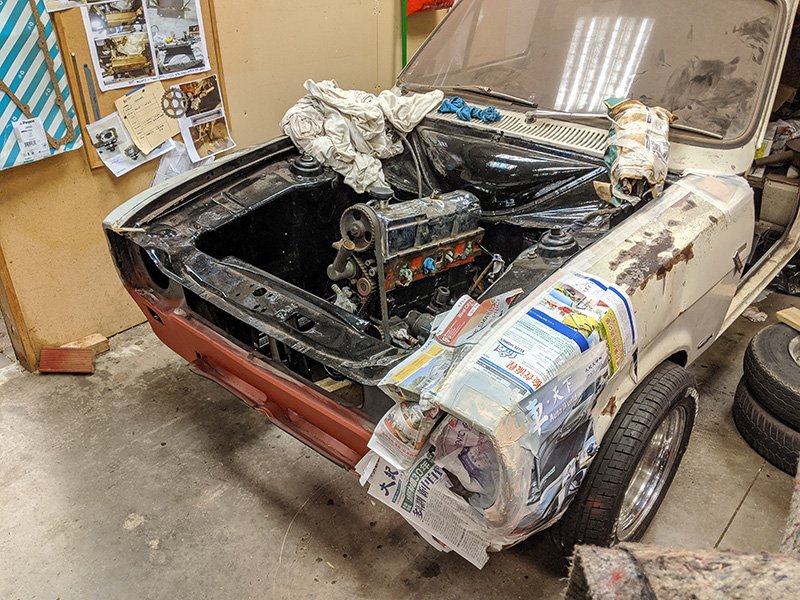
bit of a update for Jan, been pritty quiet on OS to be fair. But i'v had a bit on. been putting a bit of effort in to get this to the next stage. Decided the bonnet is too much for me so it can go off to someone who knows whats going on.2 points
-
2 points
-
2 points
-
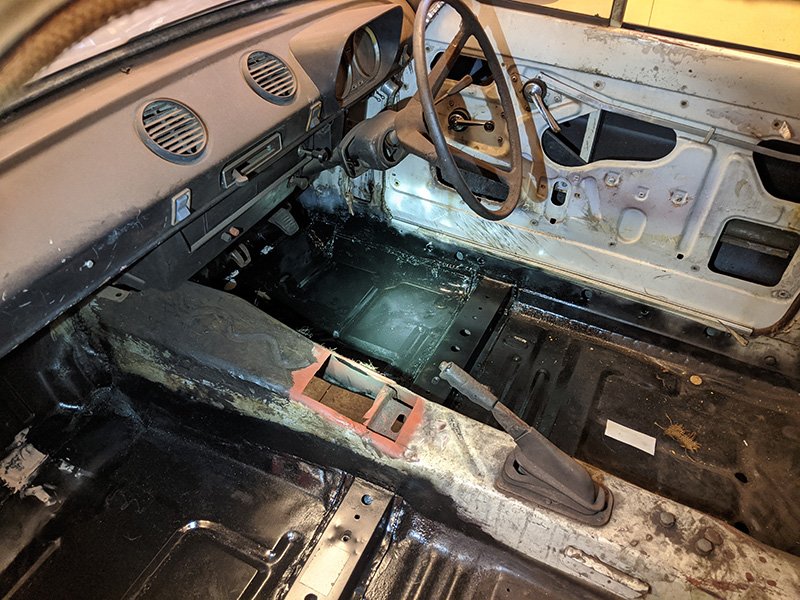
Been a productive week or so Installed electric ignition Also got some power steering hoses made up Hooked up my spare corona radiator which turns out is fucked anyway and started spraying water as it pressurized. Once the motor was going the power steering felt good. When I first tried starting the motor I wasnt getting any fuel to carb turns out someone cut the rocker arm off in the mechanical fuel pump for whatever reason and couldnt be arsed making a flange hah. Anyway had to install a low pressure fuel pump. I mounted it under the boot where the fuel lines exited fuel tank and used a chassis mount to mount 1 side thru boot and other side bolts thru chassis I ran an in line fuse which is in accessible thru boot. Covered the parcel tray in some 1960s grandma NZ spec carpet to hide all the holes. Will do for now Managed to drive it in and out of garage. Power steering feels good. Brakes all feel good. I'm missing the throttle linkage on firewall but have sourced one just waiting for it to arrive but just idled in and out. All lights working as they should. I finished putting together dash. Def need to give it a clean.. Once autobend open up I'll order all the bits for the exhaust otherwise waiting on a pallet from chch for remaining of missing bits and can try for a wof2 points
-
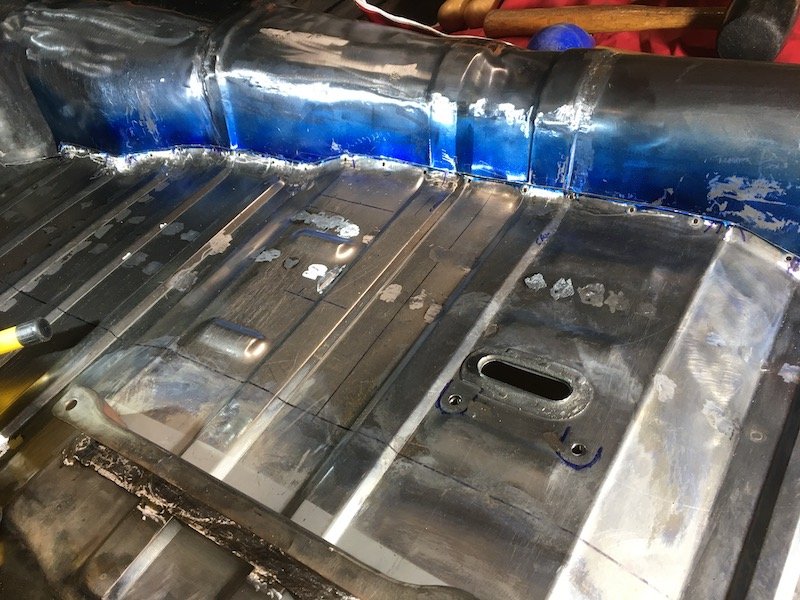
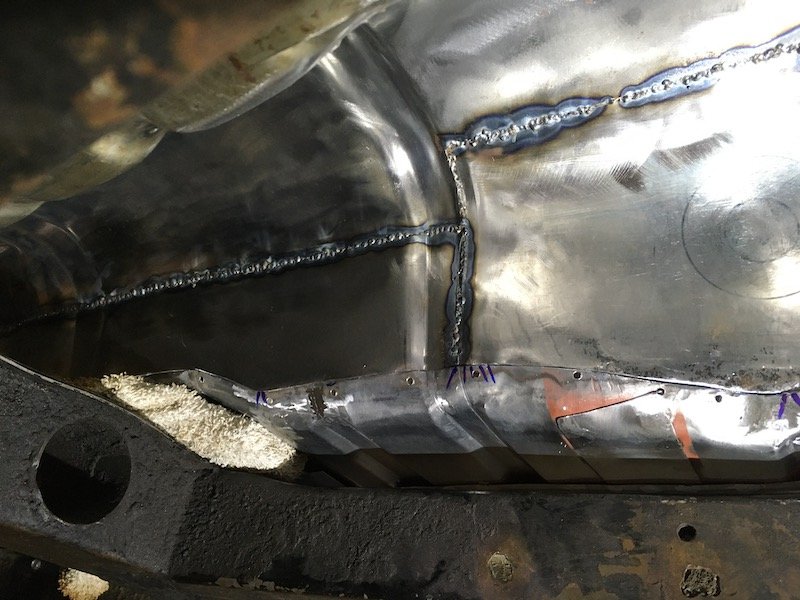
right so, rust repairs. usual story. cardboard template, cut the piece out, fold, fuck around, make the next bit. in this instance i was lucky to have an unmolested example to copy so i knew i got the patch the right shape. i just use basic tools, i think the fanciest thing i have is a shrinker/stretcher. anywho ive taken some fairly self explanatory photos of the process, only one that might need some explanation is welding up the gap. i use a copper plate behind the gap and weld onto that, the metal wont stick to the copper so it helps if you've got a gap to fill. 2019-12-29_03-56-09 by sheepers, on Flickr 2019-12-29_03-56-18 by sheepers, on Flickr 2019-12-29_03-56-25 by sheepers, on Flickr 2019-12-29_03-56-33 by sheepers, on Flickr 2019-12-29_03-56-52 by sheepers, on Flickr 2019-12-29_03-57-00 by sheepers, on Flickr 2019-12-29_03-57-08 by sheepers, on Flickr 2019-12-29_03-57-17 by sheepers, on Flickr 2019-12-29_03-57-25 by sheepers, on Flickr 2019-12-29_06-07-34 by sheepers, on Flickr 2019-12-29_06-07-41 by sheepers, on Flickr 2019-12-29_06-07-49 by sheepers, on Flickr 2019-12-29_06-07-57 by sheepers, on Flickr2 points
-
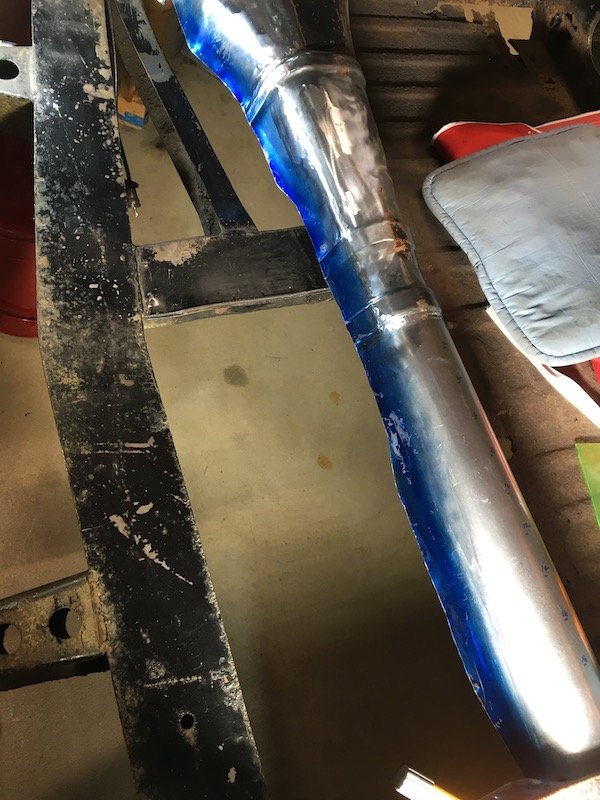
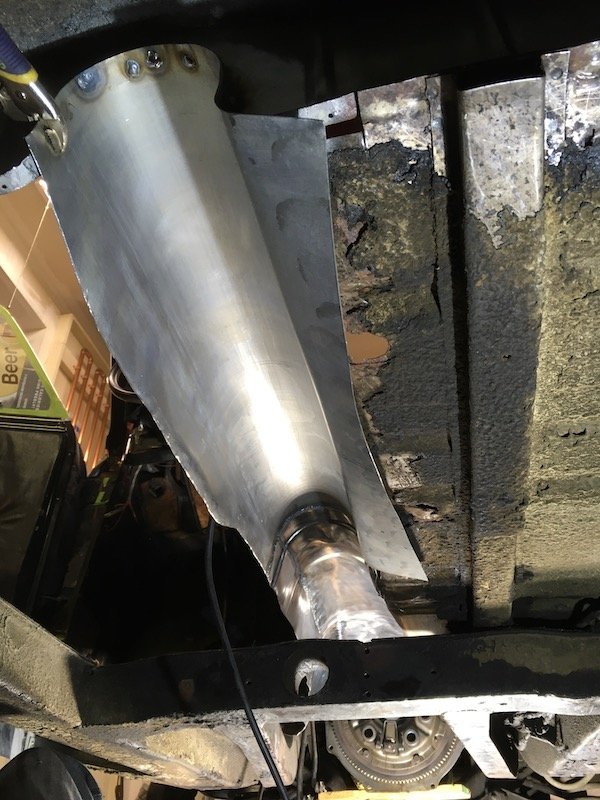
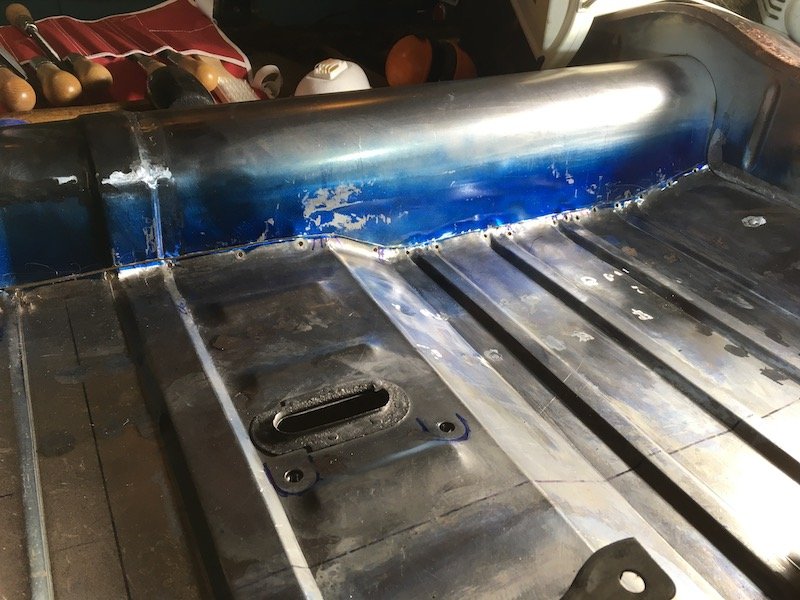
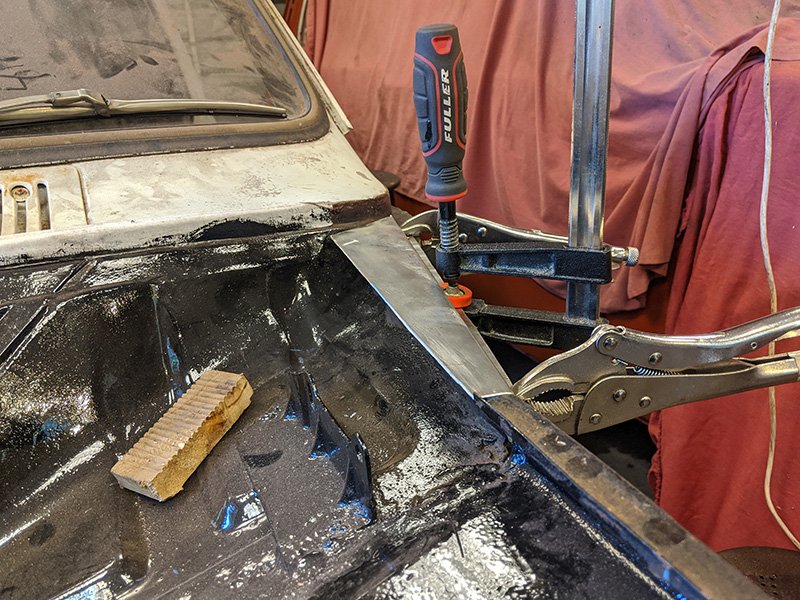
its never fun finding bodgy repairs that you then have to fix. i knew there was trouble under the bog in these two corners, i just didn't know how bad it was. its bad. the usual story of shoddy half arsed work. smash the rust in, weld a massive plate over the top then bog the shit out of it. and, as usual, it would have been quicker to fix it properly in the first place than doing what was done. this was done by David Holt (the colour blind car painter i bought the car off) somewhere between 1990 and 1996ish. luckily for me David cant weld either because i was able to remove the patches with just a screwdriver and bare hands. again, as is typical for this type of butchery, once the "repair" is removed the actual original car isnt in that bad condition, it would have been easier just to fix it correctly the first time. so now that ive got all the garbage out of the way ill go about making new pieces and welding it all back together. 2019-12-28_01-36-47 by sheepers, on Flickr 2019-12-28_01-36-56 by sheepers, on Flickr 2019-12-28_01-37-03 by sheepers, on Flickr 2019-12-28_01-37-10 by sheepers, on Flickr 2019-12-28_01-37-17 by sheepers, on Flickr 2019-12-28_01-37-27 by sheepers, on Flickr 2019-12-28_01-37-43 by sheepers, on Flickr 2019-12-28_05-23-37 by sheepers, on Flickr2 points
-
Supercharger2 points
-
Outer camtree patterns 2 of 22 points
-
Outer pattern prints complete.2 points
-
Completed the 57sc Sump Model. Moving onto the pattern making designs now. These should be a lot easier than the crankcase! Casting version with machine allowance and shrinkage compensation First cut of roughly what the sand cores would look like.2 points
-
Havnt updated for a while. Been in the US living up the Freedoms. Ive been working on a lot of CAD over the last 1-2years and have just recently bought a massive 3D printer to make casting patterns. The plan is to stock pile patterns and then hit it hard when Im back in NZ Currently doing patterns for the crankcase. I'll update more on Instagram. @Barlow.Jobs2 points
-
Finished! Bit of machining porn for you!2 points
-
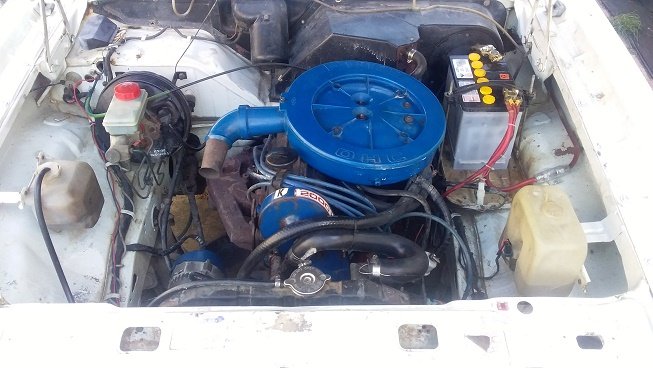
Hello peps finally managed to track down a Sunbeam Imp that was local after many years of hunting! pick it up from a fellow from out Marton way , he painted it to match a rally car imp from back in the days has a WOF and Rego but sadly its doesn't run and has a very bad head gasket or cracked head, filled bores with coolant and mixing fluids.. n plan is to get the motor going again ,found out its a mk1 motor so has the average engine with shit head so need to find a mk2 head then either look at hotting this motor up with possible a little supercharger and a blow through carb or do a motorbike engine swap 1000cc or up discussion/chats at https://oldschool.co.nz/index.php?/topic/66481-sunbeam-imp-1969-michael0008/1 point
-
Brakes have arrived, as have new tyres, but still waiting on the ball joints for the WOF. In the mean time since the car hasnt been started since i drove to the WOF and back, i whipped a plug out to see how the KJet mixtures are... Pretty damn good i'd say. Maybe a little on the lean side, but I can live with that.1 point
-
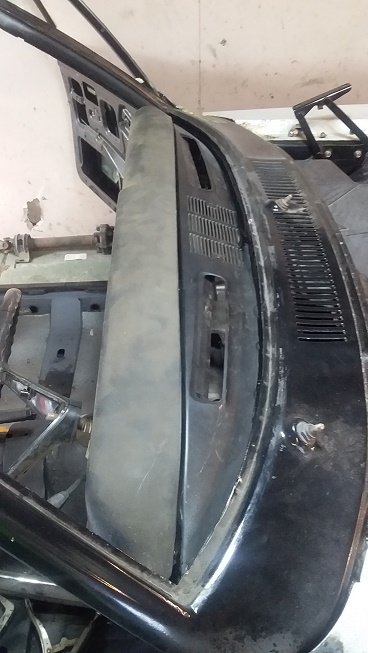
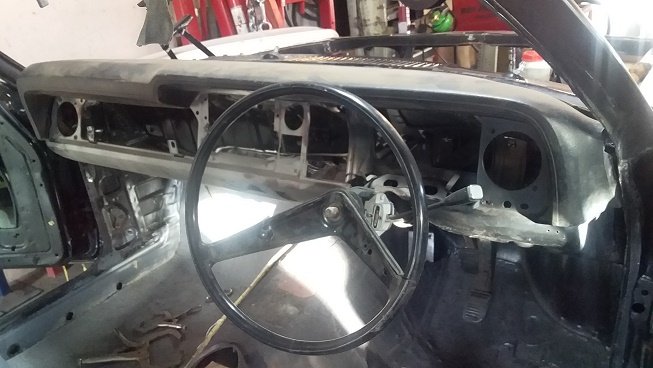
got the re face lift dash support out of the parts car and the face lift one welded back in.....first time ive ever done it....this was the worst part...think the one going in my car will be easier. can start puting the parts car back together with all the shit i dont want/need and sell it on.
1 point
-
Cheers man,I just brought it without asking haha1 point
-
WTFari1 point
-
Truck Norris1 point
-
Wow! Just came across your build thread, I’m so impressed beyond words really. Is this for real...? I will register and follow for sure.1 point
-
Finally got a chance to take this on a real drive. 50km round trip this morning, out to governors bay hotel for a coffee and some wedges and back through lyttleton and through the tunnel back towards home. The drive was awesome and the car performed beautifully. Only issue was the steering doesn't want to return to centre very well, probably just an alighnment needed but will check over the uni joints and the rack. Wasn't pushing it hard at all because it's very early days, but it seemed far far too easy to keep up with normal cars through the hills, I suspect it just eats the road up better than anything I've ever driven.
1 point
-
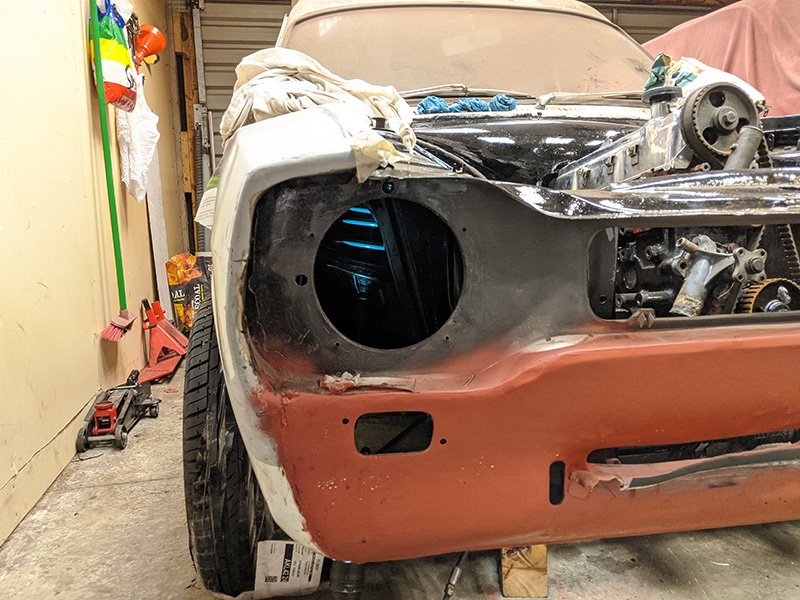
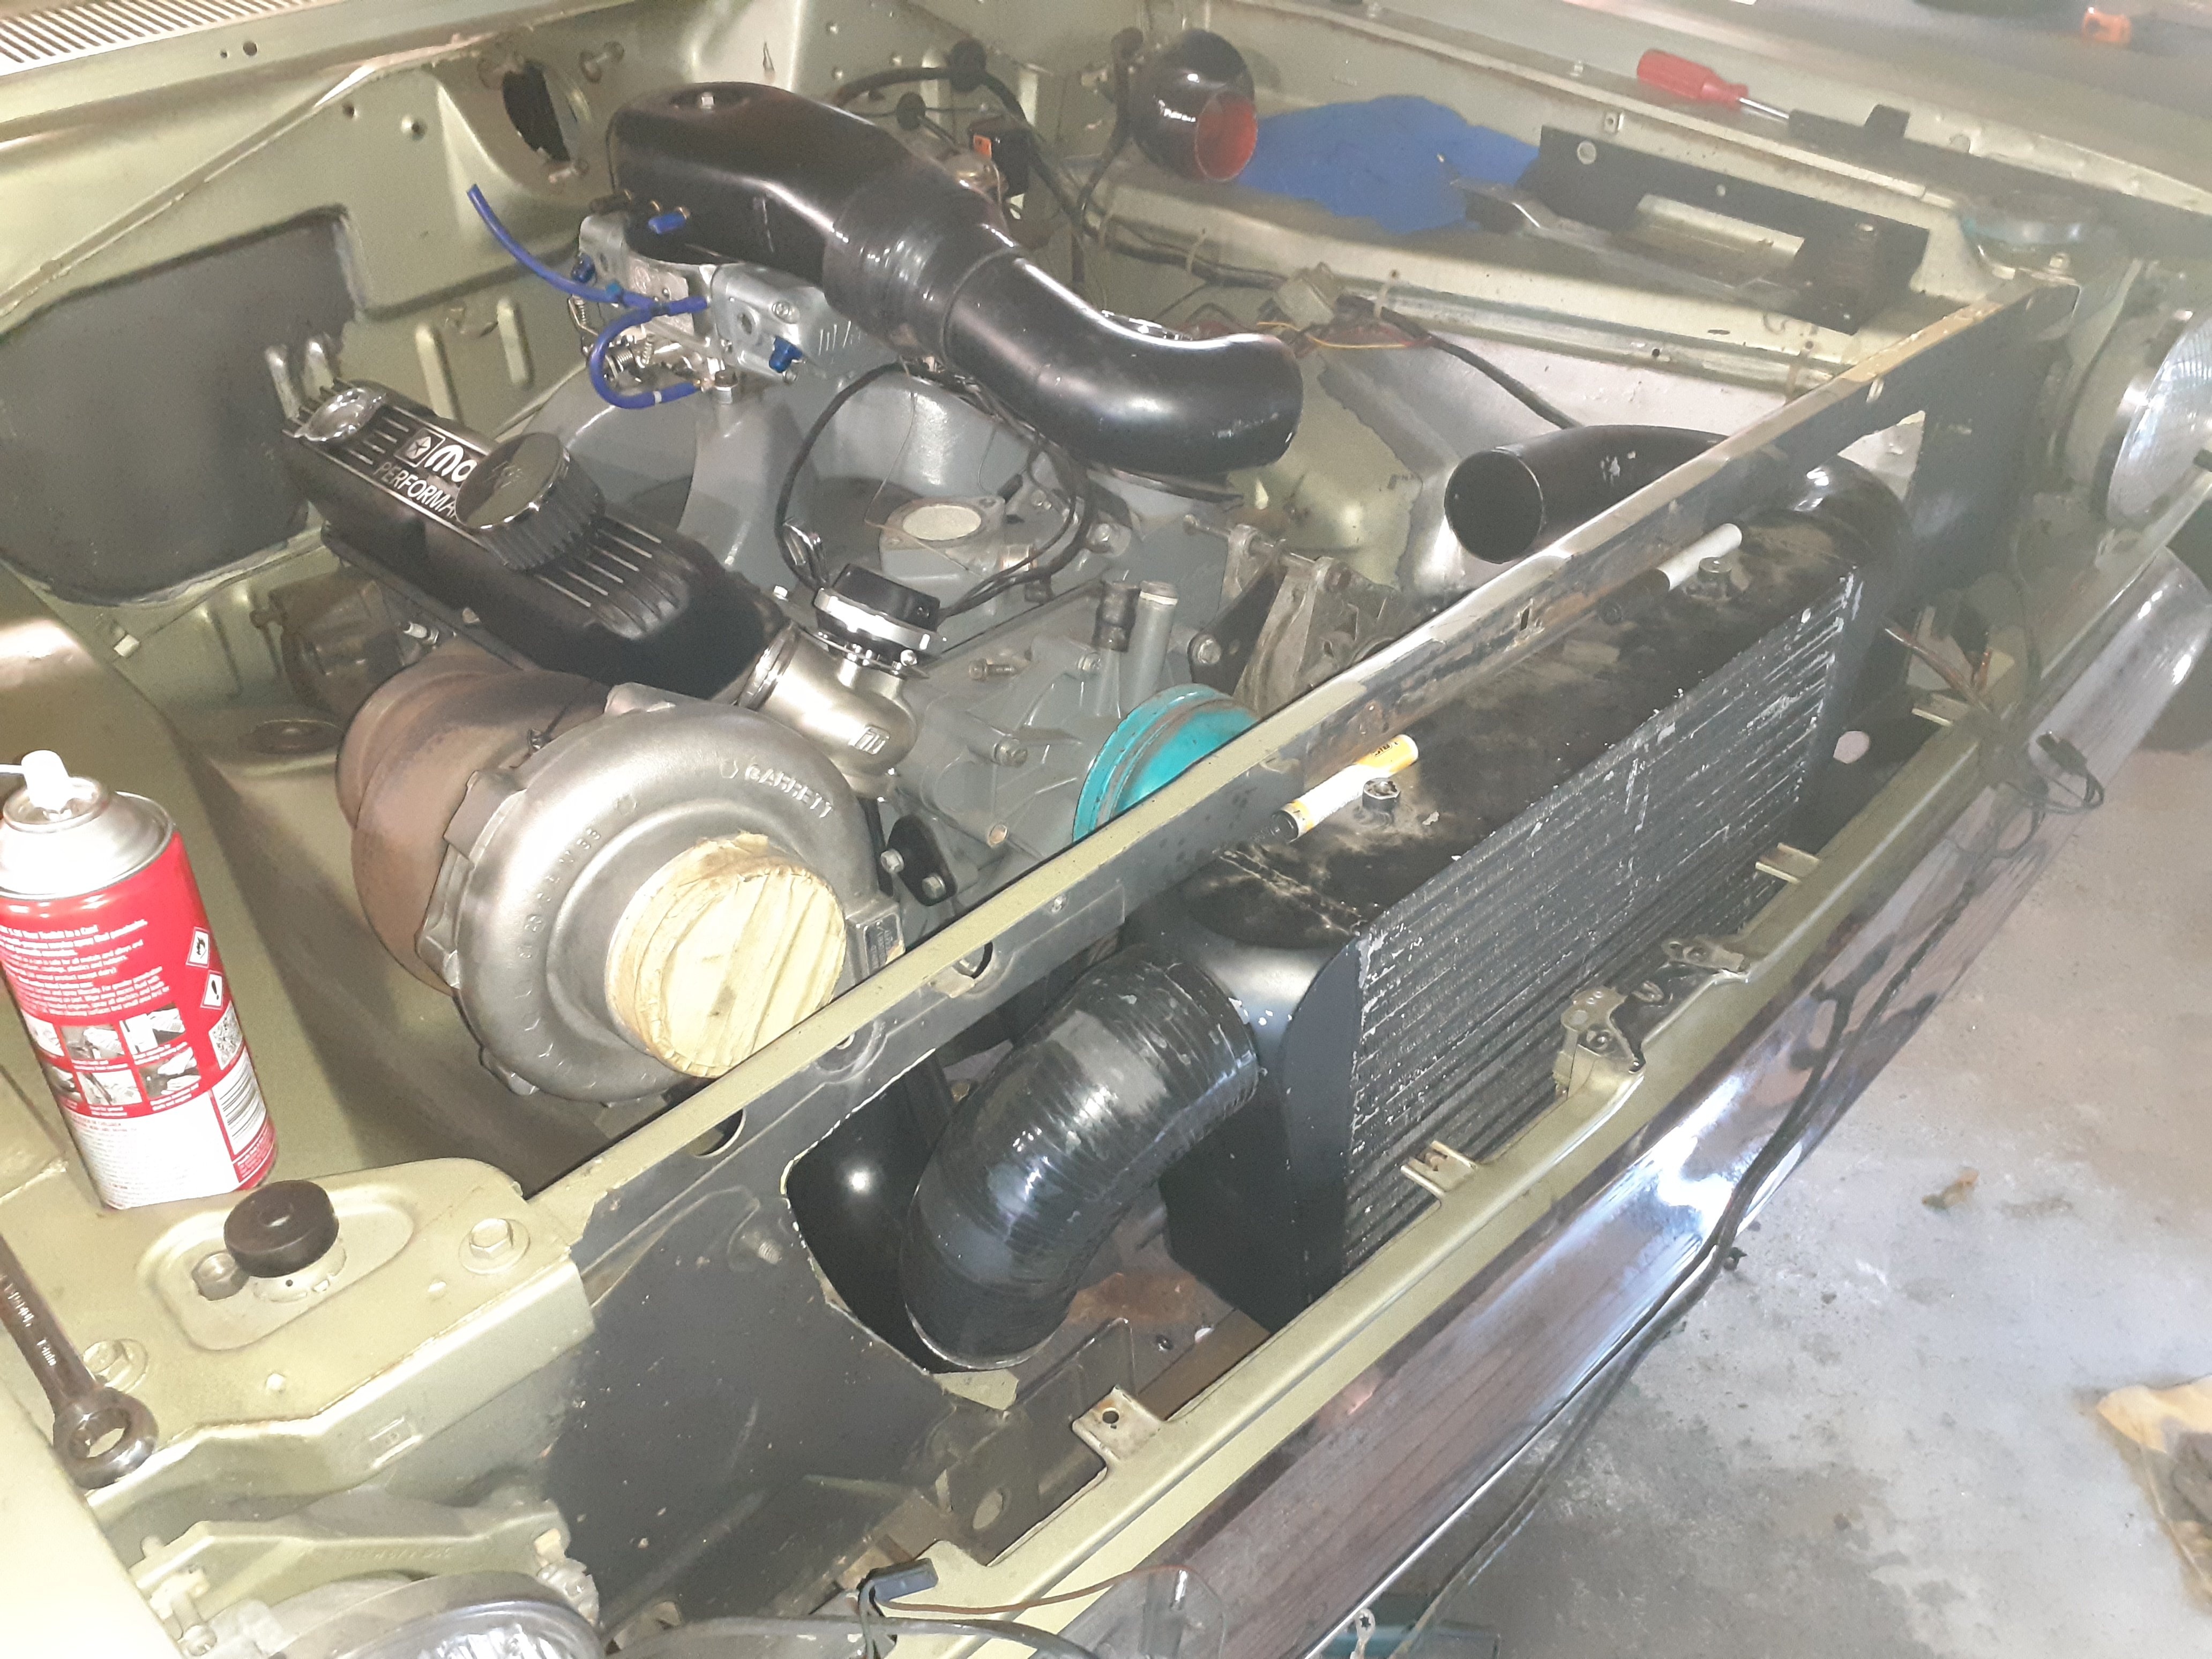
Last update for 2019 I got annoyed at my brain going around in circles about intercooling, between water to air, air to air, or doing water meth injection. Spent waaay too much time reading stuff on the internet I'd actually bought most of the stuff to do W2A but it adds a lot of weight and more stuff to do A2A means I lose the bonnet catch so I'll have to put up with 1x dick punch from @RUNAMUCK due to bonnet pins Water/meth is the easiest route but so much conflicting information on whether it works well or not plus the unit I was looking at was $800 So to stop going around in circles any more I stopped thinking about it and attacked the front with a cut off wheel and a hole saw Got some piping mocked up and the warm side, which was the side that looked like it was going to be difficult, is pretty easy using piping I cut up that was on the vg
1 point
-
Yeah, that's a thought. Will think on it/do something when I am working on it/finishing it all off next. I pulled the electric motor off in order carry out some isolation works but got waylaid. I want to isolate it (electrically) from the rest of the structure and welder. I am not sure why except to say its an AC unit and I don't want the welder to earth thru it or fuck it in any way ... and turn everything electrically hot (if that's possible) I am not a electrician so don't know the intricacies of it all but just going to isolate the fucking thing so its not an issue. I am going to earth directly to the rim I think. It only does one revolution so don't need a fancy swivel or anything. Will see. Cheers.1 point
-
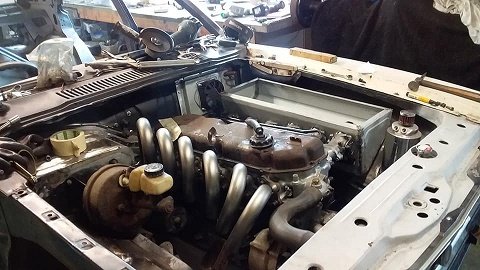
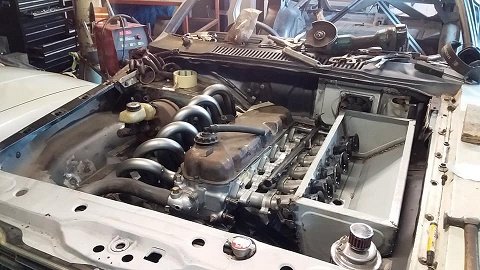
some exhaust bits turned up so i made a start on my 1st set of headers ive made.... just need to get somemore bits and ill fully make them up.
1 point
-
Inner core patterns for the cam tree complete.1 point
-
1st half of the inner core pattern printed. Printer is running like a champ at the moment. Nice quality.1 point
-
This is a not so amazing up date. (turn back now) After fixing the ignition getting the car going then have it die and burn a trigger out I replaced it put a tank of fuel threw it around town. Today I drove over the Takaka hill ginger careful. No AA roadside assist. It's all in my head that it's going to not make it.. It glided threw 240K of solid driving without issue. Here It is at collingwood. I think that issue can be put to bed. The tyres still have 5mm tread I need to finish them before wraping the Superstars in a better choice of tyre. Thinking slightly stretched and lots lower in profile. What do you guys think ? 205/80 is way to big in the sidewall for the new rims ?1 point
-
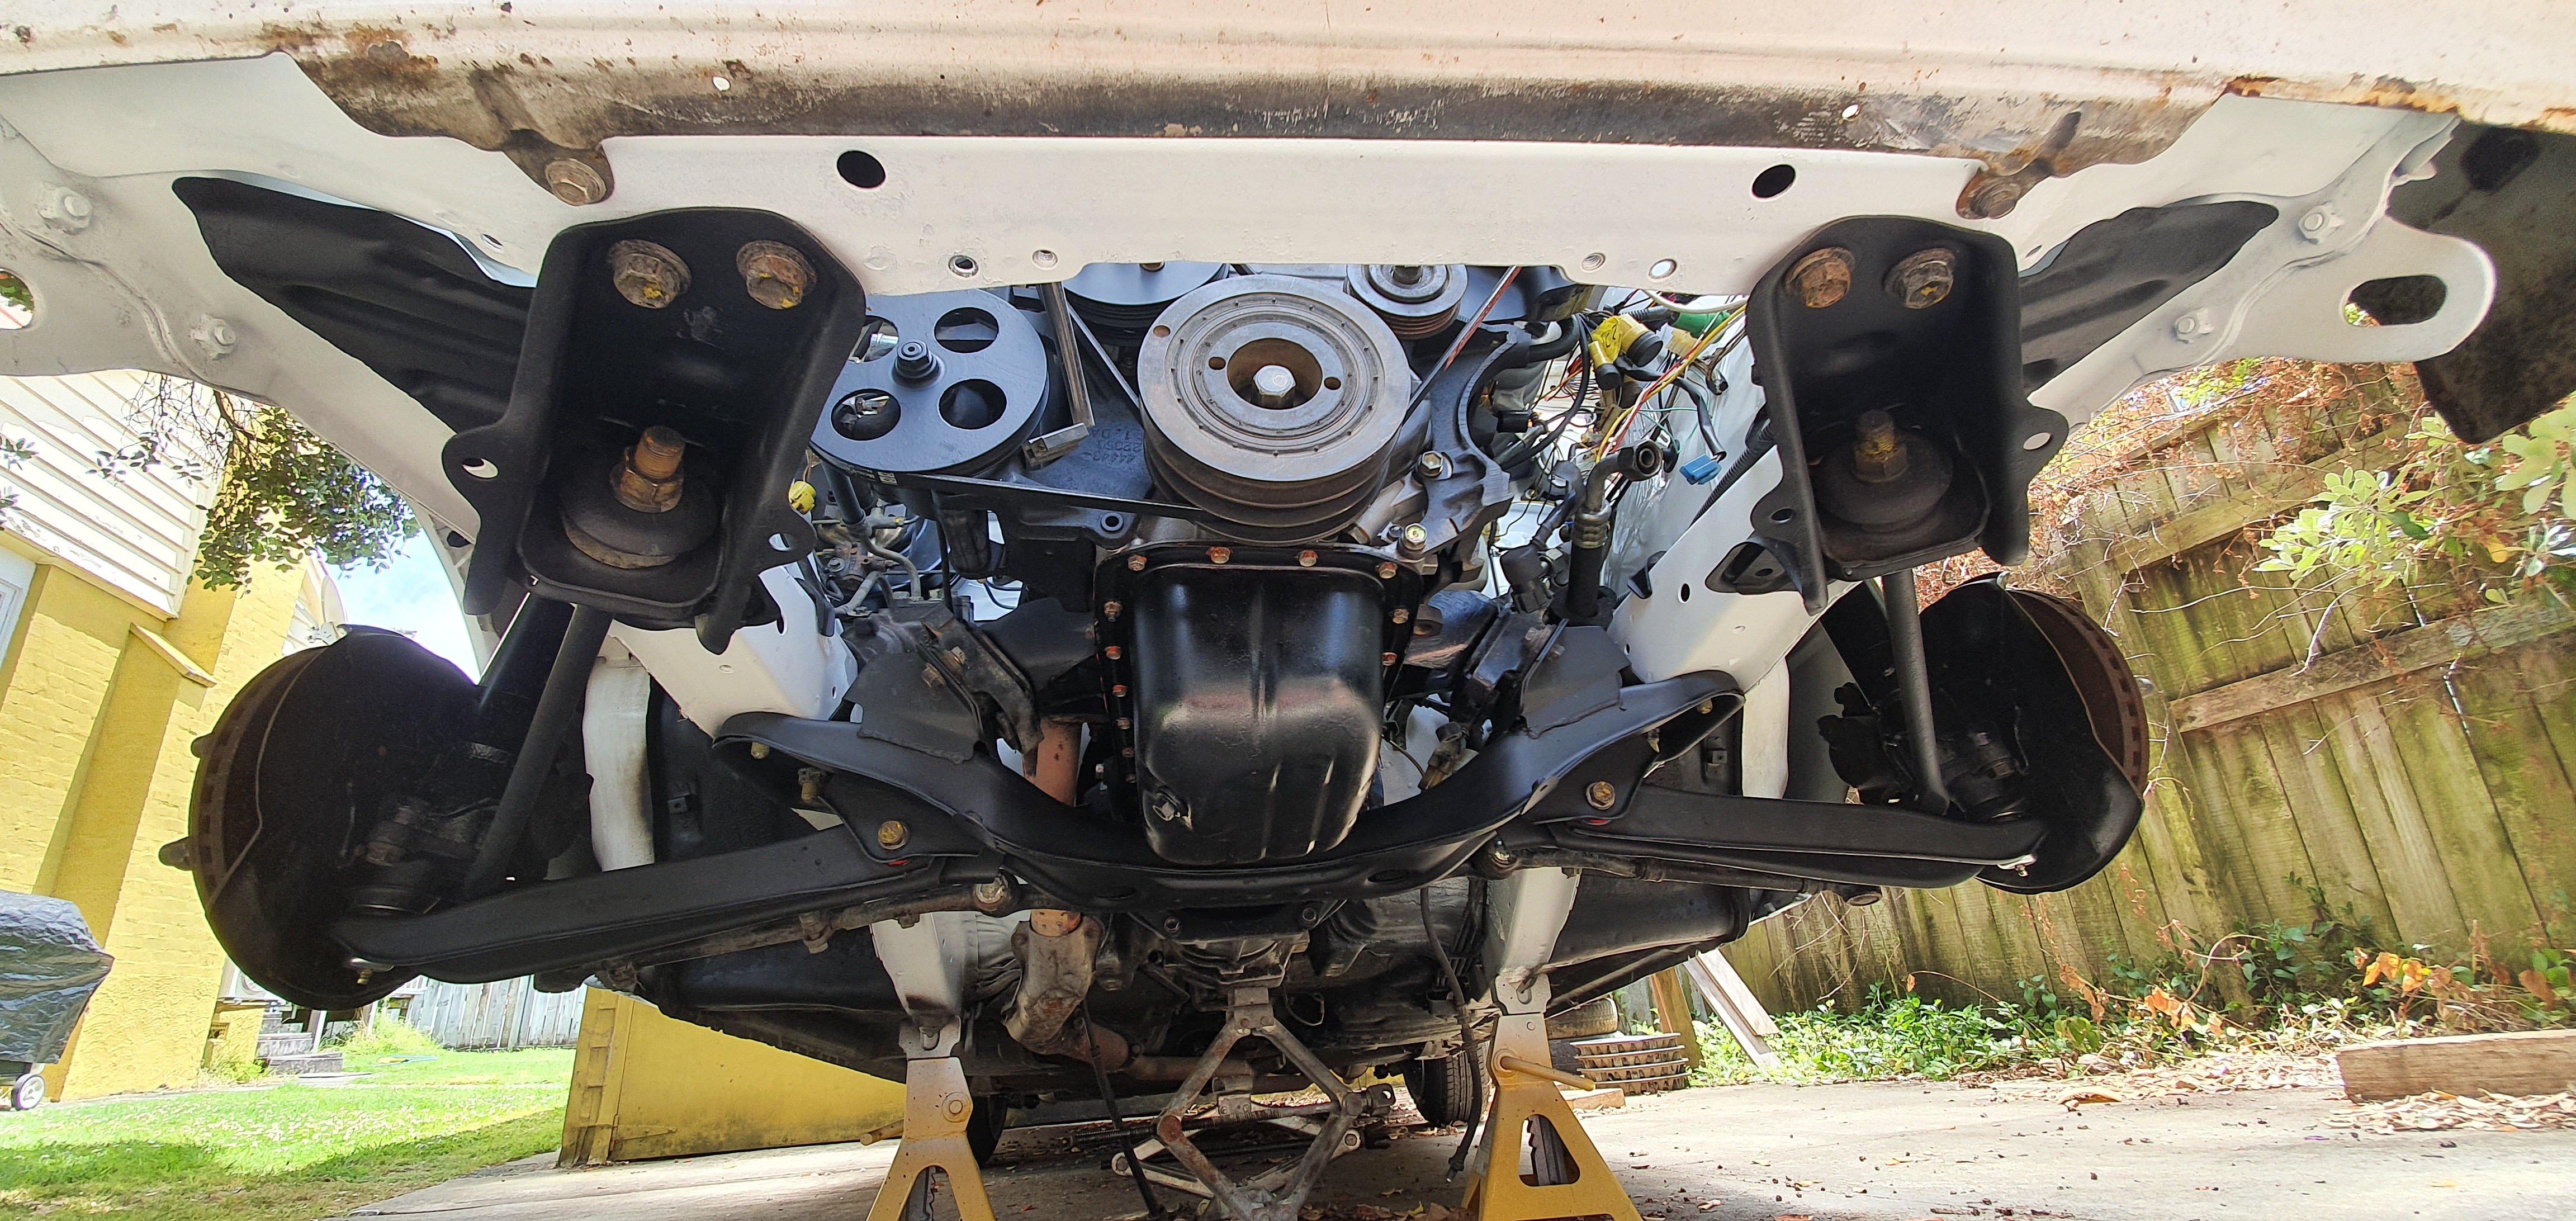
OK so the motor is pretty much ready to drop in. 2019-03-12_04-30-05 by Richard Opie, on Flickr I've been tidying things up, thanks to blasting and VHT Epoxy black. Fuck I love VHT Epoxy black. 20190102_164709 by Richard Opie, on Flickr 20190120_184608 by Richard Opie, on Flickr 20190120_184624 by Richard Opie, on Flickr 20190120_184637 by Richard Opie, on Flickr 20190120_184653 by Richard Opie, on Flickr 20190120_184724(0) by Richard Opie, on Flickr 20190127_124320 by Richard Opie, on Flickr Even the wiper linkages got a refresh! 20190216_154907 by Richard Opie, on Flickr Sump and crossmember also got the treatment. 20190219_185312 by Richard Opie, on Flickr Back on with a bit of Toyota Grey Sealant and carefully torqued up oil pan bolts. As an aside, when I took this off to have a nosy in the engine also, it turned out the oil pump bolts were only finger tight. Whew. 20190105_160736 by Richard Opie, on Flickr Nick the Sparky helped me rebuild the alternator and starter. 20190126_133528 by Richard Opie, on Flickr @Stu popped in and finished up the wee loom for the front of engine bits, so the cam/crank sensors etc are all sorted out. Here's kpr's lush crank angle sensor installed, in blurryish technicolor. Project KP61 2019 (6) by Richard Opie, on Flickr Project KP61 2019 (10) by Richard Opie, on Flickr Project KP61 2019 (90) by Richard Opie, on Flickr I've chucked all the brand new plastics/seals on the front (Toyota still carry a lot of things) and stuck the new 4AGE sticker on the front. Important. Project KP61 2019 (84) by Richard Opie, on Flickr Project KP61 2019 (75) by Richard Opie, on Flickr Project KP61 2019 (21) by Richard Opie, on Flickr This weekend the idea is to drop it back in the hole and then at some point wire it all up. Yay? YAY!1 point
-
Would've been rude as to not fit these things up, hey? 20190302_175341-01 by Richard Opie, on Flickr 20190302_175351-01 by Richard Opie, on Flickr The sparkle doesn't kick off quite as well when it's out of sunlight. But I'm pretty hyped on the aesthetic. So while the motor is out, I at least need to crack on with a few other wee jobs. The pedal box was something that needed addressing. Previously, I had the big old "long" style Wilwood master cylinders which have a press on cap with a 3/8" push on fitting for rubber hose on the inlets. It became fairly apparent that there just wasn't going to be any room behind the dash for this kind of hose... the OD of it is MASSIVE, and 3 lengths from the reservoir (yet to be mounted) to the cylinders wasn't really possible. So, I decided to change to the GS "Compact" master cylinders. Ordered from Jegs, got here within a couple of weeks. Same sizes. 3/4" for front, 5/8" rear, 3/4" clutch. 20190227_193343-01 by Richard Opie, on Flickr Primary reason for the change was to use a -4AN fitting for the inlets, which these have. Inlet is at the far end of the cylinder. 20190227_193416-01 by Richard Opie, on Flickr So of course, a test fit to the mounting frame was required. Pretty straight forward, and the space saving is an added bonus. It's getting pretty crowded behind the dash! You can visualise how much shorter they are by the outlet hardlines that are still in place from the old master cylinders. 20190227_200449-01 by Richard Opie, on Flickr 20190227_200554-01 by Richard Opie, on Flickr Following this, I had GSS (thanks @legendlives and co for the continued great service) sort the hardlines out to suit the new cylinders. Pics in a bit of that. All stripped back, I shot across to see Jon at Strange Workshop and had a hoon on his blasting cabinet. 20190306_215500-01 by Richard Opie, on Flickr 20190306_215445-01 by Richard Opie, on Flickr Naturally, a coat of paint was in order. Etch primed and top-coated with black epoxy rattle cans. The VHT stuff comes out super nice! 20190310_131148-01 by Richard Opie, on Flickr Finally, assembly for the final time (I hope) although there is a very real probability that I'll need to fuck around with the master cylinders to get the brakes feeling right. Pretty chuffed with the end result. You can see the banjo fittings and excellent hardline work in these shots. Nice and compact and tucked well out of harms way ( @cletus might confirm if I need to chuck a P-clip in there, it's well under 300mm from banjo to bulkhead fitting though). 20190311_182910-01 by Richard Opie, on Flickr 20190311_182918-01 by Richard Opie, on Flickr 20190311_182958-01 by Richard Opie, on Flickr 20190311_182937-01 by Richard Opie, on Flickr DISCUSSION EVEN!1 point
-
Decided media blasting was not really required. wire buff and rust kill many times over and then as soon as the steel way dry on with the first coat of epoxy.1 point
-
So 2 weeks before moving to the US this happens! Guy in OZ is rebuilding a T57 and needed a new block. So got to and cast one up! Didnt go 100% but still really well. On a plane to LA in 3days!1 point
-
Ok I lied. A few more photos. Rear T57 spring mounts. You can see them in this photo1 point
-
You can't just say "build space stuff" then bugger off. SPACE STUFF!!1 point
-
Shes a pretty big job. Been at the machine shop for a week. 1 more week to go! Casting is looking good. Yet to find any lumps of sand or porosity apparently!1 point
-
Dropped the second half on with no drama. So its all bolted up now and ready to go to the foundry at the end of the week. Nailed it Thats like 1000hrs work right there!1 point


This leaderboard is set to Auckland/GMT+12:00