Leaderboard
Popular Content
Showing content with the highest reputation on 01/01/20 in all areas
-
Thought I had better set up the crane, it's come up good; Should do the trick.12 points
-
Last update for 2019 I got annoyed at my brain going around in circles about intercooling, between water to air, air to air, or doing water meth injection. Spent waaay too much time reading stuff on the internet I'd actually bought most of the stuff to do W2A but it adds a lot of weight and more stuff to do A2A means I lose the bonnet catch so I'll have to put up with 1x dick punch from @RUNAMUCK due to bonnet pins Water/meth is the easiest route but so much conflicting information on whether it works well or not plus the unit I was looking at was $800 So to stop going around in circles any more I stopped thinking about it and attacked the front with a cut off wheel and a hole saw Got some piping mocked up and the warm side, which was the side that looked like it was going to be difficult, is pretty easy using piping I cut up that was on the vg9 points
-
Finally got a chance to take this on a real drive. 50km round trip this morning, out to governors bay hotel for a coffee and some wedges and back through lyttleton and through the tunnel back towards home. The drive was awesome and the car performed beautifully. Only issue was the steering doesn't want to return to centre very well, probably just an alighnment needed but will check over the uni joints and the rack. Wasn't pushing it hard at all because it's very early days, but it seemed far far too easy to keep up with normal cars through the hills, I suspect it just eats the road up better than anything I've ever driven.7 points
-
5 points
-
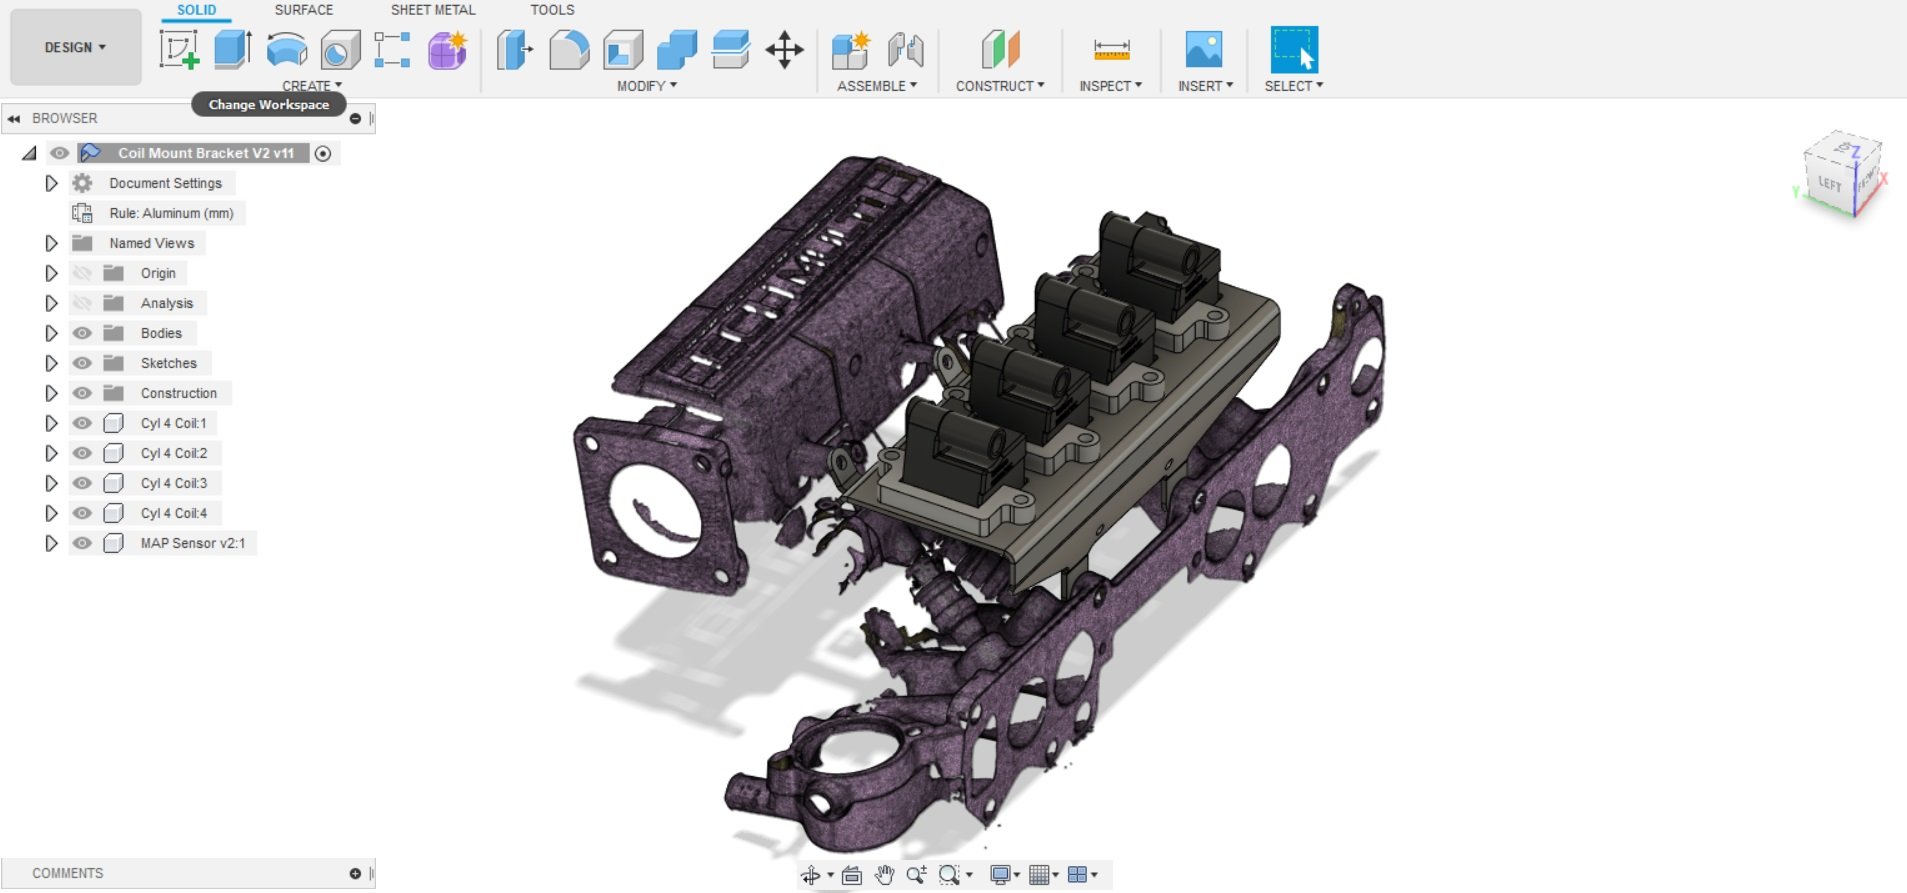
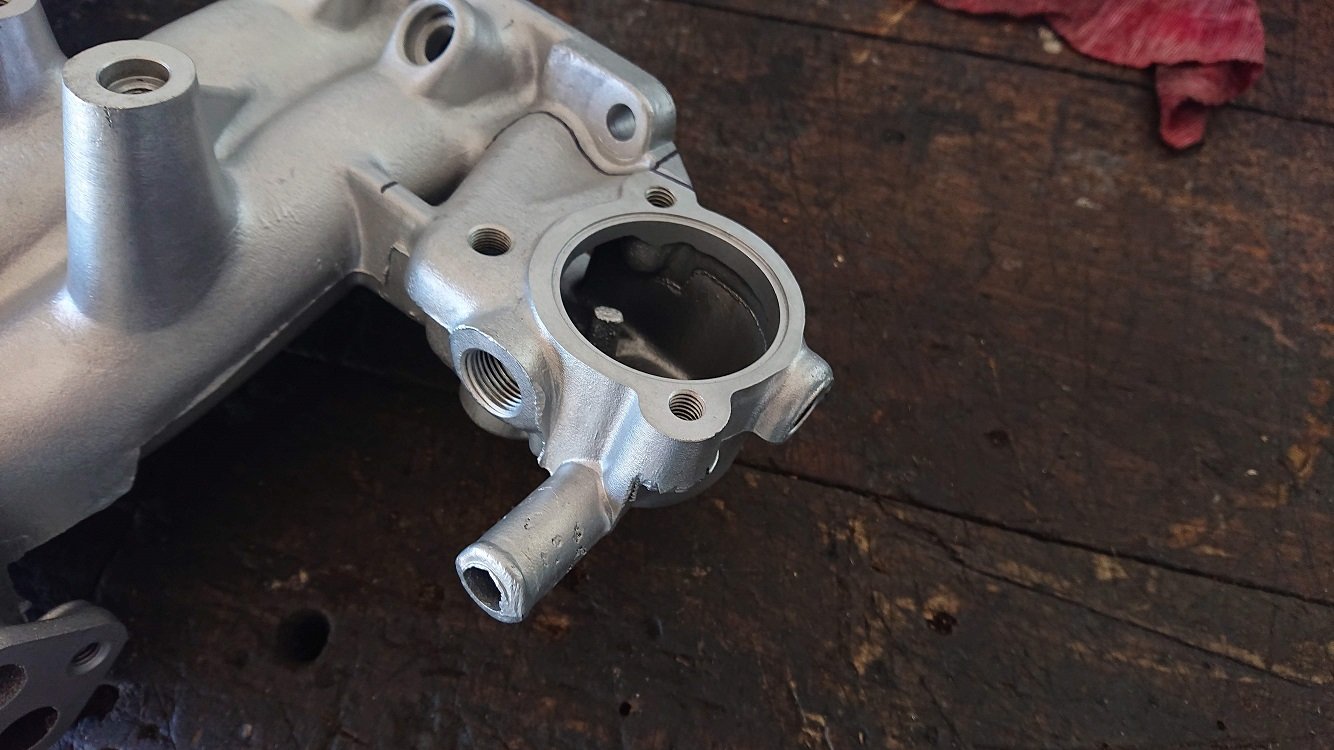
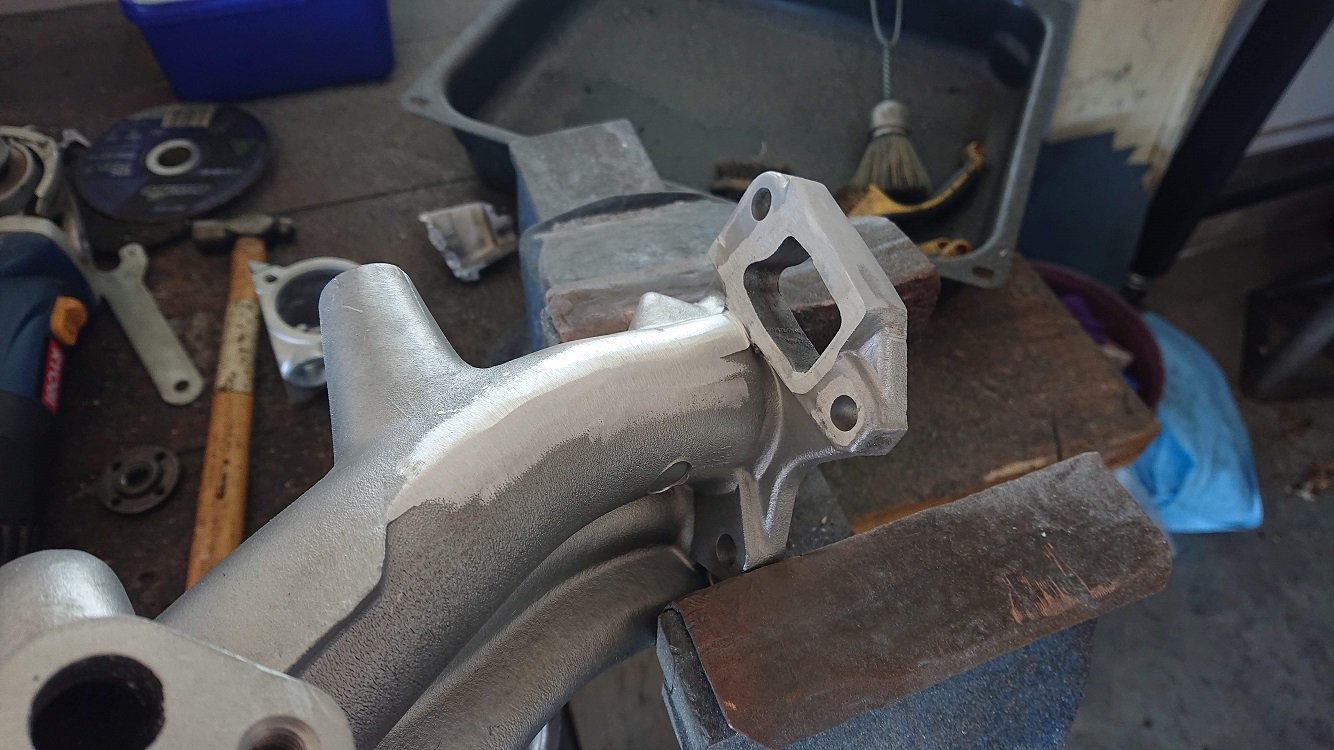
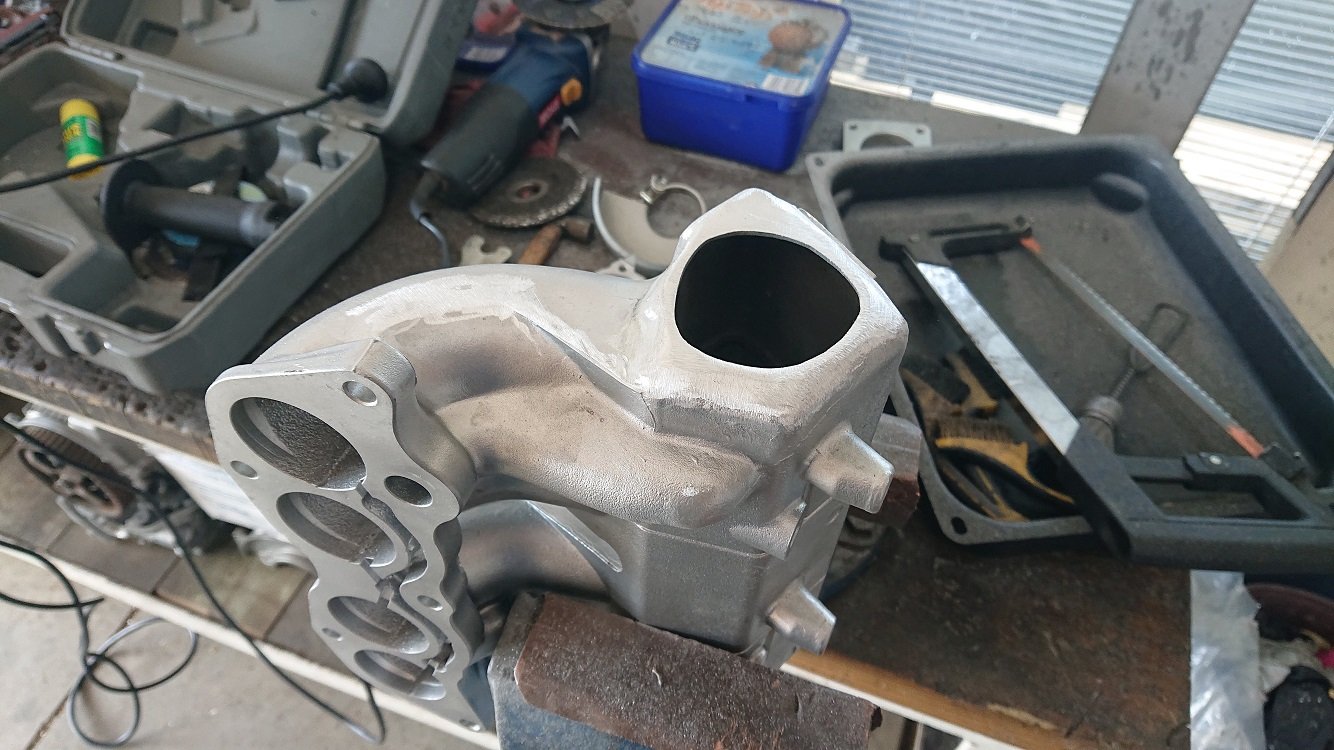
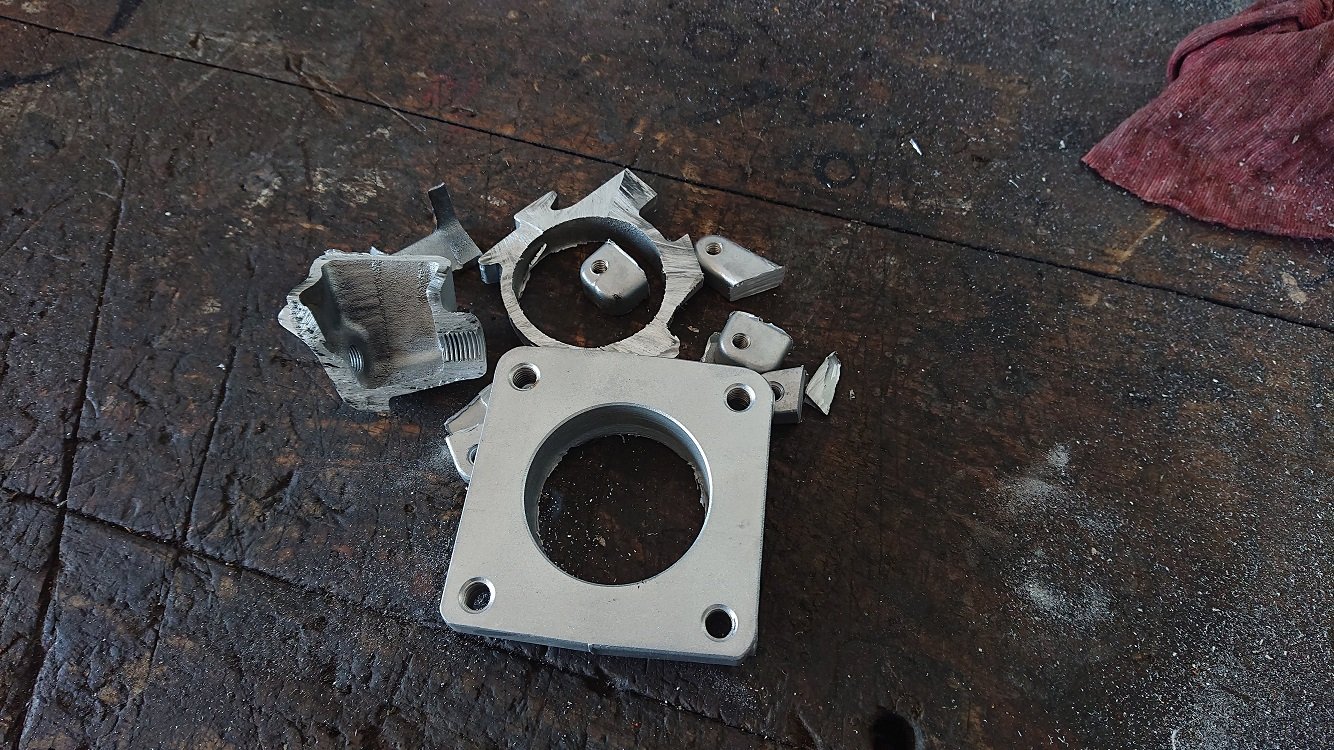
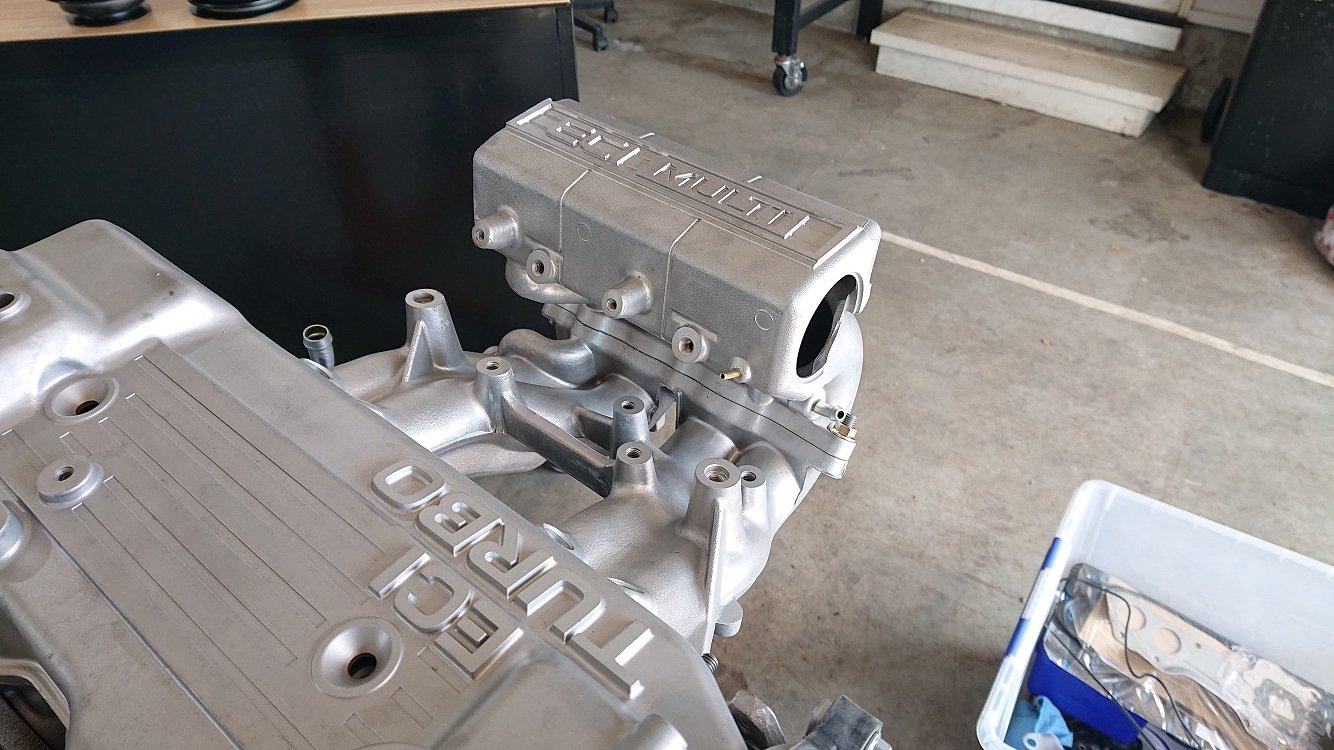
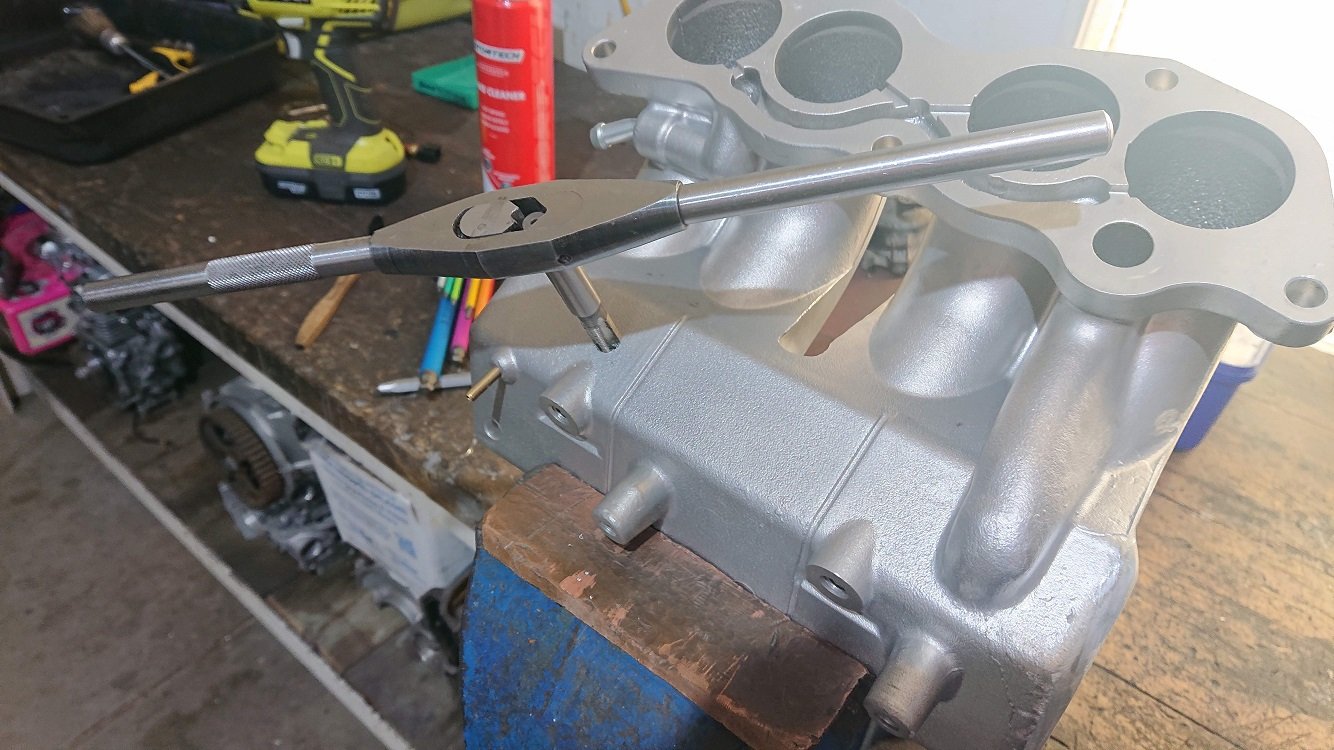
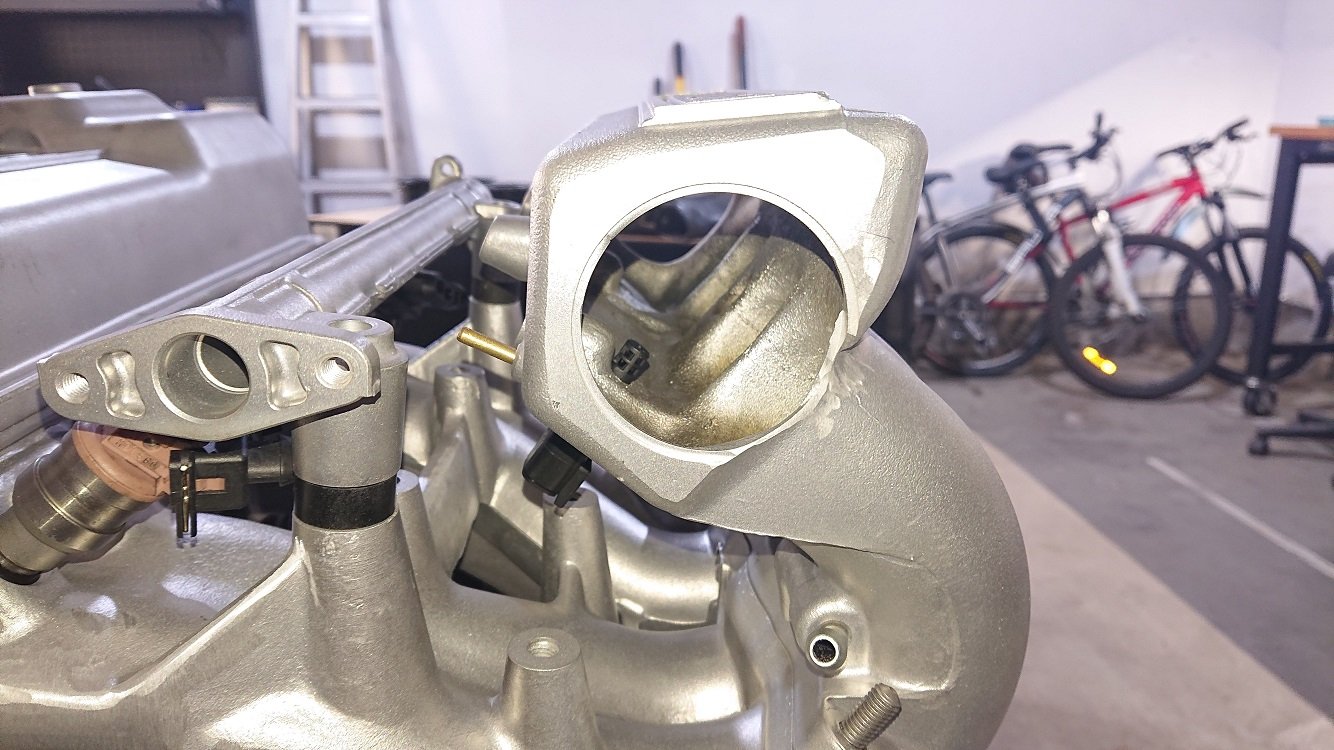
Have been working on this a bit in the holidays, getting the inlet manifold work done. I've thought a couple of times that I should have just bitten the bullet and made an inlet manifold from scratch, with the amount of work it is to get this one sorted properly for a RWD application... But I'm this far in, so I'll finish it off. Most obvious jobs are to swap the throttlebody onto the other end of the plenum, and reroute the coolant setup. I've seen a few RWD setups with this manifold where the thermostat housing is left where it is and a hose is run to the front of the engine, but as this is a RWD head the waterjacket inlets in the head are setup for the coolant to flow out of the front of the head. Leaving it like it is, with it at the back, risks a hot-spot in the front of the head. The factory Starion setup has the radiator bypass from beneath the thermostat (which is at the front of the head) pass through the inlet manifold to keep it warm. This helps with the fuel film problem TBI setups suffer from as you've got so much area for the fuel to pool onto. As I'm all about the port injection now, I don't need that, but there still needs to be a radiator bypass, so I'll run that from beneath the thermostat housing (which I'll need to make) down the middle of the inlet manifold to the factory return pipe that runs along the back and side of the block into the waterpump. This factory pipe also has an inlet on it for the coolant return from the heater core. Lots of hacksawing, angle grinding, flap wheeling and powerfiling later it's looking pretty tidy back there. I'll need to weld a block on there which has a port to supply the heater core, but that'd the only fitting I should need there. I might put the ECT sensor there too, as it'll be out of the way. Hacked off the throttlebody flange and tidied it all up to make a plate to weld in place to seal it off. While I had all the power tools out and was making a mess anyway, I hack off all the little backets and bits and pieces I wont be using. Heaps more power filing later and it's all cleaned up. Found a good spot underneath where there is about 10mm of wall thickness to drill and tap to 1/8NPT for the IAT sensor. Sensor is a delphi unit with a DTM 2-pin connector. Has a brass body where it seals to the plenum, but a plastic housing after that with an exposed tip. Should be nice and fast reacting for the temp swings turbo's produce, and not suffer too badly from heat-soak (I hope!). Should be pretty out of the way down there. That space is going to be quite tightly packed though, with the radiator bypass tube, and the outlet from the fuel rail back to the pressure regulator running through there also. Plus, the wiring harness. It'll have quite a bit going on in this space. 4 injectors, 4 coils, ECT, IAT, MAP, EFP , Crank + Cam triggers and Ethrottle all within that area. Will be a fun harness to build :-). The injectors (also ones I've had for years) are EVO VII 560cc's. They've had single spray pintle caps put on them to work better with an 8V setup, and so I can orient them like in the picture with the plugs heading underneath, instead of directly on top. The reason for this is because of where I'm going to mount the coils. Pretty simple 3mm aluminium sheet metal backet picking up of existing mounting holes. Will get it profile cut and bend it up at work. Has mounting for the MAP sensor underneath also. Coils are knockoff GM581's, which I've not used before, but should hopefully be up to the task. I could only buy a pack of 8 of them, so I've got 4 spares, hah. It's bloody humid today, so we're off to the beach for some FnC for dinner and a bit of a swim.3 points
-
I started to strip the turbo and nothing really looked wrong, so I thought fuck it and bolted it back together. So far it seems pretty sweet. The actuator pops at 15psi, although I don't actually know what it will boost to, one of the jobs is to fit a gauge to monitor it. It has a pretty loud whistle so I can hear it spooling up from 1500rpm or so, @Mof pointed out that it may have a boost leak so I have replaced the gasket into the manifold with a rubbery one as this is pretty much the only place it could leak, so next time I drive it I will see how that goes. I don't think I have had it over 3000rpm yet because of the noise. It will be interesting to see how it goes at the top end, but even if there is nothing major there I can't see it being a problem as the mid range torque feels really strong.3 points
-
3 points
-
We did some stuff with this today, one of the boys videoed it. This was the third lump we pulled out like this, works well, saved a lot of effort.3 points
-
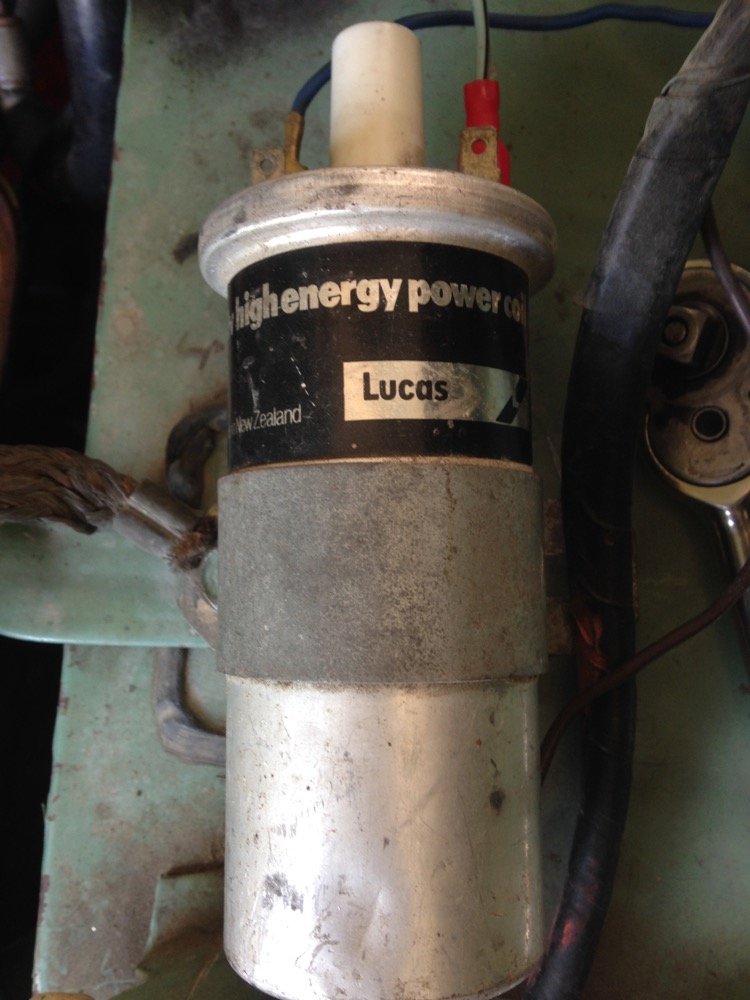
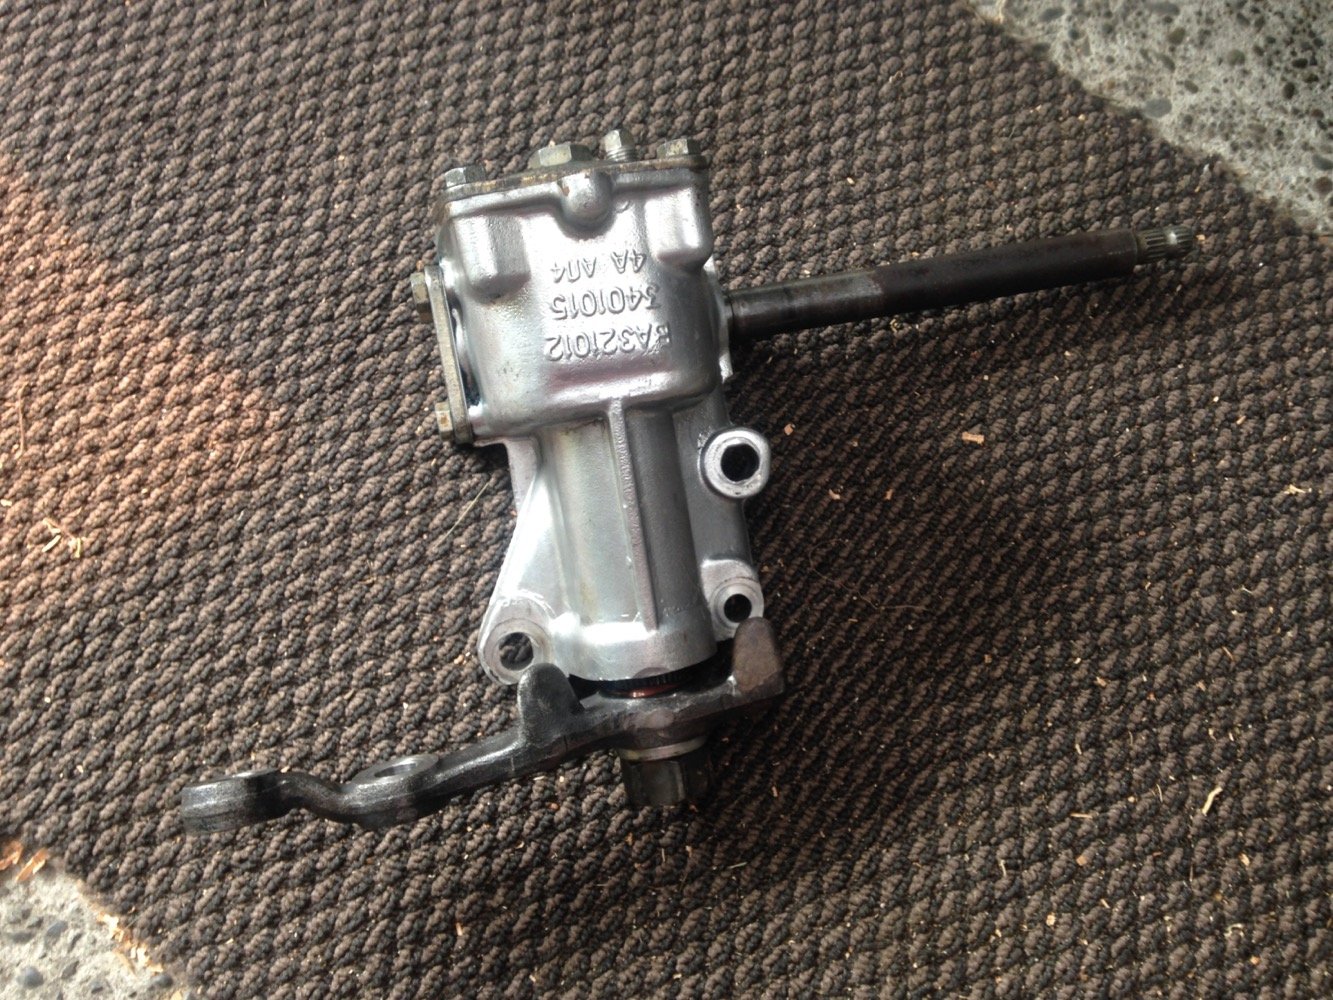
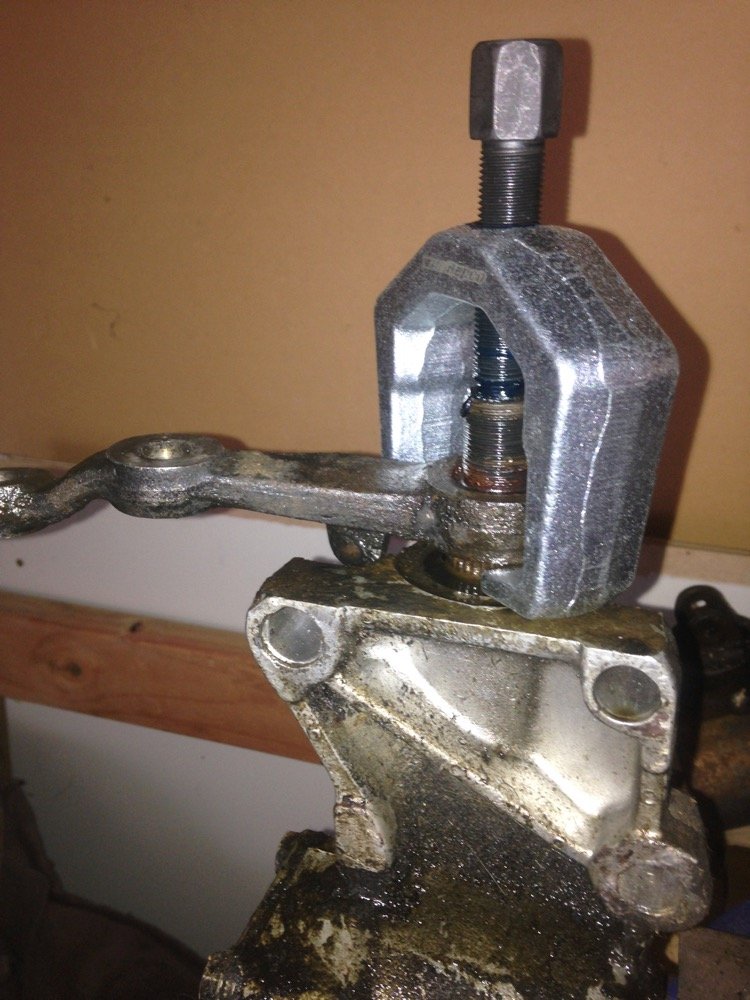
Been having hot start issues with the engine, worst of all being random which hampered troubleshooting. I also didn't bother refitting the fan when the engine was out as i've often wondered how much effect it gives without a cowl and so far back, unfortunately it draws sufficient air to keep the engine cool at idle so leaving the car running for short stops was not an option. (Must re-fit...) Keeping to my usual mantra of when it seems like the carburettors are playing up its the ignition I started swapping out bits that I could. Given the brand of the coil I was left unsure of the results, resistance to start hot was still present, or do I have two faulty coils? This game carried on with all major components including stripping and checking the distributor to no avail. Just maybe it is fuel this time? Fitting the wideband straight away gave the answer, massively lean at idle..... Quick spray of butane found the leak point and left me quite impressed that the drivability was not noticeably worse. Remove carbs, clean, check refit + new gasket. Aaaaaaaaand its back to life, solid idle just on the rich side of 14.7 to aid starting. Now on summer break I have plans for some trips away, one task on my list that remains unchecked is to drop the steering box and inspect. This is where the personality of the Niva starts to come out.. I have been unenthusiastic about this task due to all the nasty hidden bolts and knocking off ball joints etc, took a solid 4 hours to get the box out along with almost everything else on that side of the motor, as painful as it is to remove half the engine bay to access one part, i'm quite glad its not modern Japanese and I can fit my hands and spanners where they need to be! Once again inspection found trouble, grittiness in the box was due to pitting/chipping in the gears, quite likely from rough treatment prior to purchasing joint pullers..... Not wanting to put that box back in, I pulled out a spare, being of unknown quality I decided to strip it down first, what a fun mistake that was! Only seal I really cared about was the lower one, carefully hidden under the pitman arm, initially I hooked up my 2 jaw puller but it just didn't like the shape falling off with only moderate load, at 17:20 I had enough and headed down to Repco and brought a pitman arm puller, as they closed for the day, even with greased up threads I couldn't budge the darn thing, stern words were muttered and I left it for the night retreating inside for tea. After a second prolonged struggle using various combinations of tools, percussion and finally the purchase of a gas torch, the arm relented, clean-inspect-reassemble resulted in one new condition steering box. Lovely clean looking steering box too, and possibly the most expensive maintenance item for some time! Only a few short hours will have the Niva back on the road...... except for NY hangover, just lifting tools is bit of a challenge right now, hence i'm writing about fixing rather than actual fixing!2 points
-
2 points
-
See my sight glasses.... I also got an Aloris style wedge type tool post from EBay USA. It came with 7 holders. I thought it was a lot of money.... then shipping and unspecified "duty and taxes" got added, which doubled the price. So I'd been trying to think of an excuse to buy a 3HP motor to upgrade the 2.2HP motor. The 2.2HP had a noisy centrifugal switch.... The 3HP motor arrived this afternoon. After removing the 2.2 and finding it really hot, I realised the centrifugal switch was stuck on.... so the starting capacitor was always connected. The 3HP is wired up now, it's much quieter. It was getting late...I still need to align the pulley and I want to see if I can find matching belts as they are slightly different lengths.2 points
-
2 points
-
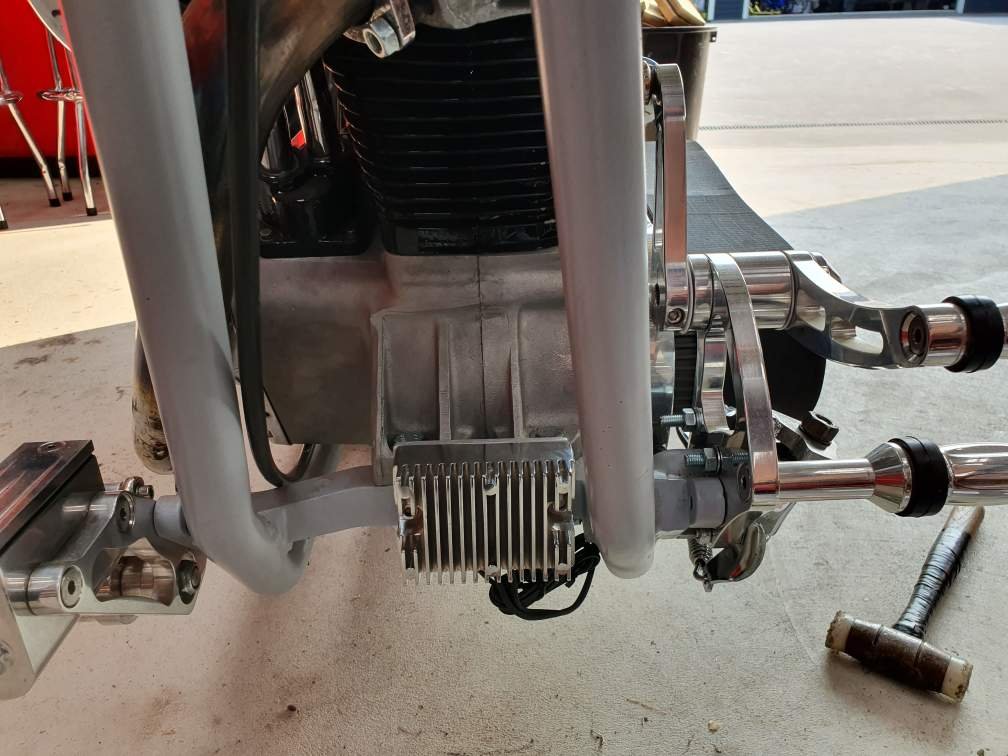
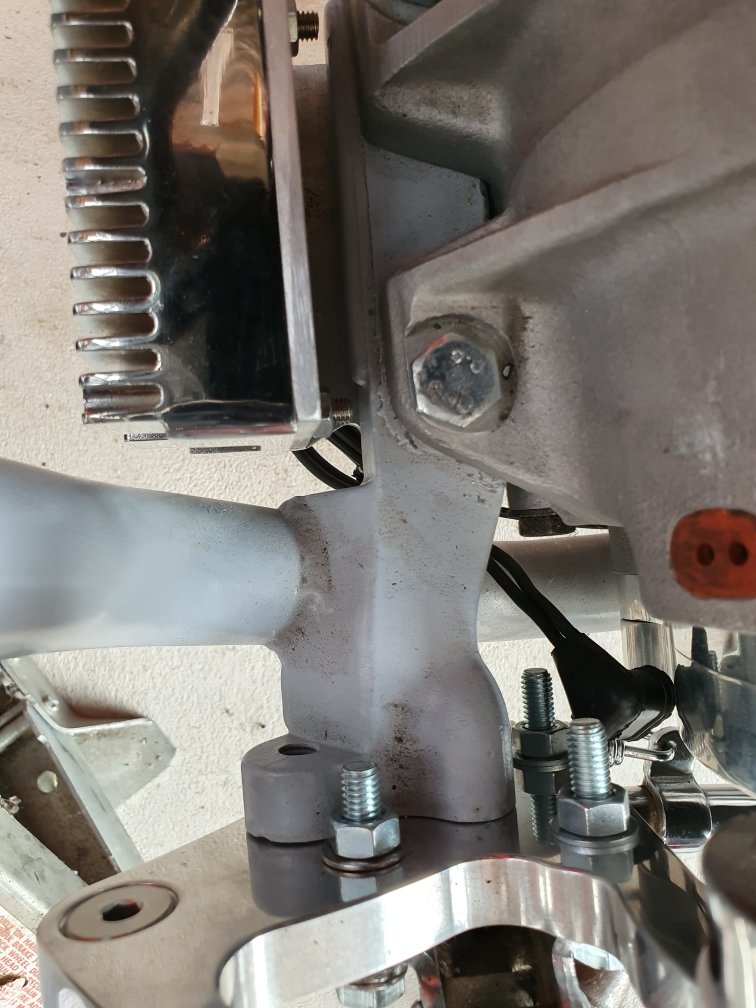
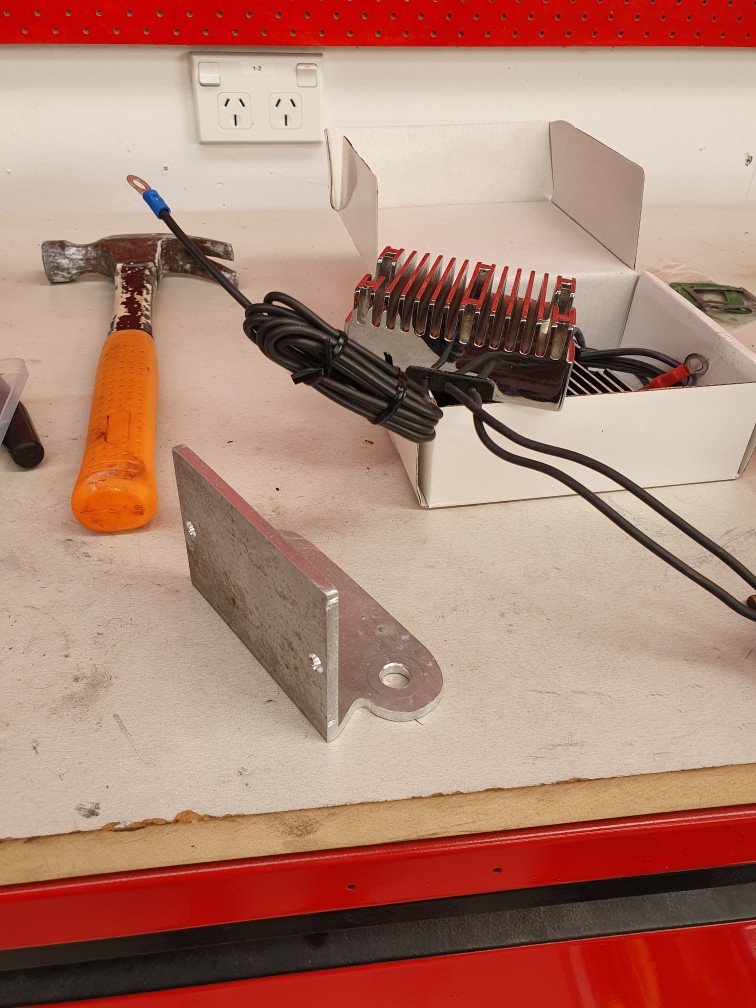
Regulators, bit of a headache. I have a 23amp stator and a 32 amp rotor. I brought a 32 amp regulator...but the pins are wrong size. So I brought another one in 23amp...which fits. My understanding (elec-trickery isn't strong point), is that the rotor is just a magnet and isn't going to affect the stator adversely and cause it to make more power. Plus if the demand is low, the system wont be making anywhere near 23amps anyways? So assuming thus to be true, I'm pushing onwards... 32amp, wrong pin size. Making bracket for 23amp regulator. I put a hook in the bracket for wiring to clear. And all done. I'll give it some saturation time for it to grow on me. I hate that it's not centred...however neither is the crankcase of this motor. In fact the entire motor is way off centre...so maybe it really doesn't matter? I can offset the bracket to force it to the centre if it really does fuck me off, but for now I'm not sure how much of an issue it is. Put it this way, I'm not in love with it...but I don't hate it either.1 point
-
1 point
-
All certed reg wof as of the end of July. Needs a WOf end of Jan haha. Man they come around fast. reunion in a month and a bit so game on1 point
-
@rivalrx thanks mate! it was good to get those bits tidied up, they had always bugged me. hopefully get a bit of motivation now to chip away at the last 10% of the project to finish it off, hows the coupe coming along? did you get your certification?1 point
-
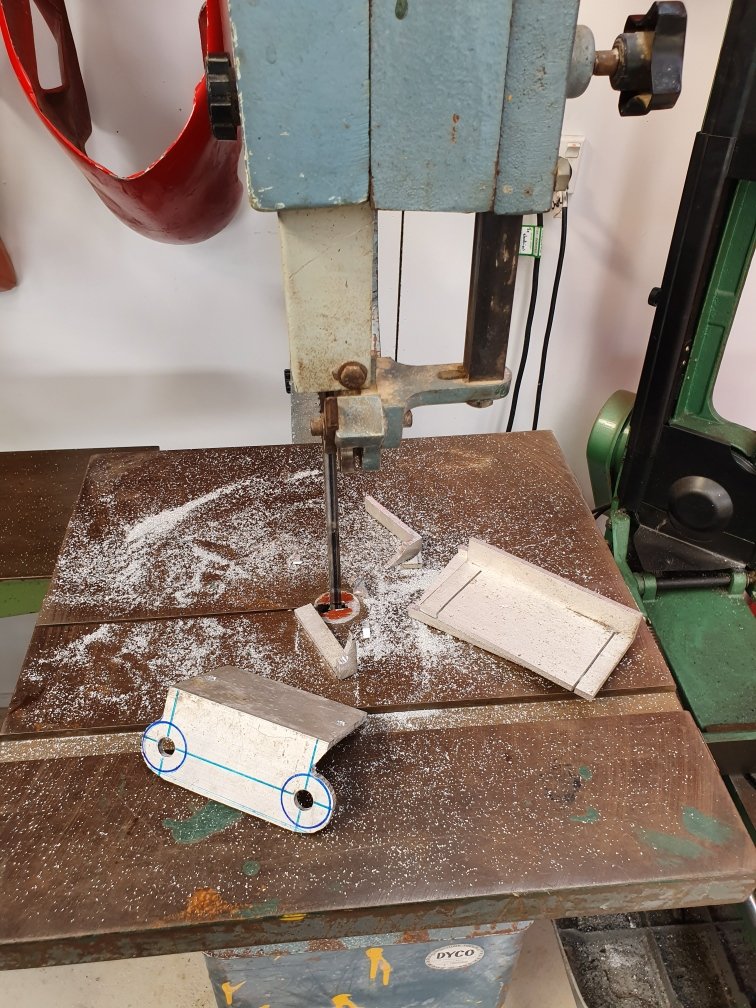
So... something like 12 years ago I bought my vice 2nd hand. I was missing one of the jaws. Buying or making a replacement jaw should be straight forward.... right? I never found anything off the shelf that was the right size. Probably because the vice is polish. Since then I made do with only the one jaw... After a few years, the one jaw broke... But I continued to make do. Finally, yesterday I decided that the tools and materials I have, had reached critical mass and making replacement jaws was achievable. The old broken jaw... The 50X50 aluminium bar I chiselled it out of. It took a REALLY LONG time to saw this. My bandsaw doesn't really go fast enough for aluminium and the only blade I have is like 18tpi and kinda blunt. The mess I made. This is the first actual thing I have milled since I got it. I had only really used it for drilling. I used the 50mm face mill for the big flat bits and 12mm 4 flute for the ends and some of the surfaces. I destroyed one 12mm end mill when I discovered that it doesn't handle climb milling with the quill extended quite far. Chipped all the points off the end. Oops. I didn't have an end mill large enough to countersink the socket screws, so had to use a 14mm drill. And the finished jaws. The originals were 12mm thick. These are about 20mm. I guess if they get all gouged up I have enough meat there to mill them flat again. It took surprisingly long to make these. About 4 hours.1 point
-
Cheers man, I'm gagging to get it legal and start hooning around. I have also done the bulk of the design work on the camper cabin for it, that is next in line for some attention, although I am now as broke as anything so scraping the funds together for that will take time...1 point
-
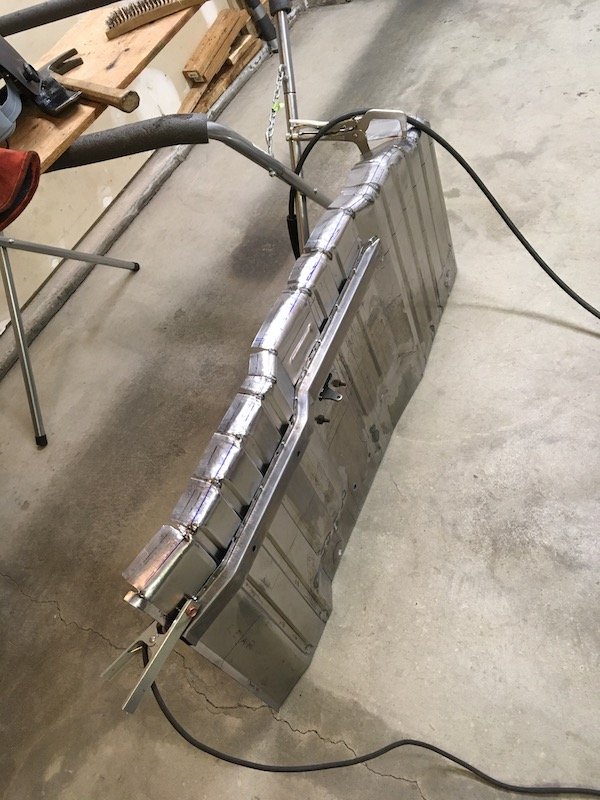
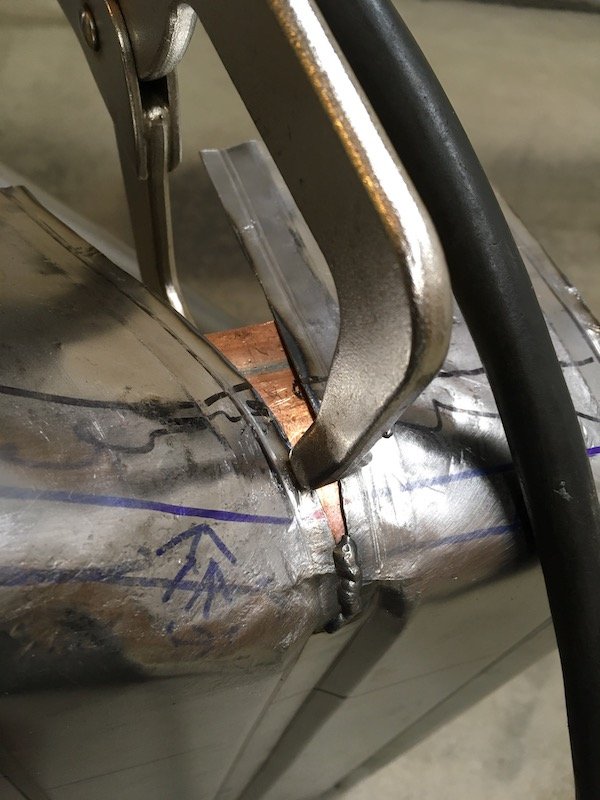
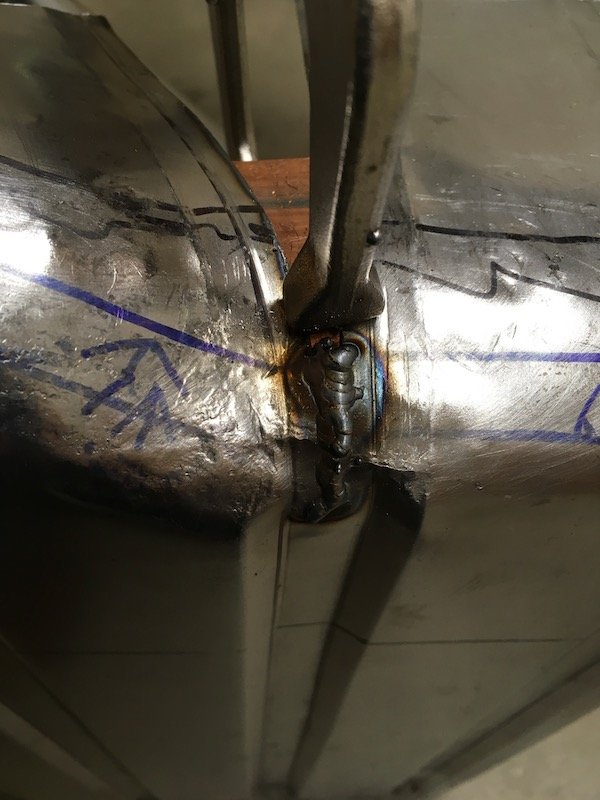
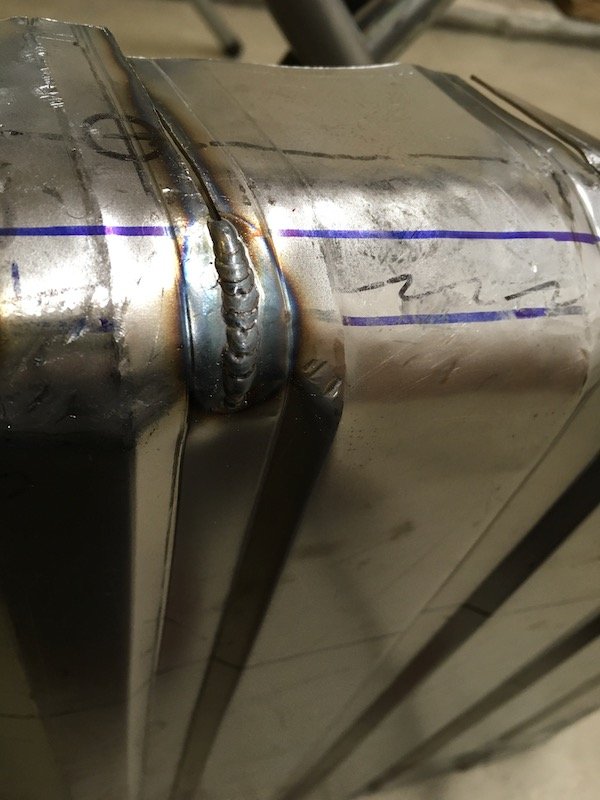
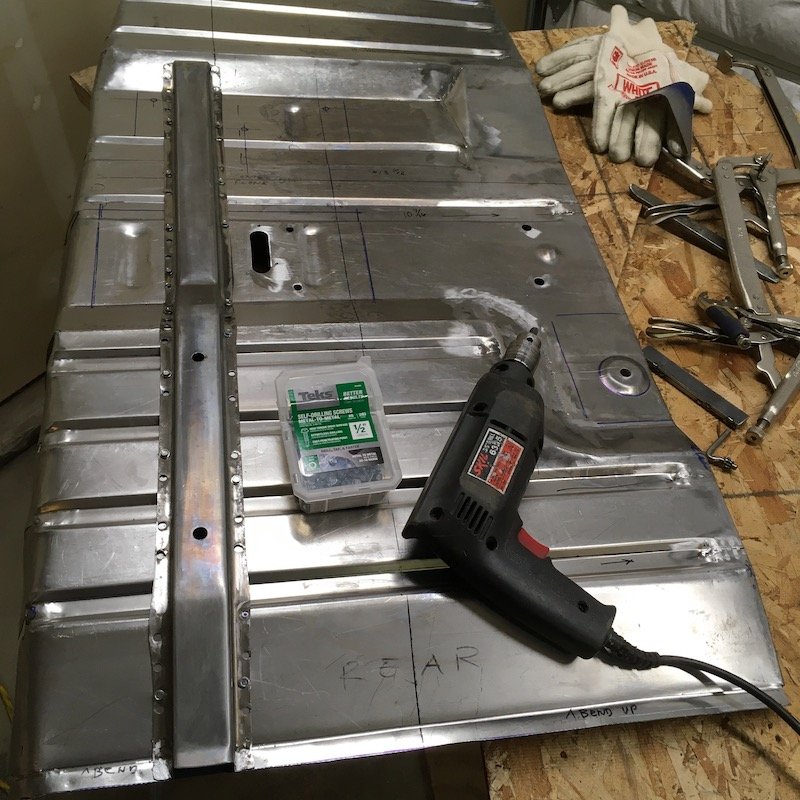
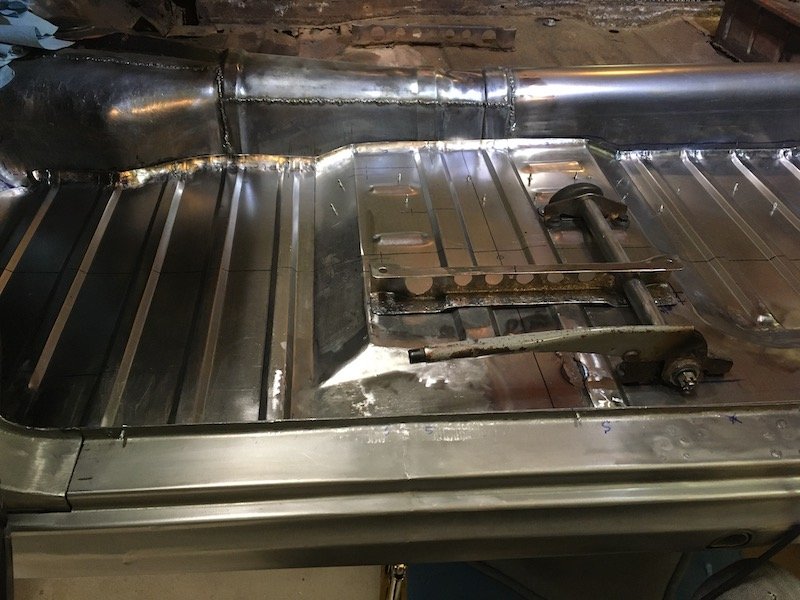
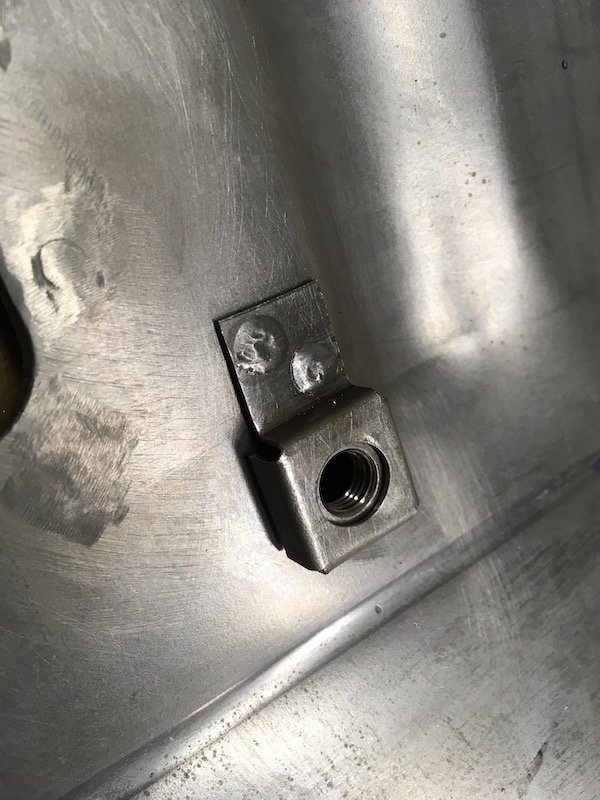
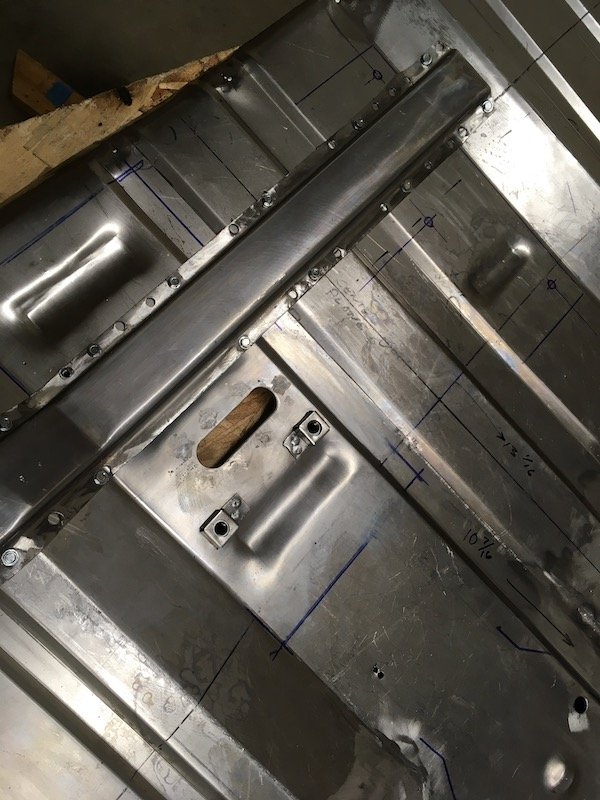
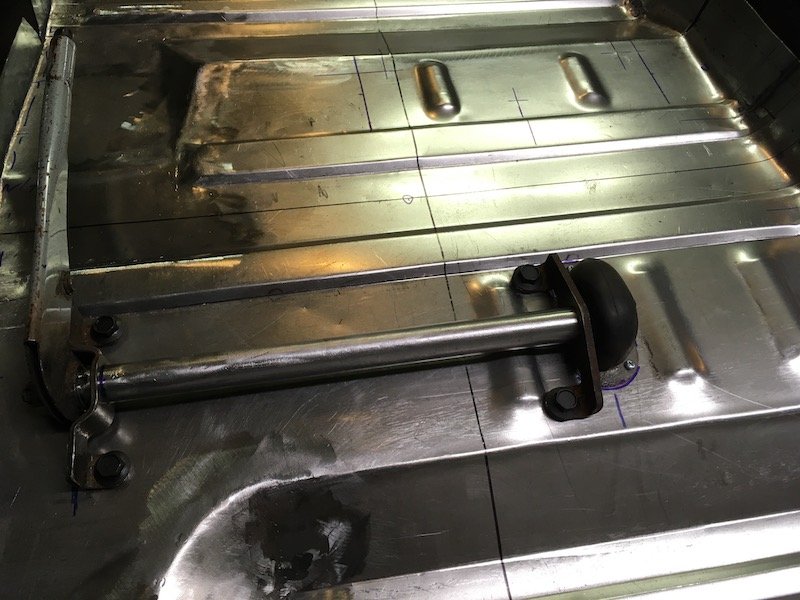
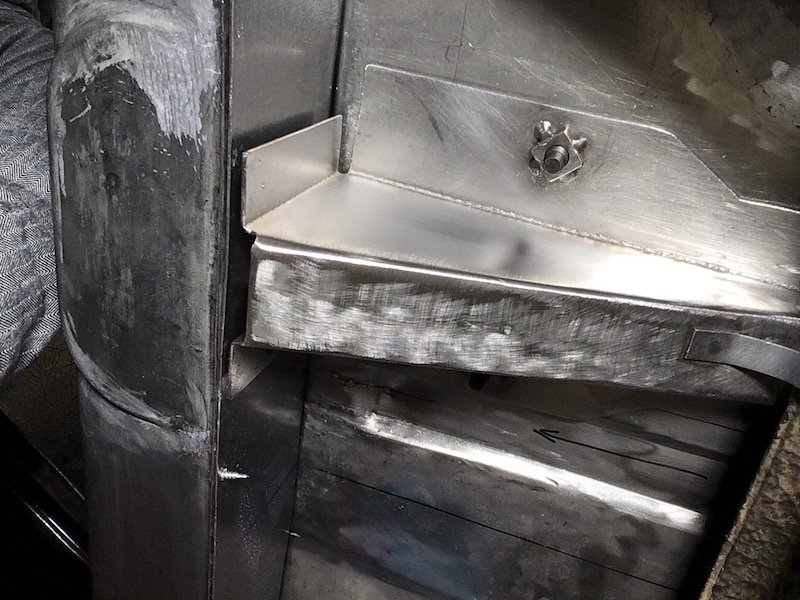
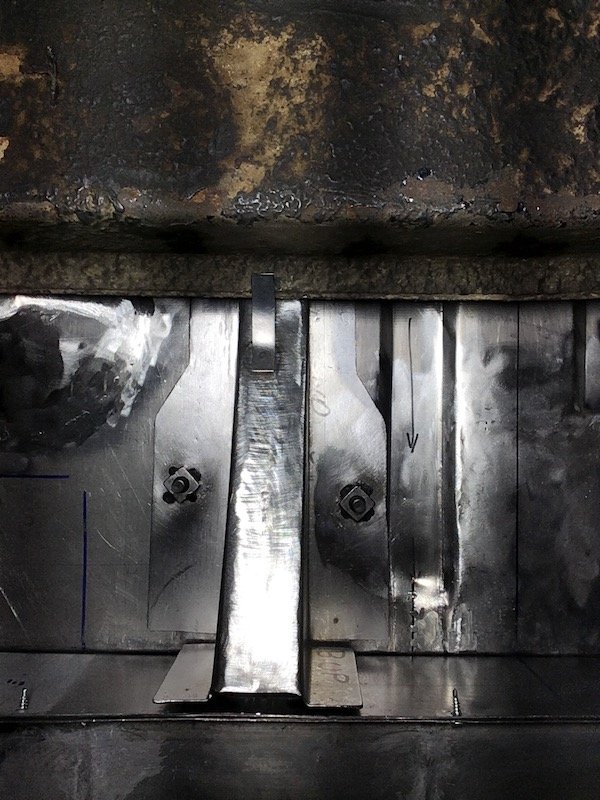
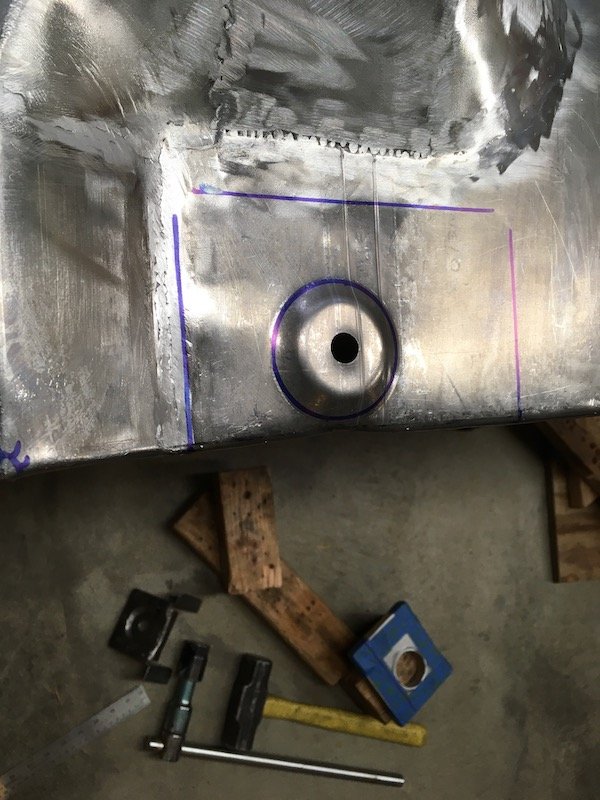
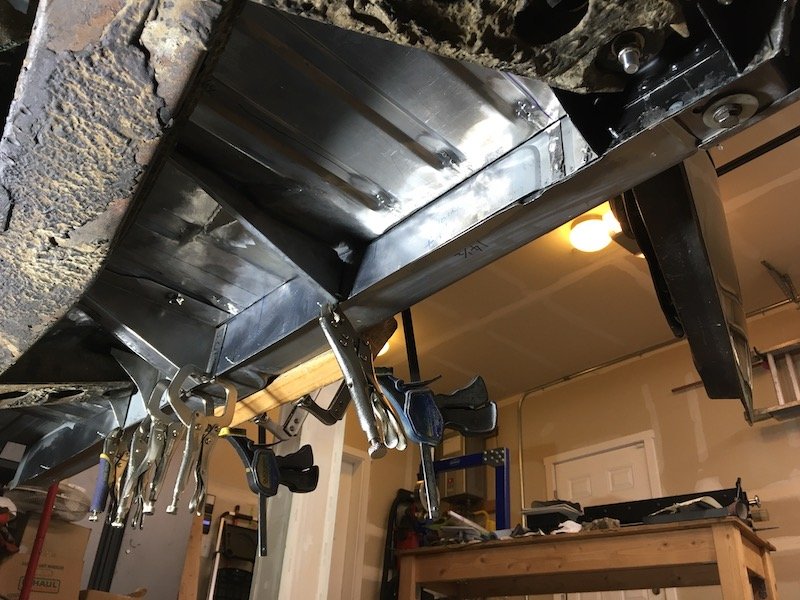
Building the 1961 Datsun 310 Bluebird Floorpan - Welding up the pie cuts along the floorpan edges. Making reproduction nutplates. More fit checks. Getting closer to completion. Some little things. I used Teks and temp fastened the underside support to conform the floor shape more accurately. And backing up a little bit from the thread post where I fully trimmed the flanges, I needed to first weld up some gaps. There's seven bends in contour along the fore and aft direction. That results in 14 pie cuts along the edges to be cleaned up and welded. Not so much on the outboard flange against the sill since these will be lap joints against a flat inner sill, but required along the curves of the trans tunnel edges. I'm keeping my options open to butt weld or lap weld against the tunnel. I back up the wide pie cut openings with copper from a split and flattened pipe. The blue line marks the extent that needs to be filled, the remainder I expect will be trimmed away. This one was kinda ugly. I just grind the excess away later. This one was a little easier to fill. I ground the welds and then, after final trimming (described earlier), did yet another mock fit with the floorpan below The fit is looking awesome! Almost pro maybe, but I have nothing from the internet to compare it to. Then I built some tiny reproductions out of 20 gauge sheet to look exactly the same as the original floating nut plates that get welded to the underfloor and support the inboard bracket of the parking brake. The 5/16 - 24 square nuts are extracted from some much larger purchased repo GM nut plates and inserted into my much smaller Nissan look alike single tab repros. Next post will be cleaning, preparation and epoxy priming the soon to be permanently welded closed cavities on the underside of the floorpan. And then followed by welding on ten or so parts. More posts soon… Discussion:1 point
-
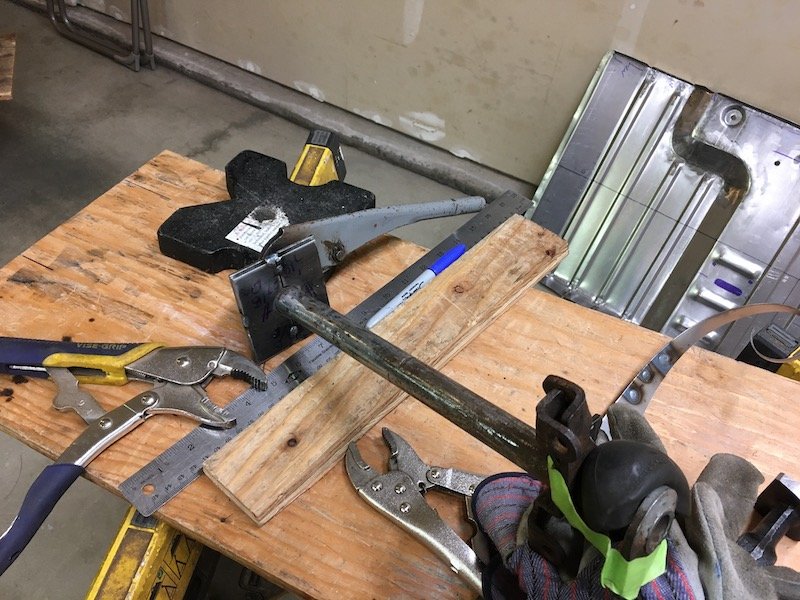
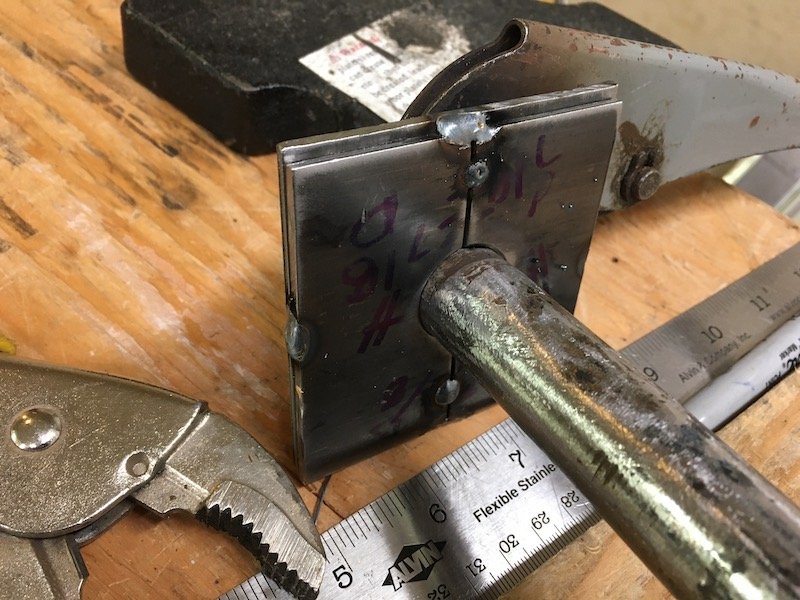
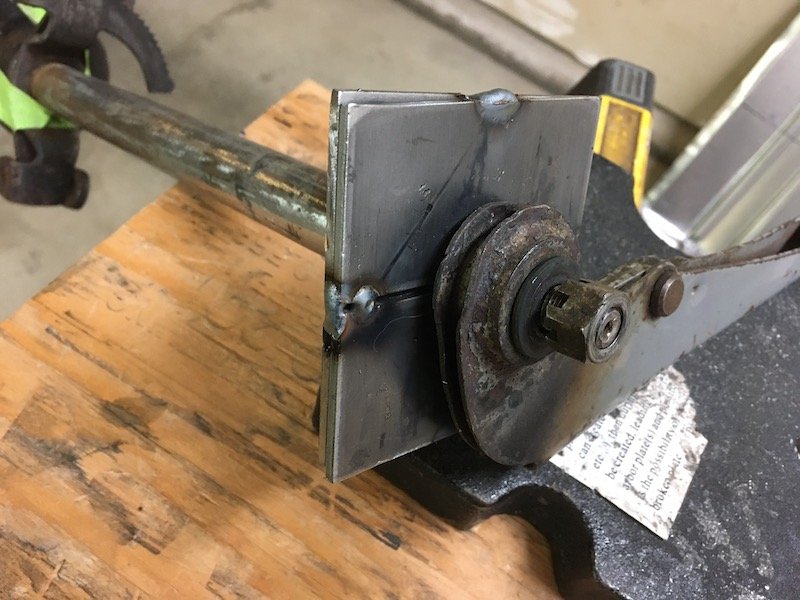
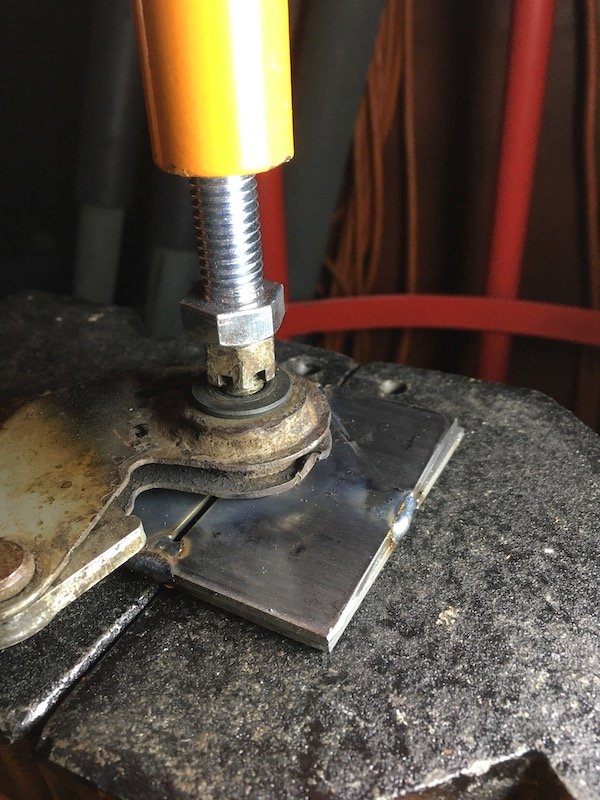
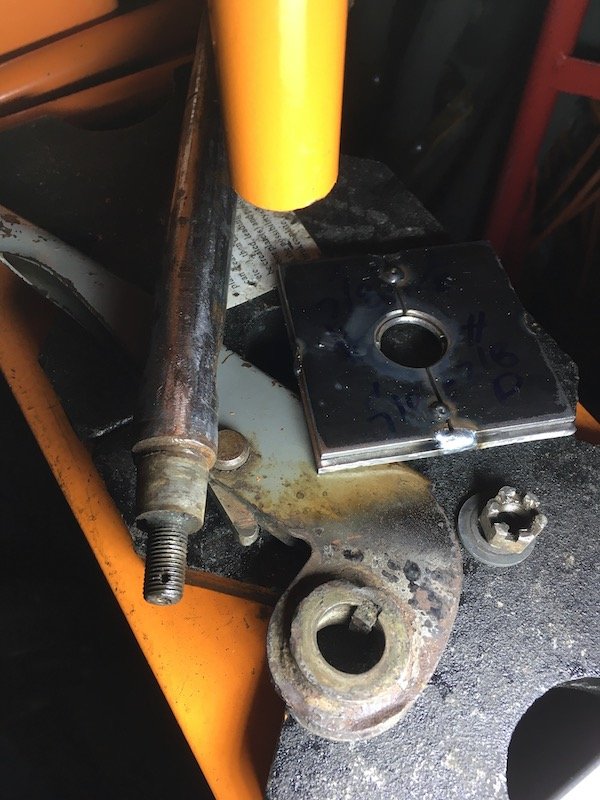
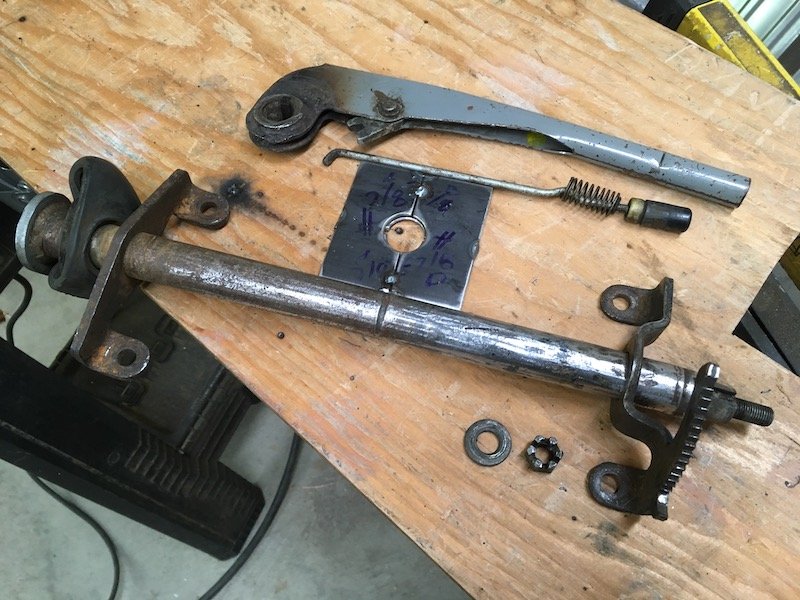
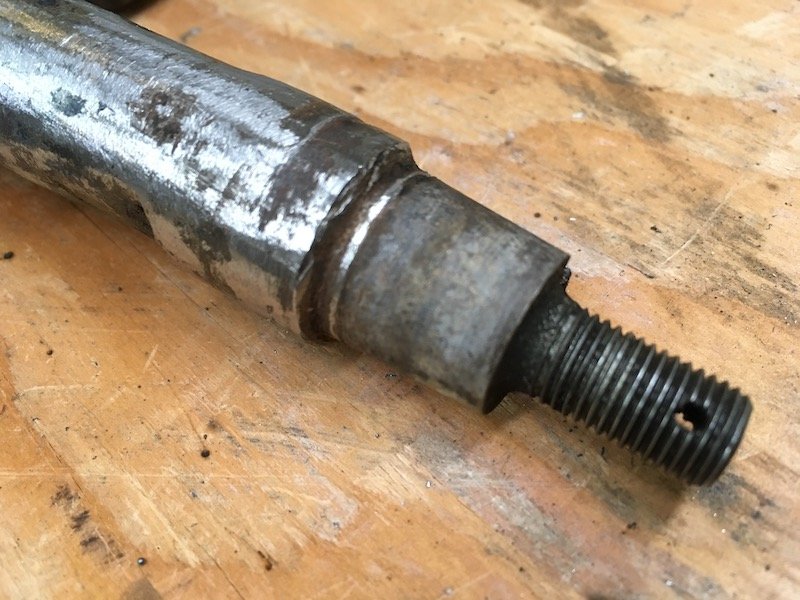
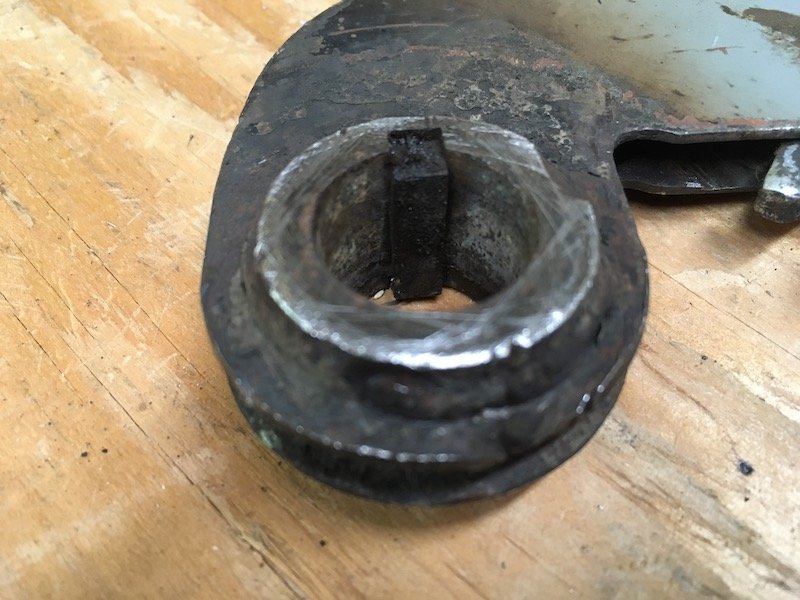
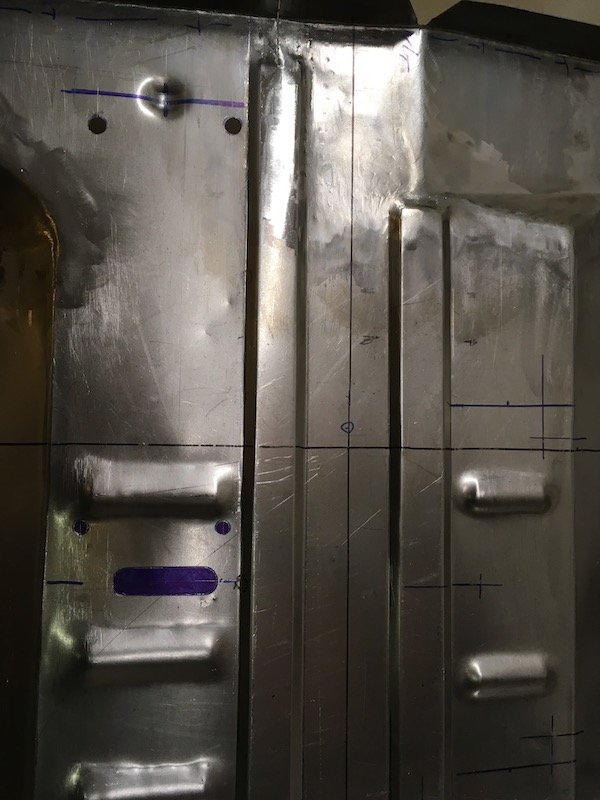
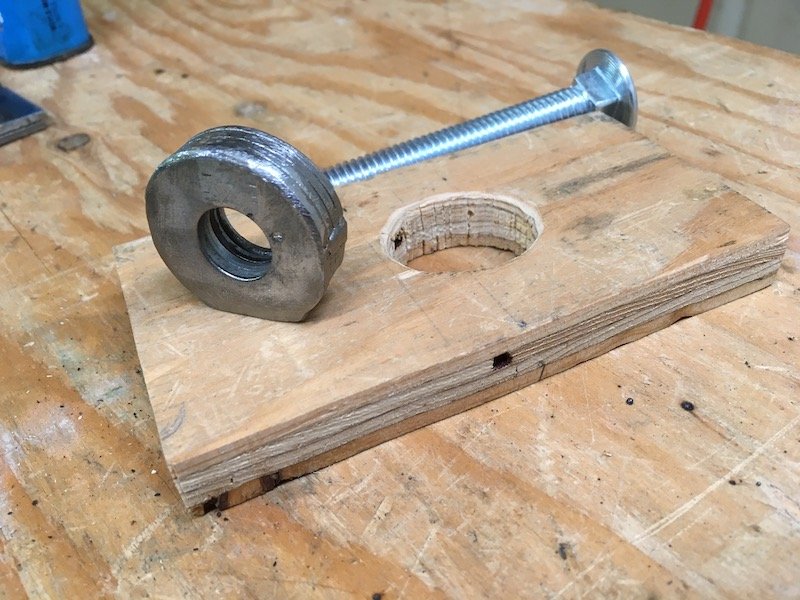
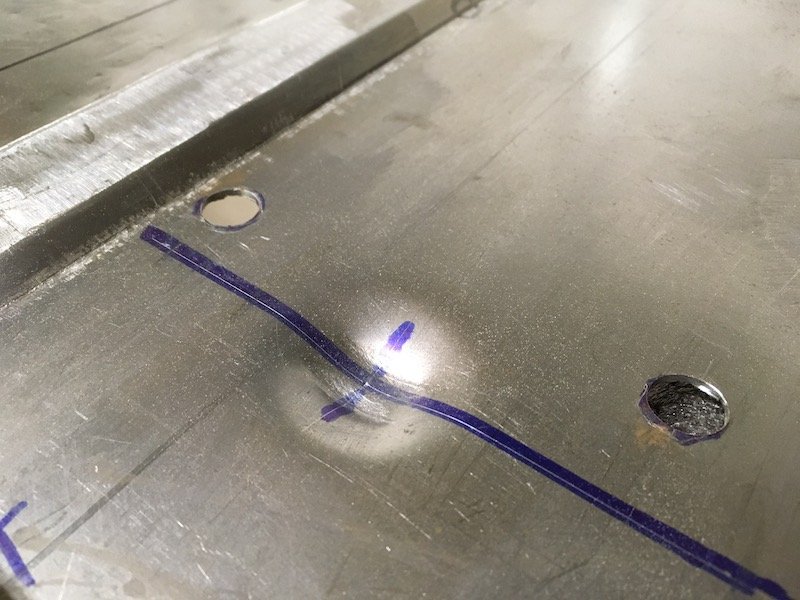
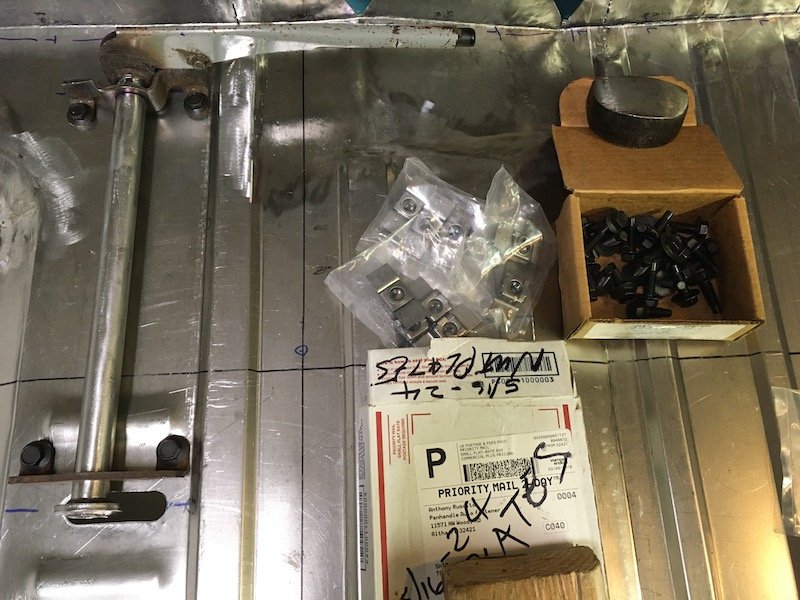
Building the 1961 Datsun 310 Bluebird Floorpan - Disassembly of the parking brake hand lever. Repair and fit checking the brake assembly installation against the floorpan. Adding the divot for the lever end. There was a problem getting this parking brake lever assembly off of the car in the first place. I need it now to temporarily attach it to the floorpan and locate the attach points and underfloor clearance cutout. The lever or arm was seized on the tapered shaft. I cut the seat bracket to remove the whole assembly and deal with the problem on the bench. Unsuccessfully, it was soaked in penetrating oil, beat, heated with a MAP torch and pried on with screwdrivers and a gear puller. Finally, I fabricated a very tight fitting, double plate steel backside restraint and popped it out with the hydraulic press. Success! At nearly 12 tons of restrained hydraulic force, the shaft popped out with a very loud bang. The abused and bent shaft and other related parts. The contact groove in the middle was cleaned up and filled with MIG weld. The bend of the shaft was corrected by beating on it. More weld metal was later applied to the shaft impact zone here and filed flush. ID of the lever. Laying out the attachment points and cutout penetration through the floorpan. Another simple tool fabricated from washers to make the same factory dimple below the lever pivot. Lever pivot dimple. Error made. Discovered I miss-located the bolt hole locations on the underside support bracket. Error was about 1/4 inch. These holes tie this structure into the mounting support above the floor for the parking brake. Above two pics shows how far off the support bracket holes were. The flanges should have been touching the inner sill. So I had to cut the square nuts off, fill the holes with weld and do these over again. More posts soon… Discussion:1 point
-
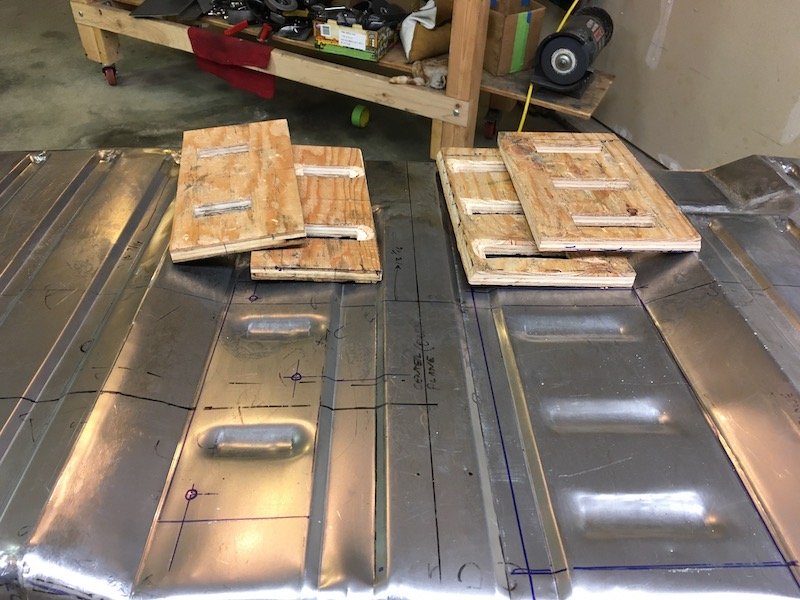
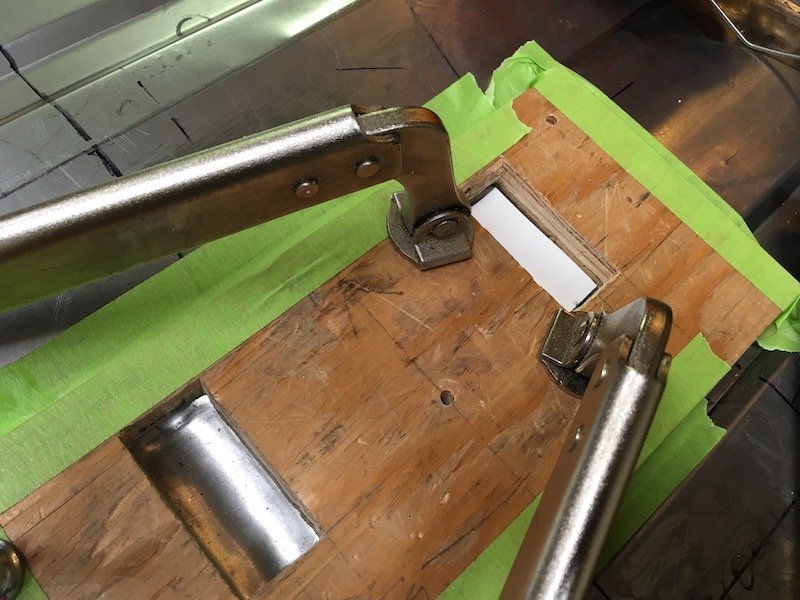
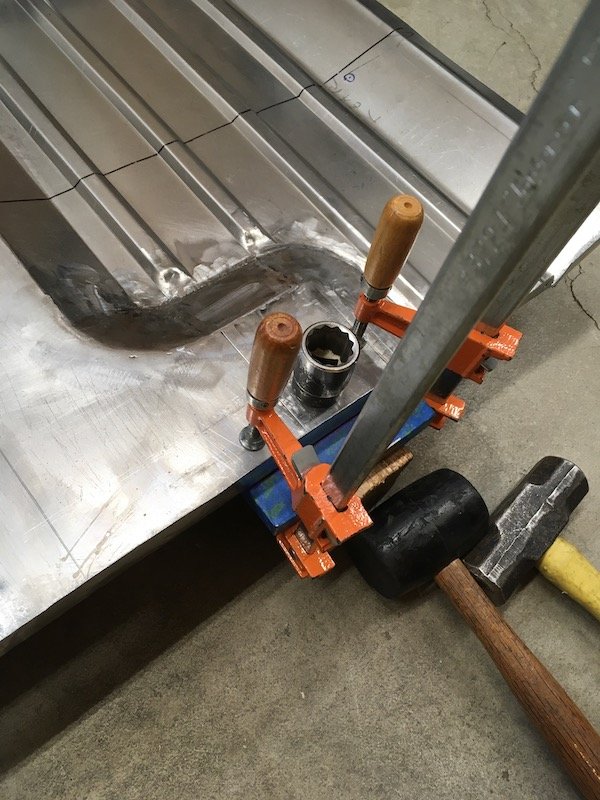
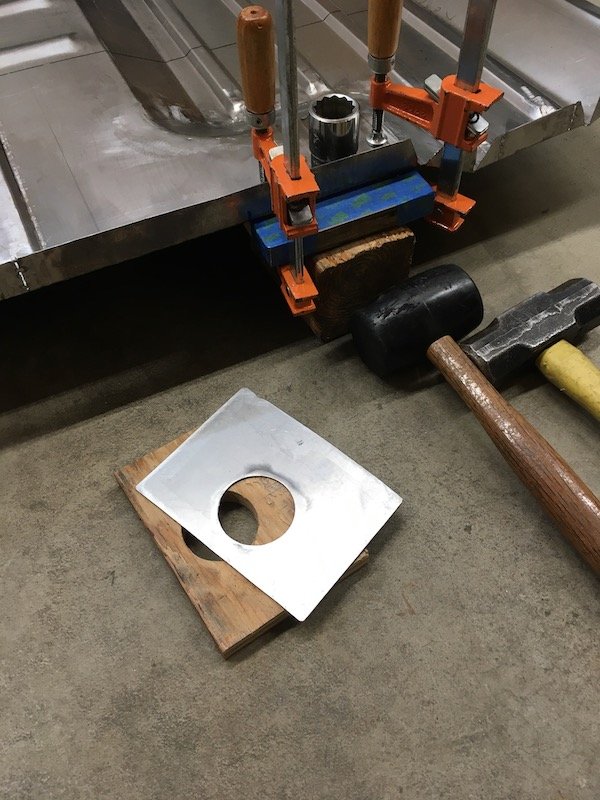
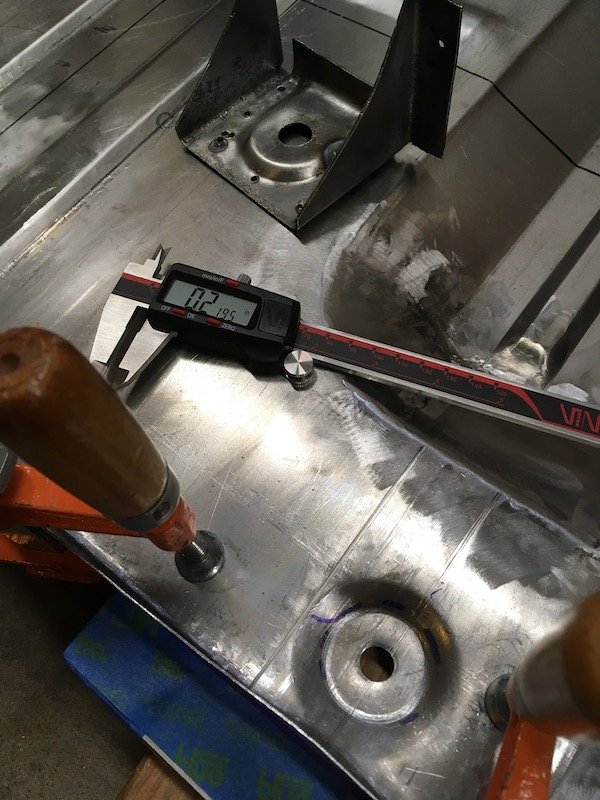
Building the 1961 Datsun 310 Bluebird Floorpan - Making the factory indents and body mount depressions. Pounding and beating in miscellaneous factory indentation features. Started by making these upper and lower forming dies from plywood. Goal and result is as shown. The dies are clamped in place and a piece of PVC pipe is laid inside for cushioning. Then an appropriate sized long socket wrench is inserted and beat on. The plastic pipe segment fatigues and breaks apart a few times and I just cut out some fresh ones and finish the job. Not a perfect result but acceptable. I know just about everything on the floorpan will be detectable as handmade, but only upon close inspection. Just trying my best here! Moving on to the body bolt mount depressions. Similar concept with two dies, very big hammers and a large 3/4 drive socket wrench. I found the upper die and plastic cushion unnecessary however. top side bottom side Fit checks and mock up continue above and underneath as progress is made. More posts soon… Discussion:1 point
-
right so, rust repairs. usual story. cardboard template, cut the piece out, fold, fuck around, make the next bit. in this instance i was lucky to have an unmolested example to copy so i knew i got the patch the right shape. i just use basic tools, i think the fanciest thing i have is a shrinker/stretcher. anywho ive taken some fairly self explanatory photos of the process, only one that might need some explanation is welding up the gap. i use a copper plate behind the gap and weld onto that, the metal wont stick to the copper so it helps if you've got a gap to fill. 2019-12-29_03-56-09 by sheepers, on Flickr 2019-12-29_03-56-18 by sheepers, on Flickr 2019-12-29_03-56-25 by sheepers, on Flickr 2019-12-29_03-56-33 by sheepers, on Flickr 2019-12-29_03-56-52 by sheepers, on Flickr 2019-12-29_03-57-00 by sheepers, on Flickr 2019-12-29_03-57-08 by sheepers, on Flickr 2019-12-29_03-57-17 by sheepers, on Flickr 2019-12-29_03-57-25 by sheepers, on Flickr 2019-12-29_06-07-34 by sheepers, on Flickr 2019-12-29_06-07-41 by sheepers, on Flickr 2019-12-29_06-07-49 by sheepers, on Flickr 2019-12-29_06-07-57 by sheepers, on Flickr1 point
-
Nah it wasn't certed. It had heavy duty leaf springs fitted I find it hard to figure out why the company that did the work would have that attitude, surely they would have insurance, and the bad publicity would cost more than fixing the vehicle.1 point
-
With the brake rotors slowly making their way to me from across the planet, I wanted to get the TVR in for a Warrant Of Fitness inspection to see if there was anything else I needed to order. Its been a little nerve-wracking, knowing that this would be the longest trip the car has taken in about 3-4 years, and it's still only a 40km round trip. Nothing for the other two cars, but for the TVR, it seemed like half the country away. To prepare for it I took the TVR for a backroad shakedown the other day; just a short 15km trip, but further than down the road and back I've done previously. The car ran and drove well, but did show up a couple of weak points. The rear shocks are feeling a bit tired and bouncy, and as I already knew, the brakes shudder badly. Today was the day though, the first time I've had the car on the motorway at open road speeds, and for a longer distance. The car did well, felt comfortable enough on the open road, but the higher speeds did show up an annoying shake at about 80kph, which I suspect could be the old tyres on the car, similar to when I got Tess (which had also been sitting for years). Otherwise everything was fine. The steering was nice and direct, the temps were good and steady, and the gearbox shifts well. She sure turns heads though; can't imagine why. I made it in one piece, with the top down even, despite some light drizzle on the way in. After waiting oh so patiently, the car was finally on the hoist and it was inspection time. The inspection required two inspectors, since the TVR was so far out of their normal parameters (both are old enough to remember working on the donors like the XJS and Capri/Cortina but haven't touched anything like it in years), but after a while, I had my answer. It was a fail. Not completely unexpected, but unfortunately one thing I hadn't counted on was the front lower ball joints having excessive play in them. It's not the end of the world, they're MK4 Cortina parts, so I have a pair on the way already. There were a couple of other advisories, such as the brakes shuddering, and the front tires starting to show signs of perishing, but overall I think its a pretty damn good list considering the car was last on the road 2015/2016. I've had worse on cars that have been already been on the road recently. The rear rotors arrived today, and the fronts are en route from the UK currently. I'm looking into options for some new shocks to help with the bounce in the rear, and some new tyres will have to be on the list now too. It seemingly never ends, but once its done it should be a good solid car. So yes, Merry Christmas to everyone, and I hope you all have a good break. Get out there and either work on, and/or drive your cars, and I'll be back in the new year.1 point
-
1 point
-
1 point
-
A couple months ago this got featured in the NZV8 magazine. @Snoozin did a wonderful job! Got sick of the doors not shutting correctly. Had my parent's bring back some Altman latches from the US on one of their trips over. Relatively simple to install, but modified a few things so they work a bit nicer and installed some electric solenoids. Need to sort some more door seals as these ones leave some large gaps in places. The final thing that needed doing to "finish" it off finally got done! Mark Dunn in Levin did an awesome job on the upholstery. We made new plywood seat bases and he built up foam for the seat. We made it thinner than the factory one, so I could sit a bit lower and further back. The seats are also way softer now! Some random pics from the past couple of months. At some stage I also swapped out the fog lights for the grill guard, as they weren't mounted that great and were cracking the bumper panel. Will modify them and put them back on one day. No.2 transmission is on it's way out. Can smell it burning the oil when going up large hills. Have changed the filter and flushed the oil and no difference. Took it up to drag day and it decided it only wanted to use third gear after the first run. Did a couple more 21-22 second runs and then parked up for the rest of the day. When we left it was back to normal. Unsure whats going on there. Had a suggestion it went into limp mode. Have another trans there that I could swap in and see what happens with that one, otherwise really considering manual swapping it!1 point
-
Yes i found enough pieces of bronze ones to make about 80% of one, then faked the rest with bits from the rustiest one i could find. Not sure why i spent about...50 hours on it? It's a ...questionable? design, like, Victorian era "I just designed an engine that runs on gas & want to run it on liquid fuel & this is the best I have" design. Not horrible, just weird. They have a 'toilet lid' looking flapper in them and a bowl of gas, and tubes, and the flapper not only regulates how much air (yes air) gets sucked into the main jet but opens at speed as a kind of mixing valve? And doubles as a backfire arrestor. Weird, logical enough, but horridly old fashioned.1 point
-
I picked through a bucket of parts & found them. Should be enough parts for 1 good one. I think the parts carb' was one you gave me too. Do you need a giant 3 litre lawnmower engine carb?1 point
-
Huh.... someone gave me rusty carb's. At first i couldn't find any, now i have spares.1 point
-
Forget that one, the new tune is better. That one sounded like a series of tiny gearshifts, kind of like an early fast&furious movie. Eww why is there a digital thing on my dash? Oh, if i look closer it's an exhaust temp' sensor. But the gauge seems to have suffered damage from a 25 volt alternating current charging system. But it worked for a month so i guess i got enough data...1 point
-
They only need 10 seconds of water flow every 1 minute. And that plug does look a bit lean but i run mine at 9.5:1 so i might be bias.1 point
-
I thought ellerslie was fine as long as someone gets broken leaky BW35 on their doorstep if they complain?1 point
-
1 point
-
If i increment the math side of things by 100 it stays at full advance all the time. By 1,000 - 10,000, same thing. It even advances while sitting there not turning over, but will retard while running. Please tell me how bad my math is.1 point
-
Don't mind this, it's just a basic, primitive tune i spent the afternoon adjusting // constants won't change. Used here to set a pin number: const int coil1 = 3; const int coil2 = 5; const int coil3 = 7; const int coil4 = 9; const int sensorPin1 = A4; const int sensorPin2 = A1; const int sensorPin3 = A2; const int sensorPin4 = A3; int sensorValue = 0; int sensorThreshold = 200; int sensorMax = 0; // Variables will change: volatile int coilState = LOW; volatile int coilPin = LOW; volatile int sparkTriggerDelayActive = false; //added this to try & see if i can delay spark at low RPM. volatile int sparkTriggerDelay = 0; volatile unsigned long rpmCurrMicros= 0; volatile unsigned long rpmOldMicros = 0; volatile int sensor1TriggerCounter = 0; // counter for the number of button presses volatile int sensorTriggerState = false; // current state of the button volatile int lastsensorTriggerState = true; // previous state of the button/sensor in this case. // constants won't change: // Generally, you should use "unsigned long" for variables that hold time // The value will quickly become too large for an int to store const long dwell = 10; // but this is how long the "points" are open, open longer reduces duty cycle of coils. // constants won't change: const long coilCharge = 2; // interval at which to charge coil (milliseconds) void setup() { // put your setup code here, to run once: Serial.begin(9600); pinMode(coil1, OUTPUT); pinMode(coil2, OUTPUT); pinMode(coil3, OUTPUT); pinMode(coil4, OUTPUT); pinMode(A4, INPUT_PULLUP); pinMode(A1, INPUT_PULLUP); pinMode(A2, INPUT_PULLUP); pinMode(A3, INPUT_PULLUP); } void activateCoilsIfLow(uint8_t inPin, uint8_t outPin) { volatile unsigned long timestamp = 0; sensorTriggerState = true; if (analogRead(inPin) <= sensorThreshold) { if (lastsensorTriggerState = (false)) { delay(sparkTriggerDelay); lastsensorTriggerState = true; } else { coilState = HIGH; coilPin = HIGH; digitalWrite(outPin, HIGH); timestamp = millis(); while (coilState == HIGH && coilPin == HIGH && (timestamp + coilCharge) > millis()); //Busy wait digitalWrite(outPin, LOW); coilPin = LOW; timestamp = millis(); while (coilState == HIGH && coilPin == LOW && (timestamp + dwell) > millis()); coilState = LOW; coilPin = LOW; } } else if (analogRead(inPin) >= sensorThreshold) { sensorTriggerState = false; if (sensorTriggerState != lastsensorTriggerState) { rpmOldMicros = rpmCurrMicros; rpmCurrMicros = micros(); lastsensorTriggerState = false; rpmConsultRatioTable(); } } } void loop() { activateCoilsIfLow(sensorPin1, coil1); activateCoilsIfLow(sensorPin3, coil3); activateCoilsIfLow(sensorPin2, coil4); activateCoilsIfLow(sensorPin4, coil2); } void rpmConsultRatioTable() { if (rpmCurrMicros - rpmOldMicros >= 497512) //sub250rpm { sparkTriggerDelay =0; } else if (rpmCurrMicros - rpmOldMicros <= 255024) //125rpm { sparkTriggerDelay =57; //prev'55 } else if (rpmCurrMicros - rpmOldMicros <= 169491) //177rpm { sparkTriggerDelay =39; //prev' 37 } else if (rpmCurrMicros - rpmOldMicros <= 127512) //250rpm { sparkTriggerDelay =27; //at 250 RPM and 45 degree sensor advance, this would be 30ms to TDC, subtract 2ms for coil charging and subtract more m.s. for advance } else if (rpmCurrMicros - rpmOldMicros <= 85008) //375rpm { sparkTriggerDelay =16; } else if (rpmCurrMicros - rpmOldMicros <= 61000) //500rpm { sparkTriggerDelay =11; } else if (rpmCurrMicros - rpmOldMicros <= 48000) //625rpm { sparkTriggerDelay =7; } else if (rpmCurrMicros - rpmOldMicros <= 41000) //750rpm { sparkTriggerDelay =2; } else if (rpmCurrMicros - rpmOldMicros <= 31500) //just under 1000rpm { sparkTriggerDelay =0; } } Posting this here so i can find it later if i'm not home. Side note: i am probably the only person using milliseconds to determine when to fire the plug compared to using actual degrees.1 point
-
After deciding that i can't really devise a means of making a sparkplug ionization measuring device at home... Has anyone here used inductance on the coil lead to calculate the delay of firing a coil to the point of the spark occurring? Bonus points if it's an earth lead on a C.o.P. setup.1 point
-
If you're asking how much of the closing face needs to be lapped to fit. It should have a minimum ring, if the seat is cut on 2 angles and the valve face would be lapped for maybe half a mill' or so? Reason being that sharp edge cuts through carbon, but is still wide enough to dissipate heat. Obviously i do 1-2 mm on my dinosaurs so maybe you shouldn't take my advice. Or i answered a different question altogether.1 point
-
I have no idea what that made cold starting easier but in the limited tests i did (2 tests. Not very accurate) it did.1 point
-
Not sure how to test the frequency of the main loop without an oscilloscope so i had it serial print for 30 seconds. Which told me the baud rate was the limiting factor. E.G. Versus Edit: what happened to the text with the other rate ect? Anyhow. adding "coilState = LOW" in the 'else' statement has transformed the open road running. Work much like i intended (Duhh what an oversight that was!) Would drive fine. But it's now hard to start & misses at 120-500 RPM? Can't figure that one out.1 point
-
1 point
-
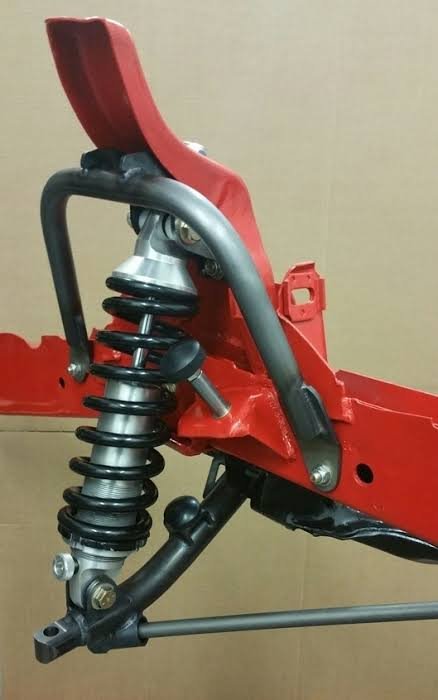
With the engine and trans in I started to look at what I was going to do for an exhaust I can choose 2 of the following 3 items Rh torsion bar Oil filter An exhaust that actually flows So I think the best option is to put coil springs in it and get rid of the torsion bars. I knocked up a dummy coilover using parts I had kicking around. I'll go see autolign this week and see if they can make a bilstein shock with a circlip adjustable lower platform and I can use the threaded one at the top. If this plan works I'll need to modify the lower arm inner pivot bush and strengthen the shock mount to cope with the weight1 point
-
Good observation, but if that happened it'd cut power to the coil which would result in a spark. So not a bad result as it'd be "on time" rather than lagging.1 point
-
Edit: Forgot to mention this is a nano 328P about 16.000hrtz? If that makes a difference to the way it runs. So.. this runs really weird on manual advance mode, seems to lag at certain RPM, then suddenly the timing will become accurate for a slightly higher RPM, then lag for the few RPM above that. Revving stationary it'll be fine at idle to ...1100RPM? cough & pop out the carb' until 1700 RPM. On the road you can feel it lurching at cruise speeds, each time the RPM rises or falls across that threshold that spans maybe... 10RPM layers where the lag disappears & re-appears, judging from the exhaust sound and gas temp' gauge reading 50-70 degrees above normal it's running retarded. Feels like a cross between riding a horse and "Run out of gas & sloshing the last bit of fuel in the carb' bowl over the main jet" surging. At 1600-1700 RPM or so it'll lose that lag & fire on time every time, feels like someone hit Vtec. Tried changing micros to millis ect, same effect. 6,000 worked better than 10,000 micros. Meanwhile. This crappy delay code will run perfectly. But doesn't have any advance/retard (and if i tried to add that i'd lose lots of time to calculate it due to the delay...)1 point
-
1 point
-
I hit a bit of a brick wall with progress because at some point I want to paint the engine bay and underside, and was trying to do things in a way which meant I could get that done, get the engine sorted and painted and in for good and then do things like make the exhaust afterwards Then I realised that was stupid and I was wasting time mucking around trying to figure out things with the engine on the stand, and whacked the motor and box back in . I need to get everything done then I'll take it apart for paint last Shifter mounted, i wanted it up high so it's not far from the steering wheel to the shifter, @RXFORD/matt from tin tricks helped me out again with that by folding up a shifter mount and putting some fancy holes in it And put the carb and hat on, the bonnet doesnt shut so I'll have to figure out what I'm going to do with that1 point
-
Except for still having a leaky sump, it seems. Someone, at some time in the past, over-tightened the sump bolts and deformed the gasket. (For "someone", read "me") (For "at some time in the past", read "last Saturday") It was fine for a bit & then it wasn't. Still, the chassis definitely isn't going to rust now. Surely I'll get it right in the end with all this practice.1 point
-
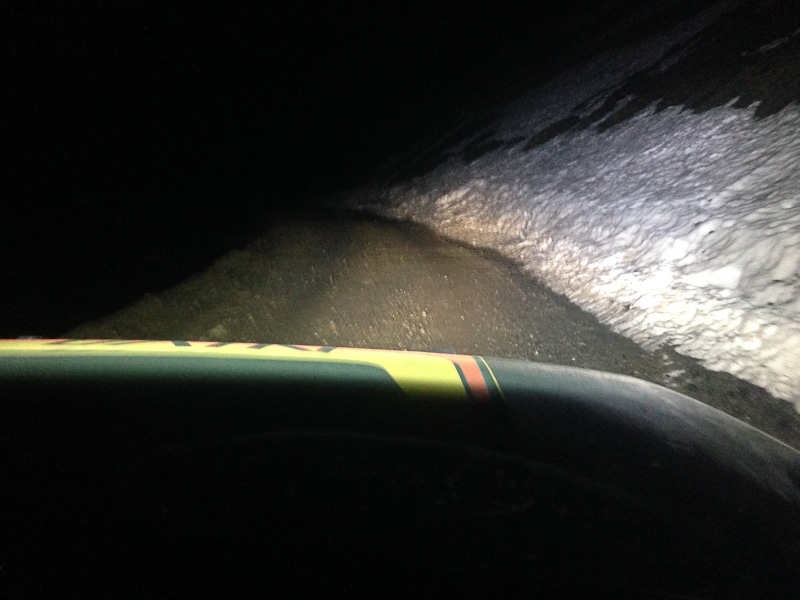
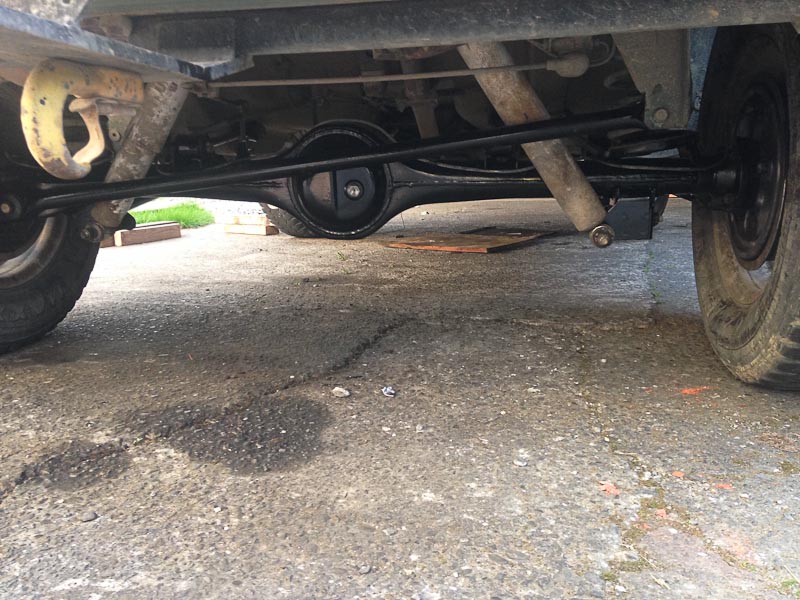
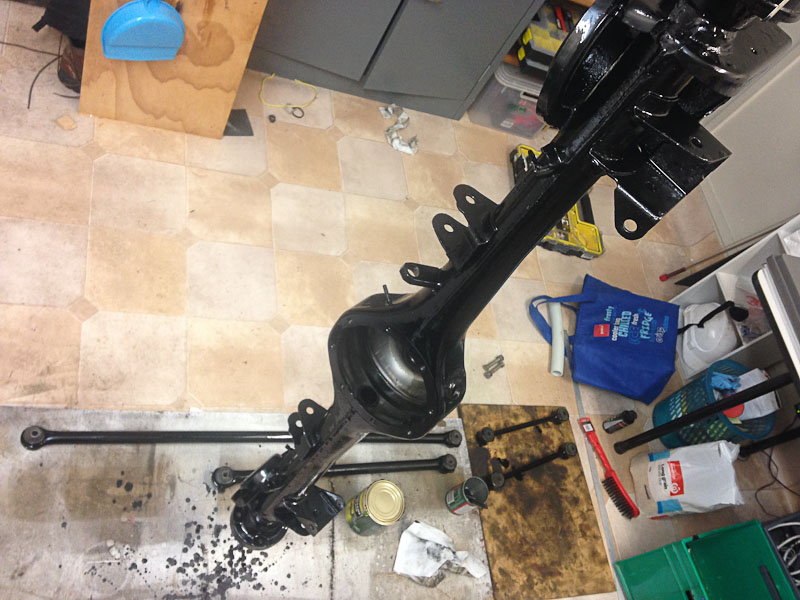
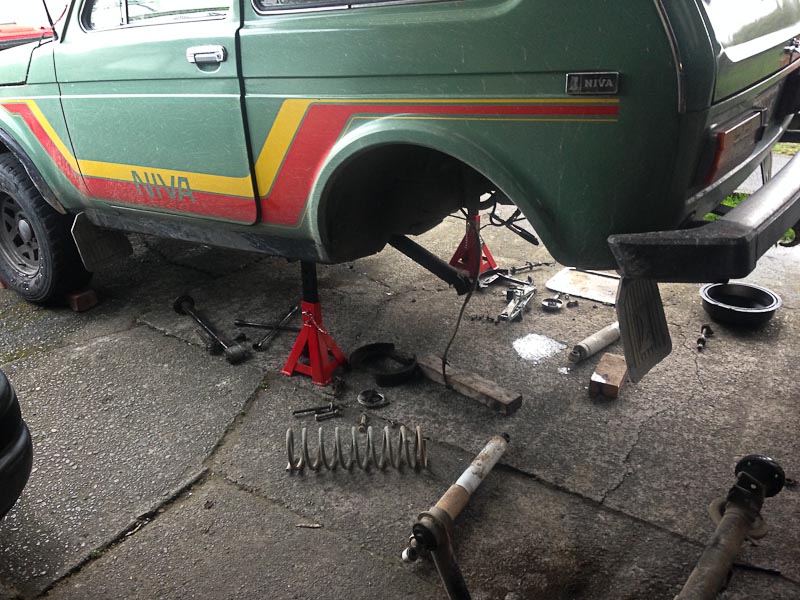
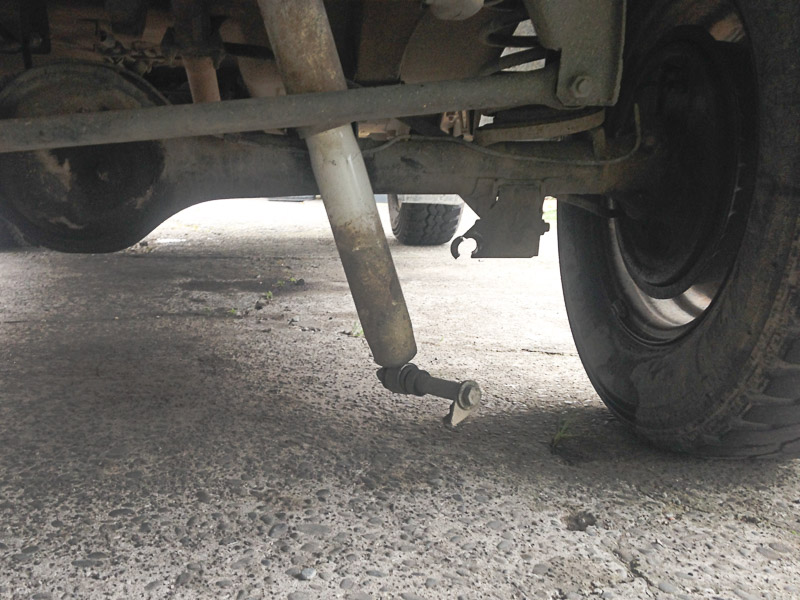
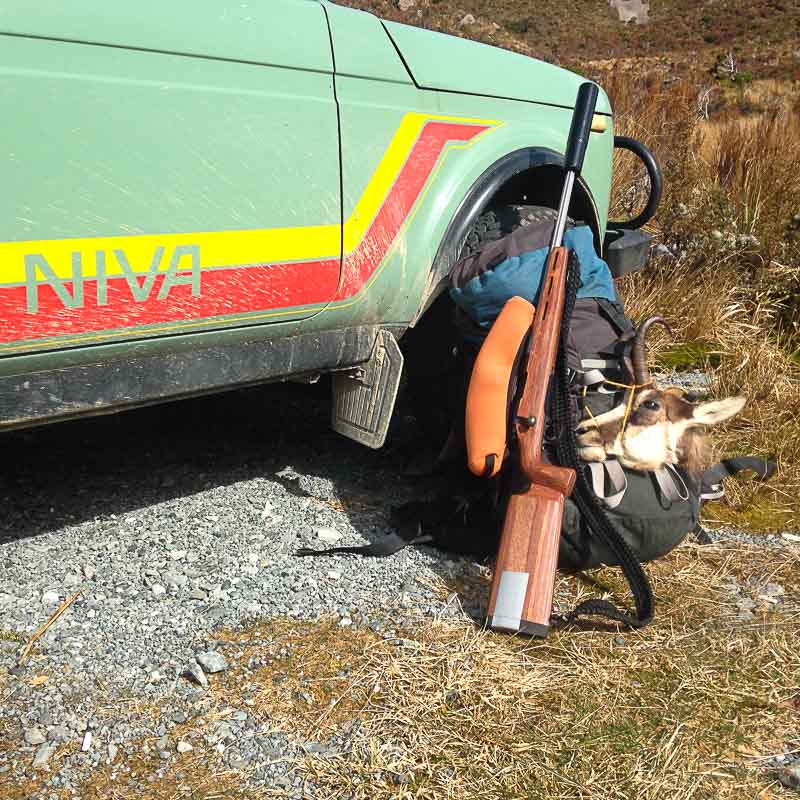
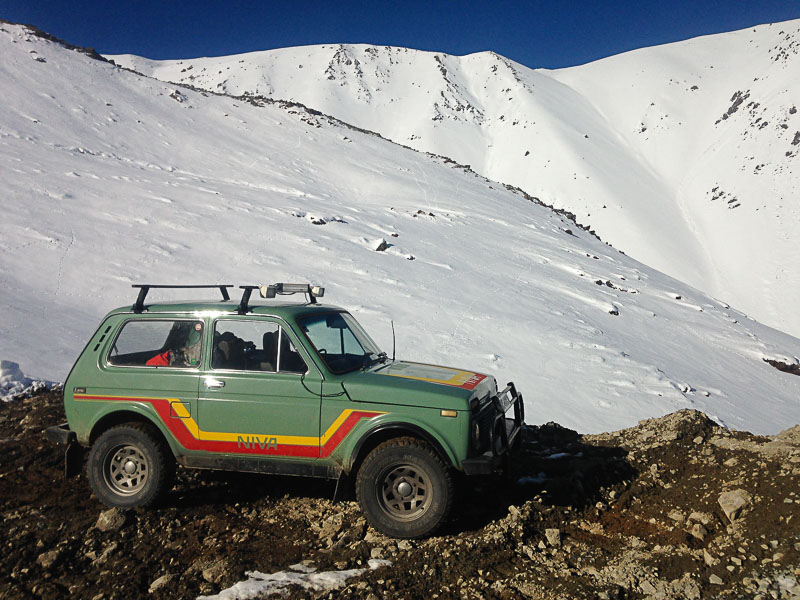
Been a few months since I really updated progress, so Got really pissed off with chasing issues in the carbs, that I traced to a vacuum leak, fixed that for a quick win, got the LM2917 running and lined up all data points on the one plot, this ended up to be very useful and with that and a set of micro drills, I soldered and drilled my way to a decent mixture, eventually settling on 0.5 idles, 1.20 mains and 2.0 air correctors, pretty much the same as where I started! there are a few more gremlins in there, I have reason to believe the pump jets are a tad rich, but economy is acceptable and that was really all I was after! A couple of days later the stalling at idle came back, notably at the gate into work, at the same time one of the older staff members who happened to be a capable mechanic heard it splutter and came over full barry spec commenting the Russians swapped Ladas for butter, oh and plugs are too cold. Sure enough, purchased up a grade and stalling be gone! That would have been the start of winter, with a running Lada, I dug into Niva orientated activities: Drove up mountains to frolic in the snow: Then spring came, so drove up mountains to fill the freezer: Life was good, then on the way home one evening there was a loud bang, followed by nothing but concern, figuring I wasn't in the ditch I carried on carefully, arriving home I looked closer: Hmm, so a few phone calls to my parts man and spun a few spanners on the magic floating Lada Couldn't resist a flick of paint while there Reverse spanner spin All in time for a late night run to the mountains for one last weekend I was promised spring shred, but woke to snow, Niva looked happier than Vladimir necking vodka Returning home the steering box made a few bad noises, being that the wof was a few weeks from dead it was back to the axle stands but this time the front end up high, I then got way too motivated and pulled the steering system out, along with some worn ball joints...... Poor thing is now destined to sit on the stands til after christmas as I just don't have time right now to really do the work right! After all this time and effort to get the Dellortos running correctly i'm 90% convinced they are coming out, I have an efi option on the cards thats just too good to refuse.1 point
This leaderboard is set to Auckland/GMT+12:00








_sedan_(23230030334)(1).thumb.jpg.34d765361d66c78db614bae6ea2c156a.jpg)


