
Leaderboard


Popular Content
Showing content with the highest reputation on 09/07/19 in all areas
-
Also today the horn jammed on, it has never worked, the button dosnt even move but I had to drive past people with it blasting away like some arsehole.5 points
-
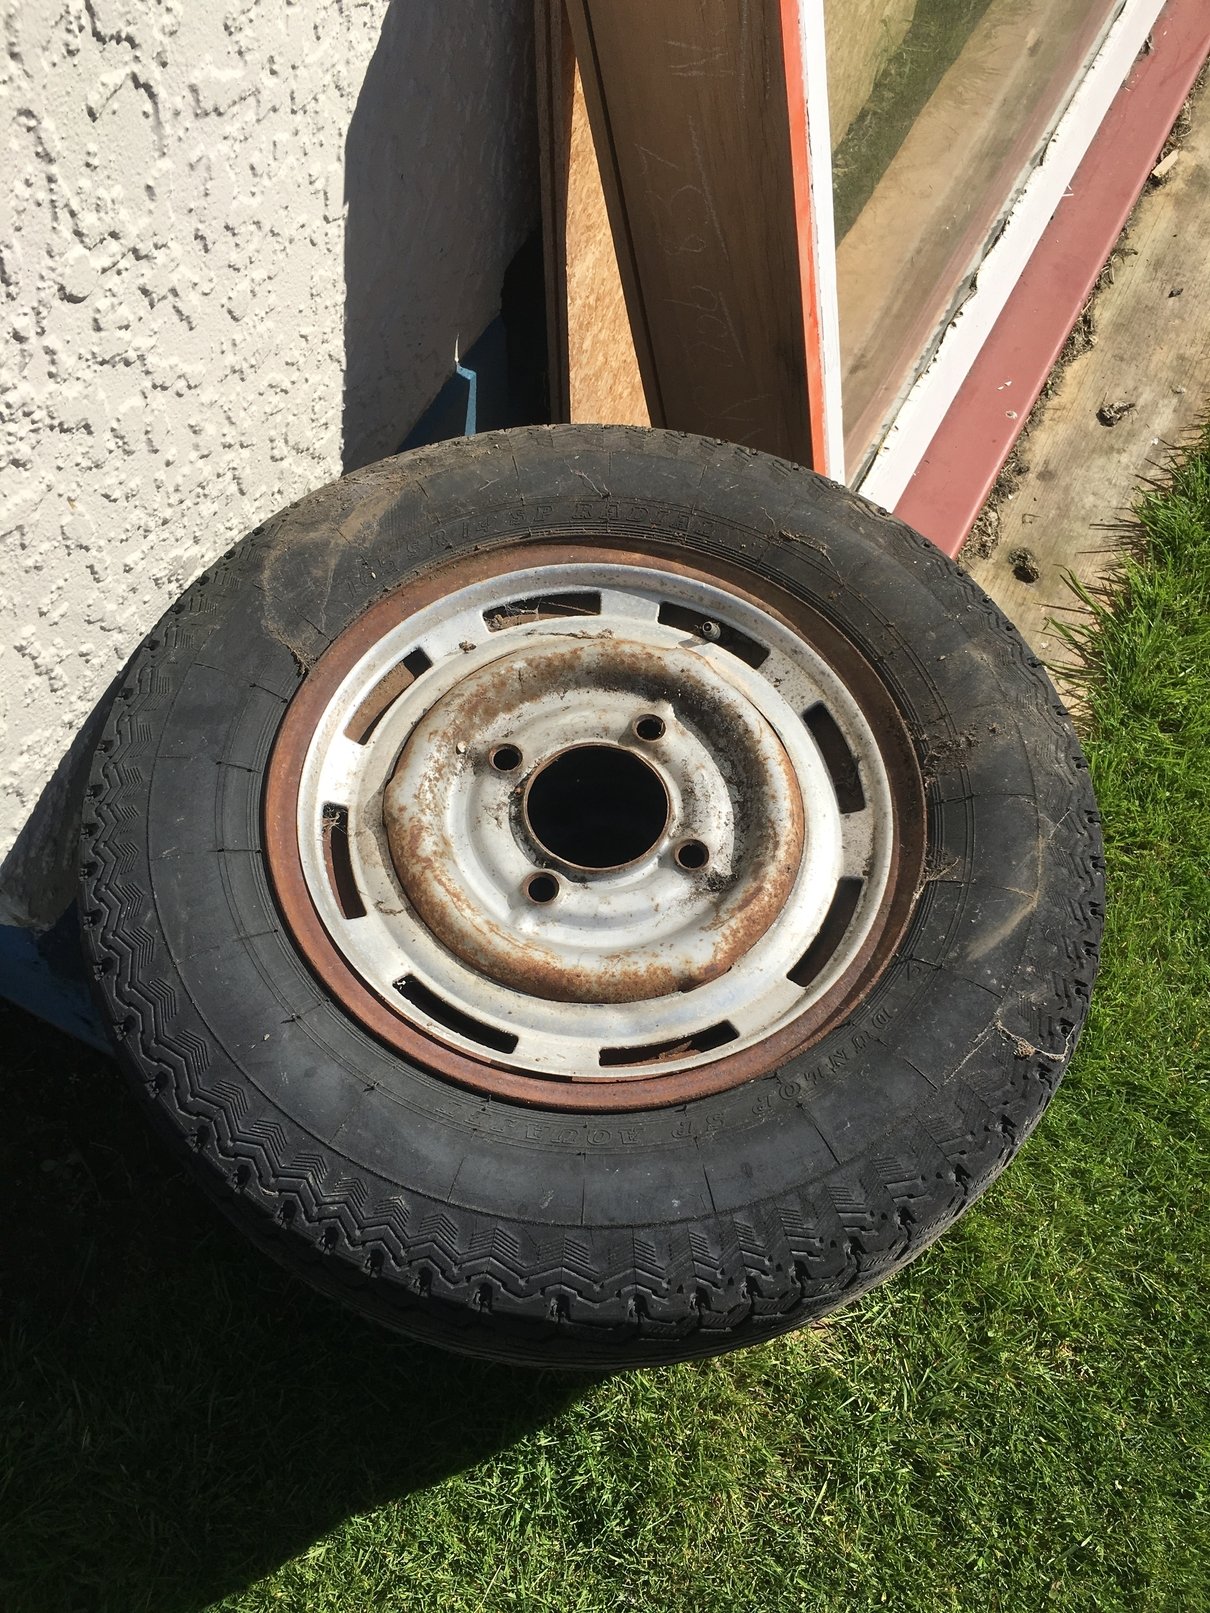
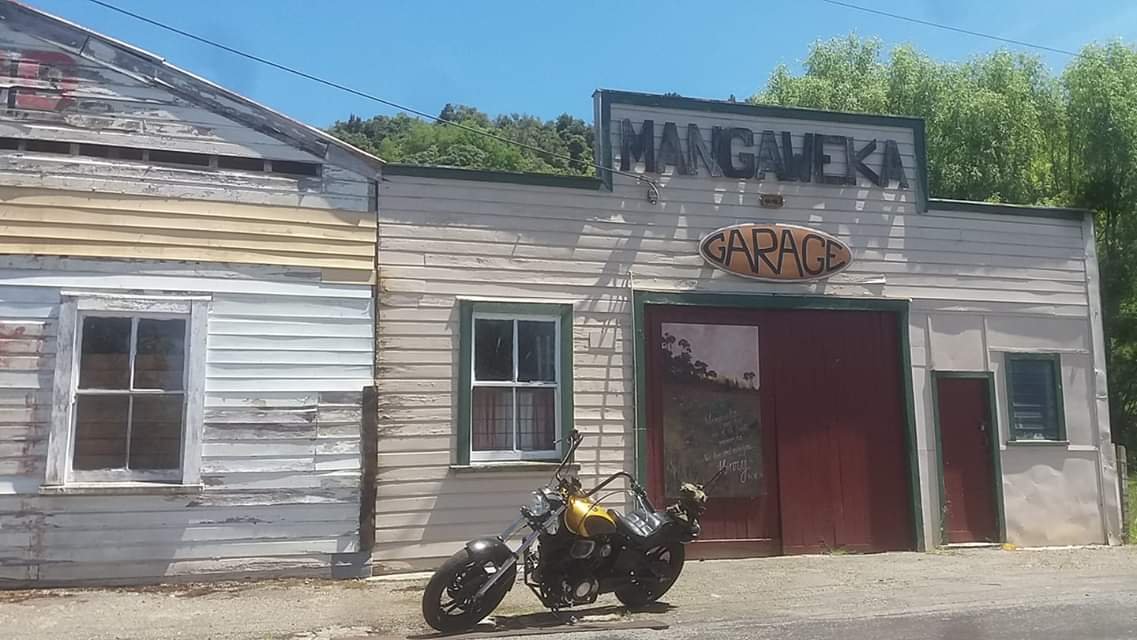
Long time between posts as usual, made another mission back to the Marshland yard before it's all gone. Managed to get four decent 14 inch rims to put the Sabre back to original and so I can fit the NOS hubcaps - will look the part once blasted and painted. Also found a floormat for it amongst the grass, I have the passenger side but had been missing the driver's so I'm a happy lad! Also dragged this monstrosity home because I couldn't bear the thought of it being crushed. I'll clean it up and then decide what to do with it.
 4 points
 -
4 points
-
How it should have always been. The pedal set fits great. I'll need to cut the hole in the firewall for the master cylinder but that's the extent of it it. Seeing three pedals makes me very excited for the future of this car.
4 points
-
Dragged some pine logs from a tree that fell down, if you get stuck this thing digs holes till it’s down to the diff in the ground.
4 points
-
Bonus images. Big thanks to these guys Kieran, stan and the other boys for the endless pumping of the brake pedal.
4 points
-
Humour mostly3 points
-
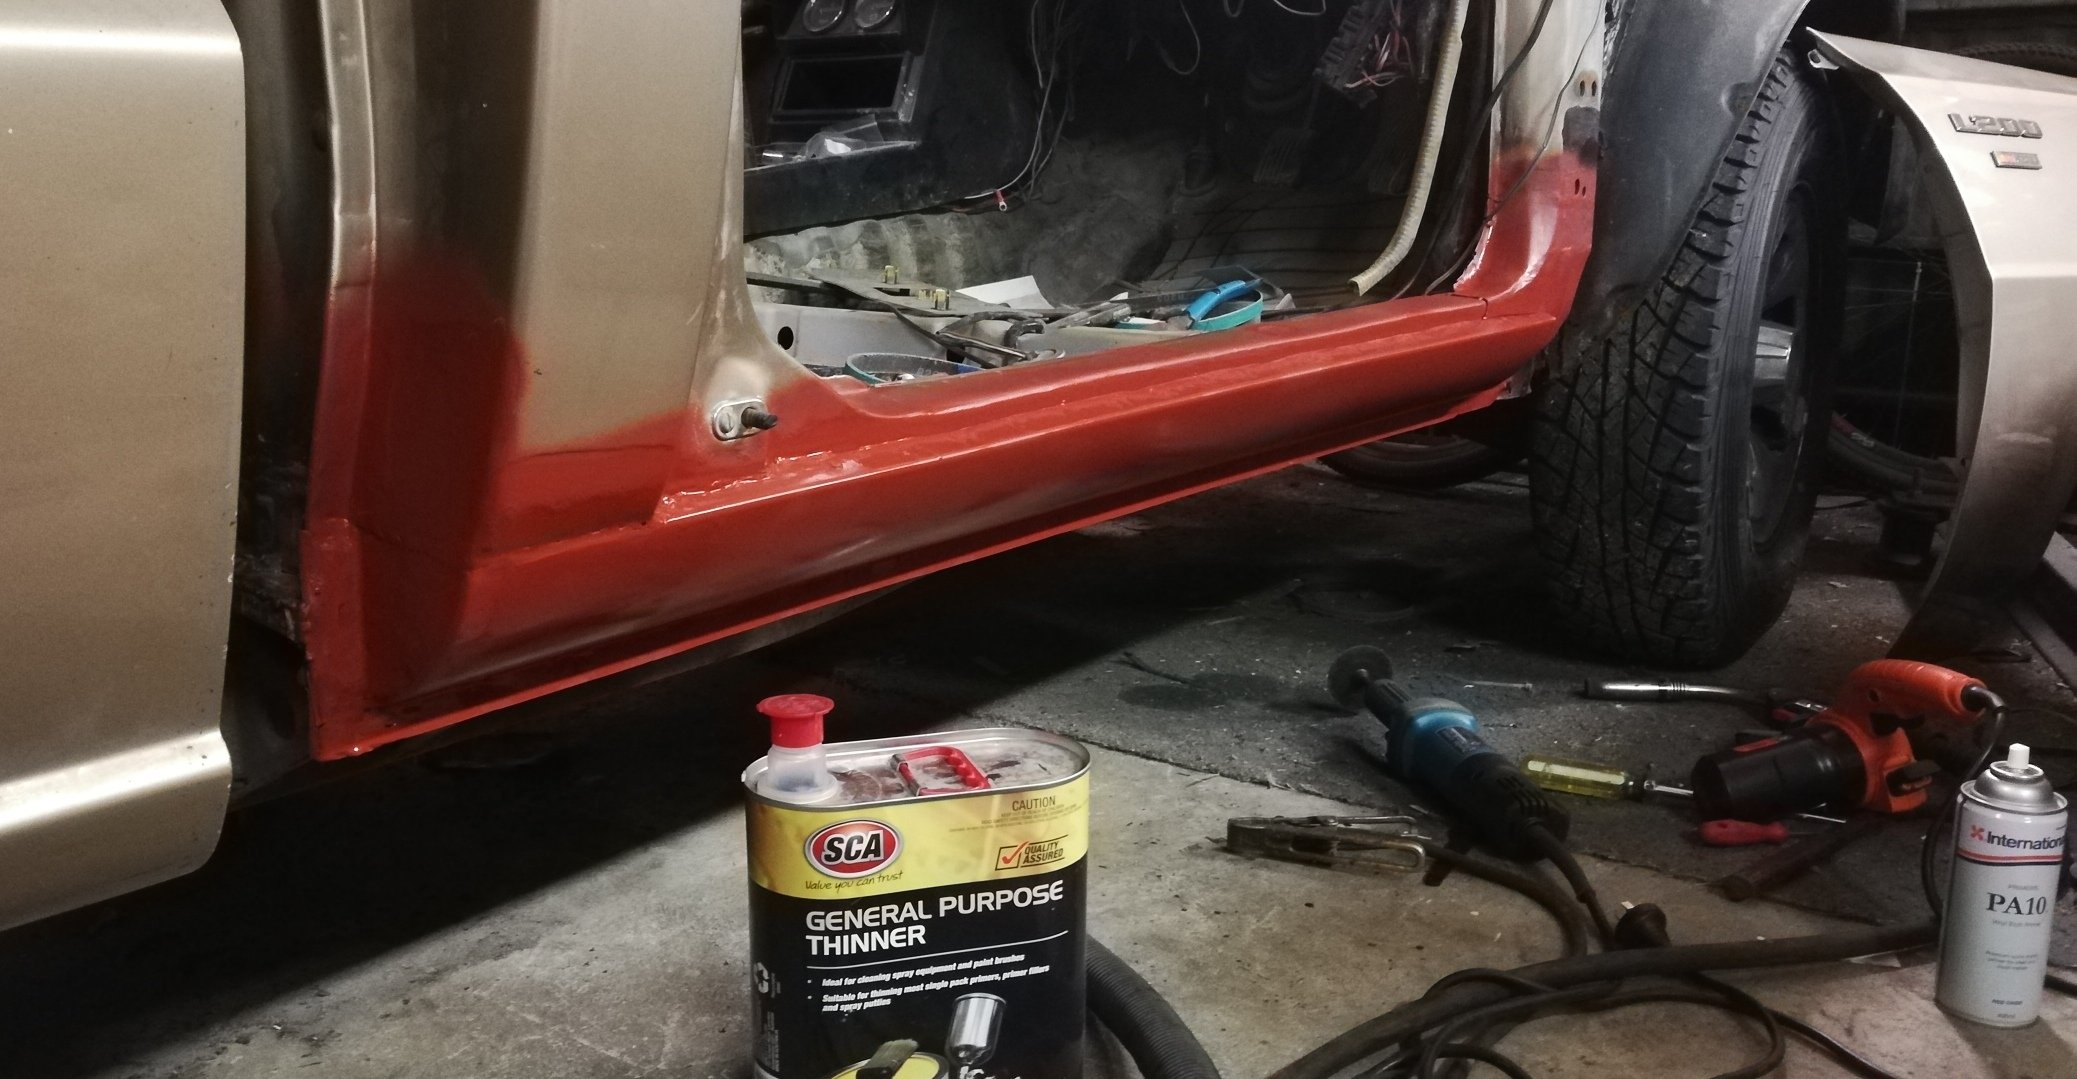
Door is being a pain in the ass to hang. The problem being that every point of reference has been dicked. Got the lines pretty good, but the bottom of the door over hangs the sill by a good 1cm in places How, I measured and checked everything and used the other door frame for reference. The sill is dead straight. Oh the door is bent Some hammer and dolly work and it's coming into shape. Looking at unmolested utes, there is a prominent angle here. Mine is smooth and bulbus . I assume it was either bent out to match the previous sill, or was bent already and the bogged the sill to match. (Same issue with the roof lines, bogged over and rounded off)
3 points
-
@EpochNZ I'm afraid so, there are still other 110s there but nothing to think of saving. They are still out there though if you know where to look!2 points
-
So the orange skoda will only live on in my dreams amidst regrets of the one that got away...2 points
-
Fuck that thing has more mongrel than Garry Glitter in a Minor2 points
-
Fine tunned everything pretty happy dont work on mondays so hopfully take for a real good ride but happy thats its all worming agian
2 points
-
Yup stones. My bike didnt make it there either but still a great weekend2 points
-
Stones? Man that's great around the fire drum while listening to a triumph herald based trike skid into the crowd2 points
-
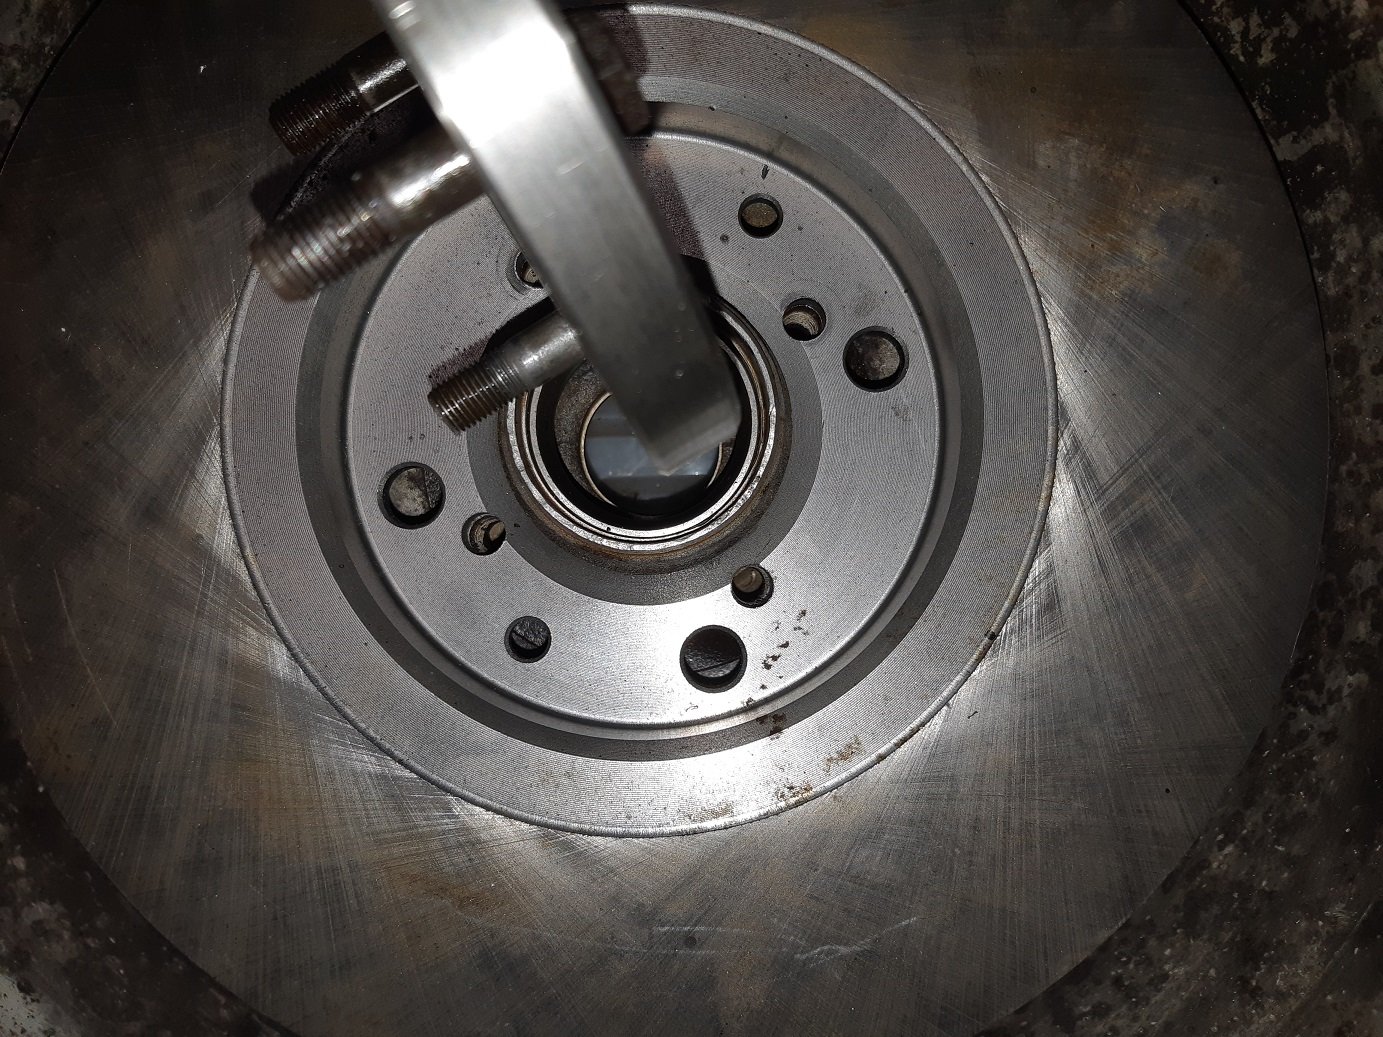
The "adaptor' is called a tophat, as a rule of thumb they are usually fitted with 6,8 or 10 bolts. As long as it's not a floating setup 6x 6mm is fine, the torque is not transmitted through the shear of the bolts it's transmitted through the friction from the two surfaces being clamped together. Nothing wrong with the tie wire's at all (everything on a race car tries to undo itself!). By the look of the radial surface cracks they've done some work and had some heat in them.2 points
-
Put this shit in a storage shed two years ago. Dragged it into 'current projects' shed last night. #barnfind
2 points
-
I’d been keeping any eye on a bloke in Whangerai who had been trying to sell a 186 on TM while doing his damndest to scare off any potential buyer by abusing anyone who had the audacity to ask a question on his auction. God I love those grumpy old traders! He was insisting that someone had painted the standard head yellow and refused to post any pictures of the inlet ports. After some months of his relisting I finally put the poor deluded old sod out of his misery by buying it for $300. An early 2-hour drive had me rolling down his driveway at 8 am in the morning, one look at the inlet ports confirmed it had at least a stage 2 Yellow Terra head. When I suggested that as an honest principled rogue, I felt a moral obligation to throw a little more coin in the pot he started accusing me of being a ‘lying young upstart that was talking through a hole in his f***ing head’. As I beat a hasty retreat up the driveway waiting for him to set the dogs on me (with the booty in the back of the van) I had to admit that at 63 years of age, despite the verbal tirade it was great to be called ‘young’ – ya gotta love those grumpy old guys! Couldn’t wait for to to get the head off but work pressure had me waiting for the weekend. As I said in the 1st post of this thread ‘sometimes you just get lucky’ - I stuck it in the engine stand, flipped its lid off and discovered a rather virgin stage 3 Yella Terra covered with the type of carbon that only prolonged over rich running can ever produce. Double valve springs and classic 70’s inlet porting. And just relish in the vintage YT valves! Once cleaned up the flat top 30 thou over pistons felt firm in the bore so Rigamortice and I made the call that we’ll clean up the head, sort out the appropriate sump/pickup combo and see how it runs.
2 points
-
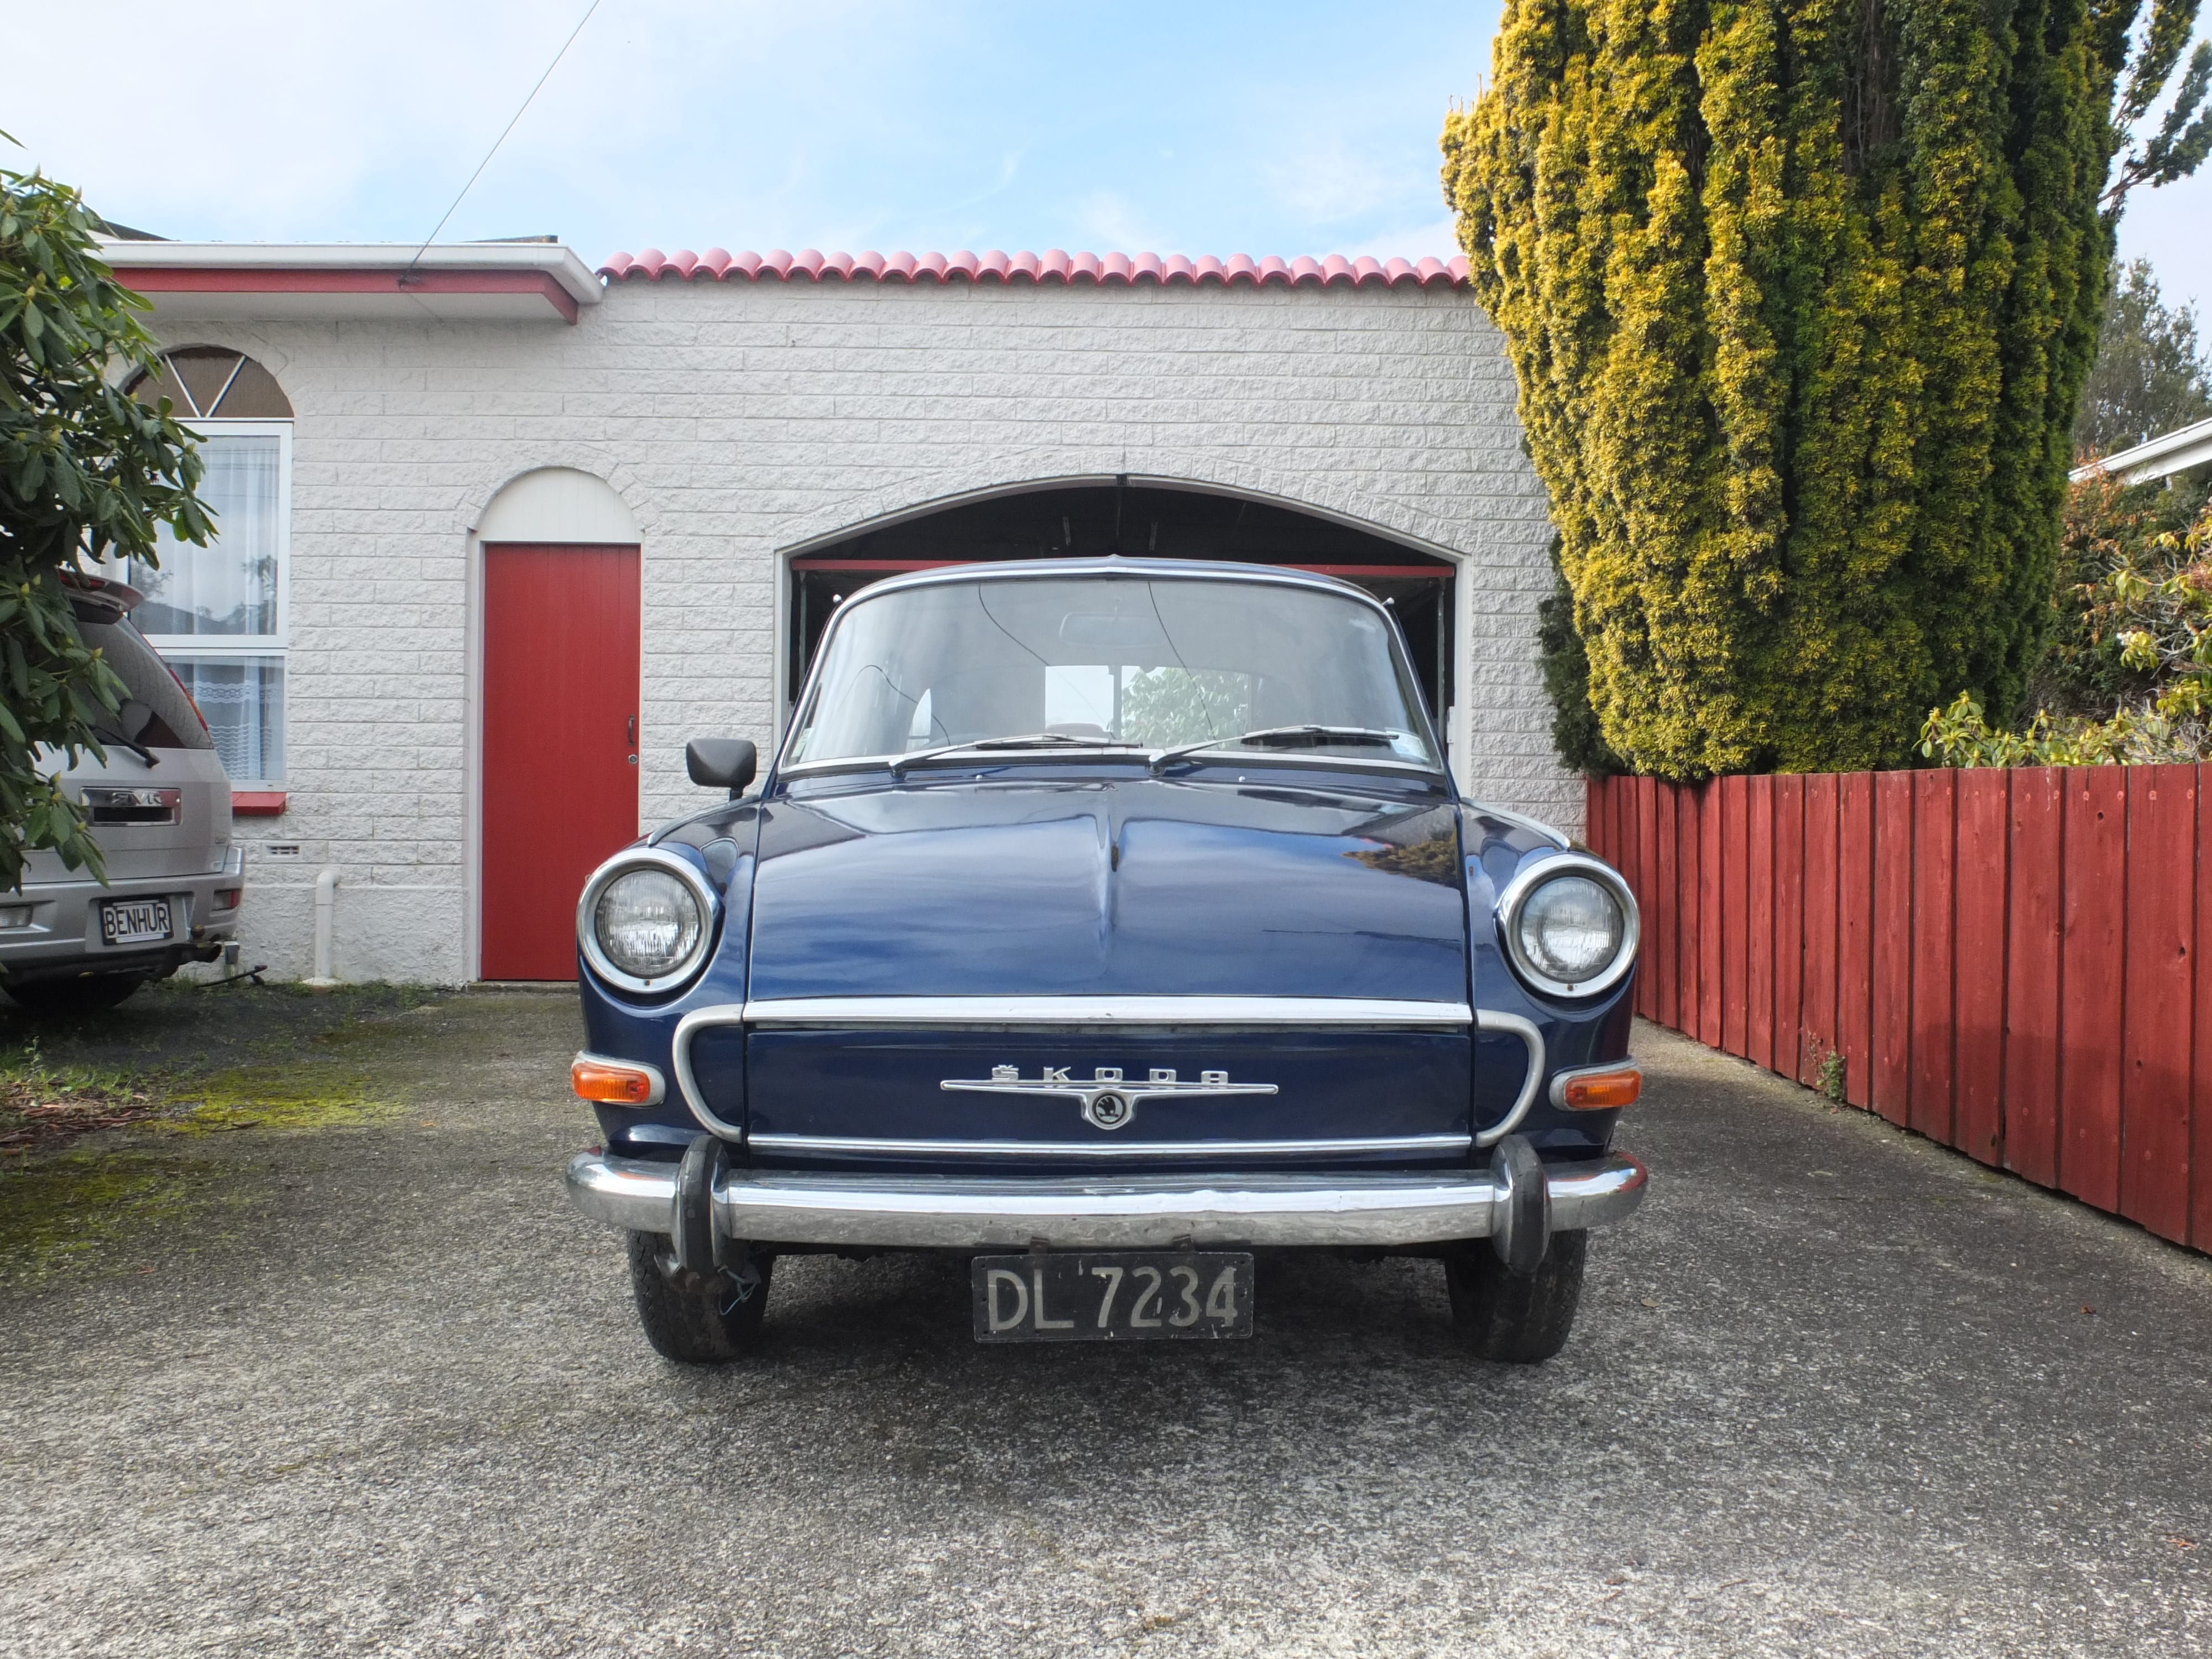
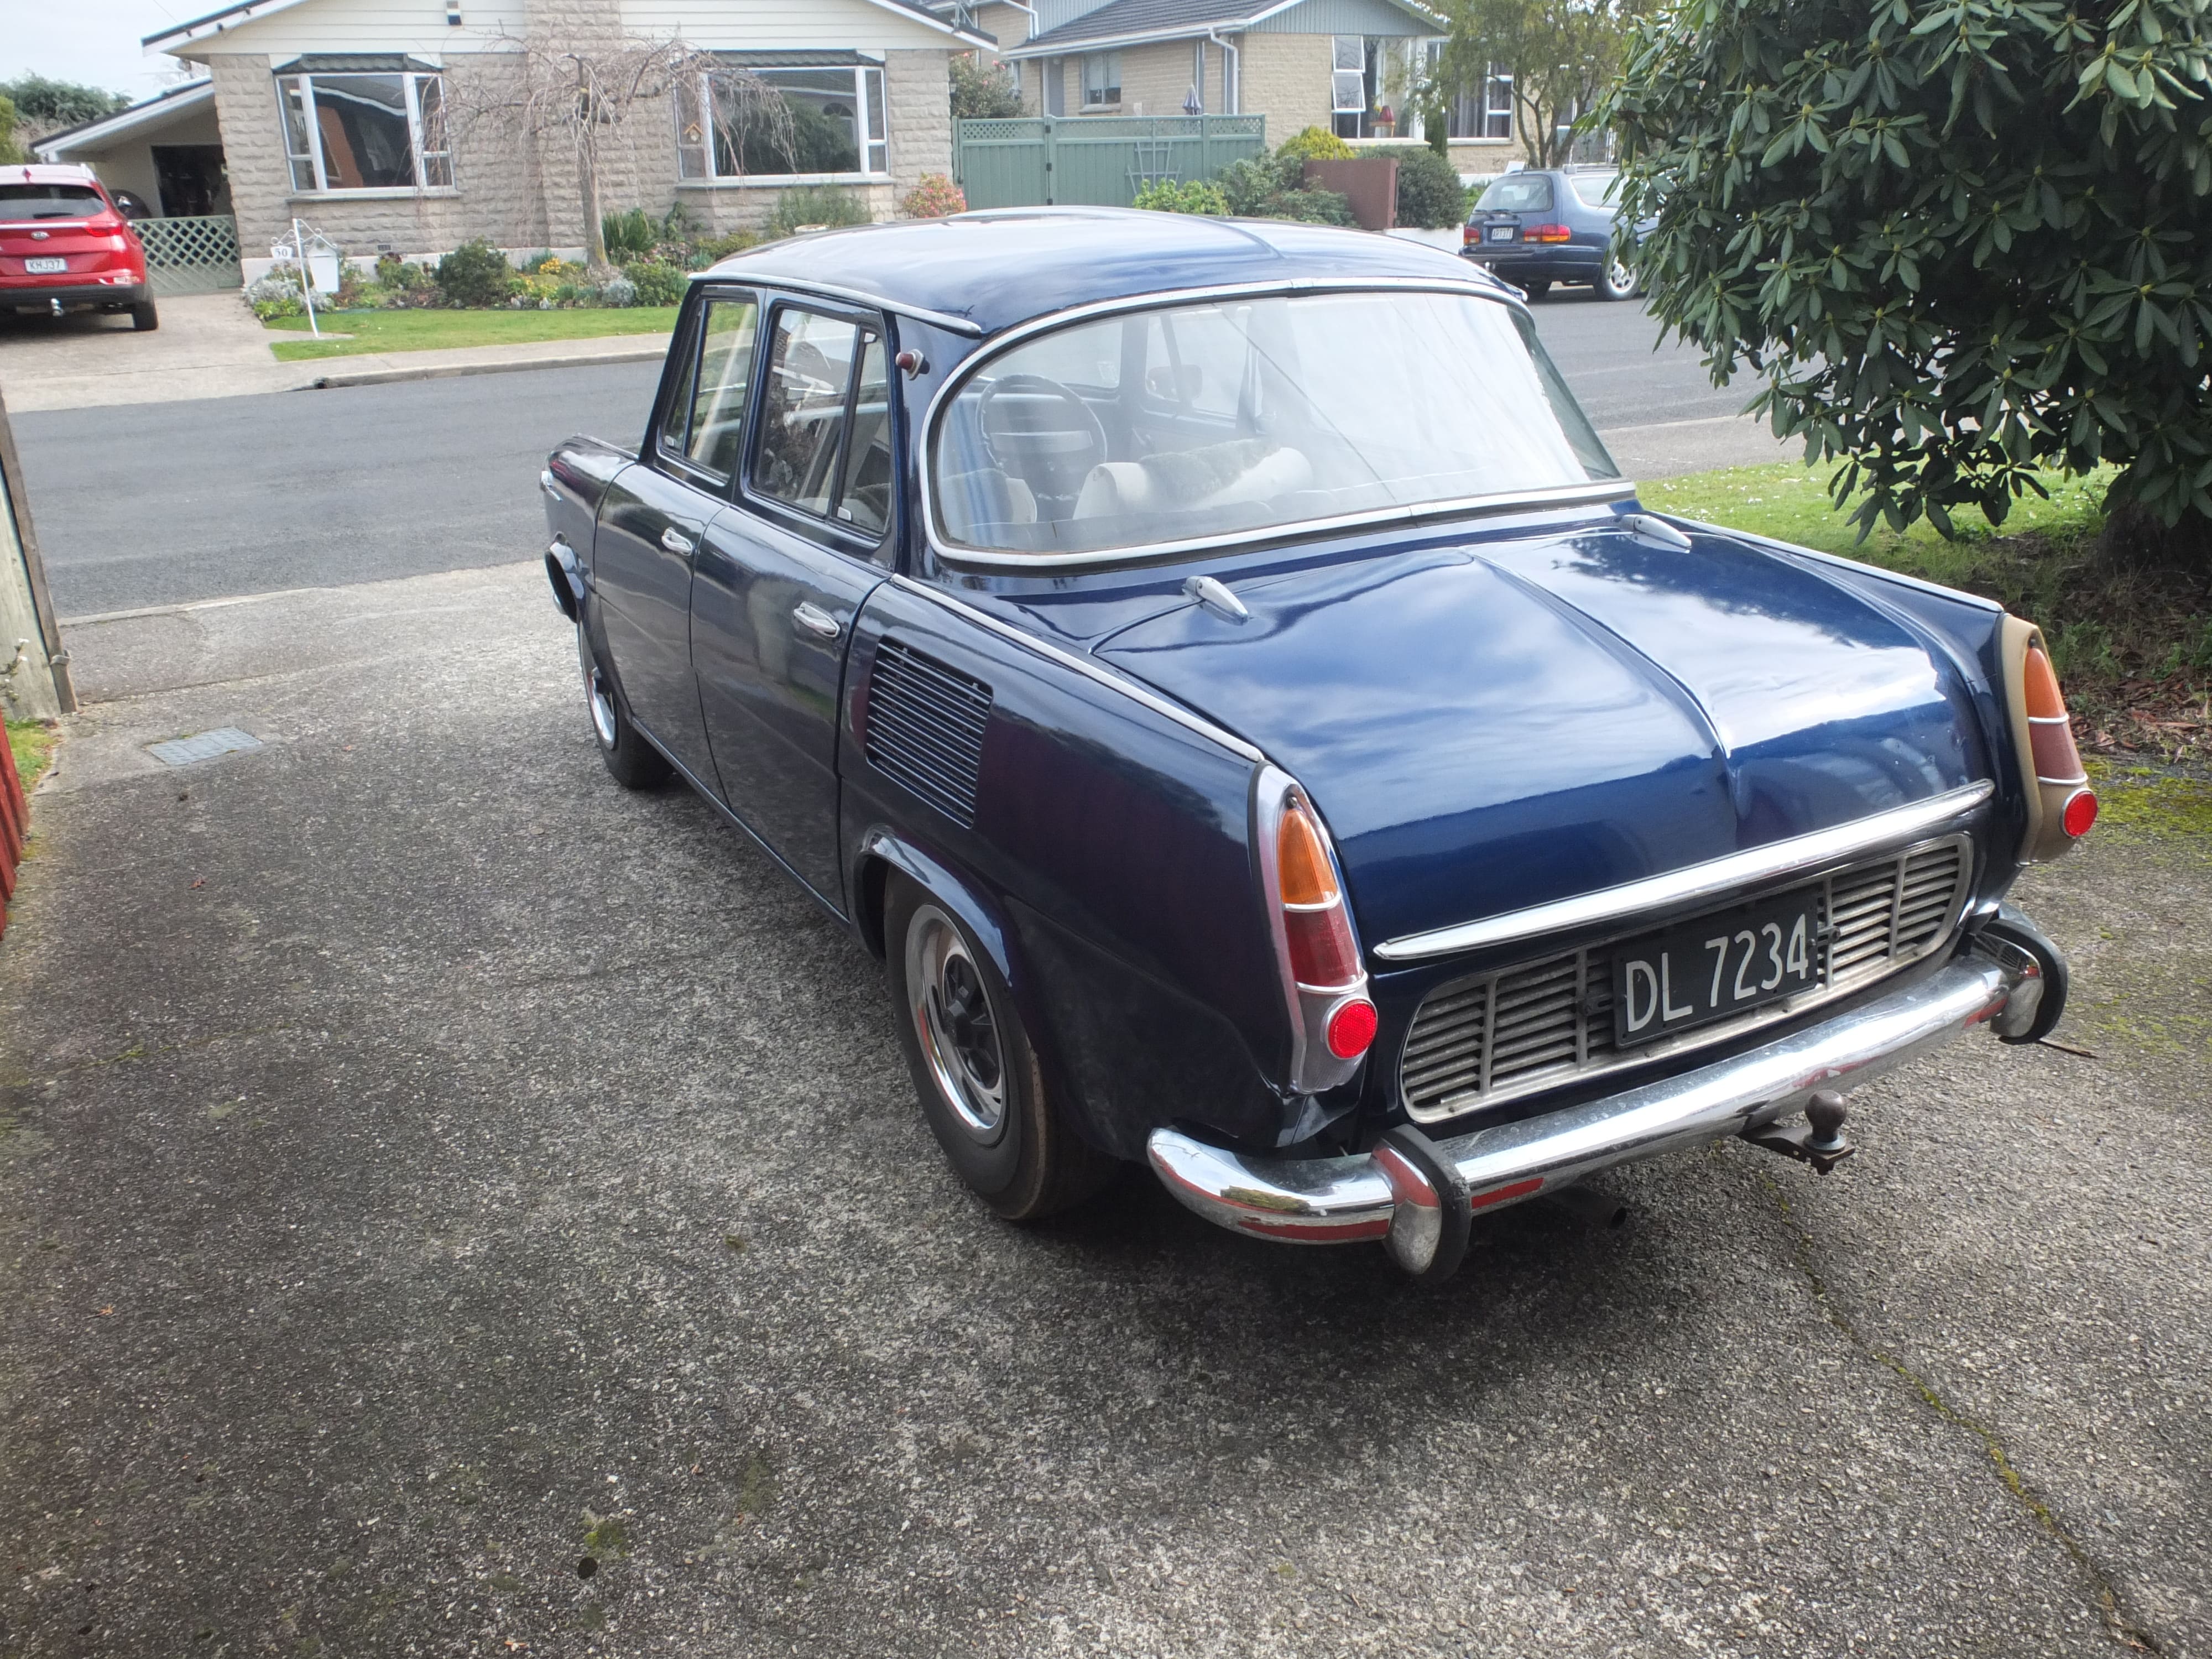
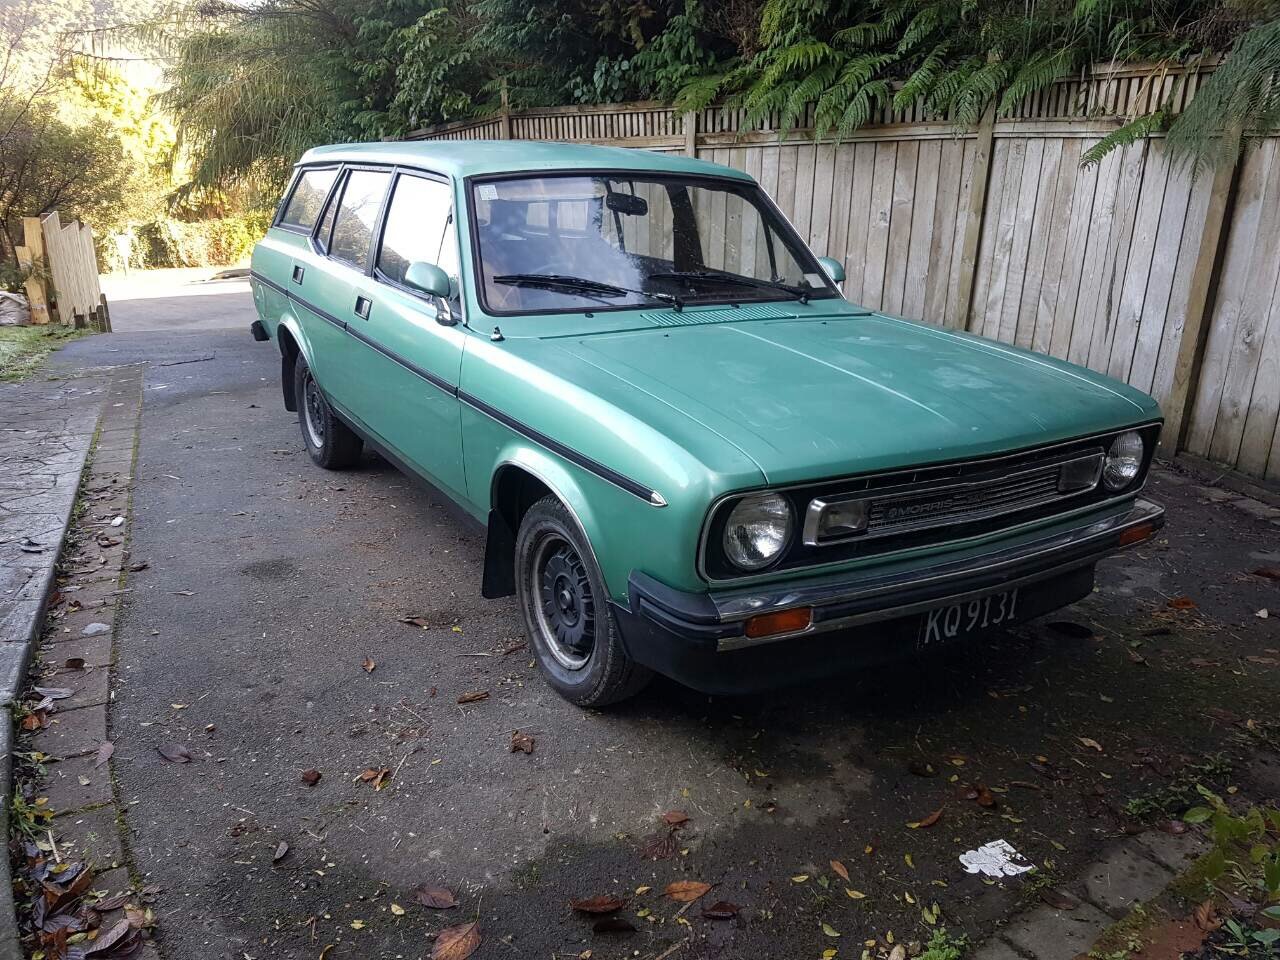
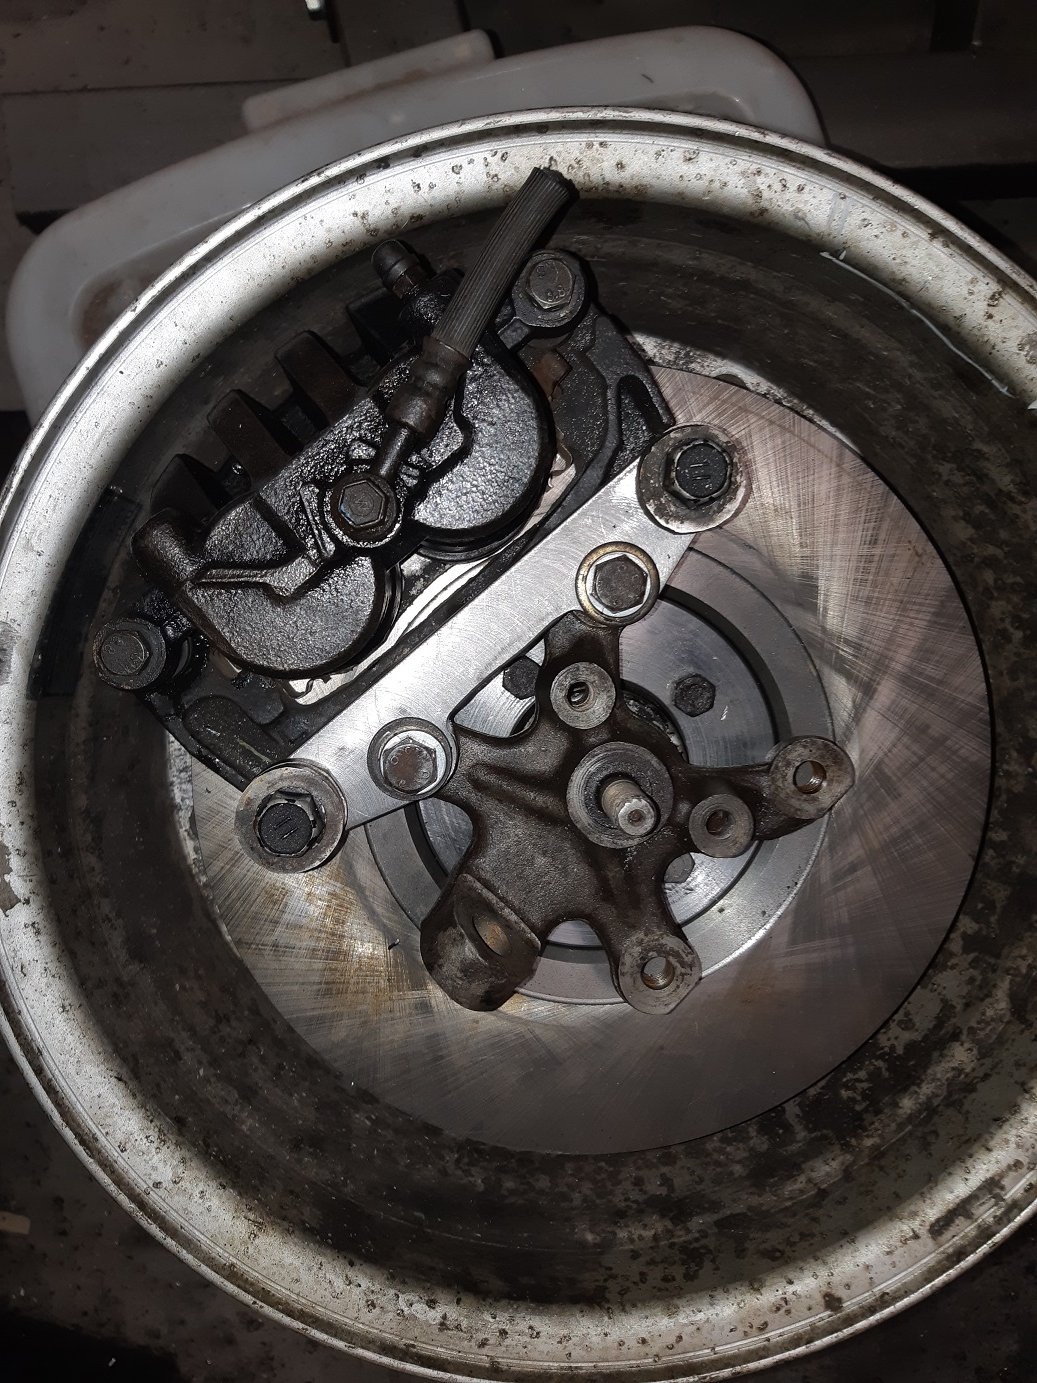
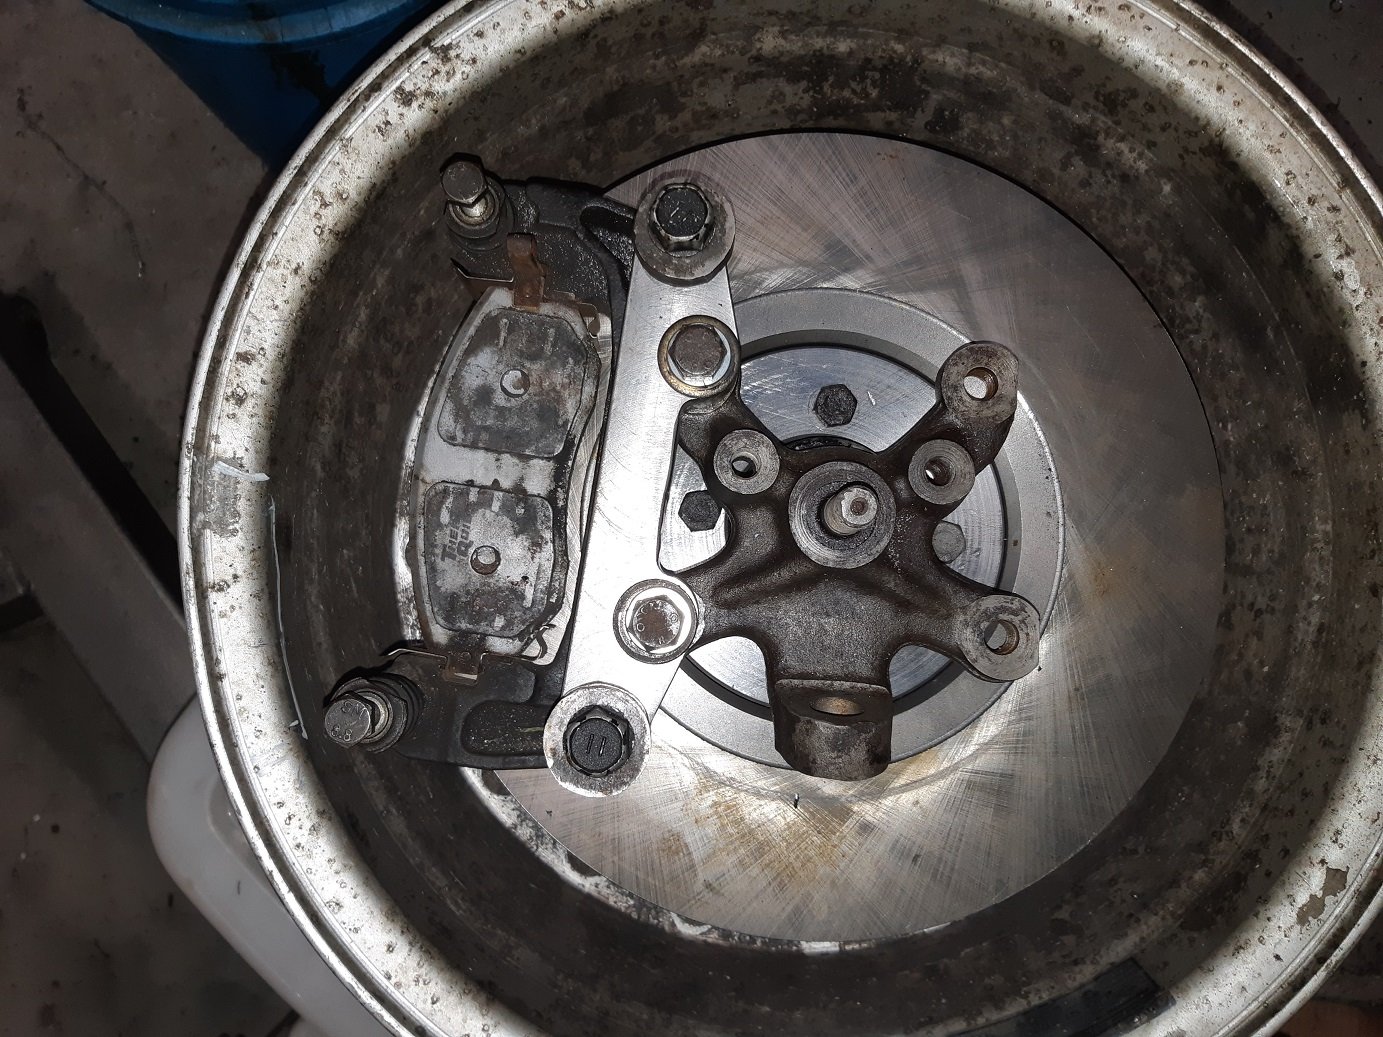
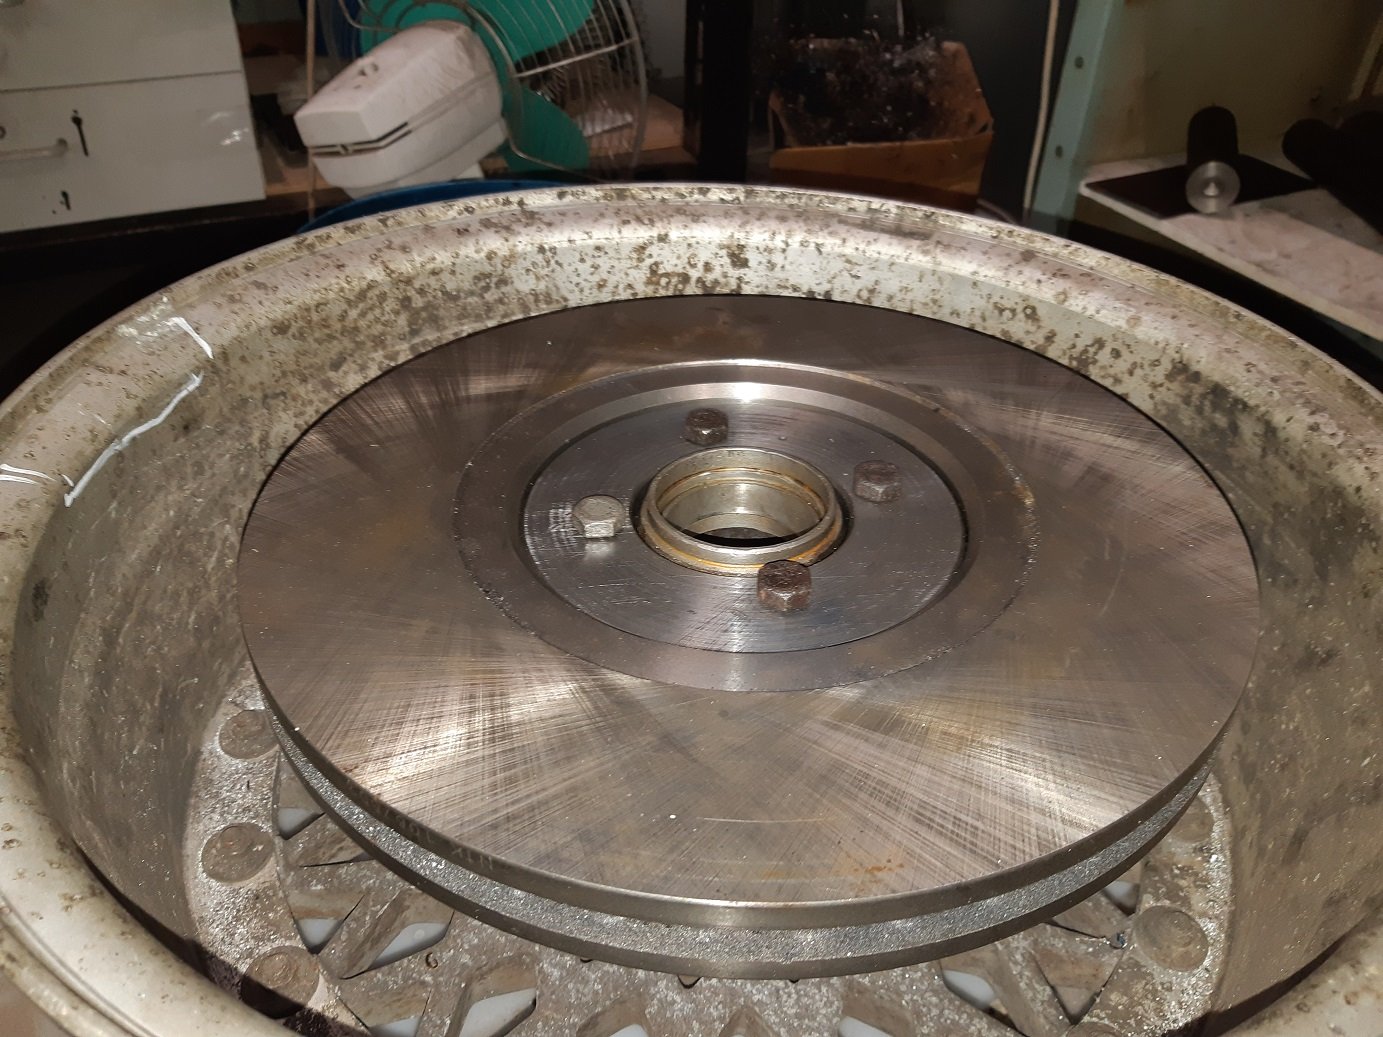
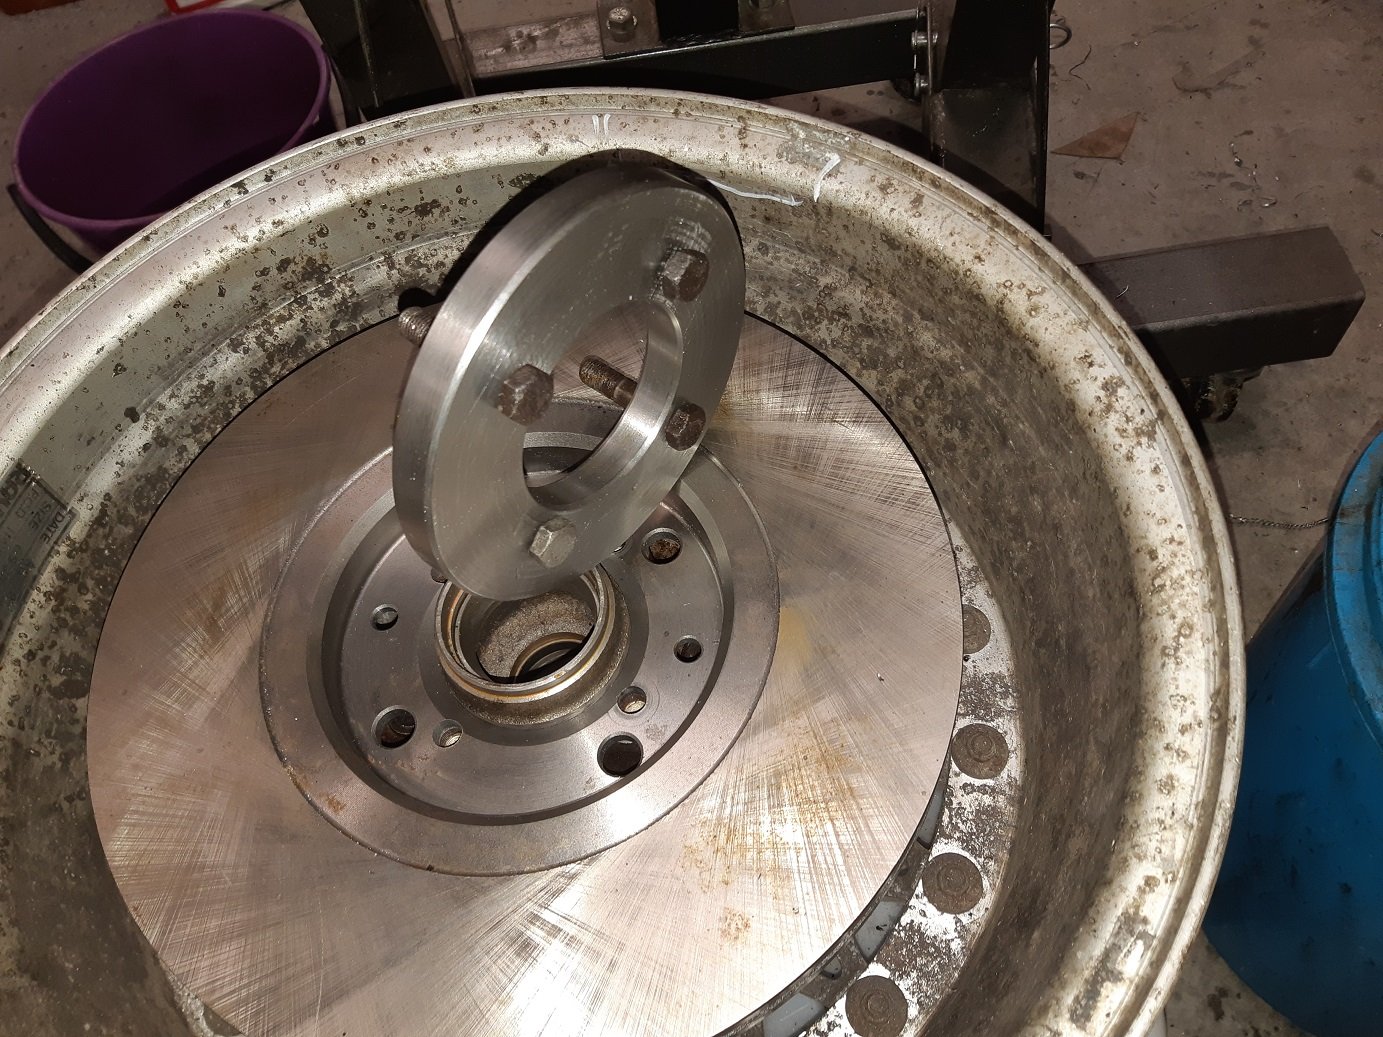
LINK TO DISCUSSION: Okay so I've been on the site for a while but contributed very little to date so here it is. This is my 1969 Skoda Sabre (1000MB outside of NZ), was my Grandfathers and comes with lots of parts. Rego is currently on hold, failed its wof a few weeks ago on tyres and a leaking brake cylinder and it should be back on the road in a few months. Plans are to convert to 5-speed (have a gearbox waiting) and potentially get a 1300cc motor from a Favorit too. All long-ish term plans subject to time, space, money etc so they might change. First though will be to swap out the existing front axle for a later 110L model to get front disc brakes and to do some interior work like headlining, carpets etc. Anyway here are some recent photos.
1 point
-
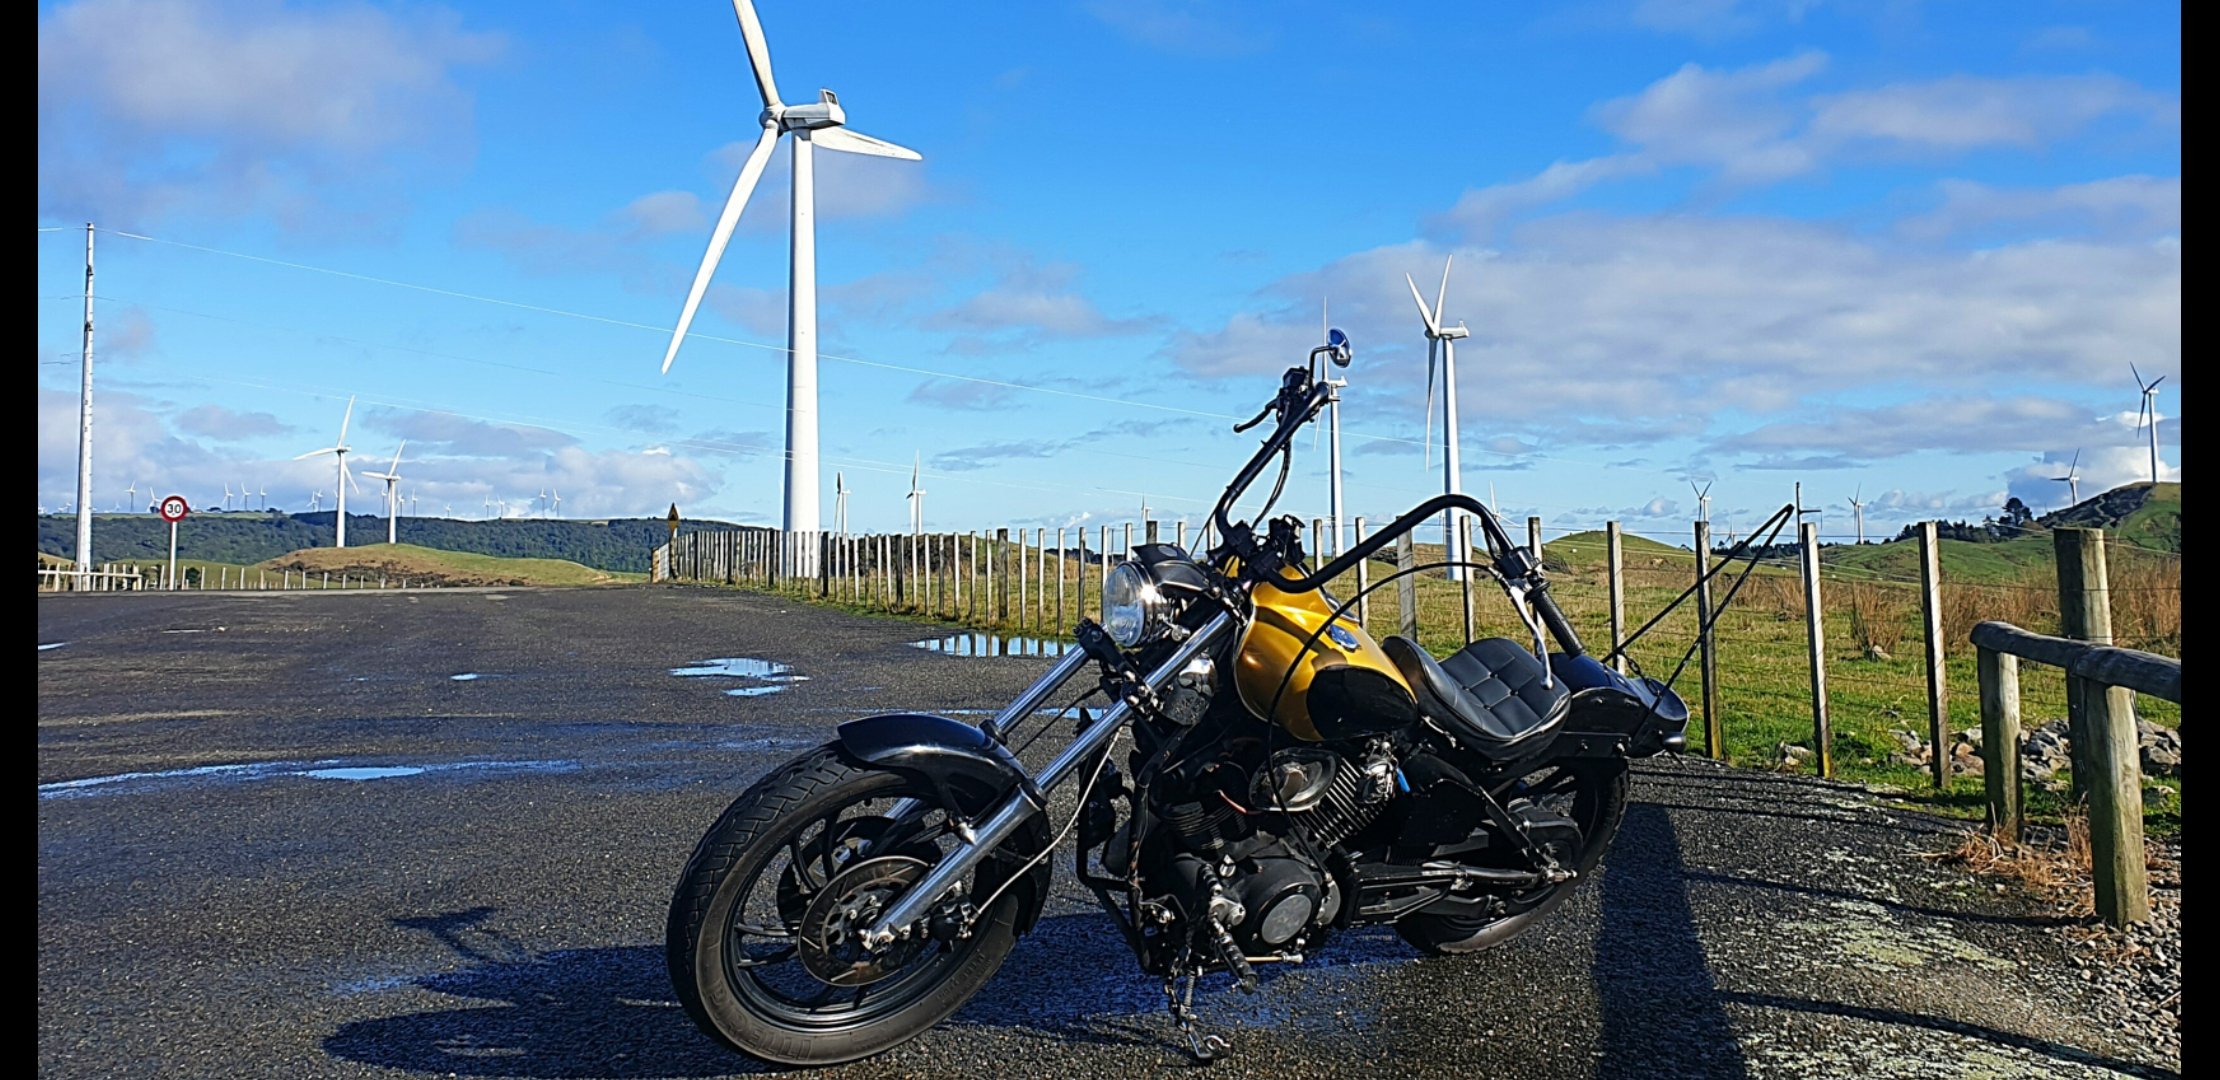
Hey guys new to this page. Heres my bike a yamaha xv1000 ive had for a yeat and ridin it eveywere located in palmerston north. Cheers
1 point
-
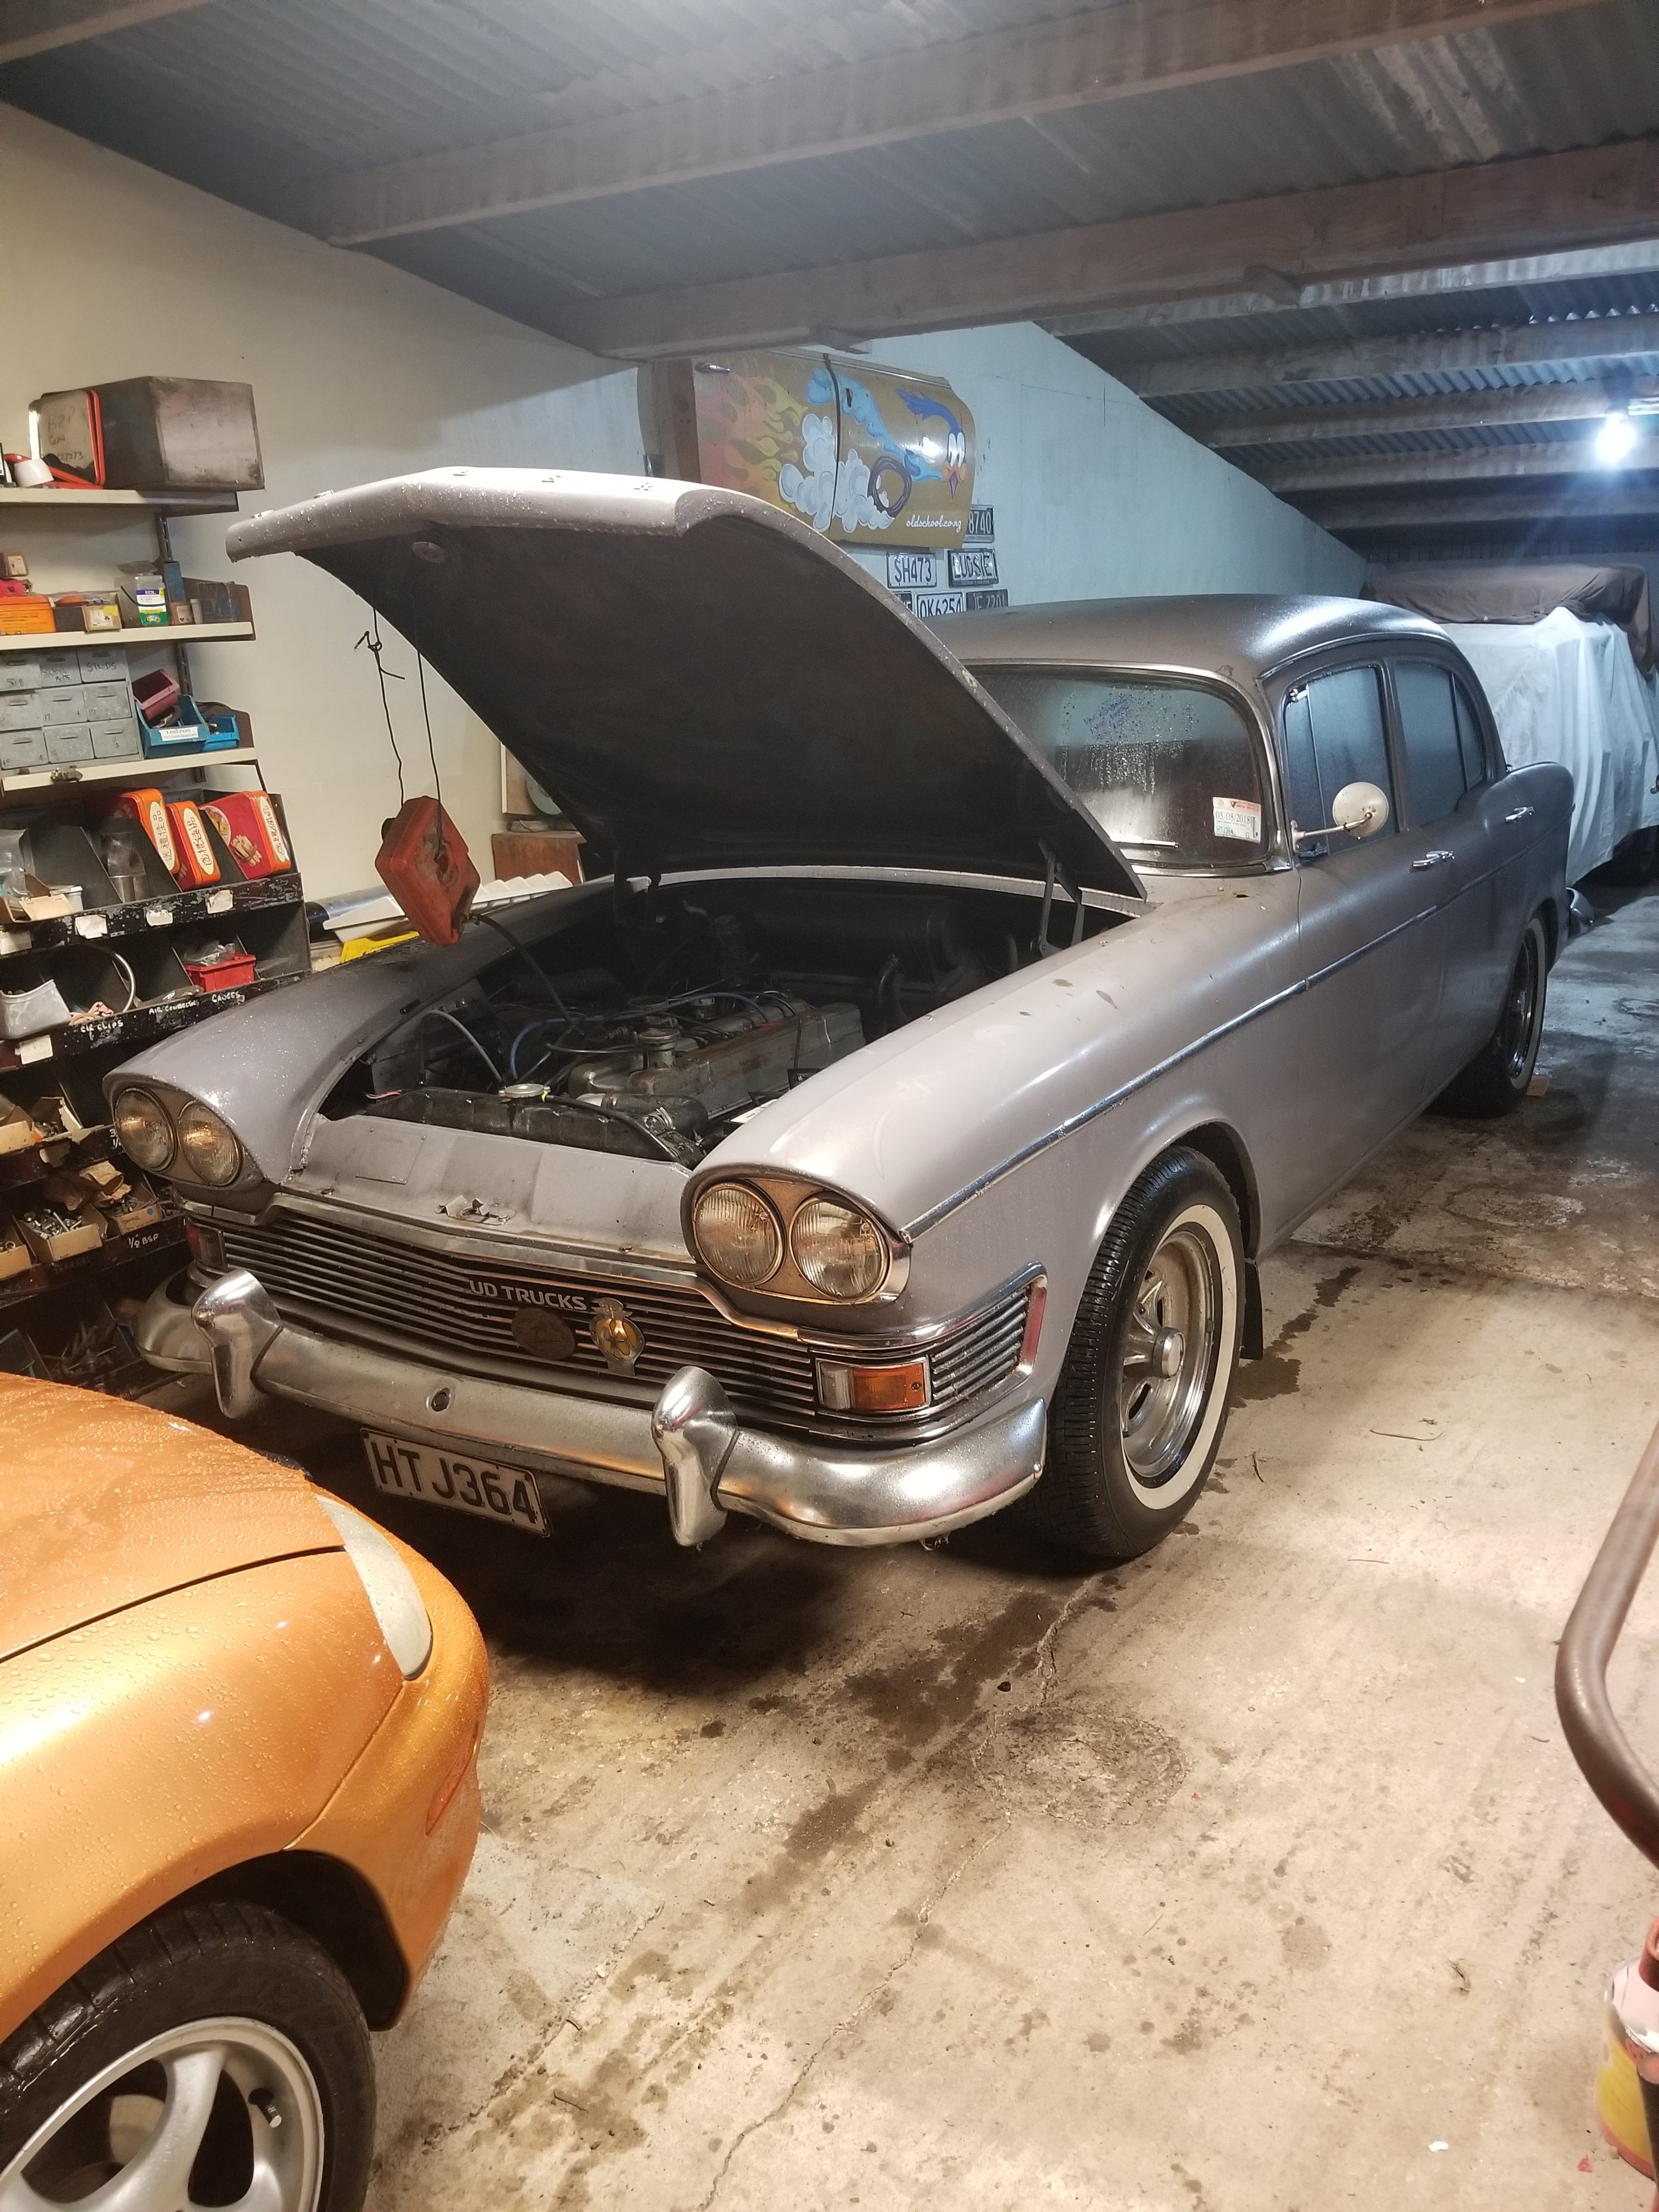
Hi folks, just realised I hadn’t posted this up yet. I think this car made a brief appearance on the British cars thread. It’s now mine and currently in my driveway awaiting fixing. Main work is going to be engine as it needs a rebuild or an alternative sourced, very Smokey!
1 point
-
Goddam that's on a slant1 point
-
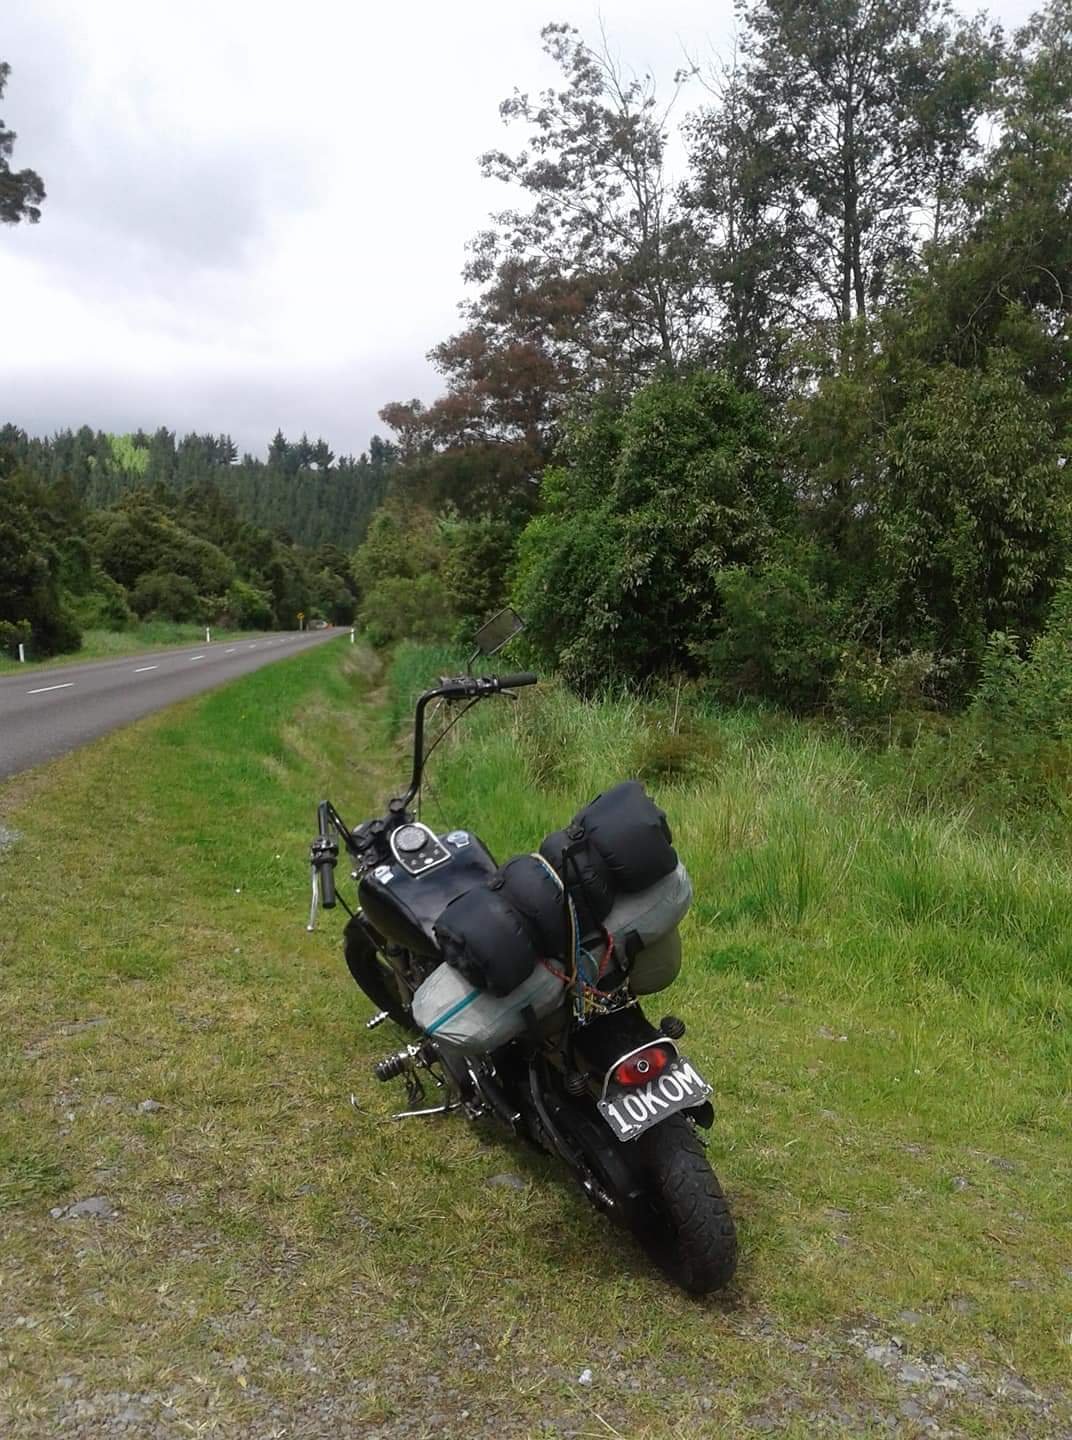
The republic of Whangamomona and 42nd traverse ride claimed a fork seal and chain roller on the NBC, so I actually have to do something to it. Unbelievable.1 point
-
As mentioned previously, I'm having some running issues and I need to try and work out what it is. The issue has been getting worse the more I run and drive the car. It previously only happened under load at about 4000rpm, where the engine would fall on its face and cut out like you had turned the key off. If you kept the throttle steady it would recover with a surge as the revs dropped, but as soon as it got up to about 4k again, it would cut out. When stationary, and not under load, it will happily rev to its 6k redline. It's a very annoying issue. I had a couple of suspicions of what it could be, but I needed to do some testing to narrow it down. My first suspicion was that I must be losing spark, as the engine cuts so abruptly and I felt that if it were fuel it would kinda stutter out. The first thing I noticed was that the replacement coil the previous owner had fitted was a Bosch GT40. This is a 12v coil, and from what I have discovered, widely known to have issues with electronic ignitions. Now, the ignition system on my car is both a ballasted system and electronic. A ballasted system runs a resistor on the power feed to the coil, dropping the voltage, meaning the coil doesn't see 12v. So I was already running the coil under voltage. After testing and confirming the resistor was still in place, I removed this coil and refitted the original Ford coil that came with the car. Changing this resulted to a smoother idle (maybe, but probably a placebo), but the engine still cut out. The next thing was to check the lead positions, cap and rotor. I note that the cap and rotor have been replaced, and the old ones were with the car. The old cap is stuffed, but the old rotor looked OK, so I swapped that in after a quick clean. No change. Next was to confirm if I did lose spark or not. The only way I could think of was by thinking out of the box and using my timing light... So I connected it up, and strapped it to the wiper so I could see it when driving. Sure enough, when the engine cut, the light was still flashing away happily. That indicates I have spark (although, not if I have a good strong spark, but some spark is better than none). So this points me down a different path. I have air, and I have spark. Could it be fuel after all? I posted up on a few forums asking for help, and got some great tips on where to start looking. One of the easiest to do was to check the sensor plate in the AFM was clean. This plate is hinged, and lifts up with airflow as it gets sucked into the engine, which in turn pushes a plunger up and down to control fuel flow. Well, although the top looked reasonably clean, the underside was filthy (probably thanks to the incorrect air filter that was fitted) I gave this a thorough clean and made sure it was spotless. This made no change, but its good to know its clean now. I also, once again, checked the intake tube and boot for splits or cracks, but none found. All vacuum lines (all two or three of them) were checked, all OK. One thing that makes me suspect its possibly fuel, is the state of the new plugs I fitted. Even after a couple of runs around the block, a couple look almost unused. Maybe lean? From 1 to 6 in order. This is leaving a couple of possibilities, ones that I cannot test without further equipment. First is an intake manifold leak or the likes. Today my smoke machine arrived, so I could test this. It's just a cheapie, but makes a good amount of smoke, and has a pump to actually blow it out under pressure. After a quick test, I modified it to work how I needed it to. I salvaged a cap from a CRC rust convertor can, drilled a hole in it, glued some hose into it, and glued the cap onto the front of the smoke machine (as it just has a big nozzle on the front normally, for maximum smoke dispersion in da clubz) This hose then goes into a rubber glove with a finger cut off it. I find using one of these seals the intake pipe nicely with the wrist of the glove, but doesn't crush the rubber hose. I don't know if it's good or bad, but smoke testing the intake shows there are no intake or vacuum leaks. I tested with the throttle open and closed, to check the intake hose for leaks as well as the plenum/manifold, but nothing, not even a weep. So what left? Well, two things really. I need to test the fuel pressures of the system, but because the fuel fittings use banjo bolts and hard lines instead of rubber hoses, I can't use my existing pressure testing kit. I have a new kit on the way, which has all the fittings I need to connect into the KJetronic system. This will tell me if there is an issue with the Warm Up Regulator or the main pressure regulator. The whole system relies on having the correct pressures, so even a few PSI difference can make it all turn to custard. The other thing I need to do, once I have tested the pressures, is to remove the fuel distributor and injectors. I need to see if the plunger in the fuel distributor is clean and moving freely, or if it's sticky. I also need to check the flow and spray pattern from the injectors. It's possible either, or both, of these things are causing an issue. My main theory at the moment is a sticking fuel plunger, which is causing the engine to starve of fuel when it demands more. The worst thing you can do with a KJet system is to leave old fuel in it and not run the car regularly. This car has been off the road for years, and I don't know when it was last started and run, or how old the fuel in the system was. KJet runs at such fine tolerances that even a slight gum or varnish on a component can make it upset. I'm determined to work this issue out and get the KJet working properly as it's a cool system, and one I haven't worked with before. I have everything I need to convert to EFI and Speeduino, but I'm trying hard to resist that urge. Now we wait. Once the pressure test kit arrives, Its game on.1 point
-
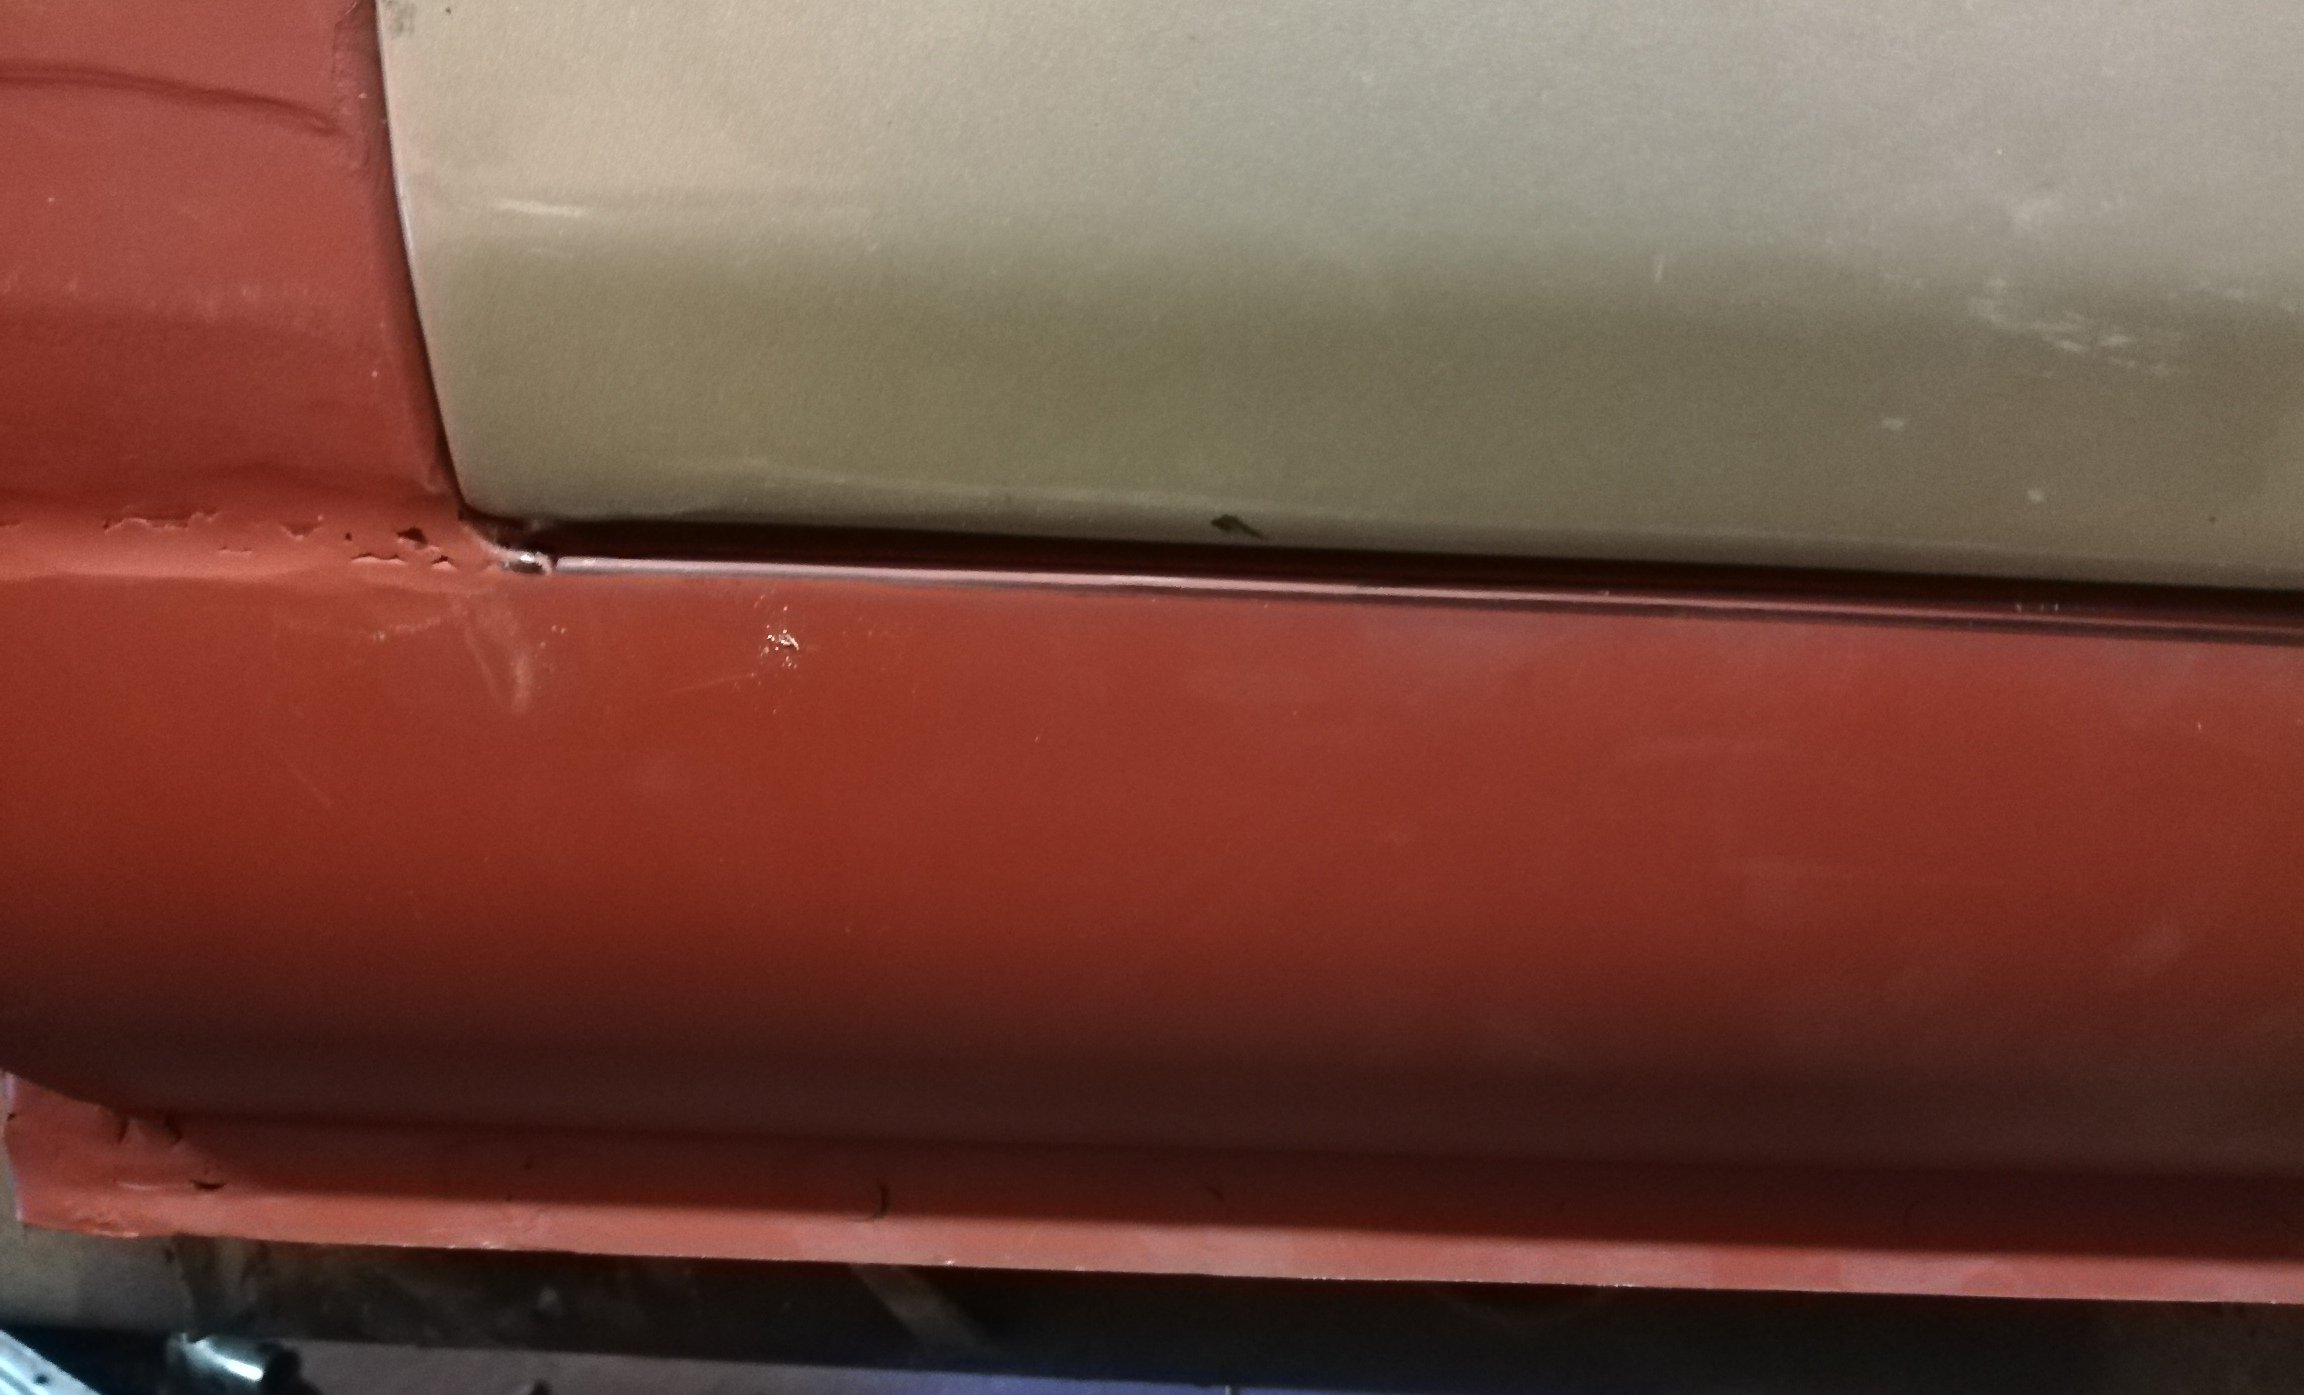
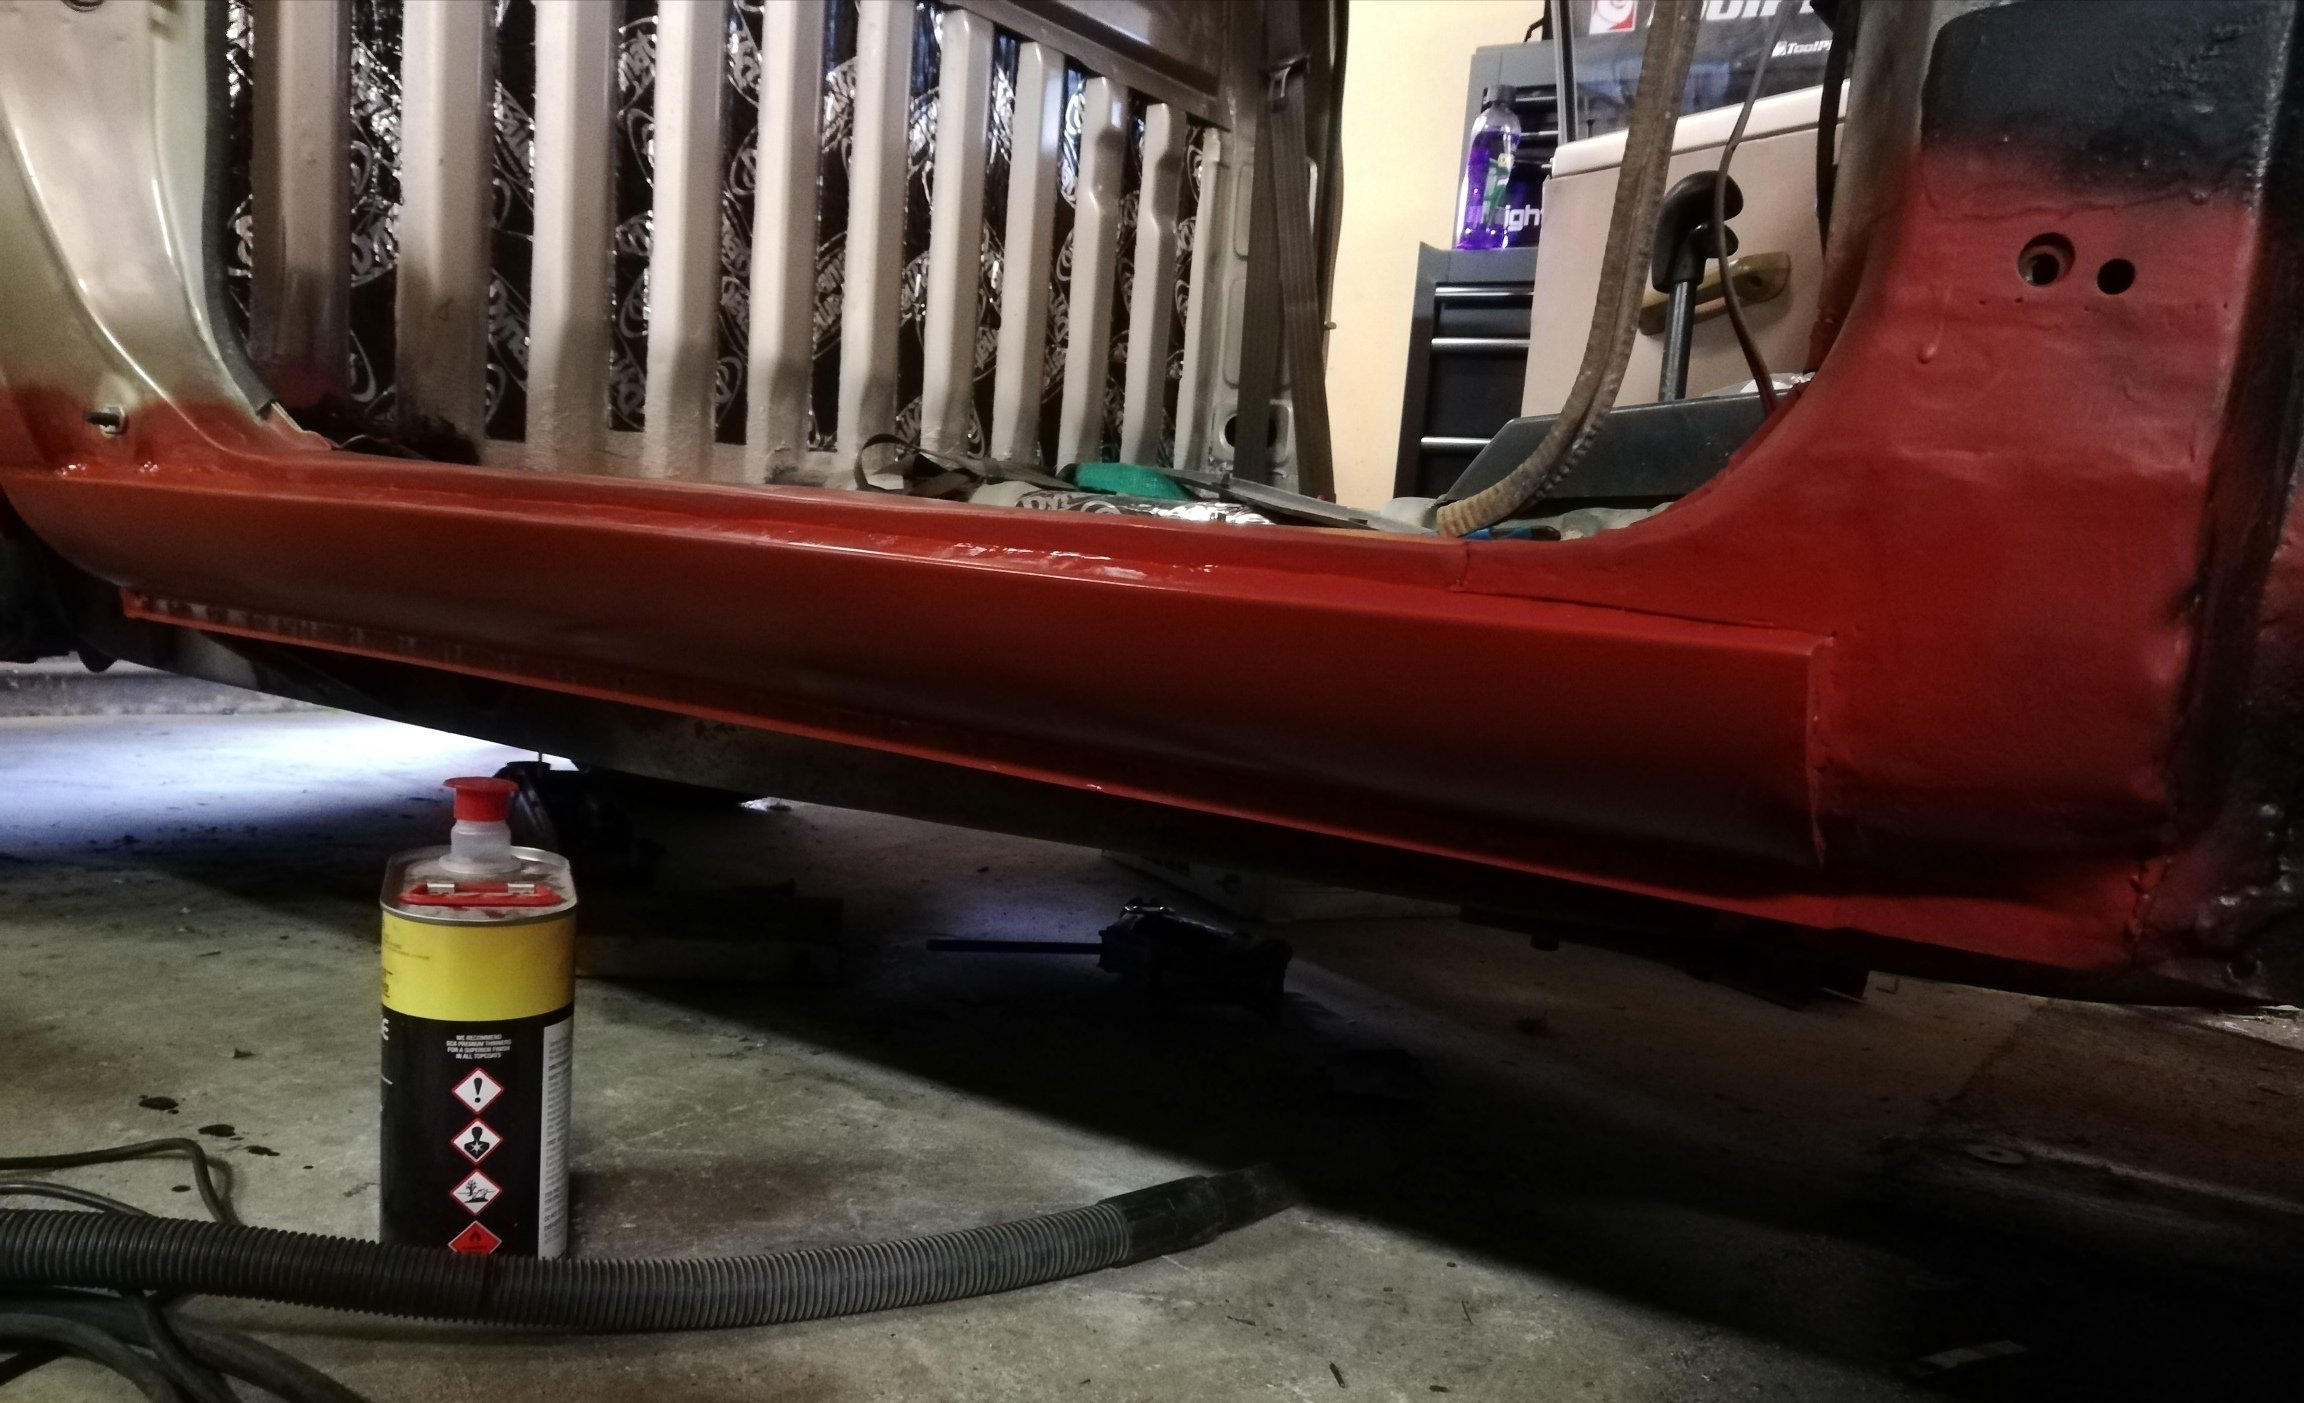
Close enough Fender is a reproduction, so I made a best guess as to panel gap. A little filler, a little seam seal and she's seamless
1 point
-
Flywheel and heavy duty clutch acquired. Have the flywheel a quick sand blast and will machine the surface before fitment. Have ordered, Input bearing Flywheel bolts Pressure plate bolts Pressure plate dowels Rear main seal Still needed, Slave cylinder Maybe a master / I have one from an old corona which is maybe the same. The hosing that goes between it.
1 point
-
This is a test photo to see the quality of pictures. Have been through 3 phones since last time posting and I'm sending them through fb messenger.
1 point
-
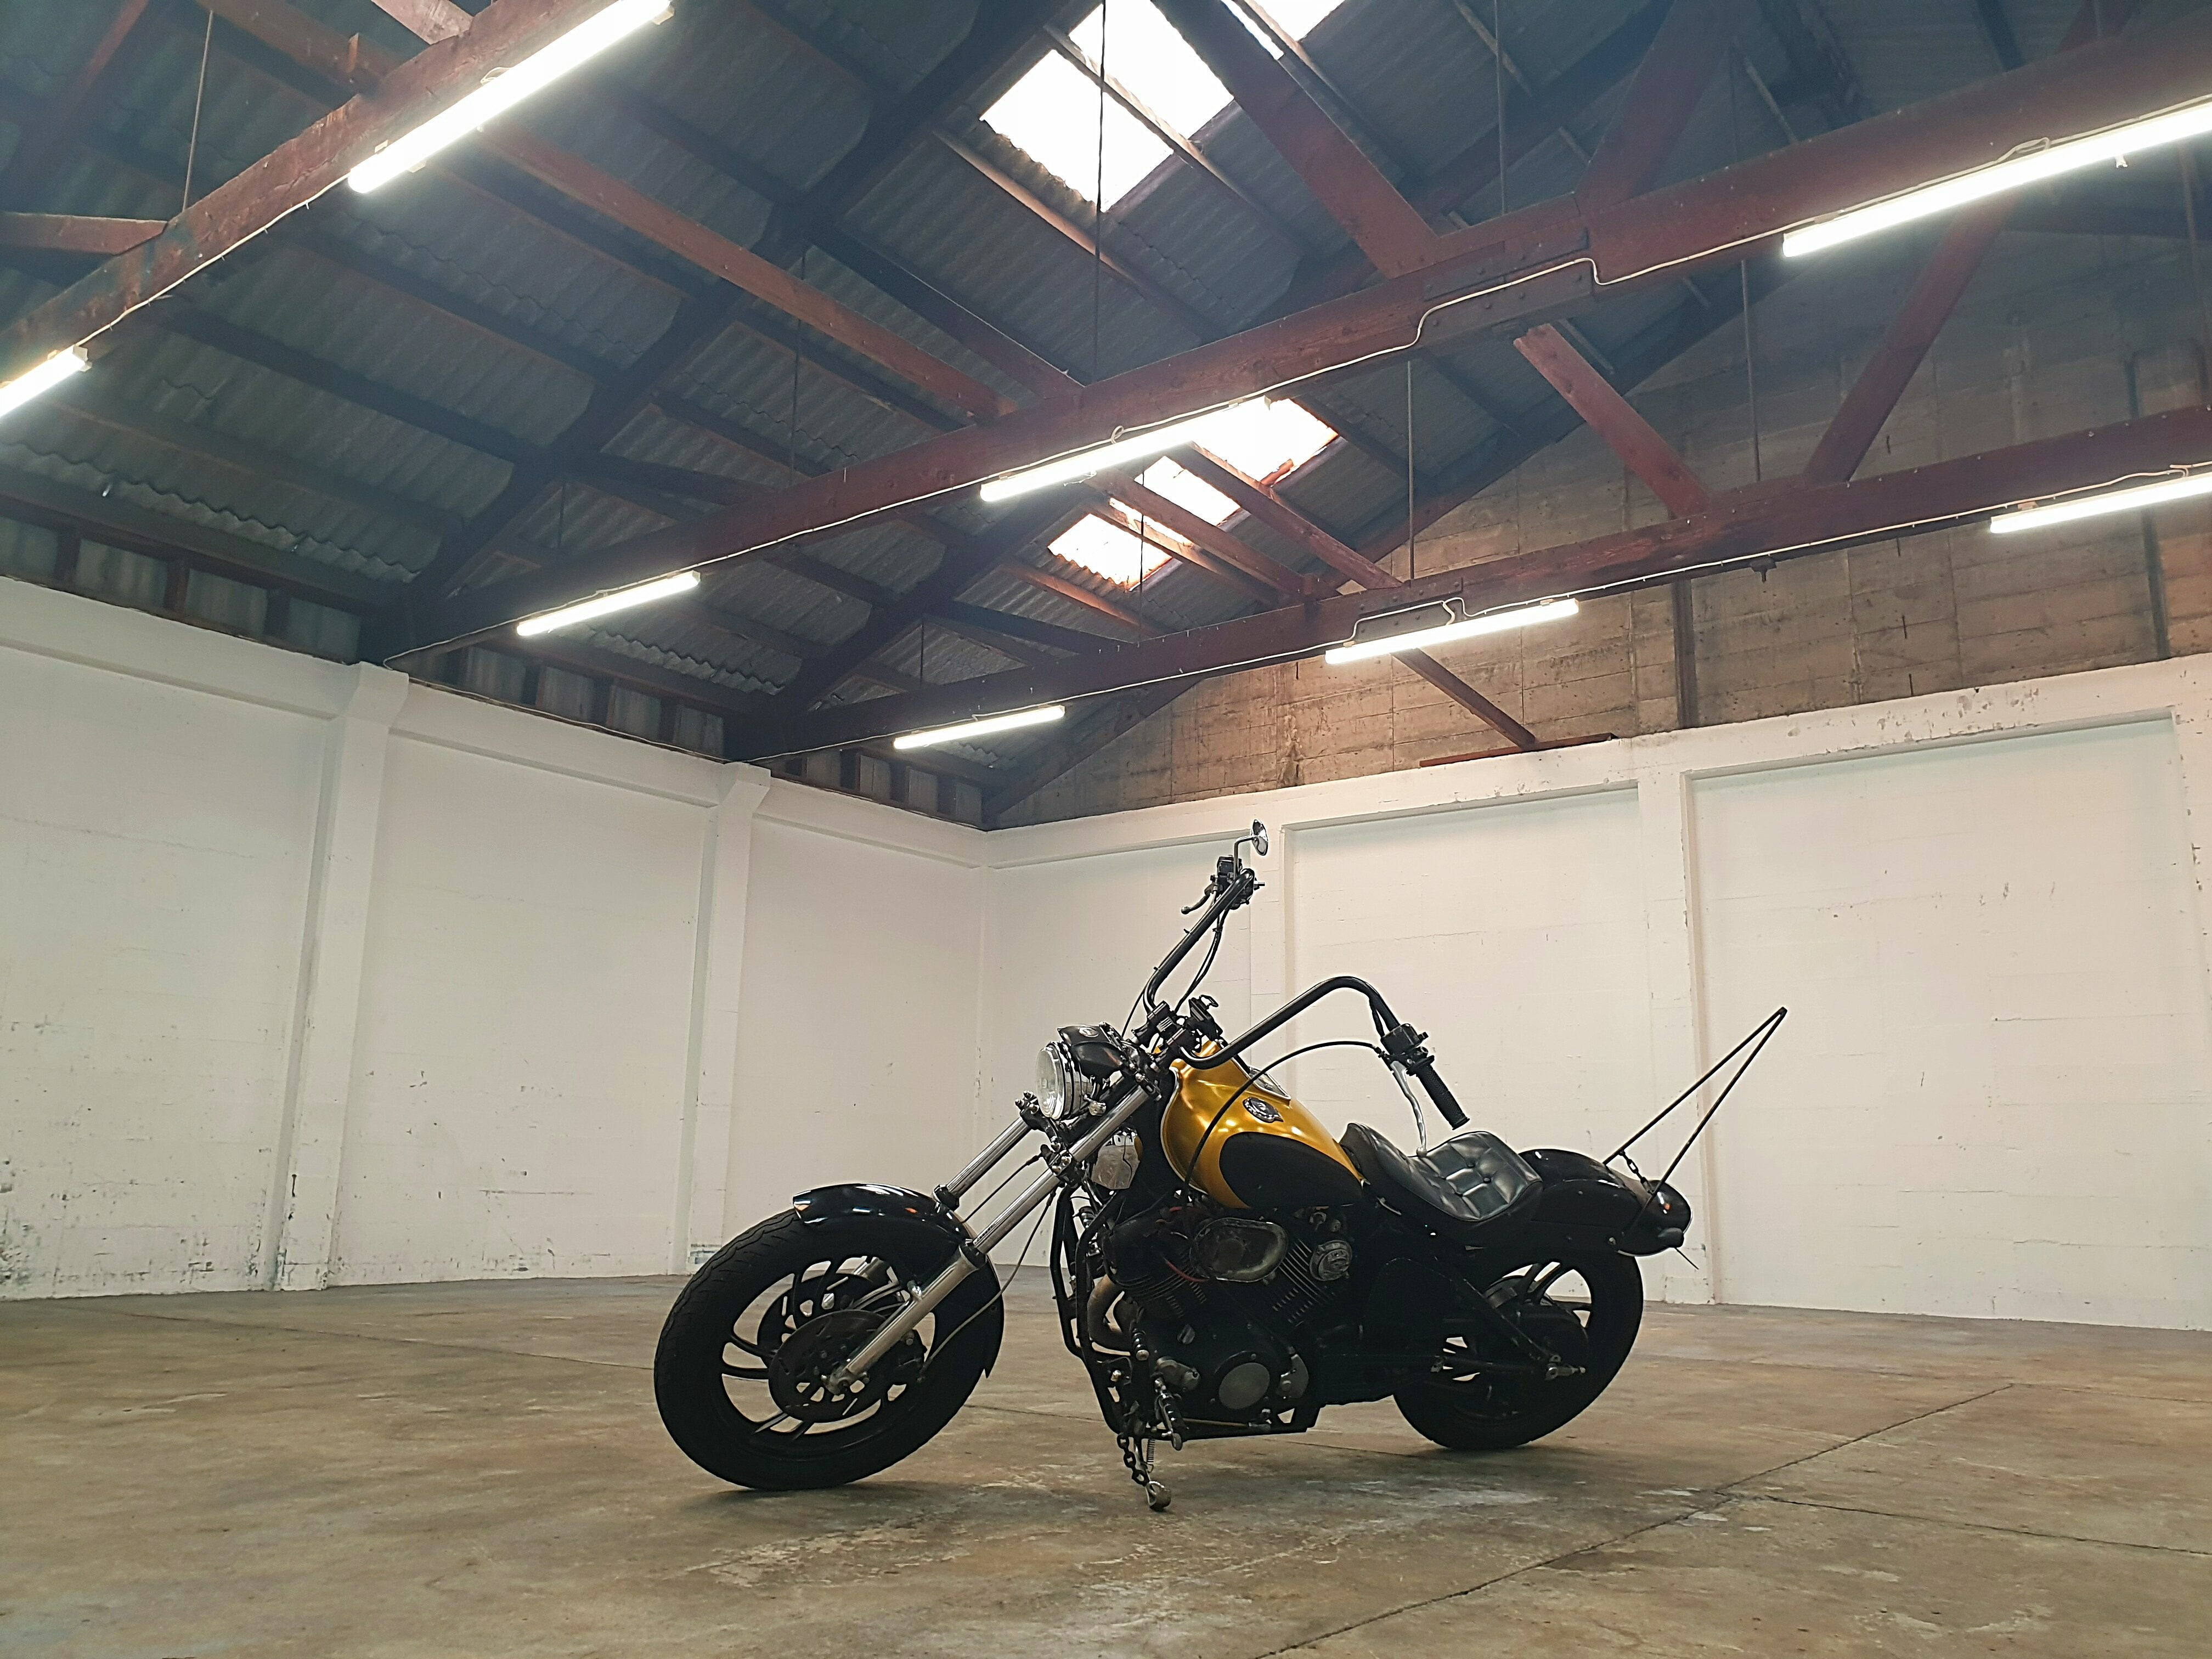
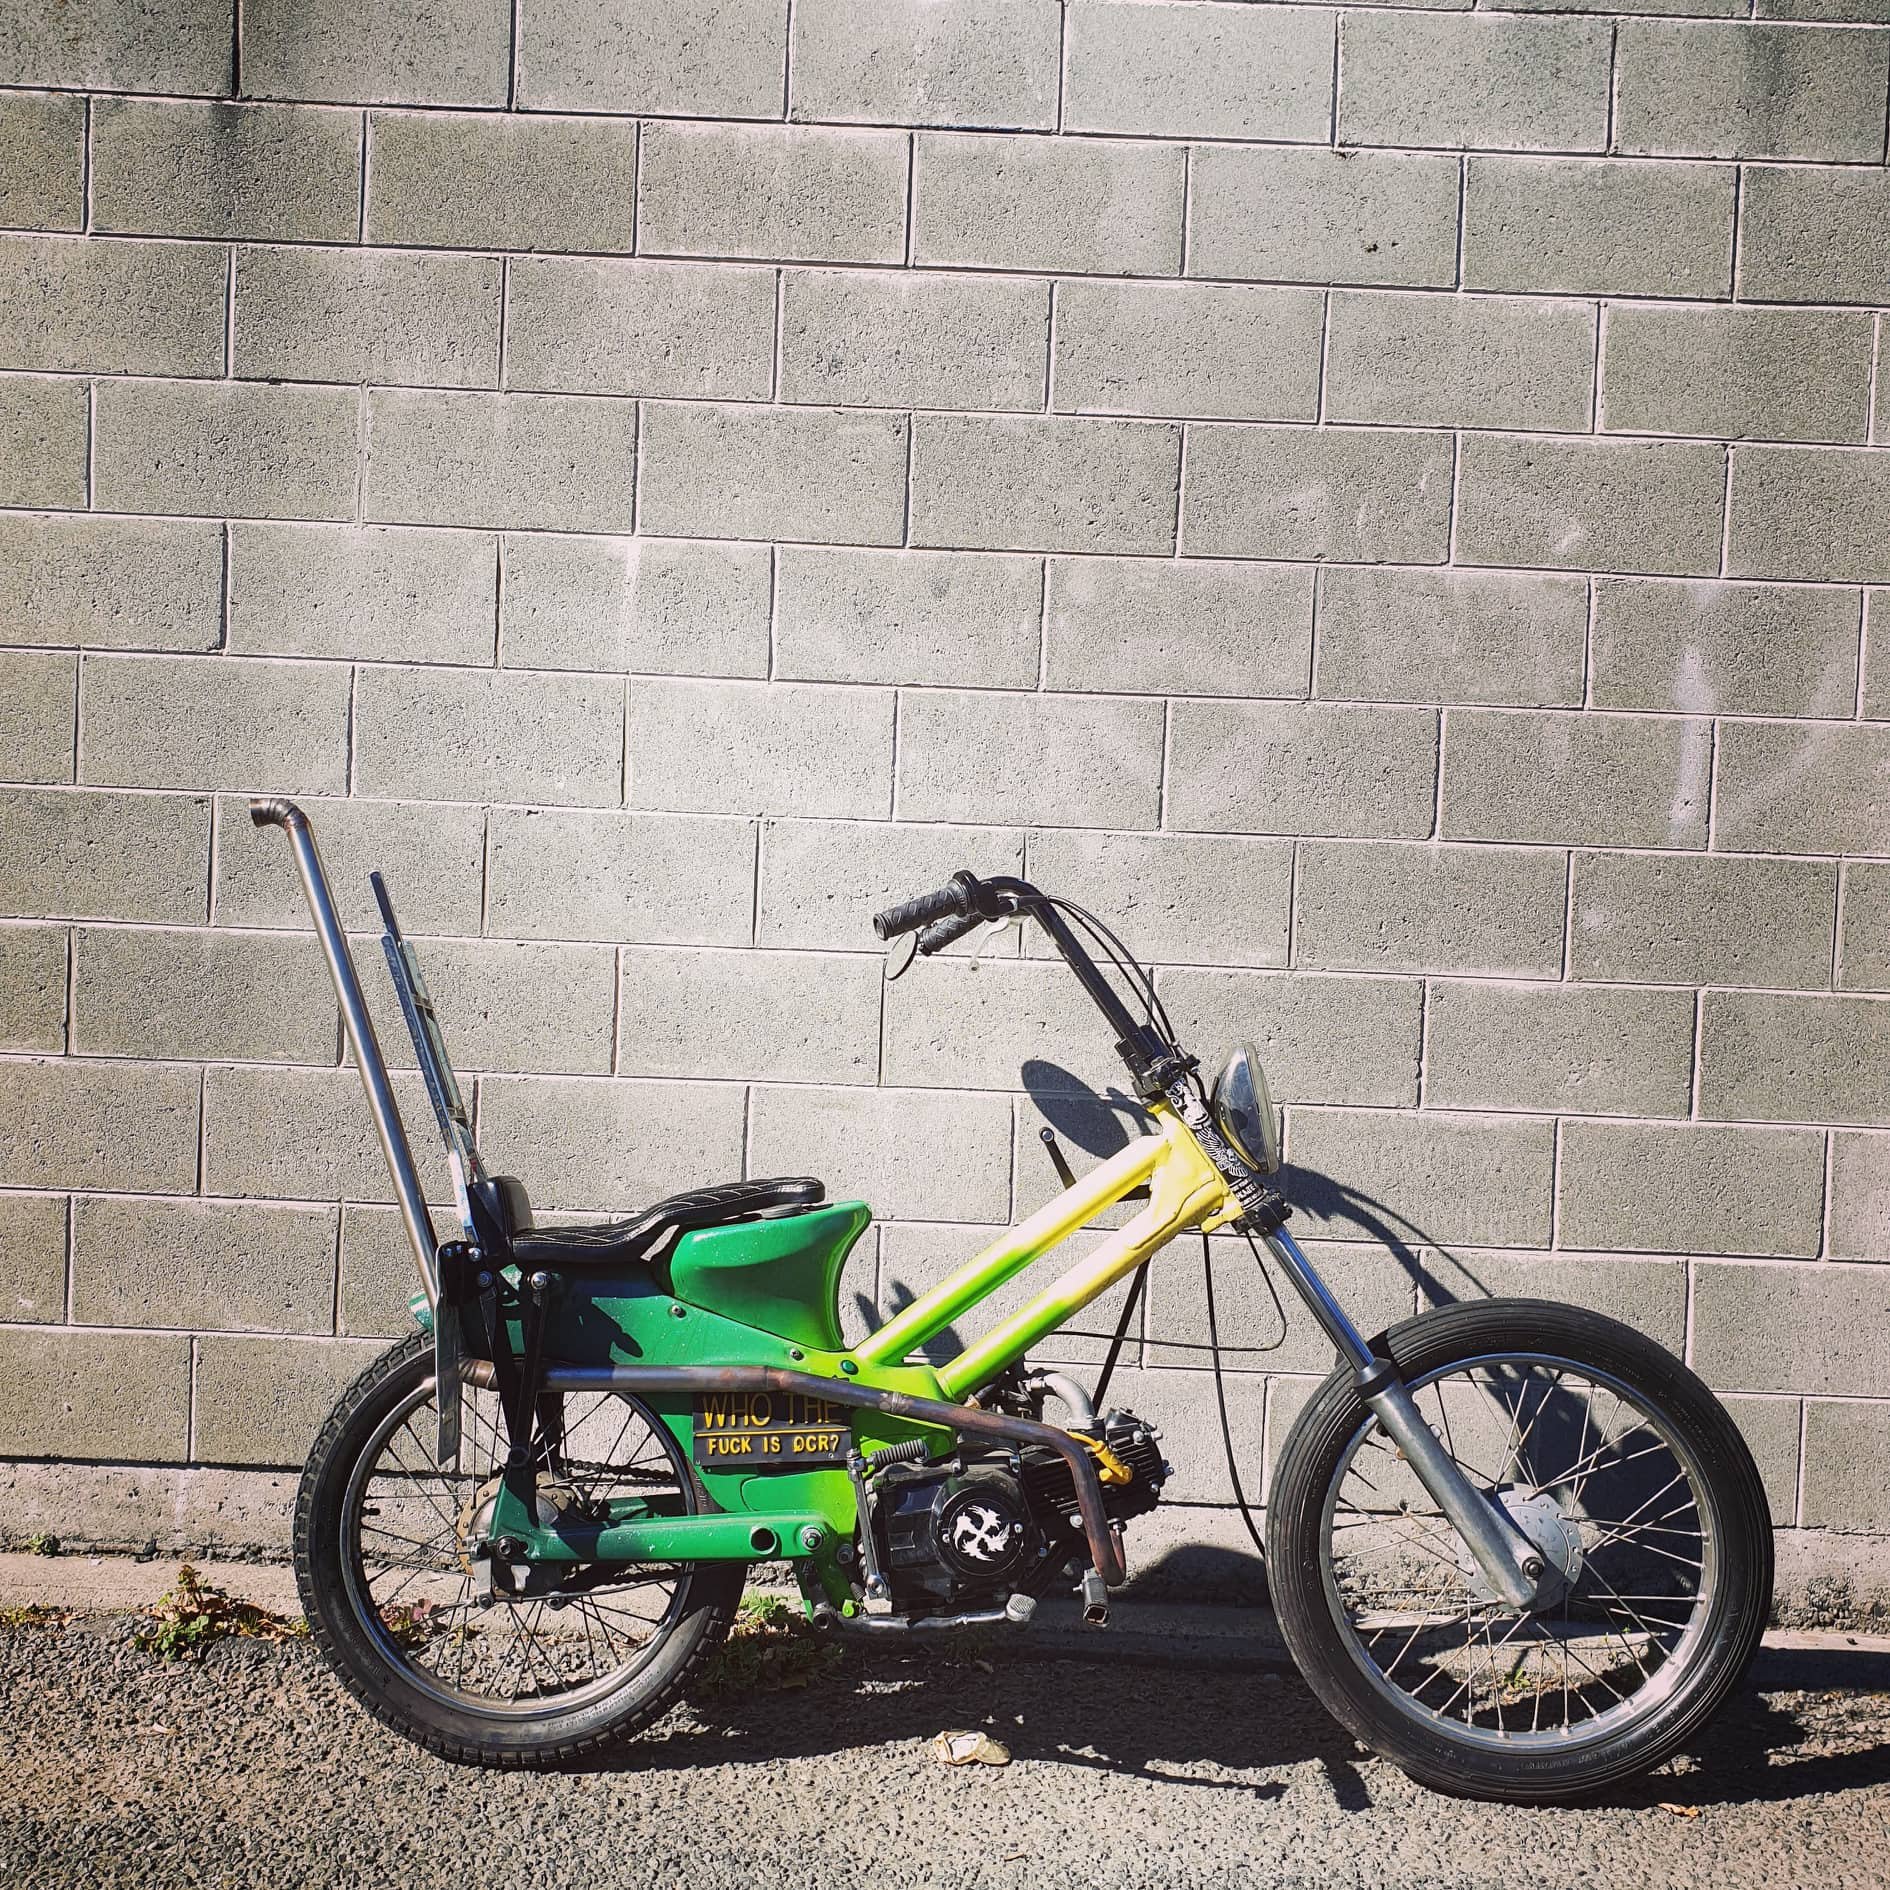
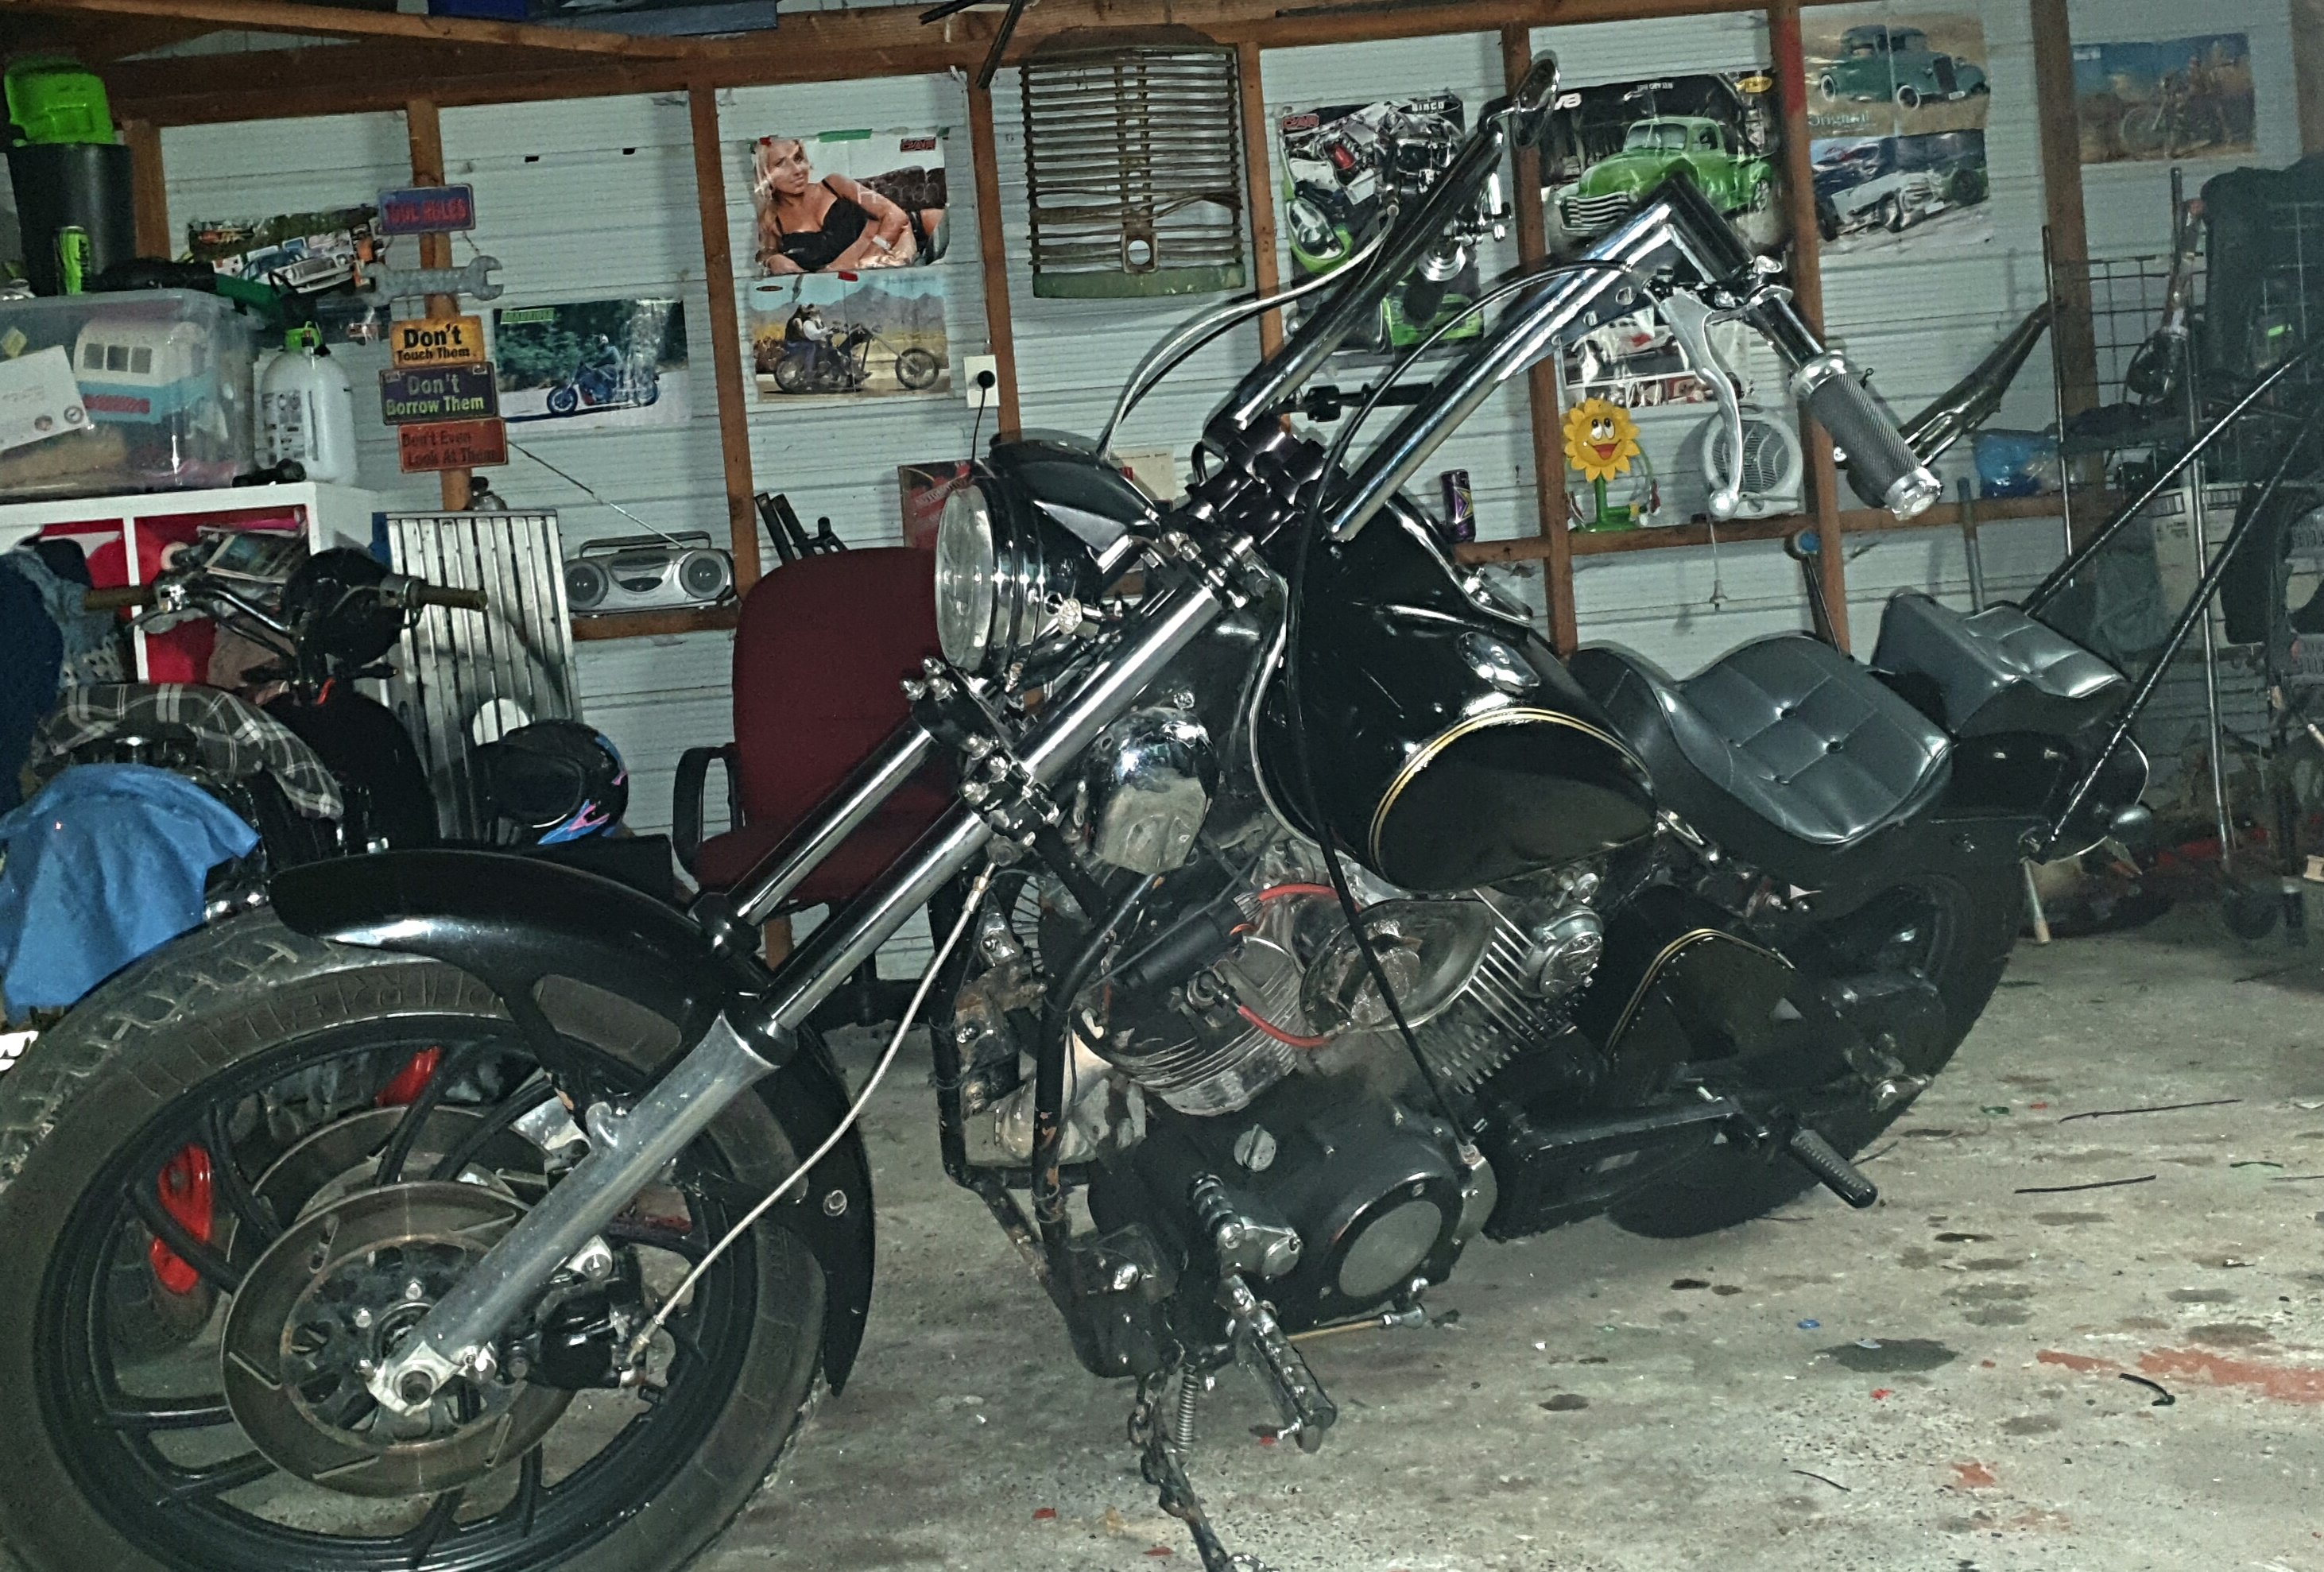
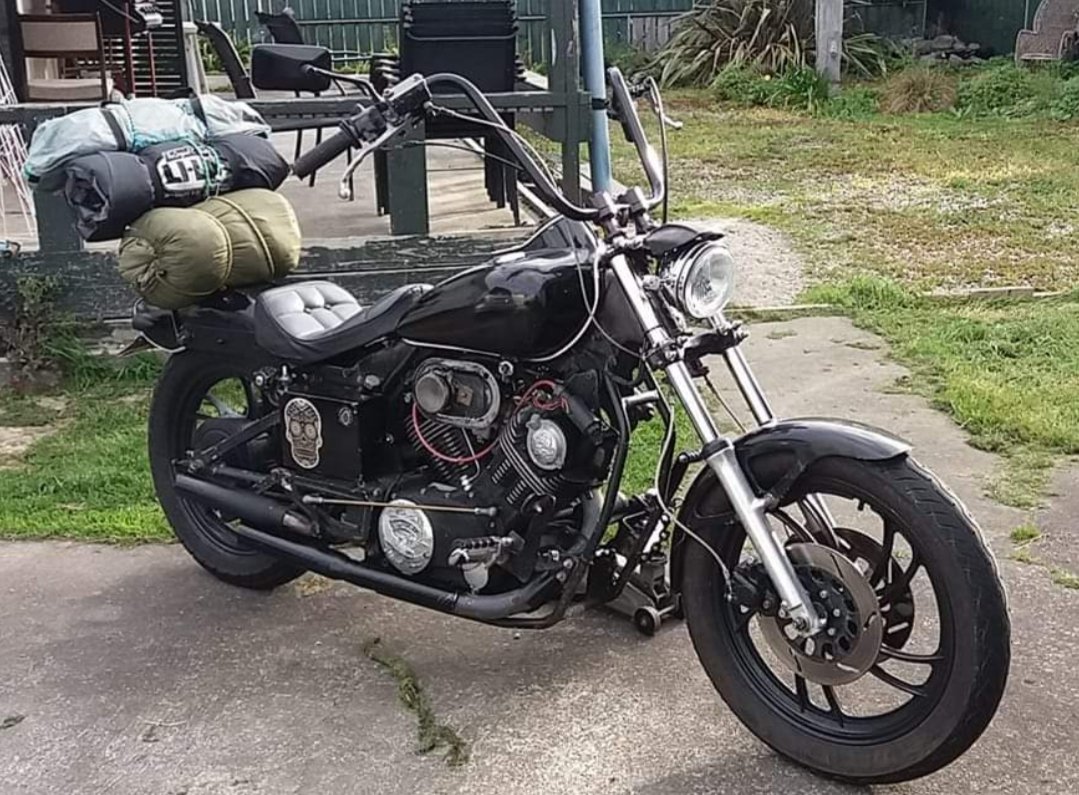
Now its done Featuring a new tall pipe from Rumbler Jesse and a suicide shifter I whipped up out of parts. Stoked as fuck with how it looks now too
1 point
-
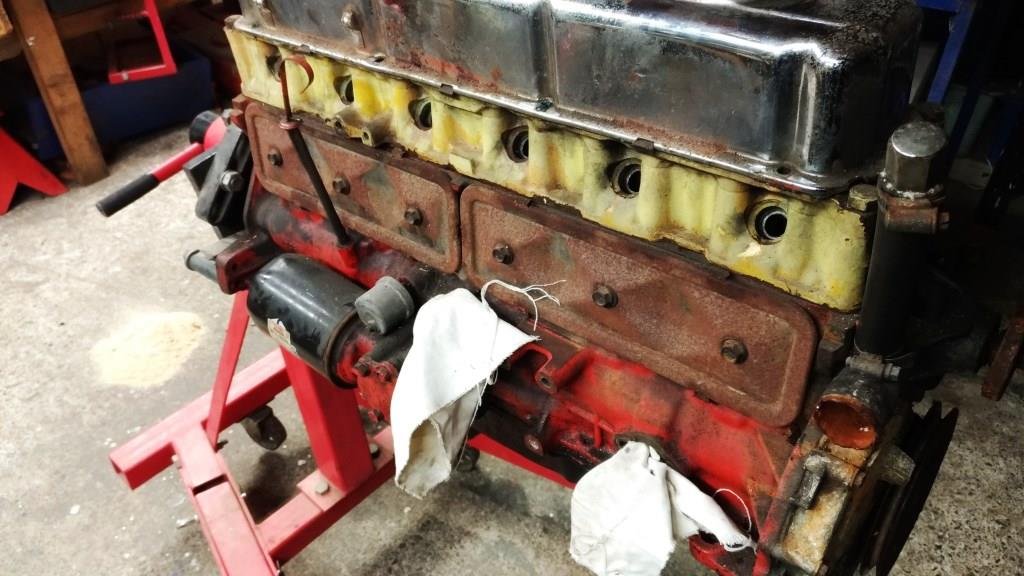
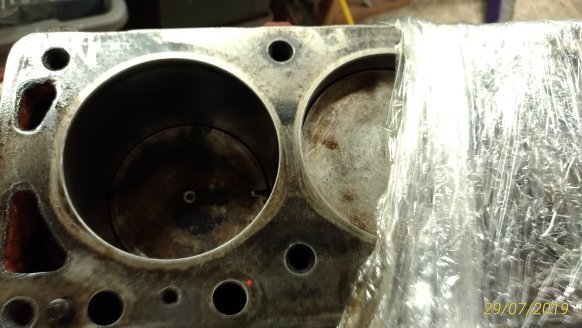
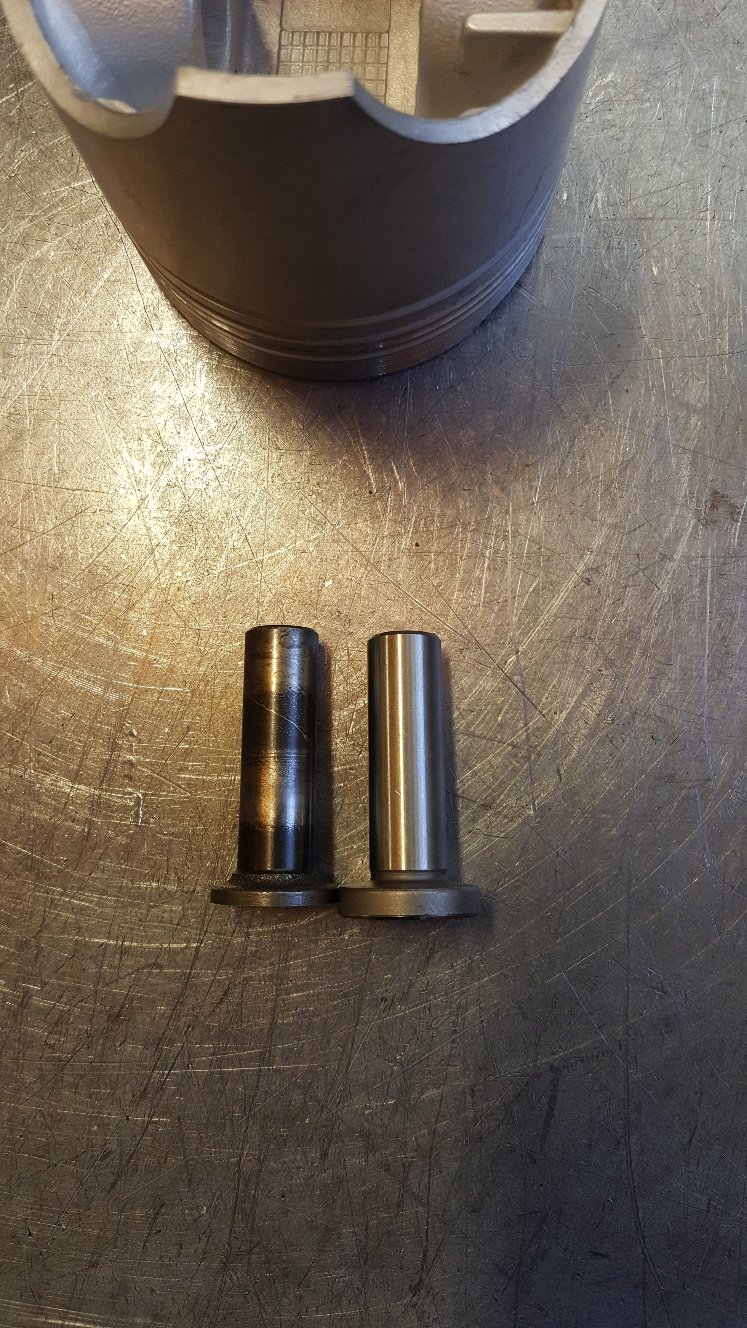
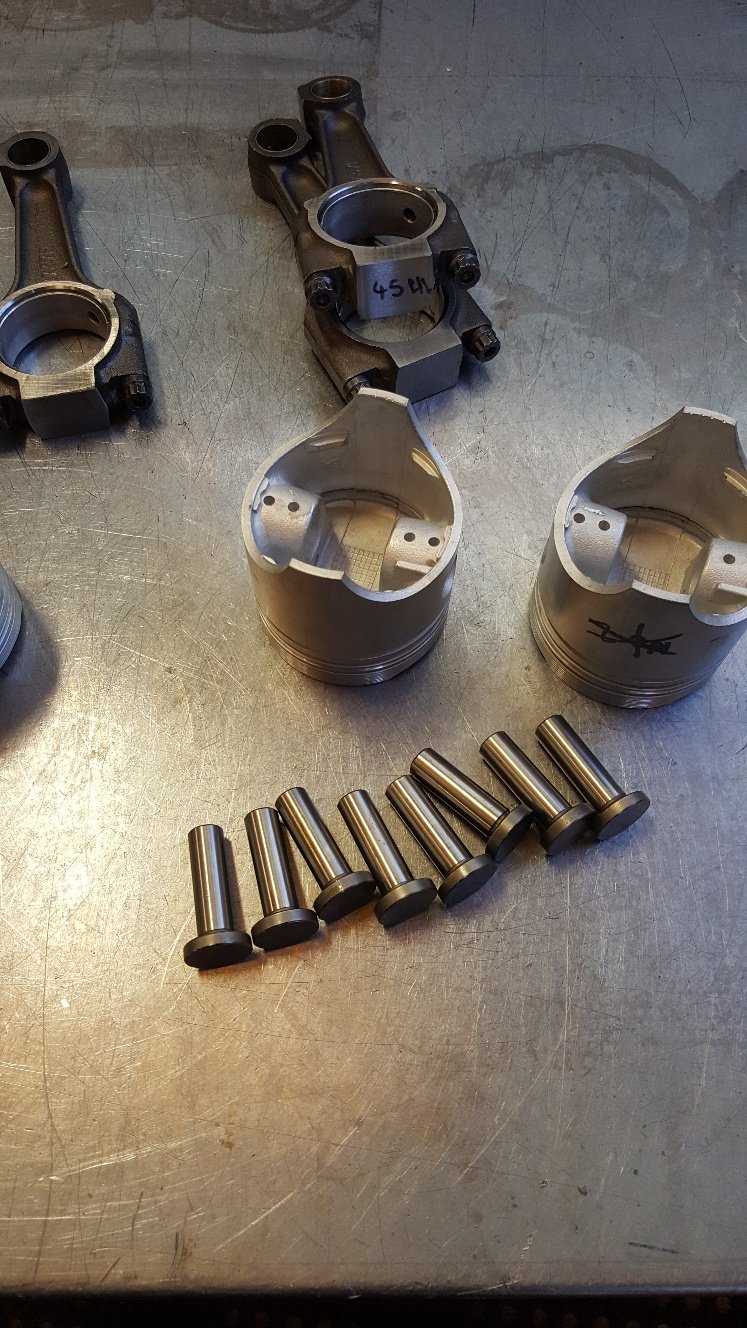
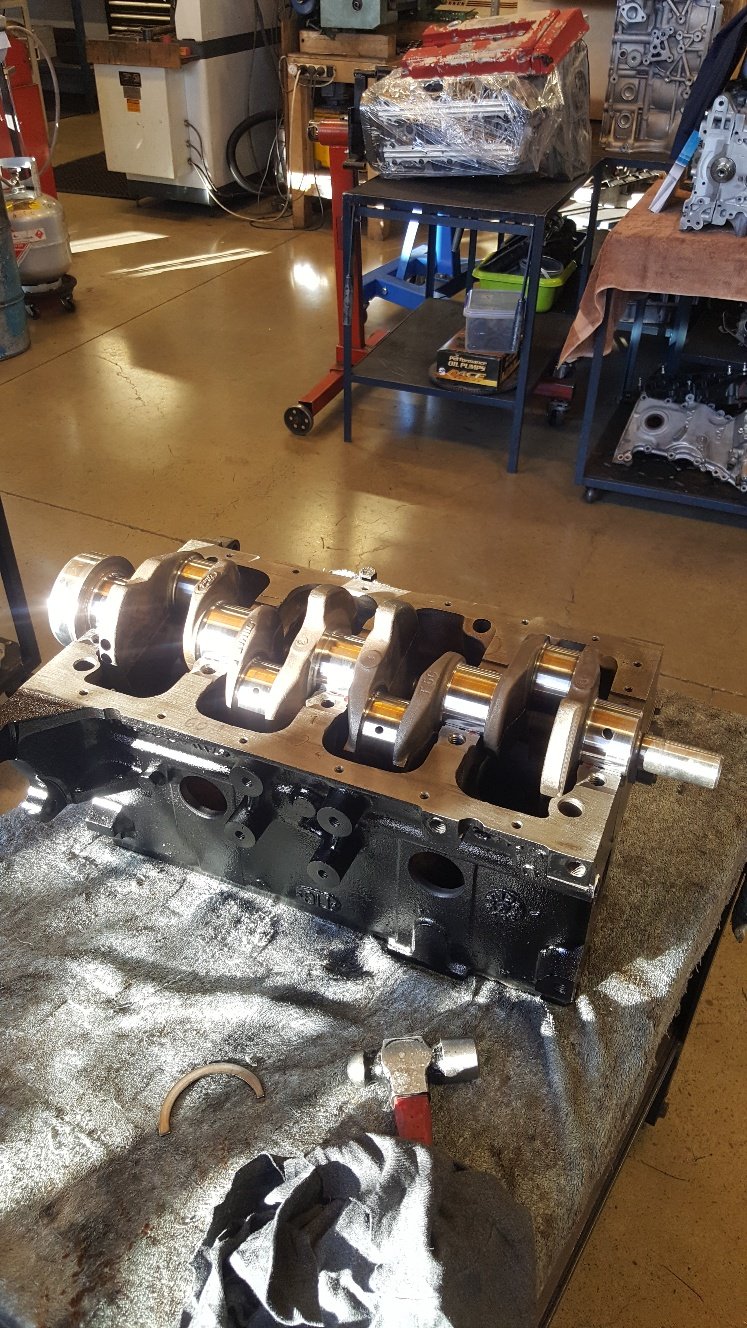
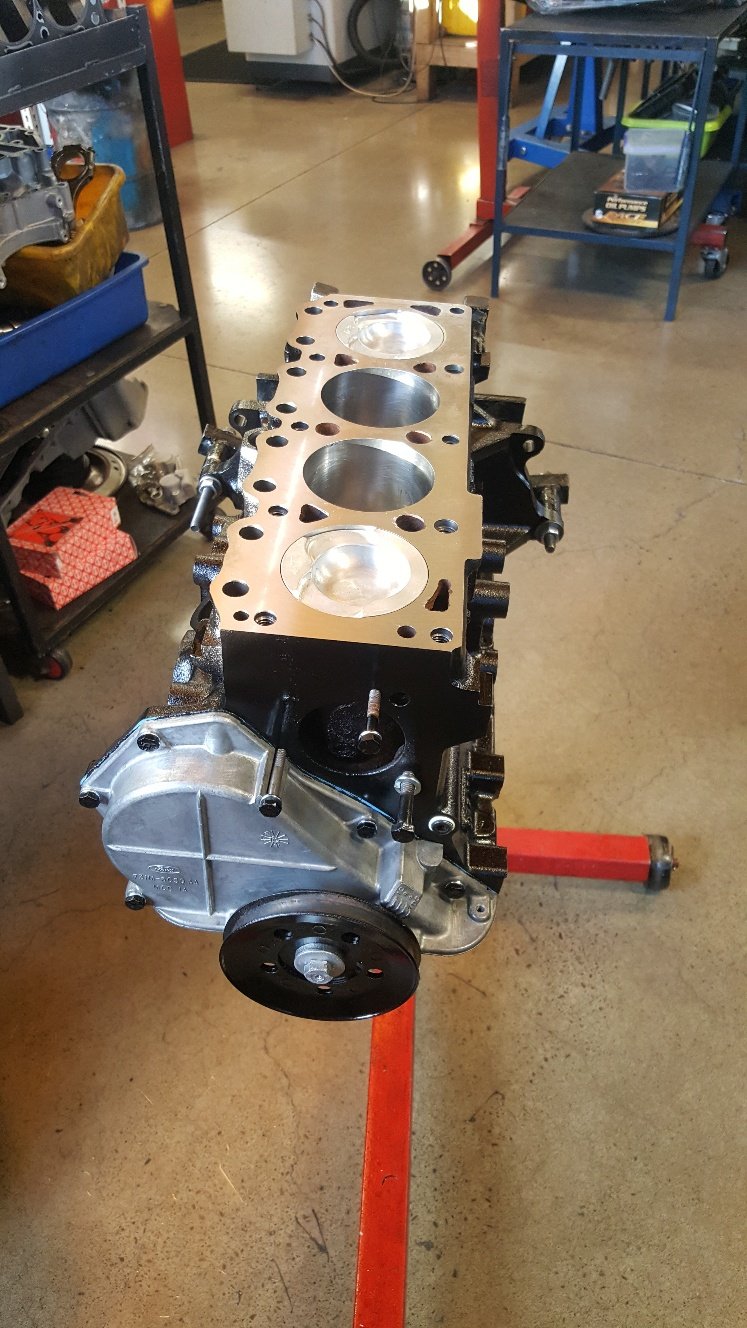
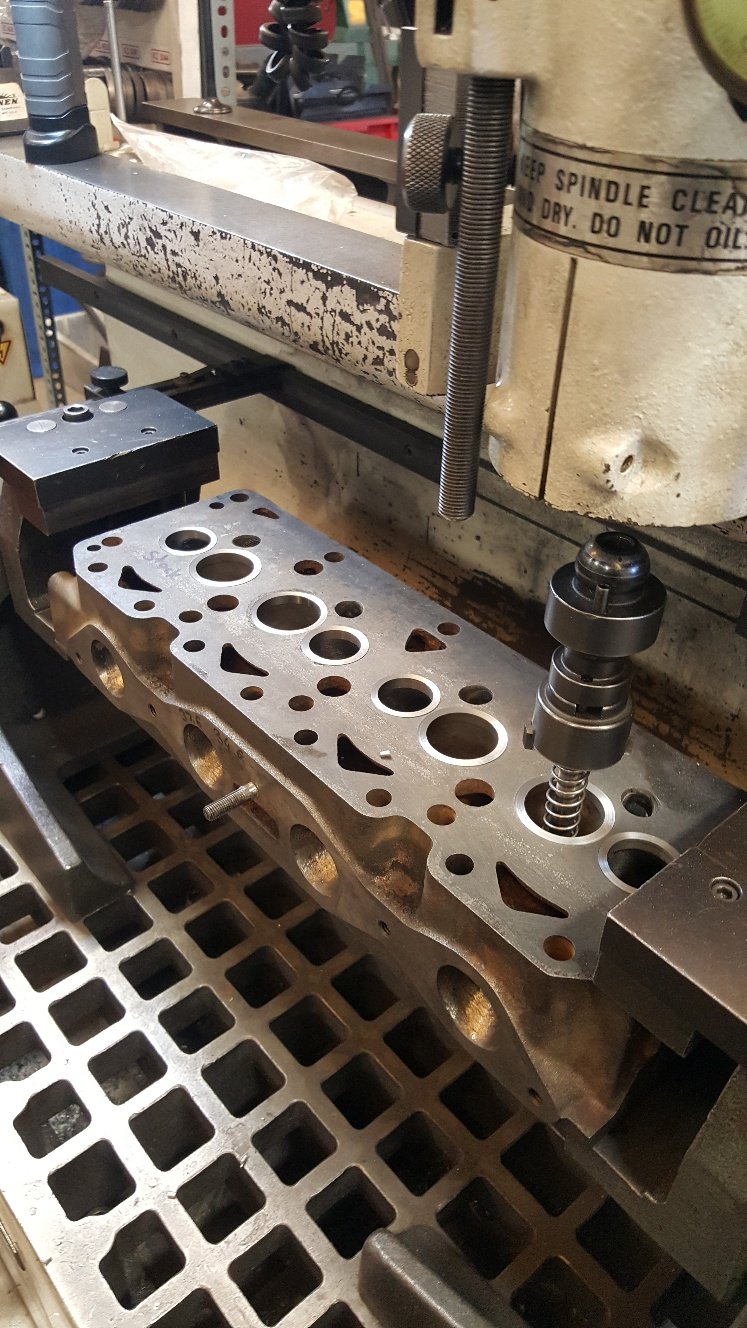
Time for final assembly. I bought a new set of cam followers as the old ones look a bit thin in the head. And I have had one break in another engine. Put the crank in. Short blocked. Checked the front pulley for tdc. It's the best time to check it. Not a common problem with solid front pulleys. But definitely common for old harmonic balancers to move and cause a headache when timing your engine. Assembled the head.
1 point
-
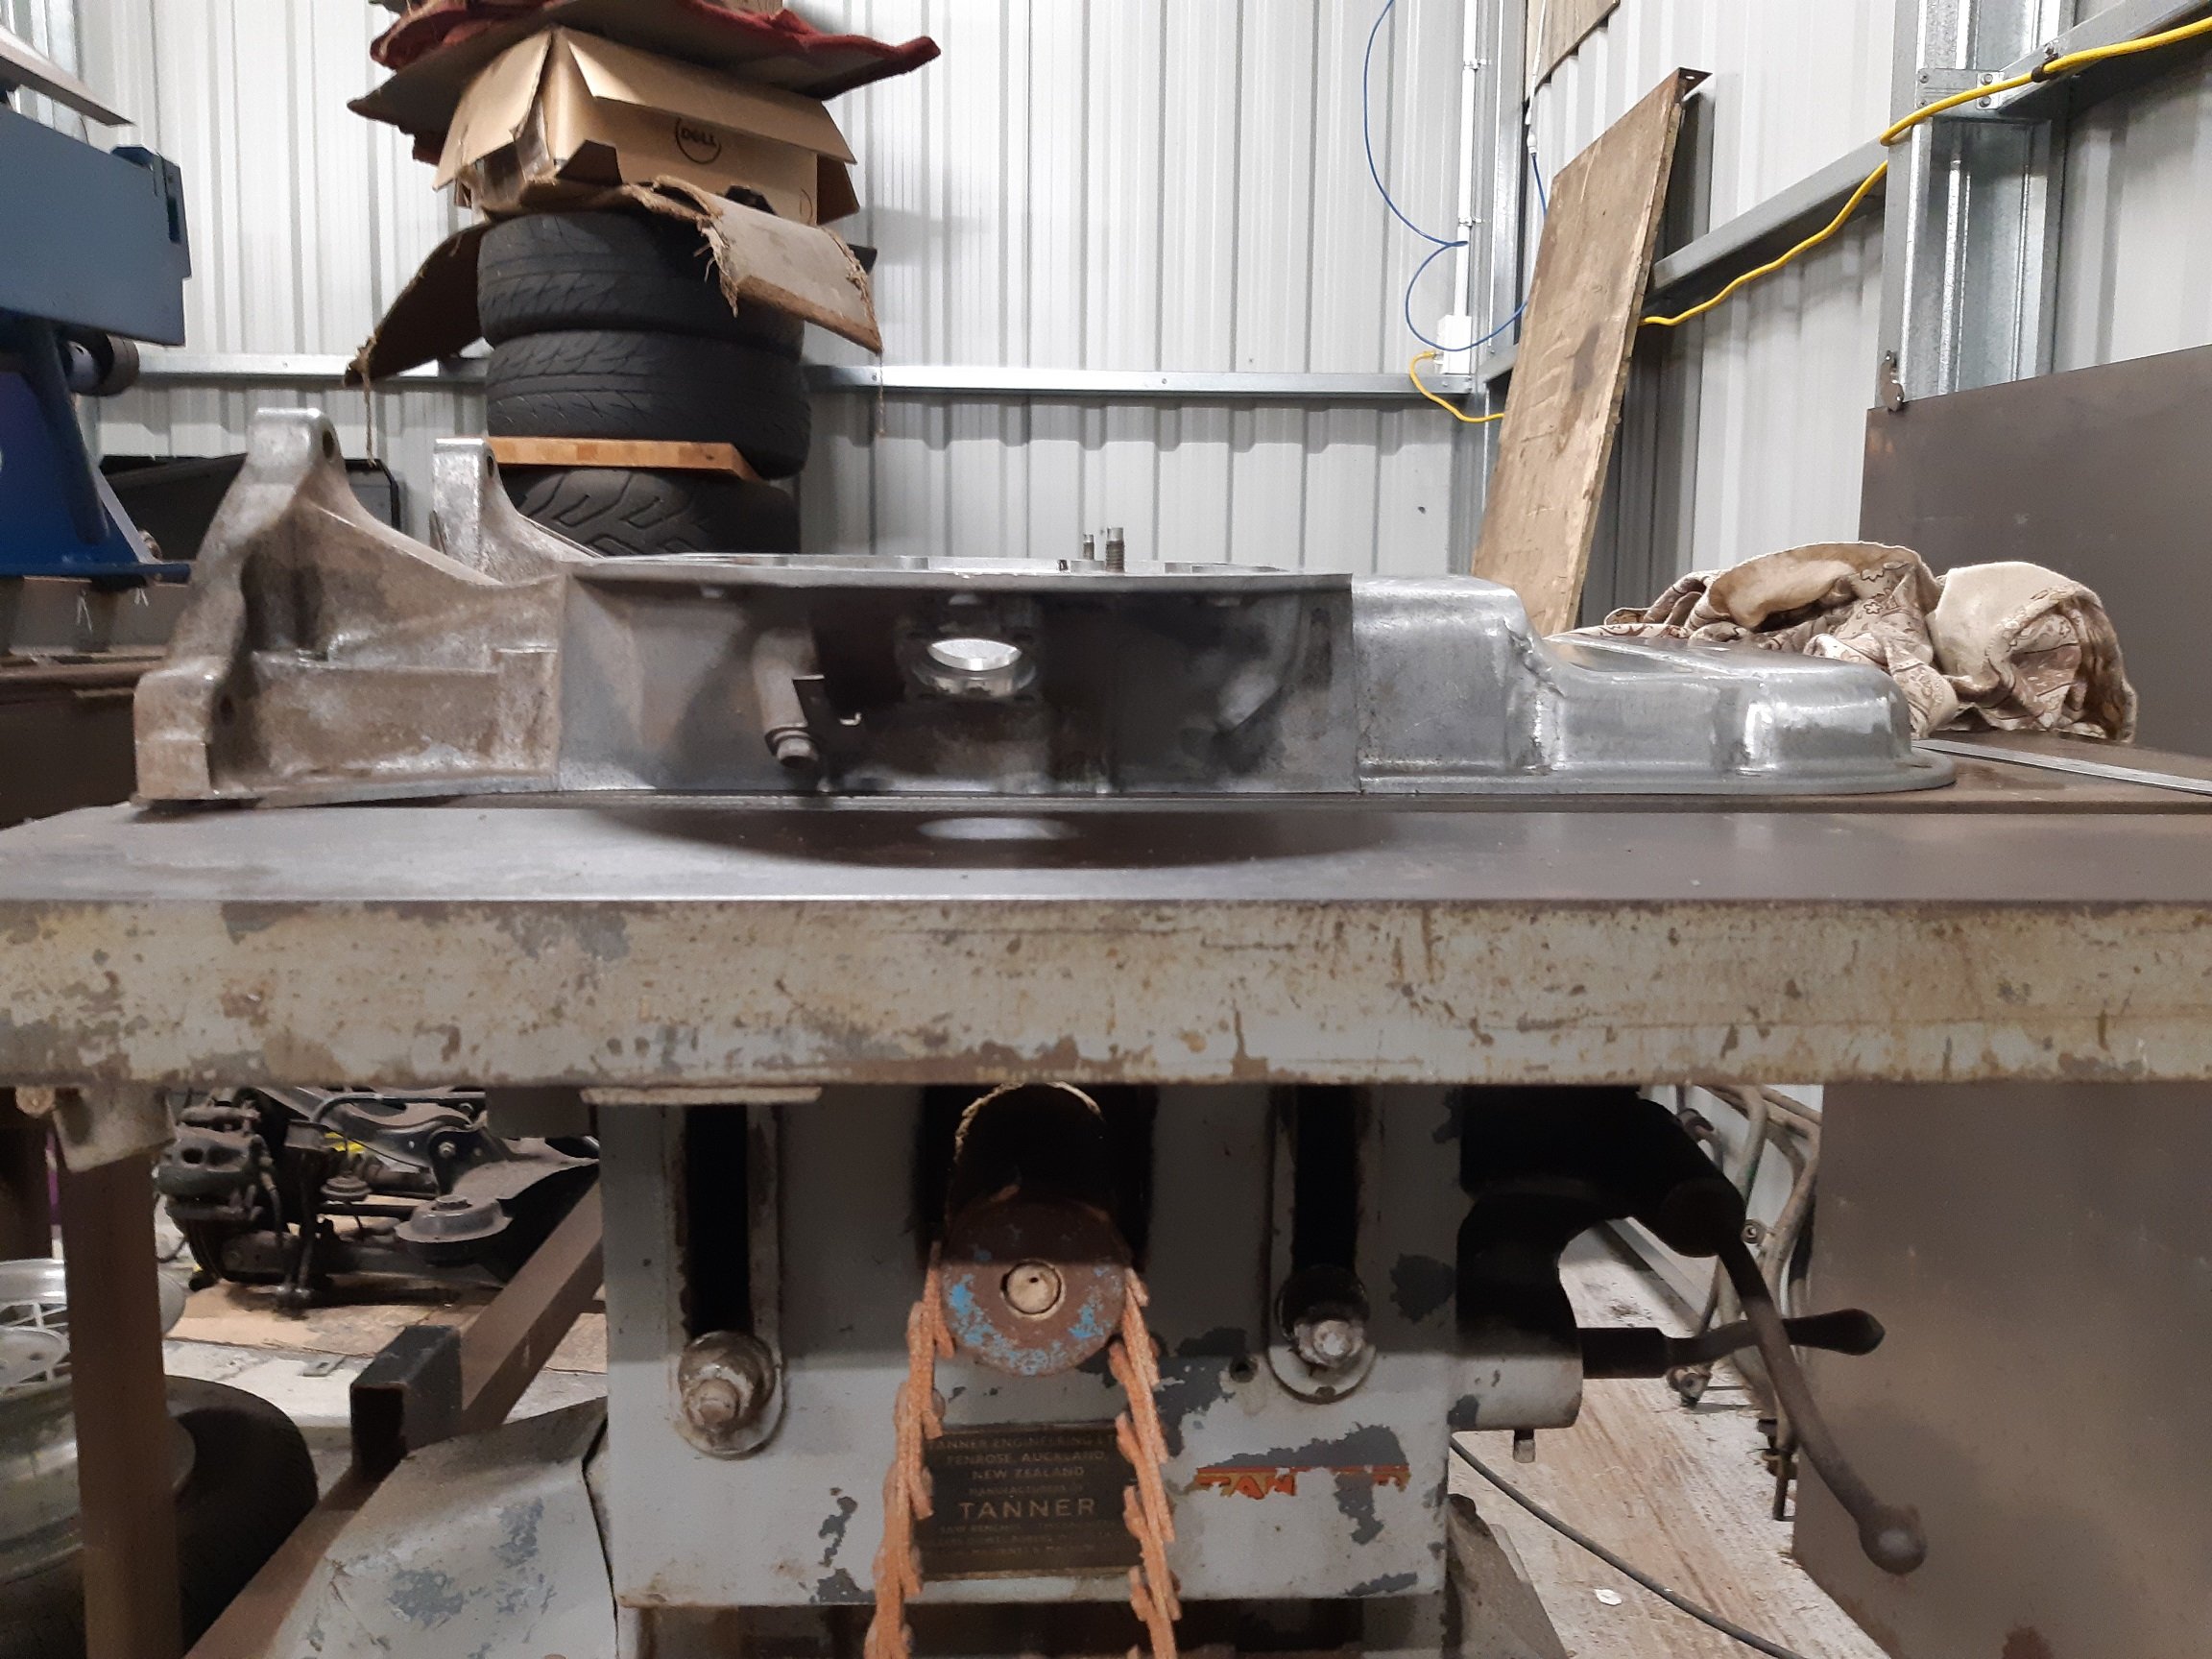
So I found a local place that could anneal my sump which would allow me to pull it flat. Dymo Manufacturing in Wingate. They put it in their kiln with it bolted to the jig. It was heated up to.... hot, then allowed to cool down slowly over many hours. ~10 I think. $70. The heat seems to have baked out any oils and cooked the sealer that was still in the grooves on the mounting face. The sealer just crumbles and turns to powder when I scrape at it. Only down side was it caused some of the small M6 bolts to seize in the jig which I wasn't expecting, so I broke one and stripped at least two more. So I'll have to find some suitable bolts to bolt it back to the engine. Oops. But it's more or less flat already. So I am happy to bolt it back to the engine, the sealer will sort out any tiny gaps. Cast iron table saw top is the flattest thing I have. I did try move it around a bit, just in case the table saw top was bent. It's the same which ever way I put it. There is still a tiny gap at the front of the sump, but it's no bigger than 0.5mm and if I put some weight on it, it closes up. Yay.
1 point
-
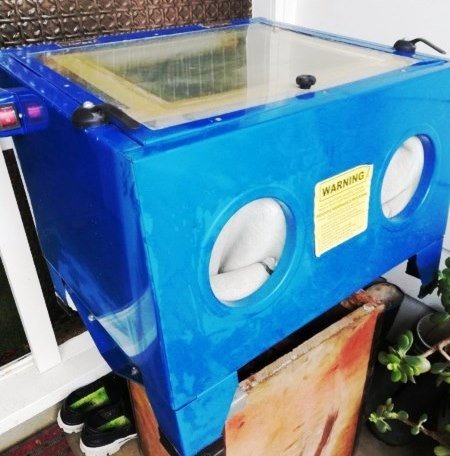
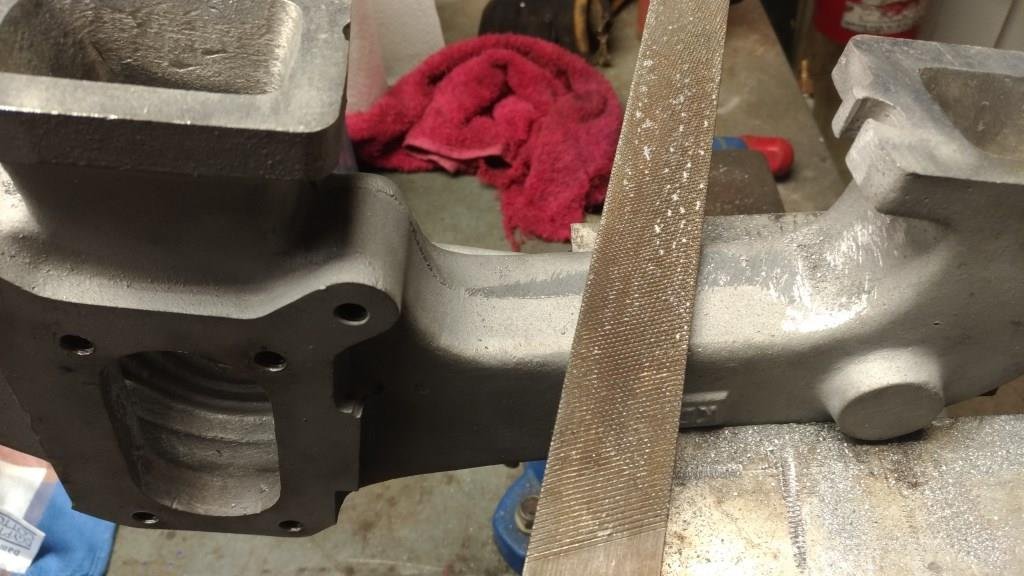
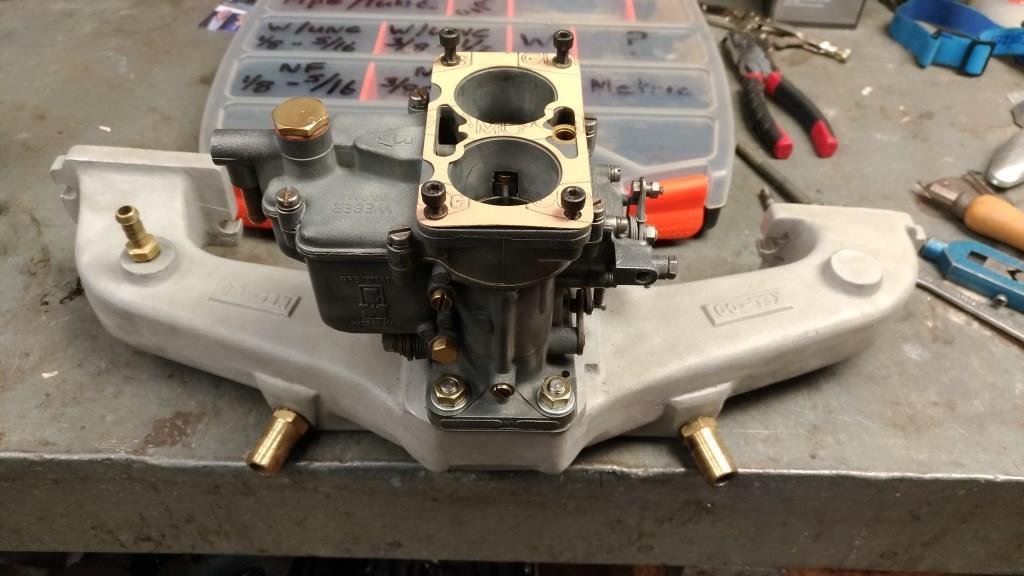
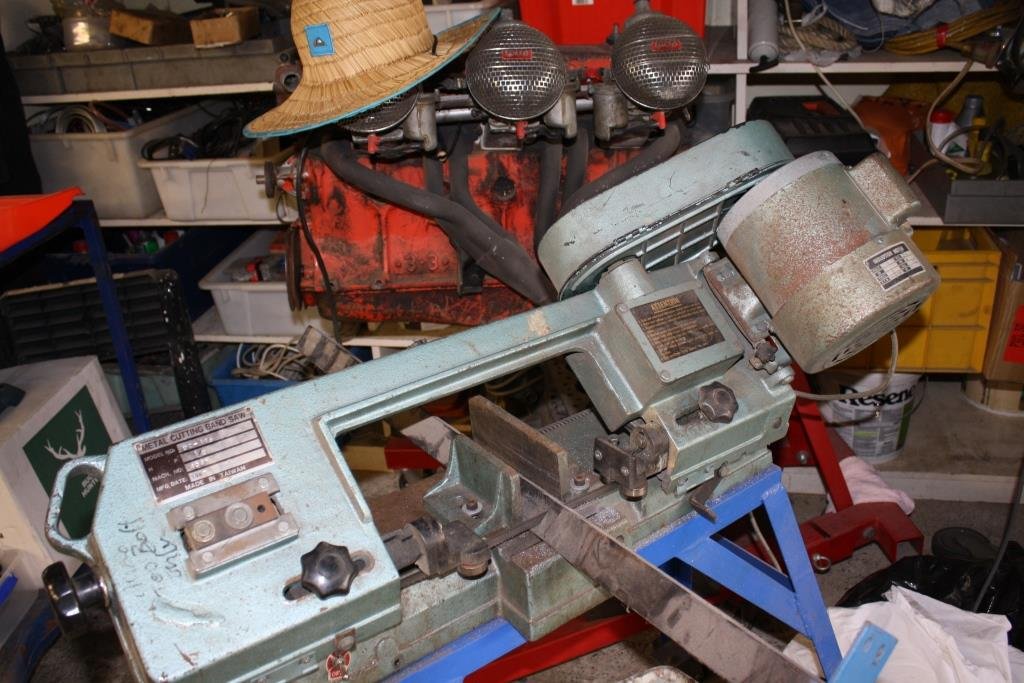
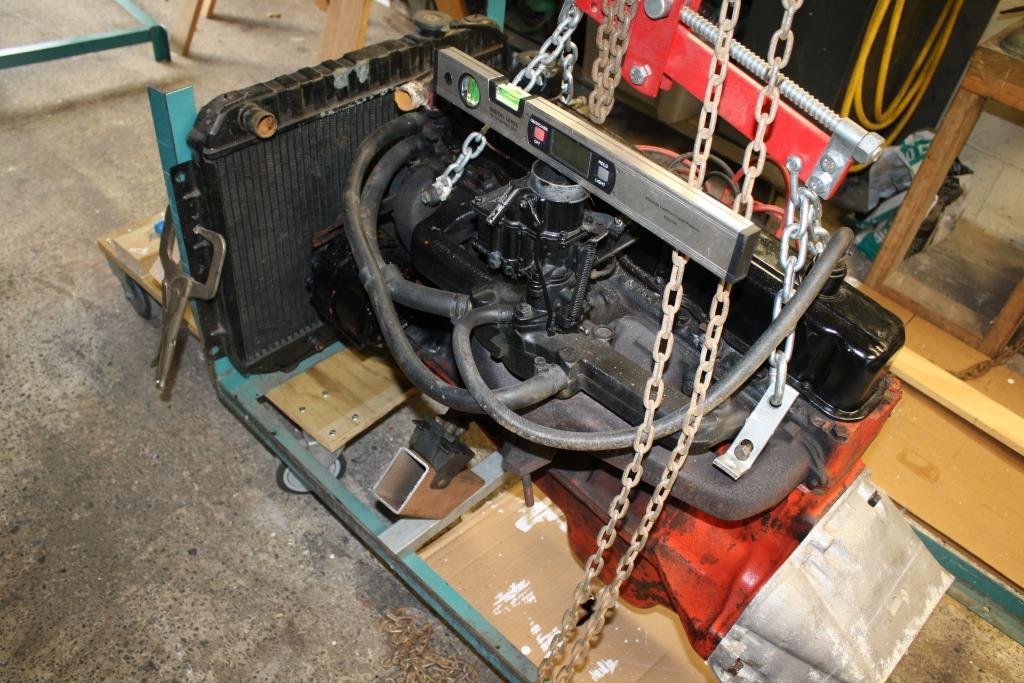
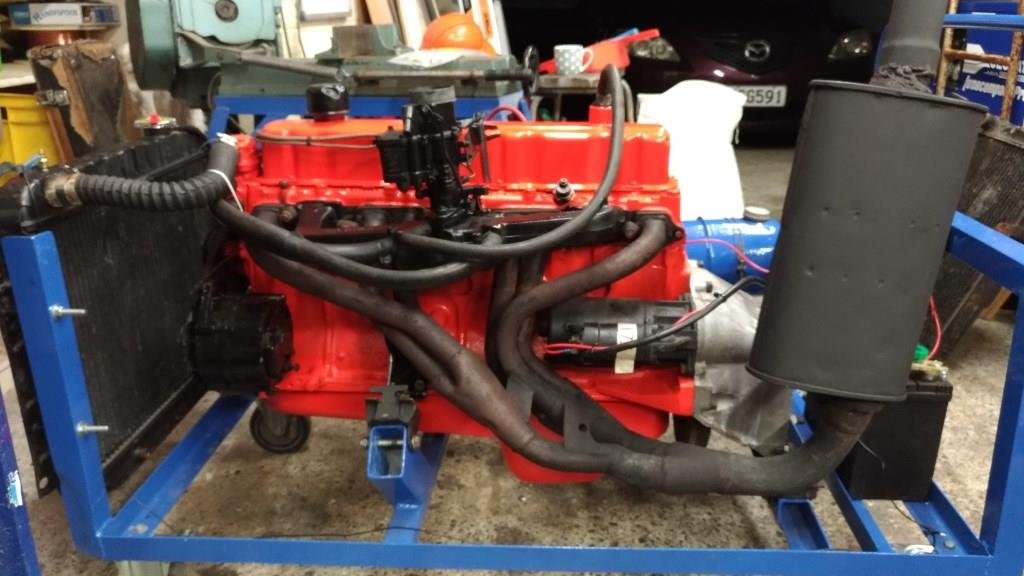
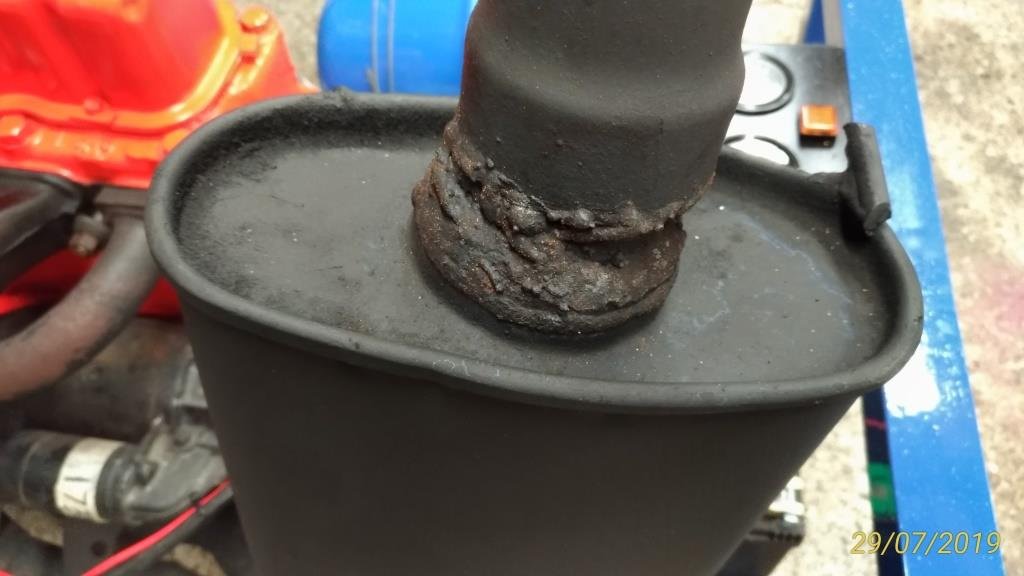
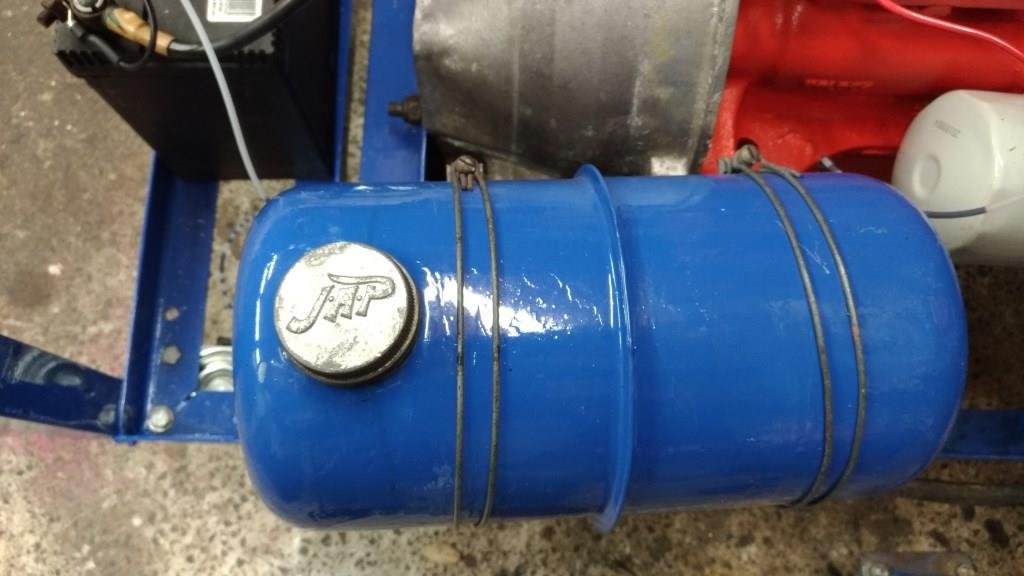
Thought it was time to clean up Rigamortice’s vintage Kel-Co manifold to get the DCD Weber back where it belongs. Couldn’t resist the temptation to cut off unwanted bits, file off casting marks and give it a blast in the new blasting cabinet (only a baby one but all I have is 12 cfm). Have to say I was pleased with the results. I’d been thinking about building an engine start-up cradle for a while, found some old castors, raided the obligatory under bench scrap steel pile and started cutting and welding,……… and cutting and welding,……. Once again happy with the end result, particularly the “Hillbilly headers” fabricated from parts saved from the rubbish bin. I just had to incorporate the “inglorious welding” I found on an old muffler! And how could you not love the 1950’s JAP fuel tank. As an added bonus you can even run motors up on it! (My favourite Torana 2850cc 9 port, stock standard but what little rever – Brock discovered them before anyone else). First 2850 start-up on the new cradle
1 point
-
Been dailying it for nearly 4 months now! Awhile ago I took it to Napier and got Simon from Airride NZ to paint on some whitewalls. Looks so much better! A couple weeks a go I drove it up to Auckland. No issues, other than the speedo dying on the way up in Thames. Have been emailing Classic Instruments about the gauge, to see if they can find whats wrong. They have since stopped replying after I did some tests and they figured out it's completely dead. Not the first issue with it either. Have already sent it away to get fixed once, as the odometer wasn't working when I first got it. Not impressed, since they aren't exactly cheap! Brought back an engine and gearbox, a couple storage boxes and a set of wheels from Auckland. The Hoonigans also shared it on their Instagram. Some comments are pretty entertaining haha. Have some bear-claw latches to install one day, as the doors are a pain to get closing properly, keep popping open and rattling. Need to sort some electric solenoids to lock the doors first though.1 point
-
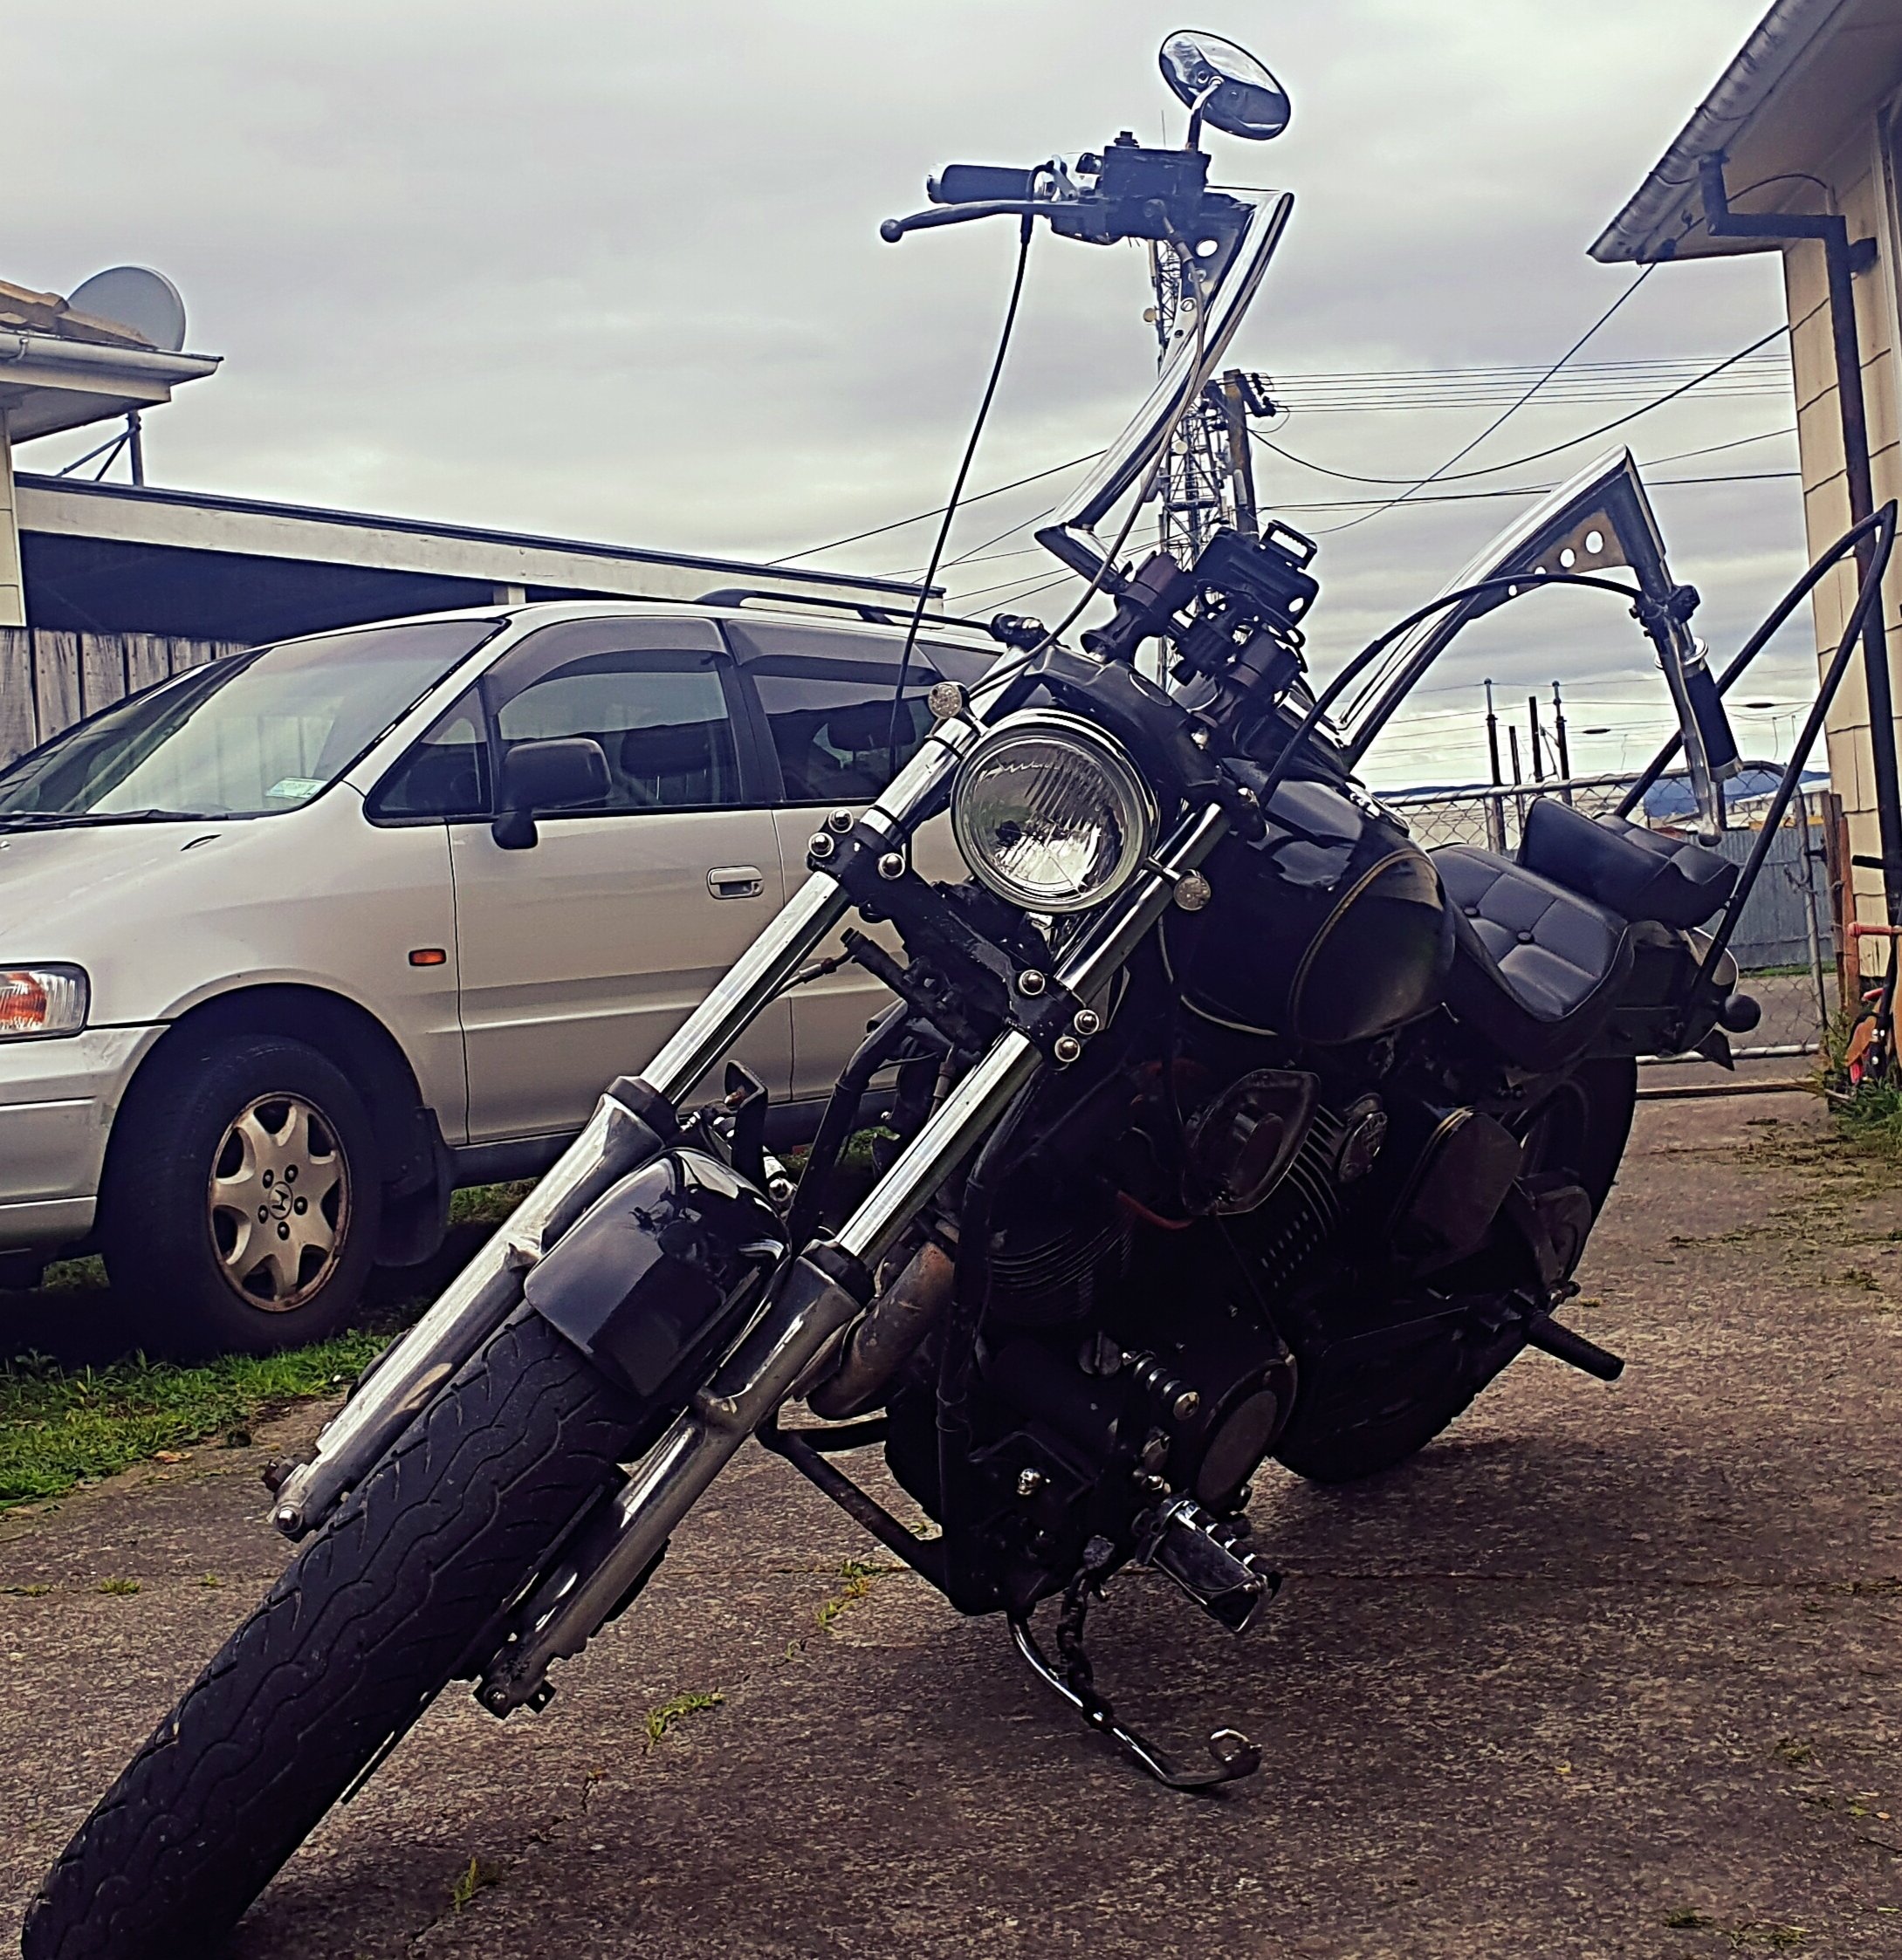
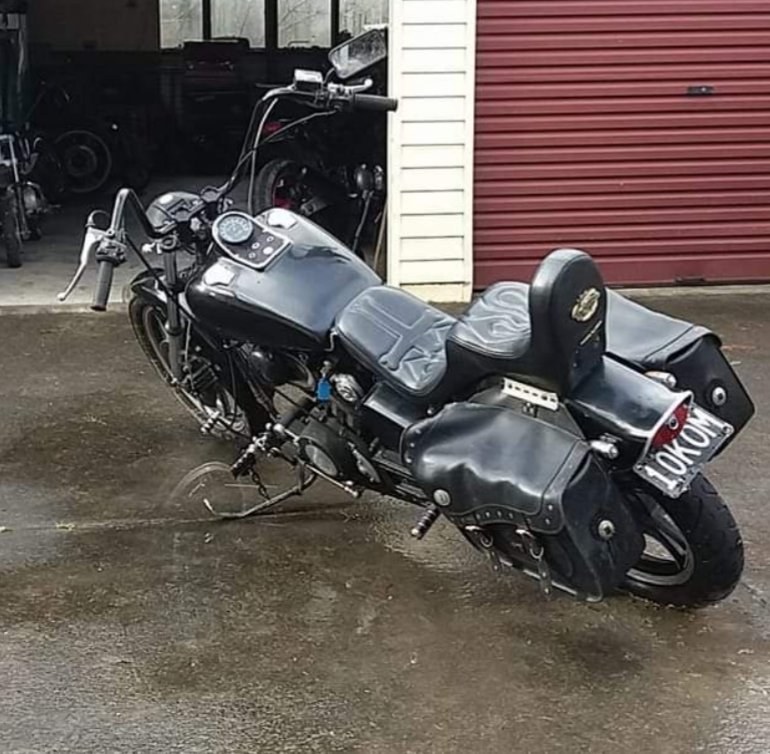
So all the parts are on new grips wich are metal with rubber grips. New seitch gear new bars on looks good just need to ride to dile in where i want bars
1 point
-
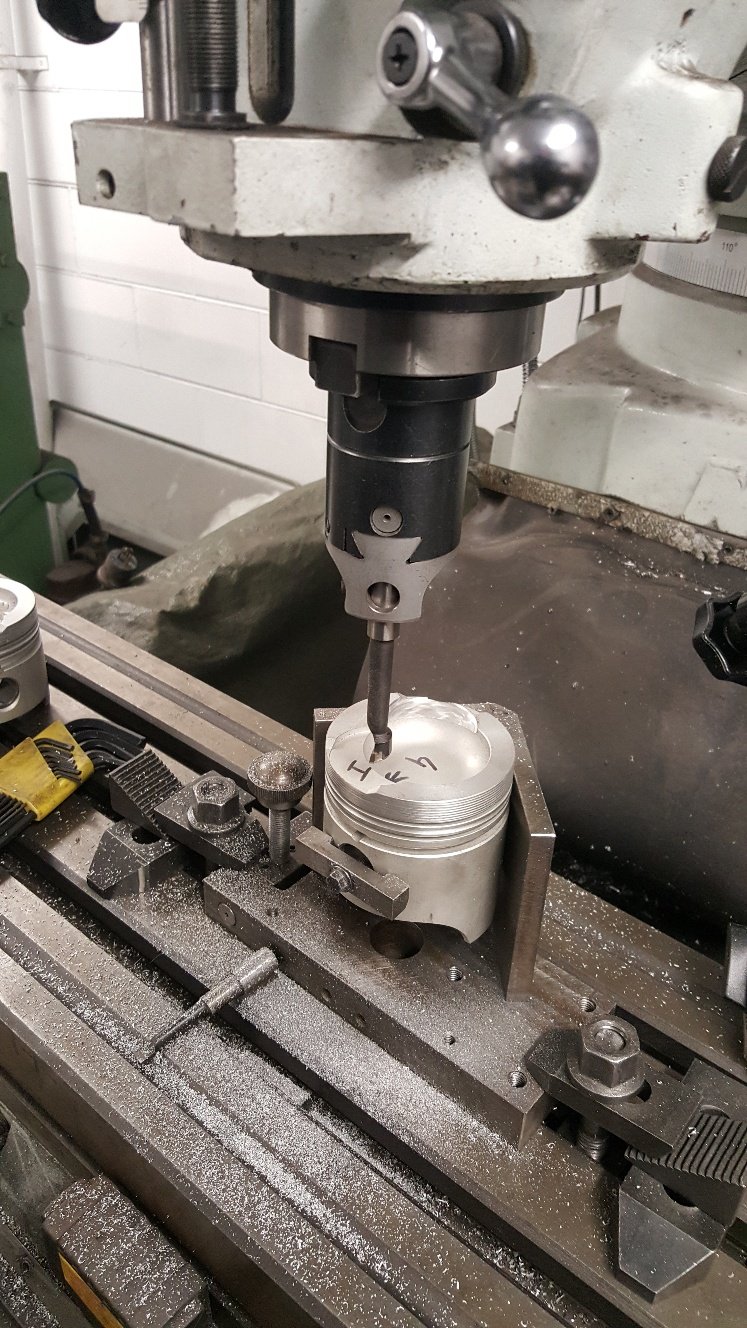
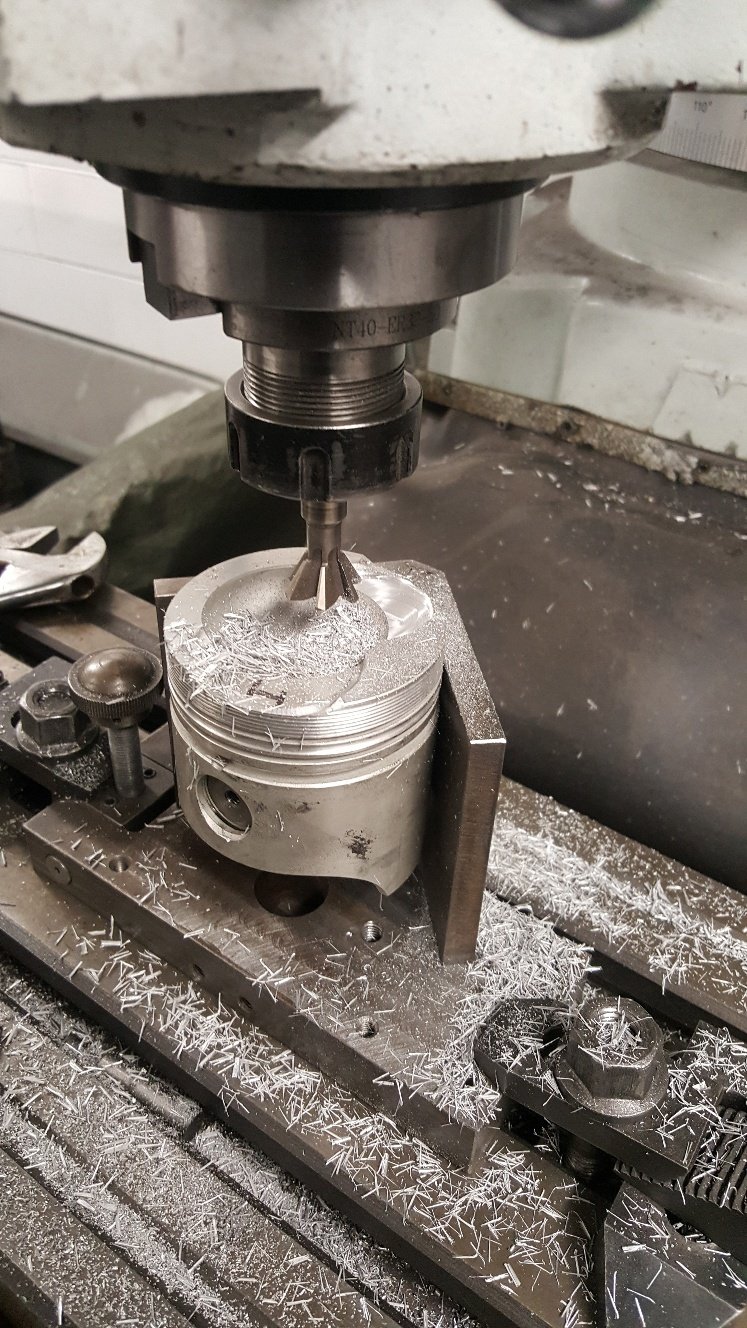
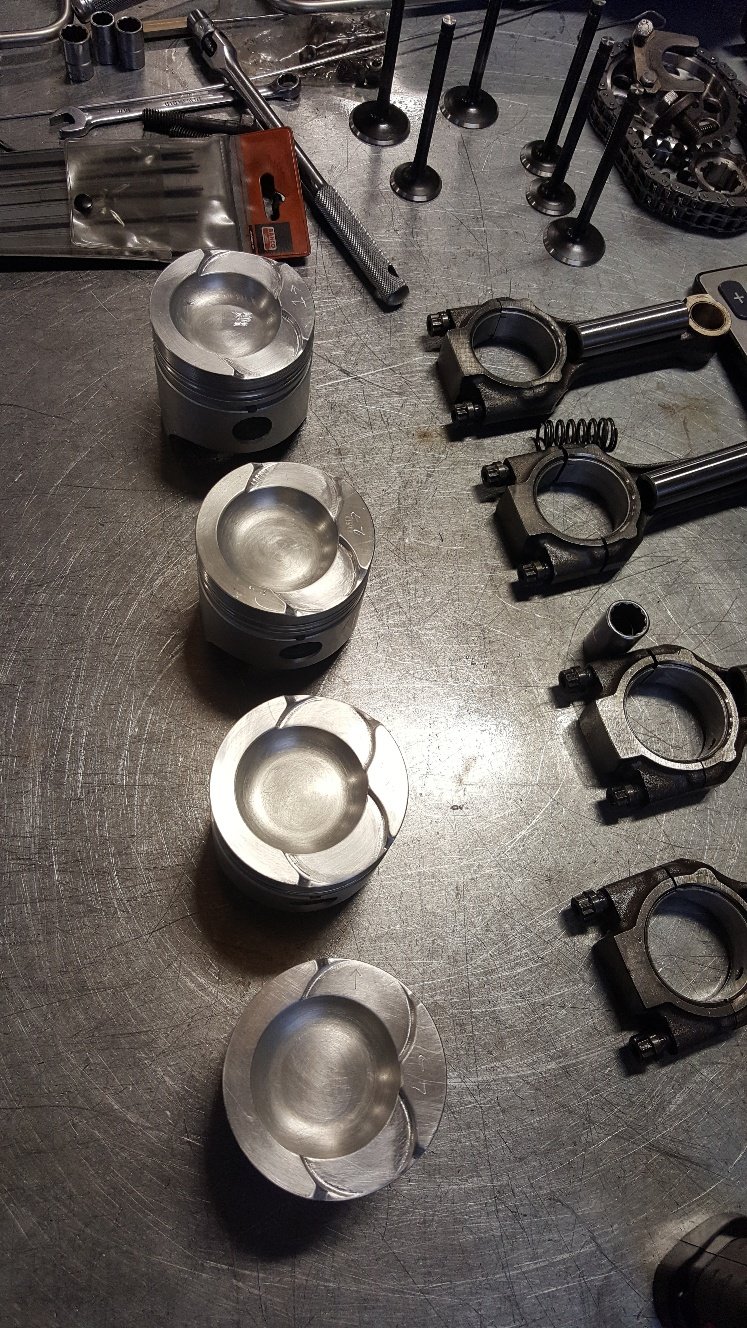
So now I know I definitely need to make the intake valve pockets bigger OD wise by 2mm. Which was no surprise as I've increased the valve size a good amount. I also found I need to deepen the exhaust pocket by 1mm. So I used a the mill to machine the pistons. We normally use a guy to do our valve pockets as we don't really have the gear to do a really nice job of it. But I'm doing this on a budget so I had a crack. This the tooling I used to take the OD out. Above And this for deepening. They came out ok. But we would normally out work this job. I gave them a tidy up with wet and dry and a small file. Tried to take the sharp edges off the top of the piston. Here's a pic of a few parts. I wasn't going spend $250 on the double row cam chain gear kit. But it had to happen.
1 point
-
As those who are more familiar with us will know both Rigamortice and myself have a great affinity for the environment and take climate change (i.e. the thing we used to “call global warming” before it got cold again!) very seriously. Stricken by remorse and overwhelmed by guilt over the tons of negative carbon credits I’ve released on the global economy through years of motor racing, driving cars for the love of it, and behaving like a typically irresponsible older ‘Oldschool’ member I have acquired an EV! You may scoff at the fact that it’s a clapped out old warehouse sweeper with buggered batteries saved from the scrap heap but to Rigamortice and myself it is a powerful symbol of our indefatigable commitment to a green and politically correct future. With help from my brother providing advice, encouragement and the Wild Turkey may I present the definitive green, negative carbon credit, EV solution to taking the wheelie bins out when you live down a long driveway, (what could possibly go wrong!). Commentary and camera work courtesy of the ever lovely Mrs sr2.1 point
-
Photo upload limit....
1 point
-
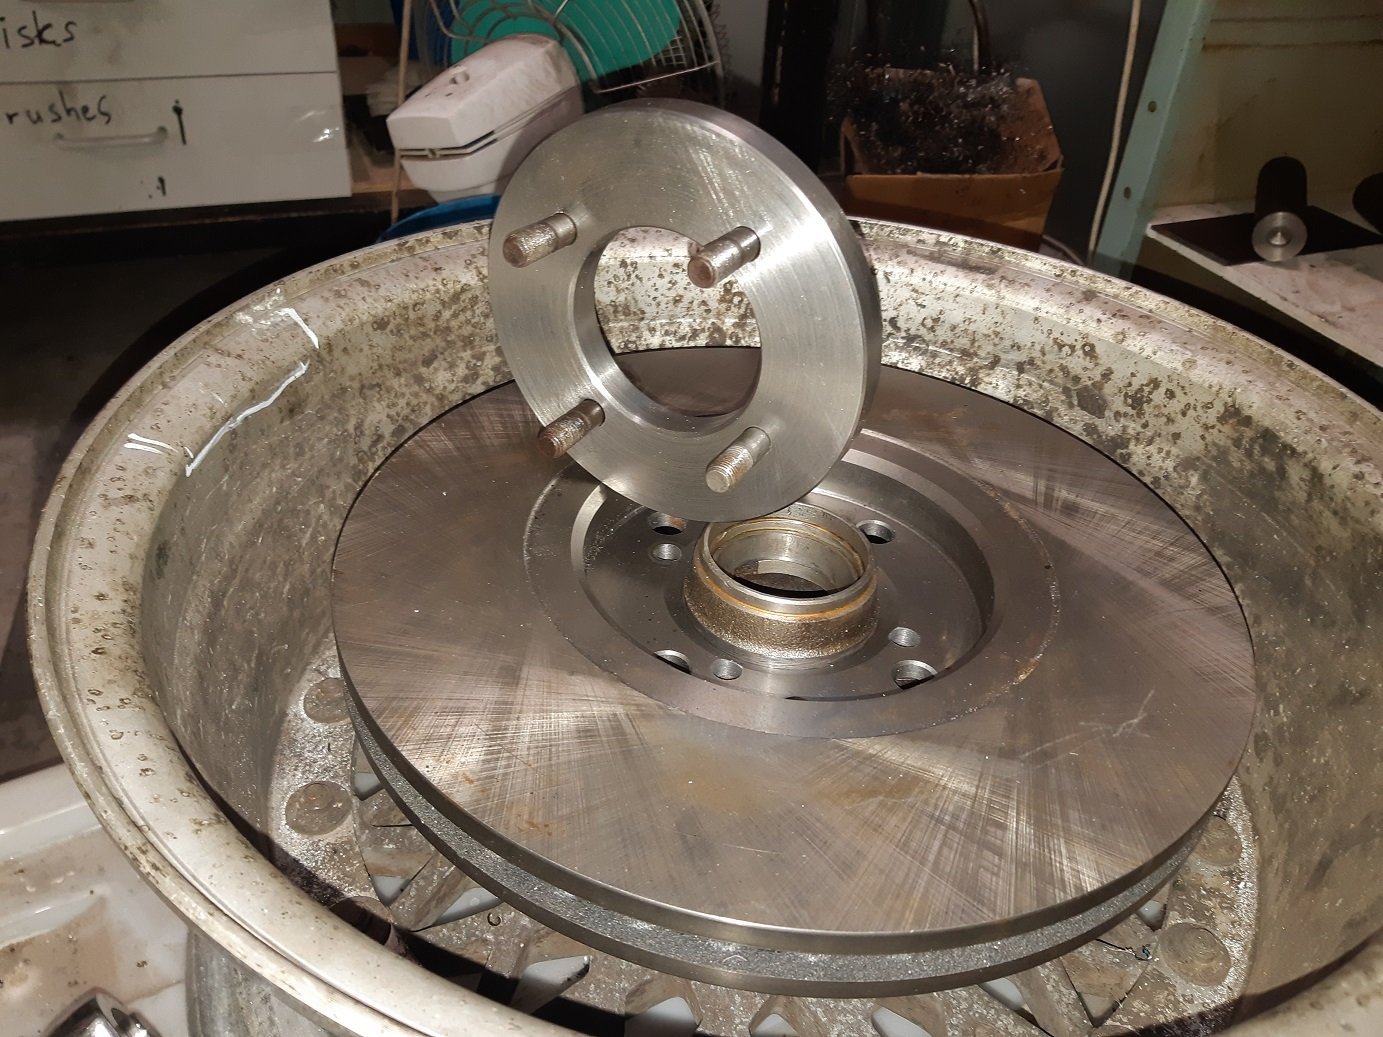
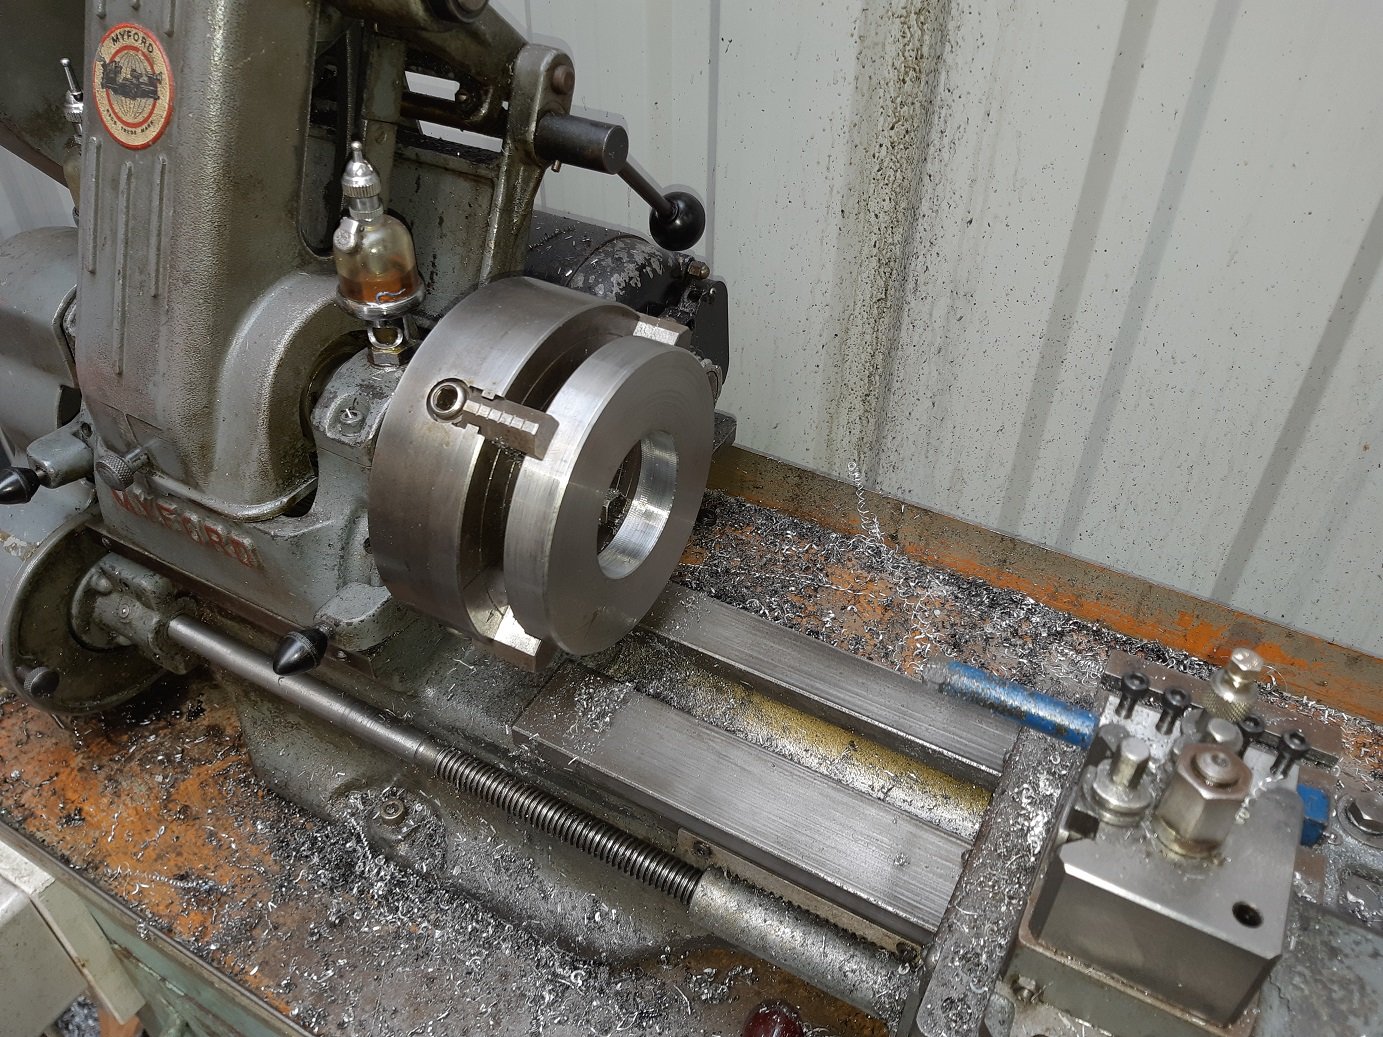
Sorted out the bore size so it's the same as the disc bore. Then I made a mandrel to stack the disc and the sandwich plate and the old disc, so I could use the holes in the old disc as a drilling guide.
1 point
-
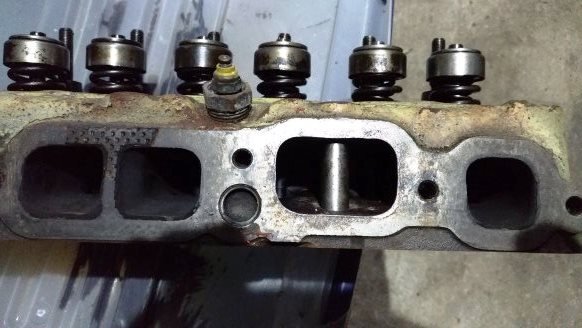
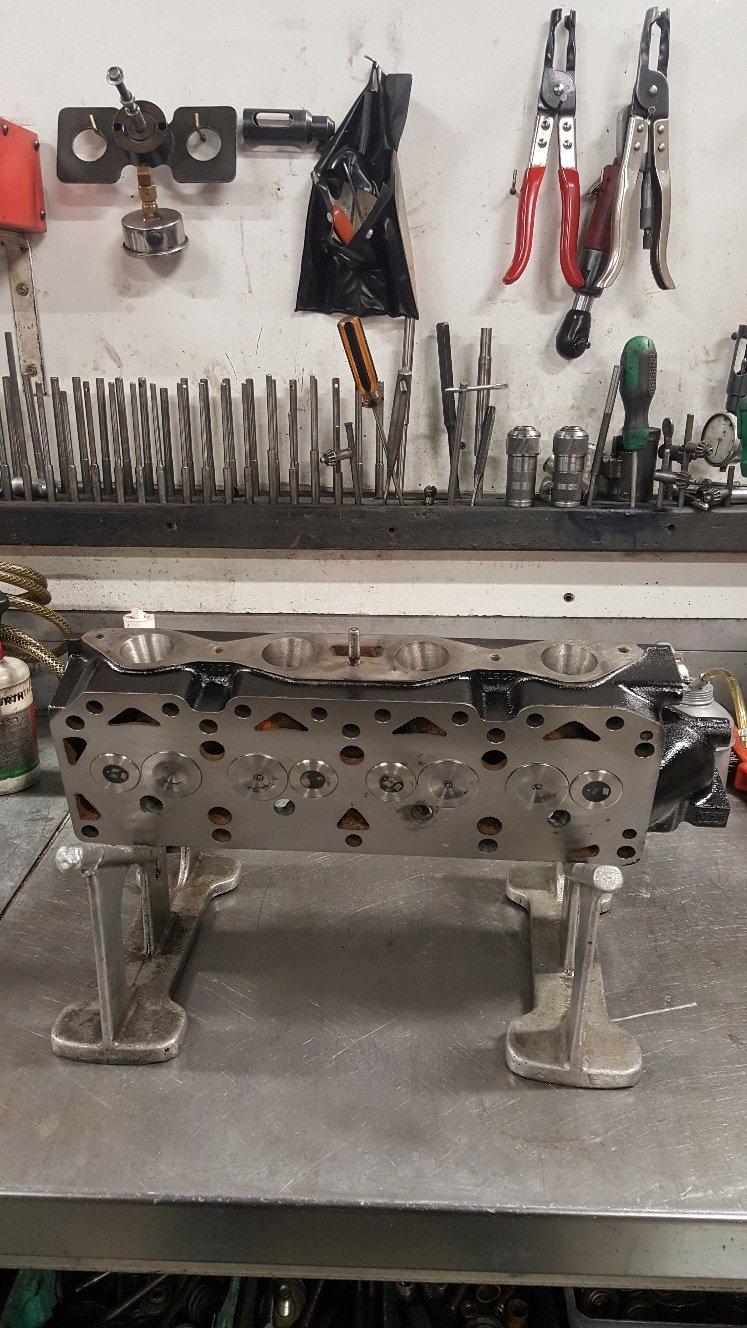
I'm happy with the valve size. So I cut seats into the new valve inserts. I cut all the seats as close to the same height as possible. Al my work mate had done some research into the best seat angles, and we used a radius throat cutter profile. Once they are all cut to the right depth and right size to get the 45degree seating where we want it on the valve face we are ready to synchro seat the seats with the stone gear. We believe this gives a good sealing finish on the seats. I didn't get any pictures of this, but basically you face the valve seat grinding stone on the valve facer to get the same exact angle. Here's a picture of me stoning the seat. You can see the seats are polished up. I now check to see if they are seating the whole width on the valve face. I didn't get a picture of this. But we use a engineers blue to wipe on the valve the put the valve into the head and push the valve onto the seat and look to see if the engineers blue makes full contact from the valve to the seat. So the valve and seats are done. So I need some valve springs so I went down to Kennelly Cams to see PK and Adam. They have a good selection of springs in stock. This is also where I got my cam reground. So running the FE Mazda valves I need to use a different valve spring retainer to the stock xflow item. I looked at using the FE retainers but unfortunately that was going to make my spring install height to tight. The spring install height is the measurement from the spring seat on the head to the valve spring retainer. Stock xflow is around 33mm. So that's what I'm trying to get close to. So Al grabbed a Toyota 1kz retainer and we took a measurement and they looked like they would do the job with a bit of turning in the lathe. You can see the spring isn't sitting in the right spot. So I made a arbor to spin the retainers in the lathe Finished retainers sitting on the spring.
1 point
-
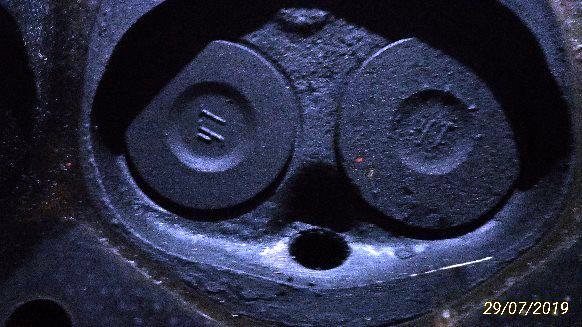
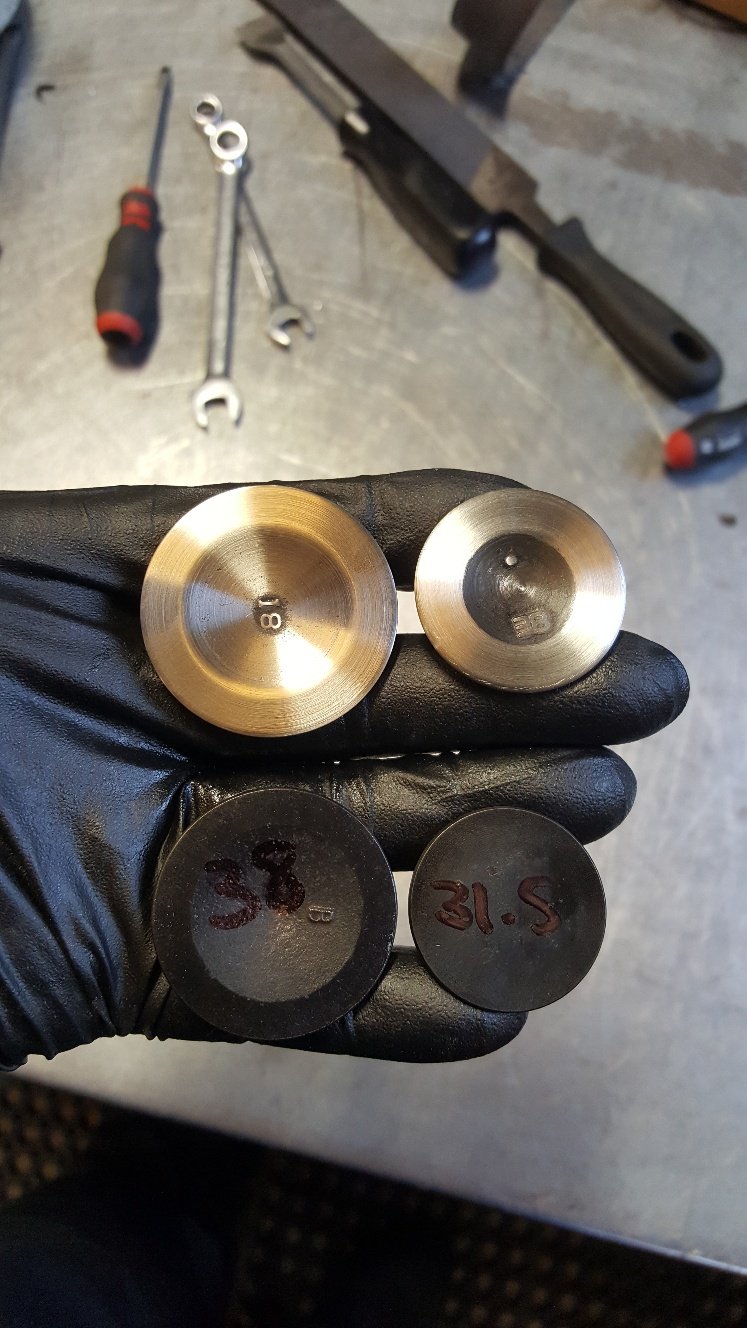
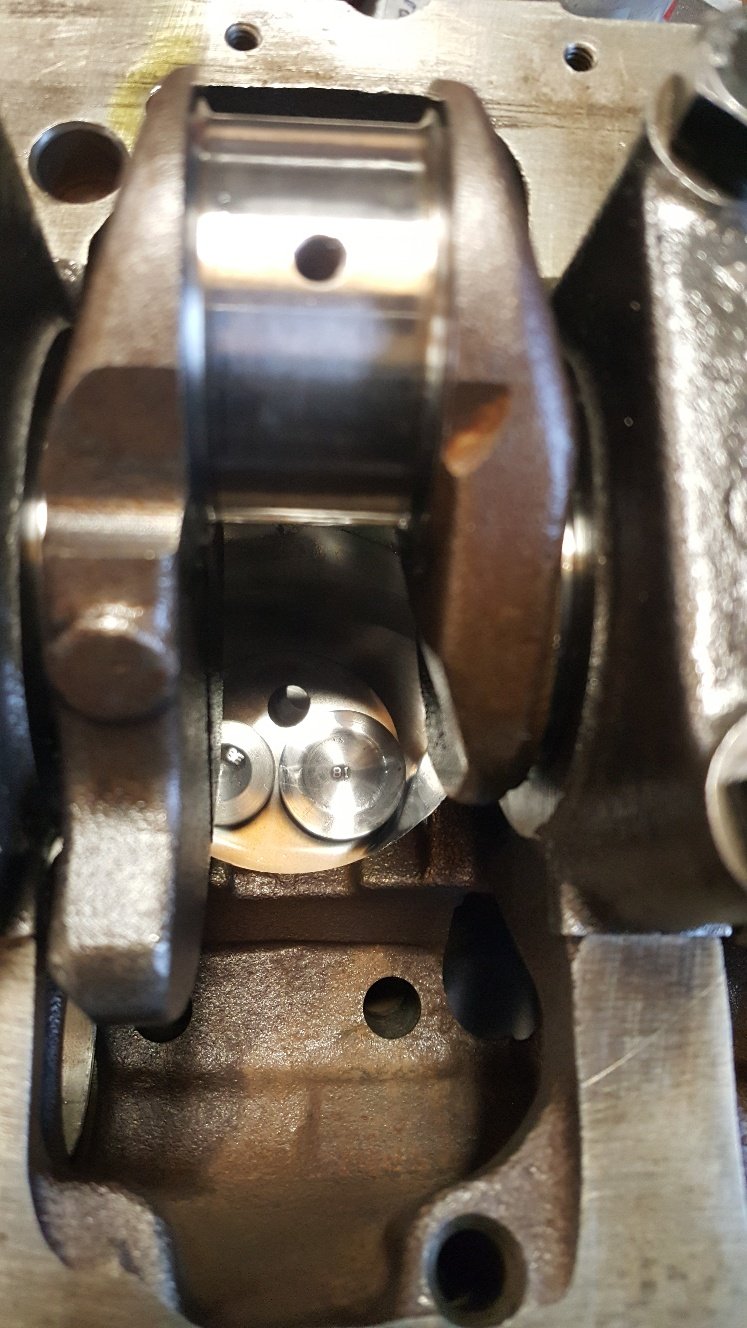
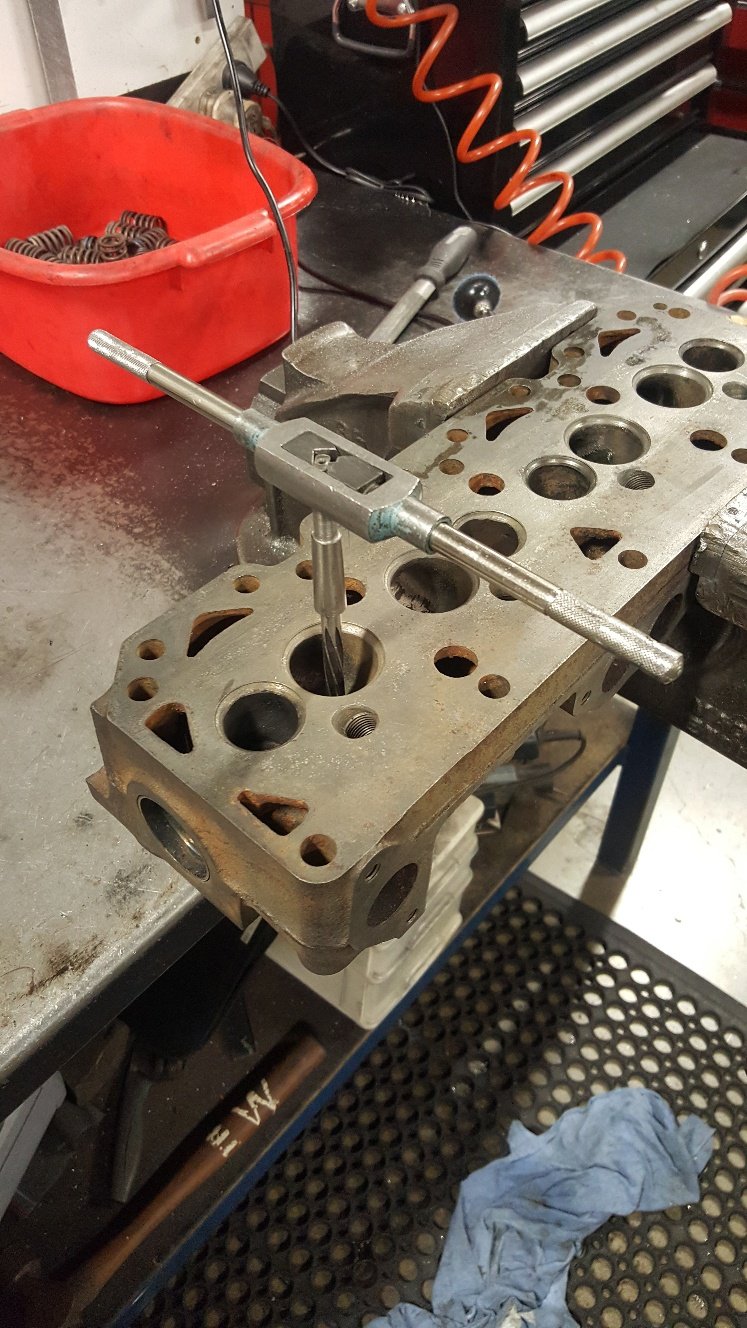
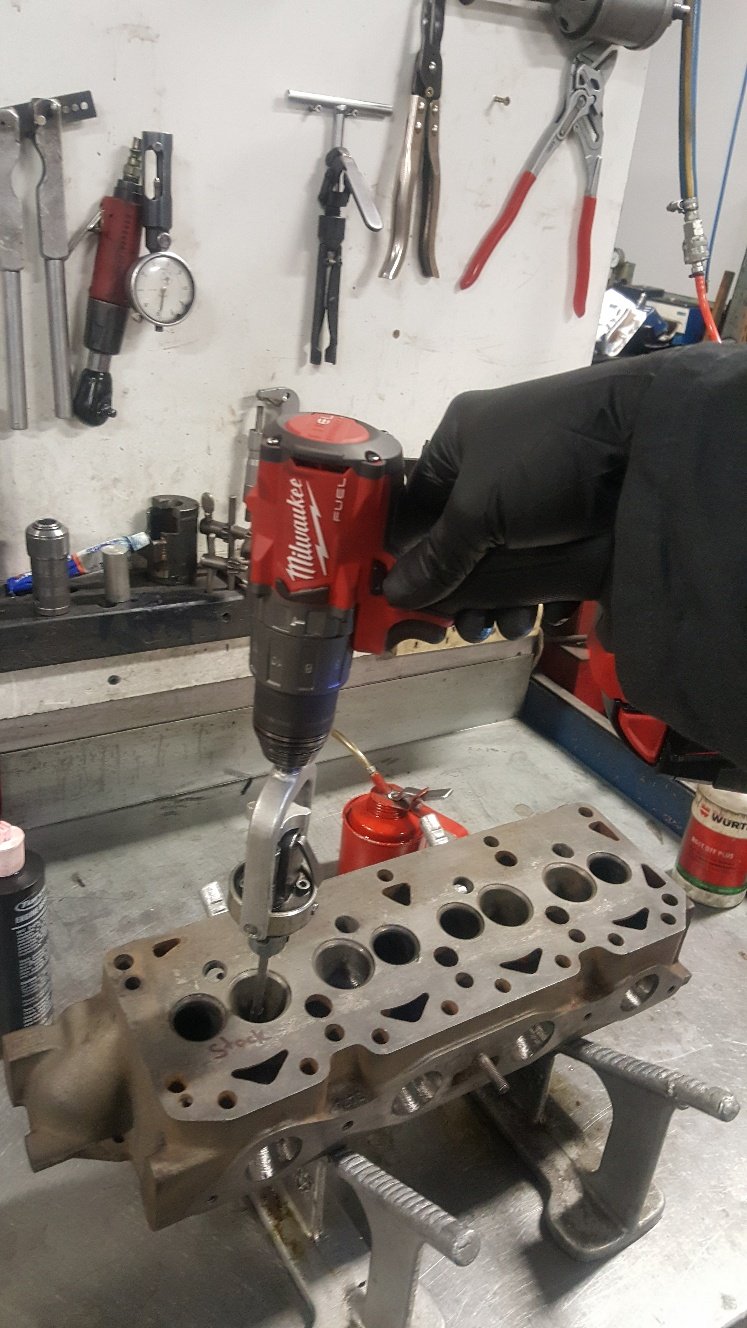
Time to cut some holes for valve seat inserts. We have a Sunnen VGS for all our head work. First picture is setting up the tool cutter to cut the hole. We are looking for between 3-5 tho crush. Once holes are cut just hammer the inserts in. Then turned down a intake valve and a exhaust so had something to check valve spacing and clearance of the side of the bore. I detopped the inserts in the VGS and then surfaced the head. I didn't get a picture of it in the surface grinder as there's pictures of that previously. Here's the valves. And a shot of the head bolted on to the block looking into the bore to see how much clearance the valves have off the side of the bore.
1 point
-
1 point
-
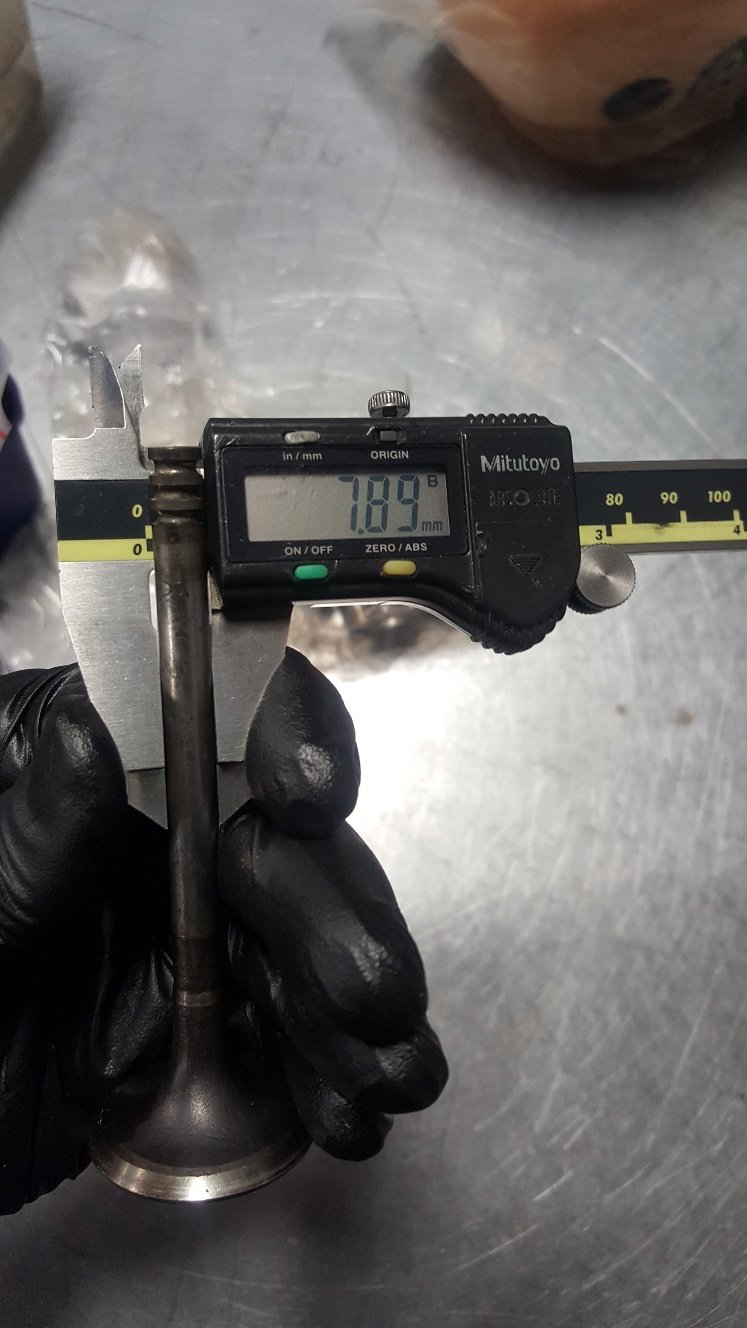
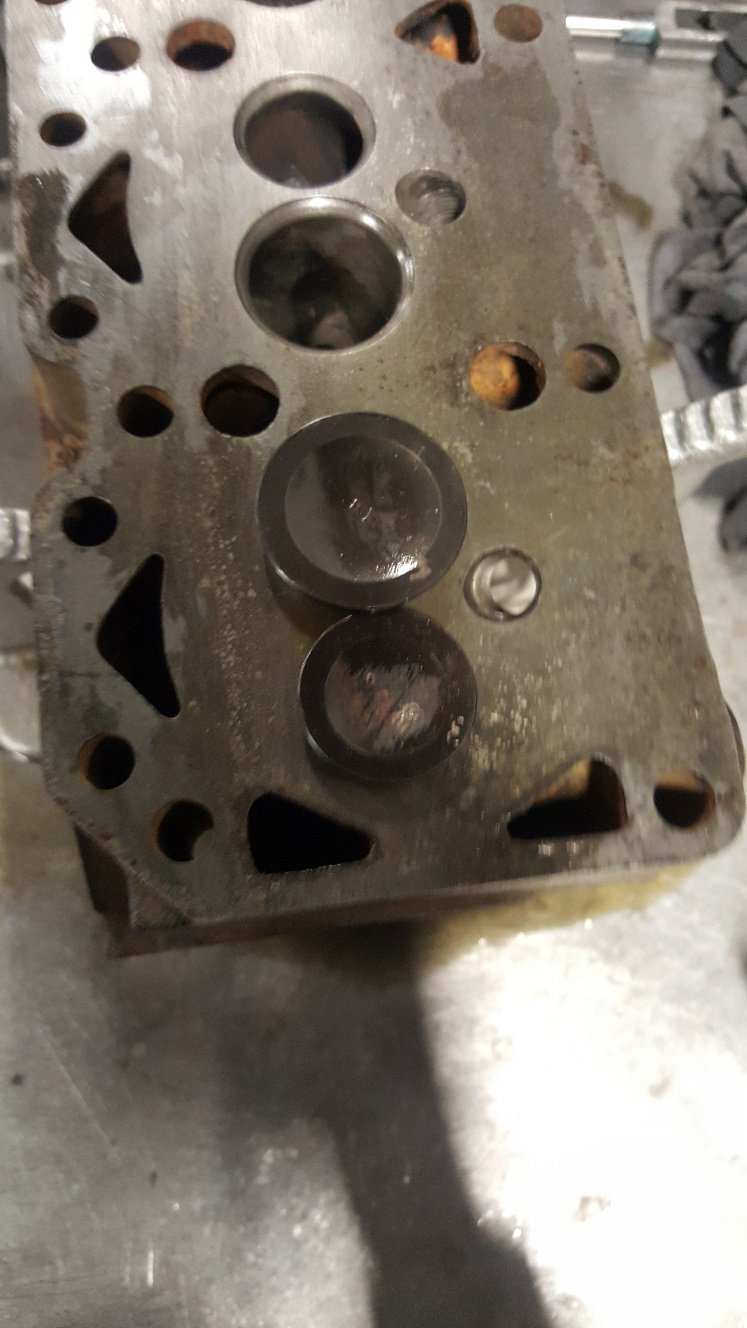
Here's a picture of the standard valve stem size Here's the Mazda FE valve stem size. So I need to open the guides up to accept the bigger stem size. This is also good because it means I don't need to fit a new valve guide. Its just a matter of reaming the guide hole the honing to finished size And now the guides are big enough to get the valves in. I will be machining these down to 42mm for the intake and 34.5mm for the exhaust.
1 point
-
Good ride home feilding thru to woodvile for a pie bak home to palmy. Im gona swap the break booster hopfully get some more break power as the fronts have always been rubish.
1 point
-
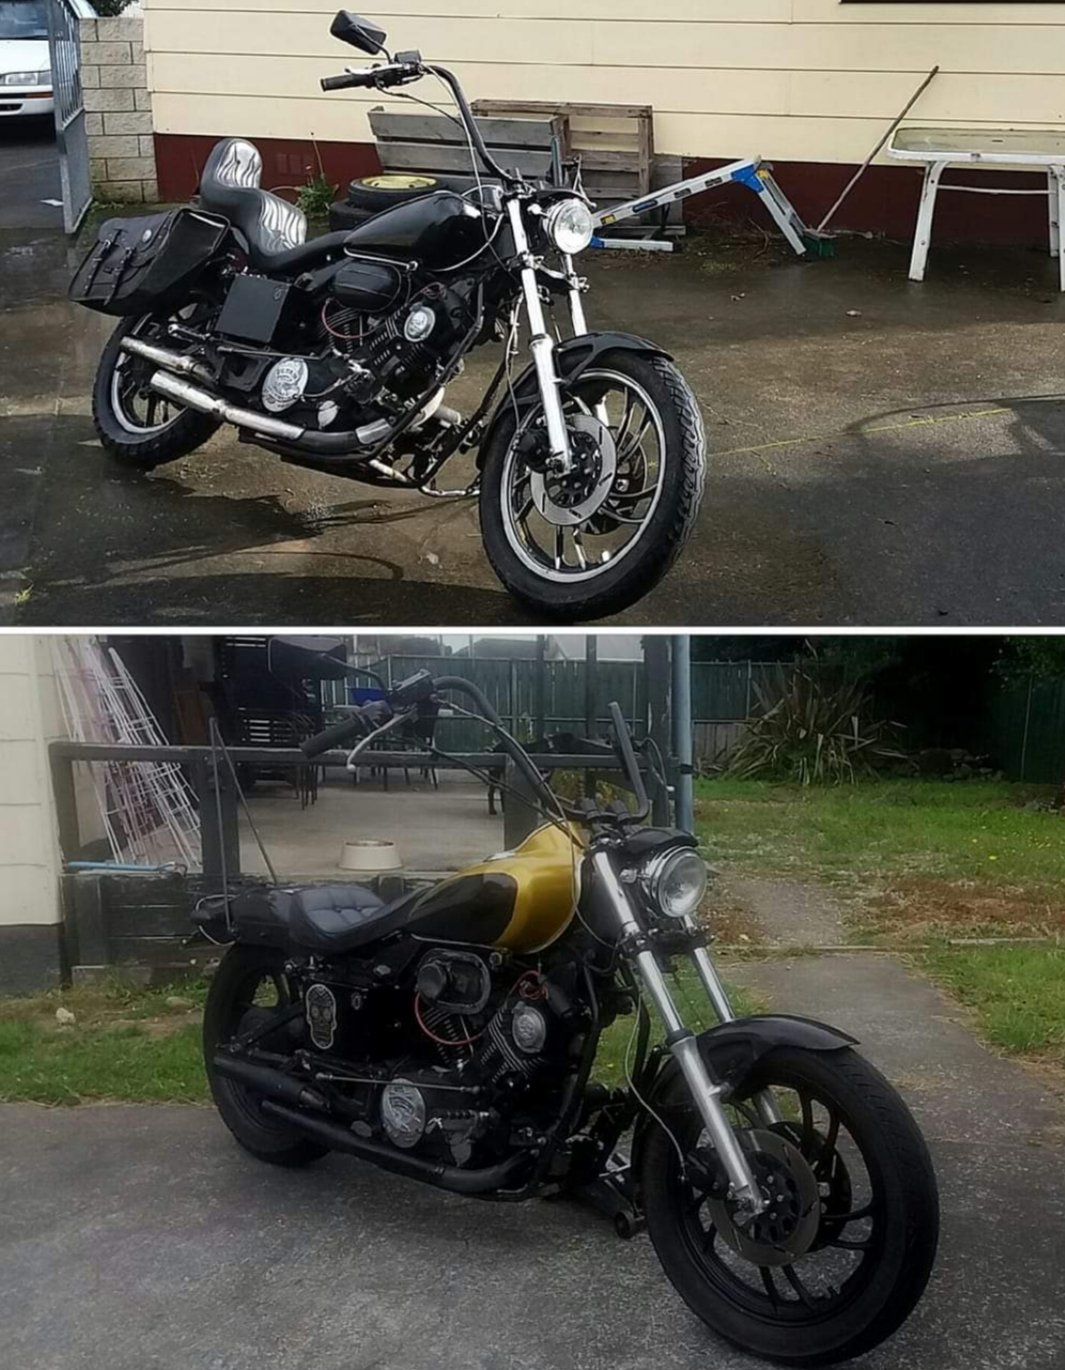
Heres a couple of photos from when i 1st got her to now replaced every gasket on it. Rebuilt carbs made sisy bar paint changed random stuff ect over the last year
1 point
-
1 point
-
1 point
-
@EpochNZ There was one orange one that looked to be pretty solid and complete - I'd say that there would be enough there to Frankenstein one out of another one or two cars haha. Even if you got one solidish car you could probably get it back together with parts from the Skoda Club / Skoda Barrys dotted around the place!
1 point
-
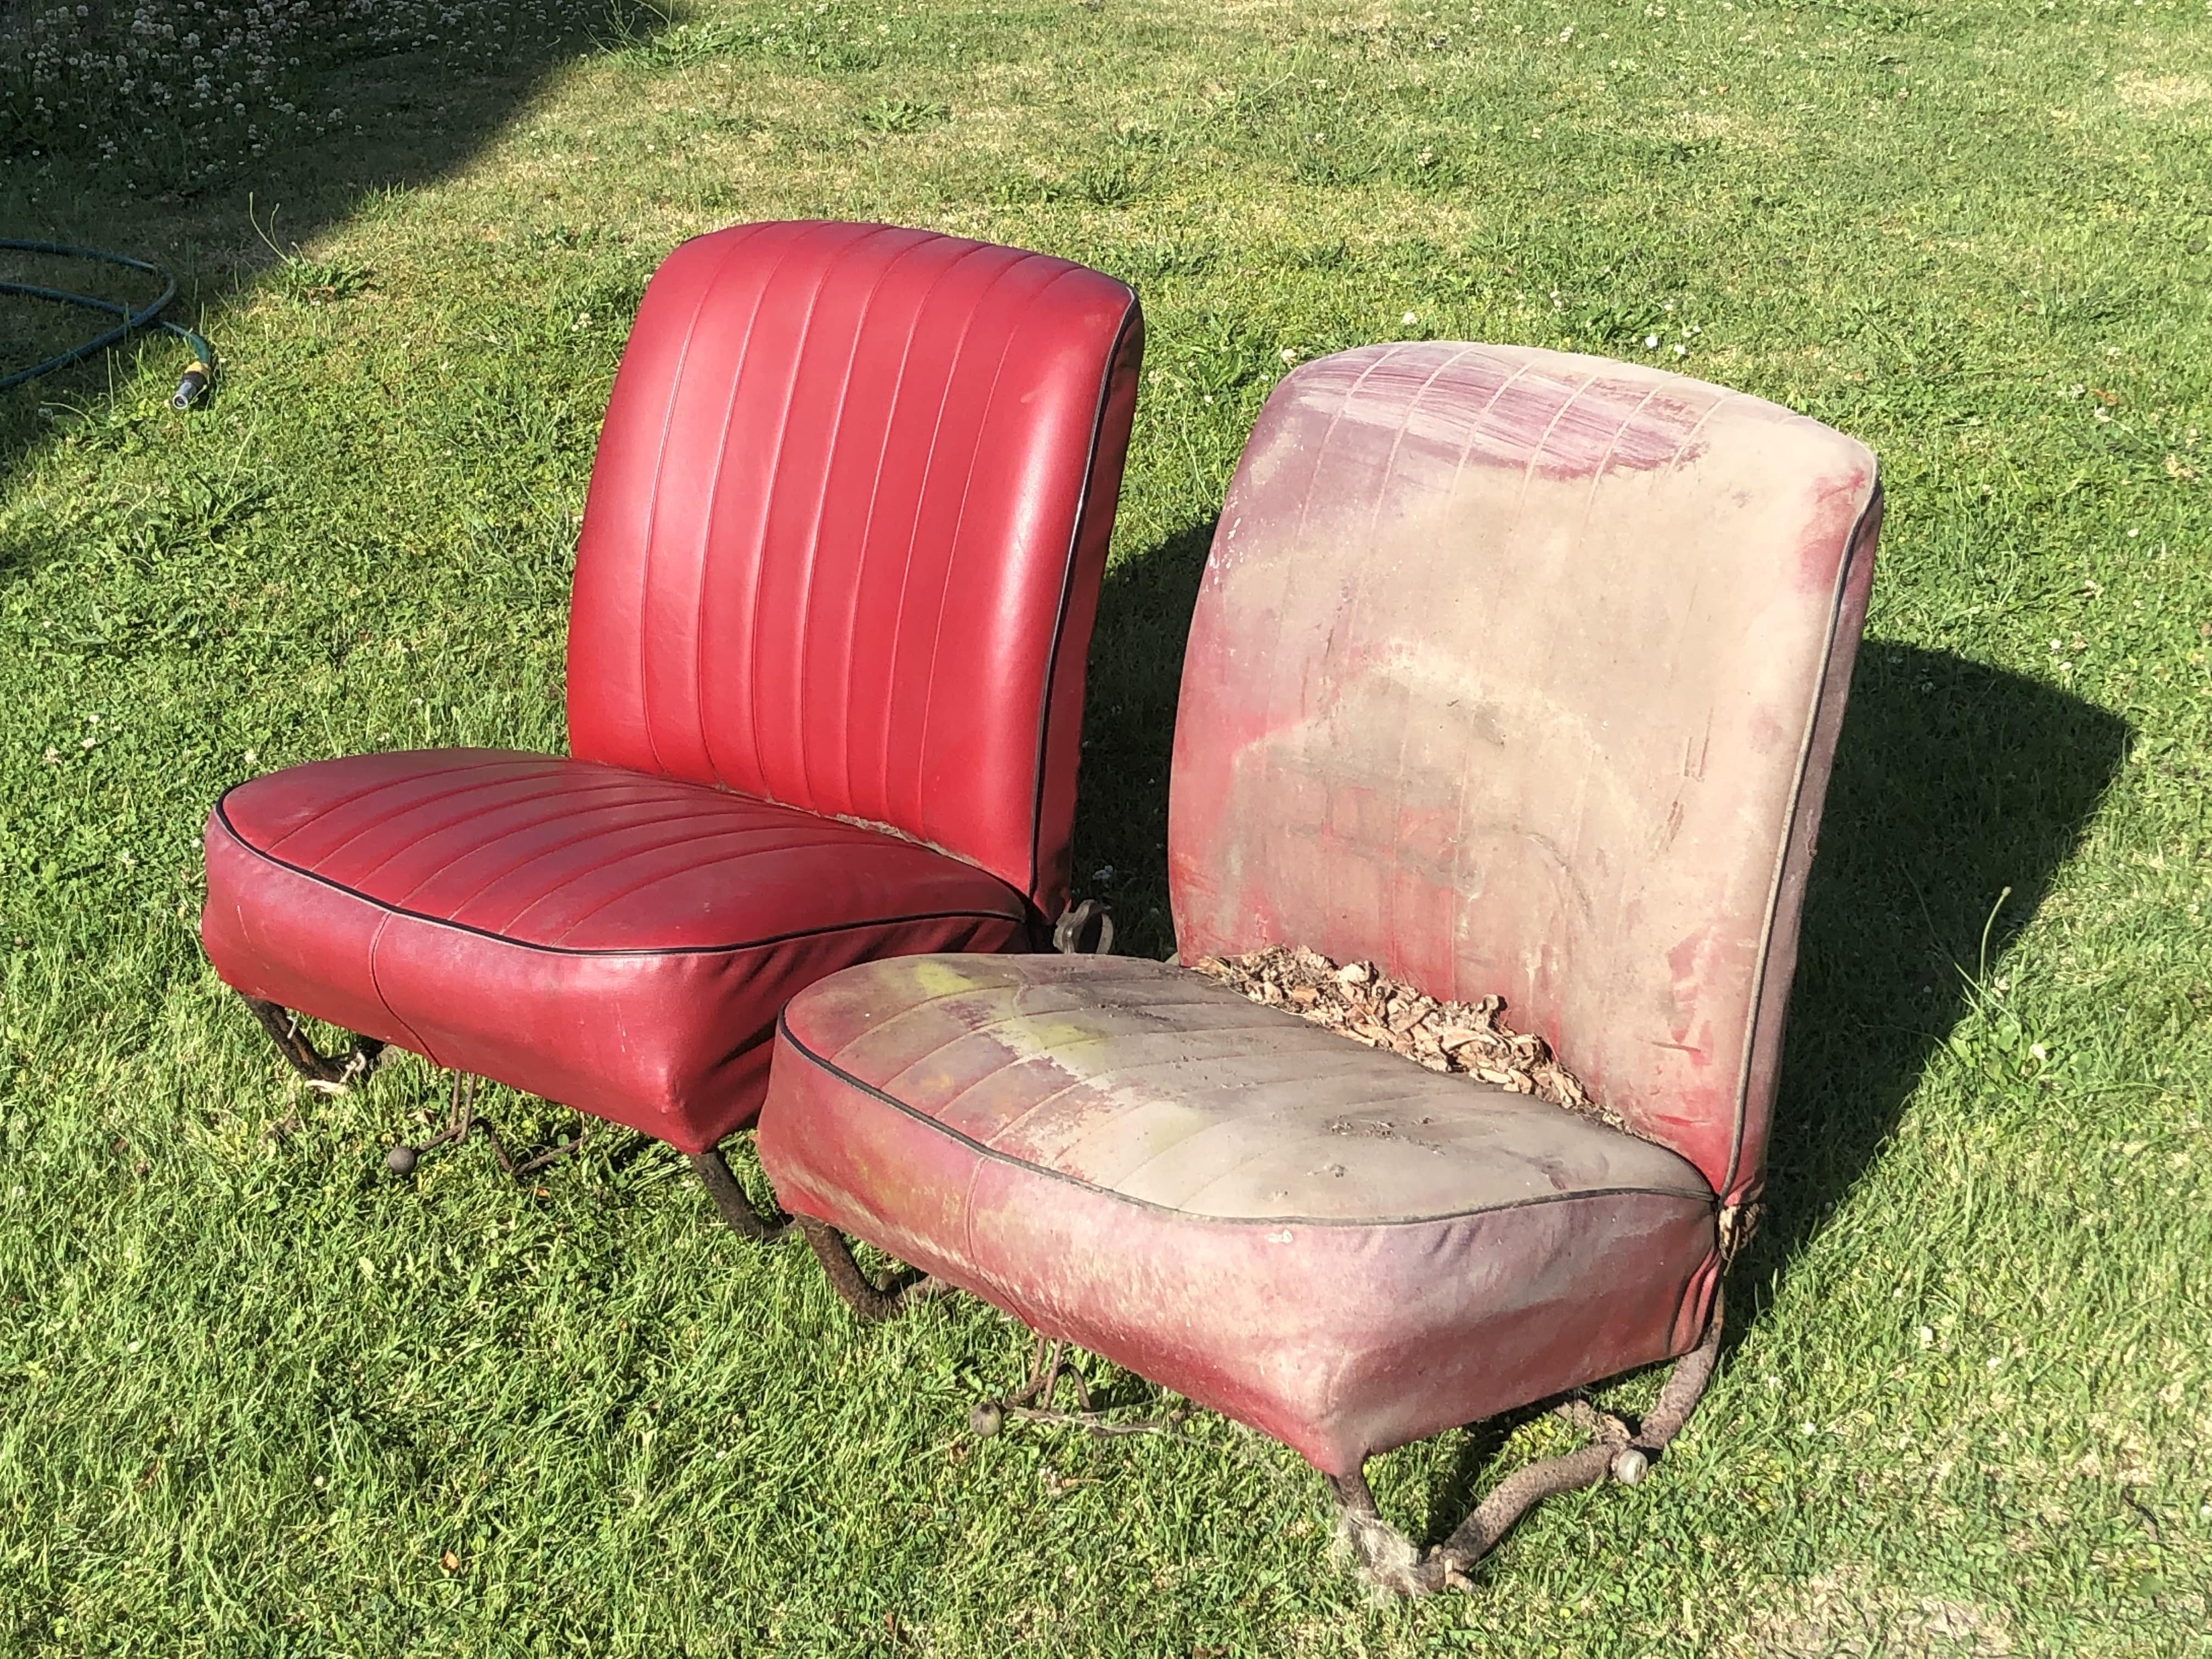
Managed to get the full set of seats out and they look like they will all scrub up like the one on the left - I am one happy lad.
1 point
-
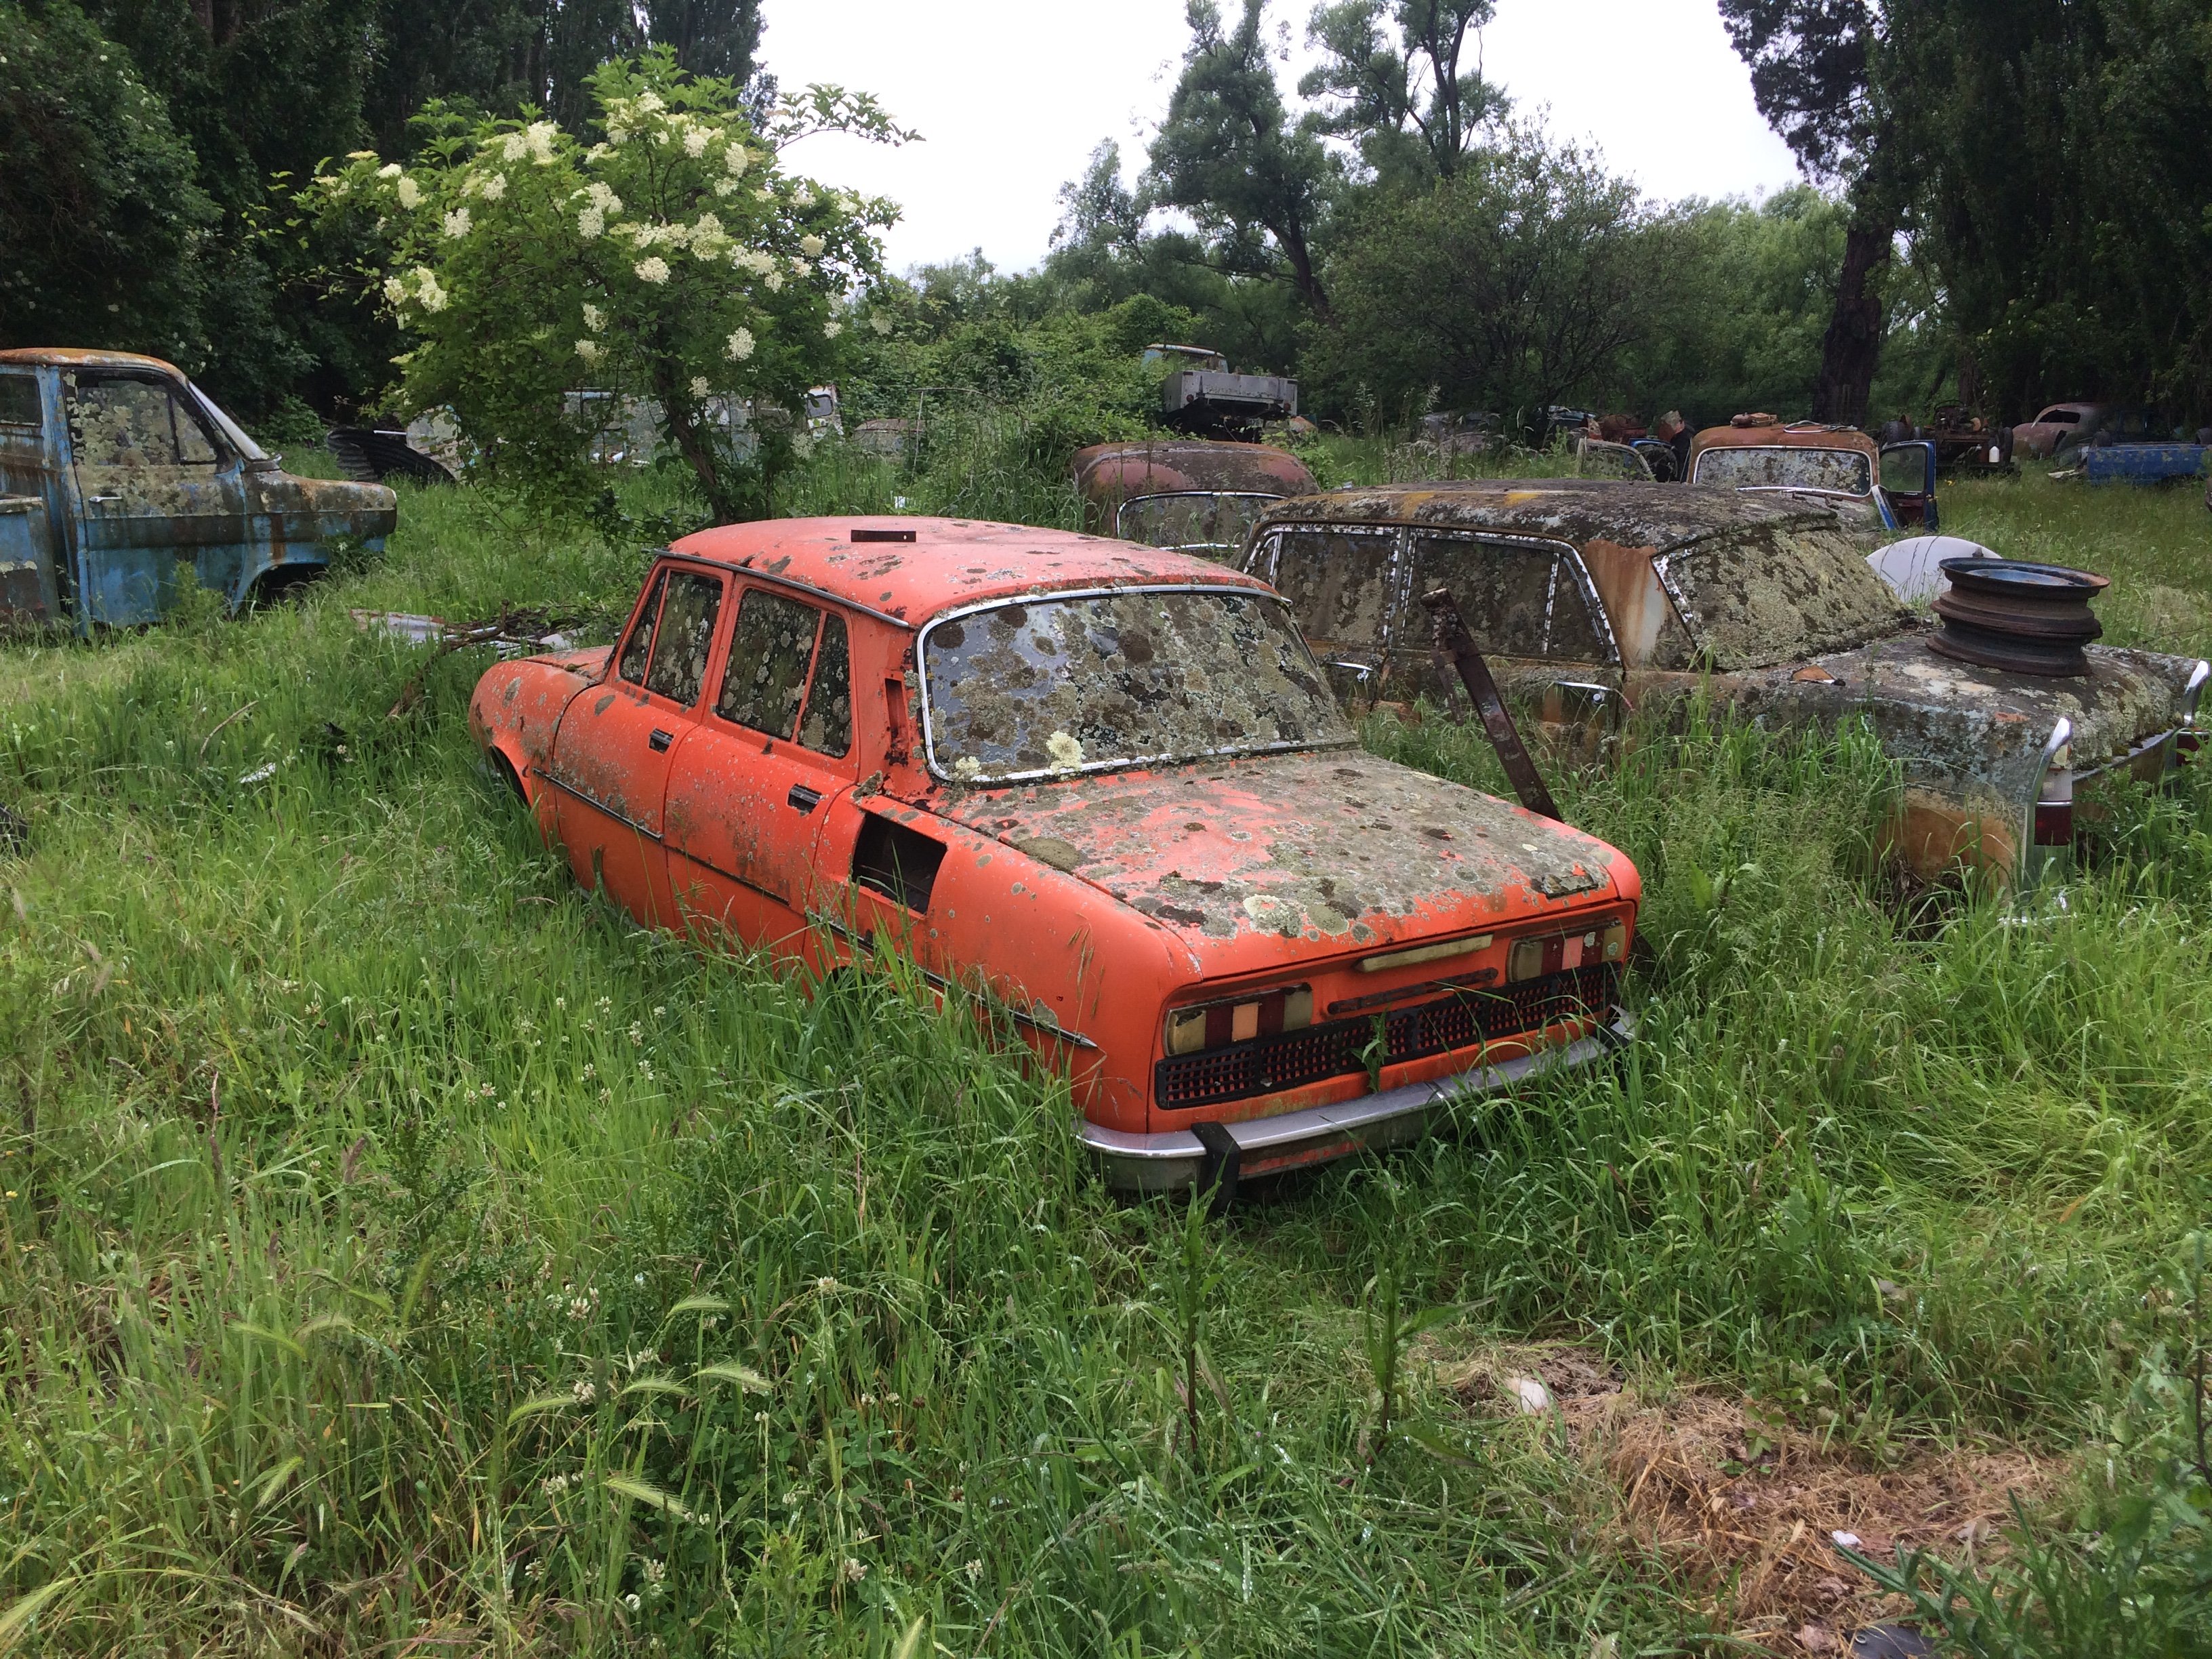
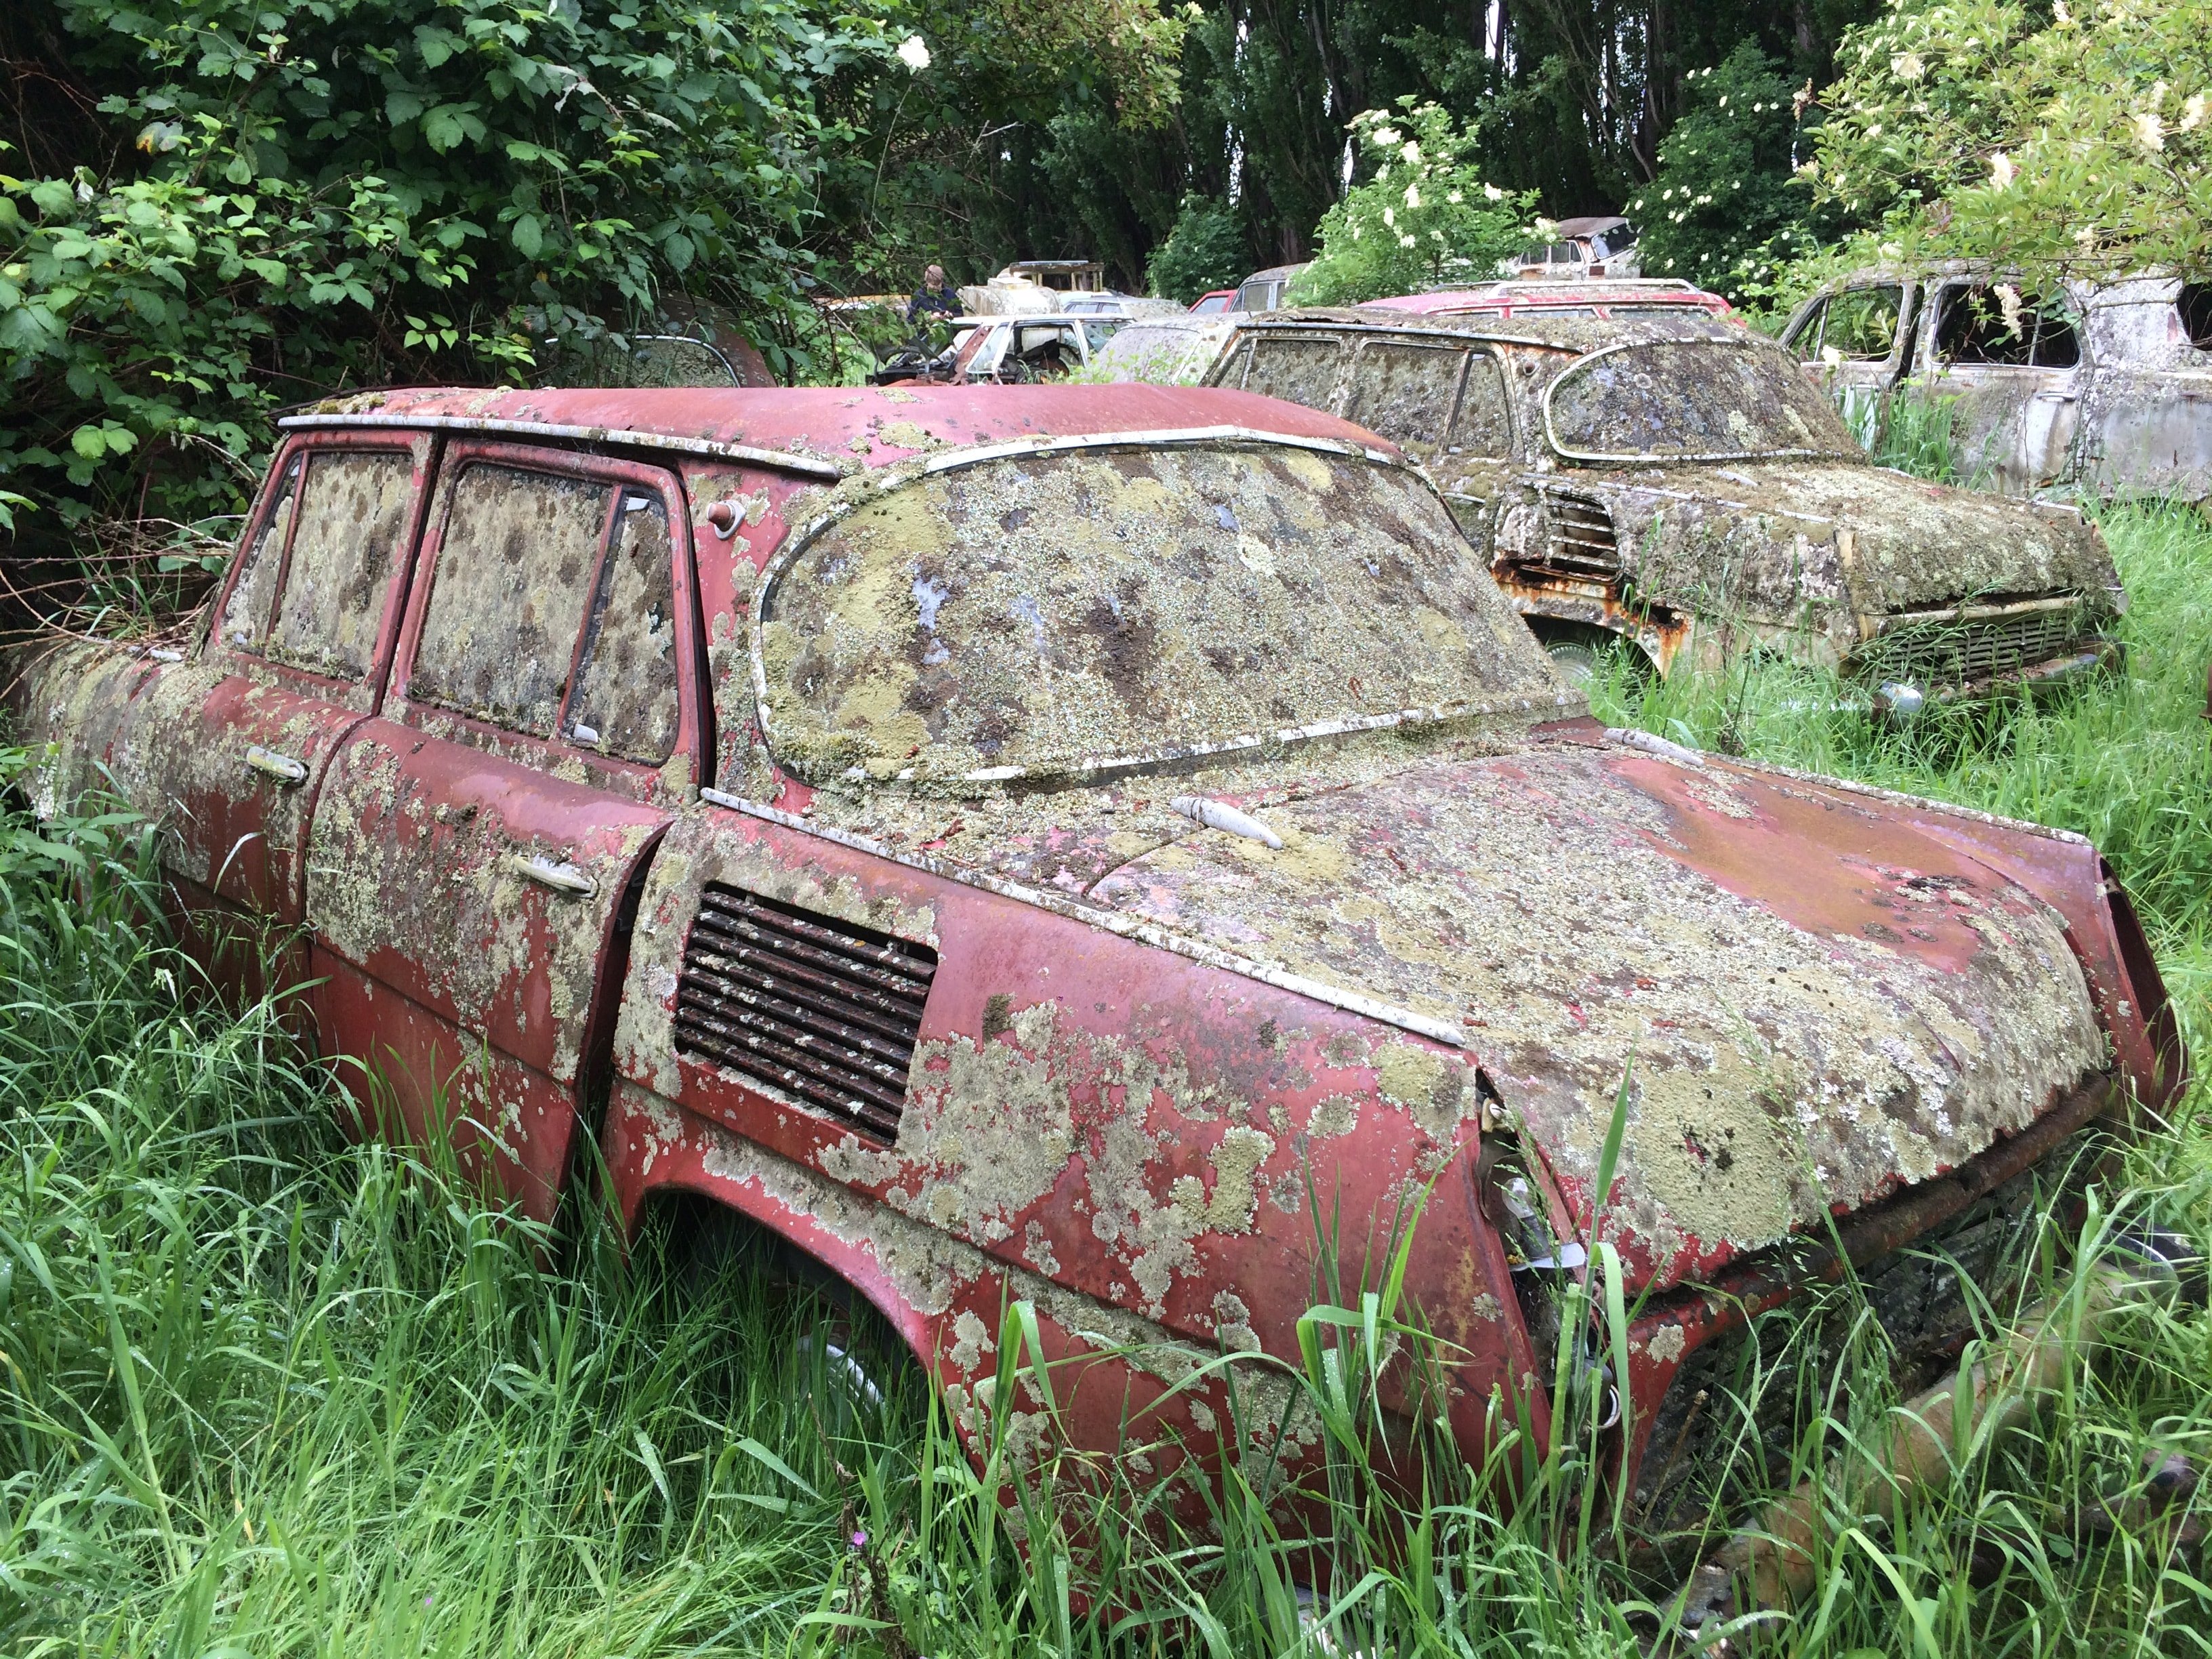
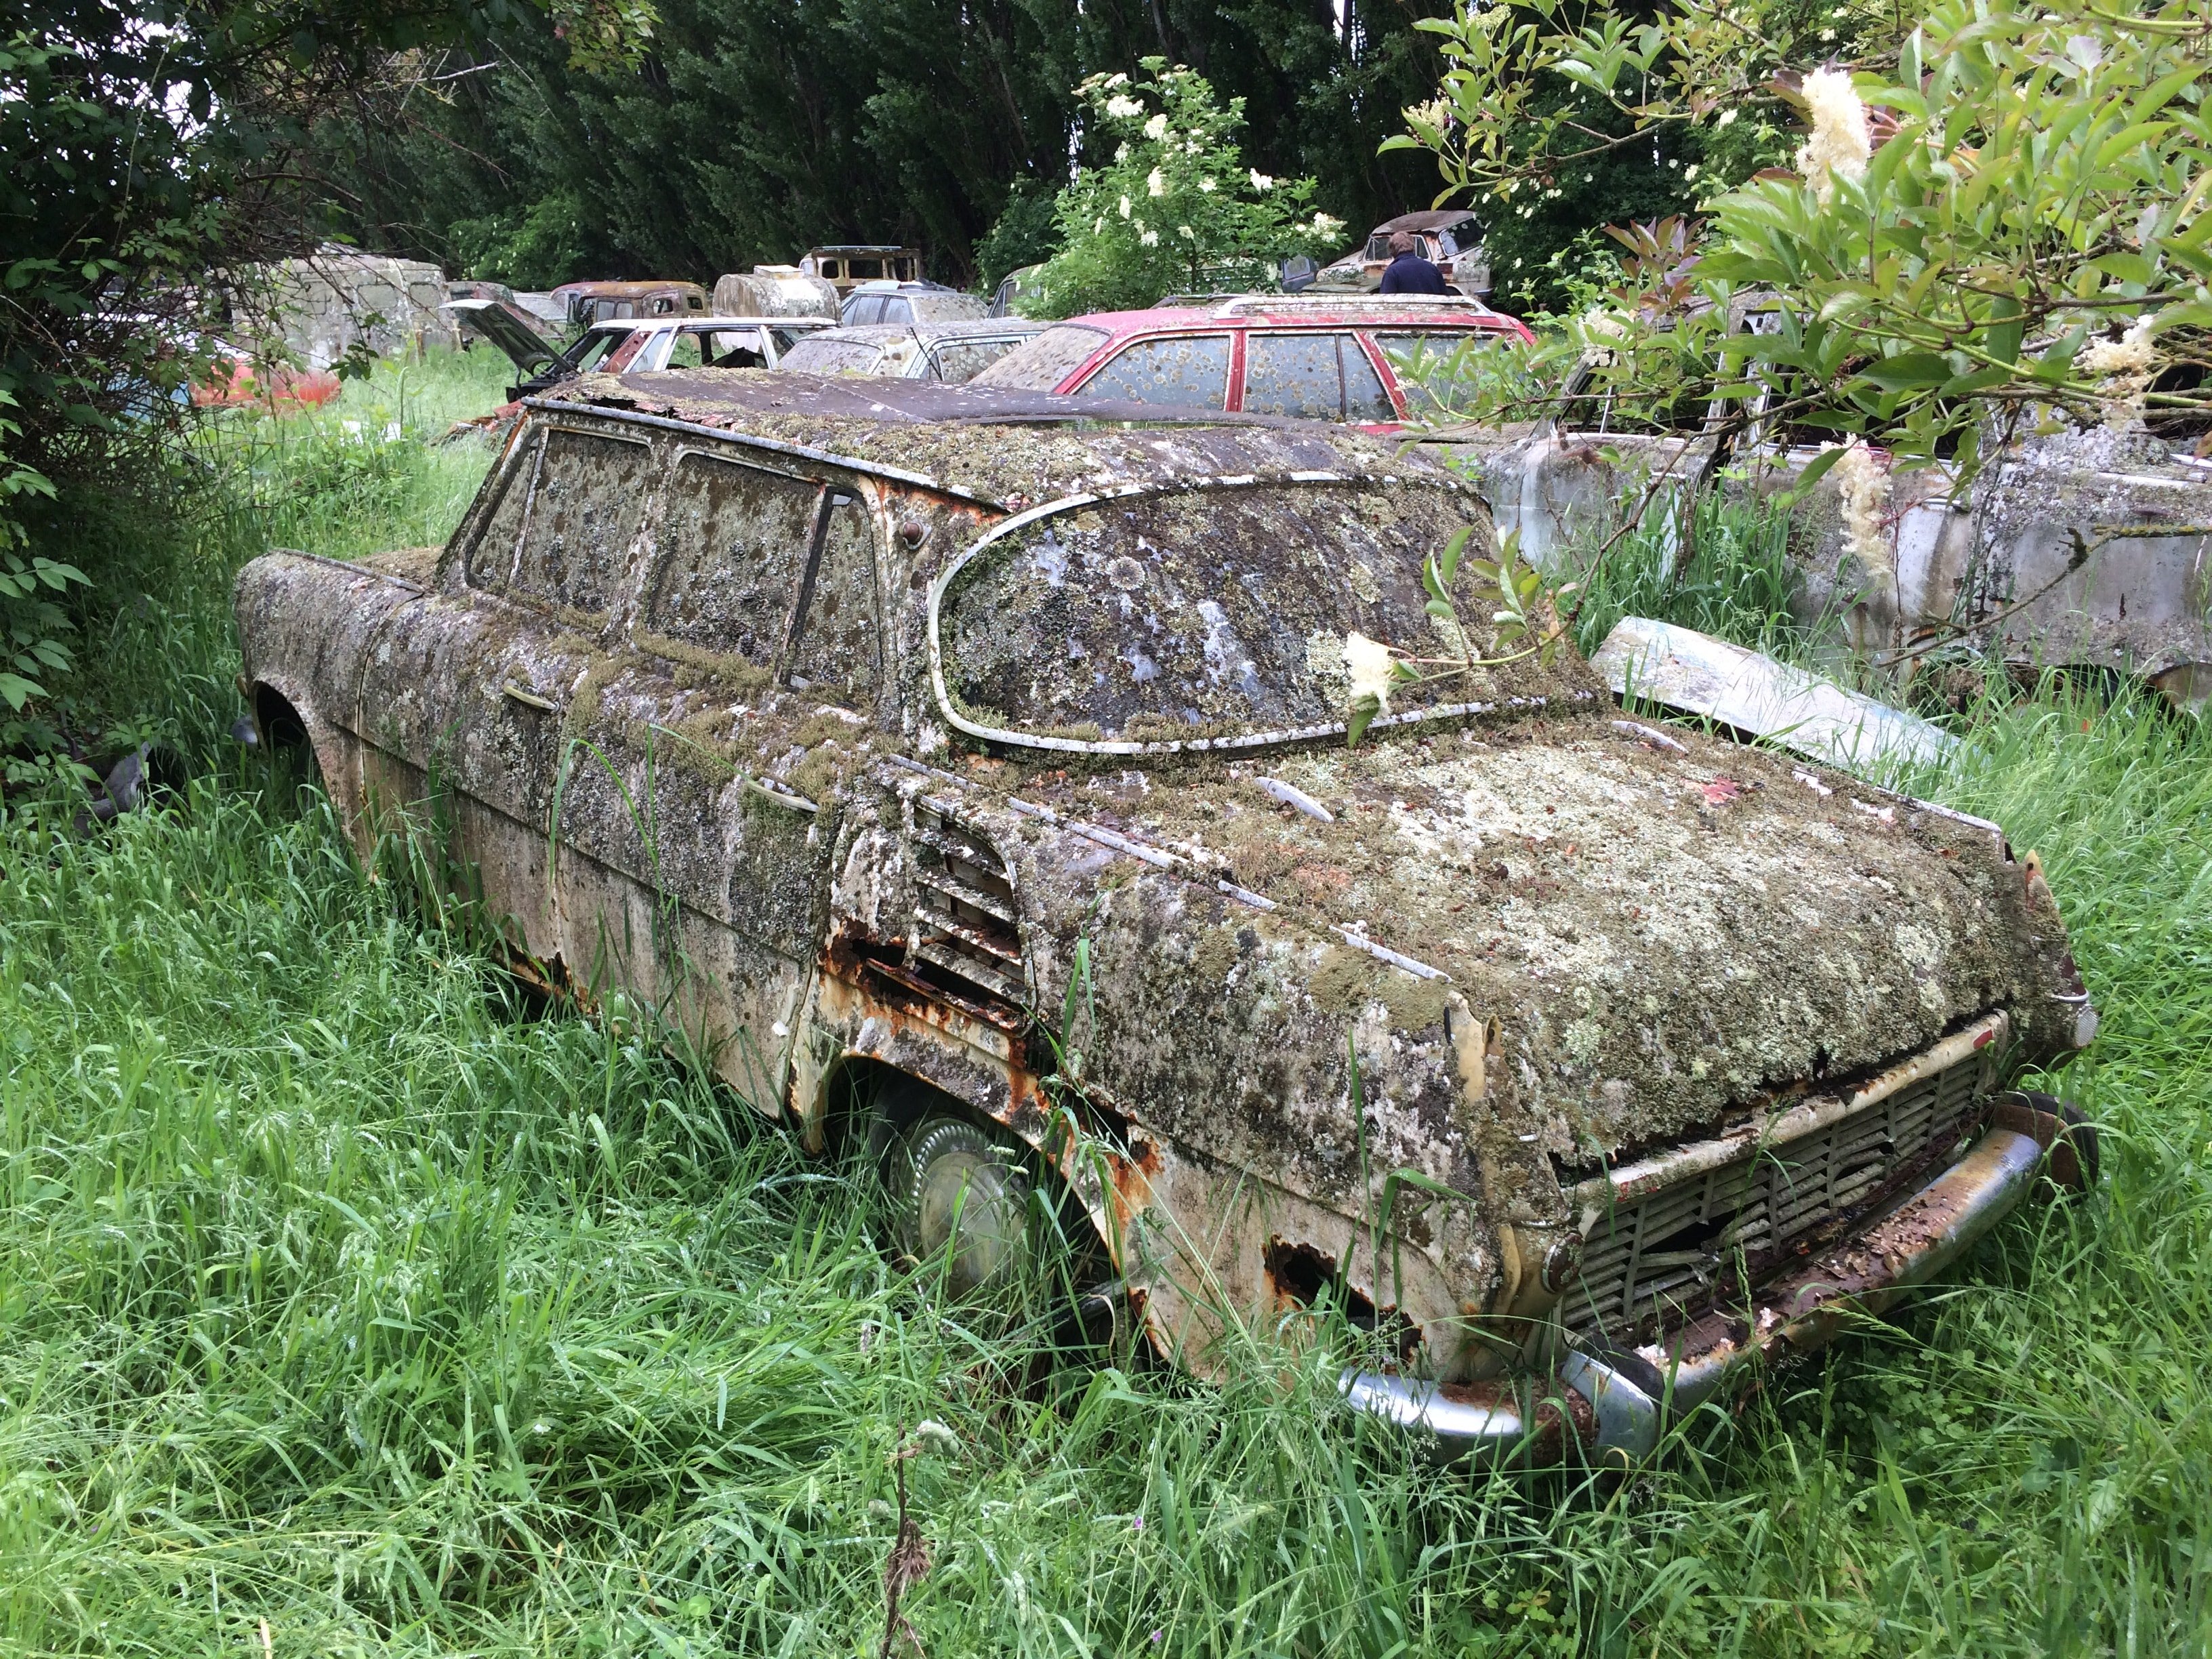
Made it back to save one of the wrecks, I was there by myself so took the white one because it was easier to access. I wanted to get the red one originally but it had black seats verses the red ones my car had new. Turned out to be quite the mission to get it out, used my XJ Jeep which has never been off the road to drag the various wrecks out of the way so I could get the trailer close enough. Then almost ripped the whole front off the Skoda winching it from the front suspension! Unbelievably rusty piece of a car. Front right wheel was fully locked on so only way I could get it on the trailer was greasing the tyre then pulling it on. Made it home once I'd got it onto the trailer (there goes the neighbourhood), got the bits off it I wanted then took it for scrap. Seats have been really well preserved, the lichen on the windscreens seems to have blacked out the sun (see photo for before/after cleaning). Newspaper found in the car would date it as being sent to it's death in 1988 so 30 years in a paddock! Also found the unrecognisable remains of a 110R coupe - sad sad sight
1 point
-
I think I'll go for this reddish one. Still a rusty pile but in slightly better condition.
1 point
-
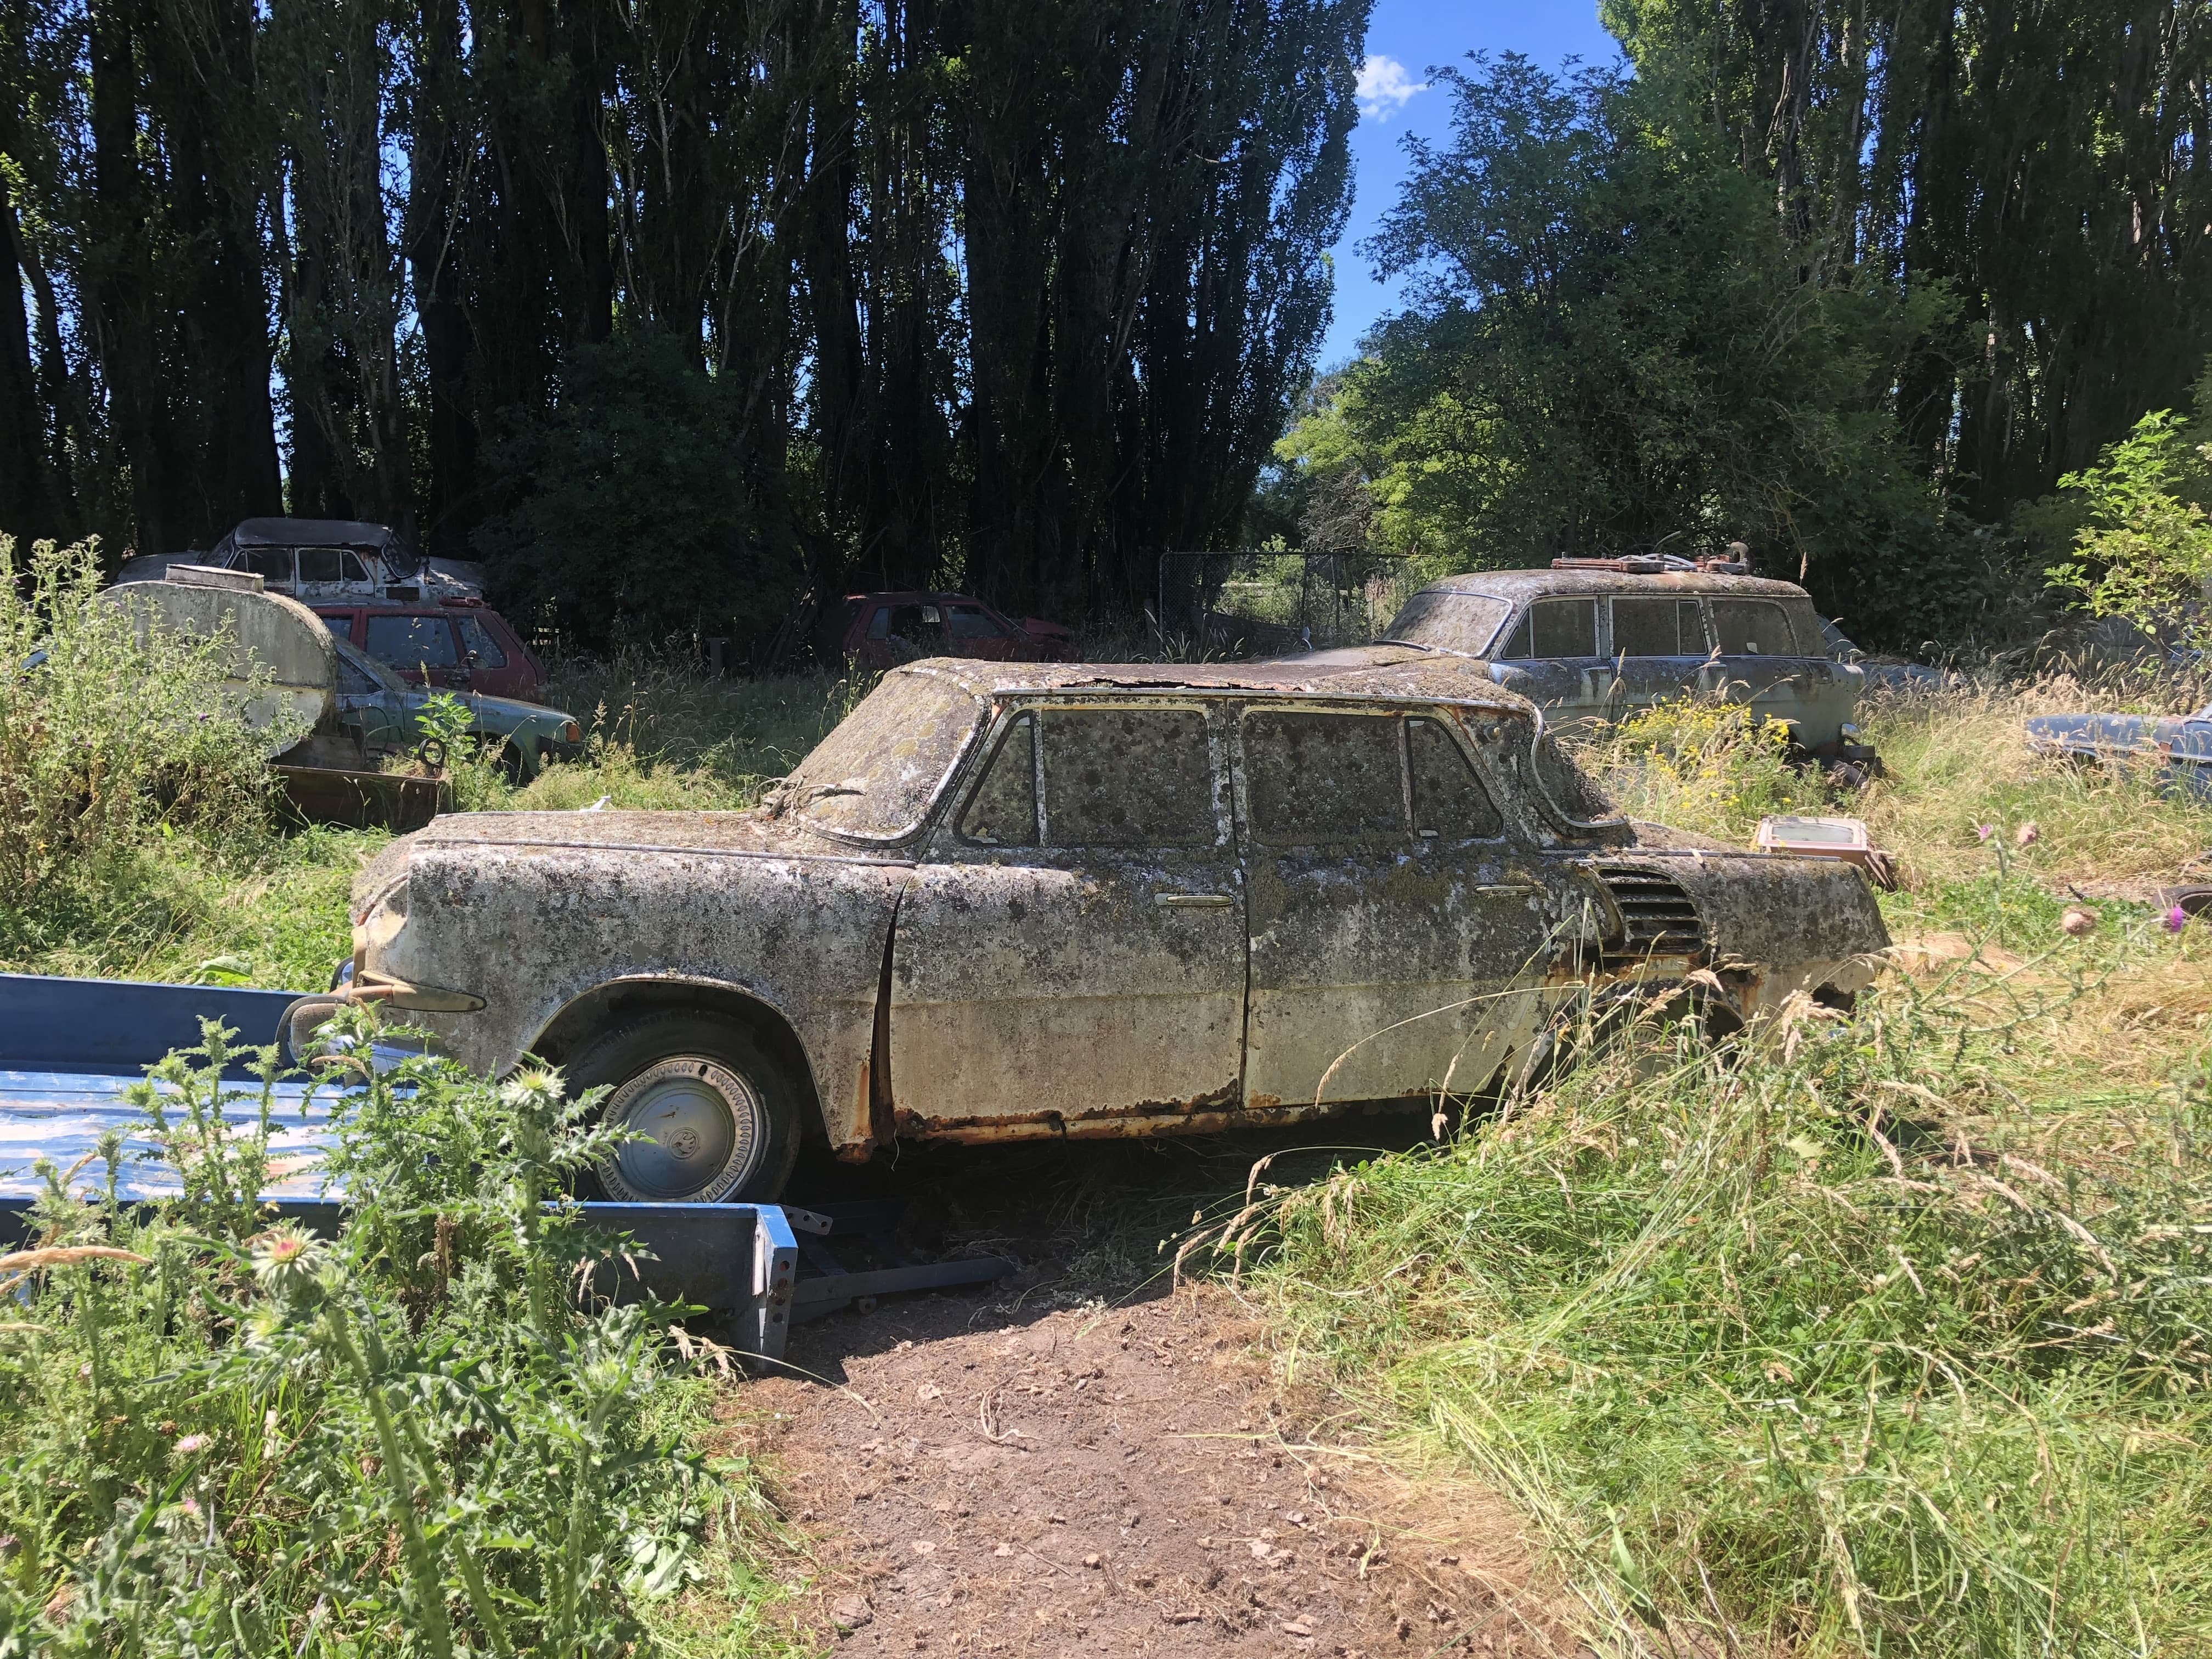
A long time between updates! Mix of work & renovations have meant that there hasn't been much work done lately. Latest news is I finally managed to get to the infamous Marshland Road site to hunt for Skodas. Didn't expect to find so many, it almost seemed like every fifth car was 110 or sections of one! I had watched a video on youtube someone had made of the site ( https://www.youtube.com/watch?v=fIzthlI87hc ) and in one shot there was a fairly solid looking Sabre! Sadly though between the video being taken and today someone has beaten me to it! There were three other Sabres on the site but in much worse condition. I will buy one of them just to get the original seats & wheels (my Sabre has 110L seats and 13 inch 120LS wheels) and maybe the windscreens.
1 point
-
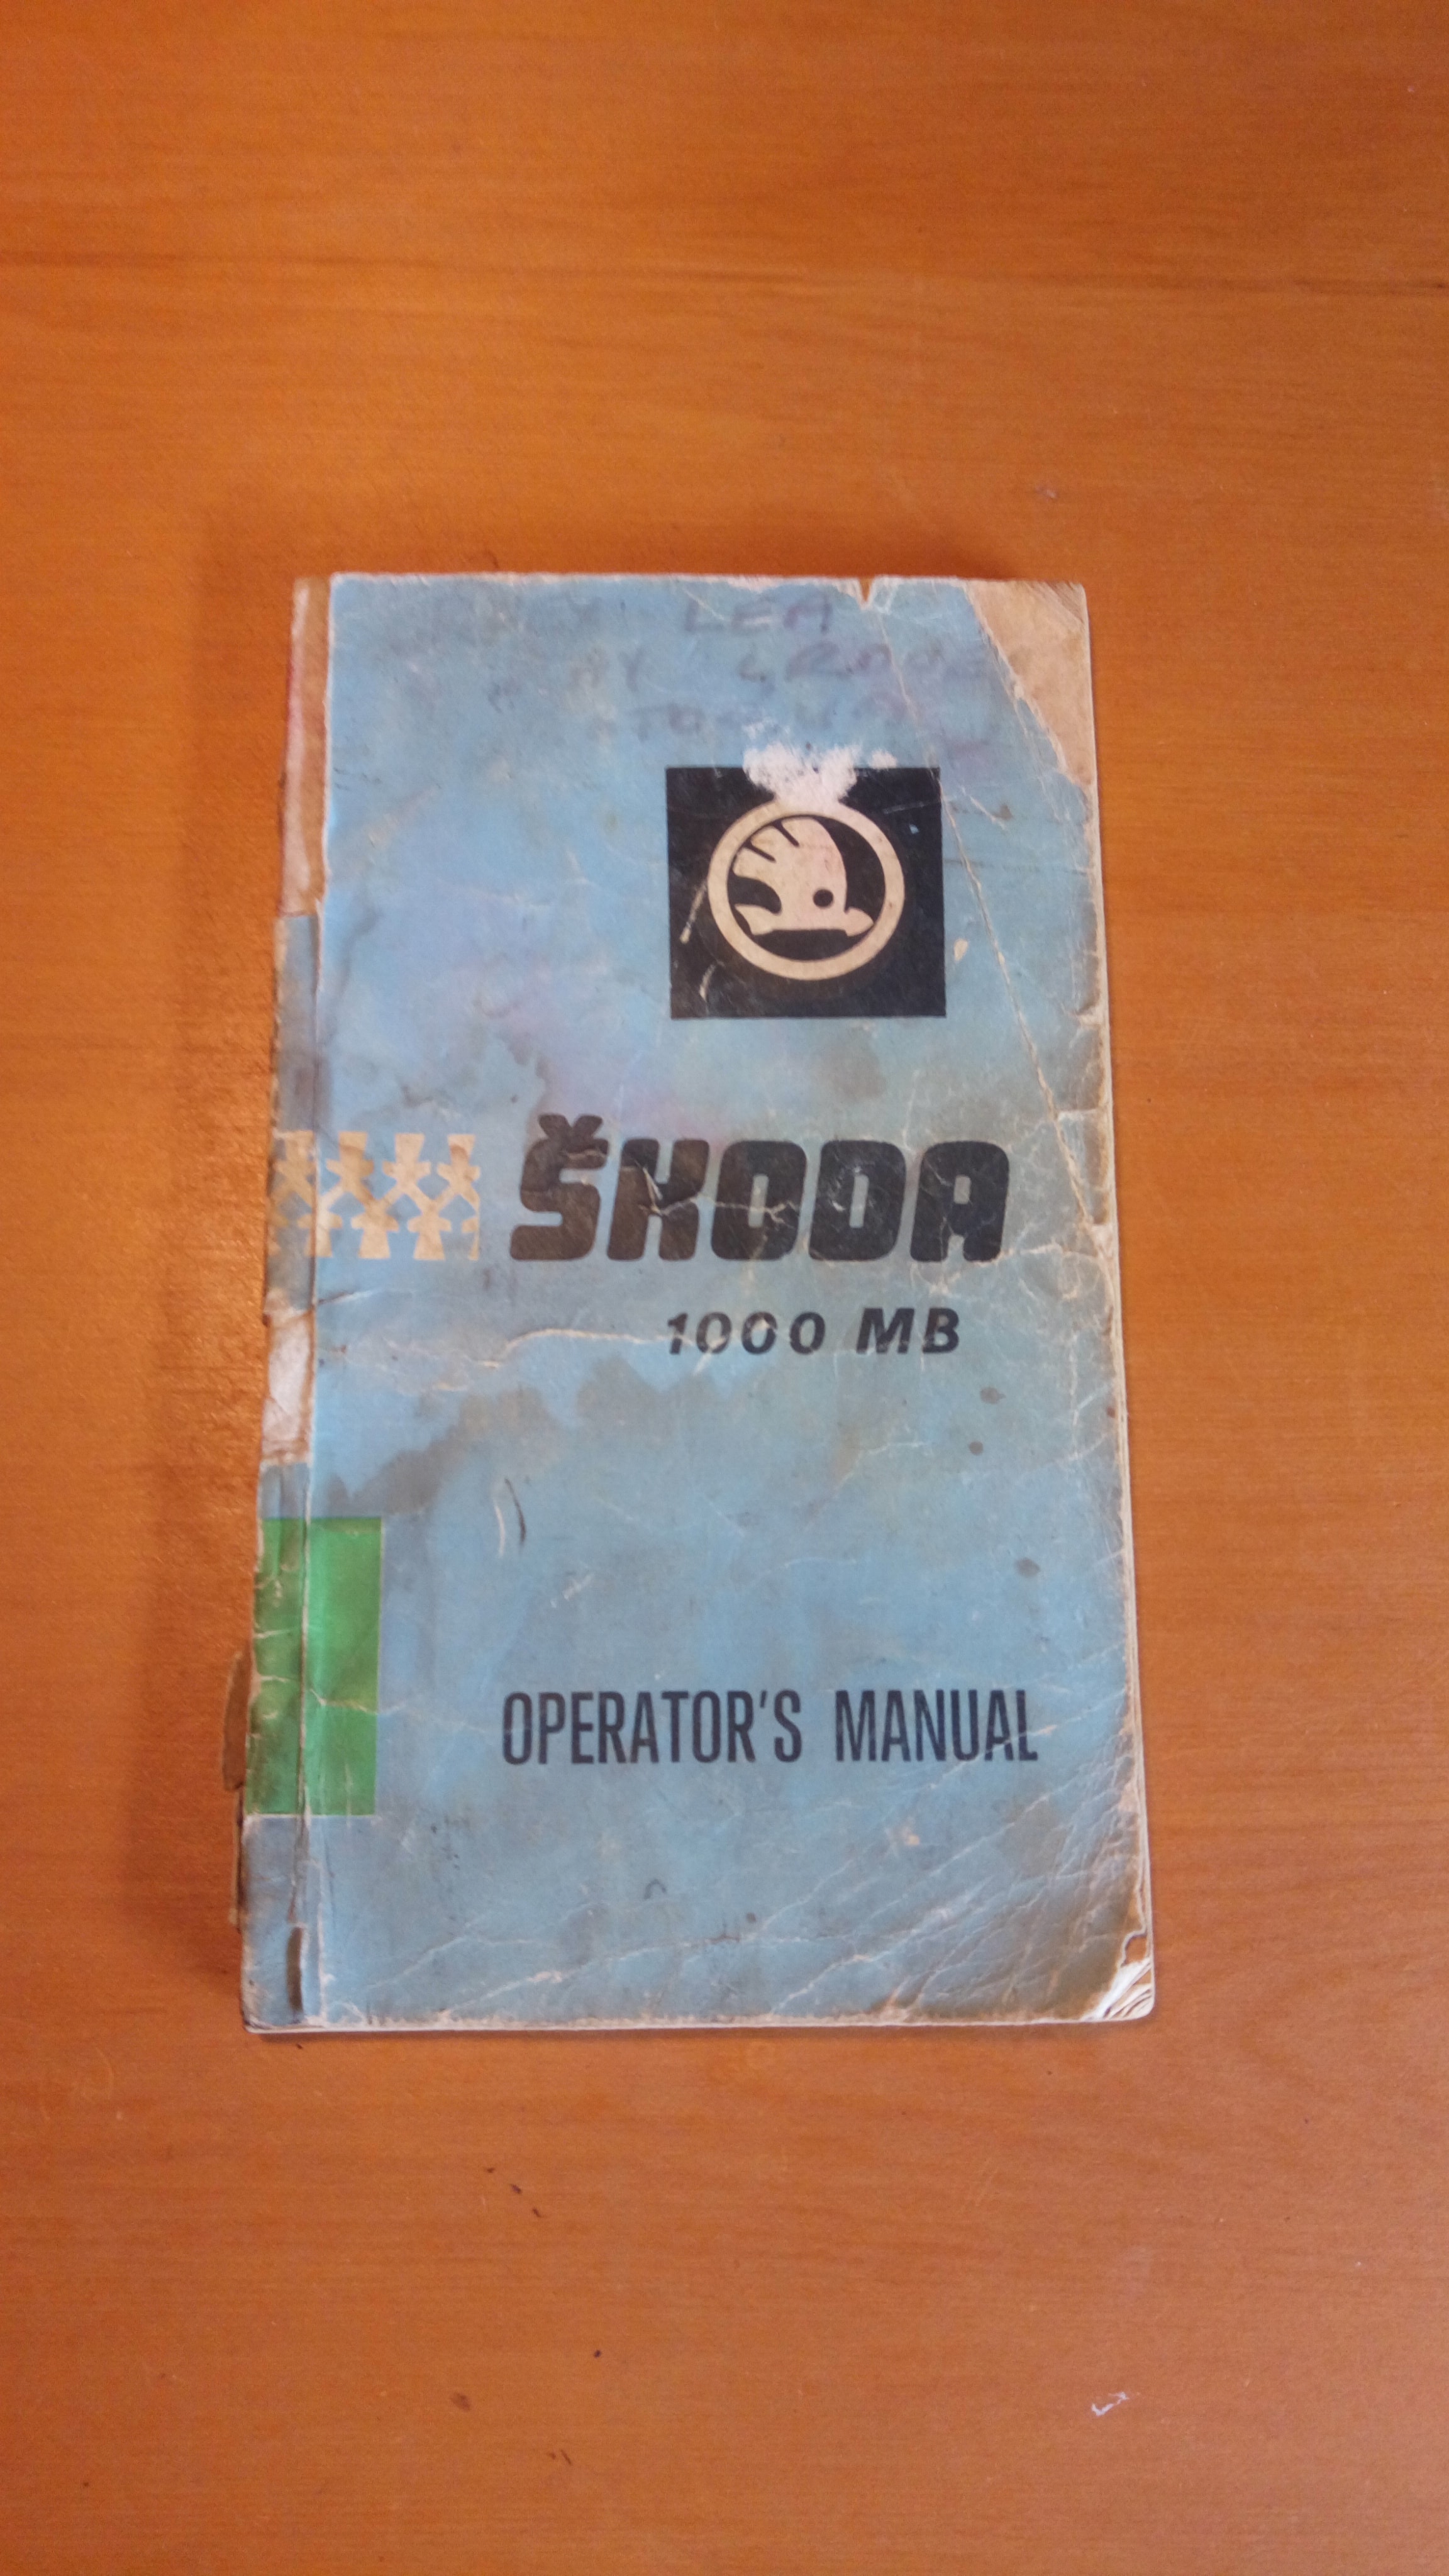
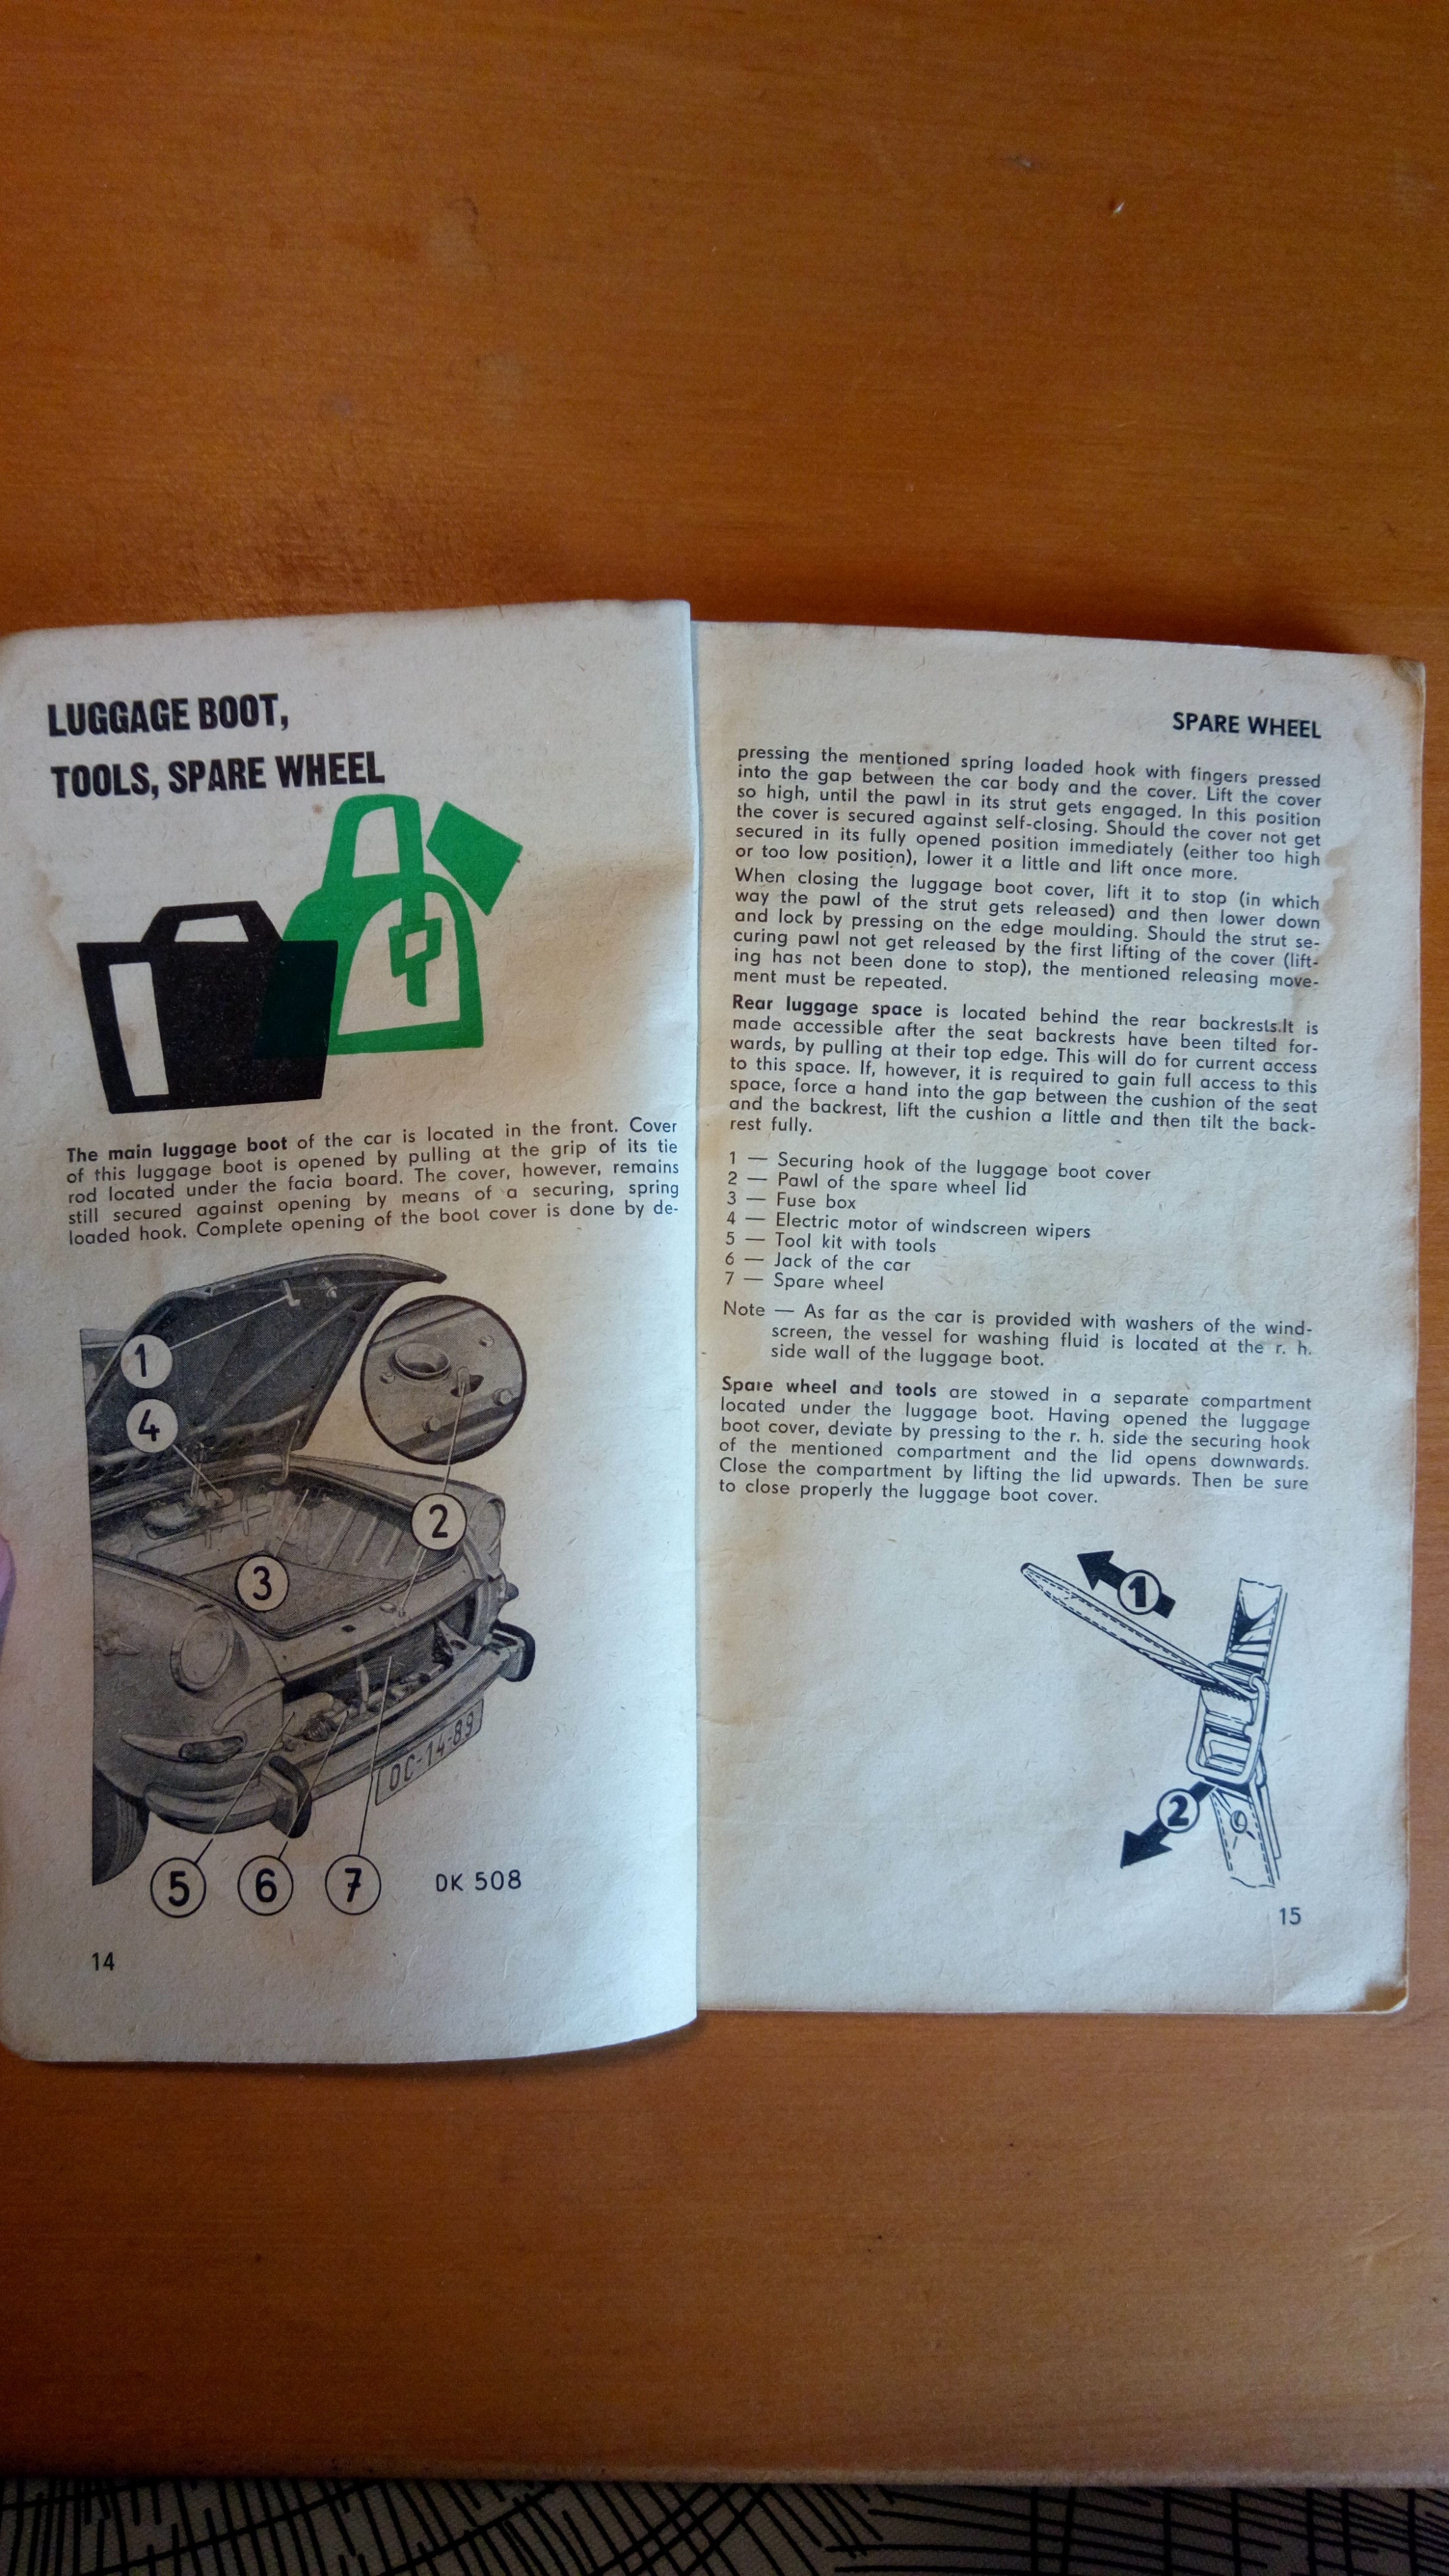
$2.95 on Trademe very well spent. Pretty tatty but complete and from the model's launch in 1964.
1 point


.thumb.jpeg.384ff72c8d2b0ee0d34a7bdedb55bdcf.jpeg)


.jpg.6bad9a6445b94f09aa1f2c7b8234b610.jpg)
.jpg.545f8d51bfdc7a5686662b67bbd75739.jpg)
.jpg.3227af7b75300c0b66faf772e209db31.jpg)
.jpg.5f805a6cfb842fa8306033f88f8916e3.jpg)
.jpg.85d77c8af690c47279b517535edb8caf.jpg)
.jpg.581c90704662574e0a970a55f37722c7.jpg)
.jpg.5fa267efc35a6bf42cb348ed931d77c3.jpg)
.jpg.af1c754ef7f486cec470f40f3756f389.jpg)
.jpg.419fa298e2d0e54da445eec3b78f9c95.jpg)
.jpg.f29fb048178ff1065a621e7eea5277fd.jpg)
.jpg.fad084fe446608465f7c0af112e953ce.jpg)
.jpg.751d99e600c4bd5ff389dbe2554b0cb5.jpg)


This leaderboard is set to Auckland/GMT+12:00