
Leaderboard


Popular Content
Showing content with the highest reputation on 09/05/19 in all areas
-
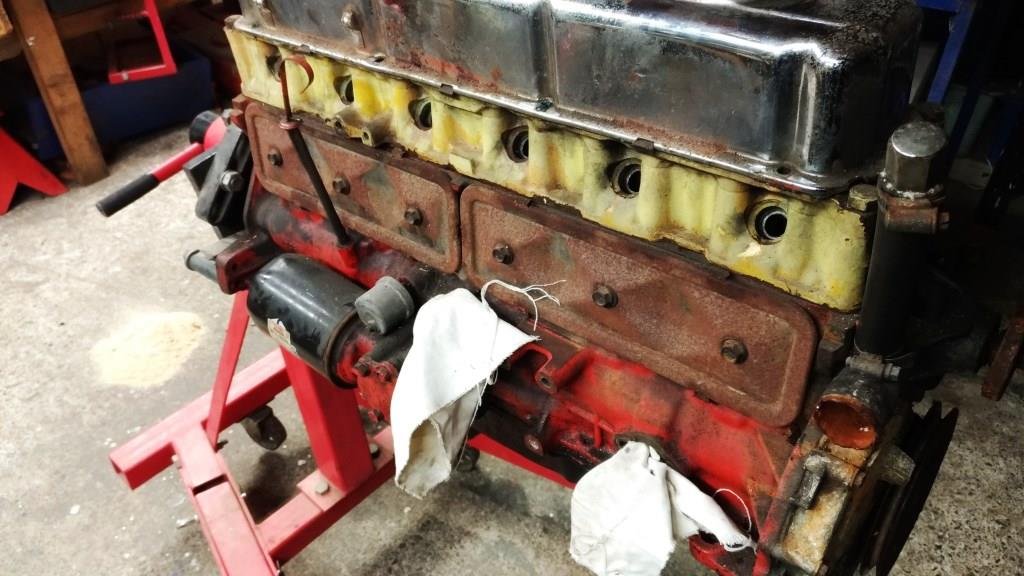
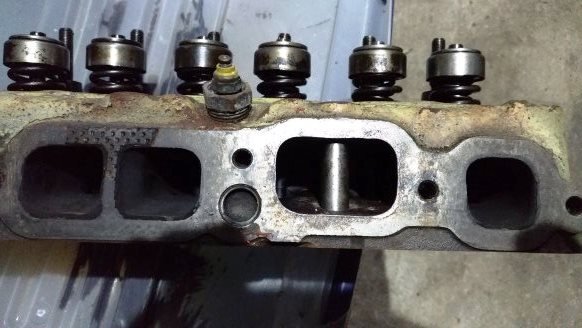
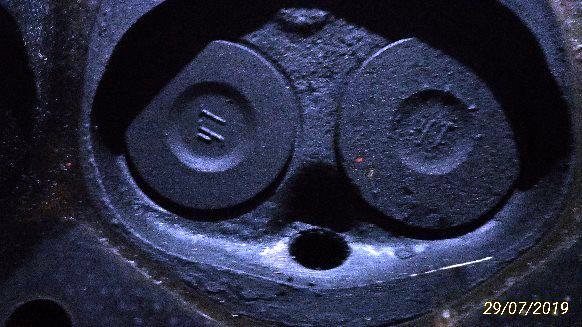
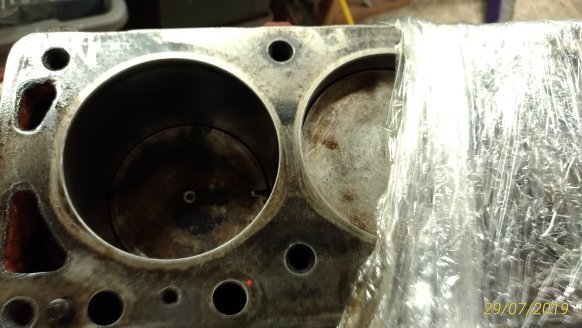
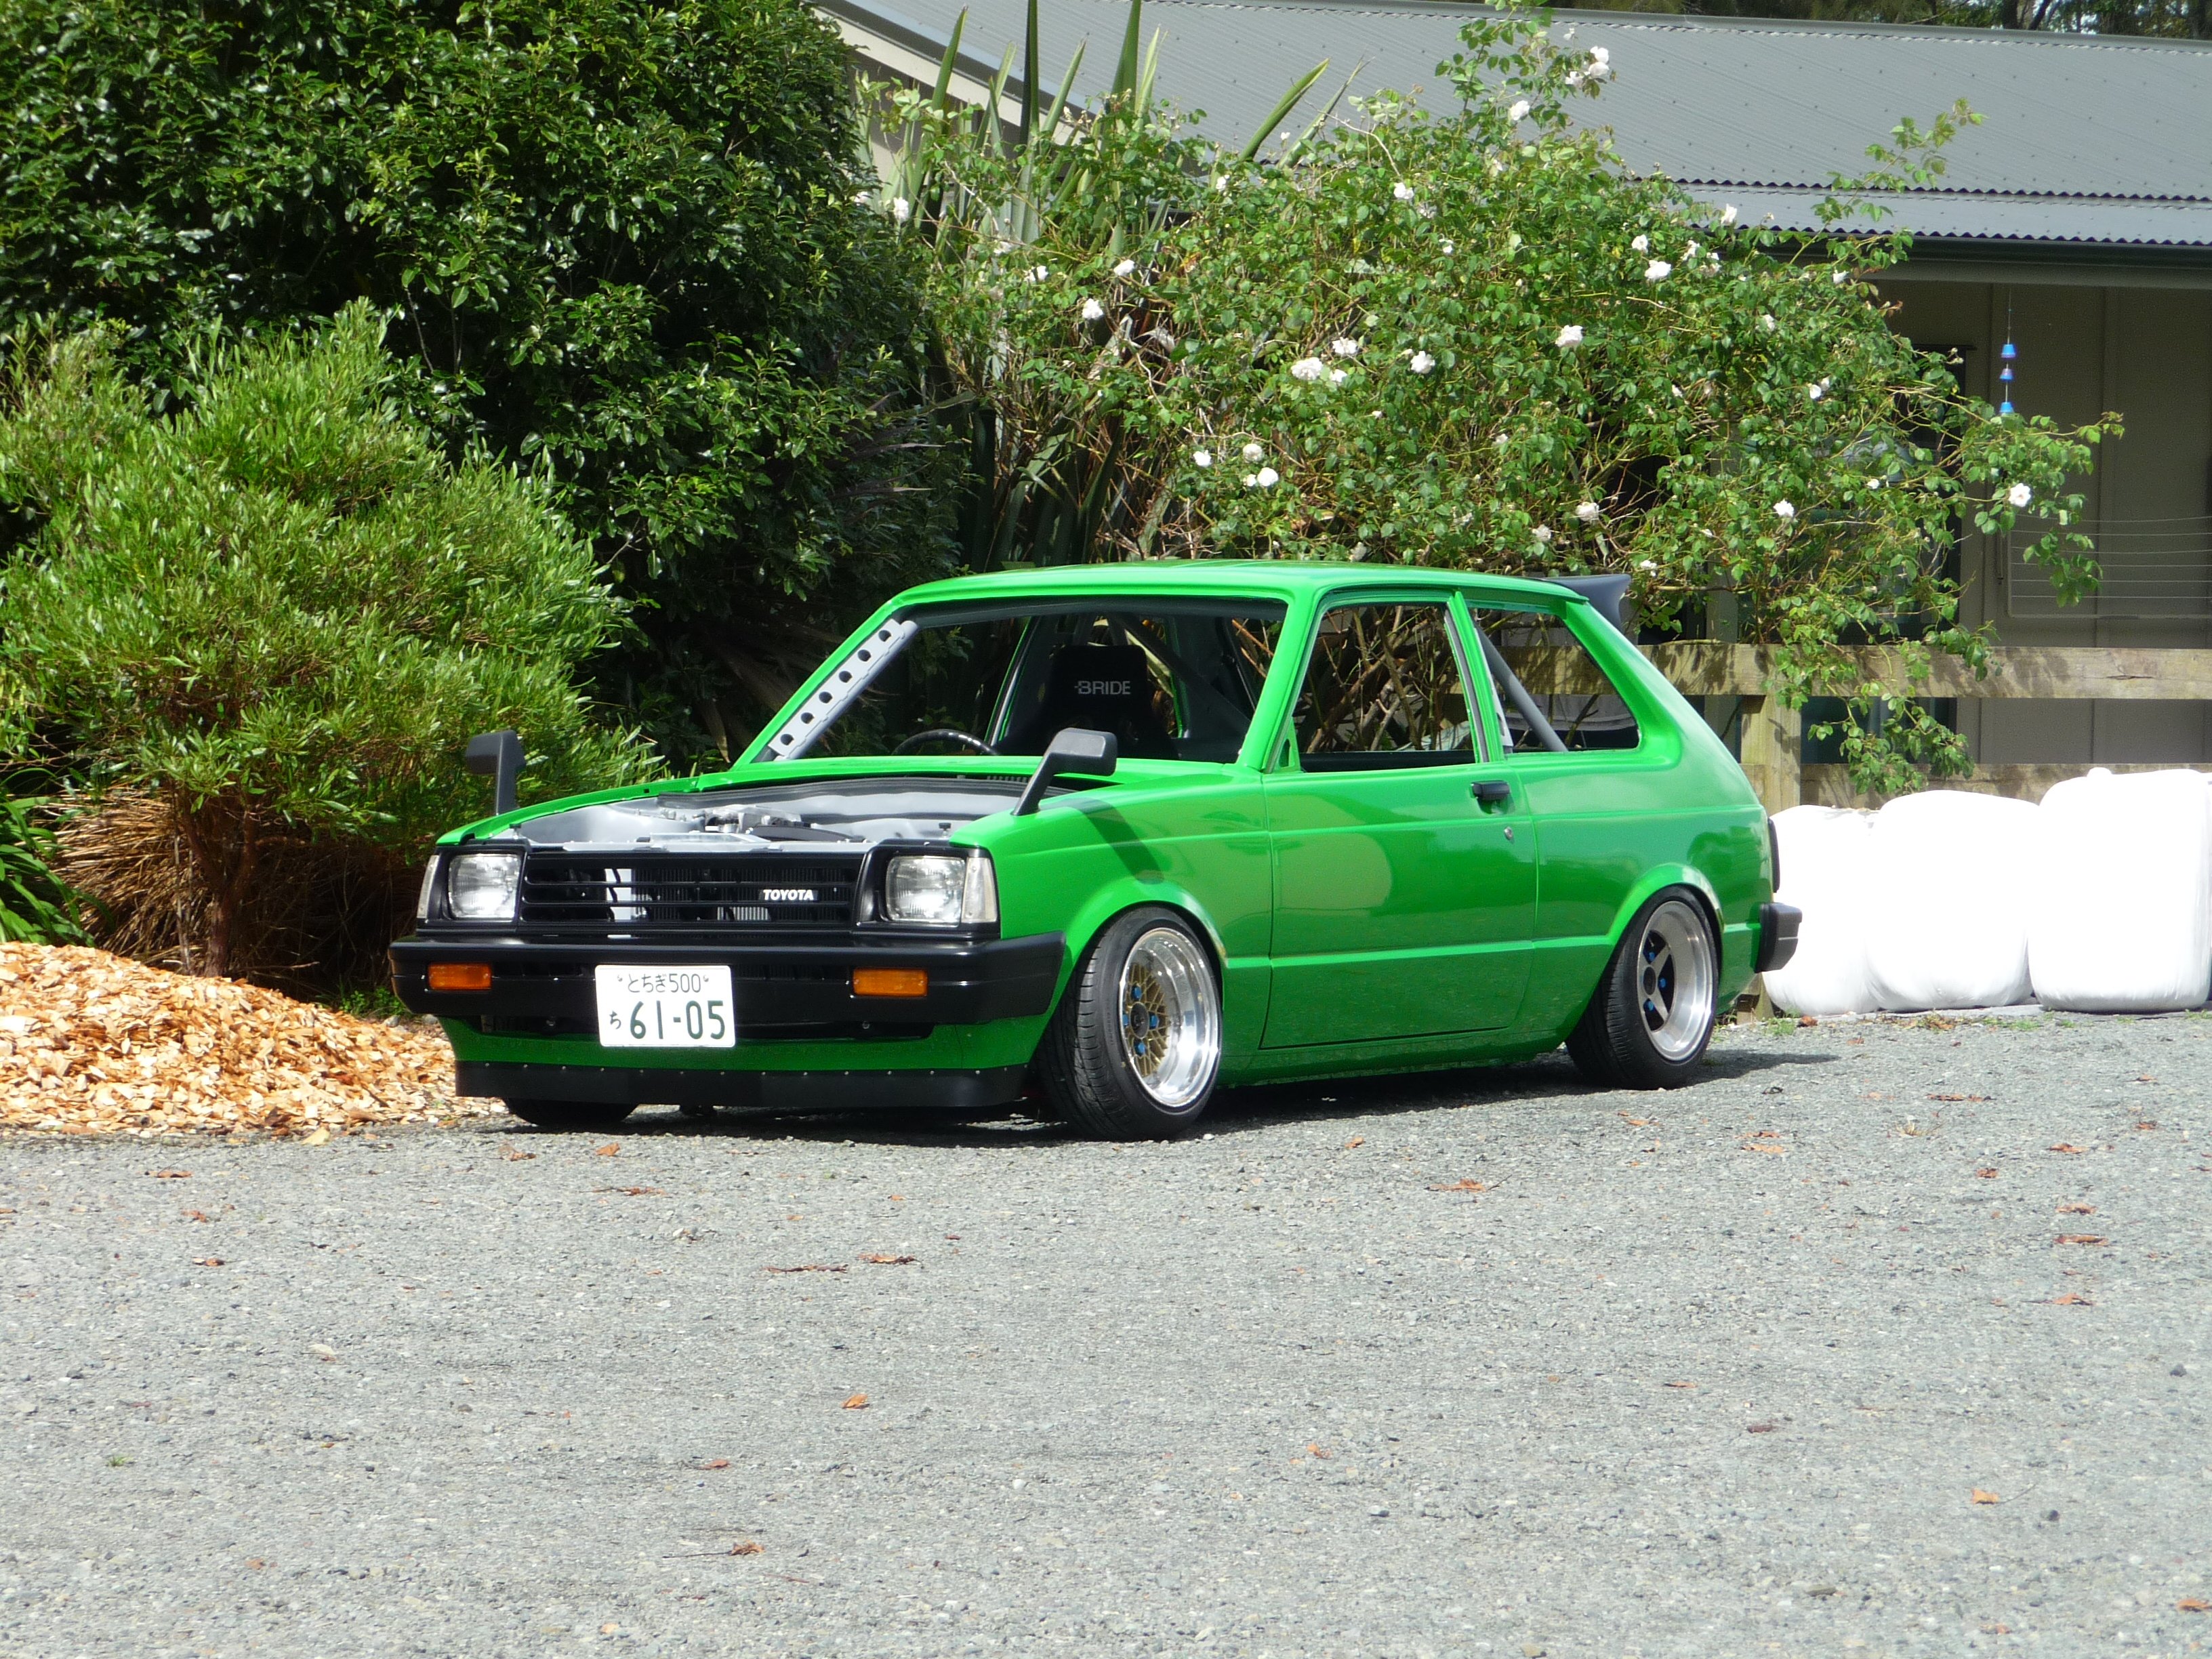
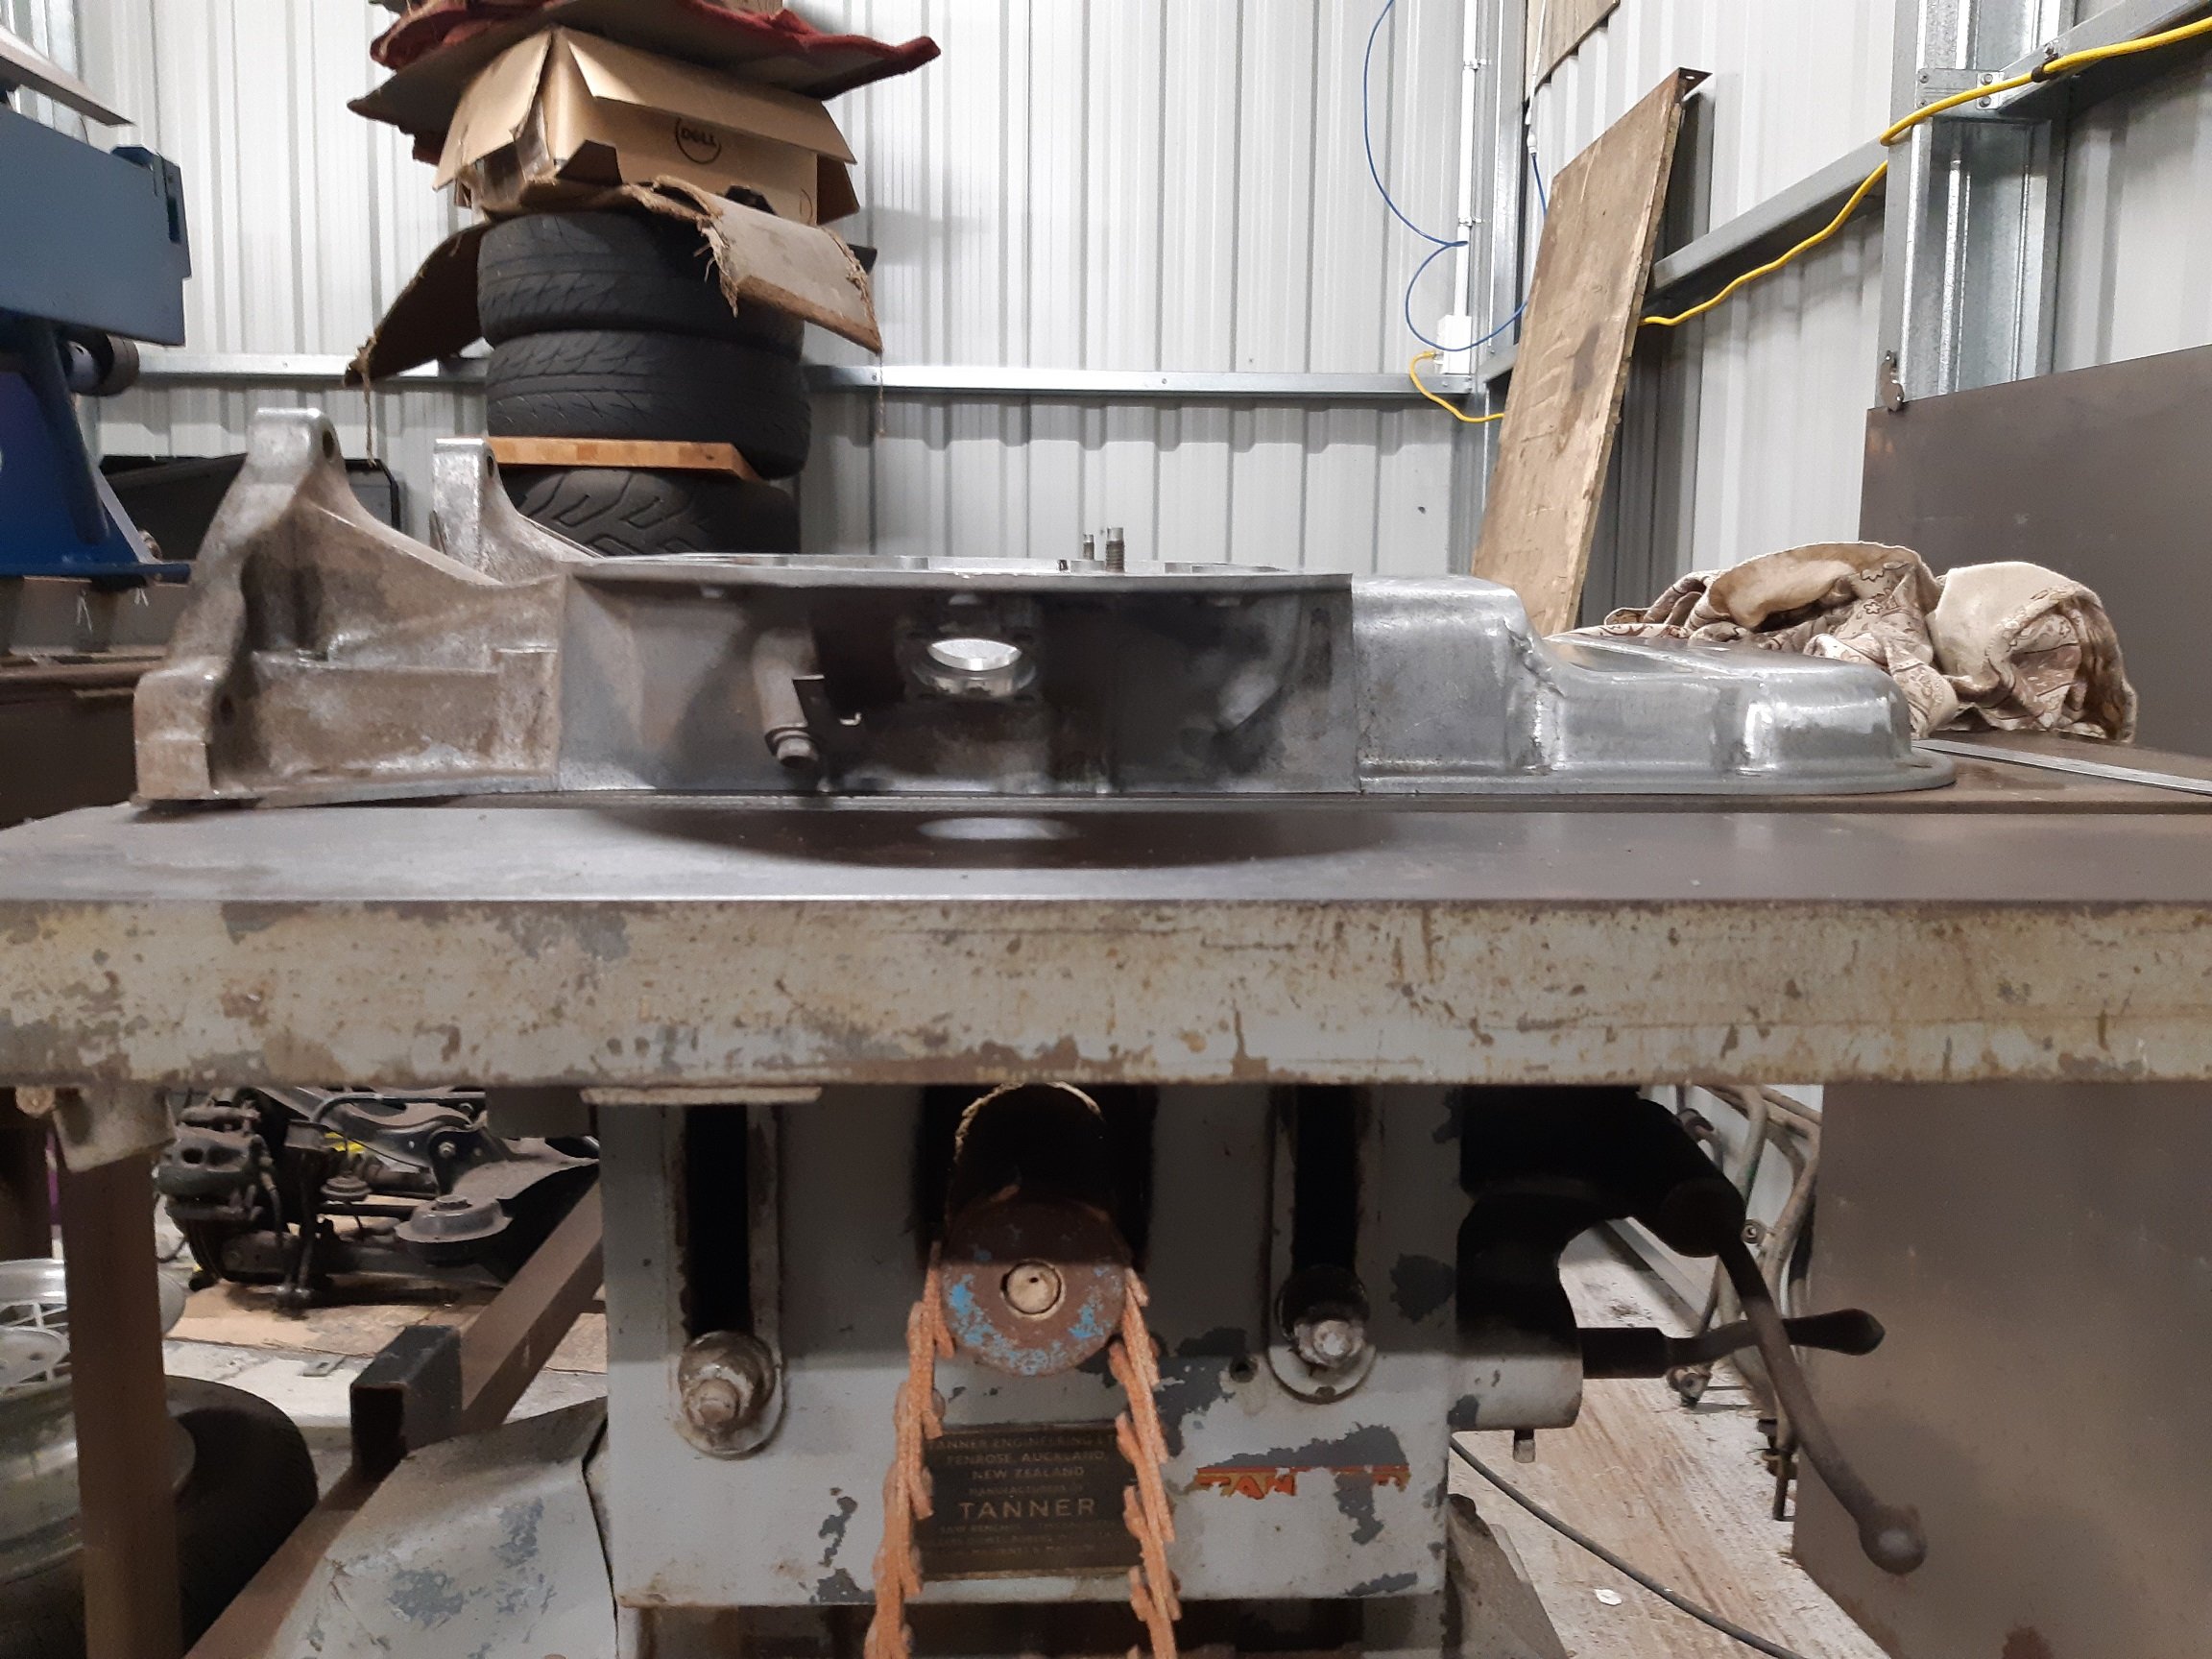
I’d been keeping any eye on a bloke in Whangerai who had been trying to sell a 186 on TM while doing his damndest to scare off any potential buyer by abusing anyone who had the audacity to ask a question on his auction. God I love those grumpy old traders! He was insisting that someone had painted the standard head yellow and refused to post any pictures of the inlet ports. After some months of his relisting I finally put the poor deluded old sod out of his misery by buying it for $300. An early 2-hour drive had me rolling down his driveway at 8 am in the morning, one look at the inlet ports confirmed it had at least a stage 2 Yellow Terra head. When I suggested that as an honest principled rogue, I felt a moral obligation to throw a little more coin in the pot he started accusing me of being a ‘lying young upstart that was talking through a hole in his f***ing head’. As I beat a hasty retreat up the driveway waiting for him to set the dogs on me (with the booty in the back of the van) I had to admit that at 63 years of age, despite the verbal tirade it was great to be called ‘young’ – ya gotta love those grumpy old guys! Couldn’t wait for to to get the head off but work pressure had me waiting for the weekend. As I said in the 1st post of this thread ‘sometimes you just get lucky’ - I stuck it in the engine stand, flipped its lid off and discovered a rather virgin stage 3 Yella Terra covered with the type of carbon that only prolonged over rich running can ever produce. Double valve springs and classic 70’s inlet porting. And just relish in the vintage YT valves! Once cleaned up the flat top 30 thou over pistons felt firm in the bore so Rigamortice and I made the call that we’ll clean up the head, sort out the appropriate sump/pickup combo and see how it runs.
 10 points
 -
Put this shit in a storage shed two years ago. Dragged it into 'current projects' shed last night. #barnfind
9 points
-
I've been commuting on mine, nearly two tanks of gas through the new engine so I'm going to say it's bullet proof for sure. The fact that that's only one day of the te urewera mission is irrelevant.....6 points
-
Close enough Fender is a reproduction, so I made a best guess as to panel gap. A little filler, a little seam seal and she's seamless
6 points
-
As mentioned previously, I'm having some running issues and I need to try and work out what it is. The issue has been getting worse the more I run and drive the car. It previously only happened under load at about 4000rpm, where the engine would fall on its face and cut out like you had turned the key off. If you kept the throttle steady it would recover with a surge as the revs dropped, but as soon as it got up to about 4k again, it would cut out. When stationary, and not under load, it will happily rev to its 6k redline. It's a very annoying issue. I had a couple of suspicions of what it could be, but I needed to do some testing to narrow it down. My first suspicion was that I must be losing spark, as the engine cuts so abruptly and I felt that if it were fuel it would kinda stutter out. The first thing I noticed was that the replacement coil the previous owner had fitted was a Bosch GT40. This is a 12v coil, and from what I have discovered, widely known to have issues with electronic ignitions. Now, the ignition system on my car is both a ballasted system and electronic. A ballasted system runs a resistor on the power feed to the coil, dropping the voltage, meaning the coil doesn't see 12v. So I was already running the coil under voltage. After testing and confirming the resistor was still in place, I removed this coil and refitted the original Ford coil that came with the car. Changing this resulted to a smoother idle (maybe, but probably a placebo), but the engine still cut out. The next thing was to check the lead positions, cap and rotor. I note that the cap and rotor have been replaced, and the old ones were with the car. The old cap is stuffed, but the old rotor looked OK, so I swapped that in after a quick clean. No change. Next was to confirm if I did lose spark or not. The only way I could think of was by thinking out of the box and using my timing light... So I connected it up, and strapped it to the wiper so I could see it when driving. Sure enough, when the engine cut, the light was still flashing away happily. That indicates I have spark (although, not if I have a good strong spark, but some spark is better than none). So this points me down a different path. I have air, and I have spark. Could it be fuel after all? I posted up on a few forums asking for help, and got some great tips on where to start looking. One of the easiest to do was to check the sensor plate in the AFM was clean. This plate is hinged, and lifts up with airflow as it gets sucked into the engine, which in turn pushes a plunger up and down to control fuel flow. Well, although the top looked reasonably clean, the underside was filthy (probably thanks to the incorrect air filter that was fitted) I gave this a thorough clean and made sure it was spotless. This made no change, but its good to know its clean now. I also, once again, checked the intake tube and boot for splits or cracks, but none found. All vacuum lines (all two or three of them) were checked, all OK. One thing that makes me suspect its possibly fuel, is the state of the new plugs I fitted. Even after a couple of runs around the block, a couple look almost unused. Maybe lean? From 1 to 6 in order. This is leaving a couple of possibilities, ones that I cannot test without further equipment. First is an intake manifold leak or the likes. Today my smoke machine arrived, so I could test this. It's just a cheapie, but makes a good amount of smoke, and has a pump to actually blow it out under pressure. After a quick test, I modified it to work how I needed it to. I salvaged a cap from a CRC rust convertor can, drilled a hole in it, glued some hose into it, and glued the cap onto the front of the smoke machine (as it just has a big nozzle on the front normally, for maximum smoke dispersion in da clubz) This hose then goes into a rubber glove with a finger cut off it. I find using one of these seals the intake pipe nicely with the wrist of the glove, but doesn't crush the rubber hose. I don't know if it's good or bad, but smoke testing the intake shows there are no intake or vacuum leaks. I tested with the throttle open and closed, to check the intake hose for leaks as well as the plenum/manifold, but nothing, not even a weep. So what left? Well, two things really. I need to test the fuel pressures of the system, but because the fuel fittings use banjo bolts and hard lines instead of rubber hoses, I can't use my existing pressure testing kit. I have a new kit on the way, which has all the fittings I need to connect into the KJetronic system. This will tell me if there is an issue with the Warm Up Regulator or the main pressure regulator. The whole system relies on having the correct pressures, so even a few PSI difference can make it all turn to custard. The other thing I need to do, once I have tested the pressures, is to remove the fuel distributor and injectors. I need to see if the plunger in the fuel distributor is clean and moving freely, or if it's sticky. I also need to check the flow and spray pattern from the injectors. It's possible either, or both, of these things are causing an issue. My main theory at the moment is a sticking fuel plunger, which is causing the engine to starve of fuel when it demands more. The worst thing you can do with a KJet system is to leave old fuel in it and not run the car regularly. This car has been off the road for years, and I don't know when it was last started and run, or how old the fuel in the system was. KJet runs at such fine tolerances that even a slight gum or varnish on a component can make it upset. I'm determined to work this issue out and get the KJet working properly as it's a cool system, and one I haven't worked with before. I have everything I need to convert to EFI and Speeduino, but I'm trying hard to resist that urge. Now we wait. Once the pressure test kit arrives, Its game on.5 points
-
Yeah nah yeah Got parts back last week then had some of the bits powdercoated still gotta order spokes and a wider rim then reassemble, new tyres and wof reg4 points
-
These boots are made for walking3 points
-
3 points
-
I hope you have a Bluetooth speaker mounted to adv GN, blaring the entire trip playlist consisting of life is a highway born to be wild 500 miles3 points
-
I finished making this slightly cool block lifter for my log splitter this afternoon. As per it's scrap steel and bits out of the bin. Works great. @moparmuppet let's see a picture of your log splitter, I couldn't picture it when you described it in the trade me thread.
3 points
-
Bad juju in some cultures...hopefully No13 doesn't bring bad luck for me? More to come.
2 points
-
Alright "we" think we got it : for those following2 points
-
Flywheel and heavy duty clutch acquired. Have the flywheel a quick sand blast and will machine the surface before fitment. Have ordered, Input bearing Flywheel bolts Pressure plate bolts Pressure plate dowels Rear main seal Still needed, Slave cylinder Maybe a master / I have one from an old corona which is maybe the same. The hosing that goes between it.
2 points
-
This is a test photo to see the quality of pictures. Have been through 3 phones since last time posting and I'm sending them through fb messenger.
2 points
-
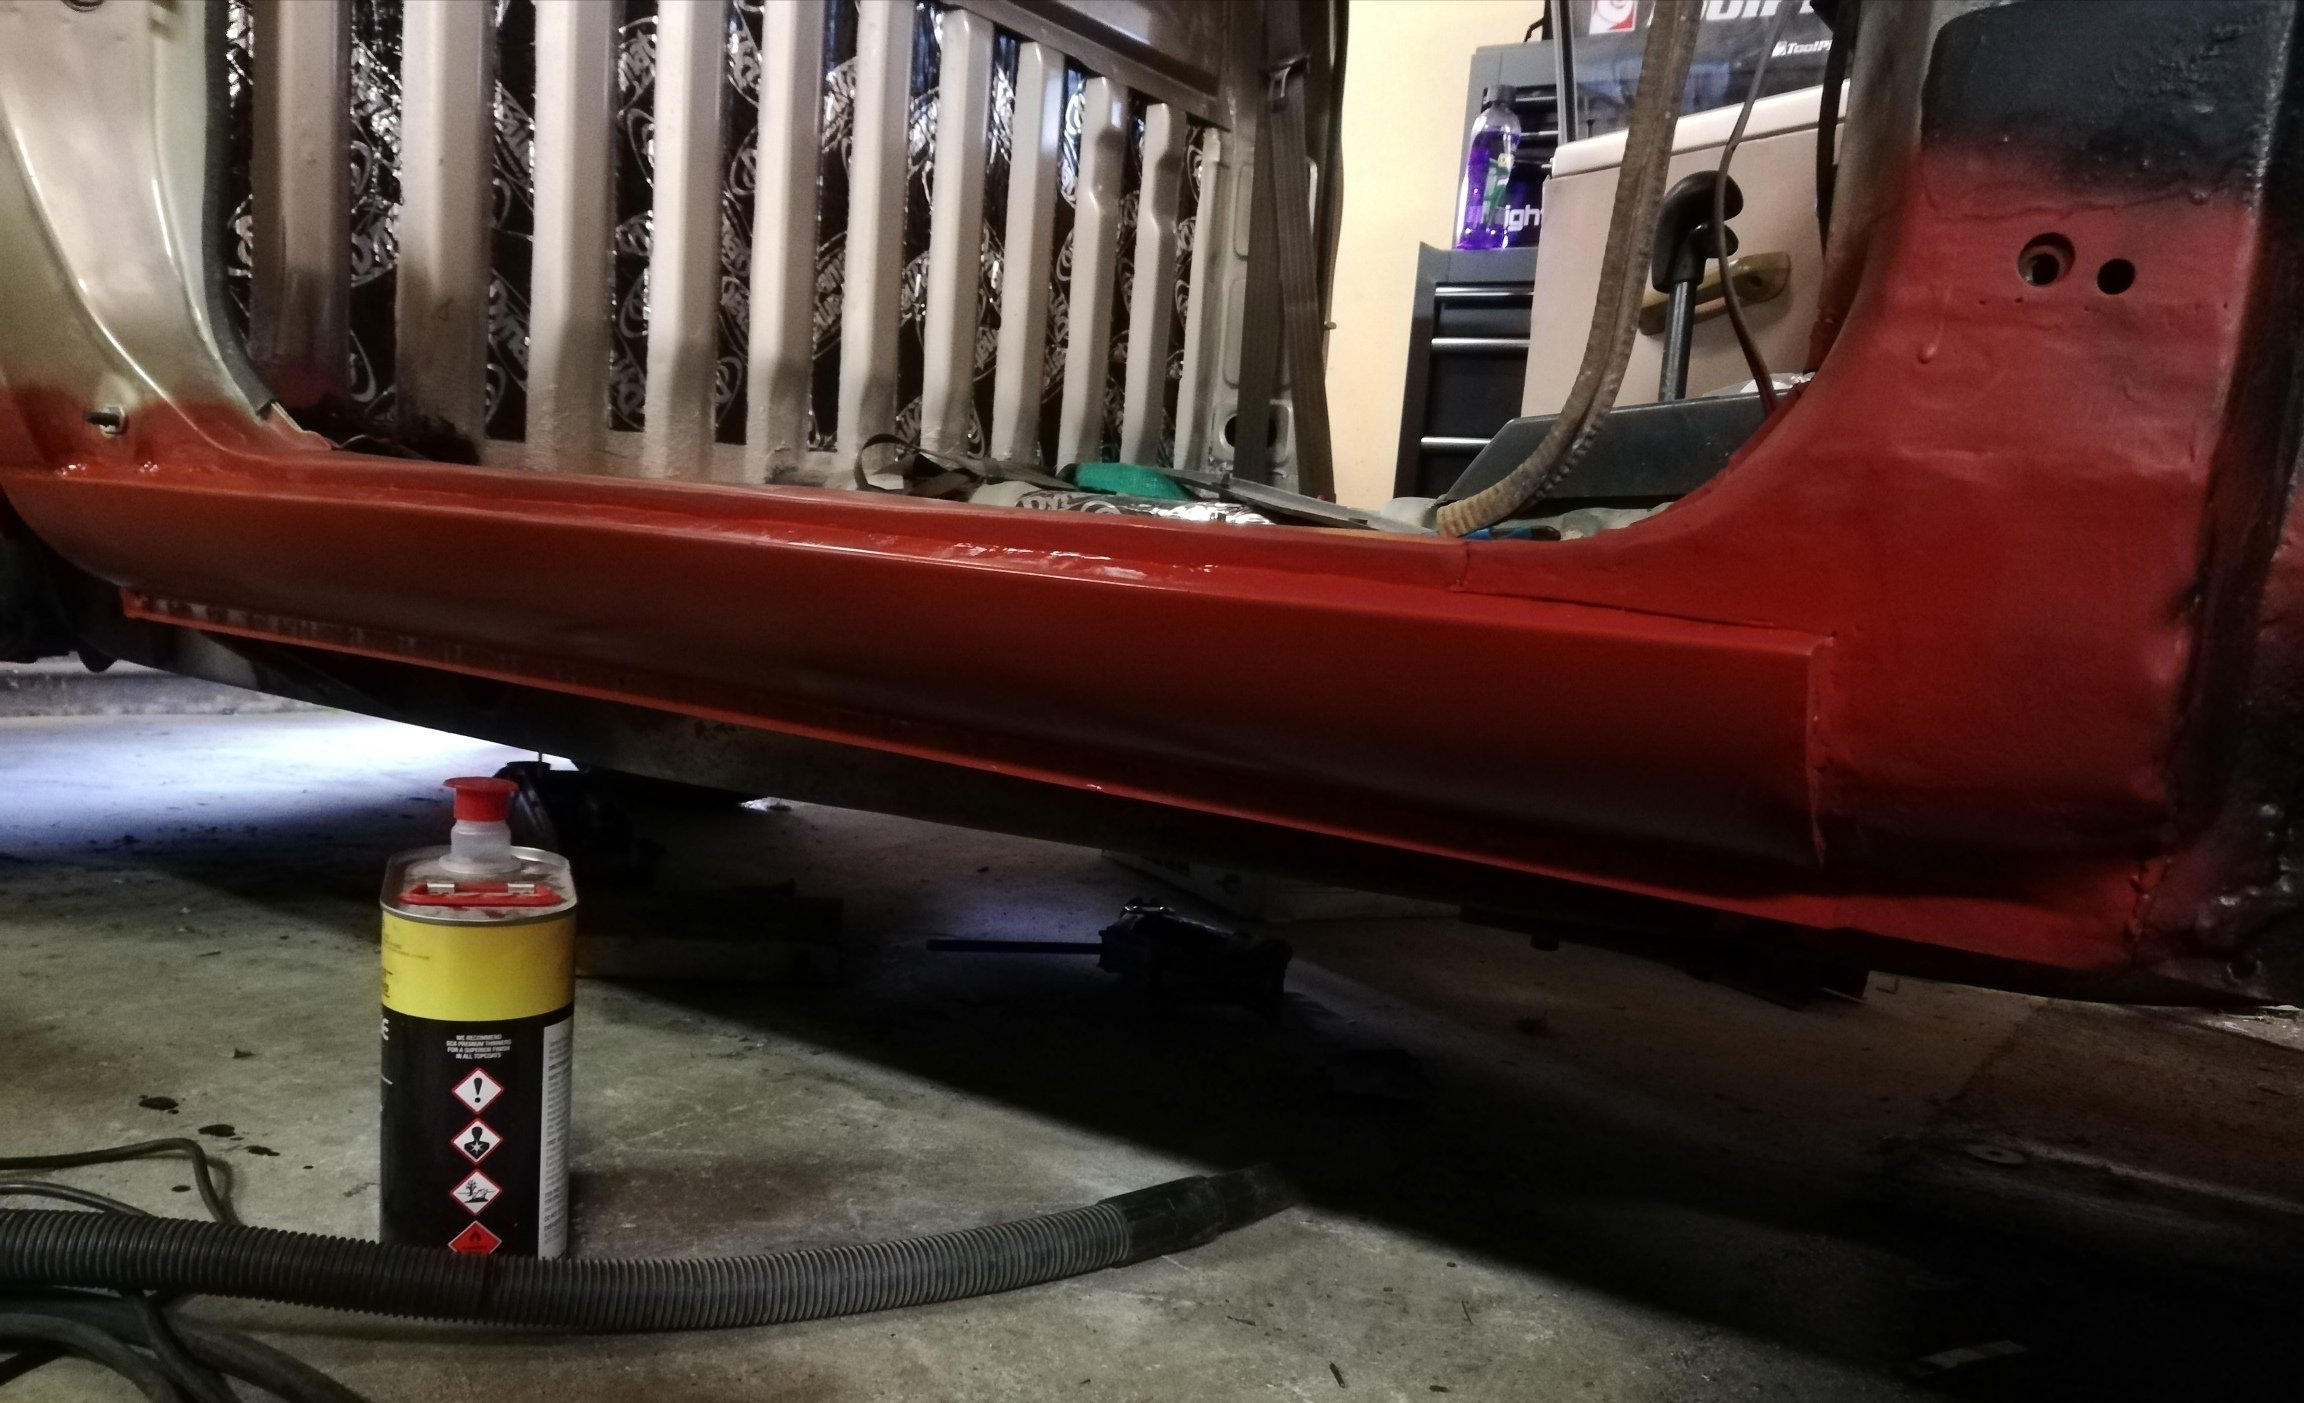
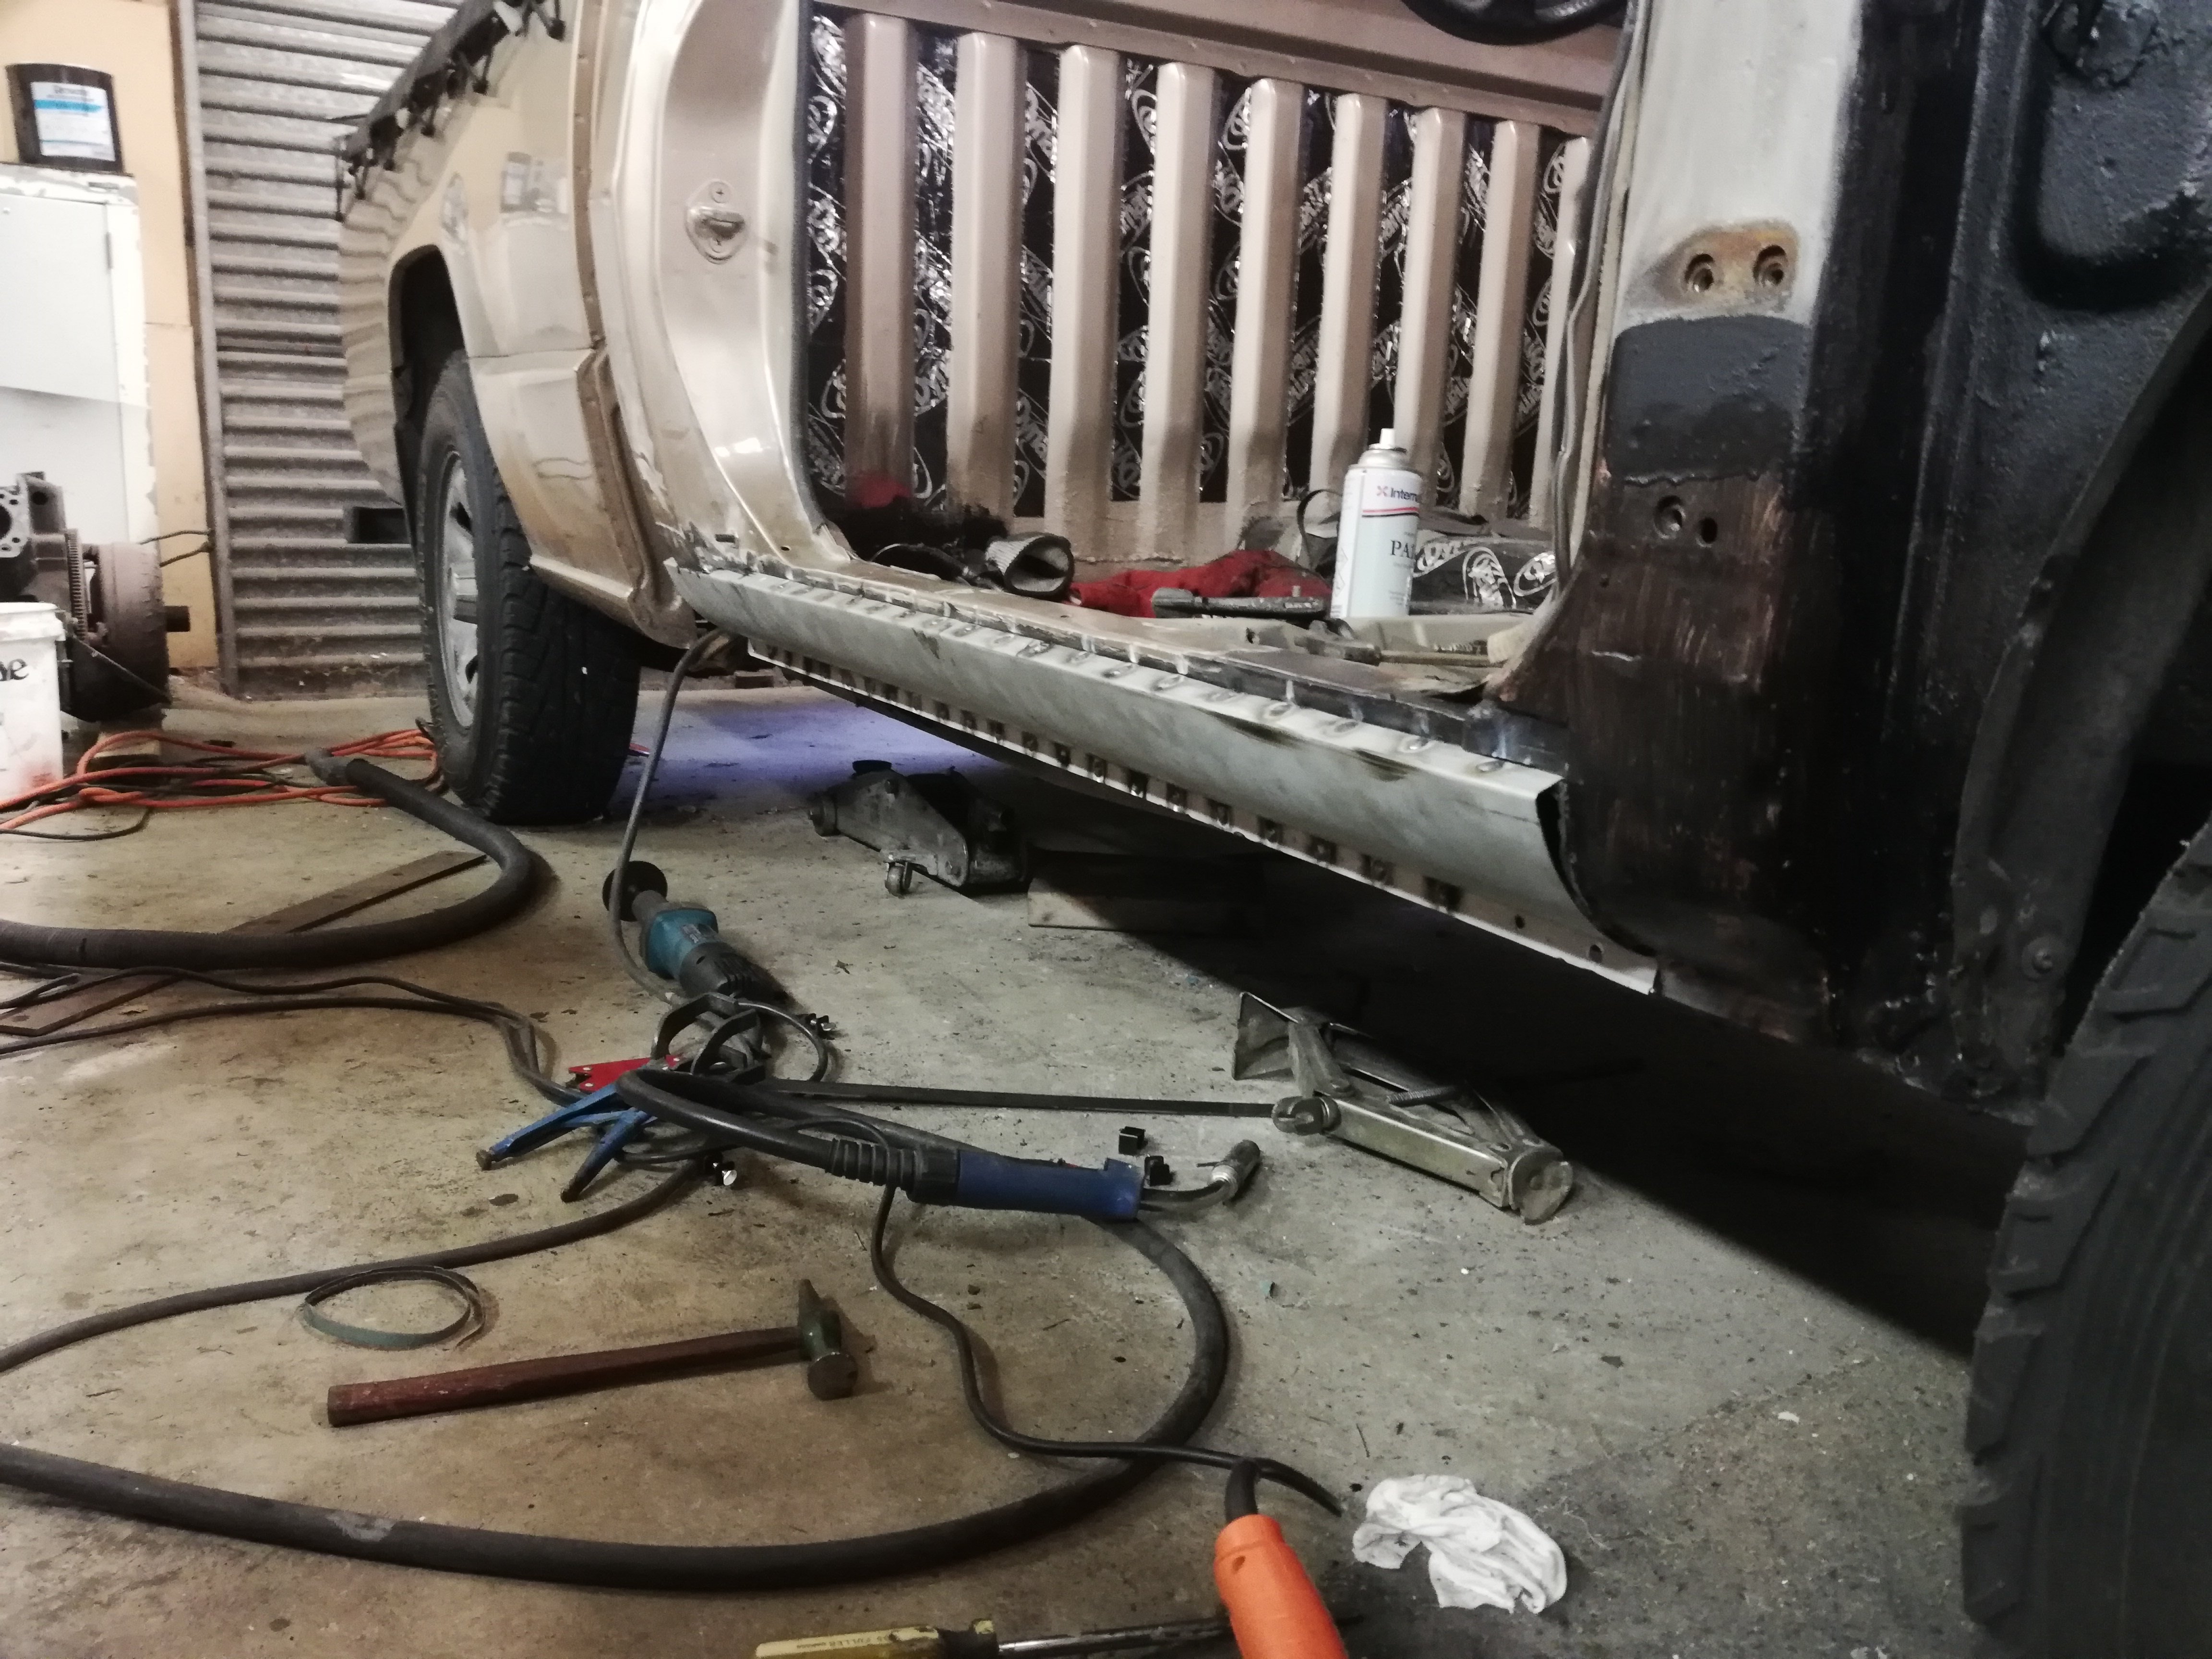
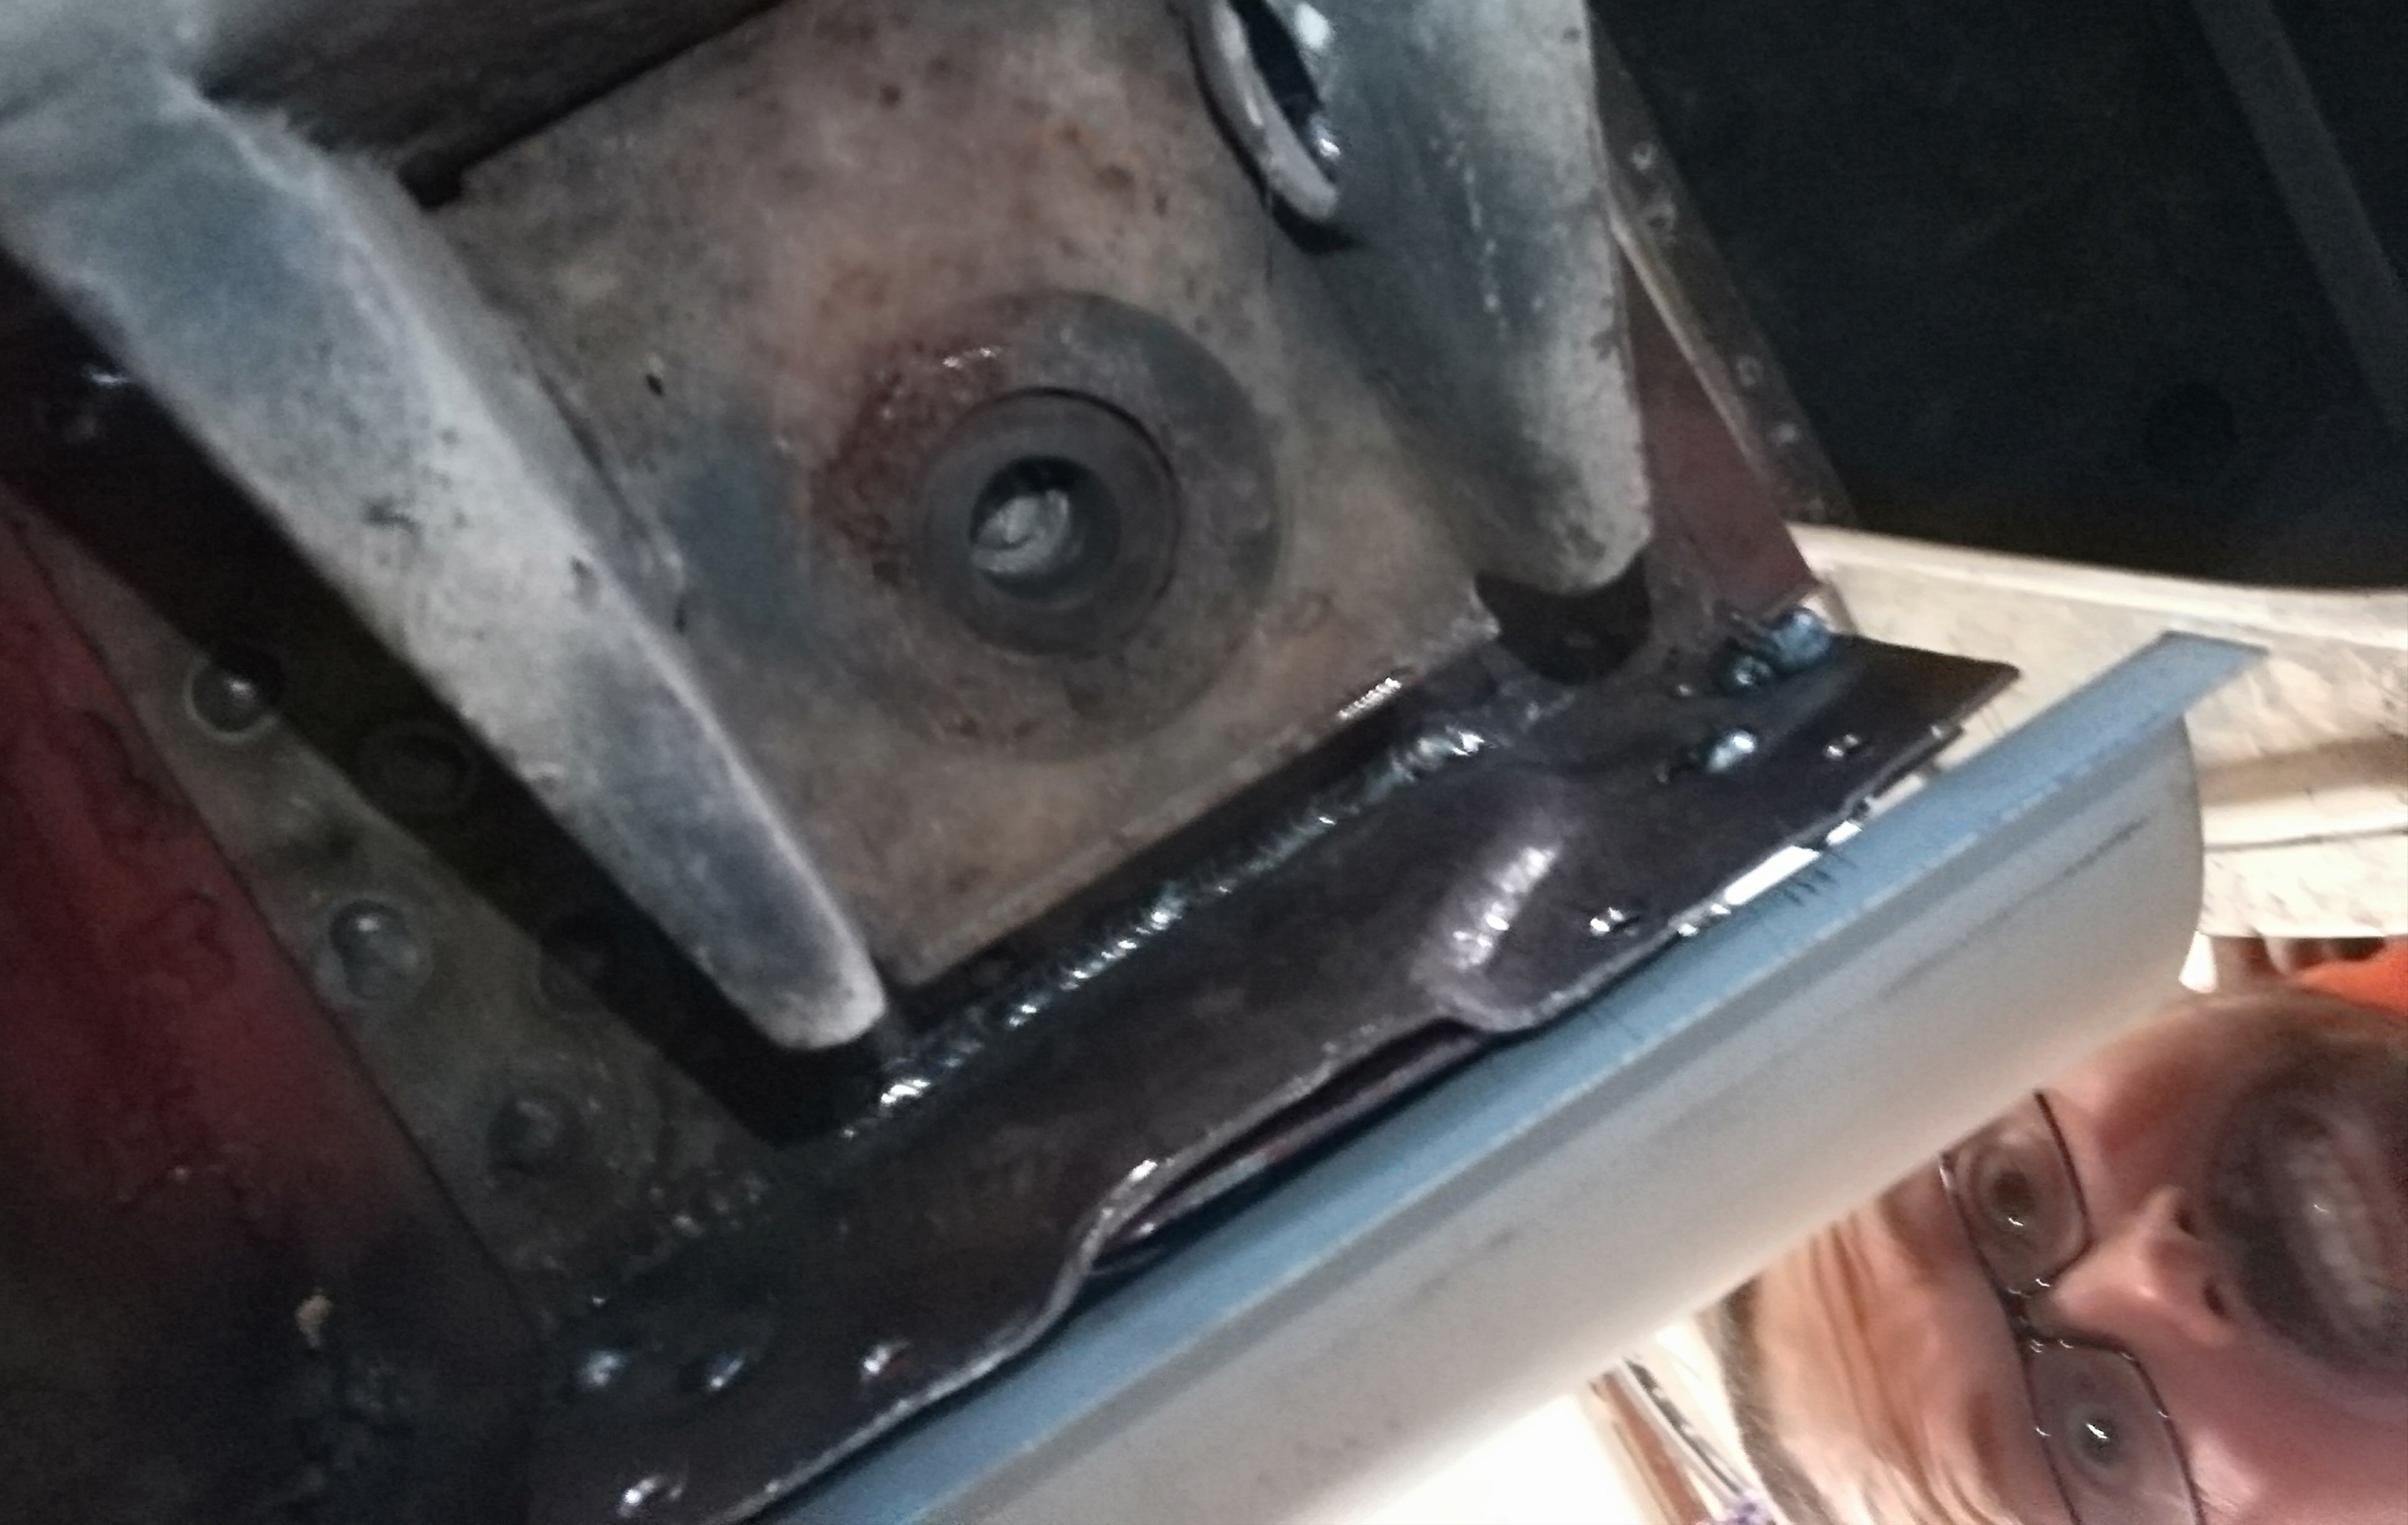
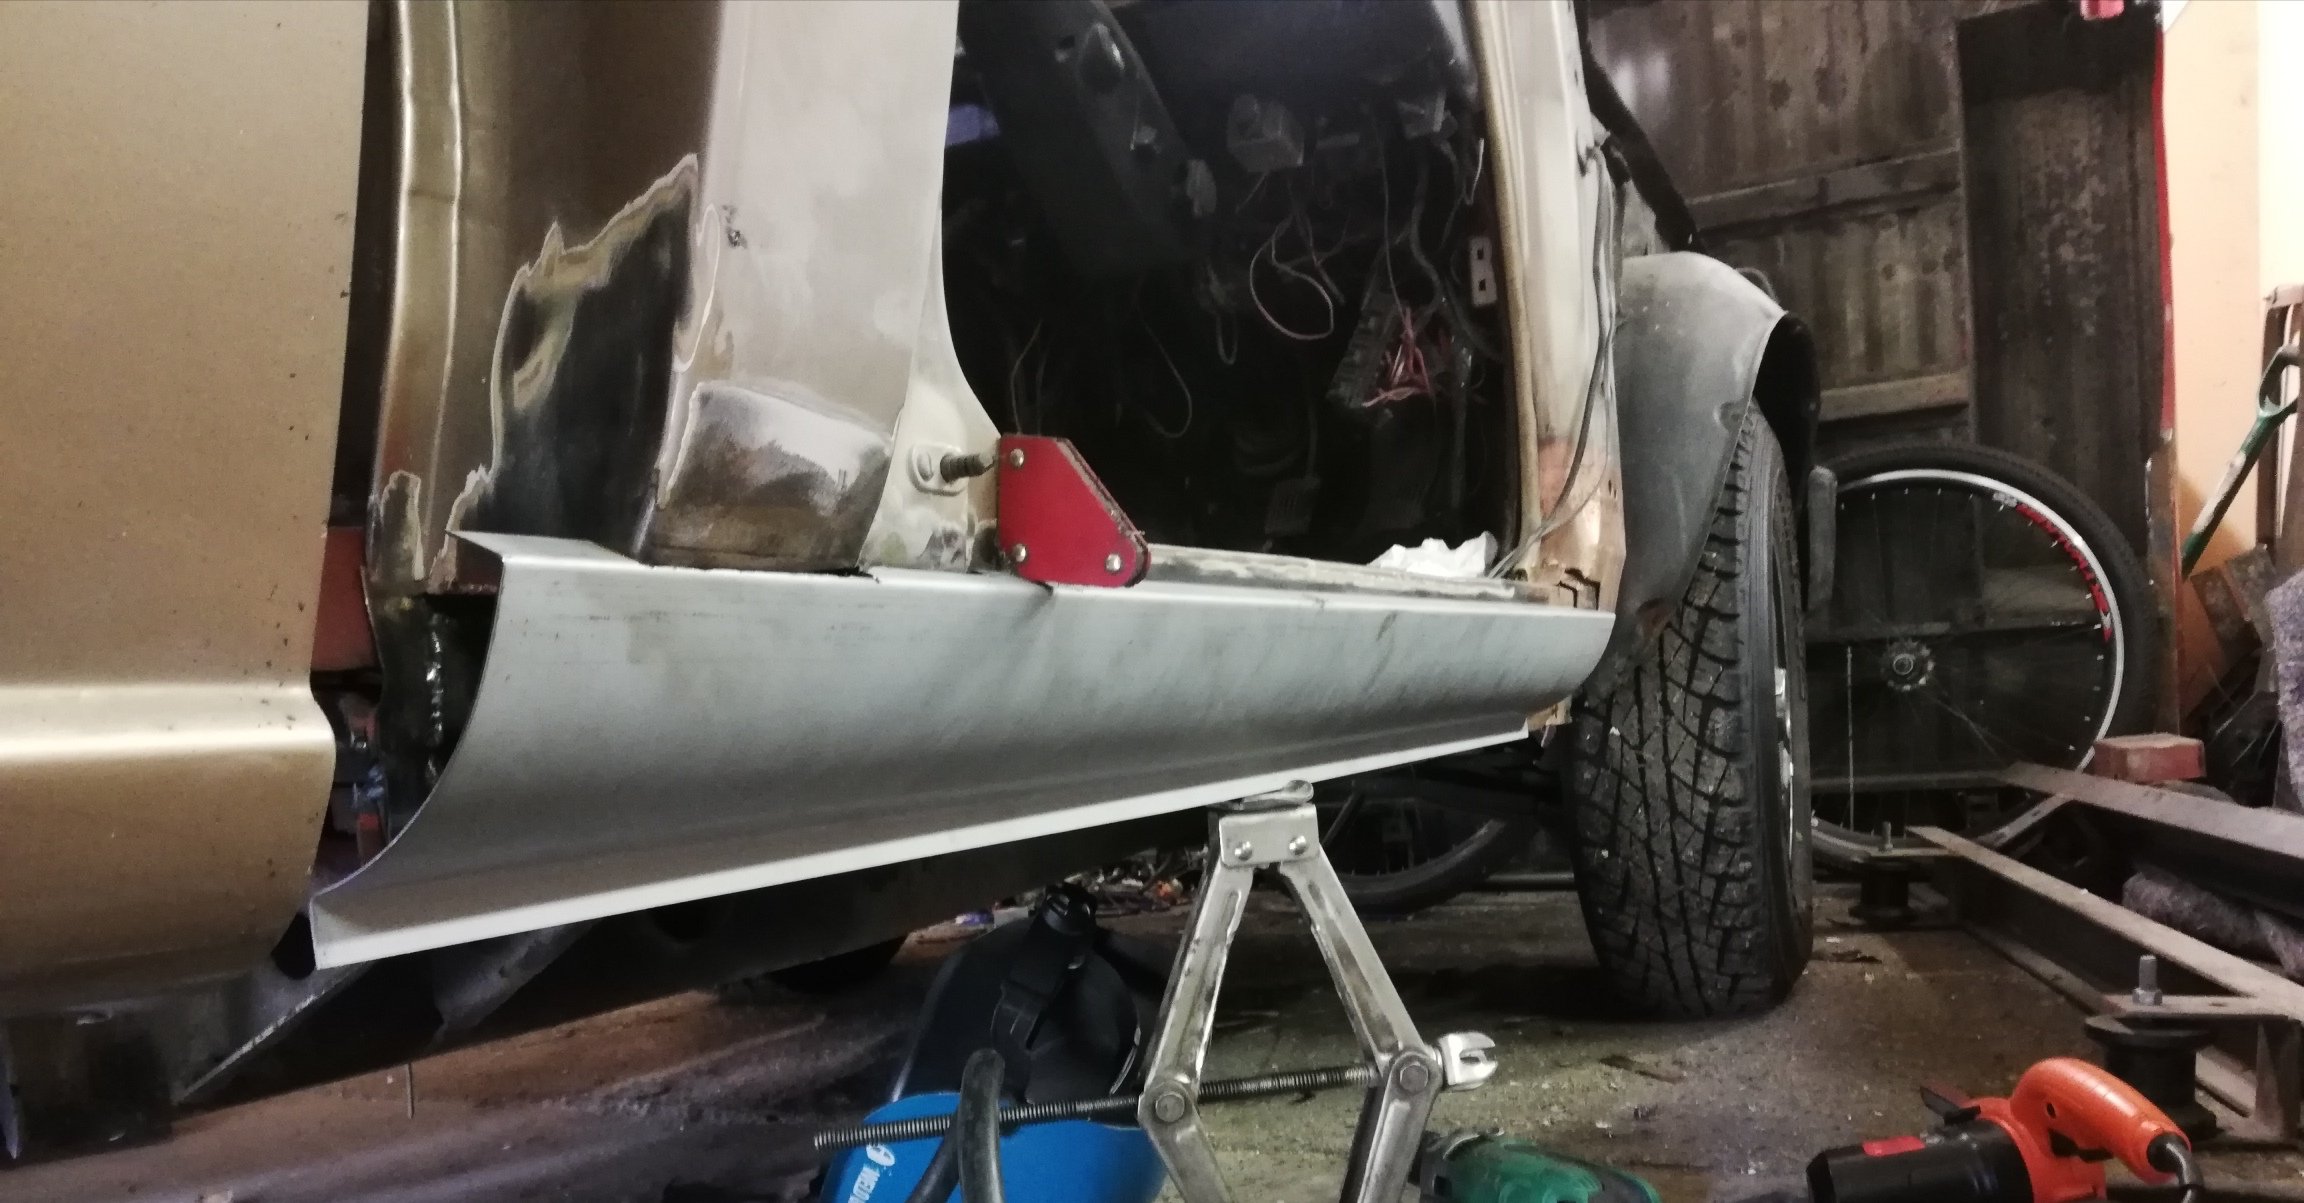
I can't get no satisfaction Except some times I do Was at a bit of a loss as to how to line the new sill up. Luckily A series engine components came to save the day. Looking at the step/scuff panel part of the door frame, it looked pretty squashed. Must have been stood in a few times. The section right in the middle where the seat frame mount is attached was unbent. So I used a rocker shaft from a 1098 Morris minor to reshape it. This must have worked because when I then set the top lip of the new sill where the old one was, the bottom of the inner sill also lined up (it was well out before) Needs another day to make a rear cab corner and join in the front of sill to the bit behind the guard
2 points
-
https://cnptengineering.com/handheld-laser-welding-machine-p00107p1.html Yeah wouldn't mind one eh2 points
-
Less than three months away ill start packing How’s everyones progress going?1 point
-
Last weekend was a productive one on the TVR, starting with wrapping up the fuel hose replacement job I started earlier. I was held up with the wrong filter, so I did some more research and ordered what I hoped was the correct filter (using the number off the existing filter) Thankfully it was the right one. The early cars with the filter under the car use a Ryco Z399 filter. A set of nice new copper crush washers and on went the fitting I had to replace the hose from the pump to the filter, as I was doing away with the accumulator, and the existing hose was both incorrectly rated, and starting to perish 1/4" hose is pretty small, and not that common here, but I found Repco stocks Gates Barricade hose, which is bloody expensive per meter, but some of the best hose available. You'll note in the photo above that the old hose is J30 R6 rated, which is safe to about 50PSI in an injection system (despite saying a higher rating on the hose). The Bosch MFI system runs at about 80PSI, so although that hose had been working OK, I wasn't going to trust sticking with an R6 hose. The Gates Barricade hose is safe for 225PSI as it is a J30R14T2 rated hose. Since I had been doing all this work on the bench first, it was time to move to under the car, where I got a timely reminder to always check your lifting points. The TVR had been in the air on the Quickjacks for a week now, and unknown to me it had settled on the front blocks, and they had started to tilt and slip. It's possible it would've been OK, but it's not worth the risk. I dropped the car back down and reseated all the blocks. ALWAYS check the car is secure before getting under it, even if that means giving it a good shake or shove. Better it falls off the stands onto the ground, than onto your head. With the car safely in the air again, I refit the new filter to the mount and secured the bolts and ground straps. I wanted a nice straight hose from the pump to filter, but due to the proximity and angle, the only way I could do it was a loop back from the filter. At least this time I don't need to wrap the hose in tape to stop it from being rubbed through where it was touching the body, as it had been... And here is the new hose Once everything was happily in place, I torqued both banjo fittings up with my torque wrench. They don't take much, just 18-20NM, but it's essential they are torqued correctly. I have heard much talk about not using the moulded hex on the ends of the filter or disaster can strike. I don't know how true that is, but I didn't need to secure the filter as the mounting clamp held it tight anyway. After mixing some more injector cleaner into 10L of fresh petrol, I slowly poured it into both tanks, keeping a close eye on the new hose joins. When everything appeared to be dry and sealed, I reconnected the battery, and turned the key and listened as the system primed. I let it prime for a short time and checked all the high pressure lines, and once satisfied they were dry, I fired the beast up. Everything still looked good. Winning. With the car still in the air, I planned some more maintenance. I wasn't sure when the last time the driveline oils were done, so like usual, I spent hours pouring over fluid specs, and eventually settled on a Nulon fully synthetic 75W-85 GL4 for both the gearbox and diff. Nulon sells it in these nifty little baggies, which at first I thought were a gimmick, but I'll tell you now, its way better than a bottle. The gearbox is a bit of a pain to get at due to the exhaust, which chills out directly under the drain plug, and allows only a small space to access the fill plug. Always undo the fill plug first, just in case. One thing that always bothers me is getting oil on the exhaust, as even if you hose it with degreaser or brake clean, it'll still stink as it burns off. There was no way to avoid oil pouring on the exhaust with the TVR, so I settled for being smart and using some plastic sheet wrapped around the exhaust. Worked a treat. The old fluid actually looked really good, so I suspect it hasn't done a lot of miles in the car, but its probably still been in there a few years. The diff was easier to access, with the drain plug smack bang on the bottom, and the fill plug on the back. Both were bloody tight but came off when I asked nicely. Yeah, the diff will probably need some seals at some point, but that's down the list a bit for now. I used three and a half bags (1L each) between the gearbox and diff. Here we see the squeezy bois chilling at the watering hole One thing I noticed with the bags is that it can be hard to get the last little bit out. What you can do is join the two bags together, and drain one into the other. I also reused hoses between bags, leaving me with one unused, clean, hose to stick back onto the half full bag to use later. With the fluids changed (except engine oil, I still need to do that) I lowered the car back down and took it for a quick spin. Unfortunately the running issue seems to be getting worse. It used to just be under load at about 4000rpm the engine would fall flat and cut out. Now it happens randomly and is almost undrivable. Watch the video with subtitles on as I note where it has issues. You can see it revs happily with no load at the end. I had my suspicions of what it could be, but I needed to do more testing.1 point
-
Please Sir, may I have another?1 point
-
Dunedin Autospectacular Car Show, Edgar Centre, this Saturday 9am-4pm https://www.facebook.com/events/edgar-centre/autospectacular-dunedin/878814955505257/1 point
-
Update coming soon. Some of you may know what ive been up to over the last few years through my instagram account but i thought it would be good if i show you in more detail. stay tuned to find out more. sorry for the click bait. sorry for it being 5years between post.
1 point
-
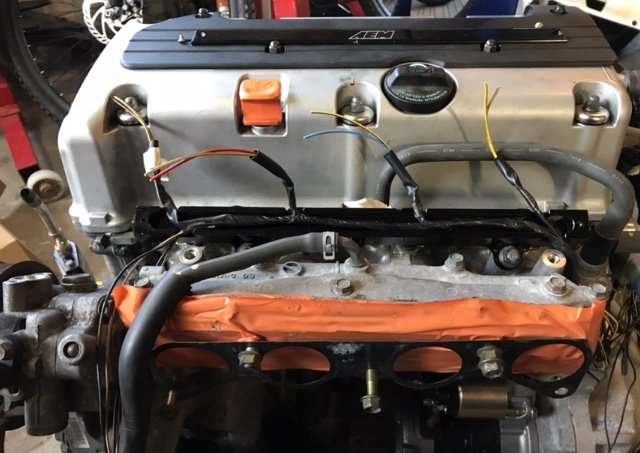
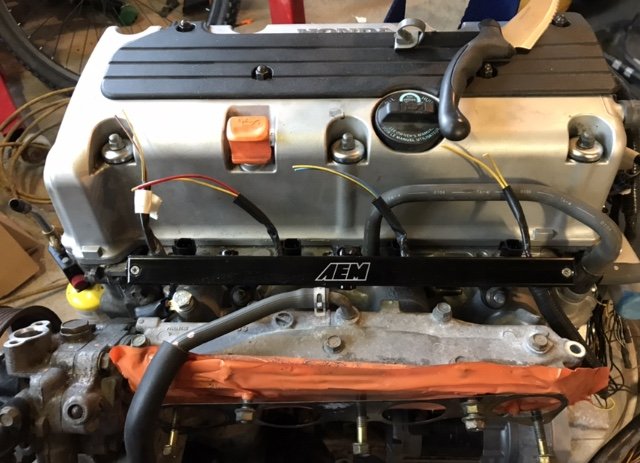
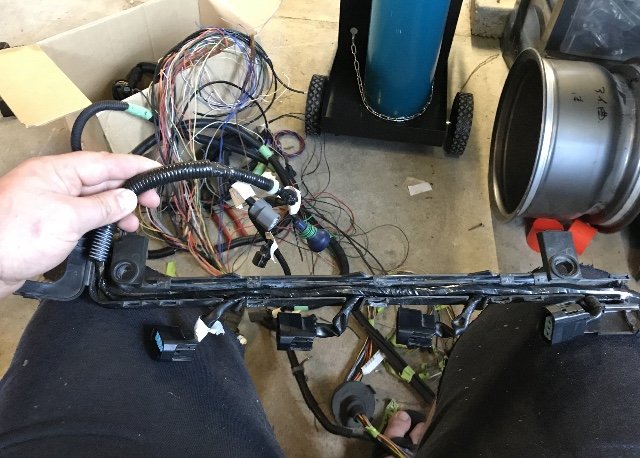
Sorted the loom out for all the sensors, coils and injections. really liking the fuel rail cable support! starting on power harness witch is a bit more tricky without it being in the hole. going to move the battery to the intake side. Witch should also free up room on the turbo side. Try find a large OEM filter box that fits in there nicely. maybe something off a later model 4wd with snorkel and large panel filter
1 point
-
Here is my cheap version of header cut offs. old school idea..weld the bolt to the rod and weld the end of the rods..cut off excess. make up 5 mill thick circle blank off with bolt hole. undo one nut and it’s full noise.
1 point
-
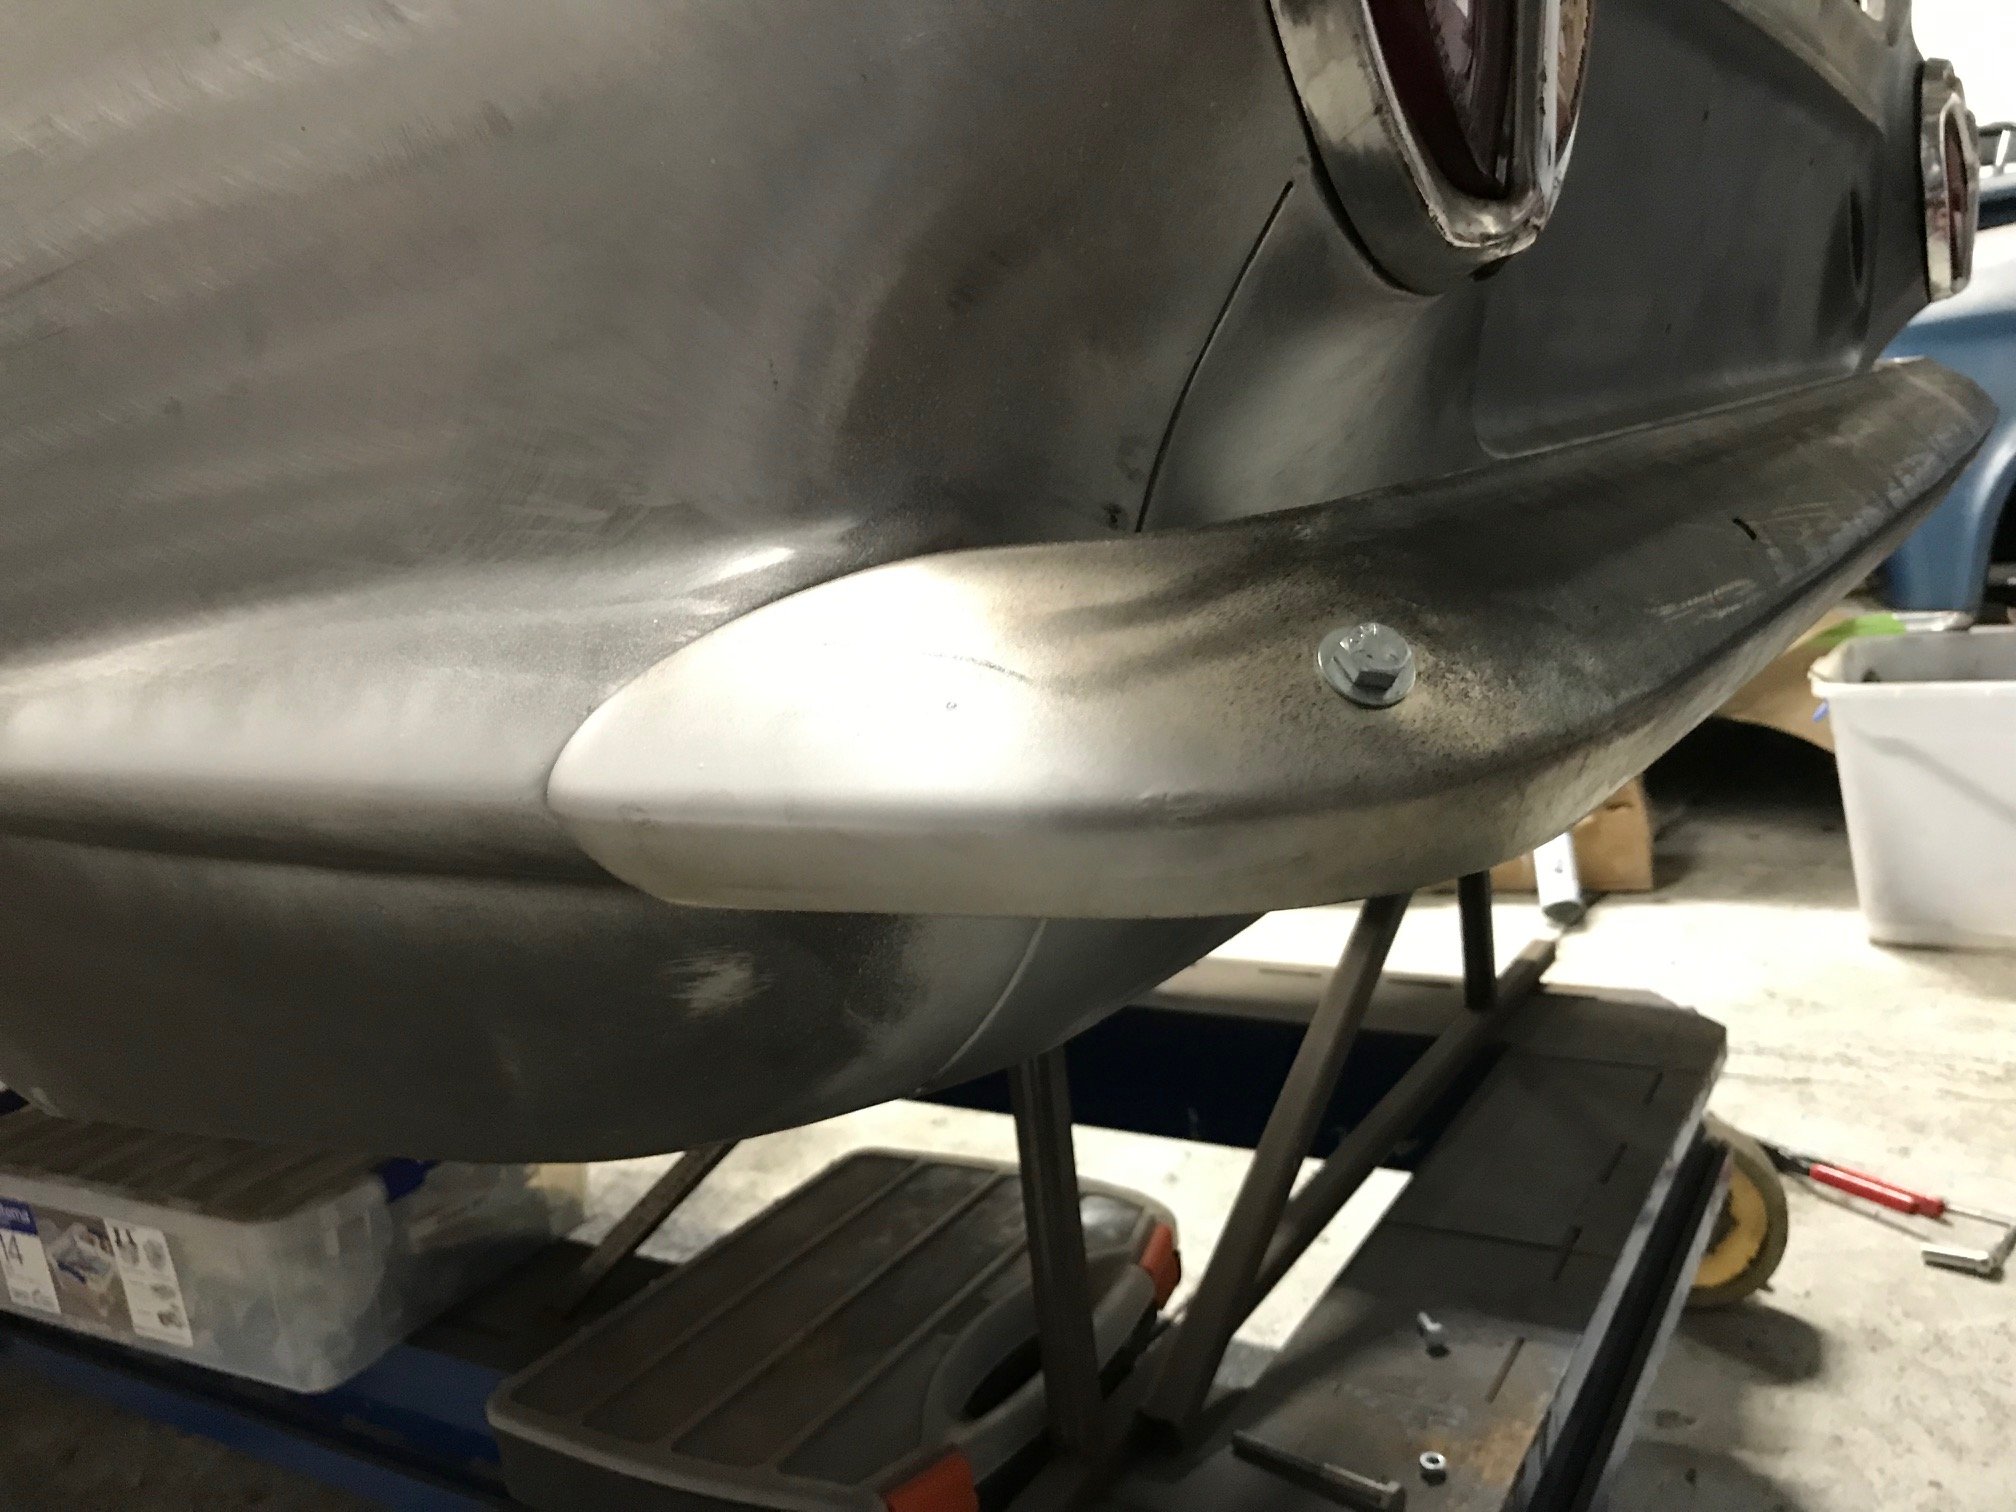
Rear bumper has been straightened up and trial fitted. Looking mint. Just needs a file up and off to the chrome players again. Down to the last few small jobs and off for the final blast.
1 point
-
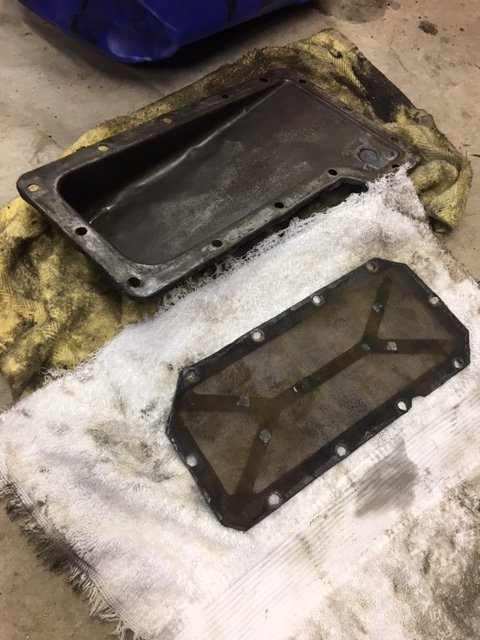
So I found a local place that could anneal my sump which would allow me to pull it flat. Dymo Manufacturing in Wingate. They put it in their kiln with it bolted to the jig. It was heated up to.... hot, then allowed to cool down slowly over many hours. ~10 I think. $70. The heat seems to have baked out any oils and cooked the sealer that was still in the grooves on the mounting face. The sealer just crumbles and turns to powder when I scrape at it. Only down side was it caused some of the small M6 bolts to seize in the jig which I wasn't expecting, so I broke one and stripped at least two more. So I'll have to find some suitable bolts to bolt it back to the engine. Oops. But it's more or less flat already. So I am happy to bolt it back to the engine, the sealer will sort out any tiny gaps. Cast iron table saw top is the flattest thing I have. I did try move it around a bit, just in case the table saw top was bent. It's the same which ever way I put it. There is still a tiny gap at the front of the sump, but it's no bigger than 0.5mm and if I put some weight on it, it closes up. Yay.
1 point
-
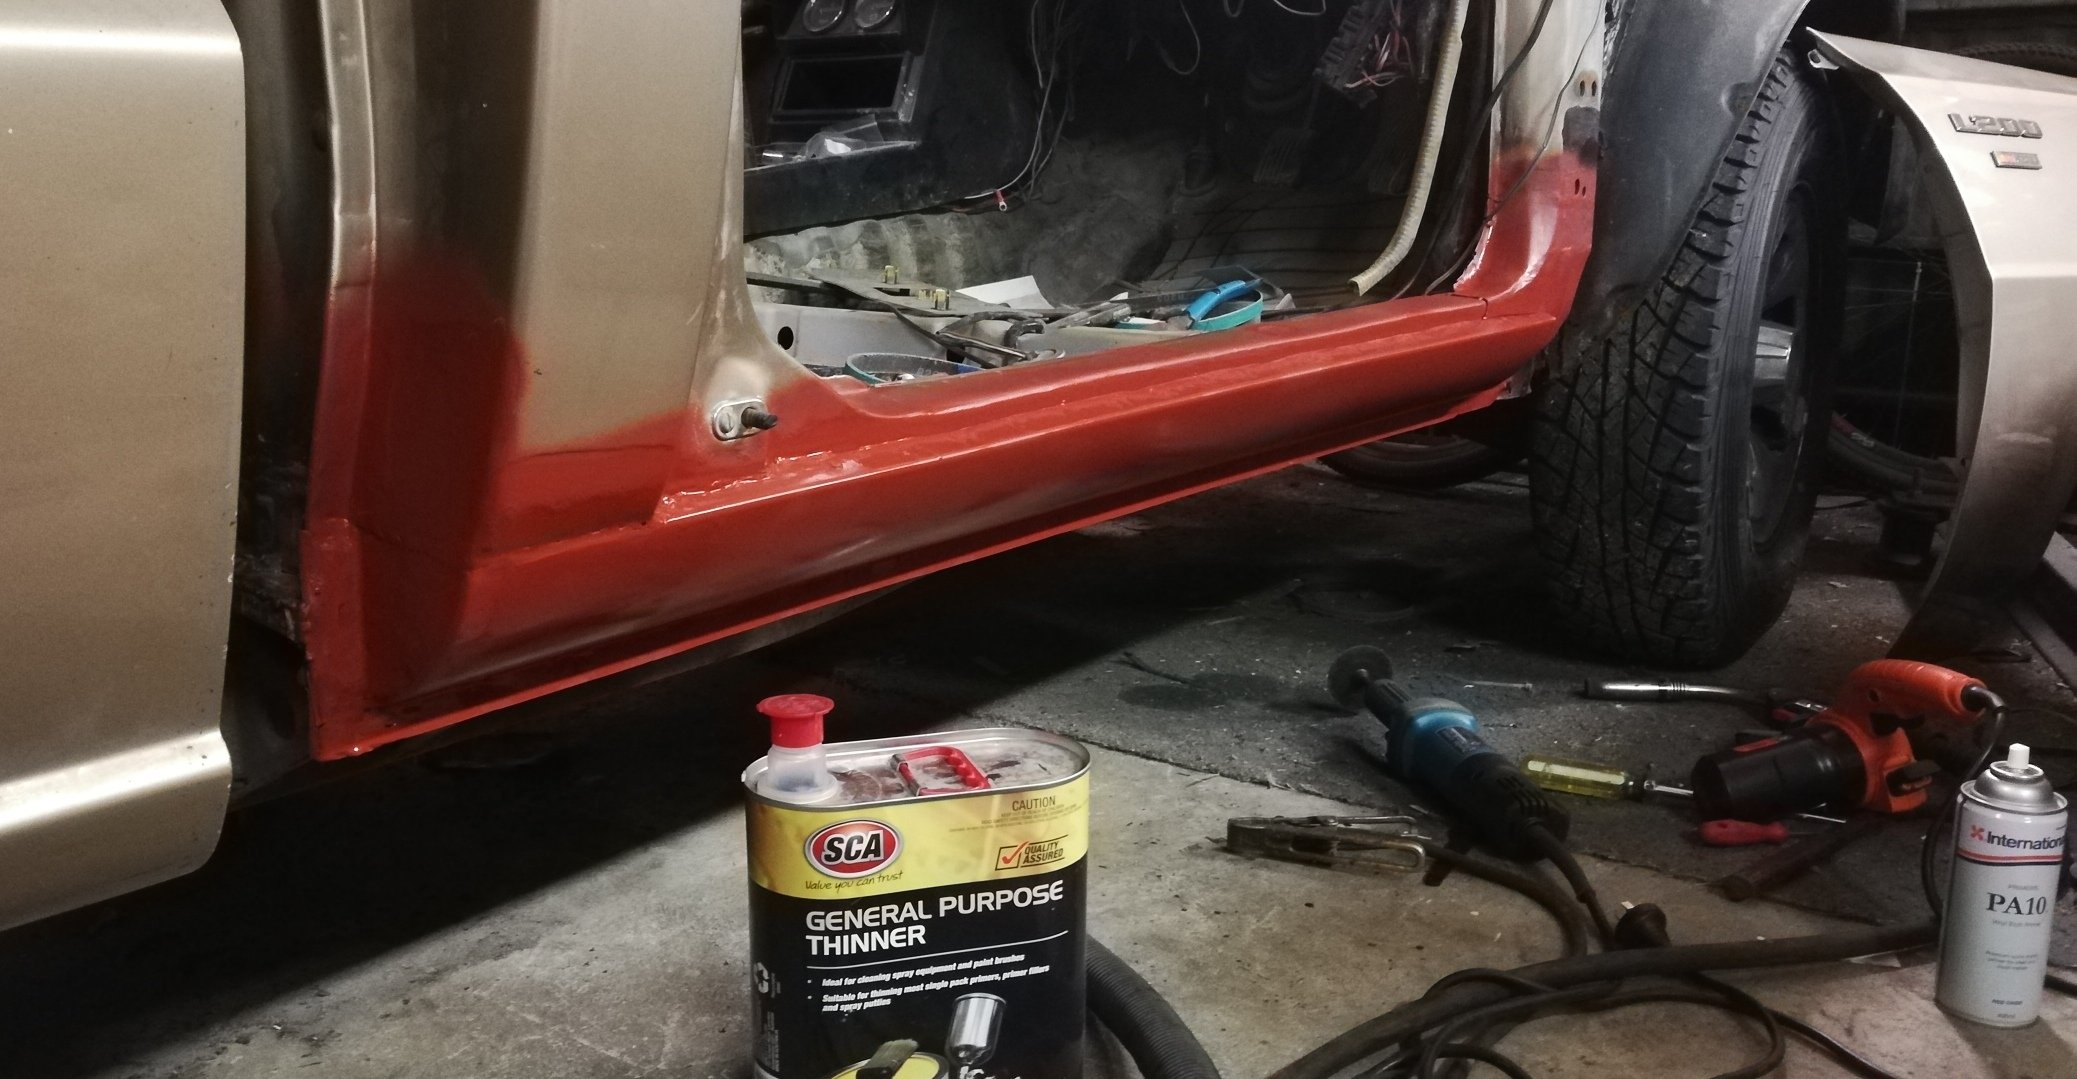
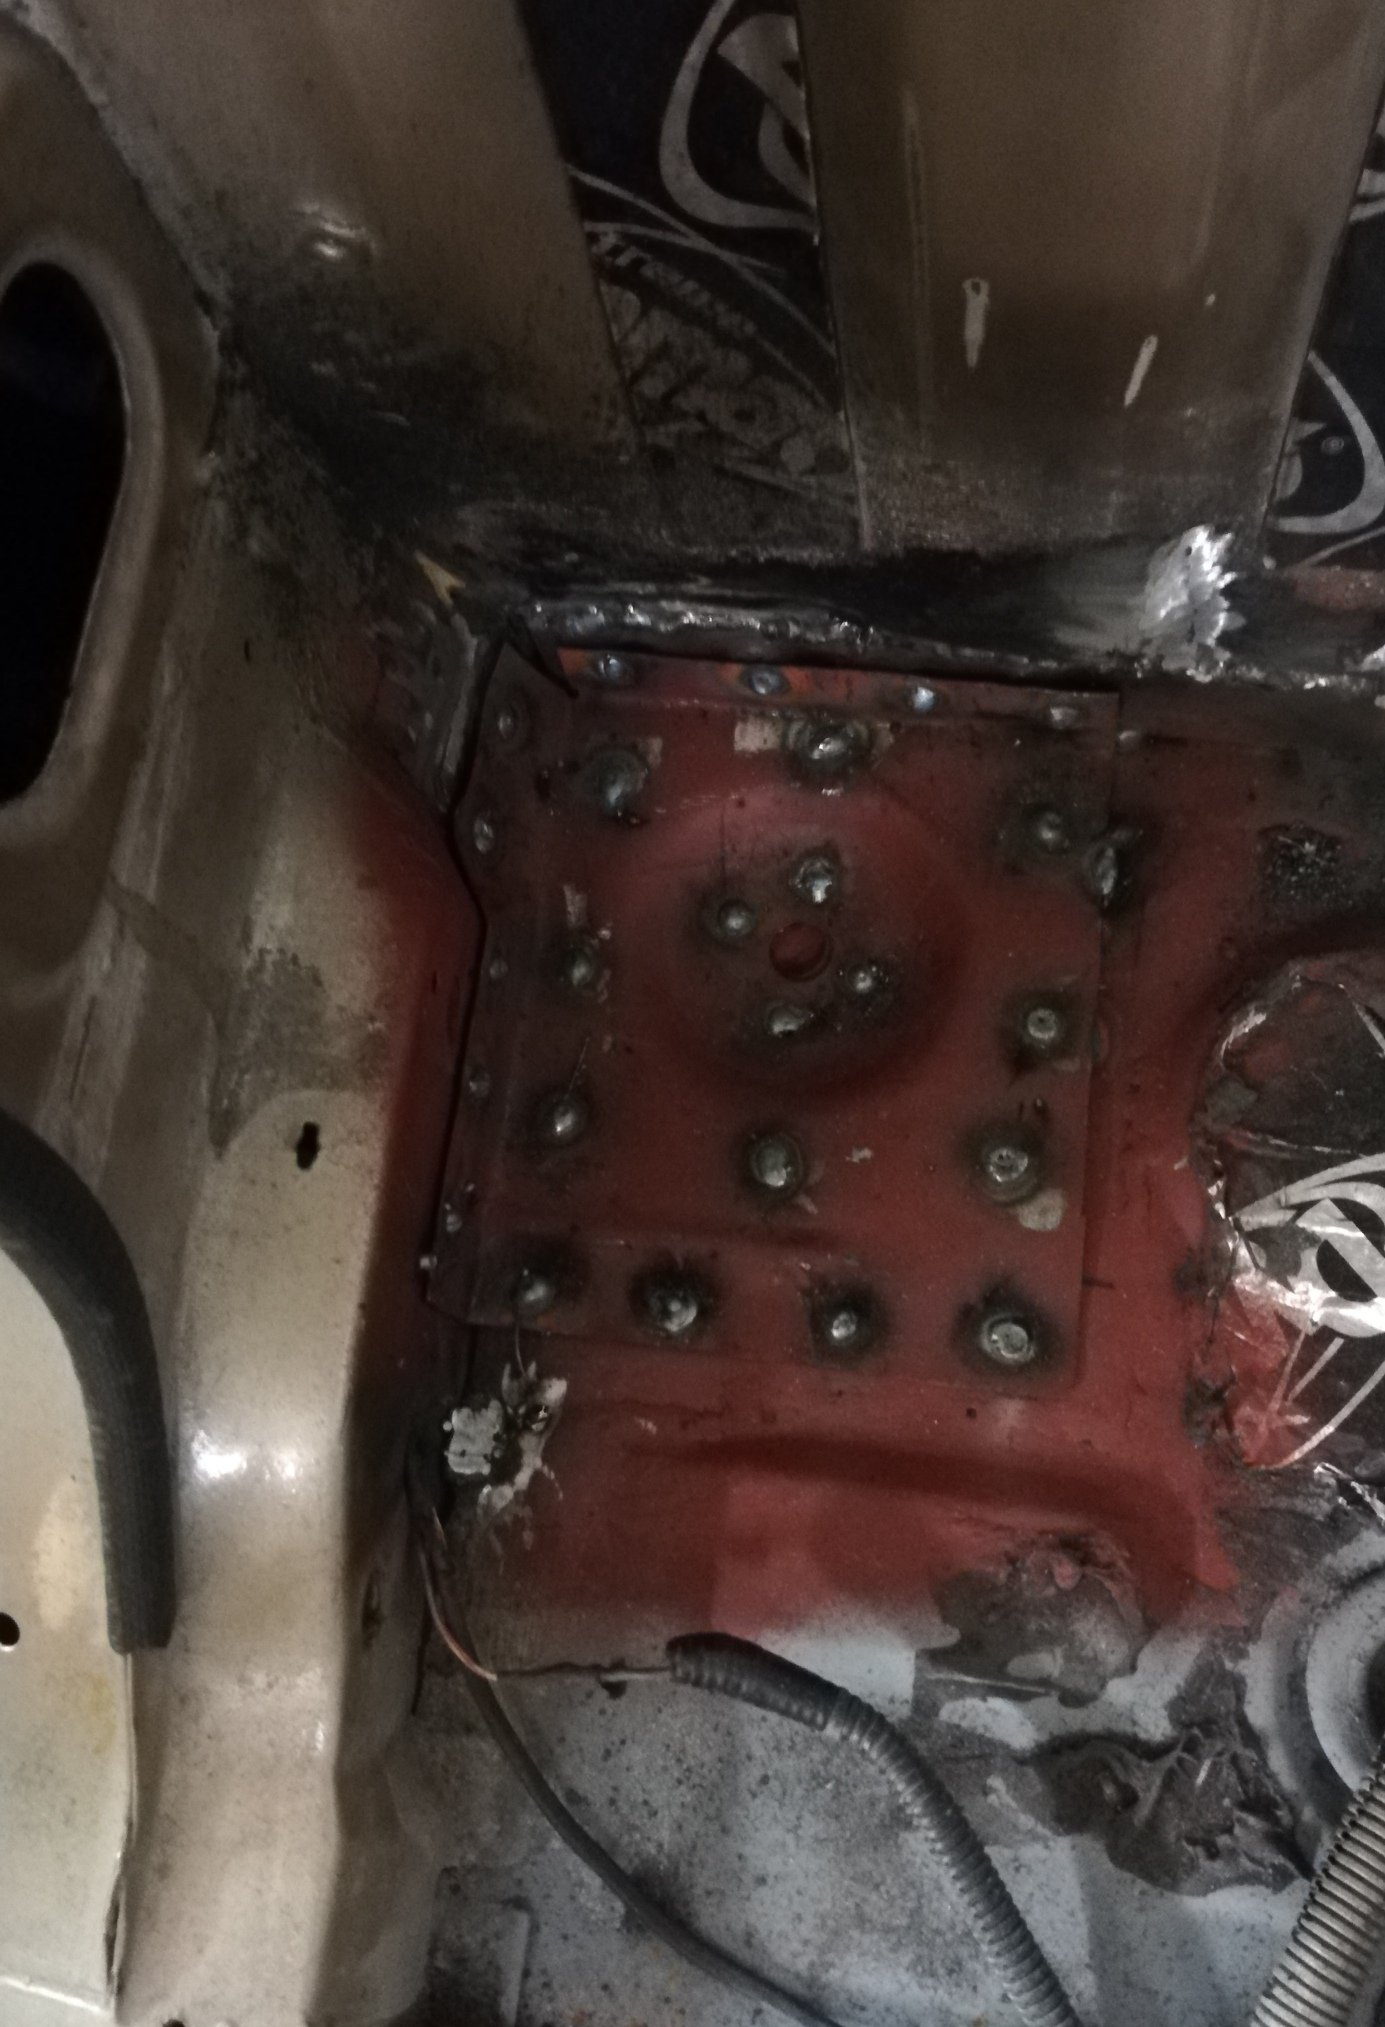
Ok ok What a balls of a job Floor is in Inner sill is in Cab back patch is in Inner cab mount plate is in Outer cab mount is in New sill getting trimmed to fit Not sure if I need an inside sill bracket like what was shown gas axed above, doesn't exist in my parts book.
1 point
-
Its taken me 3 shed nights but I've finally finished changing the oil. I had to make a new sump gasket that I forgot to take a photo of. There was nothing particularly nasty to report in the oil. I now know that to clean the oil filter I have to remove the hood, grille, number plate, radiator & undo the front engine mount bolts... Happy days.
1 point
-
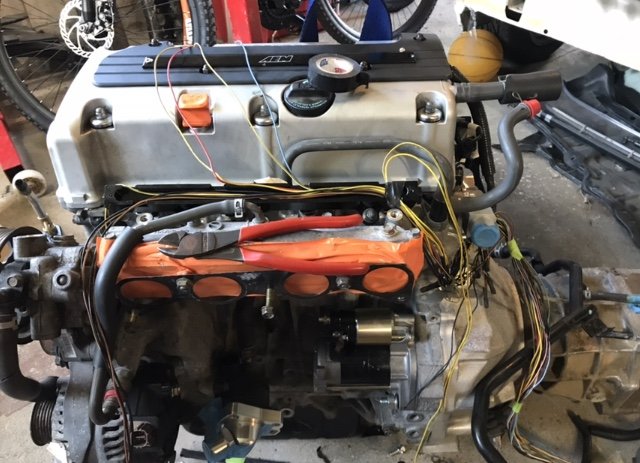
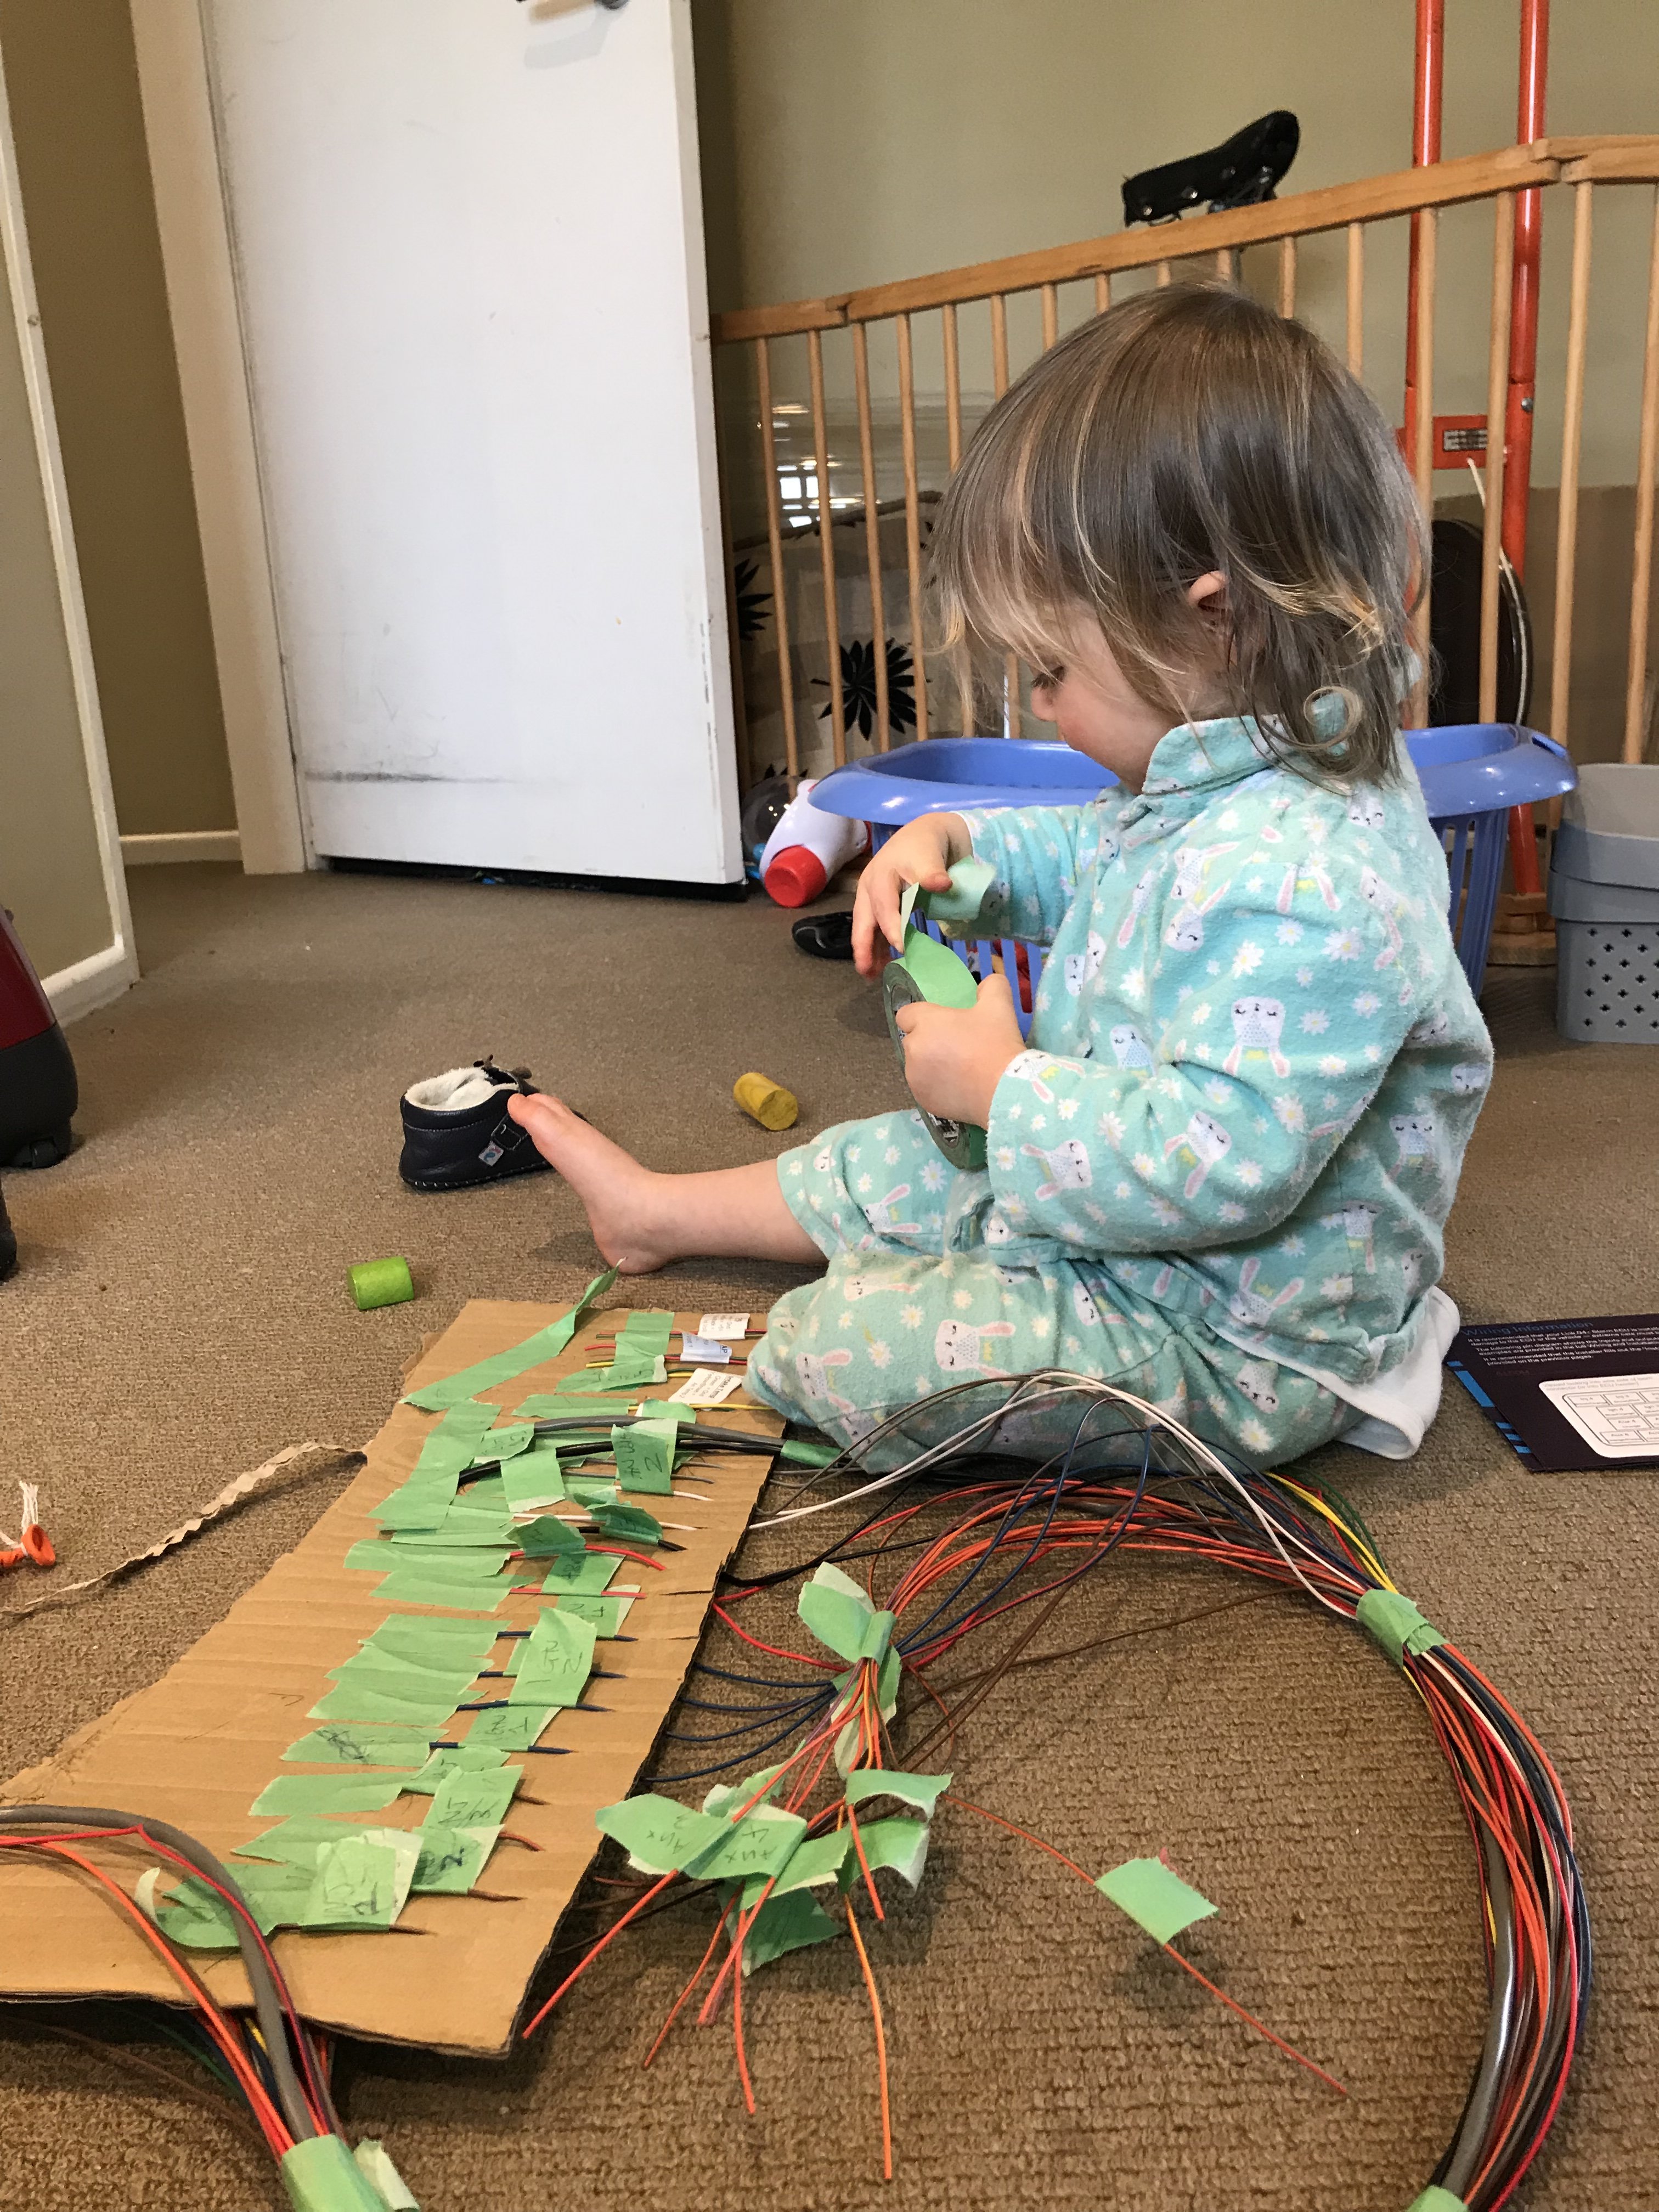
Alrighty ended up buying a Link G4+ storm and I am going to replace the engine loom. I’ve outsourced that job to my little girl so that’s under control:
1 point
-
After testing the Gizzmo IBC boost controller, yes its pretty old but its still newer than the engine haha. It works well and even at 14psi it is still in the 10:1 AFR range, but I really didn't know if it was ok with knock etc so decided I'd better pay for some dyno time even though there isn't much that can be adjusted with the SAFC II. It drives fine and is well mannered. So on the dyno it made 260kw atw on 14psi still running rich, but he didn't try more boost because he detected some knock around 4500rpm, tried adding and removing fuel, but without ignition control he wasn't able to stop it. On low boost 9-10psi (225kw) it's okay but if it got hot at the track it might cause heat knock. On the road it'll be fine on low boost but I built it to take to the track so I am going to have to figure out the best option for an Ecu. He said I could use a Link G4 Monsoon which is cheaper but would lose idle control due to having less outputs. Then it's the slippery slope again... If I am paying for a full tune I should install 1000cc injectors, which will need a bigger fuel pump. That leaves it open to E85, but that needs new fuel lines and a flex fuel sensor. So: Injectors Fuel Pump Clutch upgrade Fuel lines Link ECU Link Looms Wire myself but needs new all the plugs etc (or do I re-use the toyota loom?). Then full tune at about $899 That'll get me around 300kw and an better power curve...lots of money though. If I upgrade the cams it'll be able to make 350kw+ but they are $1000+ then install. Rock and a hard place... OR just install a link and see what it'll do with the 550cc injectors and Walbro 255 pump. BUT then its another retune if I go with bigger injectors later. Any heres the dyno sheet dyno, 260kw is pretty good but I can't use it!
1 point
-
Post Nats update: Tightened front left wheel bearing, rolled guards a bit more, installed oil, de-greased some bits, changed polarity of windscreen washer so that it squirts instead of sucks. Will remember to take pics next time. Things to do: Fix brake shudder. Still driving it lots. Weekend jaunt on some closed roads (it said ROAD CLOSED AHEAD, not road closed....) around the Clevedon coast with some OSGCs.1 point
-
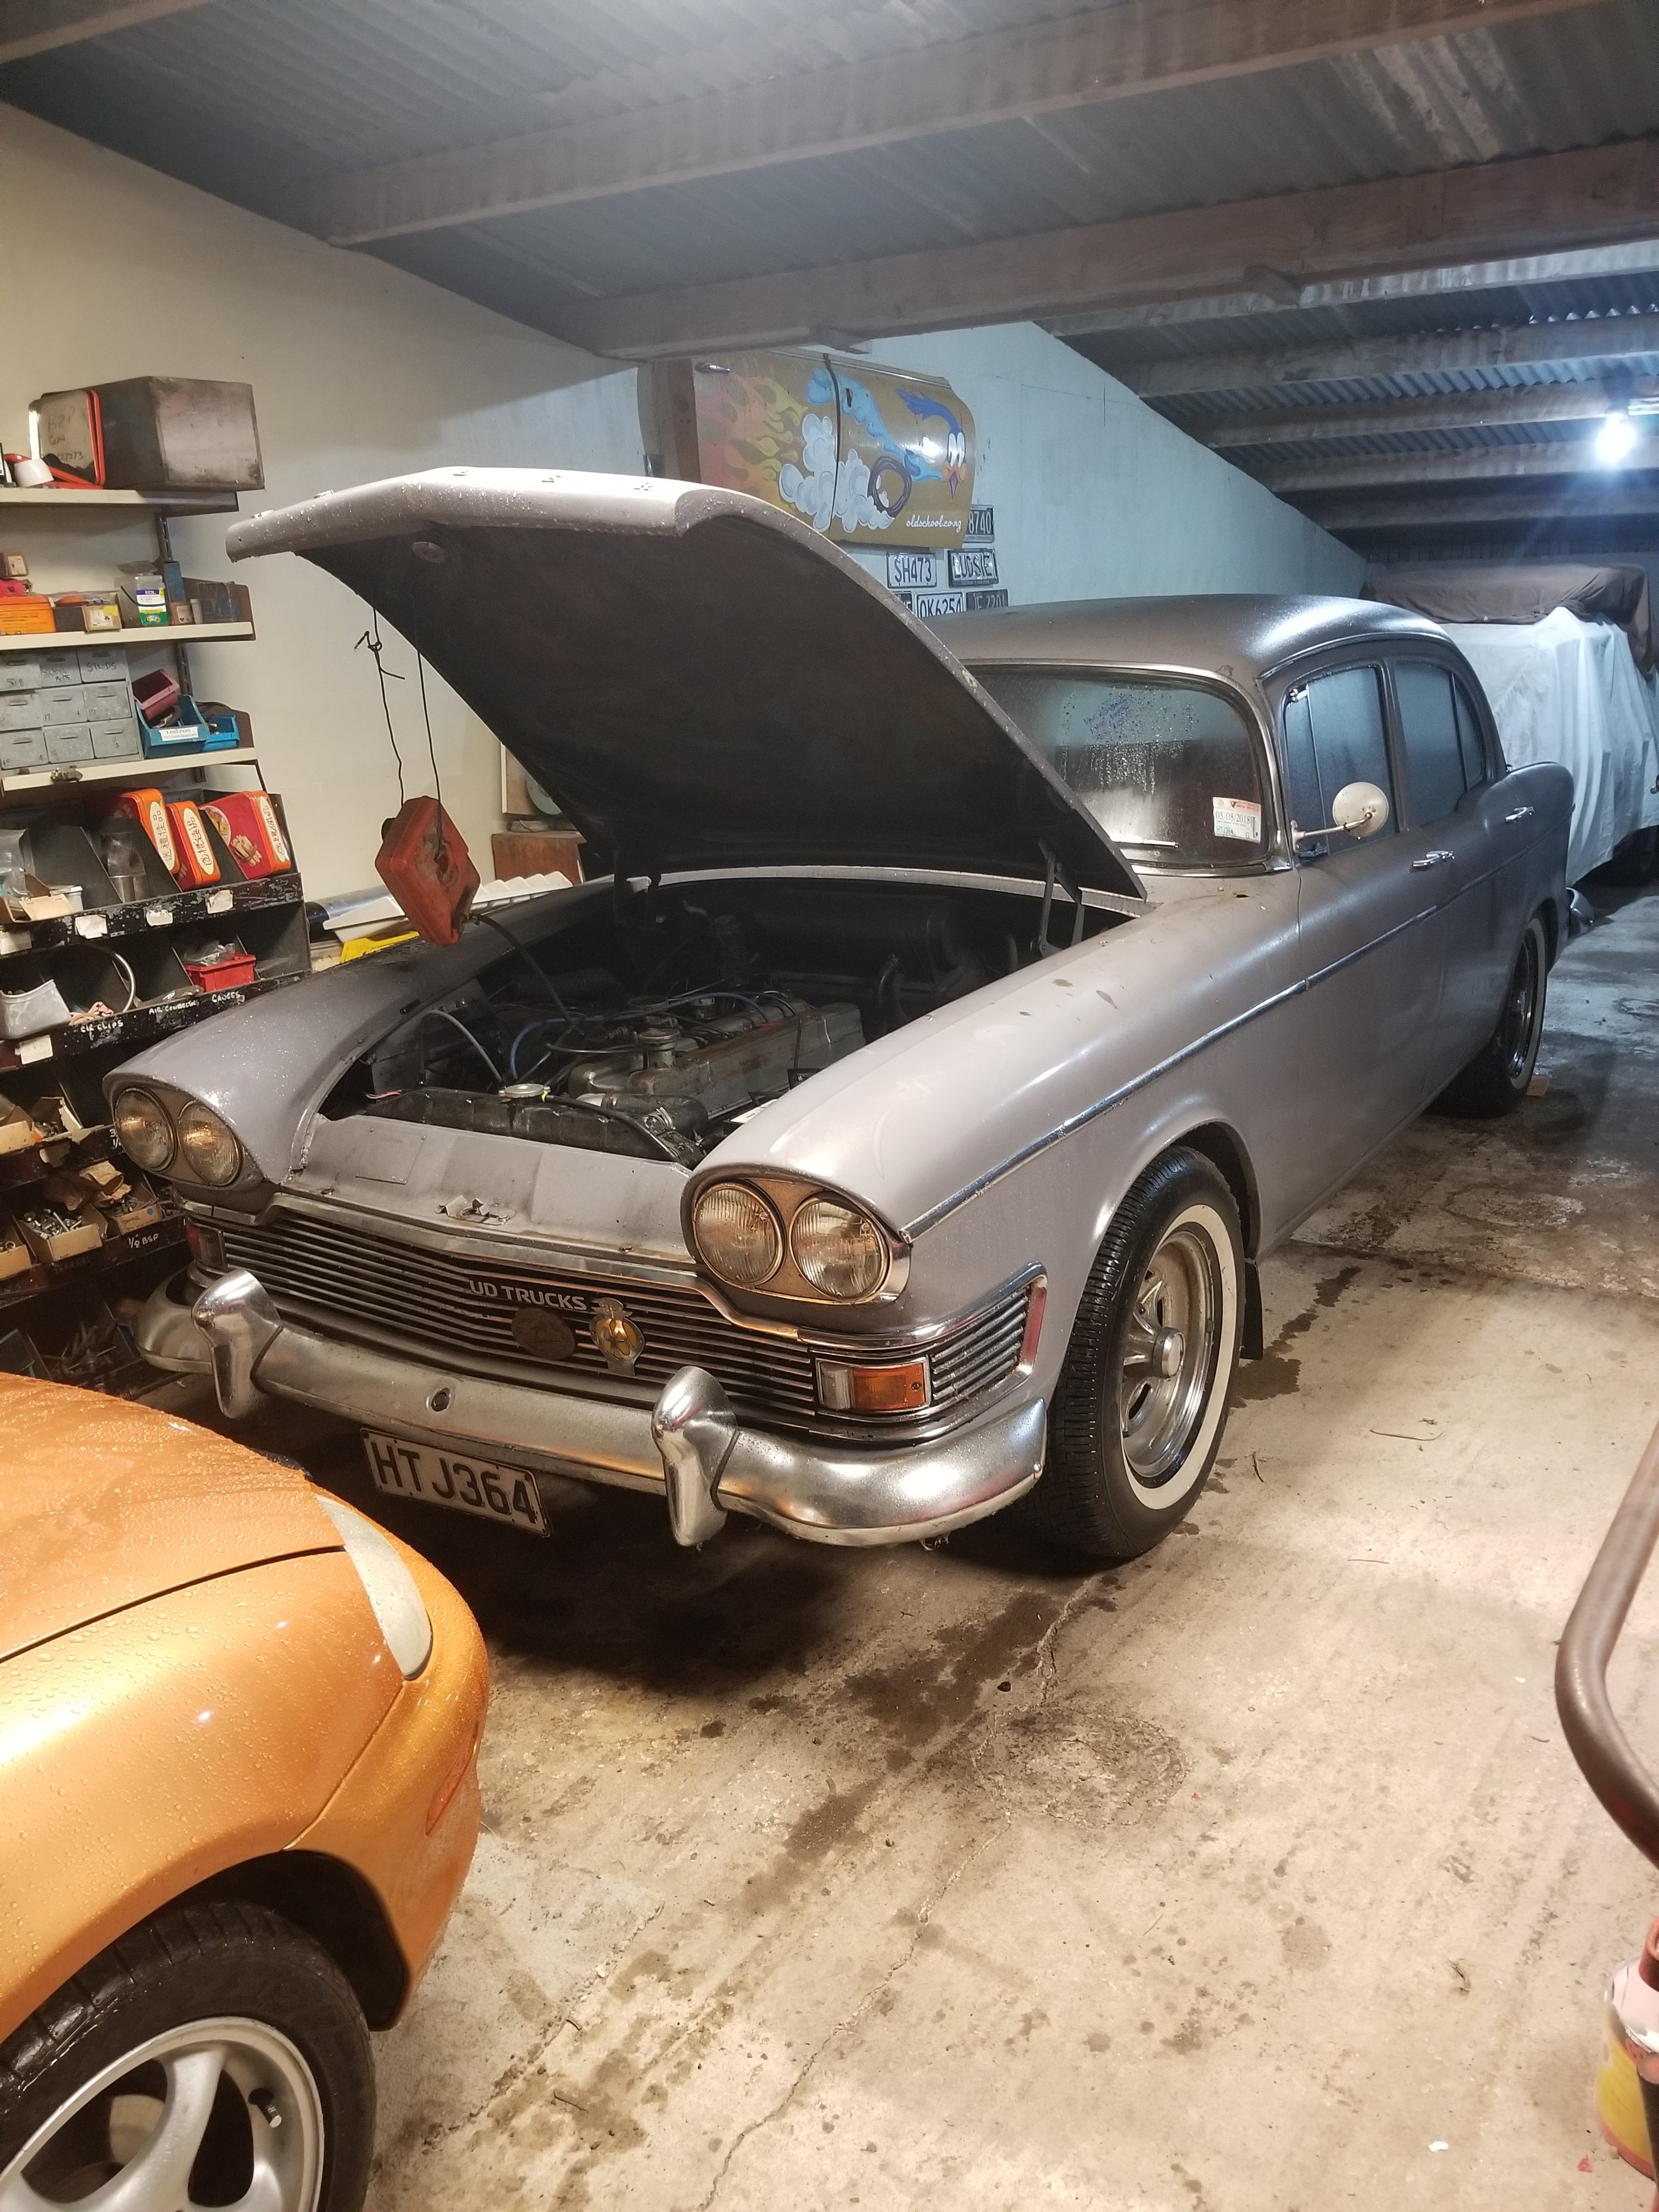
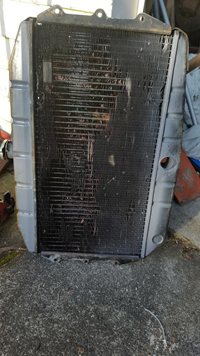
Small update: Hawkes Boes. Big trip from Auckland. So, did the usual check the car before a long trip. Oil change, diff / gearbox check, coolant etc. All good. Went to grab some cable-ties and gaffa tape and the radiator let go. Fluid into the fan, across the engine, up the windscreen etc. Thank goodness for good wiper blades. Anyway, pulled the rad out and it was obvious that it was poked in more than one place. The poked radiator. With only 4 days till departure I had no choice but to get it re-cored, rather than scavenge something else and make it work (which would be normal procedure) 1 Million dollars later I have a new radiator. Anyway, all fixed I followed threeonthetree in convoy to Hawkes Boes AND kept up with his younger car comfortably. Which made me think, The car is 54 years old. It has three gears. It weighs a ton and a half. It has a 3 litre straight six. This isn't going to go well. But then .... It comfortably does a 697 MILE trip - that's 1121kms over three days. (note - without exploding/ breaking / other such stuff) It averaged between 11 & 12 litres per 100km. (23ish MPG) I did worse than that in my turbo Subaru. Wat? I'm impressed. Guess I'll keep her for a bit. Photocred: Roman. Humber at Hawkes Boes camping setup. (It's a BIG tent, not a small car)
1 point


This leaderboard is set to Auckland/GMT+12:00