
Leaderboard


Popular Content
Showing content with the highest reputation on 07/26/19 in all areas
-
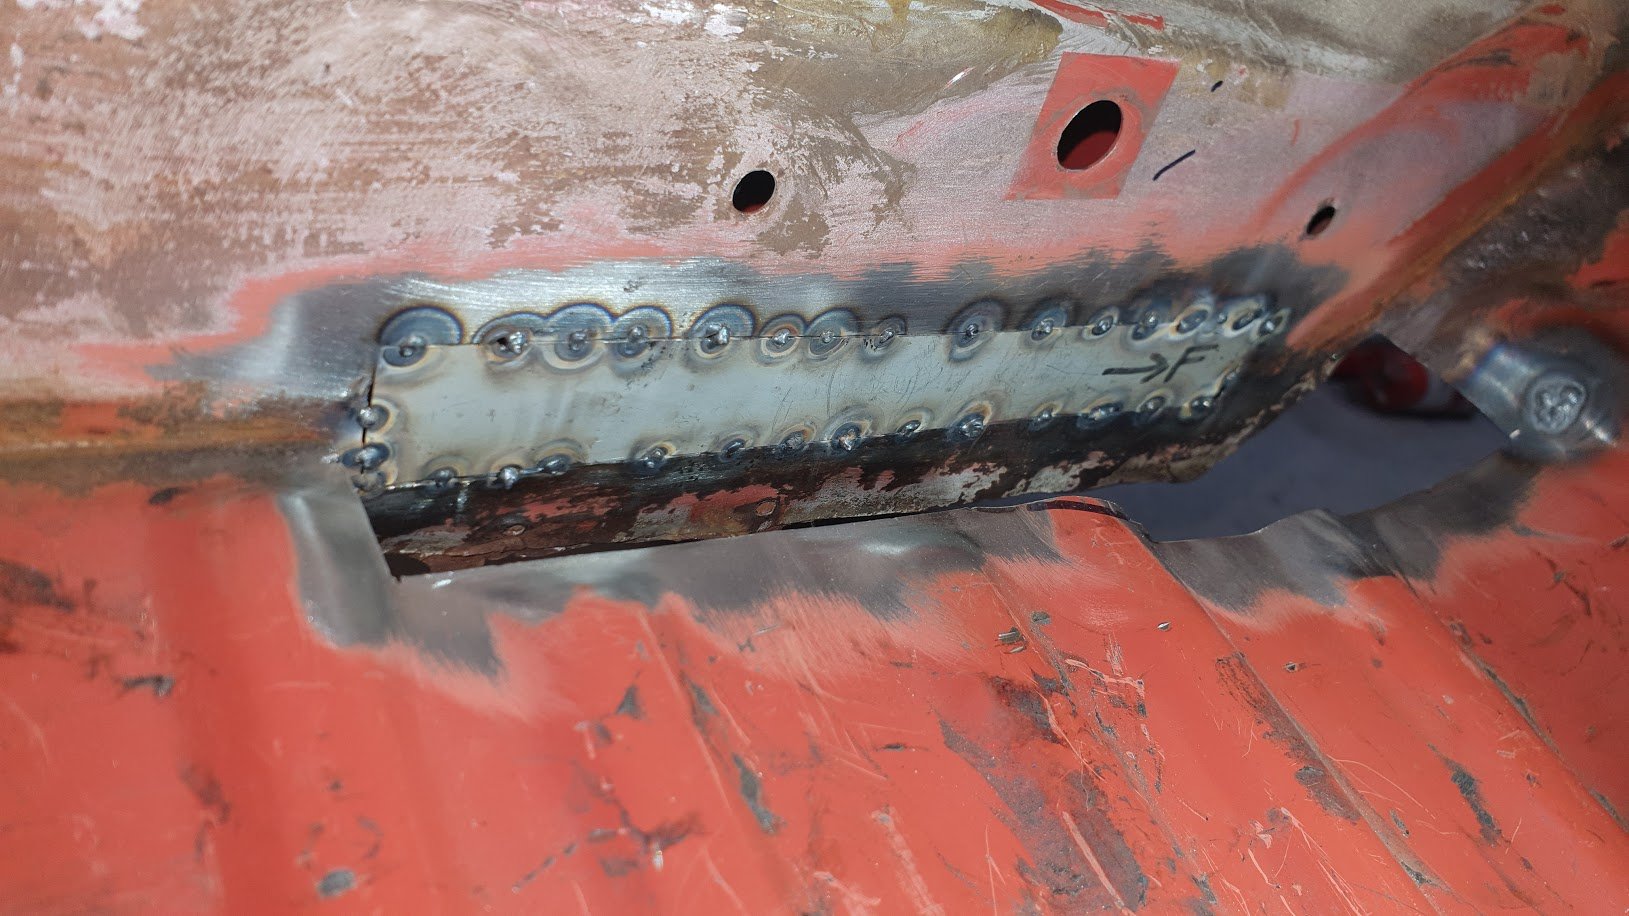
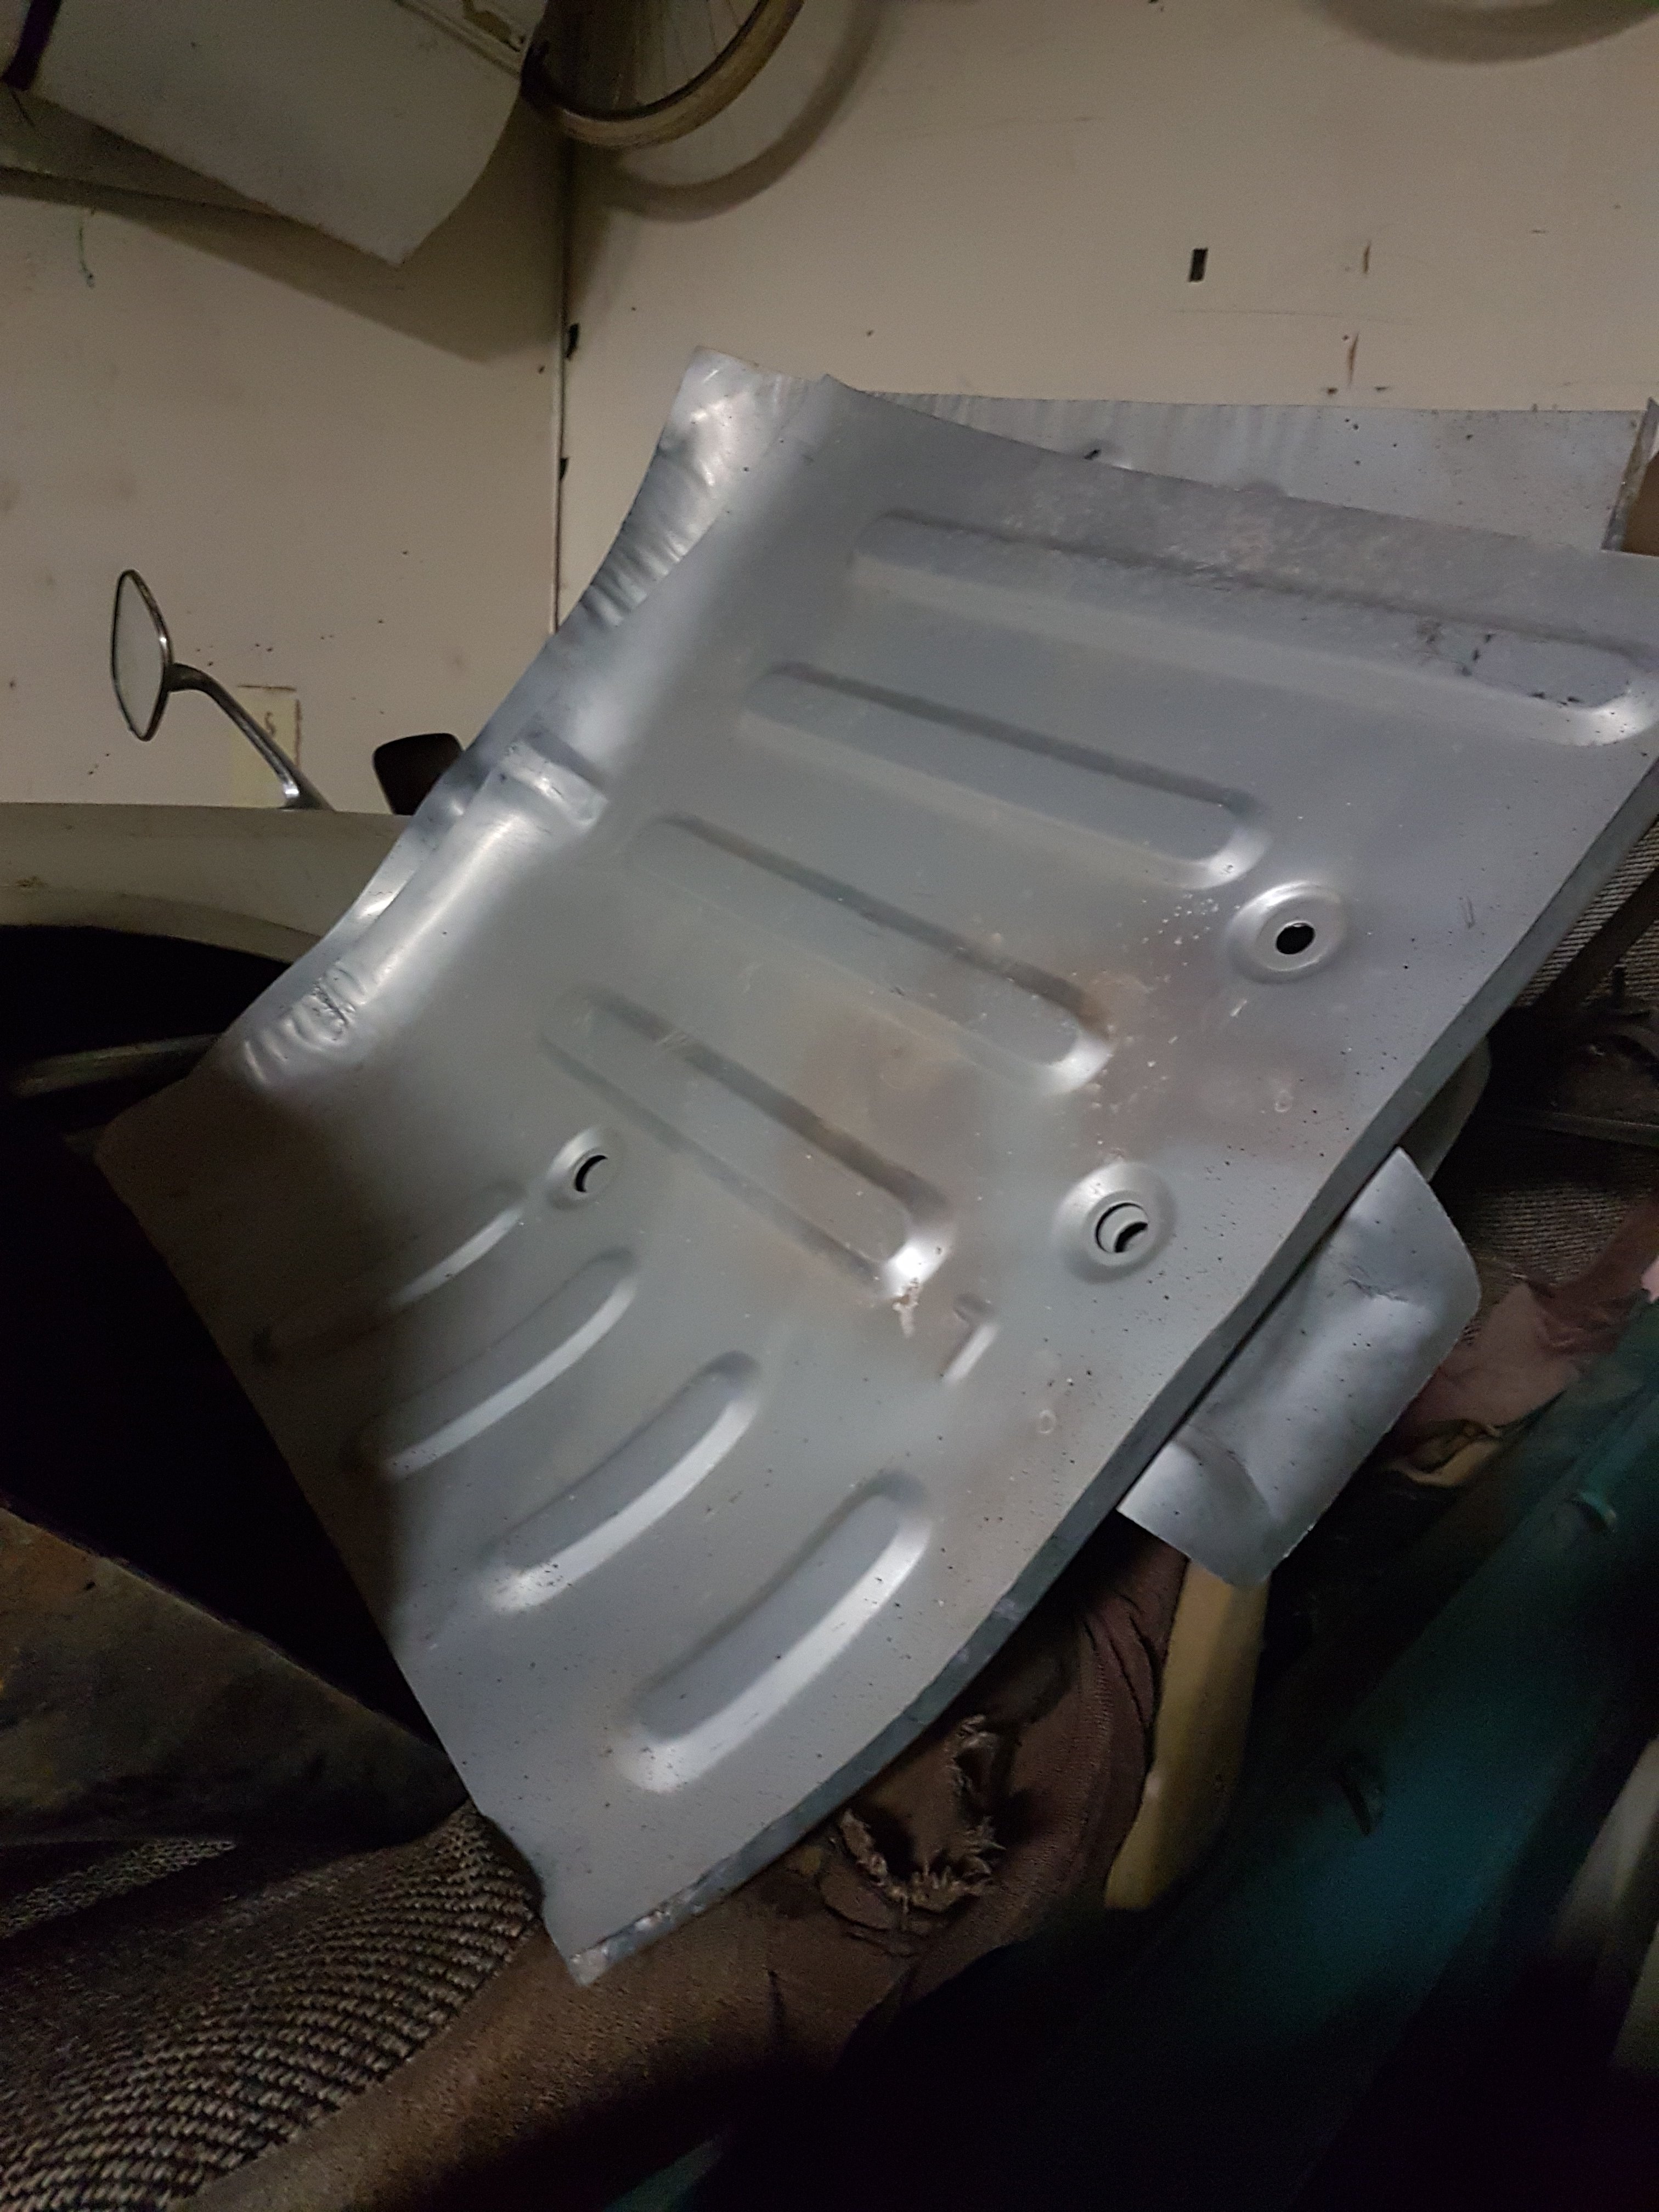
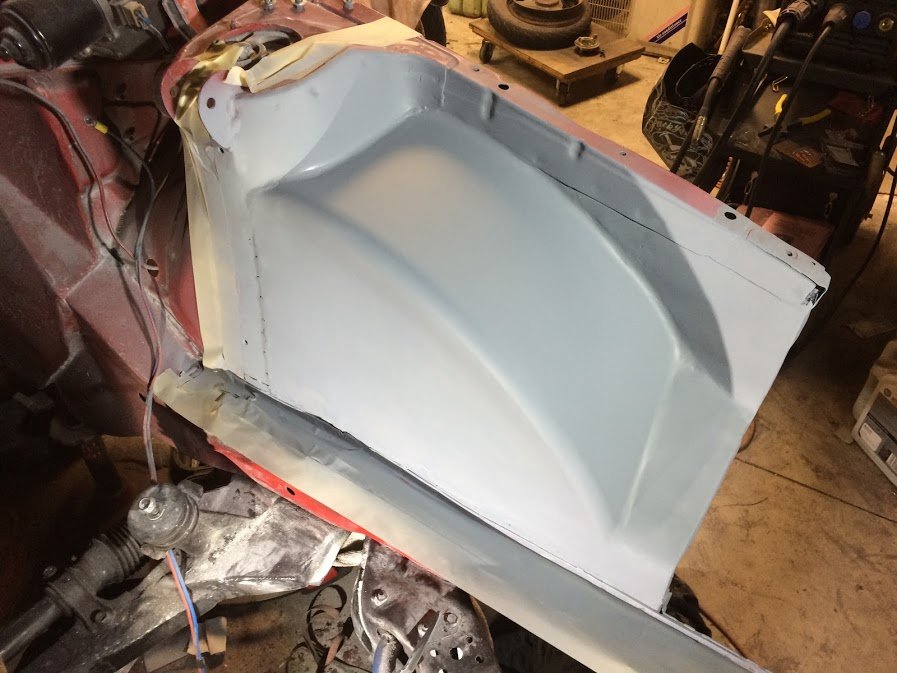
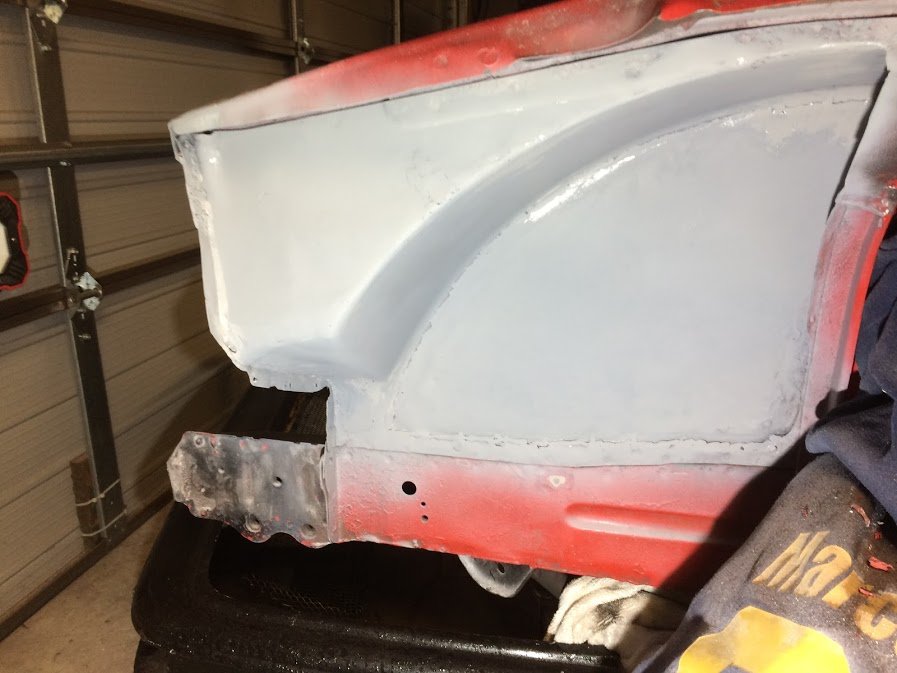
So... a change in the place i took this for a WOF meant it had a bit more of a thorough inspection. It didn't fail but he mentioned that some rust in the passengers floor would need attention soon. So some investigation happened. Turned out that hiding under the sound deadening was a little more serious than anticipated. Likely a leaking windscreen caused this. Out with the cutting disc and I had at it! And then glued it all back together Grind, Sand, and Prime - phone was left in the house so no pics except after And finally a renewal of paint and anti-chip coating. A nice tidy up for it.
 16 points
 -
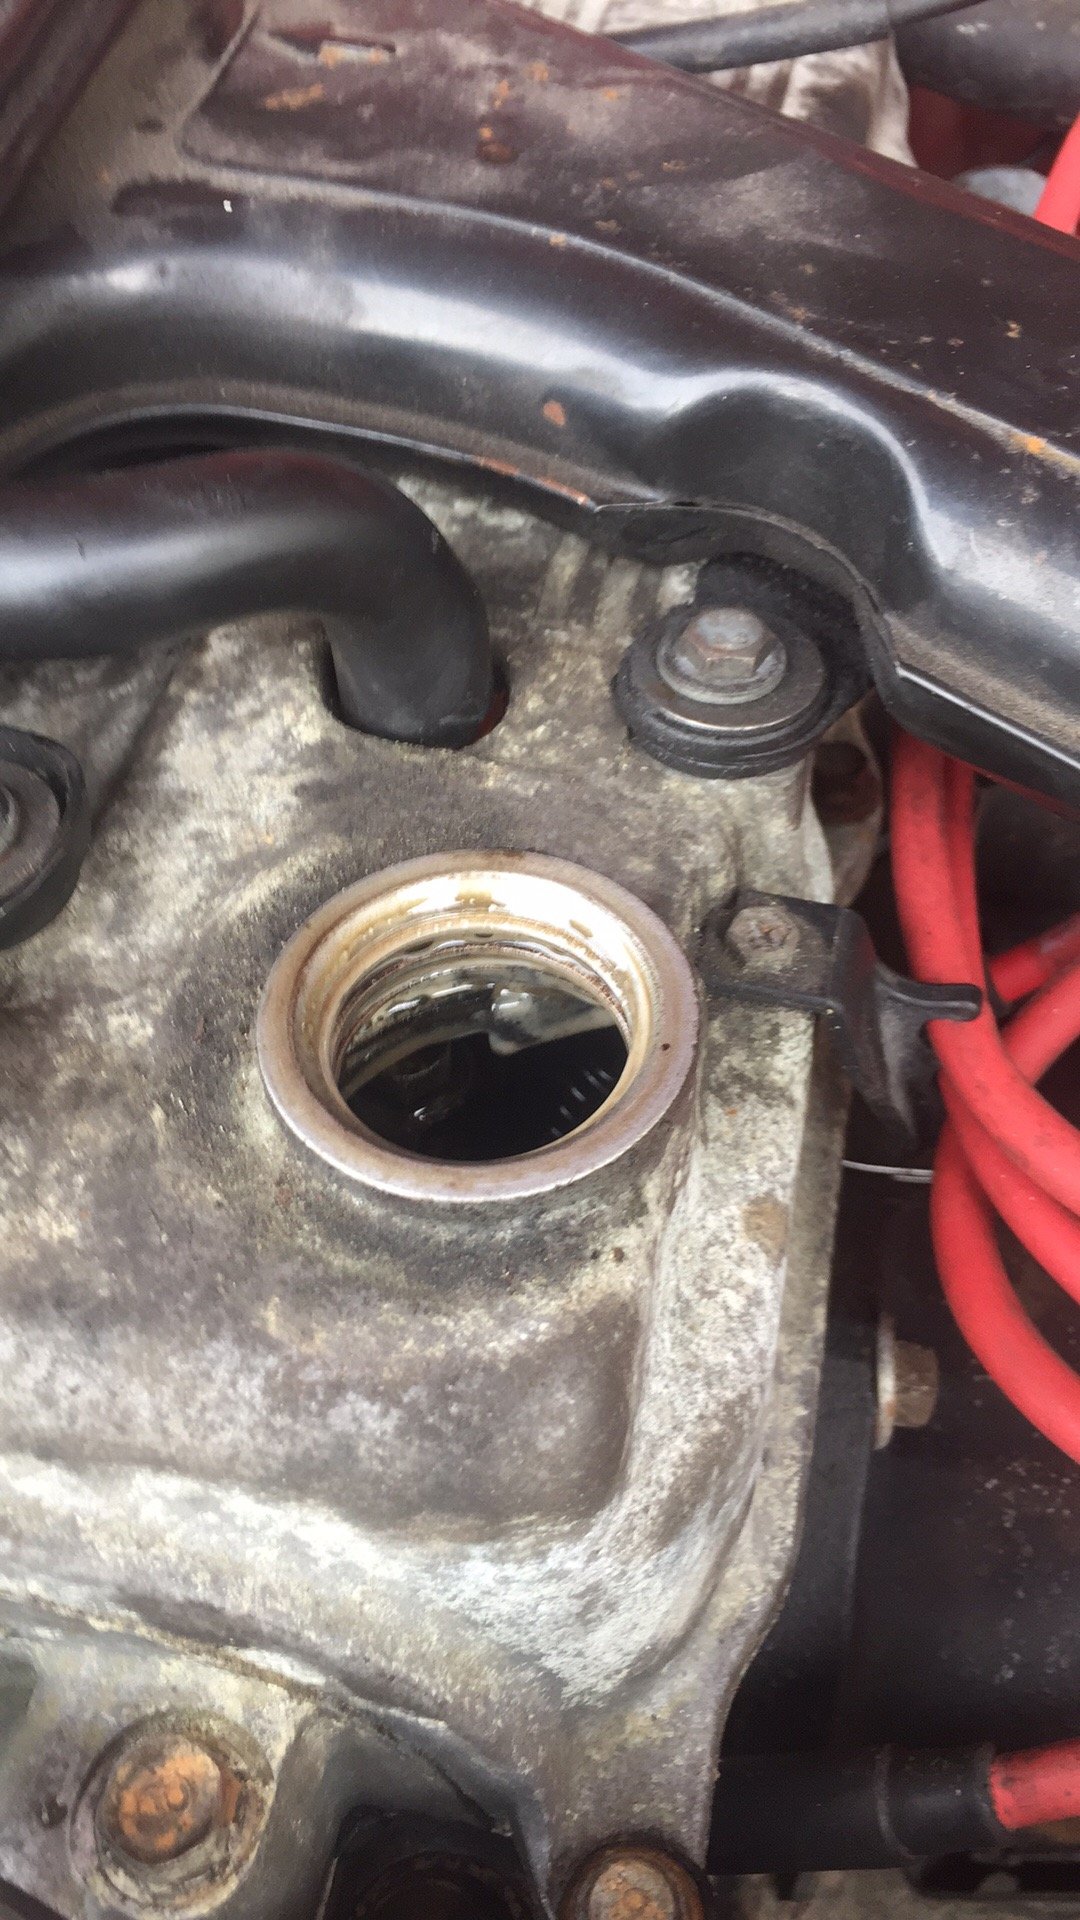
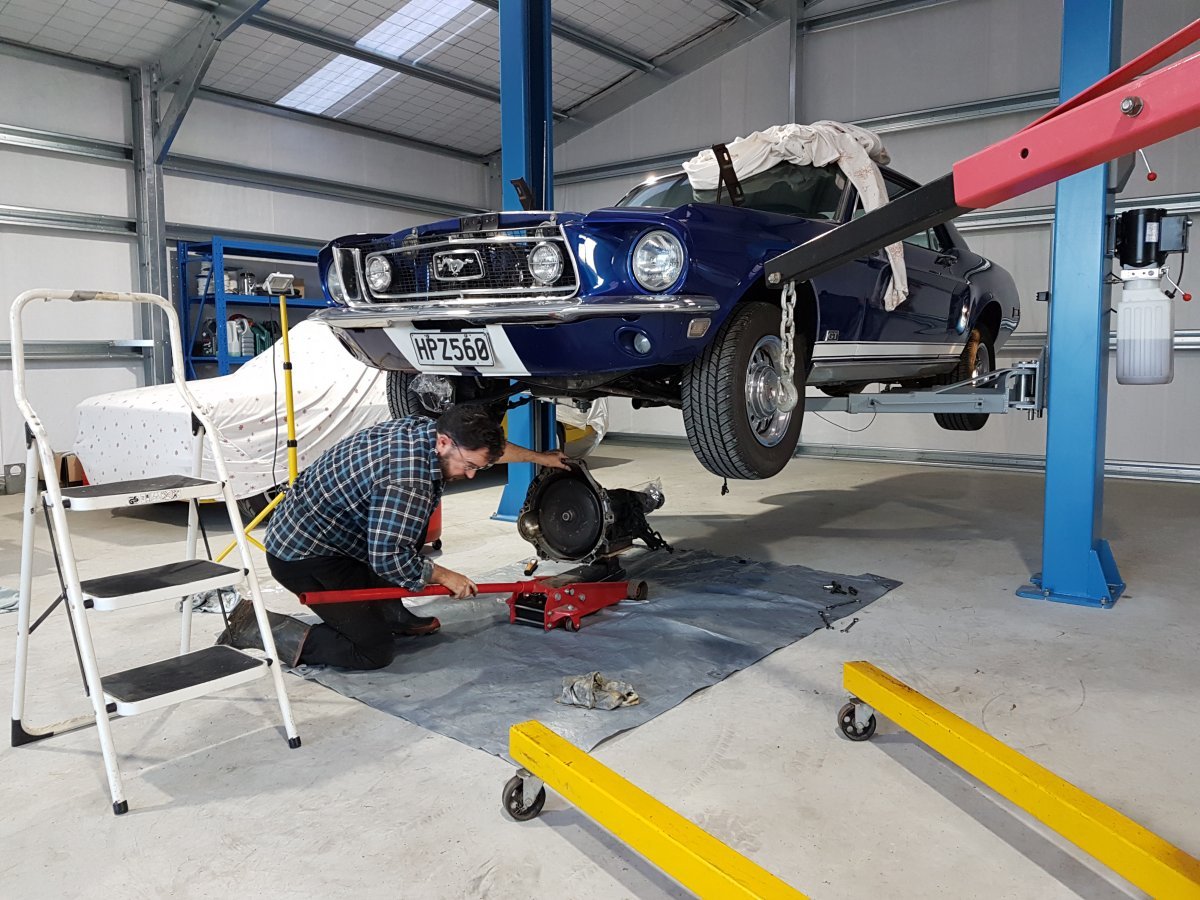
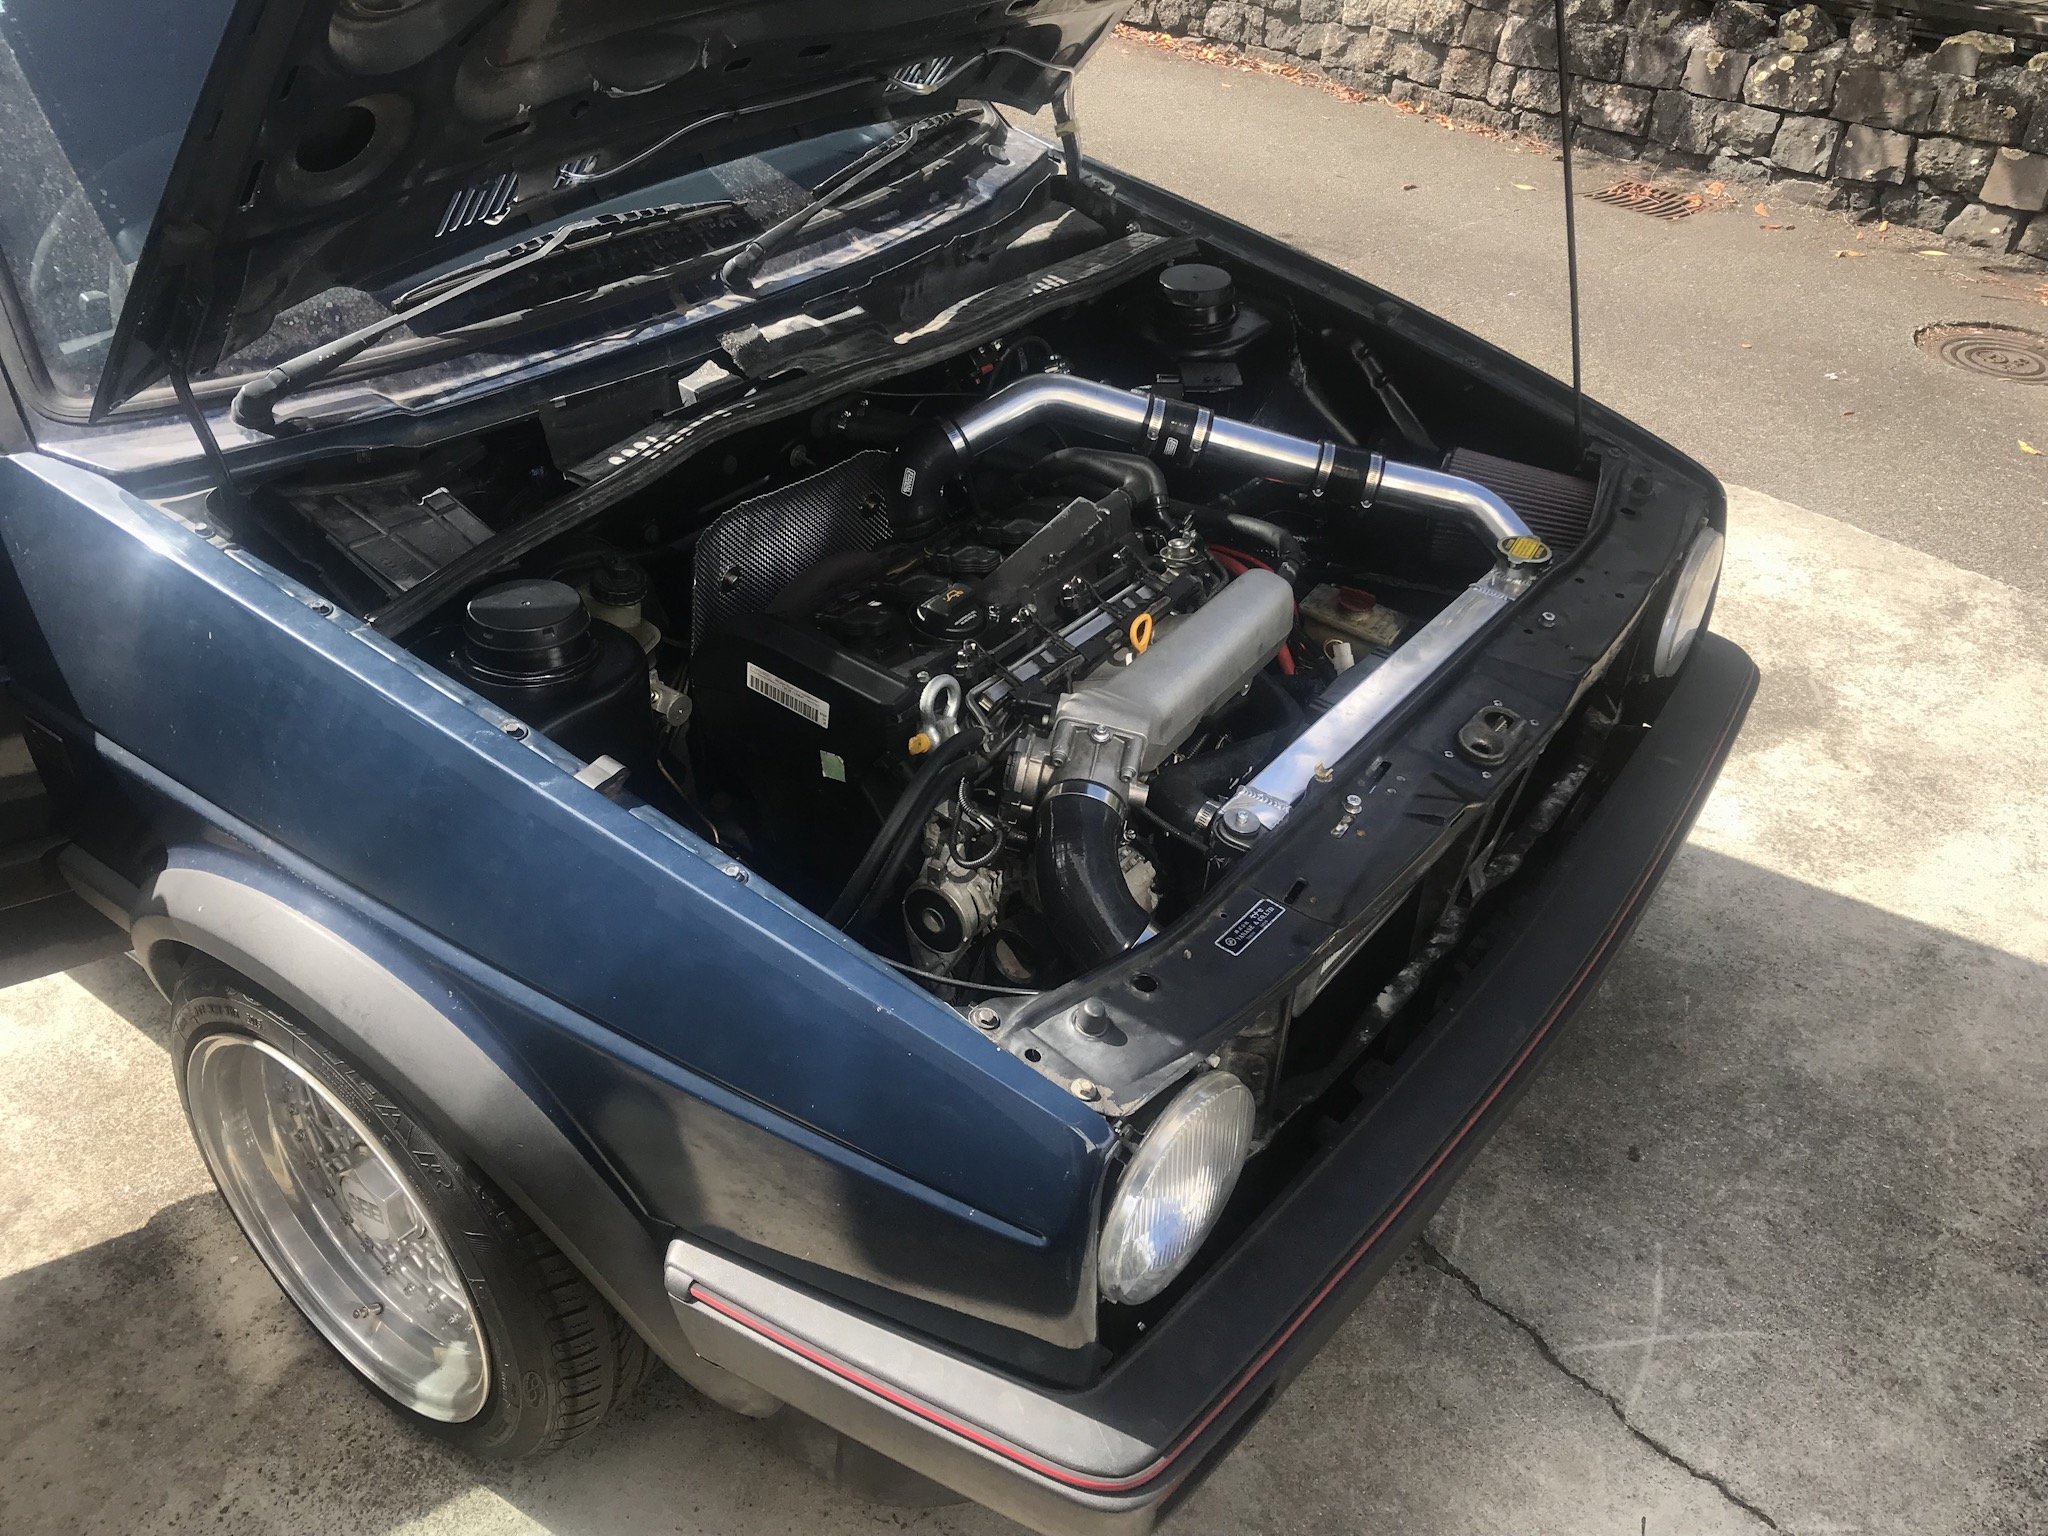
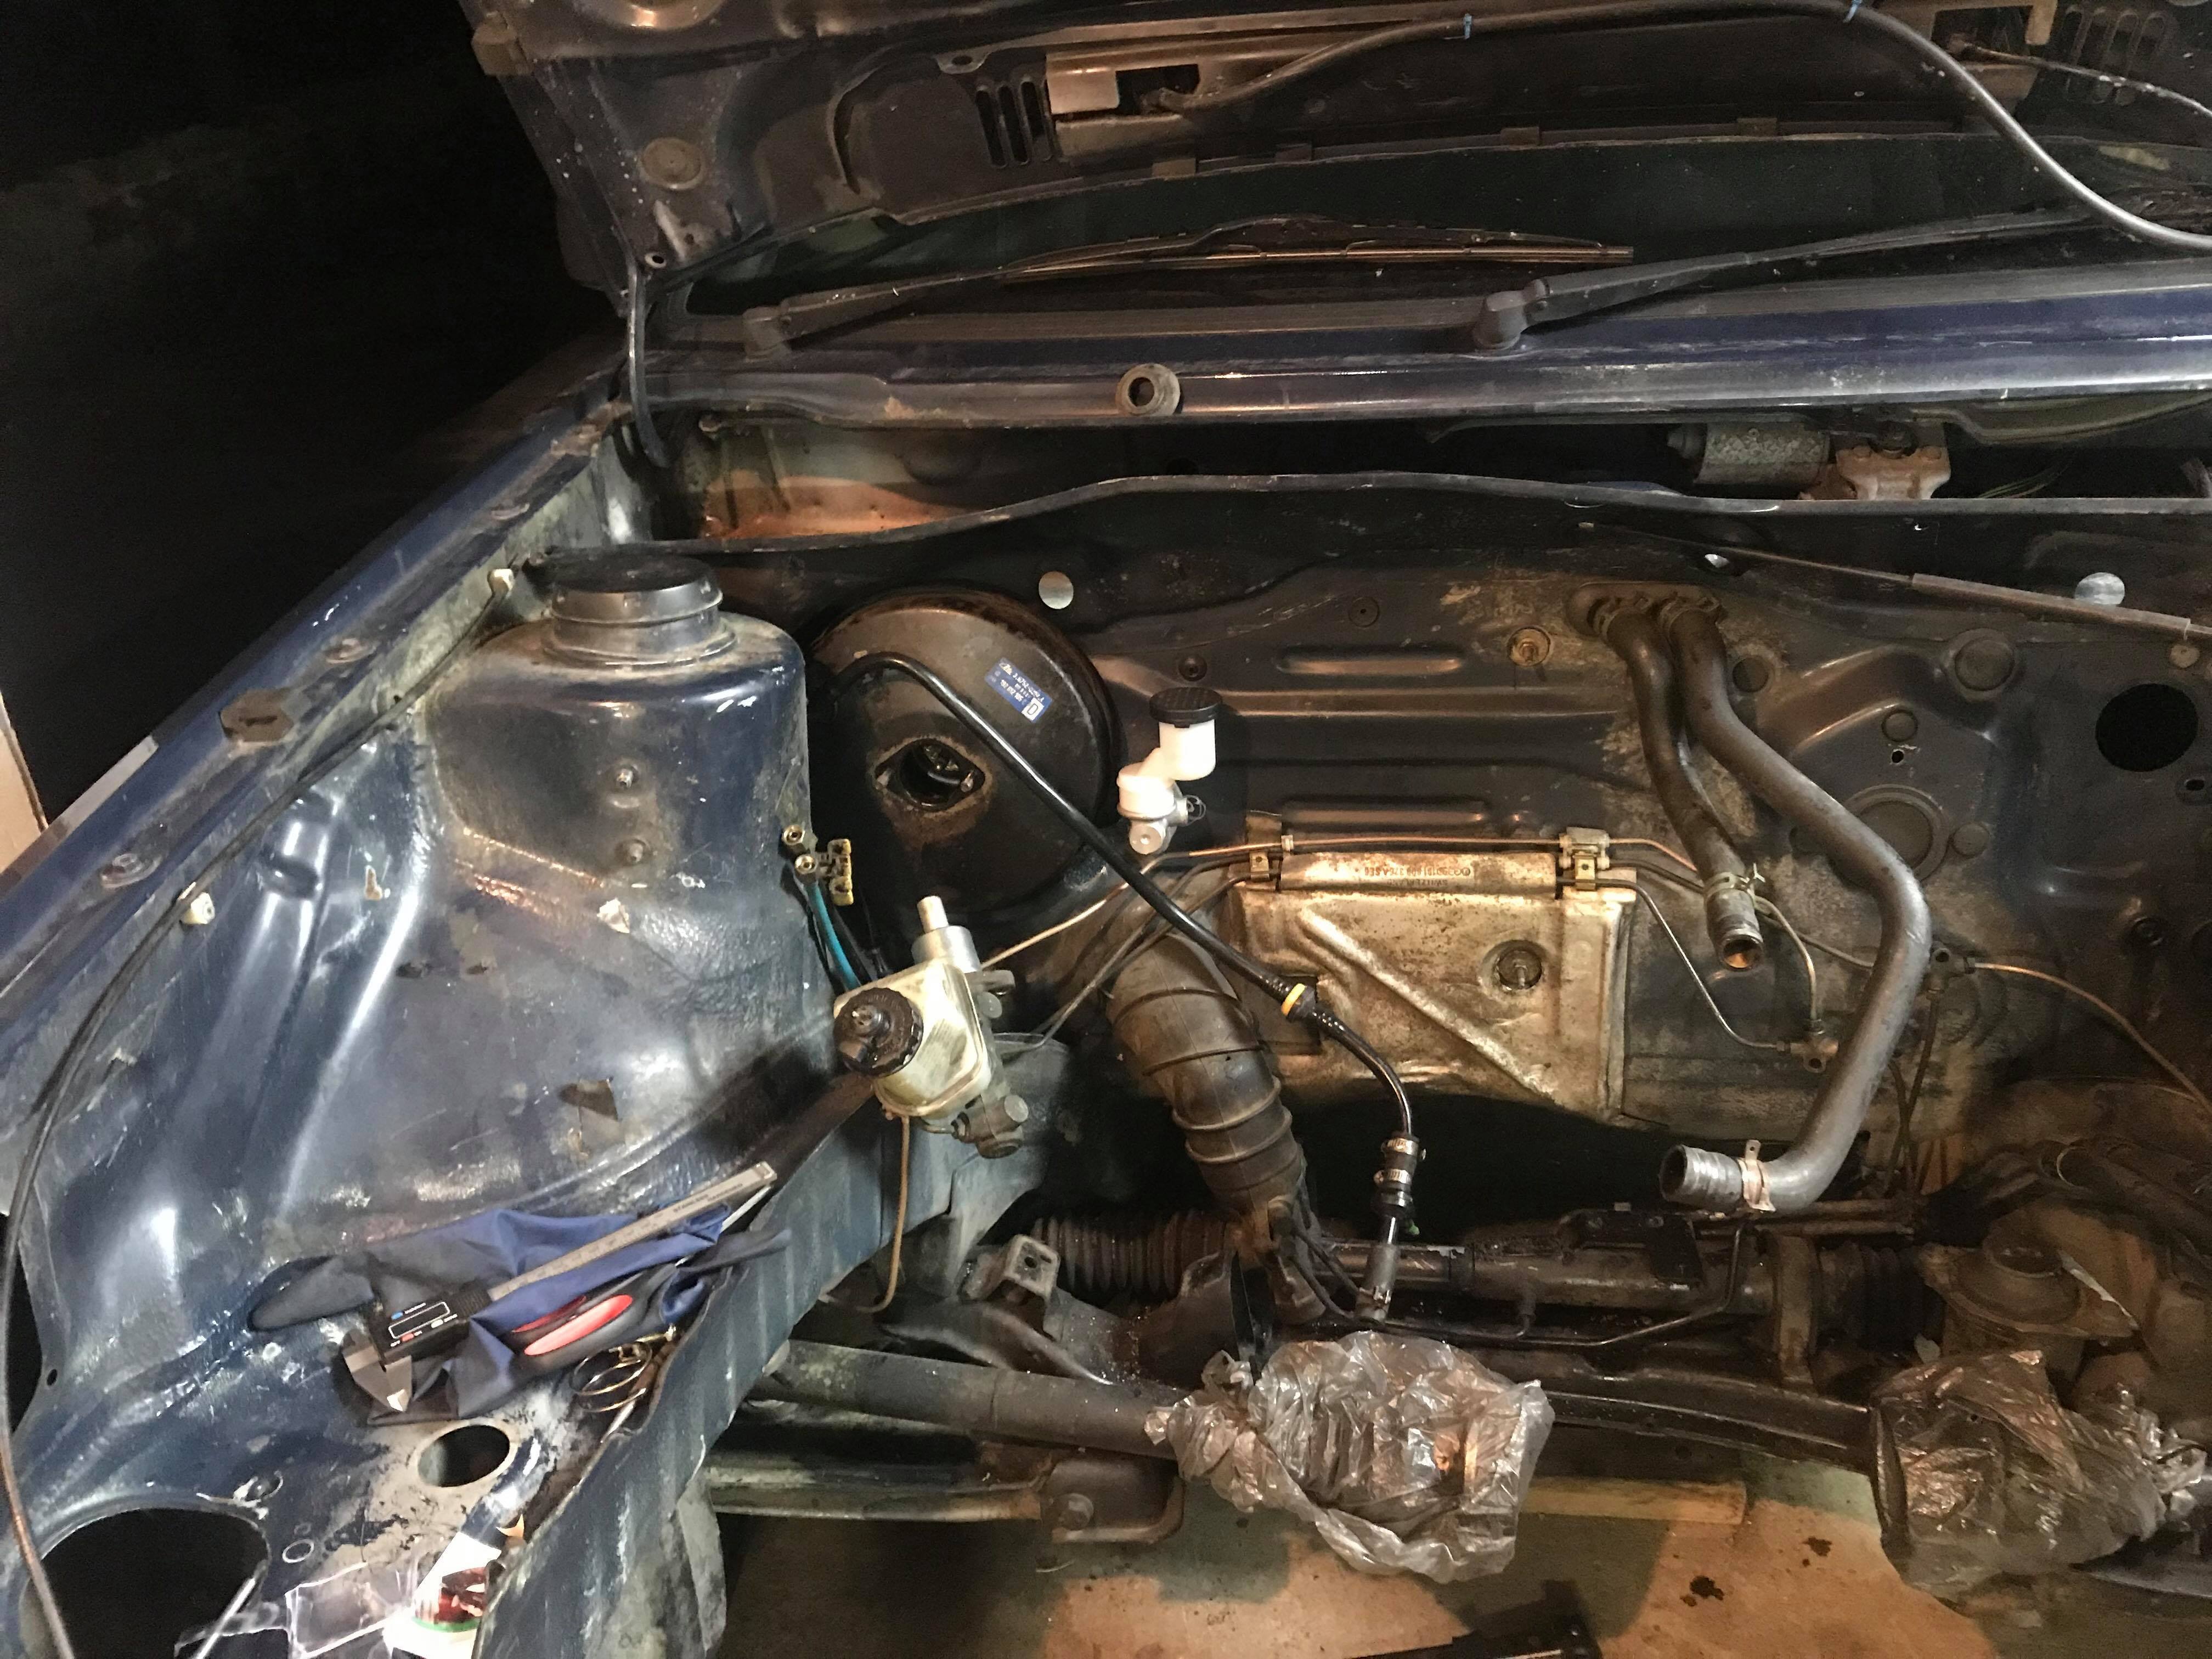
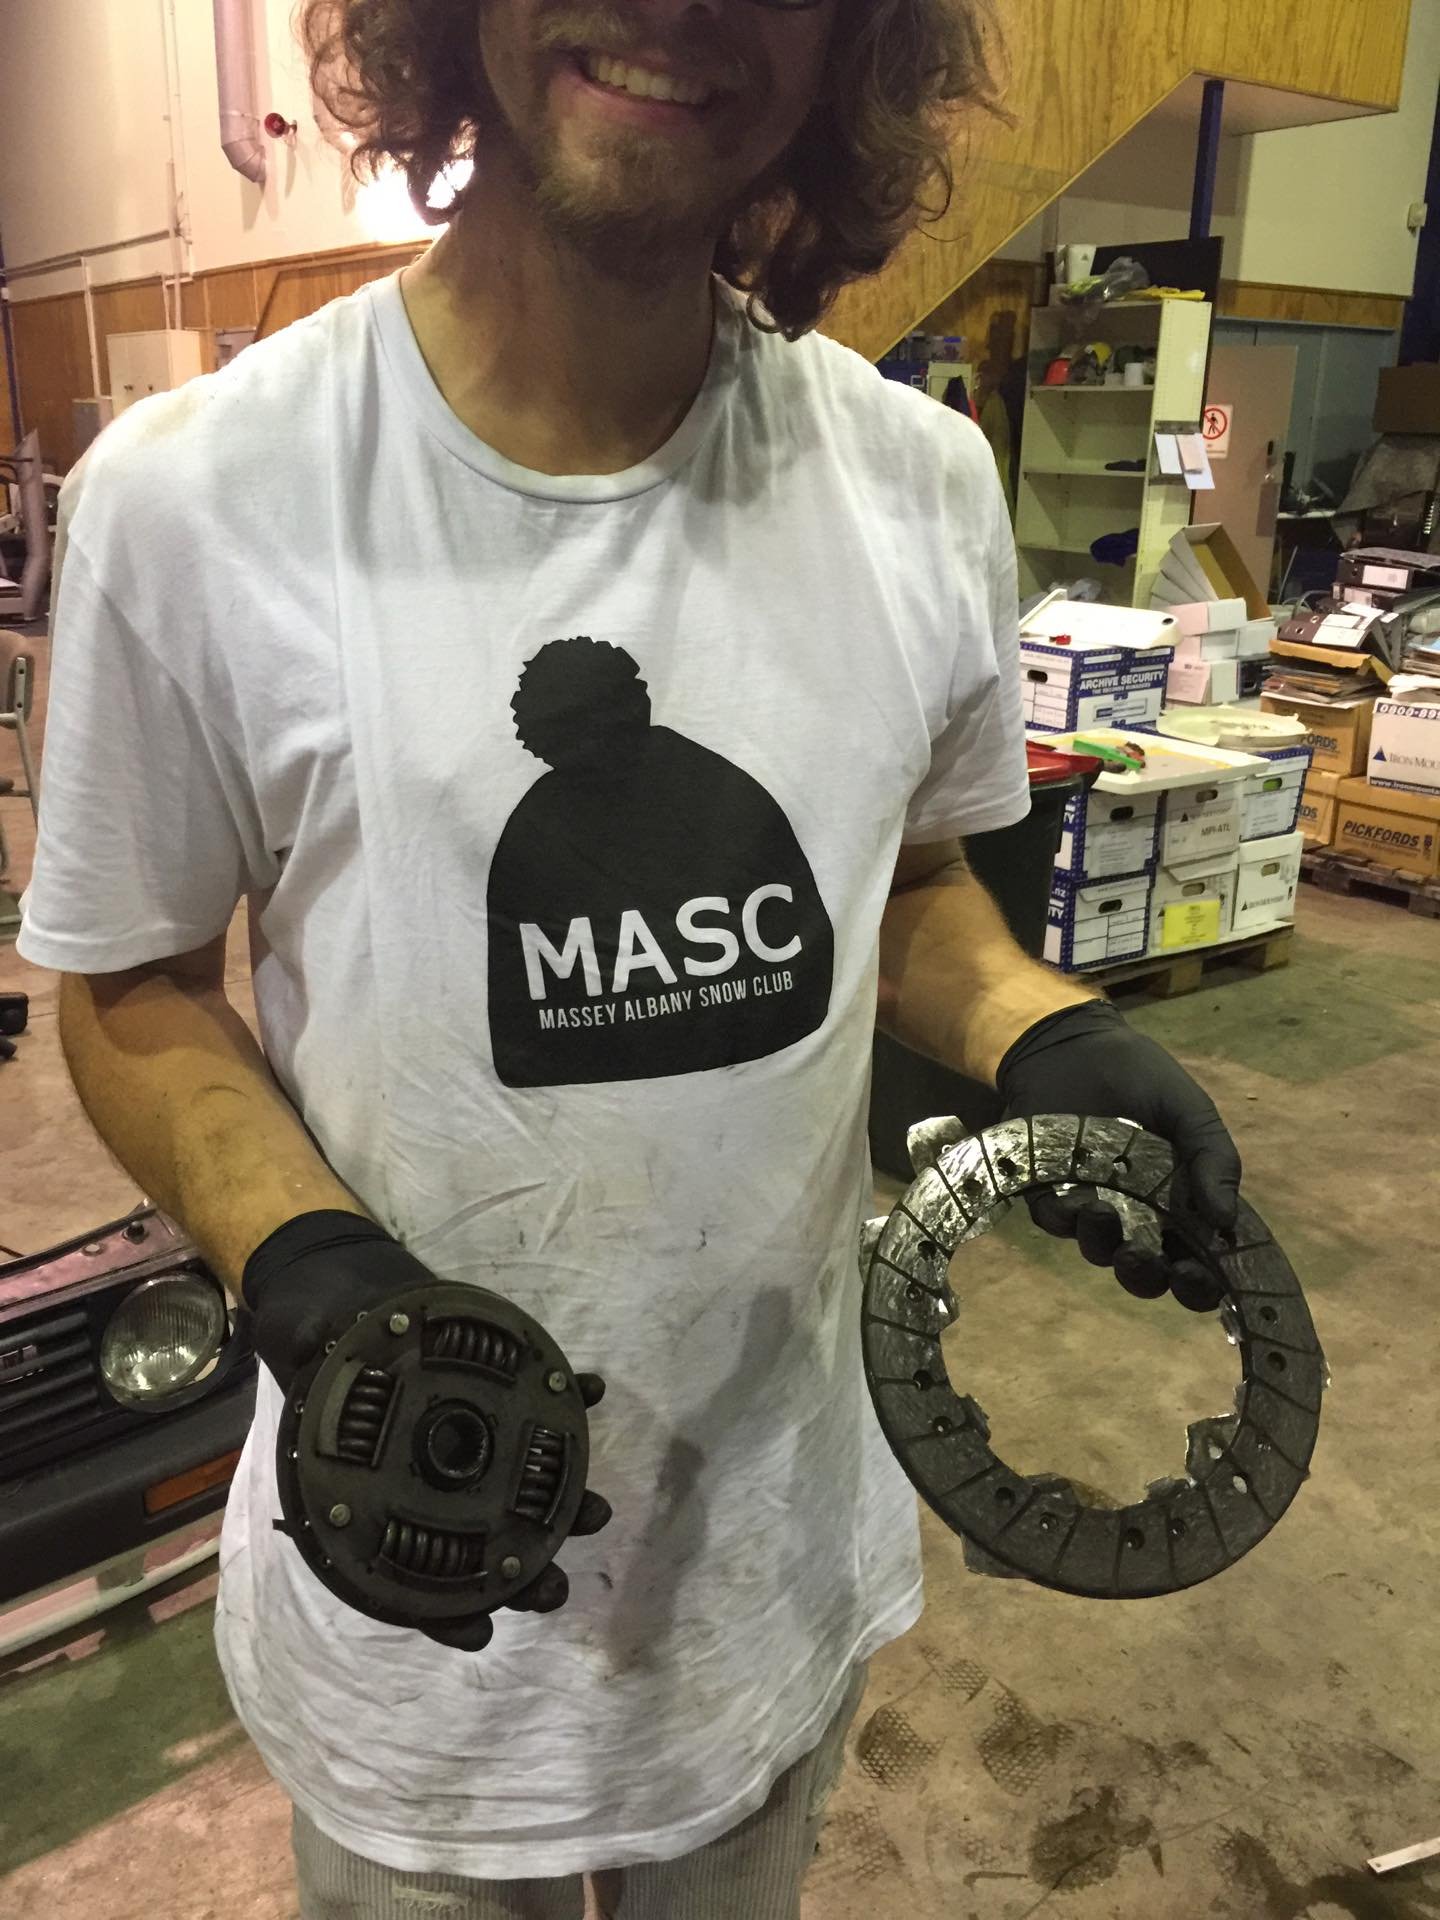
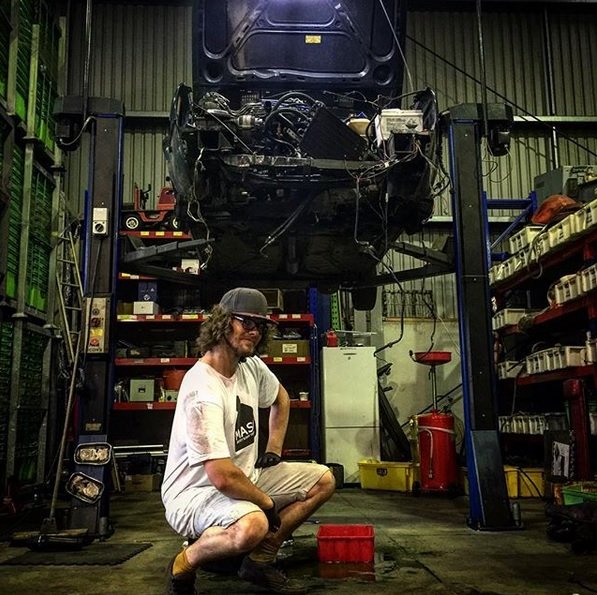
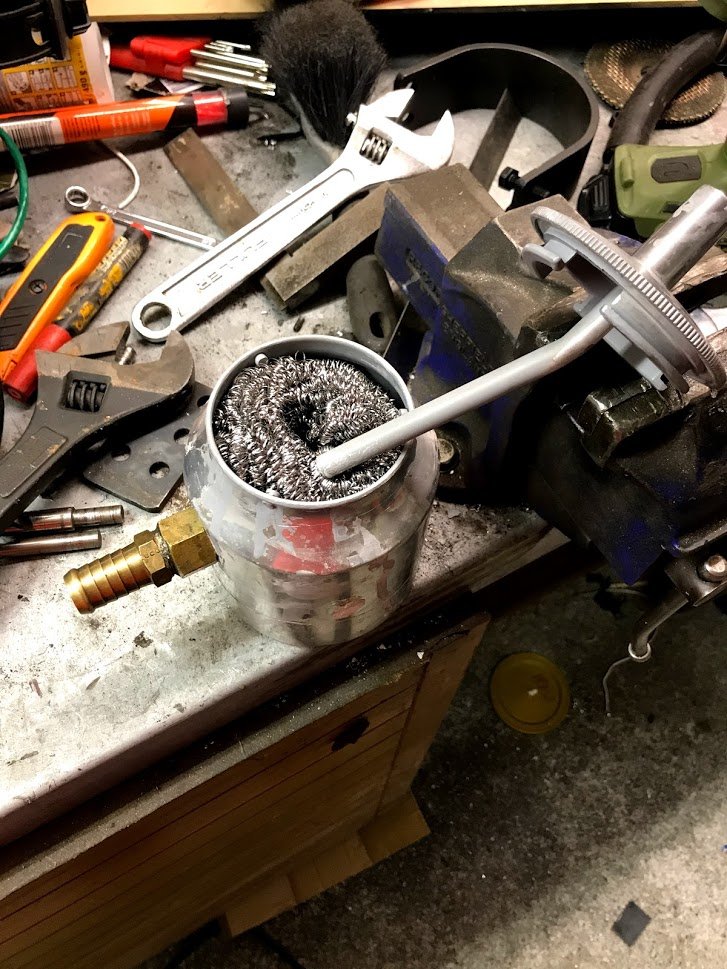
I did a wee bit more tinkering with the Ruby last night. I made a start on an oil change, have drained the old oil out and undone all the bolts on the sump to get at the filter gauze. Annoyingly it looks like I might have to lift the engine off its mounts to get the sump past the front two studs. I might see if I can get the studs out first. Either way, its annoying. The oil that came out, aside from being old and a little sludgy, is in much better nic than I would have expected after being sat for so long. I sprayed a bit of CRC around the front windscreen latch and hinges and veeeery gently pushed it open. Unfortunately the latch mount on the window frame appears to have been made from die-cast cheddar cheese and crumbled away in front of me. So I'll need to manufacture a new one of those... I'm sure (I know) it isn't the only thing like this I also found this funky spanner on the floor under the car. Not sure where its fallen out of, I think maybe its for adjusting the valve clearances.
6 points
-
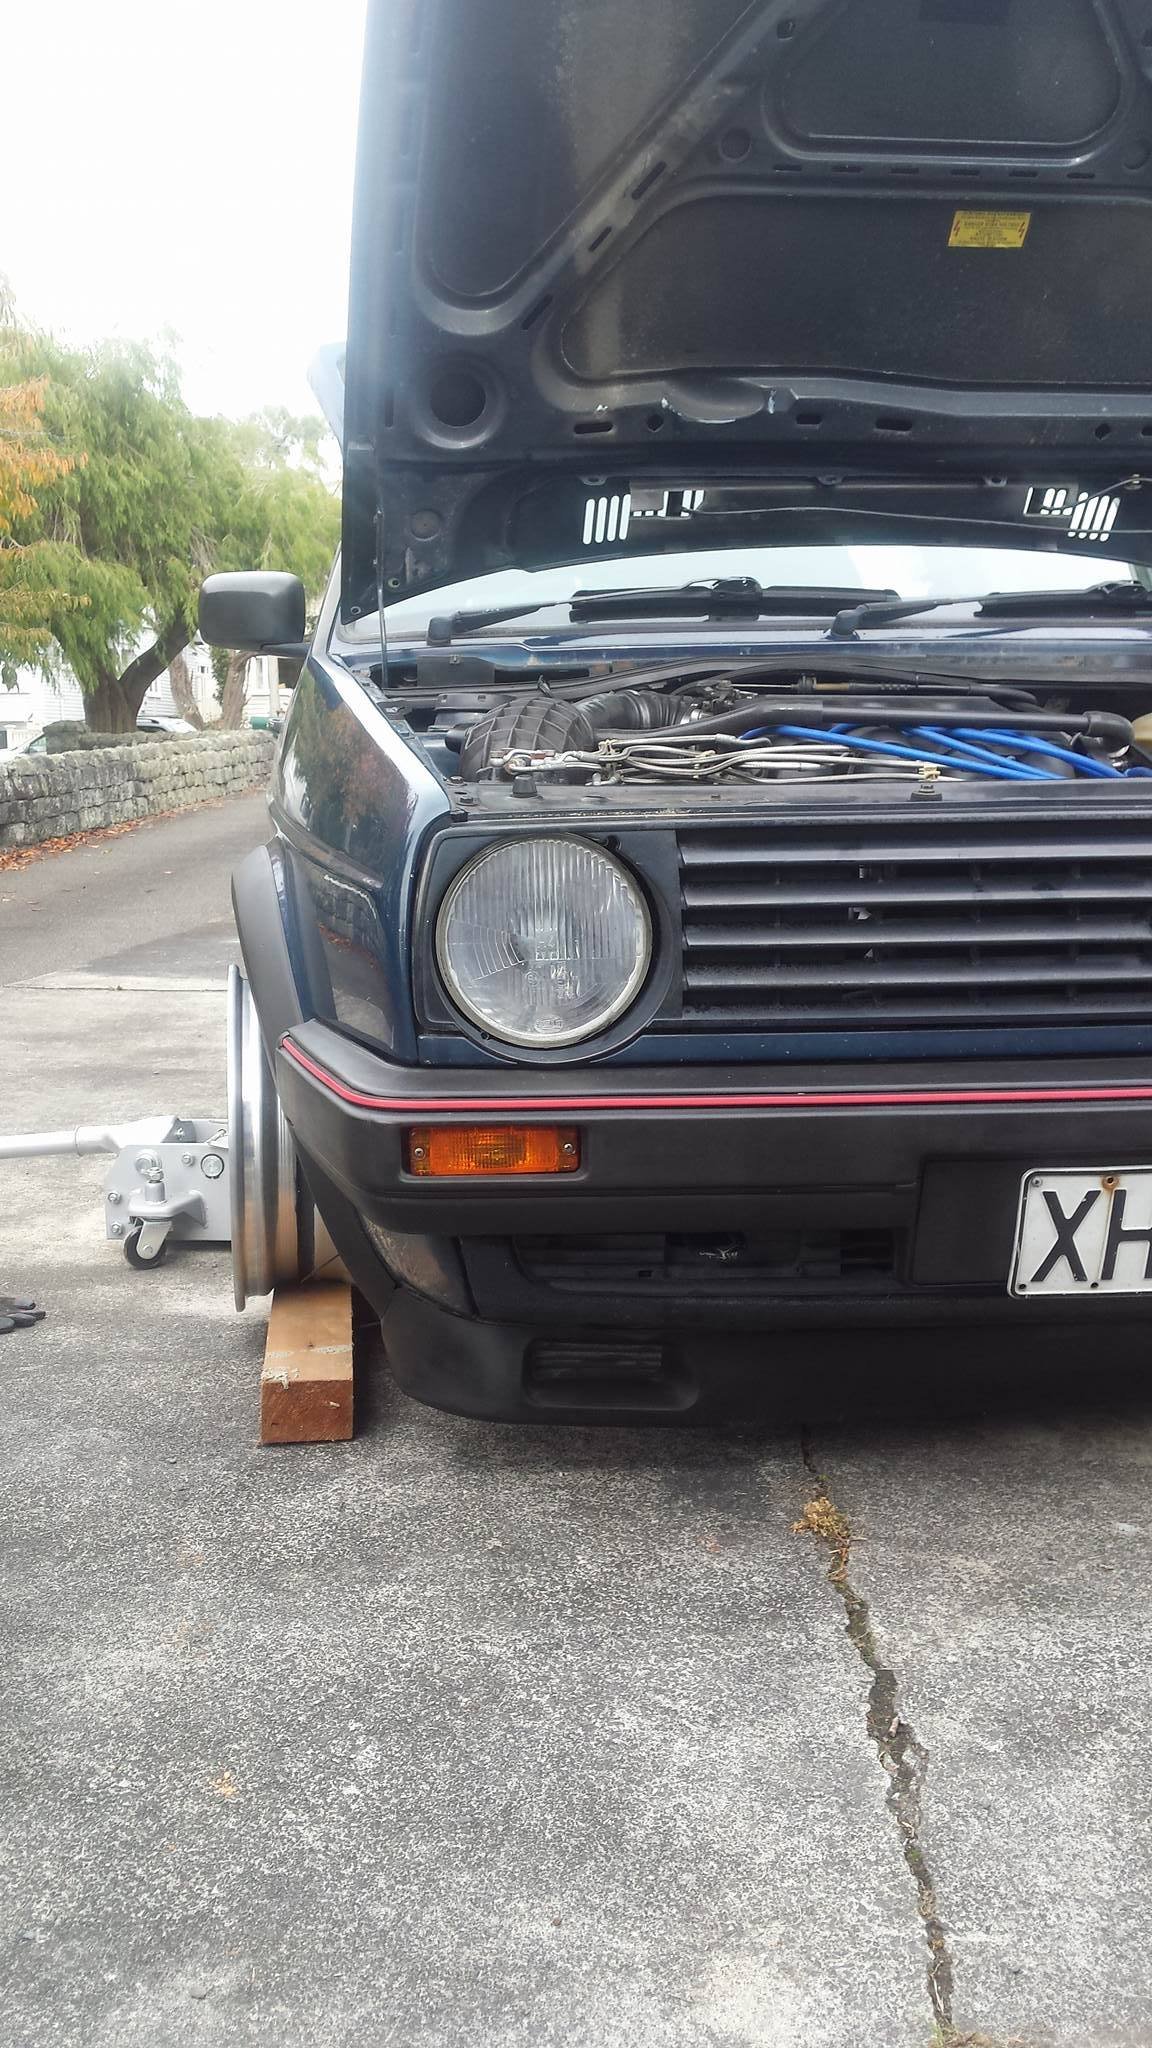
I would not recommend this transmission mount, poor fit onto the gearbox extension housing (I needed to cut the tops off both mounts and weld the old top plate onto this one) and so much noise and vibration through the car so I put a standard mount back in, much better The ignition leads have been replaced after it was found they were causing a misfire on hi boost only. And I've finally sealed up some minor but annoying leaks from the thermostat housing and rocker cover using better products. Loctite 515 on the thermostat housing gasket and ThreeBond super sealer on the rocker gasket. It's a 2L rocker cover on a 1.6 head I don't know if that's why it's always leaked in the past?? The rebuilt gearbox is back in and the car shifts much nicer now especially with the Redline oil in it.
6 points
-
Actually, i did buy some floor pans! Kinda progress..
5 points
-
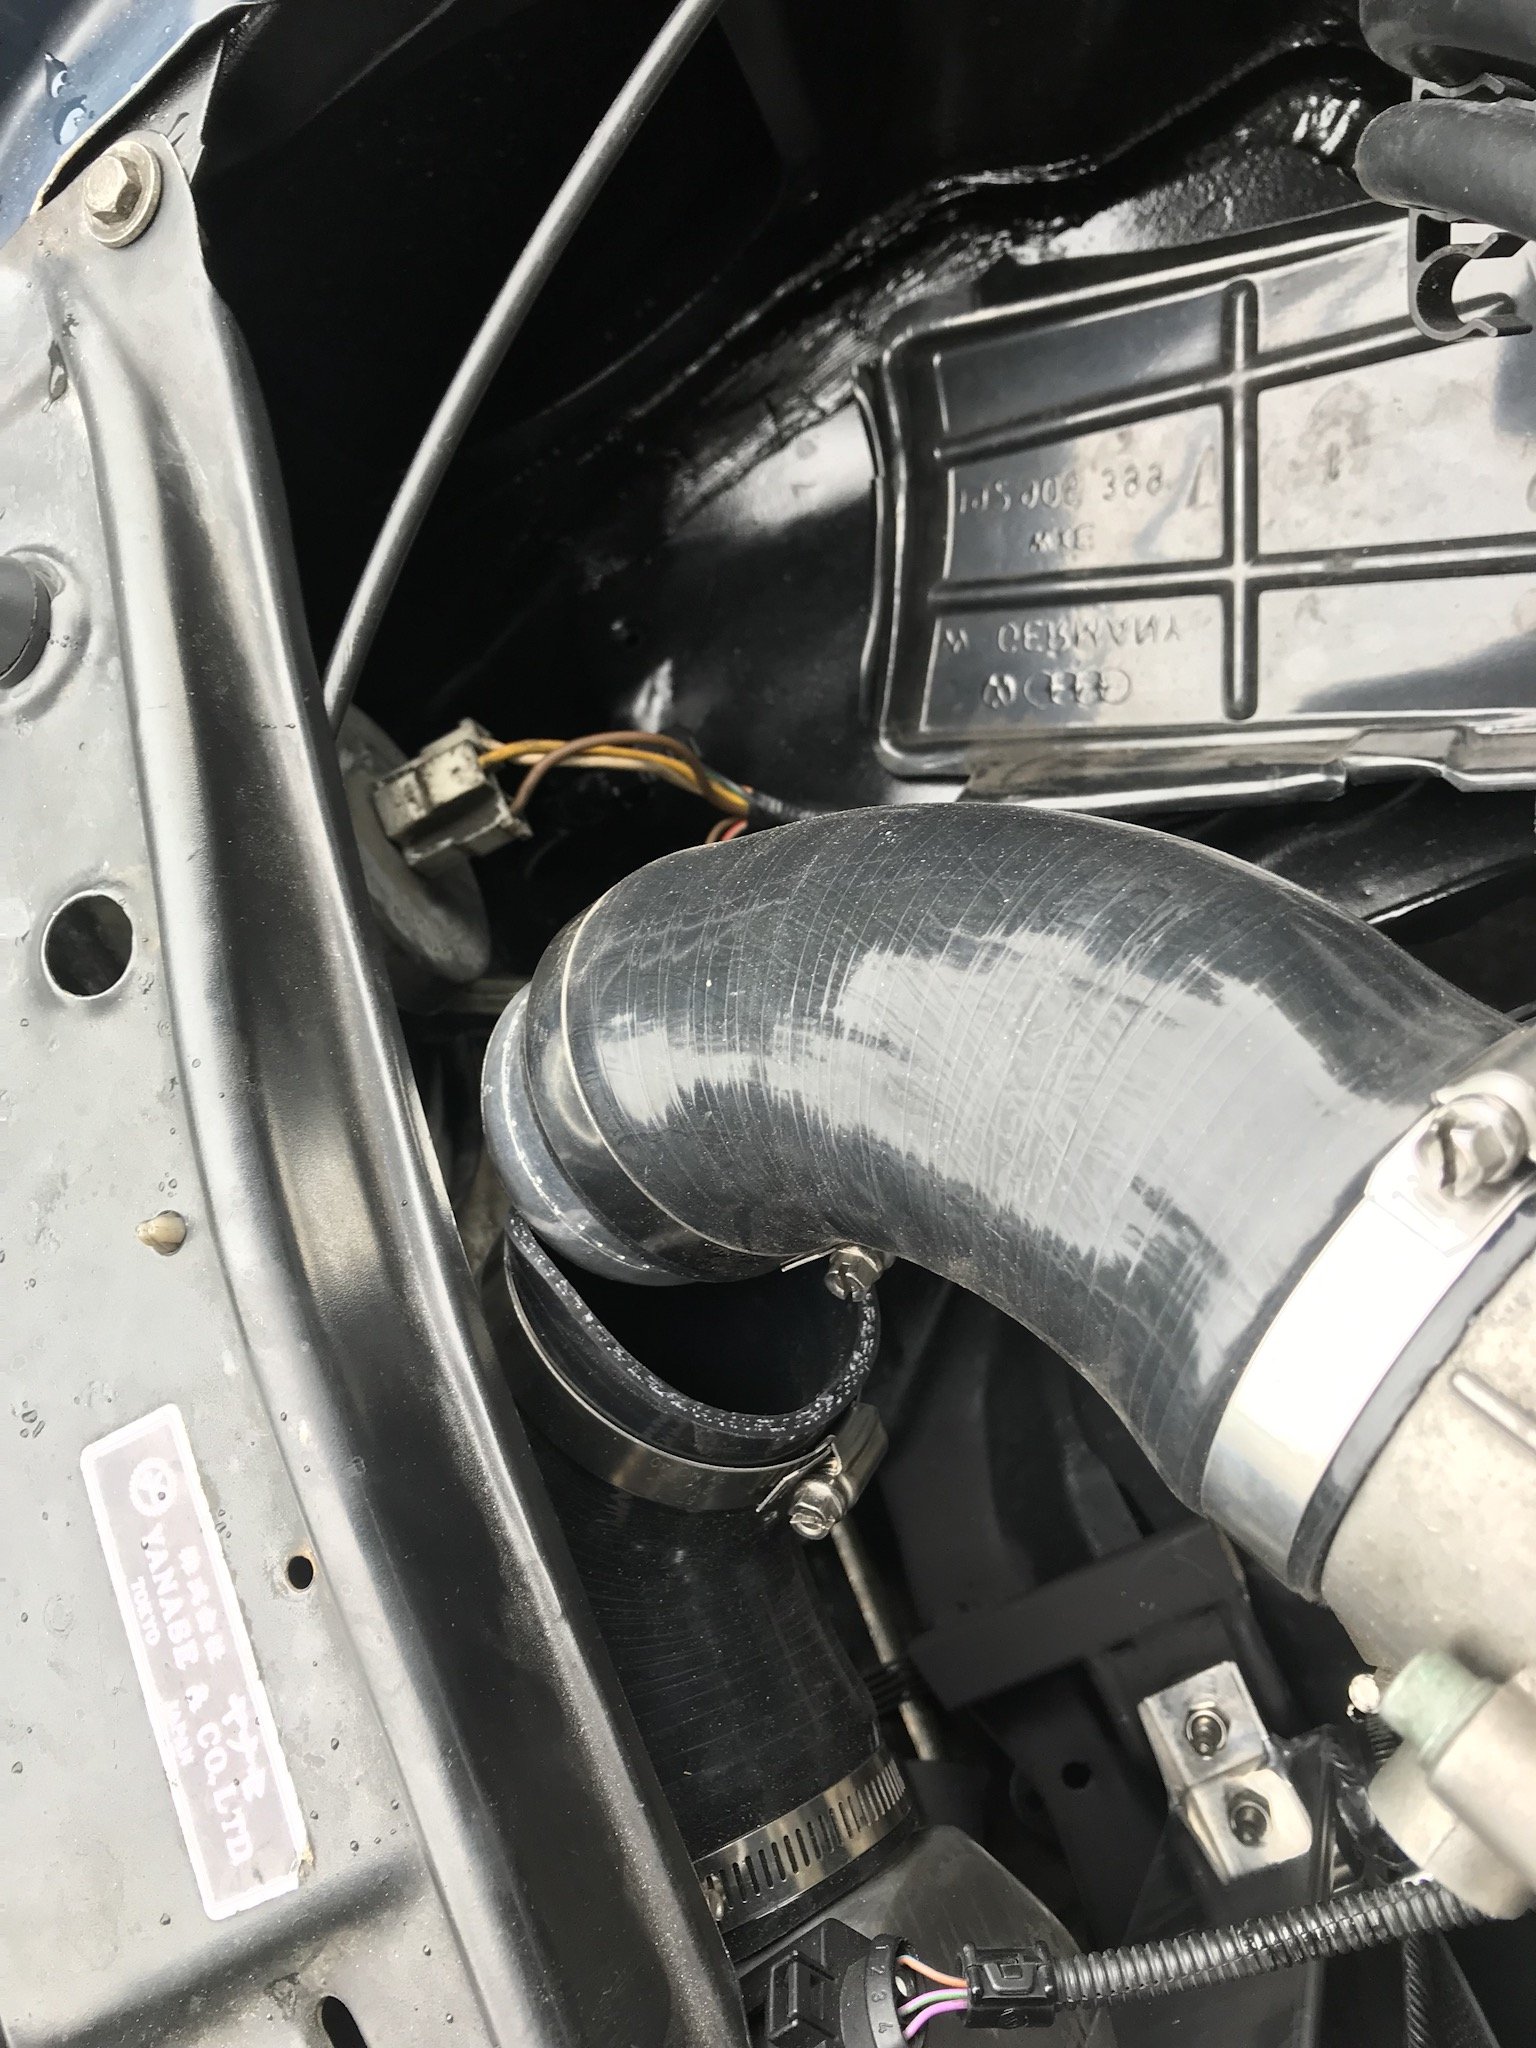
this took WAY longer than it should have. i decided to mount the speakers as flush as possible. both Celcia's have sticky out type "pods" with the speakers in them and i have knocked the shit out of them getting in and out of the car with my big work boots on and the speakers have taken a hammering because of it. and i kind of wanted to cause the least amount of disruption to the look of the door cards as i could. so i did it like this. 20mm spacer which has black carpet on it but ill probably put some matching red vinyl on them eventually. while i was in there i ran wires for the central locking and put some sound deadening in the doors. now i need to run a power feed for the small front amp, mount the crossovers and finish the wiring. all the wires are run to where the amp and crossovers are going to be so that should make life a bit easier. i'd also like to get the power steering installed this weekend but we'll see how we go. 2019-07-25_09-12-23 by sheepers, on Flickr4 points
-
https://www.trademe.co.nz/motors/used-cars/chevrolet/auction-2241434027.htm?rsqid=3da44eafa457424f9dd65f9b918f20fe-001 perfect for next years cruiser mate will help get going etc will help flip leafs3 points
-
Update! I never said progress....
3 points
-
Ohhh god were do i start... So this i beleve is a honda im not sure. Not sure it matters anyway hahha. My friend more or less trew it at me haha. Hadnt gone in a long time. Got home atached a light from my parts box. And a can on start ya bastard down it 2 kicks latter walla. Not sure where im going with this sexually confussed pile of broken but hay. It runs and works so worth a laugh
2 points
-
So after a couple days of not fixing the "Universal" Thermostat Housing Gasket. And running not quite right. But Running. I had a couple hours to fix the Cooling system leak. She got hot on the half hour drive to my mums/my workshop and had used more water than she should have out of the small leak. Dip stick looked like this. My milkshake brings no one to the yard. Several fucks were uttered. As well as a handful of other expletives. Fuck it. cheap donor. Getting the original motor reconditioned anyway. Block sealer in a bottle of some description if it works it works. My personal experience with cooling system block sealers is about 50/50.
2 points
-
Show me your Swedish bits..... Admittedly via Britain but its the thought that counts. Bill at SaaBits is an all round GC and will be getting much more of my money. Was asked when it was going in. I replied "When the outside temperature gets over 20...."
2 points
-
So I've done a bit more on this dirty Berty. I flipped it over to finish off the frame extension, and cut off a few unneeded bits. Seeing as it wouldn't rev or idle with no choke, I cleaned the carbs out, they had sea weed growing on the float needle things. I also welded up the plenum, and played around with restricter sizing (had to go down to a 35mm opening) this resulted in it running waaaaay better, and revving out like it should. I also removed all the washers that had been put under the needles (they were trying to make up for them not lifting due to lack of vacuum) and it ran even betterer again! I needed some way of mounting the air filter, and remembered I still had some silicon left over from the hektik Hilux, it was perfect, and pretty! Little vid of it running betterer, the linkage was a bit sticky, hence the high idle then dieing out at the end. Then I took the wrap off the headers as it was fucked, and cleaned the headers up a bit. Then I changed the muffler out for a prettier one, it's from a GSX1200, so even though it has one chamber (the other was straight through) it has a larger outlet than the original, so should flow well. I had a sprocket that needed boring and keying, but decided to go with a plate wheel and bolt it to the original sprocket hub. Bit bigger than the OG one. I then put the back end together, and ran a brake line up to the slave cylinder. Got a few hoses from the wreckers, this female - female clutch line from an AE100 Corolla made life easy, used the mounts and all. Then I made a new gear shifter linkage, as the old one was fucking rank. I also moved it forward a bit to suit me. Next was sorting the steering wheel/shaft/rack. This was a bit of a mission, but it worked out well. Managed to mount the wheel on top of the bar it used to be below, and move it forward a bit, so I can pilot the vehicle, with the added bonus of being able to get in and out of it. Also put the front suspension back together, so I could work out the pedal position, and the position of the bar that mounts the steering bearing, clutch and gas cable mounts, and the brake master thing. The brake master has to be in this funny frame thing to miss your legs and still fit under the hood. Once all that was done, I crimped the cables, but they were too short due to me lengthening the frame, so I made little extension doofers out of D shackles. Now the back ends done, all the controls are pretty much done, and it's running better, I'm getting onto doing the front steering knuckles and tie rod ends. Still much to do, but progress is being made! Regards, VG.2 points
-
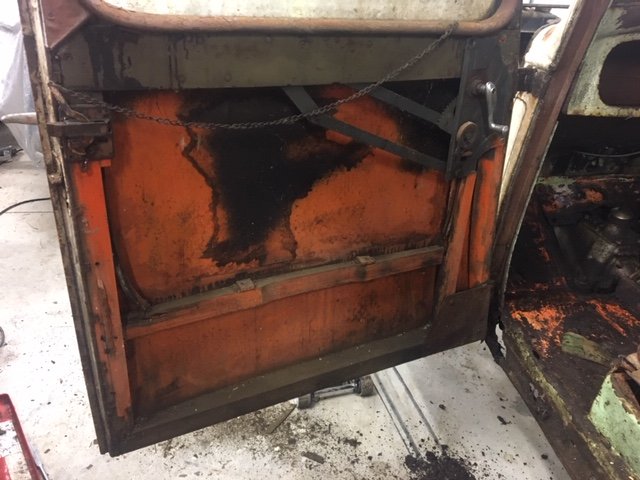
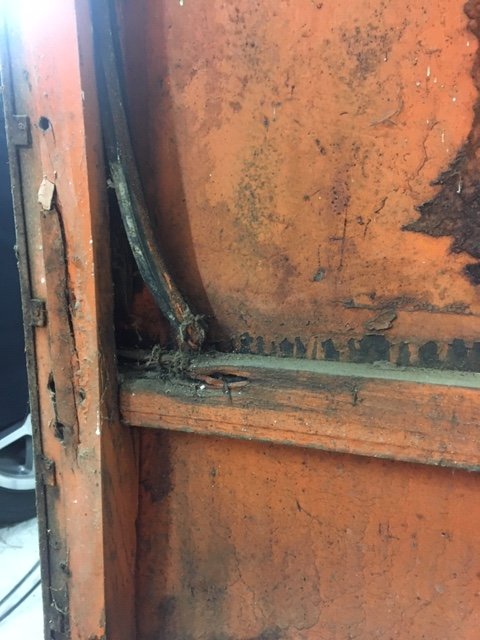
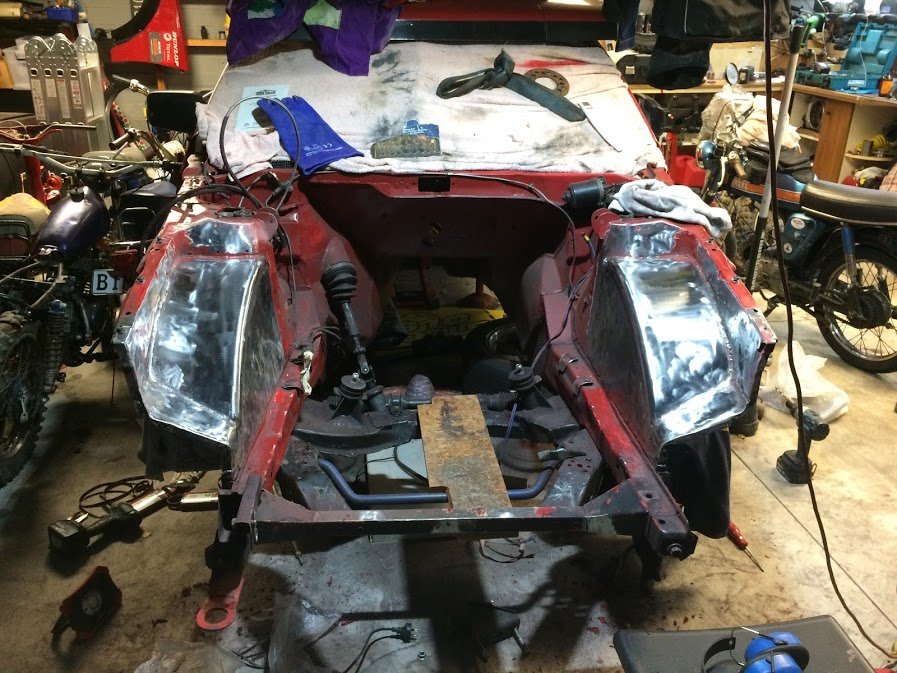
AMAZING AUSTIN FACT #1: The Austin 7 was the first production car to have the controls as we know them today. I.e Clutch -> Brake -> Accelerator etc. AMAZING AUSTIN FACT #2: I learnt this one the other night while pulling apart one of the doors to have a look at its rust... Austin 7's have a wooden frame! The wooden frame thing was a bit of a shock. Here I was one minute looking at the door thinking it should be a pretty easy rust fix, then pulling off the door card off the next minute and finding that it was actually going to be a very challenging rot fix... My skills at steam forming ash timber are fairly limited, and while there are companies in the UK that manufacture the parts, I'm too tight to spend that kind of money. So my loose plan at this stage is to replicate the ash wood parts by cutting and laminating ply. Worth a try anyway.
2 points
-
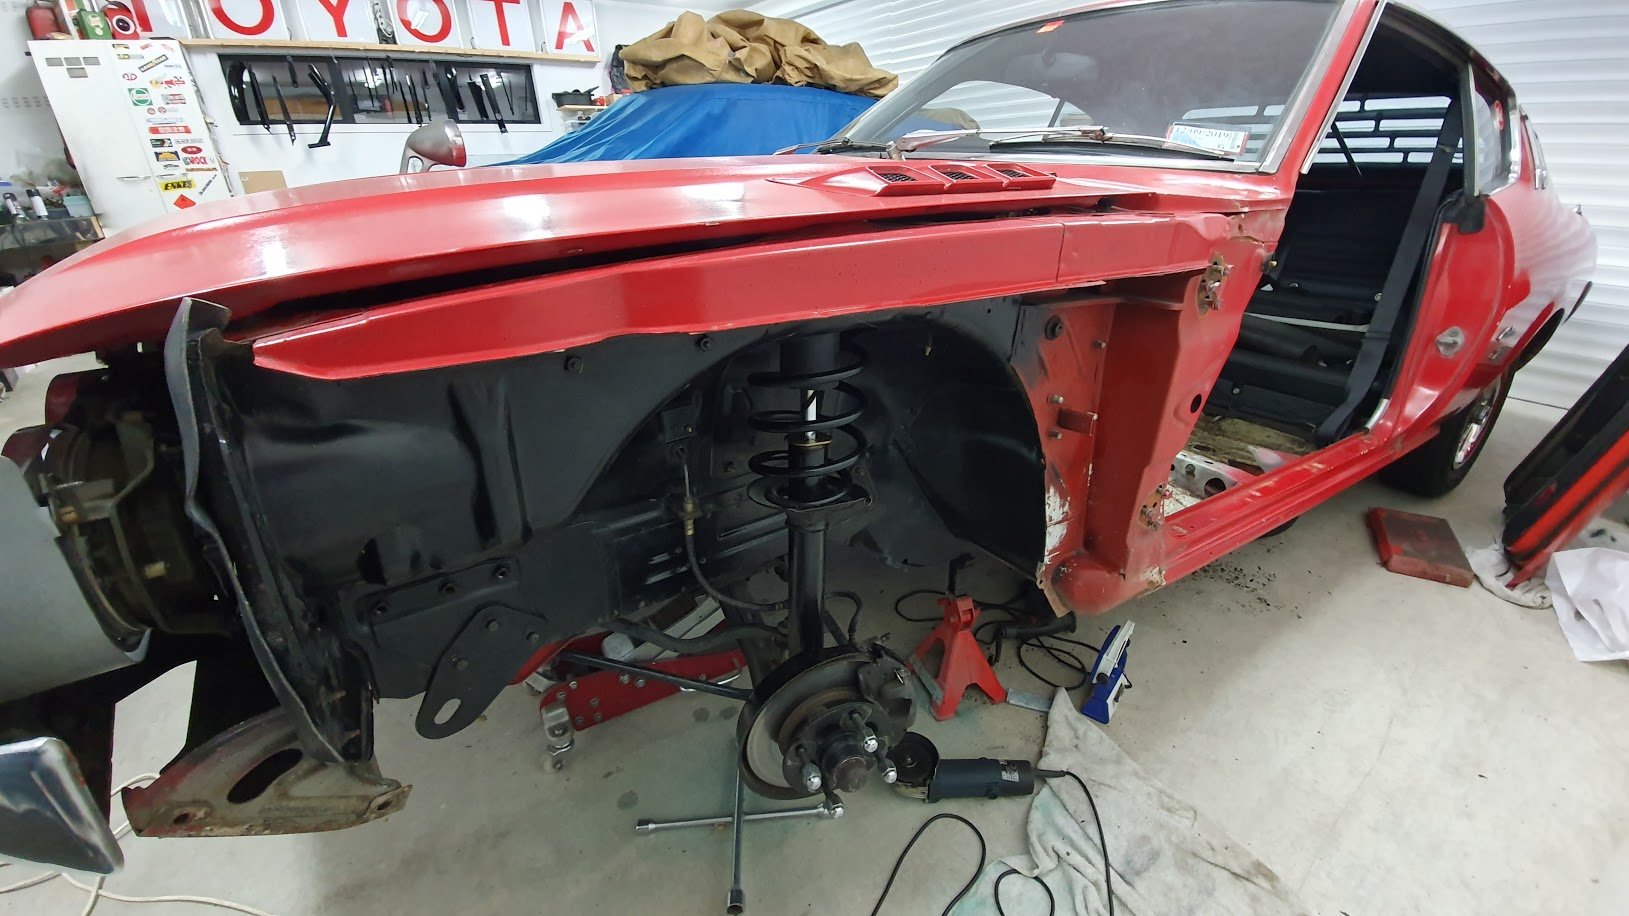
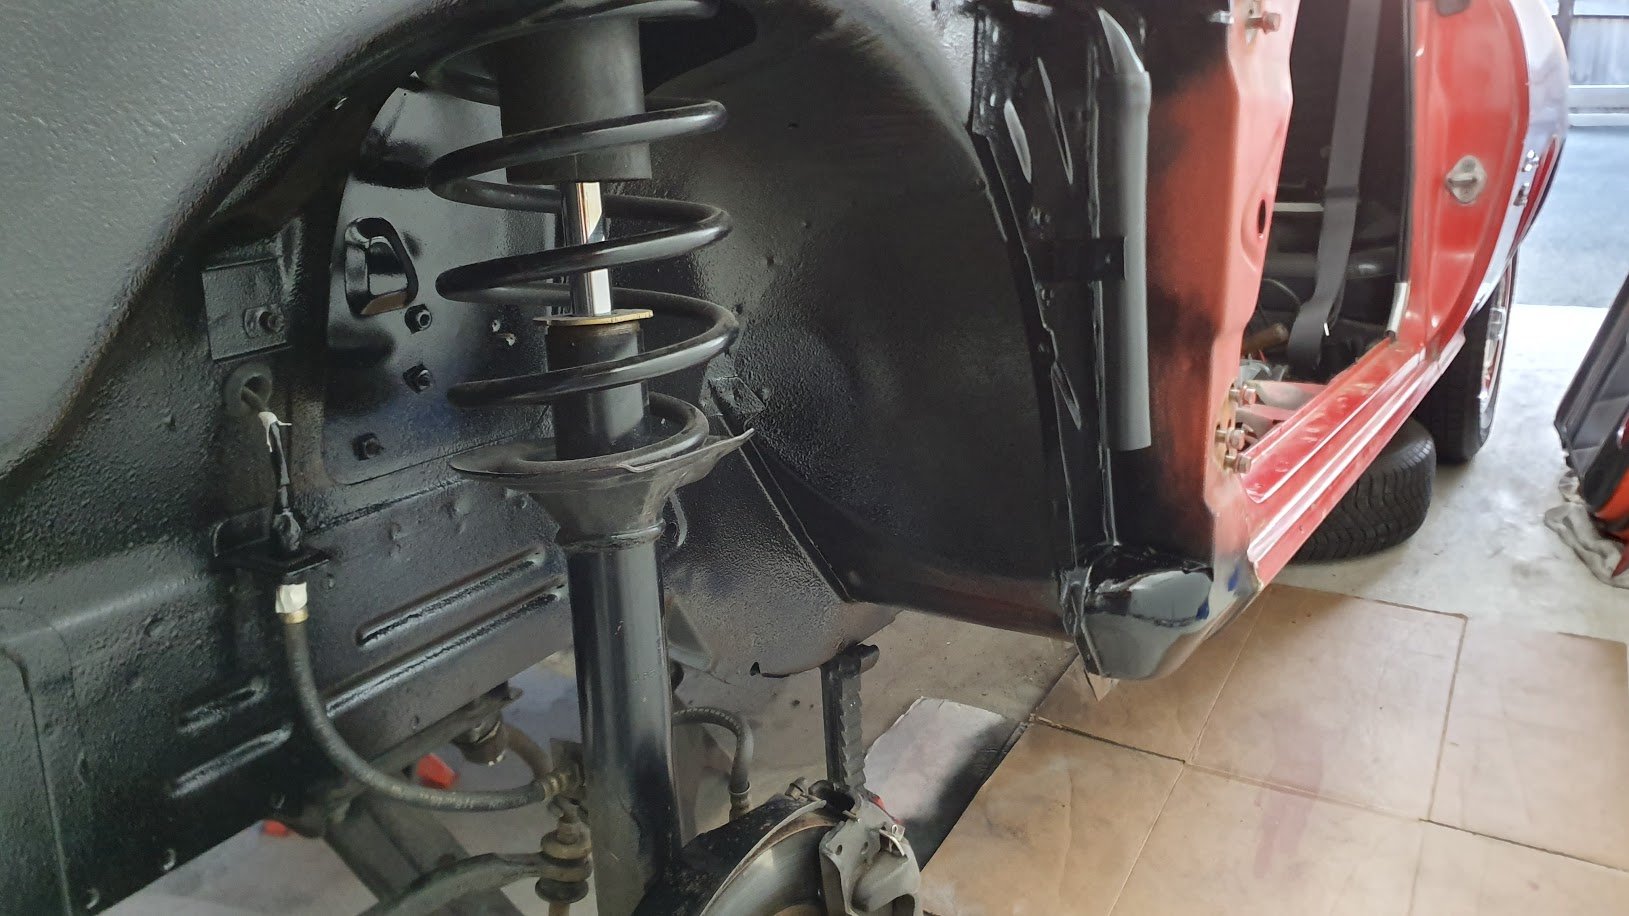
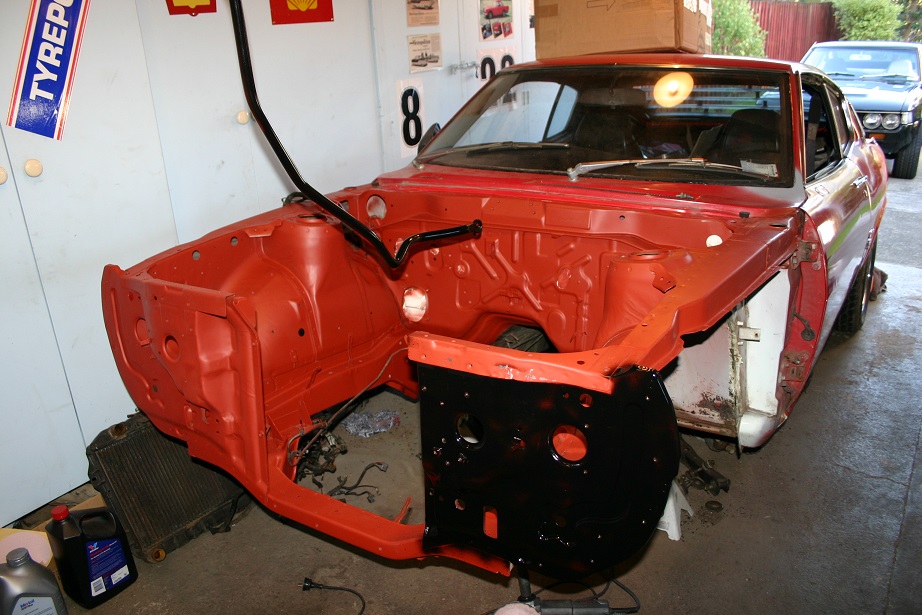
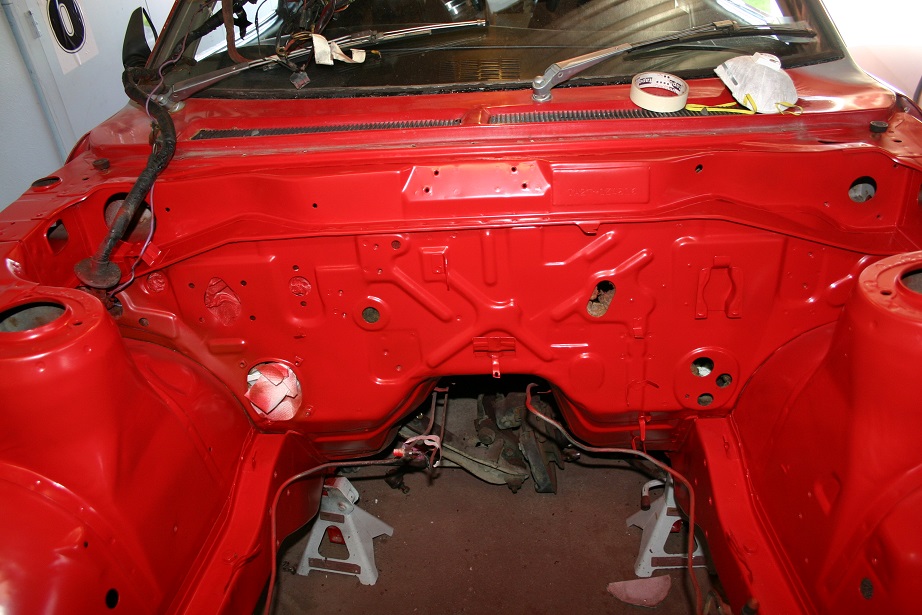
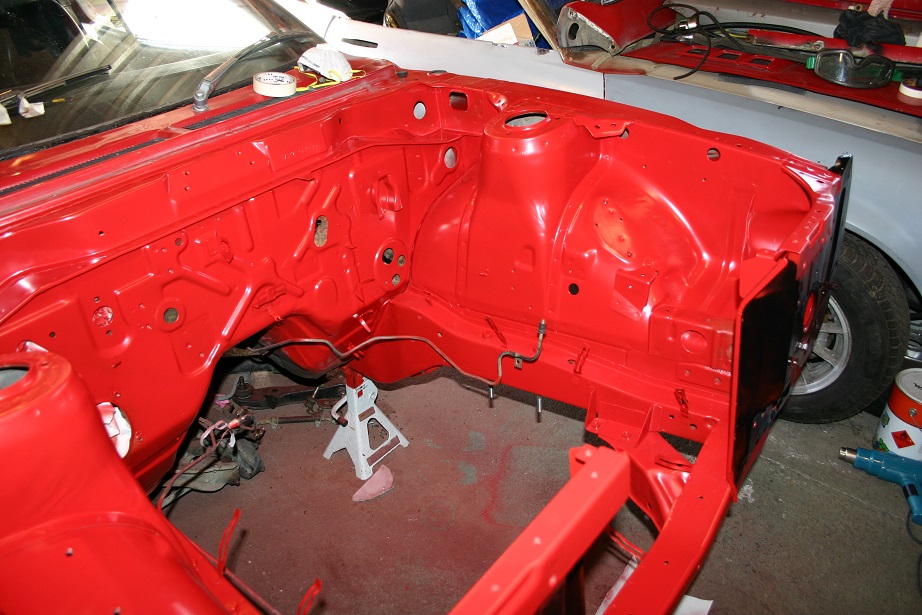
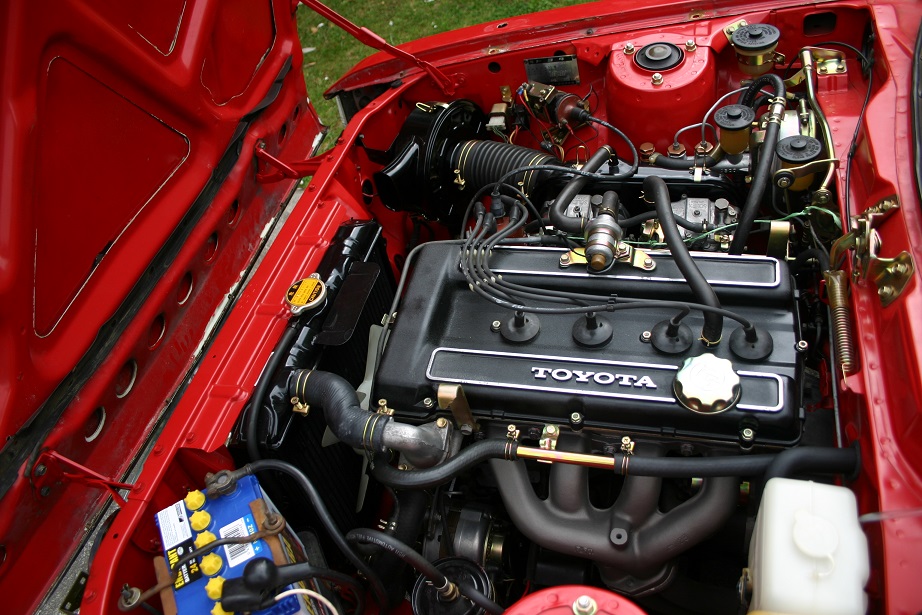
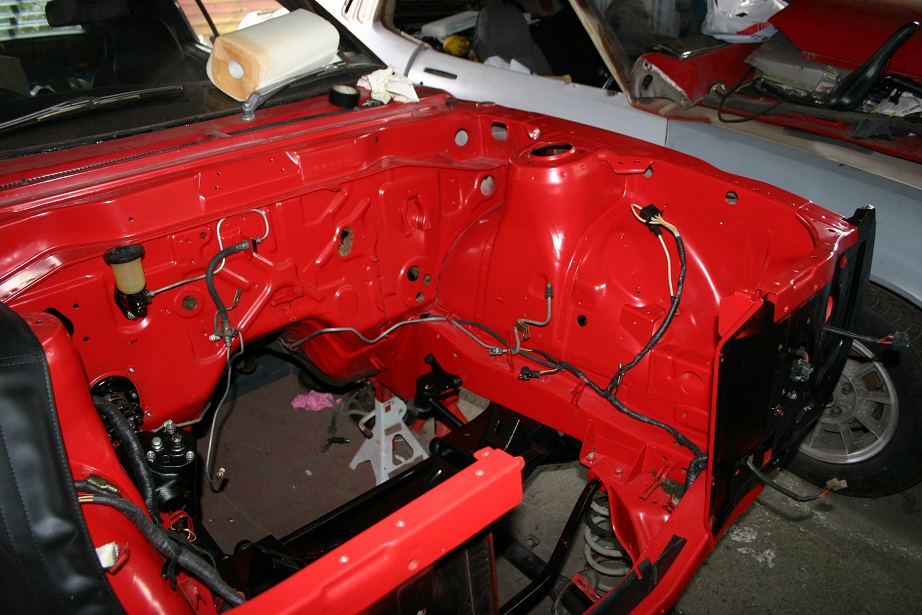
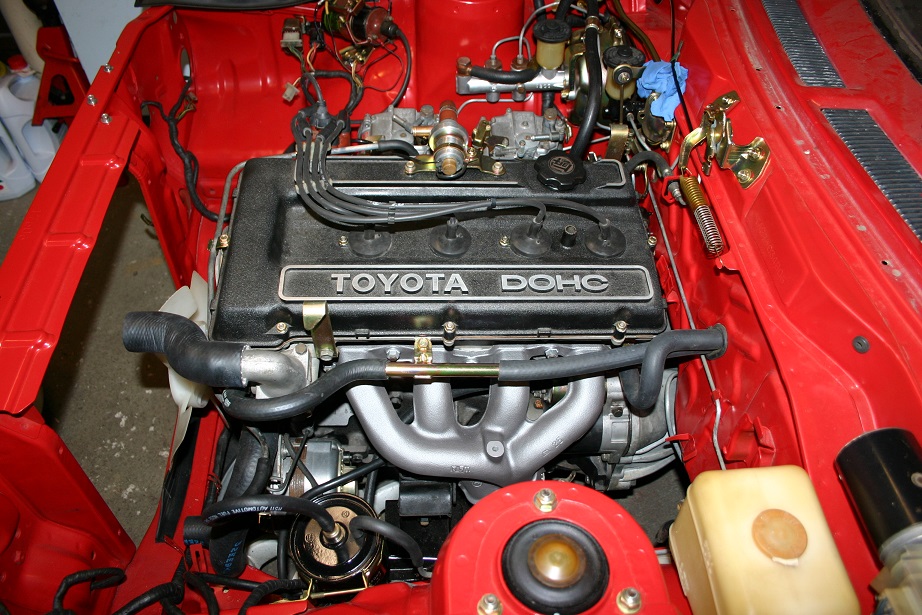
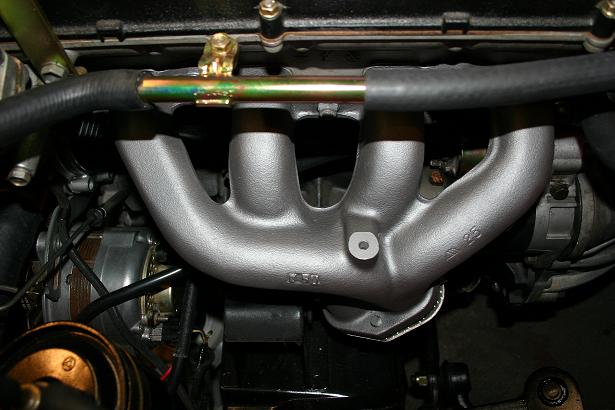
Now - In parallel to the engine out/stripping - I had a spare 2T-G off at an engine re-conditioners - the original was well and truly rooted and ended up scrapped. New EVERYTHING just about, back when all the hard to get bits were still available new from Toyota [You may have noticed another brown celica in the garage - this was a "barn find" that I brought and sold along with another liftback shell to a Toyota employee - maybe another story later] Priming began. and parts cleanup too - dang that takes a lot of time to do!! [oops - the black celica arrived in the family now too] Red Colour
2 points
-
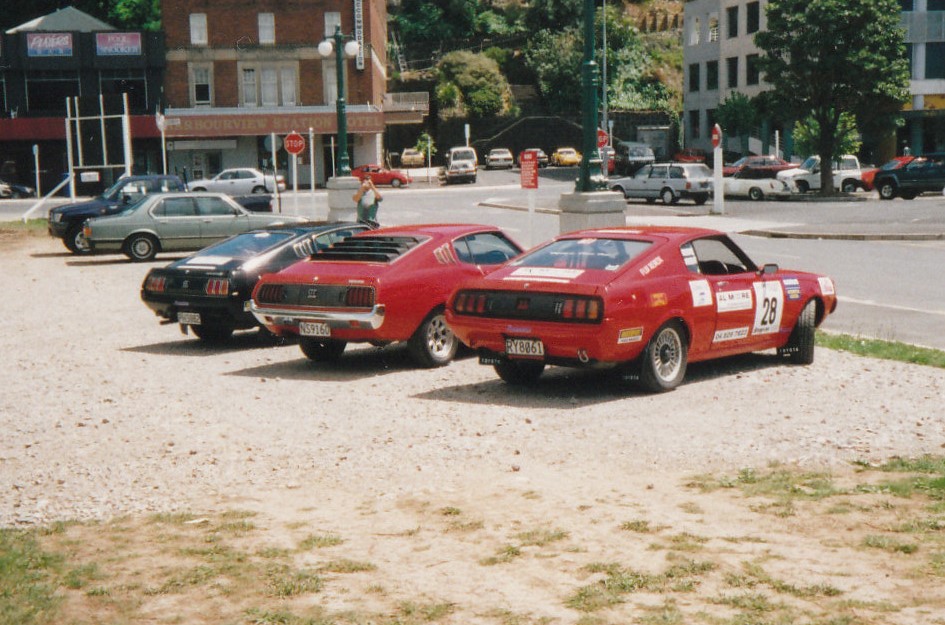
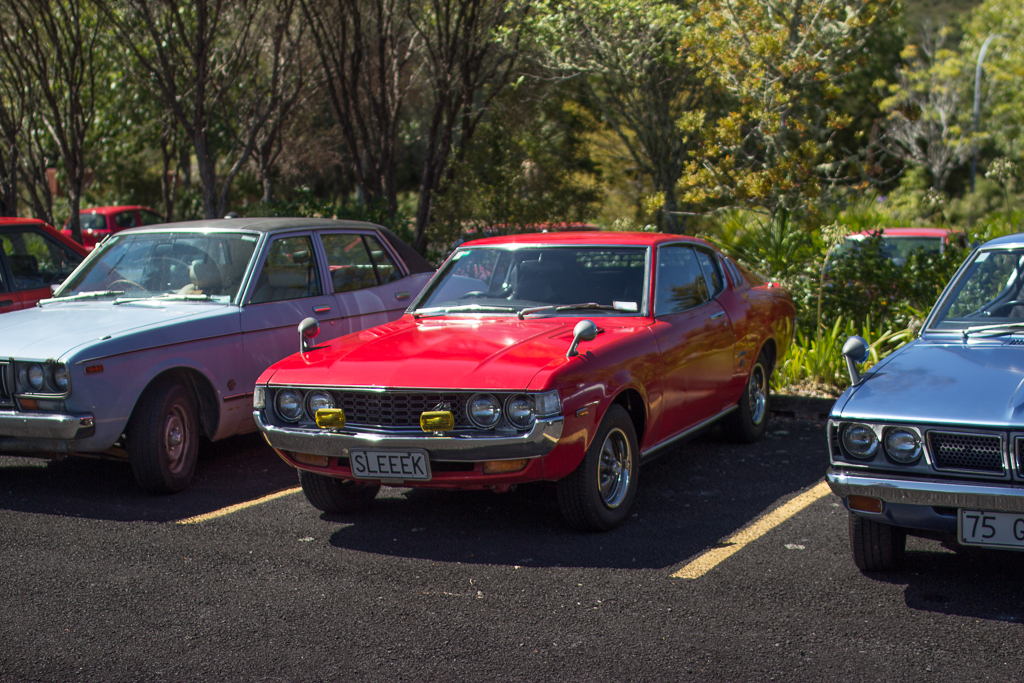
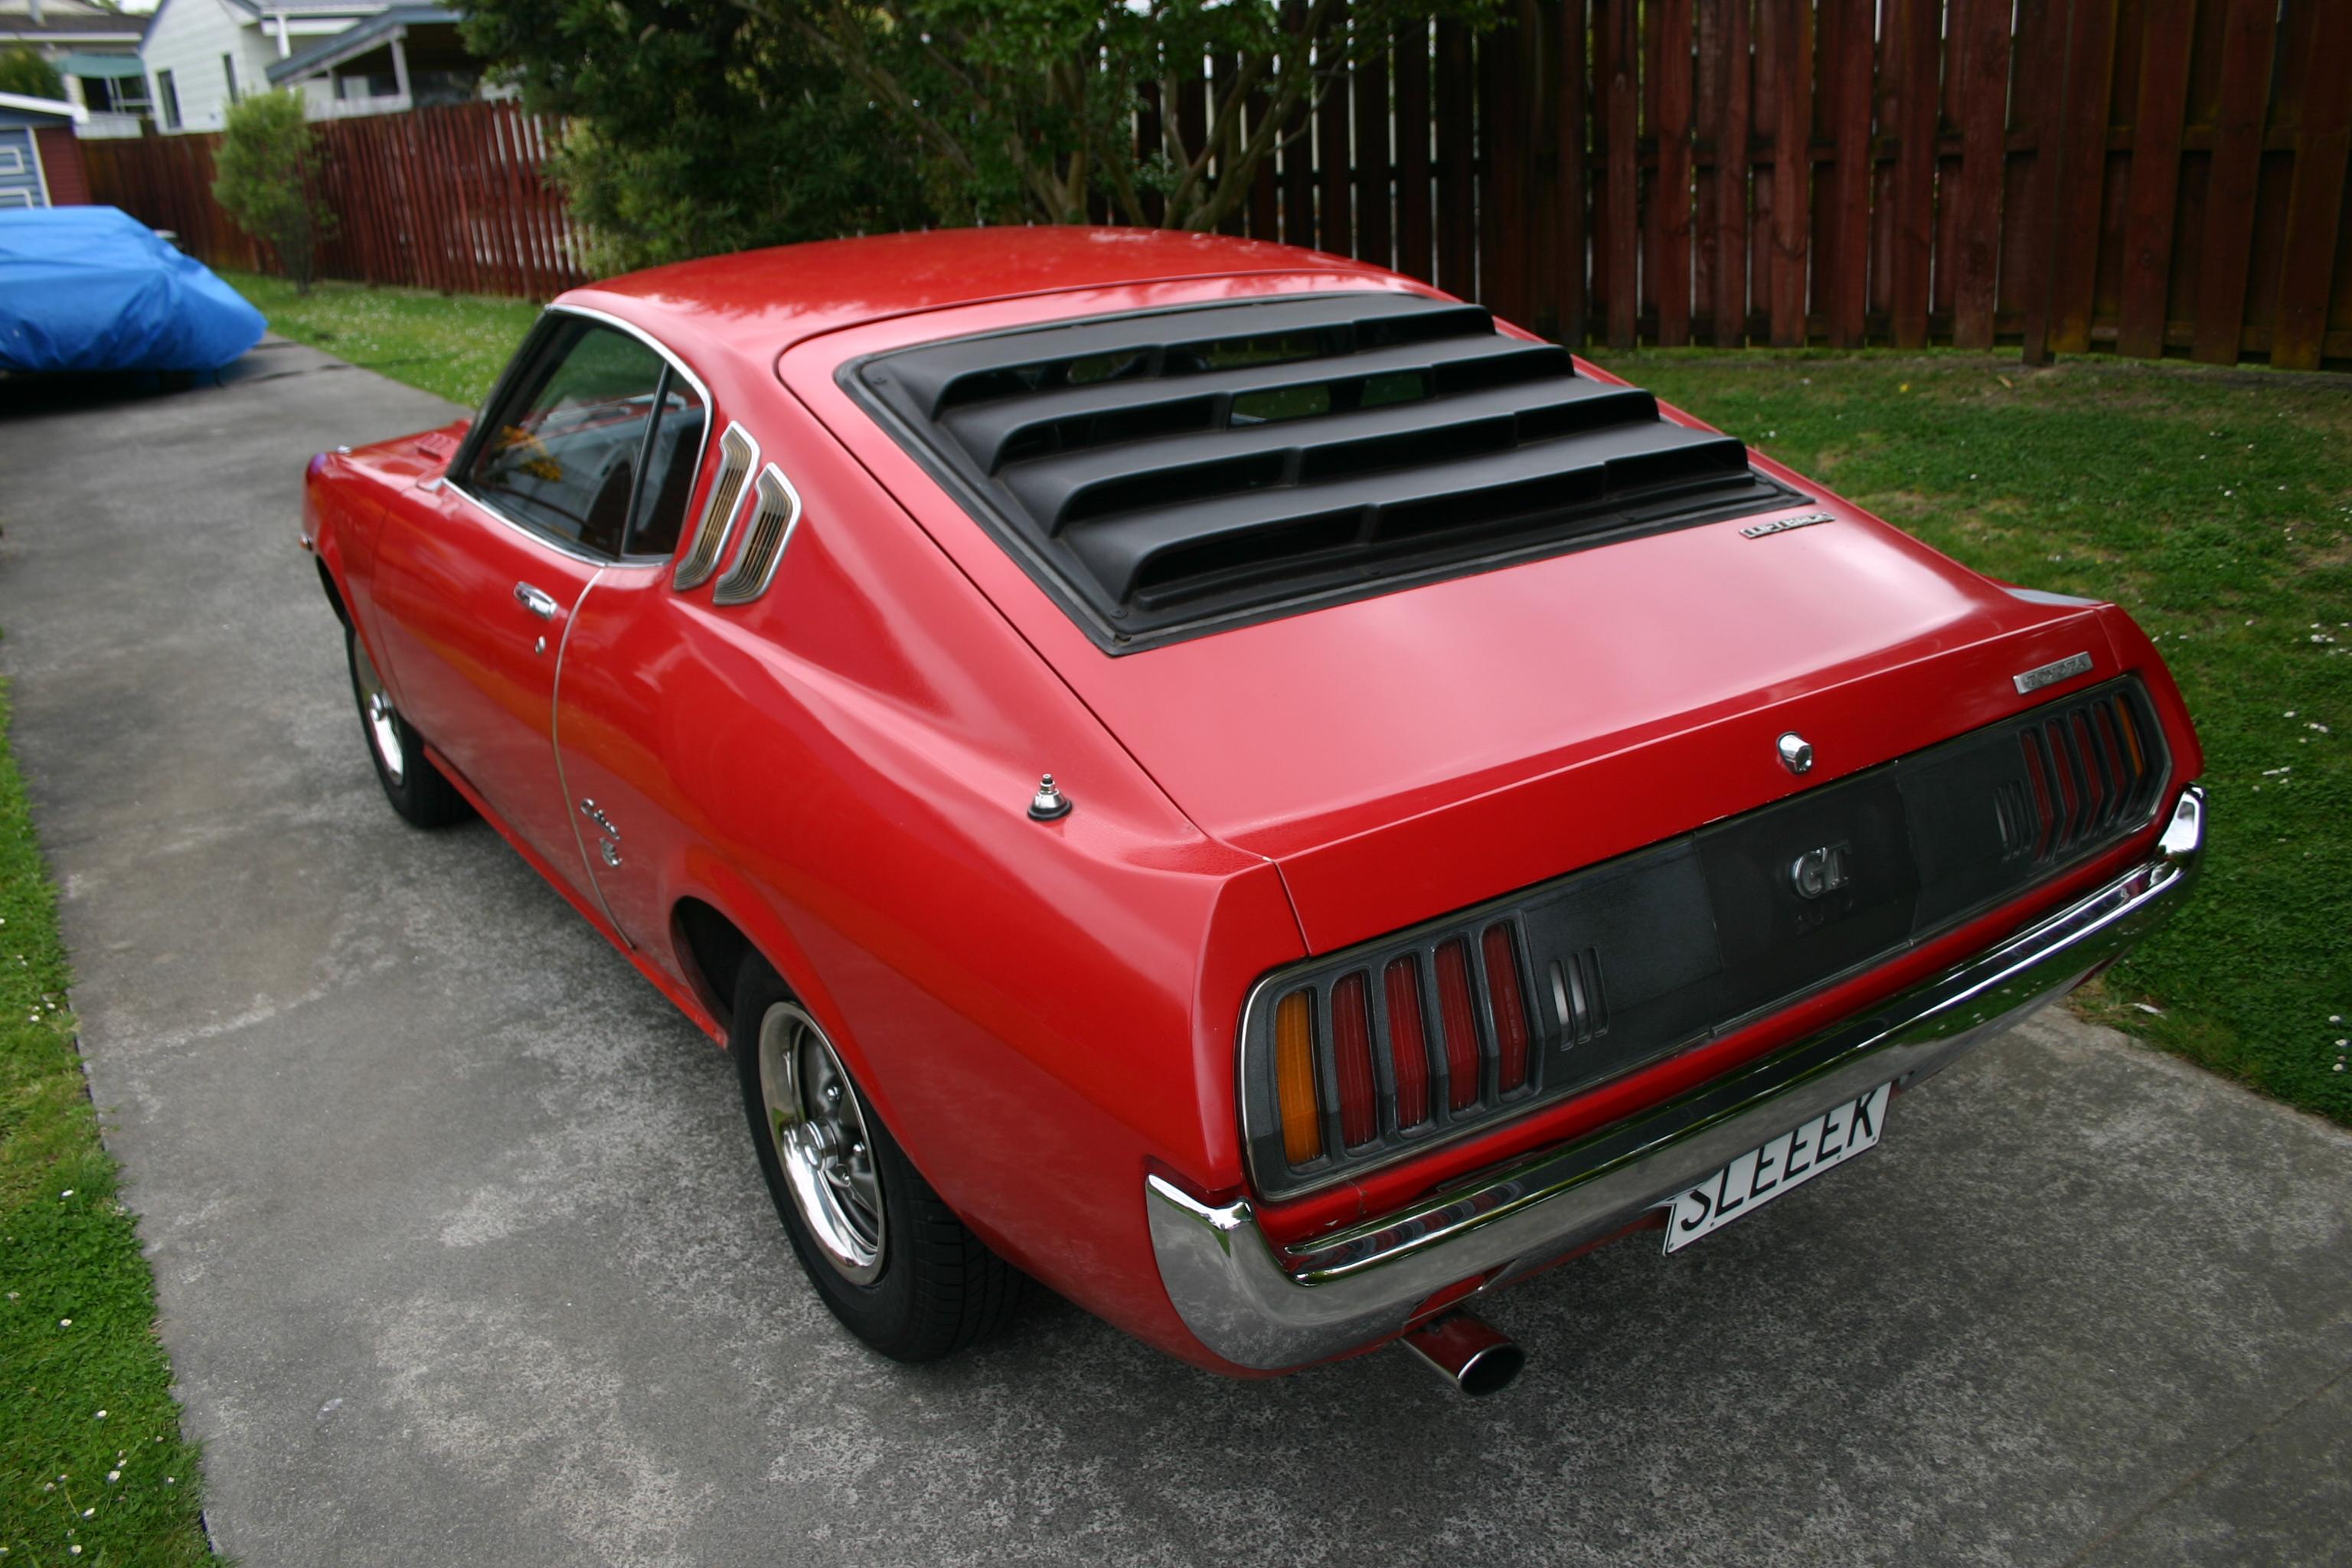
... member since 2004 and only now do i get around to making a project build thread for my main oldschool car - what a slacker!!! TBH i thought it had one, but all searching has failed to turn anything up. Anyhow - grab a cuppa for the life of SLEEEK as it has been in the last 19 years. Digging out the old pixels on paper this is how SLEEEK looked when purchased in 1999 ... meet skinny young me at 21 years old Now 1st thing that annoyed me was daily air topup of the firestone wide oval tyres on these volk 3 piece rims.. very loose and wobbly 3 piece rims. So Bridgestone Zona's and some Dunlop W10 tyres made me broke for the next few months.. I also liked clubsport so a day at the track in this was what it needed.. MG Car club sprint at Pukekohe 1999 At this time I met and befriended another celicaholic named Al - he was just prepping a celica for Targa NZ and asked for service crew assistance from one that knew celica's inside and out Amazingly - I now own all 3 celicas that are in this picture - it took 15 years to get them all under my garage roof.
1 point
-
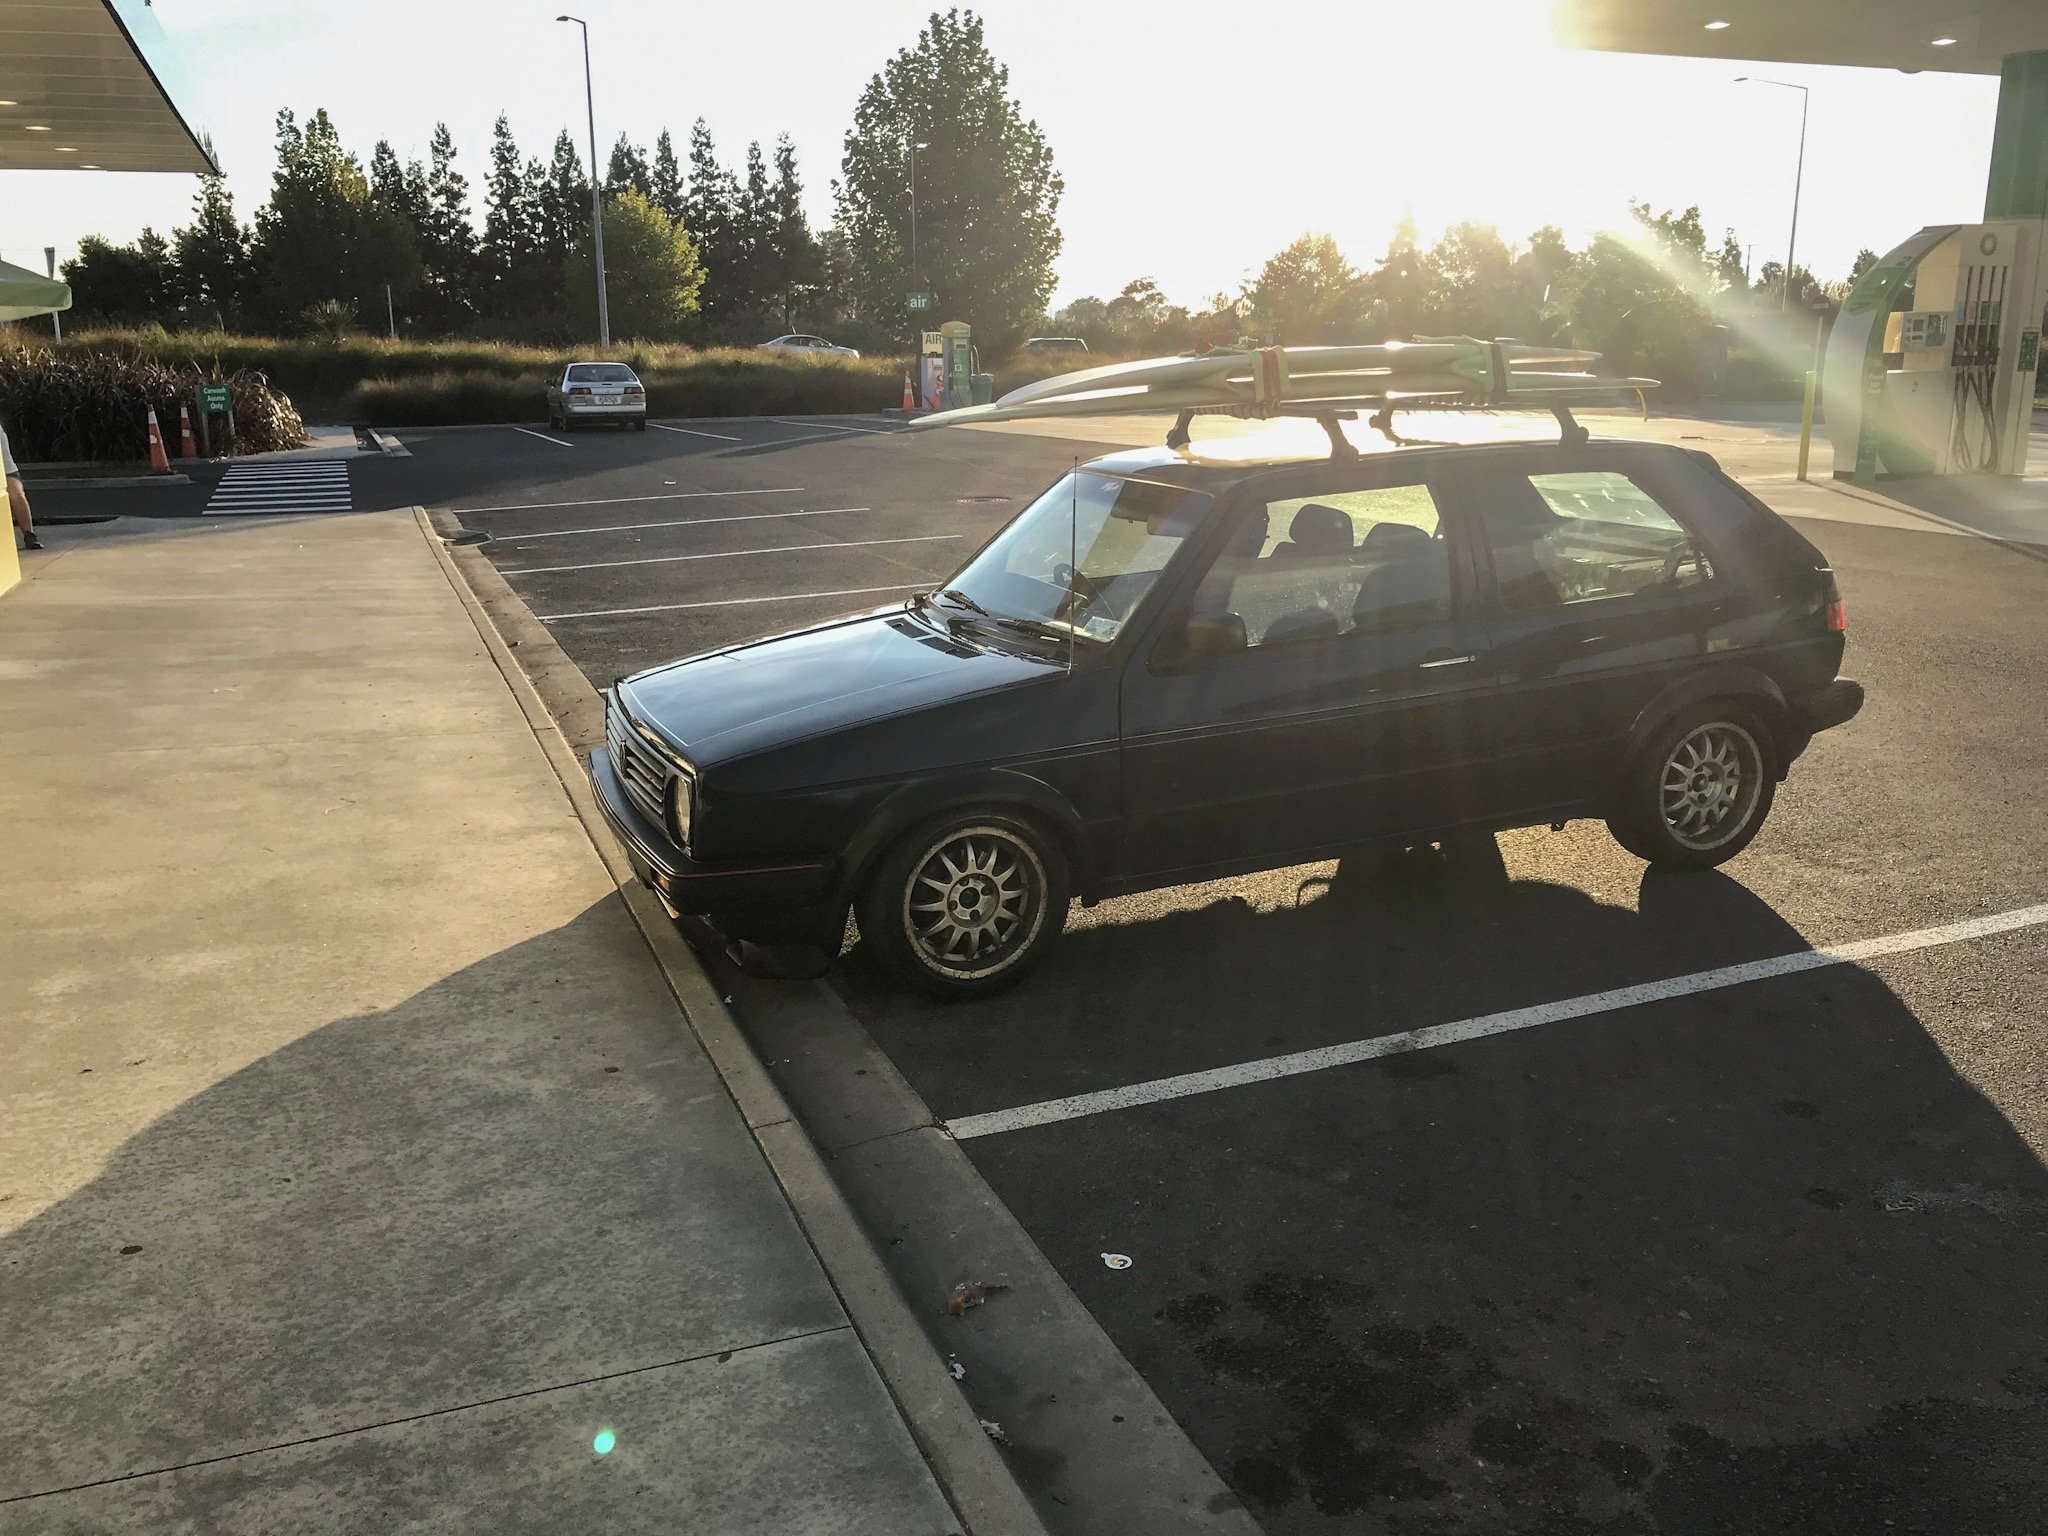
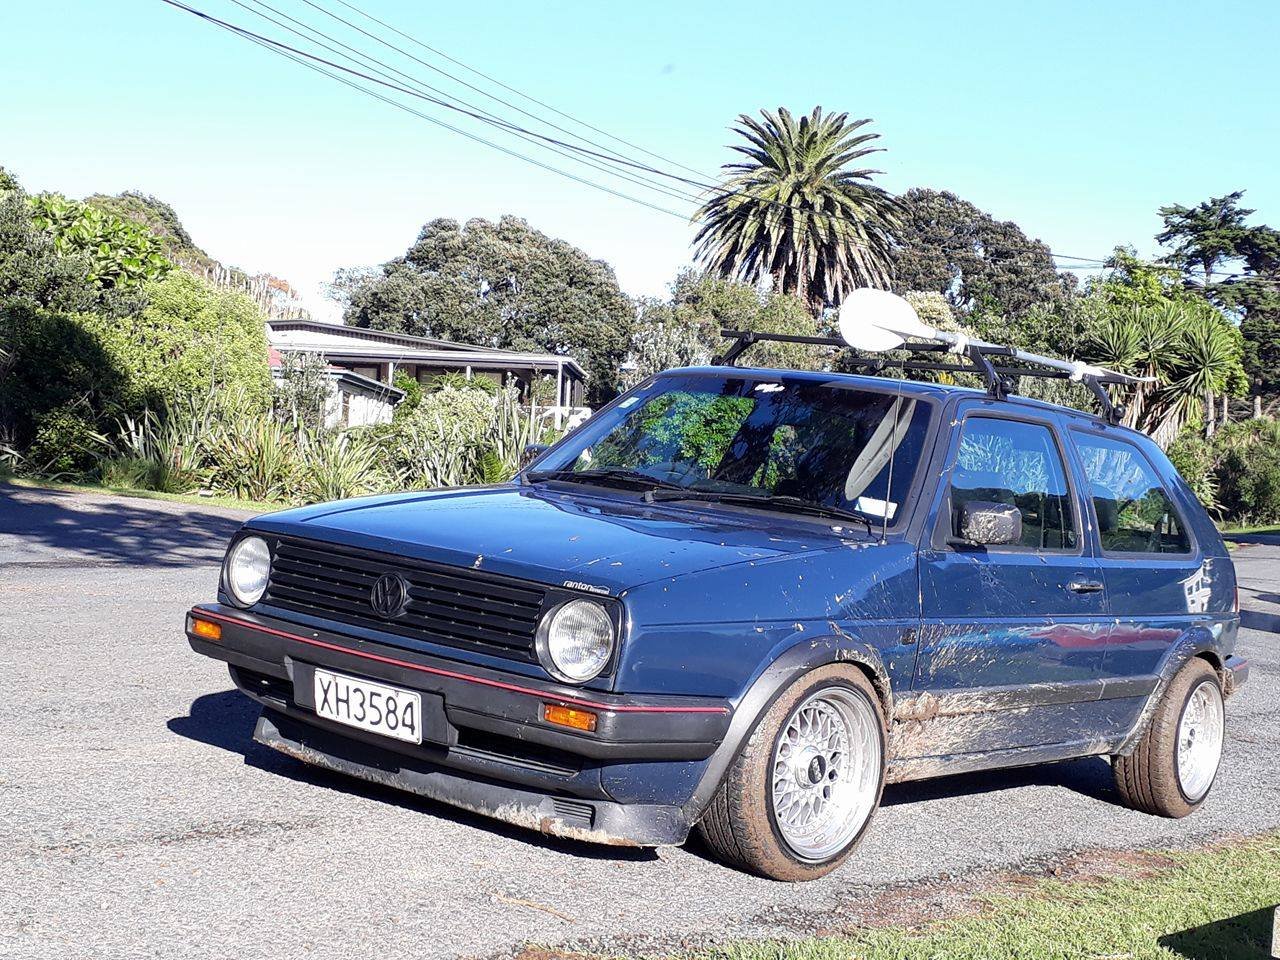
Discussion: Link I bought Rolf (the golf) as my first car back in 2007 when I was 15 from a family friend. It had a damaged water pump and a broken radiator, and no oil in it. I found a water pump and a Haynes Manual on trademe and set to work, turns out the radiator was fine and no damage had been done to the engine due to the lack of oil. Its an awesome first car i drove it to and from school and university for a fair while on its standard 8 valve. Im filtering through all the previous build threads i made to try and create a bit of a timeline. This was always a learning experience and looking back on it some of the things I did I look back now and am a little concerned with. In saying that Ill probably do the same thing in 10 years time as well. 2010 (2l 16v swap) $500 engine with bent valves was all i could find but at the time it was a good excuse to learn how to rebuild the head.1 point
-
Dunno if it's the right ohms But I've always had good results with msd blaster coils1 point
-
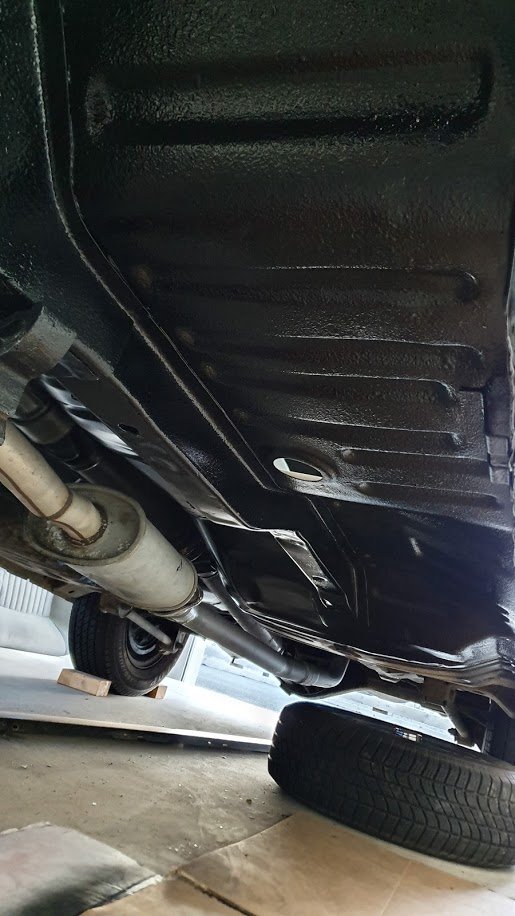
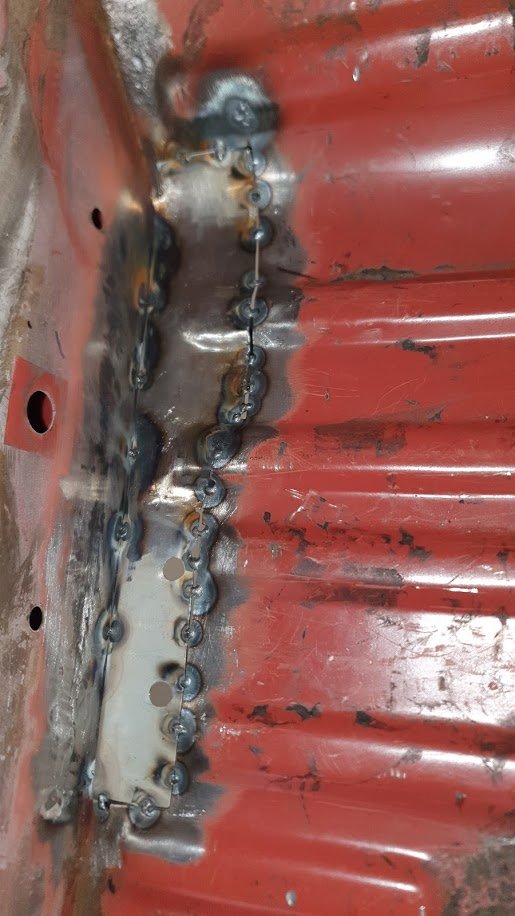
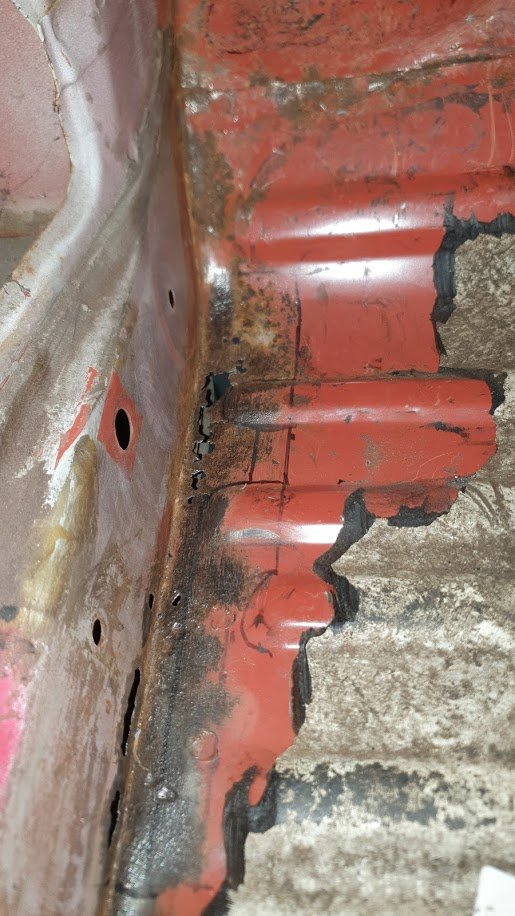
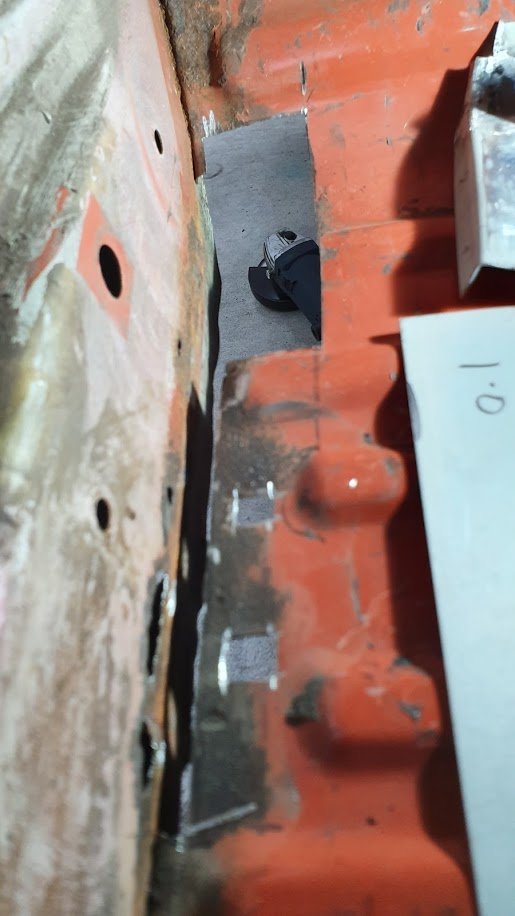
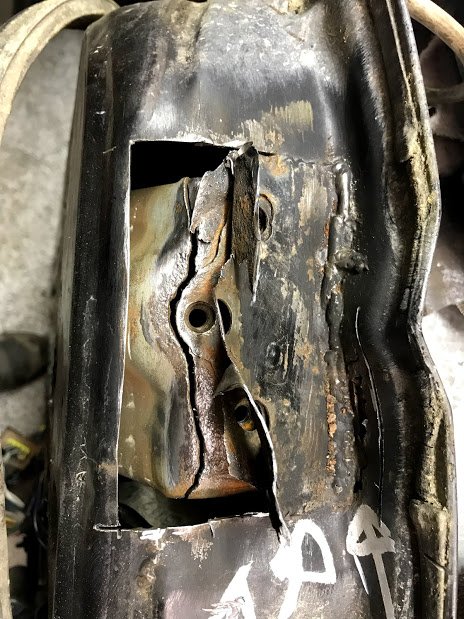
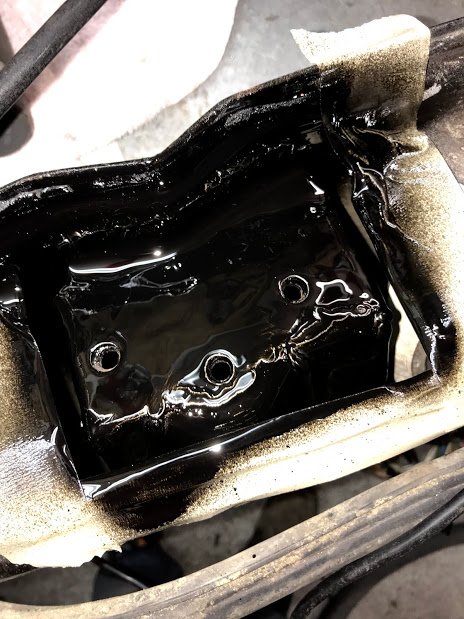
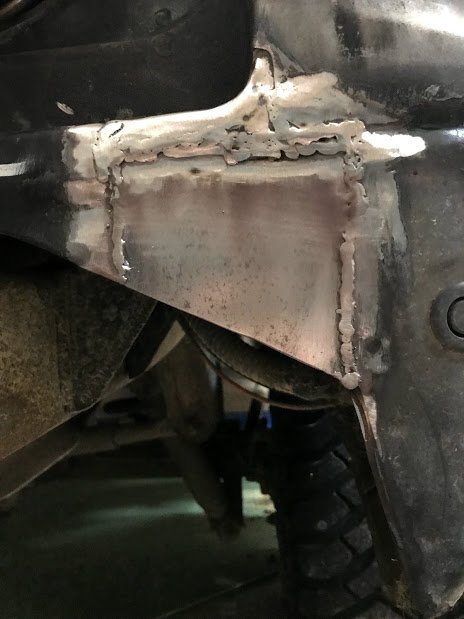
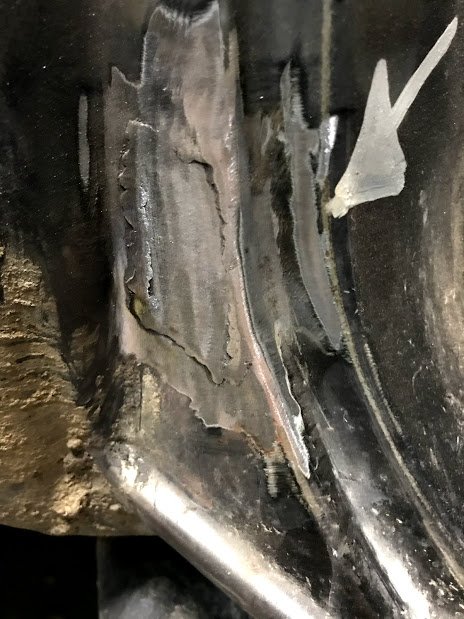
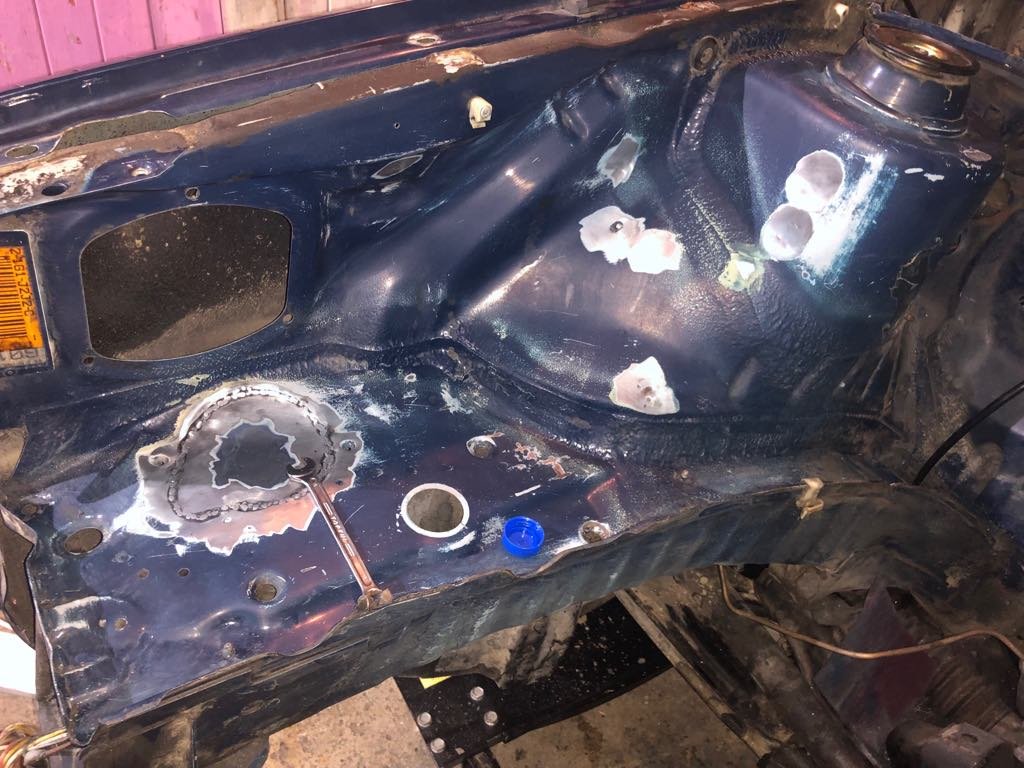
Wof man noted rust, I knew about the bit on the back but had never been a problem. Difficult one was around the door hinge where I hadn't seen it. Looks like it was repaired previously and not rust protected behind the plate. Started cutting it out and found a support behind it which had cracked, strange break... Had a look inside the door and everywhere else is rust free so it was worth doing the work. Arrows from wof man showing rust coming through on the original steel behind the previous owners weld. I've had this 6 or so years now I think and never saw this welded on plate. Then found the support cracked: Once I had a couple of spot welds on the crack I could completely cut out the plate knowing it would all line up again: Bucket of paint on the welded support thing, I welded some ribs going down from the weld figured it can't hurt. Plate welded over the top, bit of a rush job so not my best work but its solid and flat: Removed rear bumper to cut out this section and weld in a new plate, had a couple of reactions with something but again its solid and not a show car lol. Can't see most of it with bumper on anyway: And the rear door jam, this one was caused by rust starting around the plastic screw female insert jobby to hold on the wheel arch trim. Had a look inside when cut out and its totally rust free everywhere else in there which is great. Again wasn't worried too much about finish because its mostly under the trim. Good for another 30 years? EDIT: also failed on door hinge play on drivers door and the rear barn door is fcked from the weight of the spare wheel. Tried some suppliers and that lower rear barn door hinge must be pretty common. No one that I tried had stock, one offered to bring in from Japan but that was a 6 week wait. There's a guy who wrecks Safari's down south, he says he has some with no play. So bought those to get wof. Hopefully they really do have no play.
1 point
-
Time for a rebuild
1 point
-
I got one of these https://www.herbosequipment.co.nz/collections/welding-supplies/products/160a-inverter-mig-tig-arc-welder Comes with a 10A plug so no dramas with needing a 15A outlet. Really happy with it so far, even a shitty welder like myself can lay some alright beads with it.1 point
-
the dude helping me seems to have a direct line to the dodge system where ever he works. i asume a dodge dealership, or an auto sparky. ill dump all the info he gives me in my build thread once ive got it all and hopefully any other people can find that info that simply wasn't freely available. although he called my project ambitious... i told him thats how we like it in NZ1 point
-
Got it back last Saturday and spent all weekend and a few nights this week cleaning parts and reassembling. I got a mystery pack of plastic trim clips off Ali which was very handy for replacing all the broken ones Paint is.... meh. It cost $1600 all up, that was to tidy up a couple of dents, do the outside, inside the rear door and touch up one of the front door shuts. There's a few runs and badly masked bits and all of the dust inside when I picked it up Realistically it's better than I could have been bothered to do though and it looks ok all back together I painted the bumpers with black plasti dip type paint which makes them look heaps better, I'll be interested to see how it lasts
1 point
-
You might be wondering.... It's coming up to the third Wednesday of the month; is OS burger night on? No, of course not. But if it was still on, we could take in some culture by going for a look at this: https://www.eventfinda.co.nz/2019/ellerslie-winter-nights/auckland/ellerslie ....Or just eat a burger, get a selfie for your Instagram and get outta there.
1 point
-
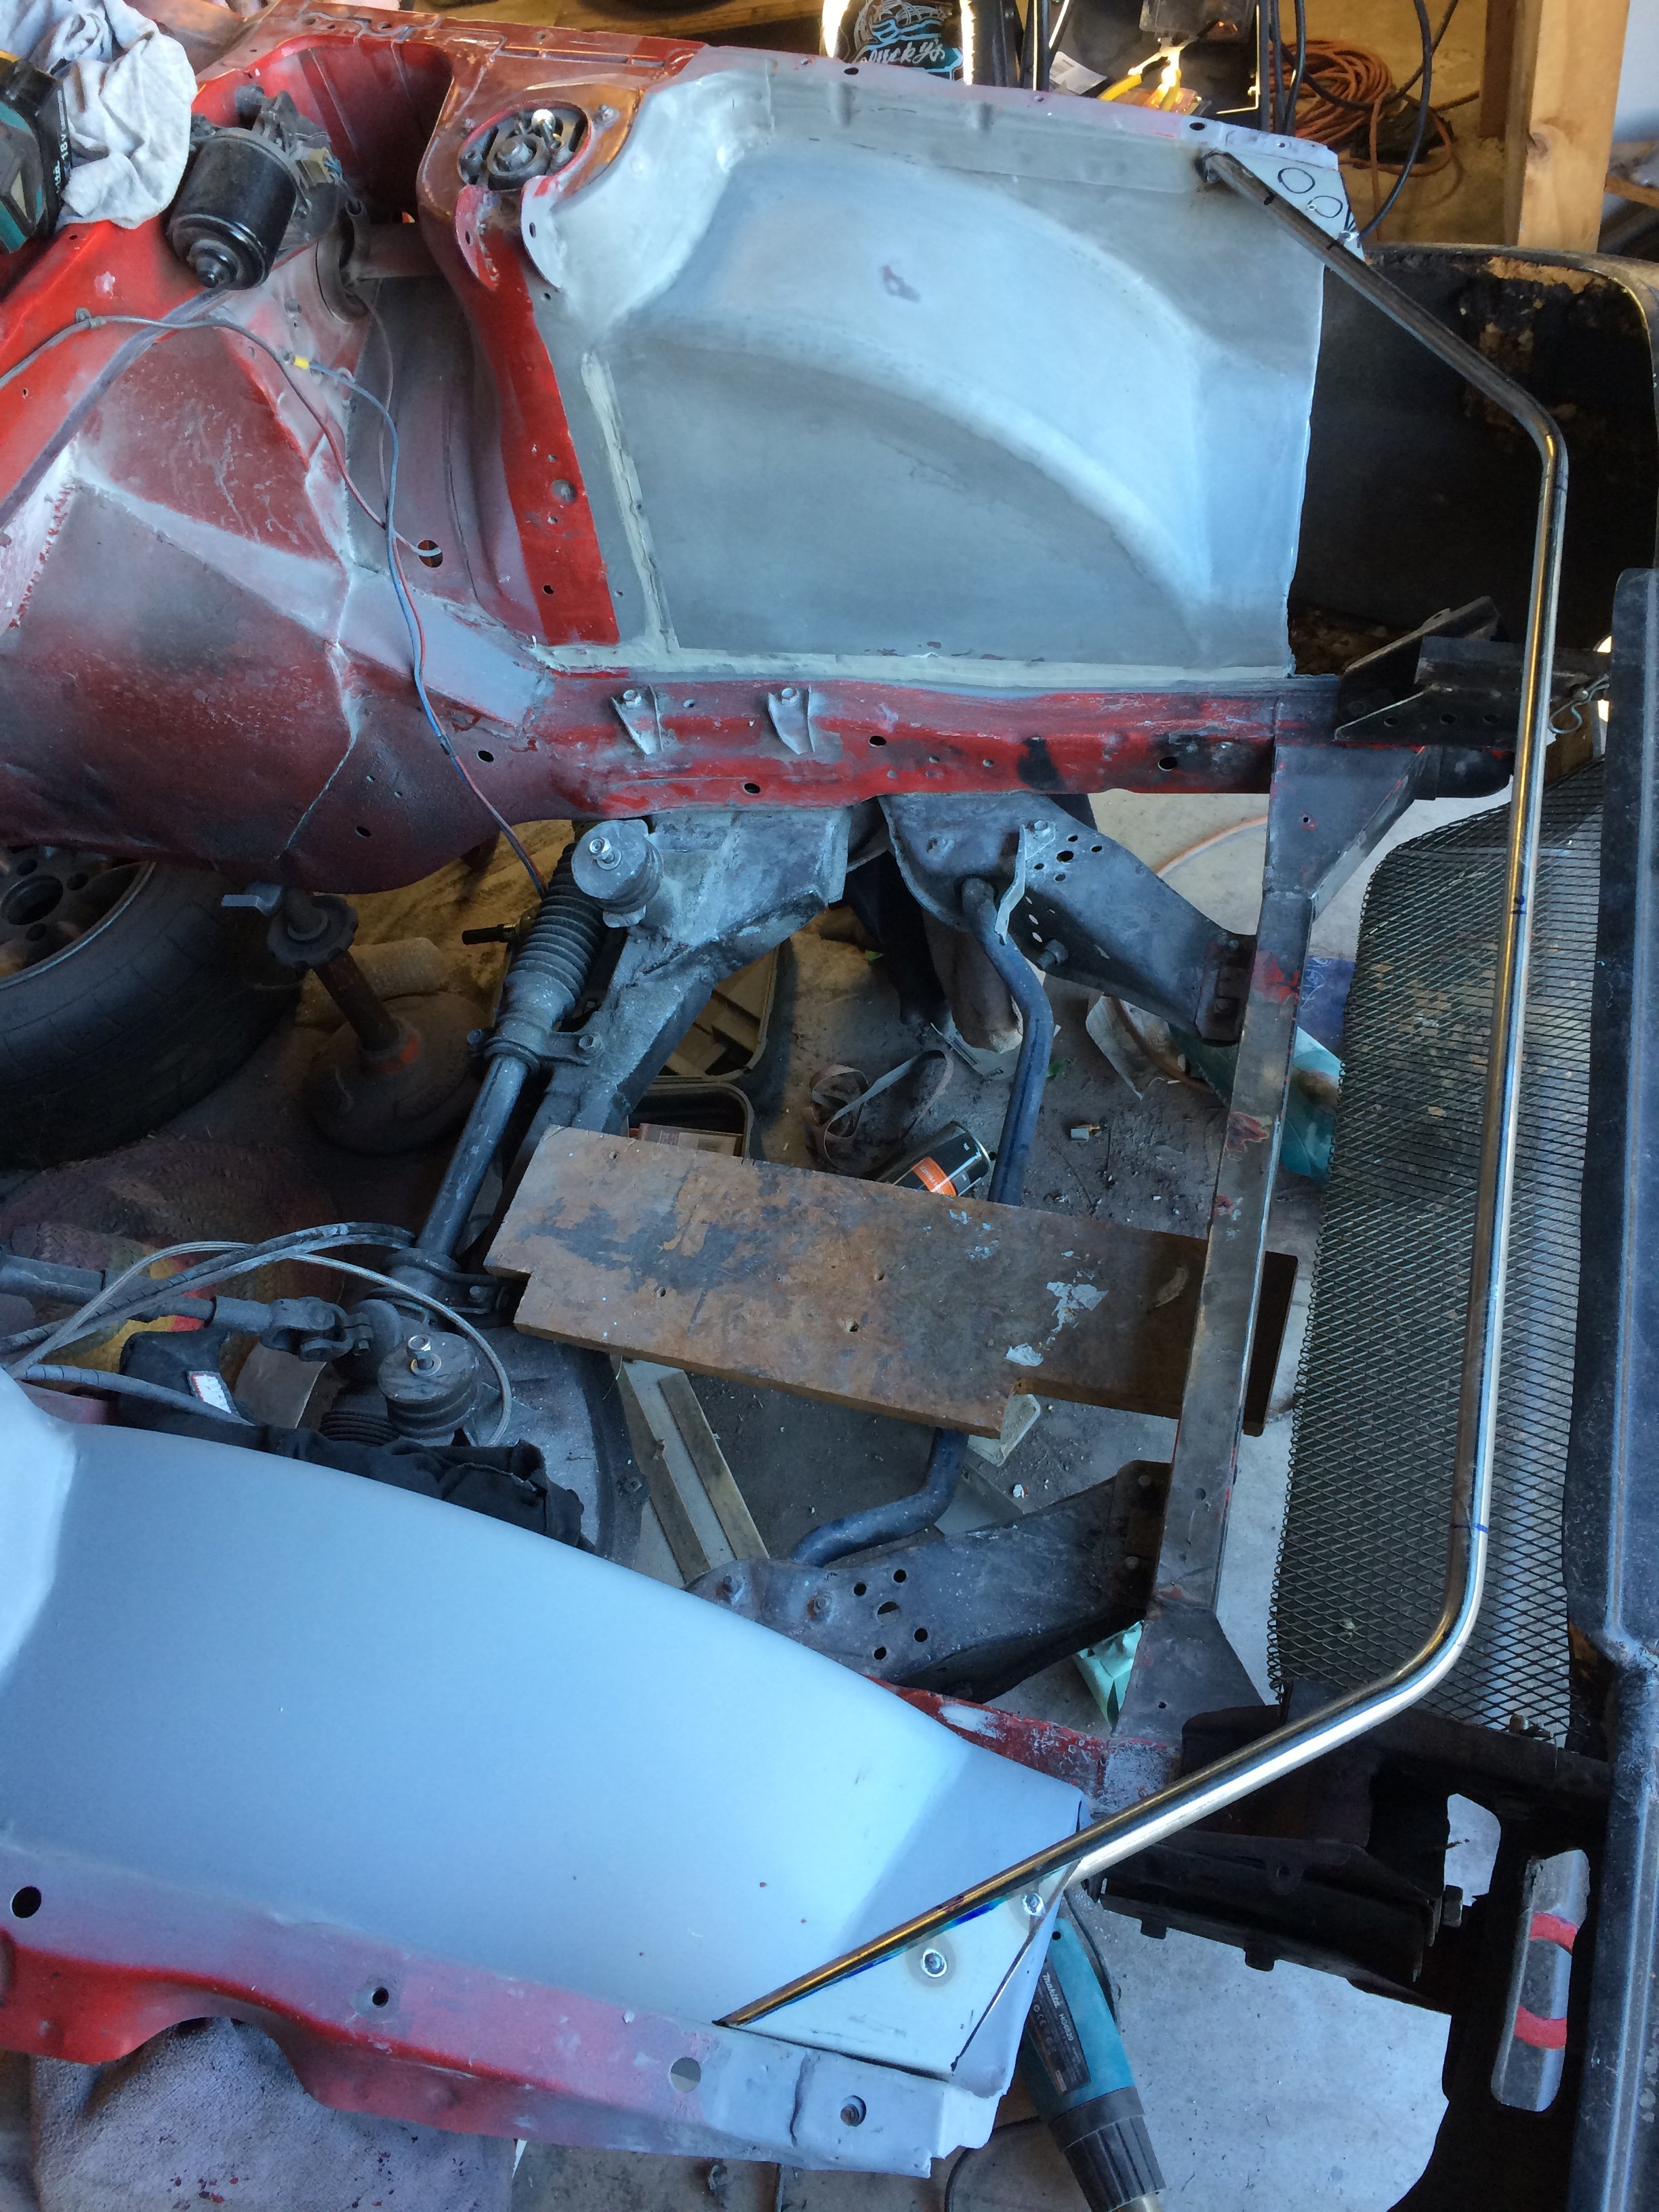
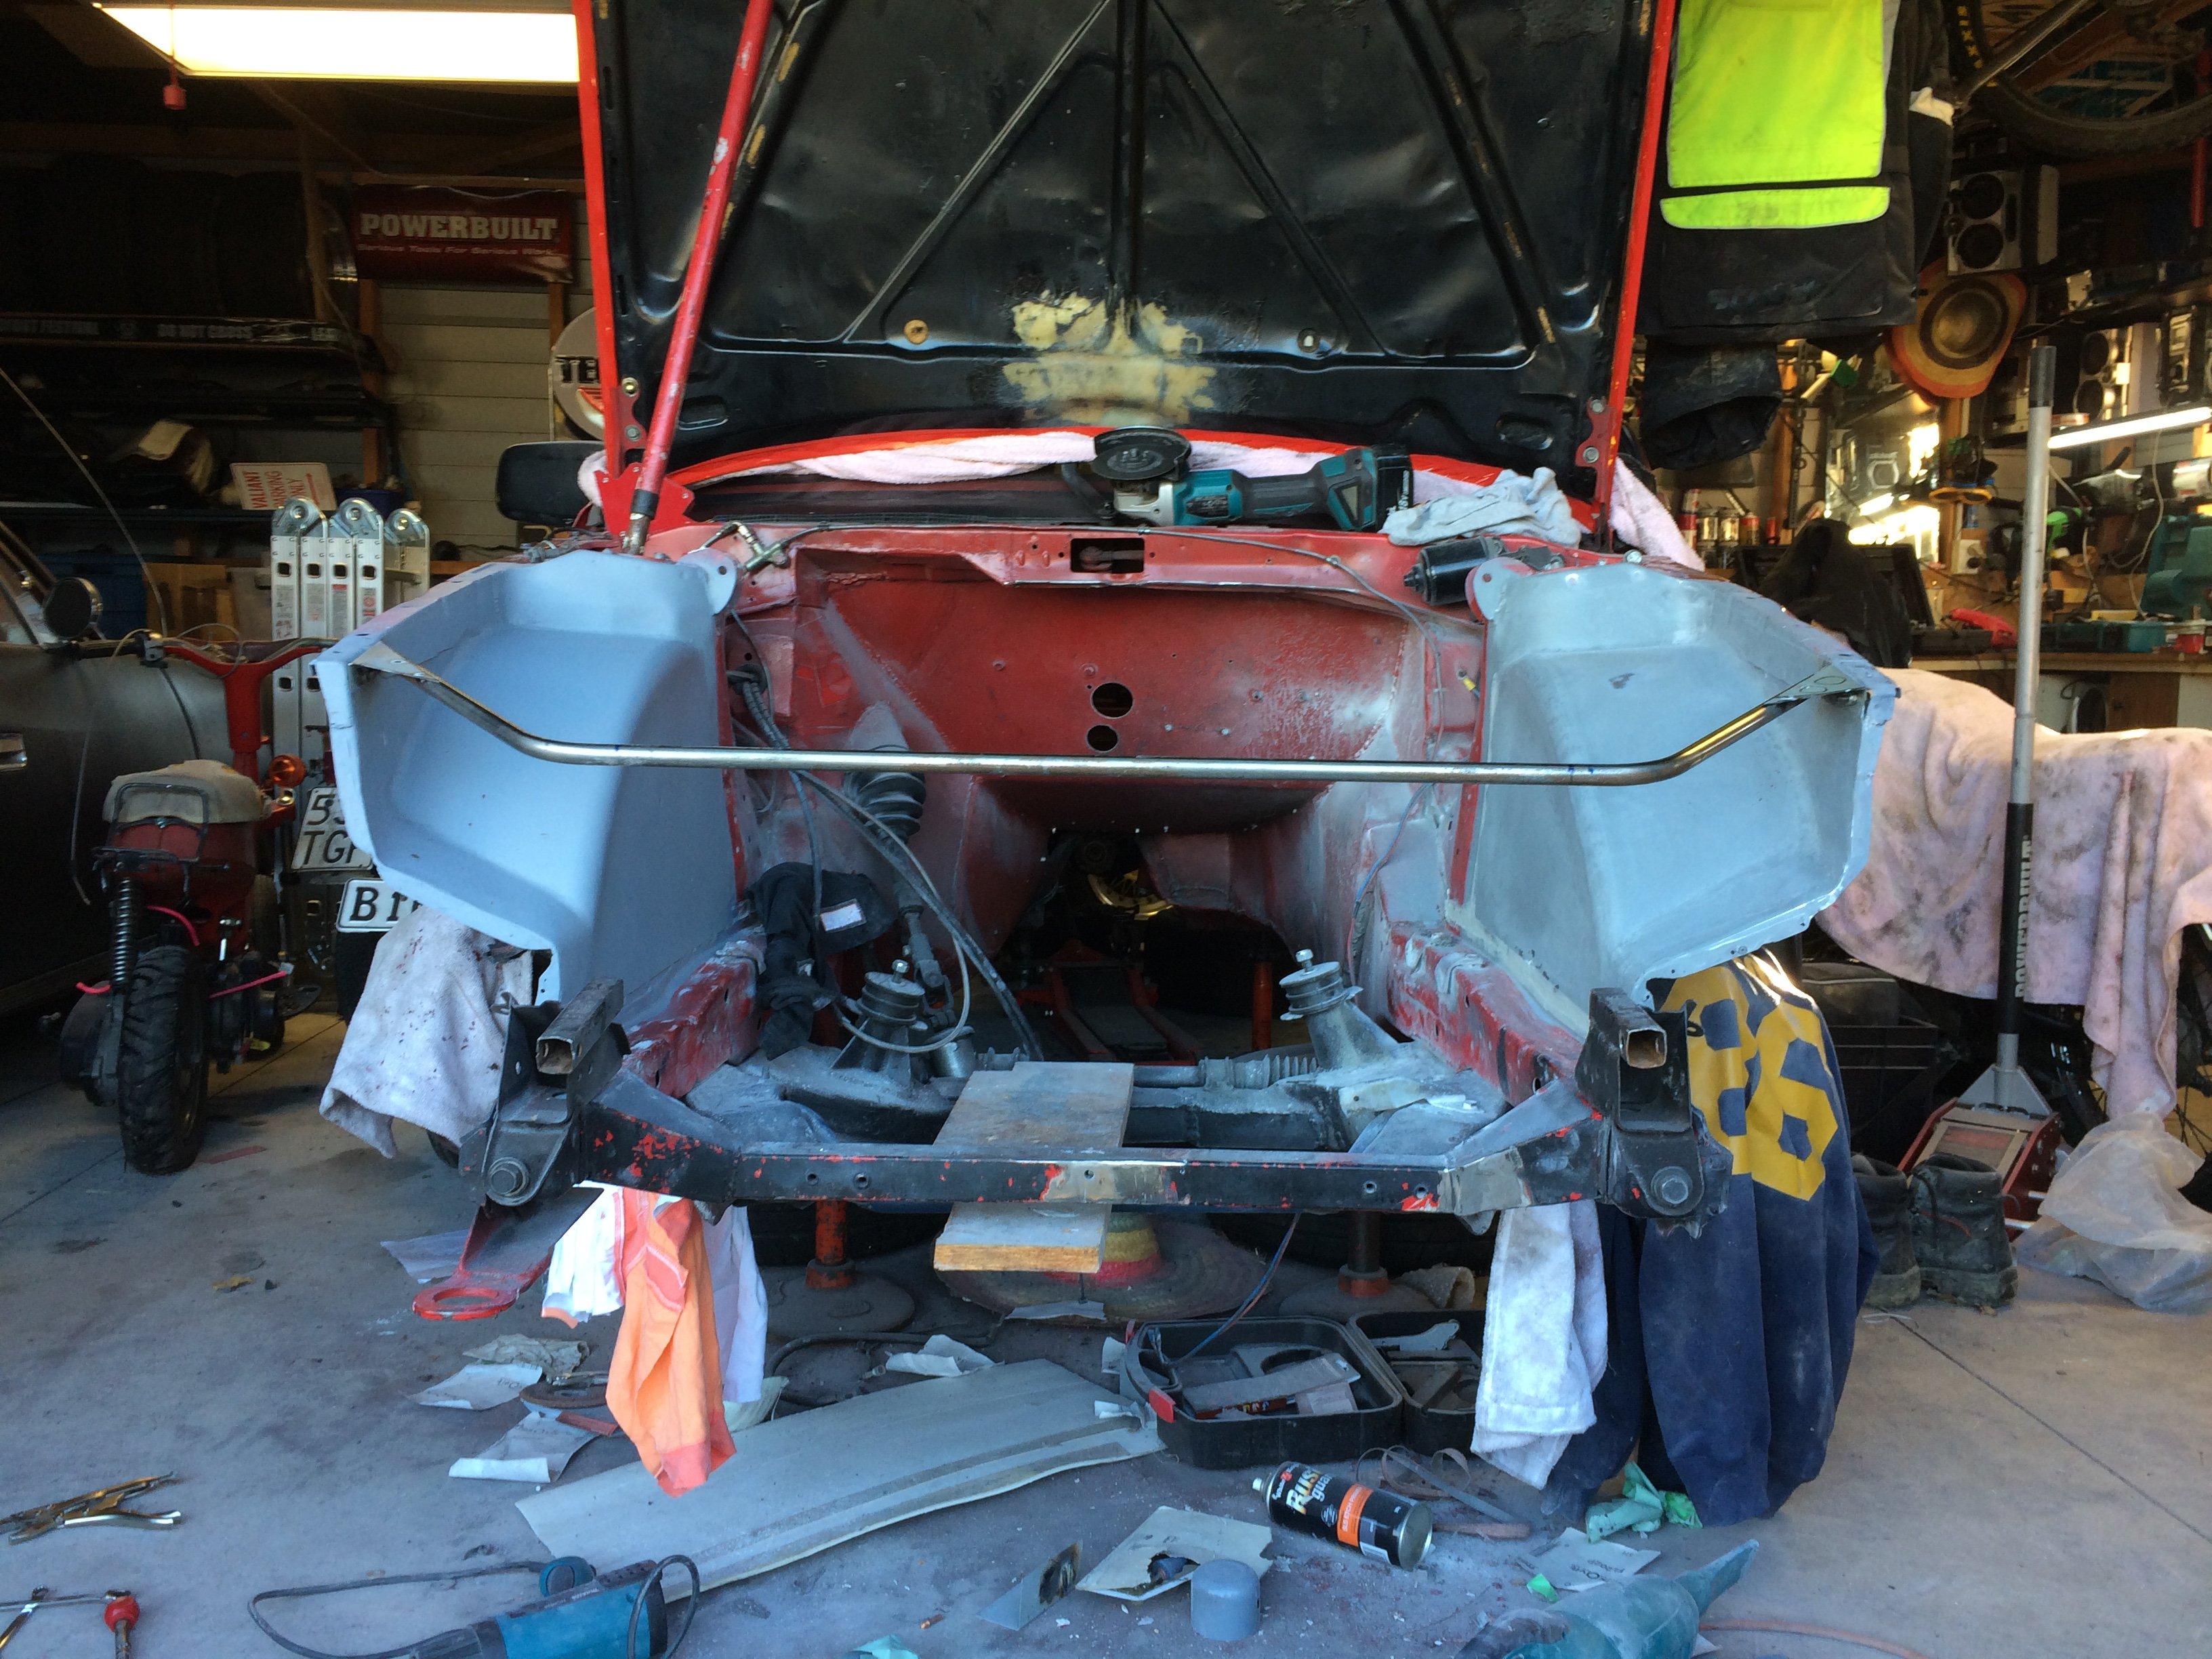
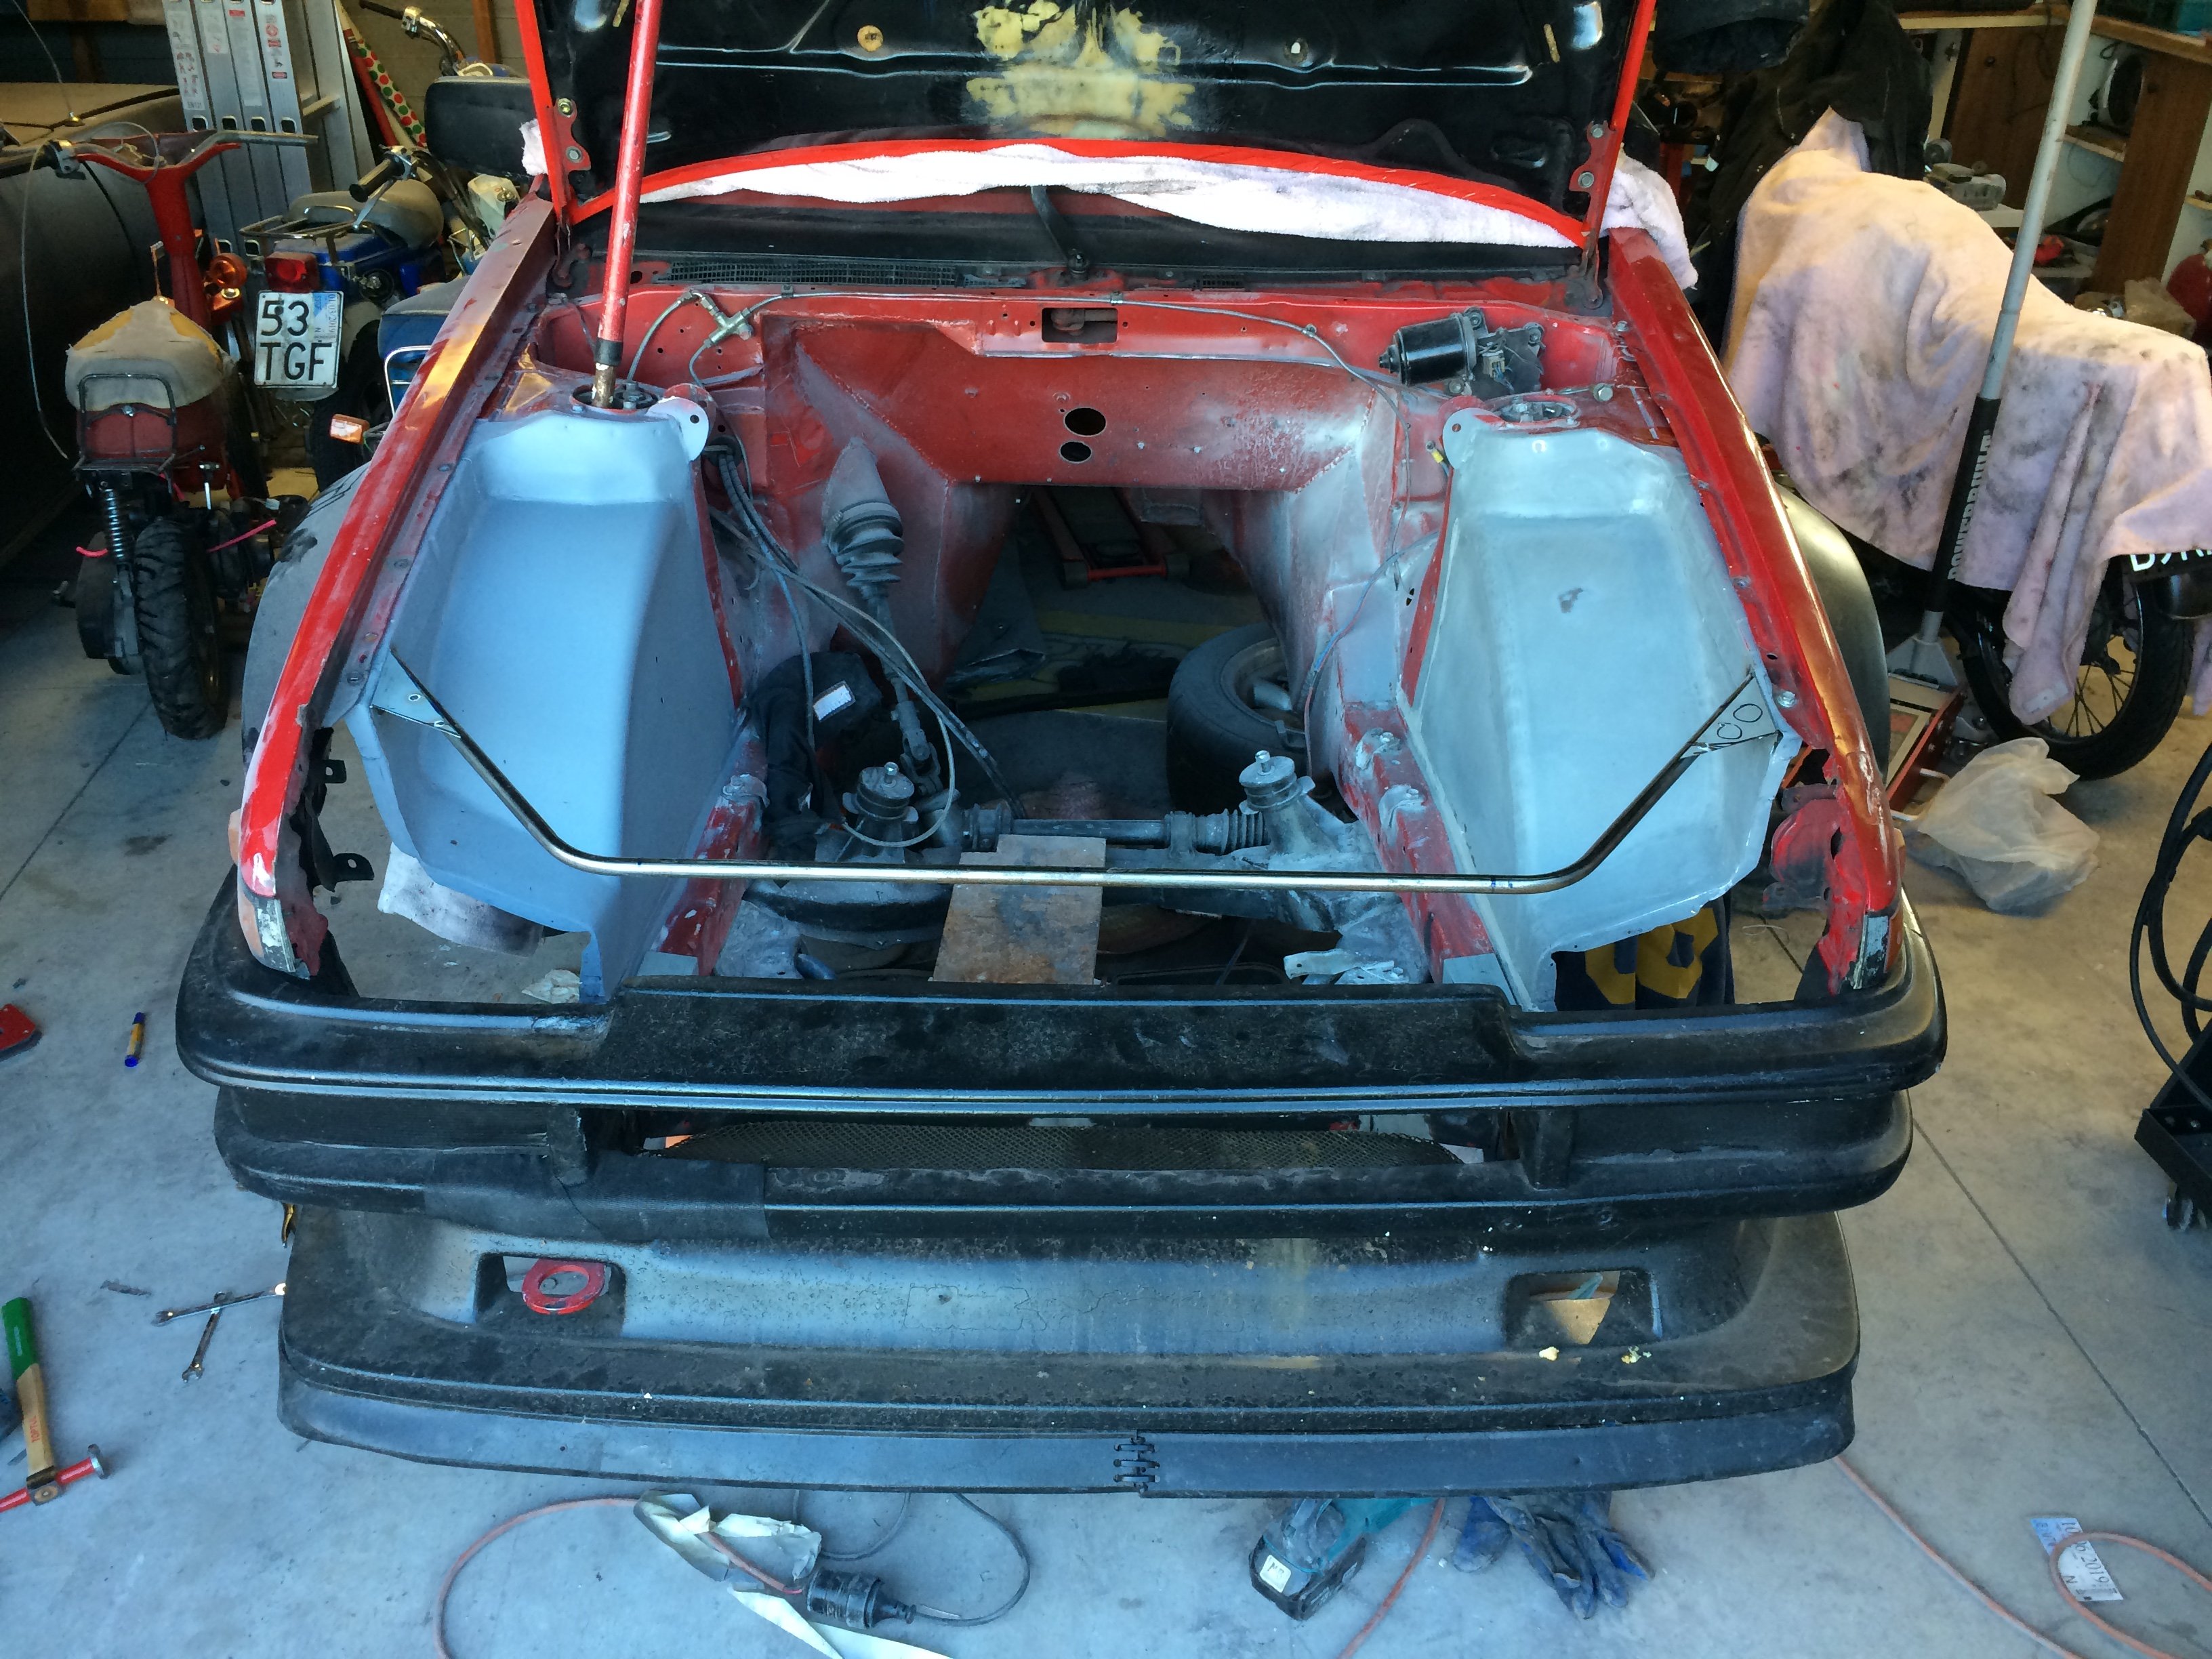
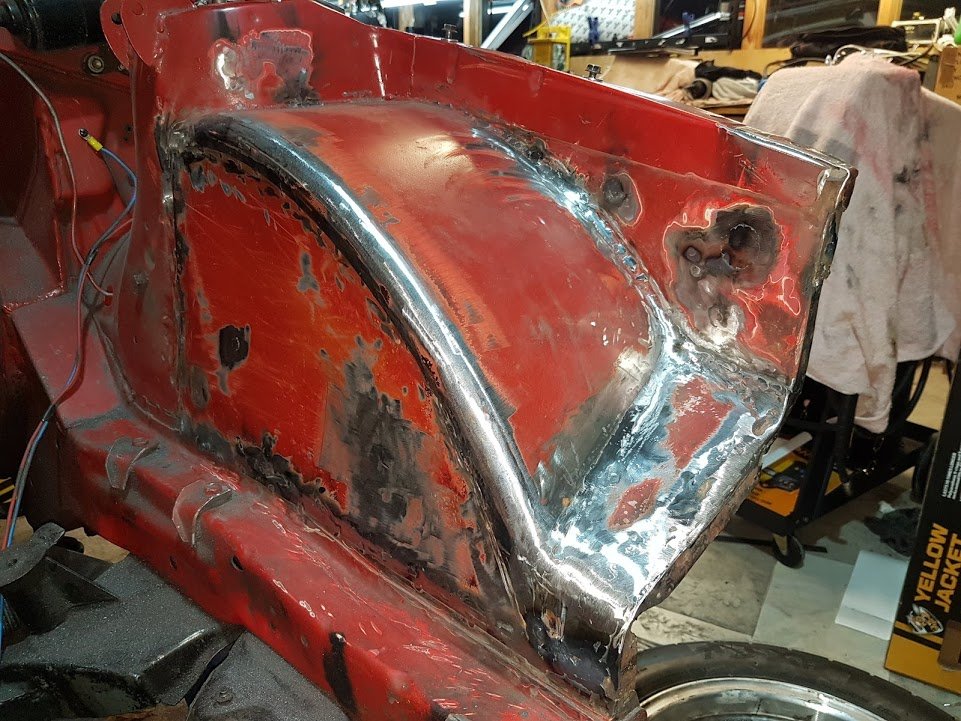
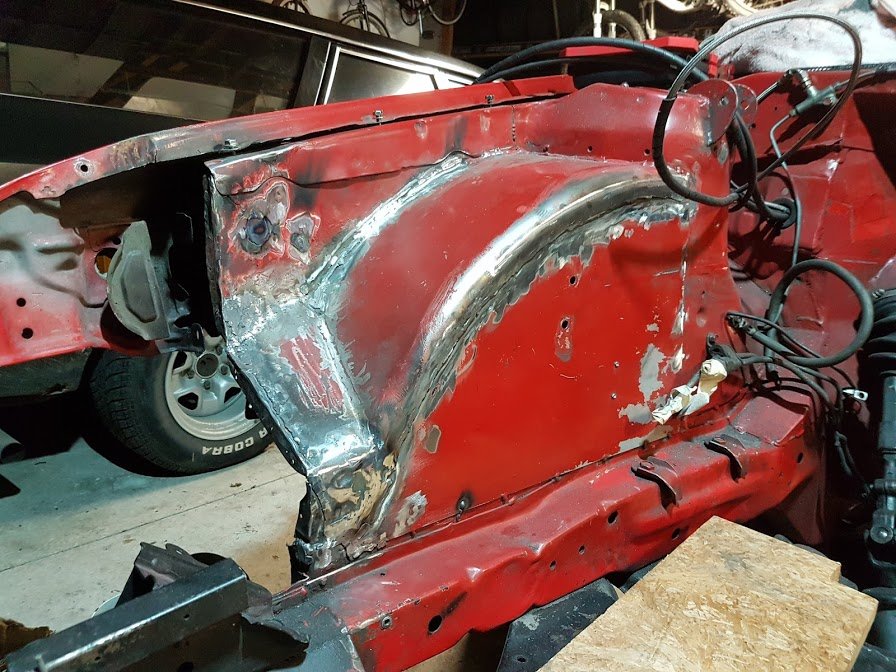
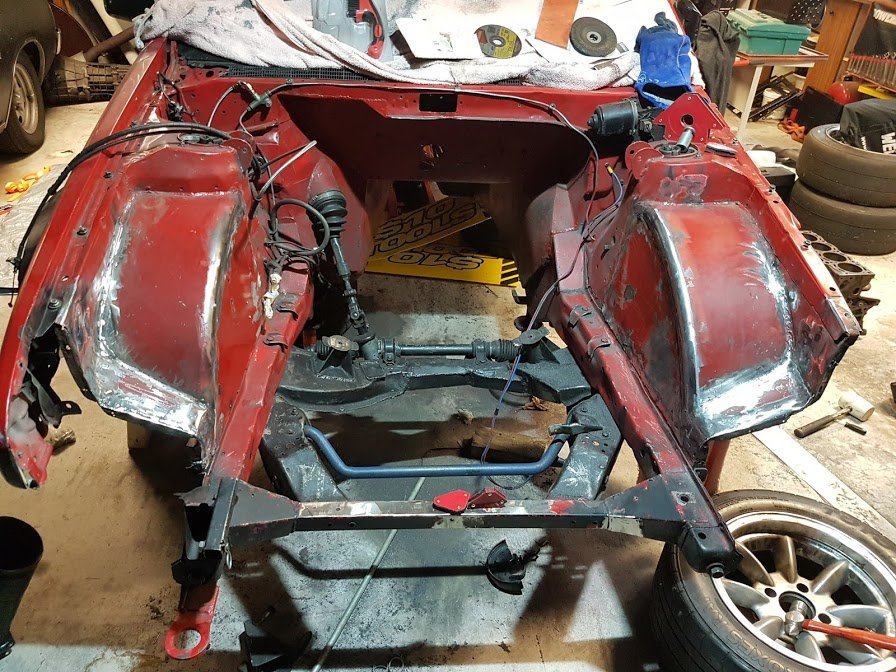
I’ve made good progress on the right hand tub now. Got most of the finishing and a coat of primer onto it. Then @Rhyscar came around with his tube bender and we started on the new radiator support: This bolts in place on the sides and will have a couple of vertical stays for the radiator and ducting mounts. Popped the guards and bumper back on for a visual inspection: And the new radiator will mount like this: With ducting to take the flow out the bonnet. Woohoo! Now back to body work in the engine bay.
1 point
-
September will be two years since I've driven this car... So I've decided that I should get it going and try to race it at the final round of the Manfeild winter series. I've not done a whole lot since 2017 due to general slackness, but have cleaned up a bunch of welds around the tubs. This was about a year ago: Fast forward to this week and I've started doing things again. More weld removal, a few holes welded up, paint removal etc. A bit of filler and the first coat of etch this evening to see how it looks: The underside is still a bit wrinkly, but it's good enough for an inner arch. Now to get the other side. to this level.. I always forget how long it takes to sand filler! It's a pretty painful job . Once both sides are in primer I can give the rest of the bay a good clean up, sand and start thinking about paint.
1 point
-
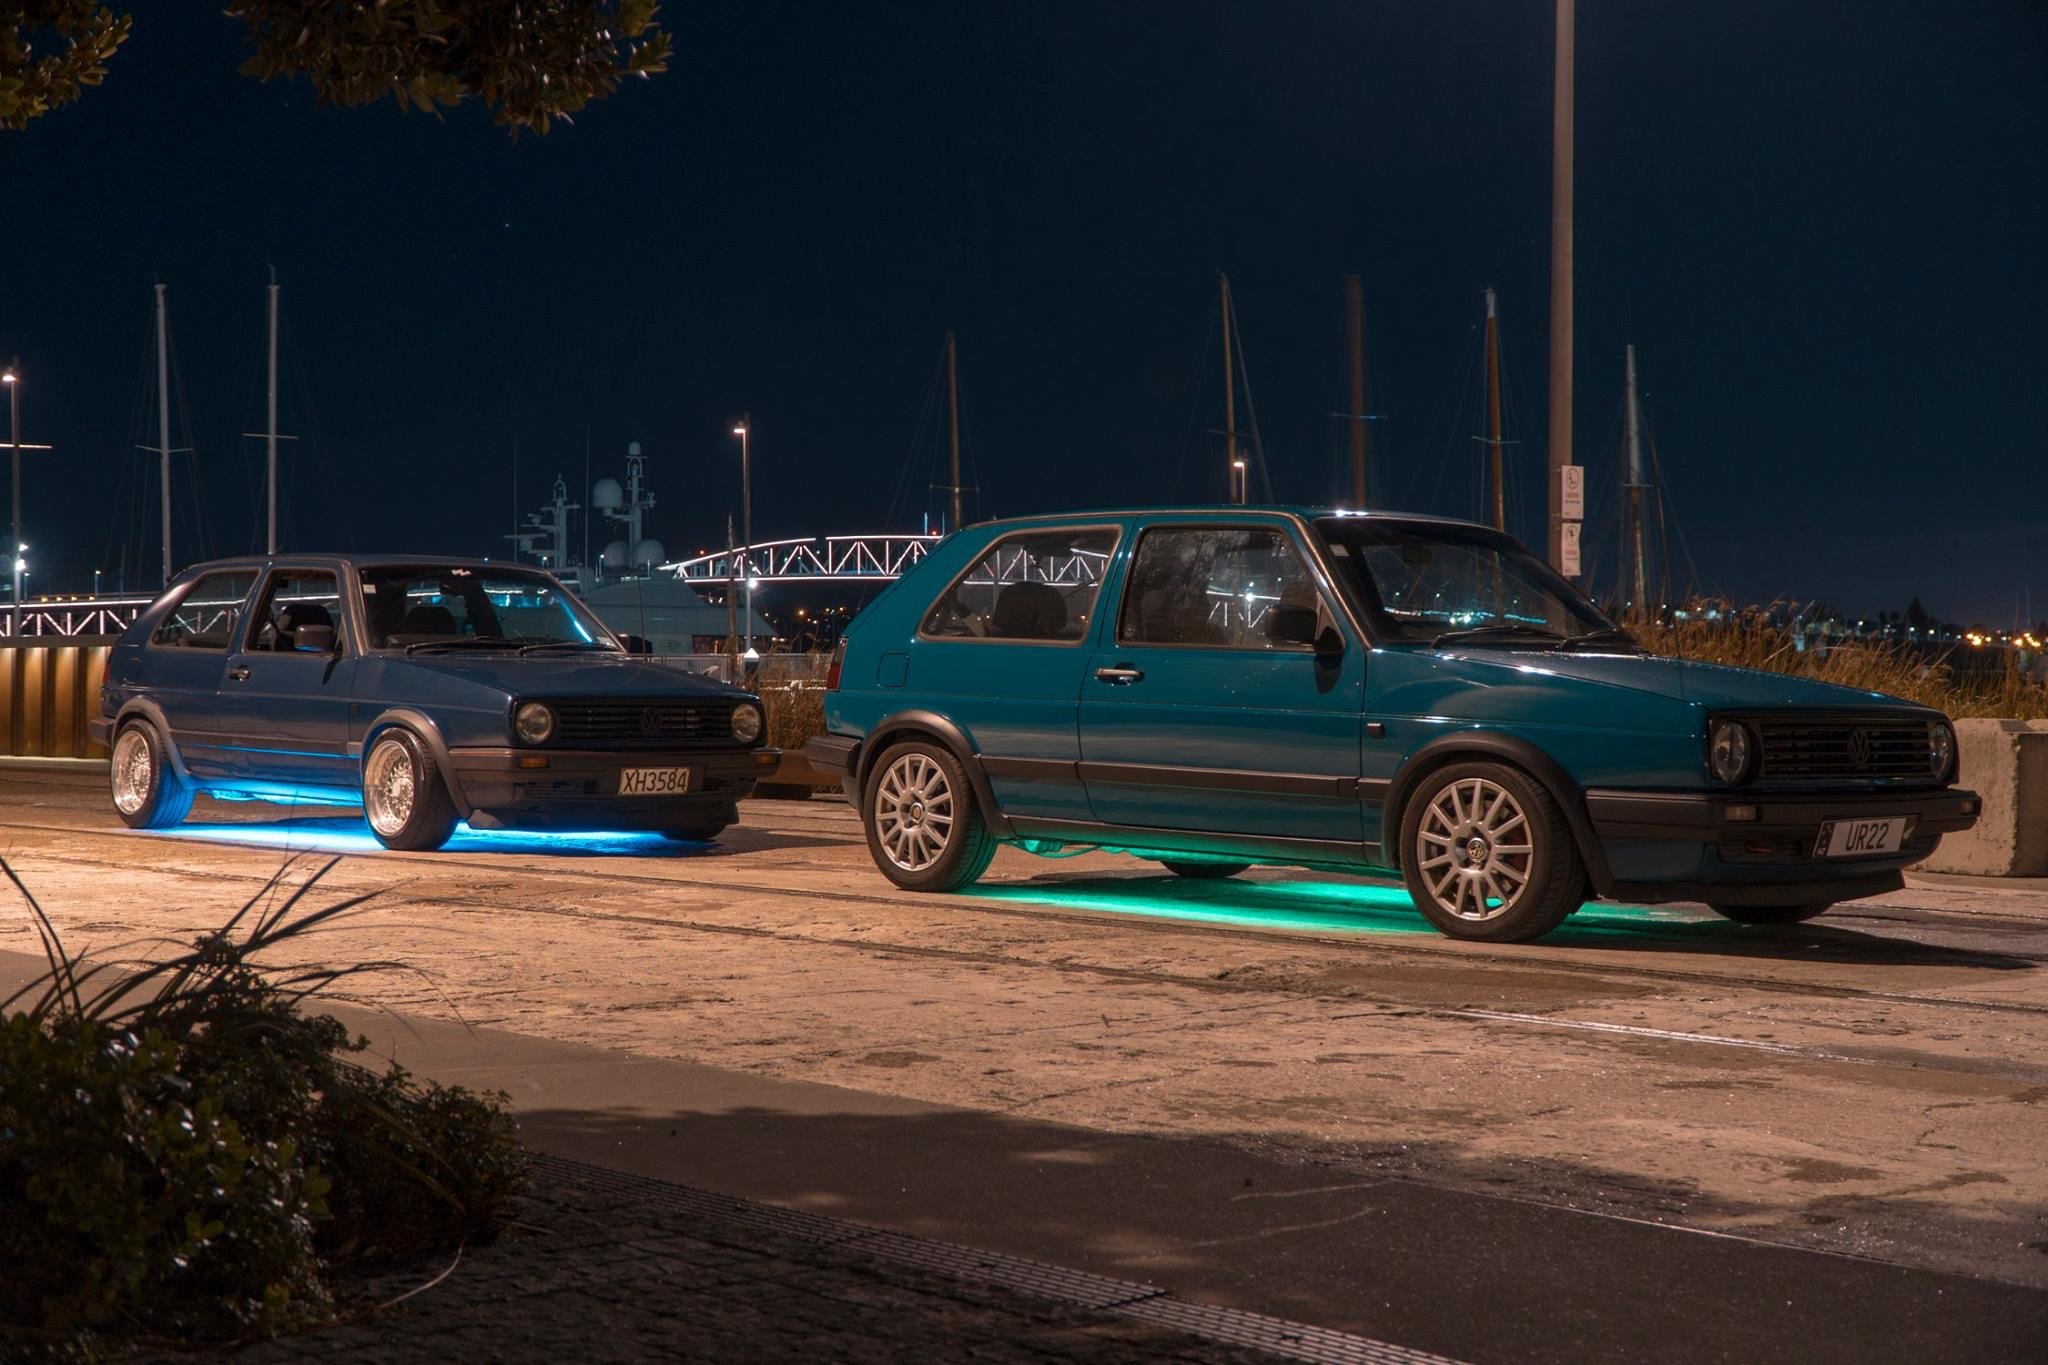
Made a bit of a drive to raglan so we could go for a surf. Made for a brilliant cruise, really couldn’t be happier, would be nice to put a lower 5th gear in it for cruising but I’m not to fussed. Also made sure to take the piss a bit with the neons
1 point
-
Run an SU on it. 1 3/4" seems about right on my 600 it just opens as much as it needs to.
1 point
-
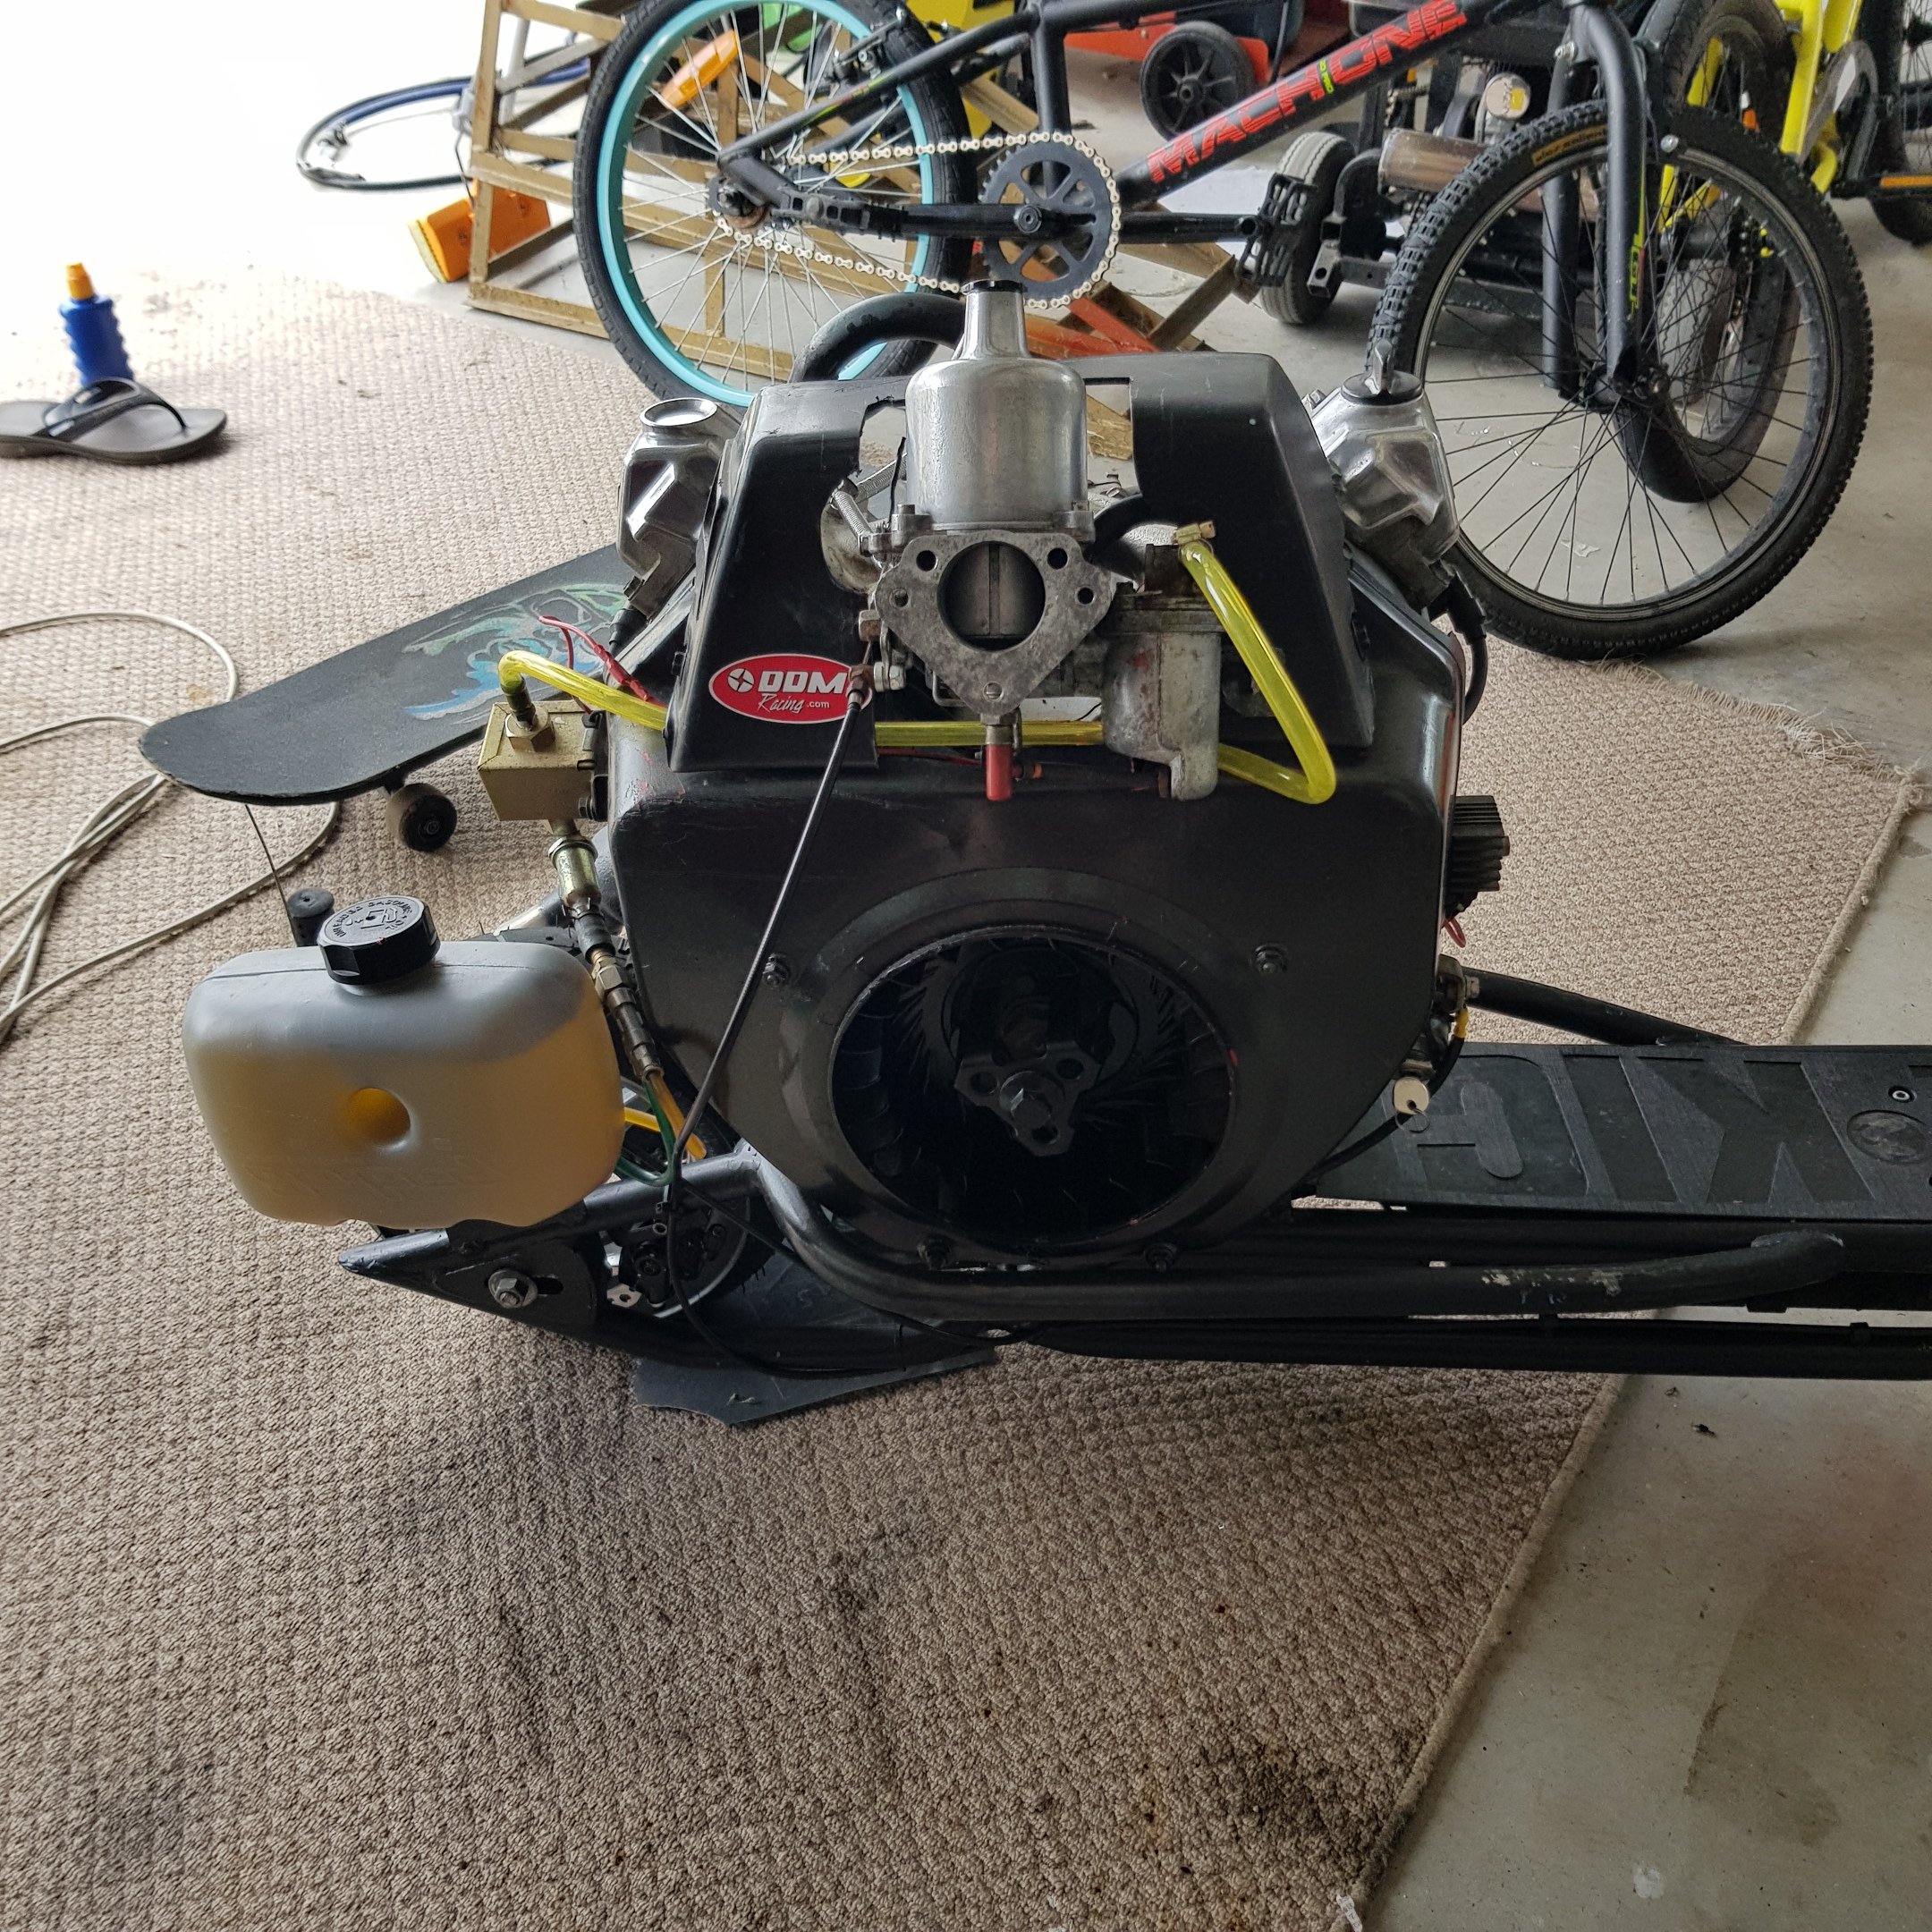
I need to flip this thing on it's lid, so I can finish welding up the frame. I got it running, to heat up the oil pre draining, it was running like a hat full of vagina's, but It's probably only run like 5 times in the last 18 years, so that's understandable. When I drained the oil it seemed to be mostly petrol, so I guess a float is stuck. Whipped the carbs off for a clean, hopefully that will help it run better. Regards, VG.1 point
-
So I fixed the main problem, I now fit in it. I made up little 120mm extensions, with a bit of tube hammed into them, to add a bit of strength. Welded them into the frame, and then added side and bottom cross braces. I just have to sort out the top pipes now. A few of the problems this thing had, that Dave sorted out, were the steering rack that kept snapping rack ends due to bung geometry. It had a rack out of some grotty old english car originally, so Dave shortened a KP60 starlet rack to suit, He also made new knuckles to fix the bung geometry. The next big problem was it was way over geared. Apparently they hardly ever got out of second. So we got a big ass sprocket for the back, which should cause it to top out at 140ish kmh. It also used to have a motorcycle brake disc and calliper, which didn't work so well, so Dave made a hub to take a car disc, and calliper to suit. Apparently it also never quite ran right, which they put down to it not having an air box. They made up a plenum, with little trumpets inside. Another thing Dave made, was a double layer heat shed with an air gap, to stop the exhaust melting the seat. I'll probably make a top shield to protect the driver from the fuel tank, thats located behind your head. I'll start putting the front end together next, so I can finish off the steering gubbins. Regards, VG.1 point
-
Back to the dyno today after sorting the fuel system. Made 355whp @26psi. It's safe to say an 11sec pass is coming up1 point
-
1 point
-
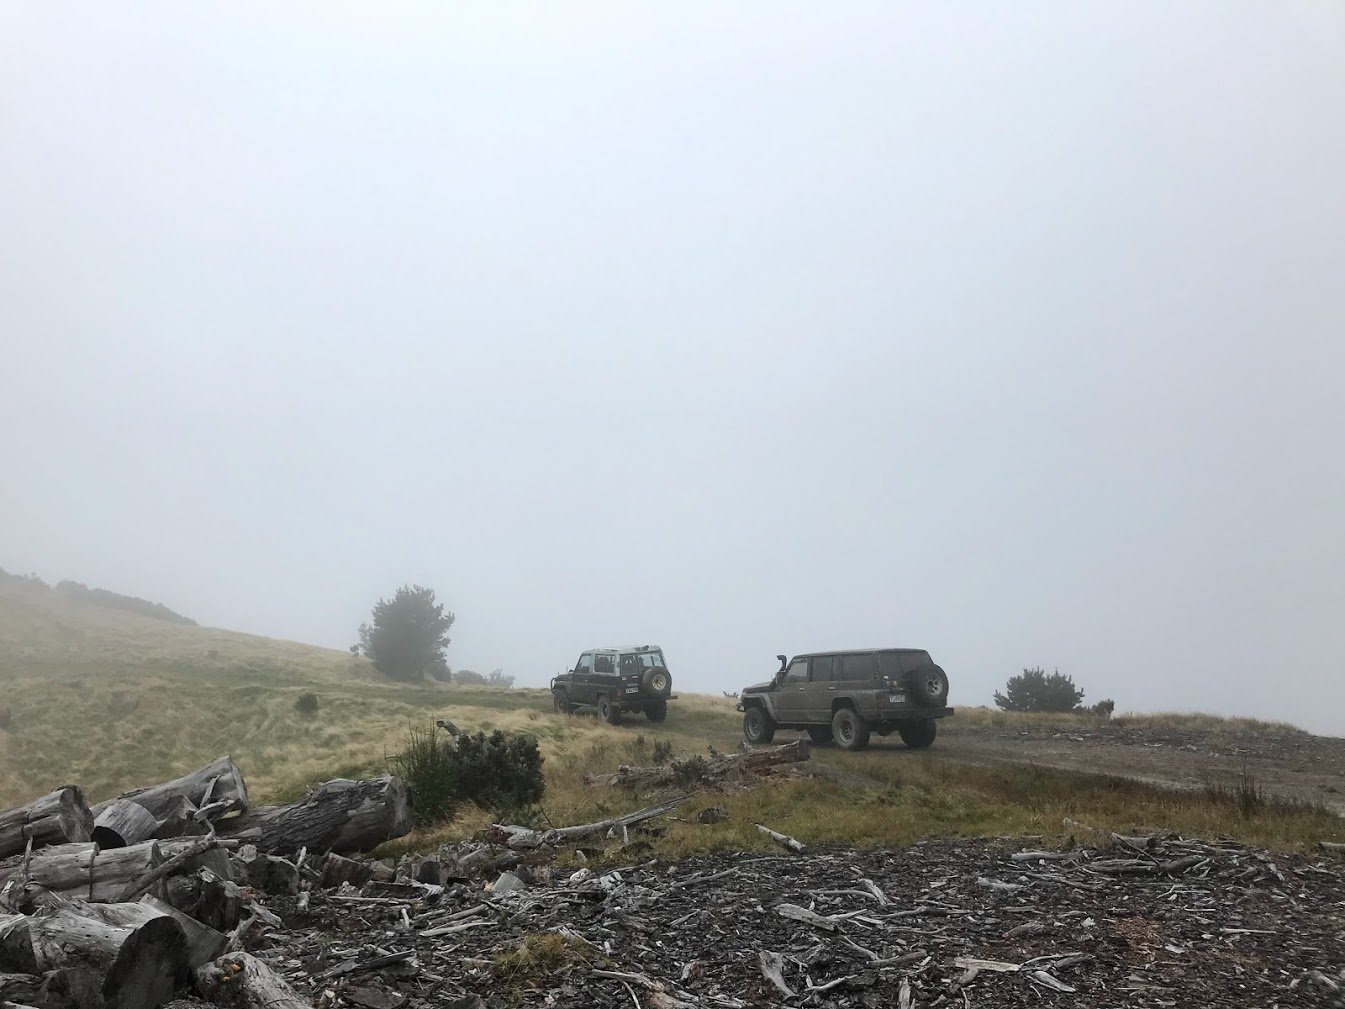
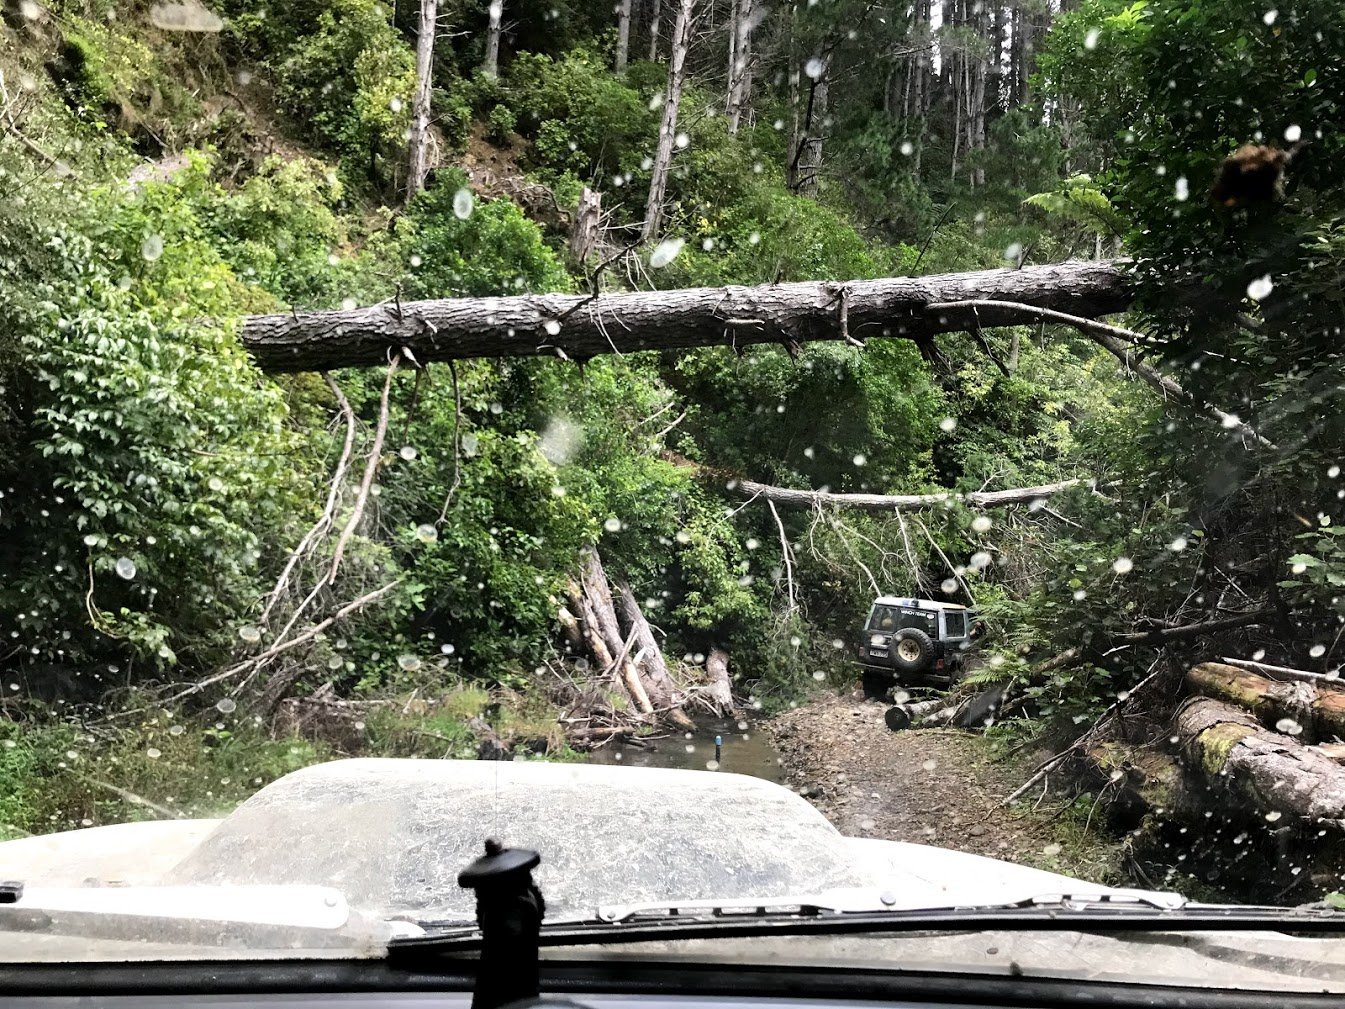
Took my 4.5 year old boy out in this around the Akatarawa tracks to test out if he liked it and he was laughing his head off like a roller coaster. That's my boy. Hmmm video's not working. Here's some photo's instead:
1 point
-
So first driving impressions were ‘who the hell thought it would be a good idea to put this much power to the front wheels’ but I’m very happy with not going any bigger of a turbo as it seems to have the power right where I want. It has great low end torque and a decent top end aswell. Anyhow, the car was running so good and even though I never really intended to build the car for it the last night speed drag was were coming up. There were import things to do like change the engine oil and get some semi slicks mounted up. But I did also have a bunch of left over exhaust pipe and a spare v band so it would be silly not to make a side pipe first? don’t worry I finished welding it and then gave it a bit of exhaust wrap and paint. installing it at the drags cause I didn’t need any attention from the police. had a tonne of fun, only managed 4 runs and blew a tire on the last run. First time ever drag racing so times were nothing special (14.6 was my best and I missed a gear) but I’m already looking forward to next season night speed wars.
1 point
-
Car was closer to driveable, clutch feels great apart from it doesn’t go all the way to the floor but the tune was a bit of an issue the car would surge a bit from 3 - 4K rpm. Got a friend to log it as I drove around the block, did a little pull and lost power he said I was making 18psi then nothing almost like the map sensor had blown. Got back to the driveway thinking the worst, turns out I’m just a muppets and couldn’t do a hose clamp up tight enough. With this done we were able to send some of the logs off to some people overseas who did some wizardry and came back with the first solid tune that I am running and the car drives awesome! After this I did some of the usual spanner checks as well as changing the gearbox oil and checking fluids.
1 point
-
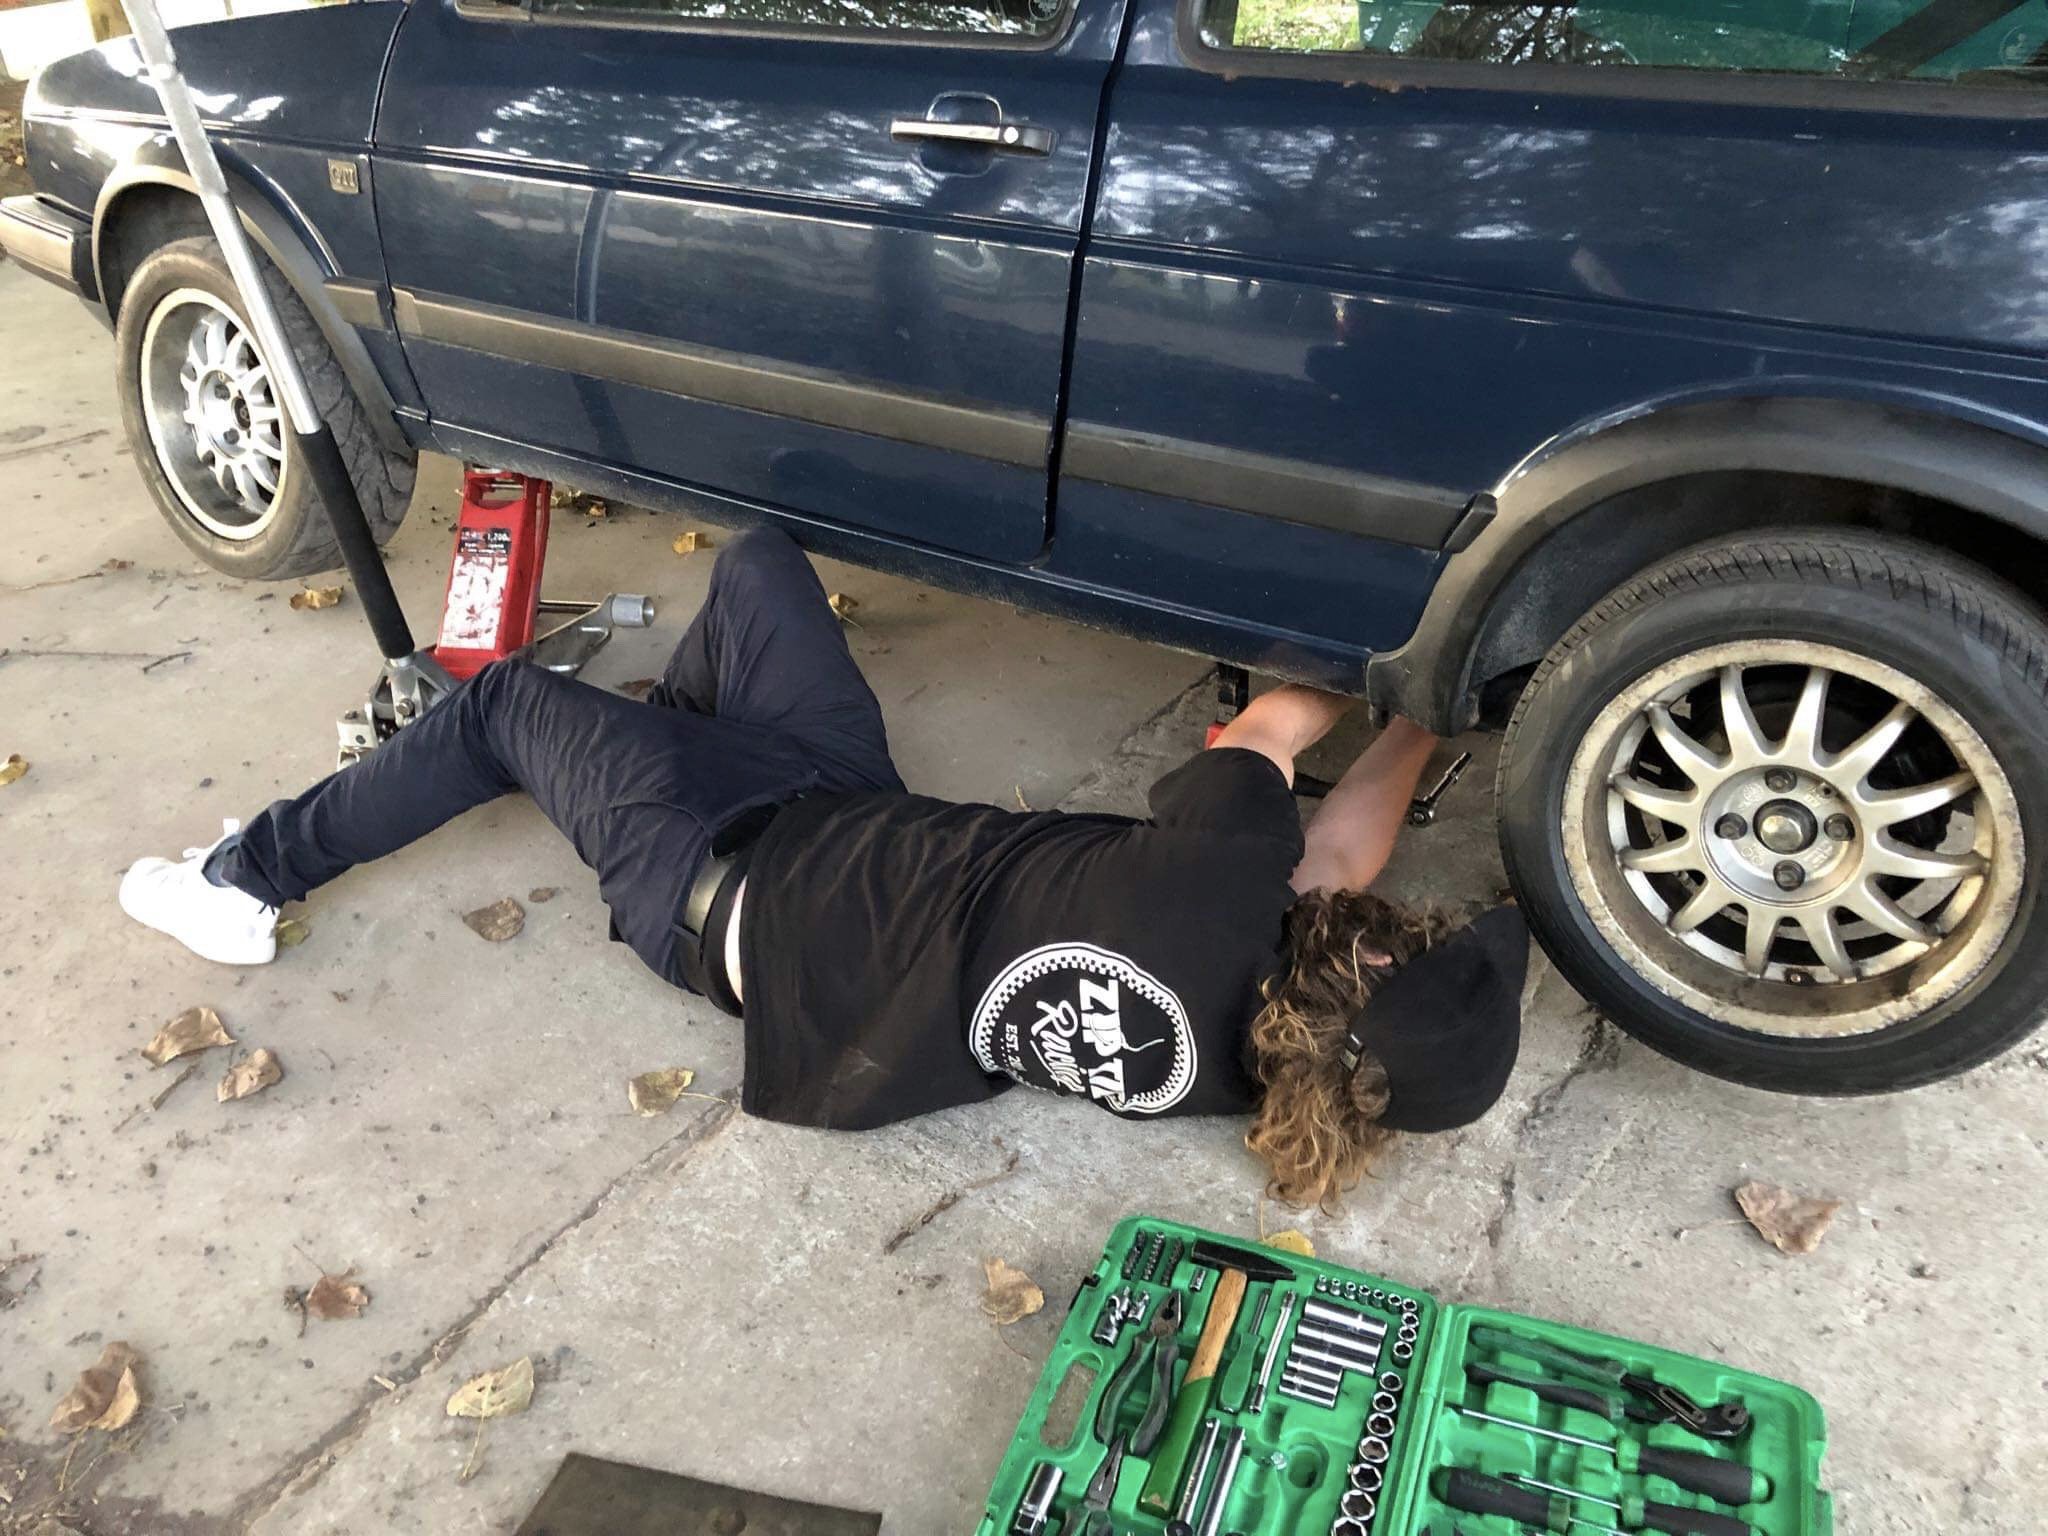
So the car was running but the clutch felt horrible trying to get it in and out of the driveway, combine with a bunch of mods that hadn’t really been accounted for in any sort of tune the car was not drive able. I was pretty frustrated to say the least so I bit the bullet and ordered a kit online that is designed to mount a van style clutch Mc under the dash. I never really took any photos of it installed but it ran for a little (a couple laps of the block) then when I tried to bleed it some more the mc blew a seal, I ordered a new one but either it was different or possibly a different brand I have managed to make it work but it was binding up near the far end of the pedal travel so I put a stop in. As currently this is working but I’m tempted to fiddle with this again at a later date. Anyhow I needed to stop annoying the neighbors and I bought all the stuff to make an exhaust so long ago so I set to work.
1 point
-
This is a little in the past but I should show some of the wiring as this was more than likely the most time consuming part of the project because 18 year old me just and spliced into anything i needed during the first swap. So armed with alot more knowledge and the biggest set of crimpers one could ever need we set to work rewire a fair amount of the car. The battery was relocated in the boot and we used 4m of welding wiring to link for the front to the rear. Running a jaycar breaker from the starter where the main power is run too, then to inside the car to run the ecu and fusebox power. I do like having the ability to switch the power off and on to the ECU/car as the vw ECU seems to always be awake. Will possibly 3D print some plastic pieces to cover the positive powers so nothing can short out to easily.
1 point
-
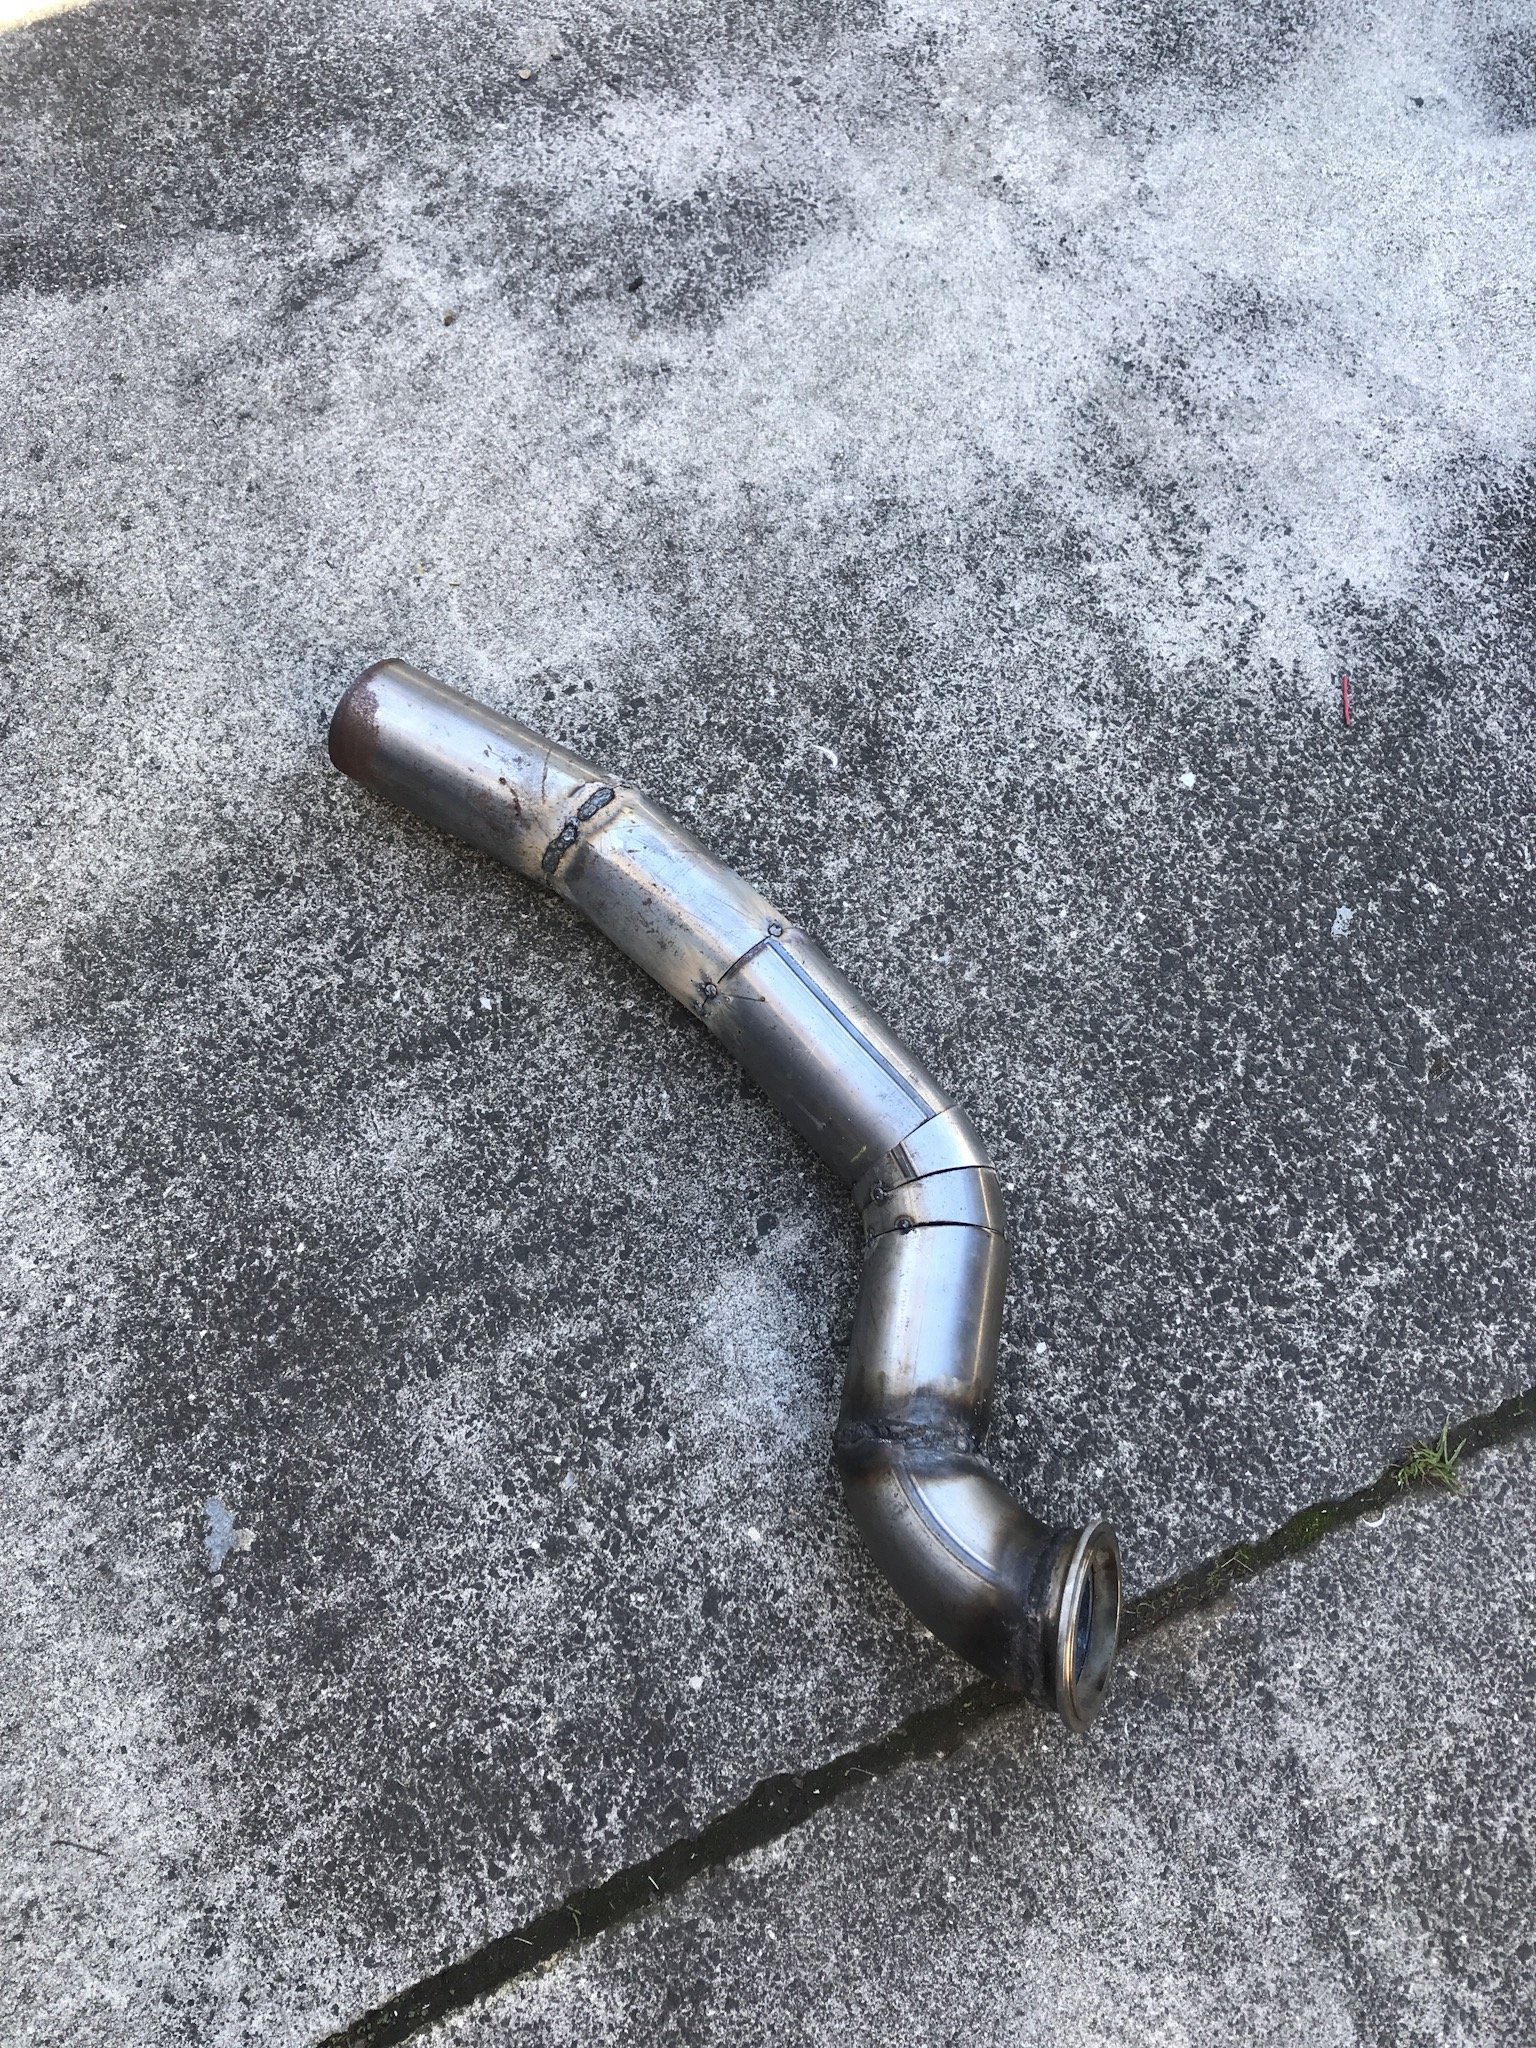
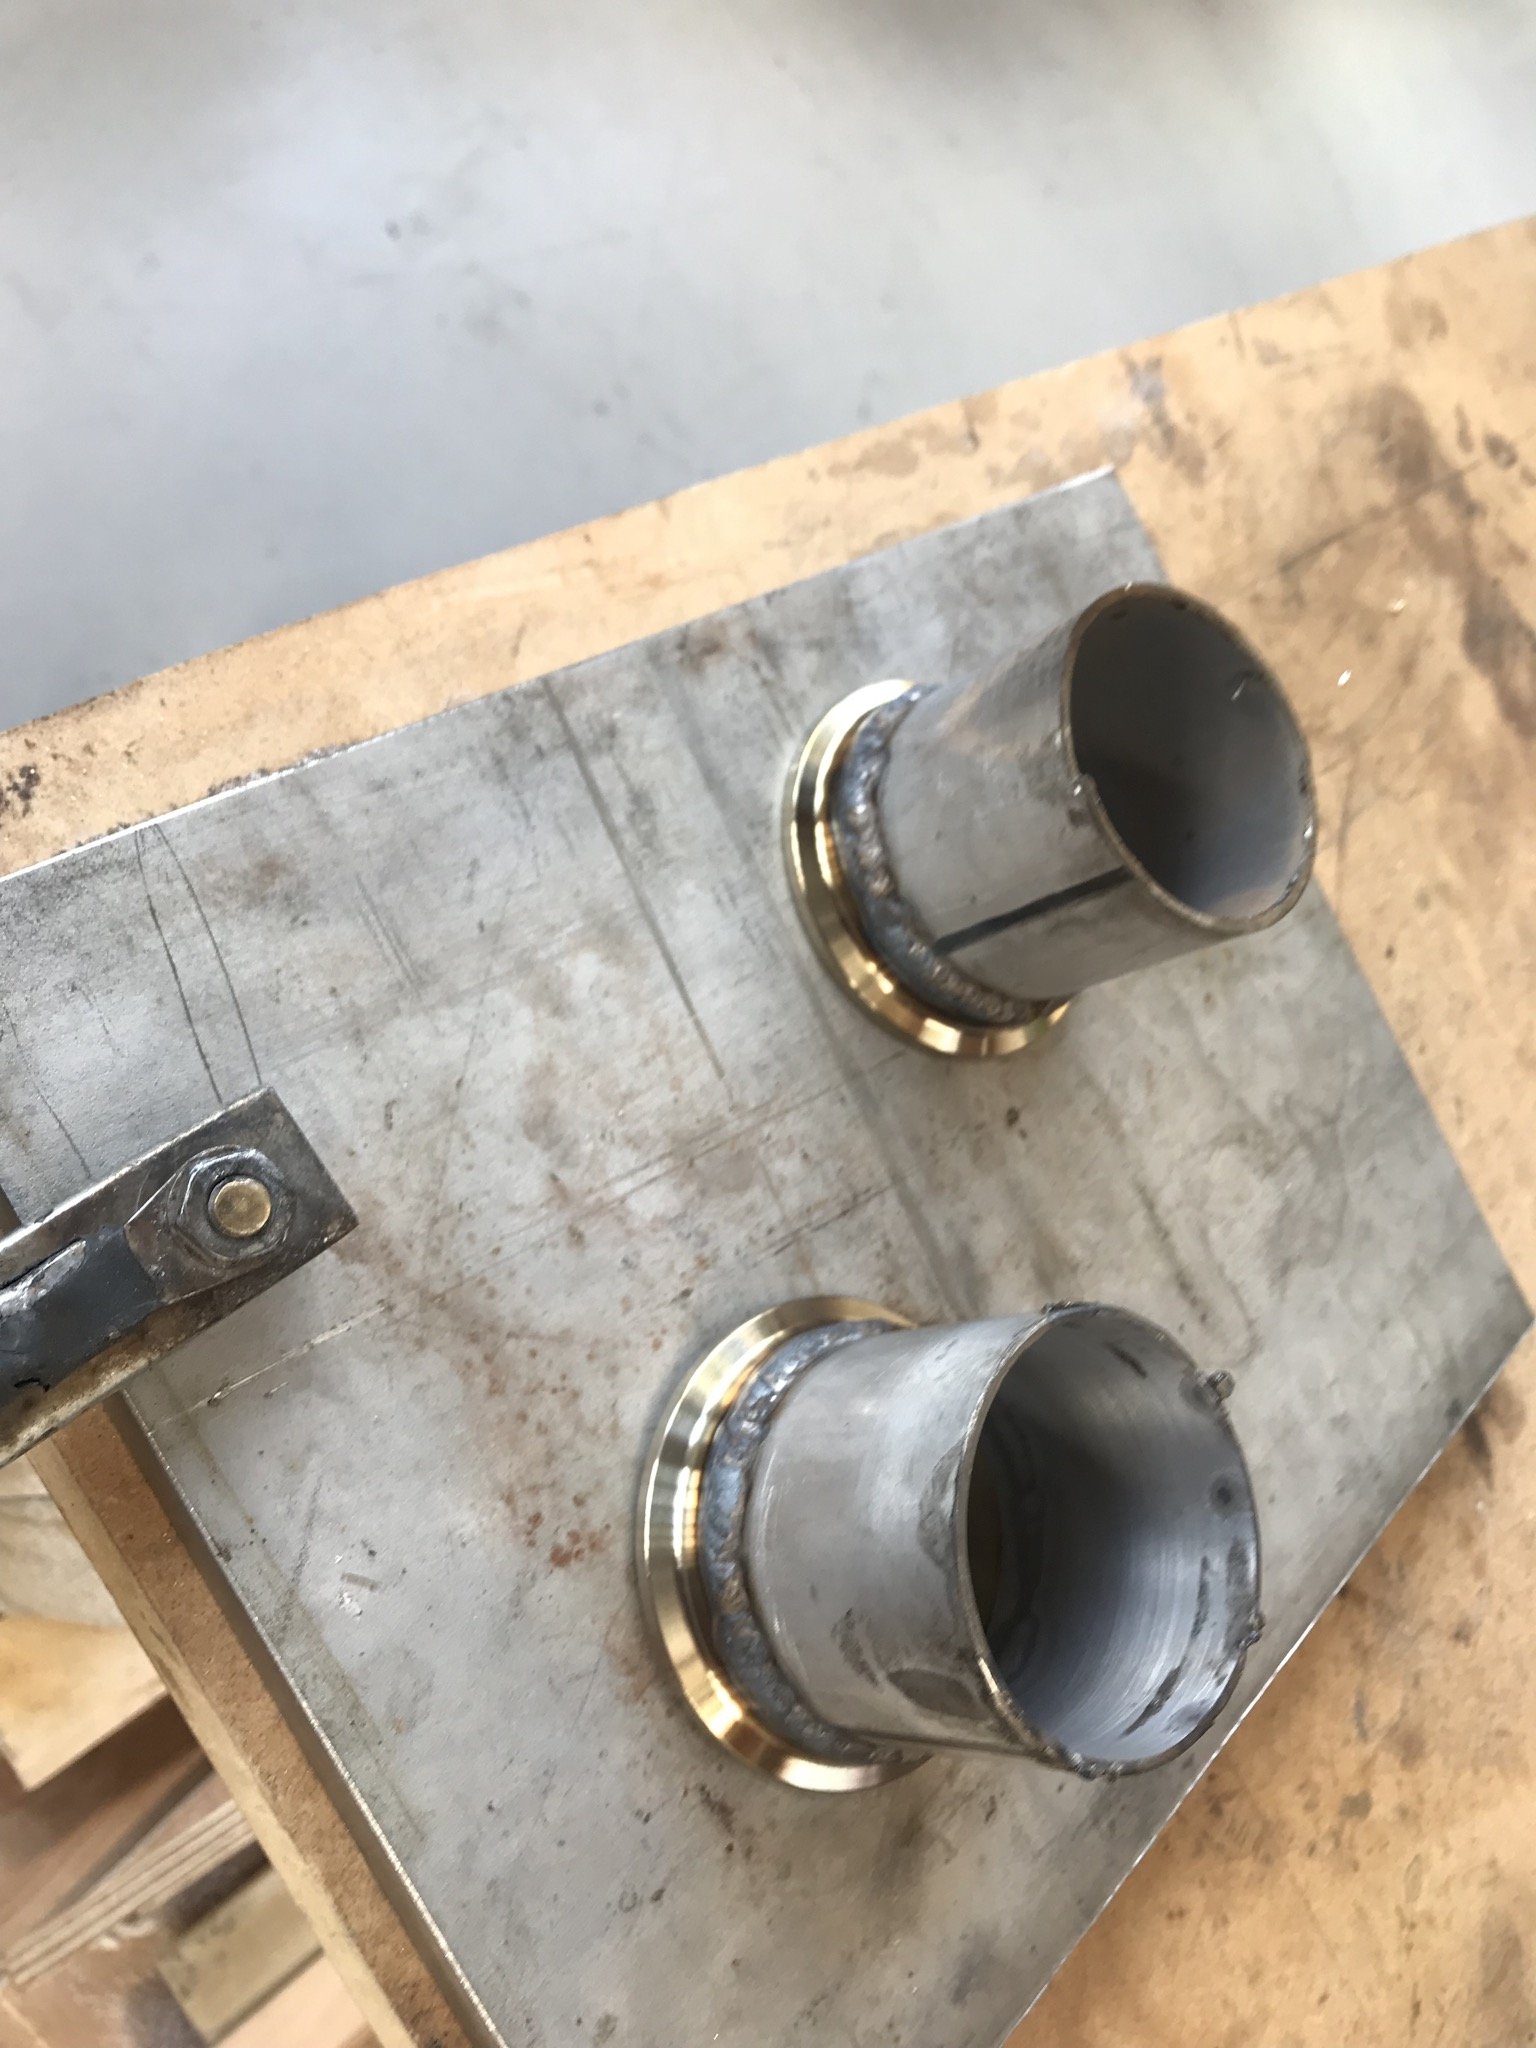
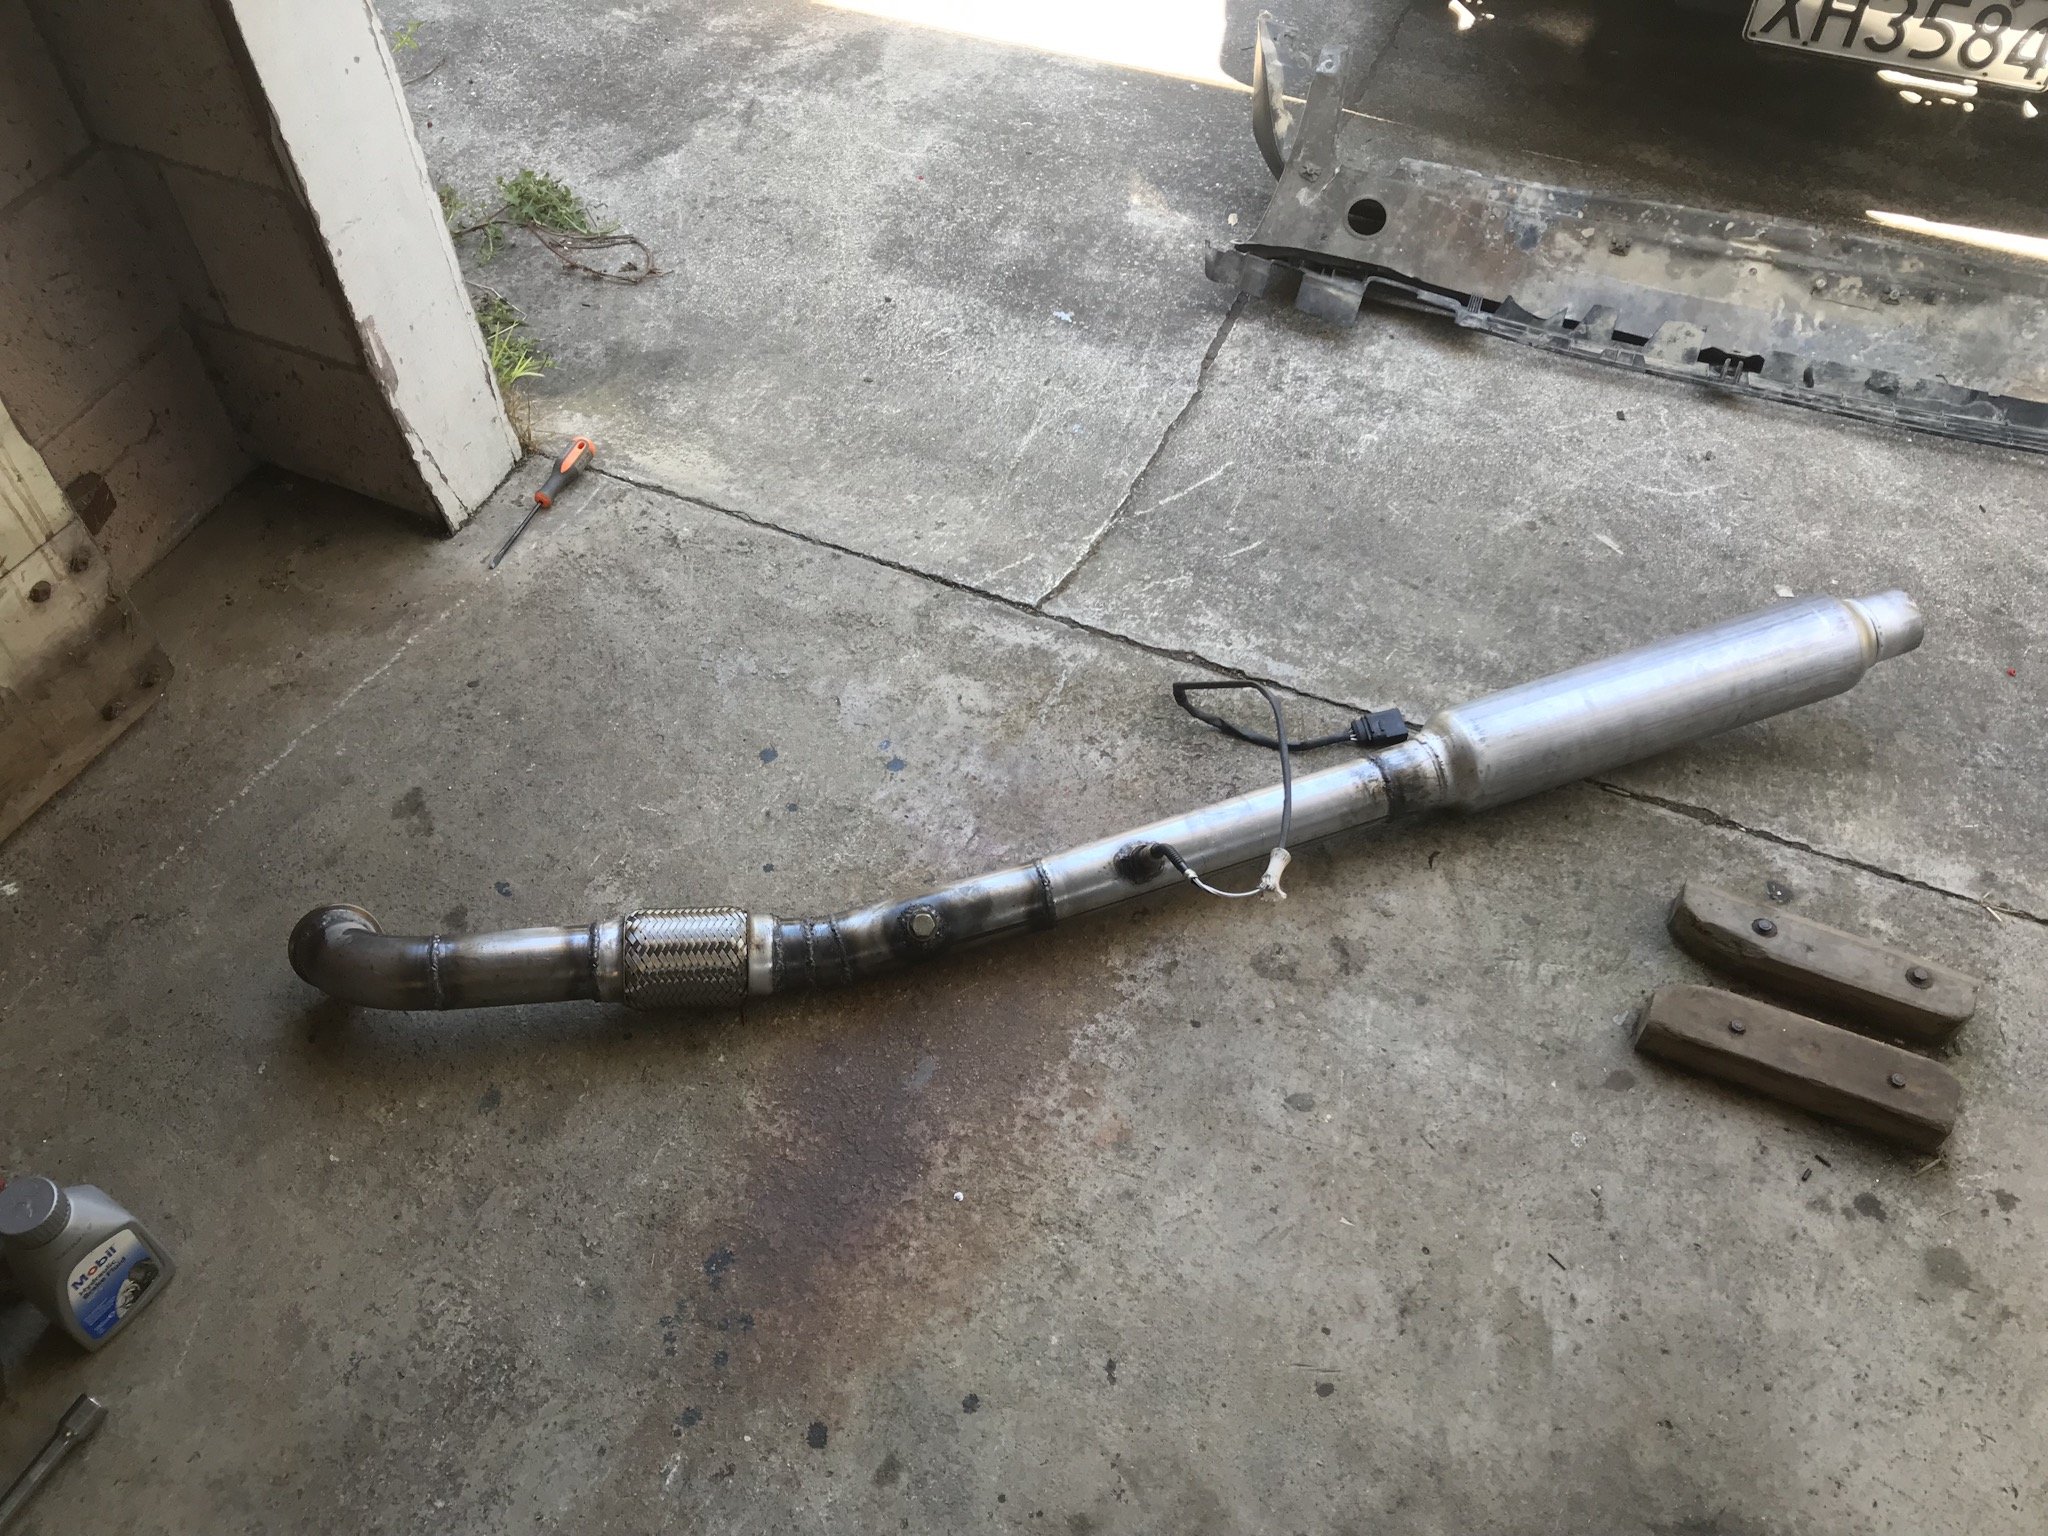
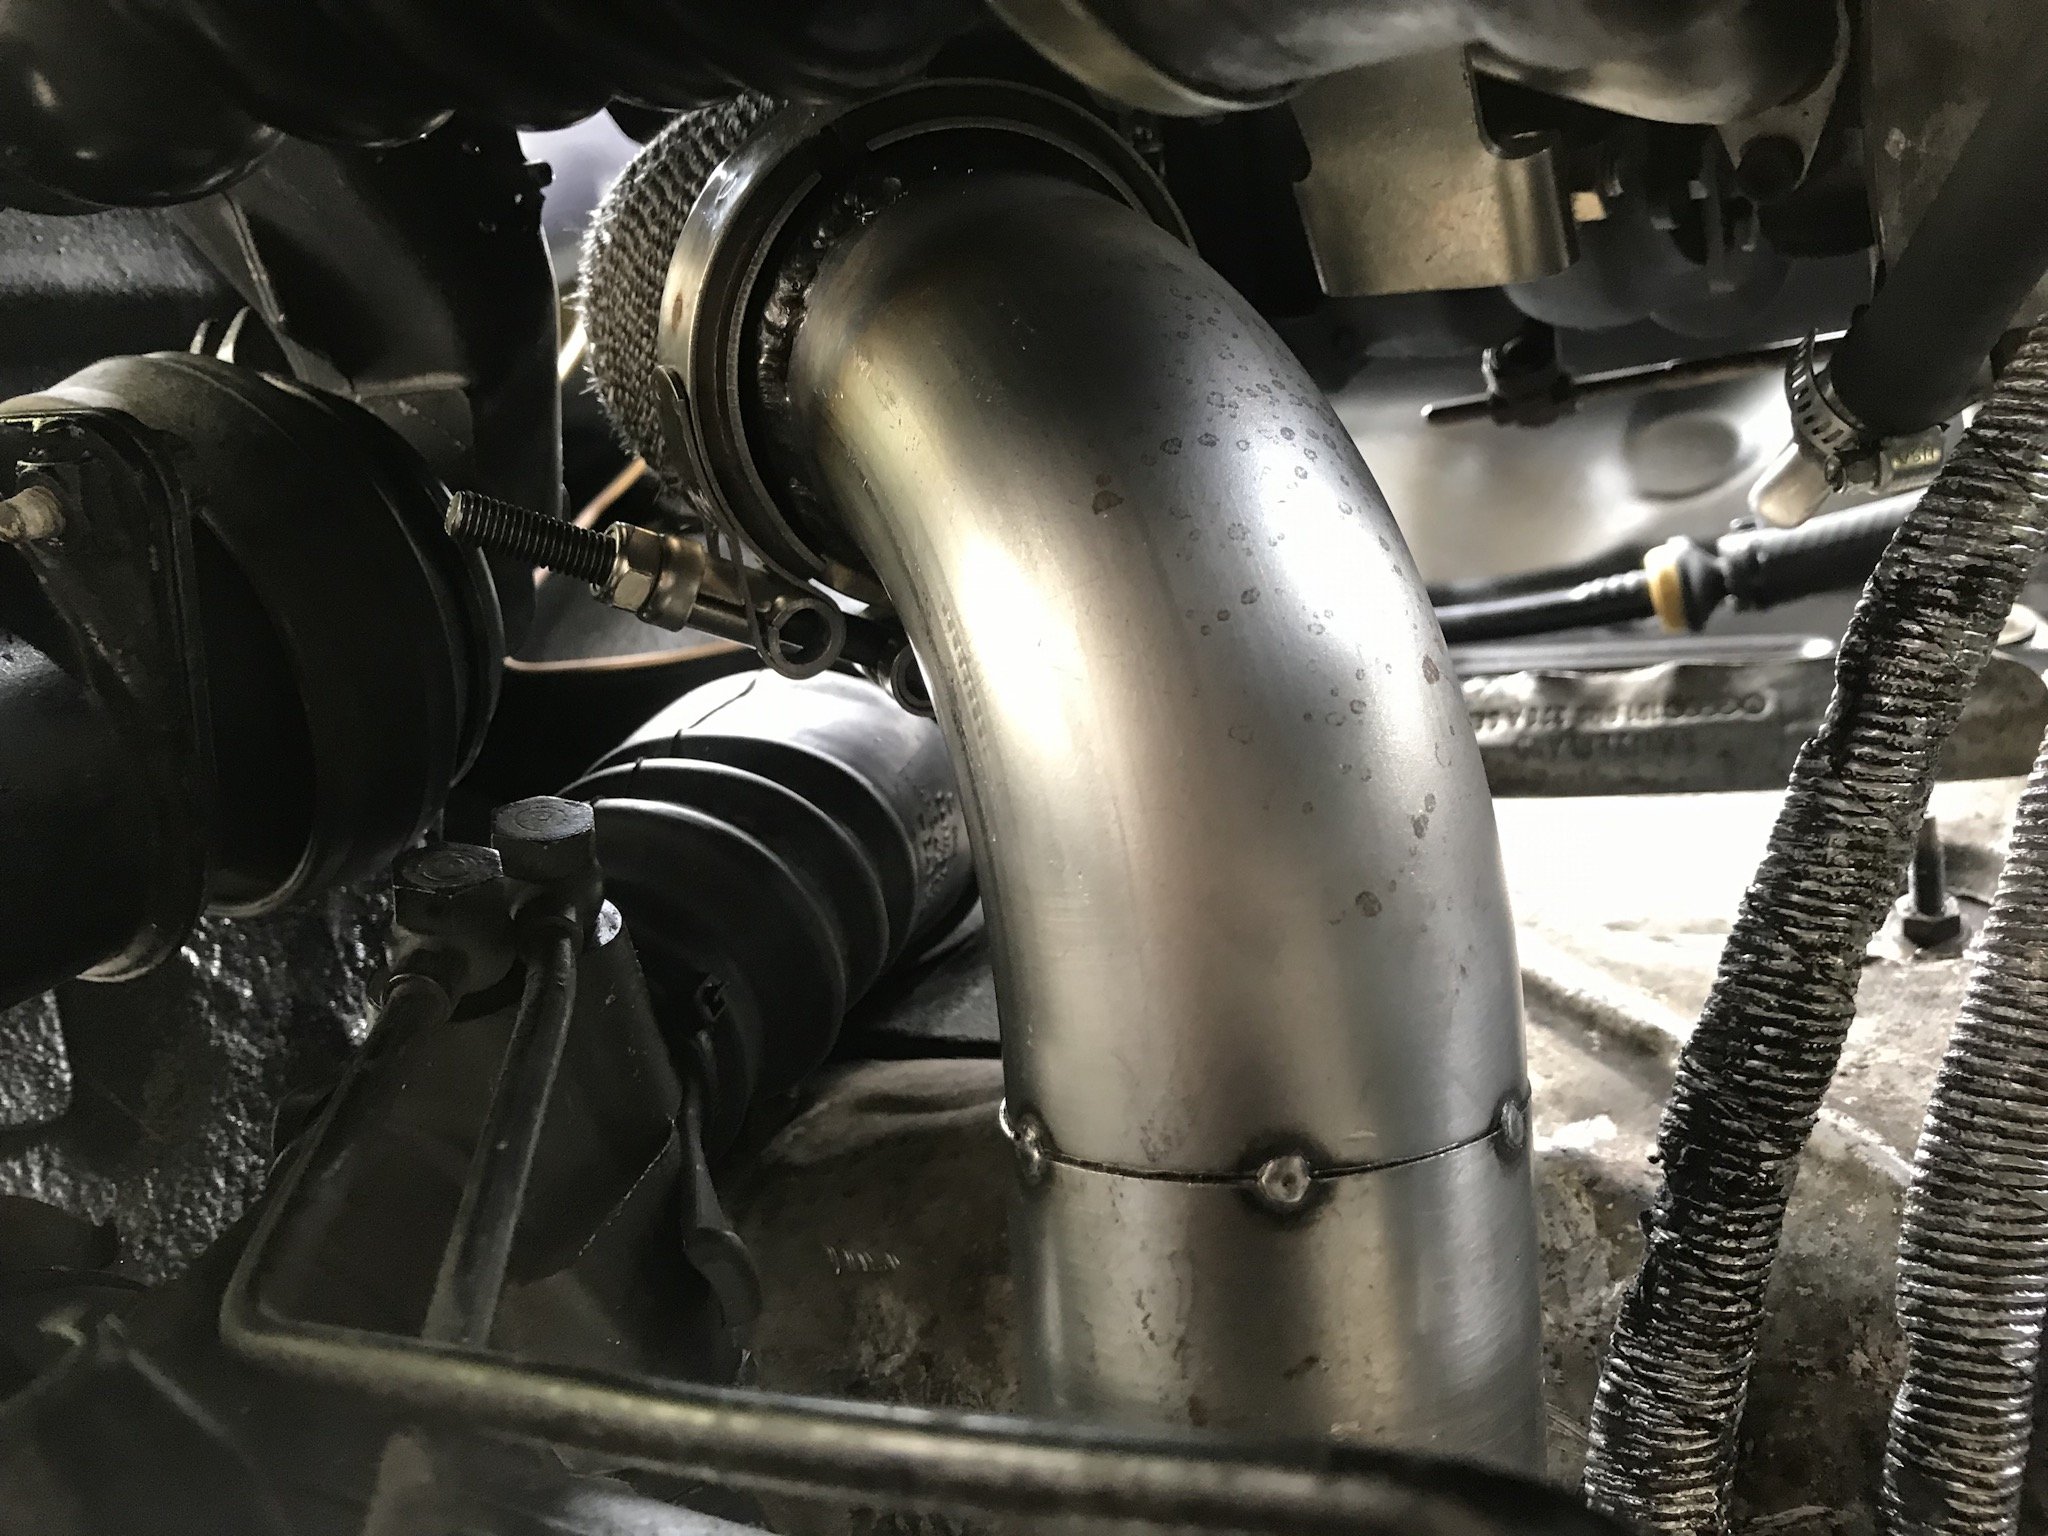
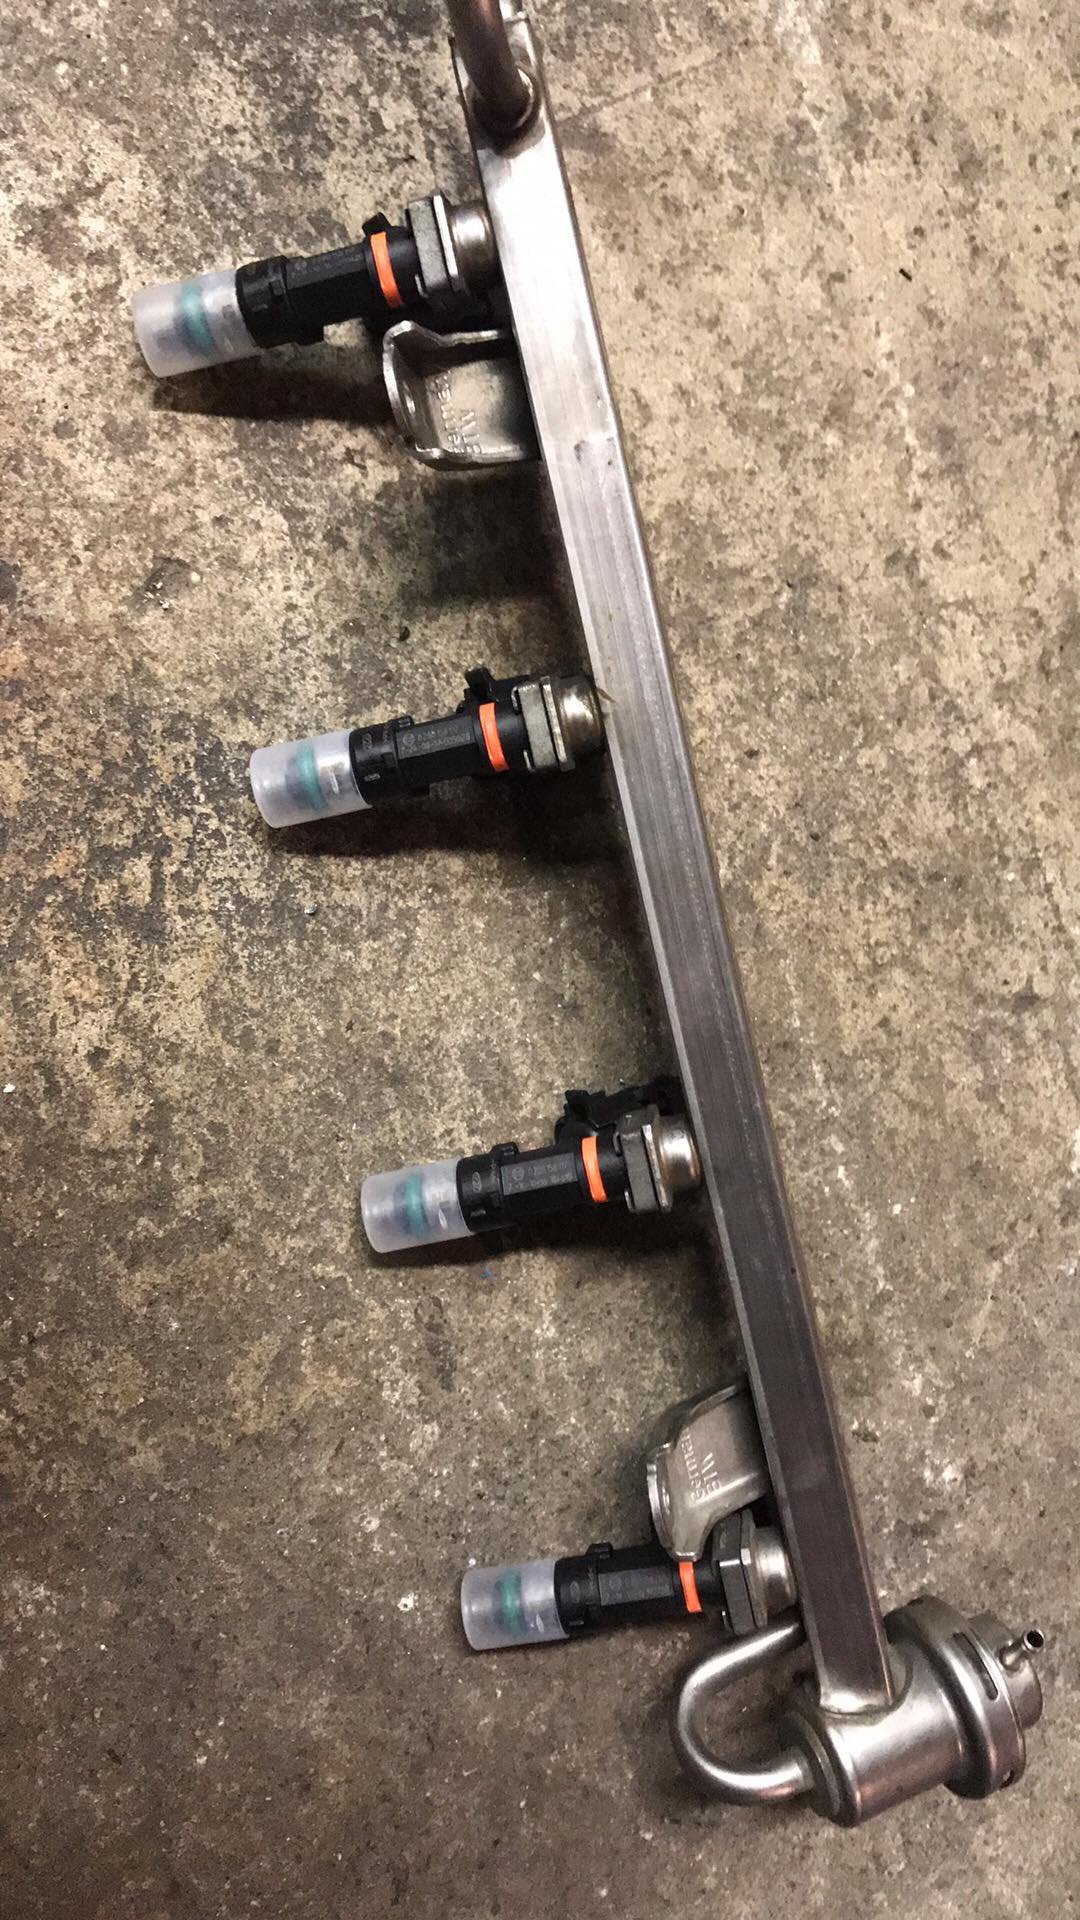
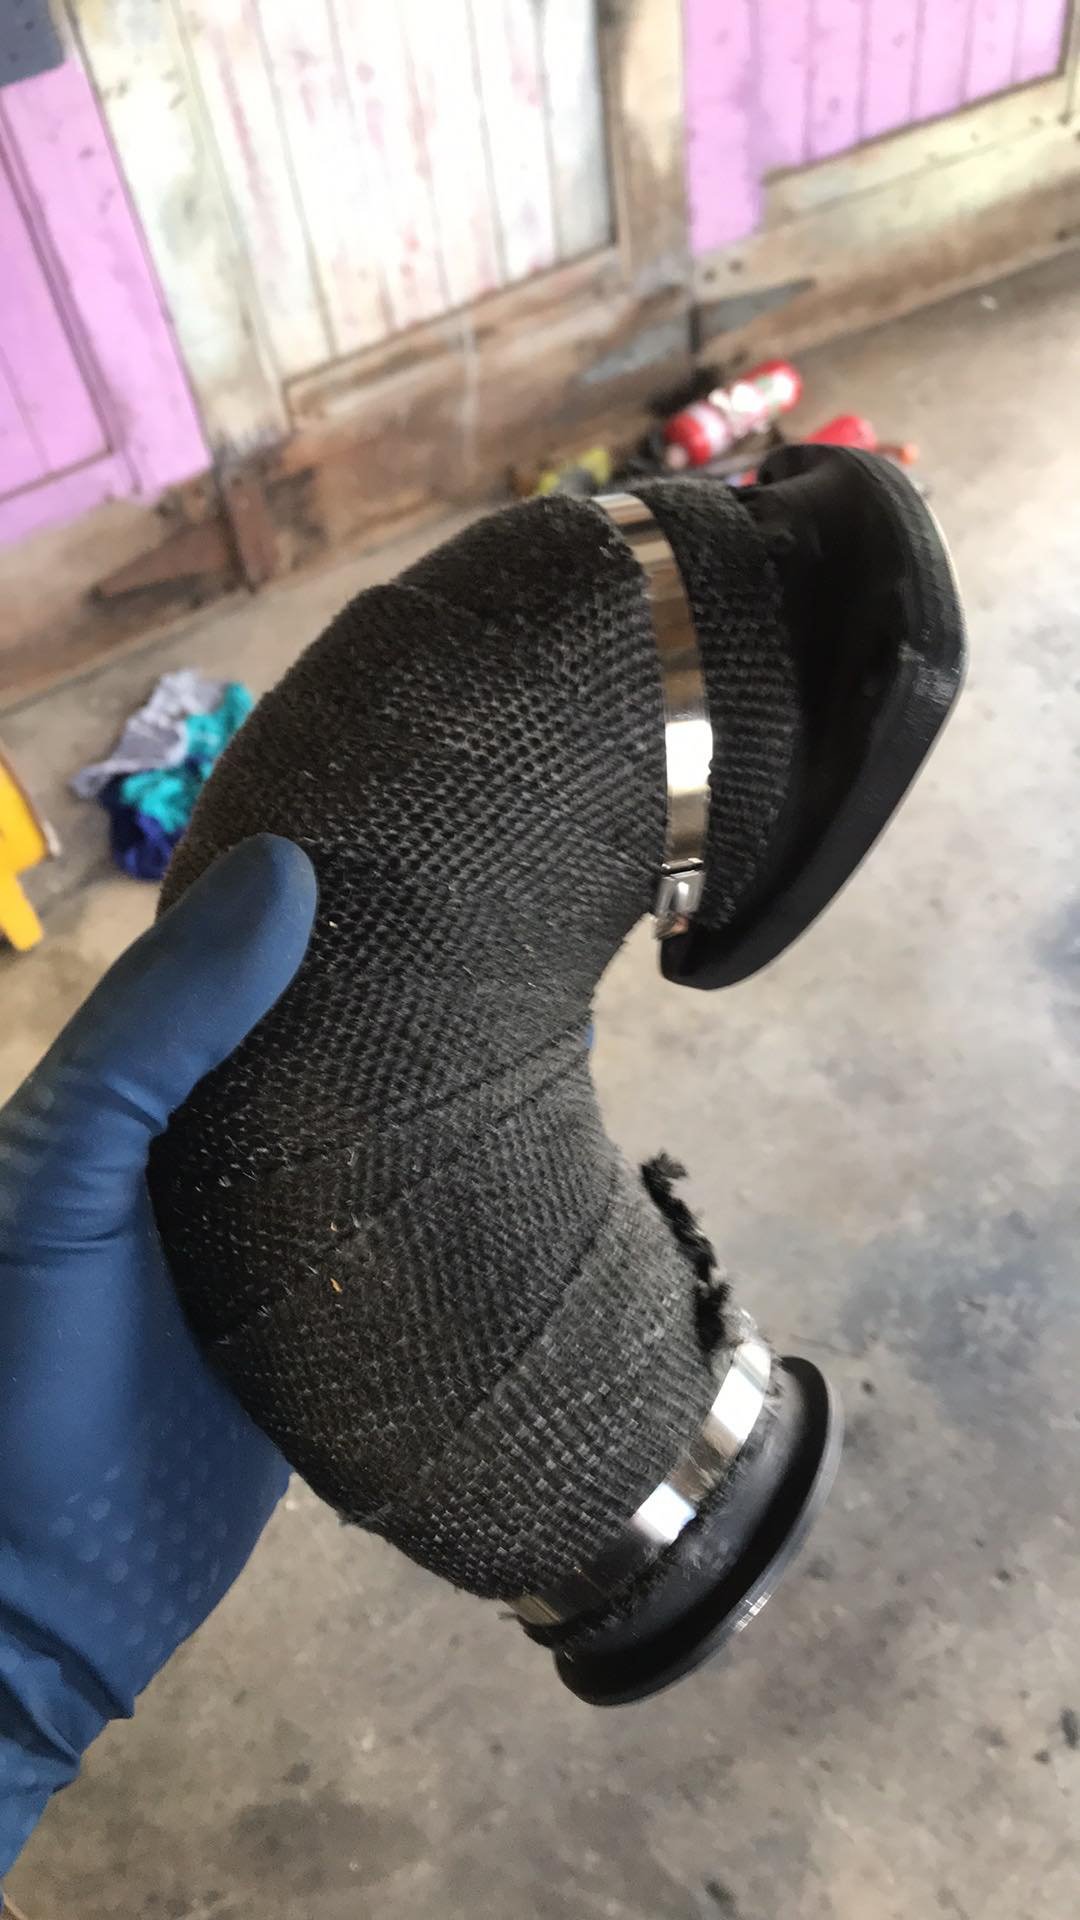
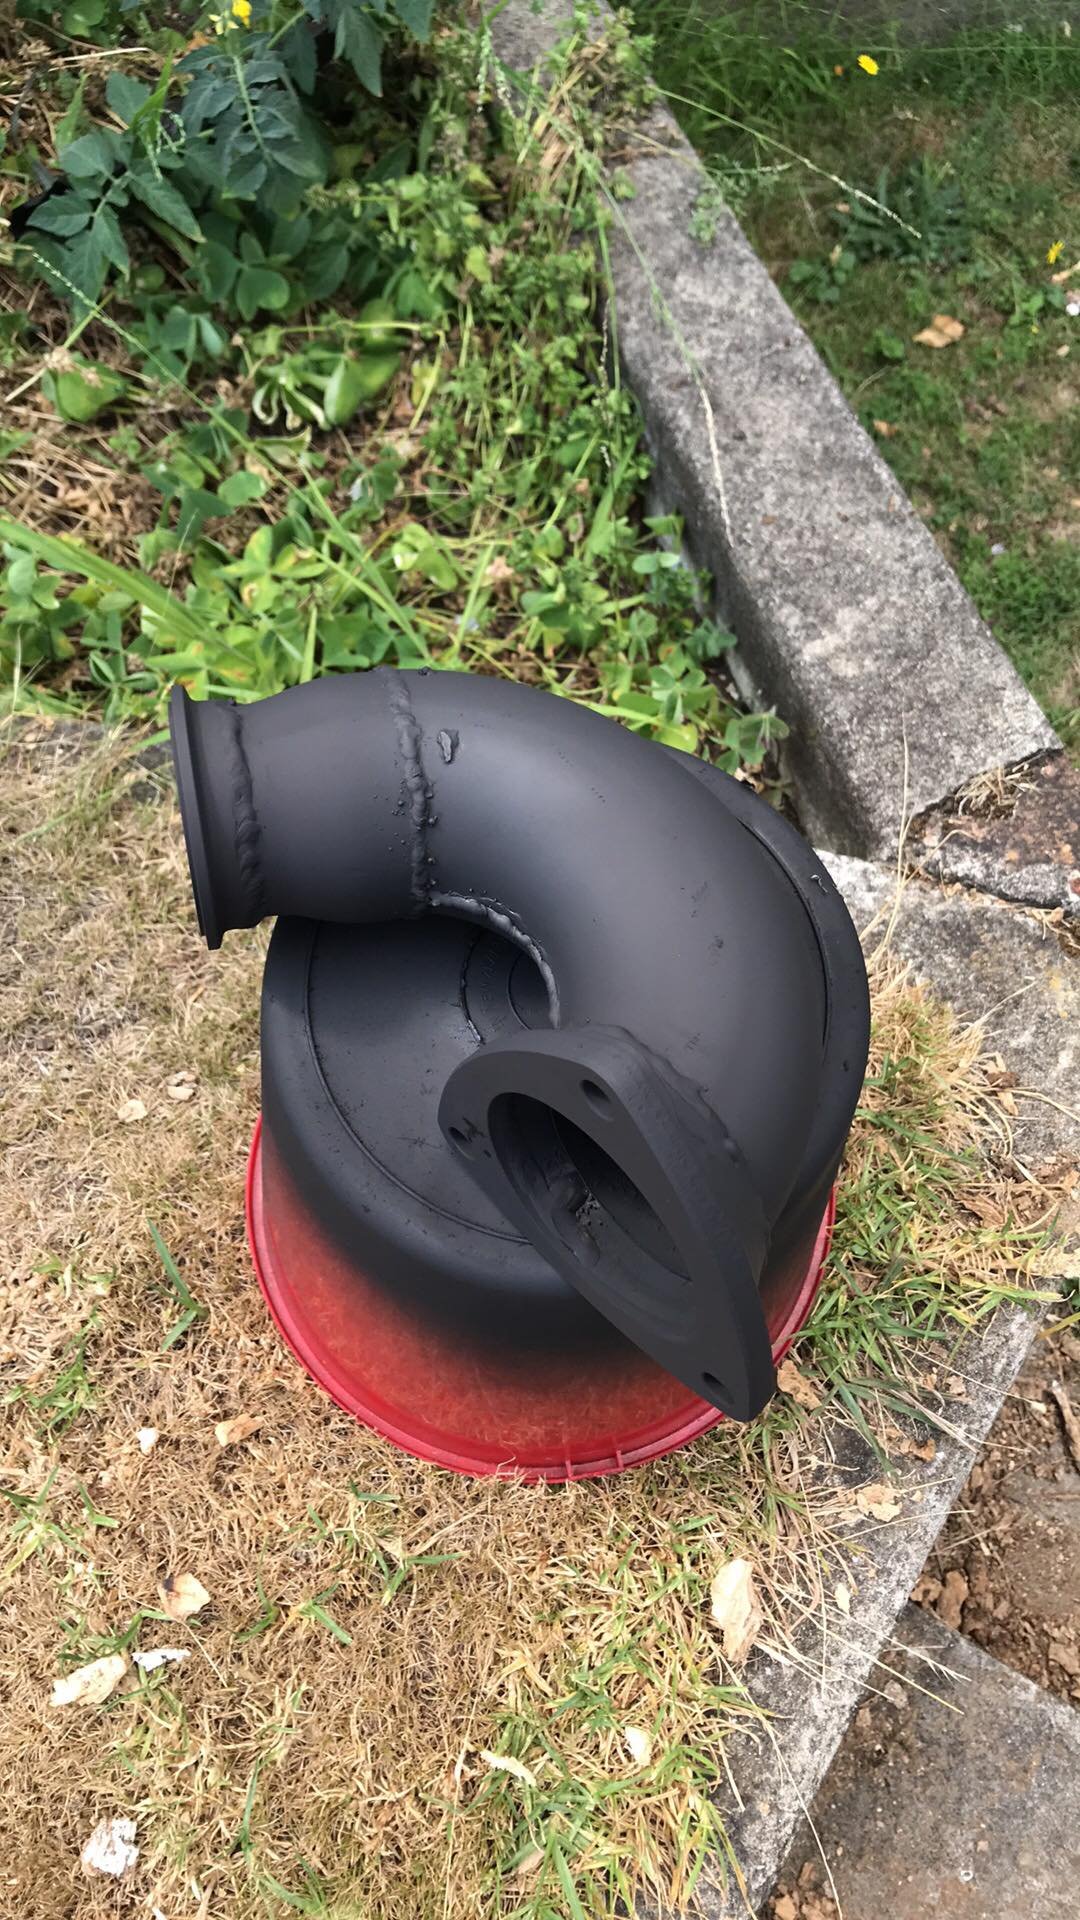
Some 550cc injectors and a 4 bar FPR to keep up the fuel. Have also fitted a mk3 fuel tank and pump which should be sufficient for the power being made. With the engine in place I was able to get an idea of the down pipe situation. The previous turbo would have run the exhaust gas straight out and down towards the tunnel. The new one runs it straight towards the drivers side shock tower. So i really needed a sharp 180 bend to turn away from the shock tower and engine mount. Excuse my crappy Tig welding, pretty new to it all so just having a go. There is also a reducer from 3 inch to 2.5 and then a Vband for easy repairs/engine removal. All painted wrapped and good to go!
1 point
-
Gave it some love with a bit of paint Anton filling in the last of the little holes with a little bog All done with final coat, very happy with the industrial look1 point
-
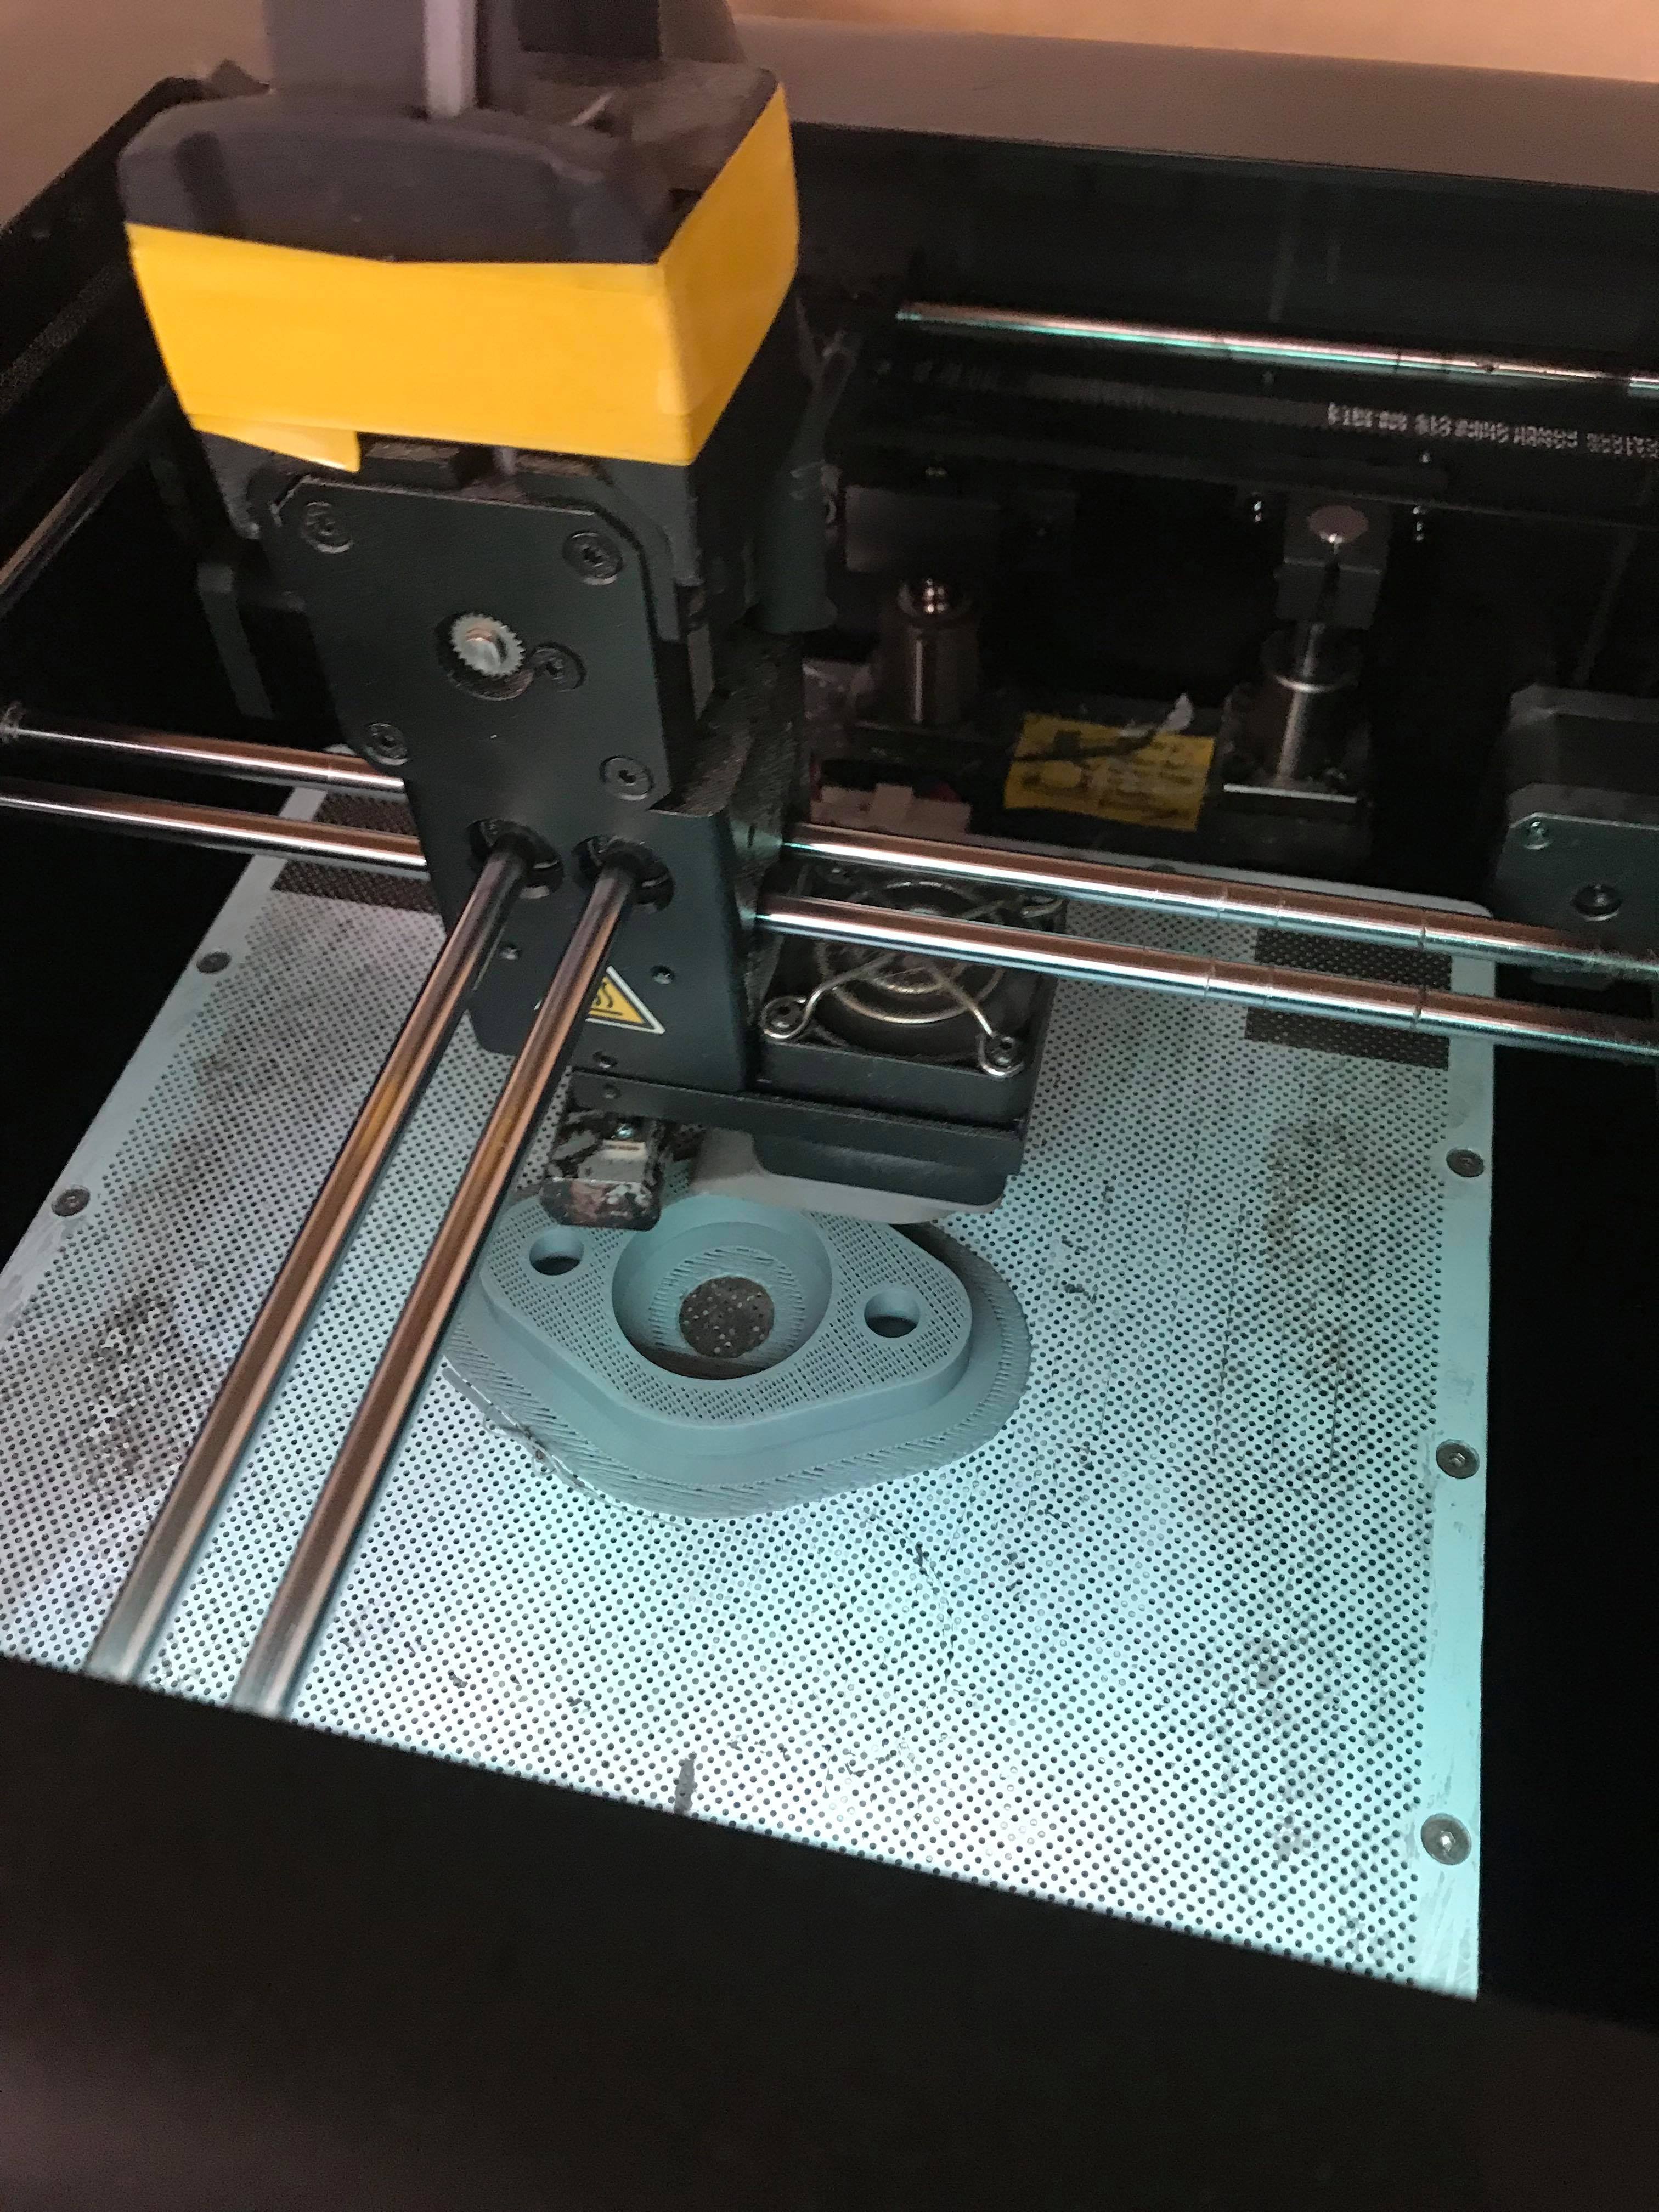
Started retro fitting a Pajero clutch MC to my firewall so we can convert the car to hydro clutch as the new gearbox requires in. 3D printed a spacer to make the distance between the clutch pedal and MC correct Also began filling any unused holes, and bits and pieces that weren't needed. Got to learn to mig weld during this which is something ive not really done before.
1 point
-
Here was one of the bad things 18 year old me must have done, possibly not bolt the gearbox on correctly... (i drove it for close to a year) so could have come loose but either way I was asking my friend if he could see the clutch cable moving, he cracked up laughing, saying that the cable was moving but the gearbox was pushing itself off the engine!
1 point
-
After all this I ended up never being able to get the megasquirt to be reliable, so a friend had a kjet setup which we put on, it ran awesome and i drove it like that for a couple of years. Did little bits and pieces including suspension and wheels. just drove it everywhere
1 point
-
2011 (2l 16v swap) Engine and gearbox installed and the car back on its wheels. Mega squirt setup, despite this not being my final solution i was really happy i had a crack at this. Really taught me that all wiring looks horribly daunting before you start but after going through and labeling and sorting out each little bit step by step its nothing a good system cant fix There was a nice useful pin out so i actually made the megasquirt loom just connect directly to the existing factory loom for easy removal.1 point
-
Head cleaned up very nicely with a bit of a diy parts cleaning bin and some elbow grease. A fresh selection of parts from the UK, i struggled to find new valves anywhere else. The old 8v lump removed, made for a good paper weight. Took me so long to get this out maybe a couple of days. Having had the new engine in and out a couple of times now for clutch replacement etc, i reckon i could do a full removal in a couple of hours. Struggled with breaking the cam gear, could not figure out why the engine would not turn over and then the cam gear would snap its tooth off. Turned out to be bent cams, which set me back a long time cause trying to find another set was proving a mission. Found some new Cams in the end and it all went back together nicely.1 point
-
Update on the 50/50 water meth injection, it LOVES it, man what a difference. It revs out freely like a totally different engine, not something I ever expected and on the motorway it pulls way better in 5th. I'd heard that diesel turbo's love water/meth injection but man it really does! It really feels like a different engine. I'm looking at getting a TD27 turbo injection pump for the boost compensator bits, so later on I can get that built into a bigger TD42 pump since I am still on the standard NA pump with the max fuel screw turned up (might be a bit more in it still). But in saying that, it's going so much better that maybe I won't need it I mean the 50% meth is like an extra injector anyway. I'll need to tow a heavy weight and see how it goes.1 point
-
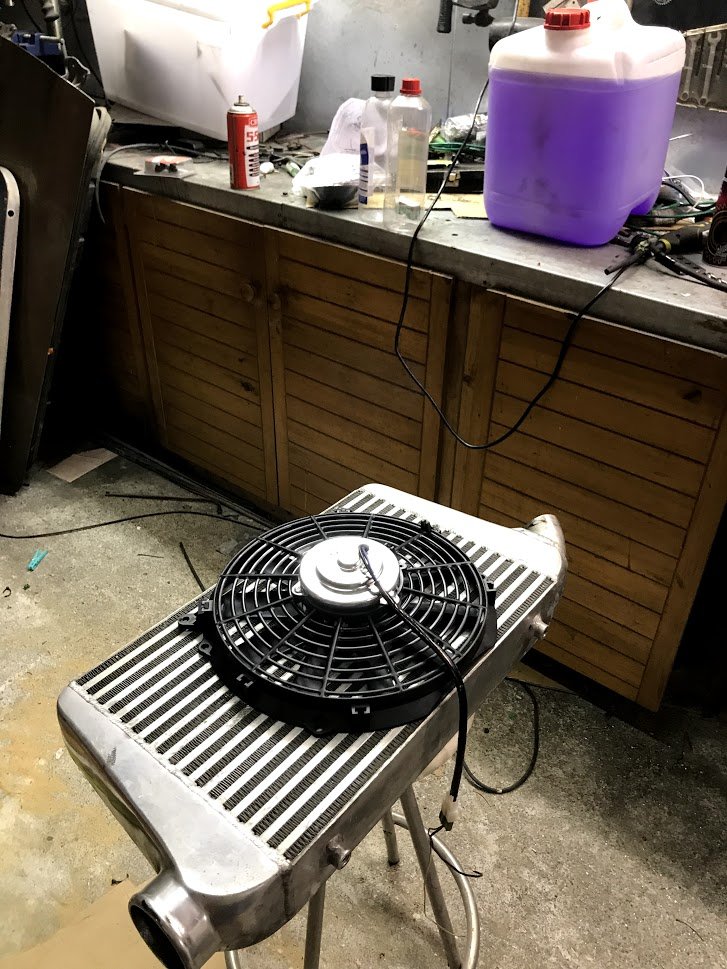
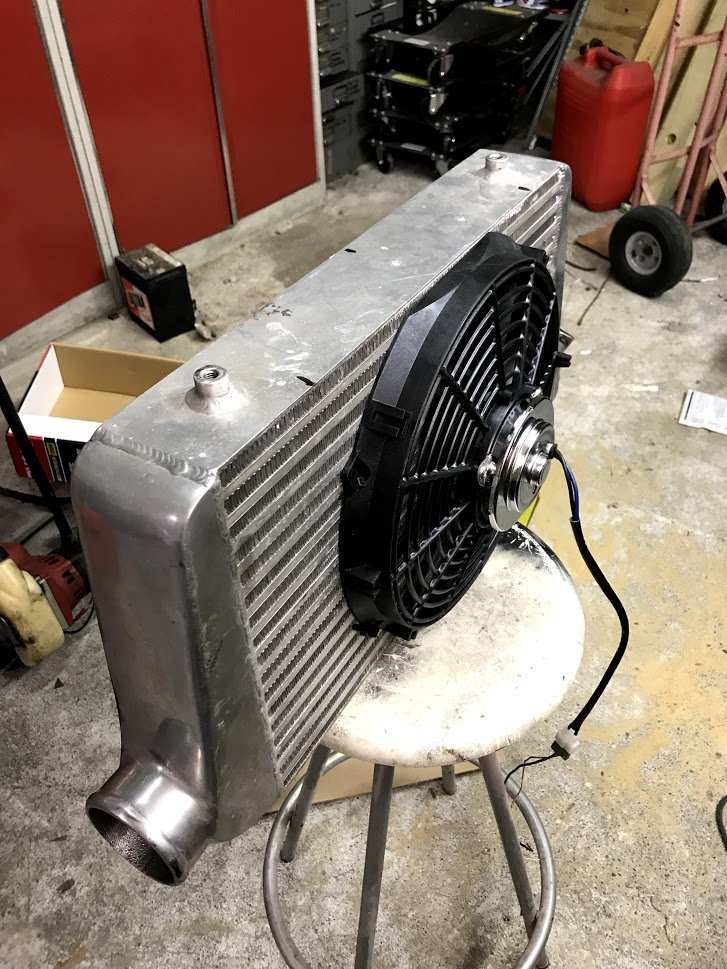
24v radiator fan arrived. So I took the intercooler off, sprayed some degreaser through it, then covered the ends and poured some kerosene inside and left it in the sun. Poured out looking oily. Sprayed more degreaser through and it looks clean. Filled with hot water and car wash a couple of times. FIlled and rinsed with hose. Super clean inside. Fan is the perfect size (yay meth): Its back in and with manual wiring to batteries it really pulls the air through! Need a 24v relay to wire it in with a switch on the dash.
1 point
-
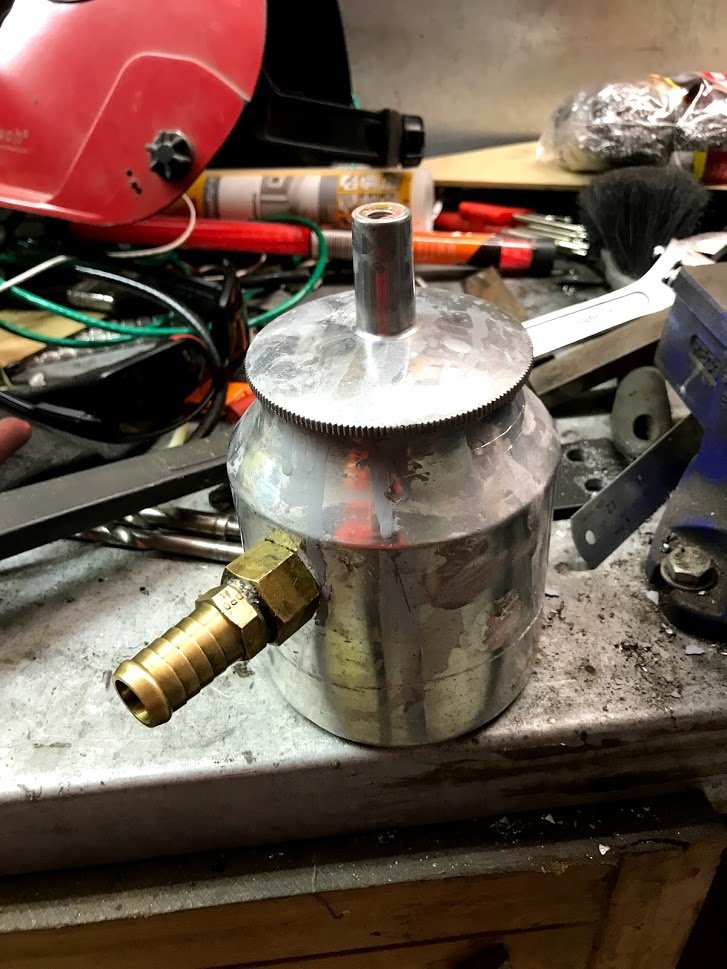
The crank case breather is plumbed into the turbo intake which has put a decent amount of oil into the intercooler so I found some bits and pieces in the garage to make a cheap ass catch can to put inline. - Aluminium tank from broken primer gun - Random brass fitting from something or other - Bought some stainless scourers - Left over oil resistant rubber hose It'll probably work better than the Ebay stuff that has nothing inside. ...Better than nothing at least.
1 point
-
Since 2004 - I have just used and used the car for more tame show events and oldschool runs Classic Jap Meet With @sheepers at Galaxy of cars Ellerslie concours Oldschool meets... [EDIT] OH and a wedding
1 point
-
Just remembered - Before I took the engine out - in 2002 I was approached by Jacqui from NZ Classic car to do a "Old & New" comparison article with the 2002 Celica T-Sport
1 point
-
Ta Daaa!!! Even the headlight buckets got original olive zinc plating done I also found some original GT wheels for it so it was a great time to fit those too.
1 point
-
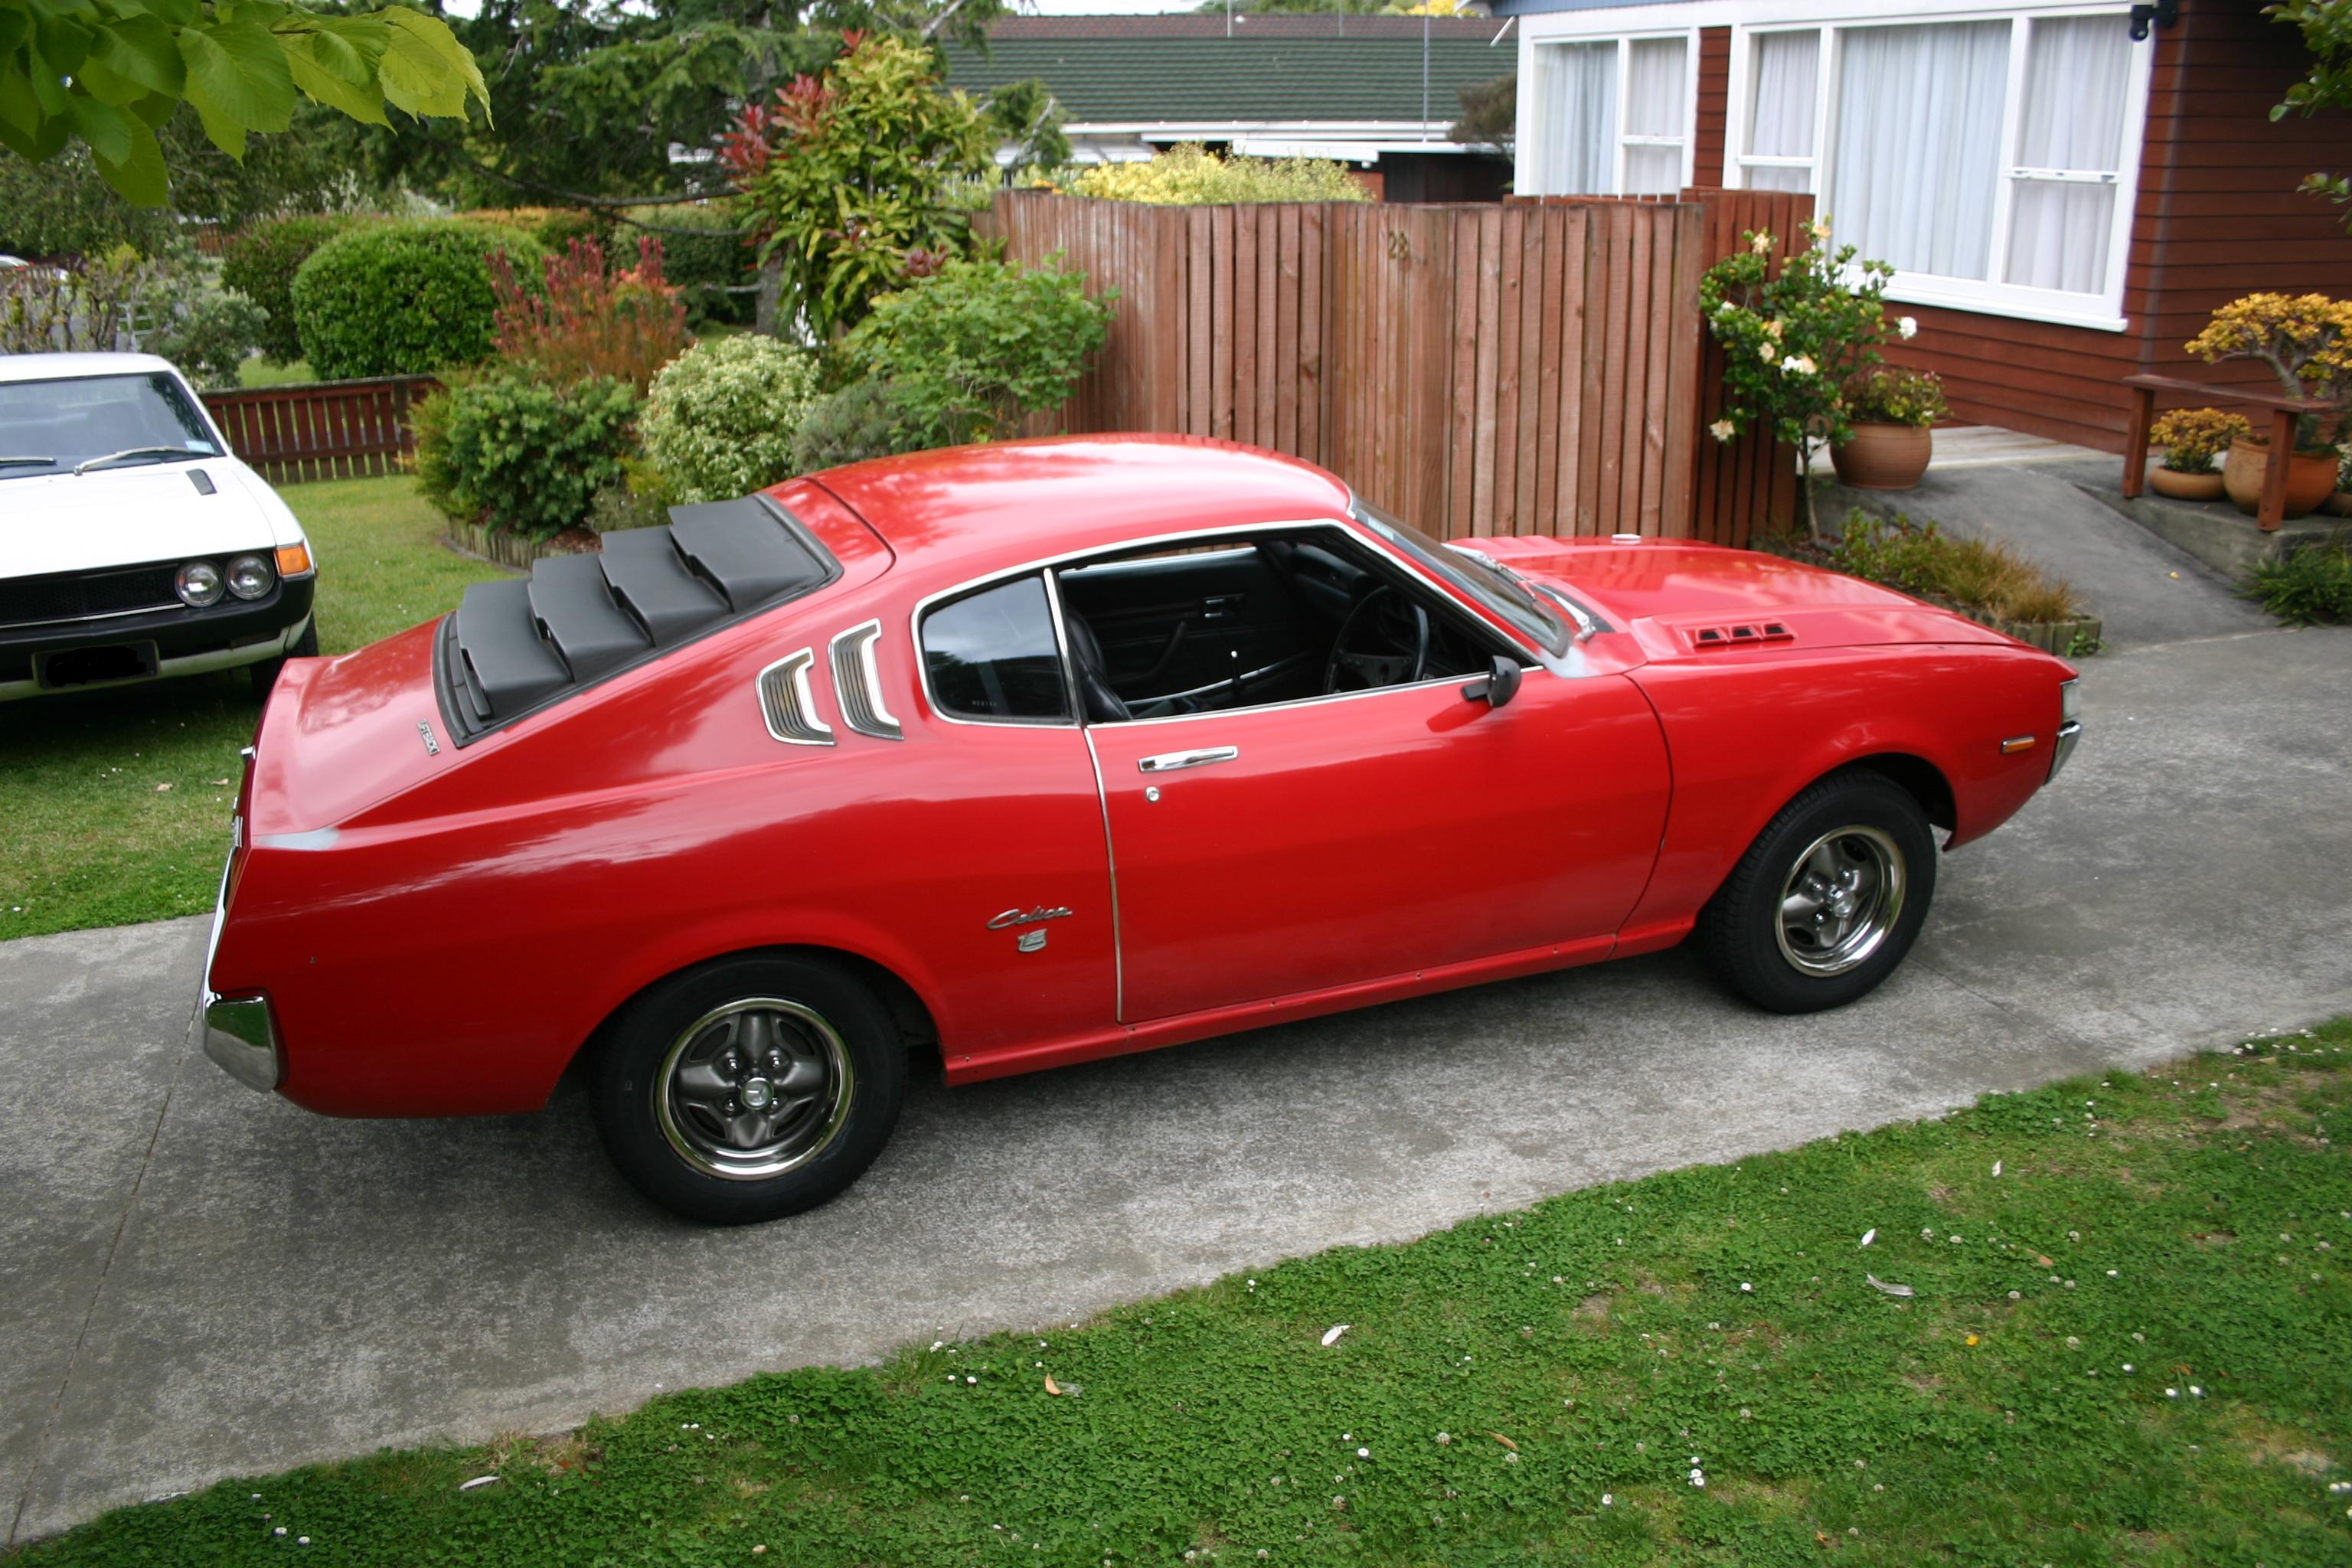
Me being anal about everything being nice and original on this... I unwound all the wiring, cleaned all the gunk and goop off then re-wrapped it in nice self-amalgamating 3M tape. Also started re-fitting the restored/cleaned/painted parts. Re-plating the gold zinc really makes this look great too AND... Engine back in Bolting shiny bits on everywhere too.
1 point
-
was just going to use standard manifold and create a j pipe to a turbski down and a custom dump pipe. Owning a land rover is almost like dating a hooker so wrong but so right1 point


.thumb.jpeg.384ff72c8d2b0ee0d34a7bdedb55bdcf.jpeg)


.jpg.e40e432550288d0ade7c426e31eedc2c.jpg)
.jpg.5829ba7bbbfd01de21ccf9fe9d325dff.jpg)

.jpg.0f1606b47169cce43ea113b407cf8d04.jpg)
.jpg.5a09a4e192038480897168c10fdece6c.jpg)
.jpg.c0b817cdfda97b4643659d15f45927e8.jpg)


This leaderboard is set to Auckland/GMT+12:00