
Leaderboard


Popular Content
Showing content with the highest reputation on 05/07/16 in all areas
-
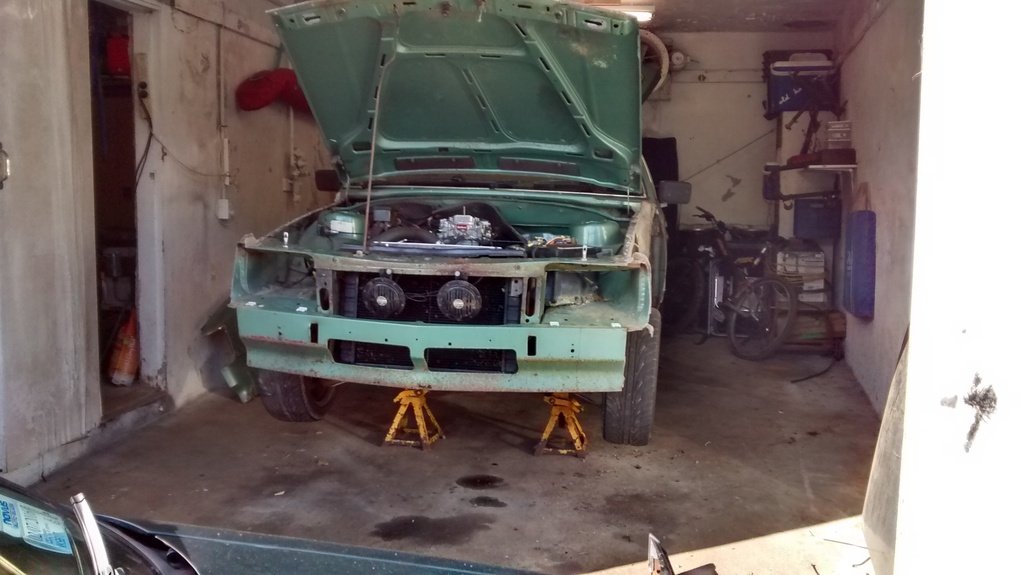
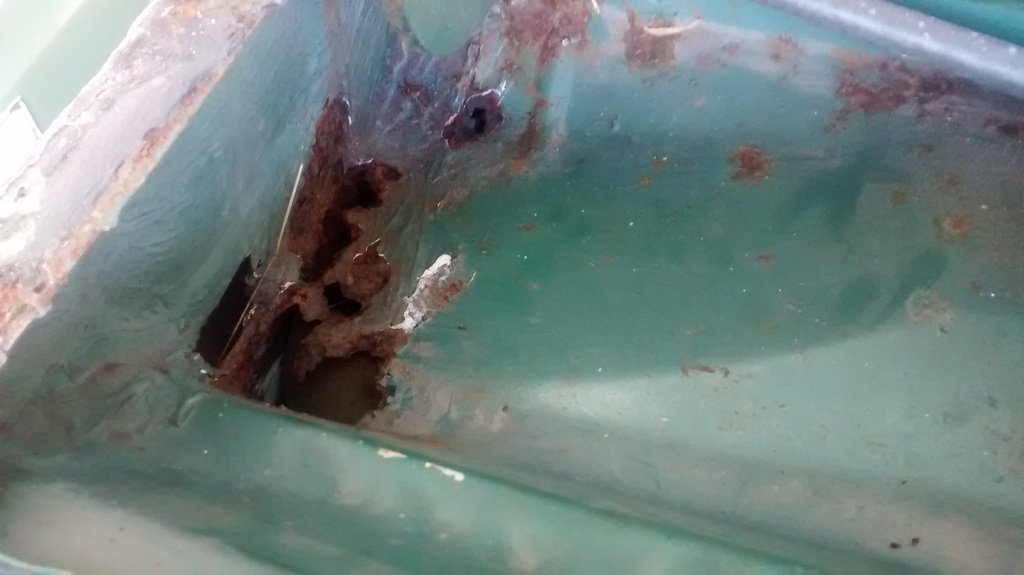
Well the big job of fixing the rust has begun. Pulled the front sheet metal off. Deja vu from a few years back. I can't figure out for the life of me why my feet got wet every time it rained... Next job is to pull the dash out and then when I have the other half of my lockup back I'll pull the motor and box then completely gut the engine bay. Was a pretty good day today.
 11 points
 -
No updates for 2 years, this is where its at now:8 points
-
Cool If you need any help with this just ask Al's mum, she has one next to her bed7 points
-
fuck this thing is lush as fuck to drive. i don't know what it is about it but its fucking cool fun to hoon around in it. anywho, Richard (new owner) came over today and gave me a hand and we got heaps done. radio install is now complete. made a mounting plate thingo, ran the wires and installed she 6" speakers in the rear shelf. it all works and sounds mint. the other thing that got done today is we removed some height from the rear by removing the rubber spring seats from the top and bottom of the rear springs. and because i had them we put some 20mm spacers on the back to stick the wheels out more. its rubbing a tiny bit because of the ballon spec sidewalls. 225's on an 8" rim gives a pretty 32 ford spec tyre bulge. if it was running the same tyre on a 9 it would be sweet. or a 205 on this rim with the spacer. whatever. anywho. pixxx 2016-05-07_05-23-03 by sheepers, on Flickr 2016-05-07_05-24-01 by sheepers, on Flickr 2016-05-07_05-18-48 by sheepers, on Flickr 2016-05-07_05-23-10 by sheepers, on Flickr 2016-05-07_05-19-37 by sheepers, on Flickr6 points
-
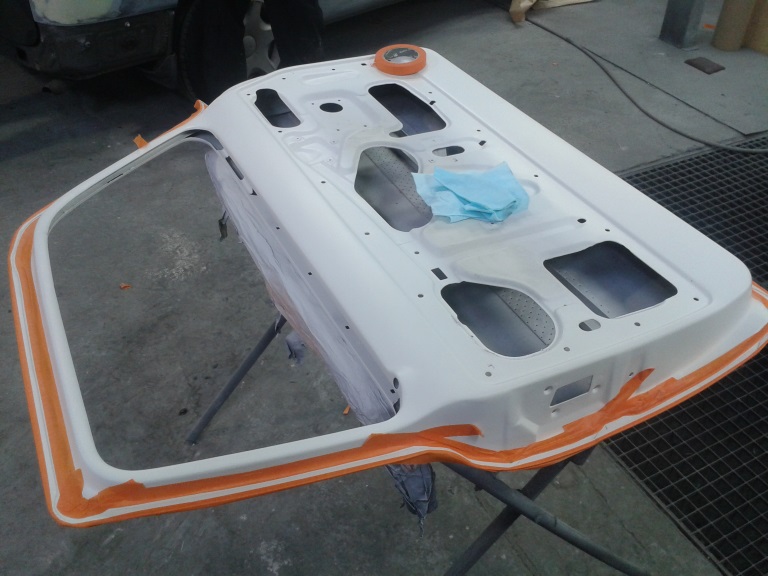
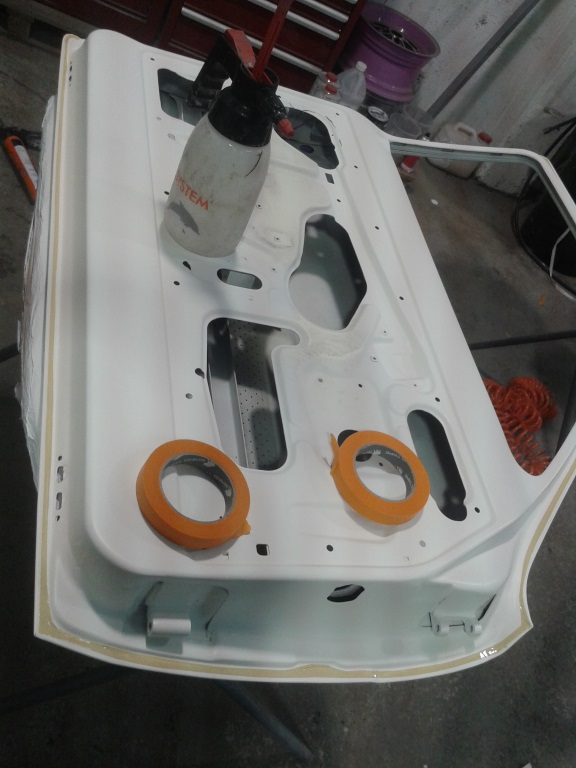
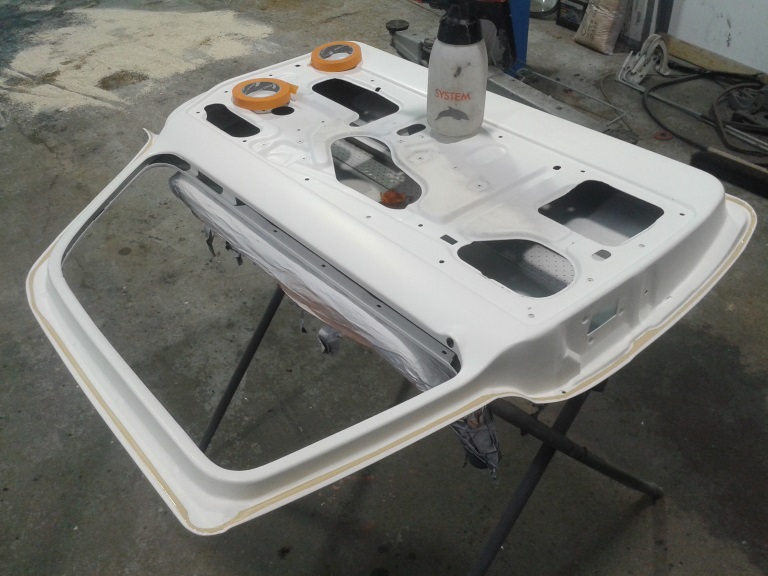
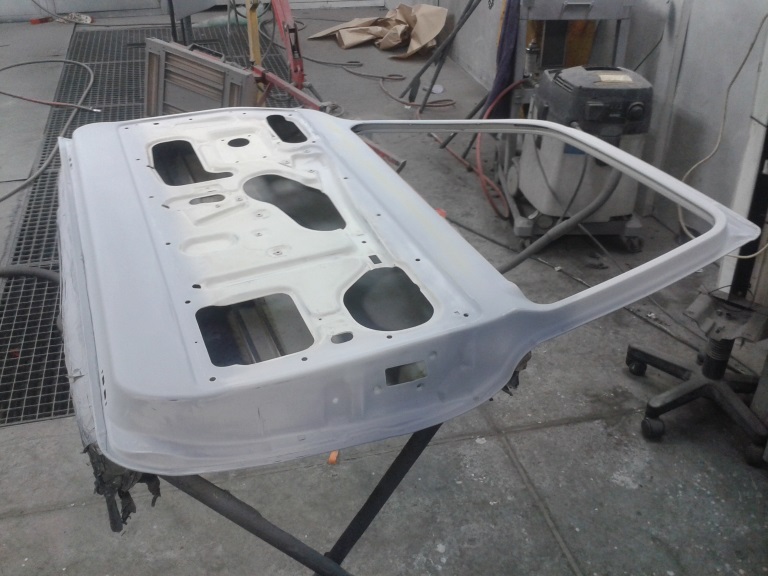
Just collected this: One piece flip front. At some stage in it's past someone has bonded in an original steel grille and steel side-vents. I'll remove these and re-glass the holes as I'm aiming for a totally smooth look. I got it for a straight swap for the original tins, and both I and the swap-ee are more than happy.3 points
-
low added. front still needs to come down a bit more but thats almost right. 2016-05-04_05-11-01 by sheepers, on Flickr 2016-05-04_05-12-30 by sheepers, on Flickr3 points
-
http://engineeredtoslide.com/2016/02/ets-drift-ute-3-years-in-100-photos/2 points
-
Holy shit!!!!!! How did I miss that.... Thanks guys.. Even when I was playing with the setup it all worked well.......and would have all the way up to puttTha steering wheel and taking it for a drive haha. Thanks Cletus for spotting that.. And thanks mof for making me get of my arse and go out to the garage to and see what the fuck your both talking about... Was thinking aboit going back to cortina steering but couldnt be arsed ...............might be arsed now. Thanks again lads...2 points
-
The sill step panels are now tack-welded into place (no pics - sorry!) which will allow me to position the body on the chassis (when I've got some extra muscles). Then, moving around the back I was struck with a dilemma. I want a bootlid in the car, and was going to make up a smooth, flat one (like Prefects have) until my petrol-head daughter insisted that I keep the 'spare wheel' moulding on the back. So starting with this - the place the spare wheel mounted: I carefully cut around the perimeter which left me with a hole: And if i then invert the panel I've just cut out, I end up with a very slick, 1938 made bootlid which looks as it should: I'll cut it along the bottom swage and put hinges at that level, remove the reinforcement strut to smooth it out, and there will be a bonnet-style spring catch hidden beneath the top of the curve. So I made up this hinge panel. Panel is 2mm steel, and the actual hinge brackets are in 3mm: Which is then (tack) welded into the wheelwell: Bearing in mind that this is now the INSIDE of the boot. The hinge panel and lower part of the 'wheel' will be welded back into the body, and the top cut carefully along the hinge panel and made into the hinged lid panel. Stay tuned!2 points
-
Aero shit is so cool. Used to foam on the aero articles in some magazines back in the day. They would make brake ducts, wings etc then backyard test with data logging and a big fan + smoke.2 points
-
Carefully removed the plates from this (last) panel, I'm going to try find the worlds smallest pop riveter to put them back on, the panels with a small piece of glass behind them really concern me though. The the front of the base I had previously left on the plate with the serial number deciding I didn't want to damage it butt his panel was in too bad of condition to not attend to or to try work around the plates left on. There is two of these (bakerlite?) panels on the cash register one of the front of the draw the other where you hand rests while using the machine, both were full of filth I've cleaned one so far it its been the most time consuming job so far. I tried using wax and grease remover as well as thinners to try just lift of the gunk but it wasn't working so I took to it with a razor blade and pick to help clean it out between the grooves then again cleaned it with thinners. These are going to be painted black but I thought it was important to clean them out properly because the tread isn't very deep and I didn't want to lose that look when they are primed then painted.2 points
-
You sure are dedicated to eliminating all of the rust. I do like the occasional wide angle shot in your build thread to remind us there is a whole bettle there. Must be pretty close to the end of rust repairs now?2 points
-
I know of no events per se atm, but I'll drink with you if you come down EdRion.1 point
-
I just took the top of my Holly 94 witch was using Mobile 91 and the car had been sitting for a few months, the float chamber was dry but no nasty crap in there, it was very clean. sediment trap on the fuel pump has no water.1 point
-
Gull were proud to say they use the highest amount of the other stations 10% and the others use 3%?1 point
-
Lol anyone else see the face in the last pic1 point
-
It's also amazeballs that much of the testing with smoke and string can be tested virtually by the DIYer now..David did a 3d thing of a ute to show airflow going over the deck. Was exactly what mythbusters found during one of their studies.... only David didn't have to construct a physical model and flow water over it in a special fish tank.. SO COOL1 point
-
Makes you appreciate sports cars where if all the factory shit is in place have lots of the air movement stuff sorted out.1 point
-
Cheers man, Yes even I sometimes need to remember the big picture some times, get so focused on the details. After the doors are finished I think that is all the rust gone, it's been quite a mission!1 point
-
1 point
-
They have to label it on the pump? It was big for awhile and has become less wide spread it seems.1 point
-
They usually convert to a steering box out of an earlier model e70. As for moving the rack, if you just move it sideways and don't lengthen it at all or move it up or down, then there will be no geometry change but you will have to deal with being able to turn tighter one way than the other. We do this all the time at work and other than the whole uneven steering lock thing then there is no problem, and 15mm is only about an 1/4 of a turn on the wheel so you probably won't even notice.1 point
-
i suspect BP98 doesn't. But then i've never tested it. Been so long i wouldn't remember how to test it...1 point
-
Paint stripper is no match for the 40 year old paint the panels are coated in. Gona have to stripdisk it all off. Welp1 point
-
The first few pieces all sanded down then epoxy etched and then primed Also managed to free up the jammed buttons so the buttons work fine now and had a good look inside, it appears there is still a couple bits broken, the link that lets you change between no-sale/cash isn't there and there is another piece/arm/link thing on the other side that looksl ike it should have a lever attached to it that would come out to the user and I can't quite tell where it would join but that's just sitting loose in the unit which is a little bit of a shame as these things are probably past me being able to fix now but its still awesome you can ring up cash amounts and it makes the bell go, you can also turn on and off the bell. All the mechanical working of this thing are insanely awesome.1 point
-
While pulling apart found a small fortune inside... at the rate I was pulling out stuck coins I thought the unit might end up paying for itself Ended up with a few coins of various ages and places but shy of them paying for the unit, one of the coins was a collectors millennium coin which is a little bit cool1 point
-
Copper shrimp I made from 45mm copper pipe and other copper scrap1 point
-
I made this when I was 11 from 2 solid chunks of wood and a DIY kit steam engine1 point
-
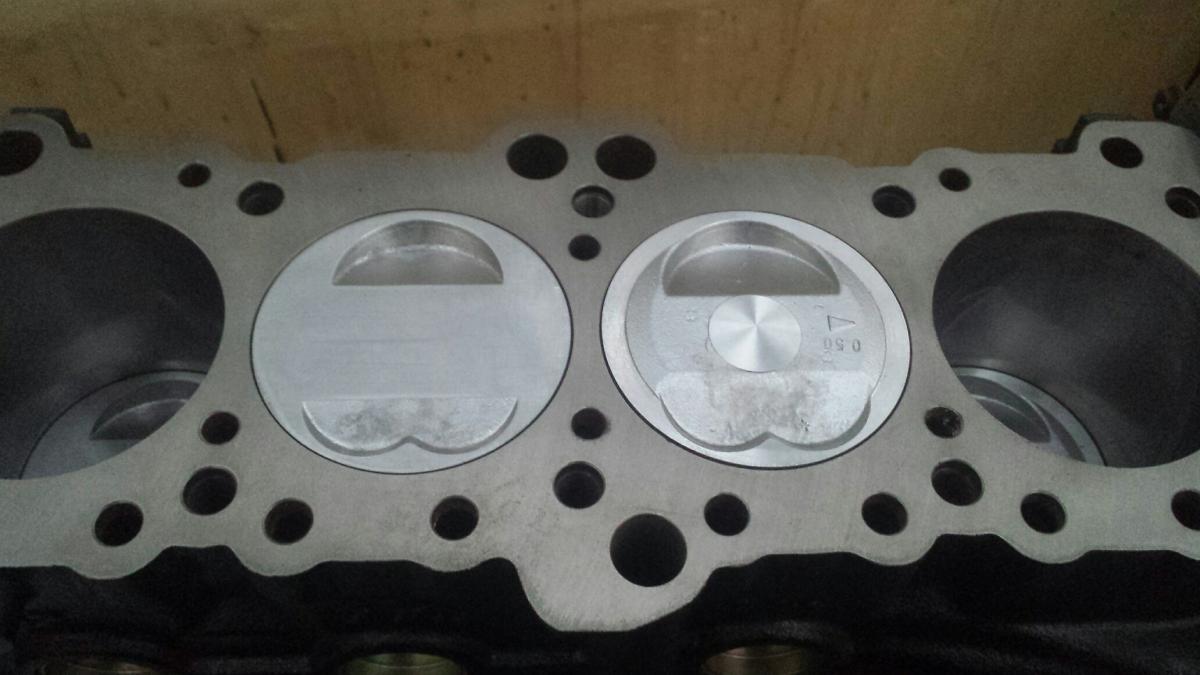
Realized my higher compression chamber shape was interfering with my pistons which just would not do at all. Currently going through the process of milling down the top of each piston. photo showing before and after of pistons 2 and 3.
1 point
-
Alright! Alright! I hope you son's of bitches see the light. you again, you again. I know you've got the metal age of ten. Listen up, Listen up. I wouldn't swap ya for a thousand bucks! so after all that, it all seems to go back together the same, which is handy. but it still doesn't fit the body correctly, the belt line is still a good 5mm lower than the door. But I can't lift the door much as it is already tight against the A pillar. least I didn't make it worse, which I was worried about. Made a start on the window sills. patches lined up using the clip holder that the one piece glass scraper is held in with.1 point
-
My long awaited thread is finally here! Discussion: //oldschool.co.nz/index.php?/topic/52756-slacker-sams-72-trump-estate/ About 3 Months ago a friend tagged me in a for sale post on the Facebook for a 2.5 estate. Naturally I was foaming at the bit. After calling the owner I organized to buy it. He inherited it from his late Father among other cars, Most of which ended up at the scrappys. The Triumph narrowly avoided the same fate. He told me about a couple of young guys in "lowered triumphs with no bumpers and silly looking wheels" that came to view it. All they wanted was the engine and gearbox, The rest they wanted to scrap.....I would've had an aneurysm had that gone ahead! Anyway its an English assembled factory PI Estate. It features such lushness as REAL leather seats, power steering, factory tacho, front swaybar, 2.5L motor - Sadly the injection has been removed in favor of 1"3/4 SU's, and Manual overdrive. on with the pics: Lush gauges The donk Potato pic The rust shituation That's all for now1 point
-
Got to do some high speed drifting at Pukekohe and even managed to finish 4th in Pro-sport class(Theres D1-Pro and Pro-sport which used to be called Pro-am) Got clocked on several entries over 160Kmh and the highest I saw was 166Kmh on the radar list. Speedo is fairly accurate as it was showing 170-175 when I last looked haha We only get to drift this track once a year because of smoke issue etc but its amazing fun, not many places you can be foot flat in 5th on entry and just never lift from the start point1 point
-
Engine mounts. Started out with a few odd shapes cut from 6mm aluminium plate: And after welding: These are the weld-on brackets for the mounts, cut from 3mm steel: The assemblies will sit on the chassis like this: (this is the back view).1 point
-
Glovebox lid - had an hour spare so knocked this up: It's in 1.6mm aluminium with returns around the entire perimeter. It's also compound curved to match the dash.1 point
-
This is hecken good!1 point
-
Chassis out in the sun for the first time. Stage one on it's journey home to meet the body.1 point
-
Cleaning the shed floor during her apprenticeship1 point
-
Although this isn't a new idea, I thought I'd flip it round from the way it is usually mounted on solid rear axles, and put the adjustable bits on the chassis. The mount is made from 3mm steel with 3mm gusset and a 3mm box section internally to give support where the bolt-holes are. So there are 6mm thick side panels with effectively two 3mm vertical blades either side of the hole-line. 'Moveable' brackets are in 5mm steel. These give 75mm of total adjustment in 15mm increments from this: To this: Welded on to the chassis: I'm only using one pair of coil-overs which will be mounted in front of the axle.1 point
-
I have managed to get the rear diff-mount 'gusset' made and in place: Which you will notice has a captive nut welded into it which is for this: Brake pipe Tee. The feed will come in as a hard-line to the front, and short flexi's will then go out to the calipers from either side.1 point
-
I've now got the rear 'K' member in place with the cross-strengthening. That's the main frame done then (once I've turned it over and finish welded the underside). Mounts for rear suspension, gearbox etc will be fitted at a later date, but for now I'm well chuffed with it. When it's finish-welded I'll take it home and start making the body fit (it's going to be channelled by about 4"), and then mock-up the cage, engine mounts etc.1 point
-
I've at last made the rear crossmember and got it into place. The channels welded into the top corners are for fuel, brake and wiring. The hoop is made from 3mm steel plate, seam welded and formed into a 40mm box. This arrived yesterday, and it's f*ck*ng huge! It's certainly going to fill the engine bay nicely....1 point
-
Chassis is coming together nicely: A bit to go, but the main framework should be finished next week. I got the Jag IRS this week And stripped out anything I didn't want, which left the good bits: I just need to narrow it around 450mm. The engine I'll be using is a Falcon XR8 5.4 litre DOHC like this one: Deal done this week! Very happy, I'll be converting it to carb/distributor which should do away with all of the wiring and the need for an ECU.1 point
-
Howdy oldschoolers, I've been out of touch for most of the past year as I've been hitting the tools pretty hard over here in Oz, but finally I've returned to the realm of manual chokes, real heavy ass chrome, and carbueretted sorcery. It was a bit of an whim as I was really holding out for a wagon of some description (ke26, xm falcon, p510), but the price was right, the spares were plentiful, and the old girl really needed a caring hand to ensure she didn't end up stickered and forgotten. It's rego'd and running (sort of) and has an absolute butt load of spares. The previous owner is hooking me up with a load of doors and shit tomorrow, but I already have mint jdm tail lights, a couple grilles, chrome window trims, a dash, door cards, blah blah blah! It came with a heinous set of bbs replicas that I despise, they're 16x9 (which looks dumb as hell on this car) and 4/5x100 mounted on 20mm spacers as I discovered today when removing them. Not too sure what I'll do with them, maybe sell for a couple hundy to a flat peaker who doesn't care. The motor is an L23, perfect for a swap to L24/26/28 I believe. 3 speed auto, which is nice and cruisey and might stay. 93,000 miles, which I believe to be correct as in 2011 an old lady named Helen left a shakily written little note of the mile's being 85000ish in the centre console. Body straightish, a few obvious bog spots and the rolled rear guards suck but I'm not too fussed as a lot of hard work has already gone into the body. The black interior looks horrible, but I feel like underneath all the dust and dirt it'll actually turn out quite nice when restored and sorted with a few spares. The current plan is L series upgrade, paint, interior, 14/15x7/8jj rims (five spoke wats would look sick me thinks) and a bit of low. I'll edit this with a pic soon, but for now picture a mustard yellow/army green and black mark IV cedric perched on stupid looking 90's bbs knock offs.1 point
-
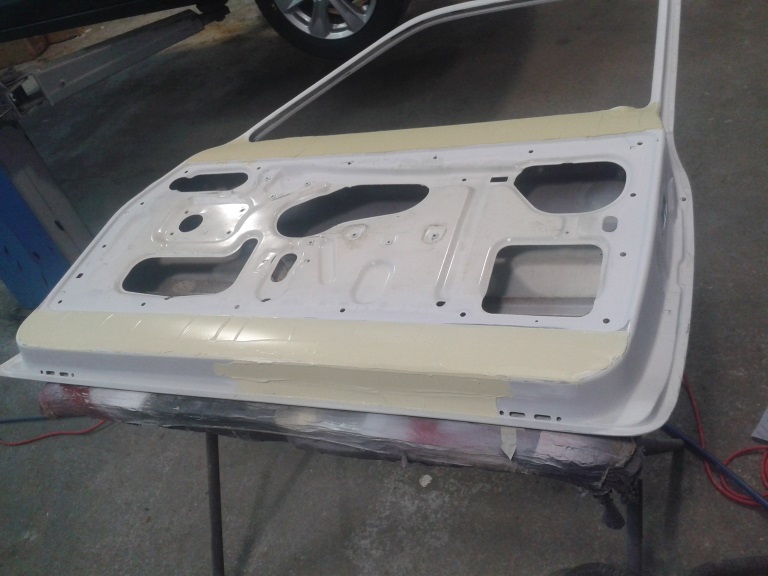
I also worked a little more on the doors. Nice big skim to cover rust the rust repair and the dents on the top and bottom faces of the inner door. The Skim all sanded back and reprimed Prepping the door for applying a seam sealer over the joins(this wasn't done in the factory back then but is common practice now days) The finished result of the sealer
1 point
-
Discussion Thread - //oldschool.co.nz/index.php?/topic/38411-rookie-daves-lie-too-us-seven/ Anyway, for ages now I have had very little motivation for this car, so I thought putting the build thread up here might help/ give you guys something else to give me shit about. Most of this will just be a port from http://www.lotus7.co.nz/forum/viewtopic.php?f=16&t=136 A brief history: After selling my last project in February I was looking for something to replace it, a quick search of trademe saw me contemplating a 7 replica, I had always liked the lotus 7 replica and it seemed the right time to do it. So after ringing and finding out the state of the car and what parts came with it, an exchange of money was made the chassis and parts were dropped off at the Auckland depot of the transport company I work for. 2 days later it was sitting in the garage. It was all wrapped up so it was kind of like an early/late Christmas present. Unwrapping it led to the discovery of the massive hoard of parts that came with it (from what I can tell so far it is only missing a headlight haha) anyway with uni looming very little was done, but a couple of Saturdays lead to the discovery that the rusty escort lump that was sitting in the engine bay actually turned out to be a brand spanking full race 1760 crossflow, with countless hours spent on the head and nothing being left untouched, SCORE! The next few months progress was slow with it becoming rolling and organizing a few bits and pieces that needed to be done. Update: The engine built up My mate Robbie acknowledging the awesomeness that is the Kent How the car was before we started OPPS! It fell over haha More updates tomorrow night when we put the floor on (would have been tonight but some dipstick didn’t buy the right sized rivets DOH!) Cheers Dave1 point
-
Discussion - //oldschool.co.nz/index.php?/topic/40349-rookie-daves-jag-s-type/ So when I got my Alfa I also got this, it's pretty sweet and quite tidy, it was originally my Great Grandfathers daily and only has 55,000 miles on the clock. It had a shot clutch though. It has been in hiding since I got it because it was in the too hard basket, but a change of circumstances and Rawb getting married made me pull finger and get it re-reg and going again. So I spent last week cruising around the Mainland in it, so much fun!1 point
-
Bought this little thing yesterday from a proper English gentleman. He even agreed to take a cash deal (<$2000) and remove it from TM where I was top bidder but auction wasn't closing until 7pm Sunday night, by which time we'd be heading back south. Picking it up Sunday afternoon in Auckland after Kumeu, when the owner returns from a trip to Singapore. 125,xxx kms! 2 NZ owners, the first one imported it at 40,xxx kms and was apparently a millionaire antique dealer who used it to putter between his shops, and the second is the above mentioned gentleman who has used it to commute daily for the last 4 years. It is a 1984 Nissan Sunny Van (2 door = VB11) with a E13S 1.3L 4 cylinder and 4 speed manual floor shift, in a front tug arrangement. Hopefully the E13S is the Jap market one which claims 75 PS. Seller's pics will have to do for now, I'll update and replace these with better photo's next week. For now the only plan is to get it on the hoist and have a look over it, new fluids and filters, and start dailying the little gem. Cam belt, water pump, CV's, and brakes have been done in the last 20,000 km according to the seller. But you best believe I've already photochop dropped it with some little alloys. Simple yet effective, the rims are some Zona mesh that were on the 'tard recently. Chur1 point
-
Ok so turns out the oil pressure problem wasnt the sender... This thing has been requested for a wedding this weekend so I thought I better get my A into G and sort out the oil pressure problem seeings as the wedding is in New Plymouth. I ordered a new sender from the UK and I got it on friday, Dad showed up at my house with the car on saturday, last night I put the new sender in and the oil pressure was exactly the same: 0. I got worried at this point as it ment the car had done 2000kms with the oil system not right. I did a bit of research and it seems people with Jaguars aren't very good at using the internet, but a couple of people alluded to the oil filter bypass valve being the problem (numbers 17-20). So tonight I pulled the whole assembly off and got to fixing it, turns out the beards were right and part 17 had come out of its seat and got wedged in there on an angle and in the process had bent the spring and damaged part 19. So I did my best impersonation of a bush mechanic and straightened the bent bits and made it all fit again. degreased the whole housing and put it back in again. And what do you know: I call that a win, now to clean it and polish the chrome.1 point
-
So I dug this out of the shed and fixed a couple of issues that cropped up on the tour of the south, namely the cold start and the steering column bush, so now it is good to go again. The bush was a bit of a pain, but I managed to do it with out taking it out which is nice, so I have been stropping around in it for the last few days, mean! The only issues that I know of at the moment are the oil pressure sender and the rear passenger door seal, so not too bad.1 point
-
Also we visited by our old flat in CHCH while we were down there, it is now a carpark I will endevour to get the rest of the photos off Maria's phone tonight.1 point


This leaderboard is set to Auckland/GMT+12:00