
Leaderboard


Popular Content
Showing content with the highest reputation on 07/04/15 in all areas
-
No , this engine from R32 with painted rocker covers PM me I will send you this pisc Okay man . Take the shot ( this not my sister ) :11 points
-
peter has finished fixing the dent in the drivers door and he gave that back to me this morning. he's taken the boot lid to repair and i should have that back next weekend, then its just the passengers door left to do. oh and the sunroof. anywho, with the front guards and a door ready for priming today was paint day. i went and bought some protec epoxy primer (epotec to be precise) and gave that a go today. it is a bit different to what I'm used to and i was trying to get it to look wet like i would have to do with durepox but that turned out to be to heavy so there are a few runs but at this stage it don't matter. I'm really only sealing them so i can start getting the shape perfect so there will be more primer to come yet. i might wet lay the colour onto the inside of the doors and the guards before i put them back on the car. this means i have to decide on a colour for it. i have decided to take the motor out and paint the engine bay because I'm a fussy cunt who seems to have endless time to fuck around rather that getting shit done. SO, this means i can paint it any colour i want. problem. I'm terrible at deciding colours and i agonise over it for months then choose the first colour i thought of. with this in mind i probably will paint it red but ill have a think about it over the next weeks or so. panted parts, inside and out. (colour of the primer is very green, looks way different to how these photos show it for some reason) Untitled by sheepers, on Flickr Untitled by sheepers, on Flickr Untitled by sheepers, on Flickr Untitled by sheepers, on Flickr6 points
-
The LTD has been letting me know over the past year that it's time for some love and after breaking a valve spring at Nats I knew for sure that this was true. Iv parked her up and removed the shocks and springs to see how a airbag setup would look in full slam Rear ride height before... Rear ride height after ...[/url[url=http://s1372.photobucket.com/user/sidewaysickness/media/Mobile%20Uploads/20150703_161203_zps9s4vi5nq.jpg.html] I get the feeling it's time for a bare metal rebuild so watch this space6 points
-
I think I speak for everyone here when I say.. HOLY CRAP6 points
-
I bet she doesn't5 points
-
Started on rear guards tonight. ^slight roll. ^getting there Made it. ^pretty much the desired height on left. maybe 10mm lower. right is 8jA withthe guards lip folded flat. Tuck'n a 14x8 on rear.. Discussion thread -> //oldschool.co.nz/index.php?/topic/47514-ants-tc24-gx71/5 points
-
Fairly boring update, just fixed a variety of issues. Replaced the oil pressure sensor (cheers matteybean) so now the oil light isn't continuously on. Went to check the vacuum advance was working and found out the vacuum advance hose wasn't even hooked up to the carb, lol. It was super brittle and had just snapped so got a new length of hose from Butlers. Then noticed the PCV hose from the intake manifold was leaking at the head so back down to Butlers grabbed a couple of hose clamps and sorted that. Also the airbox had a couple of cracks in it so my flatmate took it work and welded them up. Starts and runs bloody good now. Rear window only ever went about halfway down and always rattled, pulled the interior apart to take a look at it and found the wheels which sit within the runners were in about 5 pieces. Luckily oldschool is full of knowledgeable people and matt spitfire told me he'd used some sliding door wheels from Bunnings as a replacement for the ones in his Celica. Anyway they are basically a perfect fit and super easy to install, cheers matt spitfire! Here's the ones you want, $14ish: SKU is 518657, just give that number to Bunnings if your local doesn't have them and they should be able to order them in. I also grabbed a couple of washers as the nuts are pretty small. Pretty easy to install: - Remove and disassemble the window regulator - Cut off the old stud - Punch the back of it out - Cut a groove in the top of the new sliding door stud to fit a flat head in - Fit and tighten it with a flat head on one end and a ratchet on the other Also bought a new clutch and am on the hunt for a new slave cylinder, BNT couldn't seem to find anything. Anyone bought a new slave for a W40? I assume it's the same as a W50 slave? Got bored and chucked the equips on the rear for a test fit. Sit pretty much flush with the guard so happy with that. The fronts stick out quite a bit though, probably too much for a guard massage. Don't really want to go to flares. Some 6.5s on the front would be ideal...Don't rate my chances of finding some in the same style though. Gonna pop into Autolign next week and get some 2 inch lowering blocks and then I'll have to sort out the fronts. Will try to avoid cutting them but I don't think I'll be able to get anything off the shelf so will probably have to take them out and give them a measure up. Fun stuff.4 points
-
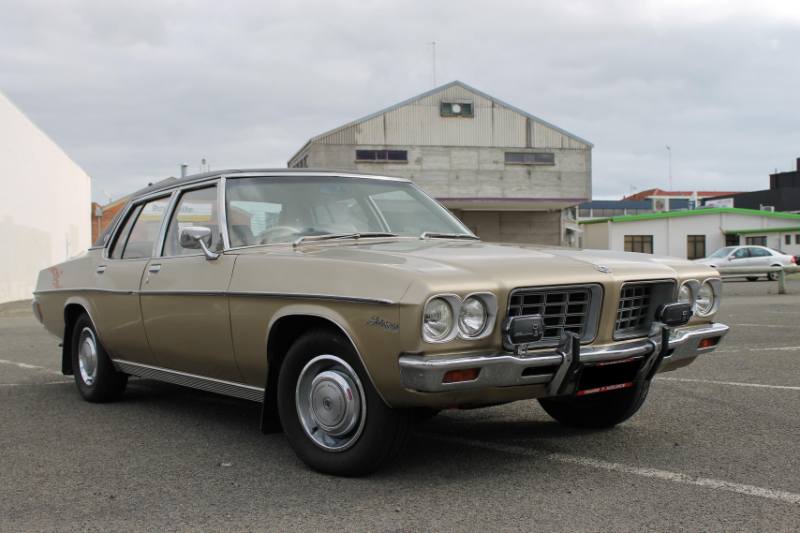
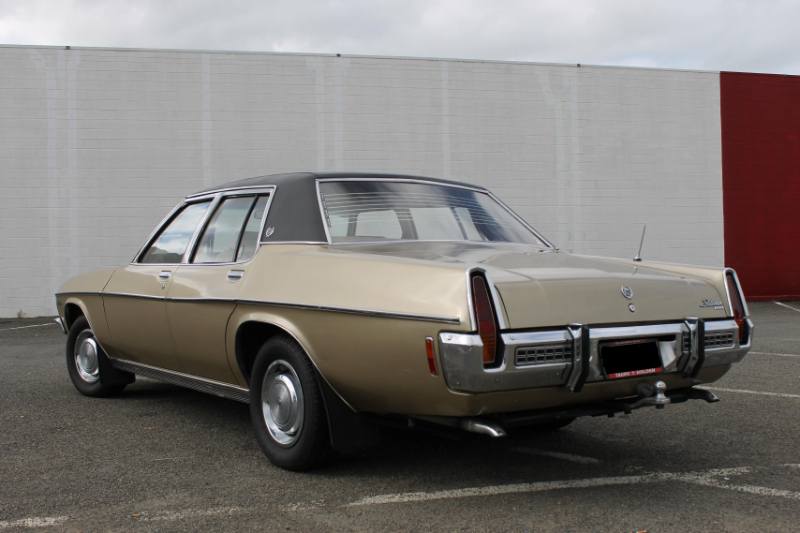
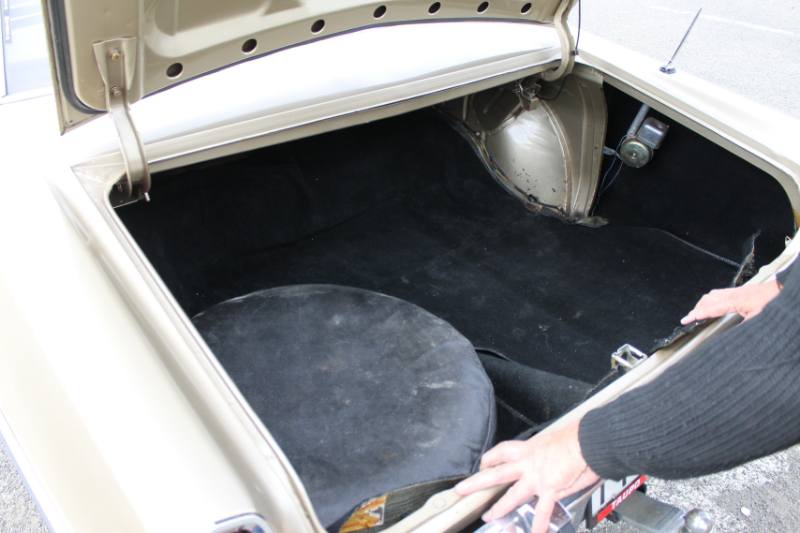
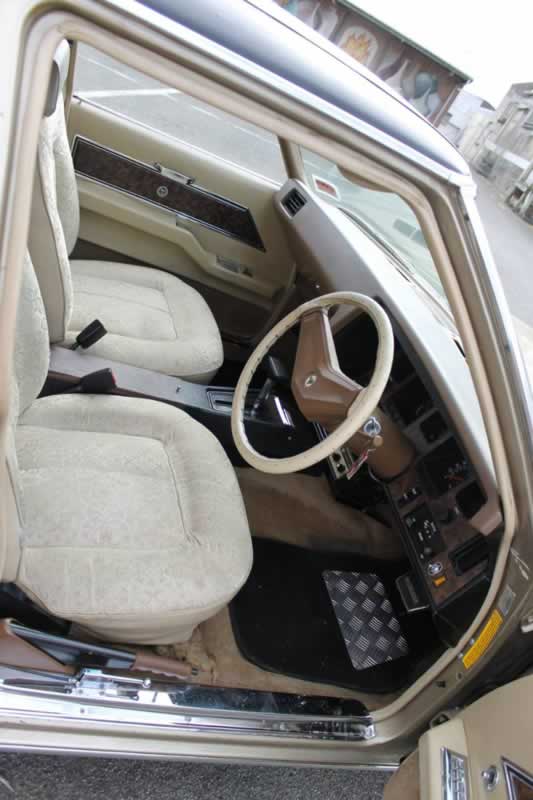
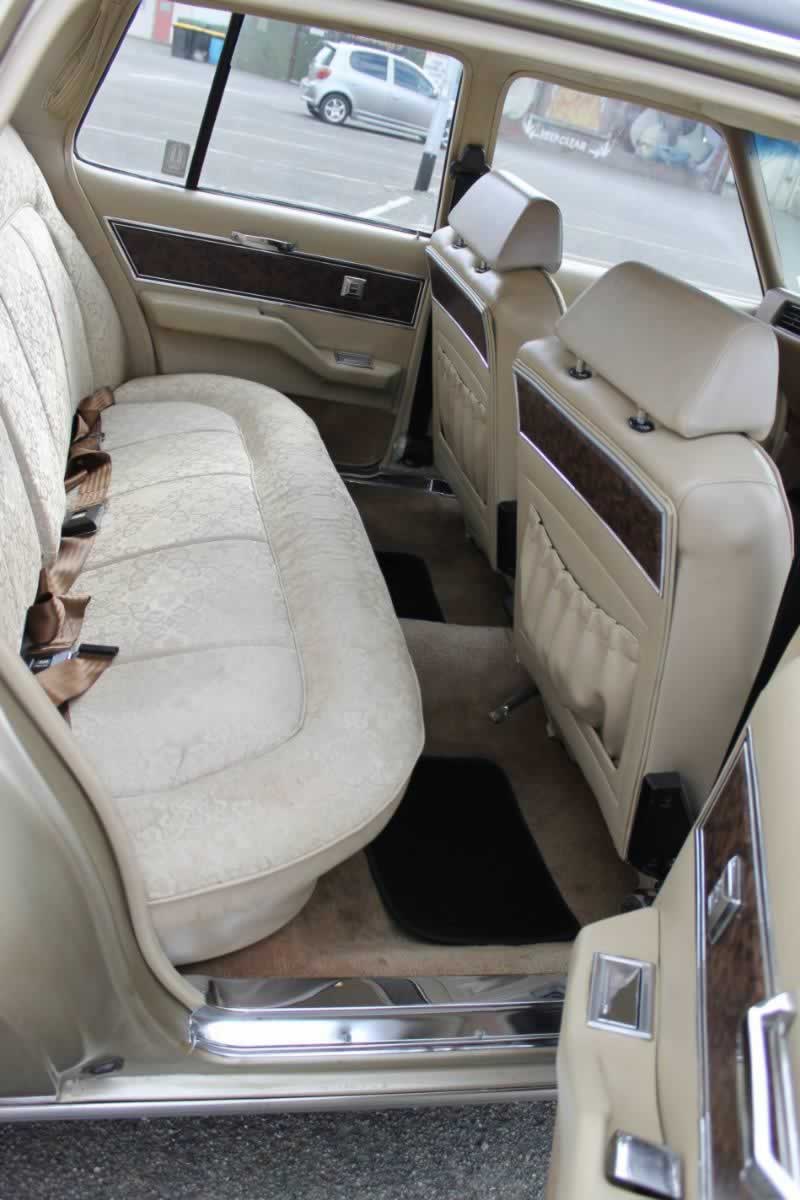
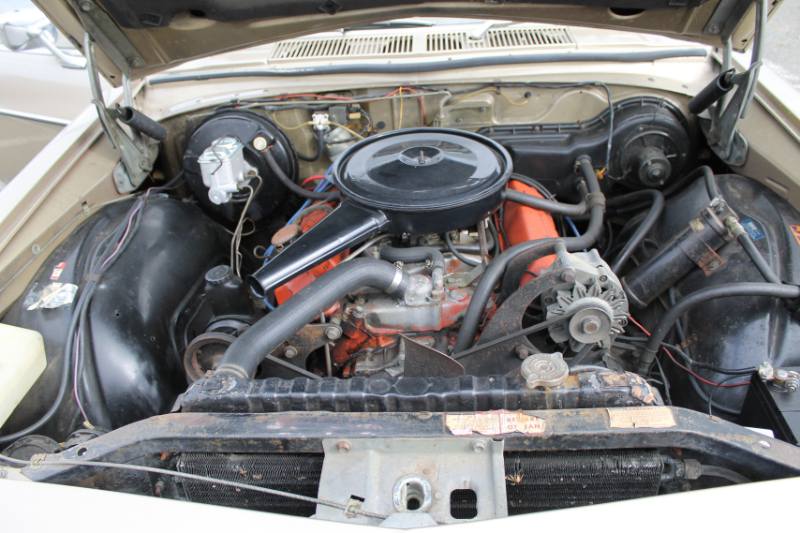
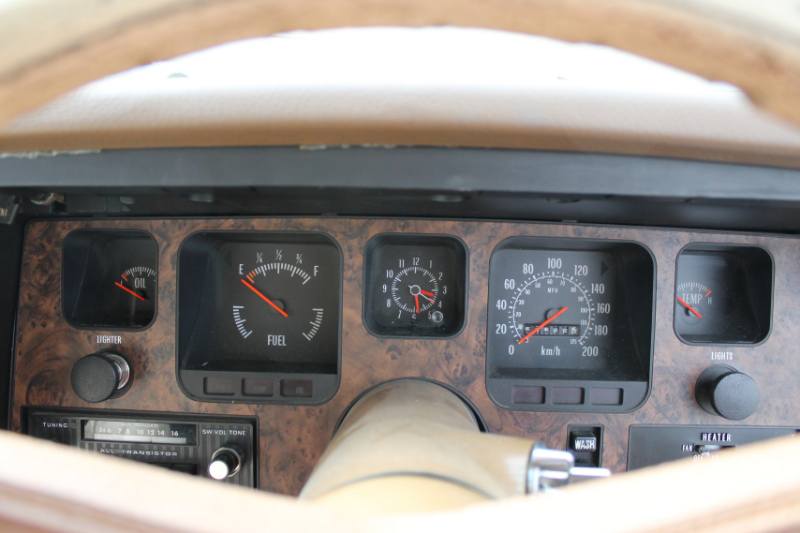
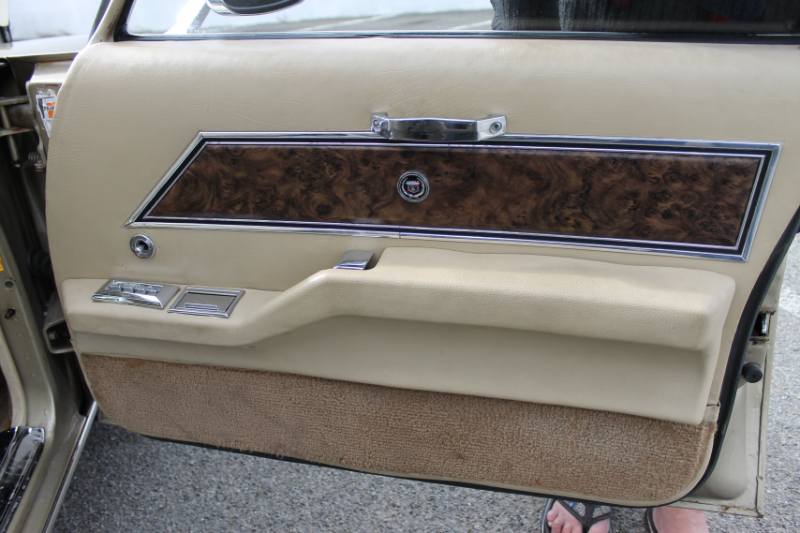
Well thought id add something here So I had been looking around for a old school car for a number of years. Something complete that I could drive and cruise. After being so picky and selective, I missed out on a couple of nice cars. Here I have recently picked up a 1973 Holden HQ Statesmen. Trademe special, saw it in Fielding and thought id go check it out. looked good in the pics. 57500km, 5 personal owners. First impression were it was a good looking car. Owner drove it in the first 5 years of ownership then sat in the shed till 2015 with regular startups and drives. also looked like it happened with all other previous owners, drive for a while and sat there. one was a deceased estate then stayed in the family with a son for a number of years doing nothing. First owner was an Auckland Holden dealer. All the windows looked brand new, hardly any scratches or water stains. The paint looked good, a little thin in places with specs of surface rust breaking through, to be expected after 42 years I guess. all the power windows worked. started easy. quiet running engine, no ticks or nothing. The interior was mint. one slight tear in fabric on drivers seat. original working AM radio with a dial to switch from front or rear speaker. Dealer installed Air Con by the looks. doesn't work, presumed to need regassing. doesn't bother me. the fan blows a lot of air and vented out front and side. much better than the standard HQ fan anyway. Engine was quiet, no oil or water leaks. though some gaskets could do with replacing as oil seeps through. checked the oil, it was down to the Low mark. so need to keep an eye on that. oh yeah, the doors. Sat in one of the front seats and closed the door. wow, no effort needed to pull the door shut. the springs are good in this one. actually I sat there and opened and closed the door about 15 times. just touch the door and it clicked shut. just like new. Checked out an ashtray in one door, it was half full with cigarette butts. the owner didn't smoke, so someone beforehand did and meant the current owner didn't clean the car super thoroughly. good old cable operated boot opener. original jack and accessories in the boot. I haven't even looked at the spare wheel, its still full of air anyway Owner took me for a cruise around the block. no squeaks, rattles as an old Holden does. Super comfy and smooth ride over humps and bumps. Has a little bit of kick for what it is Had another look over the car and took a few photos. ran it through my mind and bit the bullet. Sold. Ended up taking it for a drive around the block myself, oh so nice. Back to the house and inside for a cuppa tea before heading off on the long trip back home and figuring out how to get it home Discussion Thread
 3 points
 -
Did something's3 points
-
You are both more than welcome to come over and stay at my place. I will pt the kettle on now and the fire is going so you wont need many clothes. If you cant make it because you are fixing your skyline then feel free to send your girlfriend over and we will look after her. Tell her I have a fluffy cat.3 points
-
Please.3 points
-
New shell, new thread. purchased this gx61 with a 1ggte with a blown head gasket, parted out all the things i didnt need or already have. got rid of the sportmaxxs and sat it on something a bit more worthy whilst i went on holiday purchased some new old stock wheels while in japan (big ups to my mate josh for helping me carry them on the train) had pine engineering take them from 6" A type to 8" up front and 9" in the rear which brings me to today, car is currently a rolling body, i will tidy up the engine bay and set up the wiring and radiator for the 2jzge +w55 setup from my rx60 cressida and then swap everything over including the coilovers and give the interior a damn good clean.2 points
-
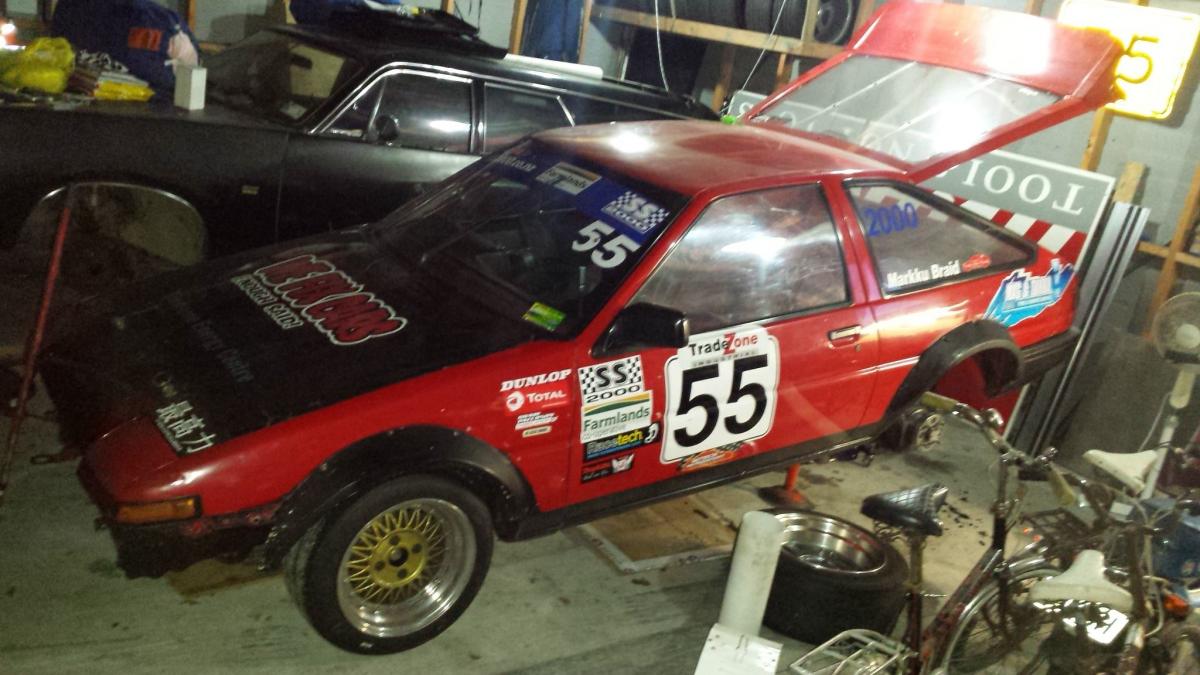
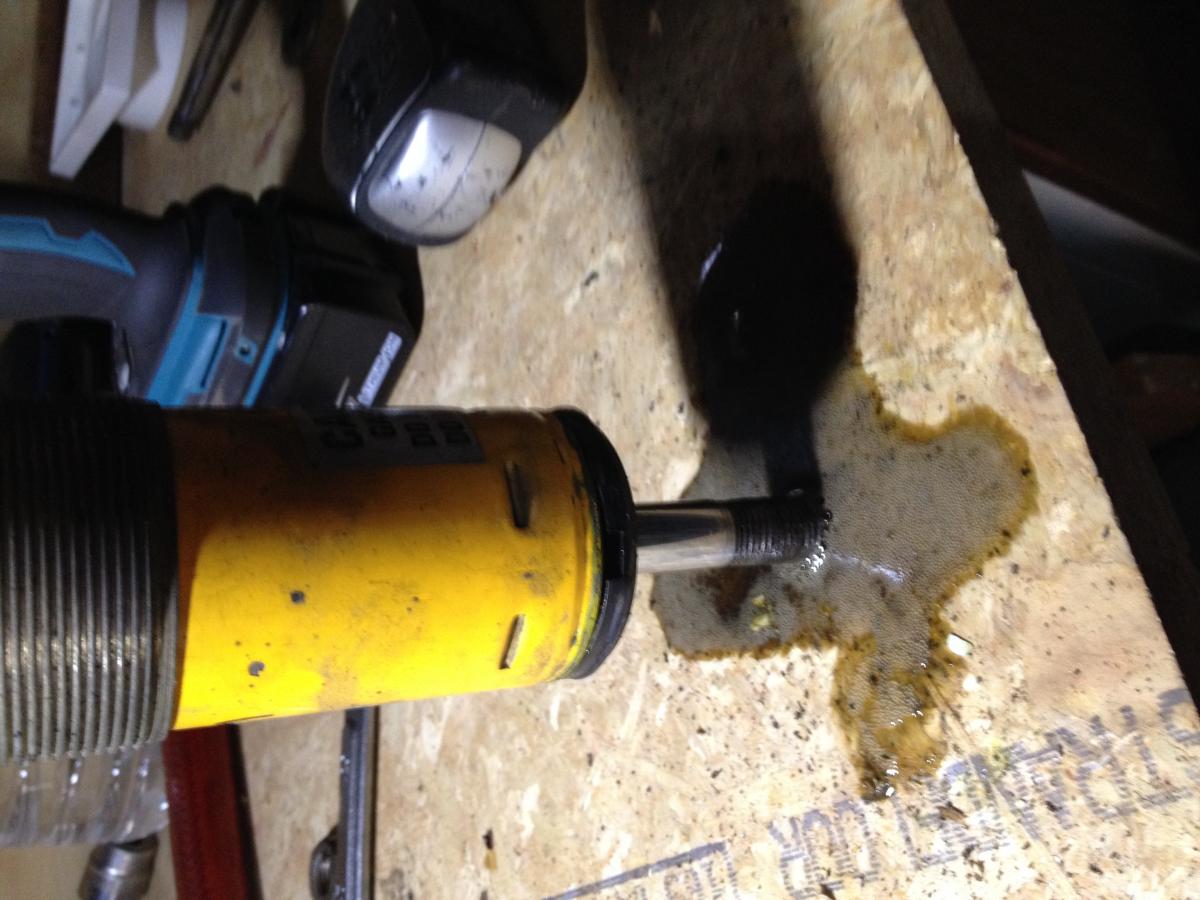
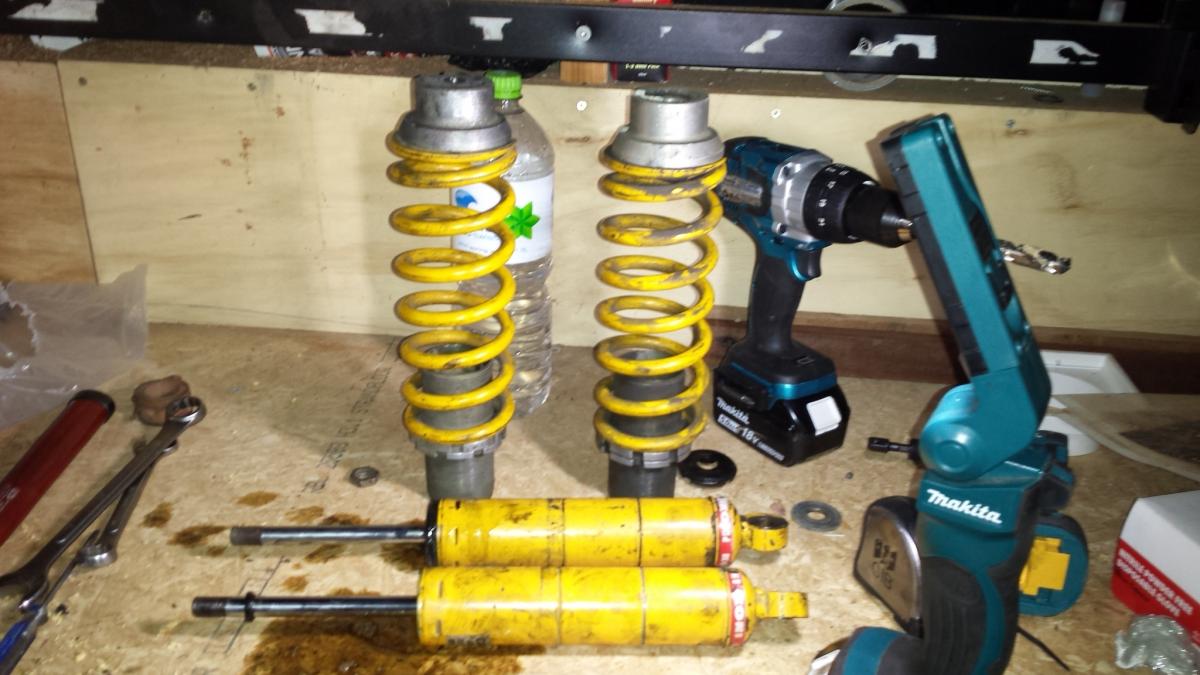
Time to start working on this again after leaving it alone since the final round at Easter. So here's the situation: There's a bit to do in the rear end. I'd suspected that the left rear shock was on its way out after the Pukekohe round of SS2000... And it turns out I was right: So it's time to replace all these bits: While I'm in there it's time to clean up the diff and replace all the axle seals as the RR is dropping a lot of oil and the LR is starting to weep as well. I should have a set of these in the mix soon (double adjustable) which will make a massive difference!
2 points
-
Guardwork, Team sticker, more low and almost at the perfect rear height, front still needs 165 65 14 chucked on and more low. Pretty happy. //oldschool.co.nz/index.php?/topic/47514-ants-tc24-gx71/2 points
-
Gave the engine bay a degrease and waterblast, will start looking at wiring for the 2jzge2 points
-
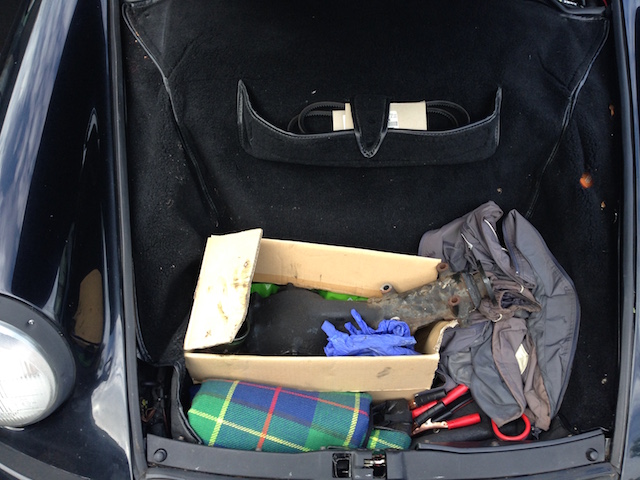
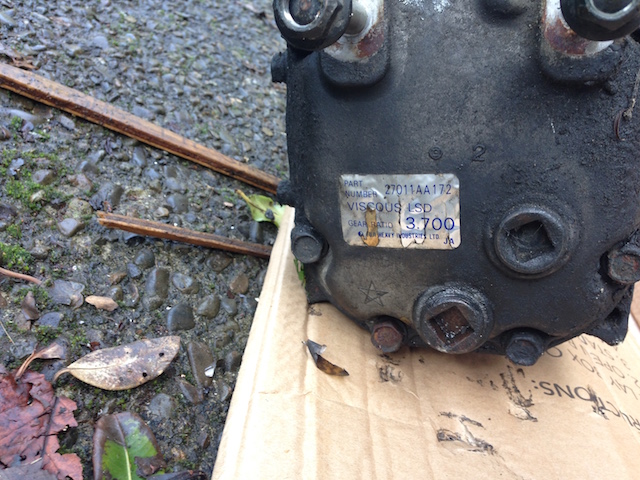
We went on a mission this morning. Last weekend we popped into Pick a Part for a visit. Its what we call a day out for the family.... We happened to notice a a Subaru SVX so Ethan looked underneath and spotted a 3.7 LSD diff in the back. We are looking to replace the non LSD old triumph diff with a Fuji Industries diff found in a whole heap of jap cars like datsuns, nissans and subaru. We can then think about replacing the swing spring and swing axled with CV's and coil overs. So we gathered our tools and prepared to roll around in the mud and grease at pick a part for the morning. Unfortunately the wife had the ute, The warrant on the Fuego had lapsed, the MR2 was trapped behind the Caravan, the Jag is unregistered, so we only had one car to take......the Porsche. Crawling around under a car and trying to undo suspension bolts is never fun but it is even worse when its gravel full of standing water. We finally got it out and then headed to the office to pay for it and the lady said "that looks like a transfer case" We re-assured her that it wasn't...."its a diff". Then then says "it looks like a transfer case". We re-assure her again that it wasn't. She then says "it looks like a transfer case though"..... I was starting to wonder is a transfer case cheaper and just say ......Yep....its transfer case all right!. But eventually she conceded that it was a diff. Here it is back at home.
2 points
-
Removed red pinstripe and hornet and fitted wheels this morning. Front needs to come down in height which should happen with the engine, gearbox and coilovers being fitted, rear is at perfect height, Previous owner has done some guard work to fit the 15x8 0p wheels so not a lot is needed2 points
-
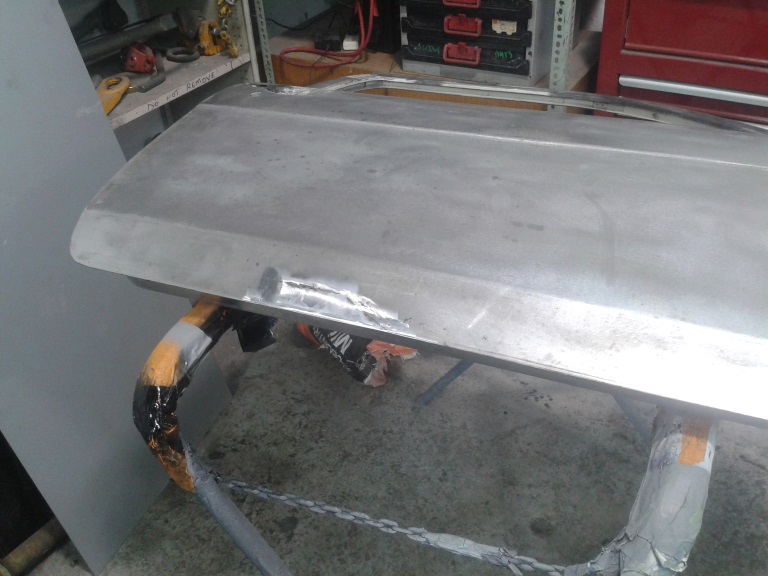
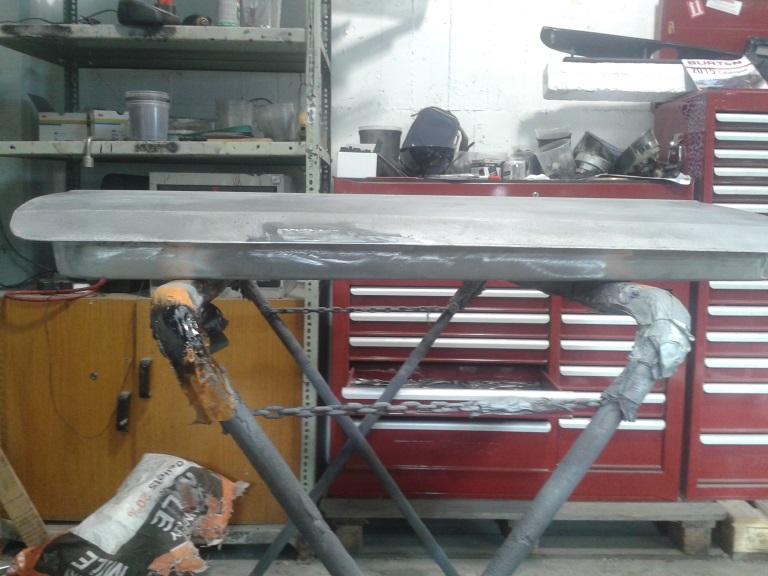
Again was a work day so didn't get much done, I finished of the skin patch on the second door and got the inside of the door metal preped and epoxied. I also heard back from burton power, looks like I can get the bracket i need to mount my calipers and if I change over to RS hubs I can use the rotors I want sooo hopefully that all works out and I'll get those items orderd asap it's all confirmed. Sorry still no pic of this just some more boring rust repair photos I also have next week off so I will be trying to fit the five speed gear box before painting the engine bay and much more. I also have now booked the last week of July off aswell but currently fitting a new bathroom which needs to be finished before the end of July as we have friends coming to stay from the 31st of July so this may soak up some of my time
2 points
-
That is kinda a dumb rule really; my bmw had a wild steering wheel shake at 120 on the motorway to the point where I had to drive slower than the traffic, fitted hub centric rings to the front wheels and now it'll sit at 150 no problems/ keep up with all the new mercs and beemas hahaha So even if it isn't required by cert, do it anyway, hubcentric rings are cheap and then you know they are right.2 points
-
Thatl suit the waikato boys perfect......................2 points
-
I had typed a long story buy closed the window by accident and aren't writing it again. Big thanks to nathan & greg for collecting and storing this until I could get it. I got it home saturday, chucked some fuel in the tank and water in the radiator and it started after a bit of encouraging. Found that the fuel pump was spraying fuel everywhere so now its running on lpg. plans are to fix rust, get a wof with the 202 and drop a 253/308 into it and drive Genuine holden service tool discussion://oldschool.co.nz/index.php?/topic/47520-chrisr-ness-hq-wagon/1 point
-
So after 6 years of not owning an oldschool car I thought it was time I did something about that. I decided at the end of last year I'd try to buy a GT6. However, I wanted a Mk2 as I preferred the more 60s styling, the problem being these are stupidly rare. But luckily I managed to be the first to offer money for the one that briefly appeared on Trademe last weekend. I picked it up from Whakatane/Rotorua/Tauranga (its a long story) yesterday. Drive back went well other than the speedo doesn't work and the headlights are dangerously bad for the last two hours in the dark, Its a 1970 and has had quite a lot of money spent on mechanicals recently. It needs the interior redone and theres a small amount of rust in both rear guards and the drivers door. Given I bought it site unseen I was pleasantly surprised. Its reasonably standard though has a few upgrades like brand new Mikuni flatsides, electronic ignition, hotter cam, GAZ adjustable shocks etc. Goes well though it is rather loud at 100ks despite having overdrive. [/url] ] If you look closely in this photo you'll see a piece of wood holding the tailgate up. Its supposed to be held up by a torsion bar by the hinges but like most this isnt working anymore and they're no longer available. So it has gas struts except these are just as broken. It has the factory option rear seat. These are like hens teeth apparently and having now experienced it I can see why noone chose them. Single worst rear seat ever, theres no leg room, no shoulder room let alone head room and you have to climb over the back of the front seats as they dont go forward enough to go around them. Here is the rust in the rear guards. As you can see drivers side is the worst of the two though the passengers is worse than this photo makes it look. Plans are to do not much to it in the short term as my mortgage is looking a bit sick but medium term plans are to continue tidying it up.1 point
-
Mind if us bunch of Ponces tag along? I'd like to see how the other half live Plus it might actually charge up the battery in one of my wrecks.1 point
-
boring pictureless update, Big thanks to neal for helping me grab a new motor for this today. Its a mostly complete 253, will do rings bearings seals etc and bung it in1 point
-
You can attend. Only if I can do a burnout on your face. Deal? xoxo1 point
-
Sweet Corona mate. I have an RT84 with an 18RG. Was 6R with W40 originally. Factory brake booster fouled on carbs so I just ran a remote booster. Other than that and making up a throttle cable and bracket, it was a pretty straightforward swap. W40 slave is identical to W50 for R-W bellhousing. Think I bought the last one from repco a couple years ago so if you can't track one down in NZ then rockauto.com has them.1 point
-
Looks good man. We must get pics of our cars, next to each other....1 point
-
1 point
-
Yeah- more photos of your sister please...1 point
-
Wow big difference in power now that the new carbs are on and it is has been dynoed, its like night and day. I was there for the dyno session and the Gloria was pulling just over 200hp at the wheels. It now has awesome throttle response and put you back in the seat power. Also just had an email on Friday that my new wheels are ready from the states, 17 x 7's for the front and 17 x 9.5's for the rear.1 point
-
I'm just pleased, as its one less job to do on the ute. And I don't have to be nice to the father in law, to gain access to his lathe, lols.1 point
-
Is the engine out of a R34 gtr?1 point
-
In Russia we have very few of these left. The fact that almost all of these machines are imported, most honest way. However, it's still legal.1 point
-
I have one of these chassis under a glass 33 ford coupe body. To clean up the front end, I took the control rods (which run forward from the lower suspension arms to the front x member) and swapped them left to right, flipping them upside down. That way they point down, rather than up. Then I cut the front of the chassis off just in front of the front suspension and made two frame horns out of 3mm plate and 50x3mm flat. I welded them on with a pipe between and now the hole thing looks a bit like the front of a model A or 32 ford chassis. Sorry, had the engineer make mounts with rubber/steel bushes going across ways that screw onto the flipped over control rods and welded tags under the front pipe to mount them. Sounds like a lot of work but when you see it, its not that difficult and makes the front end look that much better. I actually mounted the swaybar underneath also. (flipped over also). PS after doing this I found it all works well but the front end was still to high. I cut 1 complete coil off the front coil springs (not with the gas axe) With that done, the original shocks still hold the spring tight as required. I am running 3l turbo diesel gear in this car and wanted 5 stud front end to match the 5 stud toyota rear. I got L300 discs and put them on, but make sure the discs are the same ie vented / non vented. Hope this helps. Watching with interest. Macwood1 point
-
I have been involved with 3 cars that use these sensors, They seem to be pretty robust. The added bonus of being able to adjust the distance they are from the trigger. You will have to add a pull up resistor though, but that is just a resistor soldiered between two of the wires. All aftermarket ecus will prefer the signal from one of these. http://nz.rs-online.com/web/p/hall-effect-sensors/7659328/1 point
-
Been having a bit of a jam this week and are 90% there with taking the engine out. Our $8.50 Hayne's manual has proven its worth, the pretty picture instructions have made it easy enough to follow for us first-timers. Few pics of the process - Pea-shooter off Carb off Current engine bay Bought a cheap engine stand from save barn and are borrowing a hoist over the weekend to get her out.1 point
-
fantastic final picture Eddie1 point
-
Needs 165 65 14 up front to replace the yuck 195 45 14. Rear needs a HUGE roll. Will take better pictures this weekend. Next up is Stainless pipes and ITB manifold being made i think.1 point
-
If the weather is nice the Firebird will be out and I have a couple of spare seats. Wet weather and the Silverado will be there, it has 4 spares seats. Passengers must like V8 noises and loud rock music. Mike1 point
-
Another update: I have sourced a fridge/freezer for the final shed. I'll stuff it full of ice creams and the likes. We will also have some drinks and some BBQ food but could really use some more food donations on the day. So bring your meat along too but don't whip it out until later in the day. Salads, buns, garlic bread, sauce etc are also encouraged. There may also be scones along the way...1 point
-
The girls, in the Kei, in the Van?1 point
-
Just over a week to go guys and girls! A couple of key developments: - The Zebra shed has been improved with new lighting, a swept floor and more old english car parts - Kempy will be brewing a top secret type of coffee that has never been made in this Country before! - I am working on providing some iced cream based dessert treats for all attendees. Hopefully everyone has sorted a ride to this event. If not, just send me a PM and I'll see what I can do. Otherwise post up your 'ride wanted' reply here and chances are that somebody may be able to help.1 point
-
tonights story in pictures. Untitled by sheepers, on Flickr Untitled by sheepers, on Flickr Untitled by sheepers, on Flickr Untitled by sheepers, on Flickr Untitled by sheepers, on Flickr1 point
-
It lives1 point
-
Update time. Wow! I thought this would be a quick little write up but actually turned into an essay length spiel. Best you put the kettle on... So a fair bit has been going on in our little valley. I've been trying to remember to take photos but usually get carried away and have finished whatever before I remember. I did go up to the ridge a wee while back and take a pretty photo or two of the sunrise. Very nice up there. Cant wait to build a cabin for that place! Coming back down to the truck via the ridge track- Tuis playing morning tunes in the Lucerne tree next to truck. Since getting that lathe in place the shed has been getting used and sort of just evolving in doing so. Things/tools have found a place. With the winter weather it feels cosy- especially in heavy rain. Really needs a wood burner or waste oil burner for the colder days because man can it be chilly in the evening. I will make something but accept that it will only heat up a little area and be hugely inefficient trying to heat it all. Maybe something arond the main bench/lathe area would be good. One thing that we are both stoked with getting is the hoist. We could only afford it because we bought the secondhand lathe instead of a new chinese lathe. The bank balance is getting low as and we ummed a bit about spending the coin on a hoist but so glad we bought it instead of waiting because man its useful! I ordered it from trademe and had it delivered to a Nelson depot. Just managed to squeeze it in the van for a slow trip home which saved on the silly rural delivery charges. Shane came round the next day and helped put up the main structure. It went up pretty fuss free and seems fine for a cheaper chinese hoist. I can see where the costs are cut when compared to a Heshbon etc but its strong and well built where it needs to be. Currently we just plug the hoist into extension cord. Must order appropriate lecky supplies and lights then wire up shed! It dwarfs the Viva. Oh yeah- also note the steel rack we recently built. Was great to get all the steel we have found while clearing the block out of the rain and inside. Stepping away from the workshop we have been busy with many other things. First off we needed to get the ever growing piles of firewood out of the coming winter rains. Into our pile of telephone poles and old iron and we built this. I also nabbed some old wooden shed doors left outside a nelson garage doorplace. Free to take- i like. These I turned into a storage bin for all them little offcuts of wood that are a pain to stack. So now we have some storage but will need more. We have at least 50 pine trees big and small to chop down over next few years. Some in the gullies will just rot or be made into north shore style bike trails. Many we can use to keep us warm. Then that little sailing boat. The sun and the rain wont help it at all plus it was in the way- taking up space I could fill with another old car. So more telepoles and the 6m lengths of NEW iron that had been left in the bush edge by previous land owner came in handy. We built this... (turns out to be also very handy for lawnmower, old pushbikes and bike trailer storage) Meanwhile our neighbour has offered us her field which was overgrown with gorse and blackberry for the past 20 years. We wanted to clear it out so our view was nicer and had been intending to ask her if that was cool. Then she just said one day- hey how about we make it into a fruit orchard. OK ! So it was out with the scrub cutter and chainsaw and with a couple of days hard graft we had it all clear. It looks so much better and the soil is amazing as it originally had two pigs there then getting nitrogen fixed by gorse for past two decades. Next step is to plant it out but for now its just great the have a view with out gorse and masses of blackberry. Before.. During.. After... That little fence we have left up to plant grapes and kiwis on. We are both still very much newbies when it comes to growing things but no being stressy types what grows will grow etc etc Our neighbour- well shes very green fingered and will help us out heaps. Plus there's the nerd net for info. Main thing is I'm enjoying this whole land thingee and planting stuff way more that I thought I would Then there is the track up to our ridge. We had been planning to clear it for ages so a day or so with the scrubcutter and now its way nicer to walk up. Horse and Jen happened to turn up one day whikle there were up here for holiday so they got a tour of our freshly cleared track. We have now almost cleared out the building site at the top where we are planning another cabin build. Not photos of the now cleared track but I did take this one the other evening when we went up to watch the sunset and drink beer. When we got to the ridge a huge deer went storming away from us over the gully. Quite a sight ! What is cooler was the picture on my beer bottle... Speaking of tracks.. Hannah went away on a few days trip with her sister who was visiting. While they were gone I hooked into the start of our first mtb track. We have always planned the first track to head as gently as possible up to the ridgetop- a gentle enough gradient for an easy ride or walk. I really wanted to get something done while hannah was away as a surprise. I cut, dug, raked, carted, stacked, walked, toiled, bashed a track through the Kanuka grove just behind the cabin over two days and built whole first track. I really enjoyed it and worked through till it was almost dark. I was knackered at the end of the second day. Hannah got back from the tramp and I surprised them both with my new track. Its still a touch too steep to ride up easily up so Ive worked out a path for a track that seperates off where it gets steeper and will head back towards the truck then back again. Pretty much..more hairpins = more track = easier gradient (but also = more work....) Big thing getting built right now is our outside bathroom. We have had this planned ever since first viewing the property but had not yet decided on where, what and how. The 'what' bit we have sort of picked away at since before moving here. Discussed over coffee or beer (but not both) we have gone over ideas that have come about from years of using various homemade showers and dealing with a variety of toilets. Fascinating stuff. The 'where' bit sort of just fell in place once the cabin was up in its new location. Its on a slope backed with bush which is ideal for what we envisaged. Situated halfway between the cabin and the back of the shed its in a handy location for us and the cabin and its private with lovely views. The 'how' bit is just evolving as we build. Its an elevated building over composting toilet system. For now its the well proven batch type setup with wheelie bins. Rotated as they fill with a minimum of 1 year composting in the bins before going into a seperate compost area up off the driveway for another 6 months. Then the compost can be used in places like the fruit orchard and areas we are building the native bush back up. From all the reading we have done this is total overkill as far as dealing to any pathogens but hey. No harm there. Its going to be awesome having a decent setup that has a minimum amount of moving shit about, he he, and not have to pay or worry about involving outside services like septic systems. In the future Id like to build our own 'Clivus multrum' style system, a setup that uses a sloped bottom vessel and is continuous in operation. You can buy 1 m3 capacity units made in plastic if you have a spare $4000...which is an absurd price considering our 25000 litre tank cost $2600. I'll use stainless steel to make the structure. But that still involves more pingas and time which we dont have- the latter due to the longdrop filling fast. The grey water will be treated using a reed bed system. This is pretty easy espicially on our type of land because of the clay below. The water will only go down so far and then move along. Moving water through soil is the quickest way of treating it. It does not take many meters before any nasties are dealt to. First off we dug out the bank. This did take quite a while. I had to take breaks and sit down to sip at beer while looking at the mountains. We would take turns at this after Hannah saw how nice that looked. Eventually a large 'void'? was created and funny enough a hill appeared somewhere else. Much of this hill appeared next to the graden because there's some very lush dirt with some mighty fine looking well fed worms in it. Kevin just watched or chased clods down the slope. We also had this fella stroll out of the dirt where we had sadly destroyed his underground lair. What a huge bugger he (or she) is. I released him later further up in the bush but not until Id worked out what brand he was.. Turns out he's of the 'Stanwellia' species- related to trapdoor spiders and quite rarely seen as usually underground. His burrow was massive and we had sliced right through it with the spade. See here for another one.. http://www.nzherald.co.nz/nz/news/article.cfm?c_id=1&objectid=11307026 Then we planted four H5 treated poles set well down into the granity clay below. A thick plastic groundsheet runs up past the decking and right up the walls sealing in the treated plywood clad basement. The decking is insulated below with 40 mm thick insulation and the inside has reflective foil insulation. We want to create a heat trap to keep the interior as hot as possible so promoting a decent heat in the compost. Inbetween building we cleared out the bush around that area. When intially clearing the land last year of gorse we worked up to the bush edge and only so far in. We had left the gorse hiding within because its dying back anyway. But this area was still pretty bad so a few hours and we not only had a lovely little spot but yet heaps more firewood. Some of the old gorse was huge! So much more light into that area and on the bathroom. The pile on the left is gorse from just that little area. Above this we've built a nice solid little bathroom that measures 4 m2. It'll contain sssb - the shitter, a shower, a sink and a bench. Then we built steps using some more of the telephone poles. Its quite high up and we have to allow for our olds etc when they visit so easy to climb steps they had to be. Must build a rail soon because man I'd hate to go trippin off that ledge... We have made a little track through the bush and once tidied up will be a sweet way to walk to the bathroom from the truck. The steps come right down to this track. We picked through our pile of Rimu, picked out some possibly nice bits- possibly because you really cant tell until it goes through the planer. These became window and door frames plus some rafters. When the main shed was delivered the piles of sheets were protected some extra packing sheets in a dark grey colour. There were just enough of them to clad the roof with a decent overhang. Sweet! We still have a little left over for another wood shed too My old boss gave us a whole heap of wood leftover from his house build. All Cedar, Macrocarpa and some Douglas fir. Ideal timbers for building things with! So the Douglas fir we ripped down and planed then made doors with. They are barn style doors and Hannah has oiled them. They look nice. Photos later of them completed but heres a action shot.. Hannah painted the outside of the window frames with paint left over from the housetruck. Then I scored 4 litres of 'mist green' paint from nelson house parts. Its the same colour as the water tank and similar too the main shed. It should help the building blend into the bush nicely. I have a neat idea on an overlay method using random wood to break up what will other wise look like a tall painted ply building. I think it will work well. We will see. Here is the building so far with the primer coat on...1 point
-
I fixed the not idling/ running like a bag of shit problem by tightening the intake manifold bolts. I can actually shift into first/reverse now that I have adjusted the linkages. I cracked out the sand blaster and the drivers floor is pretty holey. Also does anyone have a large sized compressor I can borrow? can have a 15/16A plug on it as our garage has them. My favourite part is the rain instantly sterting to rust the metal1 point
-
Got it outiside and pulled the nose cone off and started doing some grinding. it appears all the doors have been dipped in bog and the rest of the car has had a few layers slapped on. No unexpected rust yet but It all needs to come off now. The more I grind off the more rust spots appear. I have a replacement for that last door thankfully Oh and here is one of the badge on the back1 point
-
More pics thanks neal1 point
-
Heres a sketch of the old girl drawn by my mates girlfriend.1 point
-
advantage of being so small is that in winter you can just swap the led/cfl light bulbs out for tungsten ones and that'll be all the heating you'll need.1 point


.thumb.jpeg.384ff72c8d2b0ee0d34a7bdedb55bdcf.jpeg)


This leaderboard is set to Auckland/GMT+12:00