Leaderboard
Popular Content
Showing content with the highest reputation on 07/09/24 in all areas
-
I have a confession to make. I feel dirty for what I have done and must come clean. I have raised my car Hear me out though. I know its a terrible thing but my hand was forced and it had to be done. So after my birthday cakes had been all eaten, mainly by me (little fatty), I decided I needed to look at the suspension. My front springs are essentially Rootes 'Monte Carlo' spec which means 195lb" and 9.5 inches long, or about an inch shorter, with one less coil than standard imp springs... But because I'd modified the spring perch on my stock dampers to make the car even lower it meant the Monte springs were not captive at full droop without the aid of retaining straps. These are fine in use in the UK and quite a common fitment on lowered Imps but they wont pass the muster here in NZ for certification when that time comes. I also had a total lack of any height adjustment without resorting to various spacers beneath the springs etc. So I started looking at various coilover kits made specifically for the Imp. There's at least three brands out there that do kits, all made in the UK and all quite expensive once freight is added into the equation. Luckily I ended up chatting to a fella called Frank in Australia who I've bought stuff from before. He imports and sells Gaz coilovers as well as loads of other Hillman based items. He had a near new front pair he was removing from one of his Imps and offered me a good deal on them. They are the 'short' dampers to suit lowered imps and he was including the appropriate 'super low Monte Carlo' springs. These are 8.6 inchs long and needed if I wanted to keep my Imp sitting nice and low. So while they were on the slow boat from Australia I started looking into the rear shocks. The stock Imp items were working ok but I knew that one was low on oil and not ideal in action. I was informed that Nissan Navara D21 front shocks were an almost straight swap so I got a shiny almost new pair from a ute at the local wreckers to try out. To my surprise they were actually considerably softer in damping than the Imp items, both in bump and rebound. Still, I had them to try so I machined up some suitable spacers to suit and the smaller Imp bolts and the top bushes.. Bolted them in place and went for a drive. Nup. I don't like. Too soft and a bit too wallowy. Passable for normal driving on smooth roads but start driving with a bit of enthusiasm and the back end starts getting a little bit flighty, especially in sharp compressions. I would have to sort something else out and started looking into ideas. Then the Gaz coilovers and super low springs turned up. Here are my standard Montes next to the super lows. The same coil count and rating but just set shorter. I wanted to test them just to be sure so things got a bit scientific.. They were rated exactly as they said on the tin. The Gaz dampers and superlow springs showed the overall length from bottom eye to the top of the spring to be very similar to my modified dampers and standard Monte springs. Things were looking promising for me to keep my Imp at the same height. So I fitted them.. I then removed my retaining straps and the arms dropped further, so releasing my springs from captivity I had to wind the collars up 15mm to hold the springs from rattling about. Oh well. I suspected I might end up in this situation. On the bright side it does mean the excessive negative camber has been removed and I also wont be smashing so many hedgehogs/other roadkill with my license plate. I went to sleep and had nightmares about my new lofty height. This morning I revisited it and replaced the absurdly thick, what look to be just generic damper top mount rubbers with my old stock Imp items. This moved the shaft fixing up 5mm so allowing the collars to be lowered the same amount. So I now have a 10mm extra ride height with room for adjustment and completely captive springs. The camber is about bang on for what is recommended on a road imp. I took it for a good drive to try them out but I'll talk more about that soon. Moving back to the rear dampers. I removed the soft Navara items and looked at my leaky unit. The shaft has a small amount of light corrosion just below the bumpstop. Although it was fine when I'd fitted the shocks, 13,000kms thereabouts of driving since has seen it lose fluid. I had a plan. They are pretty common designed double walled units. There is a gap between the outer tube and the inner tube that the piston slides up and down. As the shaft enters the damper the oil height increases from displacement. This cavity was down on fluid. I drilled a tiny hole near the top, through the outer skin and whilst extending the shaft out I added oil with a small syringe. I then tapped the hole and fitted a small machine screw and O-ring. The shock works perfectly enough now, at least until I get some replacements. Now it was time to look at the rear ride height. The new engine and gearbox is at a guess something like 20kg heavier than the Datsun setup. I'll have a better idea next time I weigh the car. Its enough that the car has sunk maybe 5 or 10mm. Not a lot but combined with the higher front it now had a distinctly nose up, bum down look that I'm not keen on. Plus I'd like the driveshafts to be a little straighter. They were heading slightly uphill to the hubs with the angle getting steeper as the rear squats under acceleration. The rear springs are standard 1" lower, slightly stiffer Monte spec. So I made some 15mm spacers. Probably only needed 10 but I can machine them down. It now sits as such. Bum slightly up. Half a tank of gas. Exactly no bags of cement thanks Barry. Hannah measured both front and rear arch heights as I sat down into the car and shut the door. Interestingly, and I think quite a good thing, is that the car drops 10mm equally front and rear. I'm going to try this new setup out before deciding if I skim my spacers down. Another important issue I really wanted to sort out was the exhaust drone. Every time we would take the car for a drive the drone was overpowering. I wanted to believe that we'd get used to it or learn to drive around the drone zone of roughly 2300rpm but it was futile. It had to be addressed. Mention of J pipes, resonator pipes or 1/4 wave resonator pipes or whatever name they might have was mooted by several people. Not just on for this car but also on other peoples threads and on the oldschool exhaust discussion thread. I read up about them and they sounded like an ideal potential solution but I really just didn't have any room to fit them between the exhaust box and the headers. But how about inside the box? Extend the inlet within, tee off from that to the outside and use an elbow to send pipes forwards. I looked through my collection of random stainless tube fittings.. Something like this?.. Hmmmm... it could work and was worth an investigation. Car on the hoist and within 5 minutes the entire exhaust box was removed. V clamps are fantastic. I removed the gazillion 6mm bolts, broke the silicone seal and removed the lid. Some measurements were made and a holes were cut as neatly as I could with the plasma cutter. I hole sawed some stainless tube that matched the inlet diameter.. Welded a slightly smaller 32mm pipe and fitted the tees into each end of the box. Pulled out the heavy length of 50mm 304 stainless bar and cut off some discs Those I machined up into stepped flanges. 4 holes drilled and tapped in them to suit and then welded onto the outlets on the box. The J pipes had the other flanges welded on via the inside.. Above the new Tee pipes within the box end expansion chambers I added a shelf of stainless perforated sheet that bolts in place and then filled the void above with more packing. This was just another way I could absorb some sound.. Lid was siliconed back in place and bolted down. Now the J pipes. I fabricated those up with the bends and made them as long as I could. There are multiple websites with ample information on how to calculate the required length depending on engine rpm, frequency, cylinder count etc etc. But they are usually dealing with exhausts that have just one main exhaust pipe to J pipe off from. My setup is like two 3 cylinder engines really with their own separate exhausts. I wasn't sure which calcs to use. But pretend I have just one exhaust feeding off both banks I was looking at a J pipe length of circa 800mm. I figured I would halve that and my finished J pipes came out at just on 405mm with the ends almost meeting the rear arch inners. I figured I can always chop them down in length so better to start as long as I can. I found some ideal stainless penny washers for the end caps.. J pipes installed... They are a bit ugly though. Although I can't see them from within the engine bay they are easily visible outside and I don't like seeing them. I have also never really liked the way the box ends don't tie in with the back corners so I had an idea to try. I carefully made these stainless guards.. There were already some useful holes I had added to the valance lip for the Datsun exhaust.. Guards/ugly pipe hiders in place... Time to try it out. I was pretty confident that there was going to be some amount of noise suppression but how much ? Upon start up we could both tell it was quieter. Took it for a drive to go pick up yet another customers rusty Hiace for work and yes - it was quieter!!! The drone was knocked right down. Its still there at certain loads but no where near as horrid. Now as per the earlier mention of a drive to try out the new front shocks. Well it was also a good chance to try out the exhaust. This time I was sans Hannah. It meant I could thrash the car to my hearts content without Hannah having to cling on for dear life. There are no grab handles in the car and the Recaros only hold you so much. I took the laptop though and used it as a chance to let the autotune see some of the more extreme areas of the fuel map. 30kms of twisty hillclimbs local to us and a good solid use of the throttle travel. Damn its fun. The exhaust is much better drone wise but I almost want a little more sound. From inside the car its still more straight six than flat six. I'd like more of the guttural, raspy Porsche flat six sound. My exhaust/engine sounds smoother. A bit of this could be because its water cooled and the Porsche 911s I like most are aircooled (and usually twice the capacity...) They are almost clattery at idle, slightly hollow. I do some have other ideas floating in my head about future exhaust designs. I know these engines can sound more 'Porschey' but I don't have as much room to play with as the bikes I have been viewing. But wow- this engine is a little gem. I'm tending to keep it in gear for much longer between corners because its so smooth at high revs whether I'm on or off the throttle. It'll be much better when I build my new dash and have a rev counter right in front, that's for sure. The gear change is getting better and better with use as the shaft bushs loosen up a bit. I have ideas for improvements too but no rush. Its a delight to drop from 3rd to 2nd, a gear change that can make or break the fun to be had in a car driven hard on hills I feel. The program managed a good amount of changes to the fuel table and its pretty good now. Start up hot or cold is great. Just a few bits to smooth out. I'm going to tweak the throttle plate stop screw and idle bleed appropriately. I think the throttle disc is a bit sticky when closed which doesn't help for light throttle action when trying to move off slowly. The rear navara shocks, as noted previously were not helping. Looking forward to the next drive now I have originals back in, complete with all their oil. The front shocks are actually about the same as what I had originally. I have set the damping to what I feel is about the same as the originals. It really doesn't require much damping in the front (unless some internet Barry has finally managed to persuade me that 3 sacks of concrete in the front really is the way to set up rear engined cars) I am going to dig out the go pro, hope the batteries are not dead and try to get some better camera angles along with better exhaust sound representation. I really want to hear what its like from outside with the new exhaust and better tune.6 points
-
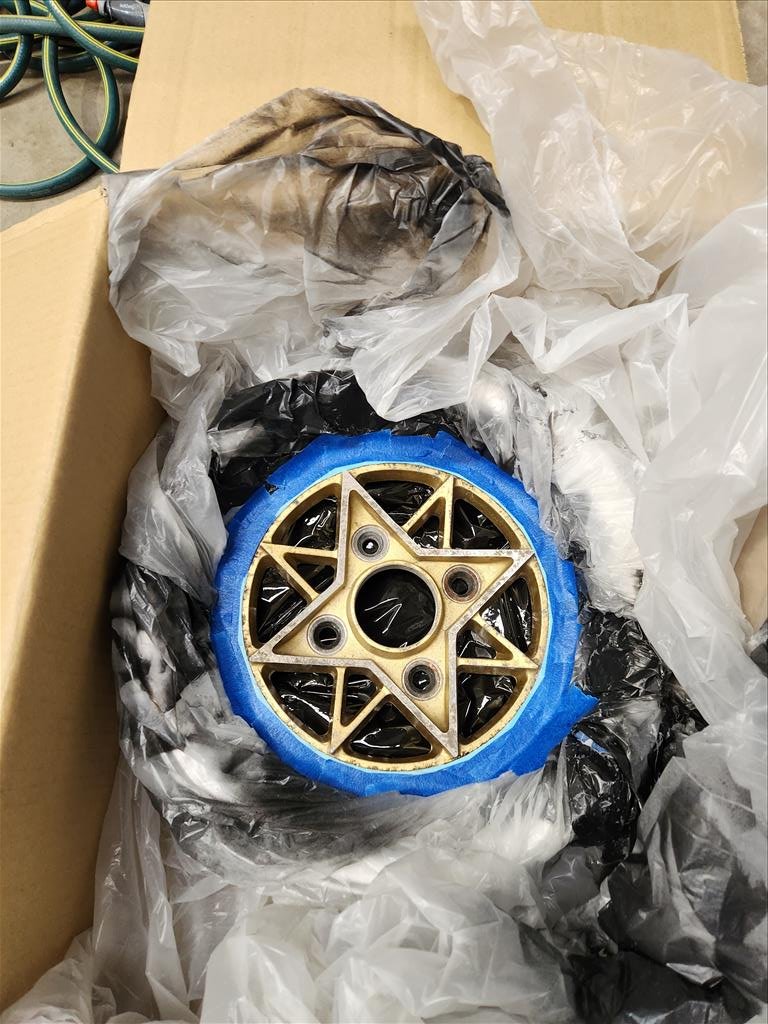
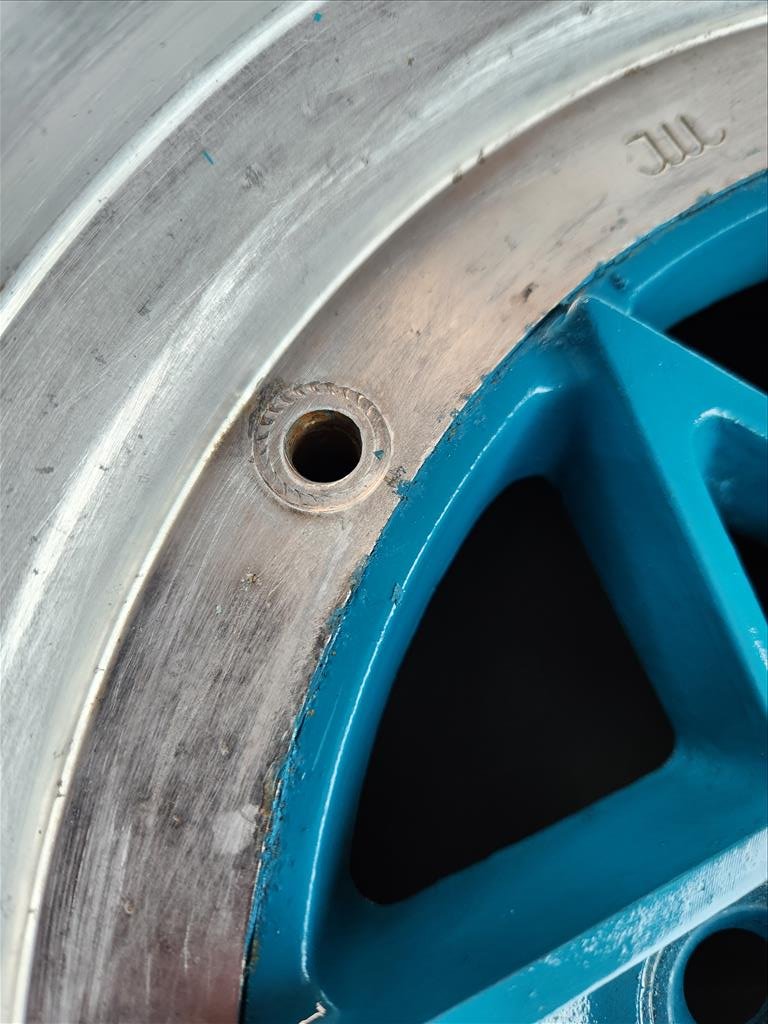
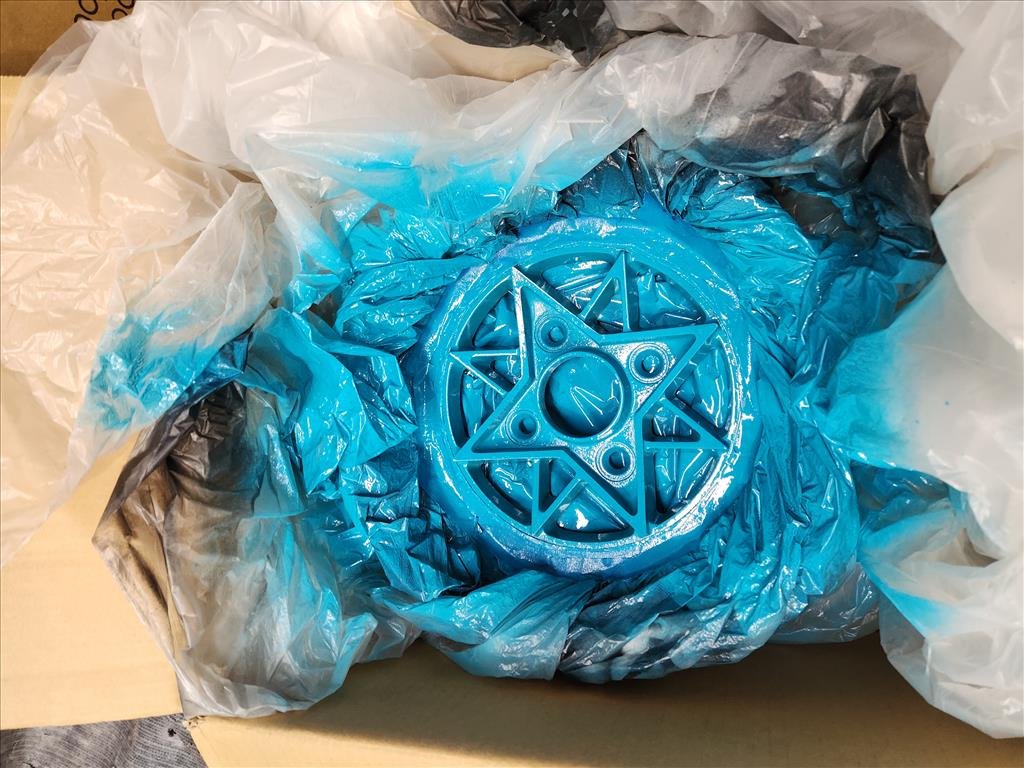
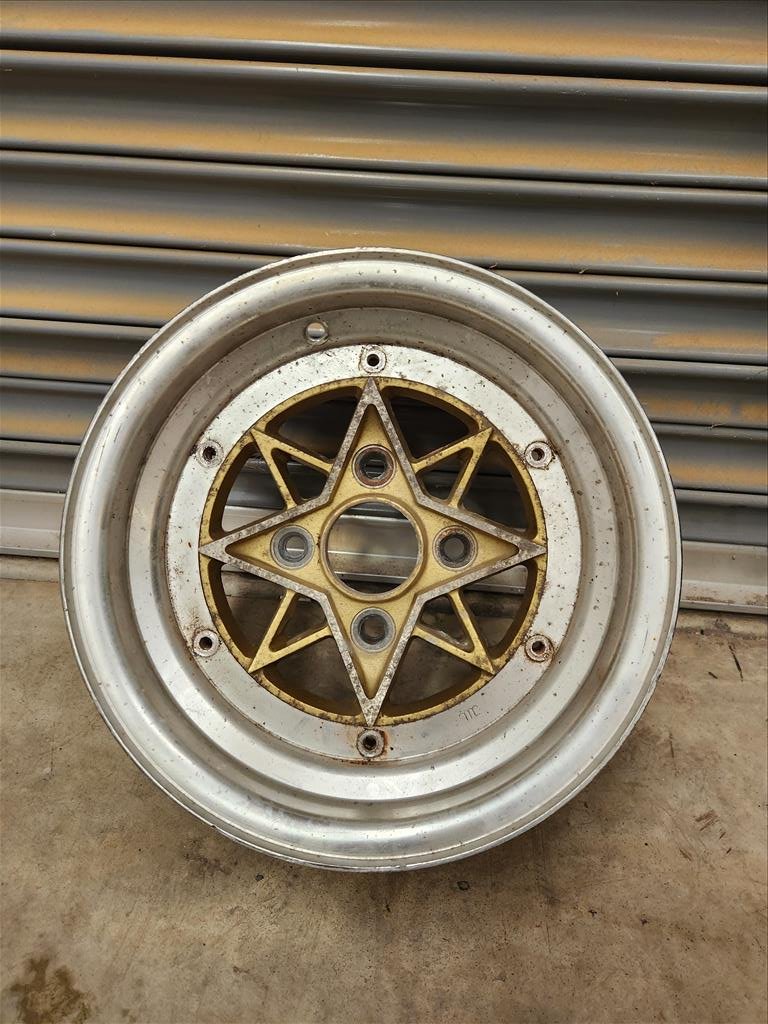
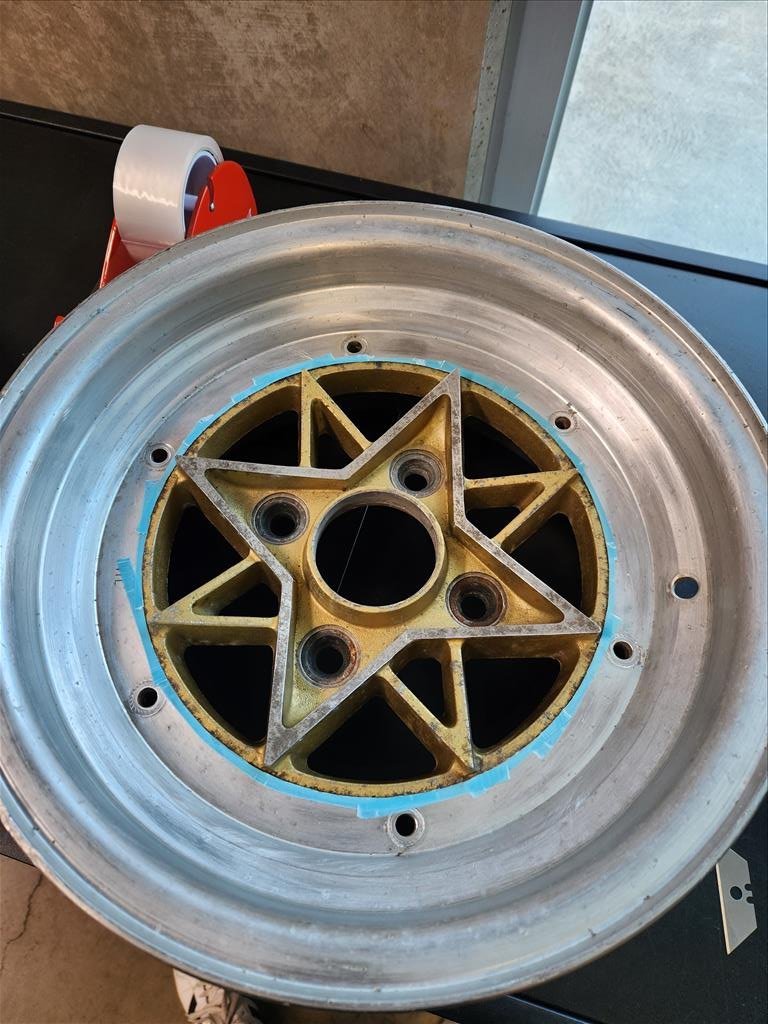
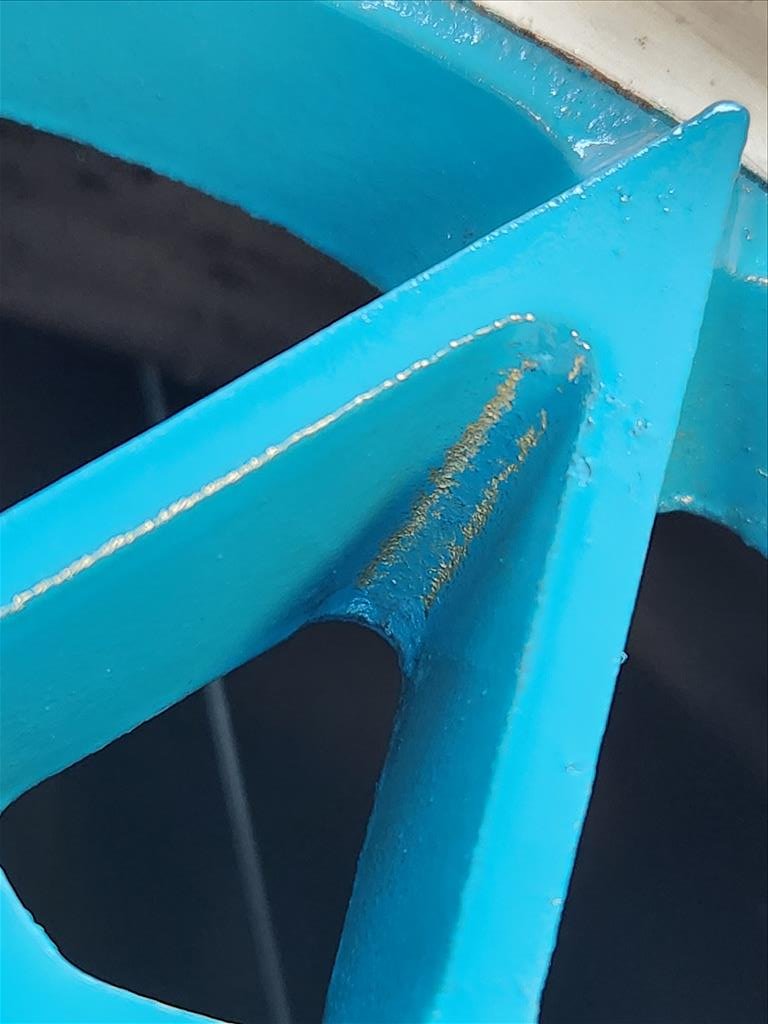
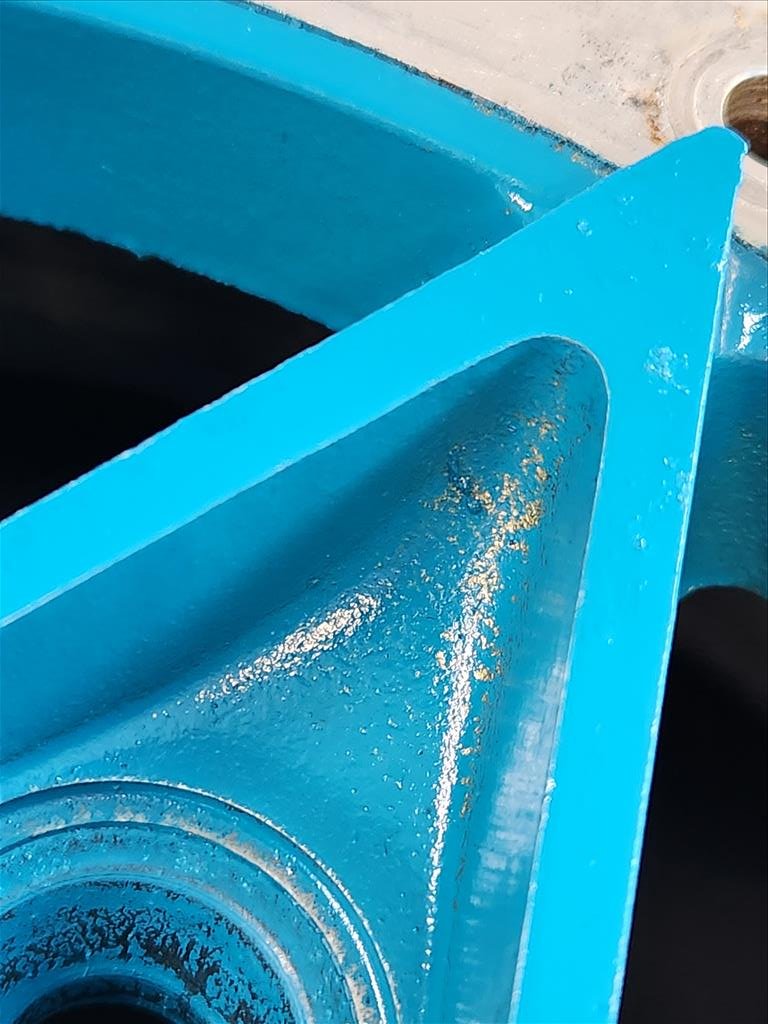
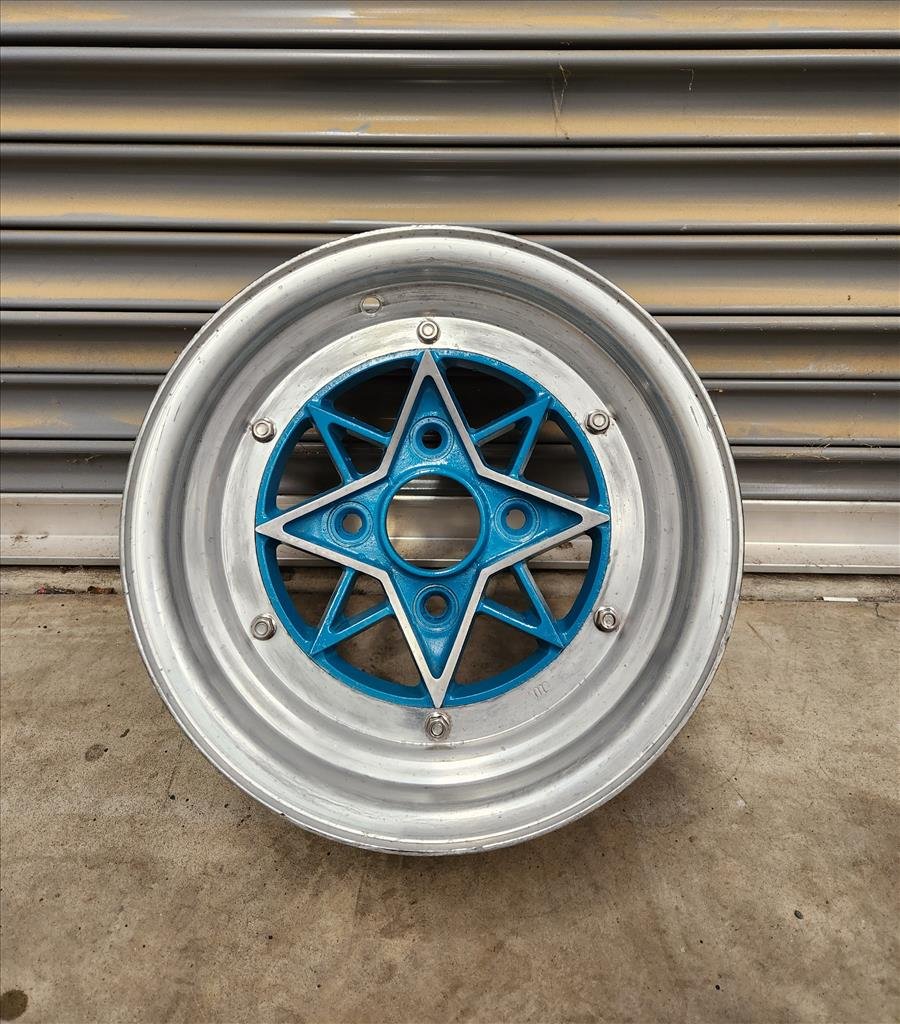
The next sacrifice for my wheel tomfoolery is this 13" starshark. I don't know why I have a 13" starshark. I suspect some whisky was involved in that one as I'm 14" for life. Anyway as you can see it's pretty old and crusty as per everything in my life so I figured why not try a new Rustoleum colour and learn about some new tape as well. Previously on this adventure I mentioned about bleed from the cheap ebay tape I was using so I ordered some fancy 3M edging tape. This tape seems more plastic than the other paper-based tape which is probably excellent for stopping bleed but makes it much more difficult to cut cleanly, at least that's what I found. I did a quick scuff over for the old yellow and also ruined the lip in the process by trying to get out as much of the old pitted crust as possible so now it looks matte and uneven. As you can see I taped around the edge and there's a little gap between the face and the lip which I could (for the most part) slip the blade into in order to get a clean cut. Then after that some more masking and the usual plastic around the outside treatment and into the paint booth. Couple coats of this blue (which actually looks a bit more tiffany blue in real life) and then some gloss clear coat which I've also never tried using before. Once the paint was dried and tape pulled off you can see some bleed still but this is actually not from the tape. The reason this happened is the lip is so pitted the paint actually went underneath the tape as there was a gap. Also to the surprise of nobody, paint doesn't stick well when the prep is poor. Anyway perhaps the finished product is better than the start product? Learnt some more things along the way. I think in my head the best way to approach this type of wheel would go like this: 1) dip or soda blast it first to get the old shit off 2) Cut the lip off 3) Paint what you want 4) Diamond cut the one star as sanding for an hour for an average finish was not fun 5) Weld new lip on That way you'd get a clean paint job. I may still do that just for kicks.4 points
-
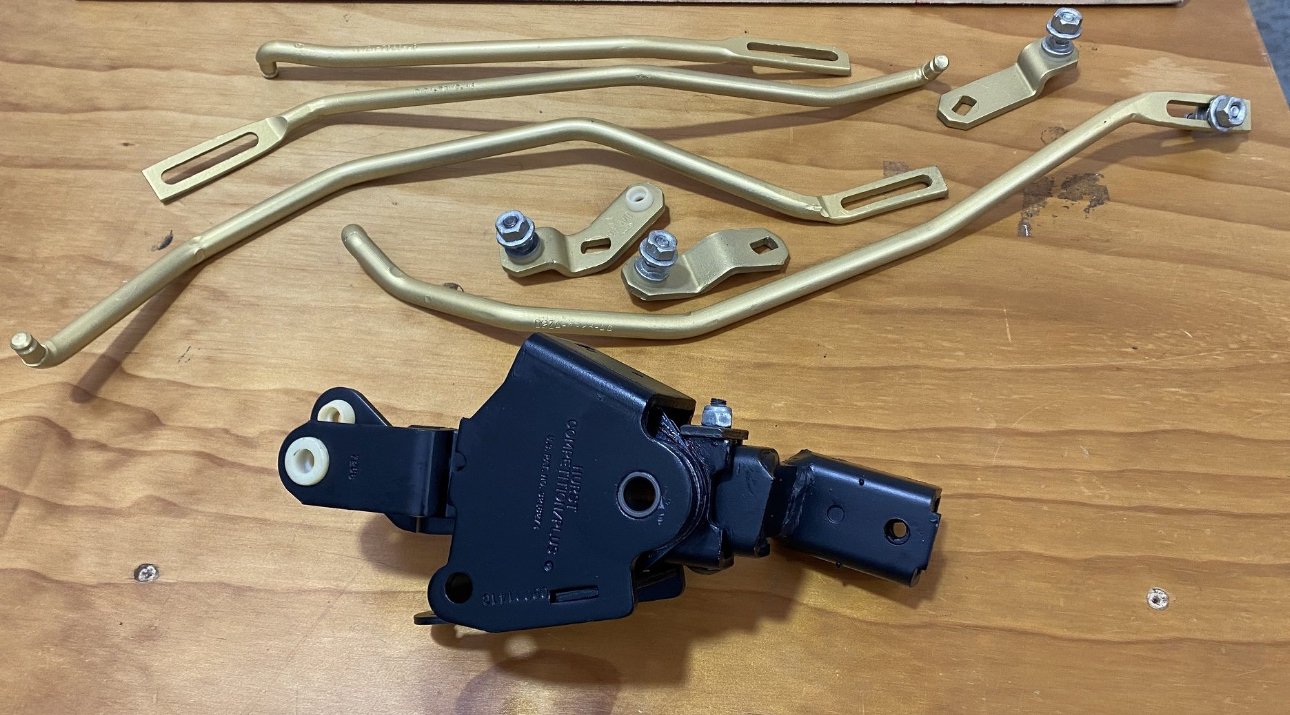
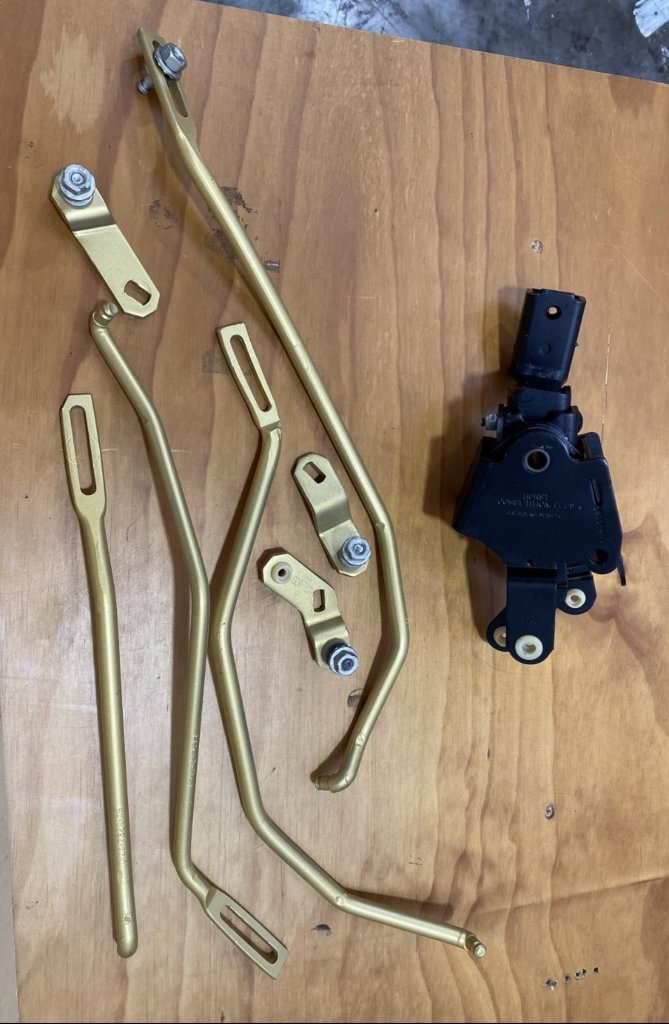
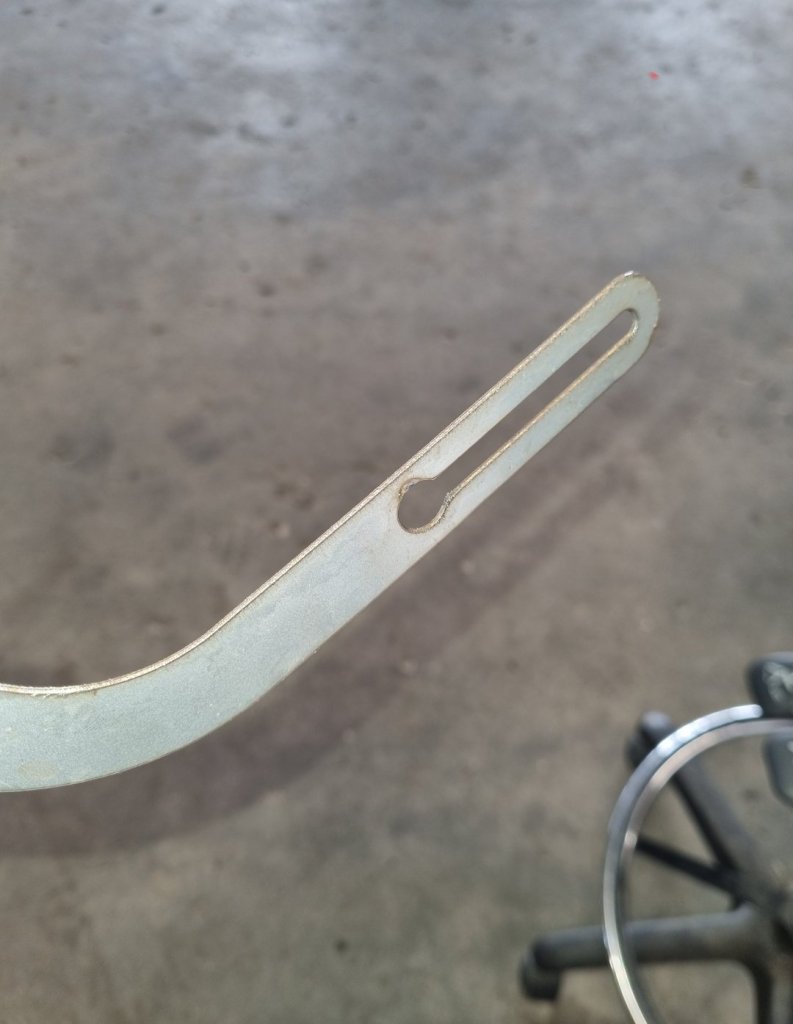
This Hurst shifter popped up suited for a 1971 Mustang Toploader. Hoping like hell it suits my loader and it appears that it should. Looks to be an extra linkage arm included too. excellent price so had to get it - mate wants my xa shifter and linkage set up for his xa hardtop Toploader. word on the street is that Hurst shifters are a game changer on an old Toploader. Time will tell.3 points
-
Use a different gun for primer, usually something with a 1.6-2.0 tip. I can’t recommend any of the cheap local options as I haven’t used them but do use an ANI from spraygunsdirect.co.uk. Think it was less than $60. You could use the same gun and tip but why would you, you want thick wet coats and primer is rough on spray guns Use a decent 2k primer.. and give each coat enough time to flash off, don’t rush it.2 points
-
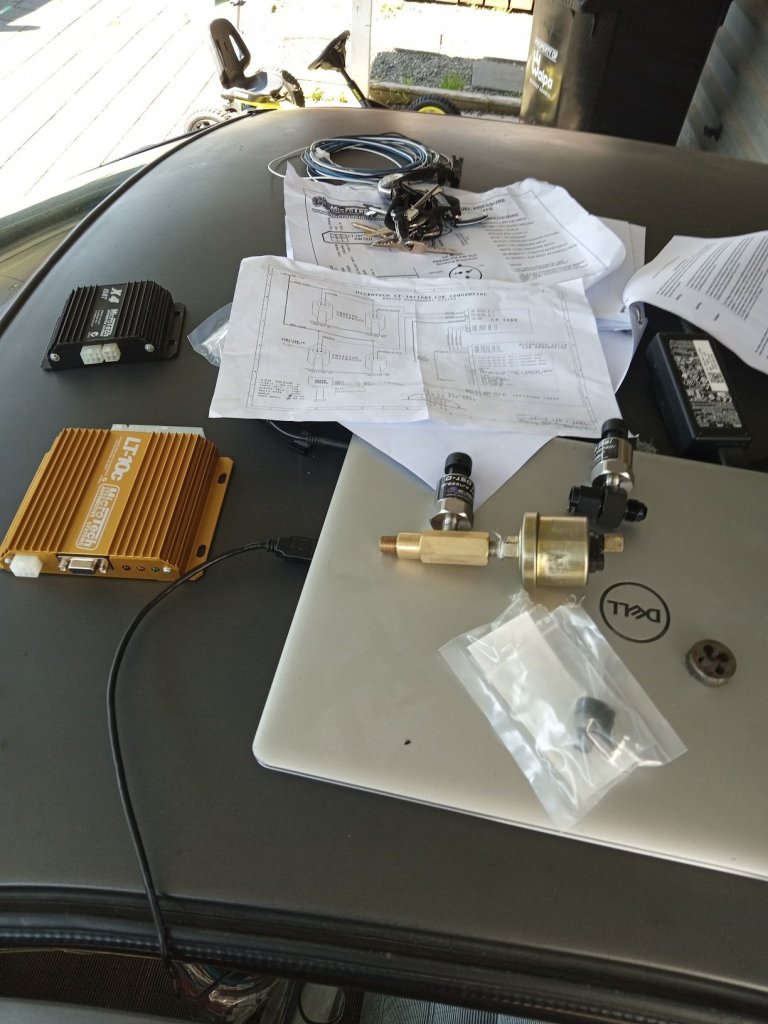
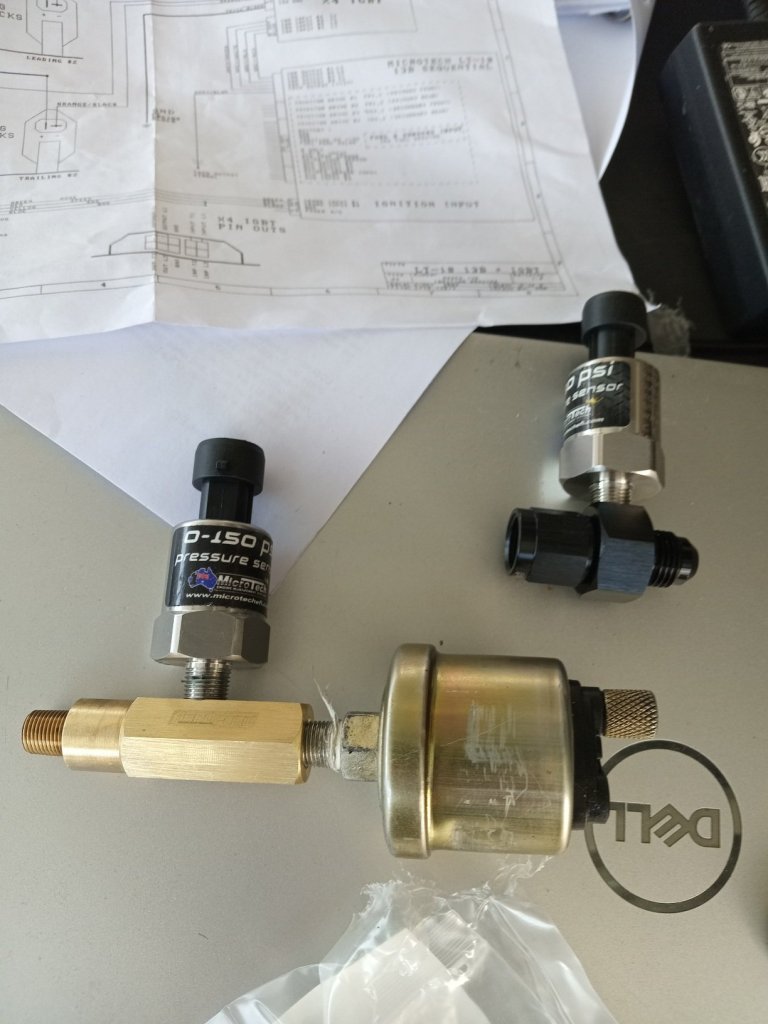
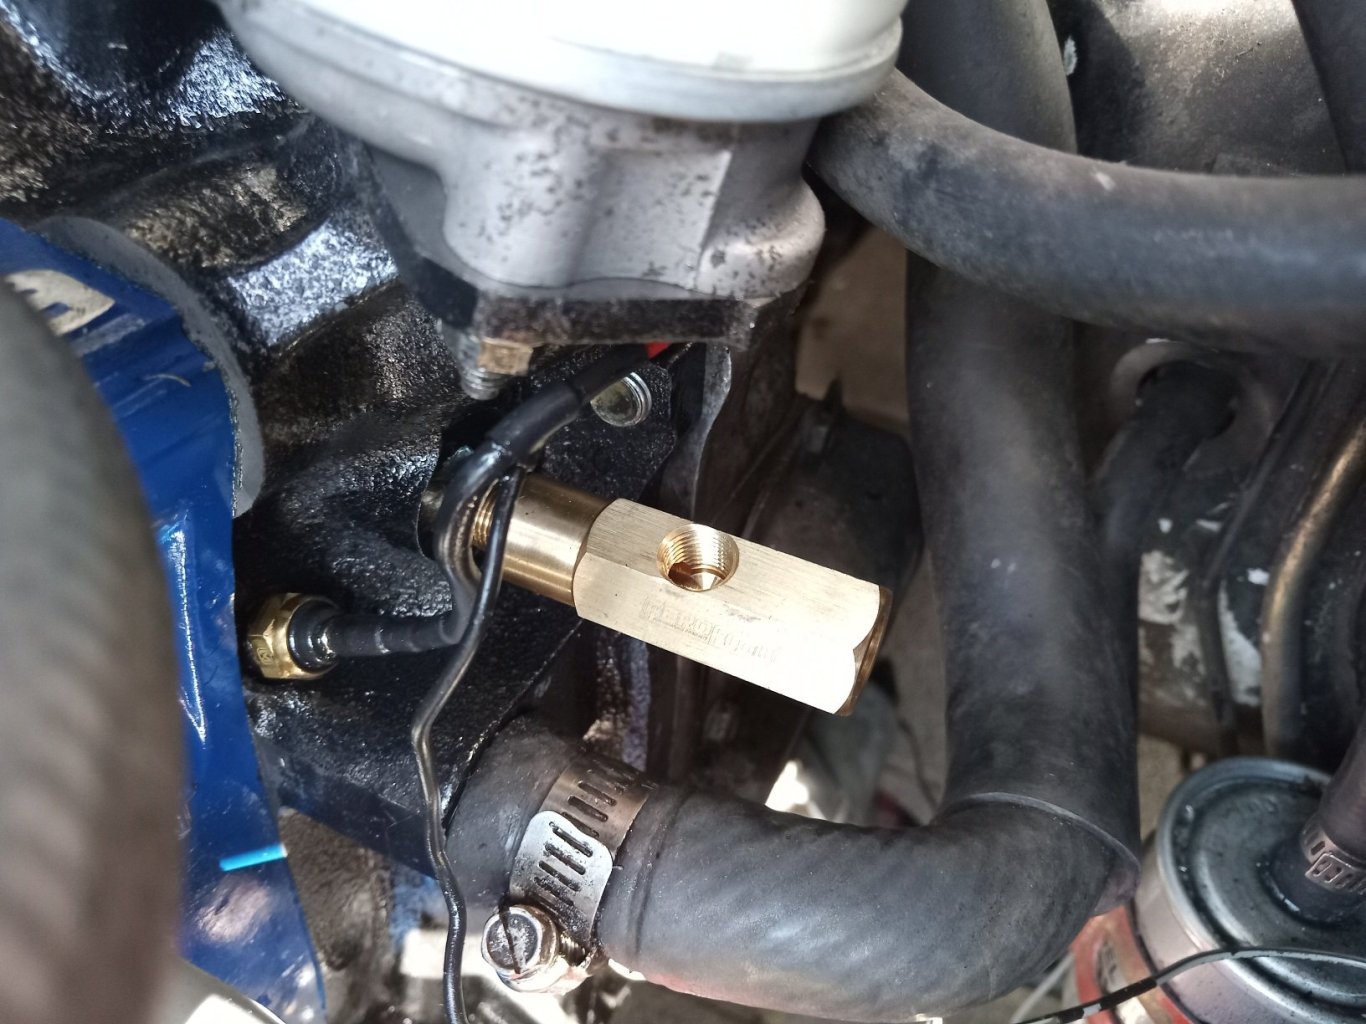
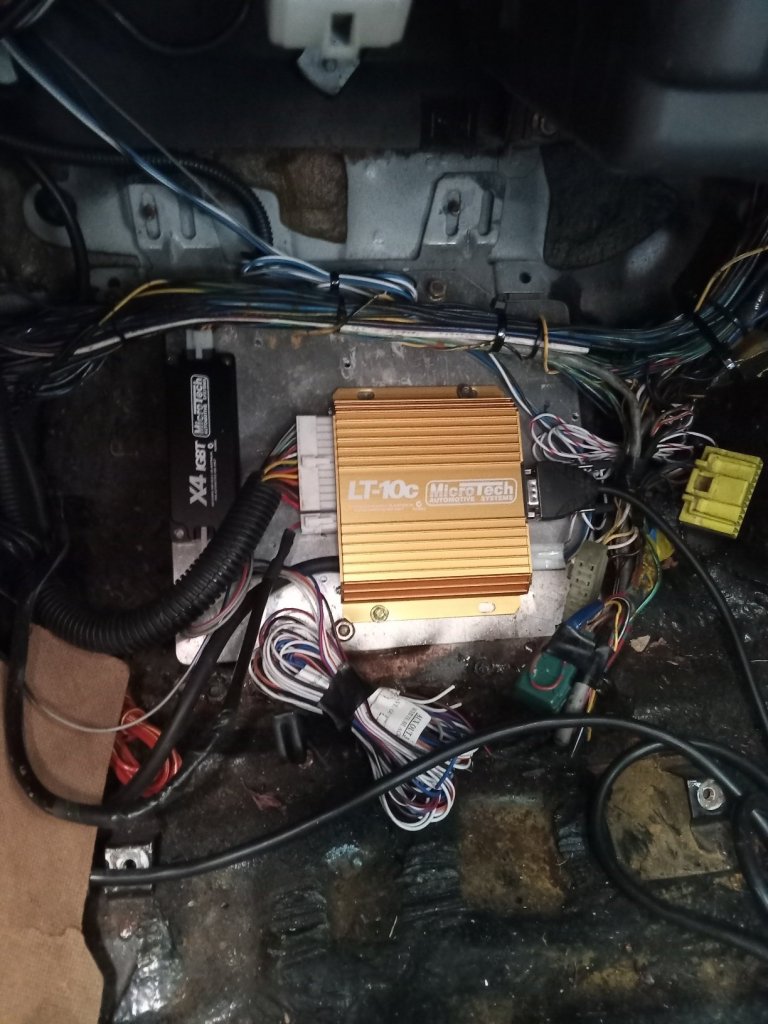
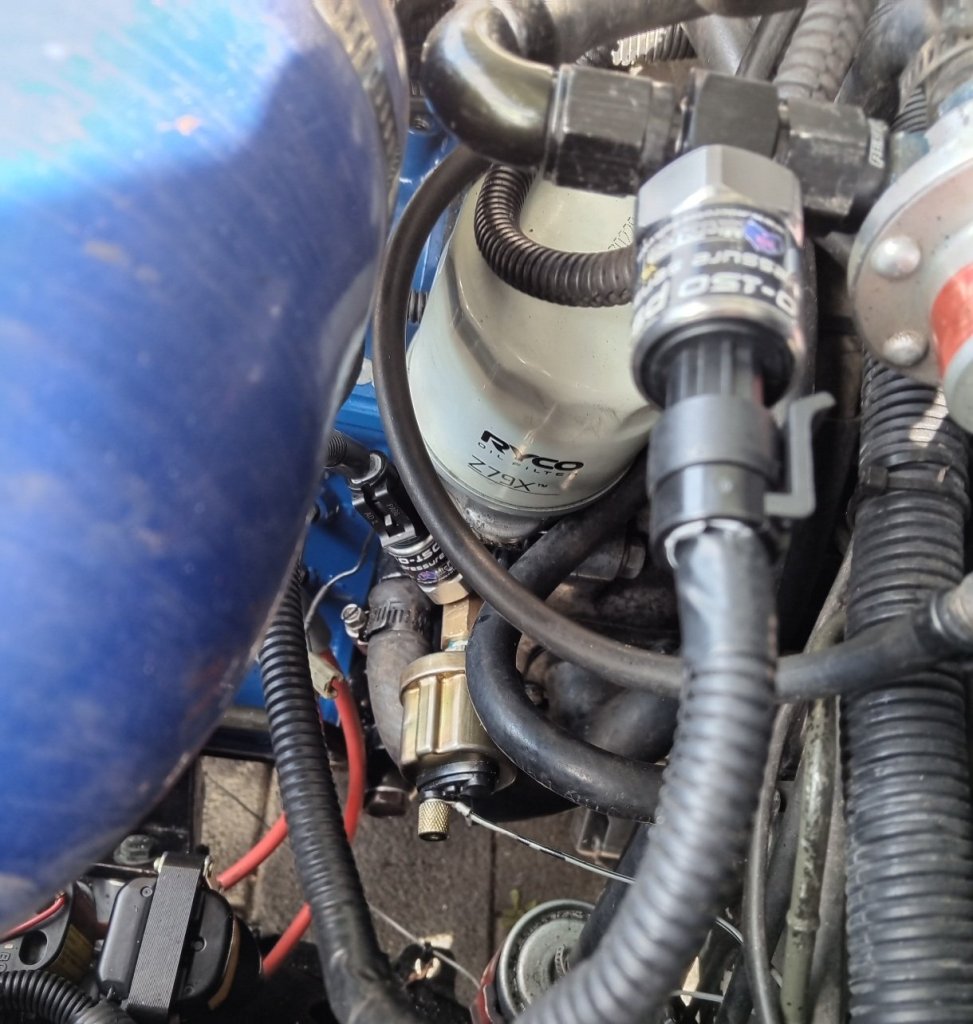
Well i bit the bullet after no luck in getting my old ecu checked, i kind of liked the idea of having some upgrades at the same time and brought a microtech lt10c, with optional fuel and oil pressure sensors to be tuned in for safety and a new ignition box..some adaptors from aeroflow to adapt the sensors into the system, and i get to keep my oil pressure and temperature gauges for keeping an eye on things easily . moving away from gull force 10 ethanol it used to be tuned to, because its no longer available, so going to run bp98 and motul 800 premix .i ended up wiring the sensors in myself because it was easy enough, and all went well there, still a bit rough and ready but once everything is confirmed to work right ill re install and tidy things up. Ready for tuning soon...2 points
-
In the other Hako news.... Stupid leaky, pedal to the floor, crunchy gears, nearly through the back of the barn quitter. Yay shiny new different bore/ bit longer/ works just fine shiny Ebay thing. Good enough for a country job. Have been thinking a repaint might be fun either in that factory red or the original dark green metallic, but seeing what happened to @mlracing.co.nz's Hako, I think I'll carry on in blissful white ignorance. / not racially.2 points
-
I've been chipping away at bits on this. First off was to sort out the idle tune (warning - more efi jargon coming up). Since that day I started the engine for the very first time on the bench there have been a few settings changed that are not ideal. I'm not even sure why I changed them but I think it was when I was mucking about trying to sort out the hot start issue very early on. I think also when I changed the idle control valve I might have played with some settings. So in order to start afresh so to speak I looked back through the restore points. These are saved every time the tuning program is used. I can go back through the files, look up a date and 'backdate' the whole tune or part of the tune. I went back to the default warm up curves that are loaded with the firmware, altered a few bits, turned the EGO correction back on (not sure why I had disabled that) and generally gave the settings a once over. I enabled 'incorporate AFR' and set up a suitable ignition based idle rpm timing curve - previously disabled. I then rolled the imp out into the evening light... Removed the engine access hatch from inside... Then I wound out the idle air screw a half turn until the revs came up to around 800ish.. Later on after dinner I went back out and sat inside what was a very cosy, warm, slightly noisy tuning room and tweaked the hot idle until I was satisfied with the idle. The following day we went for a good drive into town. Did a bit more road tuning but the temp was still not really getting high enough and would drop on downhills. I was going to have to fit a mechanical thermostat. Took the car to our local Repco branch and showed the crew in there. Lots of revving up of the engine took place The fuel tank pump access lid was weeping through the 'fuel resistant' gasket card and apart from the fumes its not really the safest situation to have. The clutch master cylinder was still leaking so that needed attention too. Plus I wasn't happy with my fuel lines under the tank - a mix of copper pipe, different offcuts of hose and many hoseclips because it was all I had left the weekend of the first drive when all I wanted to do was drive the car. So out with the fuel tank. I ordered a brand new master cylinder and a high flow 82 degree thermostat which arrived in the mail the following day. Here's some pics of the 'frunk' with the fuel tank removed. Radiator shroud in place. It works really well at directing the hot air out and keeping the tank cool. Removed.. Fiat/lada tandem master cylinder and brand new clutch master cylinder. Note my unsatisfactory fuel line routing.. I got a deal on a 5m roll of injection hose and re-did the lines, ending up with a handful of spare hoseclips in the process. Pic of work in progress.. As for the leaky fuel tank lid. I ordered some 70% nitrile rubber sheet. I'd rung up lots engineering supply places and various workshops locally hoping to find what I needed but no-one had anything to suit. So I bought some from a supplier in Christchurch and the postage cost the same as the bloody rubber! Our local barefoot postman was pissing himself when the square foot of rolled up rubber sheet that could have been posted in a small post bag turned up in a huge box. FFS. Cut the rubber to suit including a new gasket to suit the sender unit.. The thermostat I'd bought was up next. I fitted it into the housing I had fabricated a few weeks ago. Hannah asked if I was going to check it for leaks before fitting but I was confident my welds were fine and it would be ok. Nup. It leaked. I counted 4 pin holes.. So I welded them up and to be sure of sealing I painted the inside with epoxy paint before fitting it back into the car. This morning I woke up and was now a half century old. Wow. Cool. I felt the same tbh but I'm always a bit happier on this day because Hannah usually makes me one of her amazing carrot cakes.. So after a very relaxed morning of cake and coffee I refitted the tank. Since the tank was bone dry we measured in the petrol because I have been wondering for some time about the accuracy of the fuel gauge. Turns out that its bang on. The little tank holds 27 litres when full and with 6.75 litres poured in it measured exactly 1/4. It remained accurate at 1/2 and 3/4 full. Hannah duly jotted the findings down in the little imp book of notes ... We then went for a birthday drive. The engine warmed up so much quicker and stayed warm. It was a very cold and wet day so I wasn't expecting it to get super hot. It sat around 85-90 degrees which I feel is fine in such weather. We did a good 50km route with a variety of hills, straights and twisty bits to extend the engine so allowing the autotune program to do its job more effectively. The tune was much improved with the idle now being very consistent. I still can't get over just how smooth this little engine is. It's amazing. We noticed that at 6000 rpm when the engine hits the limiter the needle on my 2" rev counter ($7 second hand from a swap meet many moons ago) does a big kick-swing. It must be affected by the limiter? I am looking forward to building the new instruments though. An accurate speedo that doesn't swing and a rev counter in line of sight will be a nice thing to have. The gear shift seems to be lightening up in action and getting smoother. I think this is due to the shifter base and shaft guide bush bedding in. There's always been a metal on metal hard knock under full power shifts which I had discovered was one gearbox mount knocking the cross member. I'll insulate it with some rubber and down the line I want to look at stiffer mounts all round. The handling seems fine. Definitely a bit more weight out back, how much I'll only know when I next weigh the car. I'd like to borrow some corner weight scales so I'll ask about my local race car mates. In such wet conditions like today I just drove it as one should drive any rear engined car. Get my entry speed sorted before the corner, don't lift off mid corner and then just power on out. It sounds fantastic and is very fun. Speaking of noise. We are both already used to the drone which comes in at around 2200rpm. Its gone by say 2600-2800 and is worse when under load. So I select the right gear and most of the time its easily avoidable. Its more fun holding onto a lower gear anyway. When the rain had eased I took some pics .. Hannah is in charge of the laptop.. Got home, car still in one piece, oil and coolant still in their respective places. Tyres definitely in need of replacement though (but not until I sort the front camber out). Overall a good result and a nice way to spend a birthday afternoon. To top it all off a friend of ours dropped around a home made sponge cake because I'd looked over her van for her earlier in the week. She told me the cake is very naughty... so this next half century is starting off with a few extra calories2 points
-
What’s your budget like? I am not the most experienced painter so can’t say too much but I use a Devilbiss GTI pro lite which is a pretty expensive entry level gun. It’s really good, forgiving and easy to use. The fan can open up really well too. The Gunman does a few reviews On guns you can buy on YouTube, he’s pretty good. Also recommend Pete’s Hobbies channel for recommendations on the aliex guns. tldr; devilbiss if you have the money, ANI/aliex if you are on a tight budget.1 point
-
Yea those velux flashing kits are junk. Probably don't meet the building code too. Good move going for custom made flashing.1 point
-
Technically no In the threshold it mentions that spring seats must be oem unmodified The circlip adjustable bilsteins have always required cert, unless they were factory fitted in that specific vehicle when manufactured However they are often one of those things that gets wofs without cert, usually because the wof guy doesn't notice or read the rules properly A guy I know had some in a falcon and that got wofs because the circlip fell down into the lowest position so the other slots were not visible any more A person could be a criminal and remove the adjustableness and paint them black or something and try their luck I guess but that would be illegal technically so I would never suggest that you might get away with that I have heard stories of other criminals that just swap suspension once a year to get wofs and they say that's pretty easy to do and then they don't have to damage their bilsteins1 point
-
1 point
-
While rules like that seem a bit dumb especially if you're not an imbecile, after the week I've had, there definitely needs to be someone checking that things have been done correctly. basic instructions are beyond the capabilities of a large percentage of the population1 point
-
Hey dude. I have one of these, works good but I am only doing base and clear fix ups with them at the moment no resto stuff. You might want something else or a set of tips for primer. This R500 is the common one on the HVLP youtube vids, its not a real "HVLP" or whatever that means, but its a Iwata clone that does use a bit less air than other cheap shit. Should be fine on 2.75hp, turn the paint down and run less pressure, works best that way for me (less overspray, less air use, tradeoff its slower). Think I got this rather than the genuine rongpeng as it had free shipping, there are like 20 versions of it. https://www.aliexpress.com/item/1005005767569627.html?spm=a2g0o.order_list.order_list_main.65.3b441802SWe4lY I got one of these adapters https://www.aliexpress.com/item/1005005411806645.html?spm=a2g0o.order_list.order_list_main.69.3b441802SWe4lY and these cups https://www.aliexpress.com/item/1005005663483568.html?spm=a2g0o.order_list.order_list_main.70.3b441802SWe4lY1 point
-
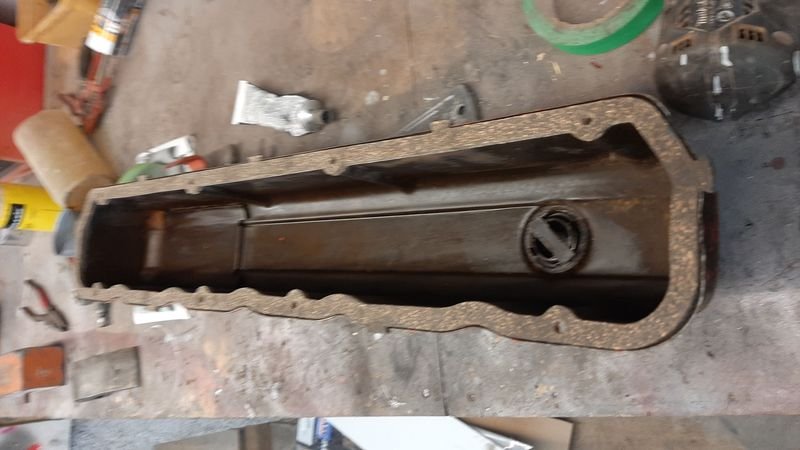
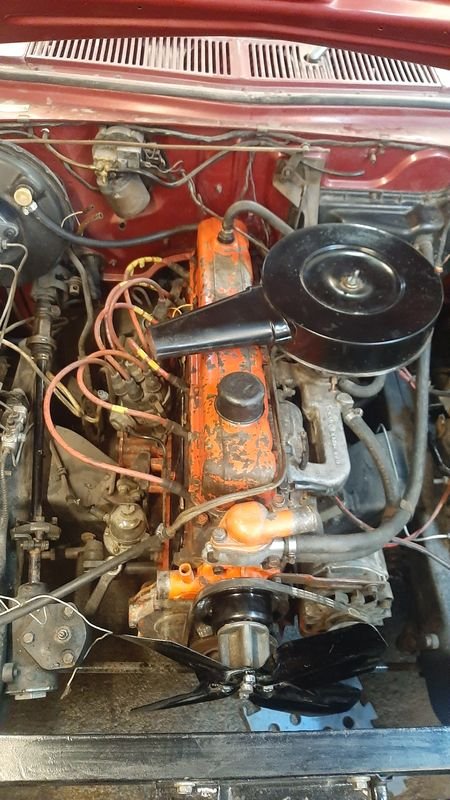
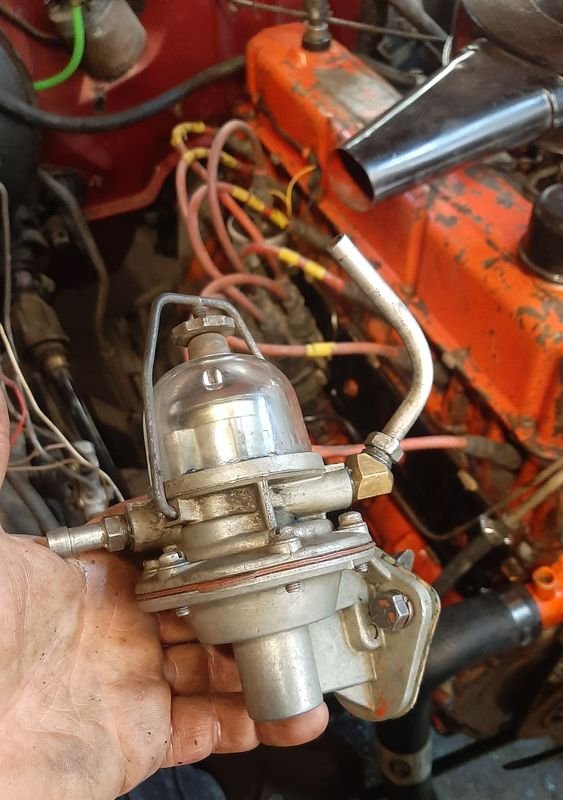
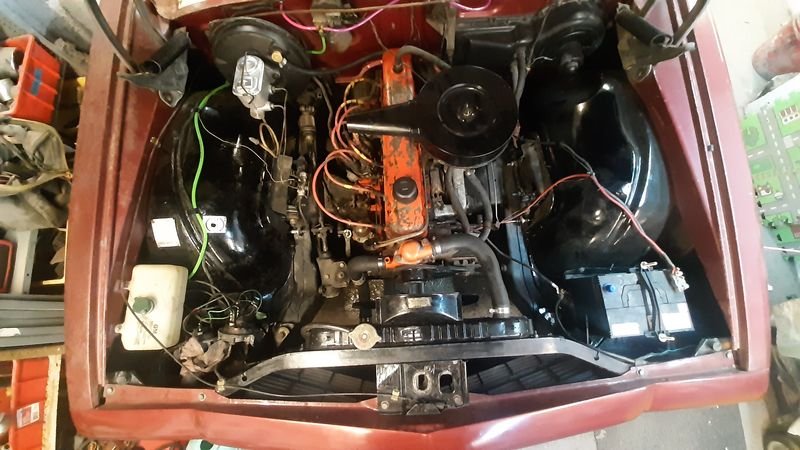
With a known good fuel tank in place time to sort the other end out. Previously we were running the engine off a boat tank in the passenger seat and a clicketyclack electric pump. Dirty ol 173 New valve cover and lifter cover gaskets Water pump replaced with a unused one that came with a $50 FBMP pile of bits (also came with a thermotstat housing that was much better, a fan extension thing that we needed, a valve cover (later model so didnt use), rocker covers and a fan that i painted,, and a sump we will probably use eventually too, so pretty stocked with that score! Cooling system got a wash out too and a new thermostat from my stash (same size as Fiat ) Fuel pump gasket set from Butler Auto Mart, and freshly cleaned Fan pulley, fan extension, fan, and lifter covers And finally new radiator hoses and clamps Unfortunately i had to take the rad out again to solder up a big crack under the top hose but alls well now1 point
-
Just a quick update. I've been in contact with the original NZ owner, he's a real character. At the age of 85 he's just bought a McLaren only to find he couldn't get in or out of it, so has bought a new supercharged Vantage as well! (Oh how the other half live). Good news is that he's helping all he can and although he hasn't any registration details he does have some early pictures and has offered to swear an affidavit saying that to the best of his knowledge it is the same car. Being an ex MP and well known public figure it will hopefully add some weight when we put in an "alternative documents application" to NZ Transport. I'm still researching the cars history; we bought it as a pile of parts from a Turners Police auction after it had been confiscated in 2000 under the proceeds of crime act and had been in police storage for about 6 years, (the previous owner had been locked up for manufacturing meth!). It's a crazy story and I'll post a quick thread of the rebuild when the history is all confirmed. A quick few pictures of the almost completed car.1 point
-
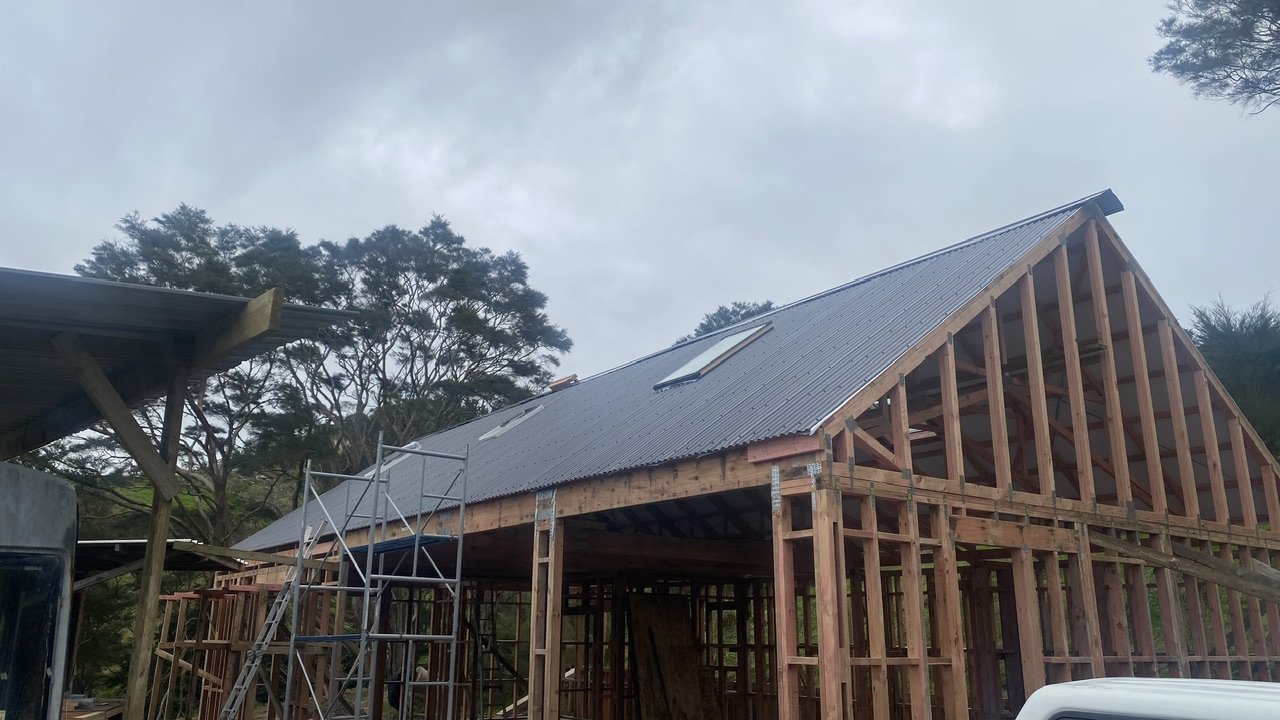
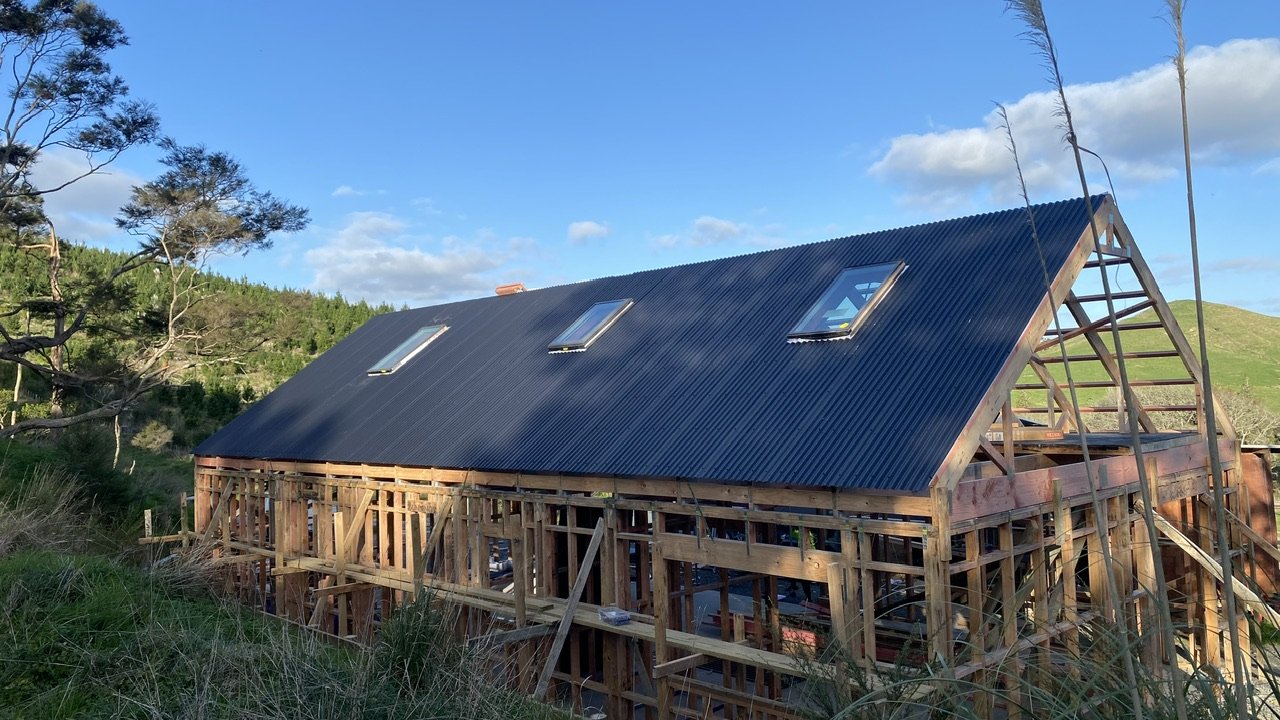
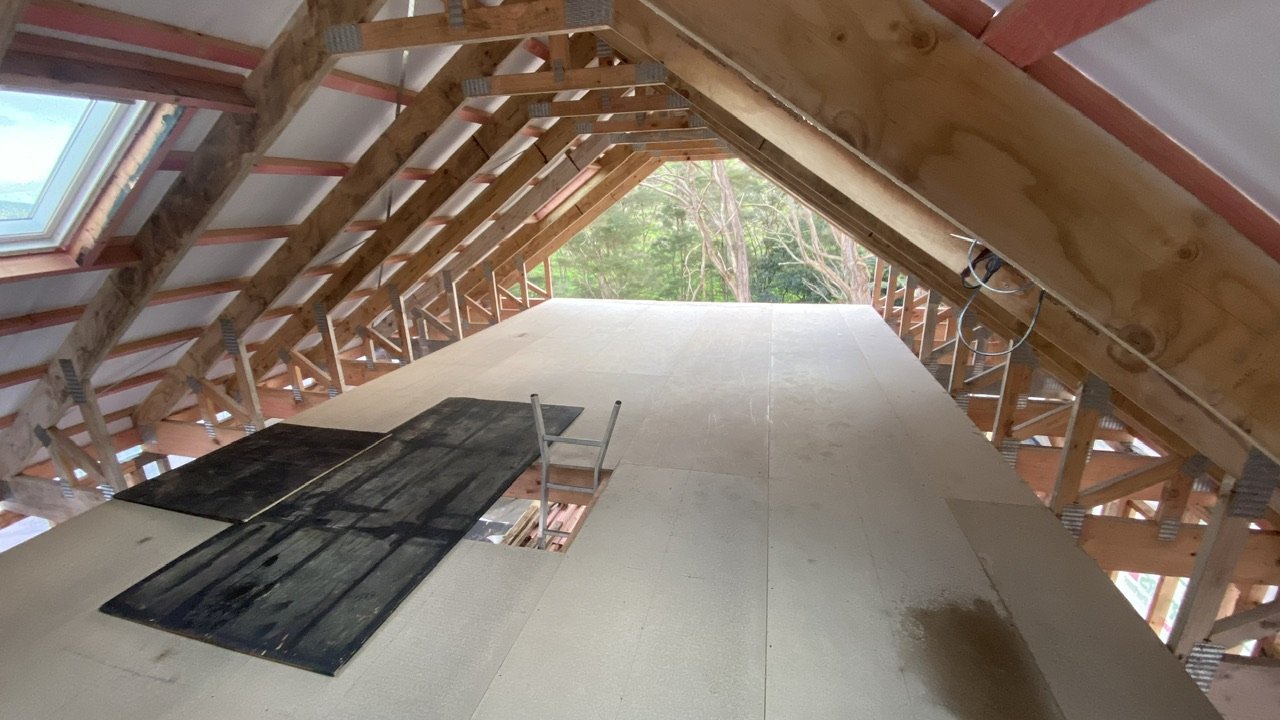
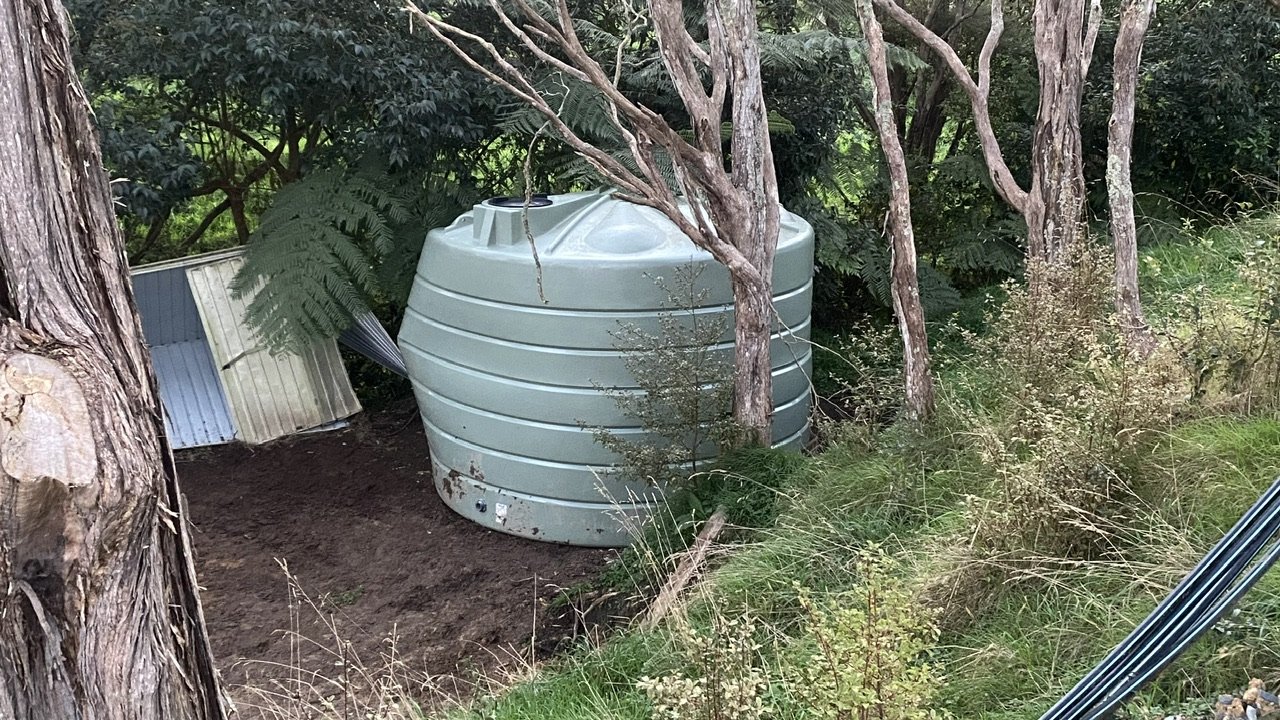
Monthly update.. Got the roof on. What a drama. Thought I would be saving time/money getting the flashing kits with the Velux skylights.. nope. Unless I was planning on doing the roof myself, no roofer wants to use these and would rather install a custom flashing. Oh well, roof is on, just need to order the skylight and barge flashings which will be done when I’m ready to order the sill and fascia flashings in a few days. Shed is all wrapped and cavity battened.. due to going with metal cladding the battens need to be separate from the steel due to the CCA treatment, so we stapled a strip of DPC to every batten. Got flooring down in the attic storage space.. And moved the water tank to its spot.. Cladding inspection passed today, so another big few days coming up soon.1 point
-
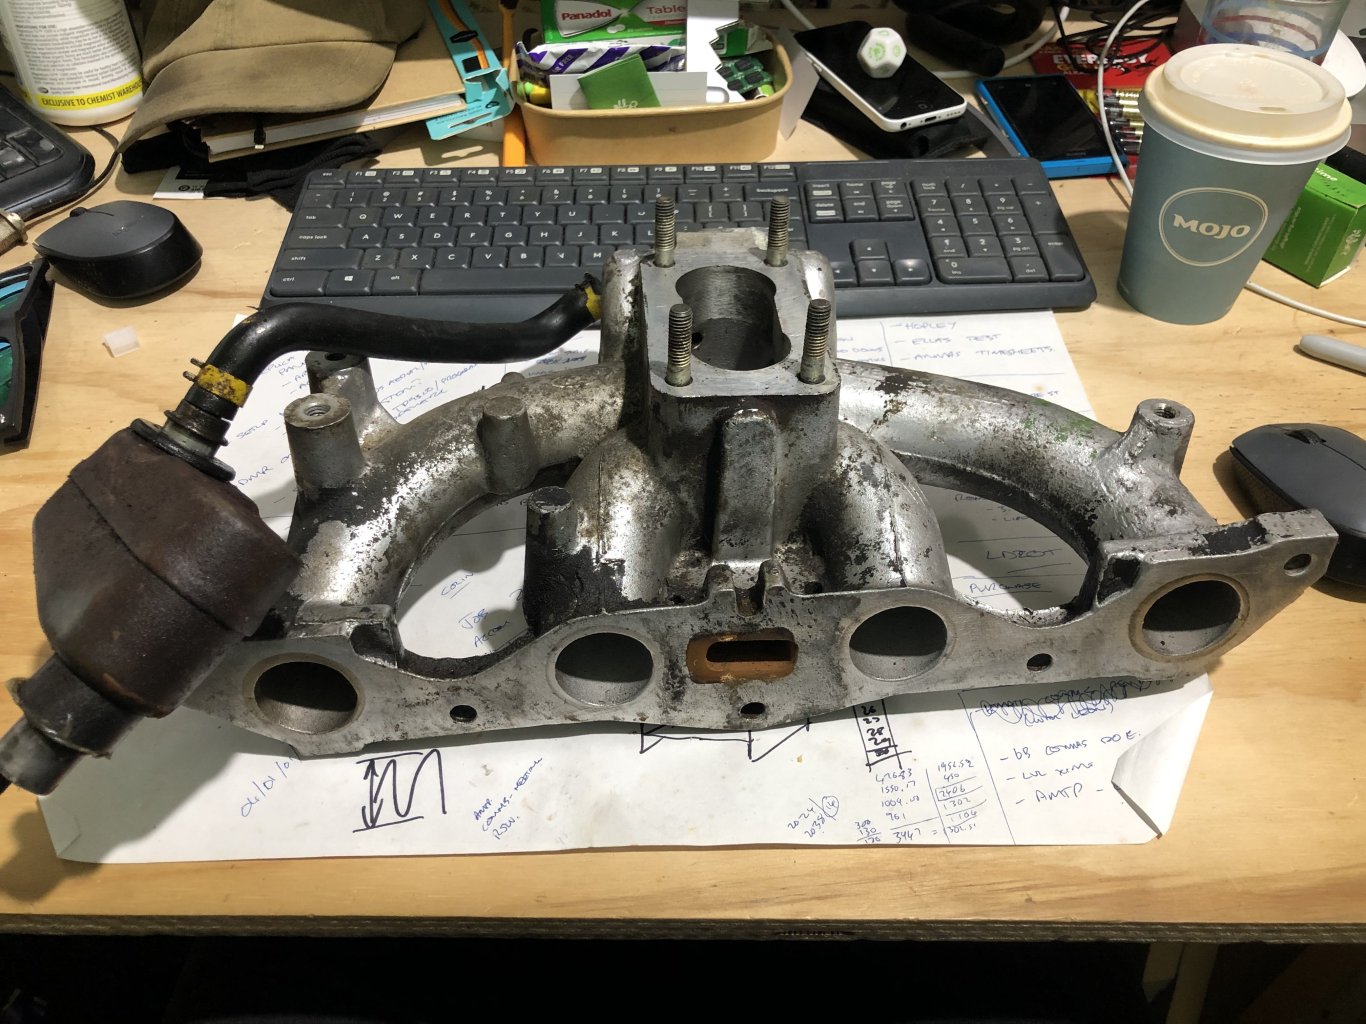
So.....in a fit of madness, this happened: The last 12 months have been a bit of a shit sandwich (and I might even have a bit of an offload in the Depression thread at some stage) but one of the main things Ive chosen to keep my sanity is to finally attack some of the projects that I have been putting off due to "poverty"....when in reality the money was there but I was just prioritising other (shitt) things over them. So for the rest of the year the focus will be on the CBR MC17 I grabbed off @a.craw4d with the goal to having it running for summer. 2025's big project will be the Sierra, hence the first purchased piece of the puzzle above....its a manifold for a Weber 32/36 to go with the other ideas: - Kent FR32 fast road cam - RX8 5/6 speed box (to be determined) - Mags and Gaz shocks all round. - Possibly YB pistons and rods in the Pinto 2.0 205 block. - Possibly EFI? Id love to chase some numbers around 150-175bhp which should be doable without getting too involved. I'm eyeing up a carport kit as well to keep it out of the weather, but this is all doable. The money was always there, it was just getting wasted on stupid stuff.1 point
-
1 point
-
Whats the actual issue? You said you can't fit a booster between firewall and m/c? Is that because it would hit wheel tubs or something or would the booster diam be an issue and hit the engine? If its a booster diam vs engine issue, a way I have often got around this on minitrucks with air suspension or engine swaps Is to use a old Mazda 121 or Ford Festiva booster. They are 6.5" diam and 3.5" deep. Common Nissan 2-bolt master cyls bolt to them so its easy to find a bore size to suit your needs. Can also orientate the vac barb fitting whichever way you want.1 point
-
I used rattle cans top coat because I can't spray properly, never cared about finish and it lives inside so not worried. Yeah agreed it's pretty shit, but I did what I could with the budget I had. If doing small areas just mix up small amount of epoxy primer. At least that's what I did, most of it was hidden eventually so I made some pretty small amounts (measuring cups from proper paintshop make this easy) to do small repairs as I finished them. I had halfmask with organic filters (sealed when not being used, they don't last forever) for even just brushing the stuff on. You know it's good if it puts hairs on your hairs on your chest just getting a small sniff.1 point
-
1 point
-
1 point
This leaderboard is set to Auckland/GMT+12:00


