
Leaderboard


Popular Content
Showing content with the highest reputation on 02/15/20 in all areas
-
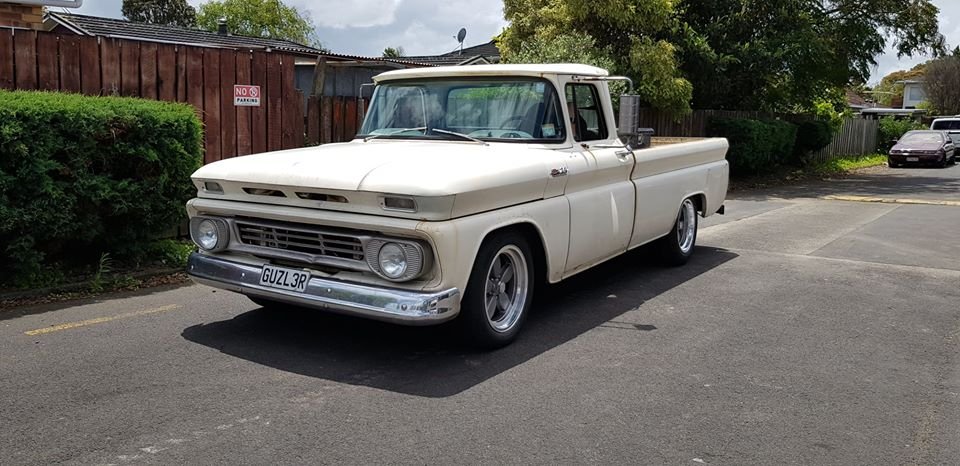
Time ran out. The Diff went in on the Thursday, Sunday was the show. Since we were back together and running, all that was left was a final push to get the car looking as good as it should. The first thing I needed to do was wash the car. I'm ashamed to admit that for the six months I have owned the car, I've never cleaned it. Not once, so it was still covered in the muck from sitting around for a couple of years, and from the trip down on the back of a truck. Oops. So with that in mind, after work Friday I pulled the car out of the garage and into the steep driveway for a wash. The paint came up well, but I noticed the front end felt pretty rough (its the original paint, the rear was painted after but of a shunt years ago), so out came my CarPro clay towel to remove the contaminants on the paint. The clay towel worked great, the paint is nice and slick now. After a quick dry, I left the car overnight, ready to start with the machine polish. Saturday was machine polish day. The whole front of the car was cloudy and dull with almost no shine. The rear was better, but still needed some attention. This is what I was working with Flat as anything. A quick test spot using my favourite combo of a green Hexlogic pad and Ultimate Compound showed promise though It took a bit of work, but it was cutting through the oxidation and bringing the metallic silver paint back. Unfortunately, the paint isn't great (although it is 40 years old now!). There is this large patch in the bonnet where the paint is discoloured And a couple of similar spots on the sides behind the front wheels. Strangely I did find a shadow behind the front wheels of where a TVR sticker would have been on each side The paint isn't perfect but for a 40 year old car I think it's doing OK. It shined up well and is showing a lot more gloss and flake now. Oh, guess what showed up whilst I was polishing the car... the bloody braided lines. Only two days too late. The real test was on Sunday when she was unveiled at the British and Euro Car Day show. This is the third time I have brought a car to one of these shows. I like to try and bring someone special each year if I can. British Car Day doesn't often have many TVRs. At most there tends to be one lonely TVR sitting off to the side, or bundled in with another group (that's where I found the 350i wedge back in 2016). This year, the lone TVR found a friend. Sadly there was a (not so) Mini between us, but I parked up nearby this lovely looking Griffith. This thing makes the Wedge look massive! The Wedge looked great out in the sun, and a lot of people were showing an interest in it. Kids especially seem attracted to its sweet 80s style The TVR was in good company too. The turnout at the show was good, although I'm not so fussed on all the new euro stuff clogging up the field. There was another TVR with weird doors that seemed to get all the attention A Morgan with gorgeous paint This cute little Auto Union DKW An awesome looking Renault Alpine that was parked next to some garish red and yellow things Plenty of Fords were in attendance Including this sleeper with a Lotus twin cam engine Of course, the Porsche crowed had a decent turnout. Most of it was boring to me, except for these two which stood out And I was starting to get worried, but eventually, a lone SD1 arrived. This one has been at the show before, but good to see it again, out and about Anyway, enough of that, back to the Wedge. After we left the show we went for a bit of a hoon to see if there was anywhere nearby that was an interesting spot to take photos. We found this old Ministry of Defence building down a back road That wasn't the end of the car being out and about this week. It was a lovely evening the other day, so since I had a fully road legal TVR, we took it out for the longest run since I've had it. It was about a 60km round trip, which uncovered a few things about the car. Firstly, it's surprisingly comfortable and easy to drive. It loves taking sweeping curves at speed, and makes some great pops and bangs on deceleration. The brakes have a nice firm feel to them now with no shudder. Unfortunately its not all roses. There is an annoying misfire at low RPM cruise. I think it's possibly the ignition system playing up a bit, or it could be running a bit lean at cruise. The only other real issues are the steering being super heavy at low speeds, and the exhaust is excessively loud to the point of being annoying. Nothing too major. I did get some photos in the sunset though There is still work to be done, but in the meantime, I think I will just enjoy being able to jump into the car, fire up the V6, and take it for a drive. I have spent so much time working on the car that I haven't had a chance to enjoy and bond with the car, it gets tiresome sometimes.16 points
-
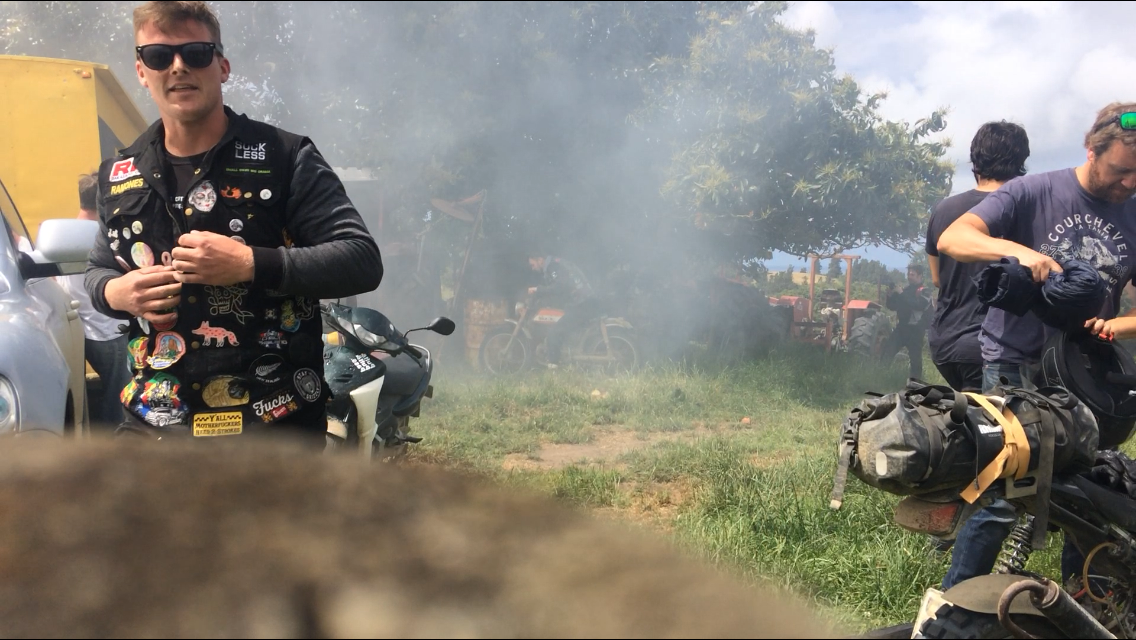
my mate Adam who is a link tuning wizard gave me a hand to get the e throttle sorted and get it idling and running ok. its getting hot fast which is concerning. the radiator is 11 years old so maybe needs a clean/re-core. ill keep fucking around with it. but anyway today i drove it. it goes mint and makes the whurry noises. tune is rough as fuck at the mo but its good enough to do a couple of Ks and see how it behaves, if i can keep it cool. 2020-02-14_07-18-56 by sheepers, on Flickr 2020-02-14_07-19-05 by sheepers, on Flickr 2020-02-14_07-19-12 by sheepers, on Flickr12 points
-
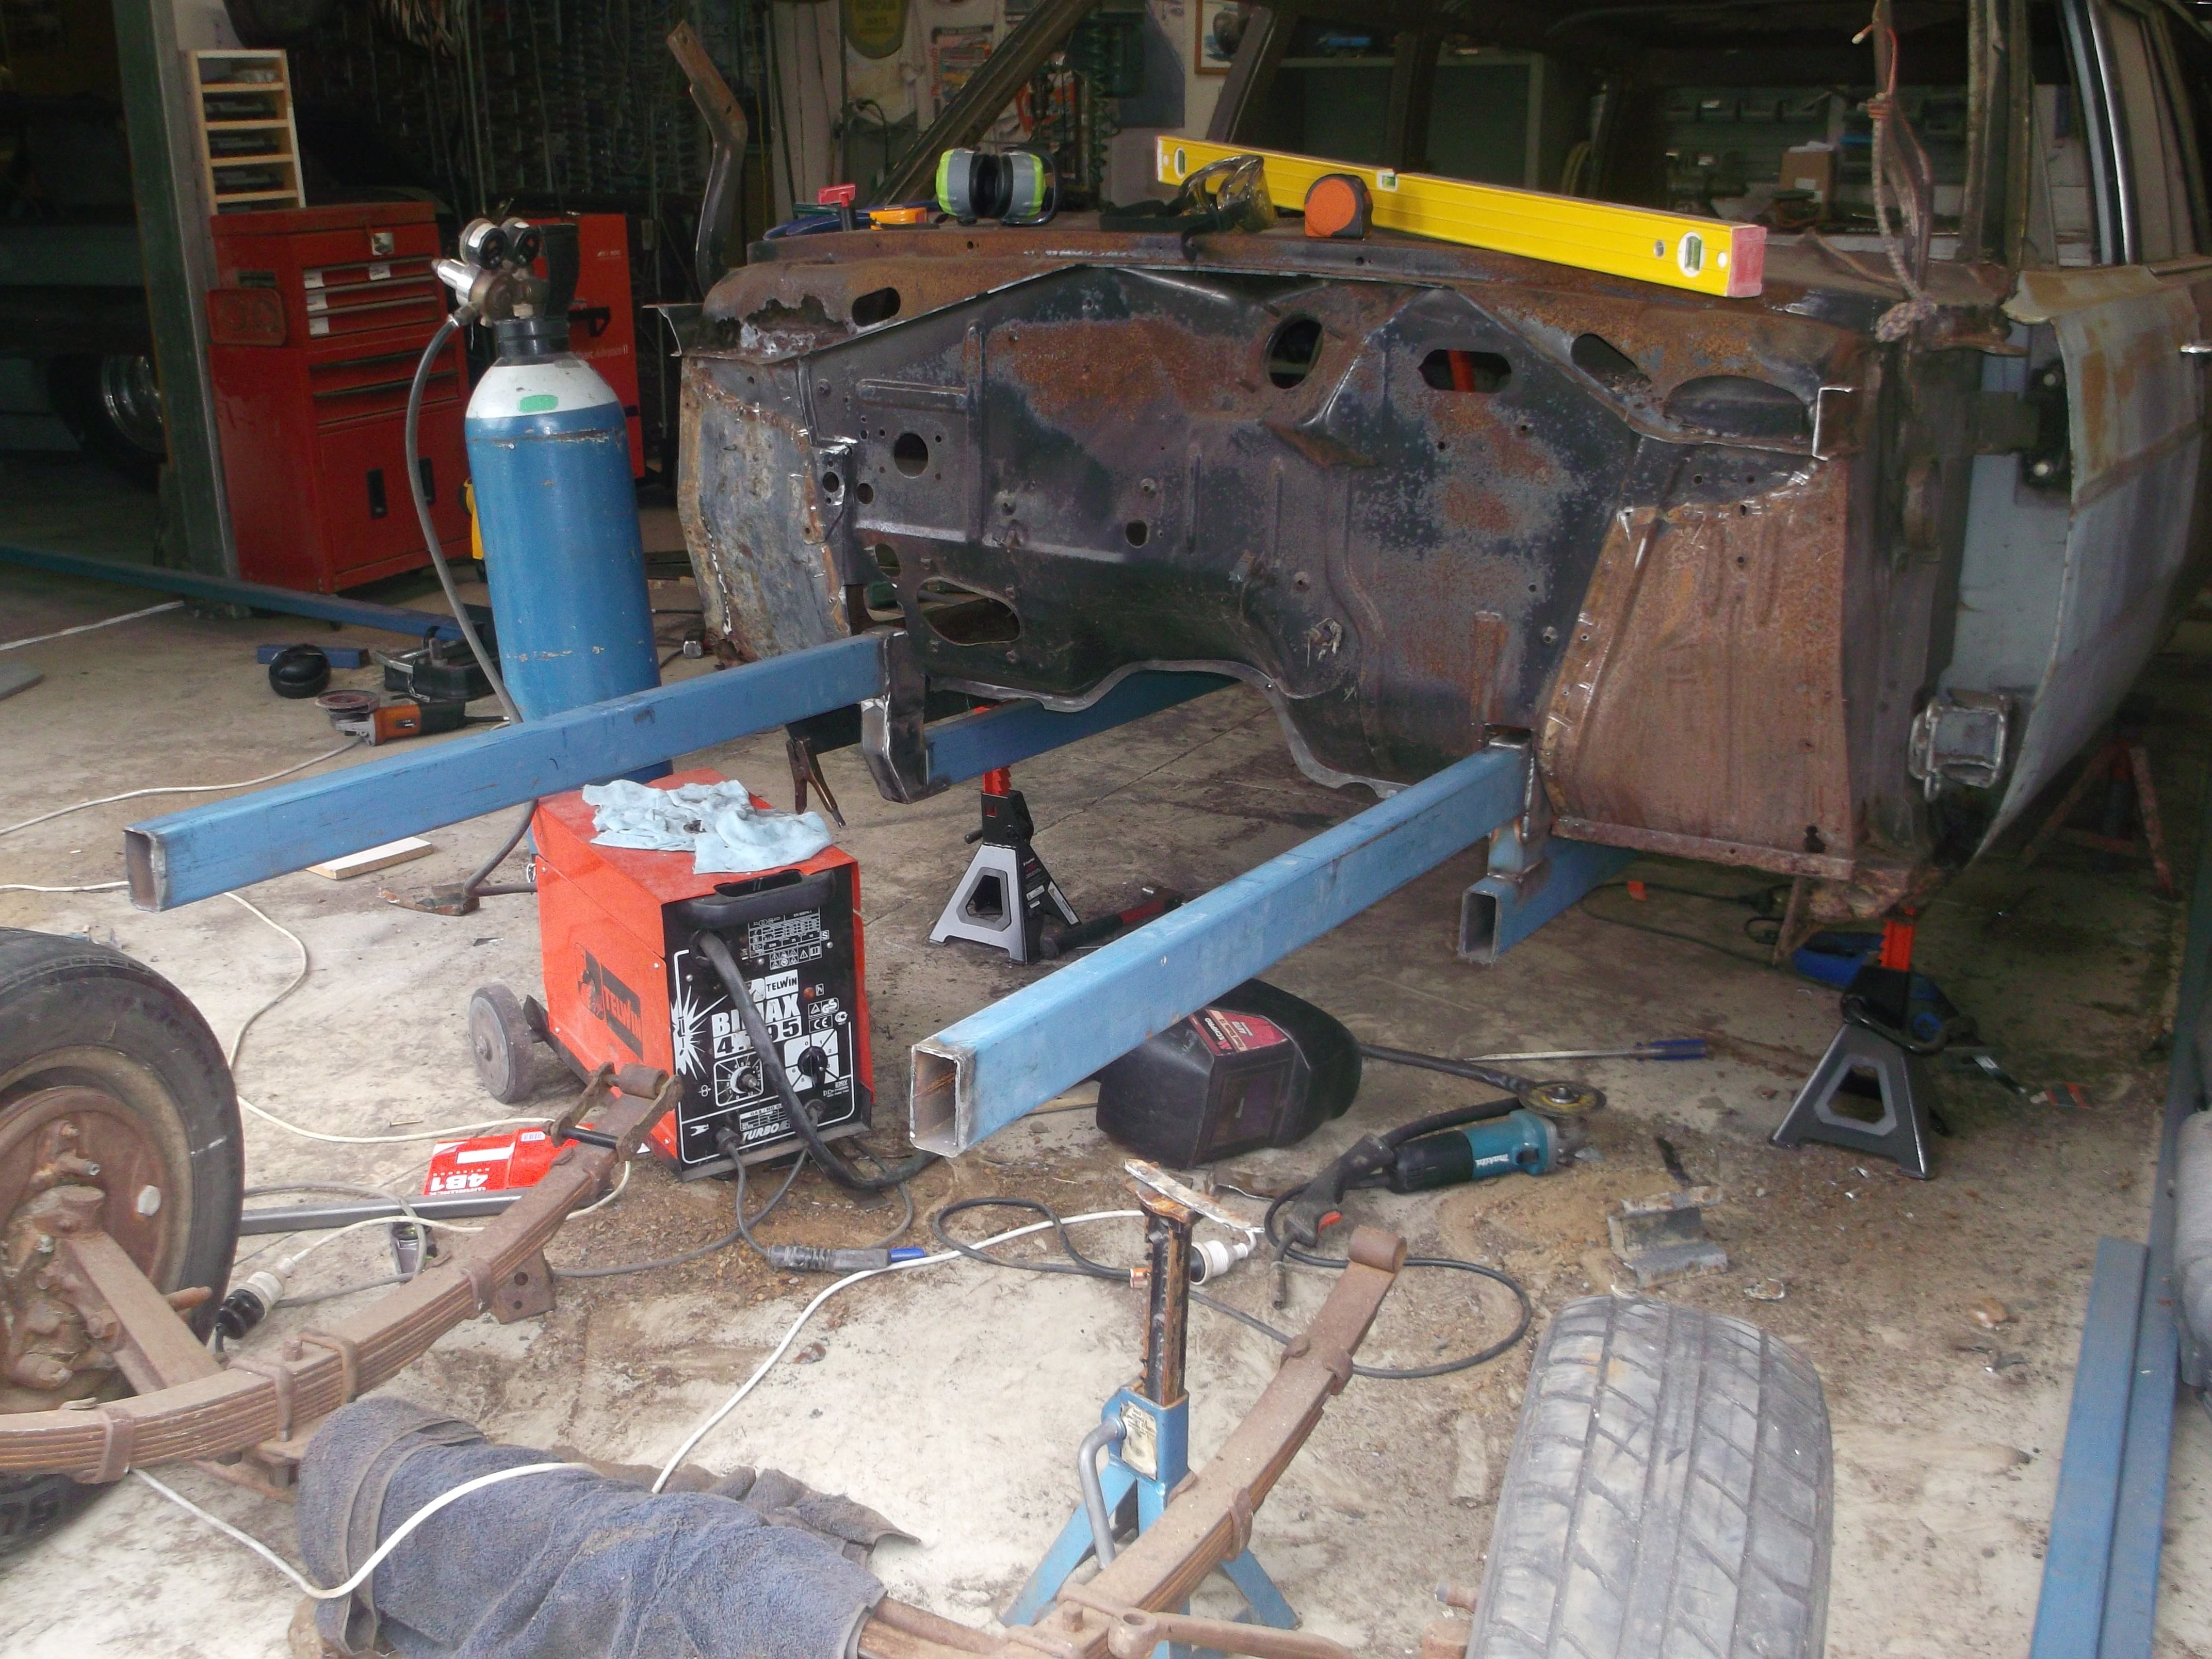
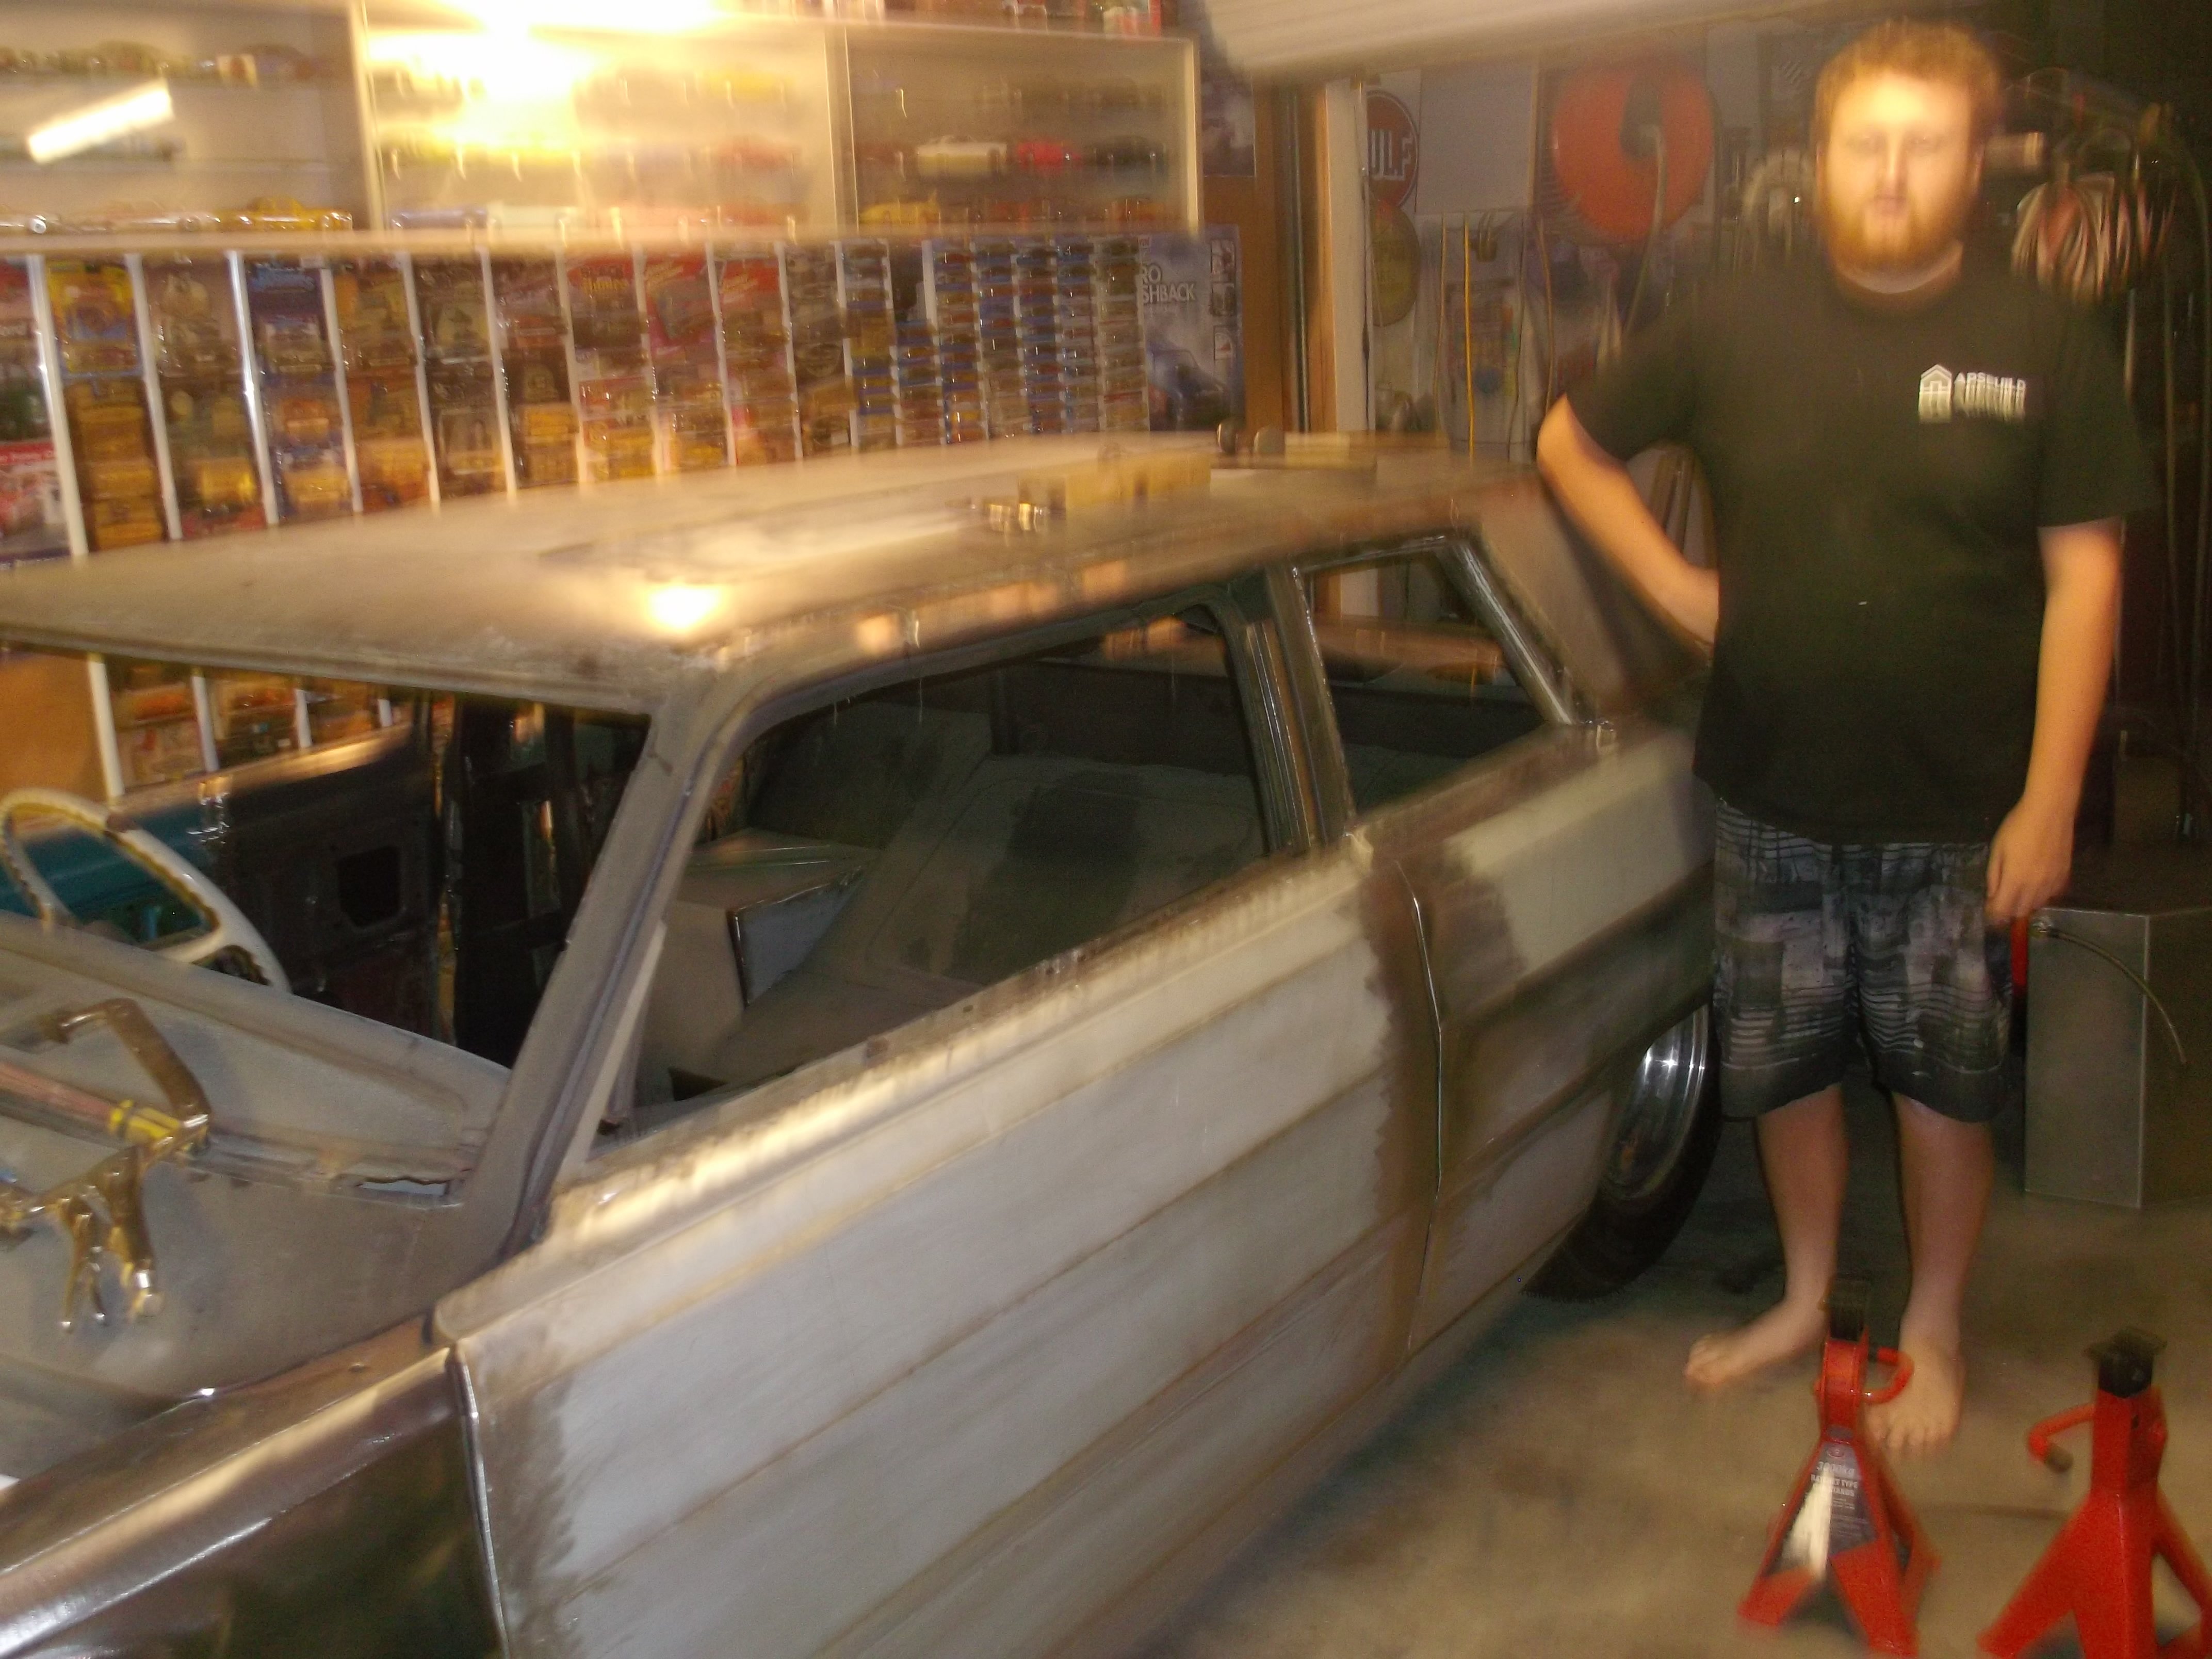
Surprisingly I still own this. I figured i'd better update the build thread now, it has more metal in it now than it did 2.5 years ago. With a year of a long distance relationship, moving house, changing jobs, other cars and a fairly sizeable task ahead to fix all the rot, progress kind of came to a halt not long after the last update. In the last year or so though I have been chipping away at it, so far I have cut and welded the l/h inner guard, heater bubble, l/h floor pan, inner and outer sill section, rebuilt the bottom of the l/h A pillar, l/r wheel arch inner and outer, outer sill section, and probably some other small bits I can't remember. I also cut the front valance off, and I am very thankful for the abundance of pressed panels available new for old Fords in that I got a new valance, front guards, and a myriad of repair sections to stitch in, without these I probably wouldn't have taken this on tbh. Here it is on its way to its new garage: Some repairs to the firewall where every Escort rots - under the heater bubble. I've made an indent in the new heater bubble so water can actually drain away, rather than collecting in the bottom of the bowl and rotting through the seam that joins it. It mightn't look tidy, but it's solid and there's good penetration through to the other side, so I'm reasonably happy. The l/h side floor section was probably the most daunting repair in terms of size, I ended up cutting the floorpan back almost to the seat mount before I found decent metal, but after I zapped in the floor section the outer sill and pillar fitted up pretty nicely. This was the most recent repair - the rear wheel arch - which someone in the past has had a go at, not rust proofed behind the repair, and it's rusted again. There was a patch welded into the outer arch, which someone had beaten in with a ballpein hammer and shaped with bog, and a large patch on the inner which had gone rotten. It all had to go, I ended up cutting away the inner half and remaking it, and welding in a pressed section into the outer. All that's left now is the l/h C pillar and vent, probably the r/h C pillar too, the bottom of the r/h A pillar, a random little hole in the rear apron, make some new front guard supports and attach the front. I have a full set of factory bronze tinted glass and chrome trim mouldings for the windows, which will probably end up on the car too. And this is pretty much how it sits today!11 points
-
Some good things have happened to the Accord since the last installment! I gave it some CV boots, thankfully the inner and outer are the same size, because both boots on the L/H axle were split. Fun fact - pre-facelift Accords have CVs at both ends, but later ones like this one have tripod joints on the inner. Confused the hell out of the bloke at BNT, anyway. It passed another WOF last week without any hiccups, and we've taken it for decent number of road trips around the upper North Island. I even slept in it after Crate Day, which honestly turned out to be more cramped and uncomfortable than I thought it would be. Still working on tidying up the front end, there's a sedan at a wrecker down country who might be able to supply the grille bits. The passenger side carpet is pretty rotten and it got consistently damp in the rain, which was a pretty good indicator that there were holes somewhere that there shouldn't be holes. I broke the unwritten rule of old car ownership, that being "don't pick at that bathroom sealant, you won't like what's underneath it" and lo and behold after chiselling away the layers of Selley's Bathroom Adhesive in the windscreen plenum chamber there was a decent hole. After taking out the wiper motor I found another hole, so out came the cutoff disc and the welder. Just to be safe I pulled the dash out so nothing caught fire, to be honest this is probably the first time this car has seen the hot end of a MIG torch in its life. I made up a couple of patches, binned them after I found more scabby bits near where I was welding to, and then made up some bigger patches. Glued them in with the metal gluestick, and hit it all with some epoxy. Might spray some underseal in there yet, or I might just spray it all with fish oil and put up with the smell for a couple of weeks. Otherwise it's been plain sailing, the front seats need some more foam because as far as I can see they don't actually have springs in them, just a layer of heavy foam which has disintegrated over the past 39 years. Local content laws dictated that as much trim as possible had to be made here, which is why we didn't get the neat colour coded interior fabrics that everywhere else in the world got, we got beige or beige. I pulled out the amplifier that was tek-screwed through the floorpan underneath the passengers seat and the lil' Johnny spec head unit that was flopping around the dash and wired in with three core house cable, and wired in a period '80s Clarion spindle mount unit - less doof, but more class! It needs a set of TS-Xs for the parcel shelf next time i'm near Buyee.com. Here's some pictures of it enjoying the scenery11 points
-
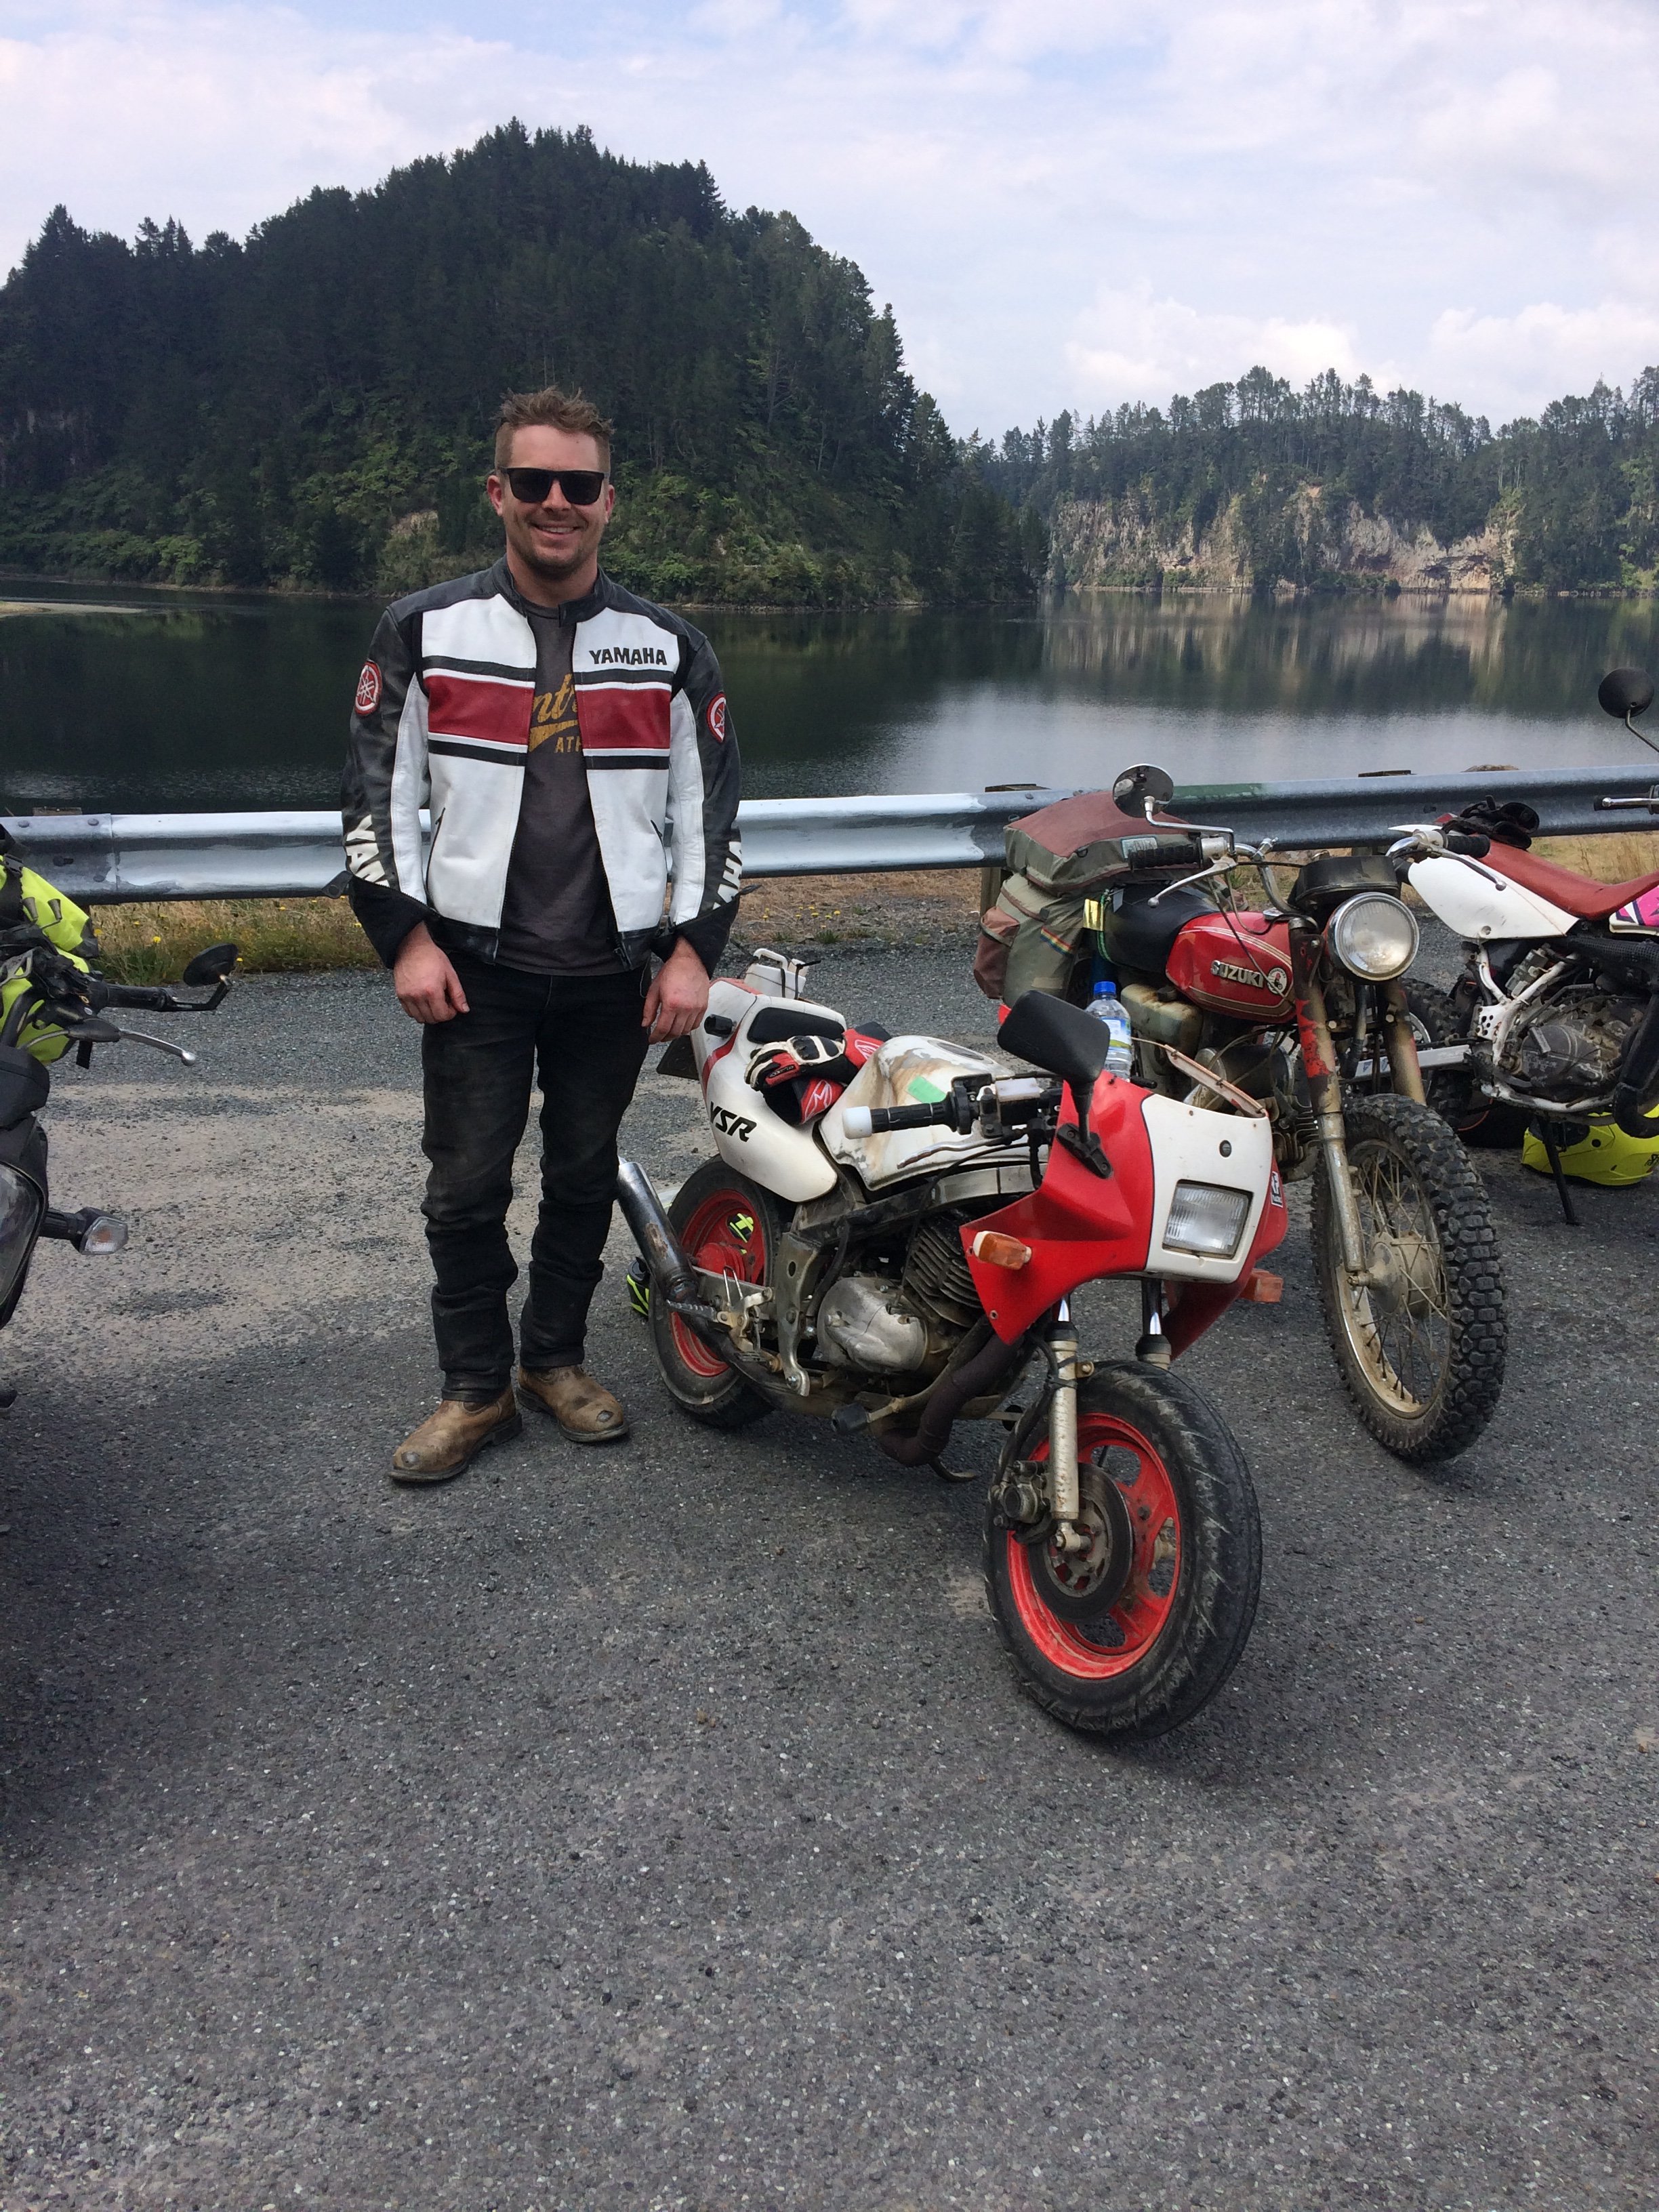
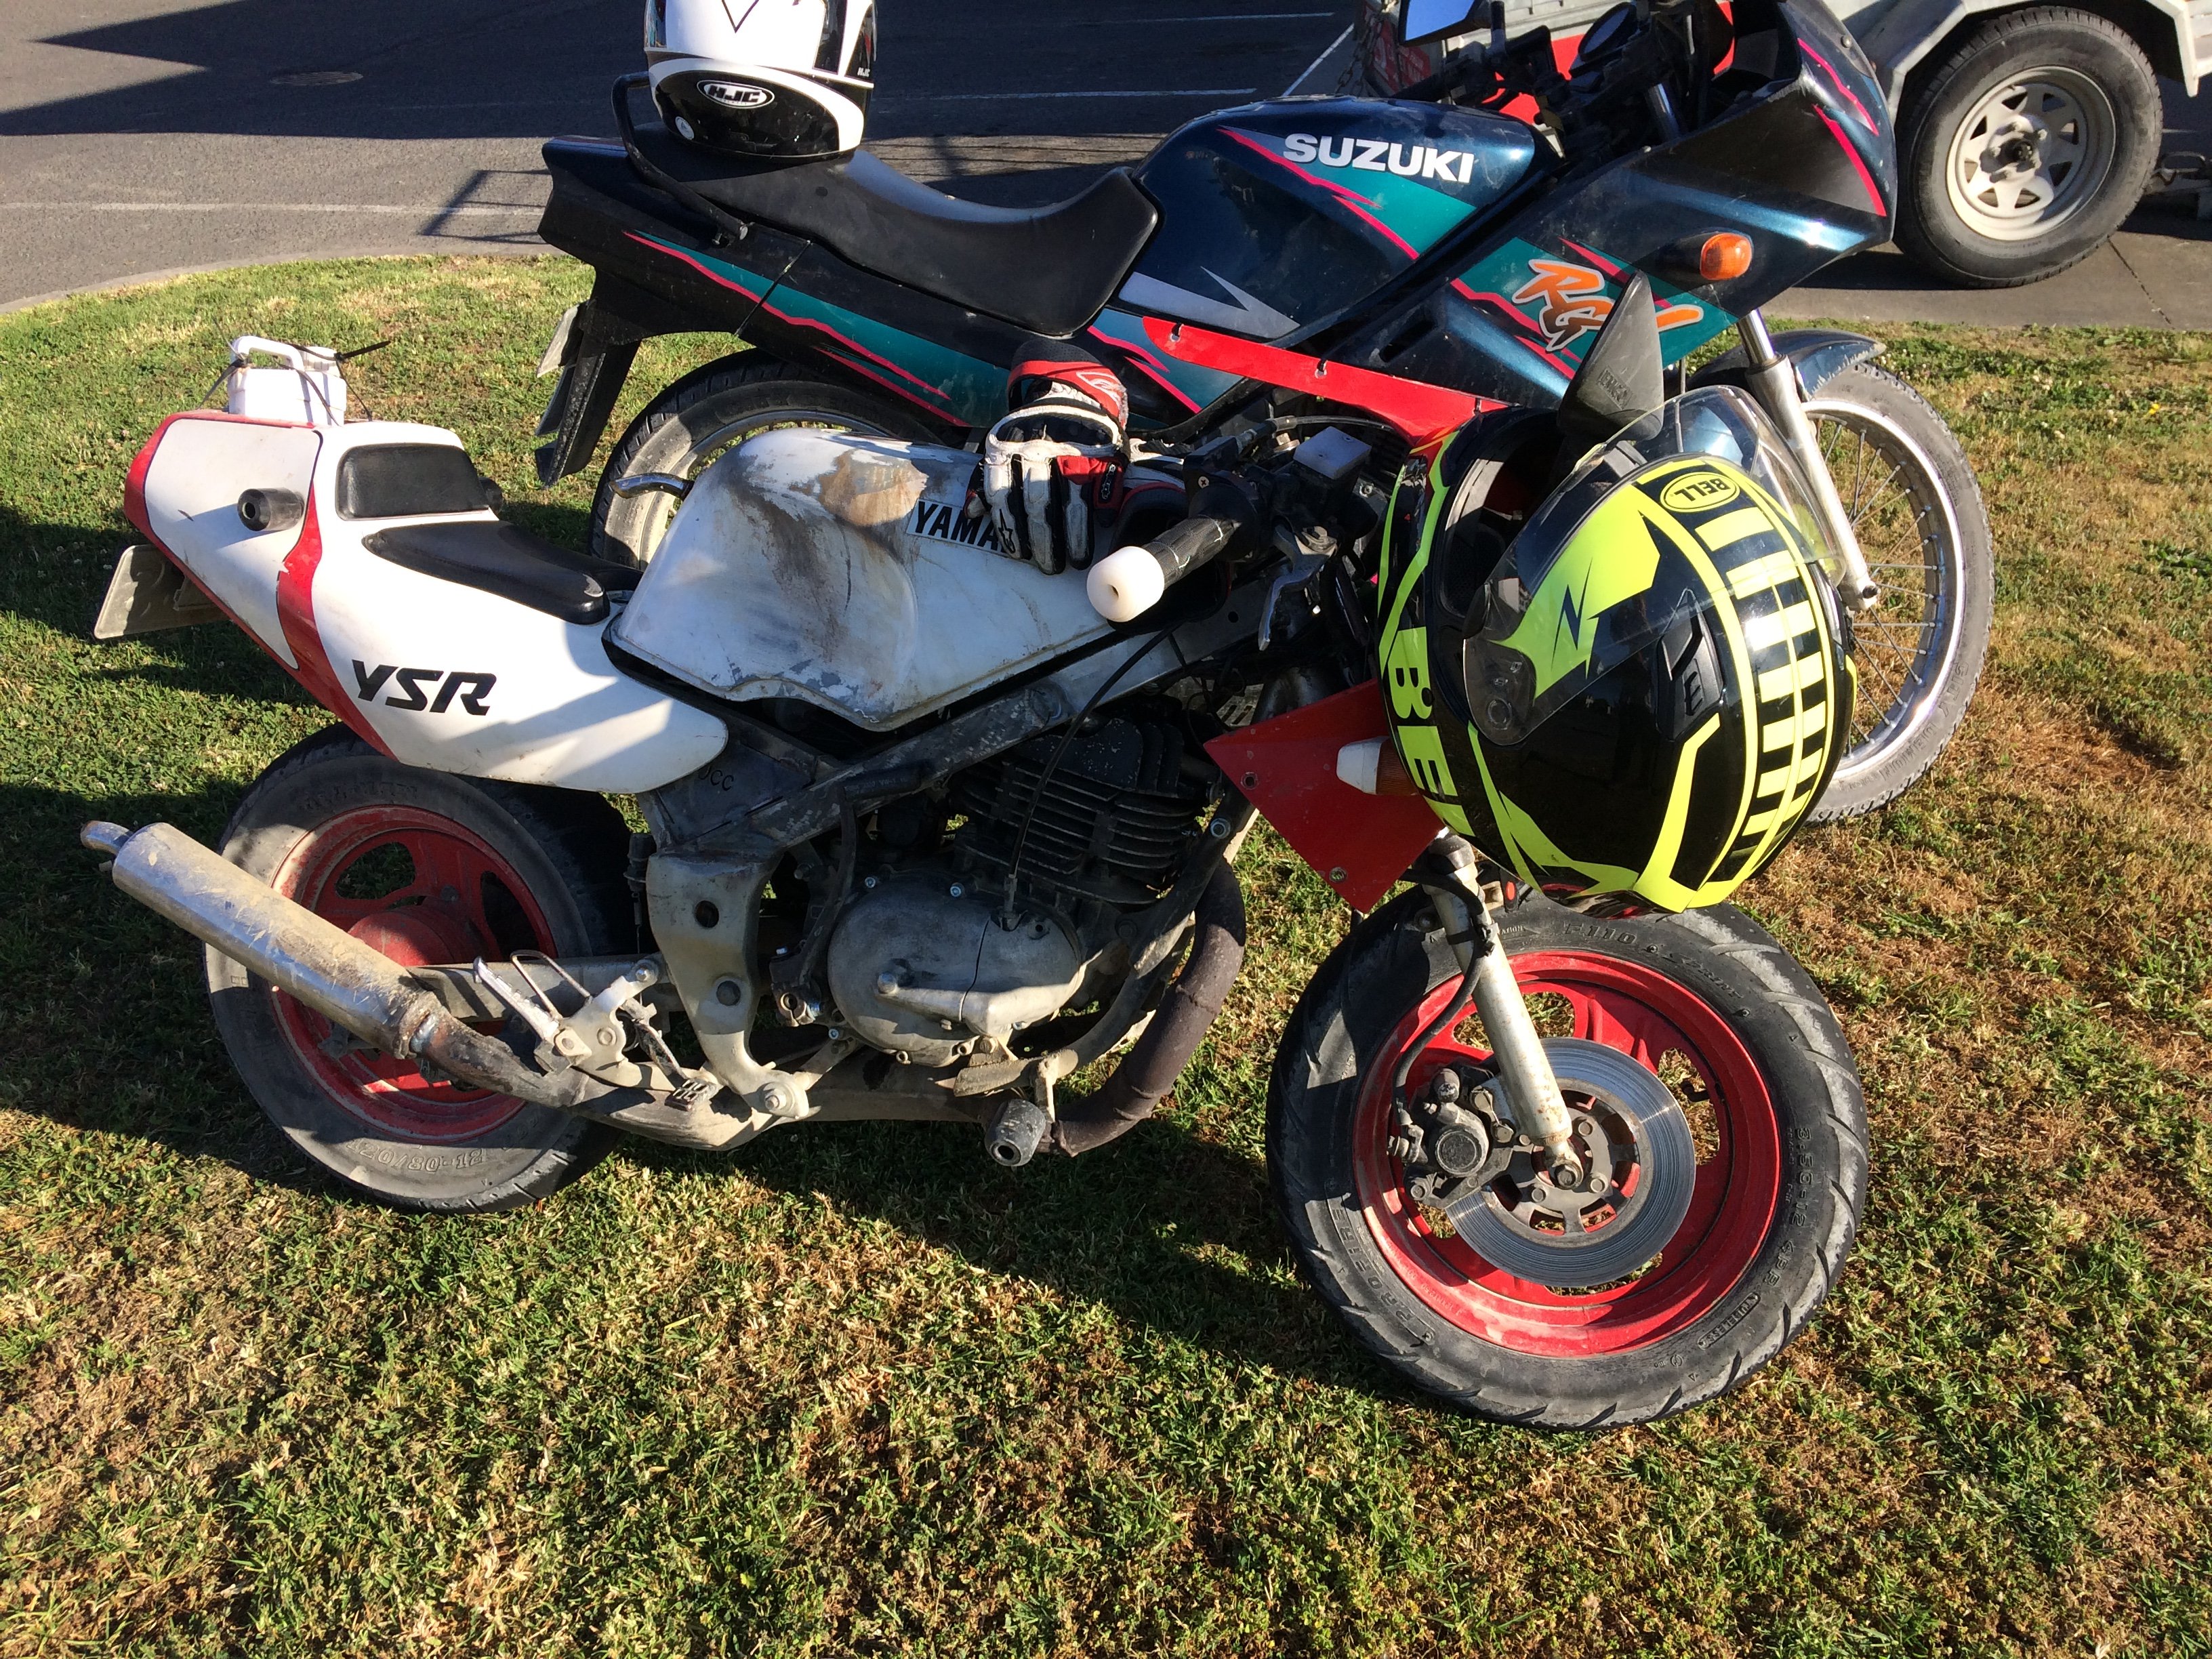
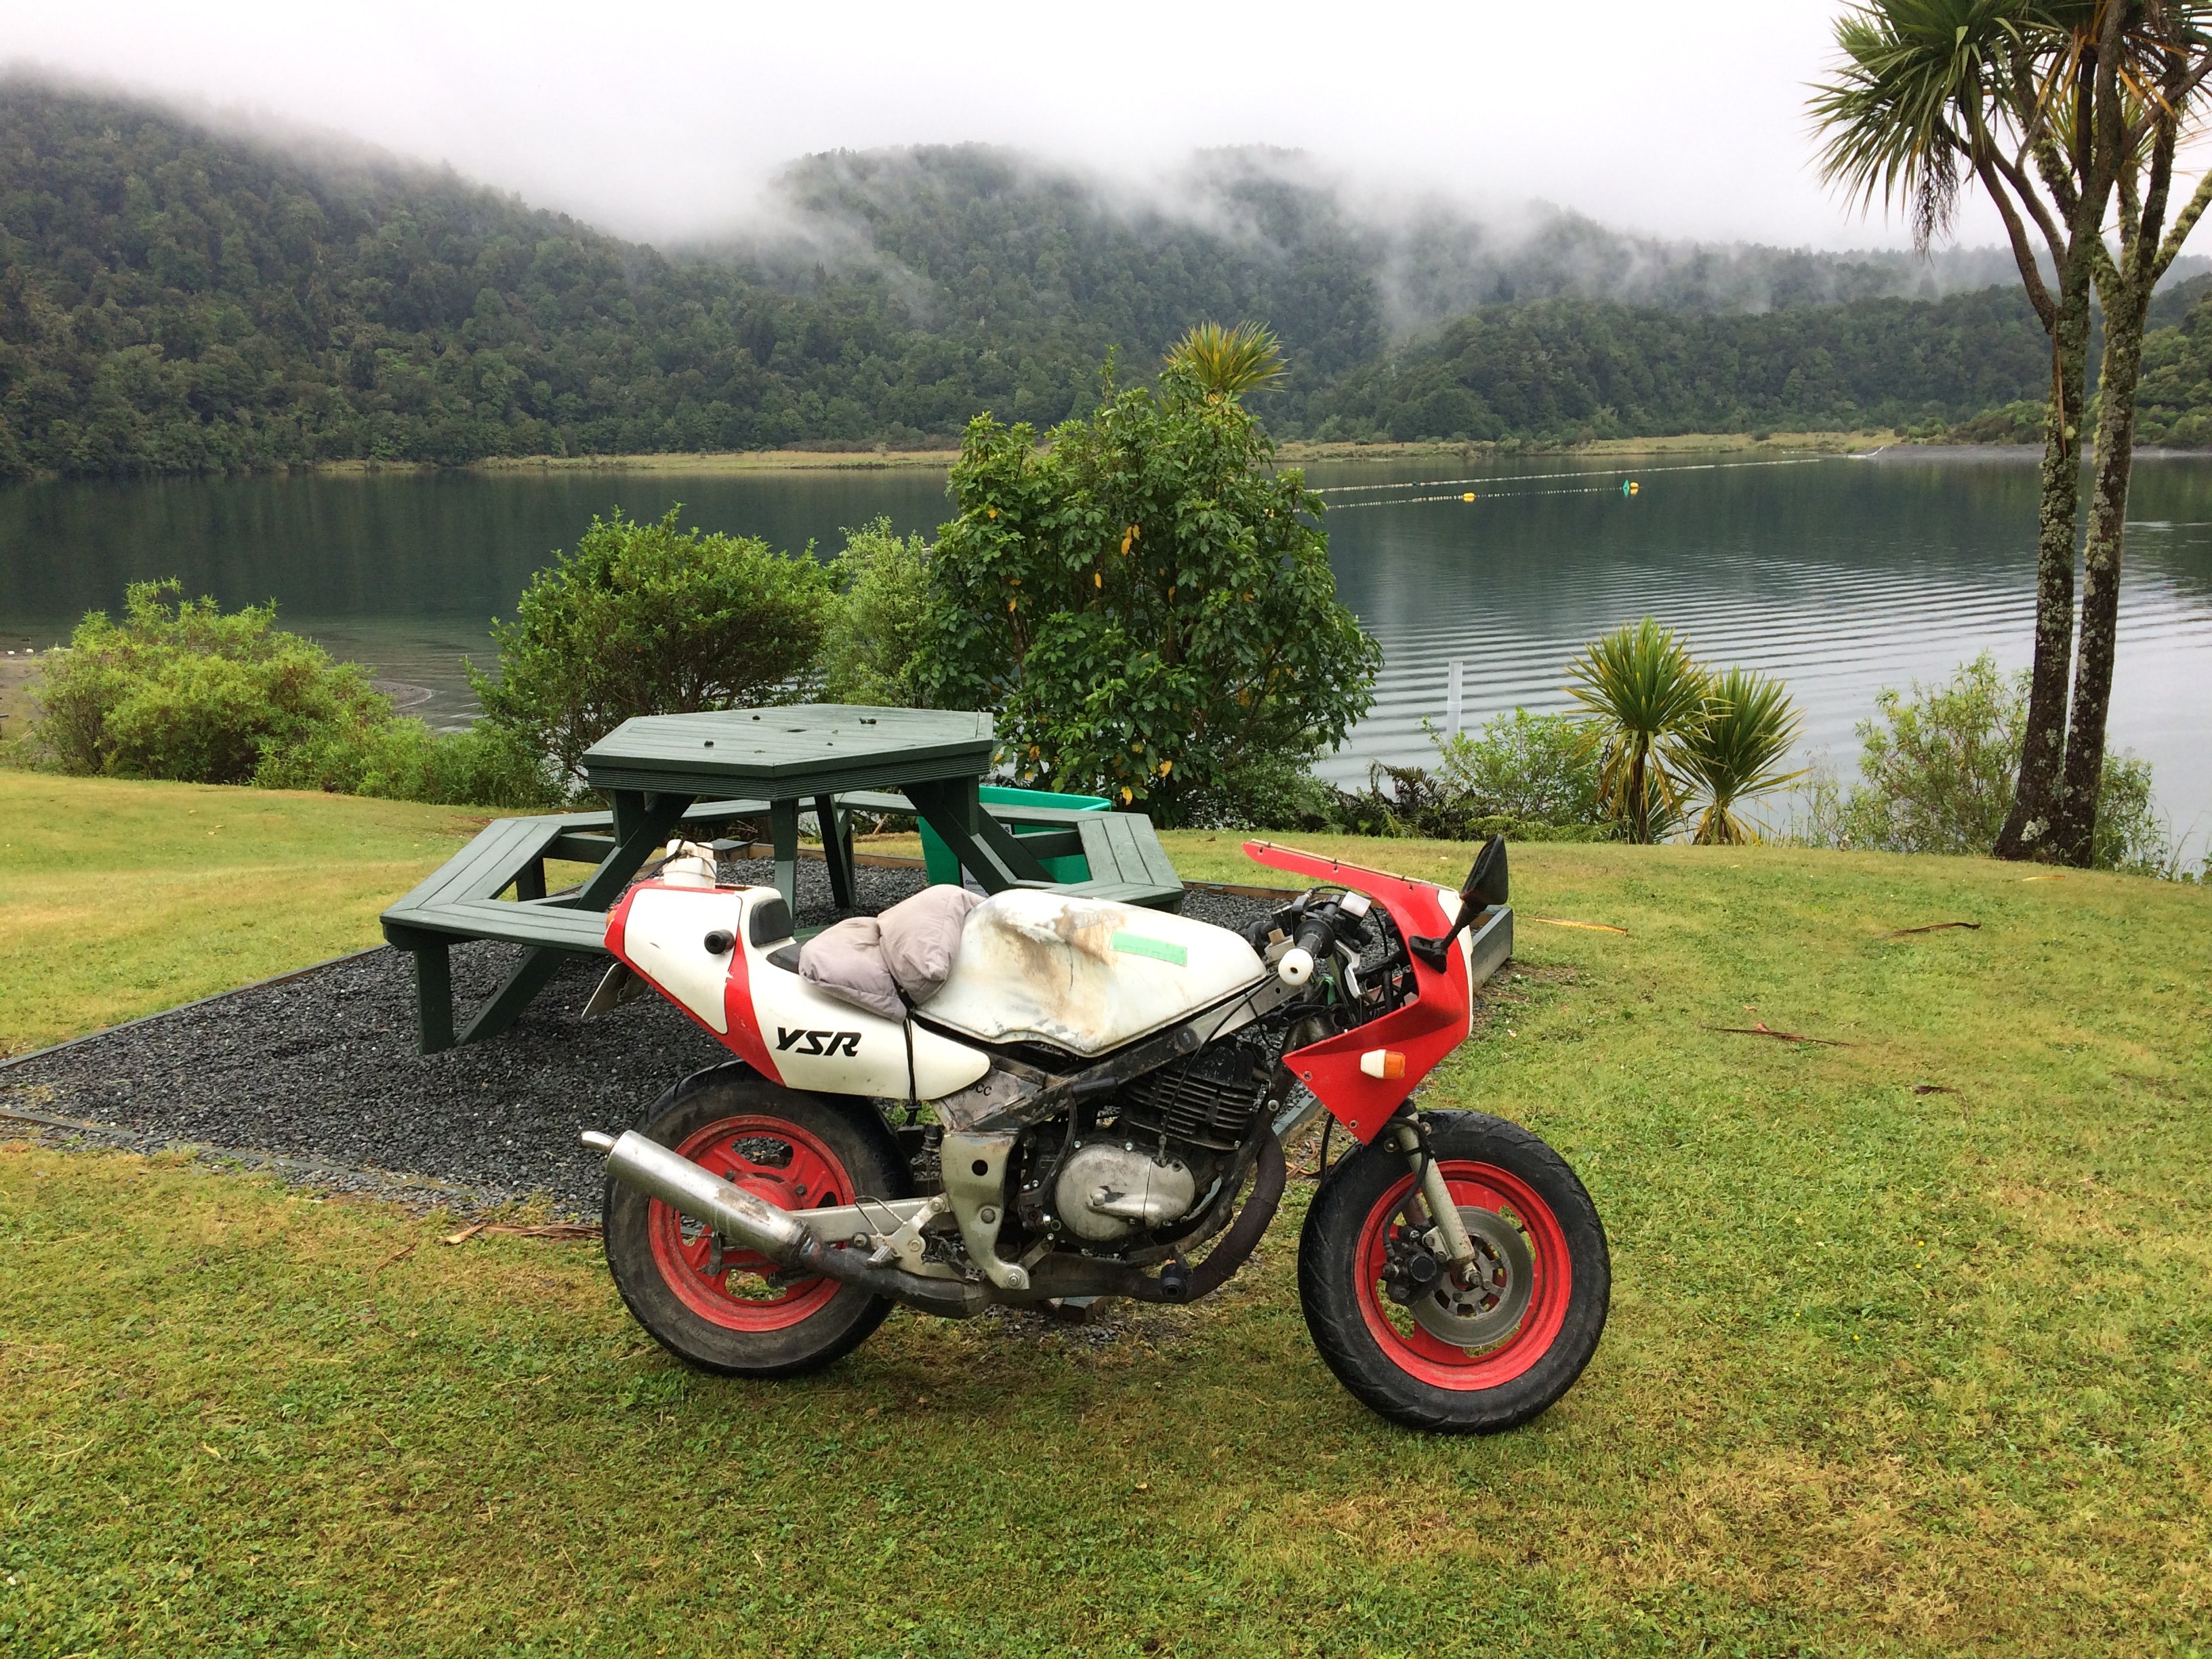
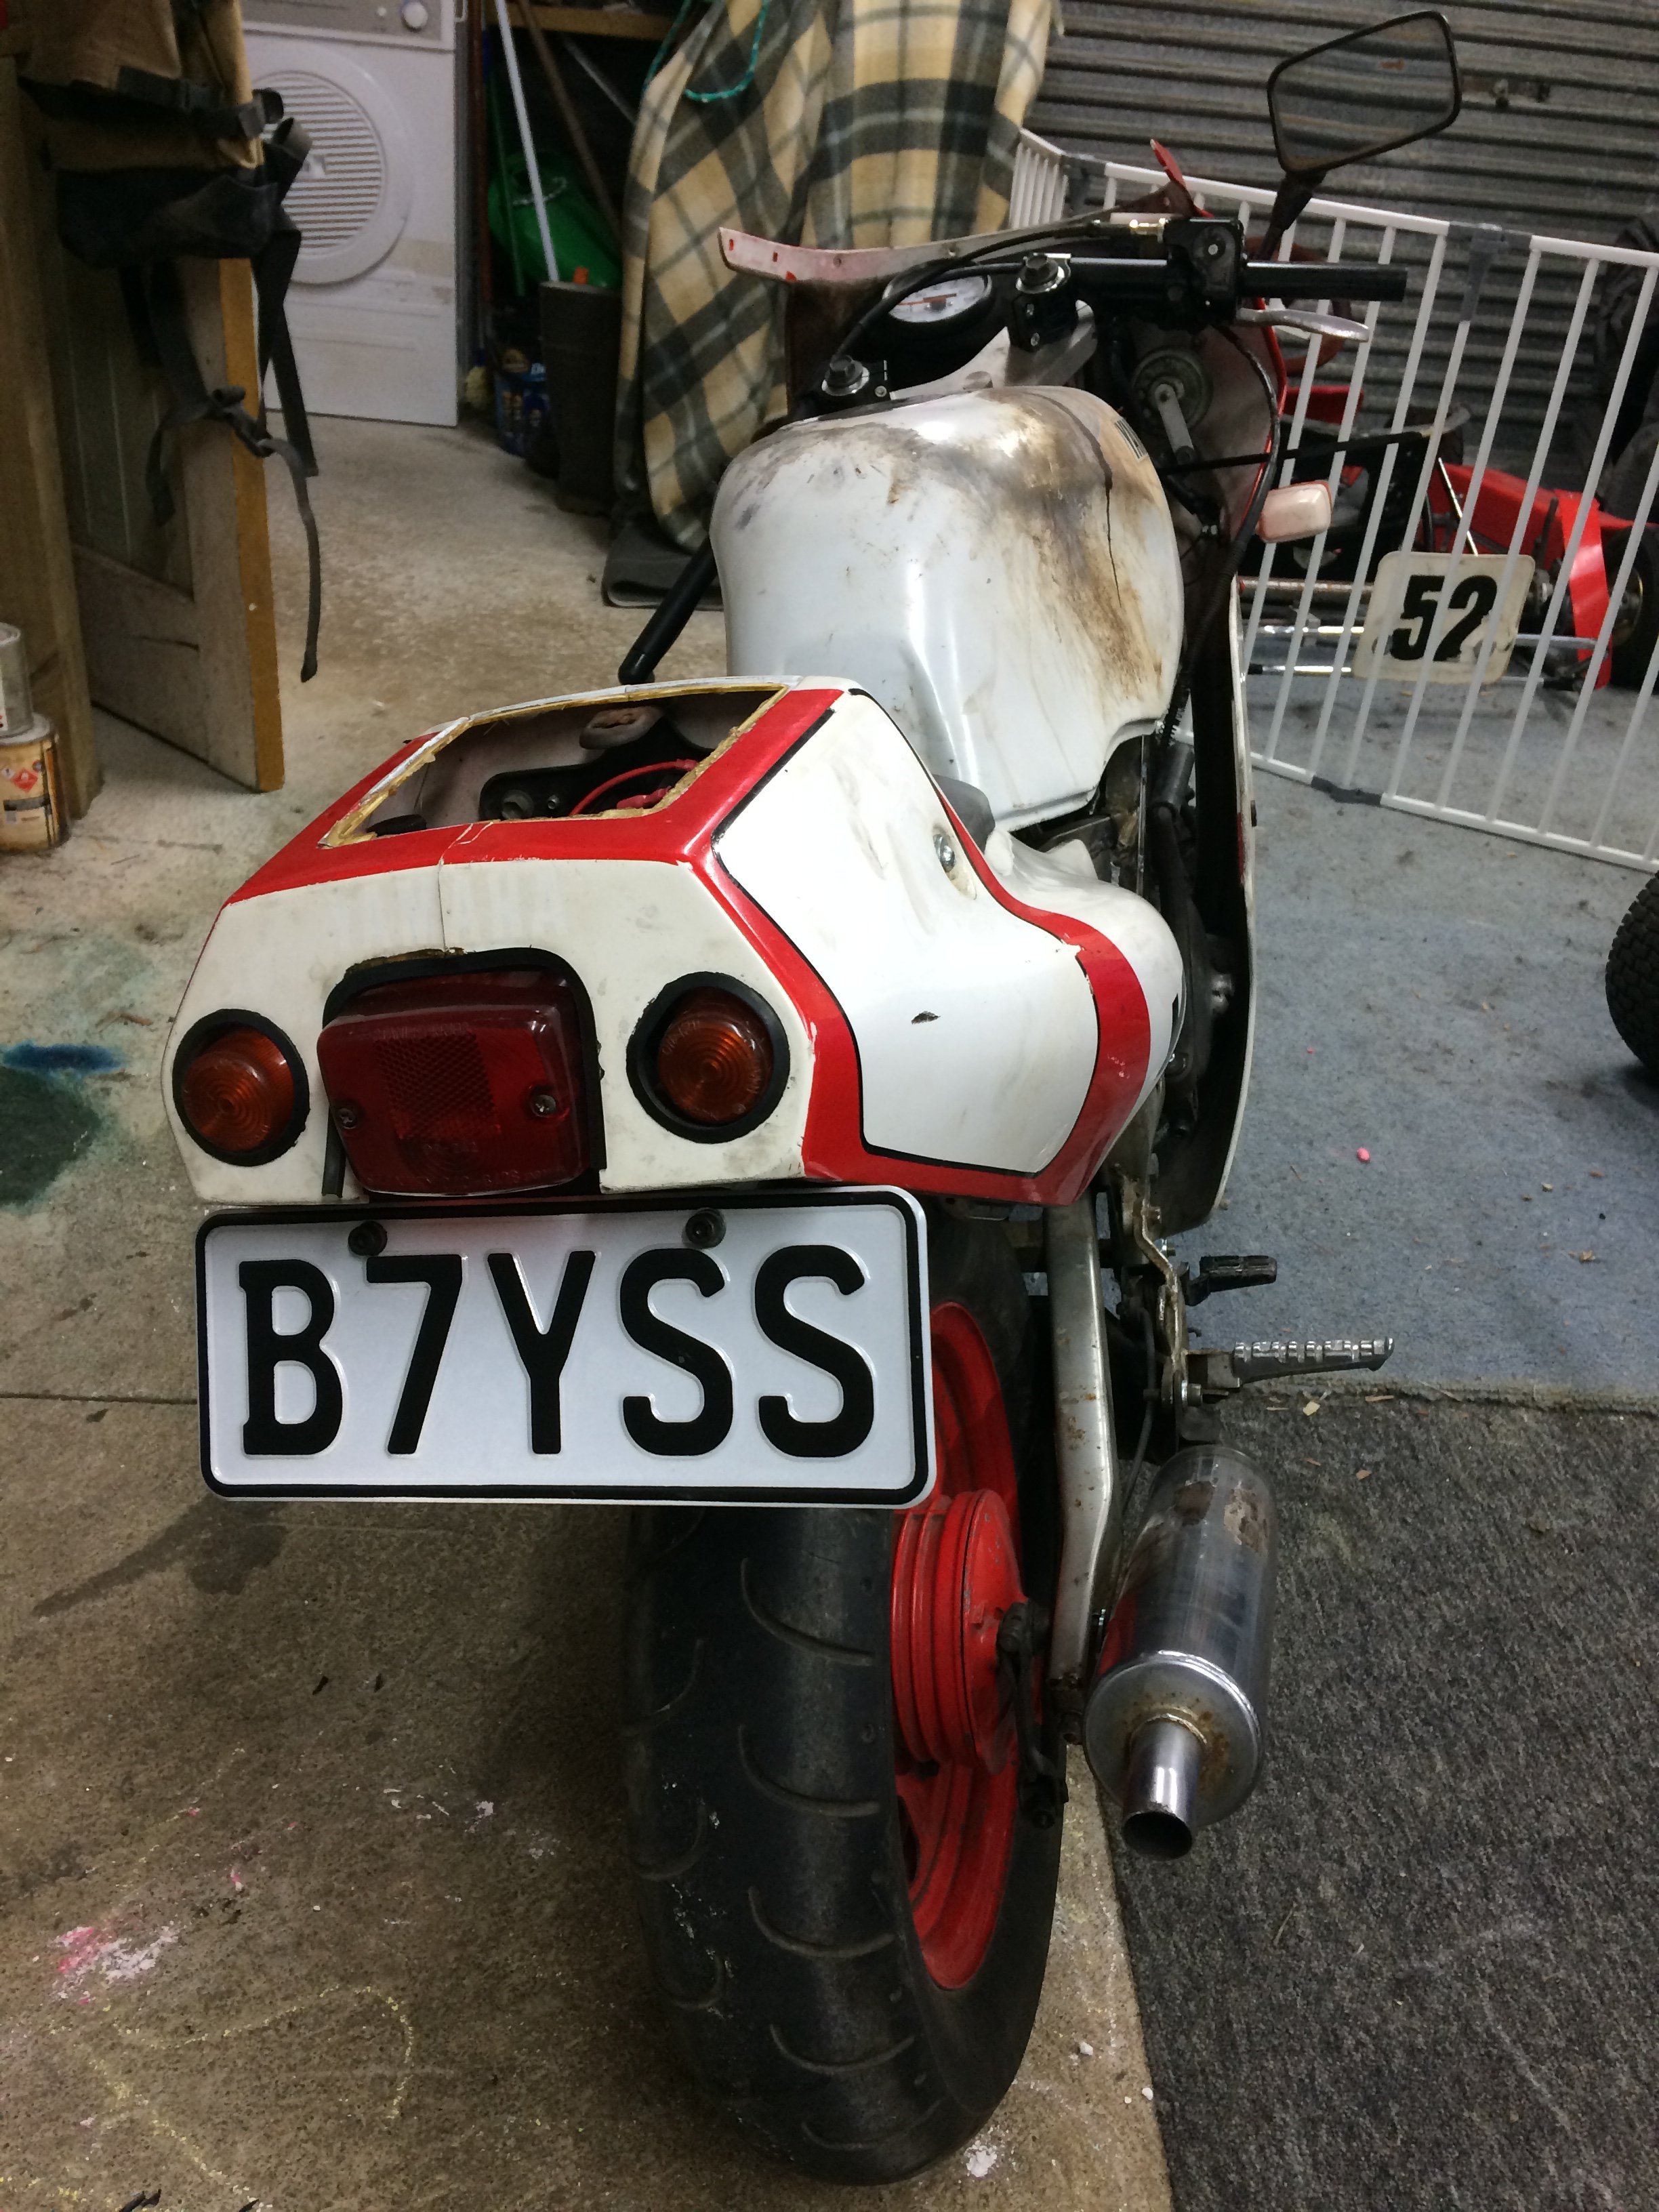
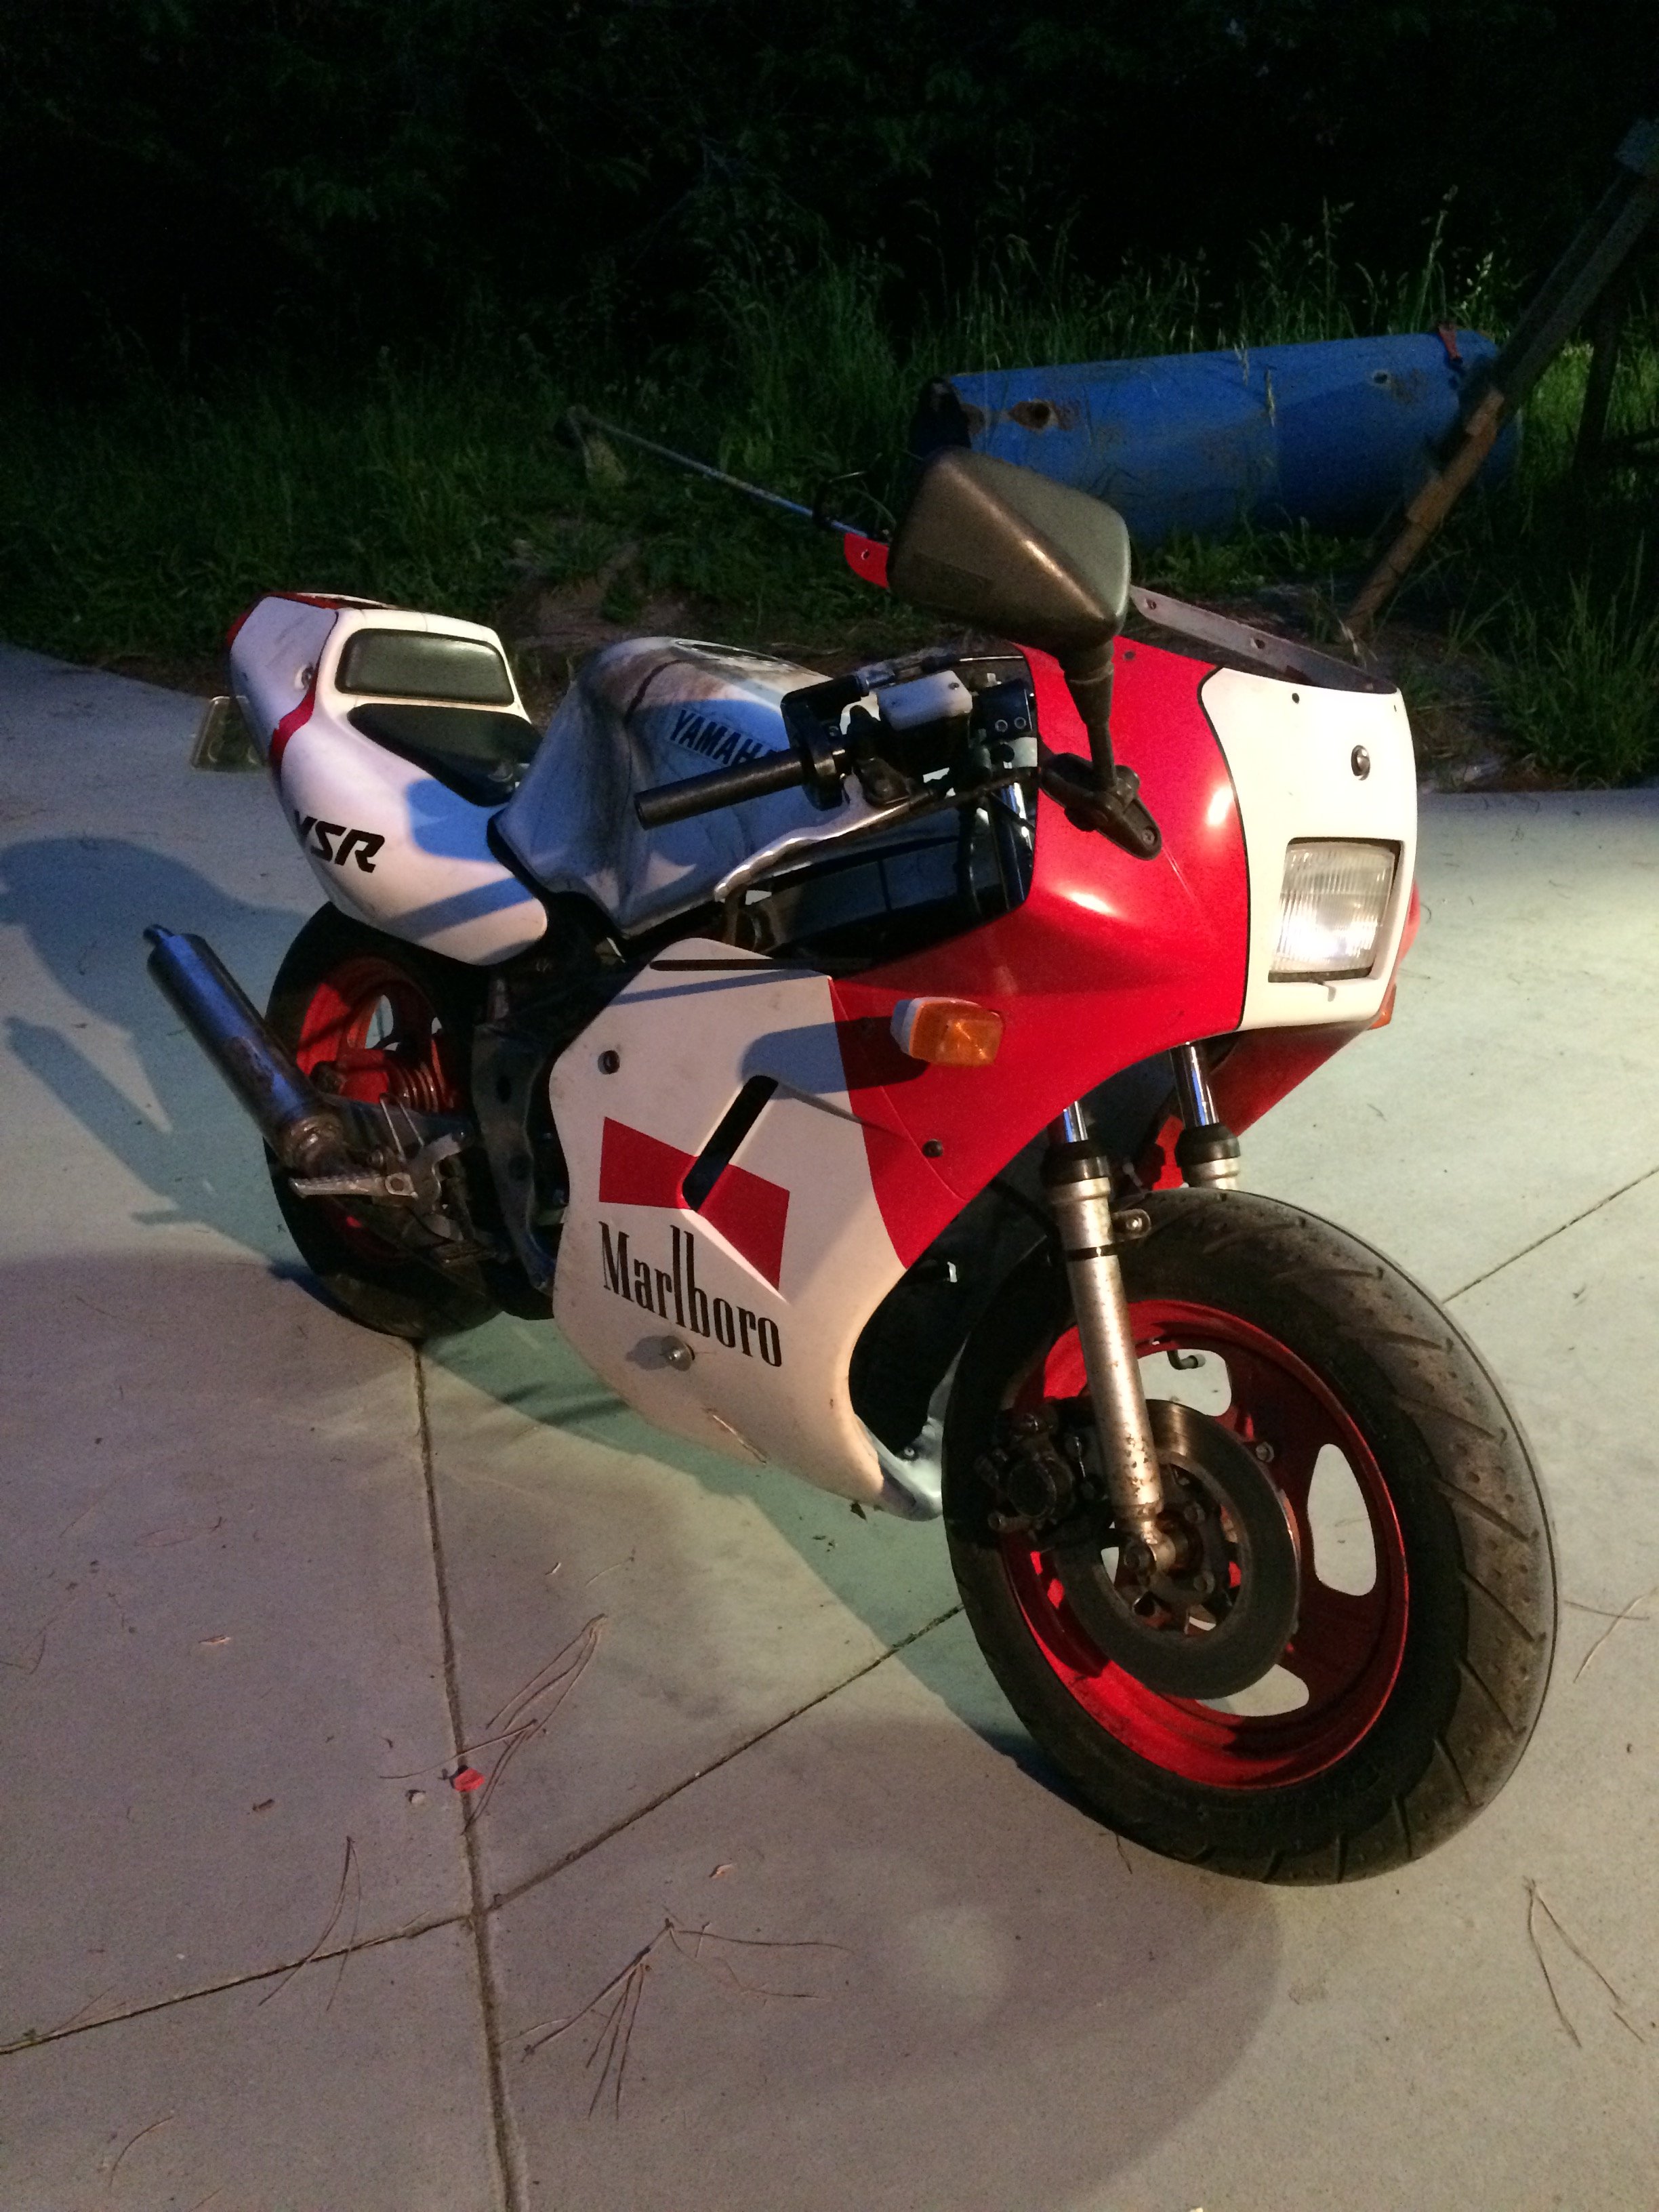
Hey Lewis, shit yeah heaps of progress, Ive just been really slack about updating my thread! The overreving thing was a combination of wiring and a split carb intake boot. Intake boot from the wreckers $15 and 15 minutes wiring for the old man and it was running OK. I was seriously running out of time for the big Urewera ride and as it transpired I loaded it onto the trailer and took a backup bike as the YSR had still never been ridden on the road. I installed. Larger rear sprocket (Which I had made myself on a waterjet) in the motel car park the morning of the ride and when we turned up @johnnyfive ‘S house I filed the teeth smooth in his driveway. The Urewera ride was my test ride. A 600km predominantly gravel test ride haha. Initially it was smokin and running quite rough, but as the pipe cleaned out it got faster and faster. It’s potential for tuning is still massive, its not half as grunty as it could be, but because its so light and small i still had it up to near 130kmh! I was passing cars on the open road haha. The gravel was a pretty tall order and in places I worked my way right to the back of the pack, not to mention developing a few cramps, but on the seal it was damn near untouchable and probably the 2nd fastest bike there (after @anglia4 s RG150). All the mods held up well and in particular the frame strengthening was really worthwhile. I had an issue on the first day where my float had jammed and the bike would only run at full throttle which was fucking sketchy on the gravel, lots of clutching, and the clutch was so heavy by the end of the day i was weaping in my helmet... and I spit my chain twice after gettting airborne fording streams... the second time bent my shifter shaft and caused a major gearbox oil leak, but we were so close to the end that I opted to ride on; and thus I completed the entire Urewera undertaking on the pole smoker. It is the third greatest achievement of my life after my two kids. This bike goes hard for what it is. I have not even sat on it since hahaha.7 points
-
Started to make a new plenum. 5" donut chop, butchered the old plenum to harvest the bellmouths. so yeh hopefully this works.. Done some more butchery, to the suspension tower cover this time. I did buy some cast elbows, but didn't like them. diameter was slightly too small and real sharp bend. managed to "reshape" the tower cover to gain enough clearance so could use the ali bends i used for testing. They have a id slightly bigger than the throttles, should be good. Still pretty close to the tower, but looks like it will all fit in there. the runners will enter the plenum on a bit of an angle, and same deal with bellmouths, they wont sit parallel with the base of plenum. Seems like a better compromise than using sharp bends6 points
-
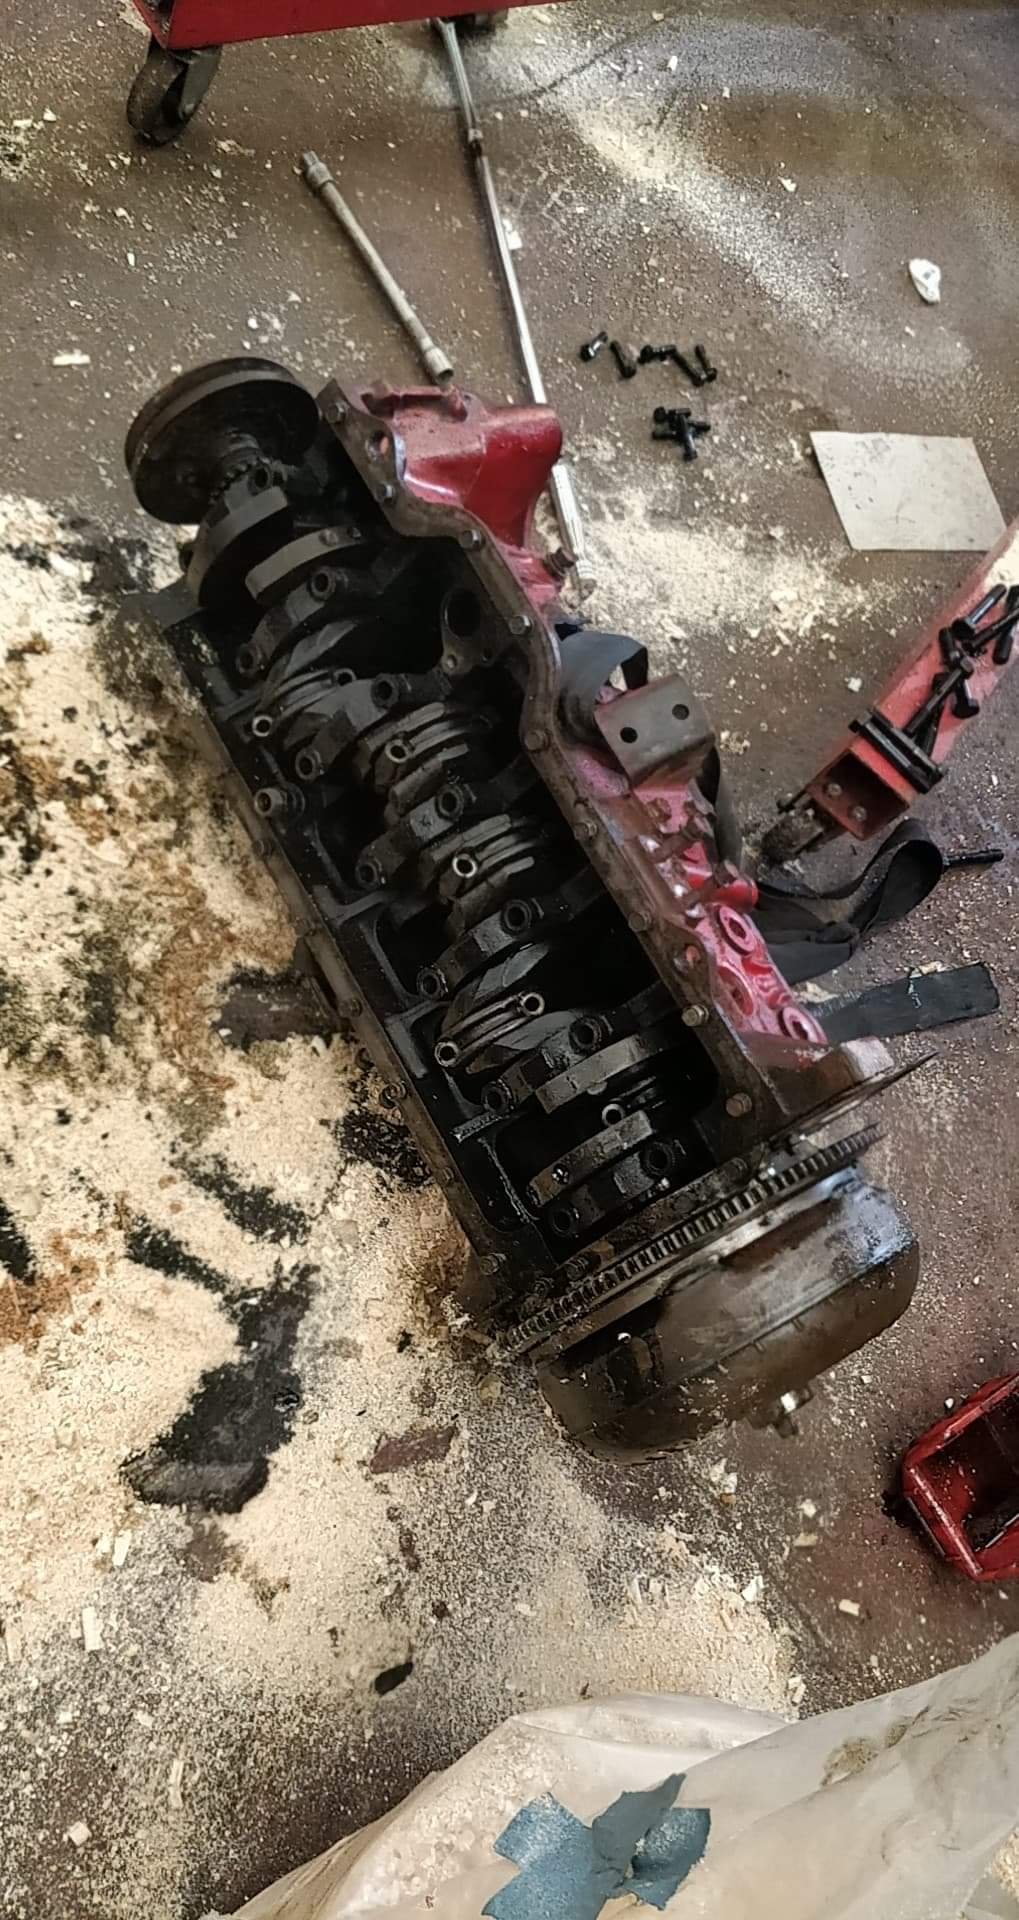
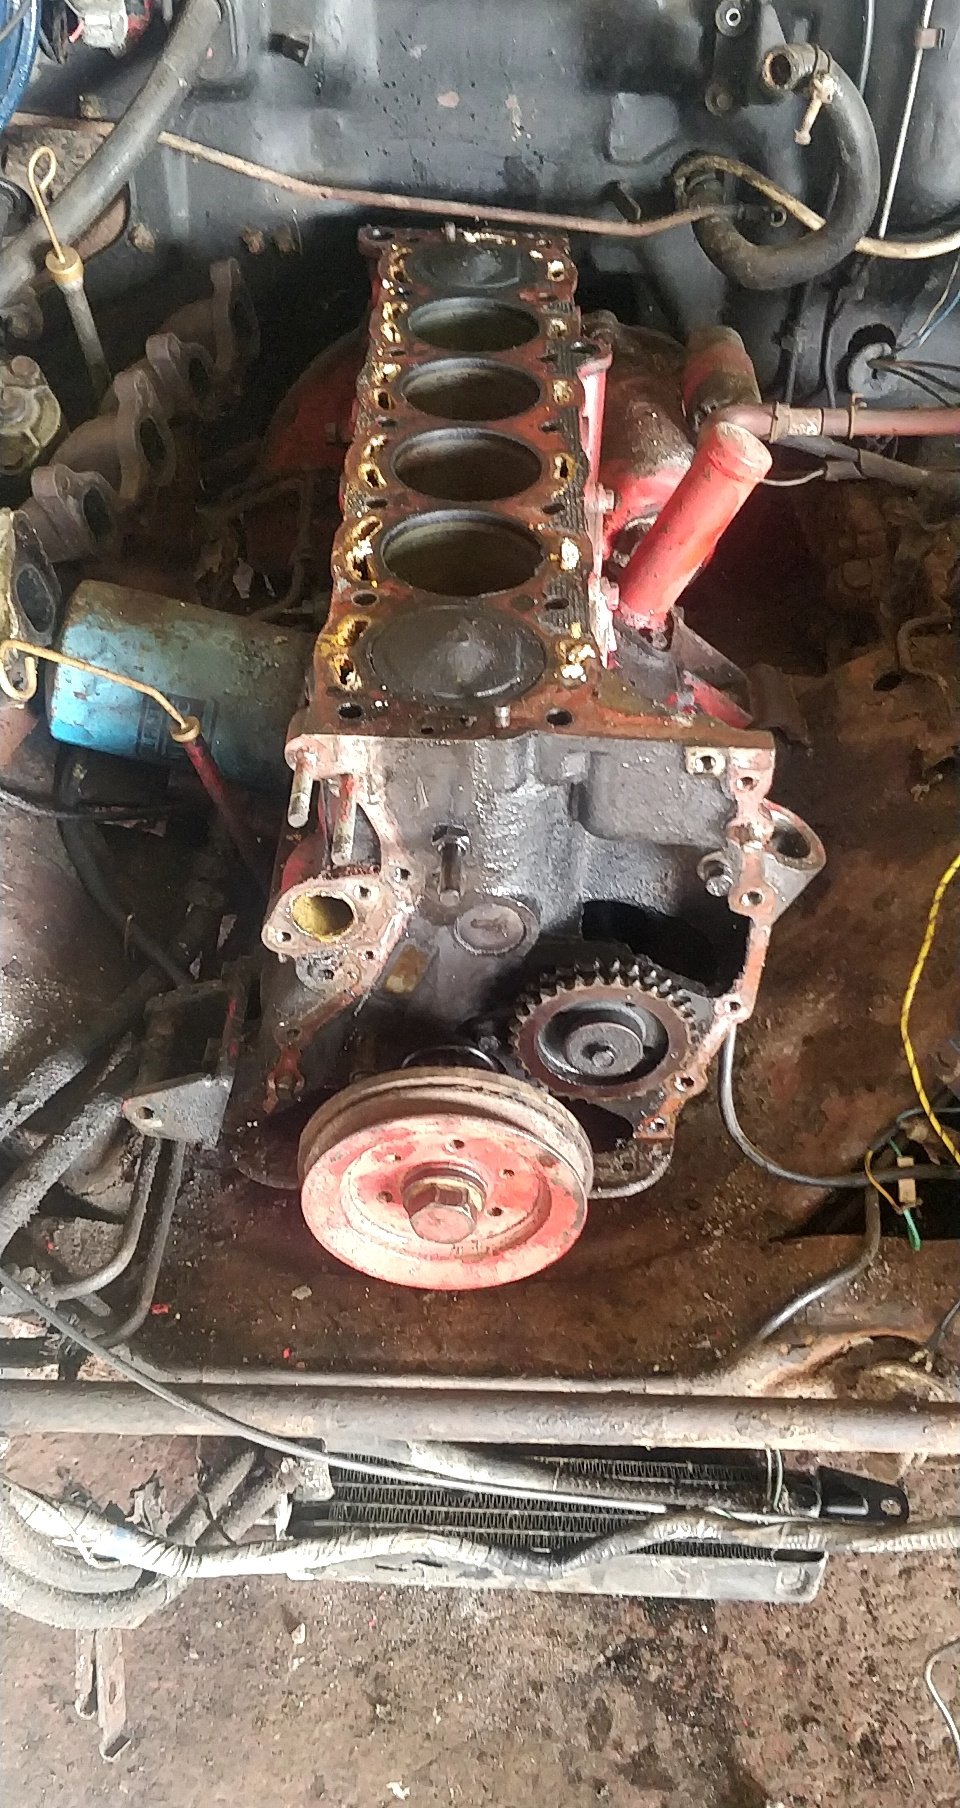
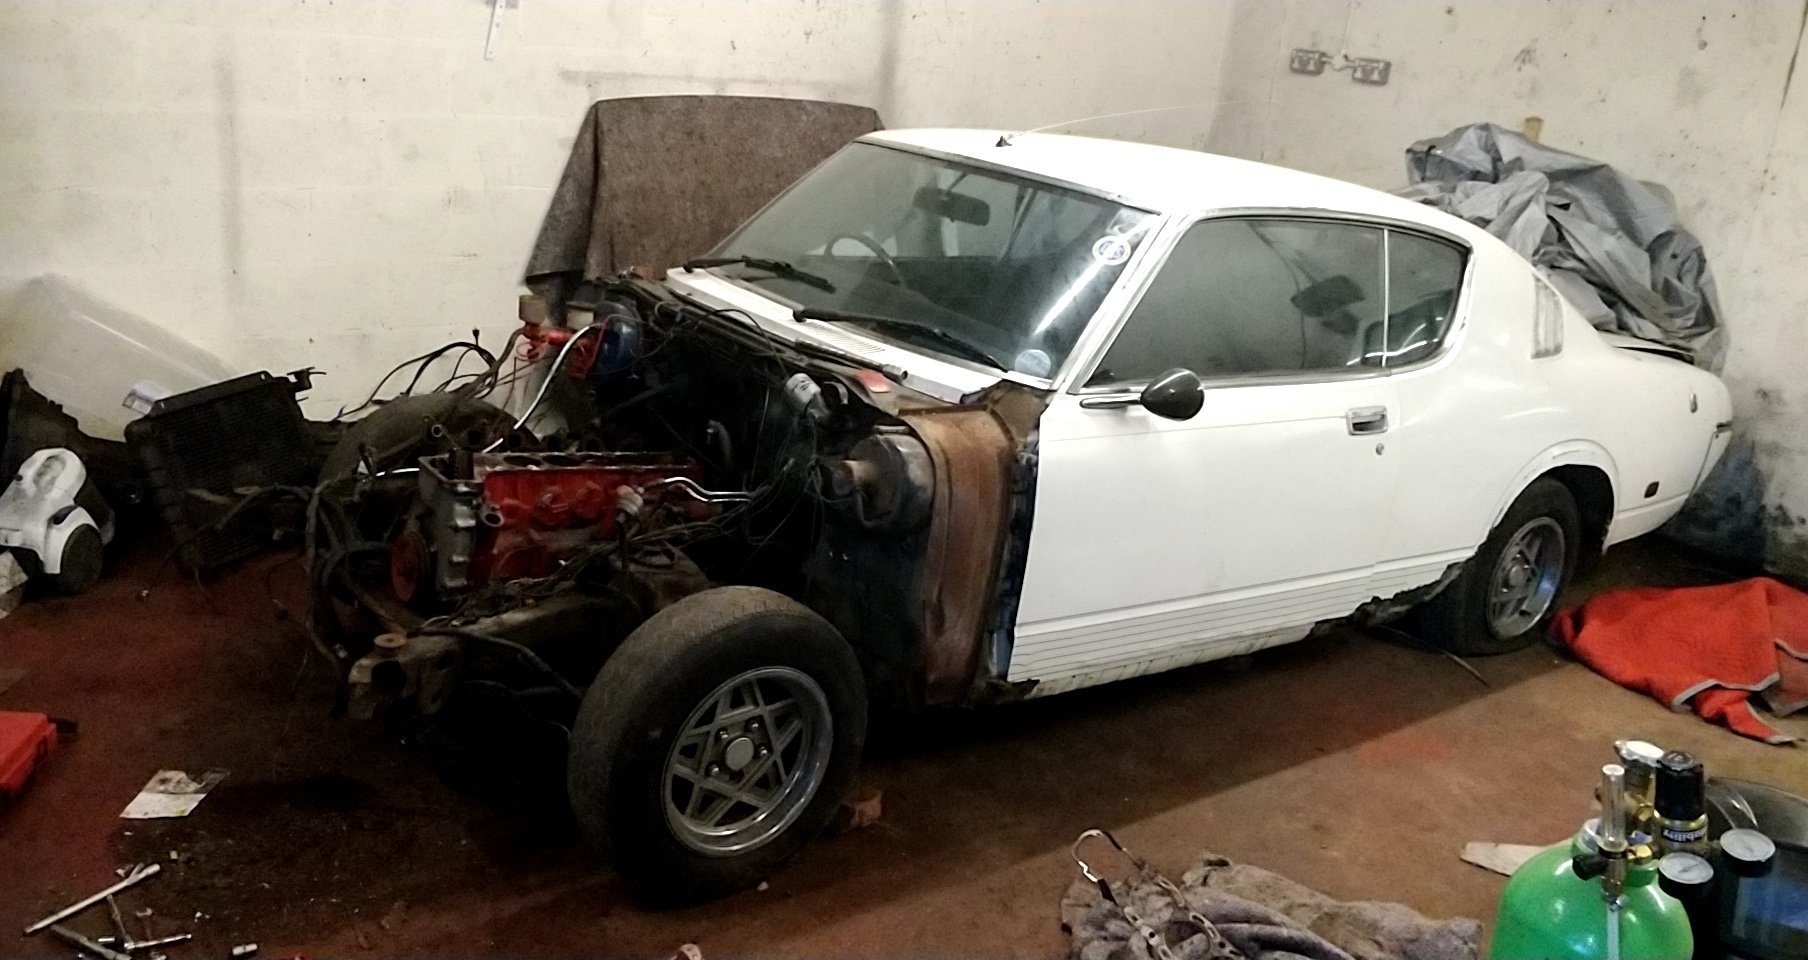
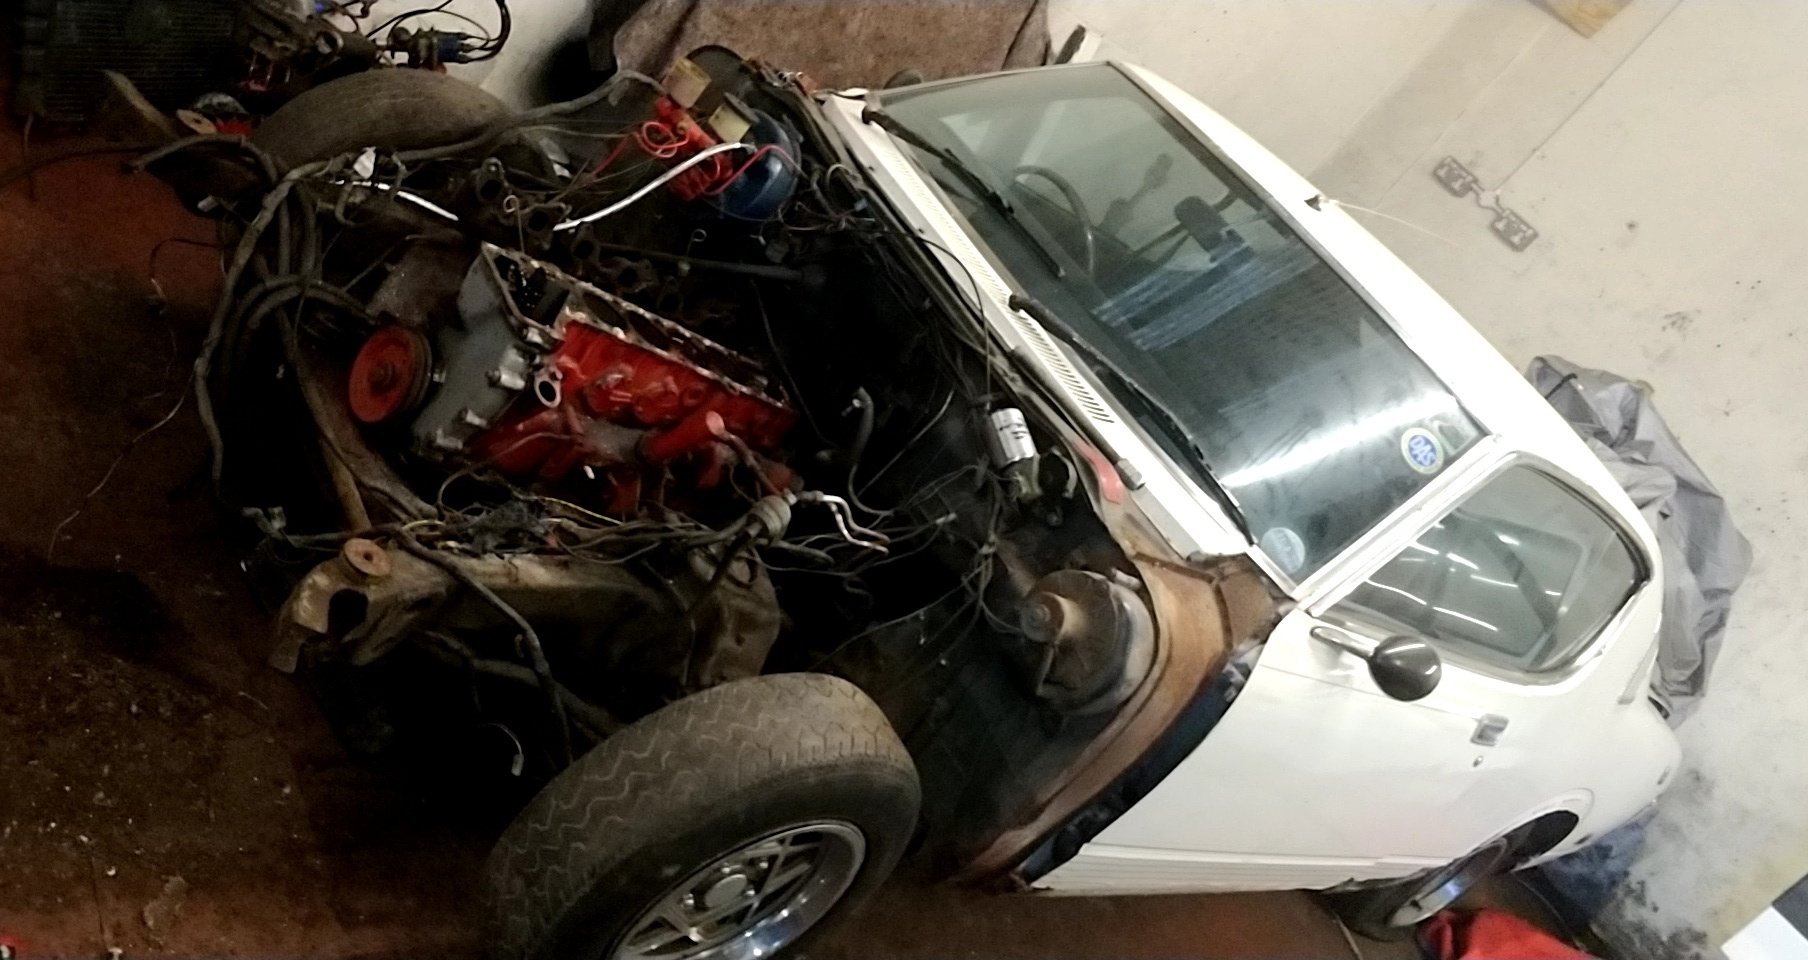
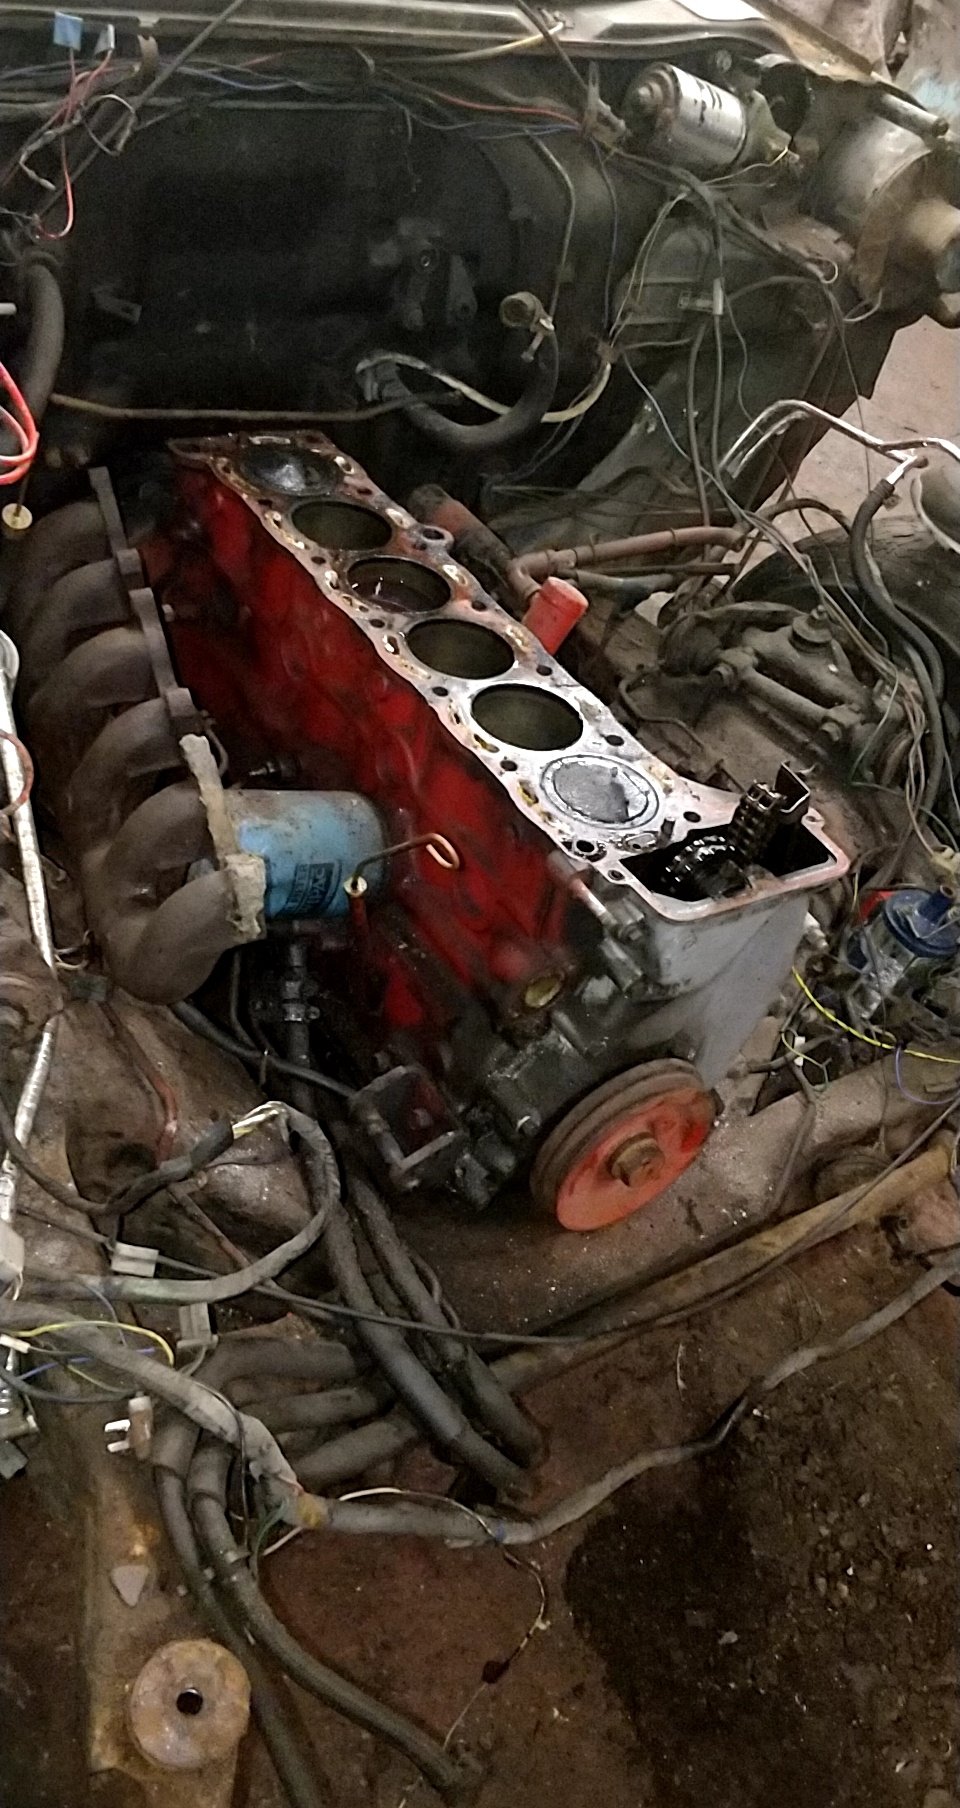
Made use of a couple of spare hours today - engine out, sump & oil pump off. Presuming its seized on the rings as theres no evidence of anything drastically wrong.
 5 points
 -
4 points
-
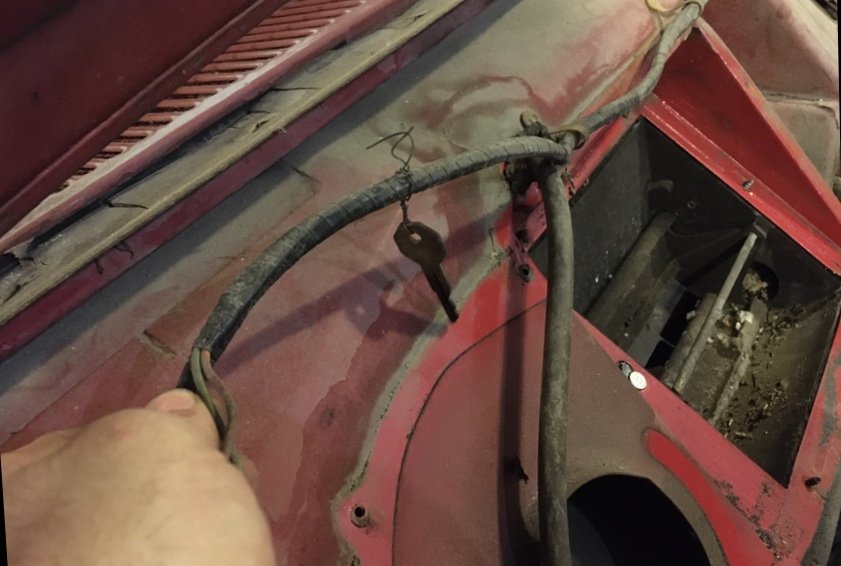
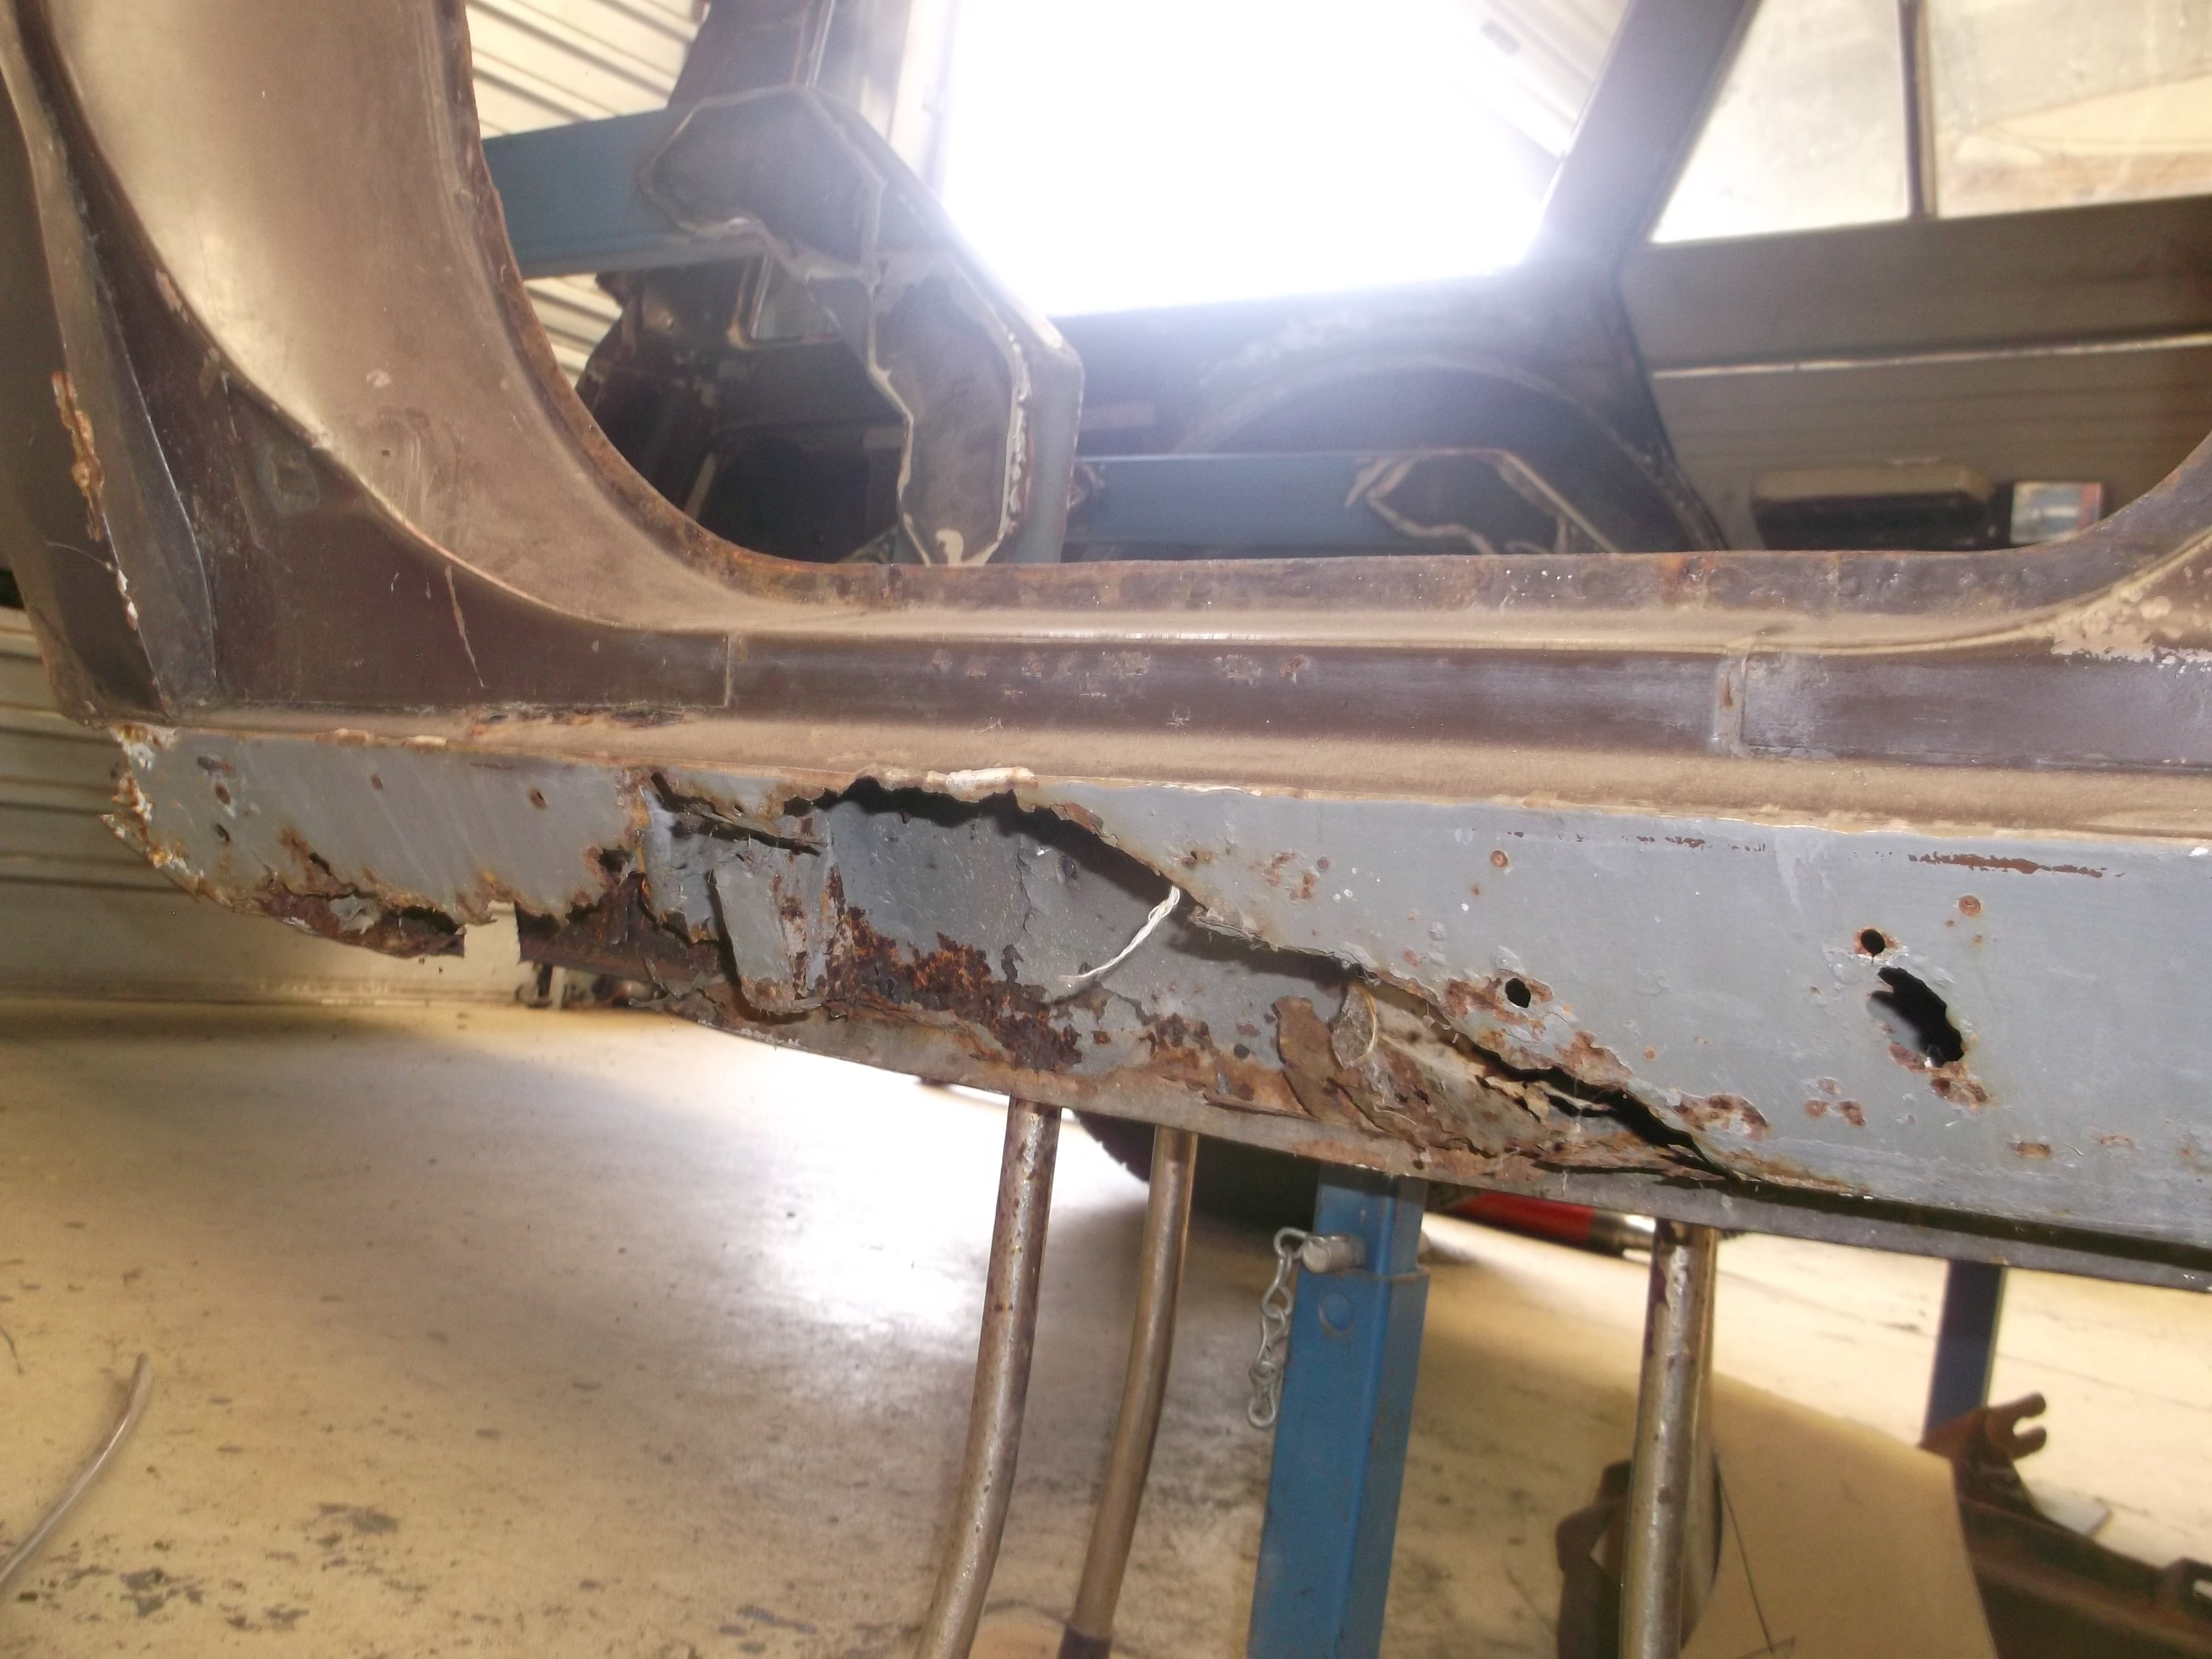
So been chipping away at some tear down. Had a real oldschooler to give me a hand even, @chris r and I pulled off the drivers door and fender. I knew I had a rust hole but as normal it was worse Need to grab a wire wheel and strip off all the old underseal. What I scratched off with a screwdriver had good metal underneath. it appears that the heater core hasn’t ever leaked which is ace Even found some of my missing upholstery And a spare key of all things. Would have rathered a valuable rare coin but eh guess I’ll take what I get
4 points
-
so yea, it goes. had to push the throttle by hand because i haven't got the e throttle working yet. pretty stoked tbh, it goes fucking mint. if i can figure out the e throttle setup i might be able to drive it tomorrow. sorry the video is a bit shit, i was trying to doort and film at the same time.4 points
-
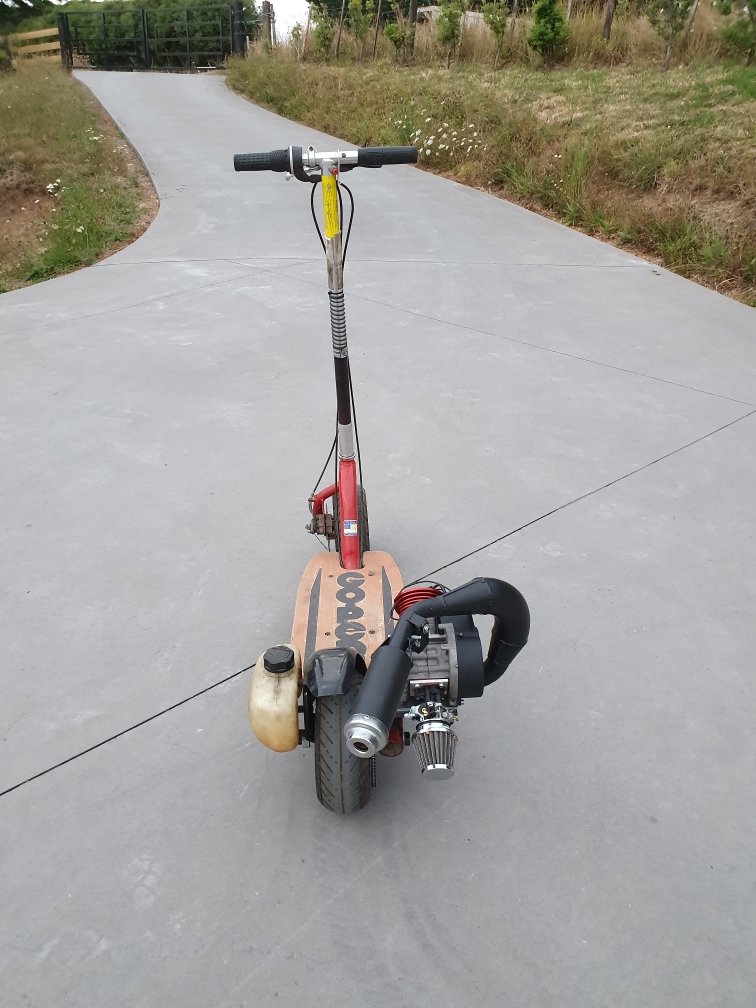
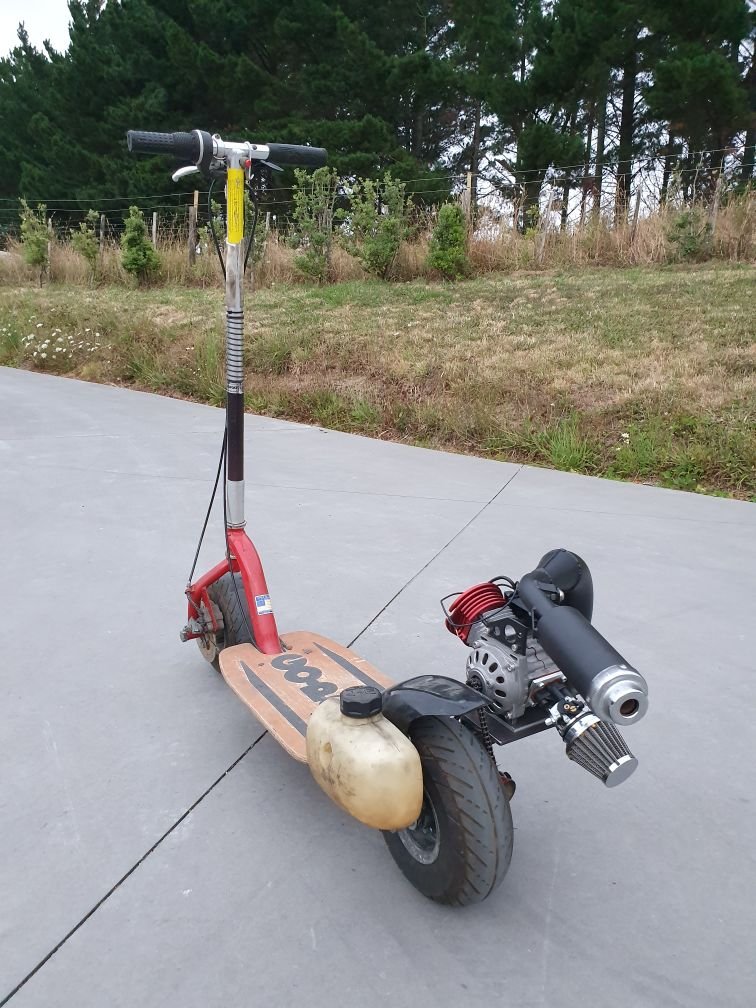
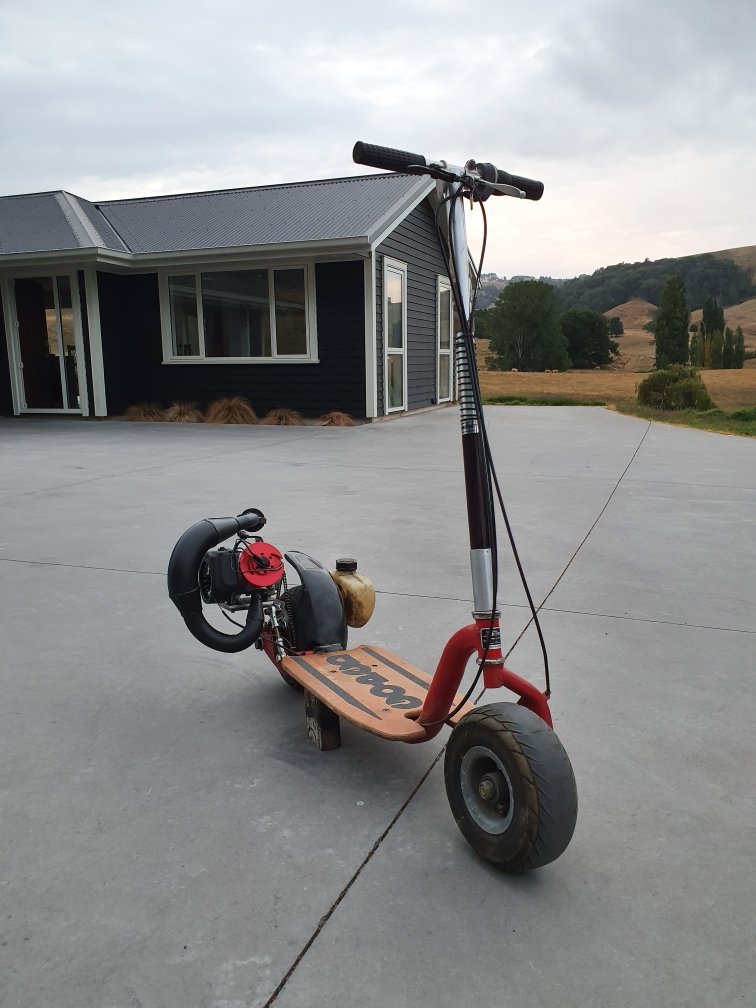
Okay, I'm starting to realise I may be pushing the limits here. There's a lots of motor on this scooter now. It's all but done, but I can't start it as the current pull start can't handle the compression. I tried to start it with a drill and fucked my drill!!! So I've ordered a different "easy pull" that I'll adapt to fit this motor. Basically it shifts the diameter of the pull start outward to increase torque in your favour. So...more waiting on Aliexpress to deliver the goods...
3 points
-
1. Got all the air burps out of the cooling system? 2. Someone told me a yarn about 1uz heater circuits years ago. If you have the heater outlet looped at the back of the engine it needs a restriction in the loop otherwise the water can hoon around the engine getting hotter and not going through the radiator 3. Radiator hoses the right way around? Probably doesnt matter with a cross flow rad but I had a customer with an uppy downy rad where the hoses were the wrong way round at the engine and it got hot 4. Put a bloody 302 in it like it's meant to have, you bloody wanker3 points
-
got both new rails on today , next is to build a flip front
3 points
-
3 points
-
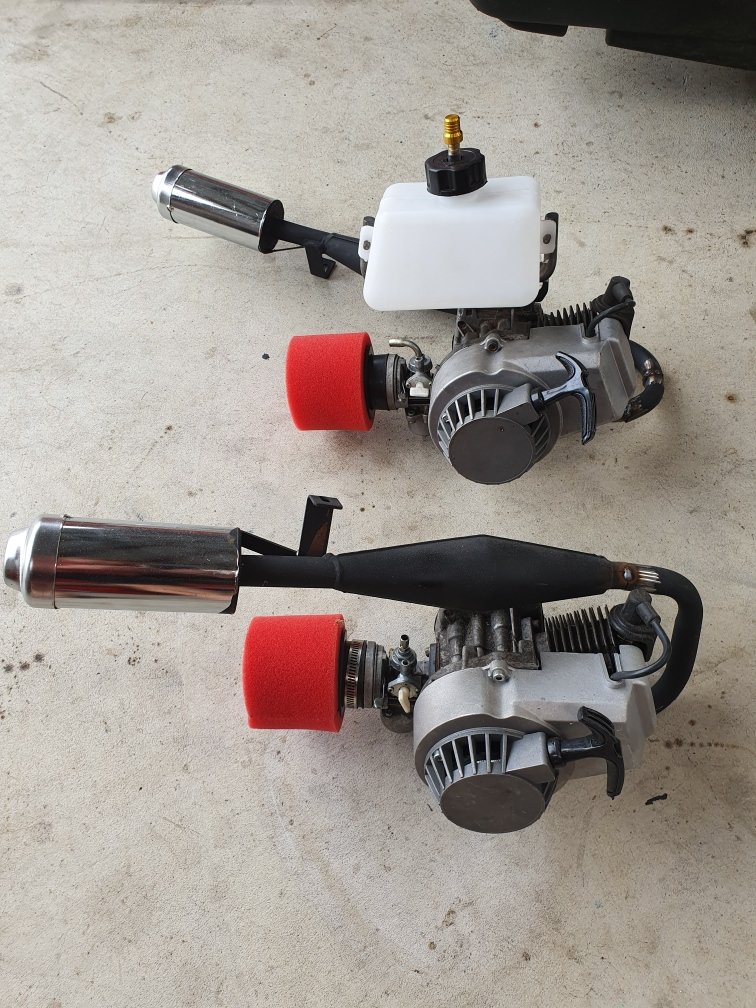
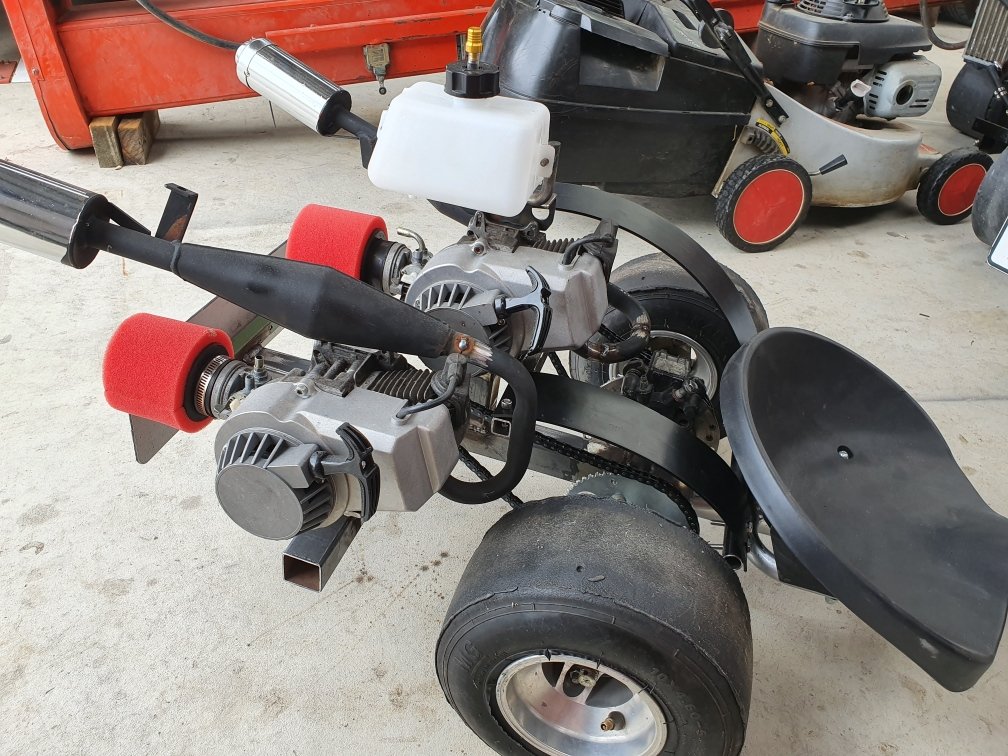
Did more work on this very neglected and long forgotten project Finally finished welding all of the various frame parts. Fitted chain guards to protect the rider from a flailing chain blow to the kidneys! Two motors....mmmmmmm....tasty!
3 points
-
I have no idea what three hundred and two tune is.2 points
-
I have every intention of driving this to Nats.2 points
-
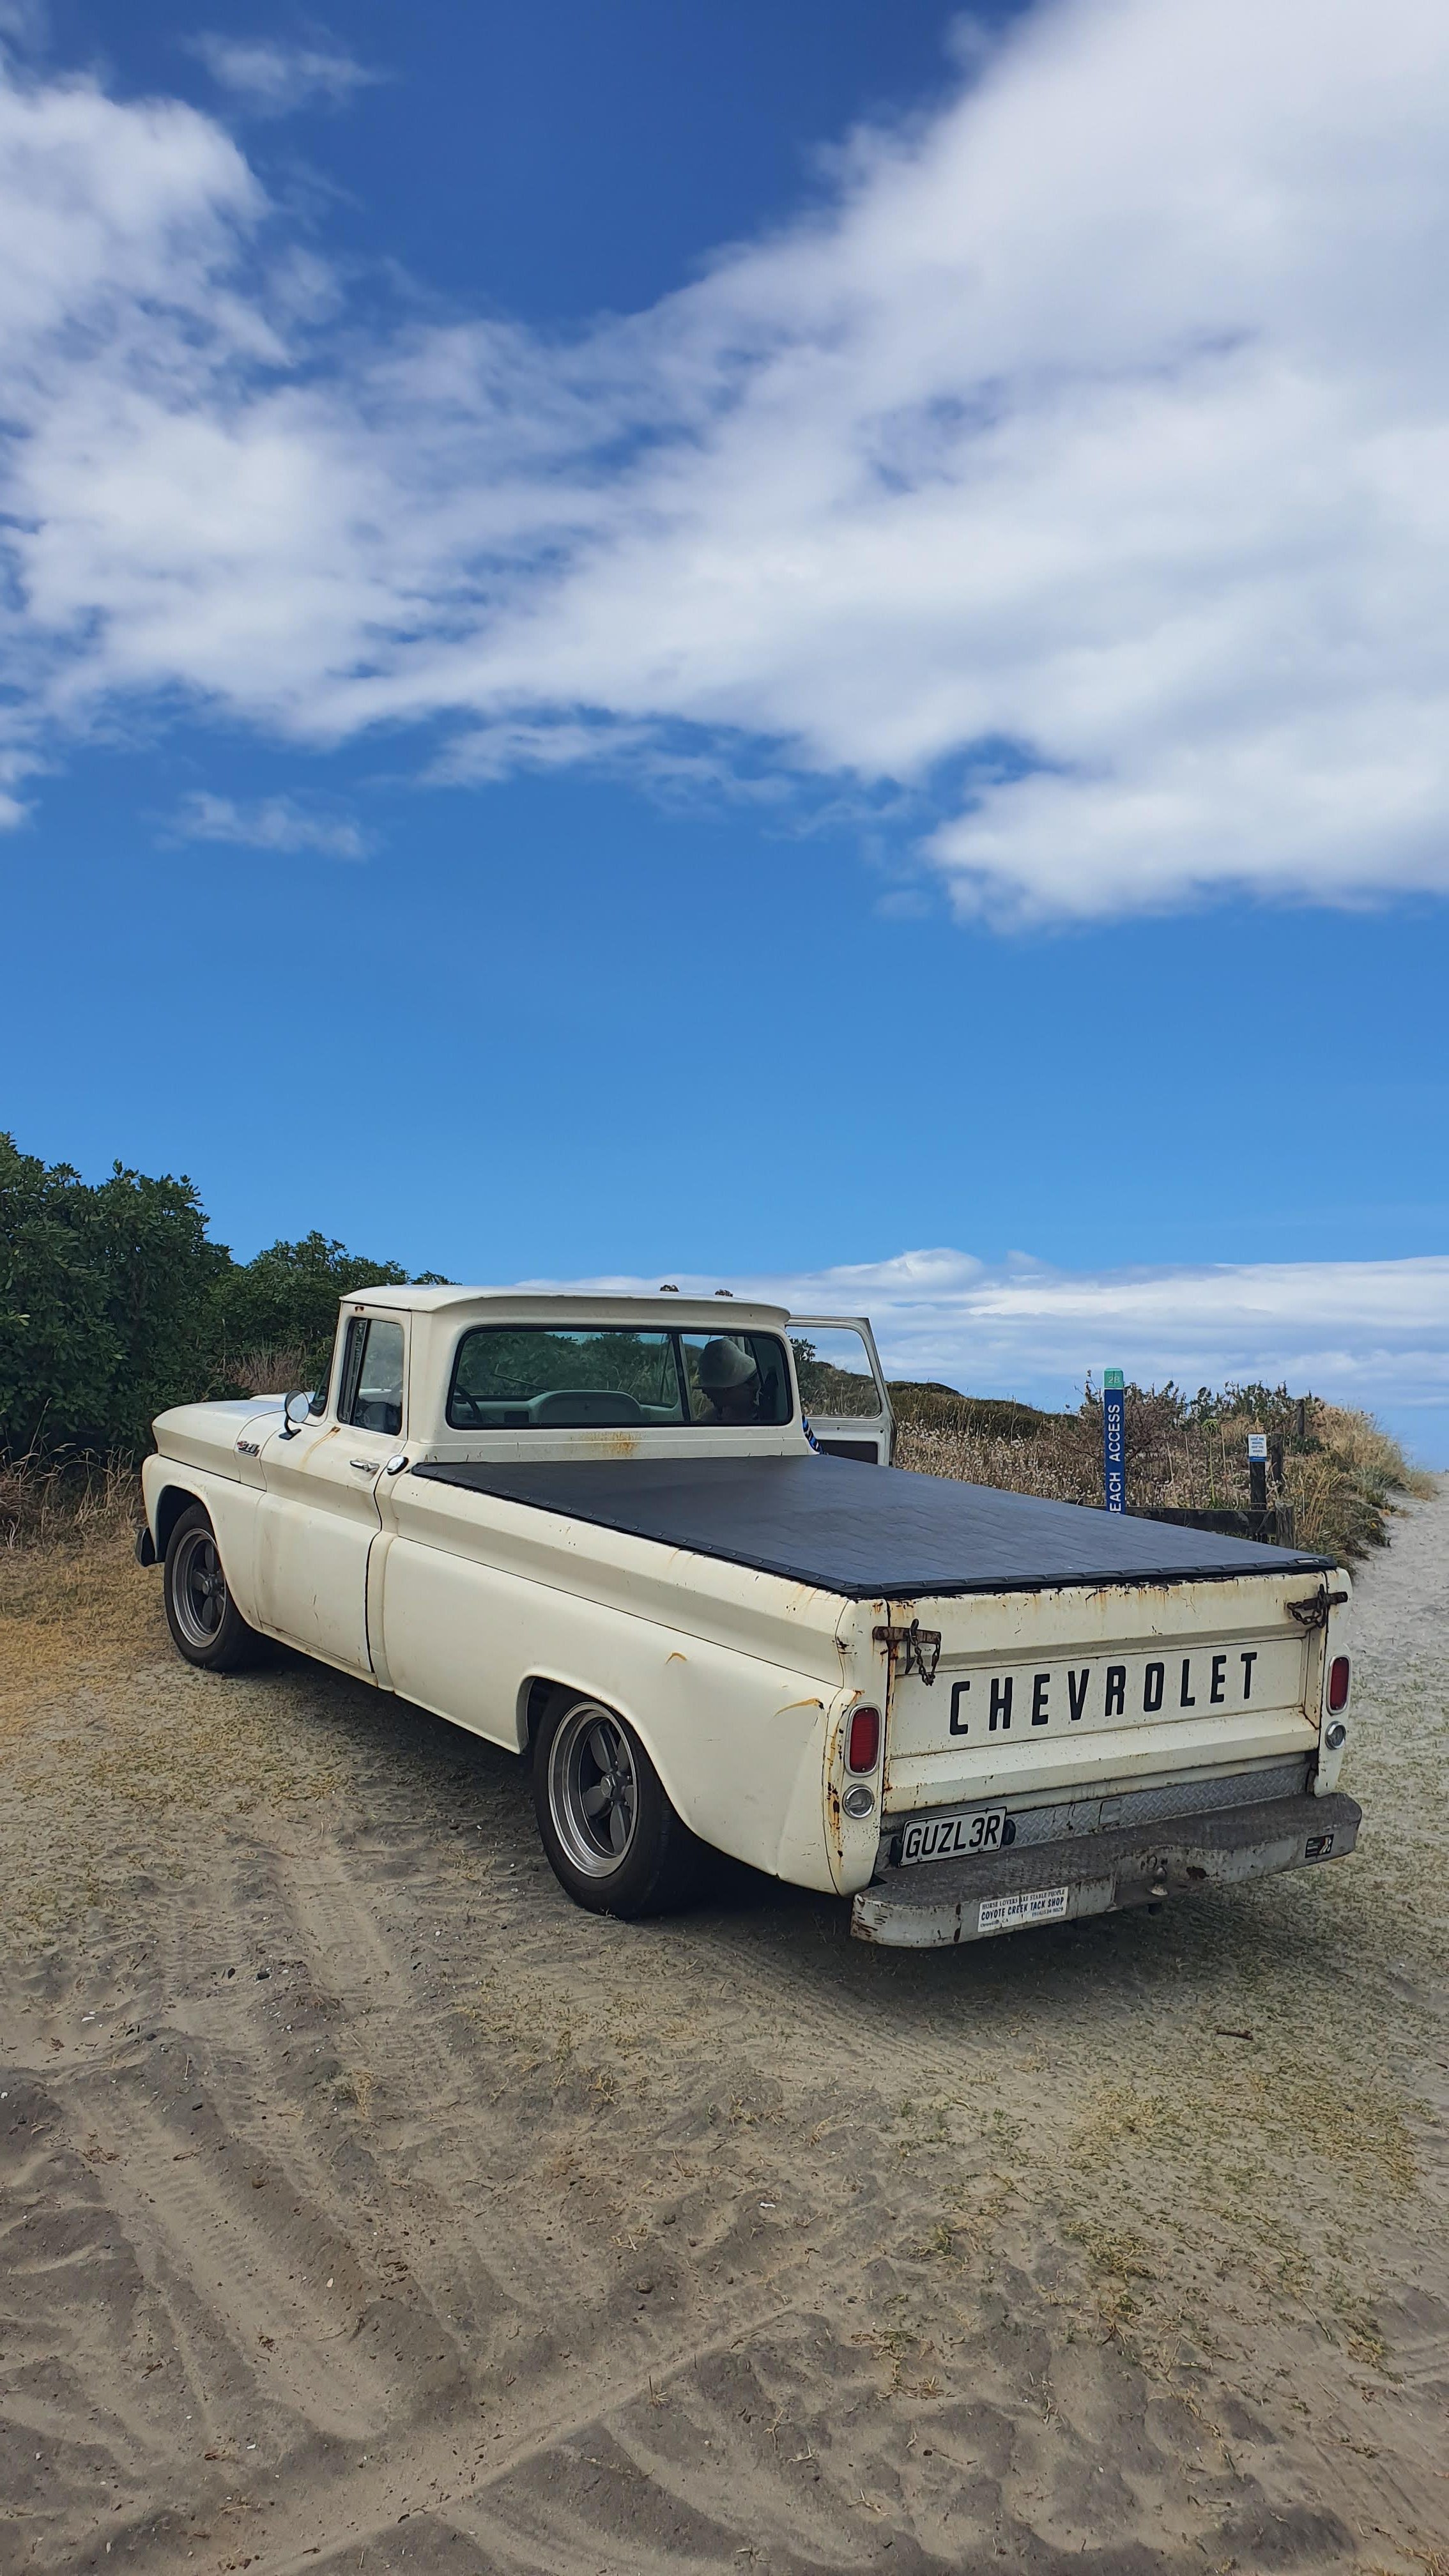
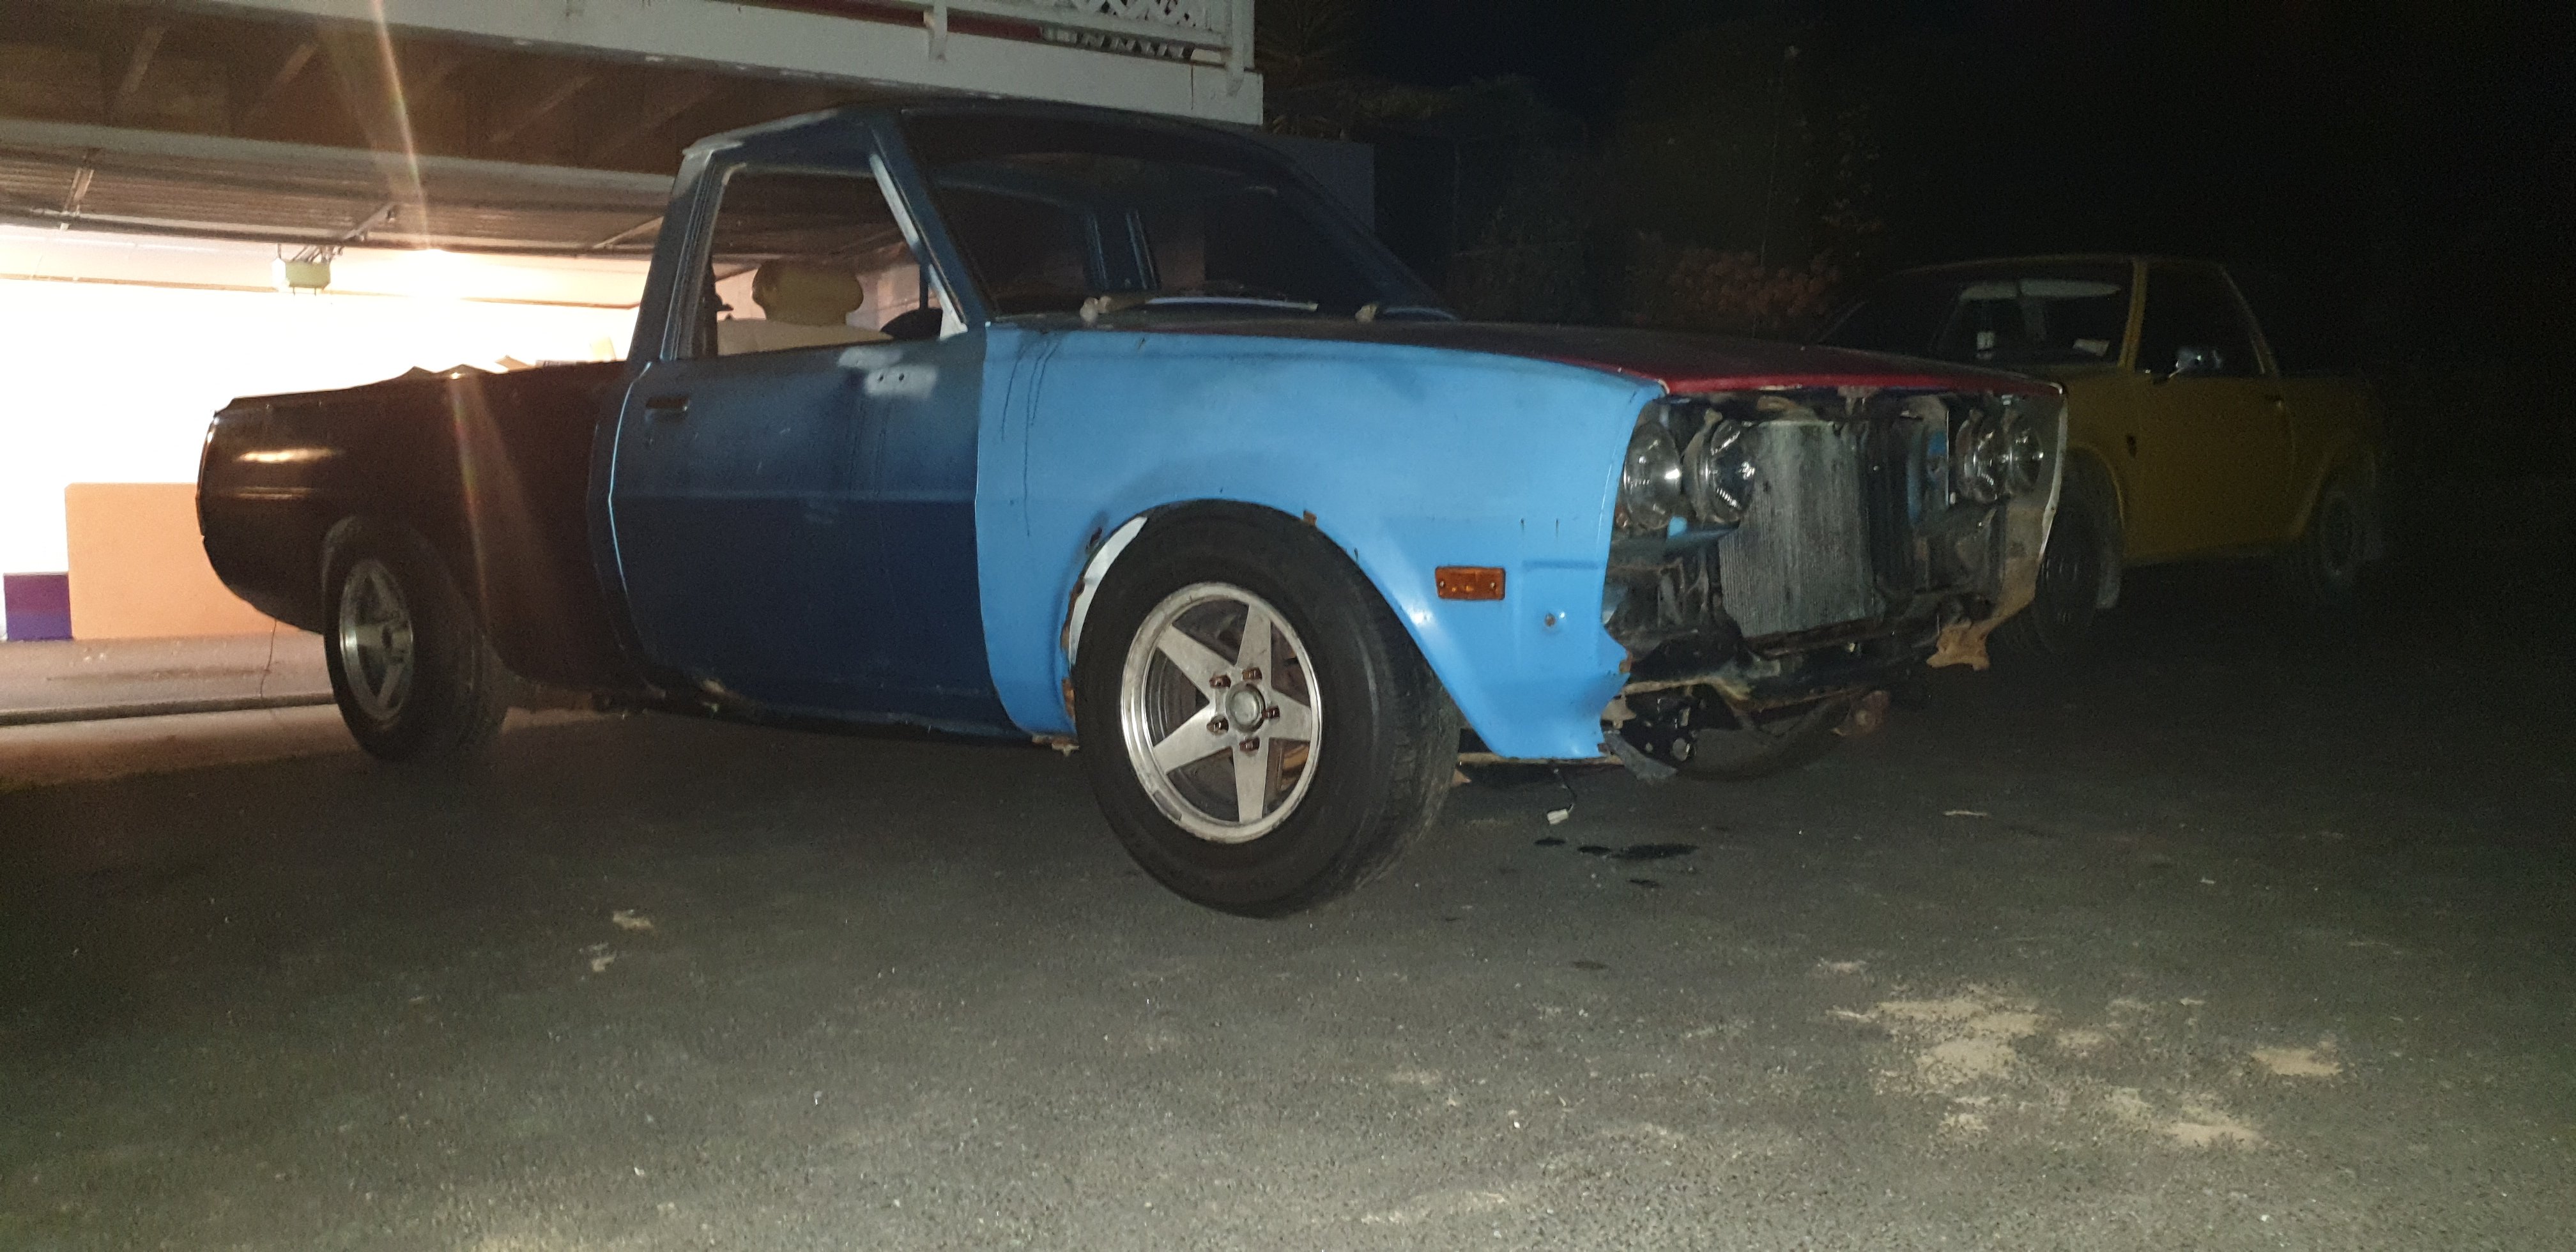
We've all done it, right? Spotted something tasty on Trademe while browsing idly on a Friday night? Sometimes, after a few beers, you might even put in a cheeky low autobid just for the hell of it. Well, fast forward two weeks and it turns out no-one else wanted that crunched Accord you were bidding on while a little bit drunk. Damn. Thus, for a stupidly small amount of money, I added another slightly rotten Eighties classic to the fleet. This one rolled off the NZ Motor Corp production line in Nelson sometime in the early part of 1981, probably into the hands of a caring gent who treasured it for a couple of decades, adorned it with a set of THE GREATEST WHEELS EVER M8, and apparently never had a flat tyre because the original Reidrubber Award is still sitting in the boot. Fast forward a few years, it passed through several more owners, and tried to pass through a brick wall which didn't go so well for it. However, considering the reputation that first-gen Accords have for disappearing slowly before your very eyes, this one seems remarkably solid. The wall-inflicted damage was limited to the pushed-back bonnet, radiator support panel, guards and bumper, with the chassis rails thankfully having escaped damage. It was in this state that I picked it up on Saturday morning, drove it to the parents place and tore it to pieces in their driveway. By Saturday afternoon it was sans front, I had pulled the radiator support panel back to where it should be (it helps when your Grandad has a low mile, immaculate one owner example you can take measurements off) and I sprayed rust neutraliser over every bit of metal oxide I could find. The whole structure is surprisingly flexible, everything bent back into place quite easily, and by Sunday afternoon the front was starting to look more like a Honda again, and the bonnet was back to where it should be. It was solid enough to make the trip home, anyway, and to drive it round to Grandad's beforehand to spin Honda yarns and spot the differences between pre and post-facelift Accords. It was already missing parts of the grille moulding and a bumper insert though, which was a bit annoying, and the bits of chrome moulding it does have are bent. Not sure where to get replacements for these, I am unused to the lack of aftermarket support for anything that isn't an old Ford... I did however find some repro indicator/park lamps from a place in Otahuhu that turned up in the mailbox the next day, which was pretty sweet. I'll take some proper photos of it once the rain stops, but here are some phone snaps in the meantime1 point
-
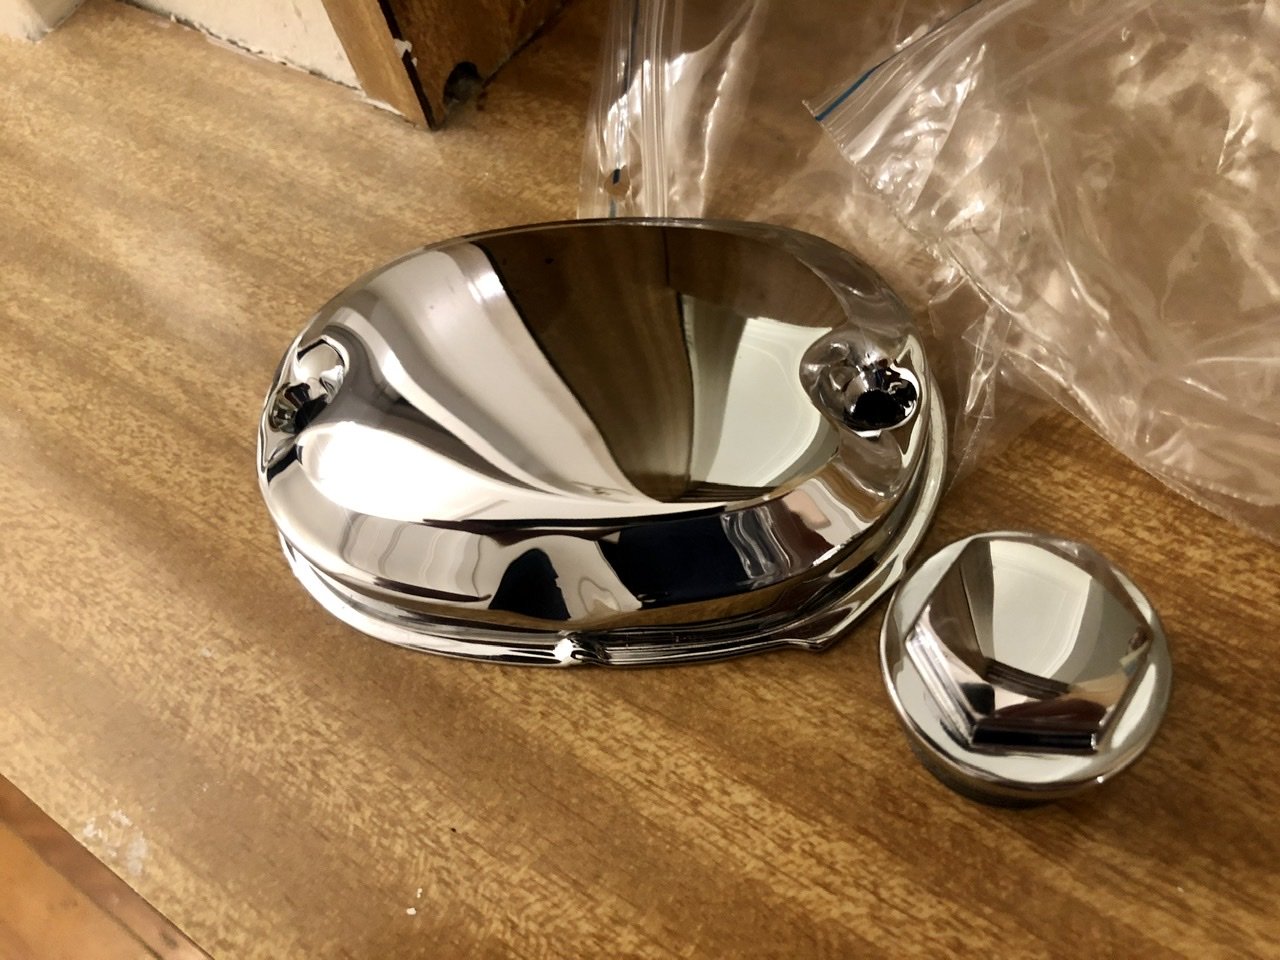
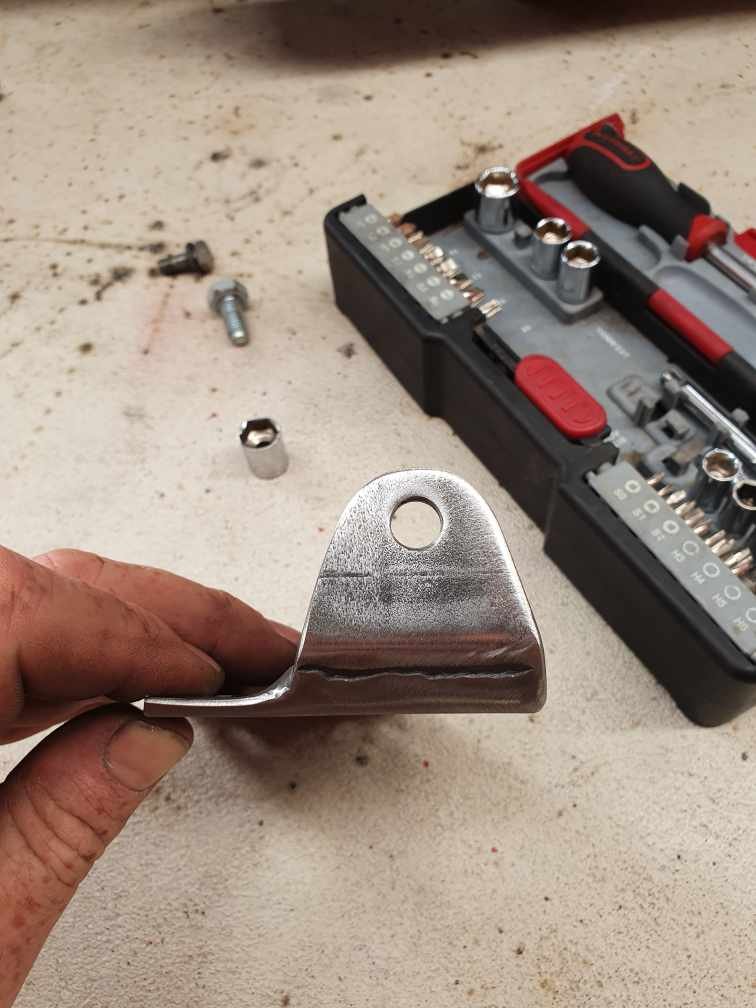
Send some bits away to get chromed and bright zinc plated. Fresh chrome looks amazing, points cover and the suspension fork bolts are now perfect. Wasn’t cheap but those parts aren’t available new anymore. To be fair they were pitted badly and most of the time was probably spent tidying up the parts before chroming. The bright zinc was super cheap to get plated, like $20. However no prep is done. If I’d known I’d have polished out the pitting marks more but for 20 bucks it look a million times better than it did.
1 point
-
i spent today fucking around with it and i did find that i had the bypass valve plumbed wrong so it wasn't able to bypass air at idle. that did bring the inlet temps down but this thing is still getting hot. thoughts? what do you think could be causing it to get so hot? its basically the same motor sitting idling and the temp just creeps up. same radiator, same fan. its not making any power yet but the temp is still rising. it heats up really quick the supercharger gets real hot as does the whole motor the fan kicks in but it cant keep up, the temp both of the coolant and the intake air just keeps getting hotter and hotter. im 99% sure i put the head gaskets on the correct sides. the base timing seems to be right. i dunno? what do you think? ps, dont post in this thread, chuck your ideas in the discussion thread (link in sig) thanks team.1 point
-
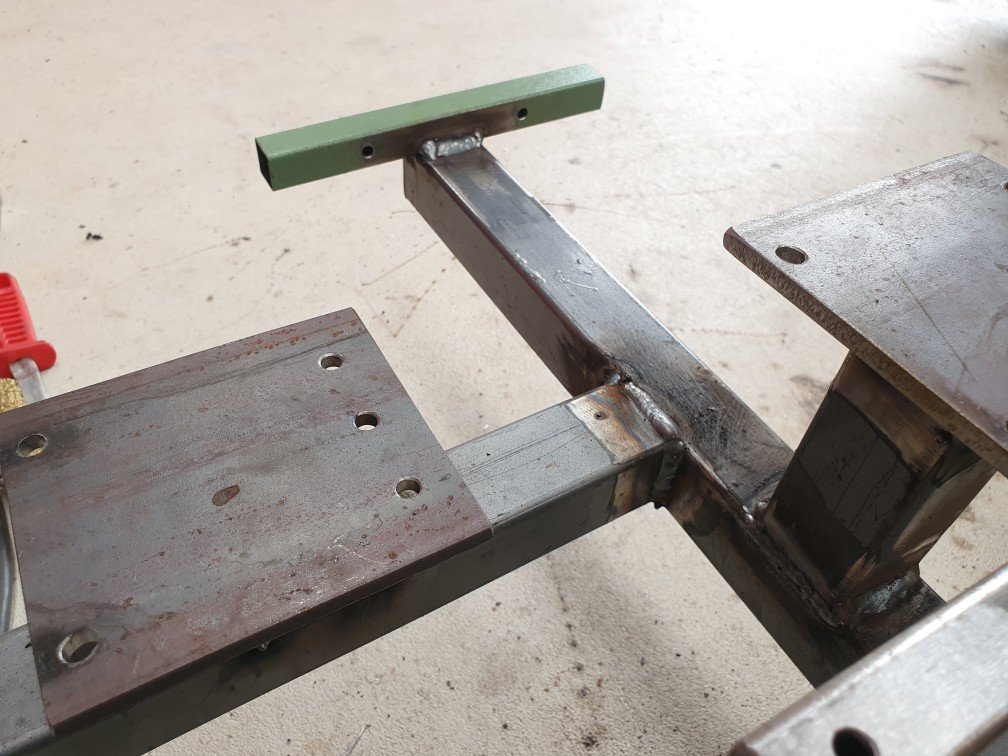
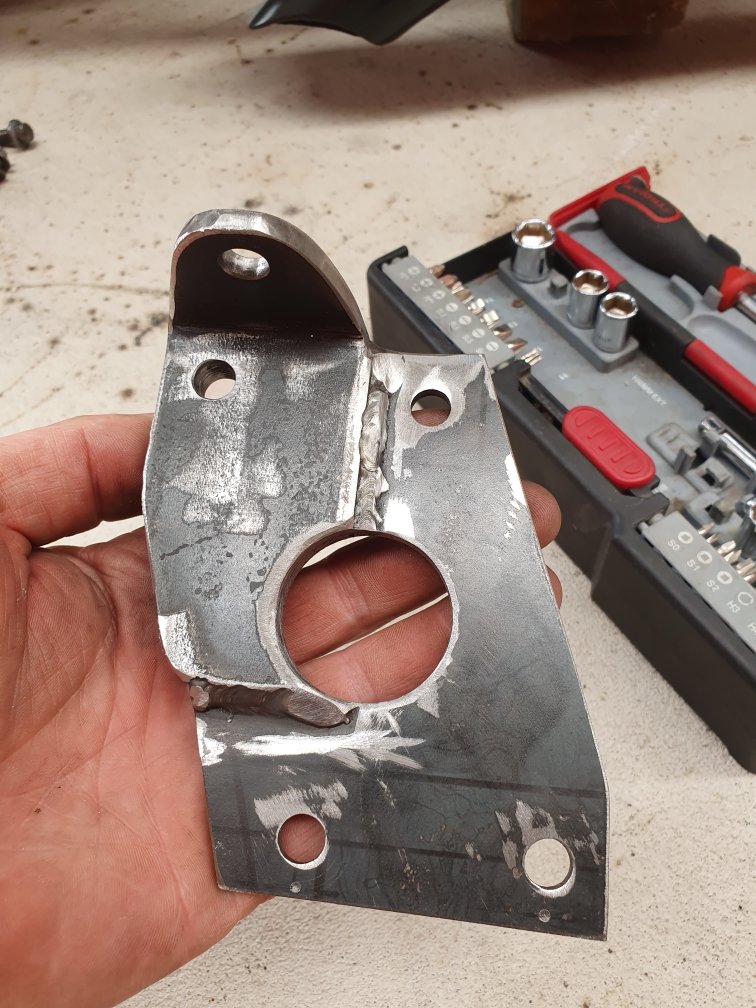
Improvements made to bracket. Looked "a little heavy" for my liking...so off to Jenny Craig's she goes! Nice hole, with a cheeky peek up her skirt. Rounded all the corners with a generous radius. Ready for paint now. Much happier with its appearance. If something is ugly, it's best to not draw attention towards it, so by doing these extra steps hopefully it'll become less visible and go unnoticed.
1 point
-
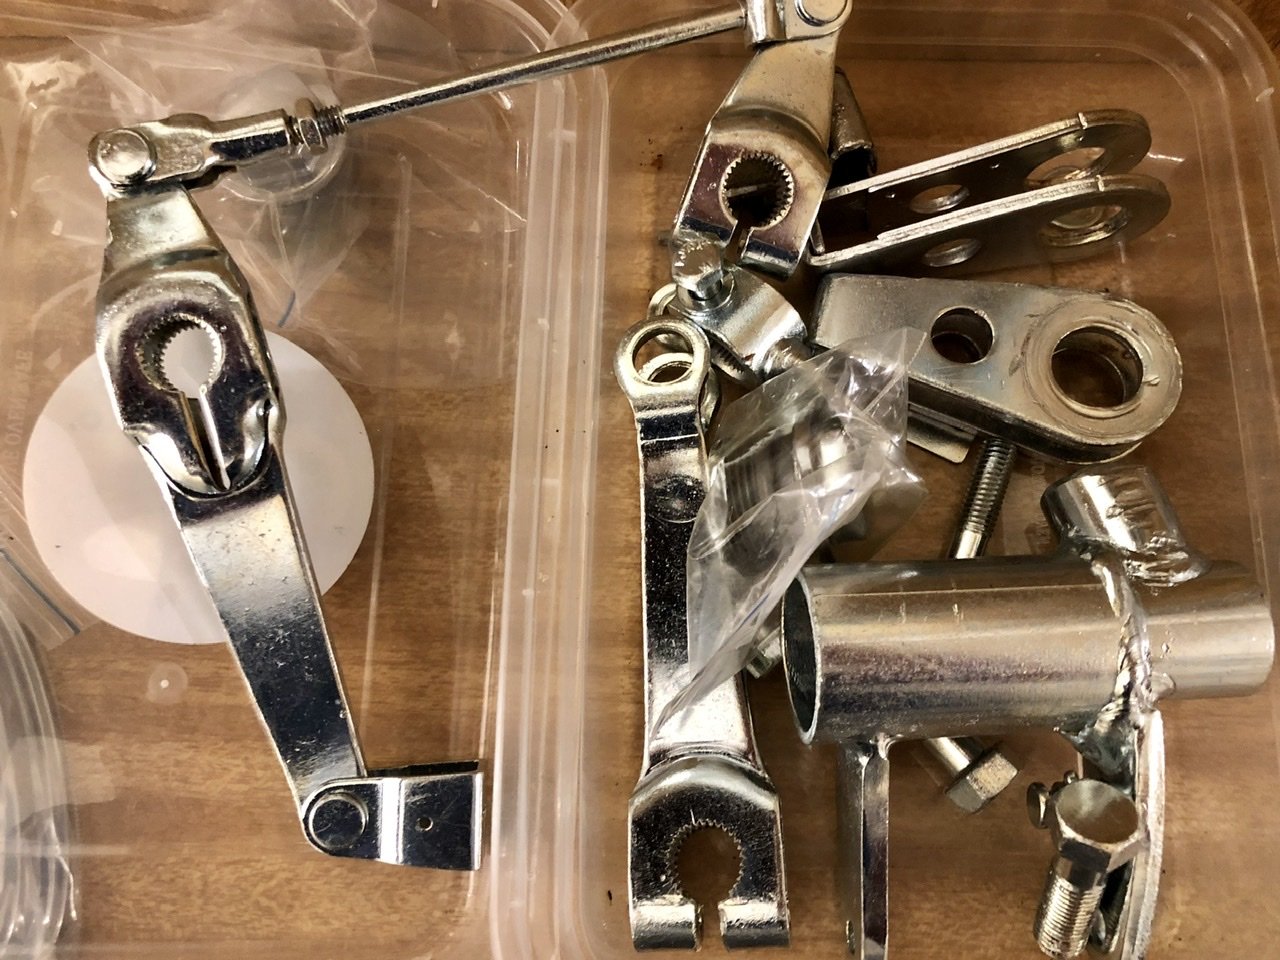
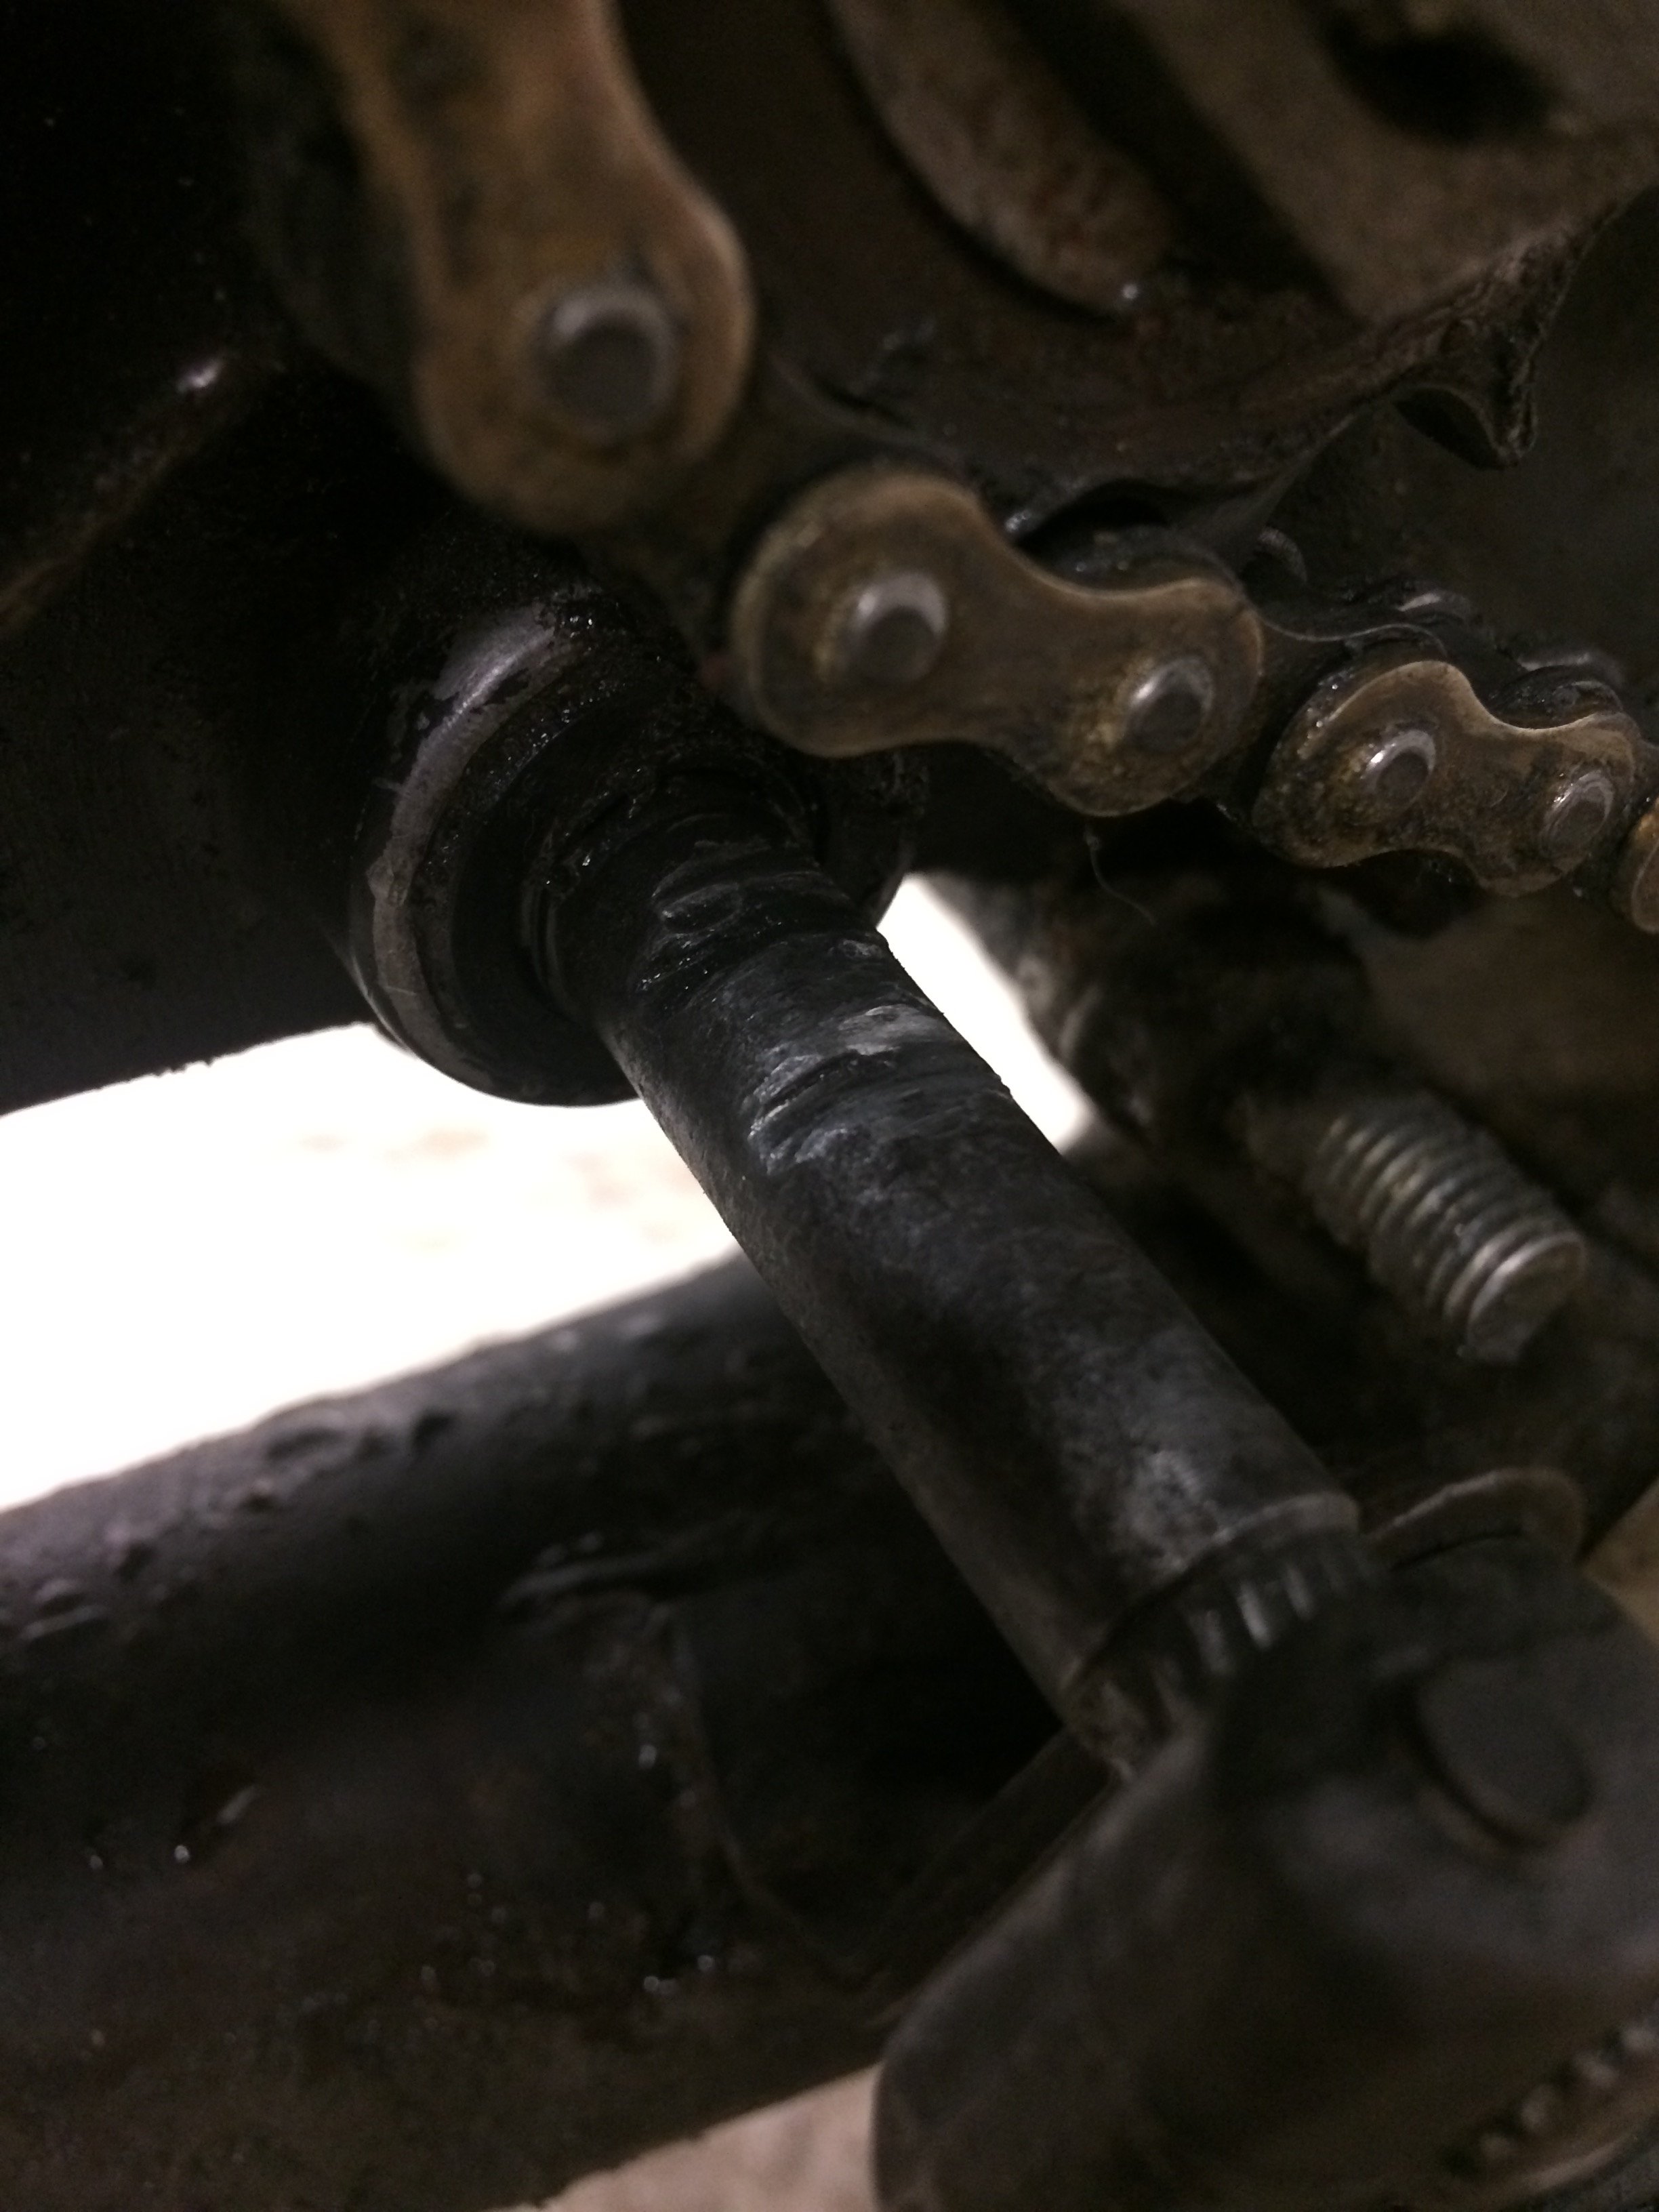
This is my most pressing repair, the shaft has been eaten by larger front sprockets in the past, probably why it bent so easily... lucky I’ve got spare engines a plenty.
1 point
-
1 point
-
1 point
-
1 point
-
Gabriel M55999 front struts for Corollas of roughly this vintage are $12.17 NZ on Rockauto at the moment. Sure there's some freight and Jacinda tax to pay but that's not a bad starting point. If they only last a couple of years she will probably have bought something else by then anyway.1 point
-
Cut that old tongue off, get a towbar place to weld a bit of box underneath, and wang one of these in it https://www.supercheapauto.co.nz/p/sca-sca-towing-hitch---2250kg-removable-standard/553480.html https://www.trailerpartsnz.com/product_info.php/trojan-towball-mount-3500kg-98mm-227mm-p-3647?gclid=EAIaIQobChMI9eqK2-LQ5wIVWK6WCh1-OwcAEAQYASABEgJDzfD_BwE1 point
-
Touch wood I have had my K jet Volvo for 10 years over 200,000 kms and never had to even fuck with it once.1 point
-
Ok so still havent got that relay to work so will make up a new one/buy one. Took the crown for a hoon down the road. Went ok... ish. The steering isnt quite centered and turning right sucked. Need to re center. And apart from the no exhaust and motor running like pooes it was a success. Still need an exhaust if anyone knows someone keen I'm in pukekohe. Wanting mild steel. Will use factory 4m cast extractors. Also cleaned up and painted the grill and surrounds flat black. Also connected up the throttle linkages so accelerator works off pedal. Getting close.1 point
-
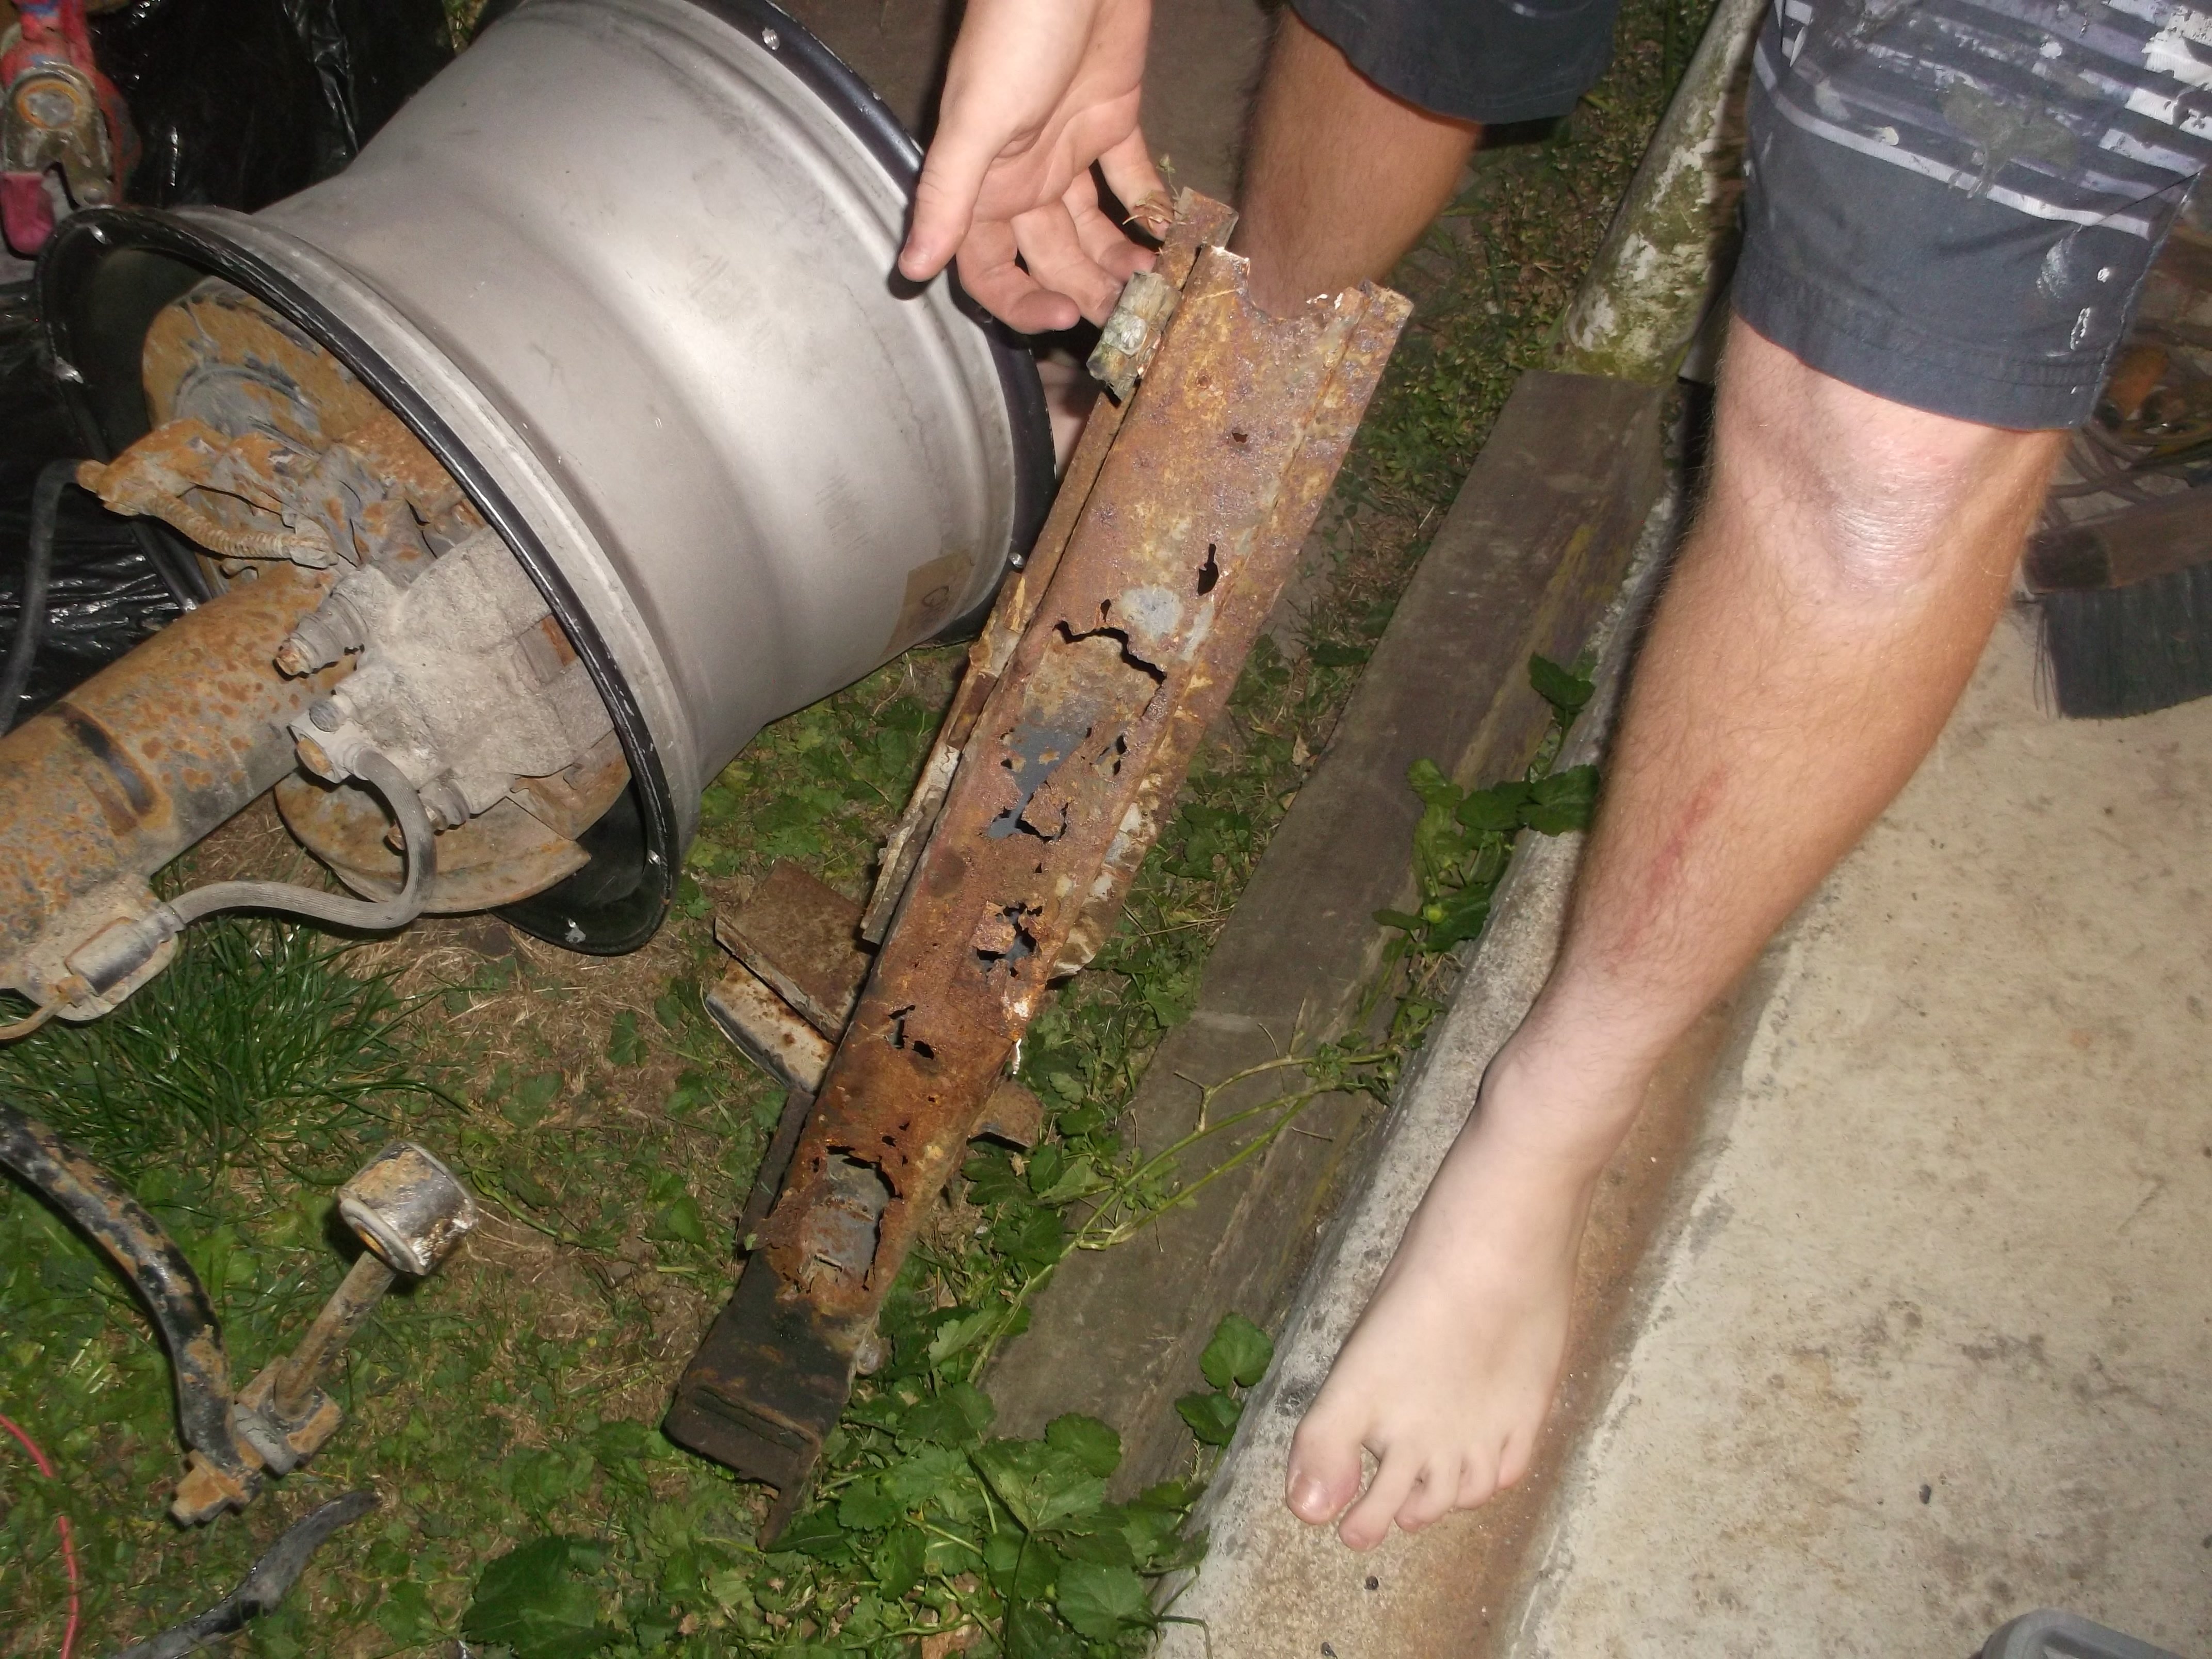
look at the rust in the old rail
1 point
-
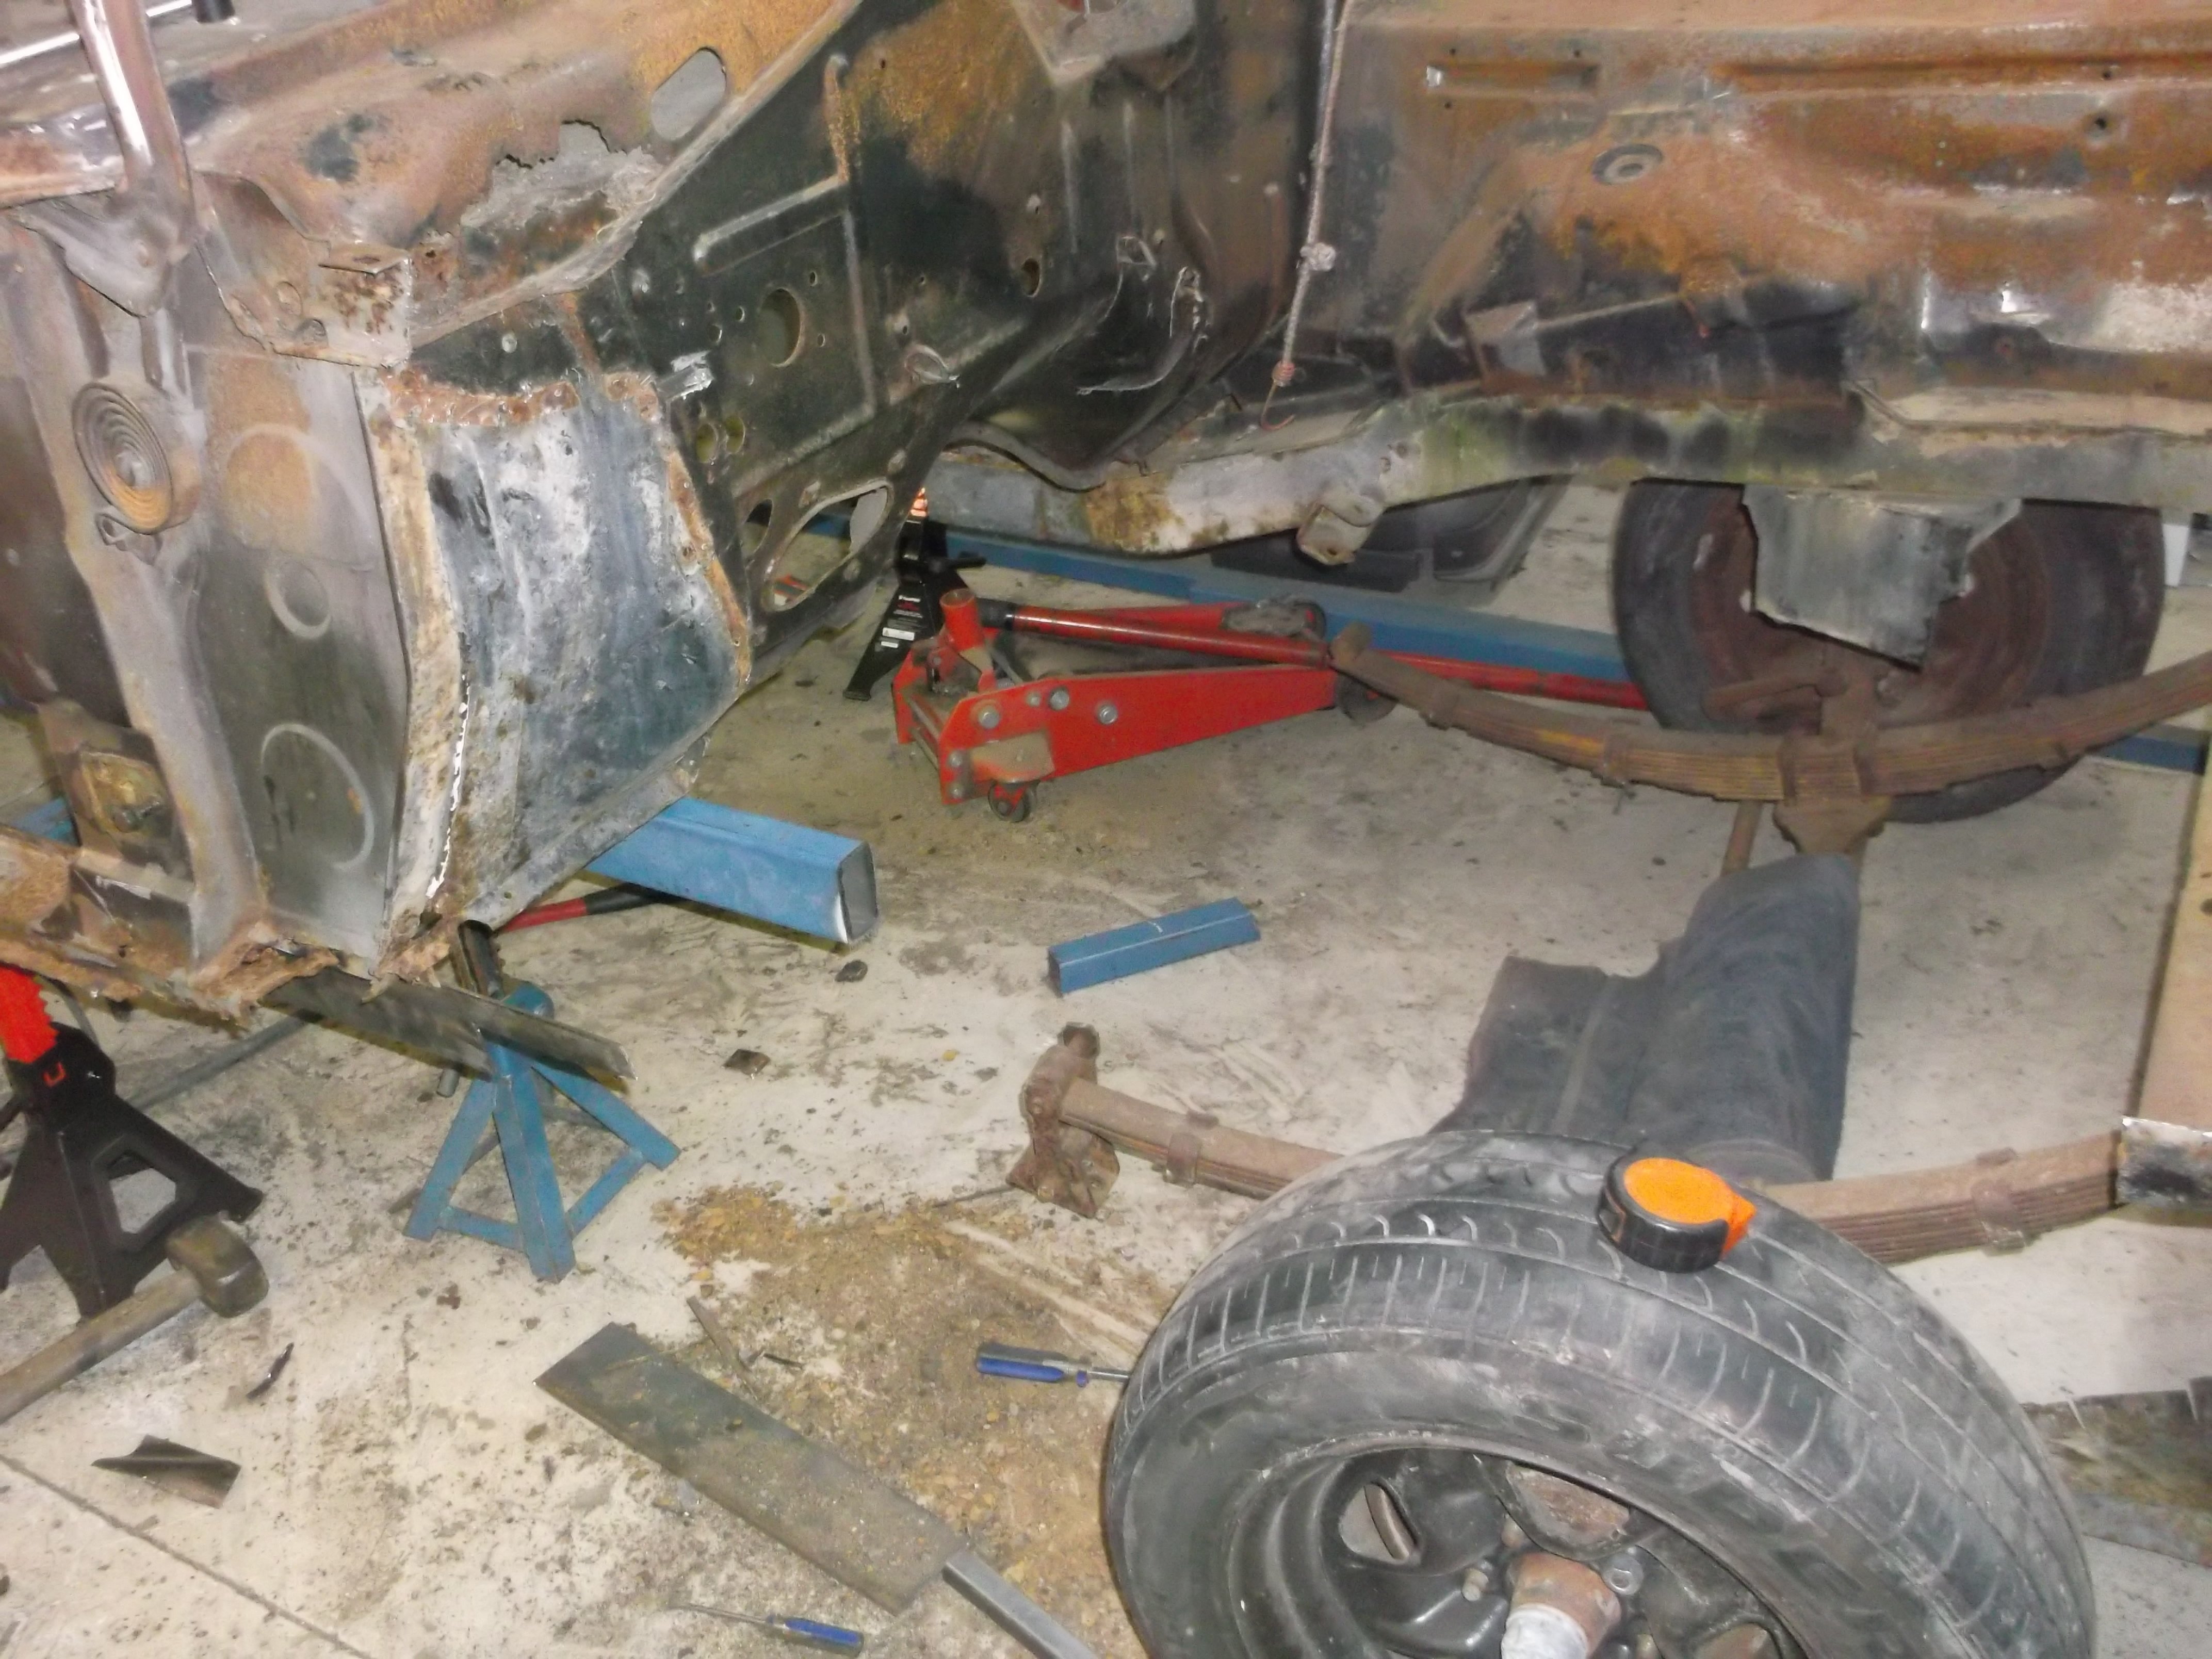
didnt do the sill today cut the front chassis off instead
1 point
-
1 point
-
back on the ground now , its 50 inches from ground to top of roof .
1 point
-
I have finally sorted gearbox with a stock ctsv cadillac tune for the trans, it is like butter now... Will attempt to get to a night speed dragwars meet one night see what she does down the 1/4. I have put 4000 ks on it so far and back to daily driven...
1 point
-
Further engine stripping today, still doesn't turn. Next job is pull the engine out, sump off and see what's siezed.
1 point
-
got the sill tacked on today finish it tomorrow
1 point
-
hope to get on to fitting new sills this weekend , mine have a few little holes
1 point
-
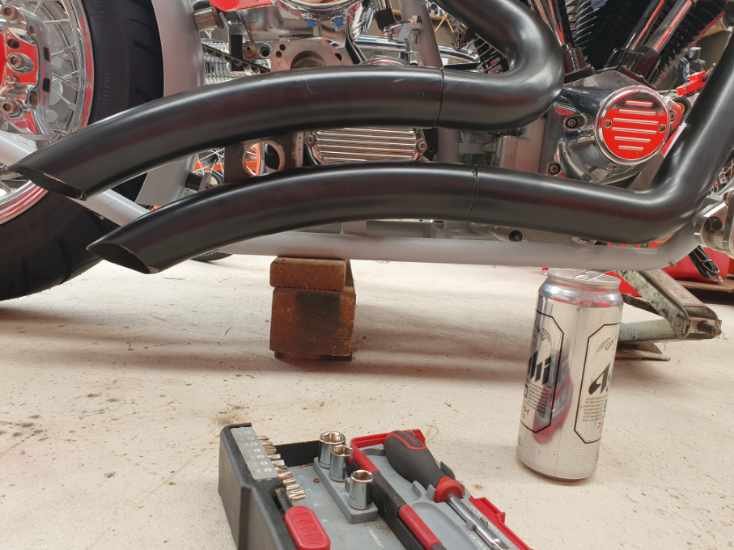
With show day now only a couple of days away, the rush was on. I had a car on stands, with a diff on the ground. Not ideal. Having found the shims to be ruined in the last post I ordered a set with a few different sizes from SNG Barratt in the UK, which arrived in record time. At the same time, I also decided that since the diff was on the ground, and I didn't want to have to pull it out again I would (stupidly) replace the diff output oil seal as that was leaking a few drops every now and then, so ordered a set of new seals. You can see the aftermath of the seal leaking here. All down the side of the diff. Also note the sweet two battery method for supporting the diff. This thing weighs a ton, so making sure it's well supported and stable is important. I did a lot of research into disassembly and reassembly of the output shaft, but by far the best resource was this Youtube video. The output shaft takes a bit of work to remove. After draining the diff, remove the lock wire and then the bolts holding the flange to the housing. With them removed its a case of using a soft hammer and a pry bar to lever the output shaft assembly out of the housing. I found it easiest to rotate the assembly and lever off the ears with the bolt holes. Eventually it will pop out. Looking a bit gross It looks like oil was bypassing the O-Ring, and leaking from the shaft seal. Disassembly of the assembly isn't hard. If you want to reuse the bearings and crush tube you will need to mark the nut and shaft (the shaft is SUPER hard and instantly rounded off the end of all my punches) and count the turns as the nut is removed. This is so you can tighten the nut to the same preload. Next tap down the locking tab, and remove the nut. The nut is HUGE and will be tight. I used a massive adjustable spanner. The nut requires a 1-7/8" or 48mm spanner. I happened to end up with both. The ring spanner is a couple of foot long. With the nut removed, its time to tap the shaft out. Support the assembly upside down (studs pointing down) from the mounting flange. Now carefully tap the end of the shaft with a soft hammer. This should start by freeing up the inner bearing, which can be removed, and then, in theory, should push the shaft out through the outer bearing, taking the seal with it. In my case this didn't go as planned, and the outer bearing more or less exploded and all the rollers decided they didn't want to be part of this anymore. This ruins any plans of reusing the bearings and crush tube. So with that in mind, I shot off a quick order to my Jag parts suppliers (Rodney Jaguar Rover Spares) and ordered some new bearings and a couple of crush sleeves. It turns out this bastard is the reason the bearing came apart That old crusty thing is the dust shield over the oil seal. Both that shield, and the oil seal were thoroughly rusted in place, so of course couldn't be popped out with the bearing as it should have. You cant see the state of this with the shaft/flange in place. I used a chisel to remove both One warning, that dust shield is obsolete now and unable to be supplied. After much research I'm of the opinion it's not needed, hence why Jag stopped making them and no one remade them. Some other models that use the same diff, and some later cars, don't seem to use them either. I guess if you can reuse yours, use it, otherwise I went without. One last thing I needed to do was remove the outer races of the bearings. I used a punch to tap these out While I waited for parts everything got a good clean in the parts washer. I didn't bother to strip off the old paint, as I wasn't going to do the rest of the diff either. A couple of days later, with new bearings and seals in hand, I set about refitting the new bearings. As mentioned in the video, I too ground down the old outer race and used that to press the new race in. This took off just enough that the old race wouldn't stick in the housing. I taped the race to a big socket and used this in the vice to press it in place And the inner race Next I packed the new outer bearing and insert it into the housing Followed by the oil seal. This was a prick to get into the housing. And then the shaft gets dropped through the bearing and seal, and then it needs to be tapped through the bearing. This takes a bit of whacking. It pays to check against the other output shaft as to how far you need to tap it down. I found it needs to go further down than you would expect, but if you don't go far enough it will upset everything from the flange outwards (brake disk sitting central in the caliper, and camber). If you go too far I suspect you will get binding on the housing, so take care. Once the shaft is in, flip it over and drop the new crush tube down the shaft and then the grease packed inner bearing goes in, followed by the locking plate and nut. Now its time to crush that tube. This takes a hell of a lot of force to do. The spanner I had was too short to get the required leverage, so I used my jack handle instead by placing the nut in the vice and using the studs on the flange to turn it. I protected the studs with some tube offcuts. In terms of setting the preload I will recommend you watch the above video as he goes into how to correctly set it, using a spring scale. Its not rocket science, but easier to just watch him do it. Once the tube is crushed and the preload is set, lock down the nut, install the new O-Ring and you're done. Reinstall the assembly in the diff. This will take some force with a soft hammer to tap it back in, just make sure the splines line up first. Now it was time to look at the nice new shims. Mmm, clean. They come covered in oil, but I chose to also slather them in copper grease to help stop them rusting or sticking in future. I went with the same stack on the right side, which was perfect for disk placement (central in the caliper), but the left side ended up needing another 0.10 shim to align the disk. I'm not sure if maybe it wasn't centered before I pulled it apart, or if the new rotor is slightly different. I test fitted the disks with the new shims and still got great runout readings, so proceeded with installing the calipers for the final time. I'm pissed off I have to reuse the old rubber flexi hose. I have a set of nice braided lines en route, but they have gone missing somewhere between the UK and NZ. They'll probably show up tomorrow... And the handbrake calipers went on next. I had some nice new brass springs to fit but I just couldn't free the old ones up, so gave in and fitted as they were. I did replace the two pins that were fitted dry as they had pitting and scoring. New locking tabs were fitted also. Now it was time for one of the worst jobs I've had to do on a car for a long time. Reinstalling the diff. If the exhaust hadn't been designed by an idiot it would have been fine, but instead, it had been built in such a way that there isn't quite enough space to slip the diff with brakes fitted between the two pipes, and it has no flanges, and the two pipes are welded to a bracket.... but we had to try anyway. On the jack it went (for now) And into the boot went a bunch of weights (to try and hold the back of the car down since there was no weight in it anymore) And then the struggle began. First, we tried to just lift it into place. Nope. No go. Wouldnt even get under the car on the jack. After much pissing around (including taking the diff off the jack, and realising we couldn't get it back on the jack under the car) we eventually wiggled it in on an angle, from the side, on the jack. It got pretty hairy. Then I tried to lift just the front so I could get the front mount in and use that to pivot the rear into place. Nope. Started to lift the car off the axle stands. Not good. We had been at this for a couple of hours now and getting pretty tired of it. Everything was fighting us. Even the damn arms were getting in the way. This one ended up being held forward by an axle stand and steadied by a couple of bungee cords attached to the house. Finally, plan B came into play. I tried to resist, but it just wasn't going to happen otherwise. Out came the reciprocating saw. It was cutting time. With the exhaust now in two pieces, things were looking up Now we had ample space for the brake calipers to clear the exhaust, and without much more faffing about, the whole lot slid nicely into place. Unfortunately, we kinda ran out of interest here, so sorry for the lack of photos. We bolted everything back together, and I sent my awesome helper/wife out to get some exhaust sealing tape and cement. She's a keeper for sure, not only did she return with what I needed, but also brought back some much needed sustenance. The idea was to use a clamp I purchased earlier for this purpose (always have a plan B), and clamp over the exhaust tape. The tape was to seal the gap, and the clamp to support the pipe and hold it in place. This plan worked well, and it seems we have an exhaust that is in one piece again and doesn't leak. The longish term plan is to have the exhaust redone anyway as it sits way too low, its too loud, and doesn't link the two banks so sounds weird. So, with everything buttoned back up, diff full of oil, rear brakes bled, it was time for a test run. The brakes are a little spongy, I suspect there is air in the front (the master cylinder level got a bit low in the couple of weeks of sitting without brakes), so will bleed that tomorrow, but the shudder is completely gone. Just smooth (if vague) braking. Obviously the worst was in the rear brakes, but I still need to replace the front rotors as they have worn undersize and still have excessive runout. Plus, who doesn't want flash slotted rotors? Everything seems to be working as it should too, which is promising. At this rate, it will be a push to get the car ready for Sunday, but since we are rolling, and driving again, that's a big weight off my shoulders. We can do it, it's so close.1 point
-
Another day stripping the crown - got the head off and it still wont turn over
1 point
-
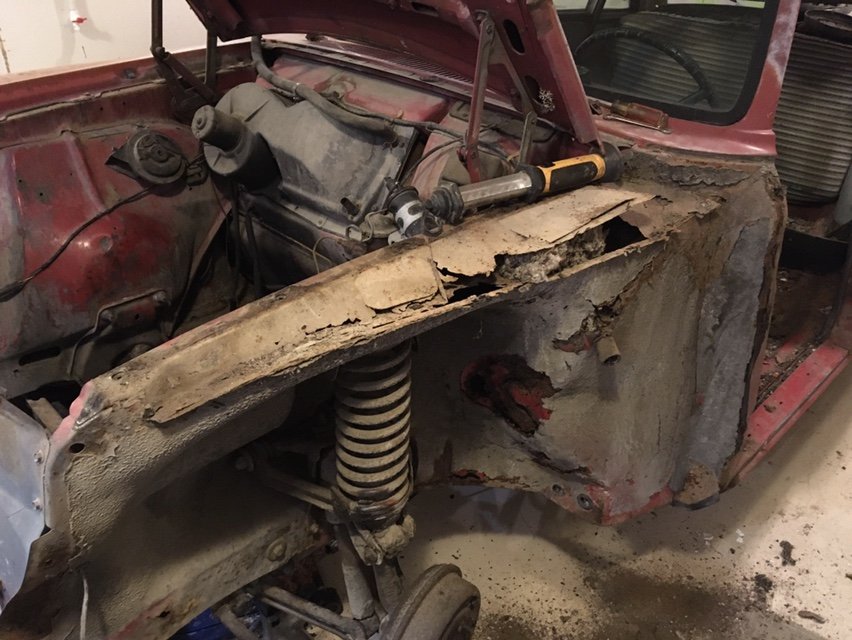
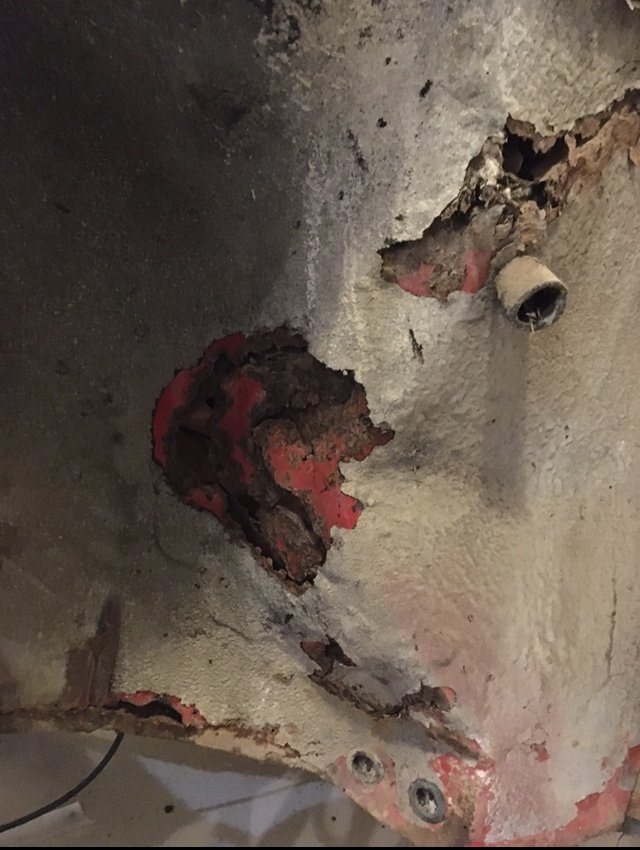
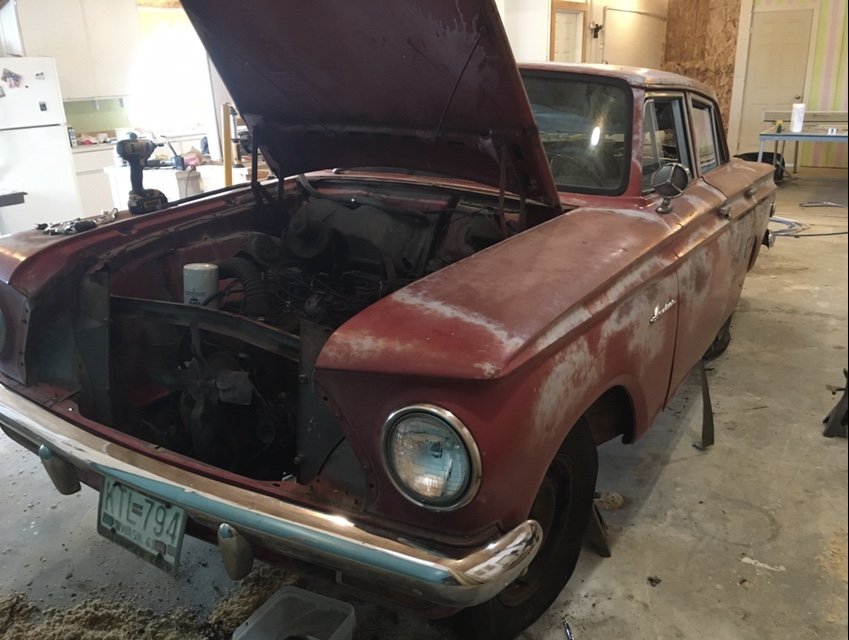
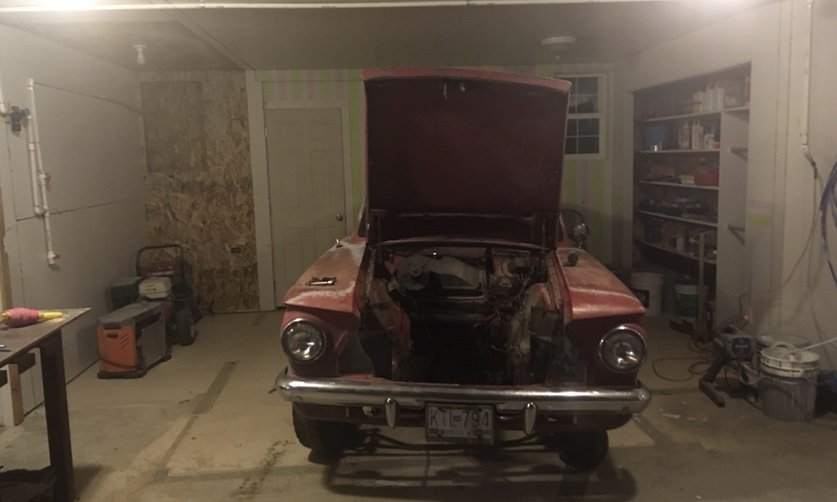
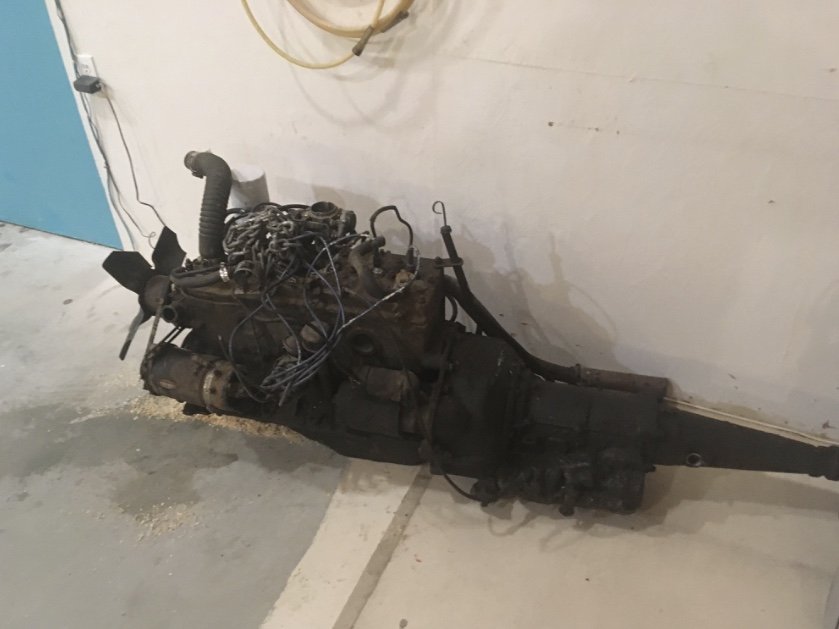
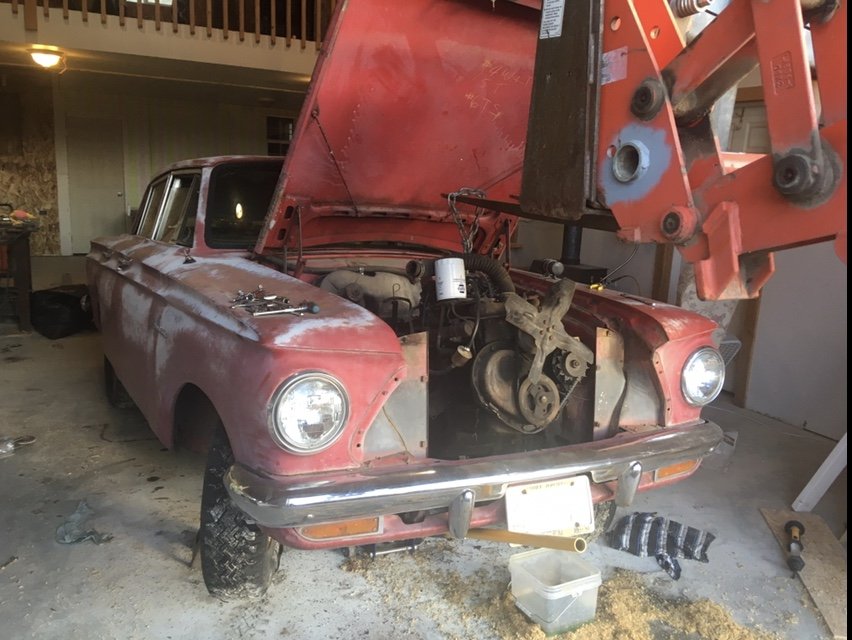
Anybody still holding ya breath? so ya never could get the brakes apart and I realized this project needed more time and money than I had at the moment. So off to the weed patch while I built myself a house and spent every penny I’d ever saved and some I haven’t yet. Best part of that is I now have a nice warm shop and needed something to tinker on. Pulled the Rambler up and evicted a few mice, holes in the floor are maybe a tad bigger but no real new problems. I’ve been thinking of finding a donor rig for a repower. The Rambler is leaf sprung rear wheel drive so I’m thinking a complete drivetrain would solve a buncha problems. Been eyeing crashed two wheel drive pickups on Craigslist and FB. For now I decided to pull the engine and tranny and see about welding up my rust problems. Coupla holes in the floorboards and the drivers inner fender is going to need some work. The simplicity is amazing, coupla hrs and a tractor assist and we have a empty hole drivers side tires leak air so bad I had to pump them up half a dozen times to push it 20’ into the back corner...... and yes the back corner does have purple and green stripes on da wall . lush I know gotta say the flathead has sex appeal, all da cool kids want generators over alternators
1 point
-
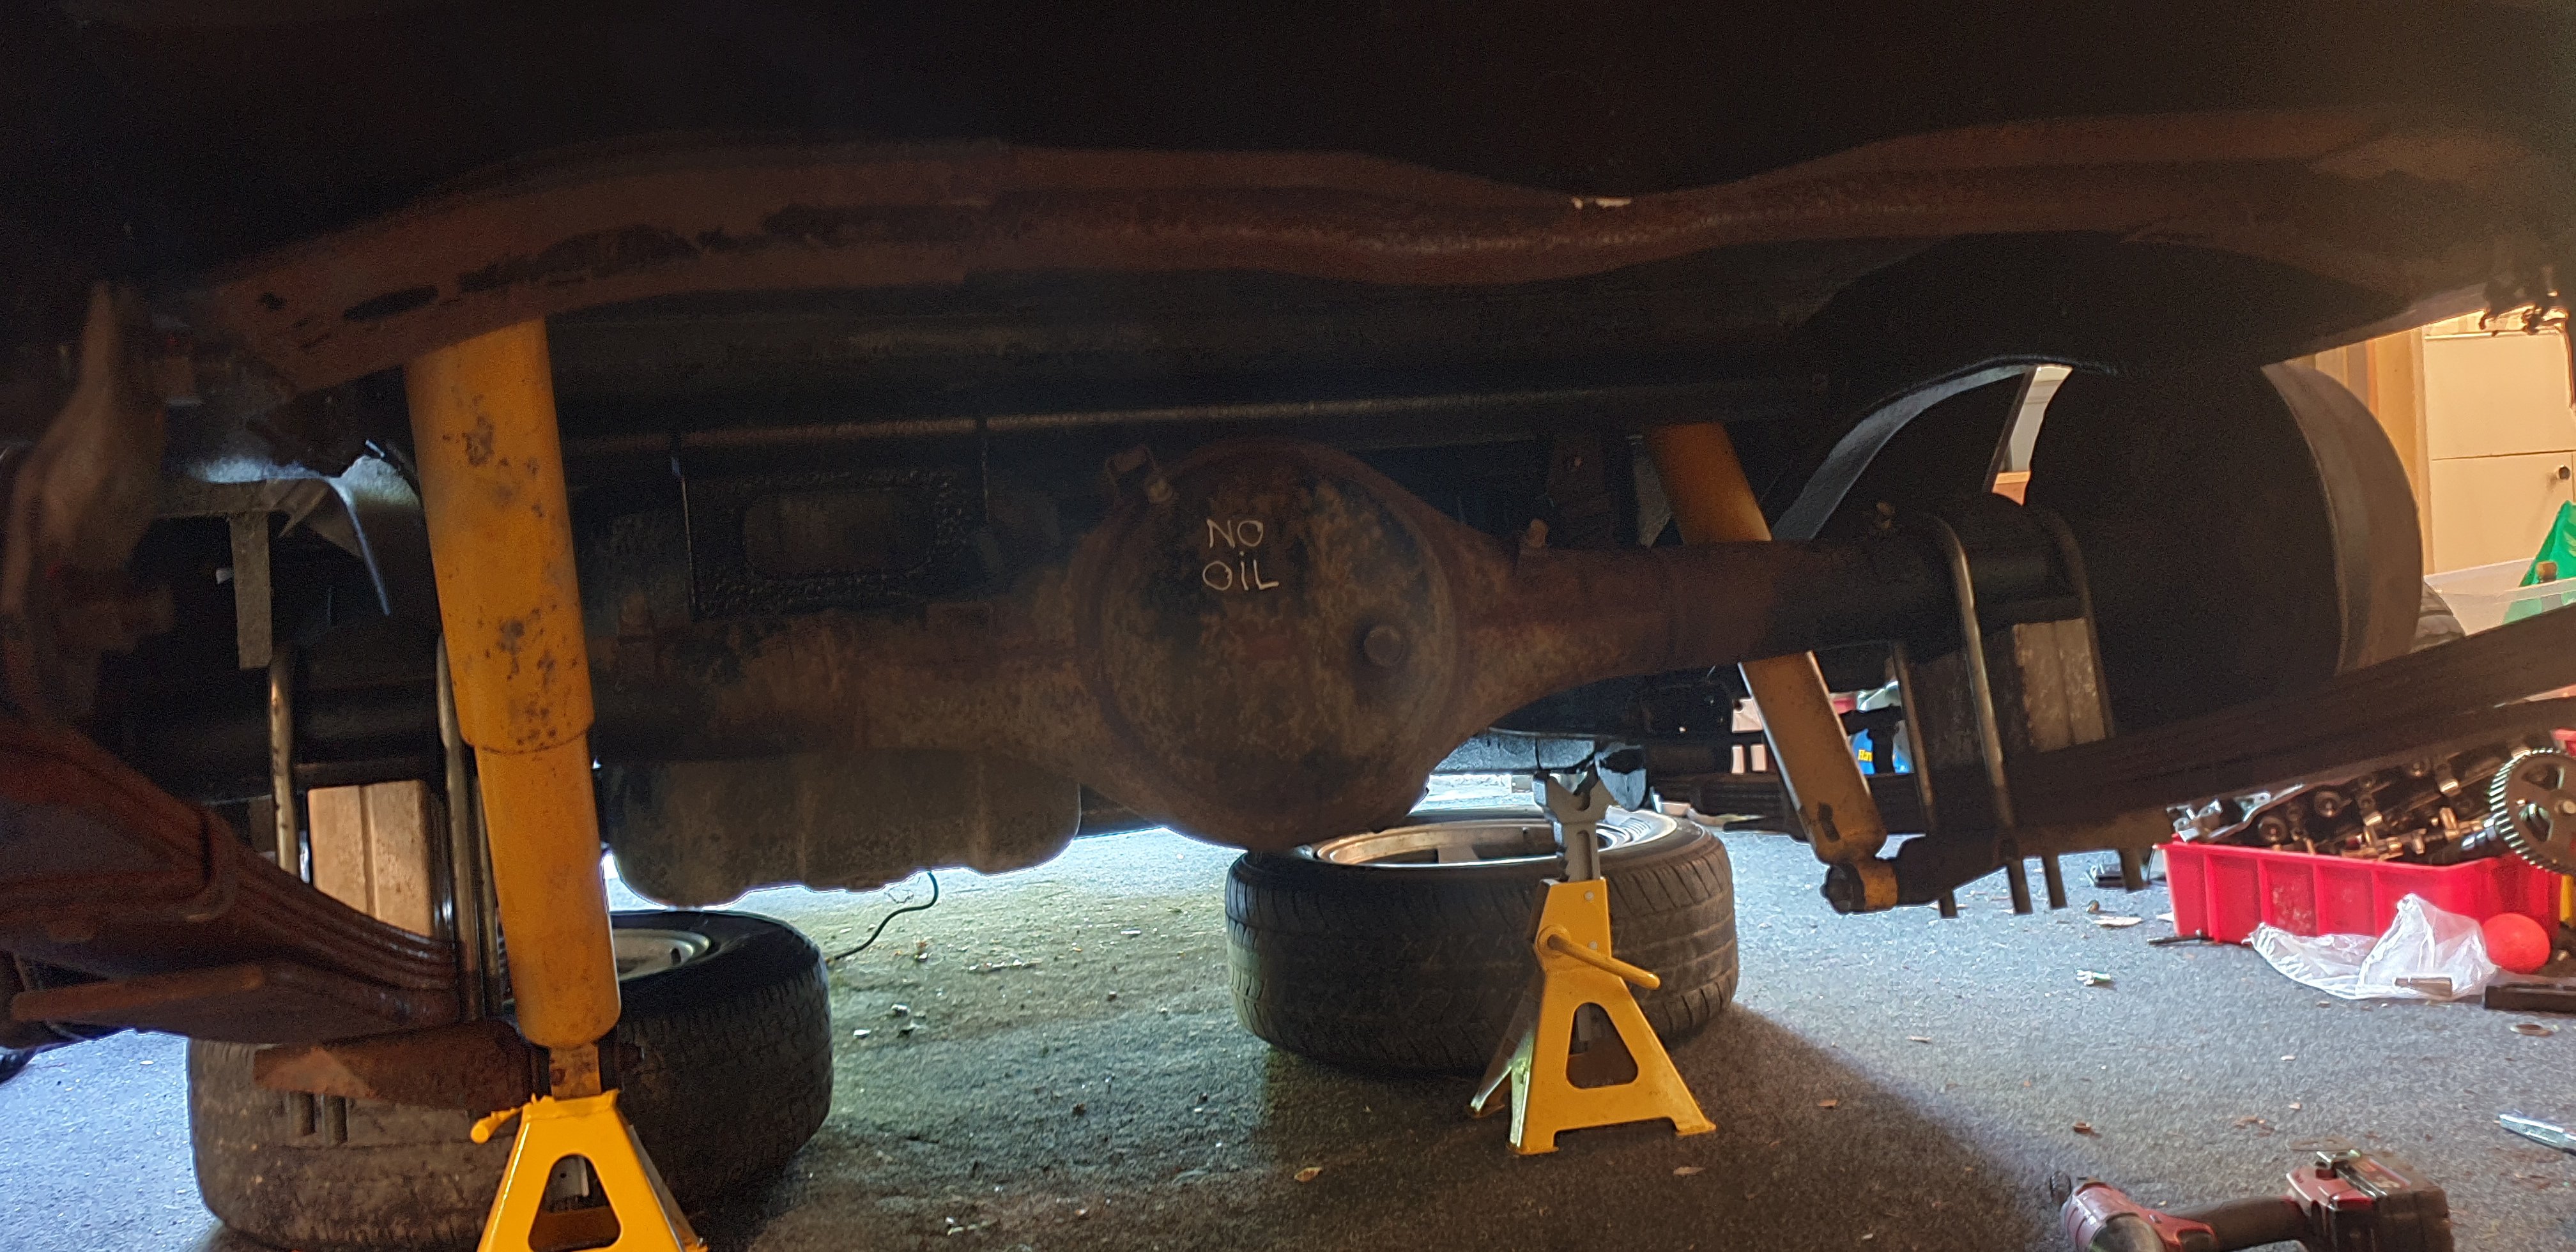
So with the wider diff I've had trouble getting wheels to fit, my mate has lent me some 14x7 pro stars which fit but the 215/70 tyres will be replaced with 185/60 tyres. Eventually I'll get diff shortened so I can fit 14x8s but that's out of budget currently. Also was always planning on running air shocks in rear but beach hop is getting closer and my goal is to drive there legally kinda so pinched some good condition monroe shocks out of the 4wd parts vehicle for the mean time. Did a few little bits like fill up diff oil, new shock bushes, fill gearbox oil, spray undercoat under the gaurds. All the little things that are kinda important. Forgot to add earlier that the motor I had in this I swapped into my lancer, so I took the old lancer motor, (4g63 sohc) did a gasket set, another head, and valve grind etc. And got it to start as of yesterday but will not stay running so my guess is its something to do with ignition circuit. Will leave that to my mate josh to investigate as I'm no good with electrical shit but it started which is chuuurrrrr
1 point
-
Goes again, everything seems to work a lot better so far. Main power feed from battery and fuse box now in passenger foot well. pretty much the only place it would fit Made catch can that fits where fuse box used to be. some fresh spraycan paint even1 point
-
Sooooo pretty much there, have had first cert check, small amount of remedial to do (mostly done) but will be legal before Christmas, but wont make the drags unfortunately... Anyway, I have a persistent code that the ecu is throwing that is doing my head in, new trans feels weird and is currently overly violent, but it goes like fuck... which is nice. Had to change wheels also... have to say they are kinda growing on me, and its nice having some sidewall. Then Feb, its off to the panel beater to sort some of the gnarly bits out, and probably clear coat it for winter running.
1 point
-
More test riding tonight, once I got the fuel issue cleared up it ran far more consistently and I think it’s going to be wicked quick for what it is. It does have a problem though where after a spirited squirt when you clutch in the revs skyrocket and when the killswitch is hit to stop the overrevving it keeps on overrevving so I had to pick a high gear and dump the clutch with the brakes on to kill it. The theory is that it has the wrong plug and the one in it is waaaaay too hot. It’s gearing is currently really short, wheelie prone, but doing an indicated 70kmh at half throttle with a gear and a half to spare... on a gravel driveway in the dark. But I had a helmet on AND I have good life insurance.
1 point
-
This is running again. with some some mixed results. Makes the same power as the old setup, with almost identical power curve. This is good, wasn't expecting it to make anymore power. runs nice. Swapped in the big inlet cam. As on old setup made another 15kw on same boost, but ran junk. (see top of this page) Ran better on this setup but still rough idle. Now where it gets weird; Had to add a decent amount more fuel, but only had very small power gains over stock cams. Tried all sorts, no dice. Still unsure whats going on. Ended up swapping back to stock cams. One major benefit of the itb setup is how well it runs down at idle. before with the big plenum and single throttle it would stall out real easy. much below 1000rpm and would just die. now it will go right down to 500rpm and keep chugging along. Have also added a simple on/off air bypass solenoid. programmed for idle up on cold start and when fans come on. Also doesn't vibrate it self to bits like the old setup. Still need to fix and tidy some stuff up. plus finish the tune. then im a gonna go destroy the paddock Next up steering servo for full scale rc hilux:1 point
-
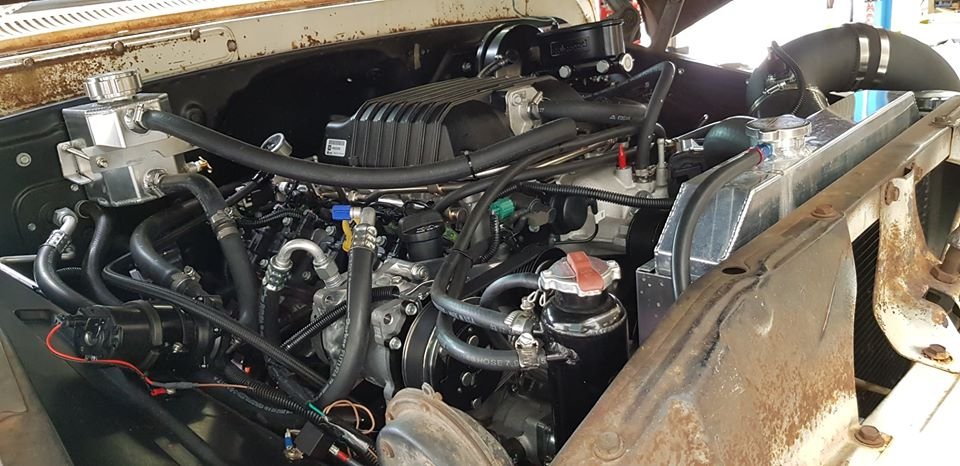
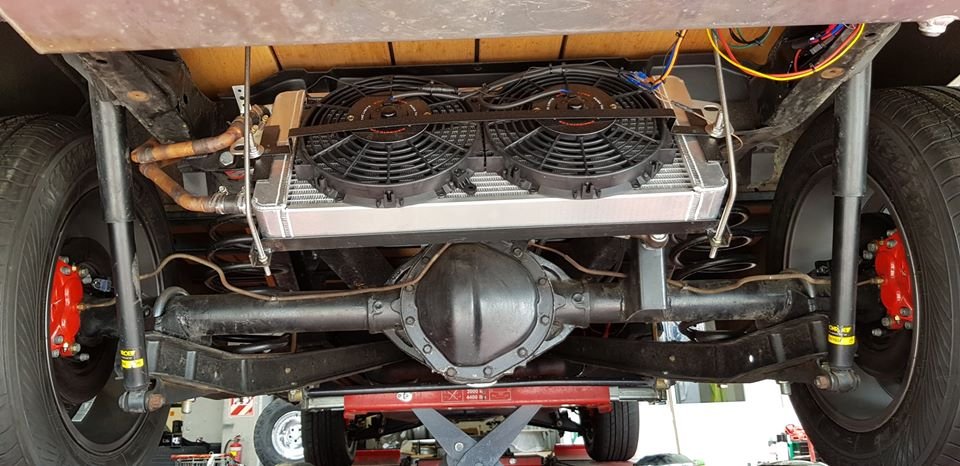
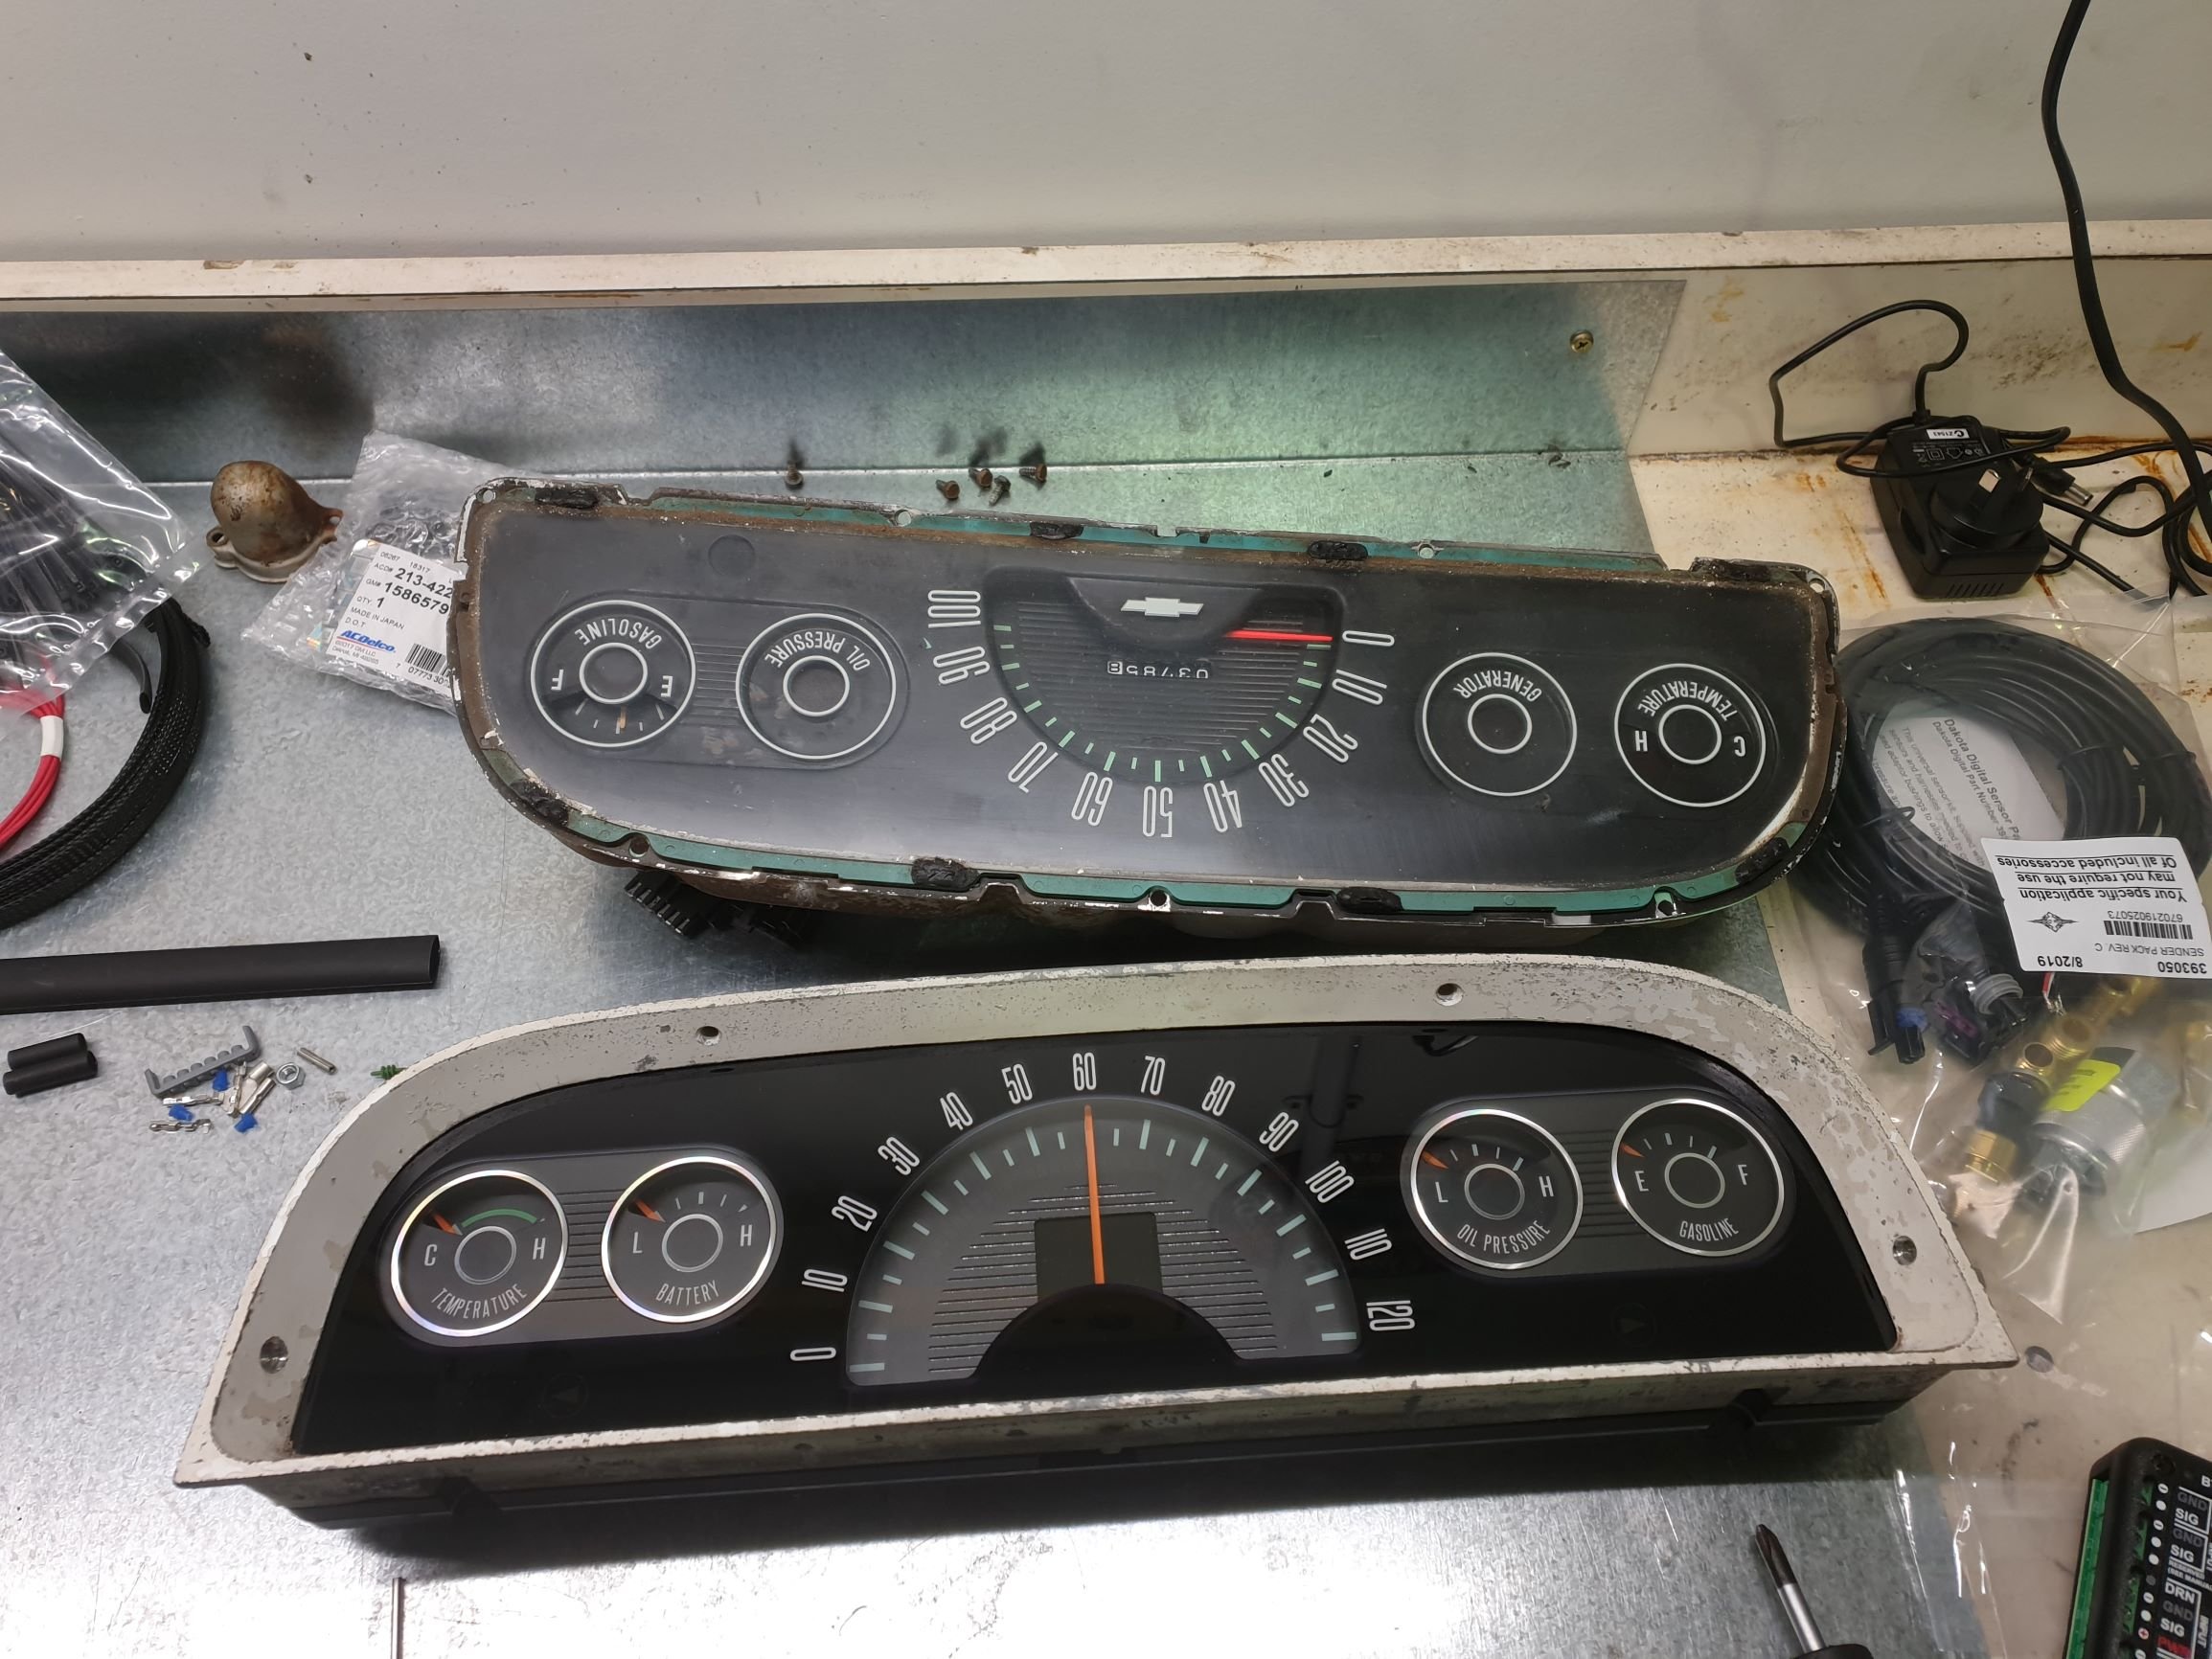
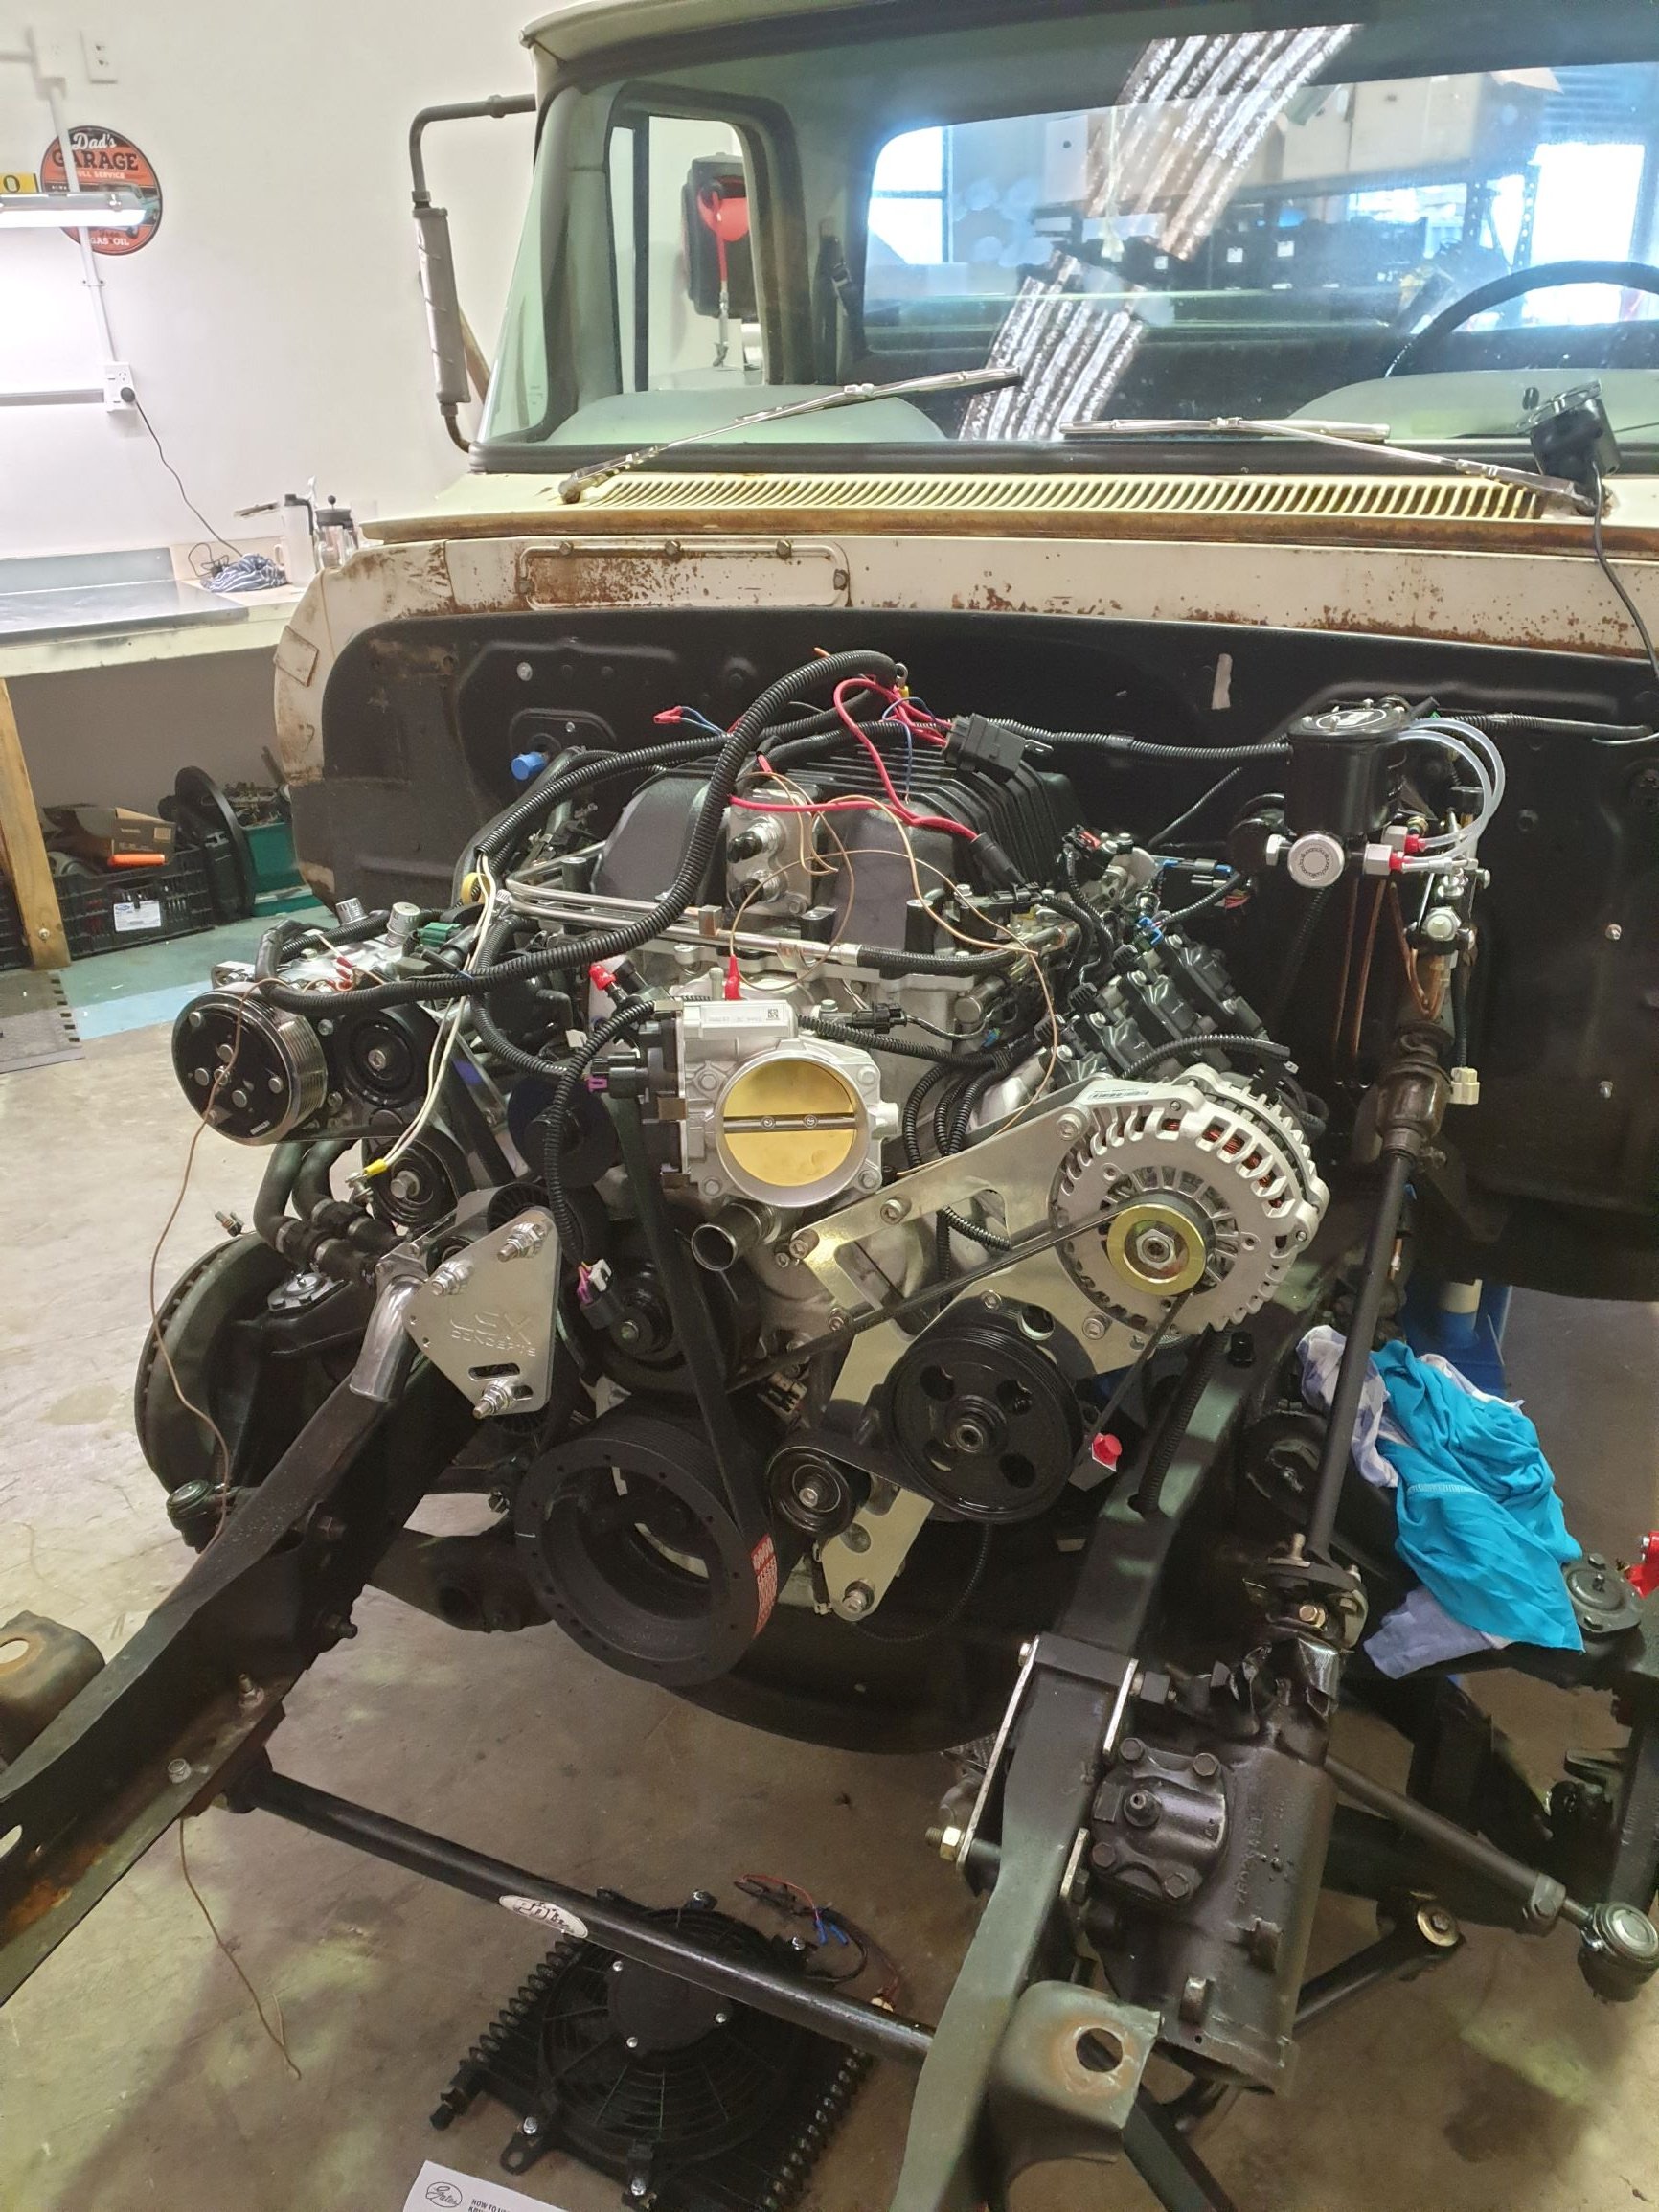
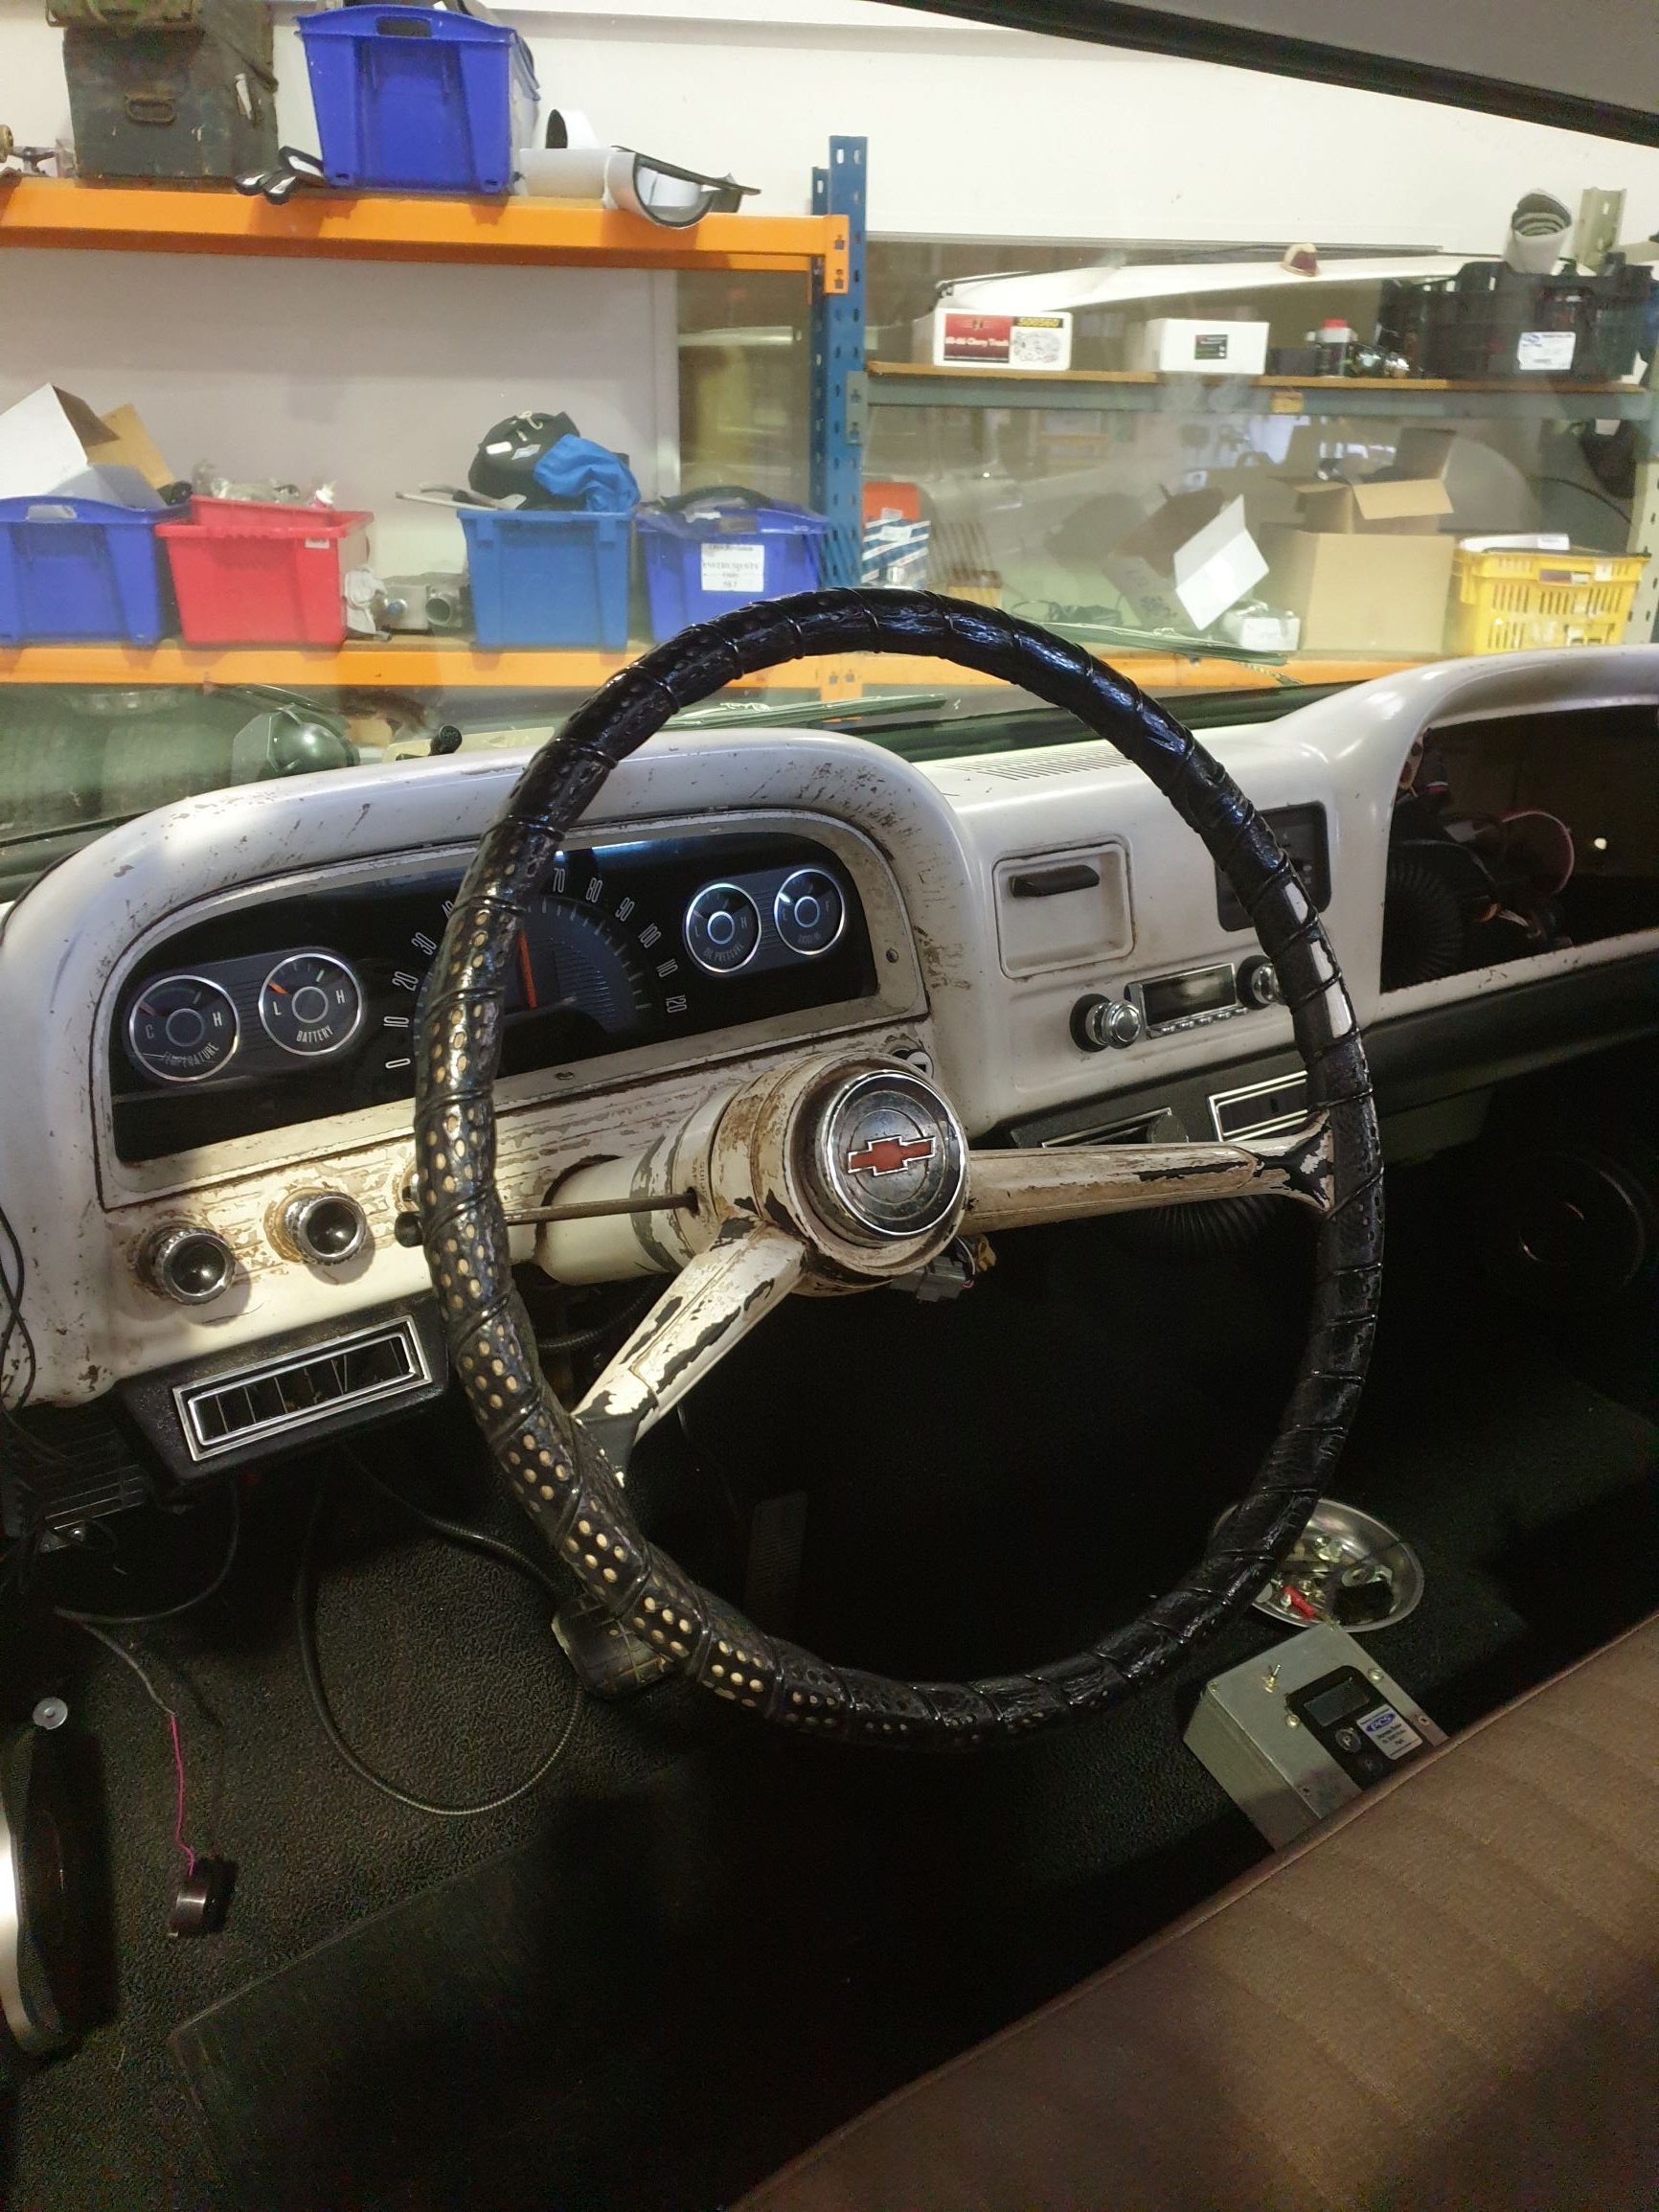
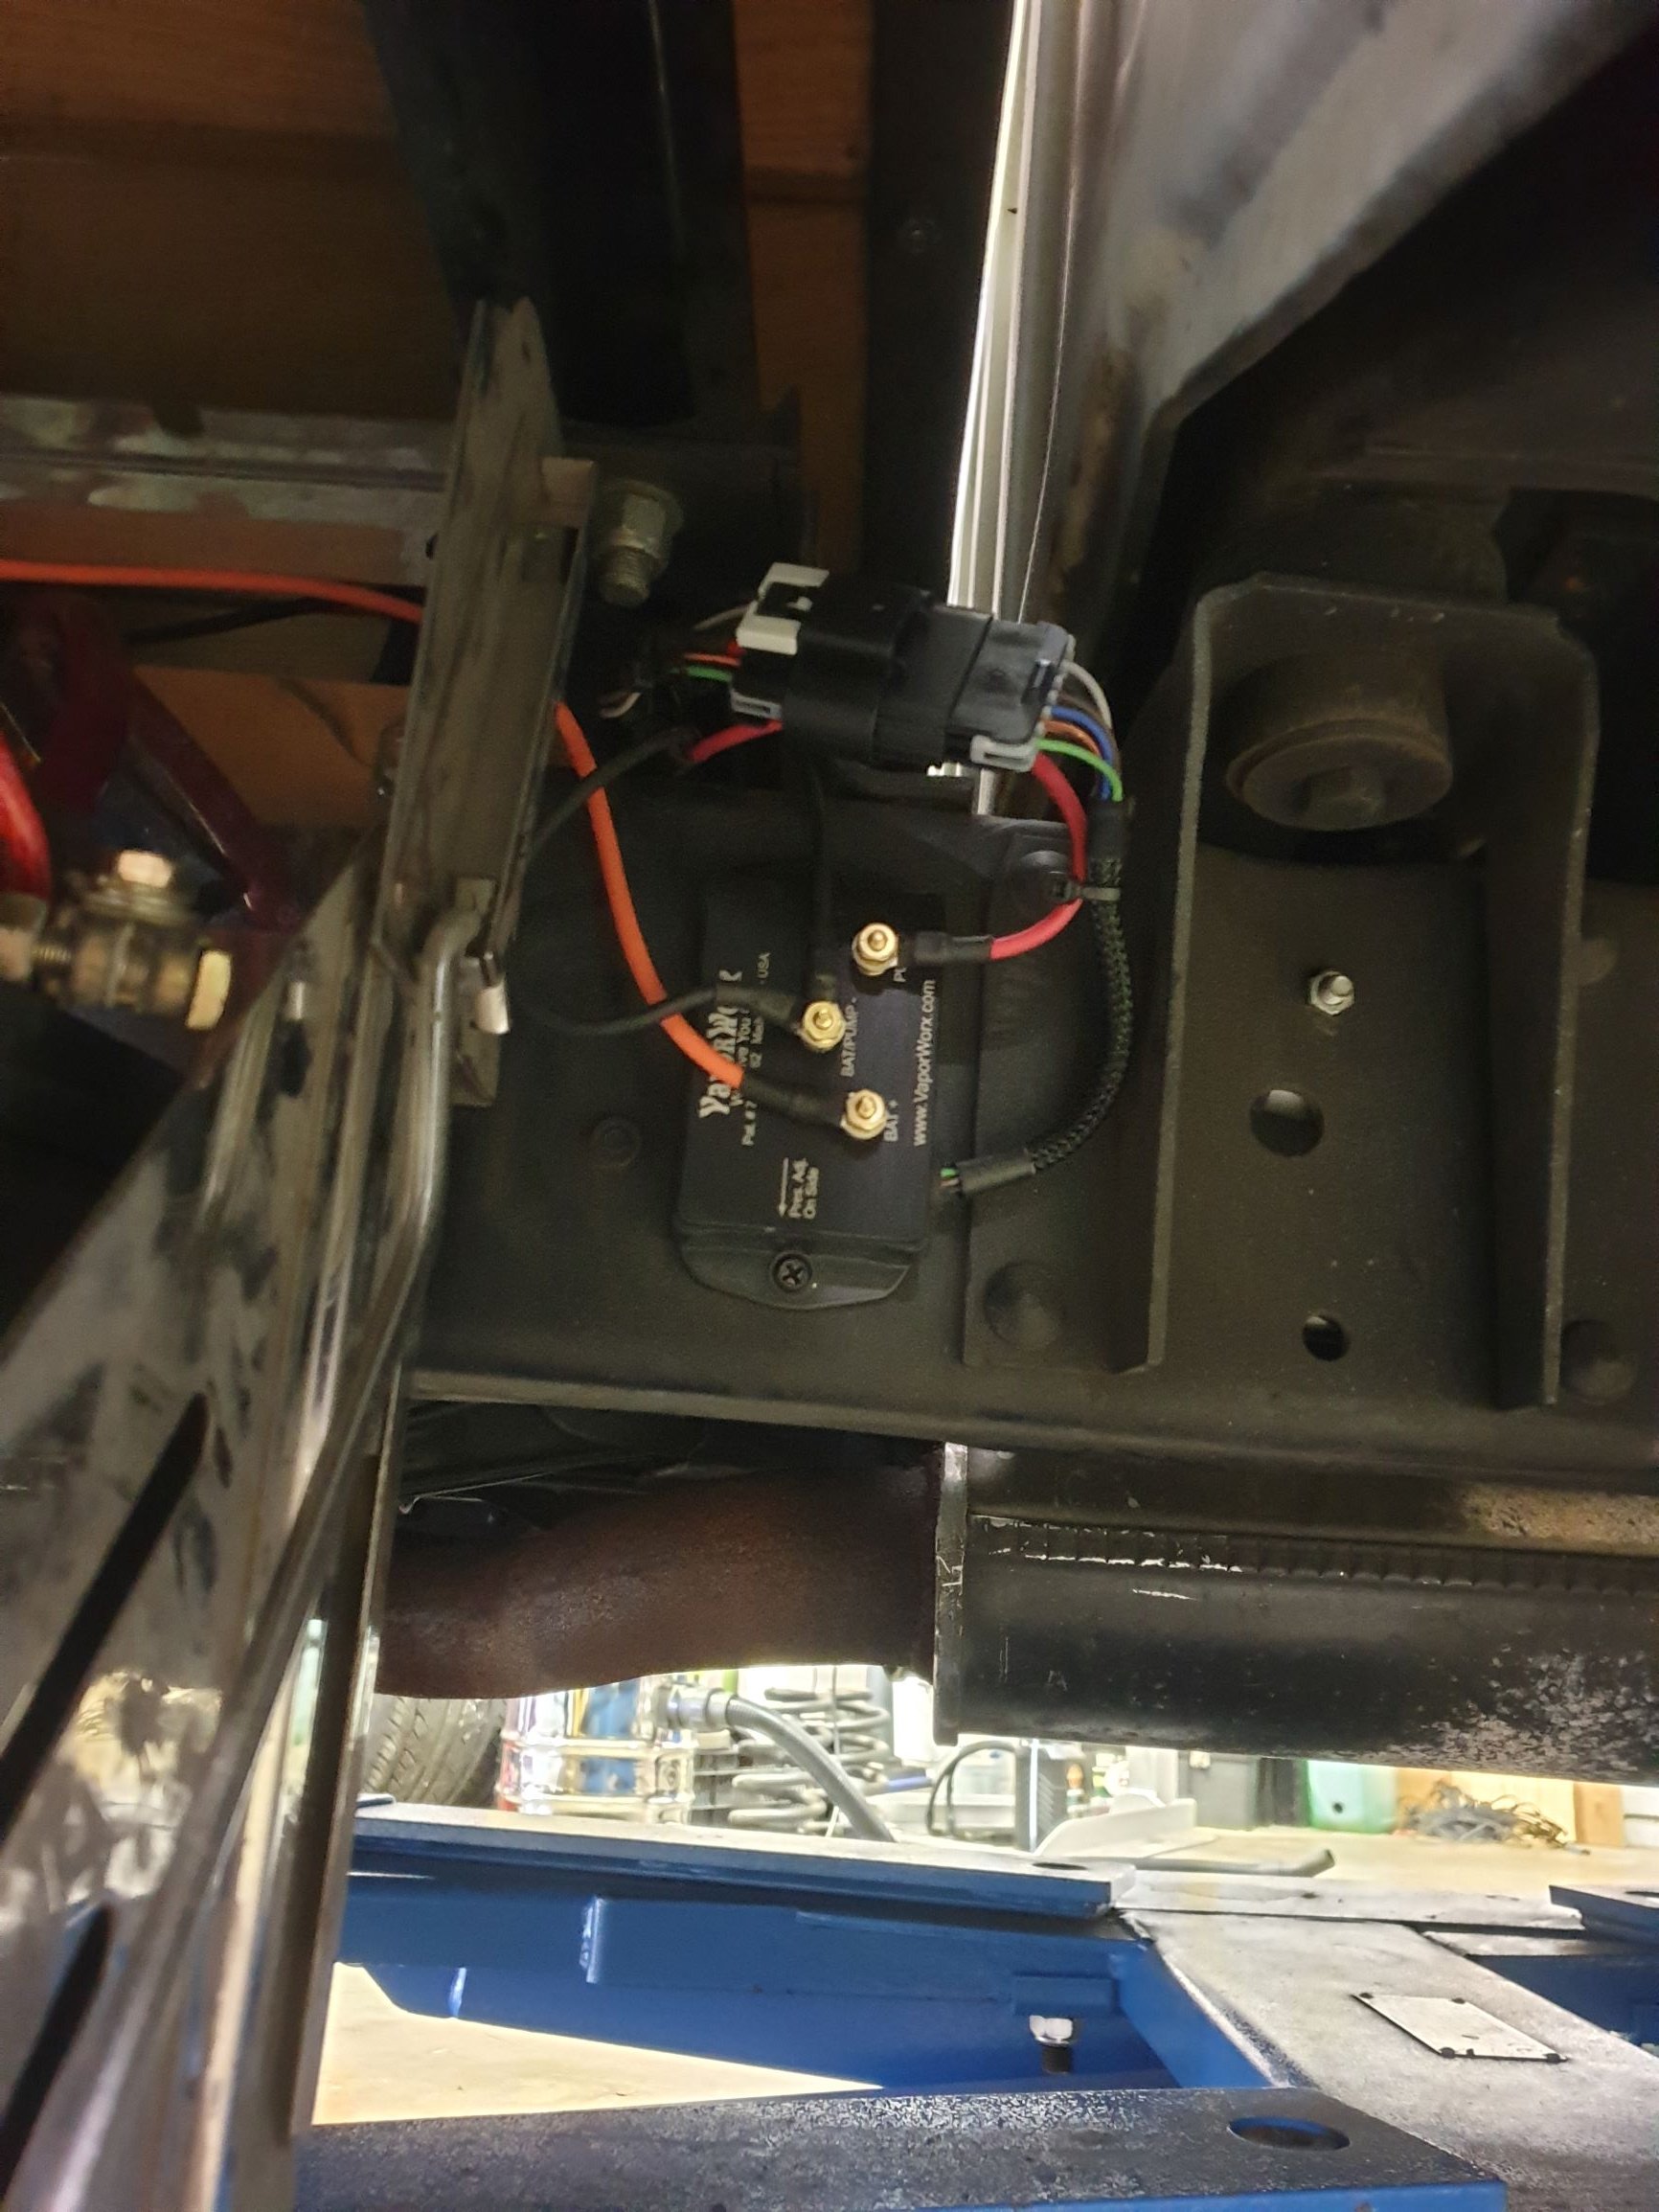
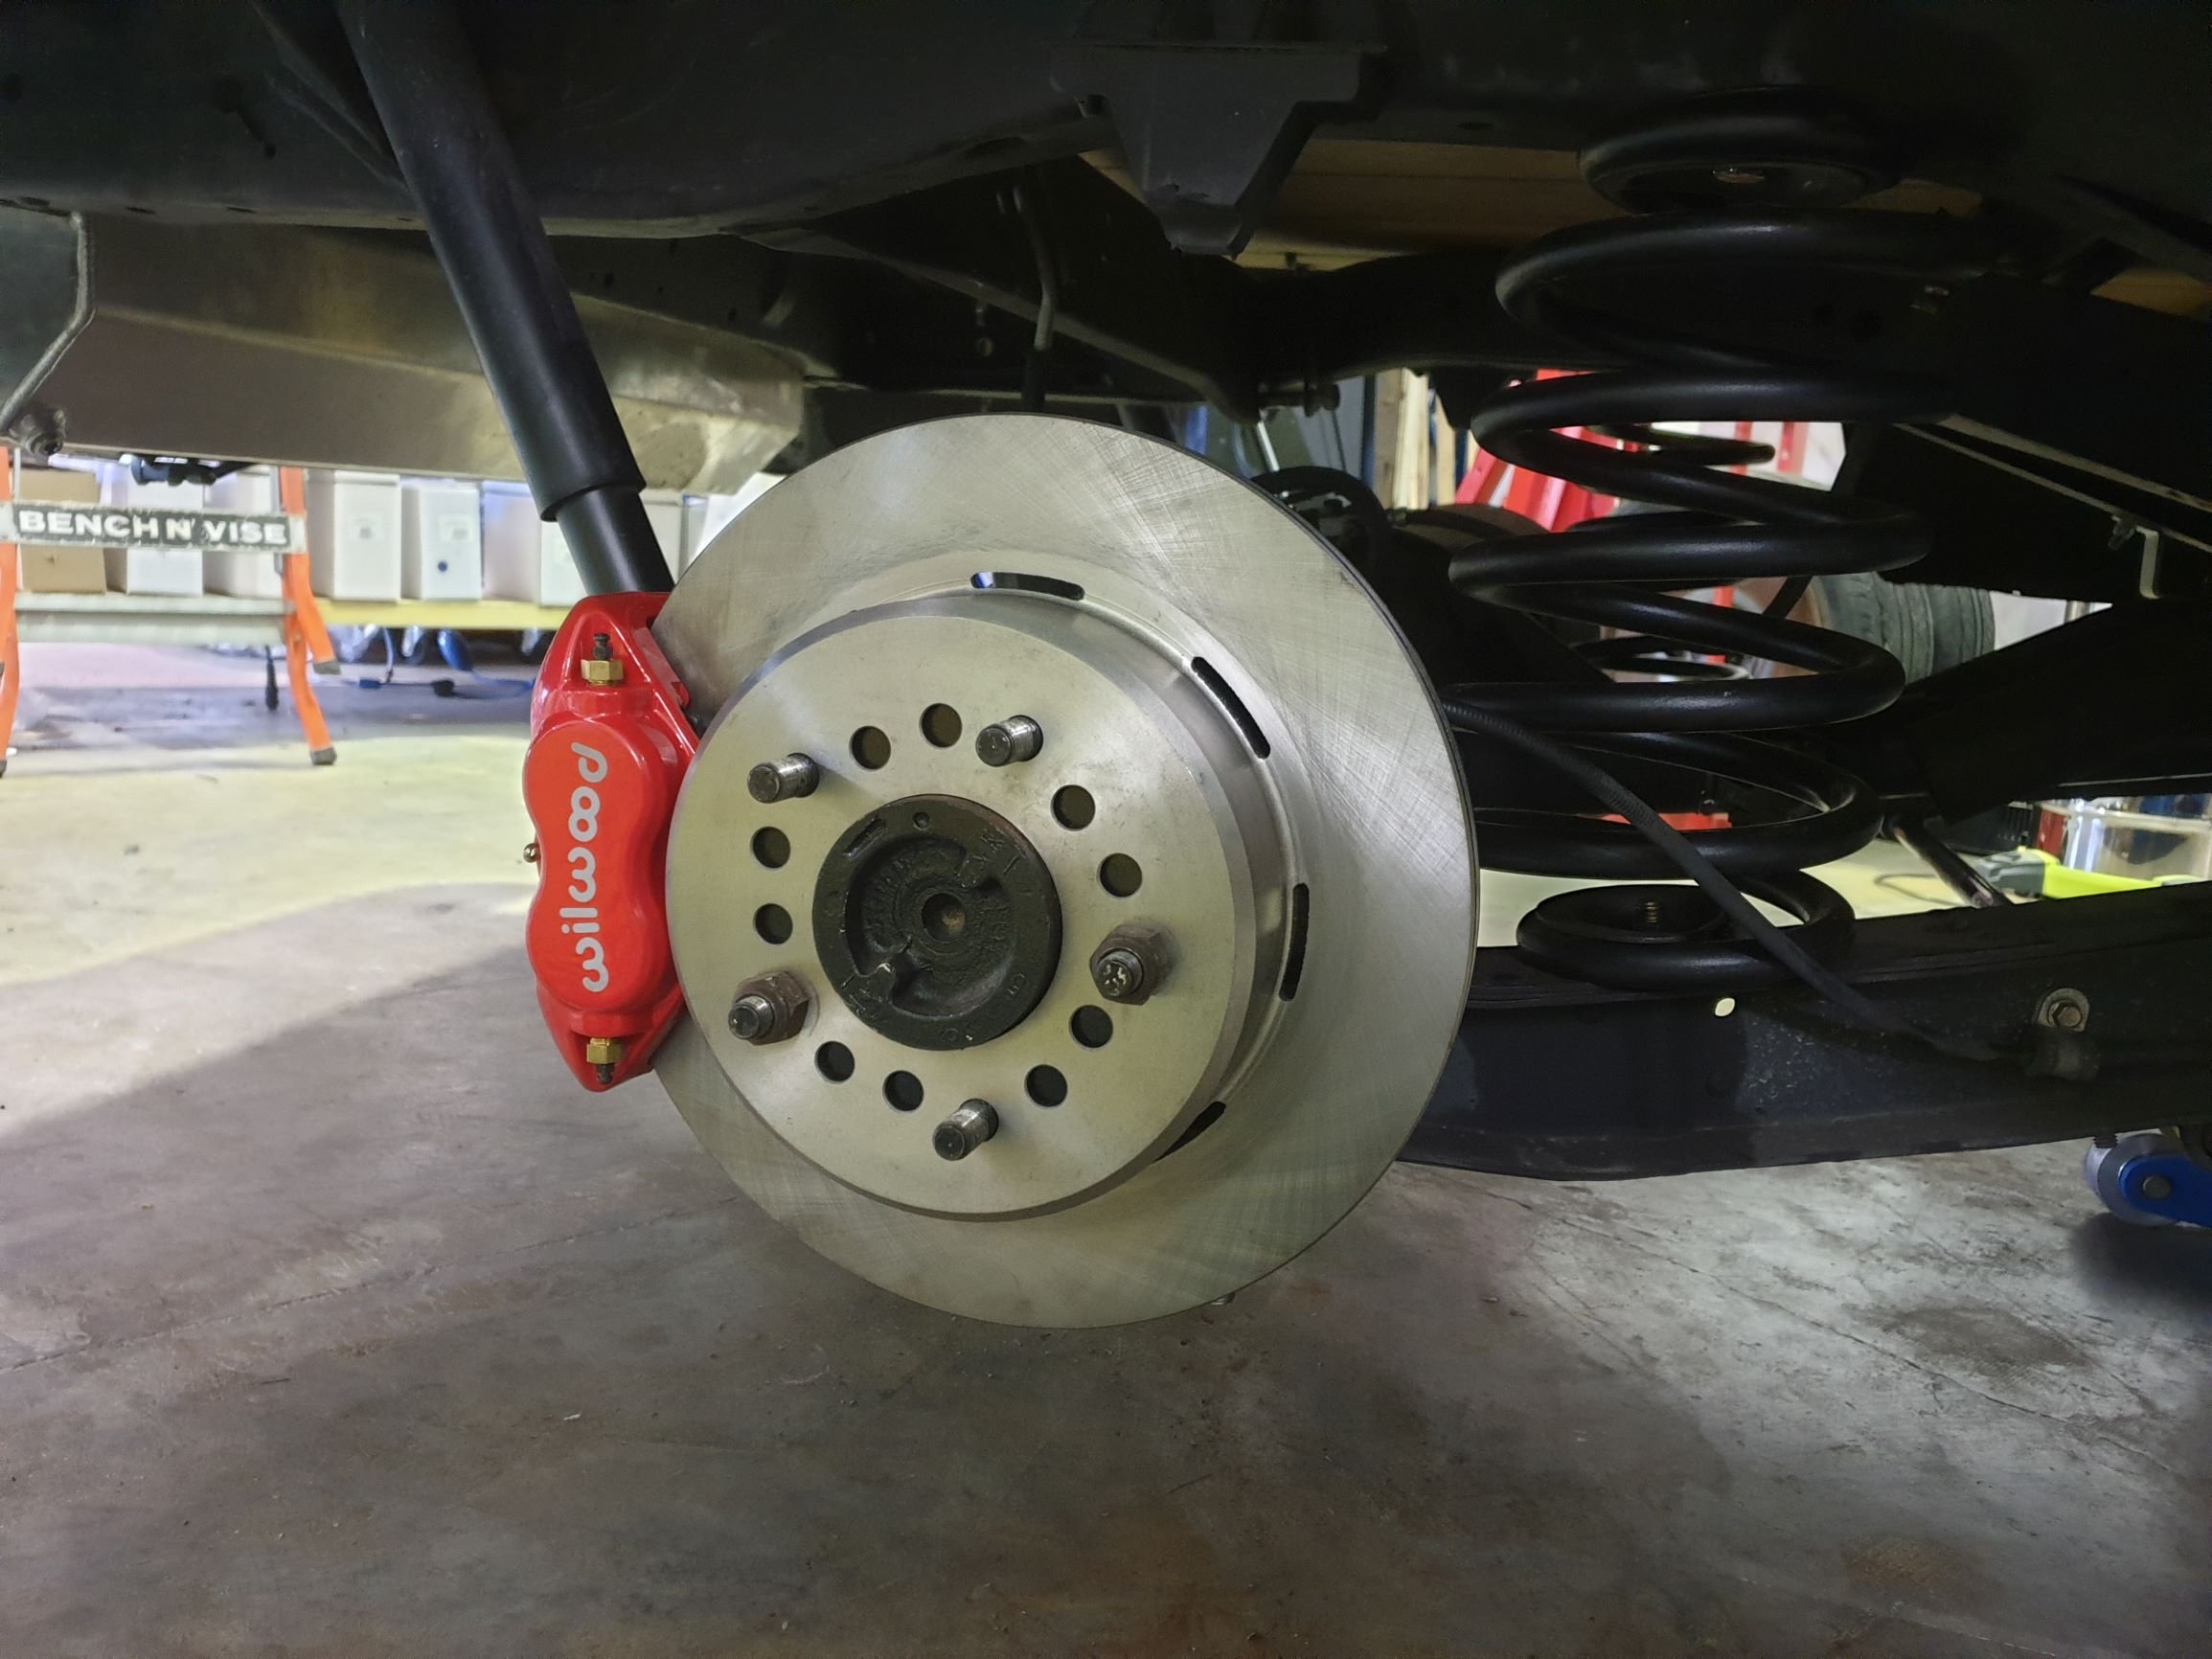
Donkey deep in the swap now. Finished up wiring on weekend, have put a vaporworx pwm set up on the fuel system. It gets fed fuel pressure, MAP, and ecu on off signal and makes the magic happen from there. I reran the fuel line in a 1/2" line, dead headed set up. Trans and engine are in, changed rear stoppers to disc, also changed pinion yoke to 1350 size, it was 1310. Remade all the front brake lines, replaced all ball joints, tie rod ends, basically all the steering/front end stuff is new. Changed the Instrument stuff to a Dakota digital set up that plugs into the Ecu for all the info. Cert check soon !!
1 point
-
Do a wheelie bro
1 point
-
This thing is broken also. have started to fix it. This is front suspension lower link, chassis end mount. its meant to be parallel to the chassis not bent down at the back. the force from the front link is mostly pulling straight forward. the mount has plently of strength to handle that, but it also pulls down slightly, and yeh bendy bendy this is the brace that runs up the inside of the chassis. weld held up fine but has tore a hole in the chassis, which is maybe 2-3mm thick. other side is fine as the braces run to the top of the chassis, this side was cut down as handbrake stuff was in the way. Managed to bend it back to where it needed to be, by putting the weight of the truck on the mount and using massive bit of pipe too leaver it back into place. Then plated the chassis and boxed in the mount, plus added another brace along the bottom side on both sides of the truck. wasn't much fun tig welding left handed and almost blind under there. but is stuck good. yep i changed that grease nipple so it doesn't get torn off One of the front lower links has been bent for awhile. plus had to replace the joints, with the proper johnny joints i brought ages ago ^ ^. Decided to remake all 3 links. New links are a size smaller pipe but are made from 4130. old ones are some cheese water pipe. so yeh new ones should be easily as strong and are lighter. drilled some speed holes in the retardedly overkill hand brake linkage, to make myself feel better about welding more stuff to the chassis. front uni of front driveshaft was smoked also. just looked old and corroded, rather than not being strong enough, so wacked in a new gen toyota joint. White is the old top link ^1 point
-
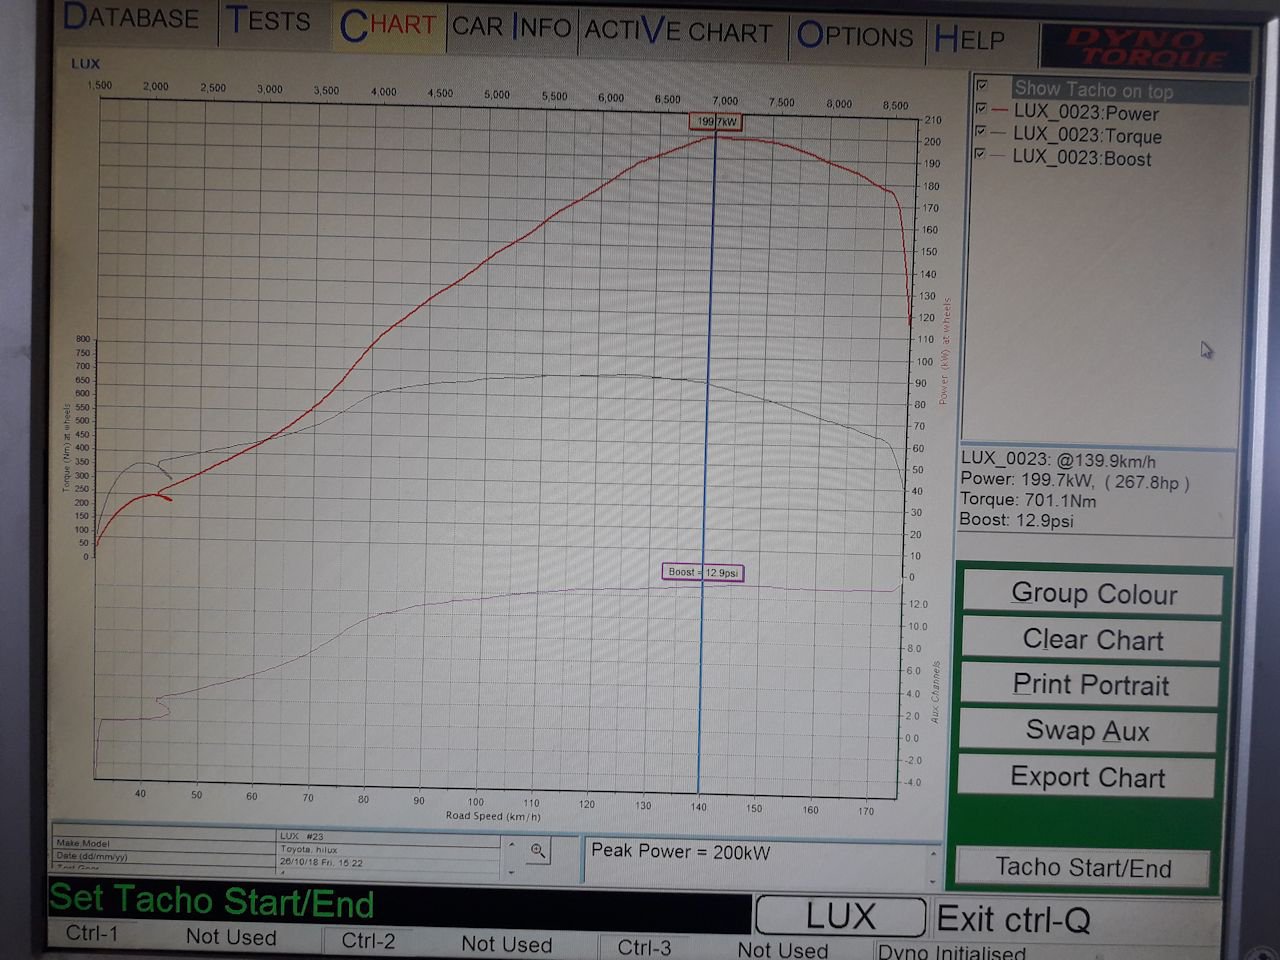
Have done heaps more testing firstly found the airbox itself is a restriction. gains about 5kw and runs a bit more boost with air box removed. its either the way the air enters, or not enough volume around air filter Rest of these runs are with airbox on.. Thought it would be a good idea to swap the head that came off starlet onto this. which has more port work. seems i had done more work on the head that come off the truck than i thought. Red line best run on original head. Blue first run on starlet head. Green cam timing adjusted on starlet head. bit of a fail/waste of my life, but managed to get it close to what it was. can see that this head seems to hang on a bit longer, but is a touch worse everywhere else. would rather keep as much midrange as possible Then went full retard. had some 193b (280 ish 9mm ish) kelford cams hanging around. which are mild ish NA cams. not meant for turbo stuff. Green: best from above on starlet head. Blue: 193b cams with cam timing roughly adjusted to best possible compromise. 220kw on only 12psi is pretty sweet, but too much midrange loss. Red: I almost didn't try this, because i thought it wouldn't work: 193b inlet cam. Stock exhaust cam. matched the stock cams and 20kw more peak! Only issue is, its junk until about 2000rpm and wont idle at all under 1200rpm. not ideal in a 4wd. 99% sure its the inlet manifold, which was spose to be thrown in the bin before i even built this truck, due to vibration and cracking issues TL;DR / too much @Roman Dave Science. First dyno run vs last :1 point
-
Sorted a few little issues, and played with ignition timing. Looking better now. 200kw on only 13psi
1 point


This leaderboard is set to Auckland/GMT+12:00