
Leaderboard


Popular Content
Showing content with the highest reputation on 01/03/20 in all areas
-
re-made the drivers side patch. im way happier with it. i took heaps of measurements off the RA23 to try and get it as close to factory as i could. the only thing i couldn't get right was the hole for the bonnet stopper rubber thingo. i dont know how but when the top of the chassis rail was last mangled by senior Holt the bolt hole moved in by about 5-7mm. this meant that the center line of the bottom fold didn't go directly through the center of the bolt hole as it does (as best as i can measure it with simple tools, its within +/- 2mm i reckon) on the RA23. its not the end of the world by a long margin, its interesting that there is a difference between the two, could be manufacturing tolerances? who knows. anywho, all that meant is that the circular shaped rebate that the stopper bolts into is offset from the center of the fold a bit. TBH its pretty hard to tell the difference between the two celicas and once its got paint on it you might not be able to see it at all. whatevs, its close enough now that im happy with it. on to the other side then i can splash some paint around. 2020-01-02_05-49-23 by sheepers, on Flickr 2020-01-02_05-49-15 by sheepers, on Flickr 2020-01-02_05-49-03 by sheepers, on Flickr11 points
-
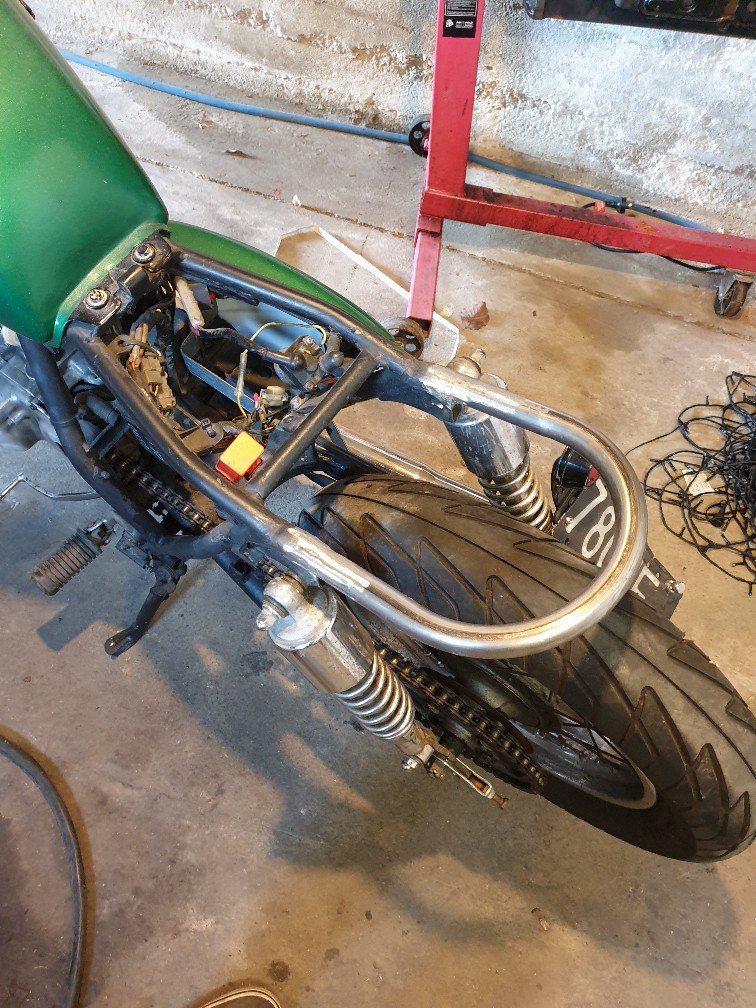
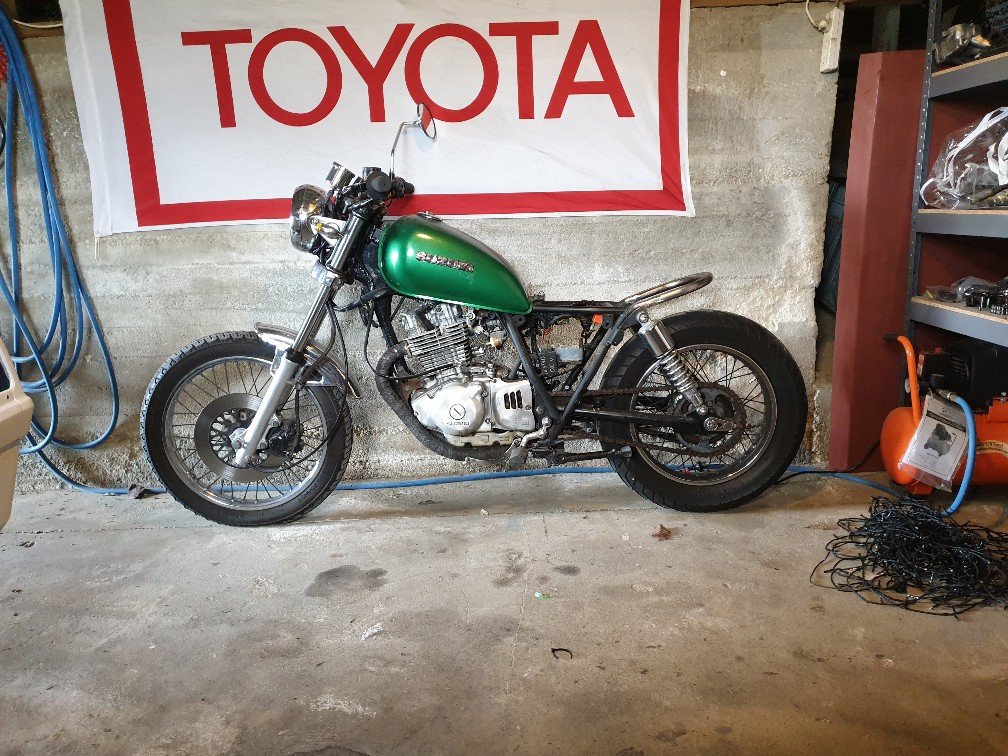
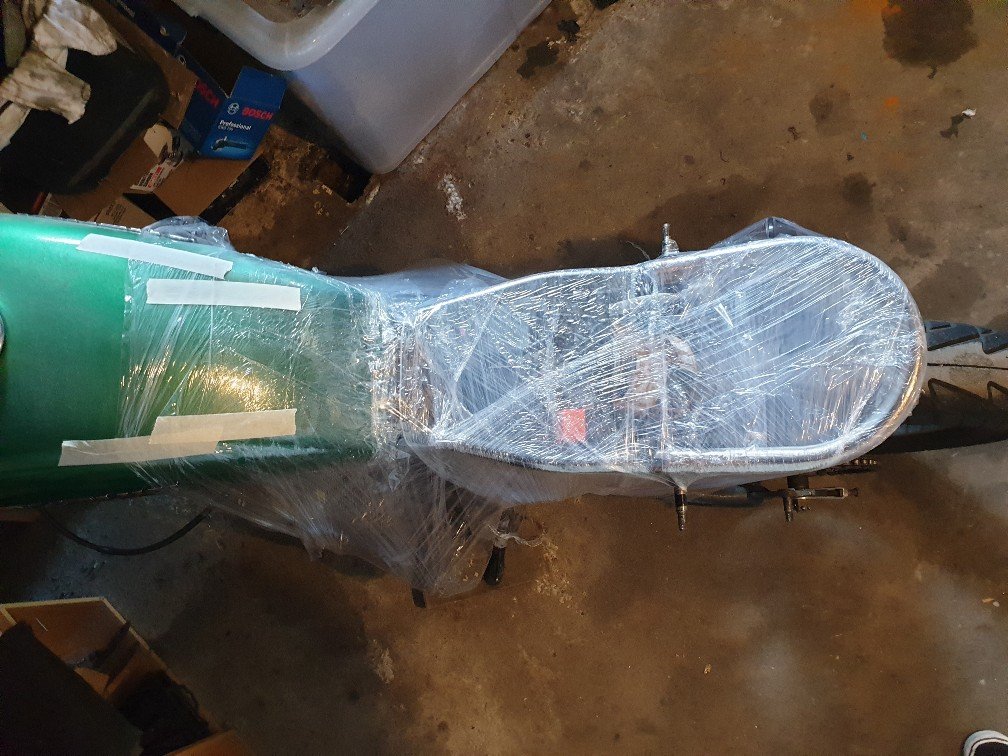
Long time no nothing. life and new born getting in the way but found some time over the break to sort some stuff out. Took this thing for a wof a while ago and the fella reckoned I had chopped "too much off". According to him and a few other people I talked to I need to have left at least 100mm of frame on after the shock mounts. So abit butt hurt i knew had some options, scrap the bike, part it out, or weld on new rear hoop and change set up. Seeing as ive given up on too many project in my past, option C is what I've gone for. Progress is as follows. Acquired rear hoop. Made inner tube pieces for support. Chopped hoop to preferred size. Welded it all together. Purchased fiberglass. Wrapped bike in glad wrap. Laid fiberglass. And here we are. I always wanted to try make my own seat so that's what I'm going to try do, from the pan to upholstery. I ran out of resin so will have to pick up more and do a couple more layers when I get round do it, I will most likely weld in a support peice at the back too. but for now I'm happy with were I've gotten.
 9 points
 -
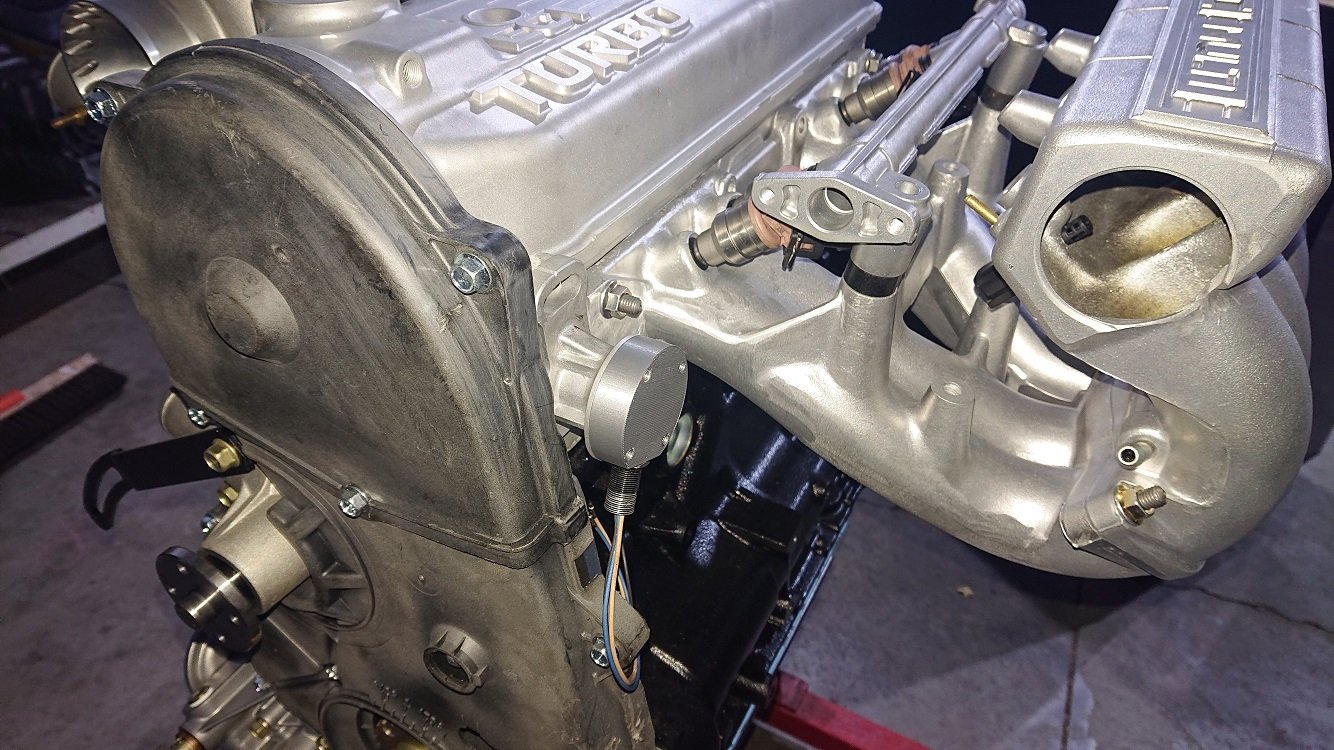
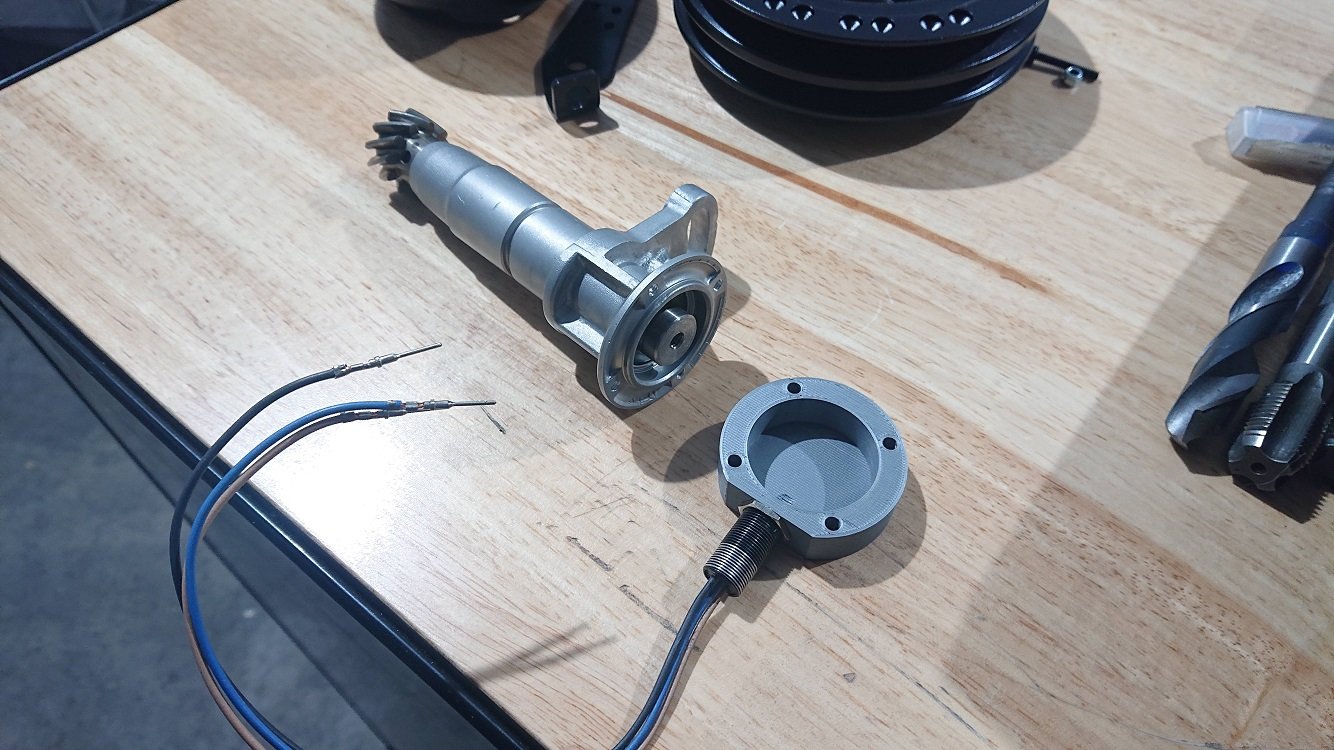
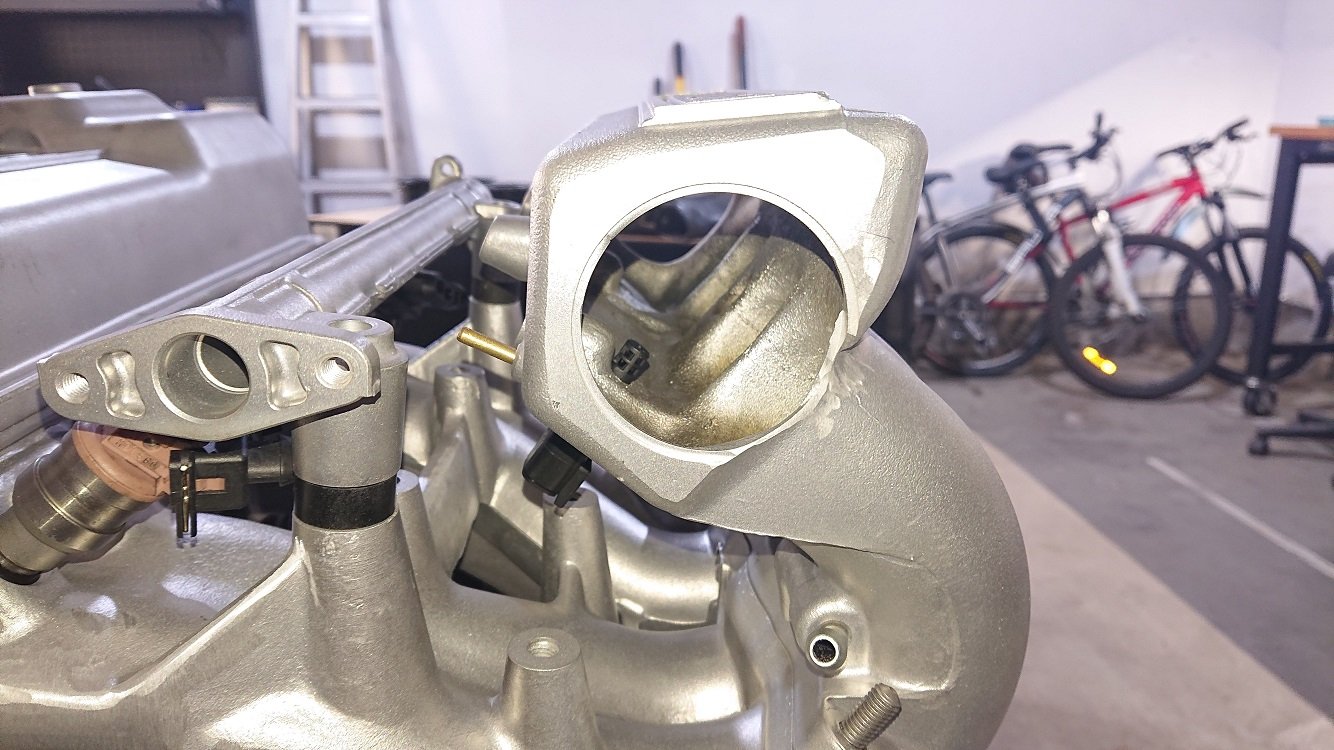
A couple more hours on the intake manifold side of this today, decided to tackle the cam trigger. I got hold of an old distributor from a carby one of these motors. It was missing pretty much everything, just a bare housing, shaft and advance weights still there. I attacked the shaft and housing with a hacksaw to get it down to just the bits I might need. I'm making this up as I go along, so I hope it works out ;-). What I'm trying to accomplish here is to mount a threaded hall sensor in such a way that it picks up a trigger signal once for every camshaft revolution. Ideally I'l love to mount something behind the cam wheel at the front, but there are no mounting points there, and although I could drill through into the head to make some, I'd enter a water gallery for sure and I don't like my chances of sealing that up afterwards. I thought about maybe picking up off the back of the cam via a custom mount that takes the place of the half moon seal, but there isn't a lot of room to work back there either. I also didn't like this idea in the end as the trigger disc would have to have a pretty small diameter, and as the trigger wheel you're reading gets smaller (so triggers are closer to the centerline of whatever is rotating) a small error in the point the trigger is detected can actually be a pretty large number of engine degrees. The dizzy rotates in line with the cam, so if I can make something tidy here, its about the best compromise I can think of. Looking at the cut apart dizzy, I liked the look of those four pads radially spaced around the housing, I figured I could clean it all up, drill and tap those for M4, and make a cap that attaches on and holds a threaded hall effect sensor. The shaft itself can then be tidied up, drilled and tapped for M6 to give a good mounting point for some sort of trigger wheel (with just one tooth :-). Some time on the lathe and drillpress later, as well as a quick 3dprint to prototype a cap (will either print the final one out of some material that can handle the jandle, or machine out out of aluminium), and I think it's going to work. Not as tidy a solution as I'd really like, and you need to be aware that if you ever remove and refit it, you'll need to reset the base timing most likely, but I think it'll work :-). The trigger disc can just be made out of a bent piece of steel, will make something tidy for it. There is a bit (I'd like more!) space to squeeze a coolant neck out next to it aswell.
8 points
-
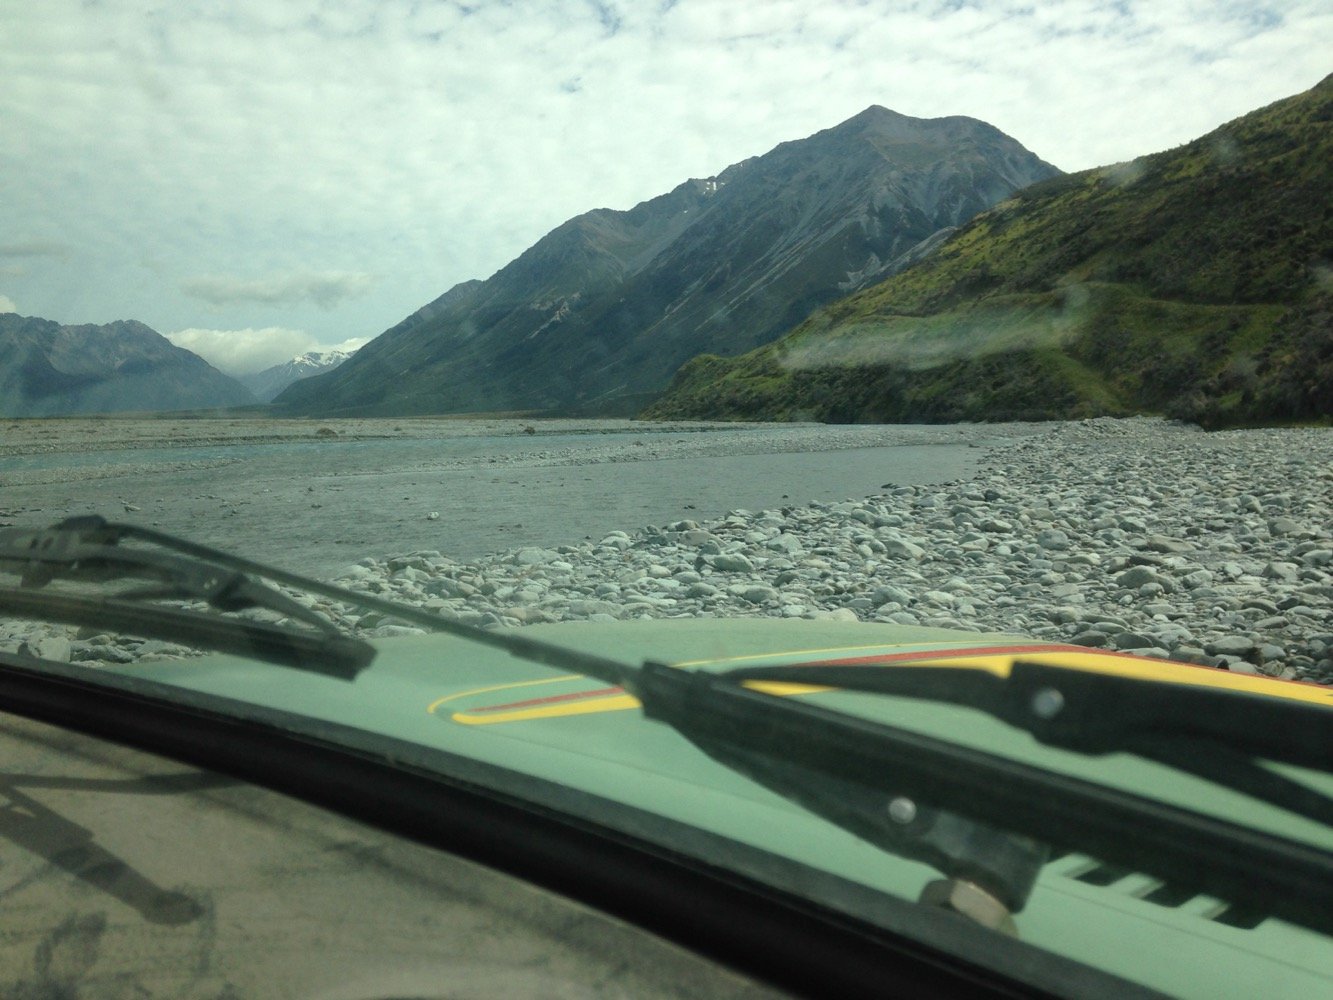
Well, glad I made a recon trip before committing to a longer few days out, the river has cut right against the true left about 10min from the diversion and flows at the usual brisk pace, watched two trucks cross in bonnet deep water, spoke to one who commented it was on the limit of what they were comfy with and there were two more mandatory crossings further up.... Yeah if I had to, I would rate 80% chance of success, but neither of us wanted to drown trucks. Retreated back to lake Coleridge for a pleasant picnic in the willows, lovely sunny day up there, weird to drive back into mist and rain on the plains.
6 points
-
Shimmed the carb needle to a half notch and have gone back to standard hot plug as on 98 I get no issues. Might run two cdi's. Can get them to retard the timing by putting different caps in there. Then flick a switch for low octane running. No real reason for this other than I think it's neat and "adventury". Could slot the stator and just set it up for 91 permanently4 points
-
Practice piece needs lots of improvement
4 points
-
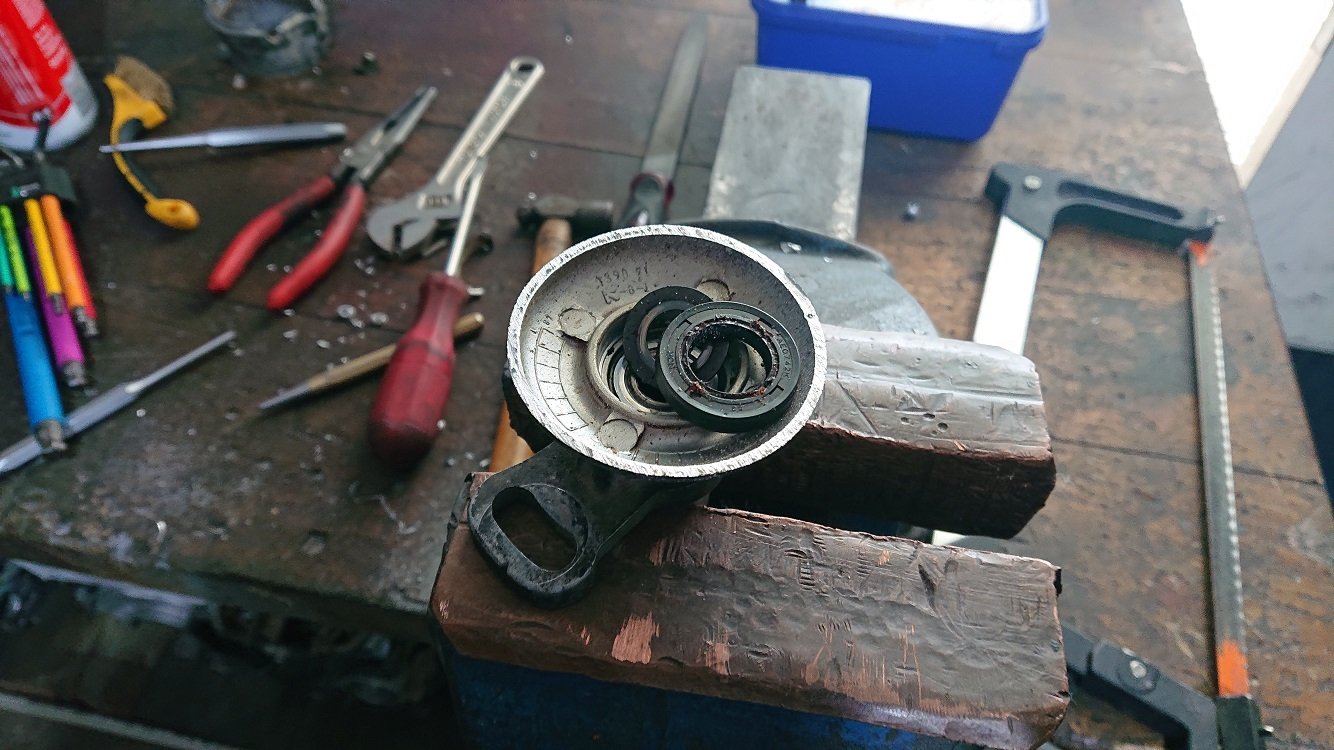
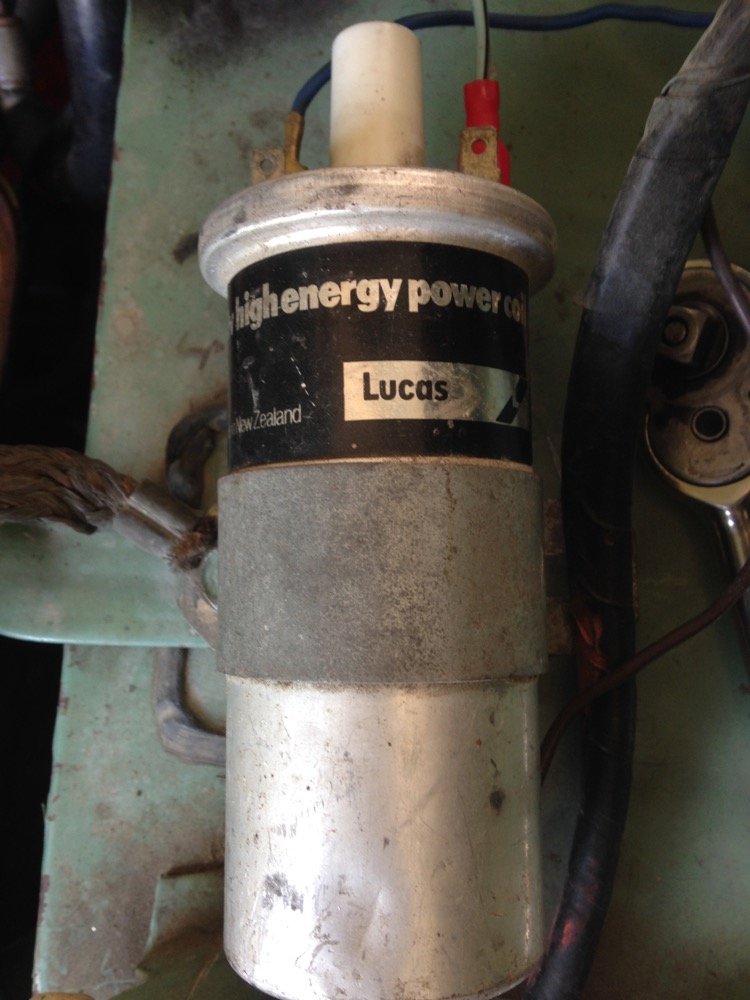
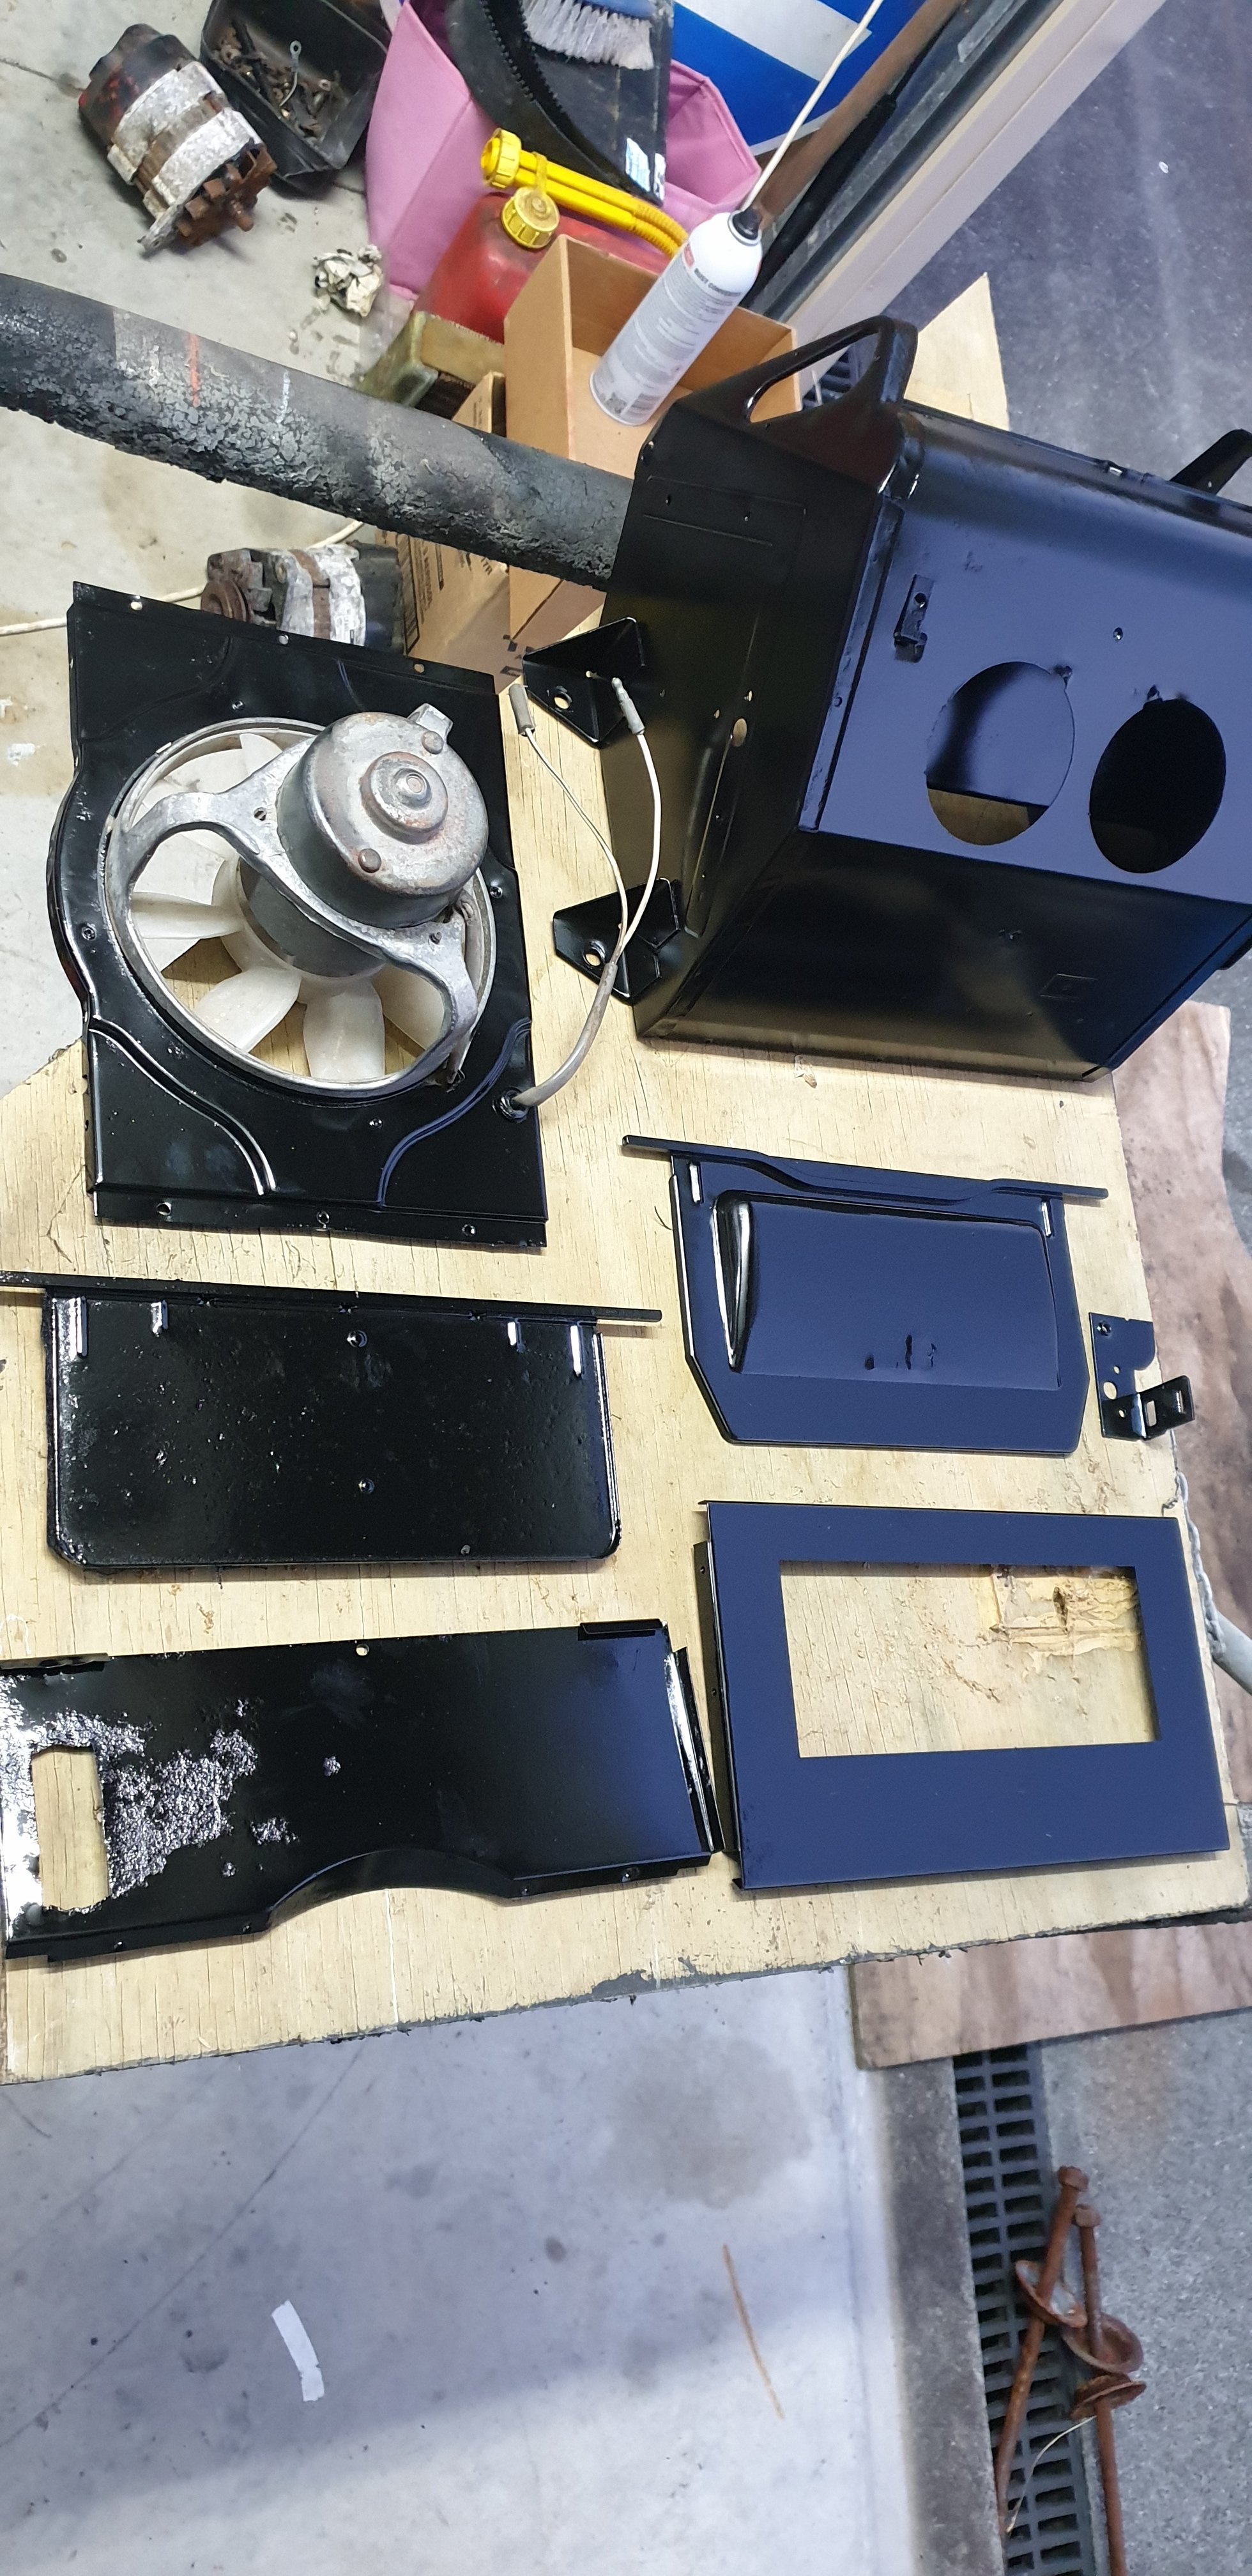
Been having hot start issues with the engine, worst of all being random which hampered troubleshooting. I also didn't bother refitting the fan when the engine was out as i've often wondered how much effect it gives without a cowl and so far back, unfortunately it draws sufficient air to keep the engine cool at idle so leaving the car running for short stops was not an option. (Must re-fit...) Keeping to my usual mantra of when it seems like the carburettors are playing up its the ignition I started swapping out bits that I could. Given the brand of the coil I was left unsure of the results, resistance to start hot was still present, or do I have two faulty coils? This game carried on with all major components including stripping and checking the distributor to no avail. Just maybe it is fuel this time? Fitting the wideband straight away gave the answer, massively lean at idle..... Quick spray of butane found the leak point and left me quite impressed that the drivability was not noticeably worse. Remove carbs, clean, check refit + new gasket. Aaaaaaaaand its back to life, solid idle just on the rich side of 14.7 to aid starting. Now on summer break I have plans for some trips away, one task on my list that remains unchecked is to drop the steering box and inspect. This is where the personality of the Niva starts to come out.. I have been unenthusiastic about this task due to all the nasty hidden bolts and knocking off ball joints etc, took a solid 4 hours to get the box out along with almost everything else on that side of the motor, as painful as it is to remove half the engine bay to access one part, i'm quite glad its not modern Japanese and I can fit my hands and spanners where they need to be! Once again inspection found trouble, grittiness in the box was due to pitting/chipping in the gears, quite likely from rough treatment prior to purchasing joint pullers..... Not wanting to put that box back in, I pulled out a spare, being of unknown quality I decided to strip it down first, what a fun mistake that was! Only seal I really cared about was the lower one, carefully hidden under the pitman arm, initially I hooked up my 2 jaw puller but it just didn't like the shape falling off with only moderate load, at 17:20 I had enough and headed down to Repco and brought a pitman arm puller, as they closed for the day, even with greased up threads I couldn't budge the darn thing, stern words were muttered and I left it for the night retreating inside for tea. After a second prolonged struggle using various combinations of tools, percussion and finally the purchase of a gas torch, the arm relented, clean-inspect-reassemble resulted in one new condition steering box. Lovely clean looking steering box too, and possibly the most expensive maintenance item for some time! Only a few short hours will have the Niva back on the road...... except for NY hangover, just lifting tools is bit of a challenge right now, hence i'm writing about fixing rather than actual fixing!
4 points
-
i carried on today with more bits. 2019-12-30_04-47-11 by sheepers, on Flickr 2019-12-30_04-47-00 by sheepers, on Flickr 2019-12-30_04-47-19 by sheepers, on Flickr then i started on the other side. i noticed as i went along that i had made a mistake on the drivers side and i wasn't sure if i should make the passengers side correctly and re make the drivers side. the more i made of the passengers side the more it became clear that id over compensated and made the passengers side wrong as well. so i shut the door, went inside and sulked. ive decided that im going to re make both sides because im not happy with the ones ive made. not the end of the world, two days work more or less but id rather have these bits right because they are the first bits ill see as i open the bonnet.4 points
-
right so, rust repairs. usual story. cardboard template, cut the piece out, fold, fuck around, make the next bit. in this instance i was lucky to have an unmolested example to copy so i knew i got the patch the right shape. i just use basic tools, i think the fanciest thing i have is a shrinker/stretcher. anywho ive taken some fairly self explanatory photos of the process, only one that might need some explanation is welding up the gap. i use a copper plate behind the gap and weld onto that, the metal wont stick to the copper so it helps if you've got a gap to fill. 2019-12-29_03-56-09 by sheepers, on Flickr 2019-12-29_03-56-18 by sheepers, on Flickr 2019-12-29_03-56-25 by sheepers, on Flickr 2019-12-29_03-56-33 by sheepers, on Flickr 2019-12-29_03-56-52 by sheepers, on Flickr 2019-12-29_03-57-00 by sheepers, on Flickr 2019-12-29_03-57-08 by sheepers, on Flickr 2019-12-29_03-57-17 by sheepers, on Flickr 2019-12-29_03-57-25 by sheepers, on Flickr 2019-12-29_06-07-34 by sheepers, on Flickr 2019-12-29_06-07-41 by sheepers, on Flickr 2019-12-29_06-07-49 by sheepers, on Flickr 2019-12-29_06-07-57 by sheepers, on Flickr4 points
-
Got the bits, and they actually correct, very dirty but correct so that's good. I had to drill out the hole in the oil pickup that goes over the stud as it wouldn't fit, I'll have to wait until the main cap is on to see if it needs any other mods. That's pretty much everything I need to assemble a long block.3 points
-
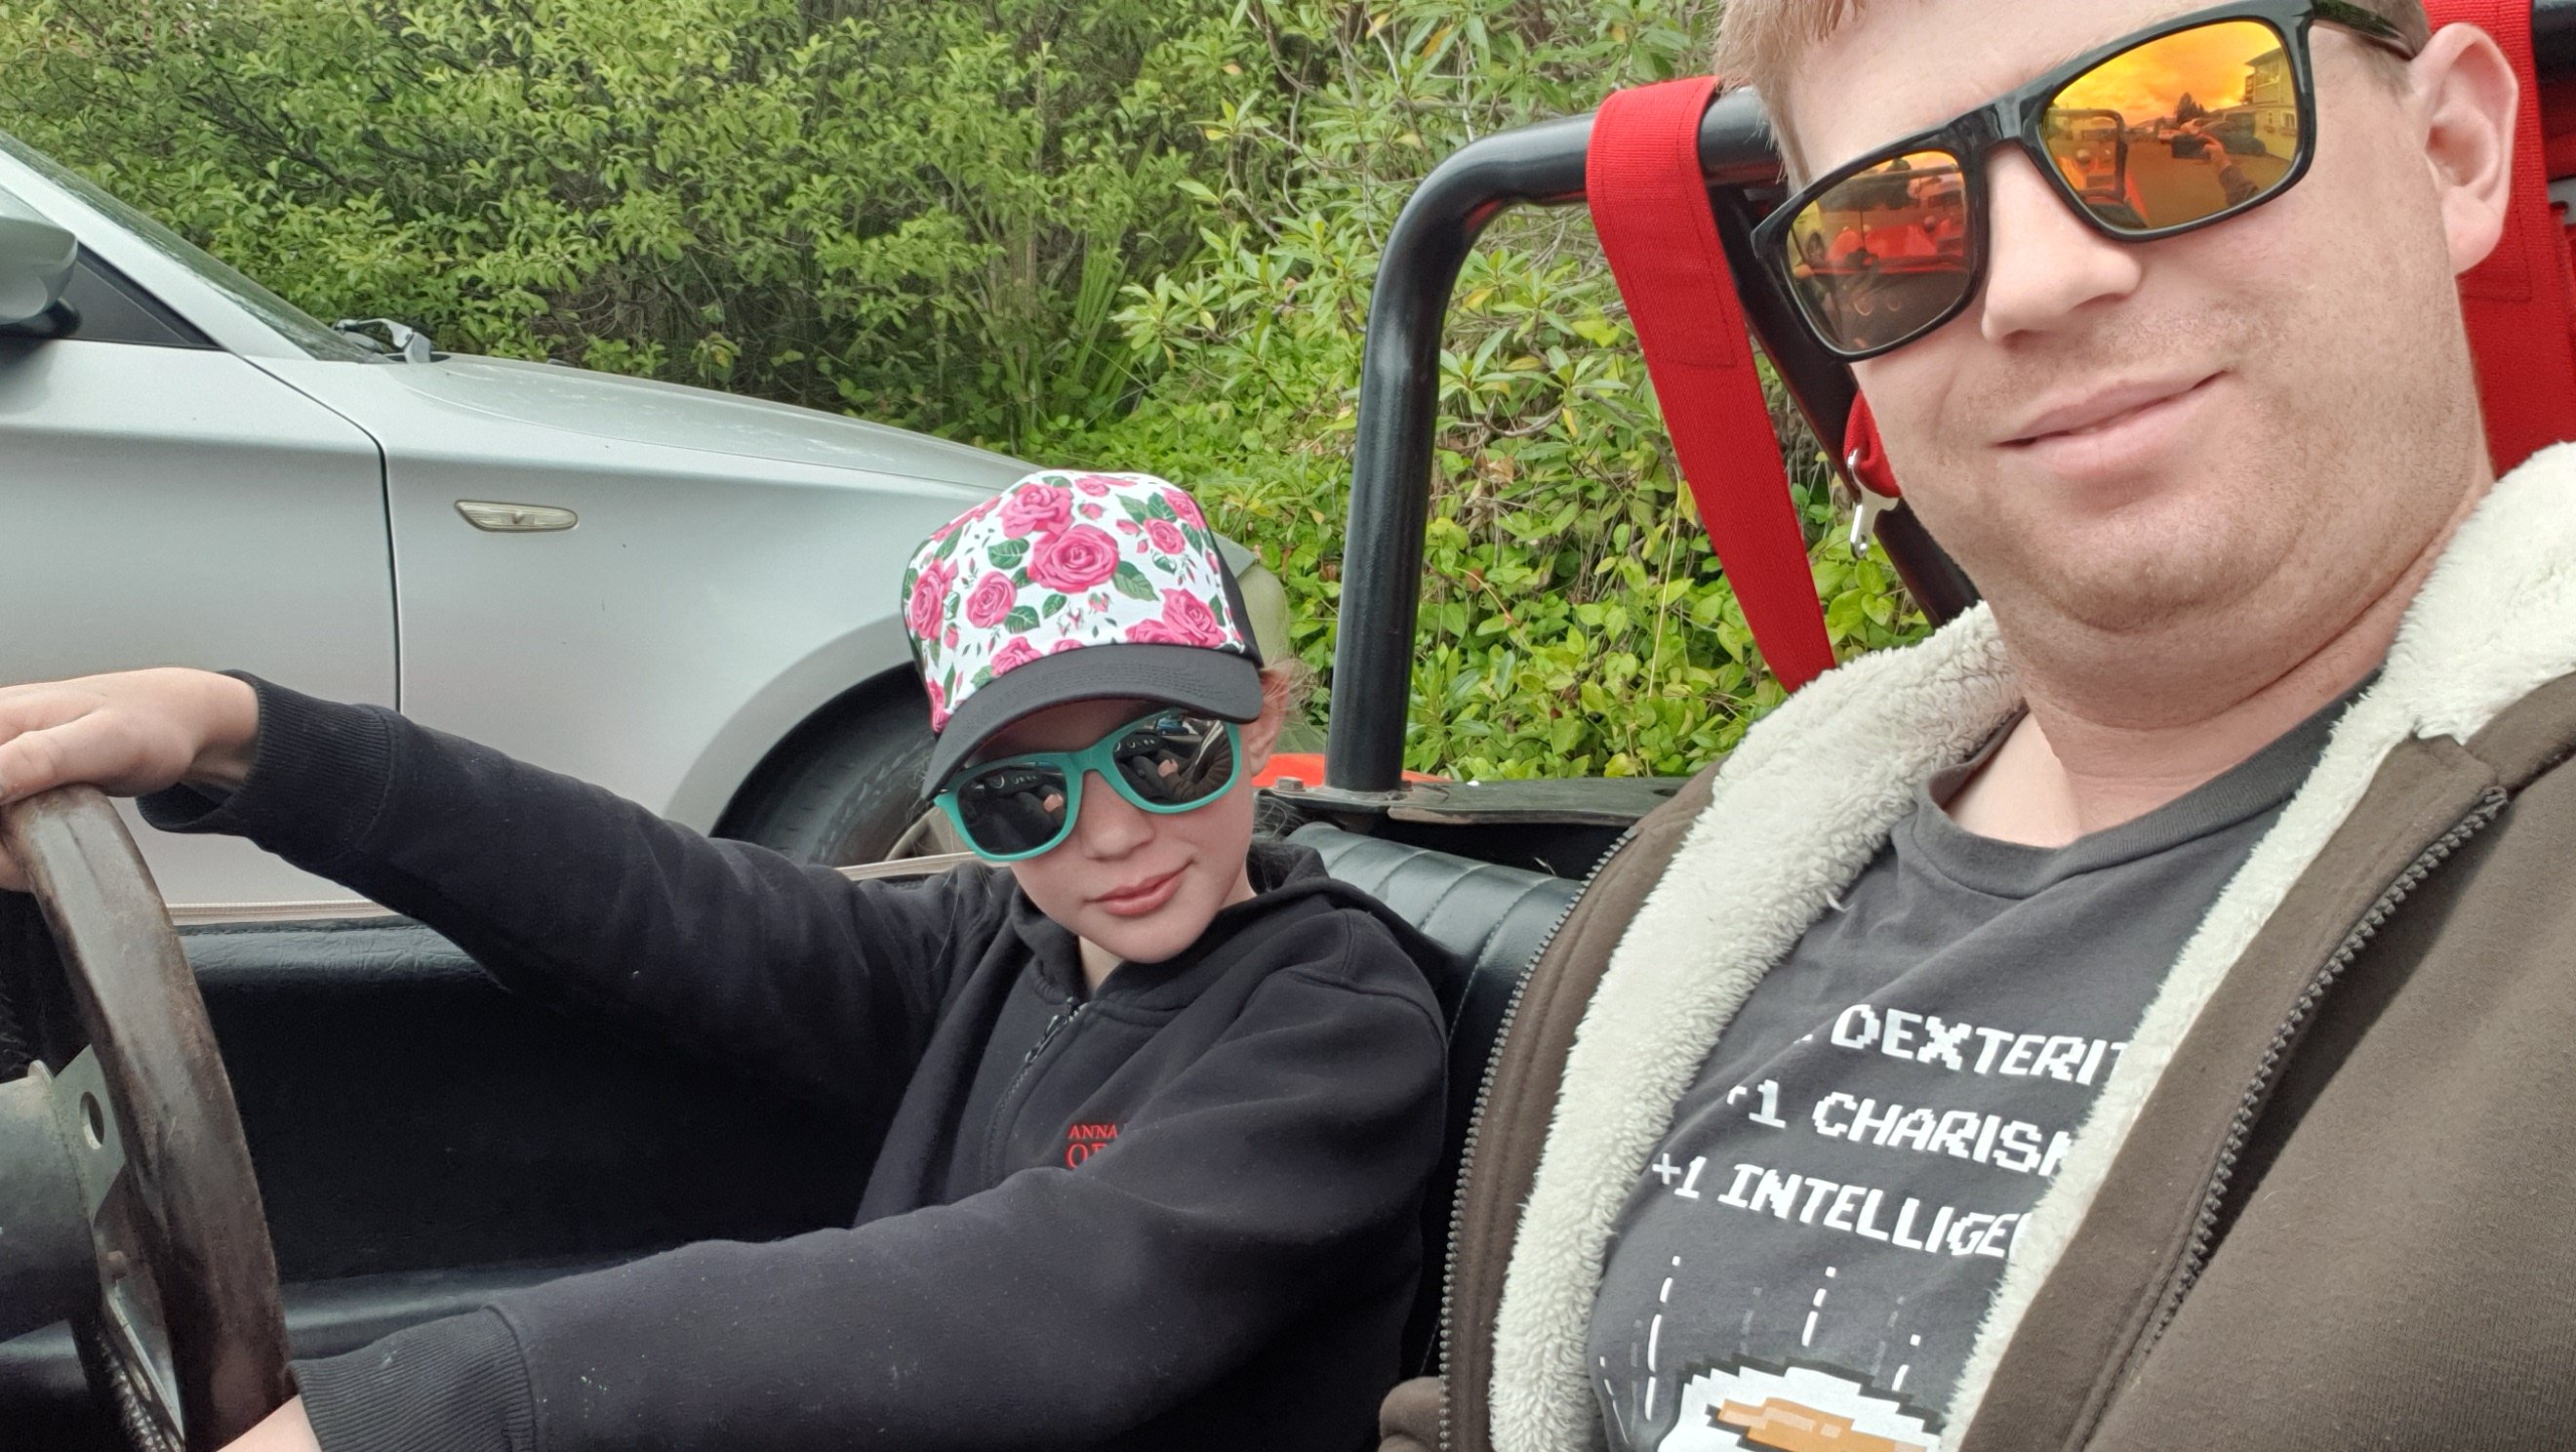
Finally got a chance to take this on a real drive. 50km round trip this morning, out to governors bay hotel for a coffee and some wedges and back through lyttleton and through the tunnel back towards home. The drive was awesome and the car performed beautifully. Only issue was the steering doesn't want to return to centre very well, probably just an alighnment needed but will check over the uni joints and the rack. Wasn't pushing it hard at all because it's very early days, but it seemed far far too easy to keep up with normal cars through the hills, I suspect it just eats the road up better than anything I've ever driven.
3 points
-
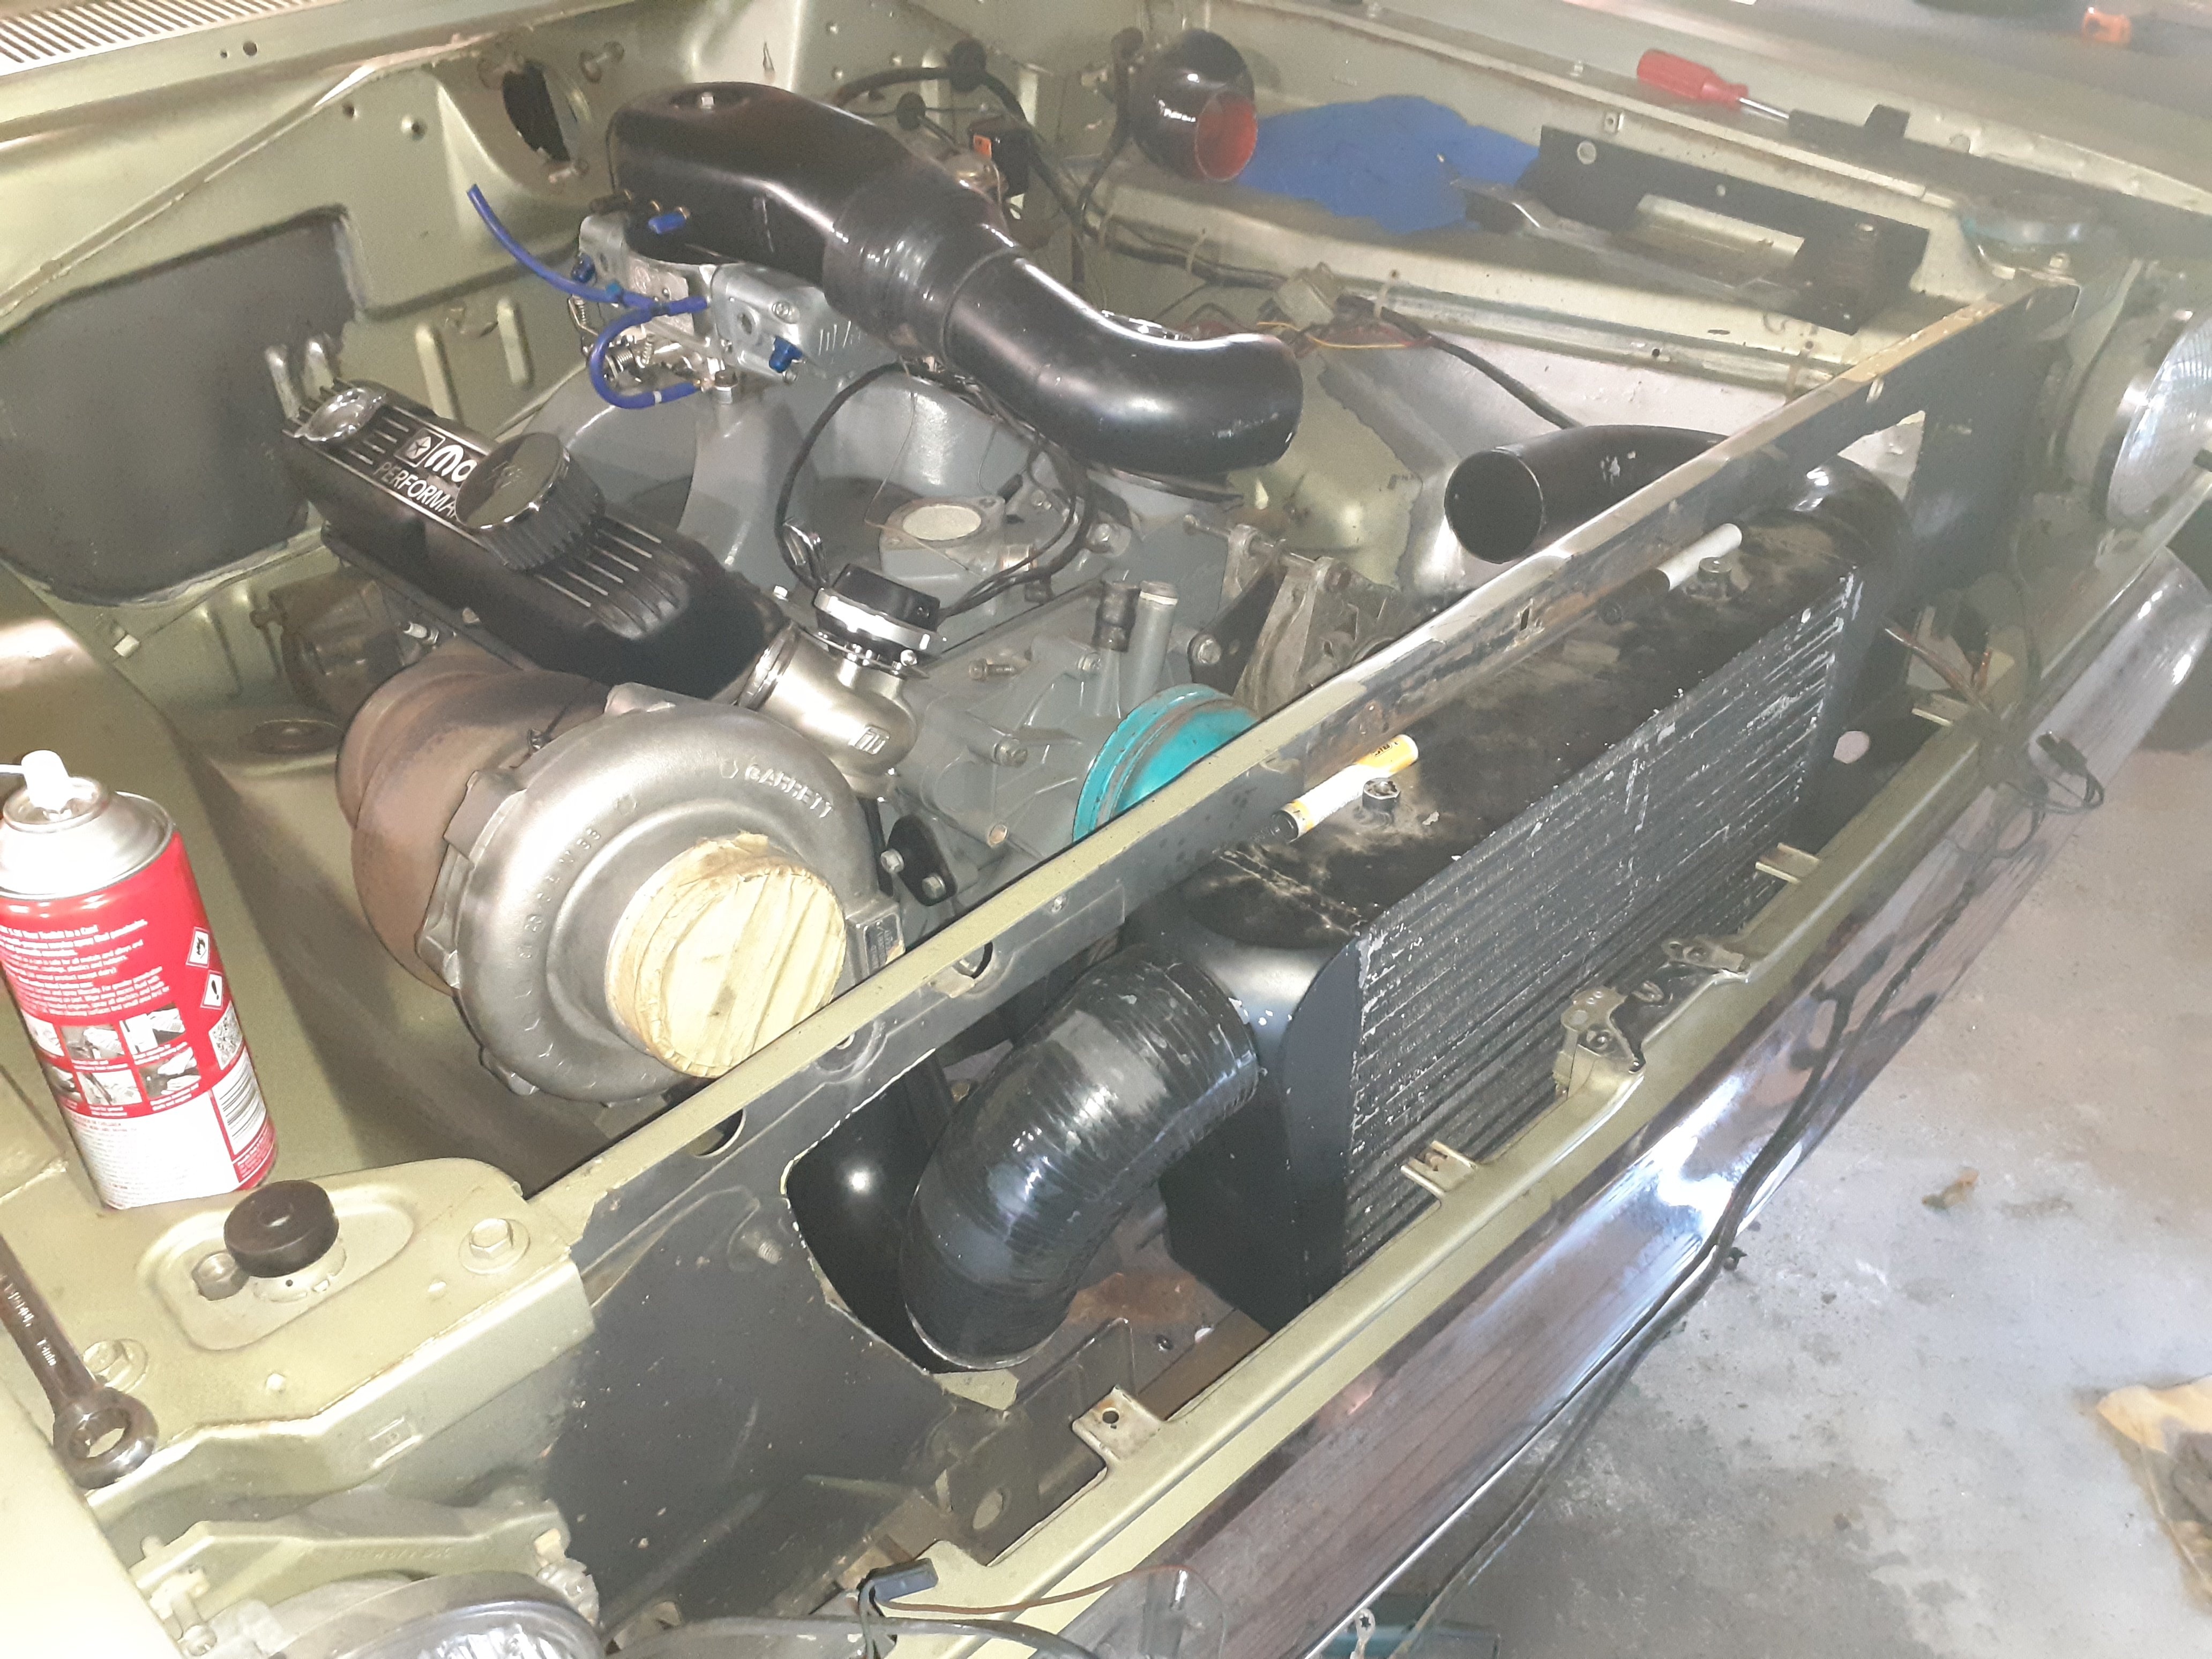
Last update for 2019 I got annoyed at my brain going around in circles about intercooling, between water to air, air to air, or doing water meth injection. Spent waaay too much time reading stuff on the internet I'd actually bought most of the stuff to do W2A but it adds a lot of weight and more stuff to do A2A means I lose the bonnet catch so I'll have to put up with 1x dick punch from @RUNAMUCK due to bonnet pins Water/meth is the easiest route but so much conflicting information on whether it works well or not plus the unit I was looking at was $800 So to stop going around in circles any more I stopped thinking about it and attacked the front with a cut off wheel and a hole saw Got some piping mocked up and the warm side, which was the side that looked like it was going to be difficult, is pretty easy using piping I cut up that was on the vg
3 points
-
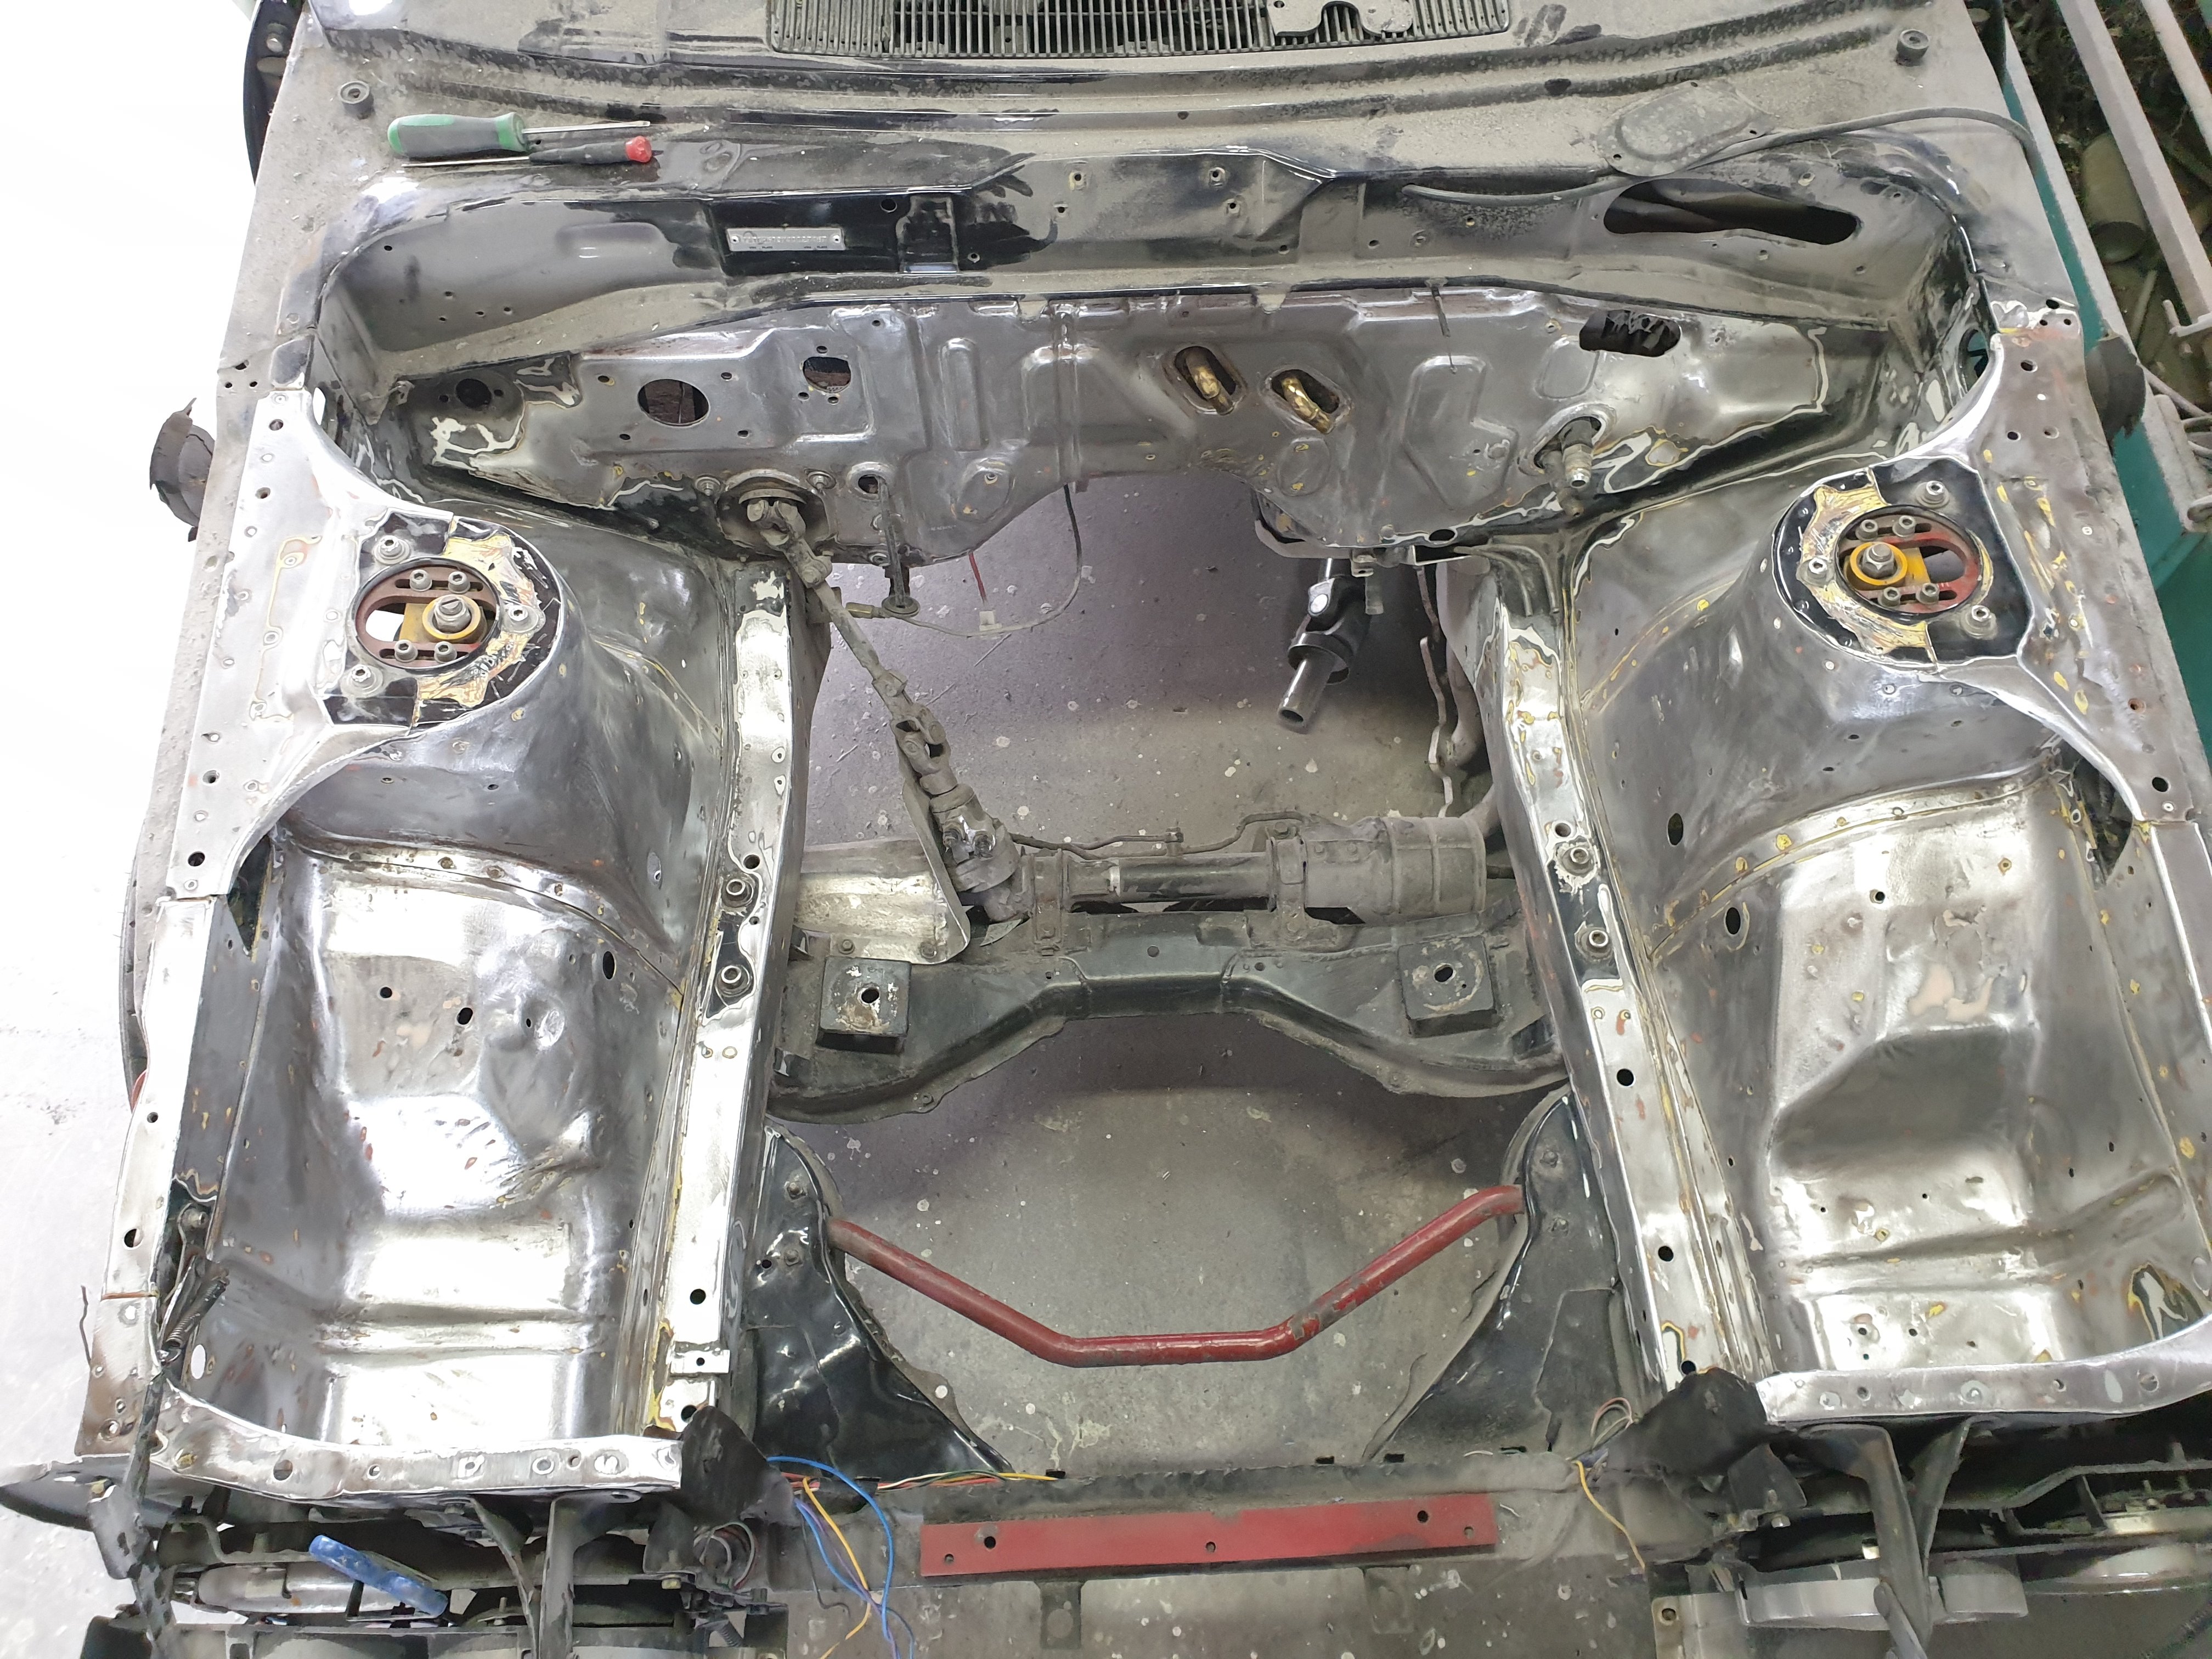
Yay. So I started sanding and it became immediately apparent that there were a bunch of layers and lots of them are fucking nasty. There is a layer of black dulon in there which is fucking everything up. Nothing for it but to strip it all back to metal. Side sharn, I bought this car in 2006 but I'd seen the car in about 1999. At that stage it had a black engine bay and a 3T sitting in it. The rest was in primer. He must have primed over the black art some stage. So anywho, fast forward to today and most of the paint is gone. I'm feathering the edges where it's a real cunt to get to and hopefully the epotec will seal the nasties from coming through. Time will tell. On the plus side I'll probably get primer on it before crissy then it can sit for a while before I sand it. Give it some hope of settling down. Still got strut tops to do and the top of the firewall
3 points
-
3 points
-
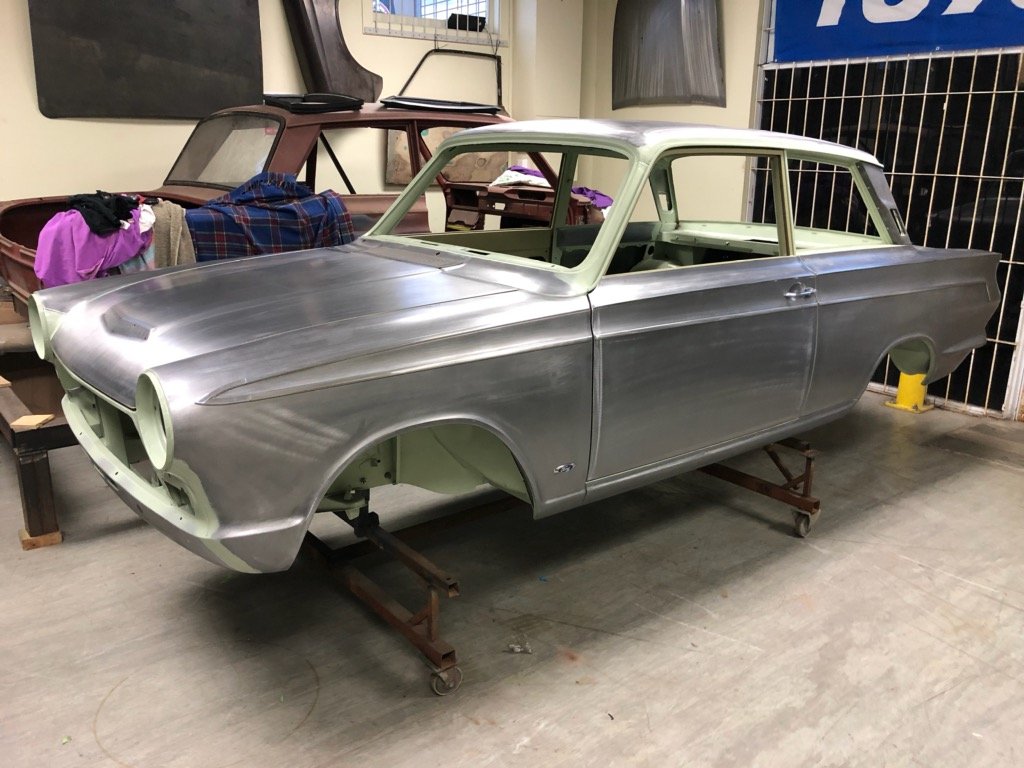
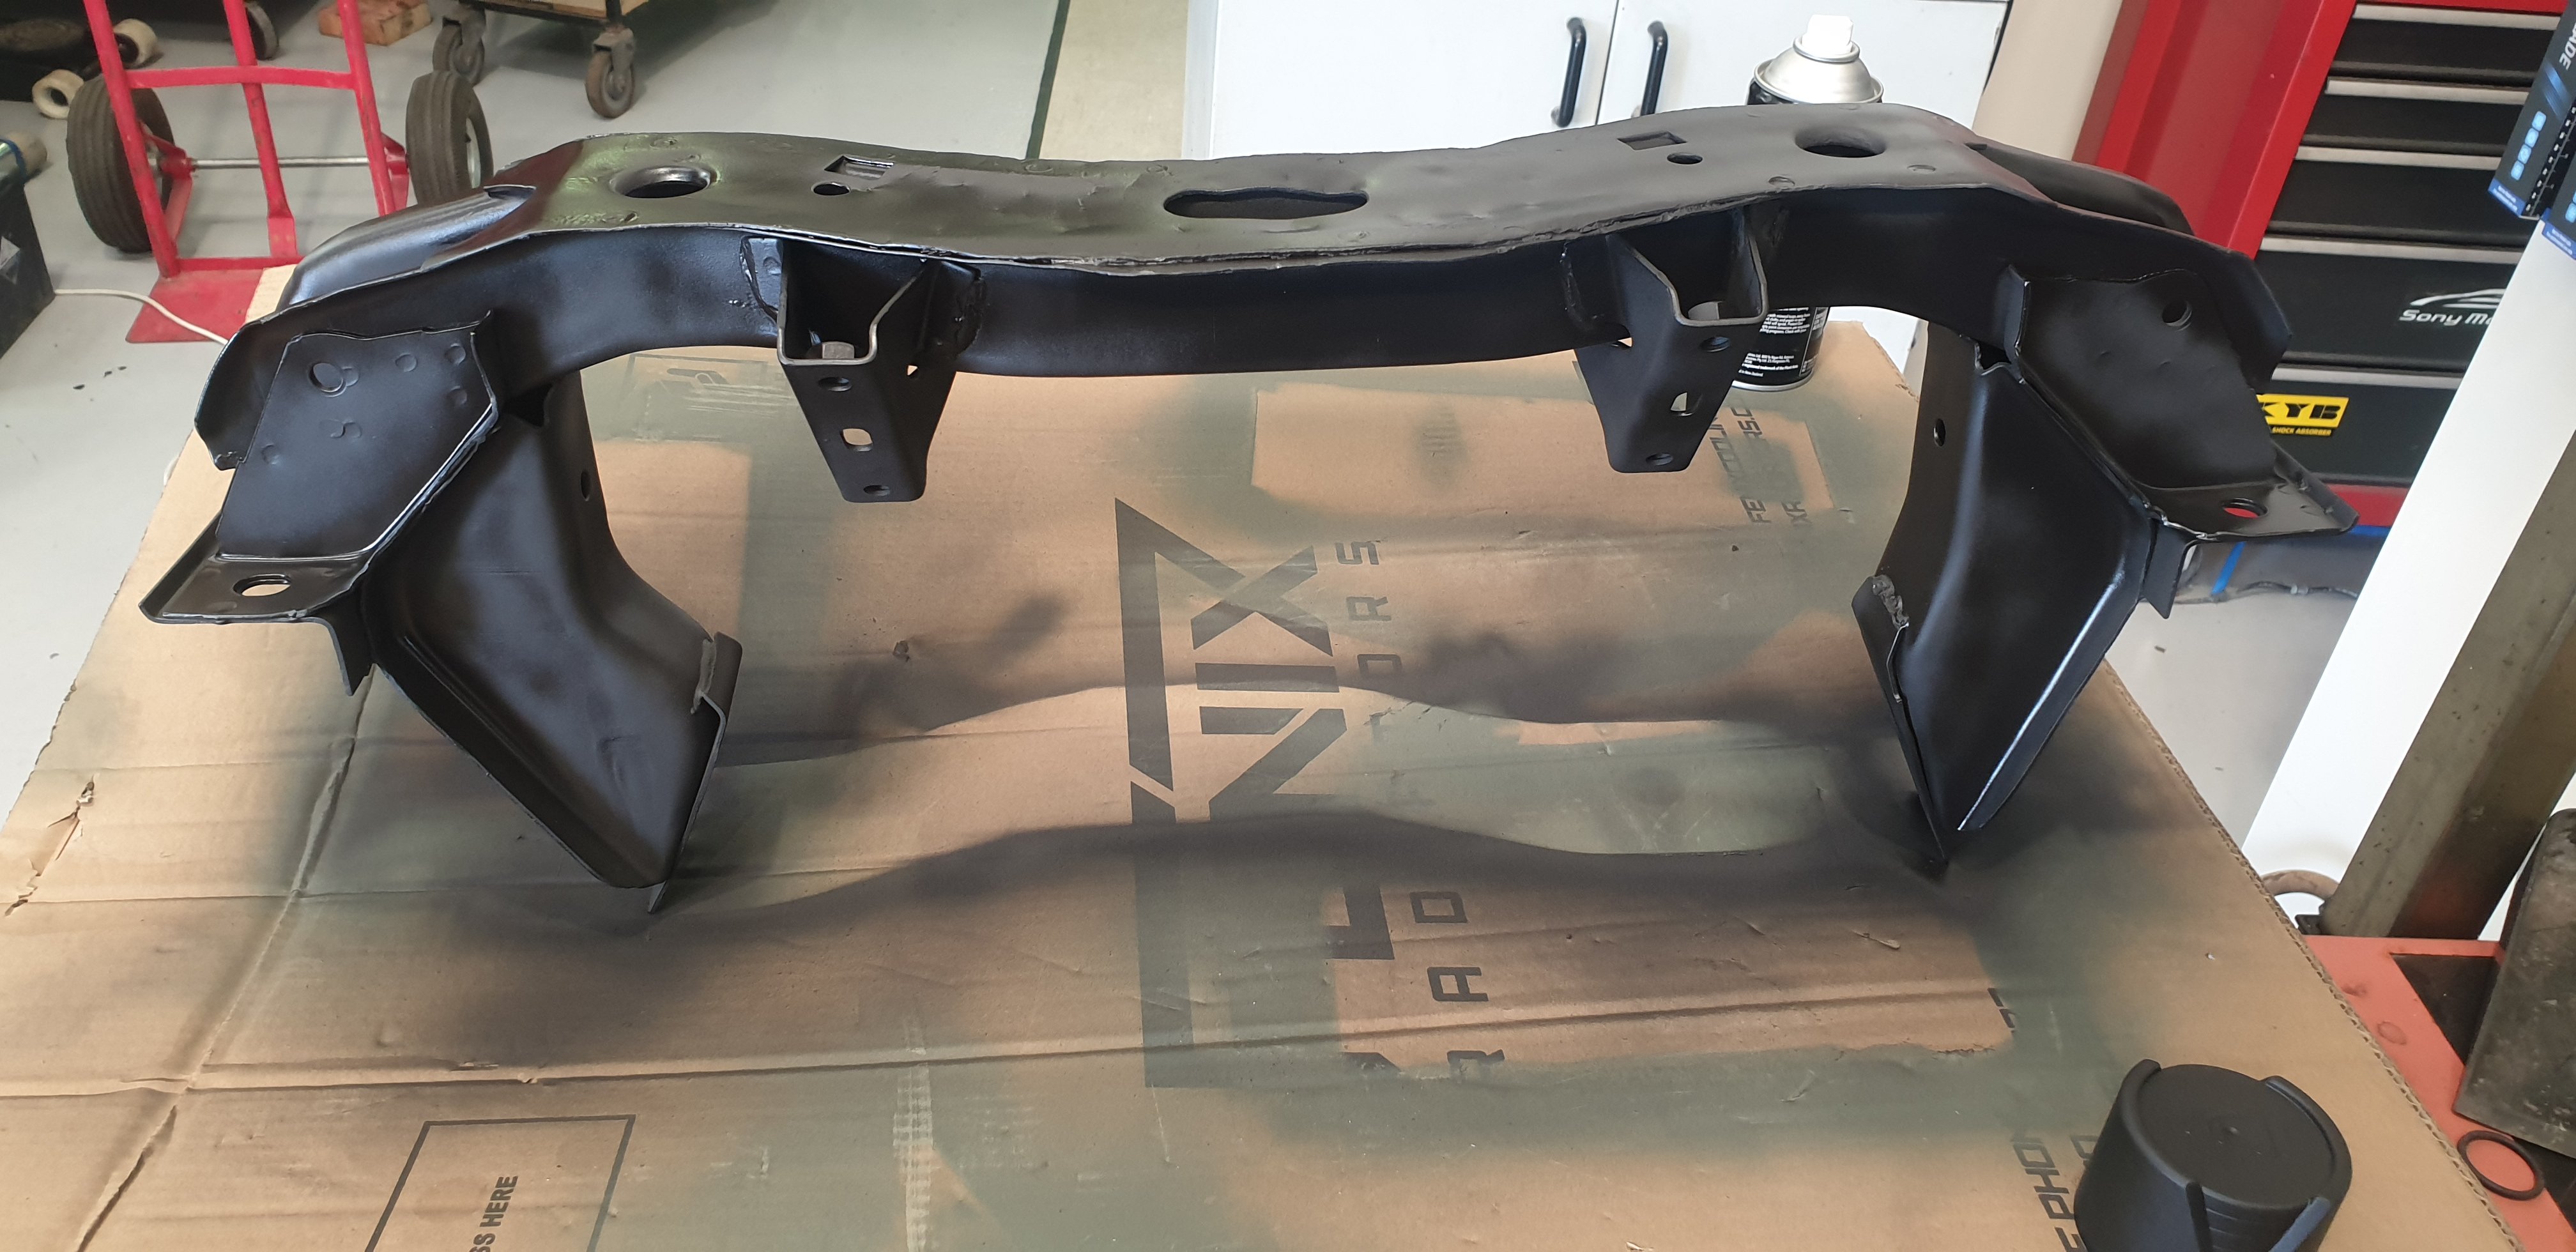
Ready for paint. The panel journey has ended and the quality is just outstanding. Thanks Greg at R3 Fabrications.
3 points
-
Assembly time tomorrow... Happy days!
2 points
-
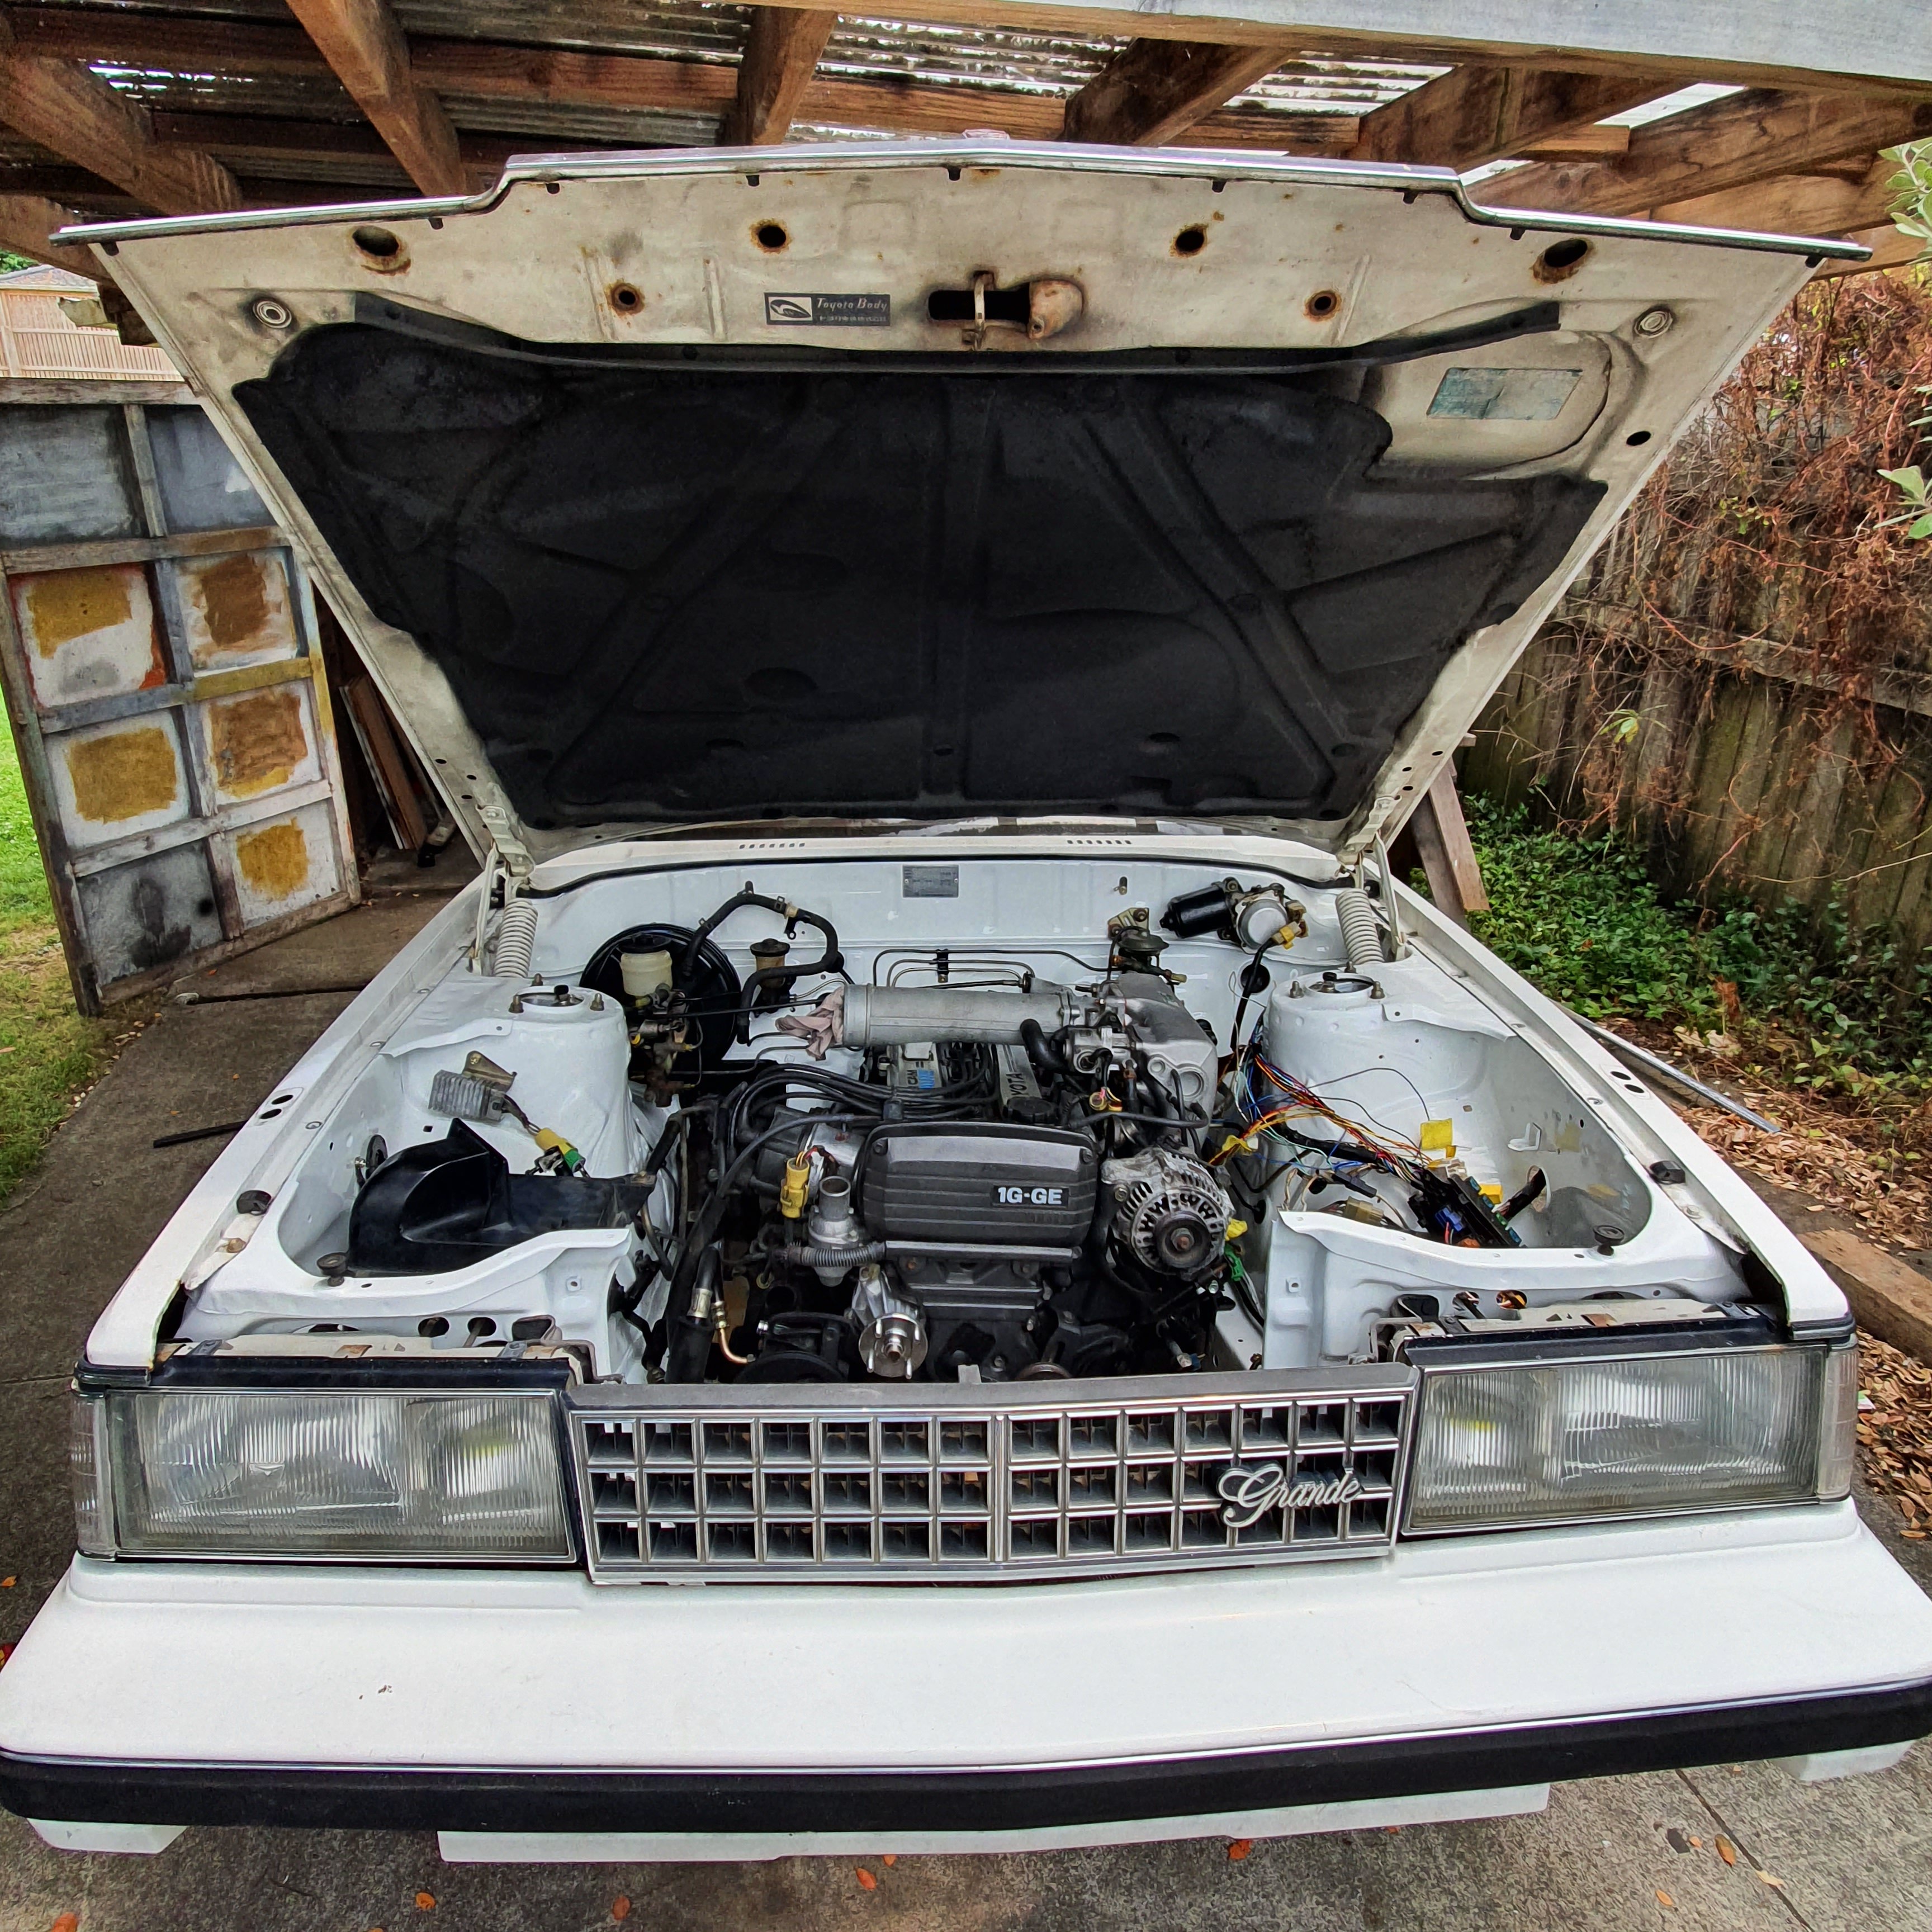
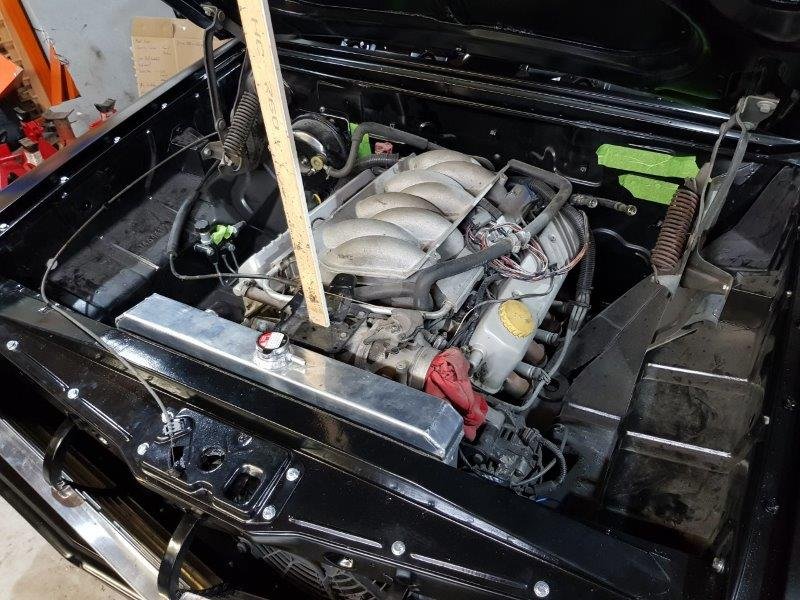
Being the first day of the new year I thought I better start as I mean to carry, or at least get this bloody car finished. I spent a bit of time fitting the best quality Ali express, chineseiumn gauges. I had a fitting made up to run the temp gauge into an existing threaded plug in the bottom of the radiator. There didn't appear to be an easy place to tap into the intake manifold and I need to leave the original sender for the computer to do it's thing. I will wire the factory temp warning light to come on when the fan gets switched on. This will do 2 things, the first is to keep an eye on the temp gauge once the fan is running and also to give me warning if the thermostat stay shut, fan will come on but the radiator will stay cold. The set I bought had a volt meter and oil pressure gauge as well. I thought it was worth seeing how accurate the volt meter is, my reasonable quality digital multi meter said the old battery I have lying around was 12.3 volts, fair enough. The Ali Express special said 13.5 volts. In reality the absolute number is not a big issue, I'm more interested in seeing that it's charging. I will be checking the other gauges against known good ones.2 points
-
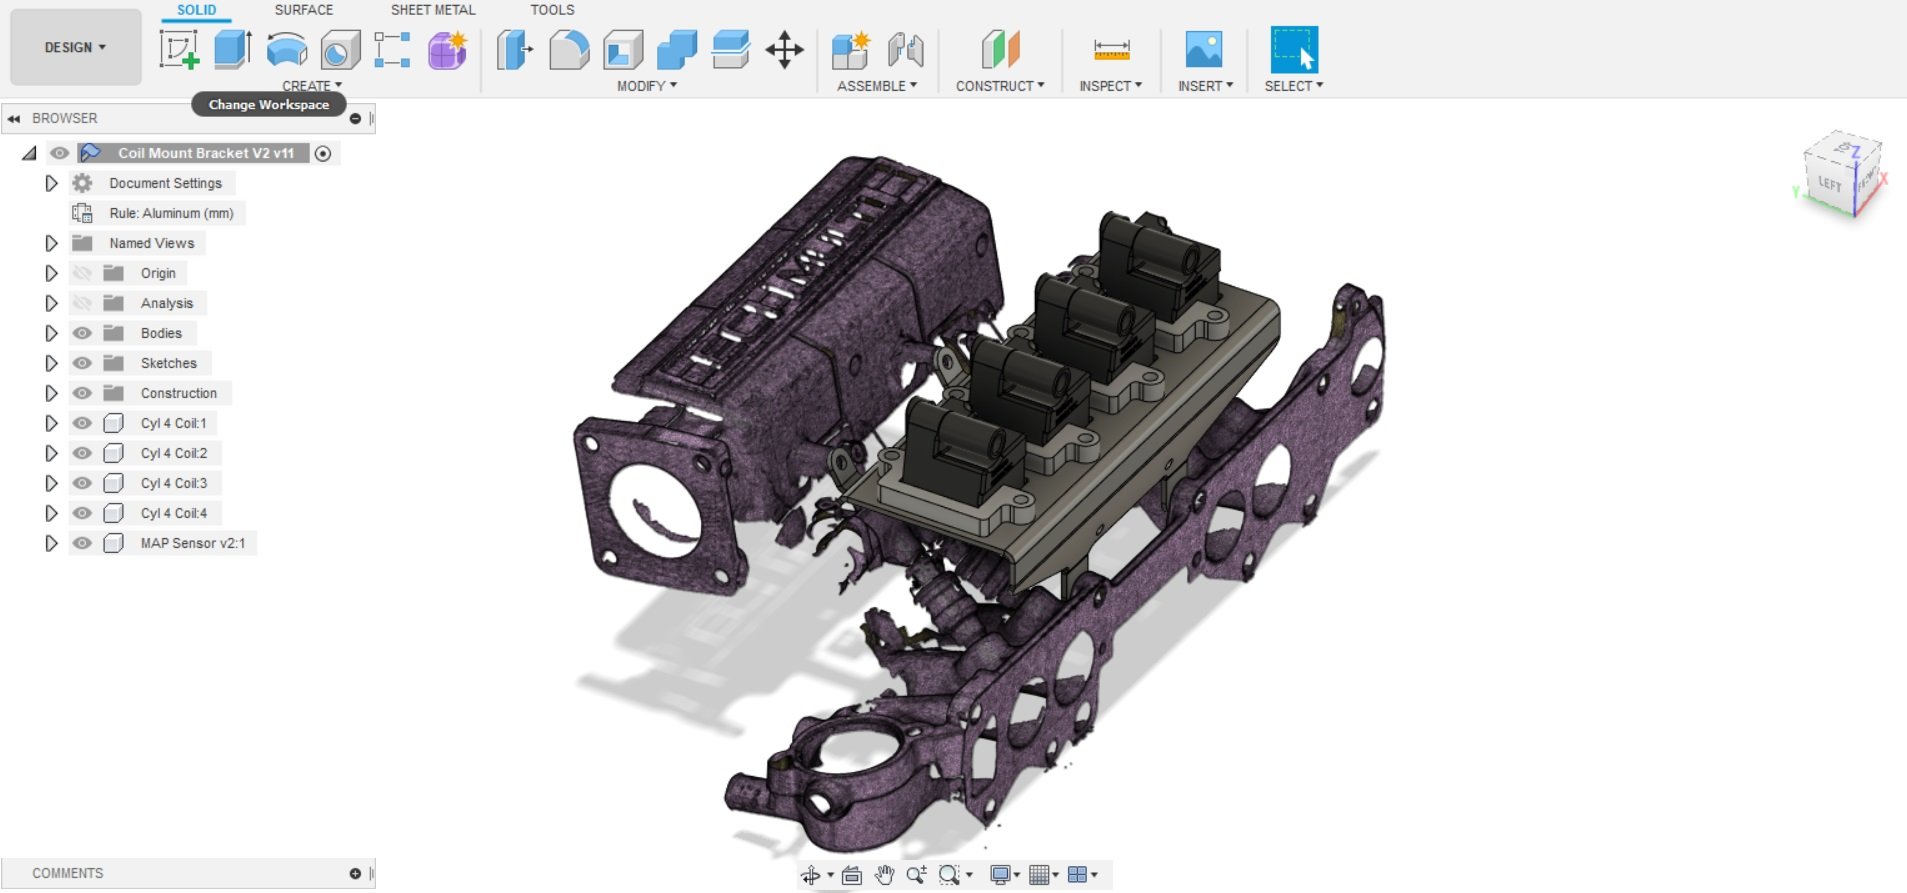
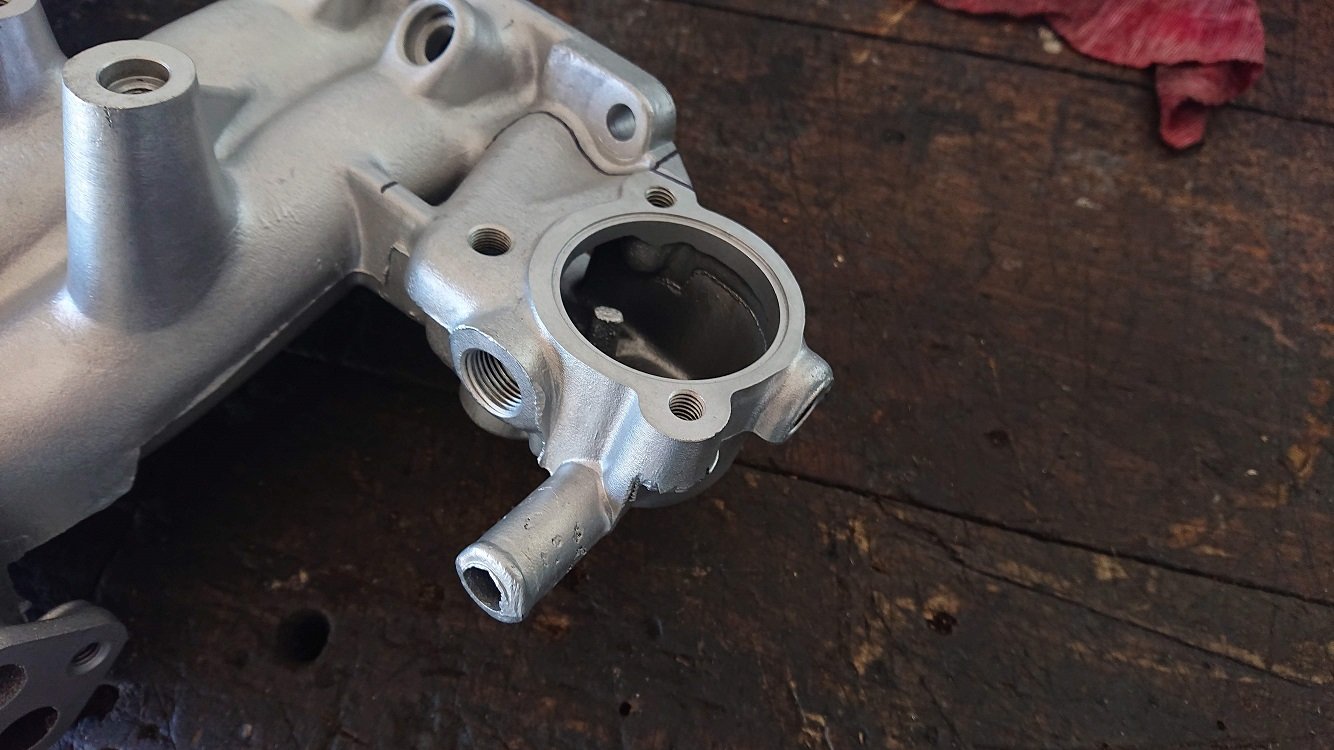
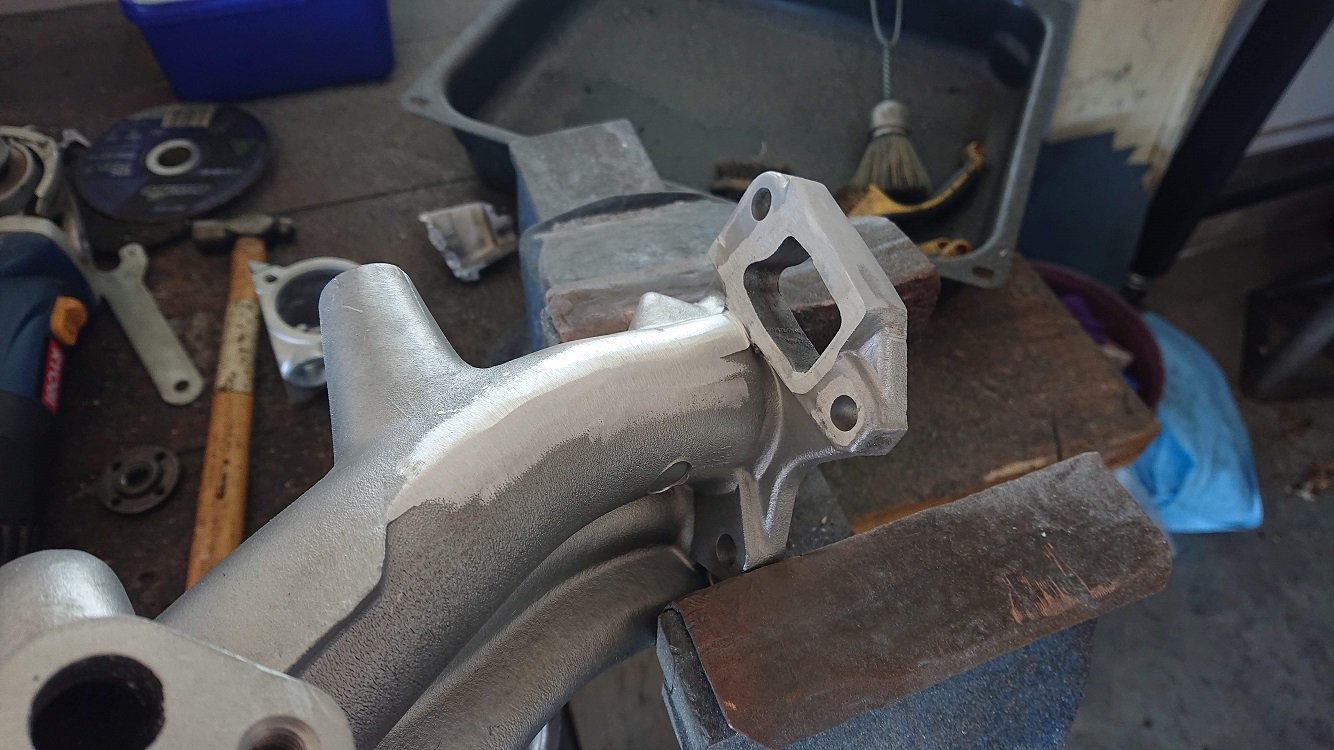
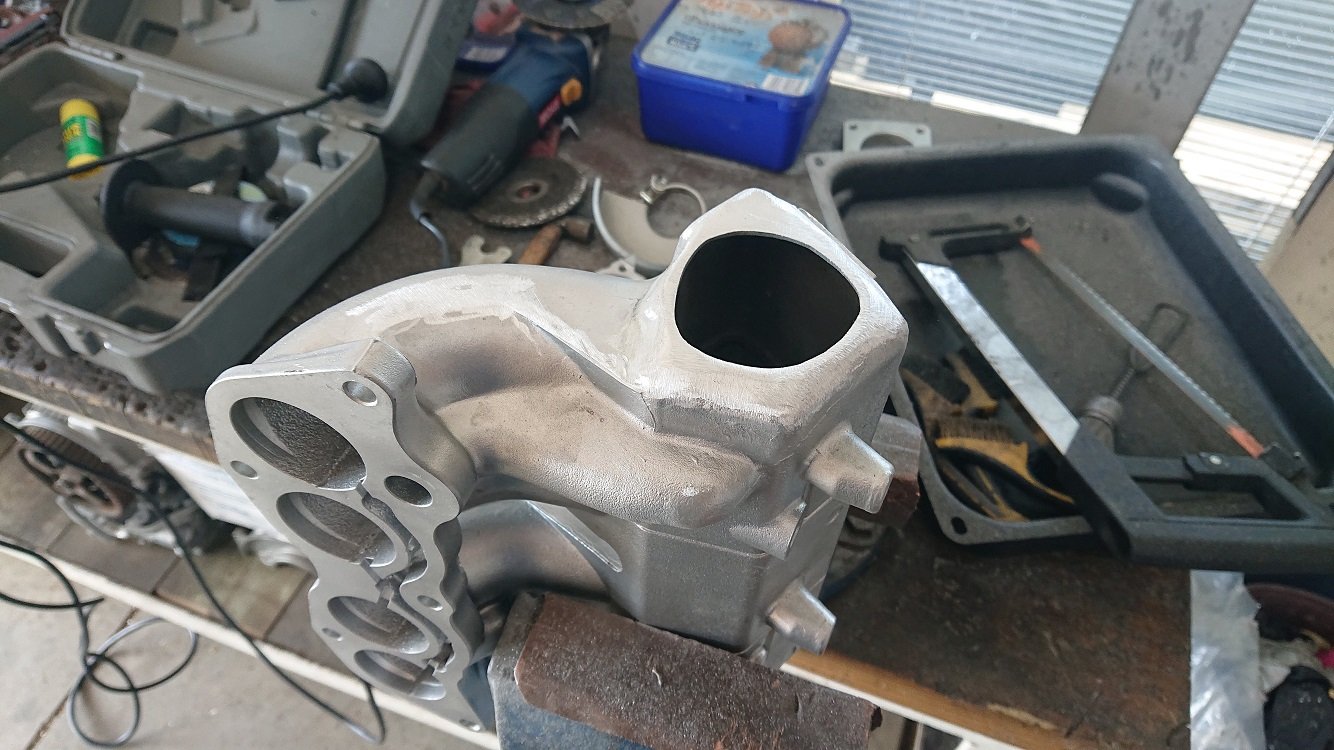
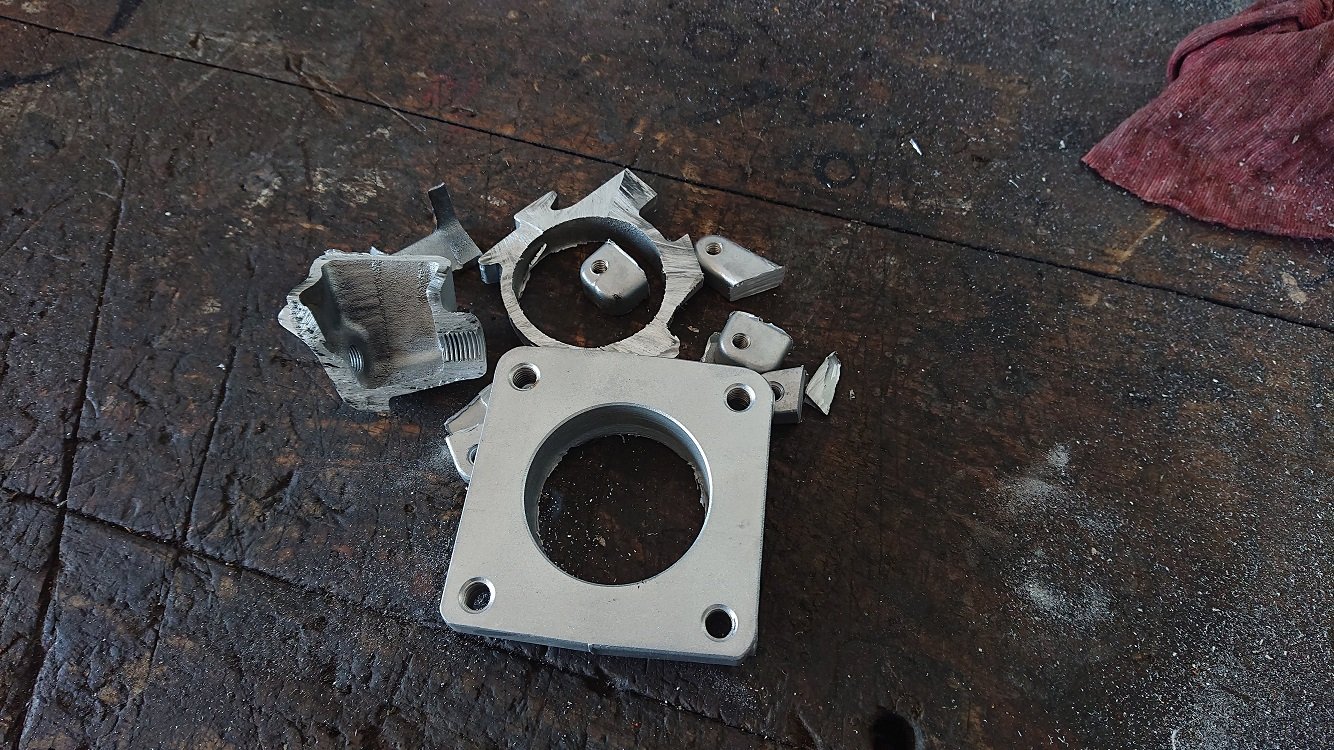
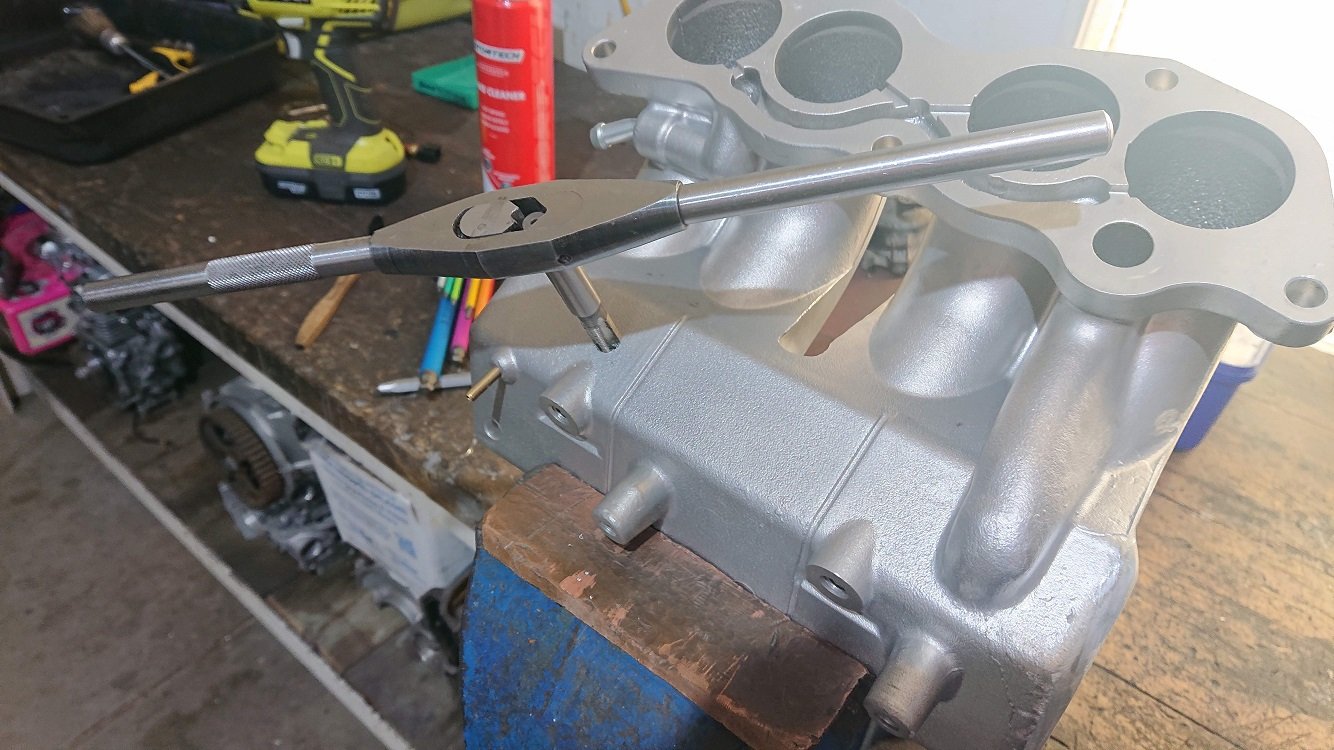
Have been working on this a bit in the holidays, getting the inlet manifold work done. I've thought a couple of times that I should have just bitten the bullet and made an inlet manifold from scratch, with the amount of work it is to get this one sorted properly for a RWD application... But I'm this far in, so I'll finish it off. Most obvious jobs are to swap the throttlebody onto the other end of the plenum, and reroute the coolant setup. I've seen a few RWD setups with this manifold where the thermostat housing is left where it is and a hose is run to the front of the engine, but as this is a RWD head the waterjacket inlets in the head are setup for the coolant to flow out of the front of the head. Leaving it like it is, with it at the back, risks a hot-spot in the front of the head. The factory Starion setup has the radiator bypass from beneath the thermostat (which is at the front of the head) pass through the inlet manifold to keep it warm. This helps with the fuel film problem TBI setups suffer from as you've got so much area for the fuel to pool onto. As I'm all about the port injection now, I don't need that, but there still needs to be a radiator bypass, so I'll run that from beneath the thermostat housing (which I'll need to make) down the middle of the inlet manifold to the factory return pipe that runs along the back and side of the block into the waterpump. This factory pipe also has an inlet on it for the coolant return from the heater core. Lots of hacksawing, angle grinding, flap wheeling and powerfiling later it's looking pretty tidy back there. I'll need to weld a block on there which has a port to supply the heater core, but that'd the only fitting I should need there. I might put the ECT sensor there too, as it'll be out of the way. Hacked off the throttlebody flange and tidied it all up to make a plate to weld in place to seal it off. While I had all the power tools out and was making a mess anyway, I hack off all the little backets and bits and pieces I wont be using. Heaps more power filing later and it's all cleaned up. Found a good spot underneath where there is about 10mm of wall thickness to drill and tap to 1/8NPT for the IAT sensor. Sensor is a delphi unit with a DTM 2-pin connector. Has a brass body where it seals to the plenum, but a plastic housing after that with an exposed tip. Should be nice and fast reacting for the temp swings turbo's produce, and not suffer too badly from heat-soak (I hope!). Should be pretty out of the way down there. That space is going to be quite tightly packed though, with the radiator bypass tube, and the outlet from the fuel rail back to the pressure regulator running through there also. Plus, the wiring harness. It'll have quite a bit going on in this space. 4 injectors, 4 coils, ECT, IAT, MAP, EFP , Crank + Cam triggers and Ethrottle all within that area. Will be a fun harness to build :-). The injectors (also ones I've had for years) are EVO VII 560cc's. They've had single spray pintle caps put on them to work better with an 8V setup, and so I can orient them like in the picture with the plugs heading underneath, instead of directly on top. The reason for this is because of where I'm going to mount the coils. Pretty simple 3mm aluminium sheet metal backet picking up of existing mounting holes. Will get it profile cut and bend it up at work. Has mounting for the MAP sensor underneath also. Coils are knockoff GM581's, which I've not used before, but should hopefully be up to the task. I could only buy a pack of 8 of them, so I've got 4 spares, hah. It's bloody humid today, so we're off to the beach for some FnC for dinner and a bit of a swim.
2 points
-
With the brake rotors slowly making their way to me from across the planet, I wanted to get the TVR in for a Warrant Of Fitness inspection to see if there was anything else I needed to order. Its been a little nerve-wracking, knowing that this would be the longest trip the car has taken in about 3-4 years, and it's still only a 40km round trip. Nothing for the other two cars, but for the TVR, it seemed like half the country away. To prepare for it I took the TVR for a backroad shakedown the other day; just a short 15km trip, but further than down the road and back I've done previously. The car ran and drove well, but did show up a couple of weak points. The rear shocks are feeling a bit tired and bouncy, and as I already knew, the brakes shudder badly. Today was the day though, the first time I've had the car on the motorway at open road speeds, and for a longer distance. The car did well, felt comfortable enough on the open road, but the higher speeds did show up an annoying shake at about 80kph, which I suspect could be the old tyres on the car, similar to when I got Tess (which had also been sitting for years). Otherwise everything was fine. The steering was nice and direct, the temps were good and steady, and the gearbox shifts well. She sure turns heads though; can't imagine why. I made it in one piece, with the top down even, despite some light drizzle on the way in. After waiting oh so patiently, the car was finally on the hoist and it was inspection time. The inspection required two inspectors, since the TVR was so far out of their normal parameters (both are old enough to remember working on the donors like the XJS and Capri/Cortina but haven't touched anything like it in years), but after a while, I had my answer. It was a fail. Not completely unexpected, but unfortunately one thing I hadn't counted on was the front lower ball joints having excessive play in them. It's not the end of the world, they're MK4 Cortina parts, so I have a pair on the way already. There were a couple of other advisories, such as the brakes shuddering, and the front tires starting to show signs of perishing, but overall I think its a pretty damn good list considering the car was last on the road 2015/2016. I've had worse on cars that have been already been on the road recently. The rear rotors arrived today, and the fronts are en route from the UK currently. I'm looking into options for some new shocks to help with the bounce in the rear, and some new tyres will have to be on the list now too. It seemingly never ends, but once its done it should be a good solid car. So yes, Merry Christmas to everyone, and I hope you all have a good break. Get out there and either work on, and/or drive your cars, and I'll be back in the new year.2 points
-
started cleaning/stripping the engine bay ready for paint. also started tidying up the wiring so its not in the engine bay. got a good chunk of it done, just need to extend the wires for the passengers side headlights etc and its done. ill probably start sanding today 2019-12-22_10-19-17 by sheepers, on Flickr2 points
-
motors all back together and pretty much ready to go back in the car. got a couple of little things left to tidy up but nothing major. and with that i started stripping out the engine bay for repaint. 2019-12-20_04-33-06 by sheepers, on Flickr 2019-12-20_04-35-02 by sheepers, on Flickr2 points
-
the old "find the right length belt "dance. usually involves 7 trips to the parts store to get successively longer or shorter belts until you fluke the combo of one that the parts store actually has and one that actually fits. this time around i only had to buy 4 different belts before getting one that fits. this is the longest one available off the shelf in NZ, if this one didn't fit i would have had to rock auto some. anyway, it fits and thats the serpentine belt sorted. 2019-12-18_07-21-54 by sheepers, on Flickr2 points
-
coil mounts. i made a set of clamps to hold down the coils. 2019-12-17_04-57-49 by sheepers, on Flickr but i didn't like them so i binned them and made these plates instead. i have a full set of new plugs which are all black and it'll have all new wiring when its done. 2019-12-17_04-57-59 by sheepers, on Flickr 2019-12-17_04-57-40 by sheepers, on Flickr 2019-12-17_04-57-28 by sheepers, on Flickr2 points
-
Removed all the factory weld spatter and bits of welding wire, didn't go too ott. Got it etch primed before I went home for the day.
1 point
-
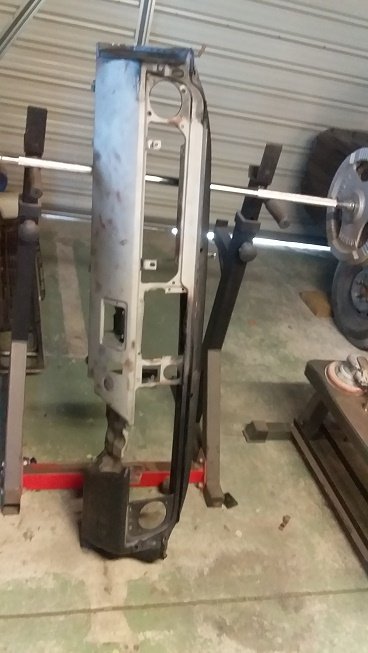
I built a front bumper, I'm not sure that this is the final bumper but it will do for now. Also I kind of want to find a proper name, ie for the paperwork if it ever gets certed, I am not sure Dynafari is where it is at.. Any suggestions? FuckfaceMcFuckstick Dynafarious Safgyna Just some of the unhelpful suggestions by friends etc..1 point
-
Had a clutch hard line made up as I didnt like the look of the braided stainless one. Finished assembling motor and gearbox and put them in the hole, half the wiring done, most of the front end reassembled.
1 point
-
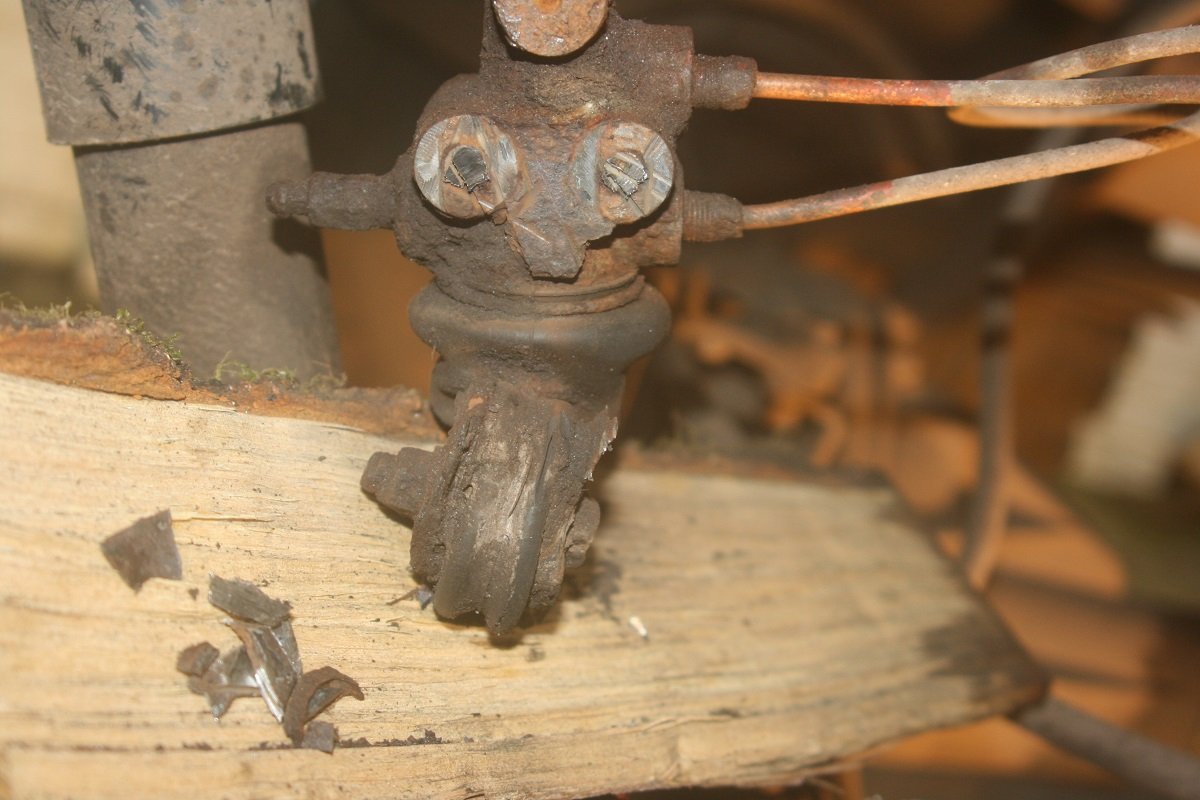
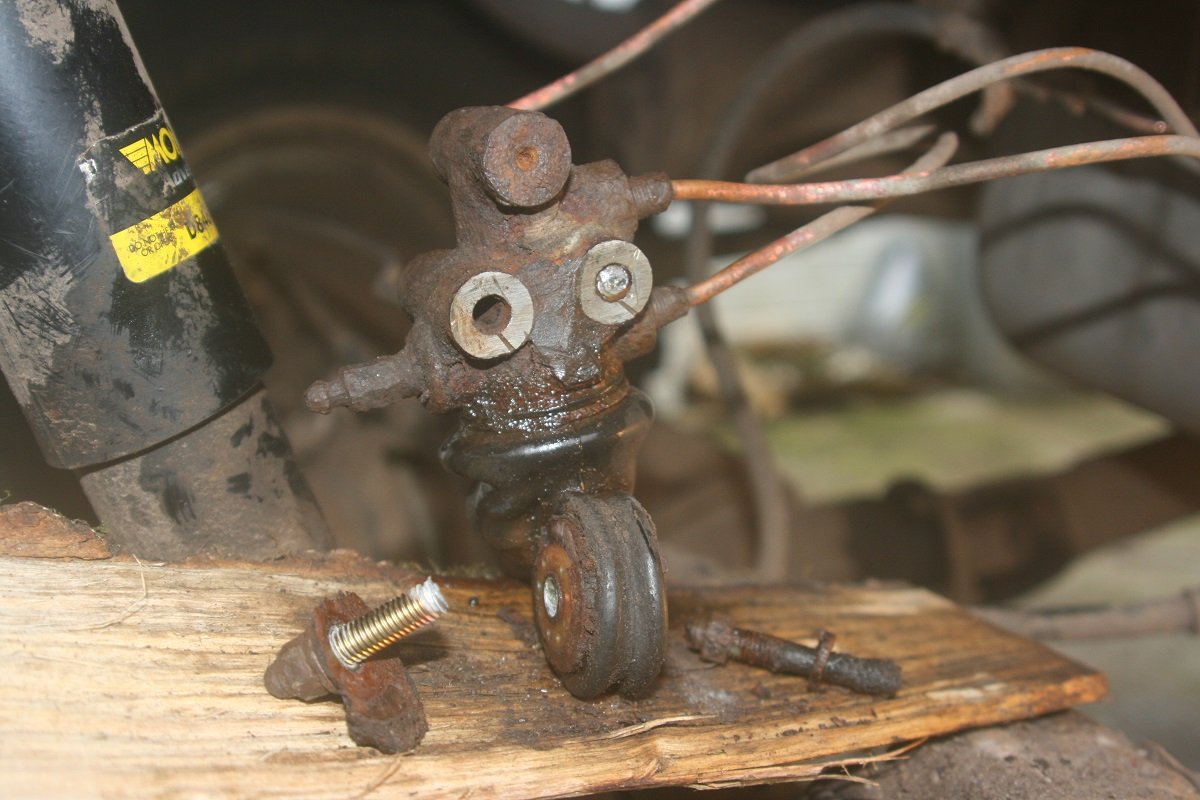
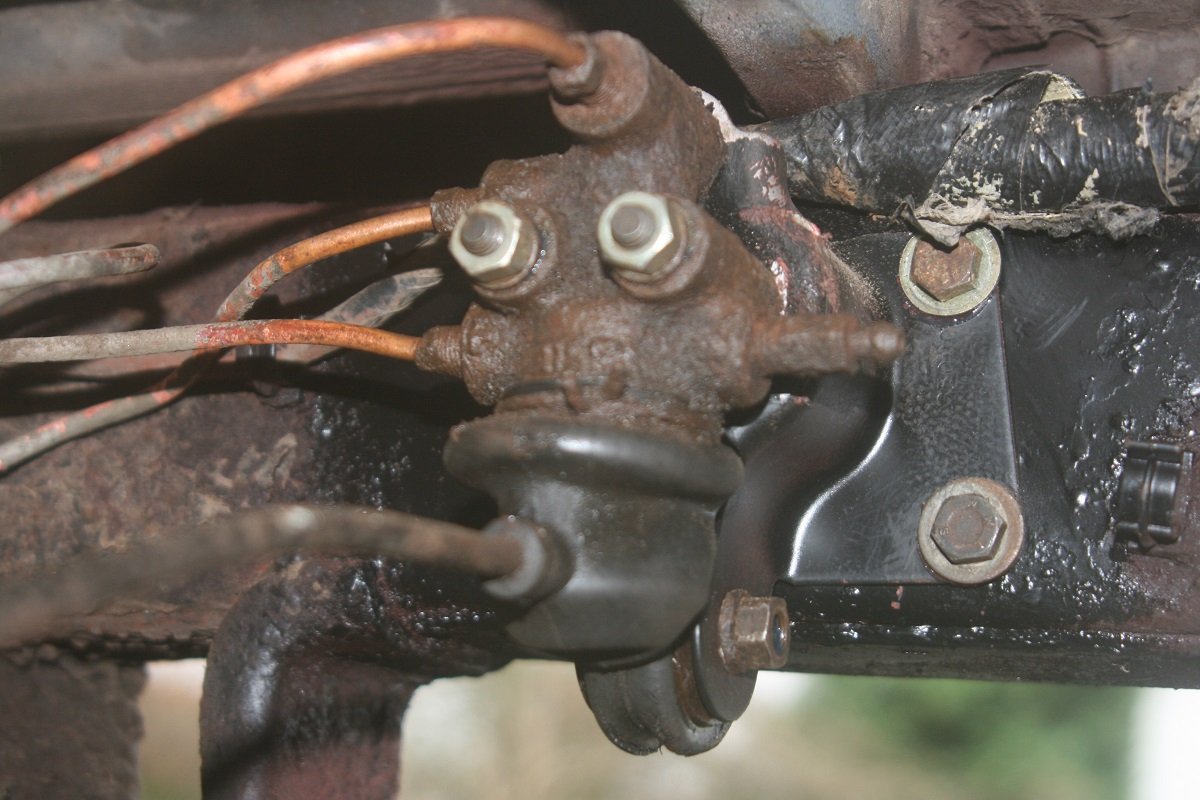
Well, I got away with that then. The mounting bolts were fucked and rusted in but some heat, patience, a 1mm cutting disc & a drift and I managed to save the load valve without having to mess about with brake fluid. I think it must have been flailing around for a while before it fell off as the brakes feel really good now. And yes, I know this is boring as fuck but it's gonna keep my truck legal for another year and in deepest winter any outdoor car time is a bonus and to have mended it without butchering the car or my fingers is always good. Happy New Year
1 point
-
guday Jordan ive never seen a badge like that before, was it on the boot of on the fuel filler flap? as far as brakes go, what parts are you missing? i have some parts i could send you but might cost a fortune to send. you can buy lots of parts out of australia, they assembled and sold MS65s there so they still have a few bits and pieces. mainly suspension bushes is what they have. Super Pro do every suspension bush except the front inner lower control arm bushings. and i have no idea what those seats are from but i reckon they'll be more comfortable than the original ones.1 point
-
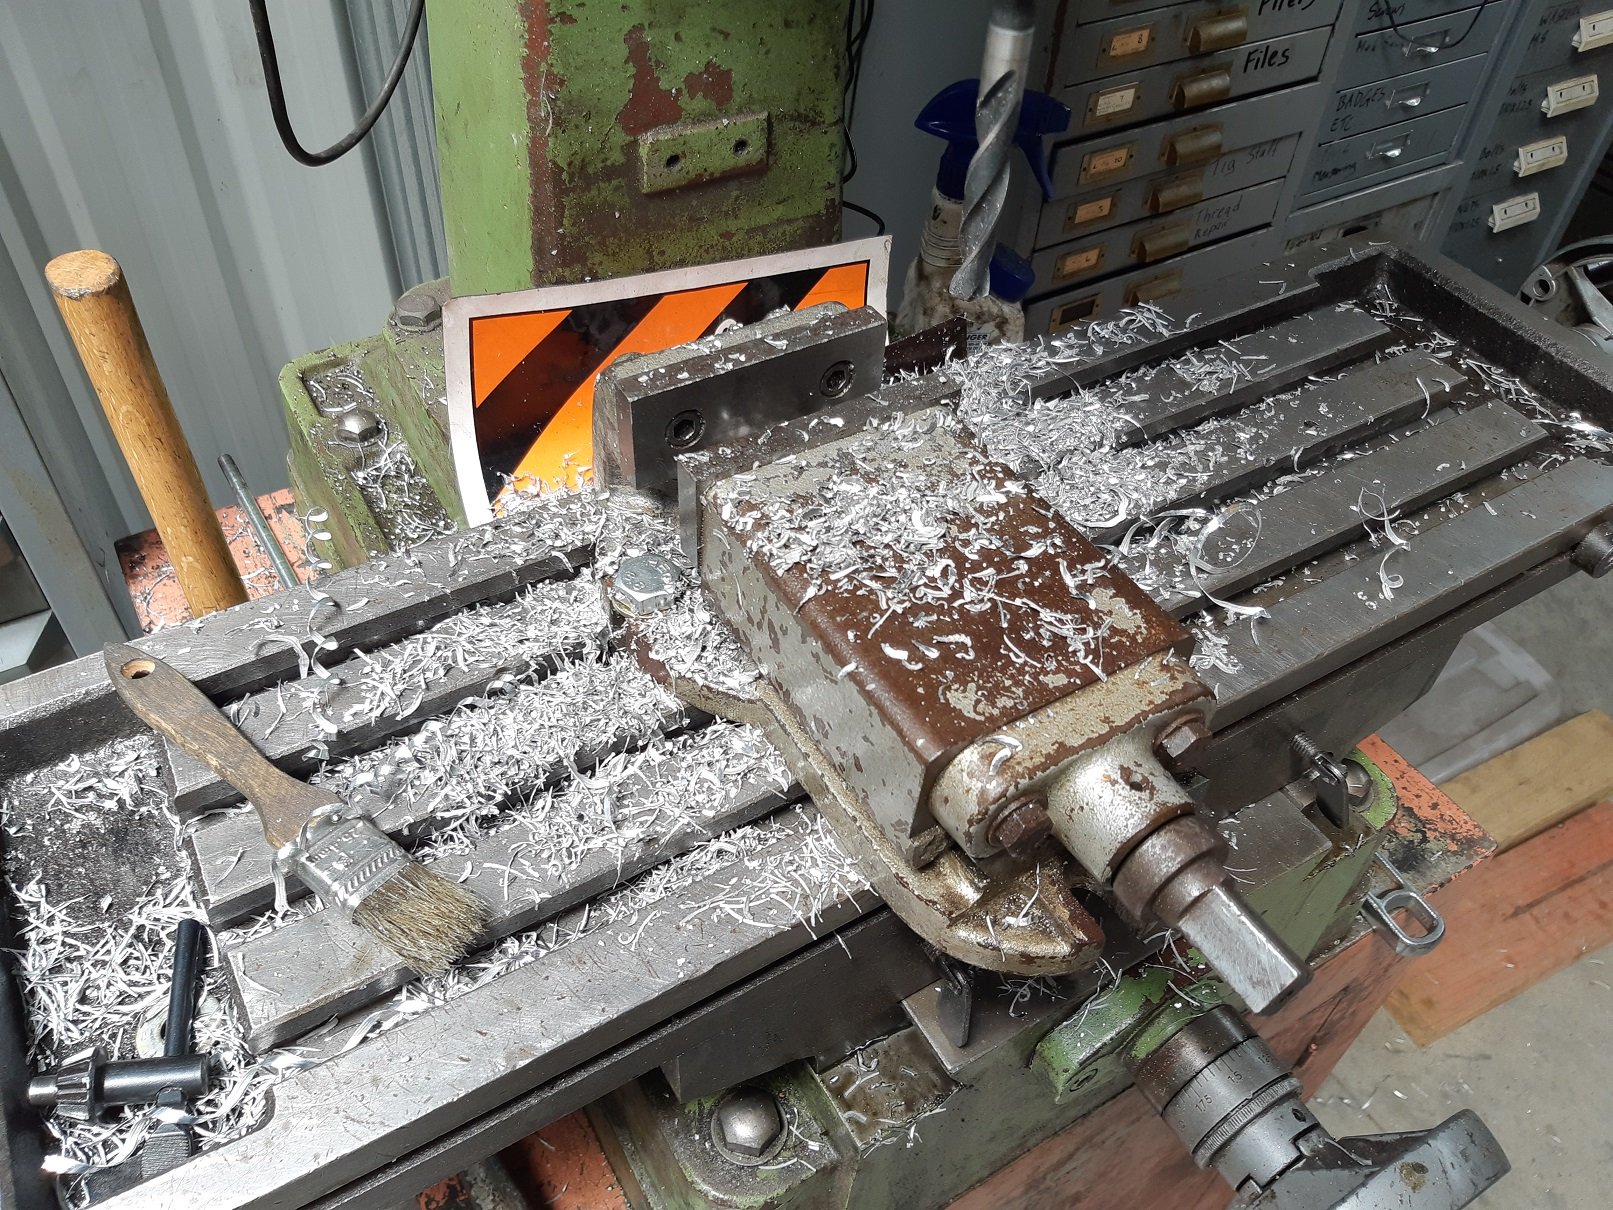
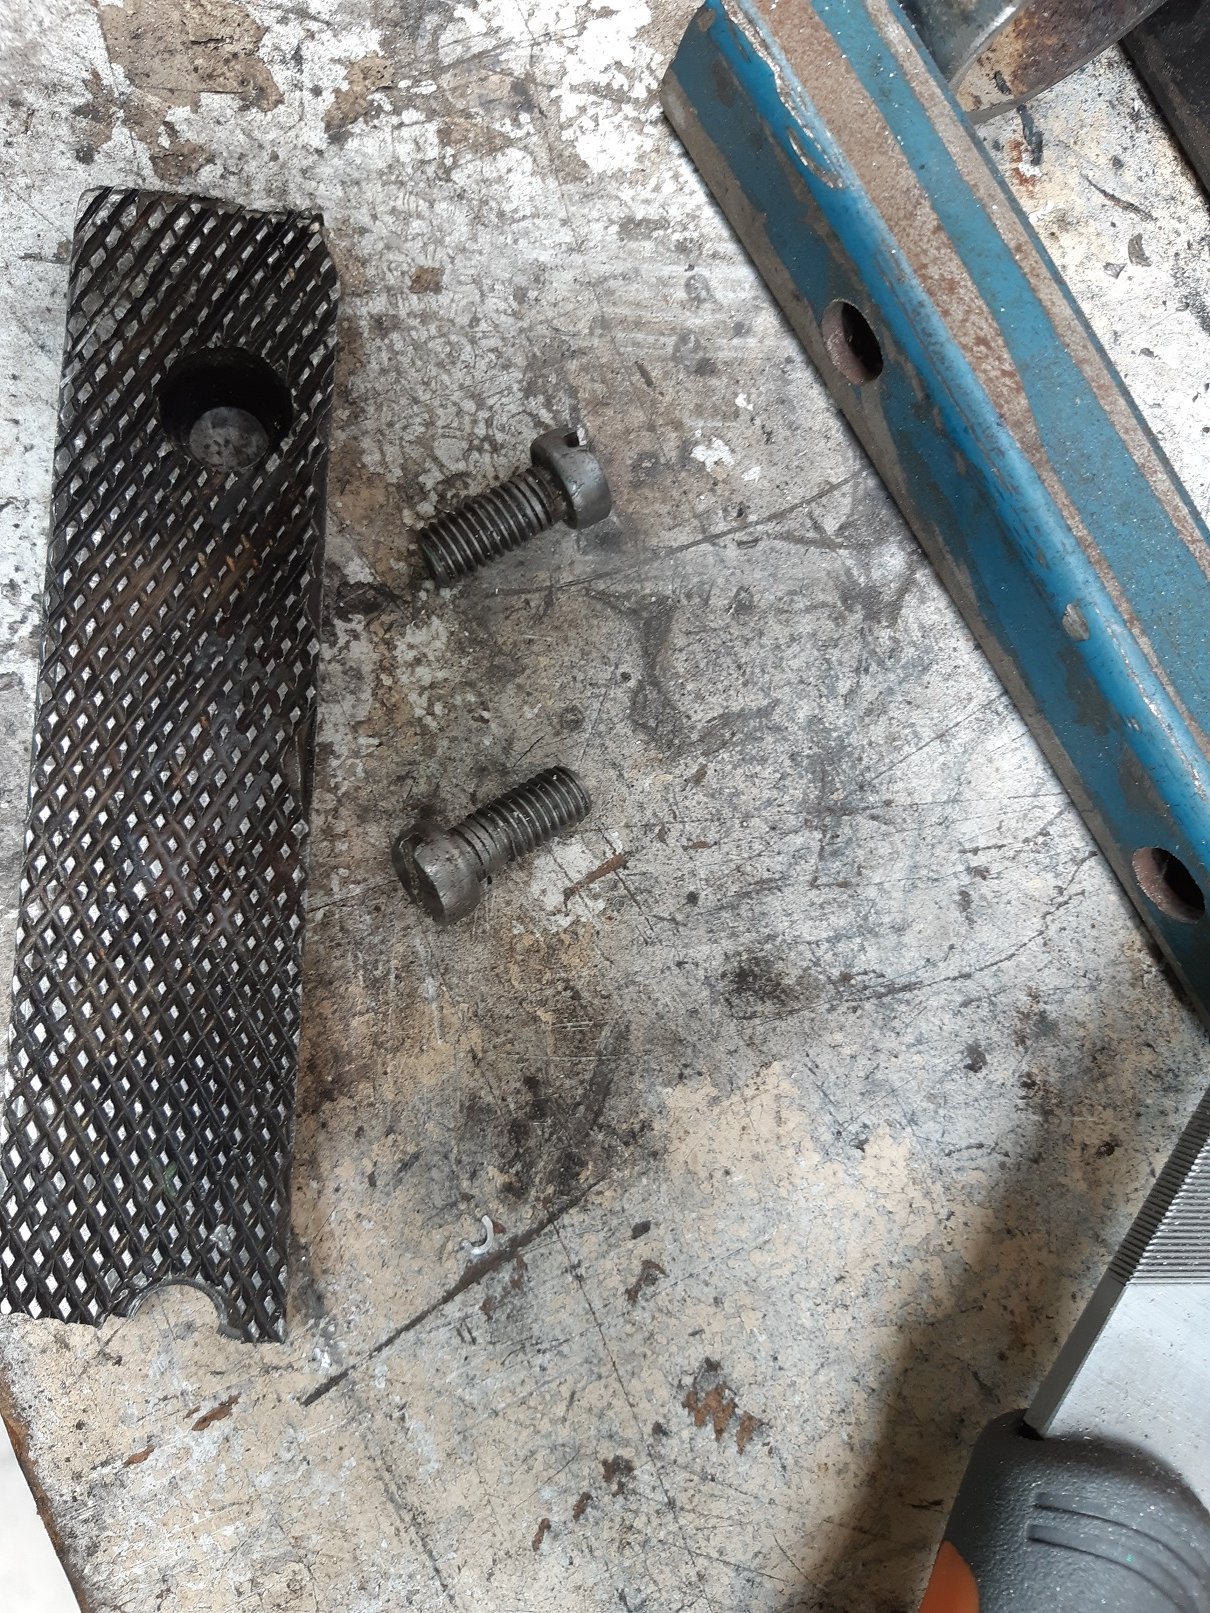
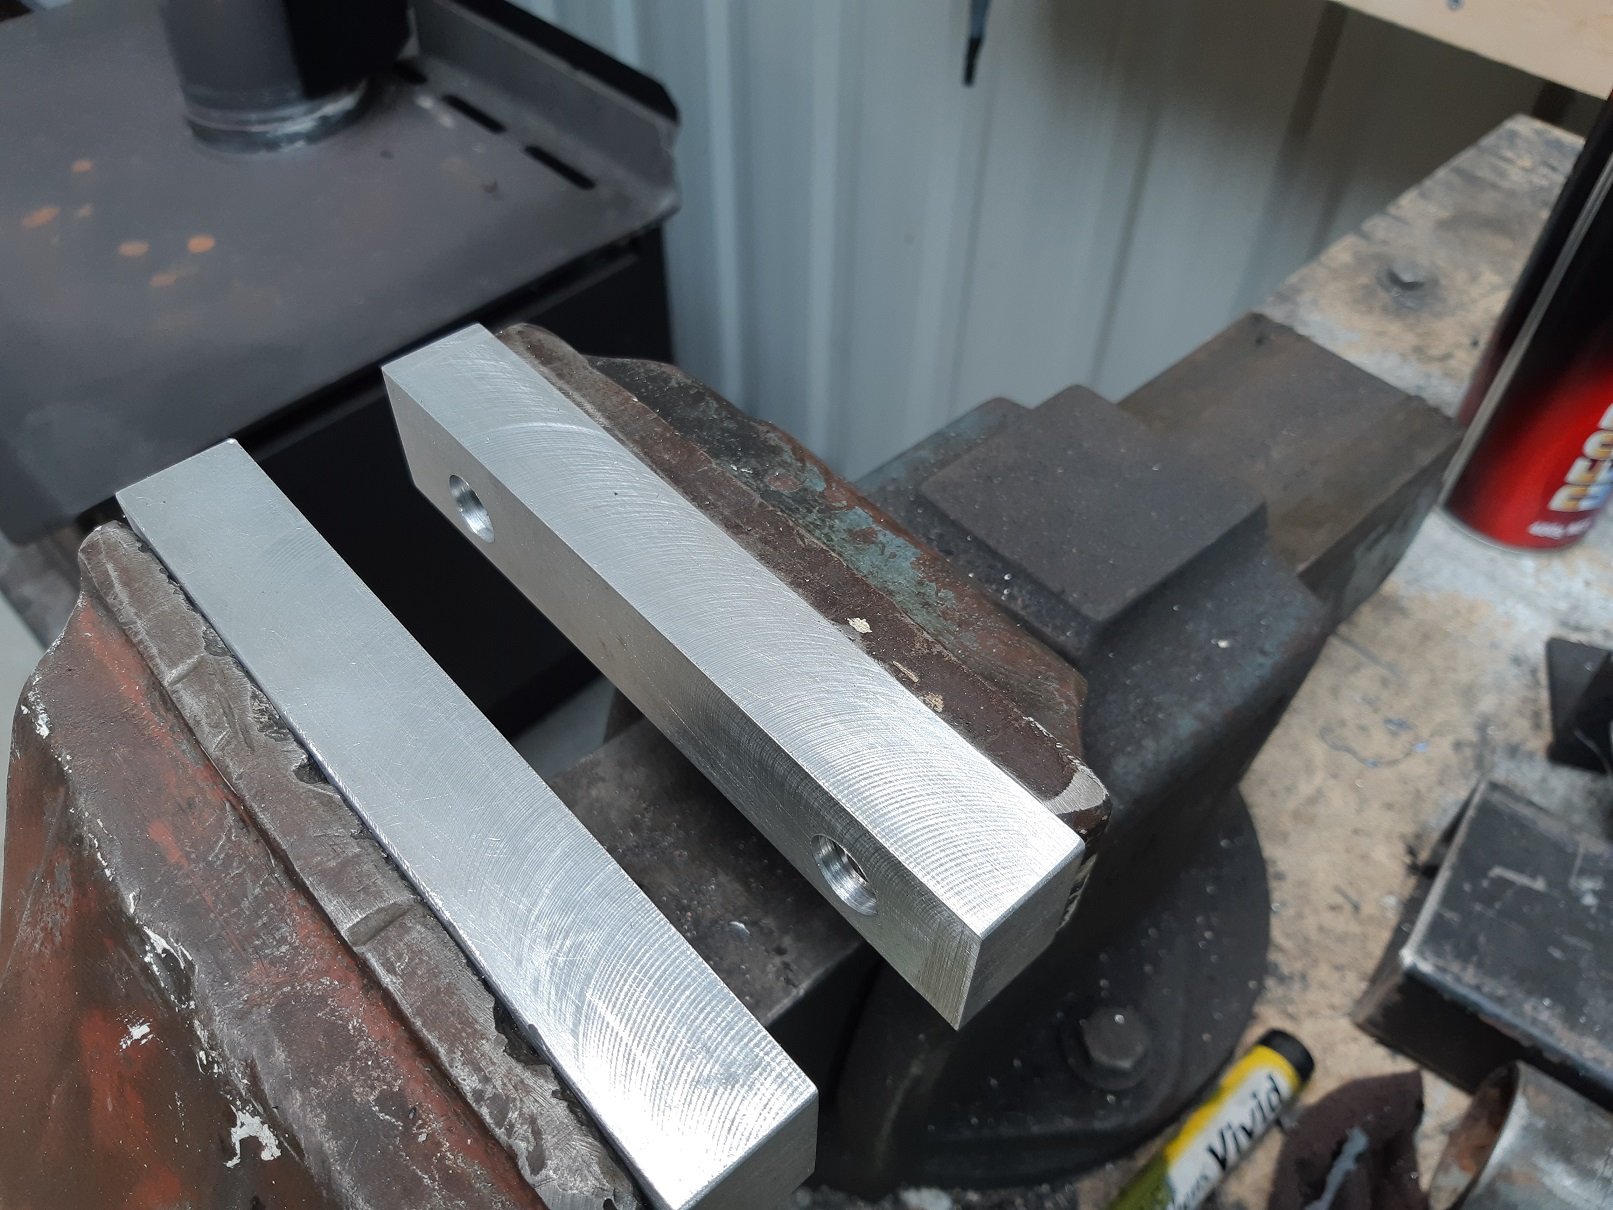
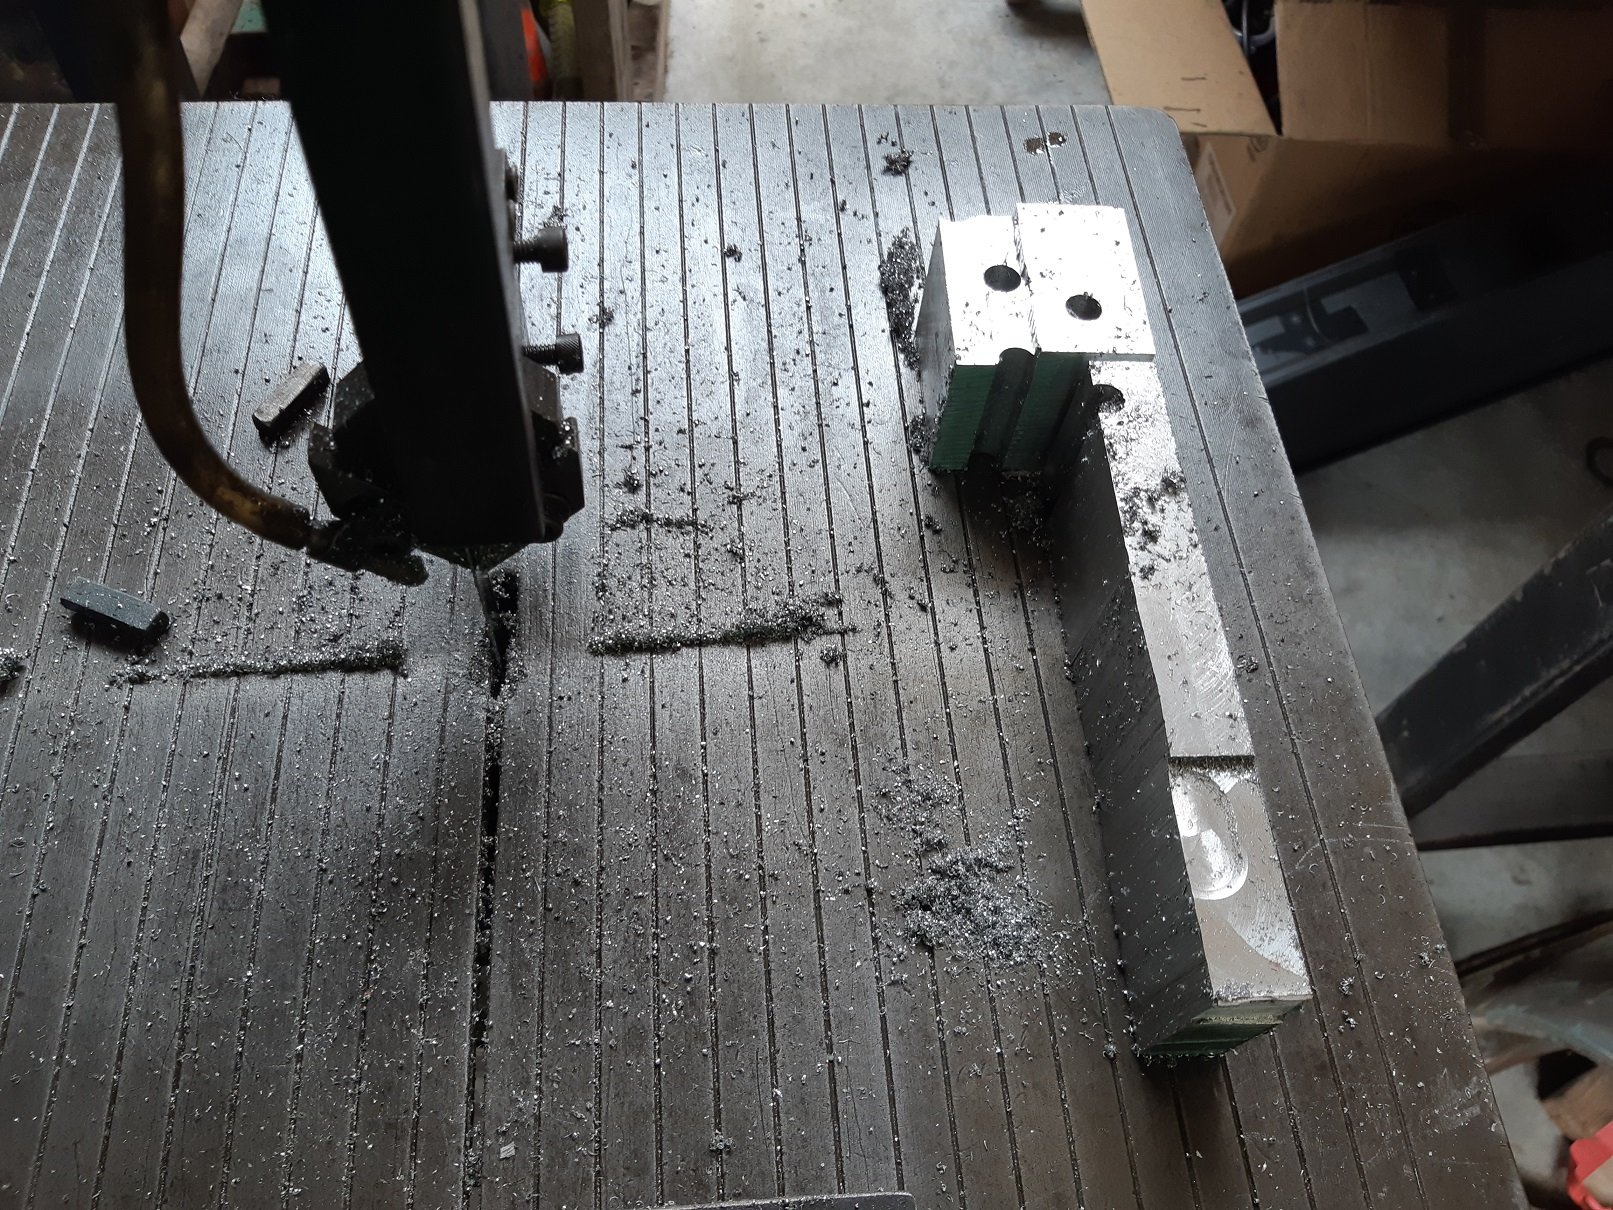
So... something like 12 years ago I bought my vice 2nd hand. I was missing one of the jaws. Buying or making a replacement jaw should be straight forward.... right? I never found anything off the shelf that was the right size. Probably because the vice is polish. Since then I made do with only the one jaw... After a few years, the one jaw broke... But I continued to make do. Finally, yesterday I decided that the tools and materials I have, had reached critical mass and making replacement jaws was achievable. The old broken jaw... The 50X50 aluminium bar I chiselled it out of. It took a REALLY LONG time to saw this. My bandsaw doesn't really go fast enough for aluminium and the only blade I have is like 18tpi and kinda blunt. The mess I made. This is the first actual thing I have milled since I got it. I had only really used it for drilling. I used the 50mm face mill for the big flat bits and 12mm 4 flute for the ends and some of the surfaces. I destroyed one 12mm end mill when I discovered that it doesn't handle climb milling with the quill extended quite far. Chipped all the points off the end. Oops. I didn't have an end mill large enough to countersink the socket screws, so had to use a 14mm drill. And the finished jaws. The originals were 12mm thick. These are about 20mm. I guess if they get all gouged up I have enough meat there to mill them flat again. It took surprisingly long to make these. About 4 hours.
1 point
-
Been dicking around with it for the last couple of days, ran it up to temp and fixed a couple of leaks etc, then just working through the list of things to sort. Took it for a sneaky drive up our road which is a dead end and pretty quiet, it feels good. it feels rock solid, there is nothing that makes you worried or scared. I need to keep that shit to a minimum for obvious reasons but it is hard to resist. Brakes are a bit vague but they had some surface rust and this is slowly coming good. Probably need another bleed too and maybe a skim although it pulls up straight. If I could take it out for a proper drive I sure that would come good pretty quick. Yesterday I wound the fuel screw in a wee bit. It gives a bit of a puff of black then starts to boogie pretty well lol. Its no racecar but gets off its arse in an appropriate manner. There is a screechy noise at 3k revs that I haven't nailed down just yet, will need to look harder. The power steering pump seems like it is only just keeping up, I might have to investigate a replacement. This may be the source of the screech, If I swap it out it will tell me. The speedo just doesnt work, I am looking at how to sort that now, but the clusters are known to be a bit shit so a good option might be an aftermarket dash. We will see if I can do it on the cheap or not. Oil pressure reads low, but again I am pretty sure it is just the gauge or the sender, the oil pressure light behaves as you would expect. The turbo has a sweet spooly whistle, it is pretty lol. Today I will reset the tappets or maybe start the bumper. Or any of the dozen minor jobs left. Yay.1 point
-
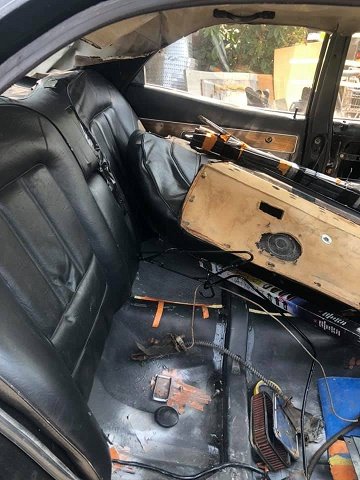
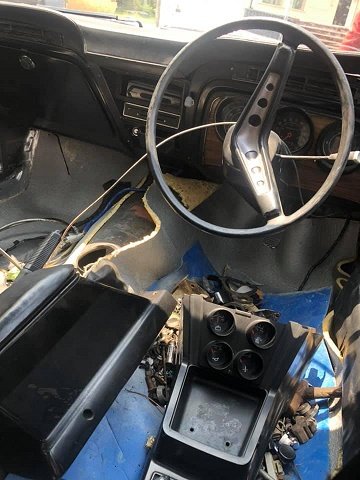
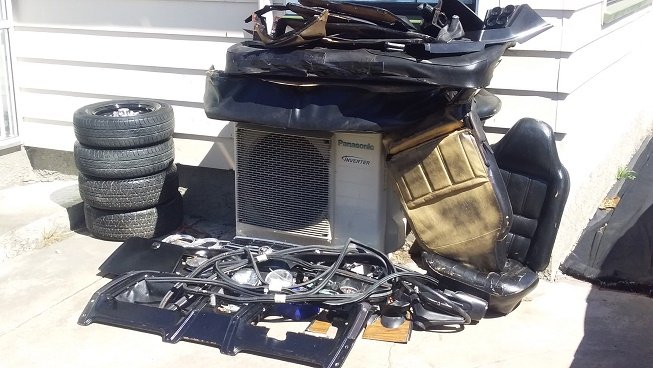
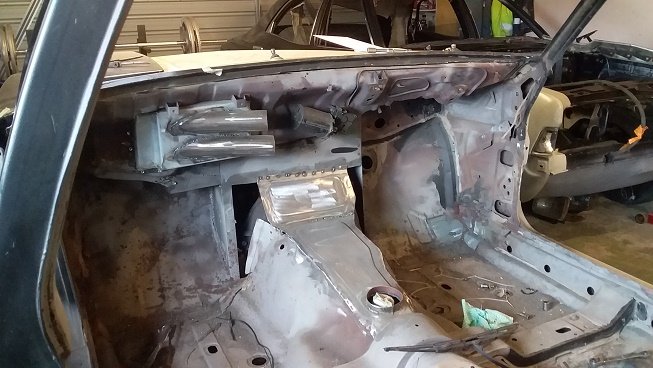
when i bought this it was a shell and i was missing heaps of parts but the shell was the starting point for me. i did buy some seats and door cards as well as the rectangle lights and a few grills (i like the look of then and the 1st ones to come along)from a mate but still needed lights and lots of other stuff..so i all ways thought that one day ill stumble across a parts car.. being a face lift 76 it has the same dash as the mk4/5 and i dint hate it but lately ive been thing about after market gauges and maybe subaru b4 seats front and back or maybe bucket seats in the back as well. then a mate rings me on Friday morning and tells me he will around soon with a trailer......and later that day i had a parts car...........oh what a parts car. its got everything that makes a GT a GT in it. so i stripped it out on Saturday and got a pile of GT goodness. the seats are pretty bad and will need an expert but they are all there. the only part i dont need is the steering wheel and i have no idea how much they go for so i put it on trademe at $1 reserve.. the body of the parts car is pretty bloody good and has live plates and tags..so the plan is to take all the stuff i want and put all the stuff i no longer have a need for back on and sell it on to someone whos after a project.....far to good to just cut up...theres rust in the rear panel and i think thats it. the big job is the dash steel back part....the face lift and pre facelift are totally different as you know so they need to be removed and welded back in ..in the other cars. so i have removed the facelift from my car today i will fully weld up all the areas with it out now and clean and POR15 what i can before i remove the other one from the parts car and weld it in. cheers
1 point
-
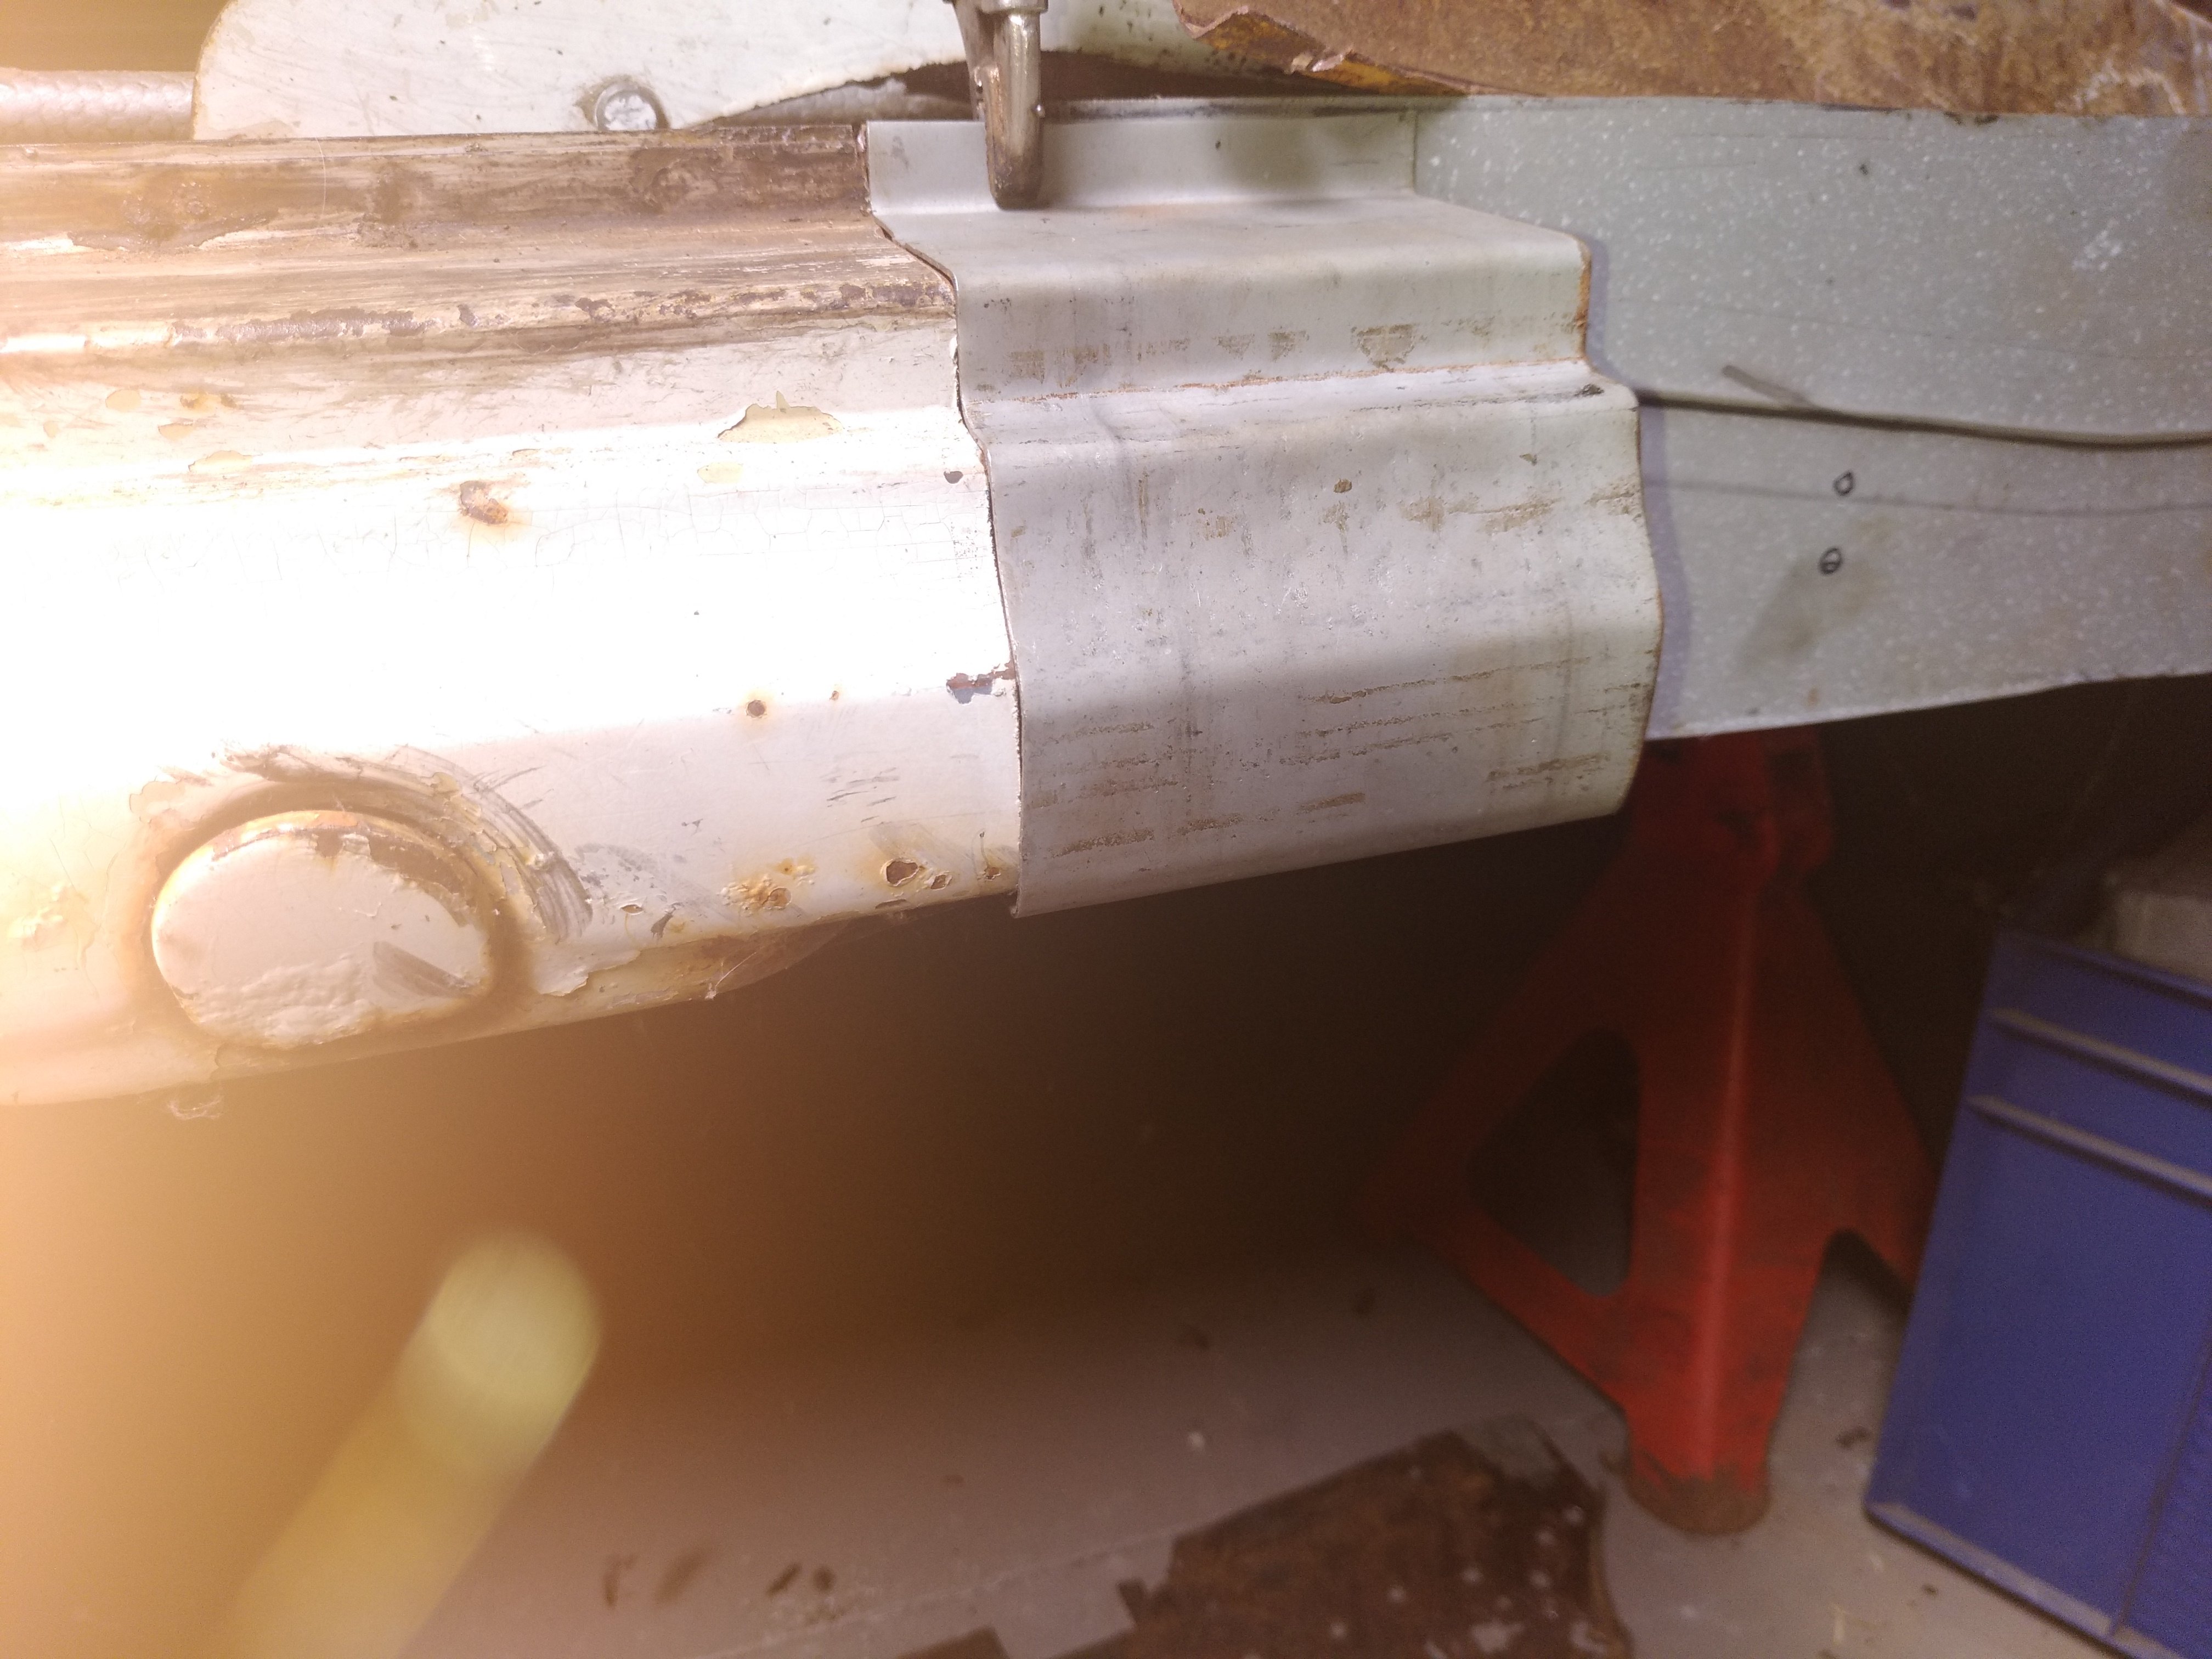
its never fun finding bodgy repairs that you then have to fix. i knew there was trouble under the bog in these two corners, i just didn't know how bad it was. its bad. the usual story of shoddy half arsed work. smash the rust in, weld a massive plate over the top then bog the shit out of it. and, as usual, it would have been quicker to fix it properly in the first place than doing what was done. this was done by David Holt (the colour blind car painter i bought the car off) somewhere between 1990 and 1996ish. luckily for me David cant weld either because i was able to remove the patches with just a screwdriver and bare hands. again, as is typical for this type of butchery, once the "repair" is removed the actual original car isnt in that bad condition, it would have been easier just to fix it correctly the first time. so now that ive got all the garbage out of the way ill go about making new pieces and welding it all back together. 2019-12-28_01-36-47 by sheepers, on Flickr 2019-12-28_01-36-56 by sheepers, on Flickr 2019-12-28_01-37-03 by sheepers, on Flickr 2019-12-28_01-37-10 by sheepers, on Flickr 2019-12-28_01-37-17 by sheepers, on Flickr 2019-12-28_01-37-27 by sheepers, on Flickr 2019-12-28_01-37-43 by sheepers, on Flickr 2019-12-28_05-23-37 by sheepers, on Flickr1 point
-
Put the other distributor in, now has vac advance again. Runs a bit better, I'll see if its more ecom on pertol over the holidays I managed to pull the ends off 2x leads swapping them over which is a pain in the bum, a couple looked a bit manky in the ends so ive ordered a new set off my favorite supplier of parts. Who, it appears, sort out the GST issue at purchase so no problems there.
1 point
-
painted engine bits. not sure if ive mentioned before but im going to repaint the RA28 to a modern mazda red. i have the paint code written done somewhere but its a 2017-18 mazda red that i really like. anywho, the silver/black combo of the engine is meant to work with that red, not the shit dirt black/purple it is now. now that the engine is getting close to finished ill start painting the engine bay. as always i want ot change a few things around and do a few things etter thatn before so ill be doing that soon. but first here's the engine in paint. 2019-12-19_05-31-21 by sheepers, on Flickr 2019-12-19_05-30-55 by sheepers, on Flickr 2019-12-19_05-30-46 by sheepers, on Flickr 2019-12-19_05-31-04 by sheepers, on Flickr1 point
-
got the bolts all sorted for the superdupercharger drive. So far ive tried two belts and they were both to short. tomorrow im going to try the longest one available off the shelf in NZ and hope like fuck i can get it to fit. the other thing i did was make the new water neck to go round the drive belt. its probably a bit long but i wont know that until the motor and radiator are back in the car. 2019-12-16_05-54-42 by sheepers, on Flickr 2019-12-16_05-54-33 by sheepers, on Flickr1 point
-
i finished the spacer by drilling the through holes then i put a very light coat of etch on it. that was enough to make it not fit so it needed a little polish. then i shrank the hub onto the superdupercharger shaft. it had to be pretty hot to grow enough to put on, as soon as it was on i suddenly realised that the heat might fuck the front seal so i wet it to try and cool it down. i hope like fuck i haven't coozed the front seal, will find out later i suppose. ill go buy the right bolts for it tomorrow and its all done. 2019-12-15_03-37-05 by sheepers, on Flickr 2019-12-15_03-36-55 by sheepers, on Flickr 2019-12-15_03-36-47 by sheepers, on Flickr 2019-12-15_03-36-39 by sheepers, on Flickr1 point
-
superdupercharger pulley. i needed to space the pulley out somehow to line up with the rest of the belt drive. the pulley had a redundant boss at the front so i made use of that bit by machining more belt drive grooves into it. simple process of grinding up a tool steel tip with the right profile, matching as best as you can to the existing using the eyecrometer then touch cutting an existing groove to get your depth and spacing correct then away you go. 2019-12-14_01-10-57 by sheepers, on Flickr 2019-12-14_01-10-49 by sheepers, on Flickr 2019-12-14_01-10-41 by sheepers, on Flickr 2019-12-14_01-10-33 by sheepers, on Flickr 2019-12-14_01-10-25 by sheepers, on Flickr with that done i needed to make a spacer to move the pulley forward on the existing boss. i haven't shrunk the boss onto the superdupercharger shaft yet so i was able to use it to check the fits of the spacer i made. i used a piece of 4340 i had which was way to big for the job but its all i had. i back turned the spacer so i could part it off finished, that way all bores and all faces would be concentric, parallel and true to each other. the only piece of material i had was 110 OD which i had to turn down to 56 odd so there was a bit of mess and a few burns on my arms. all i gotta do now is drill the bolt holes and its done. the fit is exactly right, the two spigots fit with about 5 microns clearance so it just slides on perfectly. i didnt want the bolts to be taking any shear loading at all so its exactly how i wanted it. 2019-12-14_07-08-00 by sheepers, on Flickr 2019-12-14_07-08-18 by sheepers, on Flickr 2019-12-14_07-08-09 by sheepers, on Flickr 2019-12-14_06-33-17 by sheepers, on Flickr1 point
-
superdupercharger belt drive. i fucked around with a few different pulleys and whatnot but in the end it i realised it would be just as easy to use UZ cam belt tensioners so i did that. made a little spacer for the factory mounting and used the factory bolt for one and the other o just made a pedestal and welded it to the plate id already made. jobs a goodin. now i get to drive to the parts store eleven billion times trying to get the right length belt. 2019-12-13_04-15-57 by sheepers, on Flickr 2019-12-13_04-15-49 by sheepers, on Flickr 2019-12-13_04-15-39 by sheepers, on Flickr 2019-12-13_04-16-06 by sheepers, on Flickr1 point
-
hey man, yea my back is feeling really good. still got to be careful and take things easy but so far so good. oh, also, i ran into your brother the other day, nice bloke. we had a brief yarn.1 point
-
starter has already been rebuilt, like you say, its in a cunt of a spot if it goes tits up.1 point
-
rebuilding power steering pumps. ive done a few of these now and had great success with all of them. you might do it a different way, whatever, this is how i do it. firstly, take a picture of each stage of the disassembly, there are many subtle differences to the orientations and alignments that will fuck the whole thing up if you put it back together wrong so take pictures as you go. the pump off my UZ was really fucked, lots of really bad scoring on both the stater plates and the rotor, but the inside diameter of the eccentric ring was good so it could be fixed without to much drama. 2019-12-03_09-20-52 by sheepers, on Flickr 2019-12-02_06-38-54 by sheepers, on Flickr so, how to do? you need a good flat two sided stone. not one that has been used to sharpen chisels or knives but a flat one. i have one i only use for this type of work so i know its flat. you're going to be trying to polish the plates to within 0.01mm over the surface so the stone needs to be good. also so good cutting oil will help no end. the other thing you really need is a micrometer, for two reasons, obviously to measure the parts as you go, and the other reason is that the mic can give you a really good feel for where things aren't parallel or where the high spots are. once you give it a try you'll see what i mean. 2019-12-02_12-07-21 by sheepers, on Flickr so, mic all your parts and write down what each one measures. (this picture shows after stoning so there are two measurements but more on that later) 2019-12-02_06-28-53 by sheepers, on Flickr polish the parts on the stone using circular motion or a figure of eight motion (don't do long strokes along the stone because you'll grind the surface out of flat and its very hard to get it back) and rotate the every couple of passes so your pushing on a different part of the plate. use the mic to measure the plate and make sure its still flat and both sides are still parallel. keep going until the plate is smooth. i couldn't get the last deep score out of this plate so it will just have to live like this, its not to bad but these deformations allow oil pressure to get between the side plates and the rotor pushing them apart and you loose line pressure. 2019-12-02_12-07-14 by sheepers, on Flickr in the above picture you can see the scratch marks from the rough side of the stone. once you've got the scoring out and they are flat and parallel you can give them a polish on the smooth side of the stone. this serves two purposes, they need to be smooth so they work well and dont score again in service and it gives you a second chance to check your work. 2019-12-02_12-07-28 by sheepers, on Flickr you can see on the rotor the area to the right is not flat, that only showed up after smooth polishing. i had to go back and re-do it to get it flat. this meant that i had to remove 0.04mm from the rotor. because of that it meant that the vanes were to wide so i had to stone them too. to check that the vanes had correct clearance in the rotor i used the mic. in the two pictures you can see i set the mic on the rotor, then inserted a vane, i was easily able to move the vane in and out confirming the measurement. 2019-12-02_12-07-54 by sheepers, on Flickr 2019-12-02_12-08-02 by sheepers, on Flickr once i had the rotor flat and the vanes 0.01mm thinner that the rotor i needed to address the eccentric stater plate. this sets the spacing of the whole assembly and because i had removed so much material from the rotor there was now too much clearance between the rotor and the side plates. this pic shows the "after fixing the rotor fuckup" measurements. 2019-12-02_06-29-11 by sheepers, on Flickr you can see the initial clearance was about 0.04mm and i have removed 0.04 from the rotor so i had to remove the same from the stator plate (i didnt write down the final measurement for the eccentric plate in the picture so it still says 15.03 but i actually polished it to 15.00 to keep the 0.04mm clearance). so, once thats all done the rest is simple, new o rings, new seal and a new bearing (which cost the grand total of 38$) and the pump is good as new. hope this helps you in future, like i say, theres more than one way of fucking a cat but this is how i do it.1 point
-
thanks man. its 2mm sheet that i used. i welded both the inside and the outside so i could make a nice rad on the corner.1 point
-
So I've had surgery on my back about 3 weeks ago and everything is going great. Lots of walking mainly. I have ticked a couple of little things off though. Injectors. So the stock height injector made the fuel rail clash with the supercharger mount plate. I got some "shorty" injectors that allowed me to drop the fuel rail by about 30mm. I had to mod the bottom O ring seat to take the stock Toyota crush style o ring and now is all working. Need to make clamps to hold the rail down and it's done. 2019-11-20_05-19-33 by sheepers, on Flickr 2019-11-20_05-19-22 by sheepers, on Flickr also, WHY THE HORSE FUCKING CUNT CANT YOU LINK A FLICKR IMAGE ON A PHONE???????????????????1 point
-
.1 point
-
KEEN!1 point
-
Ive said it before and I'll say it again, I fucking live this car. Great to see you able to get some time to work on it.1 point
-
Thanks gents. I've spoken with Brian on the phone and he seems like an awesome chap. I'll go see him next week if possible1 point
-
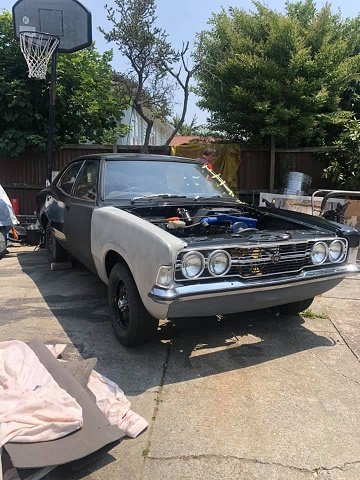
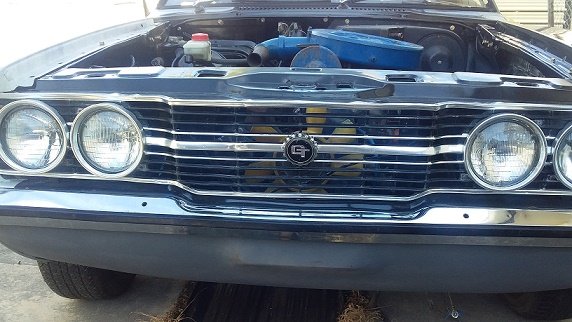
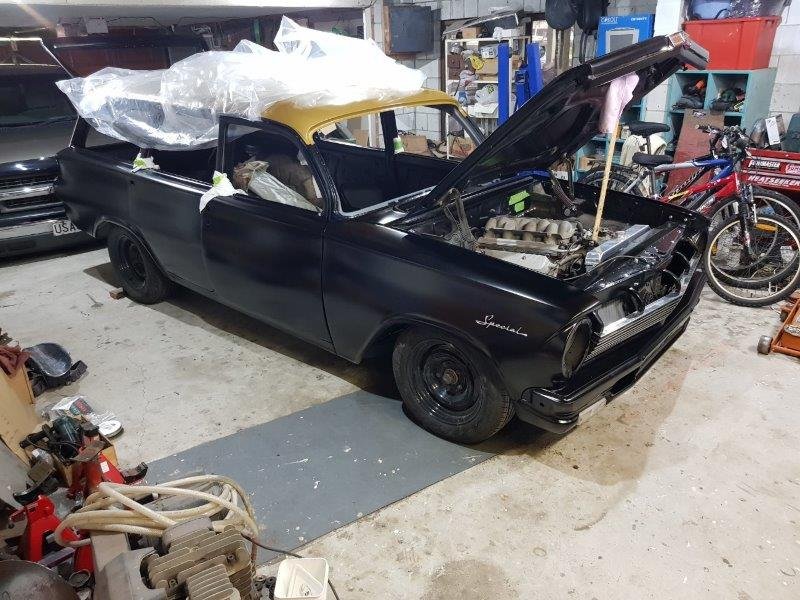
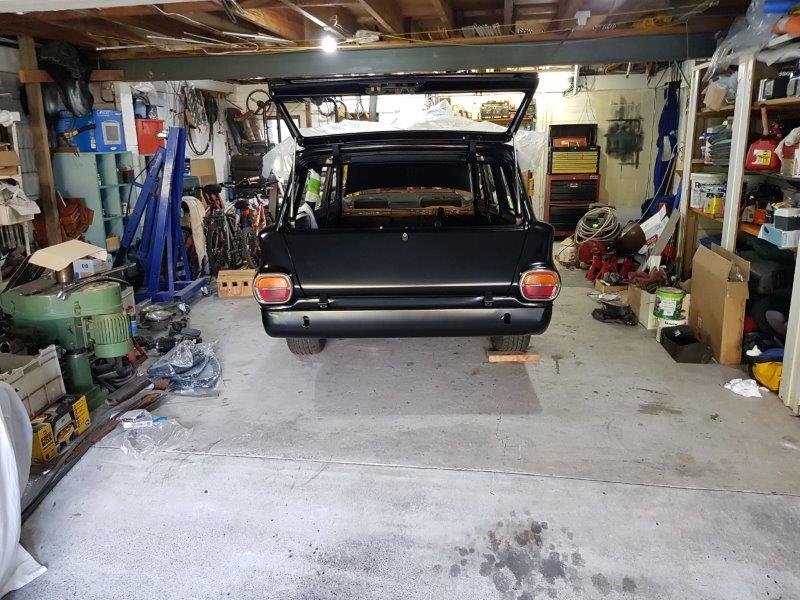
The satin black is a bastard to keep clean so its kept under the plastic sheet. I hit the car with a McGuires product that is for satin finishes. It took a whole day to fit the grill to the front panel, each slat had to be individually made straight then bent to line up. I got pretty good at it by the last one. The front panel got bolted on. Even though it had been together this is the first time all the bolts had been put in. I ran a tap through the threads which made life a lot easier, all the captured nuts were full of paint. The passengers side wasn't too bad, it was the original guard going back on, drivers side was a guard of another car so needed a bit of persuasion. Need the stick to hold up the bonnet. The extra weight of the die cast badge and bits of trim was enough for the bonnet to not stay up. I assembled the hatch and tail gate locks first after it was painted. The tail lights were some I bought about 6 months ago and are really good.
1 point
-
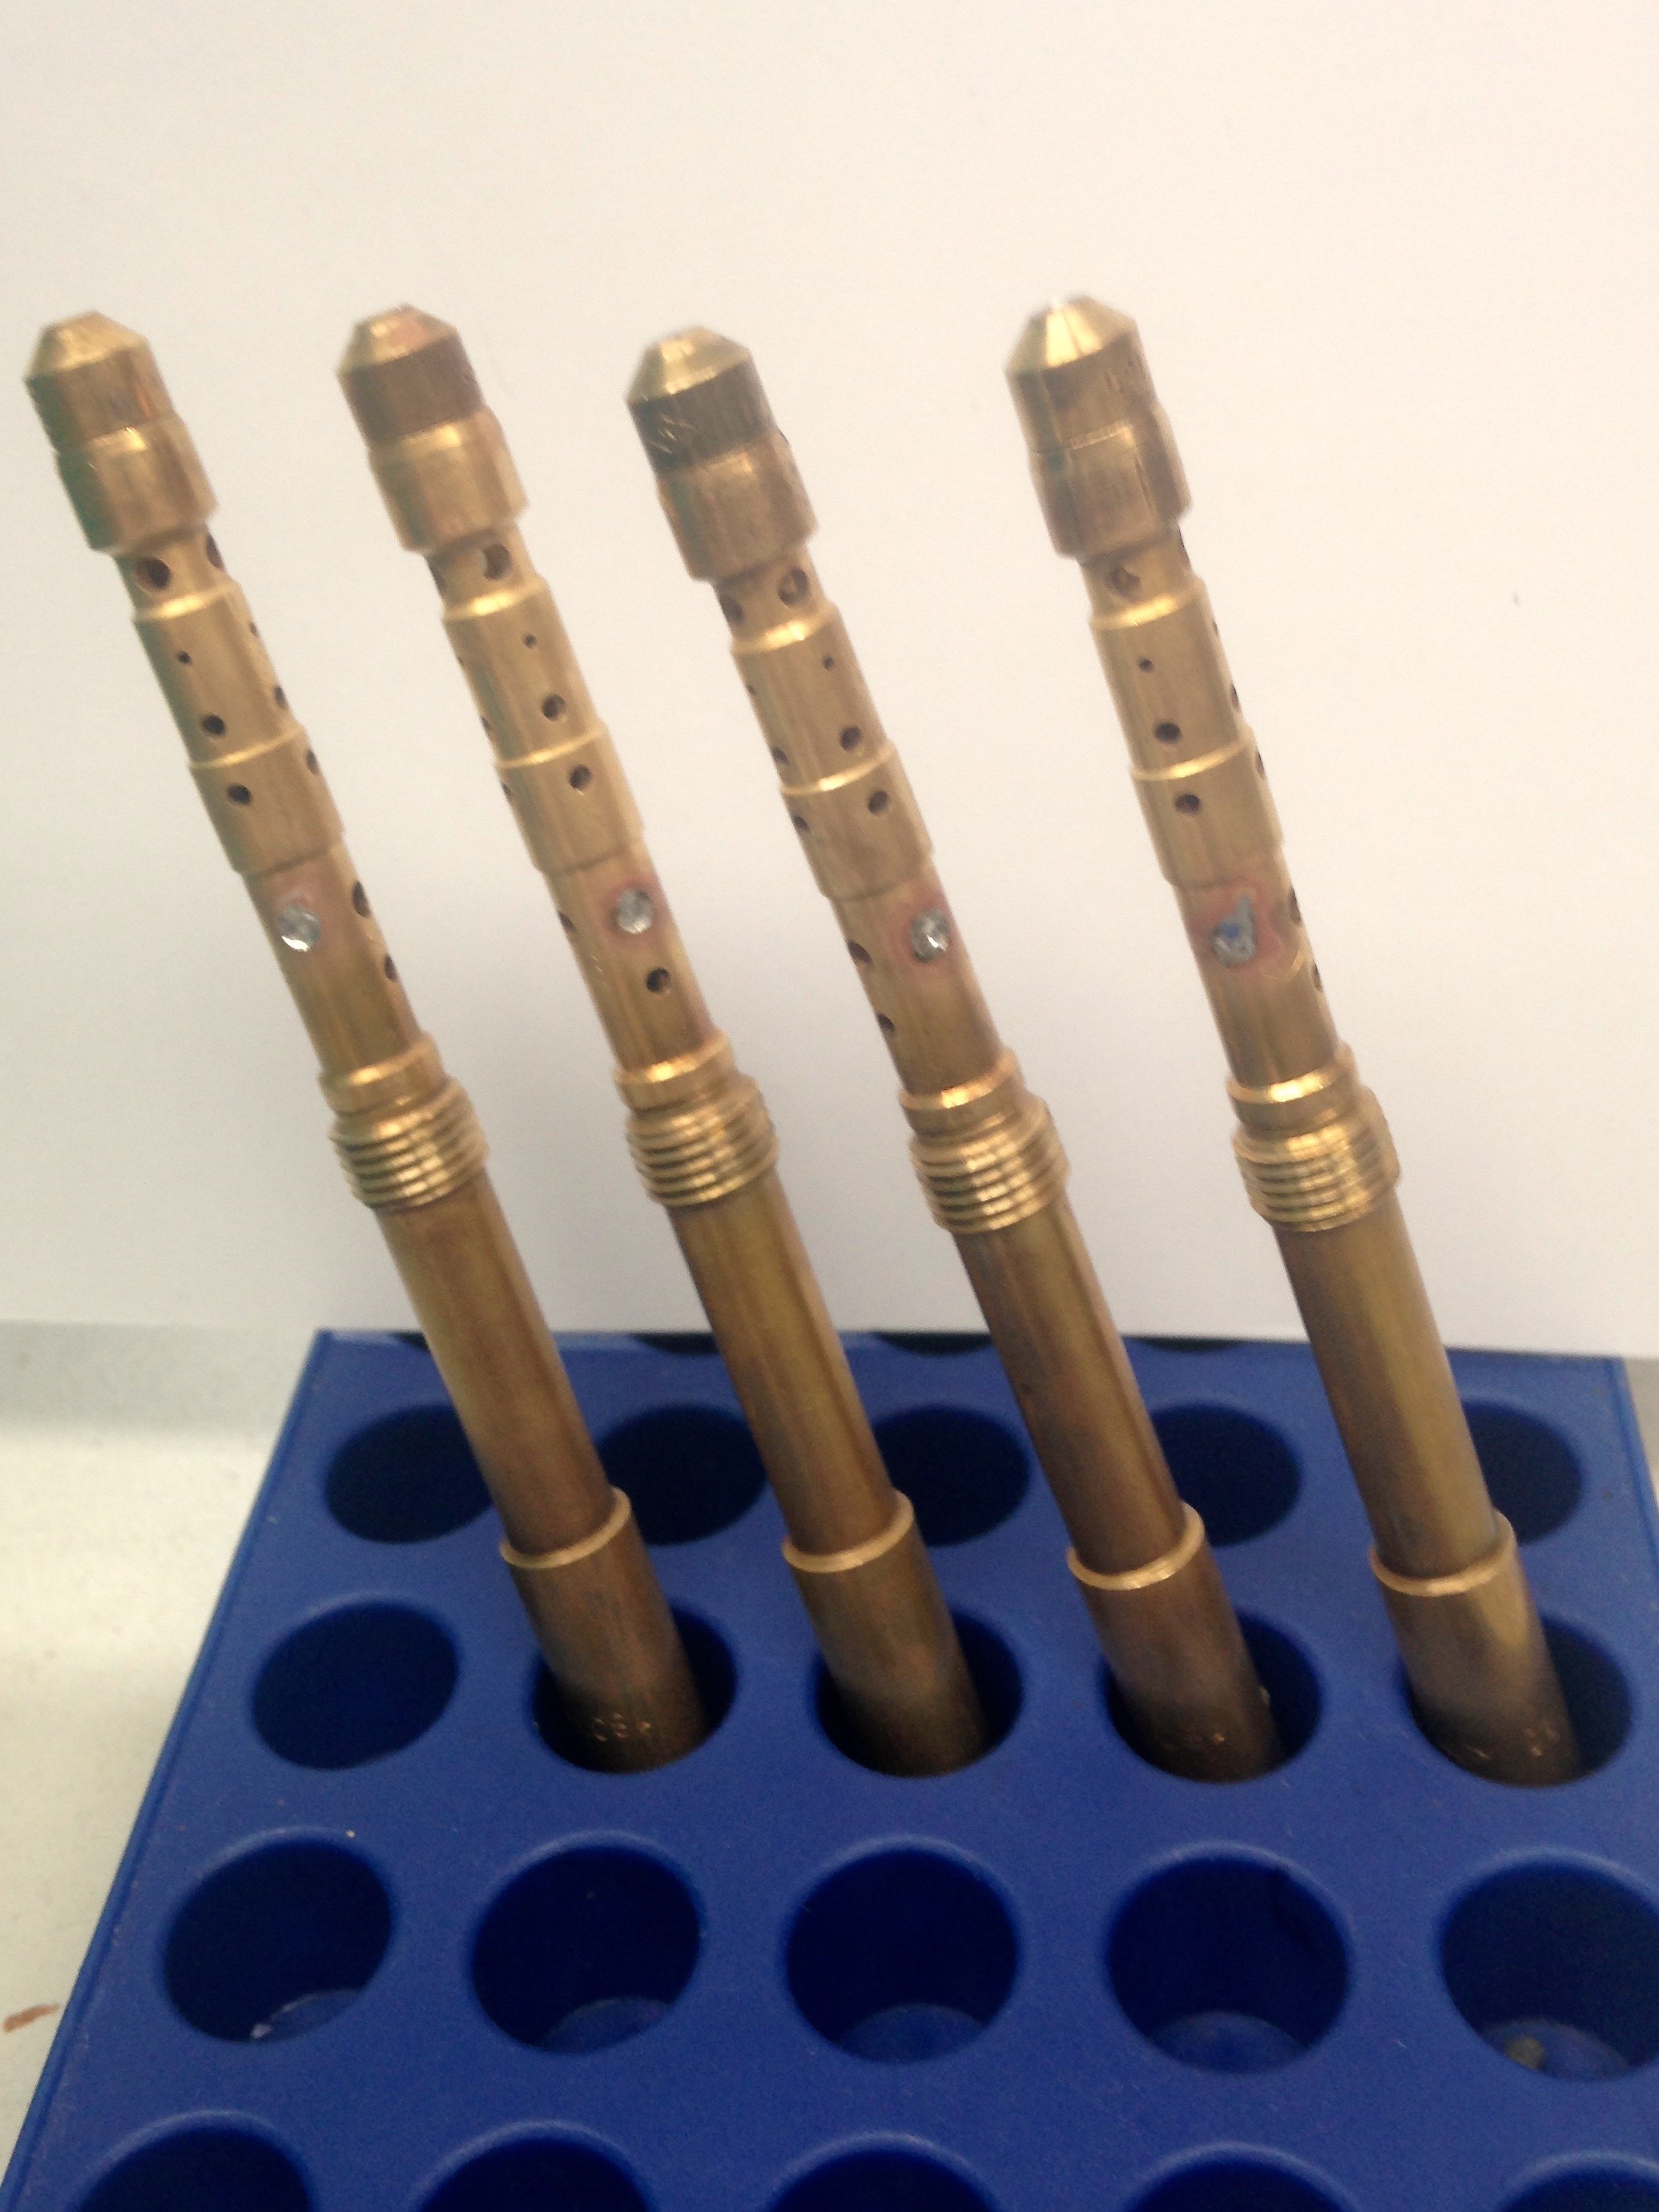
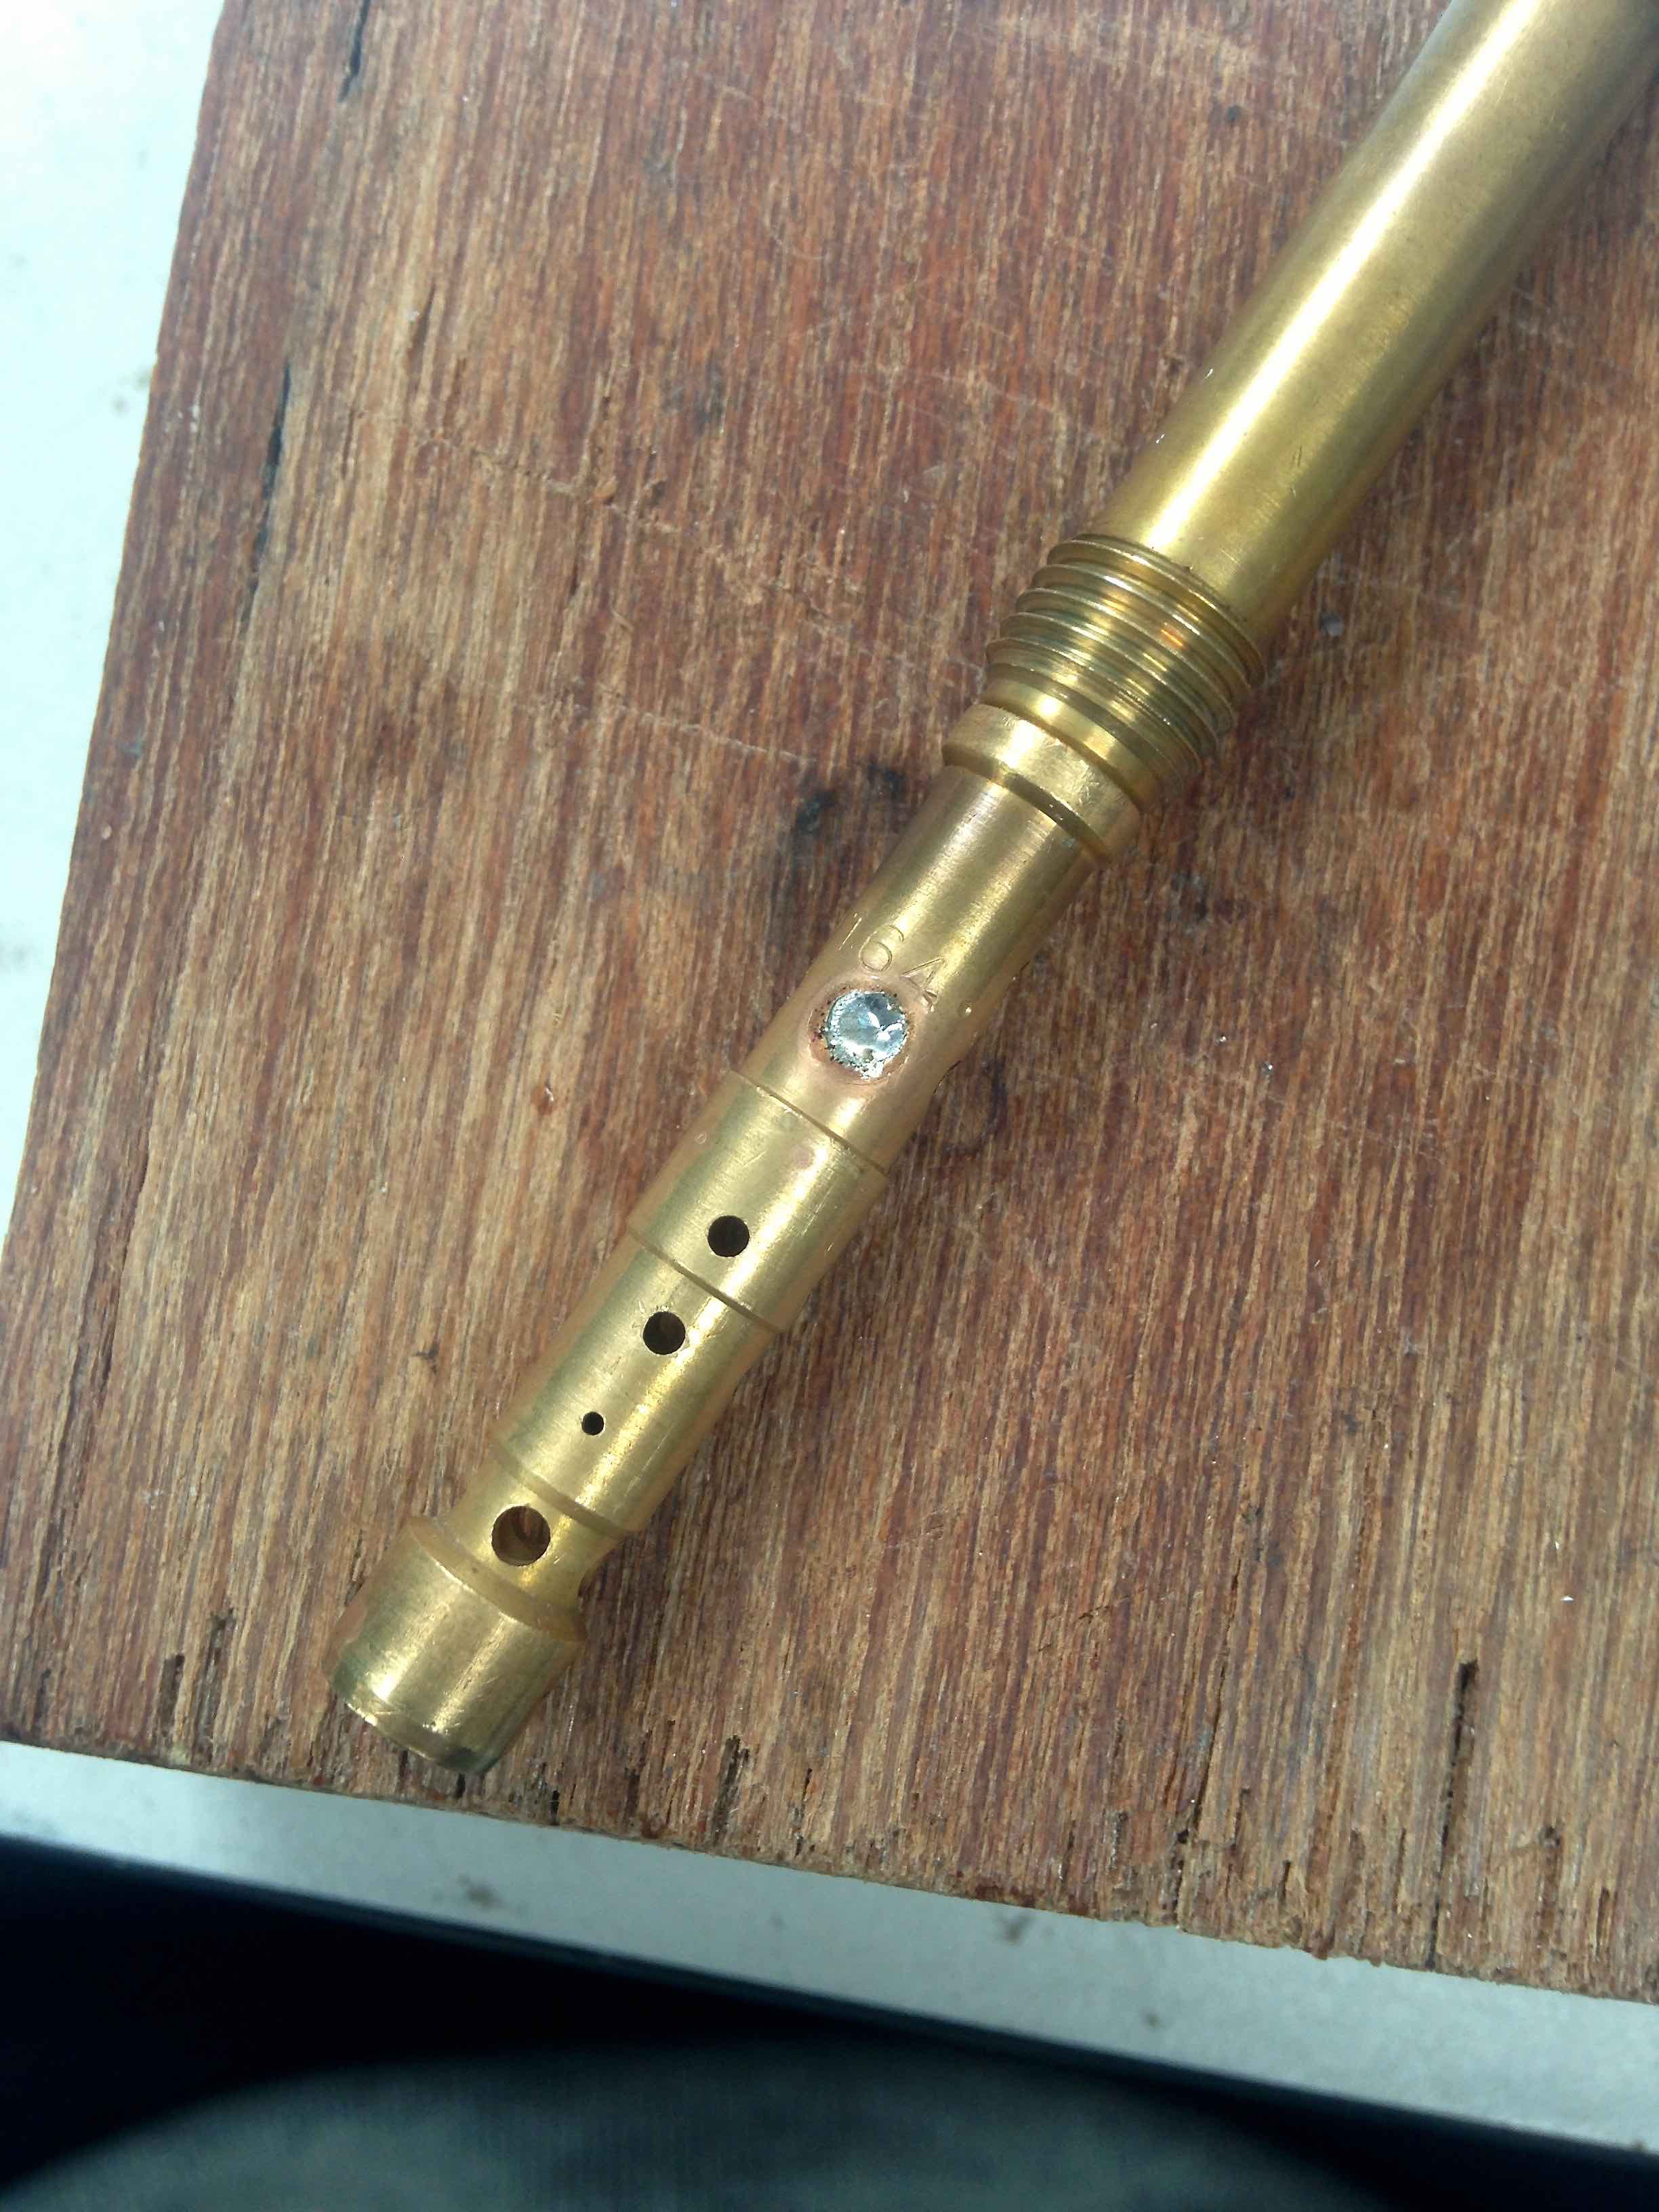
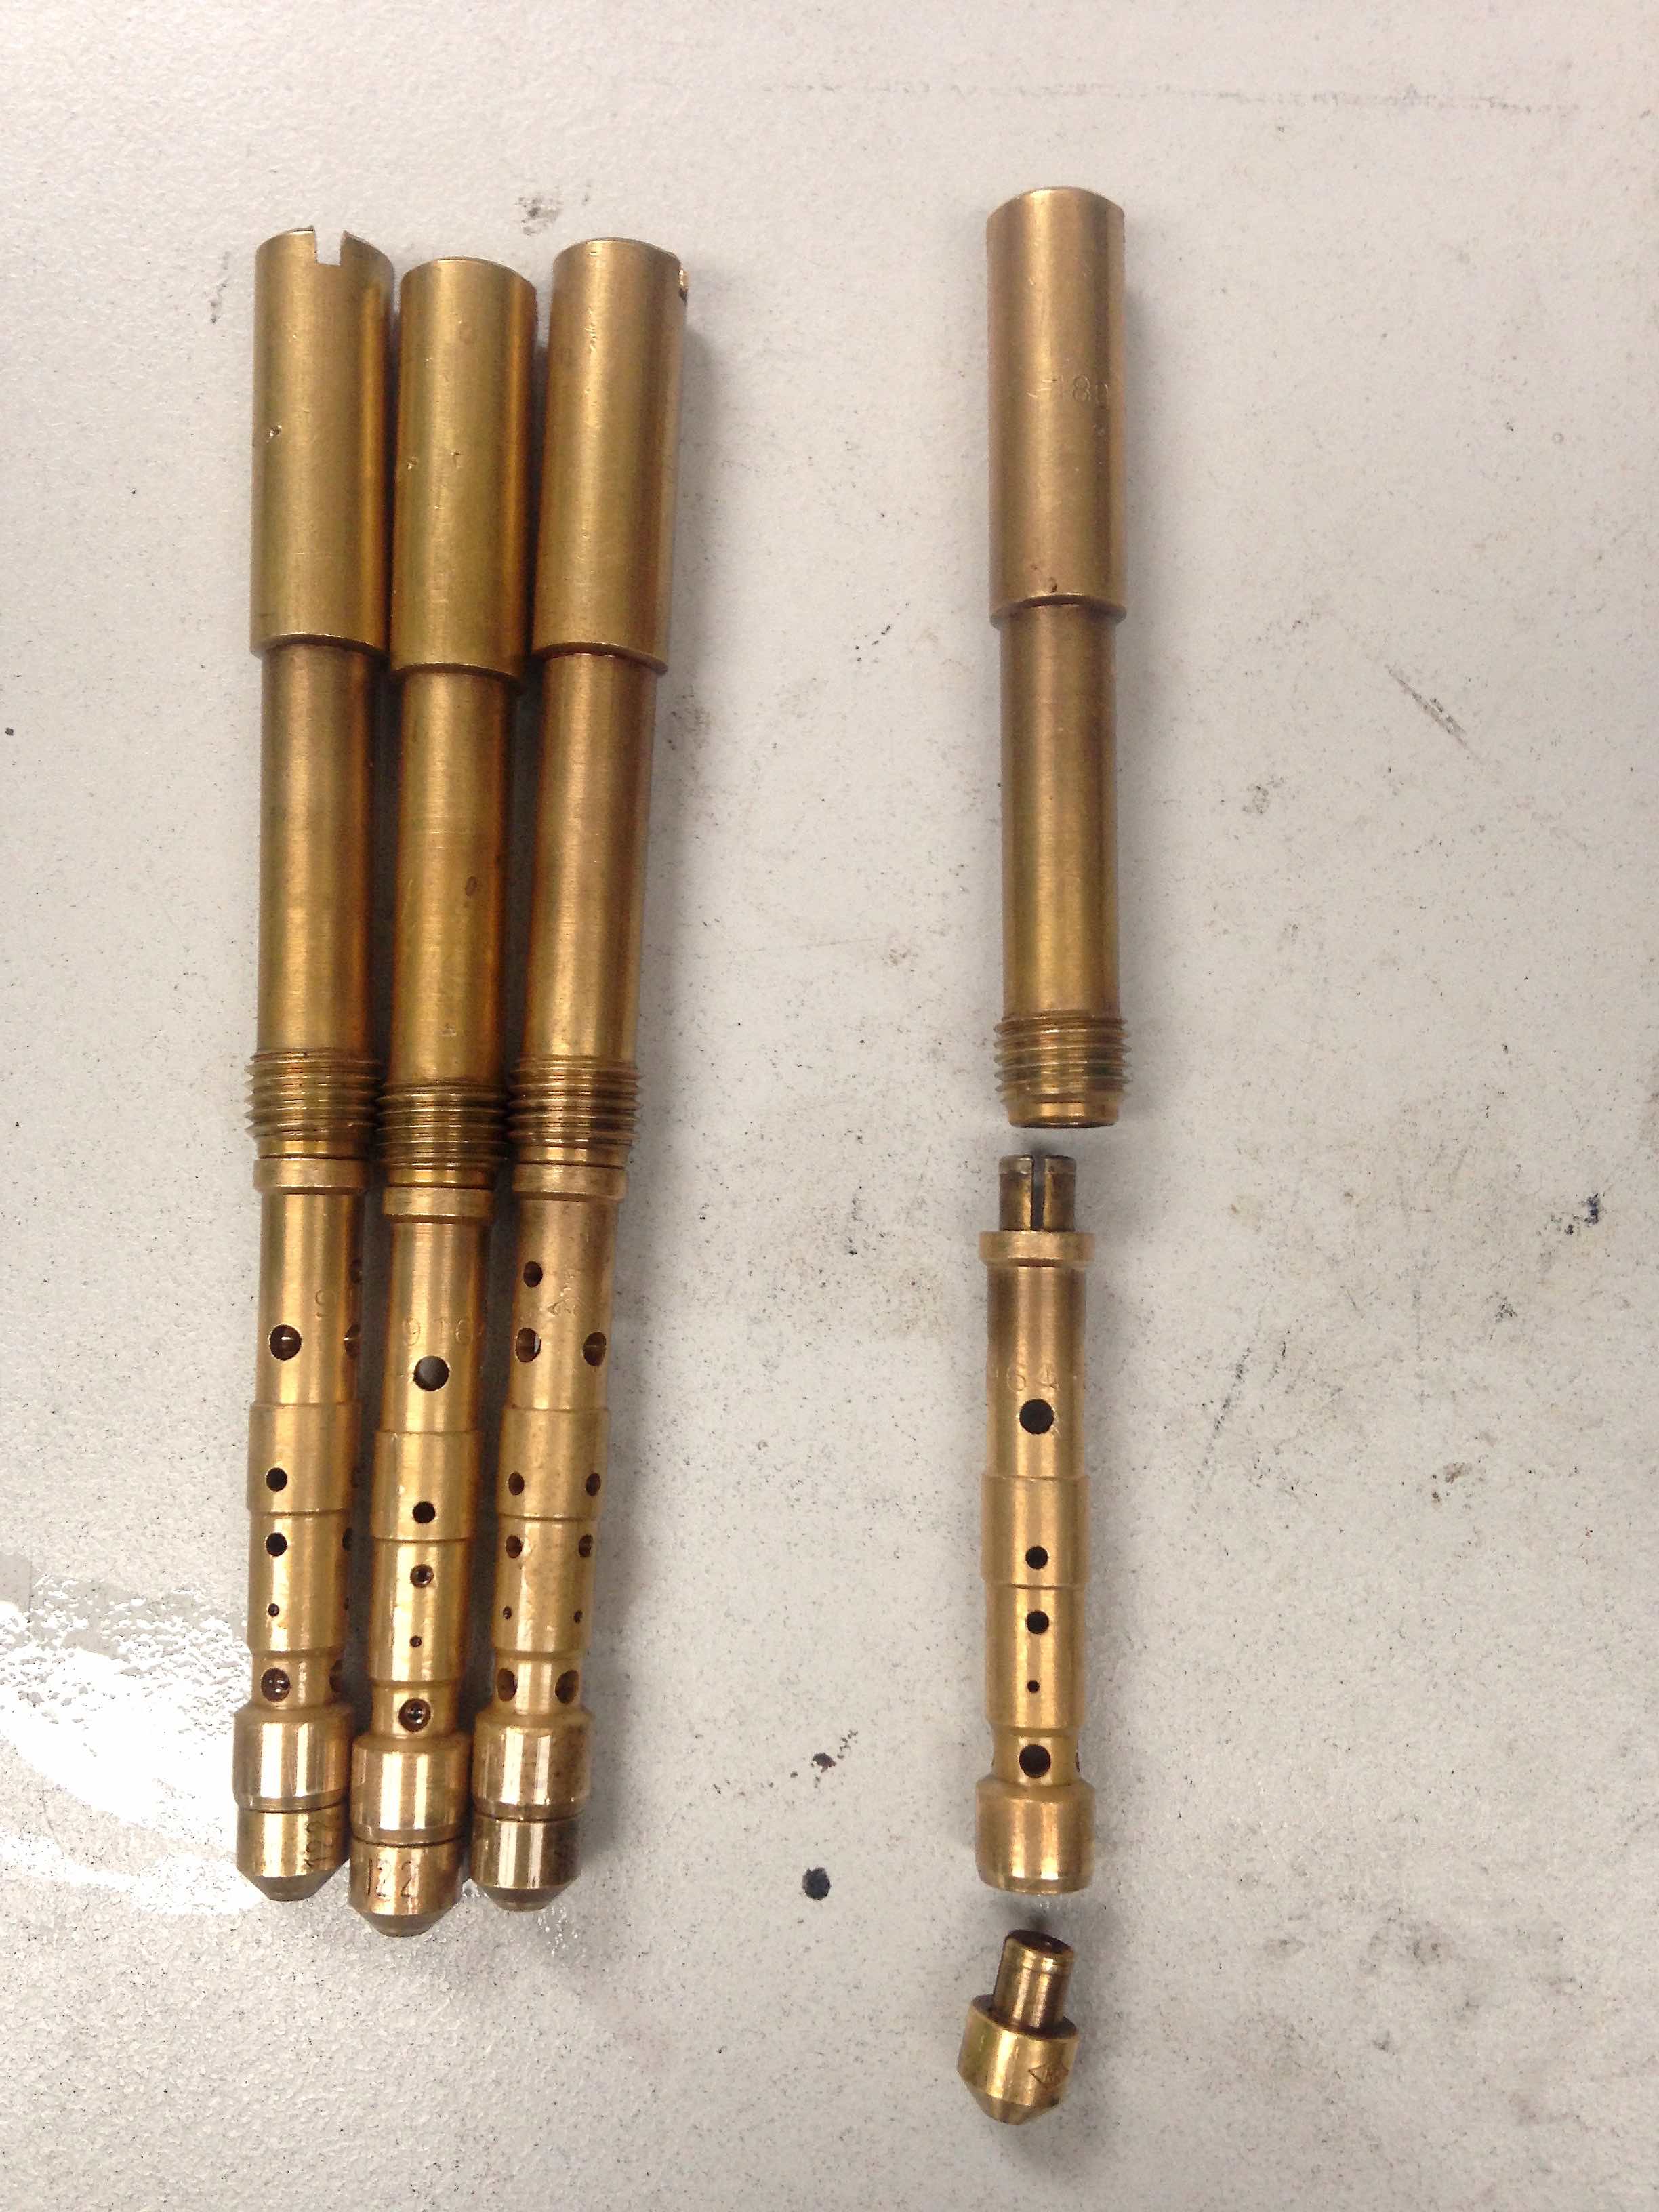
Pulled up my suspenders, slid on some spectacles and fired up the soldering iron, the day has arrived to attack the emulsion tubes! From the previous post, suspicions of the emulsion tubes not being right was strengthened, spending the day pondering methods to attack I settled on the 4 large holes at the top, from my understanding, the jet at the bottom controls fuel flow to the venturi, via the emulsion tube, which mixes air into the fuel assisting atomisation, this air mix is governed by the air corrector and the series of smaller passages along the length of the tube. roughly speaking, the holes at the top control mix at idle, the holes lower down, WOT. Having already messed with the air corrector diameter and unable find a combination that gave good mixture throughout, I was always left with a gaping hole around 3500rpm, so, dead spot around 40% throttle and 4 large holes around one third of the emulsion tube, reasonable place to start! Now, one would ask, why not just buy another set? well first of all, i'm cheap, a set of four to try would be a good chunk of efi money, second, i'm a sucker for learning and thirdly, the only difference between the 4 available styles is the body diameter of which I can't find solid data on what this actually changes. So, remove said items: Air corrector at the top, emulsion tube center, main jet bottom. Fill 2 of the 4 upper radial holes with solder and leave to dry Being a Friday night, I felt a quick drive was needed, so not expecting much I casually drove out to the open road and wow what a difference! the chasm is now a friendly ditch, I really should have hooked up the data logger as mixture stayed within acceptable limits for the first time throughout the rev range, more testing needed but a step forward in battling against the 50 fudges that constitute mechanical carburettors. PS, this is in no way an endorsement of twin carbs, EFI is king!
1 point
-
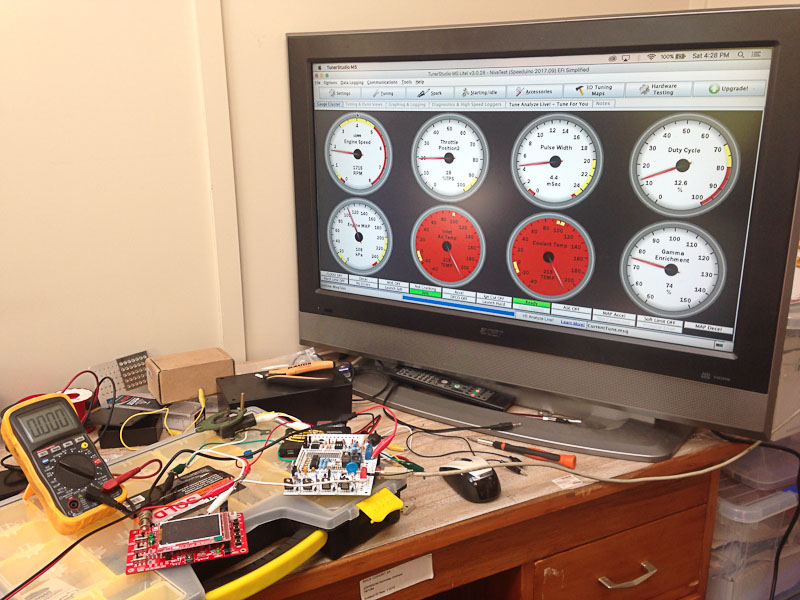
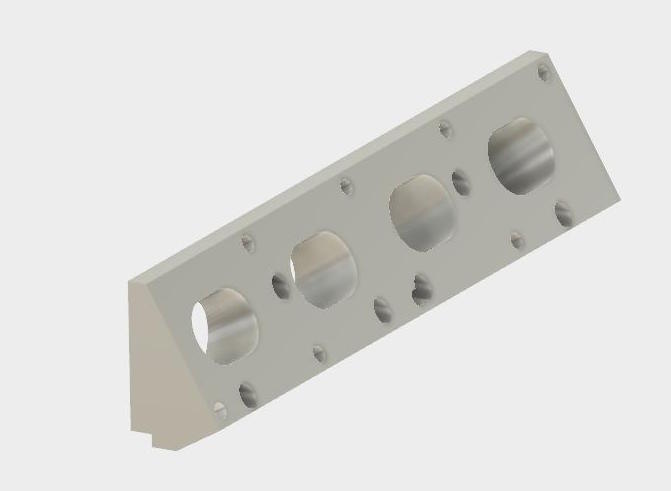
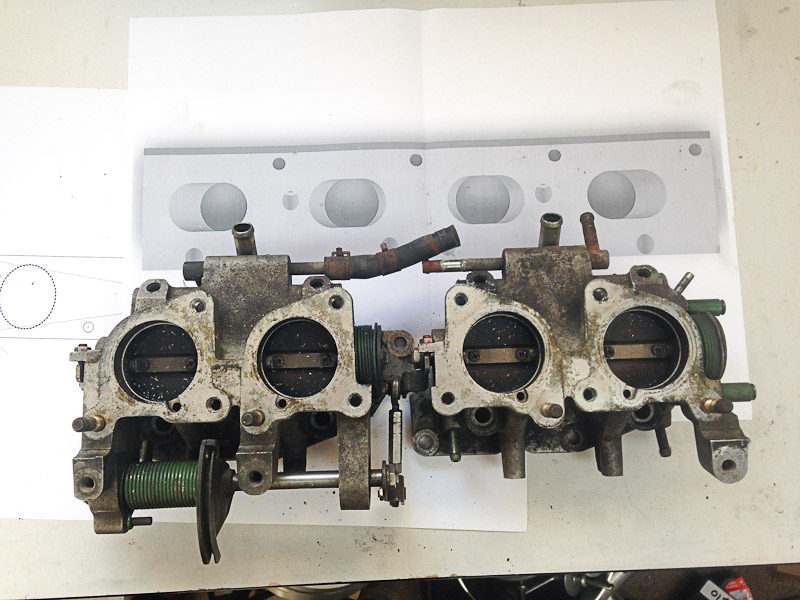
Got the Speeduino running and sat down to give it a bench test, hooked up the tps, fed a simulated crank sensor in and scoped the outputs. Pretty darned stoked to have it this far, found I had installed a few parts wrong during initial assembly which caused some searching, I even contemplated ordering a megasquirt if the fault was too hard to find, but thanks to open source and having all the circuit info available, a reversed capacitor was to blame and all is now working as intended. Drew up a concept for the manifold, while I can't quite make it as I initially though, it will still work with some extra manual labour, the idea being a single piece aluminium adapter plate won't require welding (I just don't have that much time anymore!) bit of manual machining needed and then sitting down with a die grinder for the final match up shouold do the trick. This will also keep the final package tidy in the engine bay, currently the manifold I made to snake around the distributor and dellortos is as large as the head and looks a little out of proportion (say the guy putting all this effort into a Niva) Printed out fullsize for a quick check, good thing as I had the itb sketch upside down! i'll fix that and then look to getting the blank cut out. also need to give them a good clean, a little grimy as well as the token Al swarf from being under a workbench the last few years!
1 point
.thumb.png.46e518f714cdc319554c389f990e75a4.png)


.jpg.c051f4af56894710c9b52e2fec2c2399.jpg)


This leaderboard is set to Auckland/GMT+12:00