
Leaderboard


Popular Content
Showing content with the highest reputation on 08/16/19 in all areas
-
An exciting day today! first test fit of the huge engine and trans into a mostly stock body mx5. first i started by cutting the 'ears' off the frame and firewall. forgot to grab a pic but its these parts. theyll need plates welded in to re-add the strength lost. this squares up the bay and allows the engine to sit close to the firewall then in goes the engine! its SO close to fitting in unmodified. infact if i was to unbolt the subframe, id be able to fit the sump bowl past the subframe and the engine could sit down properly. however, i dont really want to have to unbolt the subframe everytime i need to pull the engine. which hopefully wont be often, except for during the build, but even thats enough for me. if i want to slide the whole lot in, ill need to cut maybe 60-100mm out of the top of the tunnel. a pretty easy job for the massive benefit of easy install! trans hits here sump just doesnt quite get over the subframe its possible the unmodified hood may even close over it all! most of the bulk ontop is the wiring loom ect what a monster5 points
-
More progress was made on the old TVR today. Just small, but important things, again. I had a weird thought last night as I was falling asleep. What if the alignment is OK, but the wheel isn't on straight?! I previously mentioned that the steering wheel is way on the piss, and I thought it was the alignment, but hey, with everything else wrong with this car, could it just be the steering wheel wasn't positioned correctly at some point after being removed? This is a reasonably easy thing to check. First I marked the center top point of the steering wheel, with the wheels straight. Yeah, that doesn't look right! Next, I turned from center to either lock and counted the turns. Both sides had the same amount of turns to each lock from center, so that indicates that the steering rack is centered. Hmm. Also note in the above photo that the steering wheel bolt pattern lines up perfectly. I decided to take the wheel off and see if refitting it correctly would help, so I grabbed a hex key and started to remove the FINGER TIGHT screws from the wheel. Yes, finger tight. The leather wheel is a genuine Momo from '86. Not original to the car then, but still period correct. It's in very good condition really. Plot twist. I changed to the Momo Futura from Effie. I love this wheel, its so nice in the hand, and looks great. This is a much newer wheel, at '96, but still works. It looks sublime Moving right along, before I spend way too much time admiring my wheel, I changed the spark plugs. I whipped one out earlier to check and it was both black as anything, and the wrong heat range. Just a quick note on heat ranges. The number in the spark plug model is the heat range. The ones in the car were a BP6ES and I replaced them with BPR5ES (the R is for Resistor, to reduce electrical interference). Going to a lower number means the plug is "hotter". A hotter plug transfers heat from the plug into the head slower, meaning the plug runs hotter. A hotter plug is better for lower performance engines that rev lower and don't have forced induction. The higher heat in the plug helps to clear carbon and keep the plugs from fouling. There is a science to it all, but that's the basic premise. Love the ease of access. The old plugs came out with no issues. Very black The other bank wasn't much better, and plugs 4 and 6 were wet with fuel I had to remove the intake tubing and air filter to get to the plugs, so went the next step and also checked and cleaned the metering plate (silver bowl looking thing) The intake piping has been split before, but sealed up and had no other obvious splits, so that's good. The metering plate was nice and clean, but the throttle body was oily. I gapped all the new plugs down to the correct 0.6mm and fitted I haven't run the car yet, so it will be interesting to see if the new plugs make a difference to how it starts and runs. I have my fingers crossed. The next thing I attacked was the windscreen wiper. The original wiper arm was removed from the car before I got it, and I suspect someone had intentions to convert the arm from a pin fitting to J-hook (who knows how), as they had butchered the fitting on the end so it couldn't be used. I had to find a replacement. I knew I had a couple of arms from an SD1 in my piles of spares, so dug one out and had a look. The length was bang on, but it had a pretty solid kink in it, unlike the original one which is dead straight (come to think of it, the tailgate wiper is straight, I wonder if I have a spare still. I suspect its way too long though). Hmm, not ideal. Sure, it wipes and works, but its pretty well in the middle of the driver's vision when parked. Apparently, the original arm is a rear wiper arm from some ancient version of the Ford Festiva or similar. I could probably order one online, but I wanted a more local and readily available solution. I went to Pick-A-Part with one goal in mind; Come home with a new wiper arm. And look what I found A rear wiper arm from a MK3 (00-07) Ford Mondeo liftback. It's not perfect; if it sits as low as the above photo the wiper will hit the bonnet. This is due to the arm being slightly bigger at the spindle, and if it sits lower, it doesn't clear the cutout in the bonnet when its shut. I found this the hard way by taking some paint off the bonnet >_< Raising the arm up on the screen slightly means it clears the bonnet, but puts it at the bottom of the driver's vision Even at that height though, it's barely intrusive in the driver's vision. I'll see if I can live with it, otherwise, I'll have to visit Pick-A-Part again. Its an option though, which is more than I had. The last thing I had a go at today was the rear window. It's cloudy as heck and almost impossible to see through. I had seen on YouTube that you can sometimes polish the plastic clear using elbow grease and some Plast-X. I tried elbow grease a while back and got nowhere. Today I tried a couple of different methods. First, as a proof of concept, I used a small buffing pad on my drill to polish a small section with Plast-X. It's hard to see, but there is a slight difference. The arrow points to the line where the "before" is on the right and "after" on the left So the concept works. Now to scale it up. I was meant to sell my spare buffer ages ago, as it just wasn't as powerful as my bigger one for dealing with paint, but as it turns out, it was perfect for this work. I started on the driver's side, with Plast-X on the pad and this was the result Still pretty cloudy, but now you can see through it. You can just make out the steering wheel, but if I move over slightly, no sign of the steering wheel I worked it some more, but moved up to using Ultimate Compound. It's more abrasive than Plast-X, but seemed to take a bit more oxidation off. Polishing both sides made a big difference, clearly it was oxidised on both sides of the plastic Unfortunately as far as i can tell, the yellow sections cant be removed. It's pitted into the plastic, and nothing seems to touch it. I'll just be happy if it's clear enough to see a car behind me, as previously it wasn't. It was like having a white sheet instead of a window. And just because I can, here is a photo of one of the few times the bonnet has been down since the car rolled into the garage4 points
-
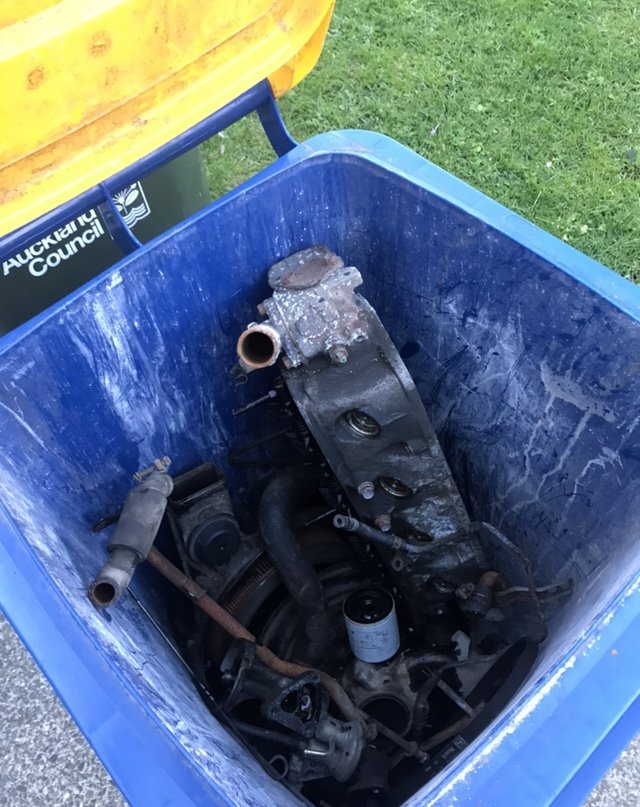
Tried another carb. No luck, given up and moving forward with motor swap. mate 4 doors down had a Crain so walked it up the rd with beers in hand this evening. 34 years and multiple beach missions the motor had pretty much welded it self to the gearbox. Couple screw drivers and a dog bar later she’s out. I’ll need to wait till next week to get rid of the block as the head and bolts ons have already filled the bin. plan.. bolt motor to box on garage floor to test clutch release before putting it in. finish engine loom and change body wiring to suit, then take it from there, hopefully get some better weather so I can deal to the frame and under body
 3 points
 -
hey also, here's a technical tip for those of you interested in the finer details of auto trans setup, if you want it to not leak fluid out the bottom, do up the drain plug. you got that?3 points
-
I dropped the injectors off to get serviced this morning. It used to honk out a monster cloud of black when the 'Tec kicked in. So there's no harm in optimising their performance. Nice spray pattern should improve fuel economy too.2 points
-
Ah yes, I must get you my spare valves. Drop by for coffee.1 point
-
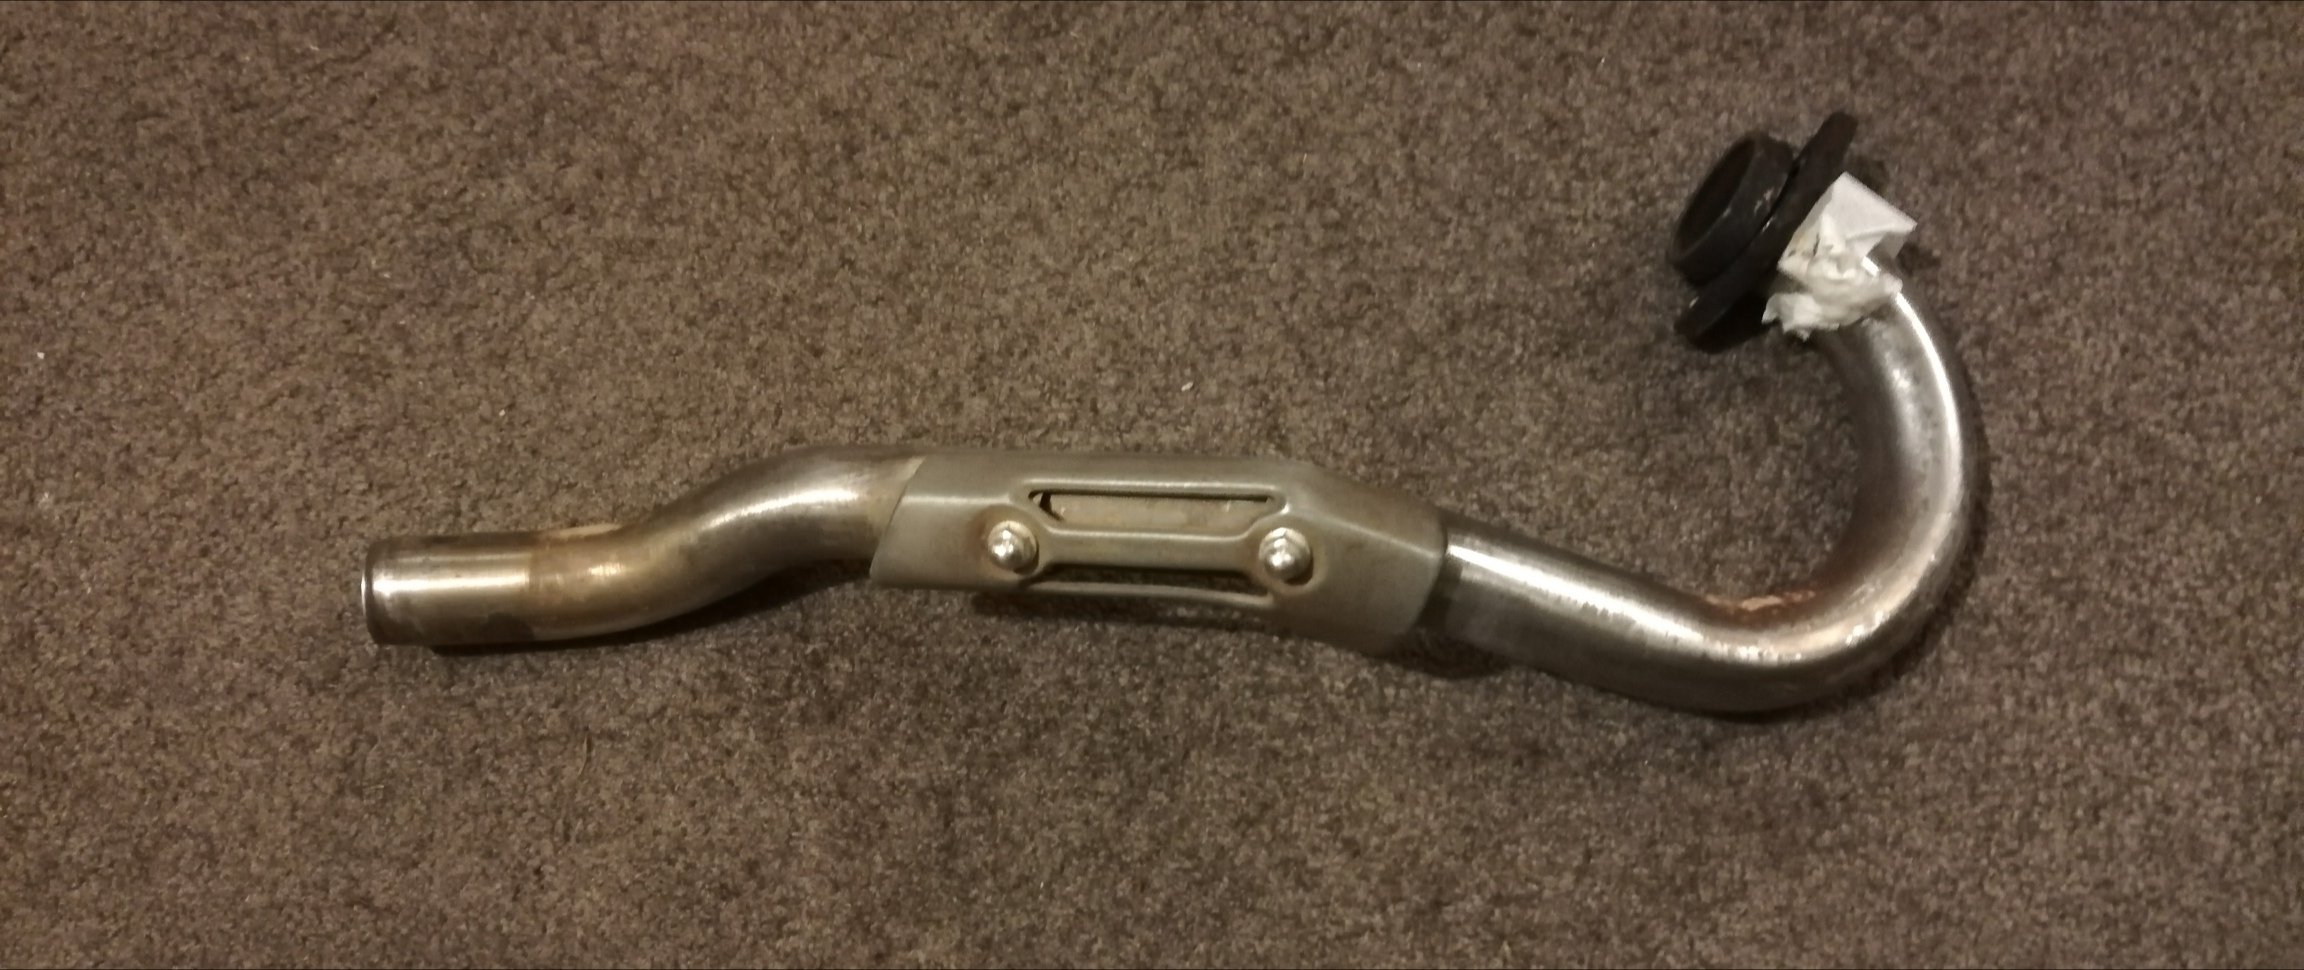
Sounds like it would be noisy. Slow noisy stuff is lame. High mount stainless header from a dr200. Will check what I can do about muffler placement. Don't want to push the panniers out or burn pillion
1 point
-
Well, it goes. But it sucks down low! To be honest its not quite what I was expecting??? I was hoping for a bit more out of it. Theres not enough room on my drive to get into power band, and that's when it should liven up. I've ordered new sprockets to change the gearing. This will certainly help. And then I'll run in somewhere with more space to hit powerband. However...it goes, it moves, it's got fuck loads of potential....1 point
-
I would scotch brite it with wax and grease at a minimum, see what happens. Or spray a patch then sand it back to test.1 point
-
Oh yeah, it also got its wof after de-cancering it a bit.1 point
-
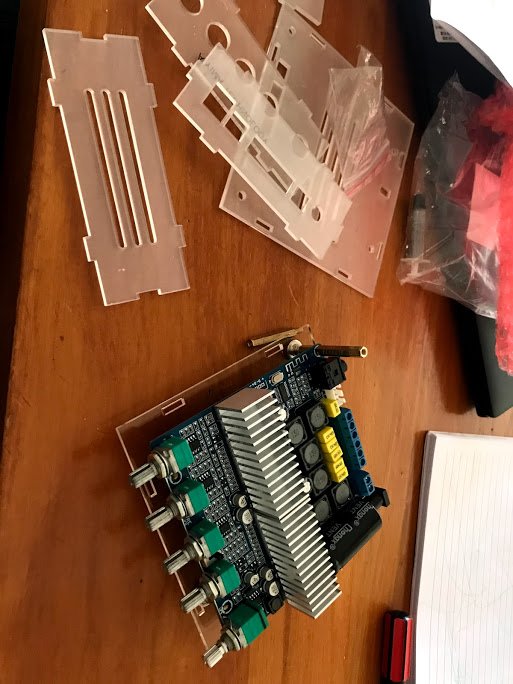
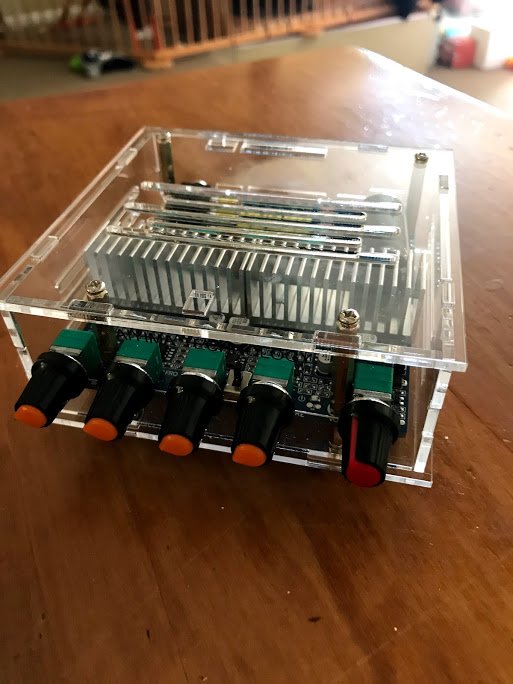
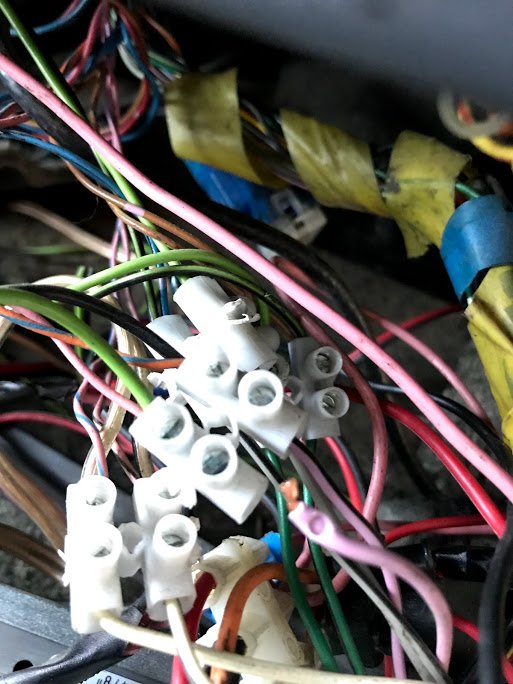
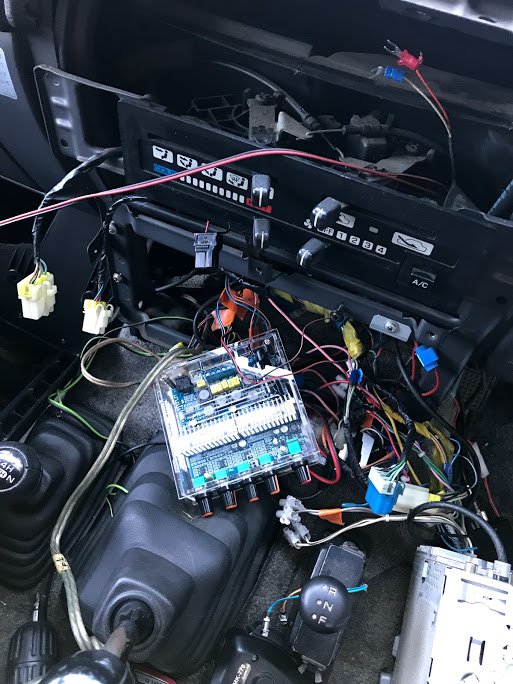
I have always found the stereo to be under powered, its a Panasonic jobbie rated to '50wx4' but it has always sounded pretty crap and complete lack of bass. The stereo was in it when I bought it, a couple of speakers didn't work, there are 6, one in each door (including rear barn doors). When I did the rust on the drivers door I found the speaker was a decent spec thing. The barn doors too. The rear doors have fusion speakers but they are damaged, the covers came off and the cone was touched by my boy I guess. I have been wanting to put an amplifier in but I didn't want to use a 24-12v power reducer because it just annoying complication and in order to power an amplifier it'd need to be a pretty high rate one. I do have a 40A one but that is all used up by the water/meth injection pump which is 12v. 24v amps don't seem to be common so I never bothered over the years. Ali Express to the rescue though, I bought one of these 12-24v TPA3116 2.1 tiny bluetooth amps. $32USD delivered. Worth a try? The fact that I Icould run it straight off 24v was the biggest thing. It arrived and it's fckn tiny, how can this do the job? Why are 'normal' 12V amplifiers still so big? I assumed it would suck. The aliexpress reviews were good. Someone mentioned that there was no thermal paste on the heatsinks. So I took them off and yep, nothing. So I added some, can't hurt right? I then pulled a part the dash and stereo junk. Man the install was pretty iffy and messy, quite a few of those horrible push on splice things, hate them. I also found that a couple of the stereo output wires in the terminal screw block type things weren't even screwed to the wire core lol....it was probably pushed in far enough to touch the other wire anyway. See the pink wire with the indentation, quality work. The manual for the bluetooth amp jobbie says it draws 3A. WTF, that's nothing?! This thing is going to suck. Temporarily installed after figuring out which wires go to each door and see if it was even powerful enough. You can see how small this thing, it's smaller than the ashtray slot. Which is where I'll put it. Tried connecting to bluetooth with my phone, no problem. Anyway, with just the two front door speakers connected, it has good volume. Better than the Panasonic can produce, pleasantly surprised. The amp control knobs are a a bit weird. The red on is for overall volume, but you also have a bass volume and treble volume (and freq adjustment for each). So you have 3 volume knobs, weird. With 24V it should be able to supply the full 50w (rms I think) per channel (only 2). At 12v it would be less, 20 or something. So I tried it with the two good back barn door speakers connected as well, so the amp is powering two speakers on each of its two channels. Sounds pretty good, no distortion and the treble frequency adjustment makes a big difference. Bass freq changes weren't as noticeable. I have an old Fusion subwoofer and box collecting dust, it came with an old runabout about 7 years ago. I used it in that car with some cheap amp that also came with it, I remember it made good bass but it seemed to have interference at lower volume...vague memory. I assumed it was the cheap brand amp. So I thought I'd try it using the 100w little amp's bass output. How the fck can this little thing power that? It's like an 1/8th the size of the old amplifier it came with. Holy crap, very impressive bass! BUT if I have the volume low it seems like the subwoofer is trying to produce sound and it comes out sounding like a broken speaker. No matter what I do with the frequency setting on the amp it doesn't stop it. At higher volume it sounds great, especially for $32USD. I'm wonder if its the subwoofer itself, it MAY be the same sound I remember it producing in the runabout jobbie. Otherwise it has to be the aliexpress amp. Which to me seems unlikely since the other channels sound fine. I haven't installed it properly yet, the amp doesn't have an on off switch so I need to figure out if I can use a switch (at an apparent 3A draw...) or wire in a 24v relay with the IGN on power. Other than the subwoofer issue, its bloody impressive for a tiny thing, is it just because technology has moved on? I mean old amps used to have 3 x 25A fuses? EDIT: what I think I'll do is test the subwoofer output with another speaker and see if I still get the low volume noise. The subwoofer is 12", if I had to buy another one I think I'd get a 10" for faster response. I listen to stuff which would need that. This 12" seemed to keep up okay but I assume a 10" would be better. Or maybe split the 100w to two 6x9's and try put them in the rear doors?
1 point
-
Fuck yeah...got it sorted!!! So loud, seriously think I've damaged my hearing. Ear plugs a must!1 point
-
I got 2 complete spare engines plus 11ty billion spare accessories....1 point
-
As those who are more familiar with us will know both Rigamortice and myself have a great affinity for the environment and take climate change (i.e. the thing we used to “call global warming” before it got cold again!) very seriously. Stricken by remorse and overwhelmed by guilt over the tons of negative carbon credits I’ve released on the global economy through years of motor racing, driving cars for the love of it, and behaving like a typically irresponsible older ‘Oldschool’ member I have acquired an EV! You may scoff at the fact that it’s a clapped out old warehouse sweeper with buggered batteries saved from the scrap heap but to Rigamortice and myself it is a powerful symbol of our indefatigable commitment to a green and politically correct future. With help from my brother providing advice, encouragement and the Wild Turkey may I present the definitive green, negative carbon credit, EV solution to taking the wheelie bins out when you live down a long driveway, (what could possibly go wrong!). Commentary and camera work courtesy of the ever lovely Mrs sr2.1 point
-
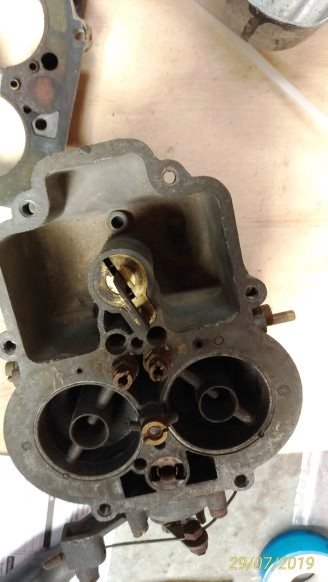
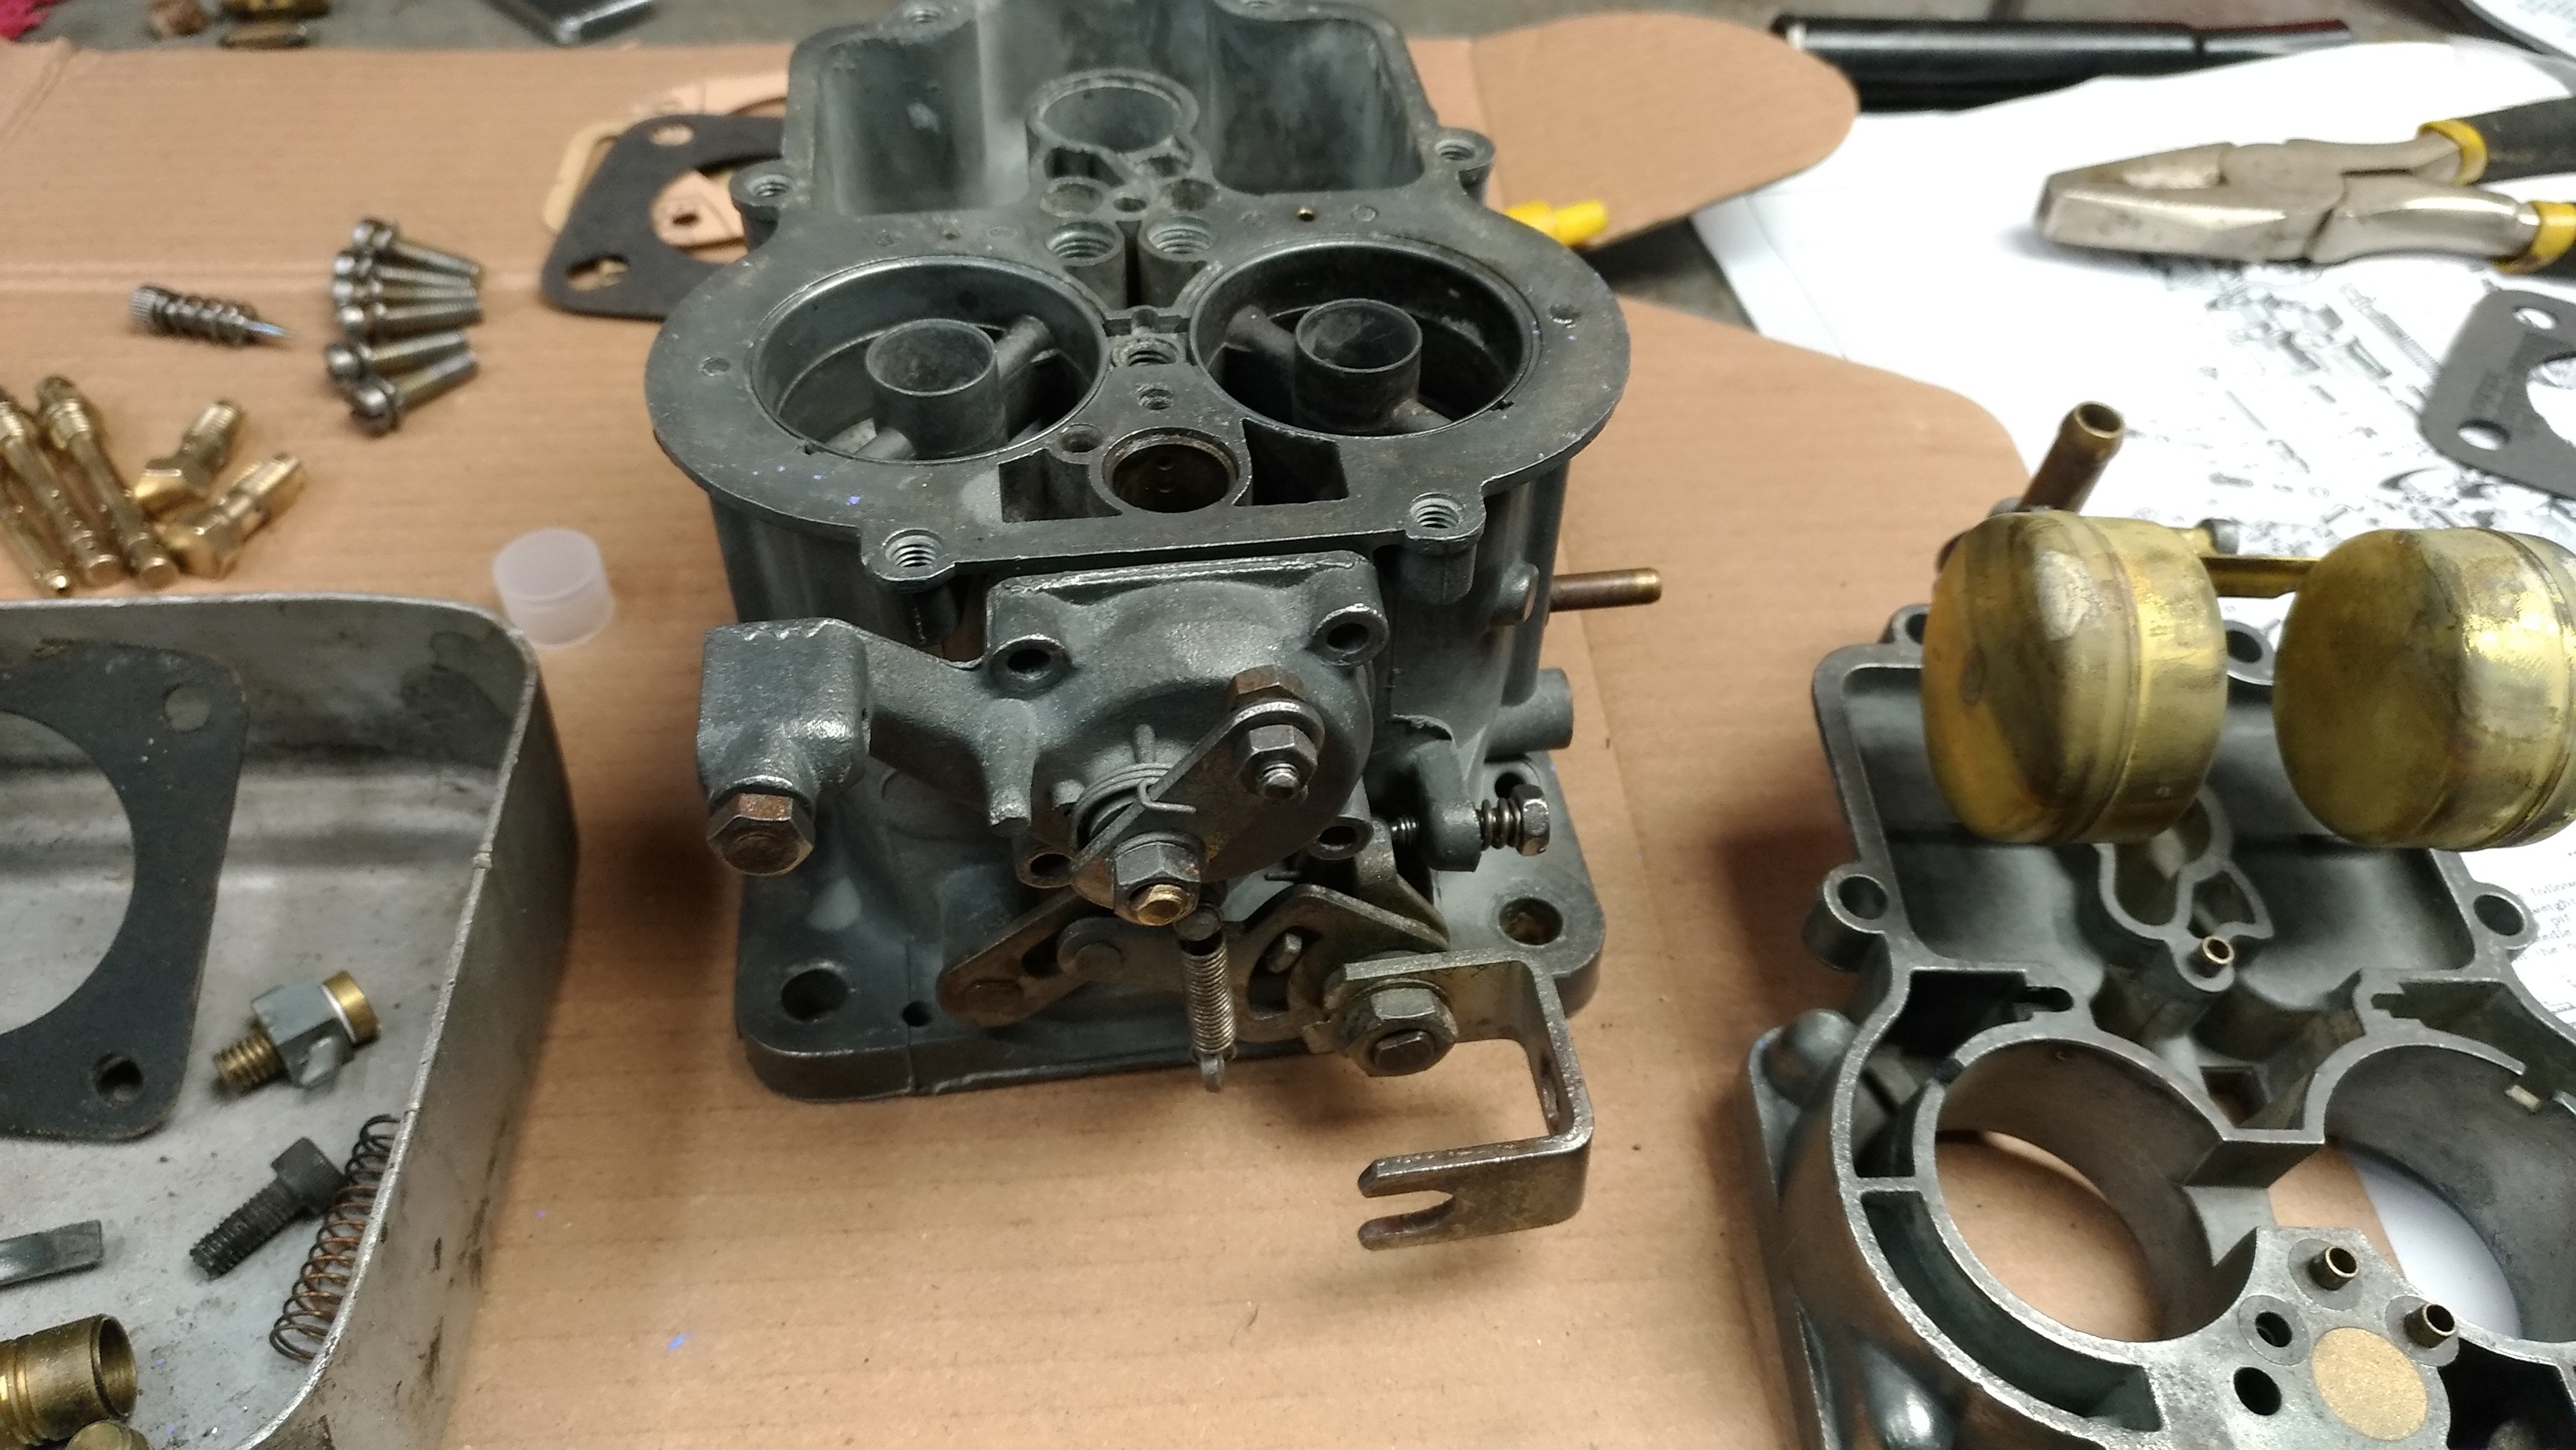
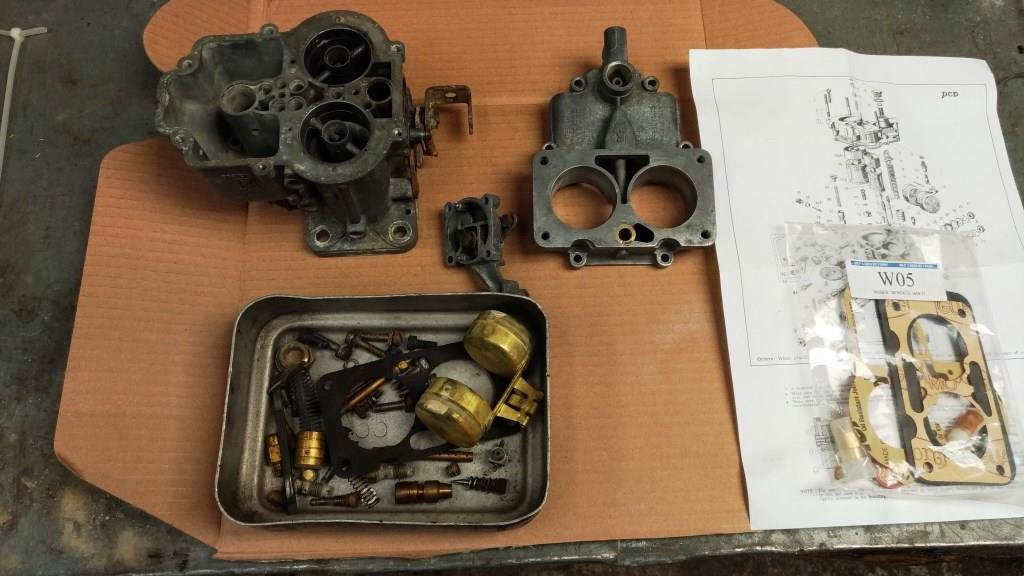
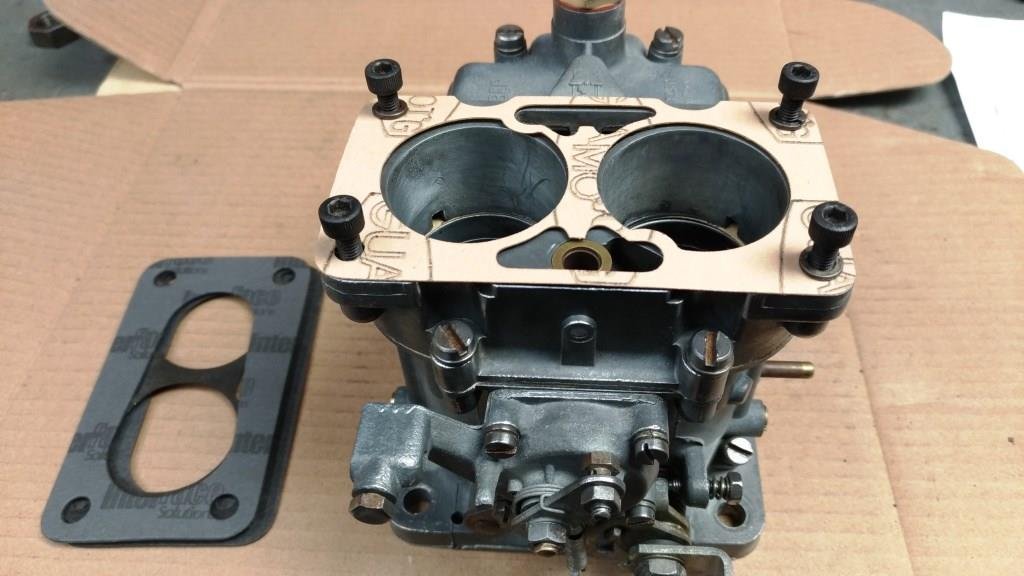
Thought it was about time to have a look at my favorite DCD Weber; we go back a long way, purchased new in 1974 it was looking a little 2nd hand. Stripped it down and on closer inspection the throttle spindles showed little almost no wear and the call was made to give it a good clean and assemble with a new float valve and gaskets. Finally located a rebuild kit from MLP Carbs in Victoria, (don’t you hate it when bloody Aussies turn out to be the good guys……!). After an enjoyable evening in the world famous sr2 man cave rattling the neighbourhood with Pink Floyd playing loud and ½ a bottle of cheap (ish) pinot noir - one more job’s ticked off the list.
1 point
-
#Auckland weather?1 point
-
got my driveshaft back and put it in. filled it up with trans fluid and took it for a test drive. everything seems to be working fine and the trans shifts perfectly. kickdown is working shifter selects all the gears correctly i hooked power up to the overdrive solenoid and that's all working mint its like a different car. motorway crusing is lush now. no more 10billion revs at 95KPH. here's an art picture because i didn't take any of a gearbox. 2019-08-13_07-49-37 by sheepers, on Flickr1 point
-
The crazys in the workshop have been at it again....
1 point
-
Not much has happened due to me having the flu, but the weather was too good not to take the TVR for a quick blat around the block Anyone who has had Man-Flu knows how hard it is to survive a normal day, let alone a day playing with old British cars, so my freight train of progress is halted at the station for a bit, as the garage is just too cold for me to be working in (its the middle of winter, and its been horrible weather recently). Due to said horrible weather, the tiny little "first drive" mentioned in the previous post did only consist of popping down to the end of the street and back, a return trip of about 100m. Today was the first day we saw some sun, and because I heard getting some fresh air and sun is good for you when you're sick, I took this as a sign that the TVR should go for a quick run around the block. I didn't go far, only a total distance of 1km according to Google Maps, but further than the car has been driven in probably 3 years. The car was already warm in this video as technically I had already taken it around the block twice before I thought I should grab a video. It started easily from dead cold, and as you can see warm starting is pretty good for an 80s K-Jet too. I had the targa panel off but the rear section up to reduce wind noise, and even then, what a sound that Cologne makes! It surrounds you. What a silly little car to drive, but such fun. It's not all happy days. The steering wheel is way on the piss (as you can see), the brakes pulsate badly, and it seems to misfire under load at about 4500rpm. There is still work to do, but its good to know that the car is actually driveable. The new spark plugs arrived today, so I'll probably throw them in this weekend, and I'll check over the rest of the ignition system at the same time. It could also do with some more fuel as I must be burning dinosaurs at a rapid rate of knots, and there wasn't a lot in there to start with.1 point
-
Yeah something went wrong, 2 part epoxy will usually stick pretty good even to a poorly prepped surface. So using the data sheet for something like the protec 408 epoxy primer it says to sandblast your metal or sand it until clean and coat it. Says if you are using new sheet metal to use their acid wash (which is phosphoric acid) to remove the oils, read the data sheet for the acid wash it says to use steel wool to apply and wash with water so you are washing and scouring it, then wax and grease before painting. This is how I learnt from a couple restoration body work guys, backed up by the data sheets of most paint systems. Now epoxy is used as a sealer of old paint so it does stick to other shit and usually well. But you want to test it out and if you go all the way to bare metal I don't see why you would want anything else under it, especially a rust converter primer, they don't have the same adhesion as magic chemically cured 2 part epoxies. http://www.ppglic.com.au/uploads/tds/408 Epotec Epoxy Primer (2).pdf So for all applications its pretty much clean white sanded/scotch brite steel clean with wax and grease and then apply 2 part epoxy. If you have pitting or want to clean it then acid wash with phosphoric, neutralise with water. I would still key the metal up again with scotch brite after the acid wash to remove everything as you can get some residue if the acid wash got dry. Anything else is garbage IMO. Then for safety as said modern epoxy cures with polyamide, old school ones used amine or something toxic (not a chemist). So 2 part epoxy is very similar as other single stage paints as far as safety goes, ie don't breath it and avoid getting it on the skin and eyes. It doesn't have the extra death factor of polyurethane which cure with isocyanate, anyone who has sprayed urethane clear knows how deadly that shit smells.1 point
-
Sunday evening update time. Fuck the weeks go past fast, I must be getting old. I made some hatches for the rear openings; I added some covers for the drawers so my tools don't fall out; I have yet to find a really good lock system for those big drawers yet... I then made a bracket to hold a power steering reservoir in a place where it was easy to access; I made some radiator supports; After I made these I found the Dyna rad supports in my box of shite, so now that I have adjusted these into the correct position with the cab on I will probably change these over. The Dyna ones have some isolation built in which is a good thing. The rad itself is sitting on two M8 isolation mounts on the underside, connected to that bit of angle. I will cut the angle into two smaller brackets, that shit was just to get them in the right spot during the setup. All snugly in place. The reservoir cap does hit the cover so something will need a cut and shut. I then stood back and admired the goodness; O fuck yes.1 point
-
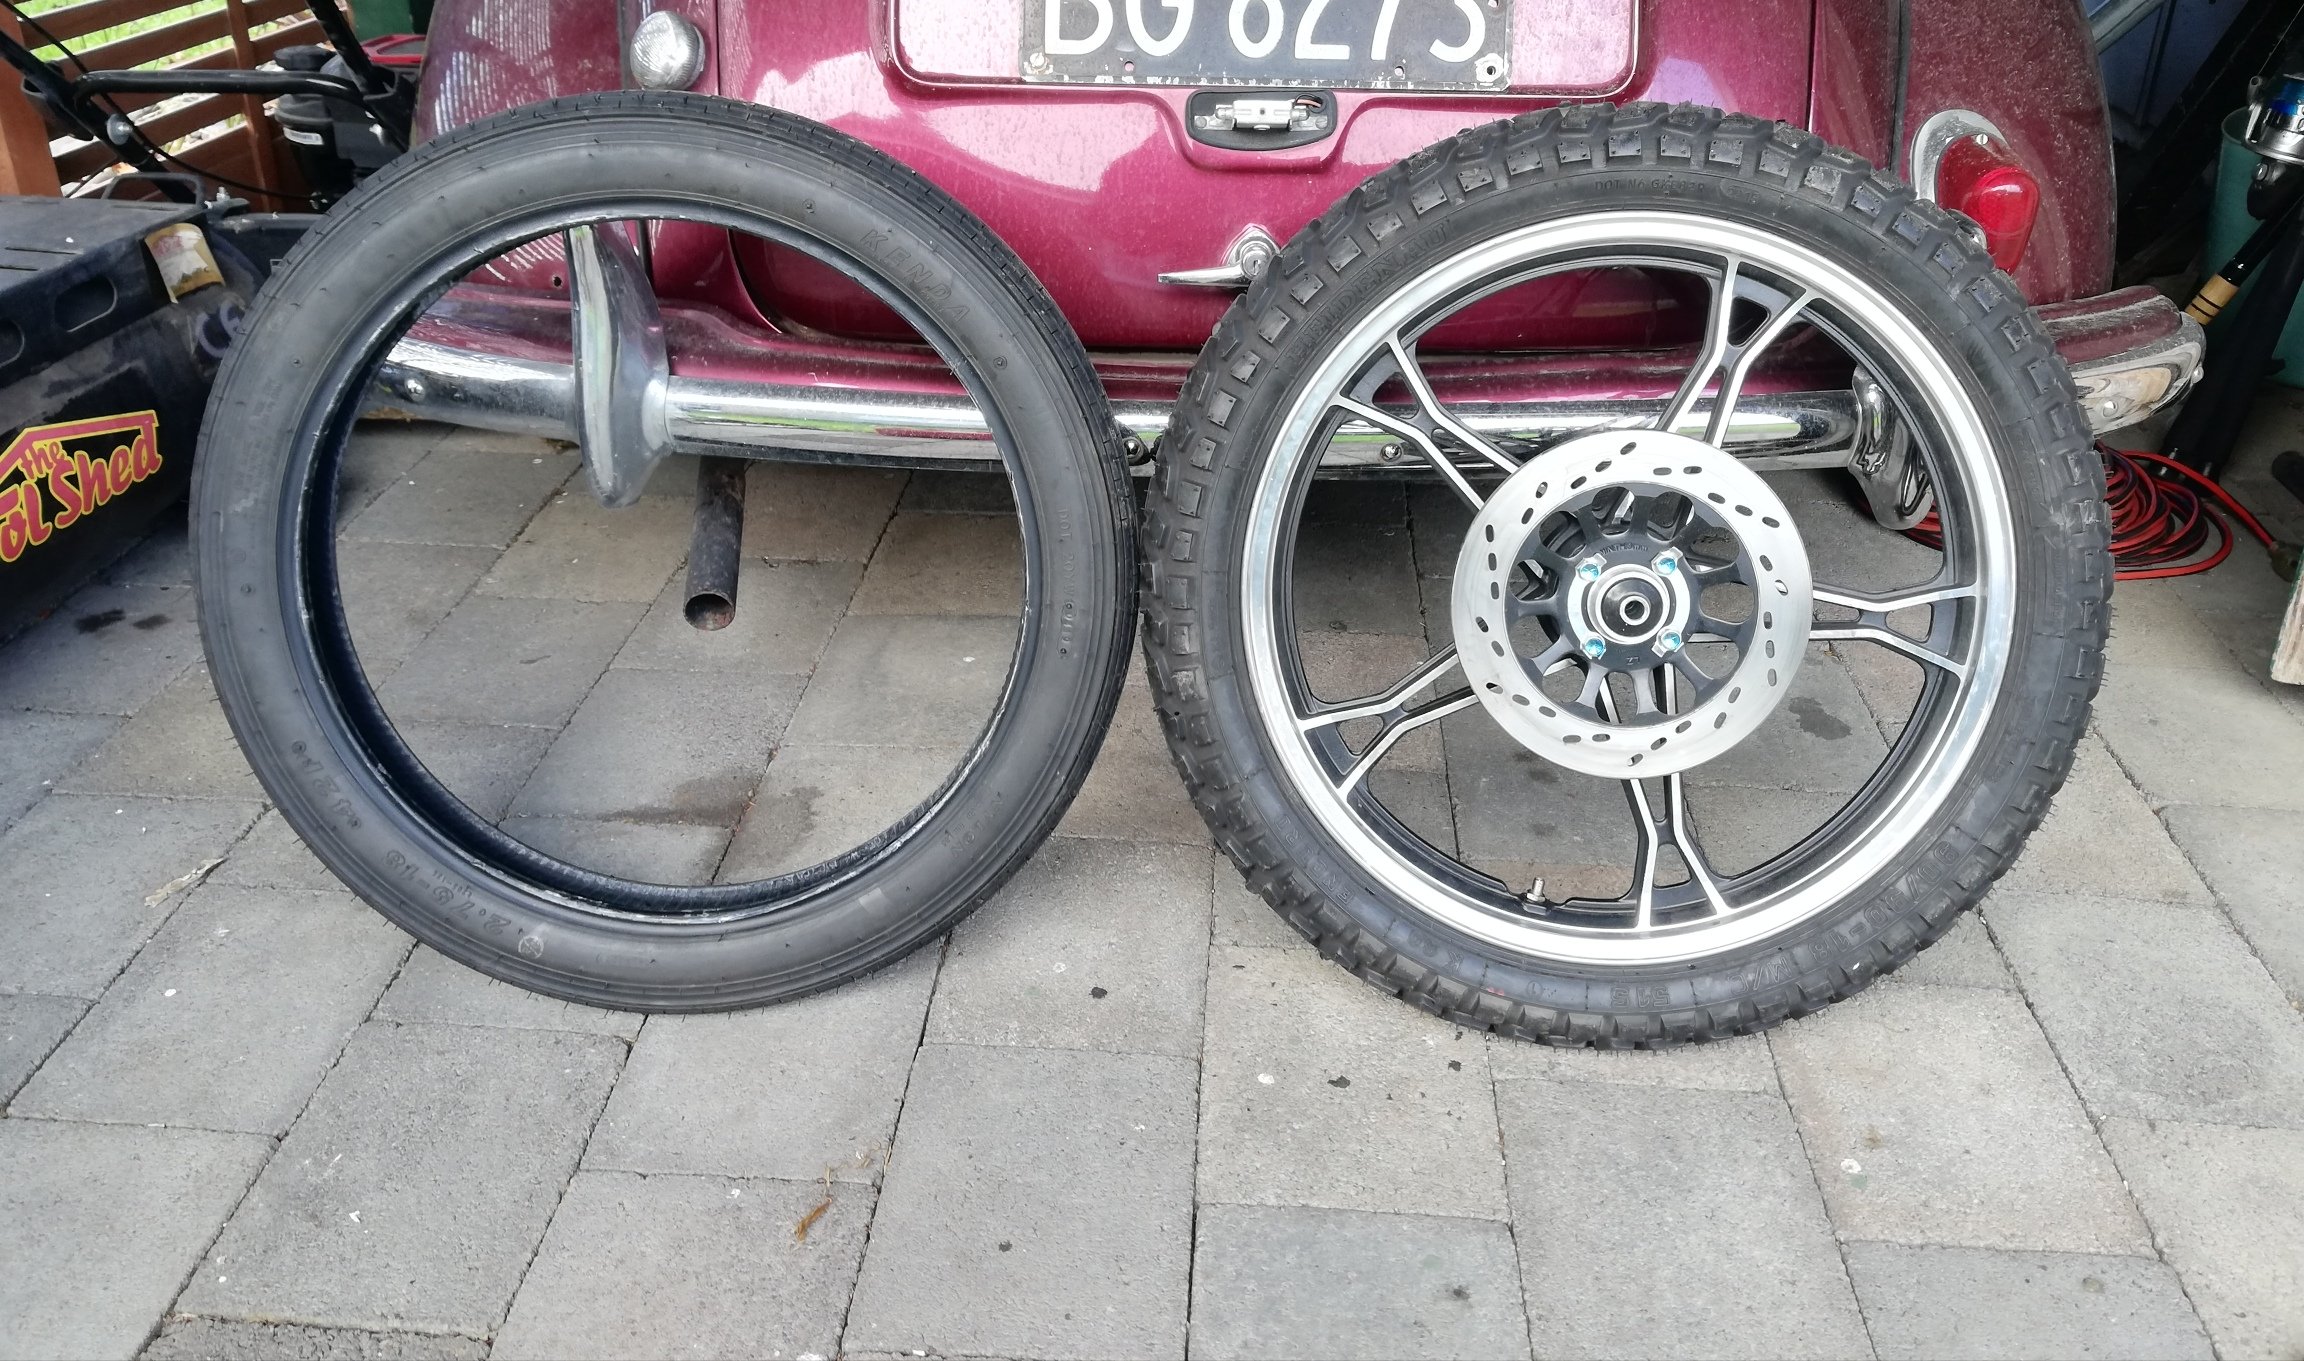
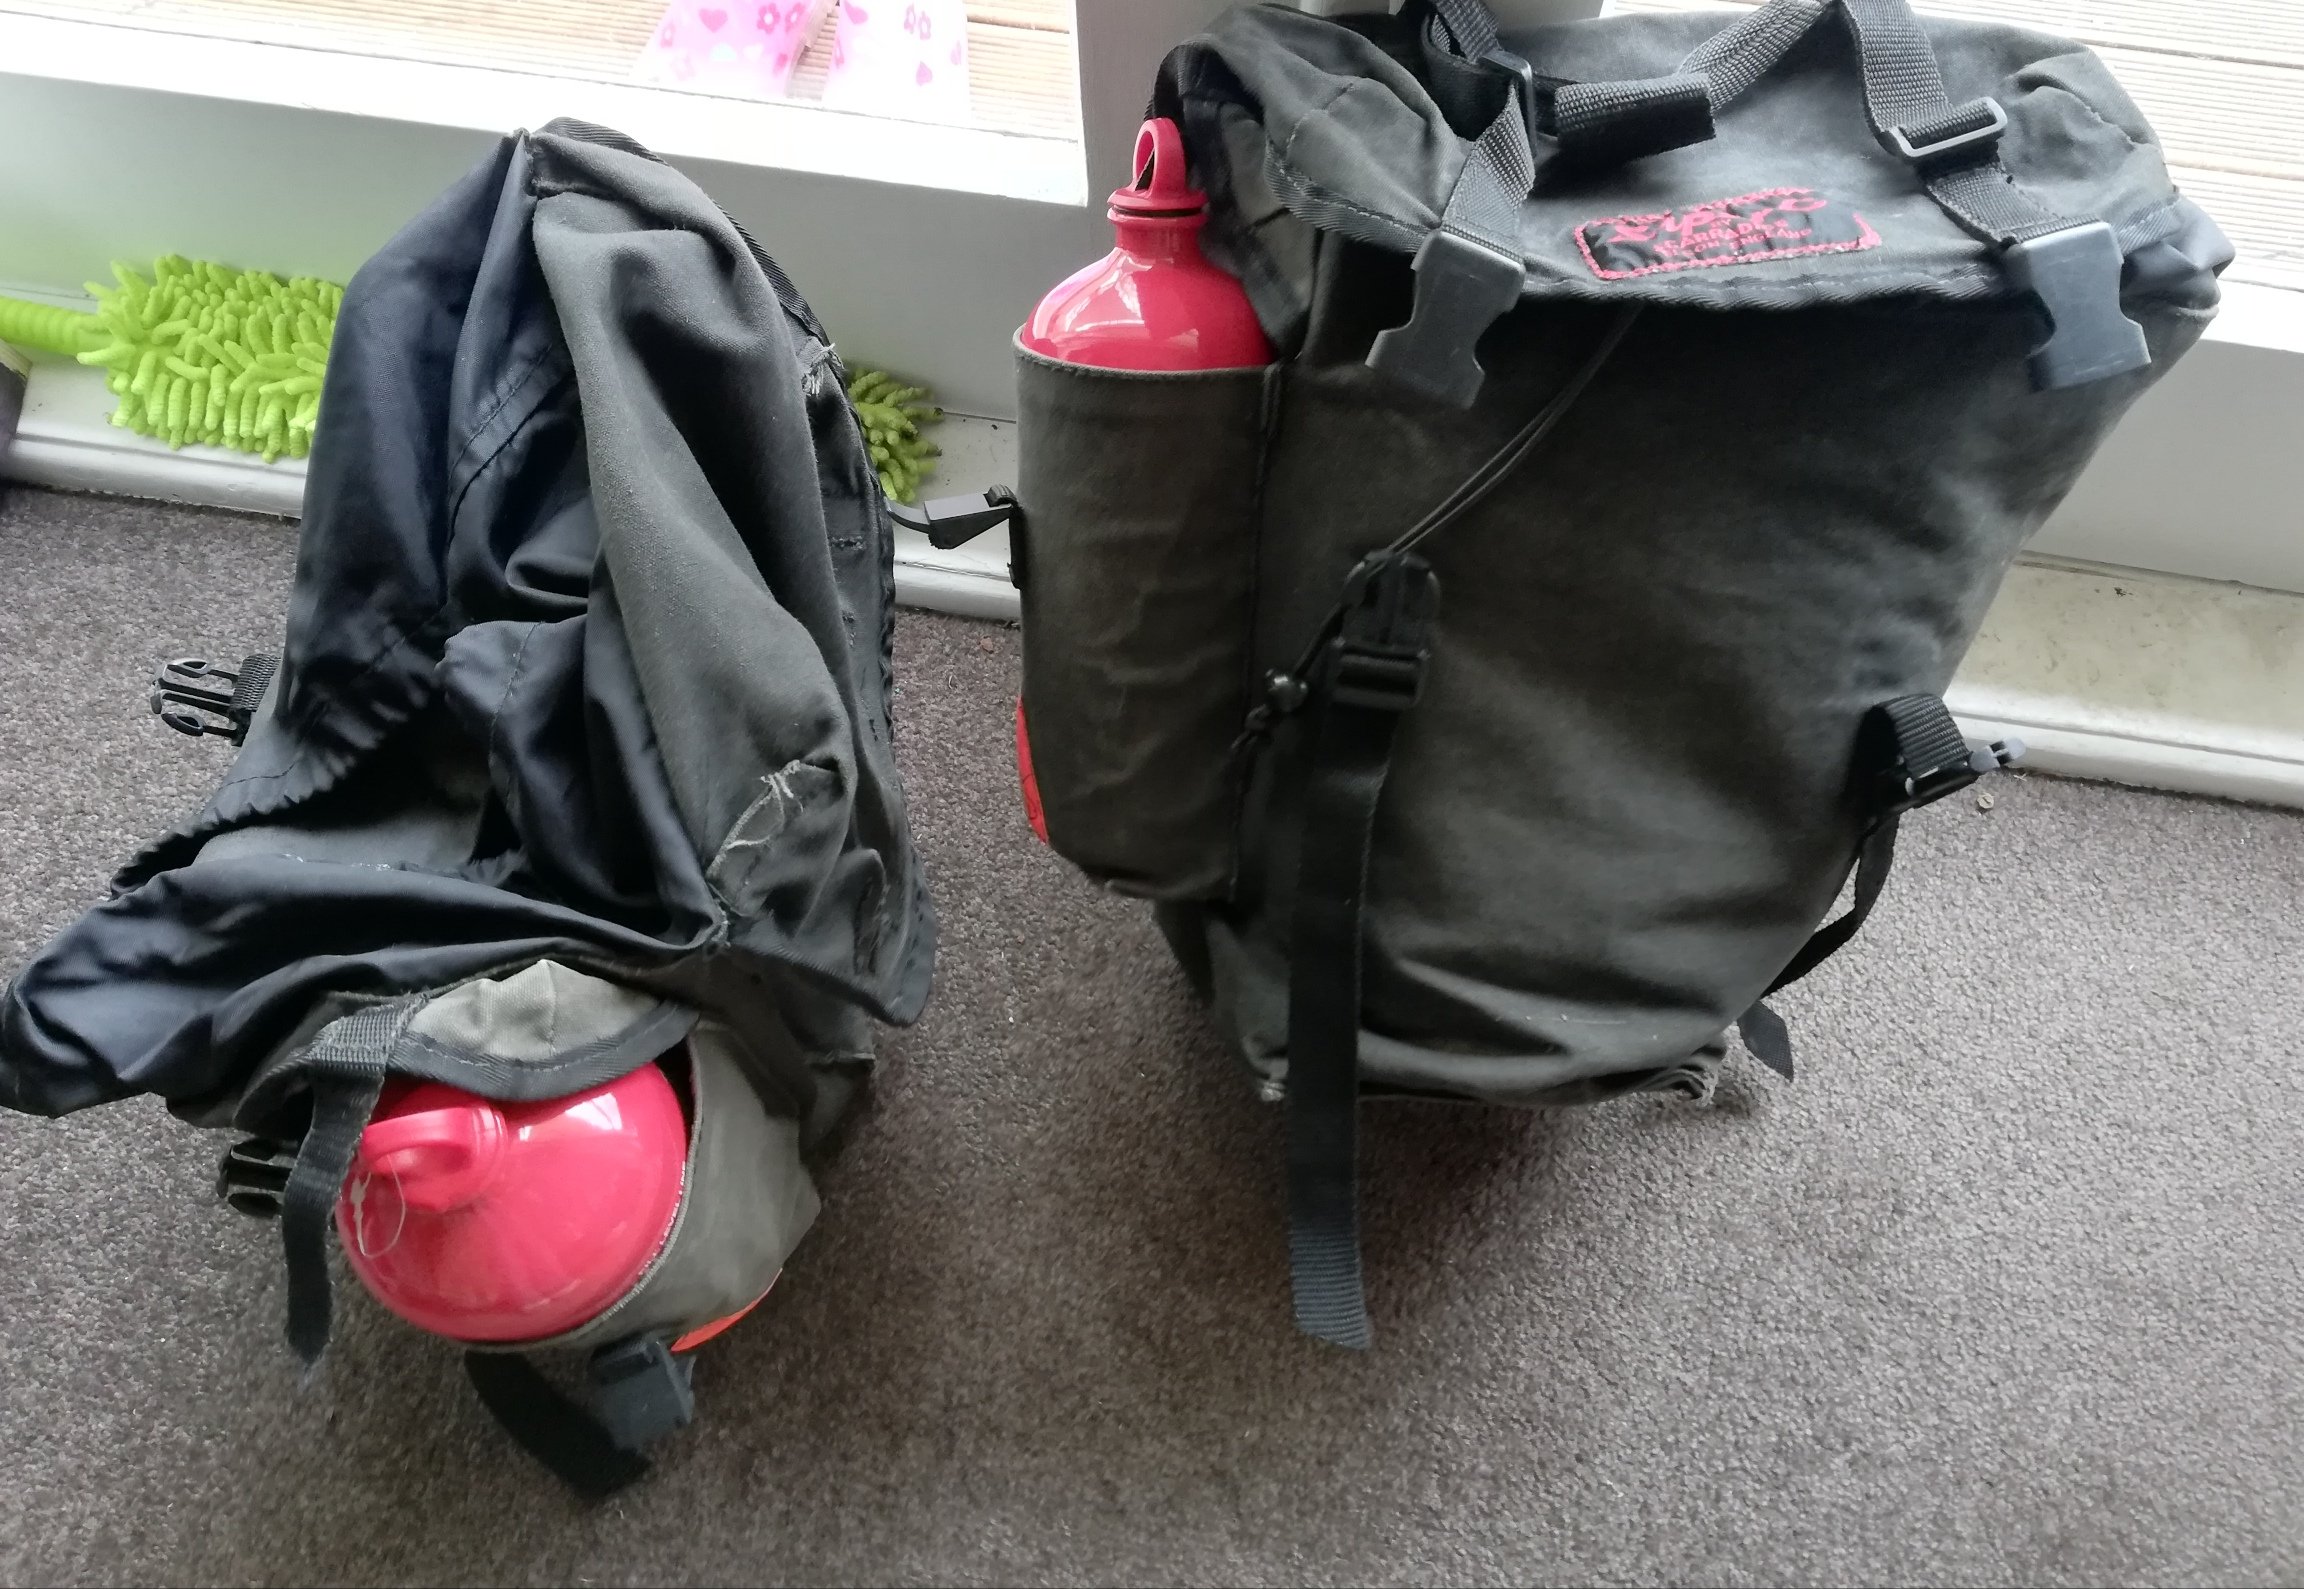
Banged the scout on this morning Looks the part The nips touch the fender, which isn't too much of a problem for commuting, but I will probably raise the fender a little to avoid getting it full of mud/gravel when adventuring Also got a pair of 1.5L fuel bottles. These will work with my msr stove and give me about 110km more range for those out of the way places
1 point
-
Progression. I drilled the steering knuckles out on a 20 deg angle, and then fucked around for aaaaaagggggggeeeeeees playing with different hights and angles on the struts, trying to get the best all-round set up. Once decided, I welded the piss out of them with Mr Miggins, and then put the front end together. It's got some decent steering angle, I just hope the racks quick enough. It's 3 turns lock to lock, and the steering is nice and light. Looking more like an offroader, I also did some highly scientific suspension testing, It's got about 5 inches of travel in the front, and 7 in the back, which is not too bad really. I started it last weekend and managed to free up the clutch (was seized from sitting so long) by standing on the brake while powering on in first gear, so pretty stoked that worked. Excellent. Regards, VG.1 point
-
Looks like euro gn125's are geared to do max 80kph. I guess that's why so many posts are about them being too slow This one does an indicated 110km at 9000rpm with a full tank of gas, 2 loaded panniers and a duffle bag on the back, and me. That's pretty legit tbh. Now that I have a 12v socket and a 300kg hanging scale I'll swing it off my engine crane to get a weight and do some gtech runs. Also have an O2 sensor I may put on the exhaust to see if I can squeeze a little more from it1 point
-
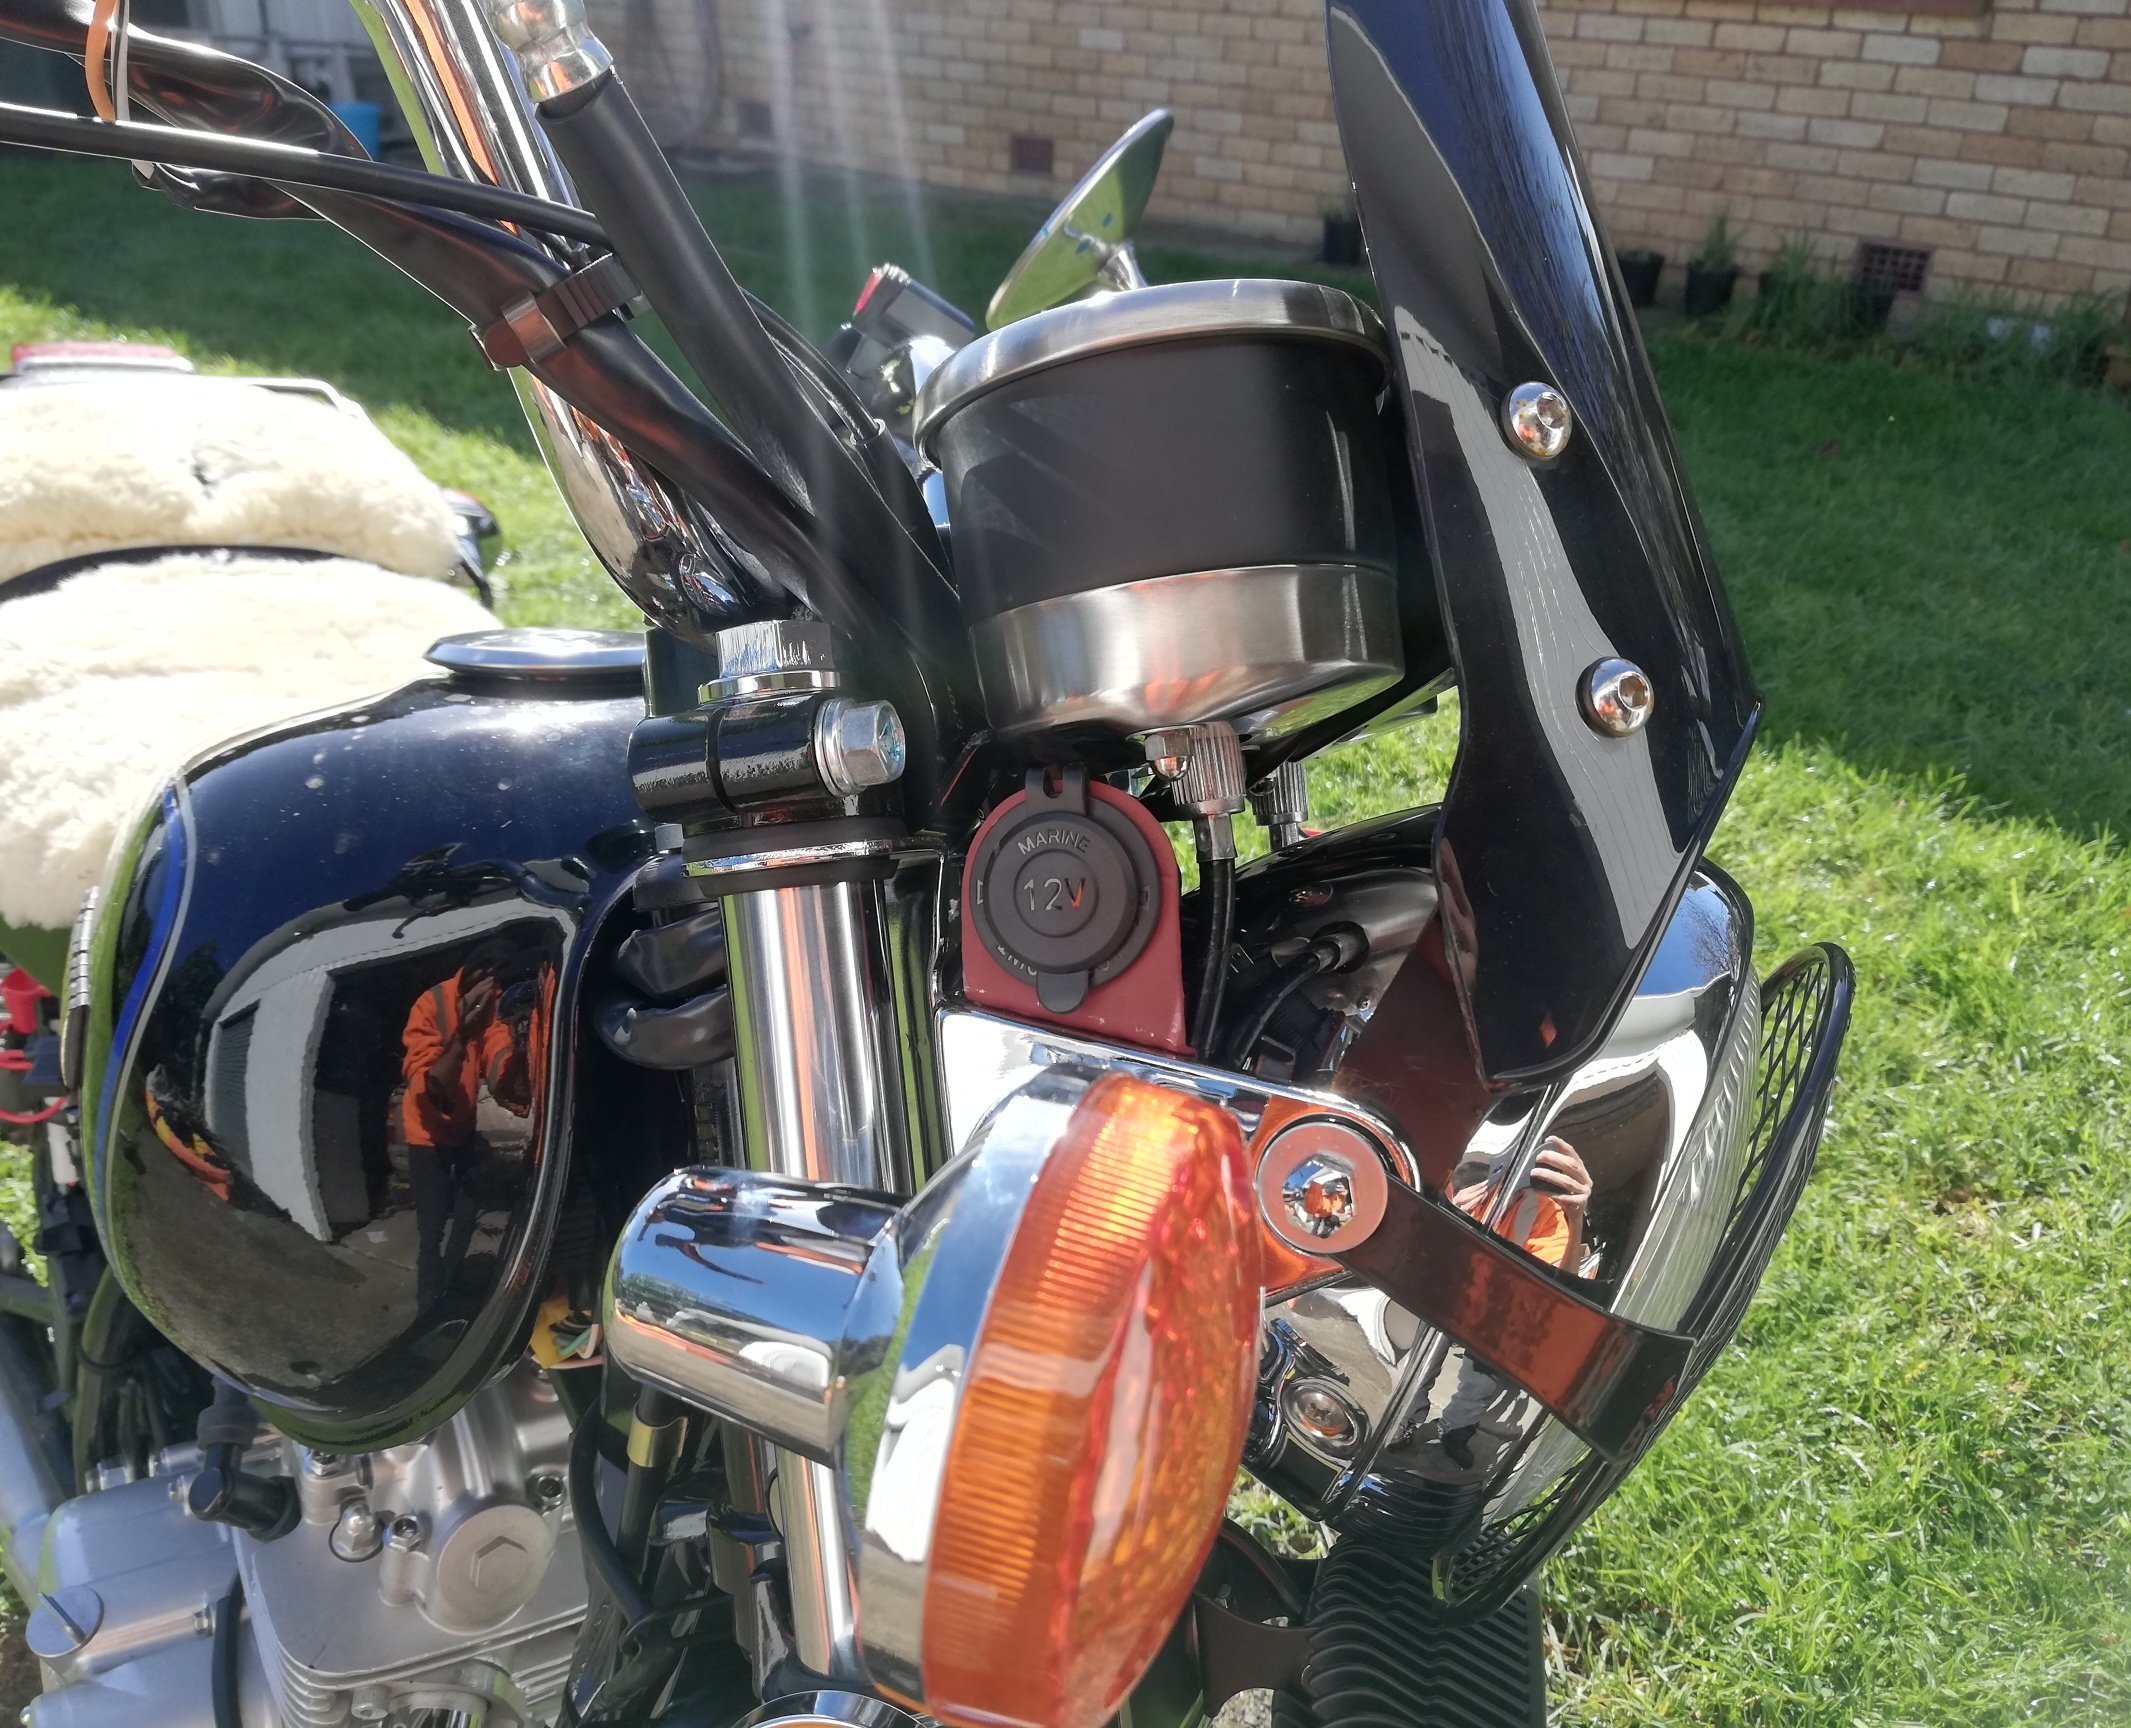
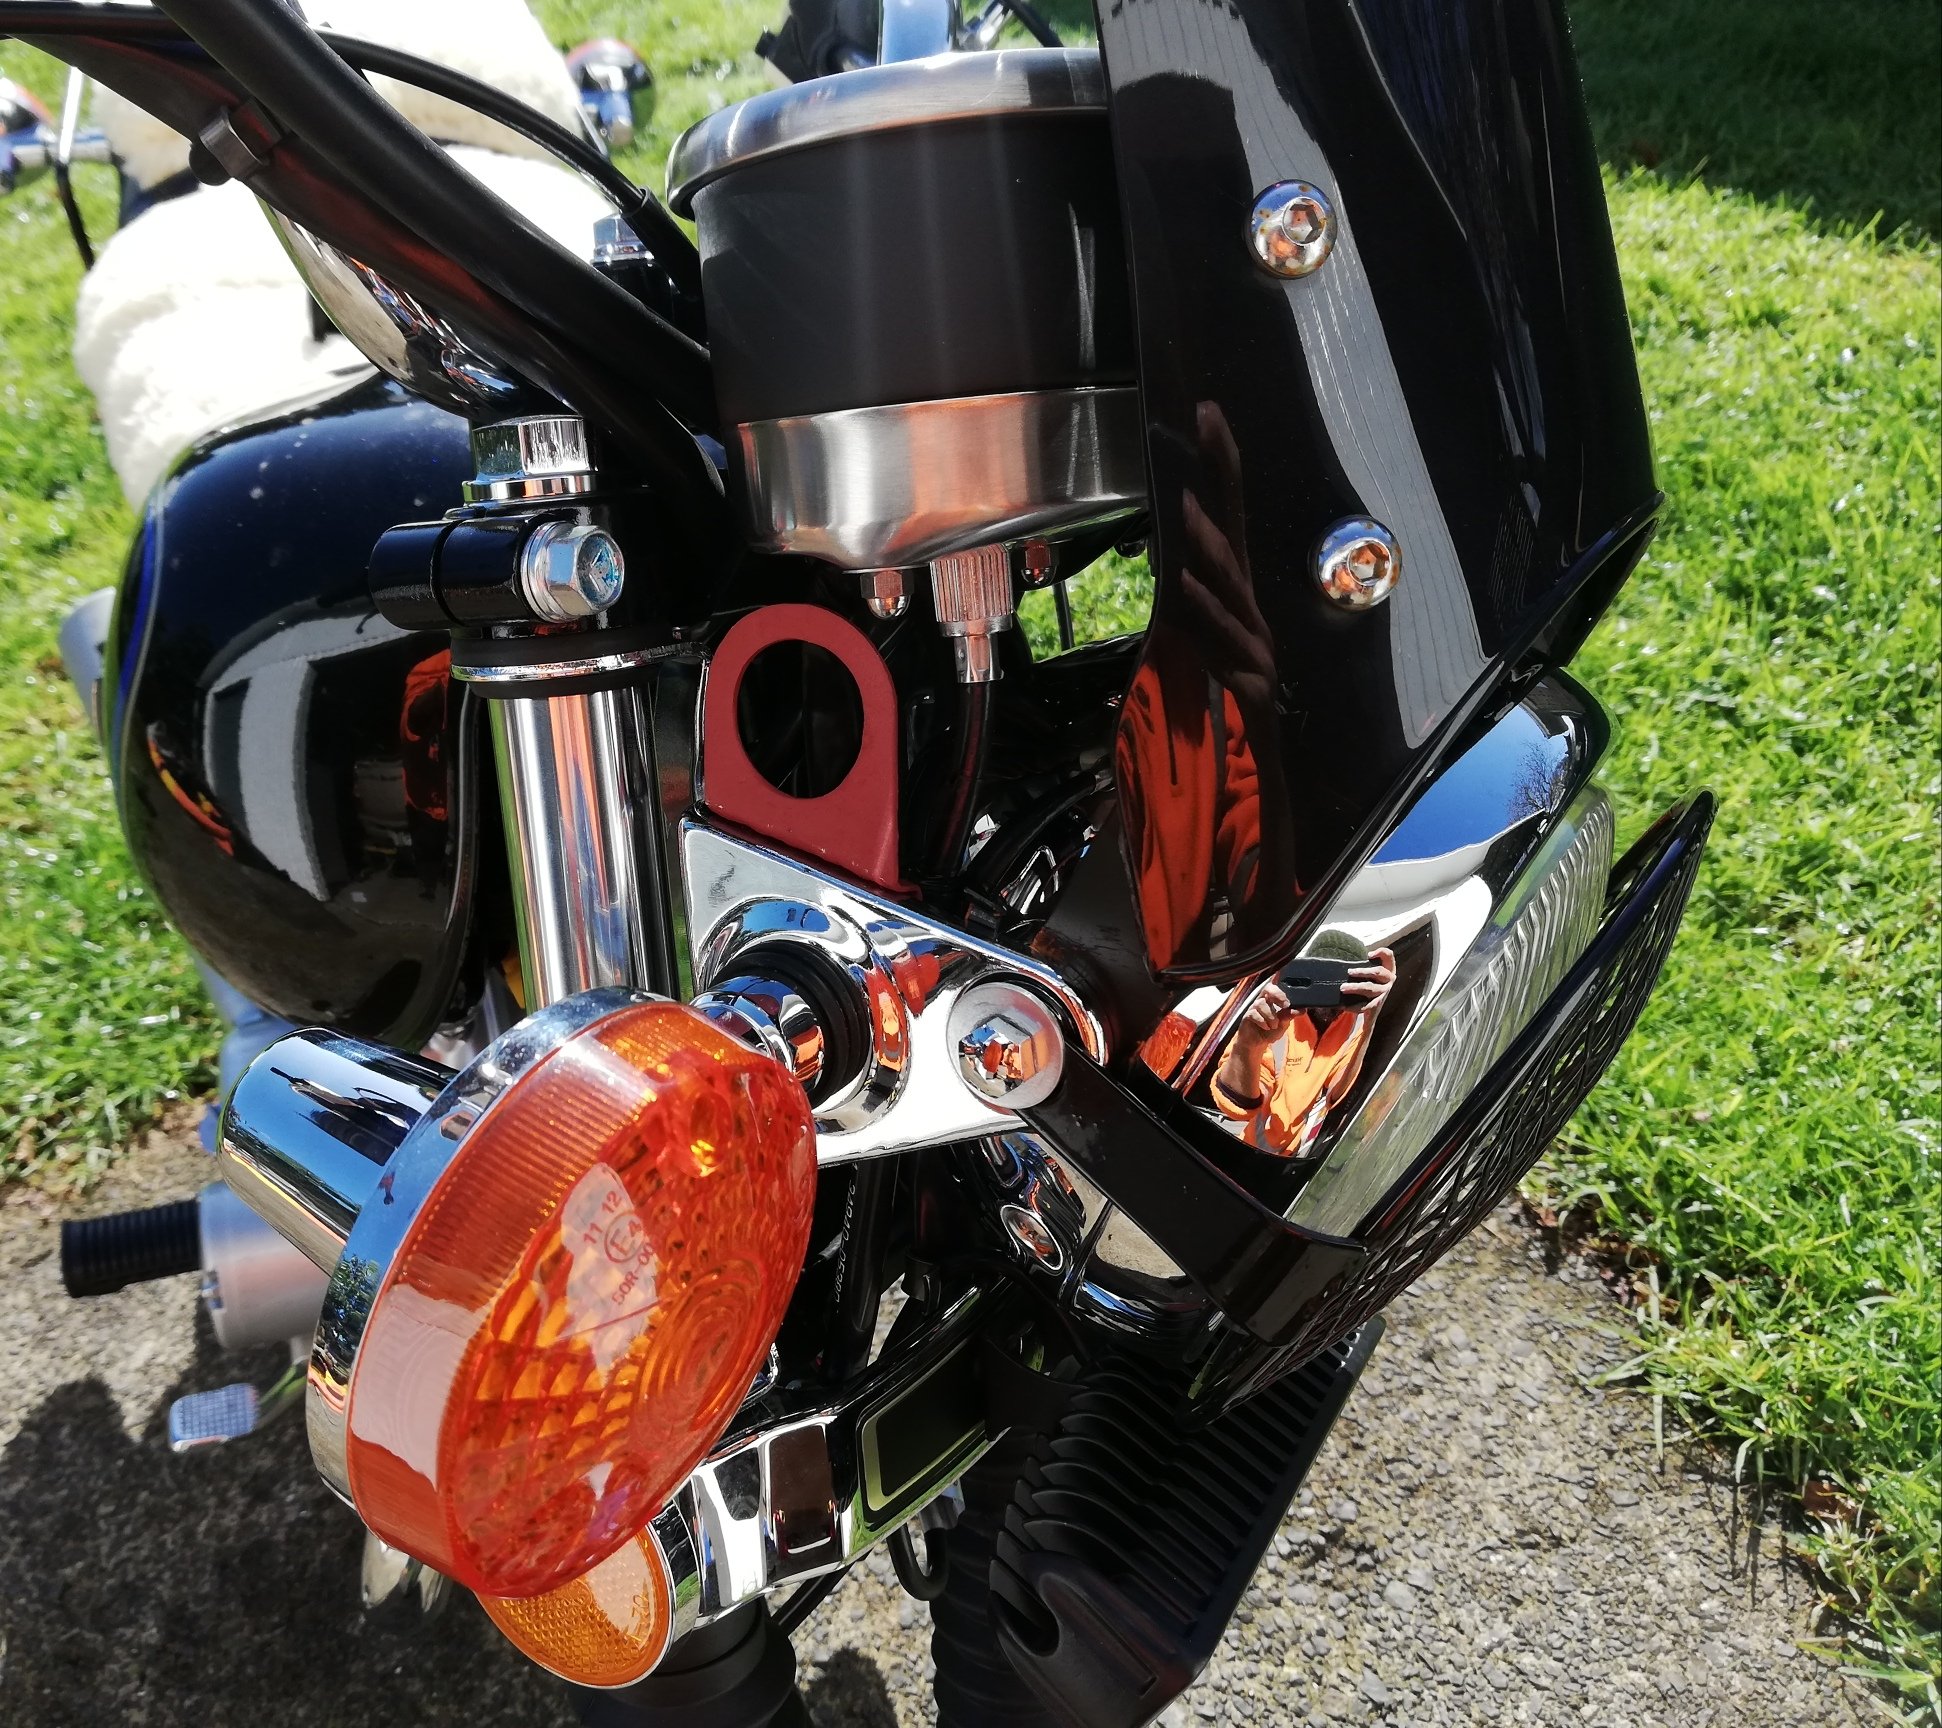
Aaaaannnndddd we're done another relay circuit, switched on the ign and another on off switch mounted behind the battery cover. A ciggy socket this side, and I will do a double USB with volt meter one on the other side. A third one in the rear could be nice for charging stuff in a pannier, but I don't carry much electronics. A cable into a tank bag may be more likely.
1 point
-
It'll fit. probably1 point
-
Sadly some projects just pan out... My xv1000s clutch is getting worse and my van needs some attention and havnt done amything really with starlet... So sad to say shes gone to a new home.. Hope gets more use. But atlest can now afford to fix my bike properly0 points


.thumb.jpeg.384ff72c8d2b0ee0d34a7bdedb55bdcf.jpeg)

This leaderboard is set to Auckland/GMT+12:00