
Leaderboard


Popular Content
Showing content with the highest reputation on 07/07/19 in all areas
-
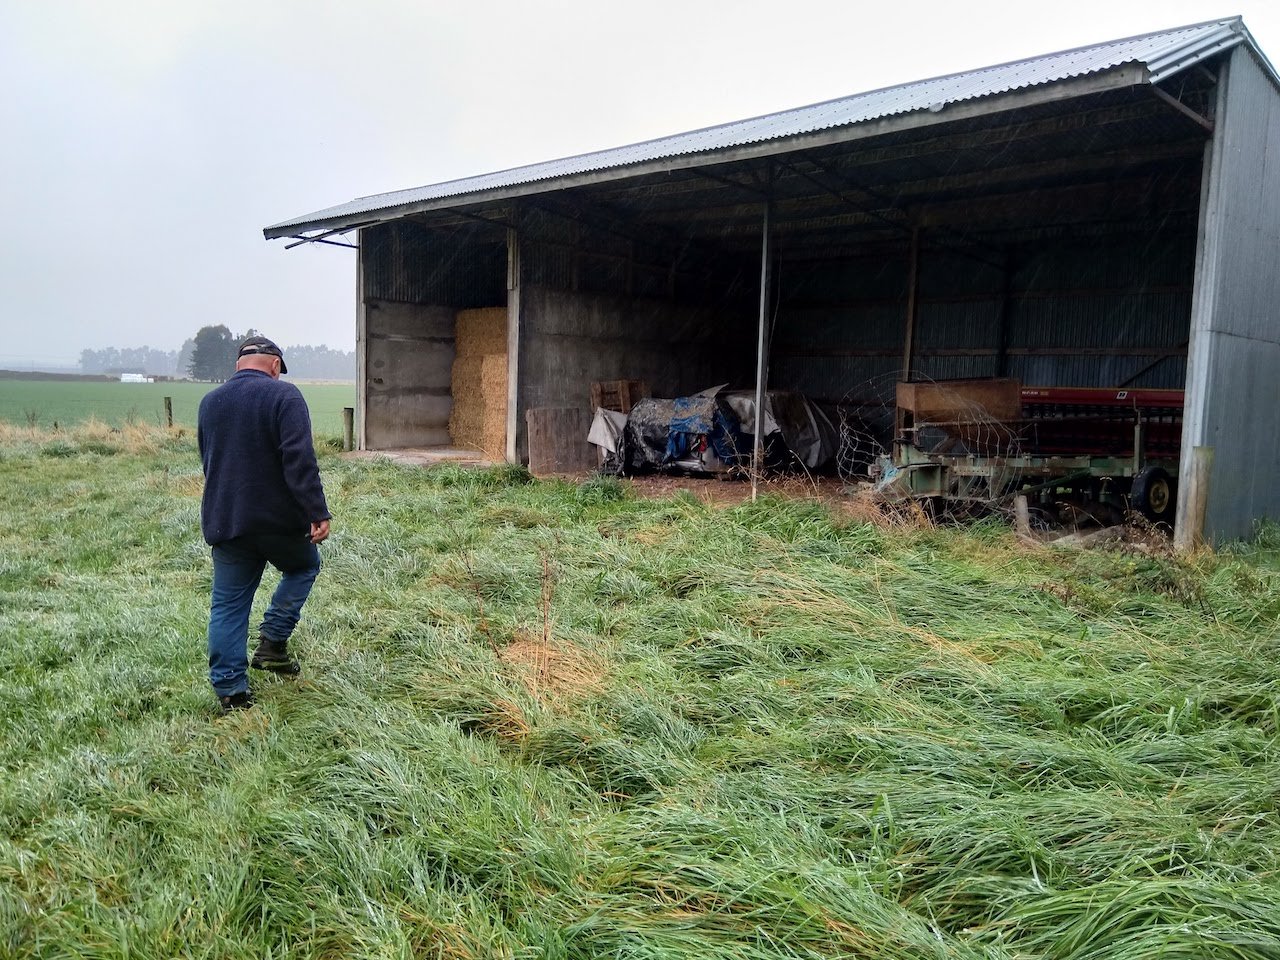
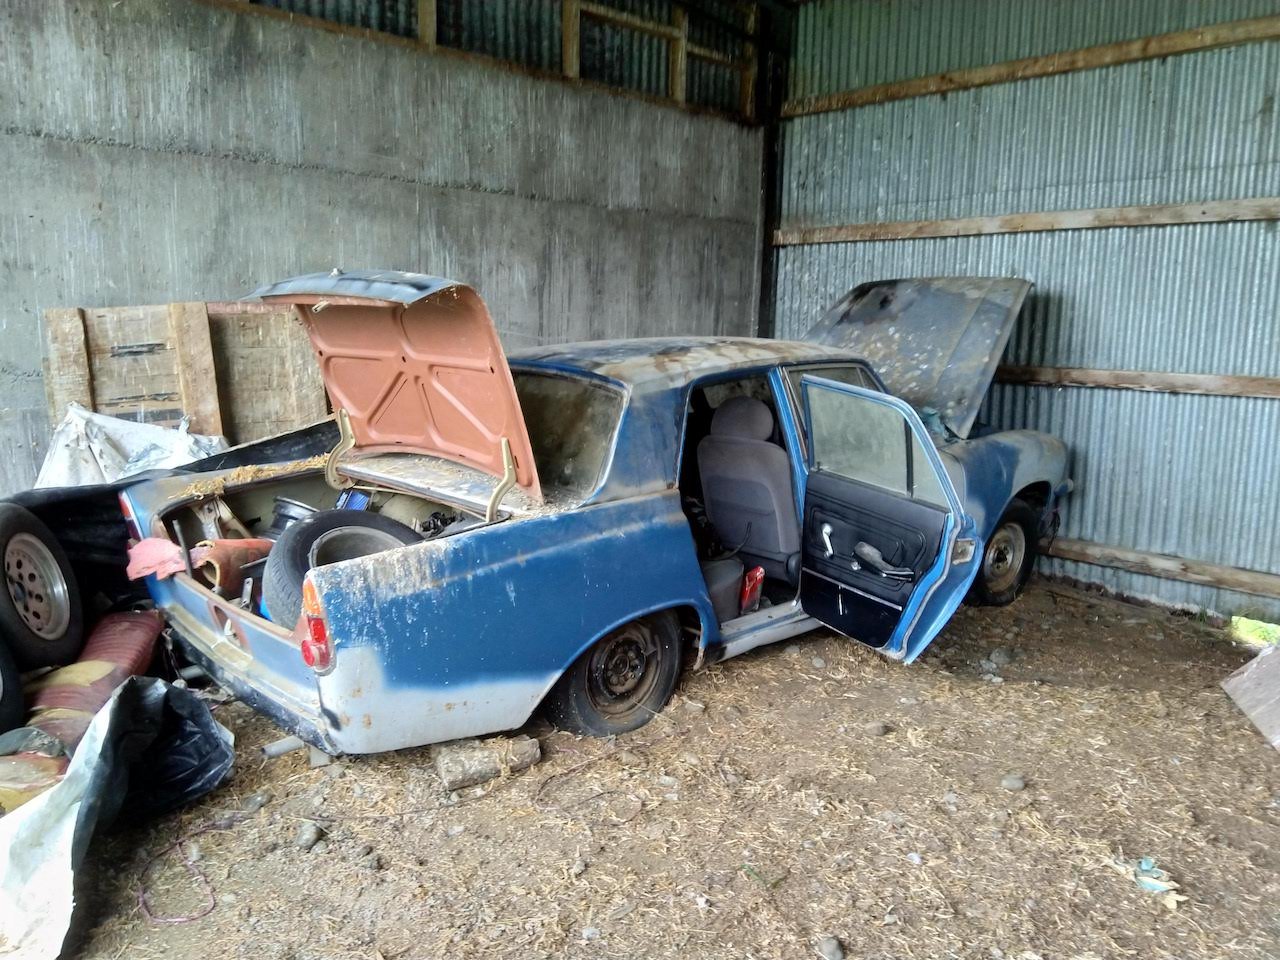
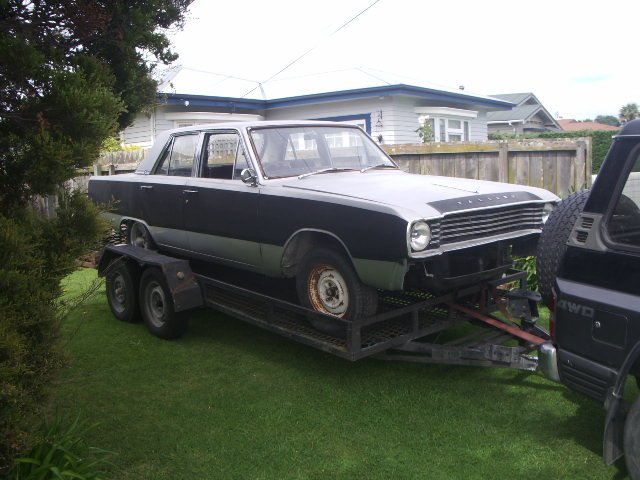
Found myself a new project. Car was last on the road in 1993, then the registration went dead but the rego is still in the system. Previous owner bought the car around '98 with plans of putting a 302 into it. A few years later he took the car to a panelbeater to get some rust fixed and bodywork done. The bill came back a lot more then expected so the car got mothballed to a hay shed. A mk4 zodiac came up a few years later that had already had a certified V8 conversion so he snapped that up and the mk3 stayed in the shed. The car only had minor rust (guards, doors, boot etc) to begin with, there was no damage to the chassis or sills. A bit of minor rust has come back since then, but a sweet barn find. The car was in Methven and had a heap of spares with it. It was pretty heavy towing back. It came with the engine pulled apart and a heap of heads, manifolds and bits. The guy that sold it to me knows someone with a mk2 motor that ran when pulled out, so I will snap that up. Long term plans for it once revinned will be some slam, wide steels and eventually an engine swap to a V8 or a barra. Am I best to get a repair certifier to come and look at it so I can get the rust signed off before I strip it back and paint? I'm thinking that might be easier while everything is pulled apart rather than taking through revin in primer, then pulling everything back apart to paint. Any ideas on how hard this would be and cost? Discuss here:
 13 points
 -
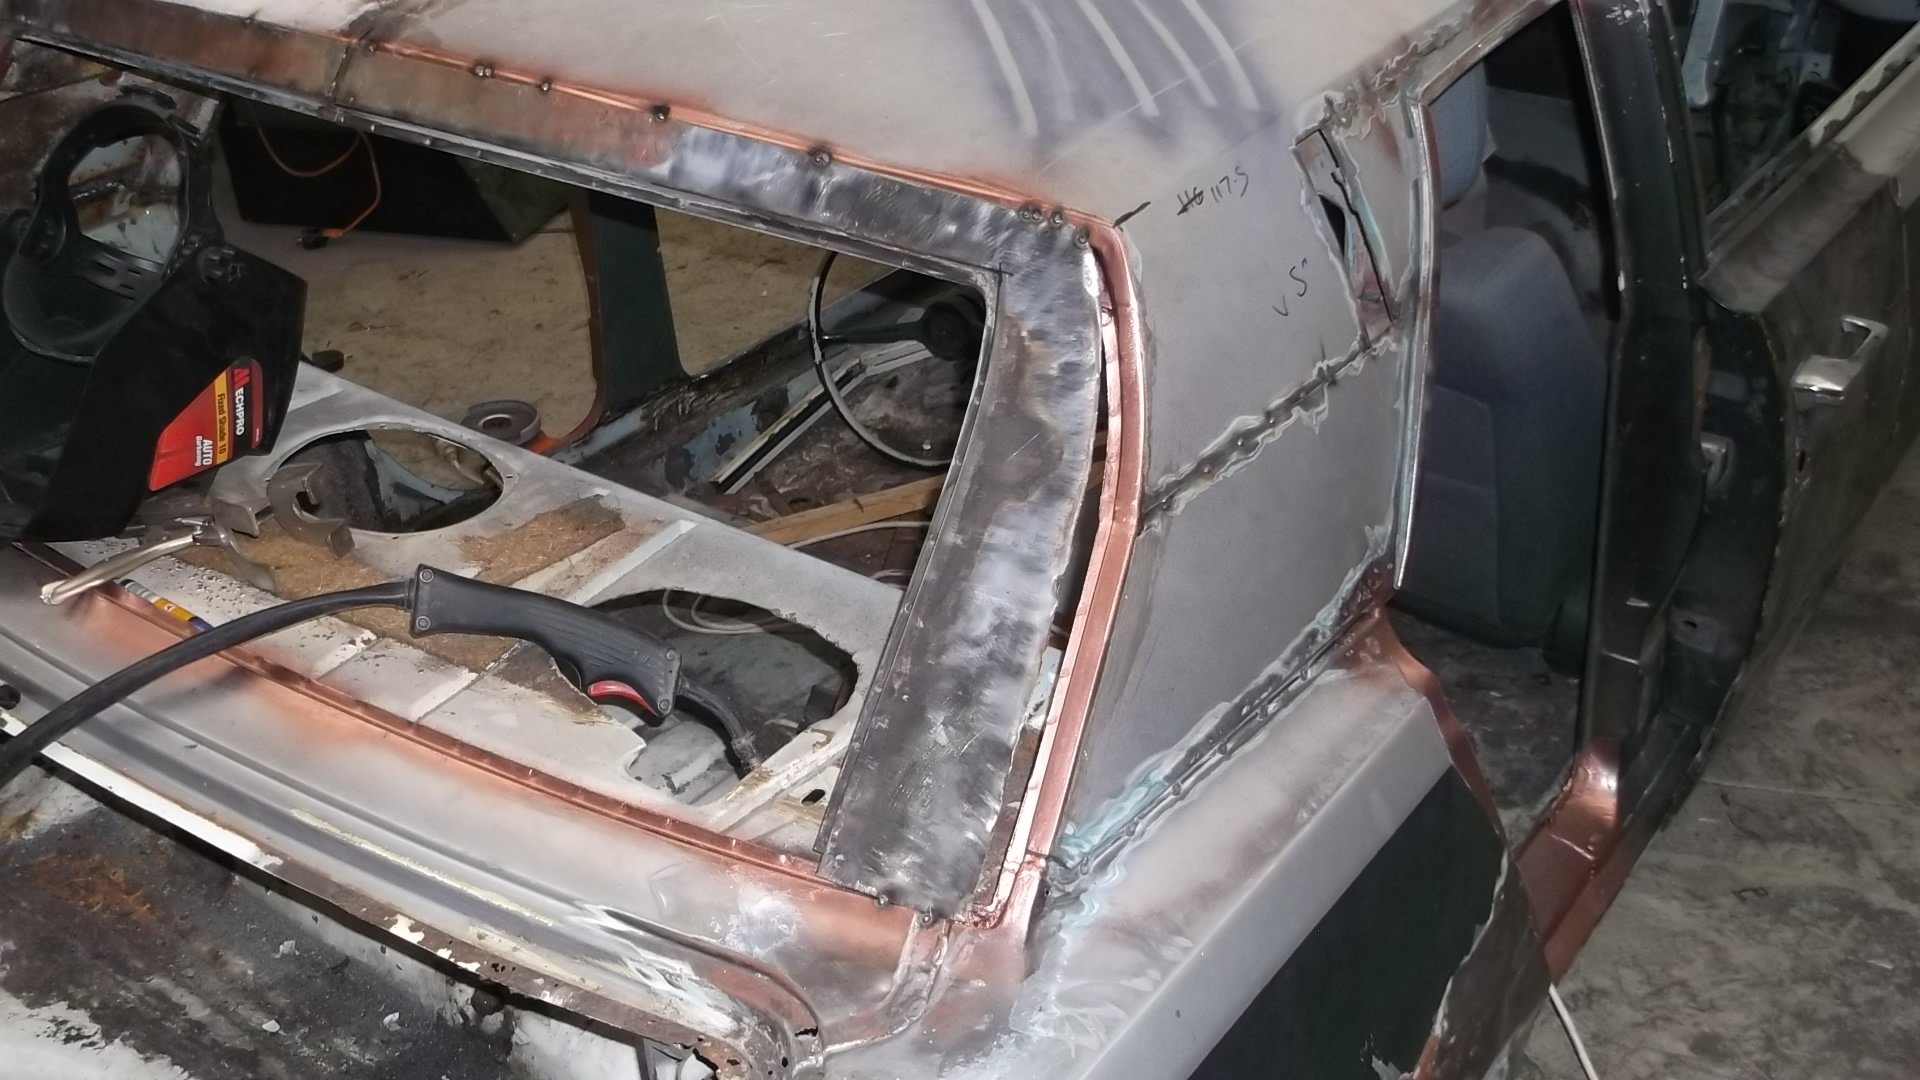
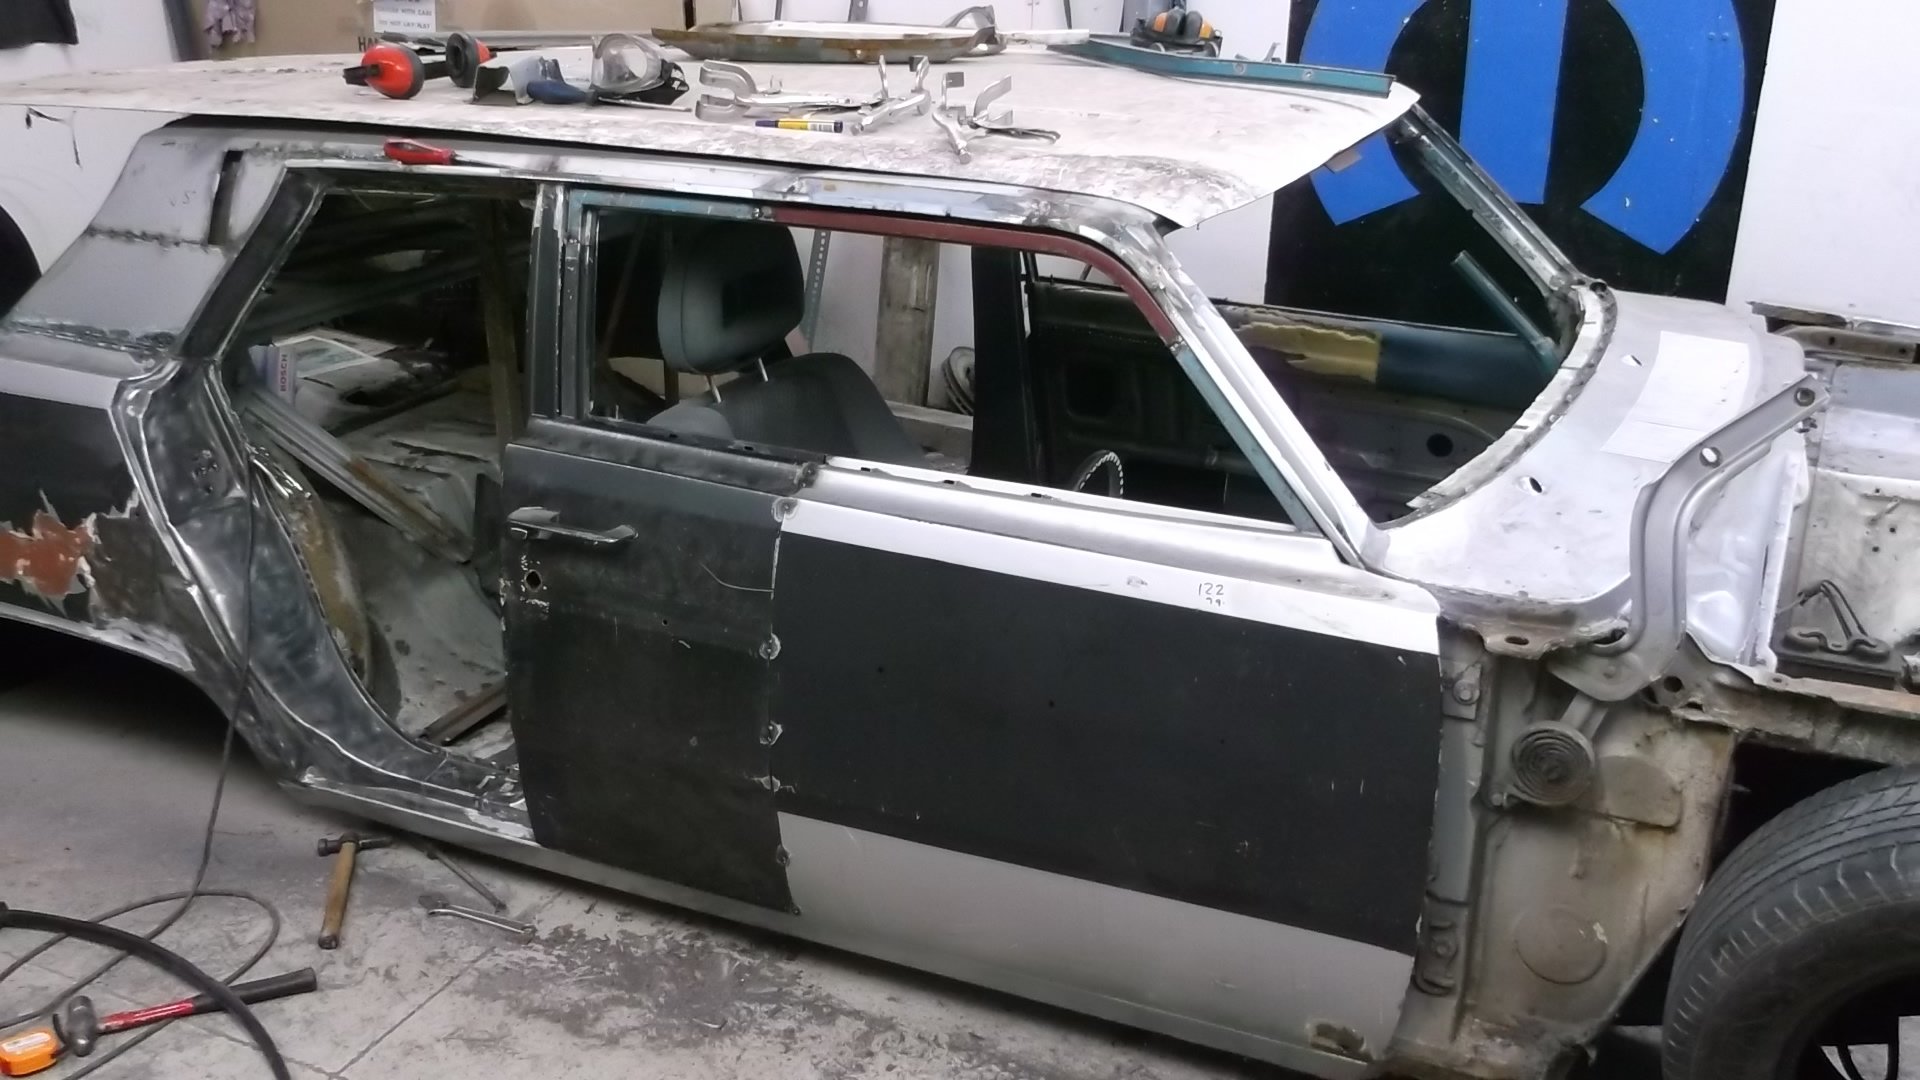
and DONE (almost)
12 points
-
vip rear window .out getting some sun.covers for gas sturts for boot
12 points
-
Why are the starlet itb's in this thread? Because the the inlet manifold on the hilux sucks. Not power wise, it seems to work good. but it vibrates, cracks and the big plenum doesn't work with what im trying to do. stalls out easy and any kind of cam setup other than factory, even cam timing changes on stock cams makes it a whole lot worse. wont idle on all cylinders and stalls real easy. not ideal for 4wding itb's will solve the big plenum issue, also will be able to isolate the plenum from the engine with some short silicone joiners. to solve any vibration issues. So had those bellmouths in above picture from another project, recycling; extended them by welding some thick wall tube onto the bottom machined a taper into them to suit the 52mm throttles and slightly adjusted the bellmouth so has bit more of an elliptical shape. machined some of the excess off them. could have taken whole lot more off but was over it by this stage. will probably test them on the starlet before welding them into plenum11 points
-
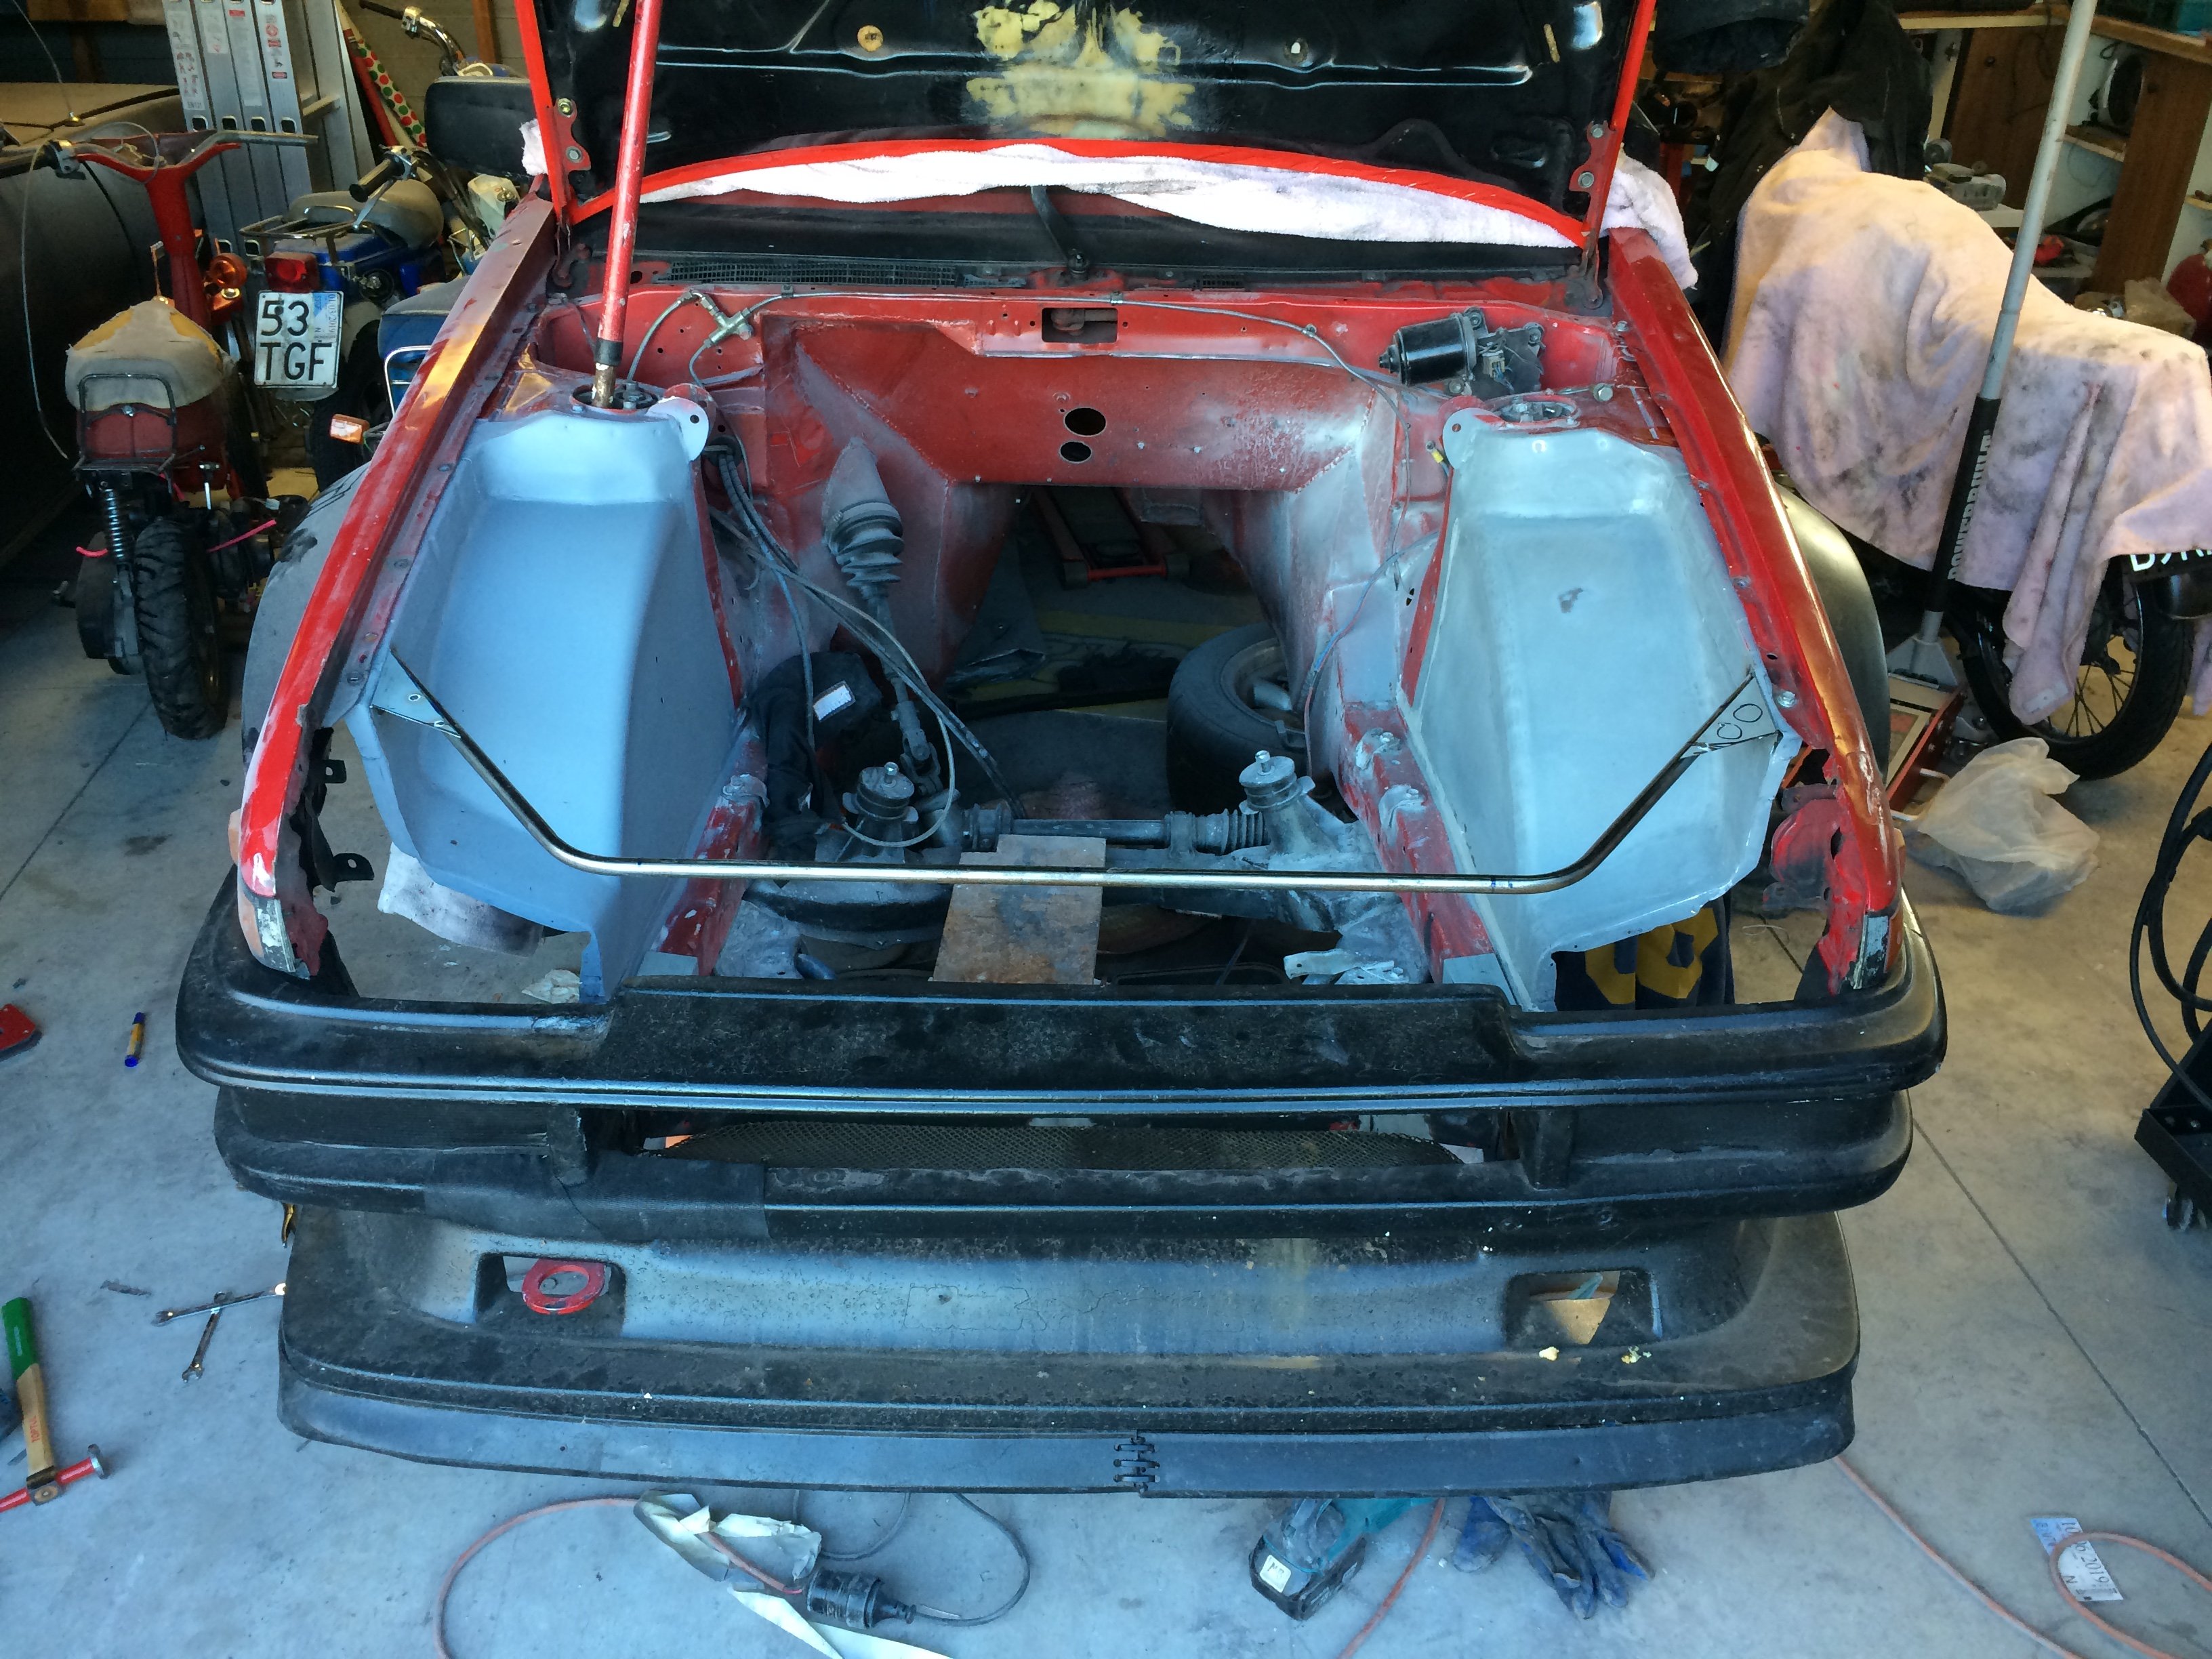
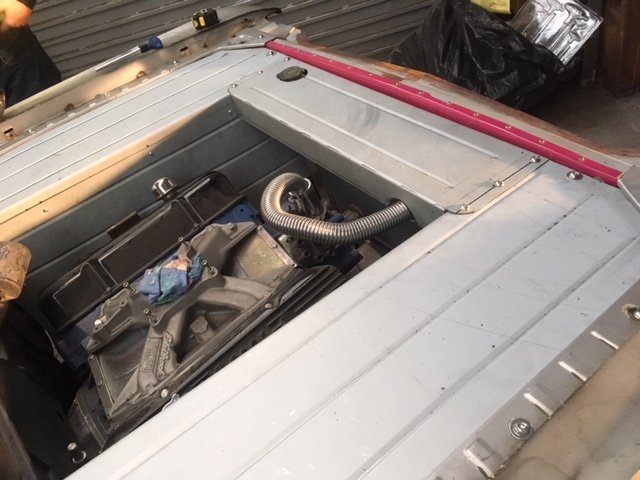
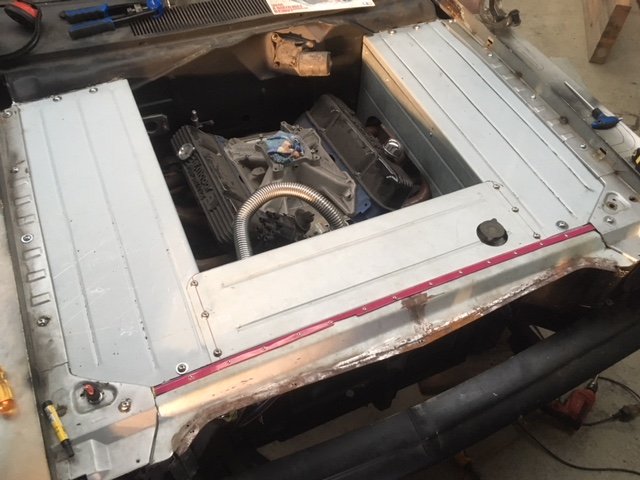
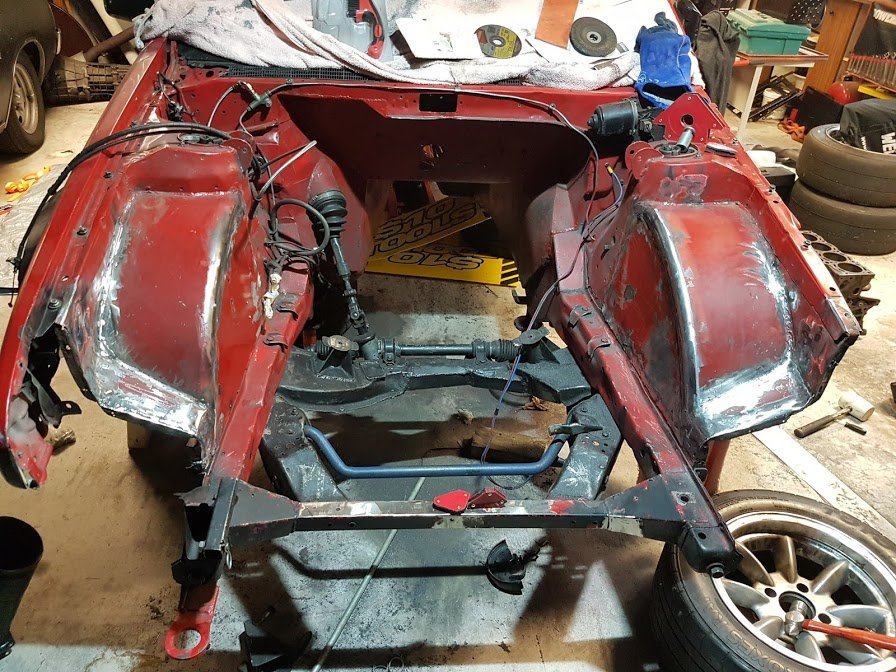
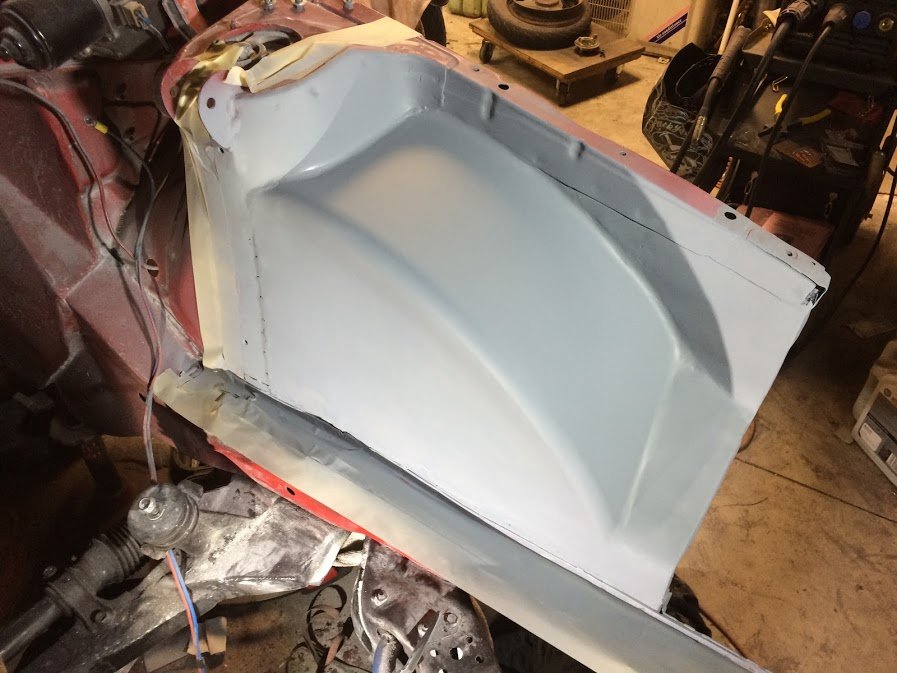
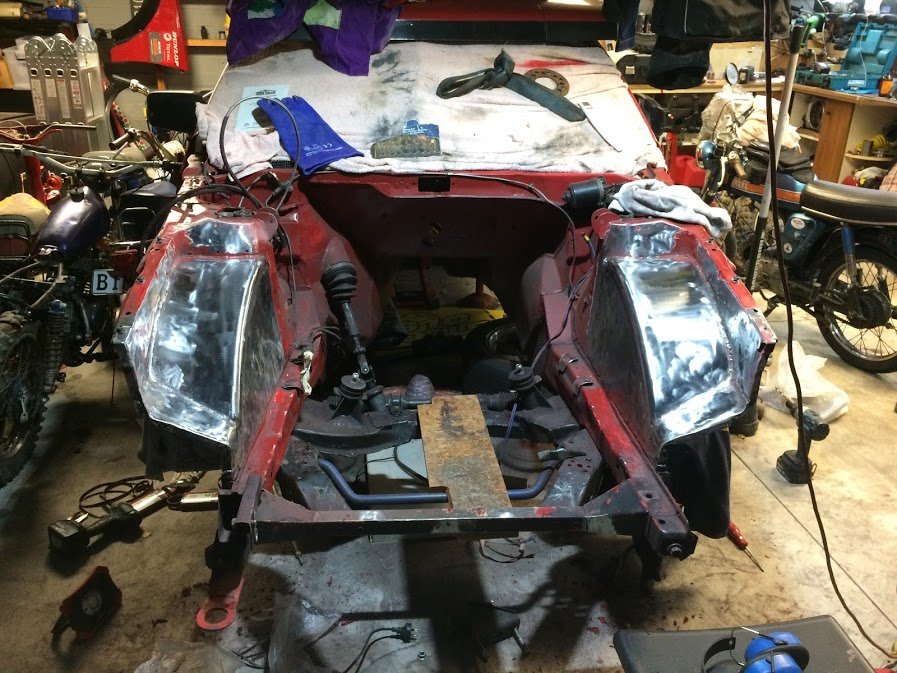
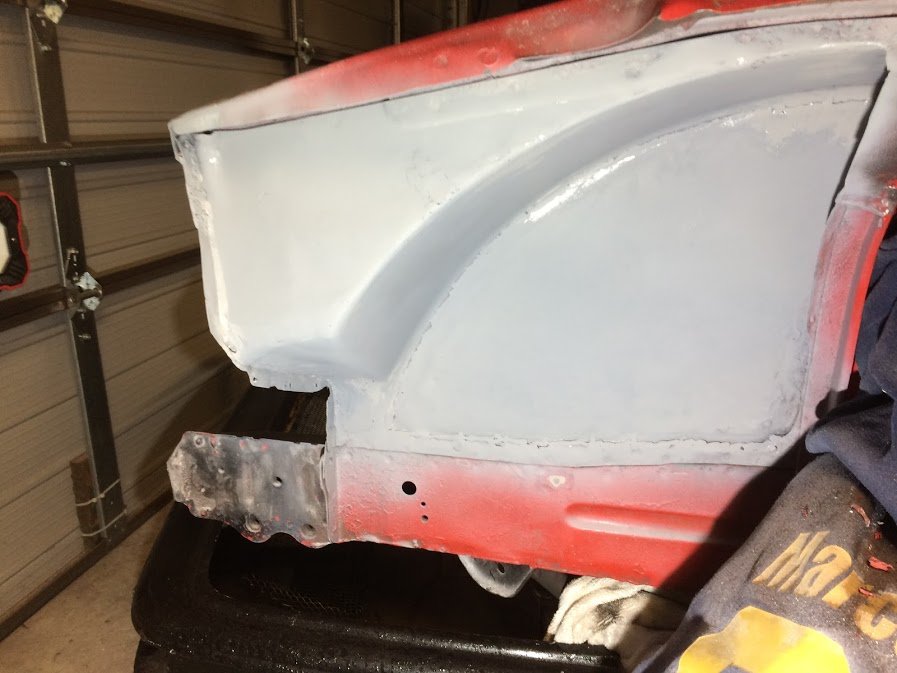
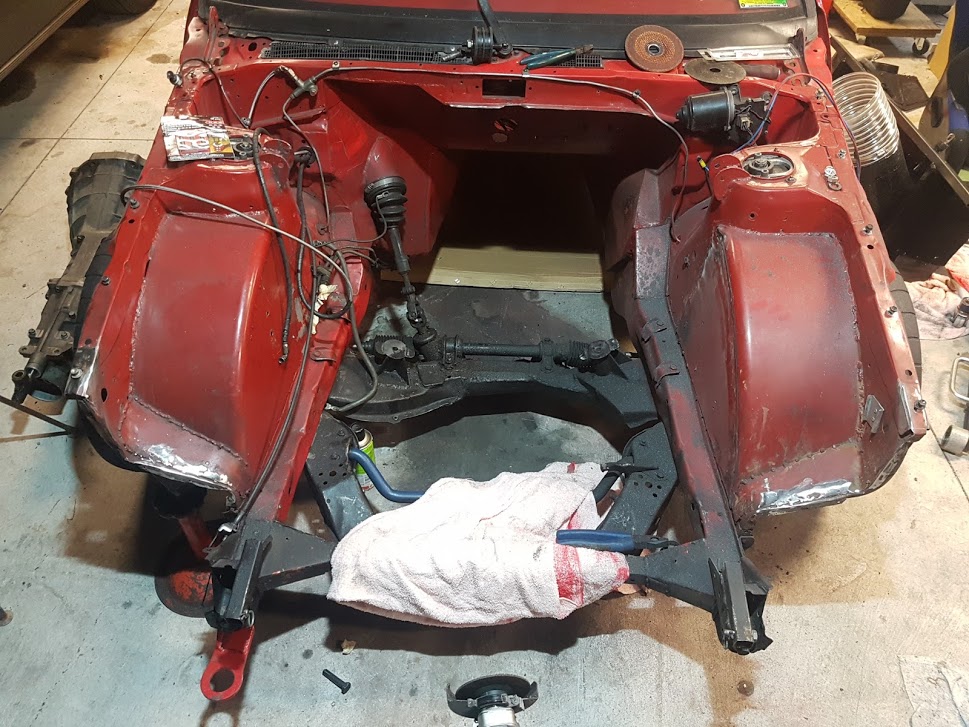
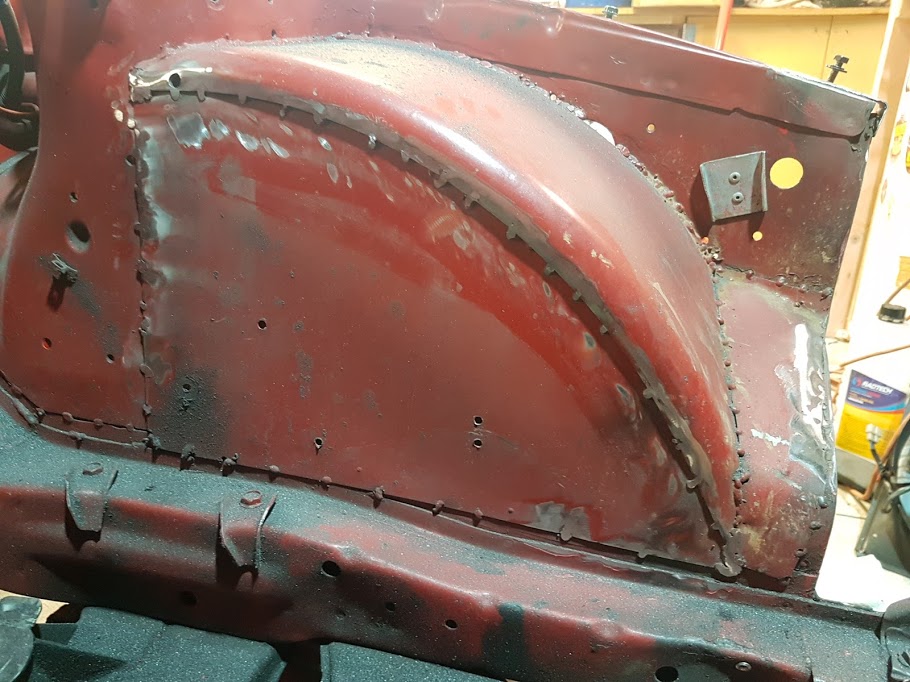
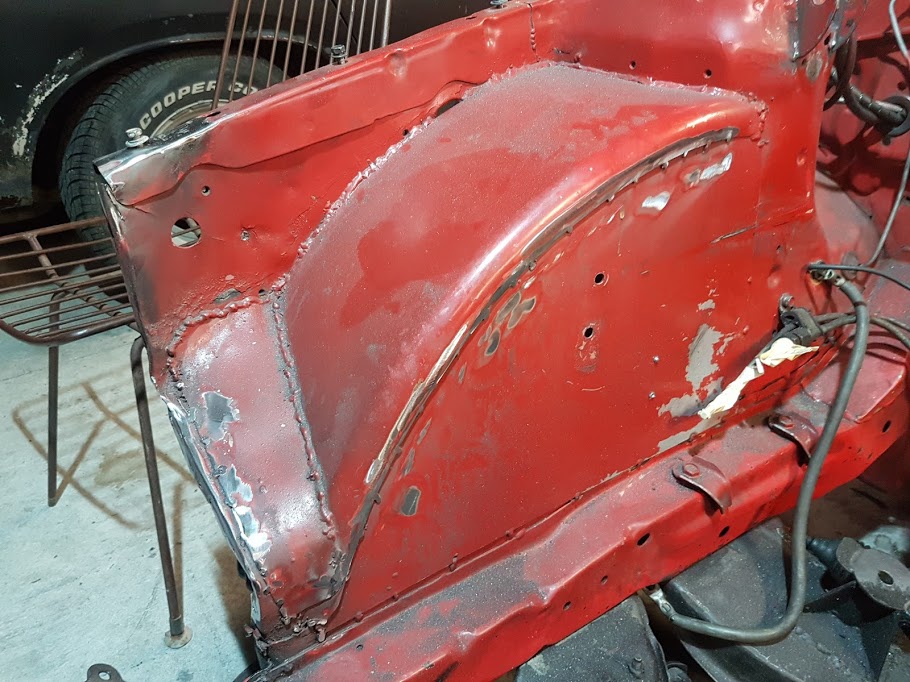
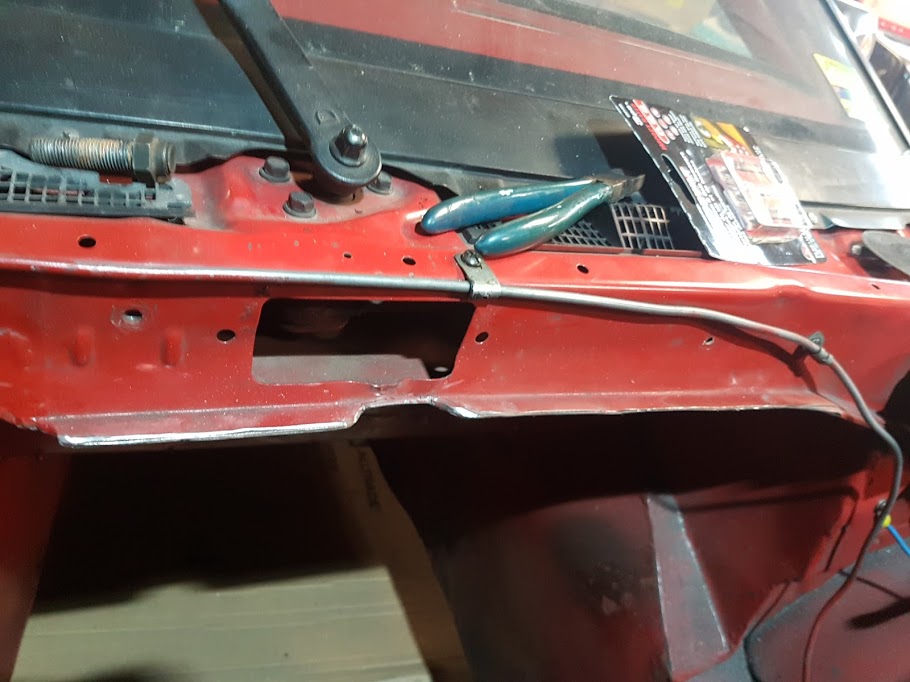
I’ve made good progress on the right hand tub now. Got most of the finishing and a coat of primer onto it. Then @Rhyscar came around with his tube bender and we started on the new radiator support: This bolts in place on the sides and will have a couple of vertical stays for the radiator and ducting mounts. Popped the guards and bumper back on for a visual inspection: And the new radiator will mount like this: With ducting to take the flow out the bonnet. Woohoo! Now back to body work in the engine bay.
10 points
-
painted the hood lining and associated trim bits today. the pictures are all shit but you get the idea. the black came out really well and it looks mint now. 2019-07-07_01-17-51 by sheepers, on Flickr 2019-07-07_01-18-00 by sheepers, on Flickr 2019-07-07_01-17-25 by sheepers, on Flickr 2019-07-07_01-17-35 by sheepers, on Flickr9 points
-
finally adjusted the clutch pedal properly relative to the master cylinder, the various adjusting nuts are very high under the dash and not made for human hands. Yay. However in doing so i broke the light switch out of the column, with my head. This is the third? time ive done this, the car cam with no end of hacks to get around the broken one it had, i got this off another 2300 nut as his spare, and it broke in the box on the way home, you can see the lump of JB weld on the front indicator To be fair they are pretty weak design relative to the spring and ball bearing they act against, and with the plastic being so old they just bust out. ITs also a special snowflake* because it spaces the column change ball and the outer steering column, so we must make do. (* for Eg found this NoS one http://www.epocacar.com/shop/en/internal/8933-devio-luci-fiat-2300-s-13-fili-nos.html for 213EUROs and its not even the one in my ca, its the one in the book ) Good ol JB Weld, (other epoxies are available), tricky to get them 'moulded' without slopping it down into the guts as well, but the old tape dams and several thin layers did the trick The 'ear' had also fallen off the indicator switch end, my boy donated one of his 20 sided dice to the fix Took the opportunity to clean and grease all the mechanisms including the gear lever control centre operational7 points
-
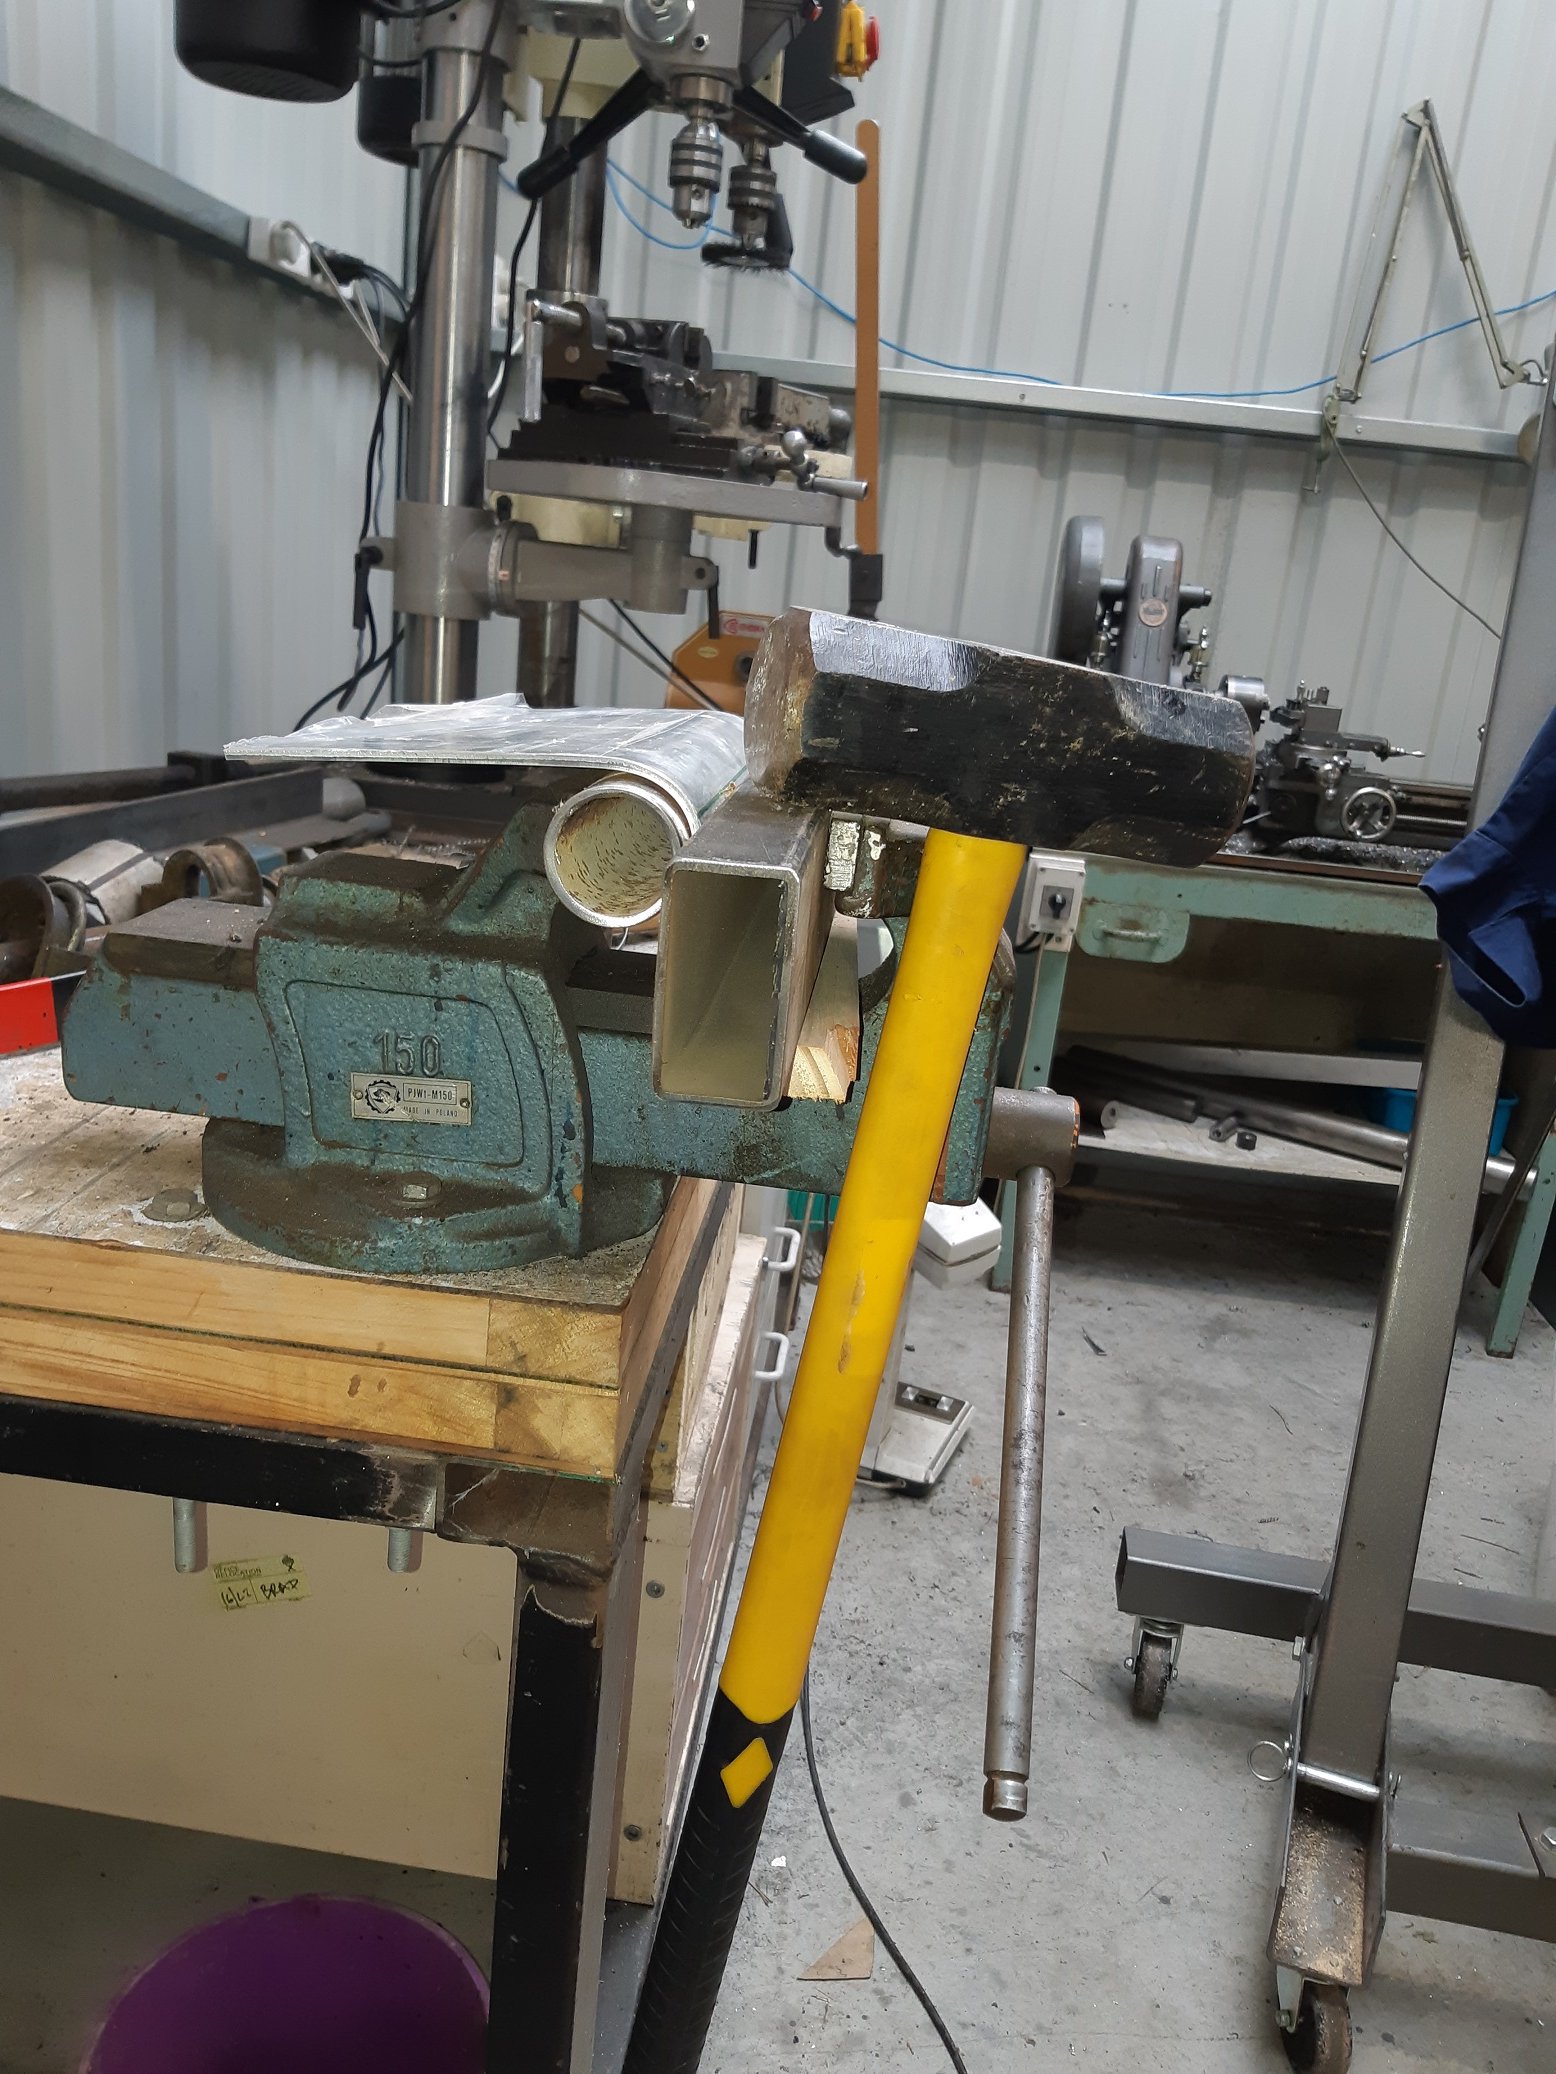
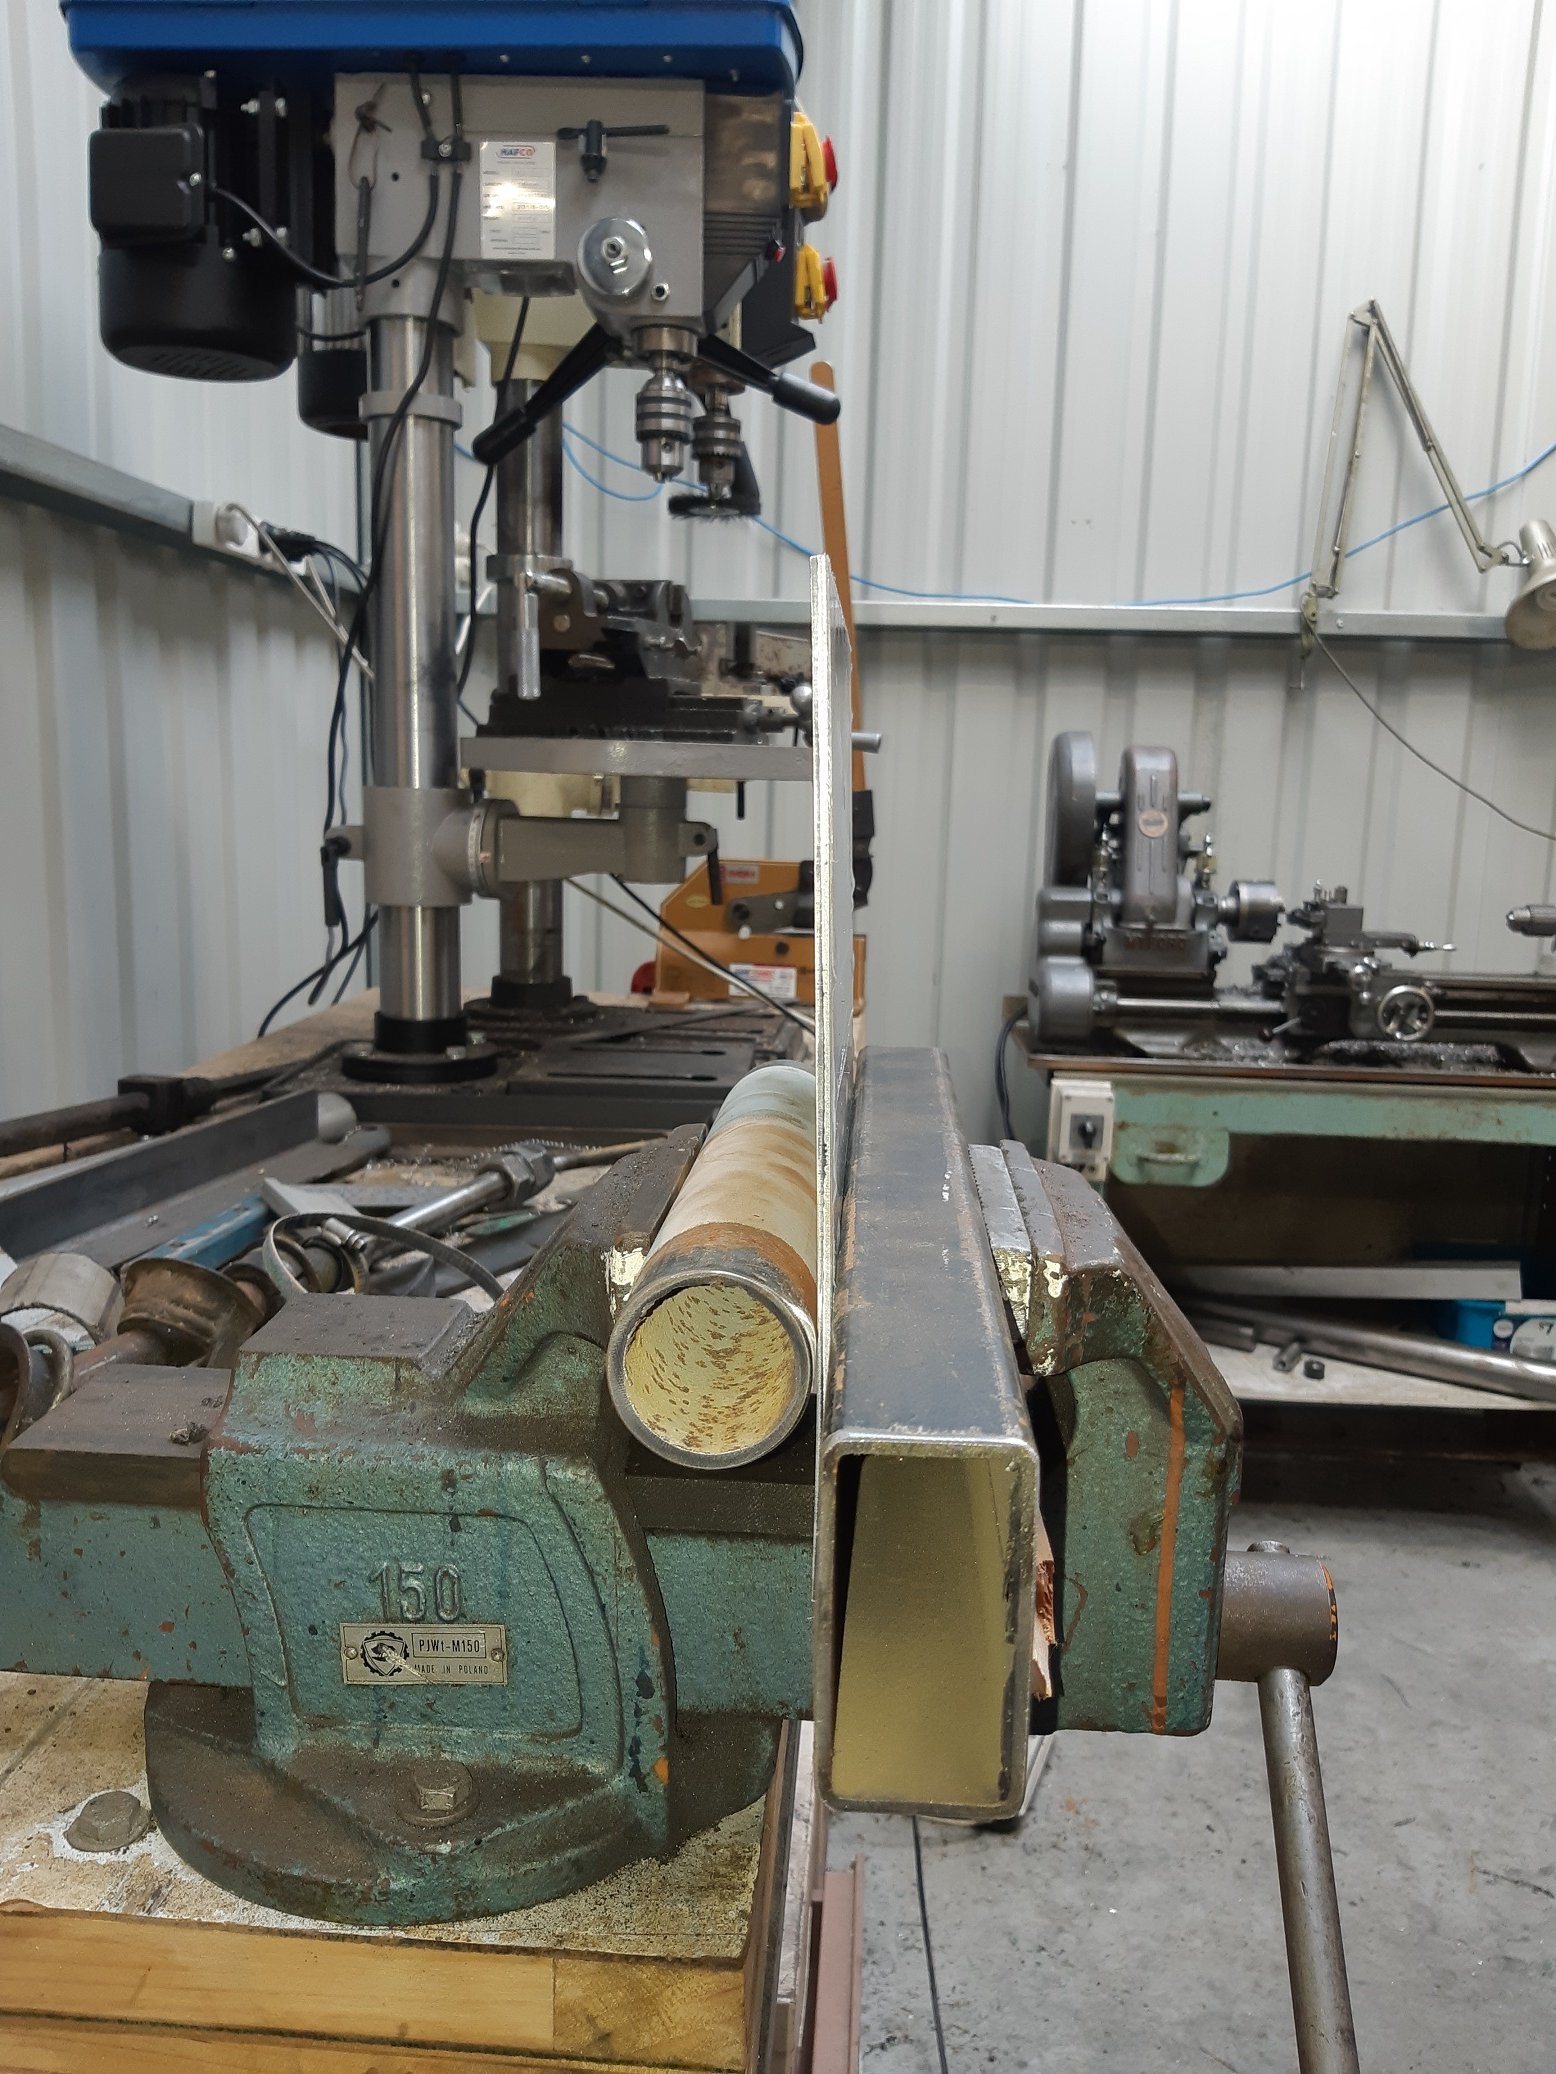
How to put a curve in a 4mm thick aluminium sheet to fill the hole you cut in the sump. Get a random bit of thick wall rusty pipe about the right diameter. Wrap it in card so you don't mash rust into the aluminium. Then, using another bit of square section, clamp it in the vice along the bend line. Put a big bit of wood against it and hit it with a mallet. Pick the wood up off the floor and put it back. Hit it again. Pick the wood up off the floor and put it back. Hit it as hard as you can. Pick the wood up off the floor and put it back. Wail on it like a crazy person. Each time, picking the wood up off the floor and put it back. Observe how much it HASN'T FUCKING MOVED AT ALL. Switch to sledge hammer, hit it literally five times. Done.
7 points
-
thanks i like to find a rusty wreck it make something cool out of it more fun that way . heres a pic of the gasser before and after
7 points
-
So plan is - twin 45mm (or 1 3/4") for most of the length, which matches the existing twin pipe from the manifold to the Y that is a muffler shop replacement that i will keep a very small part of, - into a single 57mm (or 2 1/4") pipe to match the existing rear muffler, that i cribbed from bits from the Croma Turbo i wrecked This was way more expensive than i thought, especially as a bought a nice new welder to do it with. Even my man-math was struggling. After watching some youtube and doing some actual math i started with making the new Y section from which everything else will be built from. and went forwards from there. The Y is right at the back of the floor pan and actually has a kick up towards the diff. Shiny stuff to the ex croma over the diff section And painted with some BBQ paint Pretty flash for a driveway job! Ended up using only the first 50cm or so of the old secondaries but turned out nice in the end. Shit is tight getting in and out. This is the new front section against the old part, the new Y joint ends adjacent to the white bit on old pipe so ive extended the primaries by like 2 meters. Unfortunately didnt take any photos of the whole thing as the rear half was installed so i could ensure the front half lined up Buttoned it all up just before dark and its surprisingly quiet, probably because i was used to the old blowing exhaust, but has a proper FIat rasp at around 2000 rpm or stabbing the throttle and seems to free rev a wee bit better. Tightening it all up properly means it now has no leaks, but it rattles on the cross member, i want to put a support off the gear box and I remembered that i forgot to weld in a O2 sensor bug so another couple evenings tweaking and upside down welding before a road test and butt dyno.6 points
-
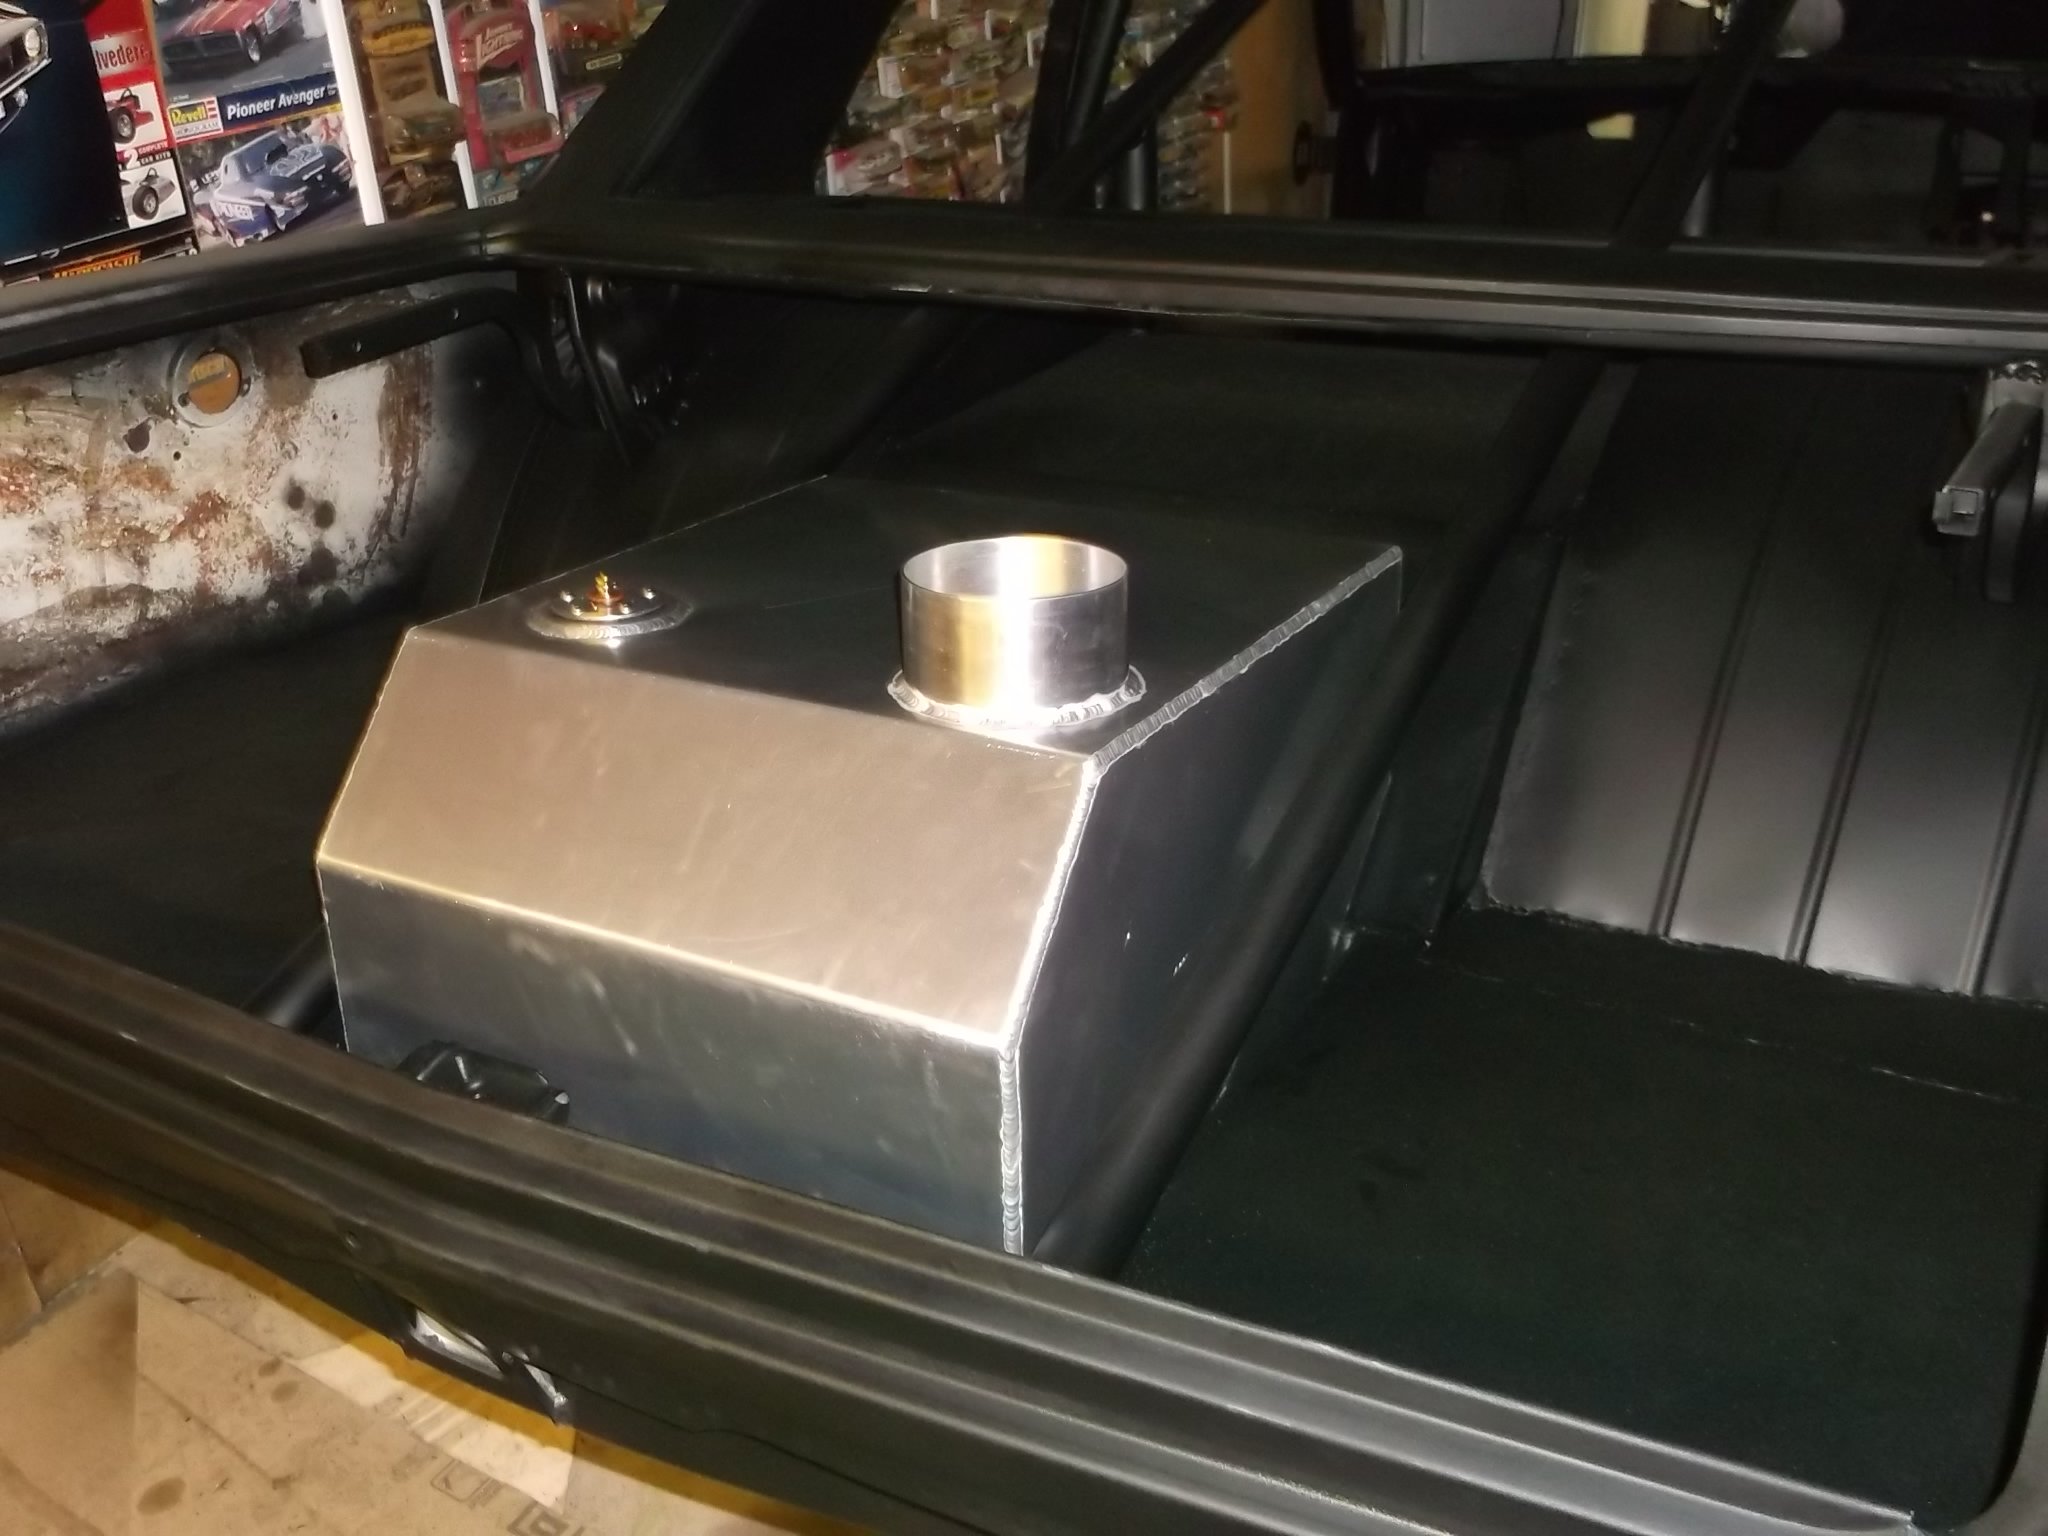
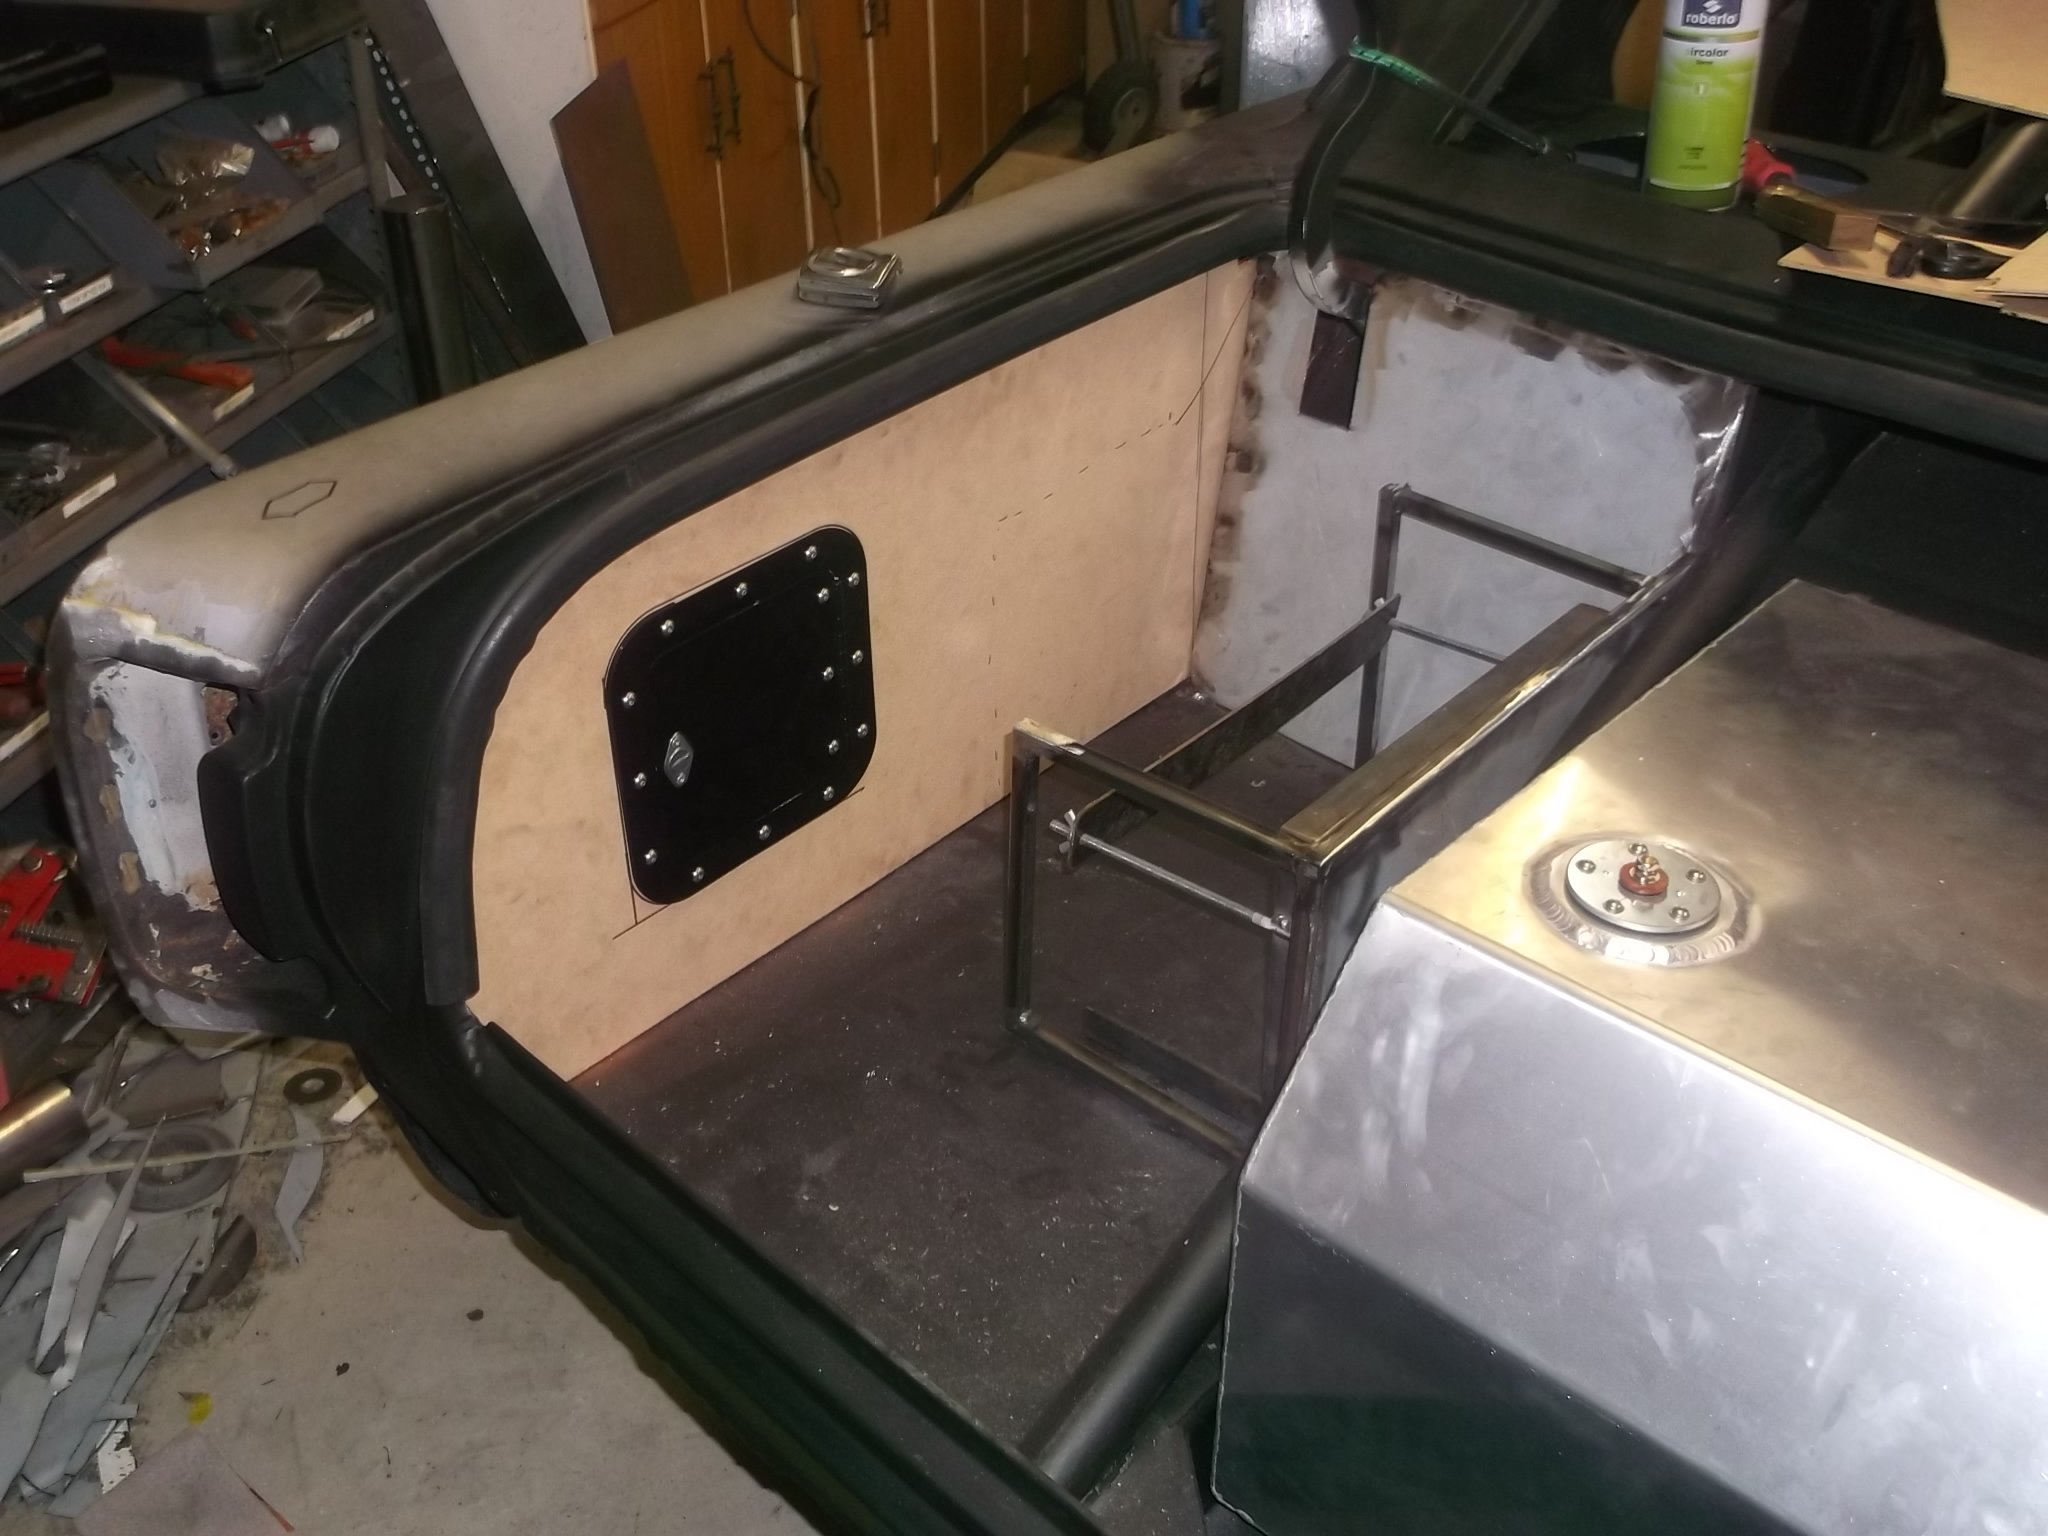
been doing the new inner guards the last few weeks,boots all lined with new tank as ell
5 points
-
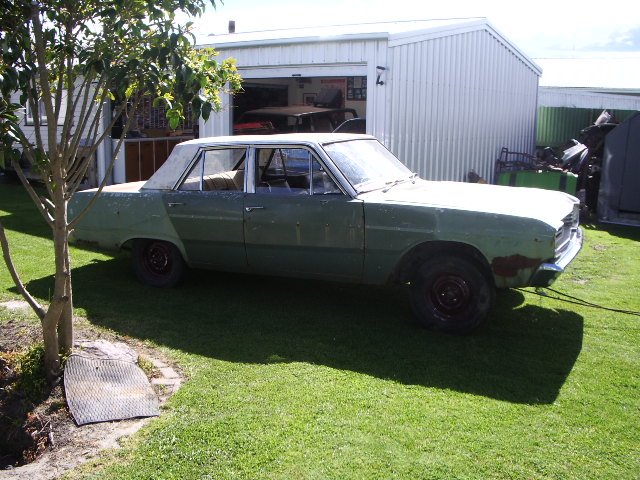
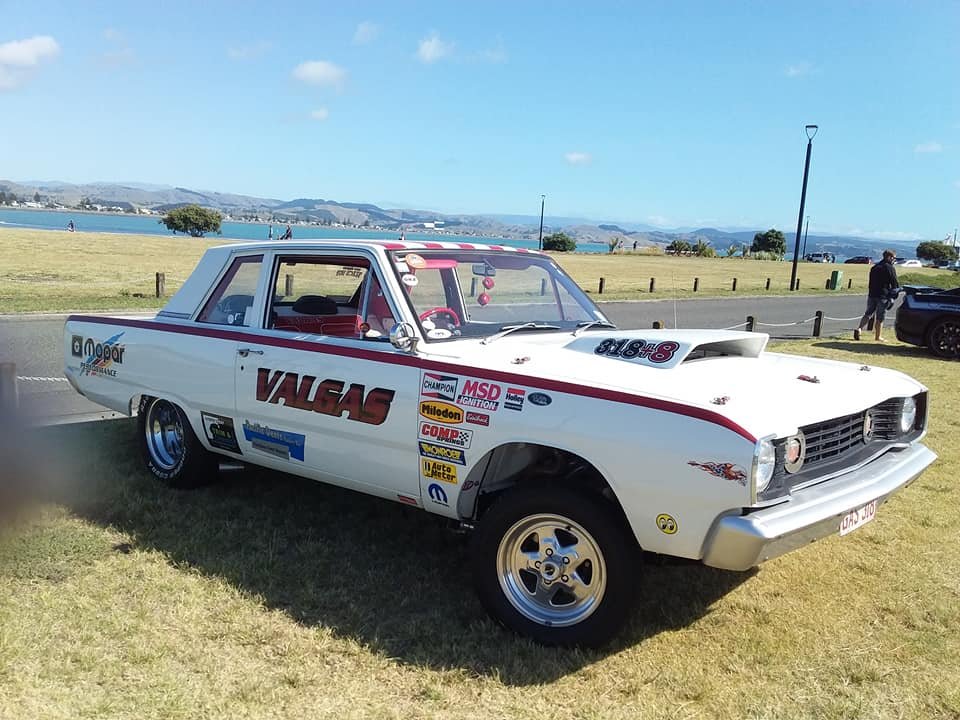
hi all con here thought i would share afew pics of my car ,its a 68 ve valiant . been working on it for five years .4 inch roof chop
4 points
-
Last few weeks ive been fiddling with this between rain showers. Starting my using my special tool Ap. 5030/7 for ignition timing inspection: The photo above is after adjusting it back form about 14deg (not a bad eyeball!) rather than 12deg, using the adjusting wheel on the dizzy However all in advance is significantly more than the 36deg max shown on the tool, so might have to look at limiting that in the dizzy. Gave it a quick wash, needs a proper polish and wax and some cavity and underbody wax . Assumed the position When i picked it up from storage i had to clean out the carb of fine brown grit. This was the fuel filter, pretty sure its rust from the lines or tank, but it was not new and could have been from itself? Either way, well over due. Chucked one of these electric fuel pumps in, same as the ute, mainly to to save cranking for ages when its been sitting while the mechanical diaphragm pump sucks gas up from the tank This is the cheap fuel filter after about 10 minutes (you can see the e-pump above it) . However its not got any worse than that after a lot more idling etc, so I might put the nice new K&N replaceable filter glass one in soon.4 points
-
Hopefully the MX100... Will get started in September once the Racecar is back on its feet.4 points
-
cheers man! im fucking turbo stoked that i can actually do a couple hours work on anything without my back fucking out. gotta be real careful though.............4 points
-
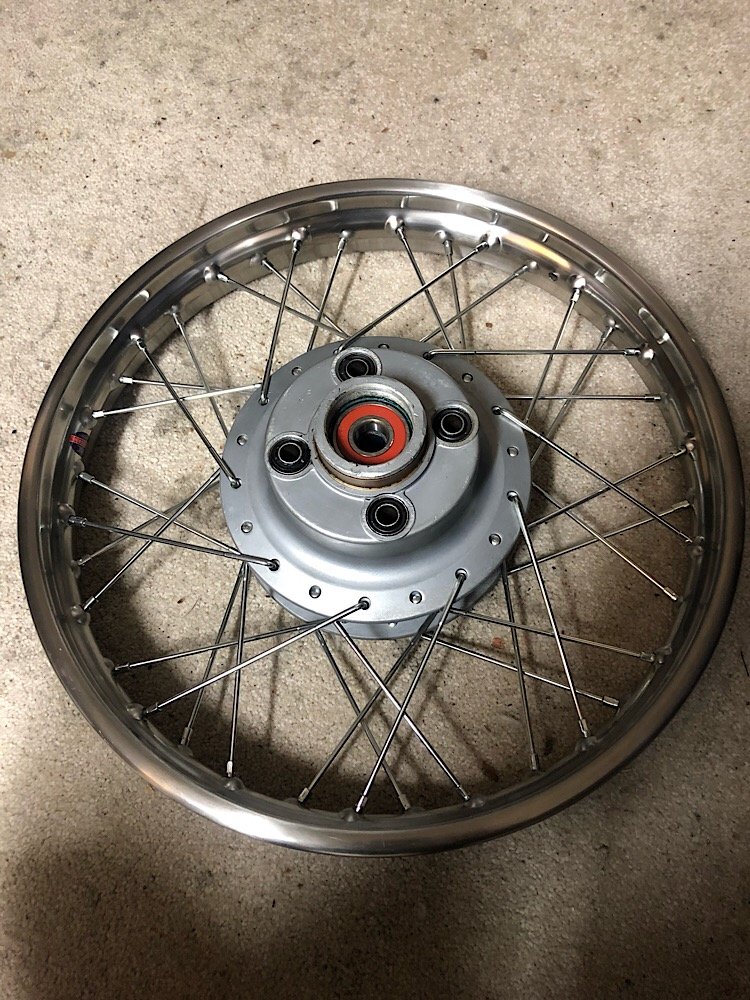
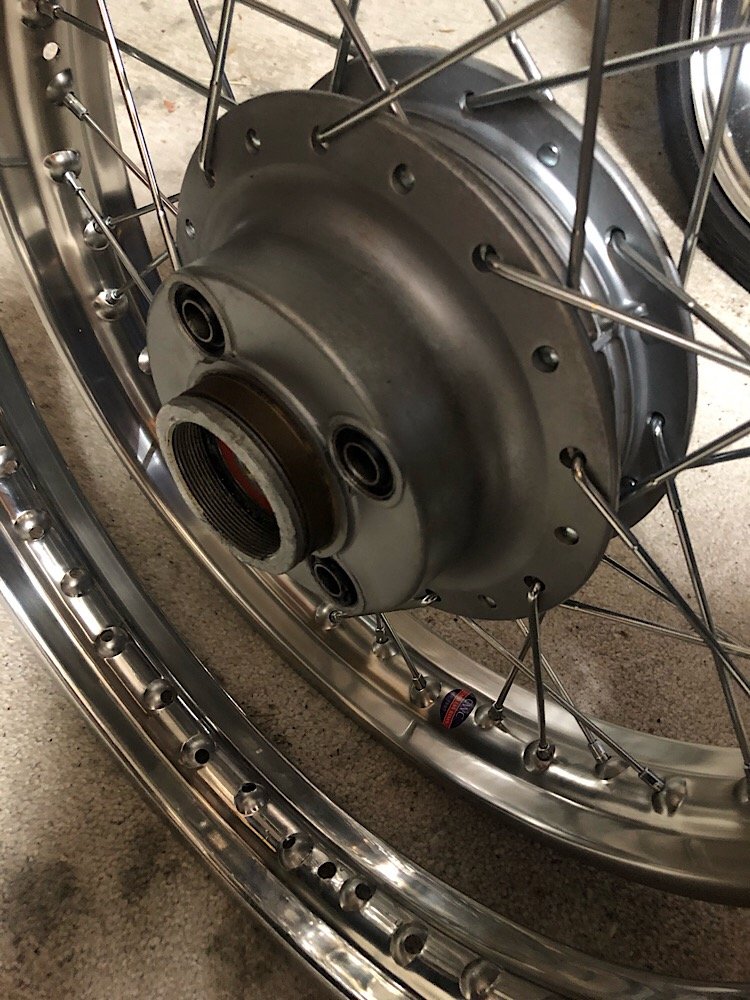
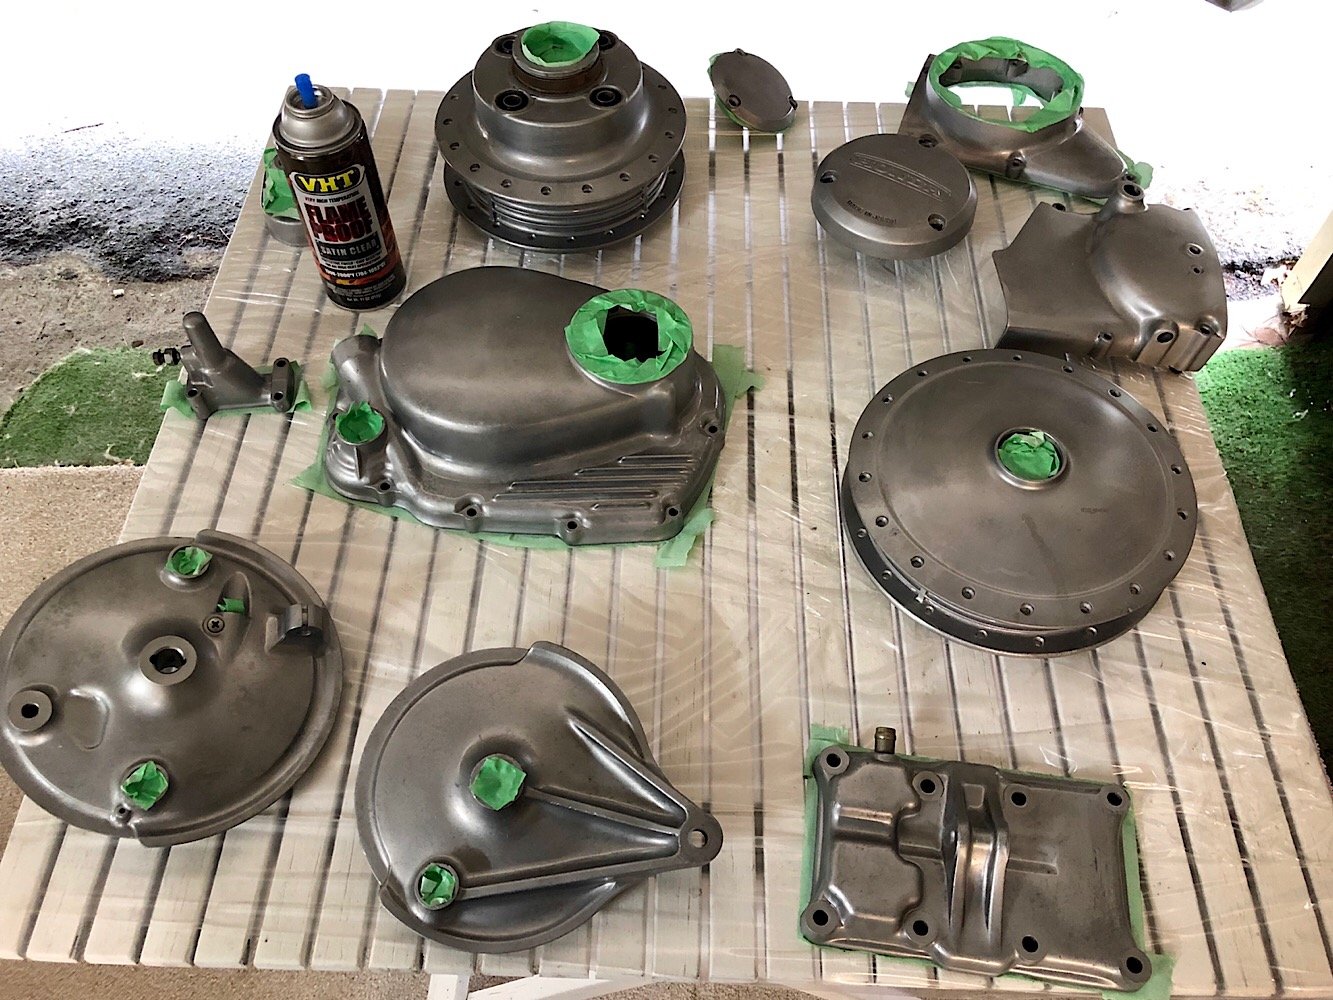
Rim’s arrived from Birmingham, England this week. Stainless steel WM2 and WM3, one size wider than factory. Got stuck into lacing them up to the hubs, stoked with how they turned out. Cycle Treads did the final truing and torquing of the spokes. Going to run a 3 inch wide tyre on the front and a 4 on the back. Gave all the vapour blasted parts a couple coats of VHT satin clear to keep them looking crisp. Also added all new wheel bearing to the hubs, stripped the front forks and cleaned them up. Added genuine Honda fork seals and fresh oil ready to go. Motor is still waiting for the pistons which is on the way and the frame is down at the engineers getting the hoop welded in fully.
4 points
-
its also half chassised with 15 by 15 under it and a 383 big block
4 points
-
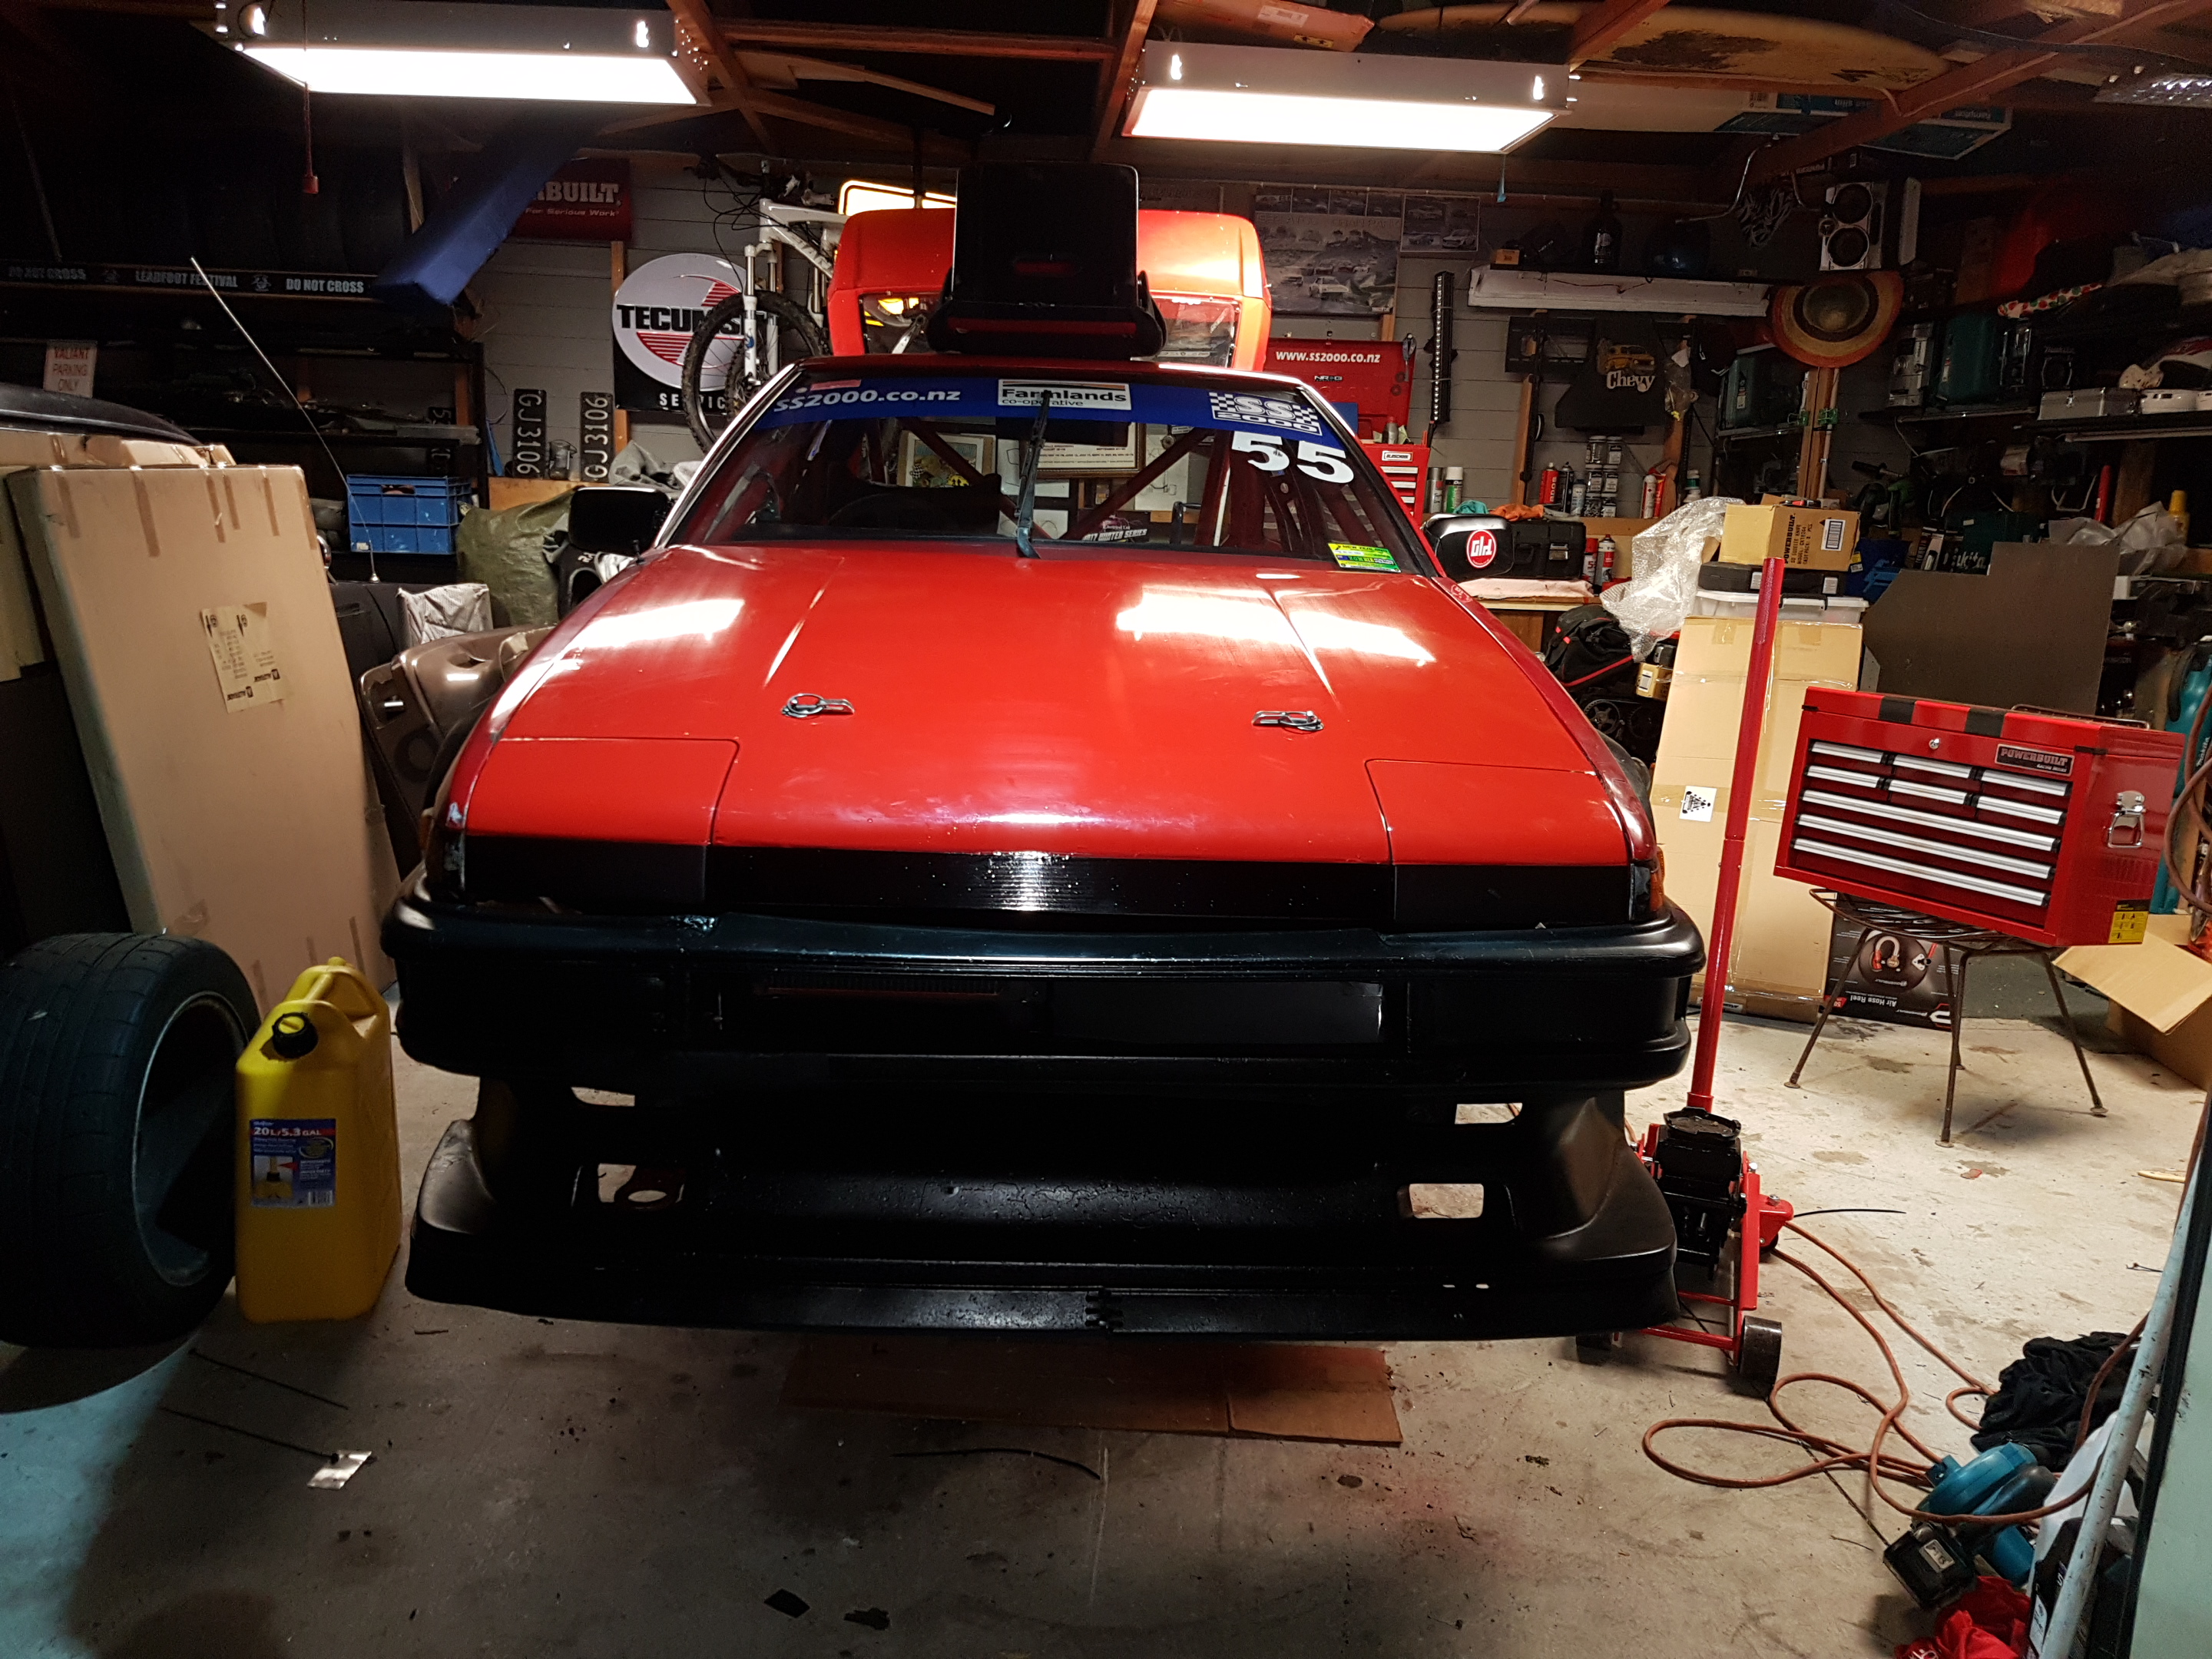
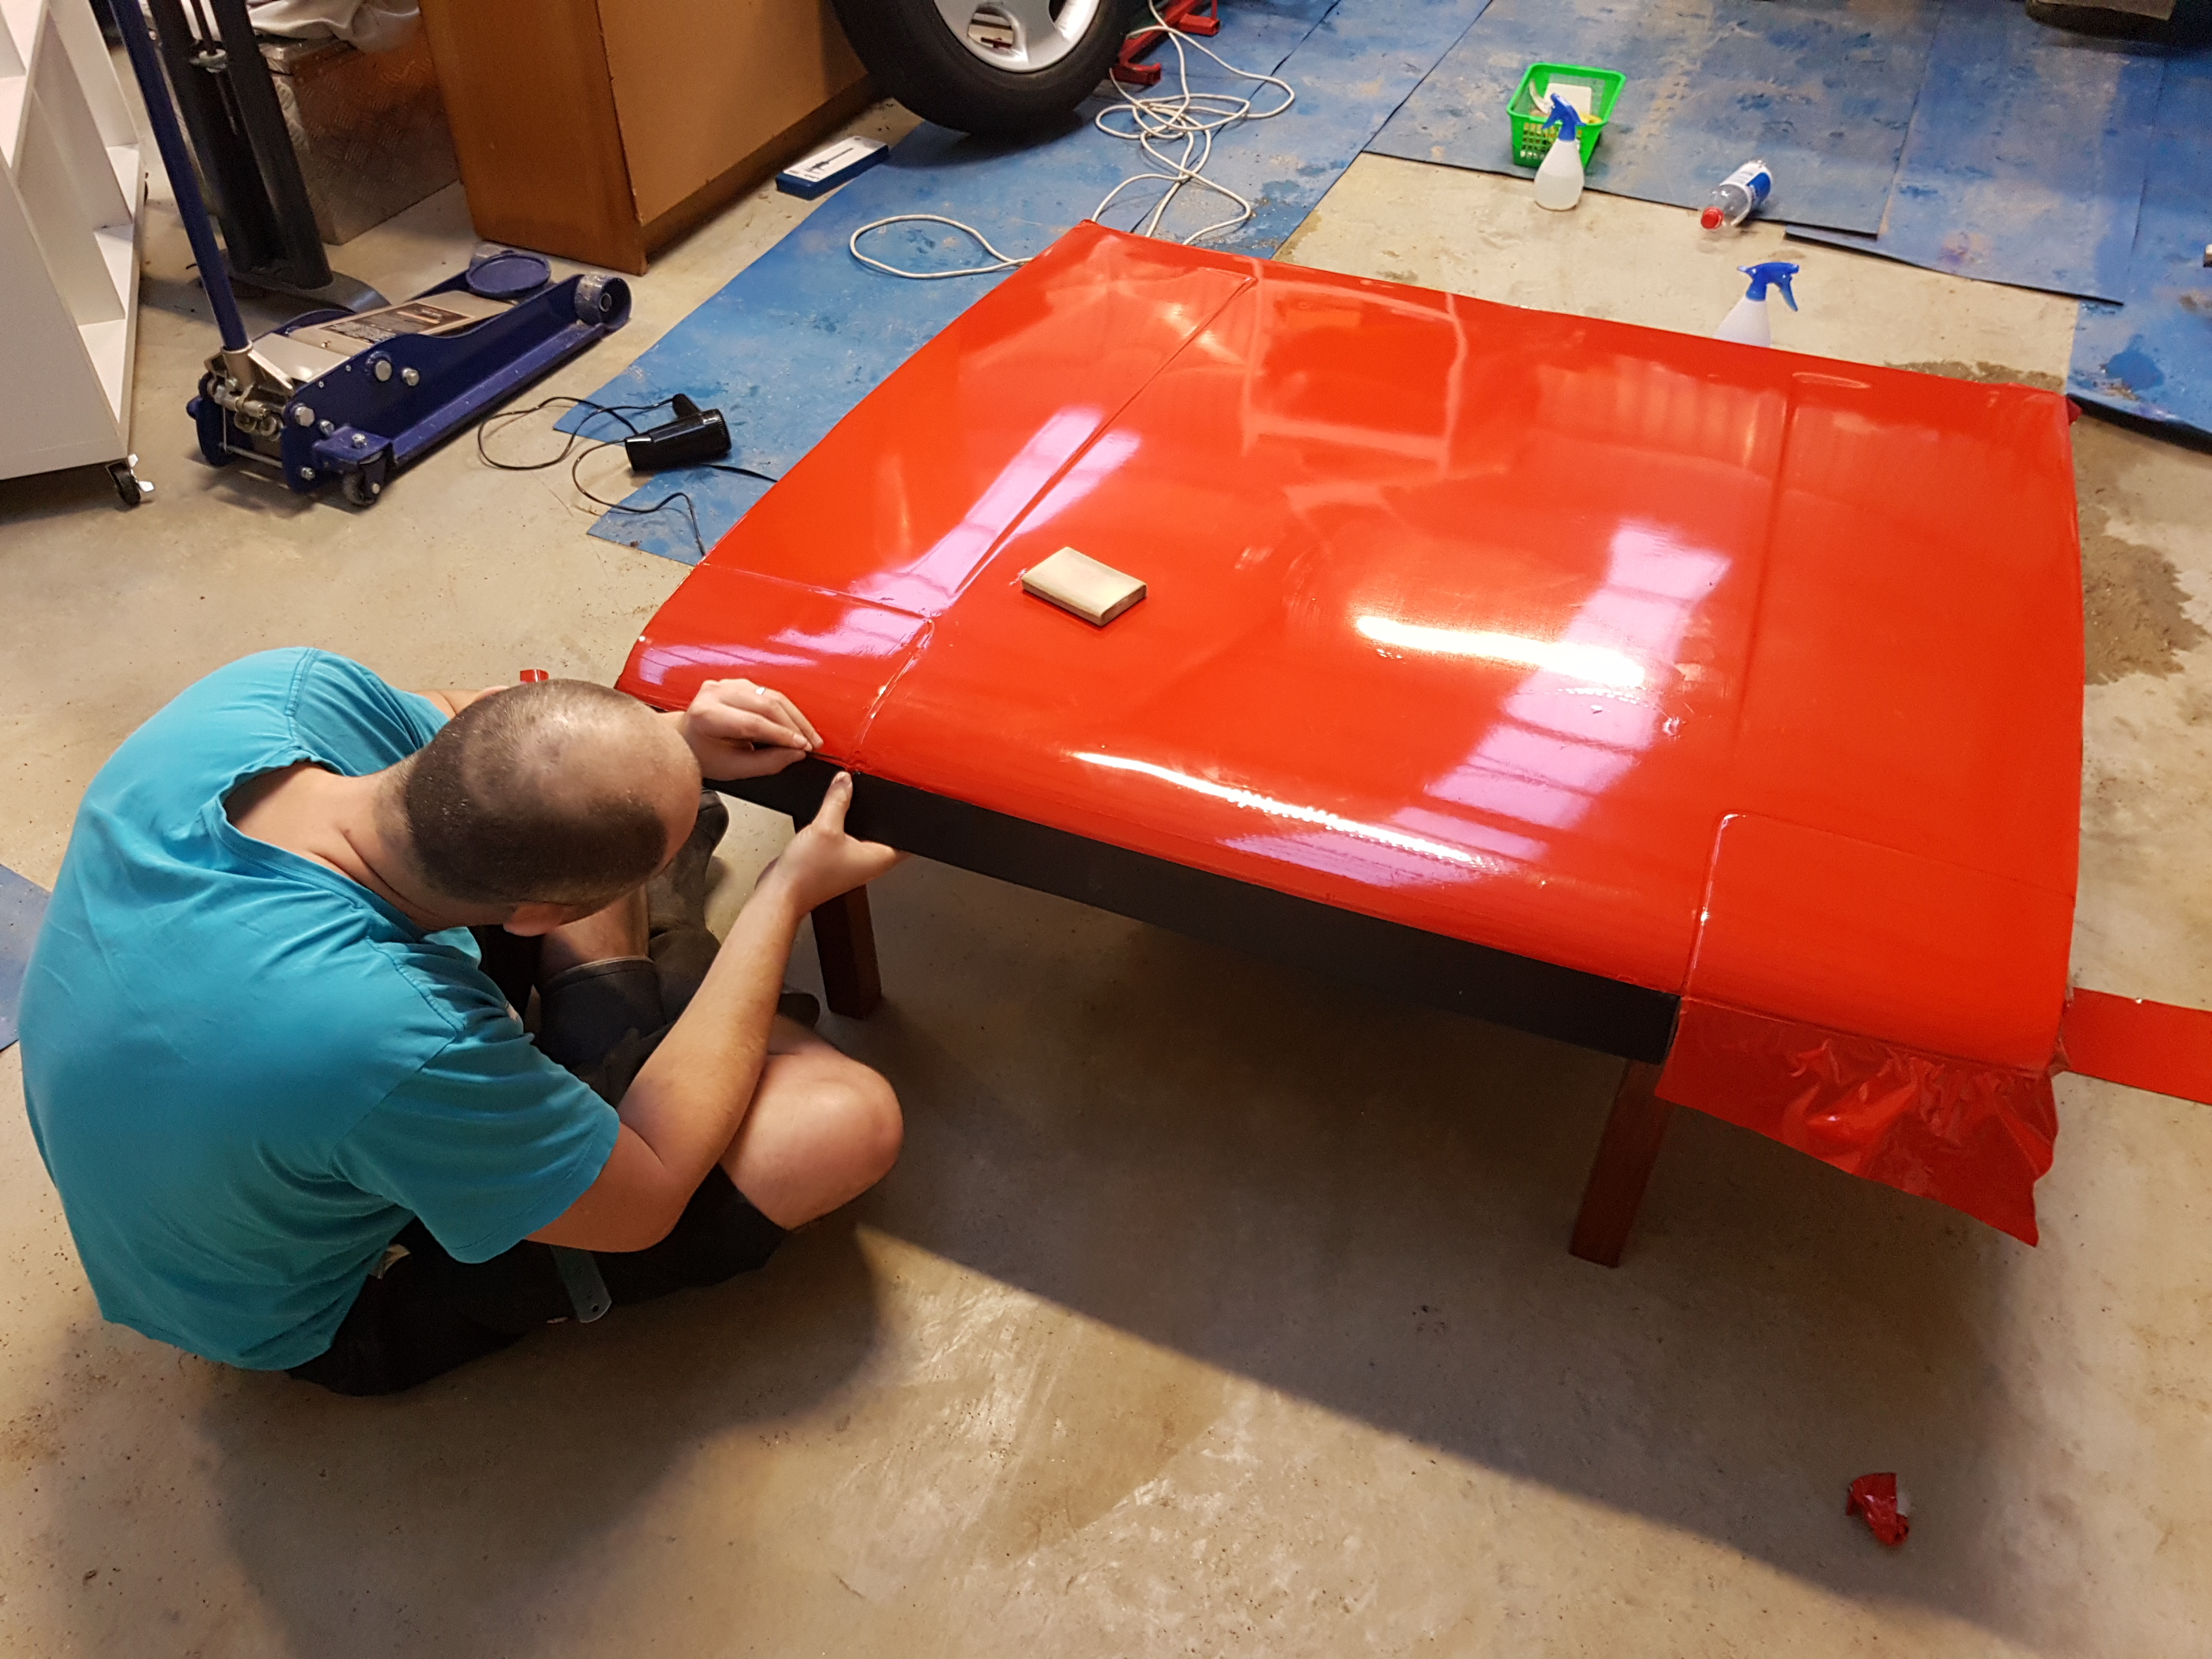
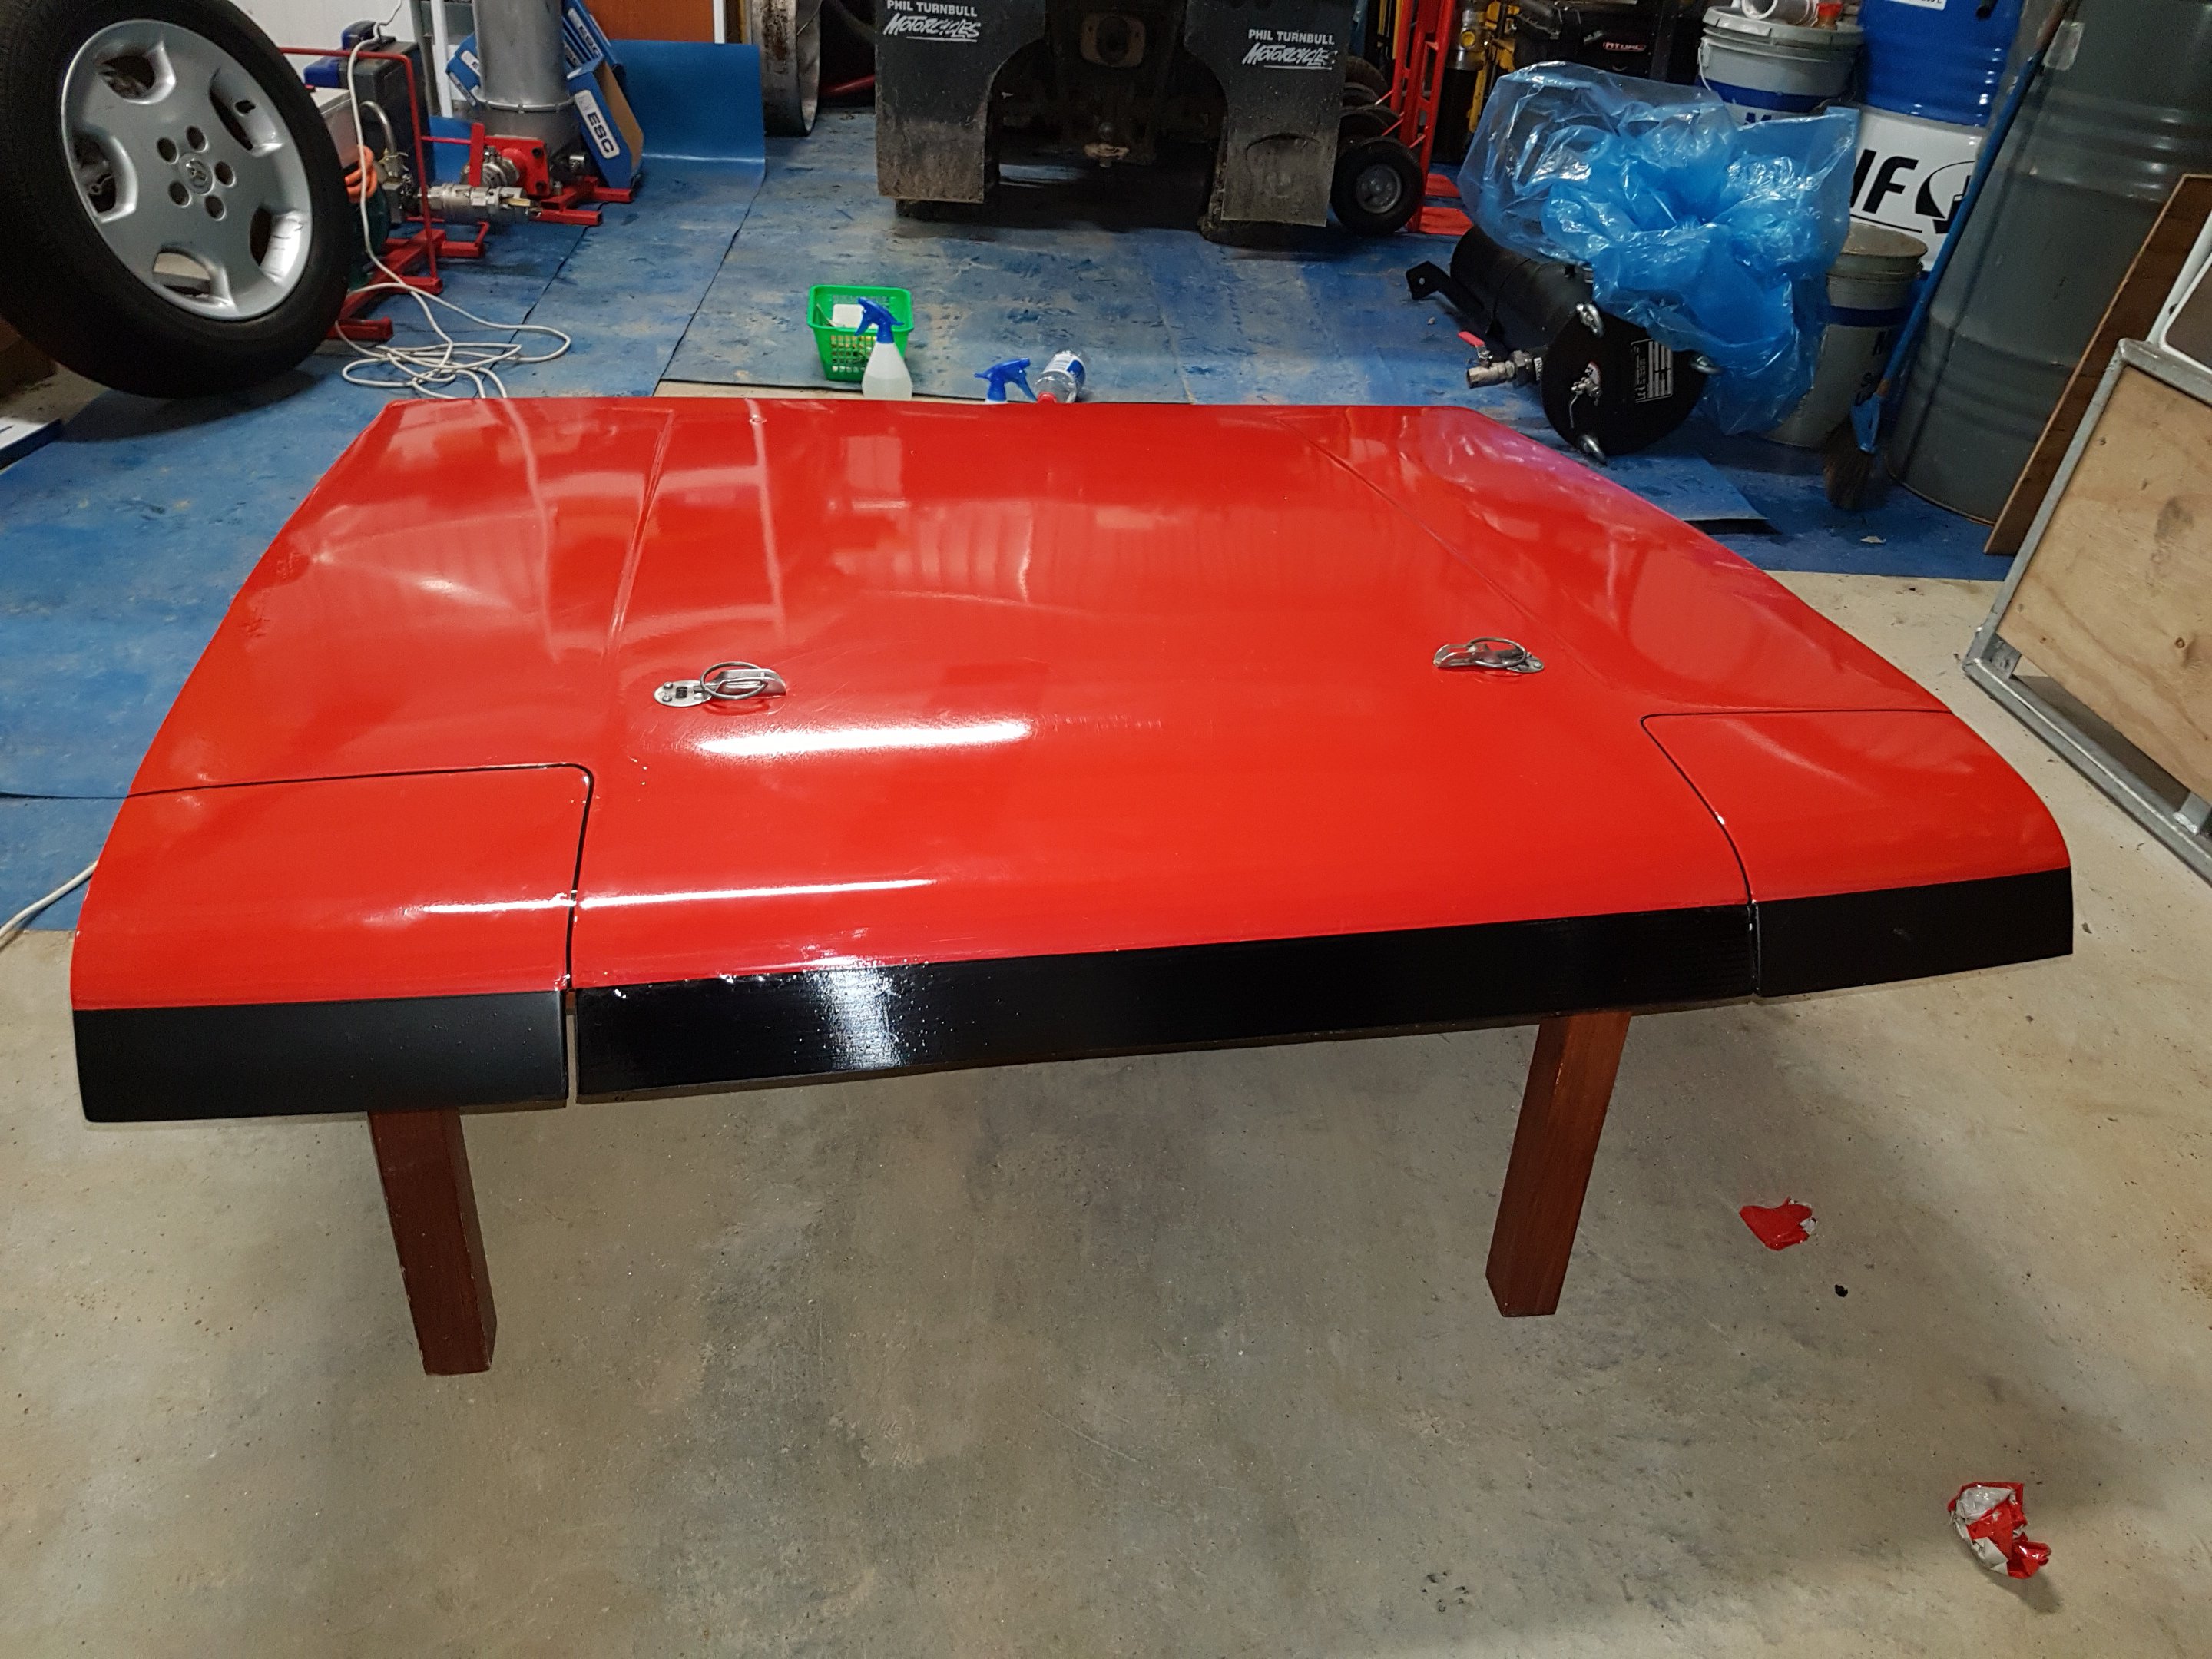
so yea. legal as. and now that is legal again it time to start doing all the illegal mods to it that i want to do. first up was installing an adjustable brake bias valve because i wasnt happy with how the brakes were before and im going to be putting a disk brake diff in it soon and ill need it for that. second was installing a smaller steering wheel. 2019-07-06_05-04-31 by sheepers, on Flickr then it was time to lower the front a bit because i wasn't happy with how it looked so the front springs got a mikita haircut. now its sitting much better. 2019-07-06_05-04-40 by sheepers, on Flickr 2019-07-06_05-04-49 by sheepers, on Flickr 2019-07-06_05-04-58 by sheepers, on Fl next will be painting the hood lining i think. its a fucked grey/mostly stained colour now so i think ill dye it black.4 points
-
Vespa. Have fitted some tyres that will be mildly better in dirt& gravel, already got a cargo rack and bag sorted, and have got a fuel can that fits in the space between my feet.3 points
-
Threw some money at it & treated it to a set of Gabriel shockies, it now sits in the drive with a flat battery. Sum idiot left the radio on! Resisting the temptation to dress it up, it ain't gunna be a showy money pit. Nudge bar, driving lights & canopy is about it! And get another donk, freshen that up & turn up the wick a bit. Just for the record with 3/4 tank of fuel it weighs 1670kg as it sits now. Be interesting how heavy the slide-on winds up being.3 points
-
the headers go though the fire wall and out though the a pillar .with electric cutouts in behind the front guard , and a t section going to the rest of the exhaust
3 points
-
its had the b pillars moved back and made into a two door .dash has been changed too
3 points
-
2019-06-19_01-30-25 by sheepers, on Flickr 2019-06-19_12-40-53 by sheepers, on Flickr 2019-06-19_12-40-43 by sheepers, on Flickr3 points
-
I'll be starting my build thread this Thursday... hoping to have the biggest little bike, glides right over gravel.
2 points
-
Cm125t if it’s not too slow/heavy, otherwise cub with lack of suspension/wonky rims, should be mint2 points
-
Goooood ol adventure NBC again for me. But without panniers this time. Them big ol boxes too heavy, made gravel riding grotesque.2 points
-
Bone stock CT110, might do an oil change the night before.2 points
-
Make a few bucks on the ride home2 points
-
I had one when I was 18.....was fun,till I blew the diff and was quoted $600 for a new diff head. So I sold it and the guy that bought it chopped it into a Ute for his lawn mowing business.2 points
-
no just a runabout and curzing around hawkes bay2 points
-
Do it anyway! Bring the ragtop.2 points
-
Time for a smol update on the fiat. Have been chipping away with making patches and buying parts/paint stripping etc. Gave the mrs a wind up about getting motivated to finish it and she pushed me in to actually buying parts. Parts are in the country but the a holes at customs forgot to process the gst invoice so I'm back to bodywork.
2 points
-
so last year in 4 weeks i stripped the front and resprayed the engine bay. gave the engine some new parts and a spray can rebuild. chucked it back together as i wanted to take it to an event. got it mostly done the night before the event worked till 2am that night. did some more in the morning as had carb issues. then took it to the event and hoped for no breakdowns. i had pushed myself to finish it in time as a woman wanted to go to the event together and was keen to go in my car. plus would've been extra brownie points right? but it turned to shit before the event. but ended up taking a male mate instead. was good but still overheated... been super slack and haven't been updating this thread will try and update it in the next few weeks yeeah
2 points
-
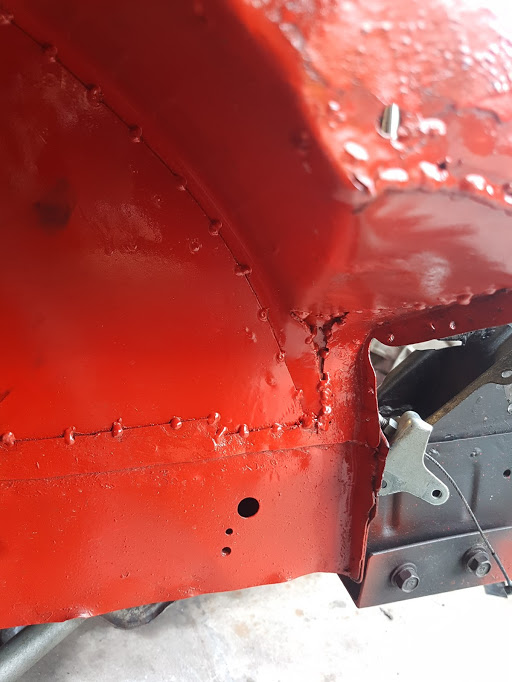
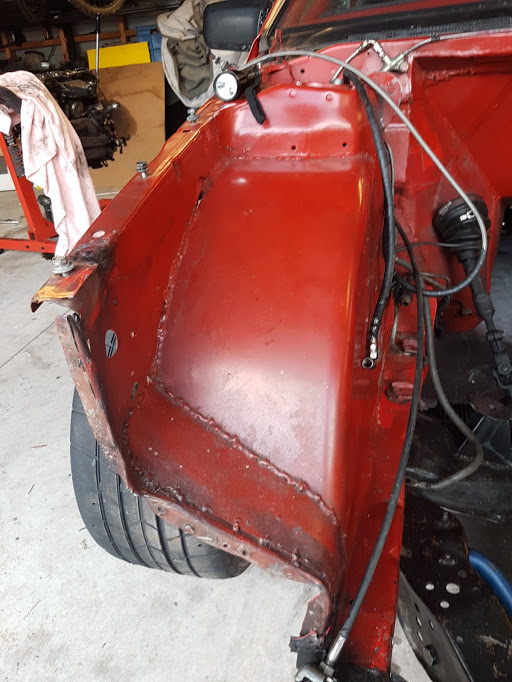
September will be two years since I've driven this car... So I've decided that I should get it going and try to race it at the final round of the Manfeild winter series. I've not done a whole lot since 2017 due to general slackness, but have cleaned up a bunch of welds around the tubs. This was about a year ago: Fast forward to this week and I've started doing things again. More weld removal, a few holes welded up, paint removal etc. A bit of filler and the first coat of etch this evening to see how it looks: The underside is still a bit wrinkly, but it's good enough for an inner arch. Now to get the other side. to this level.. I always forget how long it takes to sand filler! It's a pretty painful job . Once both sides are in primer I can give the rest of the bay a good clean up, sand and start thinking about paint.
2 points
-
Outer mould patterns finished and ready for printing. 3D printing is good but it also means to have to design the under side! Twice as much work!2 points
-
Not done much with this since dismantling the carport that fell on it, (no damage) as the ute has been hogging all my limited car time. WoF has now expired and the front half of the exhaust still needs replacing (Car is otherwise fine, starts and runs great). Im happy with the rear half, but as the front half needs replacing i want to run twin pipes from the manifold to the diff as per the 2300 Abarth S Coupe exhaust below (twin pipe section is much shorter currently and is blowing pretty bad) Eventually triples and extractors too, but not for a while, and like most Fiats the cast manifold is actually better than most aftermarket attempts. Anyway, it has been sitting outside on the lawn getting rusty , but have finally found some dry storage for it. Sleep tight sweet prince, ill see you in summer xox2 points
-
Havnt done much with this while ive been playing with the ute, except drive it to monthly meets. Here it is with another sweet torsion bar suspension vehicle at the october meet these flippin sweet sweet pics from the november one thanks to @MichaelJFox on his Rolleiflex and on the way to the december meet it ran out of gas despite the gauge saying half full until the AA man put $20 of 95 in and it dropped to under a 1/4. Once rolling again it was too late to make it to Mt Wellington So we had a solo MEAT at Lincoln Rd MEAT!2 points
-
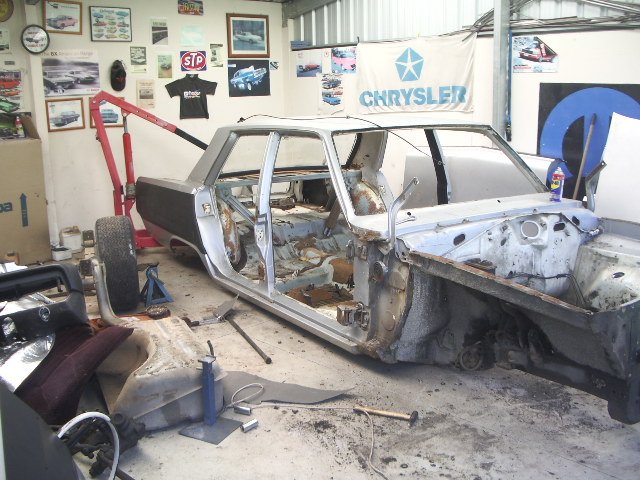
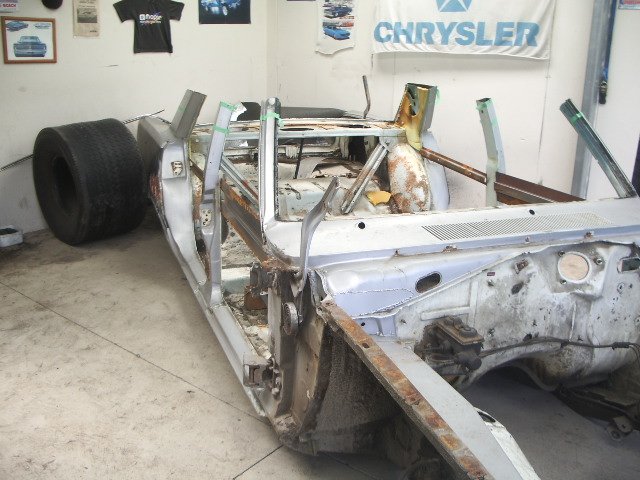
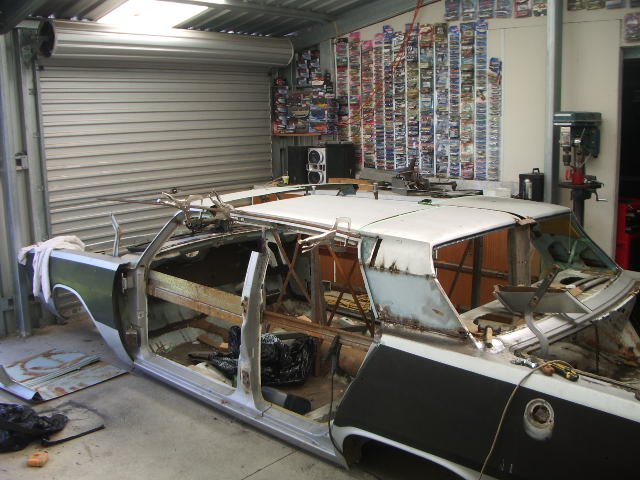
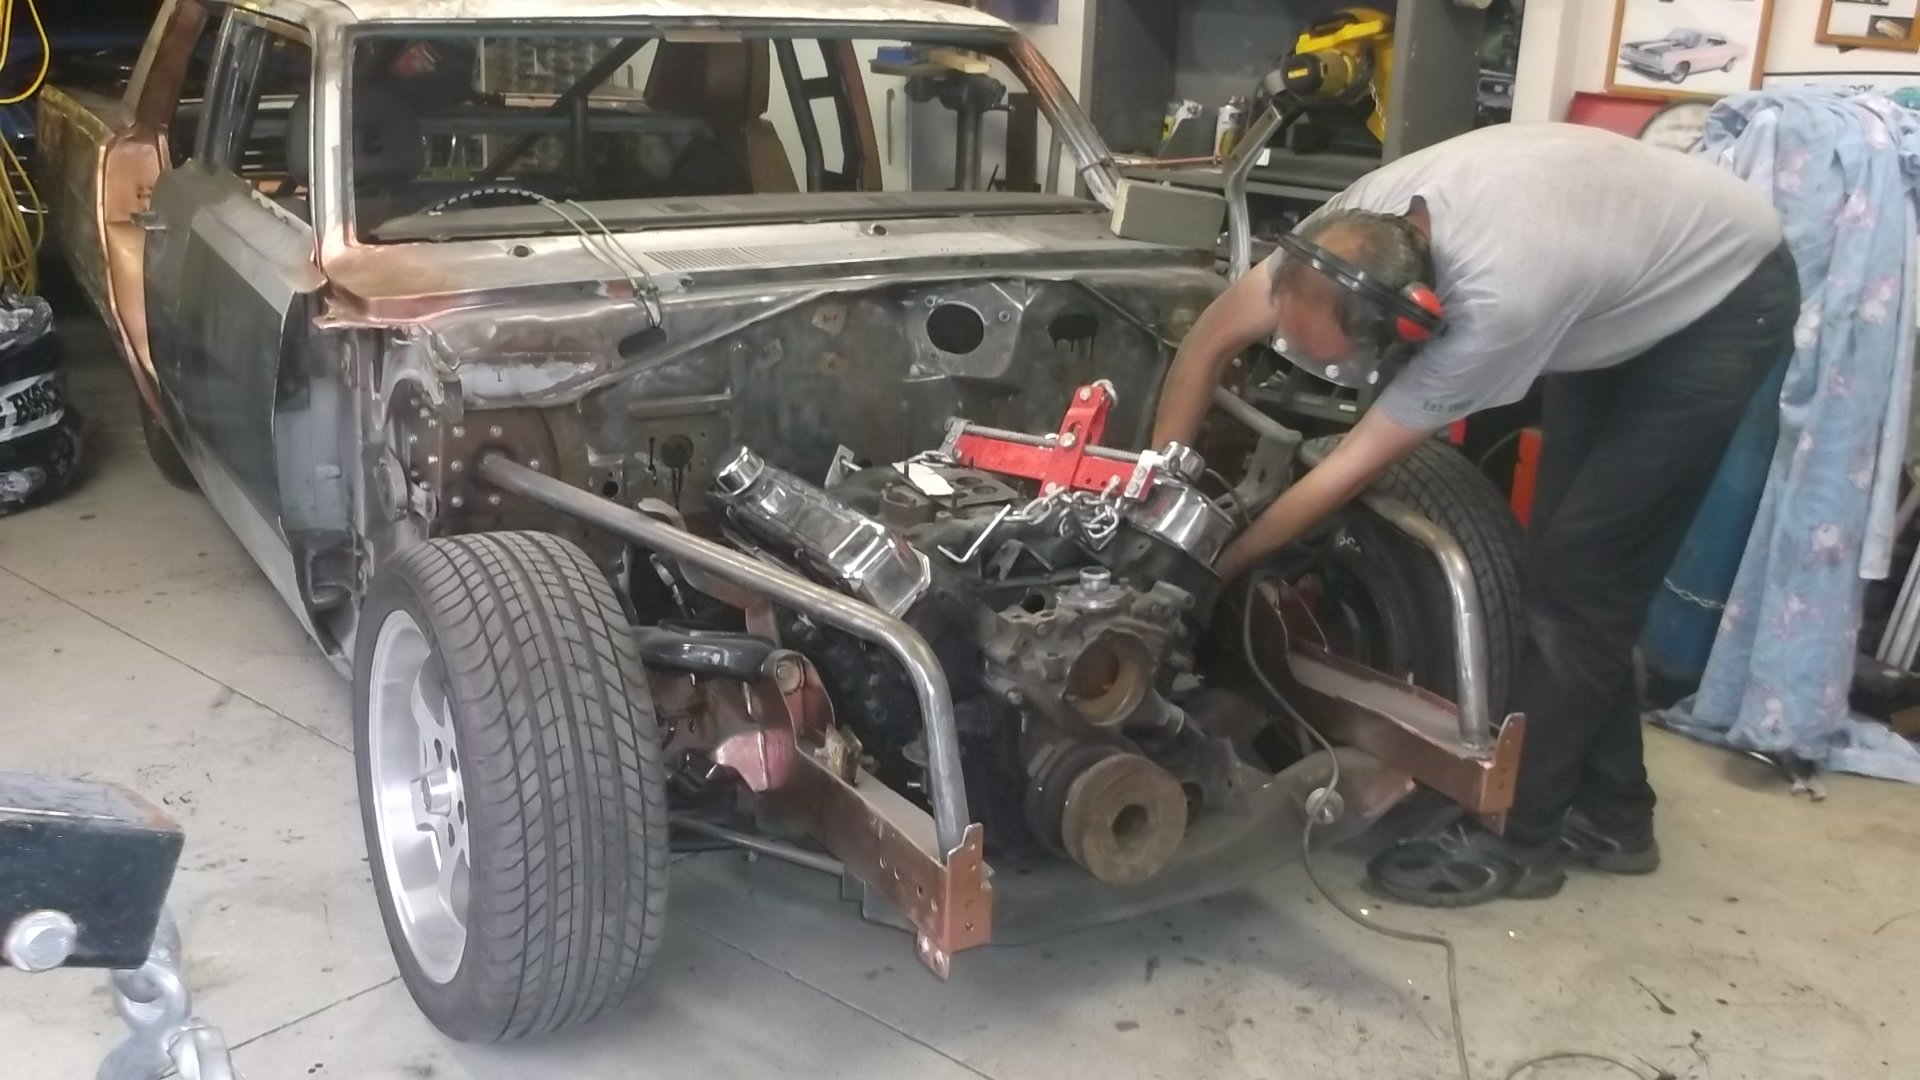
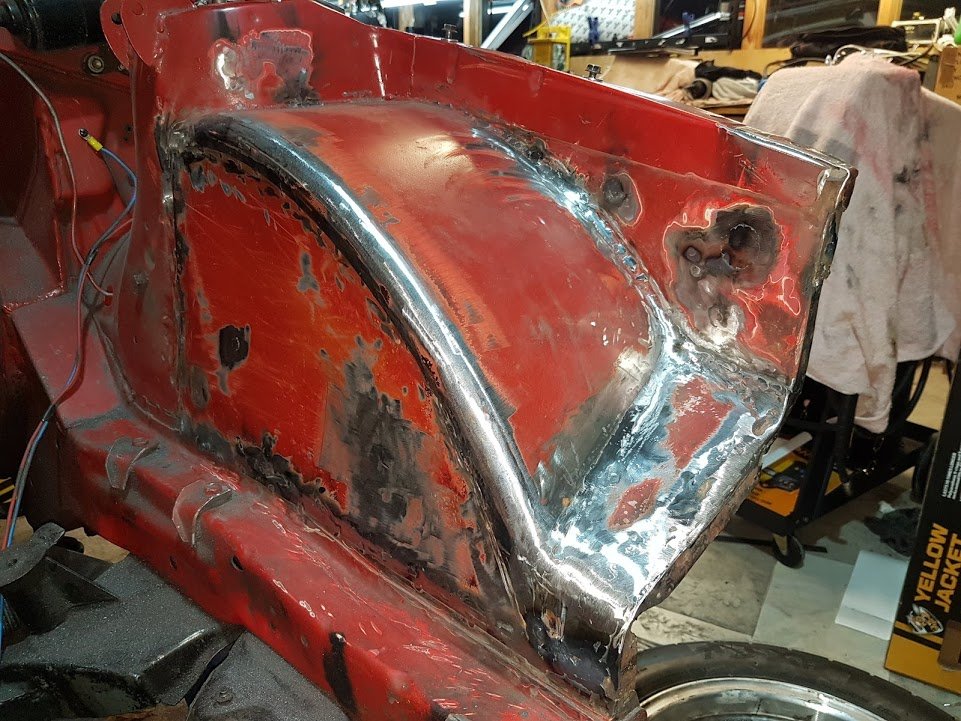
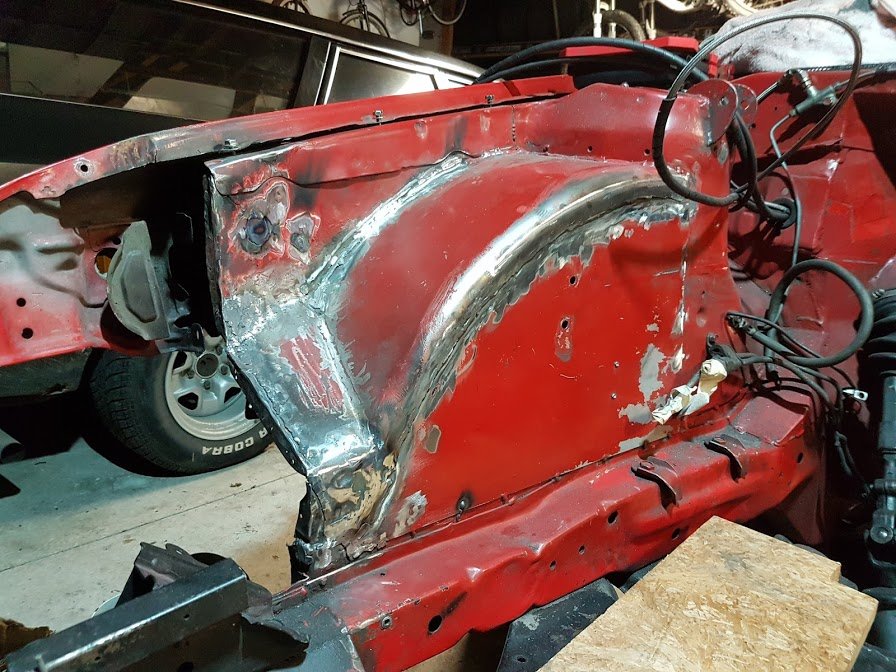
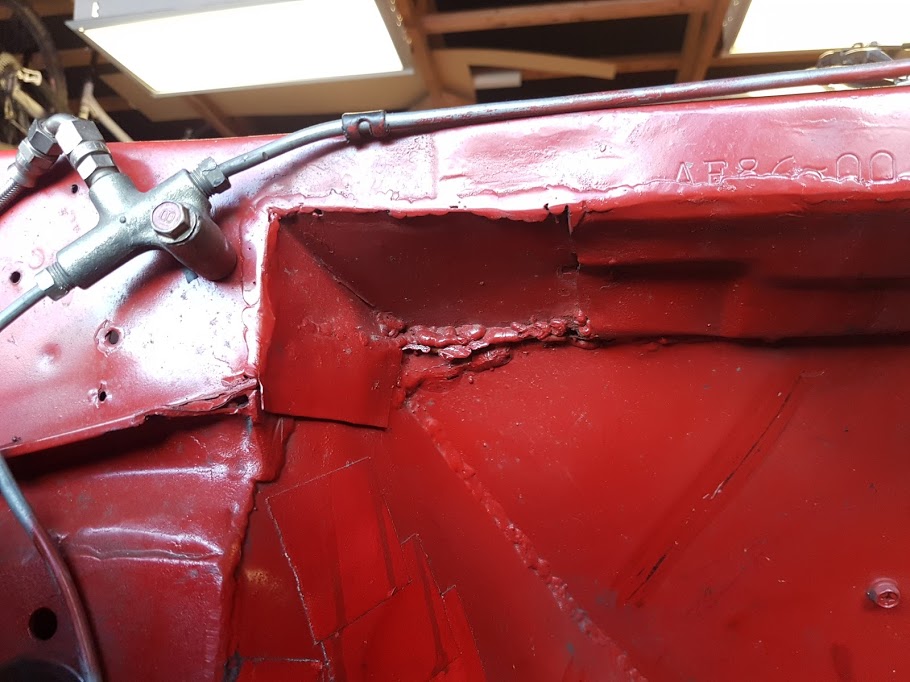
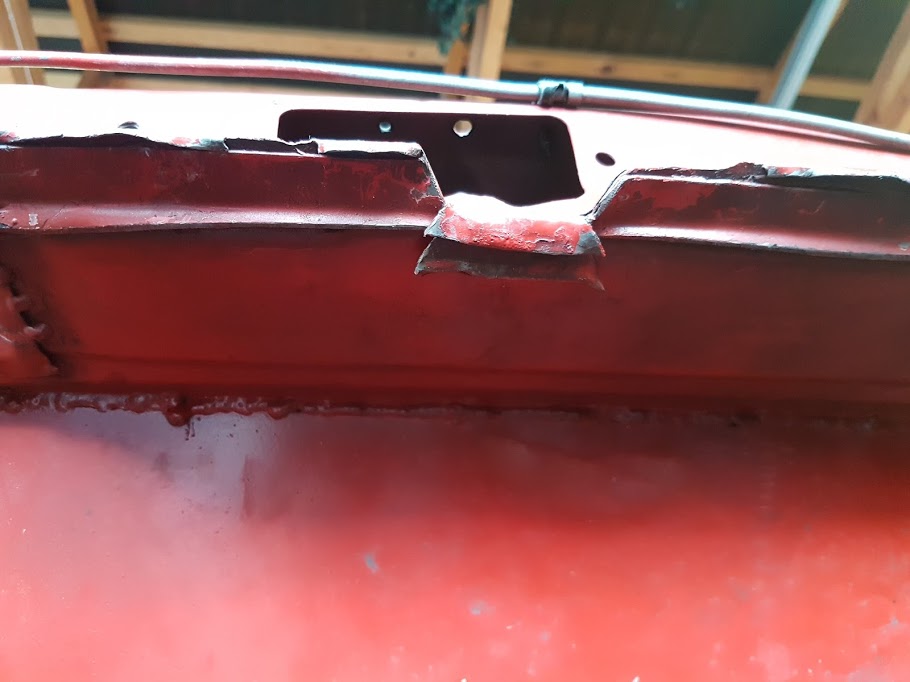
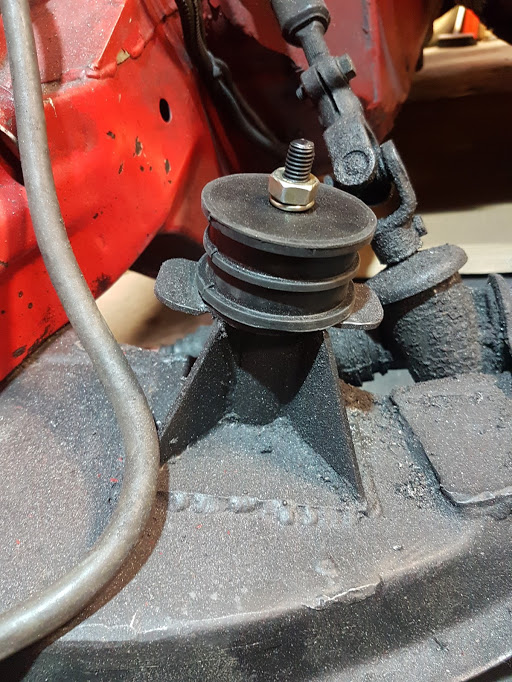
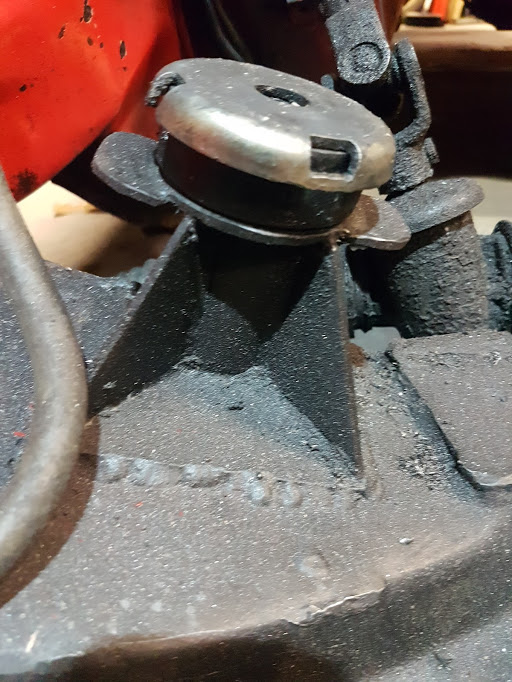
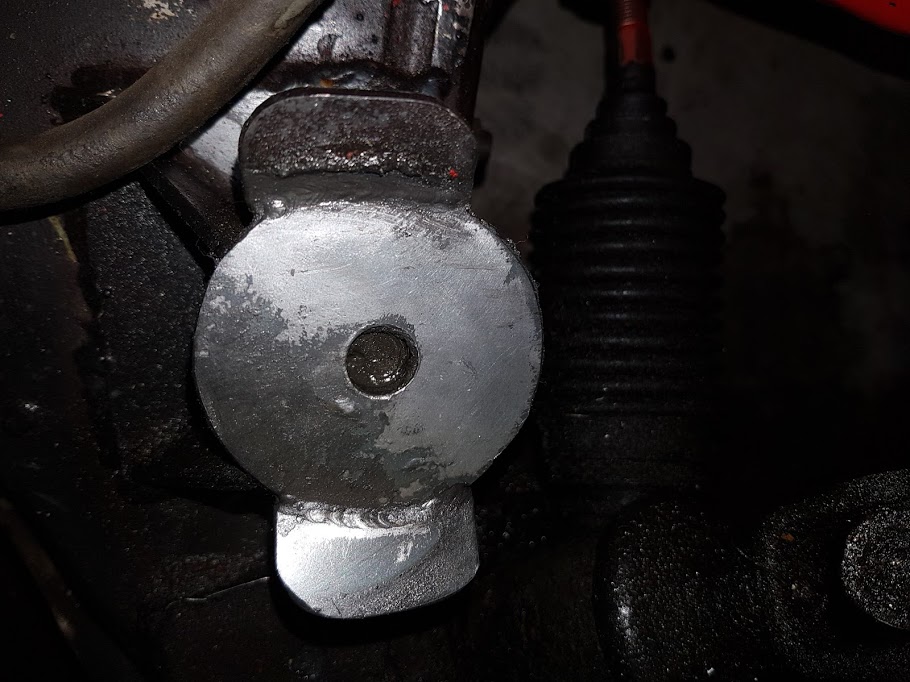
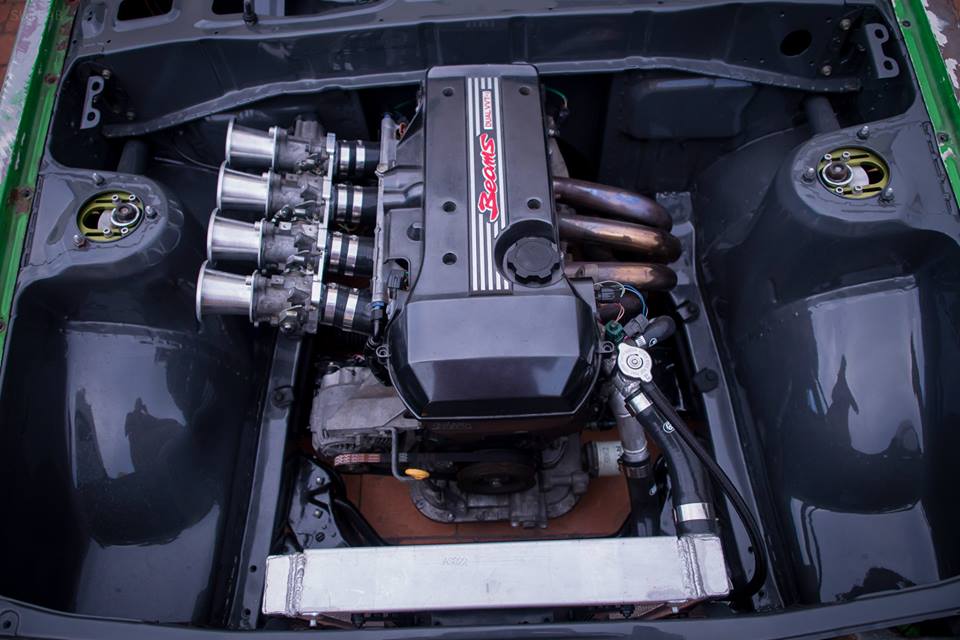
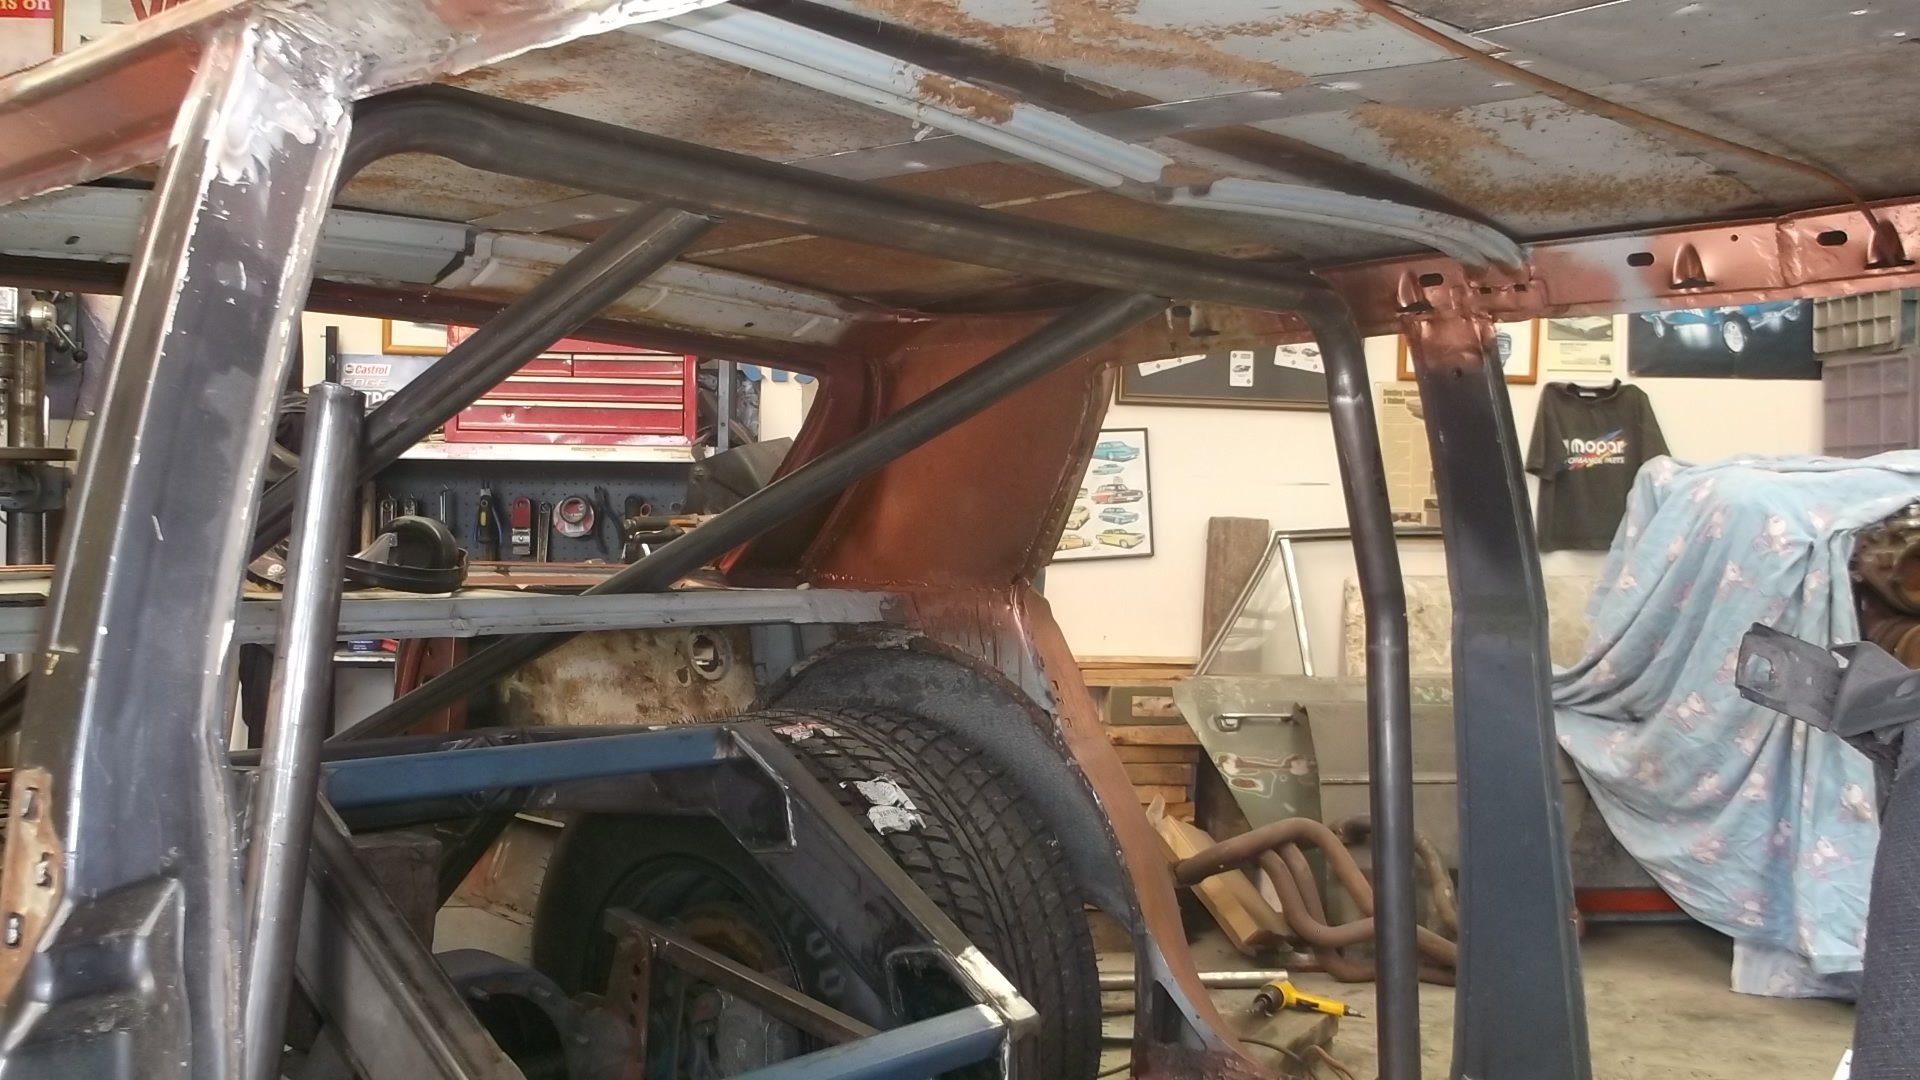
Back to those bad decisions... I don't really want to share these photos, but am going post them for the sake of good record keeping. I did all this with maximum haste and minimum care and it shows. First up, half assed tub job. From what I remember, I left the paint on for most of these welds. I also did the tubs and "wedge" sections before the front rad support panel was removed, so it was hard to get in there.... But never cleaned up the welds after removing the slam panel. Started by attacking them with a flap wheel to get rid of all the super high spots. I'm going to clean all the welds up as much as possible and will re-weld some parts. There will be grinding.... And welding.... And cleaning.... And filler. The inside is just as bad: Like, what the actual fuck 23 year old Markku? You didn't even cut the bottom edge straight! Oh well, just weld'er'up anyway I guess!?!?! Firewall - not finished and the welding at the back needs to be taken away and shot. Firewall notch to get the coil pack out - this was done at the track or on the dyno when we realised that the coil hit the seam: Started by cleaning up the edges and will weld parts of the seam: Next issue - engine mounts. The original idea consisted of pancaking a piece of Urethane between the engine mount and the pedestal with a bolt going through. In other words, it was basically solid mounted... Until the bolts snapped from the torque, vibrations and bumps. This was the situation when I removed the engine: On top of that, 3 out of 4 of my gearbox mount bolts had disappeared! So the engine and box would have been flubbering around like a kitty on crack. The best solution is a set of Land Rover engine mounts as seen in @DAD's KP build thread. These are 10mm taller than what I had before (26mm vs 36mm), but I've got another solution in the works to get the height right. Old: New: I'll also need to re-set a captured nut into the pedestal. I'm currently trying to decide on the strongest way to do this... The pedestals are welded onto the crossmember, so the only way in is from the top... I can either drill a big hole and weld a flange nut in there from above OR drill a bigger hole and weld an extra plate on top of the pedestal with a nut welded from underneath. I'm open to ideas - what have you got? So I'm taking the run bearing as a blessing after seeing the sum total of issues that need to be sorted. I'll be spending the next few months getting this right and am taking ti as an opportunity to learn some new skills and will take my time to get it looking good. Luckily I work for a company that sells flap wheels, grinding discs and linishing belts! Here's a pic of @nothingsfree's engine bay for inspiration:
2 points
-
So this is living outside while the 125 sits in the garage with flat tyres Ive put foam floor mats under the carpets to keep them off the floor, but it really needs a roof. Anyway, ive swapped out the old exhaust from under the back seats back. Took out 2x offset mufflers and some patched up 1.75" pipe that both leaked and was quiet, (and fell off at nats!) and put one straight through muffler with 2.25" pipe from the croma turbo. old rubbish on top, new hotness on bottow Sounds pretty good, but now makes me want to do the rest 2x 1.5" secondaries back as far as they will go (currently to the drivers feet area) but will probably pay a guy, cause holy hell exhaust fitting is a fiddly frustrating job on your back in the rain! Also made into a magazine, NZV8 feature on Parked up Out-west from Queens Birthday2 points
-
Since getting back from nats Ive been poking away at the inevitable list of (small) jobs on this. When we got home, this was sitting on the step. I love a bargain, I got this lot for $20 + shipping (which was only another $22!) in typical fashion I could have used a few of these bits (starter pinion, alternator end cap with bushes, diff seals, radiator hoses, tie rod ends, exhaust hanger, brake hoses) a while ago, but ho hum, spares are good. WINDSCREEN LEAK Windscreen has a pretty bad leak. It is worse when its sitting. (meaning its not coming up off the wheels) Bit gutted i didnt check it and poo it up properly before i put the surrounds on as the trim clips are a serious pain to get off and i did not what to crack the screen again. 3/4 of a tube of windcreeen sealer in and around it havnt quite got it drip free, but good enough now on the inside. However, the outside now looks gak KEYS Car also only came with a (replacement) ignition key so the doors and boot (from another car, also no key) couldnt be fully locked (or unlocked!). Door handles were also a bit loose and it all needed a clean up. I did find that my trusty old Club lock fitted into the key way, so removed the locked and rearranged the lock pins till this happened: Yay! Can actually lock the bugger. And best of all FREE! Also tidied and lubed up all the mechanisms and reinstalled the handles including the boot with some sealant behind the gaskets, and adjusted all the doors and they are way better.2 points
-
So what’s everyone riding this year? Thoughts on set ups with gear/fuel etc? Excited to not need any bedding this year. Have a good shot at being completely self sufficient on my Chaly. Should have my bike done mid October based on current progress.1 point
-
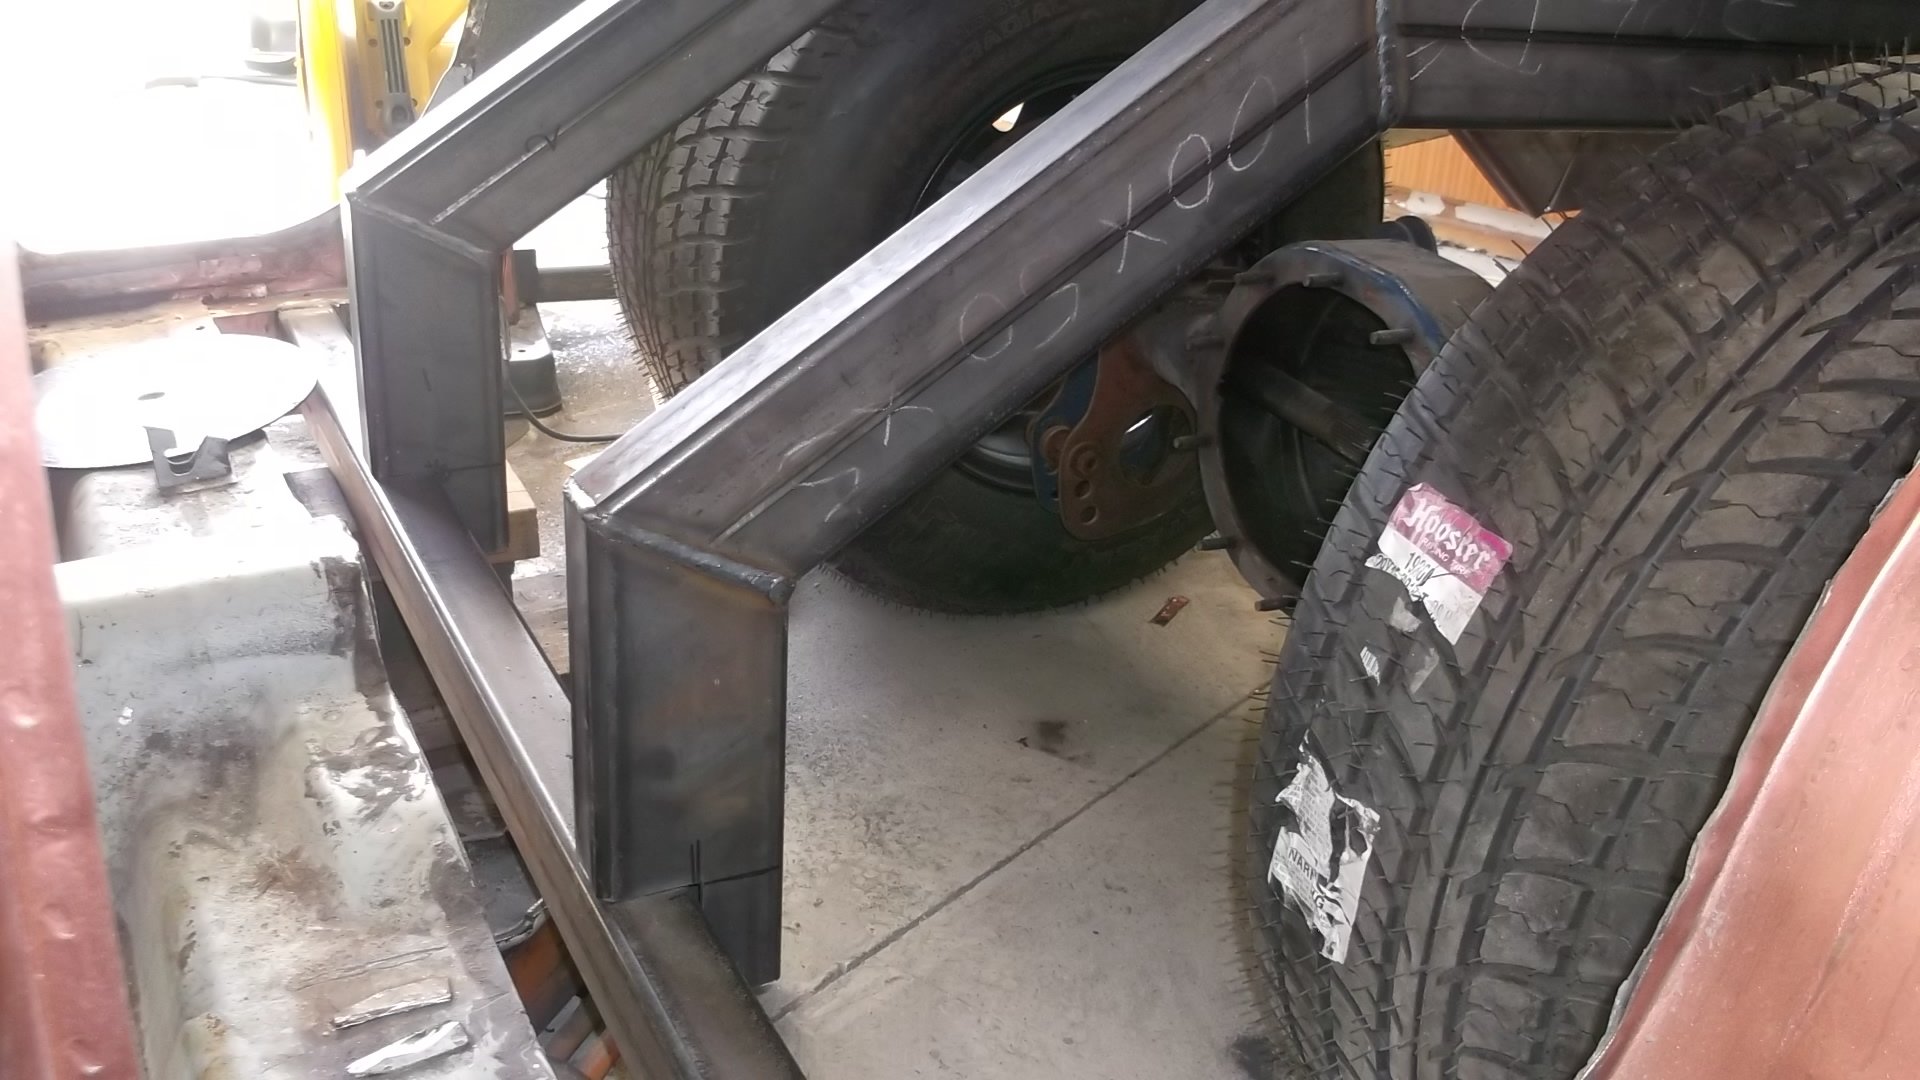
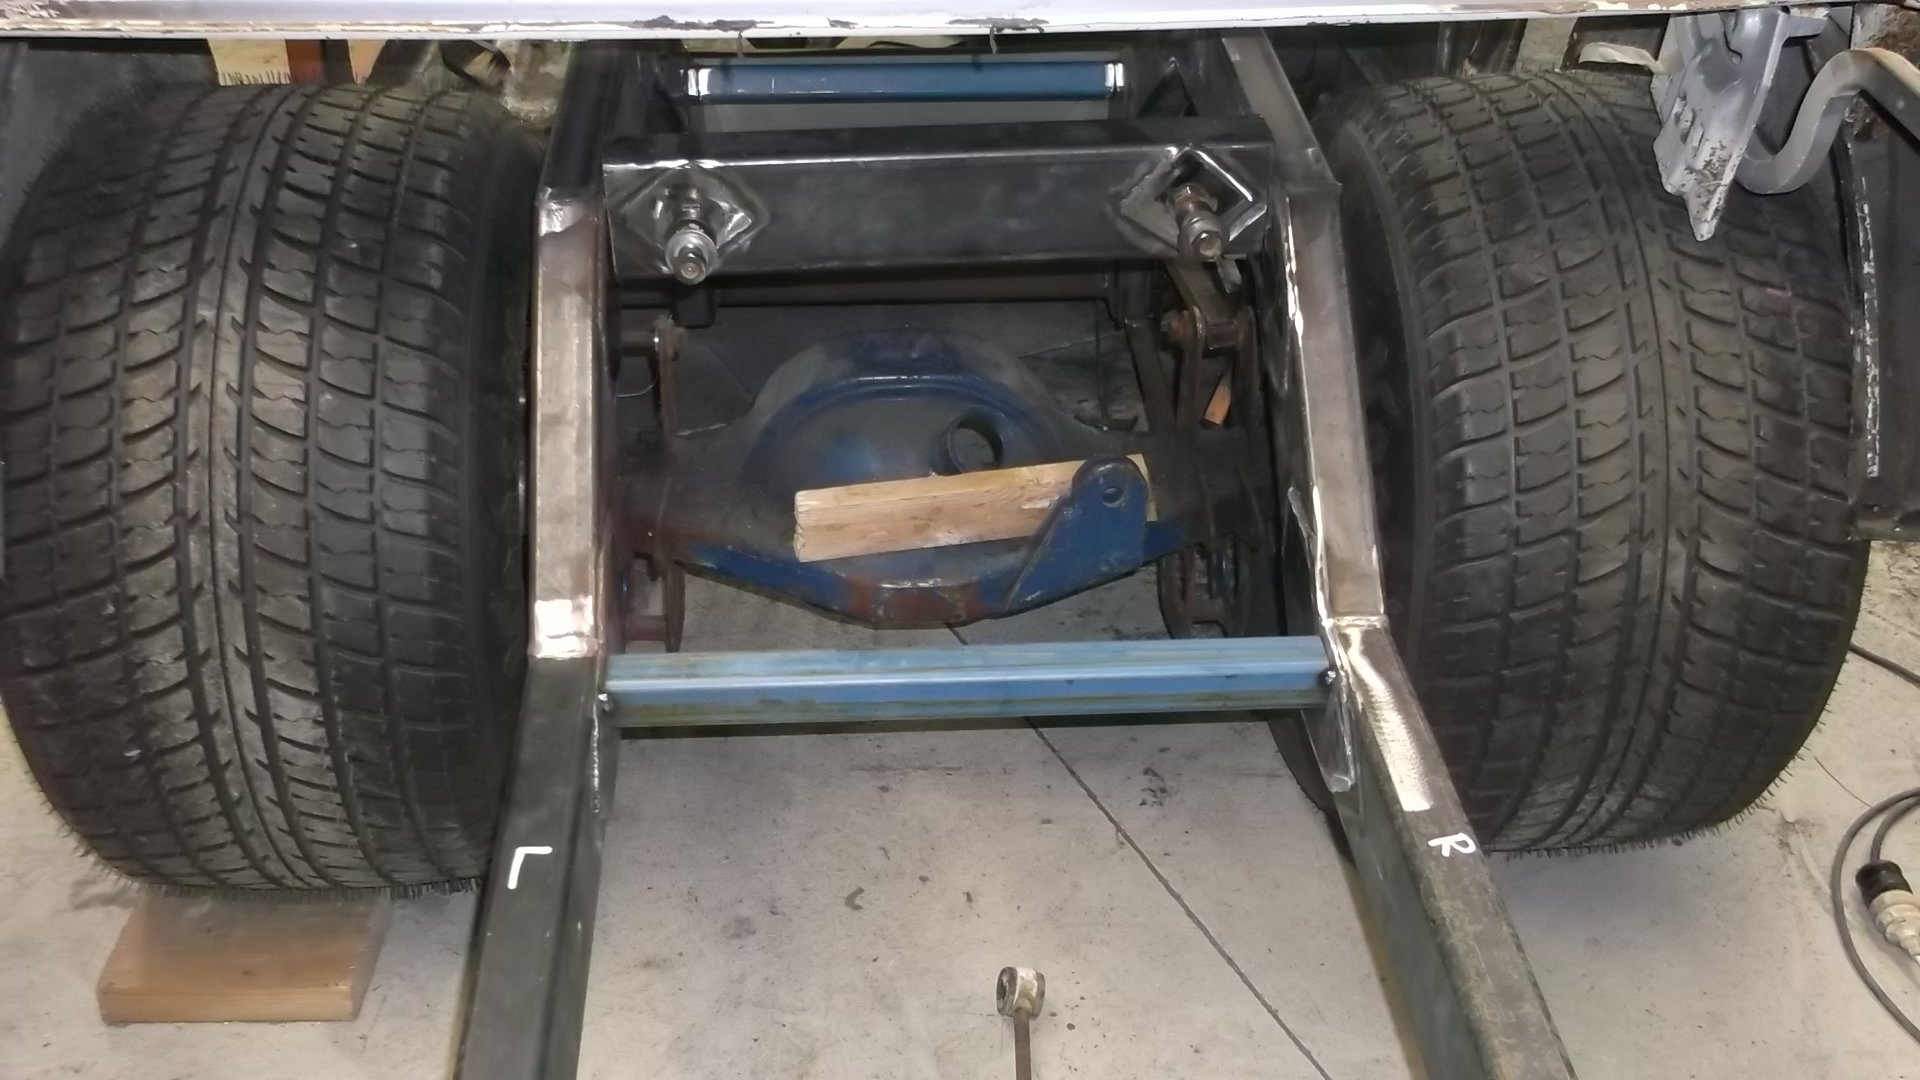
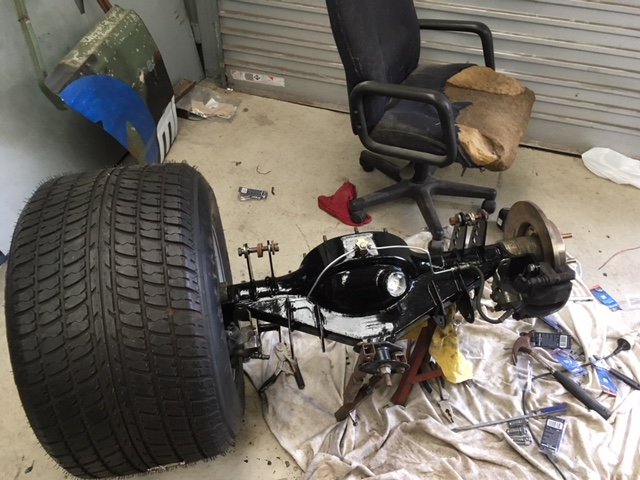
diff and rear wheels,and rool bar and rear legs in
1 point
-
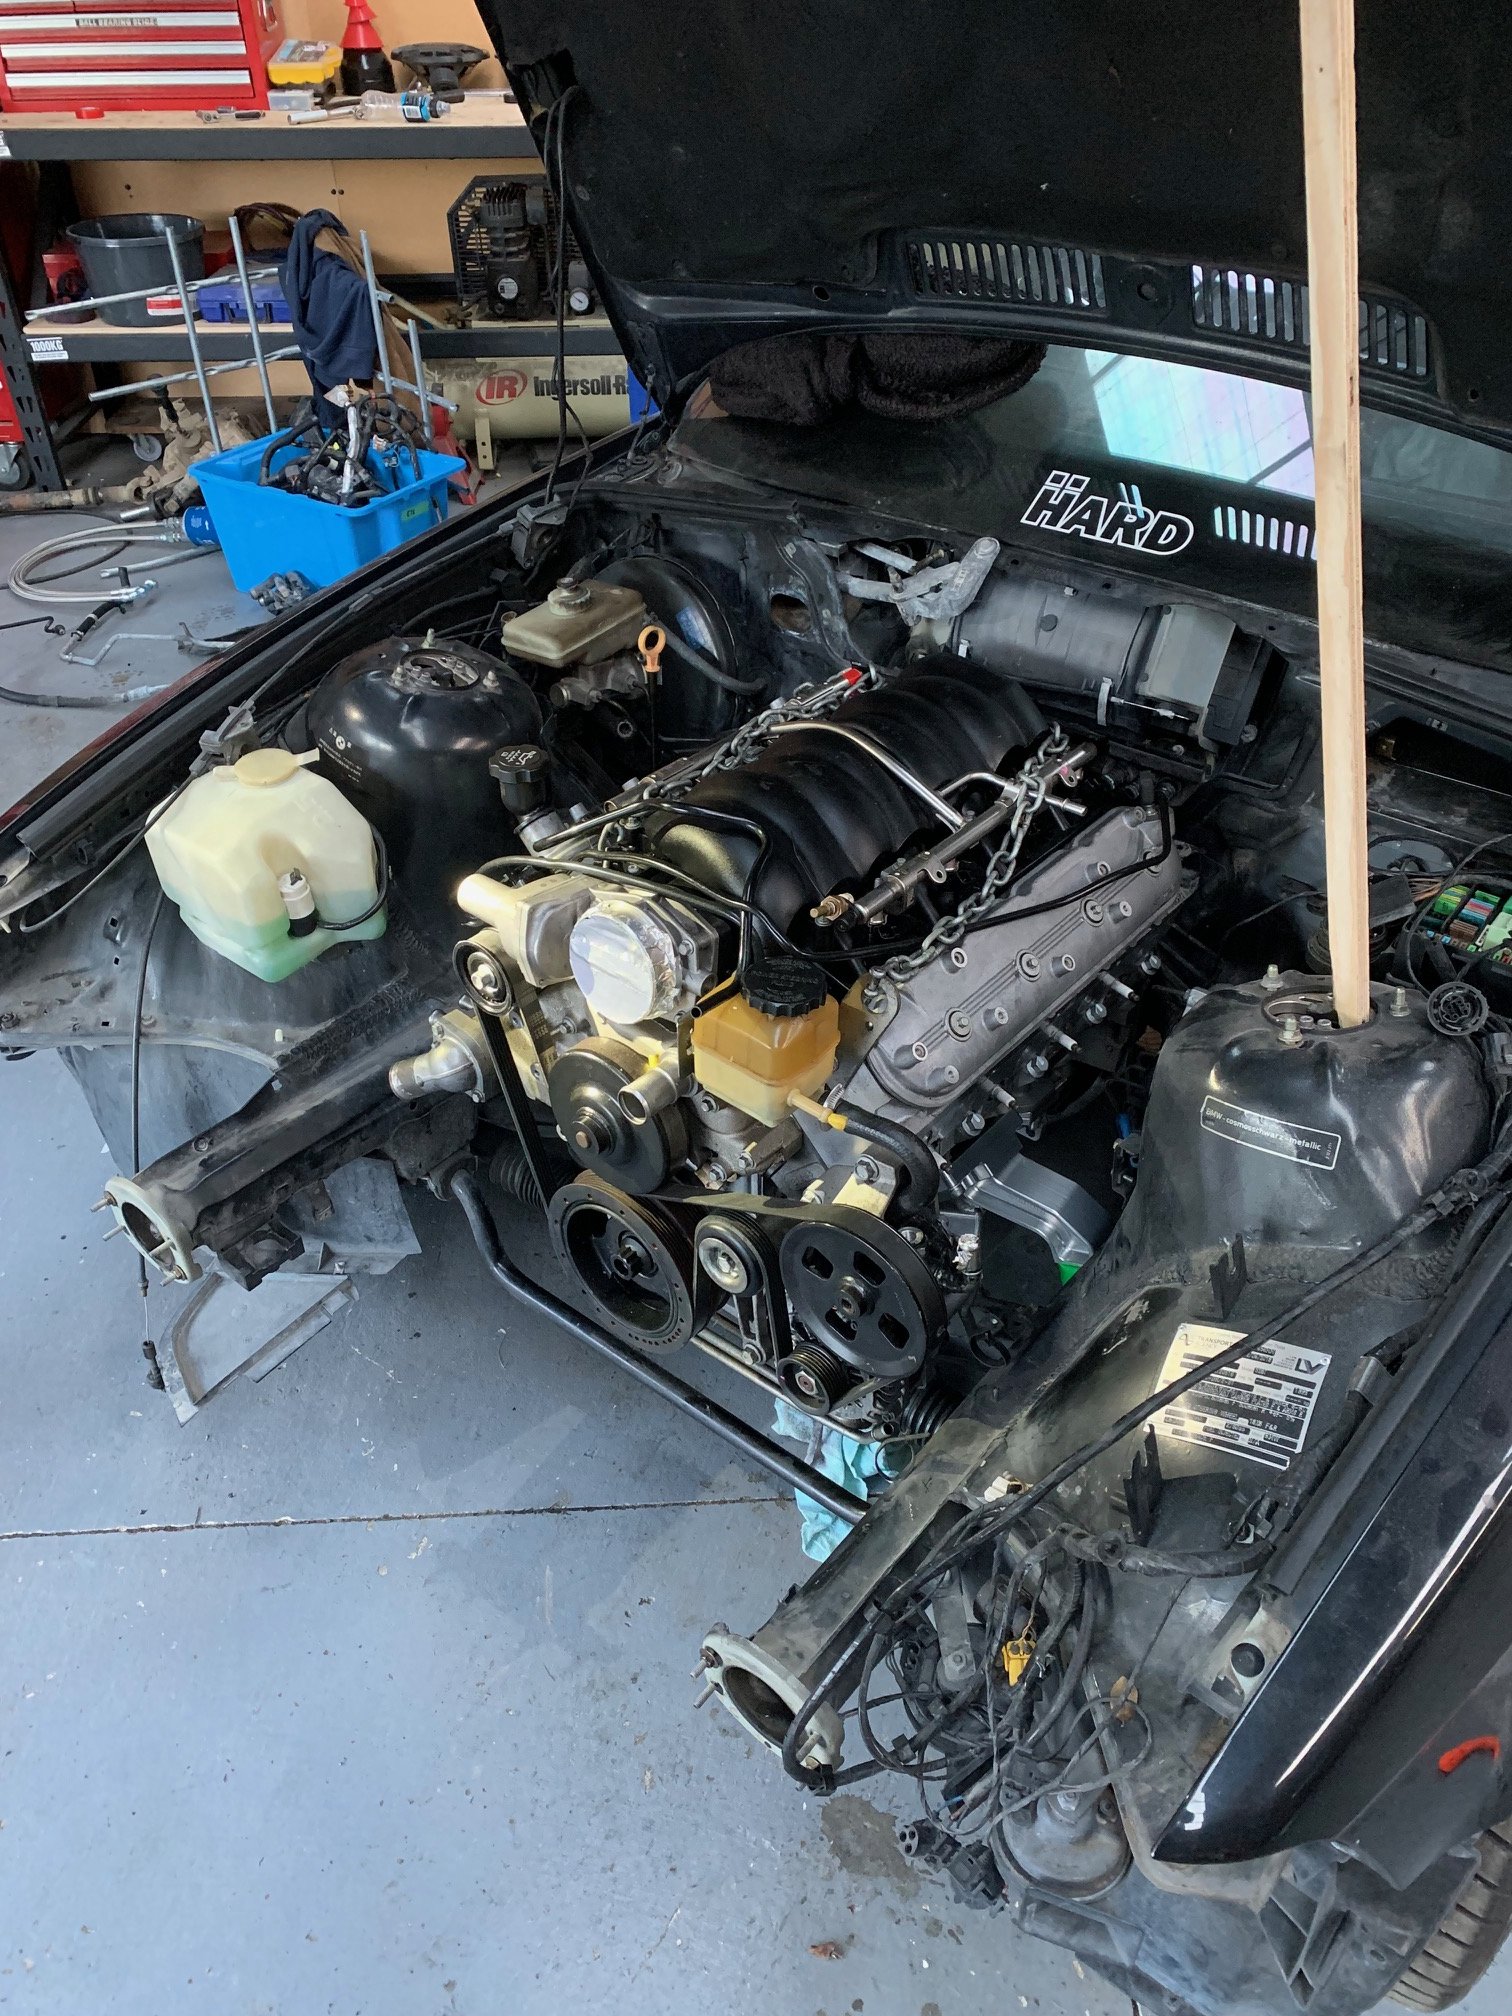
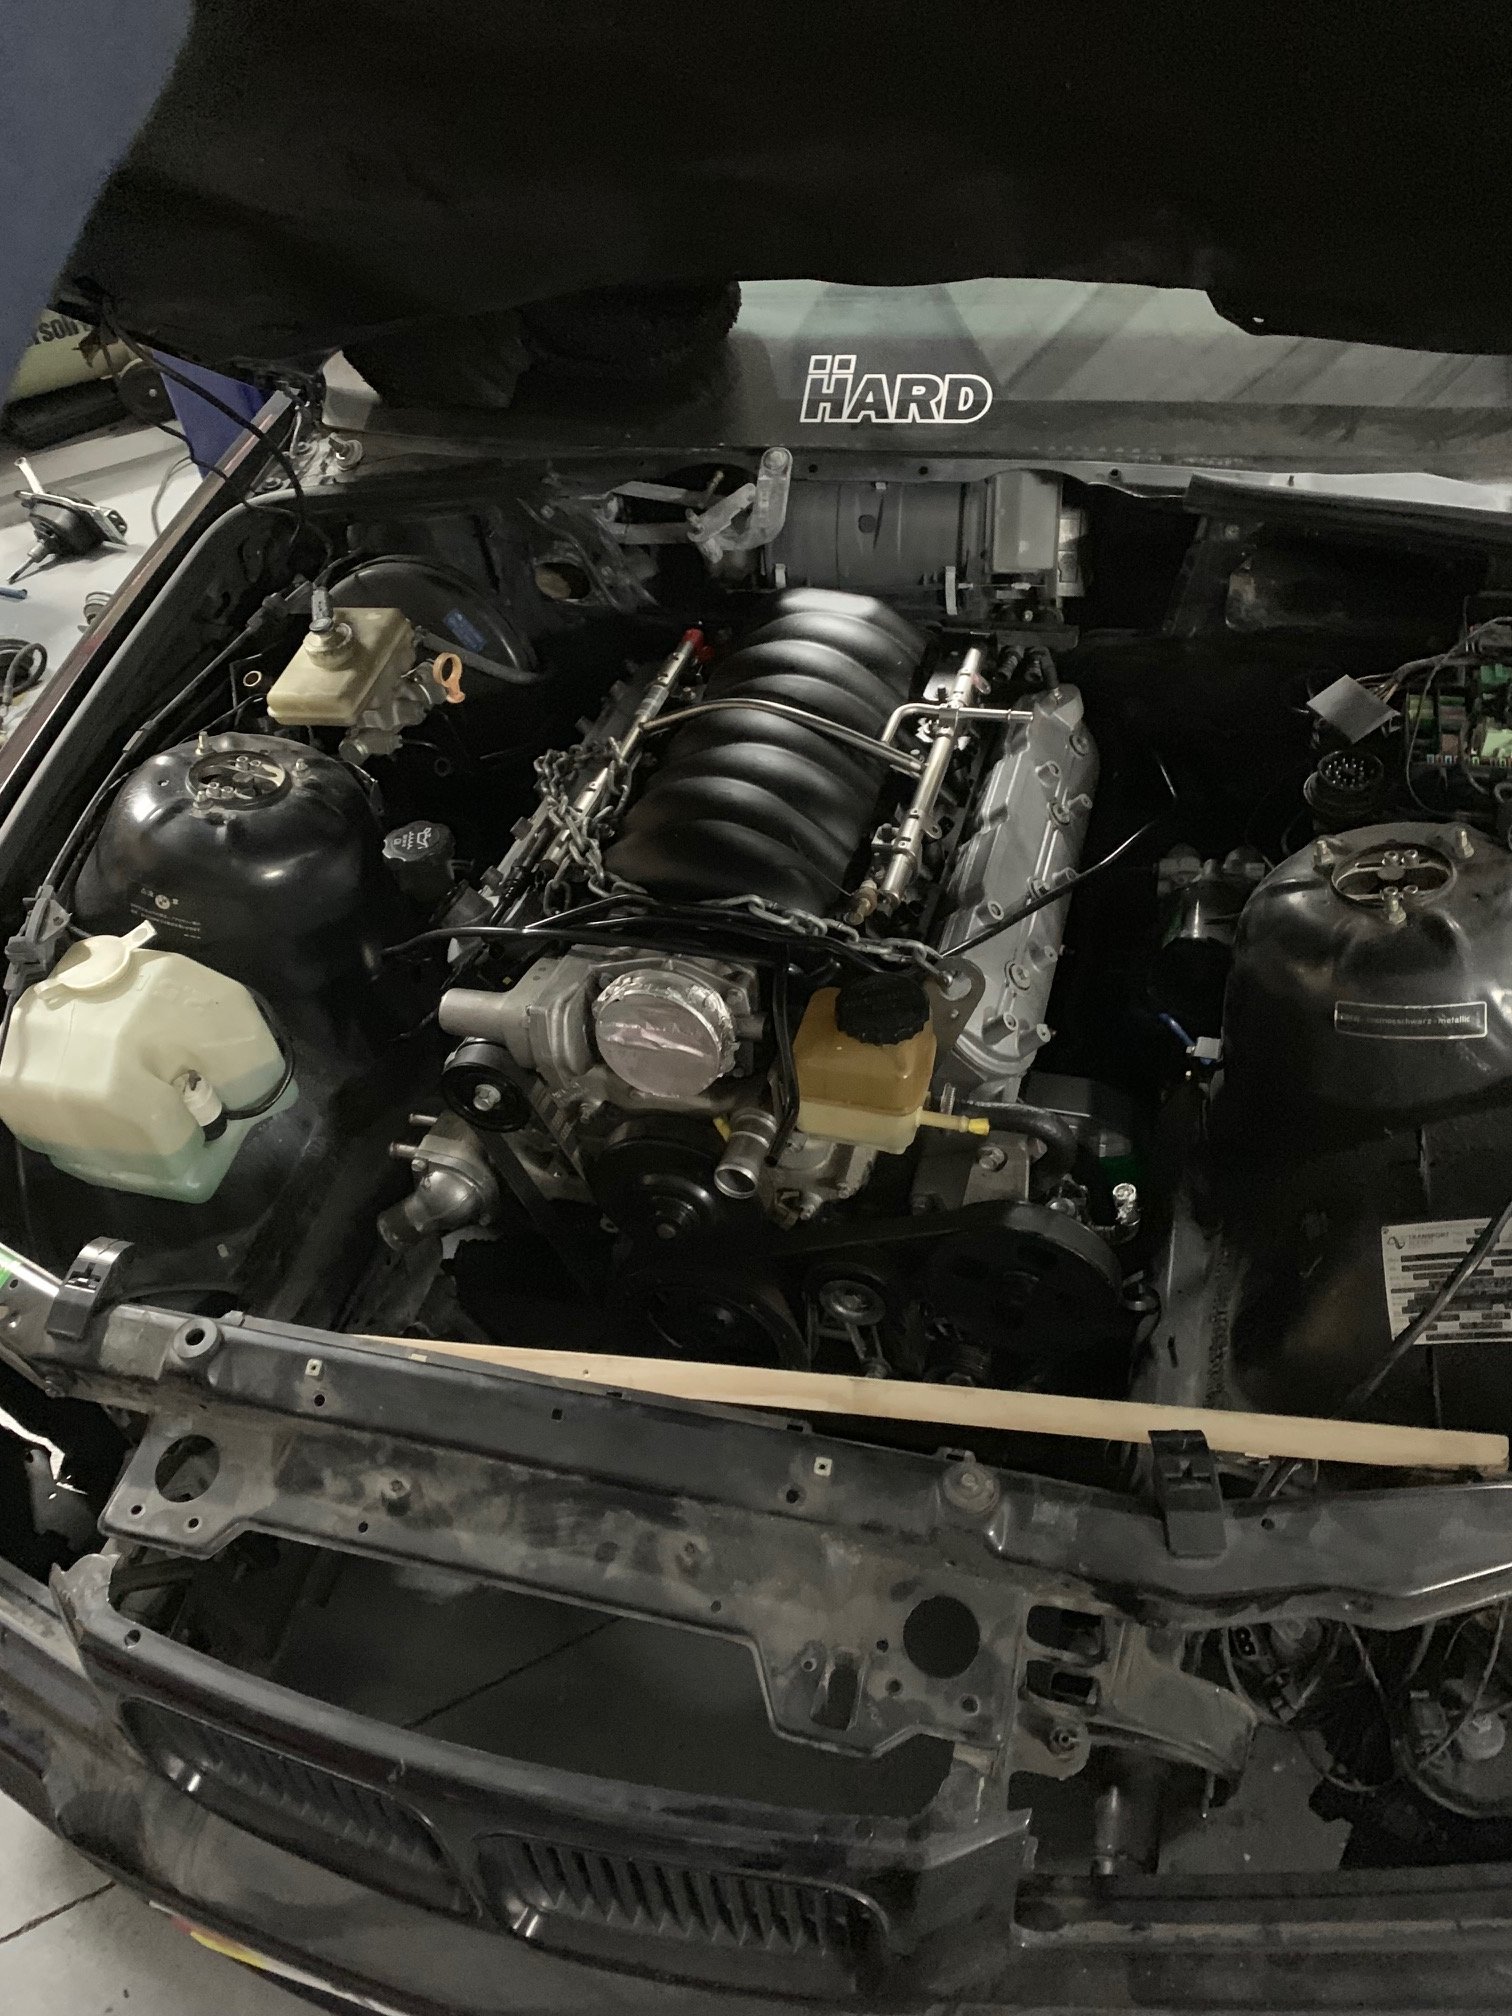
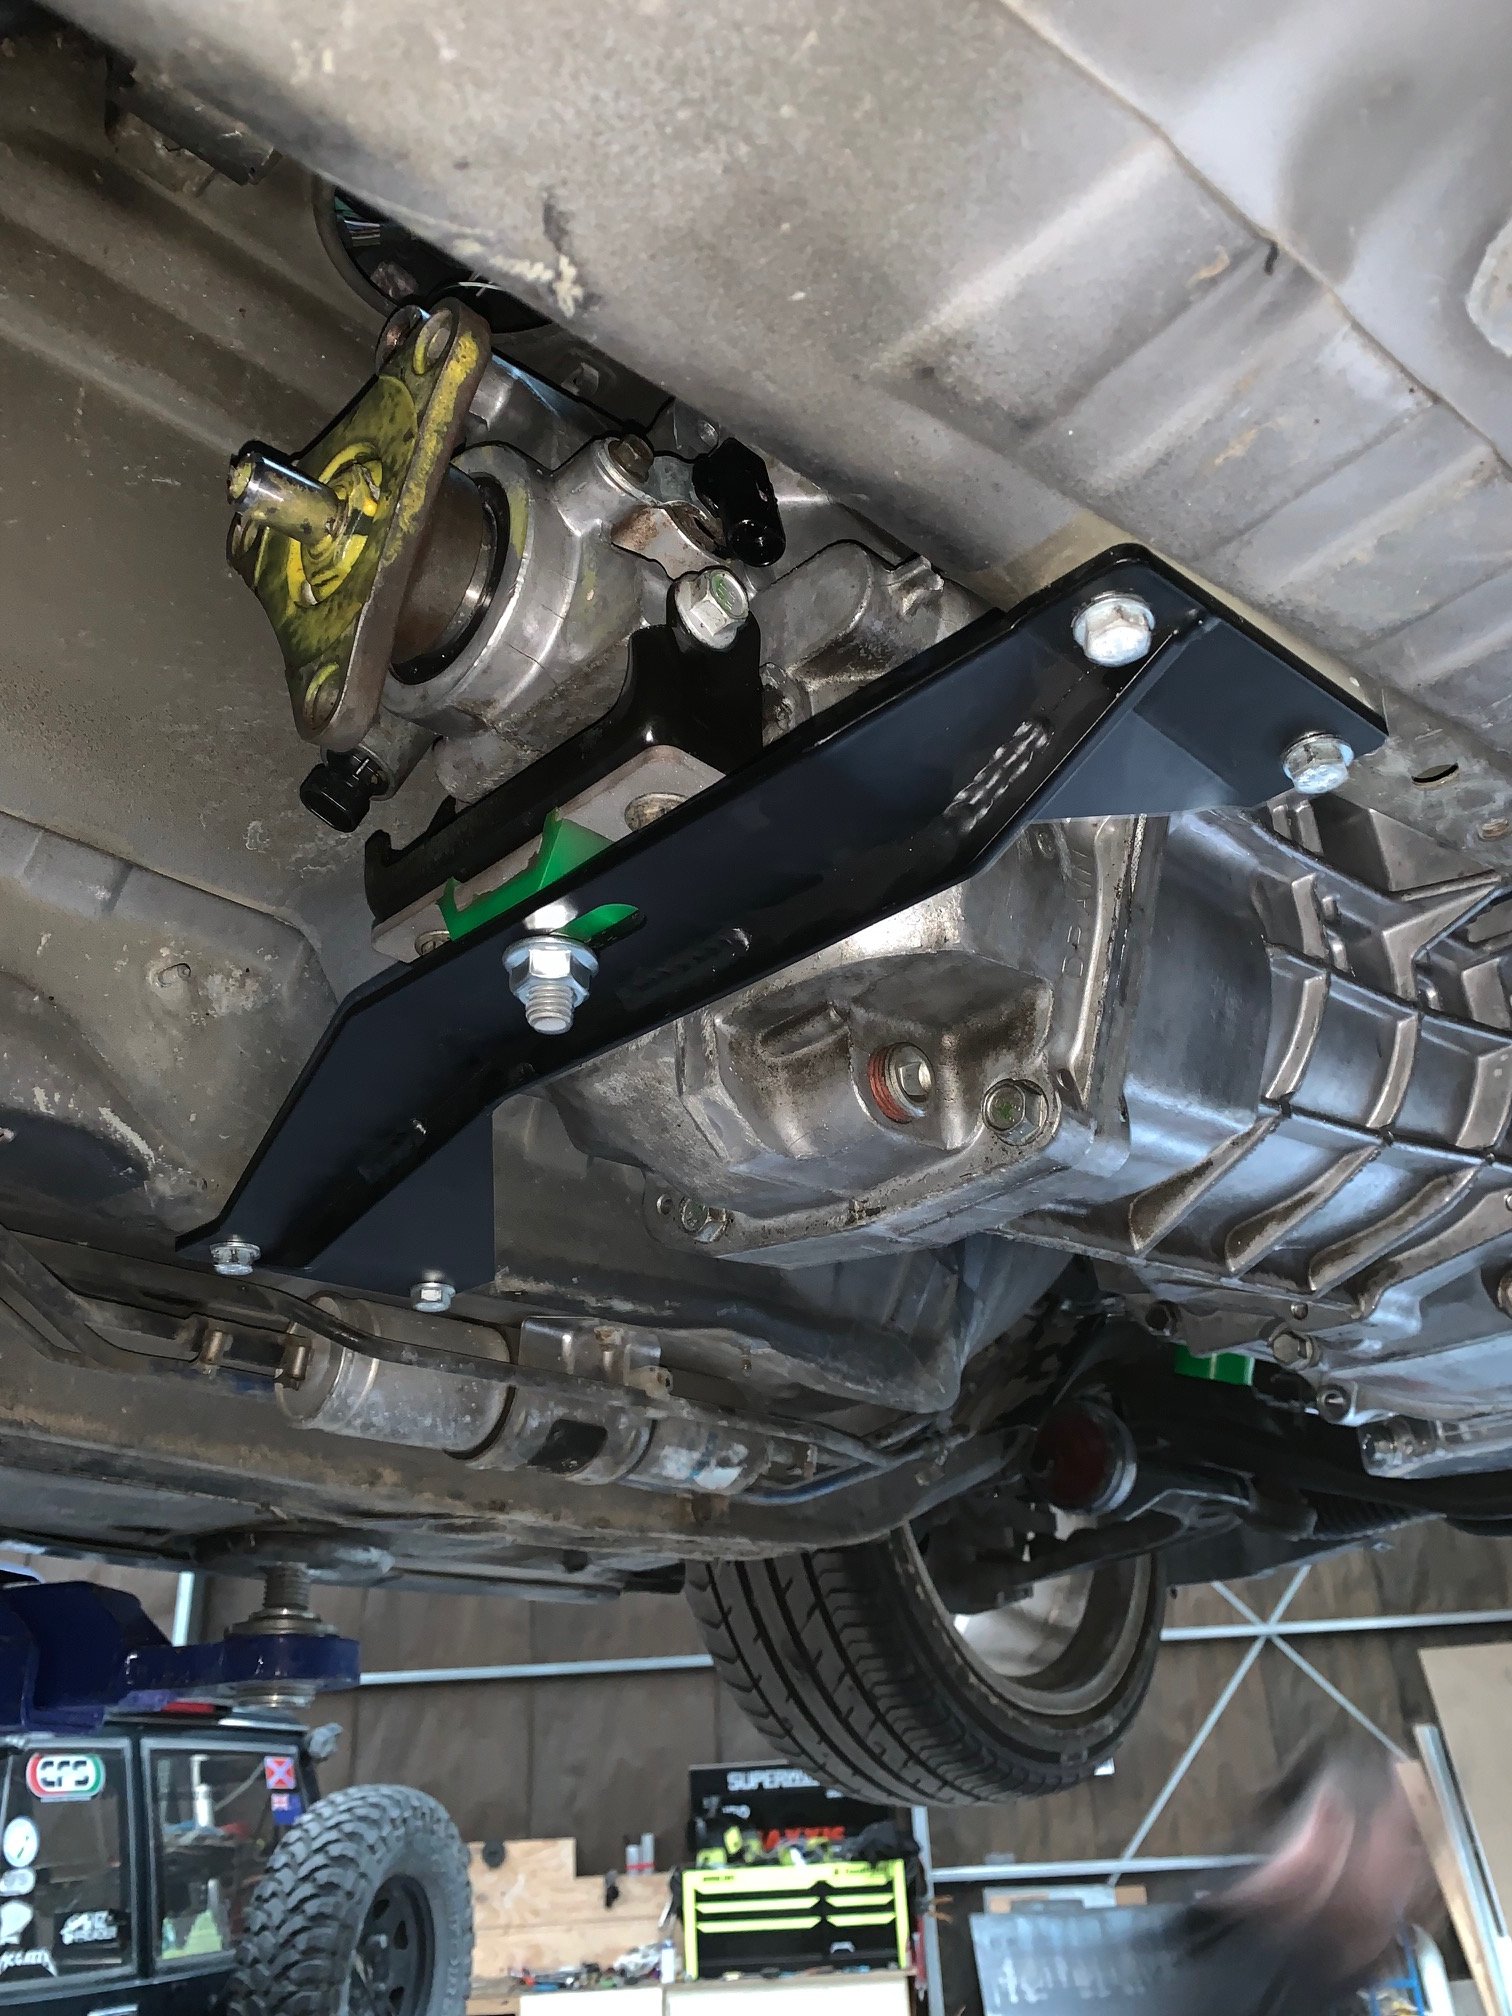
Yeah it’s mental. At the top of fourth it finally gets its legs and snaps your head back in the seat! It’s a weird sensation when something pulls harder and harder through the gears. Especially considering it’s got fuck all lag. Anyway today was a good day! Engine and box are sitting in the car and fit well. Gearbox mount is for a T56 but fits close enough. Will space it up so gbox sits a lot higher. Shifter will be a bit of a dick so I’m going to have to fagricate up a shorter mount and linkage. I think standard position sits about 5” back from the current hole. I was tempted to move the hole but then have to ruin trim and move my hydro and handbrake back and I want the interior to look pretty standard. best thing is the huge amount of room available at the front! I have a Fenix M3 radiator coming for the gap, straight bolt in... and that should provide heaps of cooling. It’s what all the USA people are using (M3, not Fenix) with no trouble. I’m not keeping AC and theres a big daddy oil cooler to compliment it. Still weighing up an oil thermostat but almost think the added complexity isn’t worth it. Headers on drivers side are going to be a real cuntflap. Writing this in the bath, hoping I don’t drop the phone. Too many diesels! Nek steps are to make new steering shaft, move ABS pump or delete it, get driveshaft made, and send loom off to the pros. I’d really like to sneak this up to Raglan but it’s not old and won’t be finished! Wish I still had an E30
1 point
-
Completed the 57sc Sump Model. Moving onto the pattern making designs now. These should be a lot easier than the crankcase! Casting version with machine allowance and shrinkage compensation First cut of roughly what the sand cores would look like.1 point
-
Havnt updated for a while. Been in the US living up the Freedoms. Ive been working on a lot of CAD over the last 1-2years and have just recently bought a massive 3D printer to make casting patterns. The plan is to stock pile patterns and then hit it hard when Im back in NZ Currently doing patterns for the crankcase. I'll update more on Instagram. @Barlow.Jobs1 point
-
This is being a boring and reliable work horse On the way home from BF meet above, the LF brake got a bit draggy and hot and it is due for a WoF, so time for a bit of a service. Turned out one of the 3 NEW! brake cylinders in a caliper was a bit rusty and got jammed so it got a clean out (rust came off with a copper brush) and rebuild with lots of rubber grease (which i didn't know of when i built them!). The other three probably need the same treatment. No photos becasue my hands were covered in brake fluid. I also installed the Fiat 1500 water pump pulley a dude from Aussie sent me randomly (thanks bro!) so i could replace the sketchy one i made from cutting and welding two std 124 ones together, and a new belt. I pcked up a timing tab thing from a bargain bin at a swap meet and chucked it on - the engine only has a TDC mark - no advance markings so this will be nice to have a better idea on ignition timing (factory says 6 deg BTDC at idle, i run it around 10 (i think!) ) Gave it an oil change and cleaned out the centrifugal filter. This is a 'later' engine and also has a modern style oil filter under the inlet manifold that as far as i can tell does almost nothing at all as its one the low pressure return side from the head. I swapped that anyway with one from the pile i got from RoackAuto for like $1.20 each + shipping Also swapped out my very nice (and very expensive @ 65 Euro!) NOS Magnetti Marelli dizzy cap because its got a bloody crack in it leaking all the sparks electricity out, so its back on the crusty one from the car at Smash Palace that works better than the off-brand cheap but new one i had spare, so will do untill i splash out on another NOS one from ebay Still has holes in the secondary pipes (so no Wof untill sorted) so im gonna take the opportunity to get them extended down the car a bit more - any suggestions for a good exhaust shop out west?1 point
-
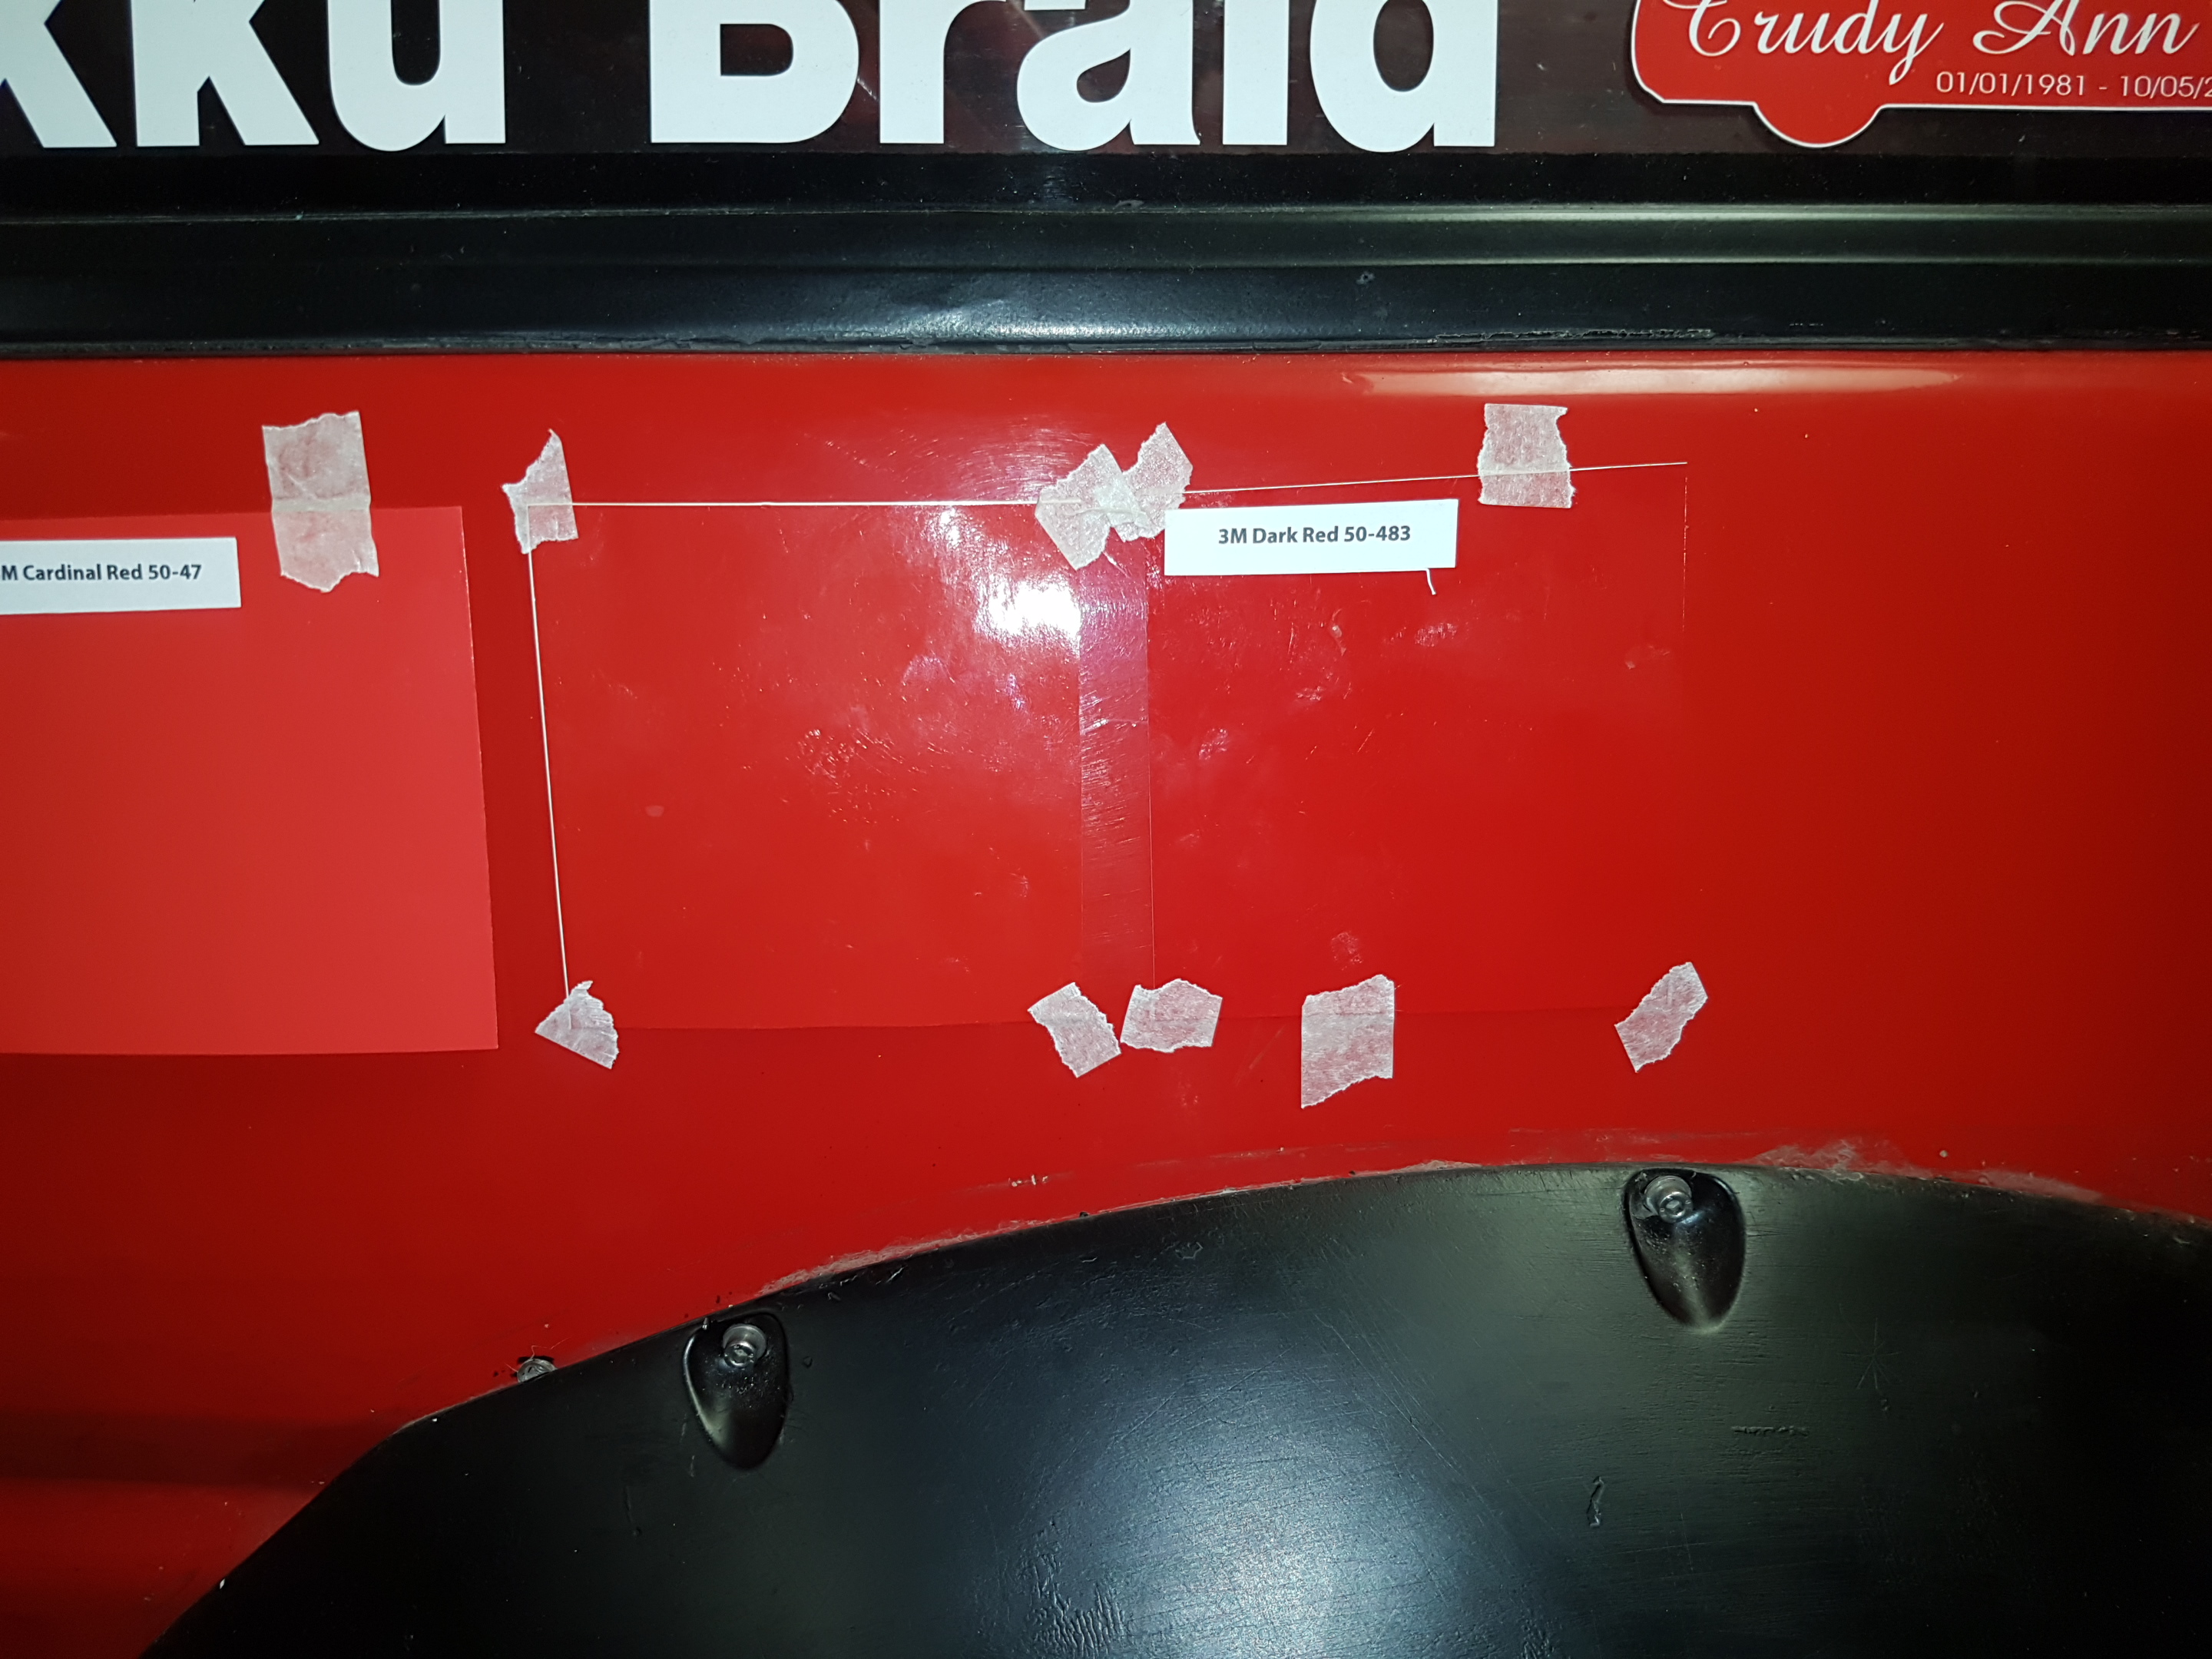
Took the bonnet out to @Archetype's place on Sunday to have a go at wrapping it. We'd used a bunch of vinyl samples to choose the colour "3m Dark Red" which seemed to match well. The 3m 1080 film is amazing stuff to work with. It seems almost impossible to get a bubble! After a bit of mucking around we had it finished with new vinyl eyelids and "grille" too. We used matte black for the eyelids and gloss for the grille to add depth. Got it home and chucked it on - looks nice: But... The colour is different to what we thought it would be. 3m obviously has a different colours for the 1080 wrap vs the standard 30 and 50 series vinyl. This is called "dark red" but it looks almost orange compared to the test sample. After a bit of research it seems like there probably isn't an option in this range that will match my paint... Dammit. For future reference - it's best to wrap your panels on or next to your car to make sure the colour matches as expected. Massive thanks to Brent / archetype / Doozi / MotoringEvents for making it happen. The job itself turned out mint.
1 point
-
The 130 alloys are 14"x6" and with 205/60 tyres the rears rub on the inside of the outer guard, and are quite low geared compared to the factory 175/80 or 85 series tyres. I do like the look of them tho! So had a set of 14"x4.5" factory steelies blasted by @Mr Vapour and they turned out pretty good. as collected from Burger Fule meet, good ol Mr V rattle can primed to stop flashing i ran a strip disc over the tyre sealing area and then primered them And then top coated. I used the light grey that i did the floor and engine bay with with a bit more roof white in it (not quite enough grey left!) I didnt sand them at all, but it turned out ok and they have had way more attention than they deserve already. I have some 185R14C tyres that ive been saving for this since getting them from @kiwi808 when he moved down sarf that have a thin whitewall on them to install when the paint is dry, as well as trim rings and dog dishes. Presidentiale! Should mean i can drop the front a bit to even out the nose high stance and still steer, as presently the front is wound up as high as it goes.1 point
-
Day 4 & 5 The long Drive Home Passing though the Mrs hometown. Stopped off at the FILs place in the 'Ding for the night on the way back. The Mrs put her name on the next project, its been in the FILs shed for 20 years, runs the engine with 4 on the floor and buckets from the Torana her brother rolled when he was 16 . Jim Currie Reserve just out of Tokoroa (reccomended!) Waikato River south of Huntly1 point
-
You can't just say "build space stuff" then bugger off. SPACE STUFF!!1 point


.JPG.f282f429e4cde48a5d1084b35a6a8461.JPG)


.thumb.jpeg.384ff72c8d2b0ee0d34a7bdedb55bdcf.jpeg)


.jpg.ccf2c0bb547abf49652fff66cfa21c29.jpg)
.jpg.f2e6efd2be423739811faff63c00d9b3.jpg)
.jpg.bb24c9a3bae281073e7ba15f56105e82.jpg)


This leaderboard is set to Auckland/GMT+12:00