
Leaderboard
.thumb.jpg.570970b401ac8d26ce9af7c1bf2bd8cd.jpg)


Popular Content
Showing content with the highest reputation on 01/02/24 in all areas
-
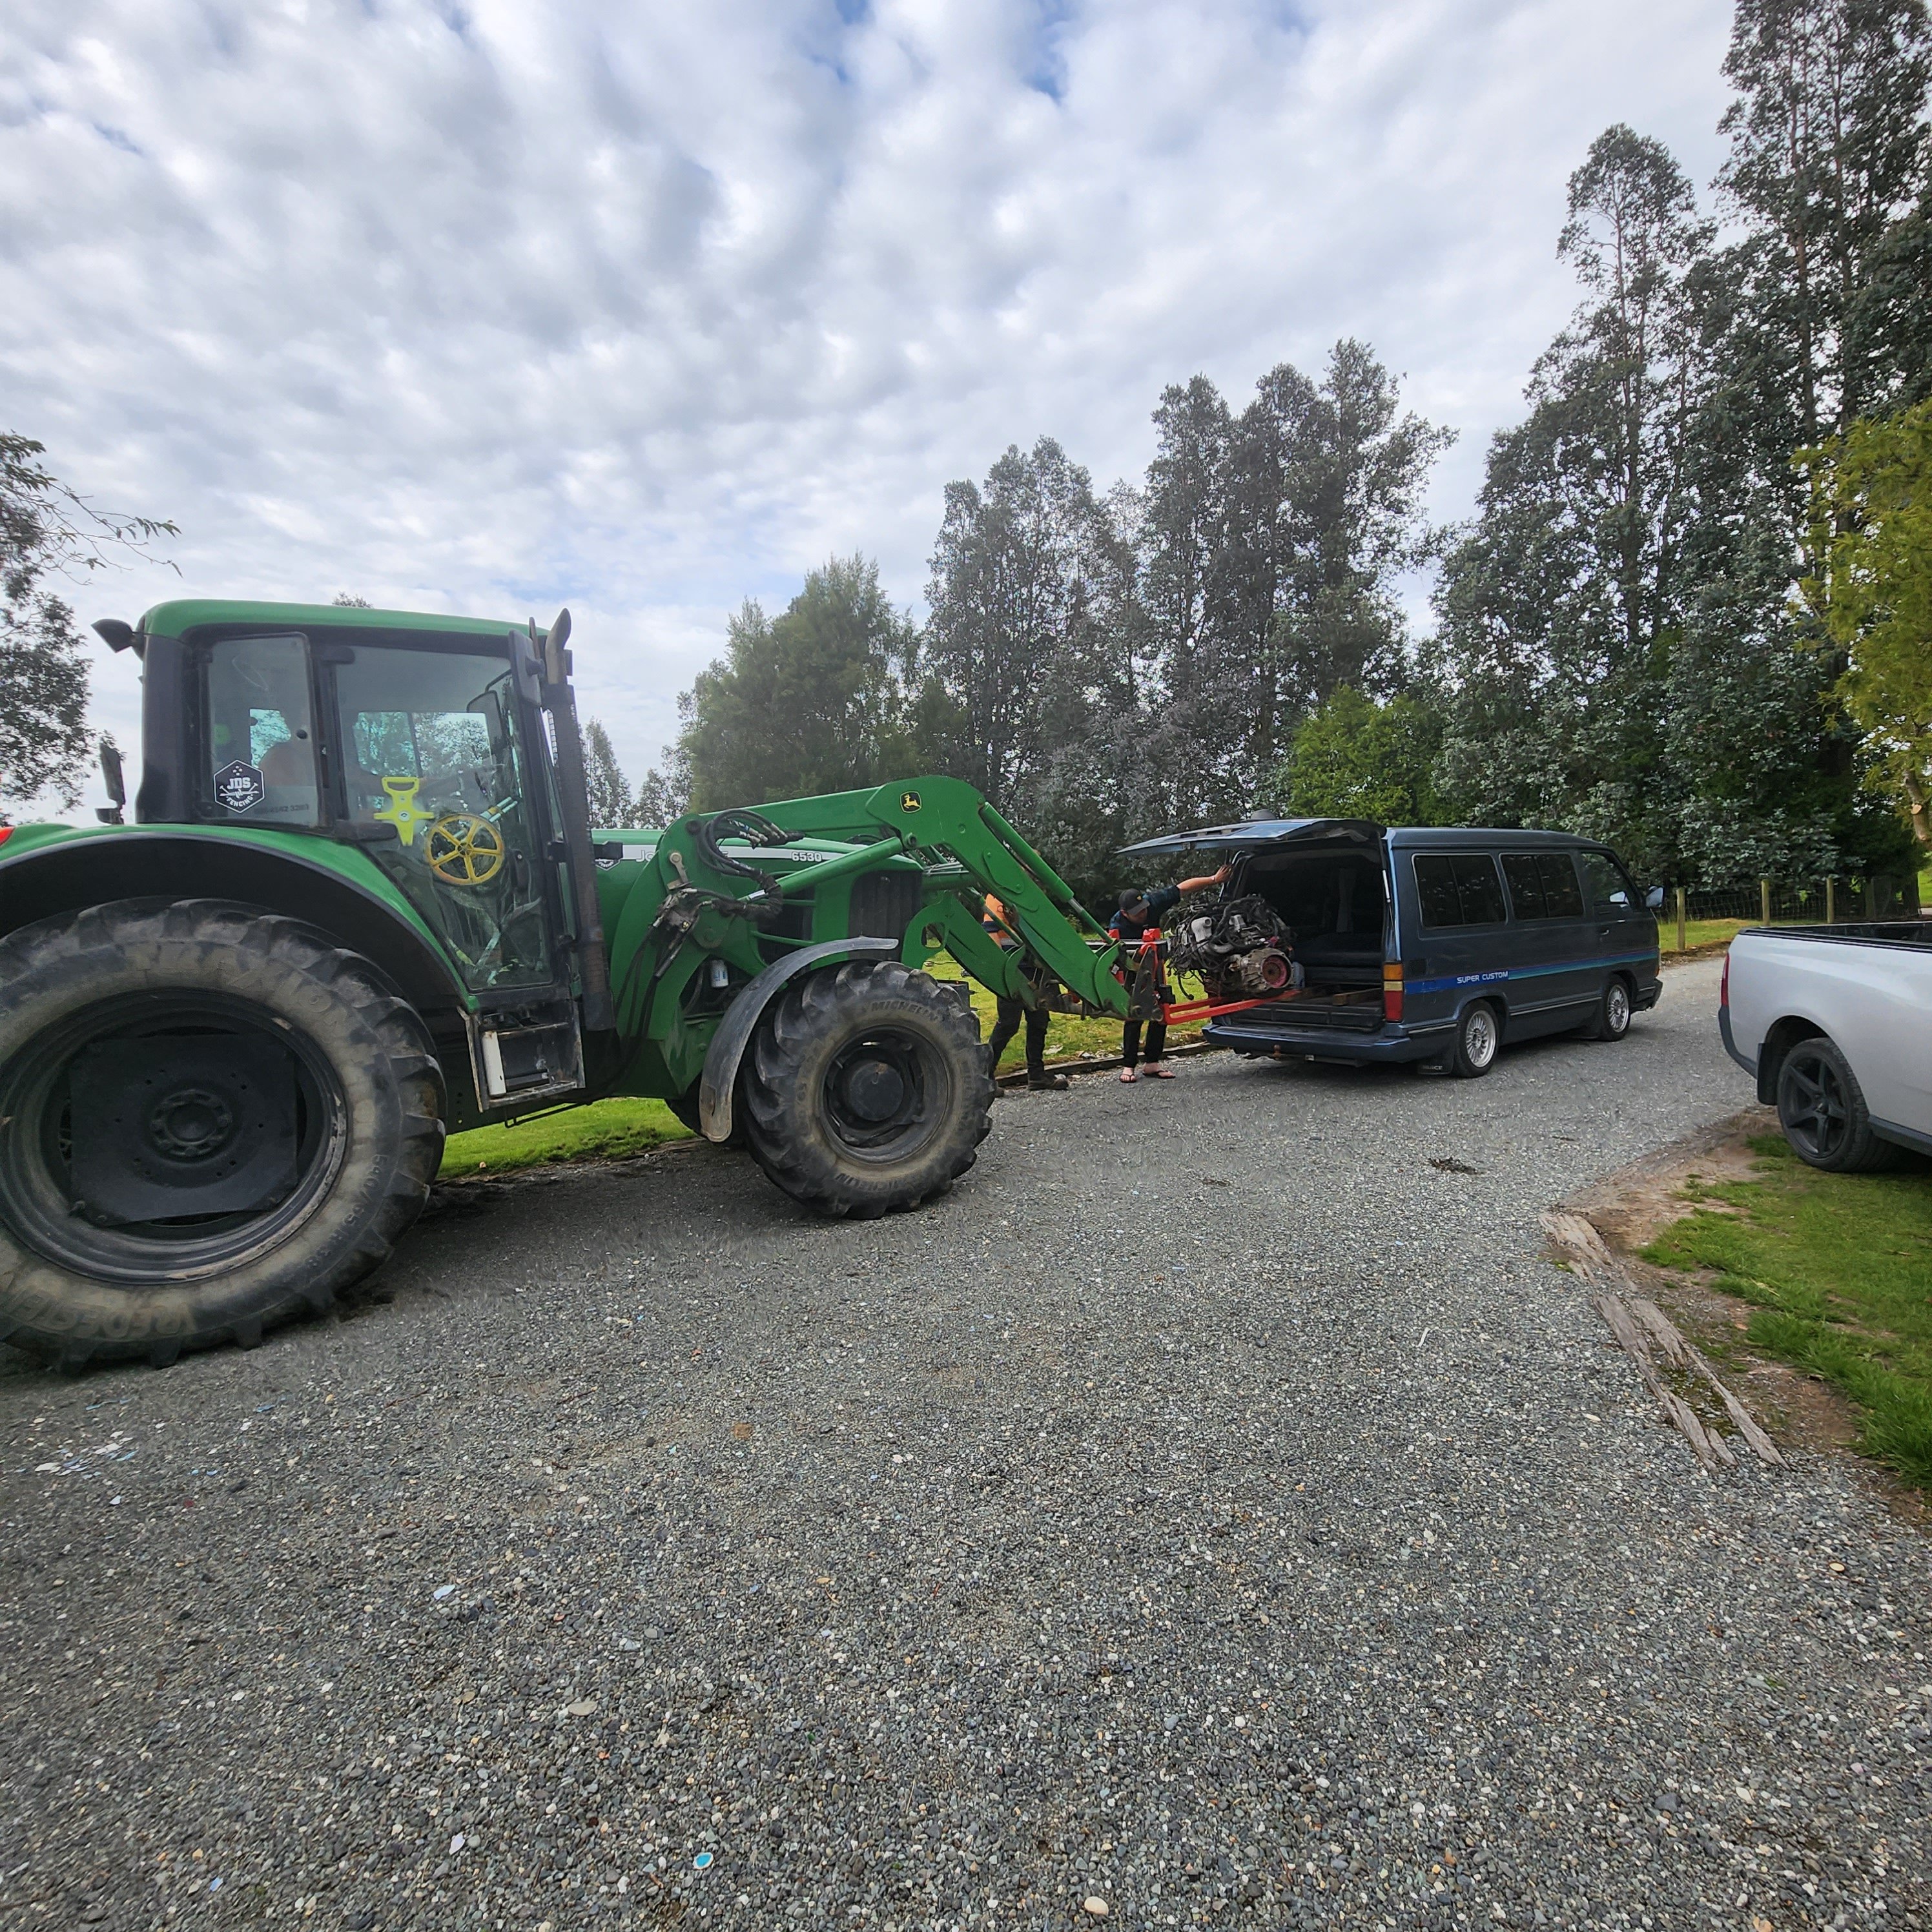
Went on a mission to Invercargill to pick up another 1G-GTE that had been on marketplace for ages. Have started a weird tradition of picking up transplant engines with vehicles they are destined for with the gx first, then the liteace and now the hiace
 9 points
 -
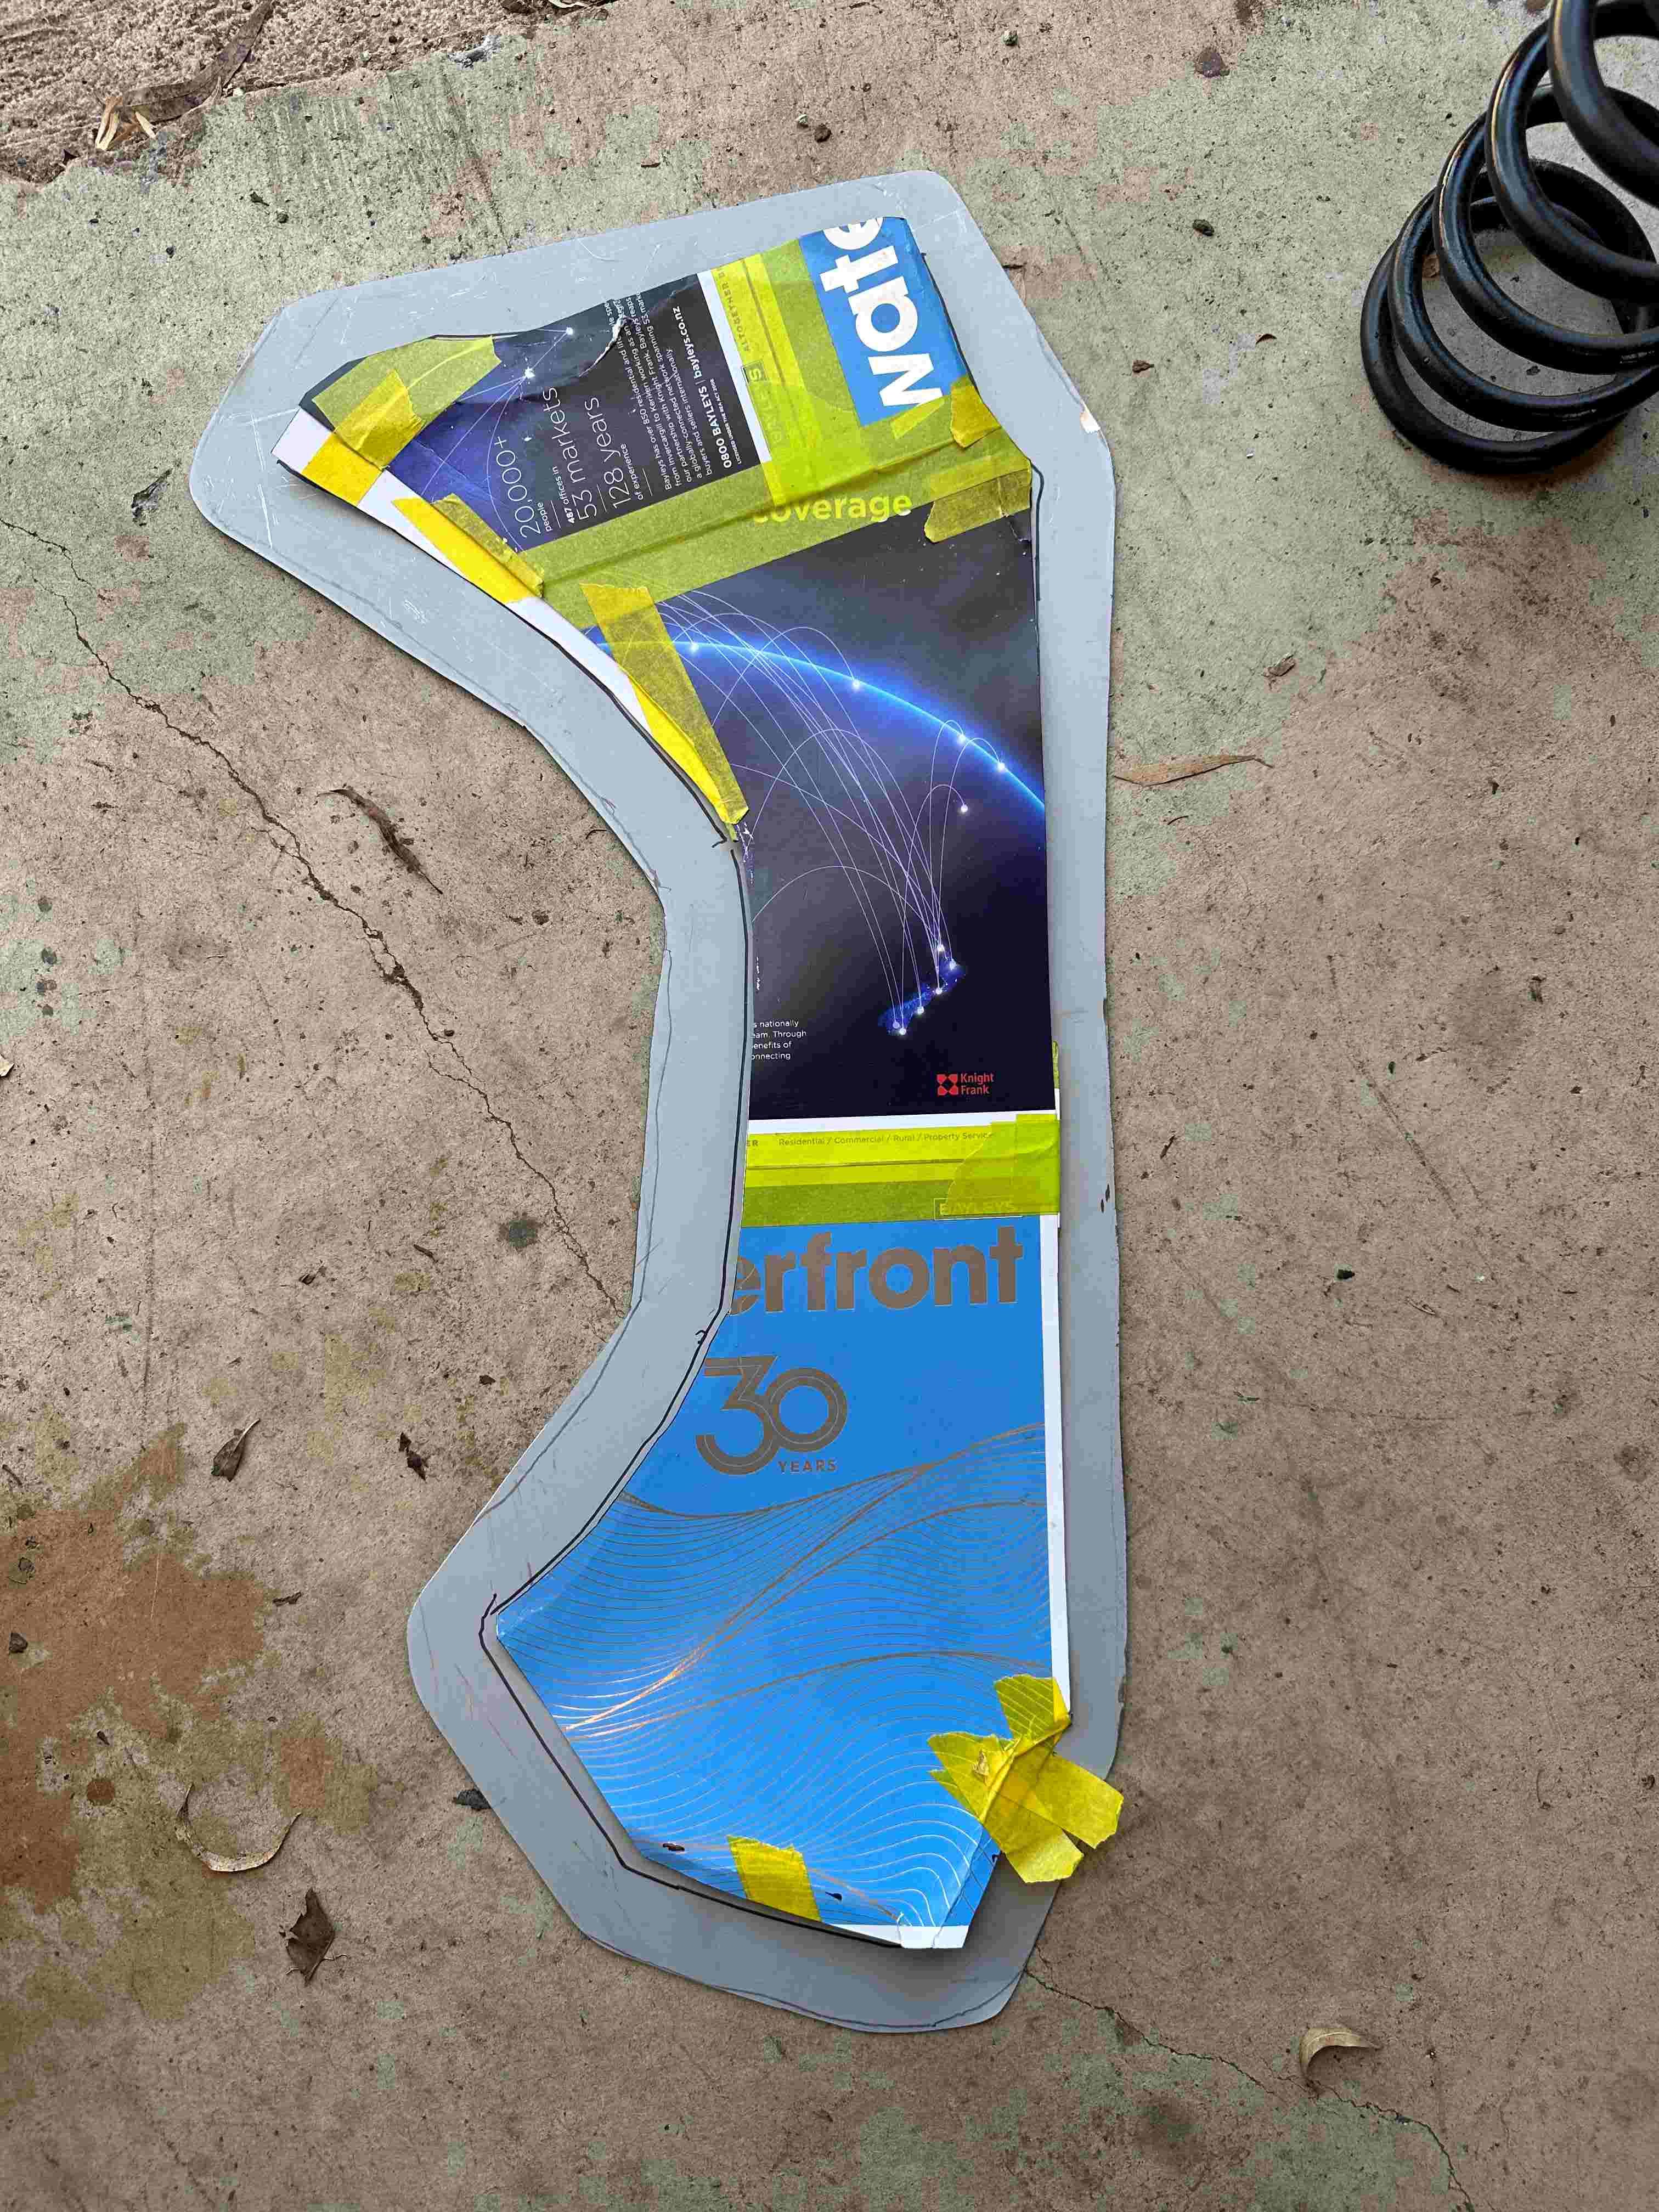
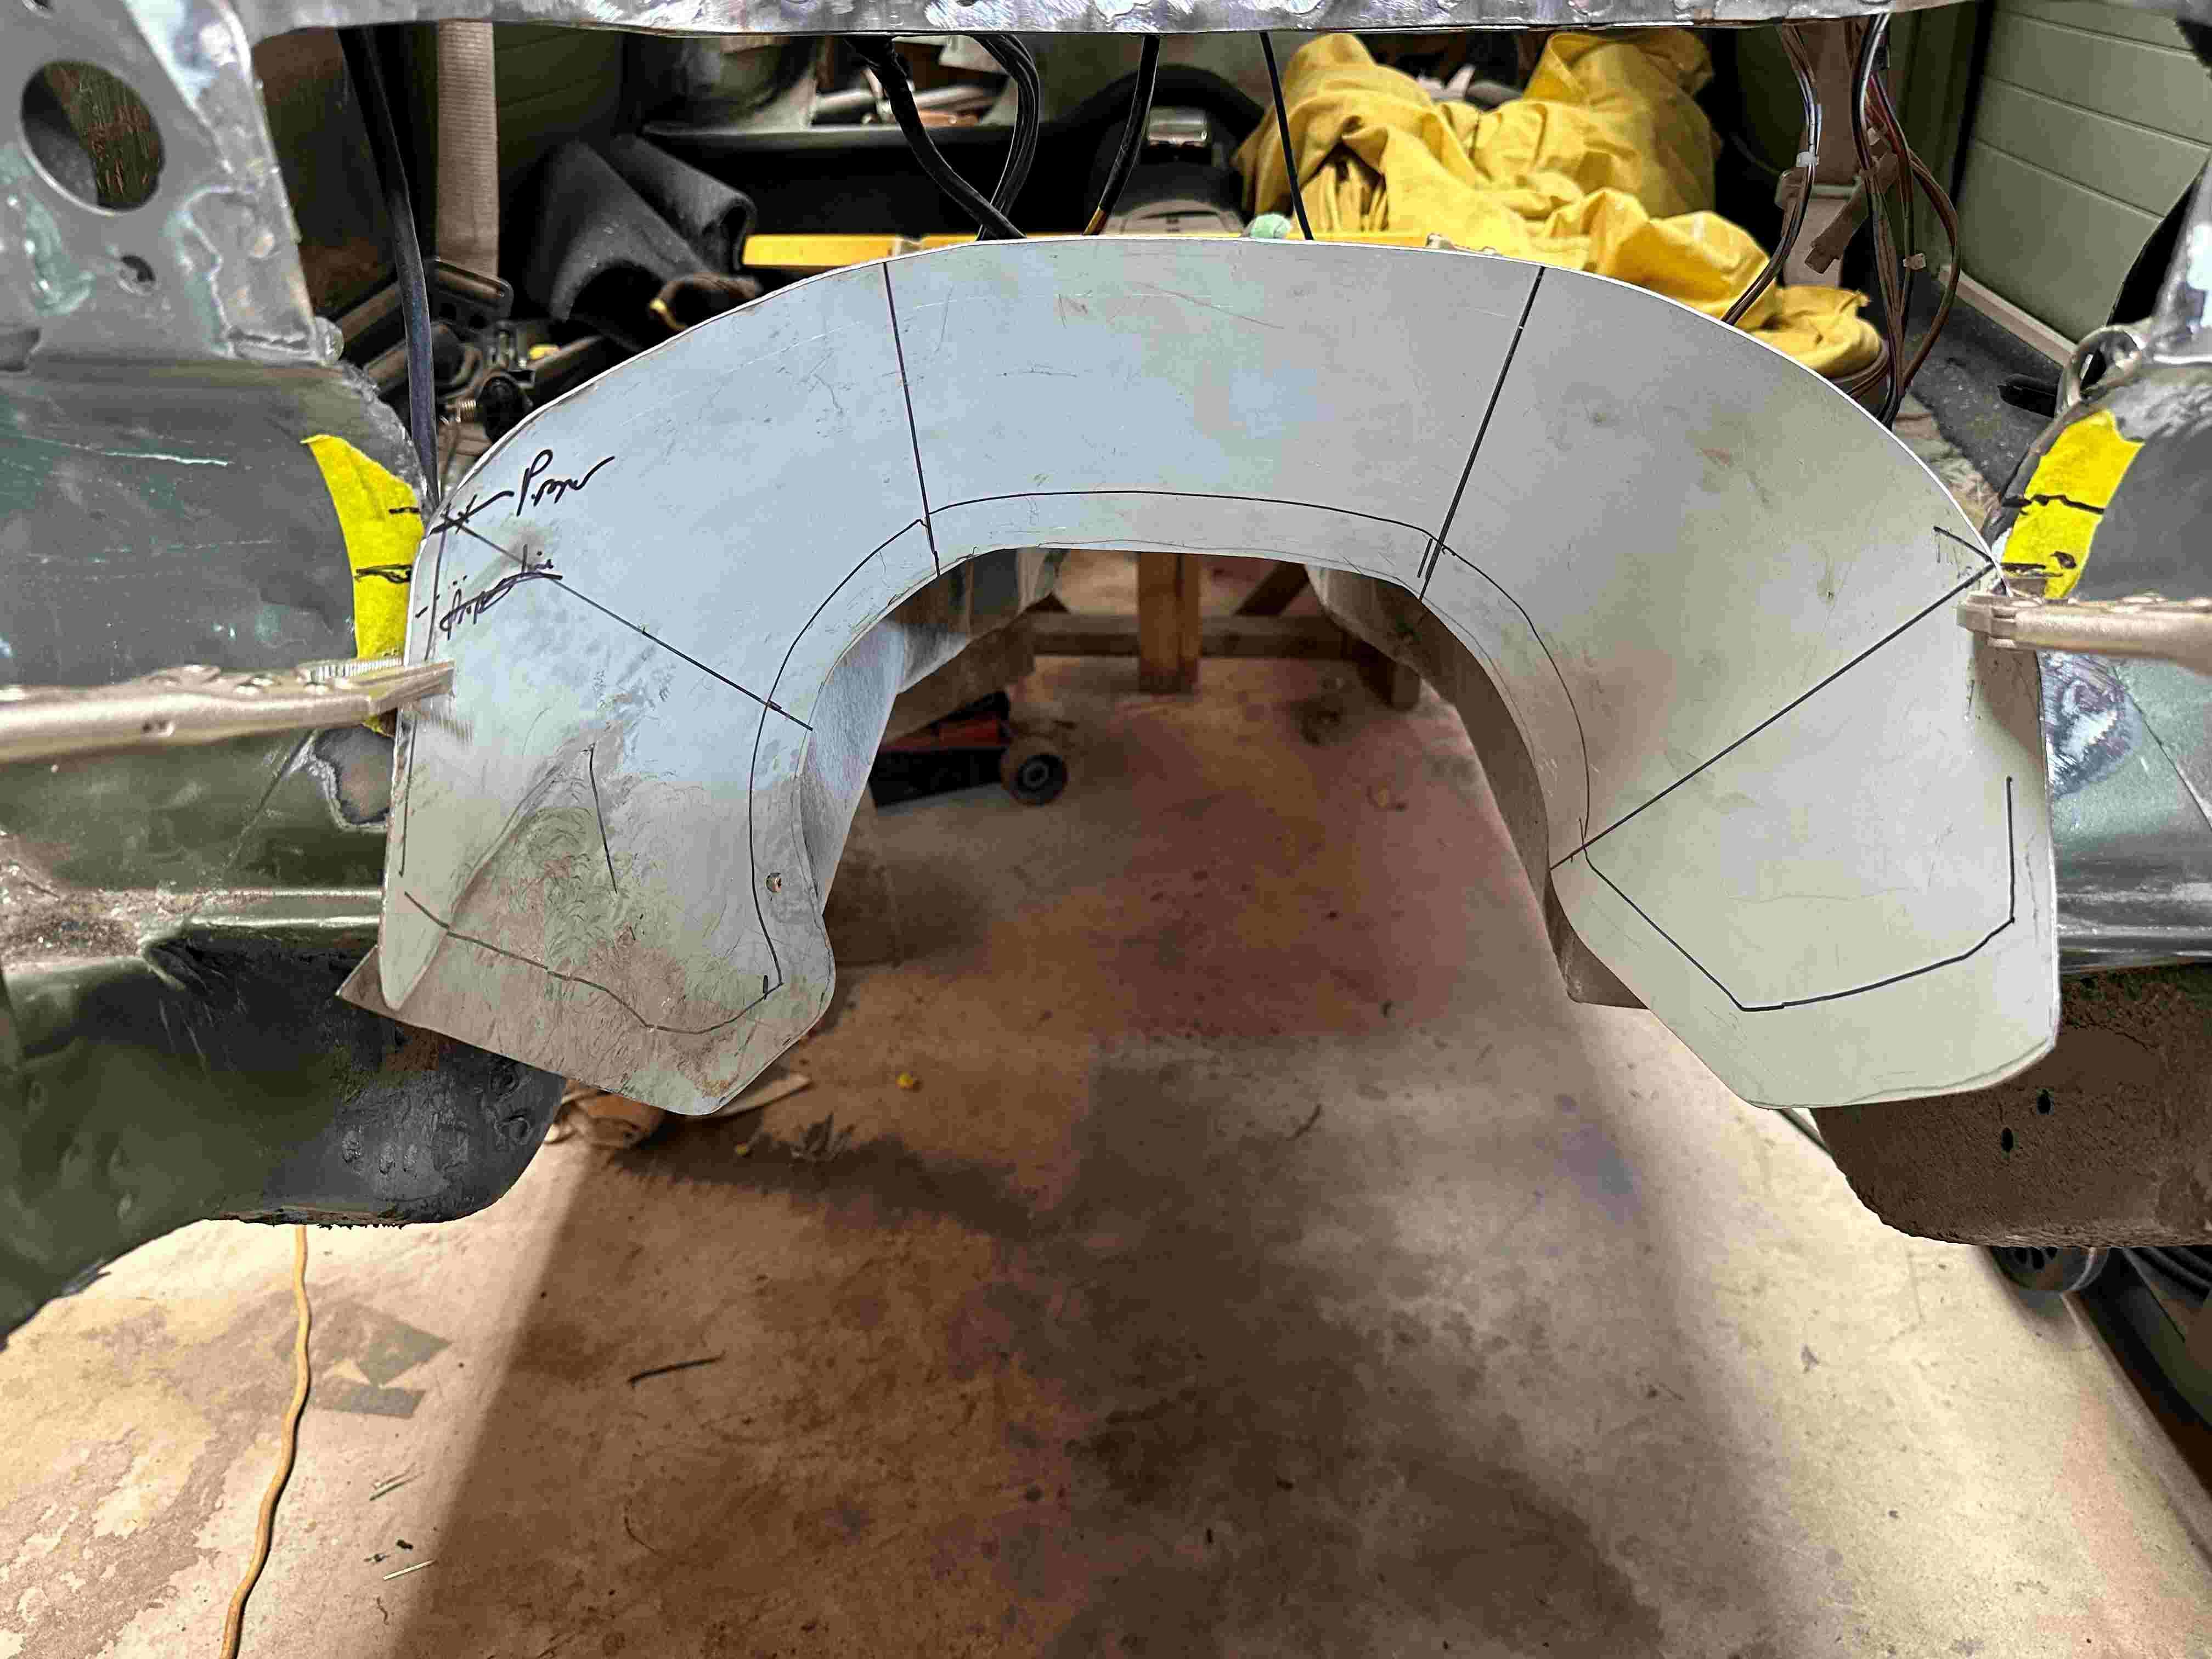
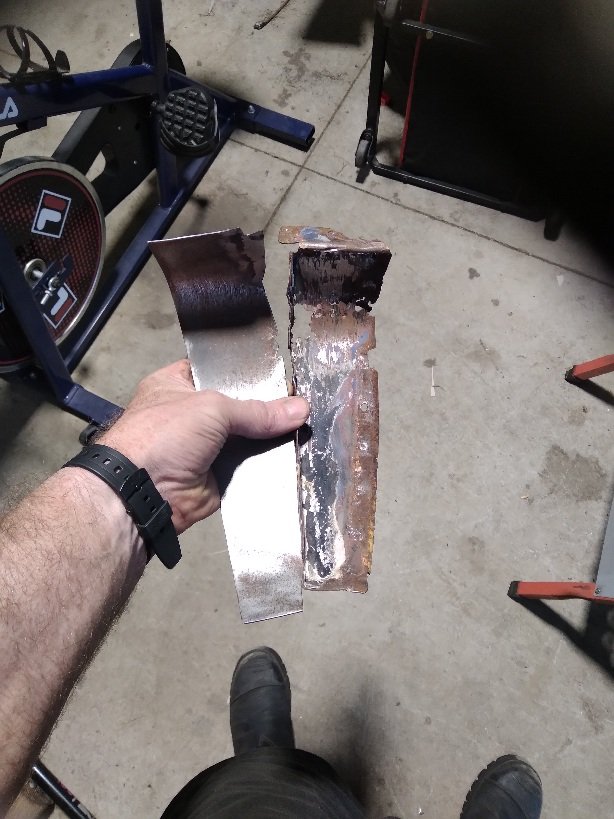
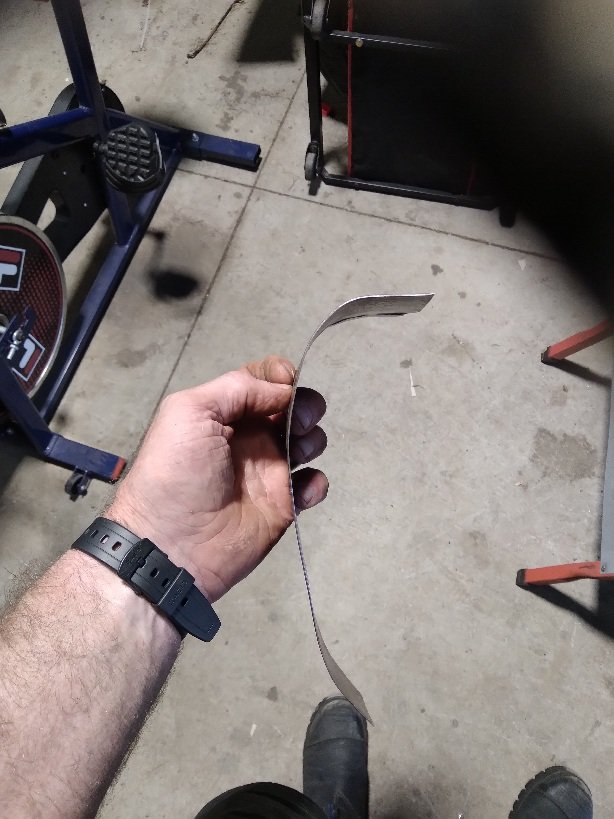
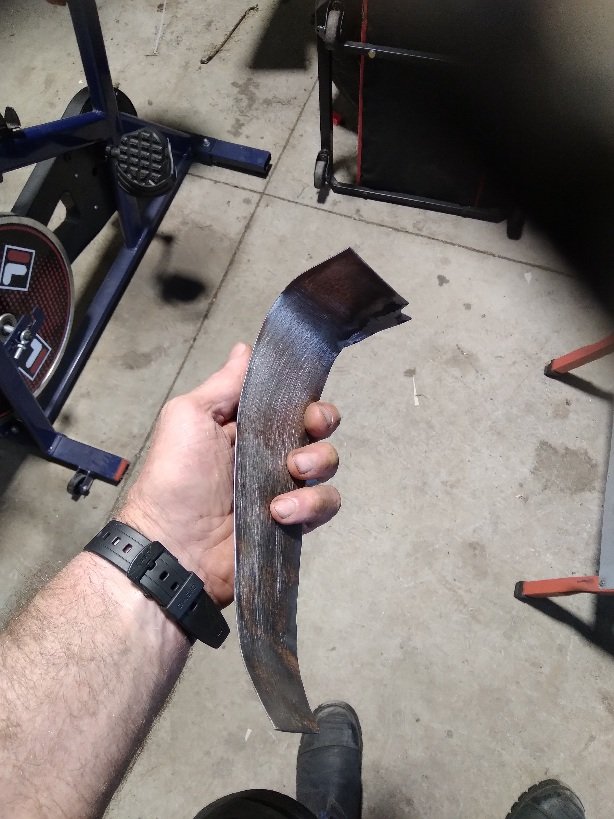
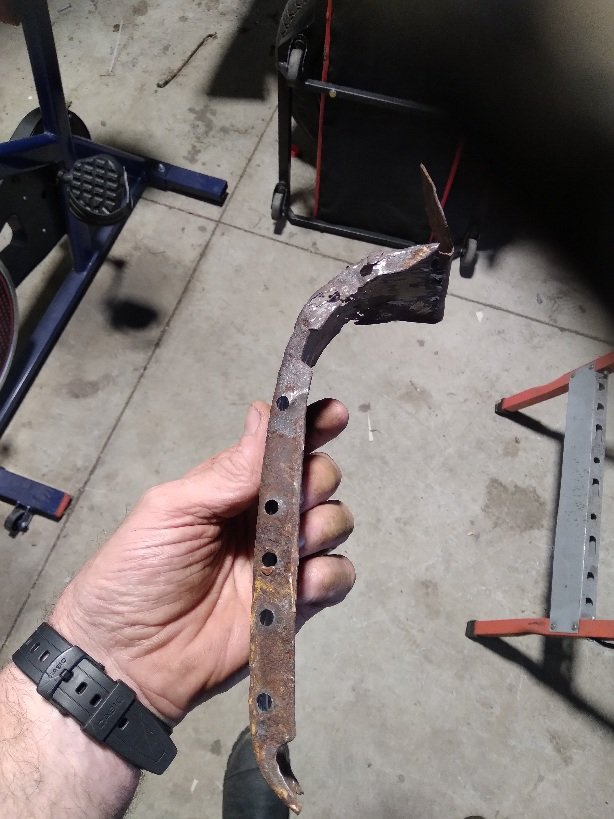
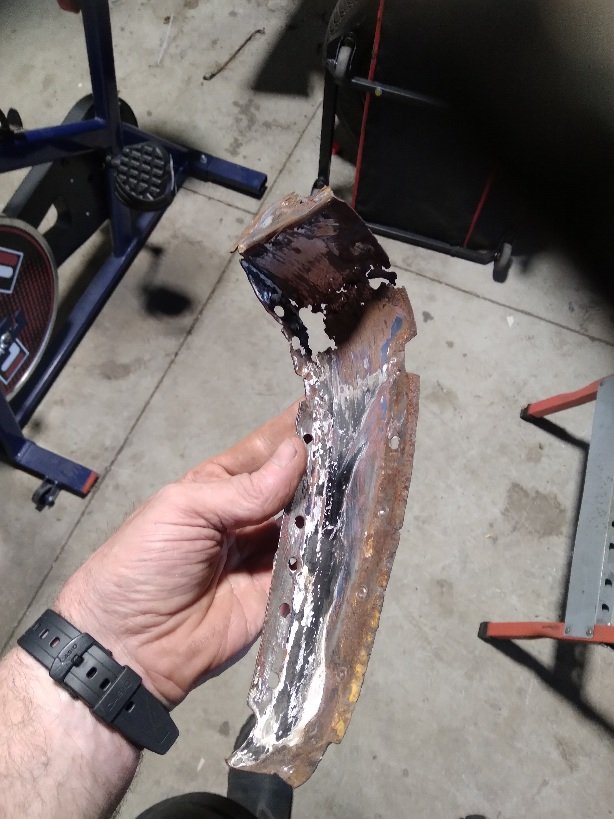
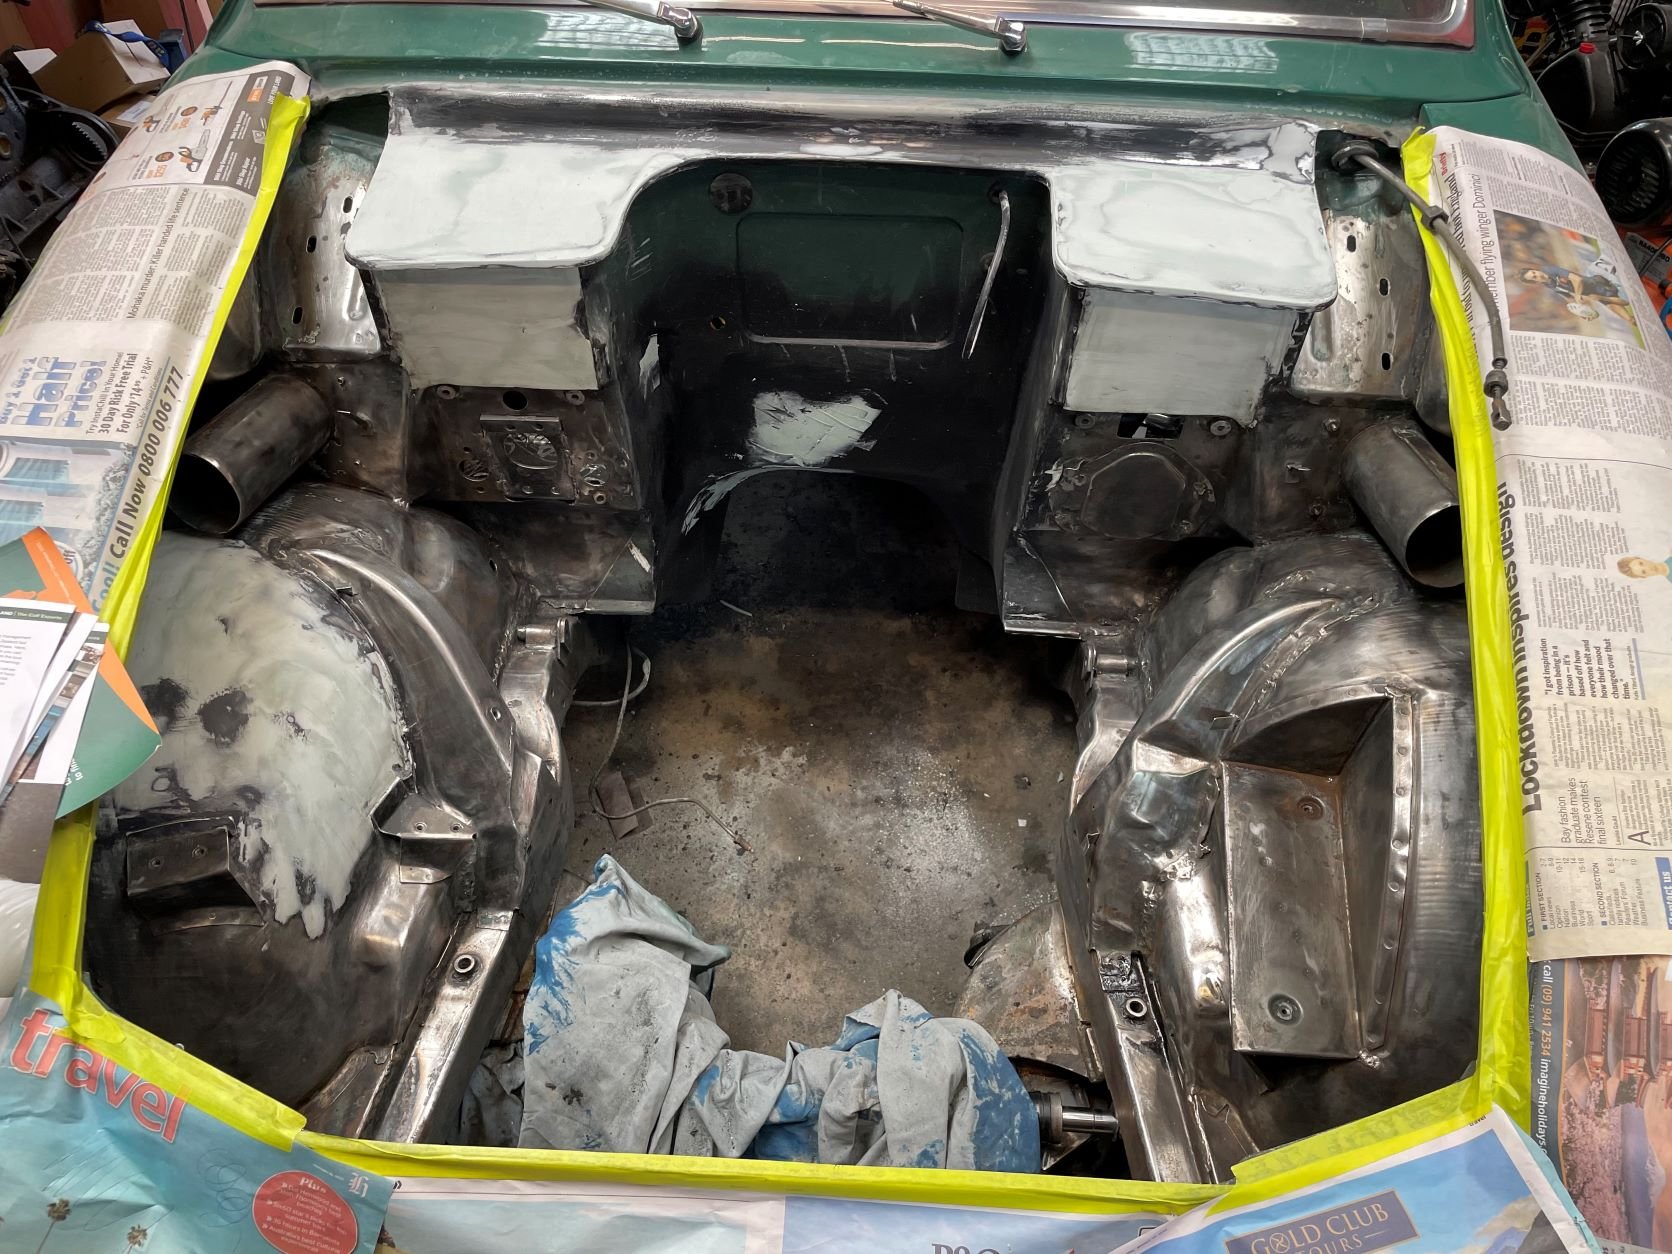
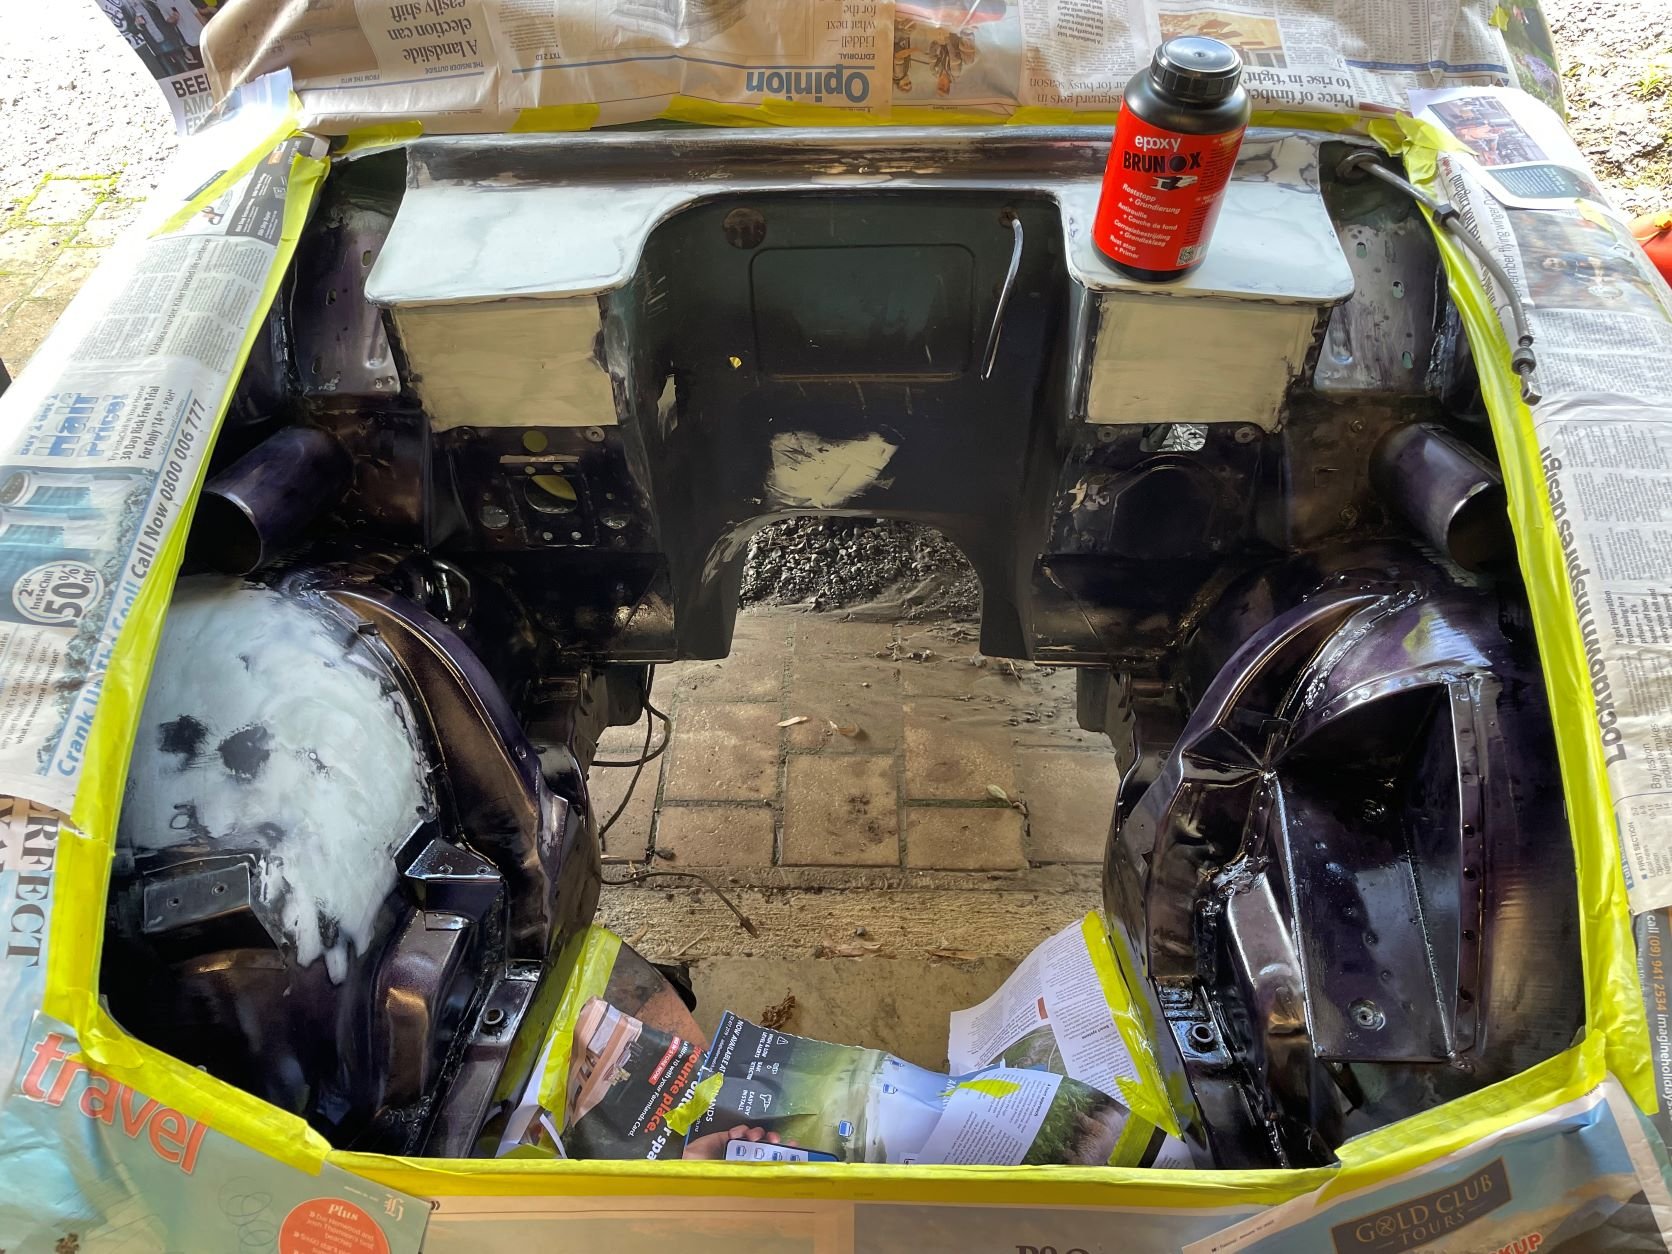
I cut the rest of it out this morning so it will be mainly two pieces. It will be tidier and stronger, I think. I made up a cardboard template which was a little oversize and then transferred it to 1.2mm panel steel and added another 30mm around it just to be sure I won't end up short anywhere. Already glad I did. Slowly bent it into shape but I will need a few more fasteners to hold it in place before the final marking and trimming. Starting to look promising I think.
8 points
-
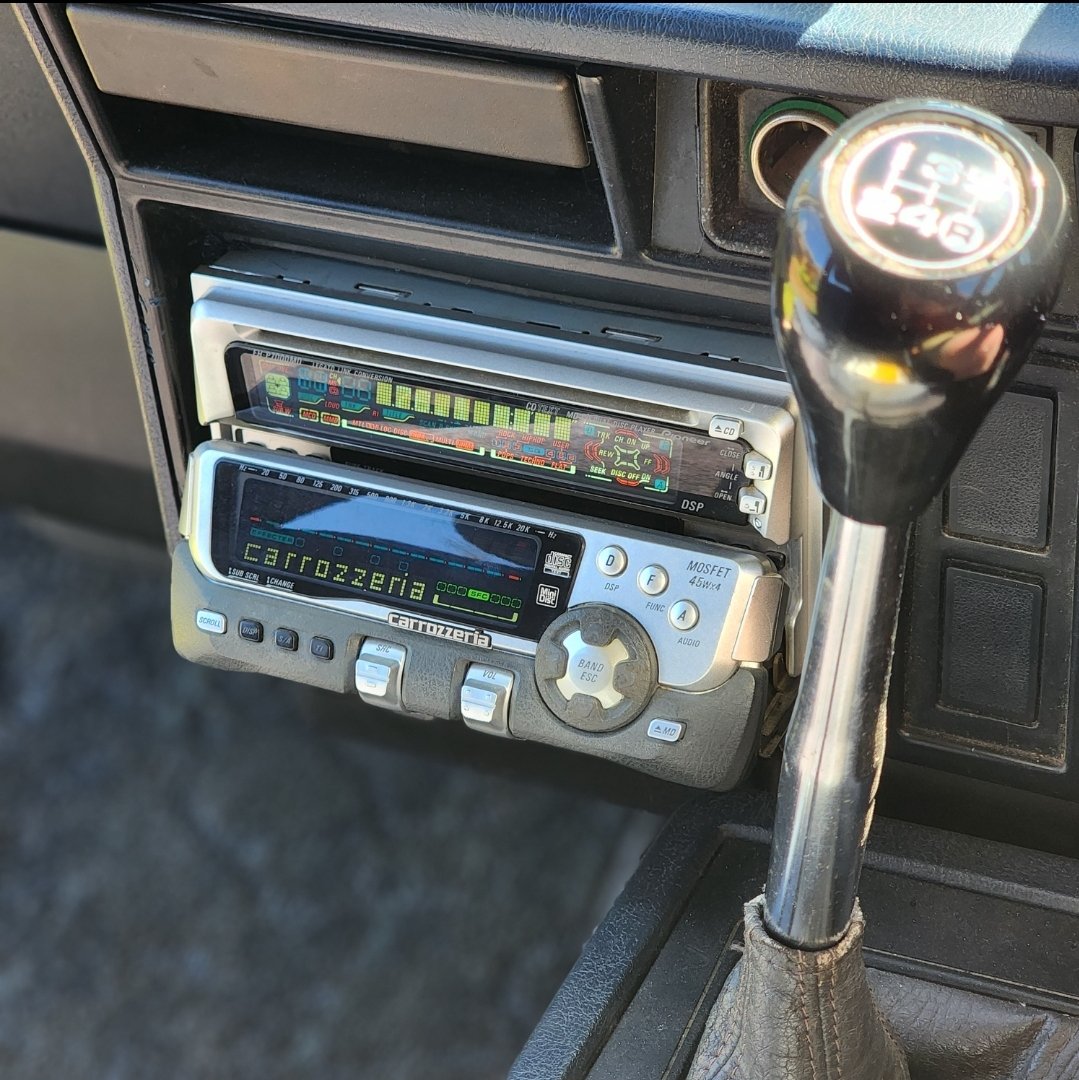
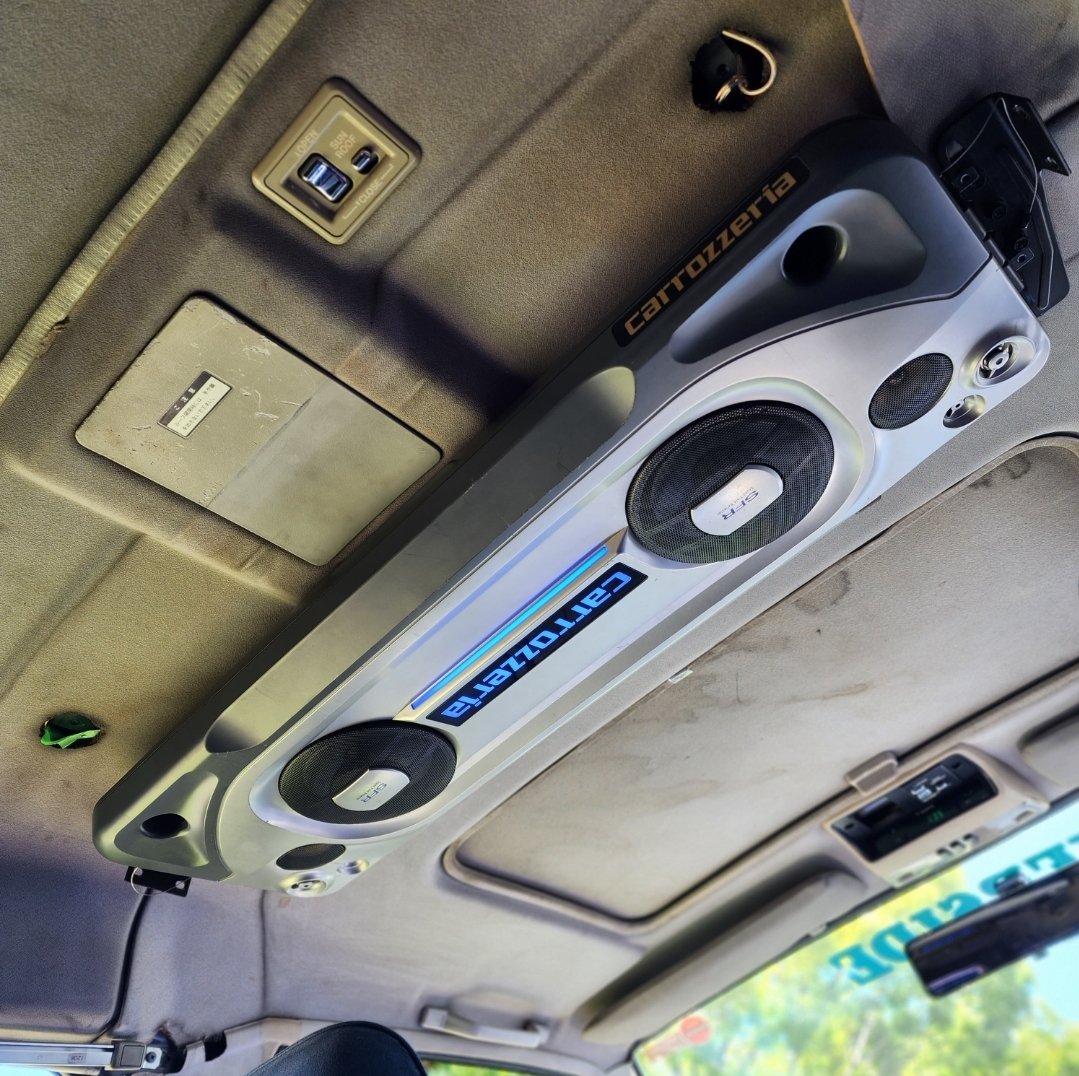
Have somehow done 10,000kms since May! Ignored the rust and installed some Carrozzeria audio Picked up this 1999 FH-P7000MD model with a lower half that tilts which is optimum for van seating height to radio location, I just can't see a thing on the top half. This era of carrozzeria is perfect for adding Bluetooth via the ipbus cd changer control port Paired with the TS-X9401ZY which was a Daihatsu move factory option ceiling speaker. works pretty well in the spot where the missing rear aircon piece is. Mounting to factory holes on the body after I drilled a couple of holes in the bracket the speaker came with and is slim enough not to obstruct rear passengers view out windscreen. I need to pick up the missing end caps for the speaker and that should tidy it up more
8 points
-
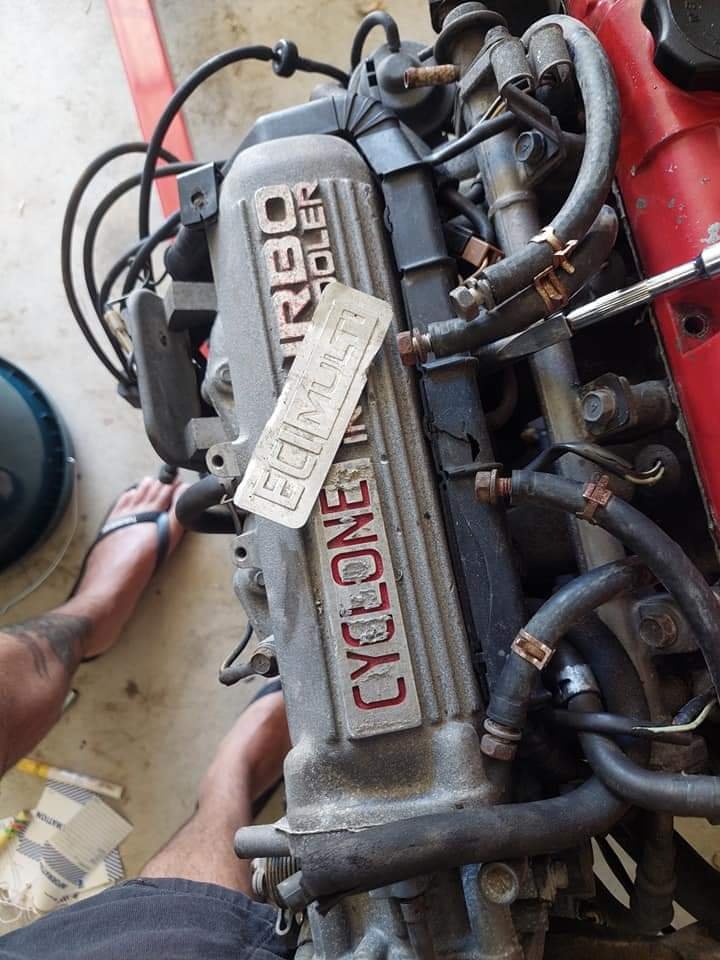
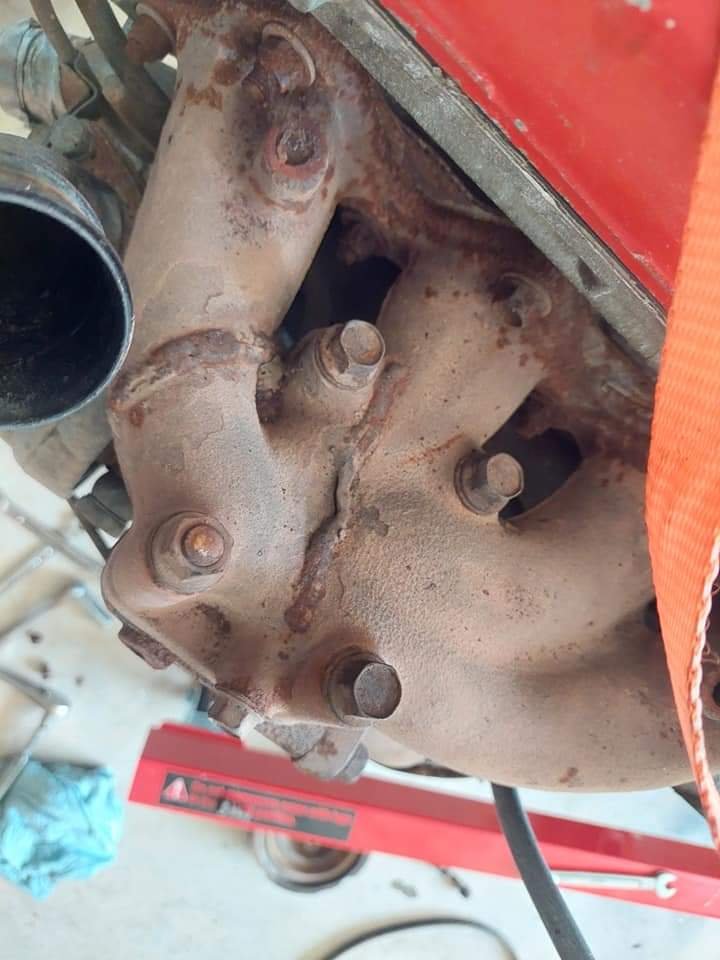
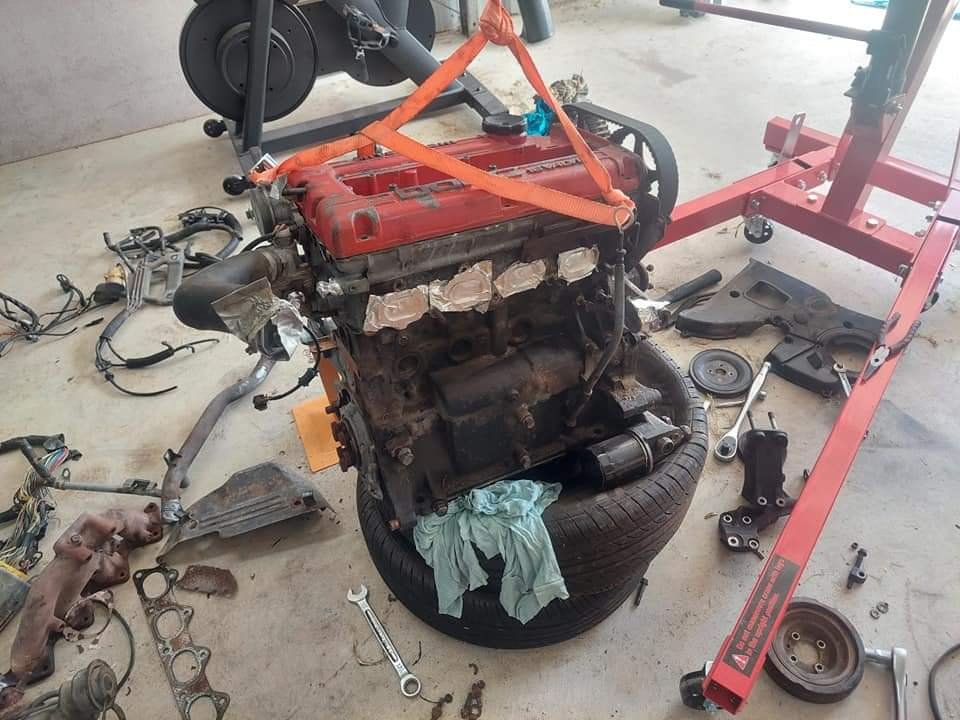
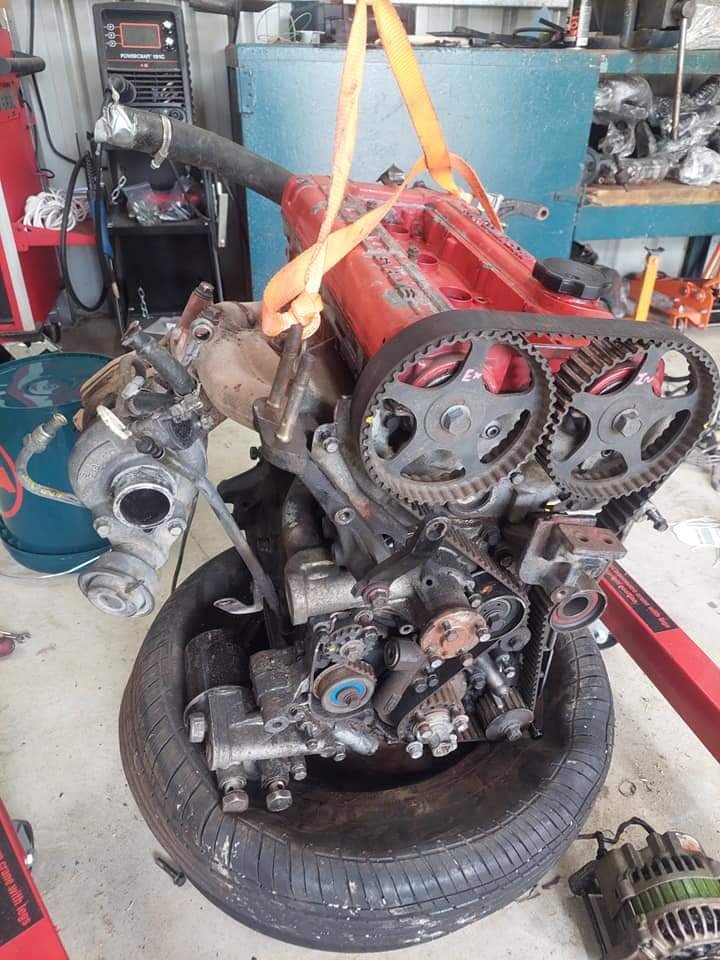
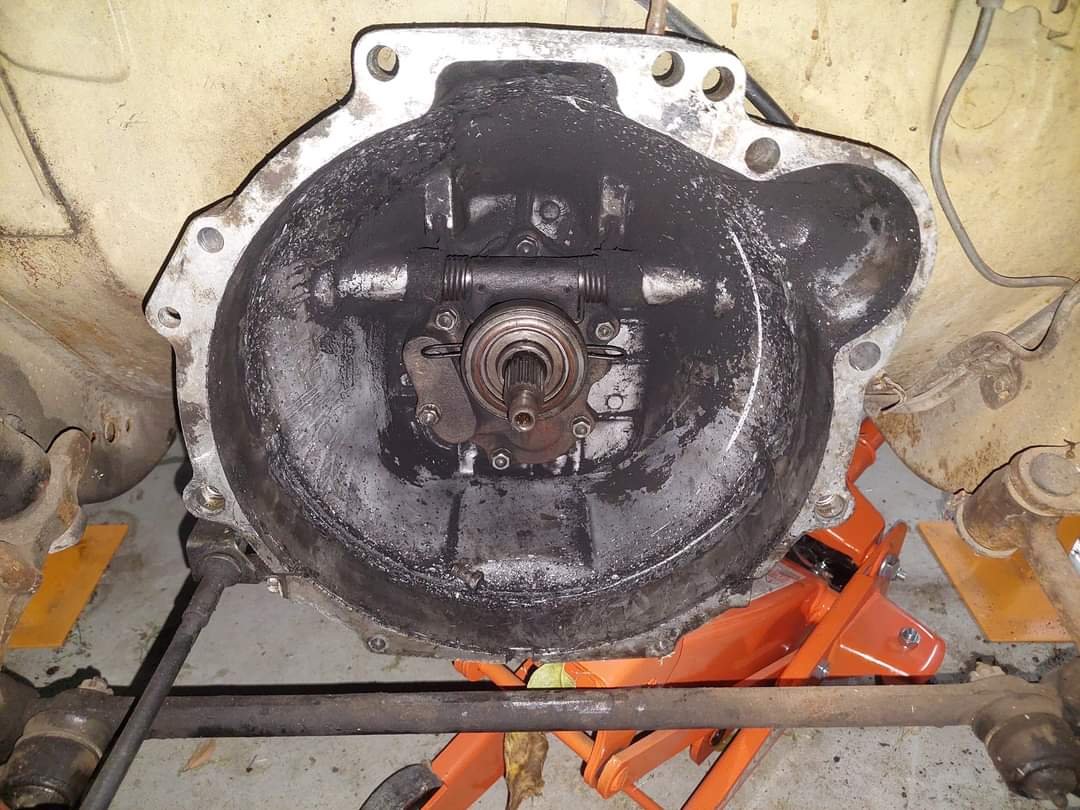
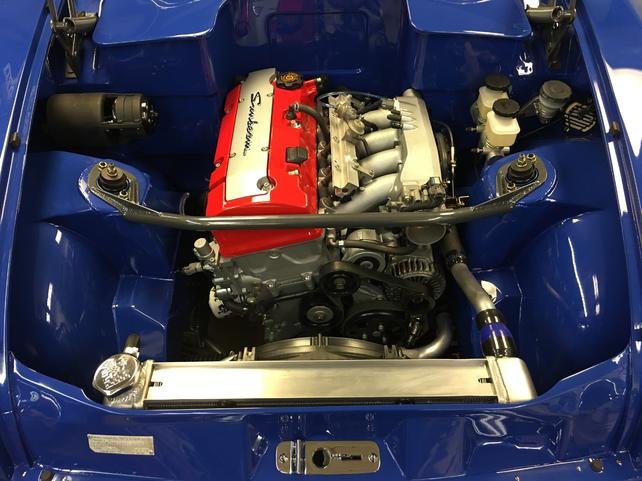
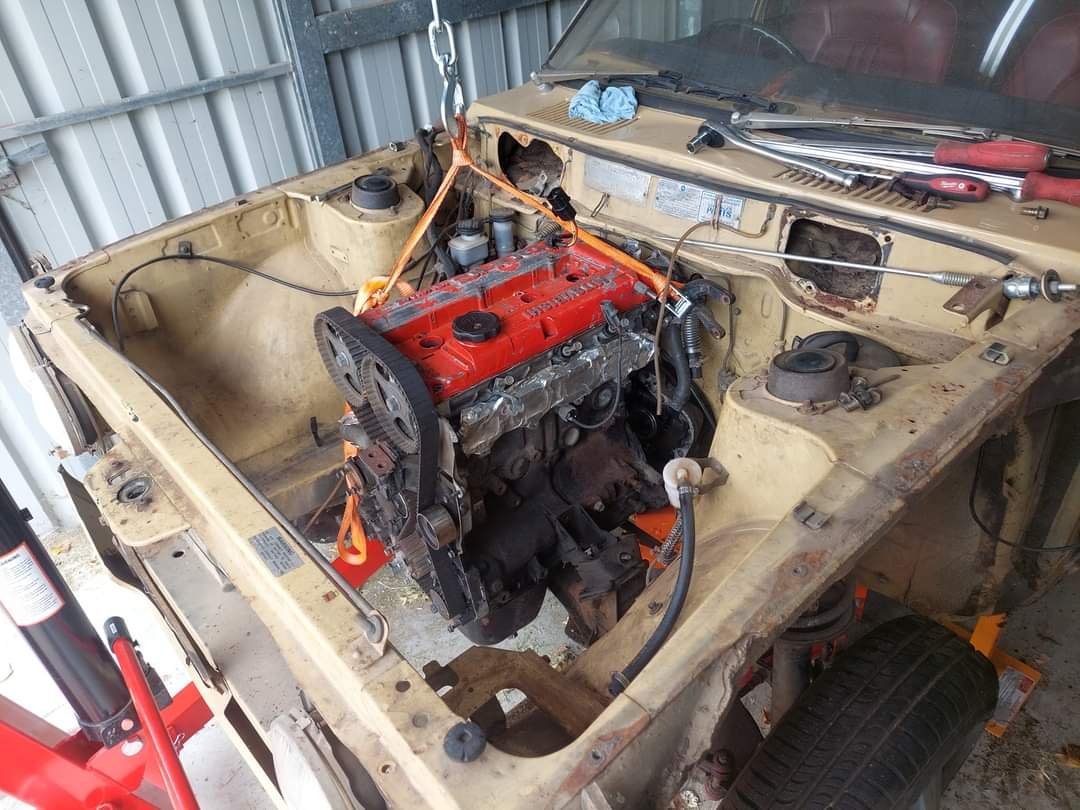
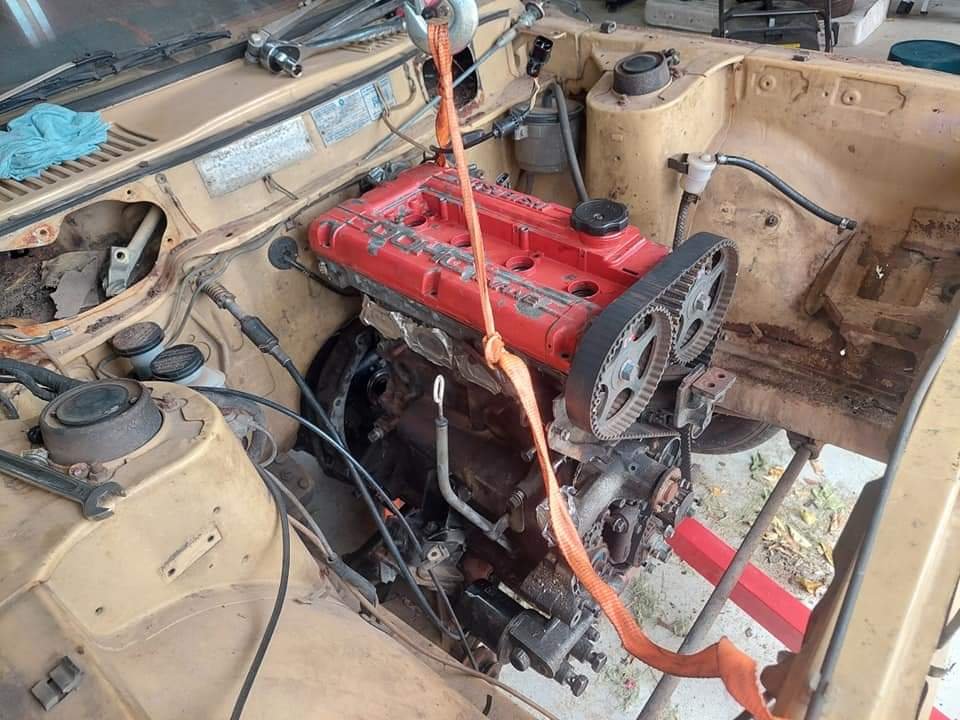
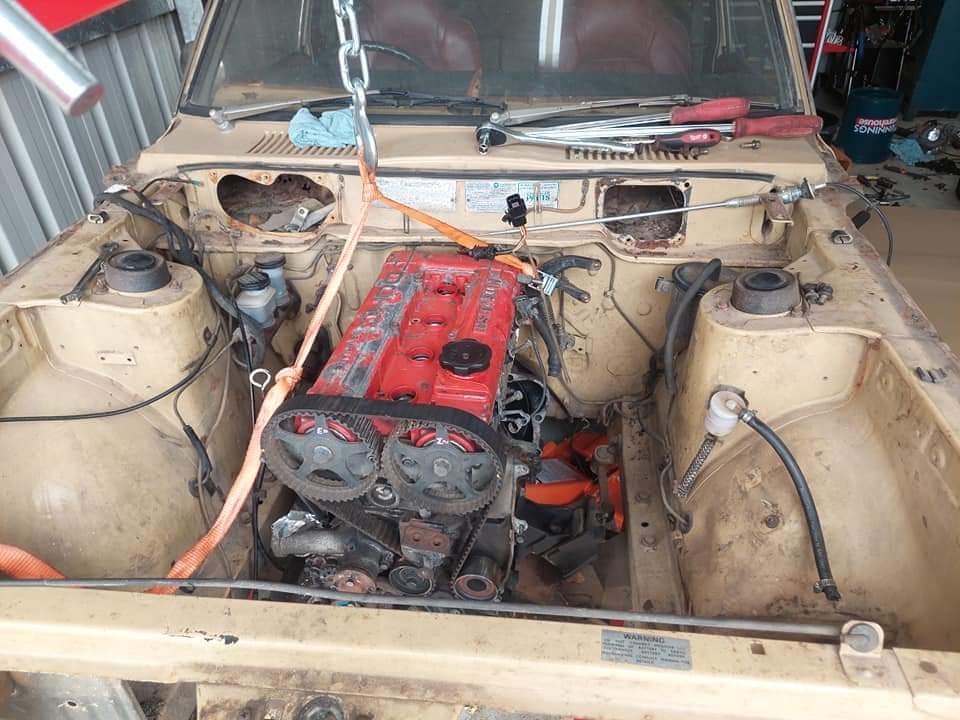
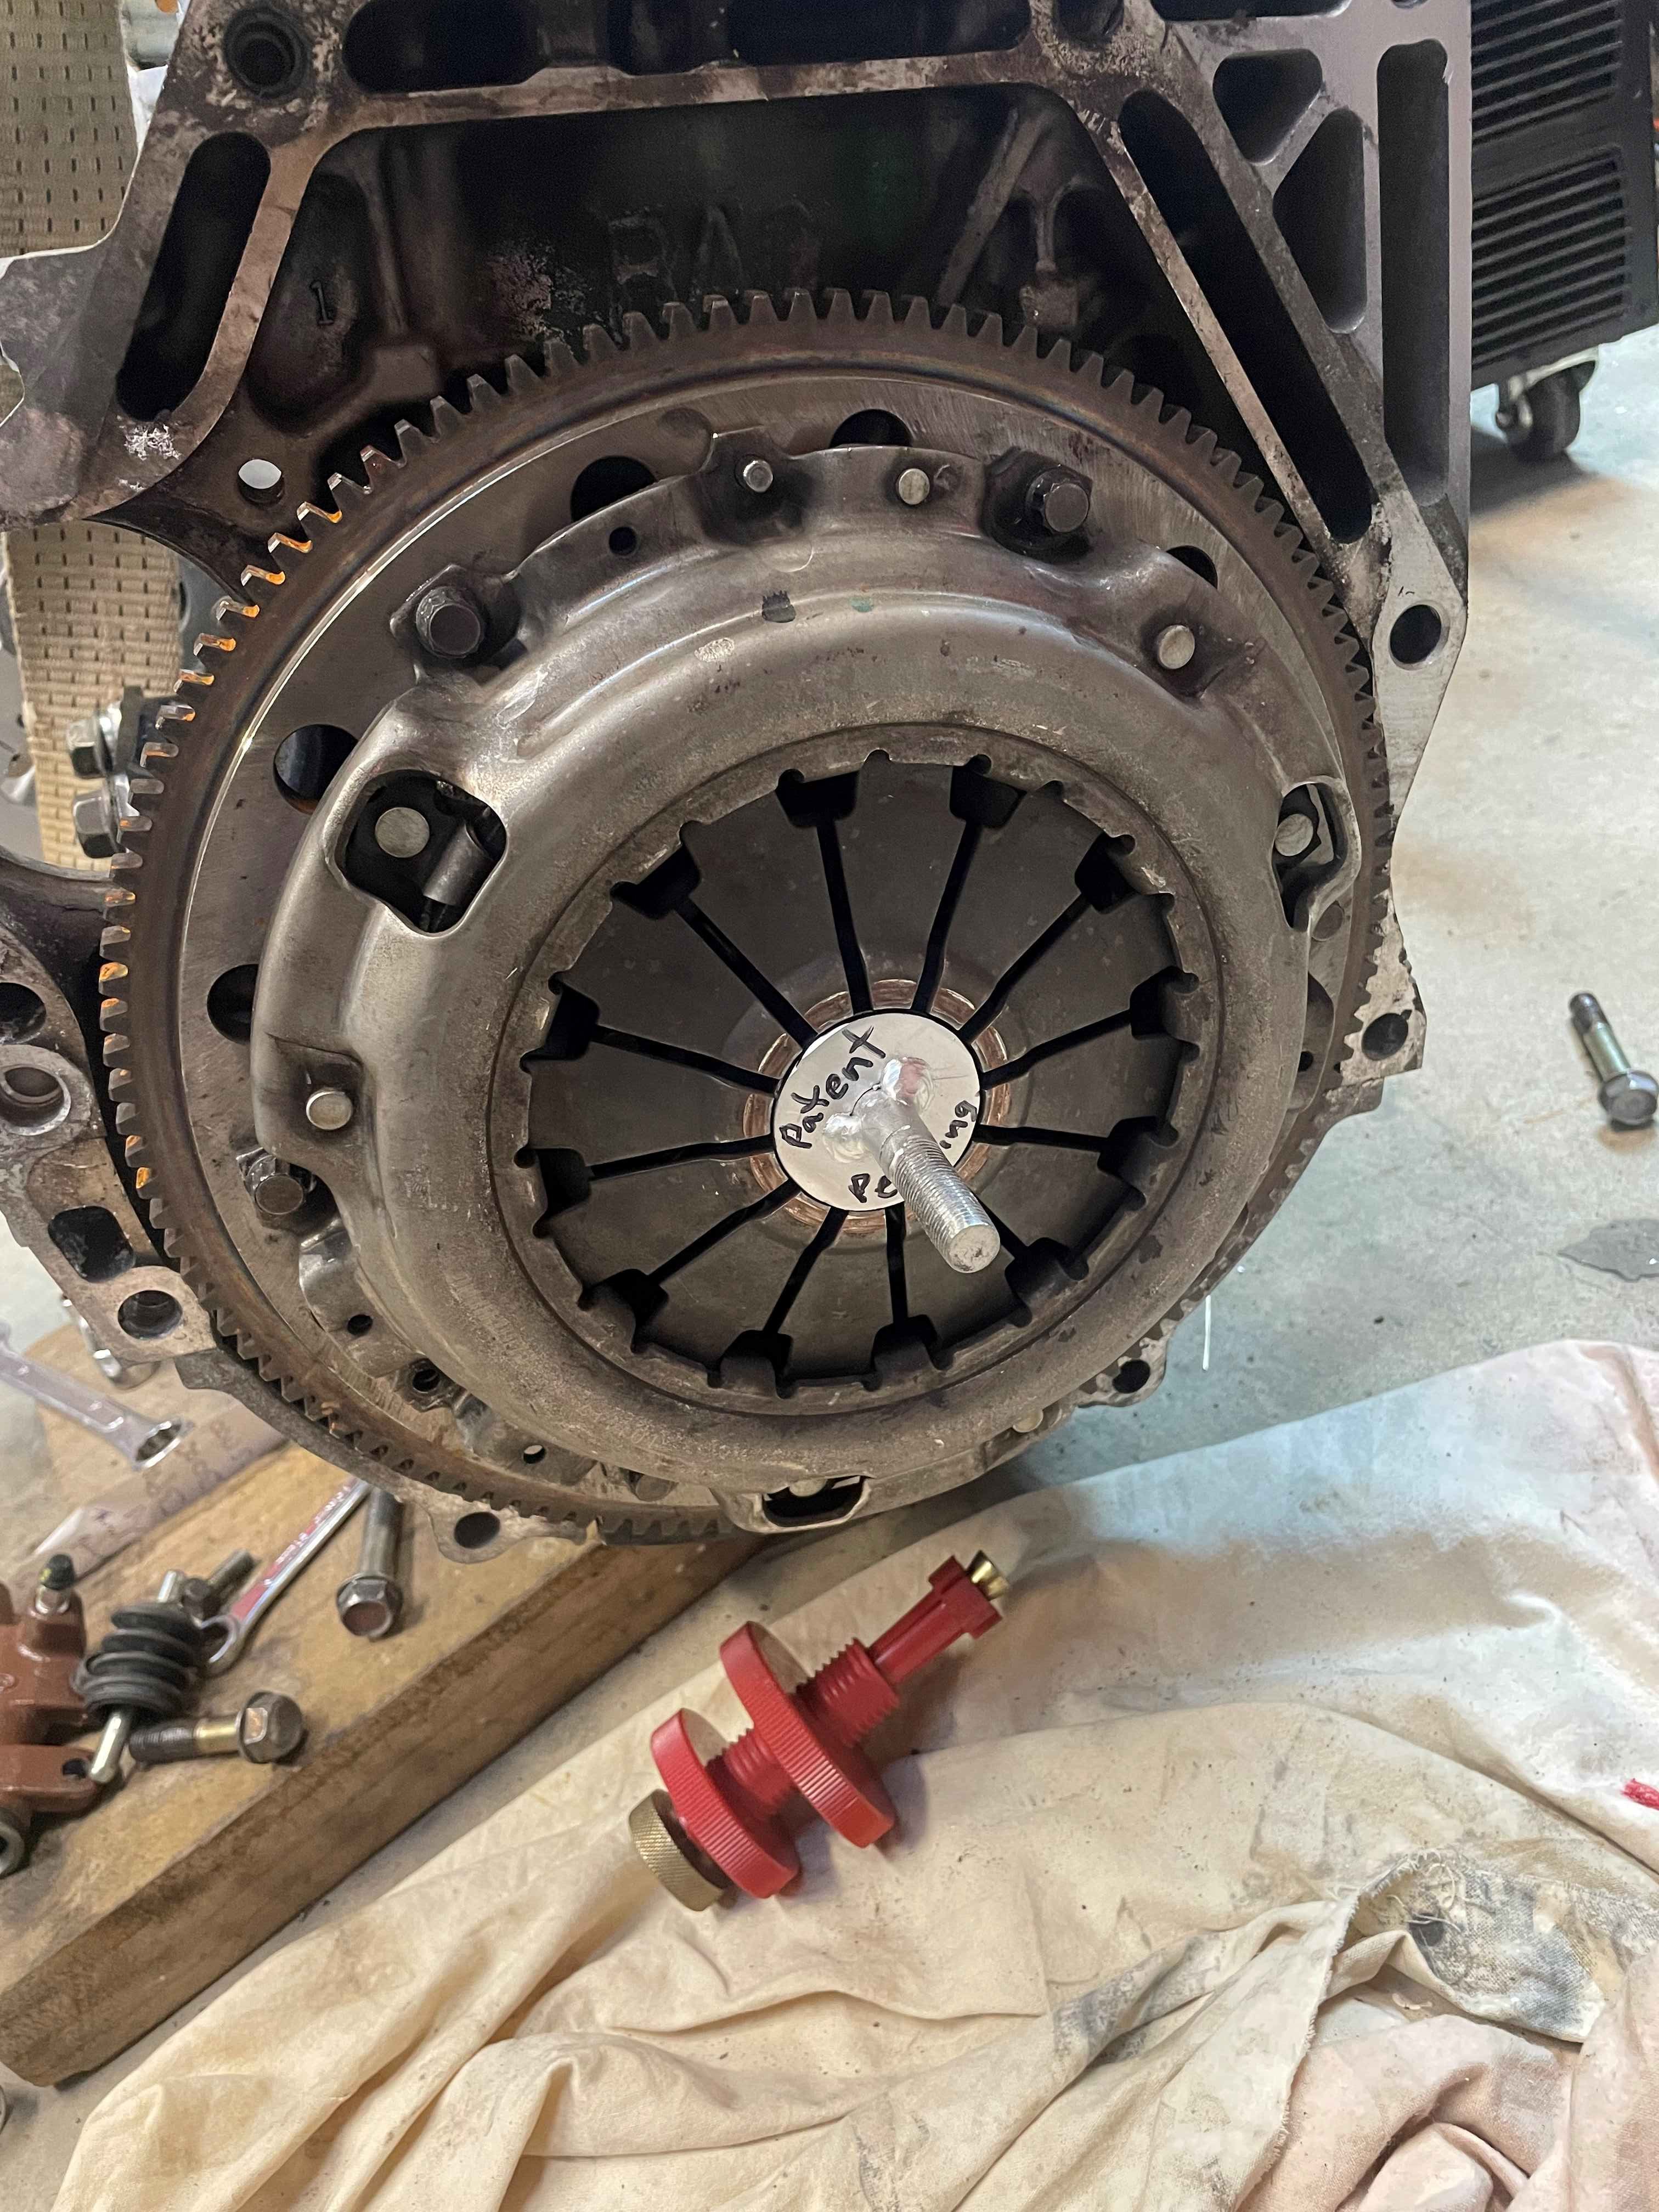
Decided to do some more work on this on new years day. Wasn't sure on what spec the vr4 engine was so decided to see what we were dealing with. Was hoping it was a evo 0 engine so was looking for the tell tales nut unfortunately it fell short, no biggy though. ECI Multi on the intake didn't quite look right, turns out someone had just stuck a plate over the 'cyclone' lettering. Also the turbo is a td05h 14b, as opposed to the bigger 16g. Going off the ecu part number it looks to be from a 1988 vr4. Stripped off the bolt ons and had a look down the ports, no bad signs so far. Timing belt and idlers look to have been done but the water pump is pretty crusty on the inside. Decided to mock up the turbo flipped around for a laugh - Will probably just make up a basic log style manifold for this to keep costs down. Then ripped it off and put on some alloy tape to seal it up for now. Check out the repairs on this old manifold from previous cracks... Later on in the evening I decided to rip the 4g52 out from the bay. Got her all setup and on stands in the front so the engine crane would clear the lcas. Check out the inside of the bellhousing.. The bloke who swapped the 4g52 didn't sort out the right size clutch/flywheel setup and the outside of the clutch pressure plate has been wearing on the inside of the bellhousing - it hasn't driven really at all but when I brought it and test drove it around the parking lot I knew something wasn't right but didn't expect this haha. And here's where we're at. Does anyone know where I can source original plugs/connectors for the engine wiring loom, most of what's on here is old and brittle or broken and I'm keen to repair most of it or even maybe make a new loom entirely. Also if anyone has any suggestions for easy ways to go about the rwd swap please let me know. I have been reading up on project zero g and also a lot of online forums so far. I'll probably be looking at a top thermostat housing delete (to get better clearance at the rear) and run an inline thermostat housing. Have someone modify the inlet manifold to swap the tb to the opposite side. https://oldschool.co.nz/index.php?/topic/88881-tais-1976-galant-goon-discussion/ Chur.
6 points
-
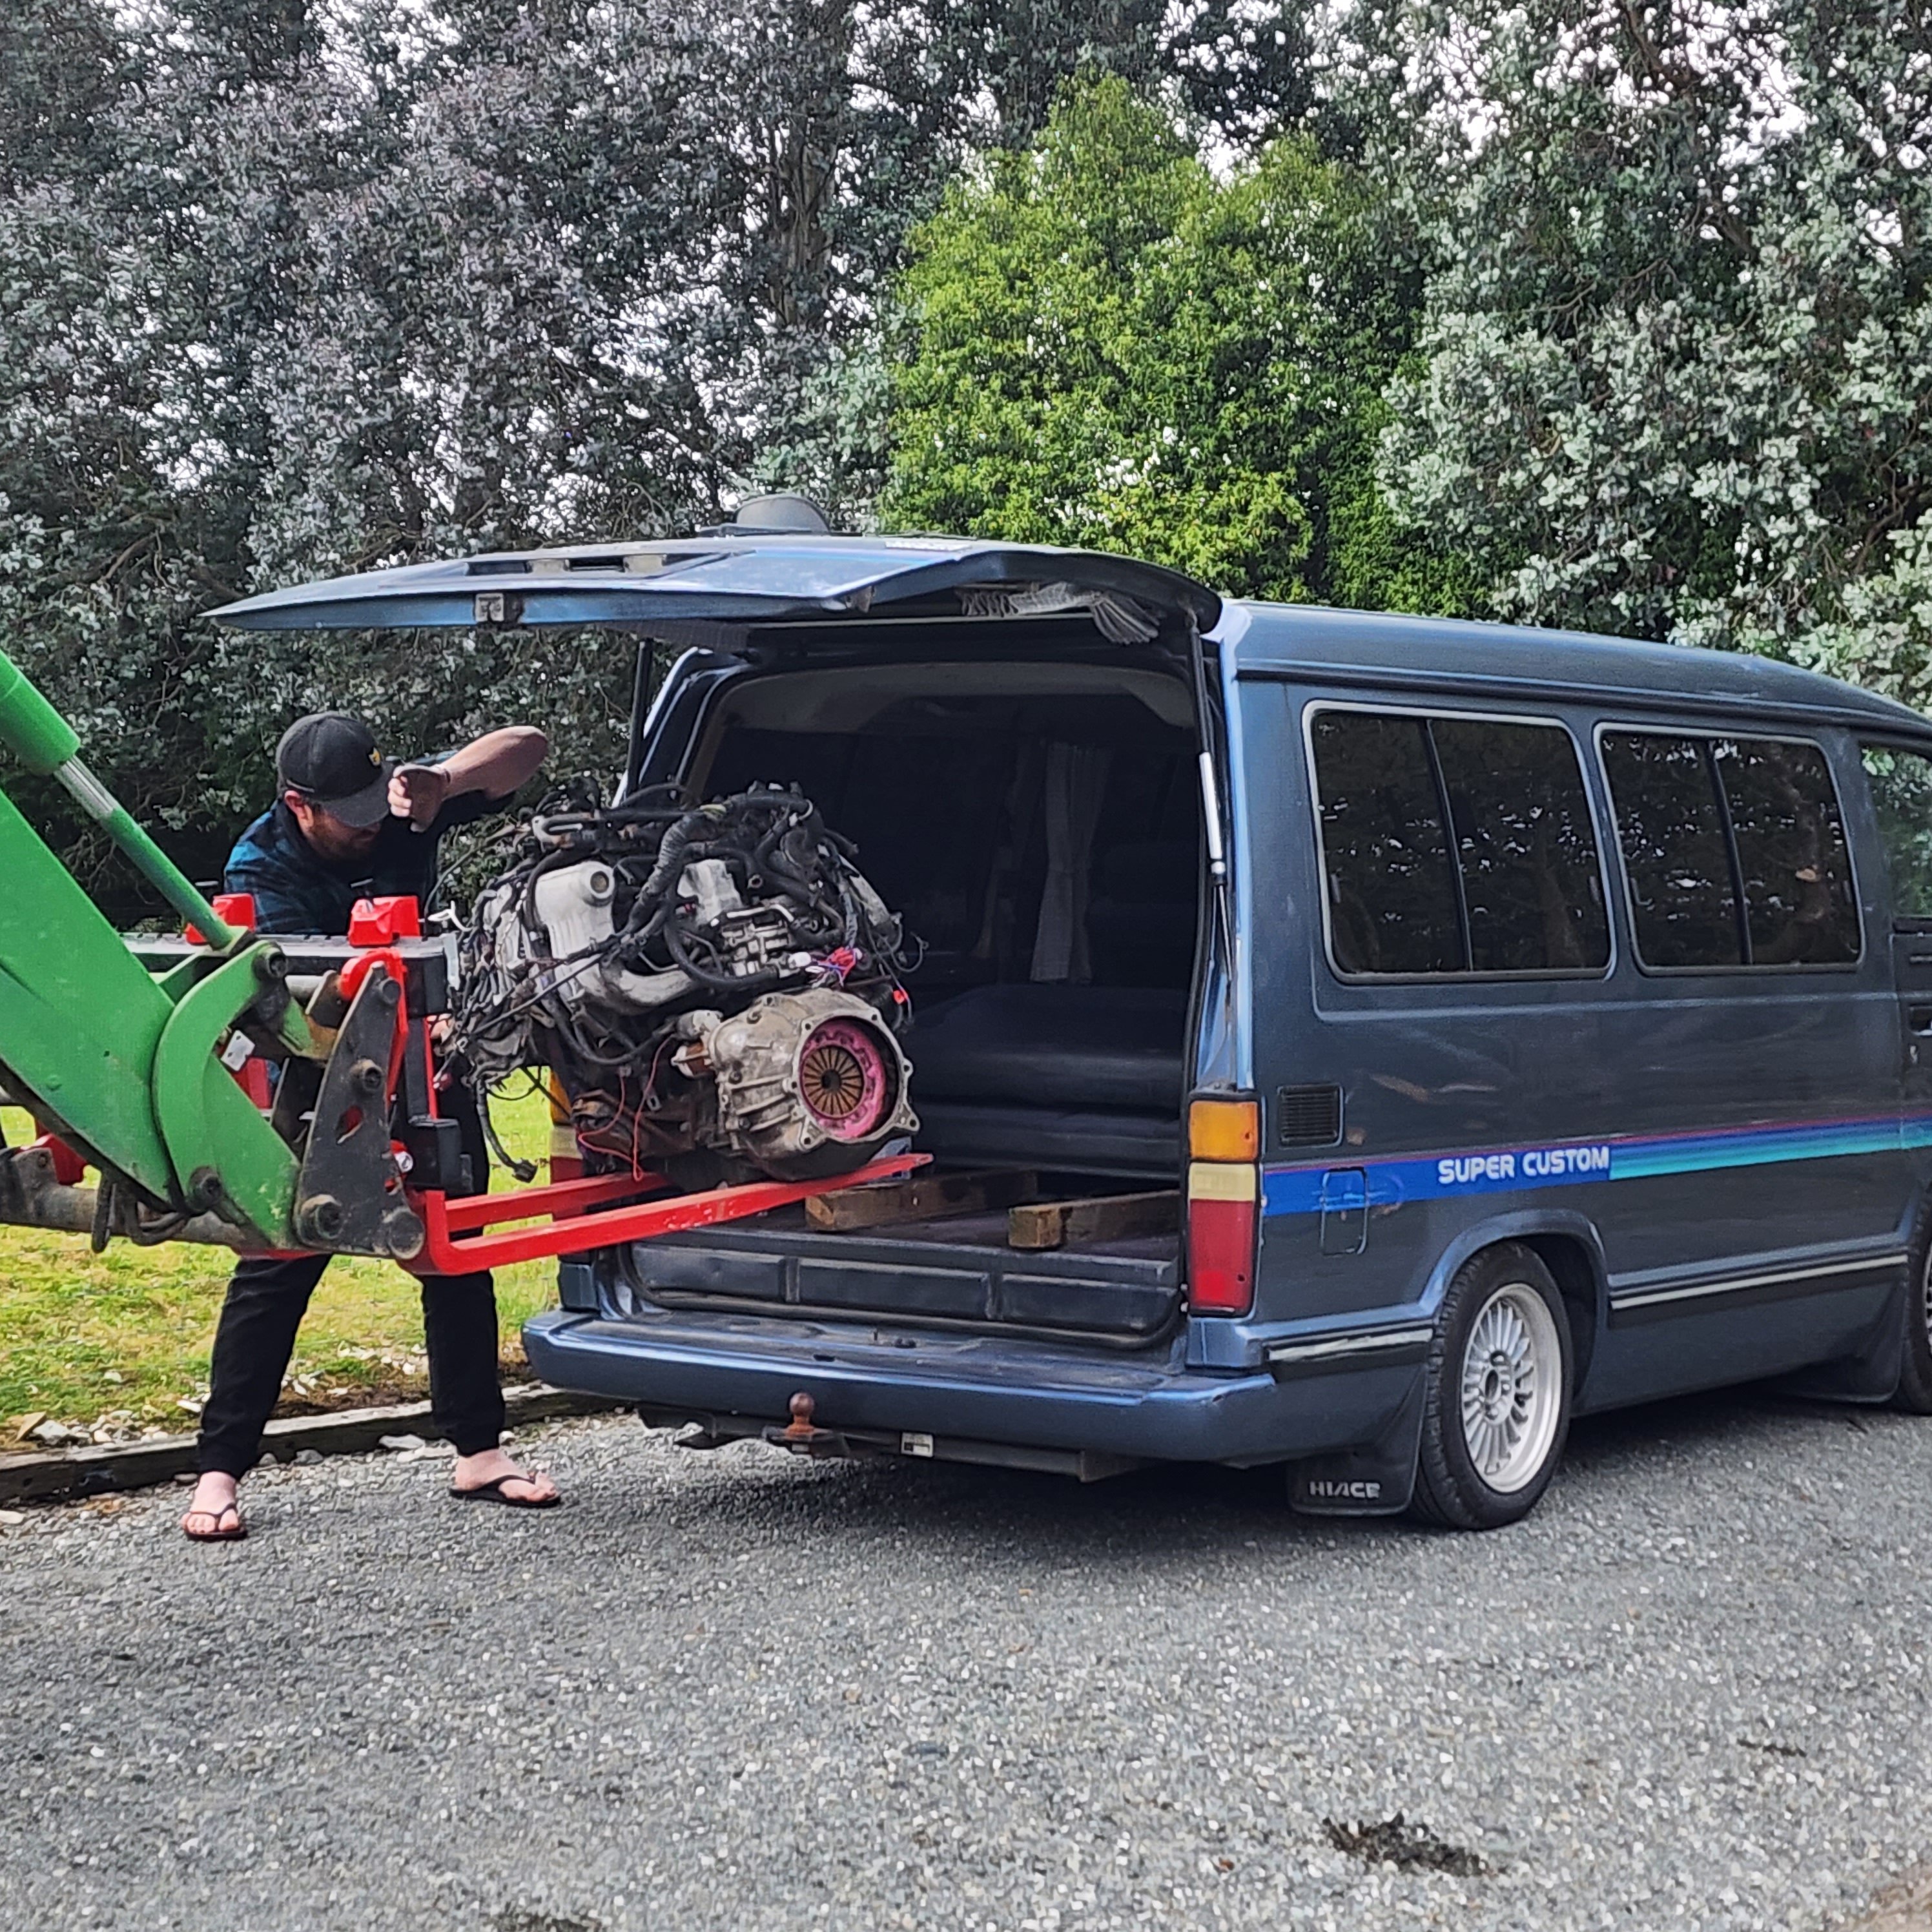
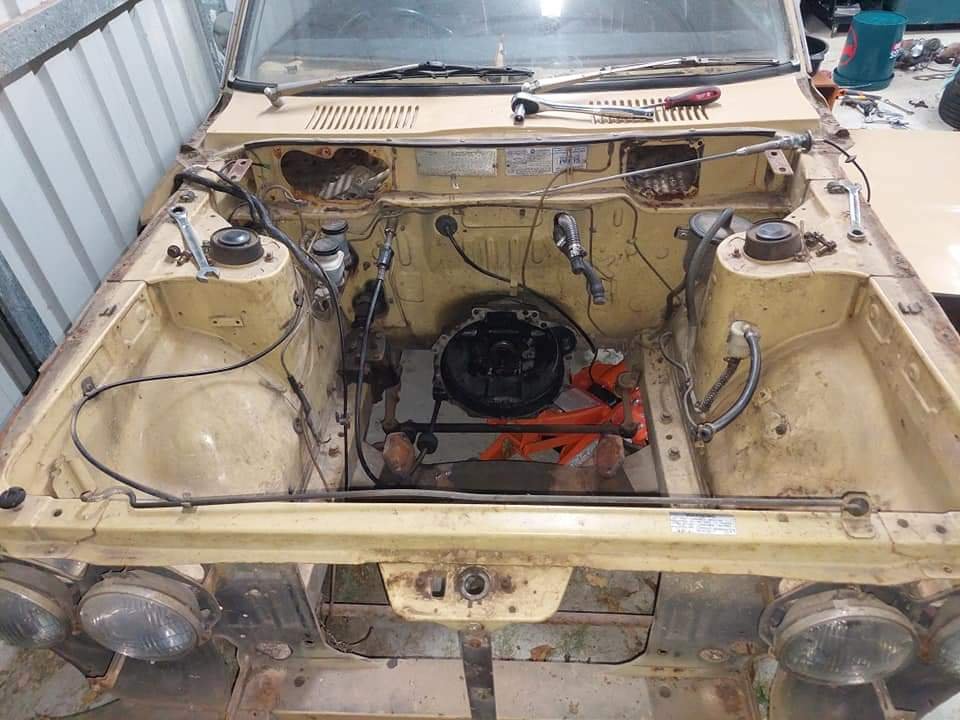
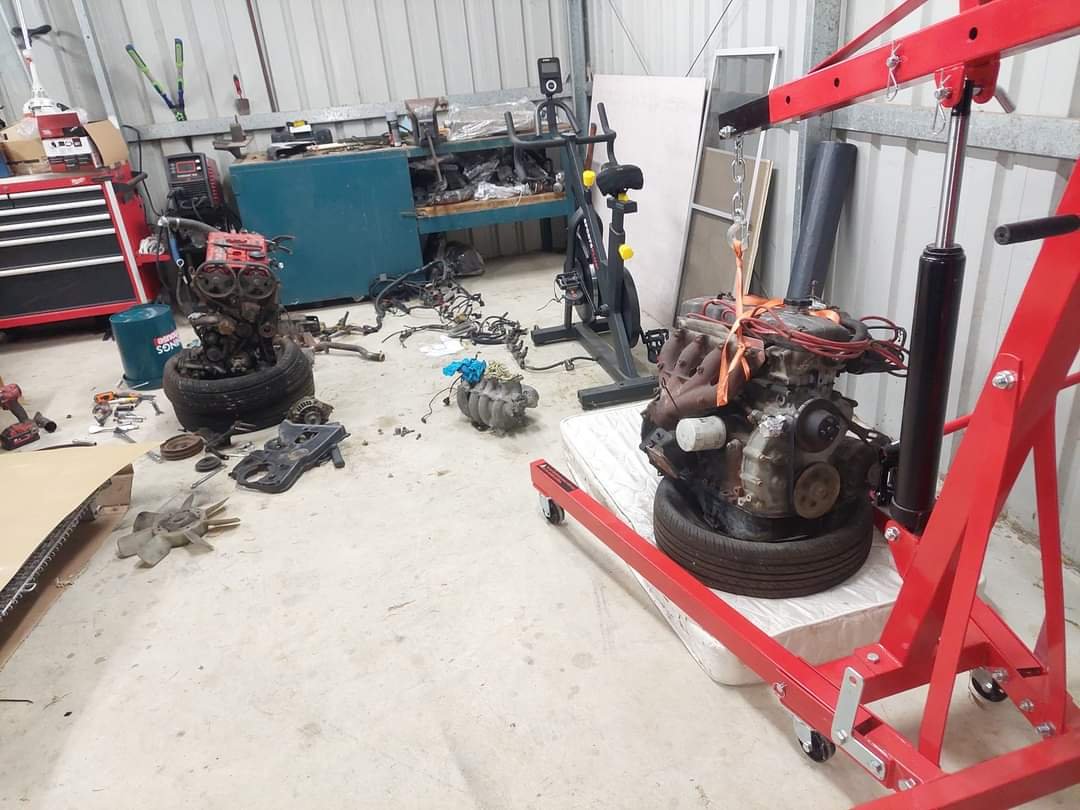
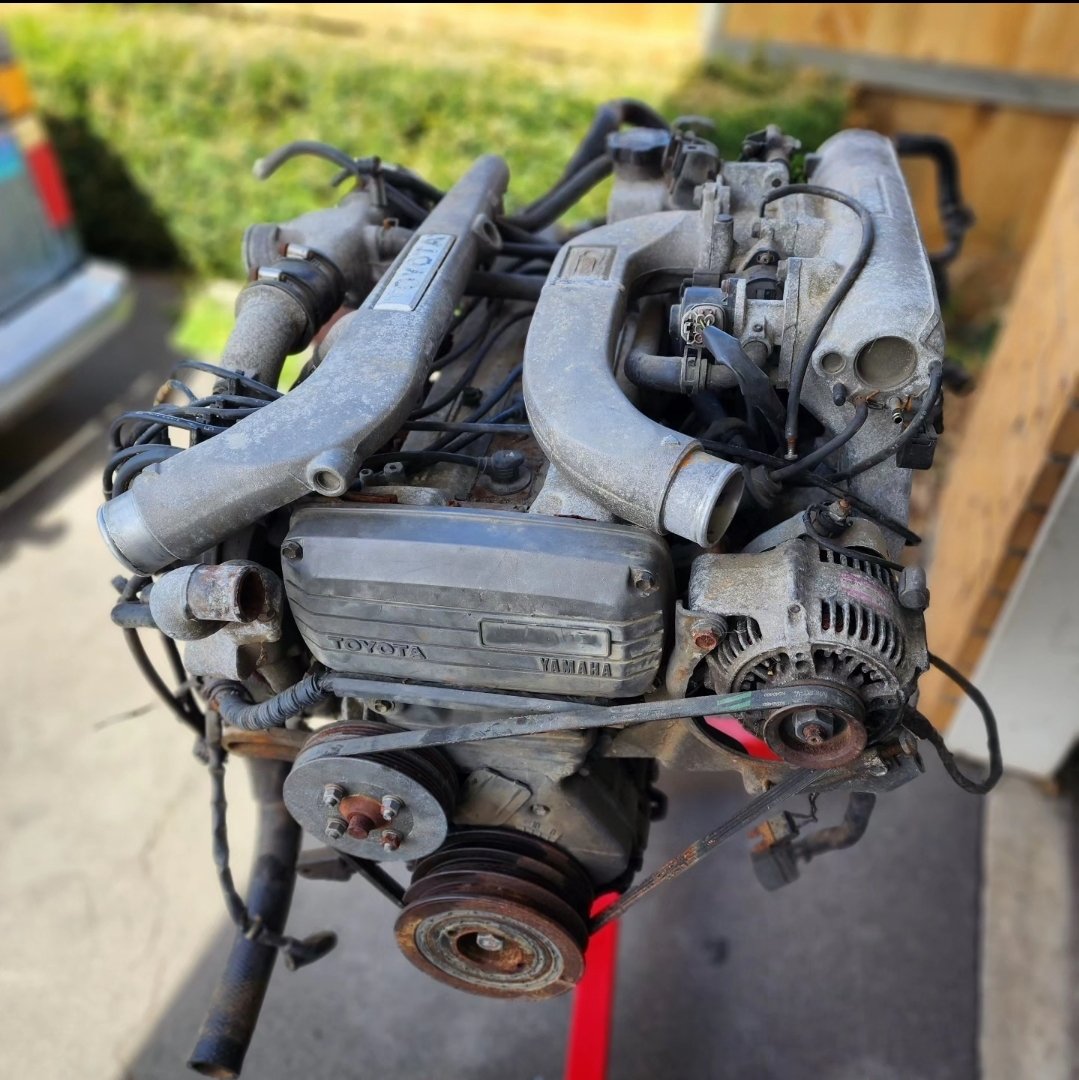
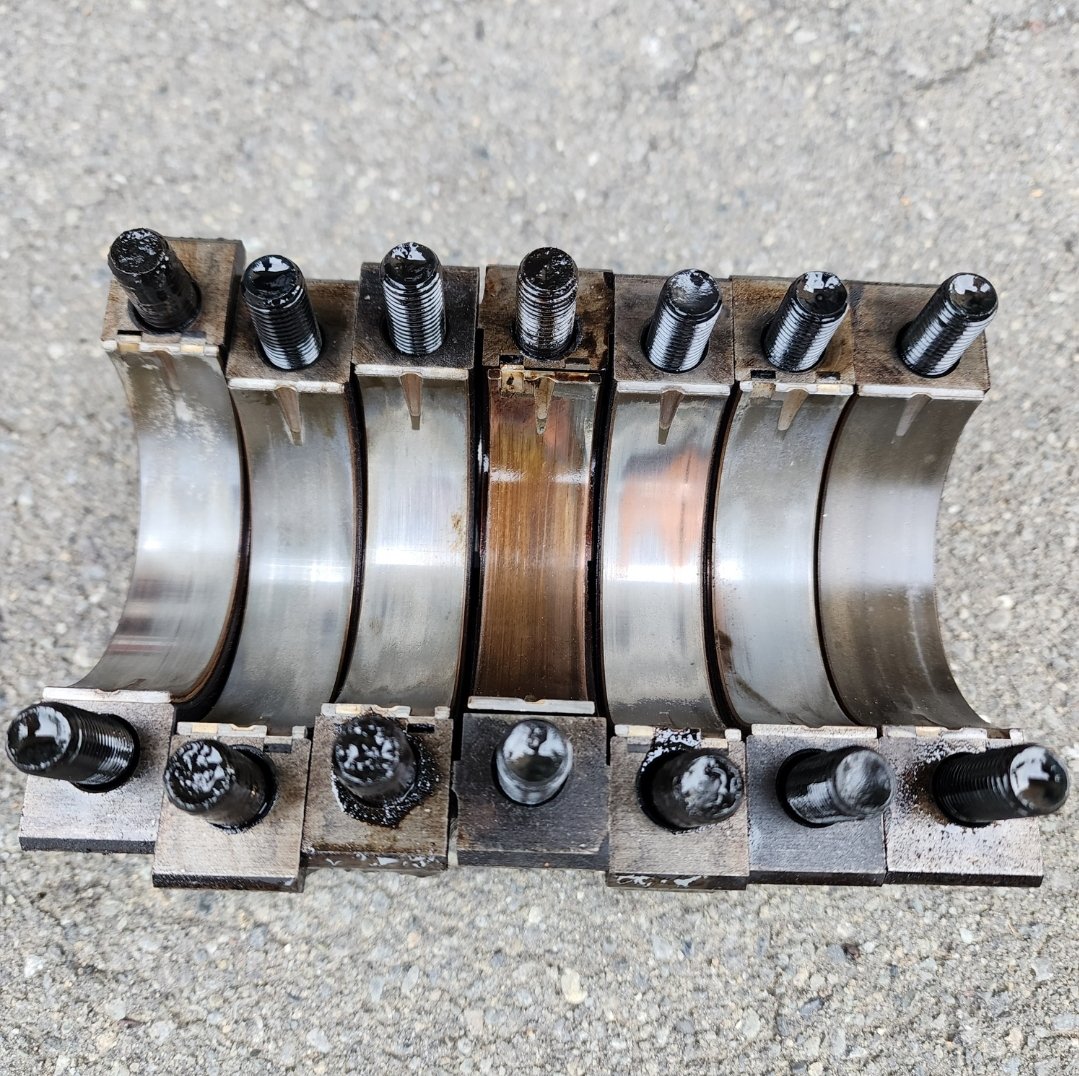
This motor was appealing because it was 100% complete with loom, usually half the stuff is missing from a never completed single turbo conversion or rebuild that never happens it had been in a surf that they had blown the gearbox in and couldnt sell complete so parted out, had the 120kms yarn, some questionable 10mm plate engine mounts, a punched in sump with an extra drain added in on opposite side and the shortened intake pipe on right to clear something. Checked crank bearings which is always first on list with and 1gg pretty disappointed, popped one cam cover off and its pretty gross inside. Unlikely the claimed 120kms new plan is to remove everything from this engine and tidy it up and put on the other longblock. I'd like to do an oem+ style fitment of the engine where everything is vapour blasted and tidied up and fitted to the van exactly as it was to the supra but we will see what state the twin turbos are and if it will all fit. Either way I needed a complete engine to measure up to see what space we have
6 points
-
Southern Hospitality
6 points
-
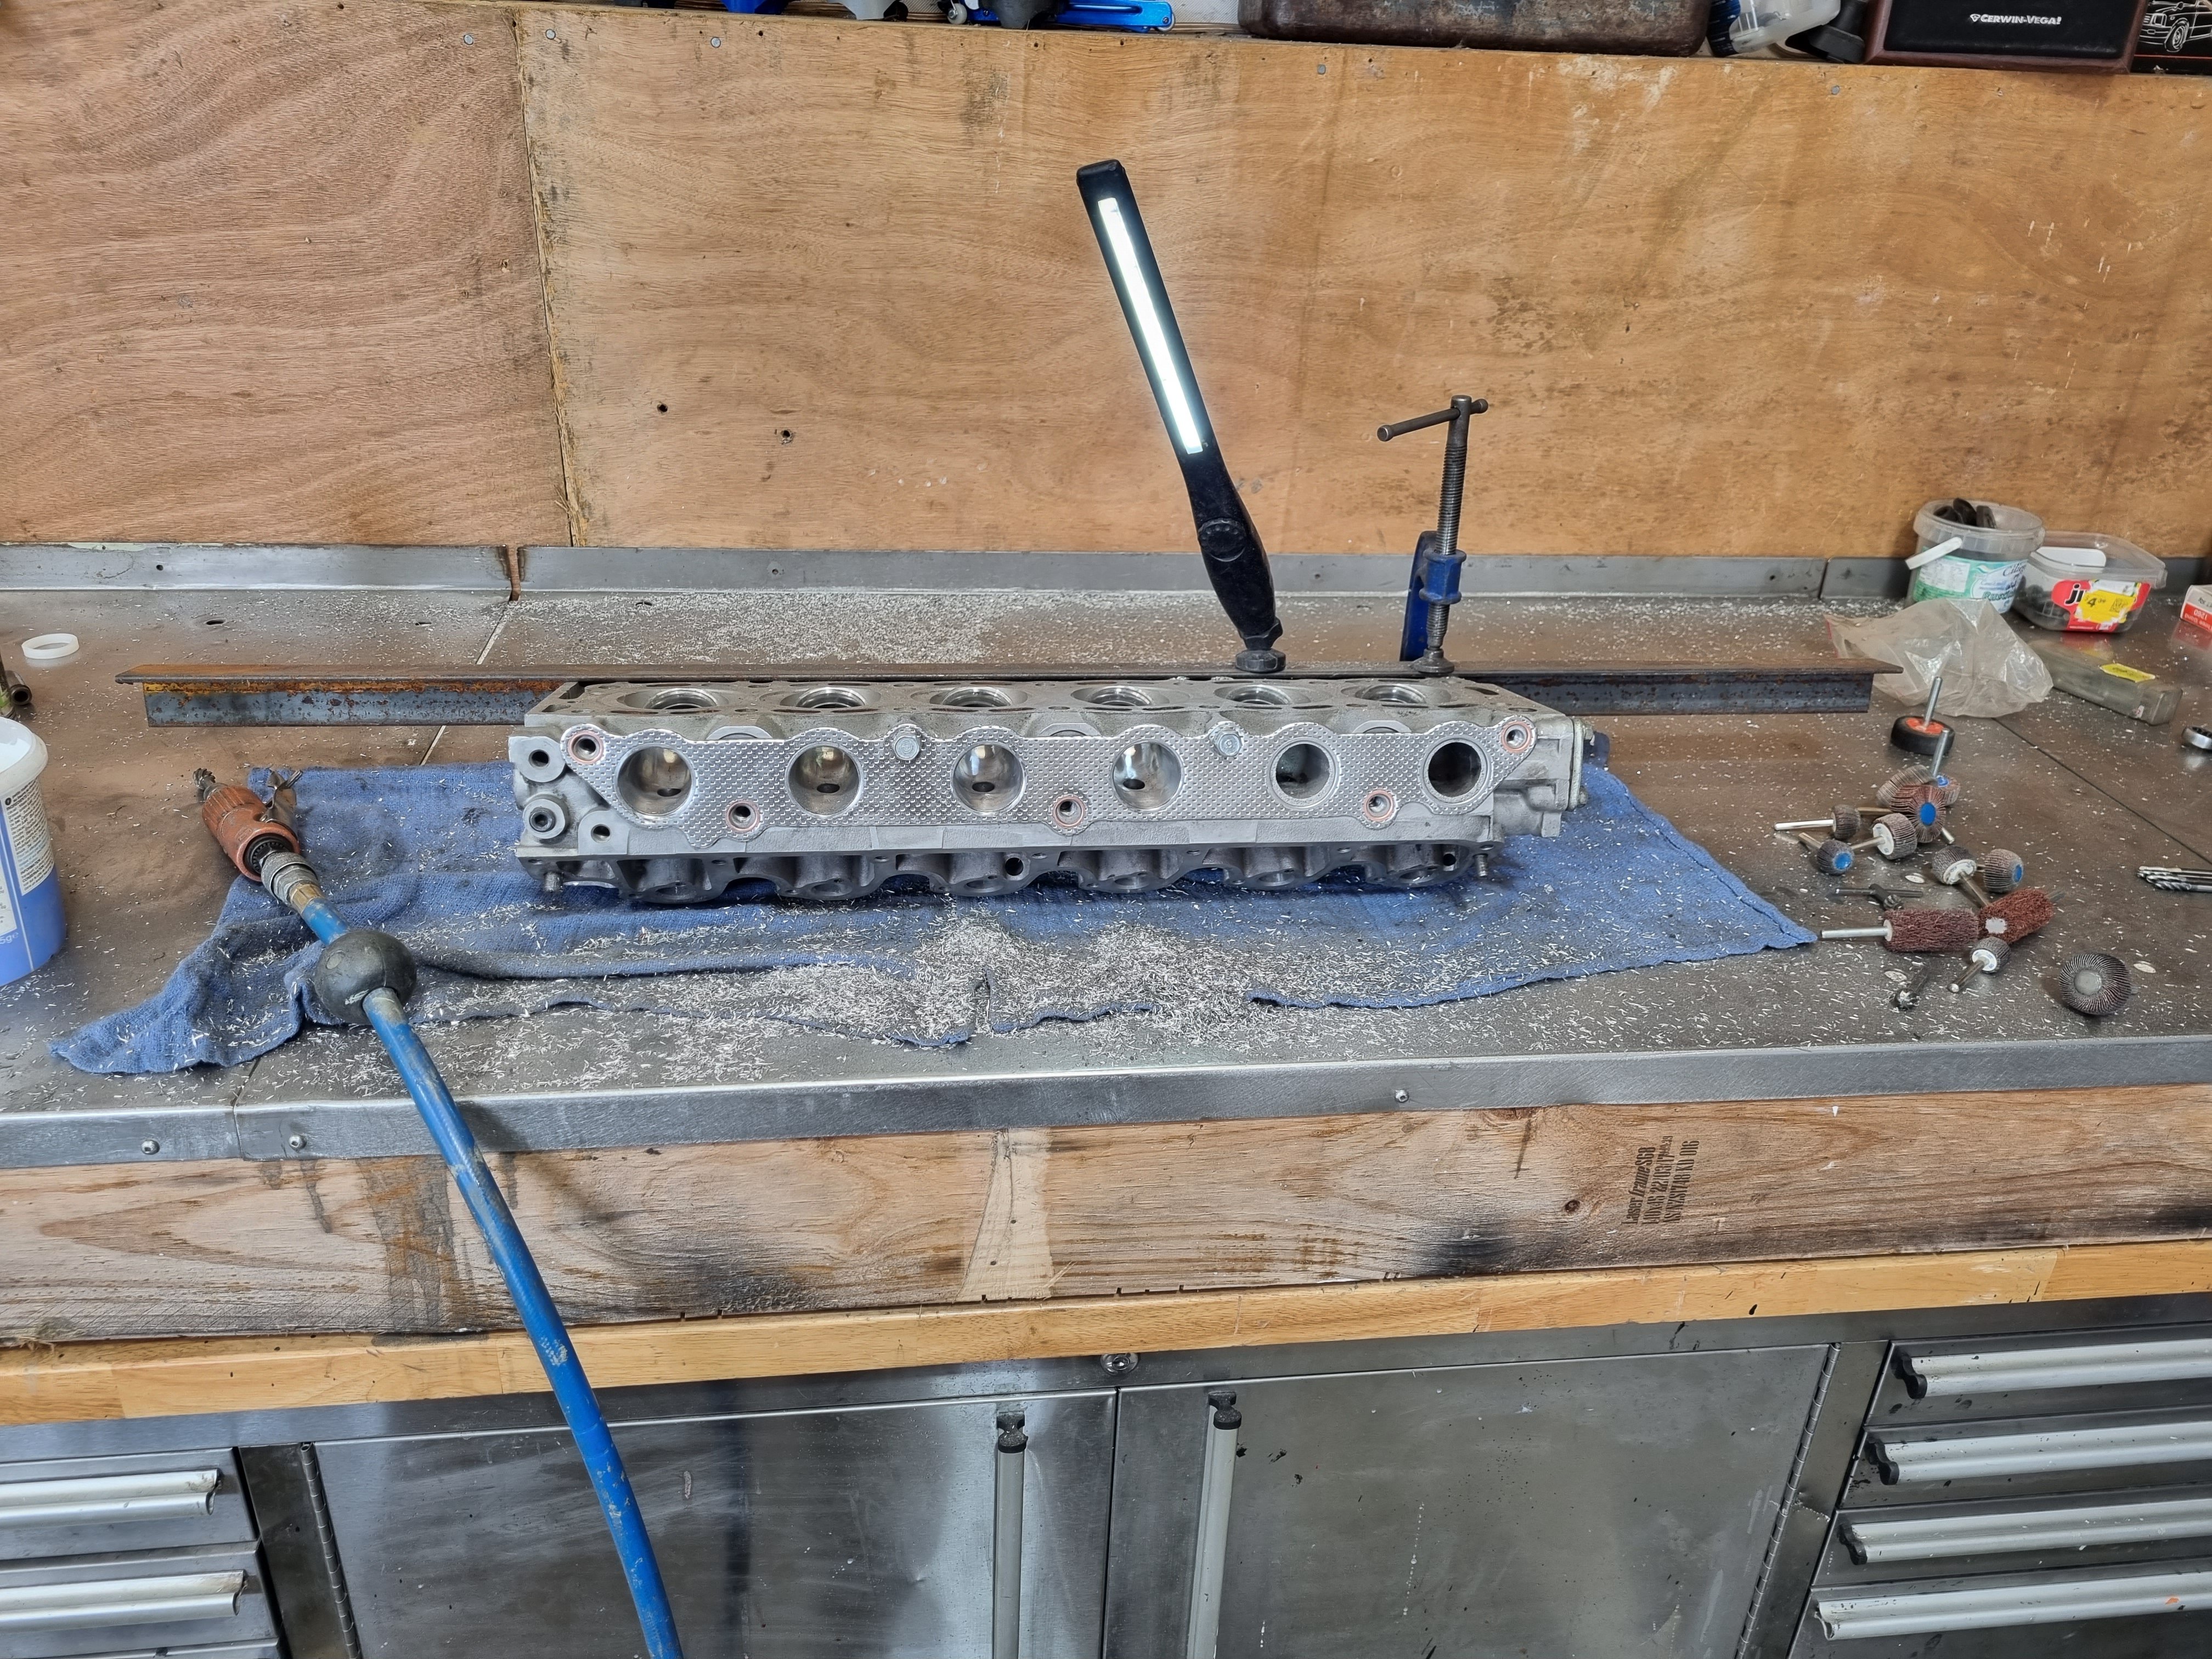
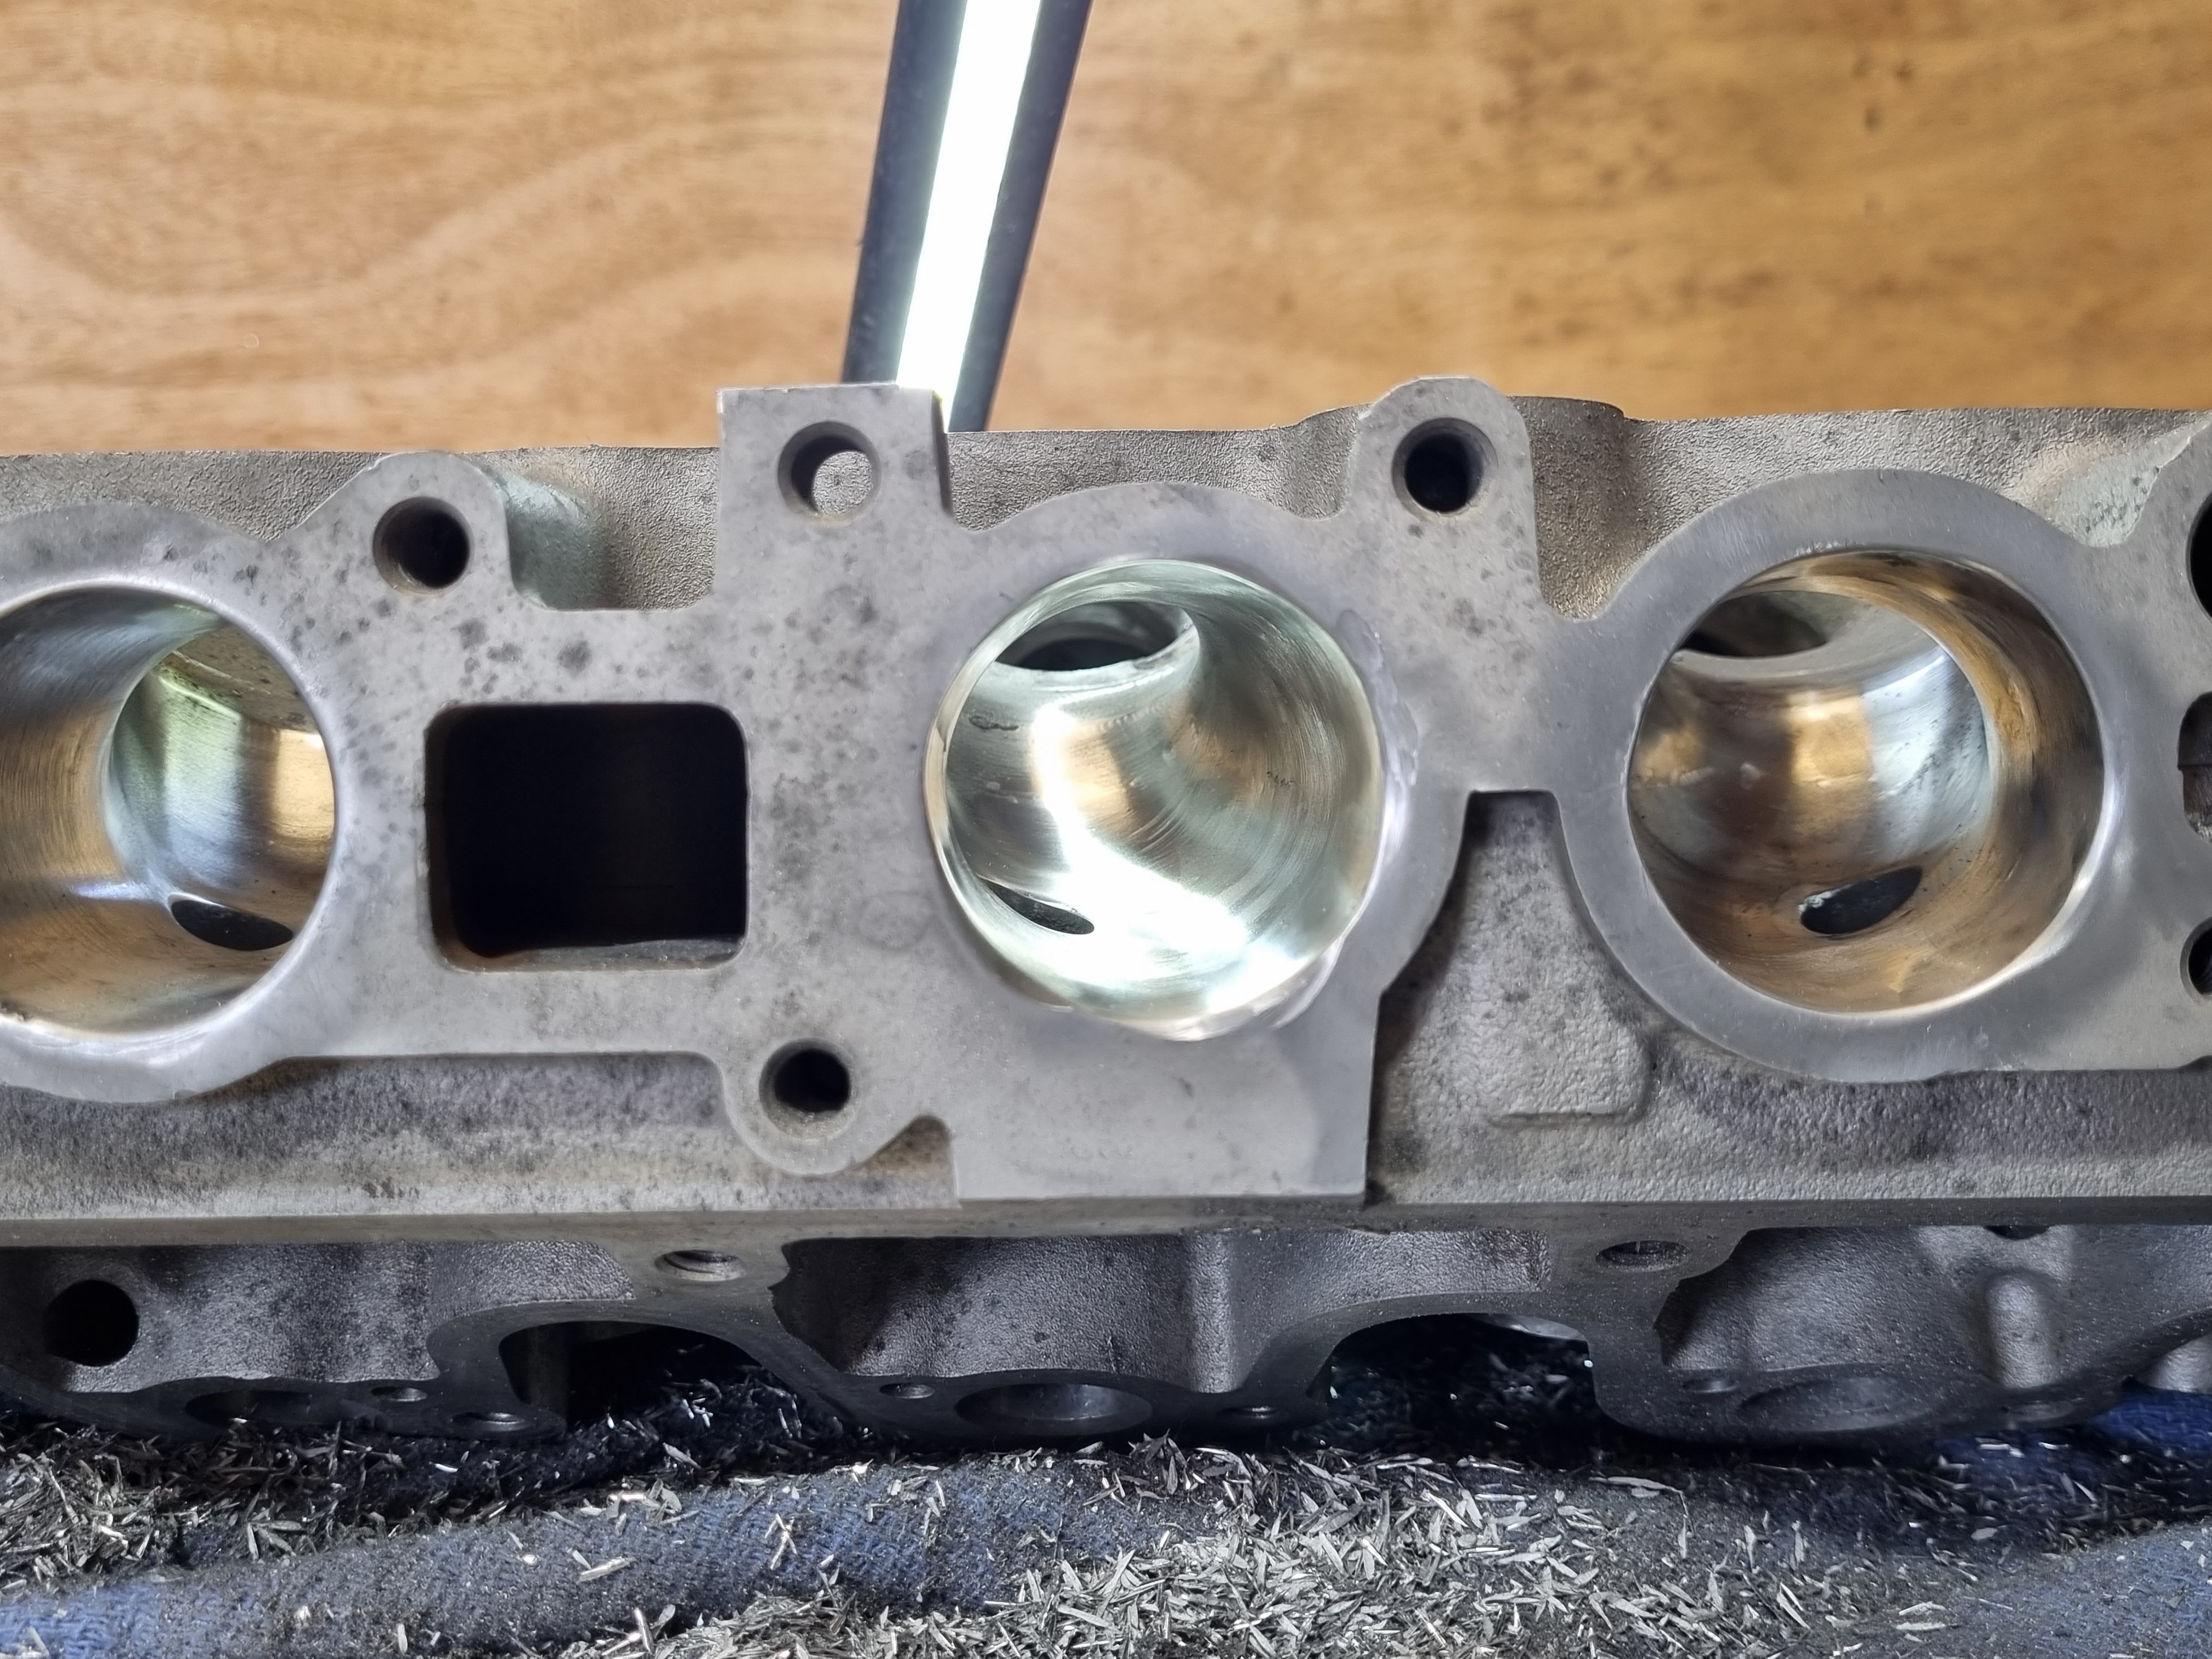
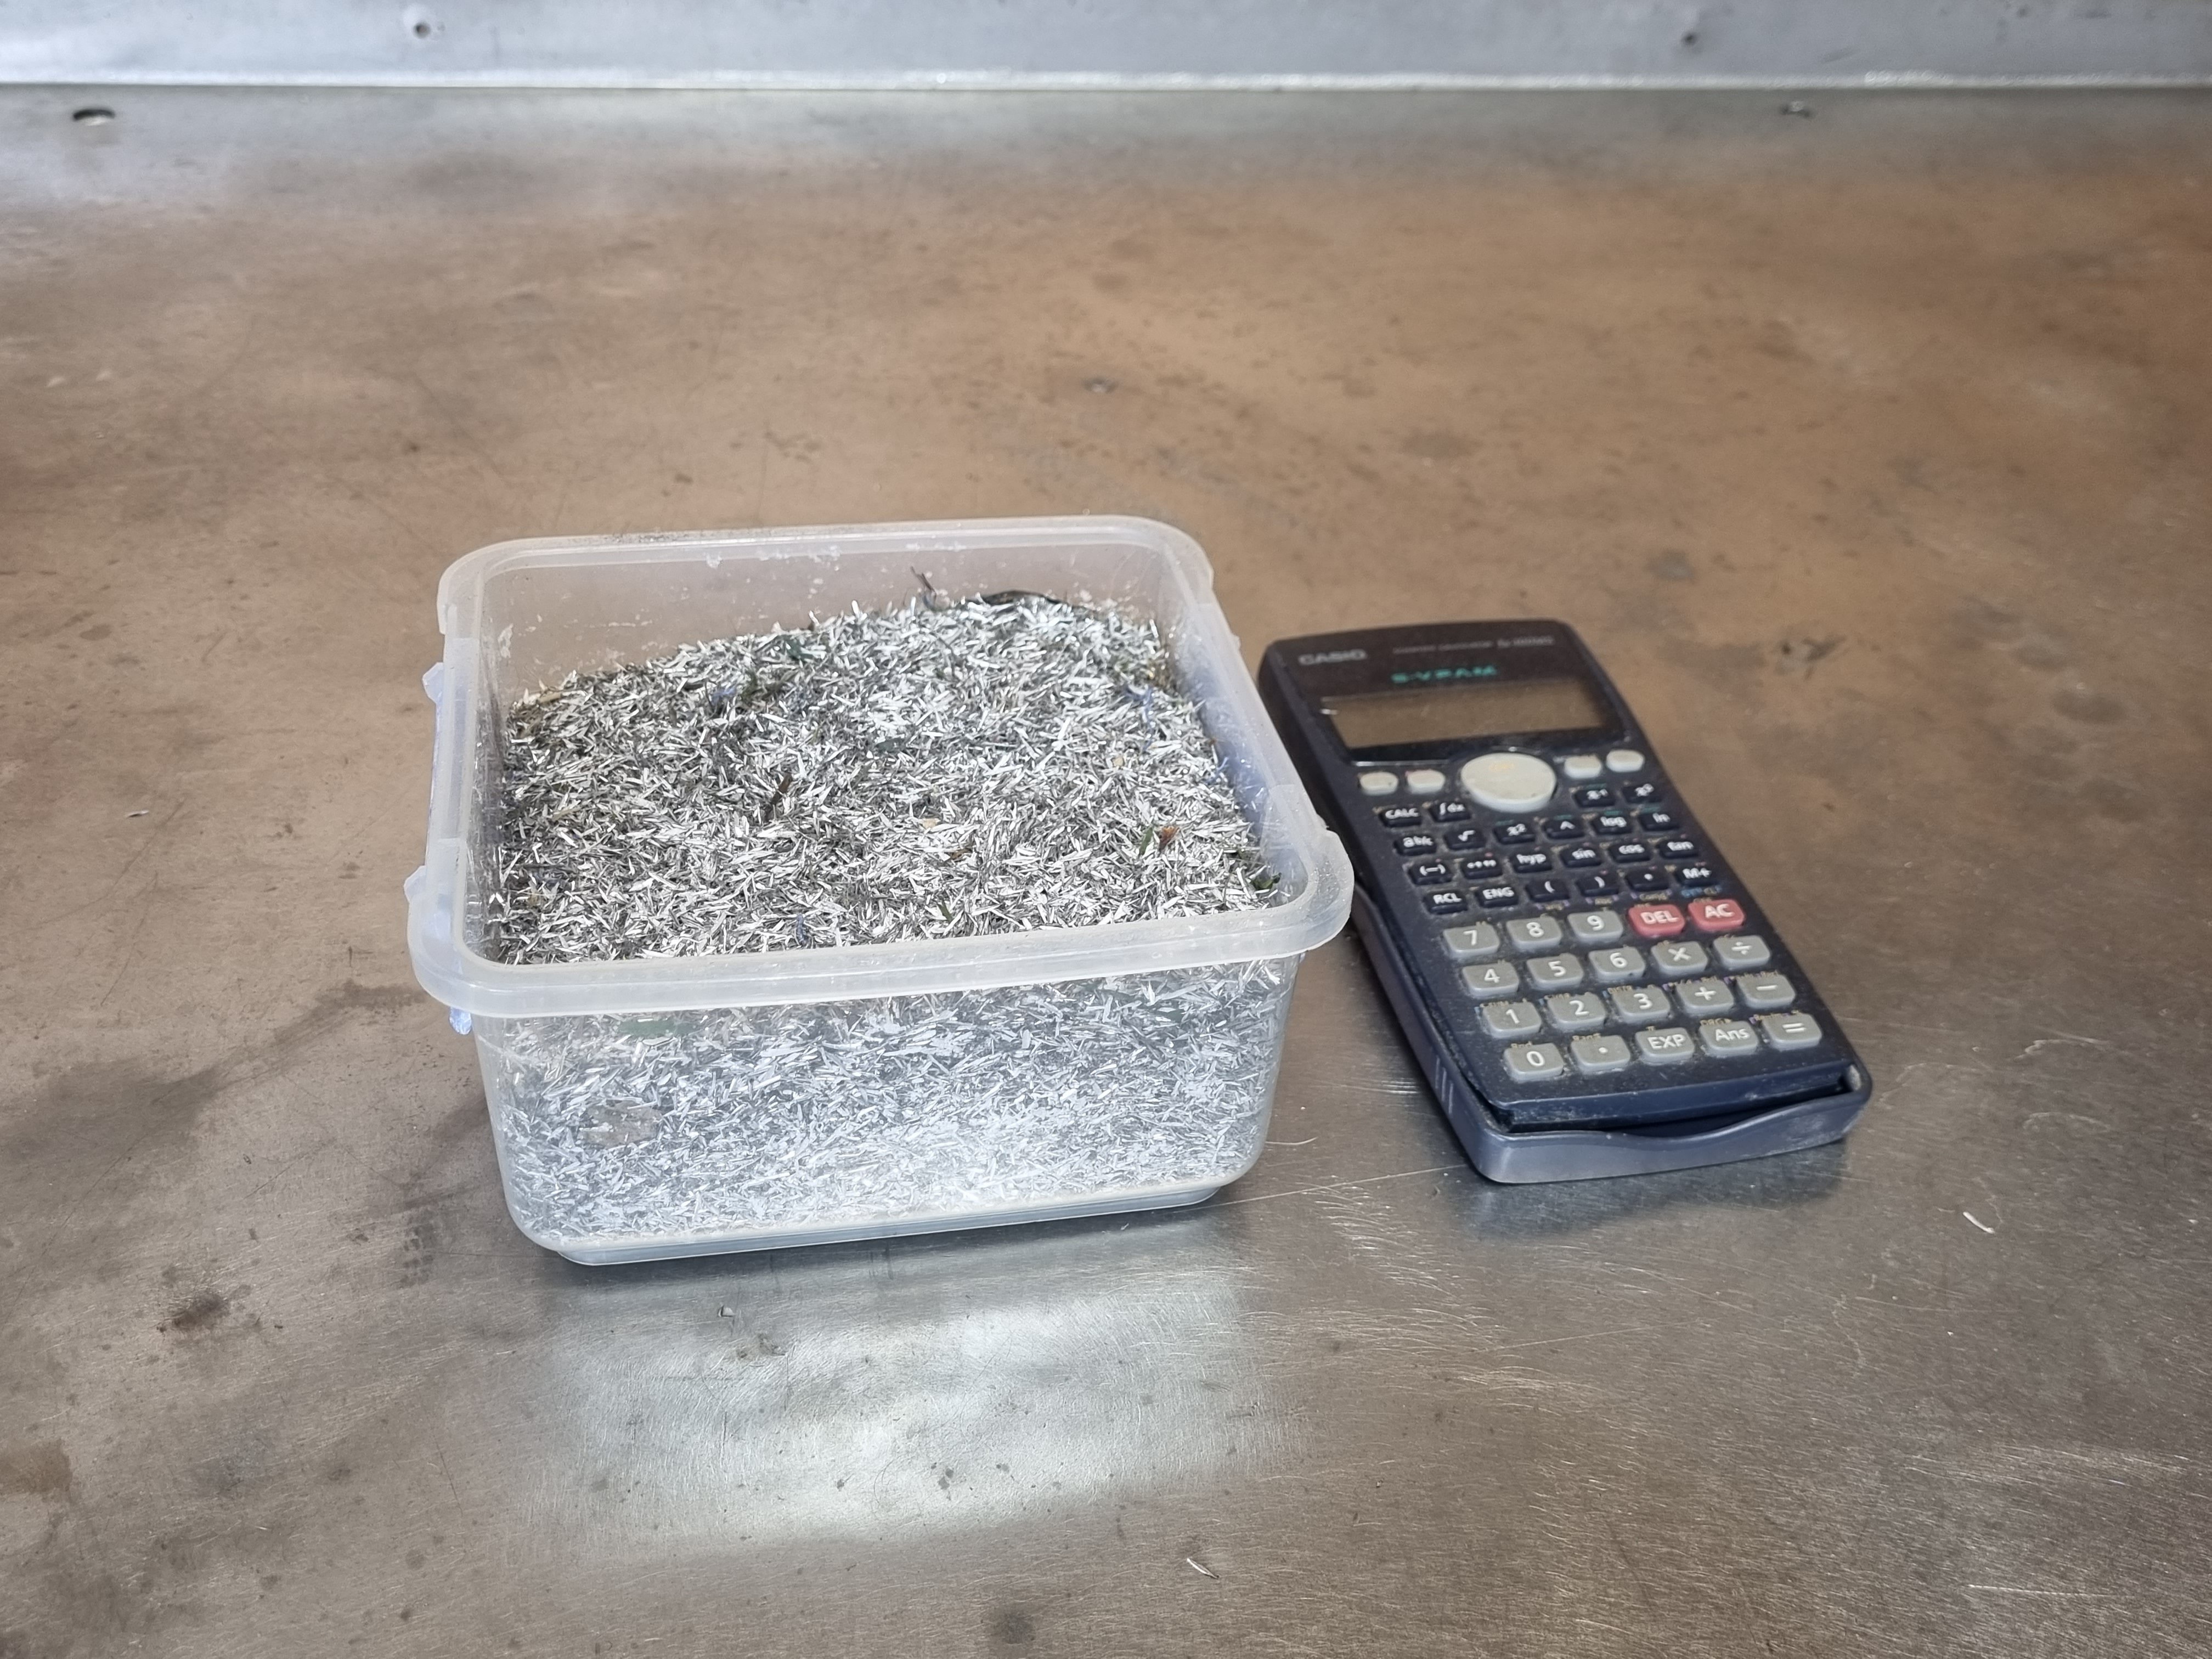
all finished. was a pretty messy job and took two days but its done now. i removed 400g of material from the ports. it will be interesting to see if it flows any better. ill get it back on the flow bench as soon as i can and see how it compares. fun fact, i ported one of these heads about 25 years ago and i cant remember how crazy i went with it (im guessing not very) but it made no difference to the motor at all. tbh that motor was a stock turd with stock intake and exhaust so porting it was a fucking waste of time but that was the style at the time. i think i planed the head to try to raise compression but that's a waste of time too given the stock piston design. ANYWHO, thats done. i took the exhaust from about 31mm to 37mm and removed a fair amount of material from the bowel, the intake went from around 31 to 38mm with the same stock removal from the bowel area.
5 points
-
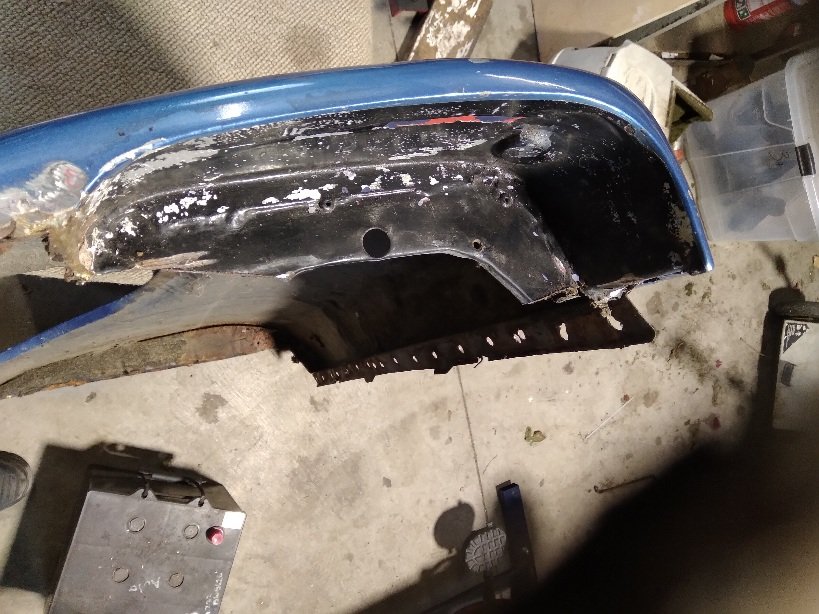
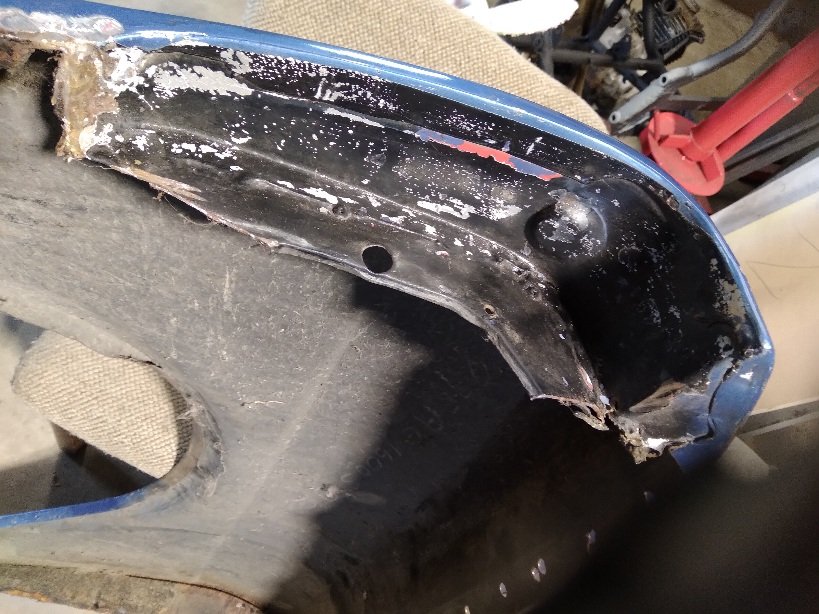
Loving this time off at the moment. Decided I wasn't going to use the flange I made yesterday and decided to make it in two pieces instead. So I spent a few hours in the shed bending and cutting panel steel. I fucked it up at the top and had to weld on a little slither of steel. Super happy how it turned out. Next time I will be welding the flange and the top part on. I included picture of the other guard and what I'm trying to recreate. Cheers .
3 points
-
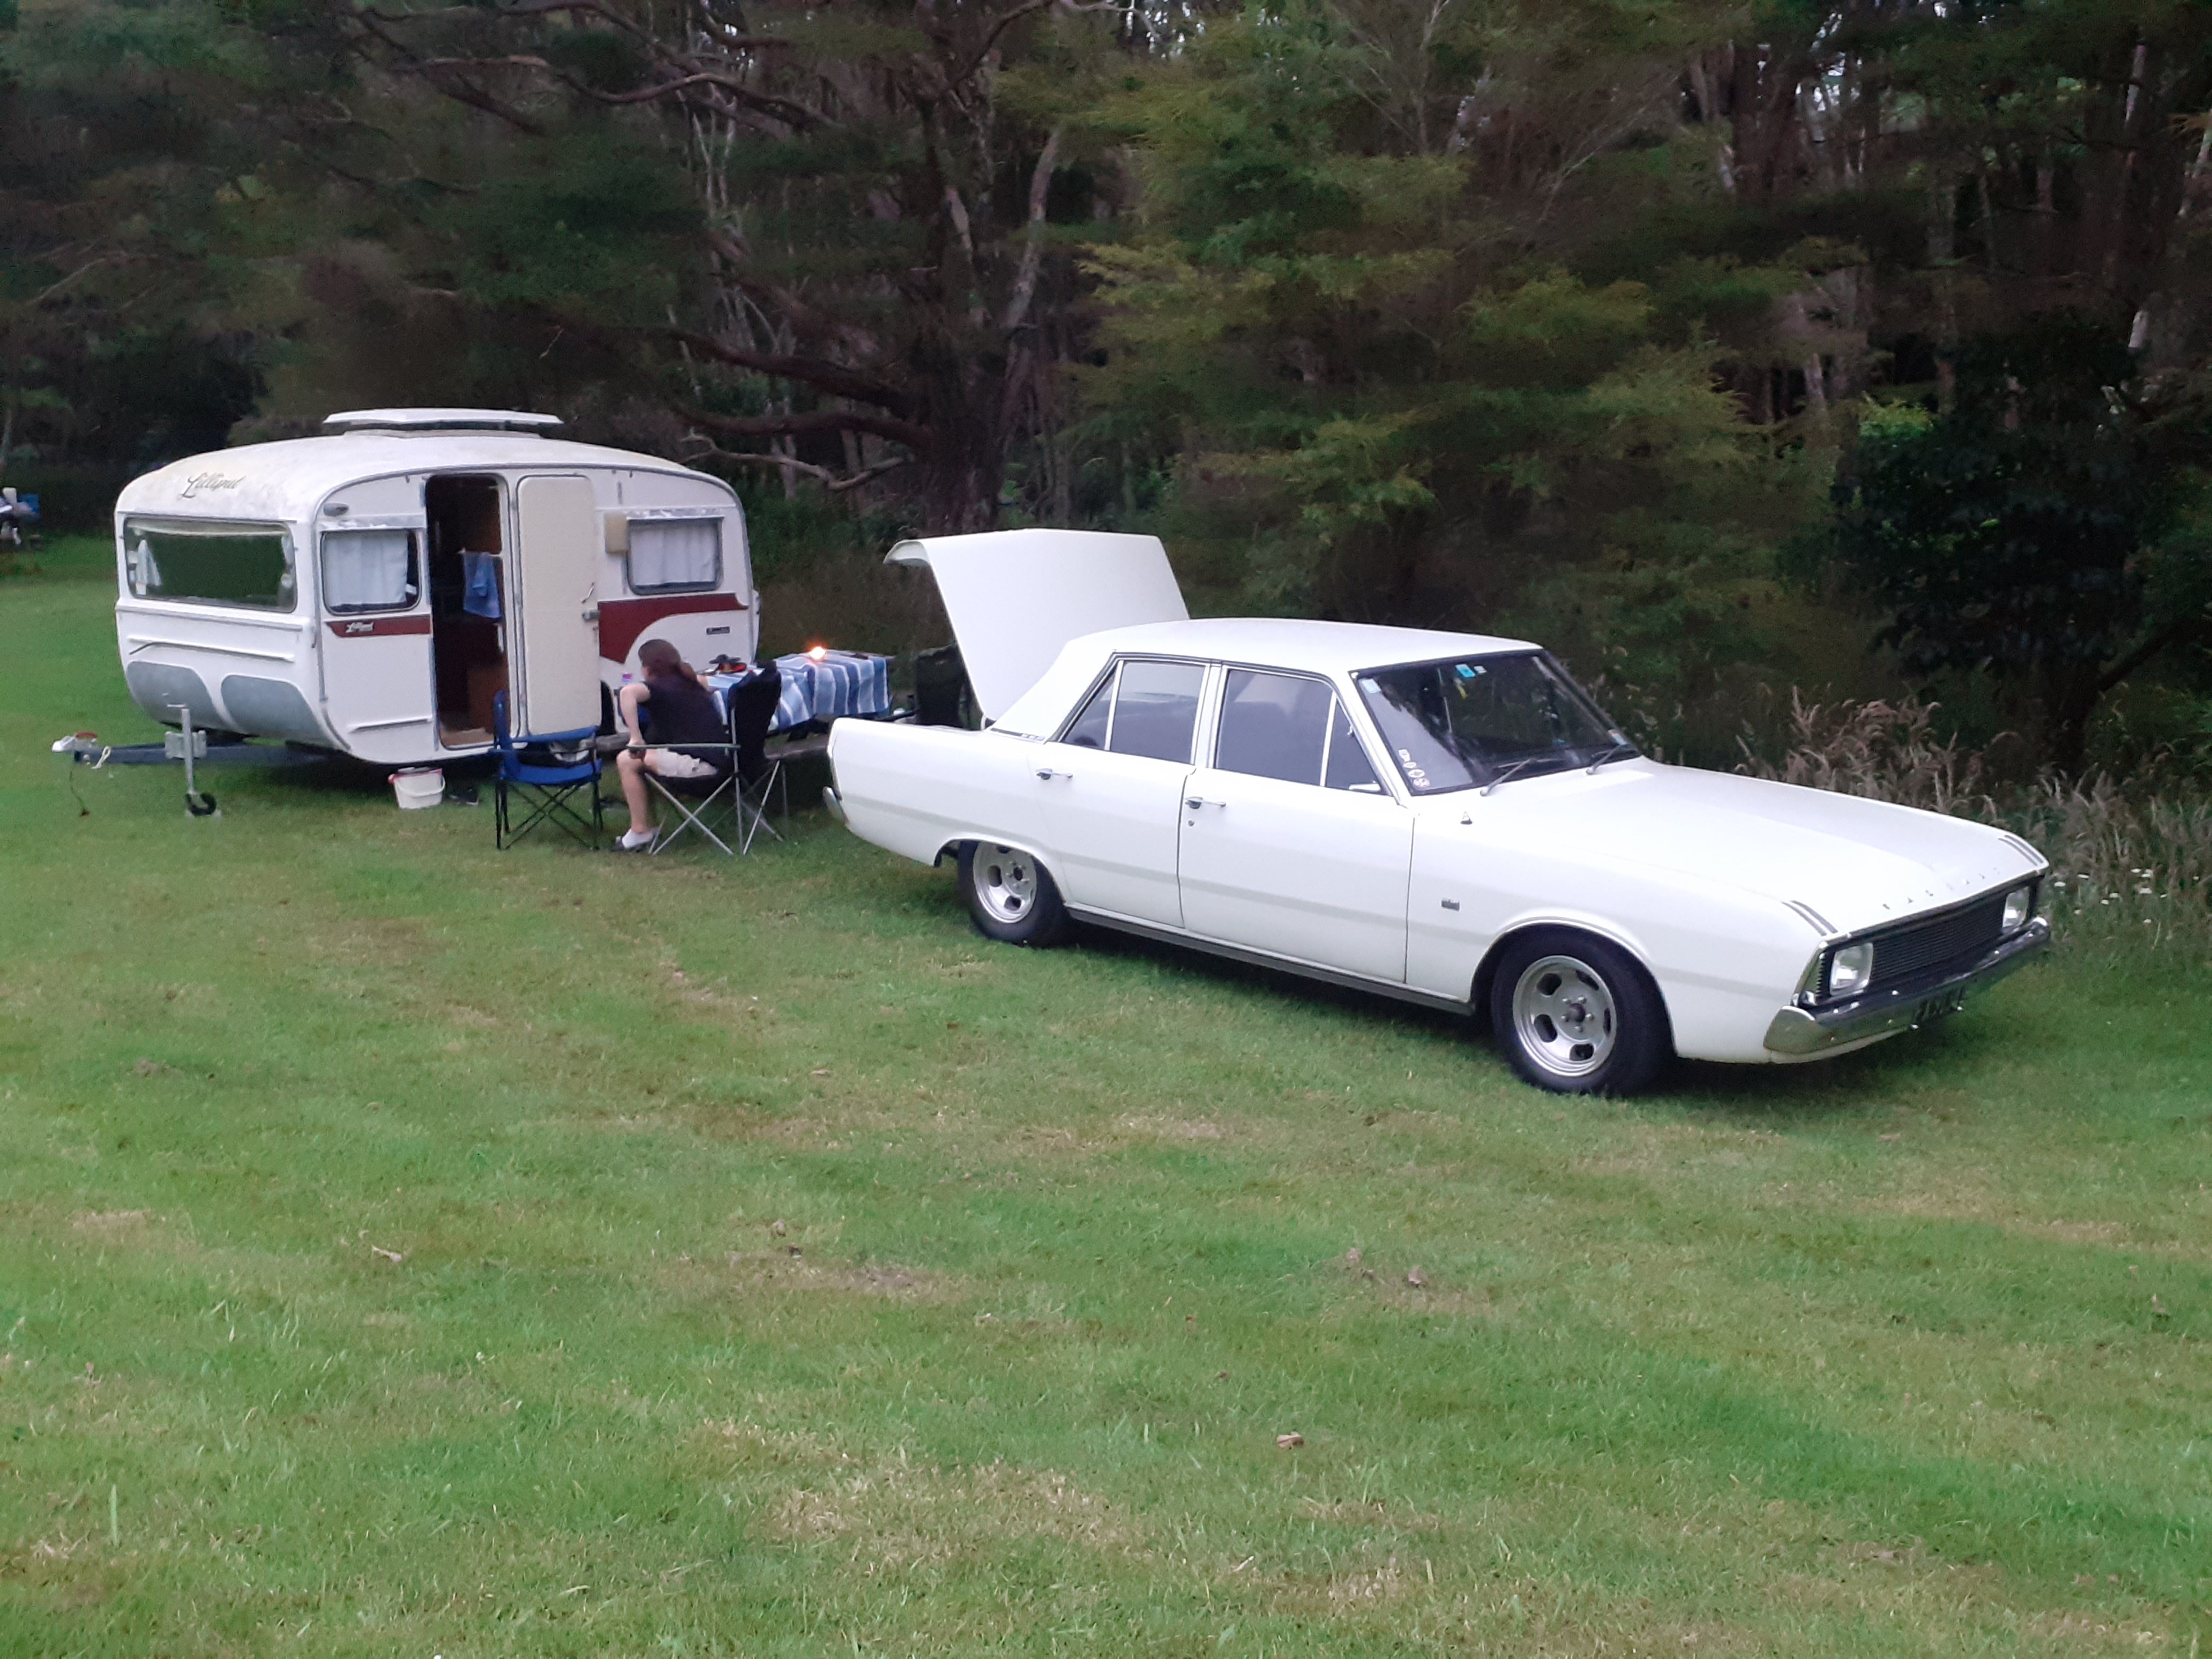
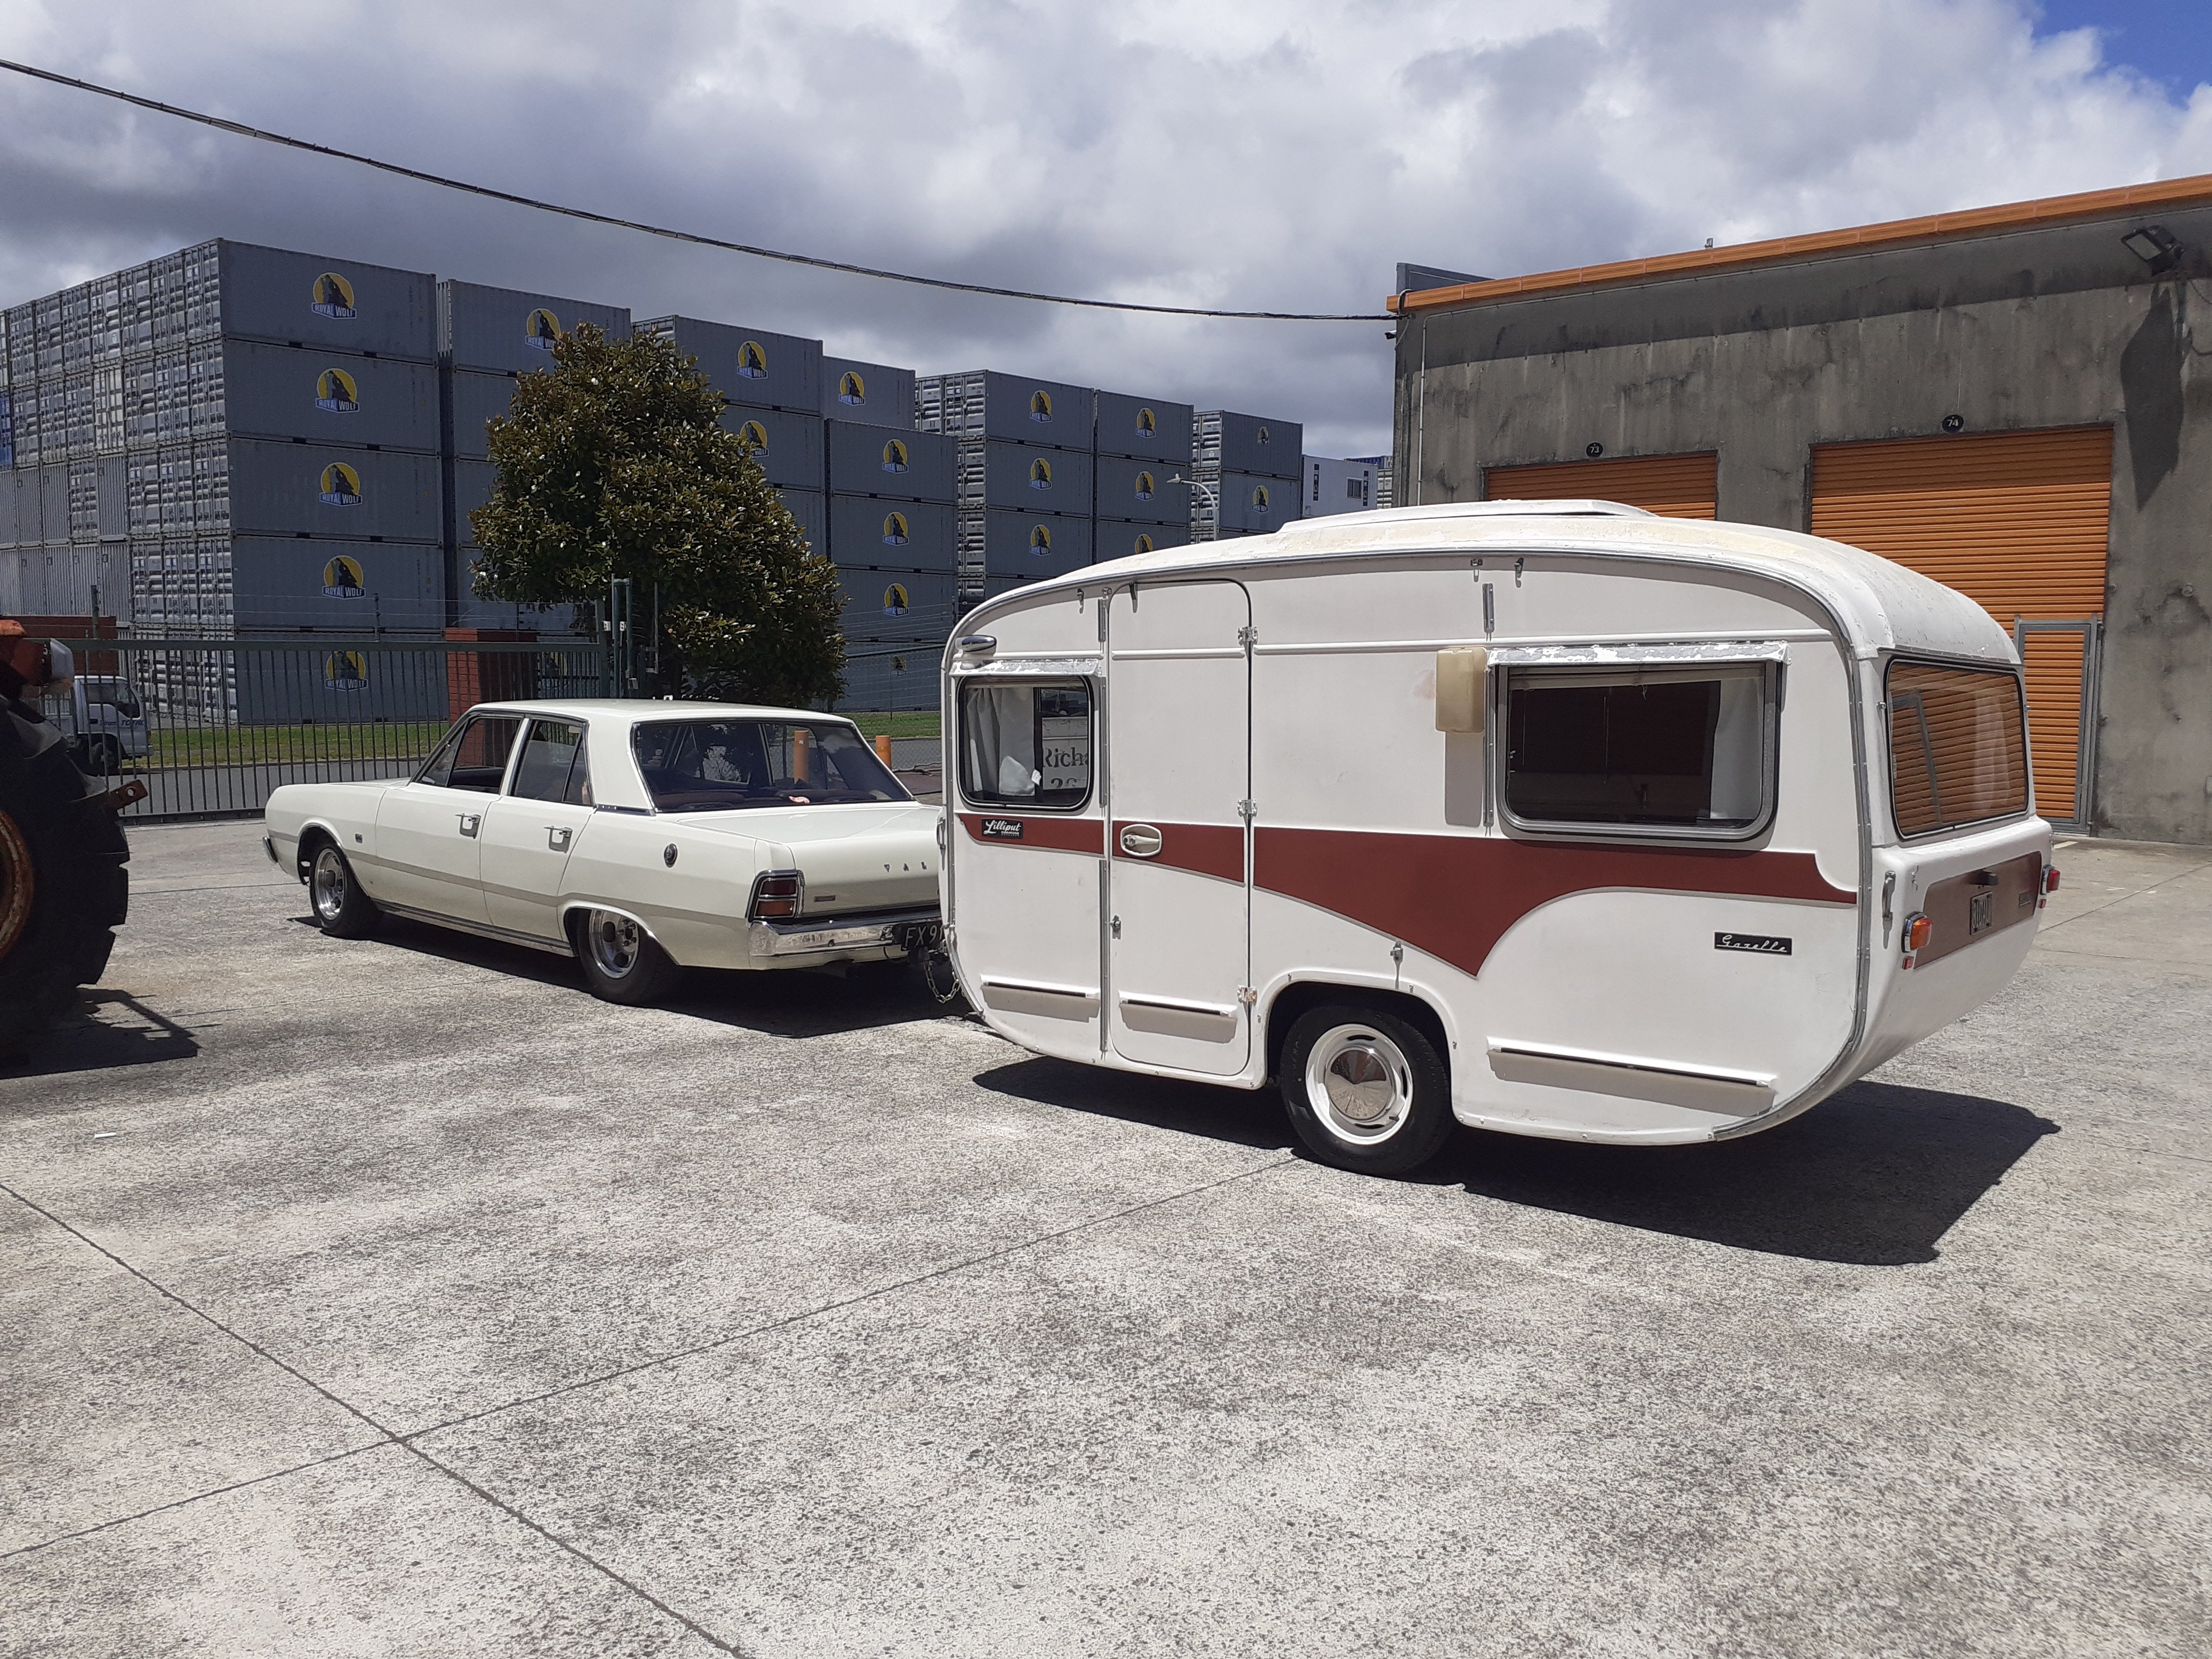
First trip done. VG tows it better on the open road than pootling around town, no mirrors or power steering or power brakes is a little bit challenging for maneuvering though. Got a bit of a list of things that could be improved/finished
3 points
-
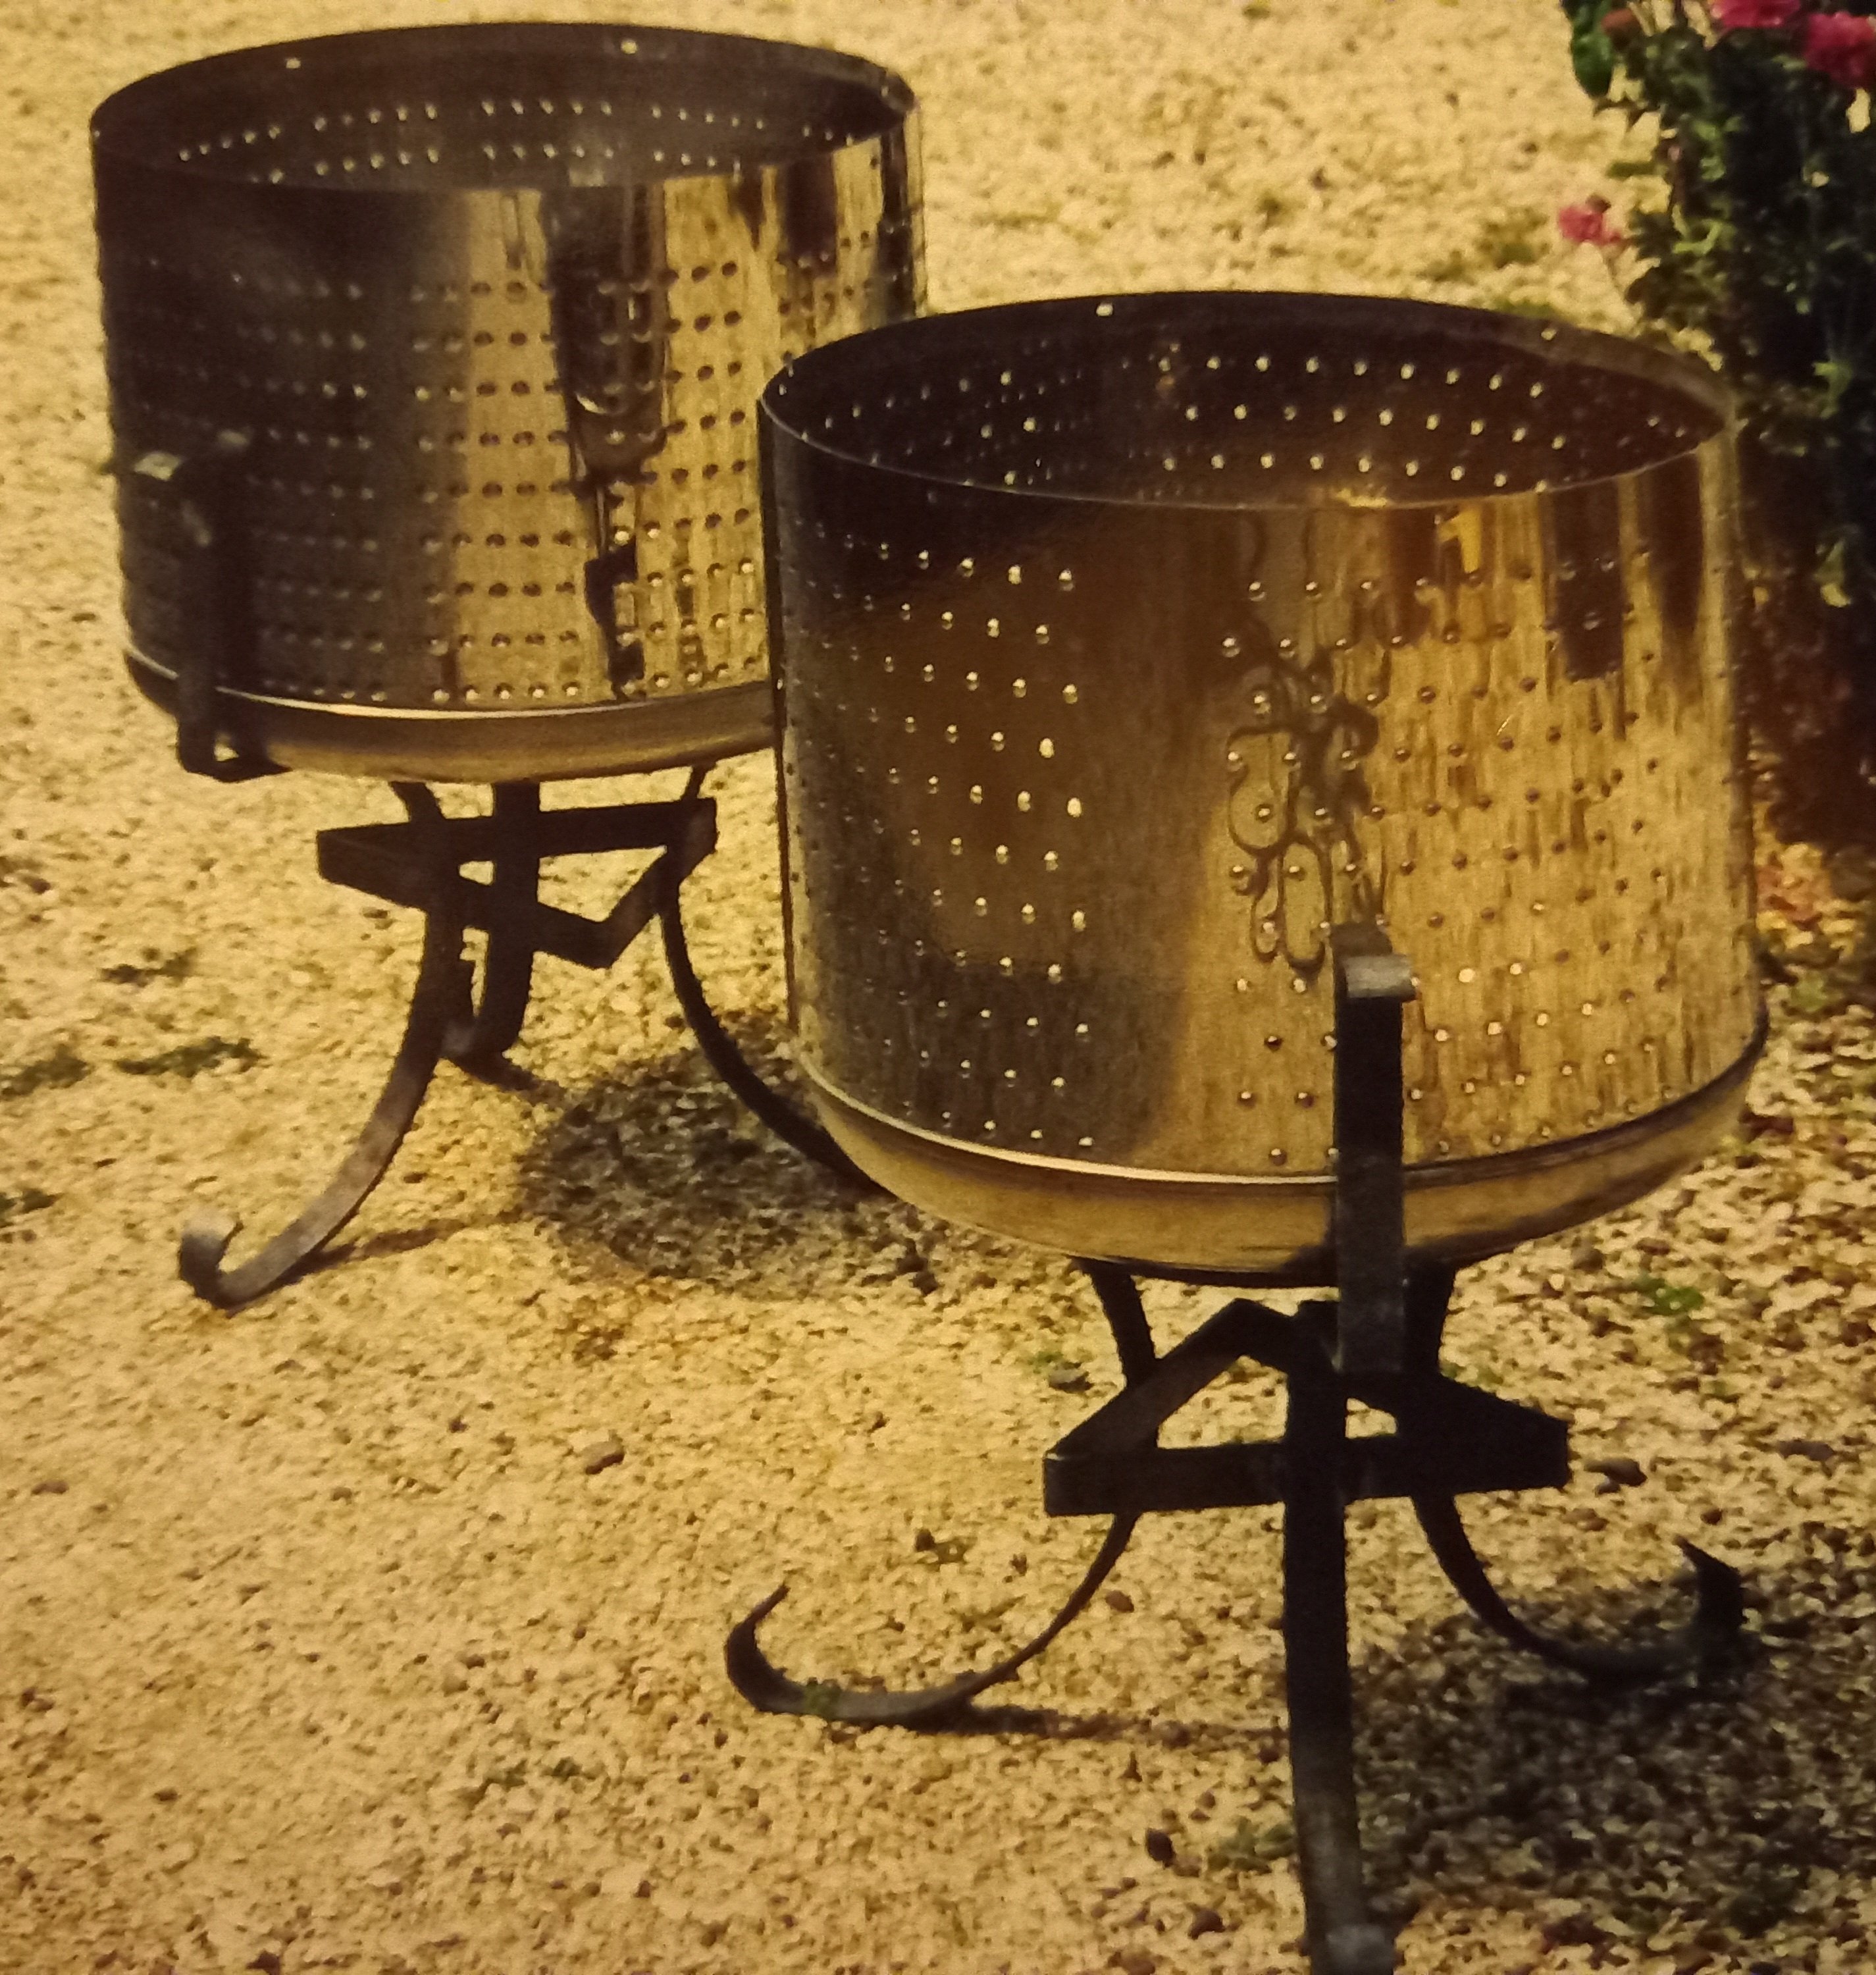
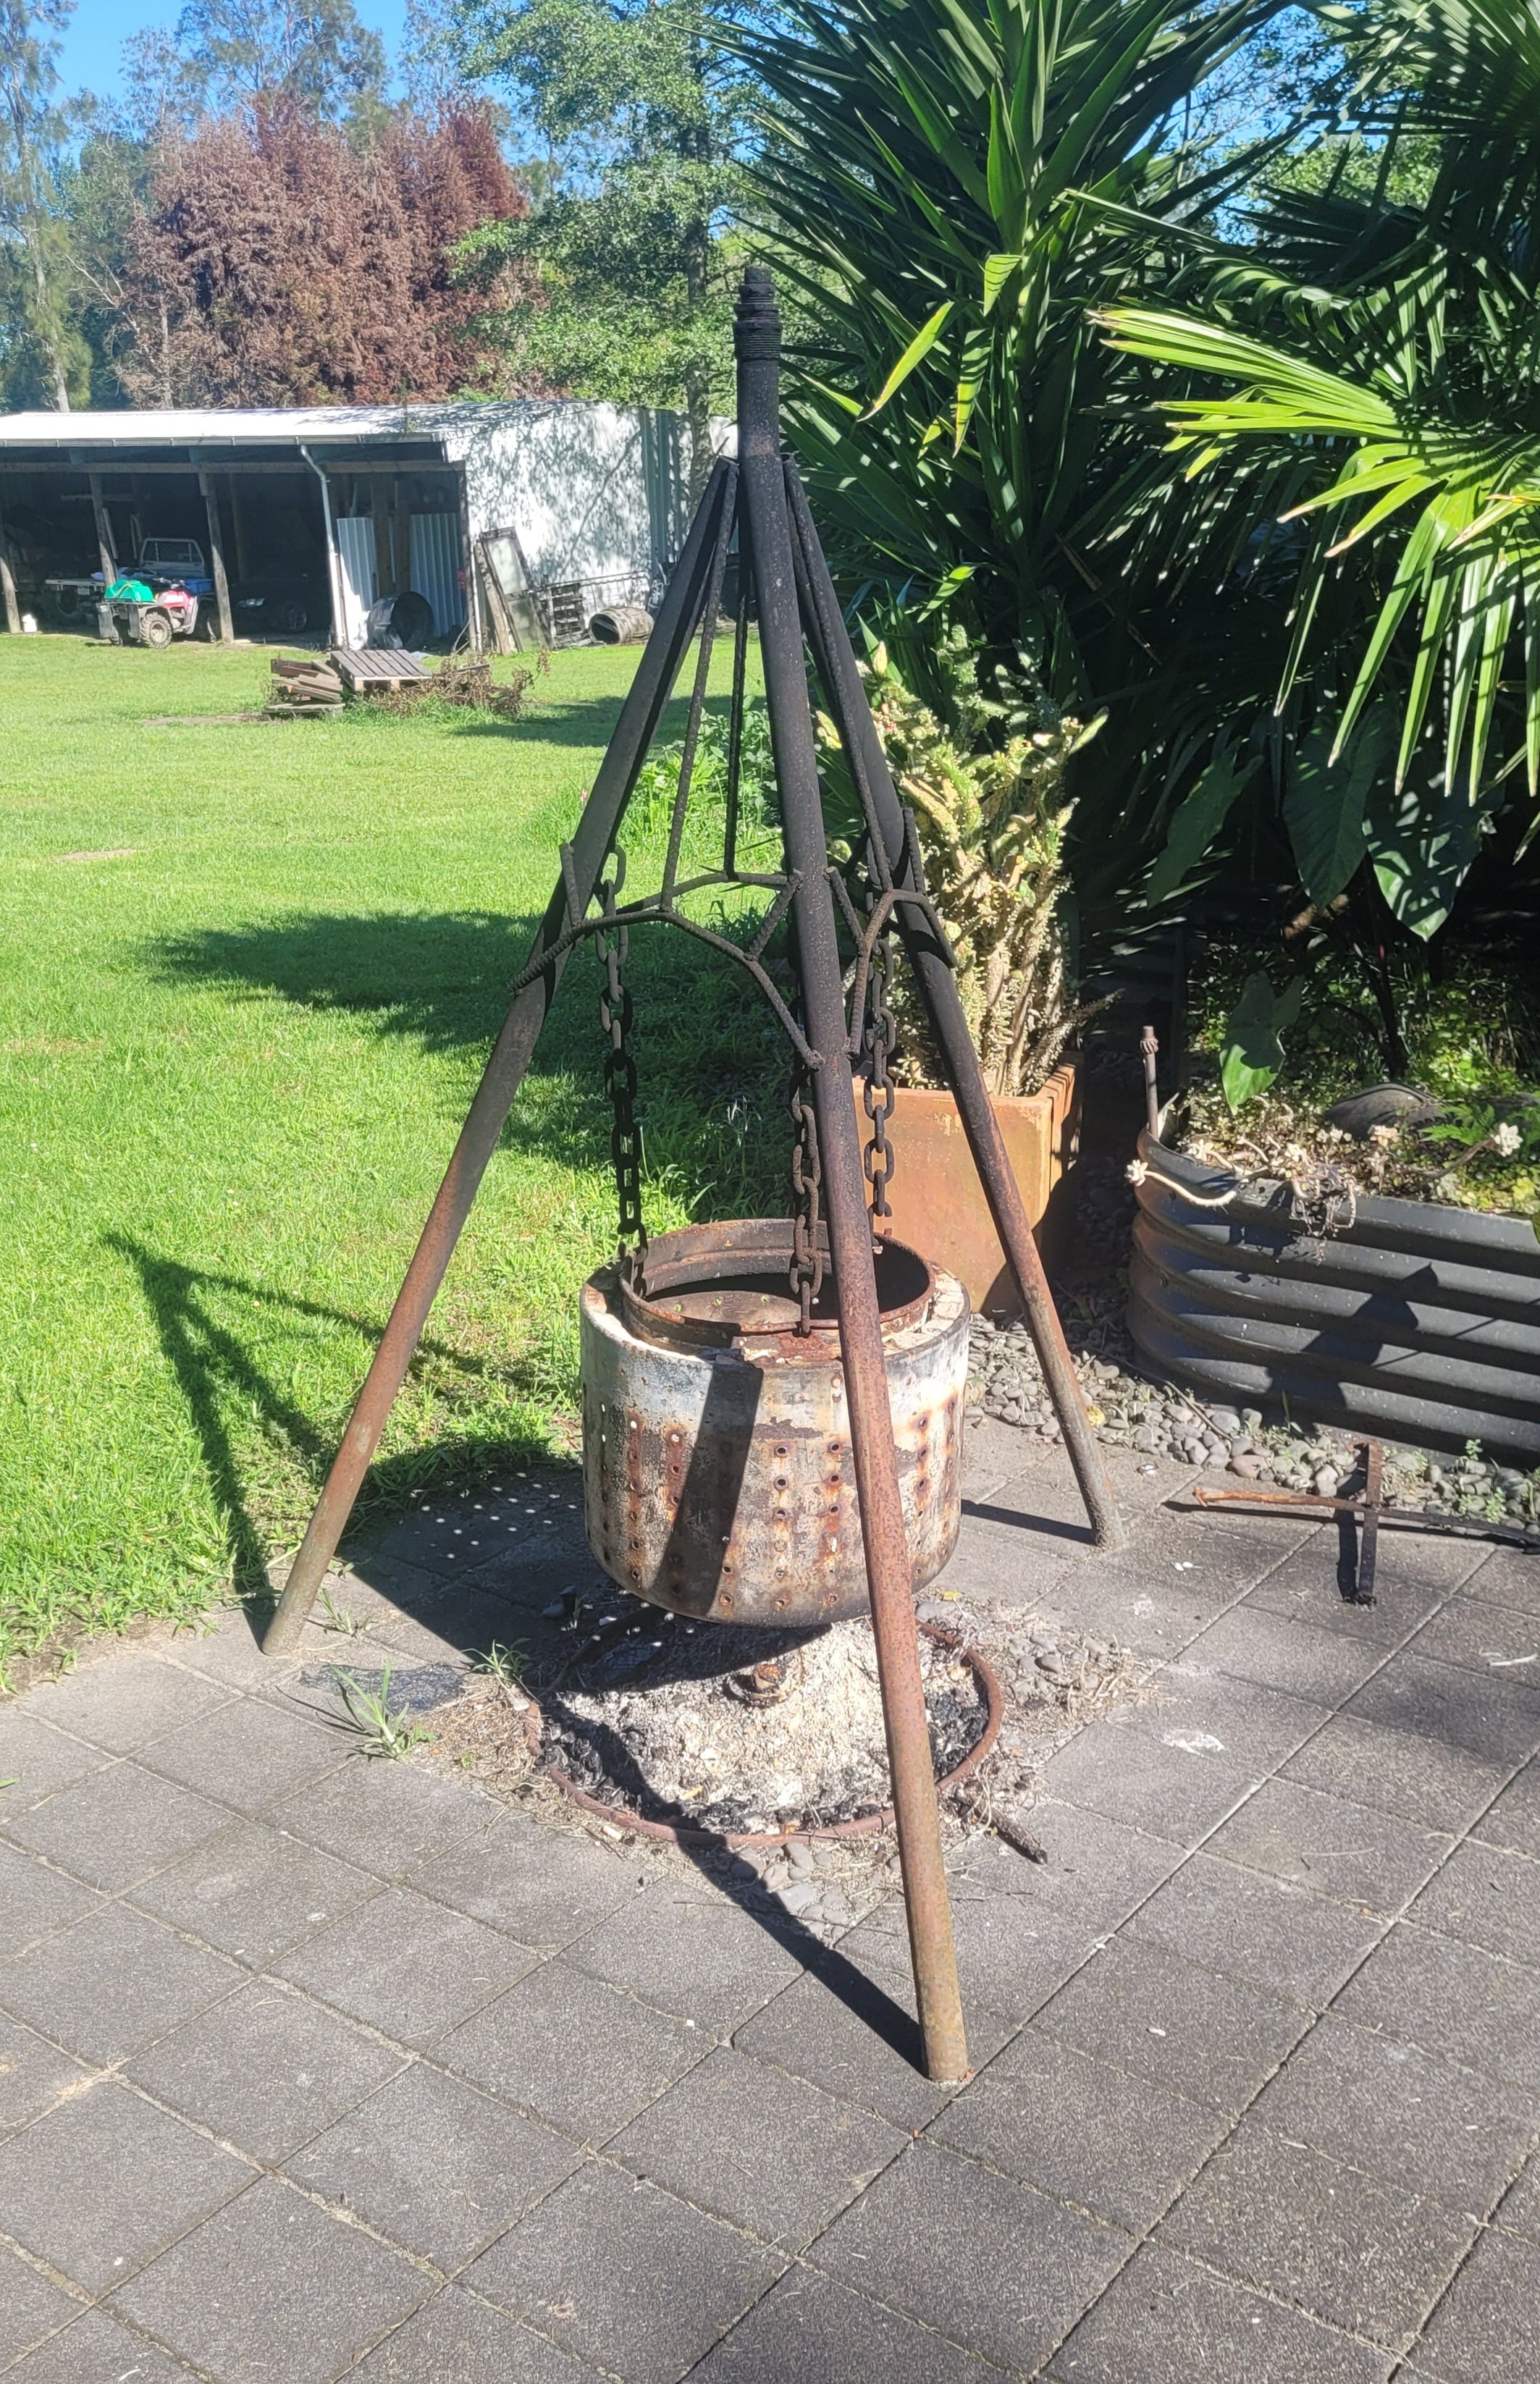
Braziers I made from washing mechine tubs
3 points
-
The Evo VR-4 core engine is all the same as the regular VR-4 engine anyway, the only differences are the bolt ons such as injectors and turbo etc.2 points
-
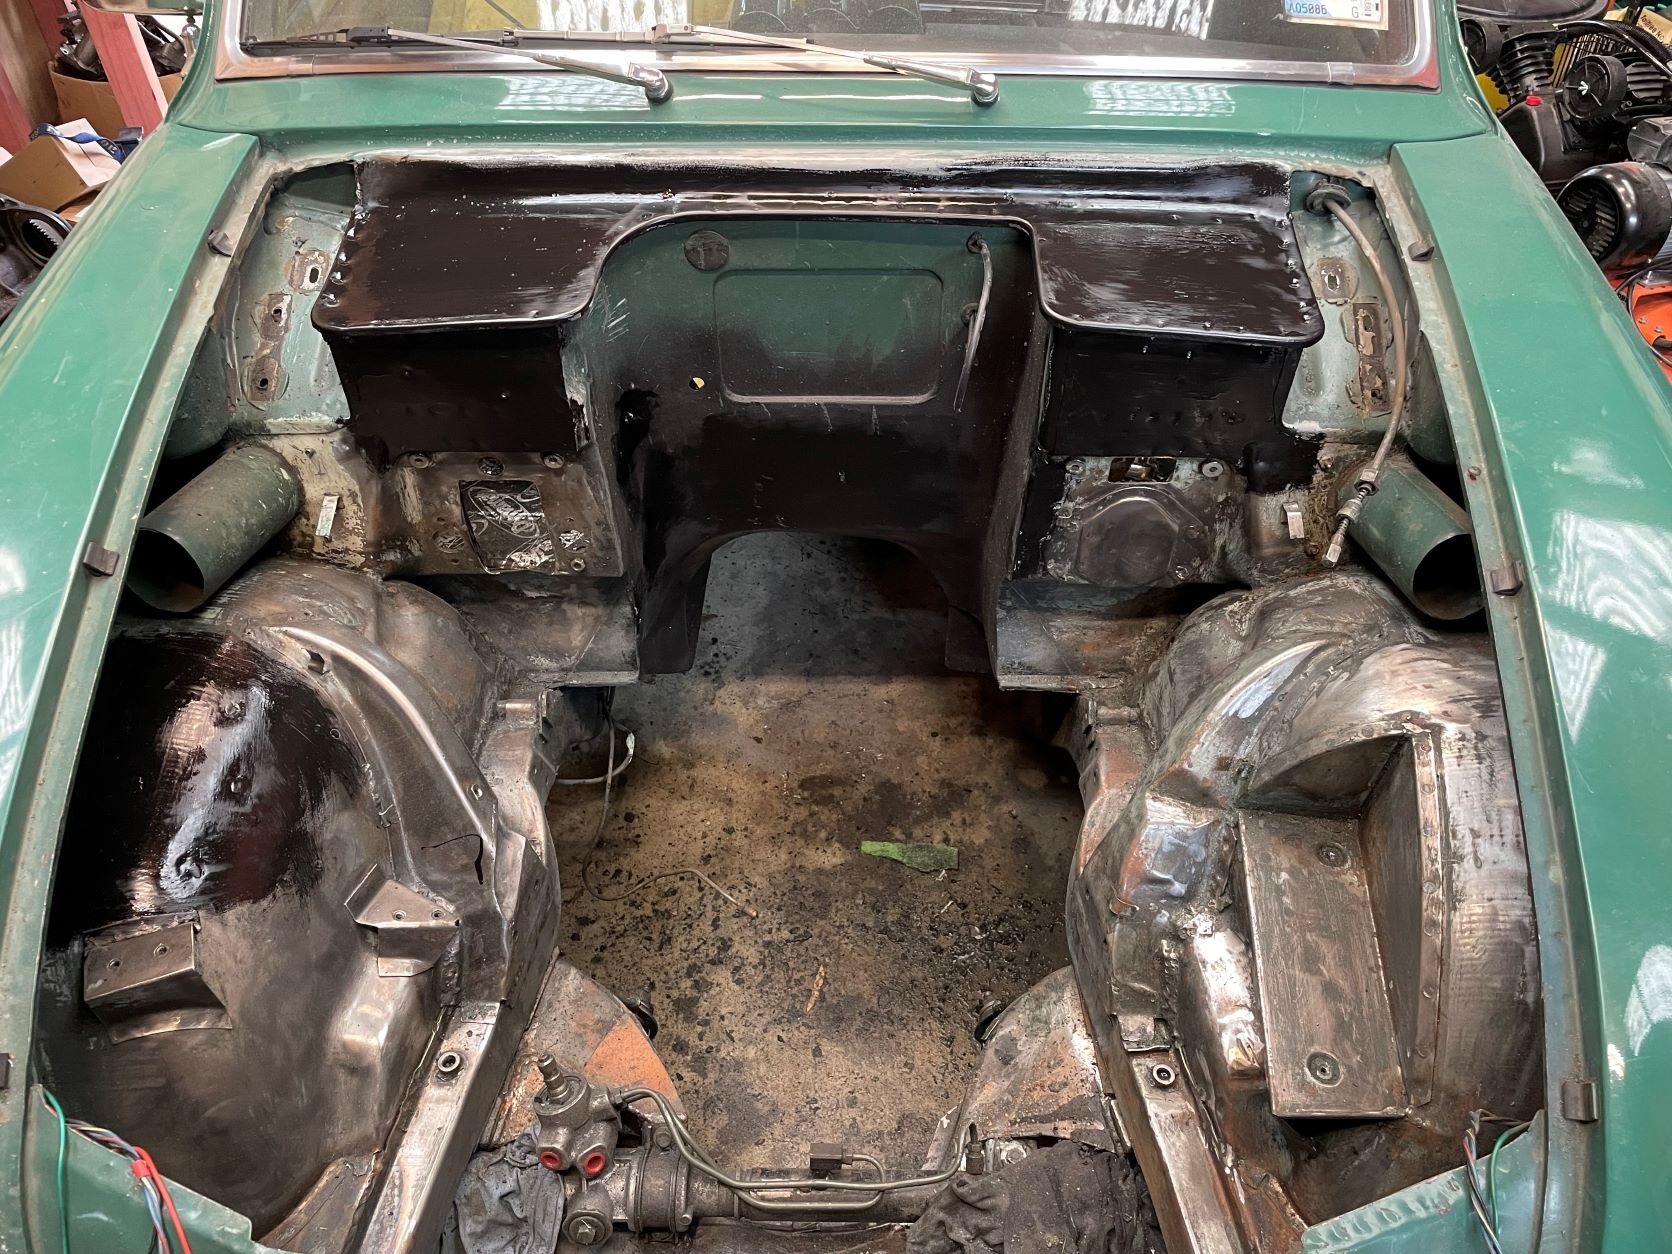
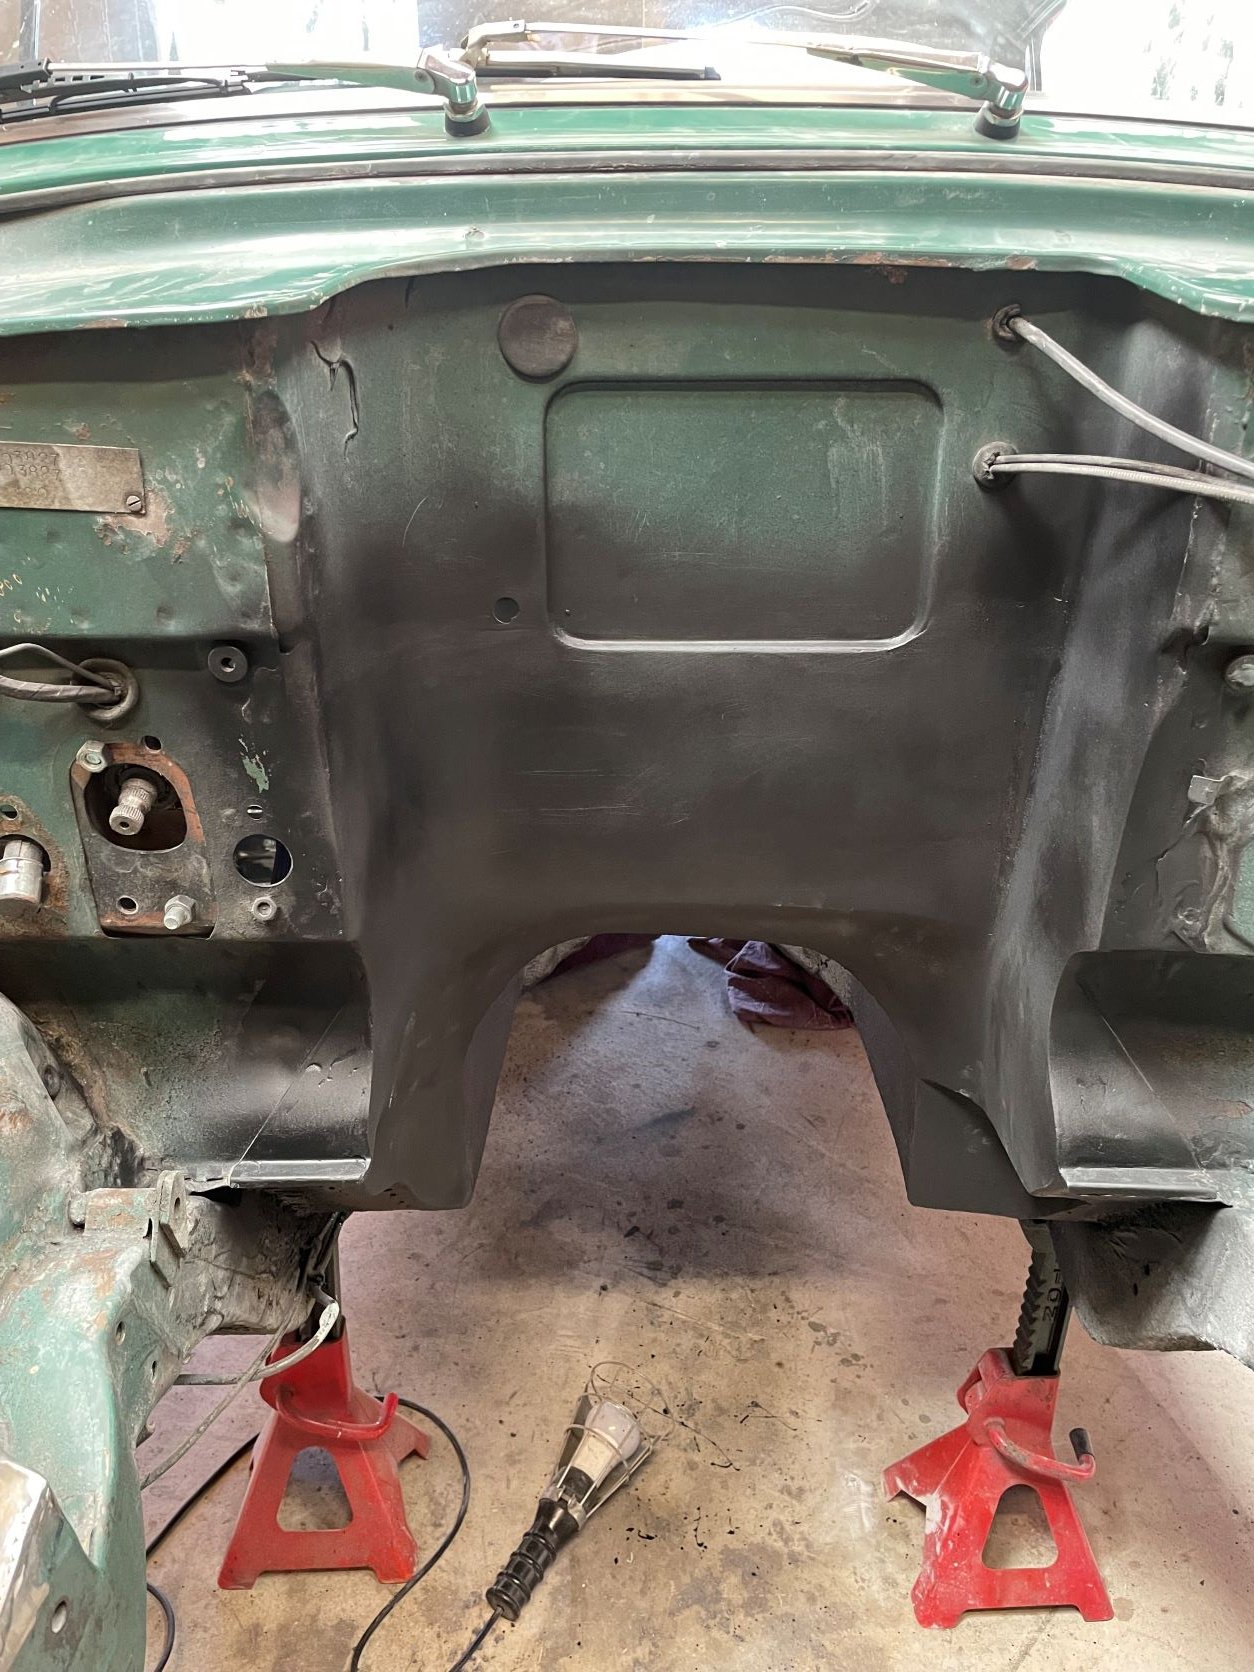
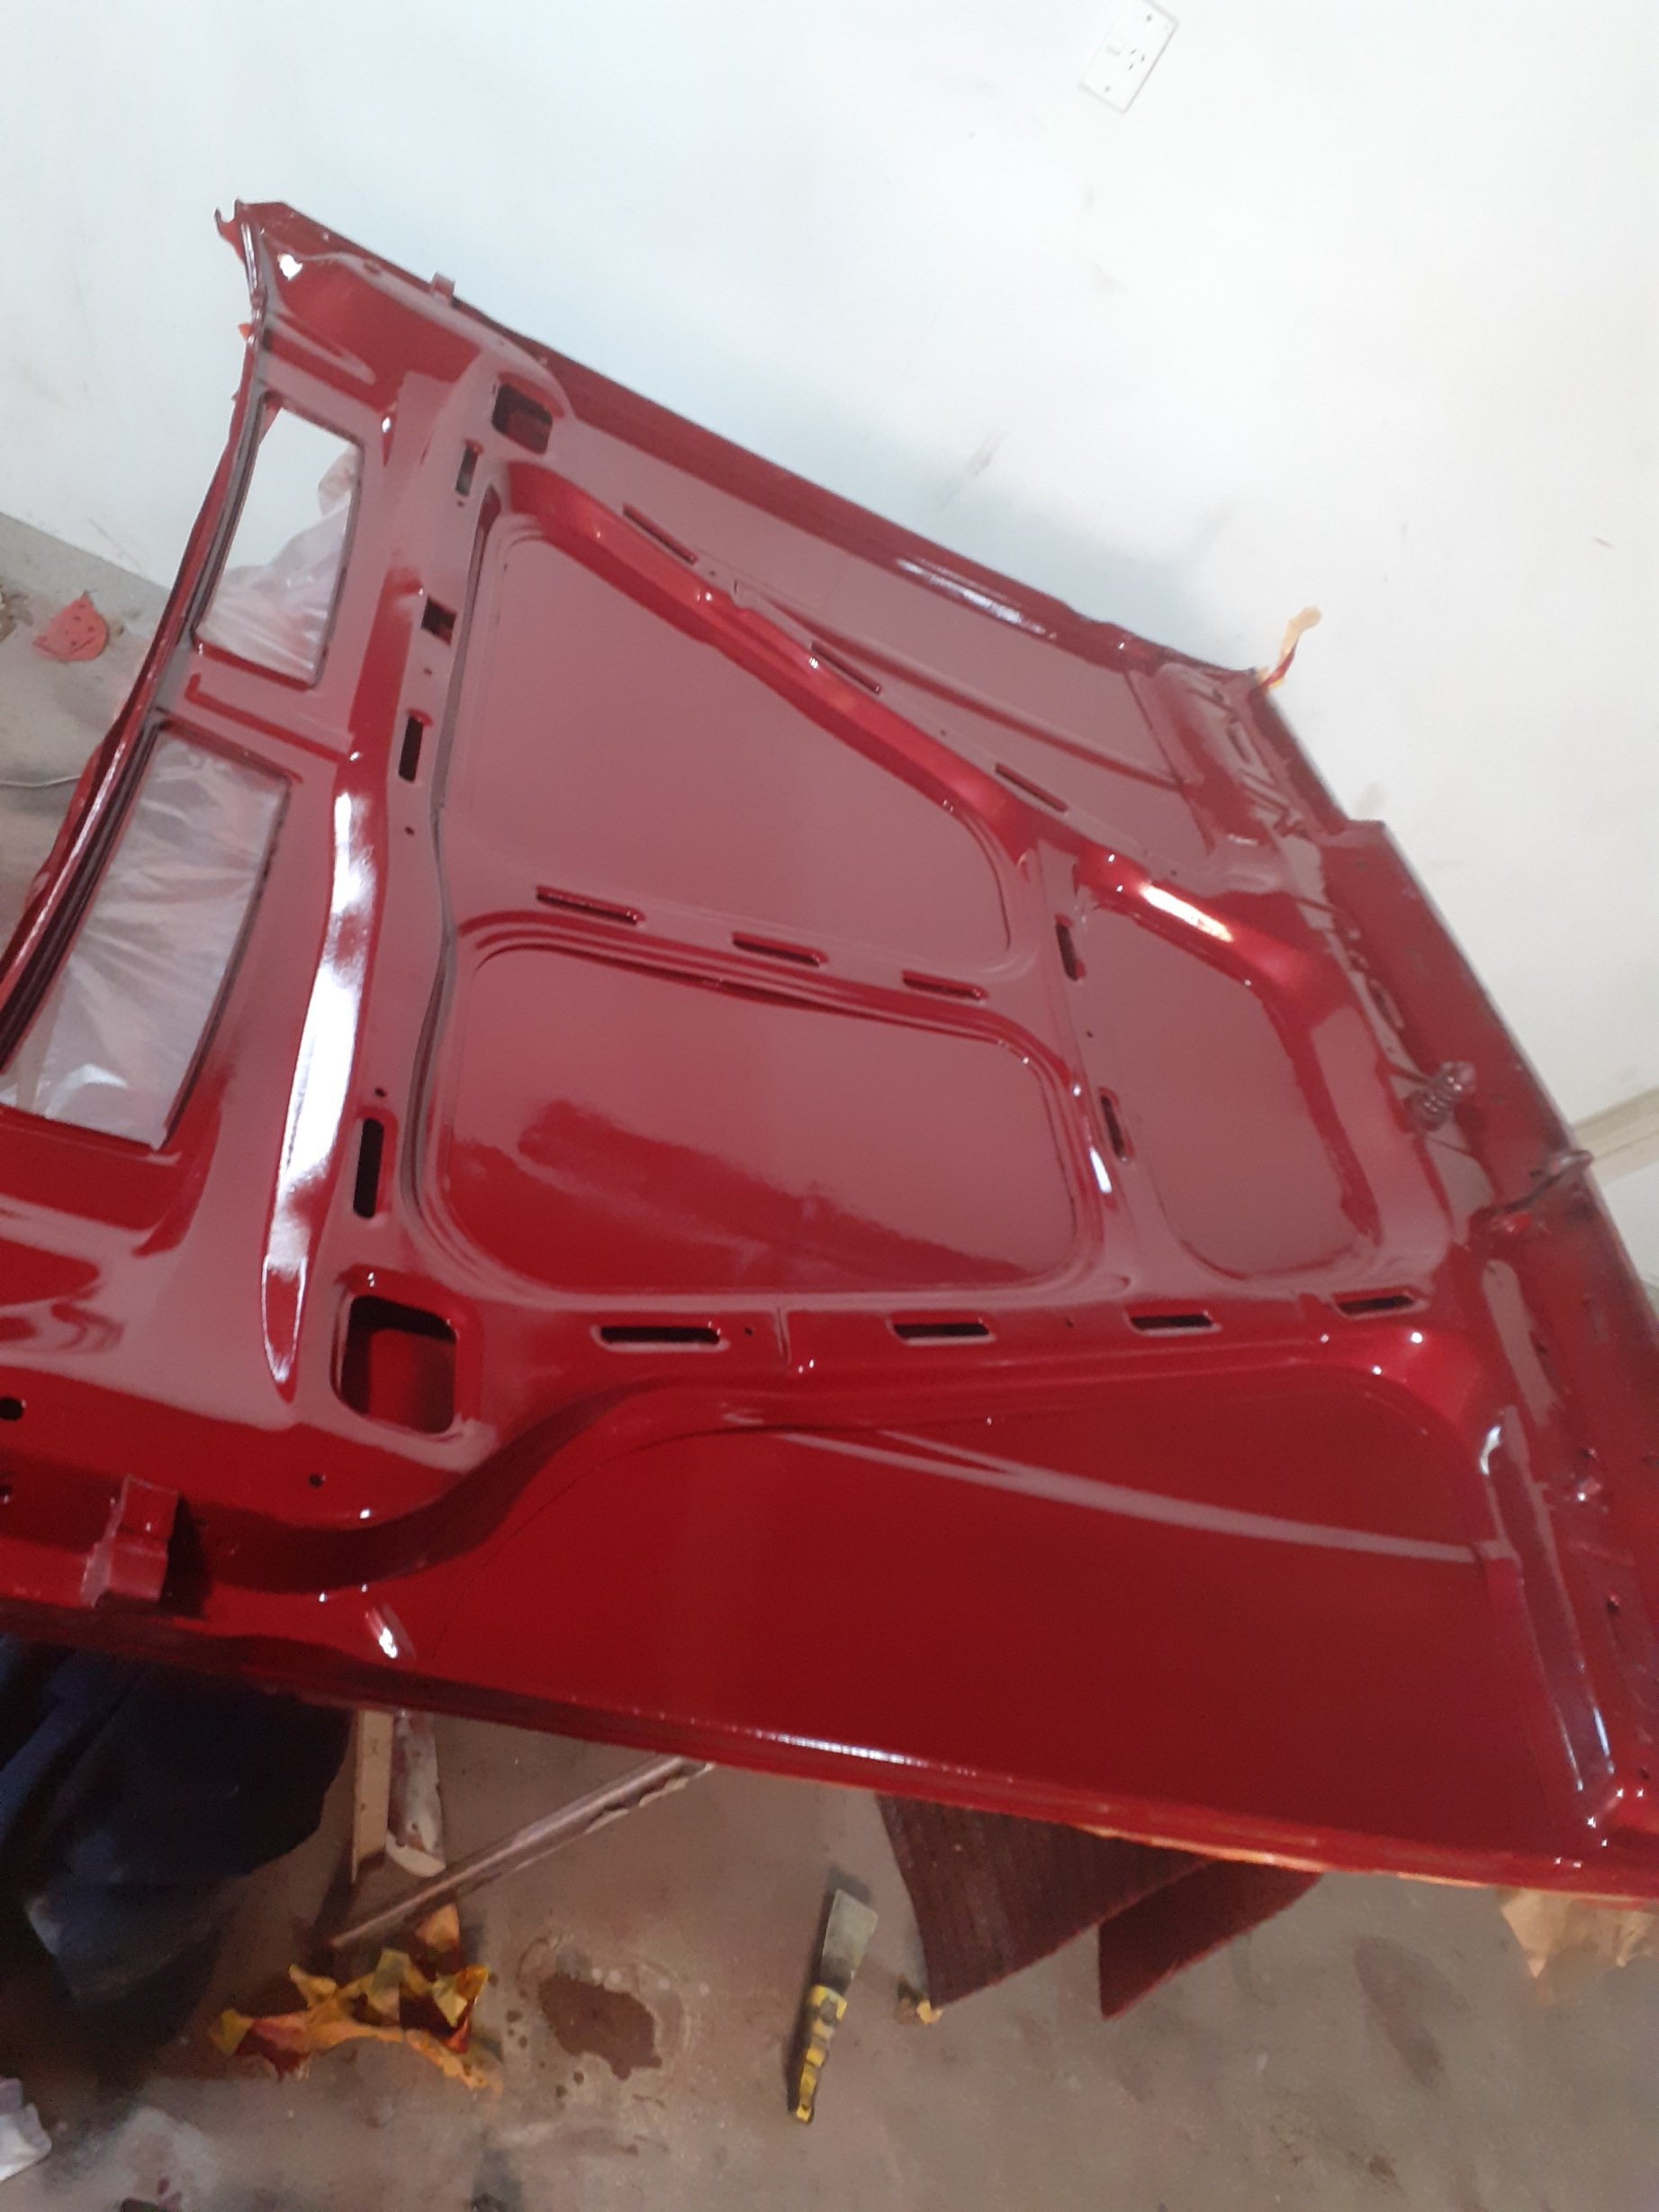
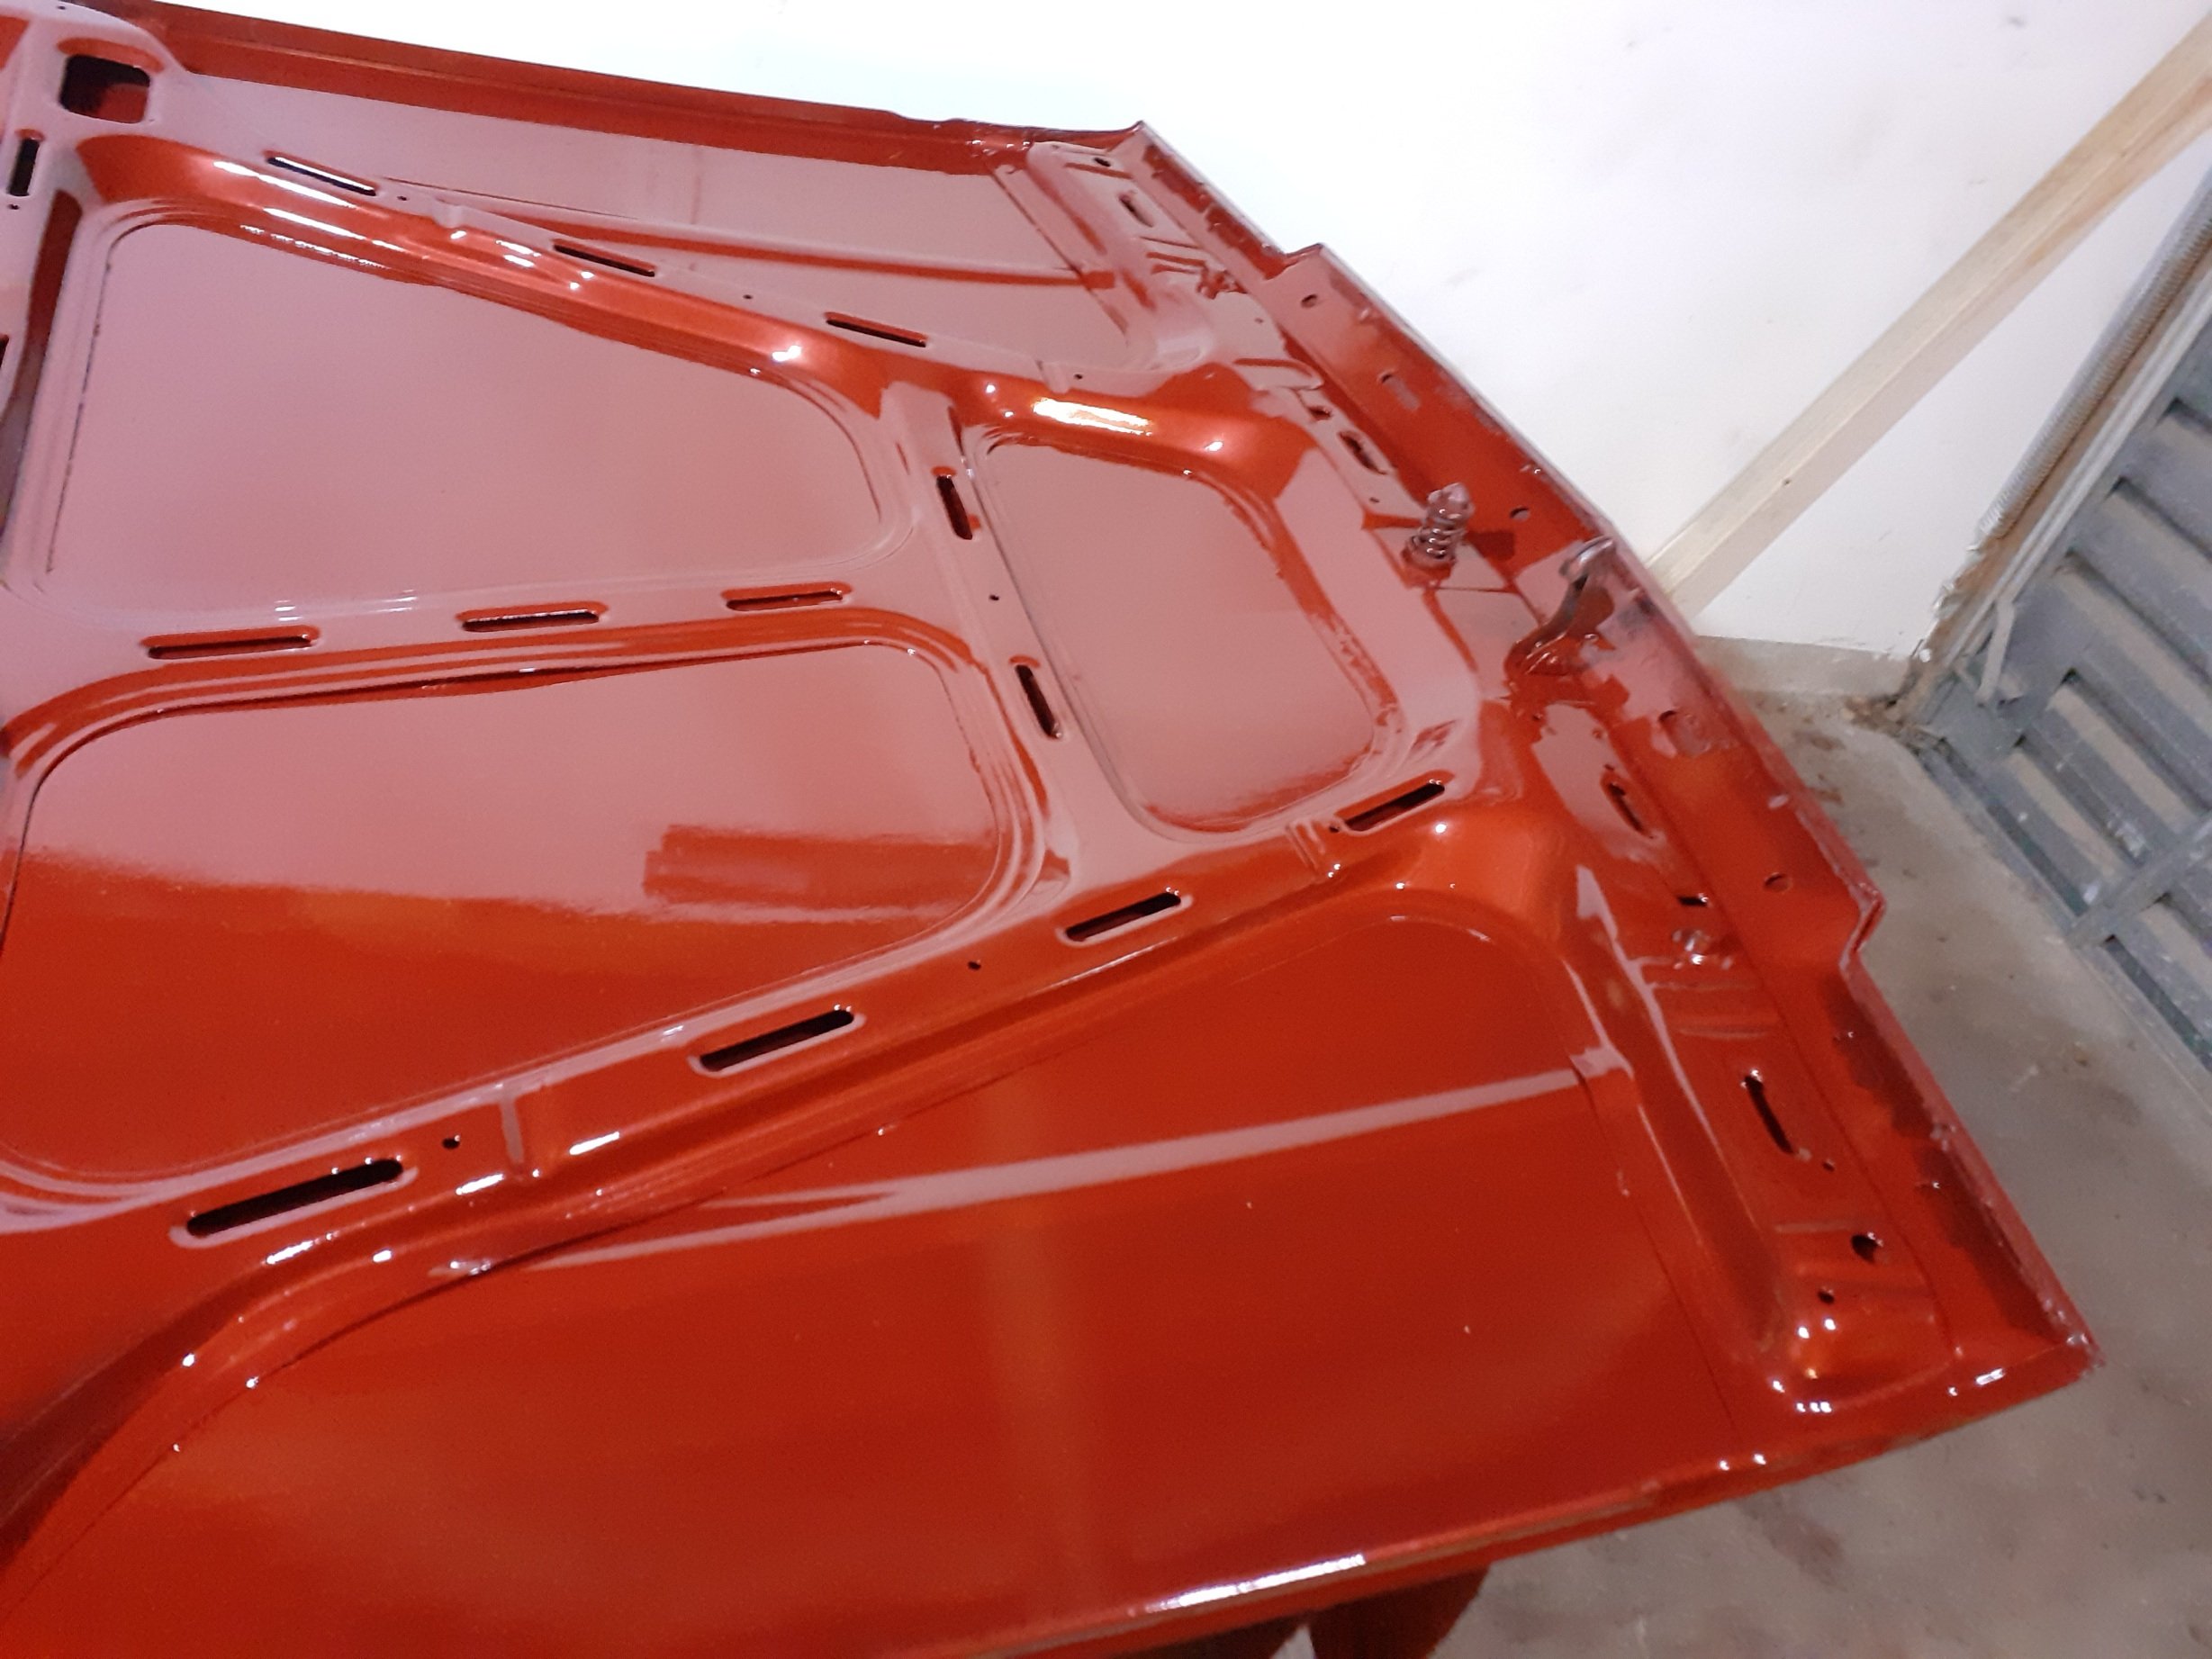
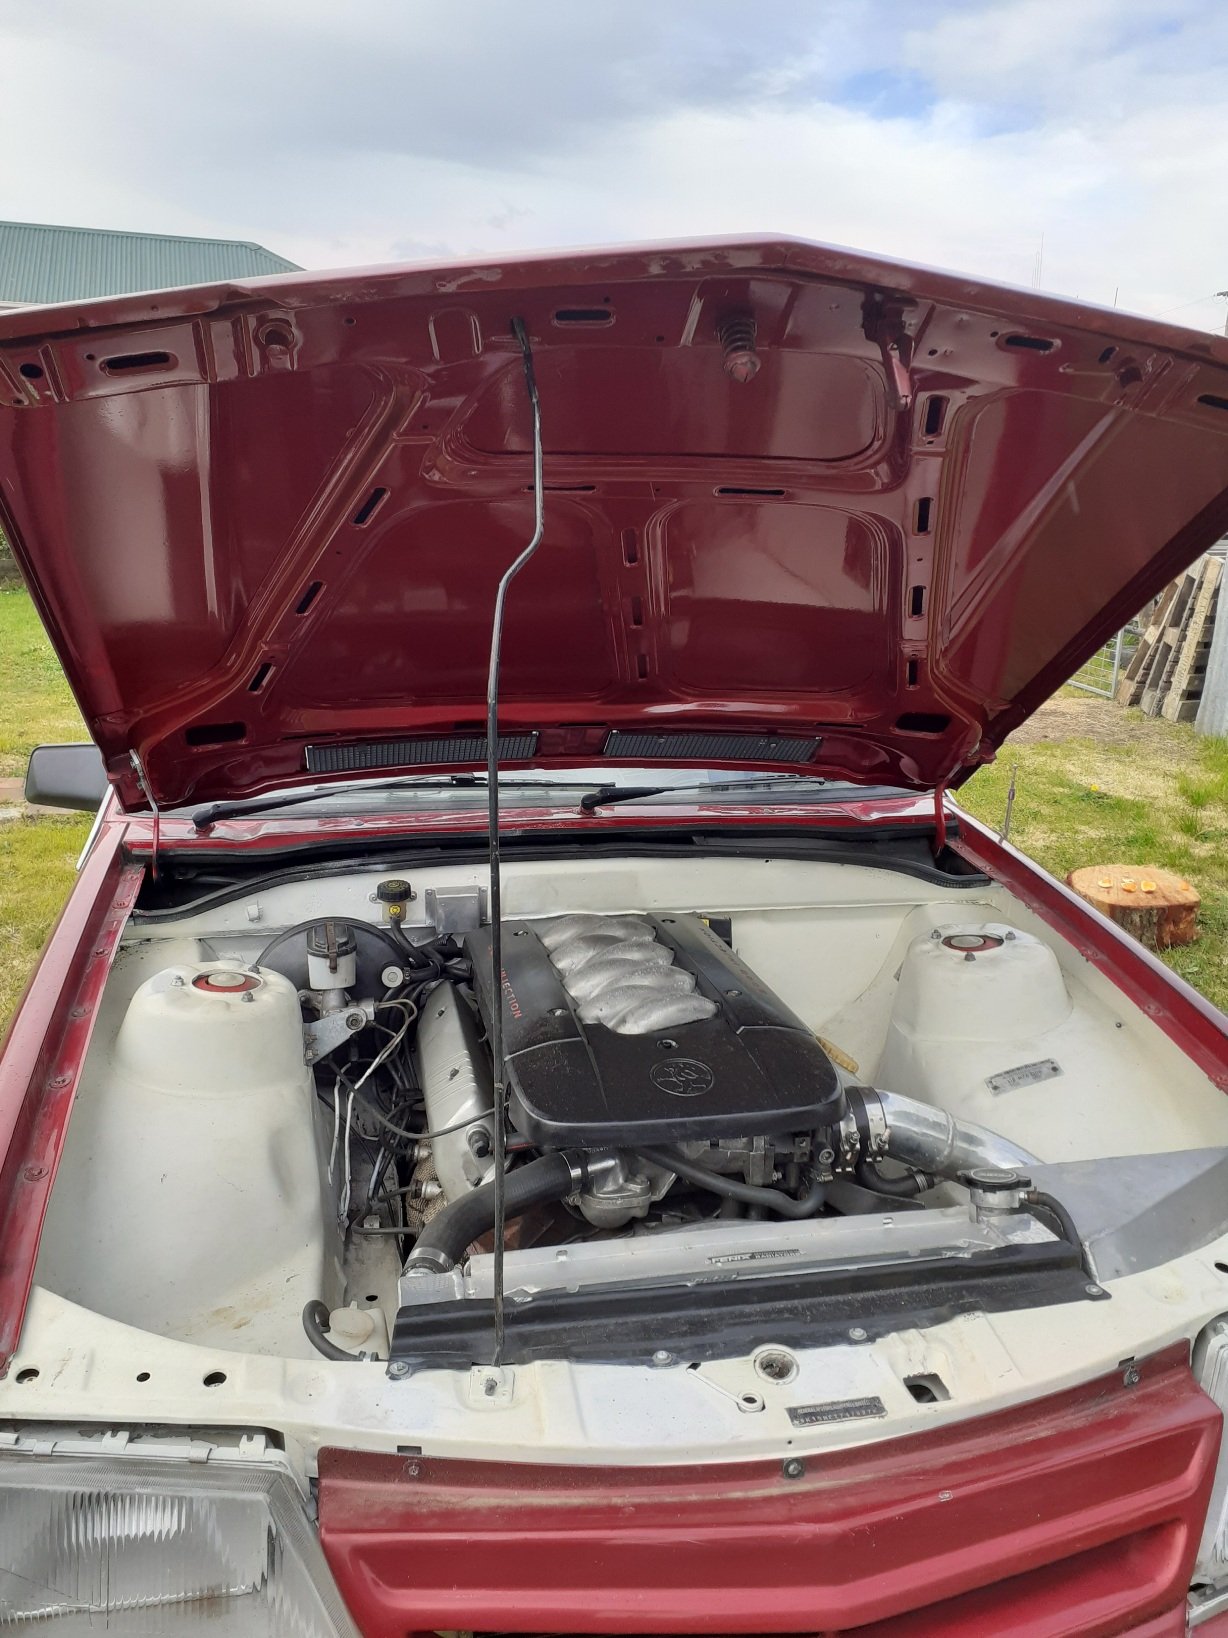
Sometimes you just have to bite the bullet, give yourself a good kick up the butt and redo something that just wasn't right let alone aesthetic. The firewall bugged me and it could have been welded in better. I stuffed up and didn't drop the top piece down far enough and then added to it which didn't go that well. It all started to get a bit out of shape. Fugly really. So today the start of a new year I made a start on a new firewall.
2 points
-
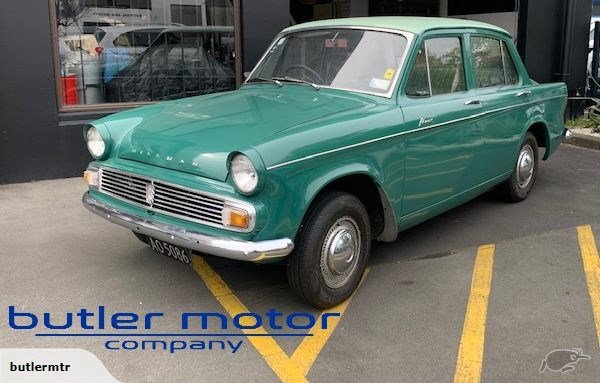
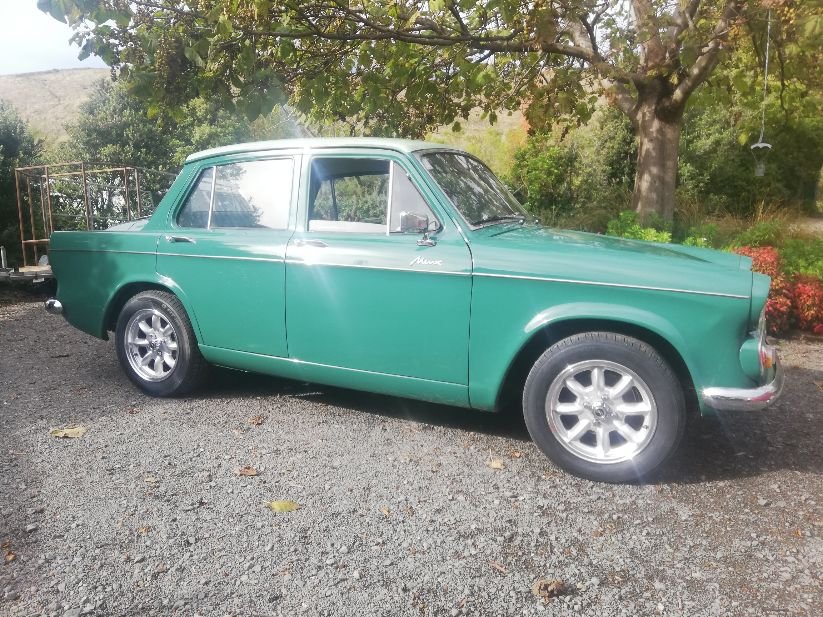
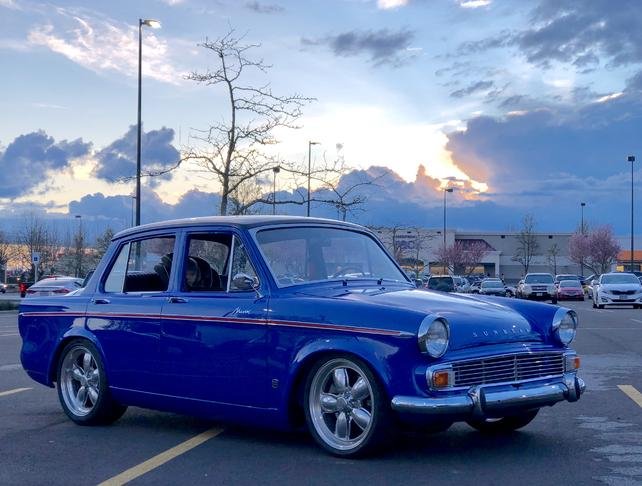
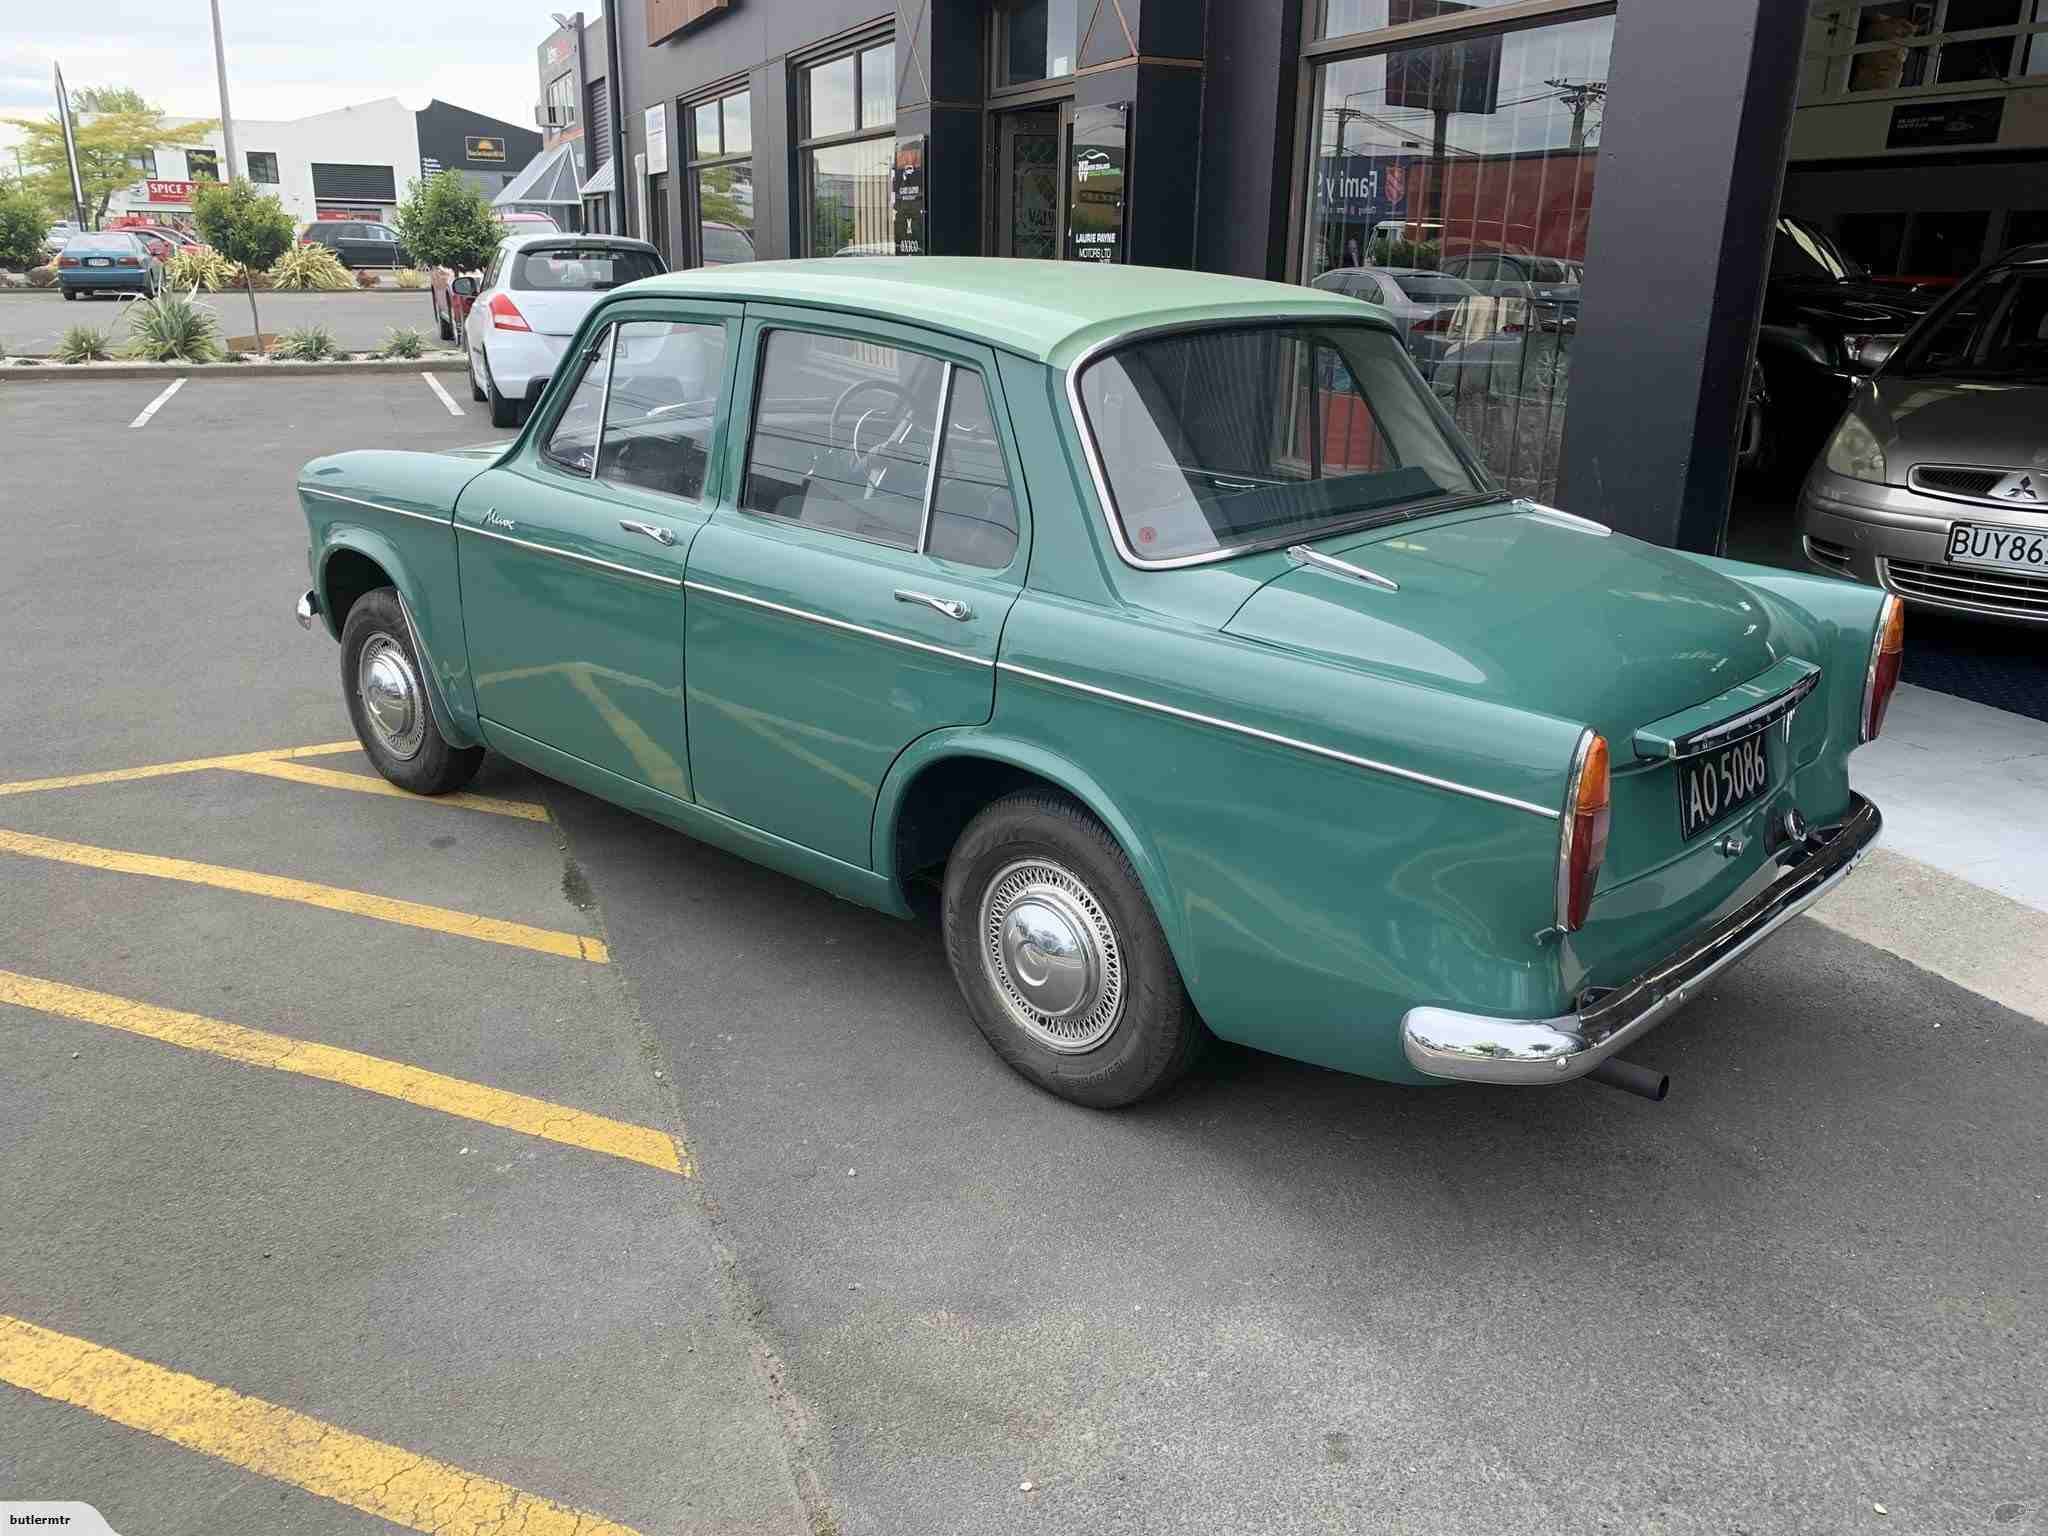
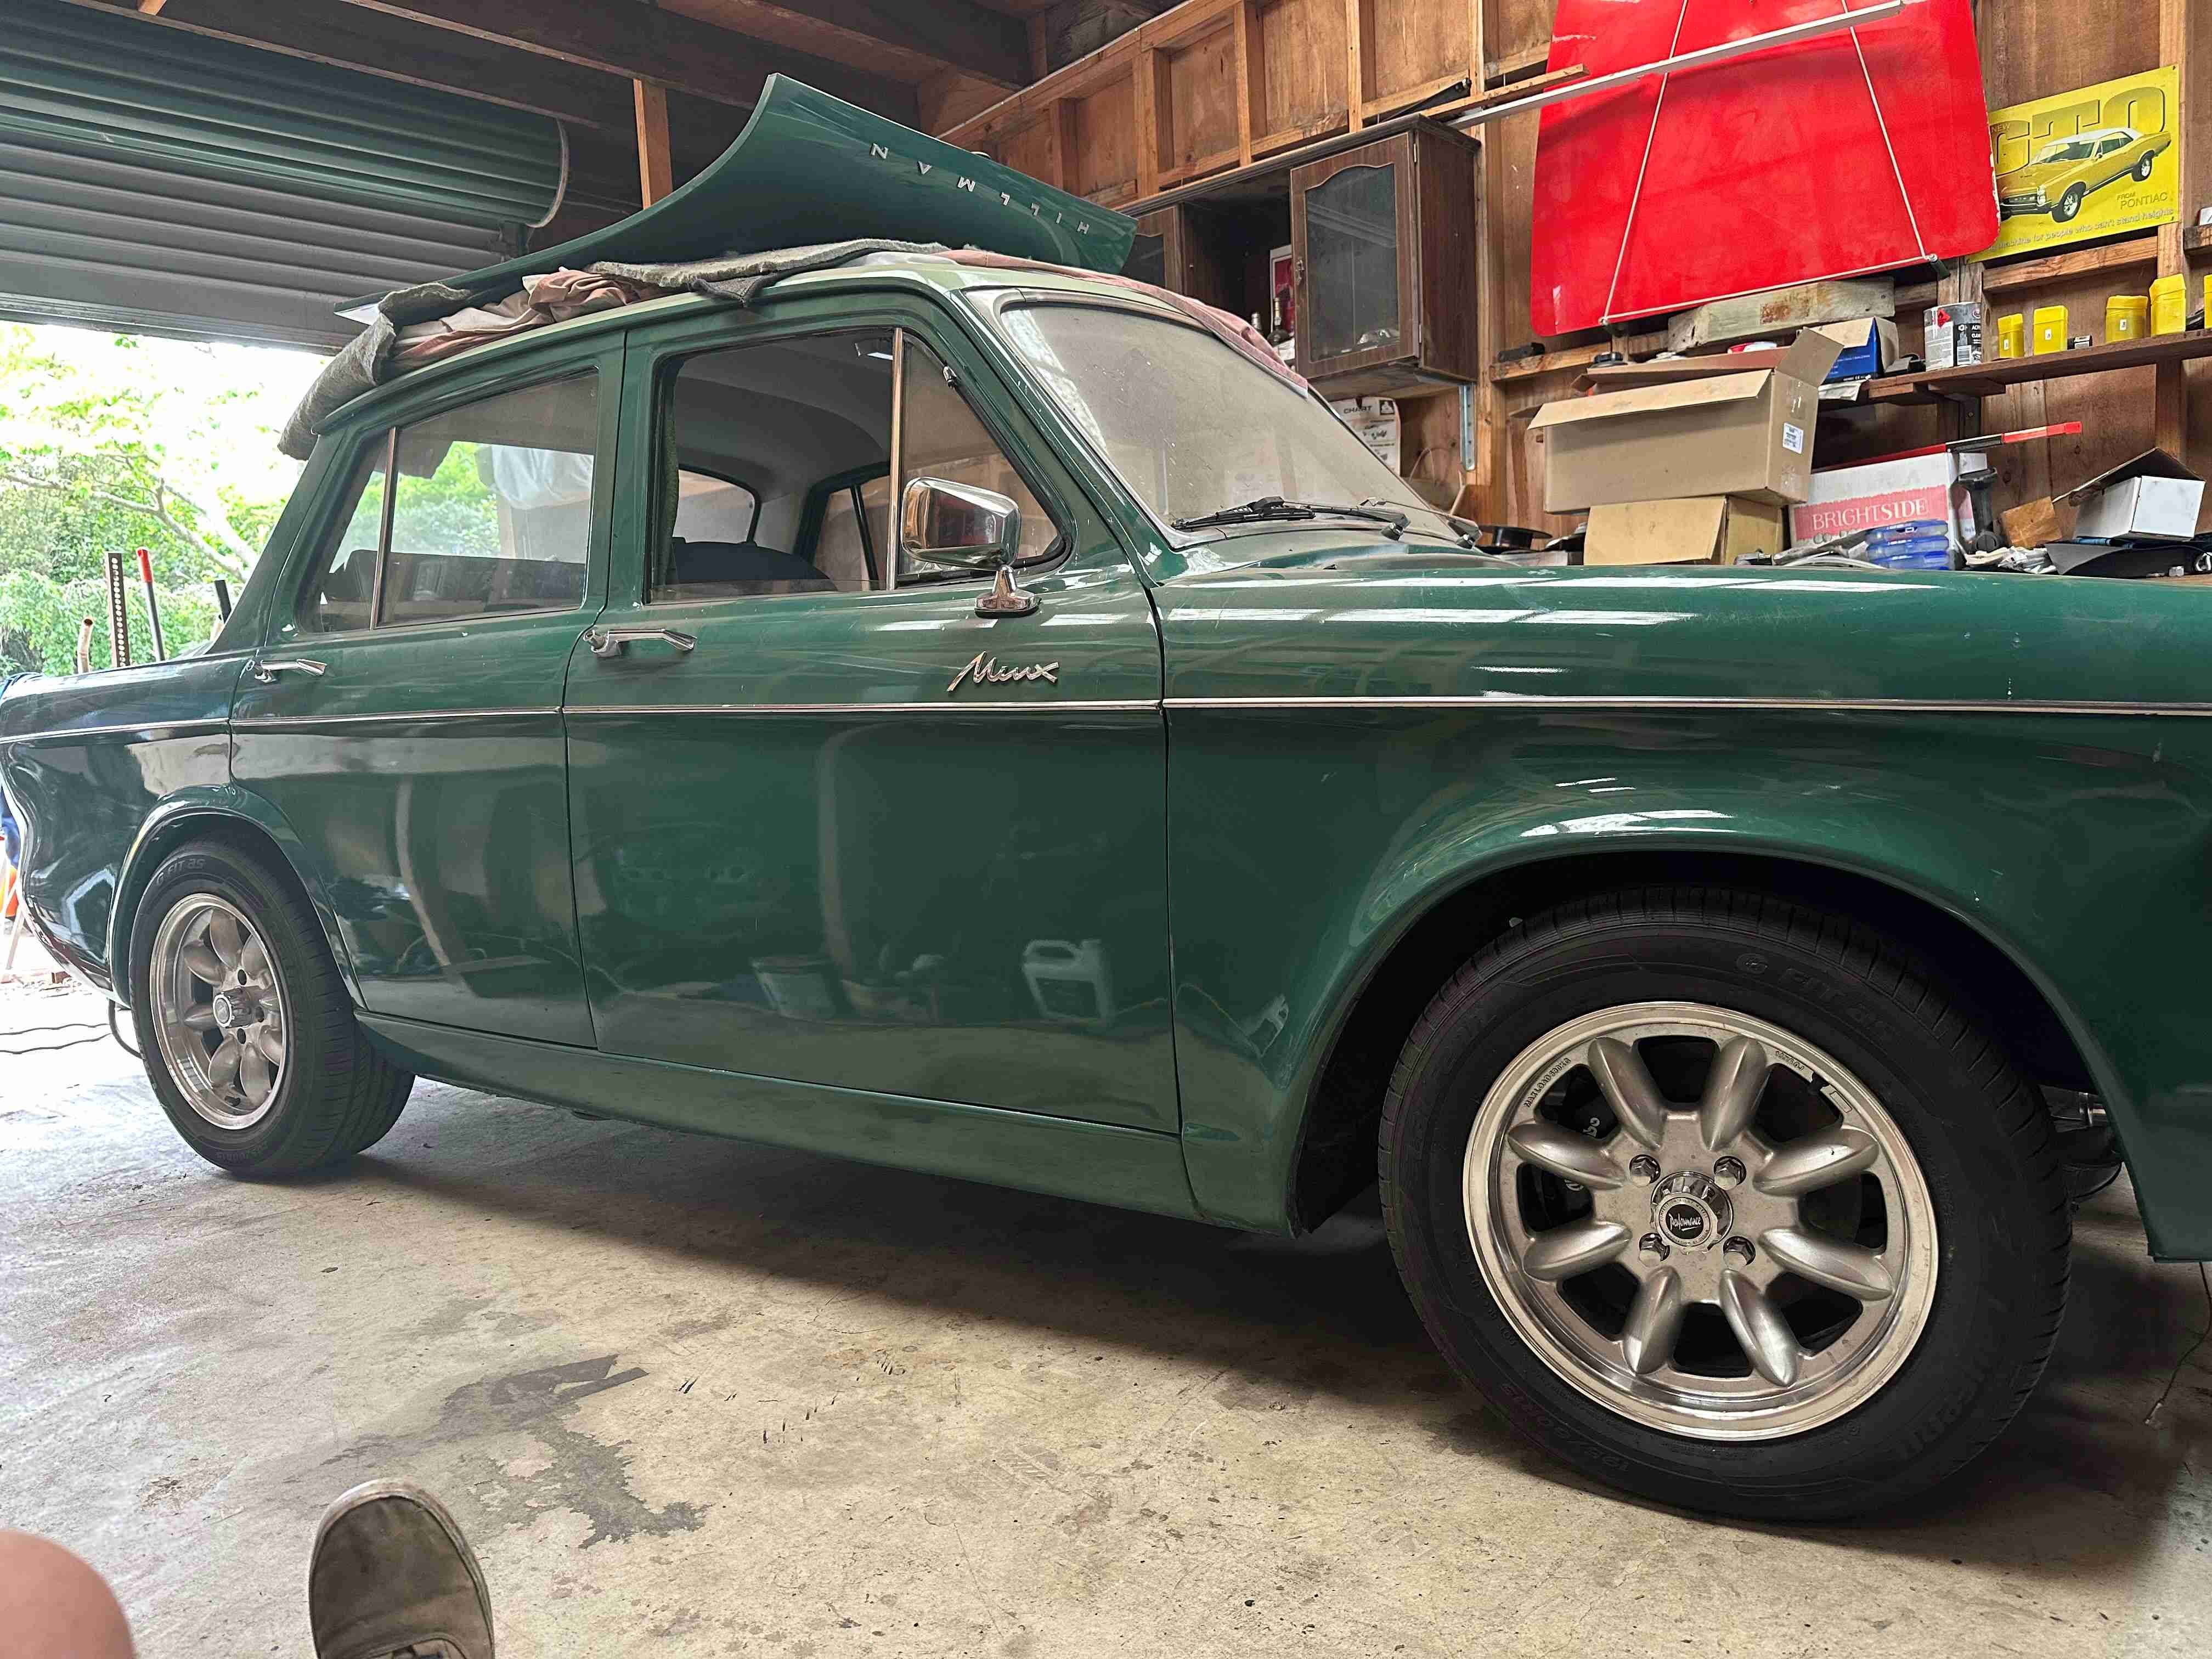
Tiger Tamers 1964 Hillman Minx Project - Project Discussion - oldschool.co.nz Here is the car as bought a couple of years ago. Powered by it's original 1600 engine with 58hp. She's no rocket ship so I will need to get it going a fair bit better. At first I was going to rebuild the engine with a head porting job, Cam , more compression which should get it to approx 90hp. Then had thoughts of Supercharging or Turbocharging it but have finally decided to repower it with a Honda K20a engine out of a Accord. I have done some lowering of the car as they sit so high in the front especially, but still another 50mm needed. It seems the combined engine gear box weight of the Hillman unit will be quite similar to the Honda engine with the Toyota R151 gearbox. Also a couple of photos for some inspiration of one done before with a lot more mods than i will be doing.
1 point
-
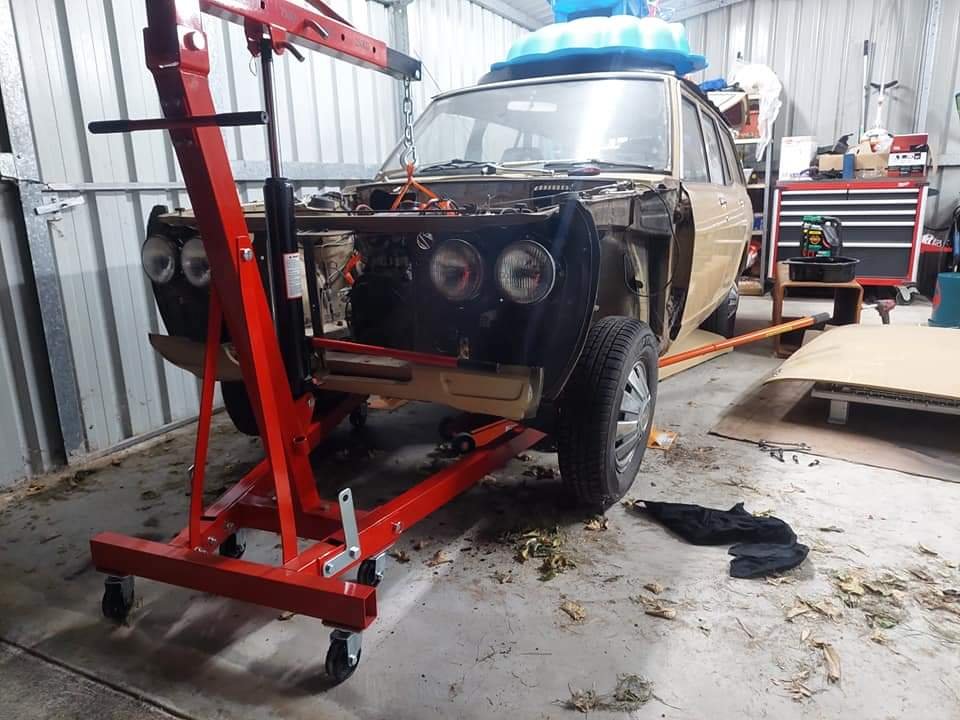
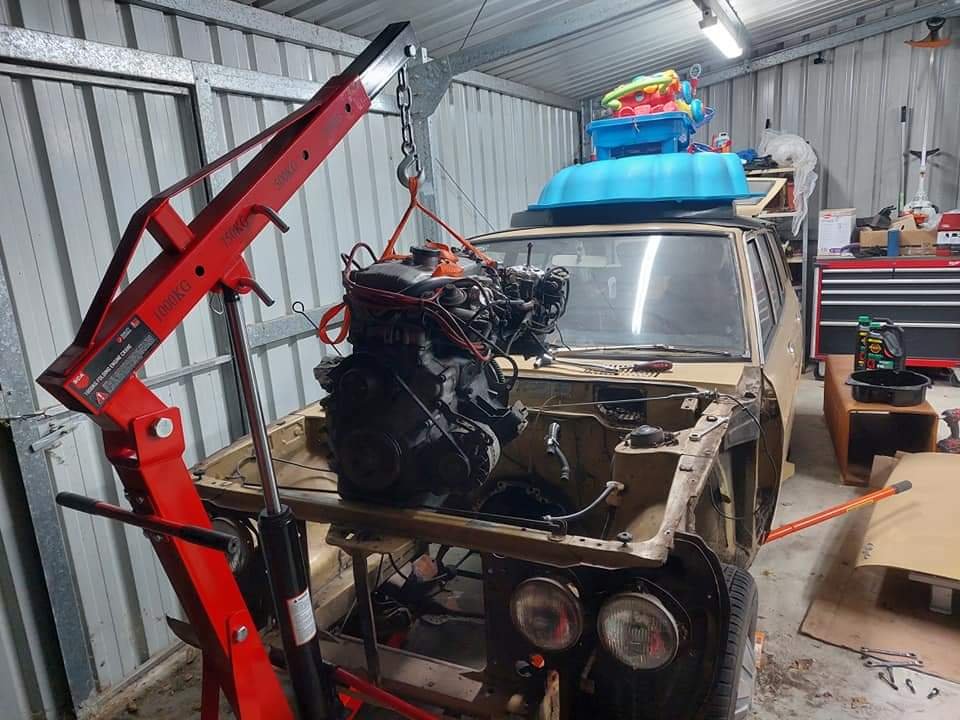
Couldn't help myself.. The mounts off the 4g52 were pretty close so figured I'd just mock them up and and hoist it in to see how far off everything is. Mounts need to come up slightly to drop the engine a little and also shift about 20-30mm back. I'll probably chop up and modify the block mounts (or make new ones). And clearance at the firewall. Will need to reroute the brake line as it's too close to the cas and will need more clearance. Sump clearance. May need to trim the crossmember a little but might get away with it. I'll try get engine mounts sorted in the next couple weeks then there probably won't be any progress as our daughter is due in Feb. See how we go anyway. Chur
1 point
-
I attempted to prime one side of my outback which was dented and dinged badly, repaint, and blend. A good plan, but my then-workspace was 300km~ away and I had to sleep in the car. So I ended up vinyl wrapping the whole thing in Nardo grey. I probably won’t do it again. It’s really cunty, requires a whole lot of prep and then May curl up. I had to do a few sections two or three times over and got 3M tape sealer and primer to help. For the wof Got new brake rotors all round for cheap, new rear pads and a second hand rear caliper, An outer brake pad was missing and in its place the caliper body was functioning as a pad. The wheels, like the trims etc were really tatty so hit them with 2k Matt b in a can, trims wipers cowl grille and door handles etc also got done headlights sanded back and cleared Rear lights and garnish also got compounded Later on in 2023 I got a new storage unit, moved all my other cars and stuff etc with this car lolol also pictured are the new plates, old ones couldn’t be saved with some paint and straightening out done a few mechanical things, Spark plugs, big job with the bigger 2.5 flat 4 than the ej20, it requires disconnecting engine mounts and gently jacking up the engine to get clearance. Slimline tools help too Did rocker cover gaskets and spark plug seals too cos it’s a leaky boi probably is also leaking from rear main seal and a cam seal, oh well attacked a whole lot of wof-listed surface rust on the rear swaybar, fuel filler pipe, and the worst on the front subframe All Coated in brunox and then black, subframe got underseal. Mind my shitty spray can technique. an undertray covers all this Headlights aligned to the best of my ability, hopefully they pass wof, even with an adjustment. The adjustment mechanism in them sucked Also replaced this shitty wiper rack that had too much play in it - the drivers side wiper went right off the windscreen on to the pillar To do.. fix this exhaust leak Finish off wiring in my new keyless entry/push start ignition. this car was stolen and found on the other side of town. I actually found it cheaper and easier to fit push start than to get a new ignition keys and barrels. as a result of the thief breaking my steering shroud my tail lights stopped working. I hunted high and low for the fault. Turns out it was because the steering column switch wasn’t working. Because it’s a common fail point, there are a few YouTube videos on how to bypass it which is easily done and fixed my problem. the thieves have costed me hours in extra work1 point
-
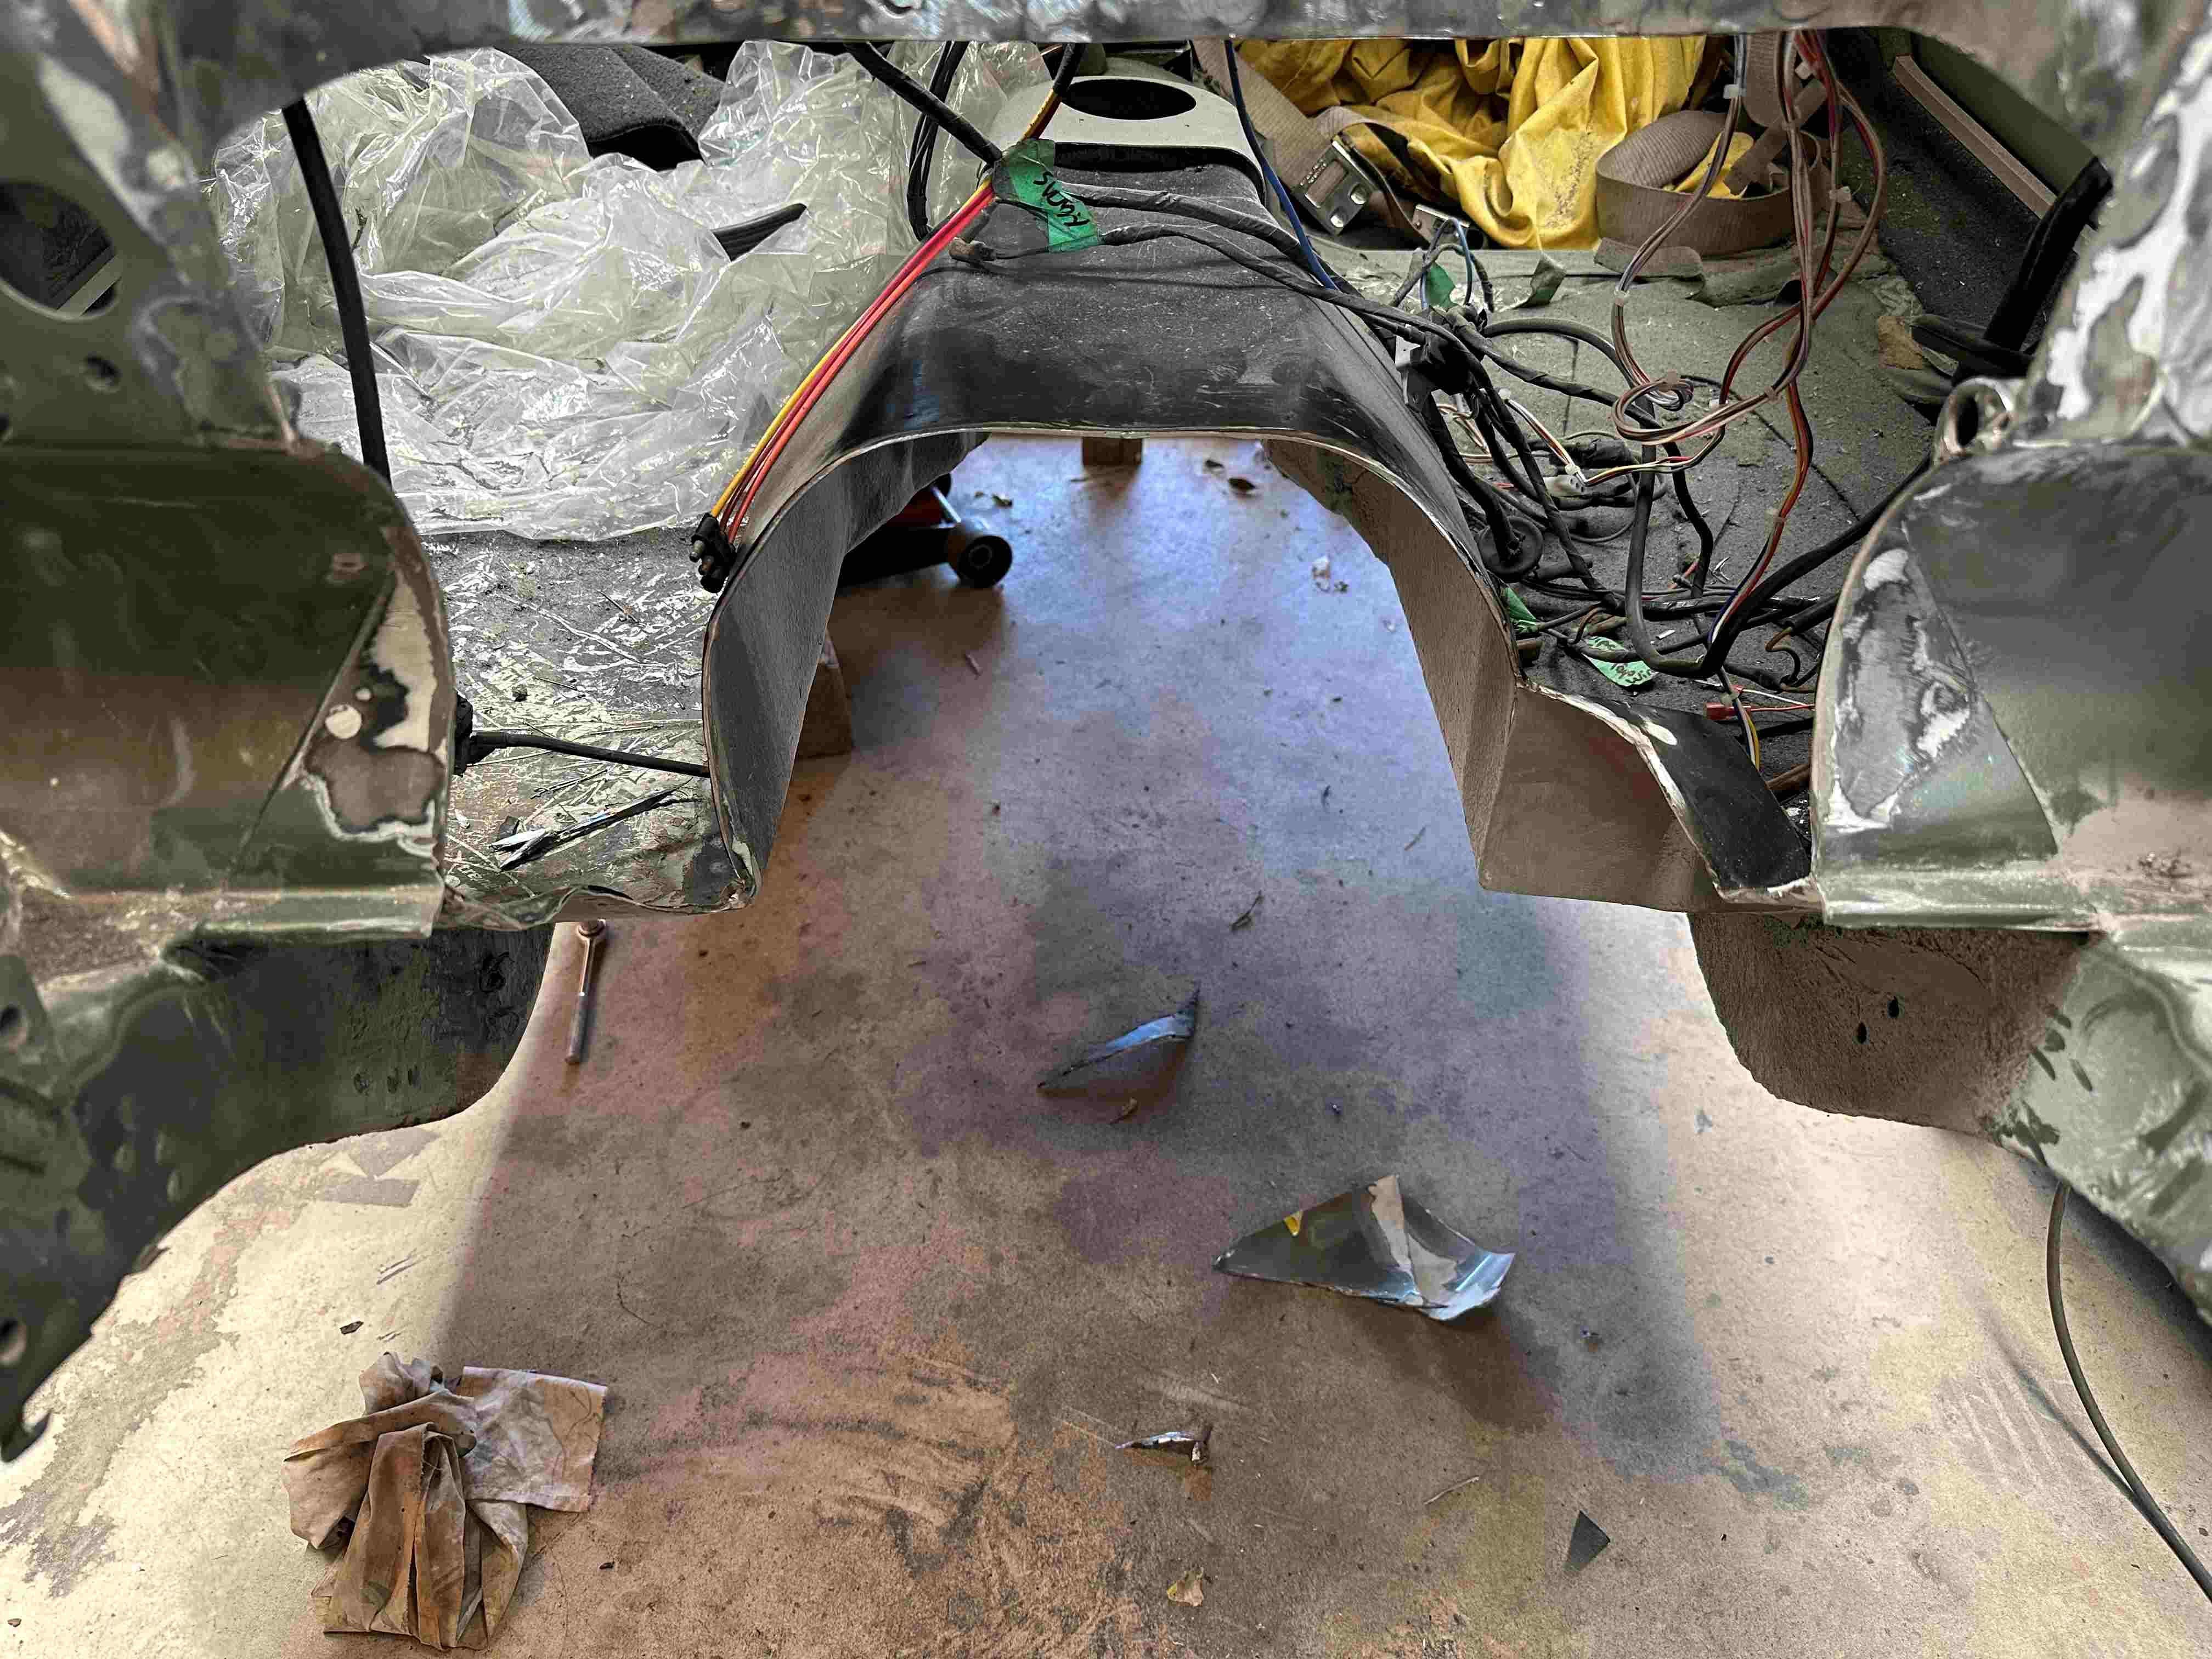
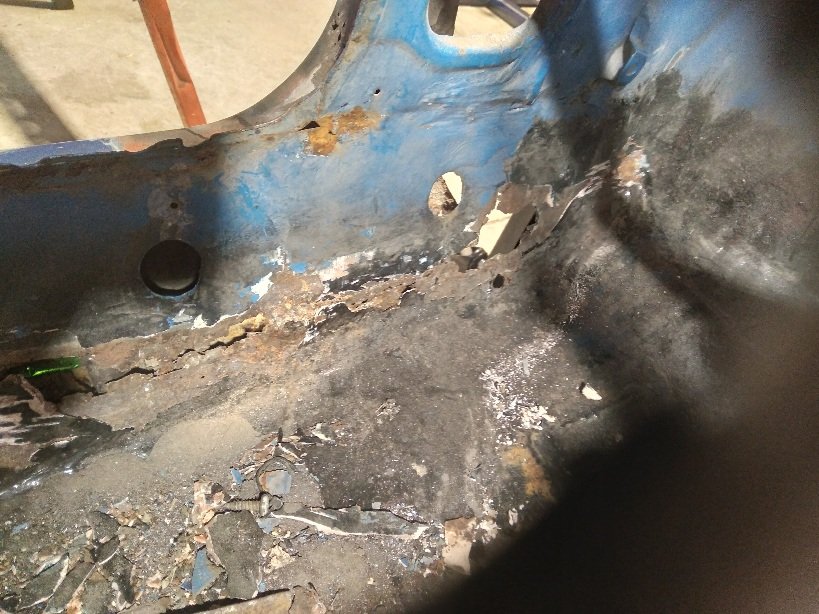
This is inside the escort looking at the inners sill and the corner below the A pillar. I am a bit concerned how it has opened up once I've started working on the A pillar. I'm thinking about what to do about it and how to go about it. I know I'll have to replace it but unsure of how to go about it.
1 point
-
How important is your steering to you? That should answer your question.1 point
-
Id go HKB all day. I no longer have the photos, but i got one off aliexpress for SFA, and it was so absolutely atrocious i refused to use it. It was so bad i donated it to LVVTA as an example of whats out there. ( @KKtrips may still have it?) It was the stuff of nightmares. Because once bolted on, nobody wohld be able to see how terrible it was. And its a critical safety part. If it fails, youre gonna crash.1 point
-
I got one a while back. It was OK. It was a real tight fit on the column spline so a bastard to get off again, and the threaded holes for the wheel were cut a bit shite. The metal is also the cheapest Chinesium, so take care not to strip those threads, maybe chase them with a tap first. Other than that, did what I needed it to.
1 point
-
1 point
-
Cheers for the tip. That will save a whole lot of hassle with the lid and make it easy to get what I need out.1 point
-
Daily update. This relentless shit is probably getting boring, but its for me not you so you can just bear with me or not. Today I made a front lip and grille carrier as the original is too rough to even bother fitting up. Its kinda rough in the finish department but frankly I dont give a shit as long as it performs the functions required. I found some stainless mesh, I'll see what I can do with that.1 point
-
Paganism appears finished, the family went out for the day and must have felt that it would be painful to me to waste a day sitting around on my arse and so didnt invite me along. My wife is very understanding. Some wirebrushing revealed even more lovely holes; Ran out of brunox, just as well I have the wiring to get through if I run out of welding to do.....1 point
-
There appears to be some sort of weird pagan festival going on that my family expects me to participate in, but even so I have managed to get the windscreen out and cleaned up, with the expected level of ugly sitting in there. Yesterday I also managed a difficult bit of the passenger door, with some pretend pressed sections and a hem detail that I'm quite pleased with;1 point
-
A comparison pic. Not the same angle but you can see the difference.
1 point
-
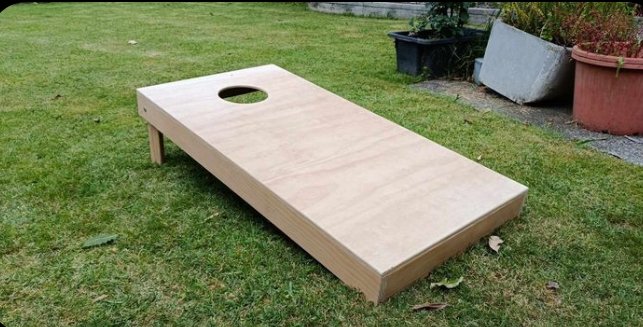
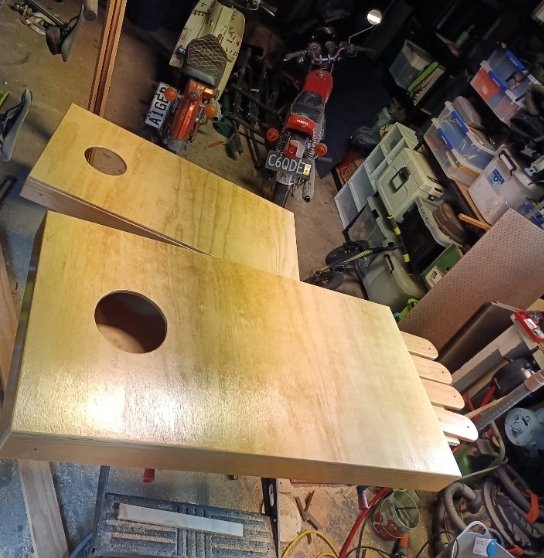
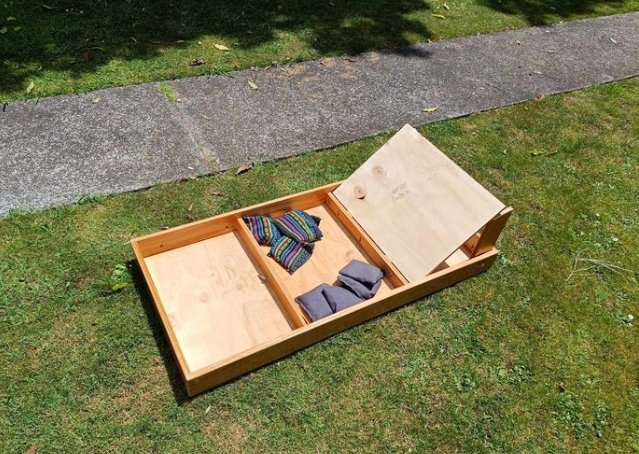
This year's Christmas builds. One for my folks and one for the in-laws beach house. Excuse the mess...
1 point
-
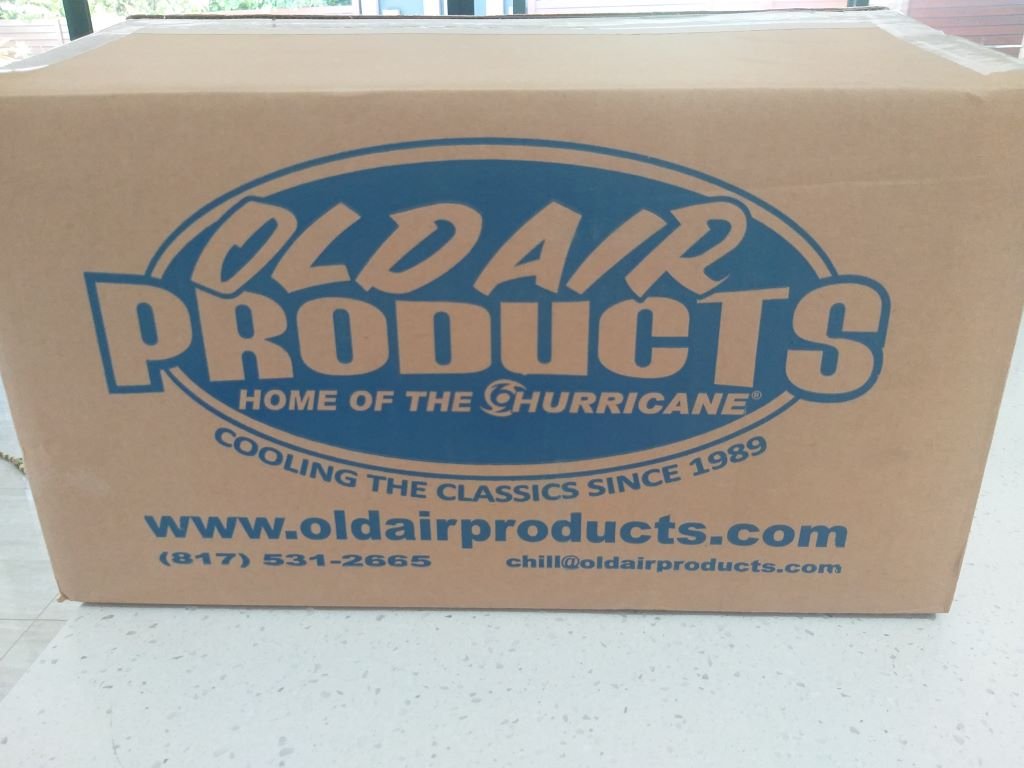
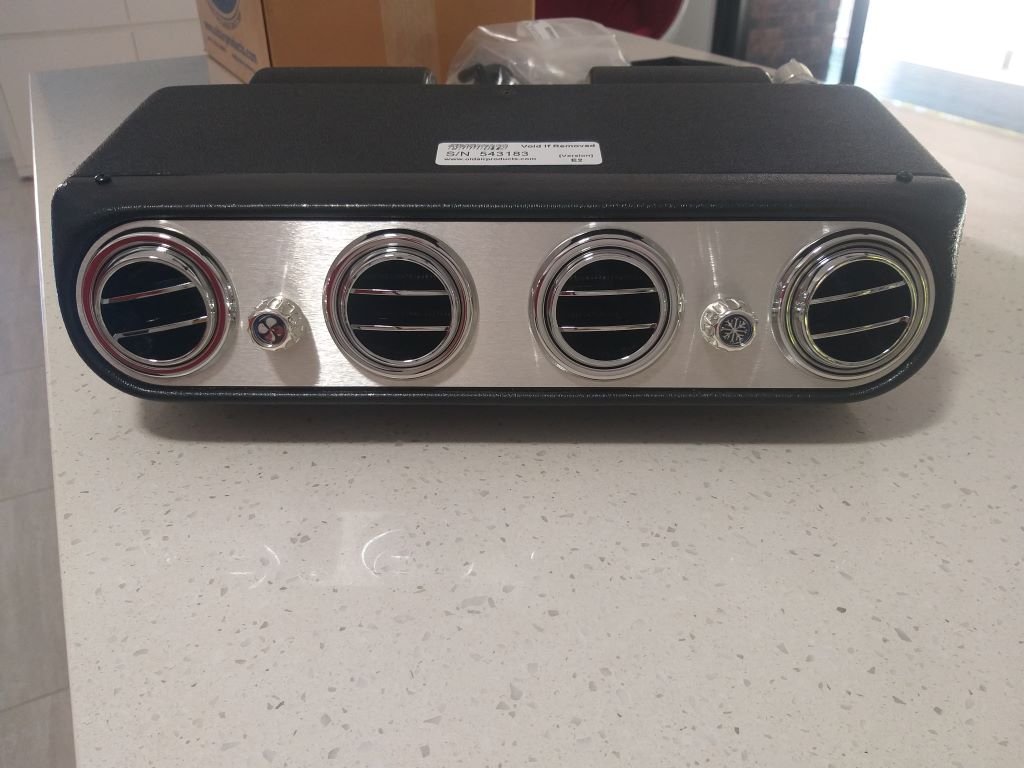
Well, it's official. The Thames van has taken over daily driving duties from our Mazda e2000 which headed off to its new owner last Saturday. With the cash from the sale burning a hole in my pocket I figured it was time to violently execute "Project A/C" so I hit the "buy now" button on a few bits and pieces and there was much excitement when the courier dropped off the first of the boxes a few minutes ago: And upon opening the box this little puppy peeked out into the light of day: Noice !
1 point
-
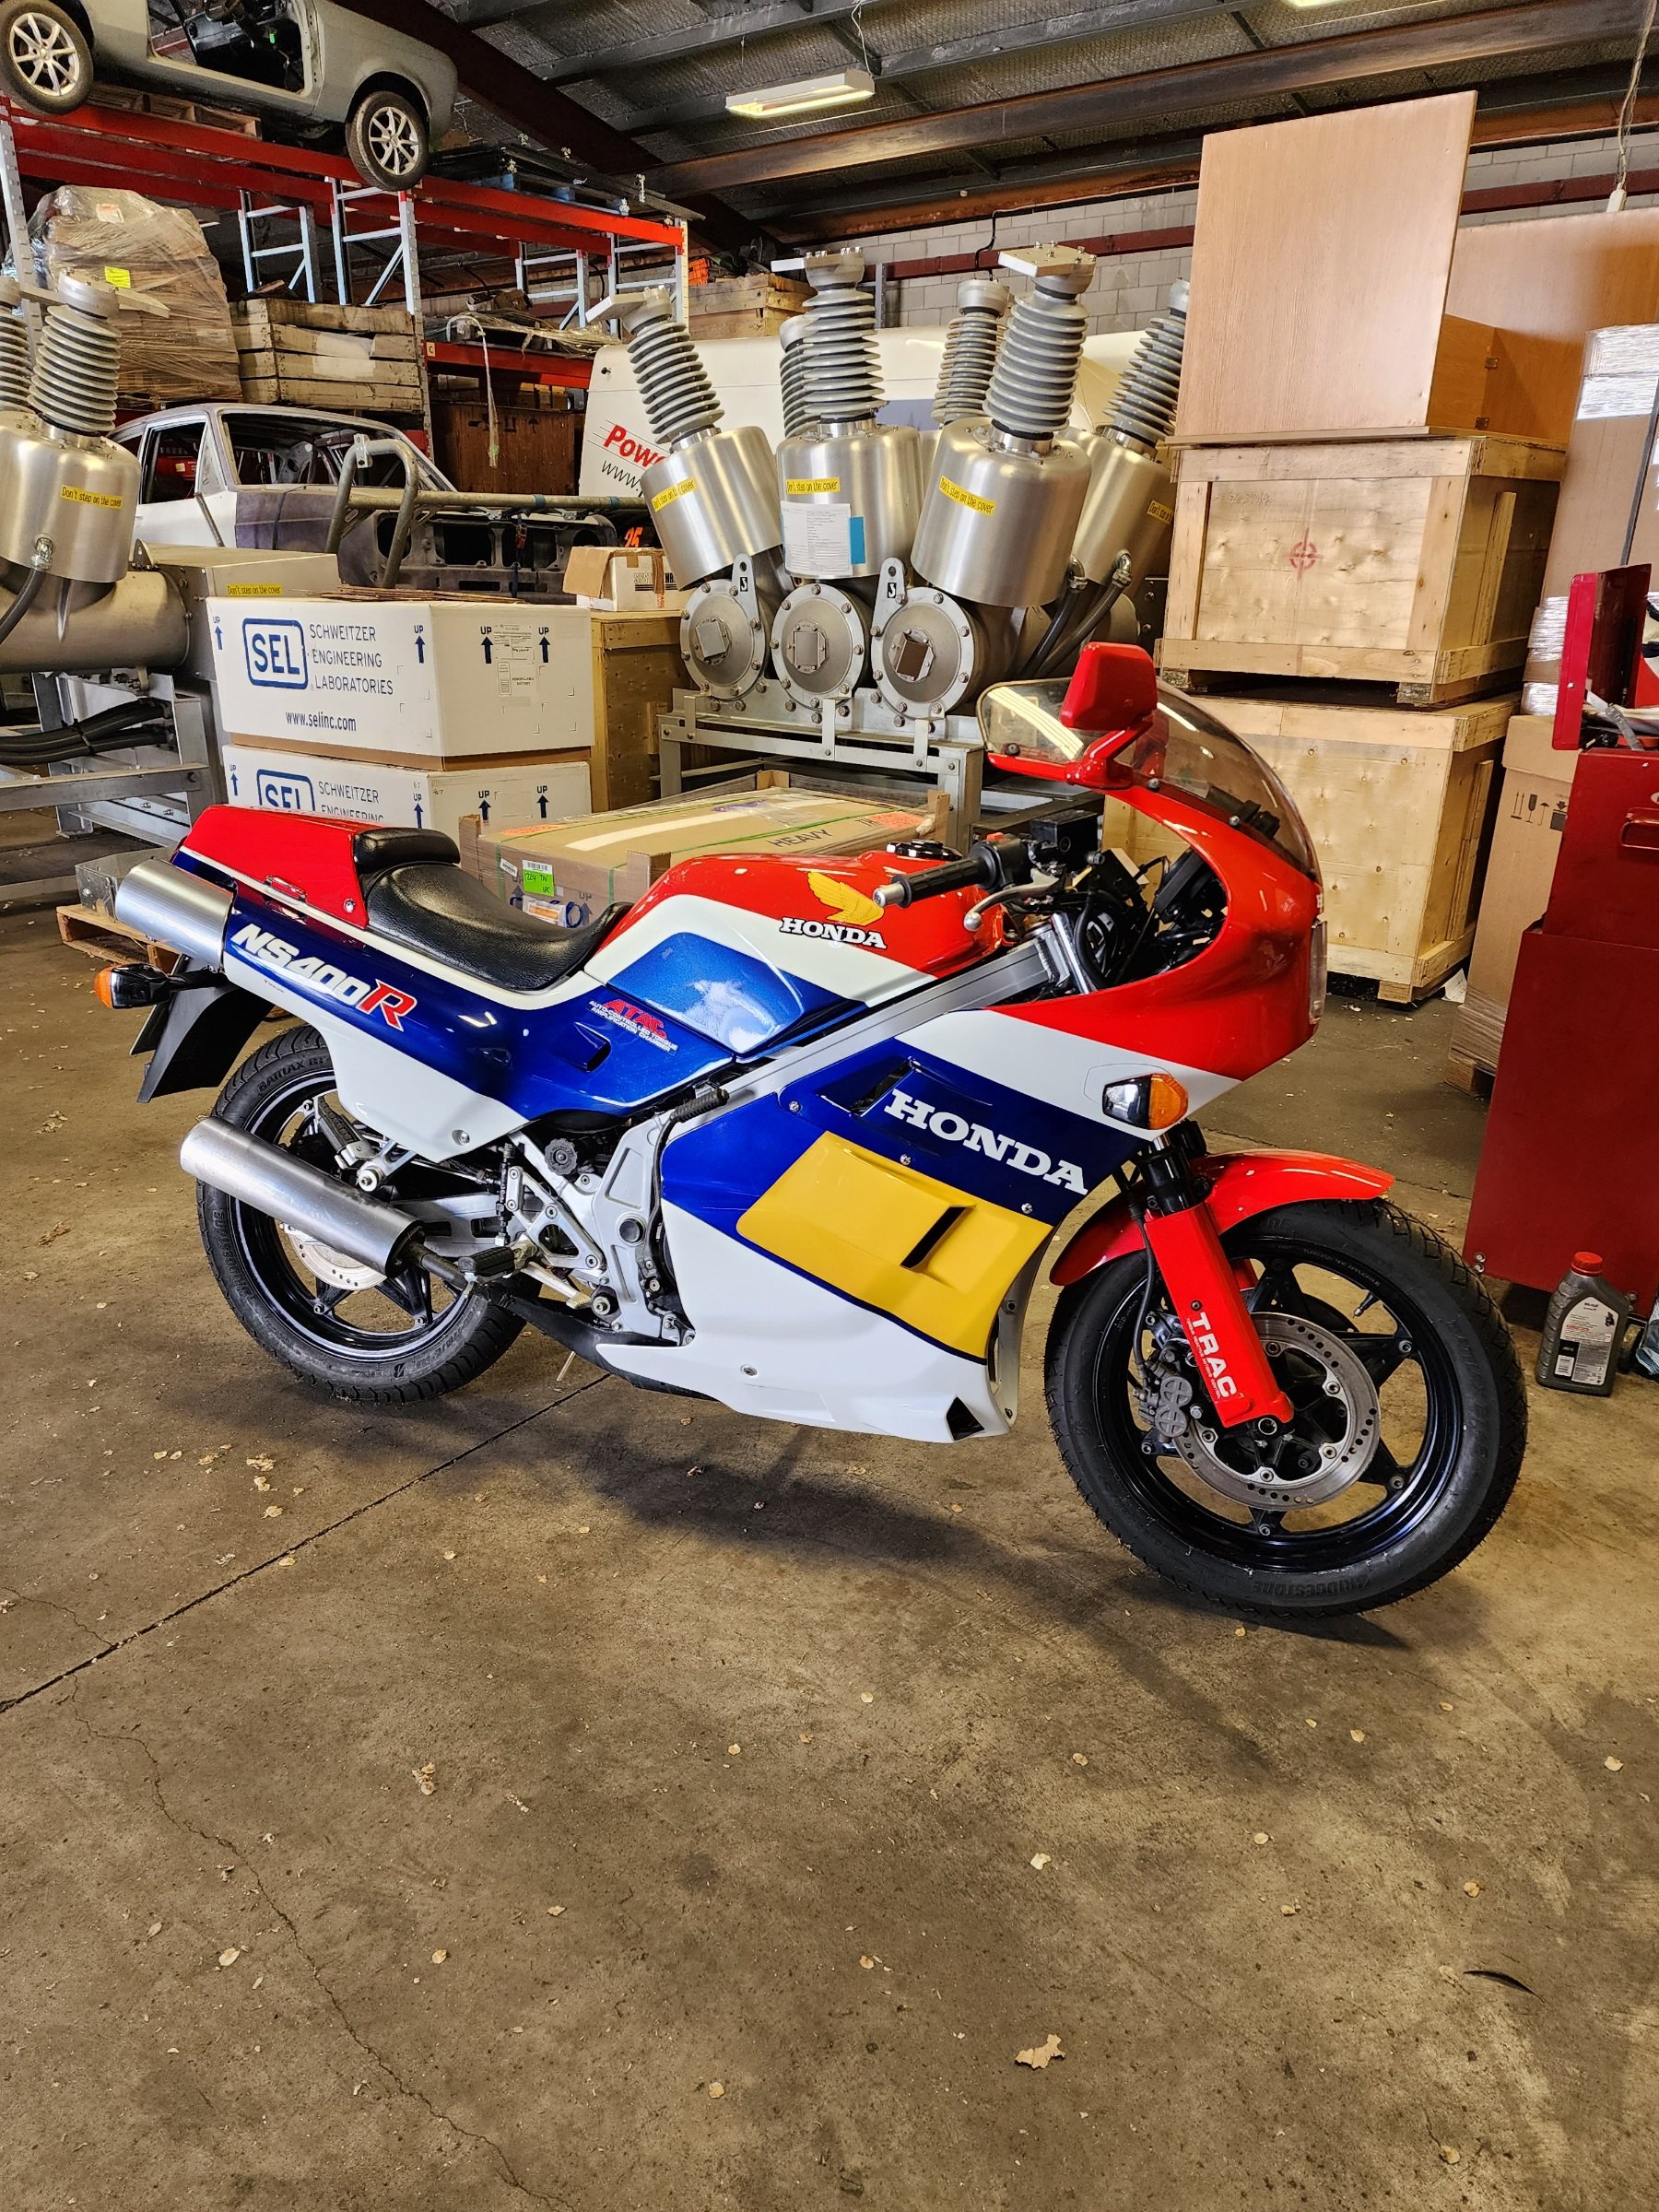
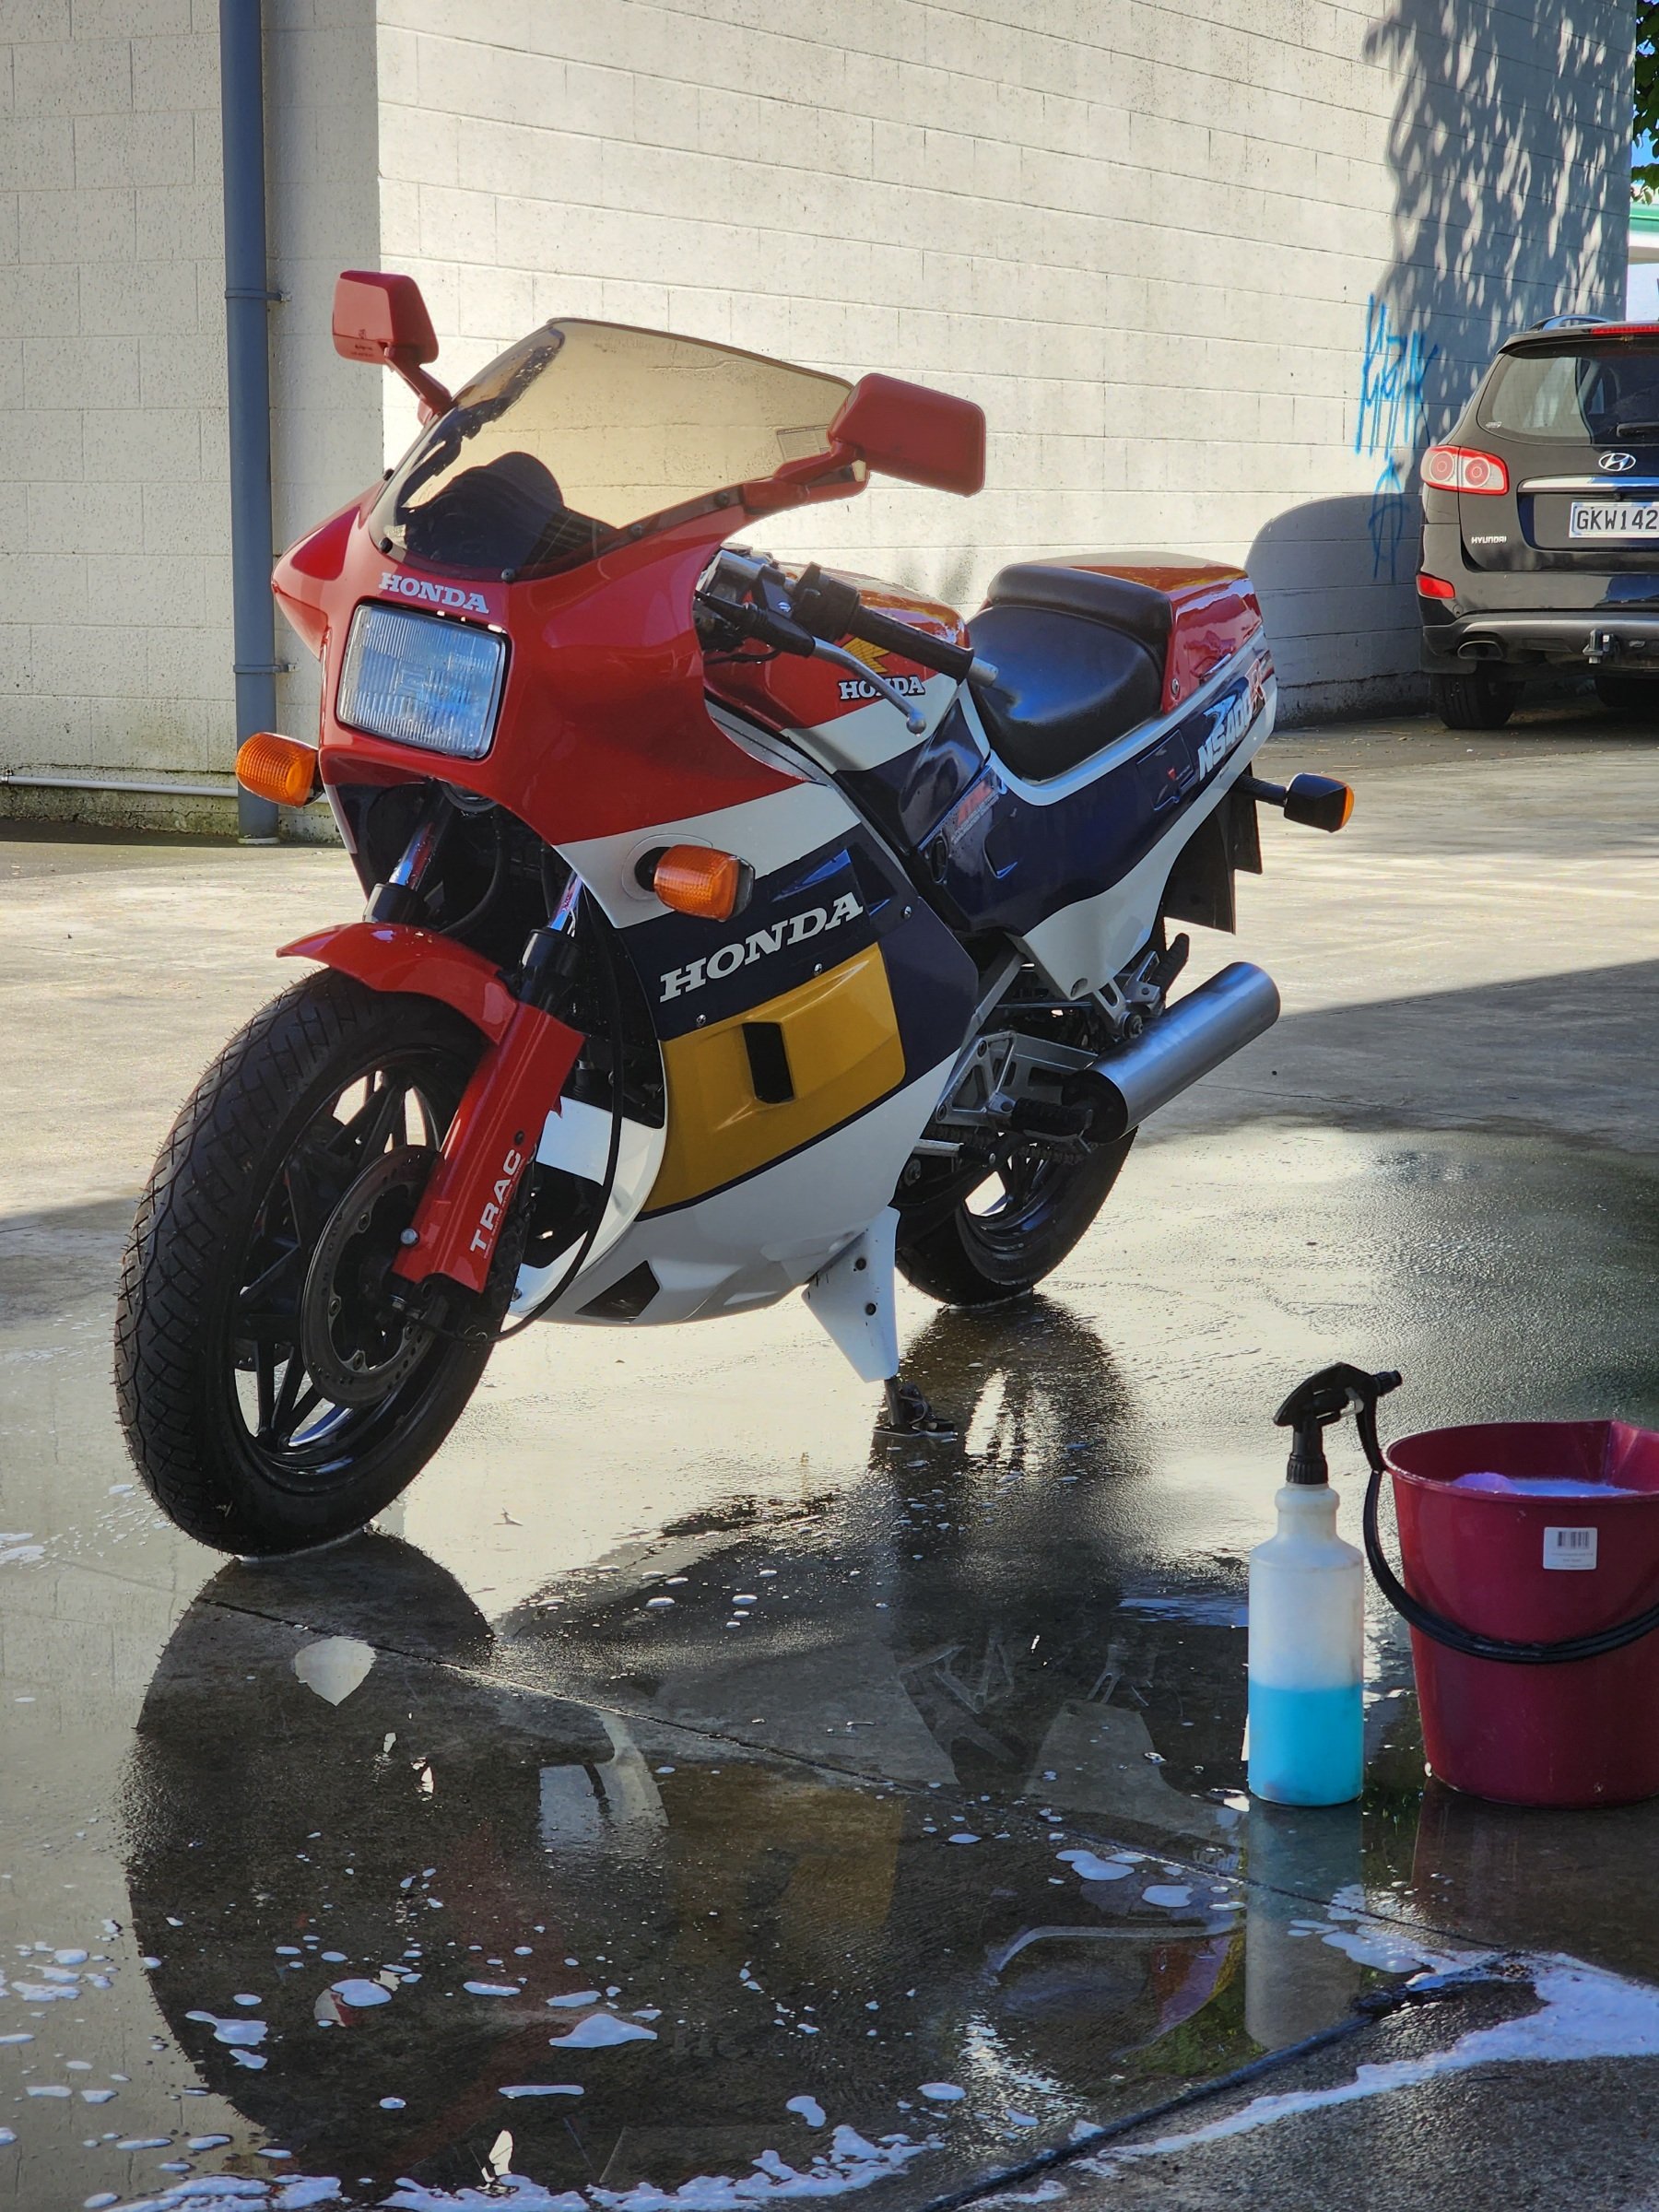
Just finished resto on this neat toy. Belongs to the boss' wife. She had one many moons ago and it was a nostalgic birthday present. Wasn't meant to be a resto, but due to it being a bit of a shed queen it needed a complete strip down. Turns out it had a cracked frame, because early Honda alloy frame stuff. Local bike shop was meant to put it on the road on behalf of the seller, it was legal to ride but was a pile of shit on the road, forks were "rebuilt" wrong, carbs were rebuilt wrong and way out of sync etcetc
1 point
-
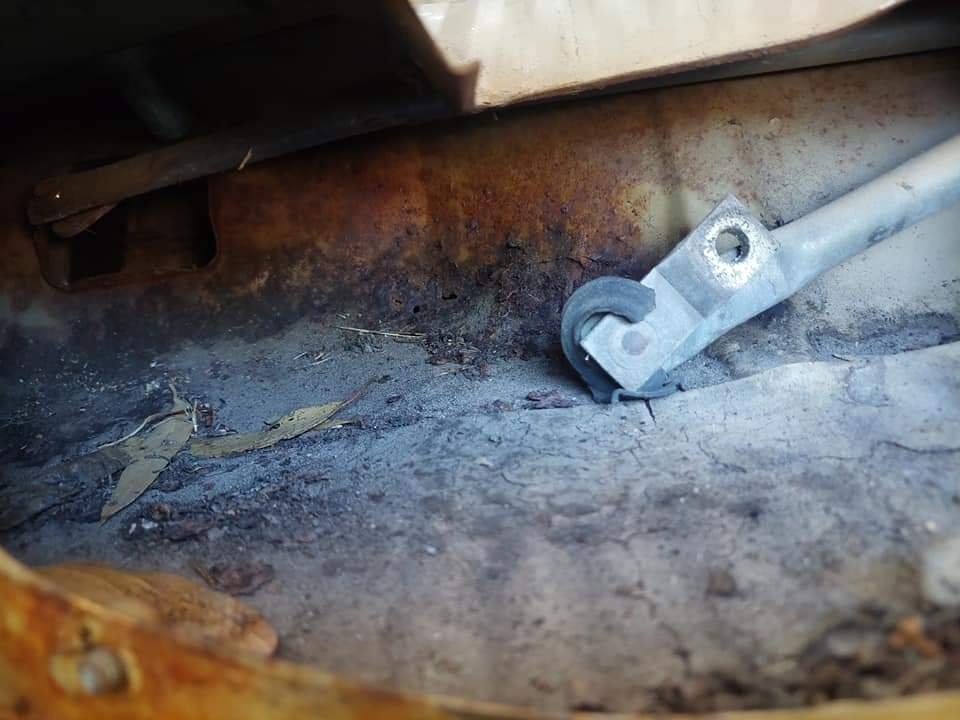
Then after pulling off the wiper motor and having a look under the scuttle panel I found this! Was not happy at all... tbh I felt pretty defeated at this point. Was not keen at all to be needing to remove the windscreen and unpicking the scuttle panel to access this point. Thought about it for a moment then decided to start pulling the dash apart to see if I could access it from the inside. Still a prick to get to but I think I'll persevere with it.
1 point
-
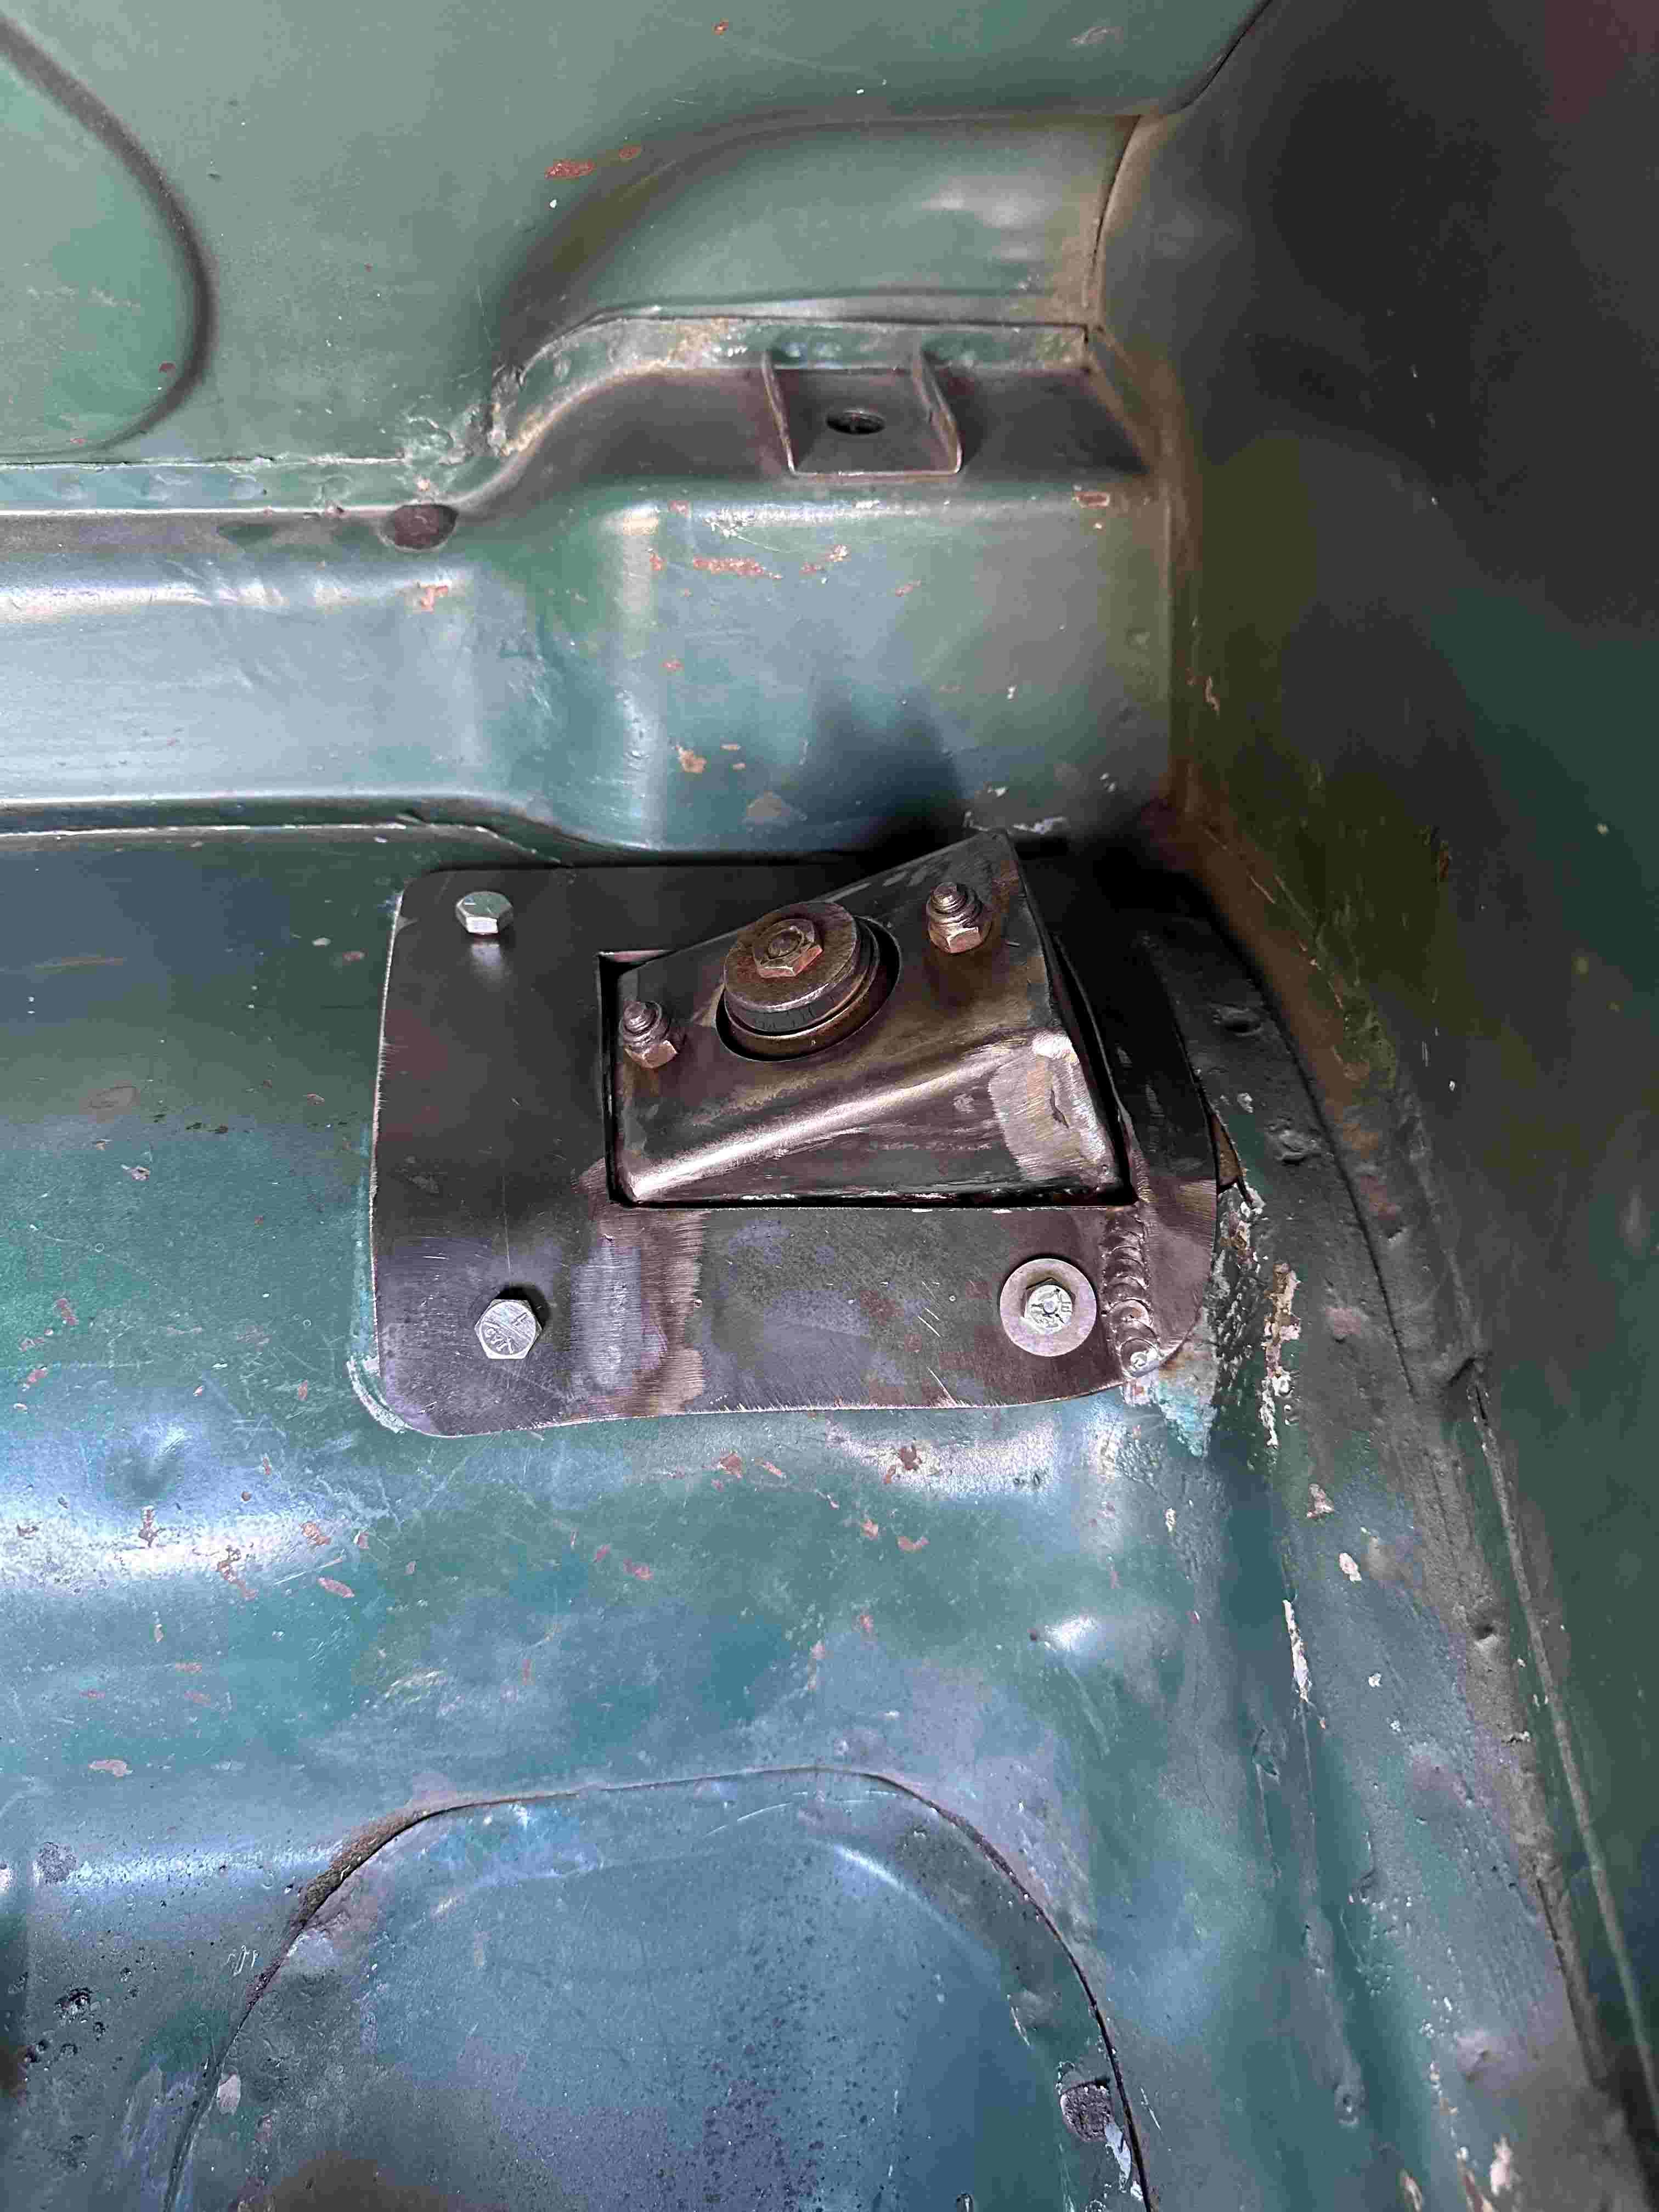
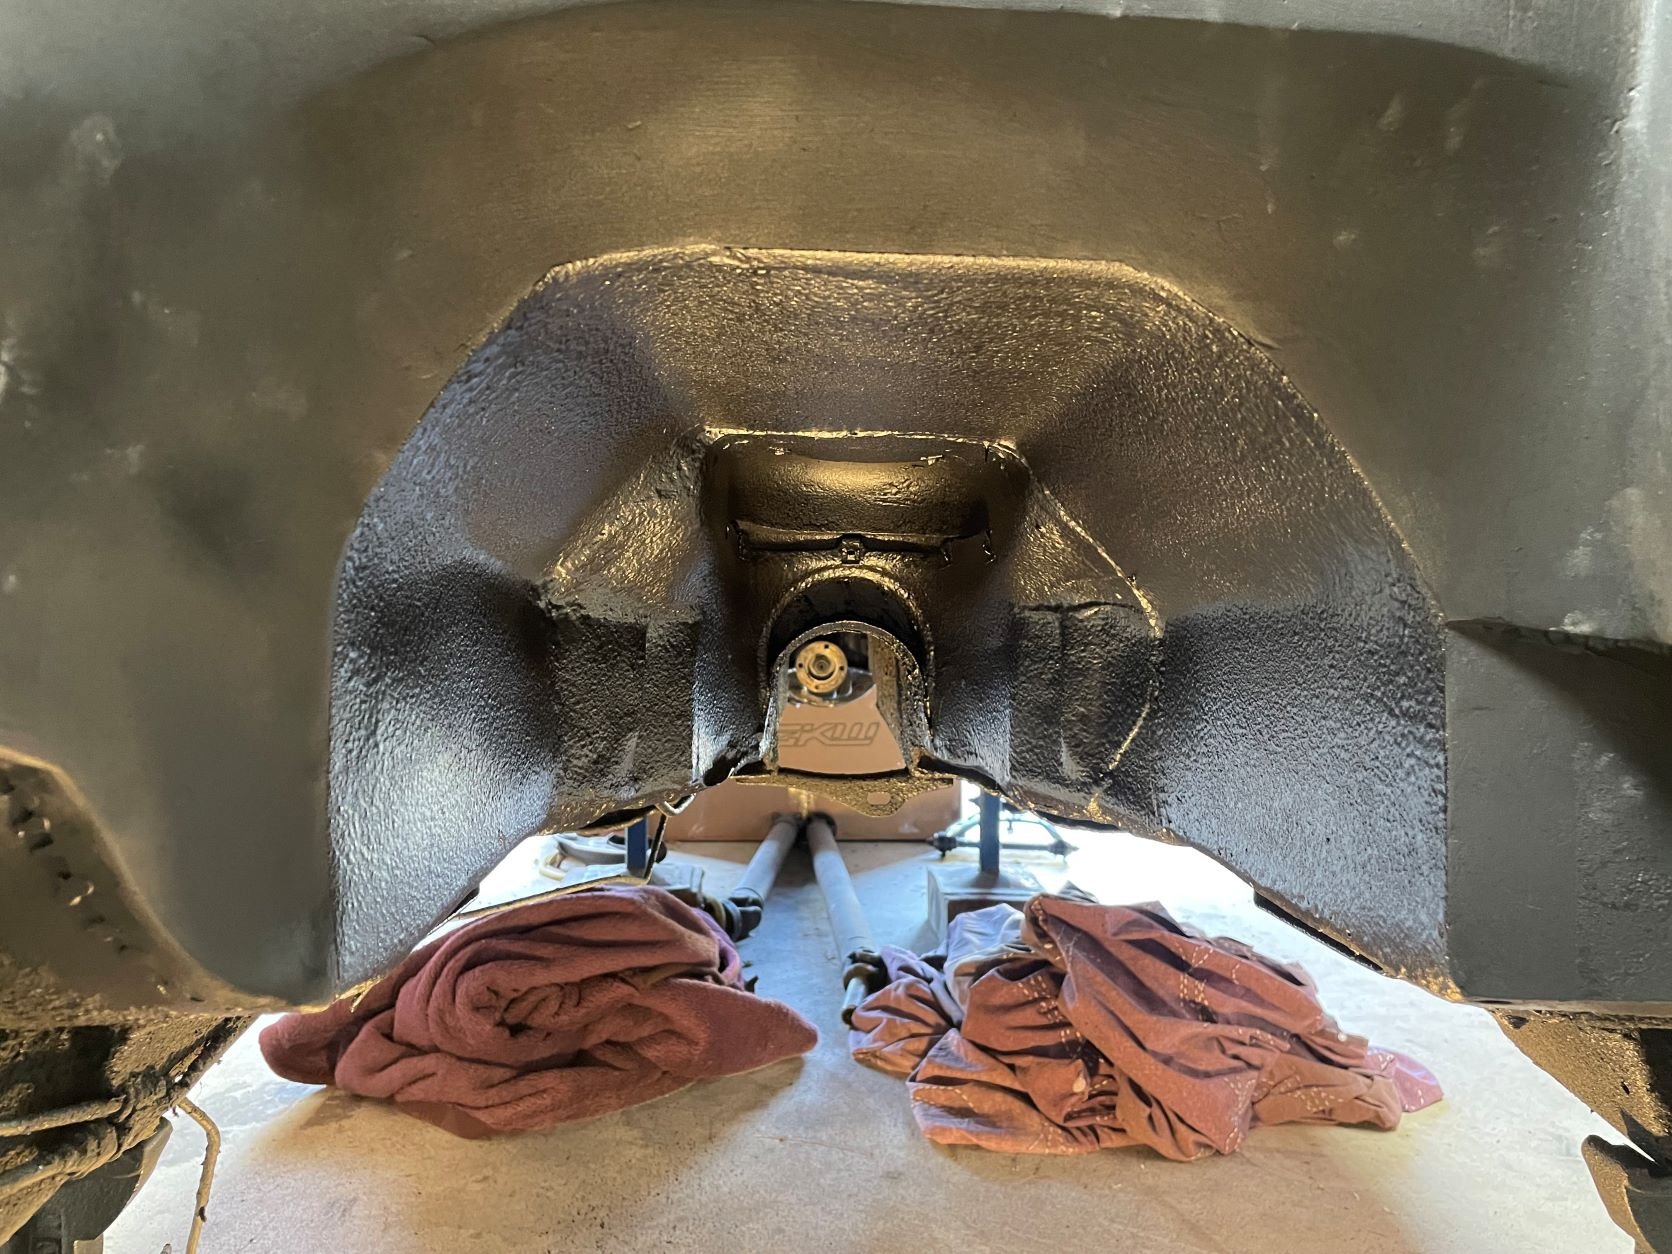
I have spent the last couple of days making up the shock mount for one side. I will send pic's through to the certifier and see what he has to say. So far, it's only time spent and a small hole through the boot floor. I have made it with the boot floor being sandwiched between two 3mm plates. Bolted together for now but will be welded in. I can weld the bracket to the chassis rail on all four sides before the top section goes in. I really need to get the car higher when I weld it in. I have two engine stands so I might make them into a rotisserie of a sort.
1 point
-
The Minx diff is out, YAY. I will offer up the Avenger diff tomorrow and see how it looks. The lower arms are about 140mm short of the Minx leaf spring front mounts, and because the upper arms mount to the top of the diff head, means they would need to pass through the rear seat. The Avenger diff I bought is a rusty mess really. It has been sitting on the ground for some time, though it does turn smoothly by hand. Much better than the minx diff.
1 point
-
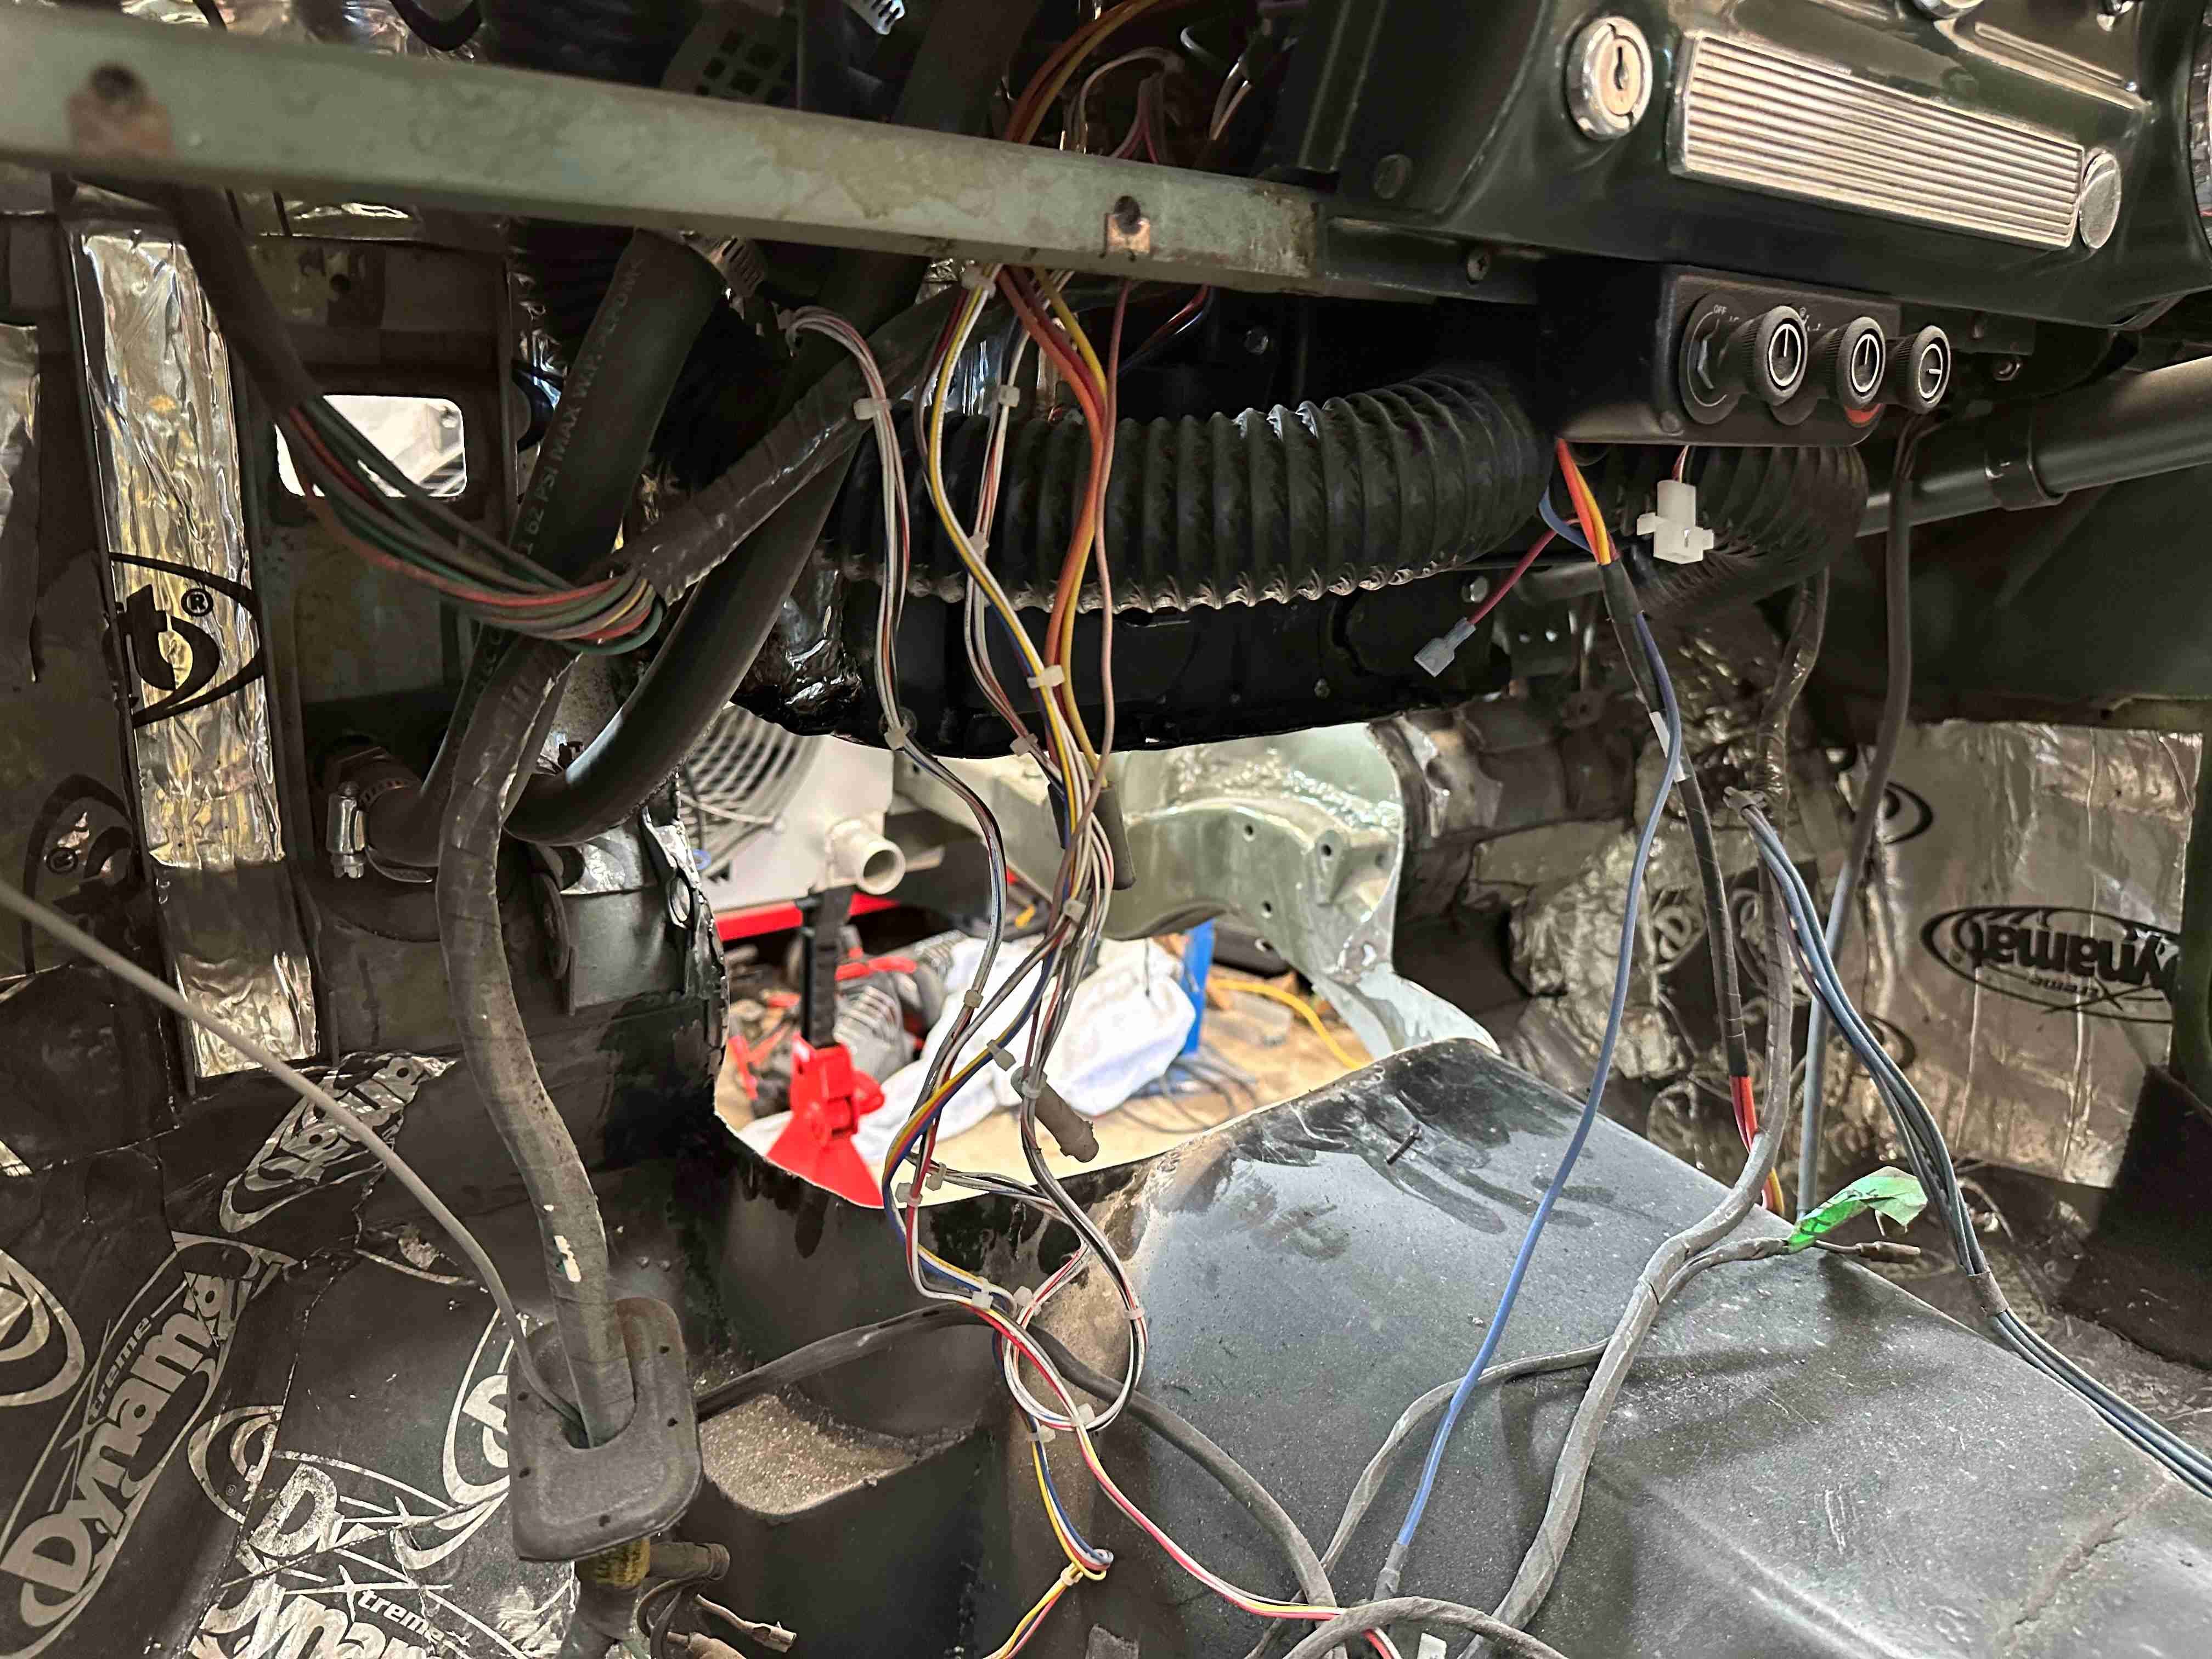
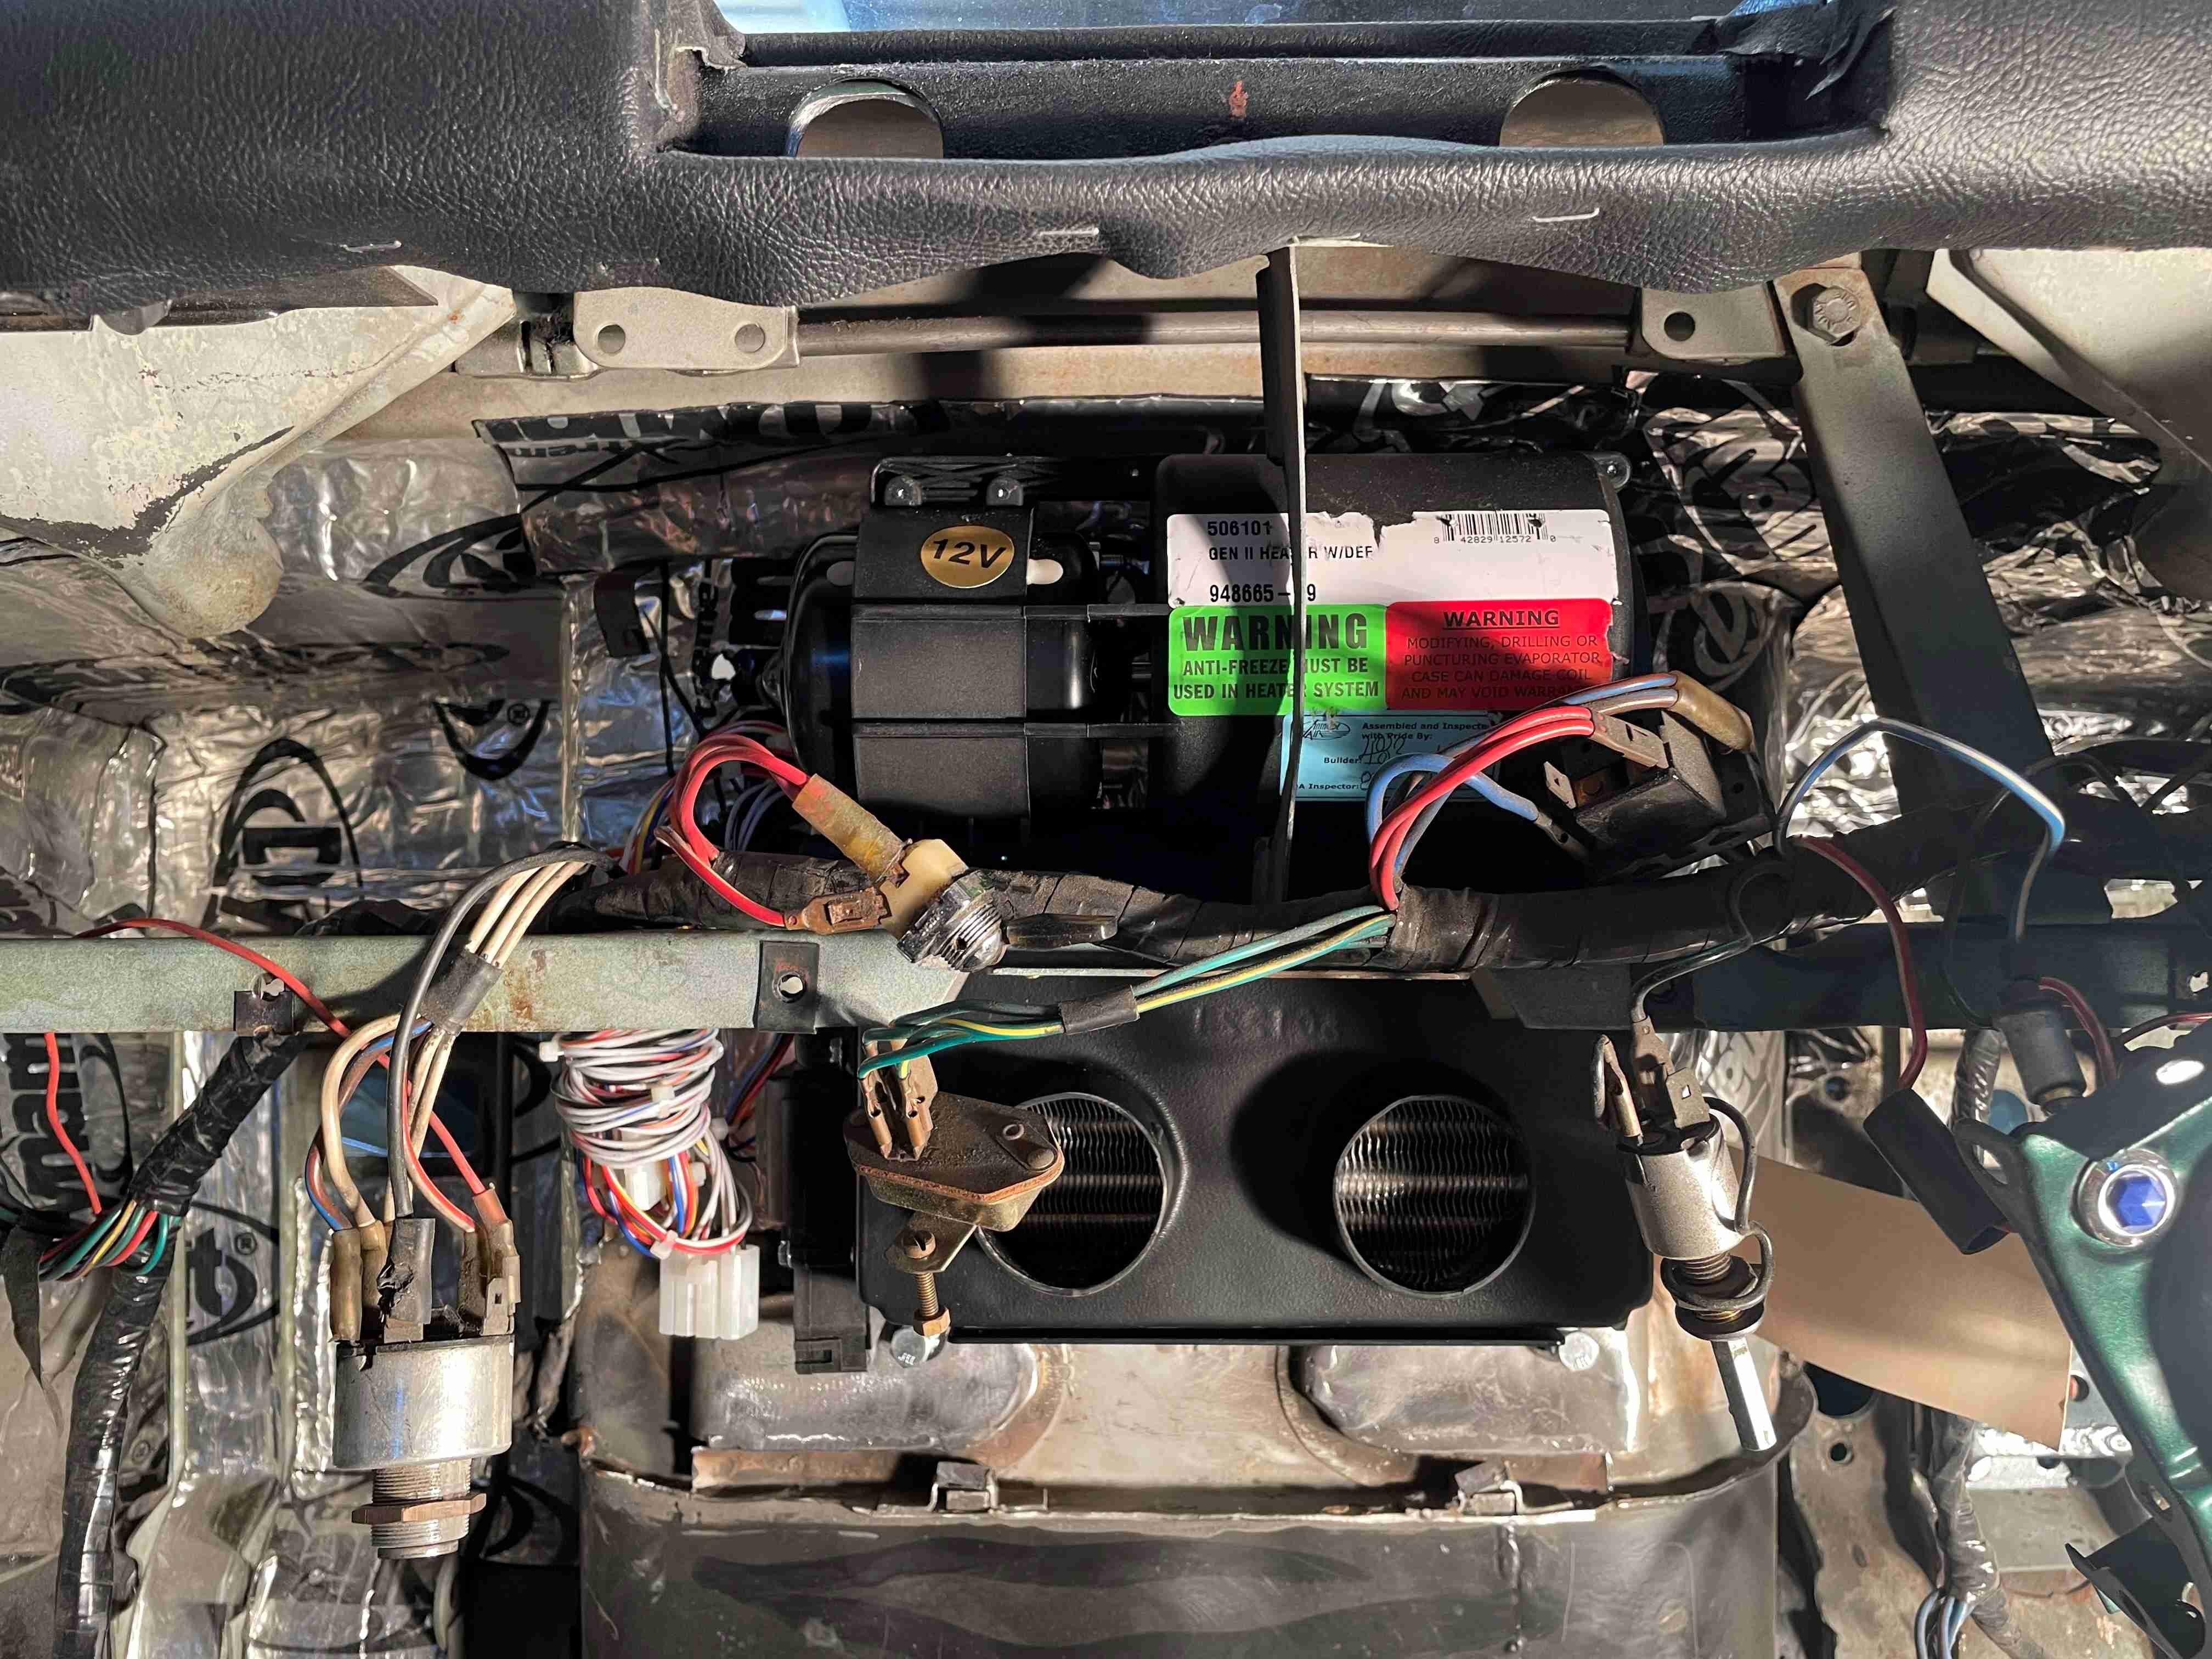
The heater has fitted in behind the dash nicely. I have the dash panel back on with the switches back in and there is still plenty of clearance to the heater. Placed the bulk head fittings in and plumbed the heater to the firewall. I have worked out the plumbing in the engine bay but there is no rush for that. Other news I have found a Hillman Avenger diff. It looks a bit rusty so hopefully it is ok. The reason I decided to go with a Avenger diff is it is the same family, a good width, about 20mm wider than the Minx. Probably not much stronger but Quaife make LSD carriers and axles for them.
1 point
-
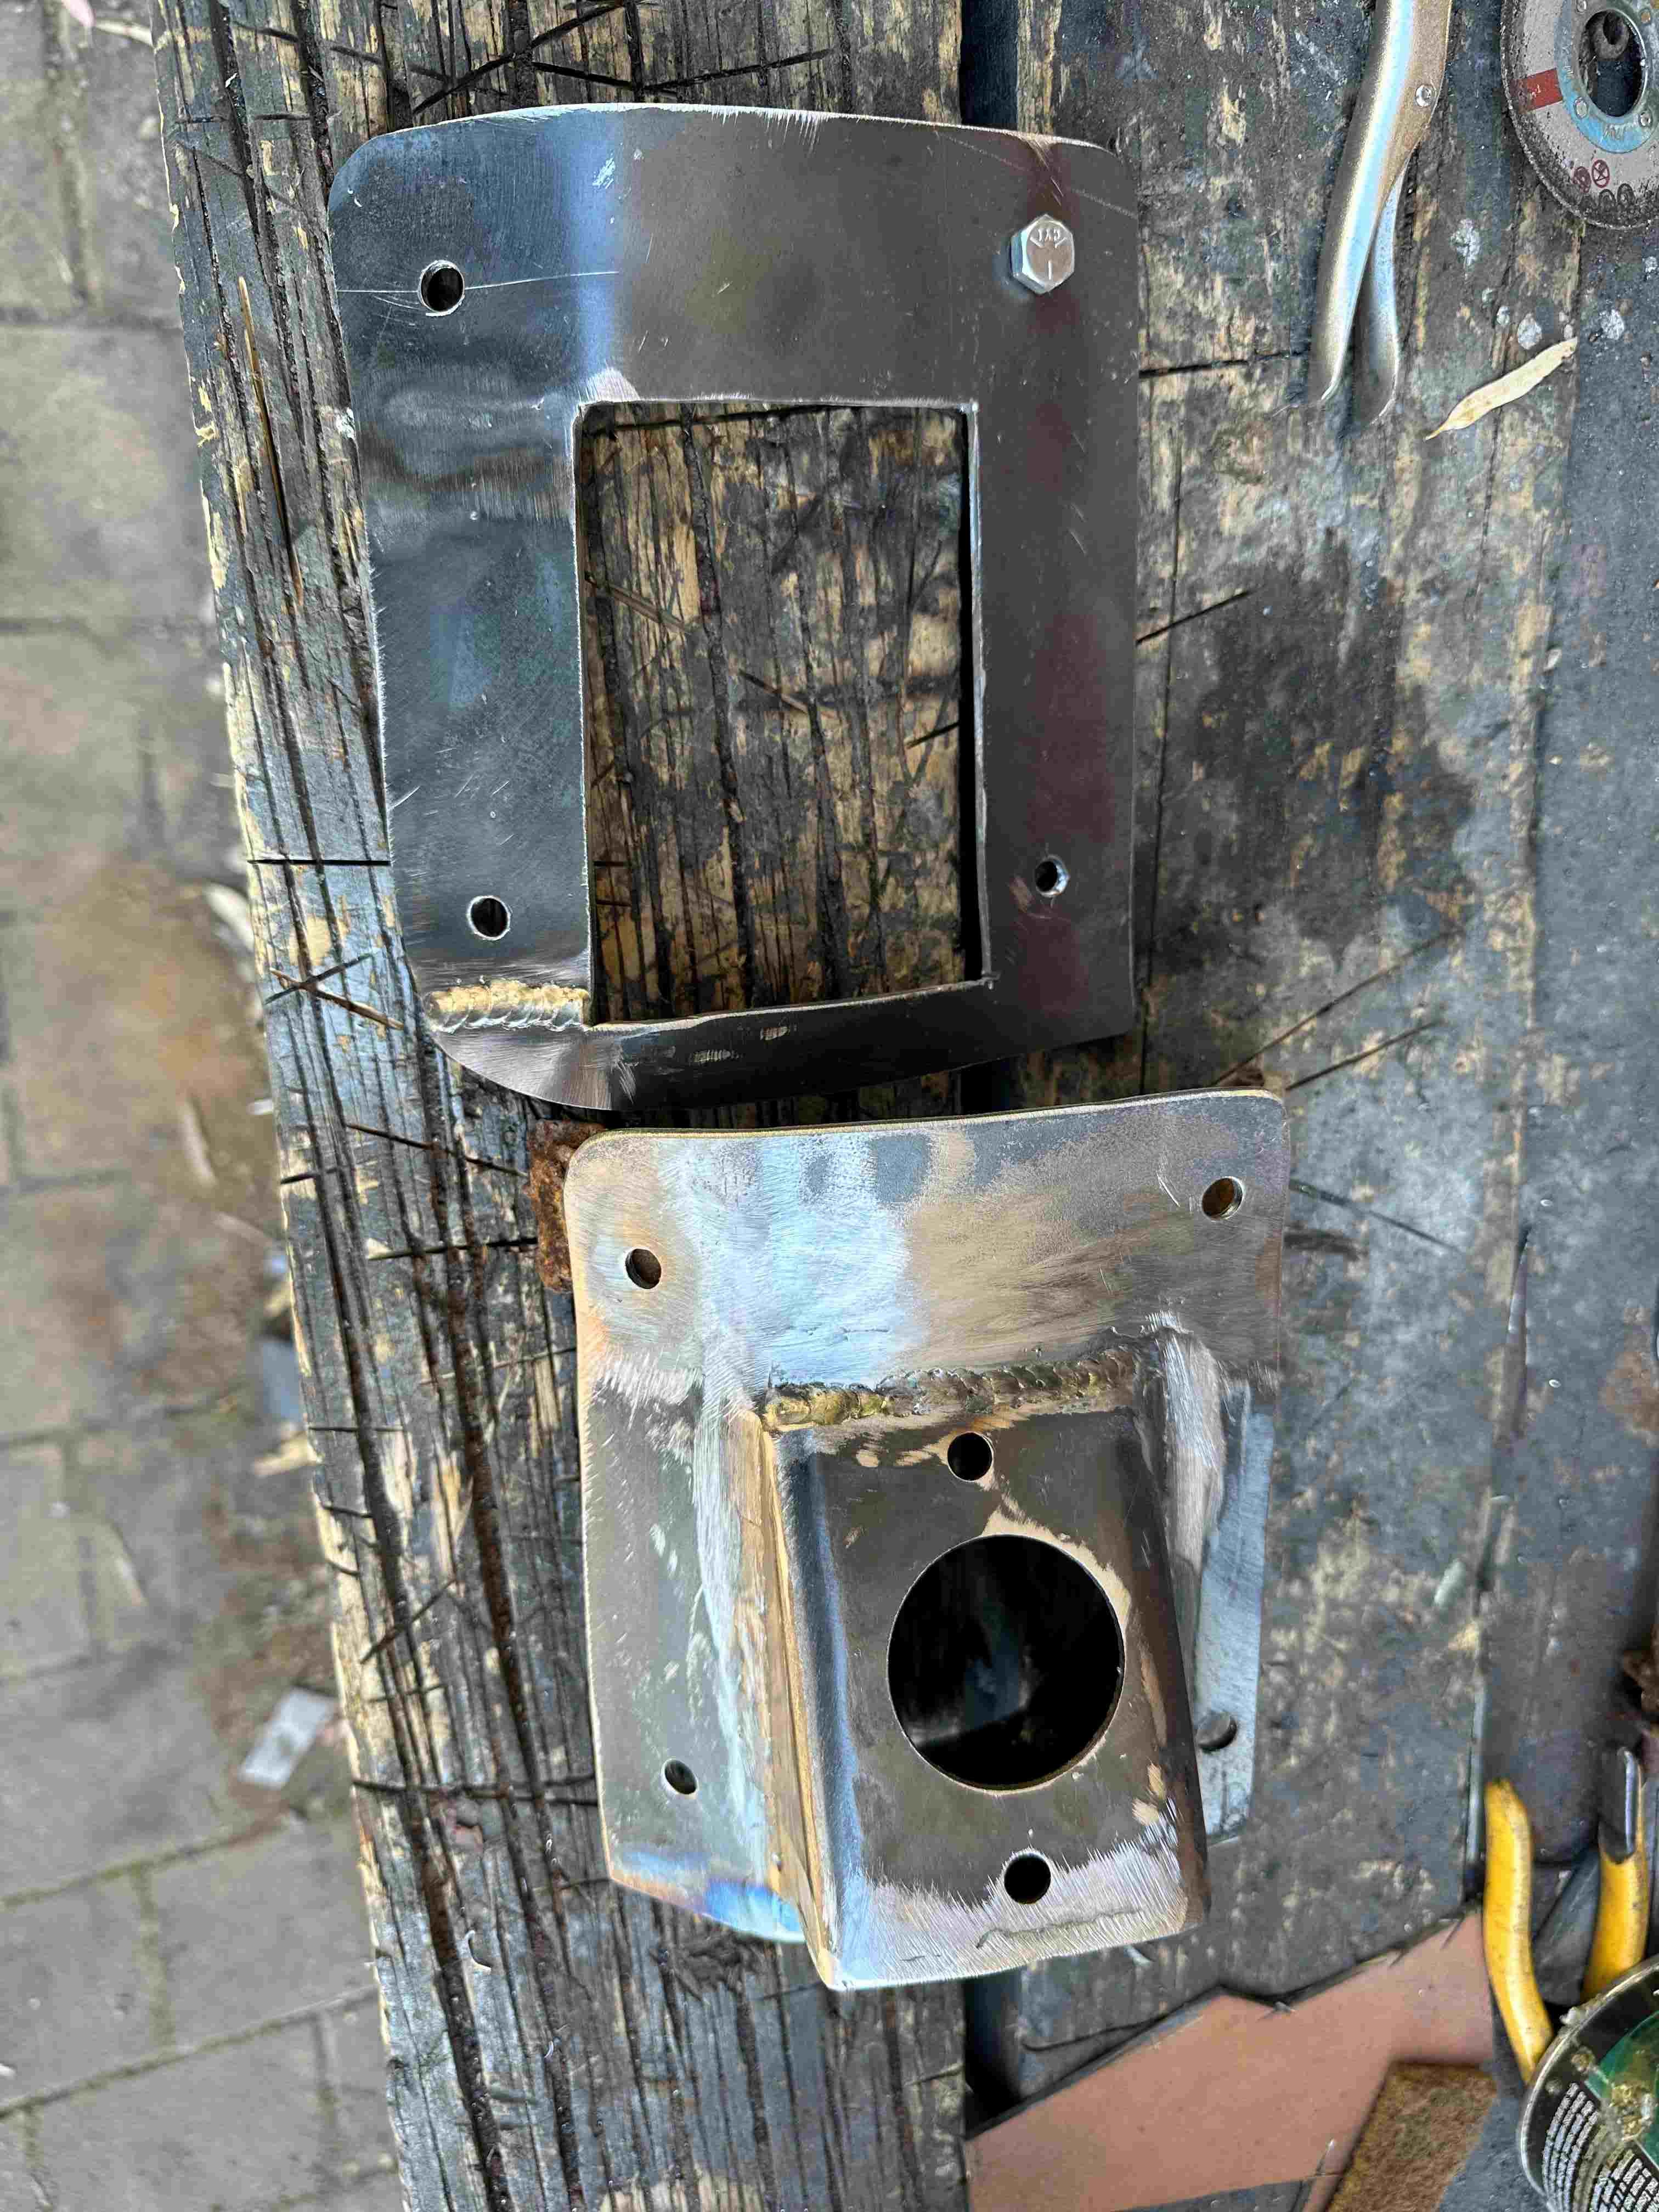
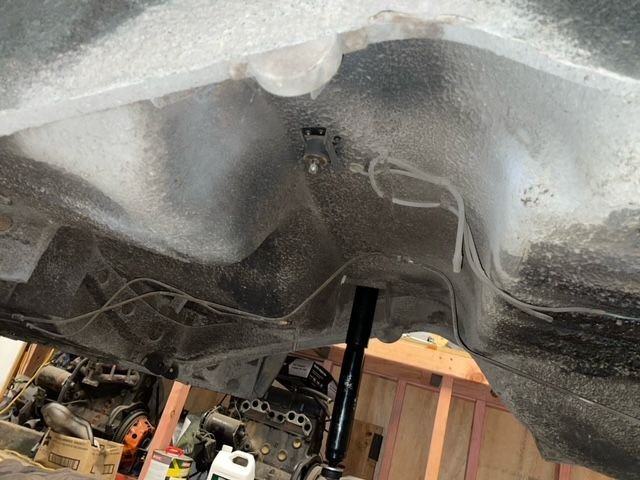
I cut back the old metal ducts and welded in a 3mm plate with another small piece of 3mm welded in behind and drilled and tapped it for the bottom mounting holes. Bolted it into the bottom mounts. Next the top mounts which will need to go through the firewall. They will be in full view above the engine so I need to find a fixture a little more aesthetic than just a normal old bolt head. I also need to remove the dash pad and reglue the vinyl down. The dash pad was badly cracked so I removed the old disintegrating foam and shaped up a piece of Paulownia timber. Put a layer of glass over it and used the spray on contact adhesive to glue the vinyl down. I just needed to use more glue and it would have been a good result. Easily remedied now it's all apart again.
1 point
-
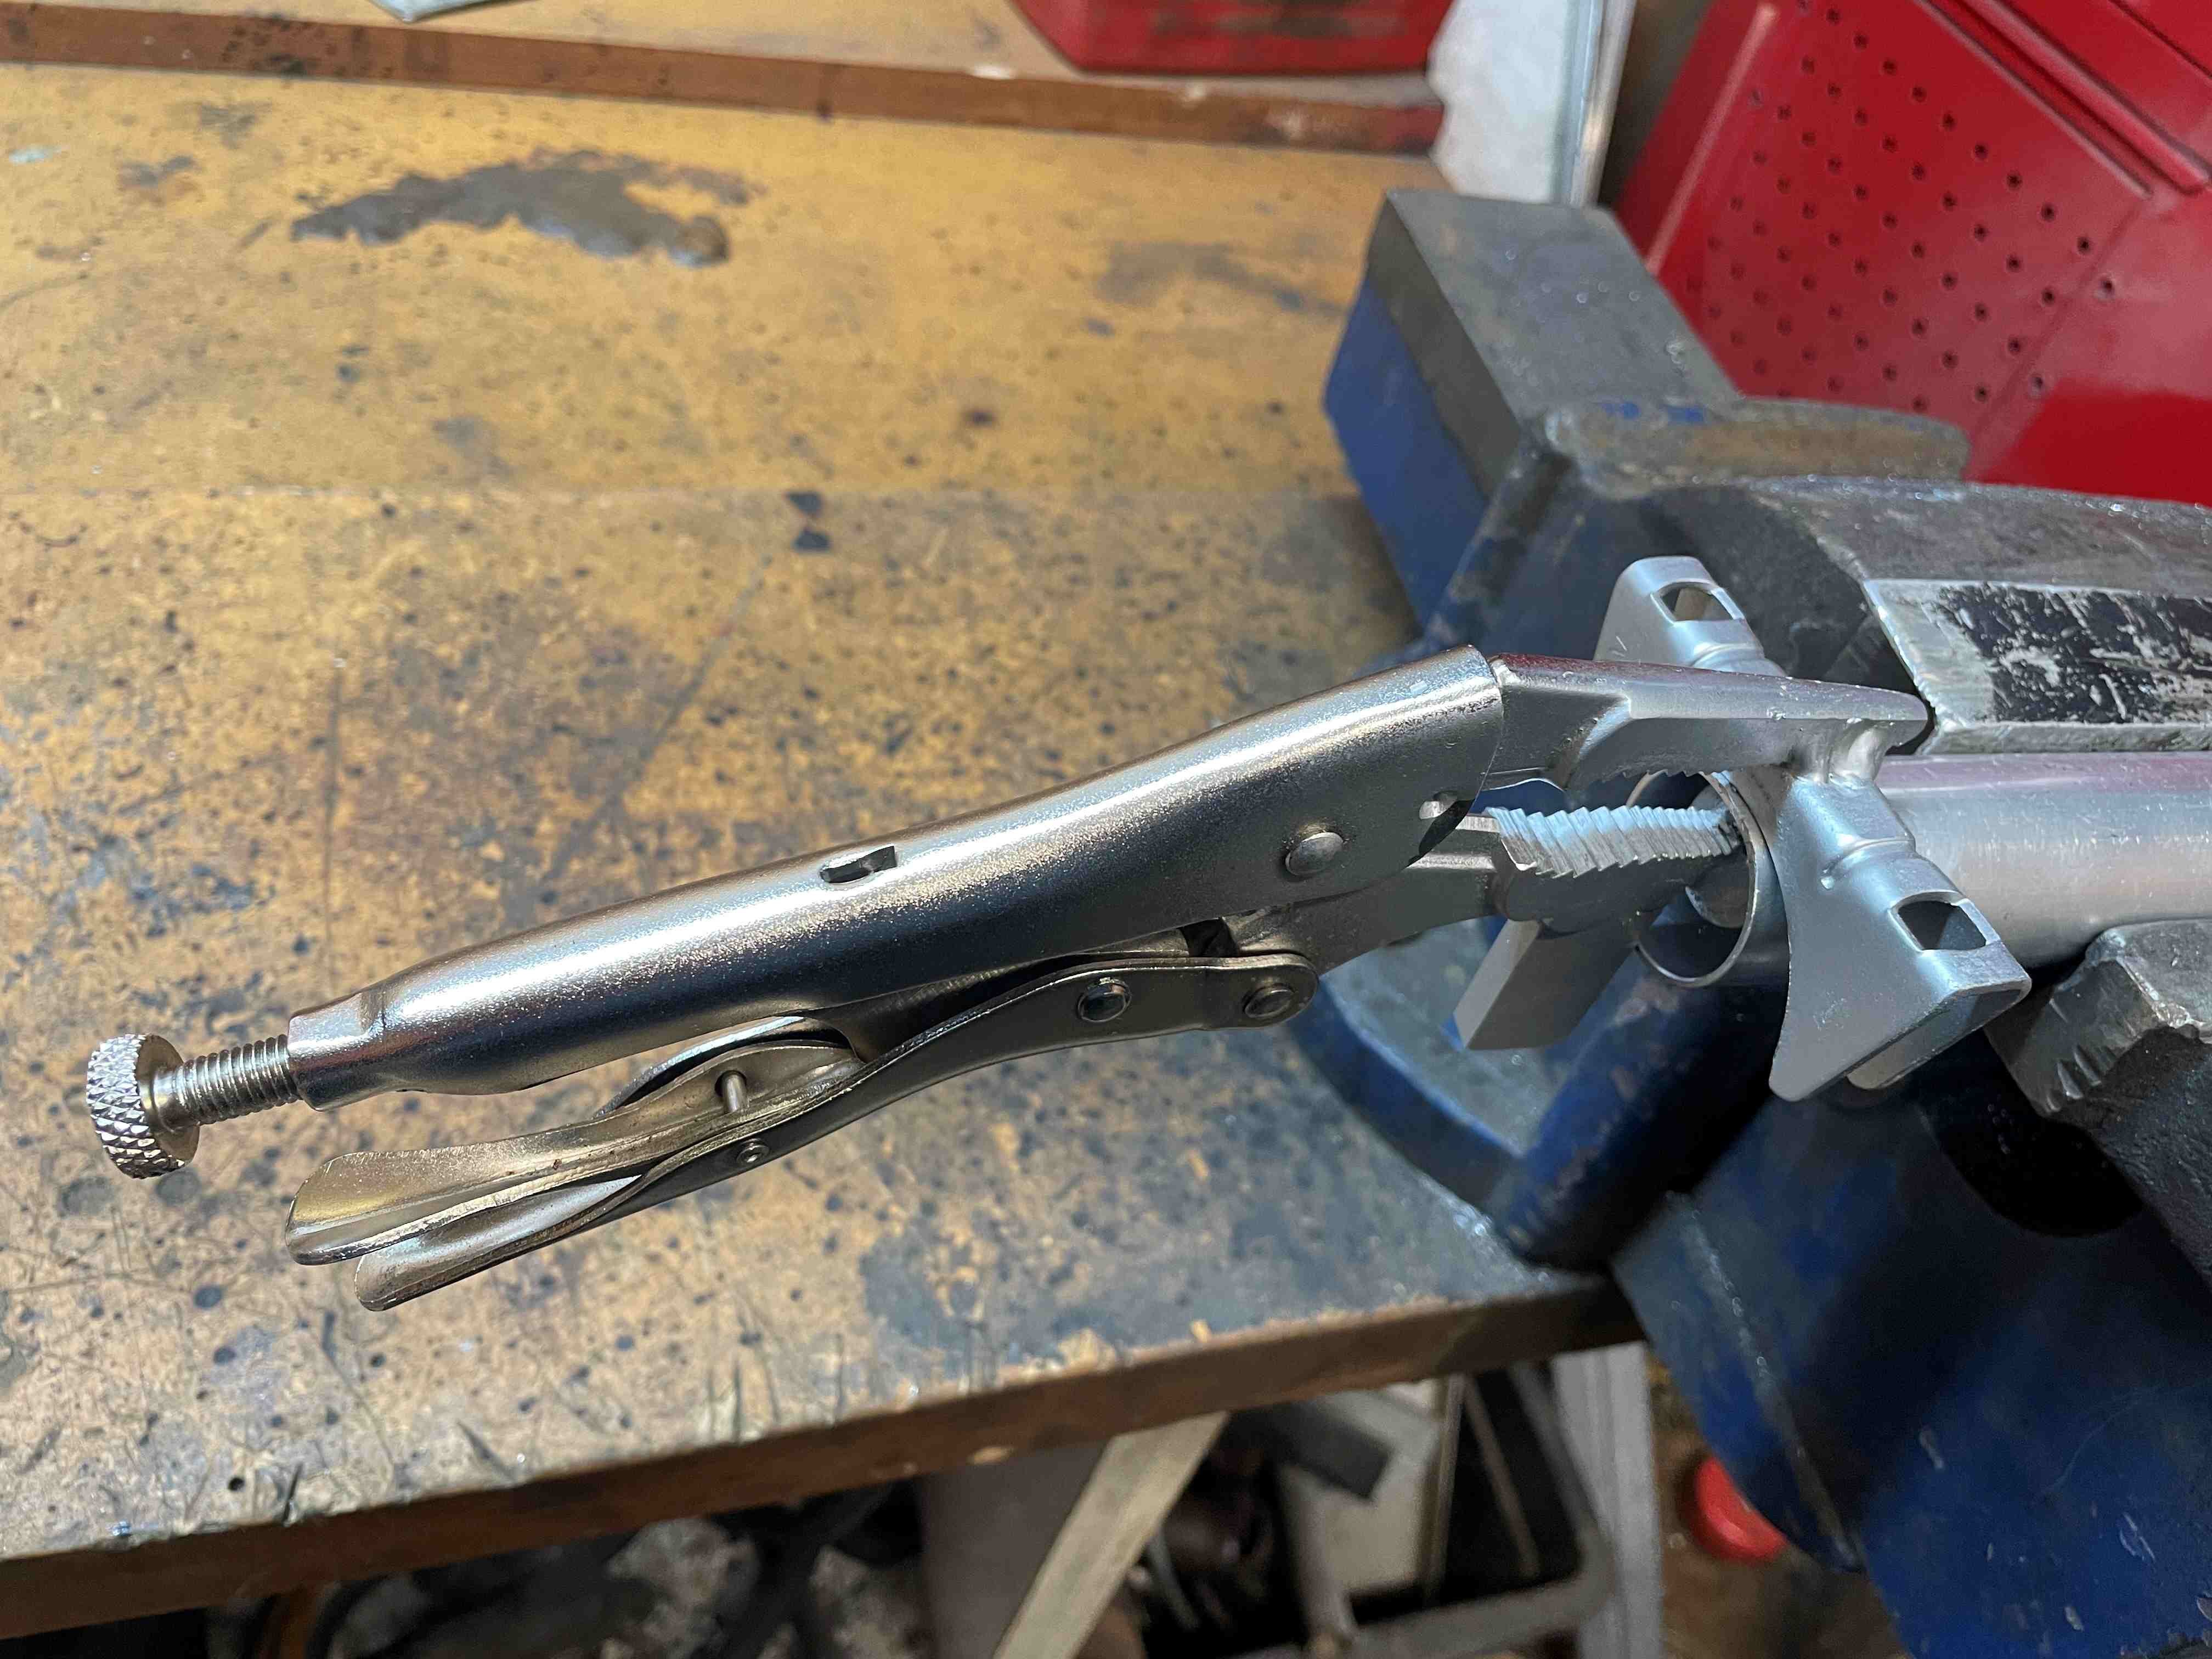
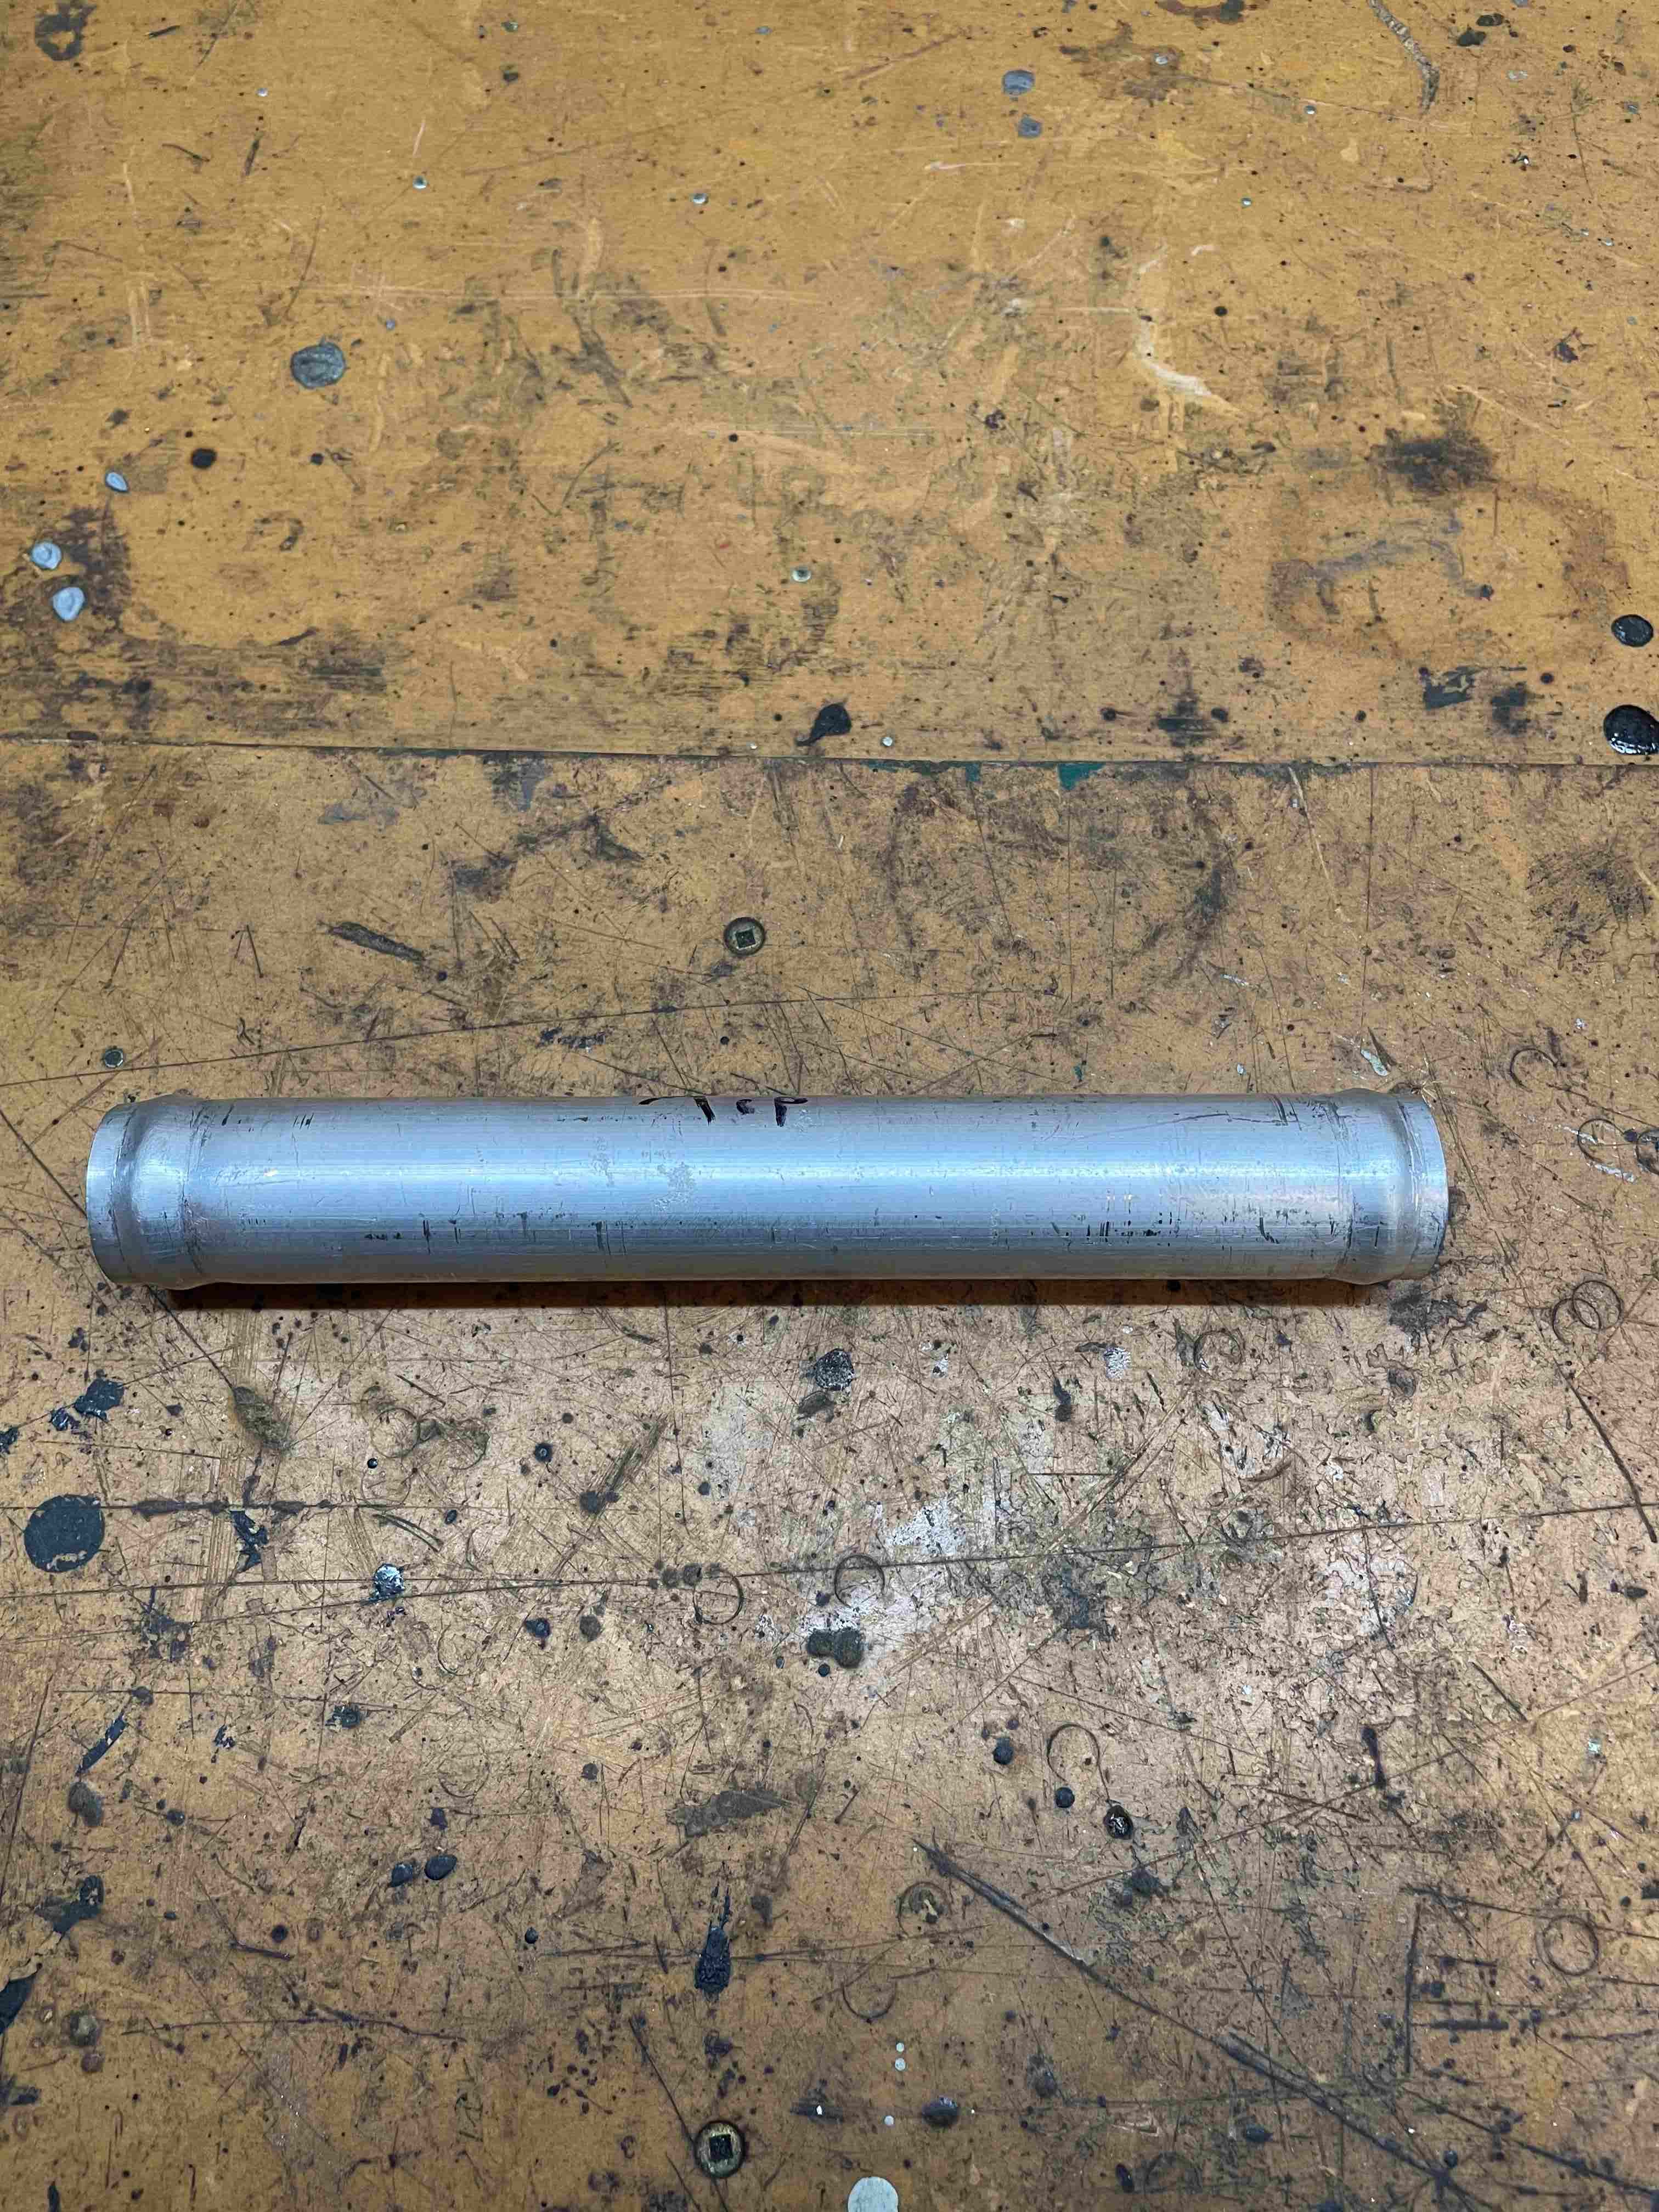
I also made my own tool to put a bead into the alloy tube with a pair of vice grips. It's a bit slow, but works which is the main thing. Also cost very little.
1 point
-
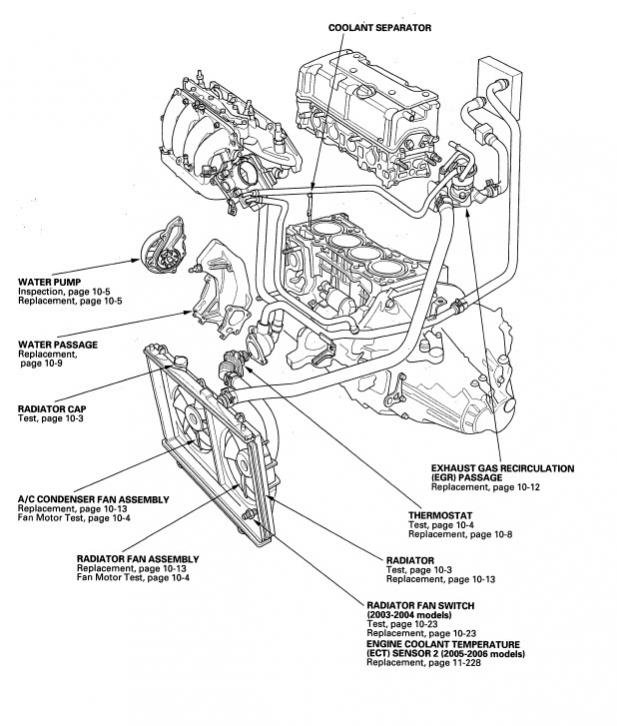
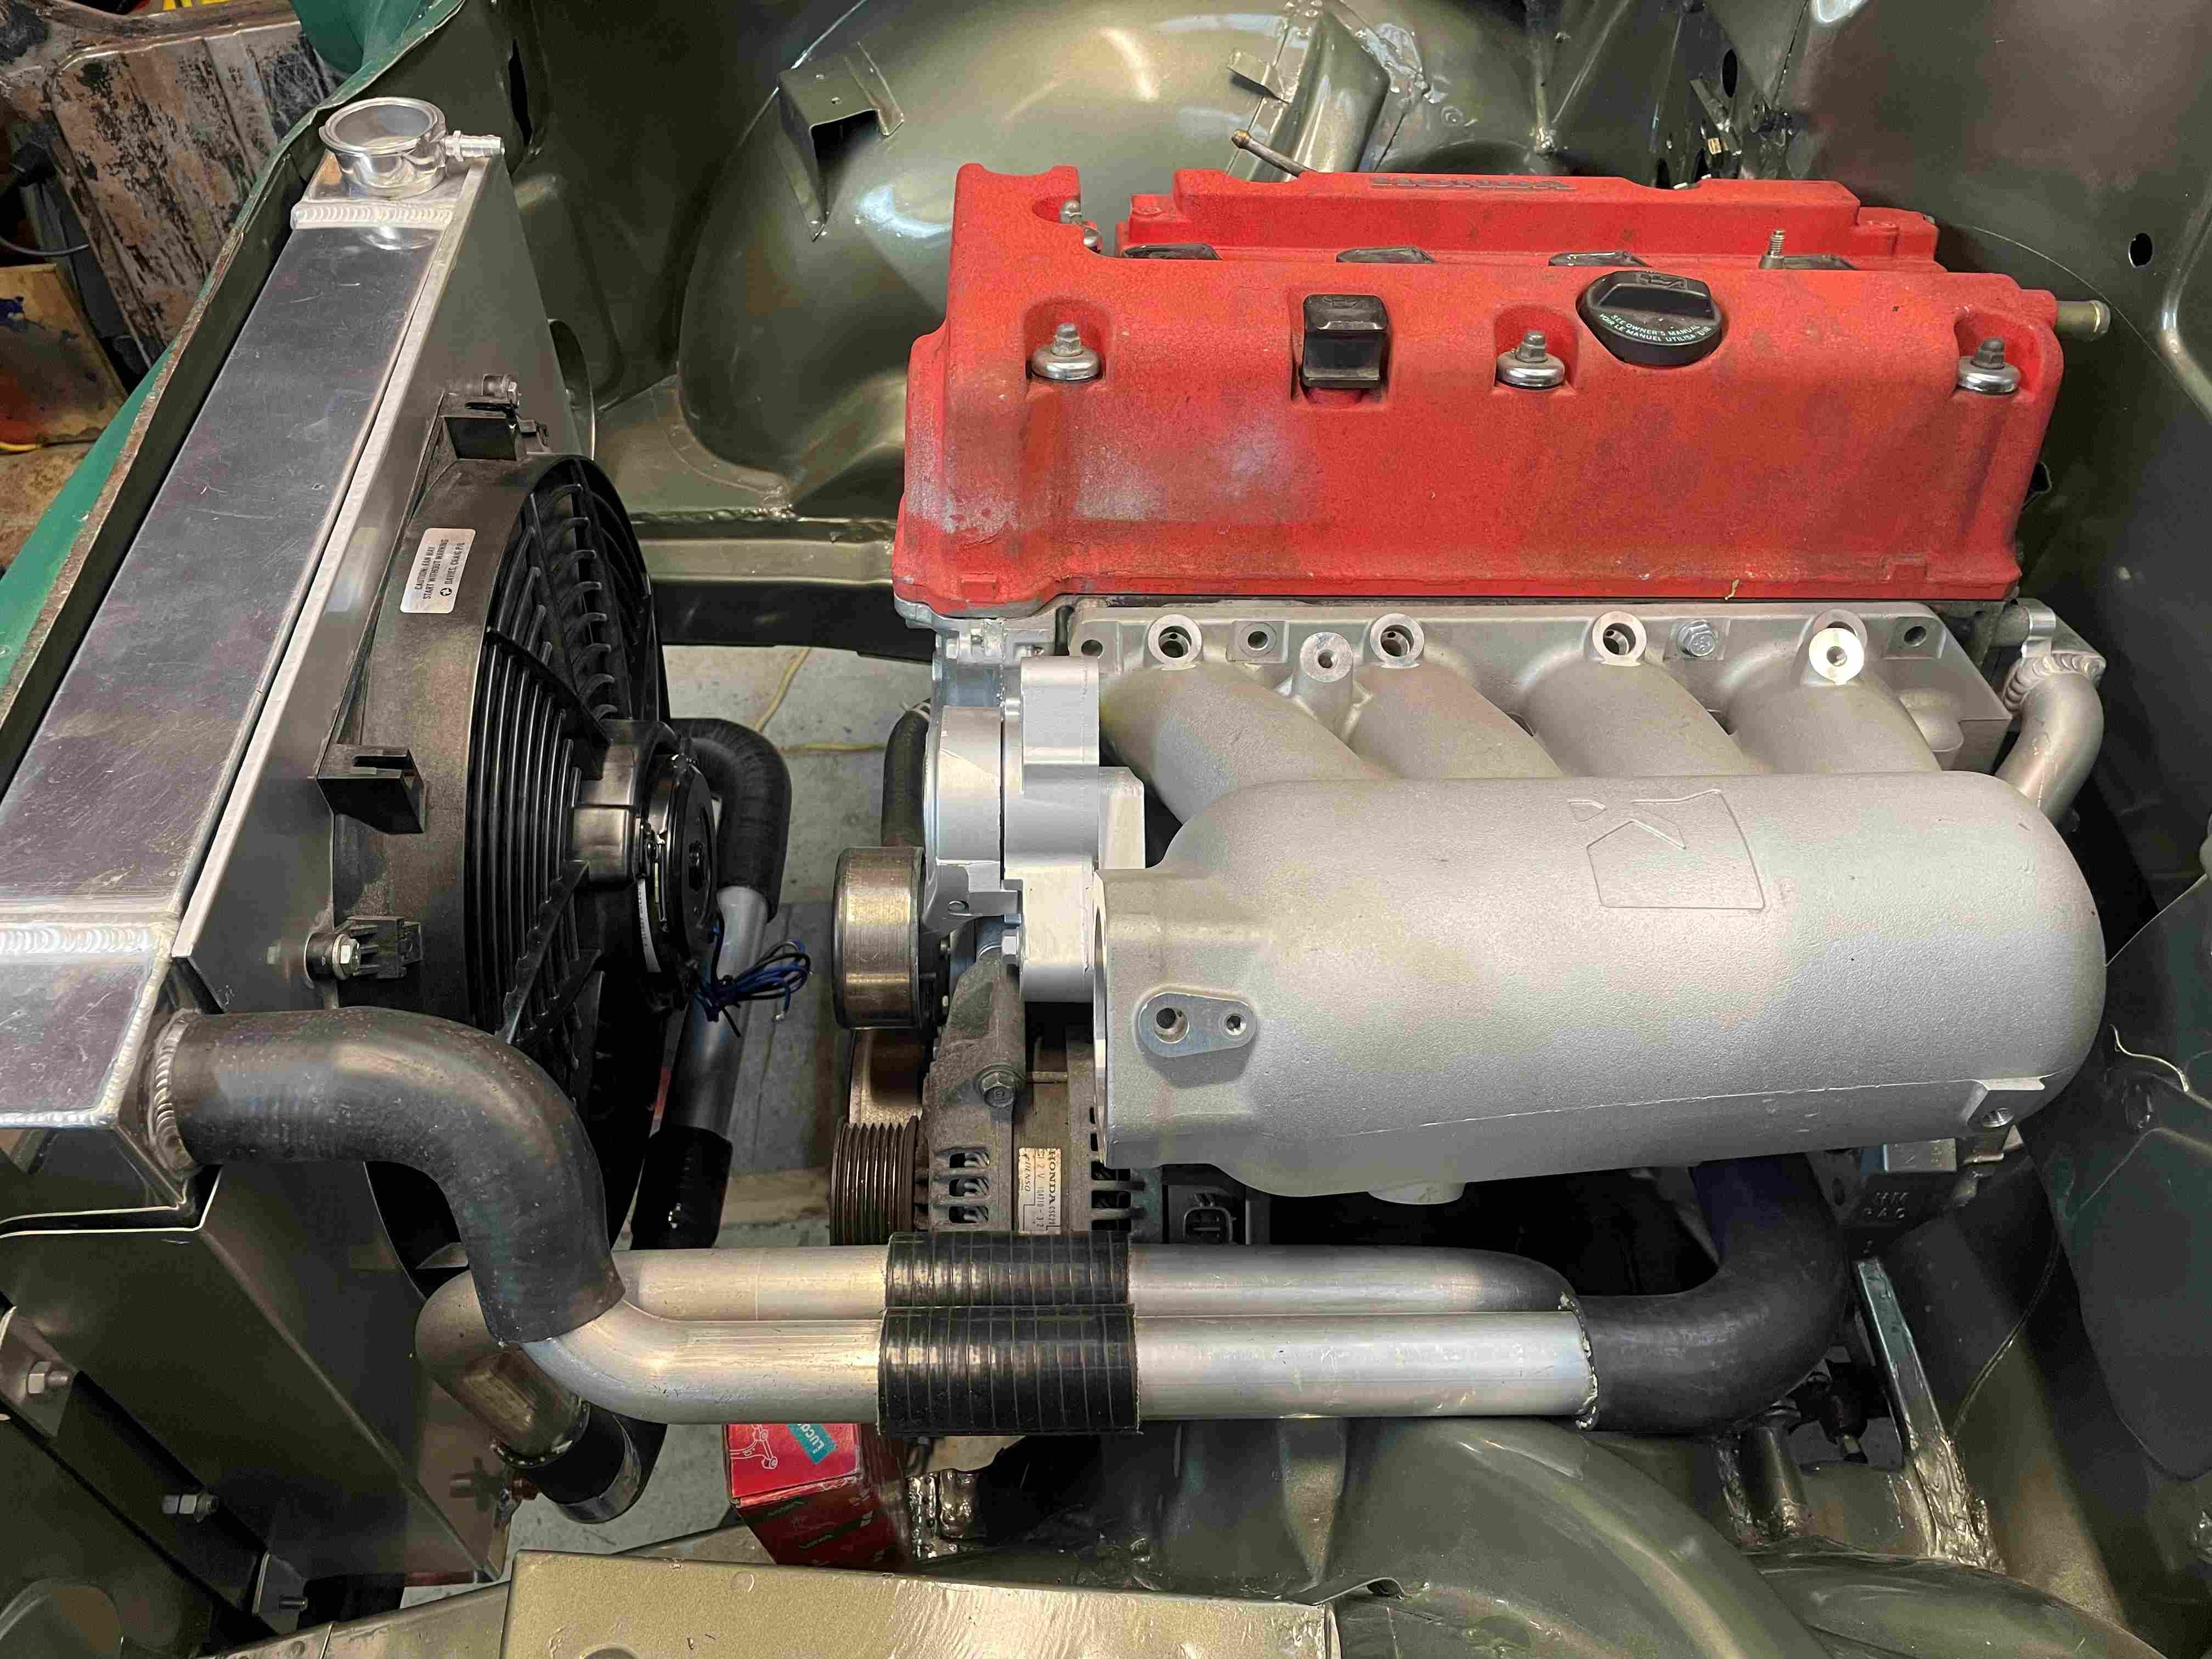
I bought a few aluminum tube straights and bends. Also so some elbows, reducers and straight silicon connecters. Then of to supercheap to grab a couple of long radiator houses the correct dia to fill in the missing links. I spent most of this afternoon working out how to make it work around everything else and piecing it together. I think I am good with this layout. I also found a few diagrams of a Honda K20a cooling system layout to make sure I was plumbing to the correct outlets on the radiator.
1 point
-
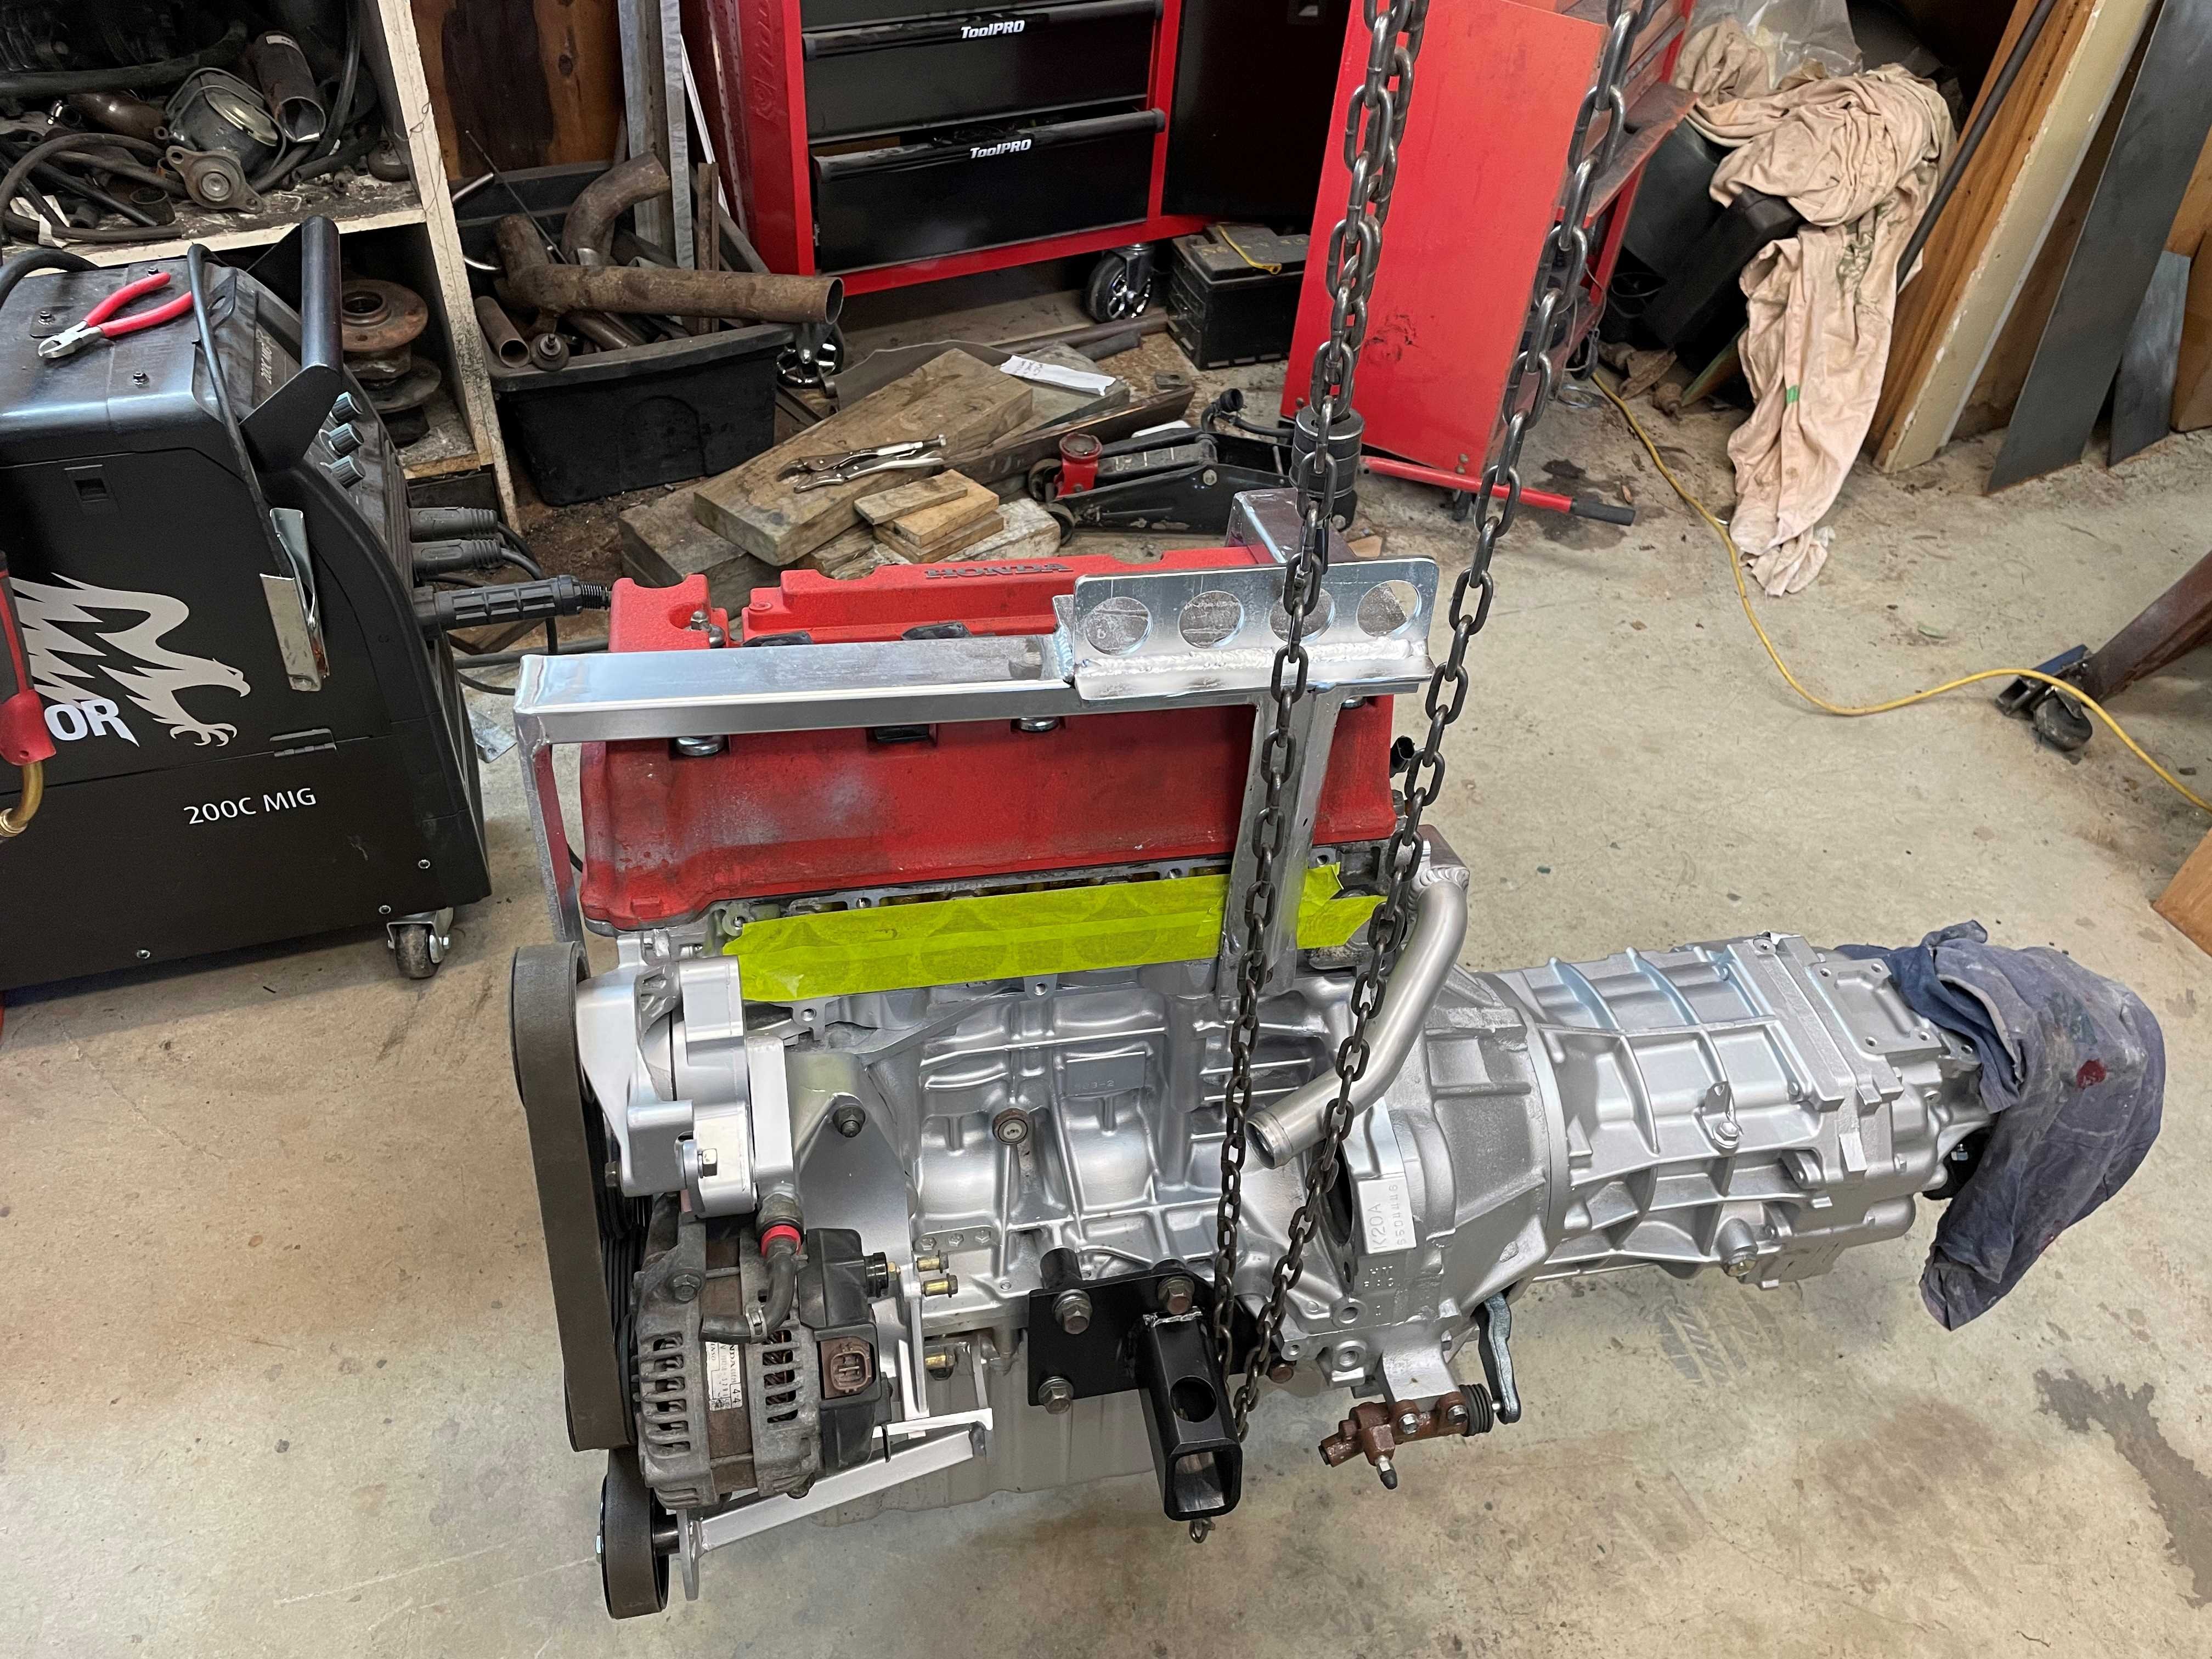
I spent most of today making a bracket that bolts to the engine so I can lift the engine and gearbox up nice and level. All calculations were done using the rule of thumb and the eyechromitor. I plan on getting the car up high enough to roll it under the car with the front X member removed and lifting it up into position. It's just a bit big to be able to drop it in from the top. So the next thing to do is find some axle stands that are tall enough to get the car to the height I need which is quite high. If I can't find anything I will have to make some or some other way of doing it.
1 point
-
I was hoping I would be able to buy a plastic dummy spline for a Toyota from Repco but they only really had one of those stupid plastic red things that I already had, which is about as much use as you know what. So I made my own. The petrol heads god must have been in a good mood yesterday because I had everything I needed to make something, without having to do bugger all to it to make it the correct size. It worked as well as the gearbox slipped into place without a single expletive said. I had to get a wire clip to hold the clutch fork to the bearing carrier and there were none in the country and getting one from Japan would take at least 6 weeks I was told. The local Toyota gave me a complete bearing and carrier for trade which was still a heavy price to pay for a clip but at least 50% of retail. lesson to oneself when buying parts get everything. Also as to the previous post when I thought the clutch fork was too close to the slave cyl. The reason being I didn't have the clutch plate in. Once the pressure plate clamps down on the clutch plate the fingers move in and that gives the required room for the slave cyl push rod. Something you don't really notice until you need to. If I had made alignment tool to start with I would have had the plate in place. Never mind at least I kept my sanity.
1 point
-
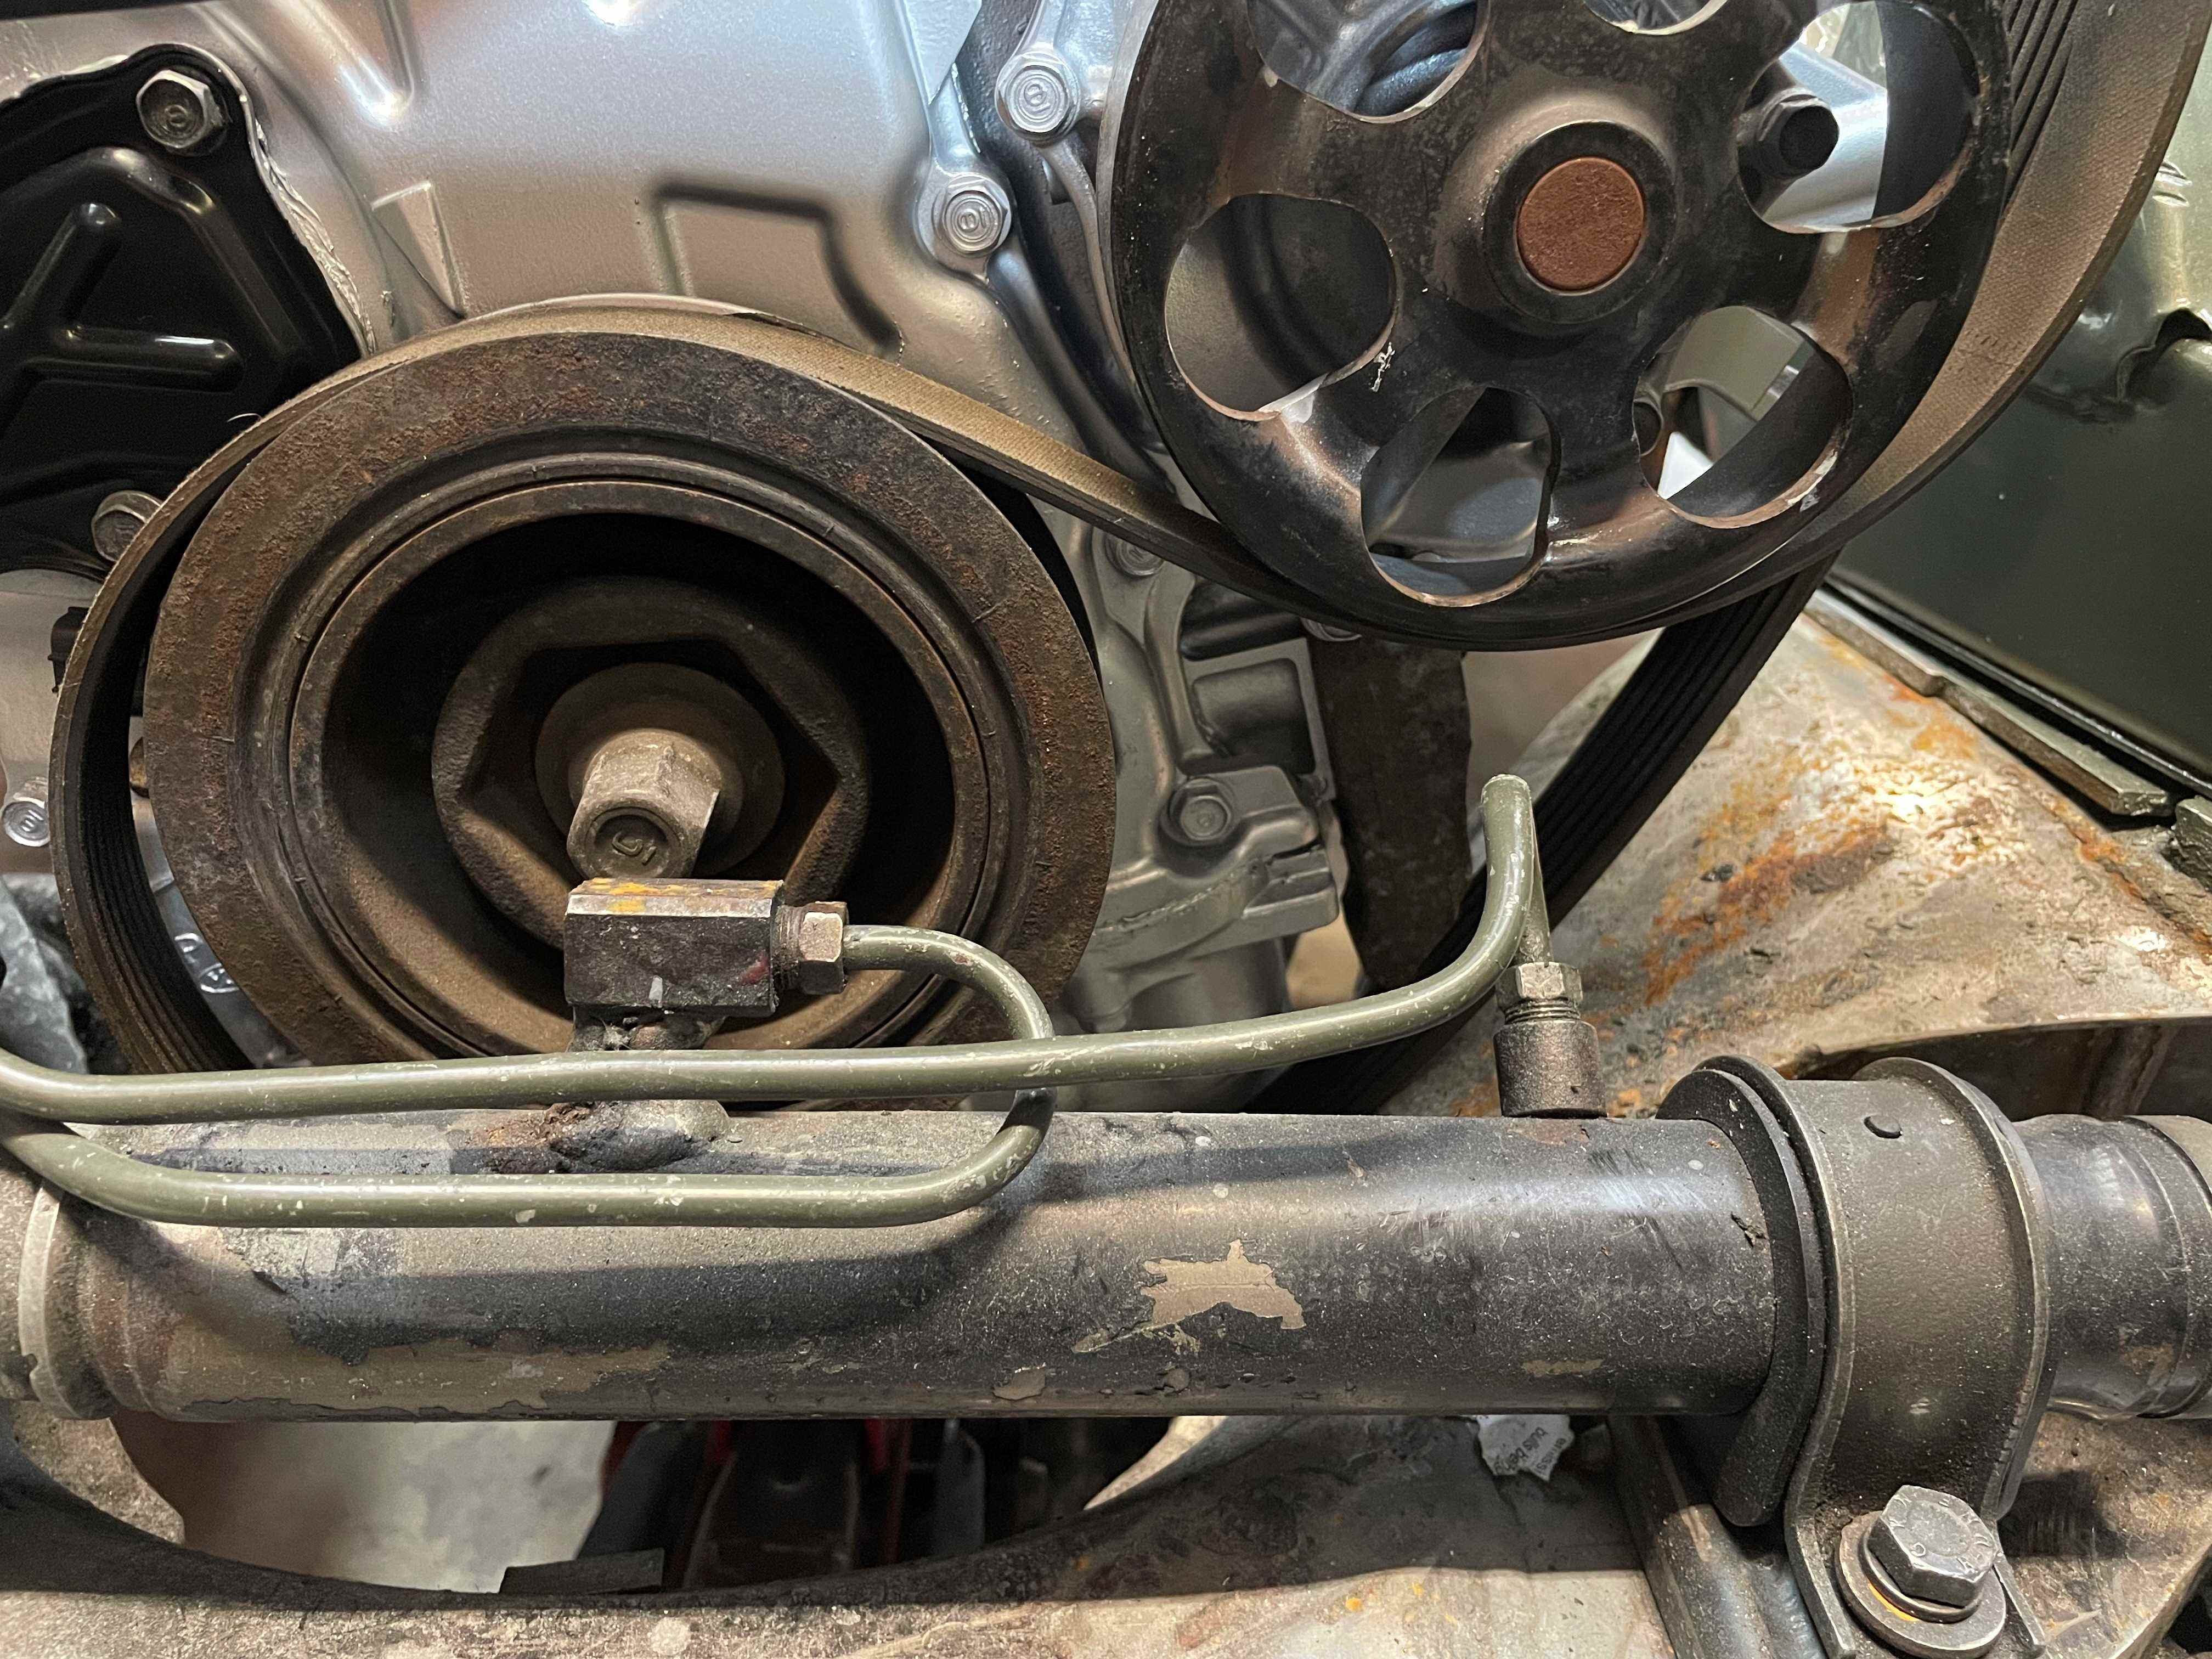
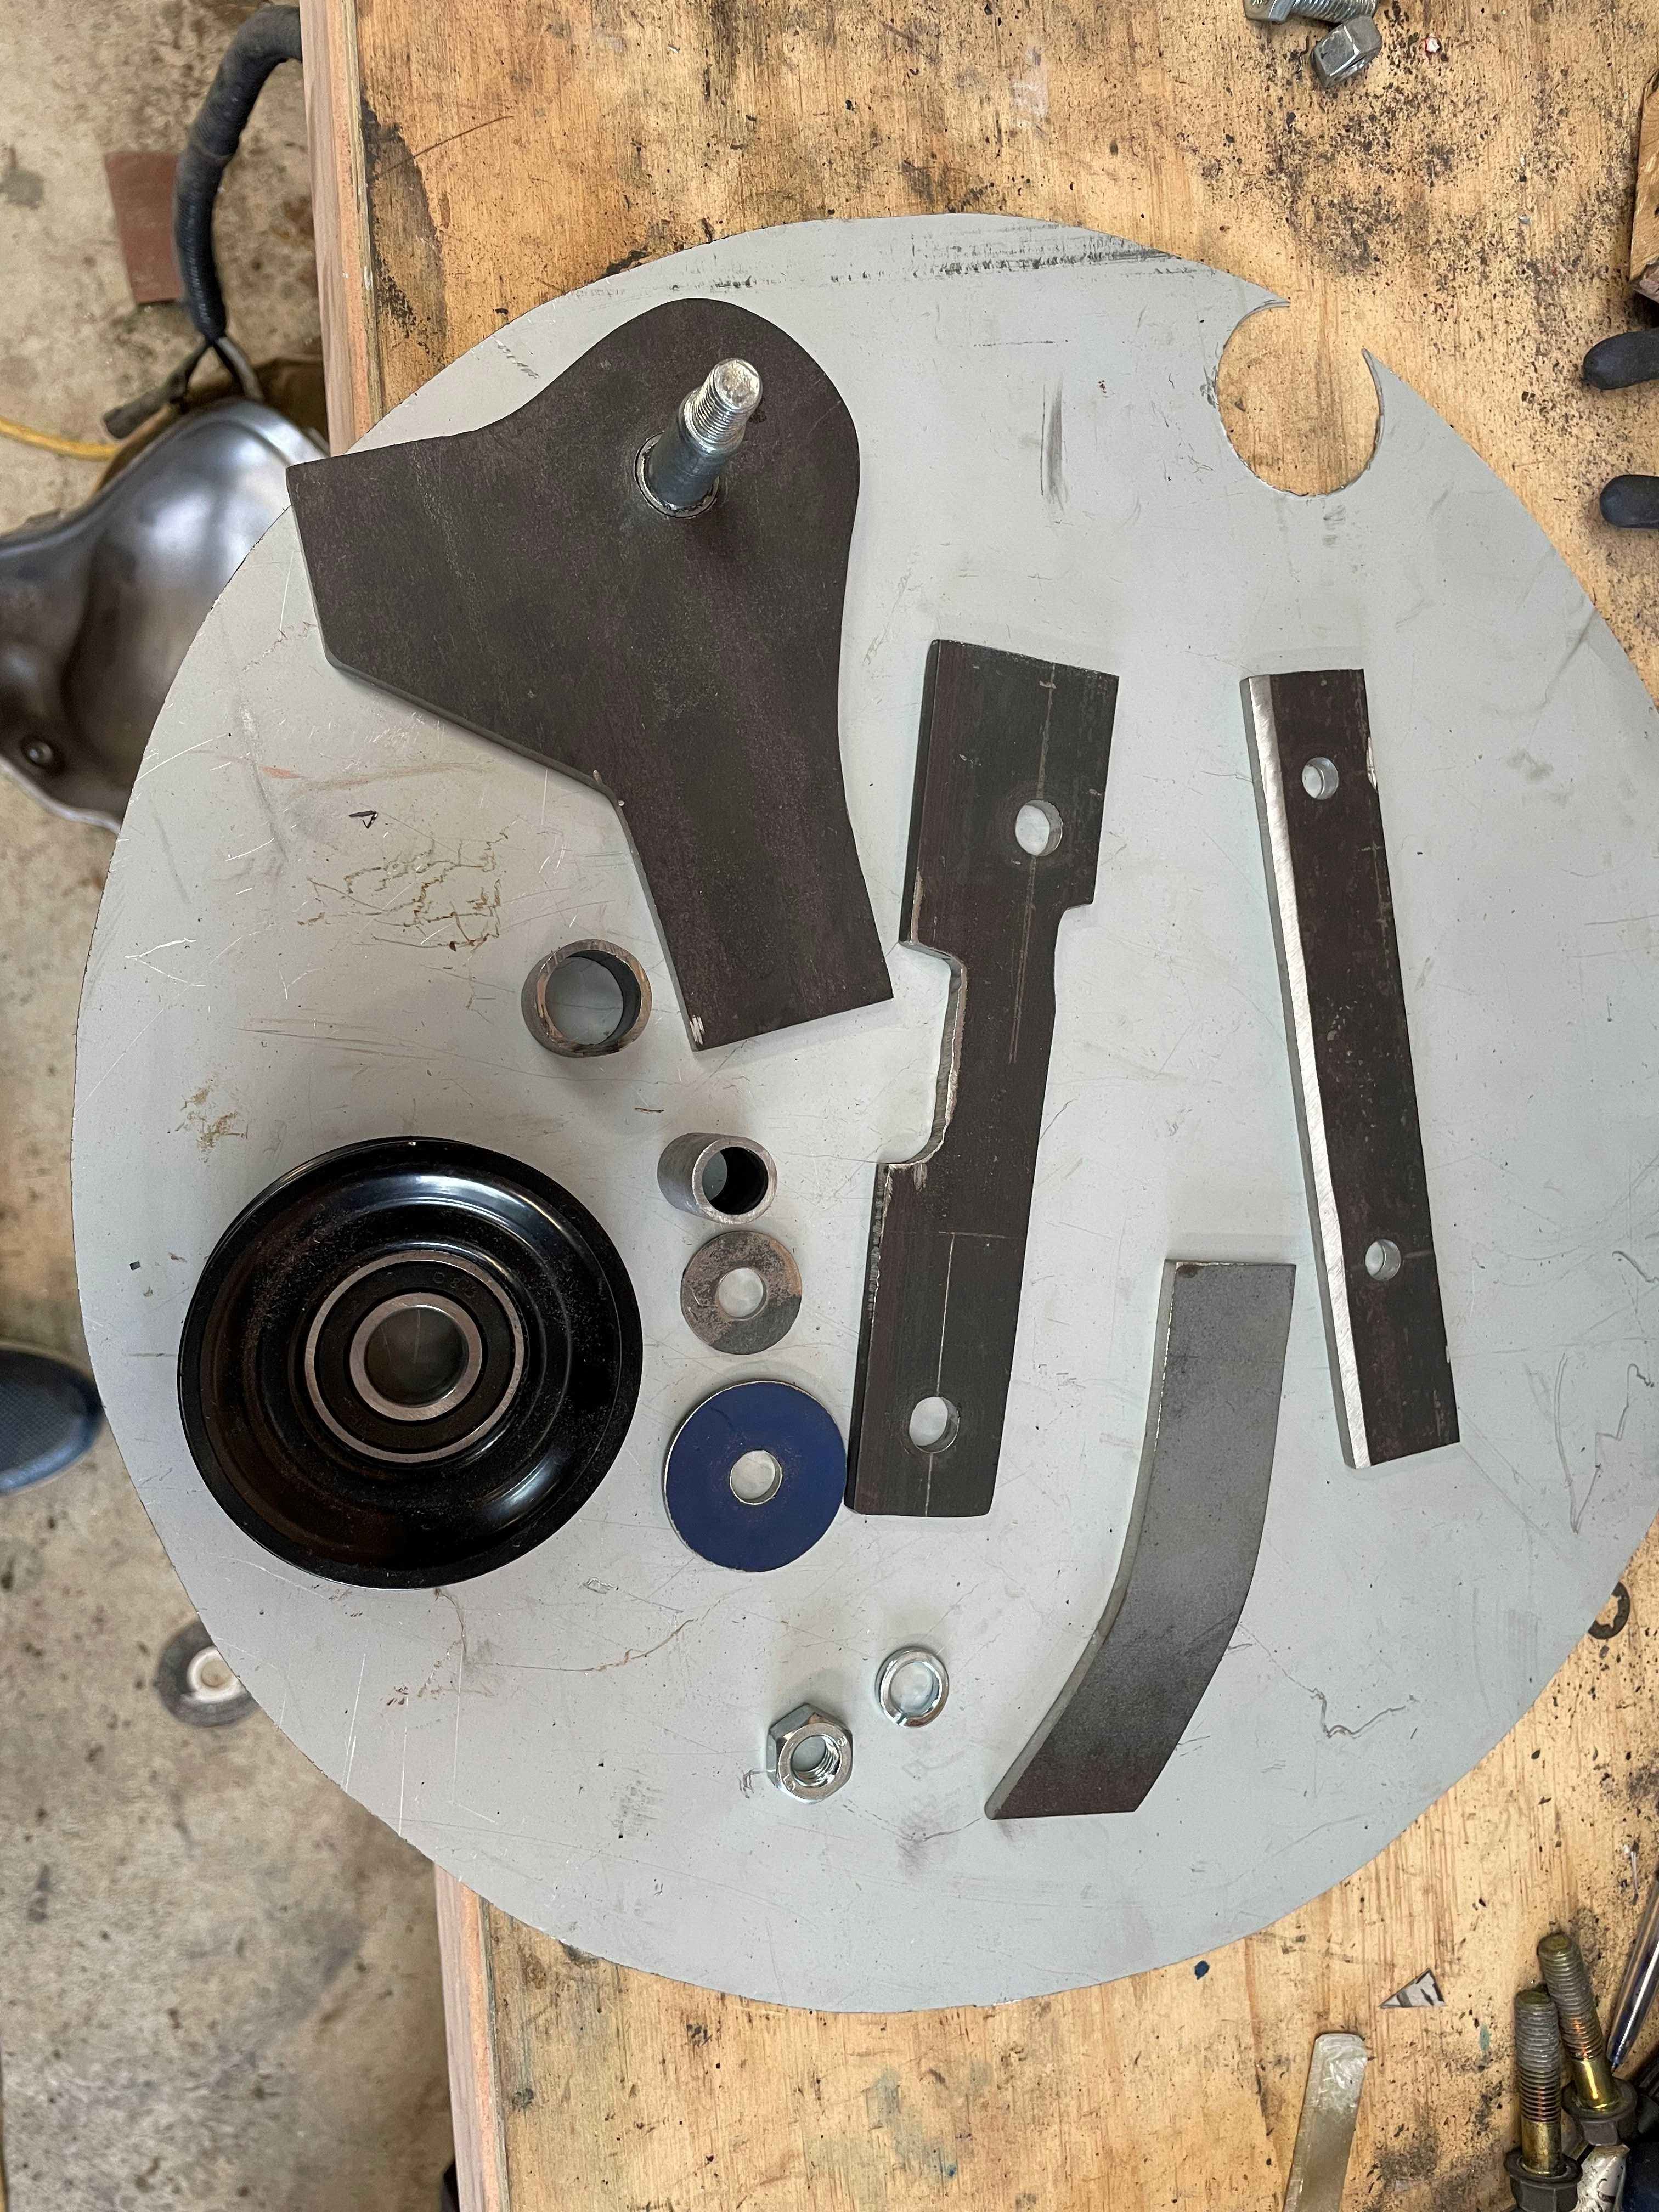
It would have been nice to keep the aircon pump and have some modern comfort to the car but it just wasn't going to fit, the engine bay is just to small and these engines are like a big block 4cyl. Once I had the engine back in I was worried that the hyd fitting on the rack was going to be in the way but after a bit of fiddling around it will be fine. I looked to see what I could get to delete the air con pump but all the kits just put the alternator down there so I bought another idler pulley and made my own bracket upI dug around to see what I had and bolt that was near perfect and a sleeve that was a little large in the outer dia but I used the Makita technique to reduce it as I don't have a lathe. I lined up the pulley with straight edges and tack welded it in place then took it off and fully welded it and gave it a coat or two of paint. And that was a days activity. As the size of the pulley is smaller than the one on the aircon pump the belt has no tension on it so I will have to lift up the top idler pulley to compensate.
1 point
-
After another couple of hours scrubbing the paint went on. Need to repaint the valve cover. It looked fresh but it isn't that well stuck to the aluminum.
1 point
-
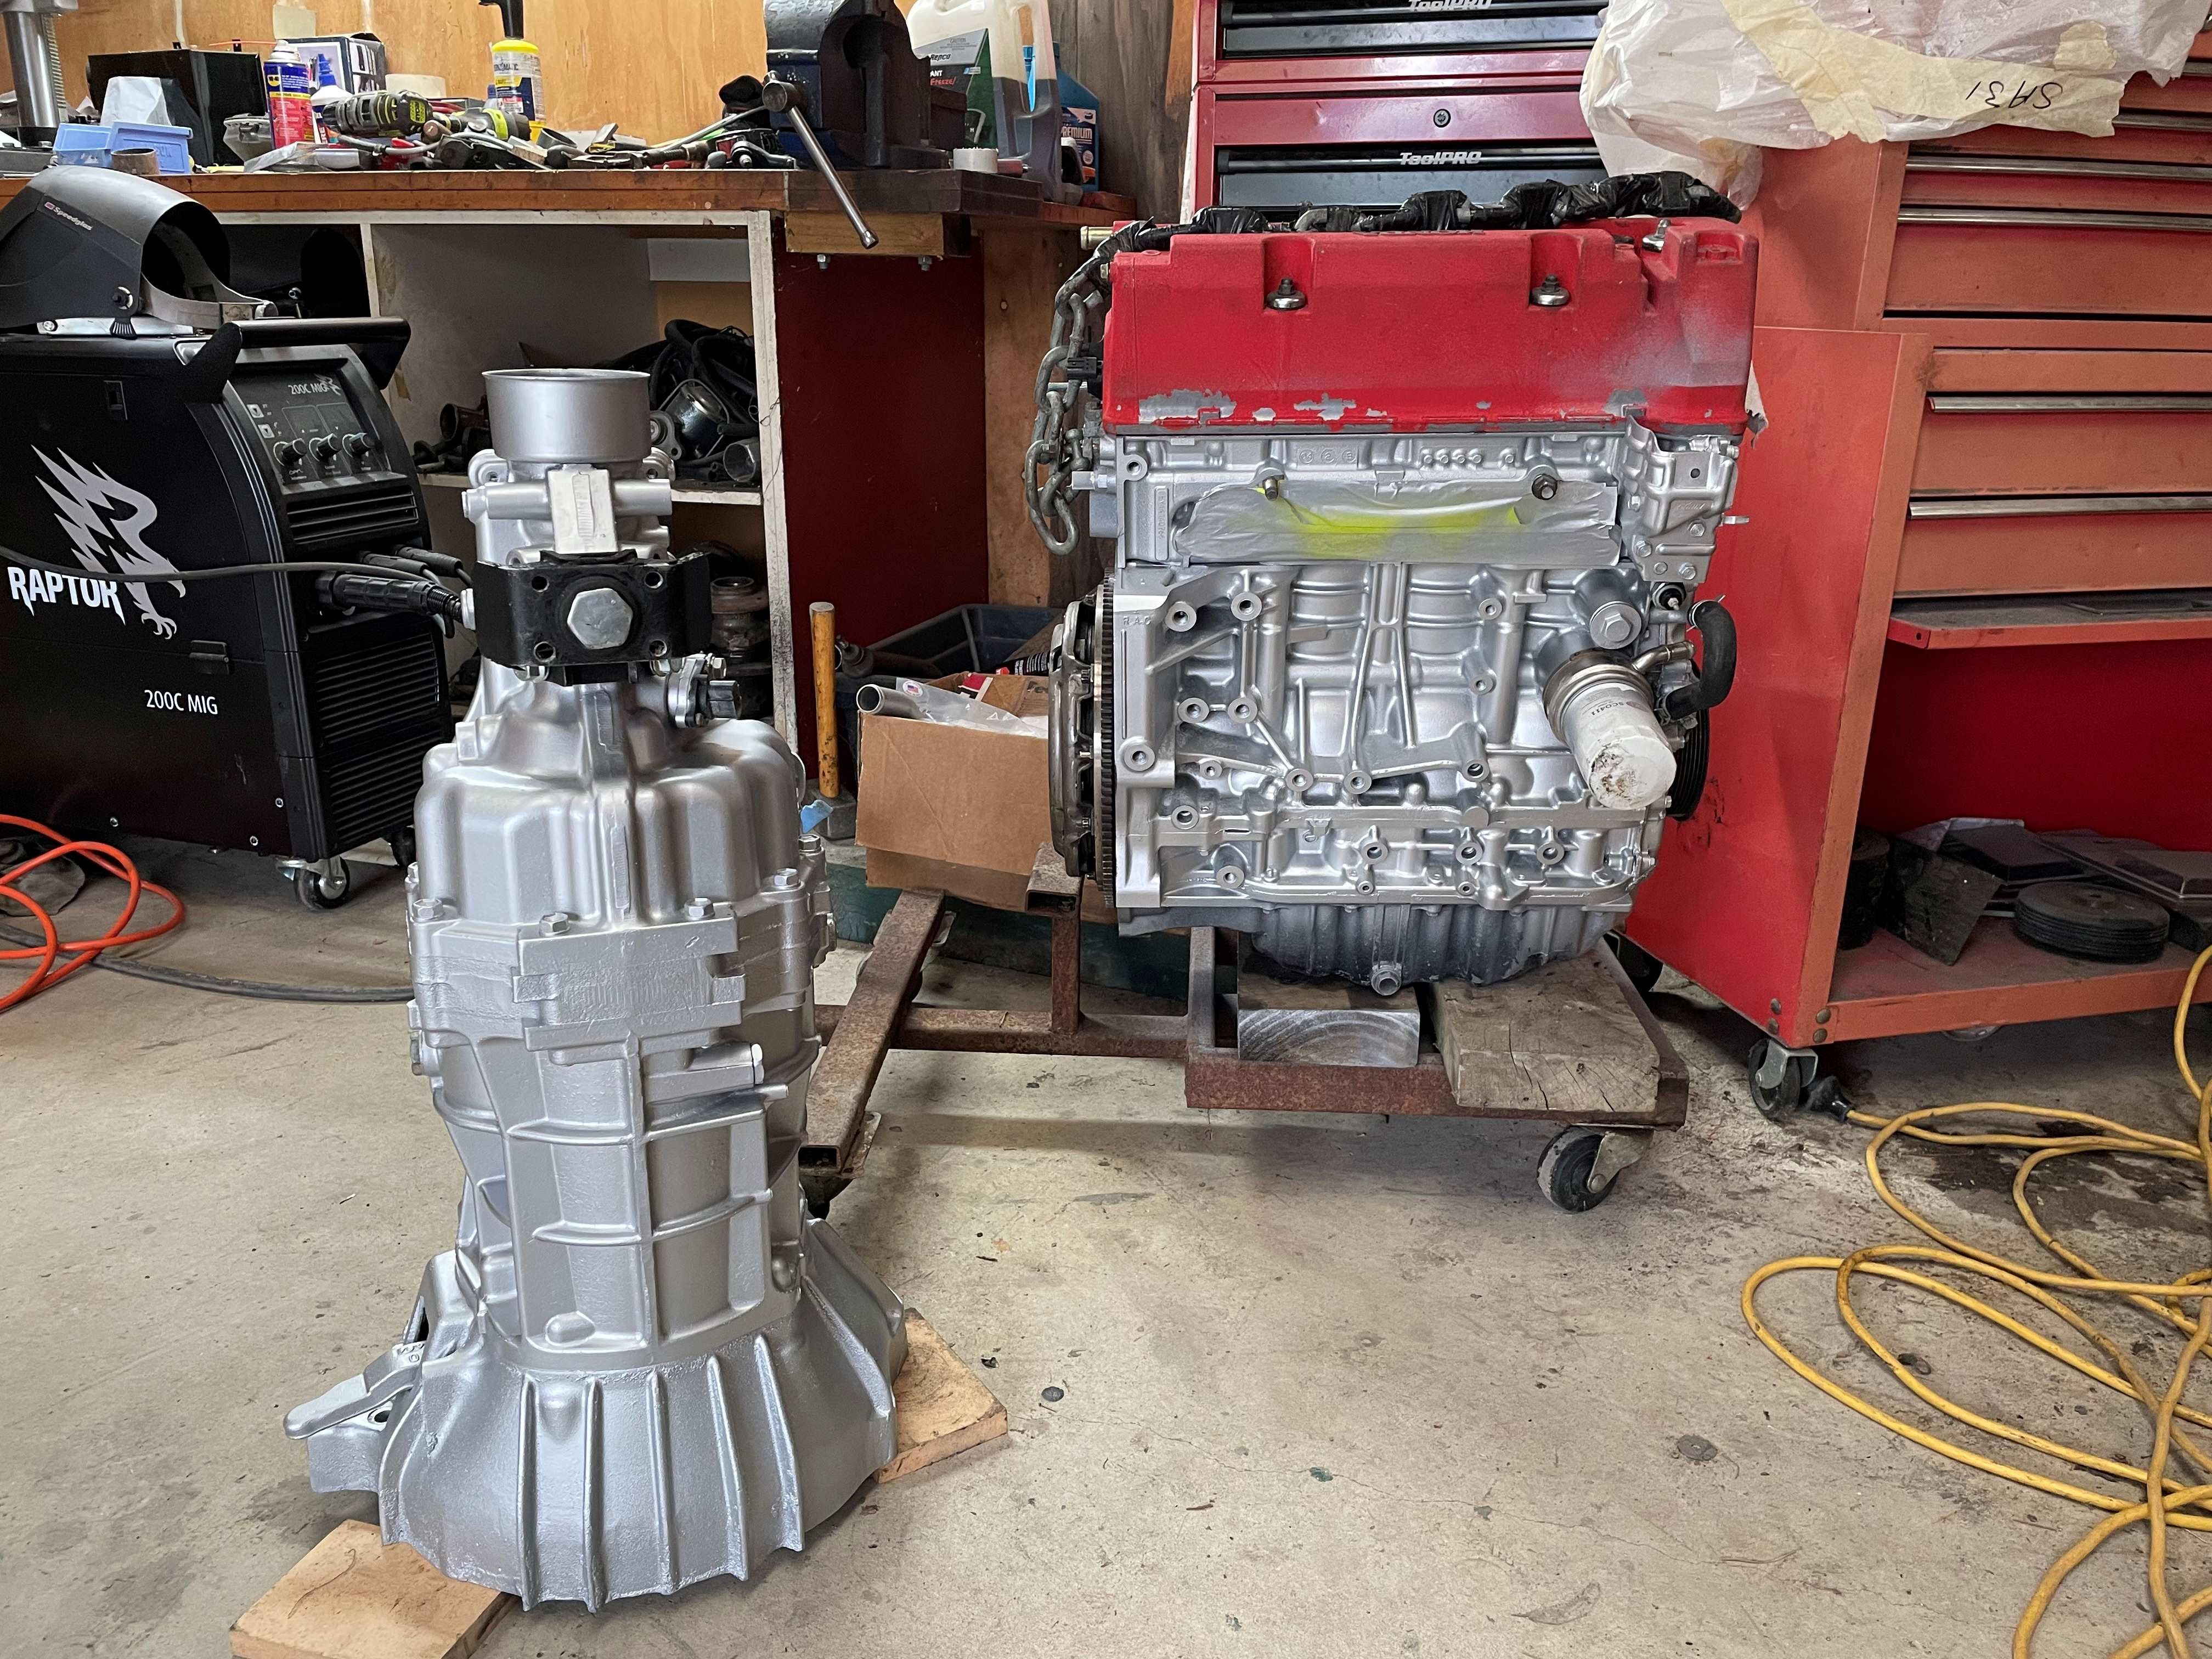
It was a stunning day in the bay today. No cyclones, no earthquakes, the sun shone, and the air was still. Would have been a perfect day for a bike ride, fishing or a BBQ in the park OR degrease an engine and gearbox. Though I did involve a degree of a BBQ theme to the day. It worked a darn site better than the SCA degreaser by far. It looks like the engine has been all apart before as there is excess sealer in where engine parts are mated. It also looks like the gearbox has been as well. Not sure if that is good or bad but it will look good with a fresh coat of paint and one day we will find out. I will pull the plugs for a look first.
1 point
-
I pulled the engine and gearbox out as I wanted to get the engine bay cleaned up and in primer. I think I will be able to finish the header out of the car using what i have done so far and keeping the engine mounts bolted to that side of the engine. First pic is most of the paint removed and some epoxy primer painted onto areas that I want to fill to make them nicer than when built. Second is with the filler in place, though it will need more work with some finer filler I have. Third pic is with the first coat of epoxy rust primer. I went with the Brunox as they tell me that's what the professionals like to use. Another coat in the morning then once cured a light sand a bit more filler here and there then some grey primer and being an impatient prick, I will probably hit it with some colour and clear coat.
1 point
-
I have finished the gearbox tunnel on the underside. Since I am not going to clean off all the original underseal which is still in good nick I sprayed it with a textured finish which has turned out ok. Now to clean up the rest of the engine bay and tidy up the original assembly poor finish.
1 point
-
I decided to replace the front seats with something that gives some lateral support. The original bucket seats didn't provide much more than a bench seat and one had been reupholstered in a different green so I thought these would do the job nicely. These seats have detachable head rests. I will need to get the rear seat redone to match and spraying the door cards with black vinyl spray should do as they are in good condition. Just working out how to mount them. The original seats were held in with two bolts at the front and the rear of the seats were on slides. The bits that were bolted to the seats and engaged the slides were only made of plastic.
1 point
-
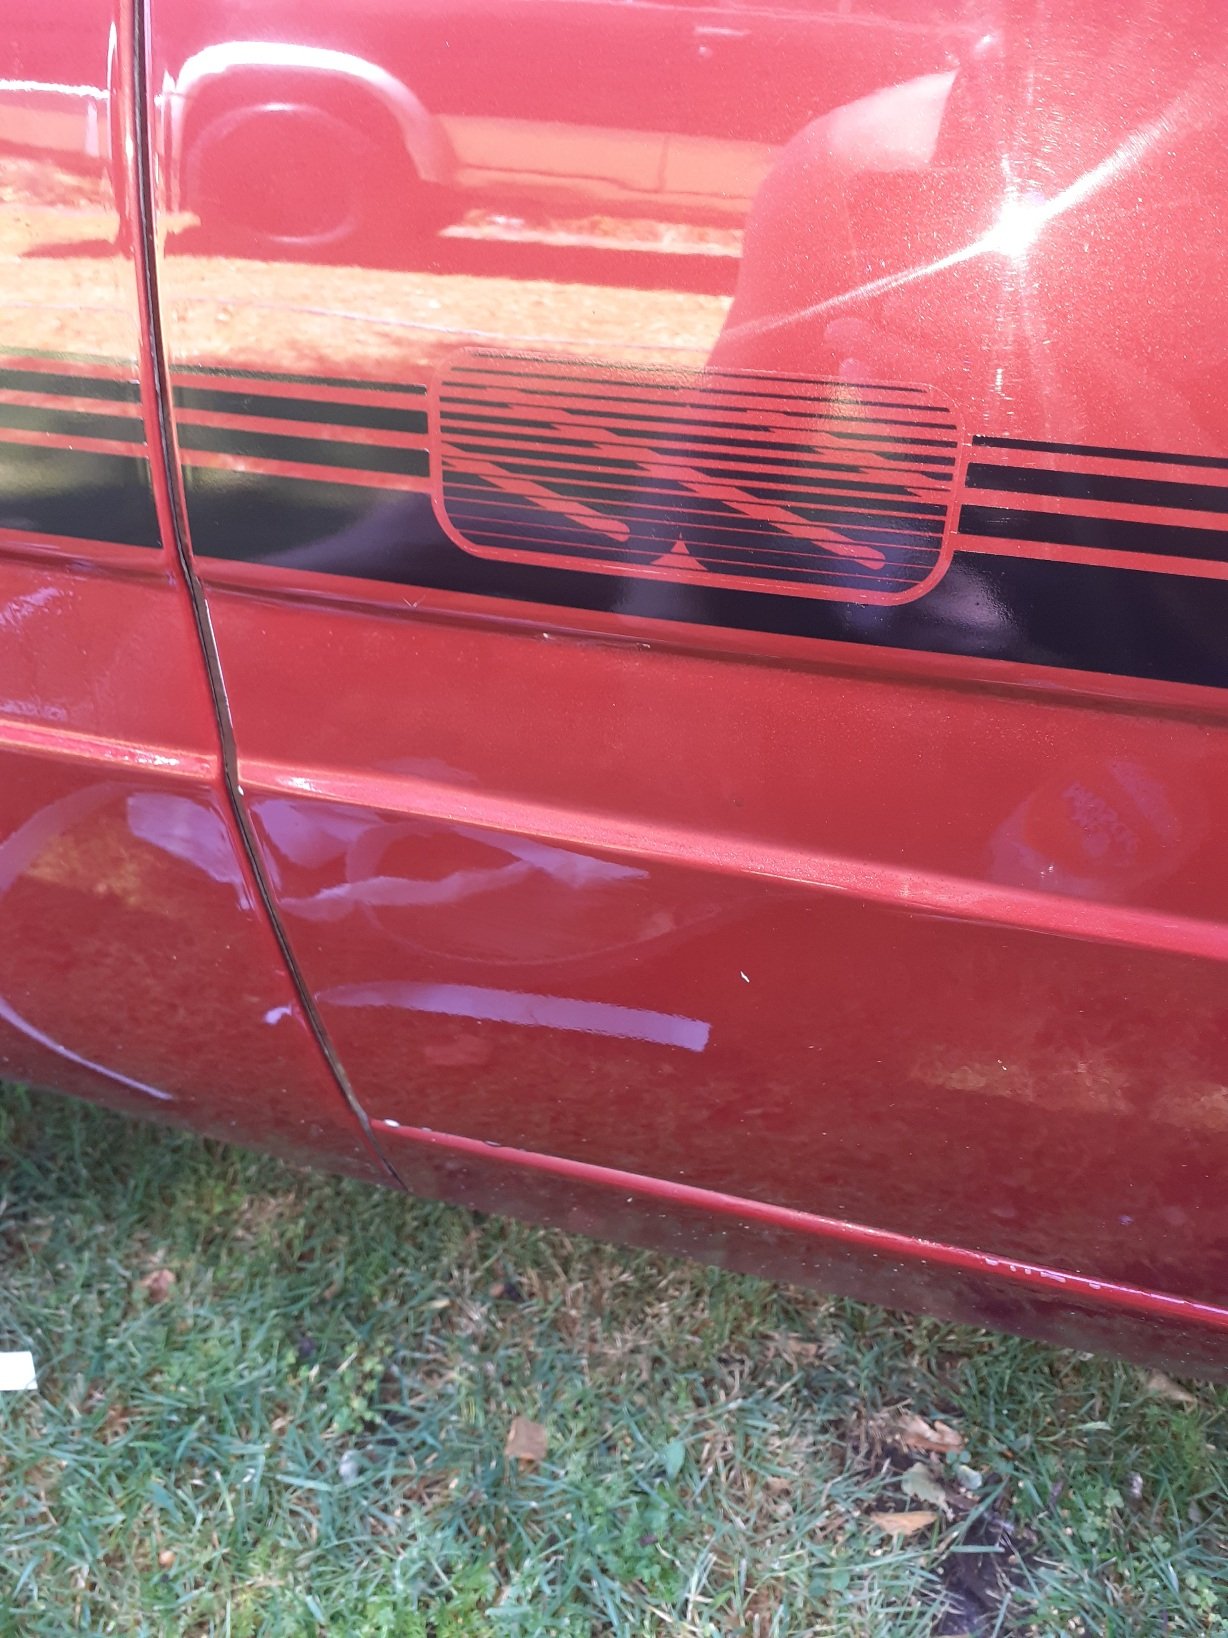
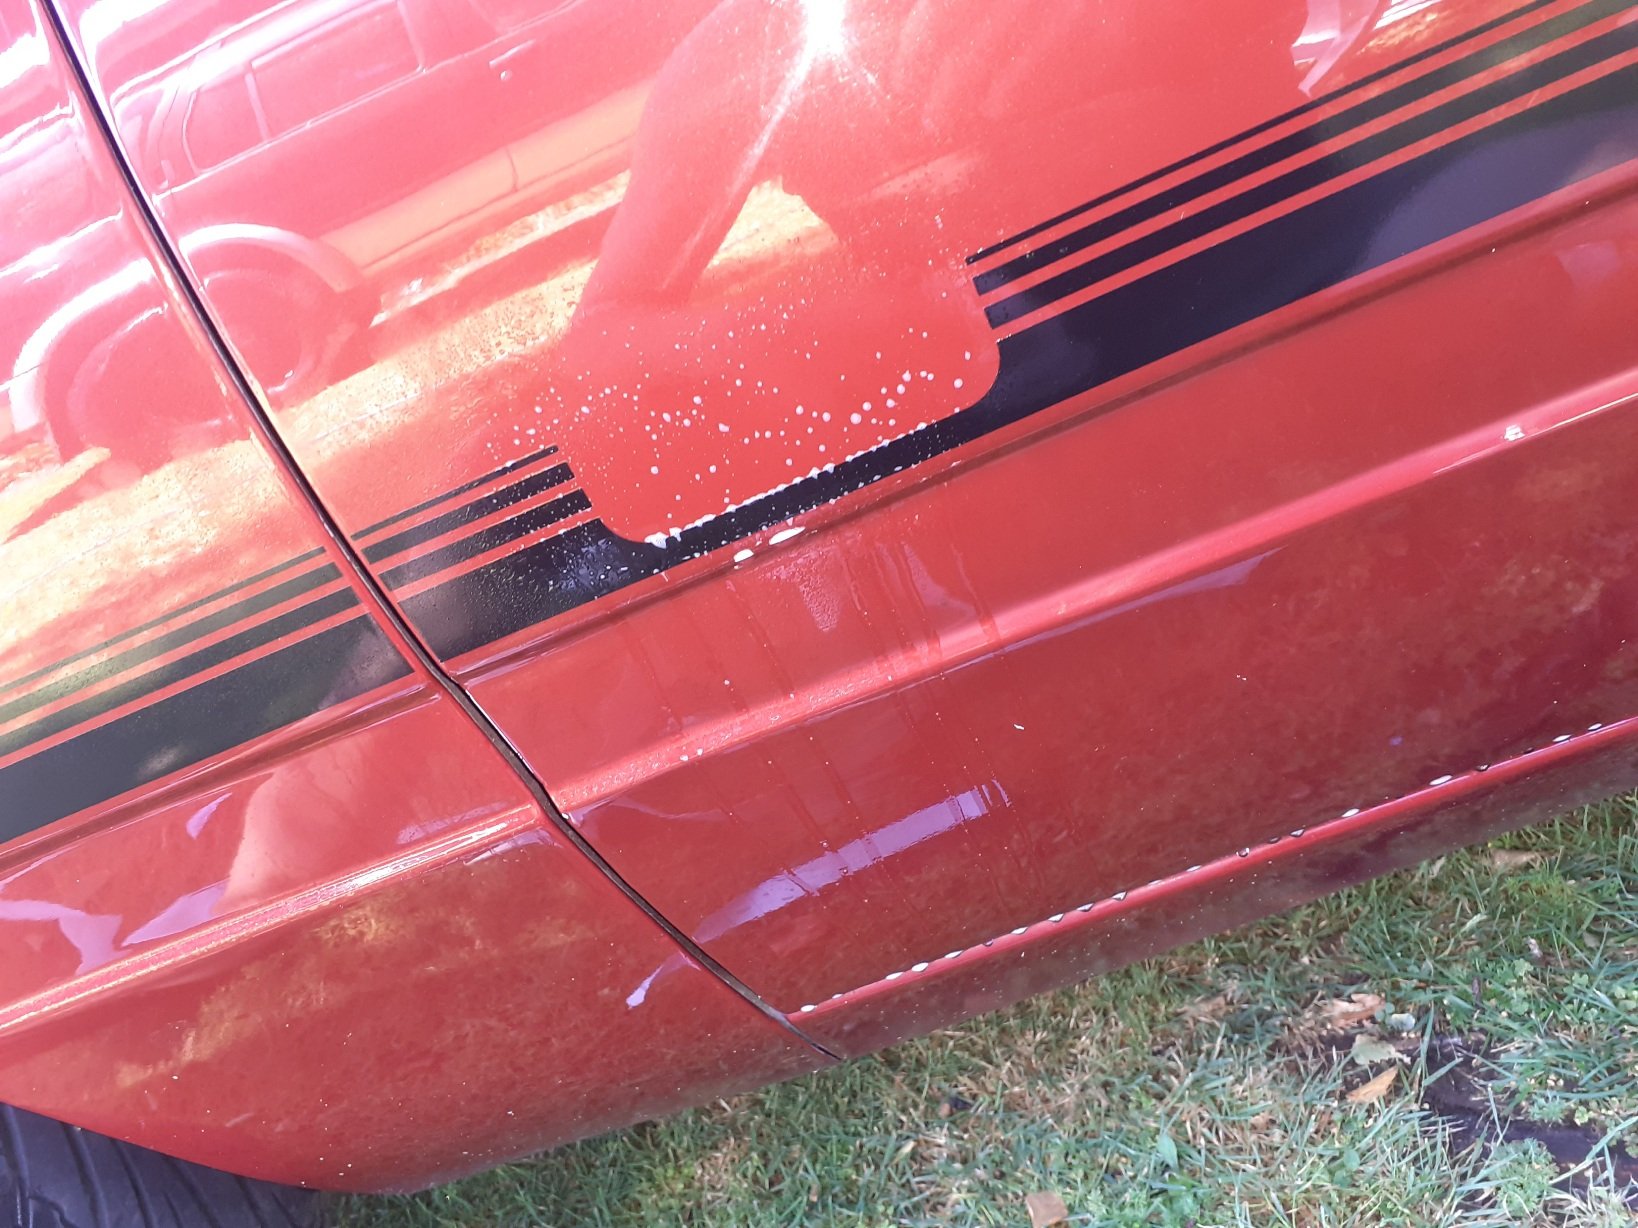
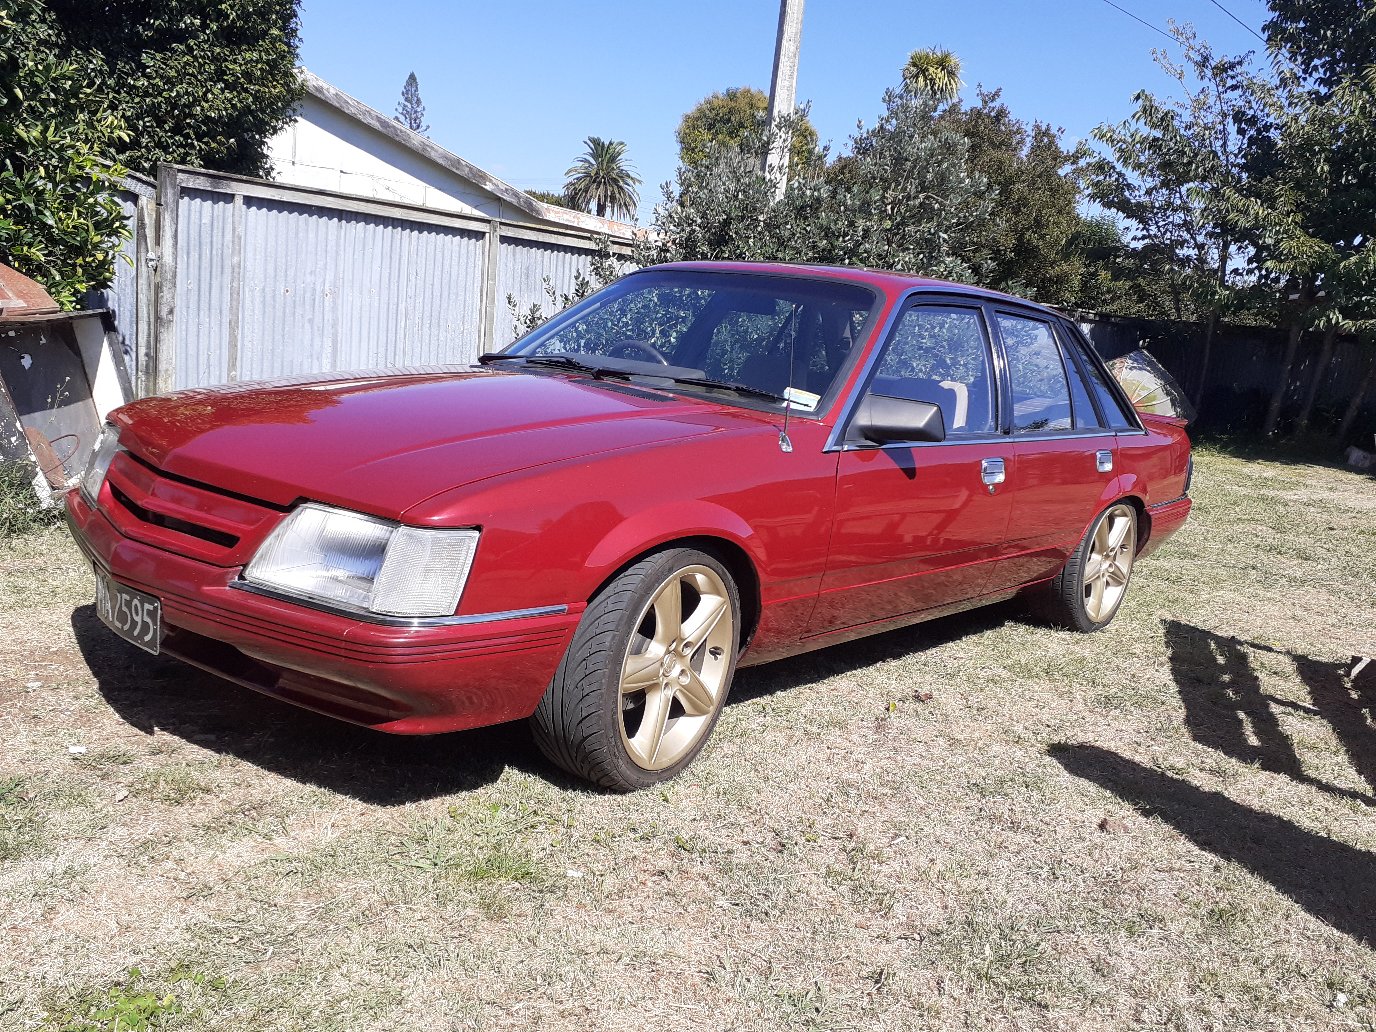
Got a 'ss' stripe kit out of aussy, by first stripes company, hdt ss vk stripe kit, took a while to get here but when it did i wet sanded the quater with high grit sand paper, cut and polished the rest of the passenger side. Pack n saves finest palmolive dishwashing liquid was sprayed on both the car and decals as to line it up (a must otherwise it will stick in the wrong place and never come off) installed it as holden dealer team did back in the day, going off picture of genuine ss cars
1 point
-
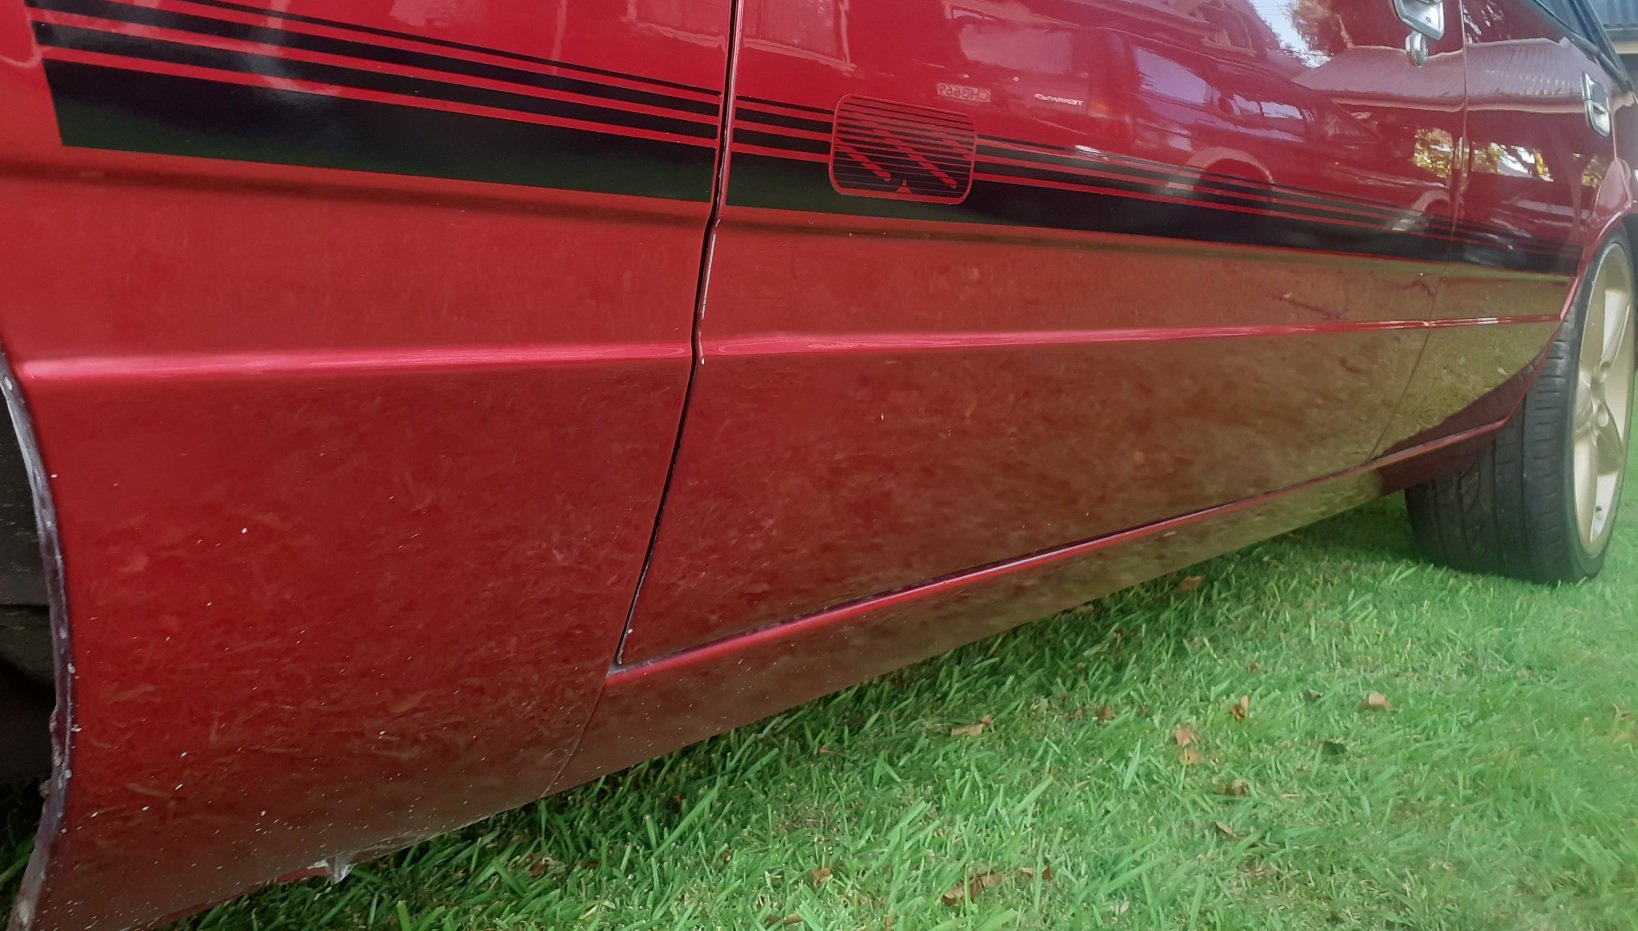
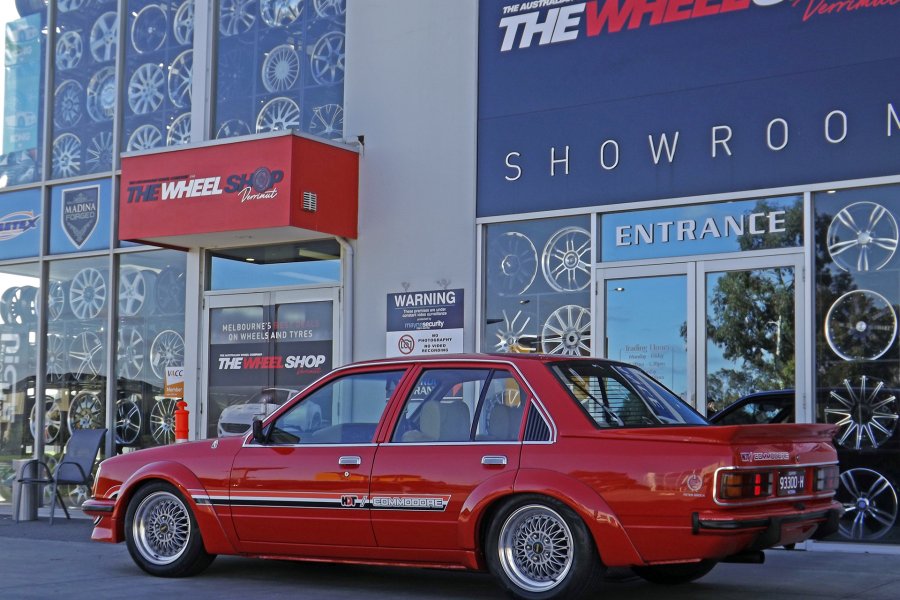
Despite having some paint flaws, which will never make it a show car, i decided to finally fully cut and polish the rest of the car. The front here was dull and covered in rattle can overspray, pretty happy with linkup products, its a lot brighter really brings the colour out ... more to come, takes a lot of time but will compliment the next phase
1 point
-
The second drop in to see how much room I have and to figure out what I will need to alter. It can go back about another 25mm but I will have to cut into the firewall a bit as these engines have their water outlet at the now the rear of the head. I will need to replace that with one that doesn't have the hose connection going rearward into the firewall. The front cross member will not fit as is. I will need to see if it can be modified or remake it using the original A arms etc and geometry.
1 point
-
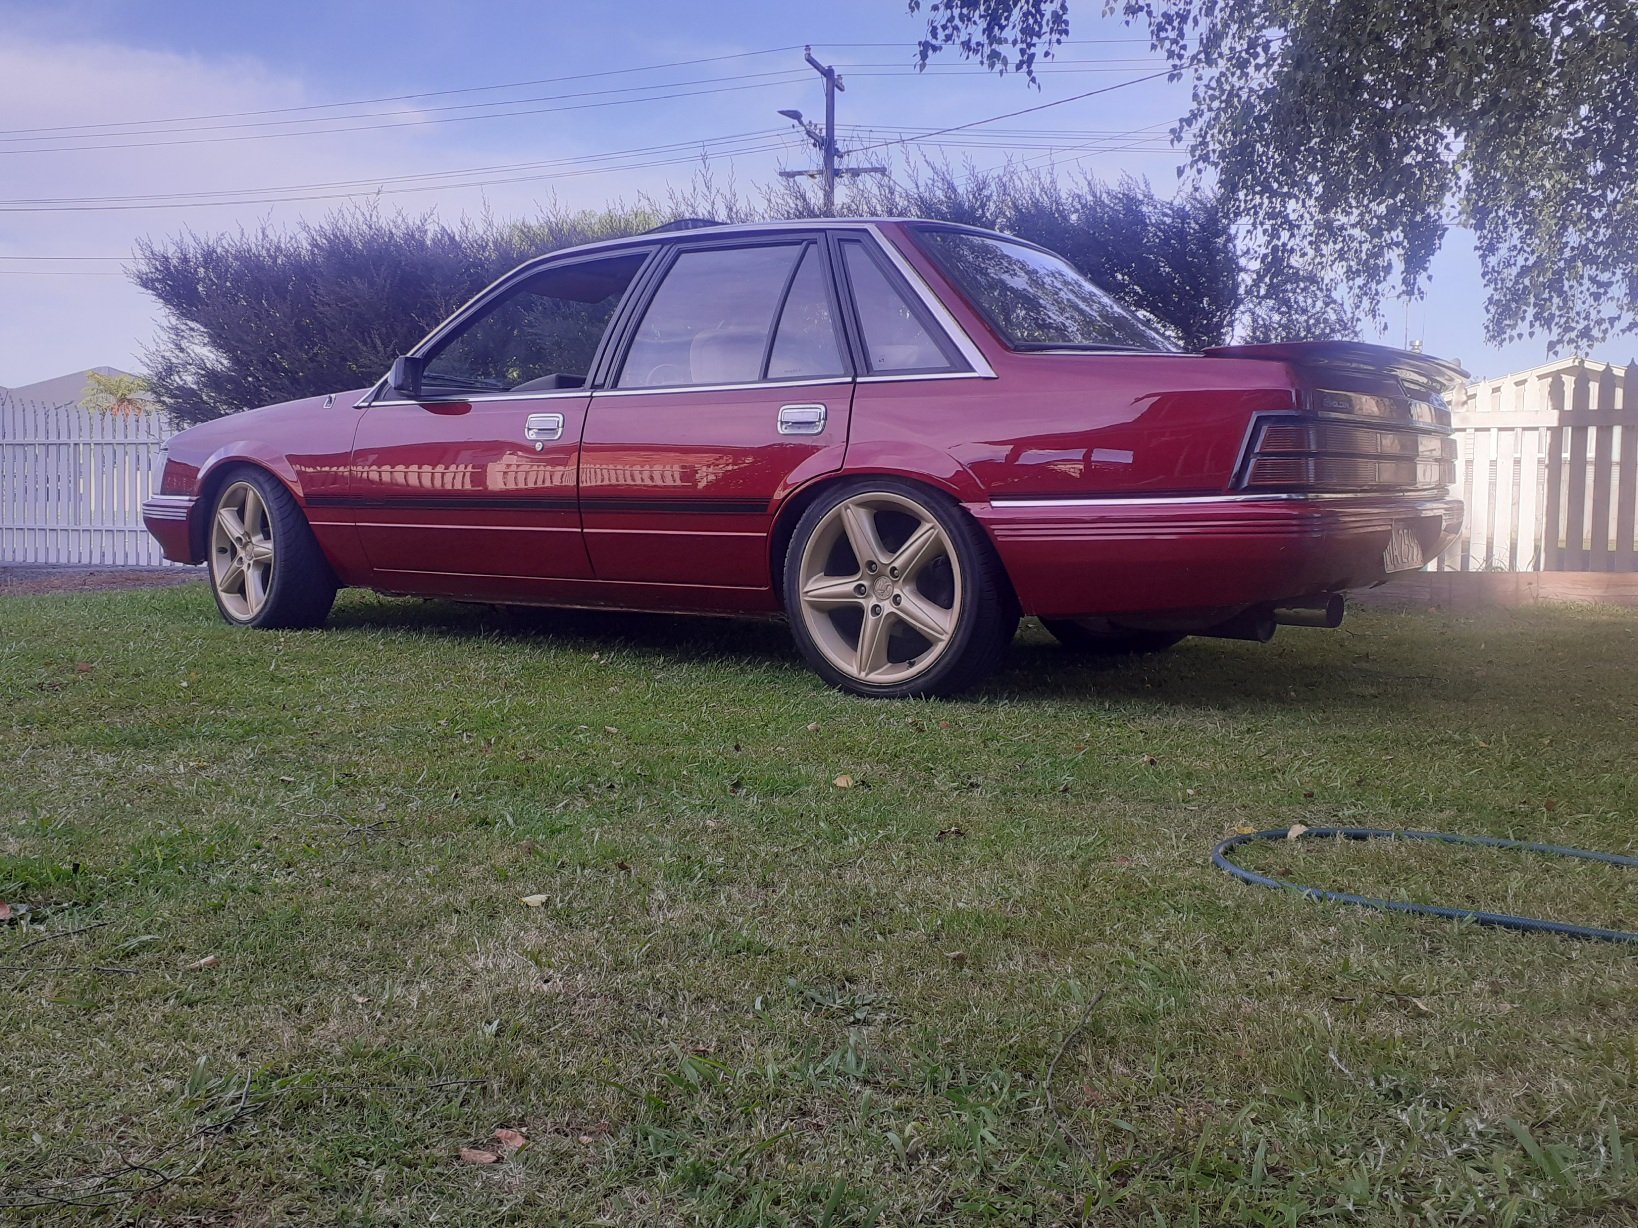
So i went and painted some more bits, this rear bumper side and under the bonnet, which used to be a mess and different shade of bright red, also these are all the same colour, camera makes it look different in the light
1 point
-
1 point
-
When funds permit I'll get some v5 simmons or similar
1 point


sm.jpg.09a680304a6ca90b0cabdb9c90e61988.jpg)
sm.jpg.7682f8bcd1d1471bc9fca385803a5a6d.jpg)

sm.jpg.1484a60c2a73cdb3e84c3e416f9a6e81.jpg)


This leaderboard is set to Auckland/GMT+12:00